JayDee
-
Posts
3,272 -
Joined
-
Last visited
Content Type
Profiles
Forums
Events
Gallery
Everything posted by JayDee
-

21st Century Schizoid Gustavs
JayDee replied to Mikester's topic in LSM 1/35 and Larger Work In Progress
Always had a hankering to build a 109 with one of those tail squiggles. Sorry I can't be more precise! -
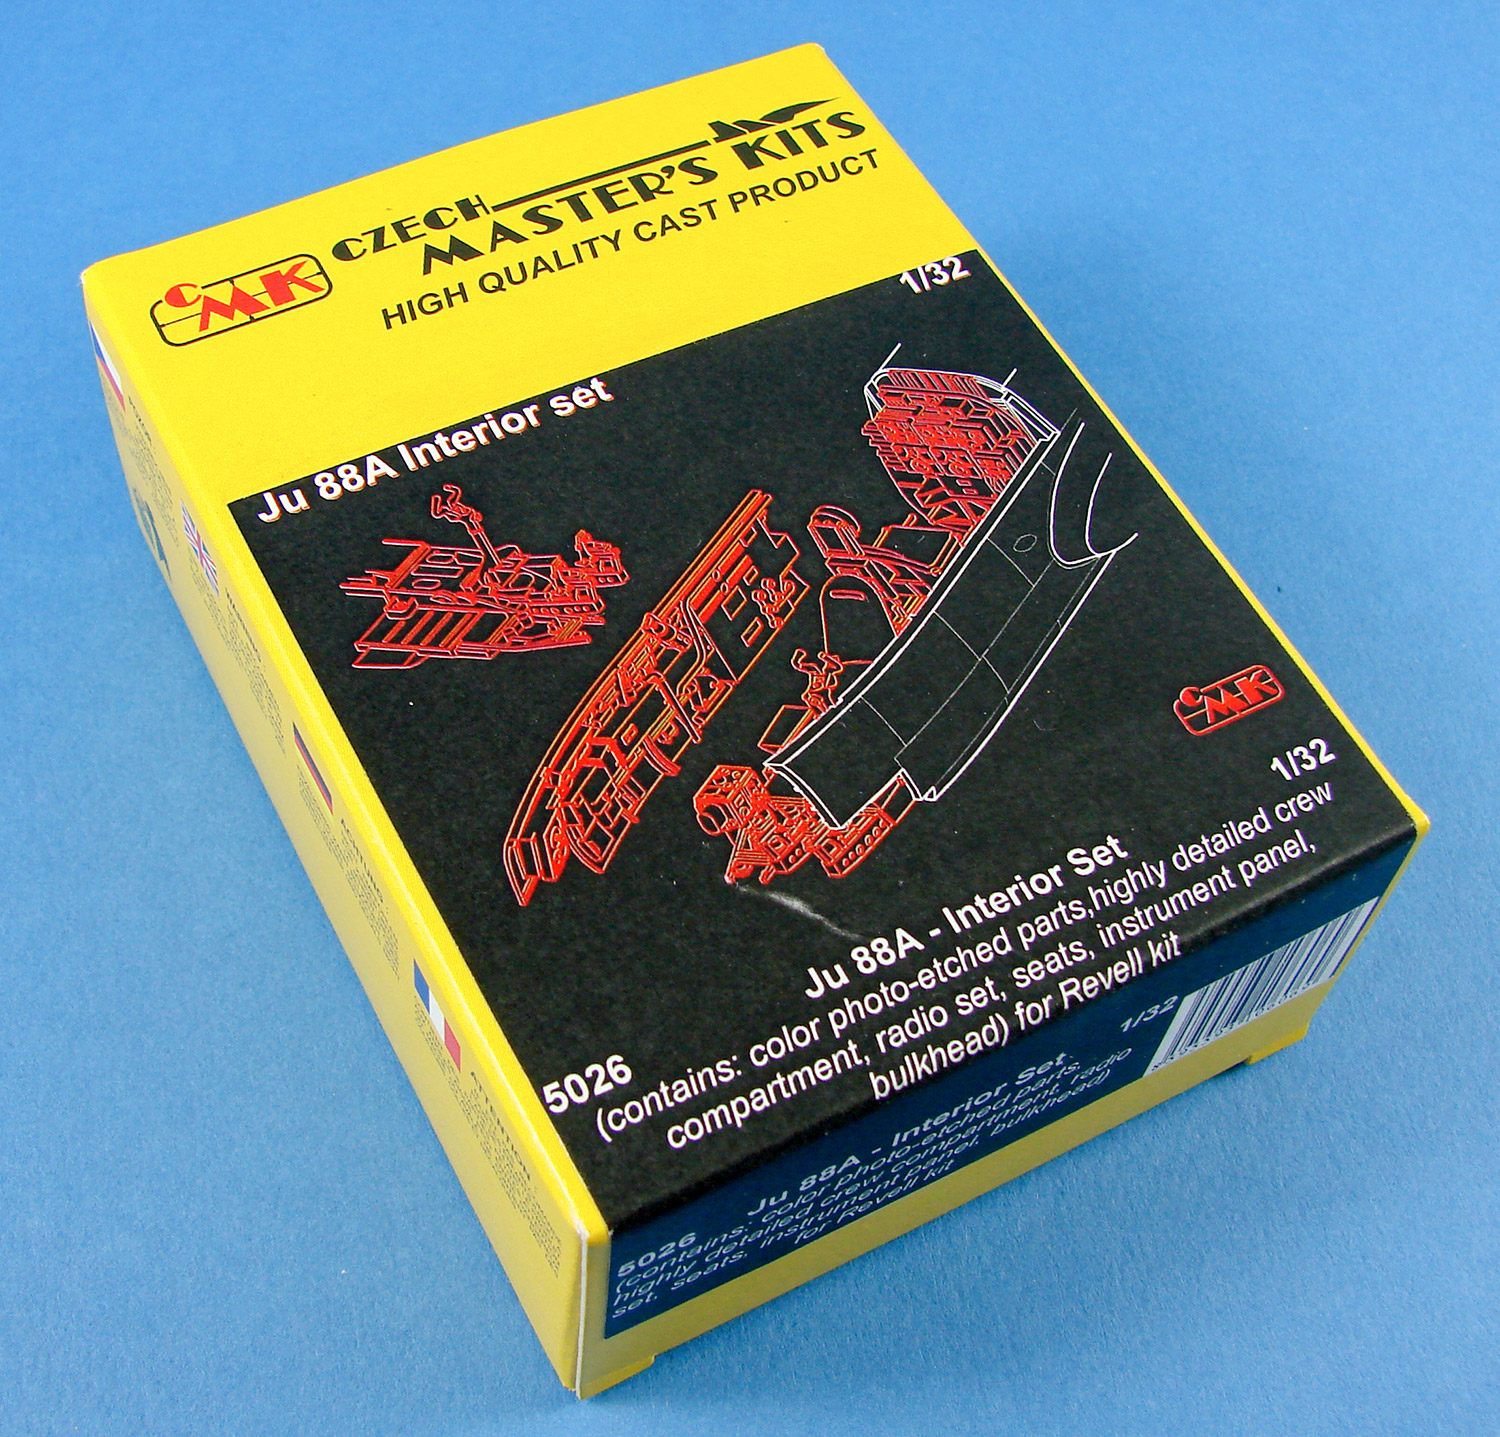
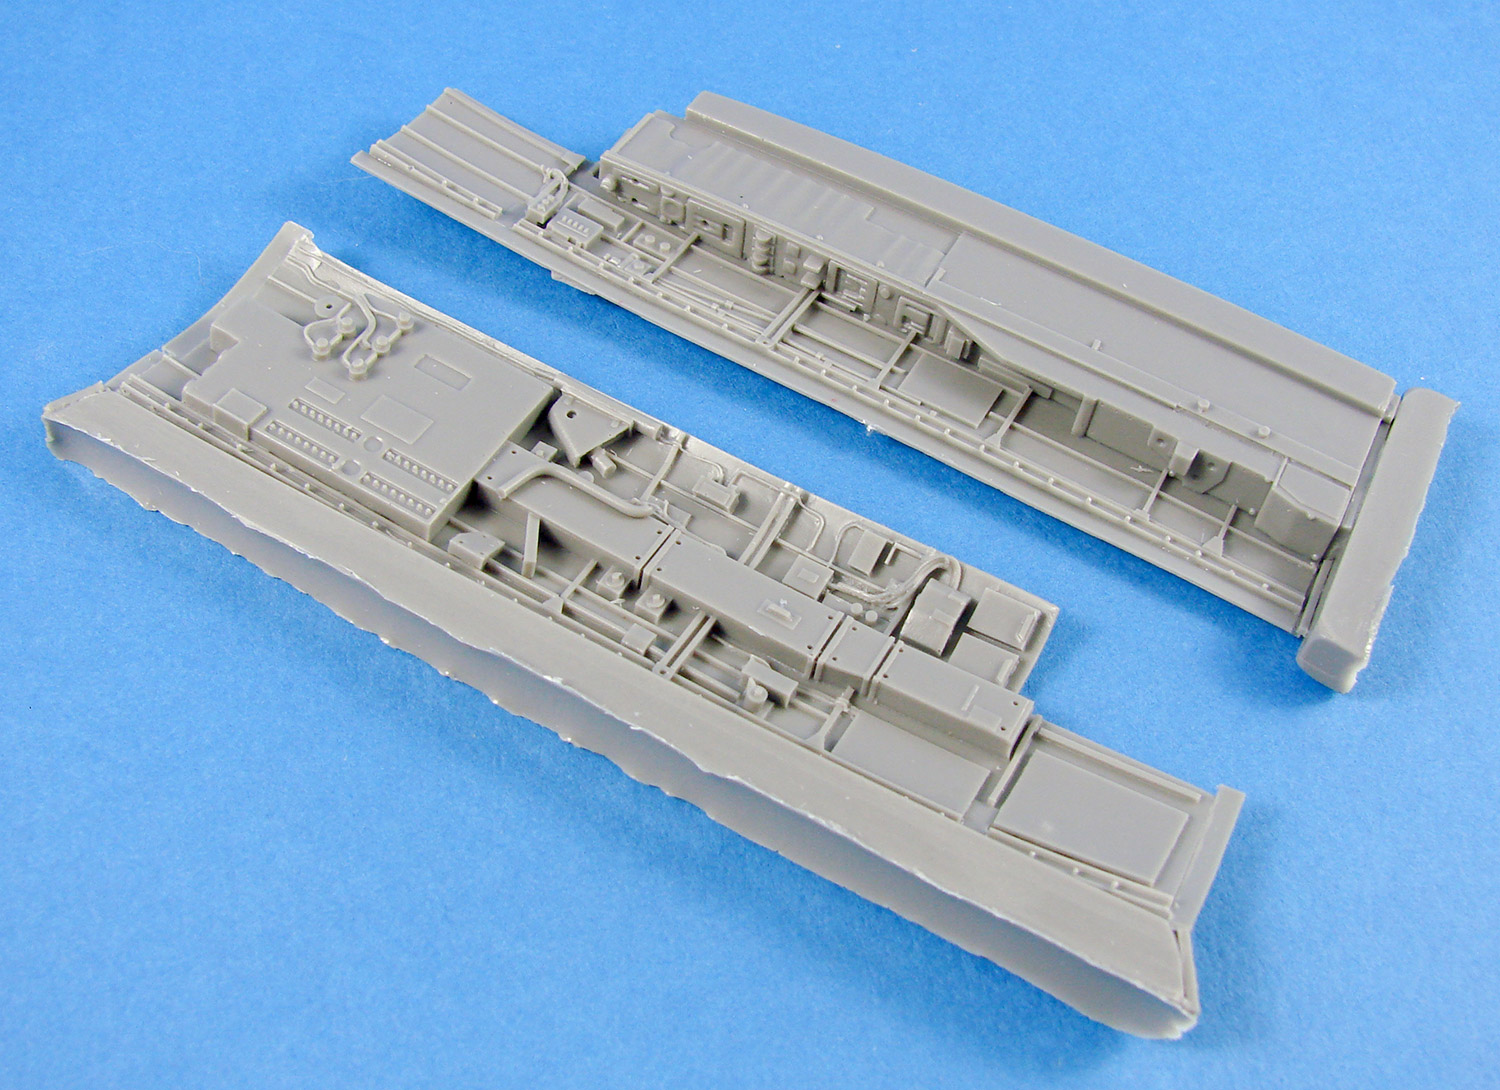
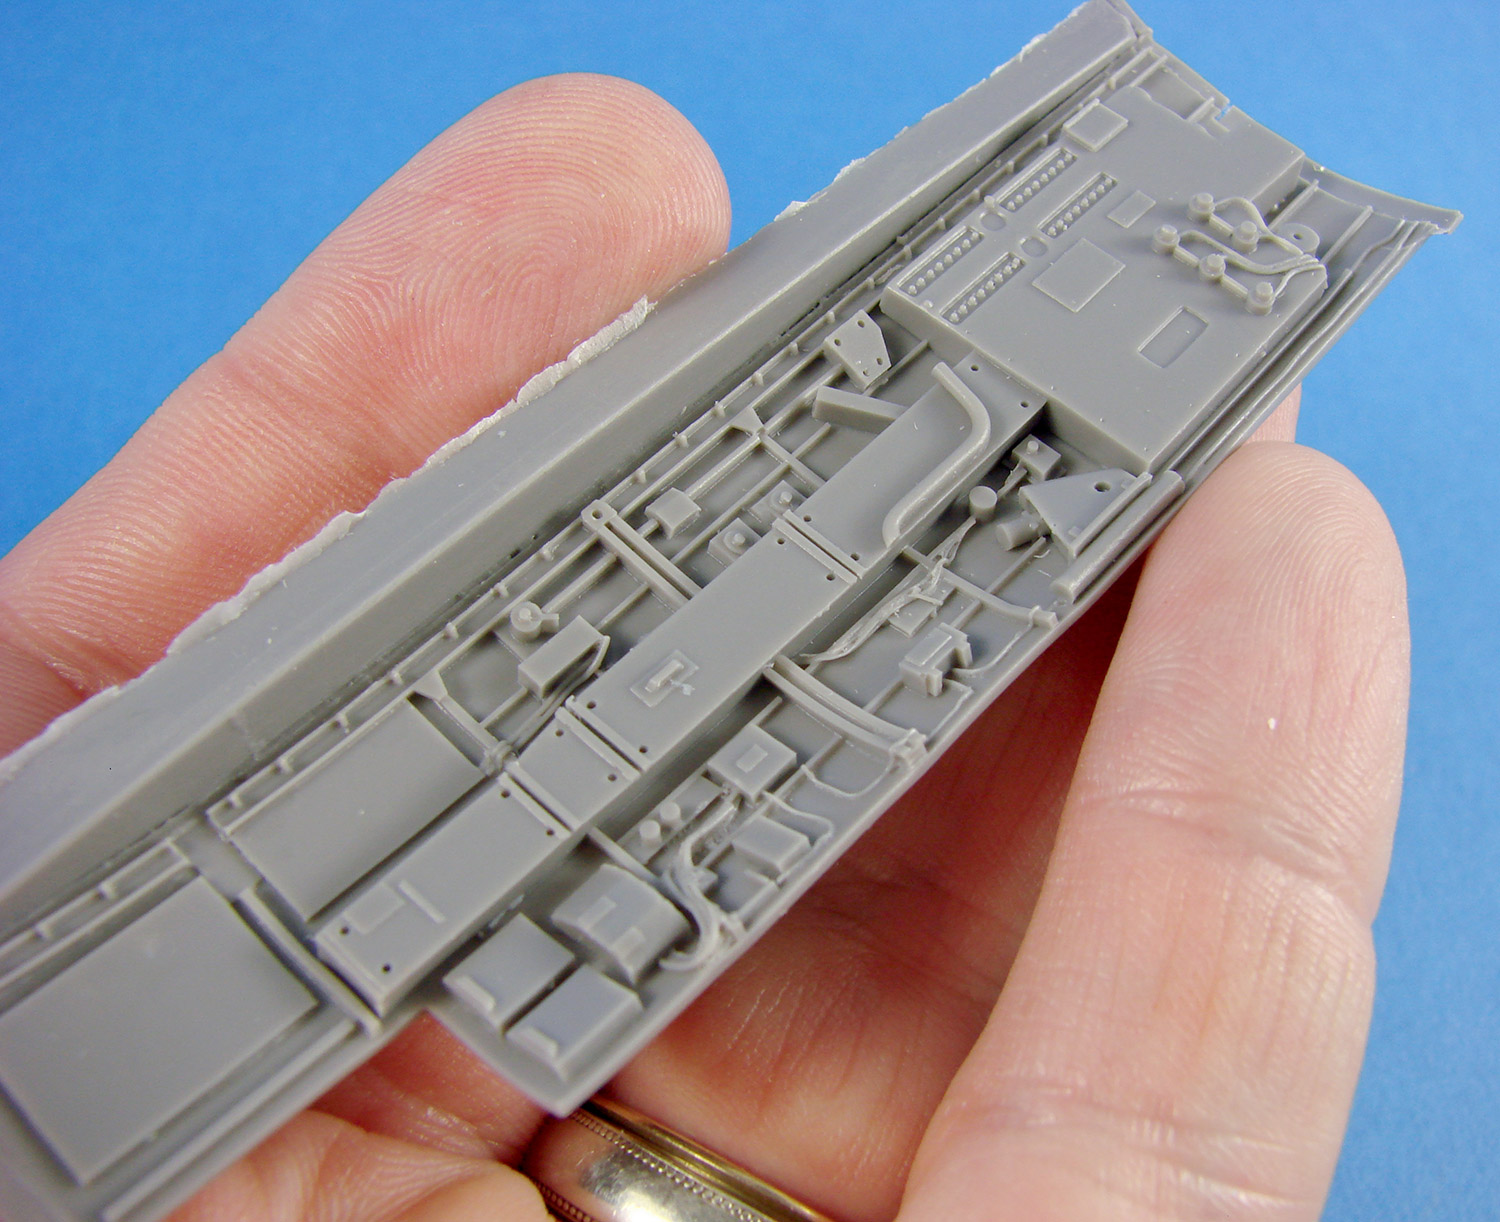
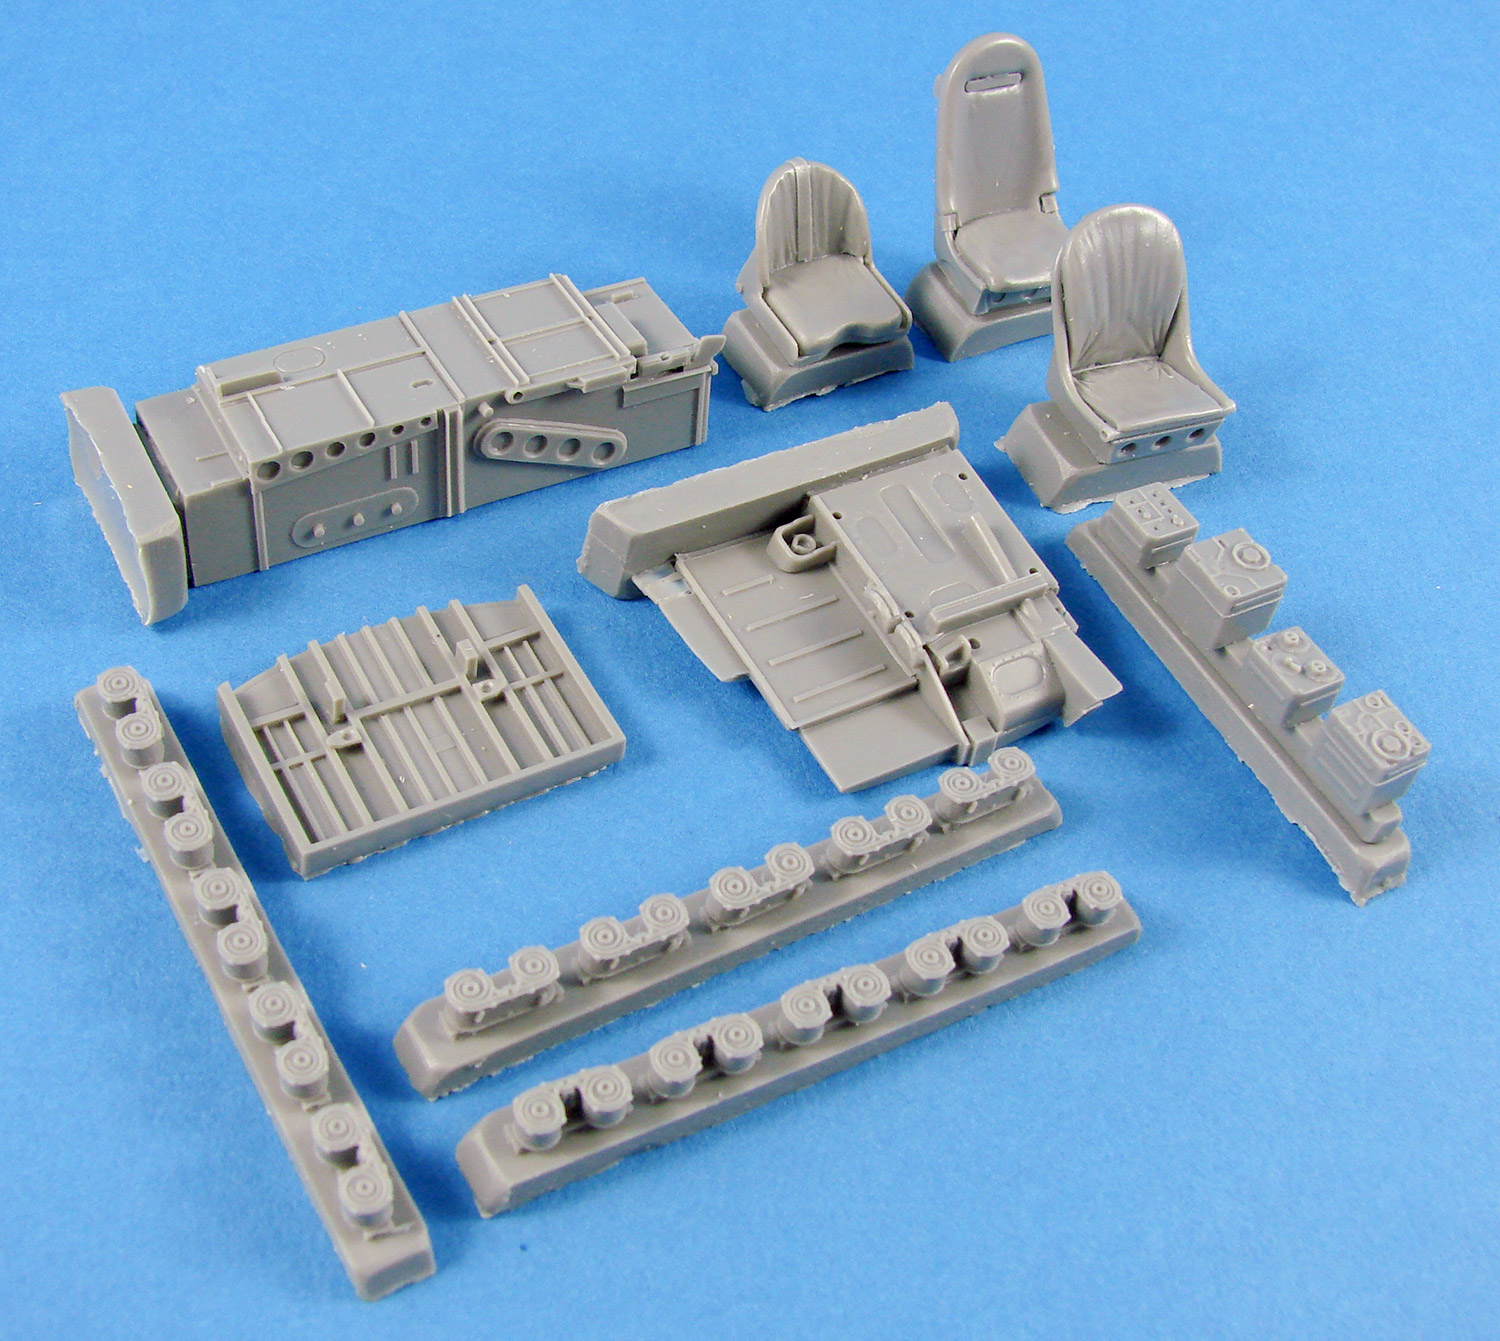
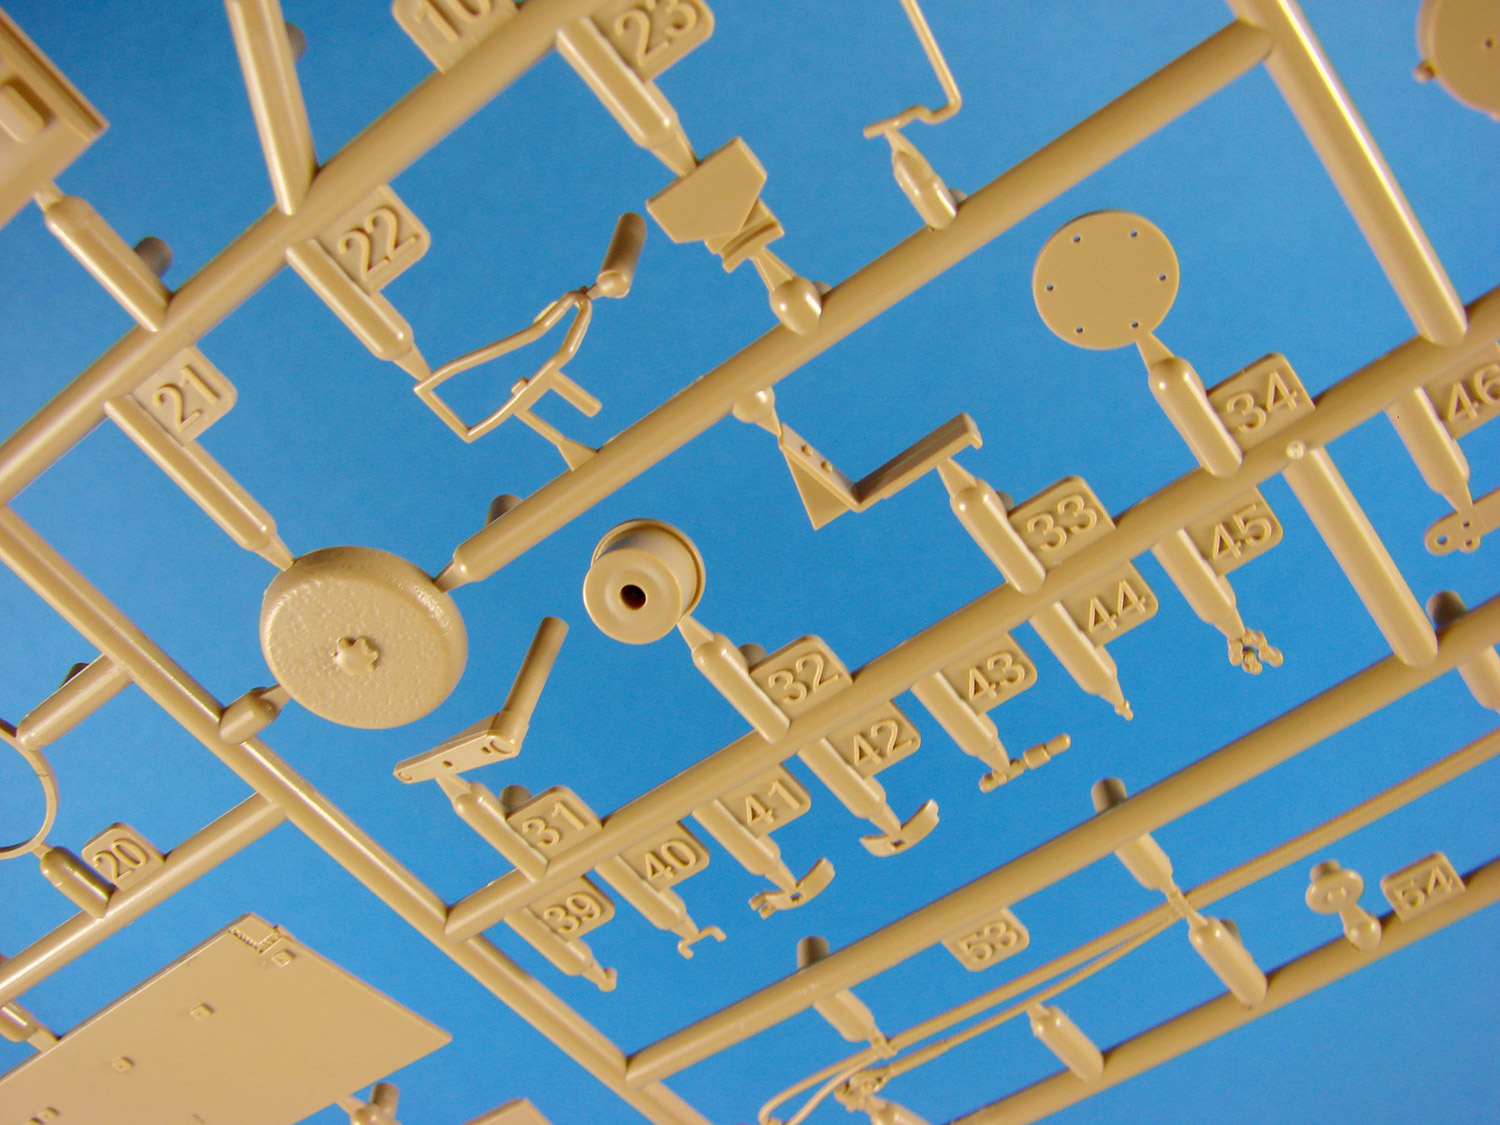
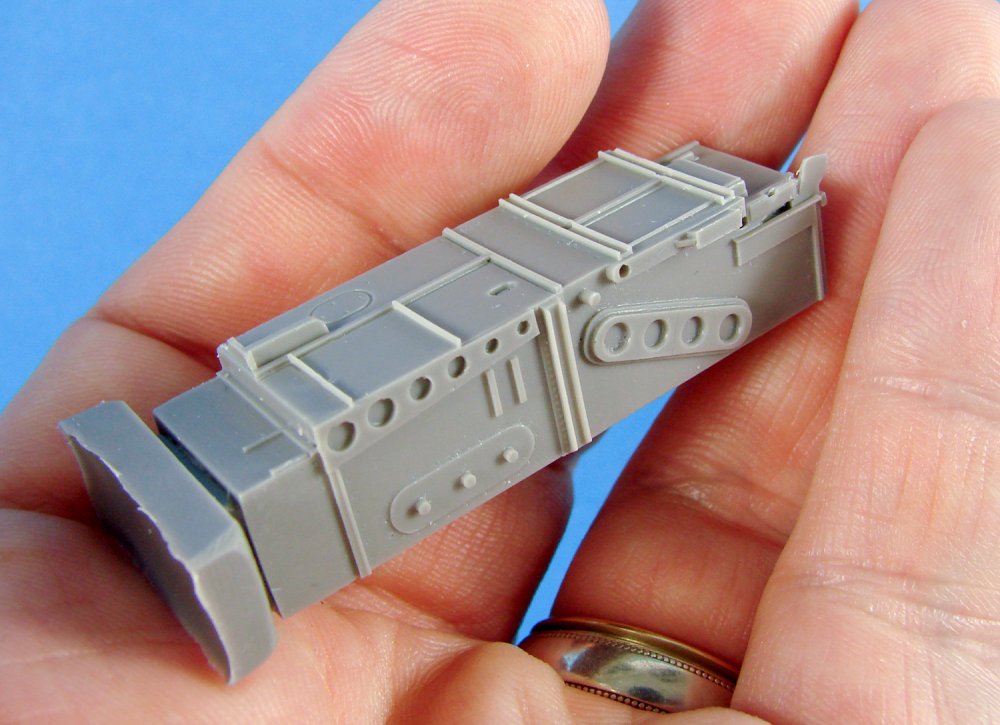
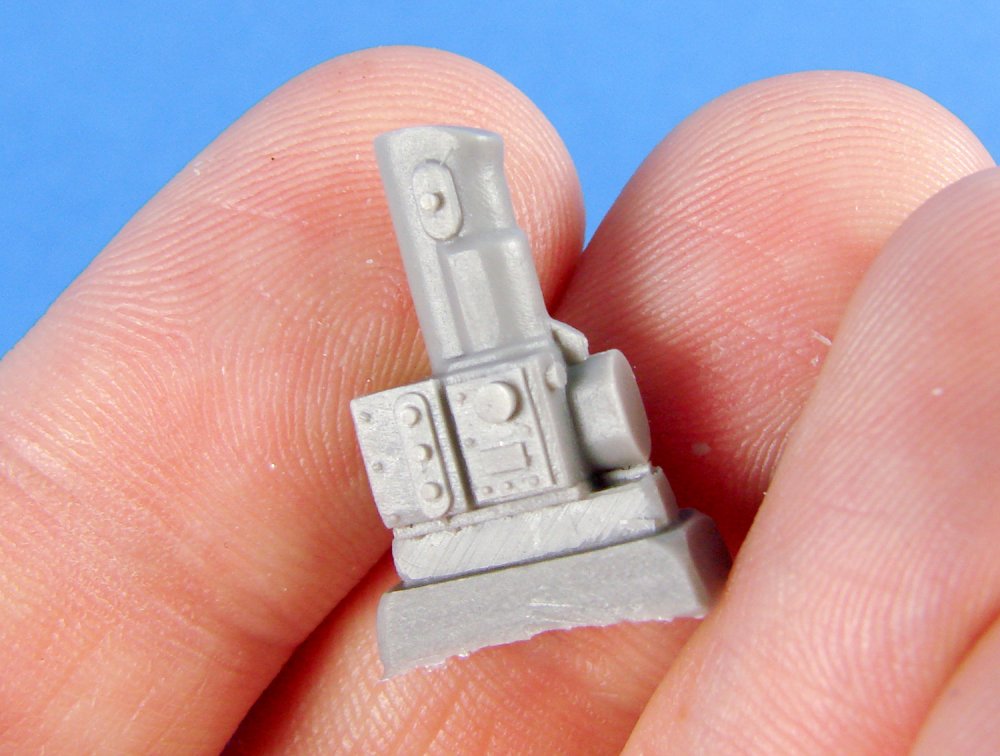
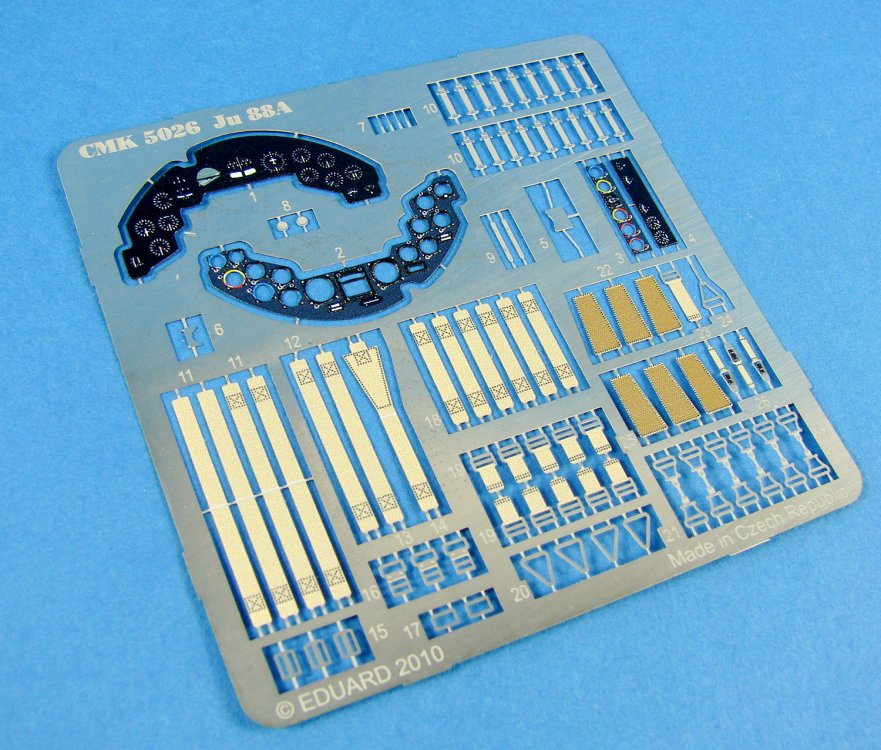
1/32 Ju 88A Interior set CMK Catalogue # 5026 Available from Special Hobby for 567 Kč (approx. £20 at time of writing) This year marks a full decade since Revell released their spectacular Ju 88A-1 kit, marking what many thought at the time to be a landmark achievement for a mainstream plastic model manufacturer. I pretty much have to agree with them too. Whilst the model didn’t have detailed engines, it did have everything else, including a superbly detailed cockpit. The kit was based on the reconstruction/restoration of a Ju 88A-1 at Gardermoen museum in Norway, and they had the museums best guy on the job, Guttorm Fjeldstad. Having said that, injection plastic moulding does have its limitations, but Revell pushed it to the max with their kit. If you want to take your own Ju 88A-1 kit to the next level, with a super-pimped out interior, then there really is no better an upgrade than that offered by CMK. CMK’s ‘Interior set’ is a little ambiguously named as it provides just the cockpit detail and nothing else, but the cockpit is of course what you bought it for! It also comes in a rather small and pretty heavy box that is crammed full of resin components. The box itself is the same size as that of the simpler Ju 88C conversion I looked at very recently and could probably have benefitted from something slightly larger. A label with a line drawing graphic gives away the contents of this set. Opening the top flap, we are presented with two zip-lock bags of medium-grey resin components, a folded instruction sheet and another wallet with a colour-printed PE fret, protected by a cardboard stiffener. The first zip-lock wallet contains the larger components in this set. Most obvious here are the sidewalls. I first have to say that there is very little that will be used from Revell’s kit as this is almost an entire replacement. If you thought Revell’s parts looked good, then these will astound you. Everything is reproduced here, including the various wiring looms and numerous items missed by Revell, such as the electrical terminations detail on the switch and fuse panel. These parts have a large casting block that runs the entire length of the underside of the sidewalls, but there is a thinner web between this and the part. I will also add, at this point, that these walls will fit straight into the fuselage without any thinning. This set does require some surgery in places, but nothing too intense. The rest of this bag includes the three crew seats with armour and cushion details, a two-part cockpit floor, three blocks of ammunition saddles and a block containing radio sets for the rear wall. Casting blocks should again be pretty straightforward to remove with a narrower portion of waste material holding the part to the block. You will need a razor saw though as the connecting points are still relatively chunky. Our second bag of resin parts contains mostly smaller and detail parts, such as conduits, seat brackets, bomb sight mount and the bombsight itself, electrical panels, rudder pedals and pedal stanchions, map pockets, ammo brackets, levers, control column with wiring detail, fold down seat, fire extinguisher, etc. Unlike the CMK Ju 88 instrument panel, this panel’s rear details are moulded with integral wiring, and it does indeed look good and saves us the work of doing this ourselves. There really will be enough to do without that on top! Also seen are parts for the radio wall, split into two sections. More wiring looms for those radio sets and also mounting brackets for the ammo saddles. A single, colour-printed PE fret includes a multi-layer instrument panel and other instrument units, a full set of crew seatbelts, and the leather straps for the ammunition saddles. Production is by Eduard, and as you’d imagine, the quality is first-rate. I know that some people don’t like pixilation in the colour printing, and that’s valid, but here it’s not really distinguishable. I’m more than happy to use these parts. If there is one slight issue with this kit, it’s the instructions. Whilst they are very good at explaining how things fit together, in some areas they aren’t great at showing where those assemblies fit, and you will need to do some Googling to fathom some areas. As you’ll doubtless do this anyway in order to reference your painting, then this should be no more than a minor inconvenience. The Ju 88A-1 cockpit is well-represented in online image searches. Instructions are printed both sides on a single A4 and A5 sheet. Conclusion This really is an excellent upgrade set to Revell’s Ju 88A-1, but it’s one that requires a little forward planning as you progress through construction, with plenty of dry-fitting before you commit to any glue. As the cockpit is almost entirely sheathed in resin, this is hardly surprising, but the result will be spectacular. In a day where prices are constantly rising and some of the products in our hobby have outrageous prices, this is a very reasonably-prices set for the quantity and quality of resin that you get, and the enjoyment of installing it all. I love it! Highly recommended My sincere thanks to Special Hobby for the review sample seen here. To purchase directly, click THIS link.


-
- 1
-

-
- special hobby
- ju88
- (and 1 more)
-
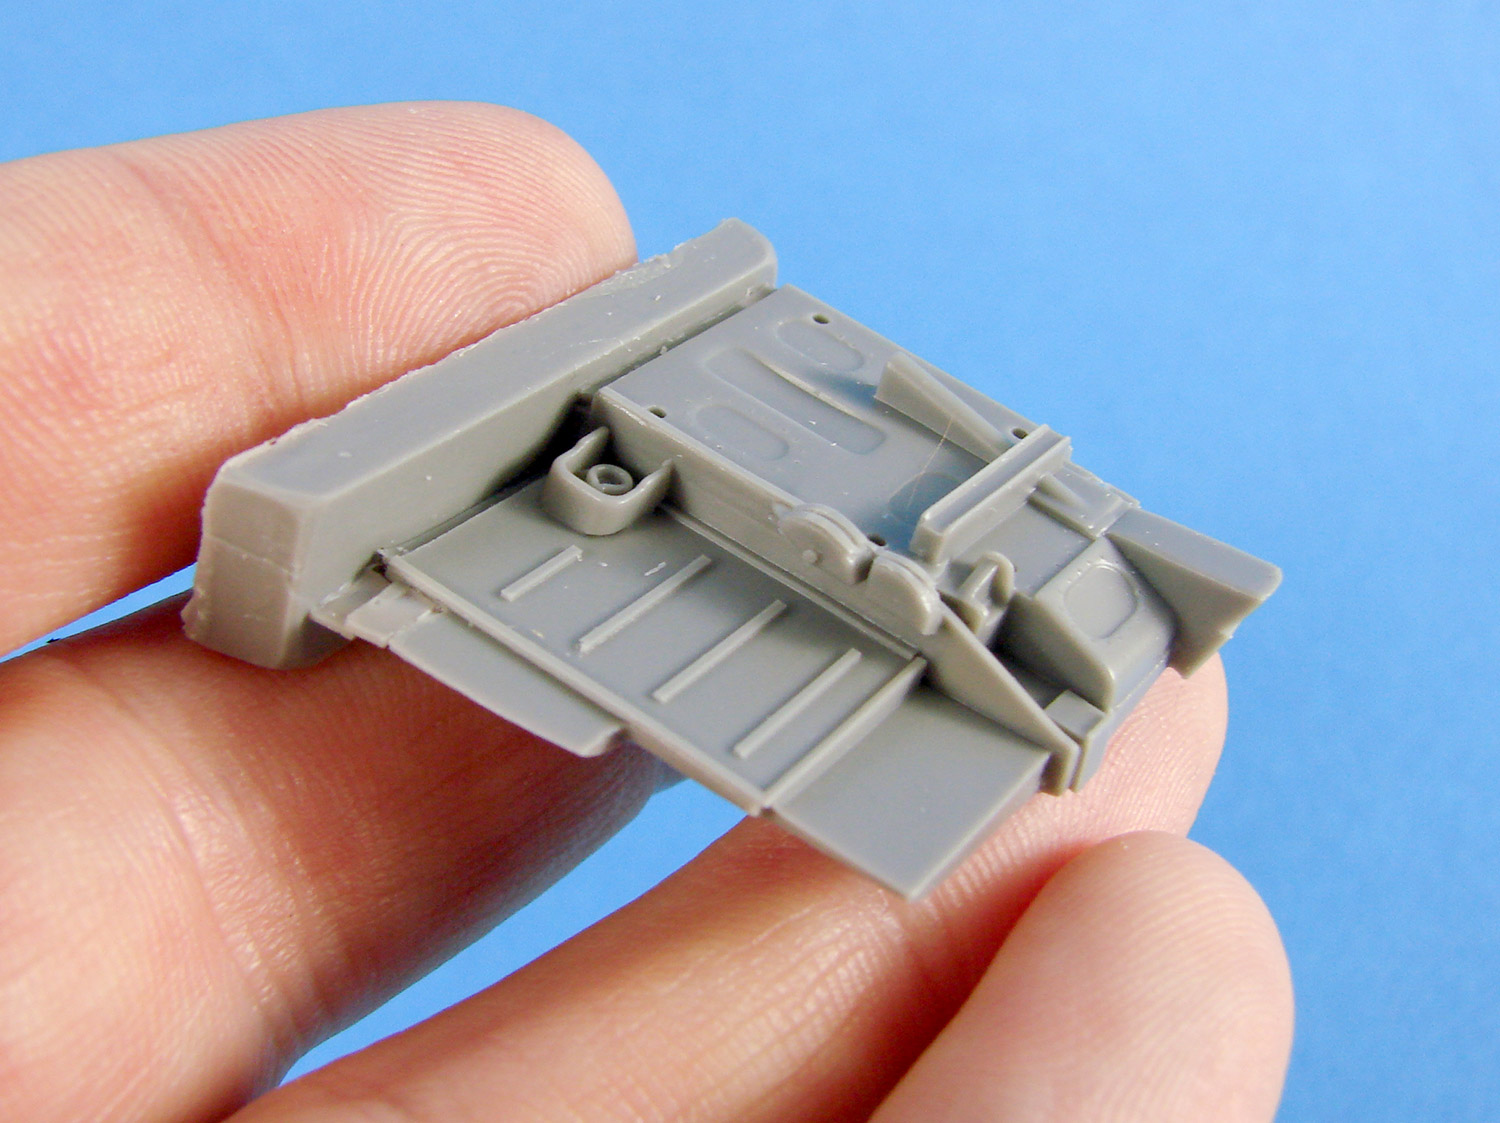
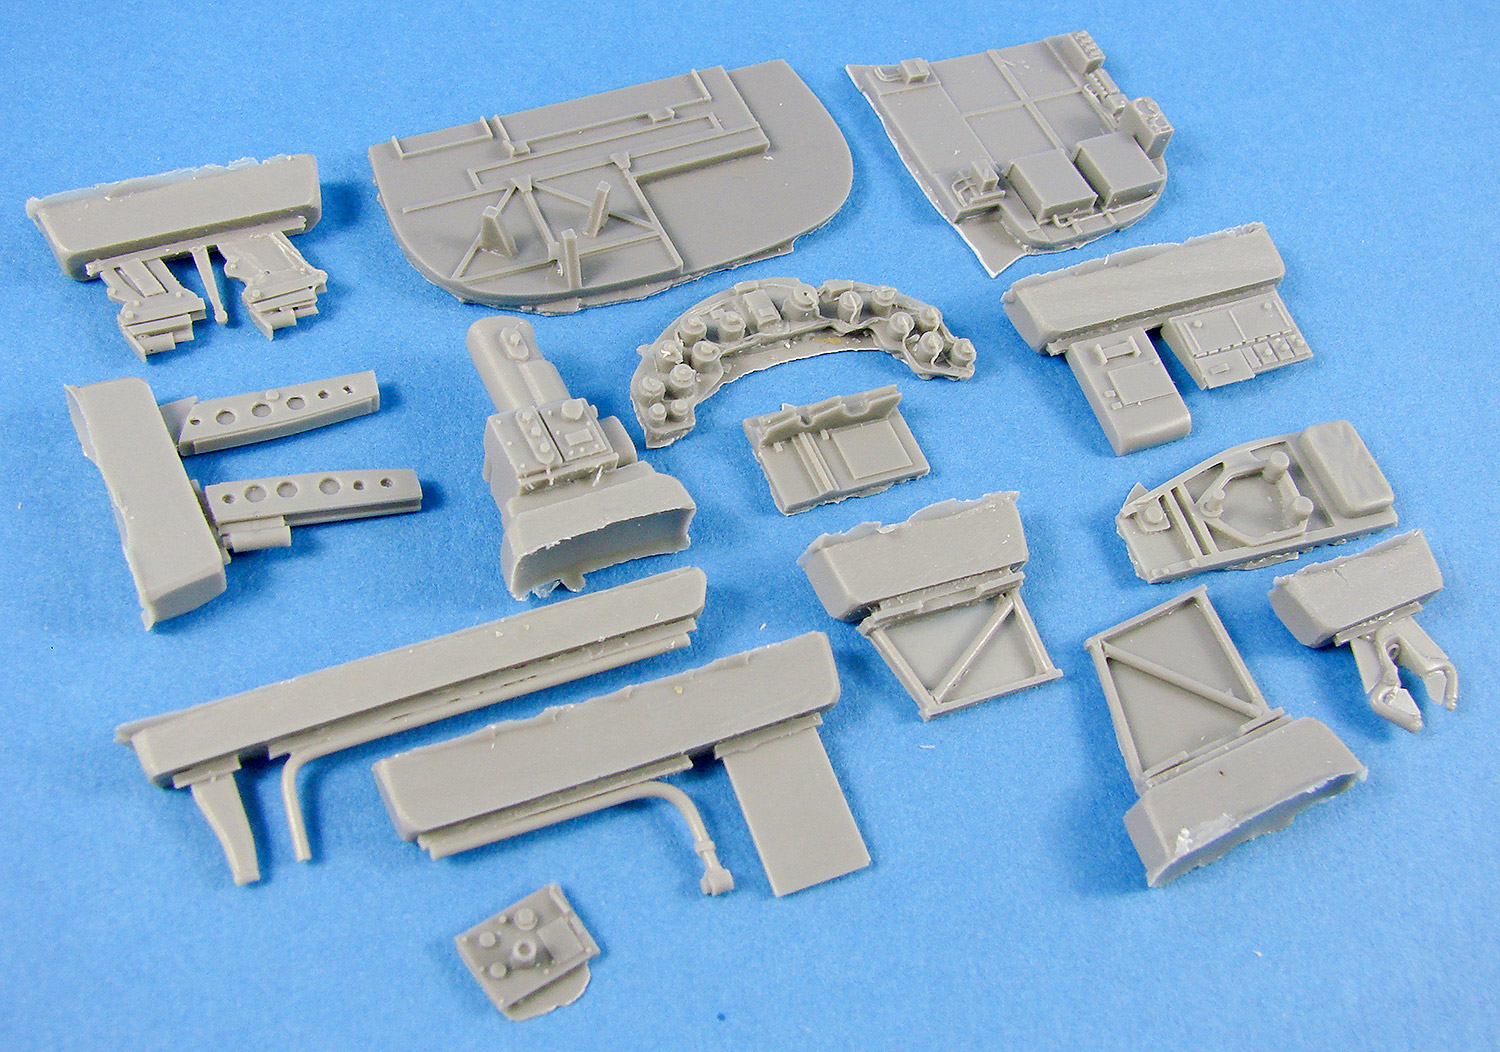
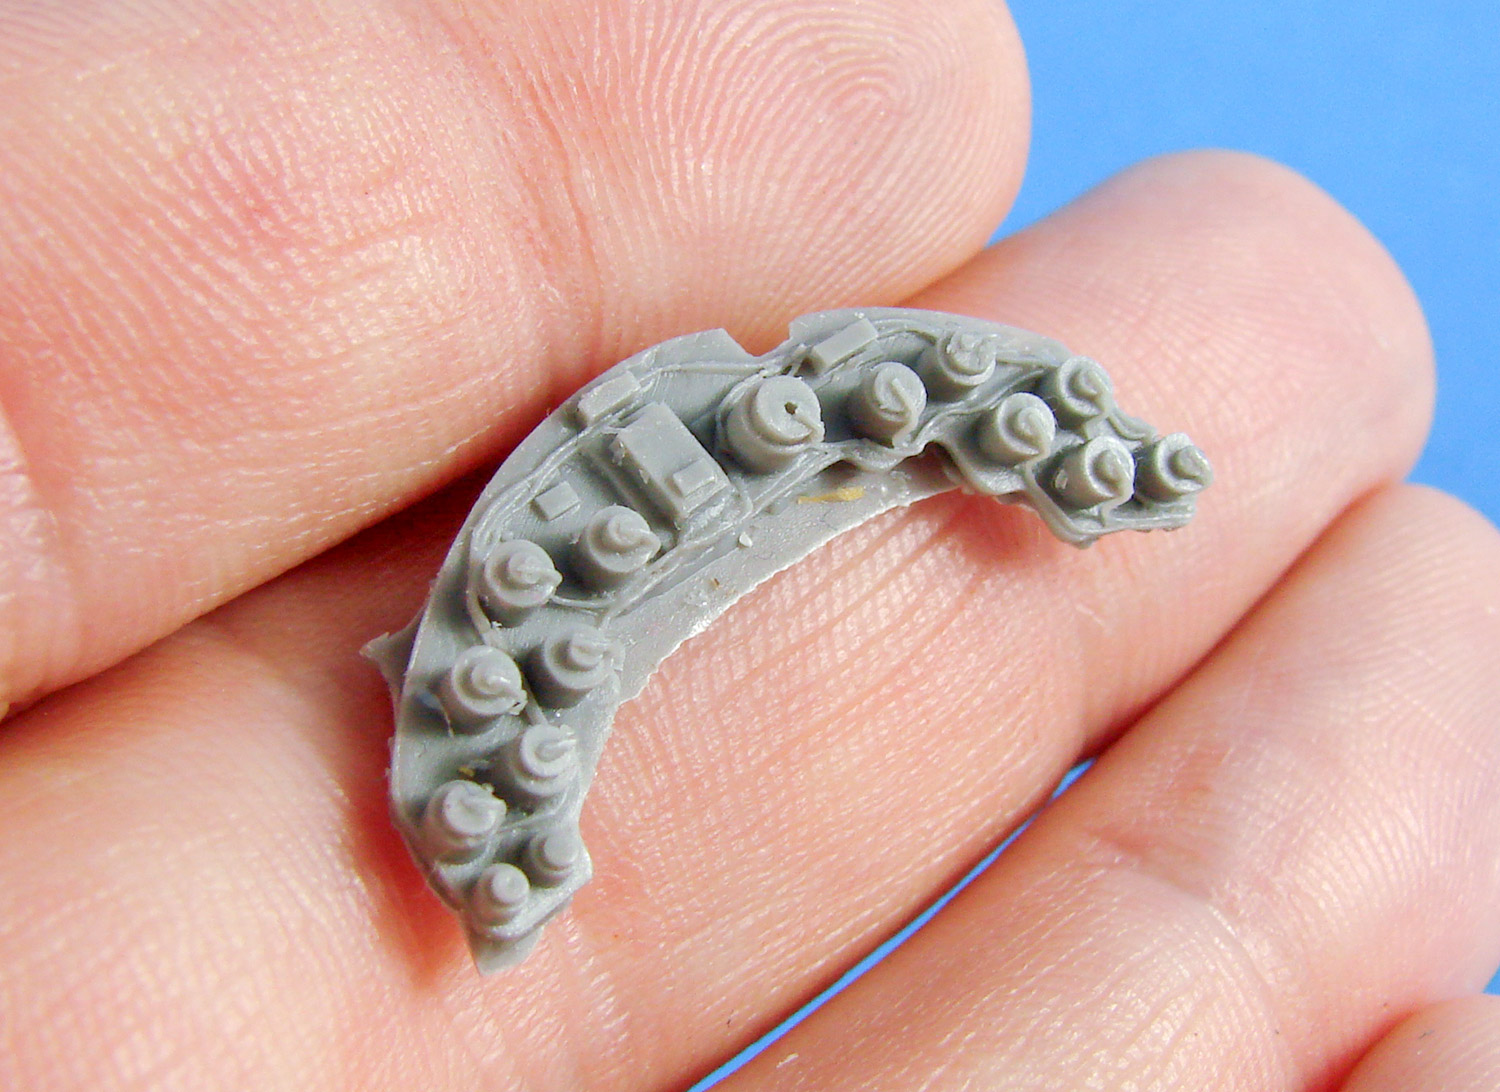
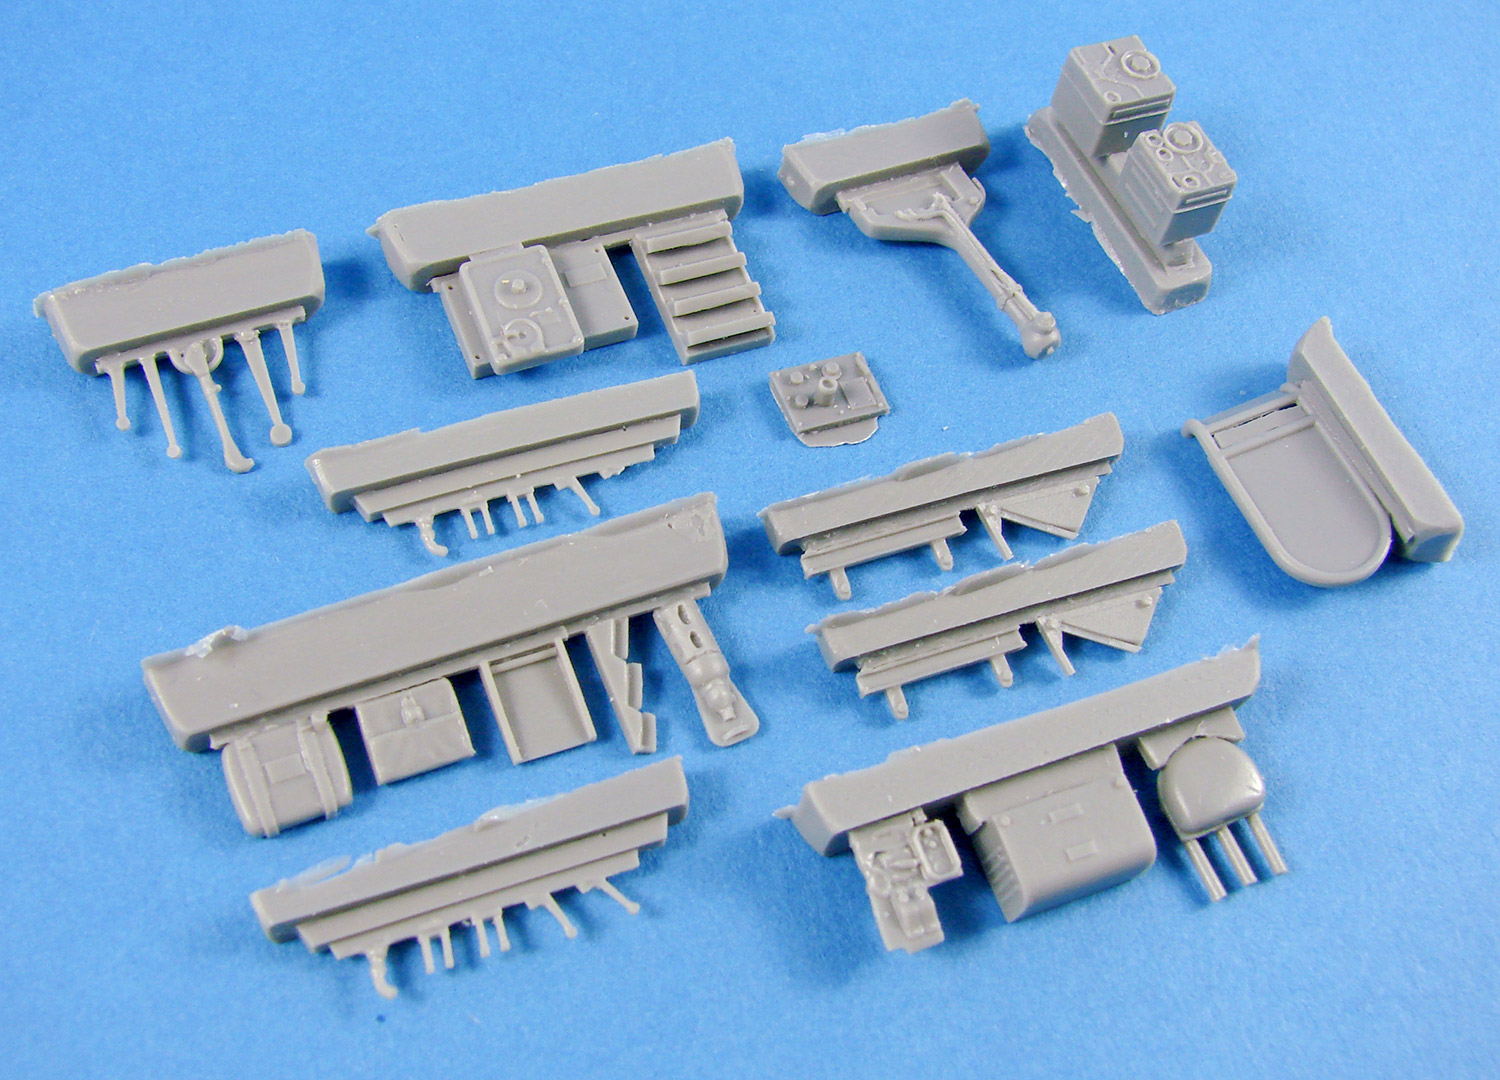
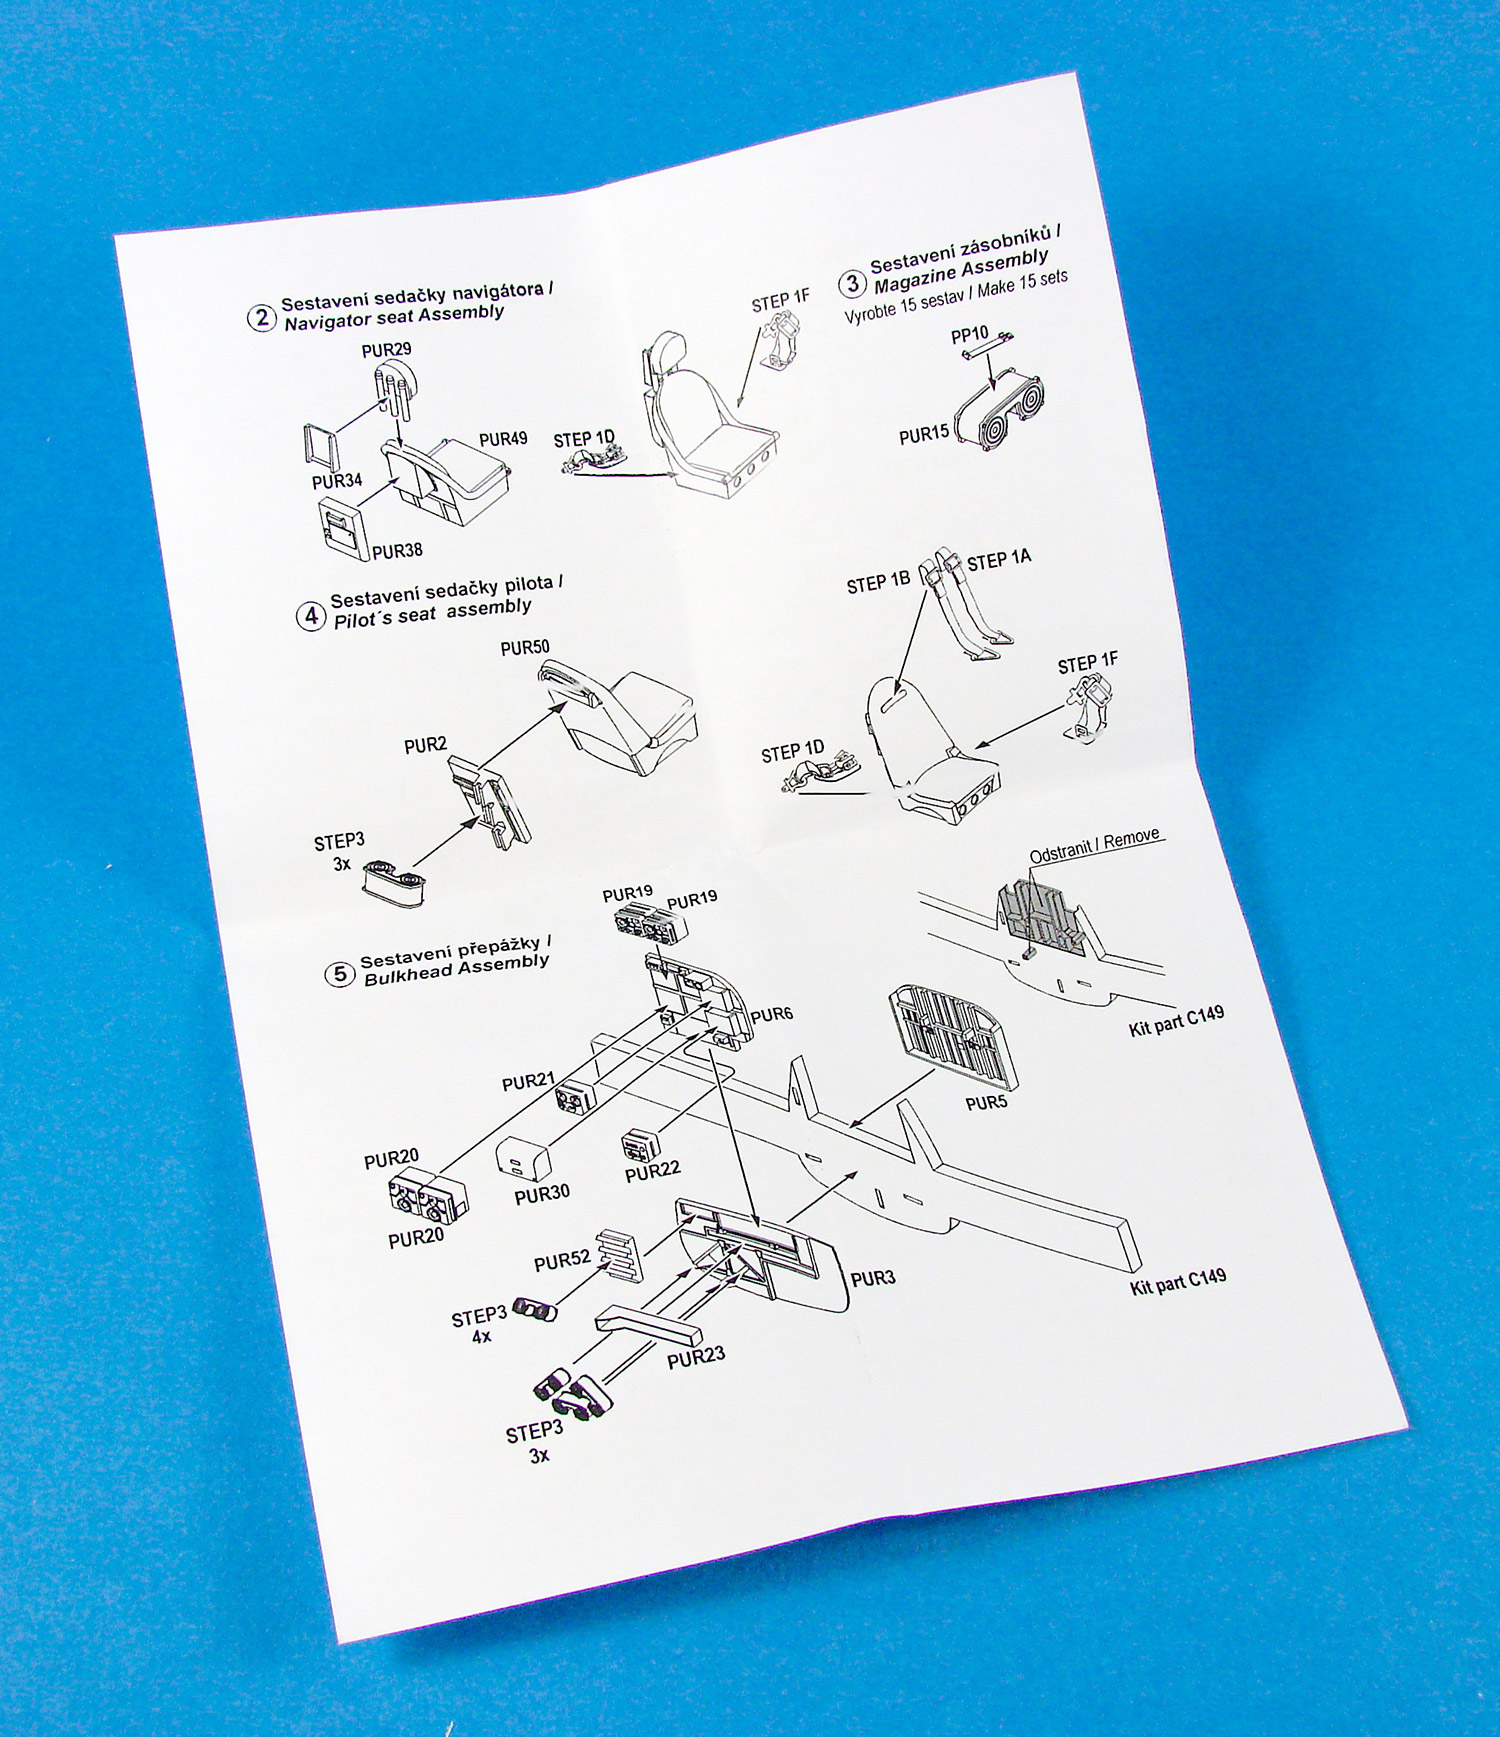
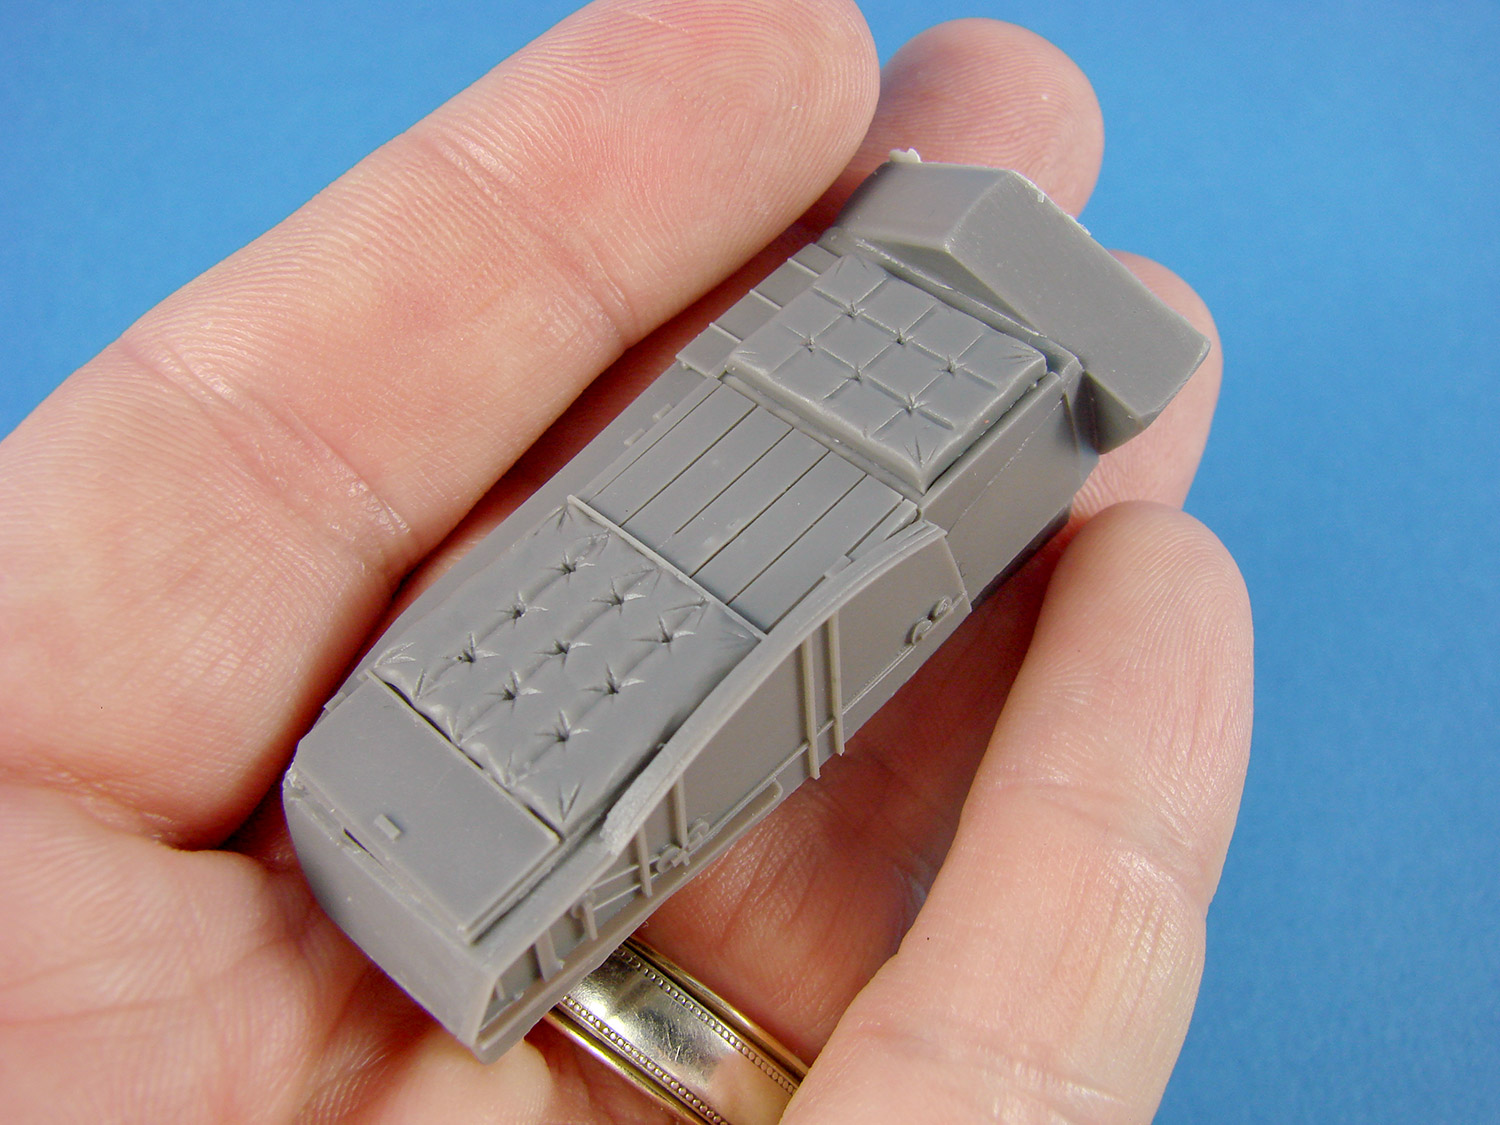
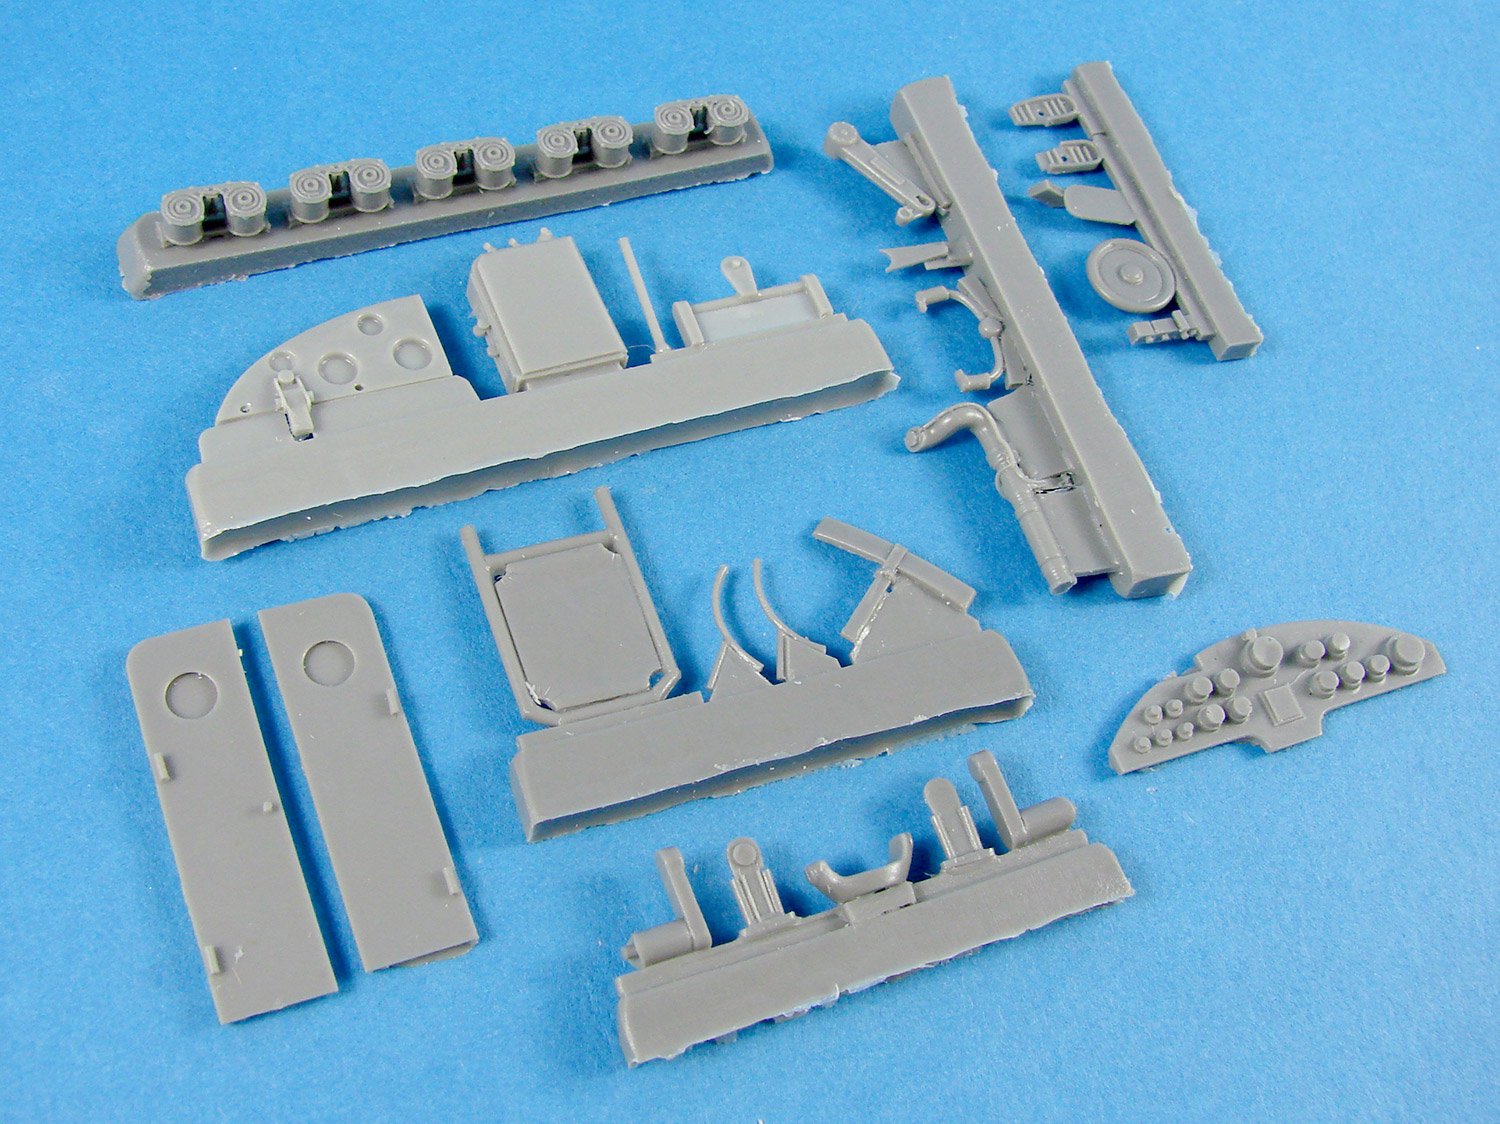
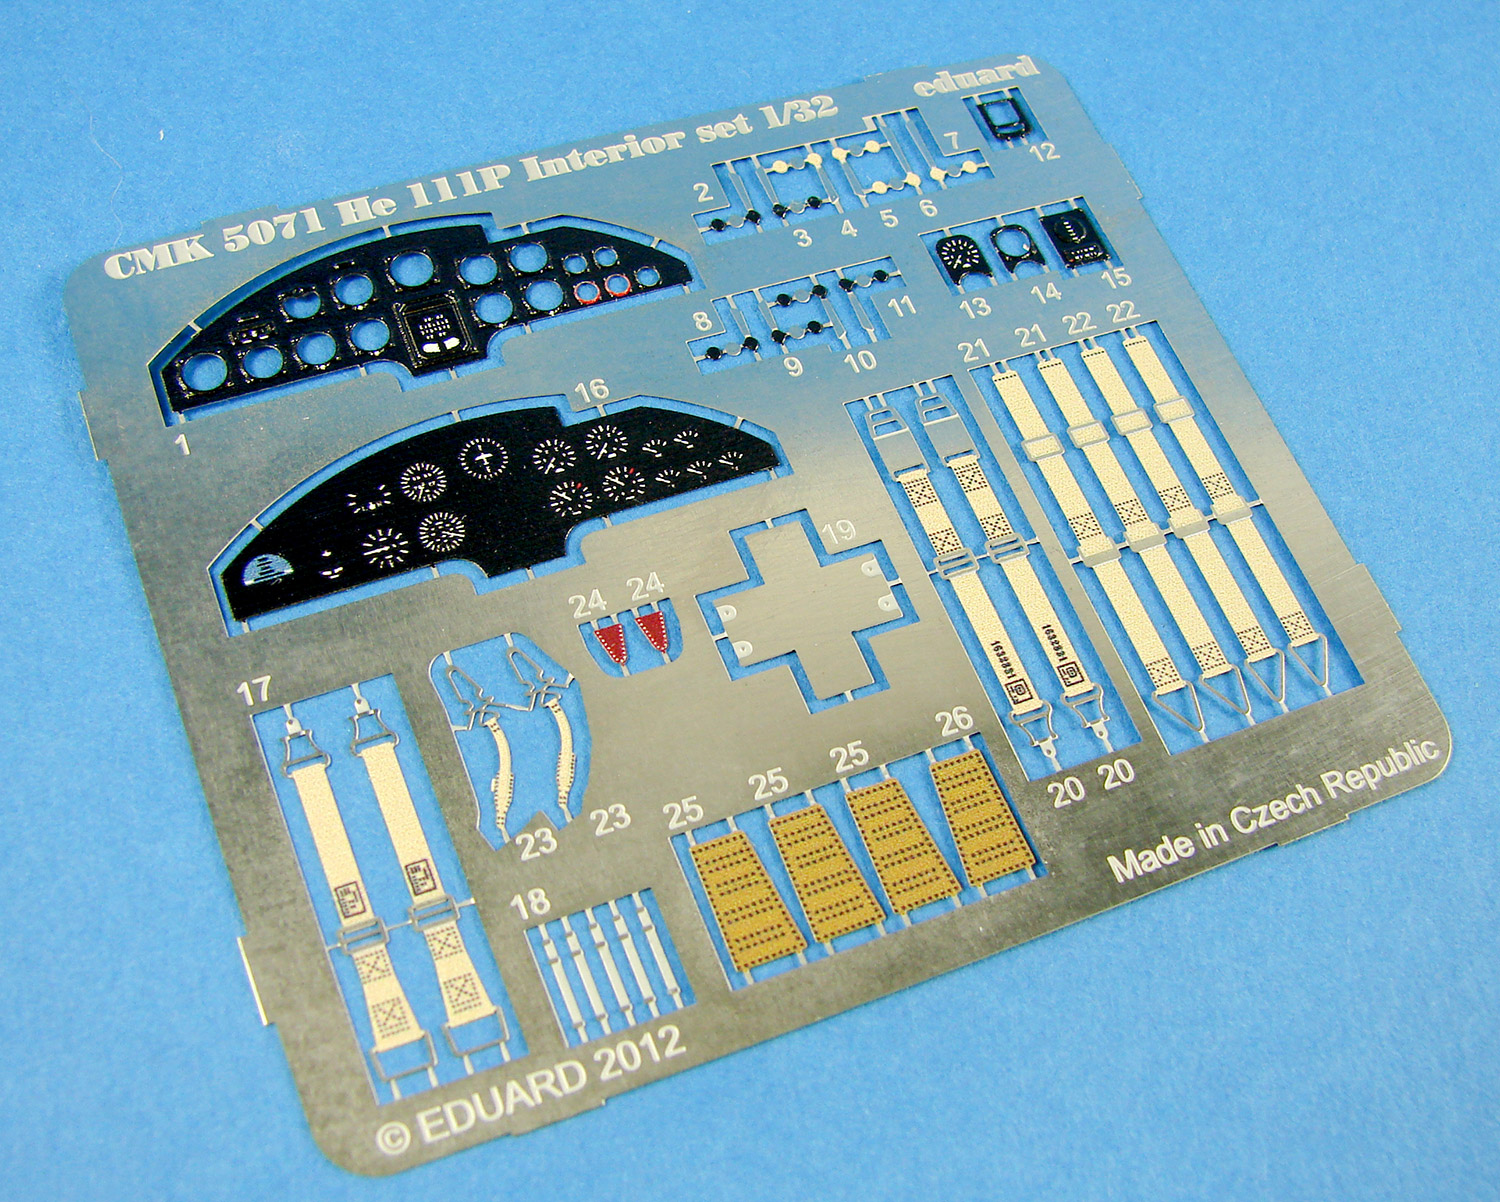
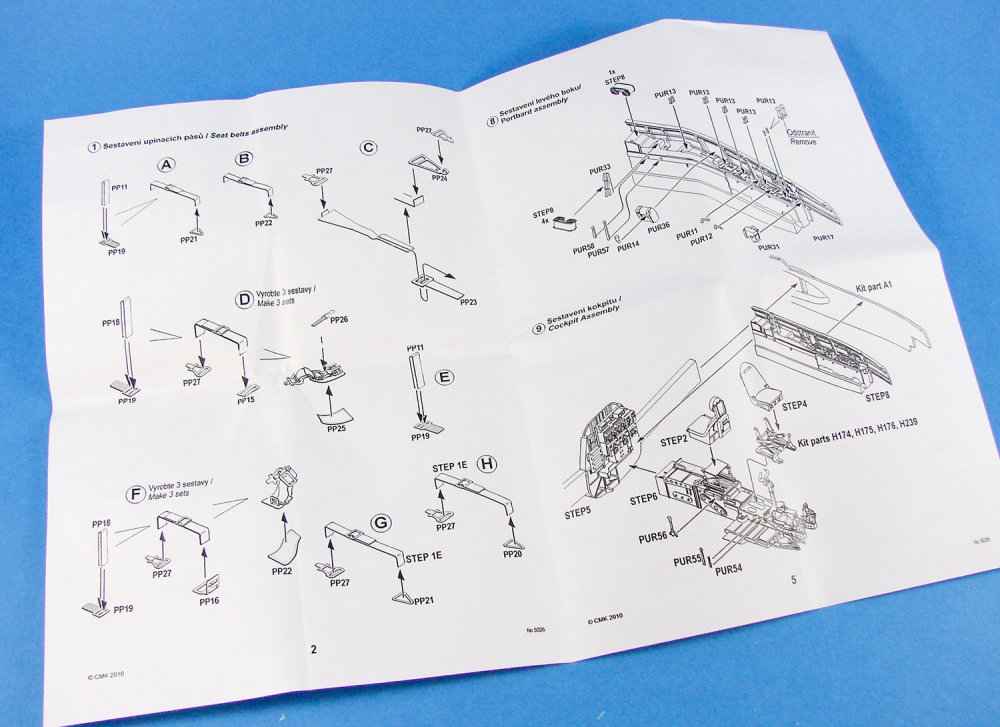
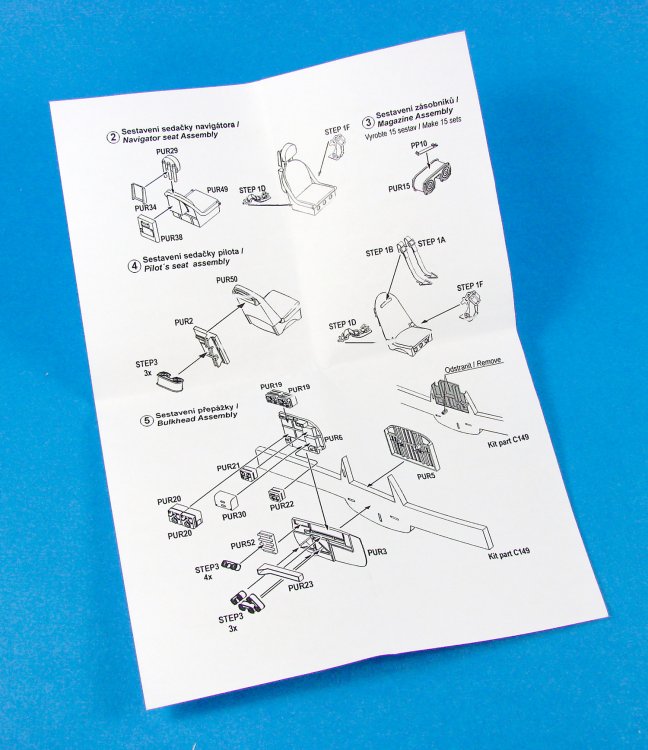
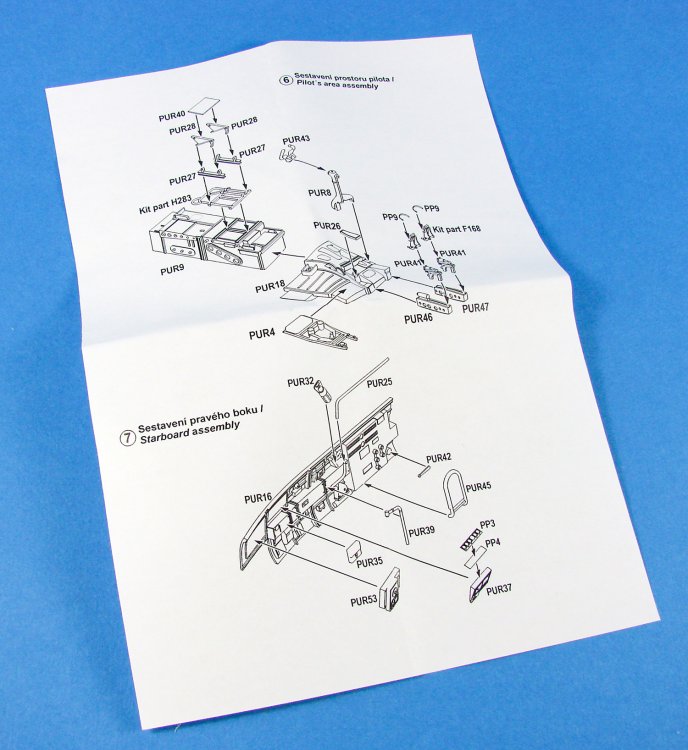
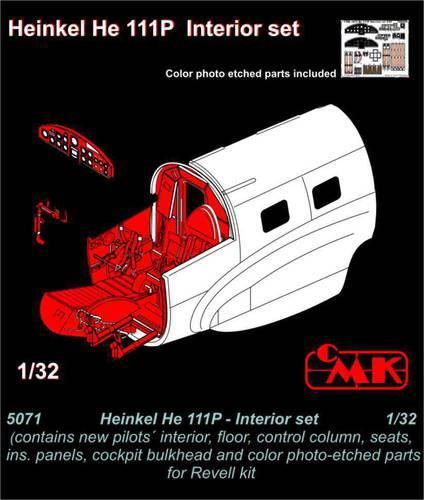
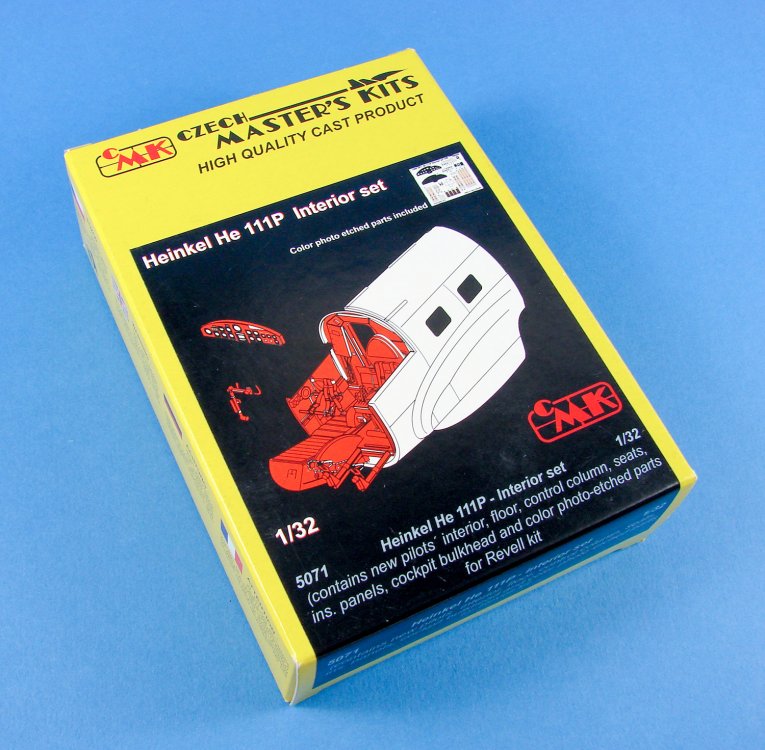
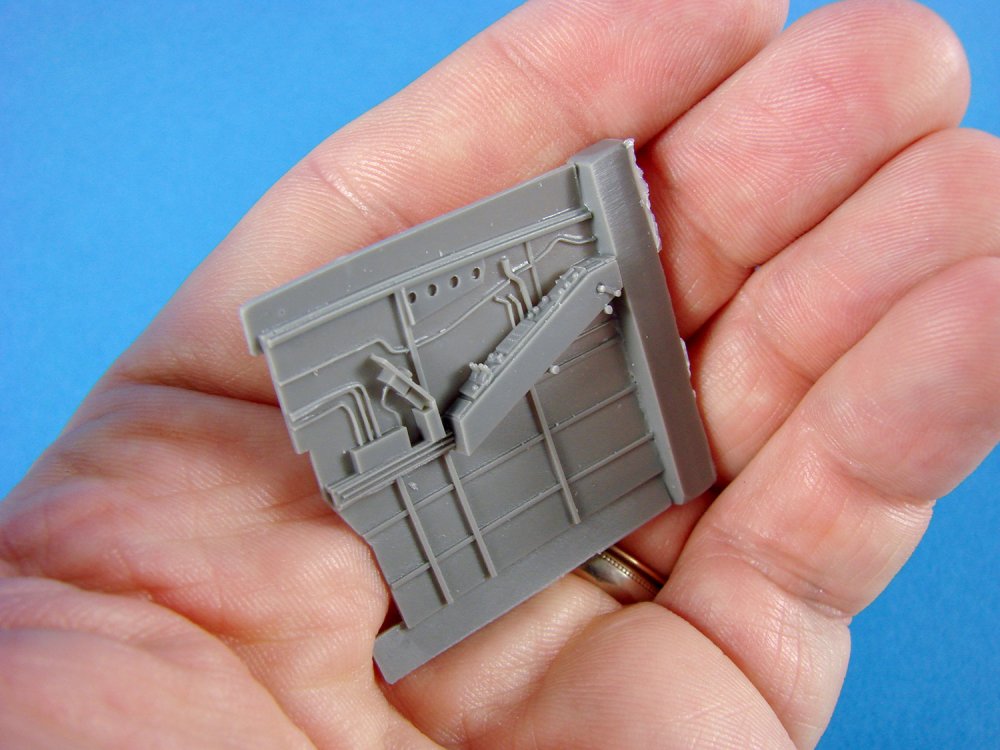
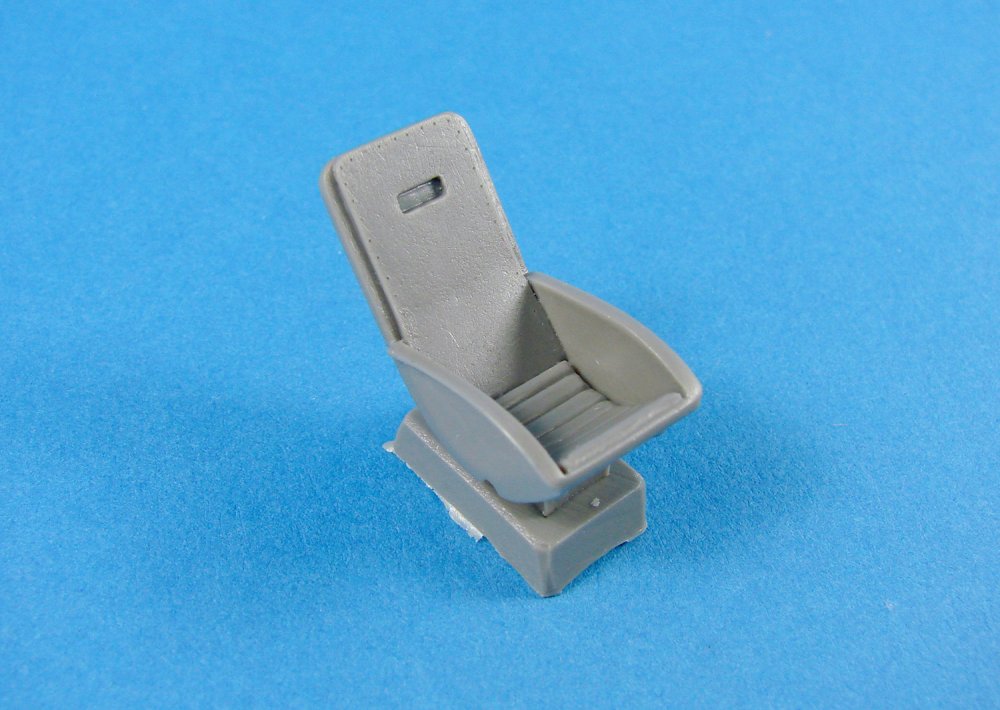
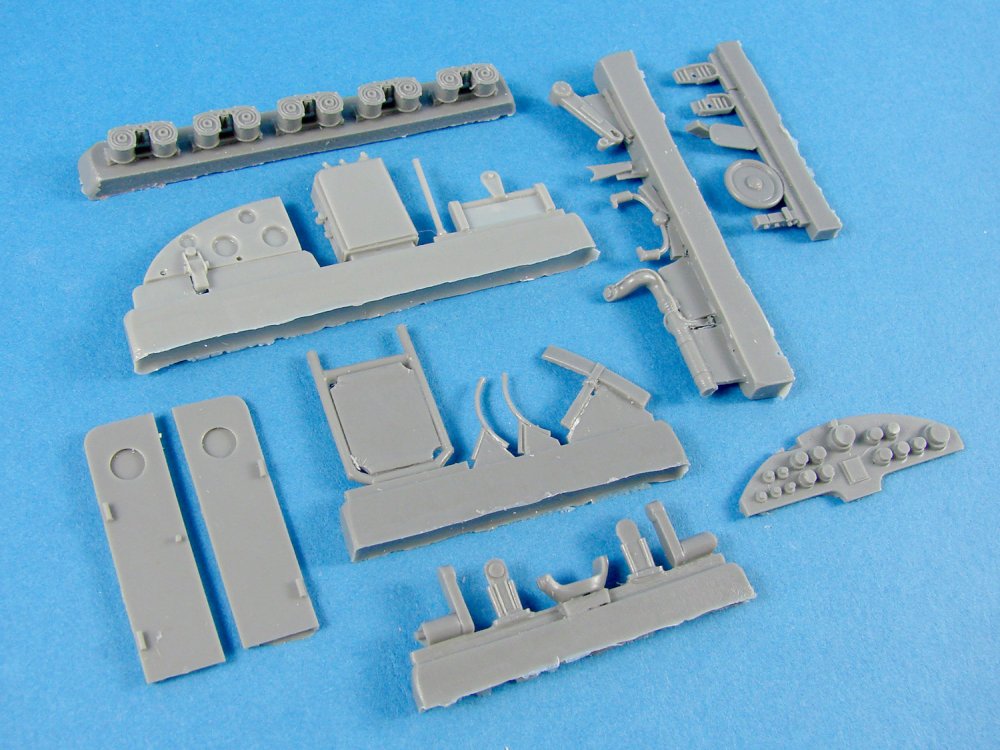
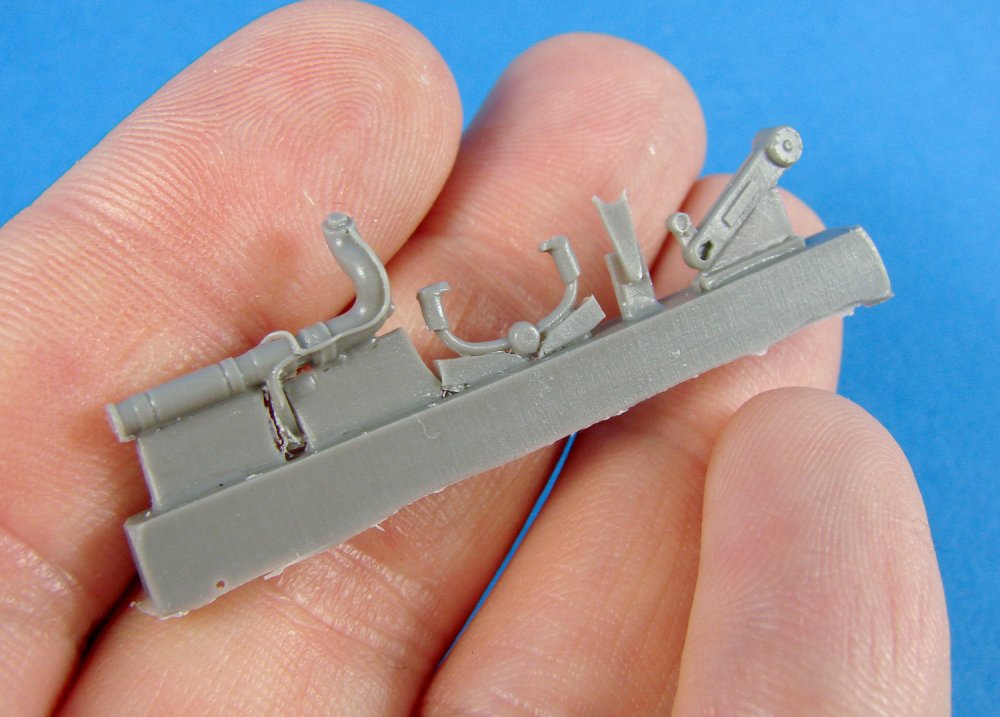
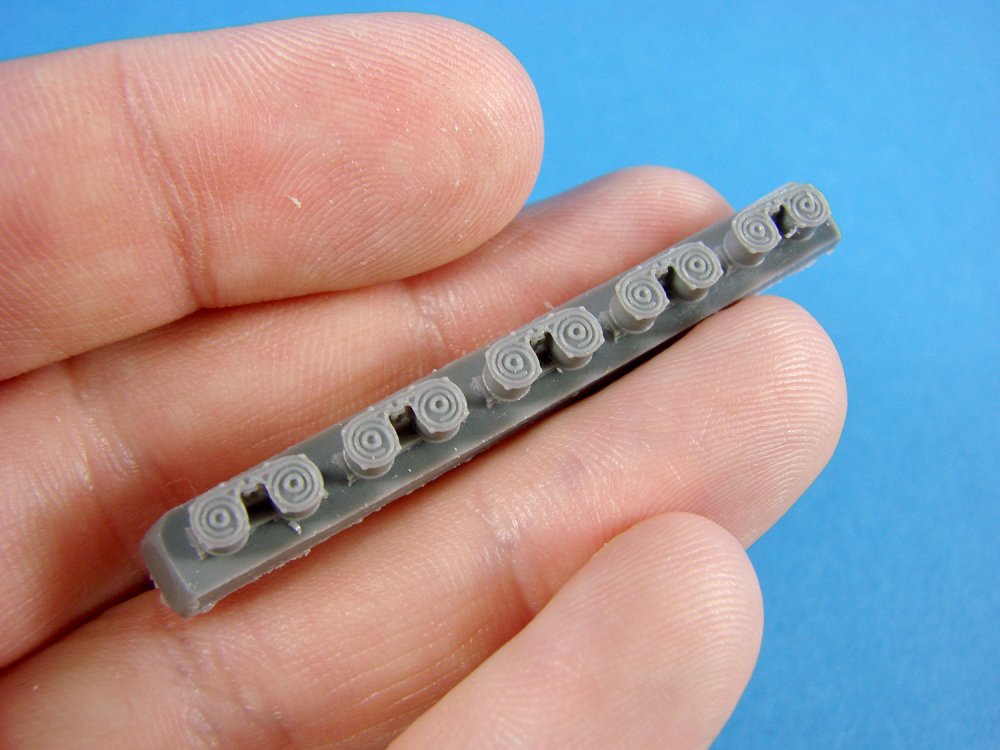
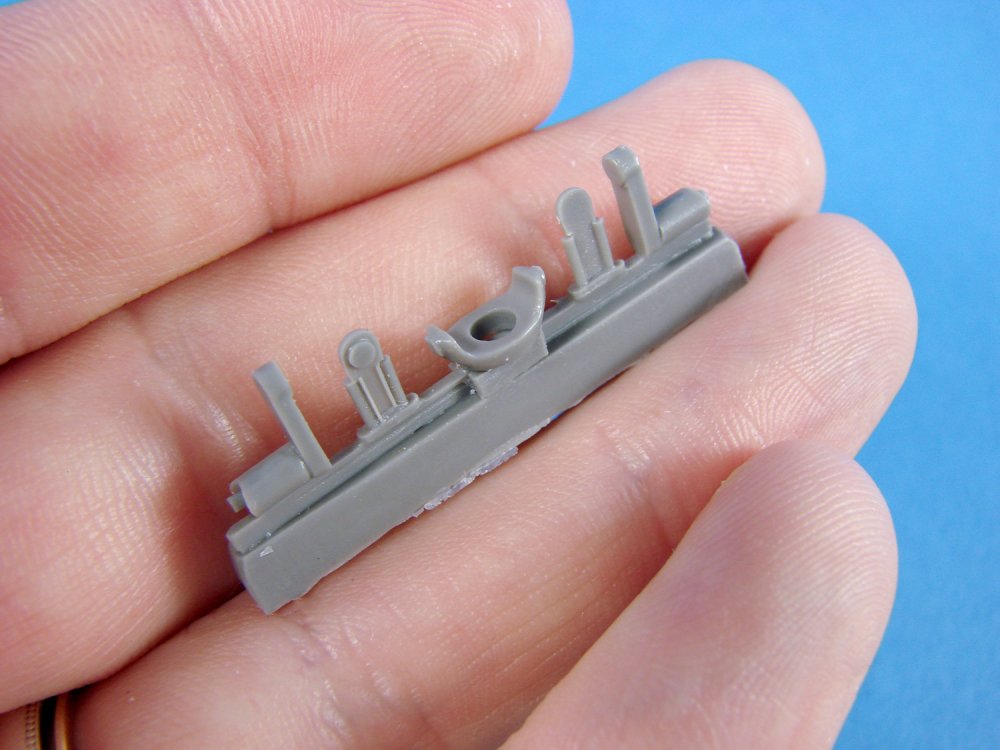
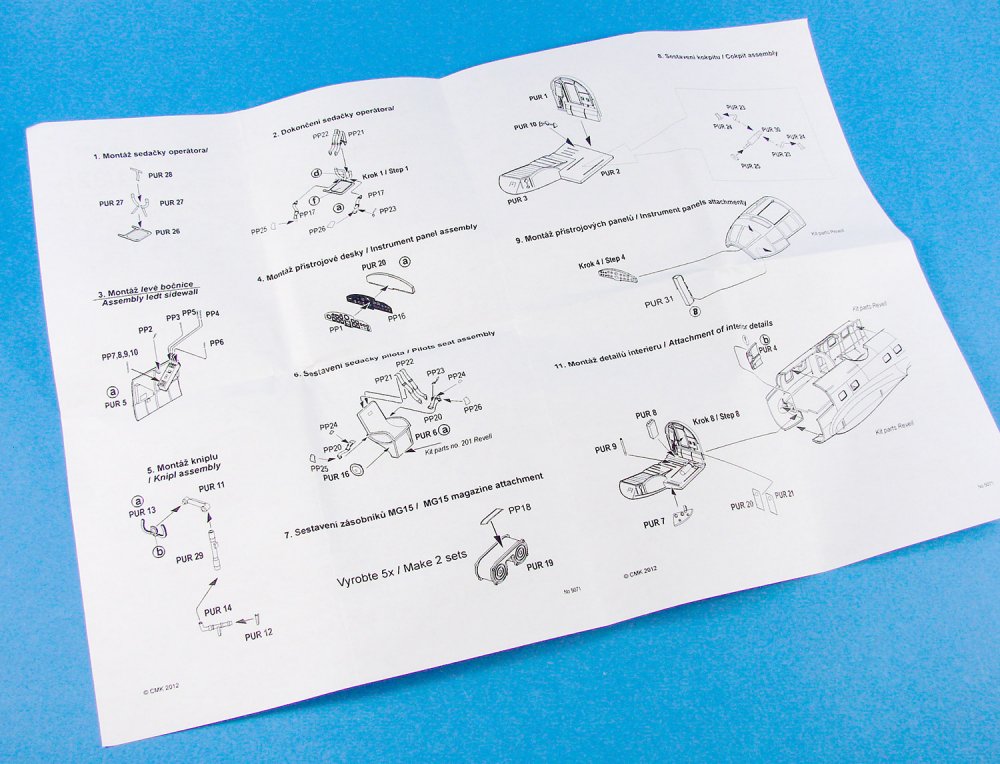
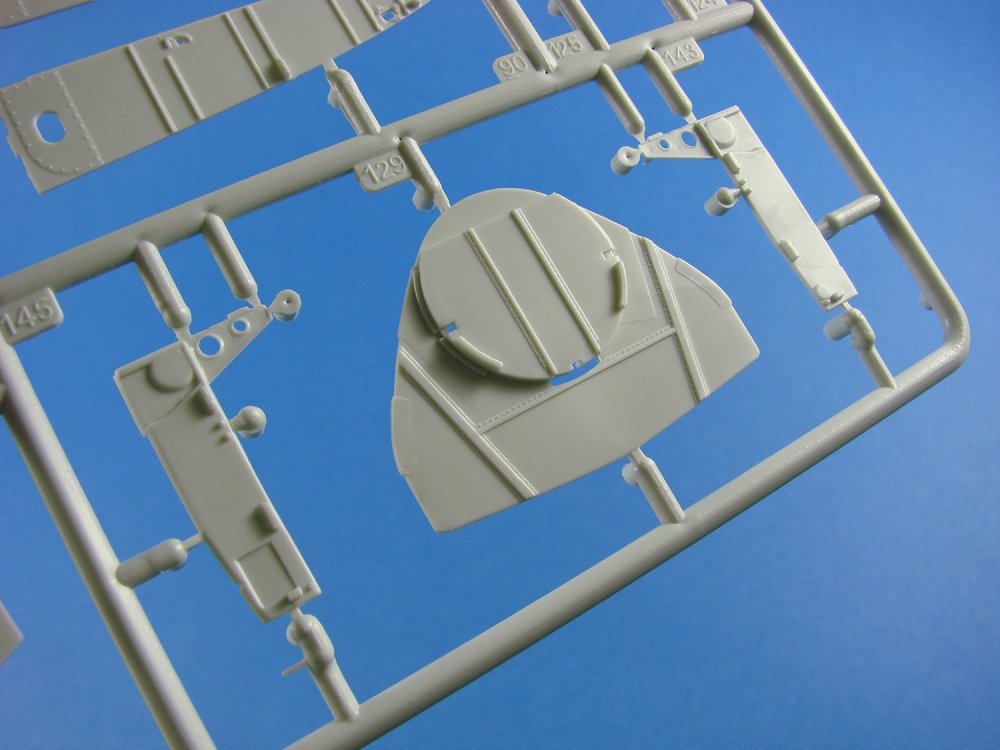
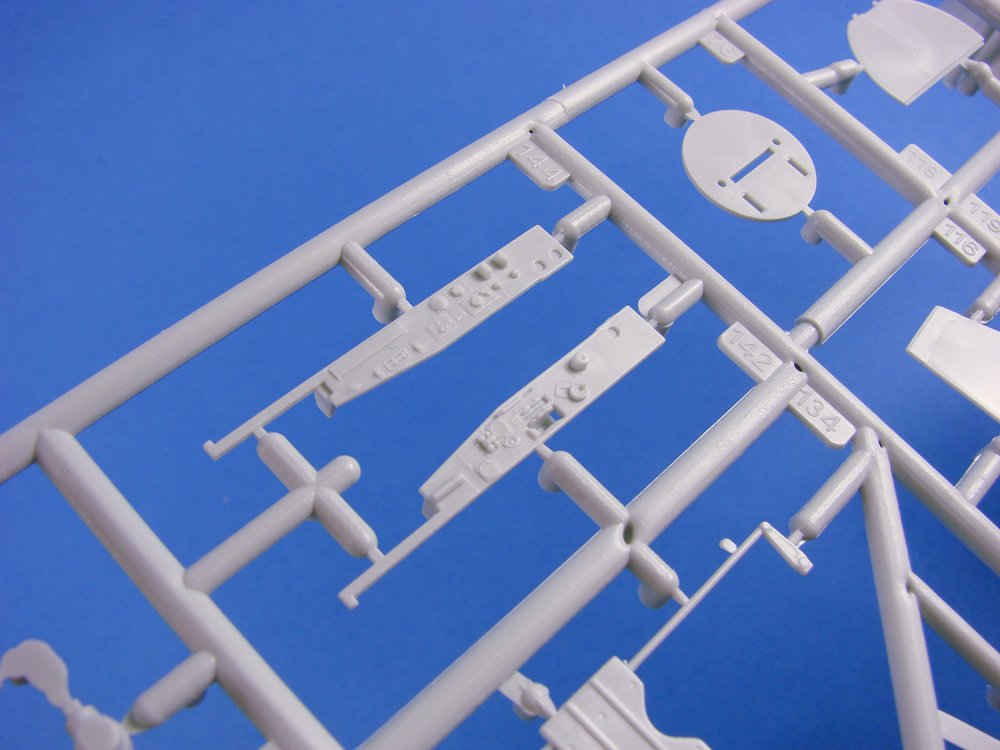
1/32 Heinkel He 111P Interior set CMK Catalogue # 5071 Available from Special Hobby for 625 Kč (around £21.50 at time of writing) I struggle to believe that it’s been a whole seven years since I first saw the new-tool Heinkel He 111P kit from Revell. Remember, these were the days before we saw the truly large injection-moulded giants, such as the B-17 from Hong Kong Models, or even their B-25 Mitchell. Revell really were breaking new ground with this and their Ju 88 kit from three years earlier (2008). Revell’s Heinkel He 111 release was quite something, and I remember seeing the parts for the first time, and wondering just how I’d display something of this size! How times change… At the moment, neither of the He 111 kits (P-1 and H-6) are readily available, which is a shame. Apart from the new Technik Ju 88, neither are the other big Luftwaffe hitters either. Hopefully Revell will dig out those tools again before too long as there’s a whole raft of extras available for the Heinkel kit, including this set that I’m looking at today, concerning the He 111 cockpit. CMK call it an ‘Interior set’, but that’s a little ambiguous as it doesn’t contain parts for anything beyond the cockpit (so no bomb bay etc.). I can forgive them though, as it’s pretty clear from this set just what is included as it’s plastered over the artwork on the front of the box. The box itself is fairly small, and not too heavy either, as despite there being a lot of resin, there are no big, hefty parts. Even the larger components are relatively thin. Inside CMK’s familiar yellow and black box, adorned with a sticker with a graphical image of the detail set, are two bags of resin, one fret of colour-printed PE, and an instruction sheet. Unlike Revell’s Ju 88, whose cockpit is excellent out-of-box, the He 111 was always a little lacking, in my opinion, and certainly would benefit from some resin goodies. And here we are! Opening the first zip-lock bag, we are presented with the largest components in this detail set. All of the resin parts are cast in a medium-grey resin, apart from one, and this is the back wall of the cockpit (the largest part in the set). This pale grey part contains the doorway to the bomb bay (blanked off or closed), various trunking/conduit unites and a couple of avionics panels with wiring looms. Lower down is a recess into which the floor slots. As this is a replacement for the kit part, it will need to be thinned a little from the rear, and I think opening up the door would be a nice touch, especially if you have fitted Eduard’s bomb bay set. This cockpit is most definitely enhanced with the door opened. The floor is cast as two parts; the main rear floor, and the starboard projection which includes the bomb aimers cushions for when he lies prone. Some thinning of these parts and casting block removal will be required, but the details are superb, including various conduits and plate details. The prone position has side details, such as a drive chain mechanism. CMK has cast the sidewalls suitably thin, and because of this, you will have to remove not only the casting block, but also some part stiffeners that run along the bottom and top of the sidewalls. Details here include the constructional elements of the fuselage, as well as side consoles, wiring, and more avionics/electrical panels. One of my parts has a very slight warp, but that will easily come out with a quick dip in some hot water for a few seconds. These sidewalls seem to have to be installed once the floor and rear wall is in place, but some careful dry fitting will ascertain the correct and best way to approach this. The last part in this bag is the pilot’s seat. When the casting block is removed, the seat will be fitted to the cockpit using Revell’s kit part. There are seven casting blocks in the second zip-lock bag, as well as three standalone components. One of these is the instrument panel which has a blank face but has the instrument bodies cast on the reverse. Some wiring should be added here as this will clearly be seen in the finished model. For the front, CMK has supplied colour PE parts, courtesy of Eduard. The other standalone parts are……yes, the split door for the cockpit! So glad to see these added, and with the ability to be posed. Now you’ve zero excuse notto fit the Eduard bomb bay. The other components cast on the various blocks include a raft of ammunition saddles, multipart control column and linkages, bomb aimer seat, control panels, constructional elements, central instrument console, rudder pedals, trim wheels etc. It is pretty clear to me that you will need to look at the given kit parts in order to better ascertain the orientation and fitting of the resin upgrades. Other elements of the actual kit are missing in the upgrade illustrations too, such as the extinguisher that fits to the back wall. It’s evident that you need to follow both the kit and resin upgrade drawings with a view to knowing what should and shouldn’t be fitted. Some kit parts that are integral to the resin upgrade, are indeed shown in the CMK instructions, such as the pilot seat mount and rudder pedal assembly (sans plastic pedals). A single PE fret contains a colour-printed multipart instrument panel and various levers for the consoles, plus a set of seatbelts for both cockpit occupants. Quality is everything you expect it to be from Eduard. I find the instructions a little bewildering at times, with some parts not drawn exactly to the shape of the component, or with a level of ambiguity over where things actually fit. I’m afraid you’ll need to do some detective work in areas, but hey, isn’t that supposed to be the fun part for us armchair historians?! Conclusion A great little set with excellent casting and details that far excels what Revell offer in their kit, and at a very reasonable price. Just expect to have to do a little Google Imaging for some things! Highly recommended My sincere thanks to Special Hobby for sending this sample out for us to review. To purchase directly, click THIS link.


-
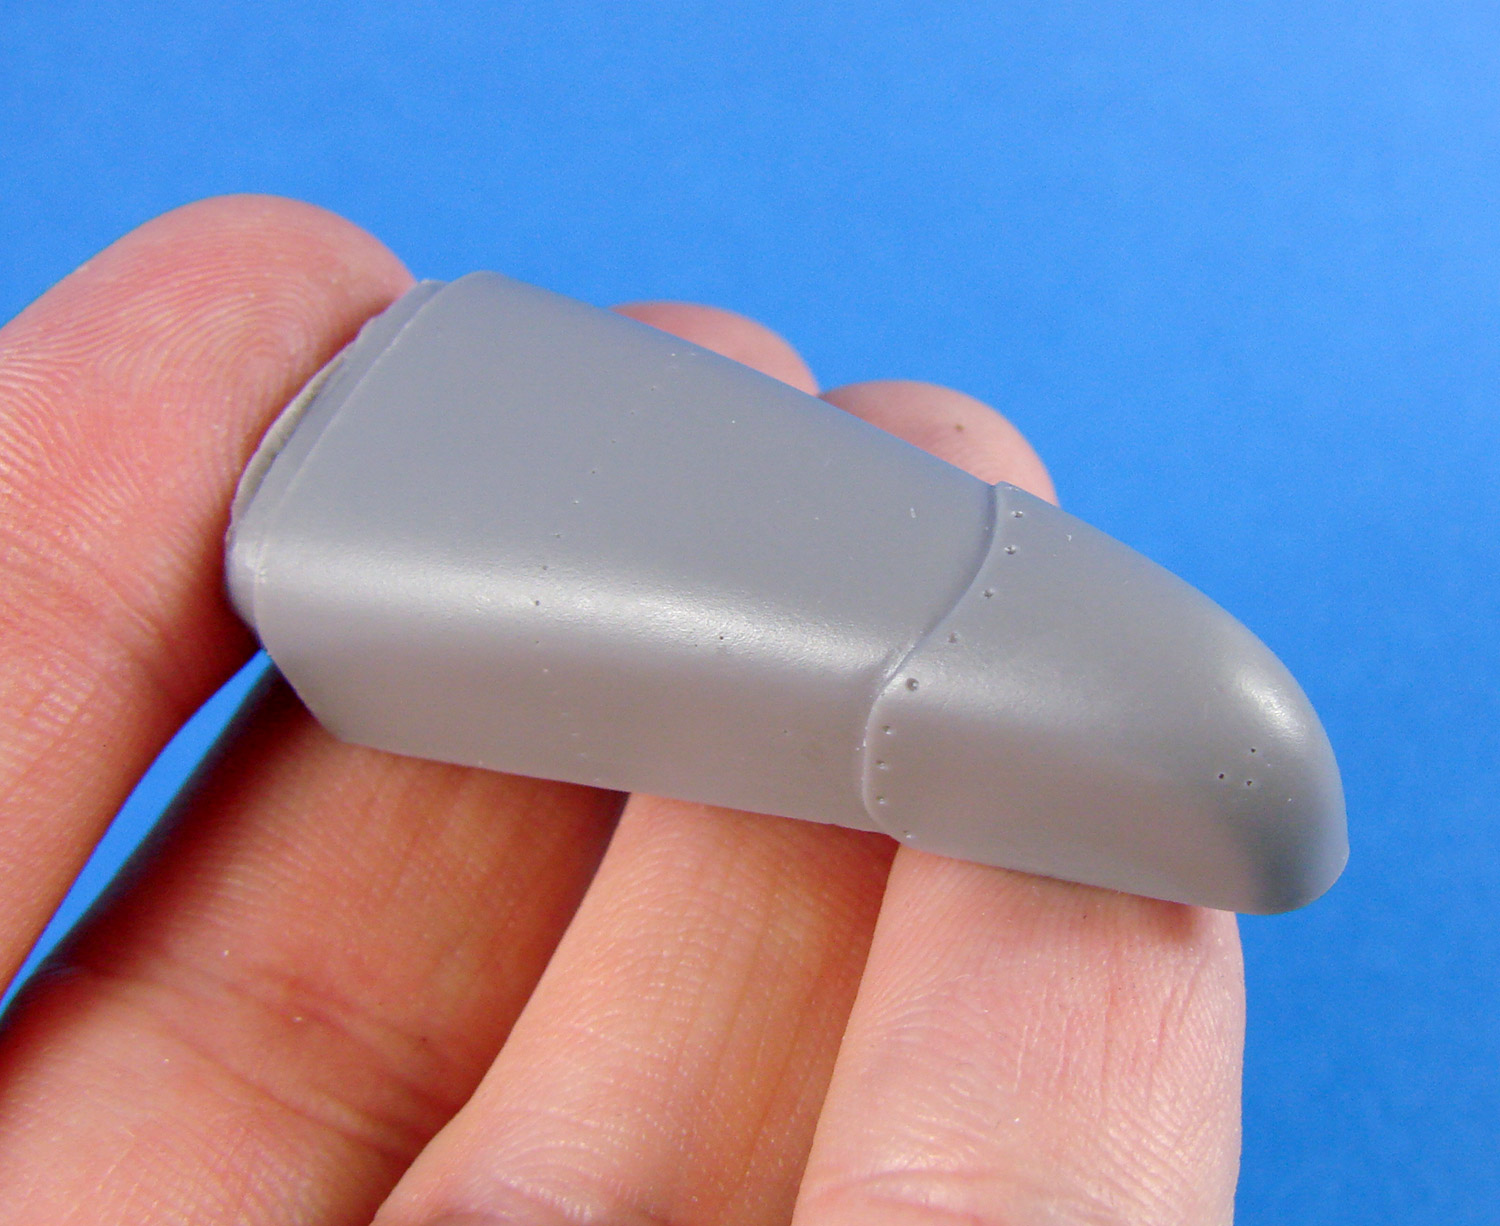
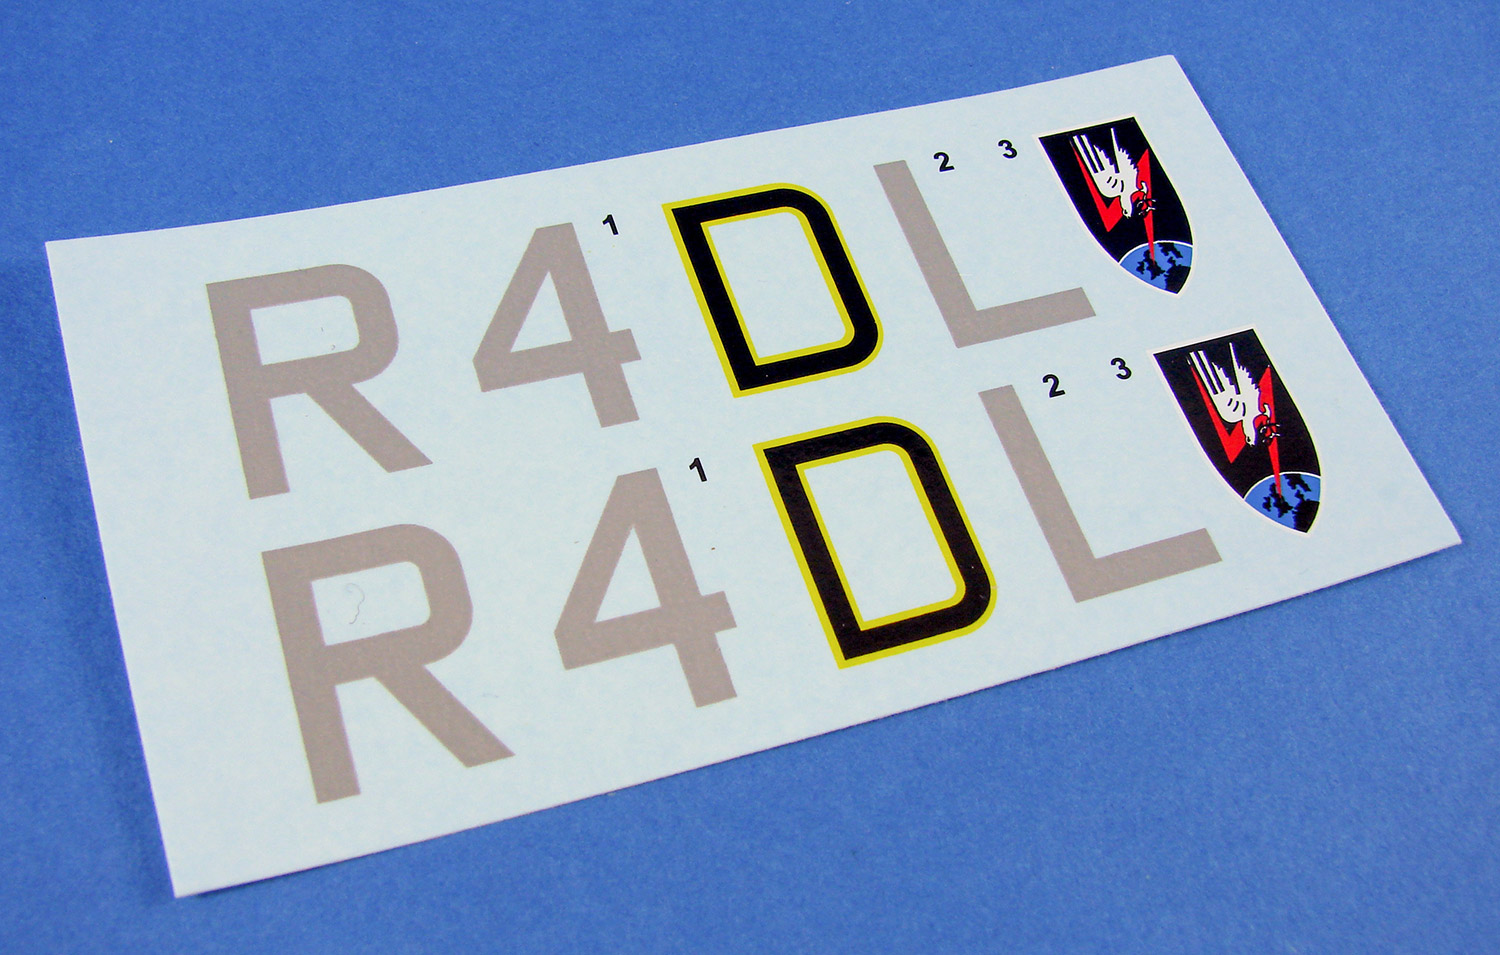
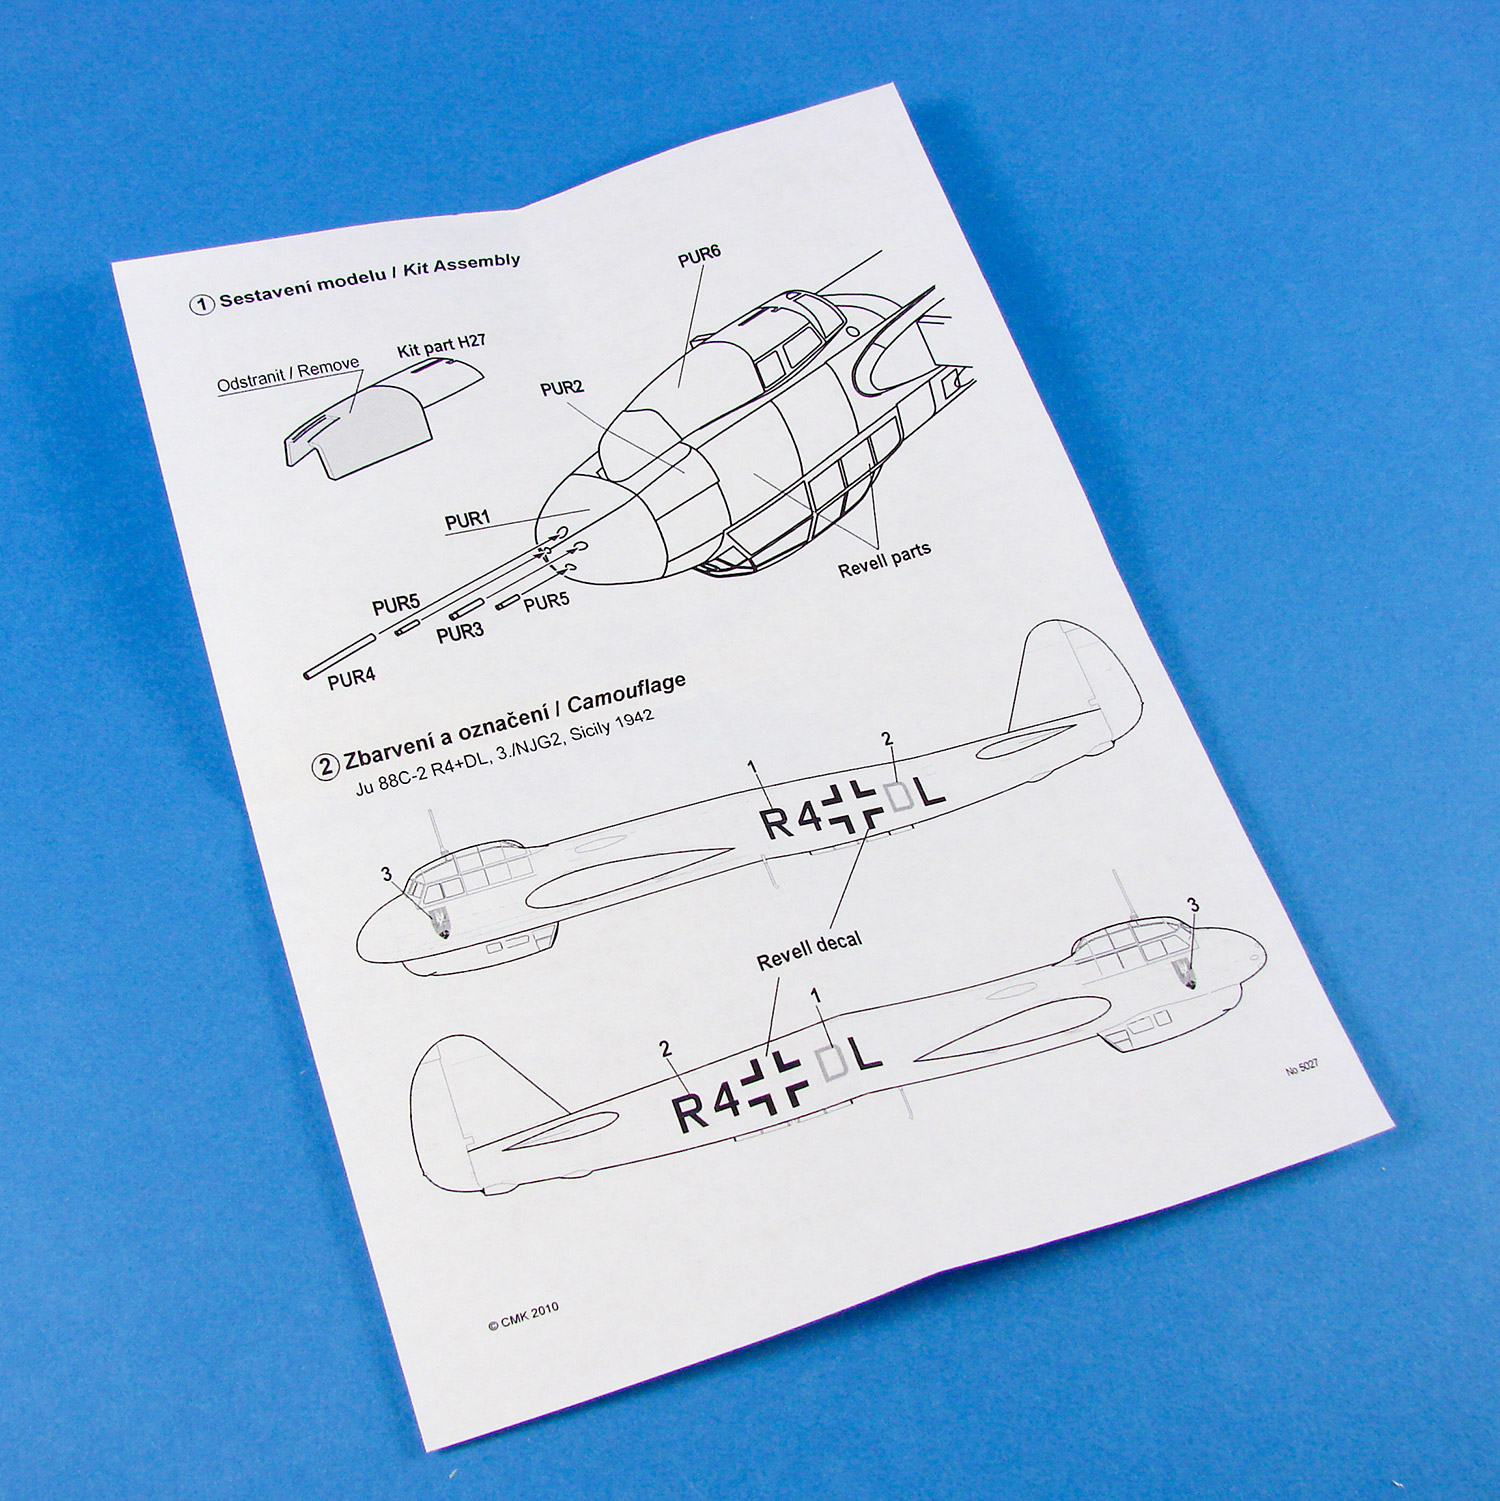
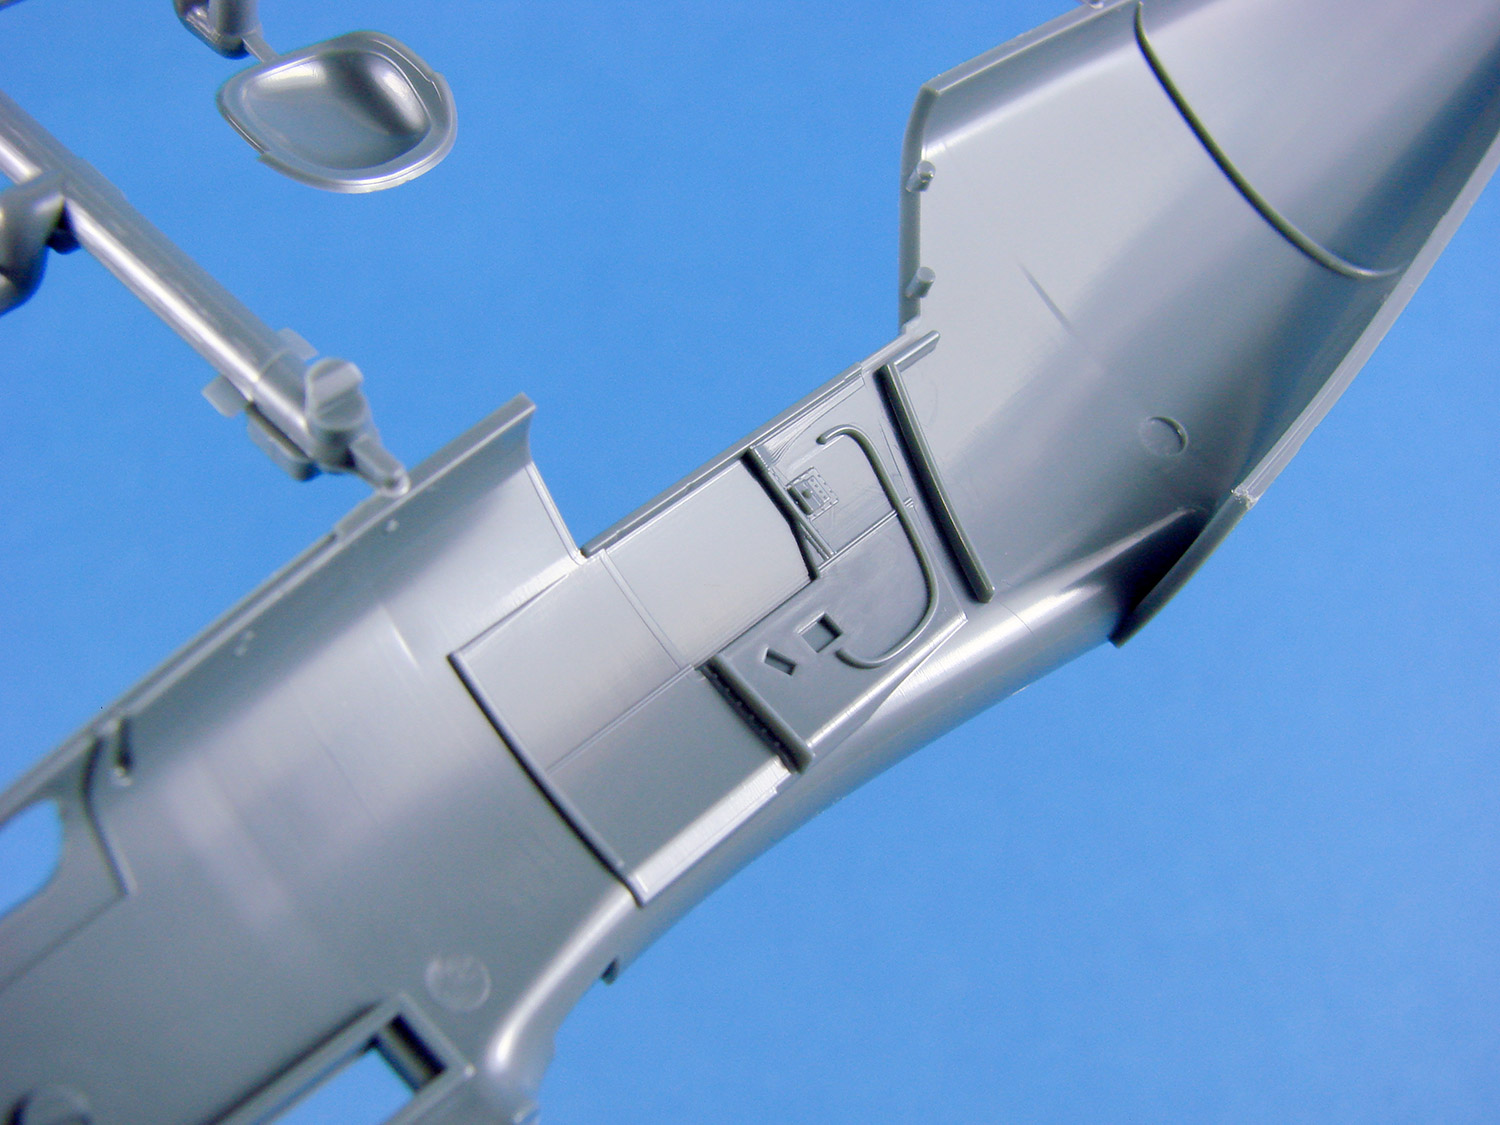
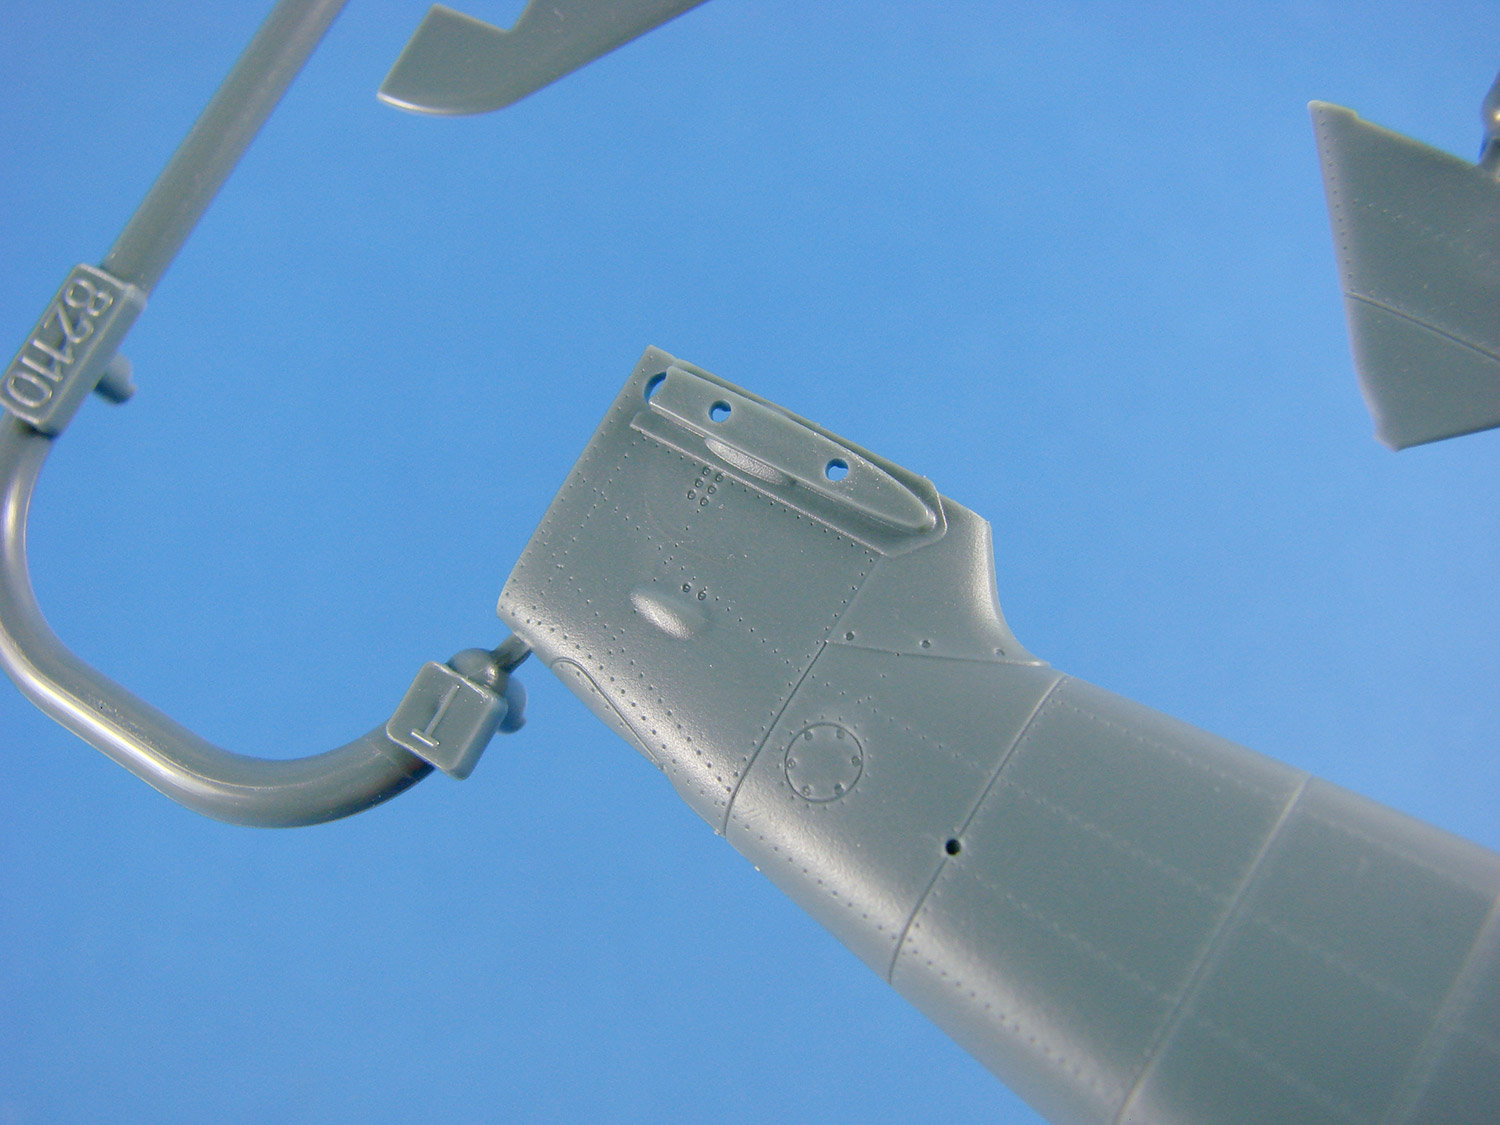
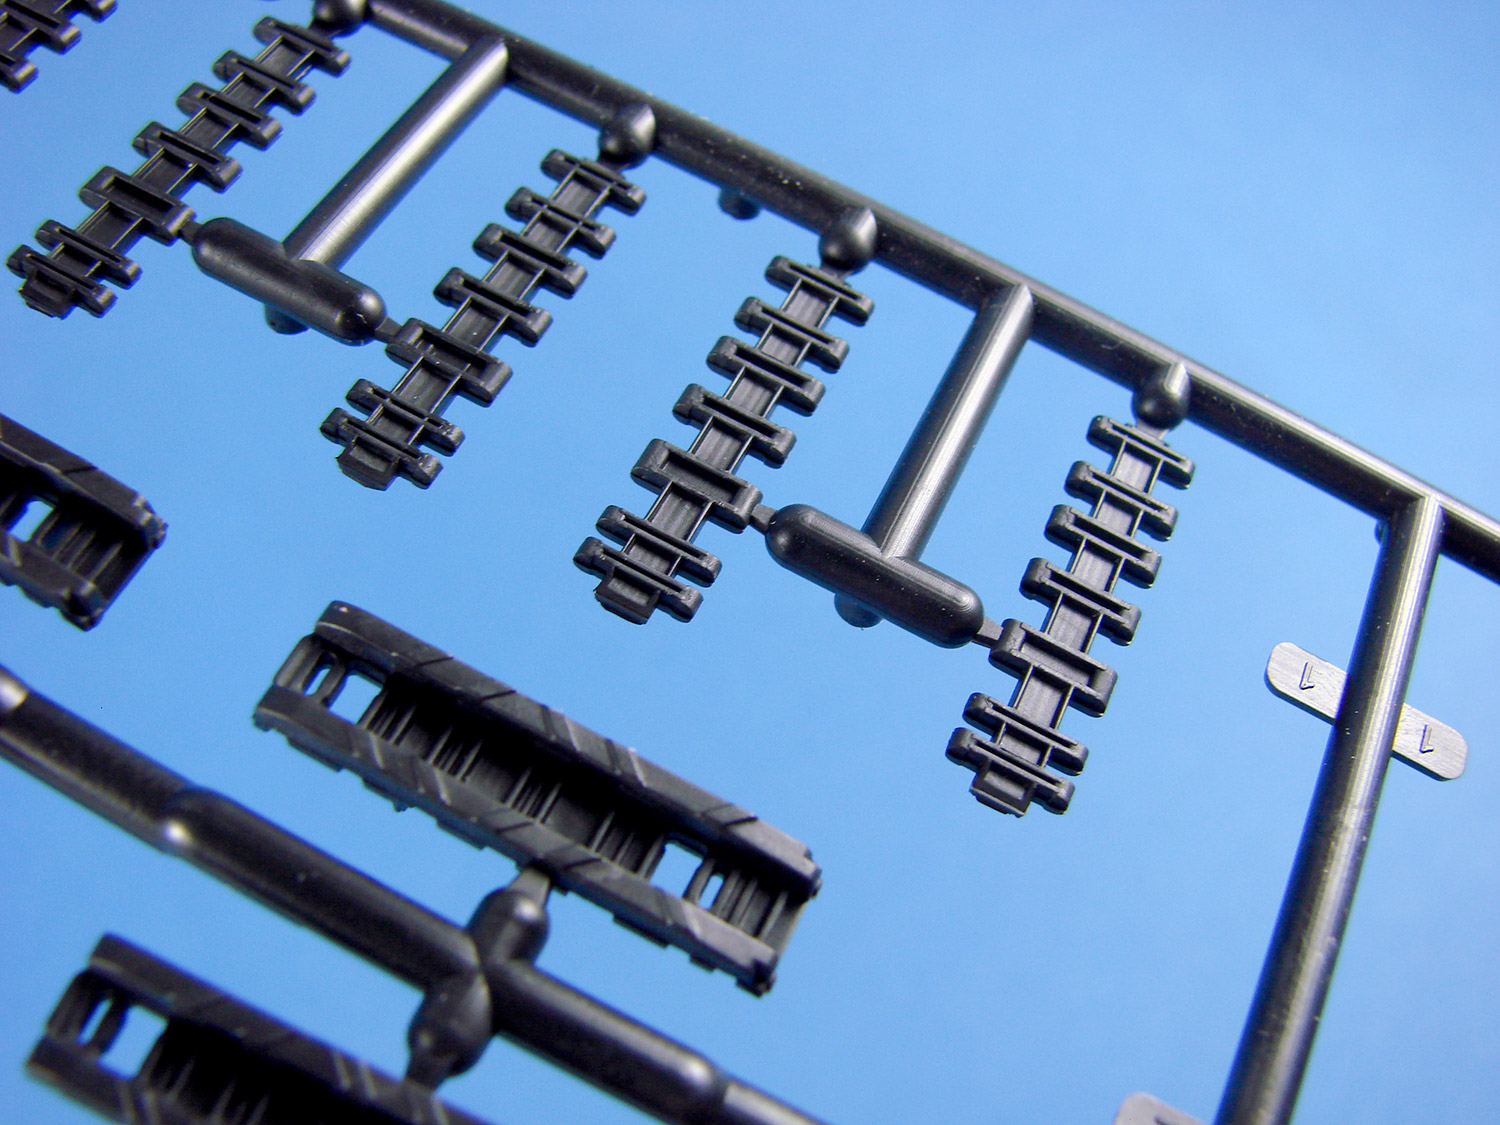
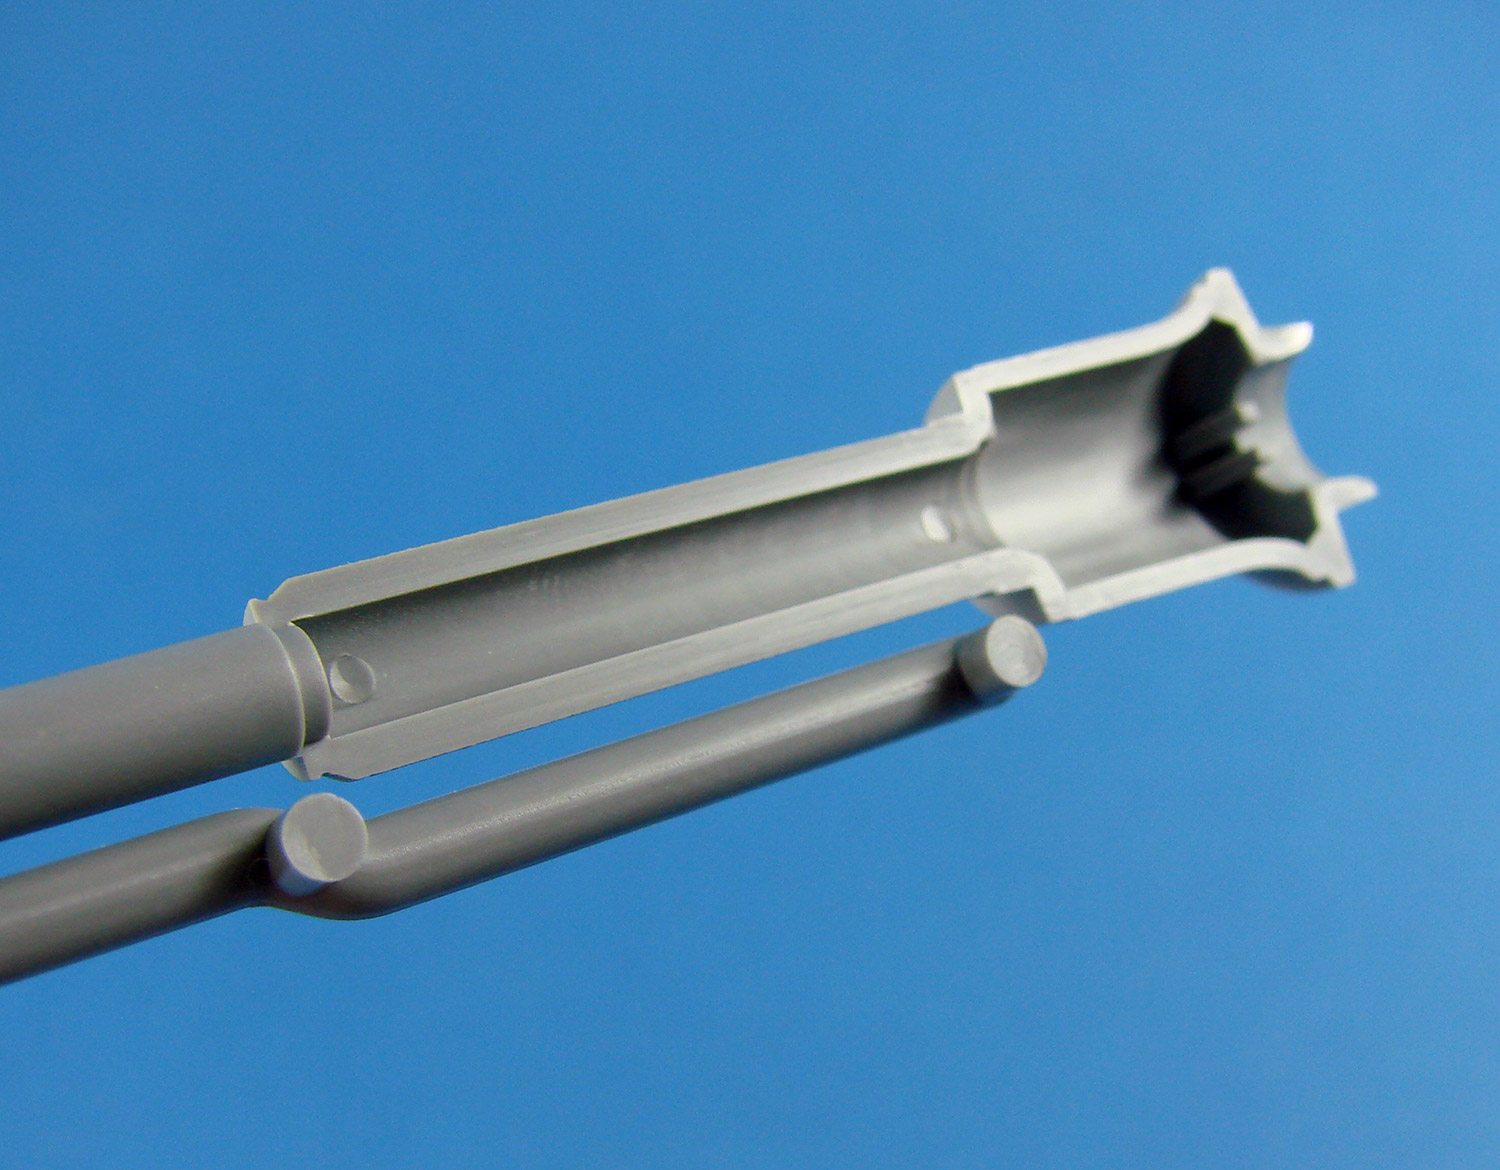
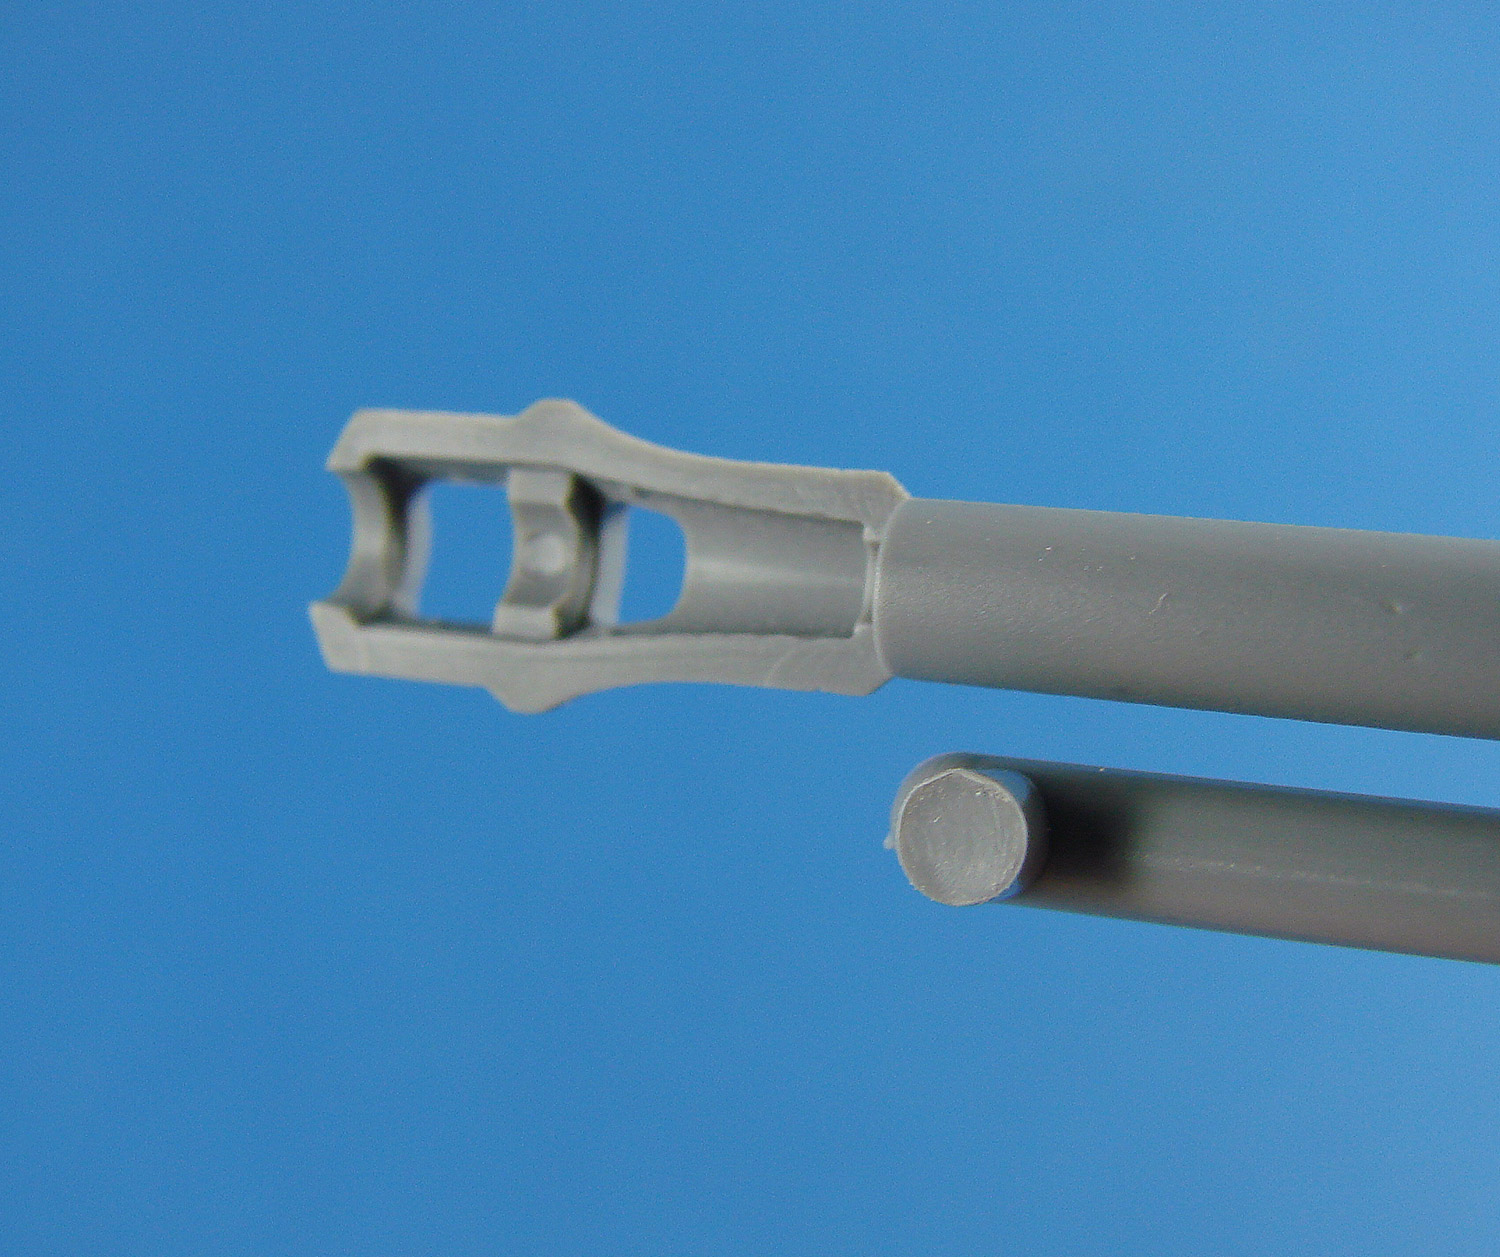
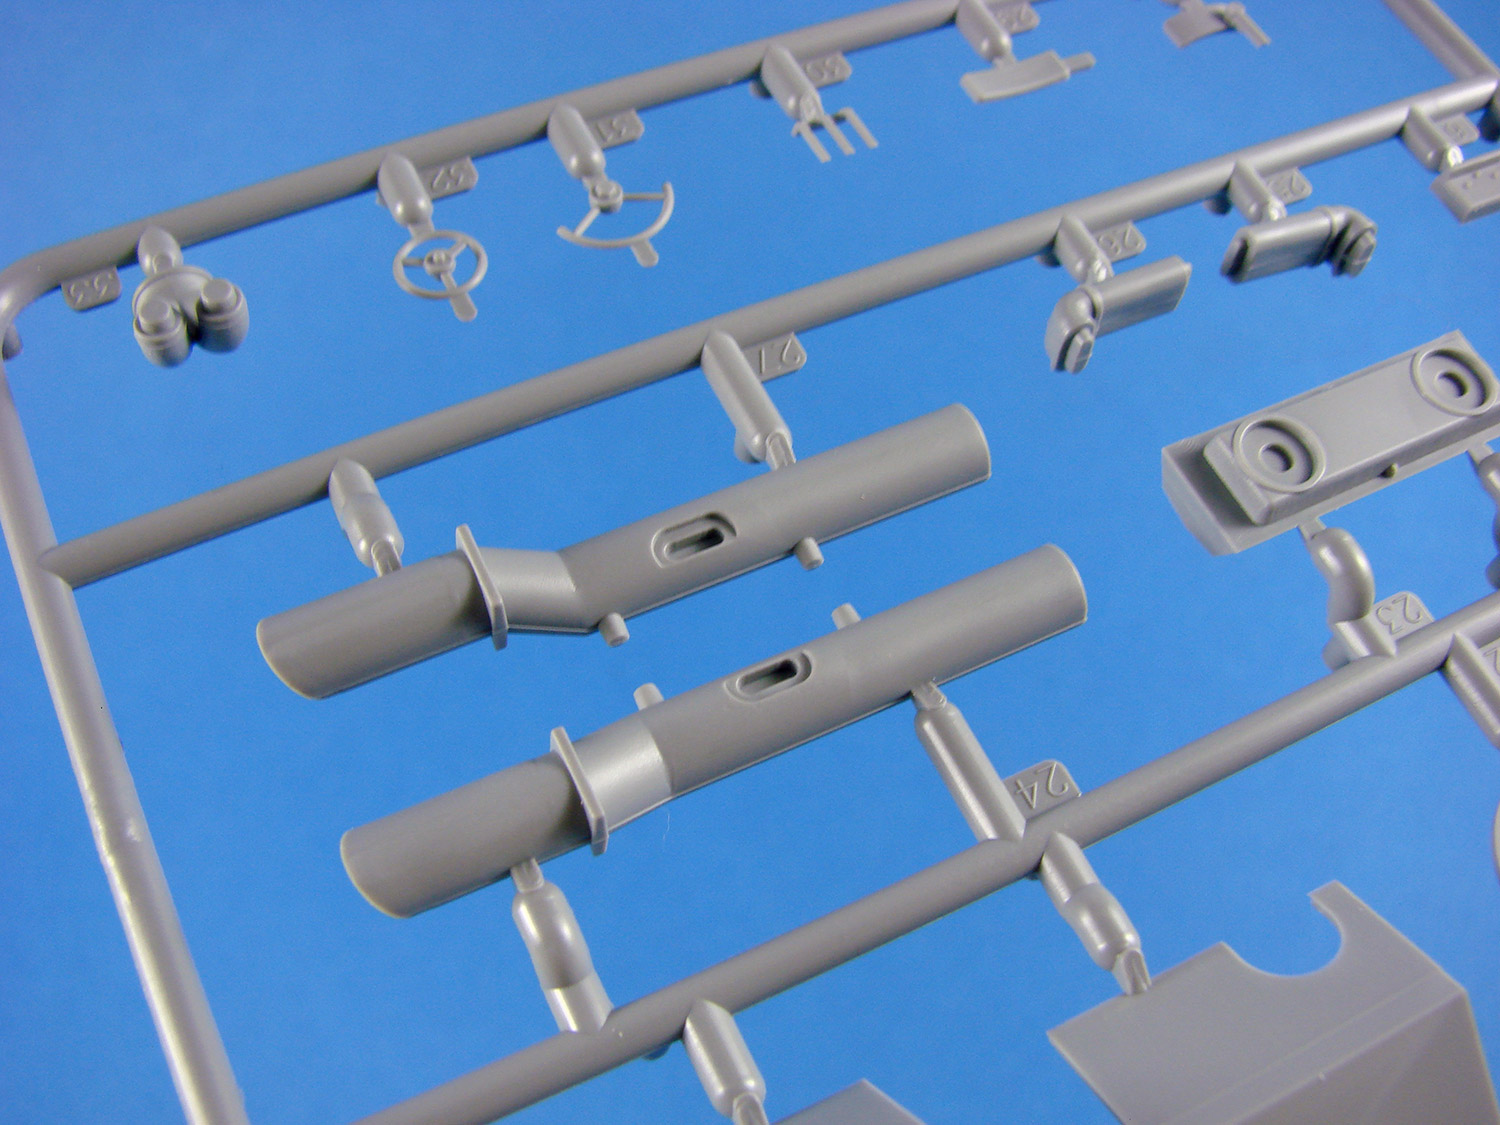
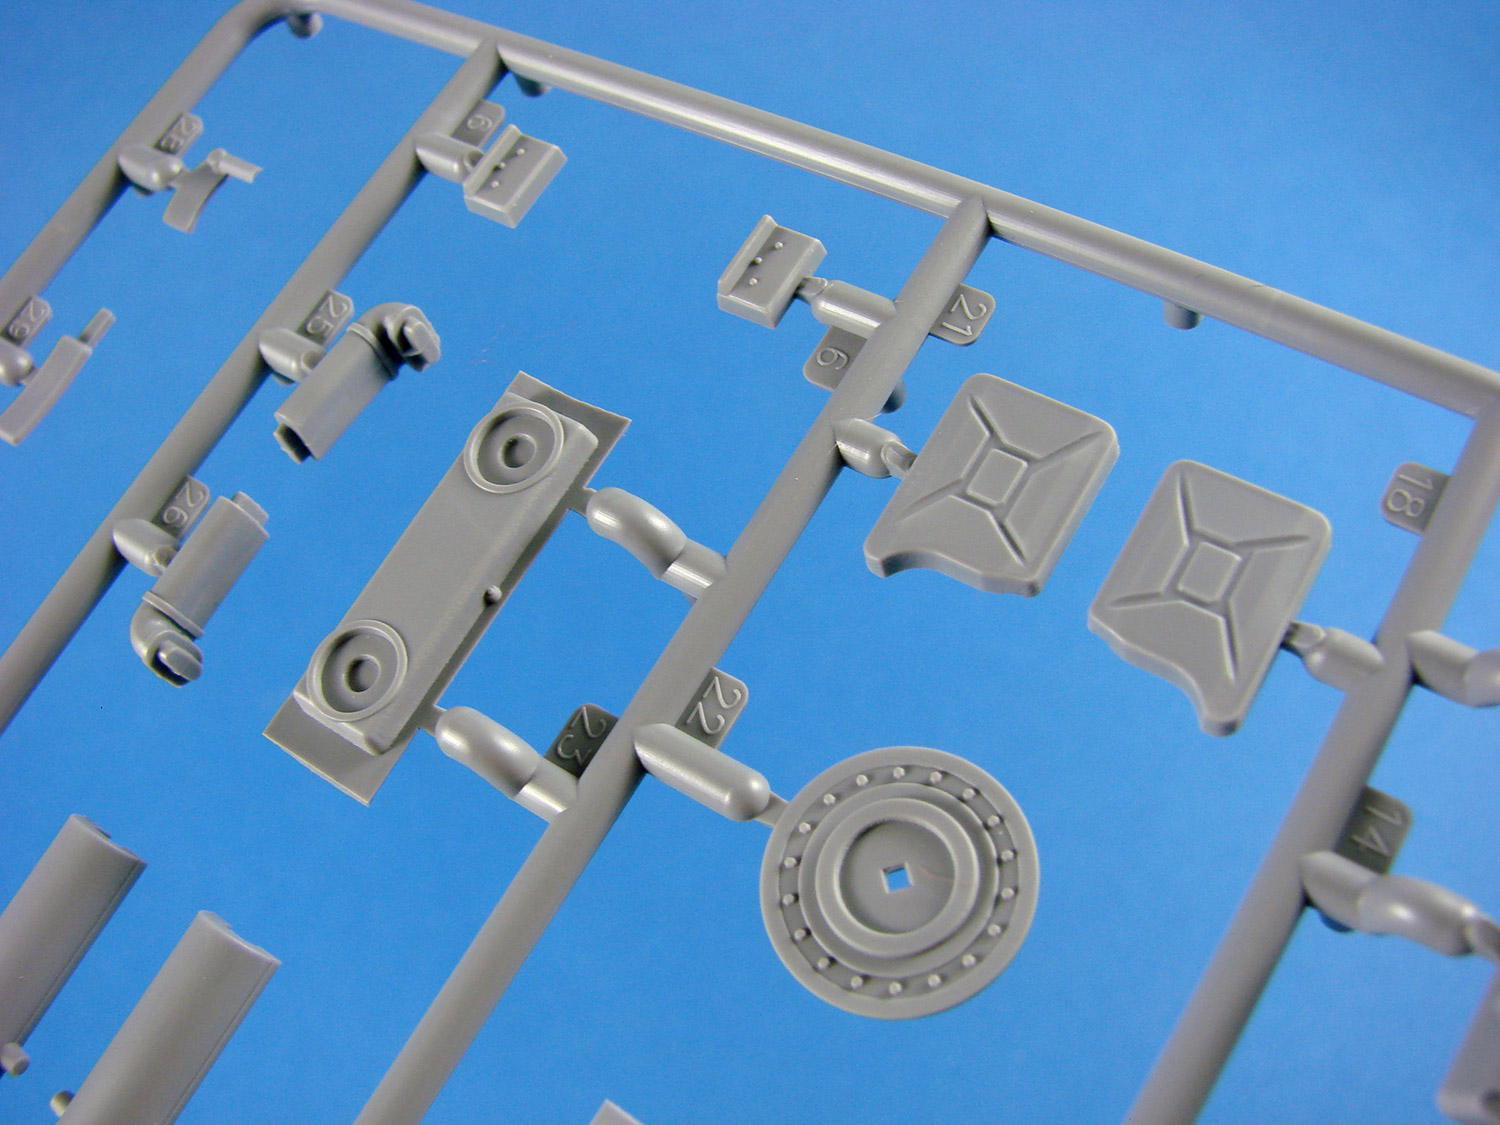
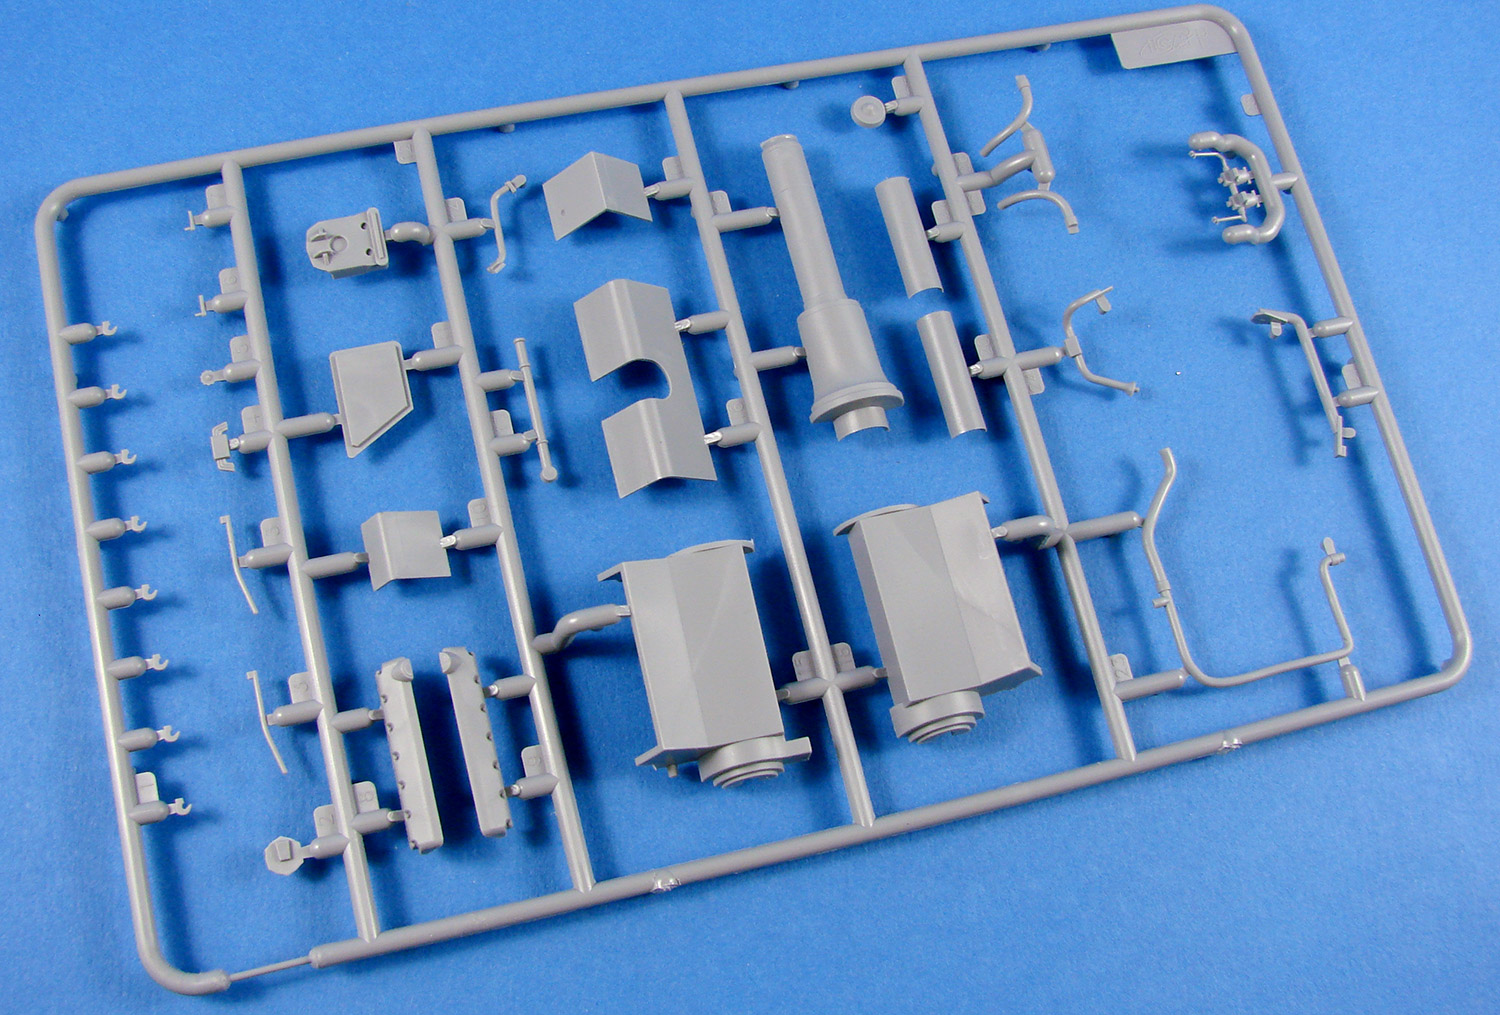
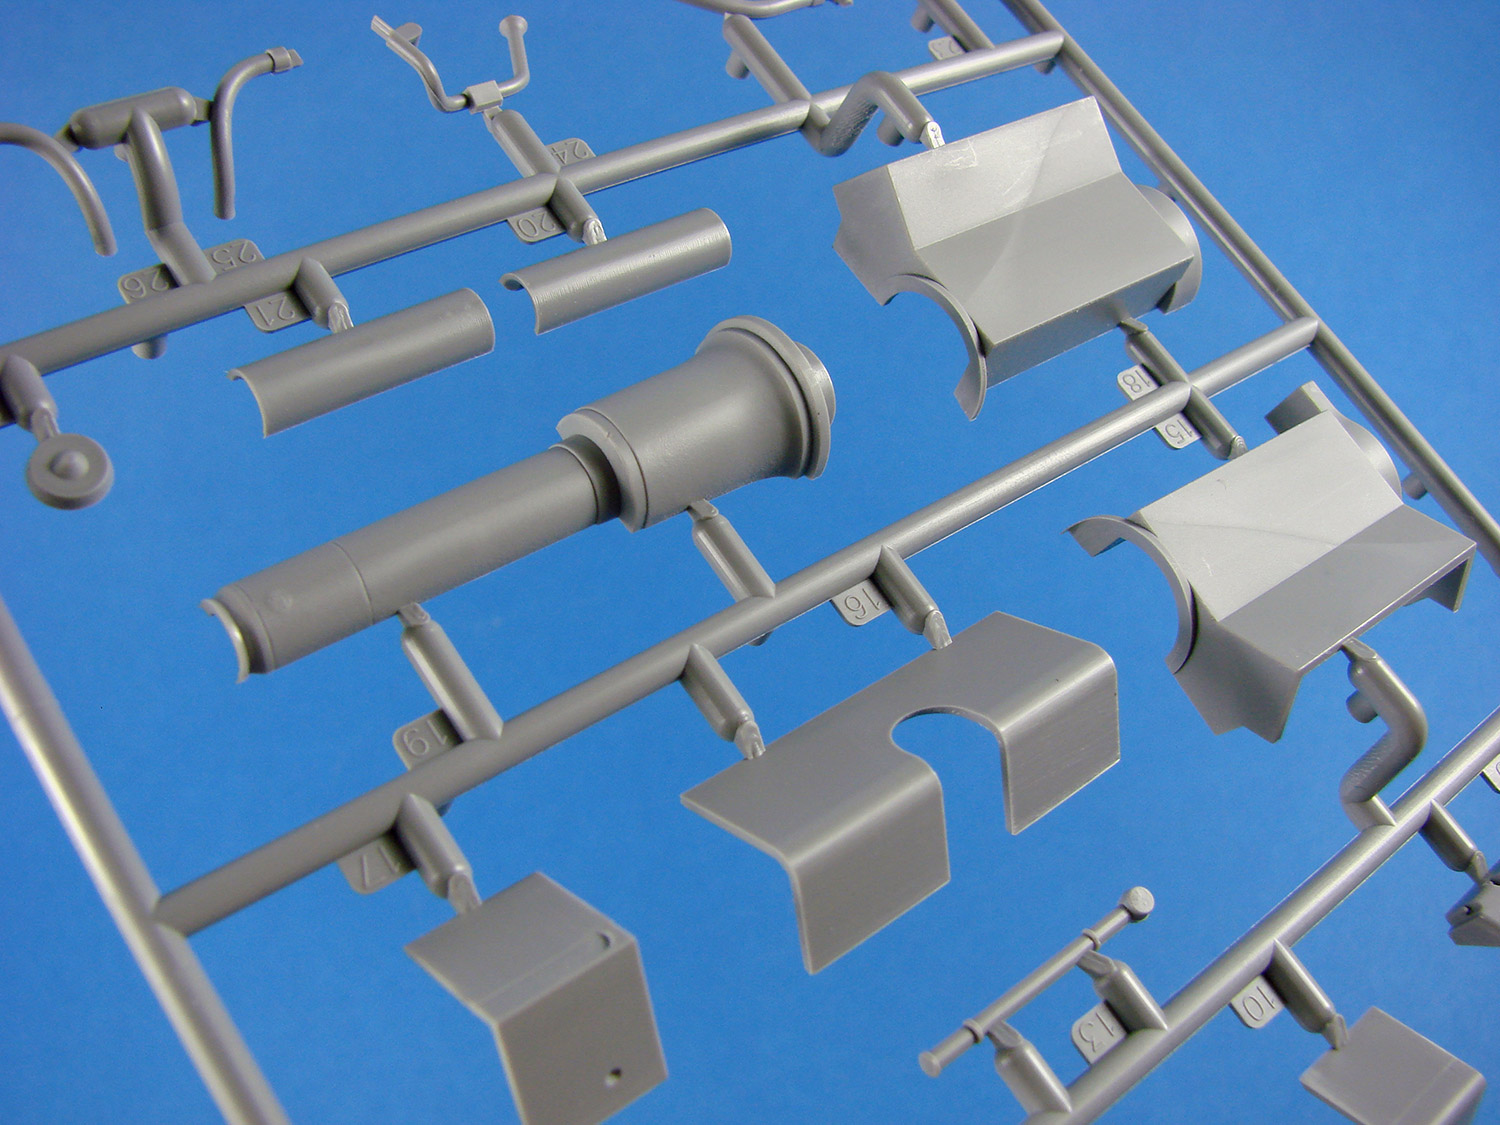
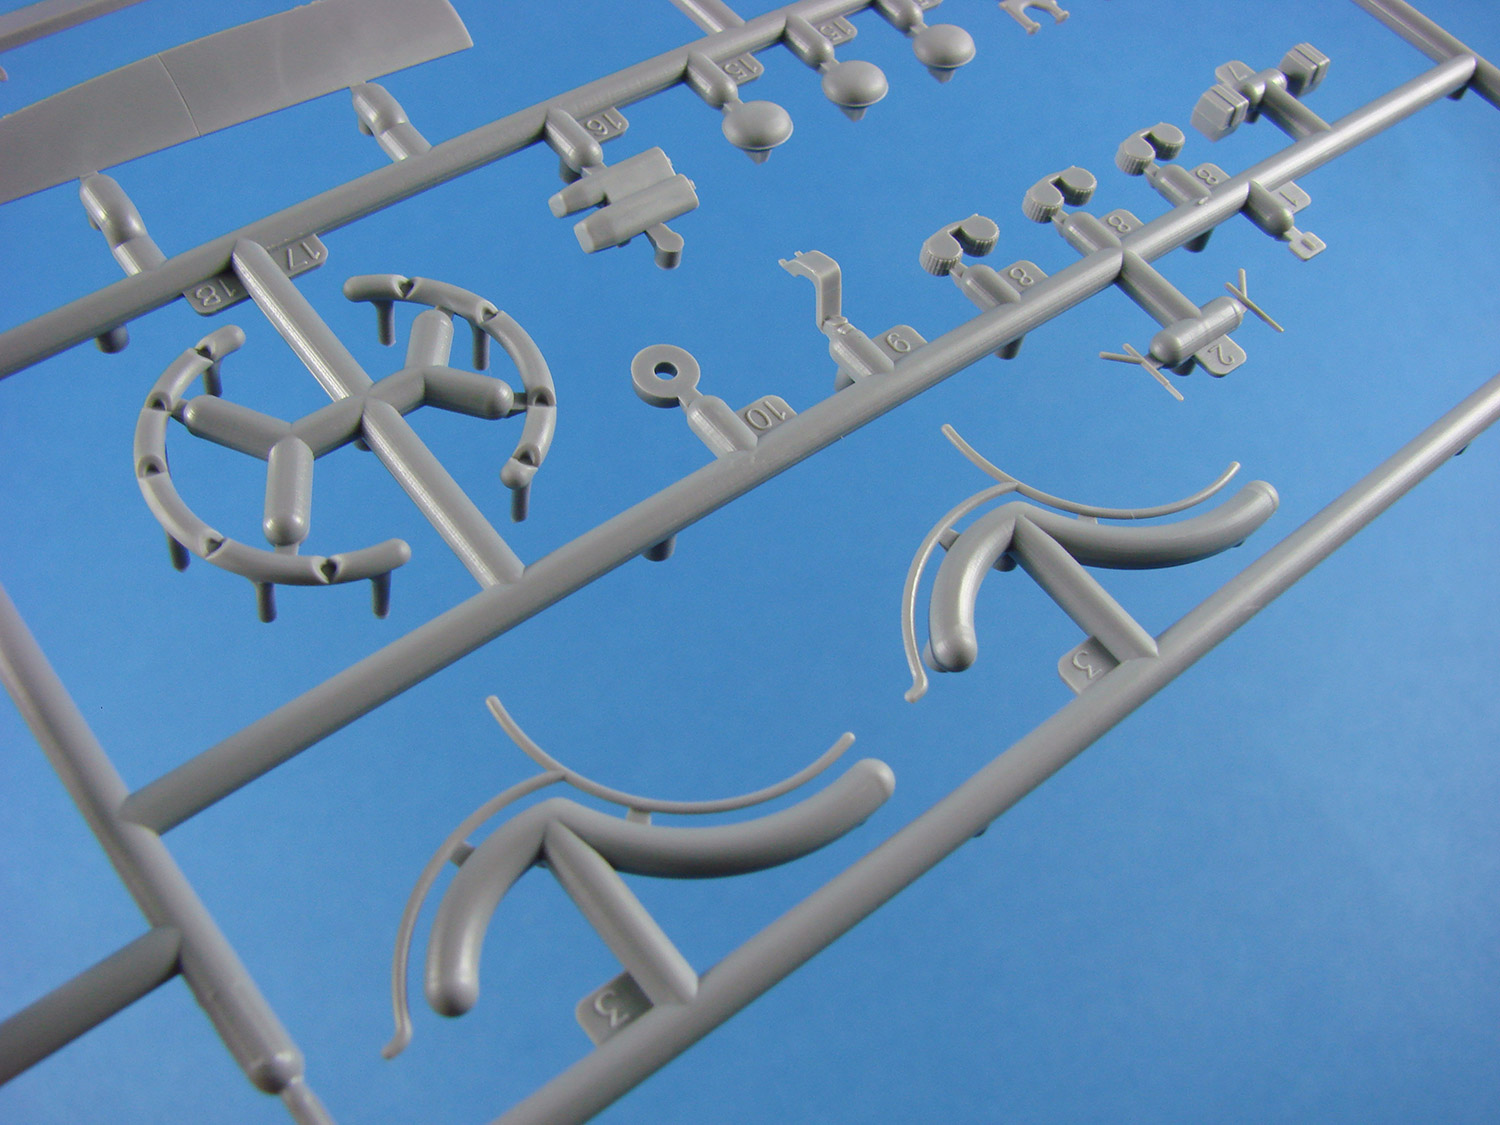
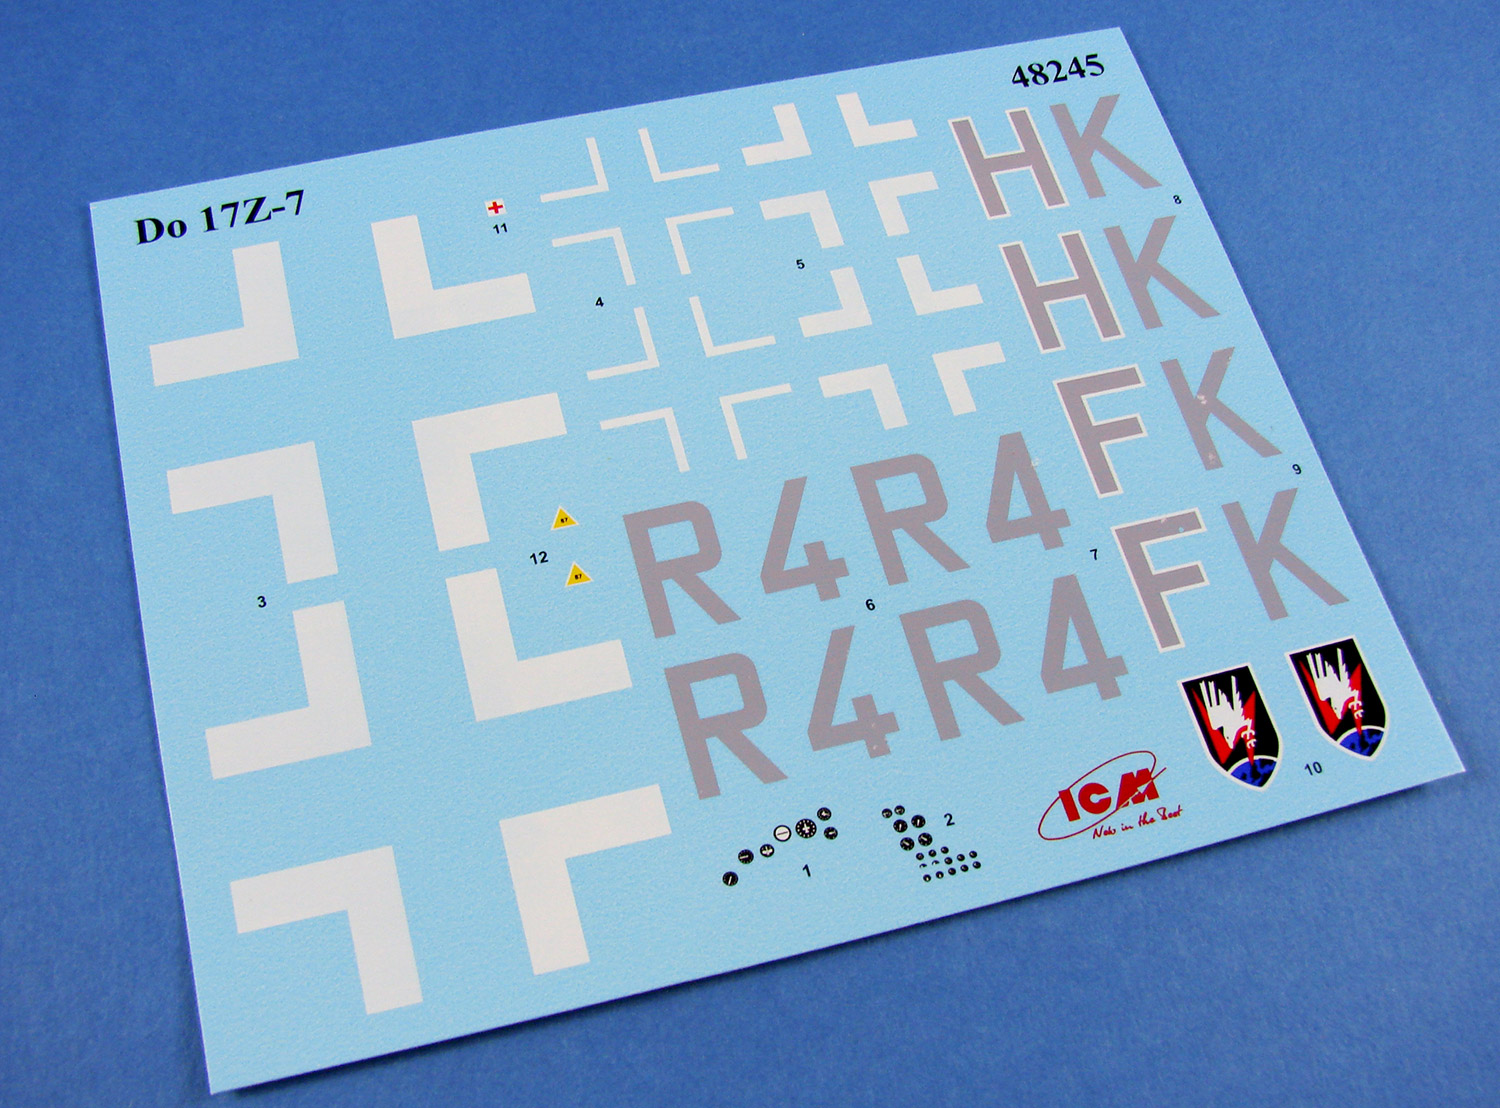
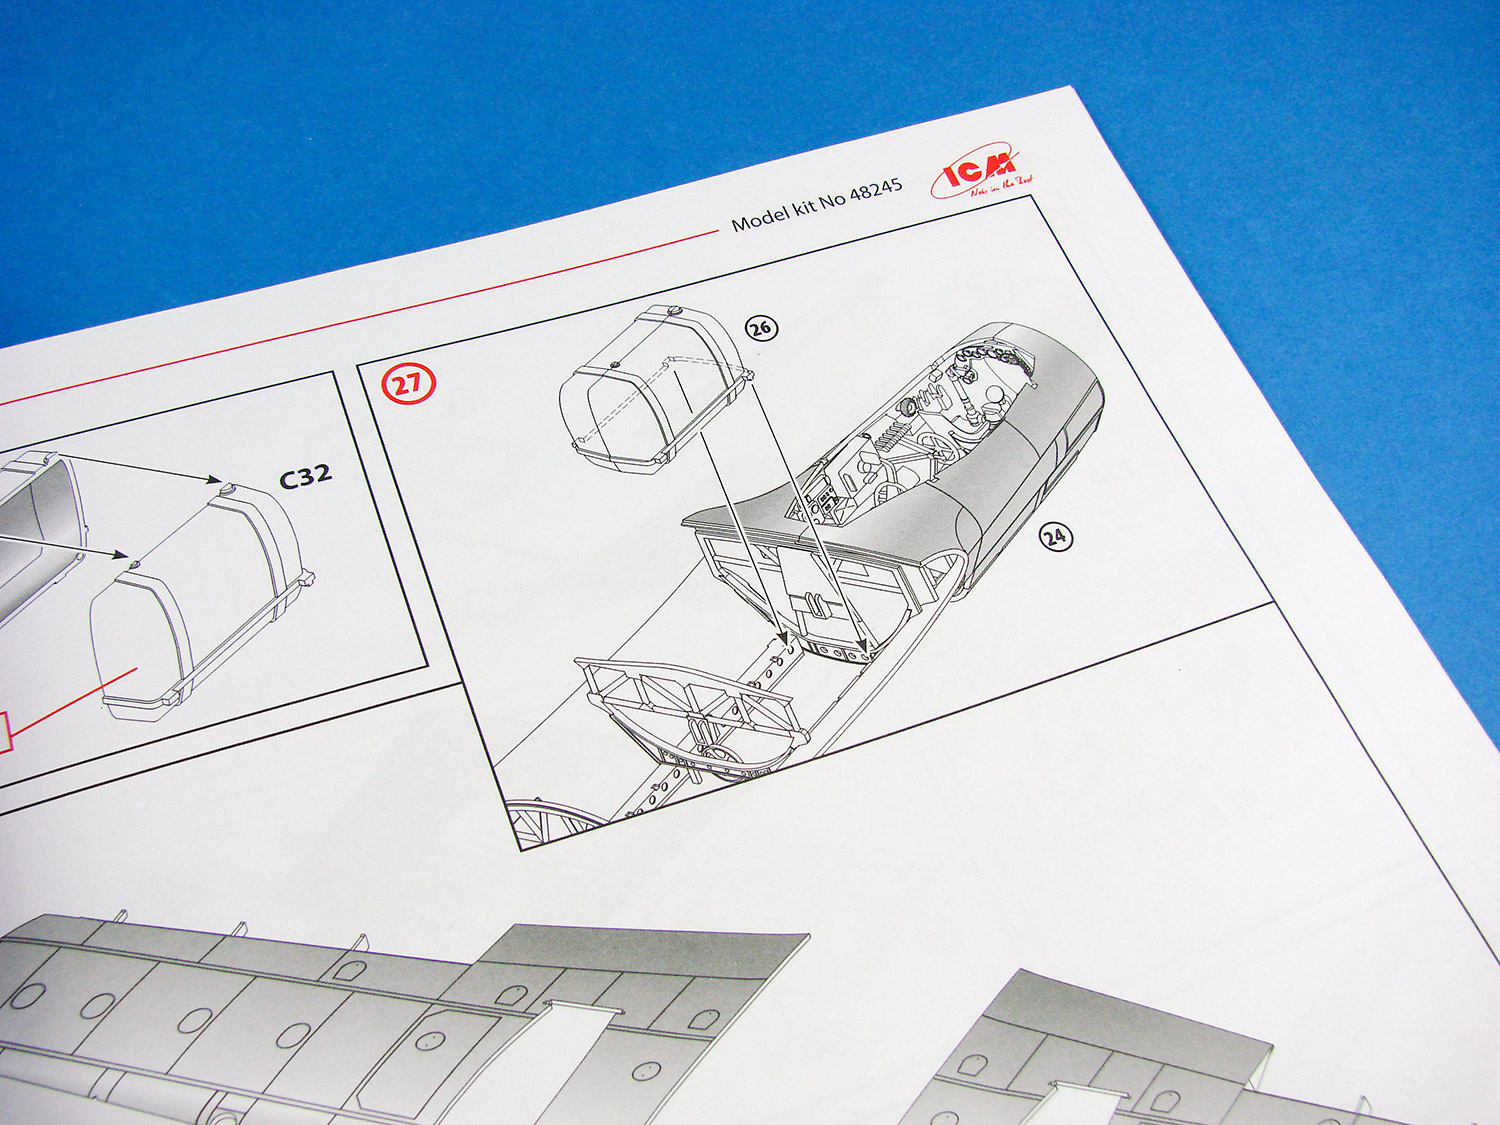
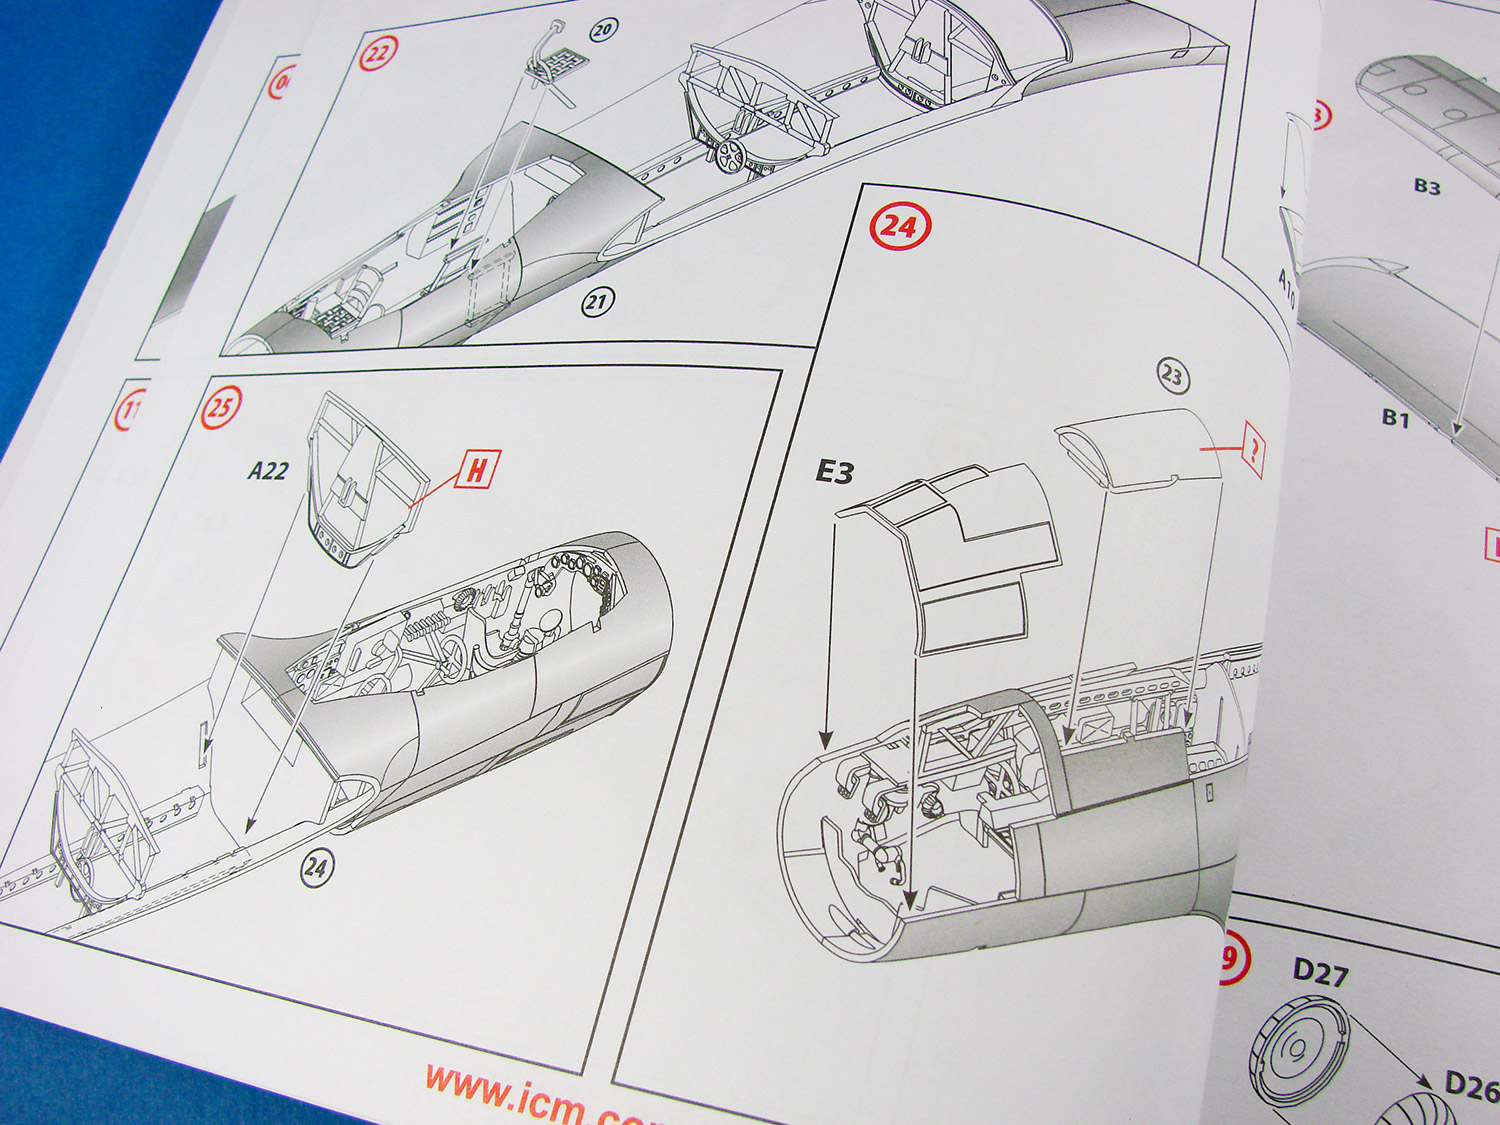
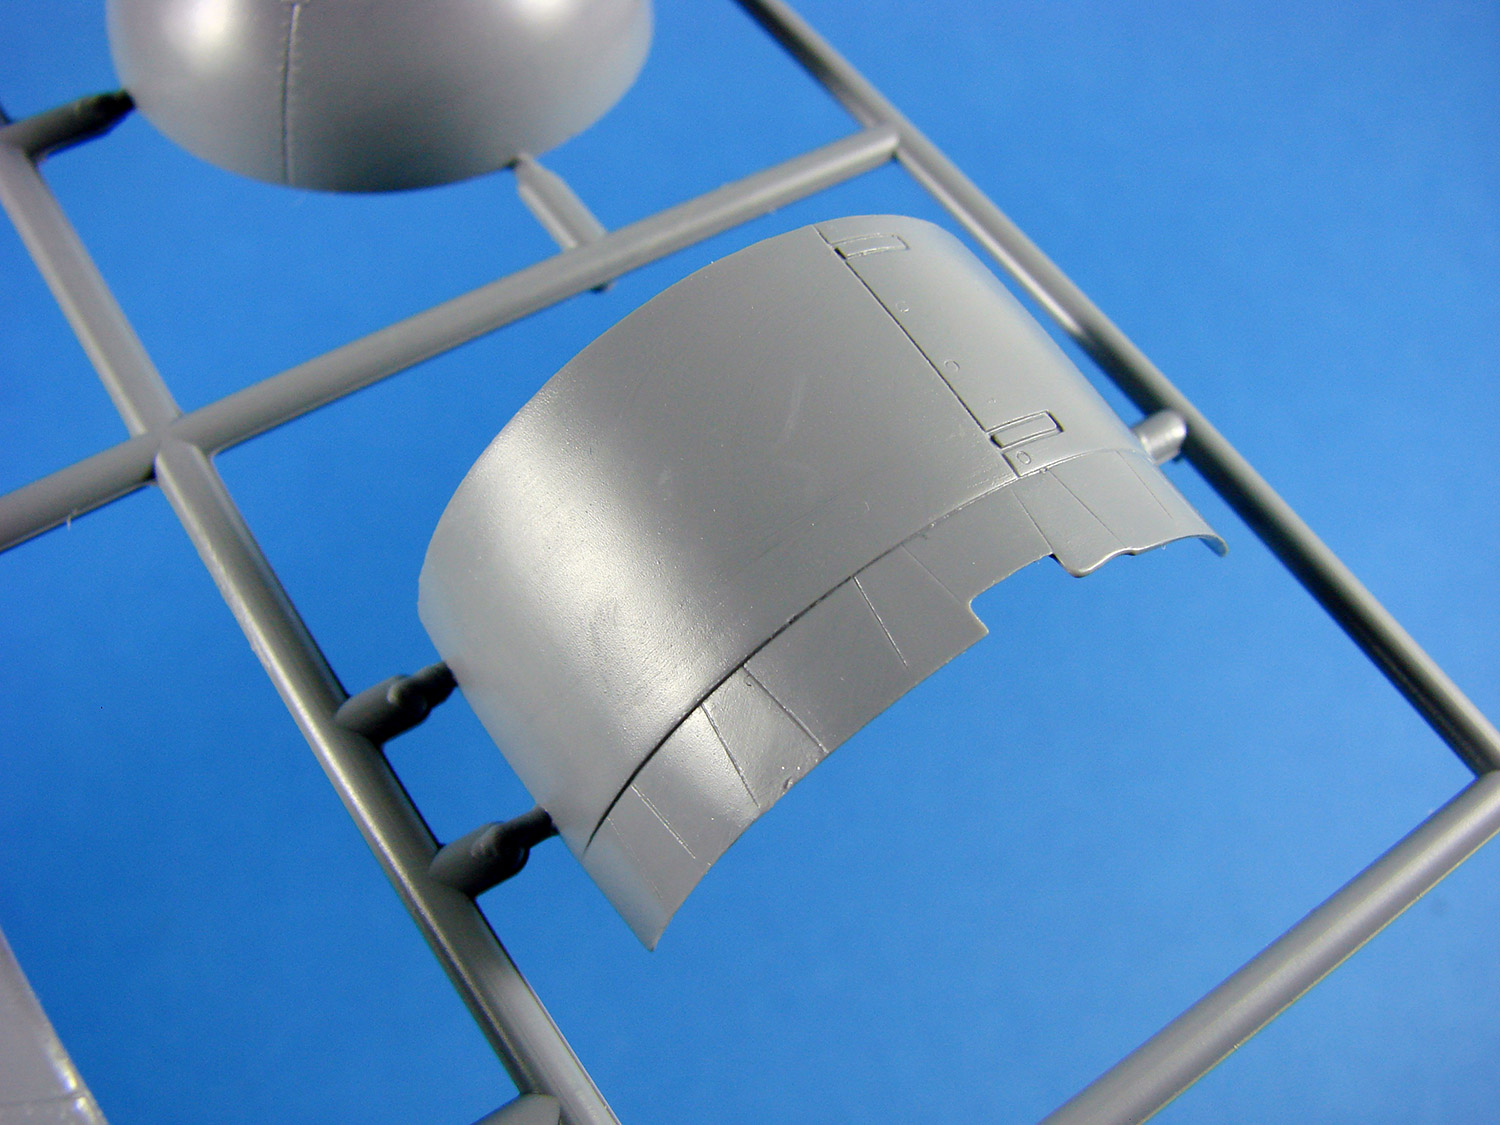
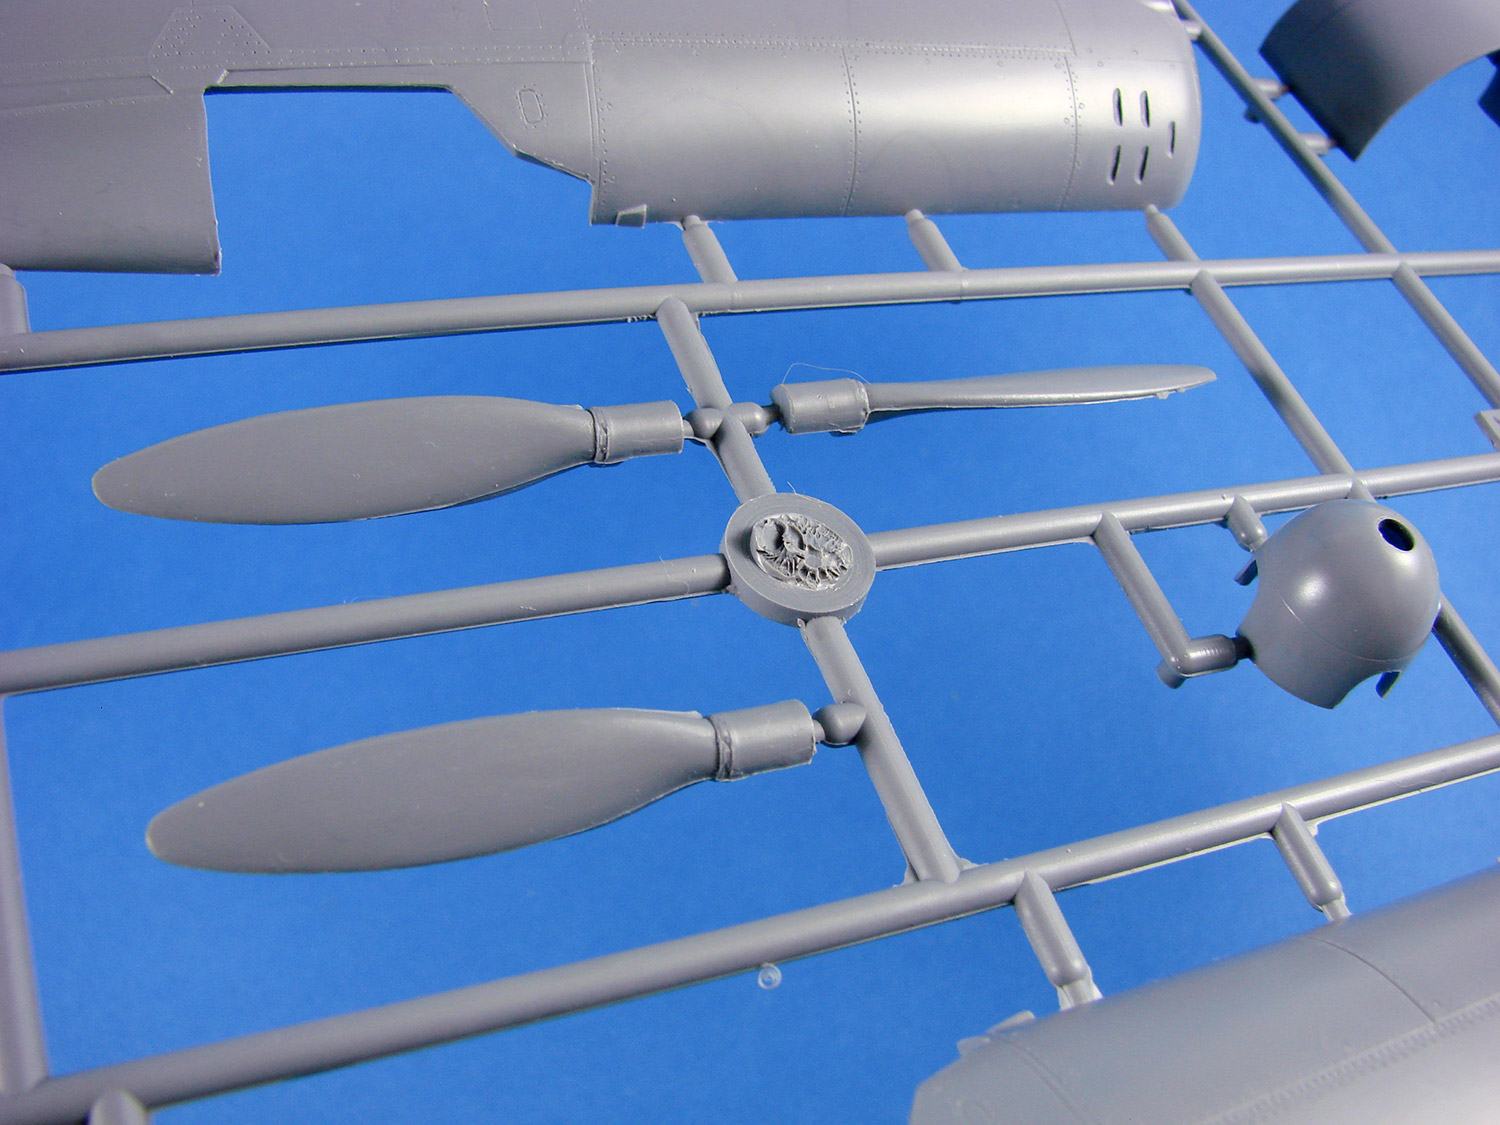
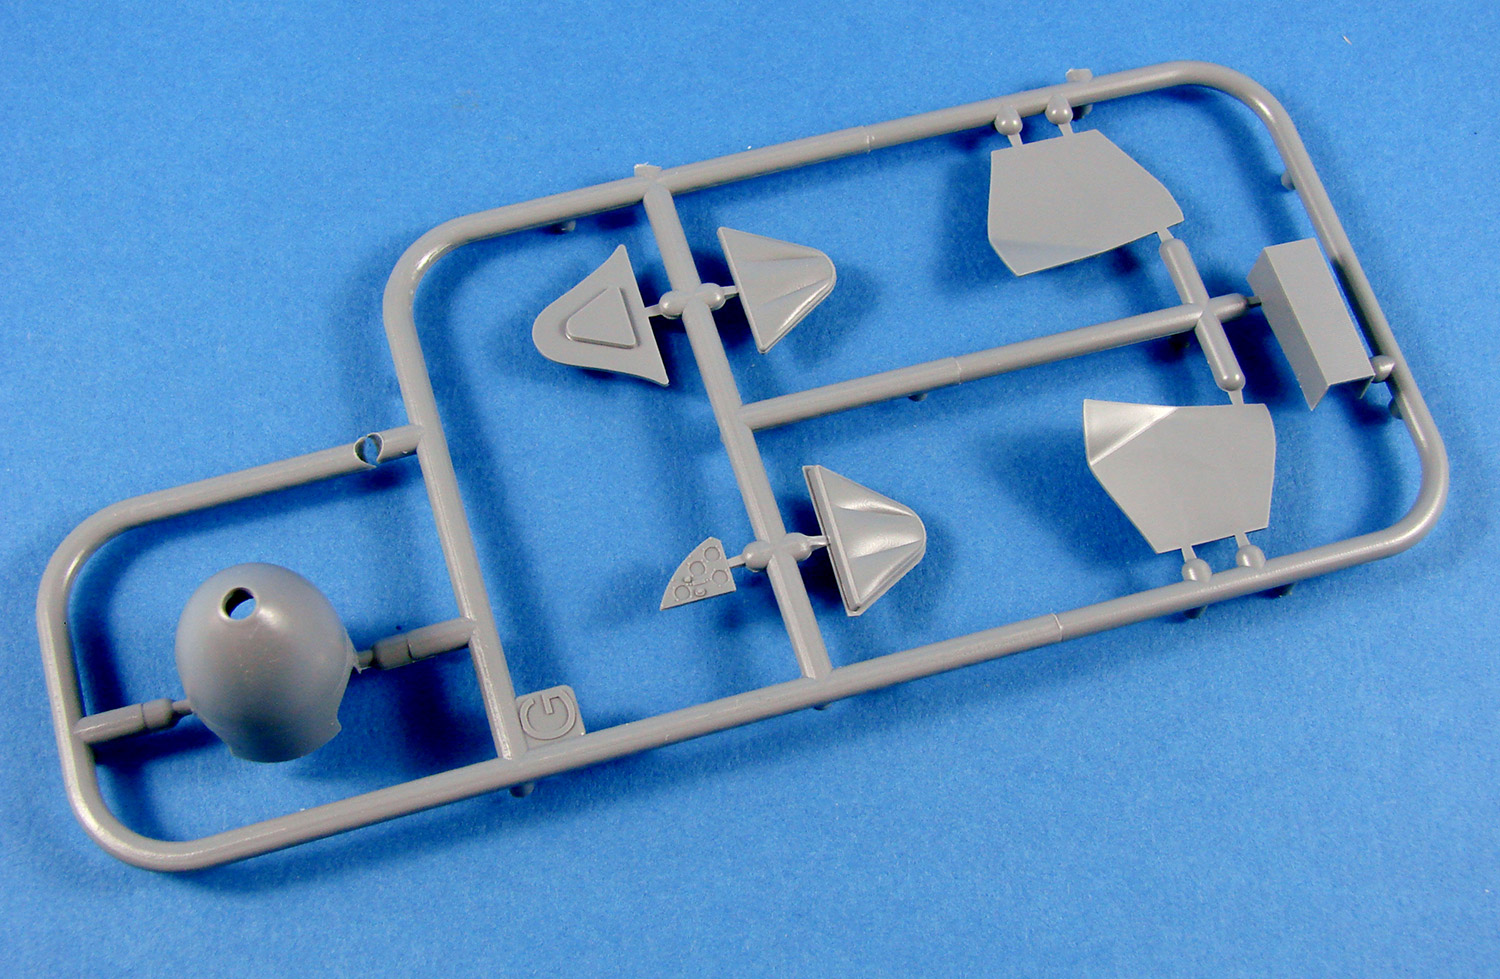
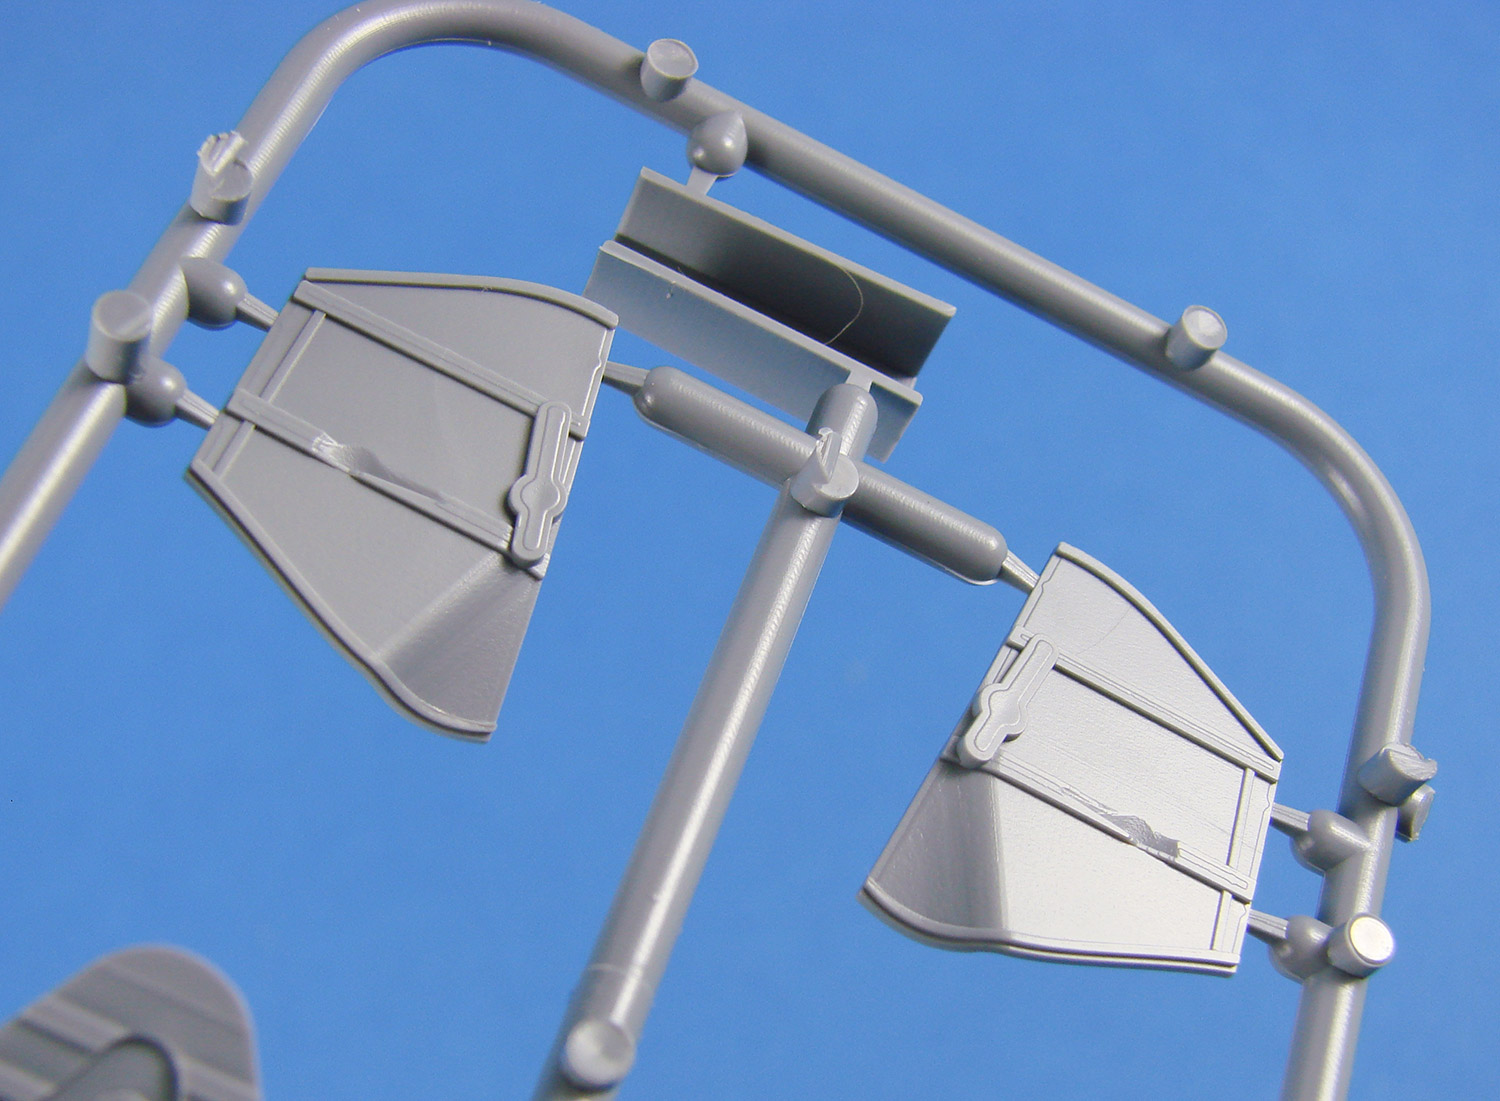
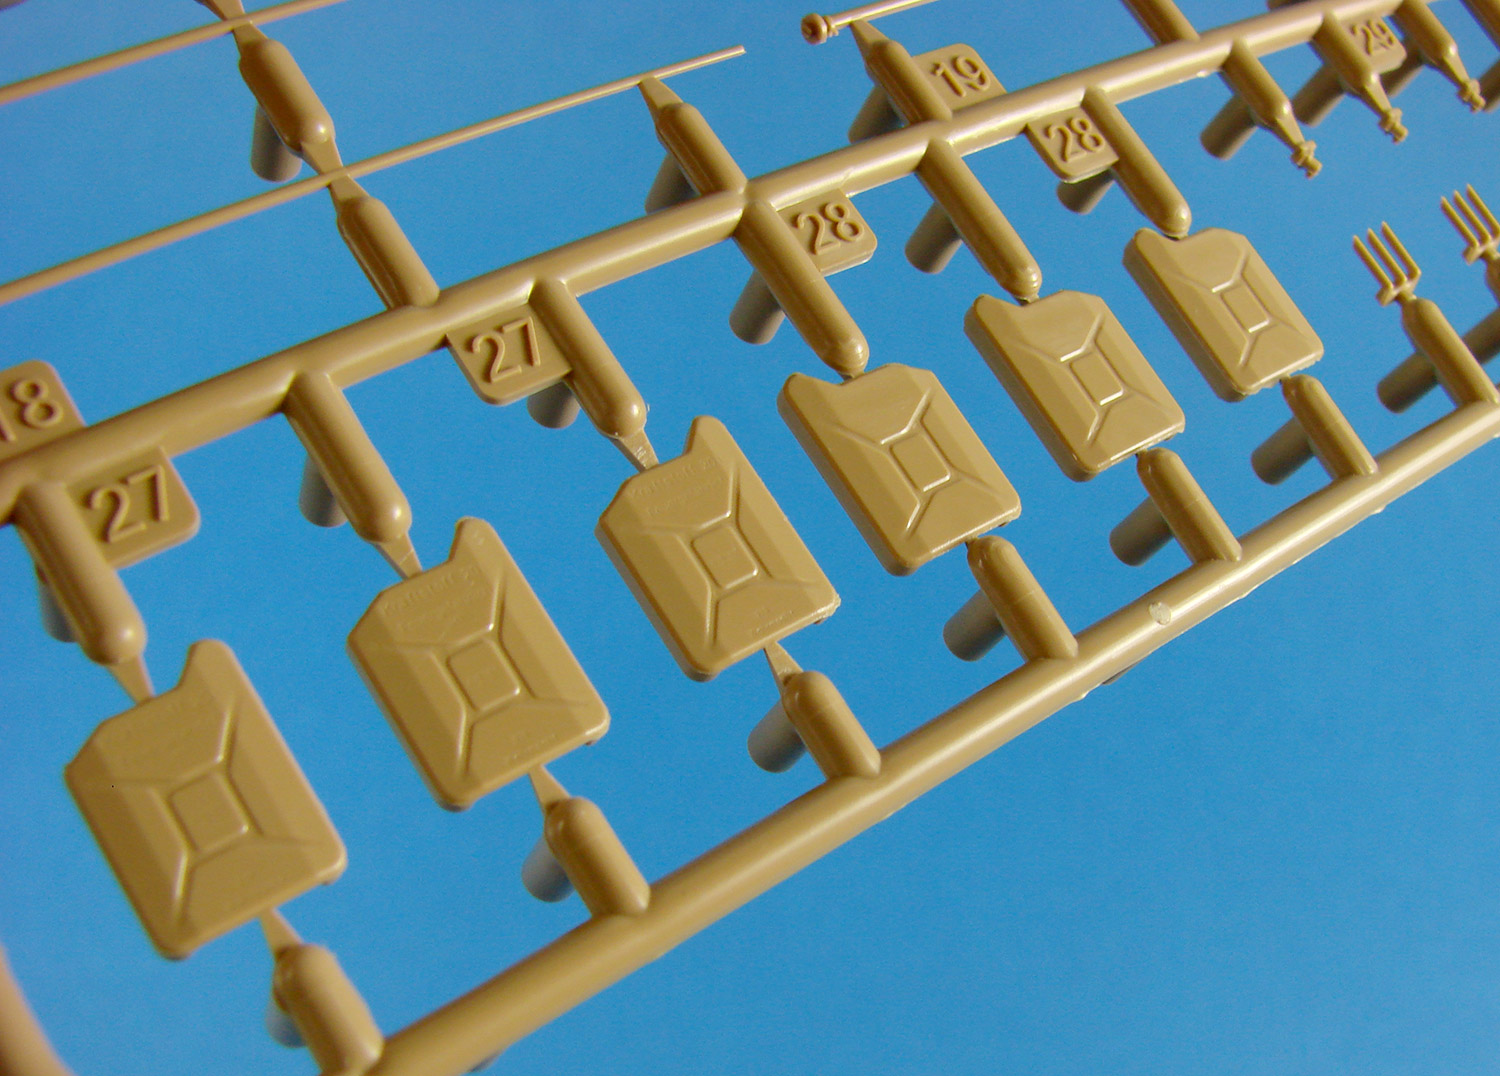
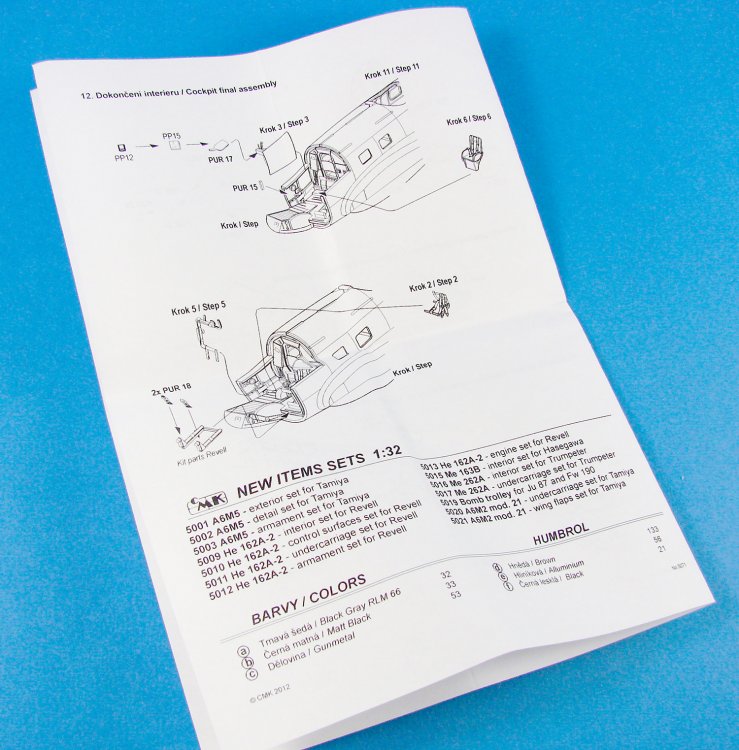
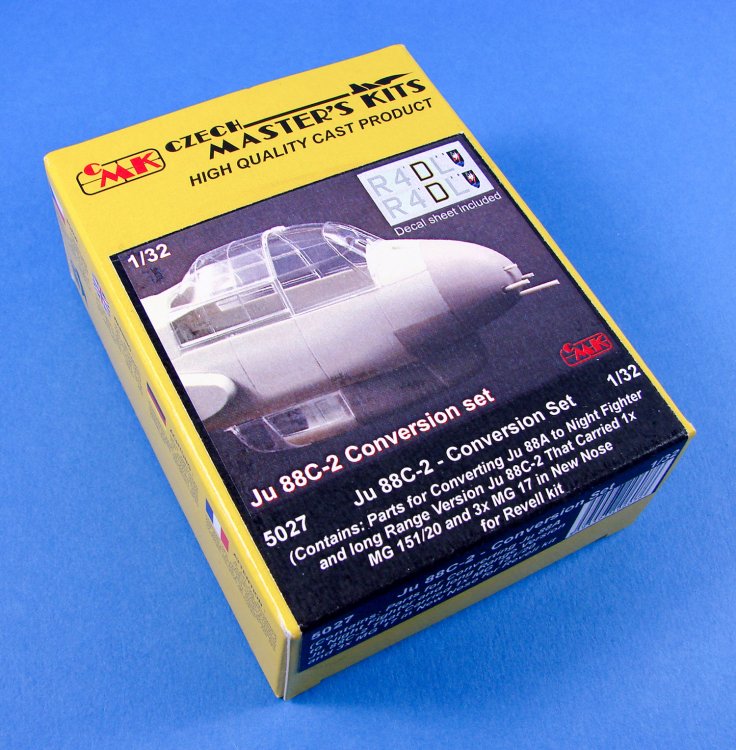
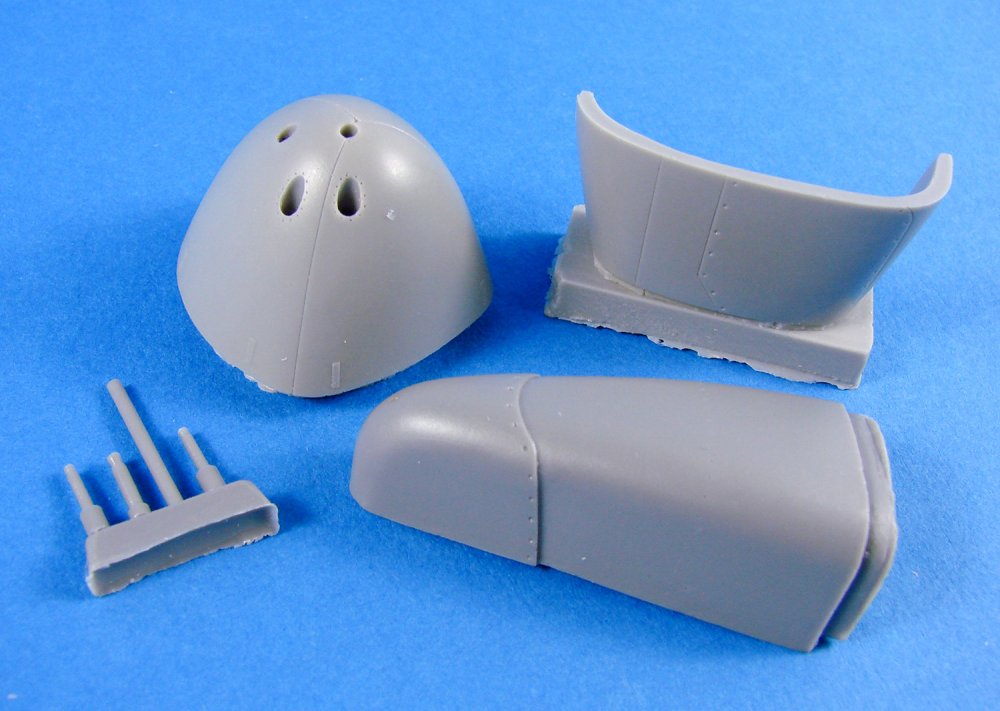
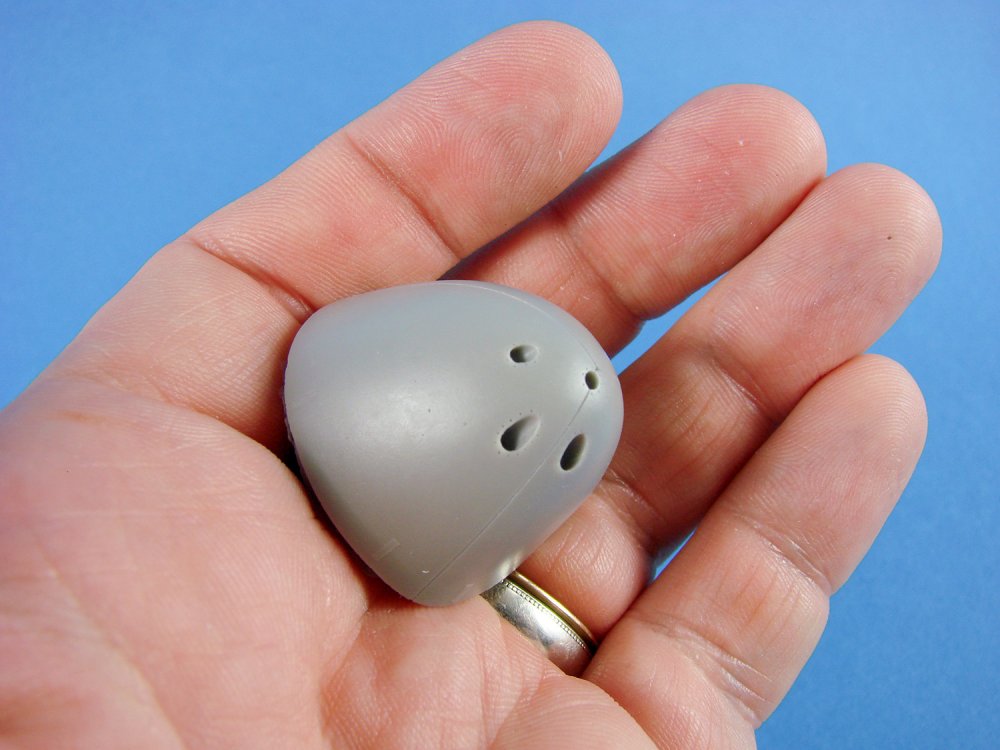
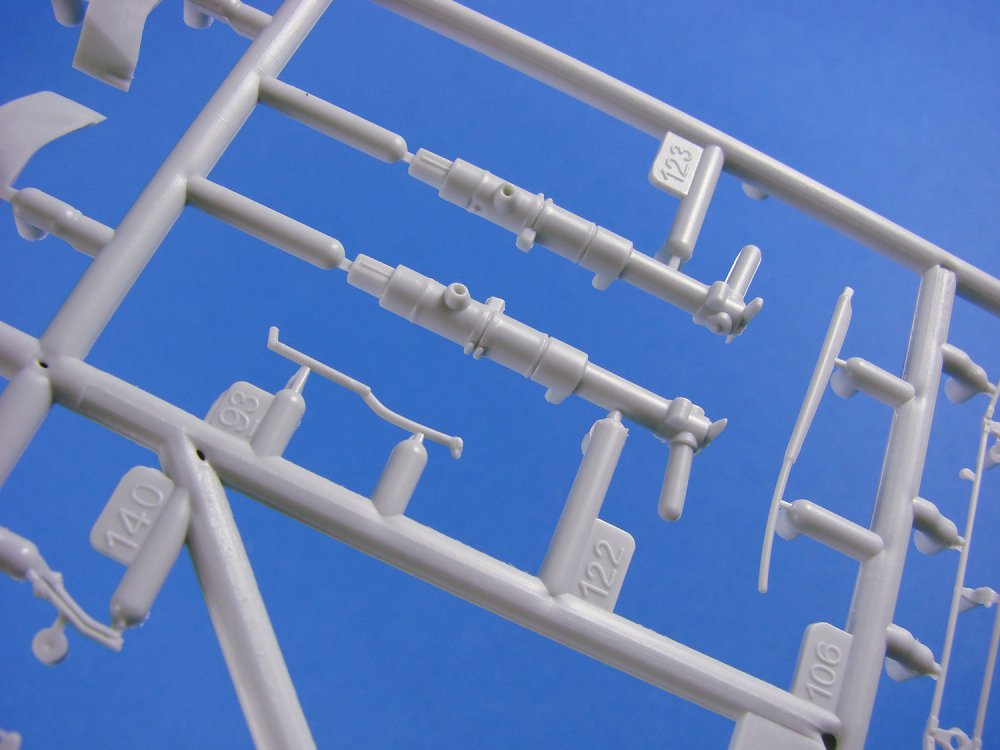
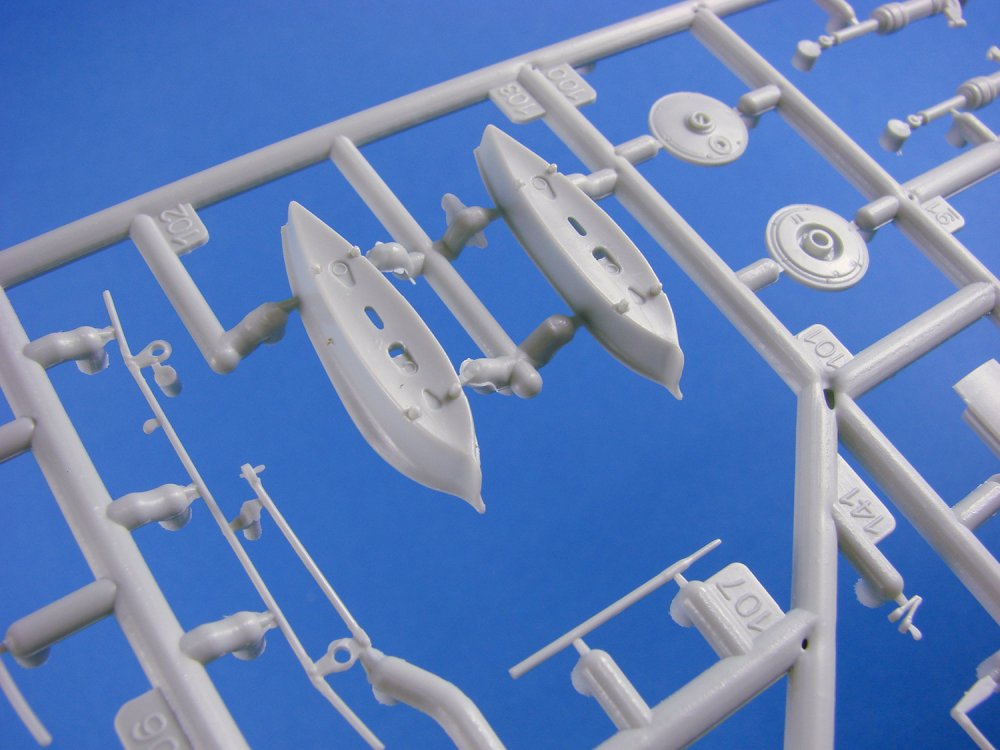
1/32 Ju 88C-2 Conversion set CMK Catalogue # 5027 Available from Special Hobby for 332 Kč (around £11.50 at time of writing) Junkers’ Ju 88 design was perhaps one of the first, true multirole aircraft, in every sense of the word, and the basic airframe was developed, added to and converted into roles ranging from fast-bomber, through to anti-shipping, night fighter, reconnaissance, heavy fighter, and also unpiloted flying bomb. The initial C version was converted from Ju 88A-1 airframes into a heavy fighter/fighter bomber role and dispensed with the usual glazed nose in favour of a solid metal nose through which four guns protruded. The gondola also had a solid front instead of the glazed area. The C version was pretty much the genesis for the later G-series machines we saw, albeit the C still had the Jumo engines and not the BMW radials. CMK’s little conversion set is simplicity itself and enables you to convert the Revell/Promodeller Ju 88A-1 into the rather slick looking heavy fighter version. There are external differences between the C-2 and C-4 machines, including the rear canopy. With the C-2 being converted from the A-1, there was only a single MG in the rear cockpit, whereas the C-4 had double rear-firing MGs, being converted from the A-5. To that extent, it’s possible that you could build the C-4 if you used the Ju 88A-4 kit. My eventual project will be to create a Ju 88C-0, for which there were only a handful converted. In a dusty corner of my attic, I have a complete starboard, forward window frame from a C-0 that crash-landed in Norway due to engine failure. To build that is on my modelling bucket list. Anyway, I digress. CMK’s Ju 88C-2 conversion set is packaged into one of their small and standard yellow boxes with a top-opening flap. A sticker label is attached to the front, showing a photo of a converted nose. Inside the box, a small zip-lock bag contains three main resin parts, plus a casting block with a further four components. A small instruction sheet is included, as is a very small decal sheet. All parts are cast in light grey resin, and the quality of them is excellent, with no flaws or other issues evident. You will of course need to remove casting blocks, or in the case of the new nose, grind down the pouring stuff so that just a small ridge remains that can help with location to the host model. The new nose is a solid piece, which is just fine as there was a metal sheet that divided the cockpit from the nose interior, with just the gun barrels protruding through. External detail is commensurate with that of the host kit, with fine panel lines. A number of latches line the circumference and the muzzle tubes have very fine riveting around them. Underneath the nose will sit a new section that does away with the glazed area of the kit and is located directly next to the new nose. As with the nose section, this is resplendent in fine panel lines, plus some fastener details. The replacement forward gondola is cast as a solid piece with a pouring stub that will need removing. Thankfully, the underside of this is profiled to fit the fuselage. I’ve seen a couple of builds where a little filler has been needed, but nothing too onerous. Detail here consists of a forward fairing that is riveted to the gondola body. Nothing else is needed, unless, like me, you intend on riveting the entire airframe. A little surgery will be needed on the original kit gondola so that you can graft the new section. Four barrels and muzzles are supplied, with hollow-cast ends. These are cast on a single block. I would perhaps try to hollow the muzzles out a little further with some very small drill bits, but a touch of wash in the ends would probably give a good illusion of depth. A small decal sheet is supplied that contains just the fuselage codes and unit badge. Printing is super-thin and has minimal carrier film. Colours are solid, and registration is perfect. I’m unsure as to what style of national markings you would need for this, but you may have to research that yourself and provide them too. The instructions do say that you use the Revell decals, but the Balkenkreuz is depicted as an outline version. Instructions are delivered on a double-sided piece of A5 paper, with one side depicting the parts in the set, and the reverse side showing the conversion and decal placement. Illustration is simple line drawing. No colour codes are given for anything, so reference is essential. Conclusion As I’ve said, a very simple and effective conversion that completely alters the appearance of the glazed nose bomber and turns it into the more menacing-looking heavy fighter version. Conversion itself looks to be a breeze and nothing here should be too difficult even for the newcomer to resin. Maybe a good first conversion project? Highly recommended My sincere thanks to Special Hobby for the sample reviewed in this article. To purchase directly, click THIS link.


- 1 reply
-
- 2
-
-
- special hobby
- conversion
- (and 2 more)
-
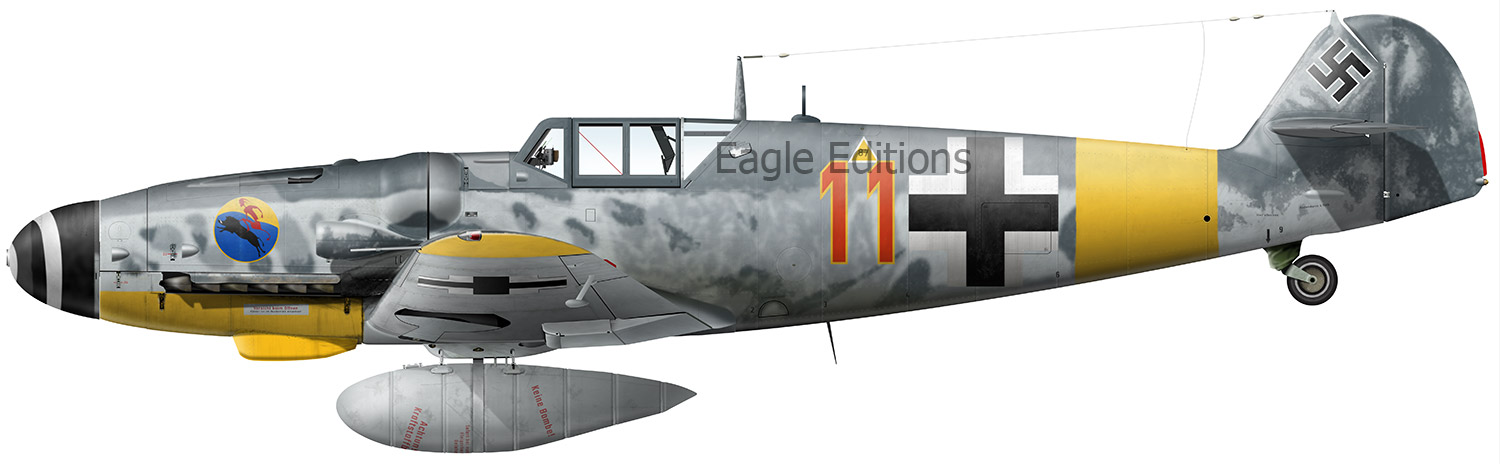
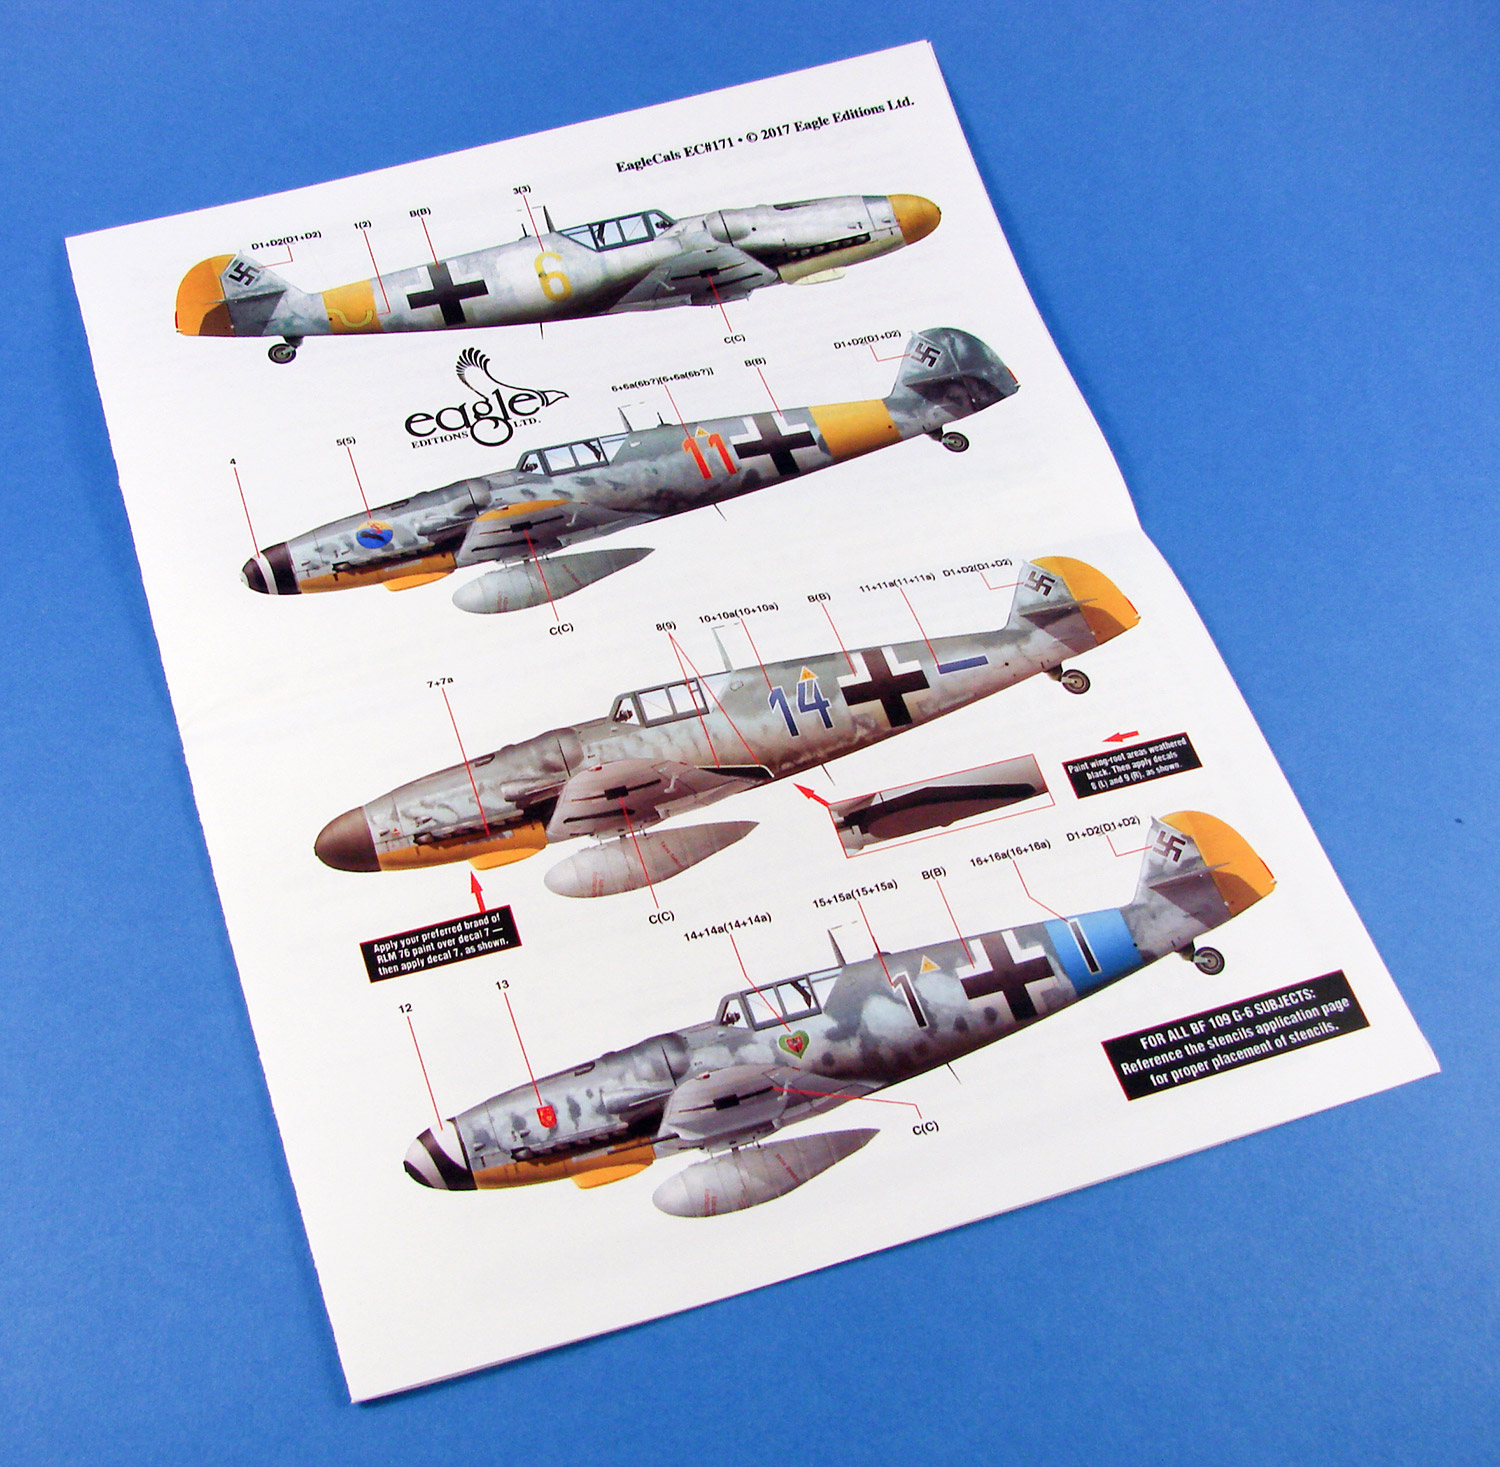
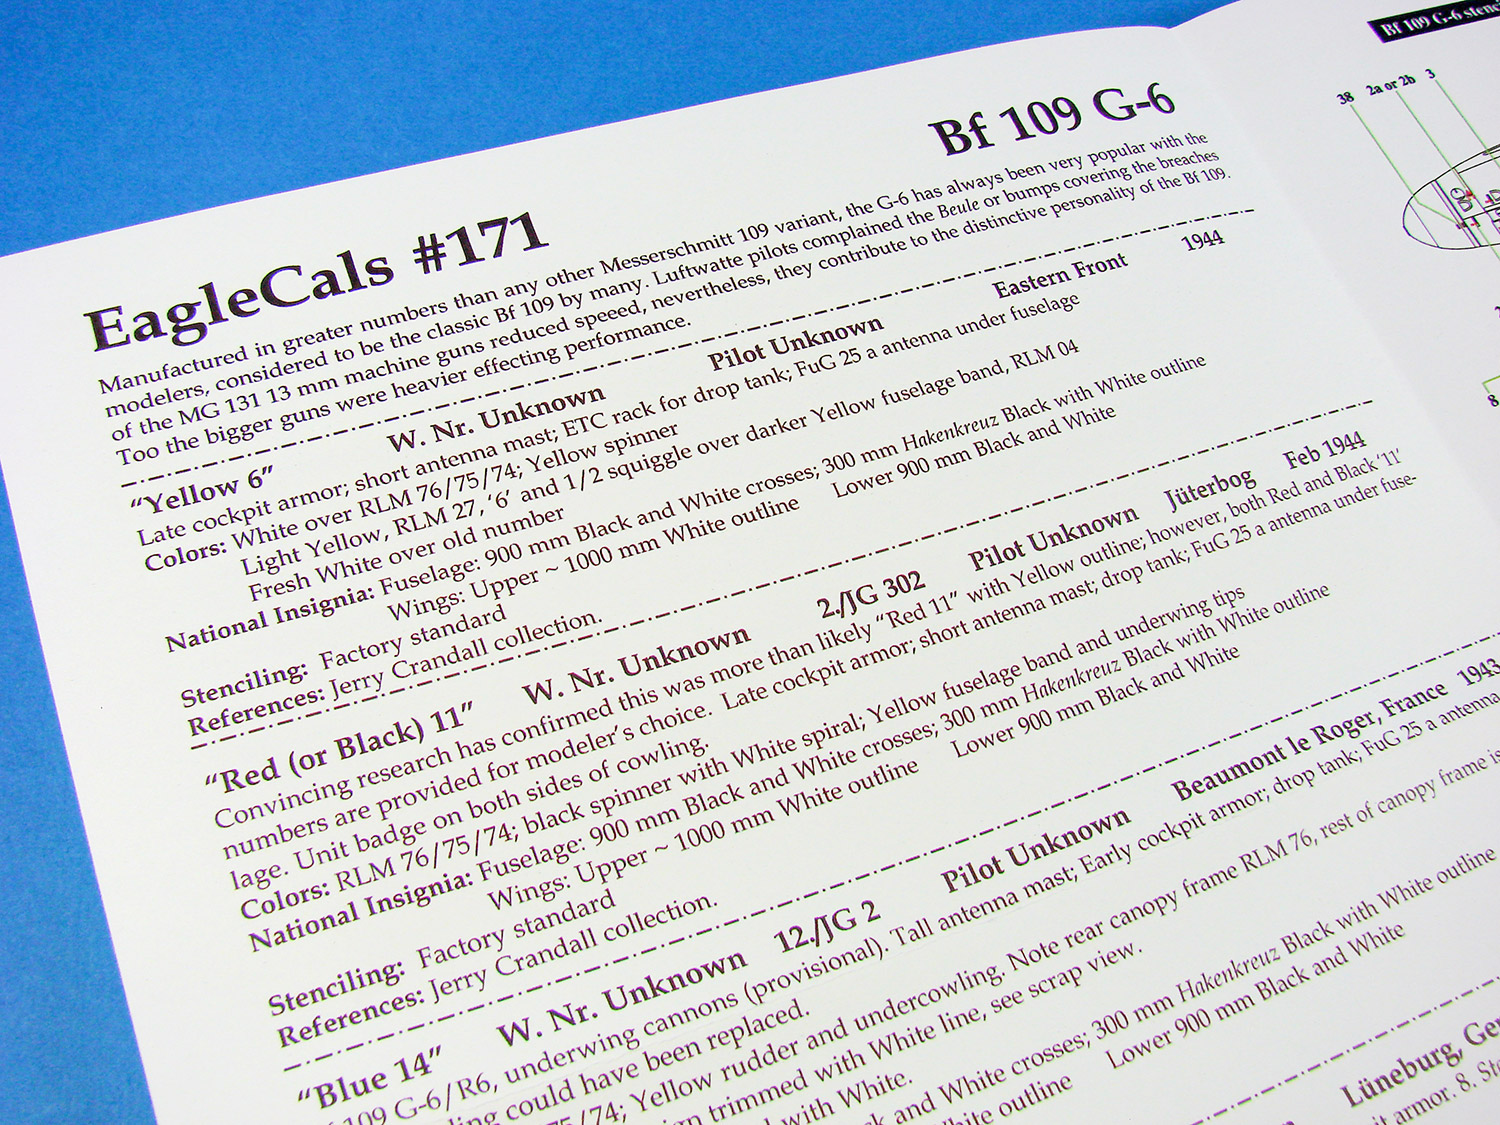
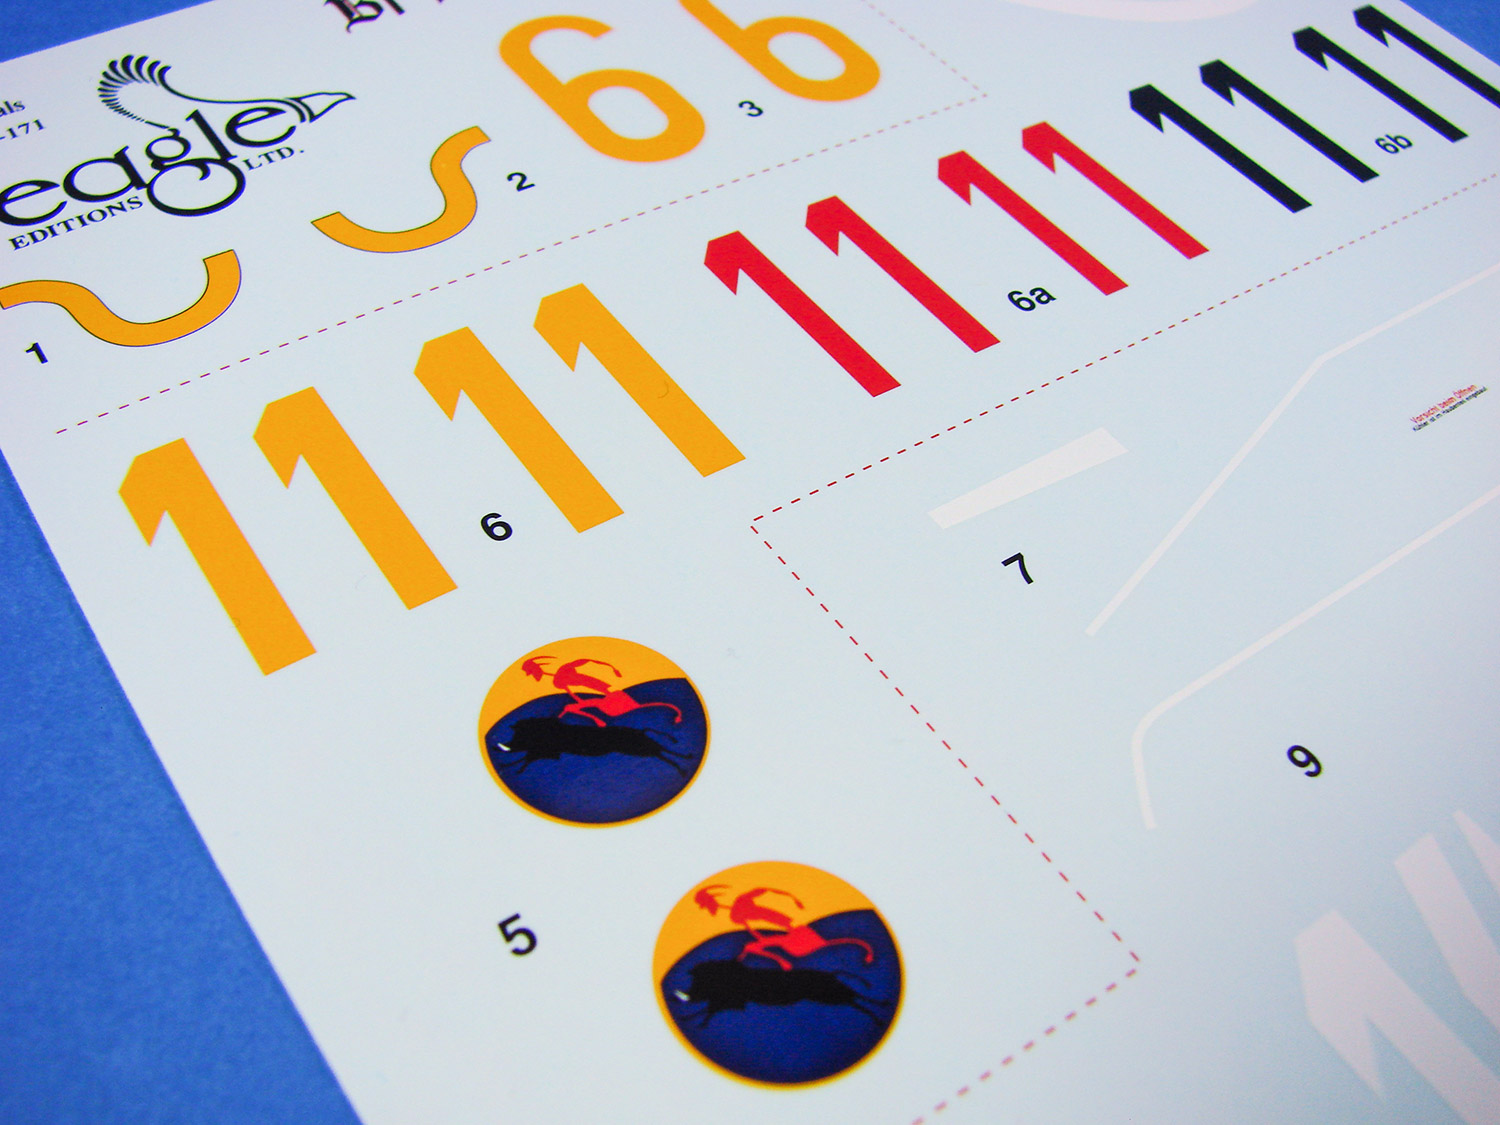
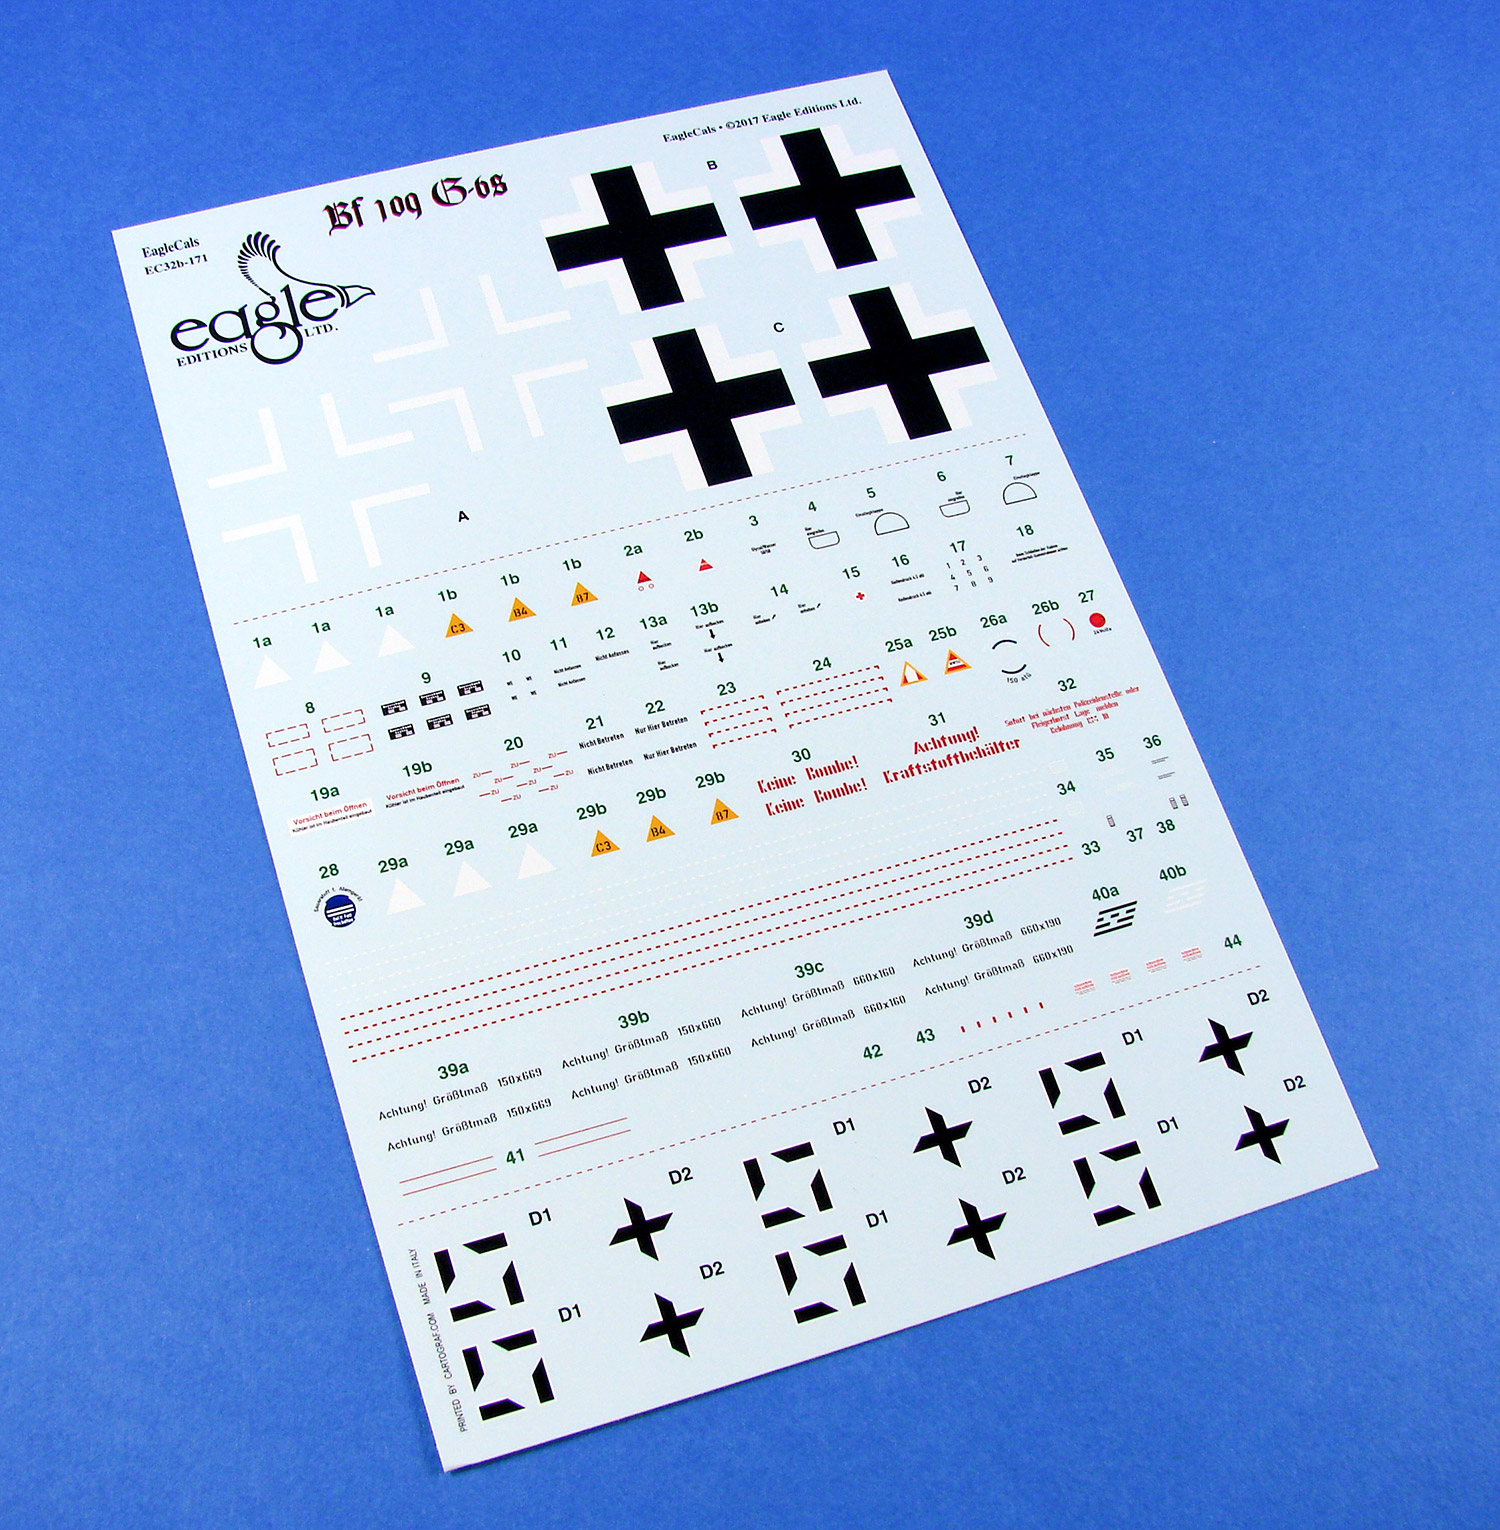
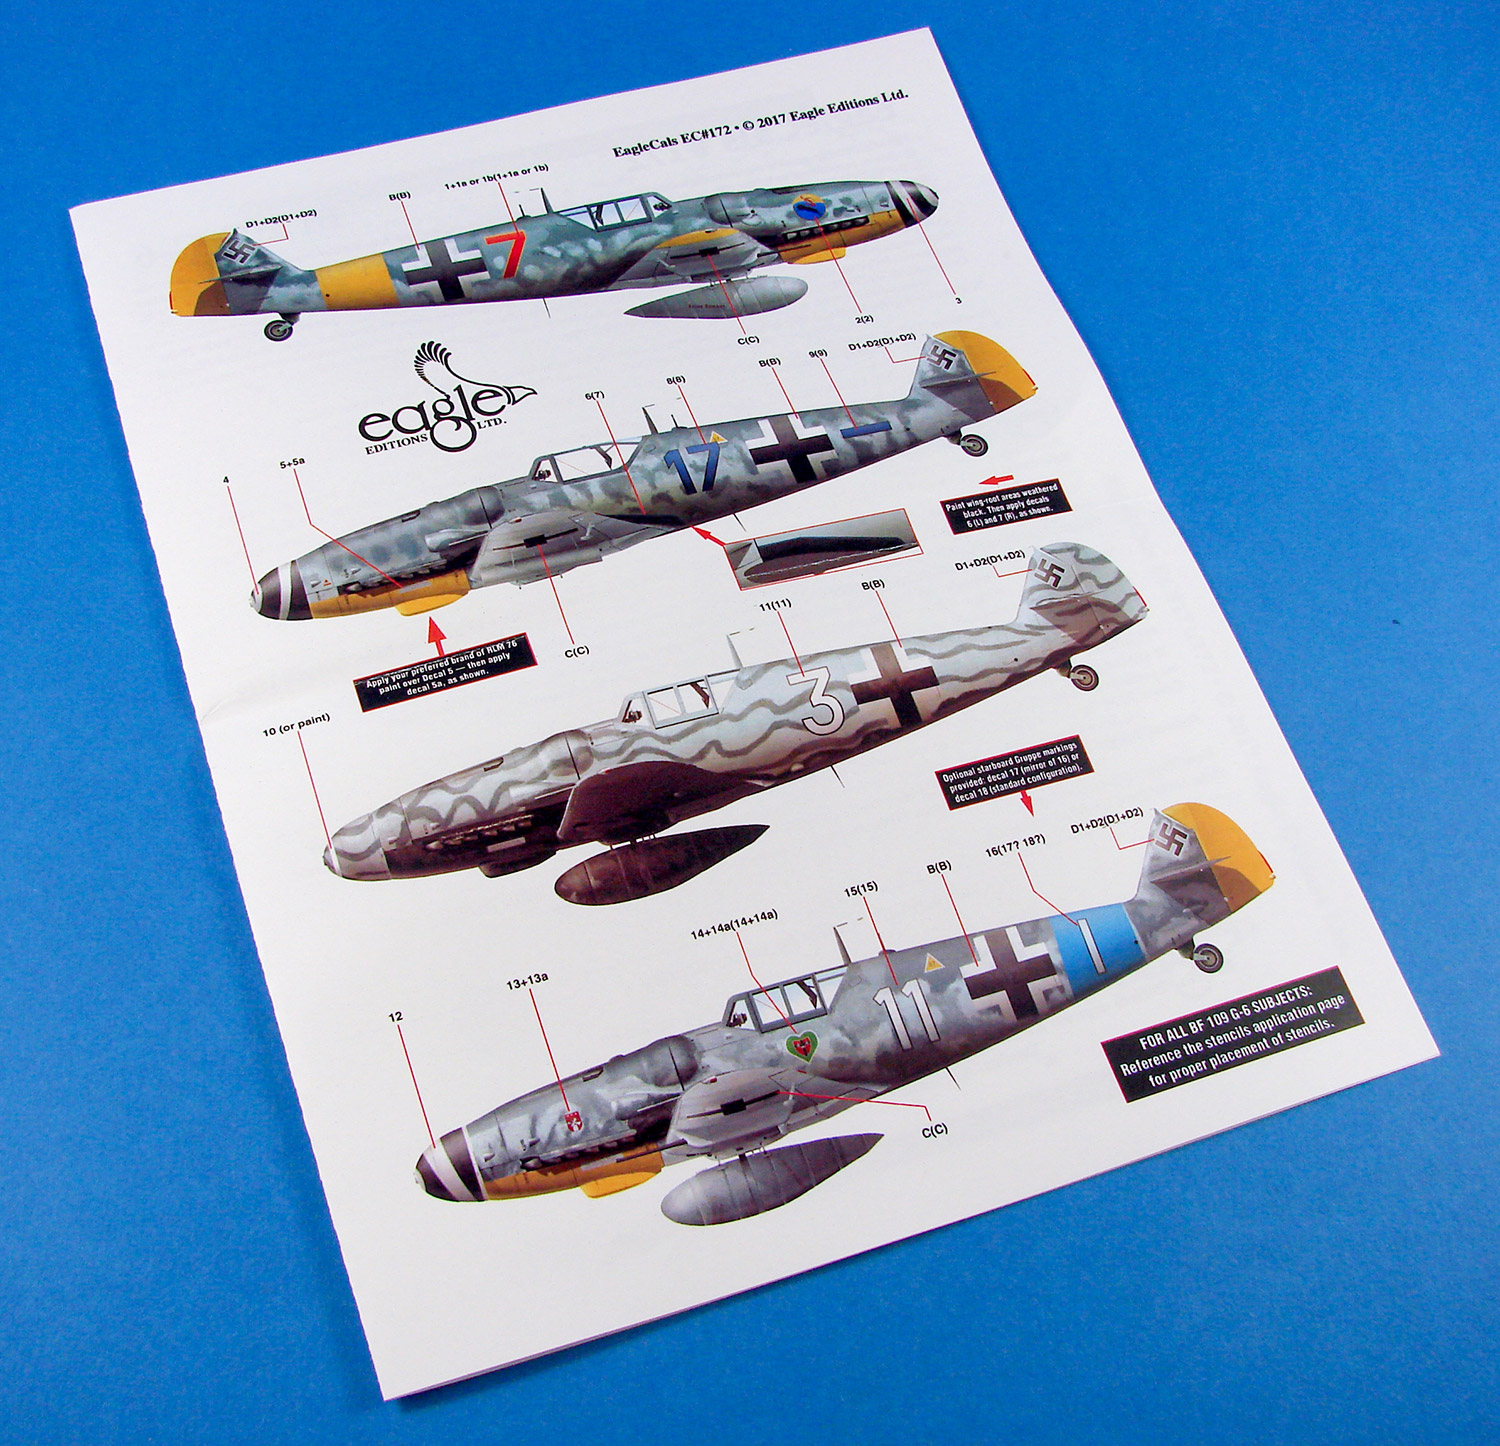
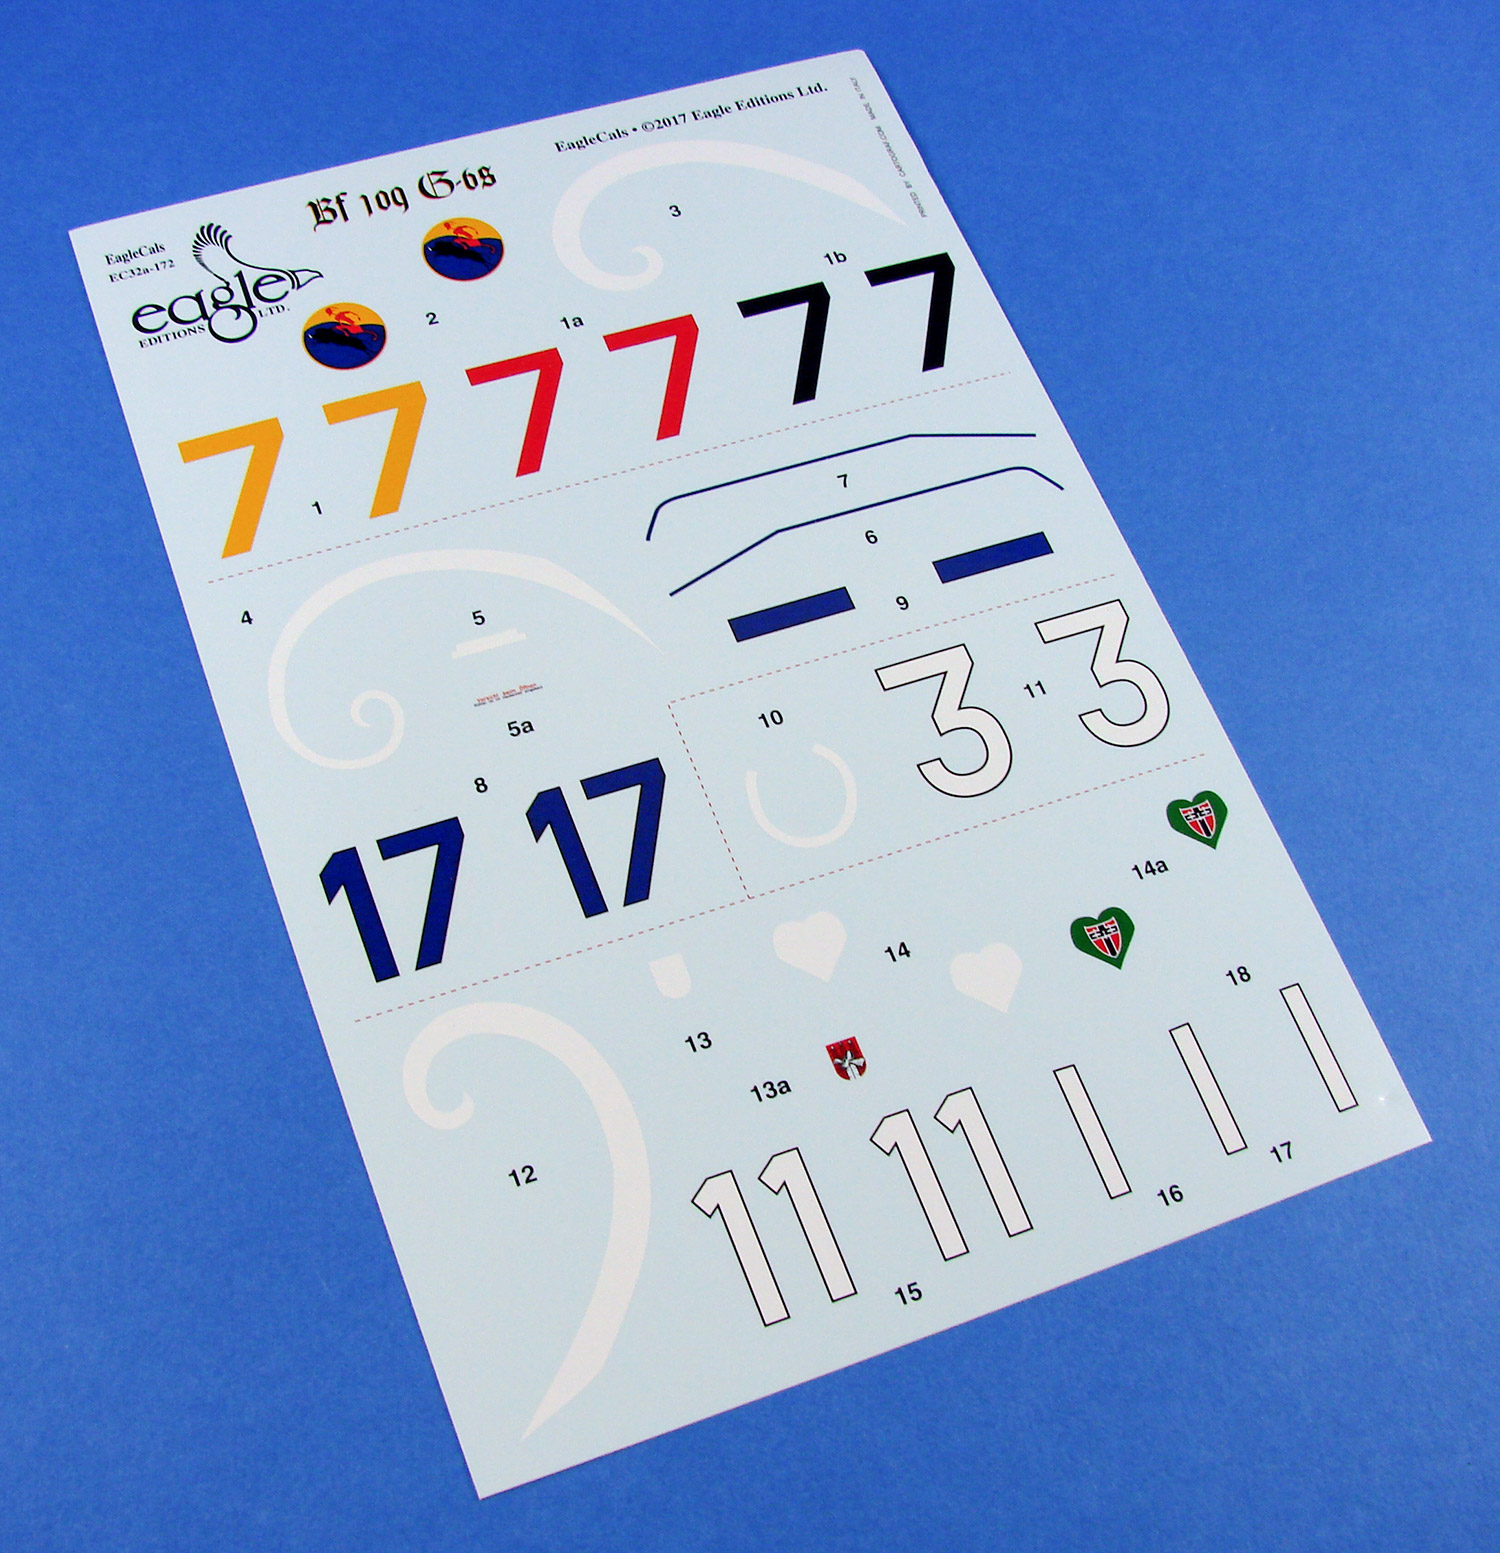
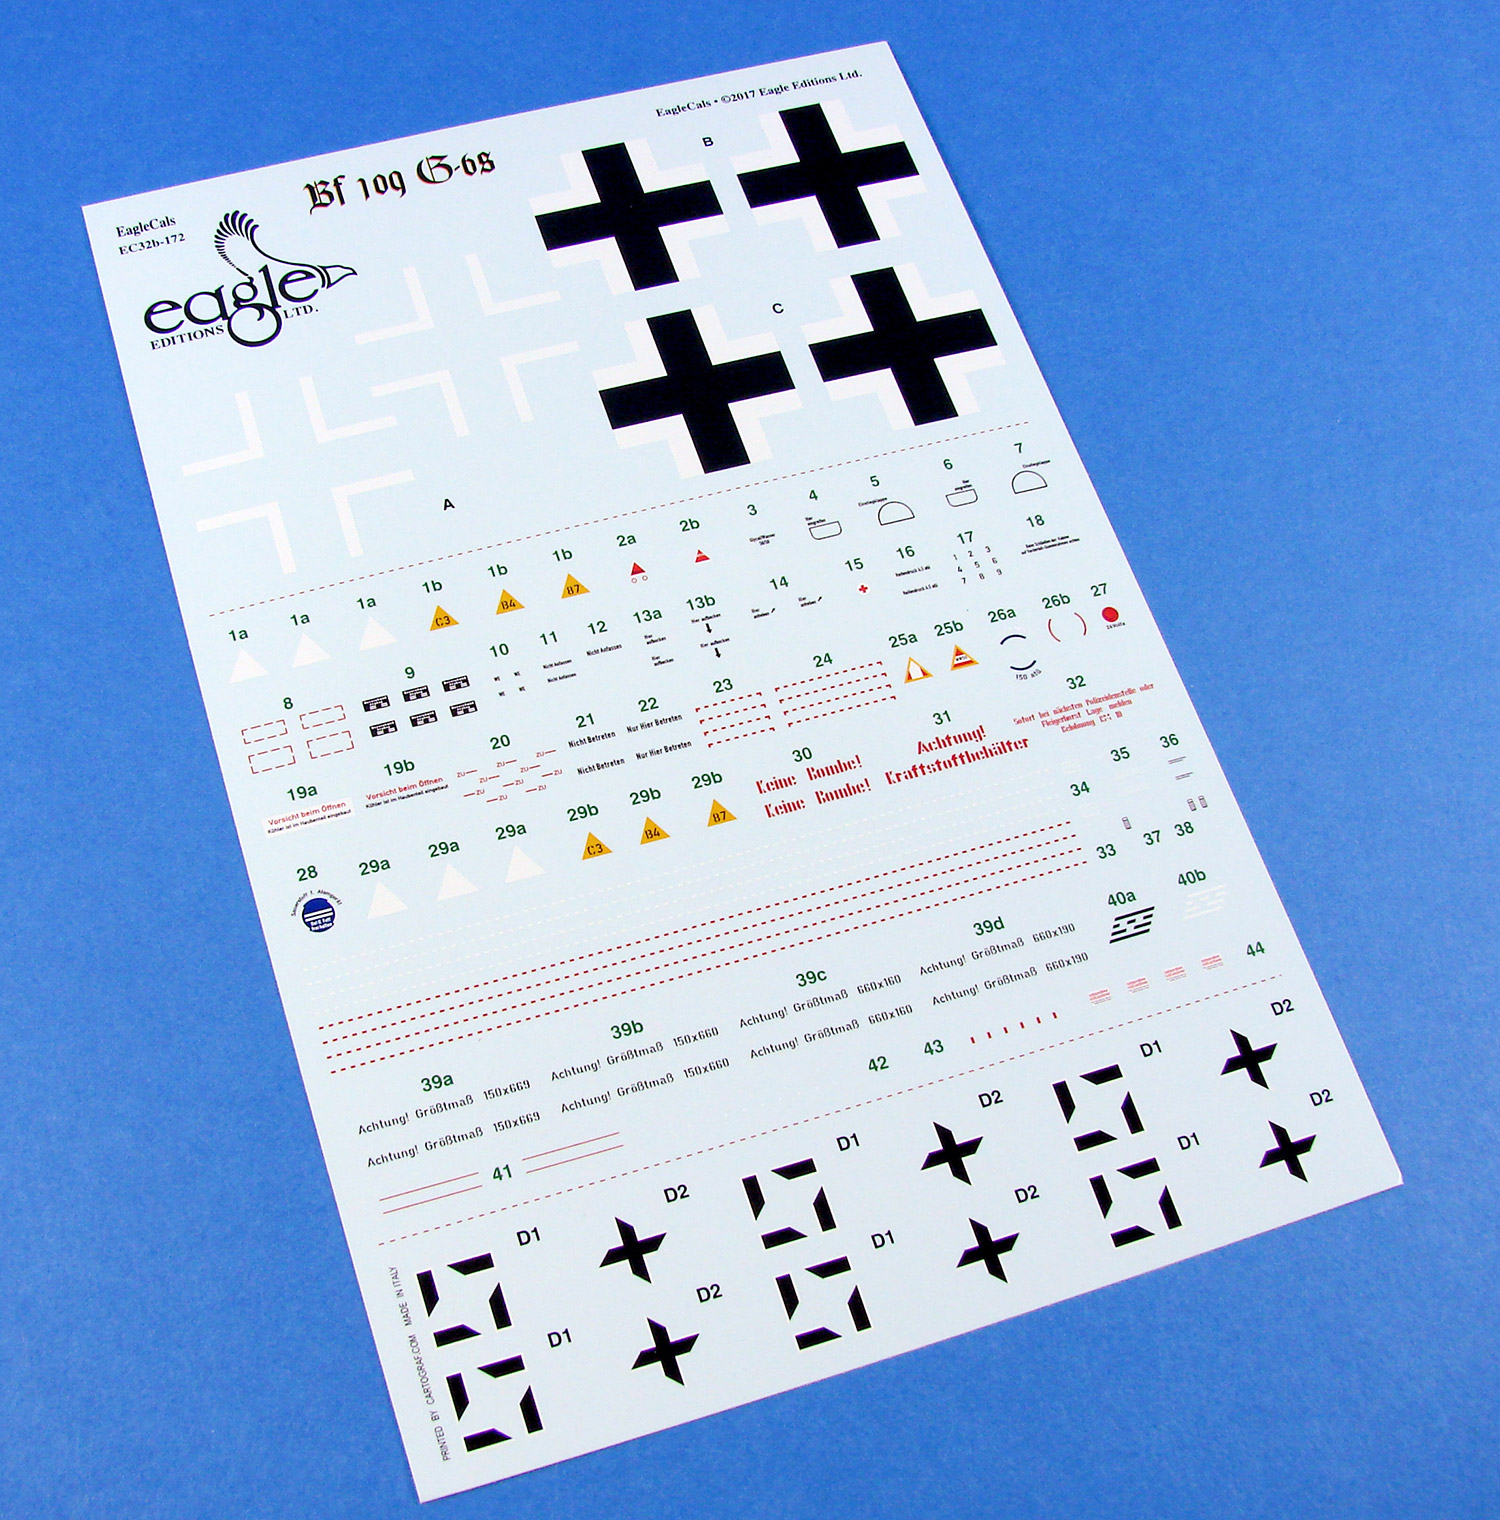
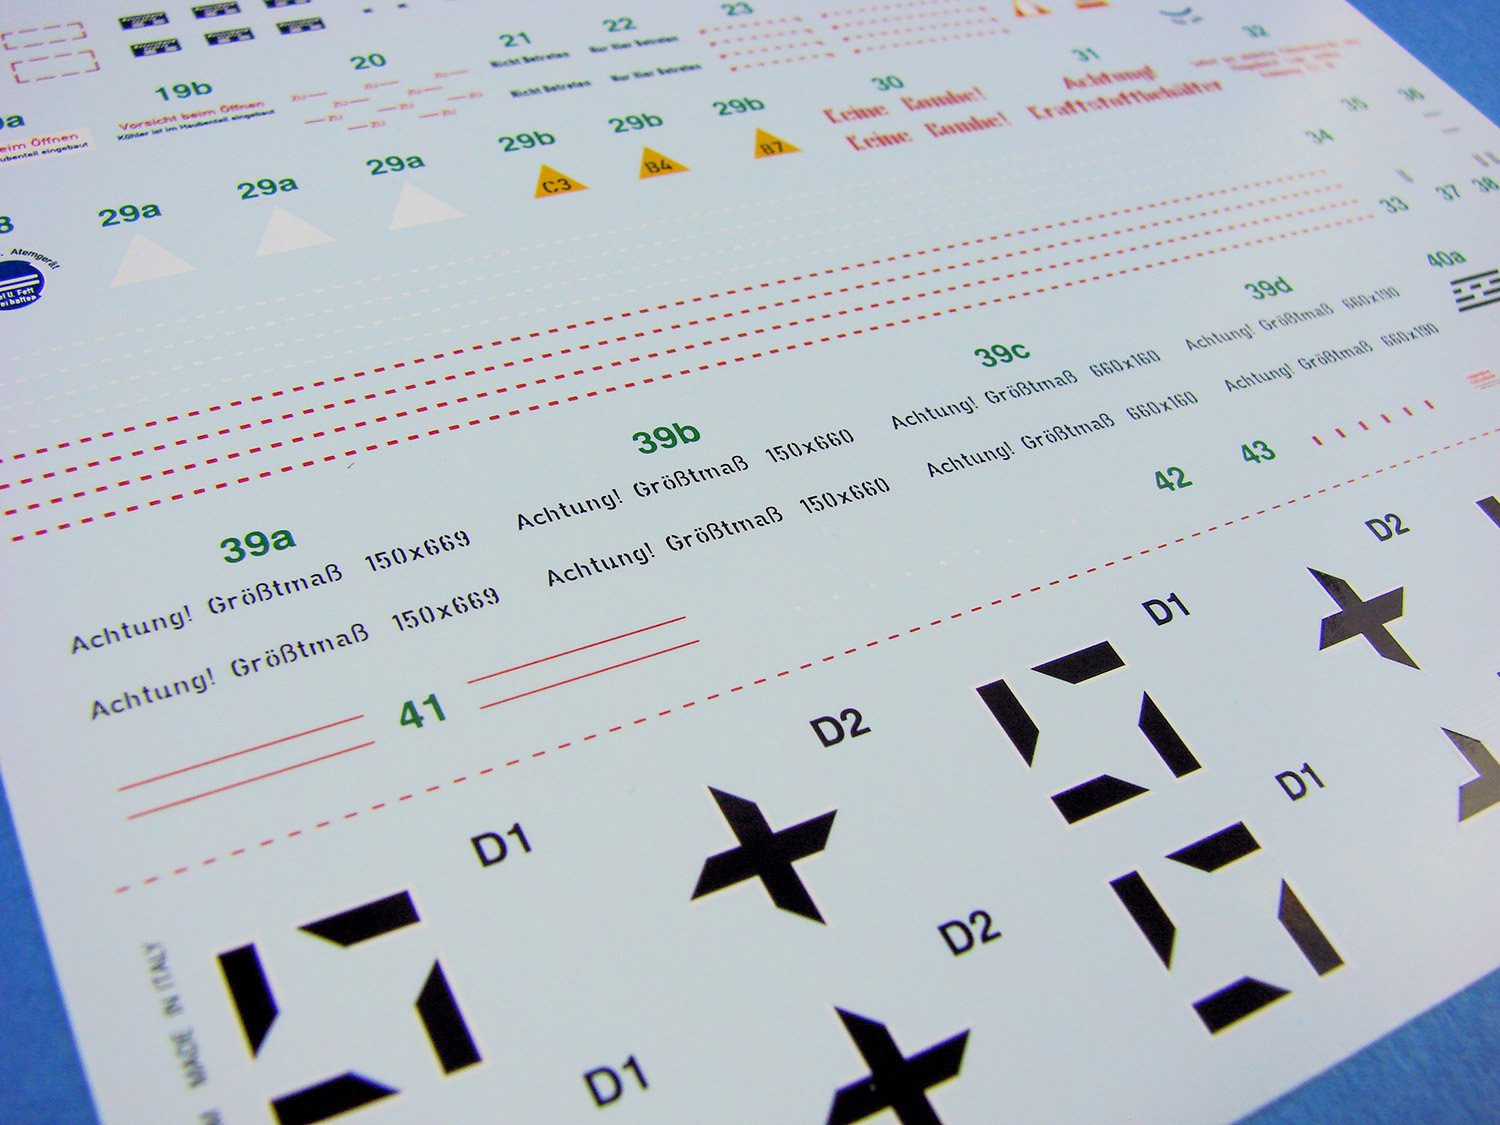
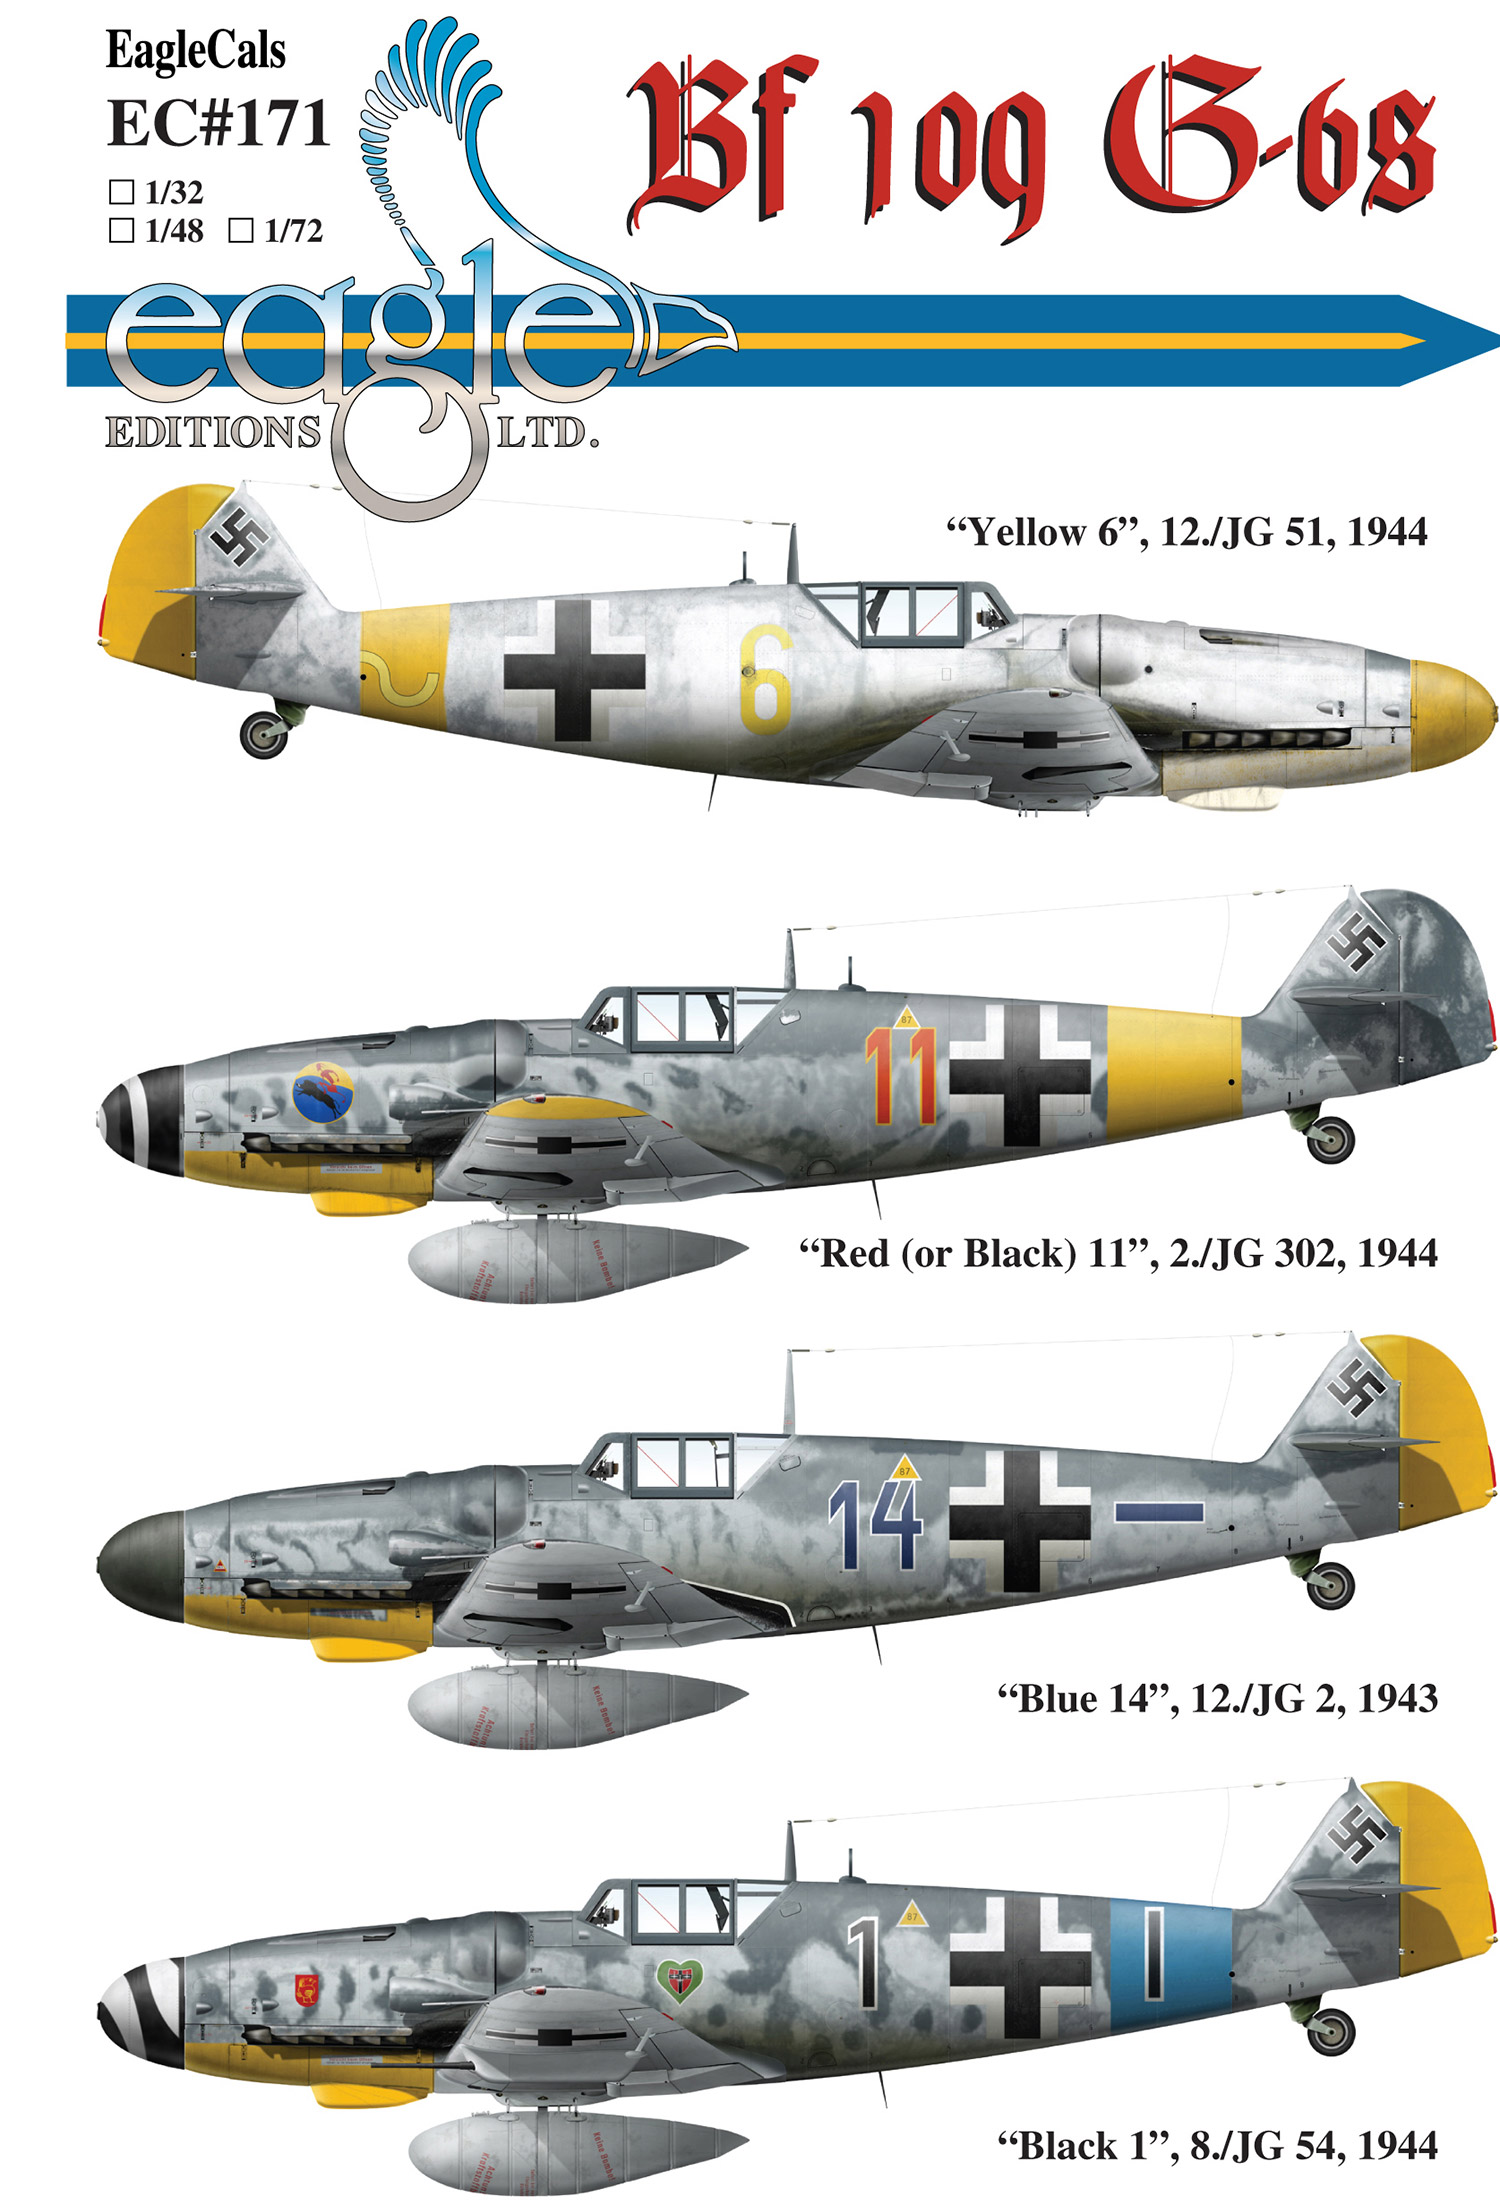
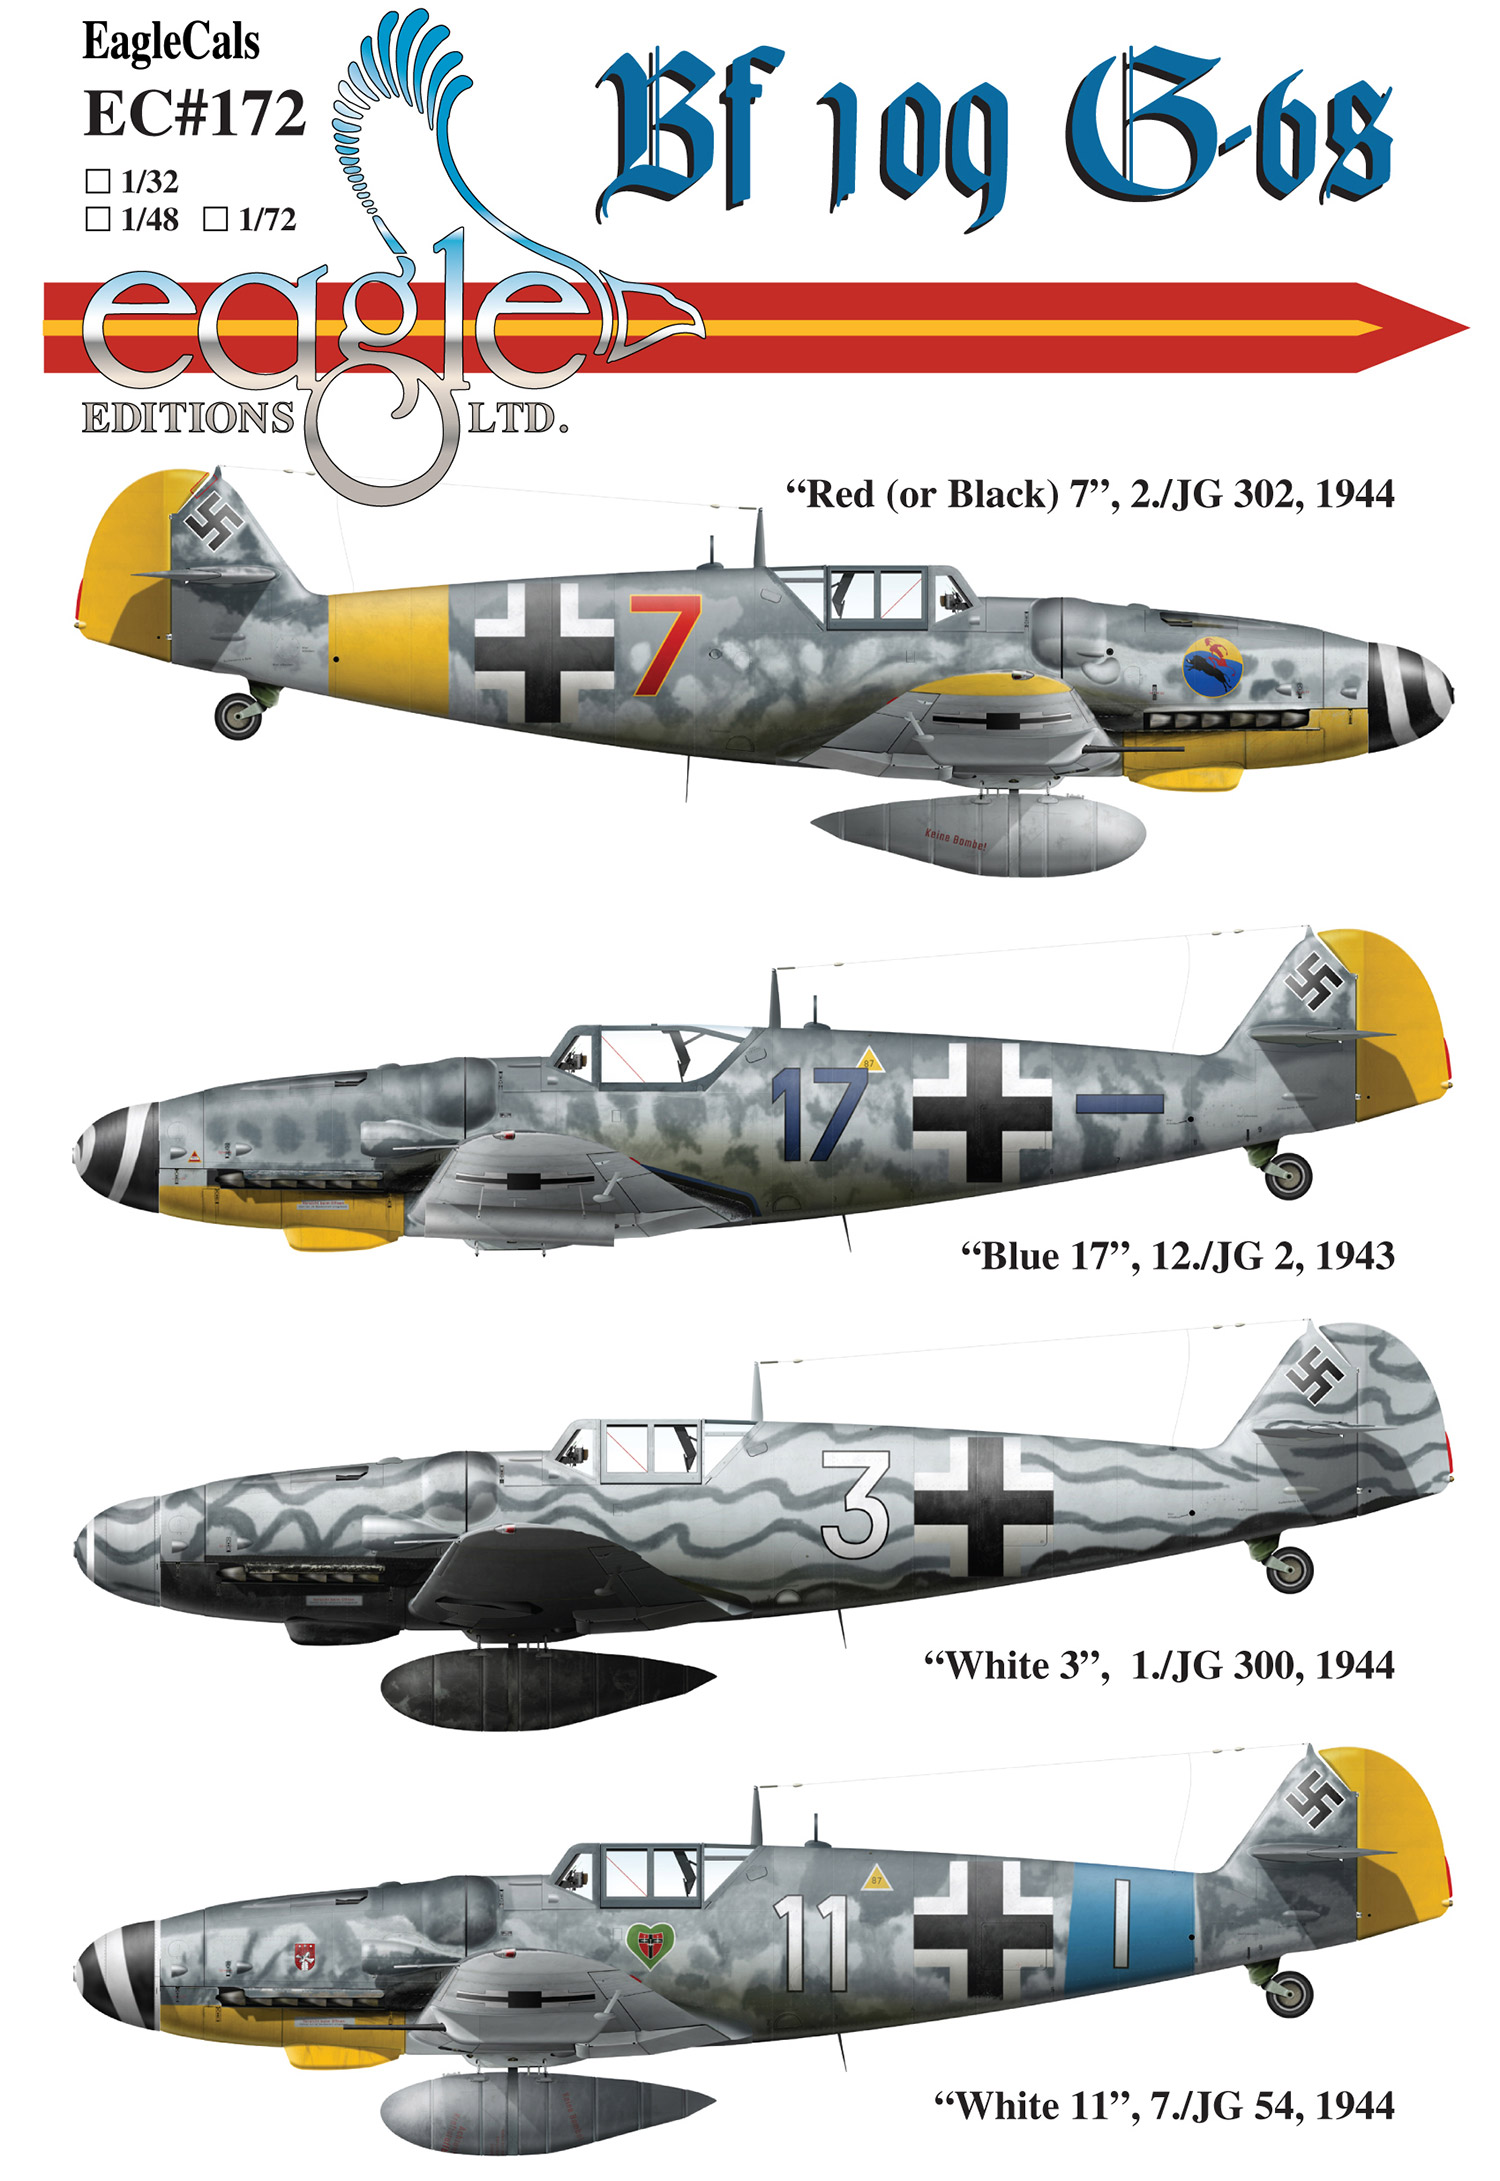
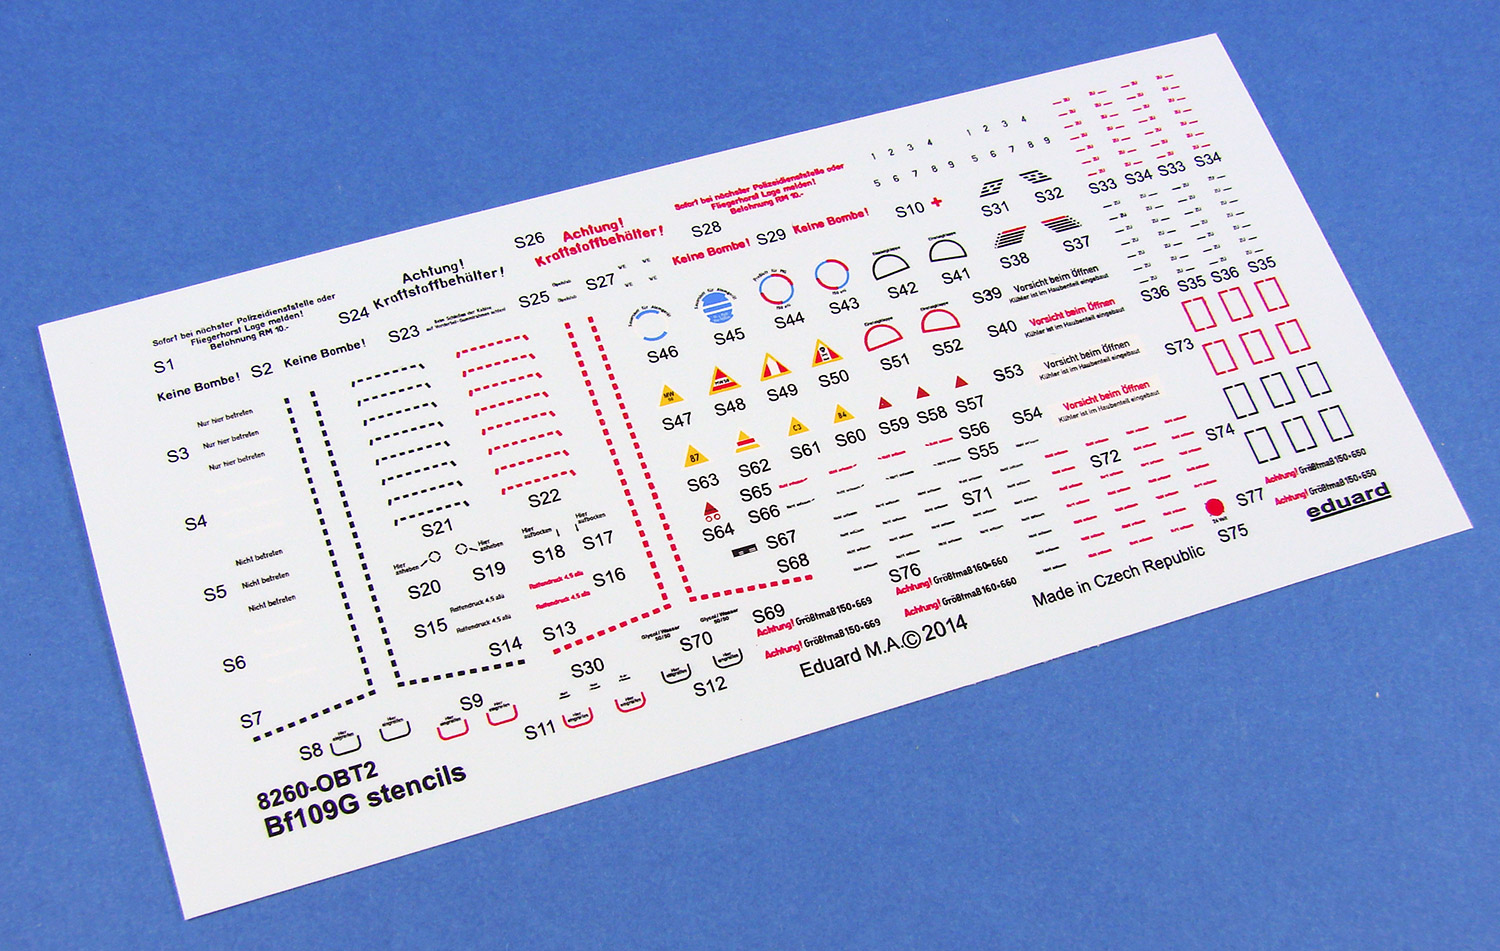
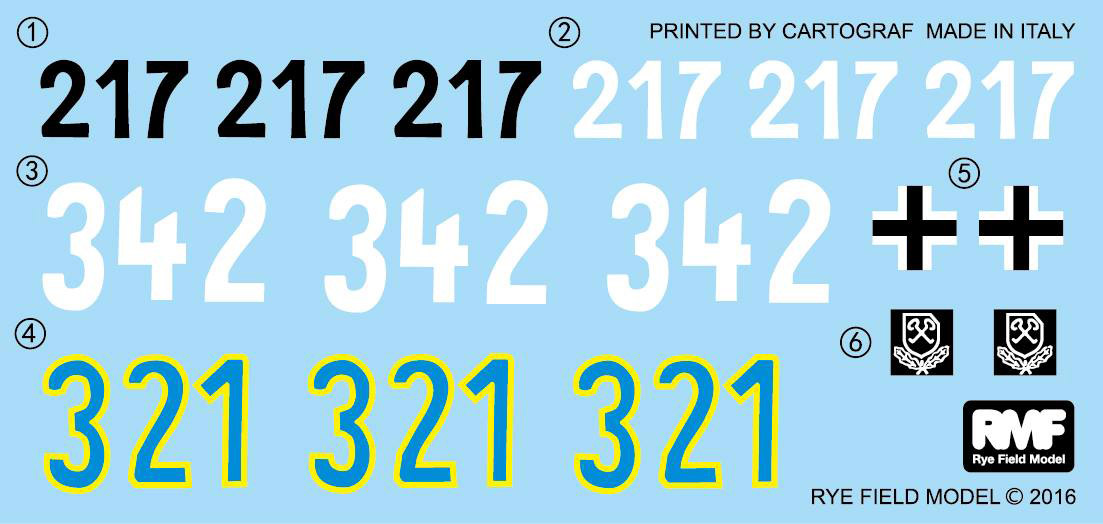
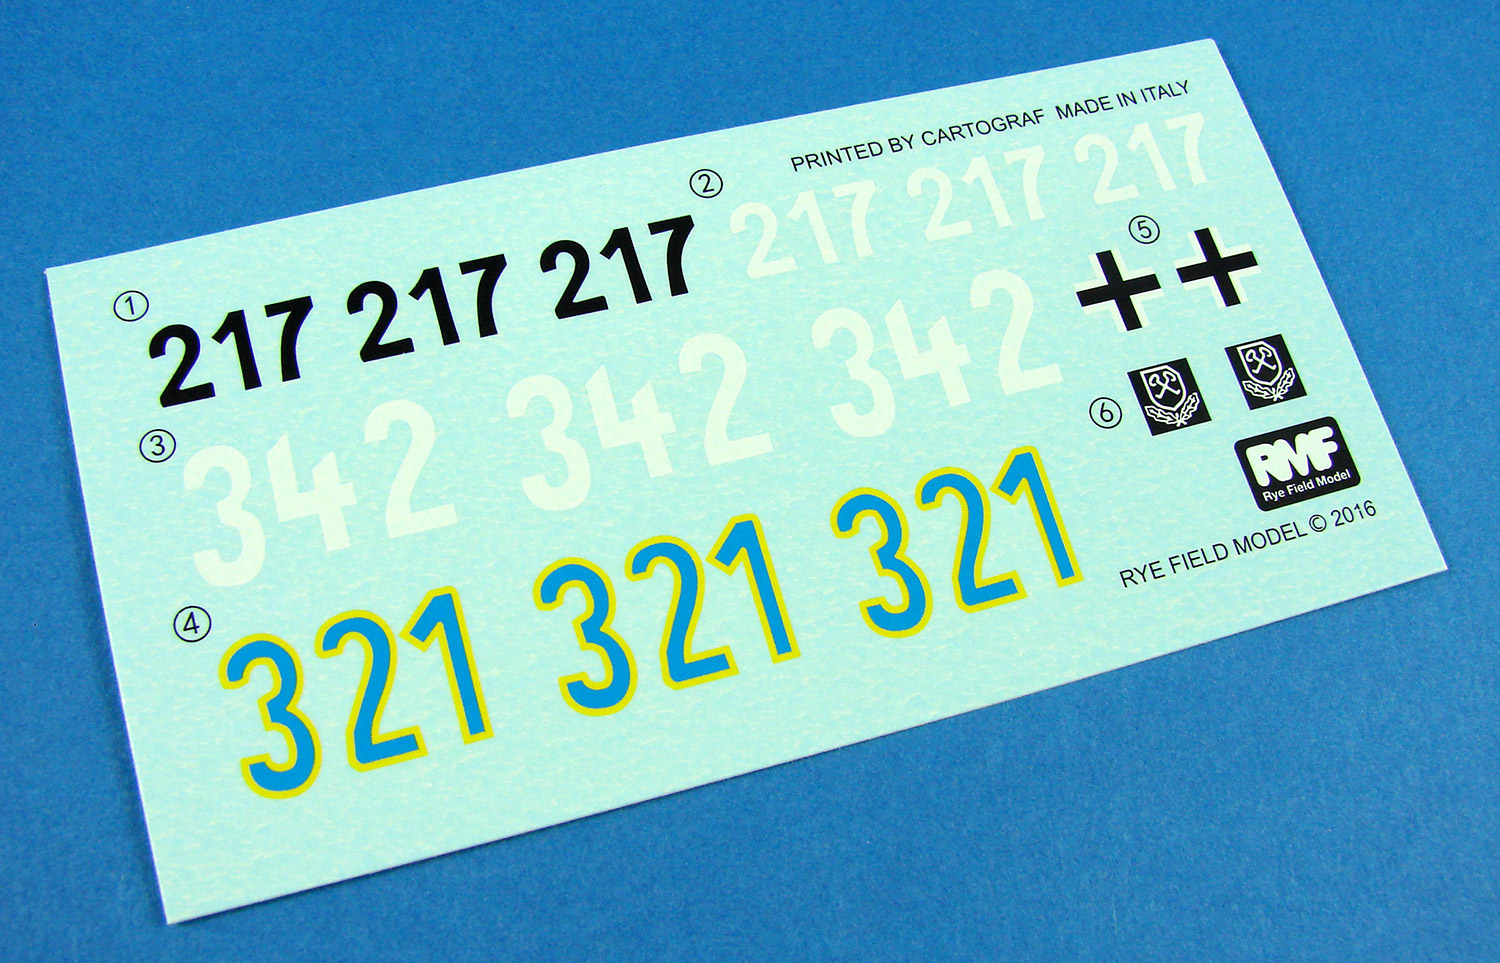
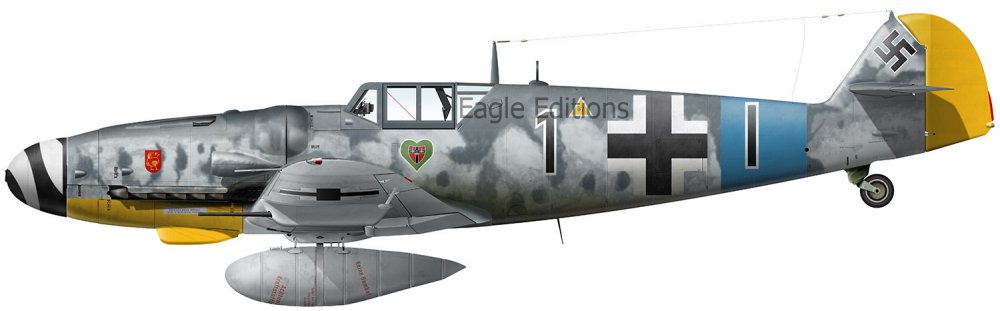
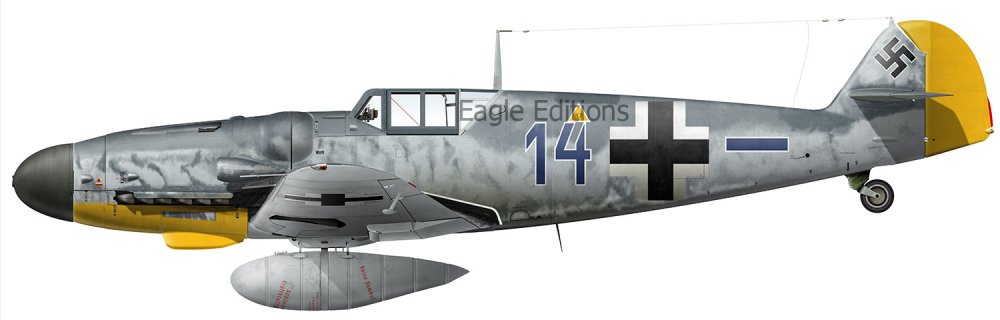
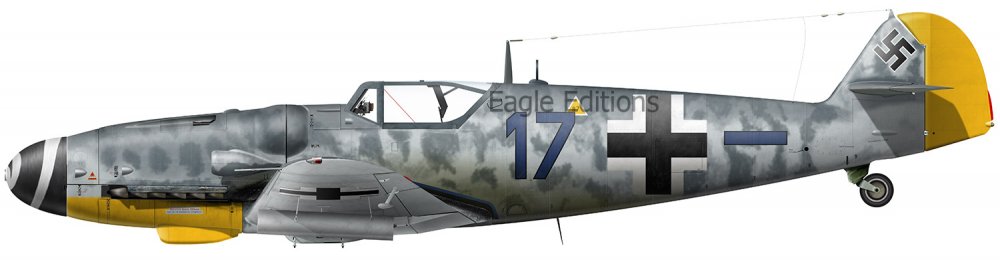
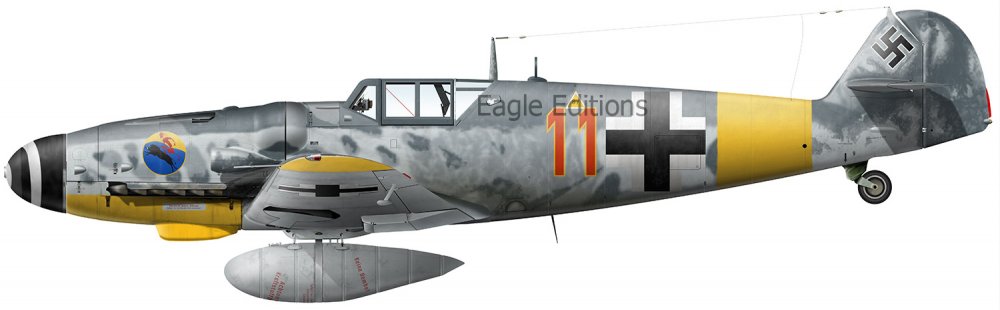
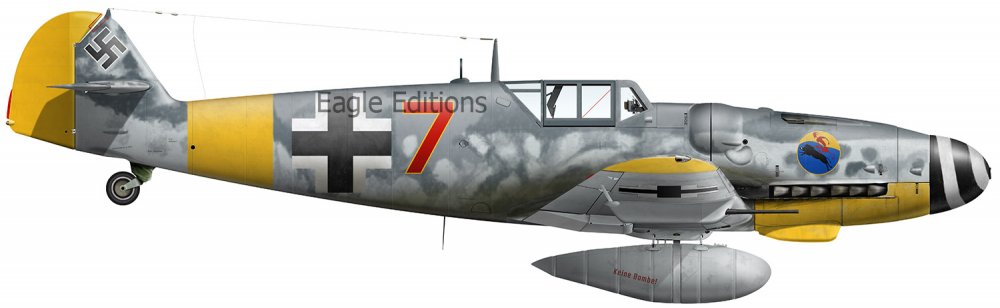
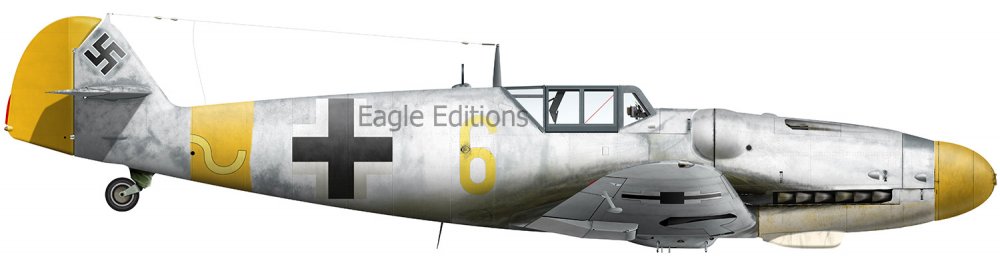
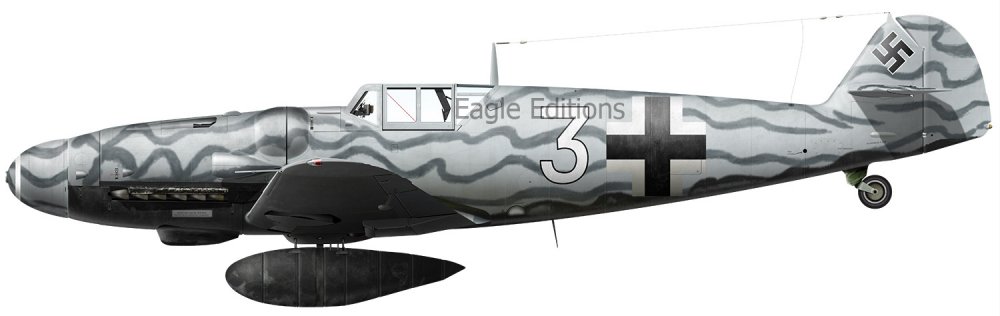
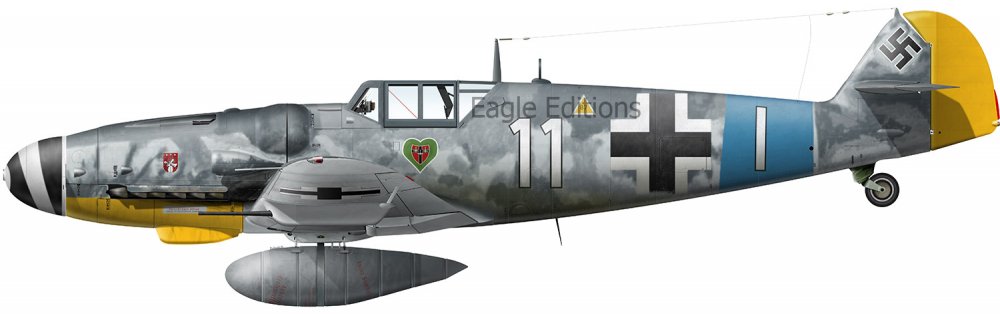
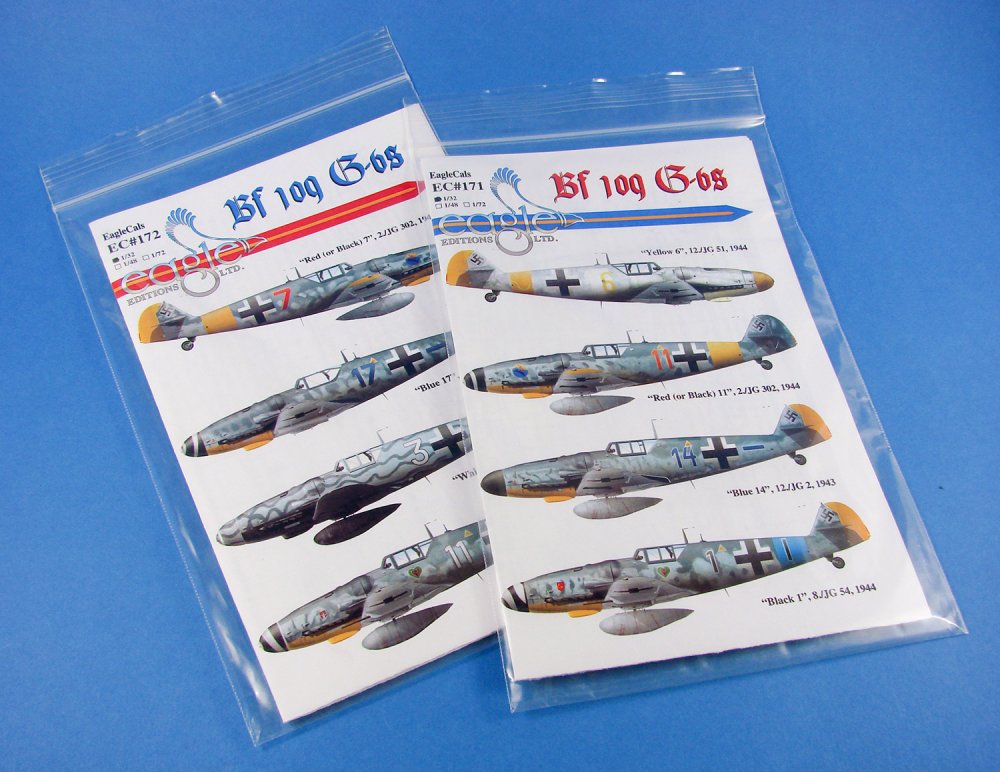
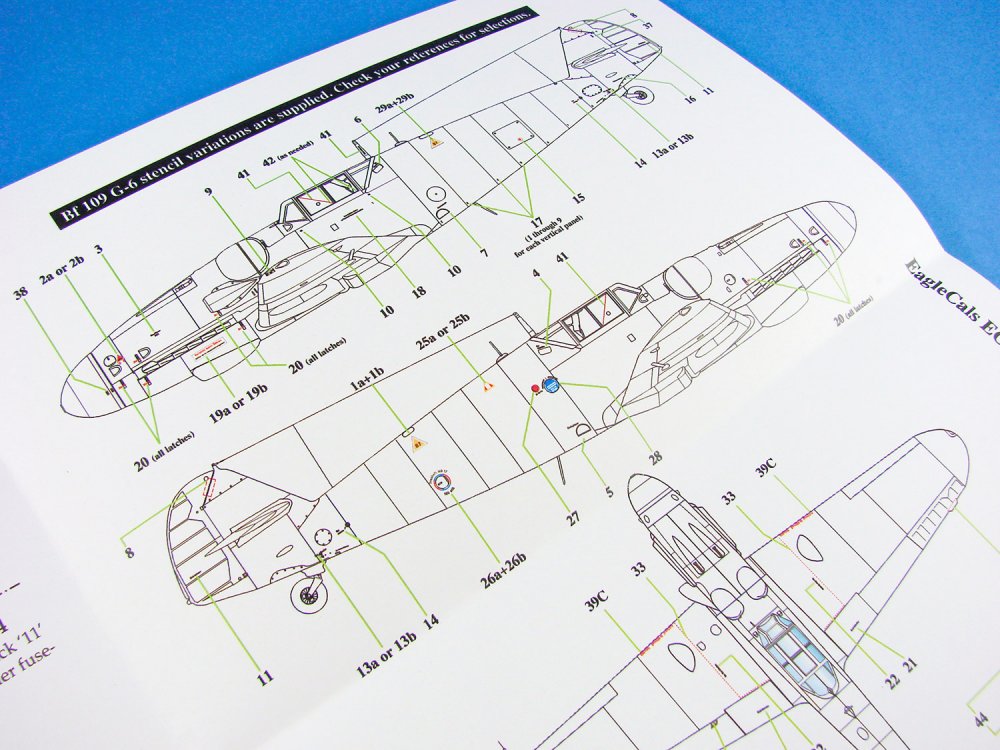
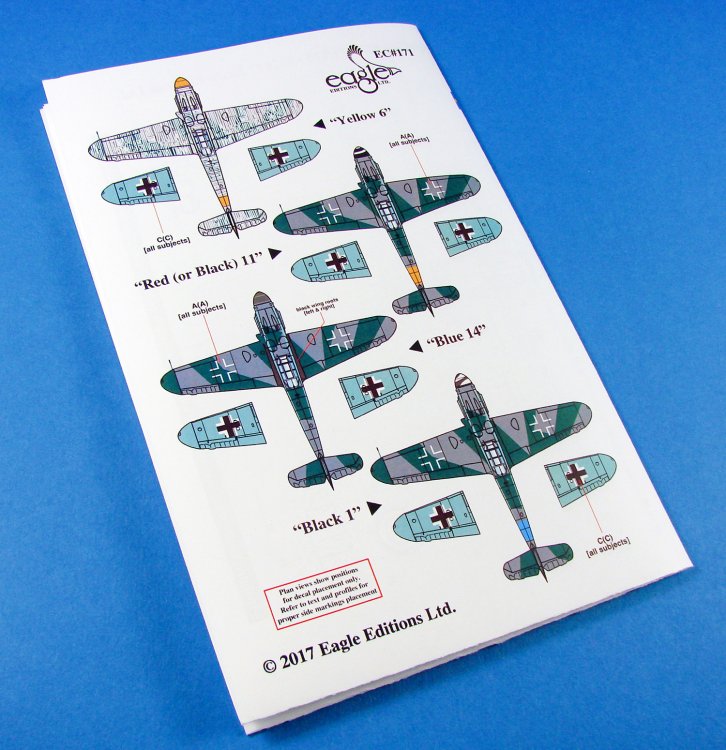
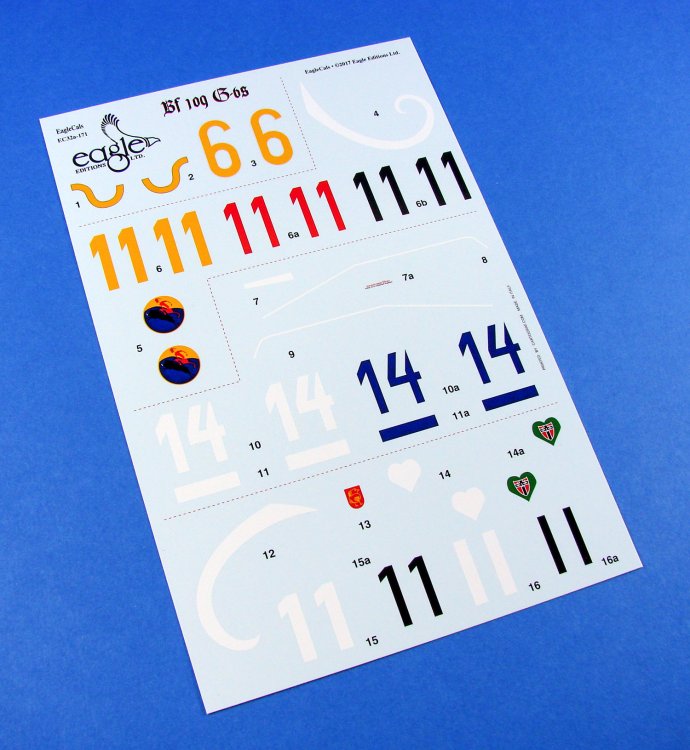
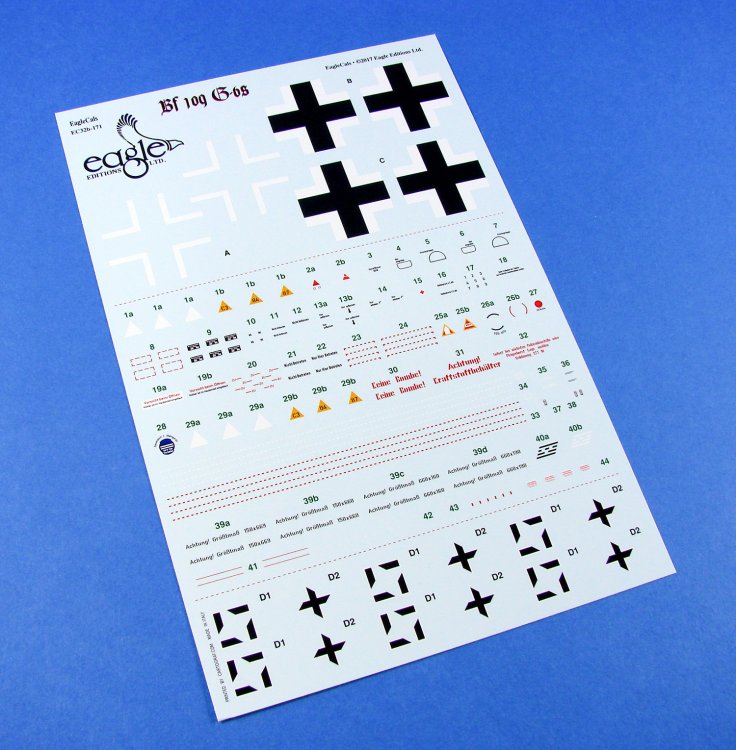
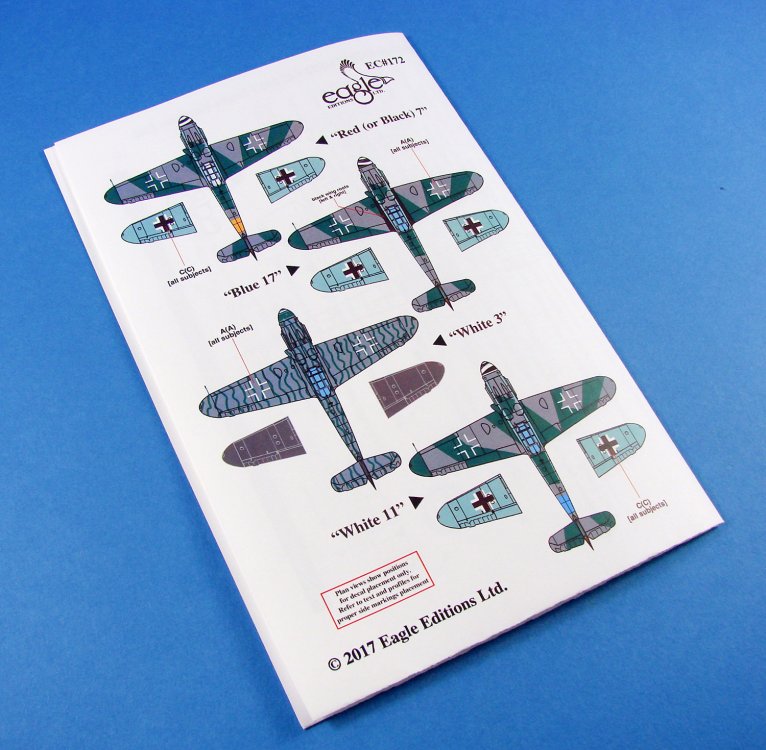
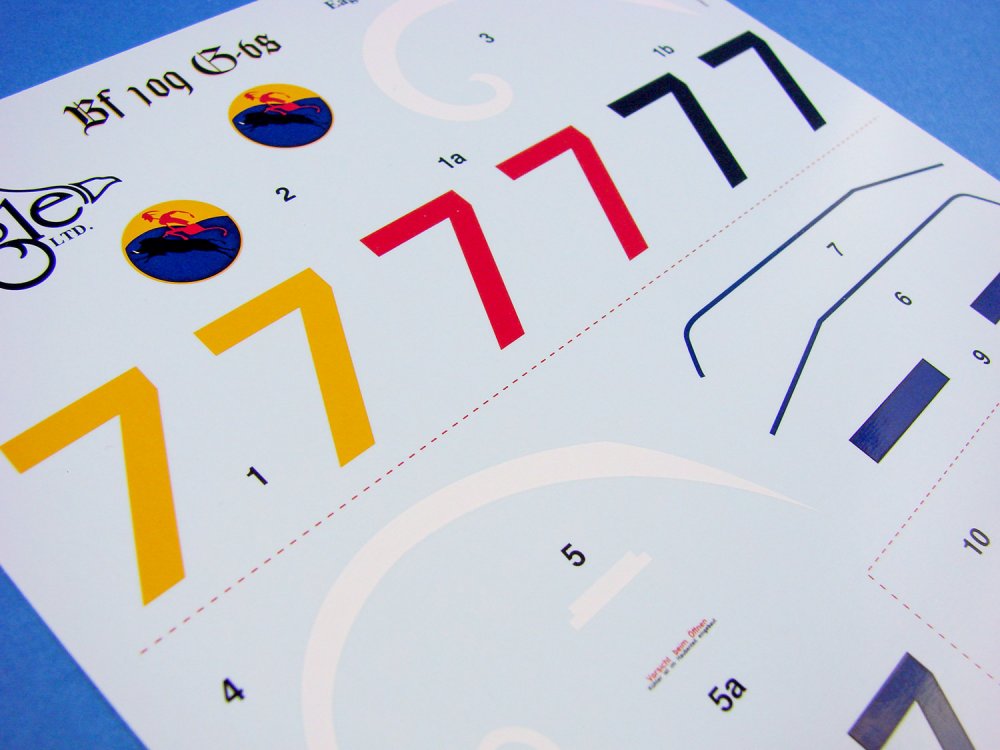
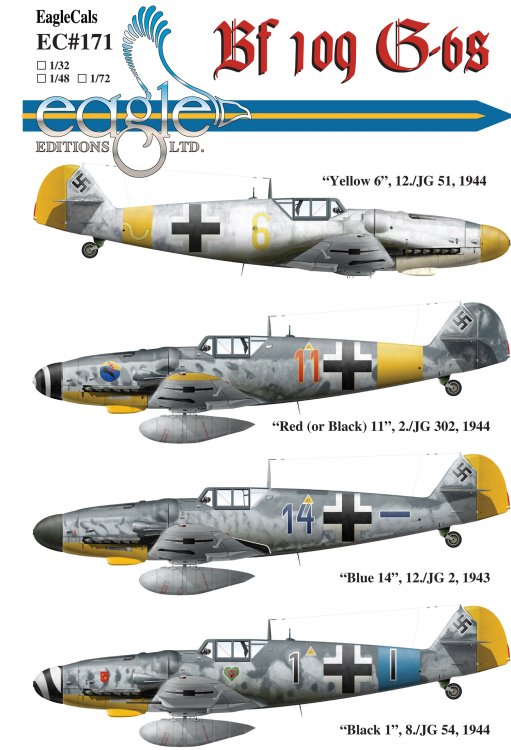
1/32 Bf 109G-6s EagleCals Catalogue: EC#171 & EC#172 Available from Eagle Editions for $24.50 each Today, we have not one but TWO brand new decal sets from Eagle Editions, both concerning the Messerschmitt Bf 109G-6, in 1/32 scale. These add to the already vast catalogue of decals for this legendary fighter aircraft. These releases are packaged into re-sealable zip-lock sleeves that contains a single, folded instructions and scheme sheet, plus two decal sheets per releasethat are printed by Cartograf. The instructions are colour-printed, and the front cover shows three port-side profiles and one starboard profile for the FOURschemes in each set. Eagle Editions have yet again managed to single out some of the most stunning schemes that adorned the Gustav. The four schemes included with EC#171 are: Bf 109G-6, “Yellow 6”, W.Nr. unknown, pilot unknown, Eastern Front 1944 Bf 109G-6, “Red (or Black) 11” W.Nr. unknown, 2./JG 302, pilot unknown, Jüterbog, Feb 1944 Bf 109G-6, “Blue 14”, W.Nr. unknown, 12./JG 2, pilot unknown, Beaumont le Roger, France 1943 Bf 109G-6, “Black 1”, W.Nr. unknown, 8./JG 54, pilot unknown, Lüneburg, Germany, Spring 1944 The four schemes included with EC#172 are: Bf 109G-6, “Red (or Black) 7”, W.Nr. unknown, 2./JG 302, pilot was Xaver Neumeier, Jüterbog, Feb 1944 Bf 109G-6, “Blue 17”, W.Nr. unknown, 12./JG 2, pilot unknown, Beaumont le Roger, France 1943 Bf 109G-6, “White 3”, W.Nr. unknown, I./JG 300 Wilde Sau, pilot unknown, Bonn-Hangelar, March/April 1944 Bf 109G-6, “White 11”, W.Nr. unknown, 7./JG 54, location and pilot unknown, Spring 1944 Each set has the main scheme profiles reproduced within the instructions sheet, which is superbly printed and crystal clear. These profiles are annotated to show all decal placement for the national, unit and emblem markings, plus each set contains a single machine with their wing root fairing edged in white or dark blue. These edgings are also, thankfully, supplied as decals, meaning less time in such frustrating masking tasks. These profiles also contain notes for where specific decals need to be over-sprayed slightly before the application of an overlying decal. Inside the instructions sheet, notes are given for the individual scheme paint application, plus any particular fitting-out notes for aircraft physical details, including ETC racks, drop tanks, FuG 25 antennae, cockpit/canopy armour, antennae masts, underwing cannon, Erla or standard canopy, Wr 21cm rockets, etc. These machines have been meticulously researched so that you don’t have to trawl your library or the internet to find out specific details pertaining to them. It’s well known that Jerry Crandall is one of our foremost aficionados when it comes to this subject, and references are supplied to state that reference is from his personal collection, or in a specific published book. When it comes to marking dimensions, these are also supplied, but you’ll need to work out the width of the fuselage/tail band. That really isn’t a problem either. The notes also state that the stencils are all factory standard, and in one case, overpainted. Each of these sets contains a complete set of stencil decals too, and a full page of the instructions is dedicated to this, with various line drawing profiles offered for your decal placement. Each stencil is highlighted with a green line pointing out its precise location, including the multitude of tedious cowl latch decals! Stencils are supplied for drop tanks too. As stencils are factory standard, box of these decal sets carry the same illustrations for this purpose. The rear of each instruction sheet carries illustrations which show the schemes from above, to help with laying paint, and also includes partial underside illustrations that help with further decal placement. Decals As previously stated, there are two sheets with each set here, and the first contains the identifying markings of each machine, and in some cases, alternatively coloured numbers, where research was inconclusive. Where the numbers have a yellow edging, the yellow number if first laid down and then the actual colour number is overlaid to give the edge effect. This sheet also contains the wing root edgings, spinner spirals, emblems etc. The second sheet contains the national markings, with the swastika being supplied as a two-part affair to comply with archaic rules in some supposedly democratic countries. At least these have been split so that the outline is complete and allows accurate placement instead of the guesswork that sometimes happens when the outline is split into two. A complete set of stencils is printed here too. All printing is Cartograf, and is extremely thin, has minimal carrier film, solid and authentic colour, and is glossy in finish. Registration is perfect. Conclusion Another two superb decal options for your Gustav. Beautifully illustrated, researched and printed, and offering you something that your regular kit manufacturers wouldn’t. When you look through their catalogue of current 109 decals, you can sort of see why you get some real fanatics when it comes to this machine. Most of the schemes here are also fairly easy to pull off, with maybe one or two needing a braver approach and higher skillset, but in all, these are excellent releases. They are also available in 1/48 and 1/72. Here are some links for your purchases: Bf 109G-6, EC#171 LINK Bf 109G-6, EC#172 LINK Highly recommended My sincere thanks to Eagle Editions for the decal sets that I reviewed here.


-
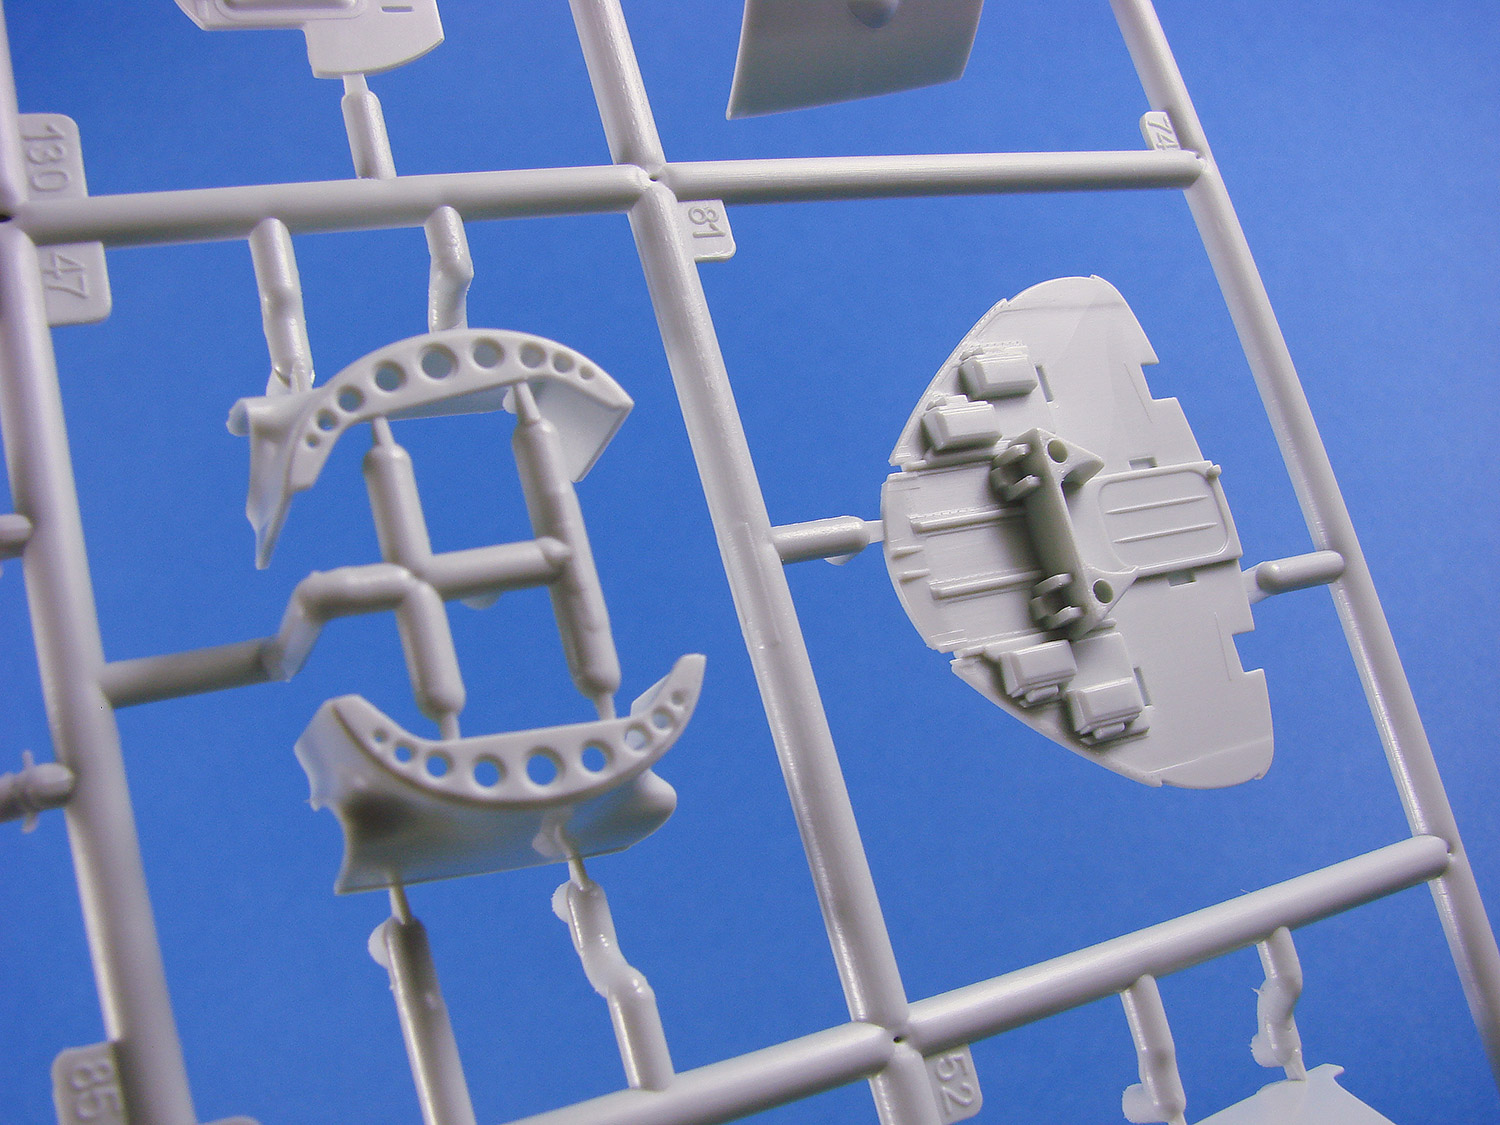
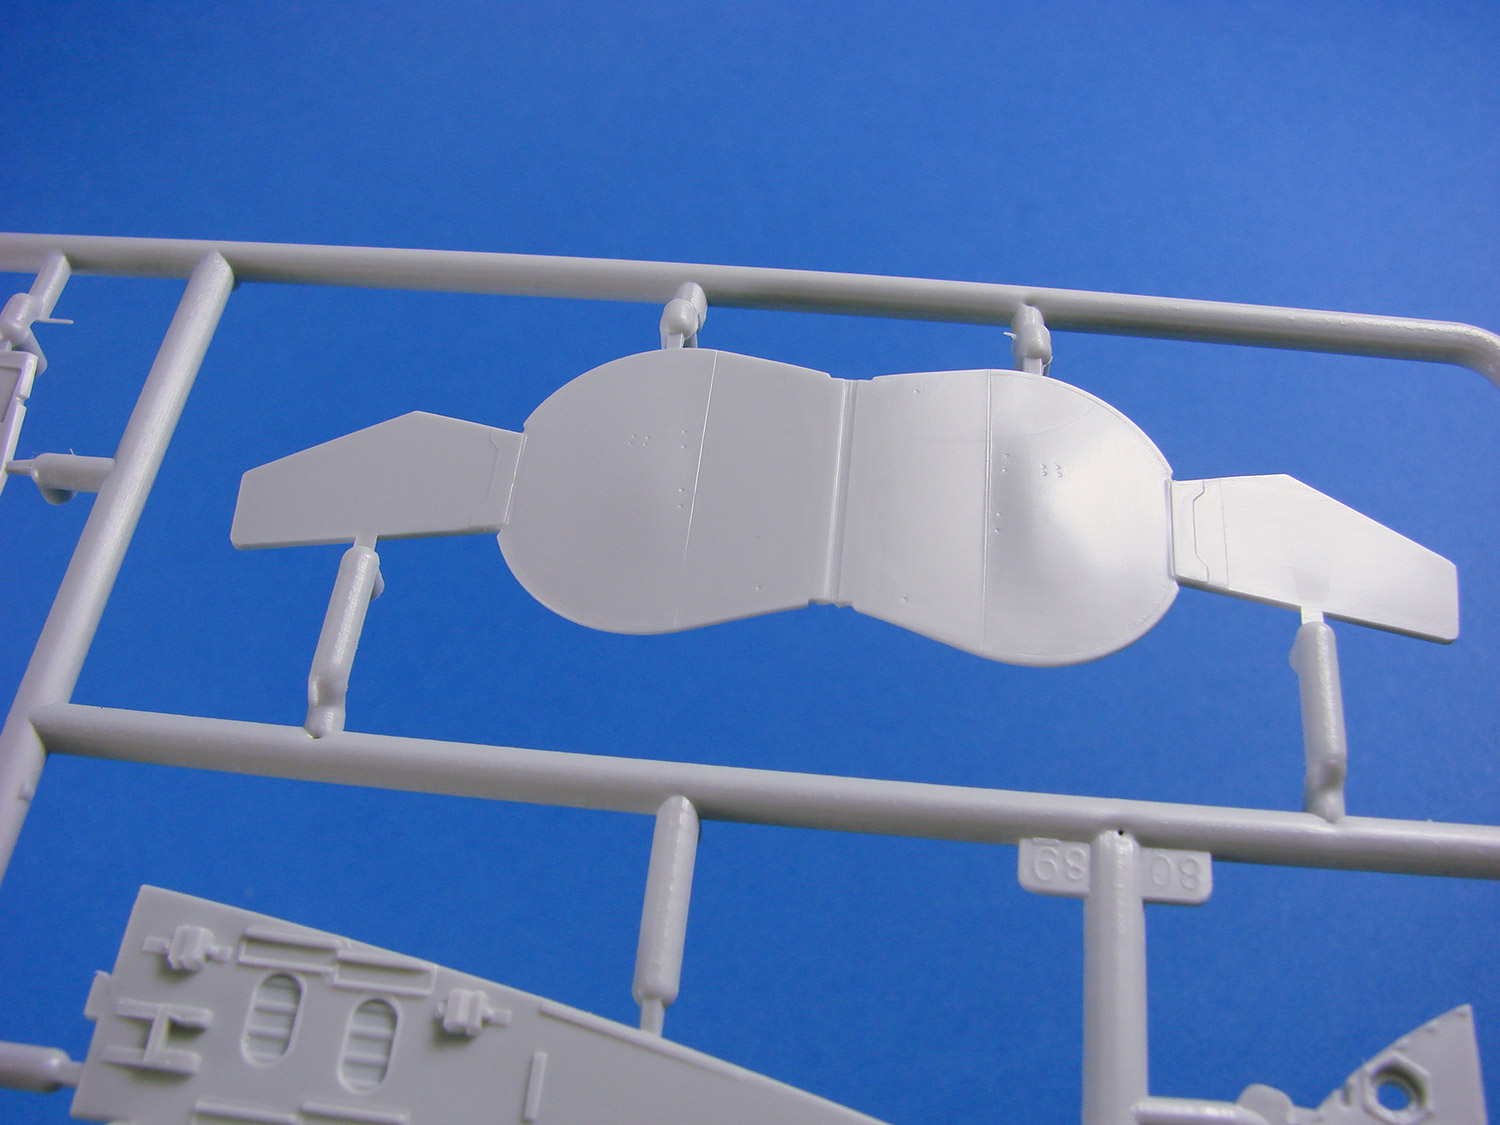
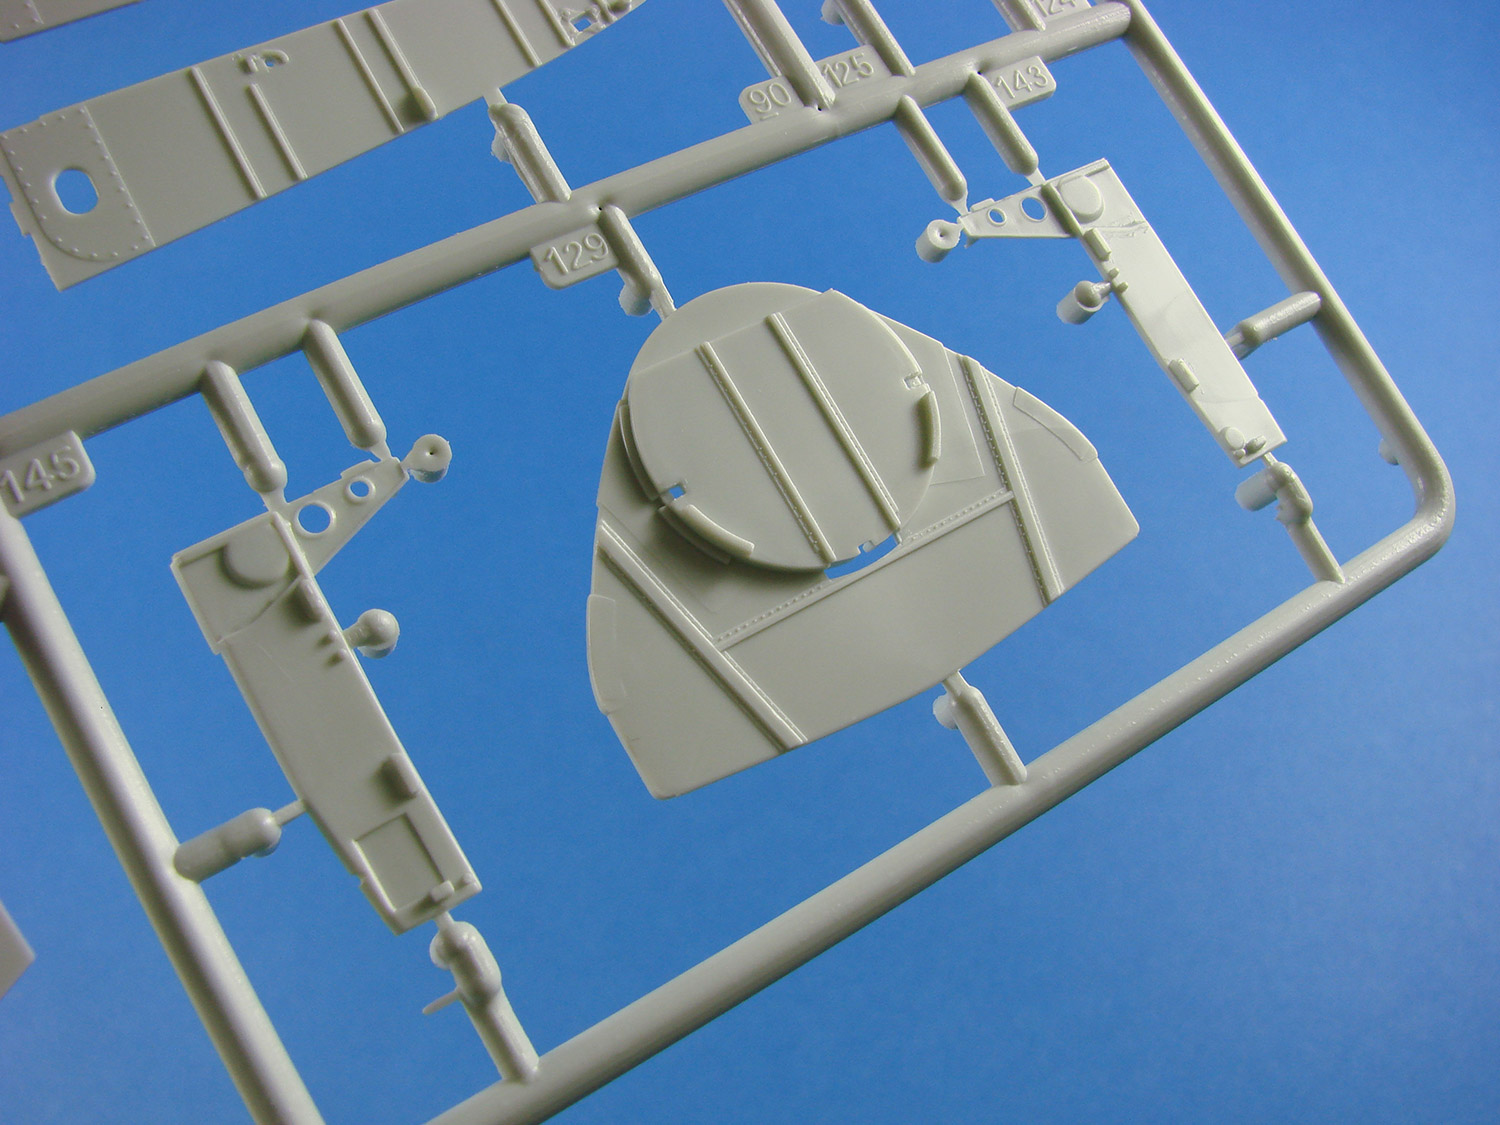
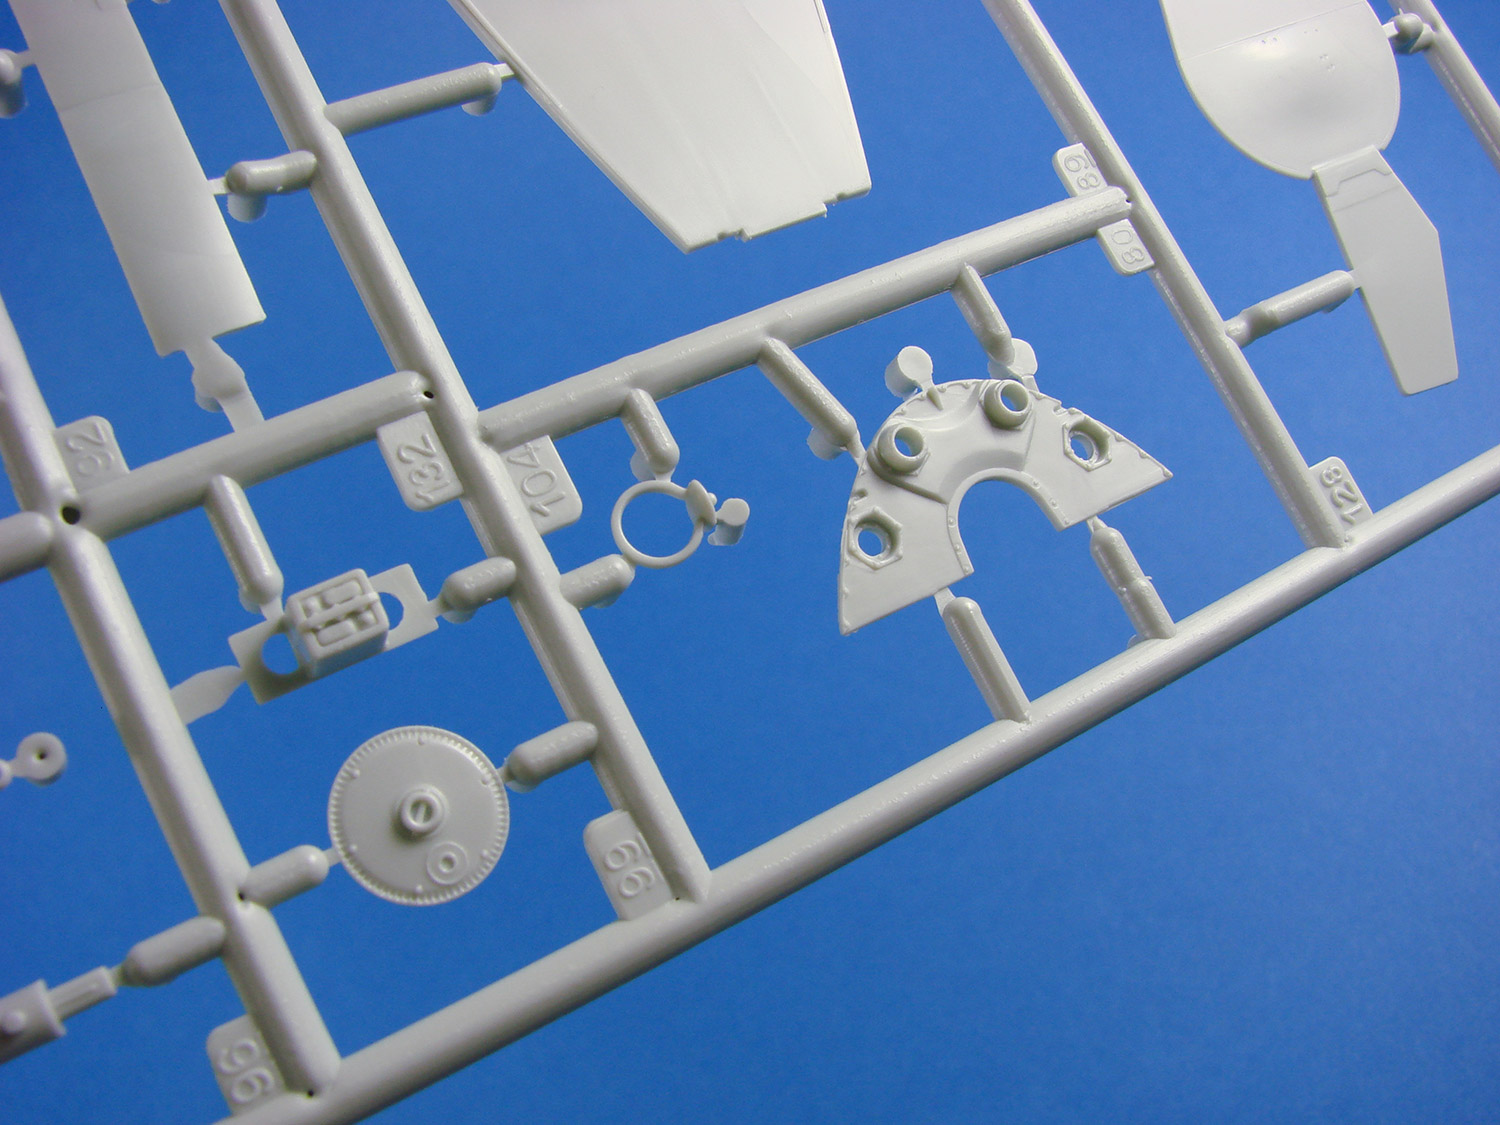
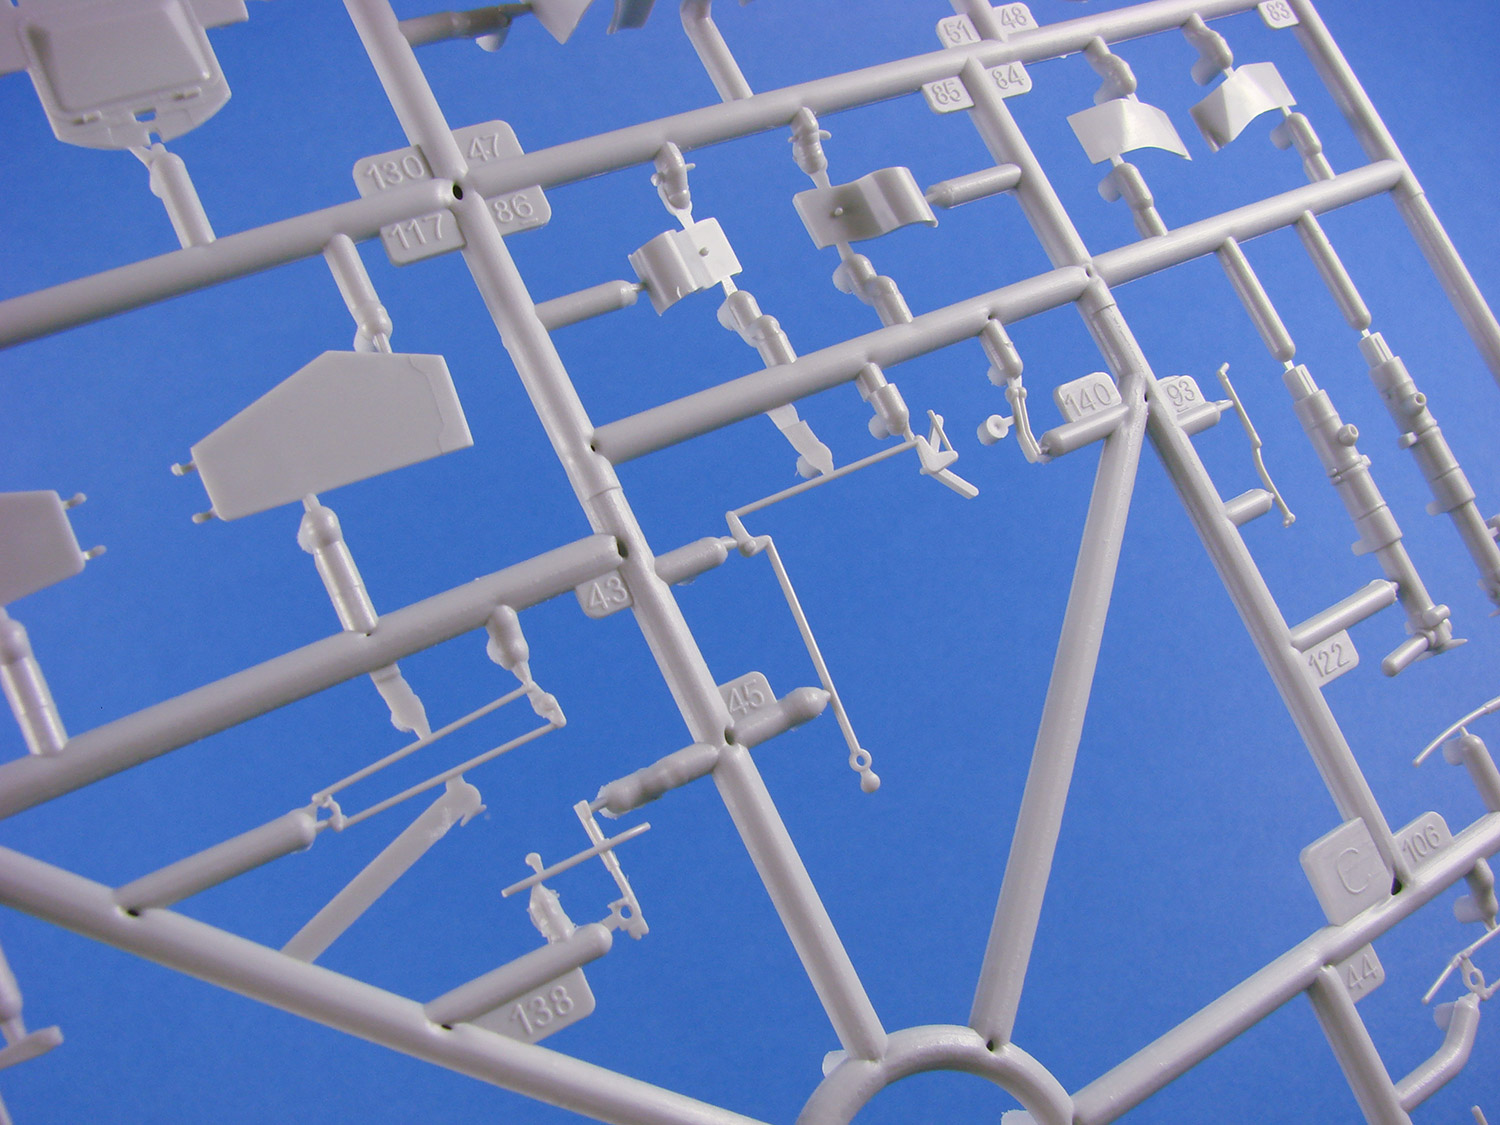
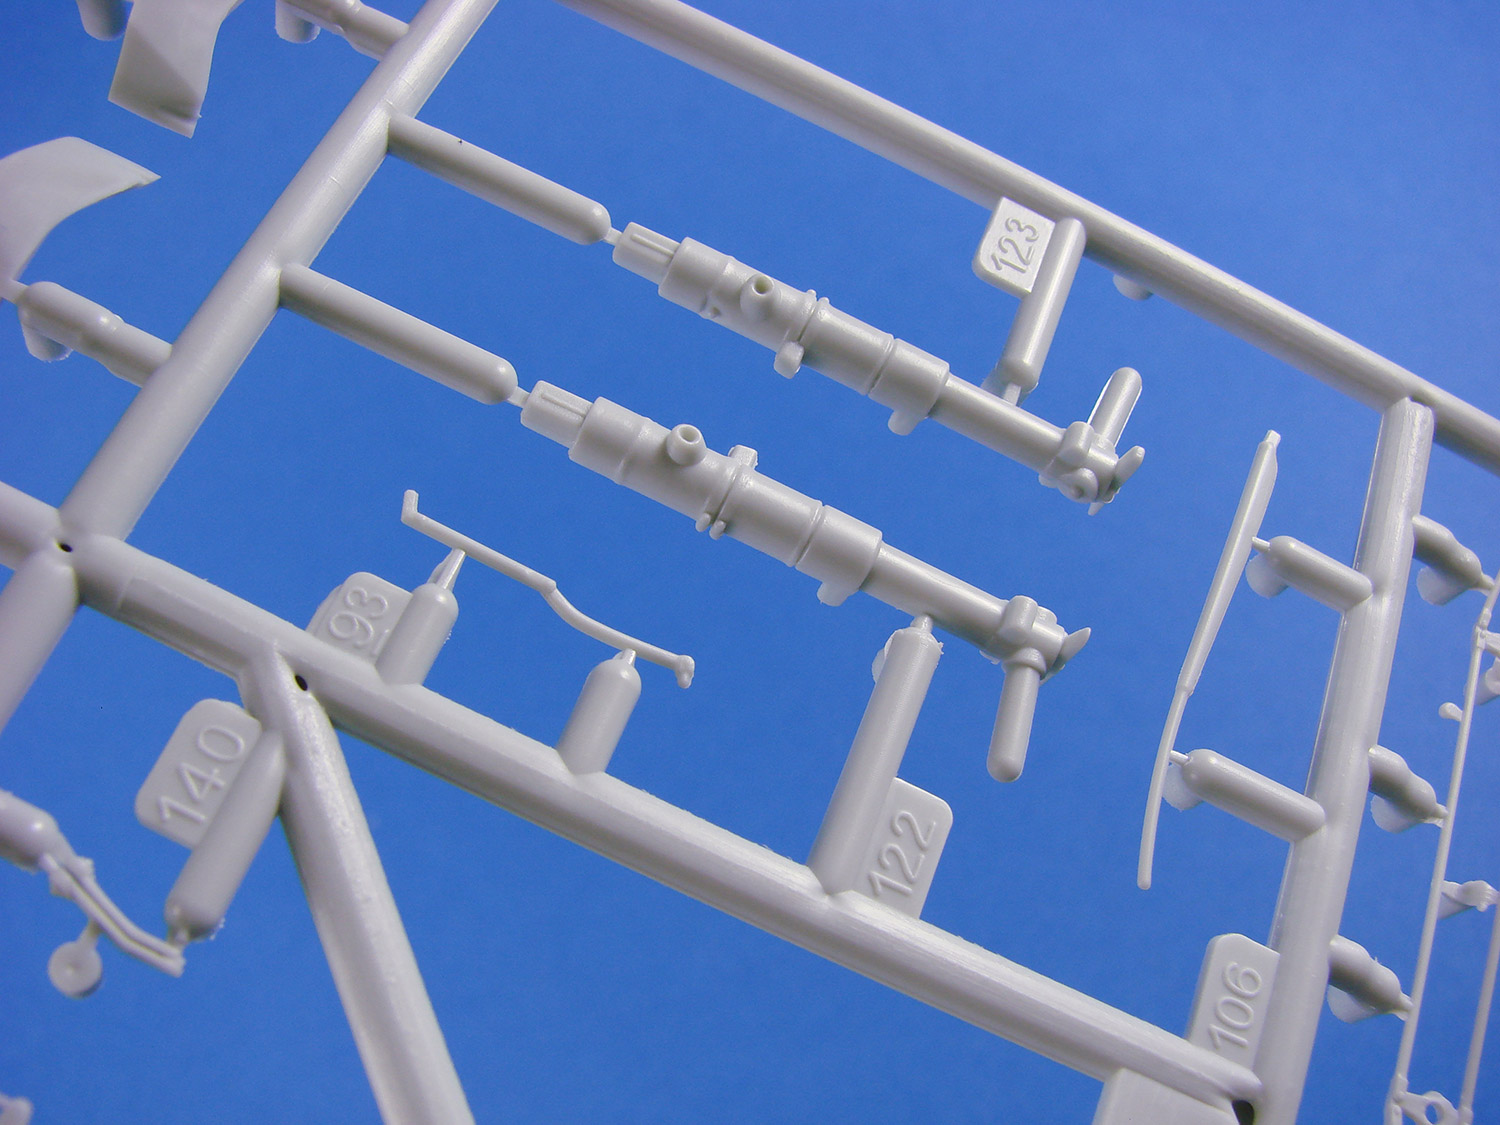
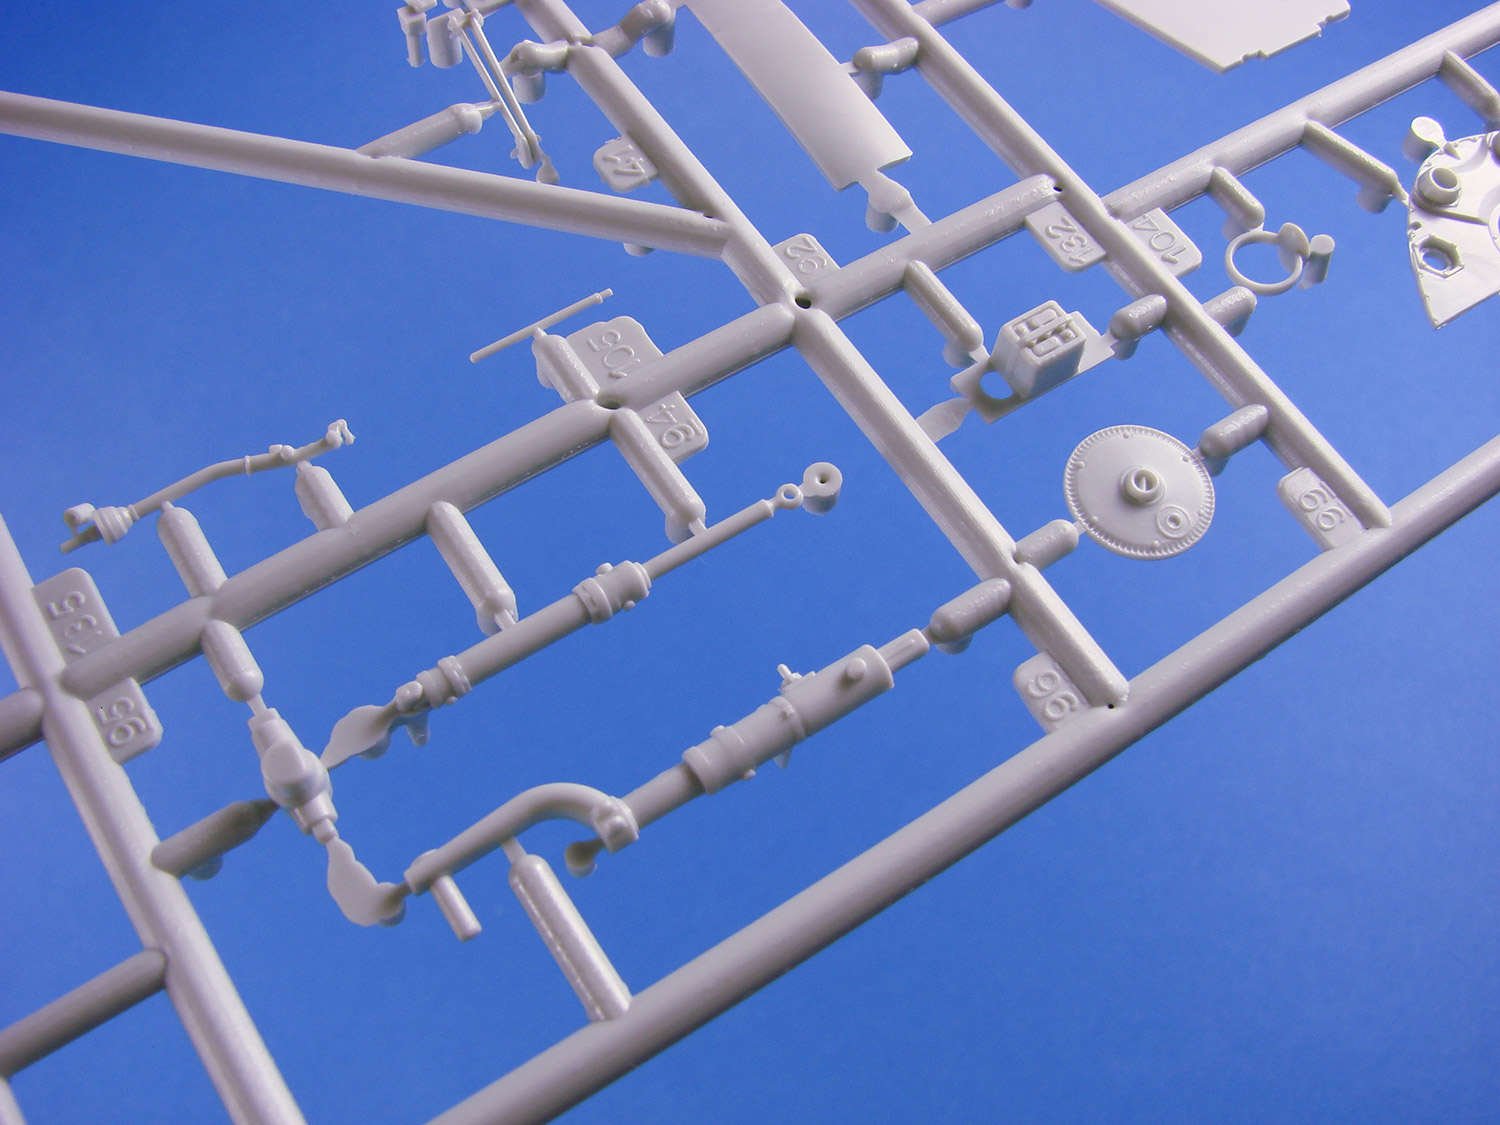
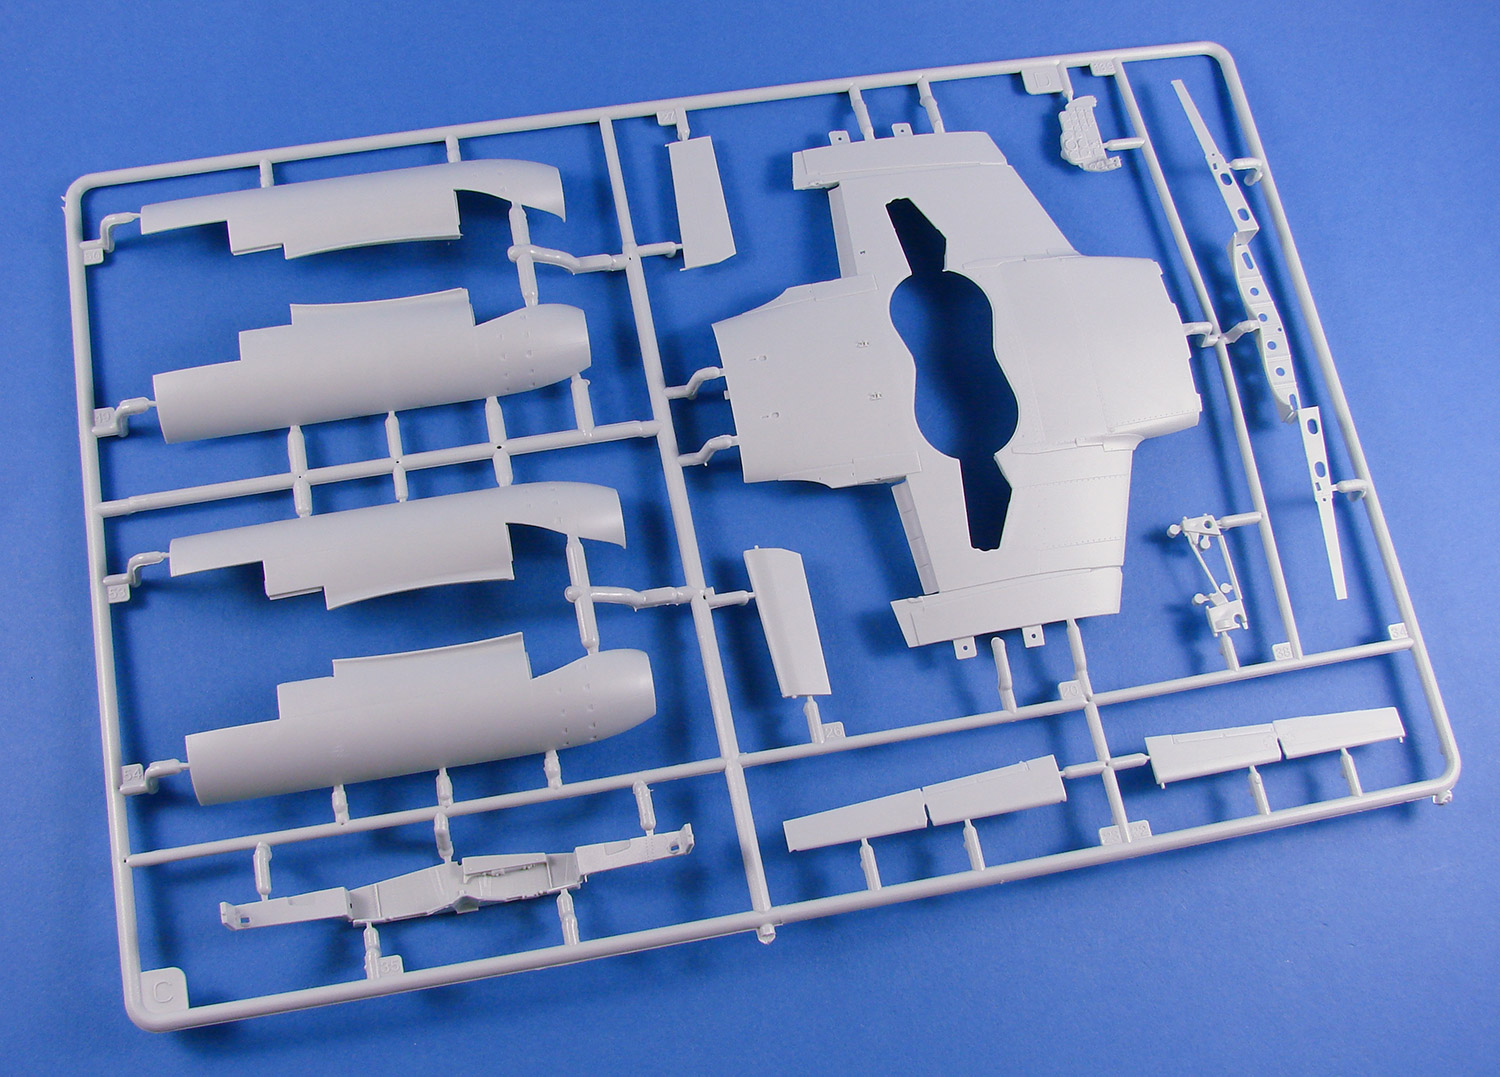
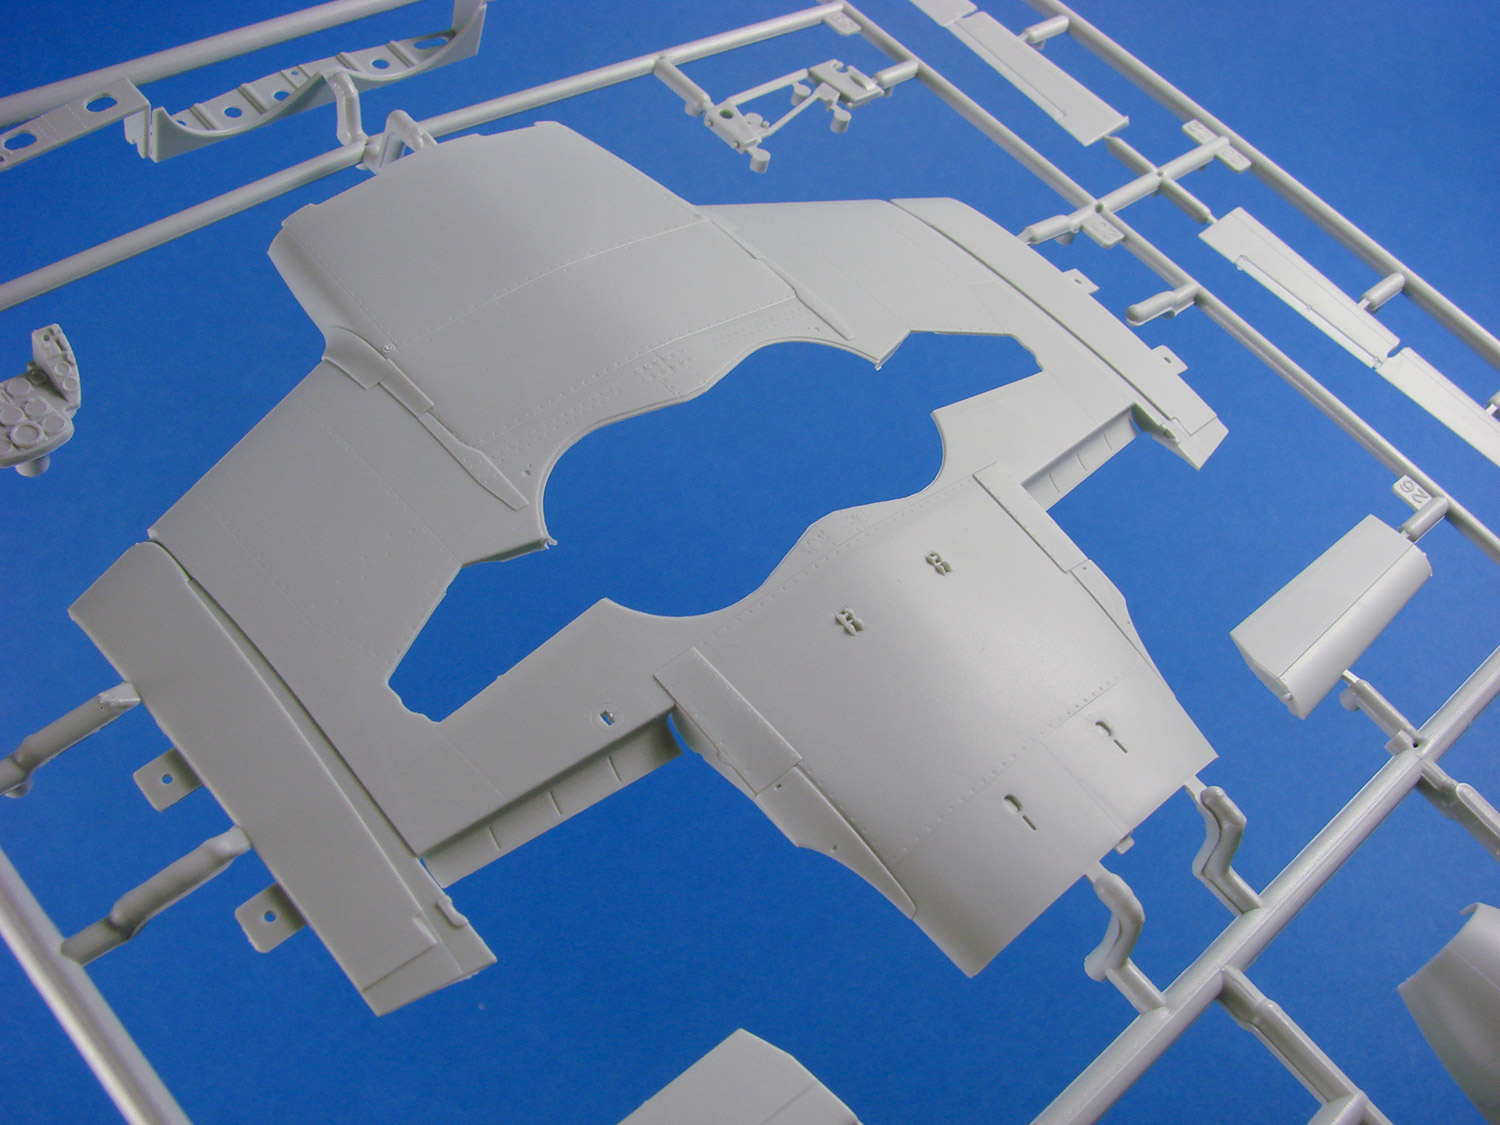
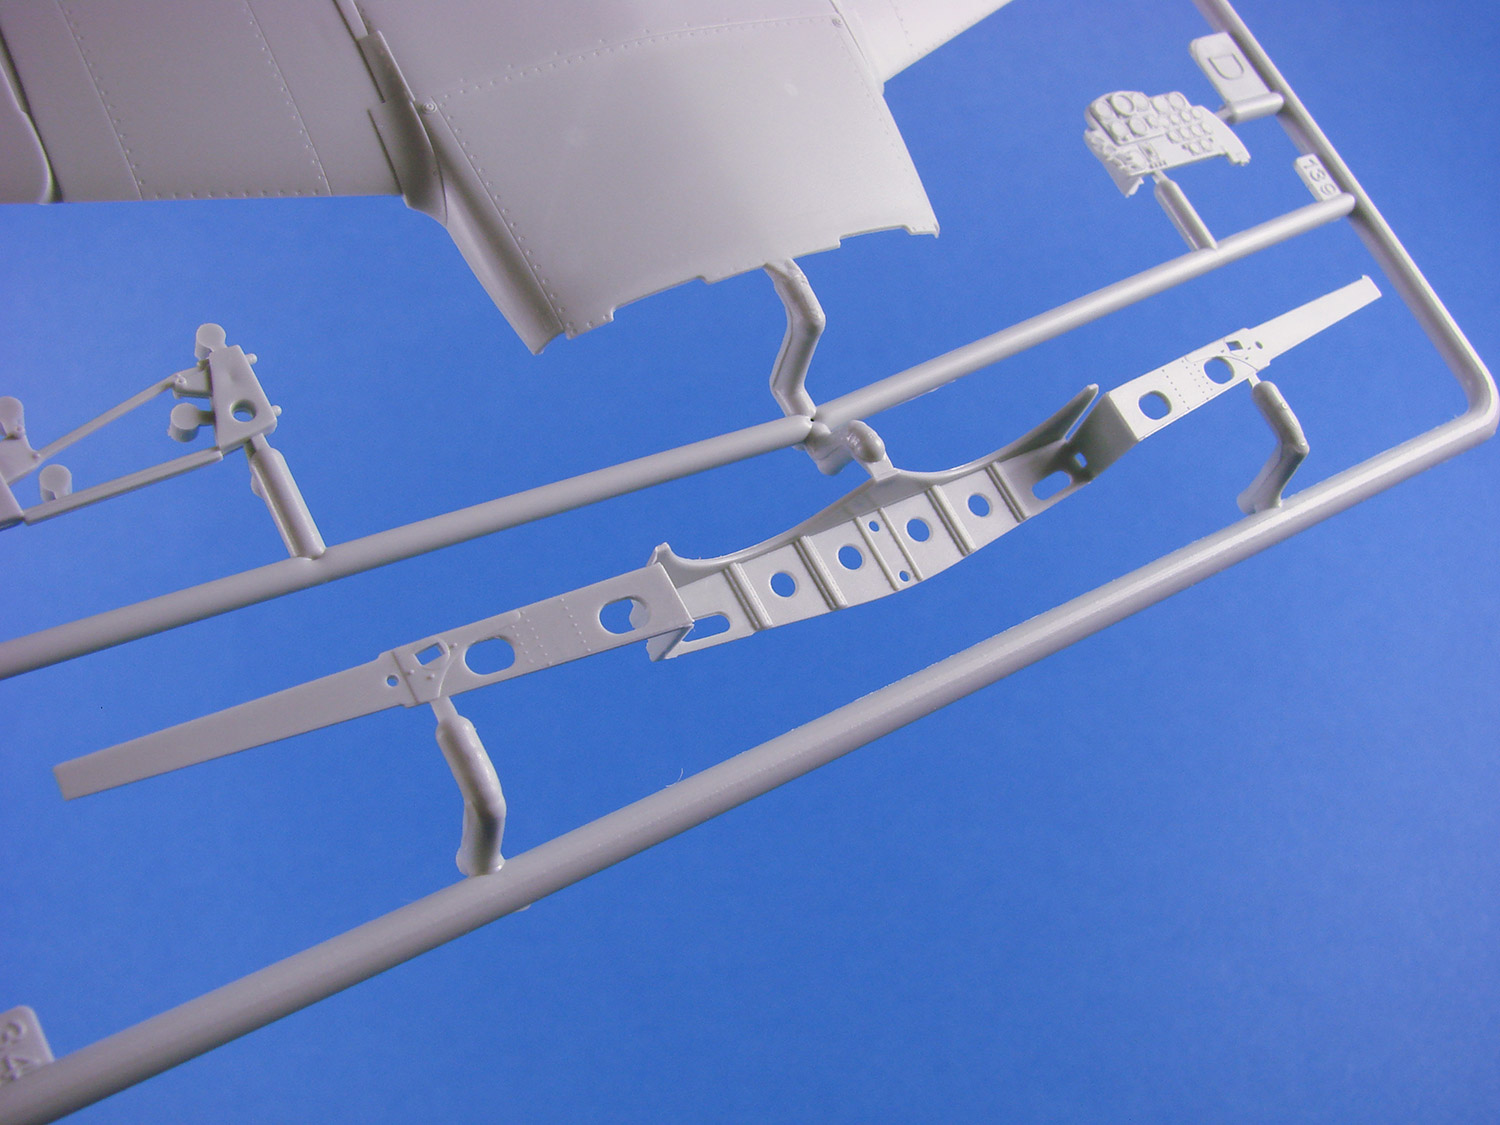
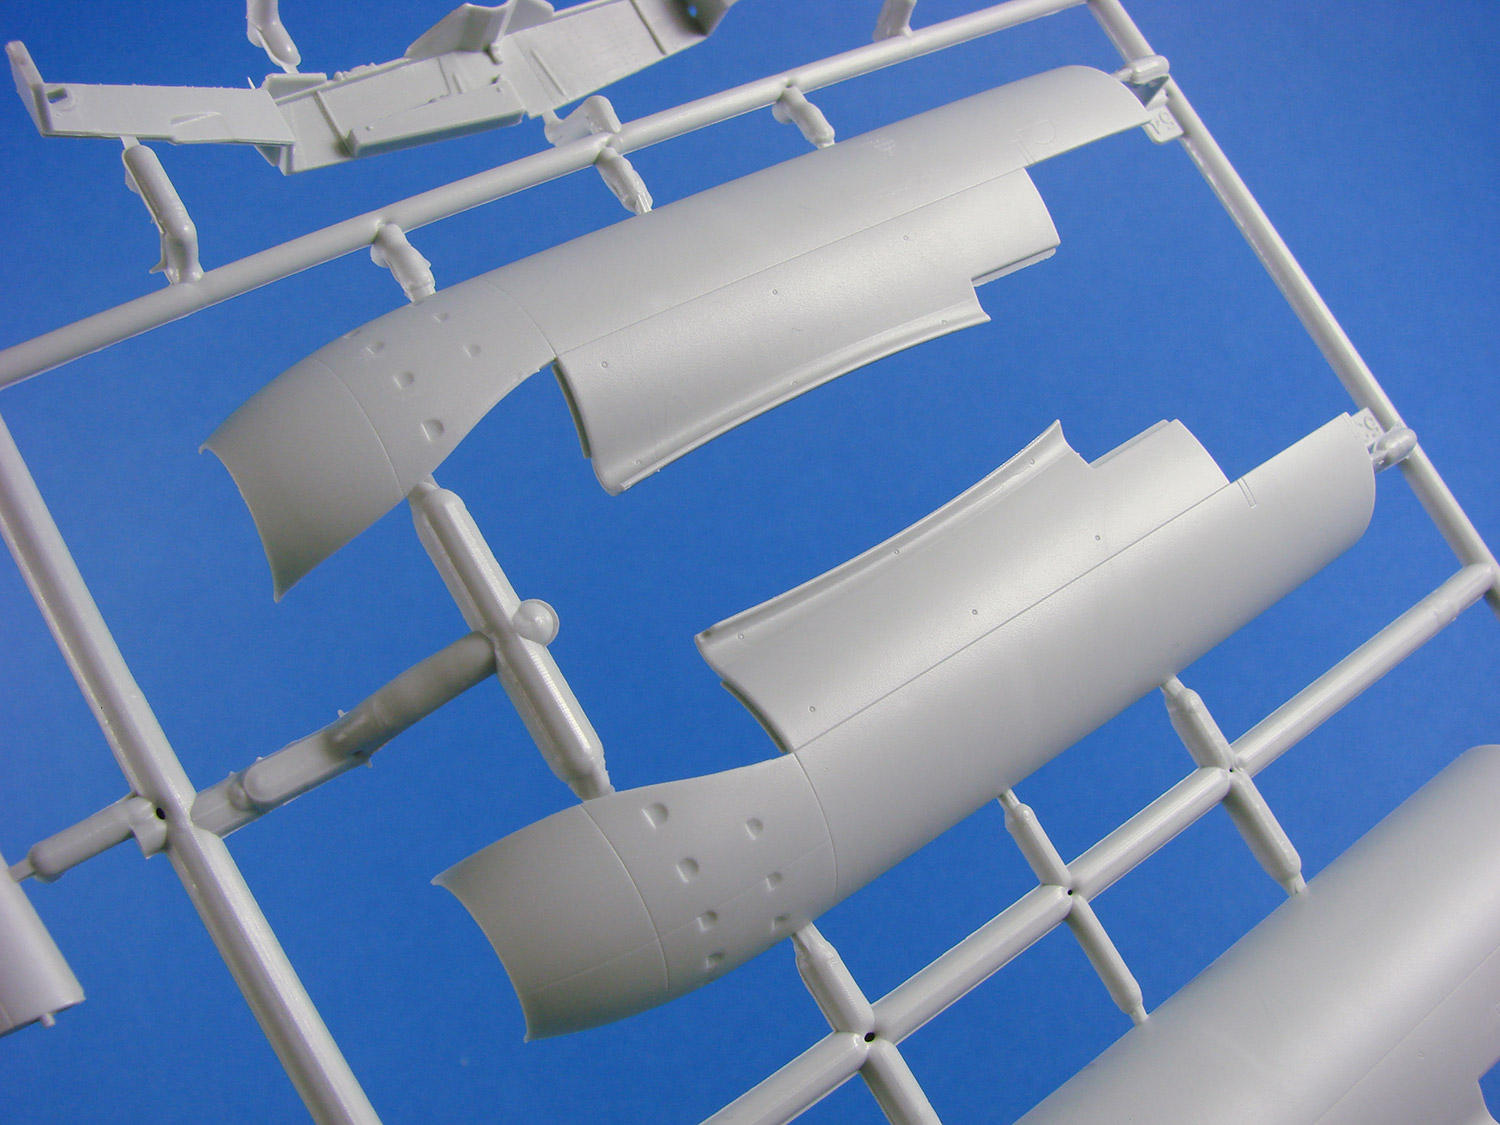
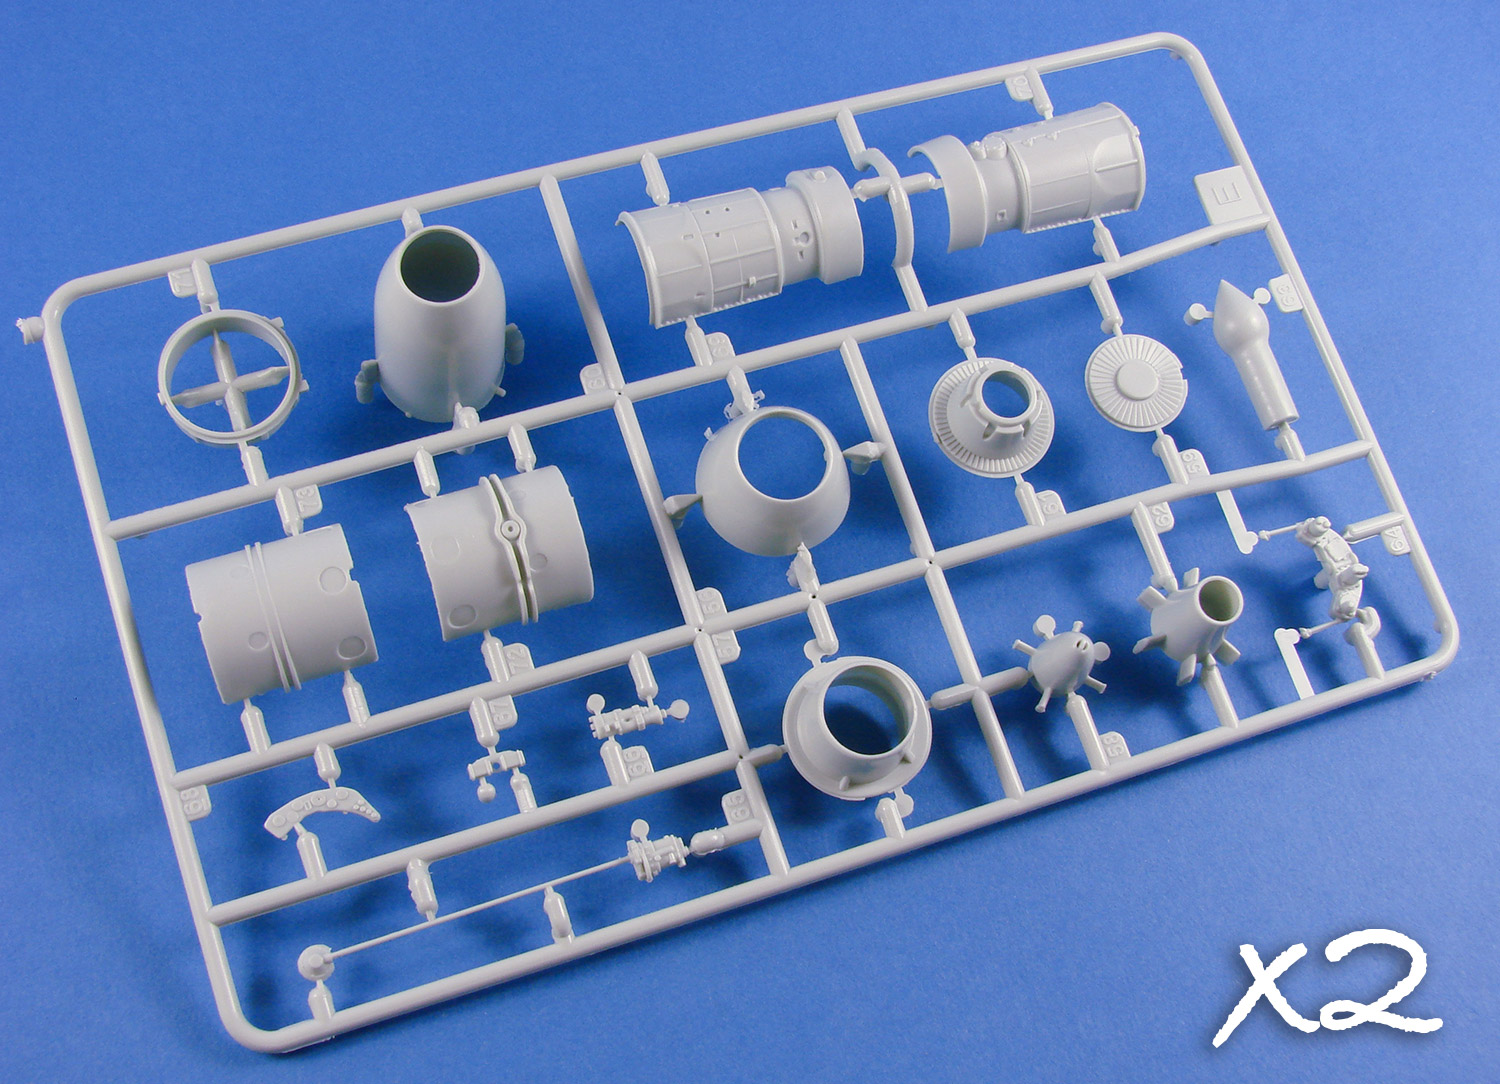
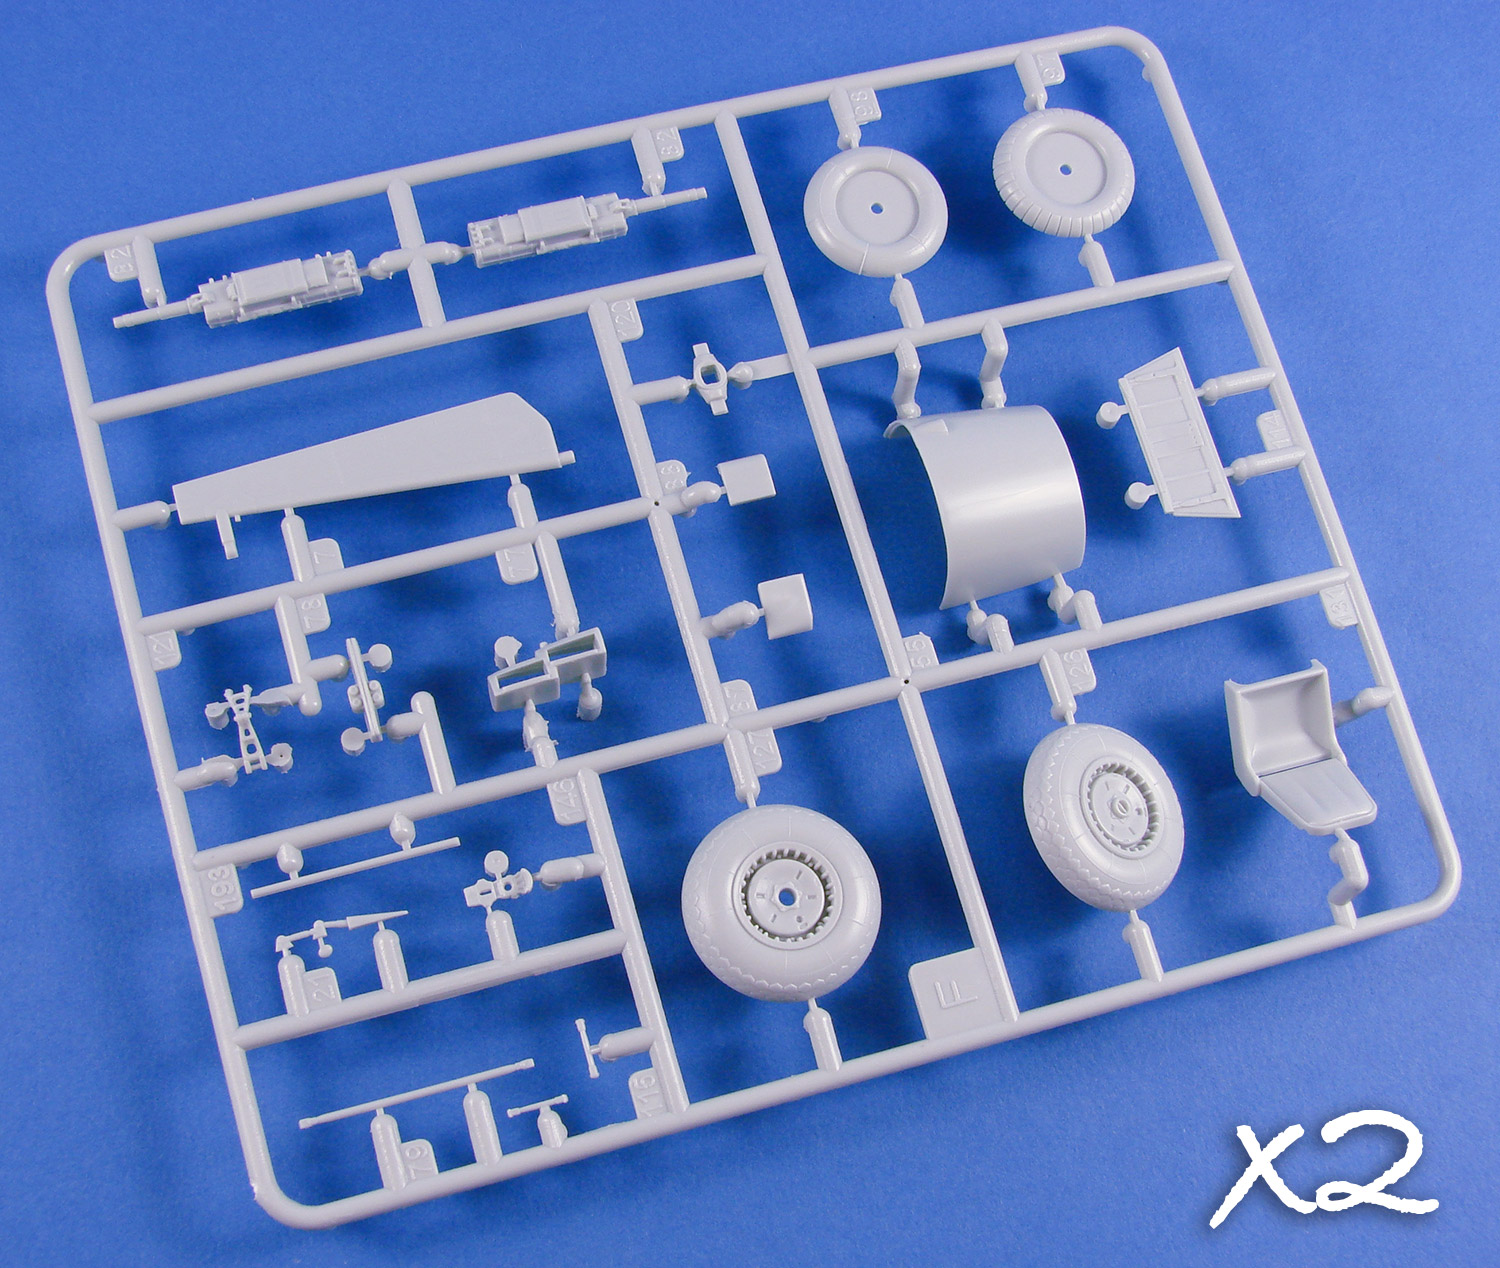
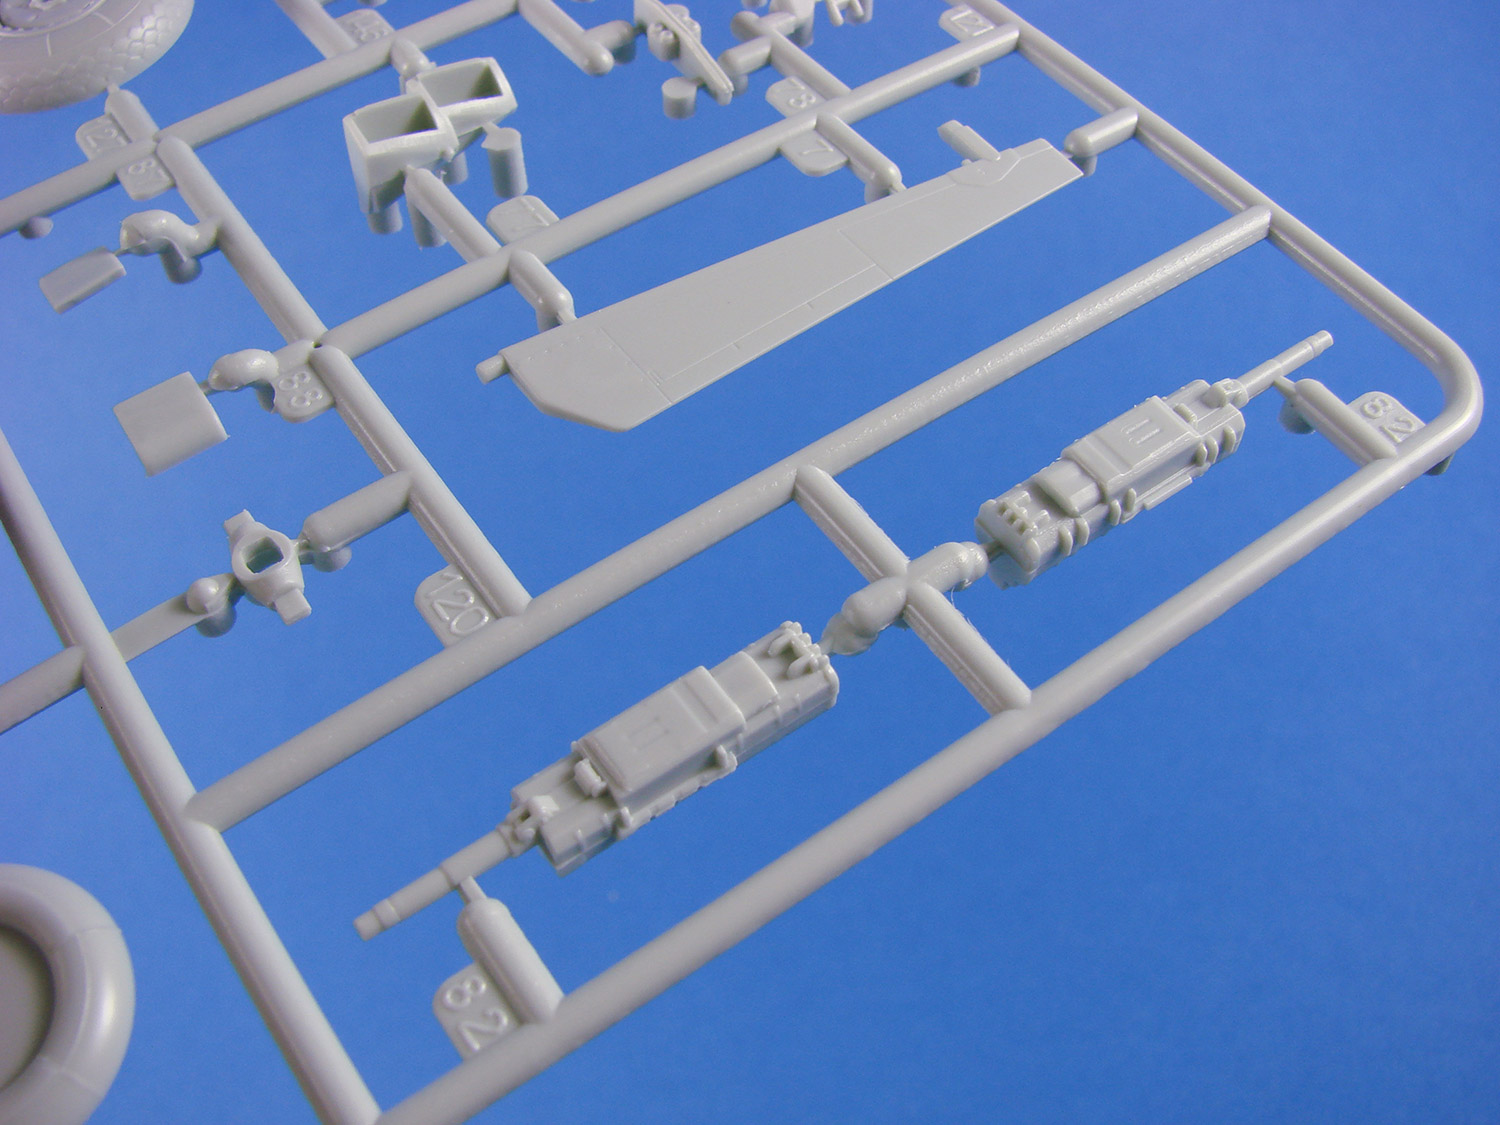
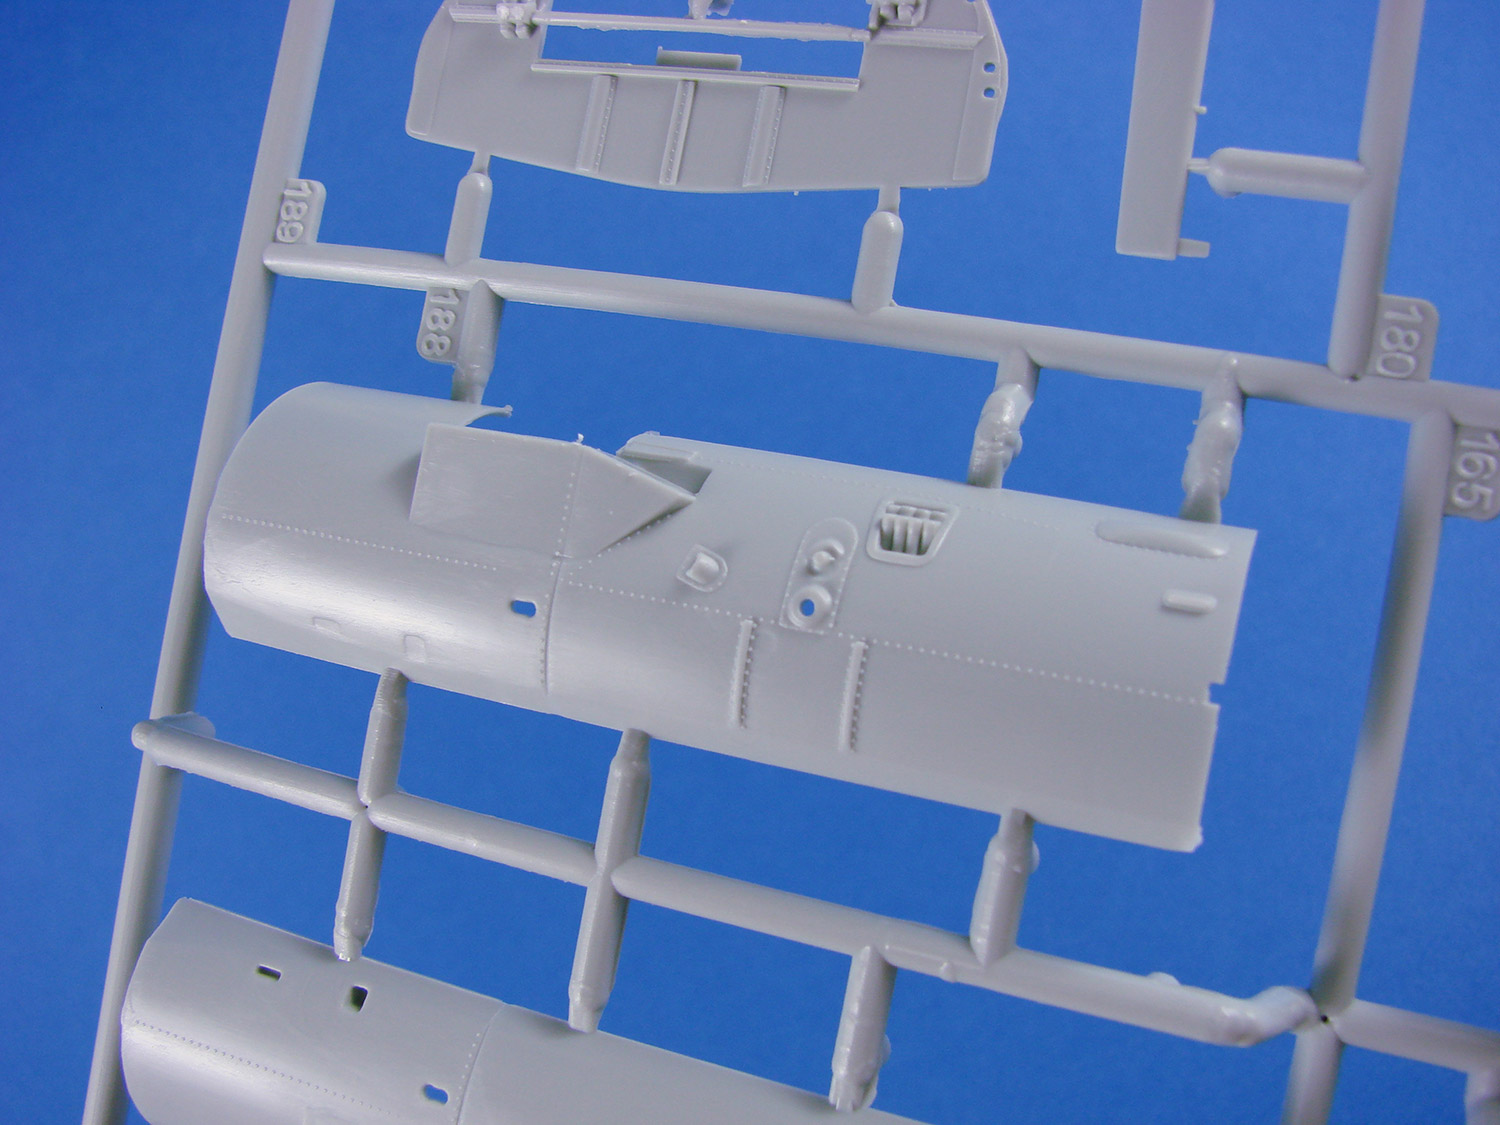
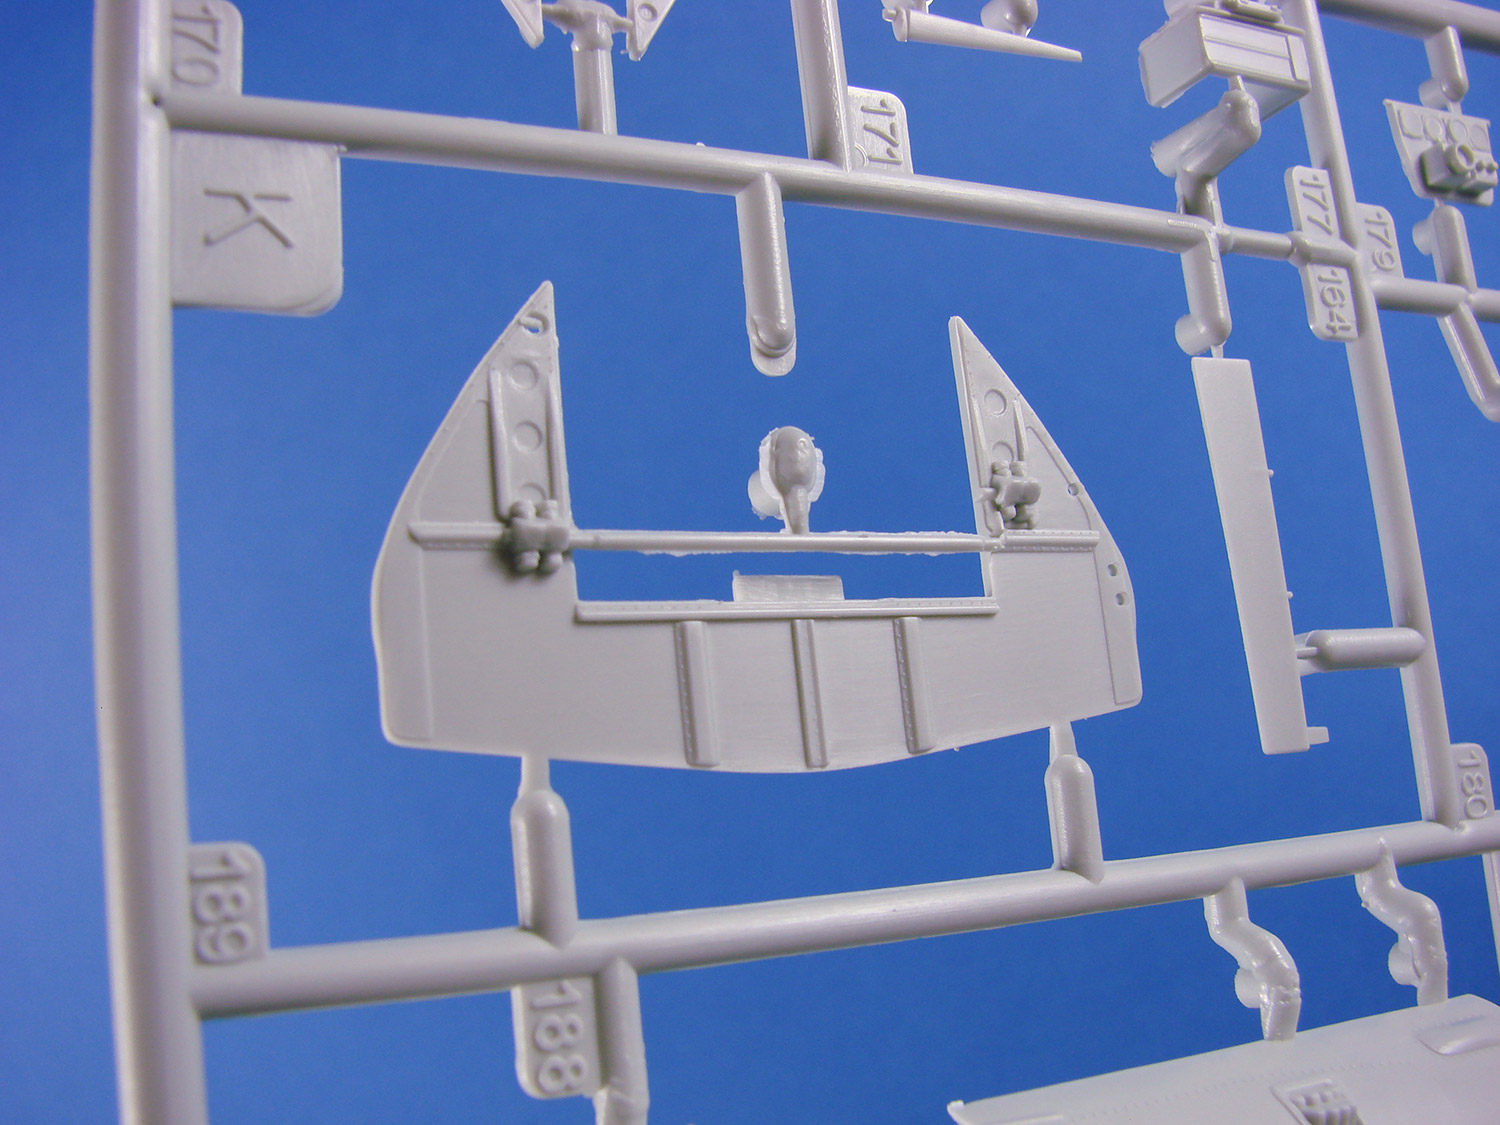
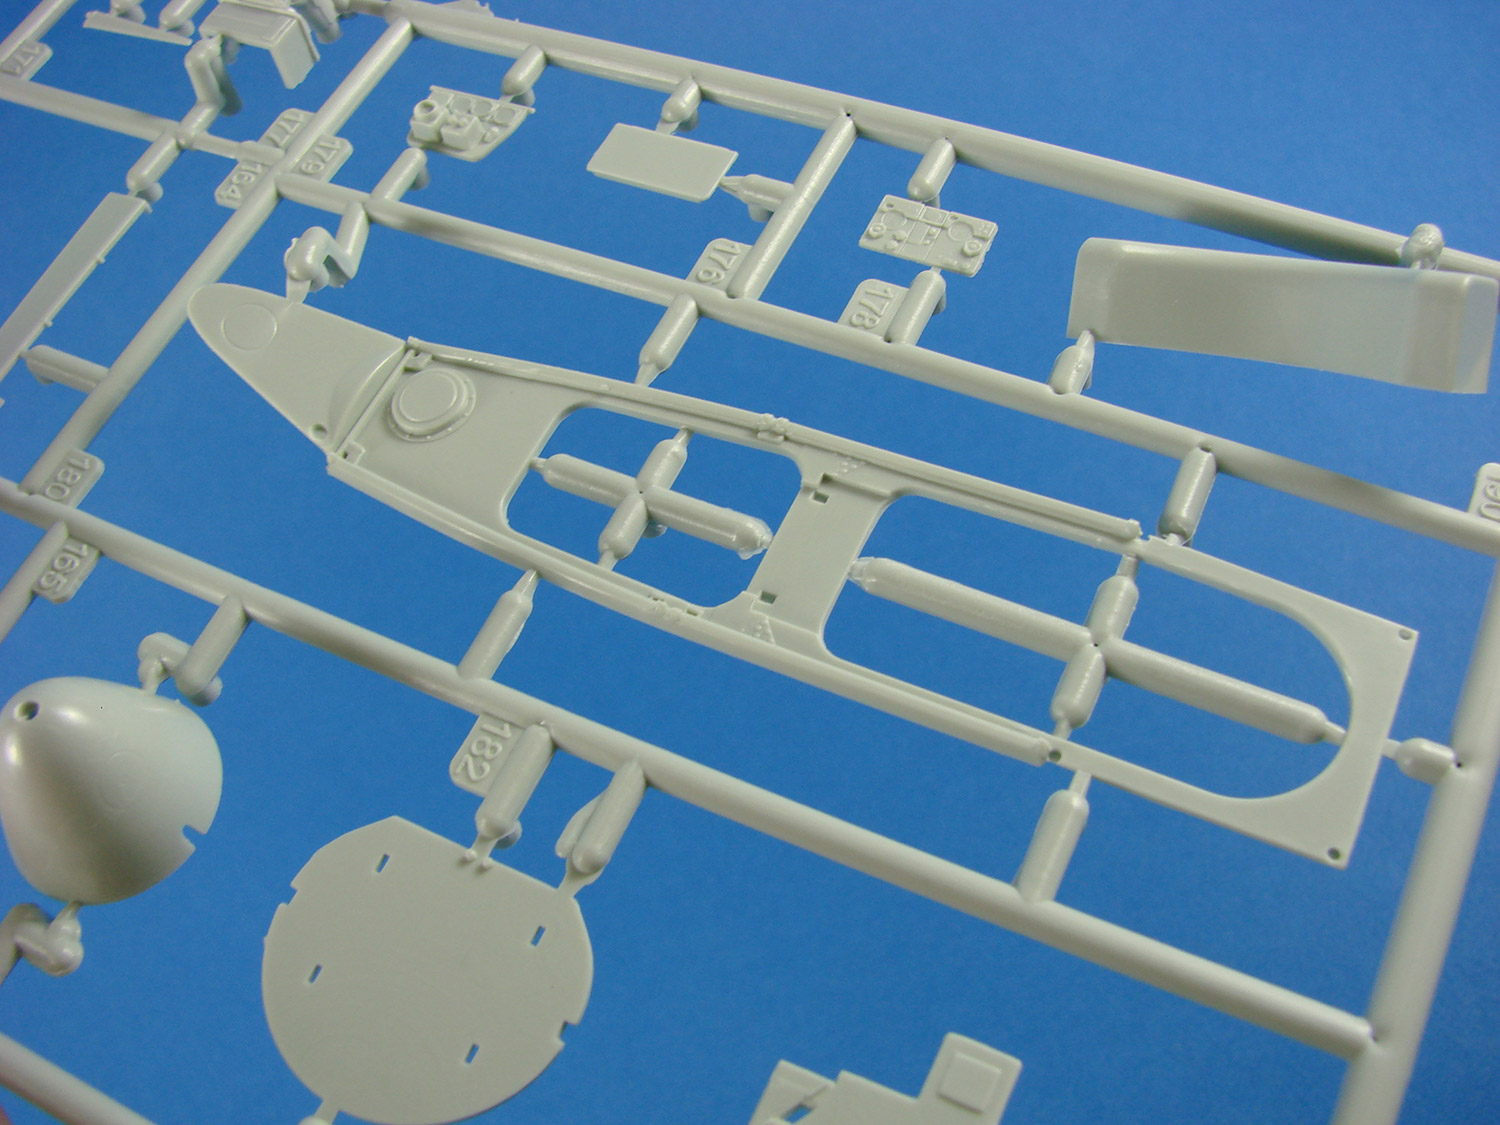
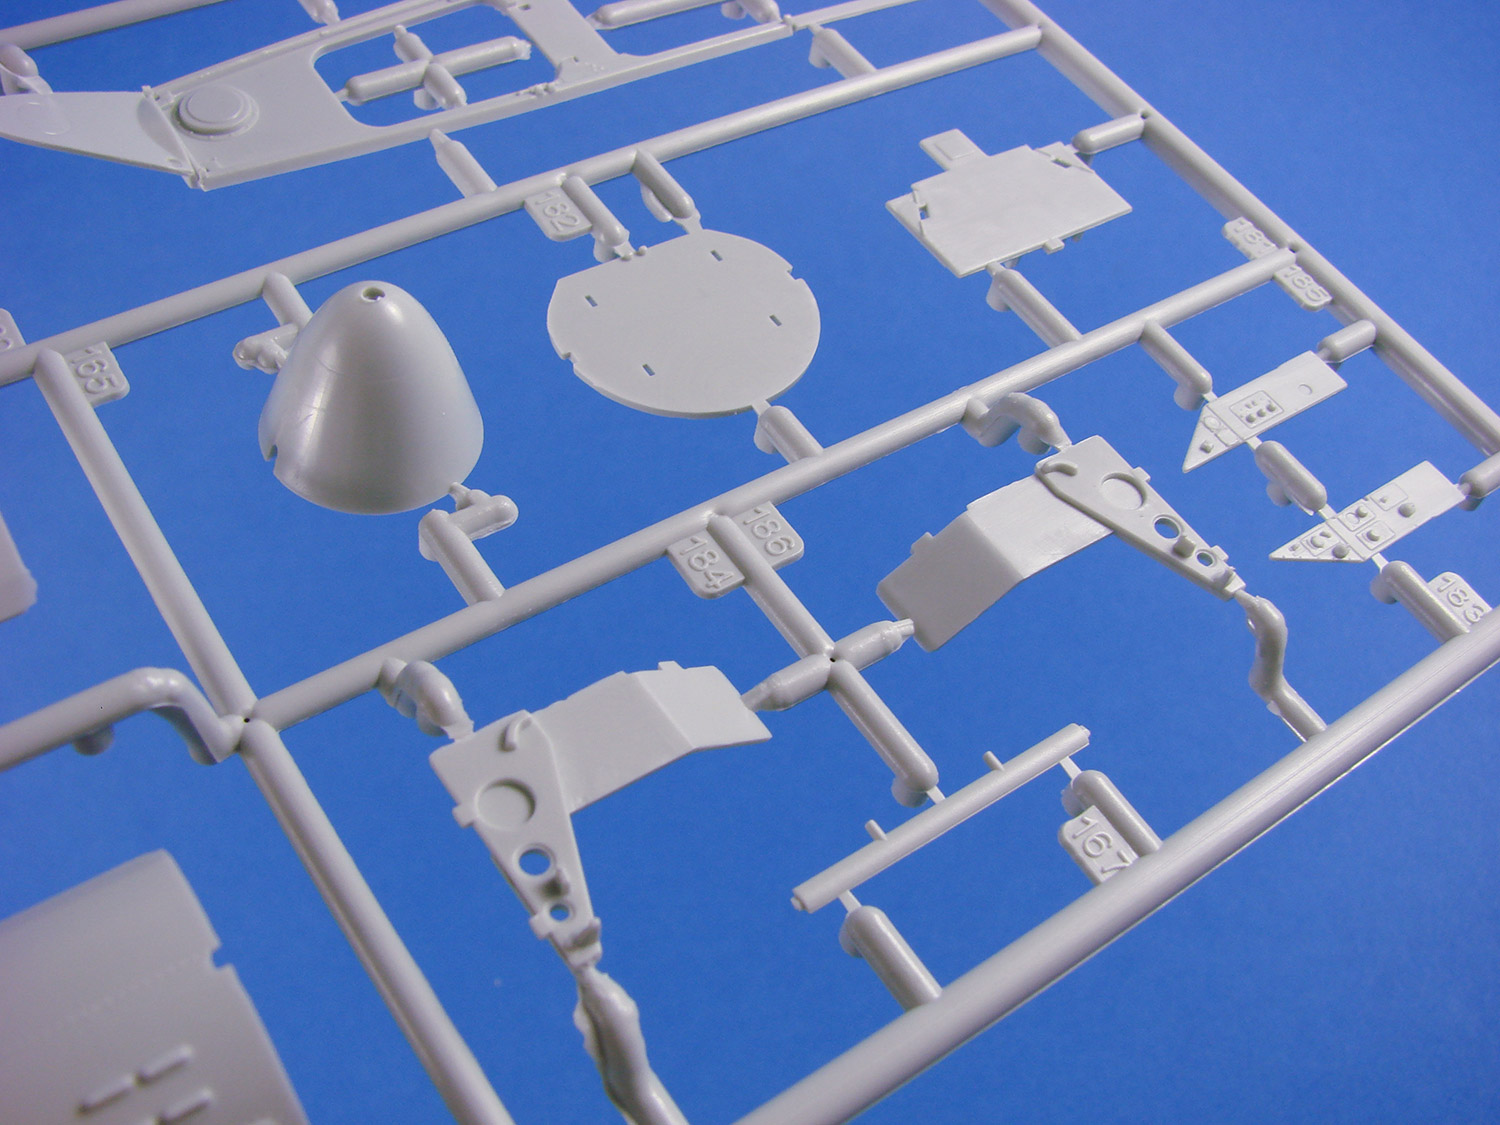
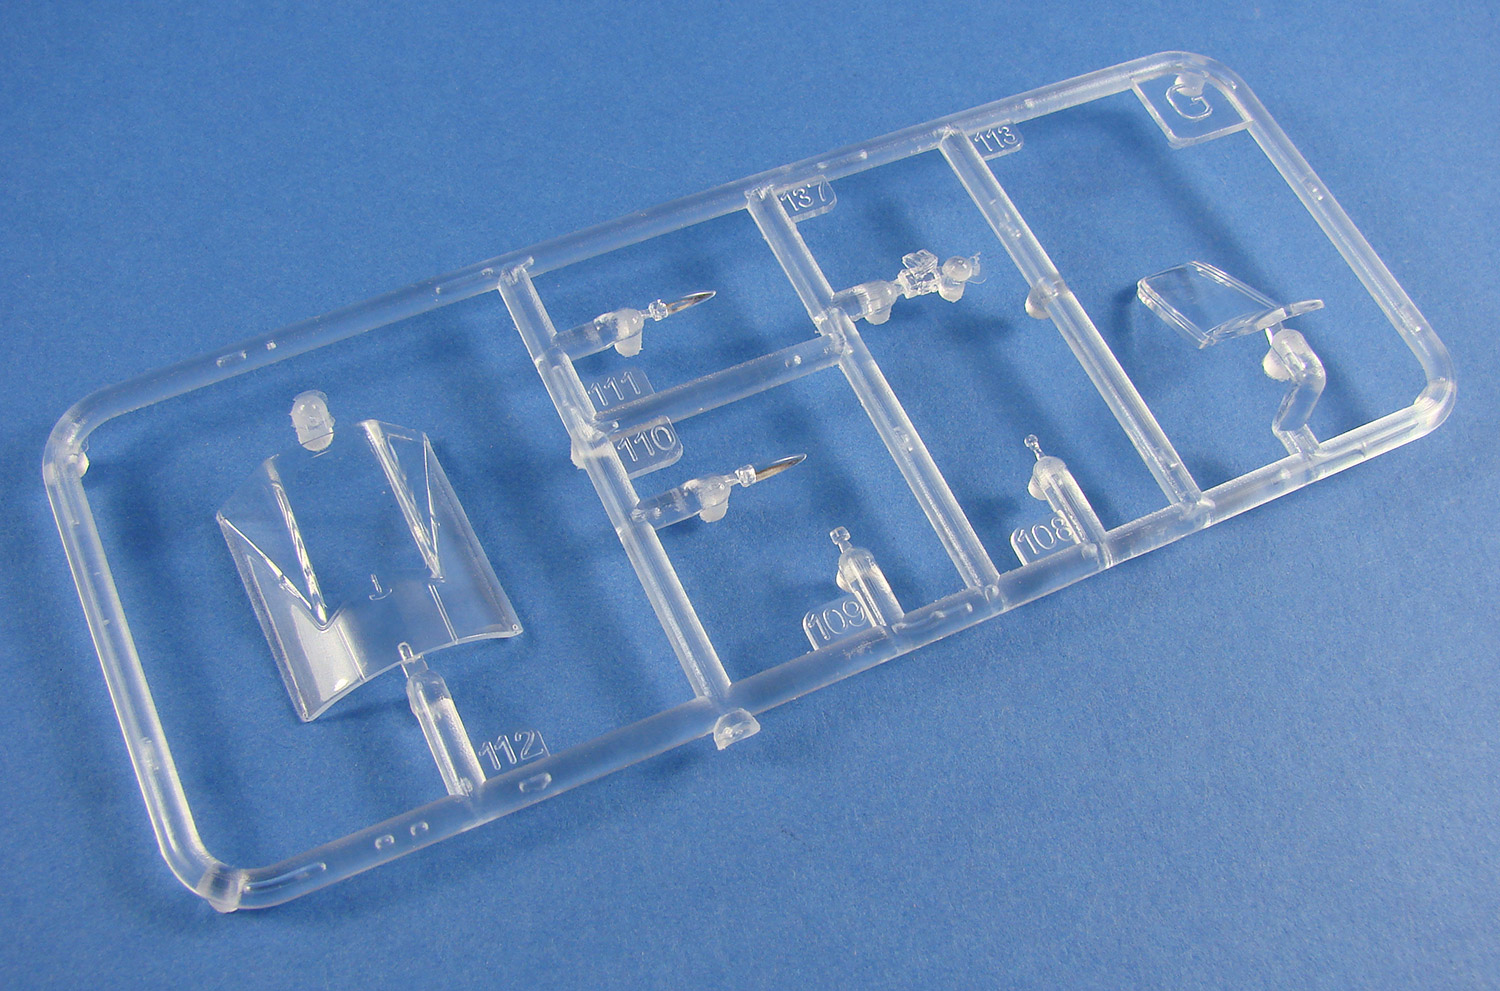
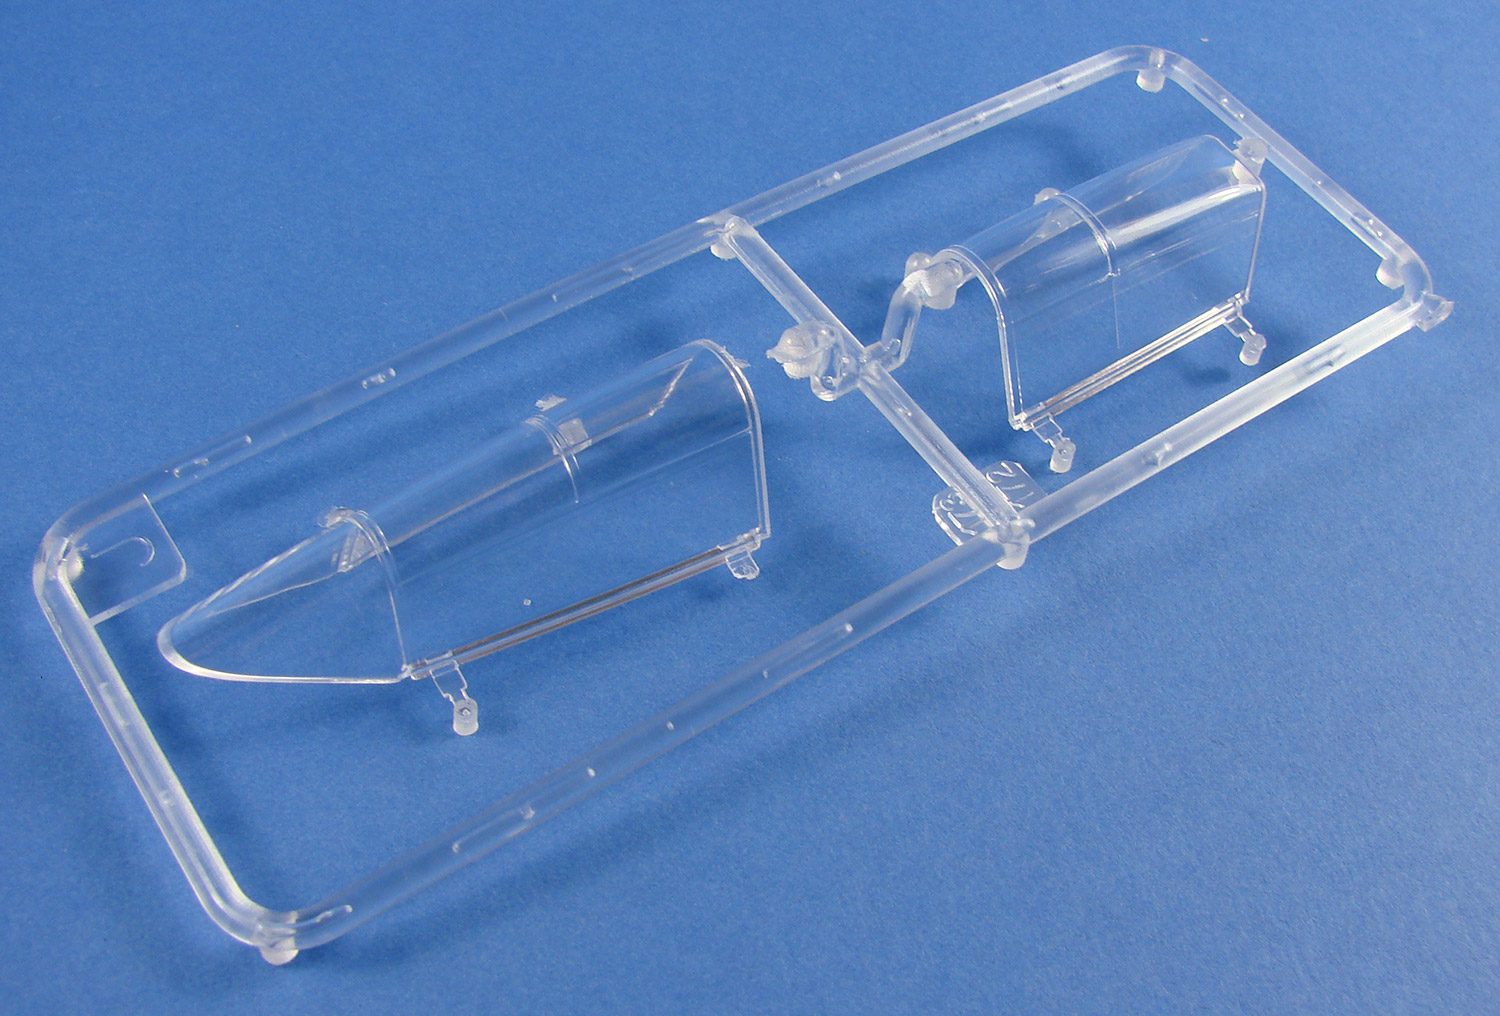
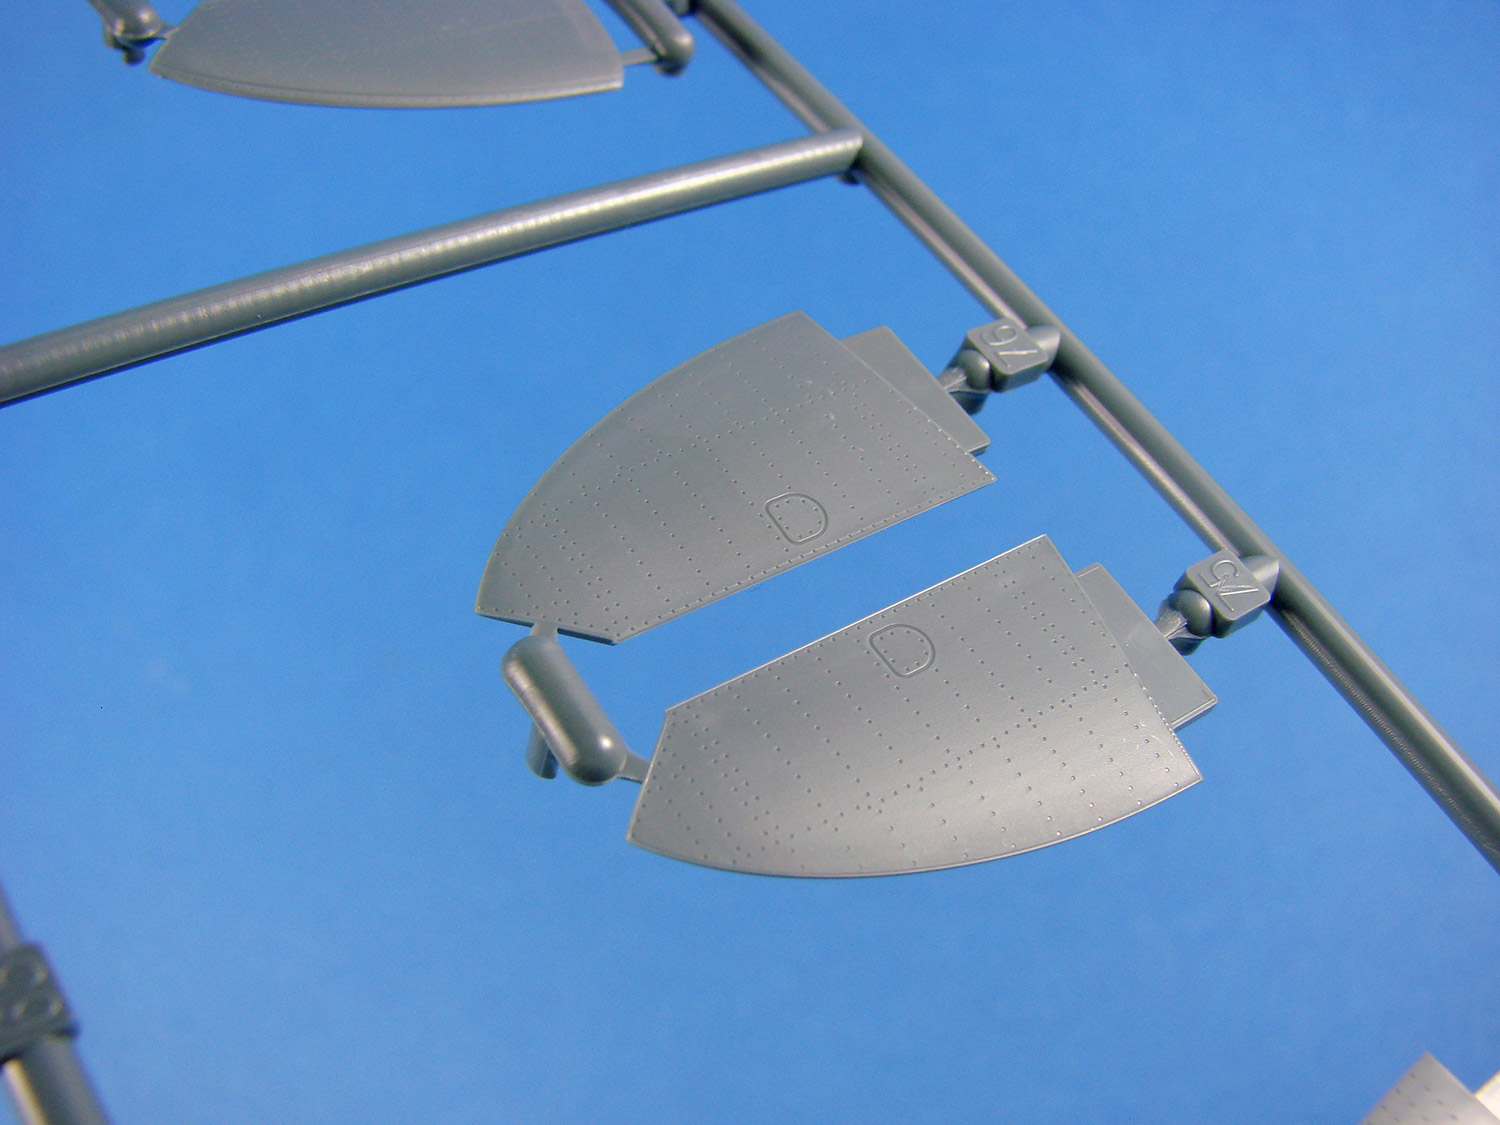
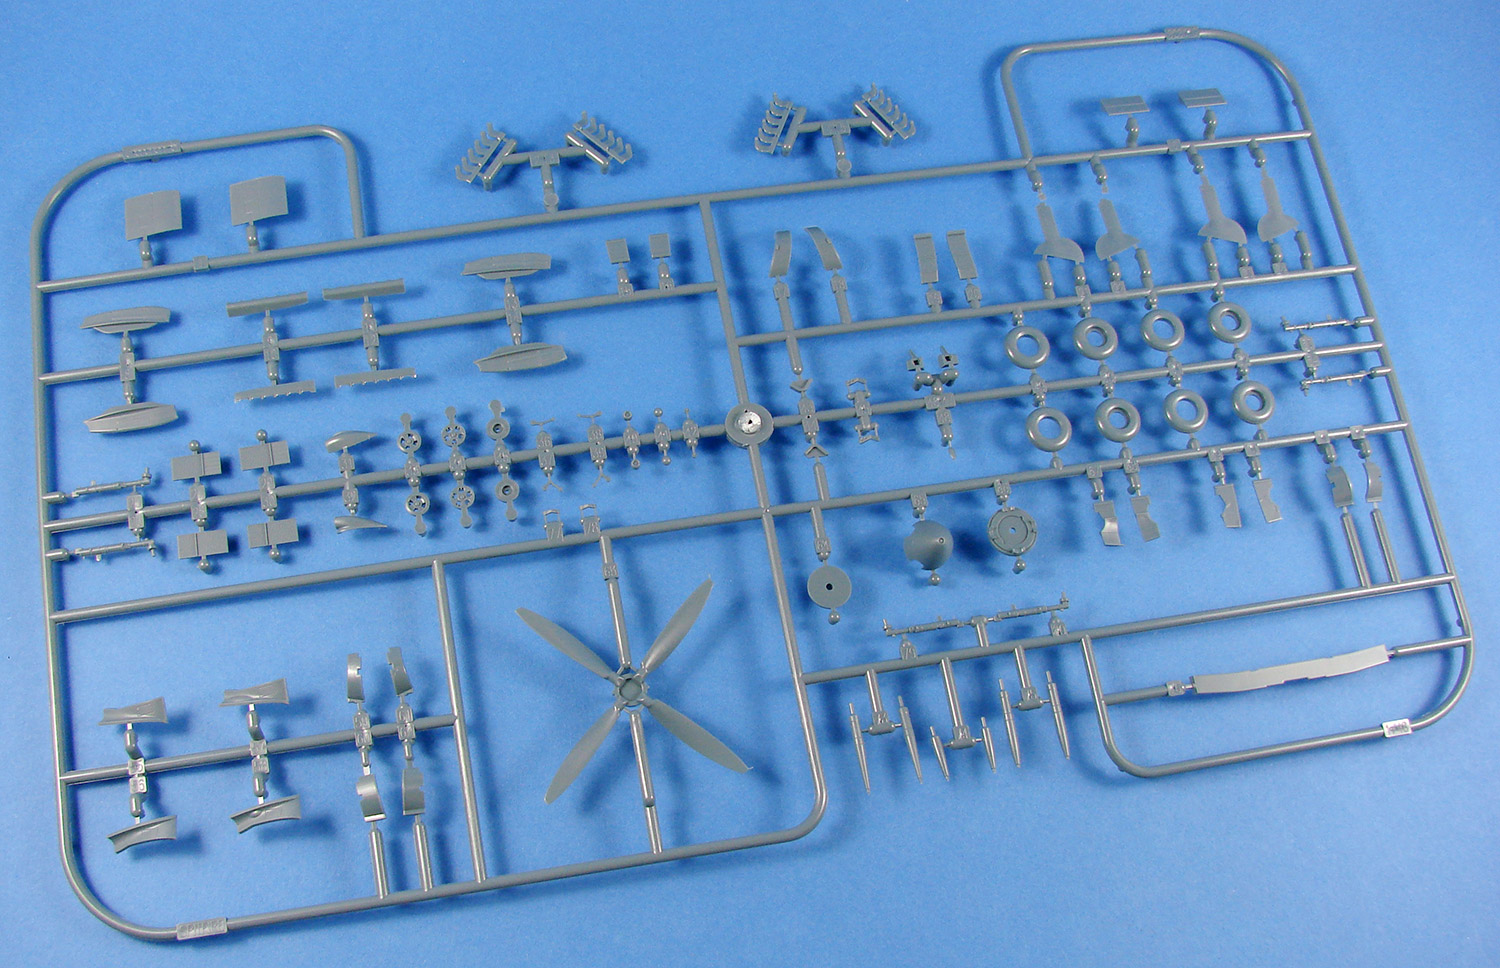
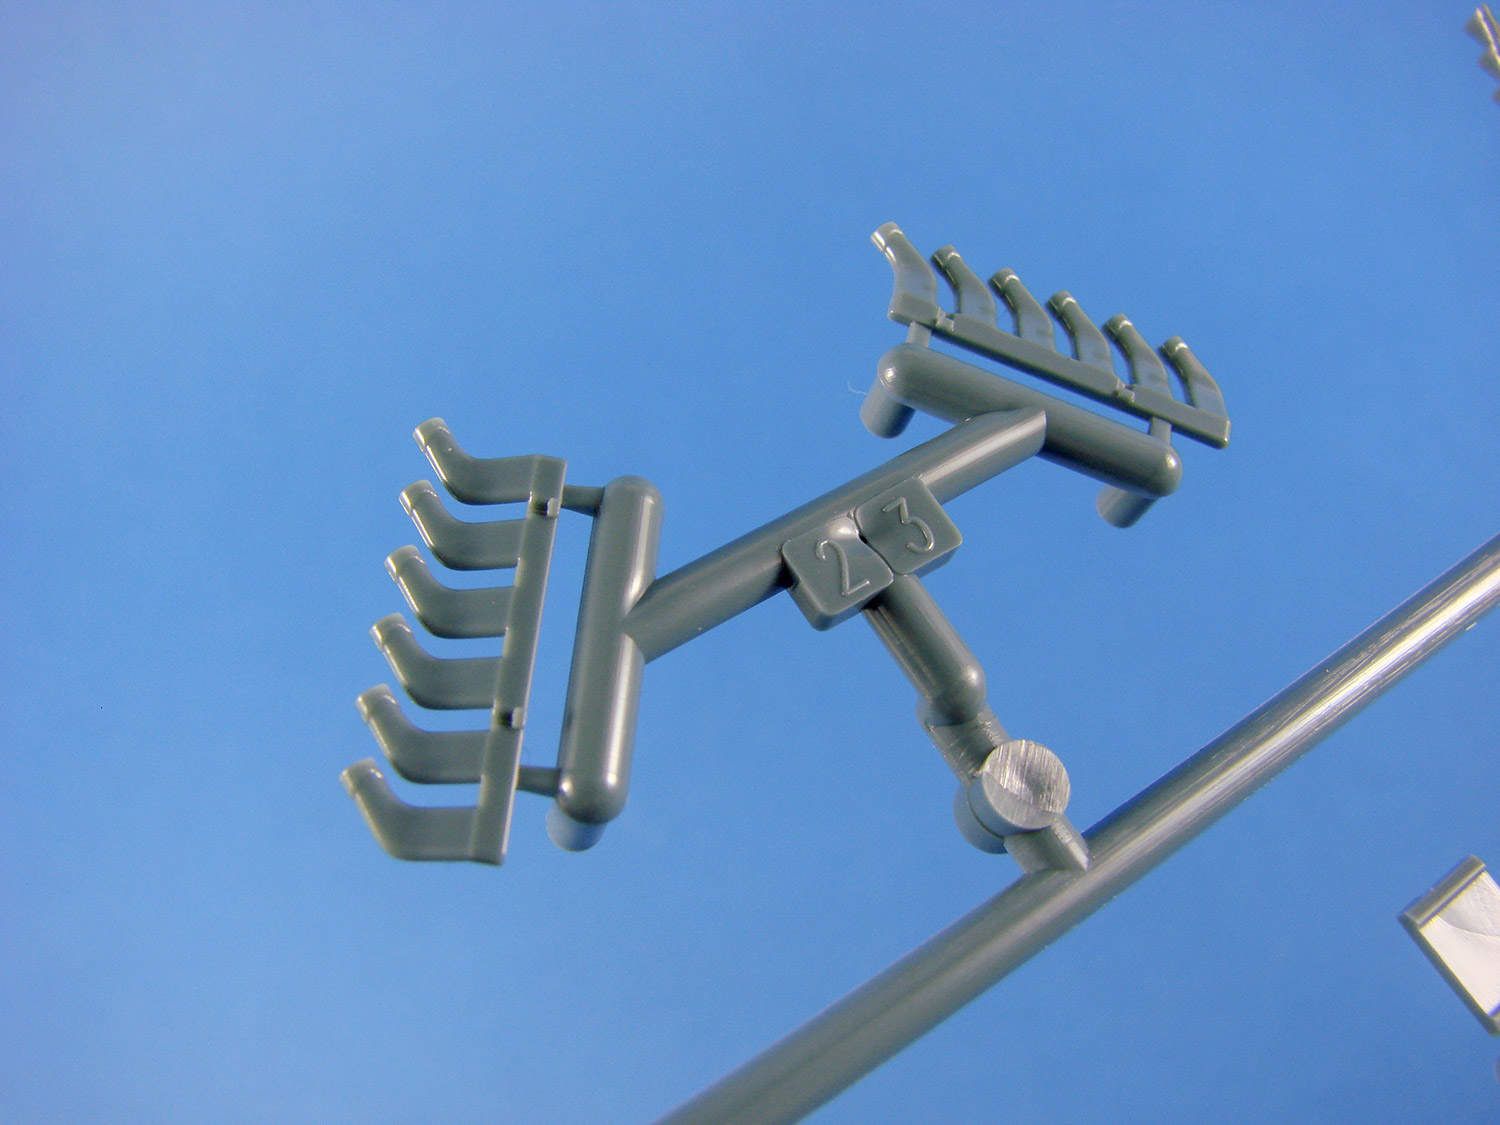
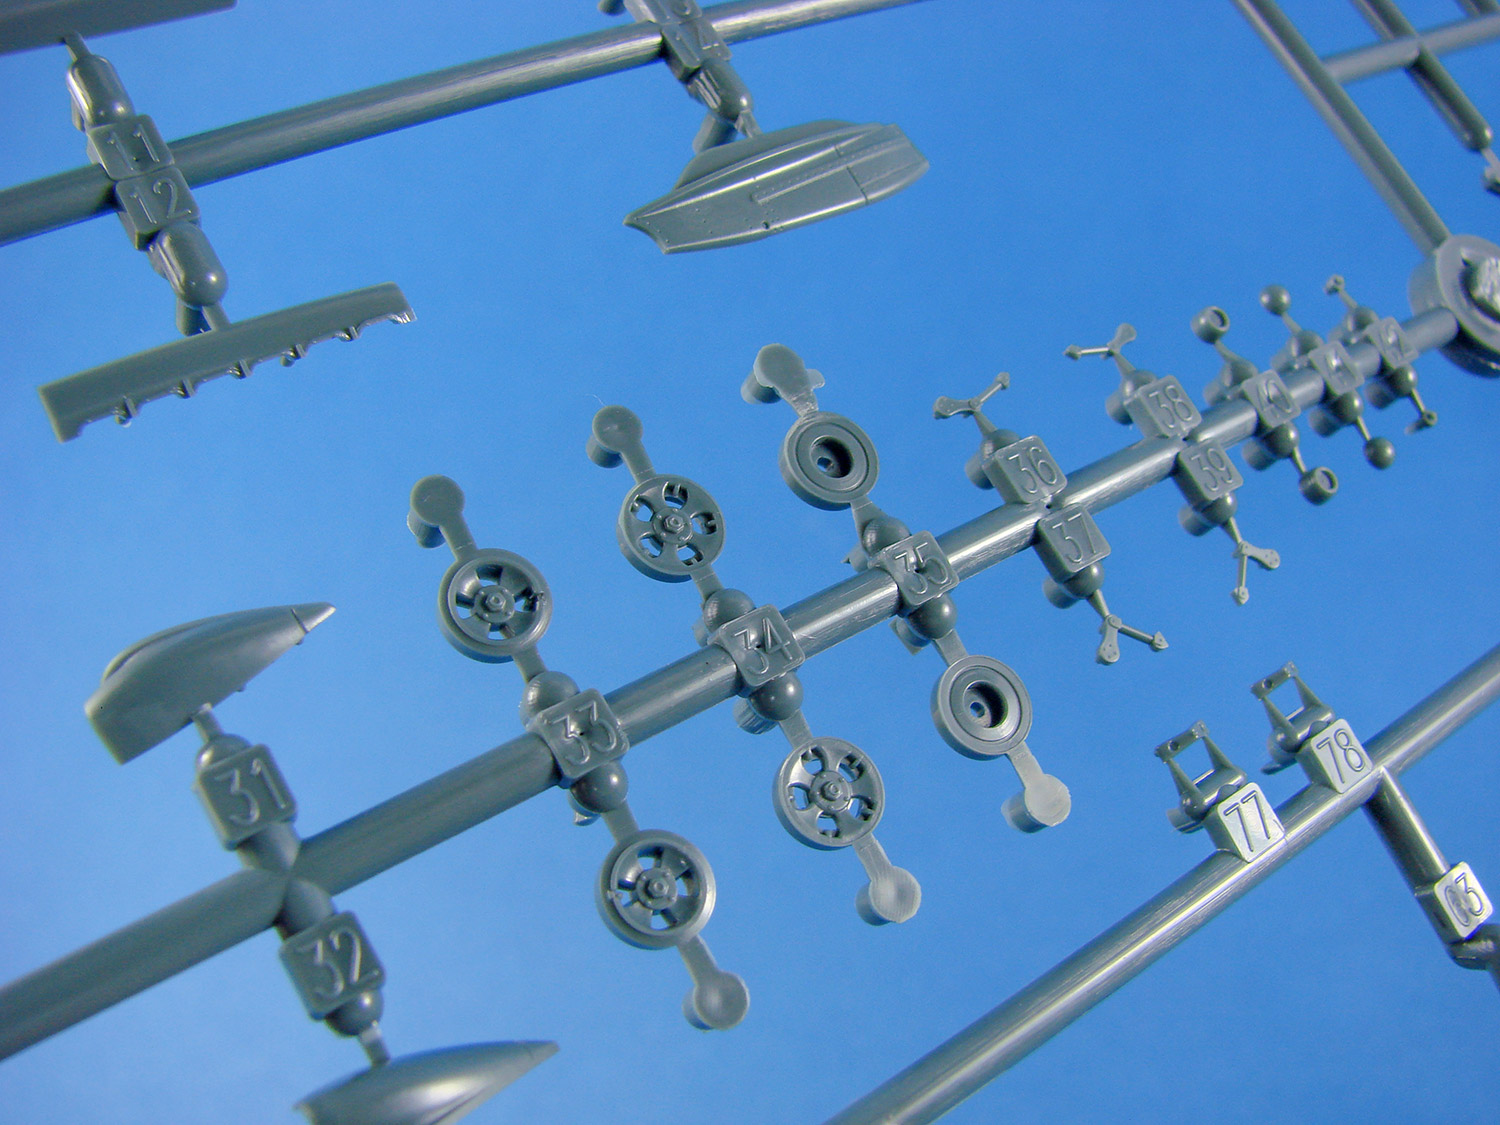
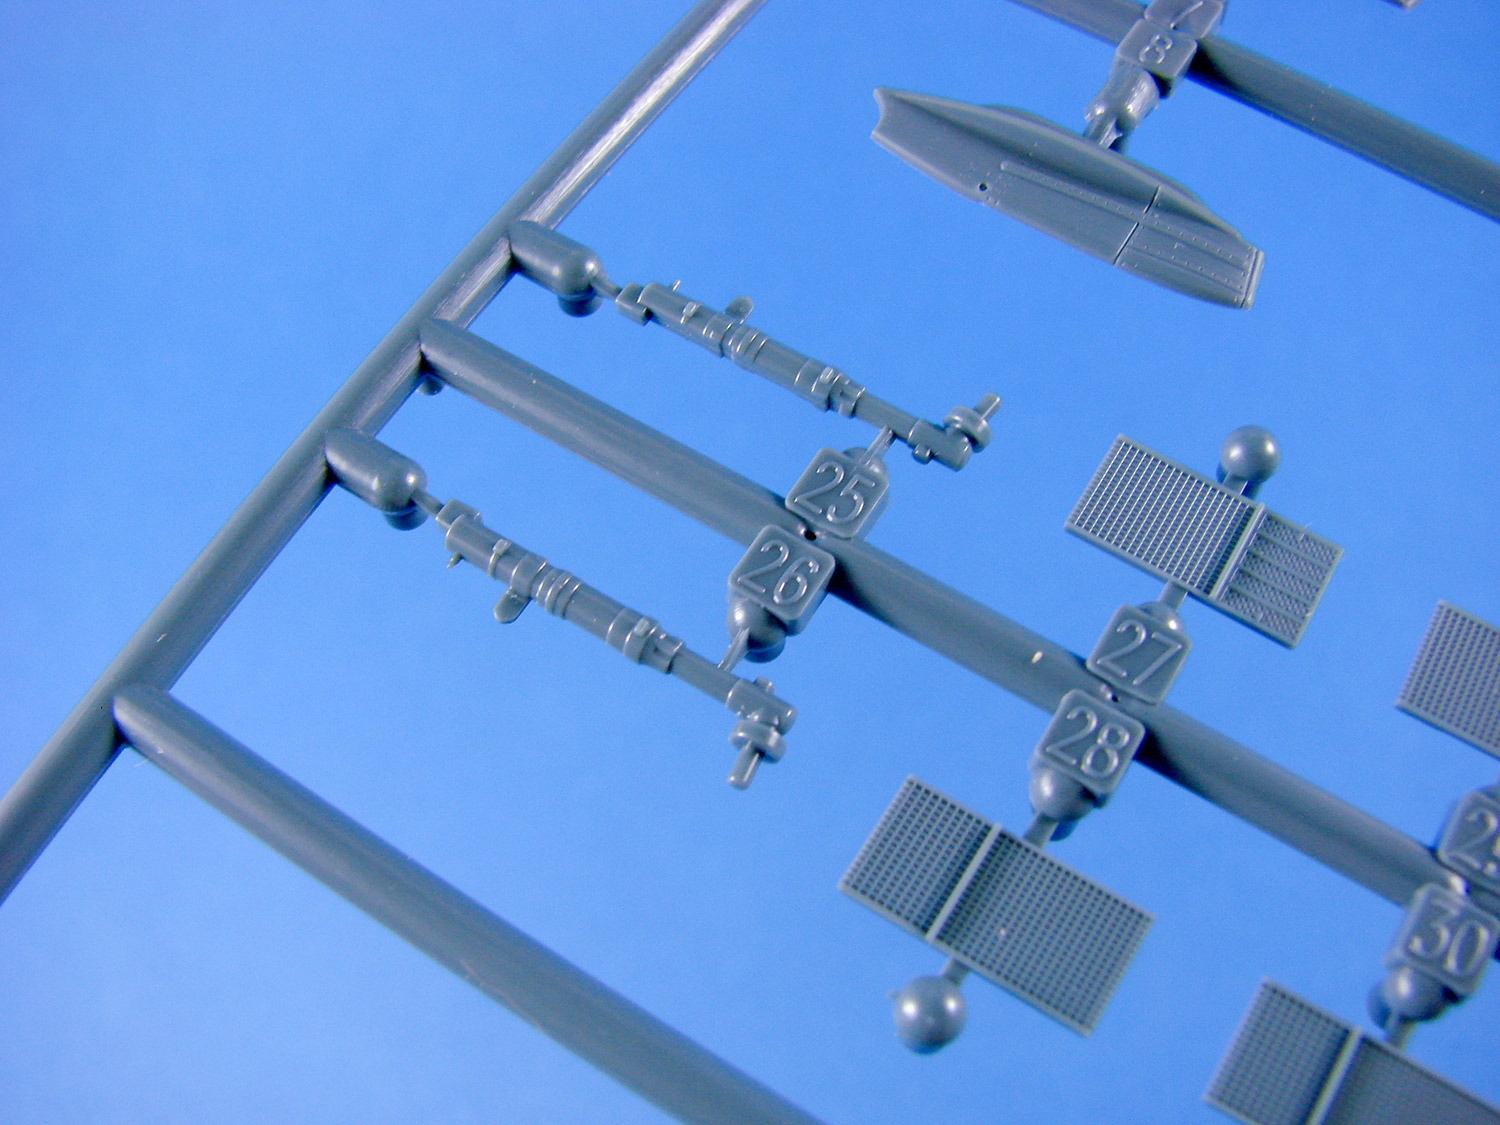
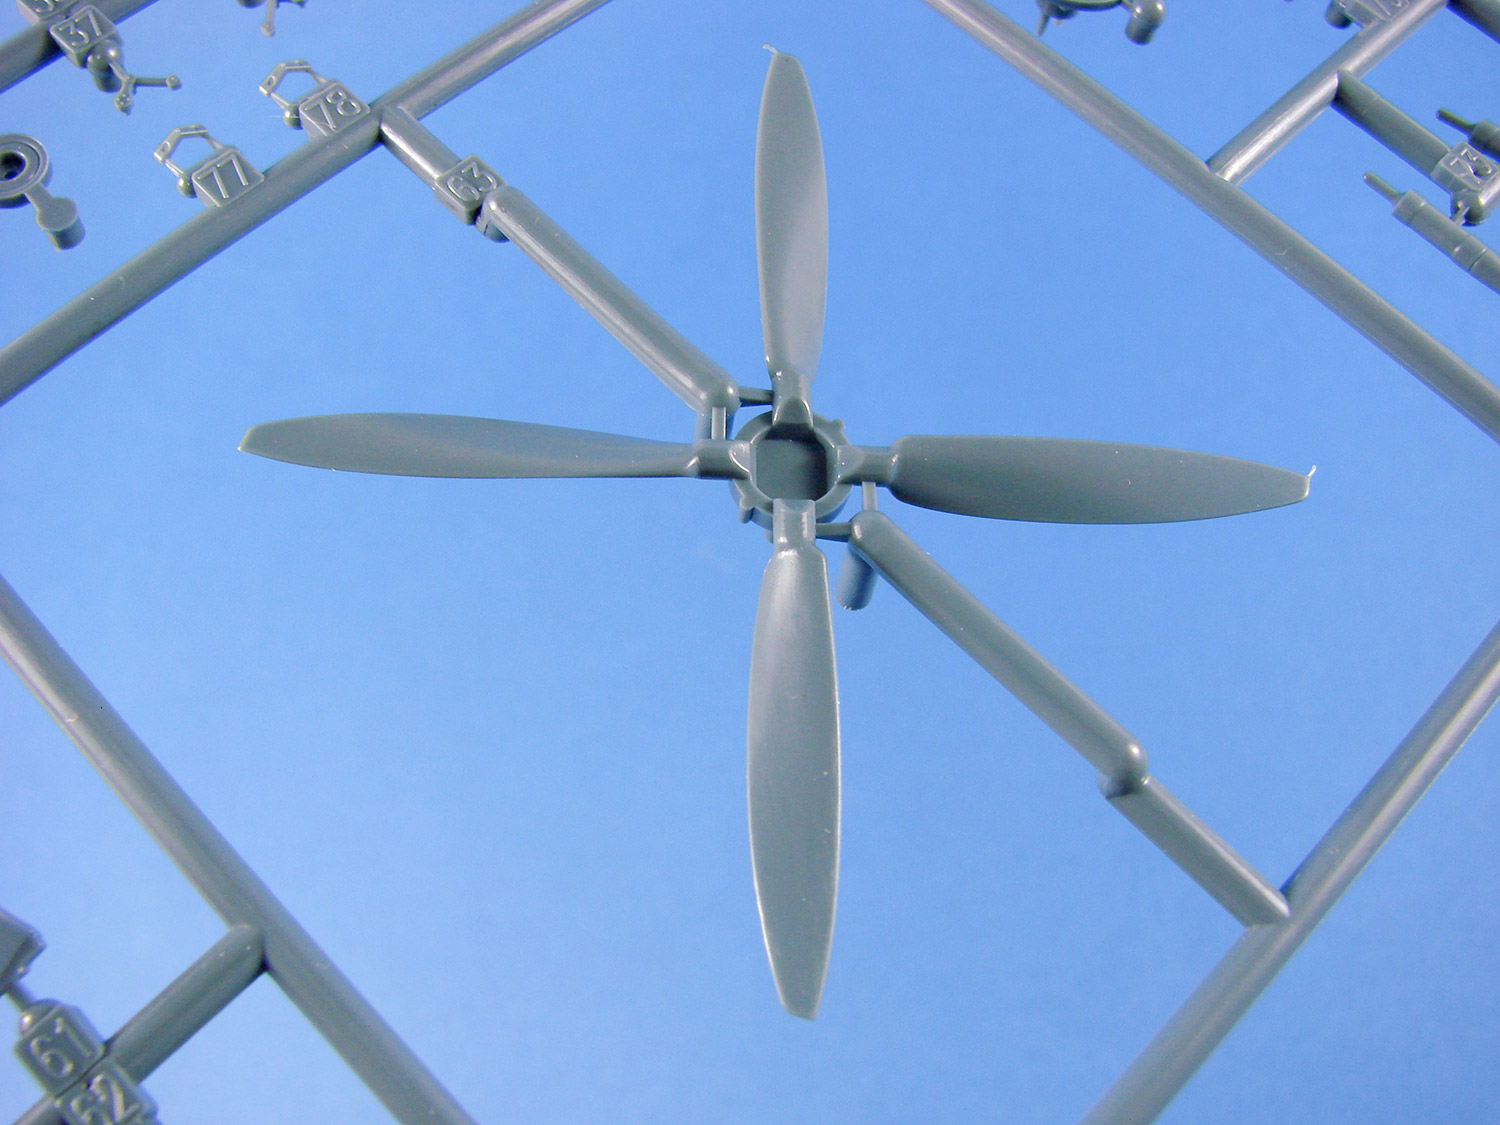
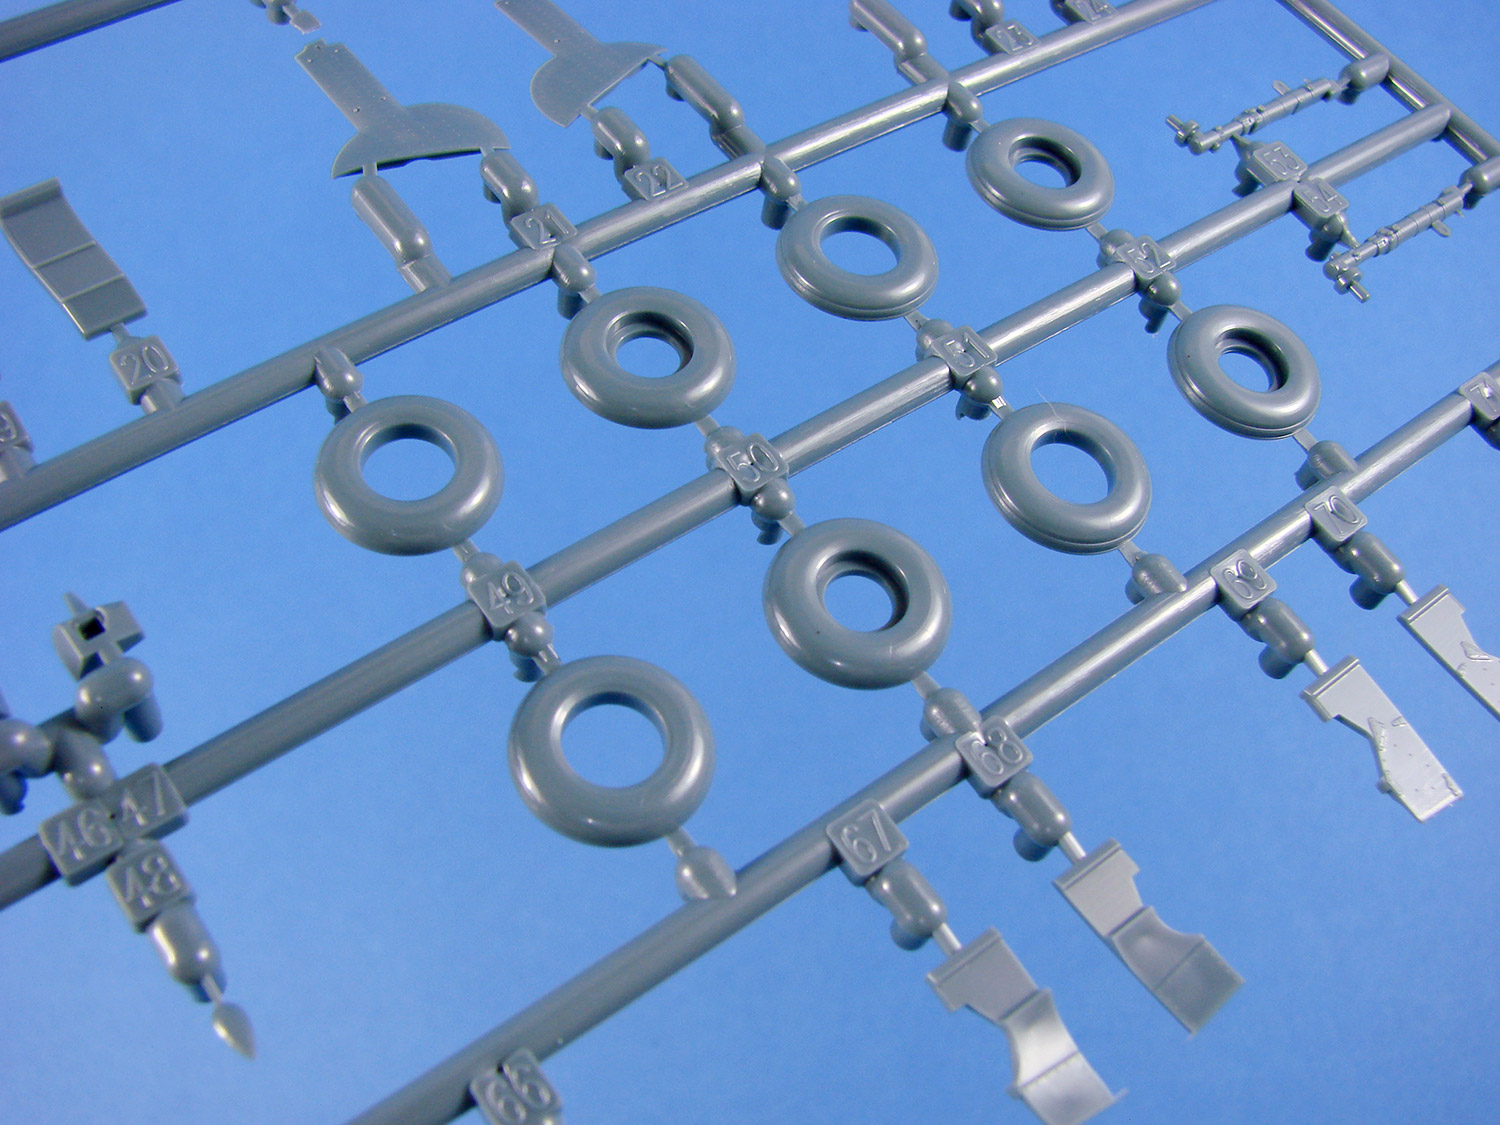
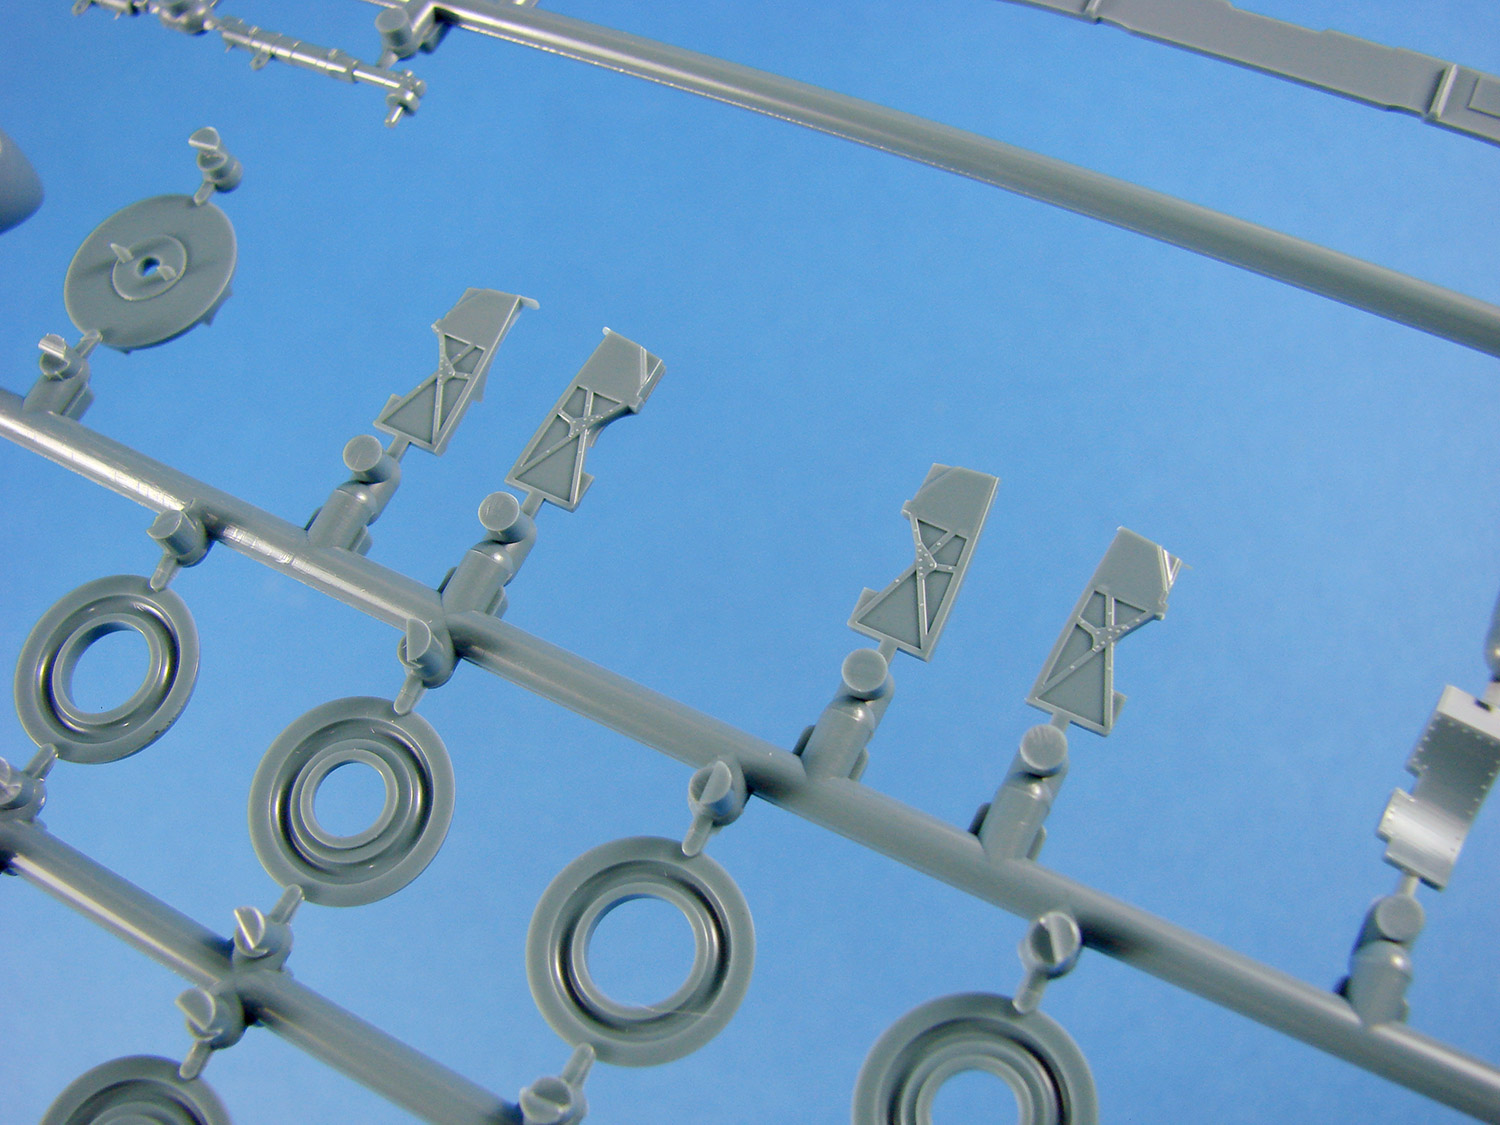
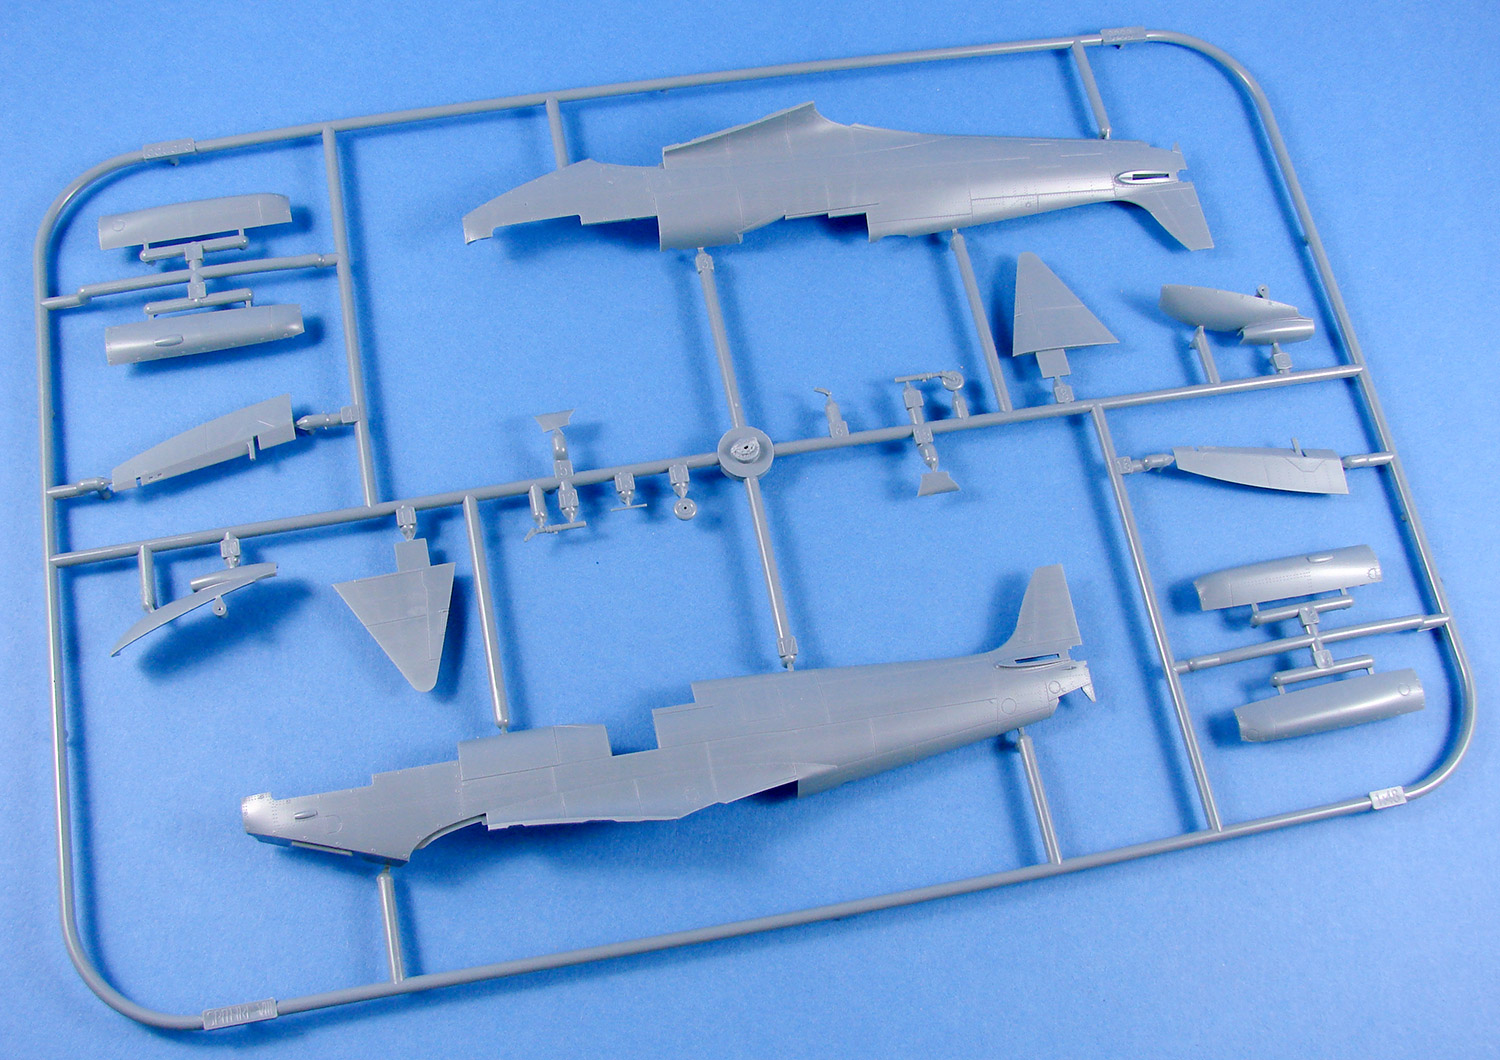
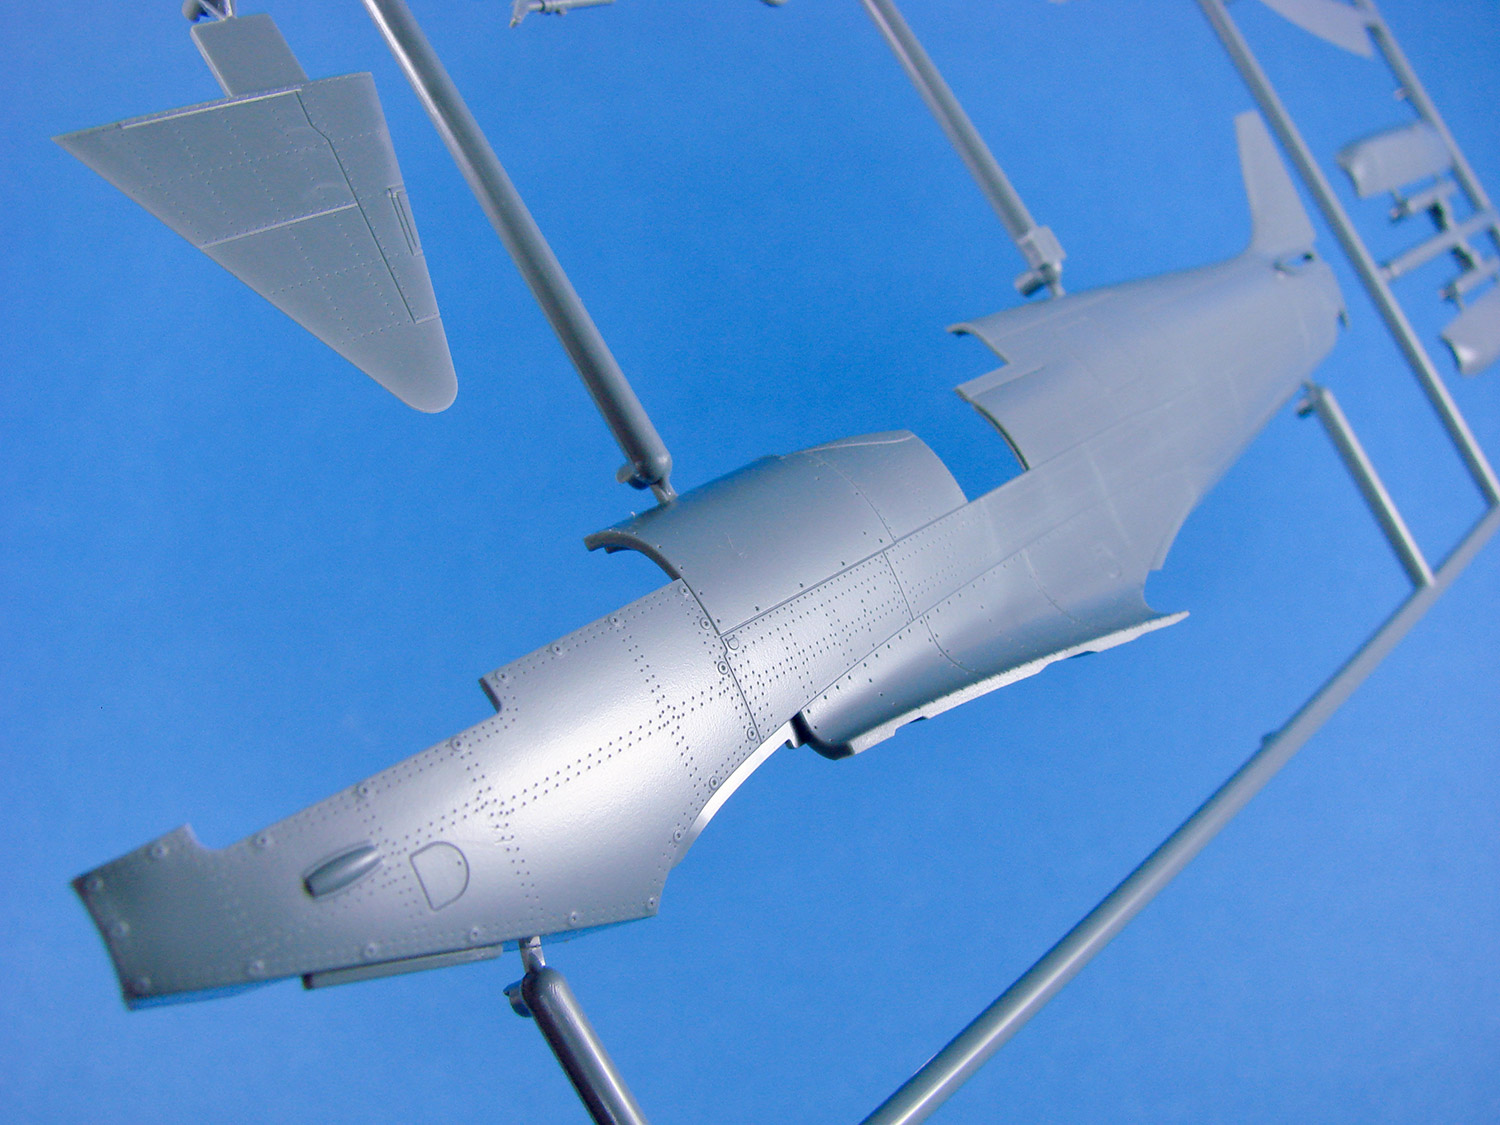
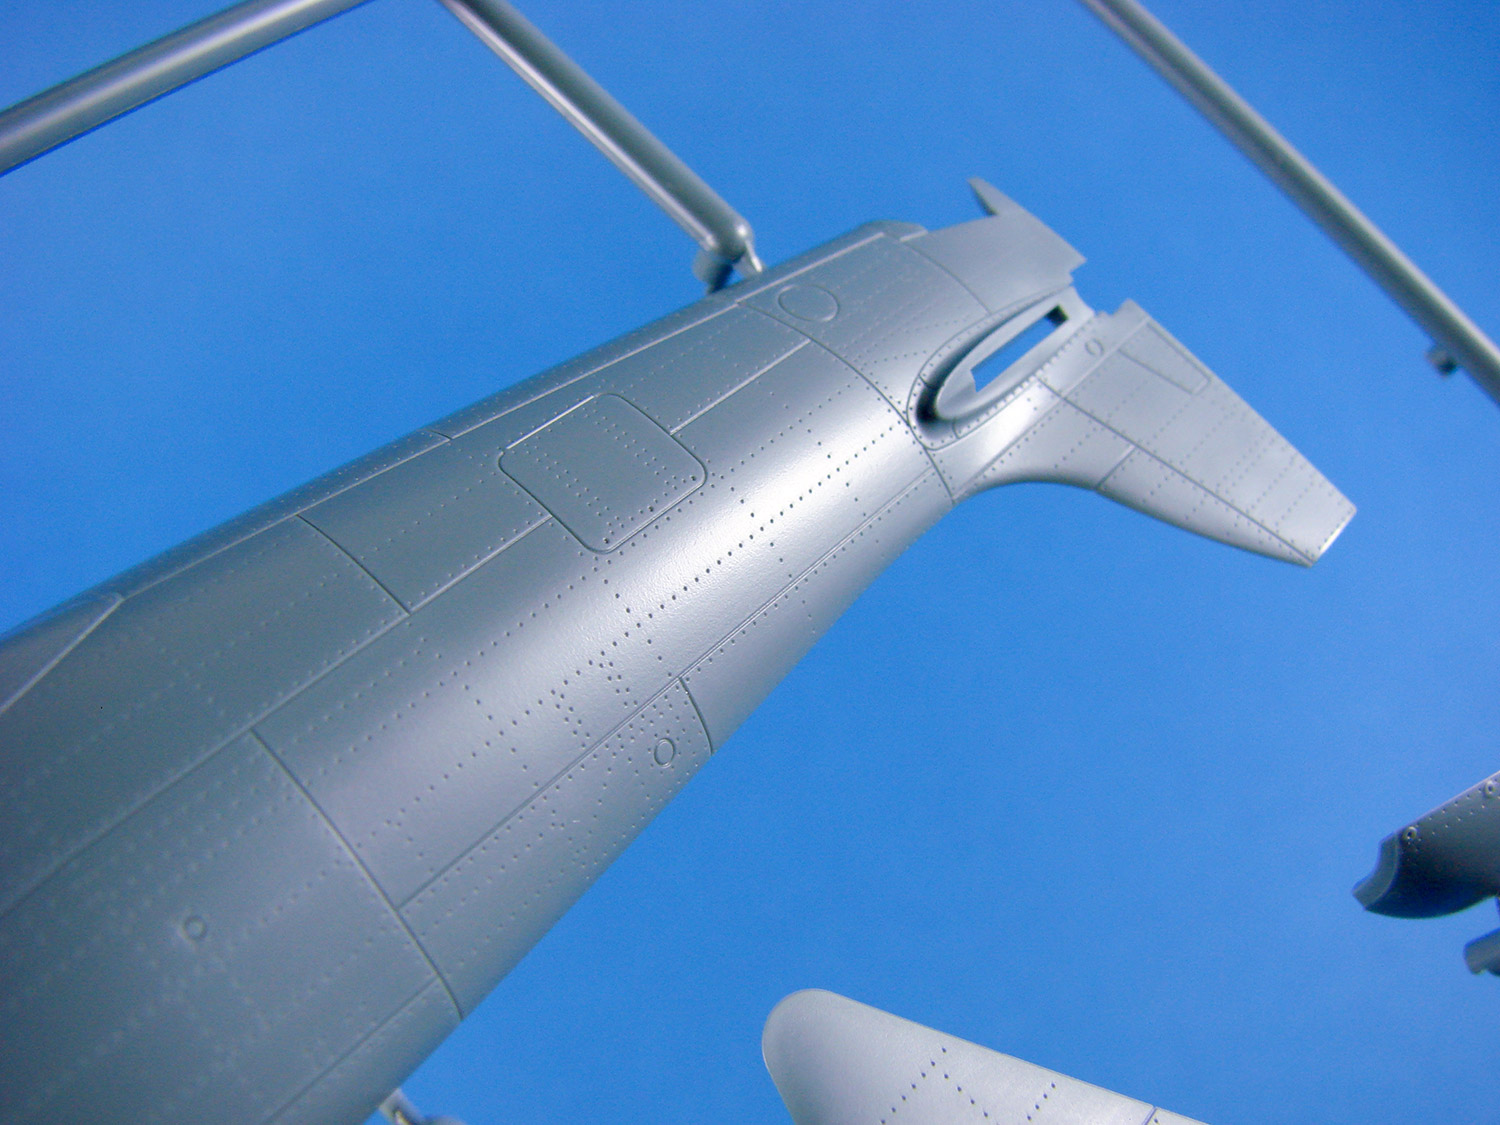
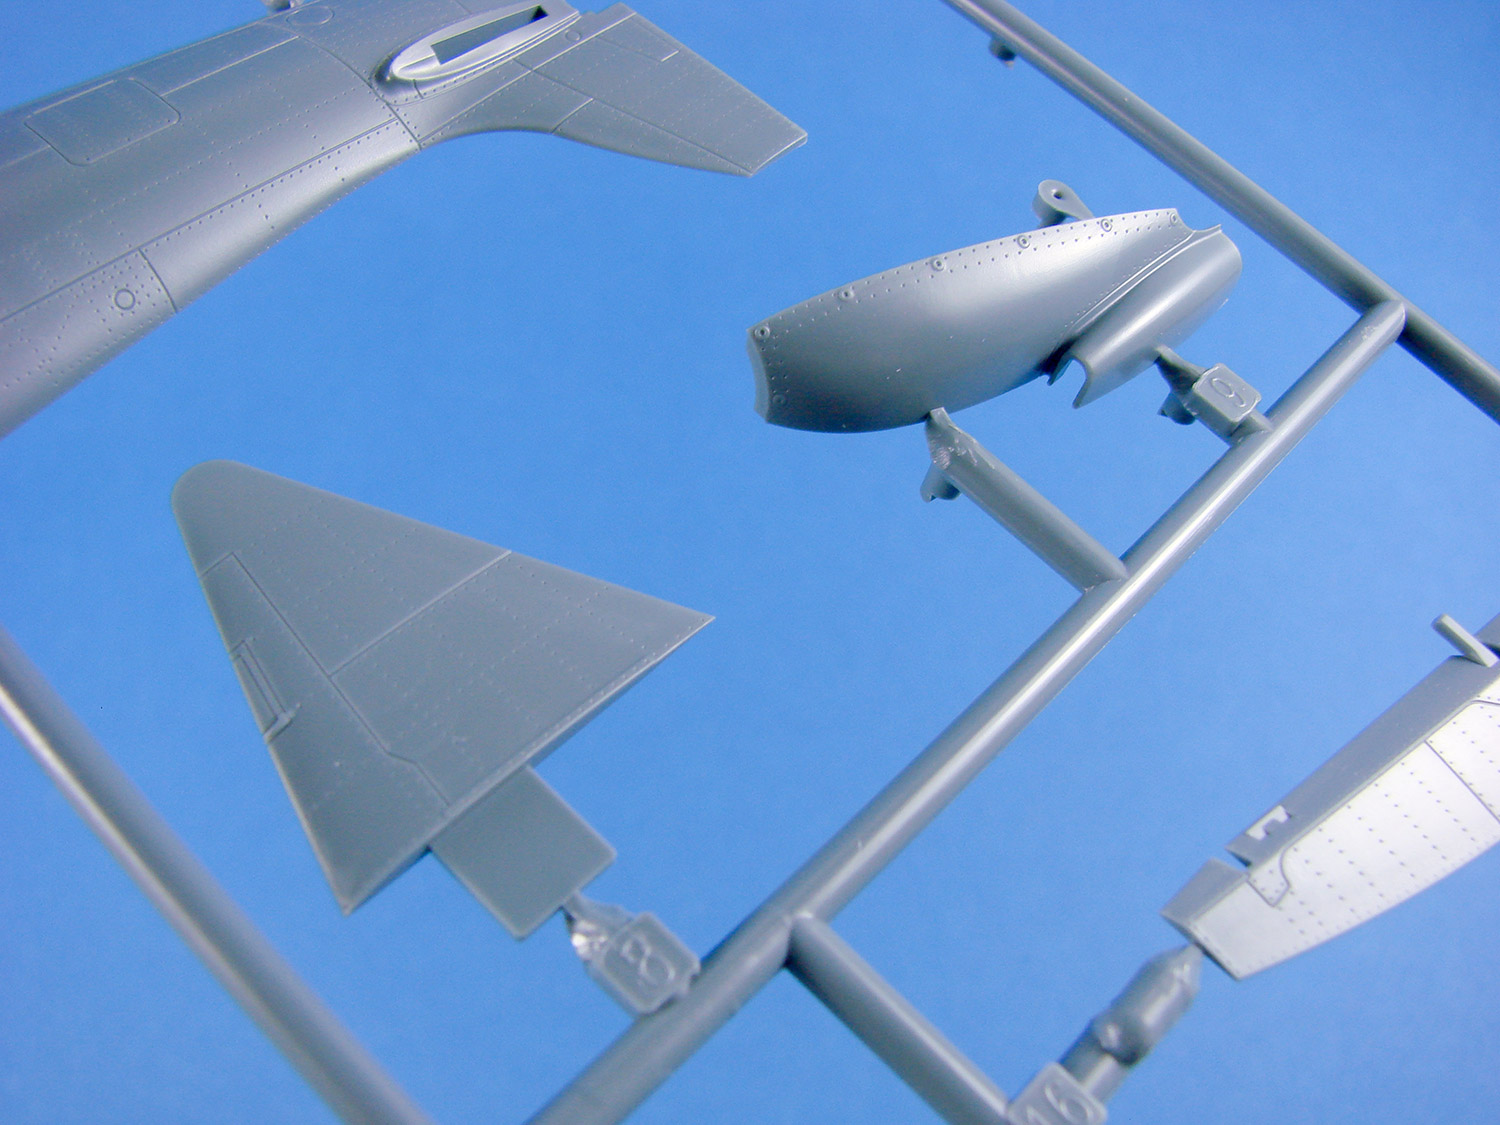
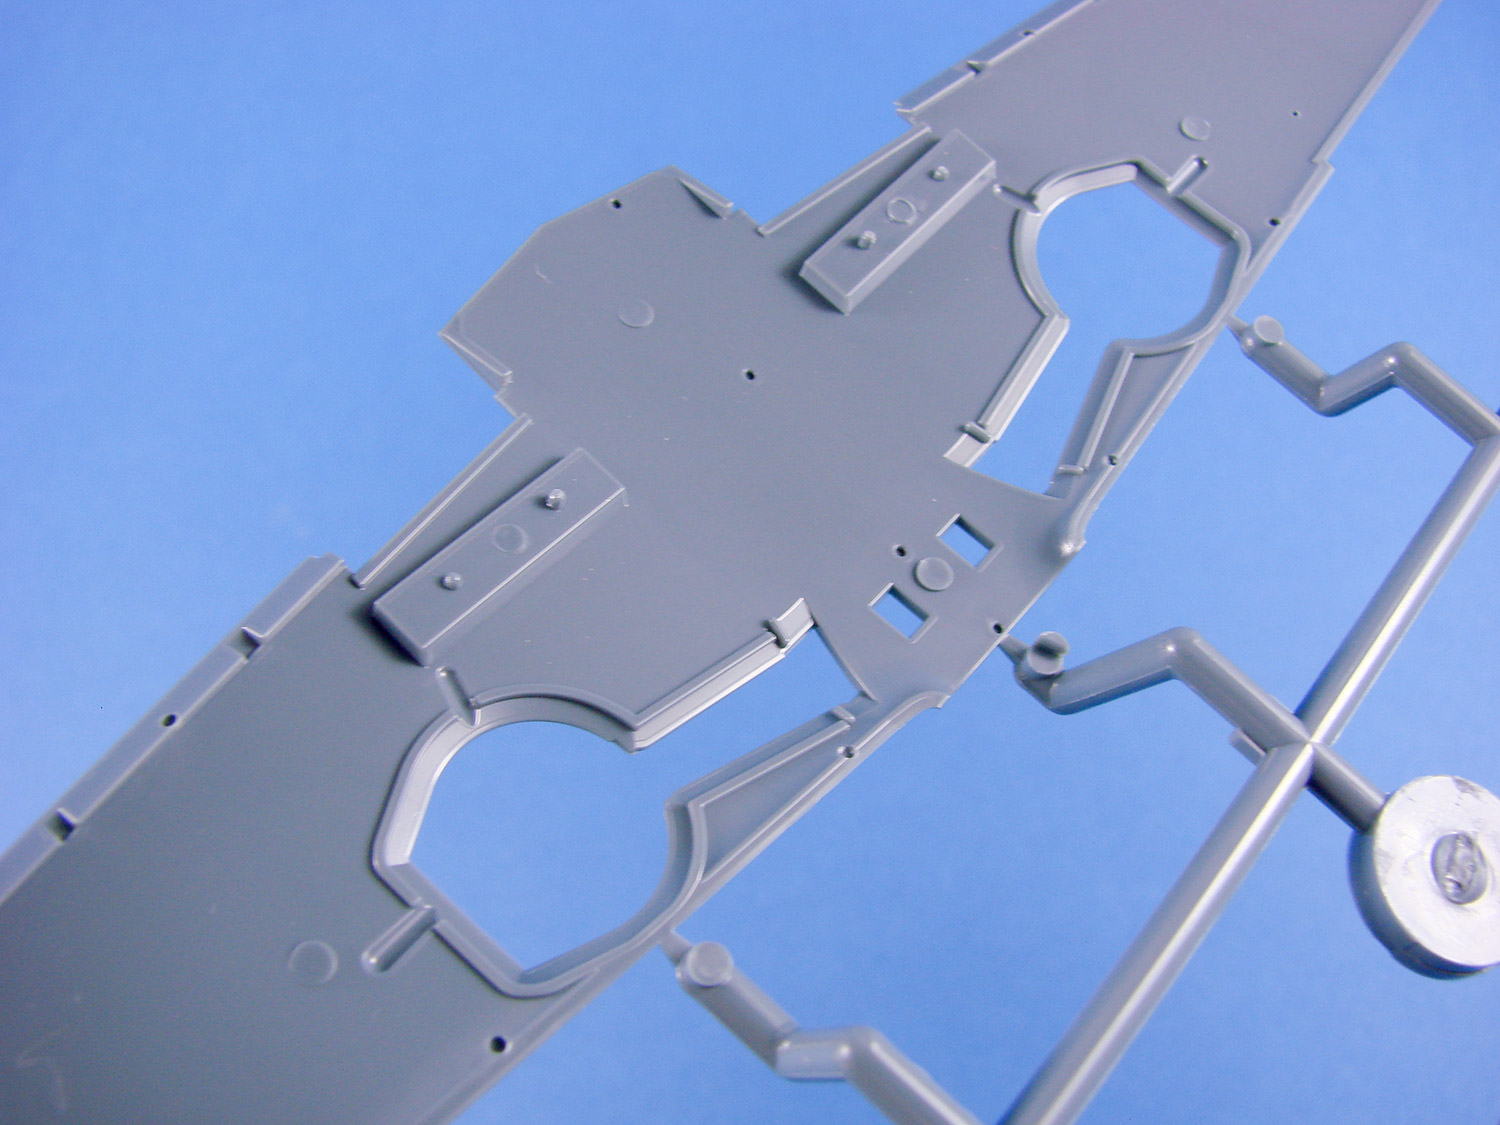
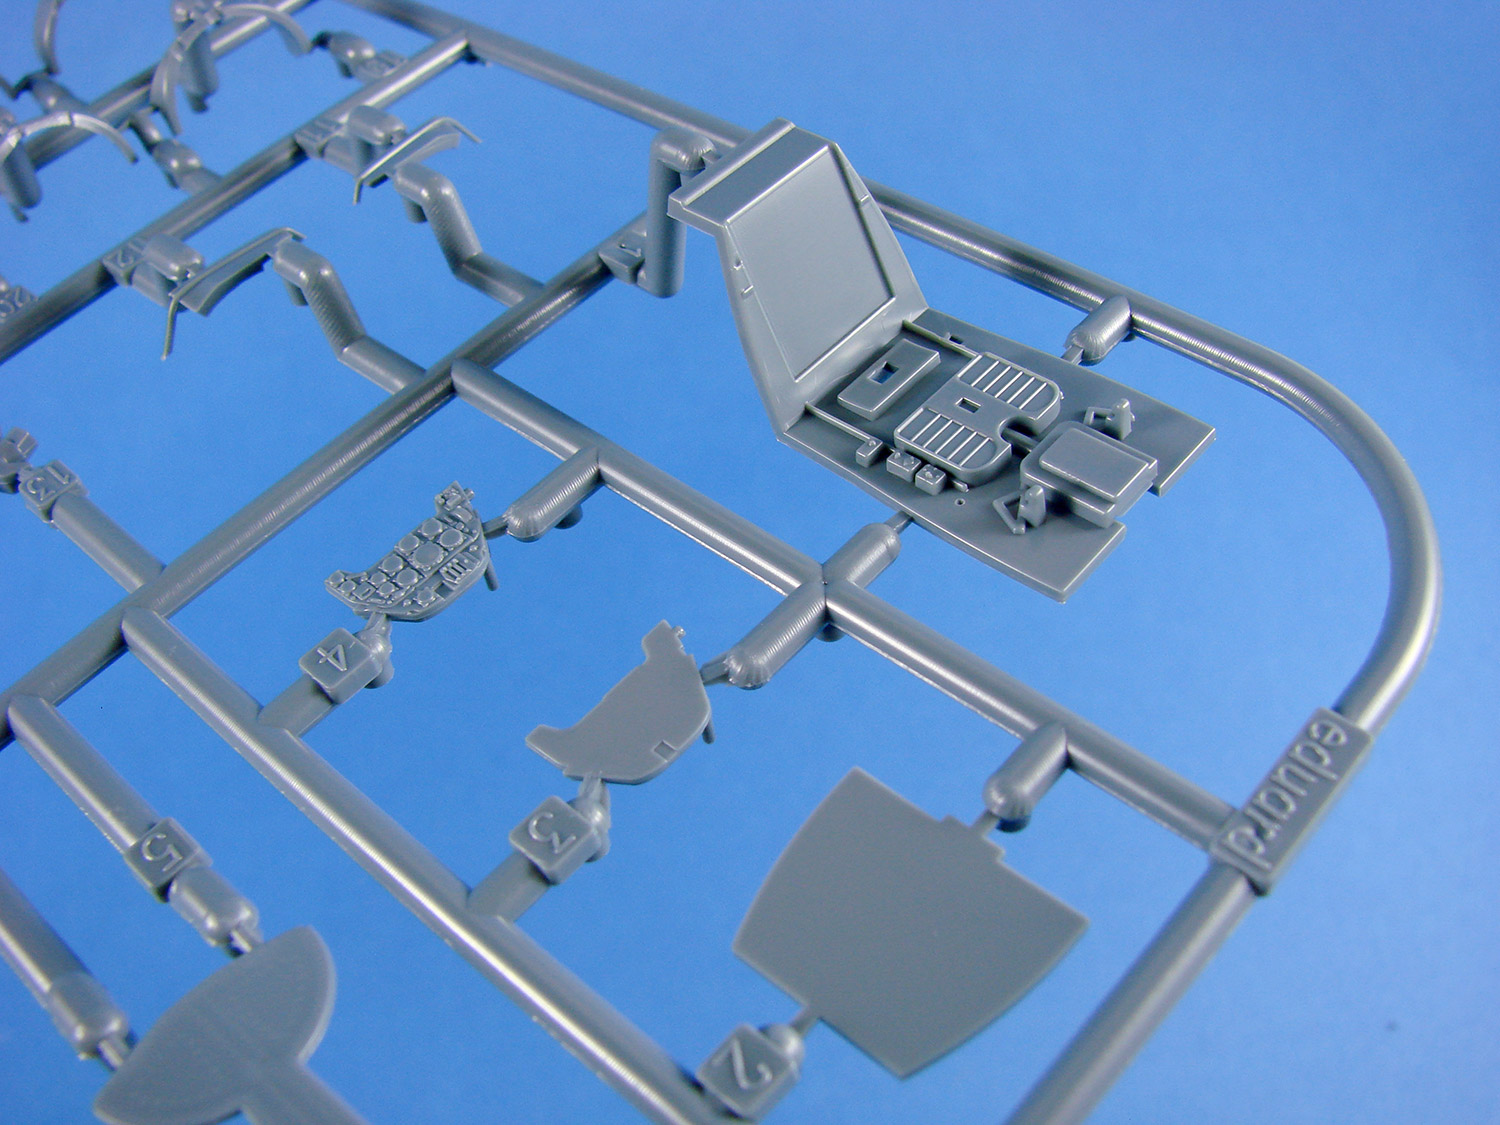
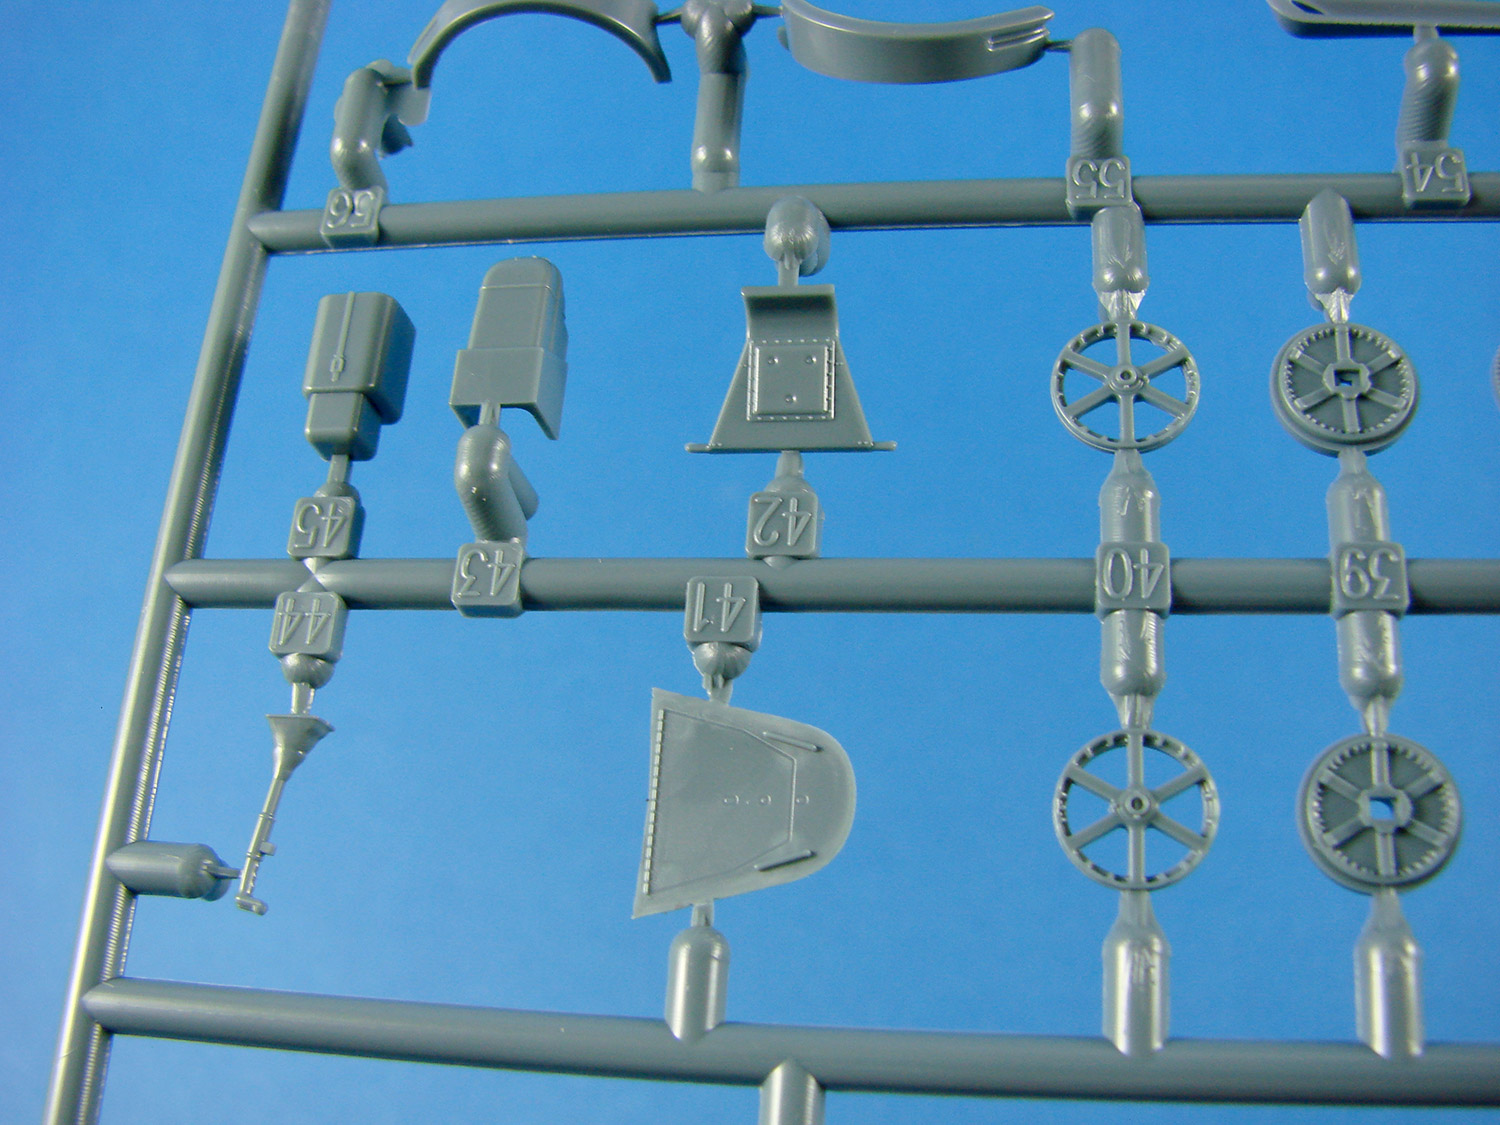
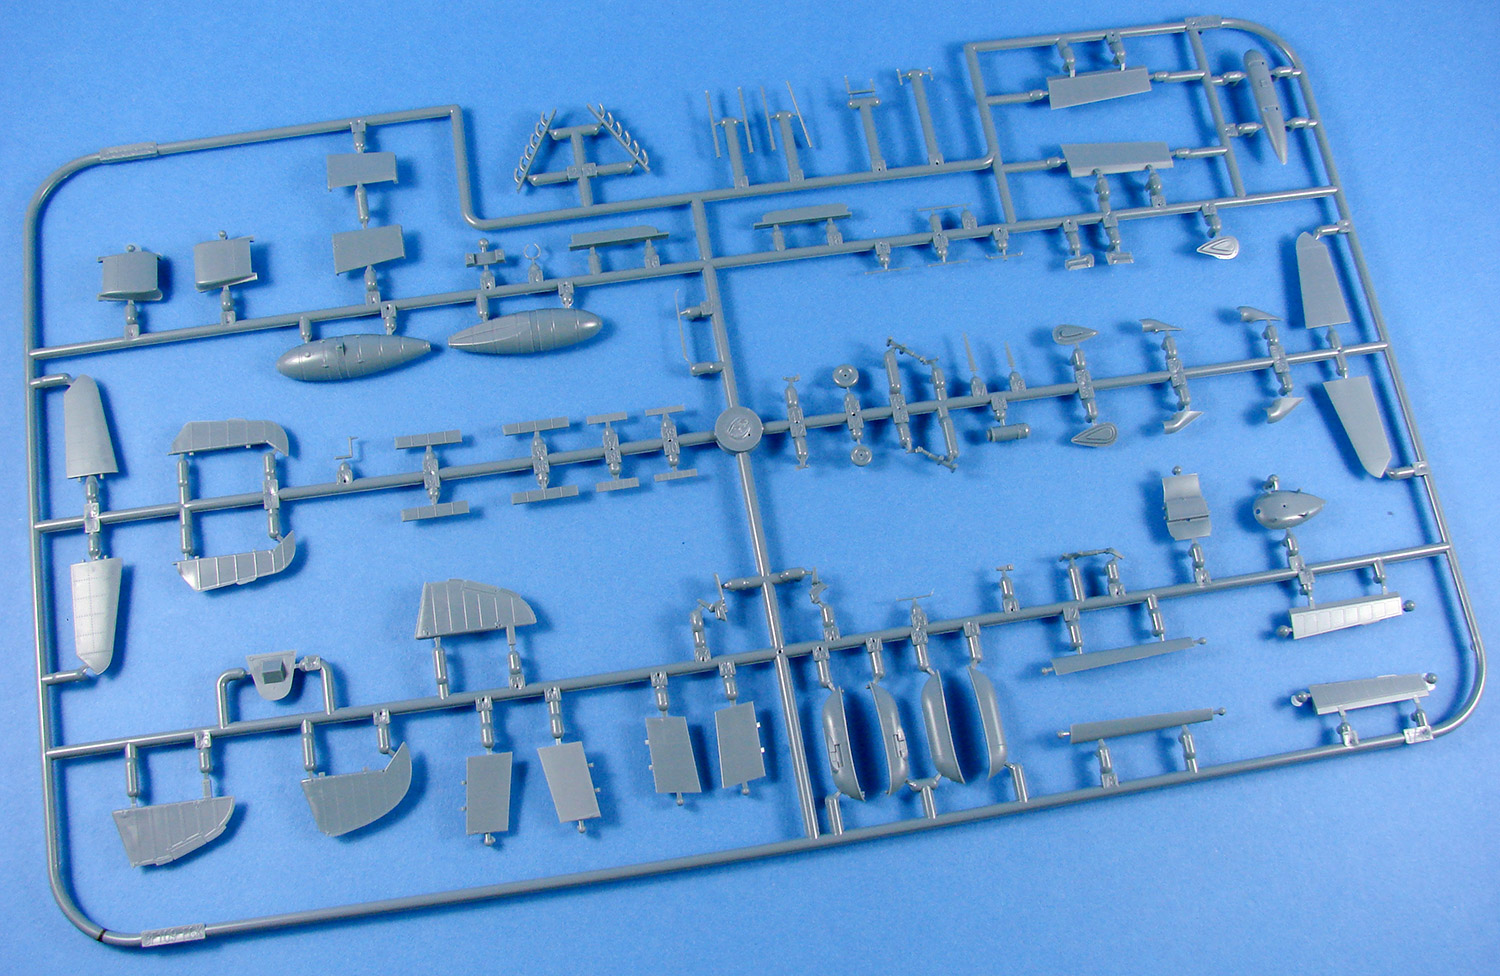
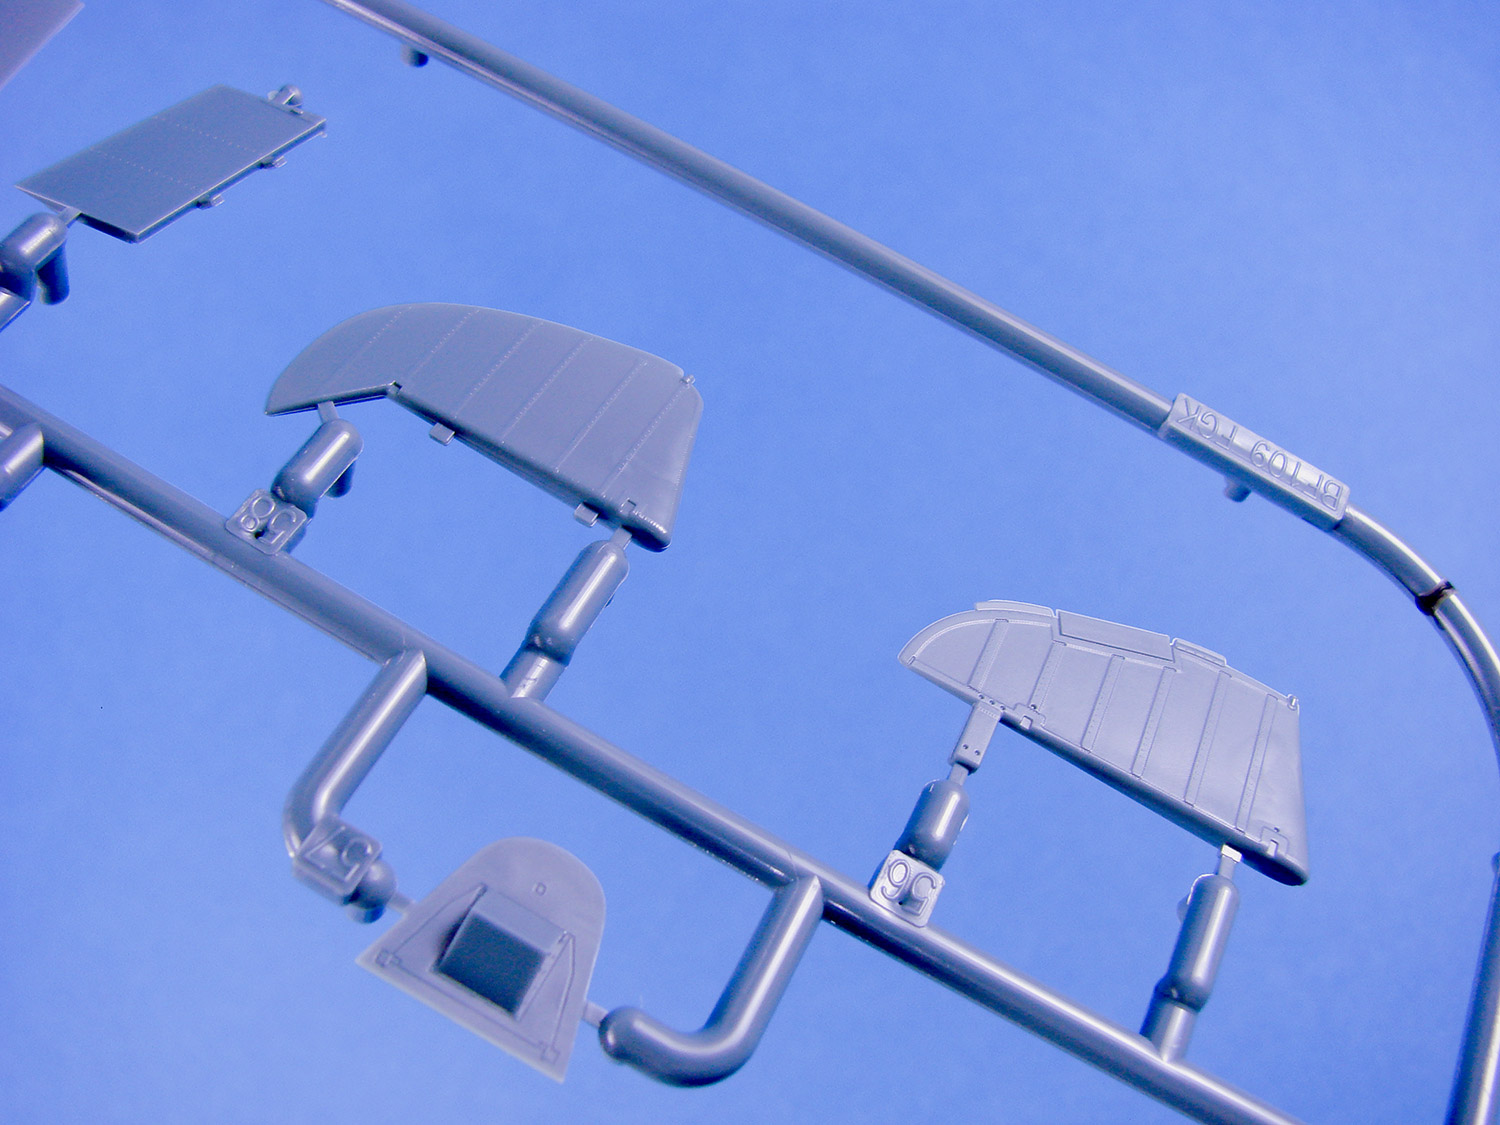
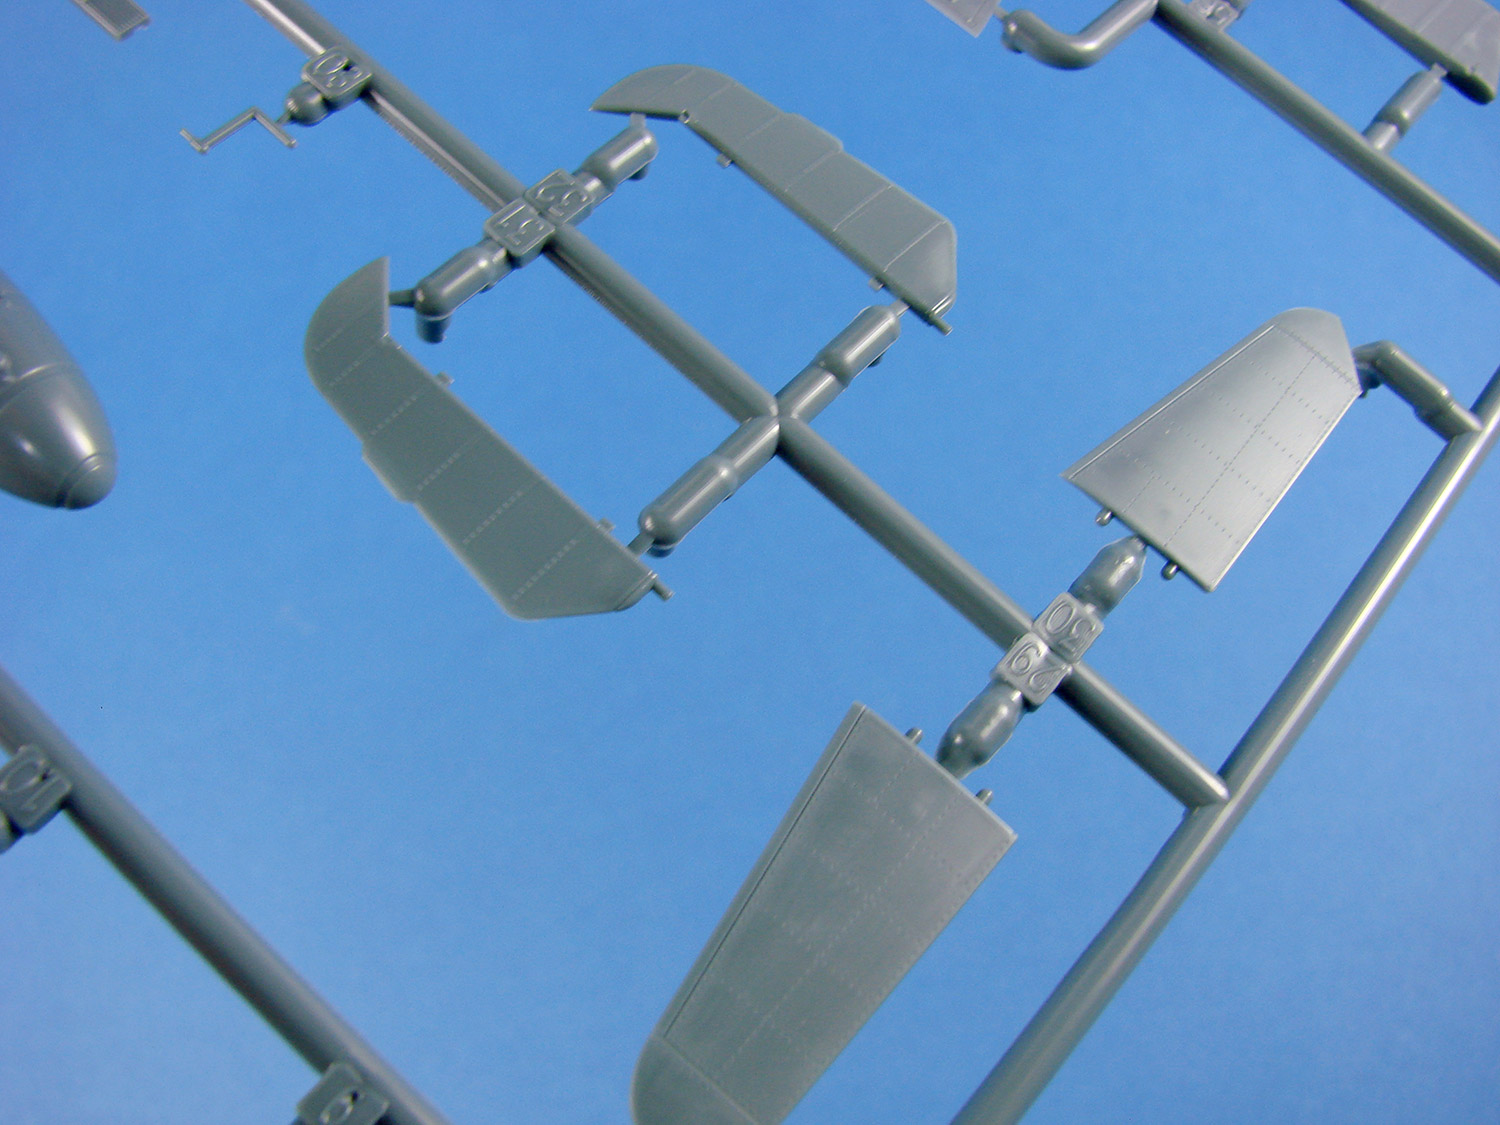
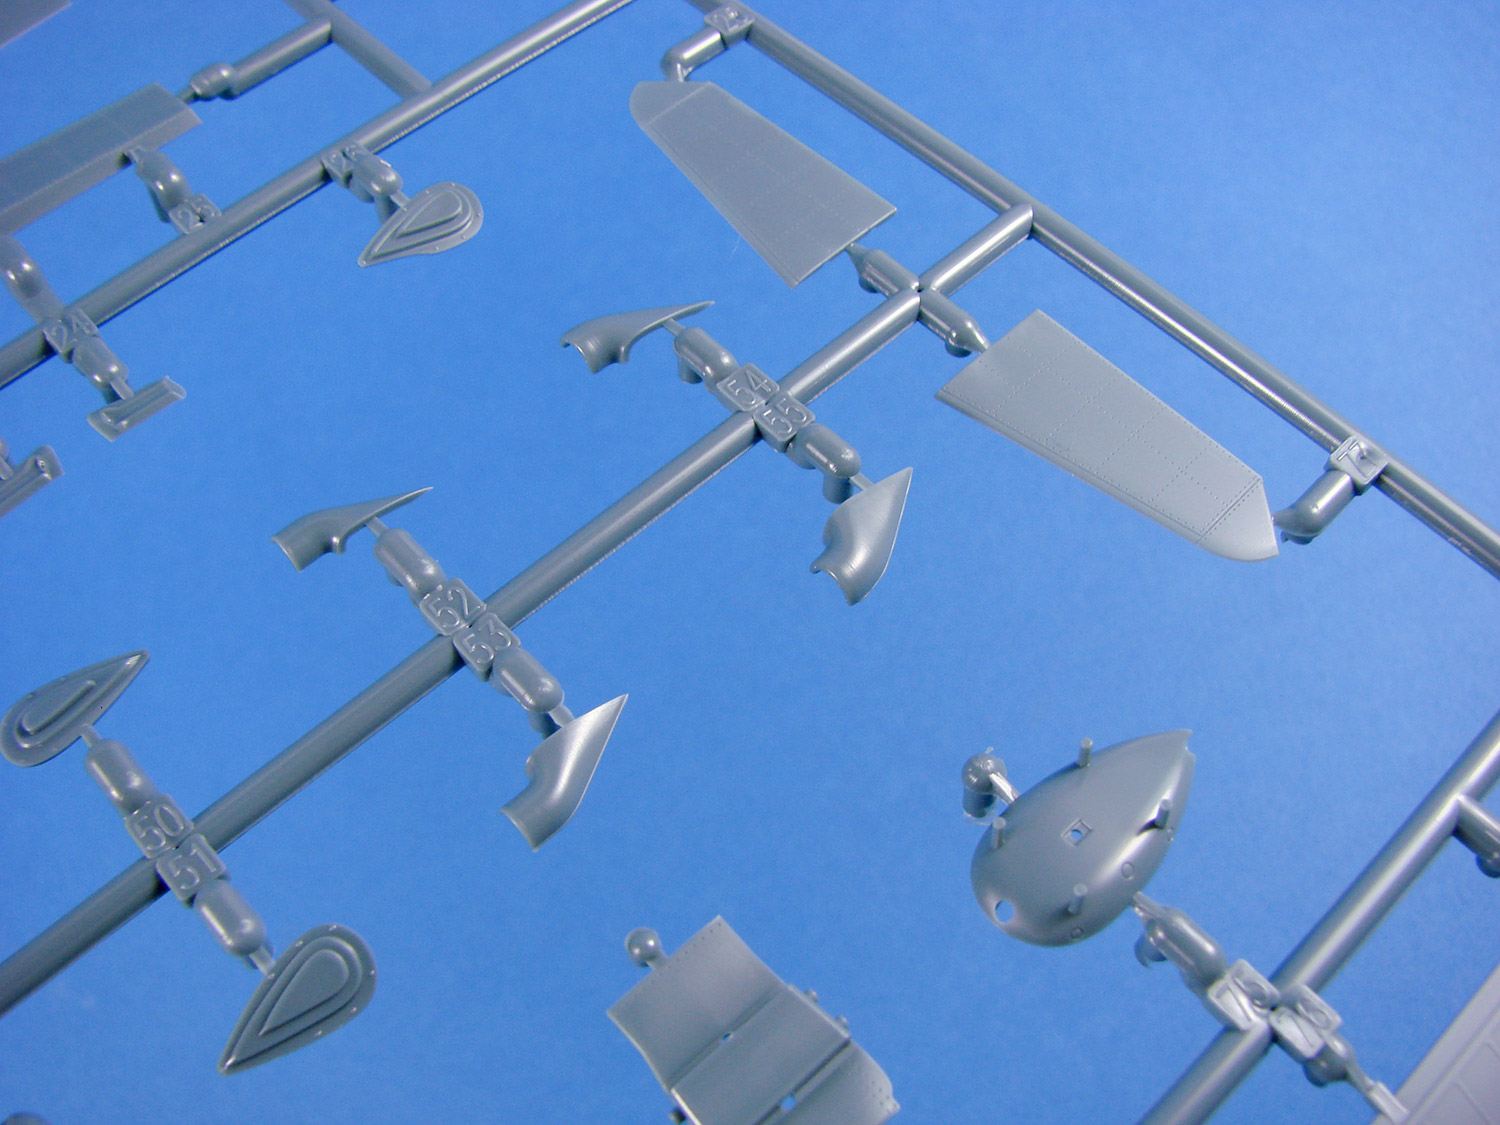
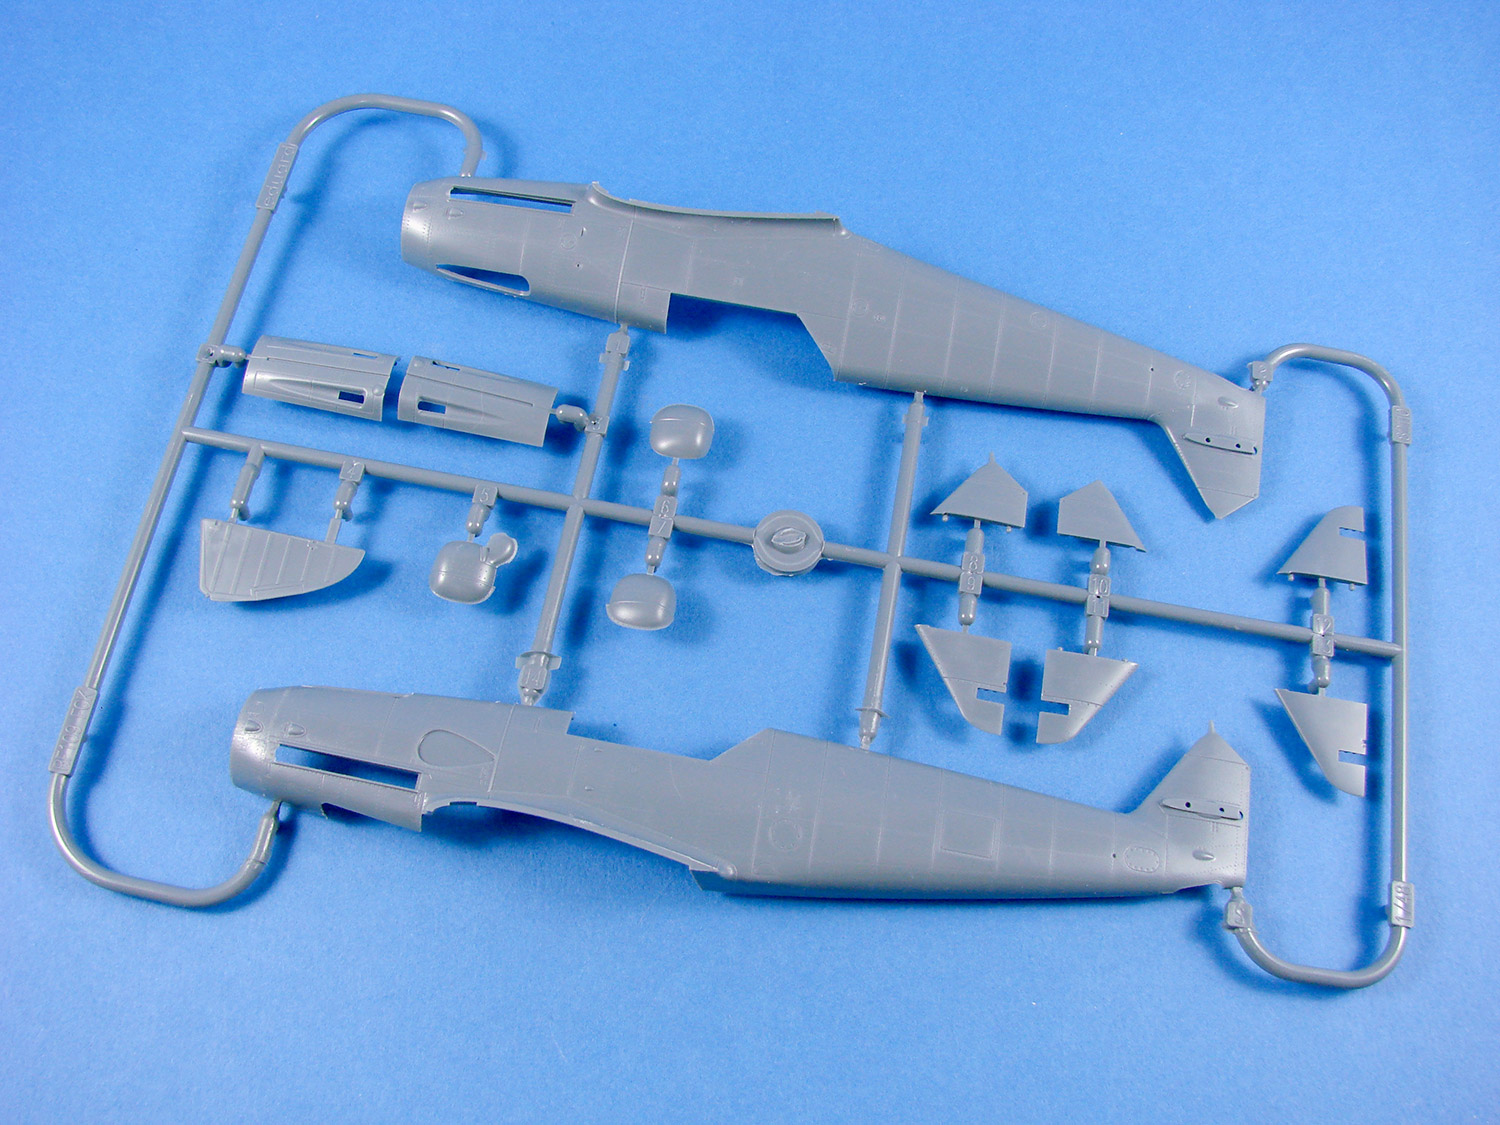
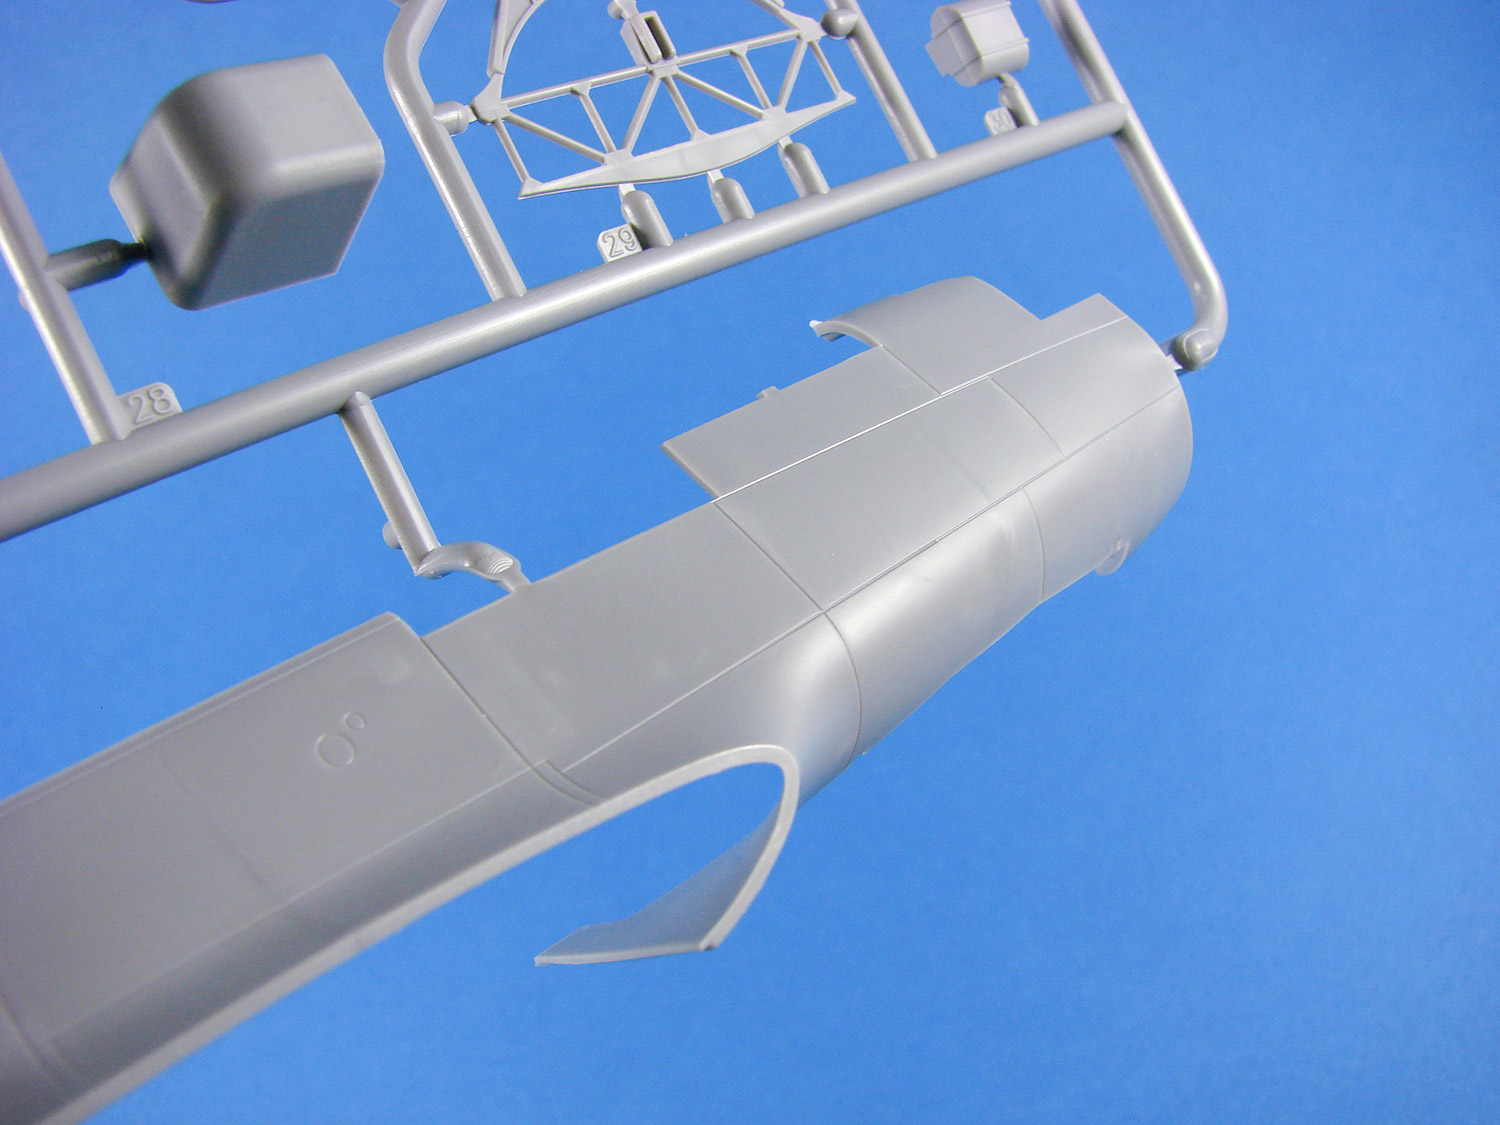
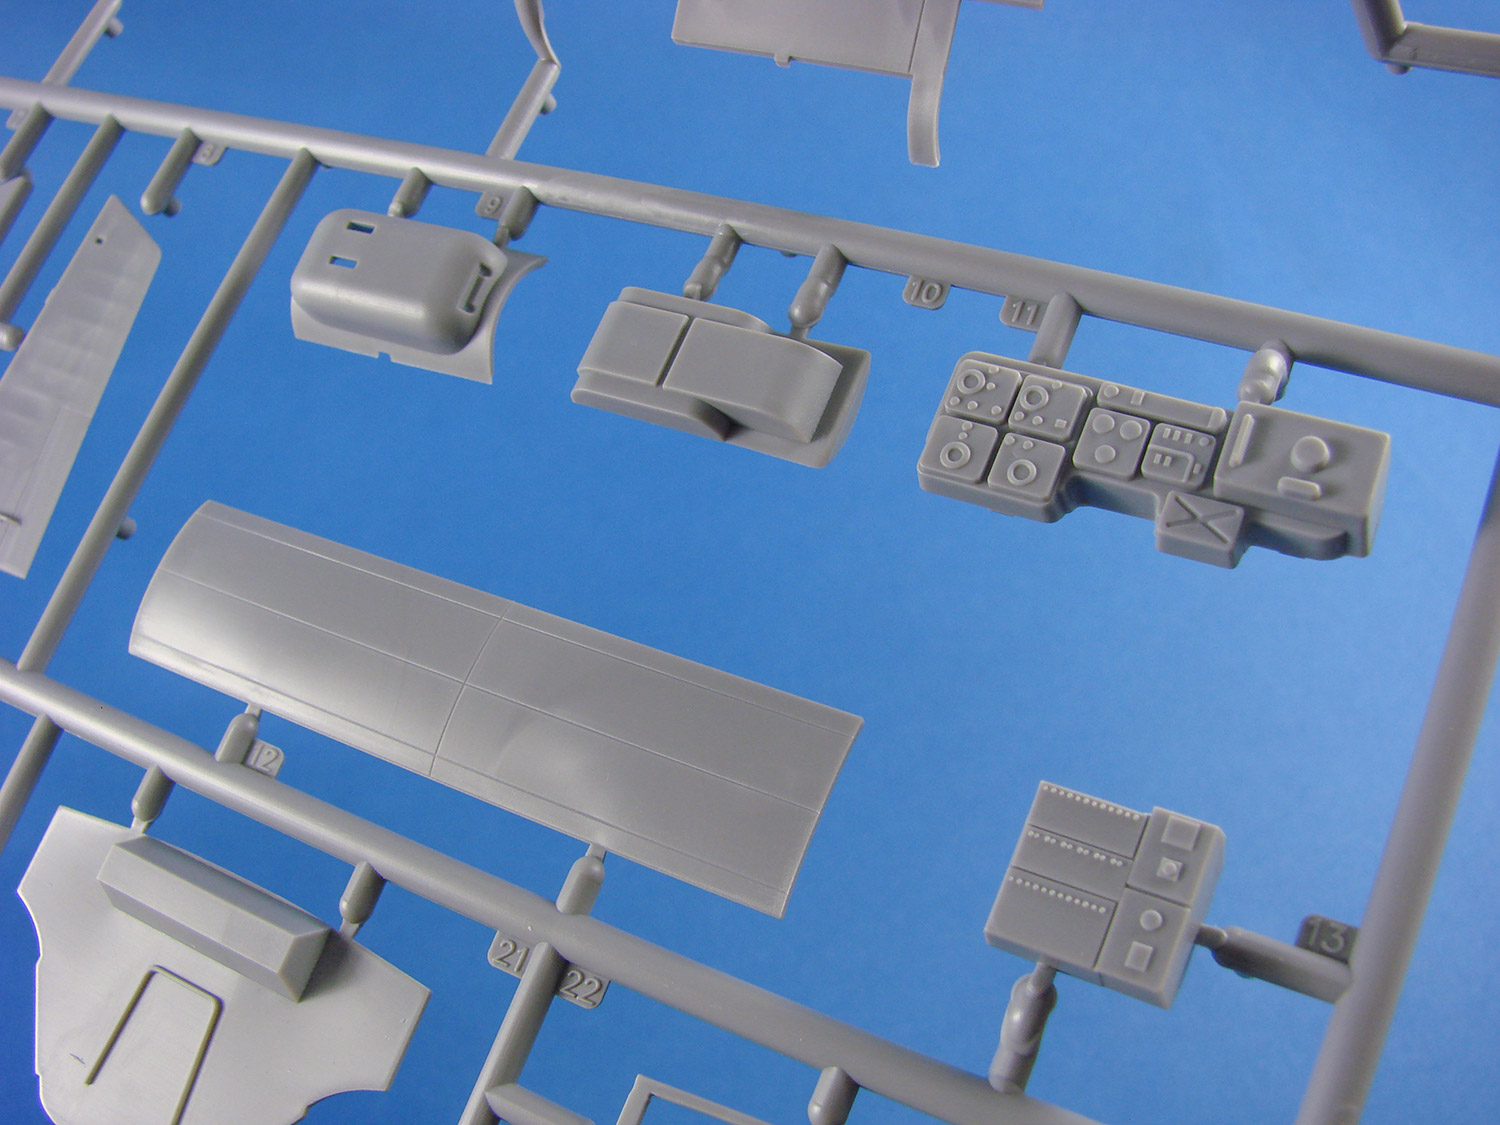
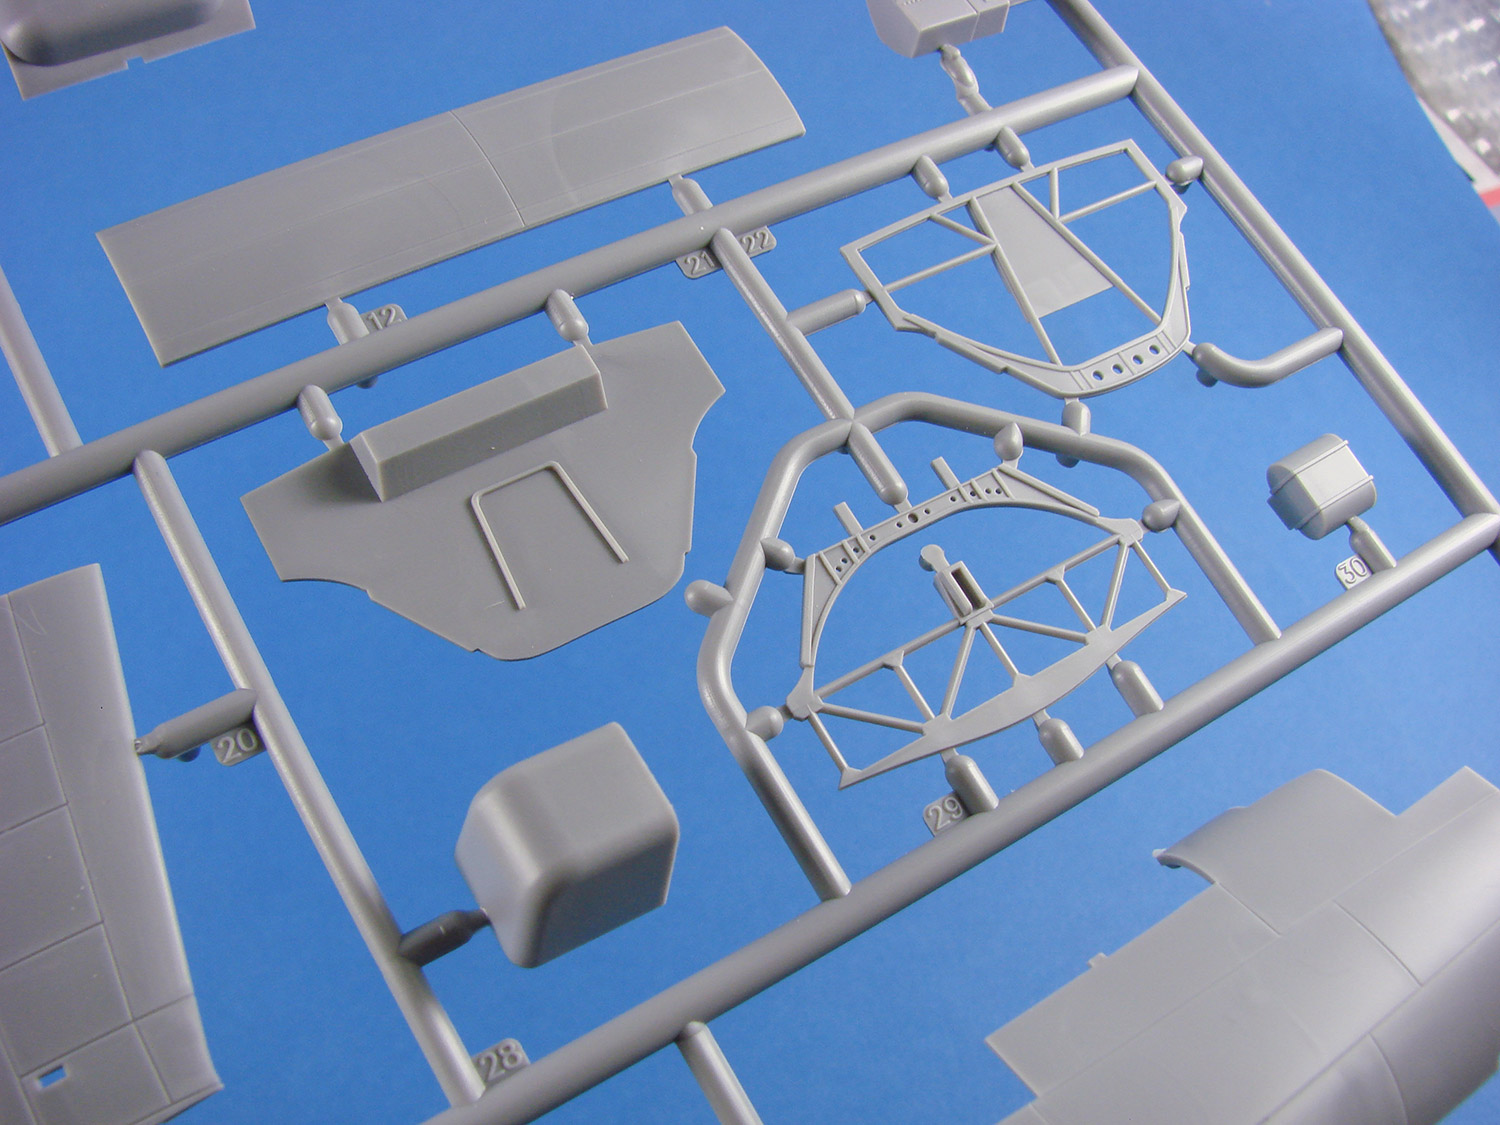
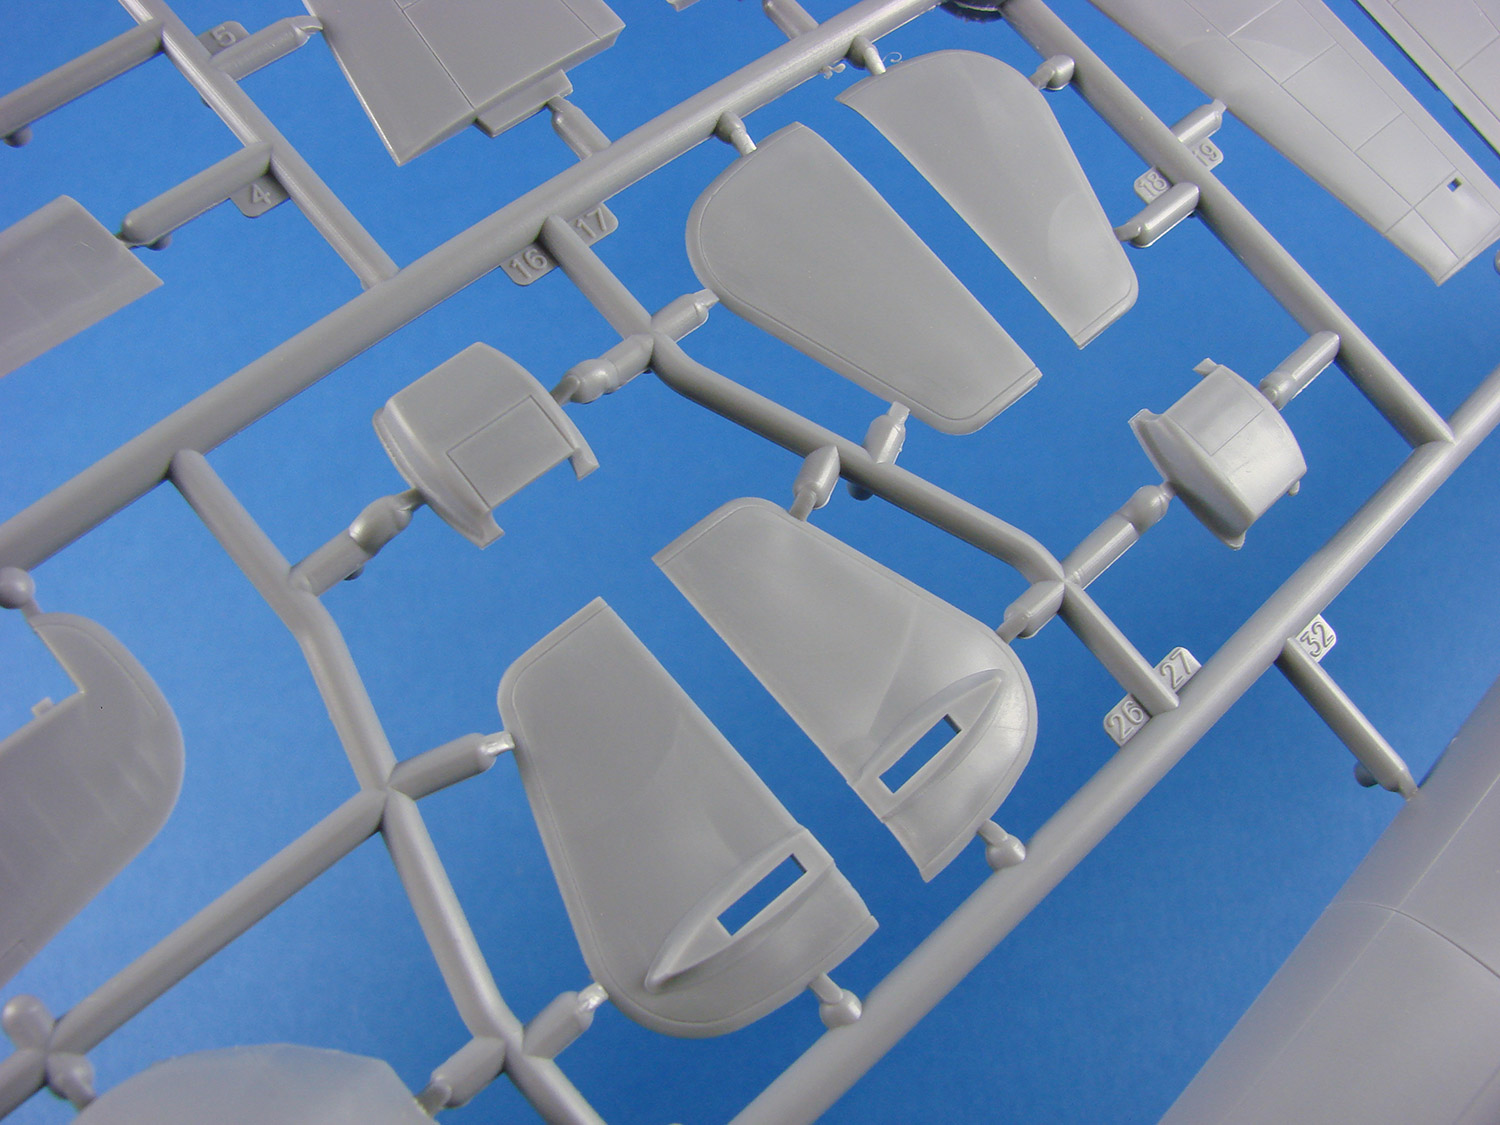
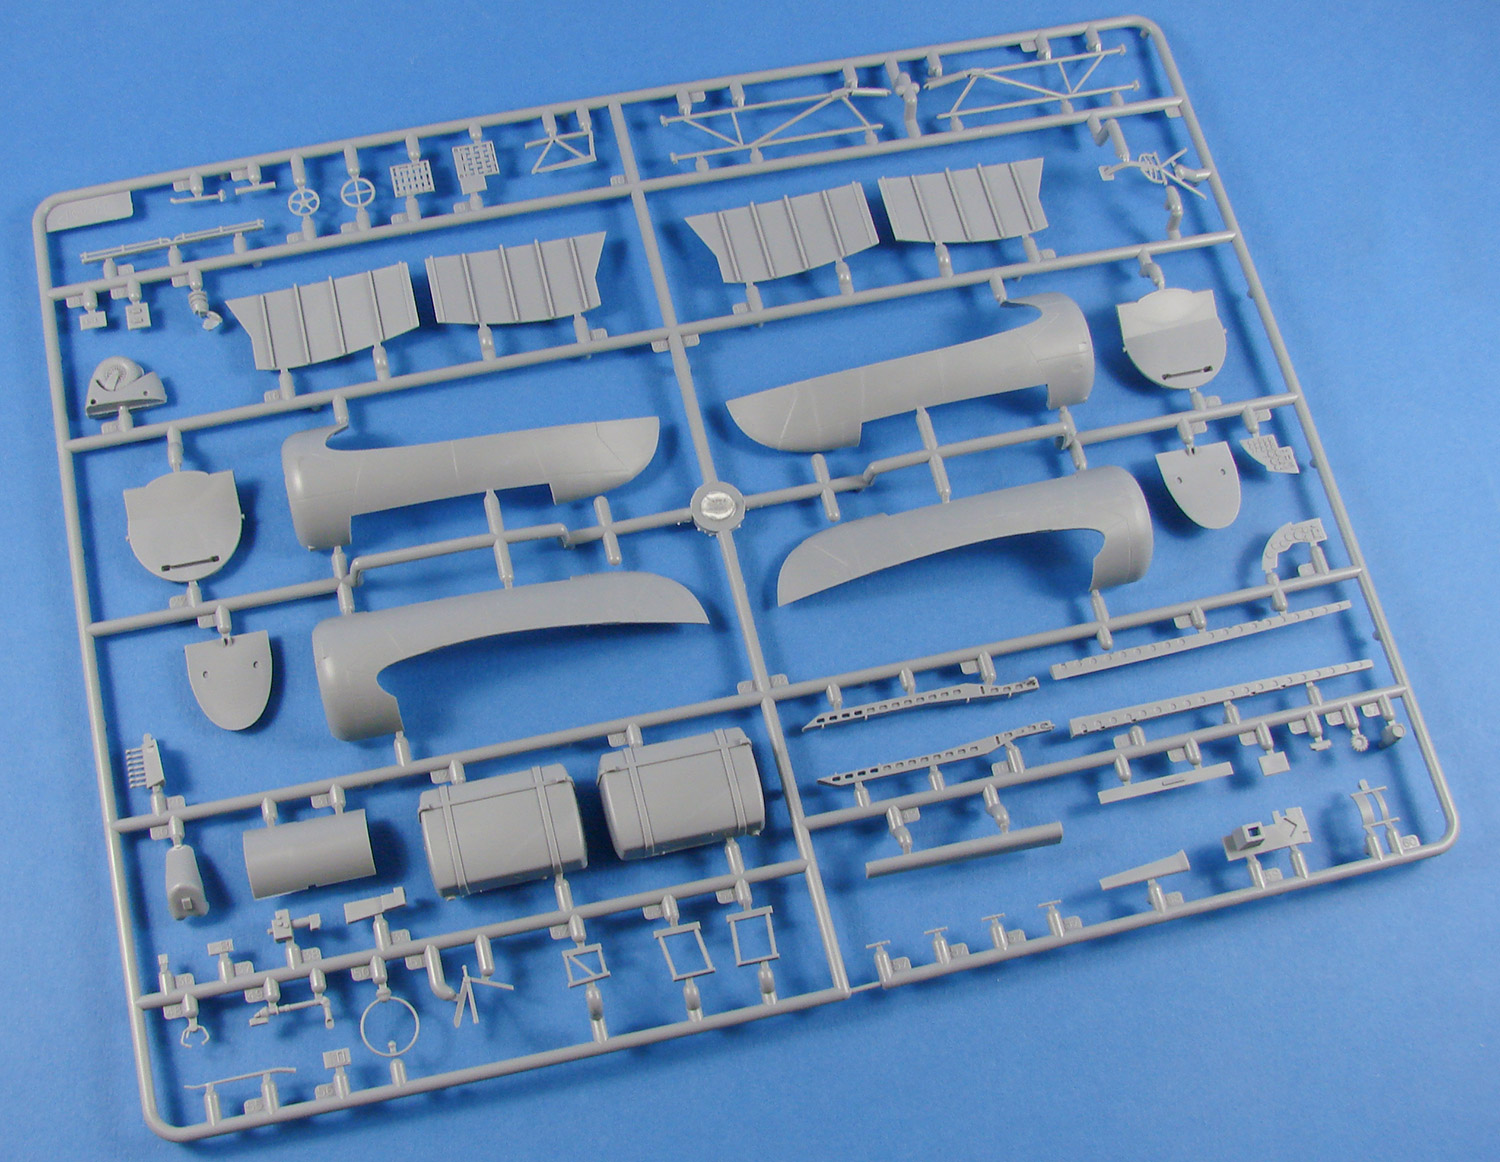
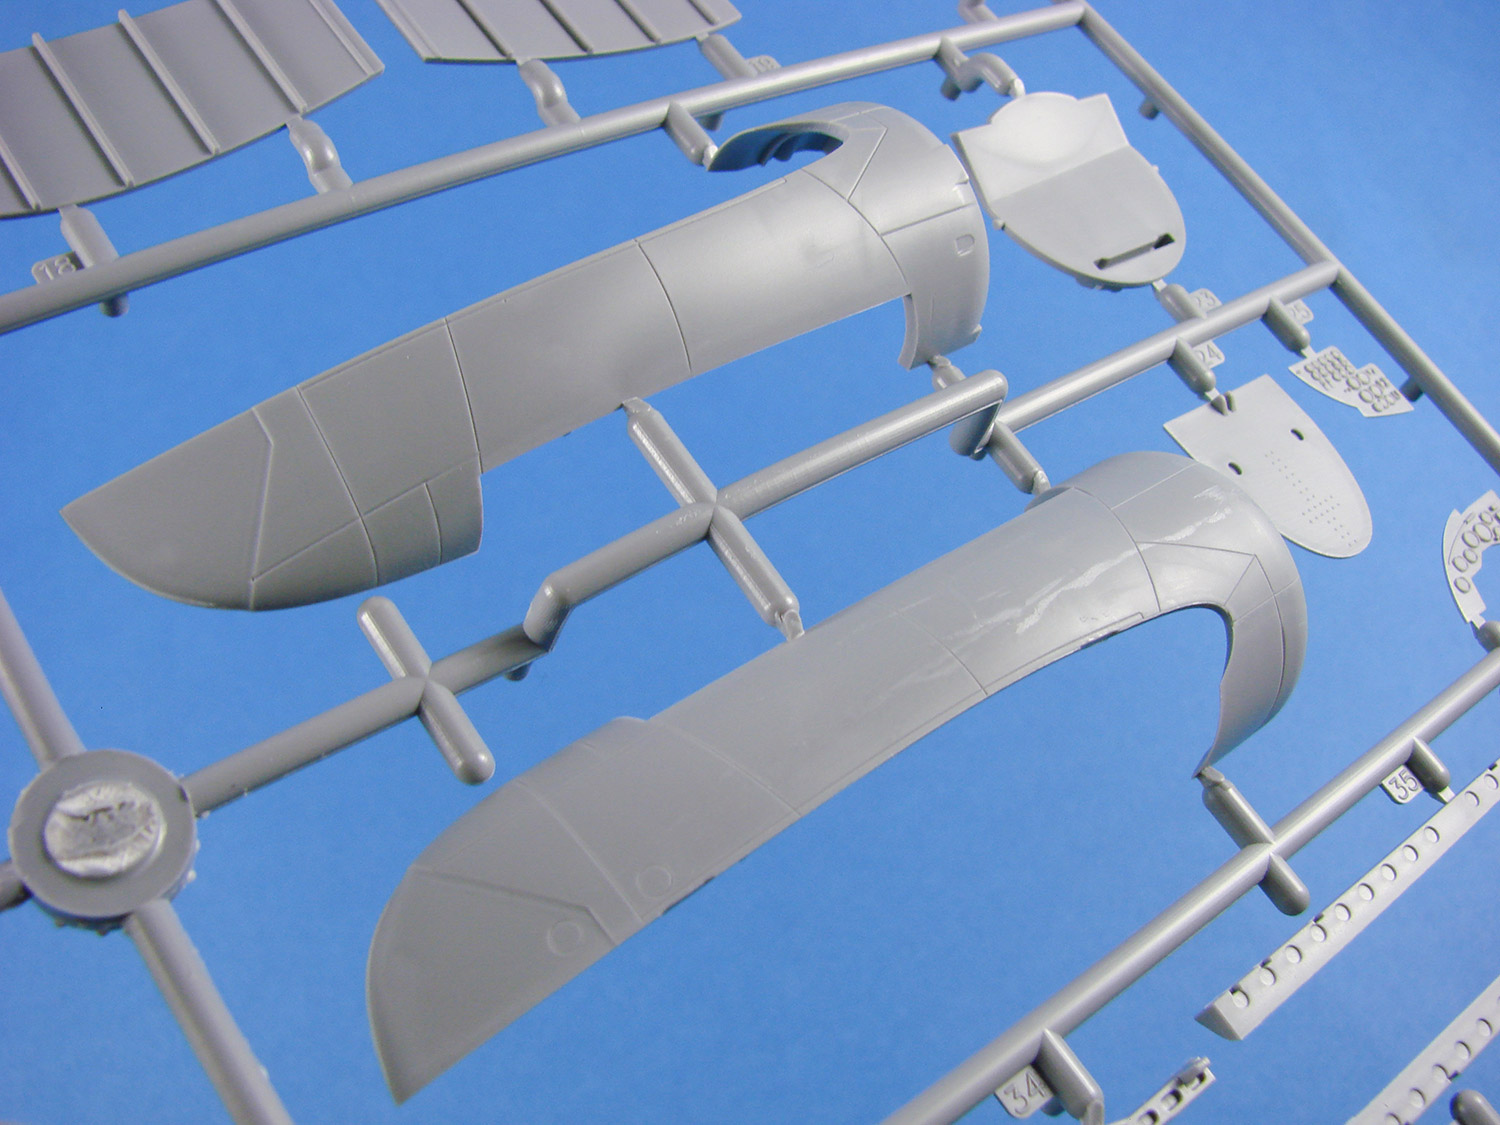
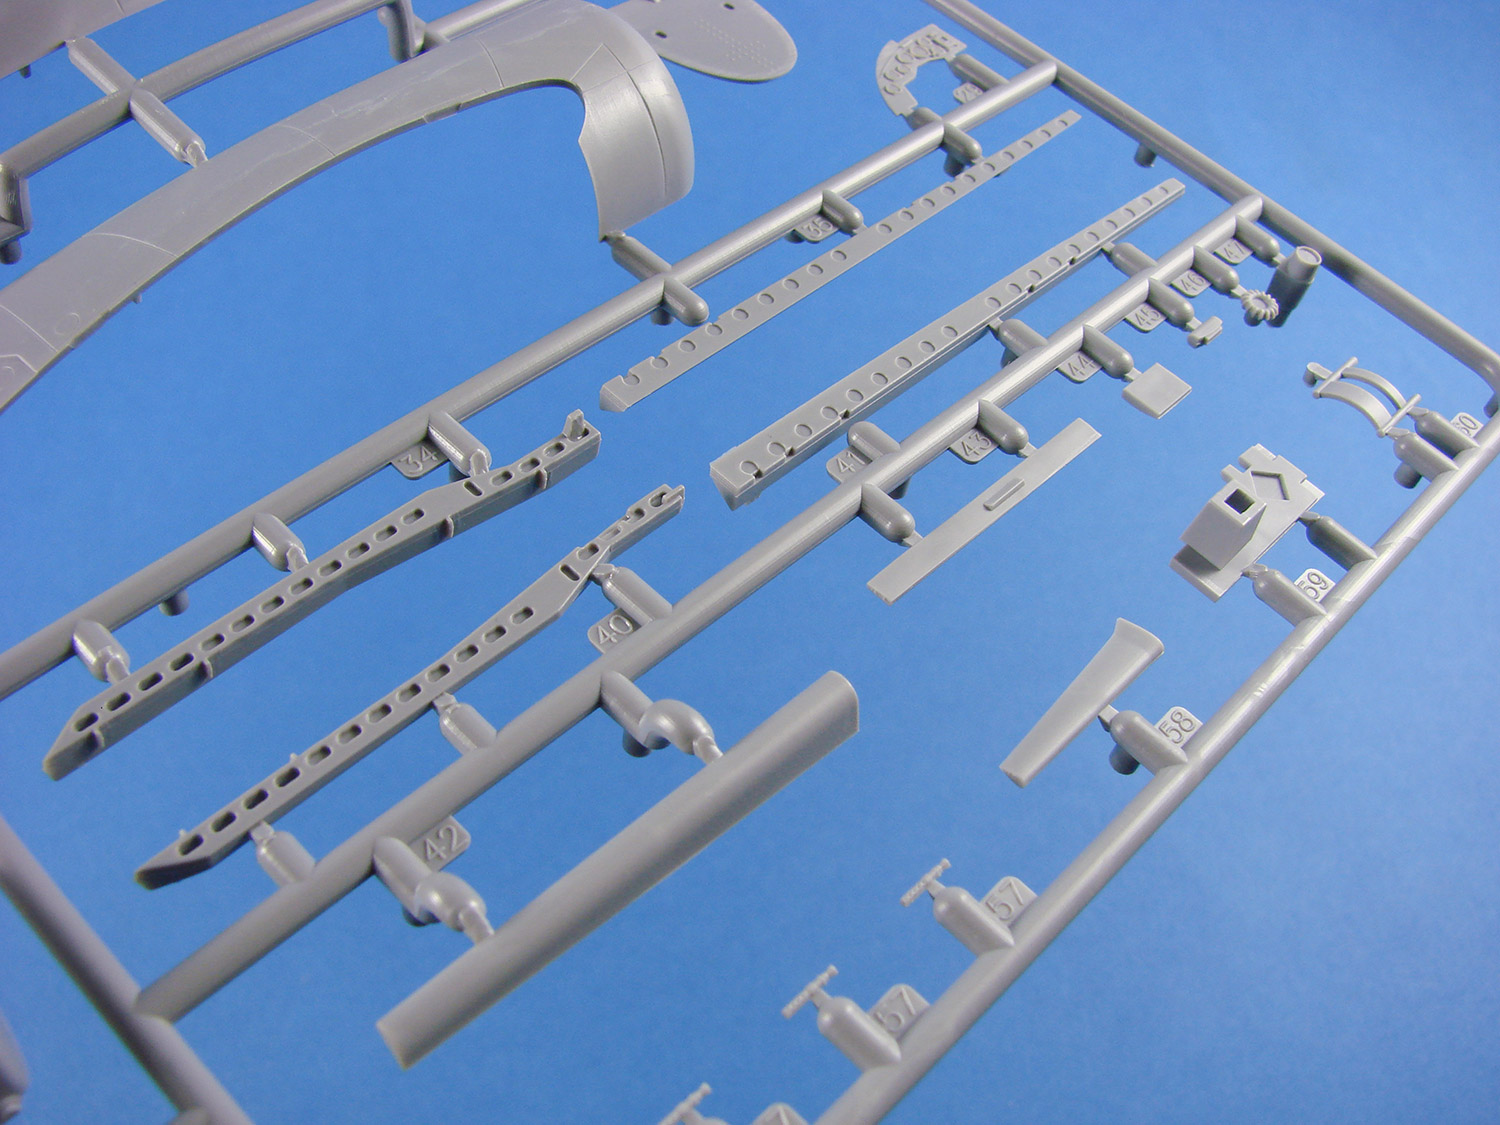
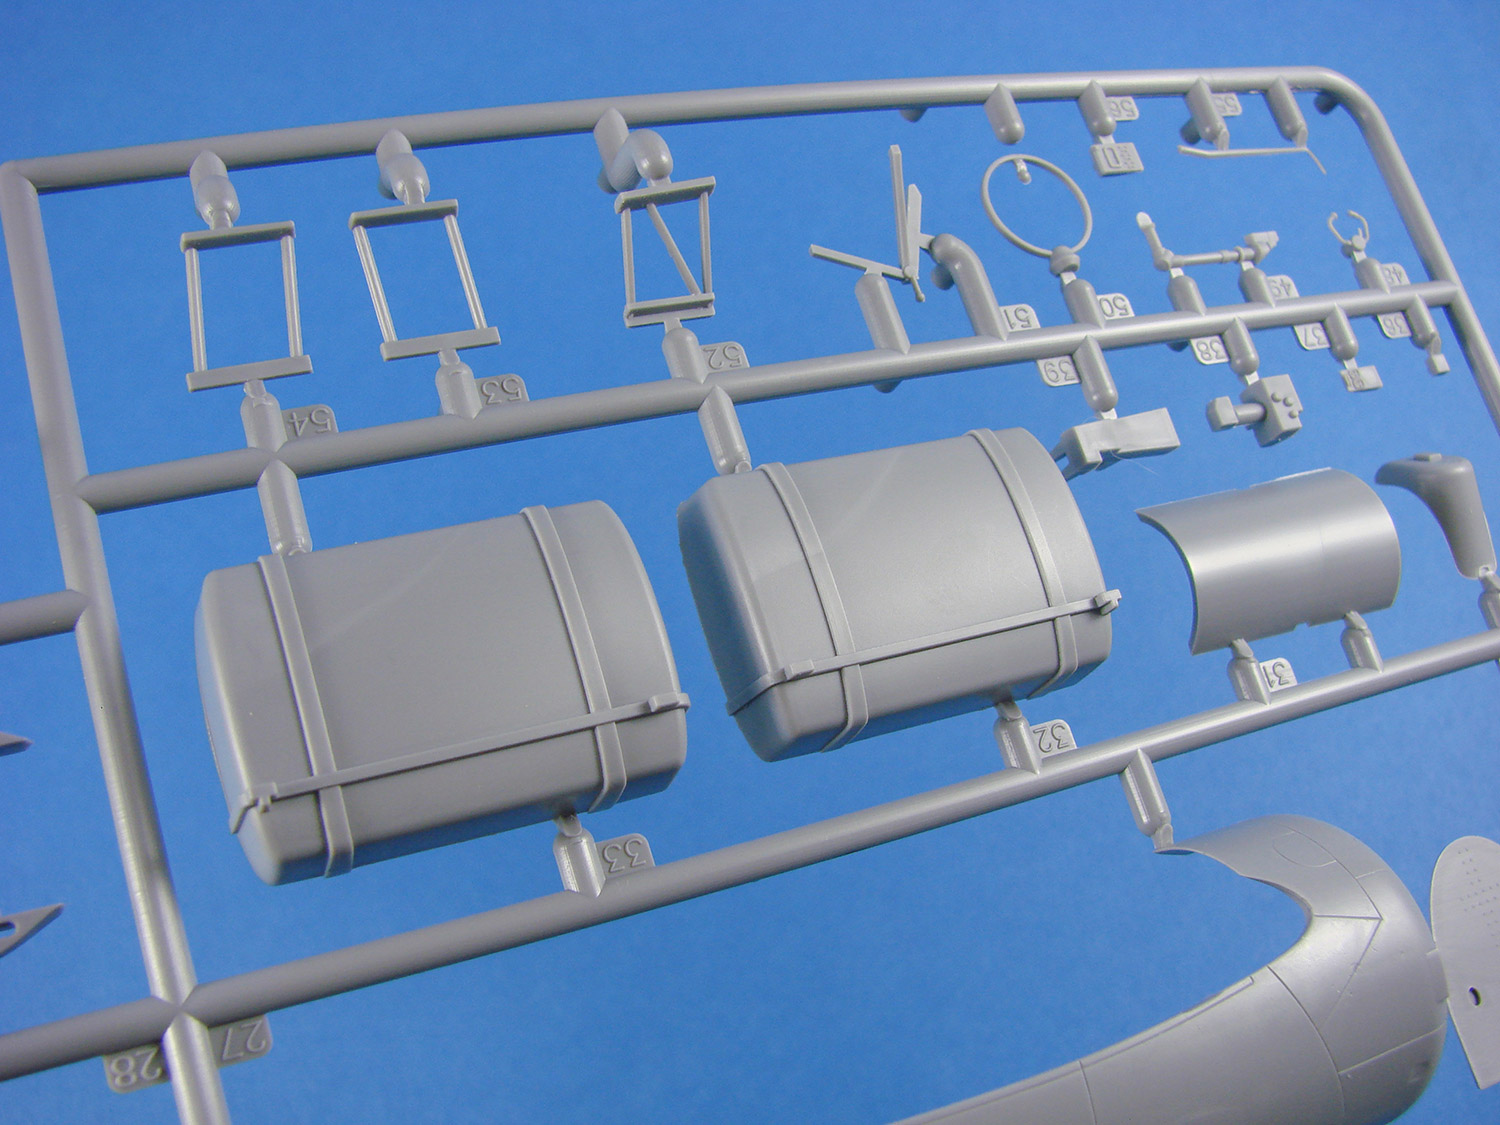
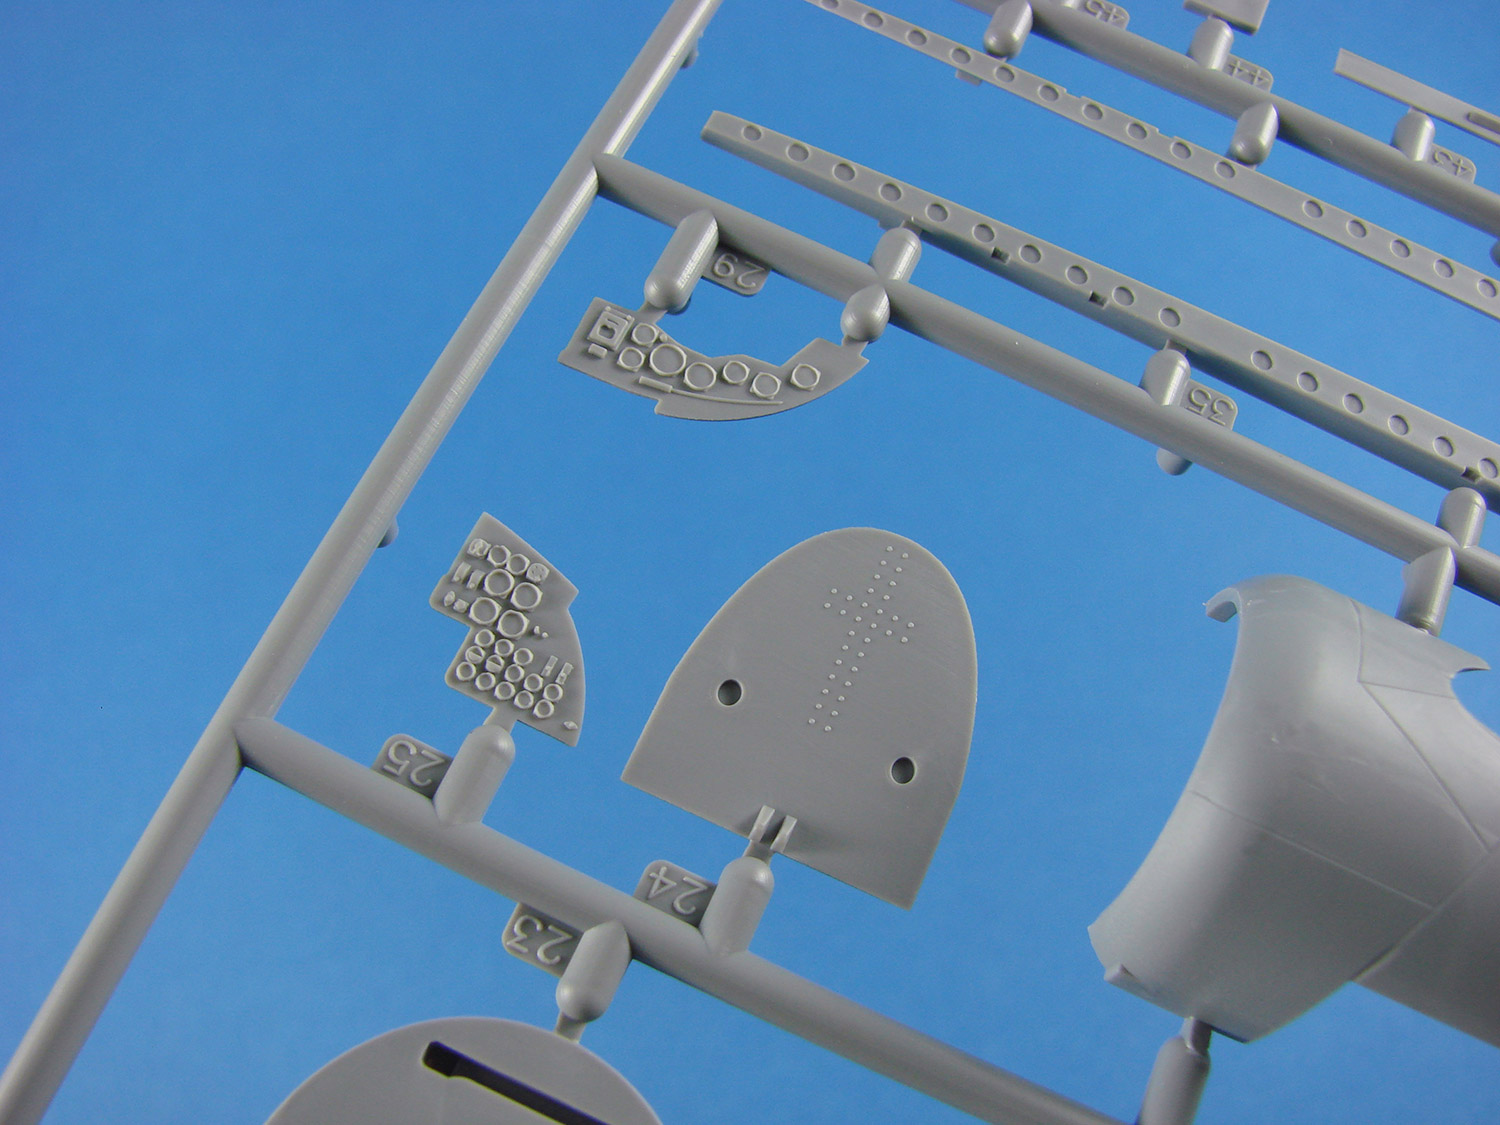
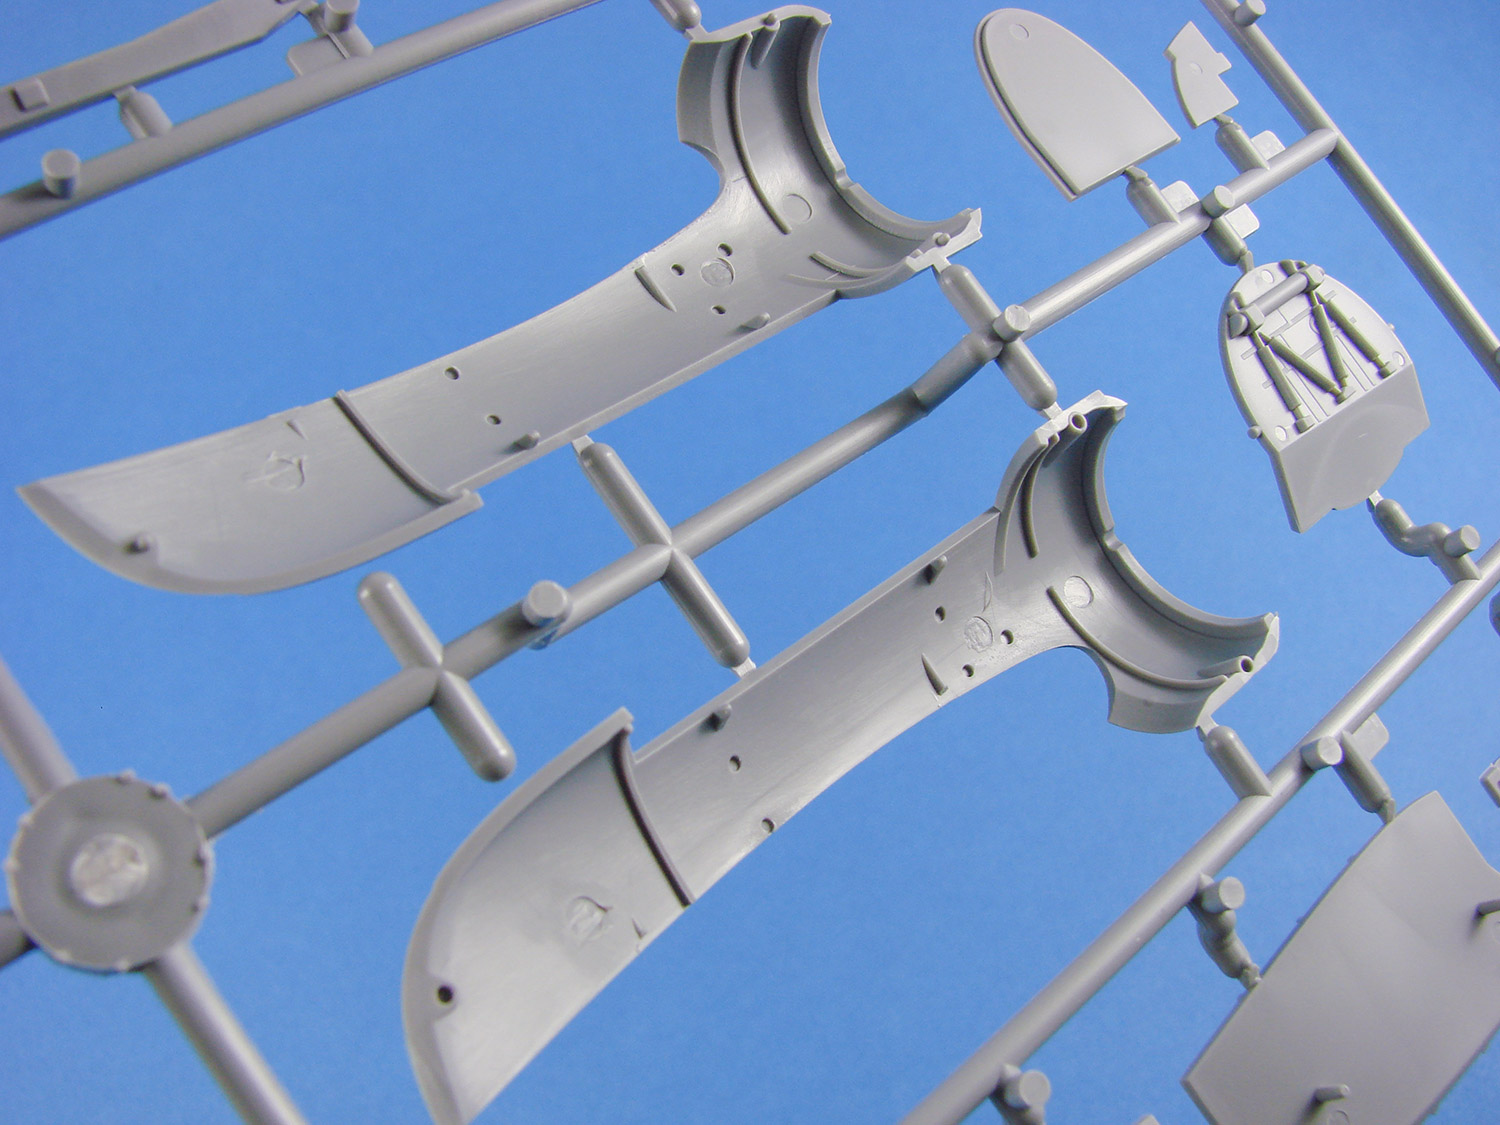
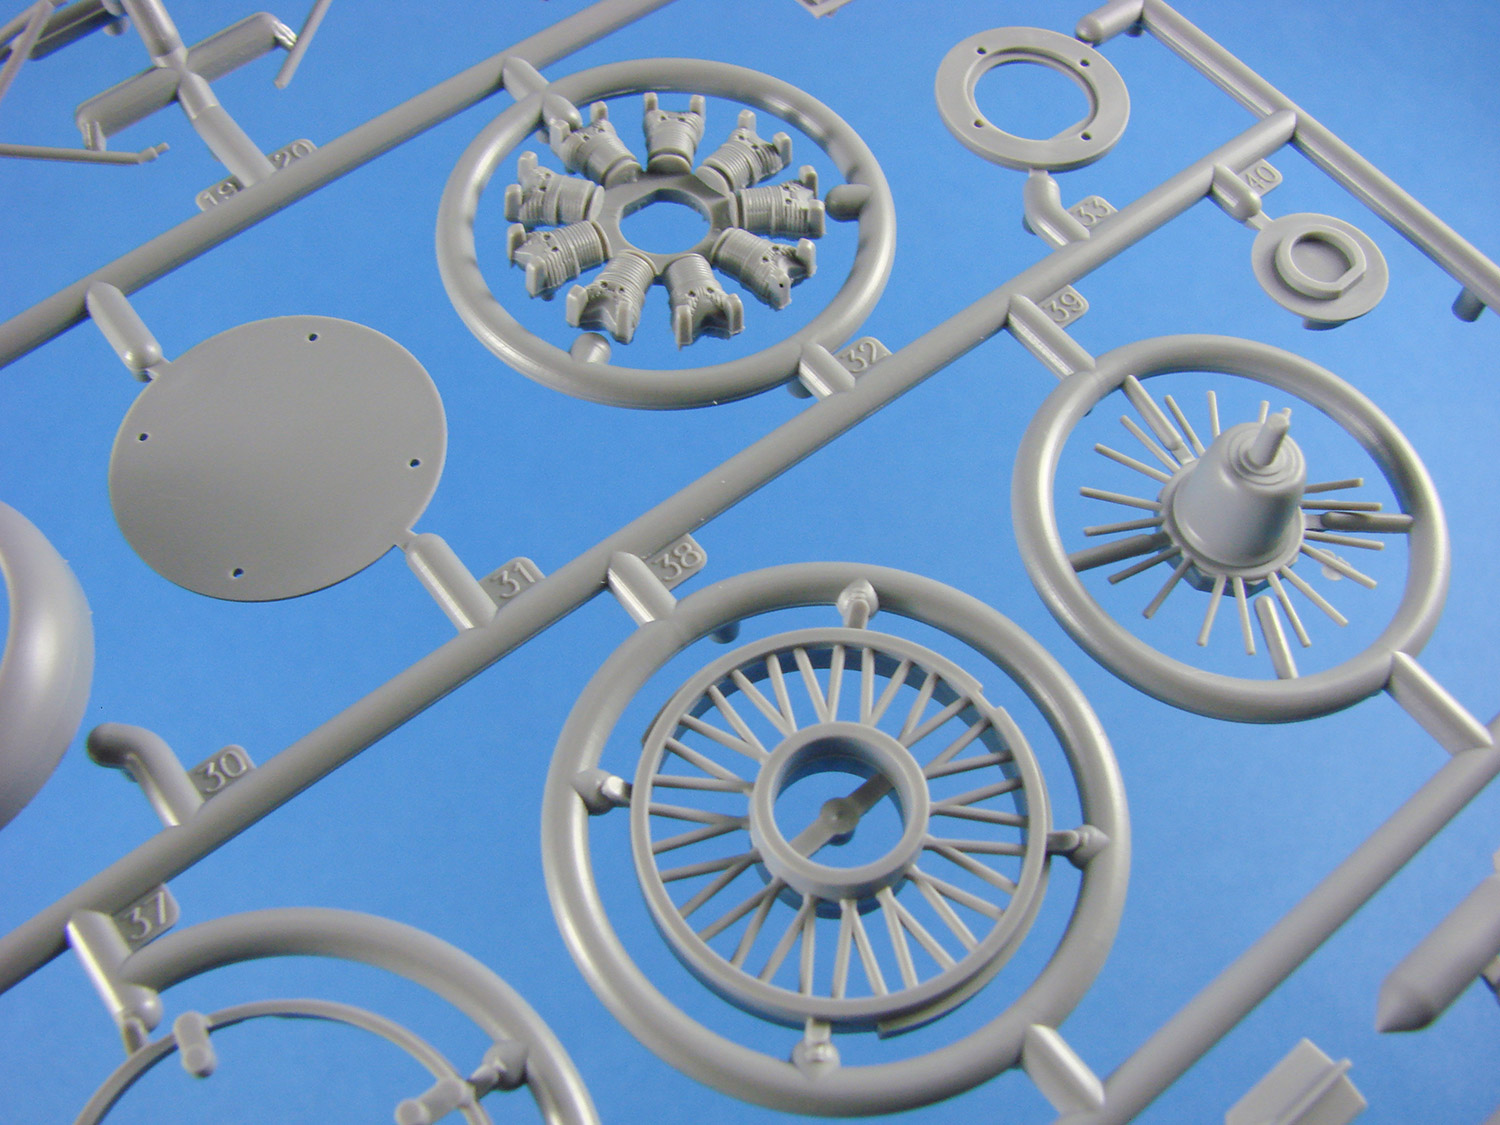
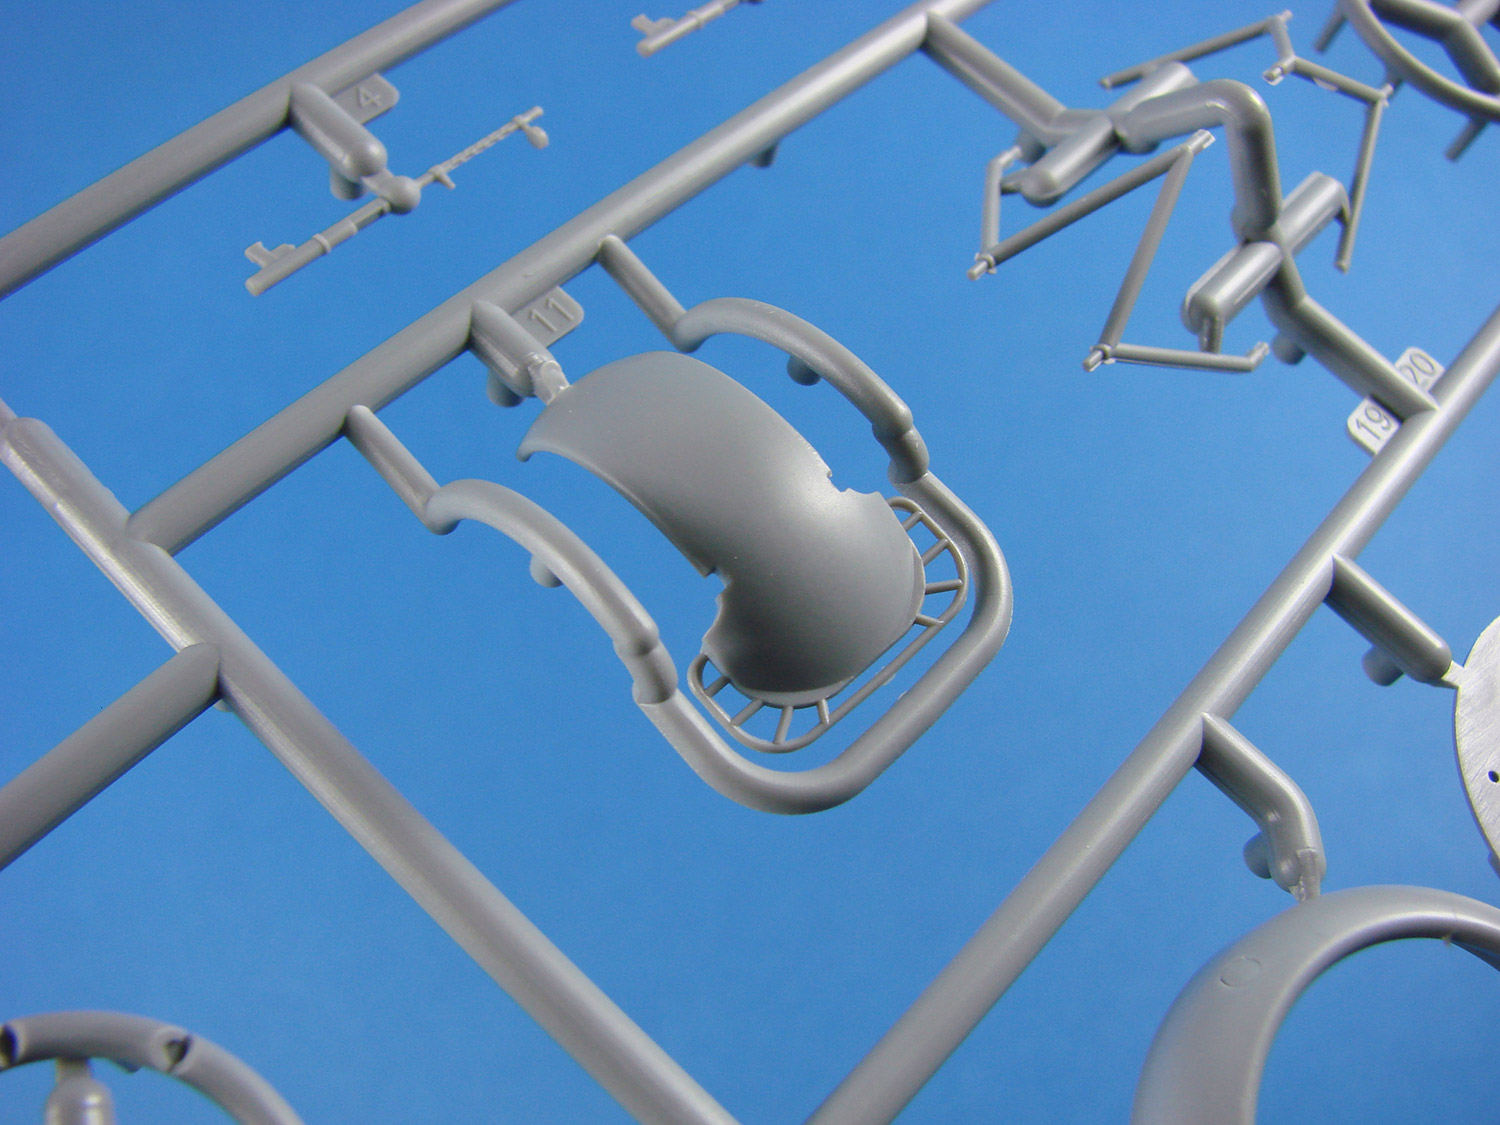
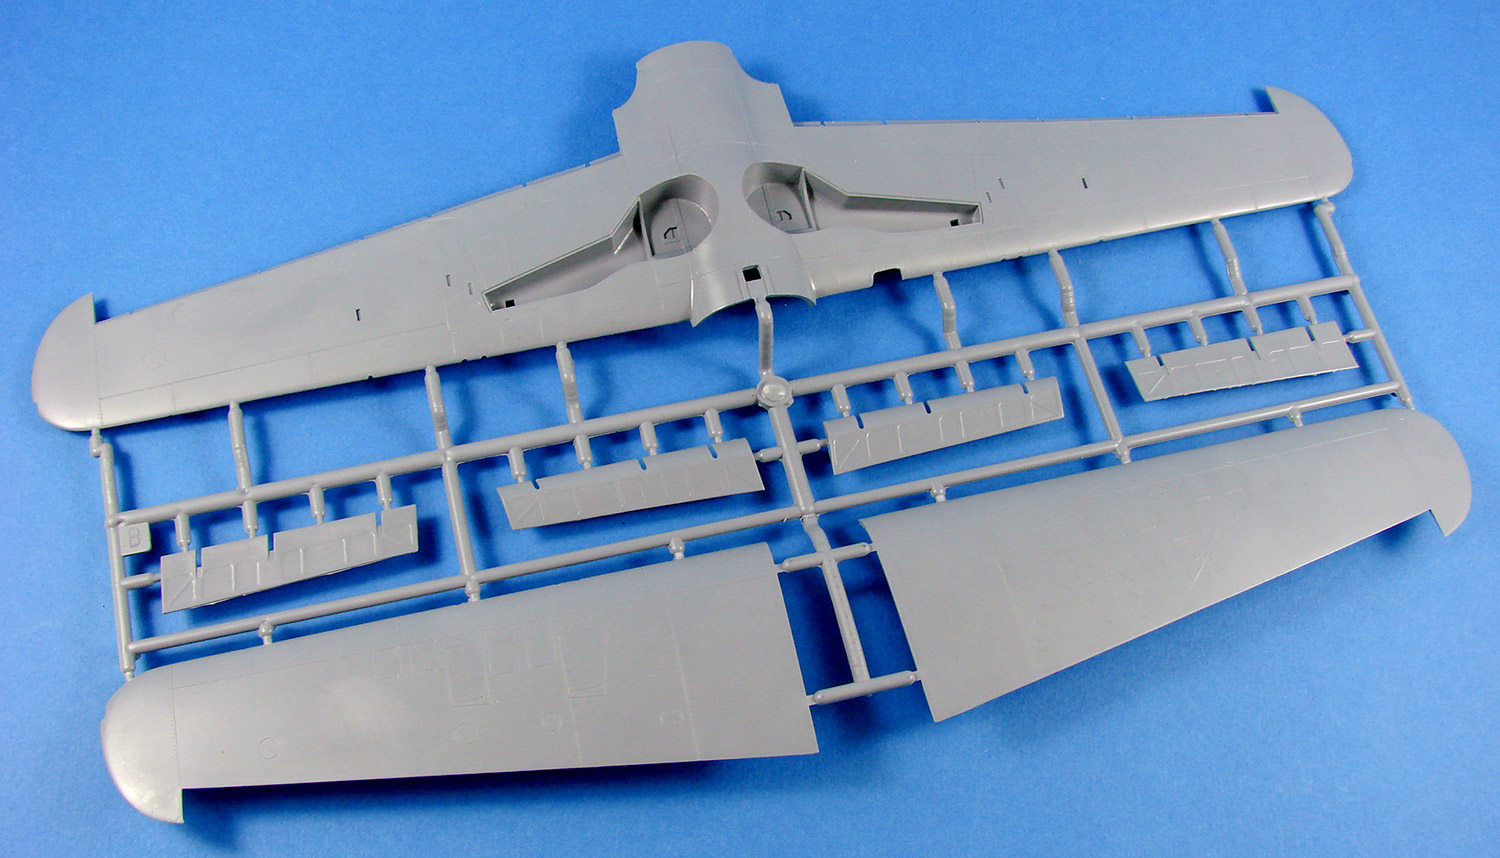
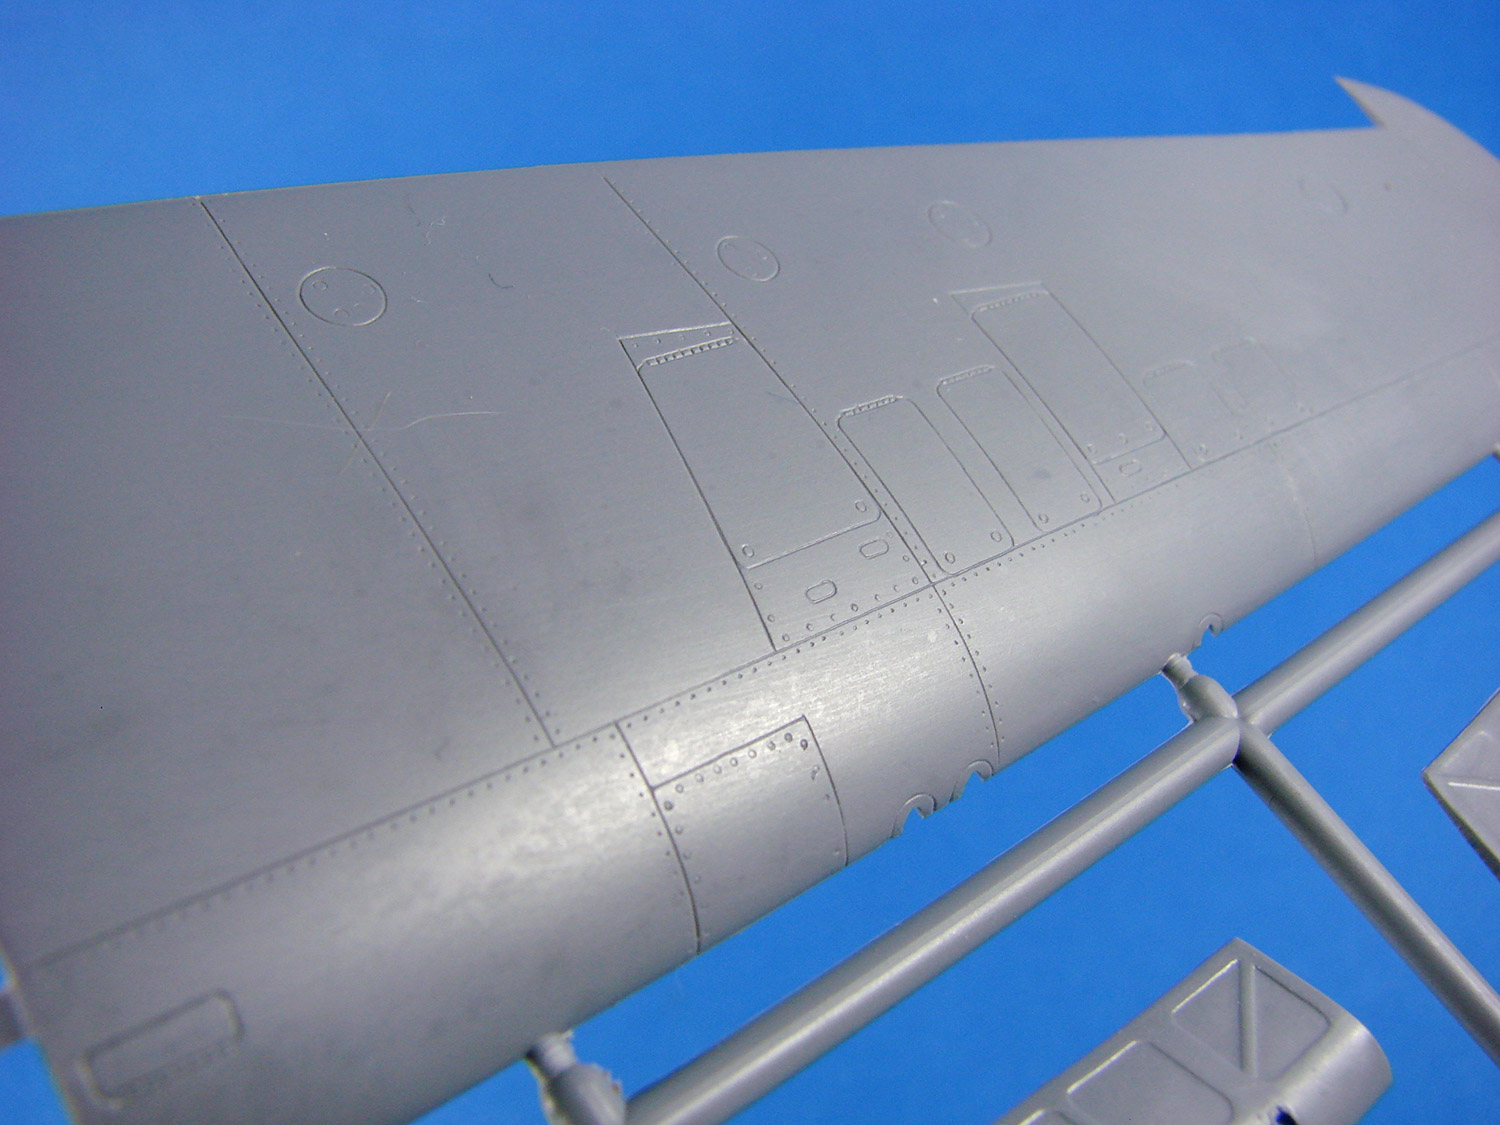
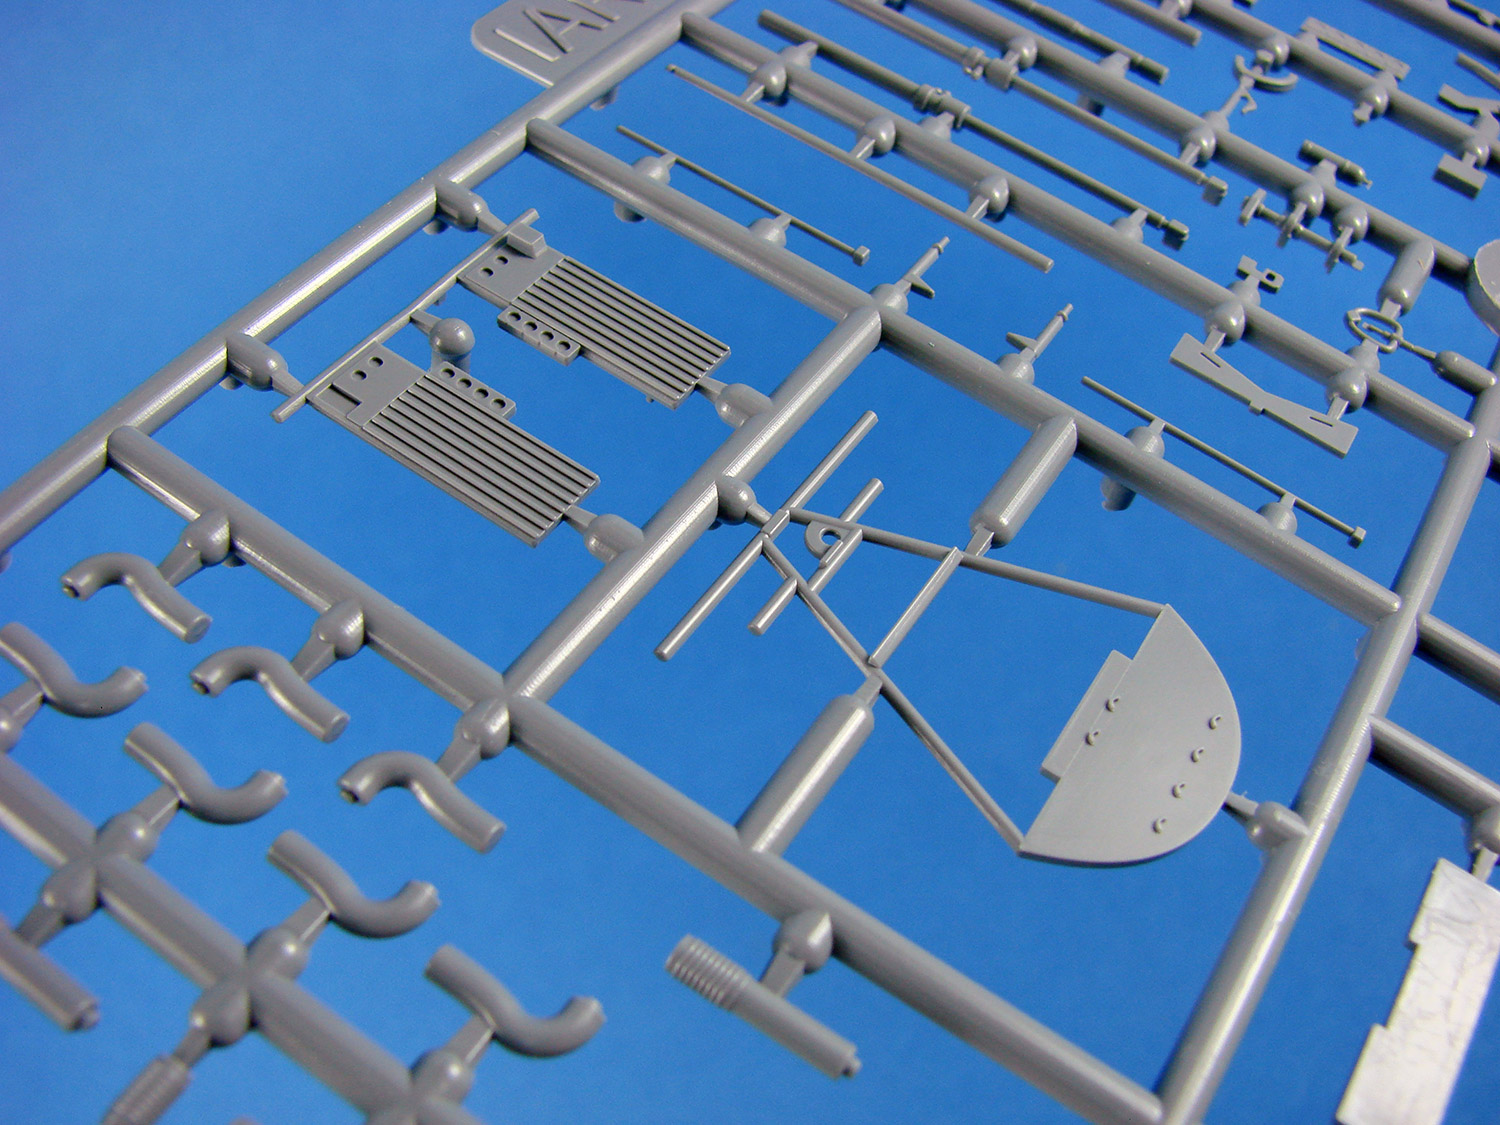
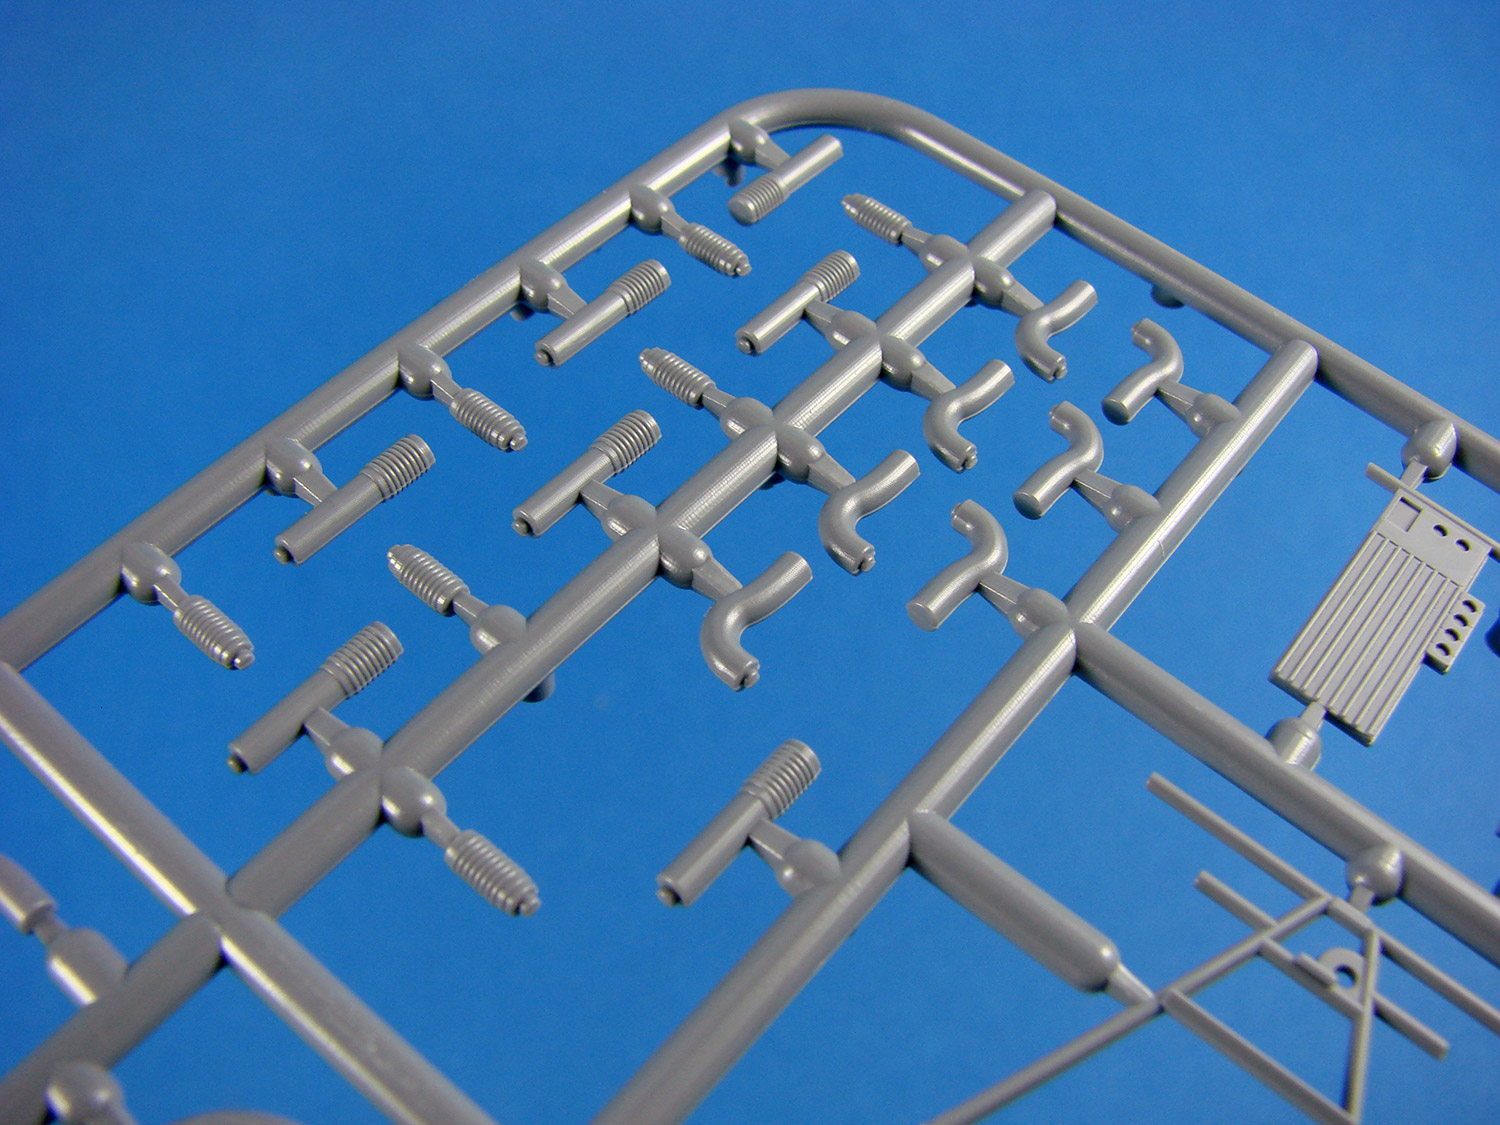
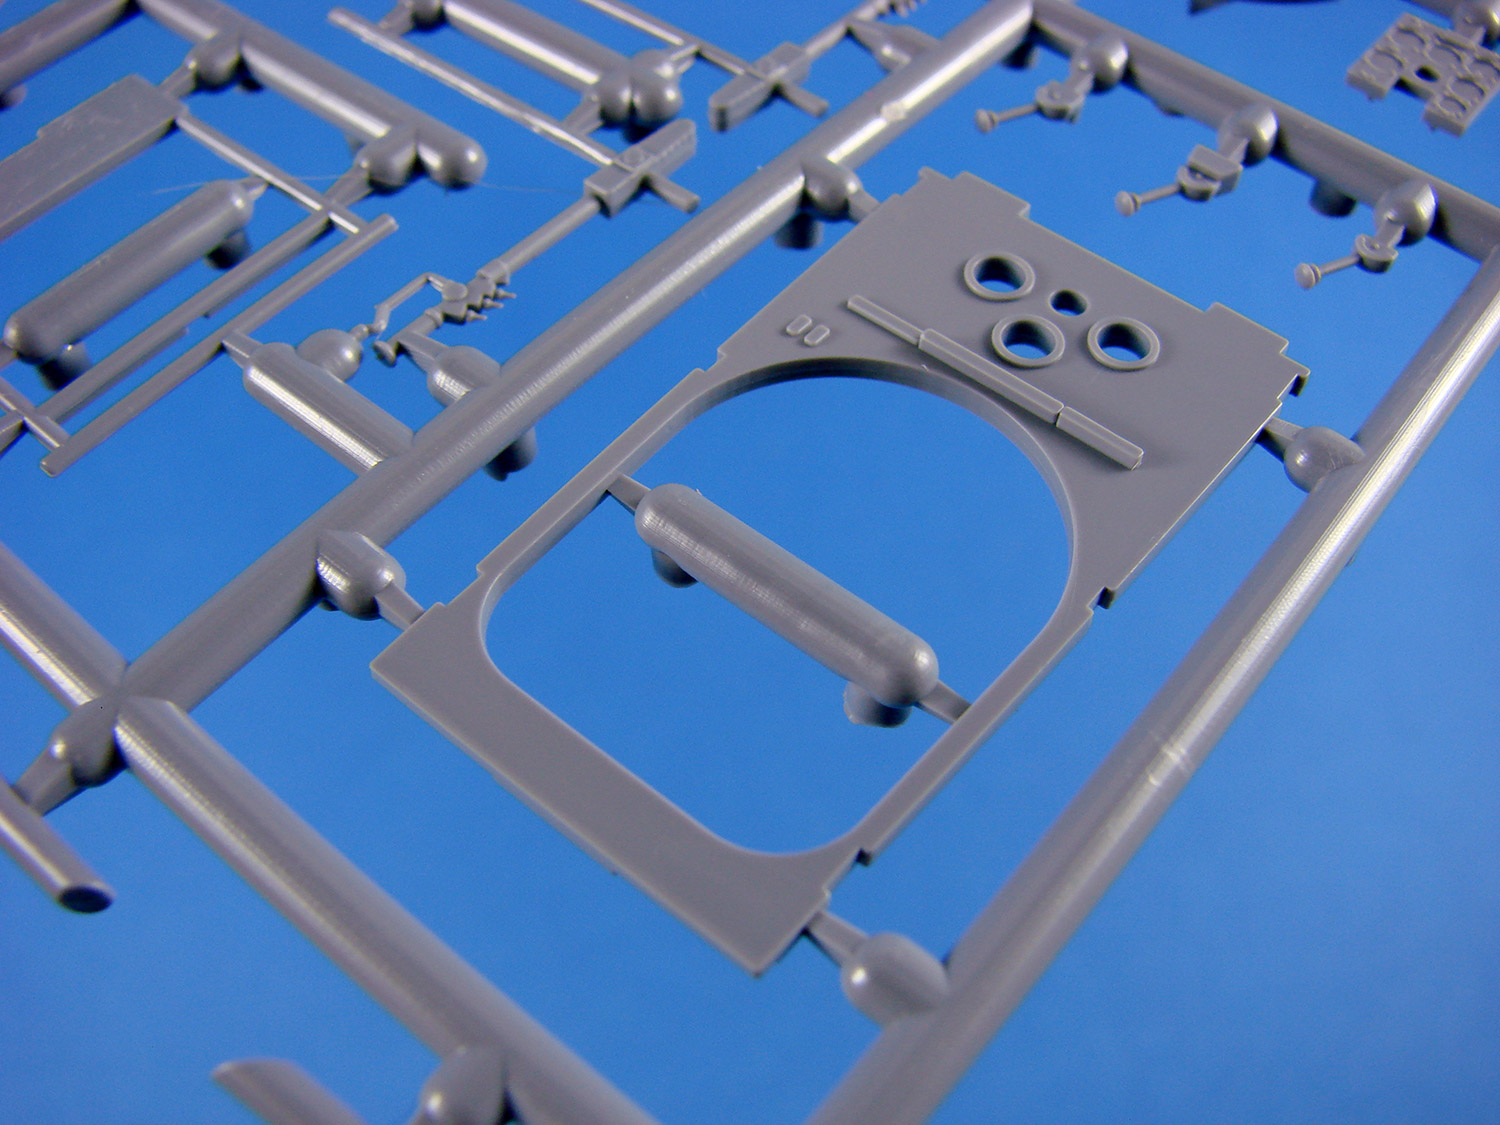
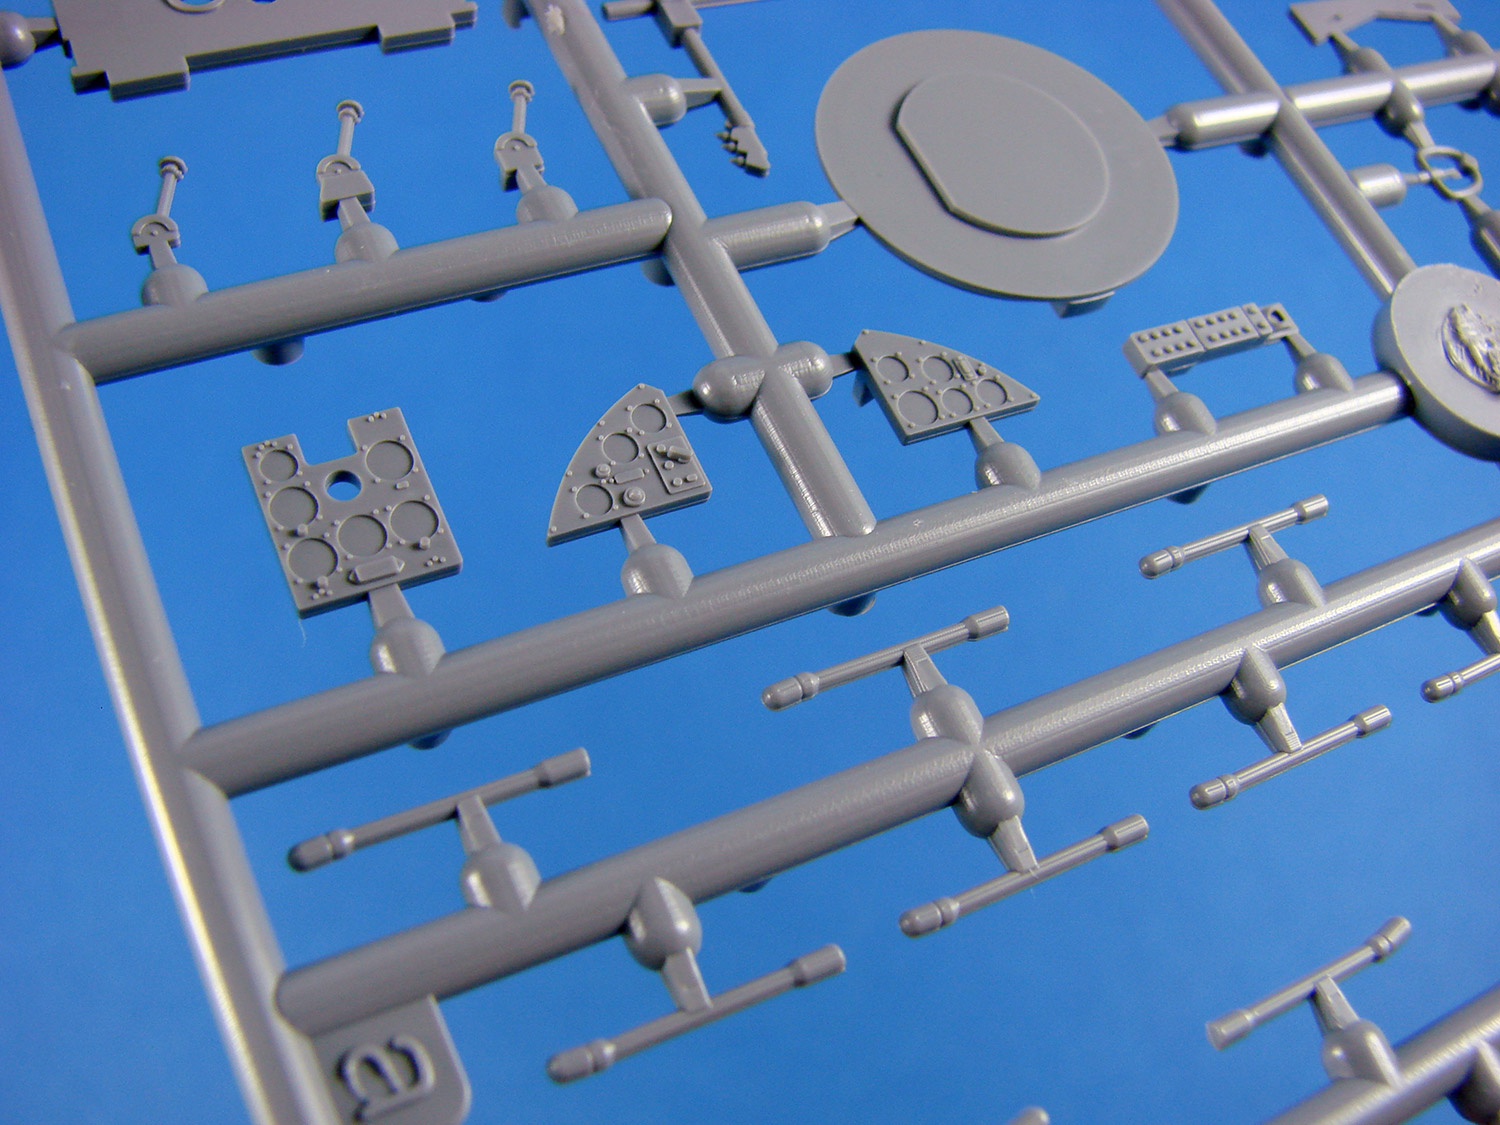
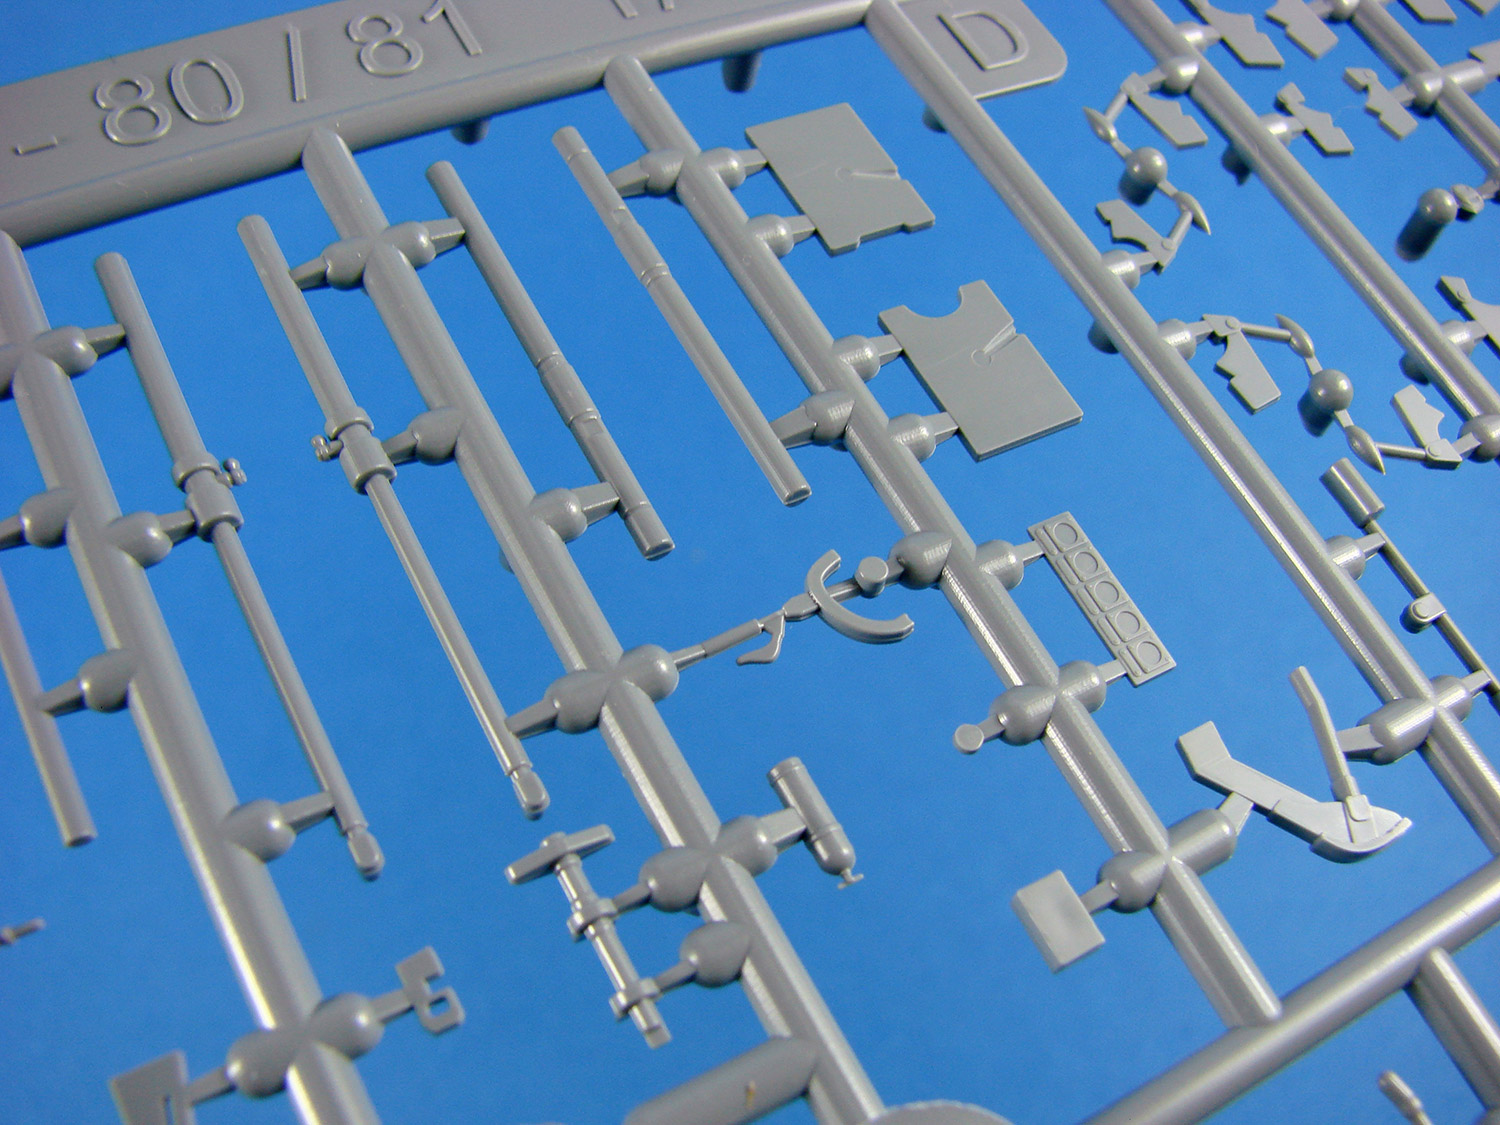
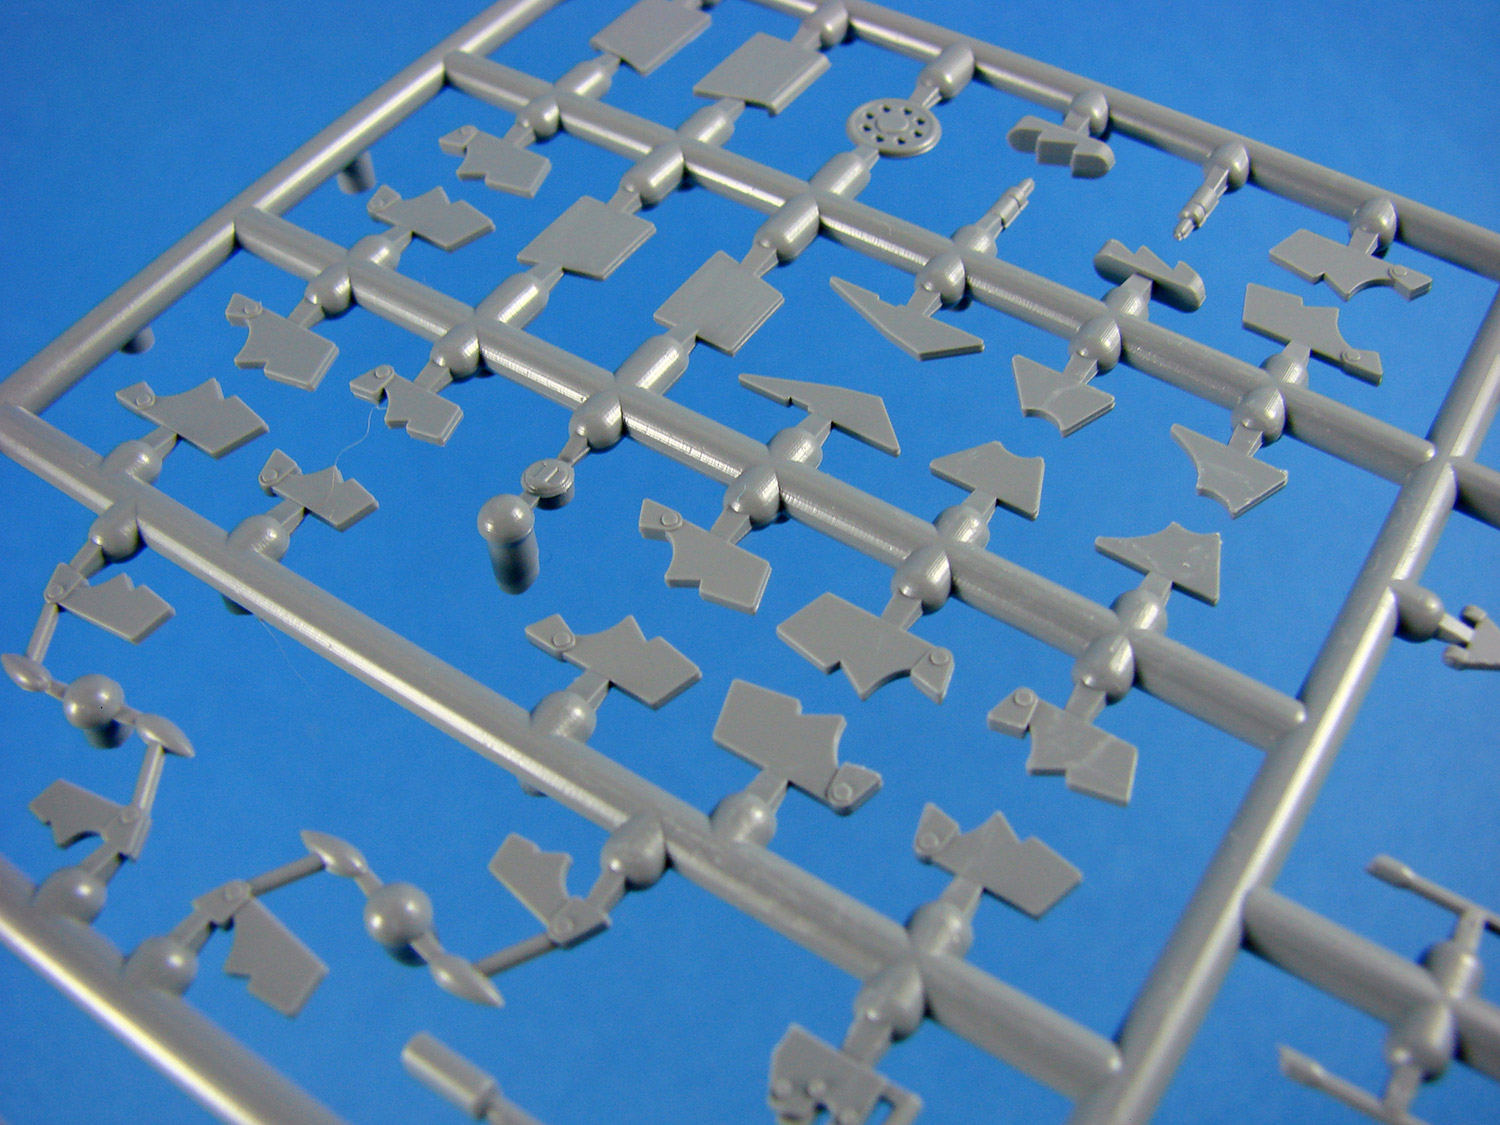
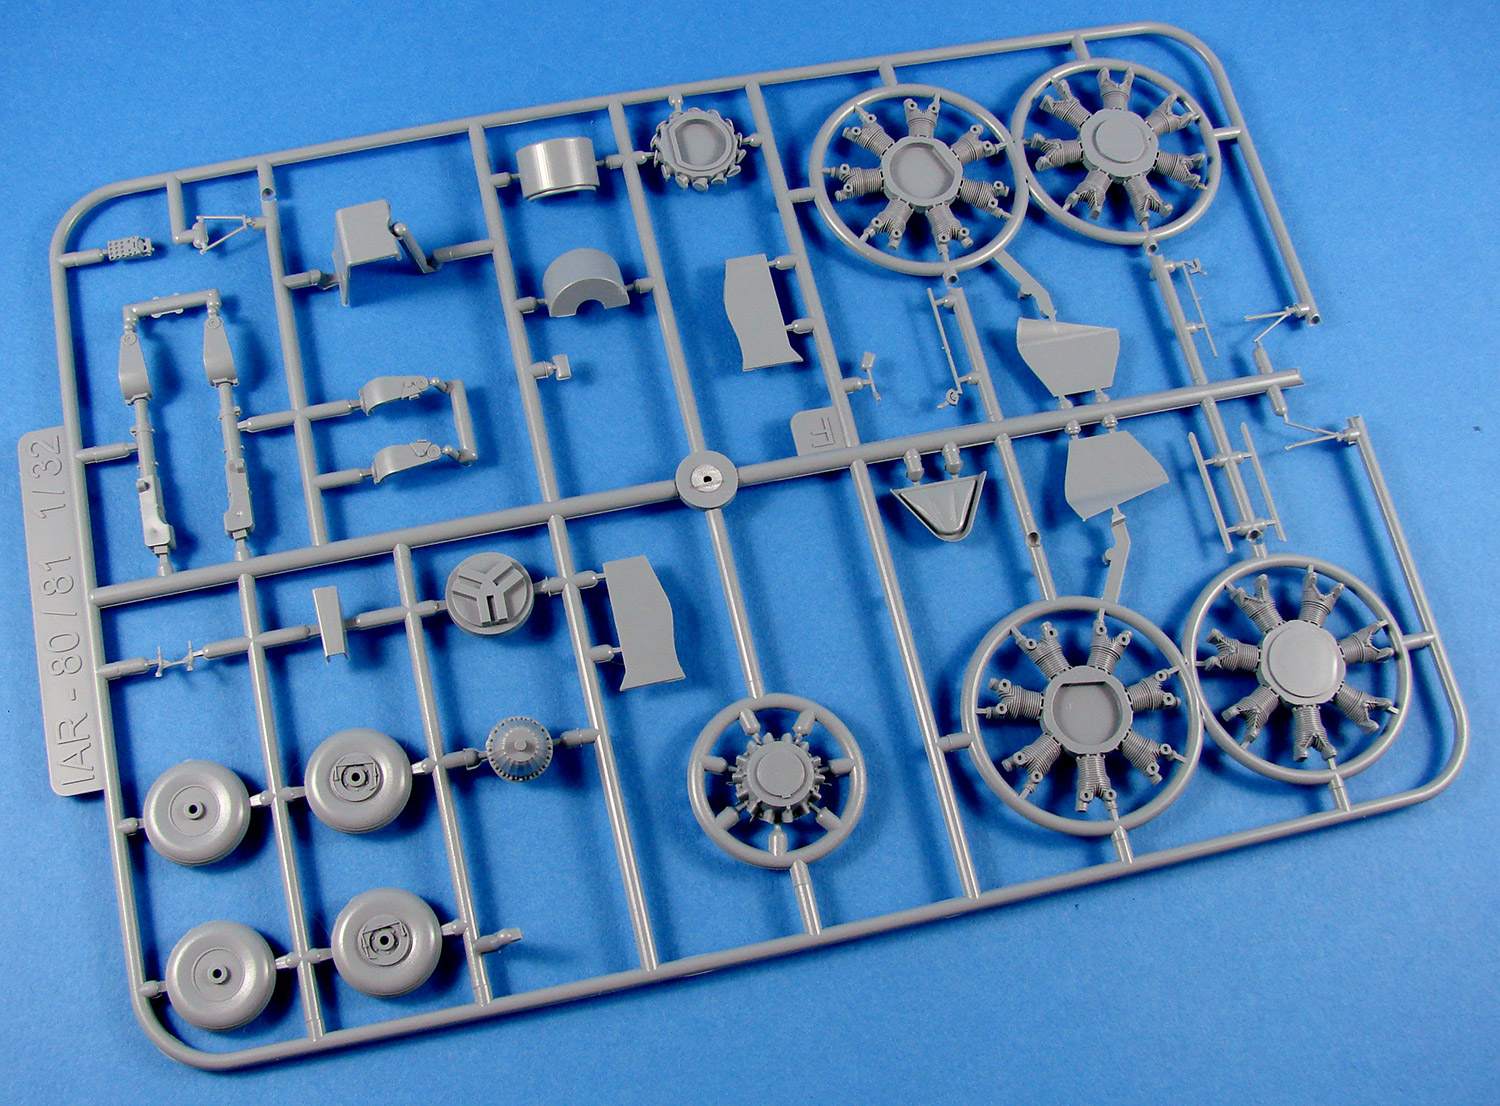
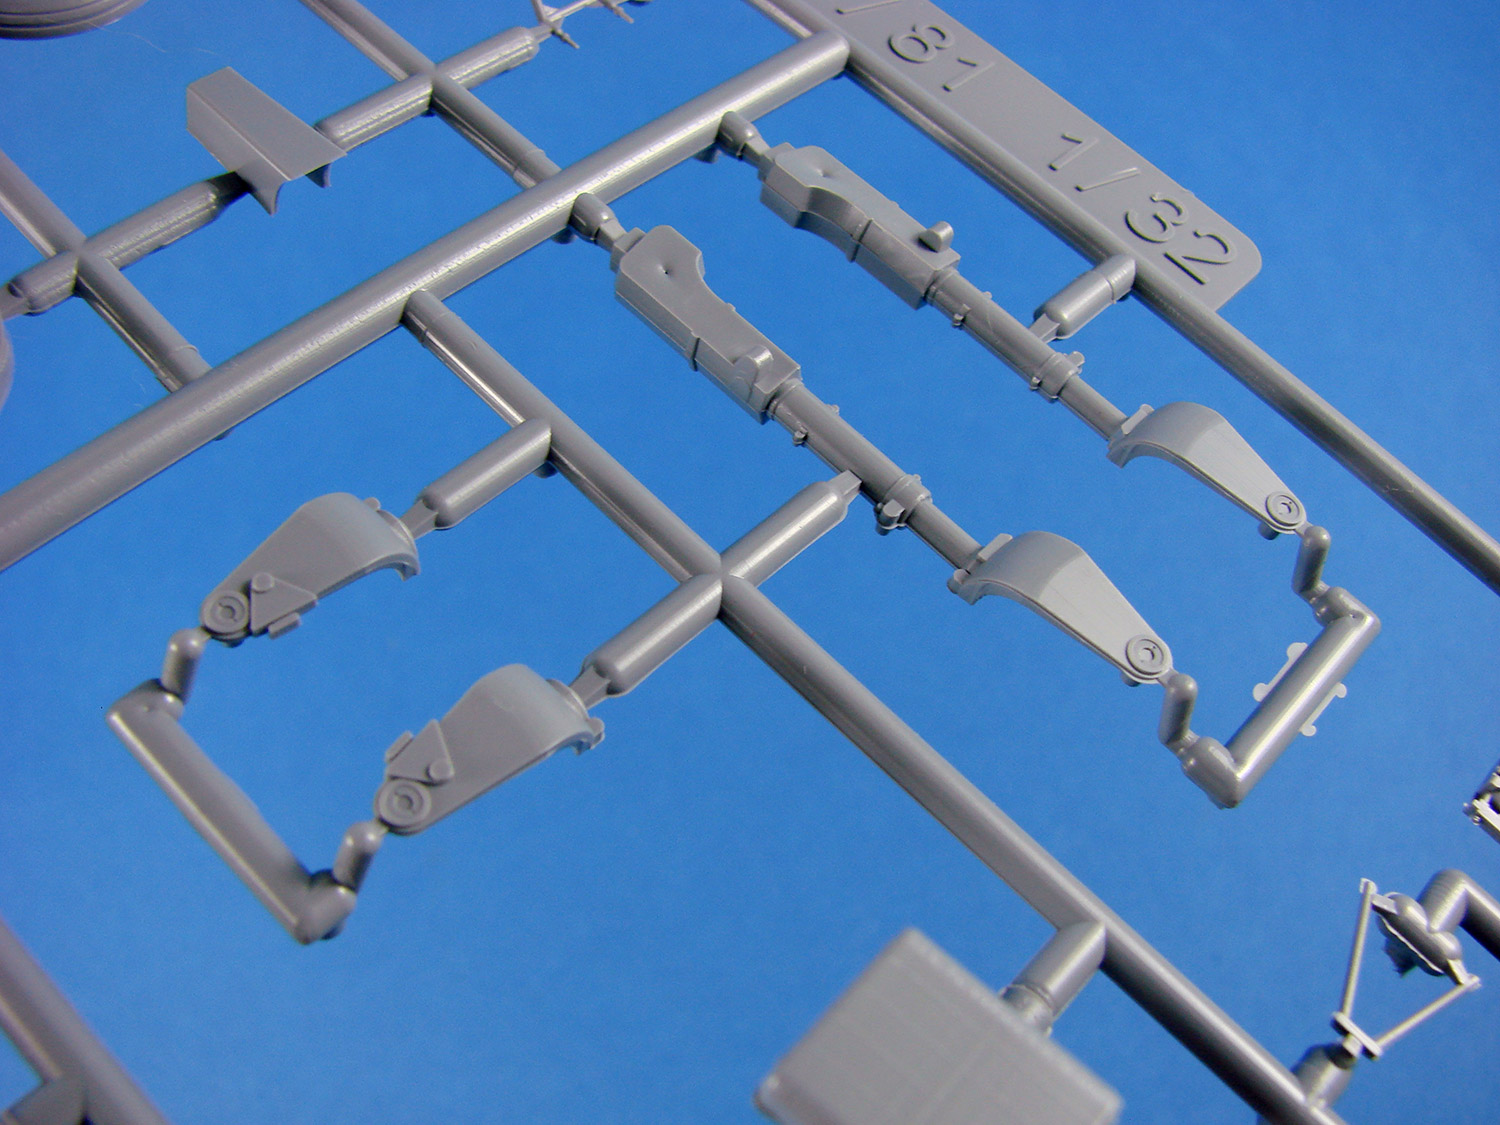
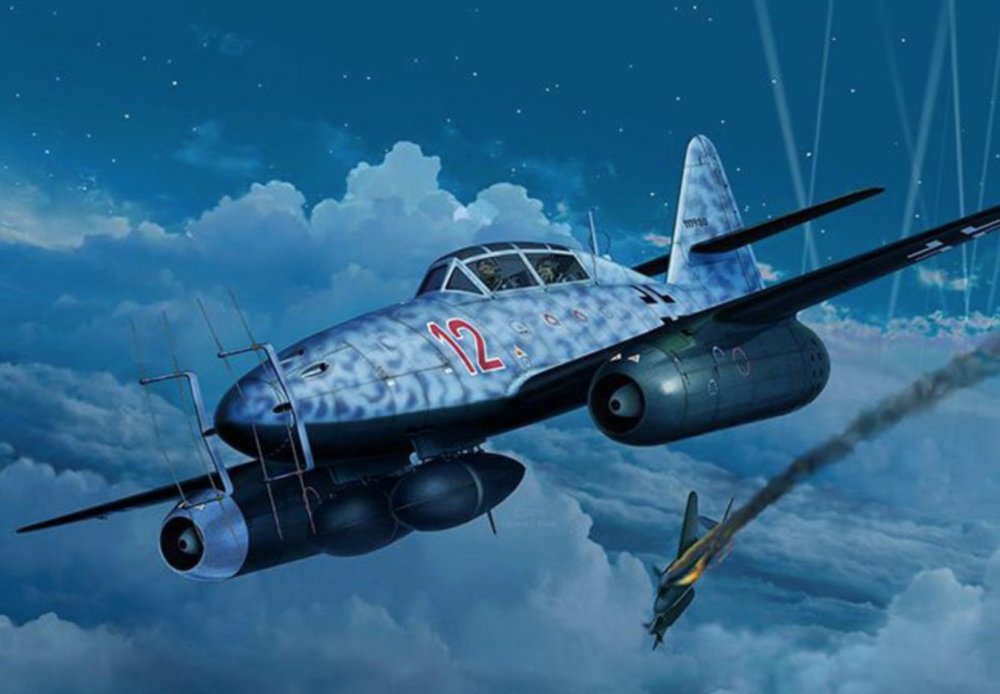
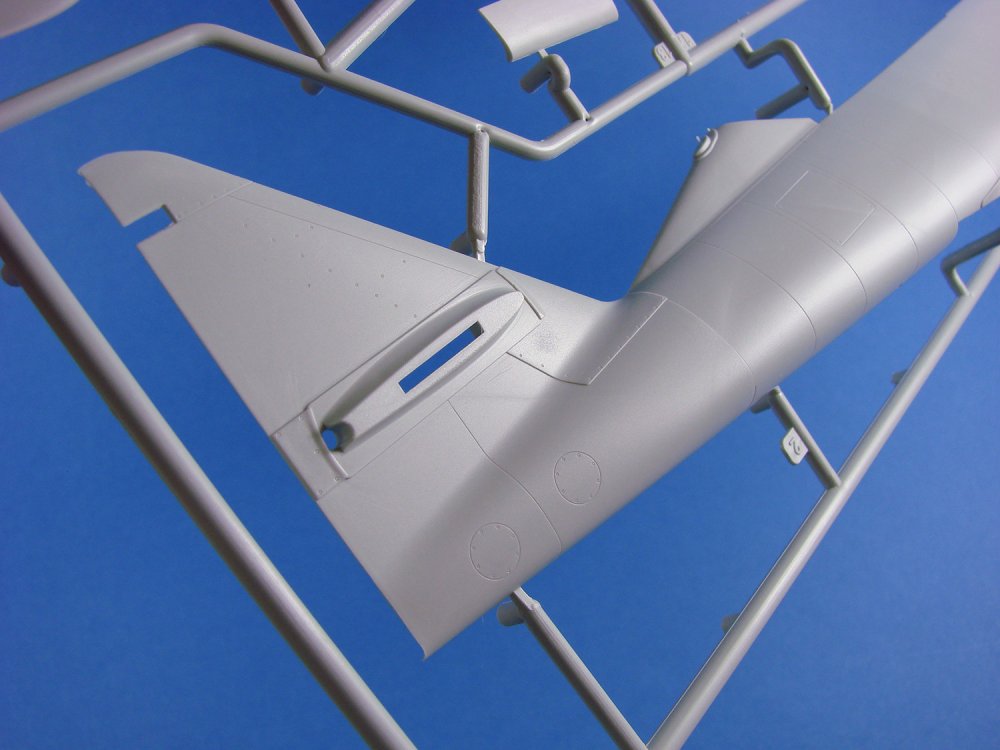
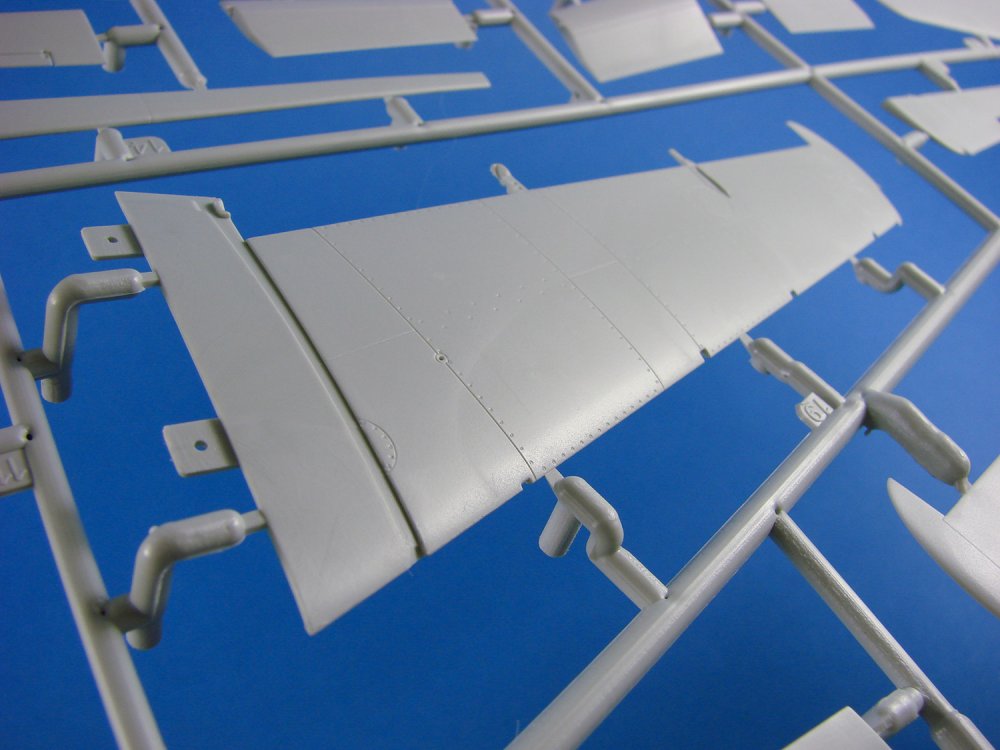
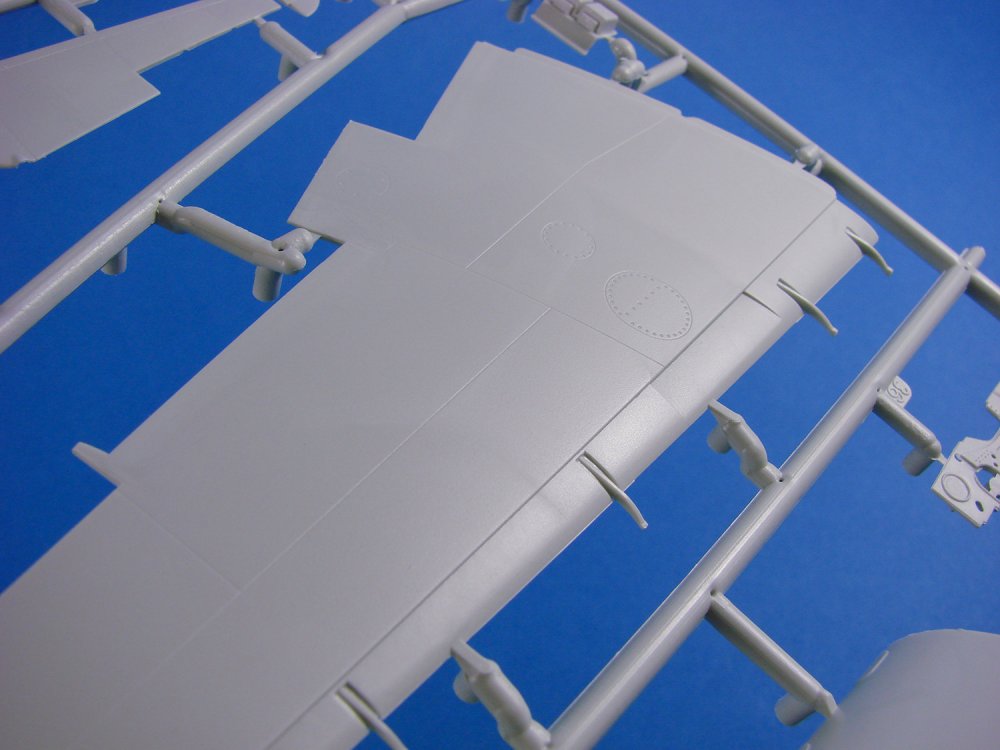
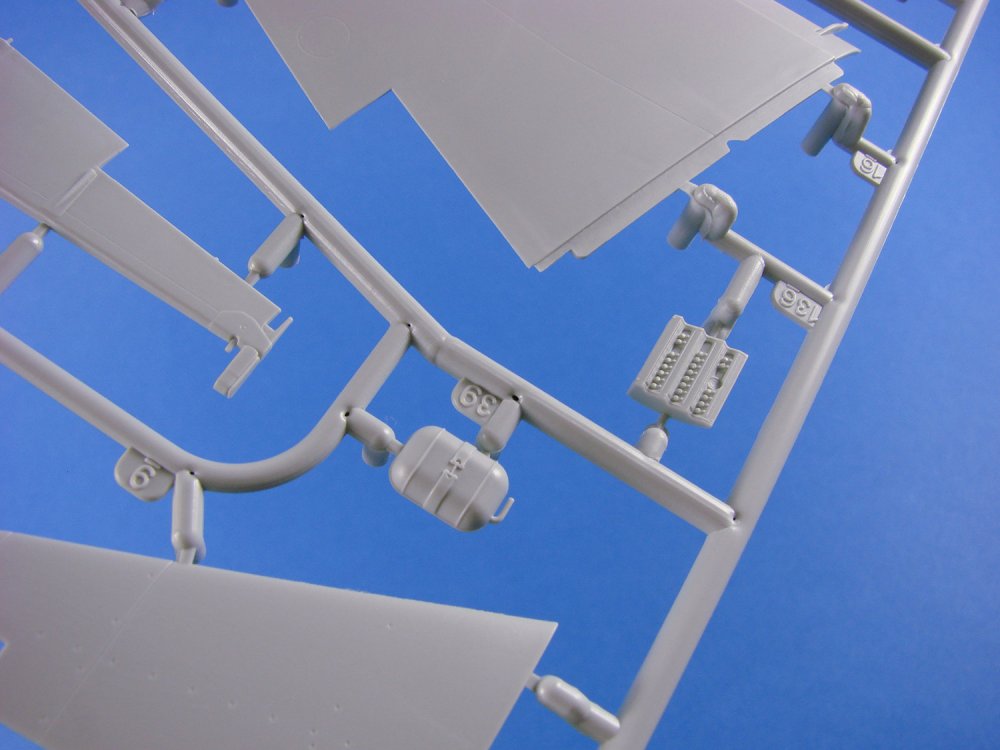
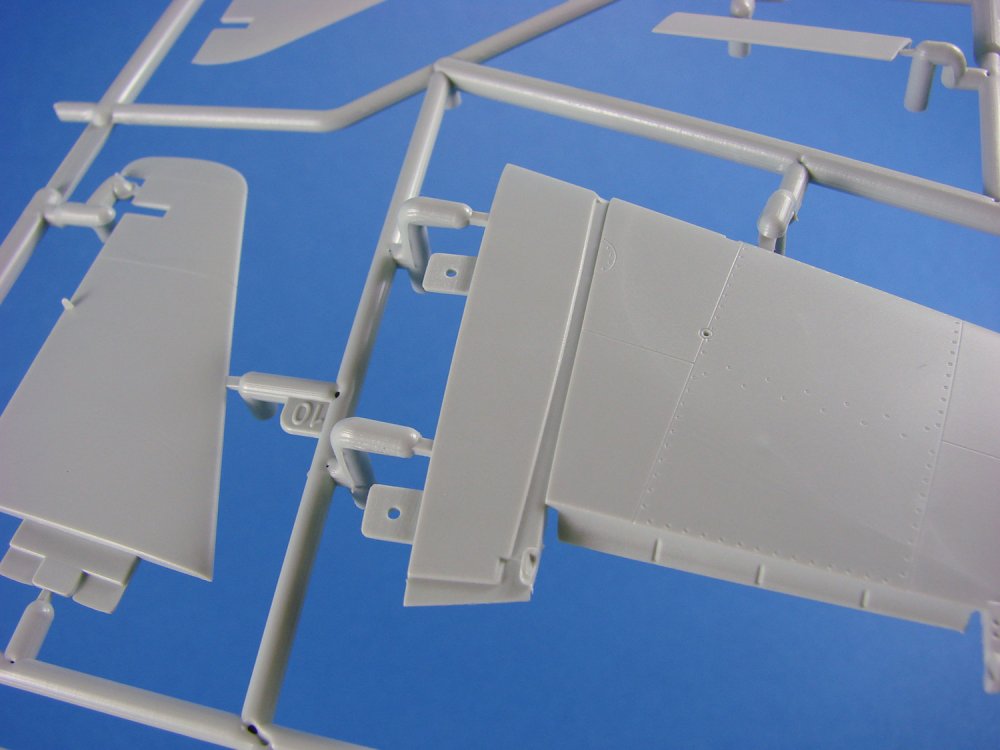
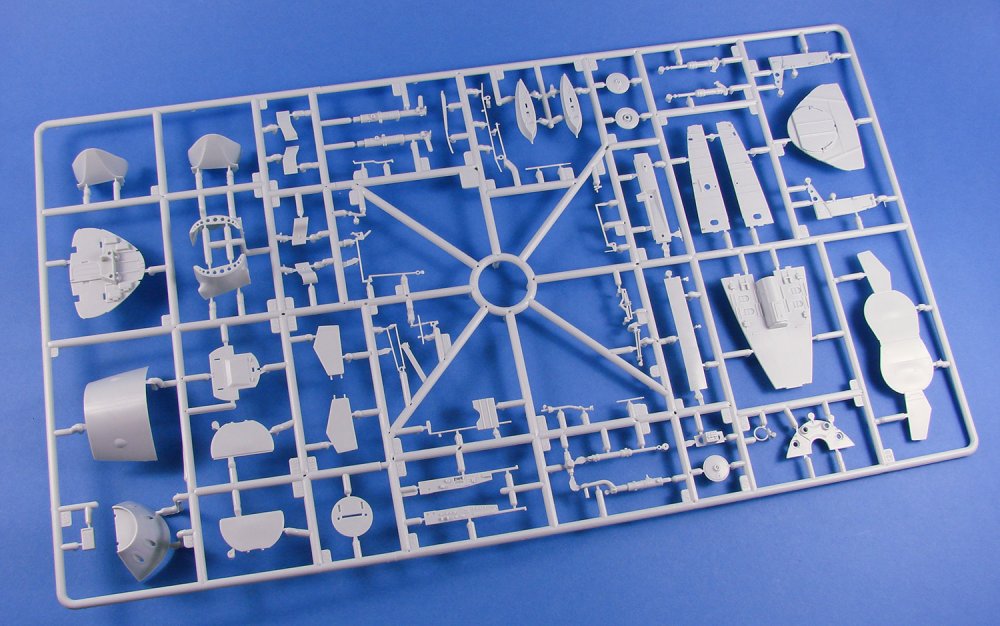
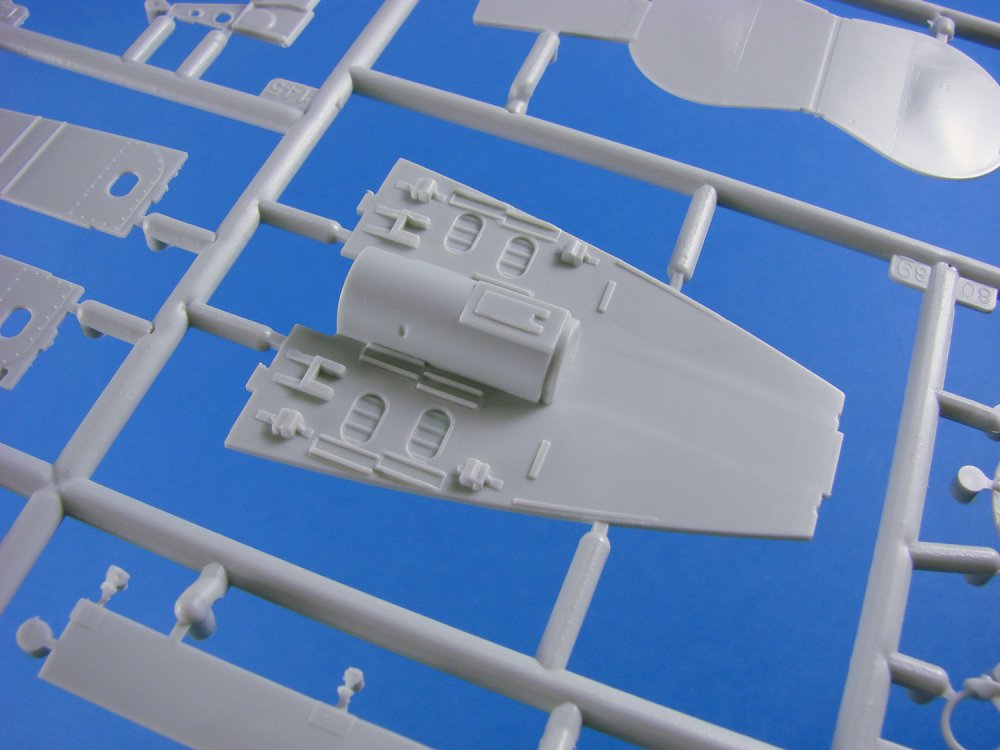
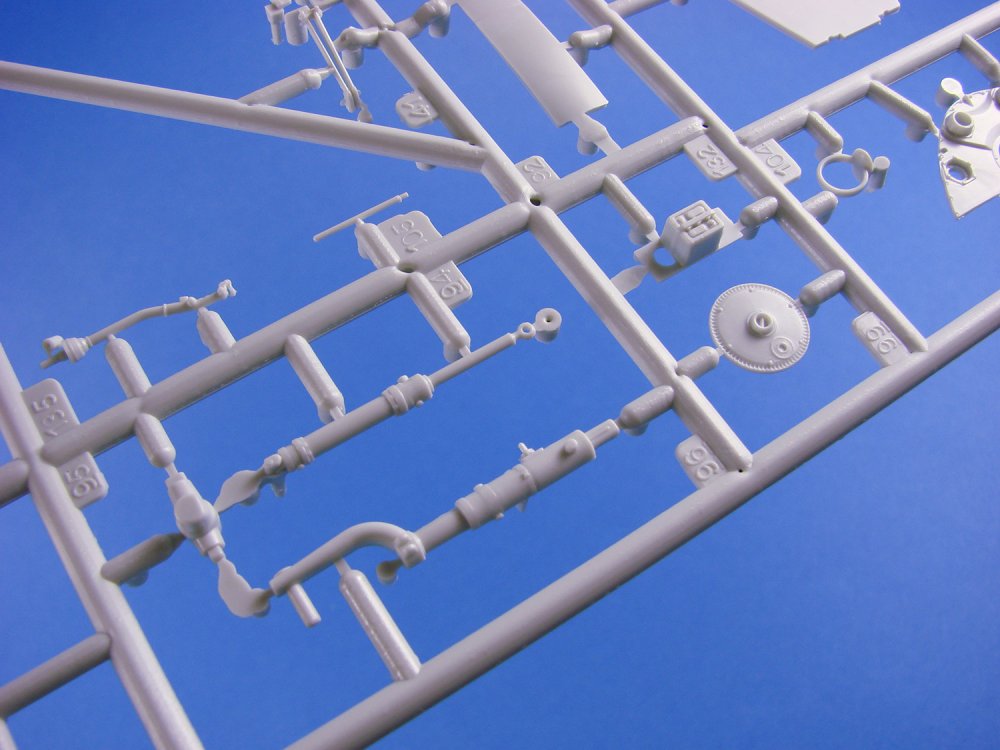
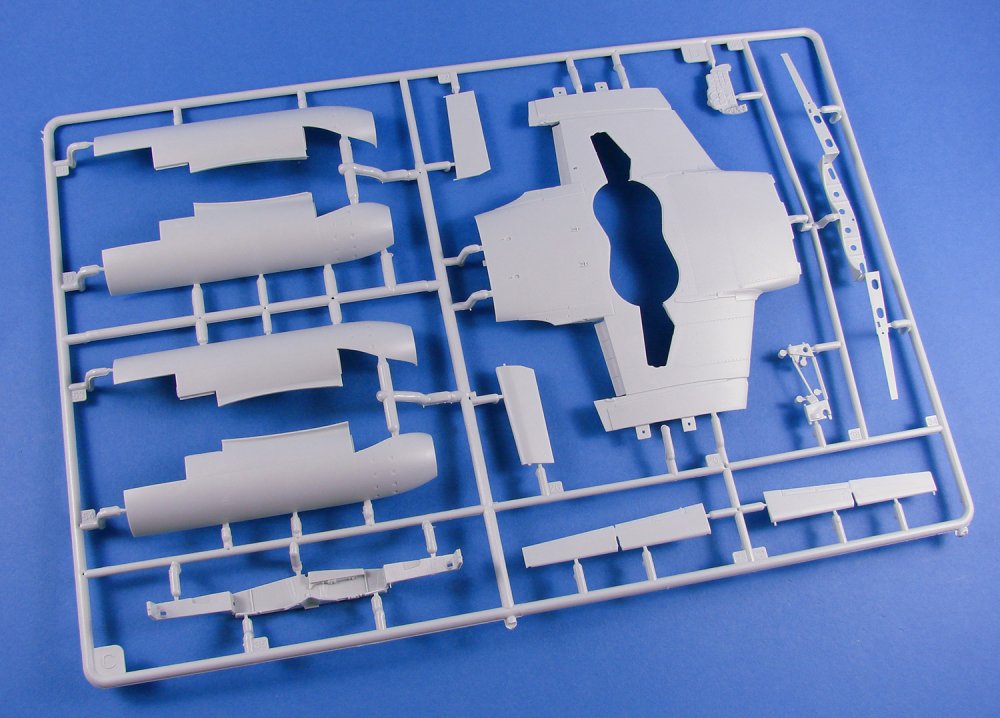
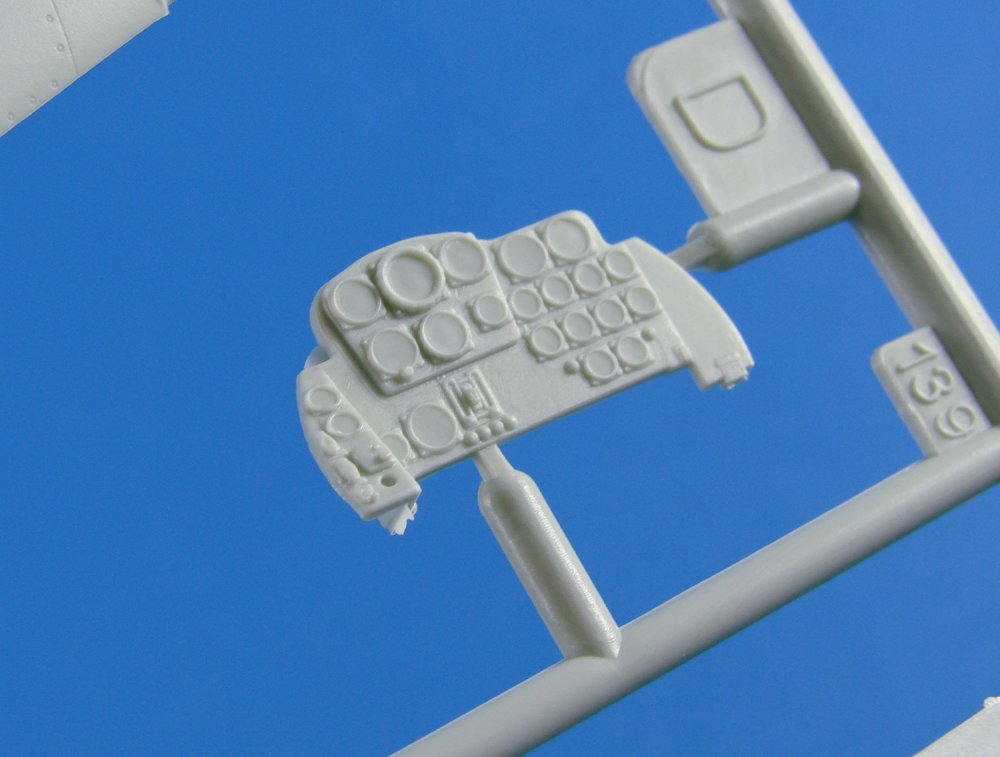
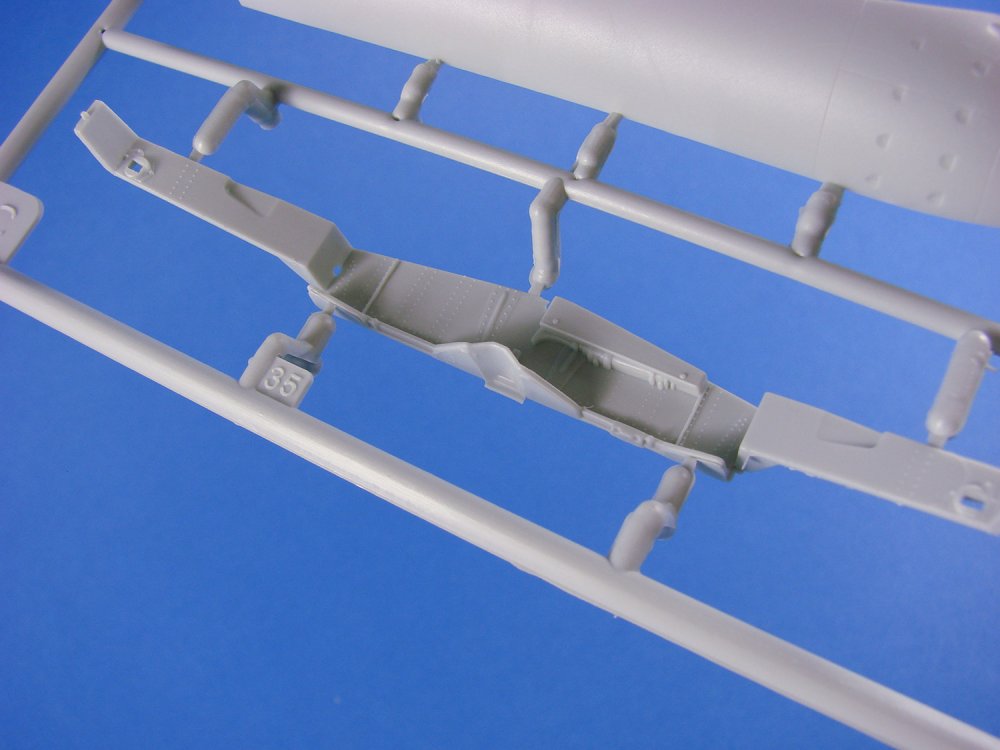
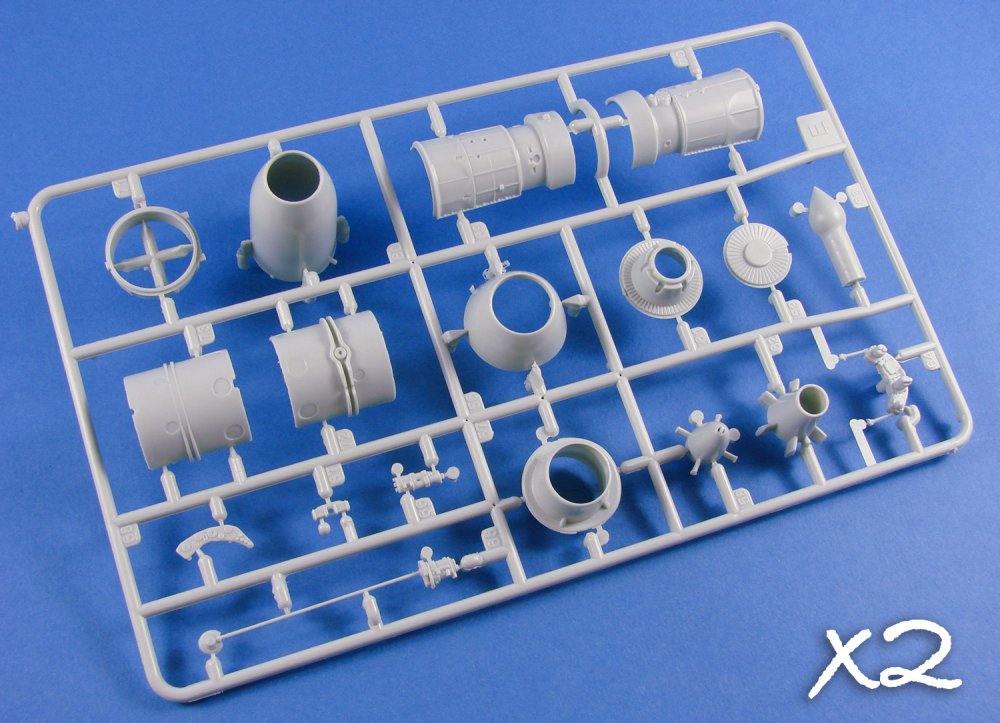
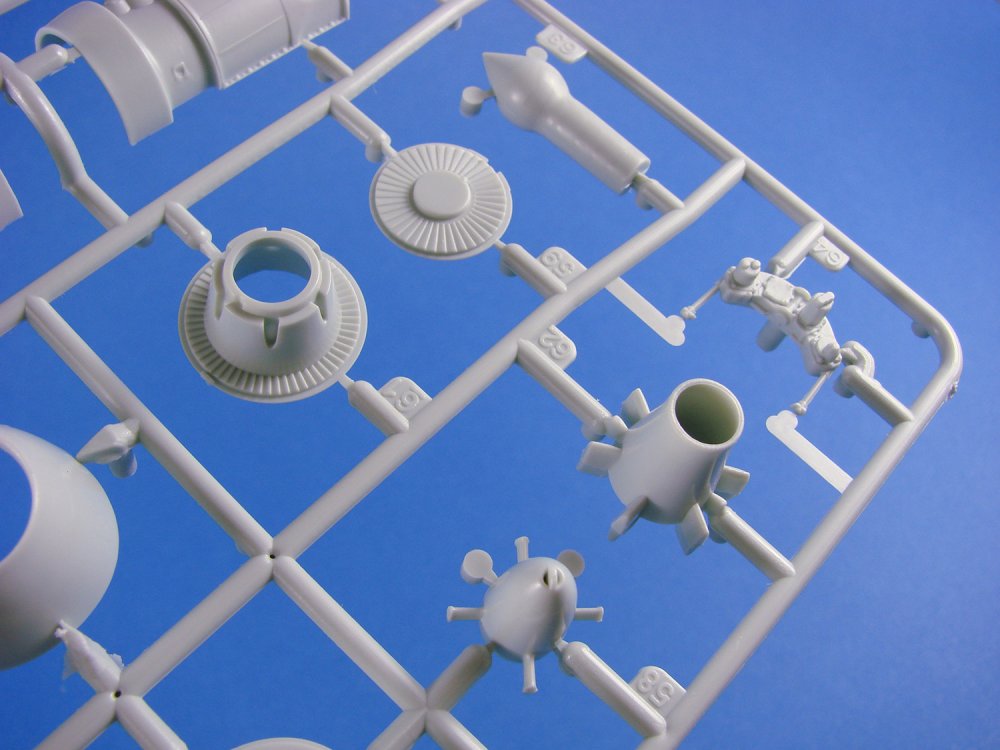
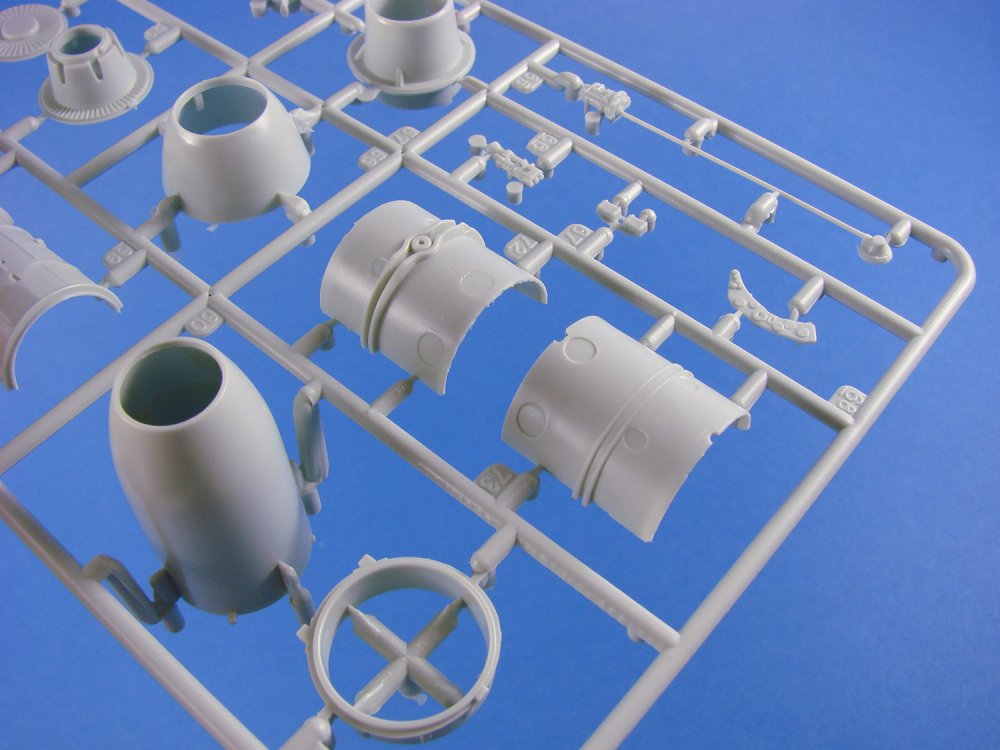
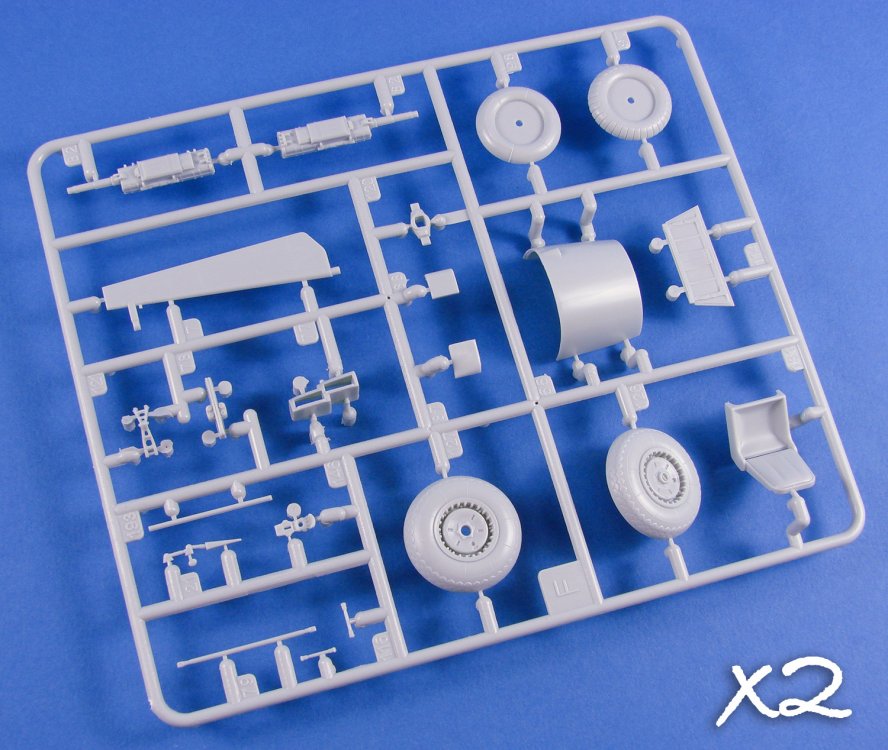
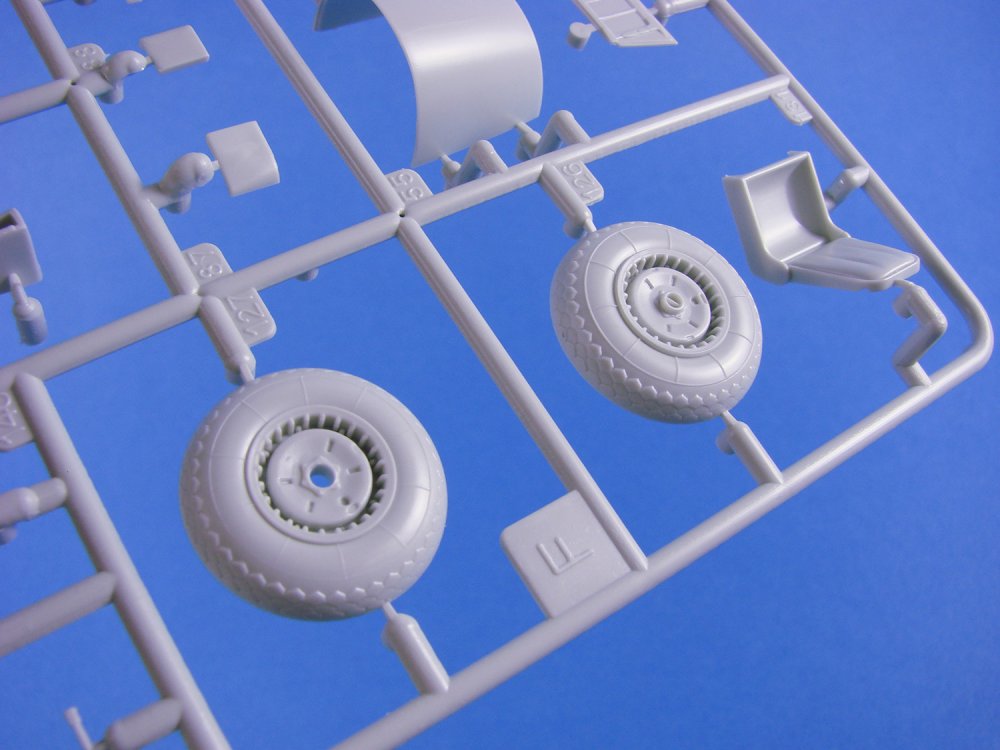
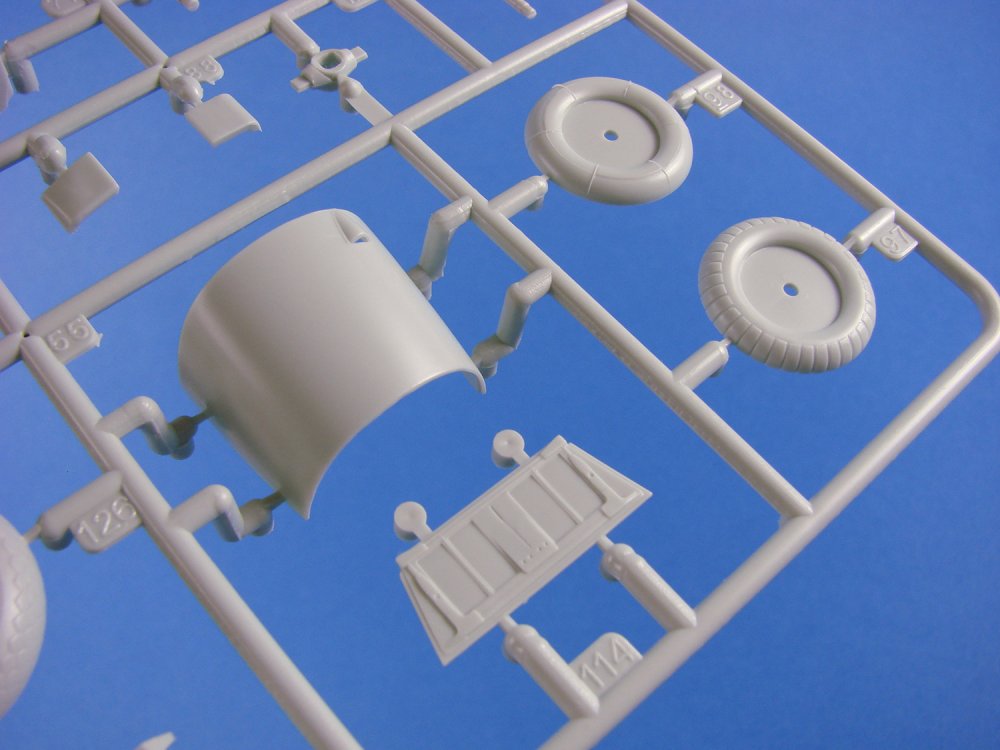
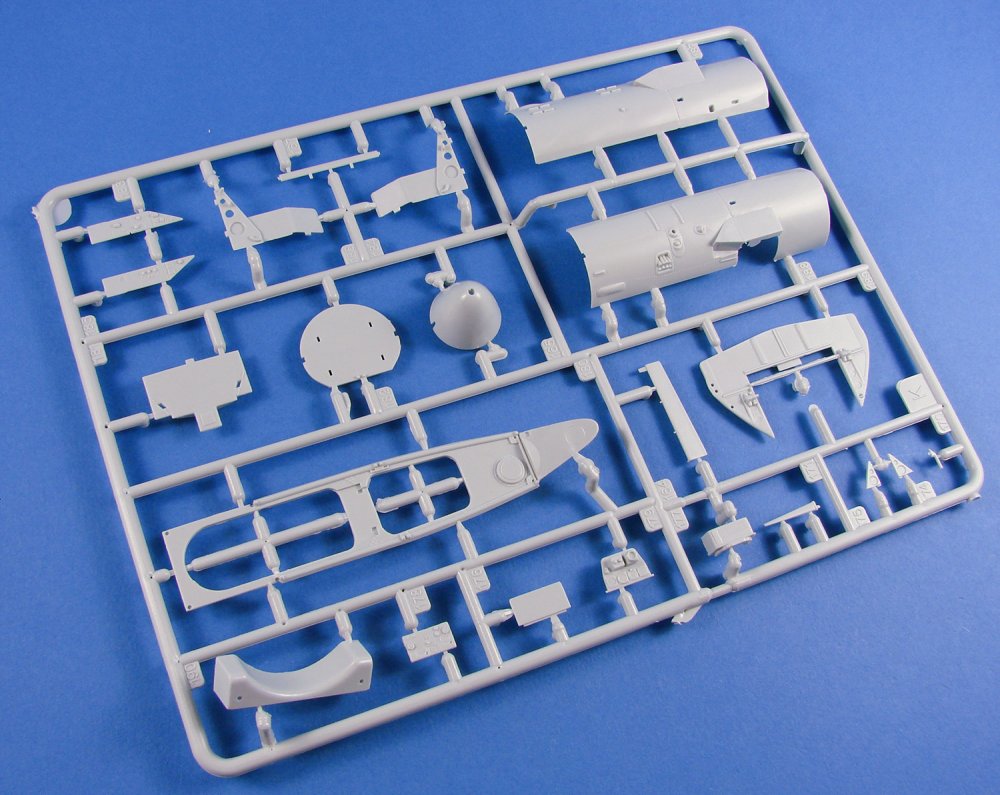
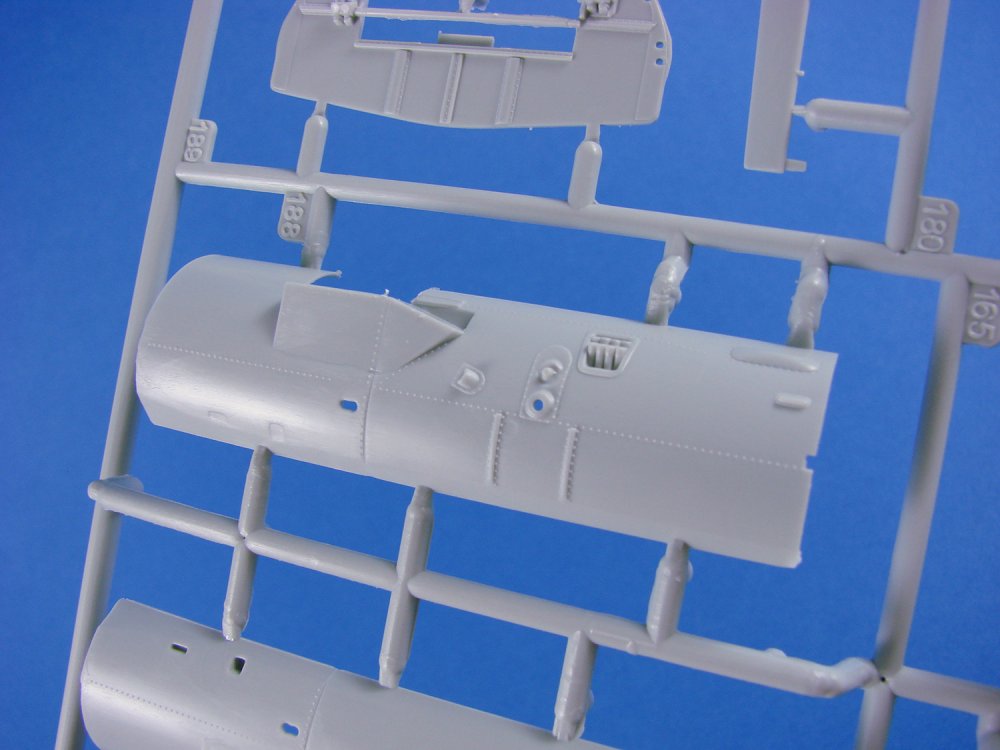
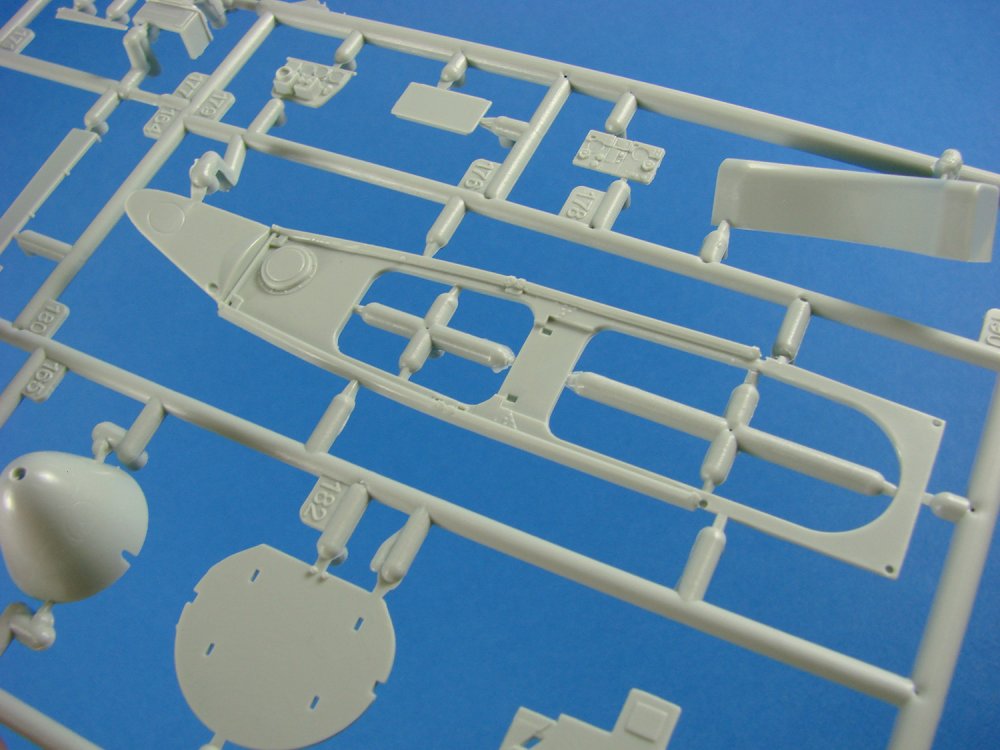
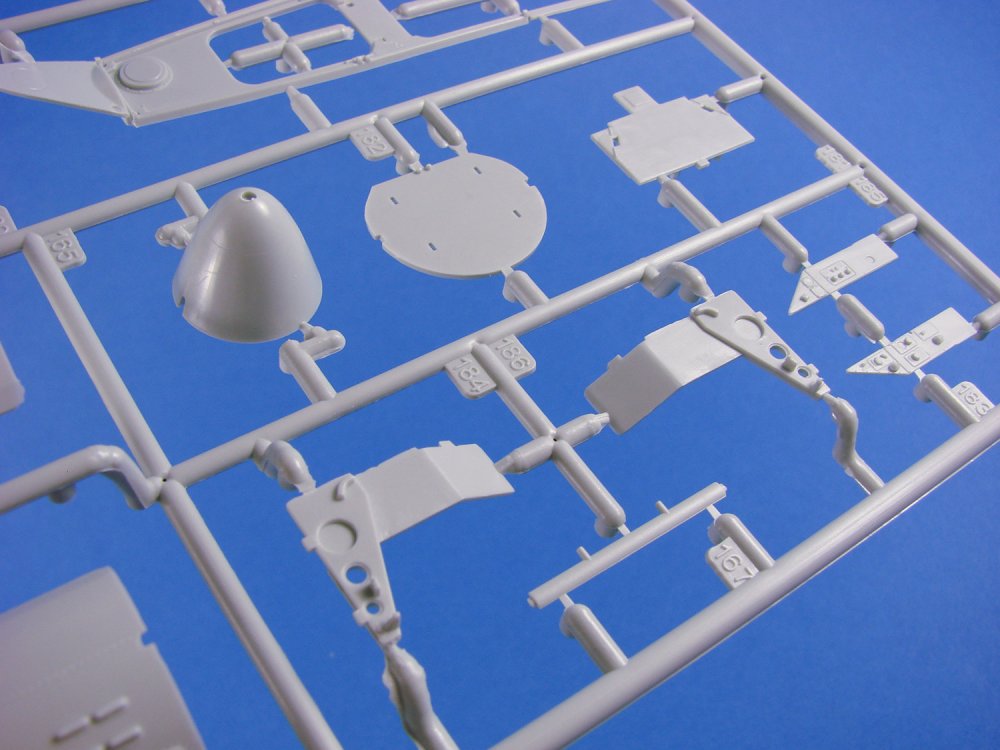
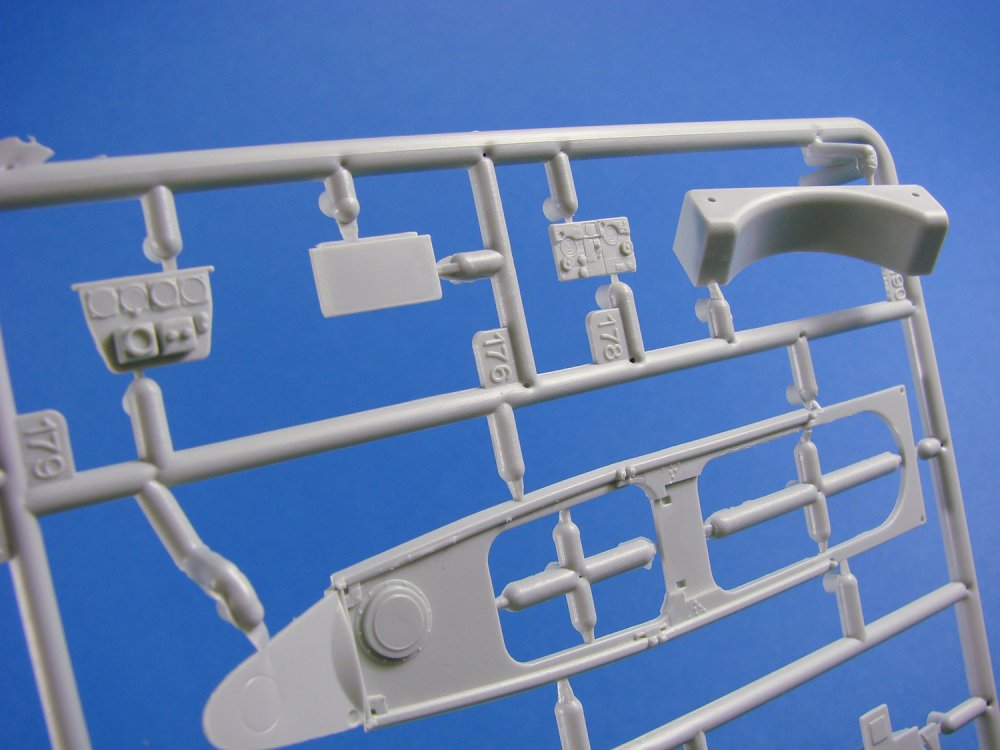
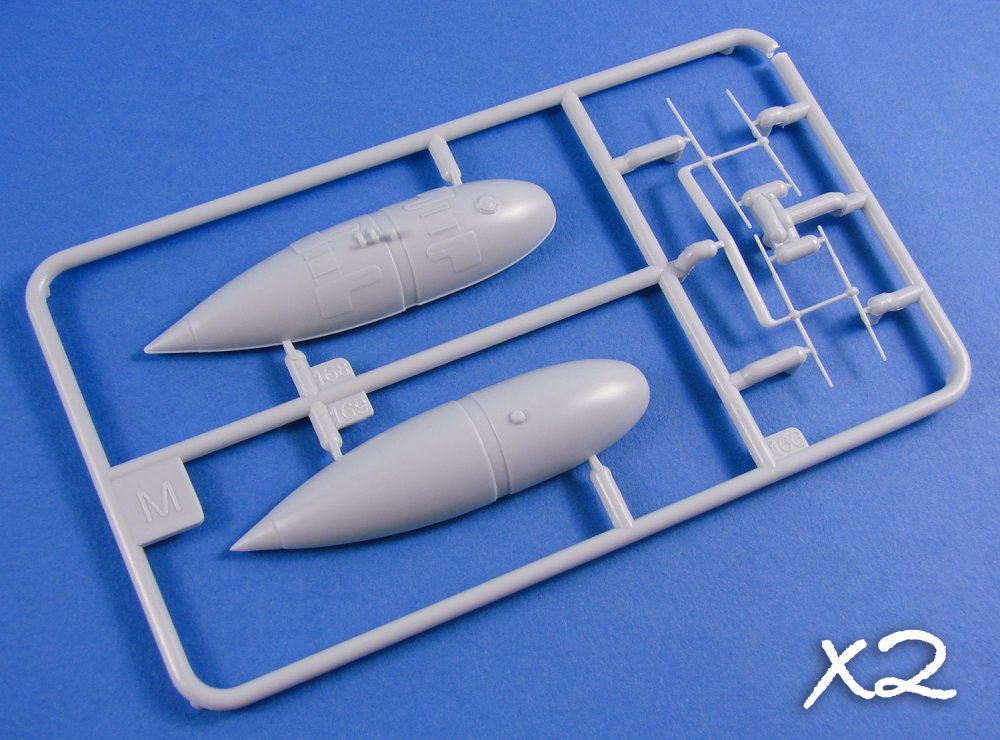
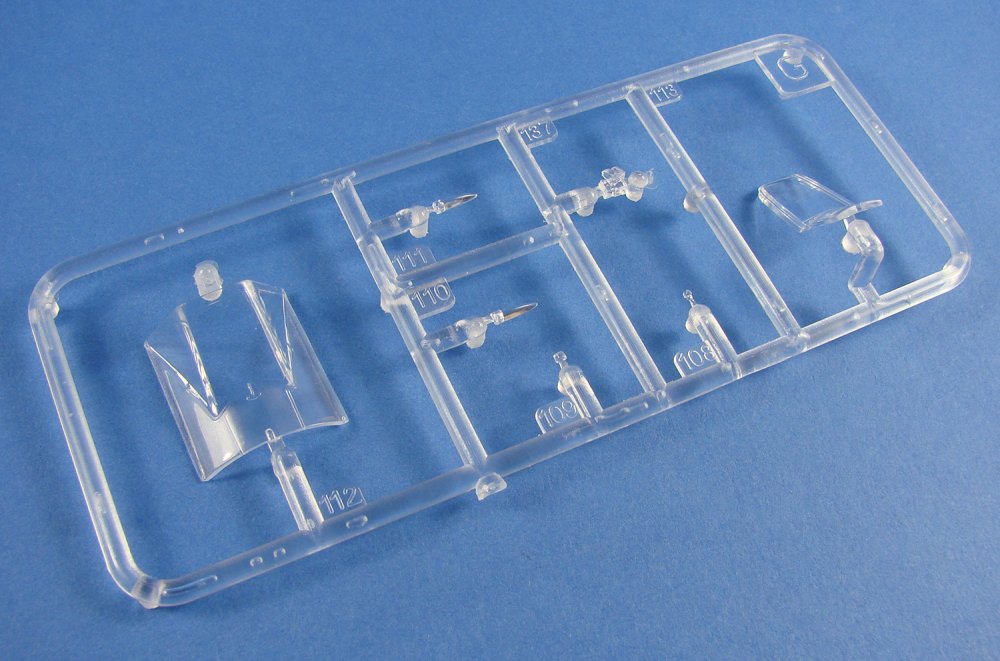
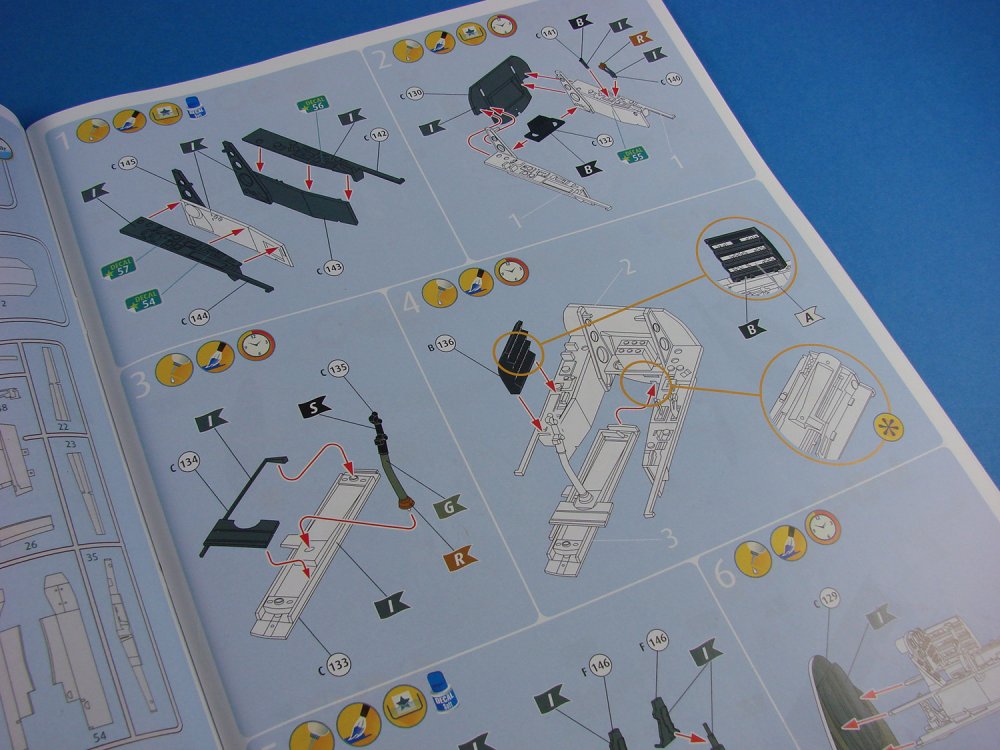
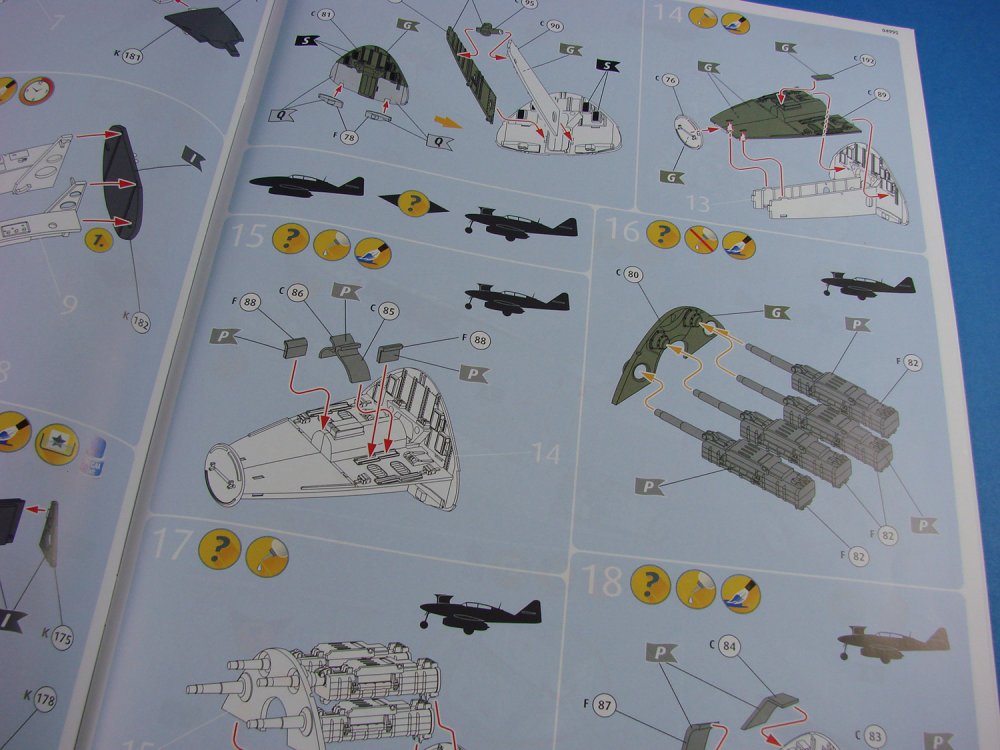
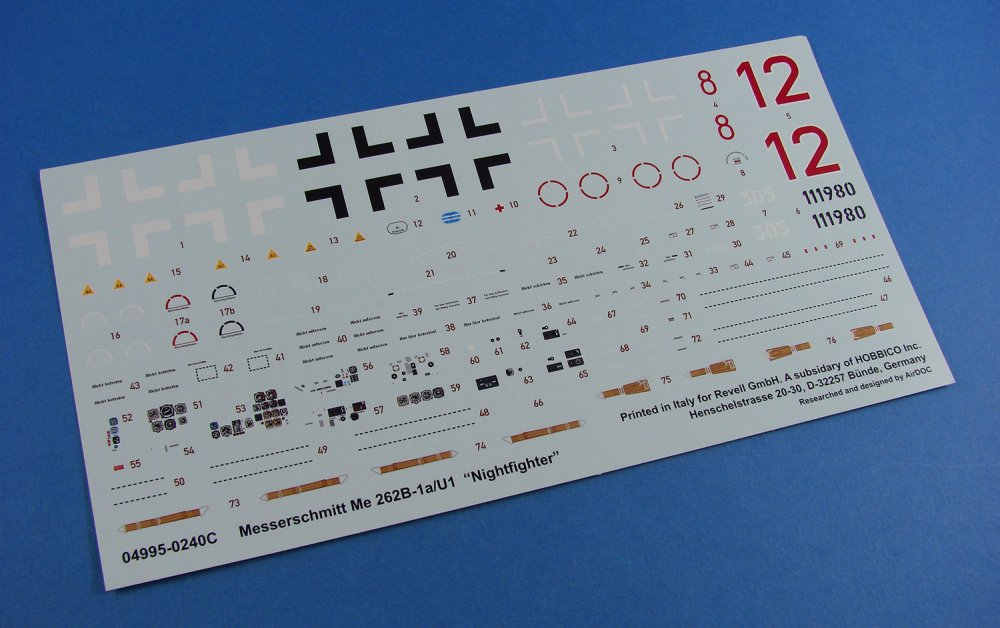
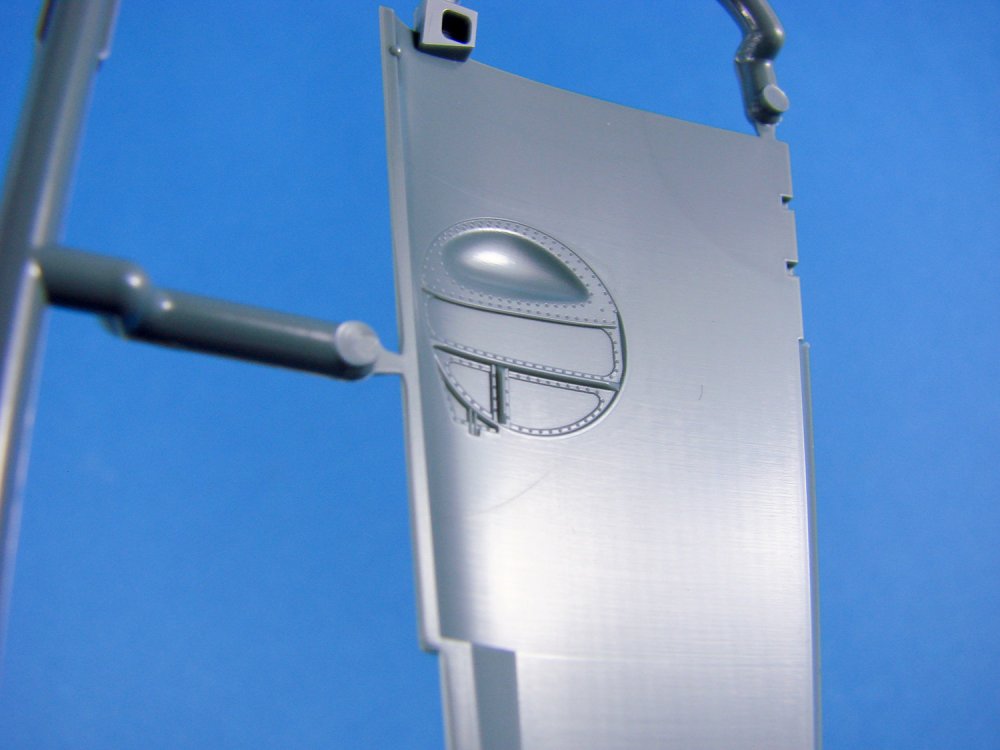
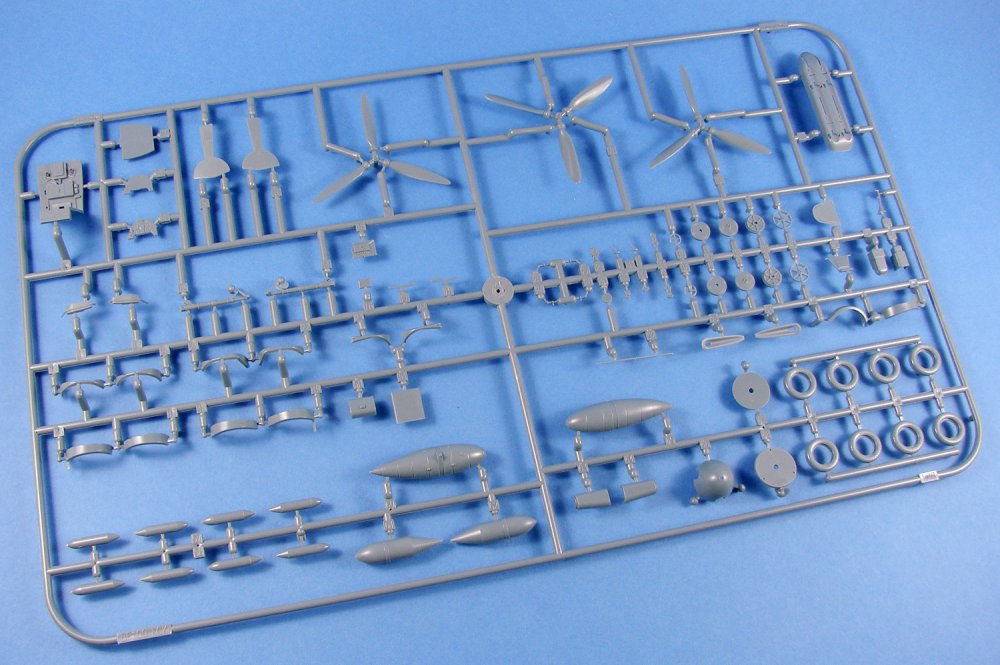
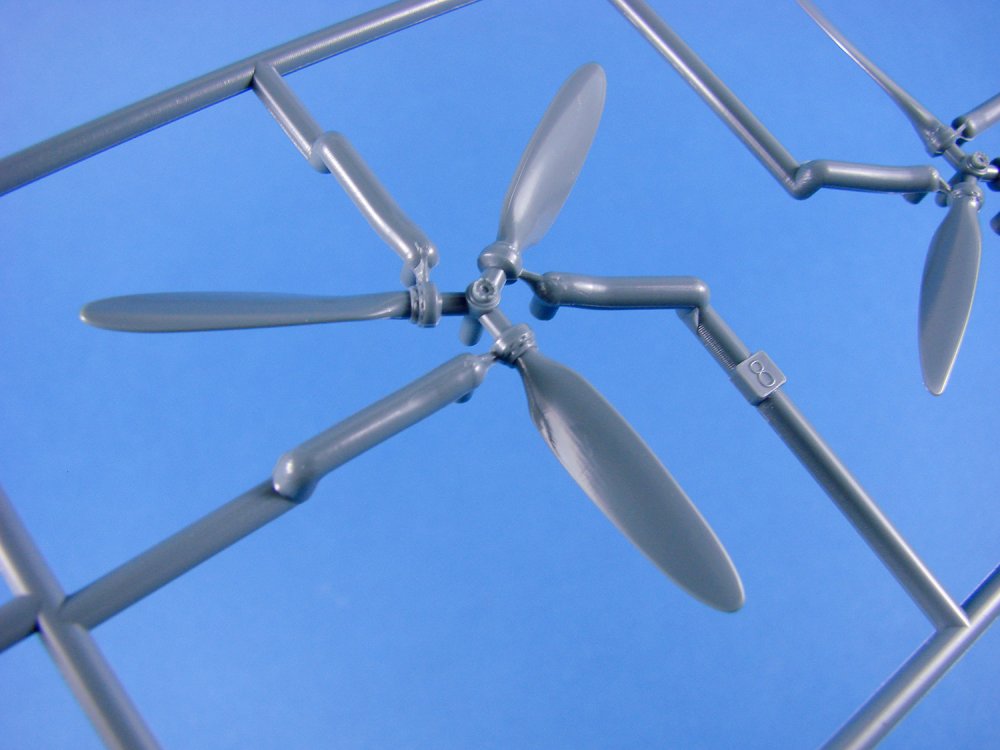
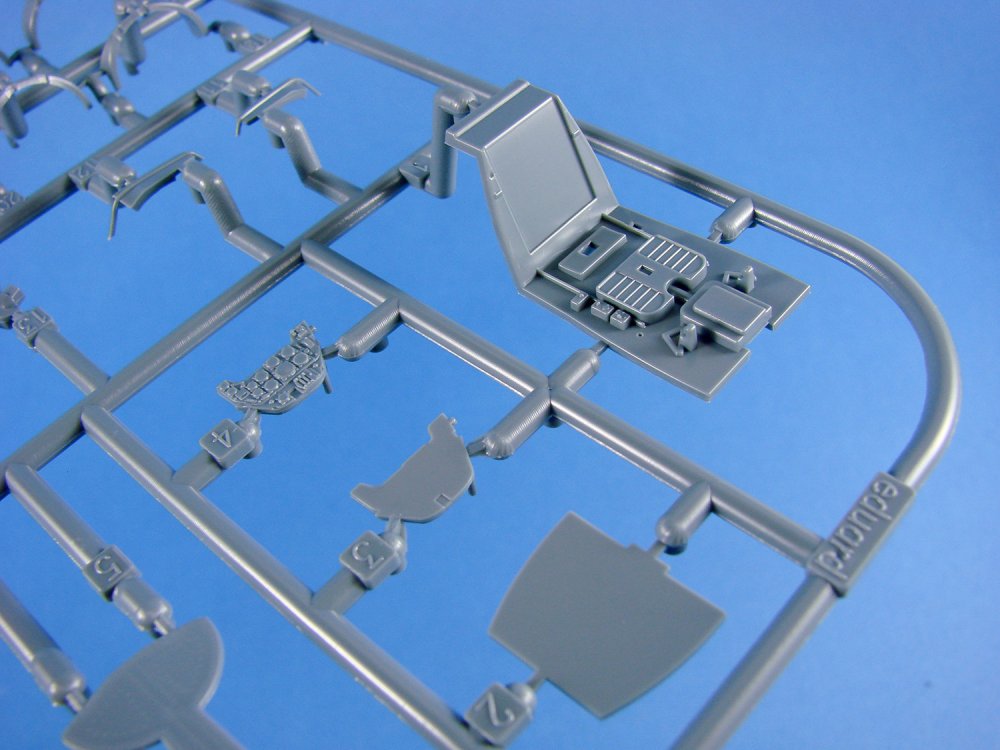
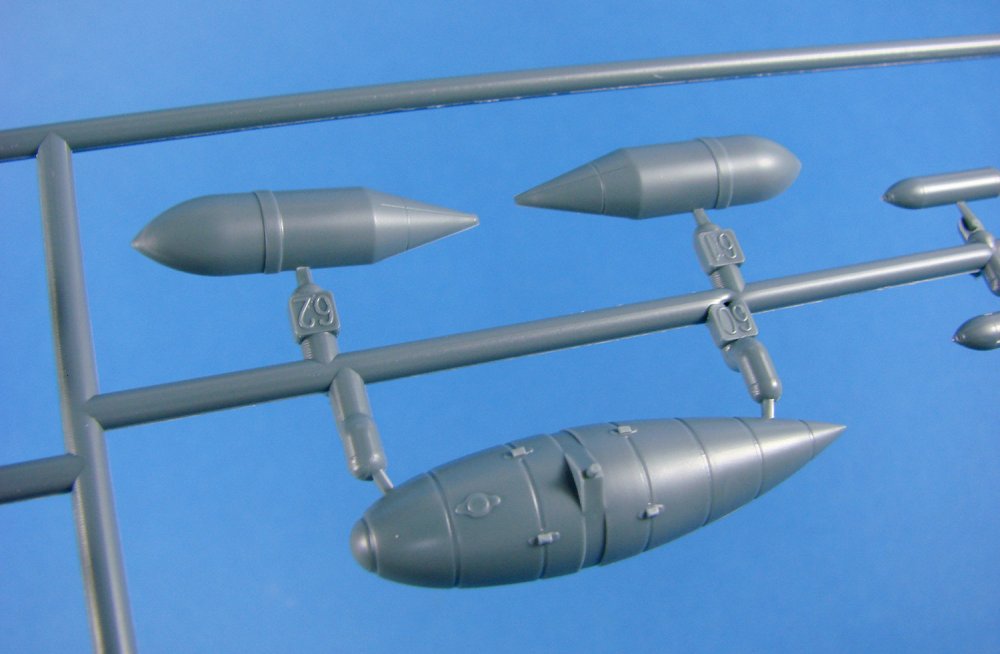
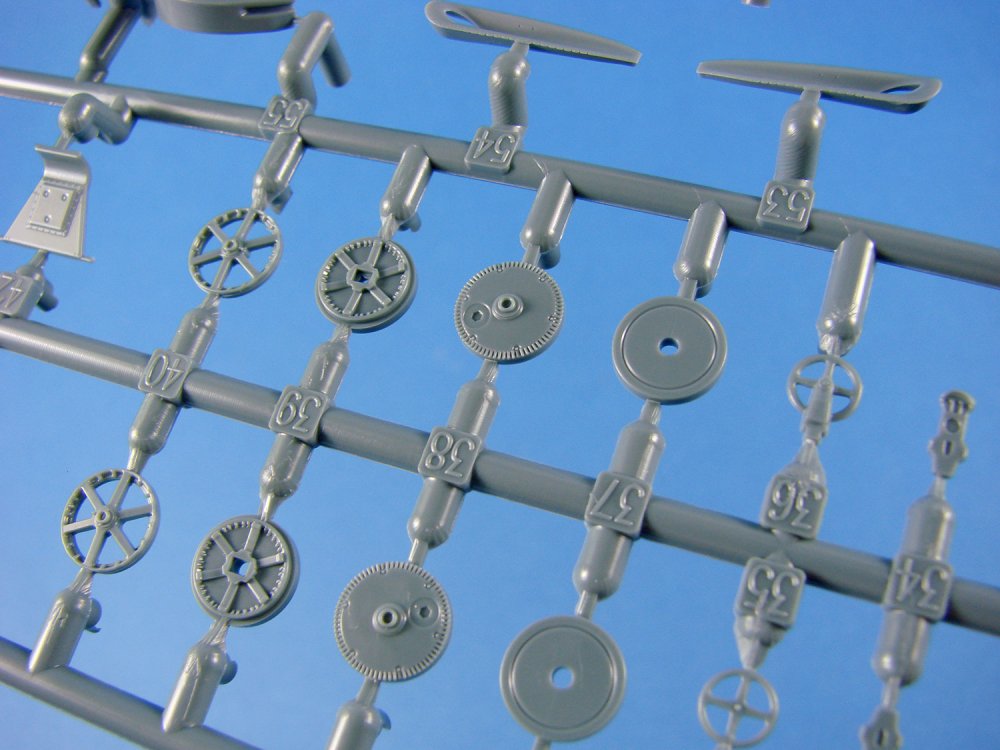
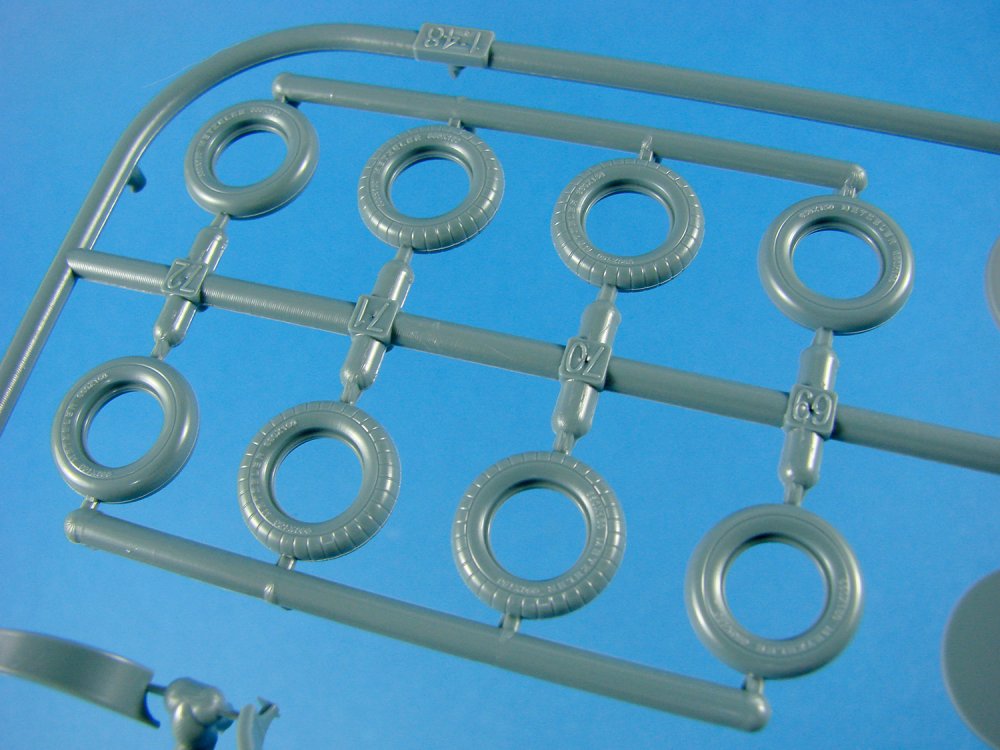
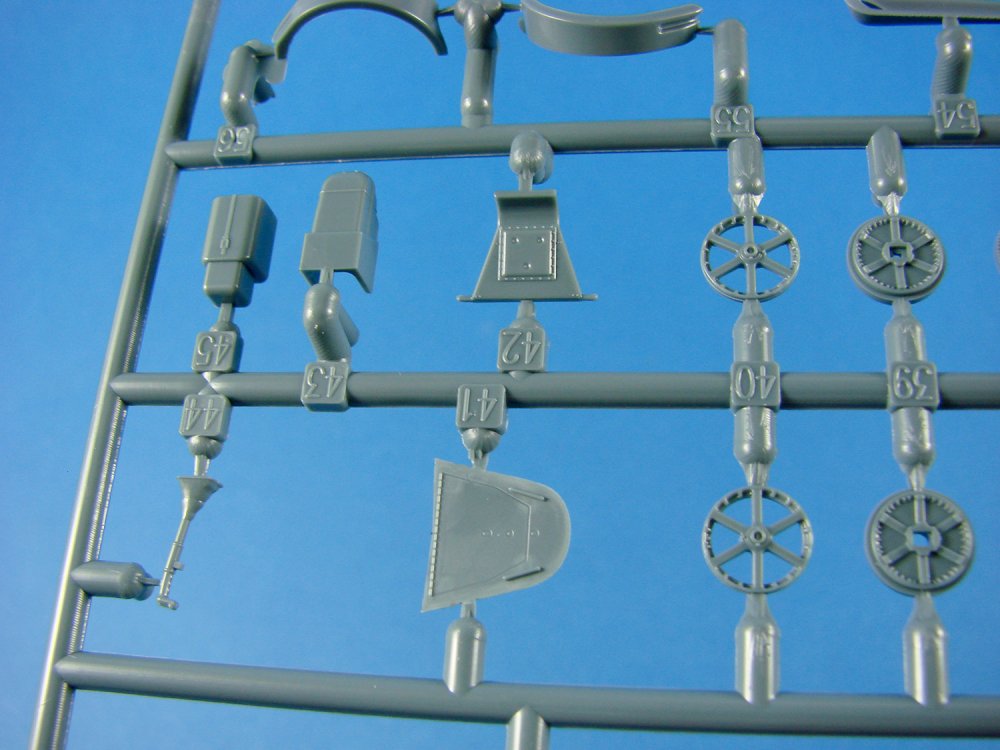
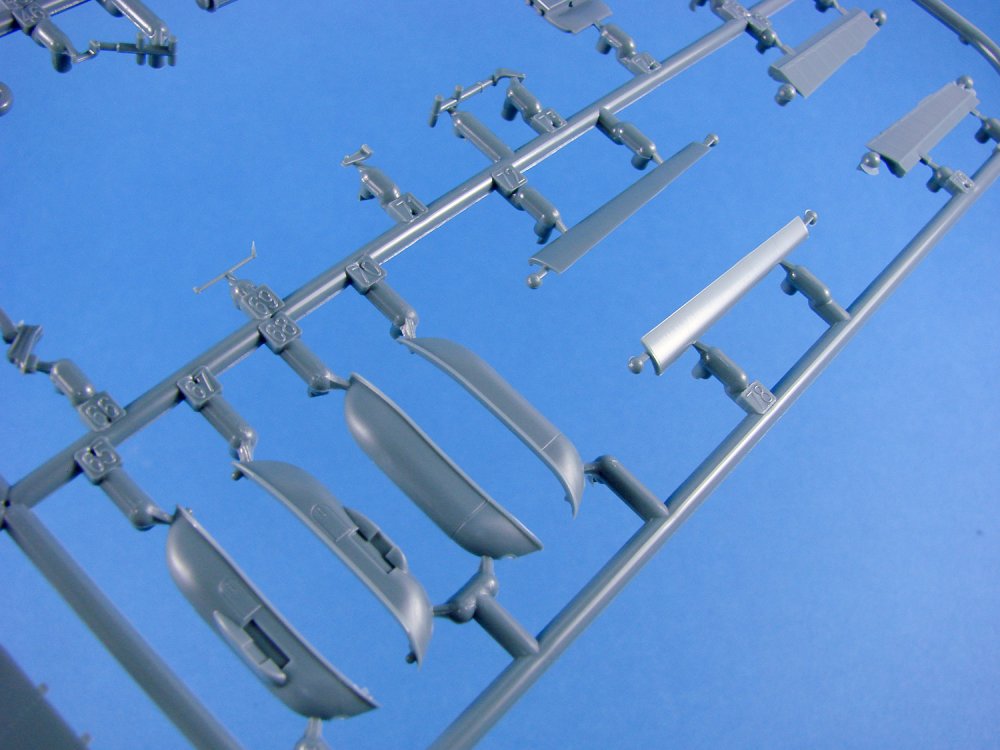
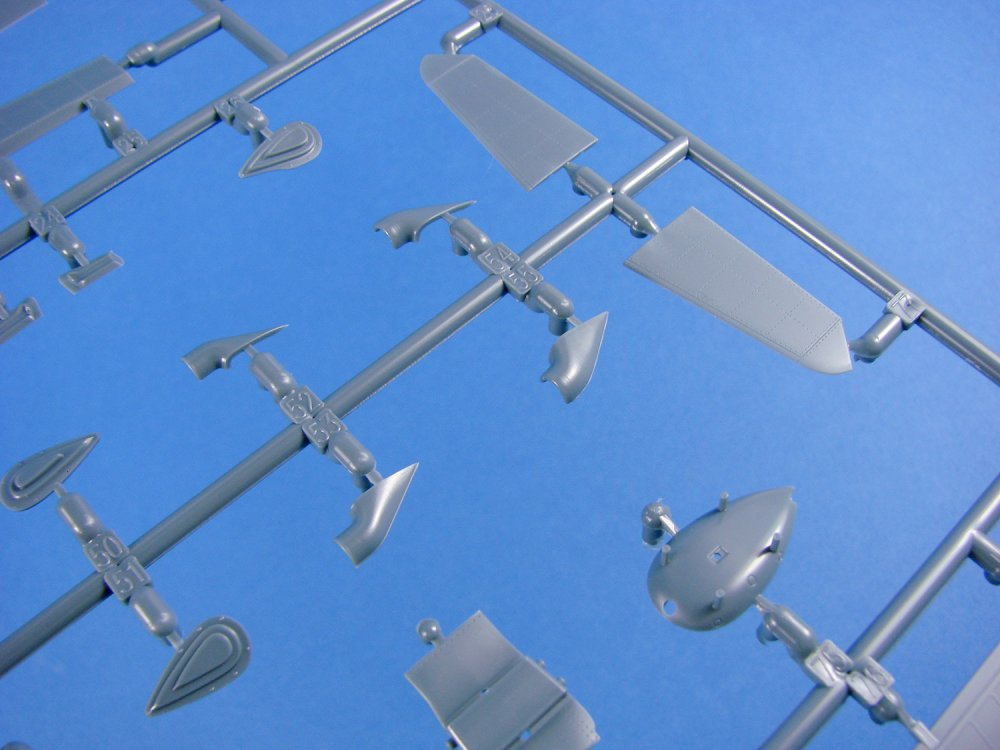
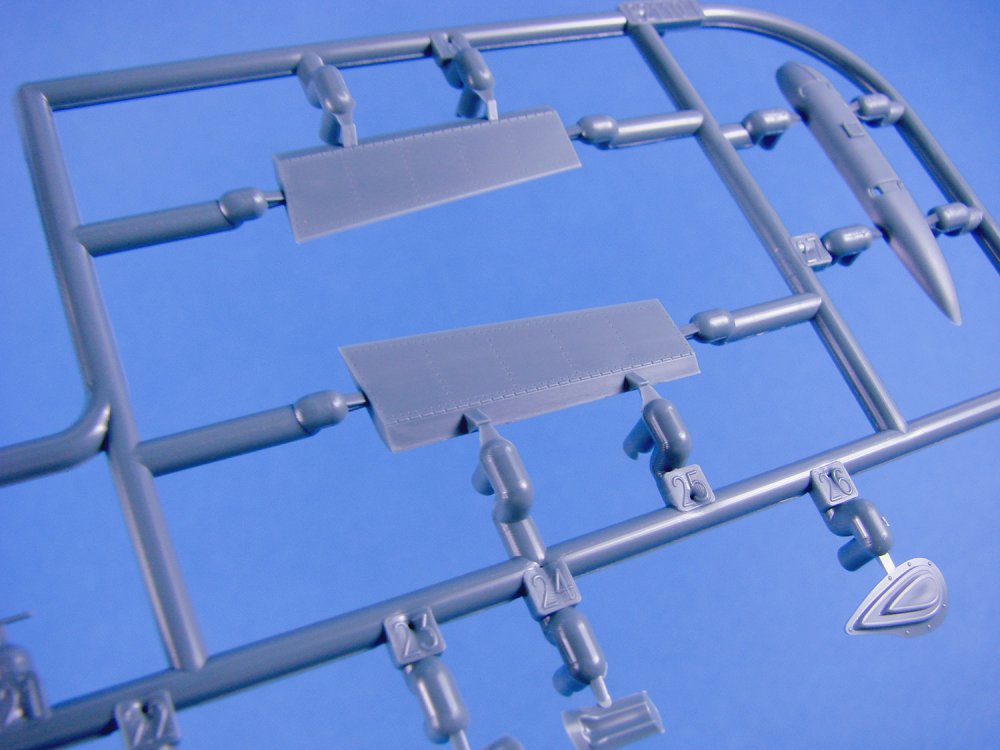
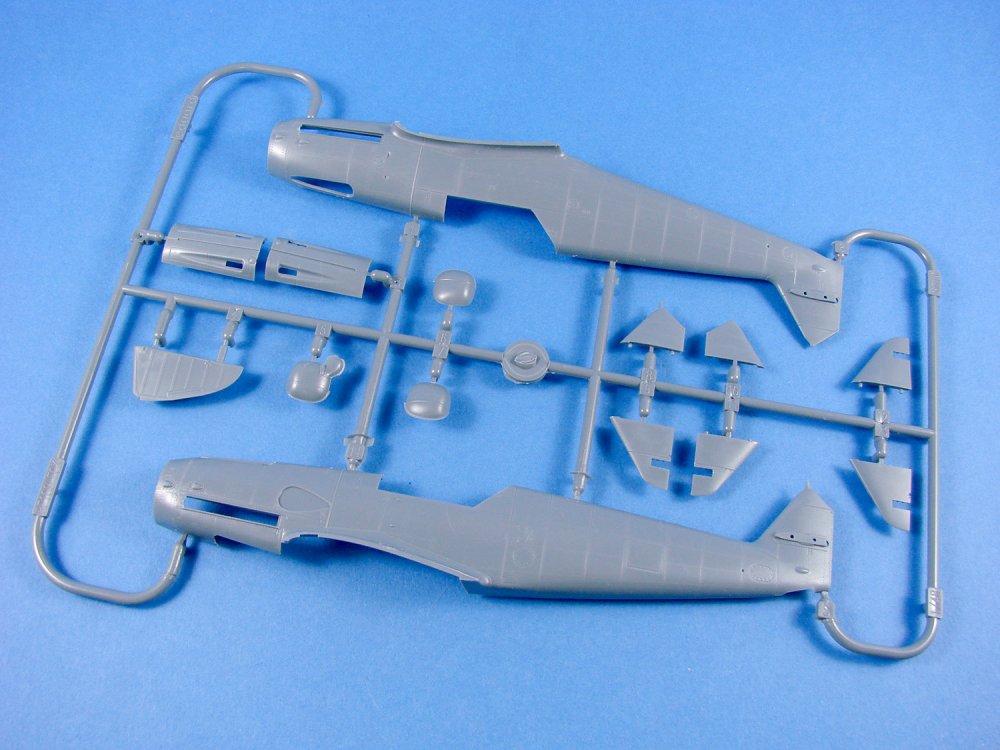
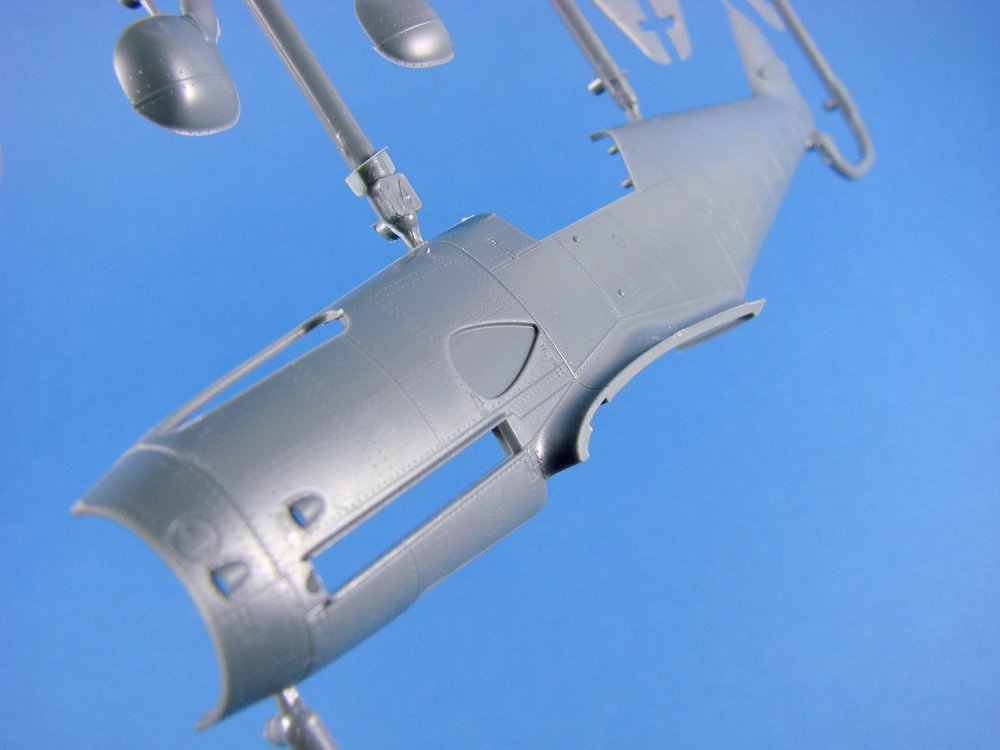
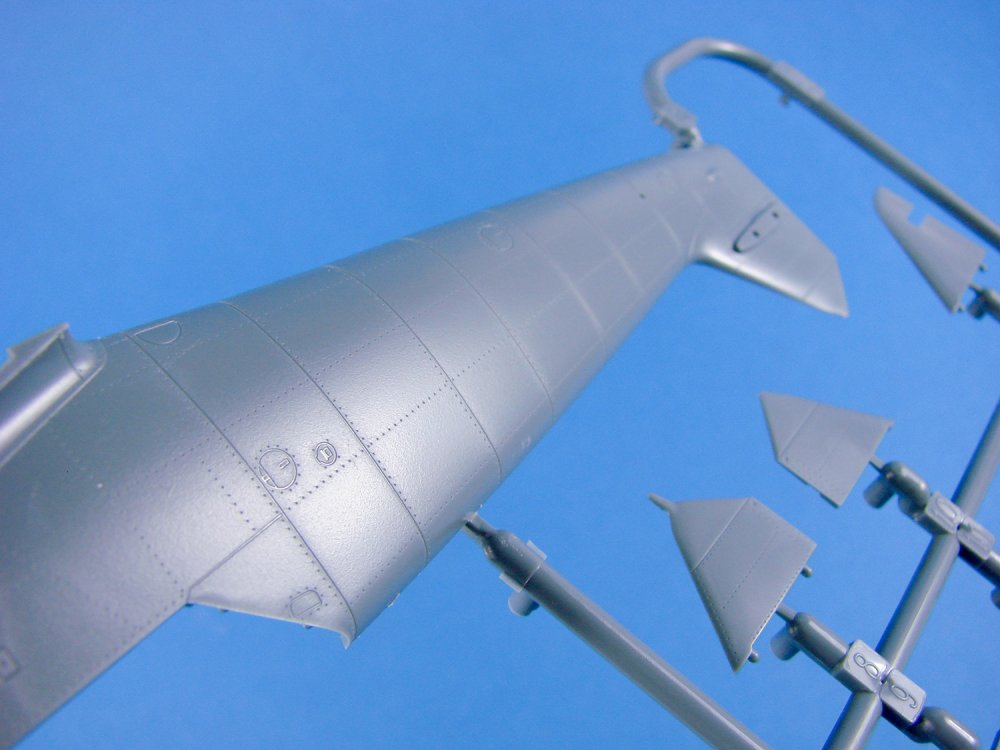
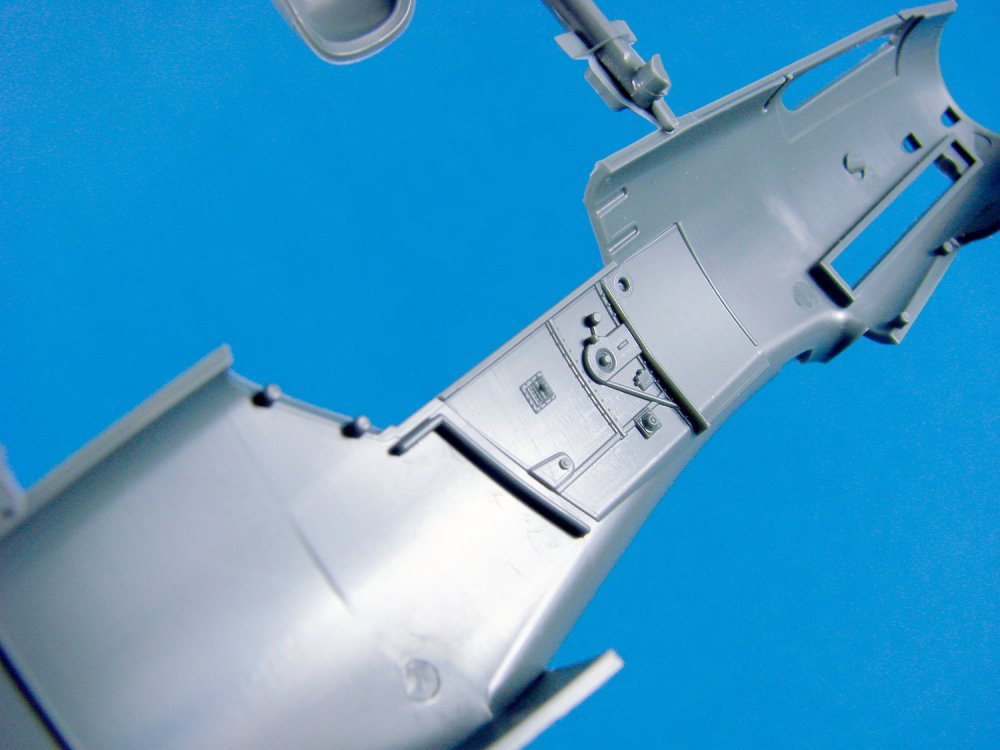
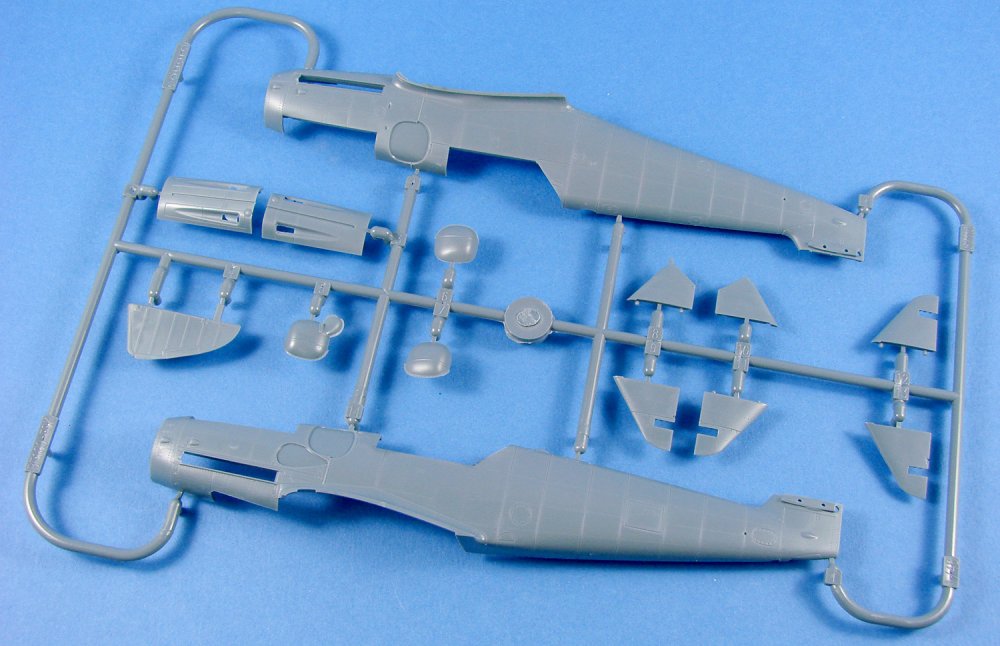
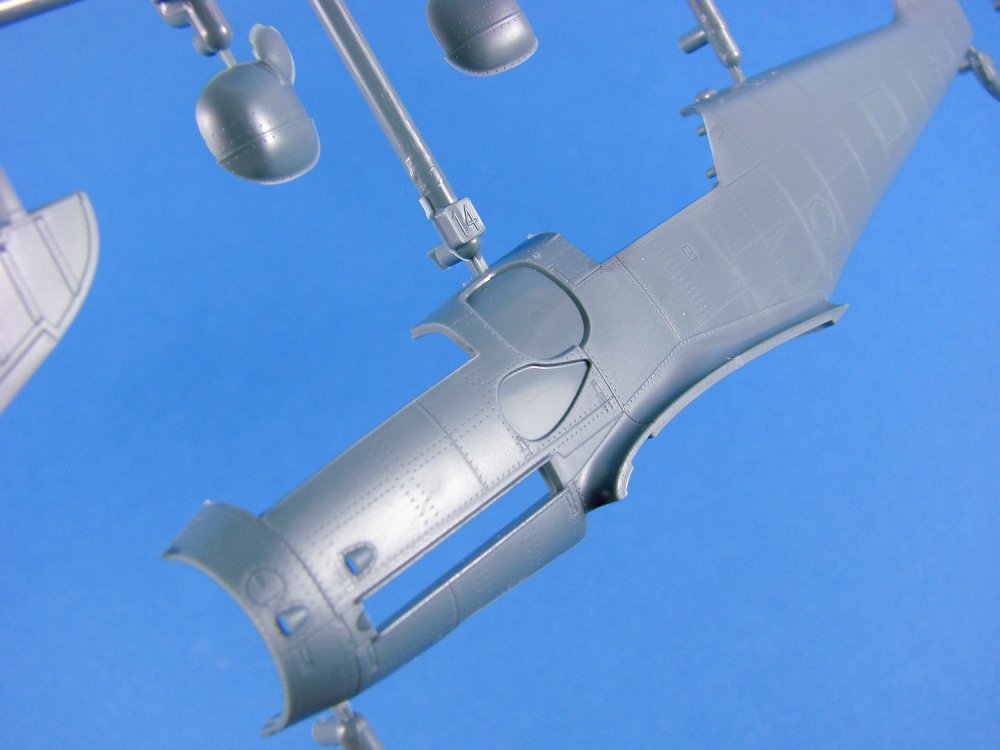
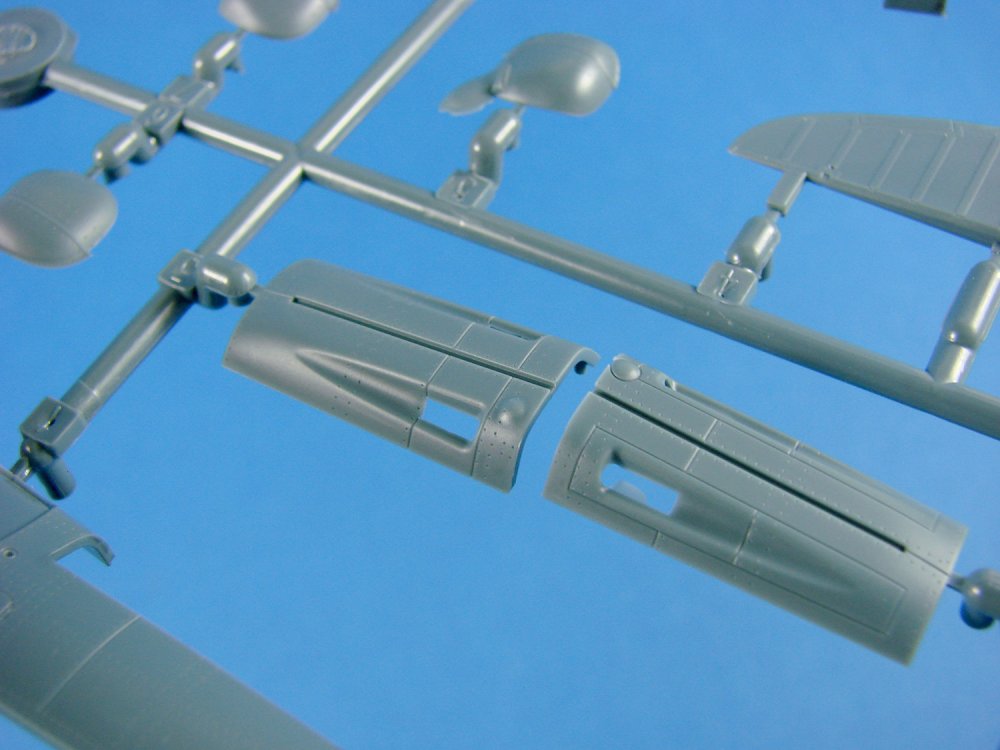
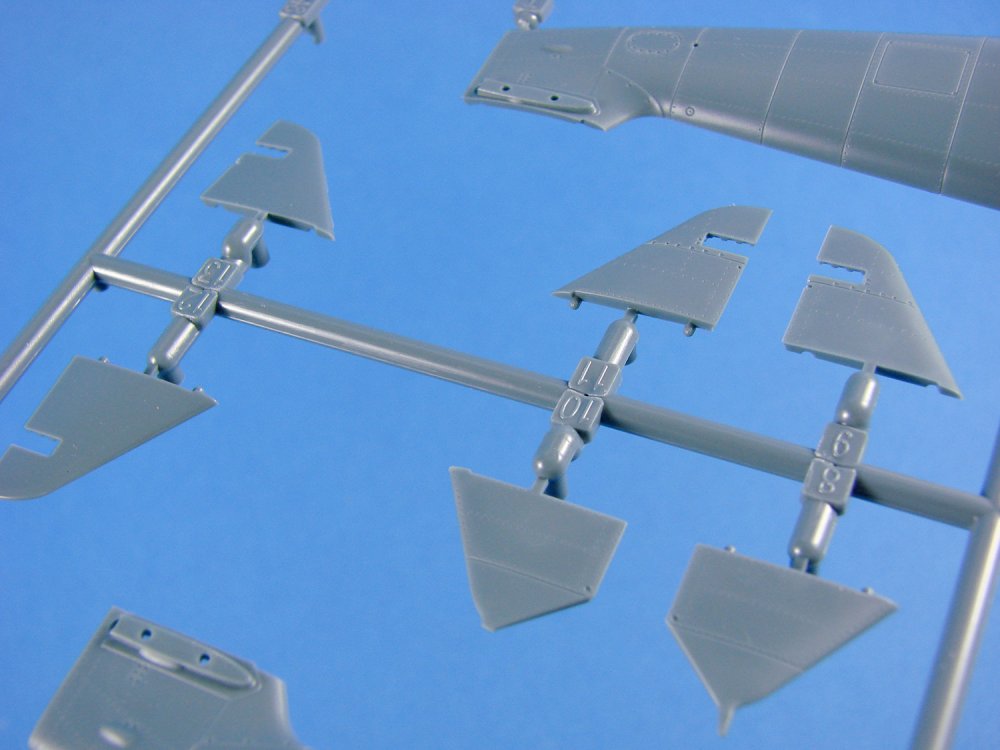
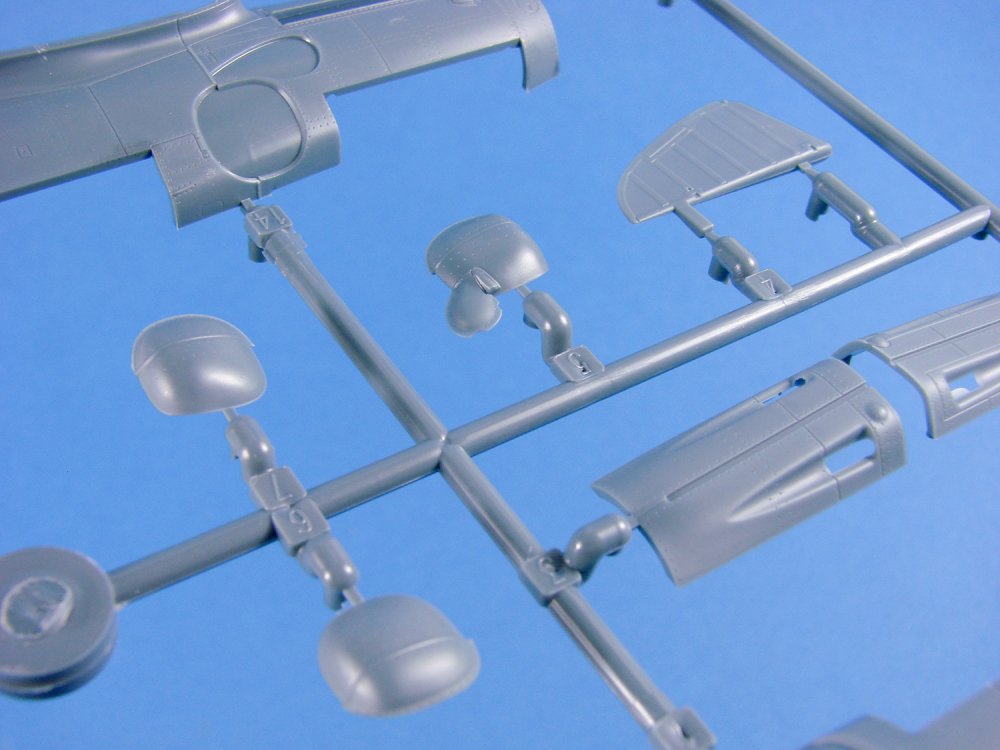
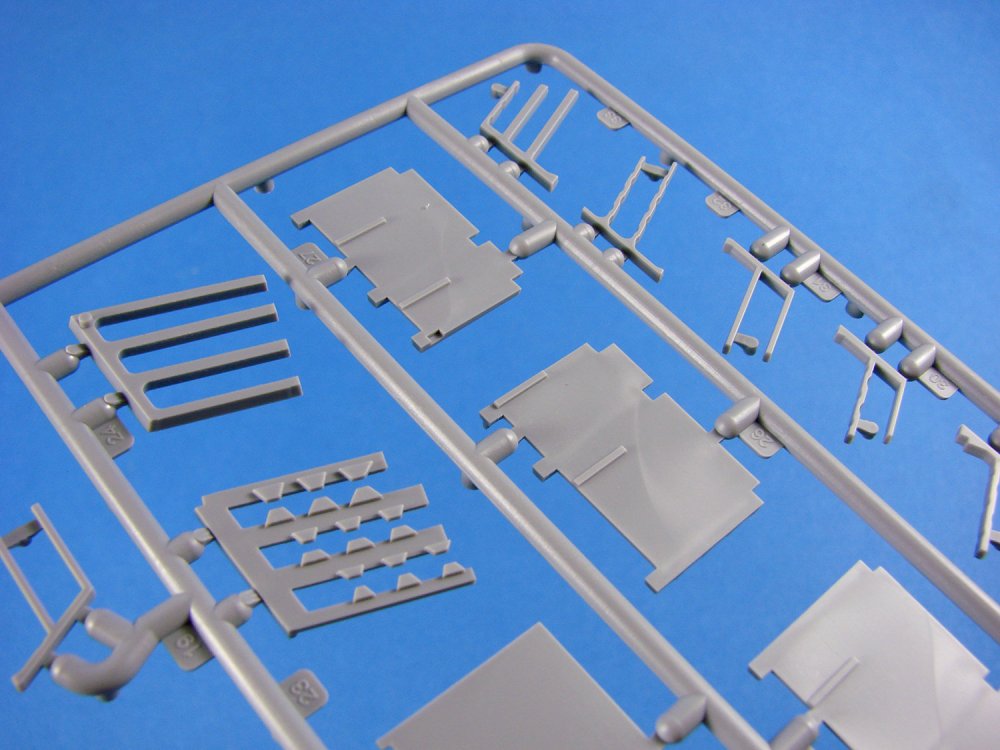
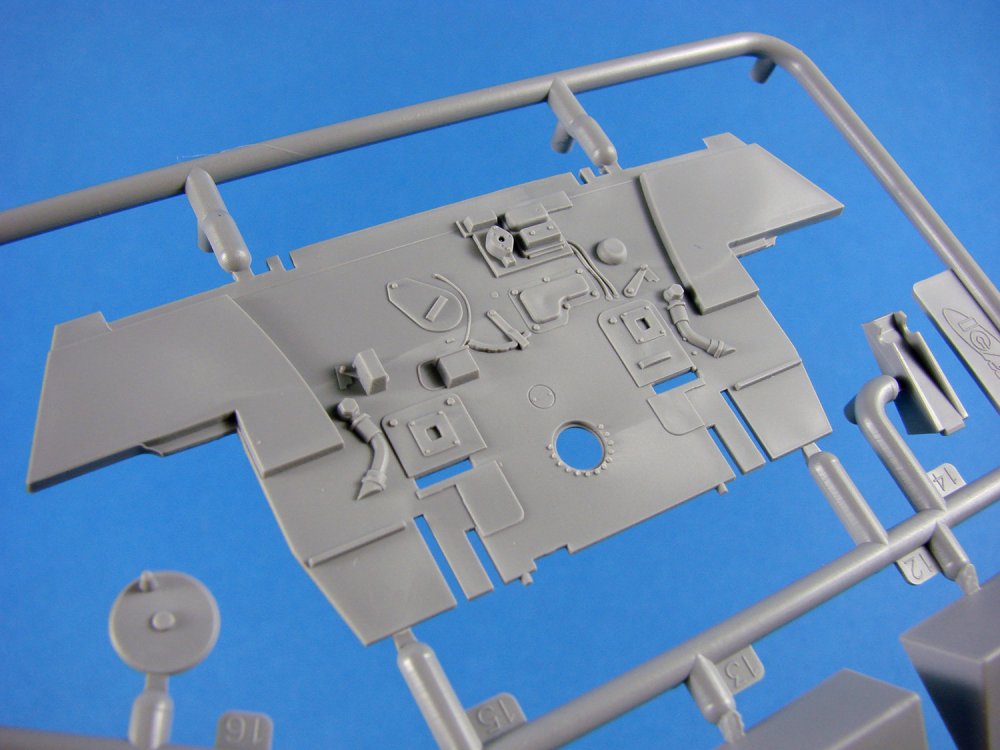
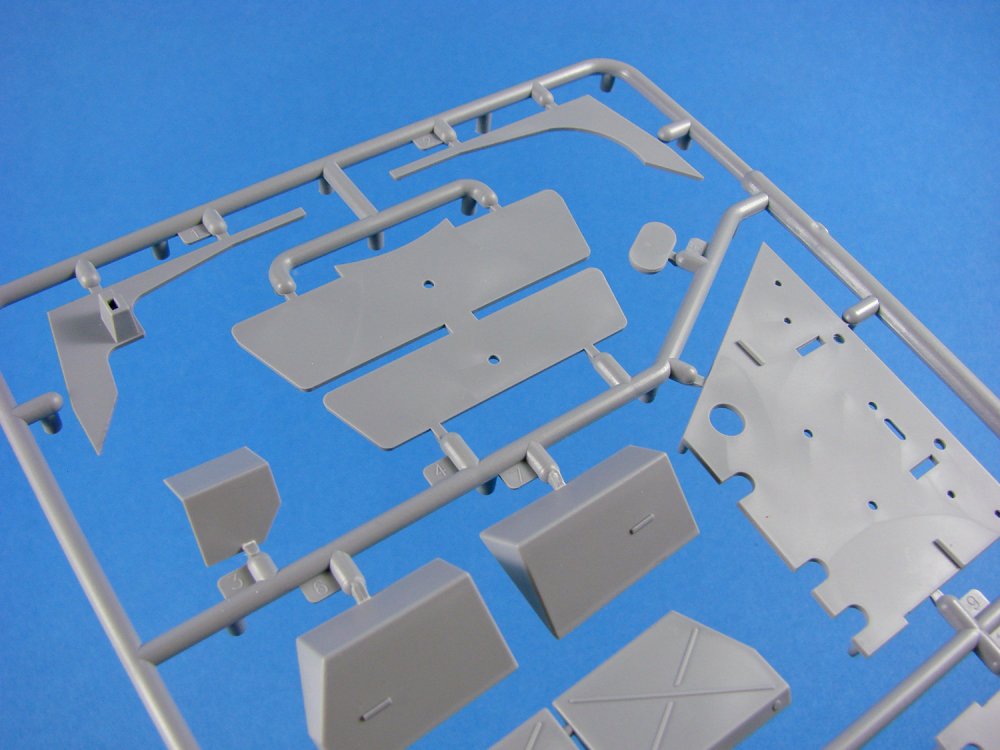
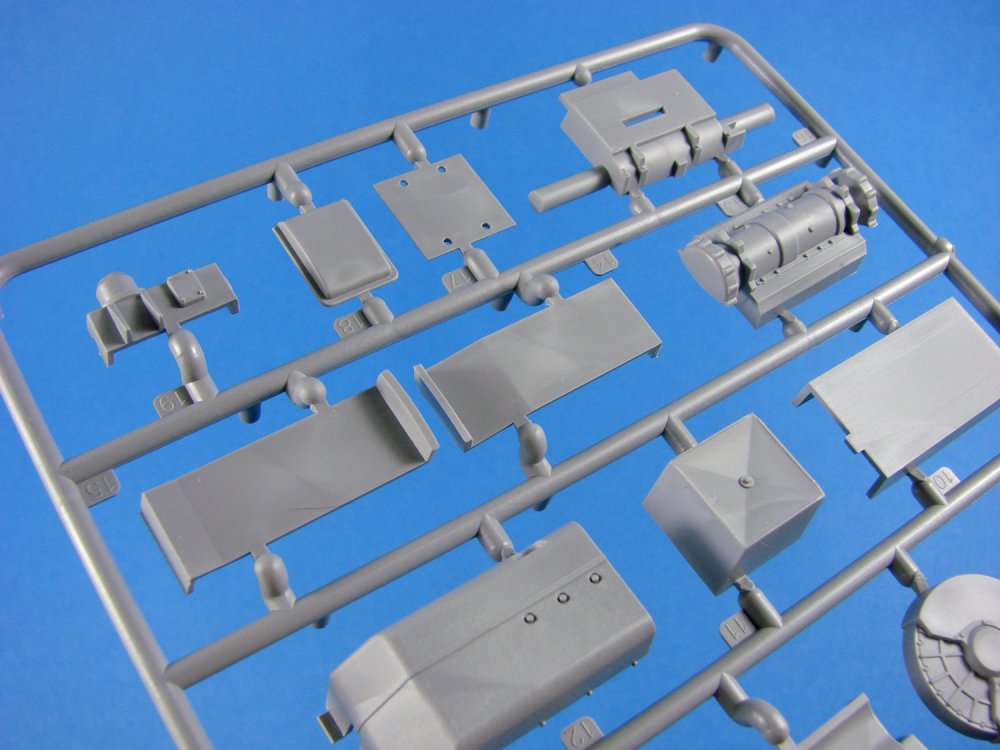
1/32 Me 262B-1/U-1 Nightfighter Revell Catalogue No. 04995 Whilst there was a rush to not just develop a viable jet engine, by both Britain and Germany, with various airframe prototypes being constructed by both sides, the final accolade must go to Germany for being the first country to introduce the world’s first operational jet fighter. The Me 262 seemed to be beset with problems from the very outset, stemming from logistical issues with raw materials and engine supply, to there not being an appetite to use new technologies to forge Germany’s military destiny. The initial prototype flew in April 1942, under piston power, with Junkers’ Jumo004 engines eventually being available for the Me 262 to fly for the first time using this revolutionary new technology, in July 1942. By now, the gestation period of this project was already 3 years, and for Germany, military fortunes were now changing. A lack of suitable materials with high melting points, was a severe drawback for the jet engine, with running time being quite short before overhaul was required. Nonetheless, the Me 262 entered service in April 1944, with Hitler’s initial insistence on the aircraft being utilised as a bomber, fully missing the main strength of the design. Sturmvogel (Stormbird) was the nickname given to the fighter-bomber version of the Me 262, whilst the fighter version was generally referred to as the Schwalbe (Swallow). It was March 1945 by the time that the Me 262 was to see its first full-scale assault on Allied bomber formations. However, the bell was tolling on the Third Reich, and by early May 1945, it was all over. The Nazi’s had much planned for the Me 262, with various prototypes and sub-versions either test flown, in service or under construction. Thankfully, a lack of foresight, materials, planning and numbers, prevented the 262 being a bigger problem than it could’ve been. The Kit Of course, Revell’s 2017 Me 262 release isn’t the first kit to have been released in 1:32. We have had everything from 1970s Frog and Revell kits, to several incarnations of the Hasegawa release, encompassing both single seat and two seat versions. Probably the best kit up until now has been the Trumpeter series of Me 262 kits (single and two-seat). These have been amongst the best from this manufacturer, and I have built a couple of these myself, so can testify to their standard. They are generally known to be accurate in both shape and detail, with plenty of the latter abound. Trumpeter’s Me 262B kit does suffer from a different rendering of its panel lines and rivets on the later-tooled fuselage, in comparison with the common wing of the fighter, that is shares. So how will Revell’s newly tooled Stormbird fare against the now harder to find, and more expensive Trumpeter kit? Revell state this about their new kit: A choice of lowered flaps Replica Jumo004 engines Moveable ailerons and rudder Radar antennae• Machine guns Detailed cockpit with side consoles Detailed Cockpit well in the under-carriage bay Detailed undercarriage 2 auxiliary fuel tanks Whilst Revell seems to improve with each new release, the same can’t be said for their box with its new livery. This more attractive looking package suffers from the same flimsiness and end-opening design as before. As with previous box designs, some nice images of the prototype model adorn the edges, and in all, it will certainly look attractive on the shelf, with its atmospheric artwork of the 262 in a late dusk combat with a Mosquito. Inside the box, it can be seen that Revell still insist on packaging multiple sprues in the same bag, with the ever-present risk of part breakage and scuffing. My sample does suffer from a few scuffs here and there, but nothing to be concerned about. A decent cockpit is always the centre of my project, and that appears to be exactly what Revell has delivered with this release. Of course, we now have two crew positions to consider, and both forward and rear cockpits are well-appointed with a wealth of both instrument and side console details, interspersed with levers, radio set details etc. Construction is quite different to the Trumpeter release, with a single forward cockpit being constructed first, and then fastened to the forward bulkhead. Onto this is then bolted the rear cockpit and bulkhead, before the lower tub is fitted around this, as two parts. Of course, this allows Revell to adapt this nicely for a future single seat fighter or fighter-bomber version. I hope the seam that will run along the underside centre of this assembly will be easy enough to remove, as it would be clearly seen in the main gear wells. The forward and main gear wells are exceptional in terms of detail, with only a little wire needed here and there. A key component of the main gear bay is the underside of the cockpit tub, and there is nothing to complain about here. This, along with the moulded internal fuselage wall detail, is further detailed with various linkages that related to the pilot’s control column. Further details adorn the internal walls, including parts associated with the hydraulics, electrical junction boxes etc. The latter would benefit from wiring up to the main cockpit tub. A single framework of spars is then assembled and fastened to the lower wing. Incidentally, the lower wing is made up from a centre section and two outboard panels. The spare box also provides a little extra rigidity that extends onto the outboard panels. Revell’s representation of the gun bay looks excellent, with a set of very detailed MK108 cannon, complete with feed and ejection chutes and detailed forward and rear bulkheads. Again, the only thing you need to add here is a little wiring on the rear bulkhead, and the cables for the cannon’s electrical firing circuit. The design of the 262 necessitates that the gun bay construction be tackled at the same time as the nose gear well. On the real aircraft, the nose was constructed as a pod, thus the modular construction of this does follow that trend. Of course, the fuselage itself has the associated gun bay cowls moulded separately. Of particular note is the single-piece forward gun cowl, with its slide-moulded muzzle troughs. If you wish to pose the gun bay doors in the open position, you will need to carefully score the inside of the single piece gun bay cover, and separate the three components. Although Trumpeter include two Jumo004 engines in their releases, there is no real option to display them, whatsoever, unless you use the clear nacelle halves. Not ideal. Now, whilst Revell’s release doesn’t feature separate main engine panels, the forward, upper nacelle cowl is indeed a separate part, and if you remove this, nacelle frame detail can be seen in situ, as well as the engine’s gearbox and pumps. The upper, rear cowl is also a separate part, allowing the engine’s exhaust pipe to be seen if left off. I would have liked to see the ability to display the whole engine beneath the wing, with lugs to mount it directly to the wing, but that’s no criticism as no kit has yet supplied this possibility. If you do want to display the engine, and even through the limited kit possibilities, then you will need to add some plumbing to it. Zoukei-mura made an excellent job in their Ho 229 kit, so if you have this, or check photos of it online, you should be able to get some good reference for simple plumbing. There are a lot of nice touches with this kit, such as the leading-edge slats that can be posed in retracted or deployed positions (some surgery required for retracted), separate ailerons, elevators and rudder with separate trim tab. The forward wheel is moulded with separate hub inserts, but unfortunately, the wheels themselves aren’t weighted. There are two styles of forward nose wheel supplied (smooth and treaded). I was a little undecided when I saw the test sprues, with things perhaps looking a little soft in places, but seeing the production kit has allayed any fears about that. With the plastic looking as refined as the best of Revell’s recent releases. Panel lines and ports are refined and whilst the model isn’t riveted, there are a number of fasteners represented in various locations. A very clean-looking exterior that will appeal to most, and still allow modellers like myself to add a little flush-rivet detail, maybe. Moulding quality is also commensurate with new Revell releases, with minimal flash and negligible mould seams. The transparent parts are also crystal clear, albeit with one of my canopy parts detached from the sprue on arrival. You should have no problem with ejector pin marks as those that exist appear to be tucked out of view and away from detail areas. I’m also very impressed with the new style instruction manual. Gone are the busy looking line drawing images, replaced with much clearer images against a pale blue background. I find the appearance of these very akin to the manuals that HpH supply for their resin its, and it gets full marks from me. A colour reference chart and parts map is supplied (Revell paints), and the last four pages are taken up by the colour profiles for the schemes. A single decal sheet is supplied, printed by Cartograf, and containing markings for just two schemes: Messerschmitt Me 262 B-1a/U1 Red 12, 10./NJG 11, Schleswig, May 1945 Messerschmitt Me 262 B-1a/U1 Red 8, 10./NJG 11. Schleswig, May 1945 Being a RoG kit, you would be correct to assume that no swastikas are supplied, even as halves, so you will need to root through your decal stash to come up with something suitable for these specific machines. As well as markings, you will also find comprehensive stencil data, as well as instrument decals that are printed in one piece. You might want to consider punching them from the paper and applying them individually. Revell has also supplied some reasonable-looking seatbelts, but using decals for such doesn’t provide a very convincing finish. Consider aftermarket for these. Printing is clear, solid, thin, and with a relatively small amount of carrier film. Everything is also in register. Conclusion I have to say that this is a superb kit, full of detail and clever engineering, and could be built straight from the box with no additional parts. On the other hand, if you wanted to really go to town, then those extra details would make the result absolutely magical. I’m a fan of Revell’s price-point on their 1/32 kits, with this one coming in at an average of only £35. I consider that to be a steal. I’m not going to start looking at shape accuracy, as I know that the designer of this particular release is impeccable with his approach to getting things right, and he worked with a team of extremely knowledgeable people who have intimate knowledge of the subject. Revell really has a winner with their new Me 262B-1/U-1 Nightfighter. Thanks to Radu Brinzan and RB Productions for the sample.


-
I already have the kit for a future build
-
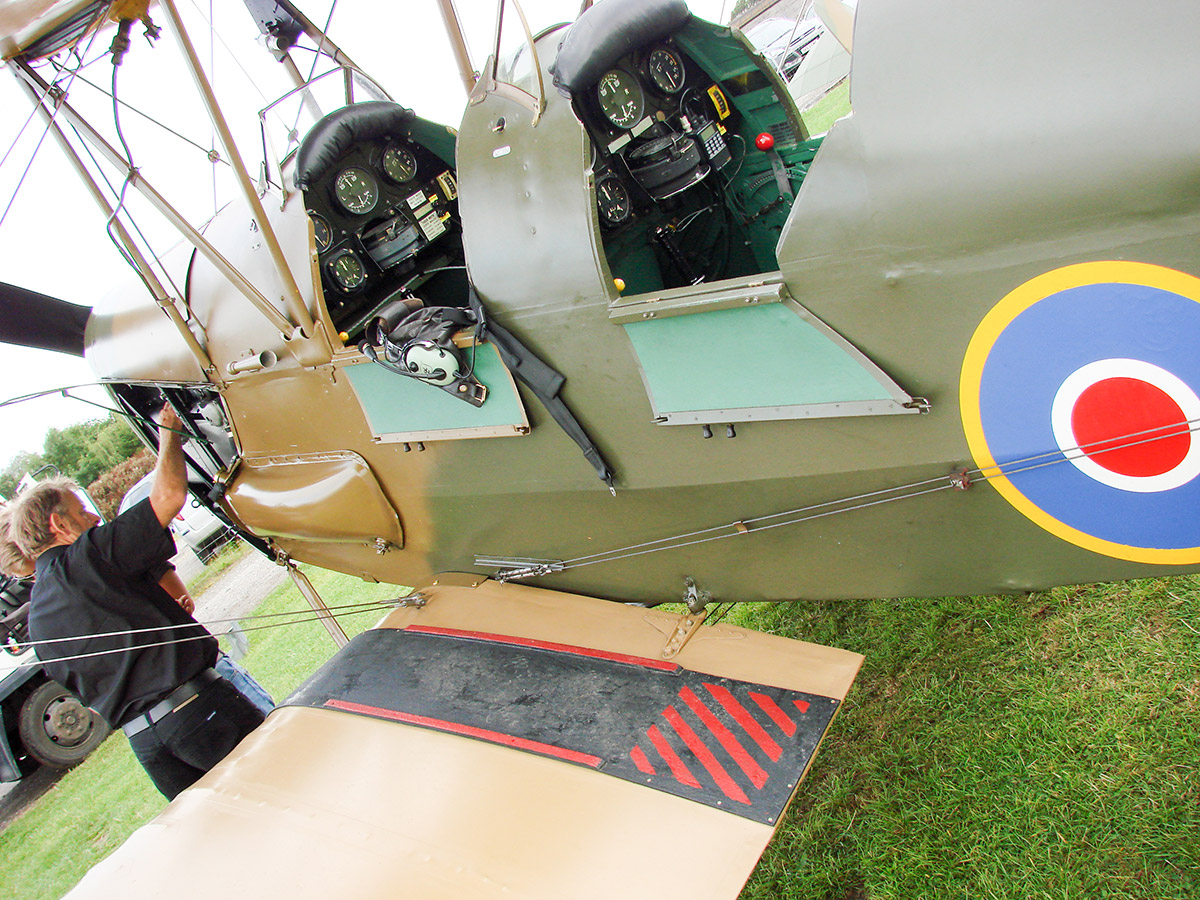
I flew it with an instructor, but I had full control for about 20 mins.
-
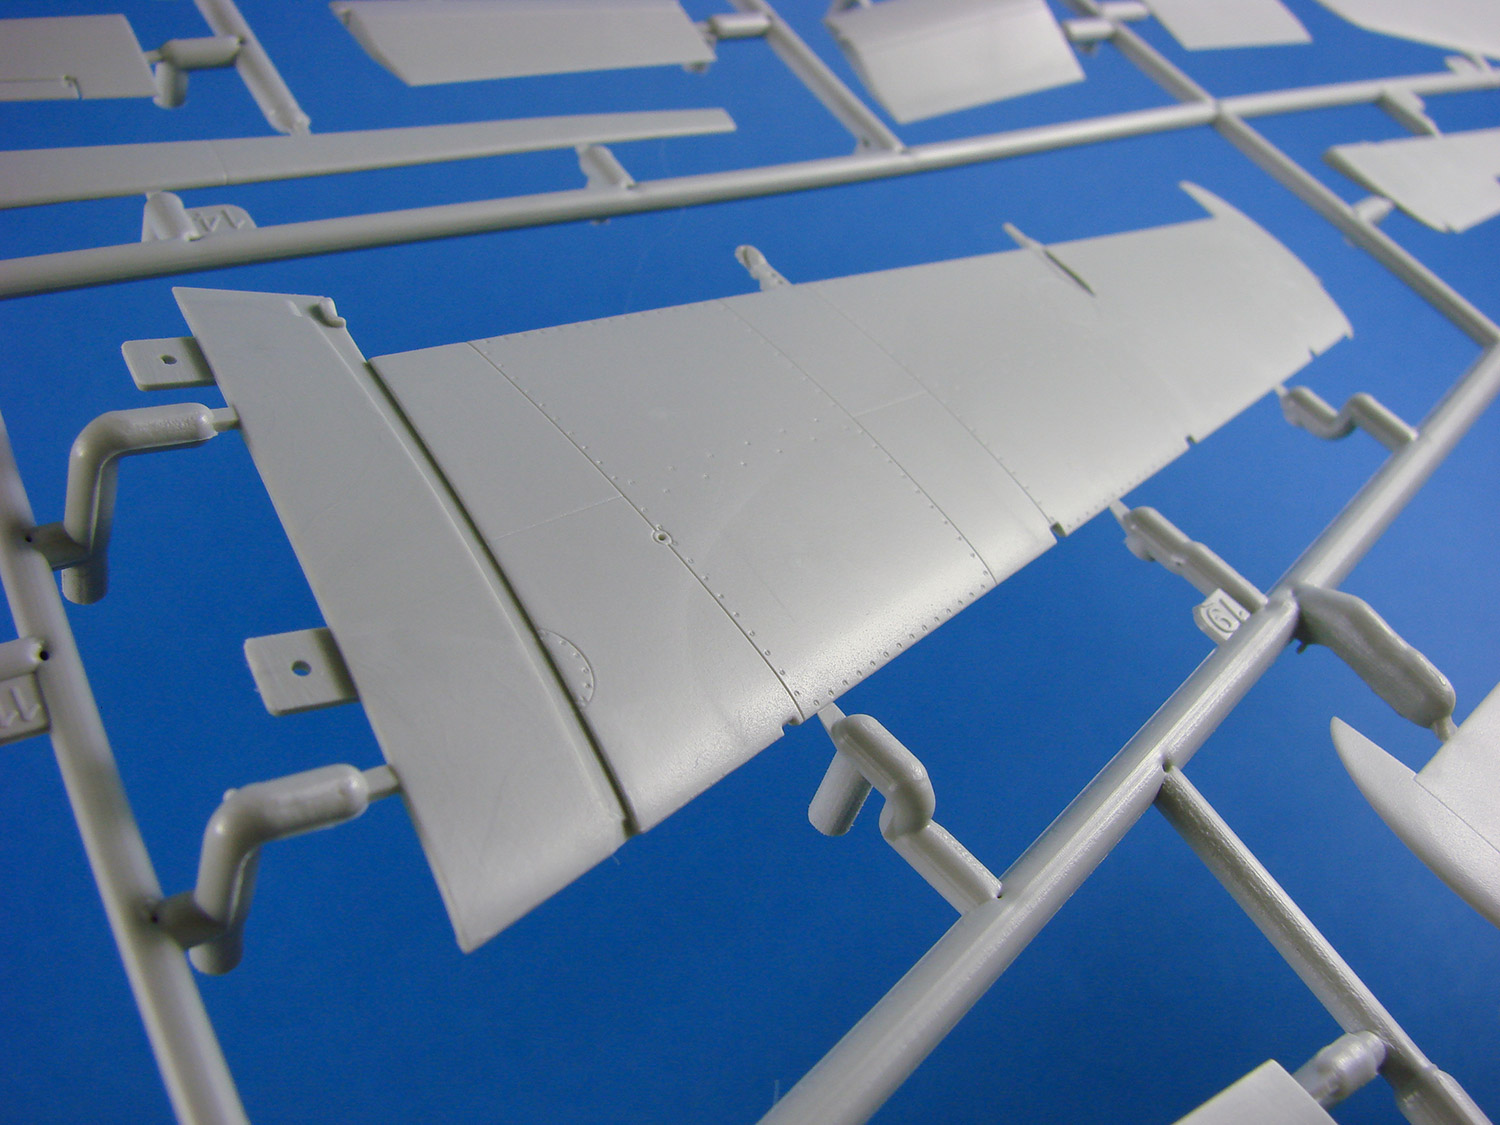
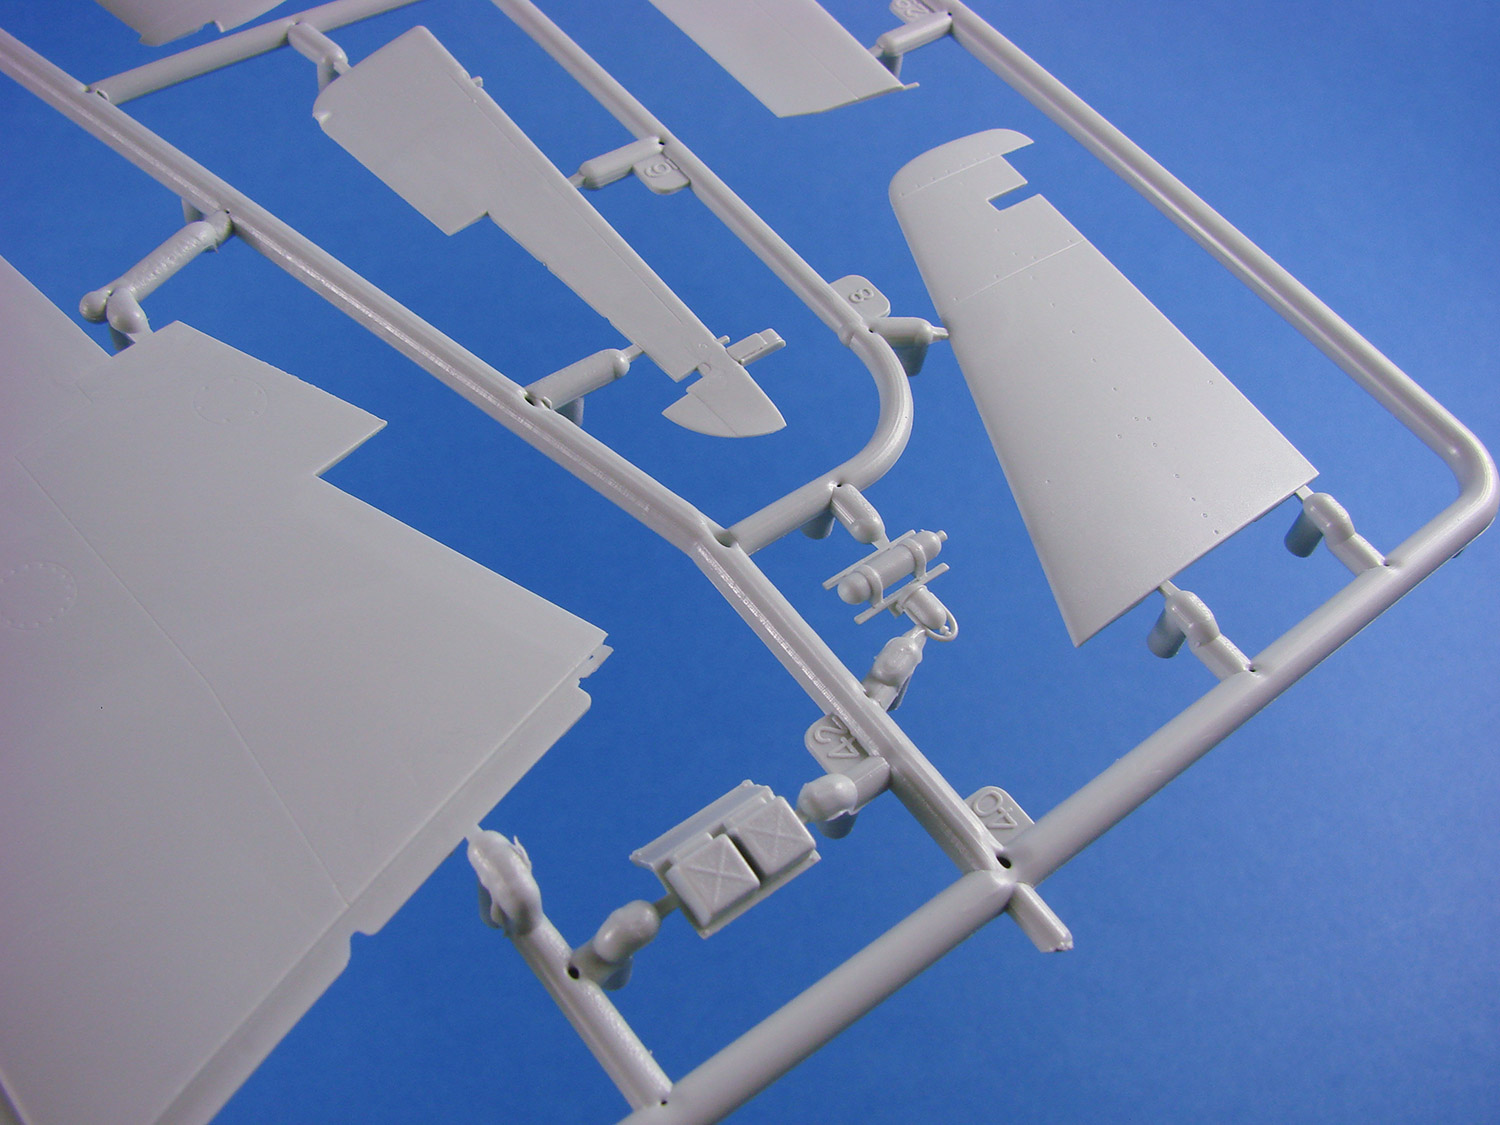
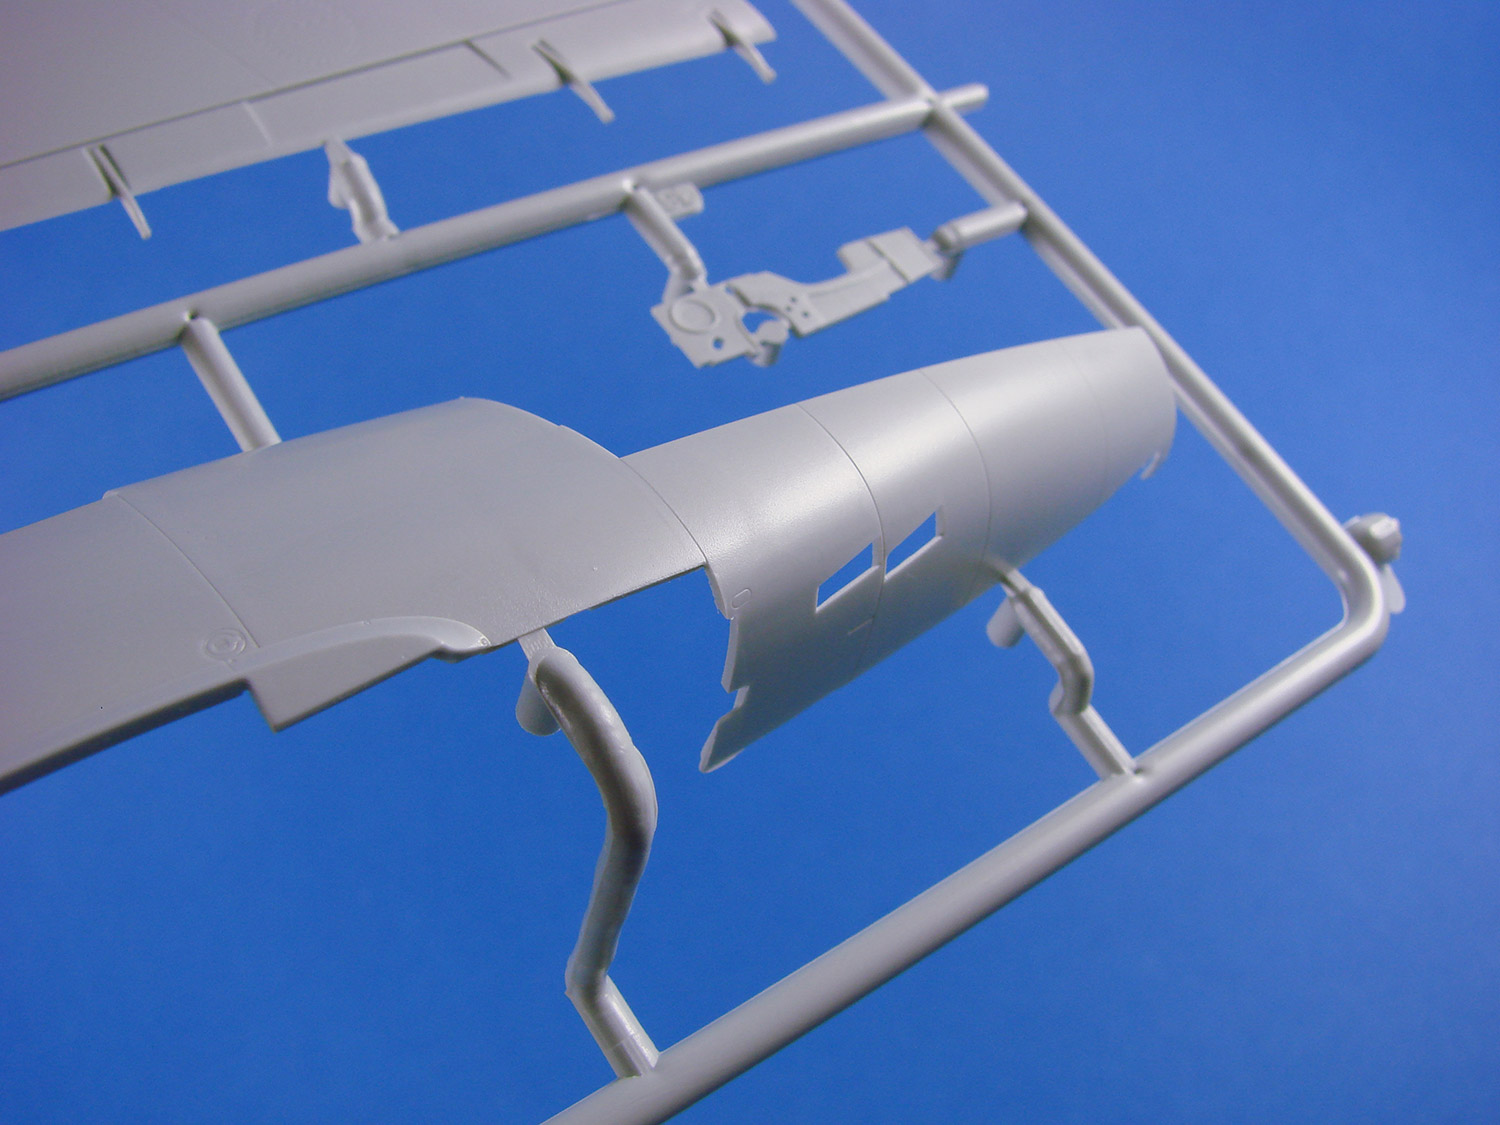
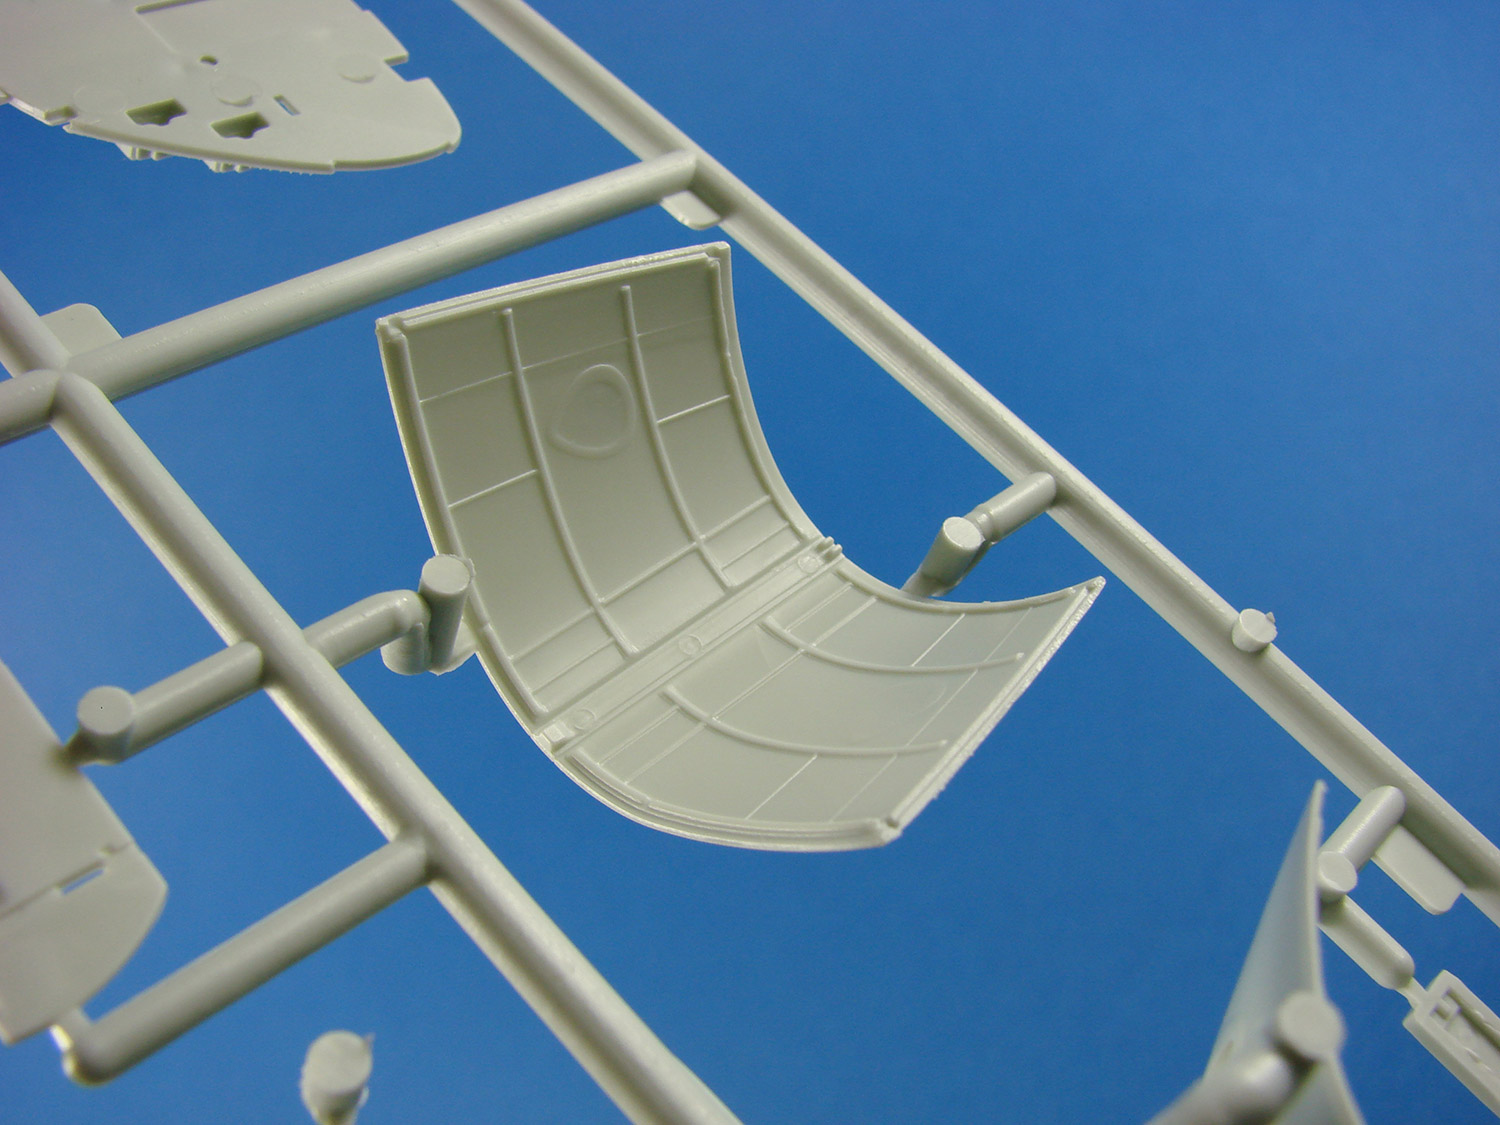
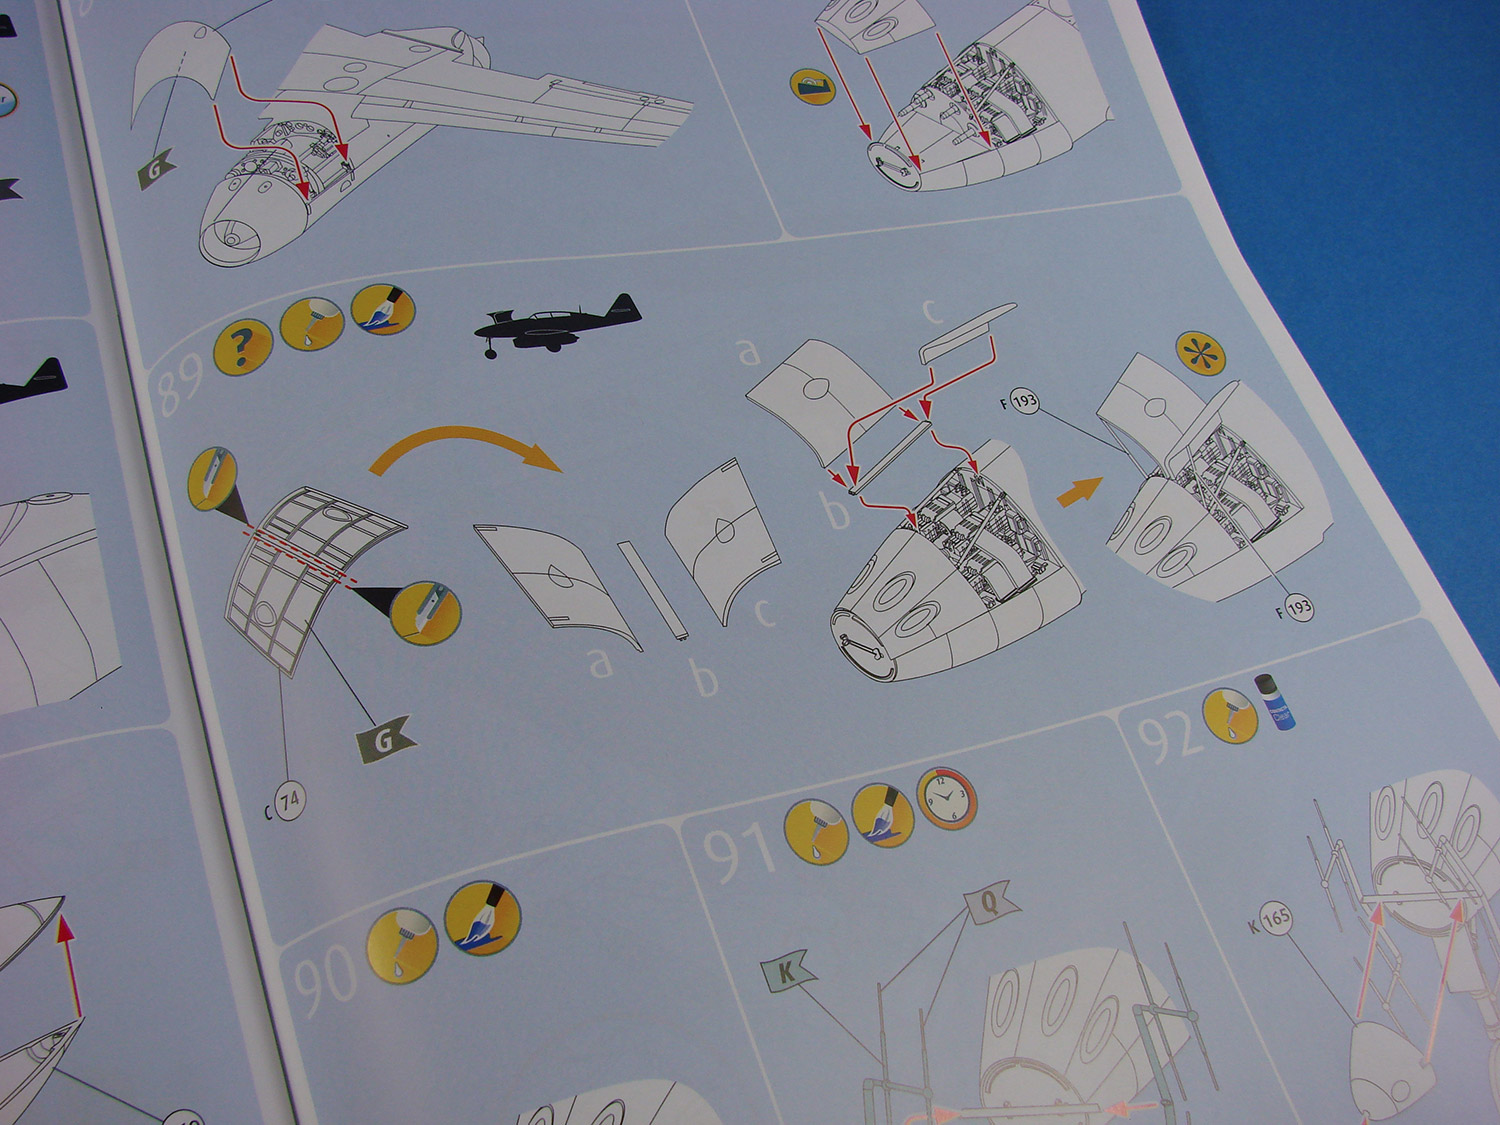
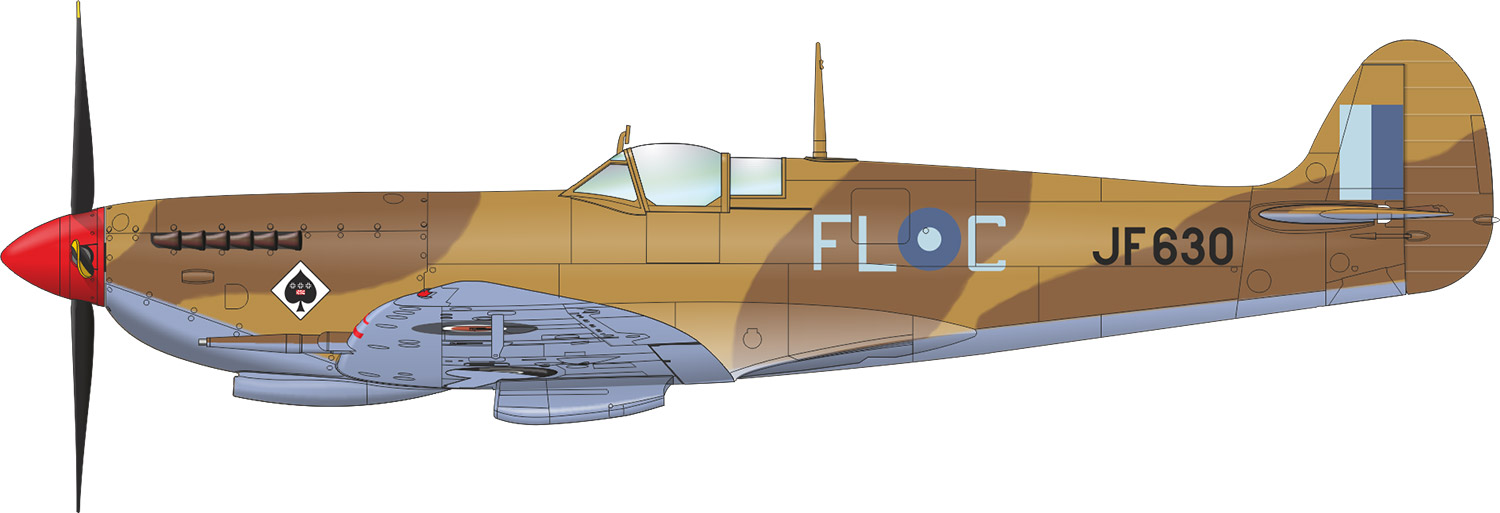
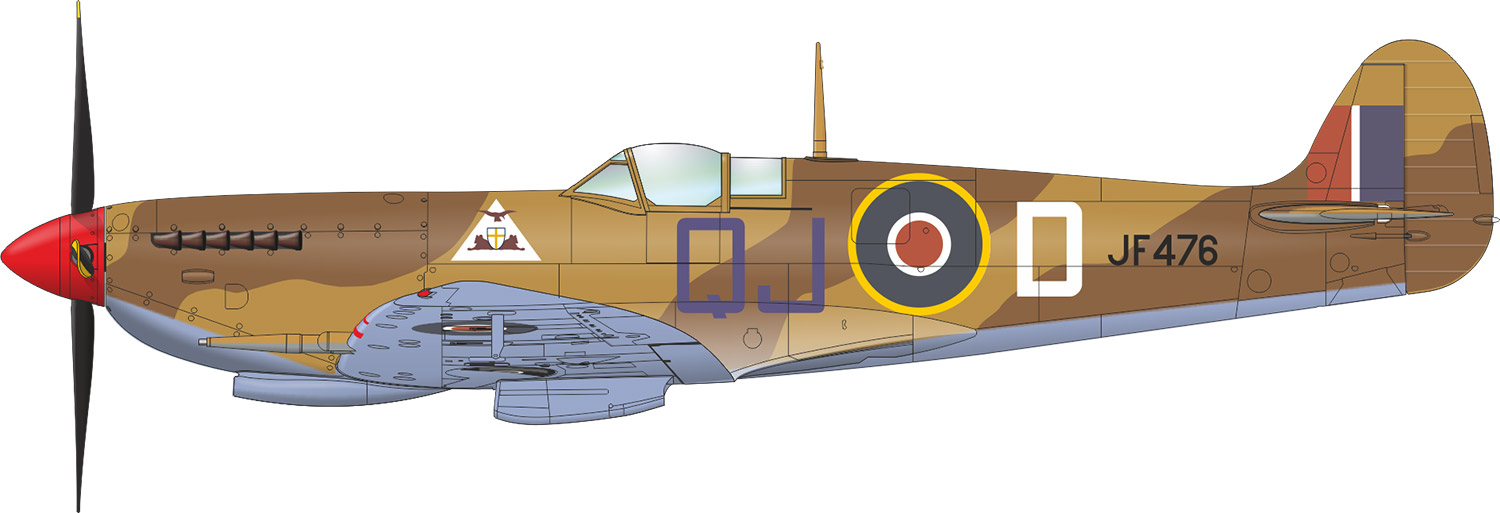
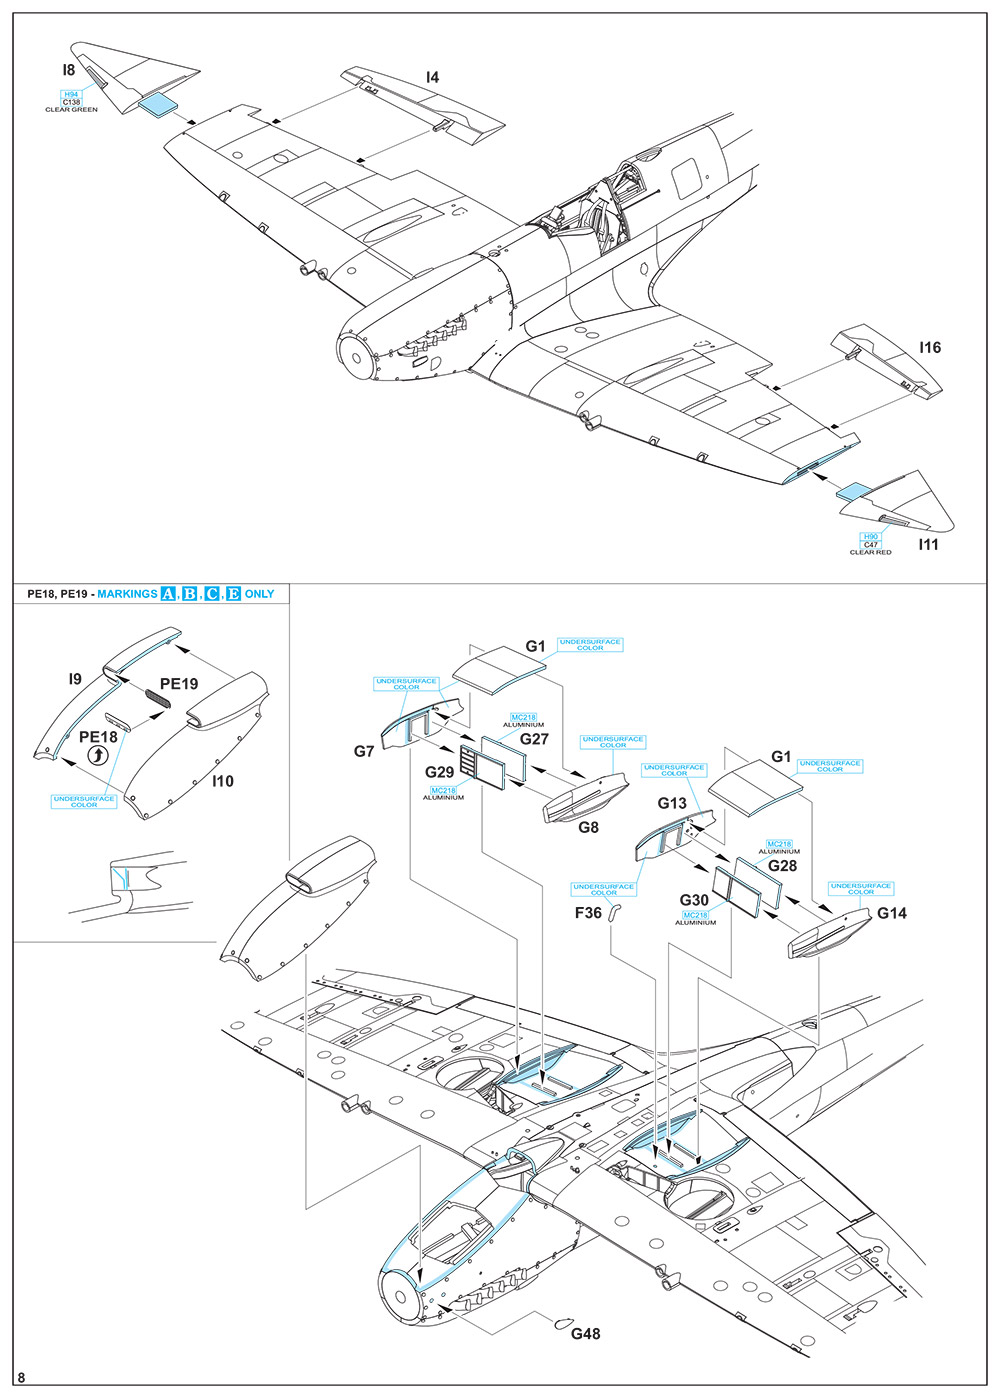
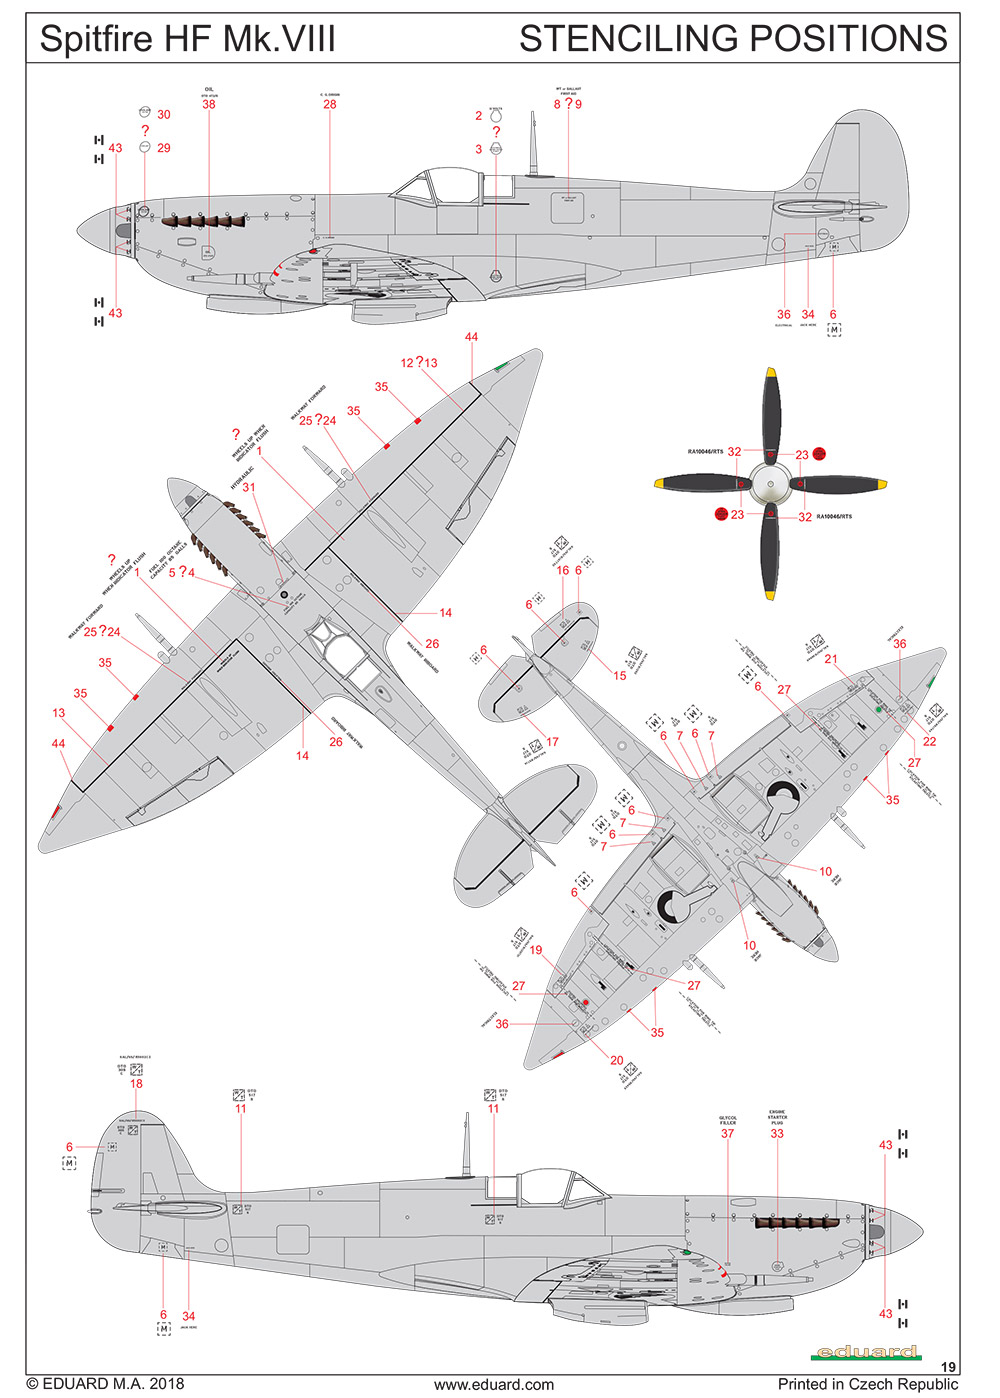
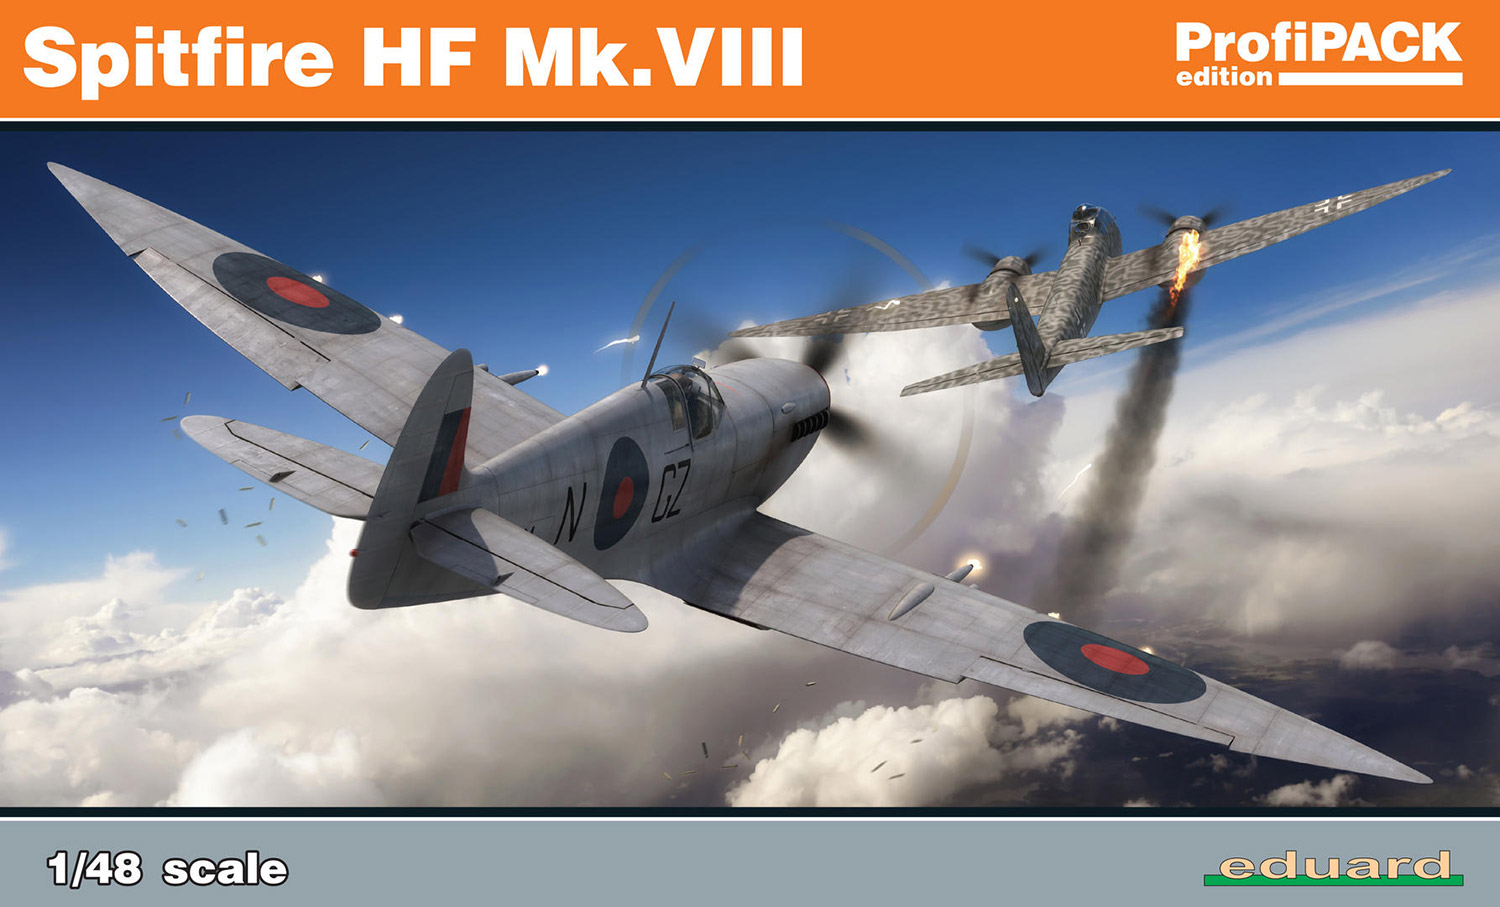
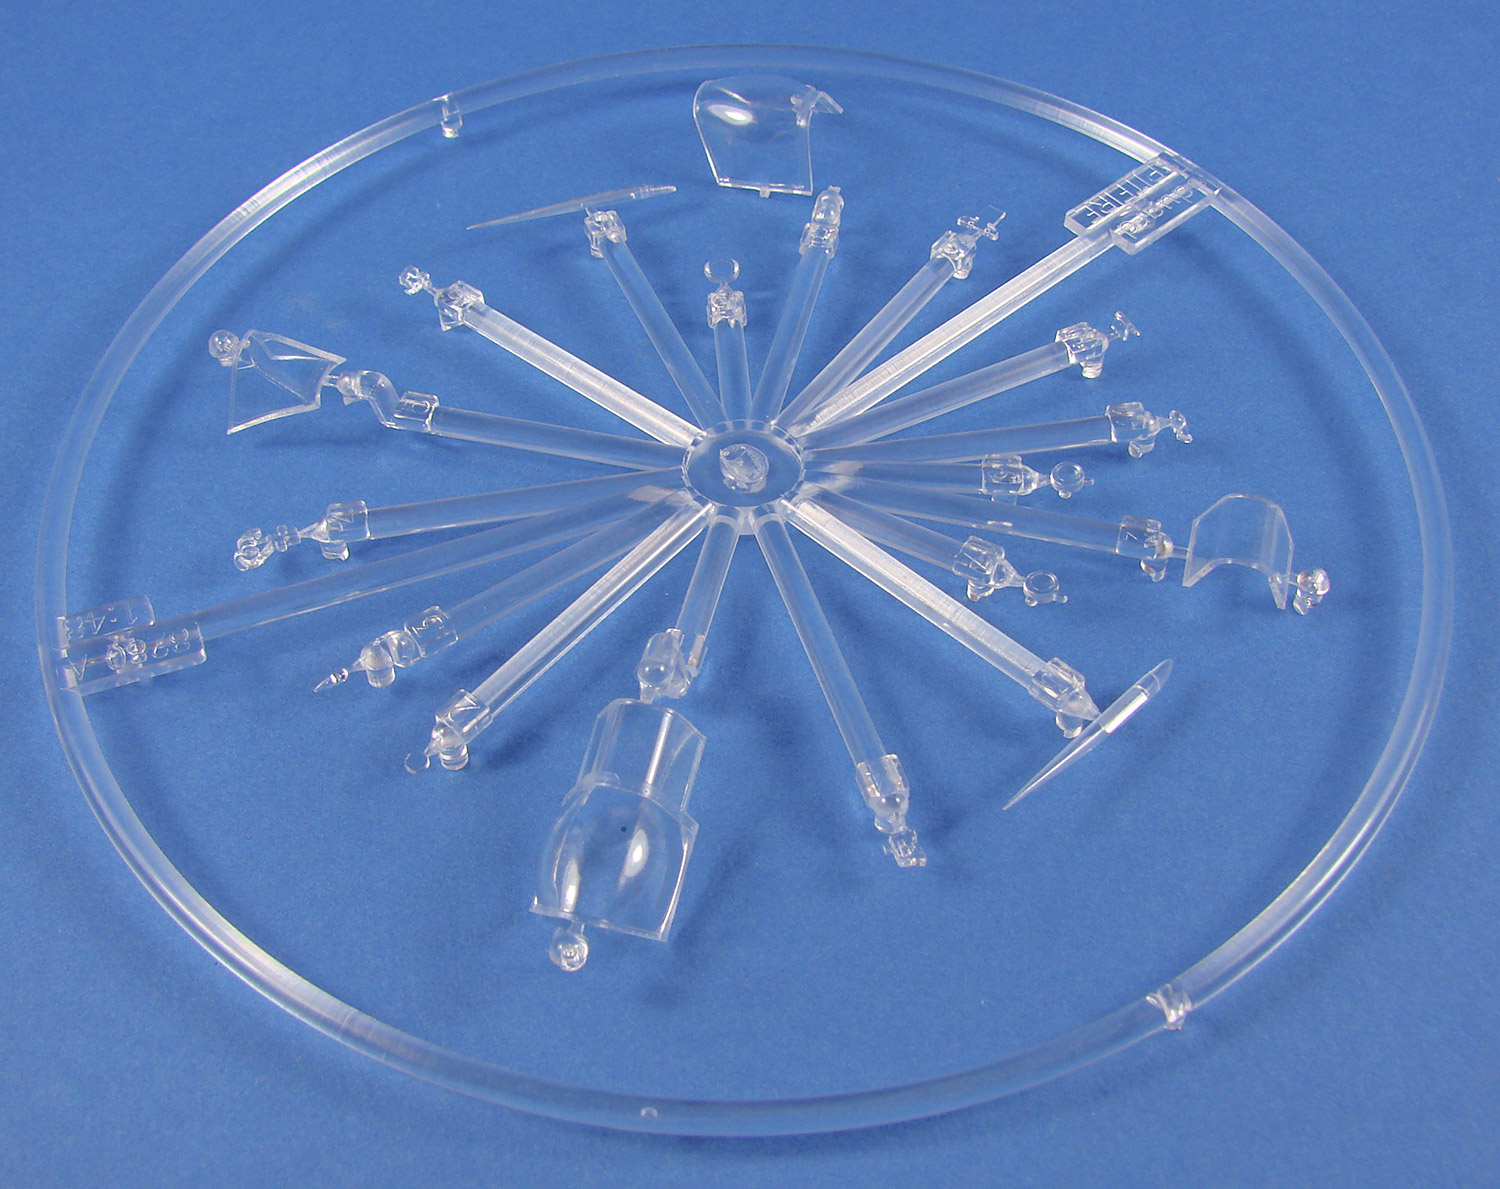
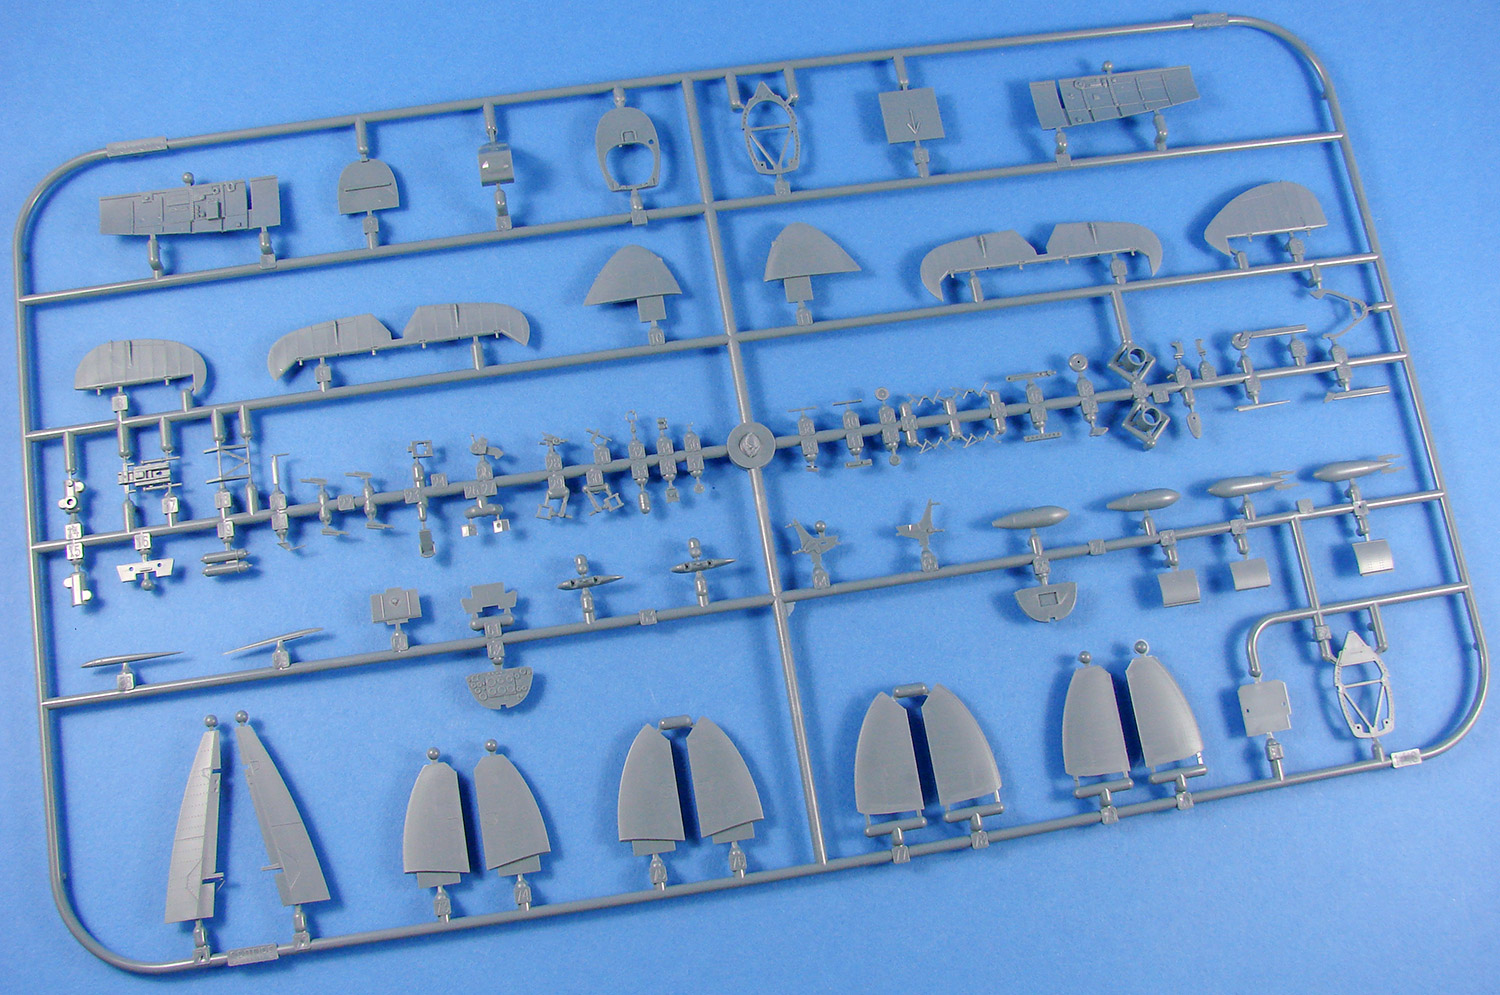
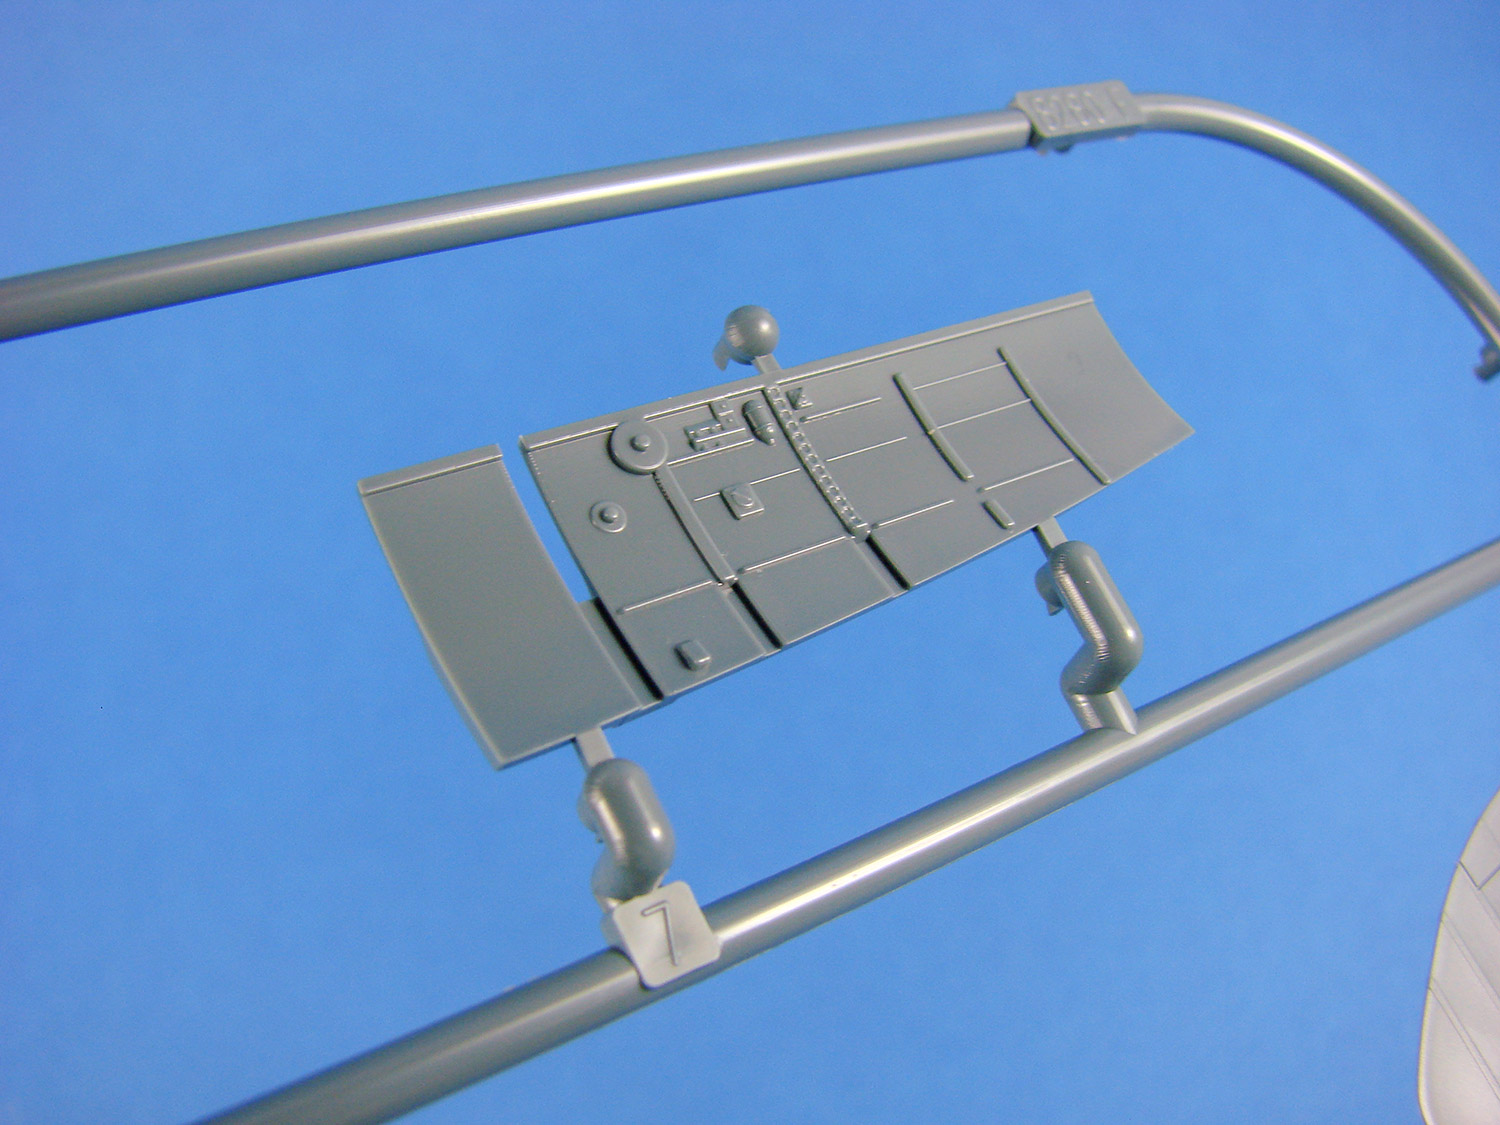
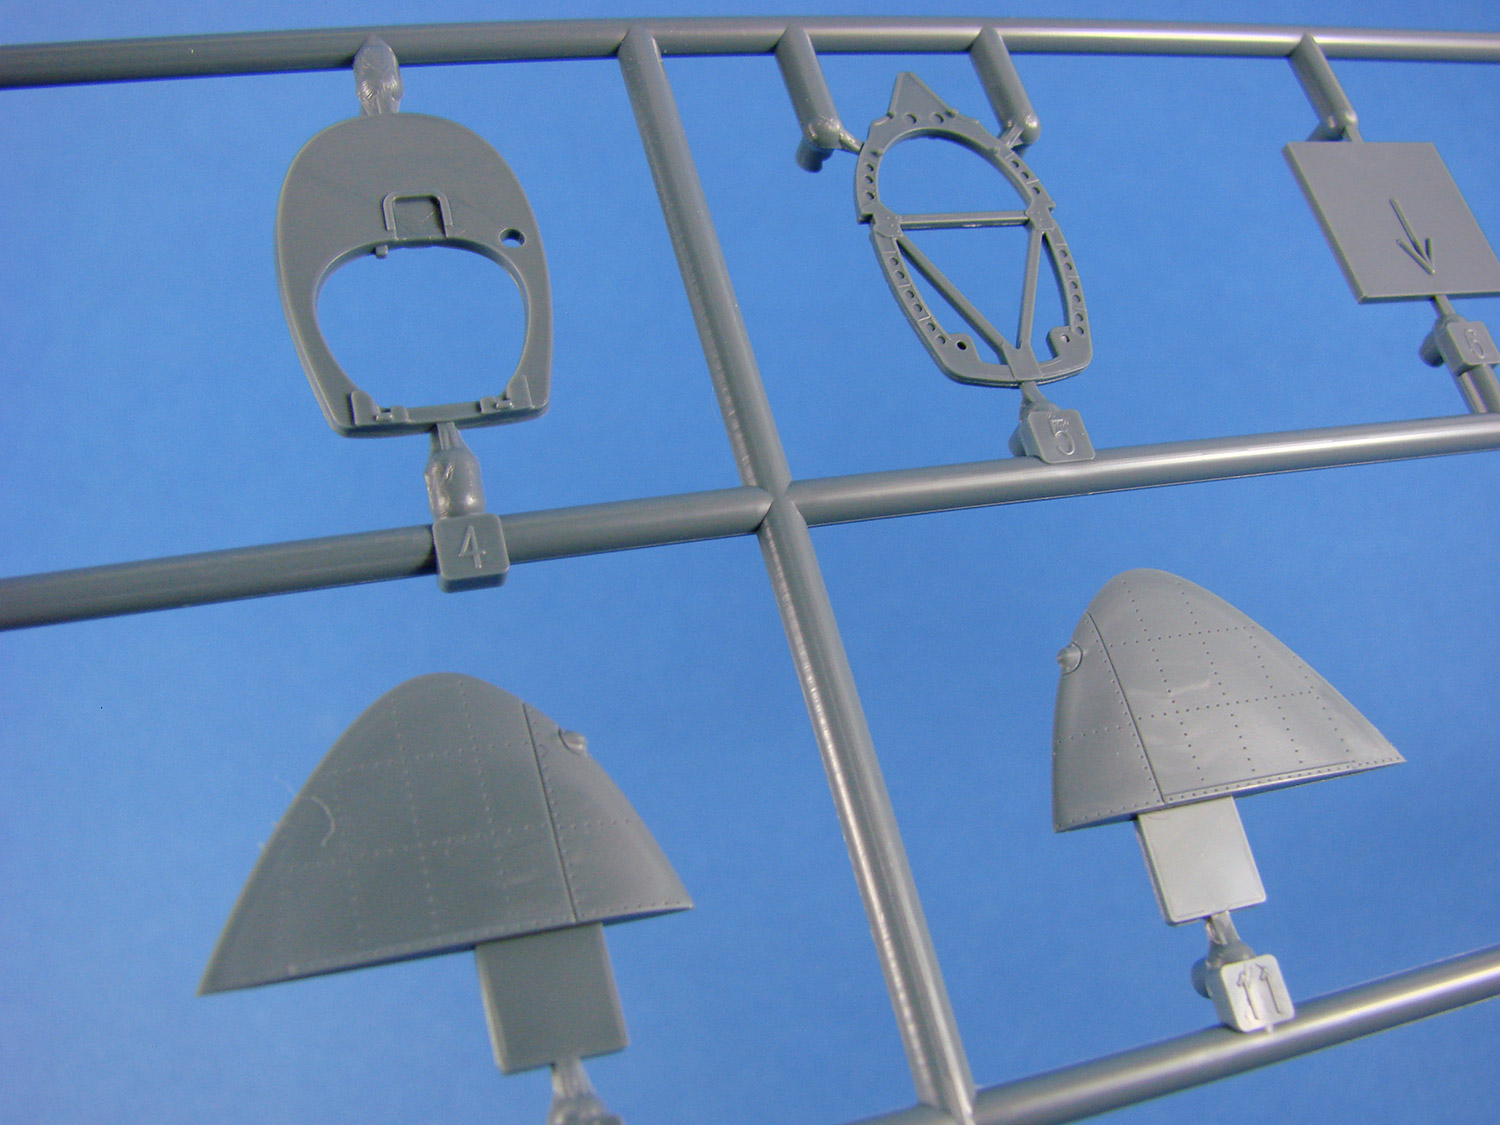
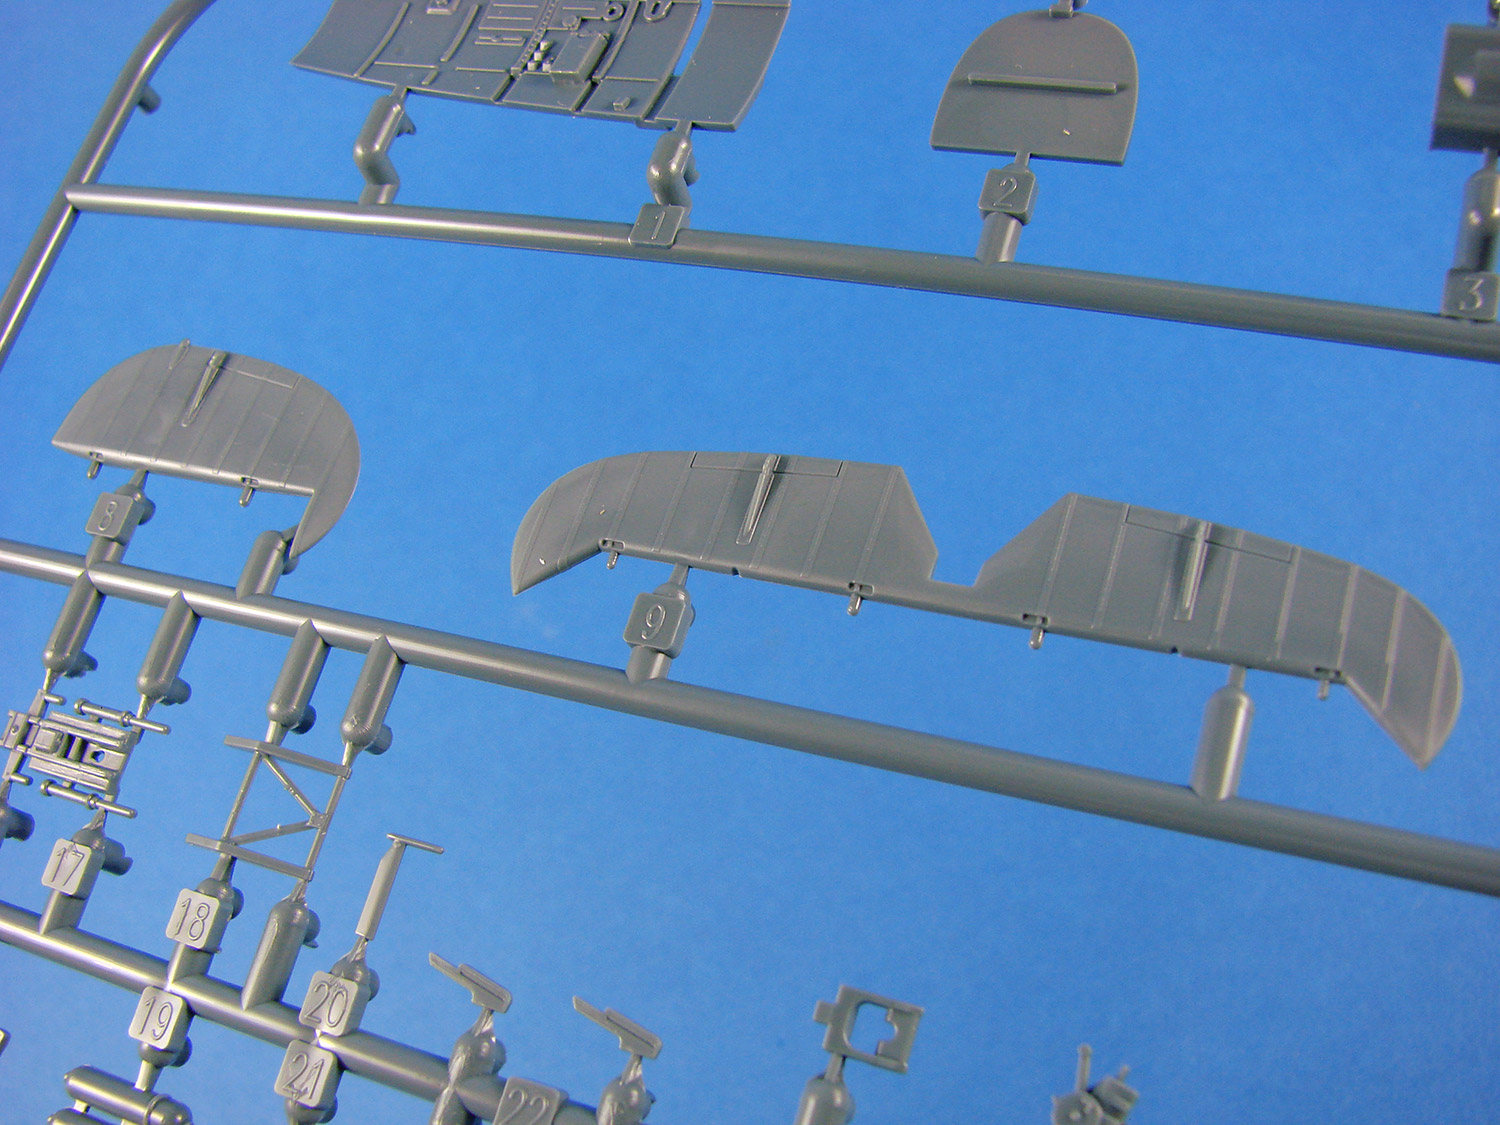
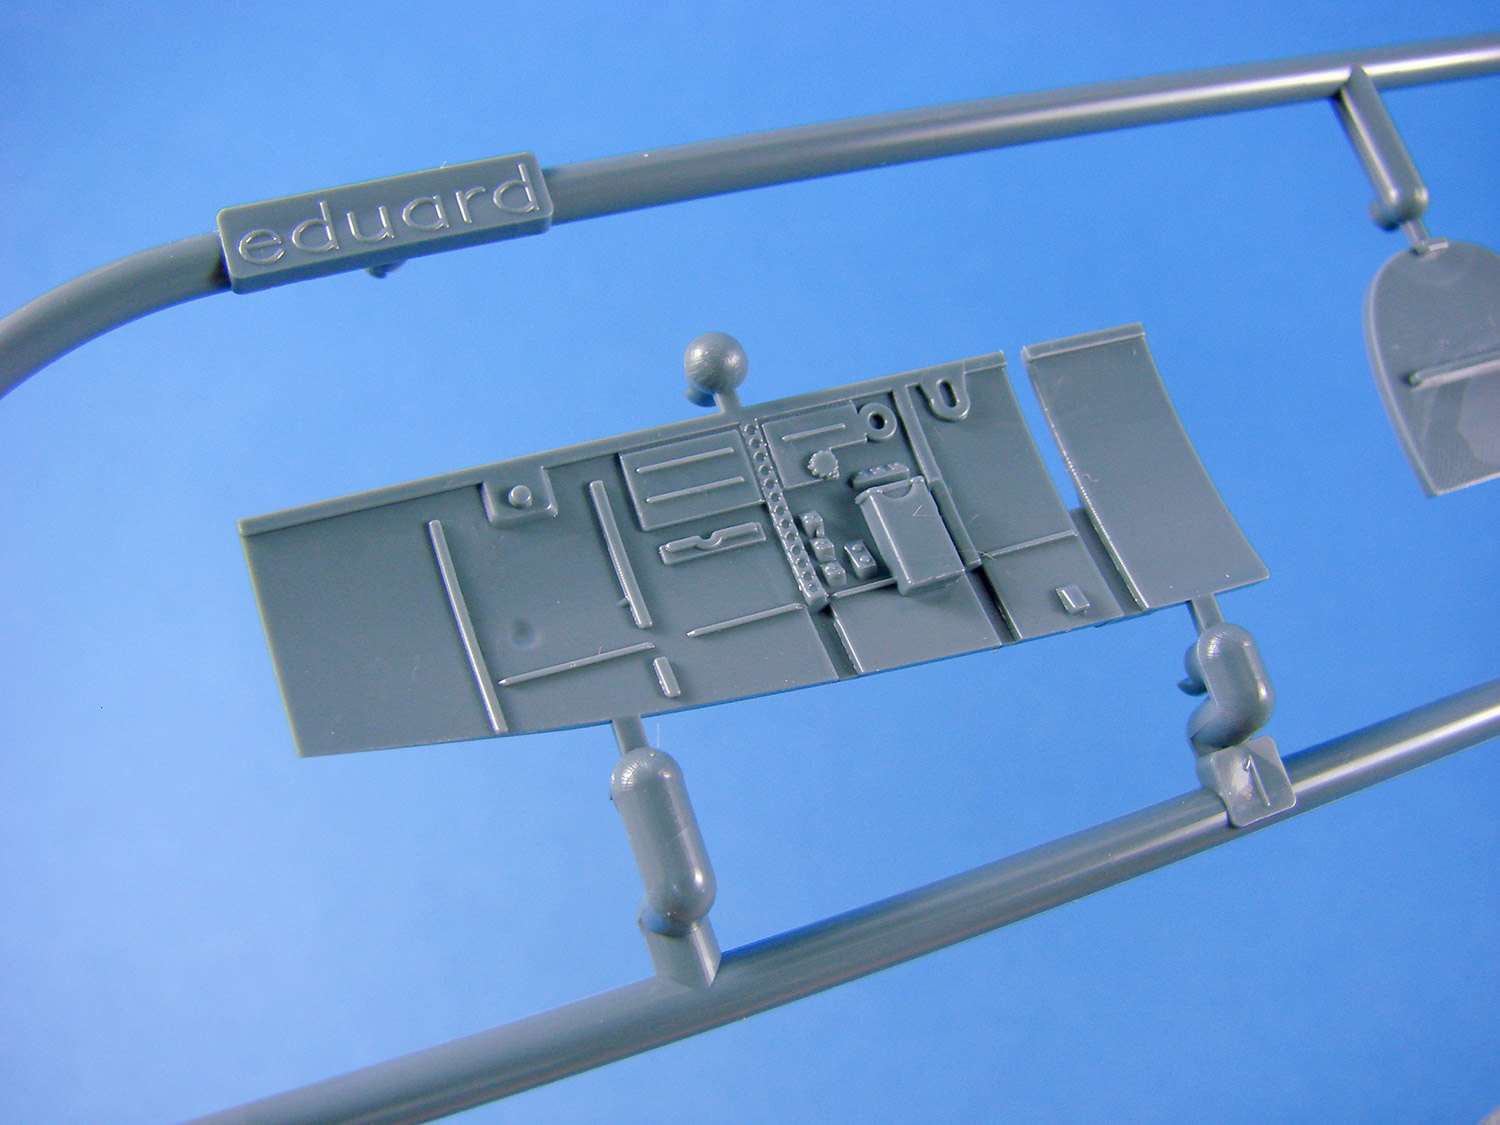
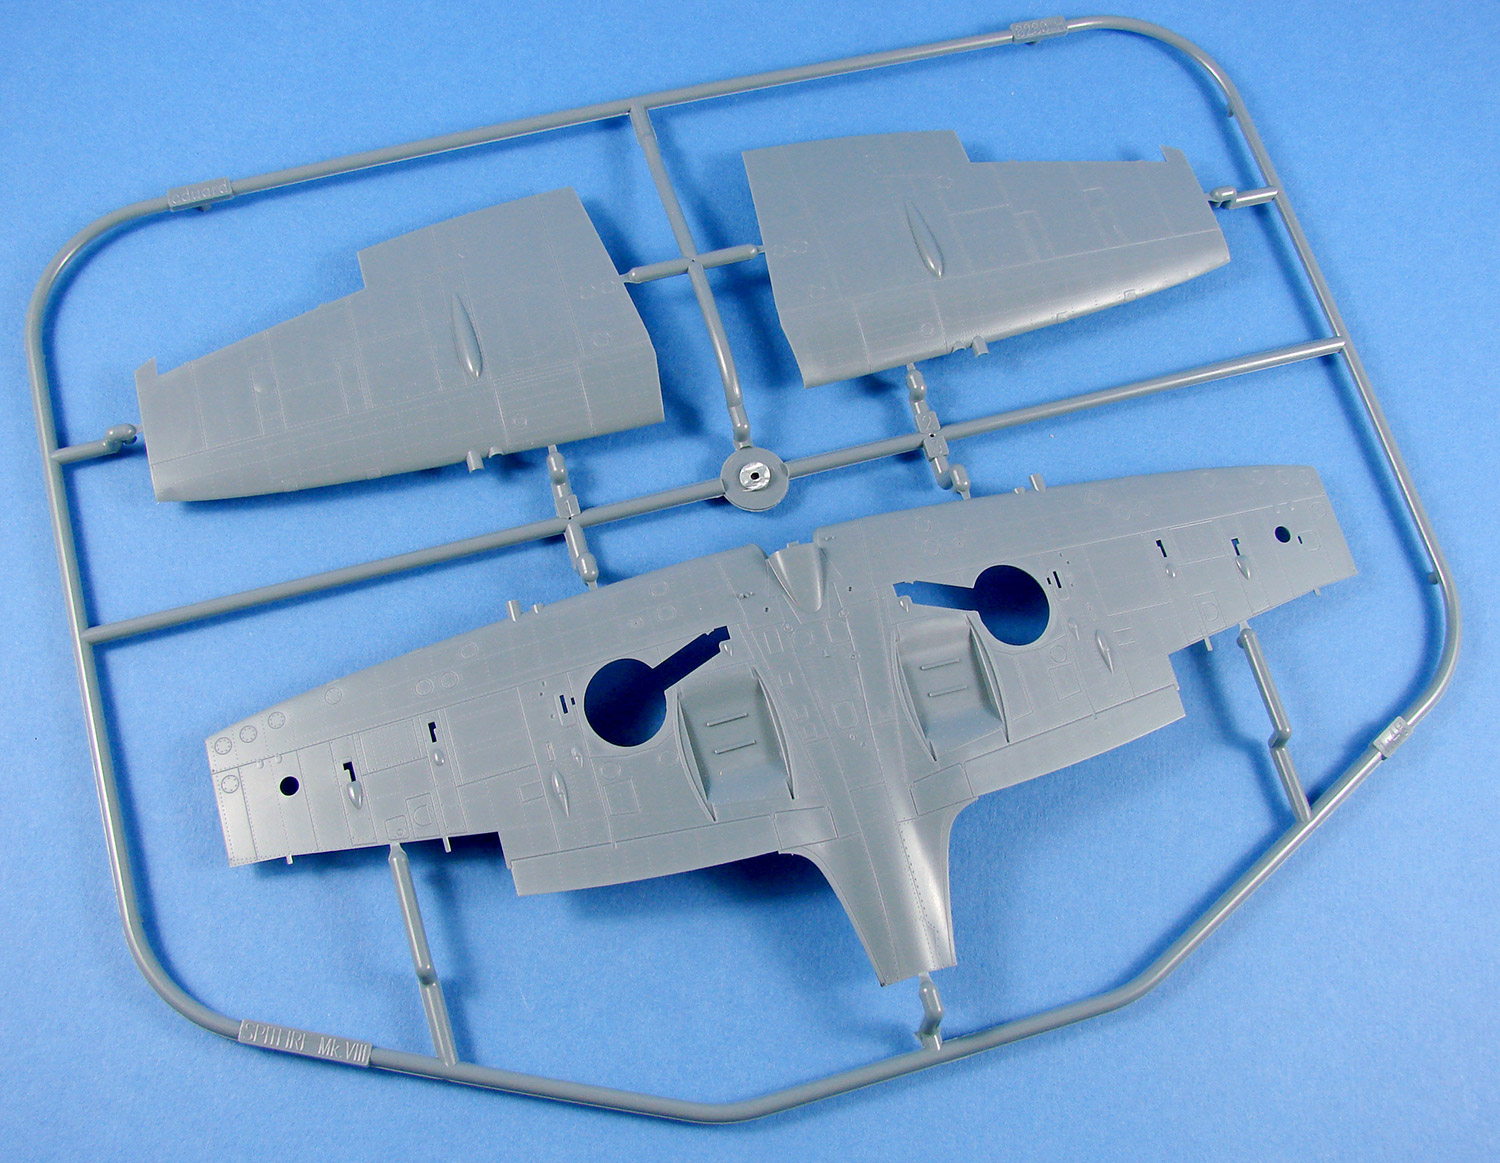
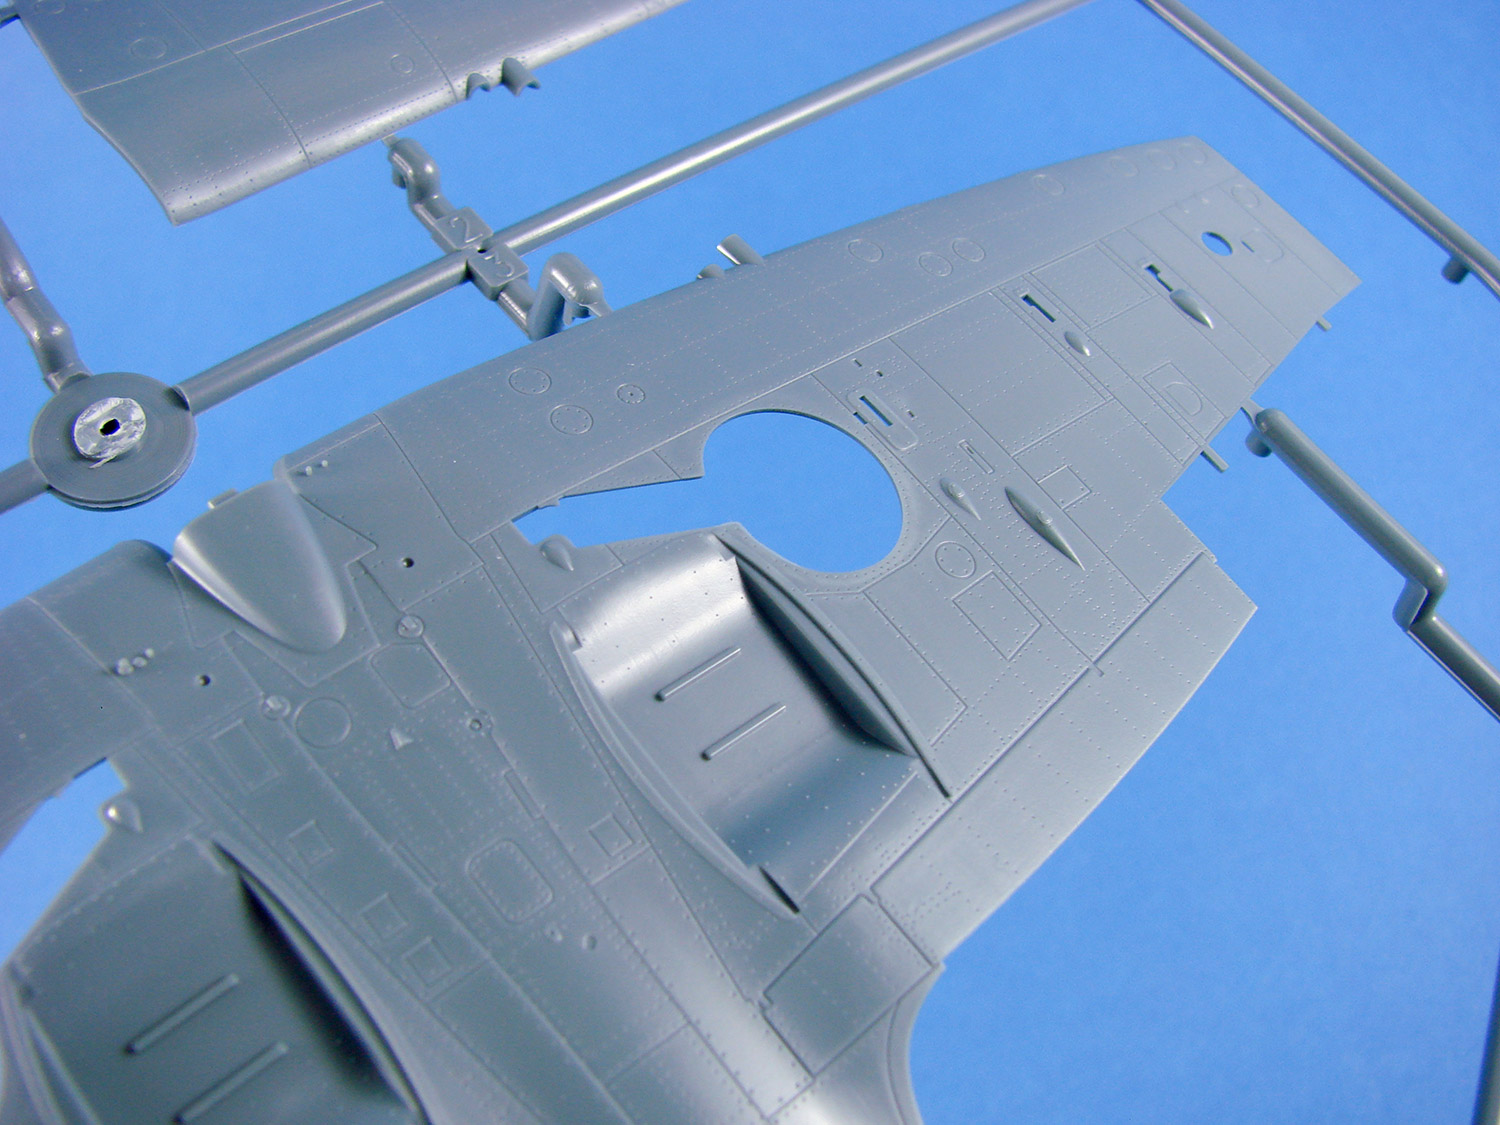
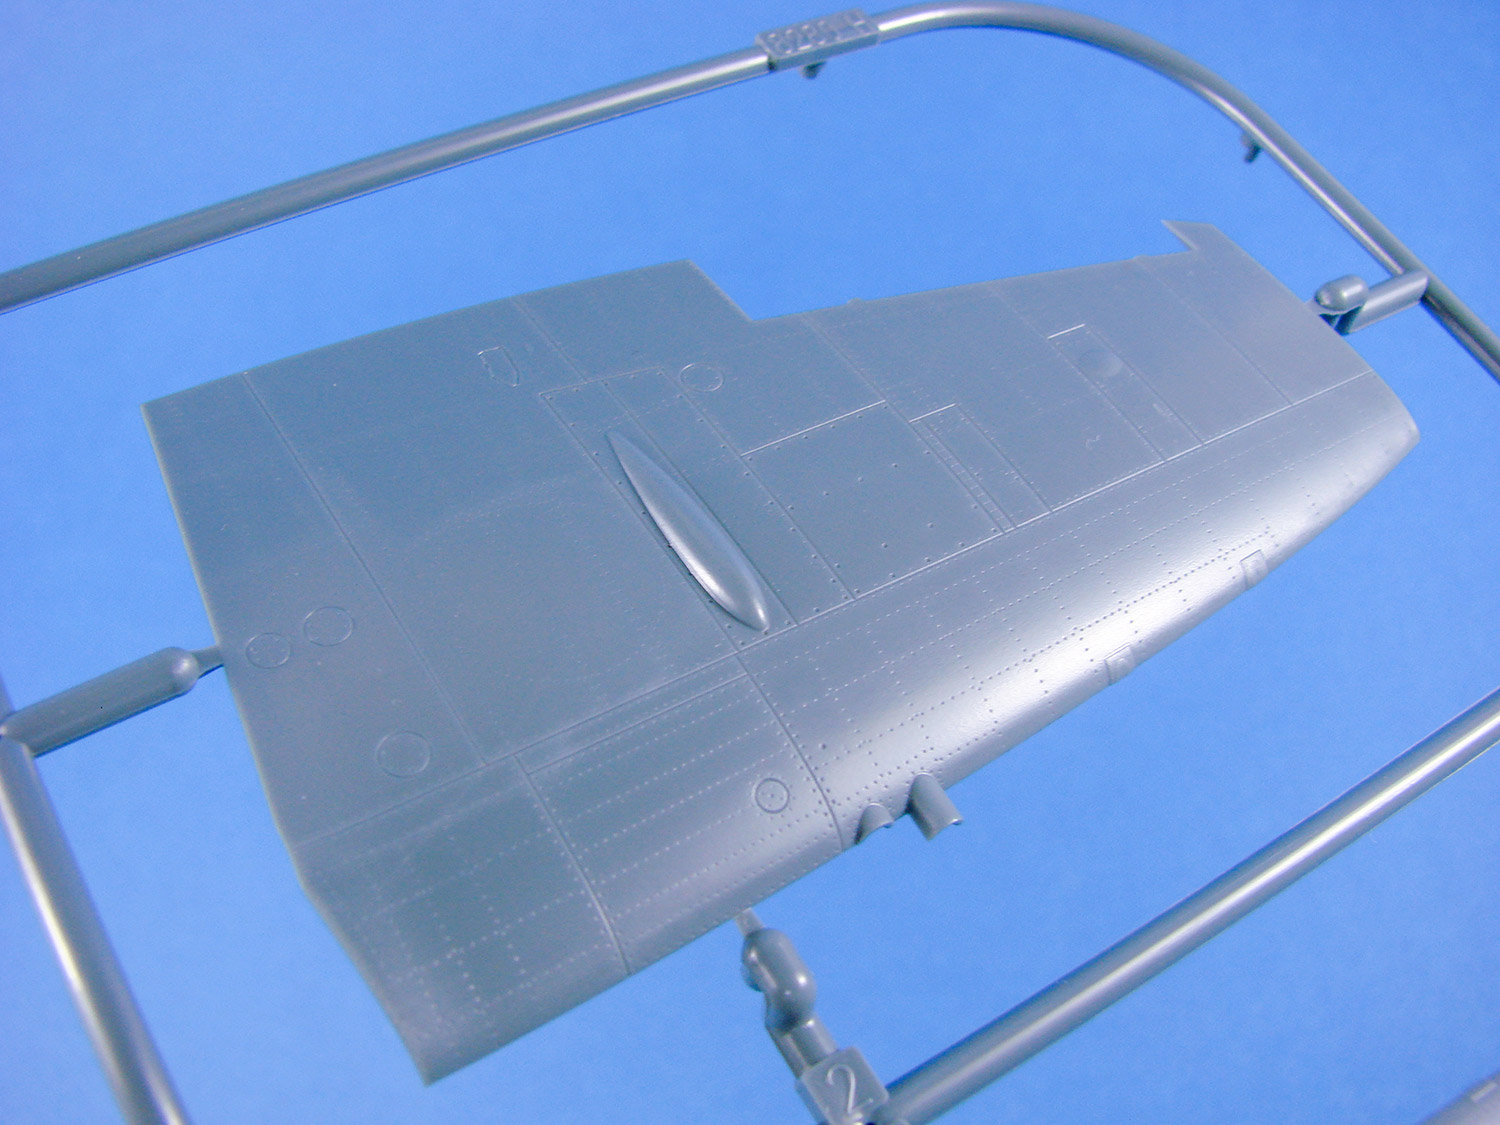
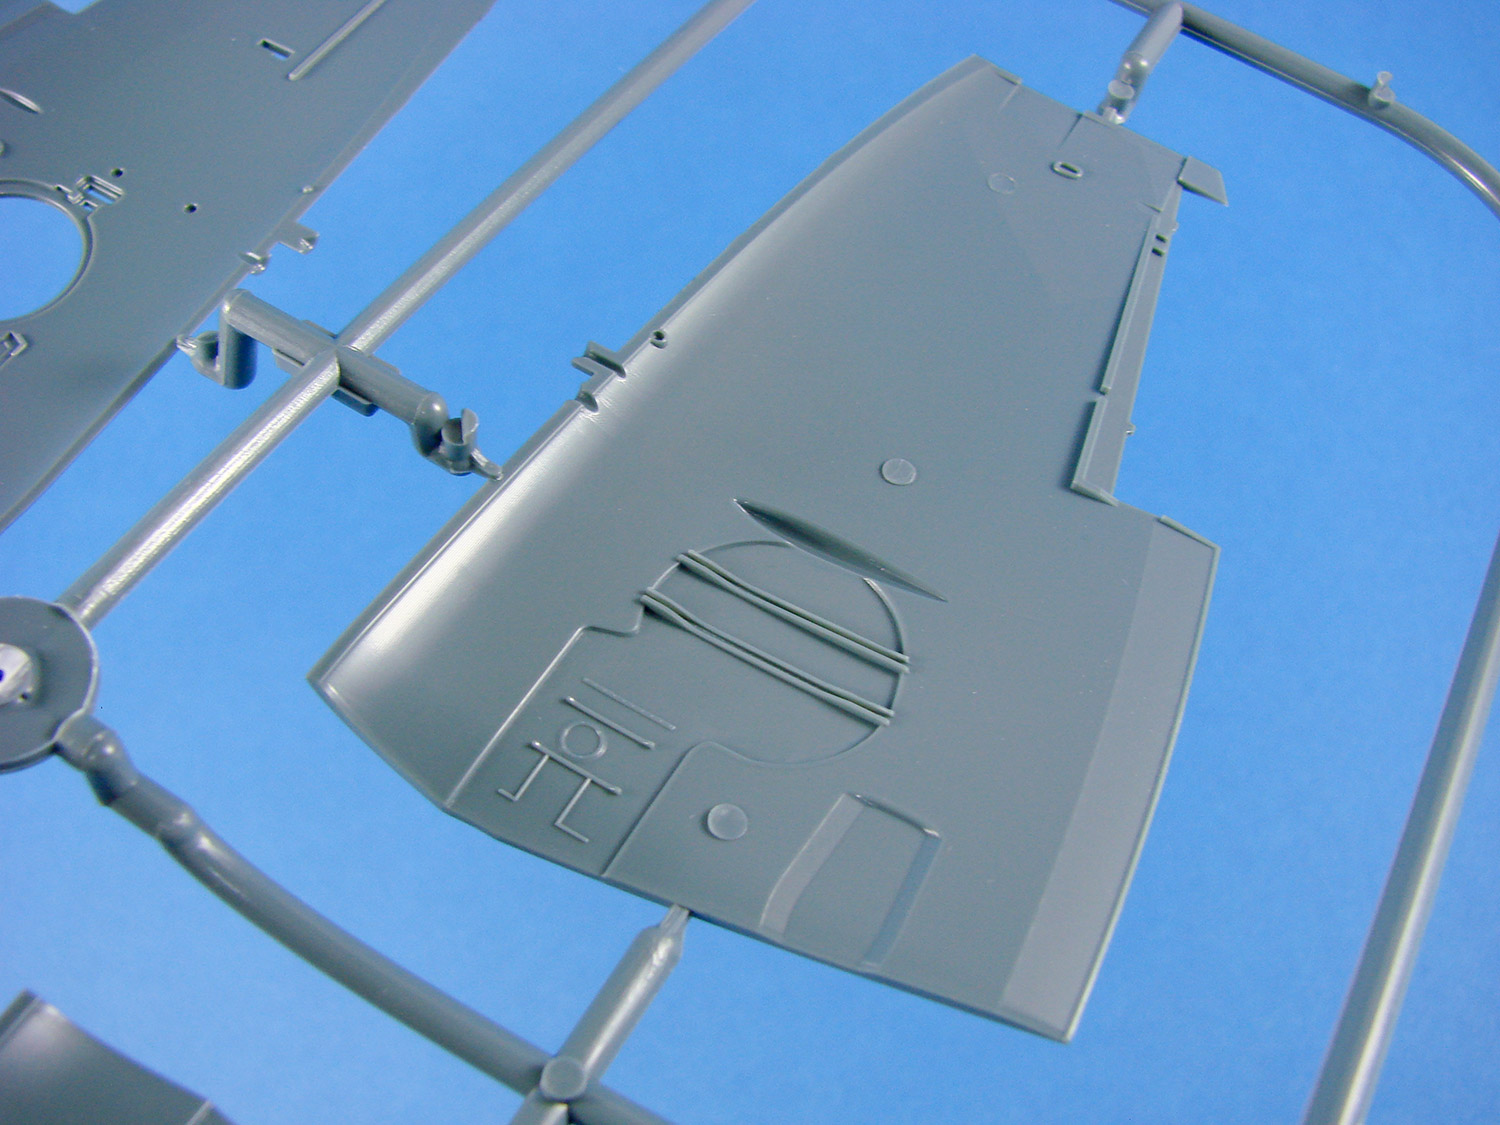
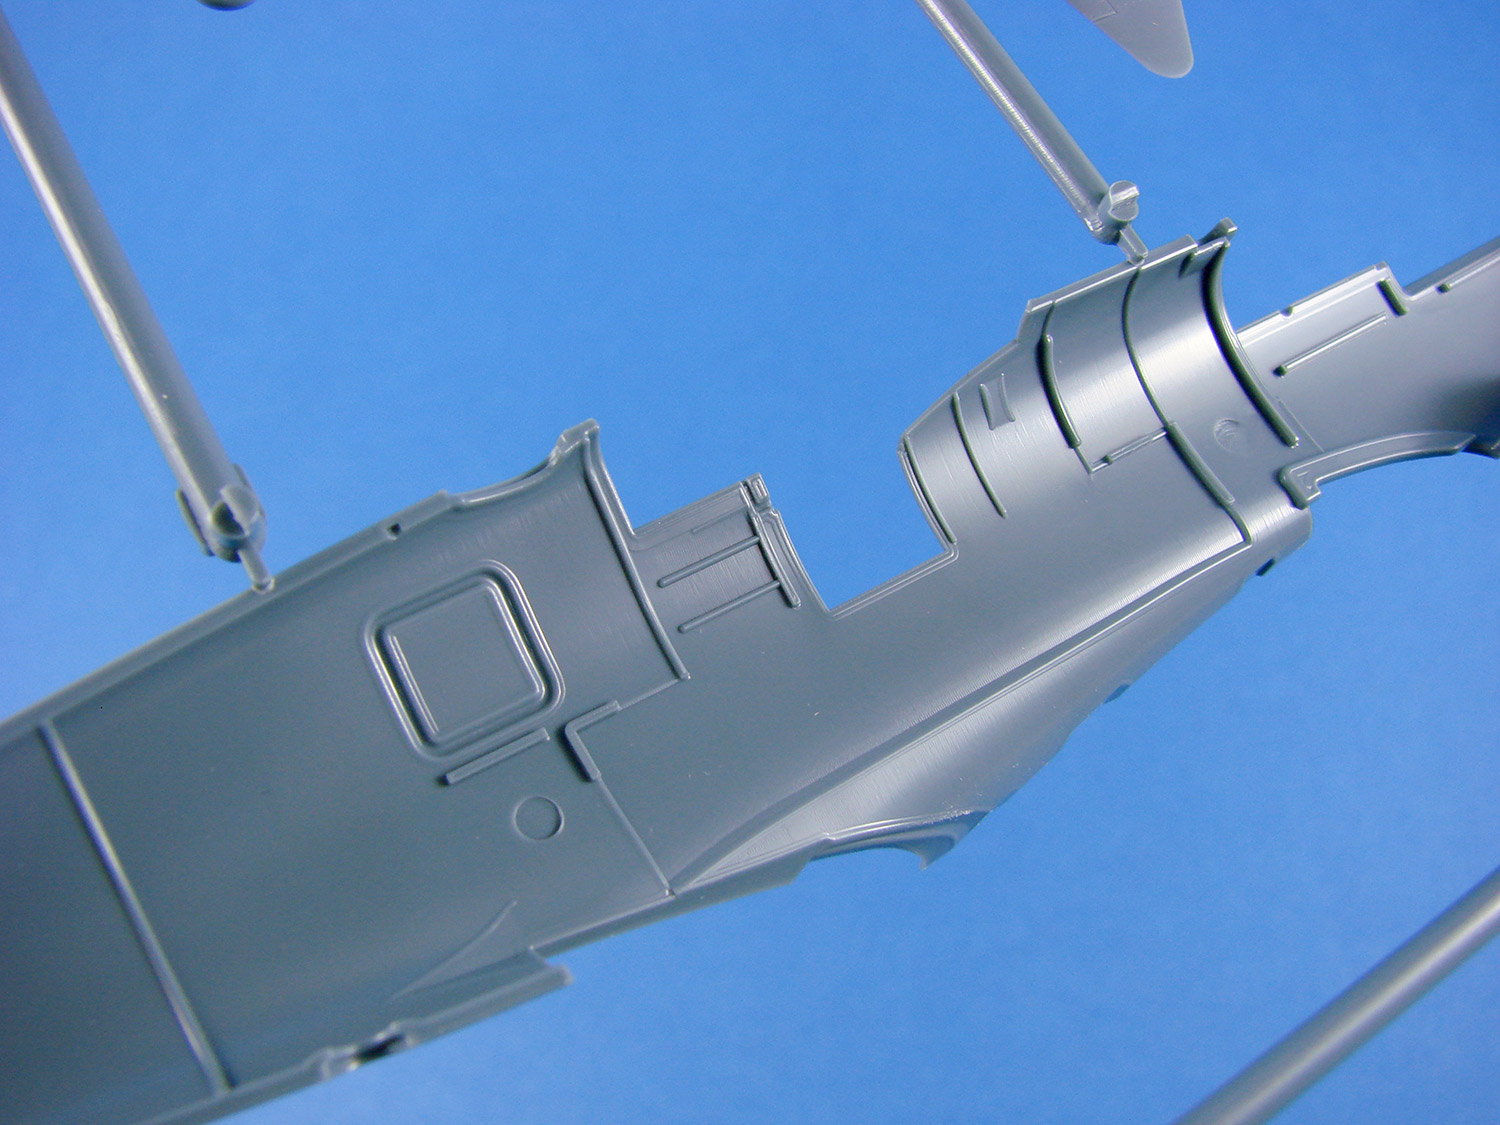
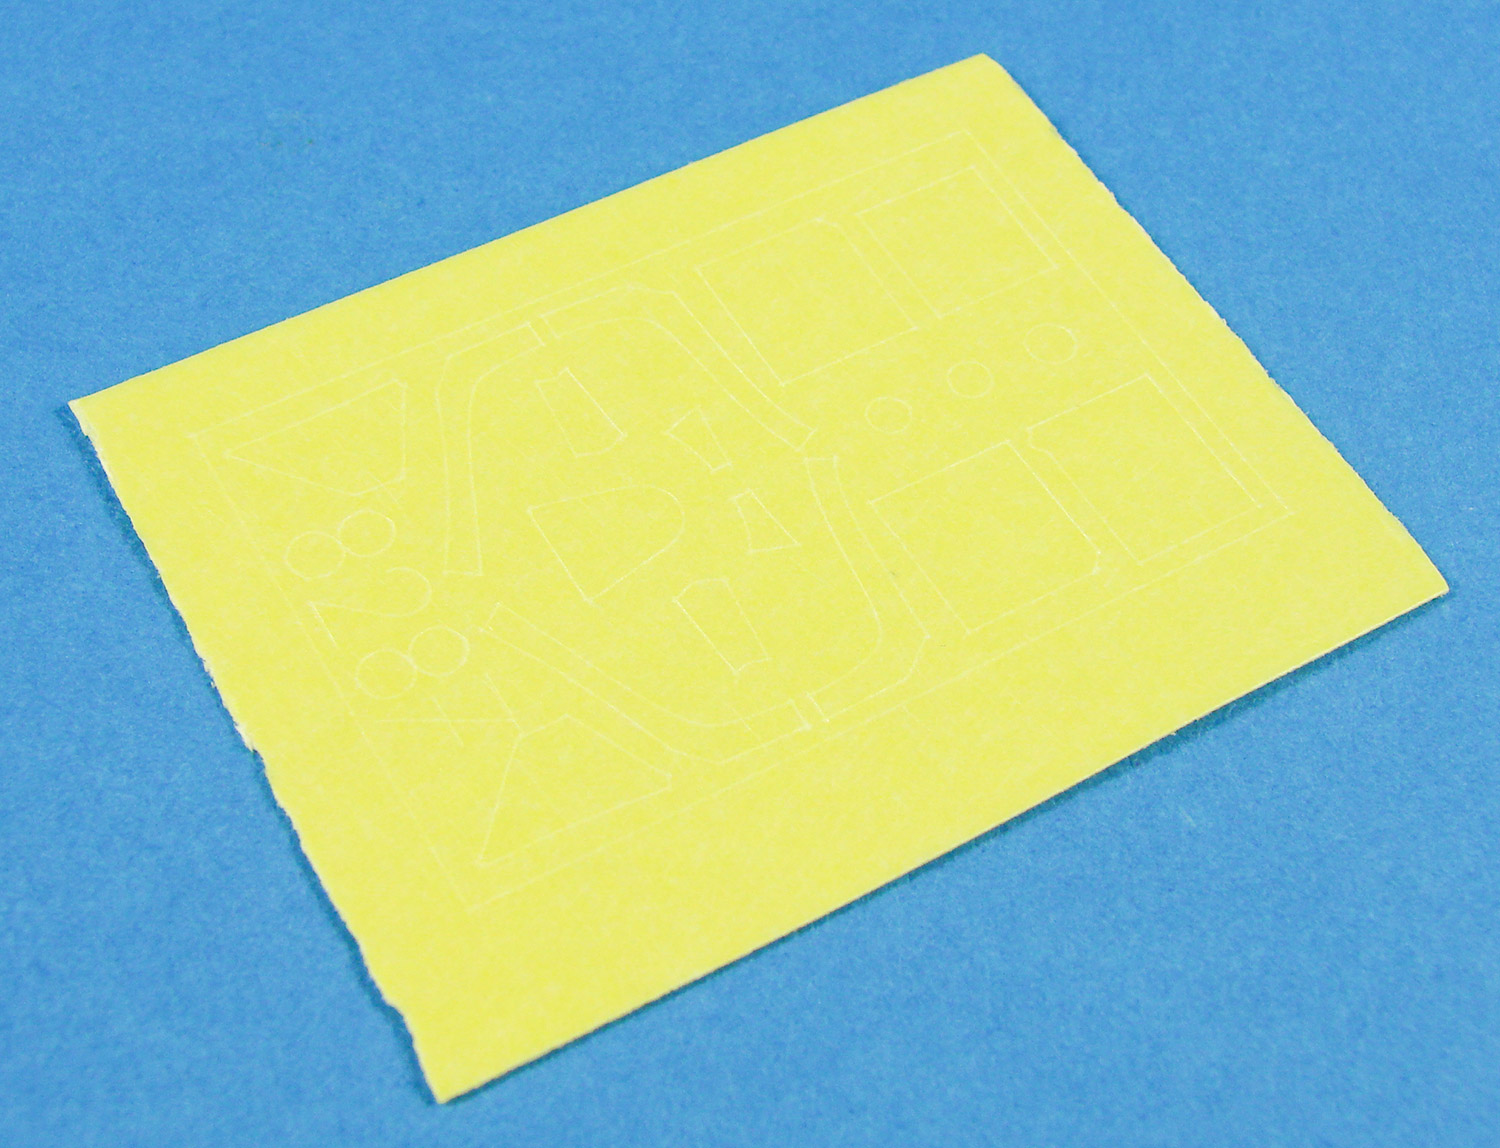
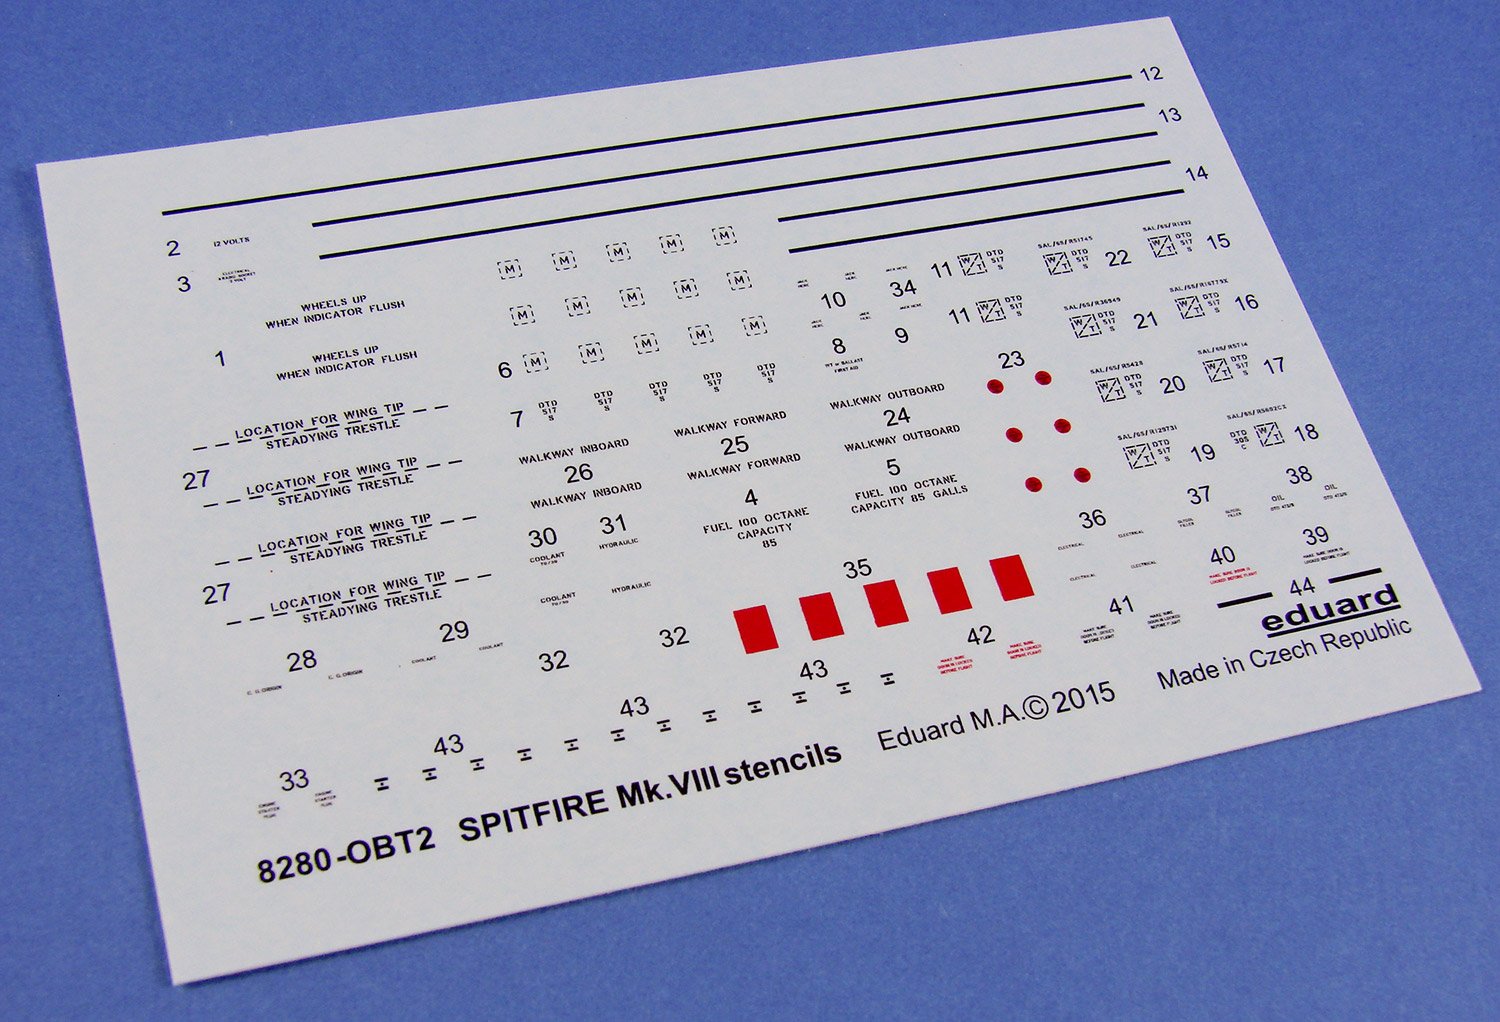
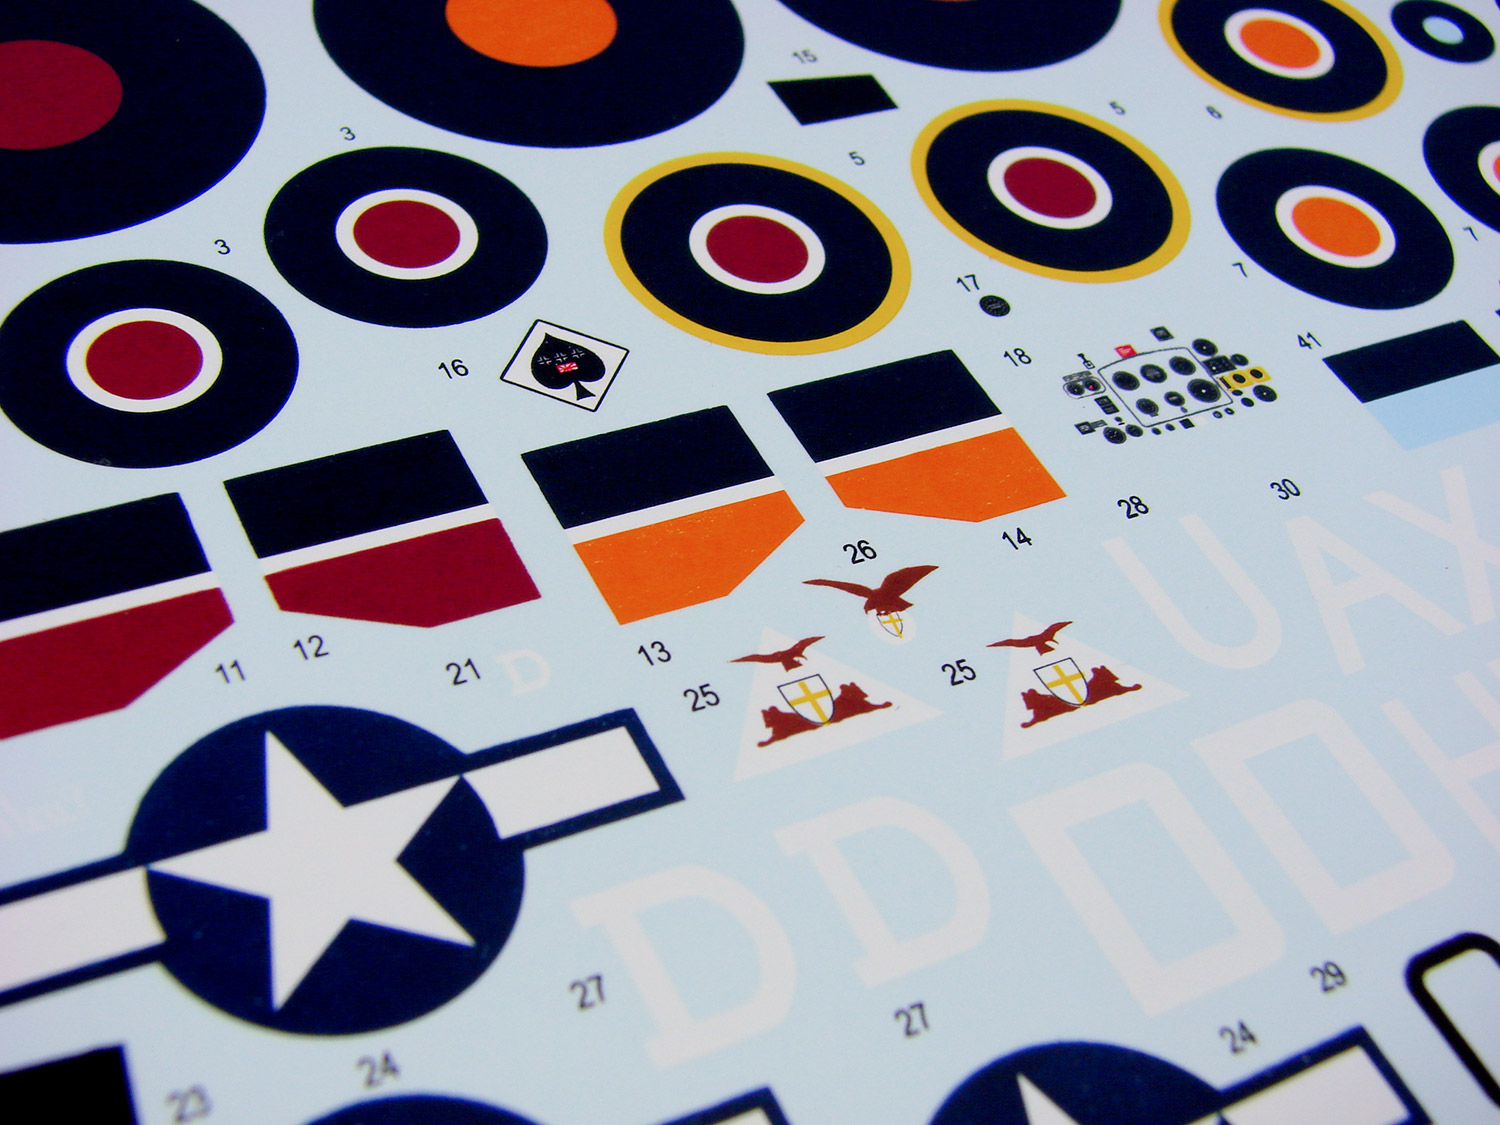
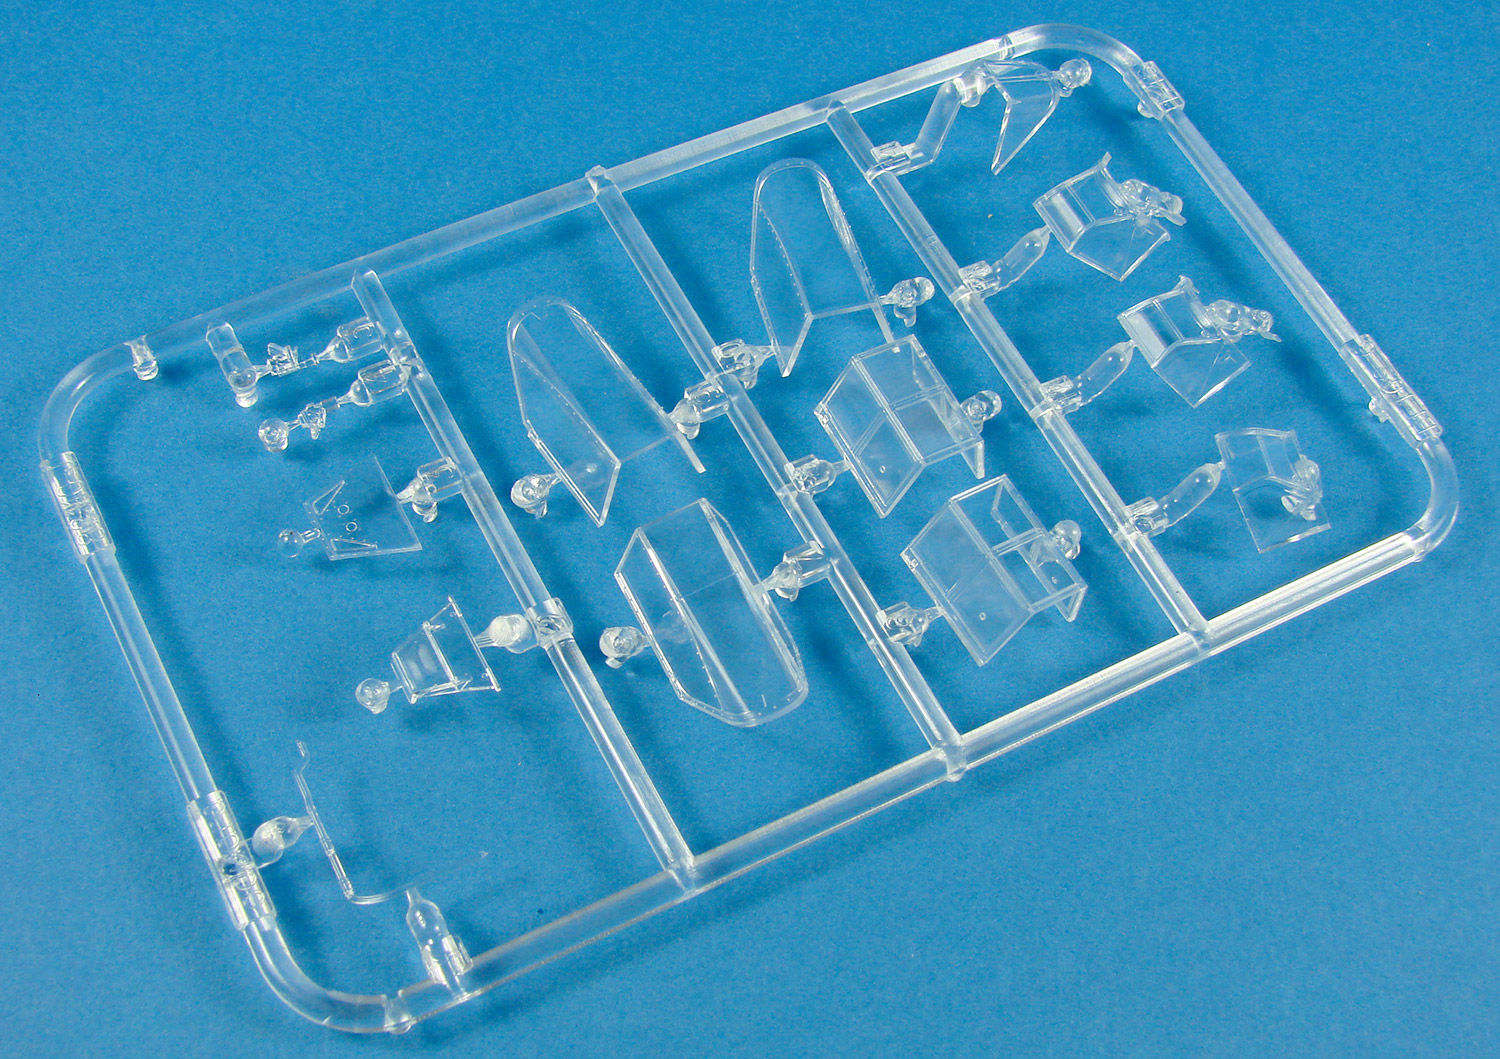
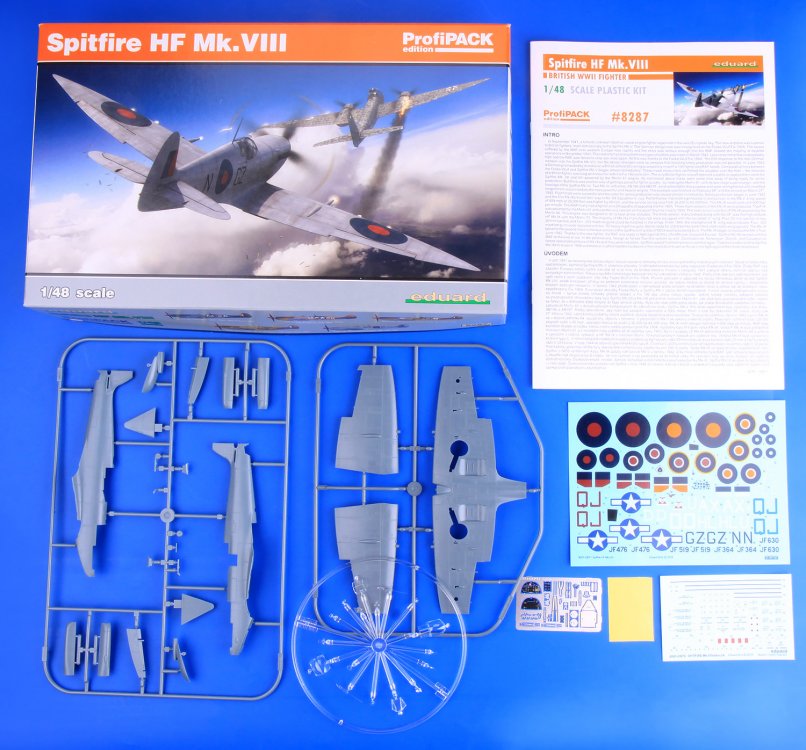
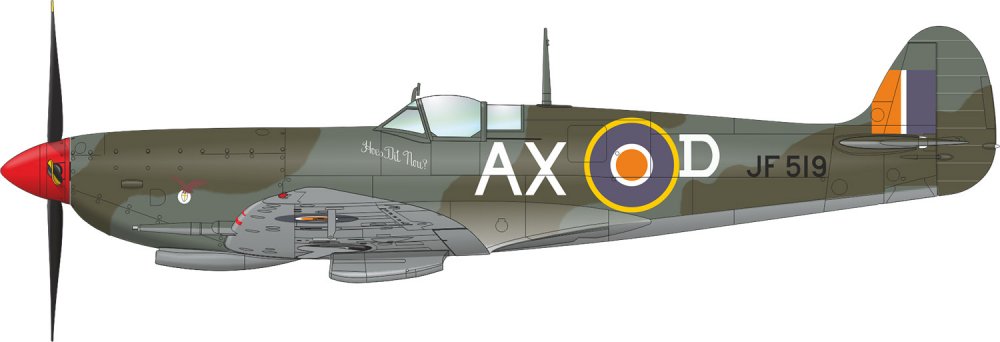
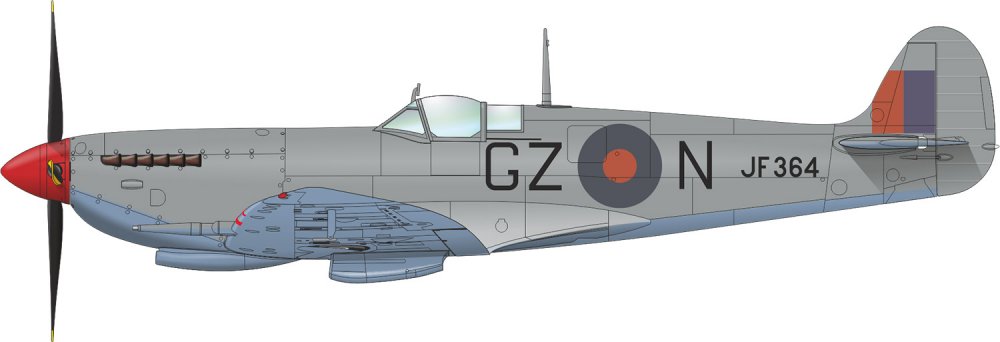
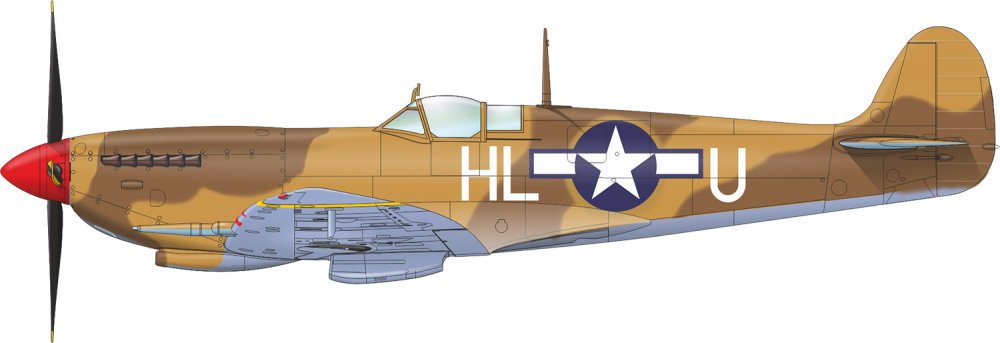
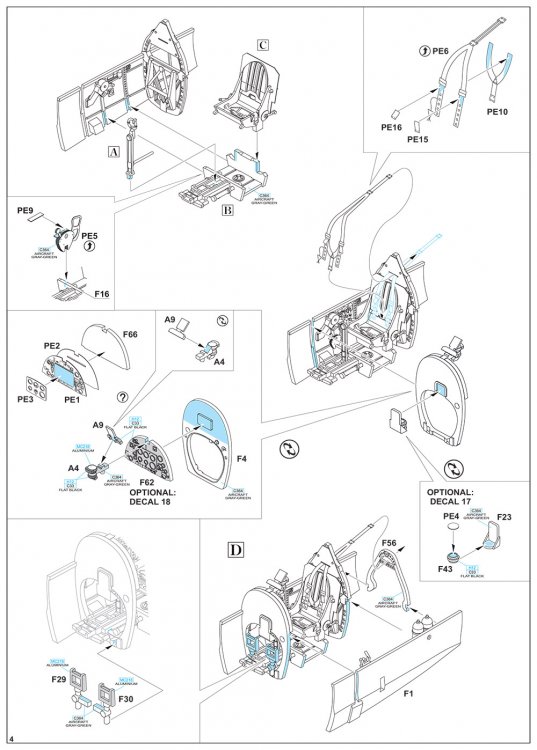
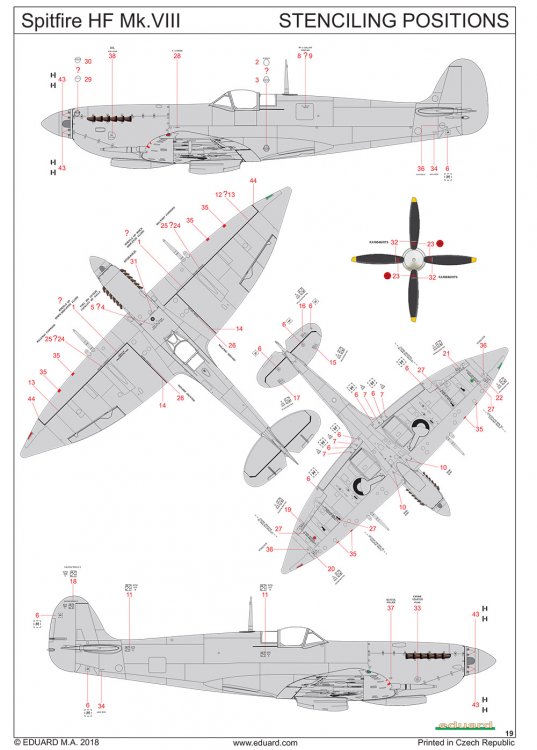
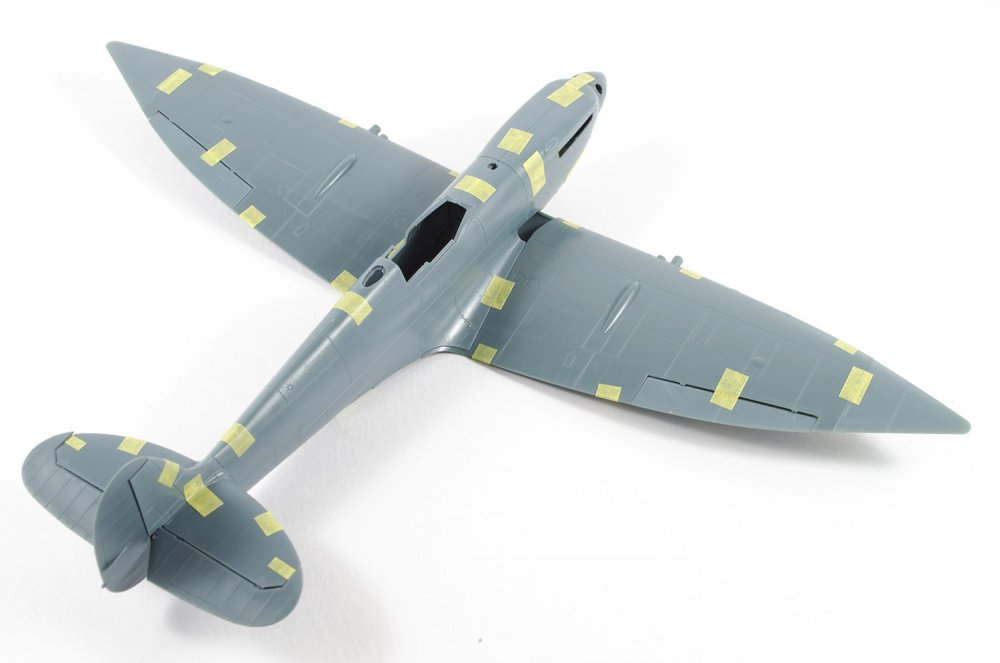
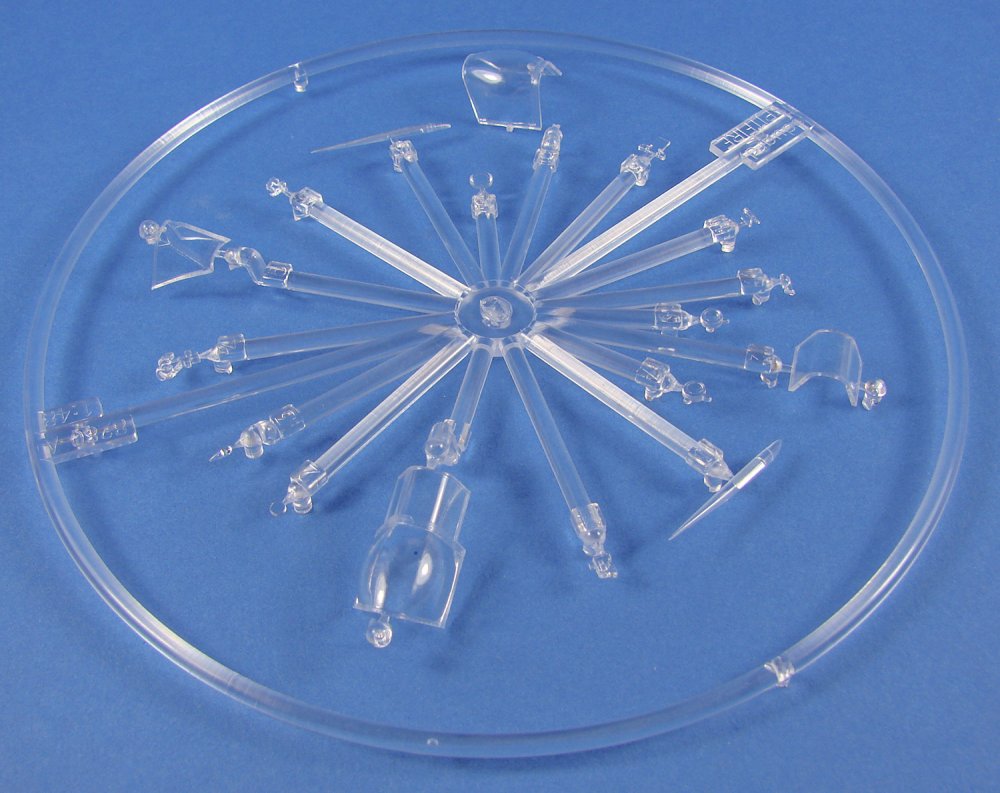
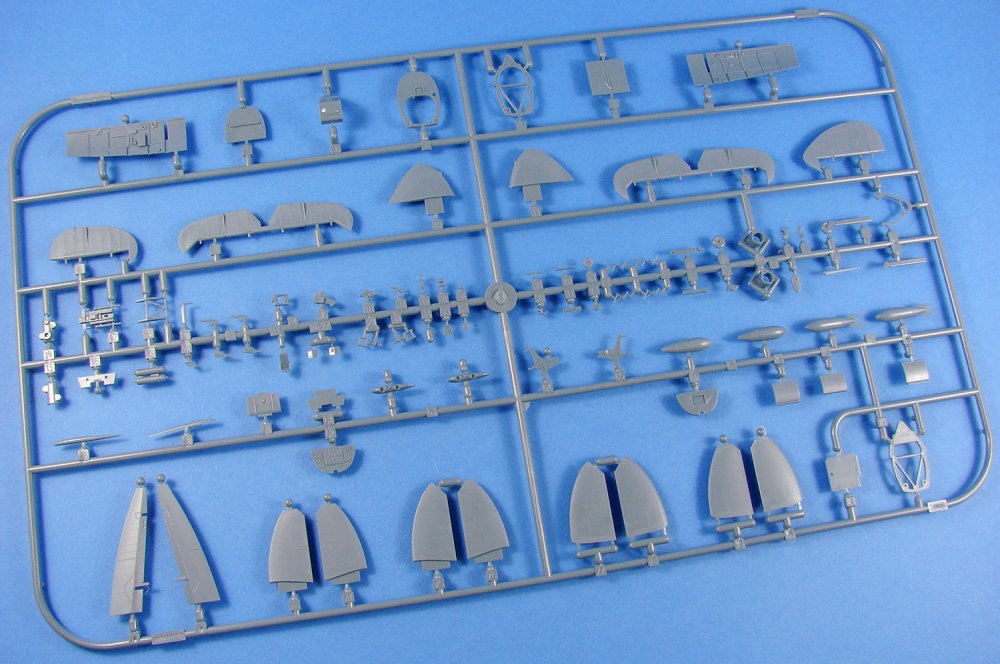
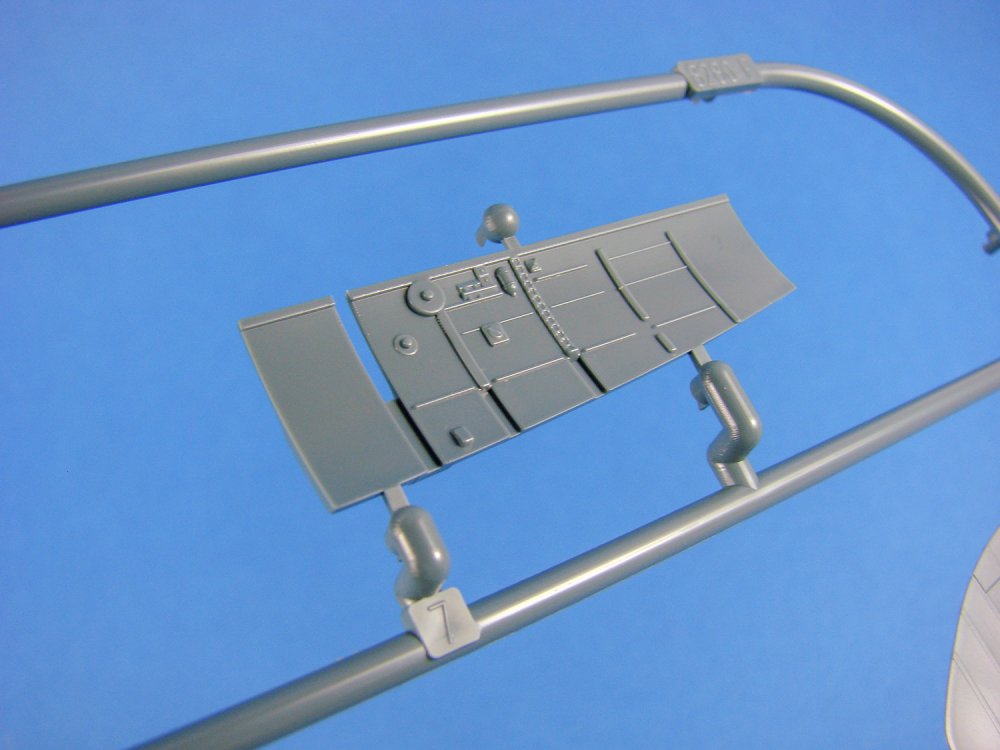
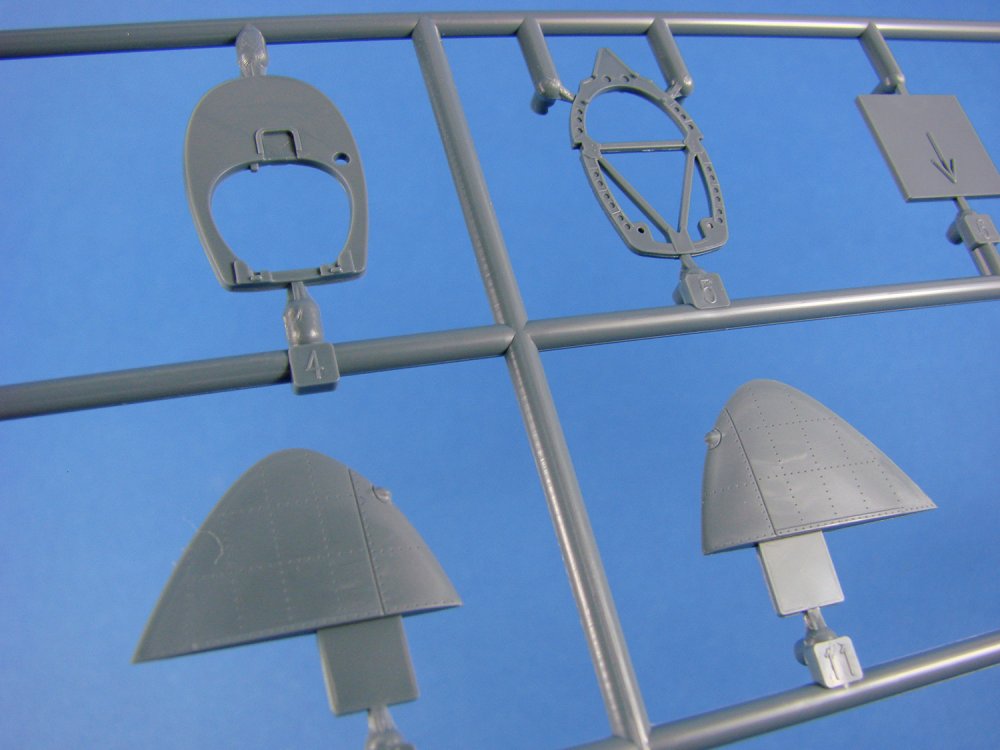
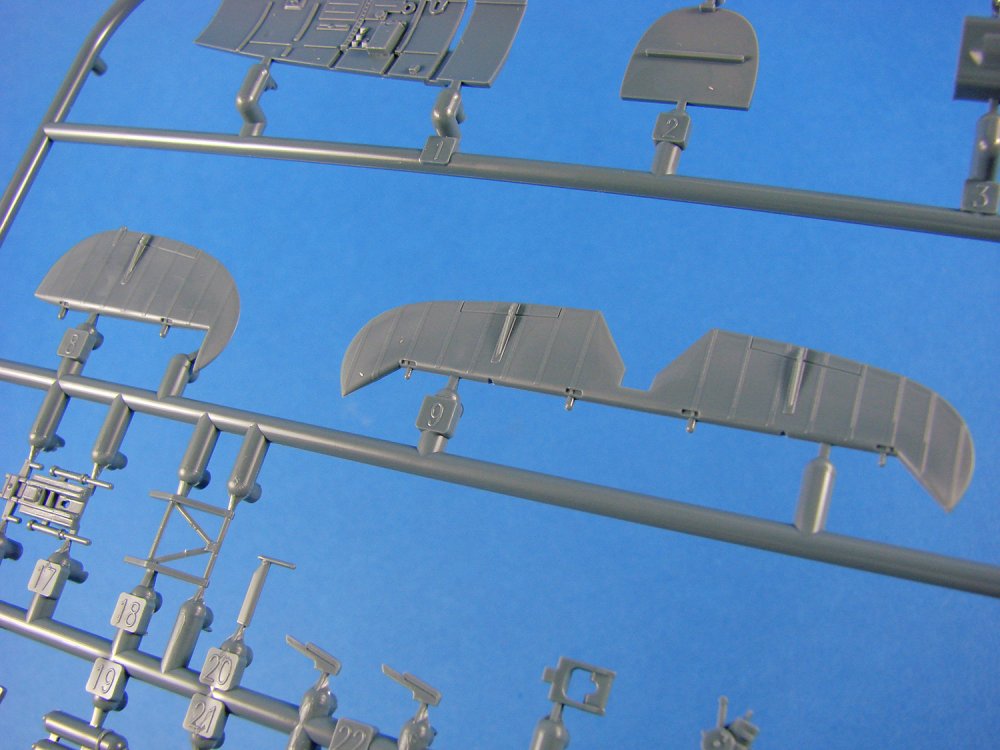
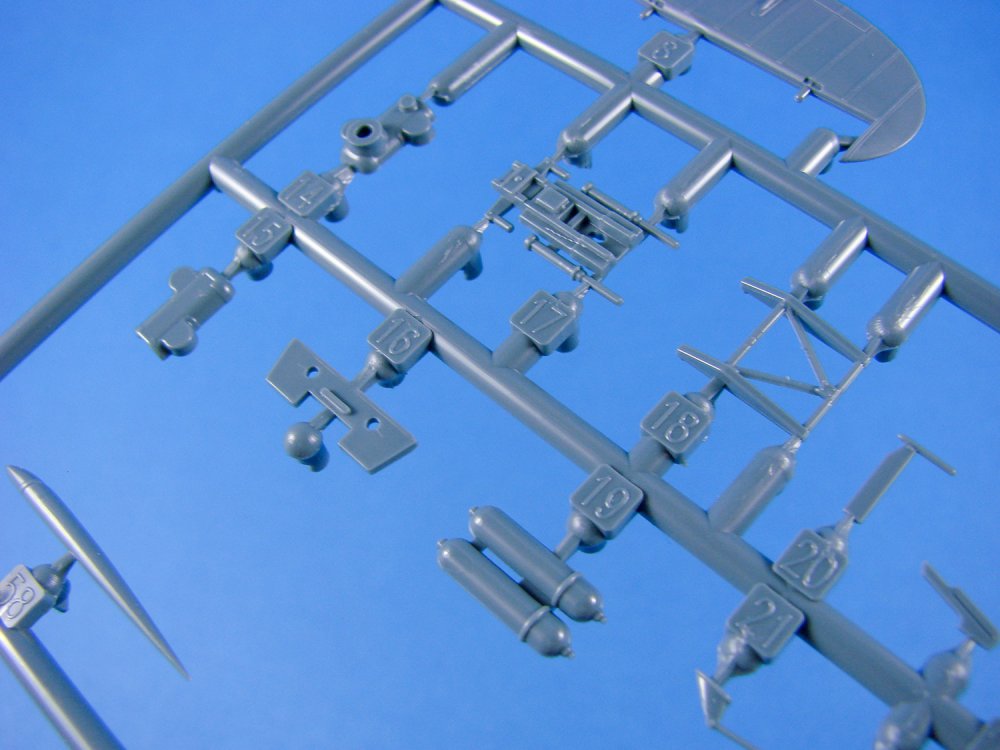
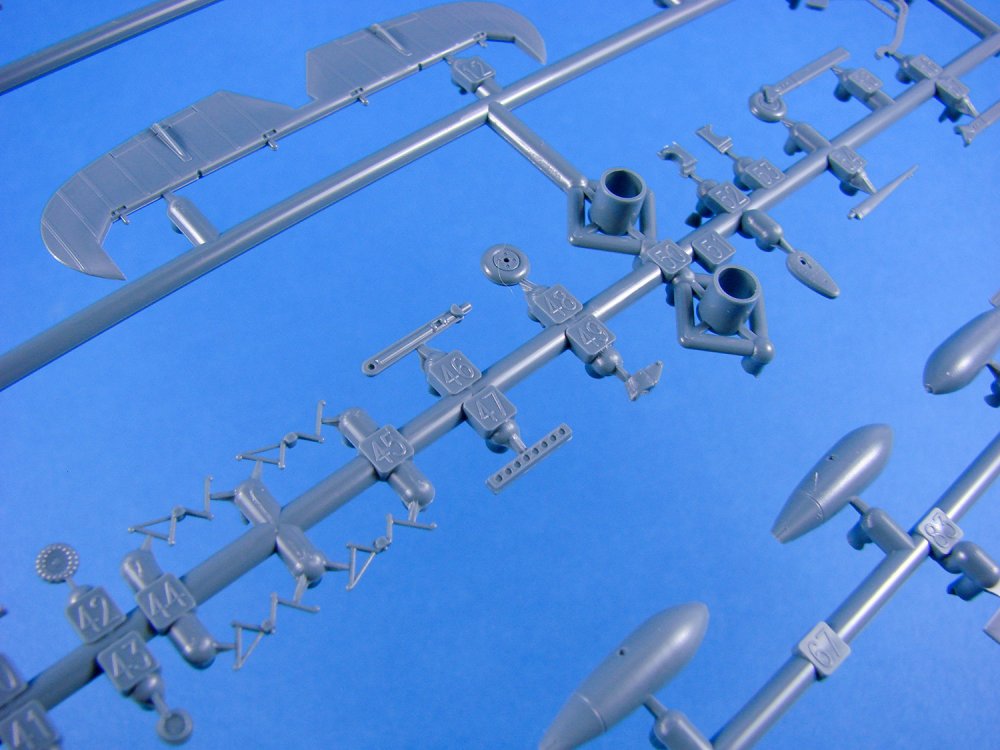
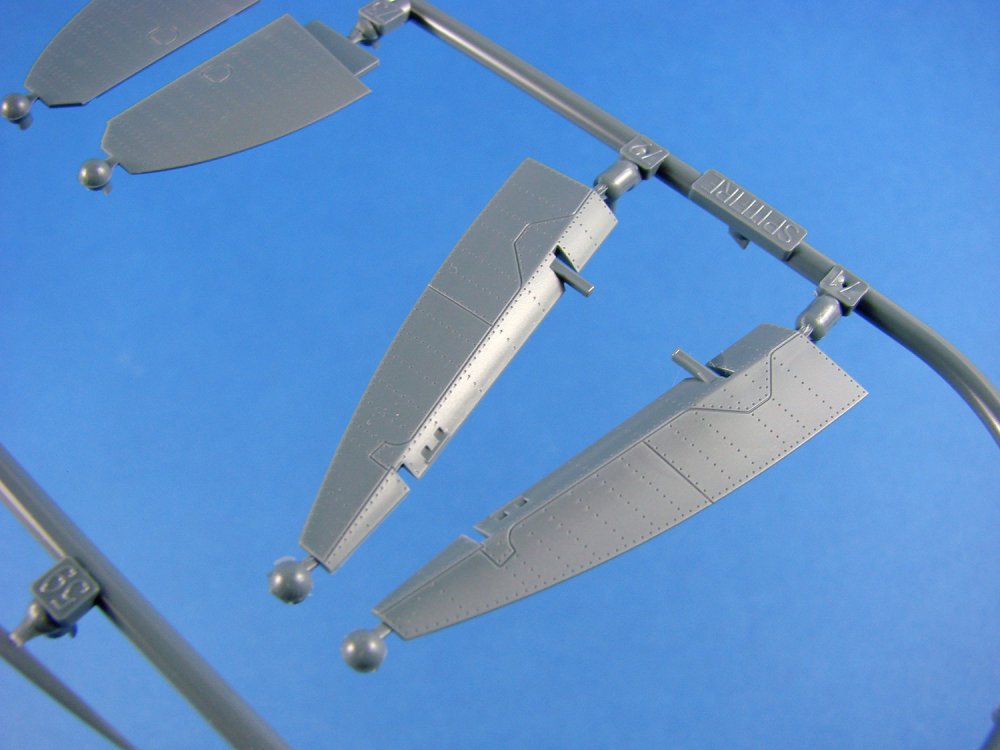
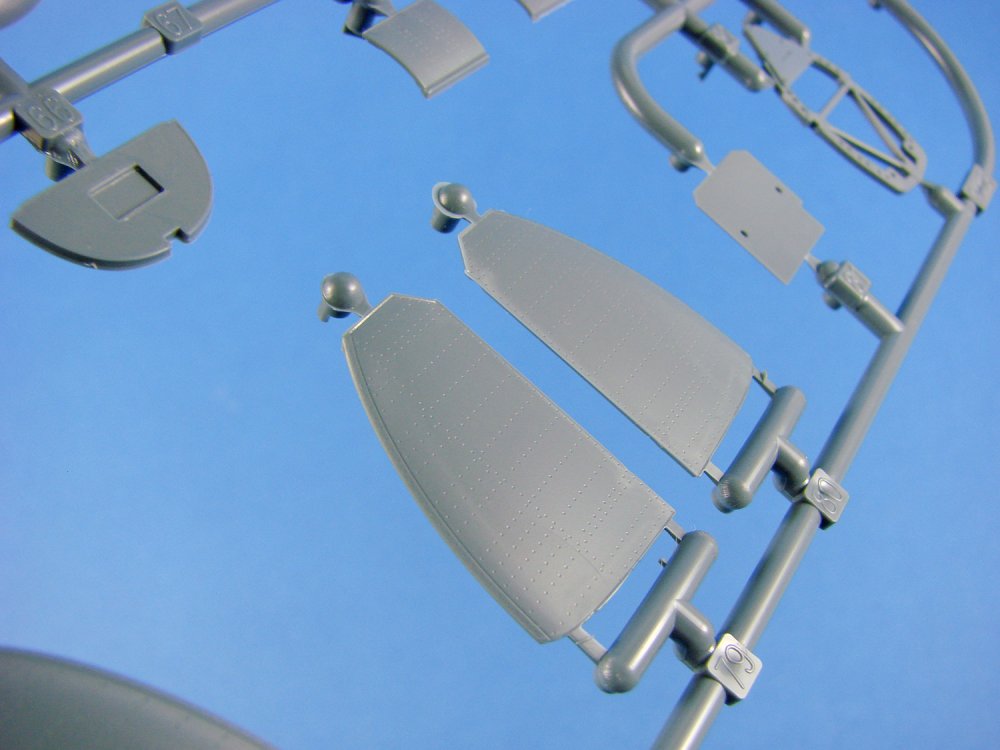
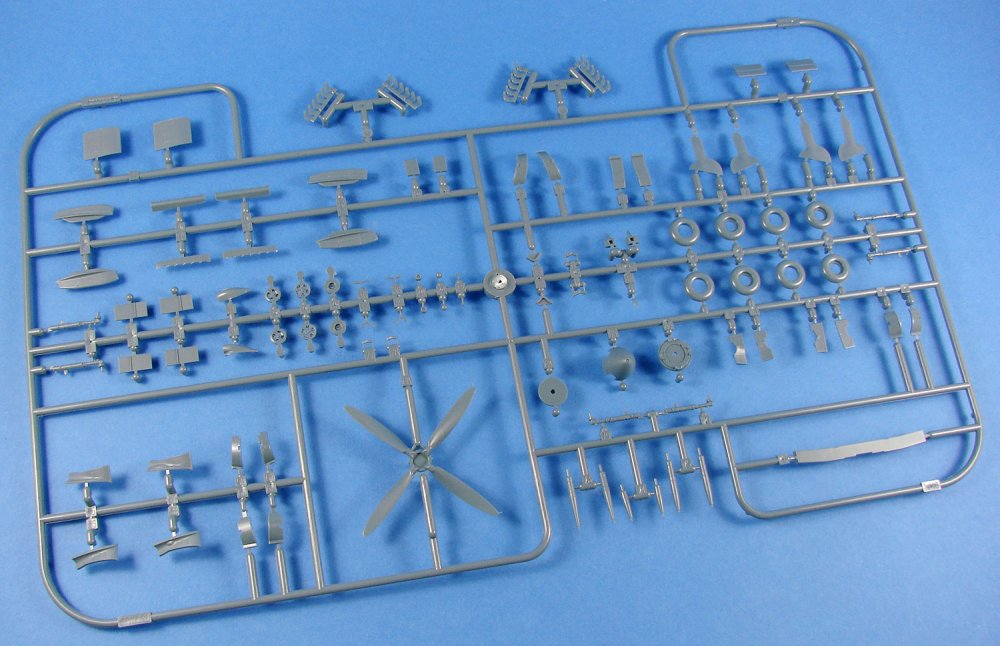
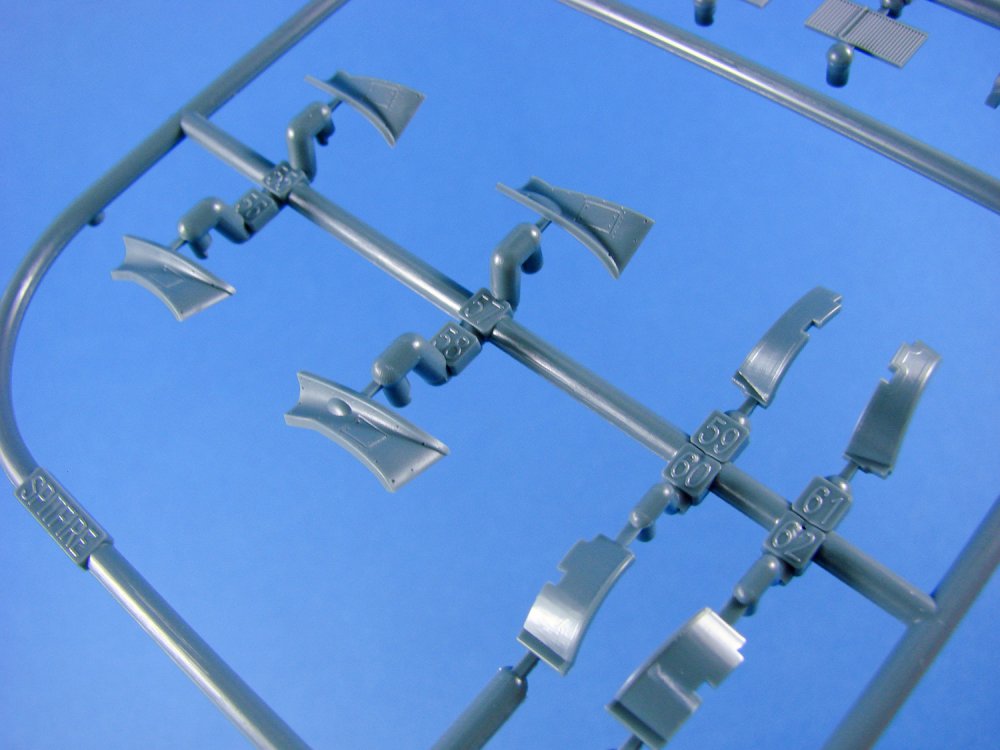
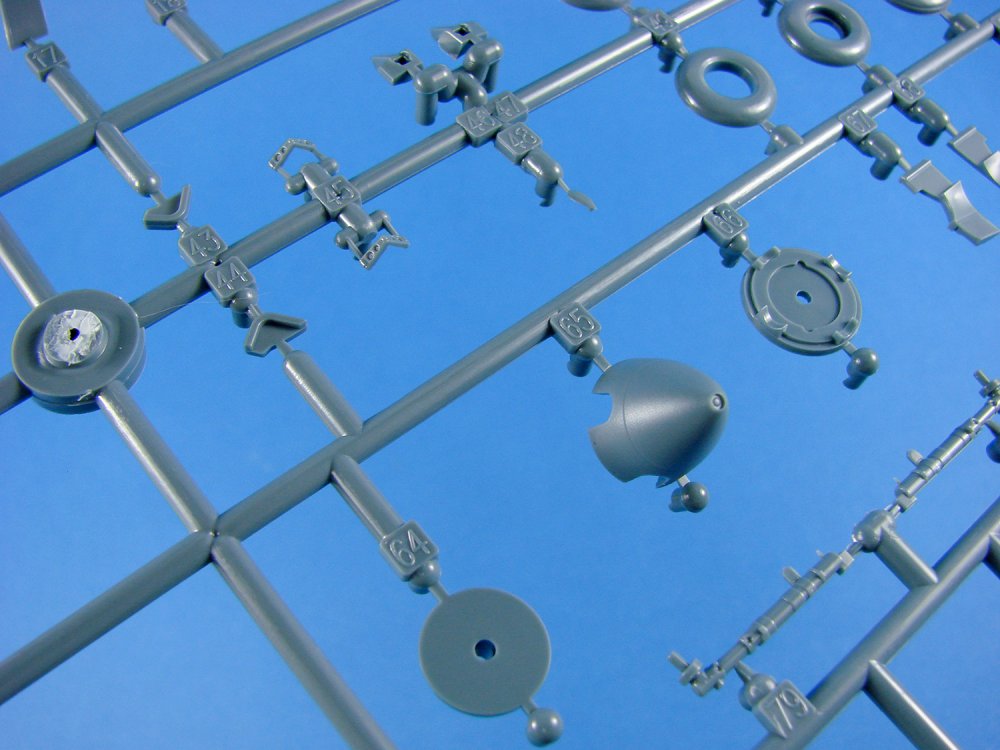
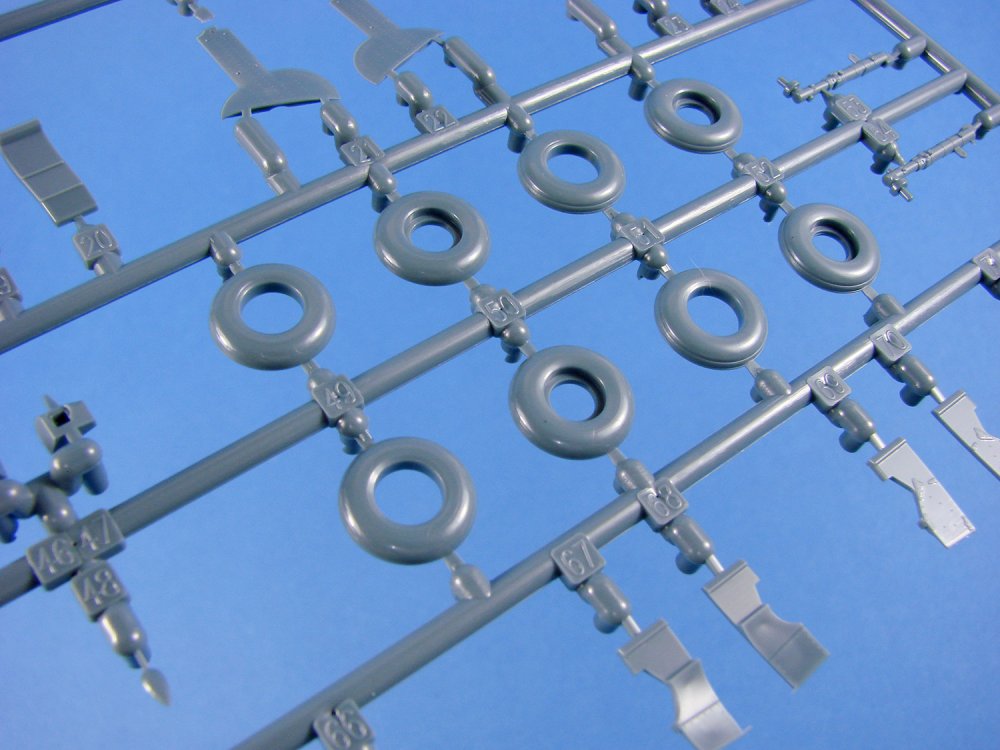
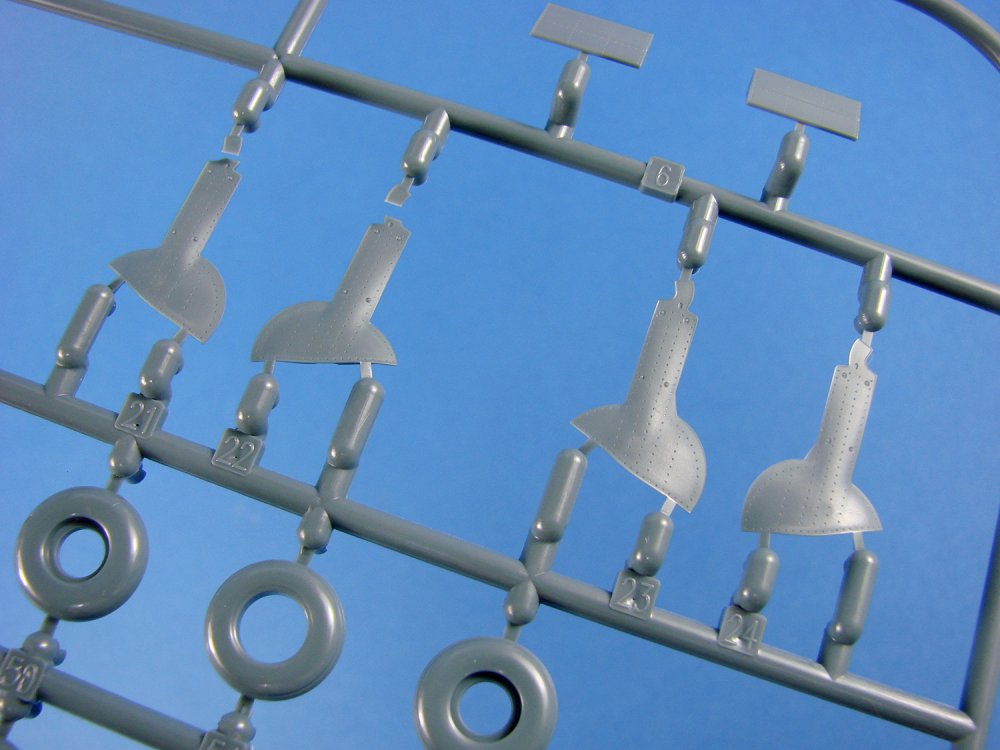
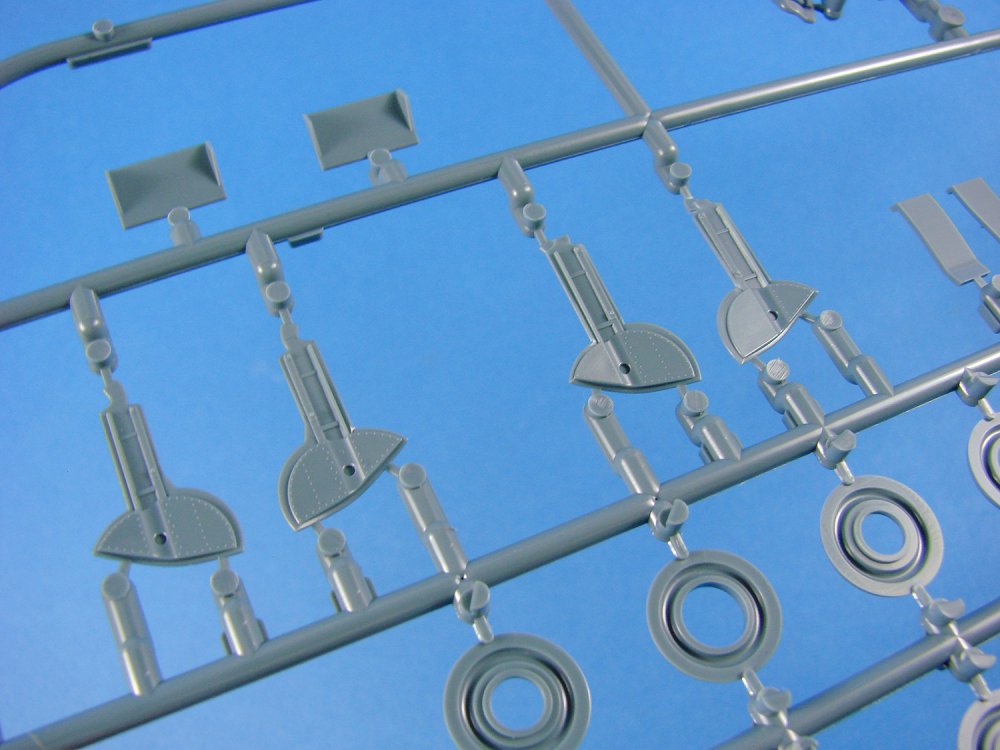
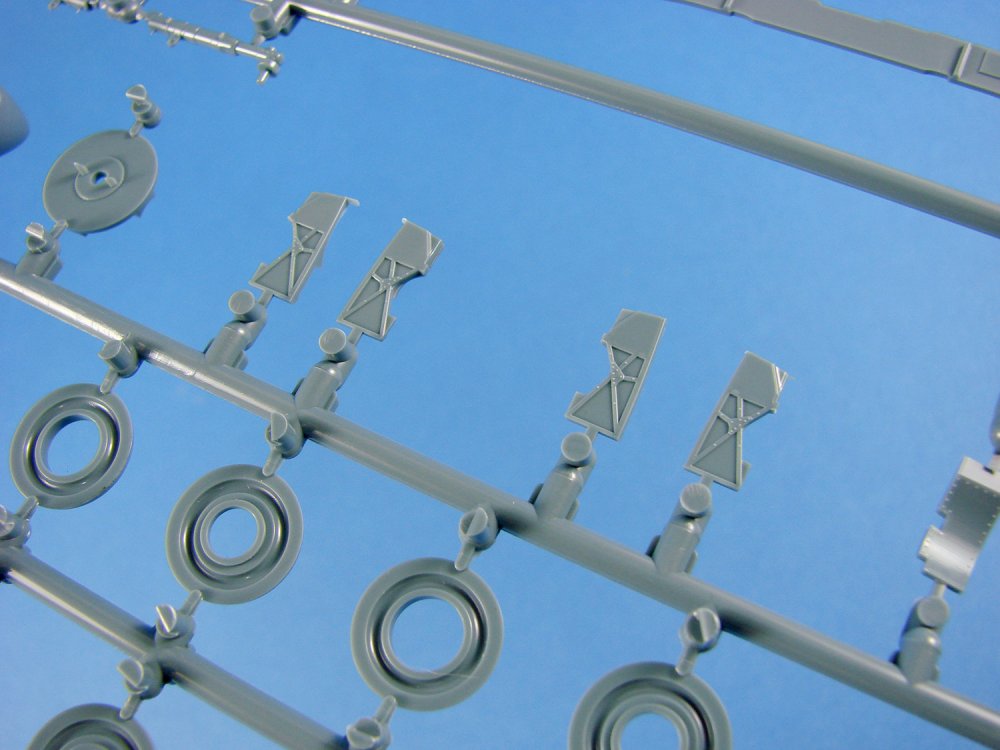
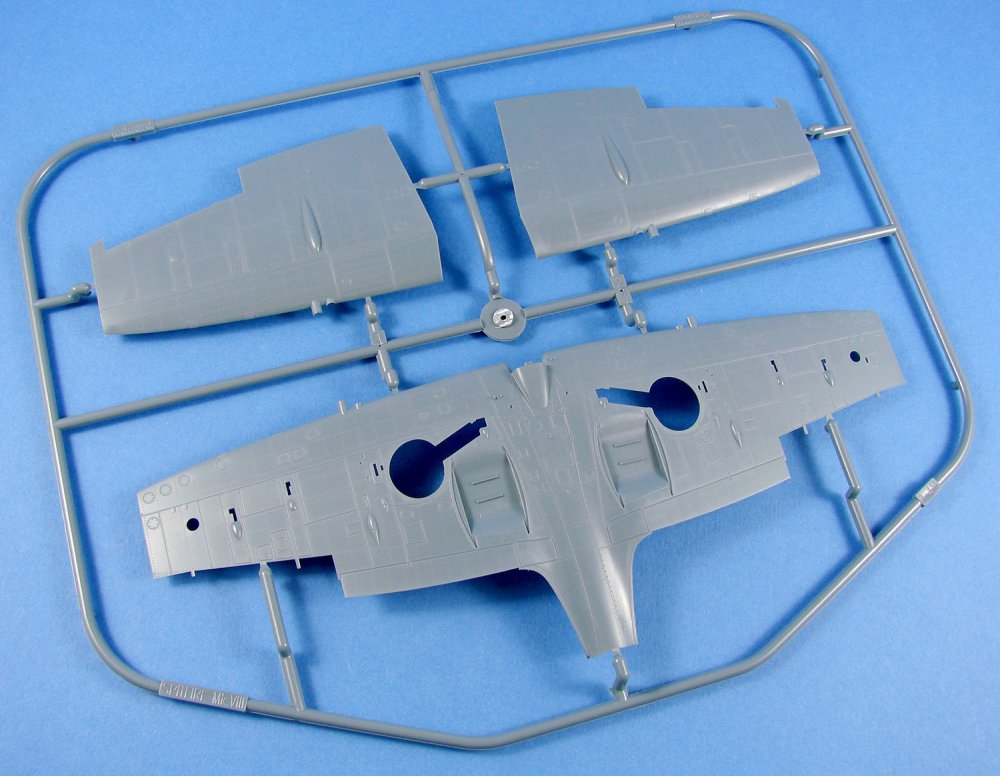
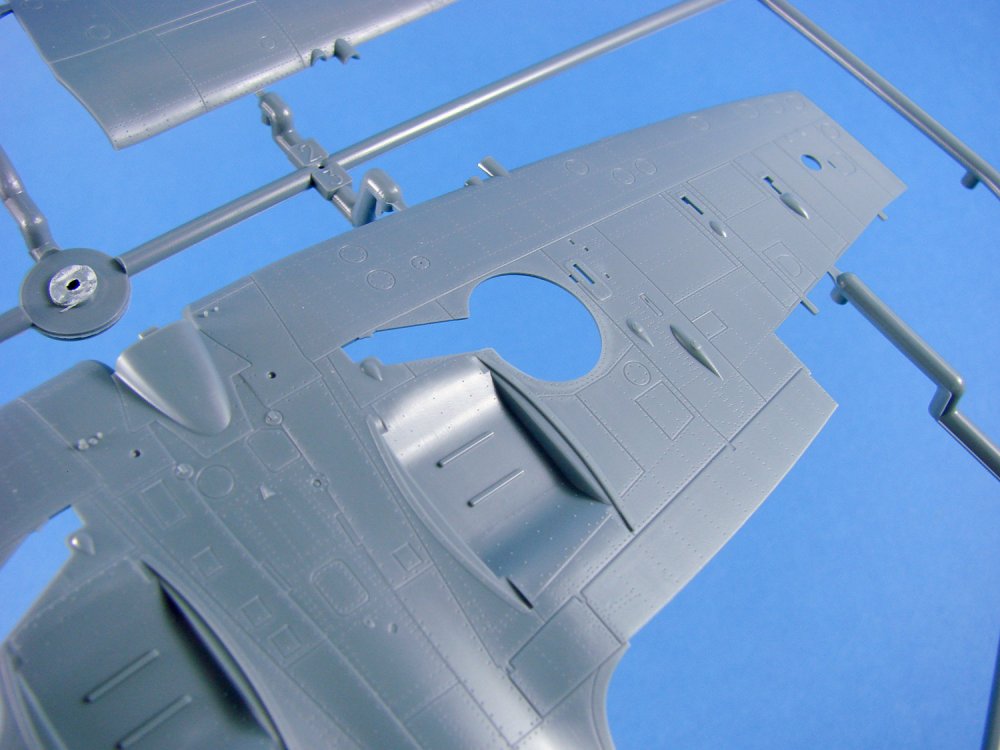
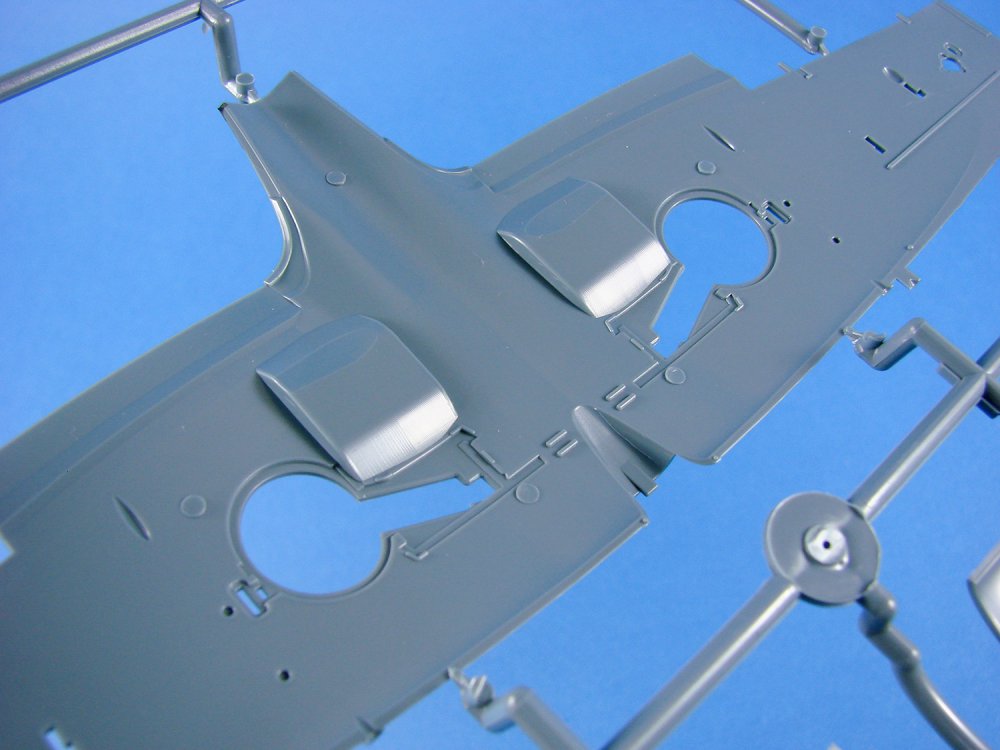
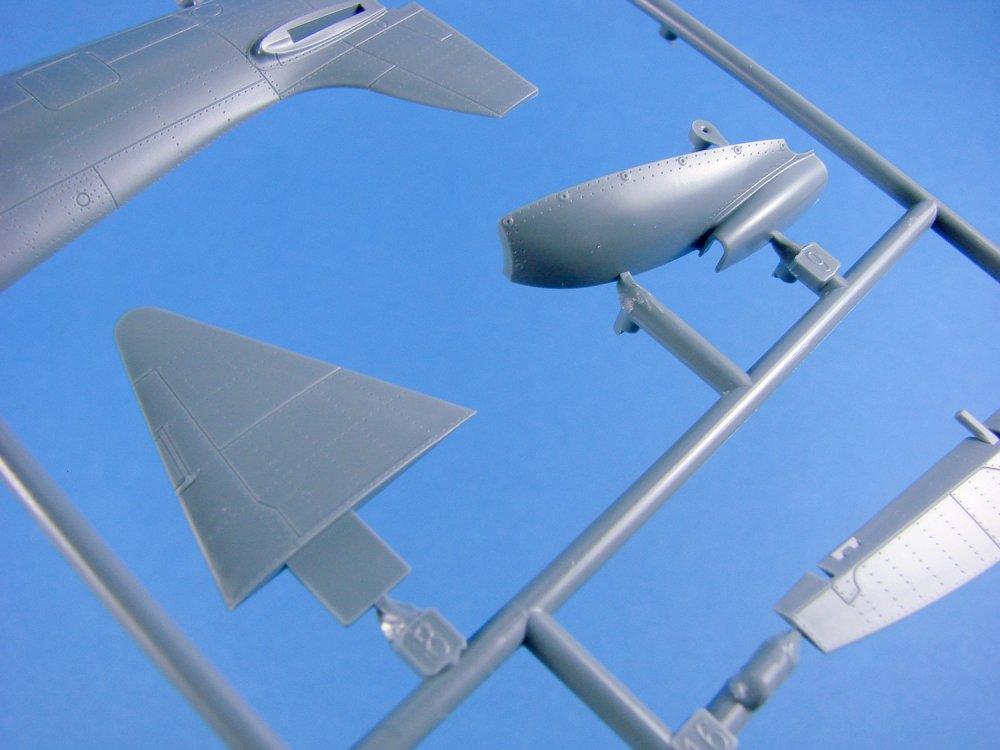
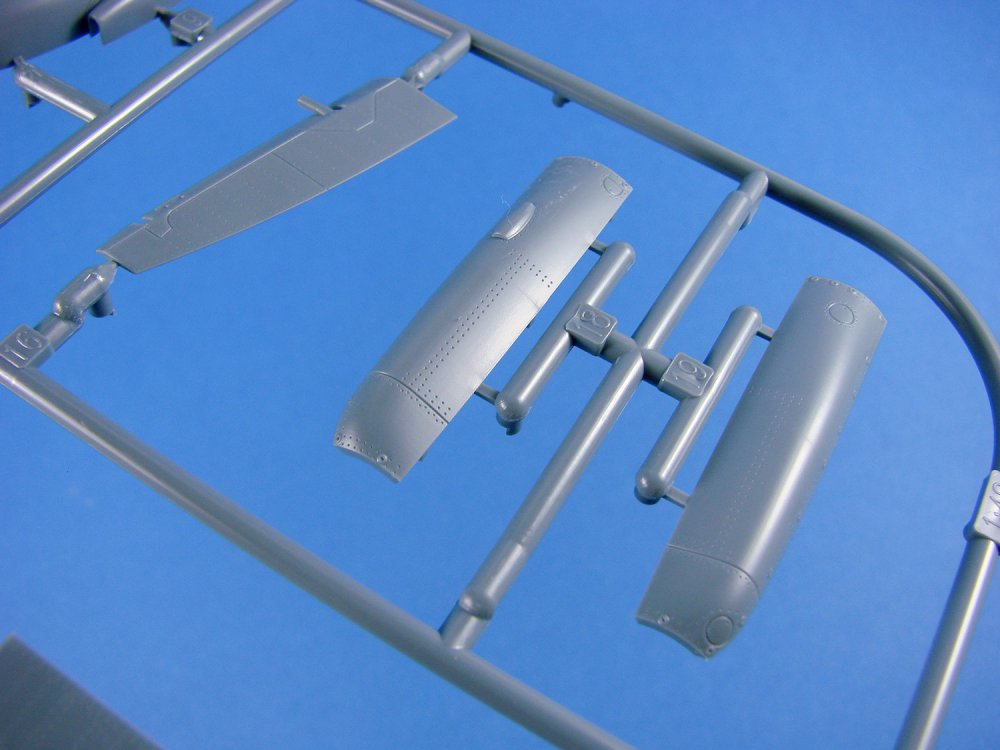
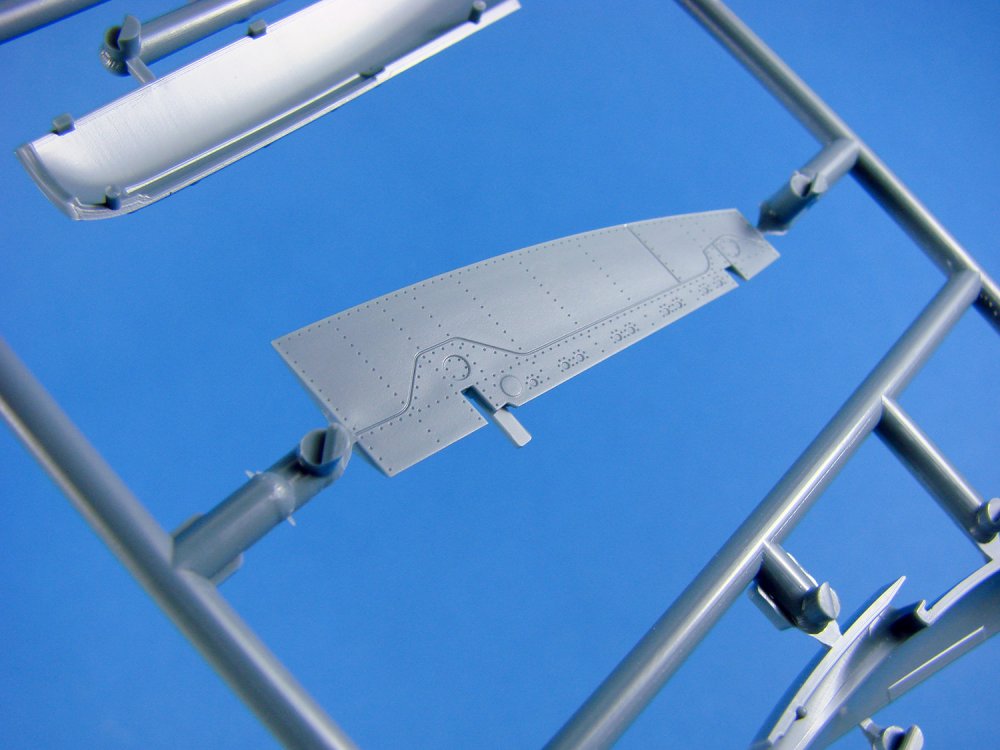
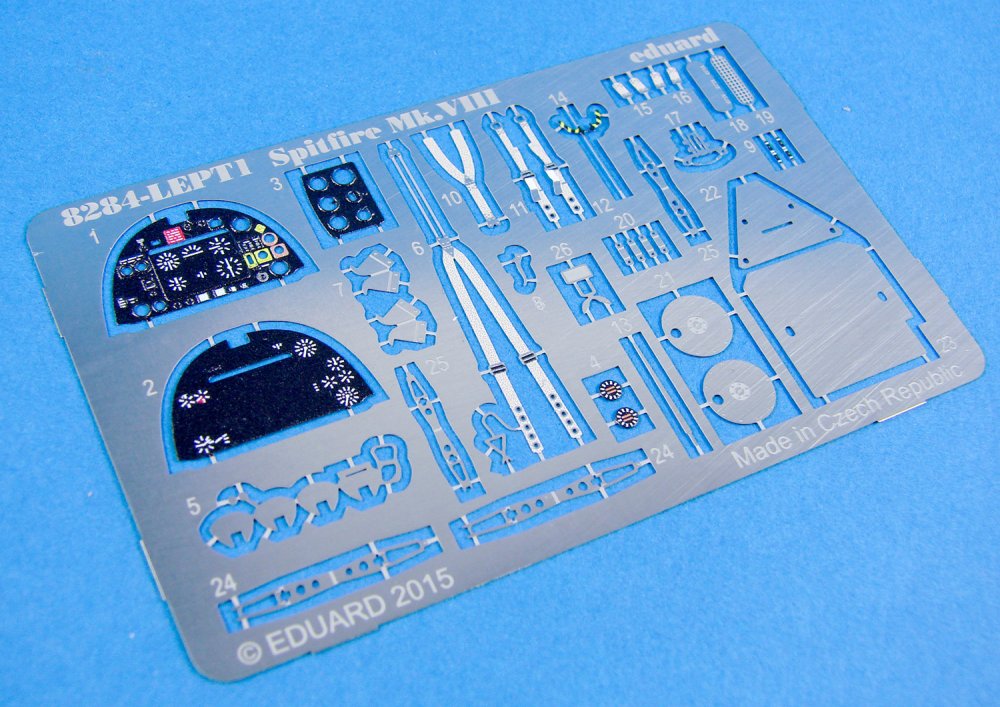
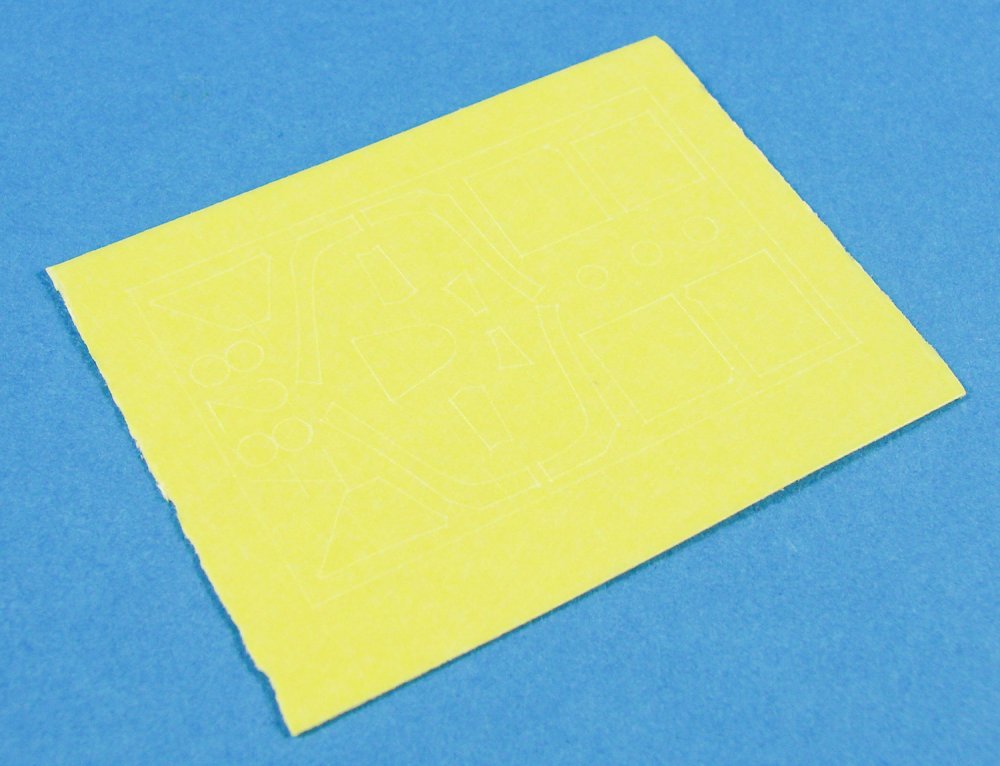
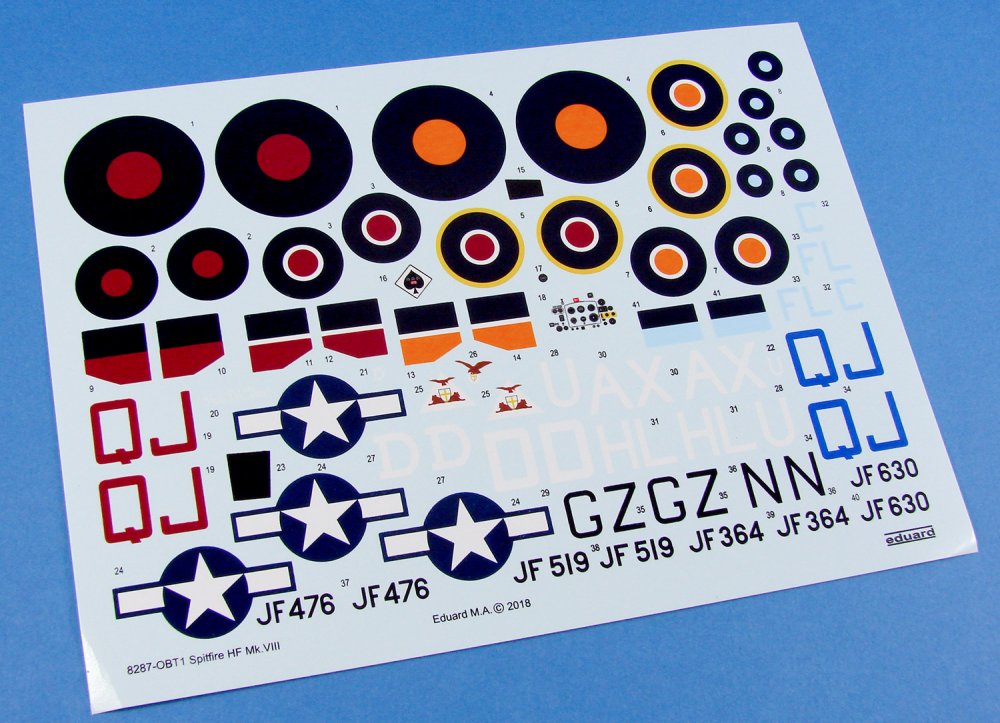
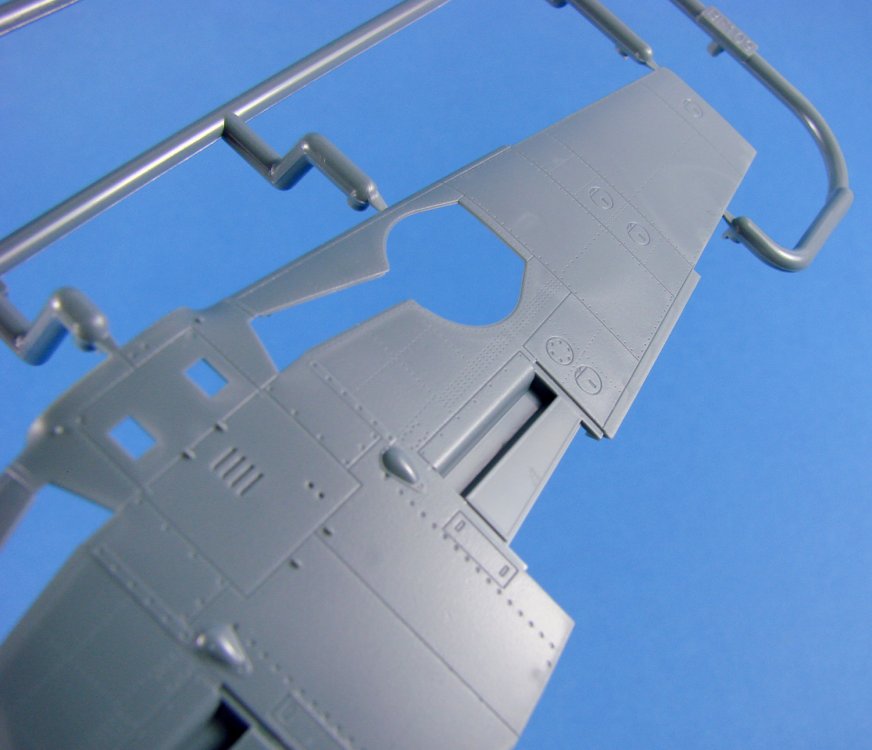
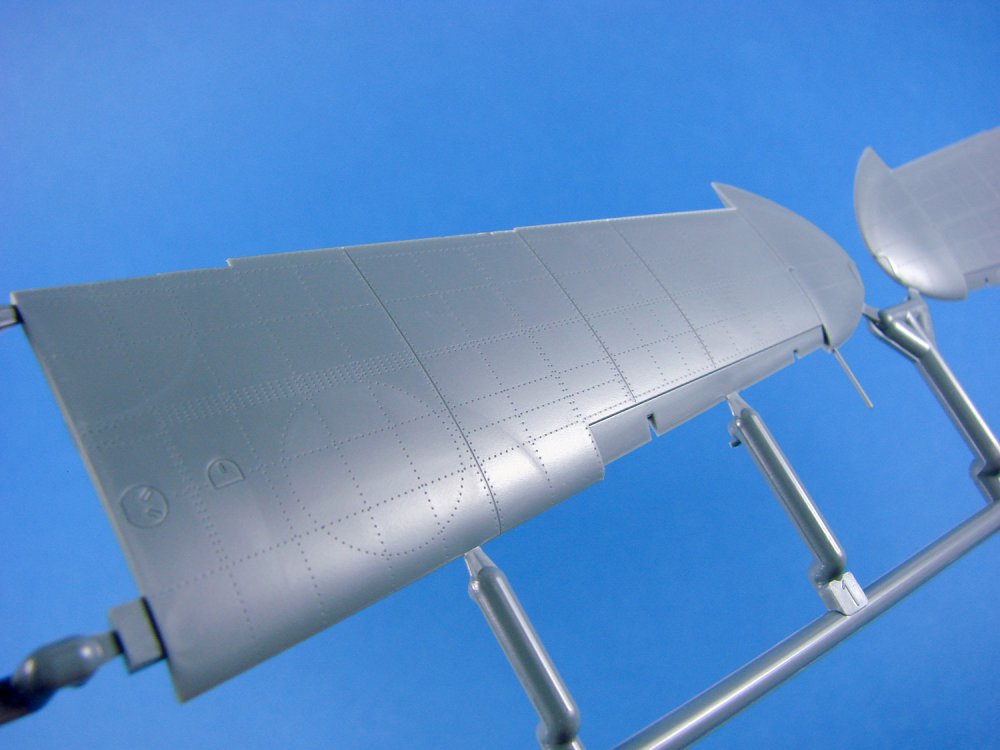
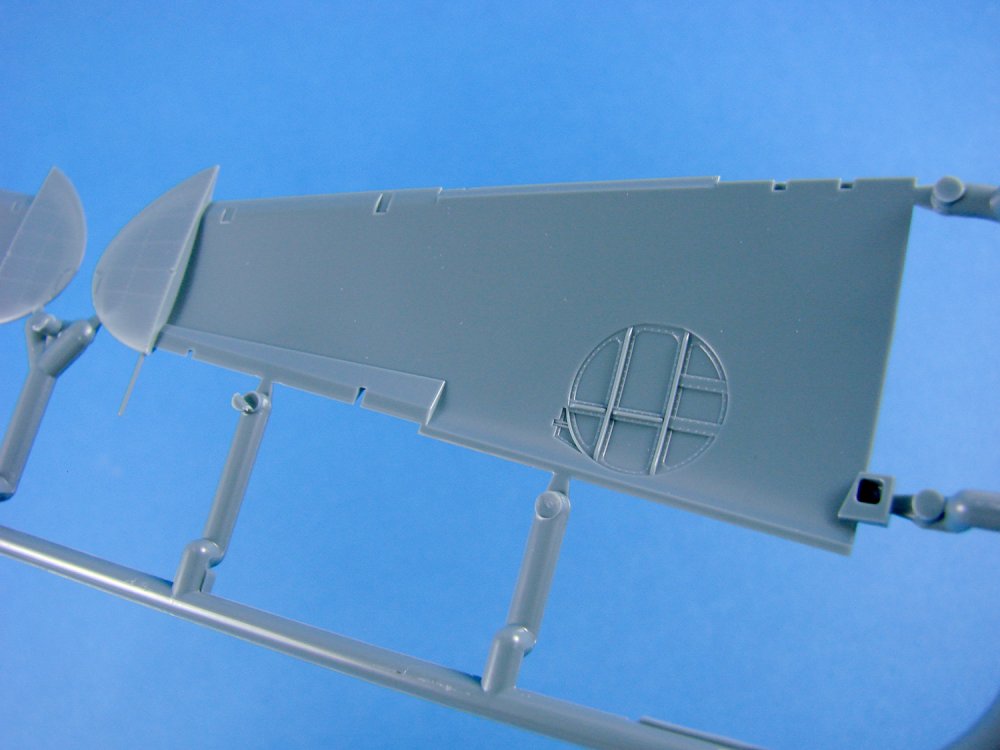
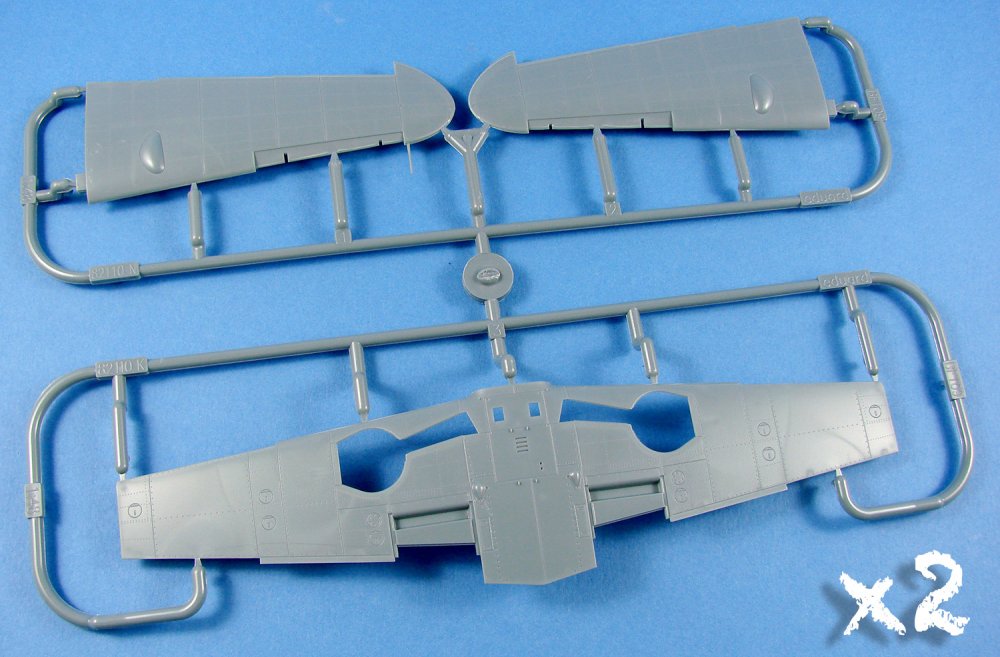
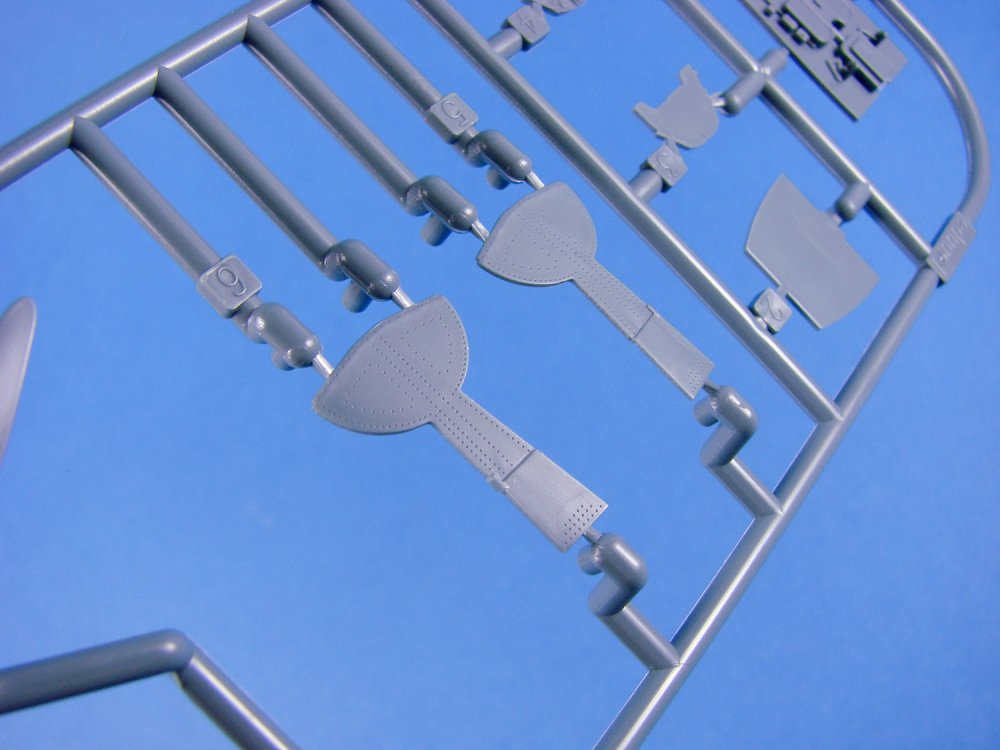
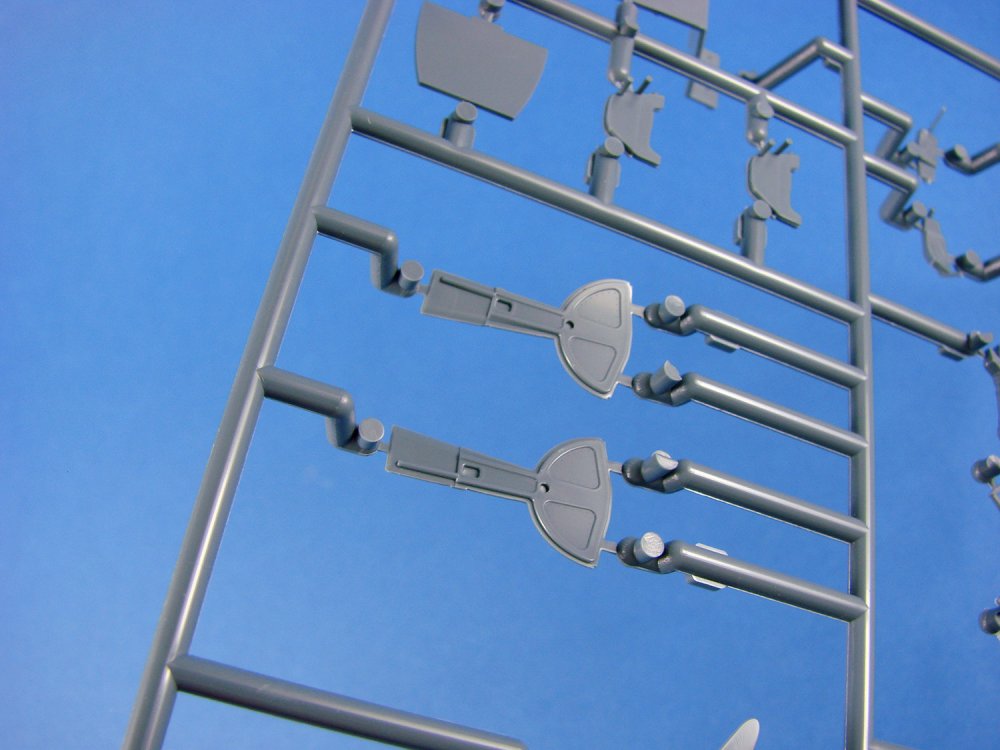
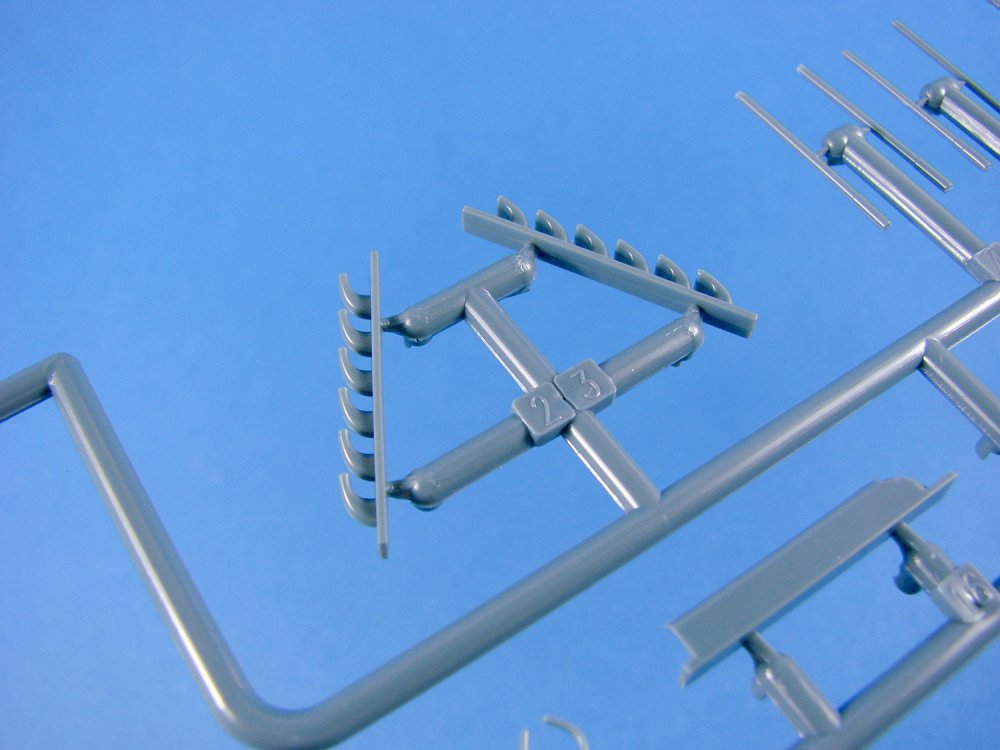
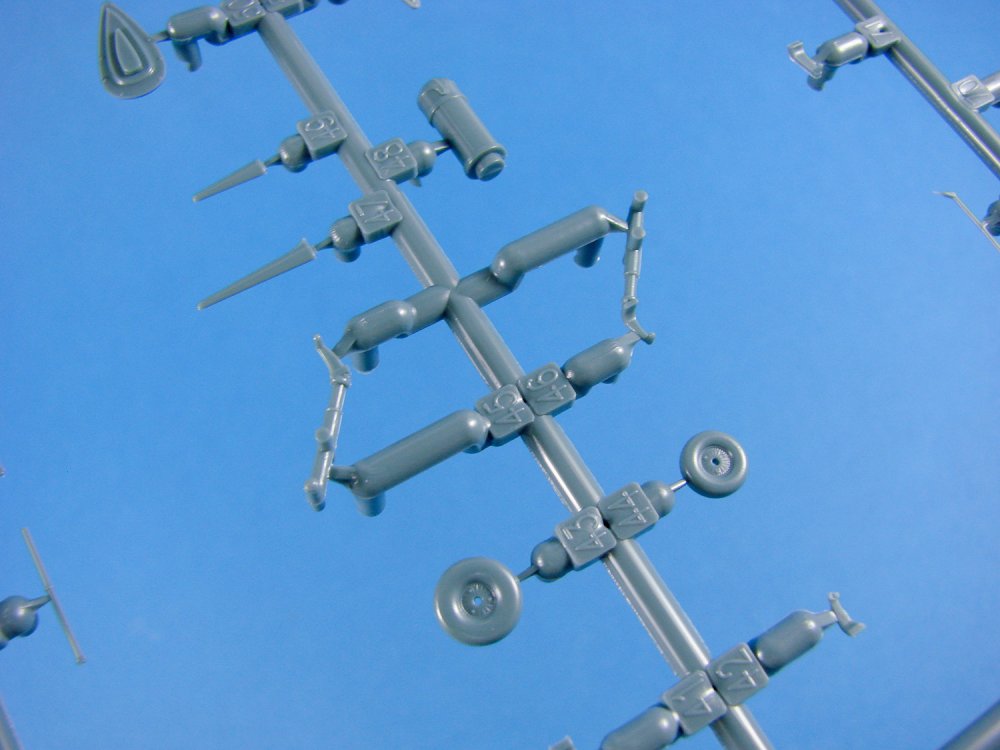
1/48 Spitfire HF Mk.VIII ProfiPACK Eduard Catalogue # 8287 Available from Eduard for €37.45 The Supermarine Spitfire is a British single-seat fighter aircraft used by the Royal Air Force and other Allied countries before, during and after World War II. Many variants of the Spitfire were built, using several wing configurations, and it was produced in greater numbers than any other British aircraft. It was also the only British fighter produced continuously throughout the war. The Spitfire was designed as a short-range, high-performance interceptor aircraft by R. J. Mitchell, chief designer at Supermarine Aviation Works. Mitchell pushed the Spitfire's distinctive elliptical wing, designed by Beverley Shenstone, to have the thinnest possible cross-section, helping give the aircraft a higher top speed than several contemporary fighters, including the Hawker Hurricane. Mitchell continued to refine the design until his death in 1937, whereupon his colleague Joseph Smith took over as chief designer, overseeing the Spitfire's development through its multitude of variants. In September 1941, a hitherto unknown German radial engine fighter appeared in the west European sky. The new airplane was superior to British fighters, most distressingly to the Spitfire Mk.V. The German design was soon recognized as the Focke-Wulf Fw 190A. The first response to the new German weapon was the Spitfire Mk.VIII, but the design changes were so complex that initiating timely production was not possible. The only British fighter aircraft deemed suitable to oppose the Fw 190A were the Spitfire Mk. VII and VIII powered by the Merlin 61 engine. The Mk VIII was an adaptation of the Mk VII without the pressurised cabin and was intended to become the main production model of the Spitfire. When the "interim" Mk IX proved itself to be adequate for the RAF it was decided to use the shadow factory at Castle Bromwich to produce that version only. Apart from the lack of pressurisation, the Mk VIII differed little from the Mk VII. Some early production models had extended wingtips but the majority were fitted with the standard version. There were three sub-variants for low altitude (LF Mk VIII), medium altitude (F Mk VIII) and high altitude (HF Mk VIII) which were powered respectively by the Merlin 66, Merlin 63 and Merlin 70 engines. The kit This release is packaged into the standard size box that we see for many of Eduard’s 1/48 aircraft and has the familiar orange ProfiPACK band along the top edge. Eduard’s artworks seem to get better and better, with this having an image of the high-altitude Spit in overall grey, chasing a wounded Ju 188 above the clouds. The edges of the box show profiles for the FIVE schemes that are supplied with this release, and varied they are too. I know that whilst Supermarine test pilot Jeffrey Quill didn’t like the extended wing-tip version because it screwed with aileron performance, there is actually something quite alluring to the eye with this version, so I was pleased to be able to get my hands on this review copy. Inside this box we have four medium-grey sprues packed into two re-sealable clear sleeves, and a single clear sprue that resides within its own zip-lock wallet to protect it from scratches etc. Being a ProfiPACK release, we also have a fret of colour-printed PE, plus a small sheet of masks. To complete the contents, a 20-page A4 manual is included. No resin is included in this release. Sprue A Sprue F Sprue G Sprue H Sprue I Photo Etch Masks Decals Instructions Despite my kit being properly packed, it didn’t stop the clear hood becoming detached in the clear sleeve. No problem though as the delicate part was thankfully undamaged. I quite like the way that Eduard arrange these parts on the circular sprue. Clarity is superb, and the mouldings are realistically thin. As it comes, the model is designed to have the canopy posed in the open position, and separate parts are included to do that, but it you want to close up the office, then a part is supplied which has the hood and rear canopy moulded as one. To fit this, you will also have to undertake a very small amount of simple surgery to the fuselage halves. Nothing too difficult though. Unlike Eduard’s Bf 109 series where the cockpit wall detail is moulded in situ, the Spitfire kits have a separate cockpit tub that fits into the fuselage after paint and assembly, although I do tend to add the side walls into the fuselage first. This design allows the modeller to use the resin Brassin cockpit release as a drop-in item. If you don’t wish to go down that route, then the plastic kit parts are very, very presentable and offer the modeller an above standard level of detail right out of the box. As well as the detailed side walls that have superbly rendered airframe constructional details as well as separate detail elements such as undercarriage selector, throttle quadrant, trim wheels, oxygen tanks etc. Instead of looking directly into the bottom of the cockpit and seeing the inside wing plastic, this model of course has a fully detailed area which includes the actuators that the rudder pedals attach to, plus a myriad of other small details that mean this area is as busy as anywhere else in the pilot’s office. A seat with moulded rear cushion is supplies as a three-part assembly, and of course, colour-printed PE seatbelts are included with this release, as are numerous other cockpit parts, including armoured plates for the rear seat and head rest, spade grip trigger, etc. When it comes to the instrument panel, this ProfiPACK release has a layered, multi-part PE option that is colour-printed. These actually look very nice when installed, and an improvement on the already nice plastic parts. Should you want to use the plastic option, then a decal is supplied for this too, in case you didn’t want to paint the small details. Of course, some decal setting solution is recommended! If you’ve never seen an Eduard Spitfire kit, then you are missing out. Those who have will agree when I say that the external details are exquisite, with delicately rendered panel line, port and rivet details. Note the breakdown of the fuselage too, allowing Eduard to tool different versions. The lower engine cowl is separate and supplied as halves, as it the upper. It’s actually here that causes the modeller a little bit of grief as removing the upper cowl seam is troublesome with the surrounding moulded details. Due to the undercuts though, this was a necessary evil. Thankfully, Eduard also sell a resin alternative, cast as a single piece and exhibiting the same finesse of detail. Sticking with the engine, a beautiful set of fishtail exhausts are to be used with this kit, with their stubs only slightly hollow. Again, resin alternatives are available separately, should you want to go the extra mile. More PE parts are included for the lower cowl intake. The fuselage rudder and wing fairing leading edges are separate parts to allow for different versions to be built, and if you look at the interior of the fuselage, you’ll note the radio/battery compartment door is moulded so it can be easily cut away to accommodate extra detail sets. Of course, it’s the Spitfire’s wing which is the real star of the show. An almost full span lower part and upper panels make up the bulk of this wing. Not quite full span as you have to fit the wingtips as separate parts, again helping Eduard to tool different versions of this aircraft. As this is the HF Mk.VIII, this time we get to use the extended, slightly pointy wingtips which give the aircraft the feeling of a little awkward grace, with the beautiful, elliptical lines slightly disturbed. I quite like this look and was hooked on it from the 1/32 Hasegawa Spitfire Mk.VI that I built as a kid. Ailerons are also separate, but landing flaps are integral and moulded closed. The design of this model again allows for Eduard’s own aftermarket sets to be added with minimal surgery. As with the fuselage, the surface details are first rate, with fine panel lines and rivets. Cannon stubs are moulded separately, as as the underwing radiators. The latter are made up from six parts each, and the wing has the correct intake and exit ramps moulded in situ. To ensure the wing maintains the correct dihedral and has some rigidity, a wing spar is included. The remaining control and flying surfaces are nicely recreated, with the ailerons having an accurate metal skin and rivet finish, and the rudder and full-span elevator being of fabric and tape appearance. When it comes to the main gear wells, the liners have been split into three parts in very much the same way that Tamiya moulded their 1/32 kit. The reason for this is because the walls aren’t vertical, and the alignment of the liner is skewed. The solution works very well, and the remainder of the detail in this area is moulded onto the lower side of the upper wing panels. Eduard do sell the bronze gear struts, and they are excellent, but the kit parts certainly do come up to muster. Both plastic and PE oleo scissors are supplied, and the wheels are moulded as halves, with separate hubs. Unfortunately, these aren’t weighted either, so you may opt for the resin alternative that is separately available. That powerful Merlin engine also demanded a four-blade prop, and this is moulded as a single piece, with a two-part spinner. A single colour PE fret is included and is nicely printed. Part connection tabs are thin and will be easy to cut through. Other parts on here include the inside handle for the sliding hood, numerous cockpit detail parts including the door release mechanism, and of course, the colour seatbelts. A set of wheel hub plates are included, but not for use with this release. Masks are included for the canopy, wingtip lights, and the various underside wing and fuse lights. Kabuki is Eduard’s material of choice and the set is finely cut and you can guarantee it will be a precise fit. Two decal sheets are included. The first one contains the numerous stencils that are dotted around the airframe. Both sheets are printed in-house by Eduard and are superbly thin, with minimal carrier film and perfect registration. The second sheet contains the various national markings, serials and codes etc. No, that orange in the roundel etc. is correct. Those are the SAAF markings! There are FIVE schemes possible with this release, and they are: JF364, No. 32 Squadron, Foggia, Italy, early 1944 JF476, No. 92 Squadron, Triolo, Sicily, November 1943 JF519, No. 1 Squadron SAAF, Trigno, Italy, February 1944 JF630, flown by F/O L. Cronin, No. 81 Squadron, Palel, India, March 1944 308th Fighter Squadron, 31st Fighter Group, Castel Volturno, Italy, 1944 Instructions are supplied as a 20p-age, glossy A4 publication, with a parts map and the construction broken down into easy to follow line drawings with selective use of colour to highlight parts installation etc. Paint references are also supplied throughout, in both Gunze Aqueous and Mr Colour reference codes. The last pages are taken over with the five schemes, all printed in colour, and including a stencil map. Indications for scheme parts options are easy to see throughout the build. Conclusion This far, there have been almost 20 various releases of Eduard’s Spitfire family in the last 5yrs, and they show no signs of slowing down. It’s hardly surprising when you consider that this must be the best, most accurate and most catered-for 1/48 Spitfire kits on the market. Having built a couple in the past, I can say that these are amongst some of the most fun and satisfying model kits to have hit the market in recent years. This long-wing version really is a beauty and one that I’ve been personally wanting to see for a while. As I write, I have a box of resin and brass goodies coming, and you will see this in a forthcoming issue of Military Illustrated Modeller. Highly recommended My sincere thanks to Eduard for the review sample seen here. To purchase this directly, click THIS link.


-
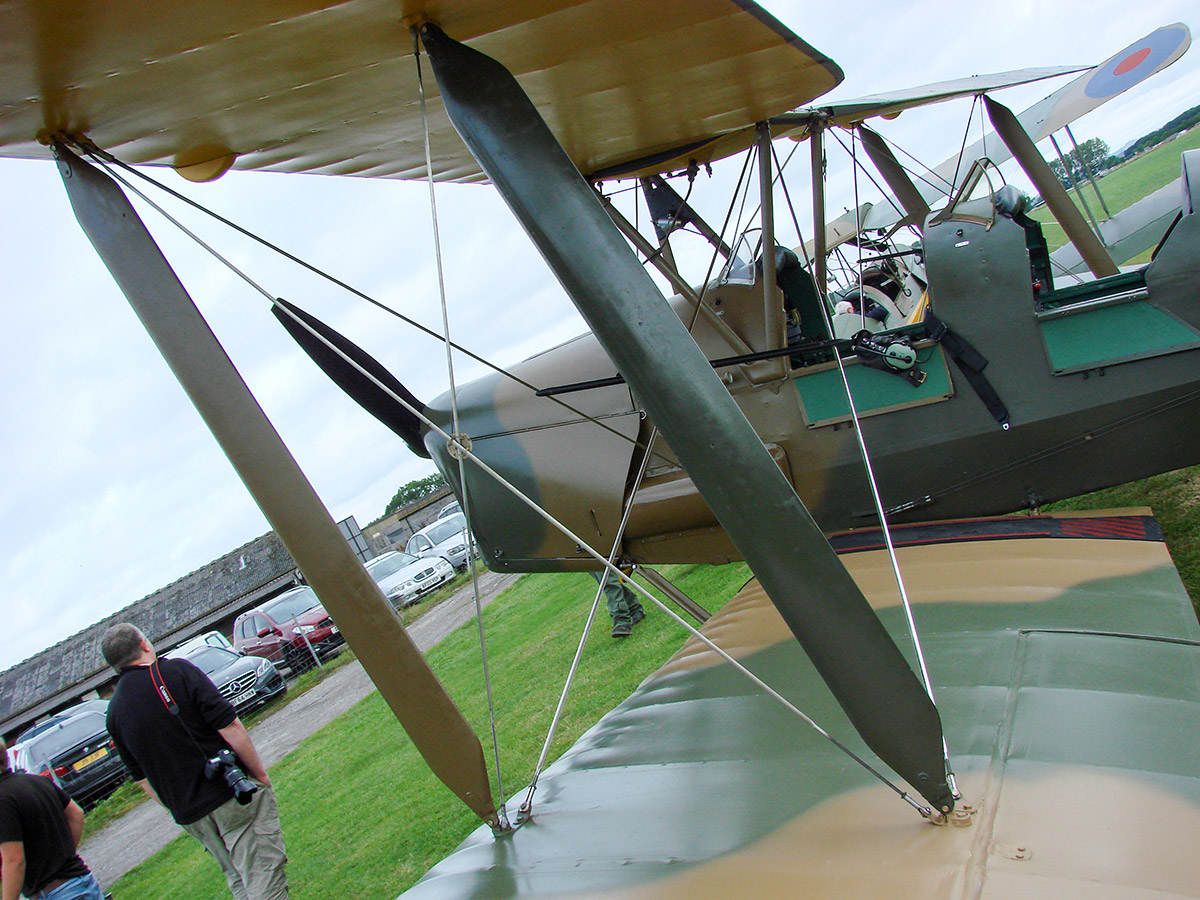
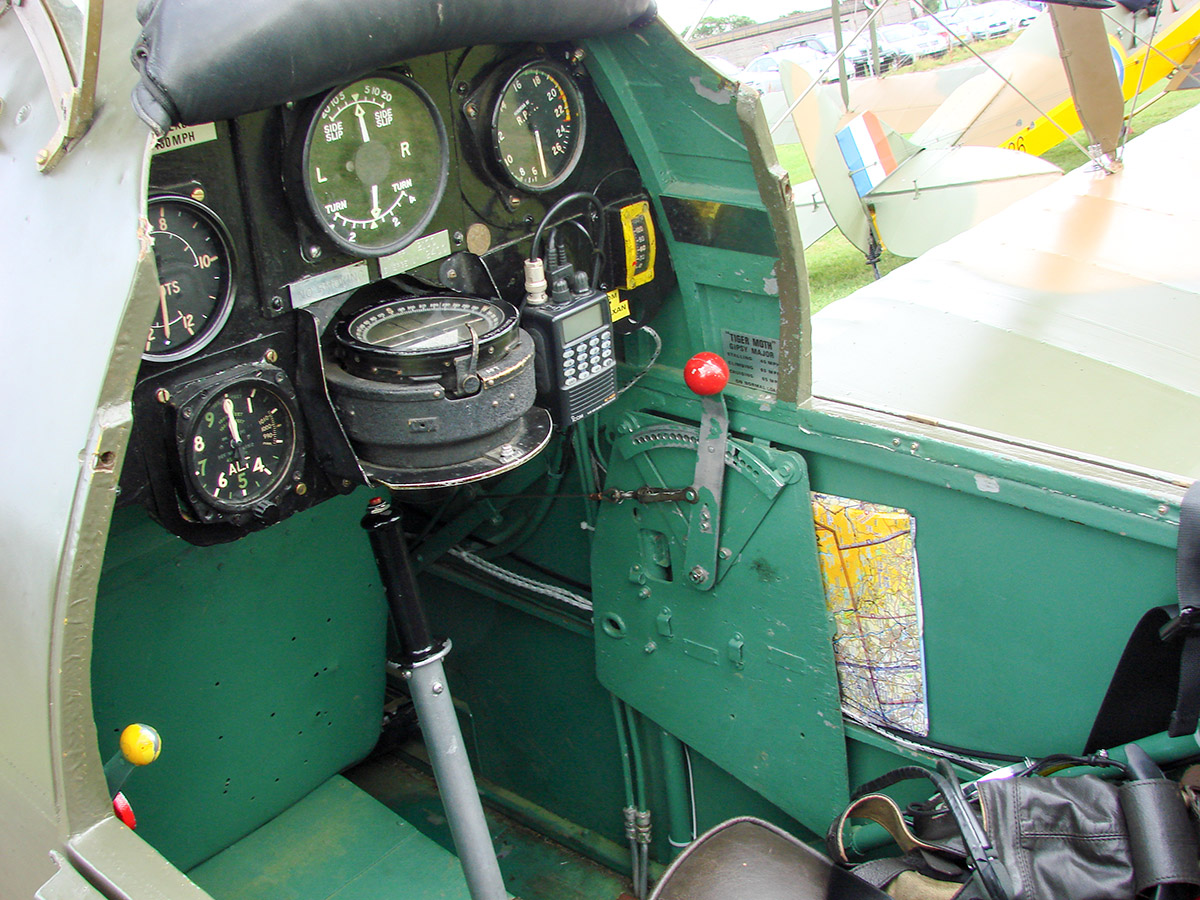
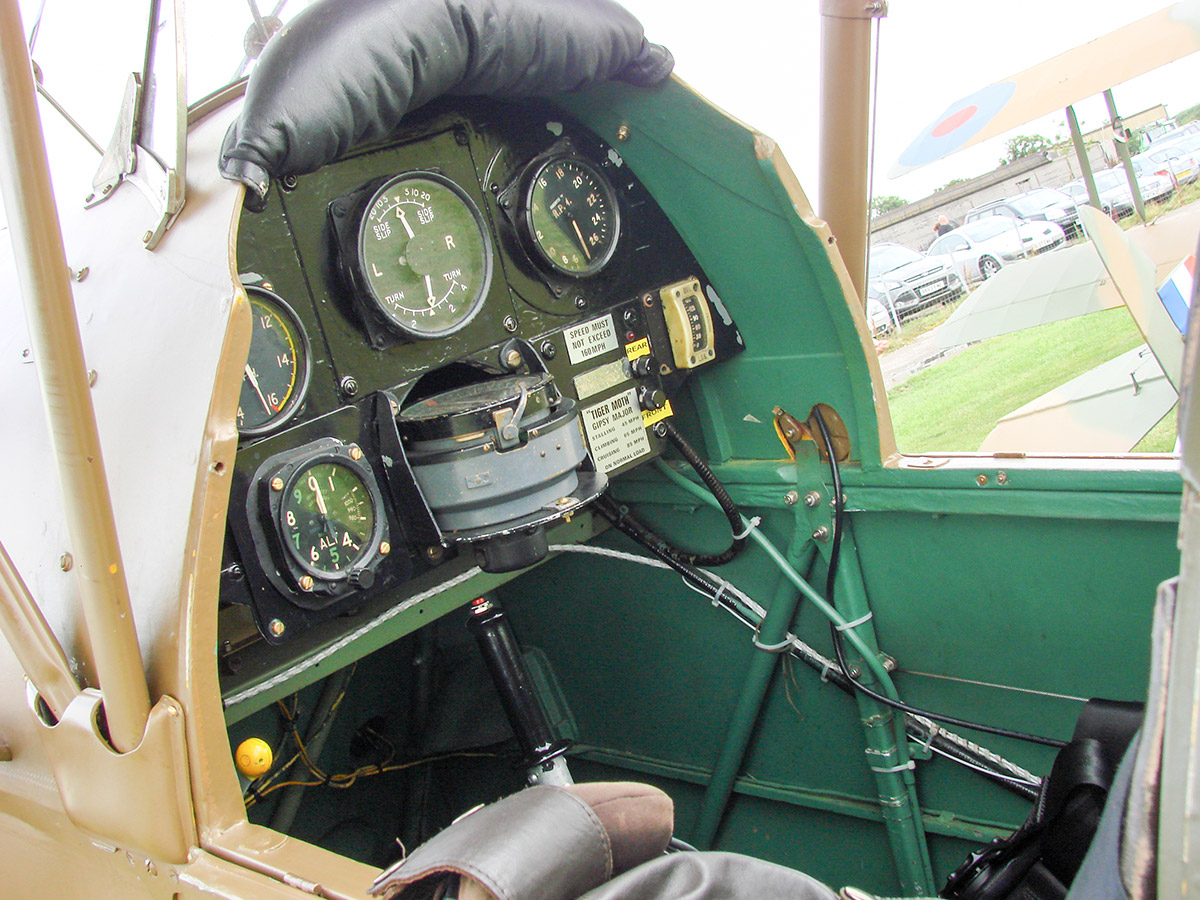
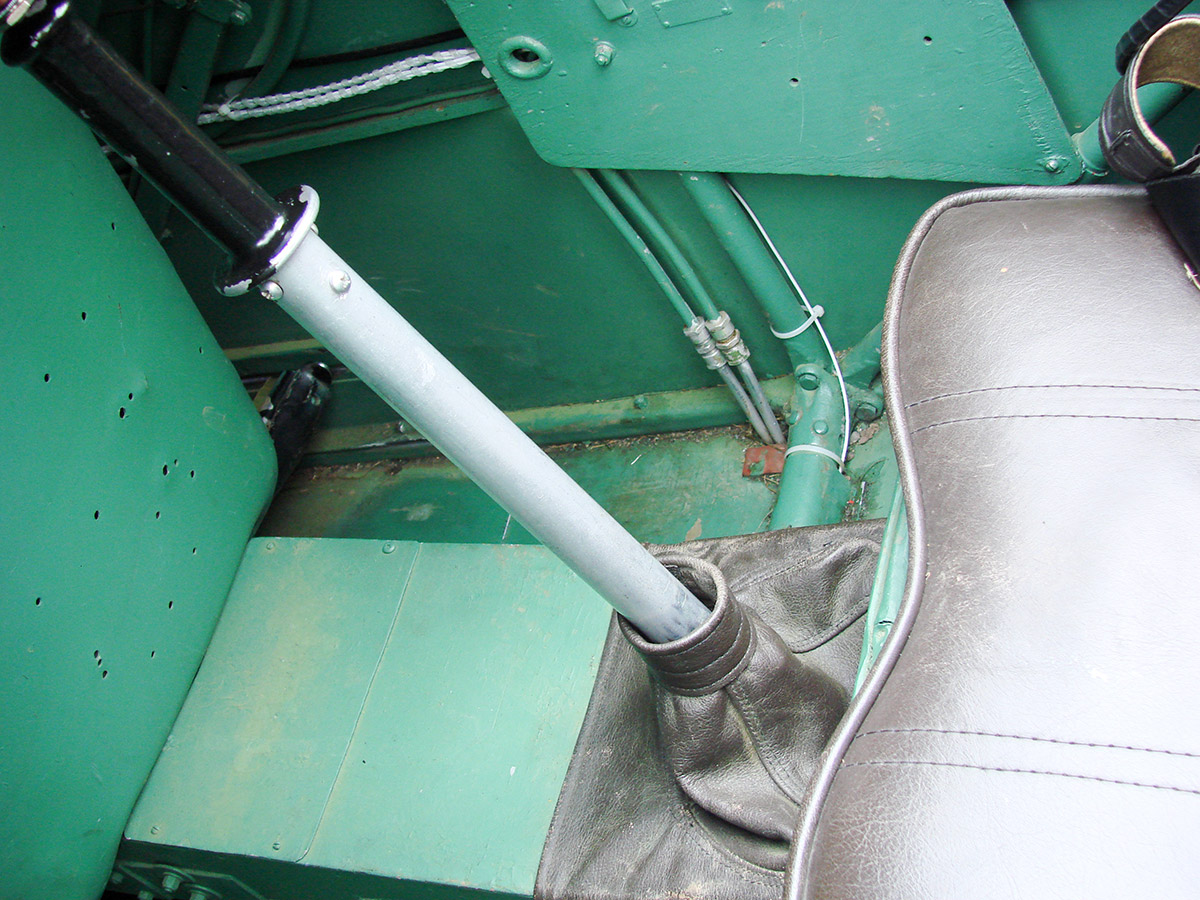
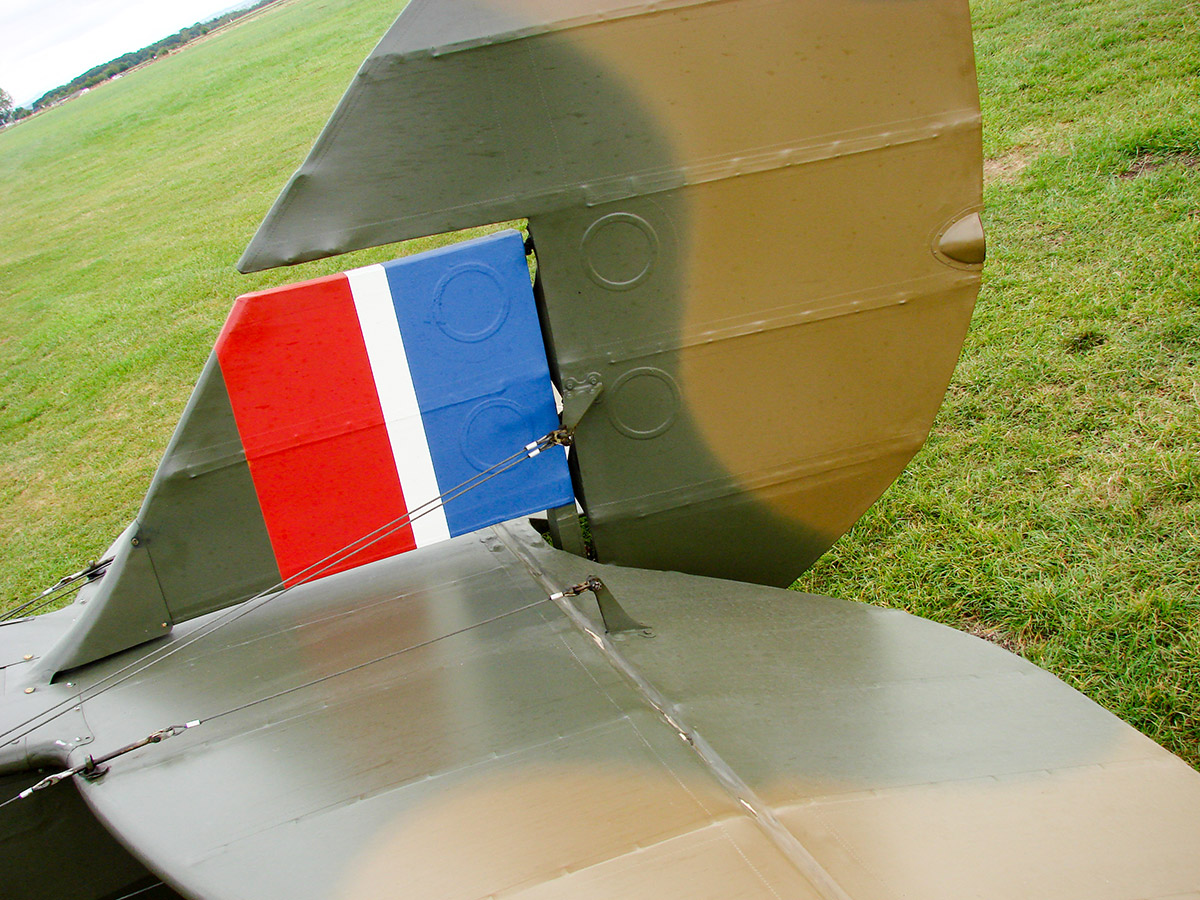
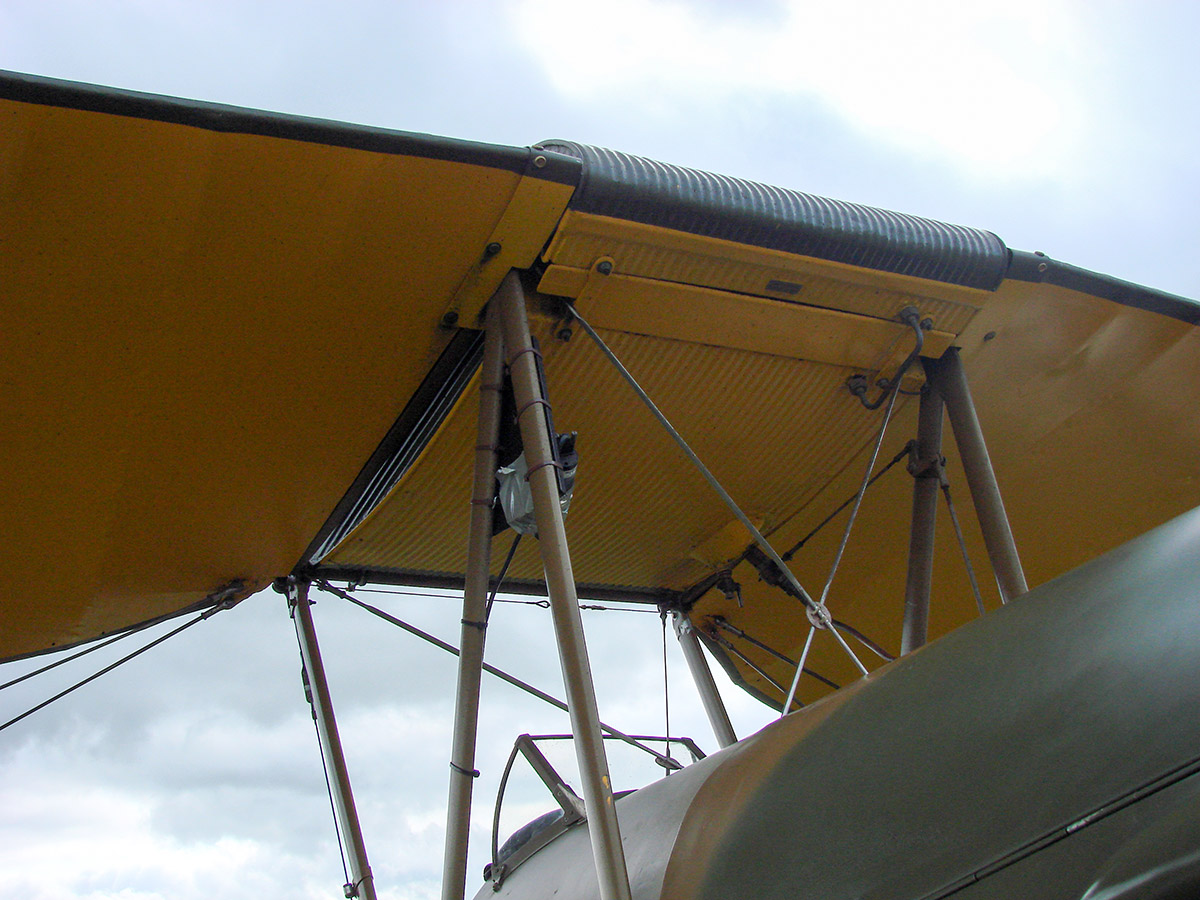
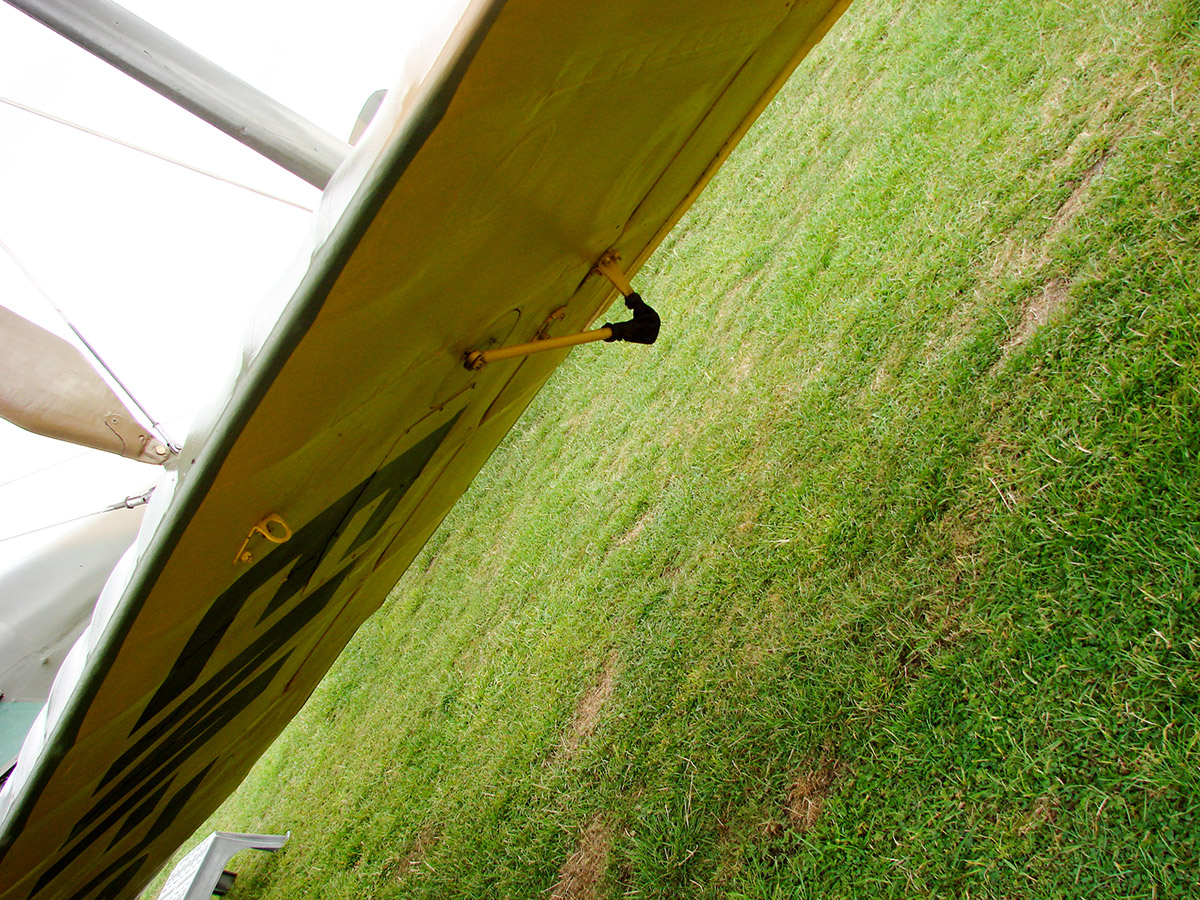
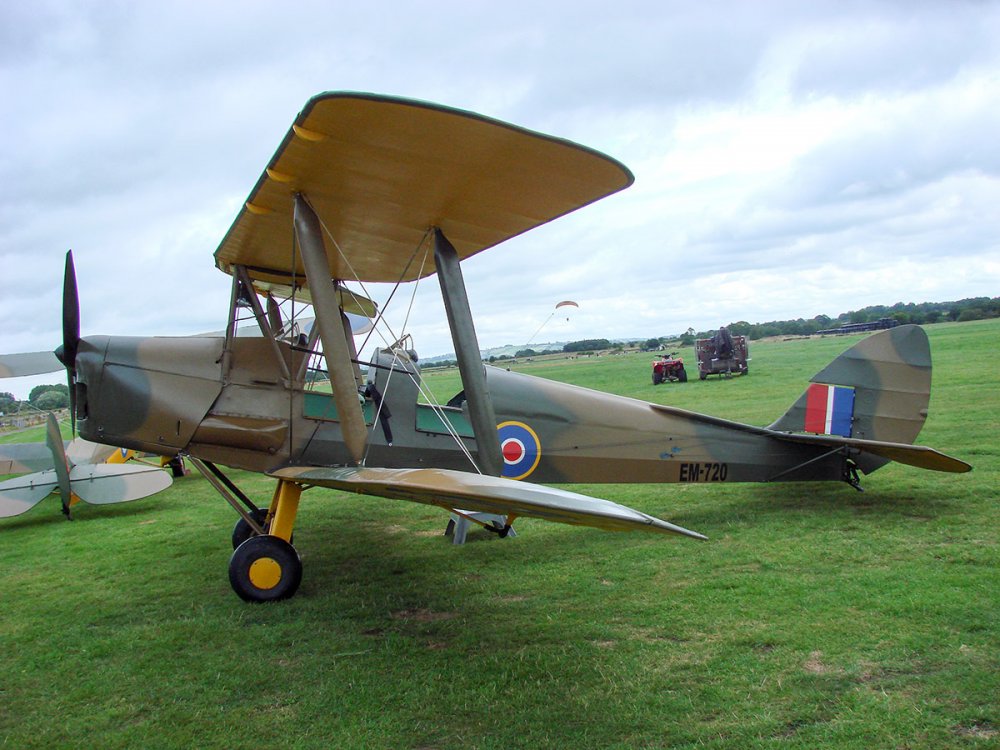
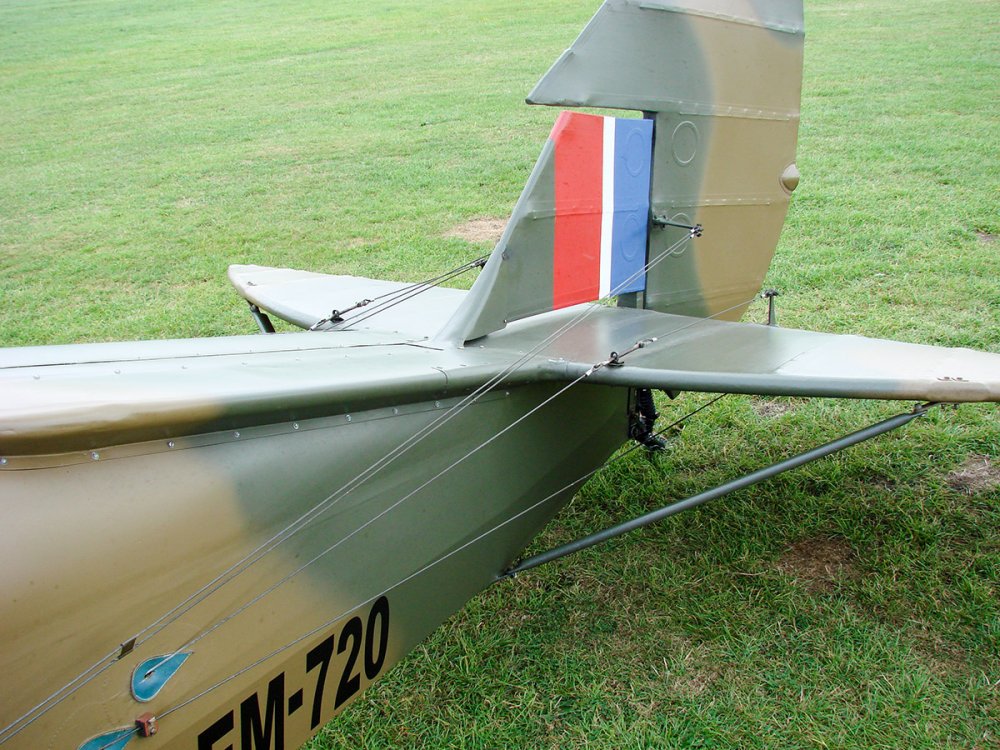
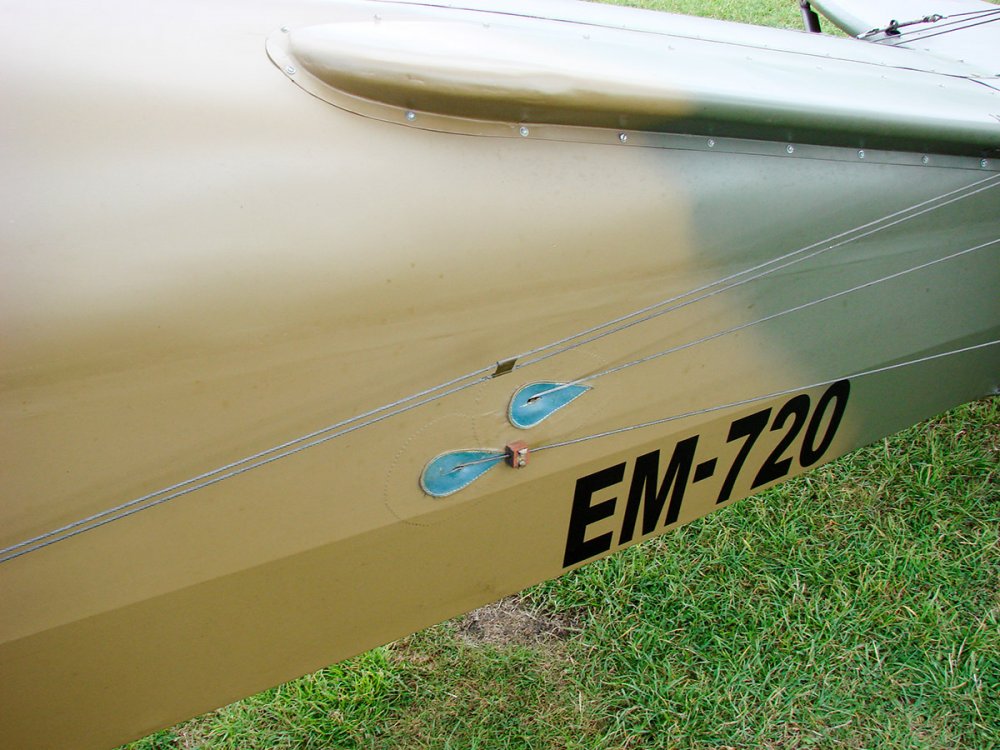
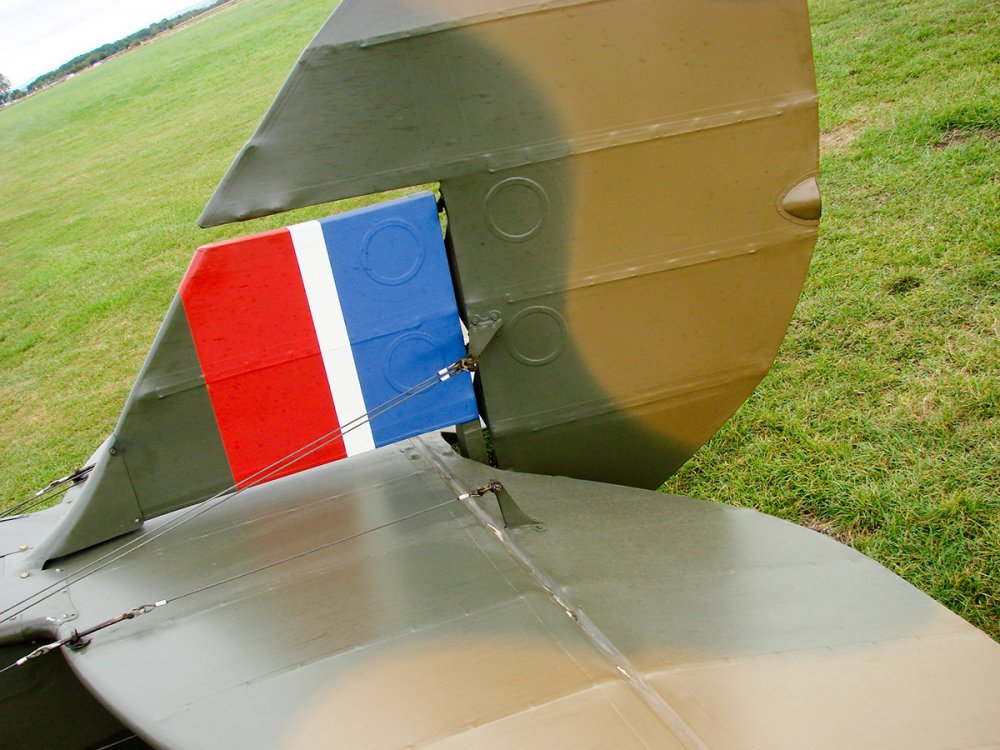
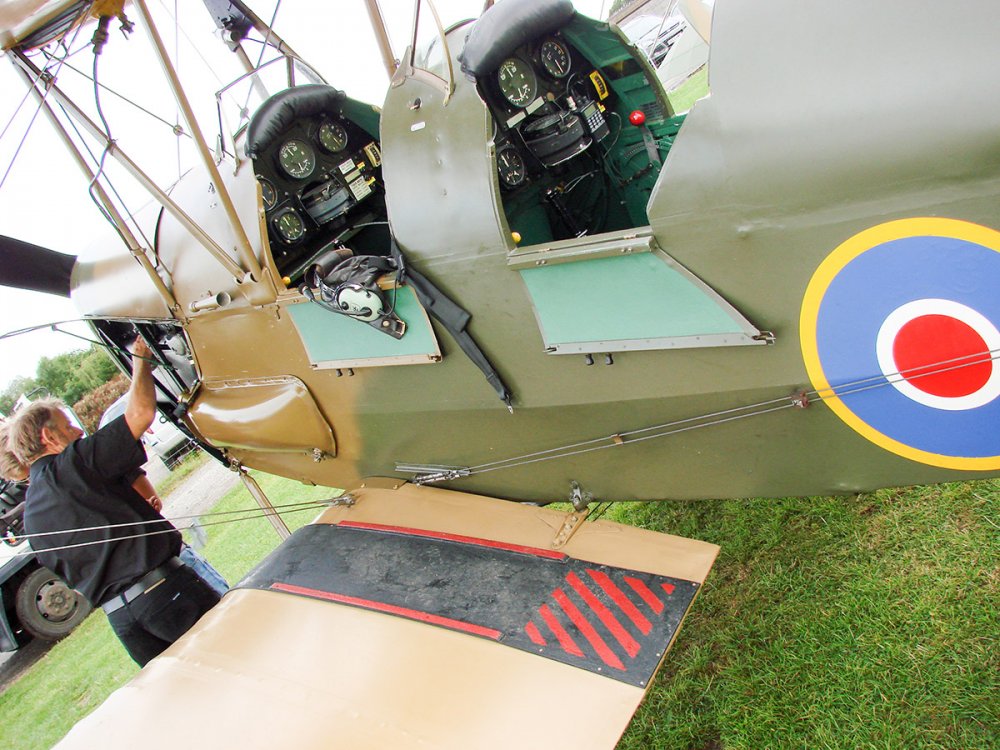
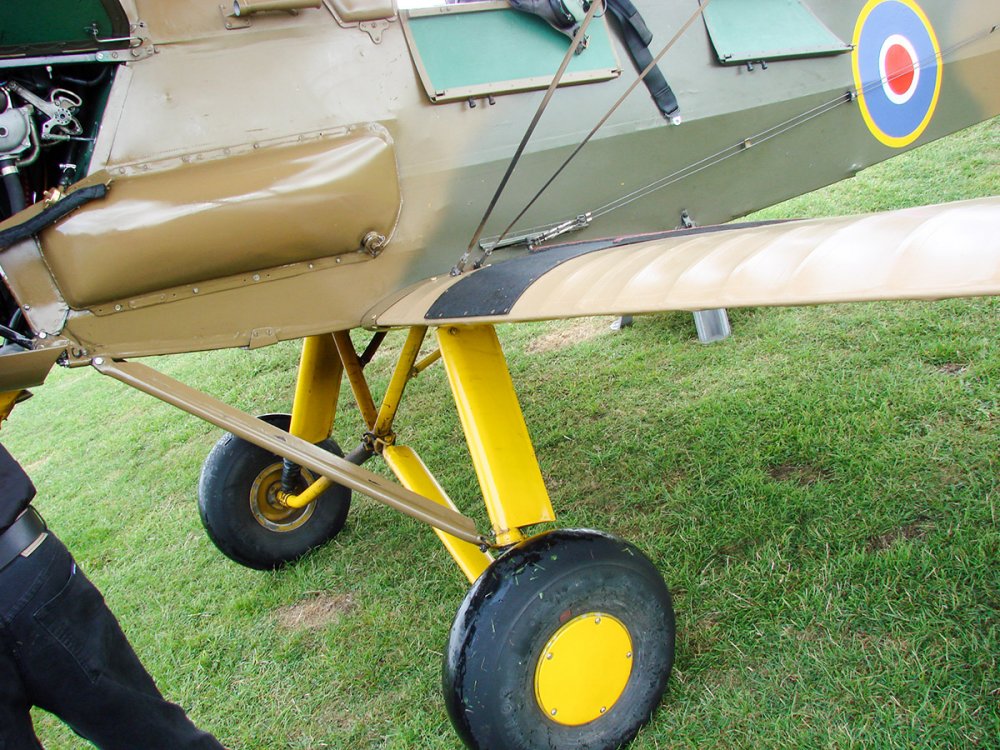
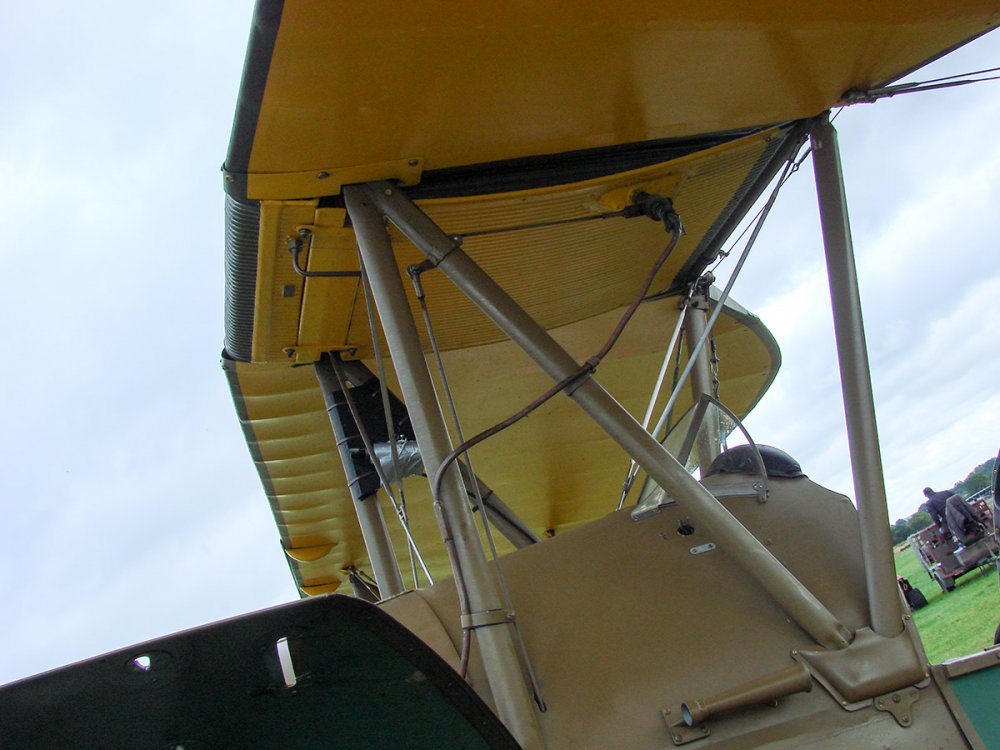
Thought I'd share these with you. I flew this Moth a couple of years ago over Derbyshire. Absolutely loved it!


-
1/48 Wellington Mk.X (He727 NA-K)
JayDee replied to JeroenPeters's topic in LSM 1/35 and Larger Work In Progress
Very neat. Looking forward to seeing the internal structural stuff and bomb bay.- 304 replies
-
- 1
-
-
- wilnis crash
- trumpeter
- (and 1 more)
-
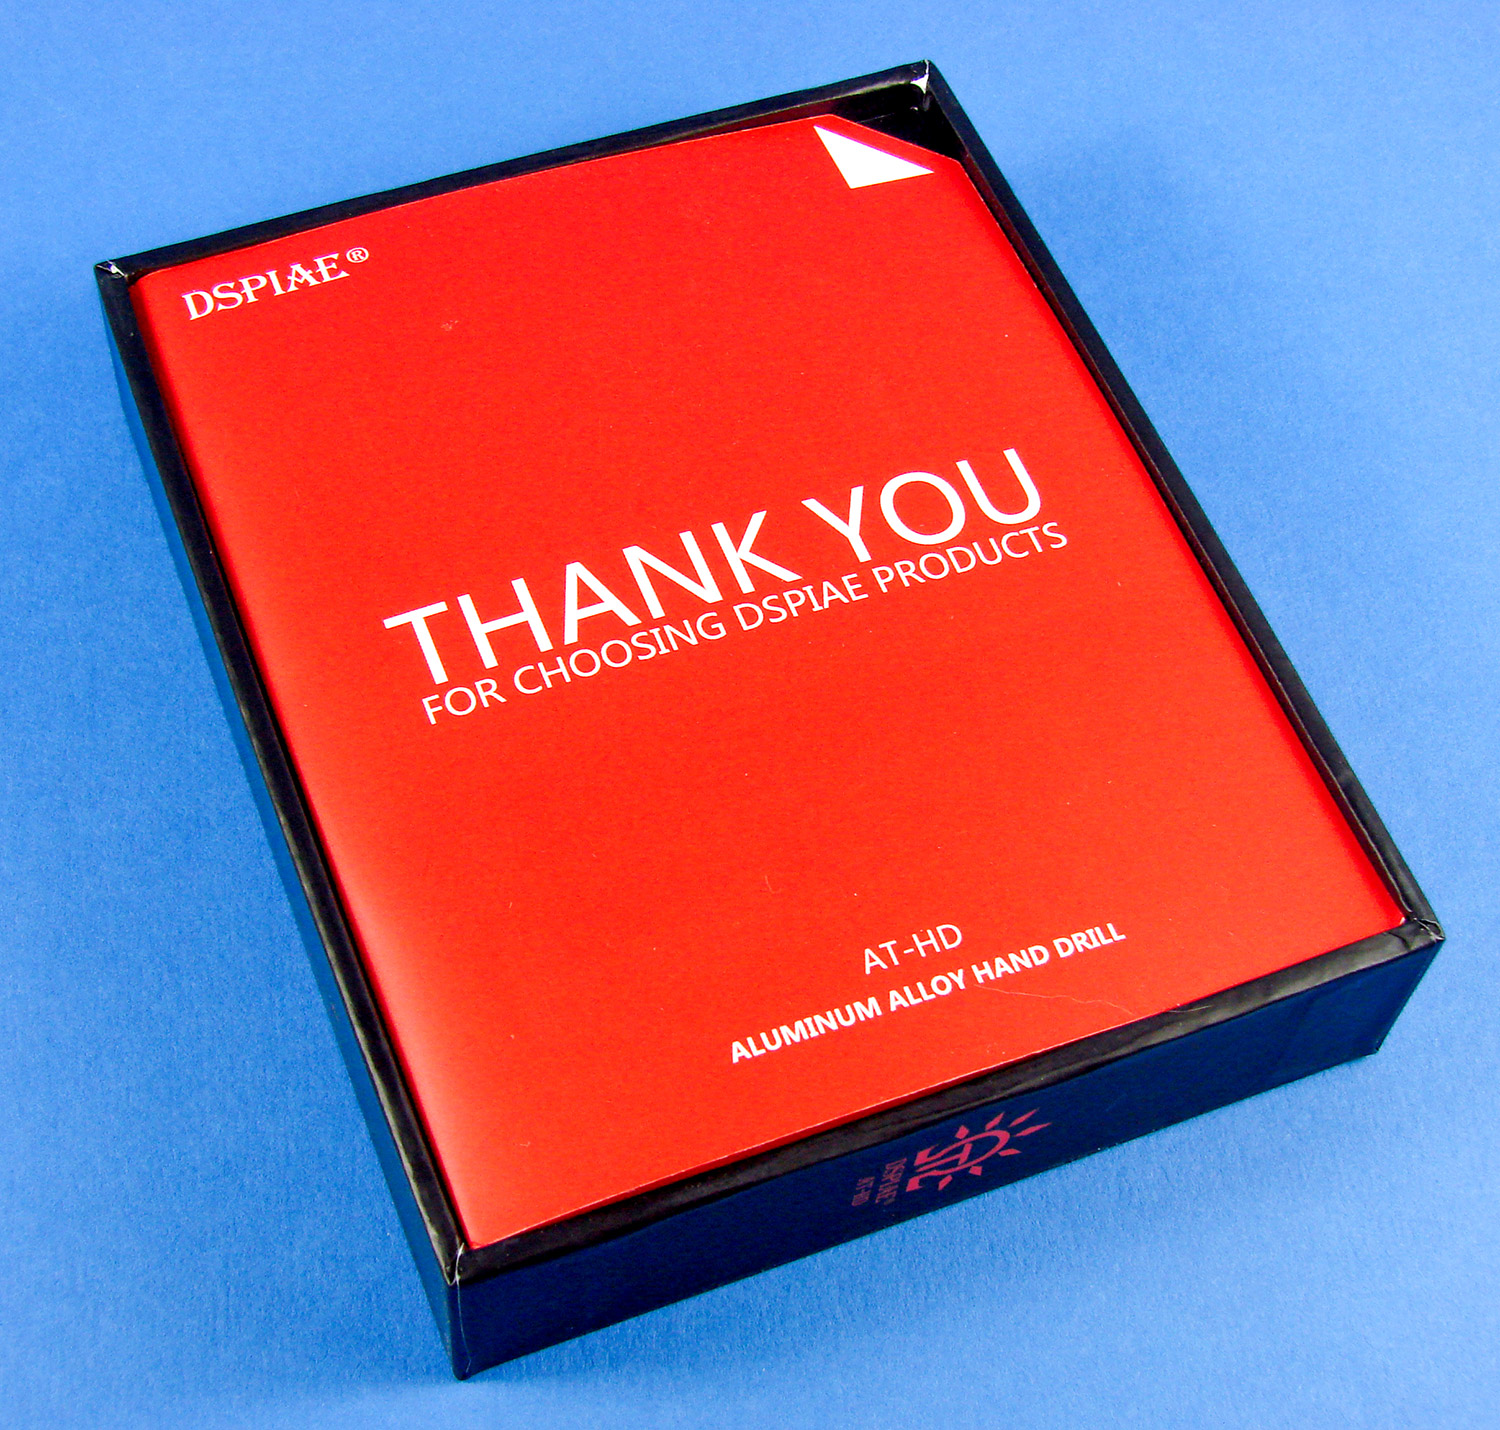
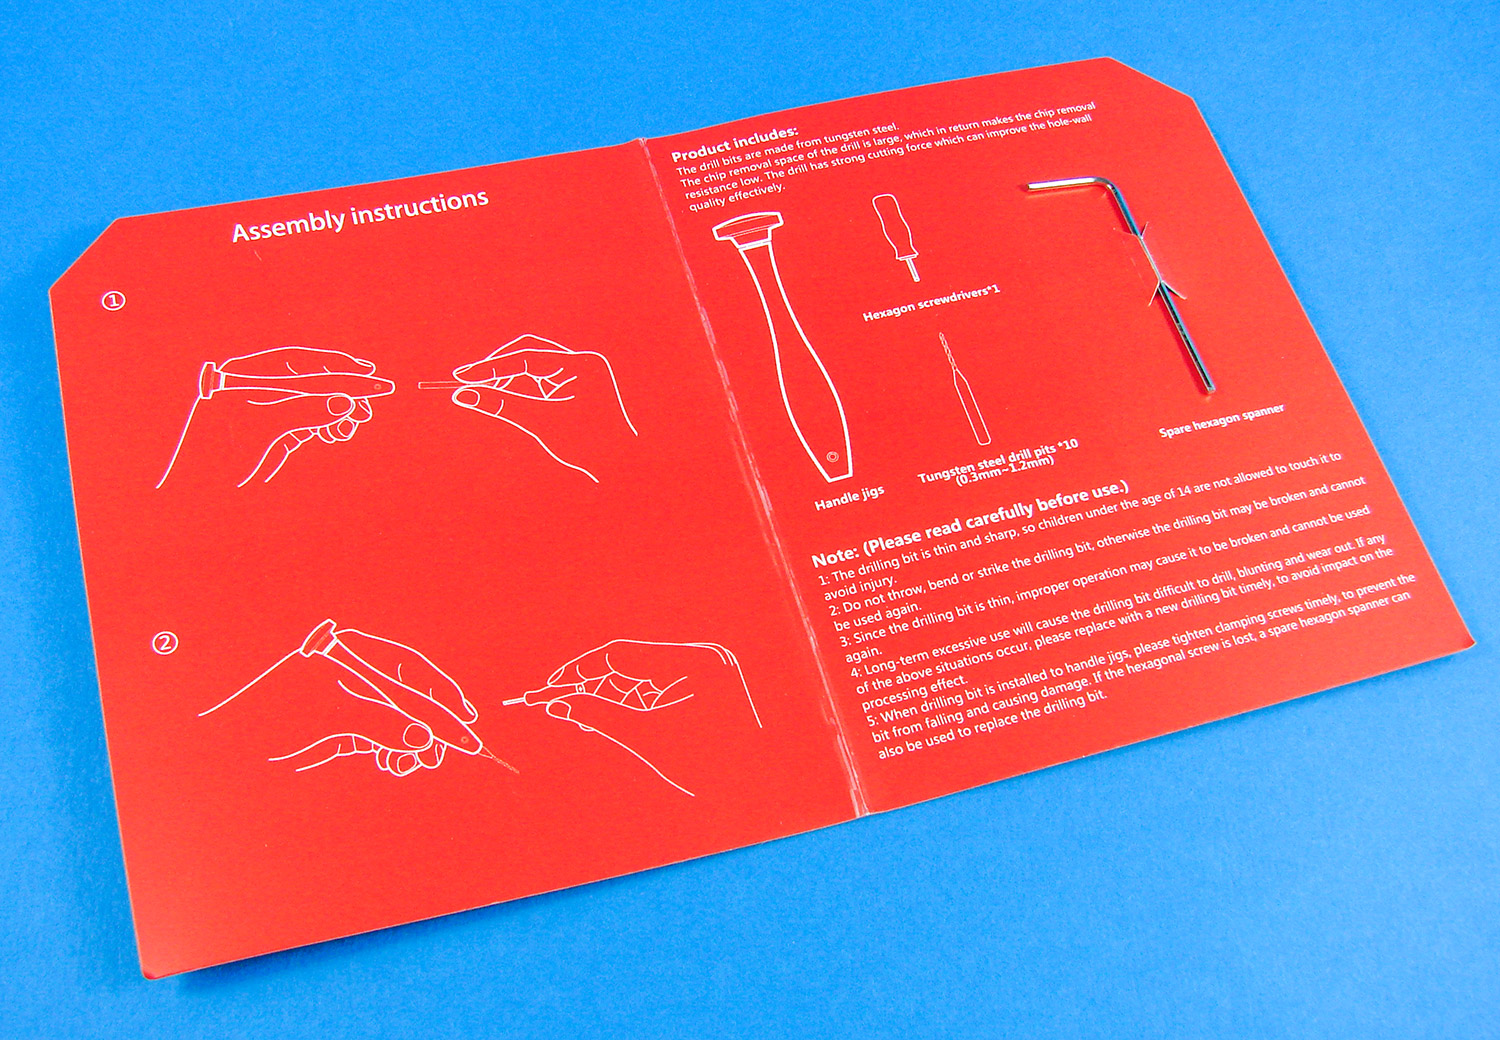
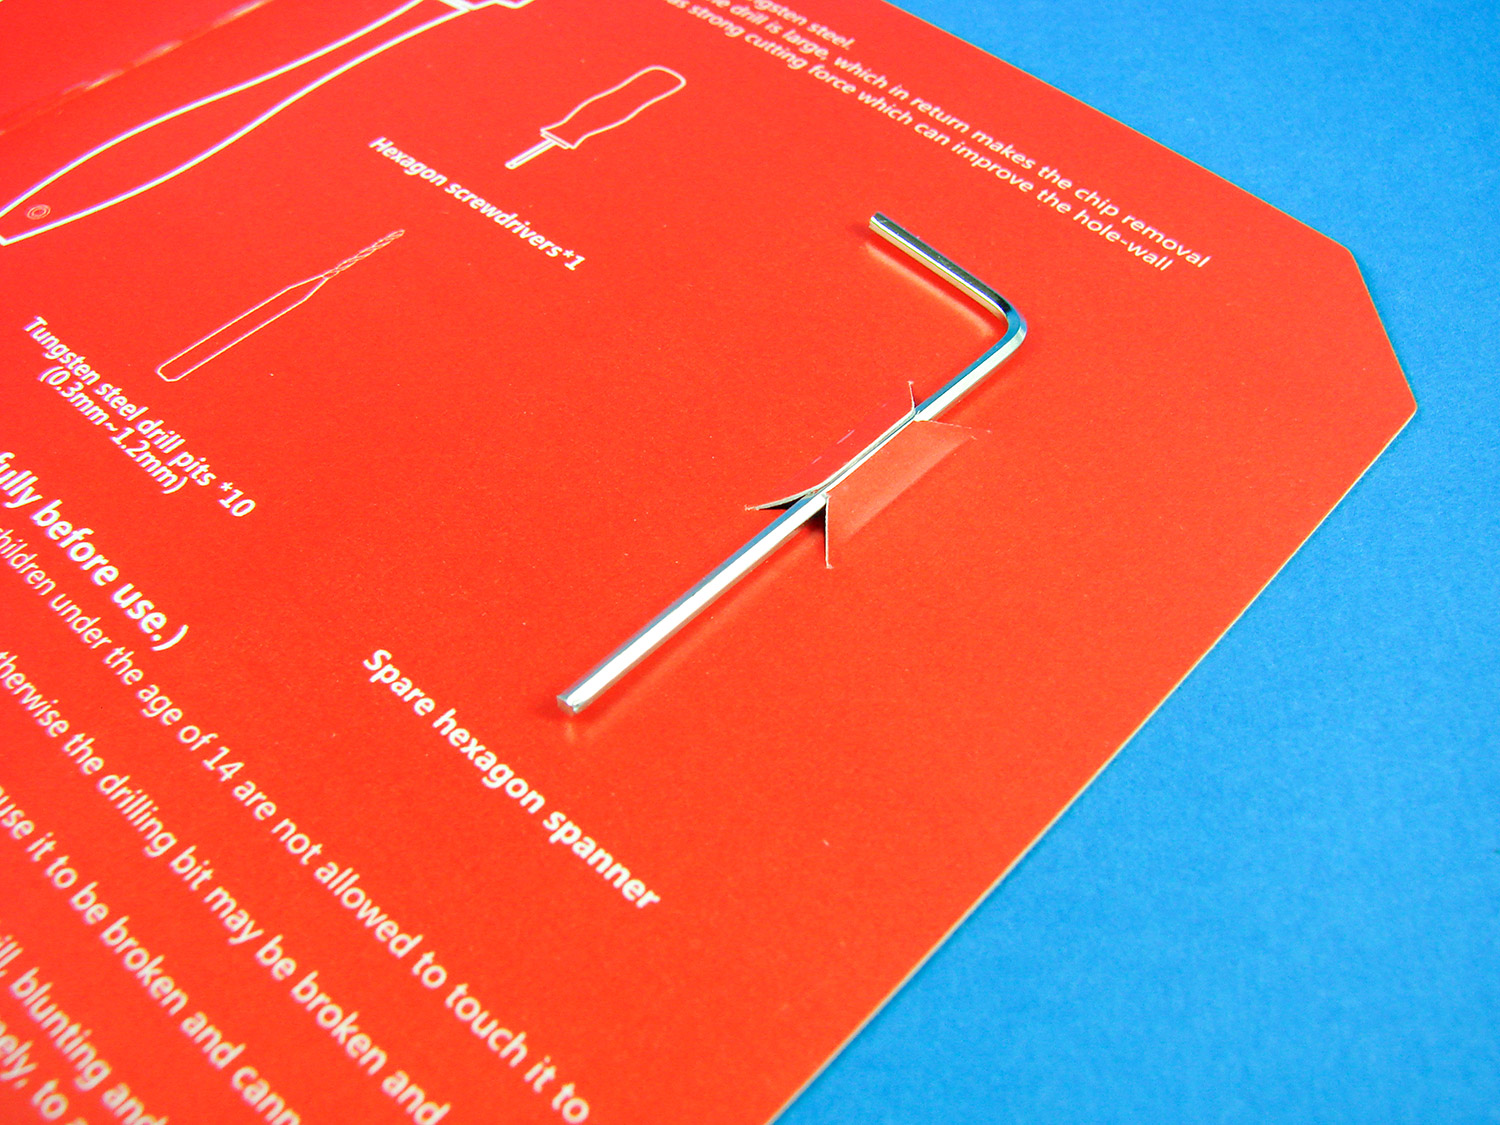
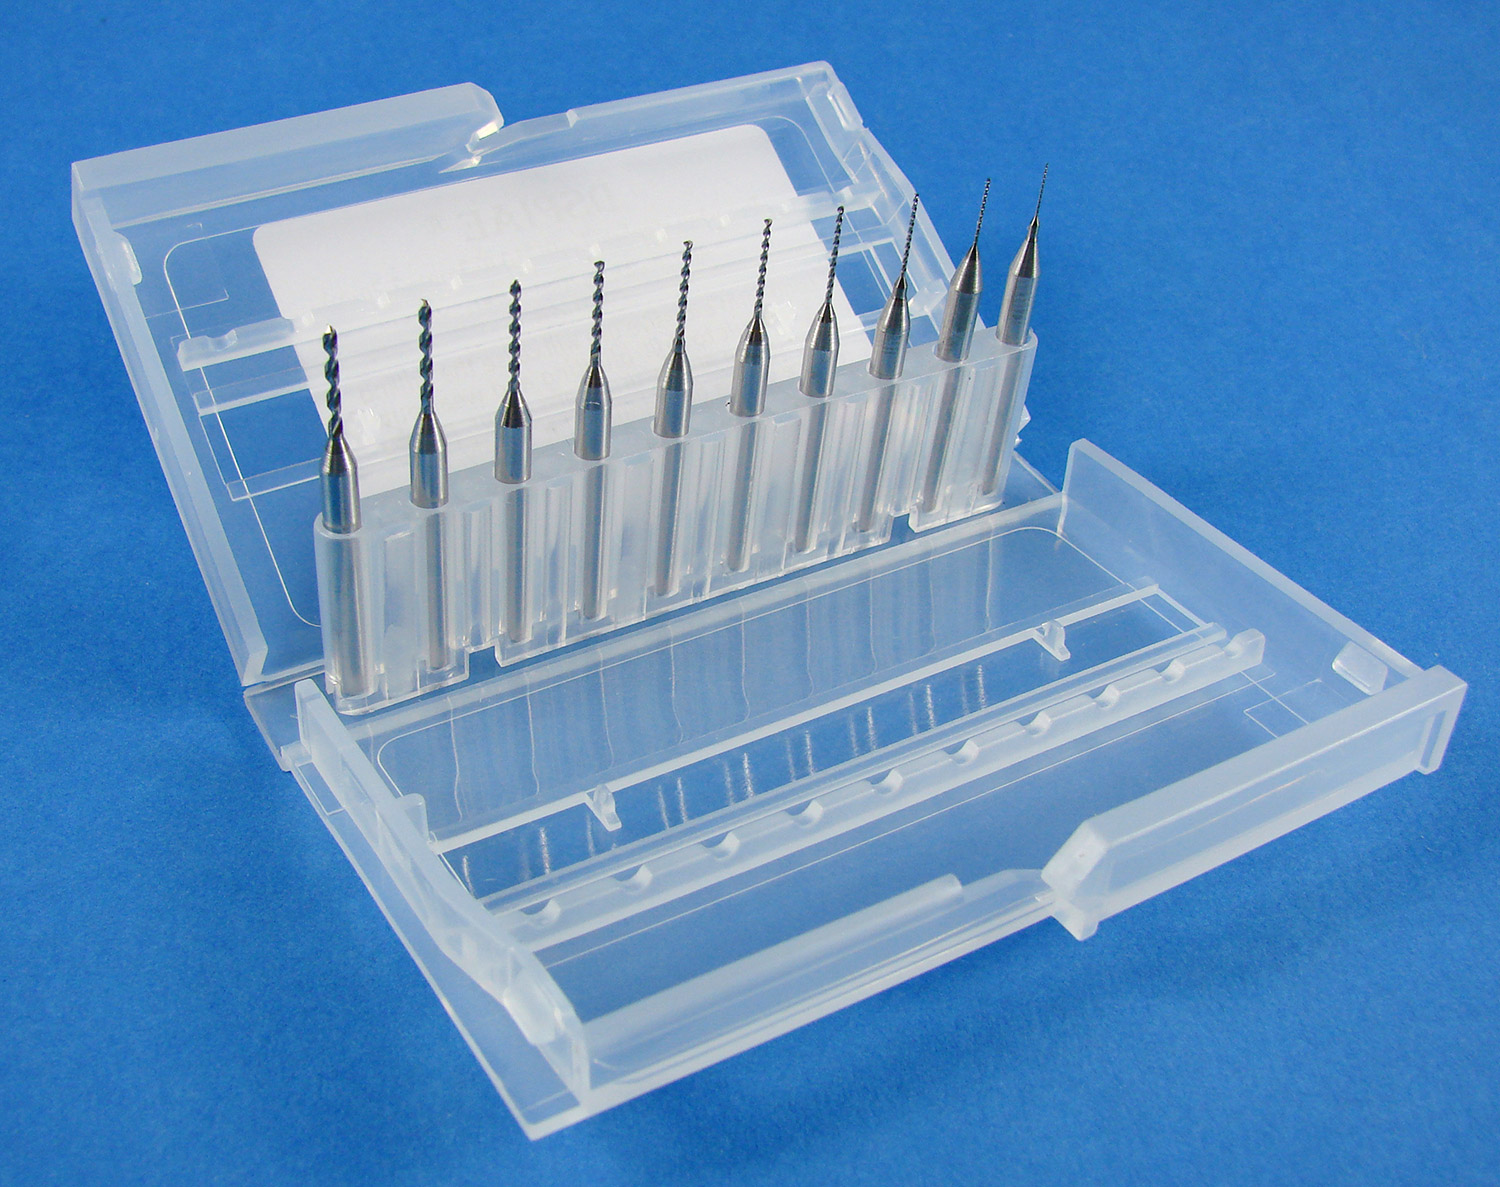
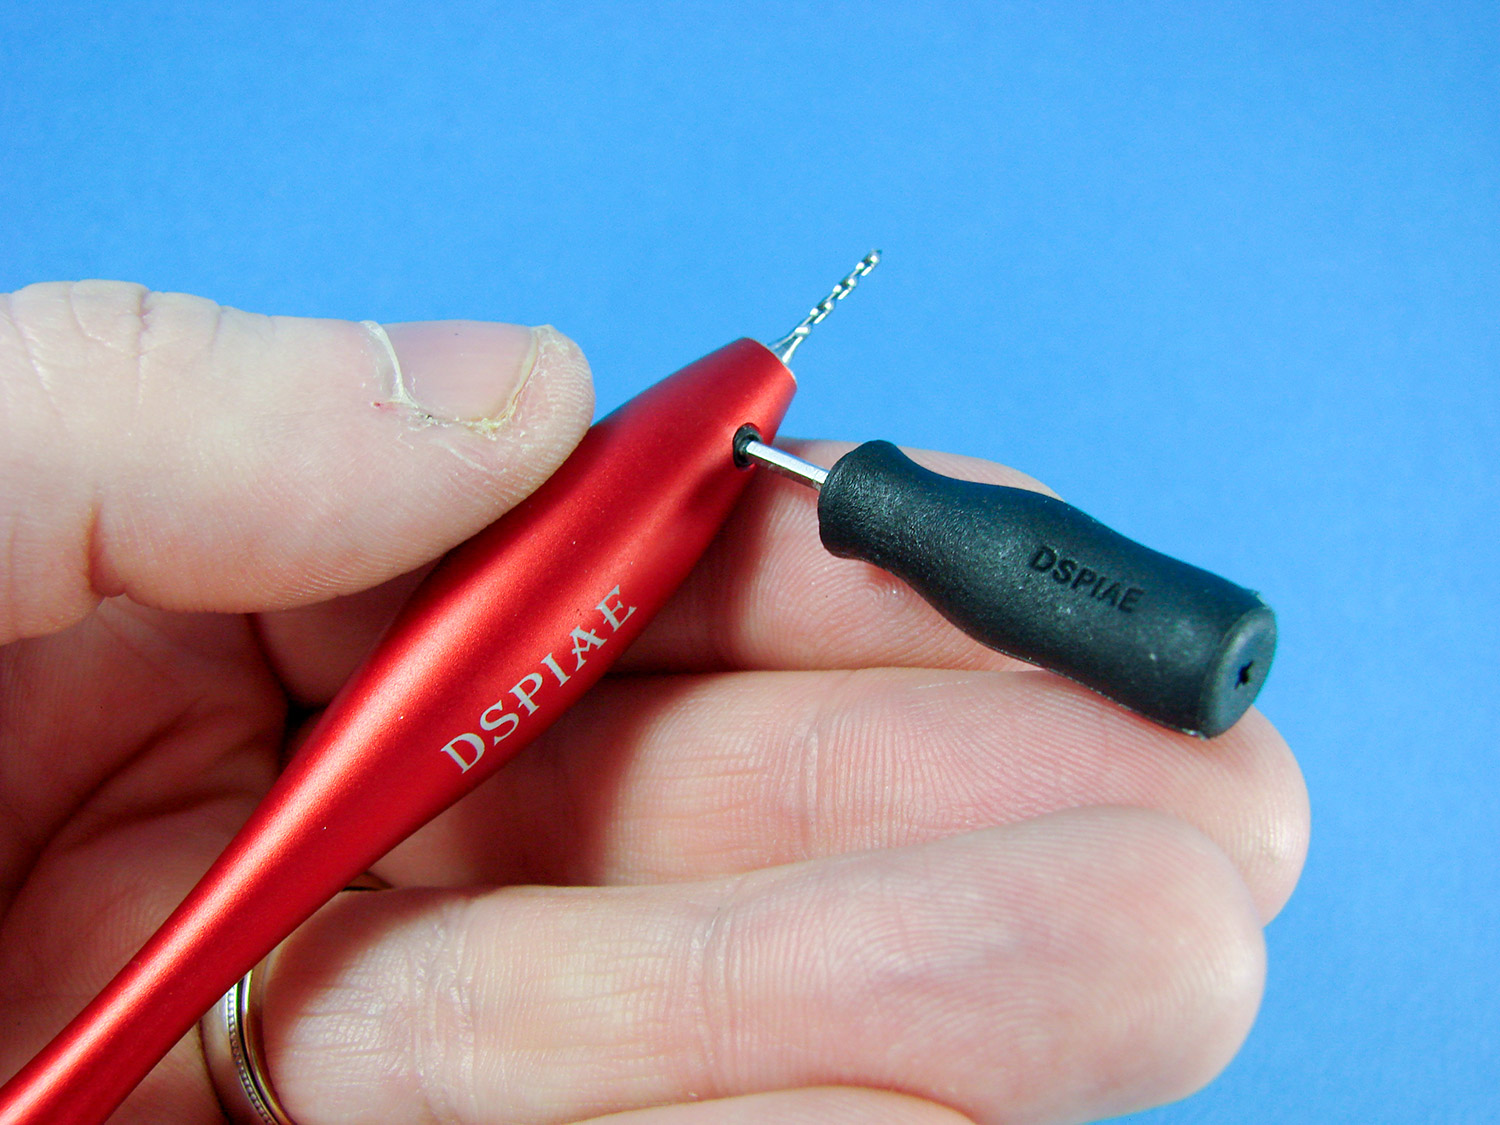
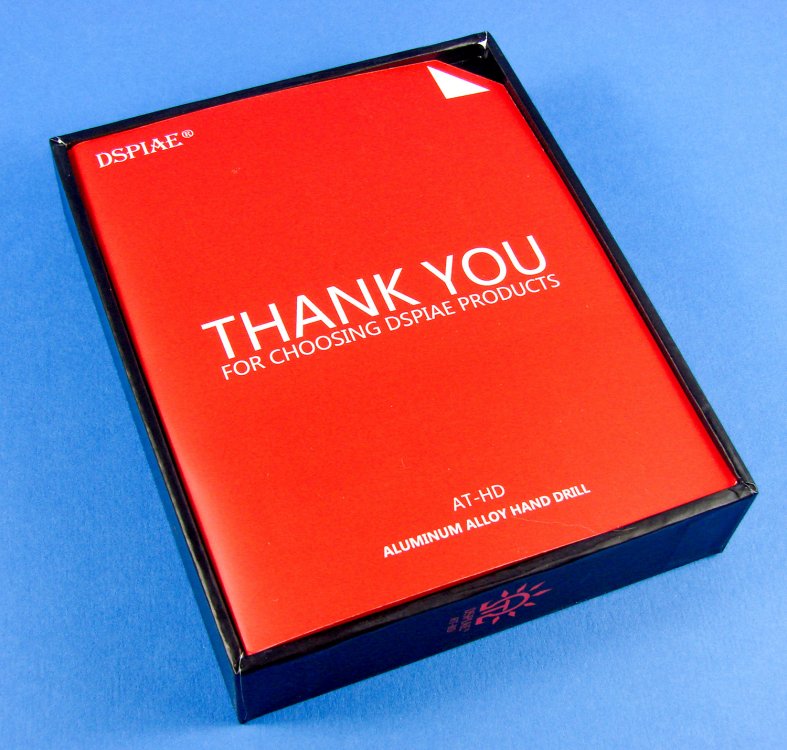
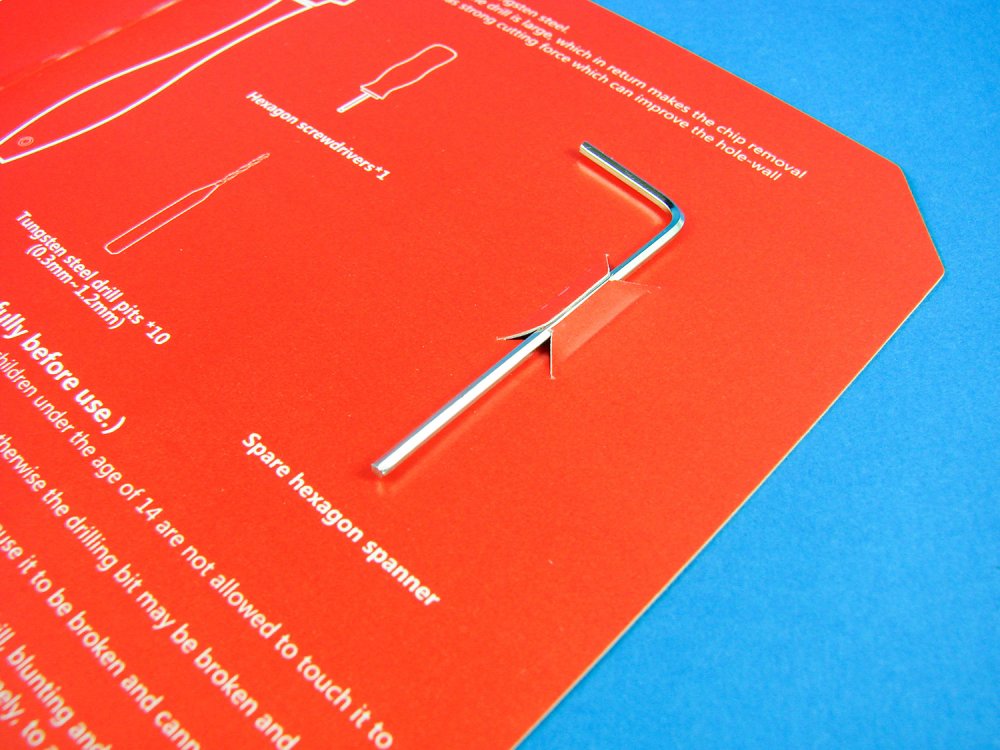
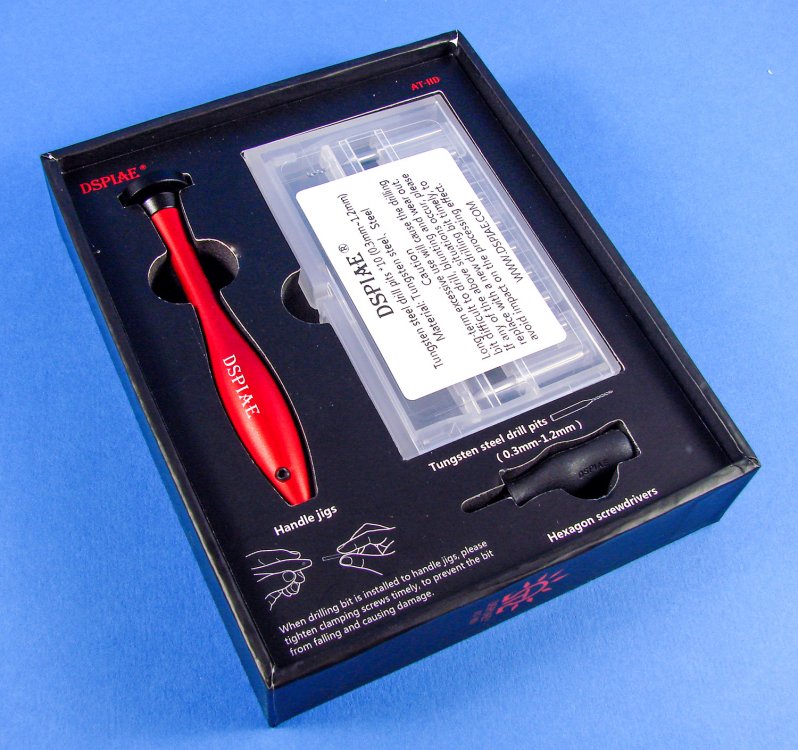
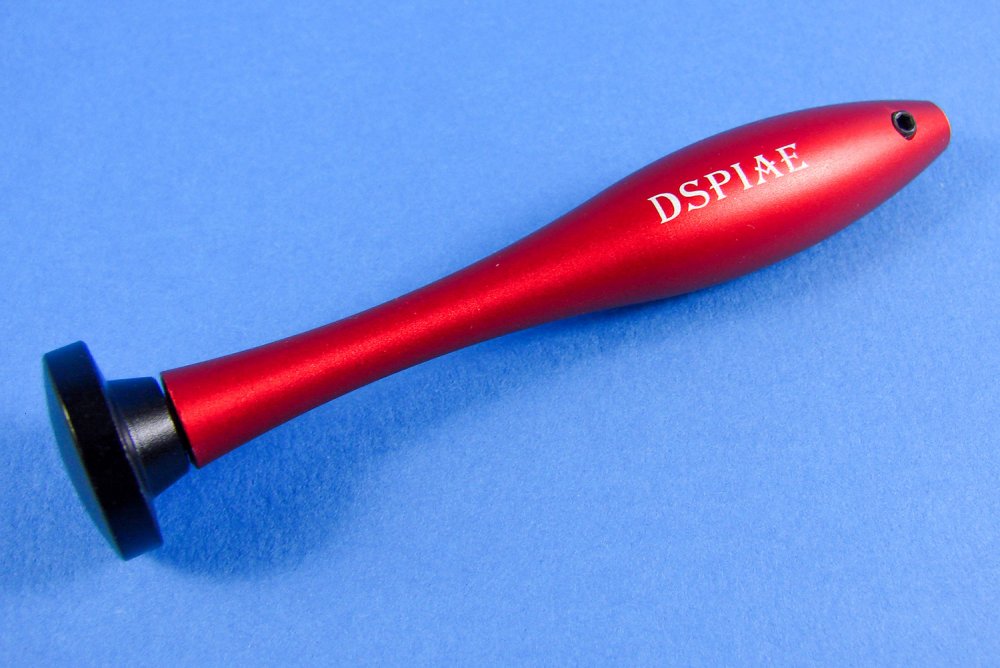
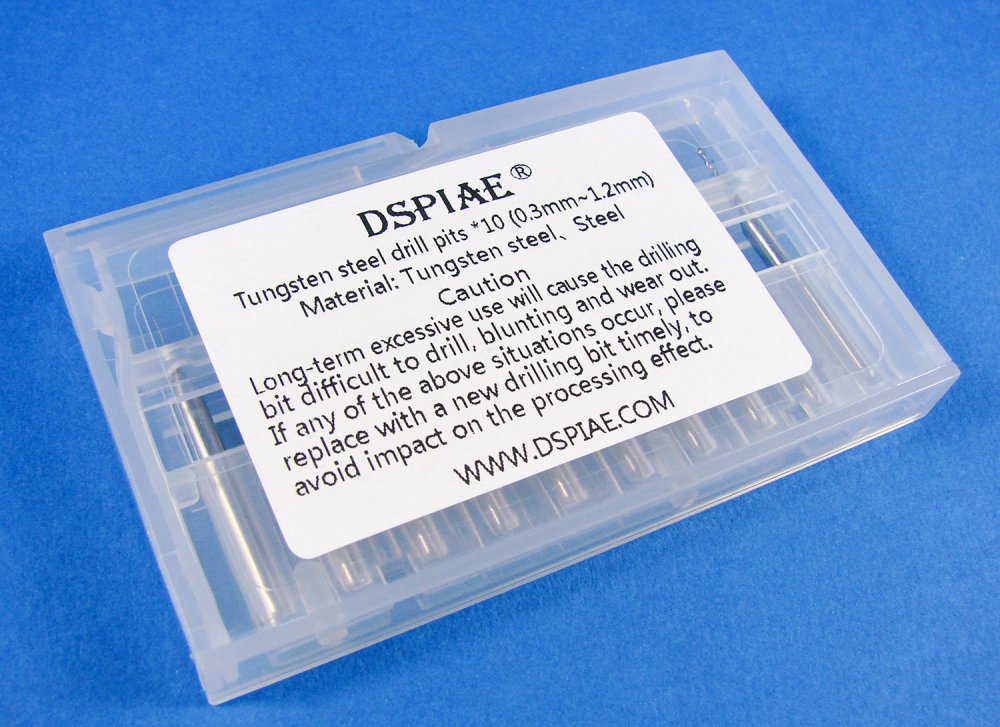
Aluminium Alloy Hand Drill DSPIAE Catalogue # AT-HD Available from Breveco Modelling for €22.50 If you’ve never heard of the DSPIAE and their excellent but small (at the moment) range of modelling tools, then you really should acquaint yourself with them. In recent months, we have taken a look at their Stepless Adjustment Circle Cutter, Single Blade Nipper 2.0 and Craft Tools Rack , and I now use these regularly over other tools that I’ve been using for years. As with the previous DSPIAE tool, this new one I look at today has been sent to me by those kind folks at Breveco Modelling in The Netherlands (hi Evert and Corien!). This time, DSPIAE has chosen to focus its innovation onto a new hand drill set. I have several pin-vices in my tool armoury, some far better than others, so I was looking forward to seeing how this new release fared. The first thing that you notice with this particular brand of tool is the heavy, bomb-proof and amazingly high-quality packaging with some quite bizarre but original artwork. The inspiration must’ve been something Inca or Aztec. It’s certainly very eye-catching. On the side of the box is a code to certify the tool is a genuine DSPIAE product. To open the box, you push the side of the package to reveal a product tray within. A red insert welcomes you to your purchase with a nice THANK YOU! Lifting this insert out and opening it up reveals a set of instructions for the drill, but I doubt you’ll actually need them! There is also a spare Allen/hex key for tightening up your chosen drill but in the hand drill pin-vice. At this point you may ask why this isn’t a twist and lock affair, and I can’t answer that. Only DSPIAE must have the reasoning for that. It’s certainly the first pin-vice I have with such a lock method. Lifting out the insert reveals the rather elegant tool, plus a set of tungsten steel drill bits in their own lockable plastic case. Lastly, a small hex screwdriver for locking the aforementioned drill bits into the pin-vice. The shape of the pin-vice is also unique. I was a little sceptical as to how it would feel in the hand, with its fluted appearance, but was pleasantly surprised that it was actually very comfortable. You will note the black plastic stop on the top of the tool, that sits in the palm of your hand. This is fixed to the aluminium body by means of a bearing, so it rotates easily and prevents those blisters that can result from hours of repetitive drilling work. The finish of the tool is also excellent, with red anodising and the DSPIAE name. Now, when it comes to attaching the drill bit, it’s quite simple. Your chosen bit plugs into the end and the small grub screw is used to tighten and lock it into place. As I’ve said, this is quite an unusual approach where the twist and lock method is usually the one we see. This set comes with a nifty pack of tungsten steel drill bits in a clear plastic case. Be careful opening this or you’ll scatter the drill bits, and some of these are very small. There are a total of 10 drill bits, ranging from 0.3 to 1.2mm, in 0.1mm increments. I do find that these are a little stronger than some other materials used for micro-drill bits, but care will still need to be exercised. One thing of note here is that the shank of these drill bits is common to other sets on the market, meaning you can still use the sets that you may currently have. Conclusion This is a simple but high-quality tool. If you already have a pin-vice, it might be hard to justify another, but this would be a good tool to use as a primary. If you are in the market for one, and wanted a small set of drill bits too, then again, this is a very good option. The quality of DSPIAE tools is beyond doubt, and I’m becoming a bit of a junkie for their range, which is expanding nicely. Check them out at Breveco Modelling. Highly recommended My sincere thanks to Breveco Modelling for the review sample seen here. To purchase directly, click THIS link.


-
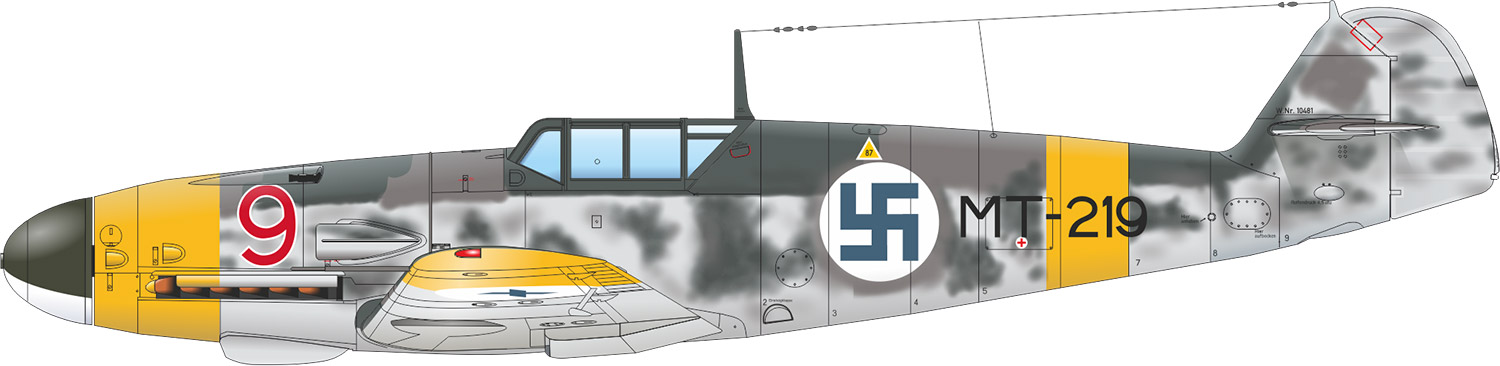
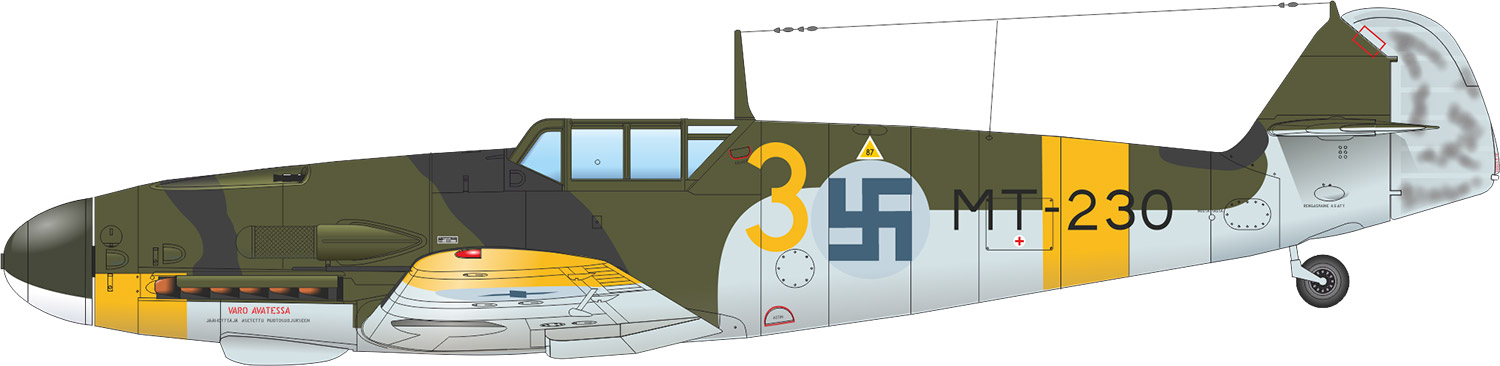
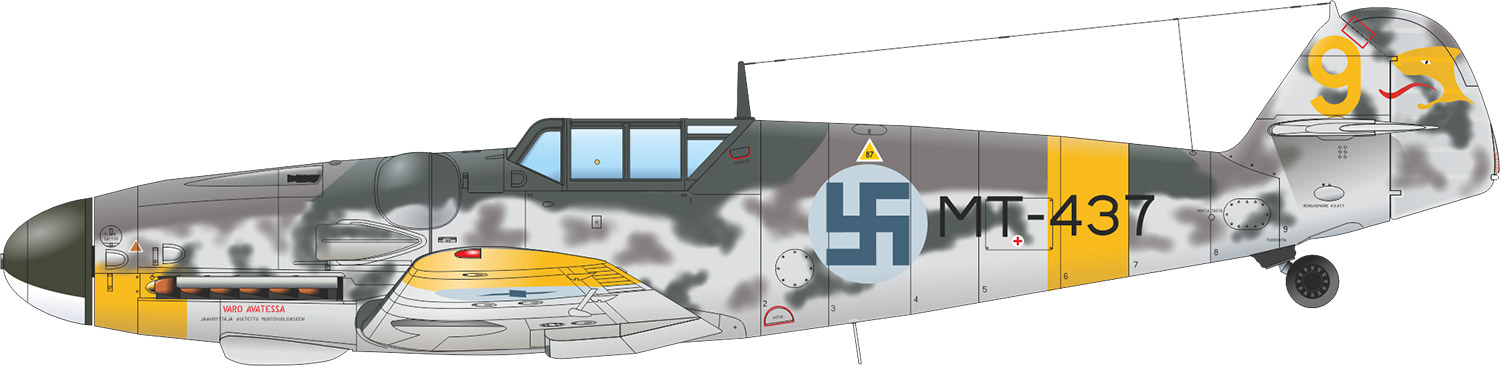
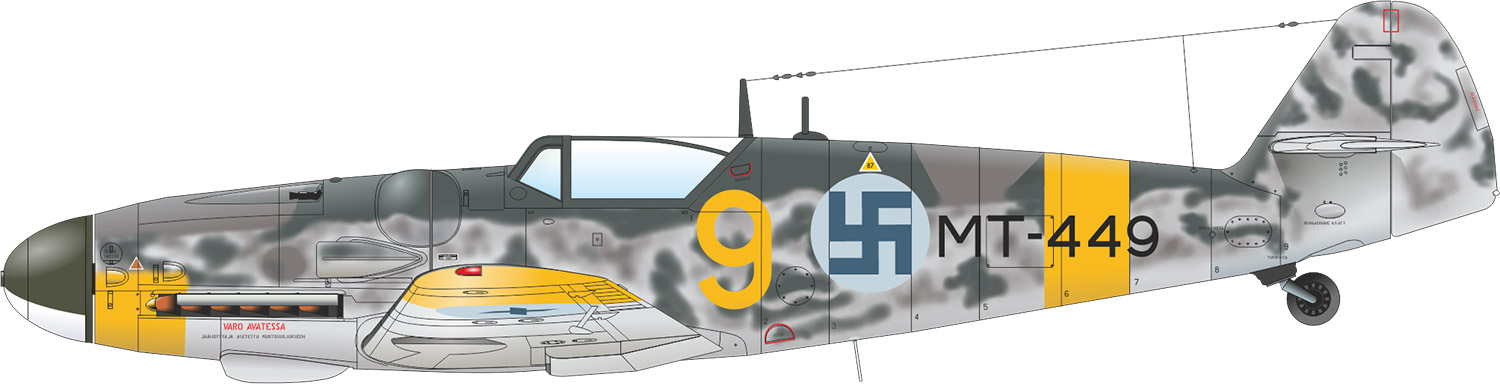
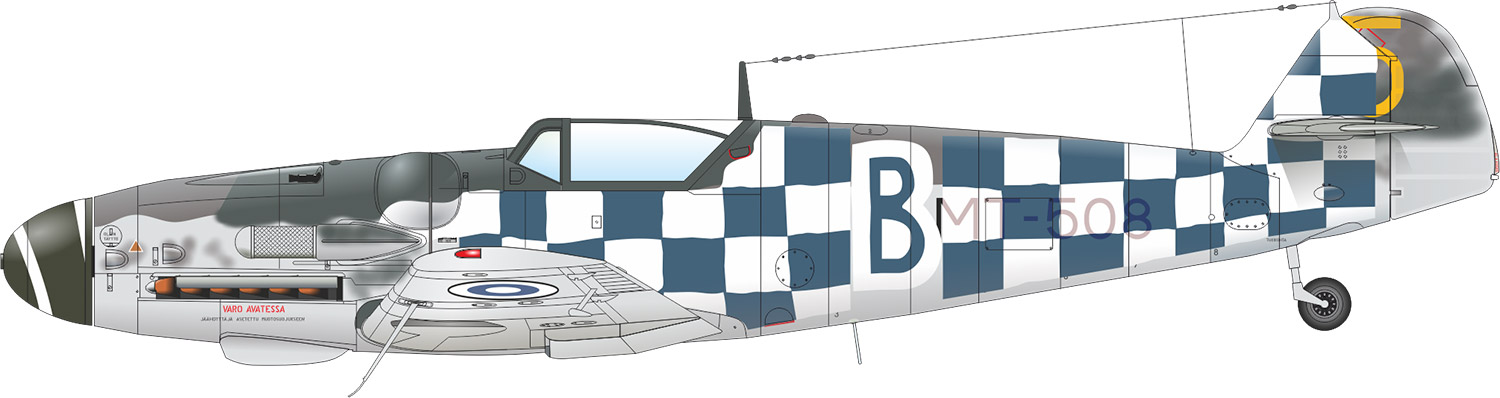
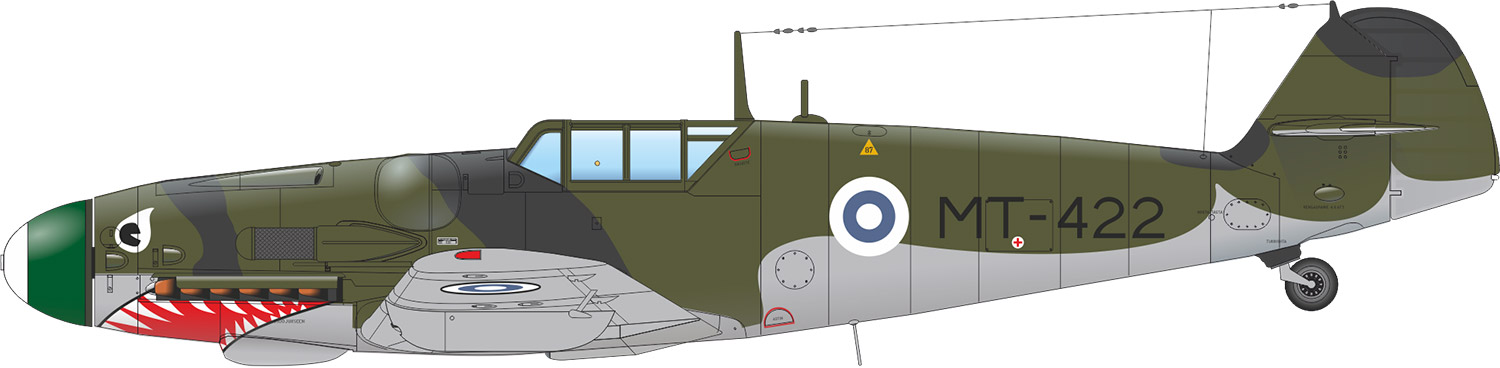
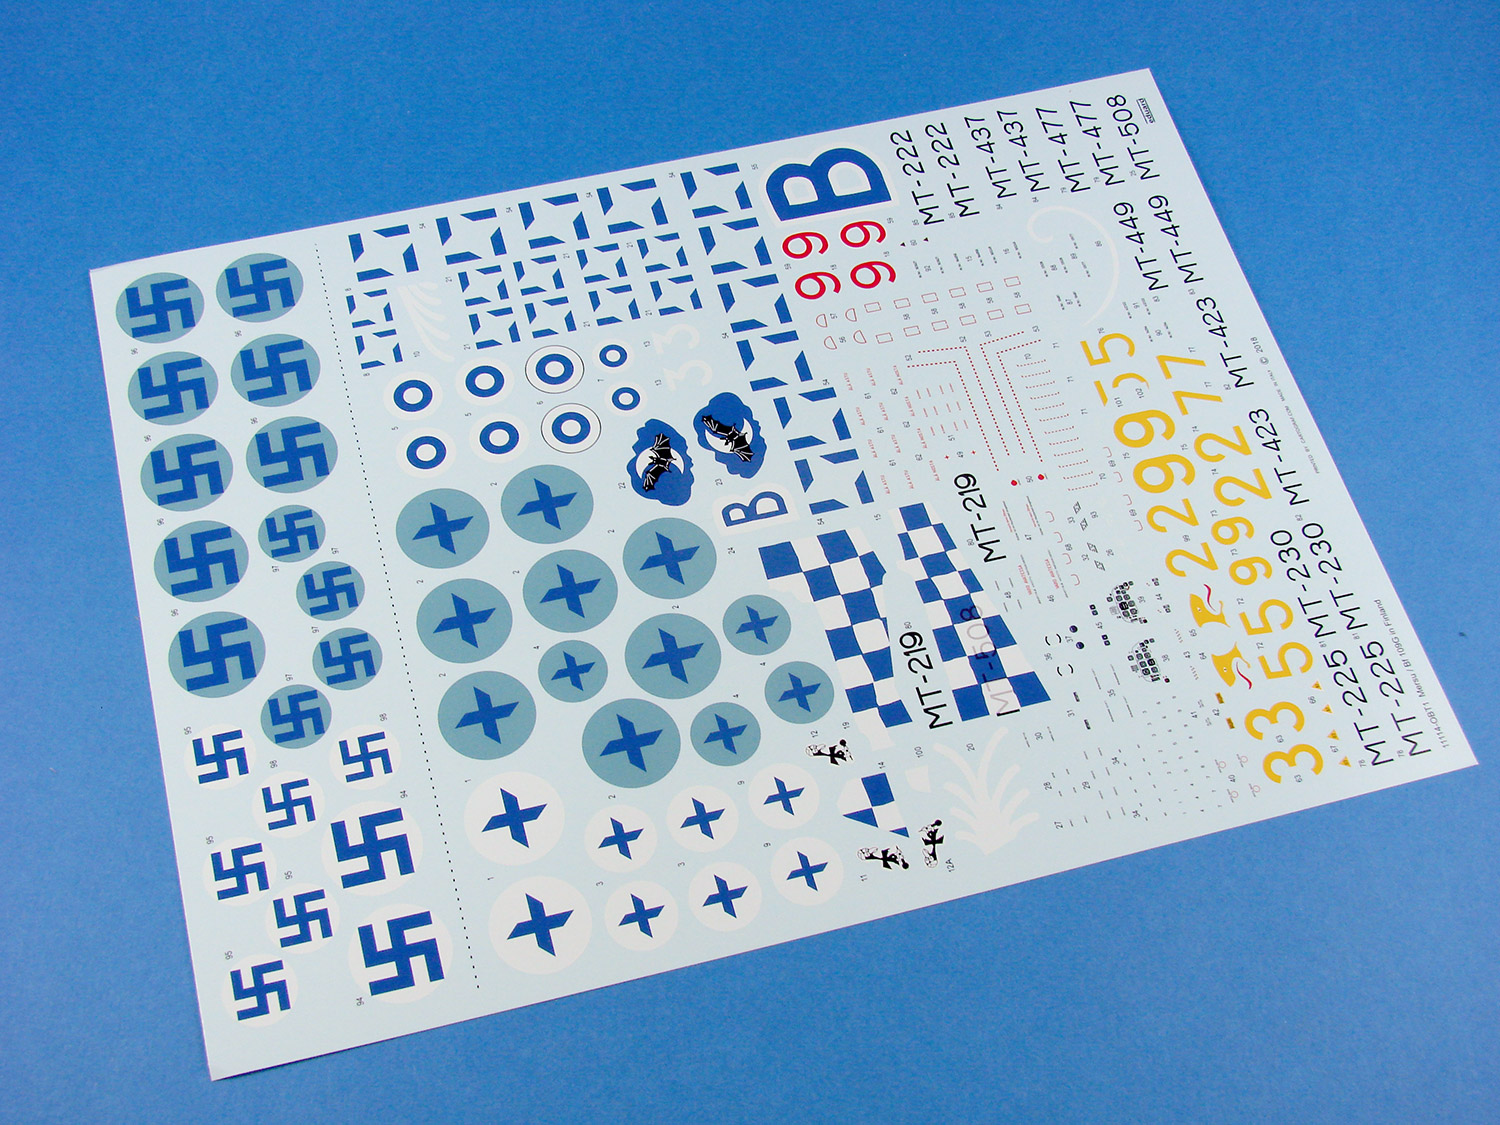
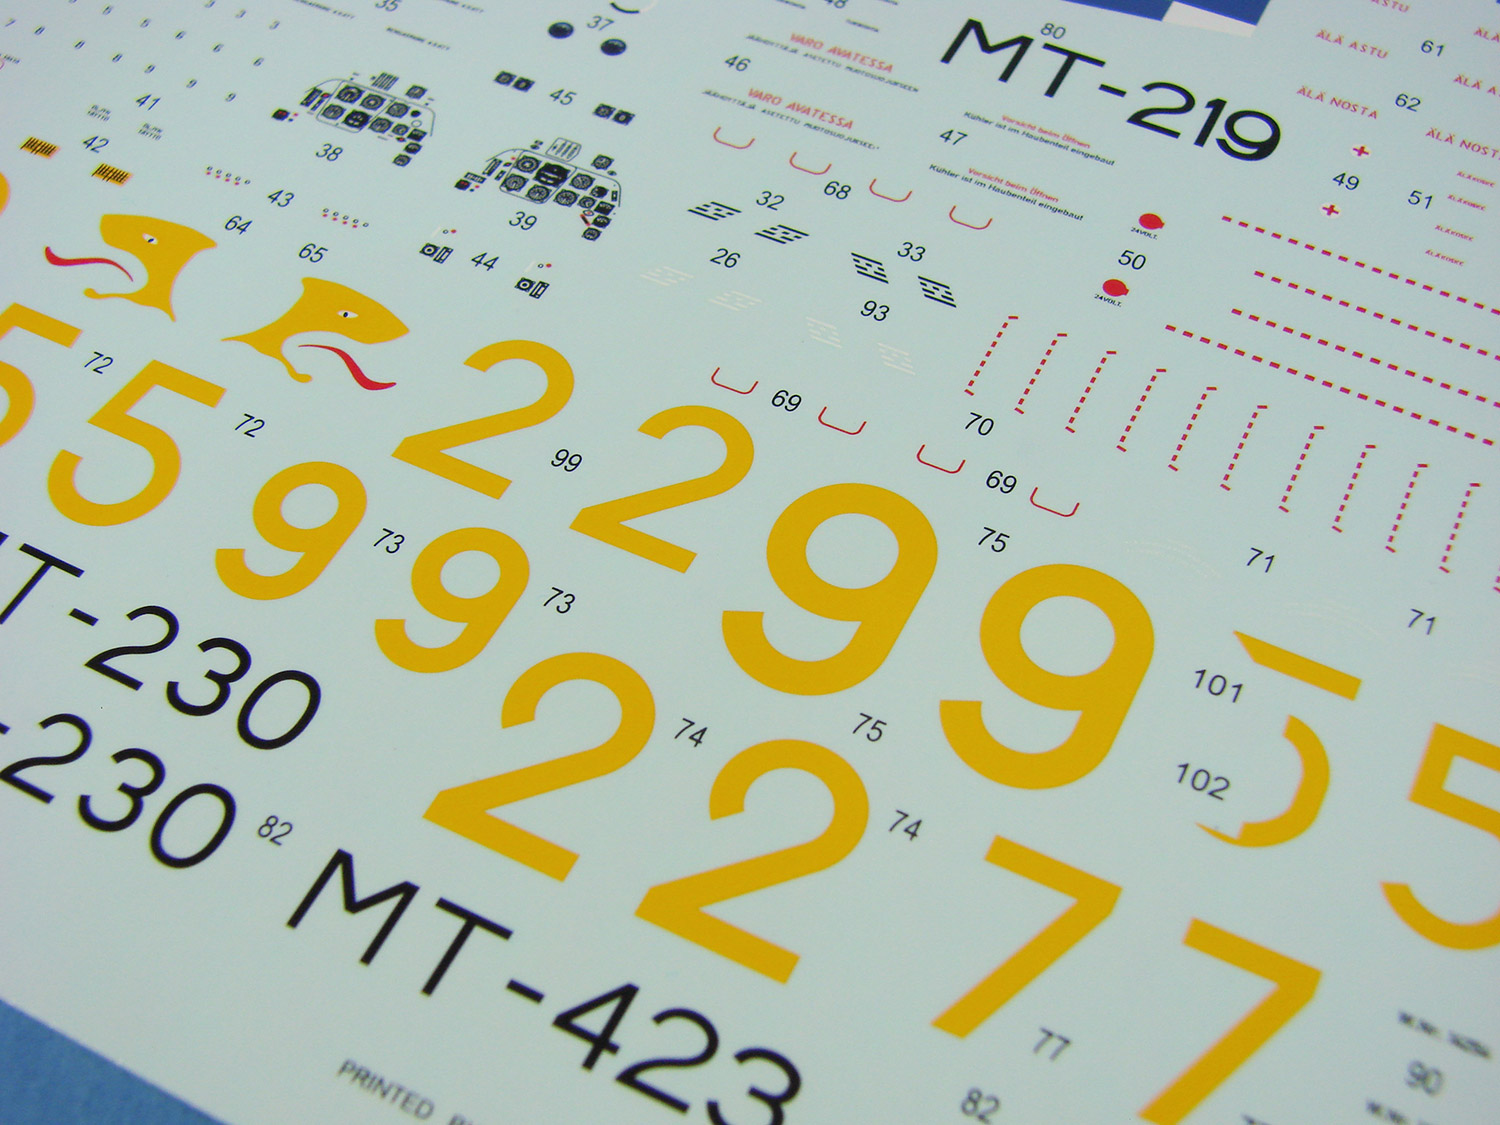
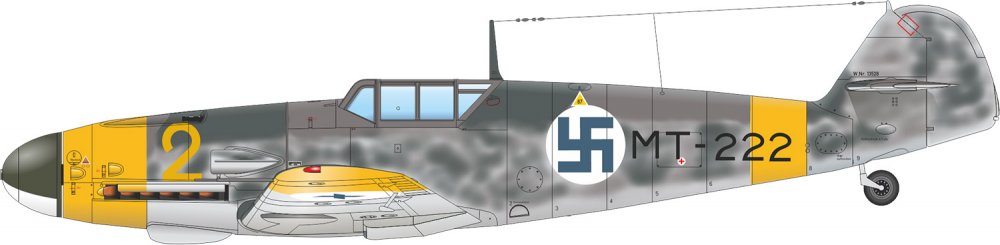
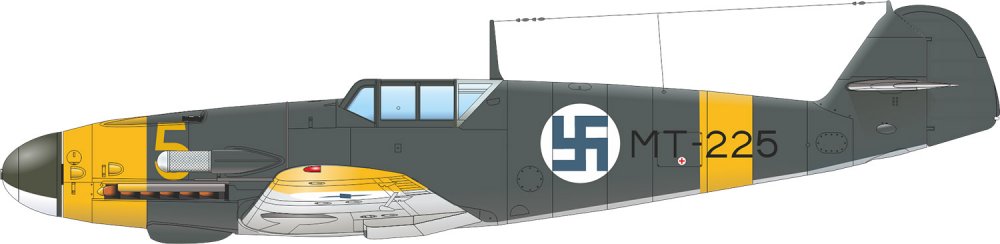
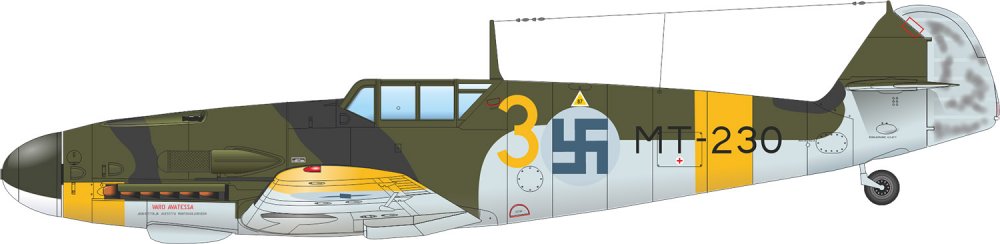
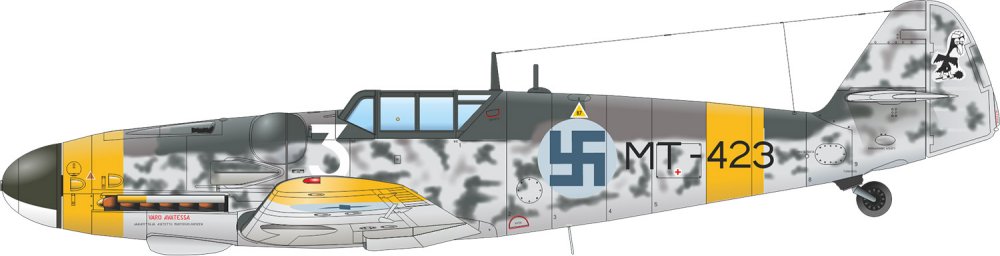
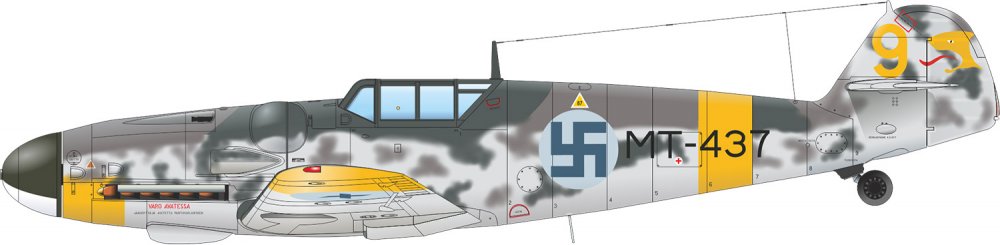
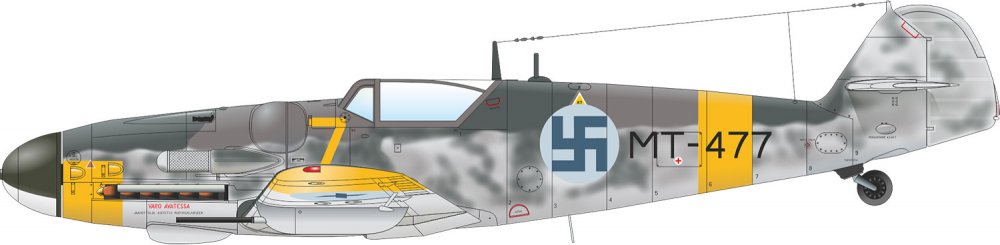
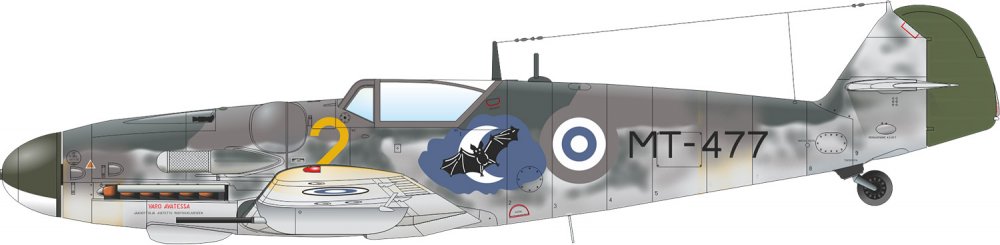
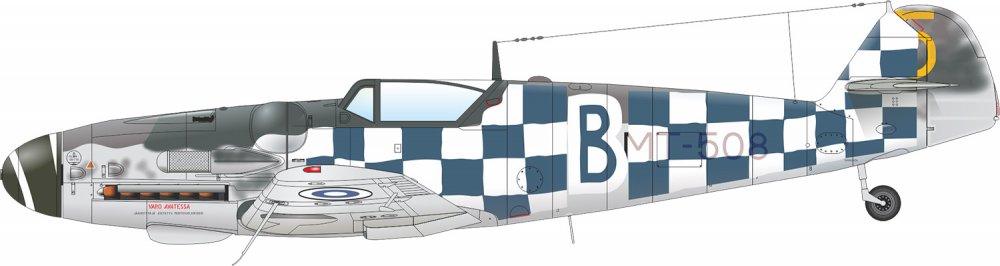
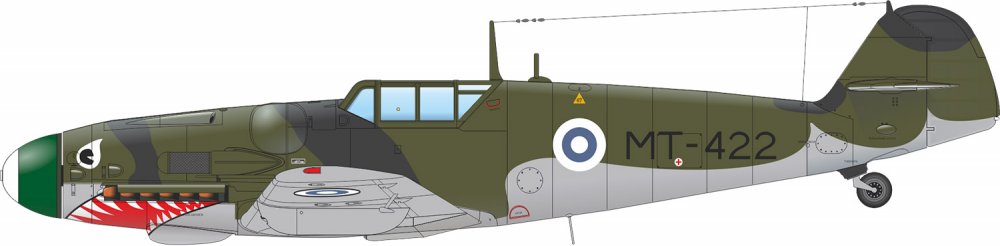
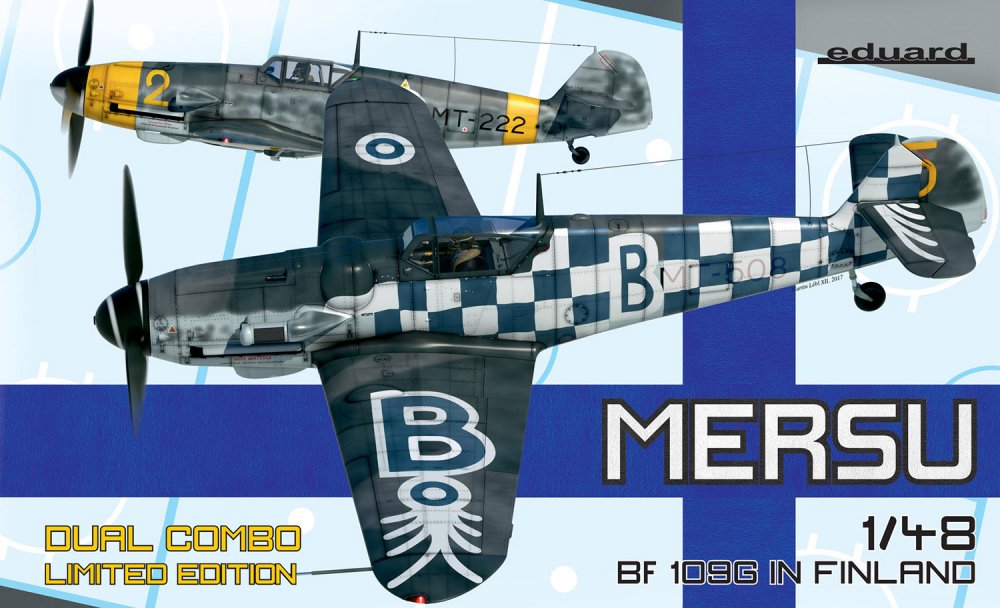
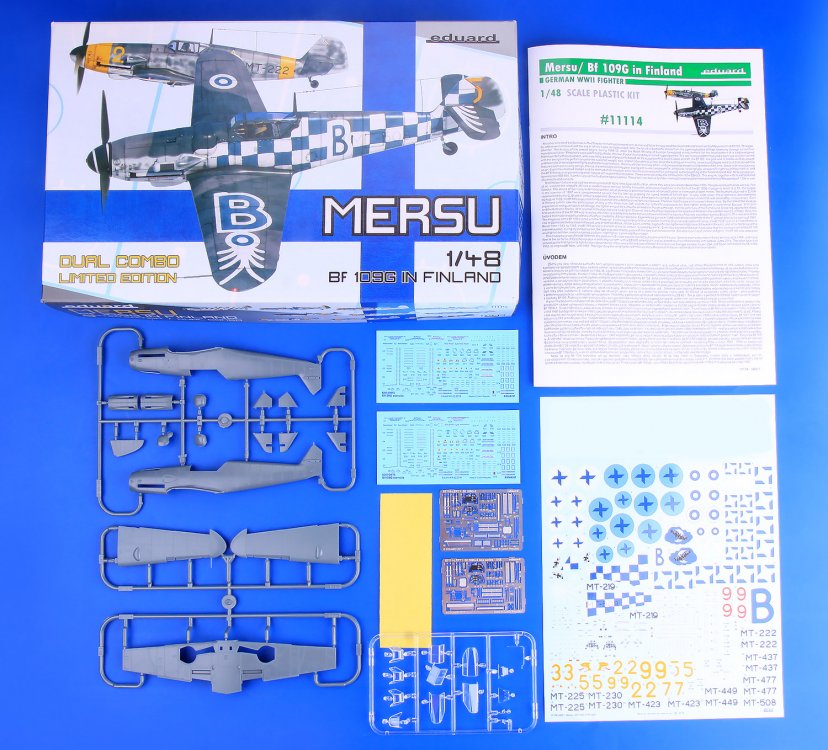
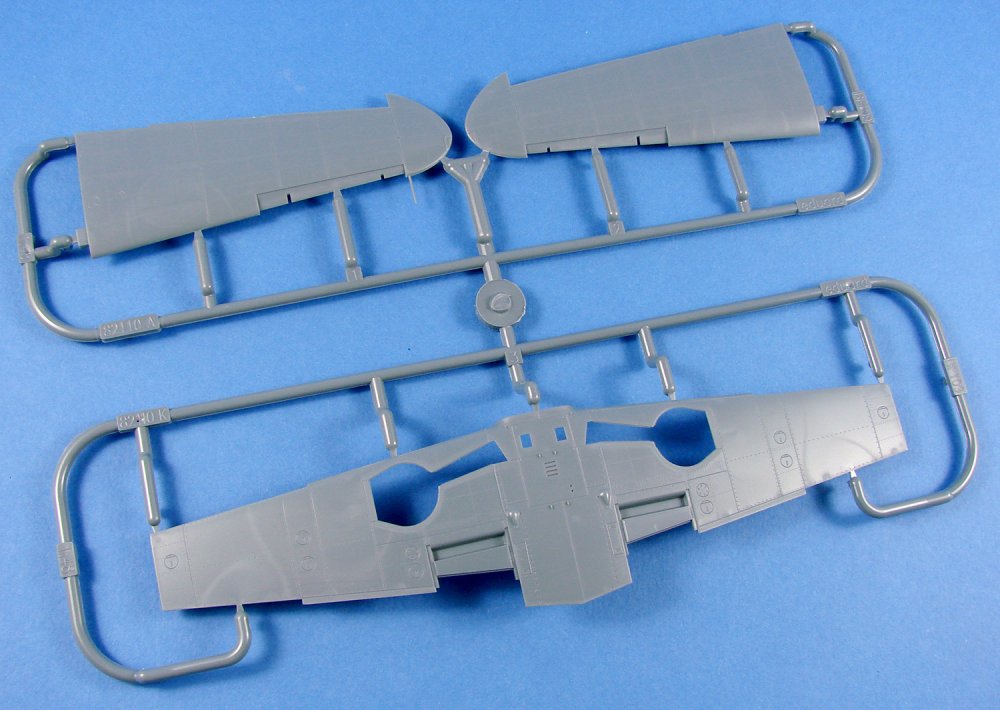
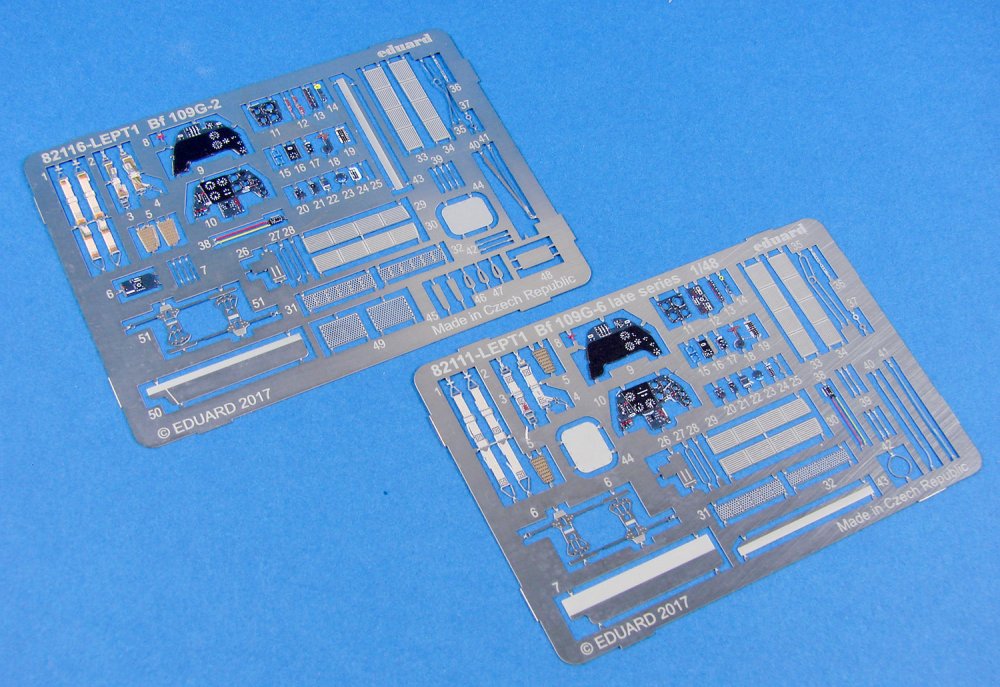
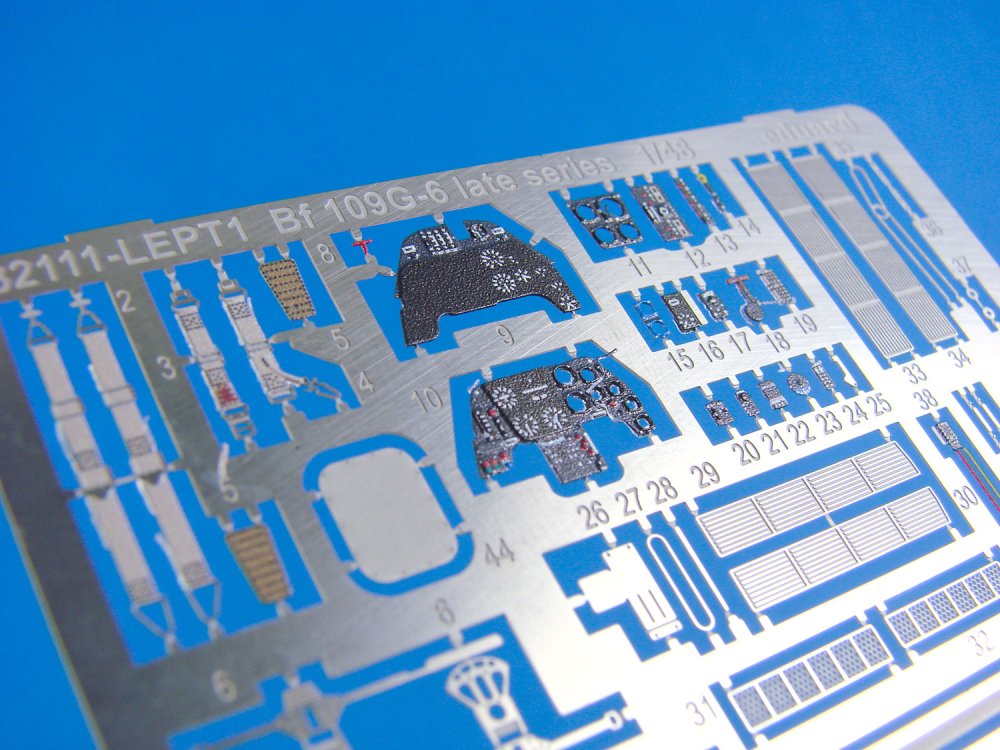
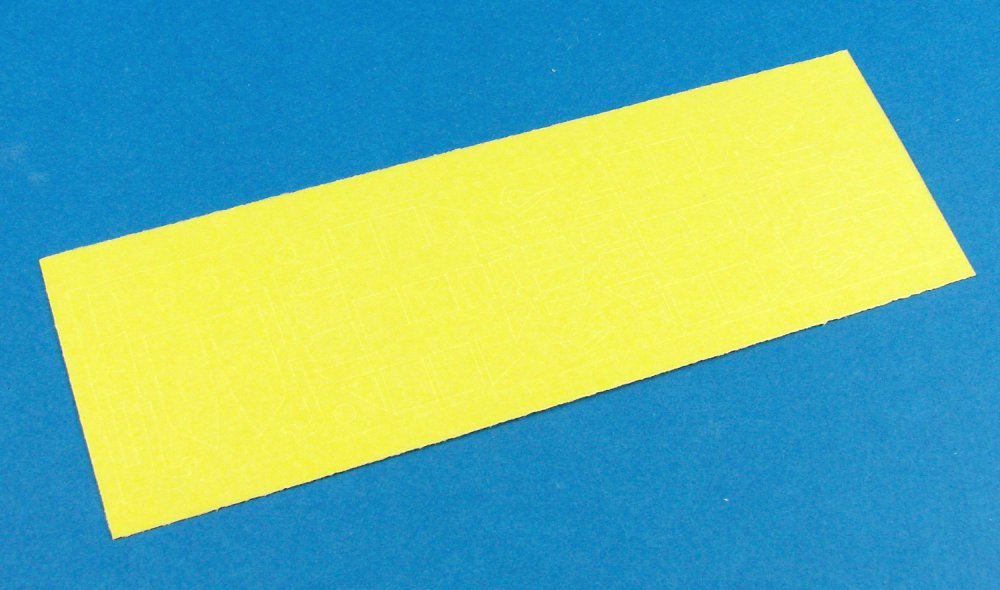
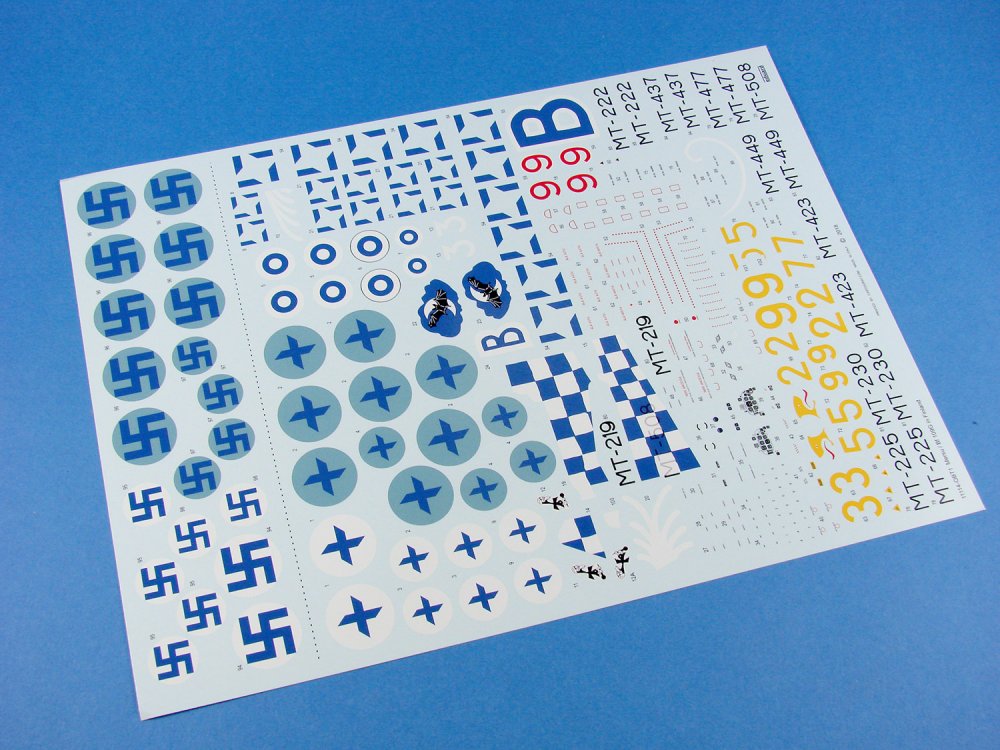
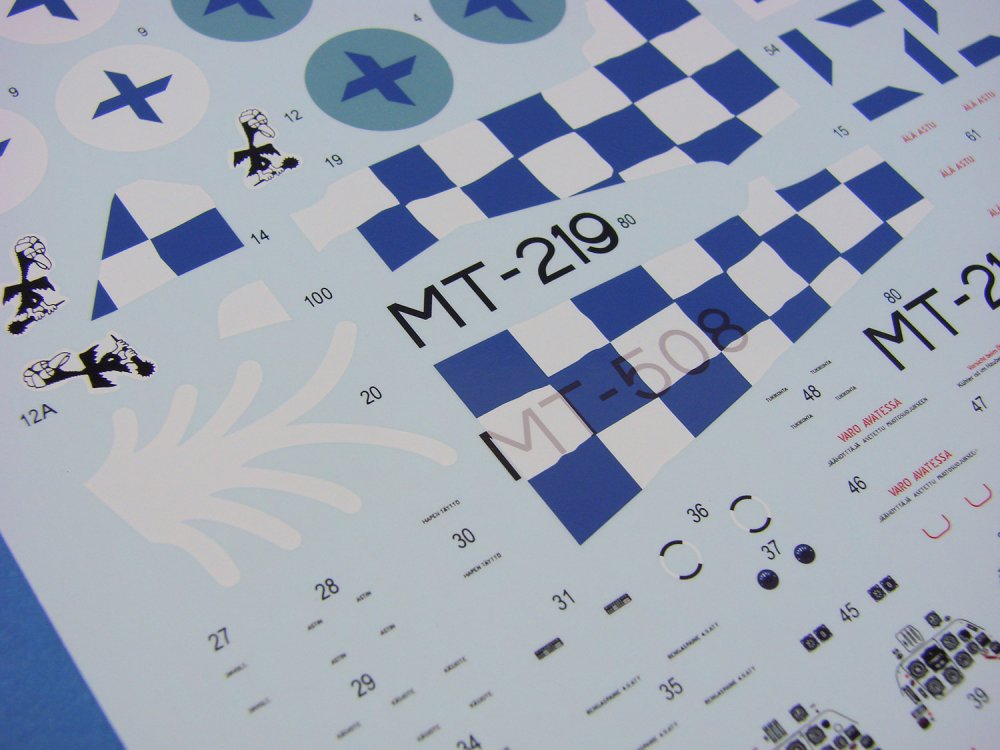
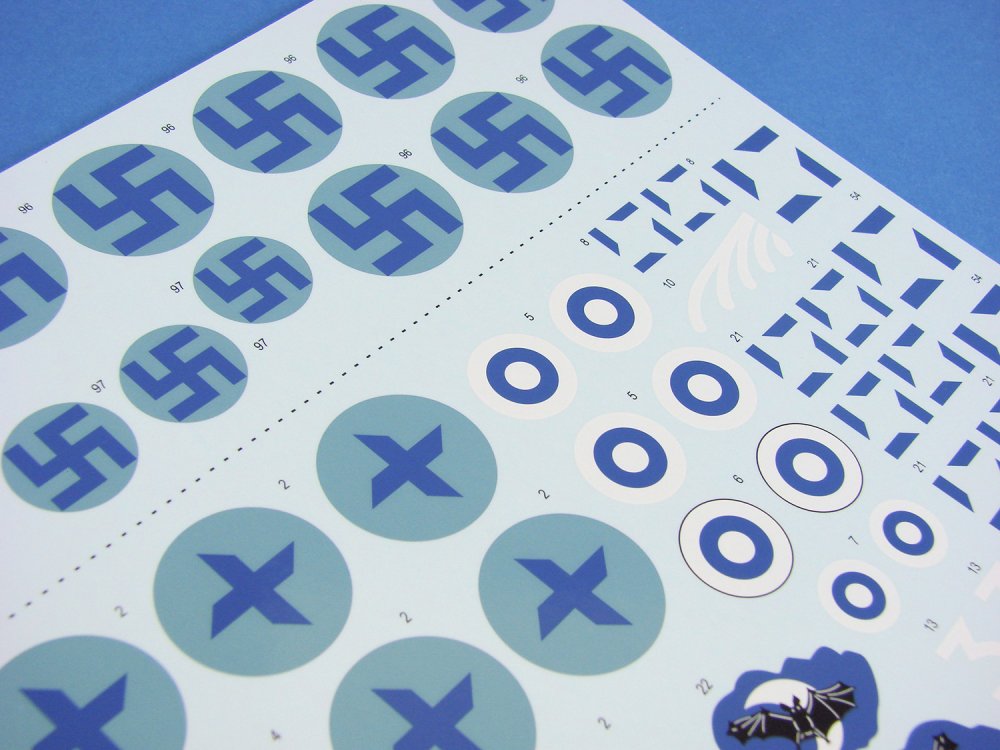
1/48 ‘Mersu’ - Bf 109G in Finland Dual Combo Eduard Catalogue # 11114 Available from Eduard for 67,45€ The Messerschmitt Bf 109 is a German World War II fighter aircraft that was the backbone of the Luftwaffe's fighter force. The Bf 109 first saw operational service in 1937 during the Spanish Civil War and was still in service at the dawn of the jet age at the end of World War II in 1945. It was one of the most advanced fighters of the era, including such features as all-metal monocoque construction, a closed canopy, and retractable landing gear. It was powered by a liquid-cooled, inverted-V12 aero engine. From the end of 1941, the Bf 109 was steadily being supplemented by the Focke-Wulf Fw 190. Whilst the 109 was conceived as an interceptor, later models were developed to fulfil multiple tasks, serving as bomber escort, fighter-bomber, day-, night-, all-weather fighter, ground-attack aircraft, and as reconnaissance aircraft. It was supplied to and operated by several states during World War II and served with several countries for many years after the war. The Bf 109 is the most produced fighter aircraft in history, with a total of 33,984 airframes produced from 1936 up to April 1945. Ok, it's a G-4, but...... The G series, or "Gustav", was introduced in mid-1942. Its initial variants (G-1 through G-4) differed only in minor details from the Bf 109F, most notably in the more powerful 1475 PS (1,455 HP) DB 605 engine. Odd-numbered variants were built as high-altitude fighters with a pressurized cockpit and GM-1 boost, while even-numbered variants were not pressurized, air superiority fighters, and fighter-bombers. Bf 109s remained in foreign service for many years after World War II. The Swiss used their Bf 109Gs well into the 1950s. The Finnish Air Force did not retire their Bf 109Gs until March 1954. Romania used its Bf 109s until 1955. The Spanish Hispanos flew even longer. Some were still in service in the late 1960s. They appeared in films (notably Battle of Britain) playing the role of Bf 109Es. Some Hispano airframes were sold to museums, which rebuilt them as Bf 109s. Edit courtesy of Wikipedia The kit Since Eduard initially announced this release, it was one that I was pretty eager to get my hands upon. I’ve always liked to build the esoteric, or where I can’t, then something which sports colours that are most definitely out of the ordinary, and Eduard’s Mersu fits that bill perfectly. Just for info, Mersu is just the nickname given to the Bf 109G by its Finnish pilots. This kit is also a Dual Combo, containing two kits, as the name suggests. For this, Eduard has supplies sprues for a G-2 and a G-6 to be built. If the schemes made you want to build two G-2 models, for example, then a set of Overtrees can be bought quite cheaply. See links at end of article for G-2 and G-6 Overtrees options, plus extra PE sets. Eduard sure know how to produce an attractive box art and this one is certainly pretty colourful. The box size seems to be more or less the same as for a single kit, so one thing you’ll notice here is the weight and little space there is in the box with the way things are packed. All of the TWELVE mid-grey sprues are packaged into two re-sealable clear sleeves, with the clear parts having their own wallets to protect them. In the bottom of the box you will find TWO PE frets (one for G-2 and one for G-6), a single, large Cartograf-printed decal sheet, and a glossy 32-page A4 instruction manual. In this Limited Edition release, there are no resin parts provided. If you want to go that route, Eduard have just about everything to cater to your very whim. The instruction manual takes each of the two 109G variants in turn so that there is no confusion between the two sub-types. There are a small number of variations in the sub-types themselves without over-complicating things any more than is needed. When Eduard re-launched their G-6 kit in 2016, they did it with more than the obvious scale-correcting revisions. This time the wingtips were moulded as part of the upper wing panels instead of being a separate component. The pitot, however, is still moulded to the wingtip. Care will be needed when handling the model during construction. Externally, the wings have some beautifully rendered detail with thin, sharp and even panel lines, rivets and port access details etc. The rivets themselves look good to the eye and don’t look over-emphasized. Slats are separate parts, as are the landing flaps and ailerons. Recesses are moulded into the lower wings in order to accommodate the radiator intake grilles. For the G-2 machine, no upper wing blisters exist, but correctly on the G-6 version, the small kidney-like bulges are included and look very good in shape and size to my own reference. On all control surfaces (ailerons, elevators and rudder) the fabric and tape depiction is quite measured in appearance. All of these parts are also moulded as single pieces, which makes sense in this scale, with trailing edges being suitably thin. Of course, the real differences you will see between the two sub-types are in the appearance of the fuselage, and Eduard supply one fuselage for each of those types. This of course means that you can’t build two G-2 or two G-6 models. You will need those Overtrees I was telling you about. The G-2 fuselage of course doesn’t have the characteristic gun cowl bulges that the G-6 had, and of course, the G-2 didn’t have the tall wooden fin and rudder ensemble, as evidenced on the sprue (despite there being parts for the latter moulded here). The G-6 fuselage halves, as well as recesses to add the bulged cowl parts, also has a cut-down fin which can accommodate both the early and late fin versions, plus the associated rudder option too. Another change externally is that the G-6 has the upper cowl moulded separately whereas the G-2 simply has the gun troughs that install from within the fuselage. Both kits have separate exhausts which must be installed from within, and there are two exhaust options; one with and without flash plates. If you wish to fit exhausts with a PE plate, then that options is available. As with the wings, the exterior of the fuselage is rendered with superbly fine panel lines, port access, fasteners and rivets. The wing root is atypical ‘G’ minus the small knuckle joint bulge that Eduard erroneously added to their now scrapped 2014 G-6 release. There are two supercharger intake options, depending on which machine you will build. Although Eduard do produce a superb resin cockpit for the G-6, there isn’t one yet available for the G-2. This really doesn’t matter though as the stock parts more than make the grade, with what builds up into a busy and complete pilot’s office. The kit parts include a clear fuel flow line and pretty complete sidewall and cockpit floor details. With this release, however, those details are supplemented with both additional details, refined details and replacement details, including rudder pedals, and a colour-printed instrument panel amongst other parts. The PE also has a set of seatbelts which are totally omitted from the standard release. This kit is supplied with a pretty comprehensive clear sprue that contains three windscreen options, three Erla canopy options and two regular hood options and rear fixed canopy. Out of these though, two windscreen options, one standard hood and one Erla is up for use, and you’ll need to crosscheck the specific machine options for the parts you’ll need to fit. I’m quite a fan of the appearance of the Erla hoods and when I build this for Tamiya magazine, both machines will be fitted with these. I think I would quite like to have seen some resin wheels in this release as the standard kit parts aren’t as nice, nor are they weighted. Generally, the undercarriage parts are excellent in depiction with nicely defined main gear struts with integral compression scissor. A brake line should ideally be added for extra realism. Should you buy the Brassin alternative, this detail is added, and supplied with resin gear doors, but I do think the standard kit parts should suffice under normal circumstances. There are a lot of parts on these sprues that aren’t scheduled for use with this release, including propeller options, centreline bomb racks and munitions, cowl bulges, rudders, fuel tanks etc, but the instructions will clearly show you what can be consigned to the spares box. Sprue A & K Sprue H (x2) Sprue I (x2) Sprue J (x2) Sprue N & K (x2) Sprue S Sprue T Photo Etch Two frets are included here, with numerous colour-printed parts. Whilst these mostly concern the cockpit with the instrument panel, console details, seatbelts and rudder pedals etc. other parts are included for external details, such as panel detail and radiator grilles. Production is excellent, as we have come to expect from one of our hobby’s premier aftermarket manufacturers. Masks A single sheet here contains the masks for two standard canopy versions and one Erla, as the latter was never fitted to the G-2. Masks are also provided for the tailwheel hubs, but strangely enough, not the main wheel hubs. The familiar Kabuki tape is used to produce these, and they are sharply cut, with references in the instructions as to the position of each mask. Decals A single, large sheet is provided here, and printed by Cartograf. As my version is sold in what is generally thought as the free world, swastika decals are supplied, as well as options which contain the markings in two parts, as you would expect as the sole option if you live in a country such as Germany (despite the Finnish swastika not being a symbol of a banned political party). Thanks Eduard for the extra options! This very comprehensive decal sheet contains markings for all of the TEN scheme options available here as well as stencils and cockpit decals in case you don’t wish to use the colour PE parts. All printing is first rate with nice thin inking, solid and authentic colour, minimal carrier films and perfect registration. A good example of just how good these decals are is to look at the blue and white chequers of one scheme, complete with semi-obliterated serial number. These really are excellent. The supplied schemes are: Bf 109G-2, MT-219, flown by lentomestari (Warrant Officer) Yrjö Turkka, 1/LeLv 34, Utti, Finland, June 1943 Bf 109G-2, MT-222, flown by lentomestari (Warrant Officer) Ilmari Juutilainen, 1/LeLv 34, Malmi, Finland, May 1943 Bf 109G-2, MT-225, flown by luutnantti (Lieutenant) Lauri Nissinen, 1/HLeLv 24, Suulajärvi, Finland, April 1944 Bf 109G-2, MT-230, flown by kapteeni (Captain) Jaakko Puolakkainen, 2/HLeLv 28, Värtsilä, Finland, August 1944 Bf 109G-6, MT-423, flown by ylikersantti (Staff Sergeant) Hemmo Leino, 1/HLeLv 34, Kymi, Finland, June 1944 Bf 109G-6, MT-437, flown by ylikersantti (Staff Sergeant) Leo Ahokas, 3/HLeLv 24, Lappeenranta, Finland, June 1944 Bf 109G-6, MT-449, flown by luutnantti (Lieutenant) Olavi Puro, 2/HLeLv 24, Lappeenranta, Finland, June 1944 Bf 109G-6, MT-477, flown by luutnantti (Lieutenant) Mikko Pasila, 1/HLeLv 24, Utti, Finland, September 1944 Bf 109G-6, MT-477, HLeLv 31, Utti, Finland, summer 1948 Bf 109G-6, MT-508, flown by luutnantti (Lieutenant) Arvo Arima, HLeLv 31, Air Race, Utti, Finland, June 1950 AND....if you are a member of the Bunny Fighter Club and order their special version of this kit, then you also get this great scheme! Instructions Eduard’s instructions are clear, concise, thoughtfully laid out in terms of variant assembly, and also very attractive. Starting with a potted history of the type, and then a parts map, each G version is shown is illustrated with zero ambiguity when it comes to parts options, and the modeller shouldn’t experience any confusion if following the drawings properly. Annotation is made throughout for any specifics related to the ten different aircraft. Paint references are given for Gunze Aqueous and Mr. Color paint types. The last pages of the instructions are given up to the individual colour scheme profiles and a stencil guide. Conclusion In my mind, there is little doubt that Eduard’s 1/48 Bf 109 range is just about the best you can buy, with the kits being proven in terms of accuracy and engineering. Ok, there was 109G-6-gate in 2014 when the new tool G-6 was found to be over-scale, but that was withdrawn from the market and the kit re-tooled for 2016, and we see an example of it here in the Mersu release. You’ll see many builds of the G-series online and in magazines, and they do indeed create a stunning little reproduction. Eduard is of course always looking for new angles for its kits, and the Mersu package is a stunner. Two excellent model kits and some of the more unusual schemes that the Gustav wore whilst under Finnish service. If the 109 is an interest for you then this really is a kit that you should consider adding to your stash as it won’t be around forever. If you want to make more use of the supplied decals (and why not!), then these kits are also available as Overtrees options: Extra Sprues 82116X – Bf 109G-2 Overtrees – LINK 82111X – Bf 109G-6 Overtrees – LINK Lept (PE sets) 82116-LEPT – Bf 109G-2 – LINK 82111-LEPT1 – Bf 109G-6 - LINK VERY highly recommended My sincere thanks to Eduard for providing this review kit. To purchase directly, click THIS link.


-
Any movement?
-
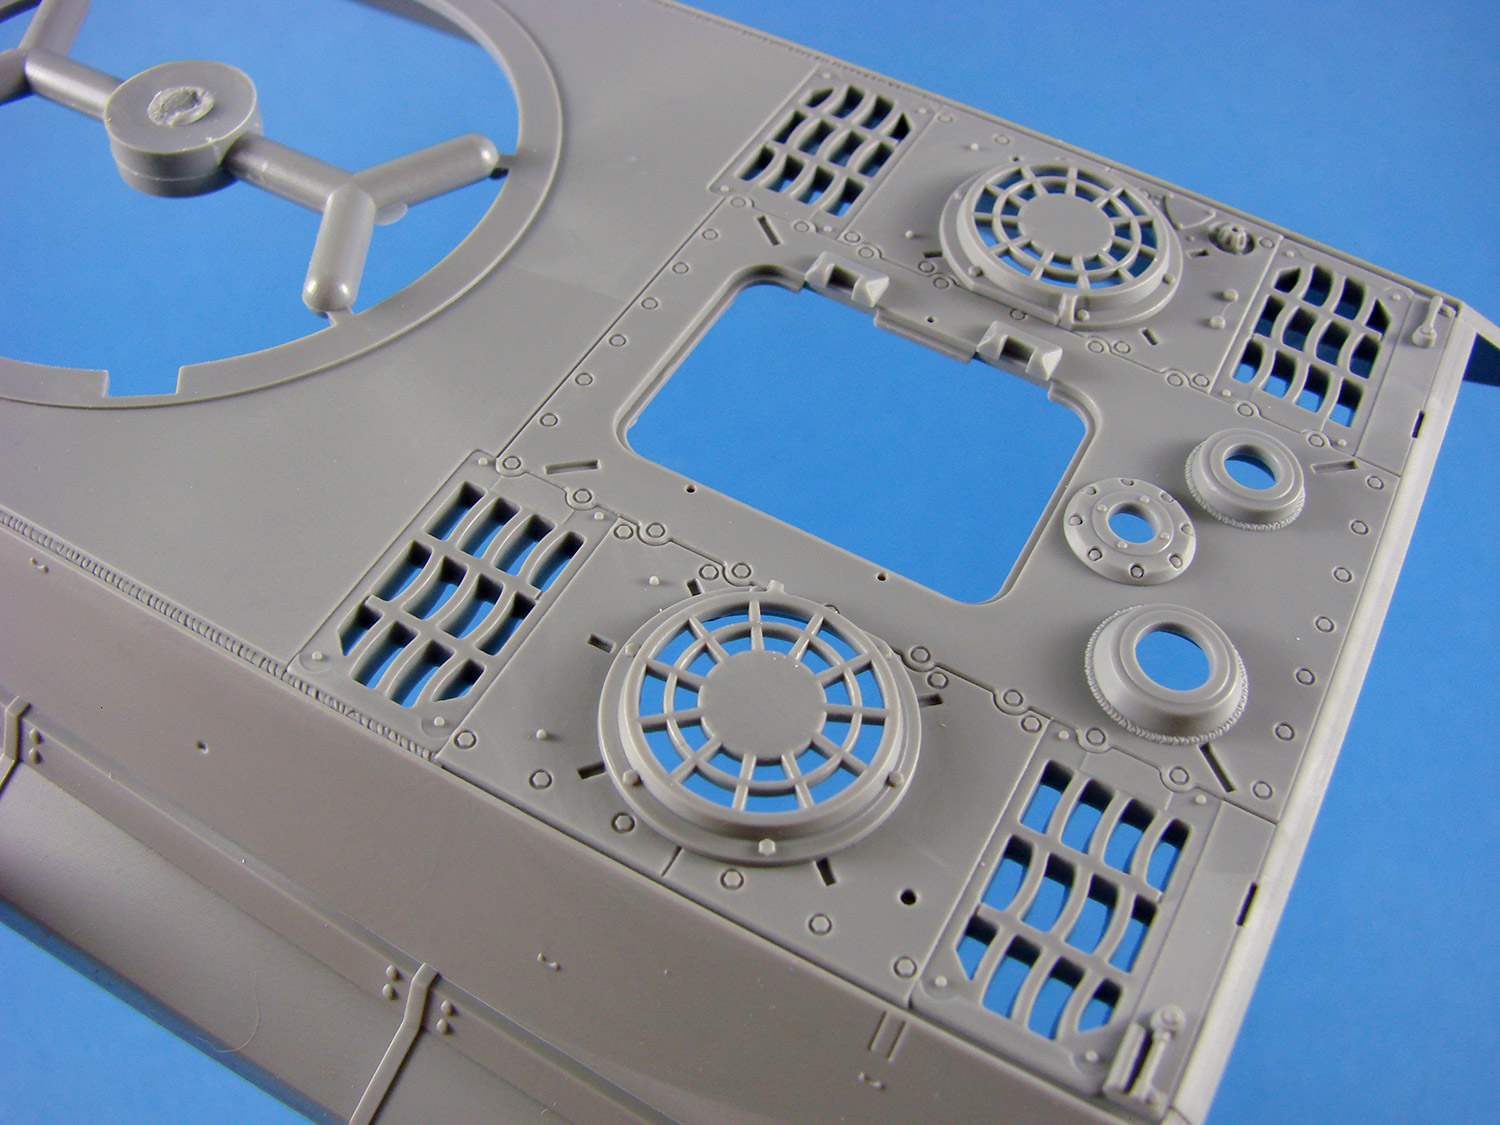
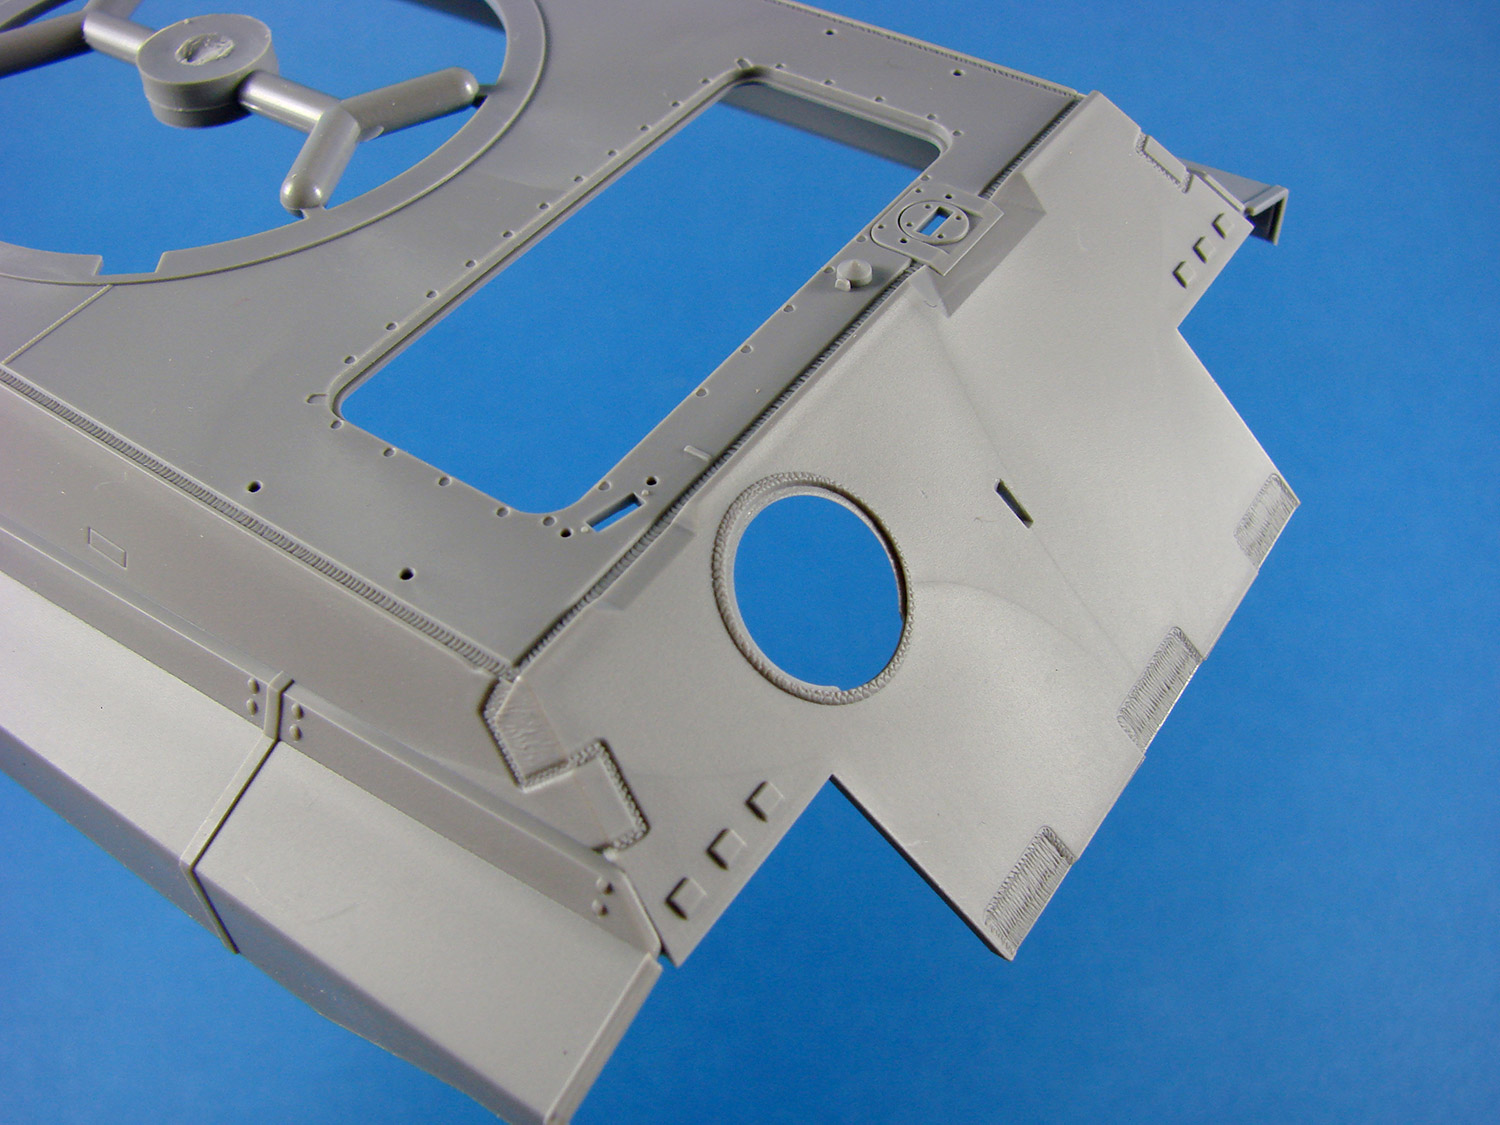
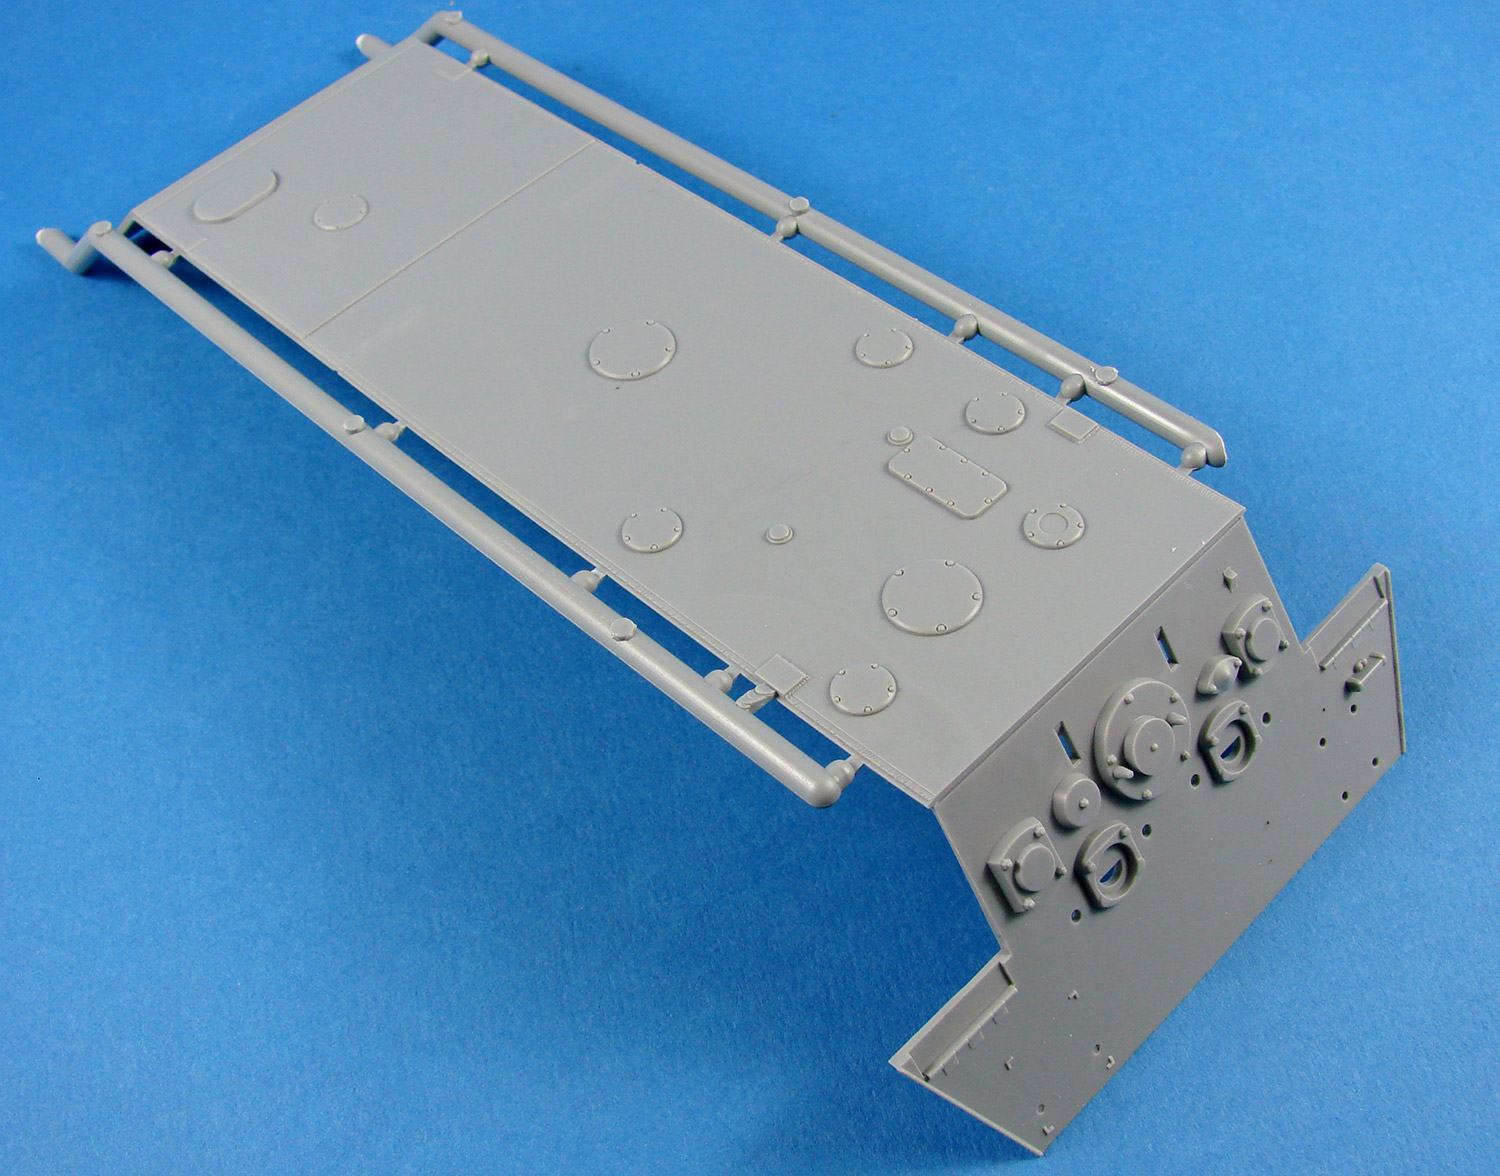
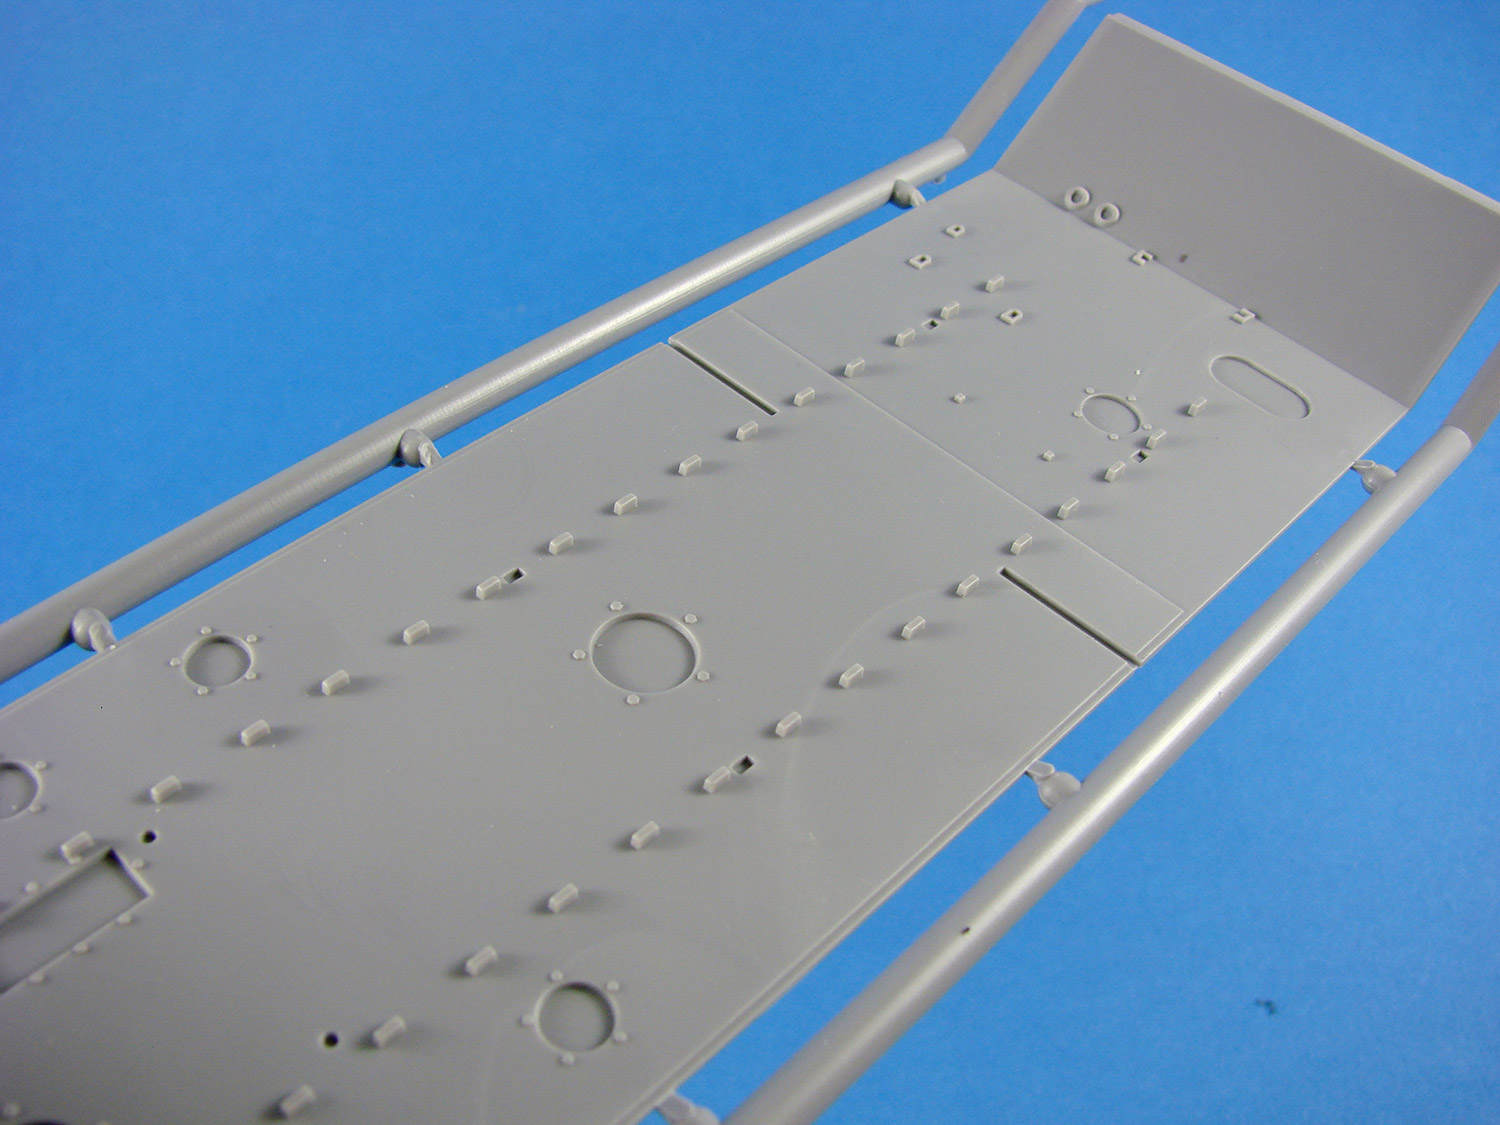
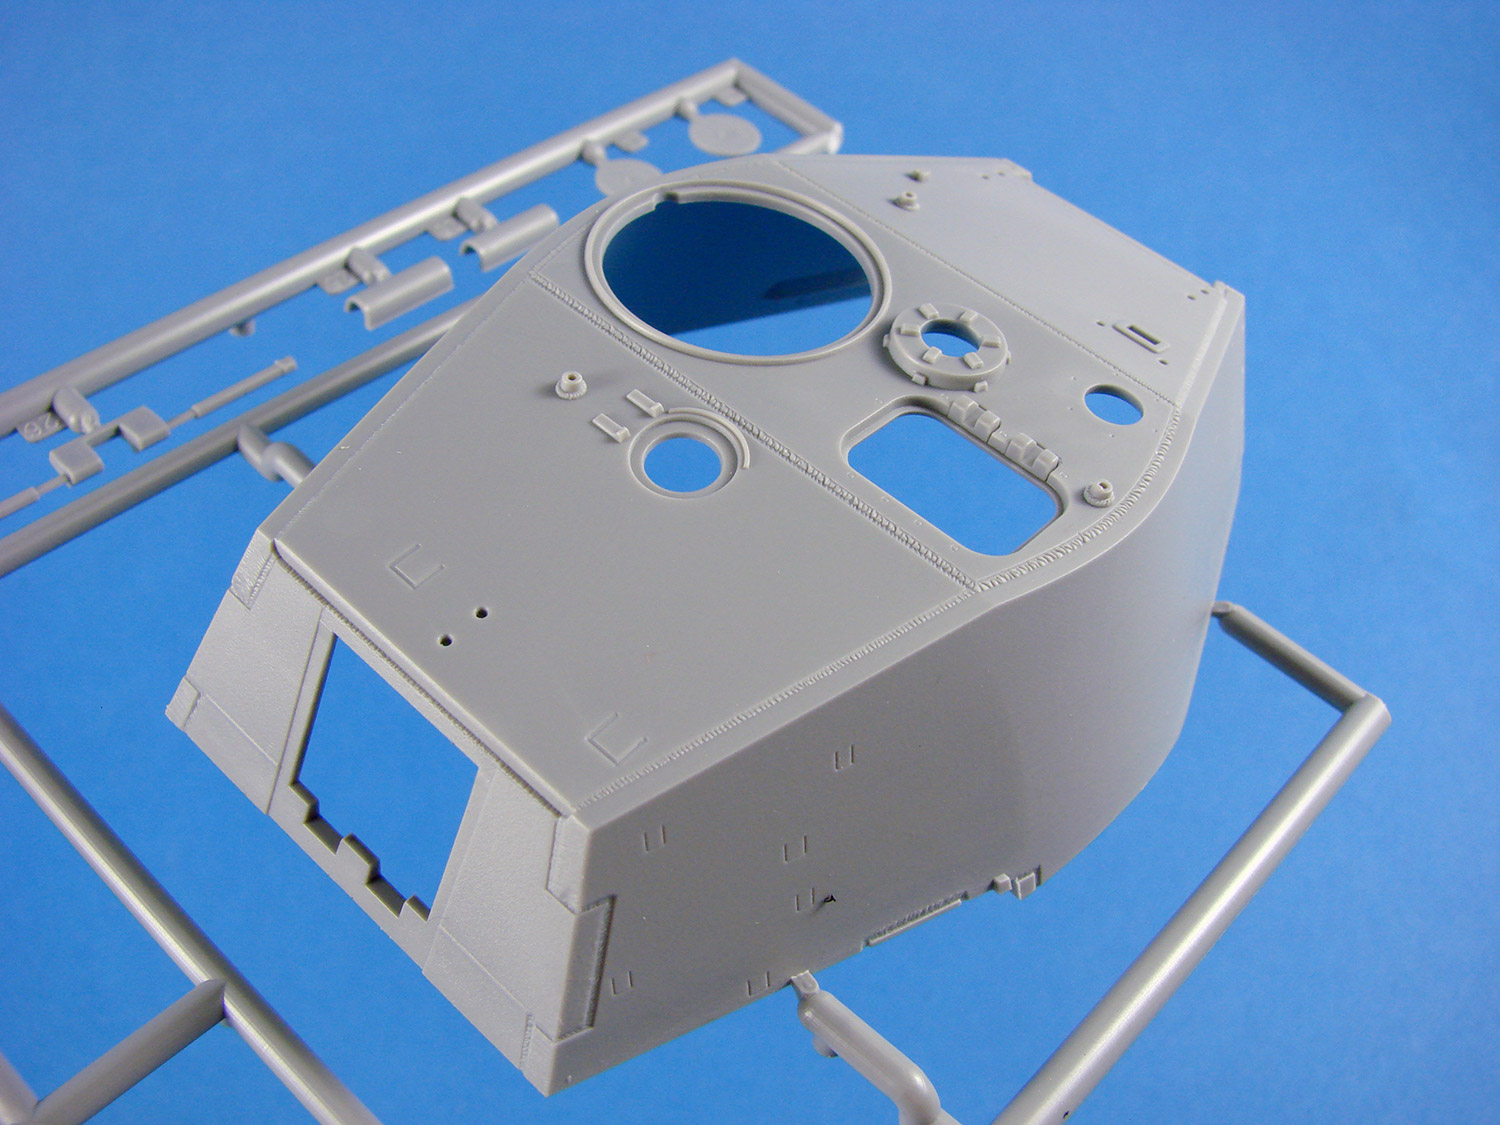
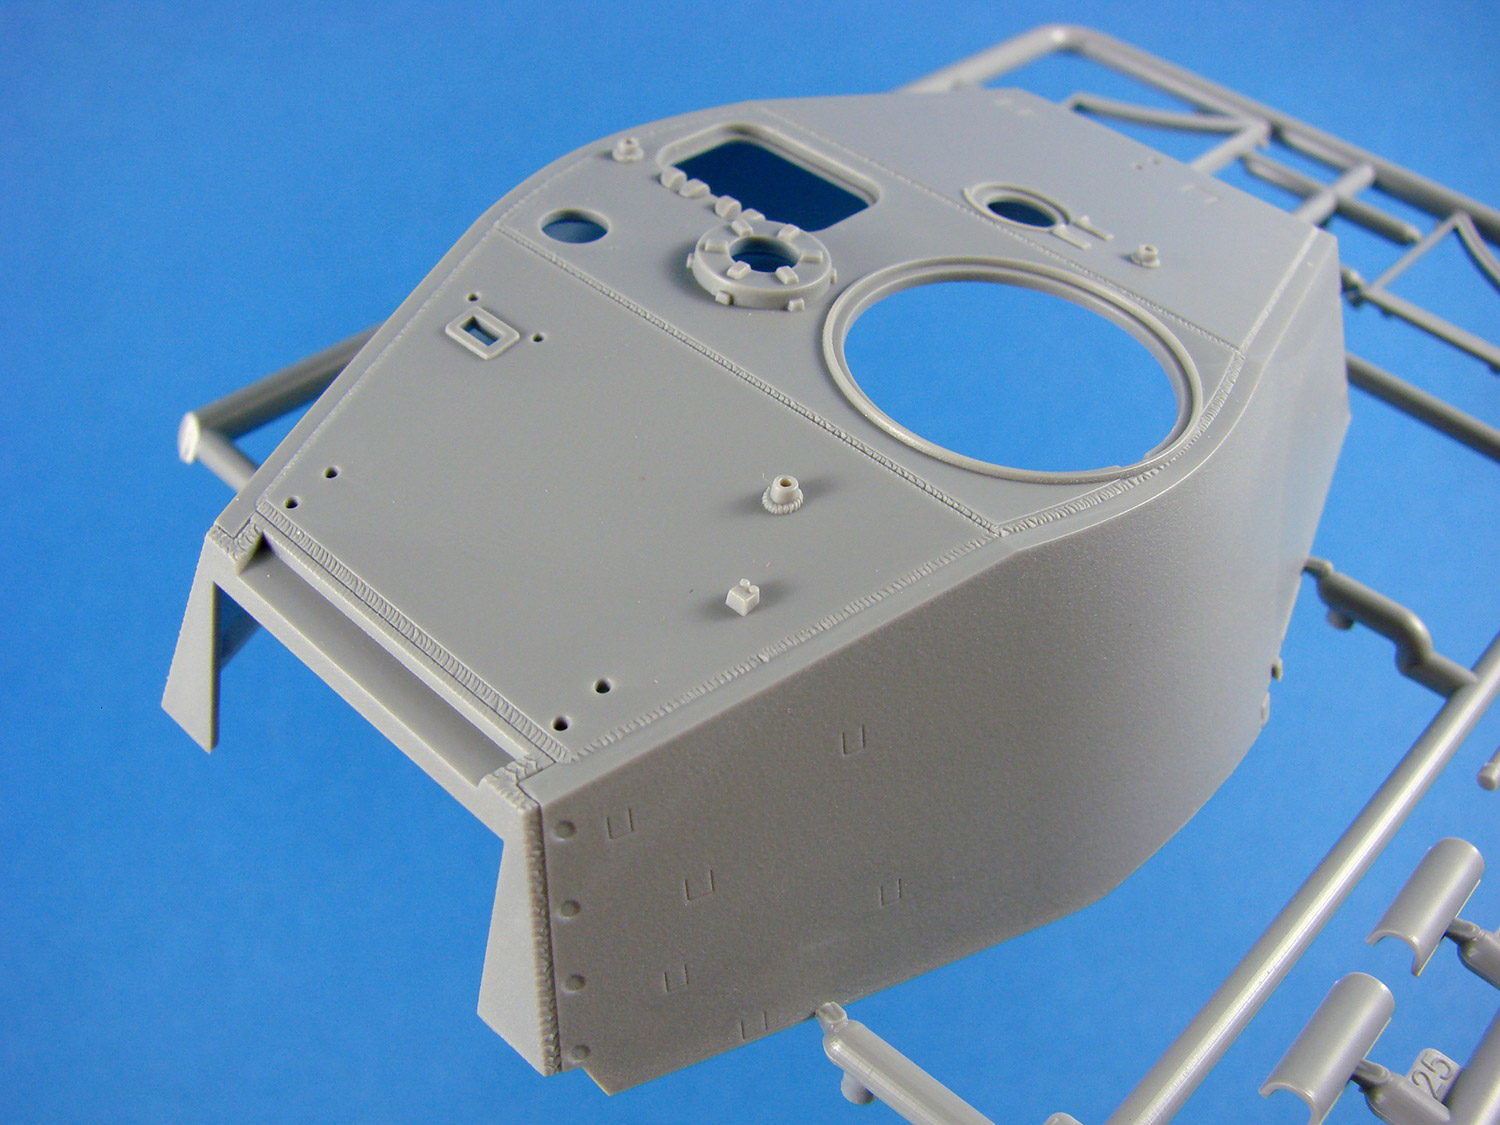
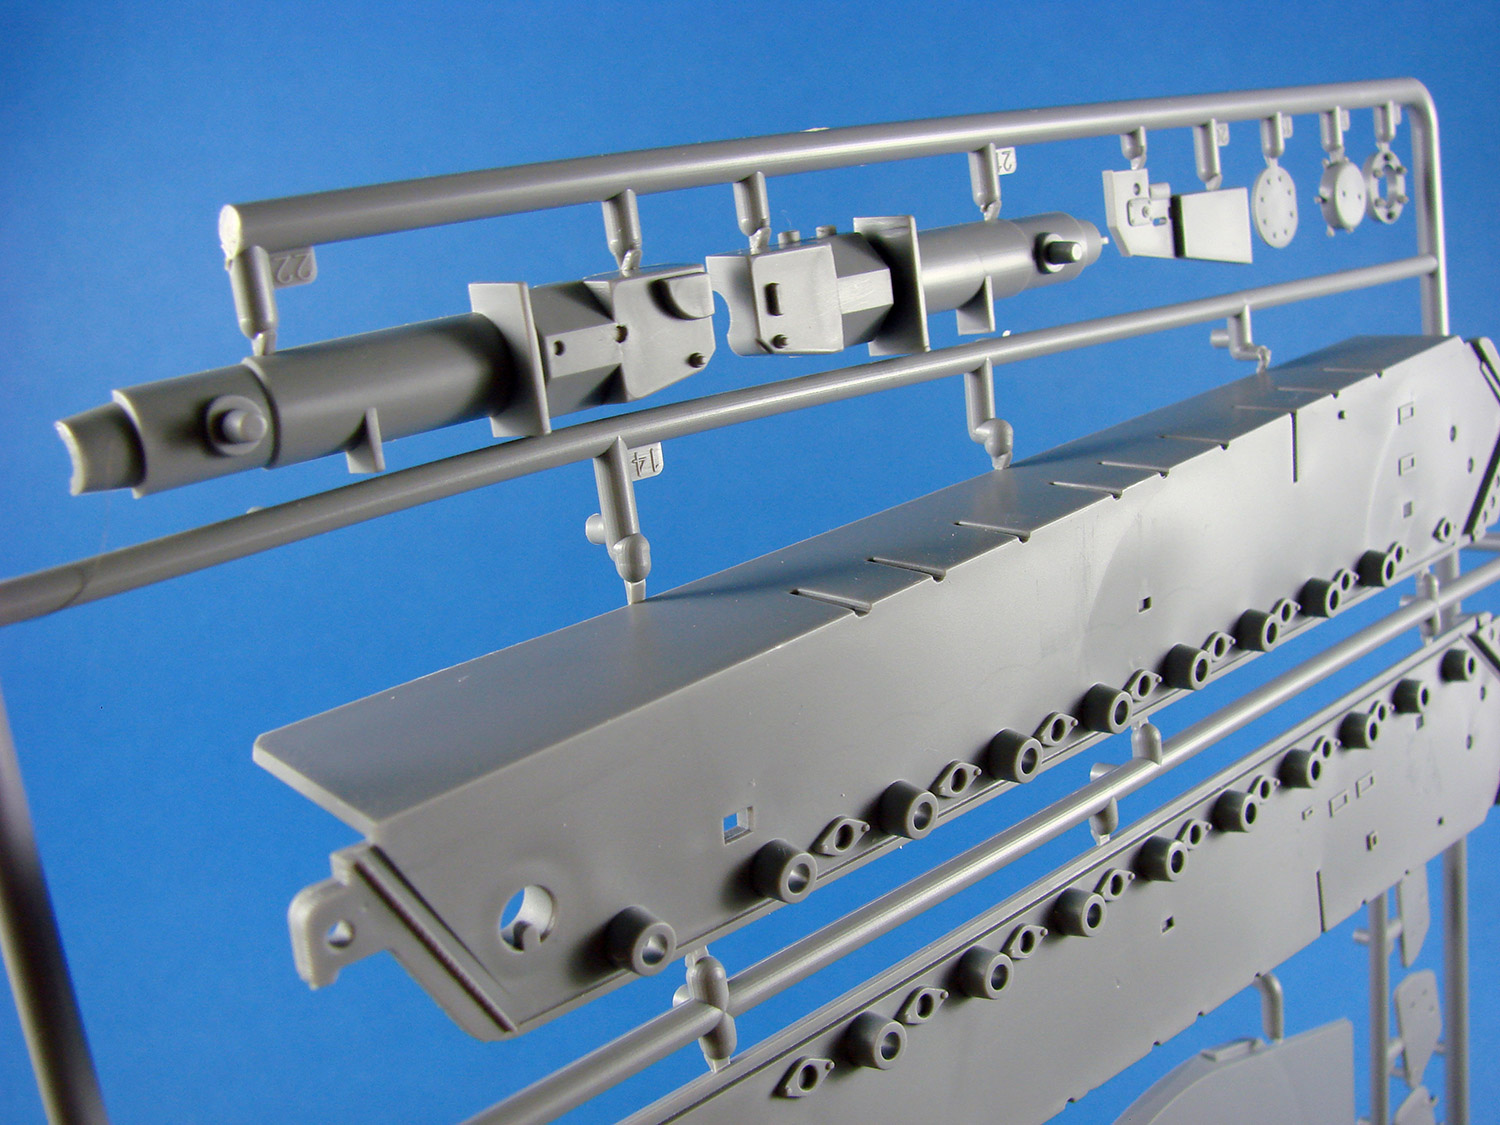
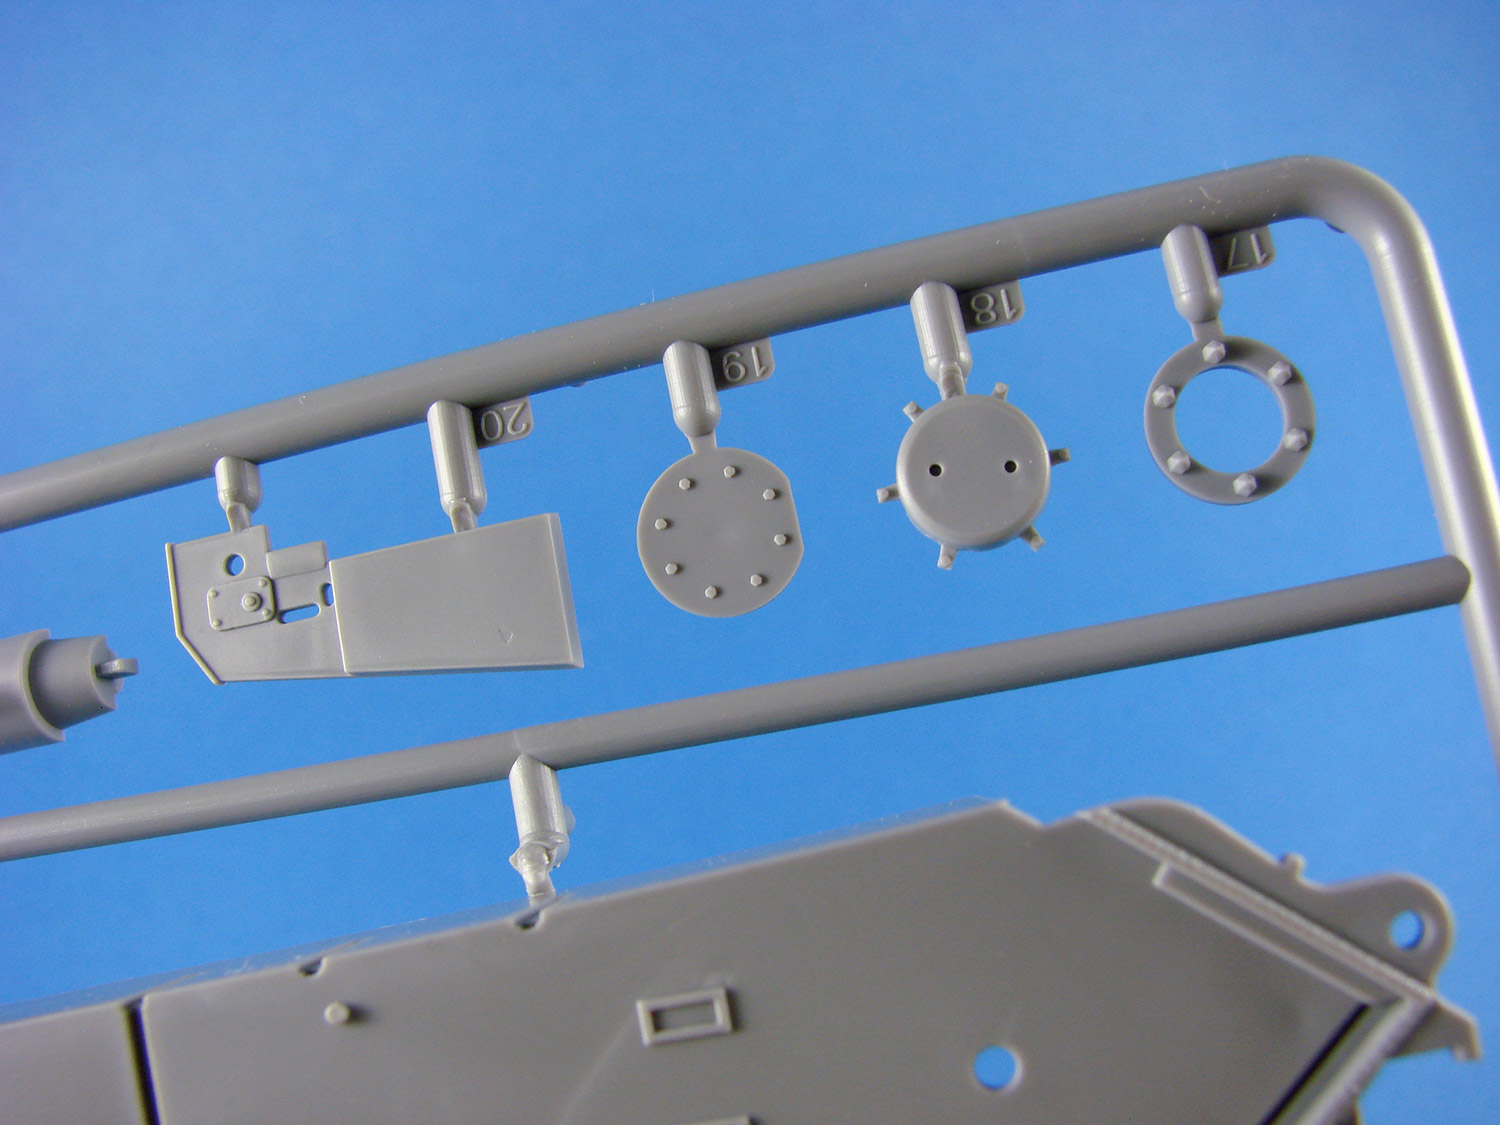
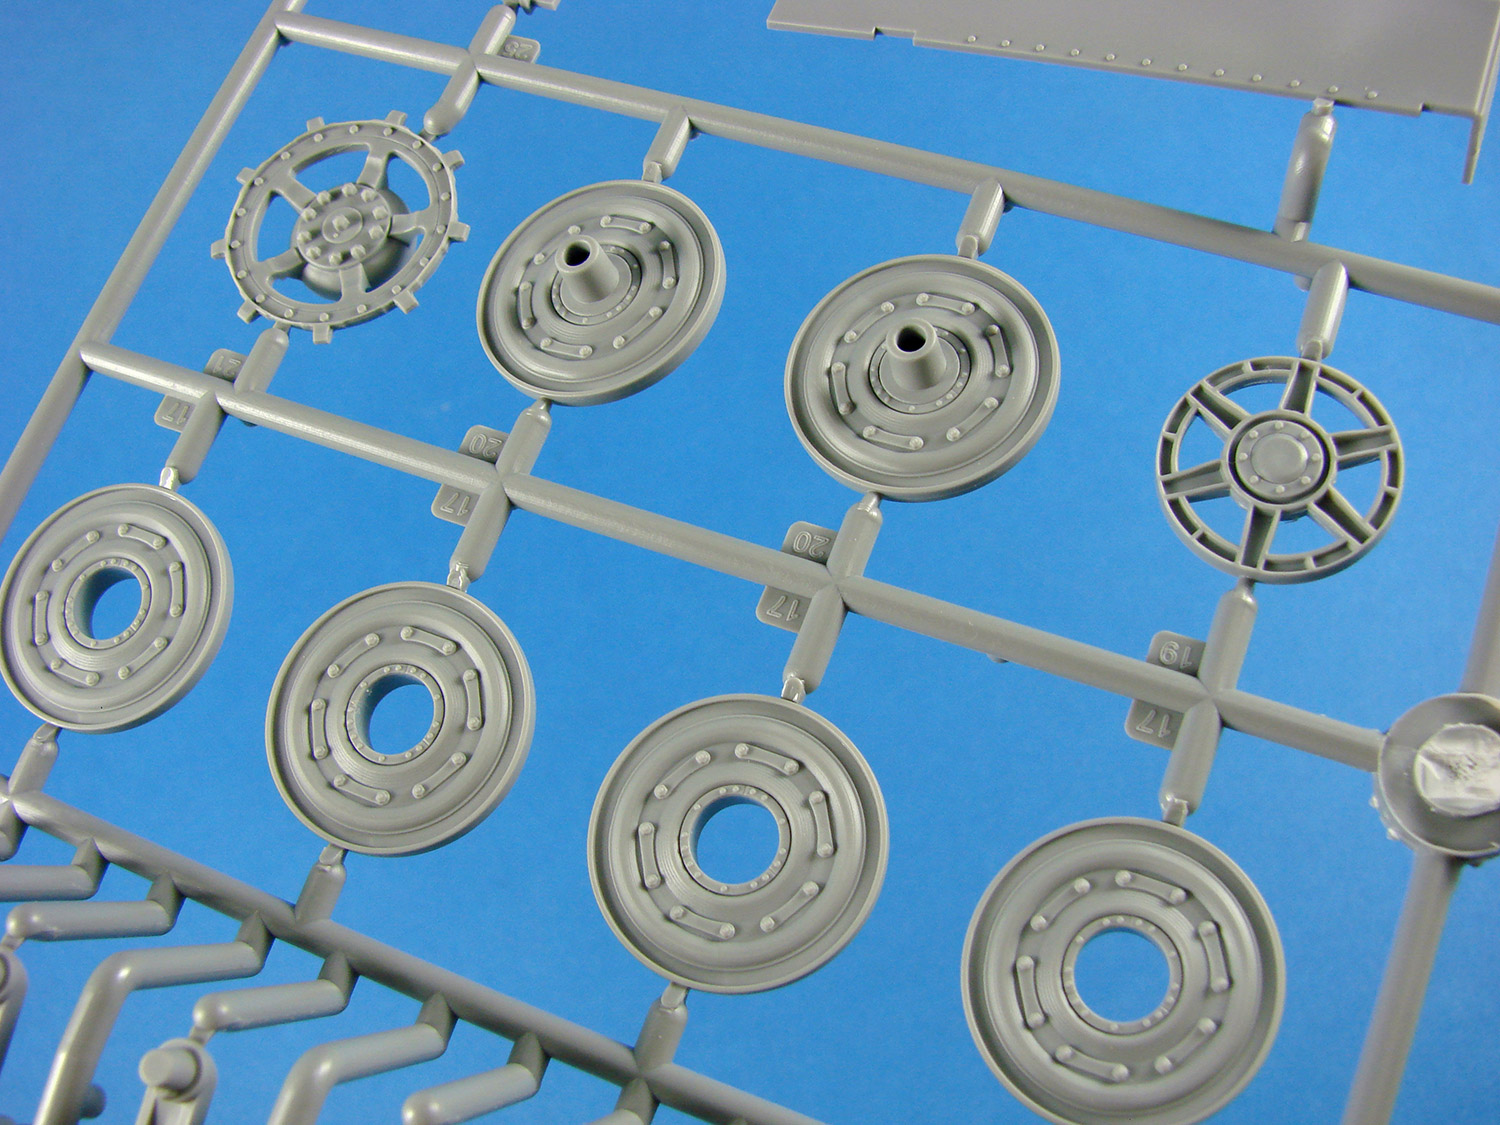
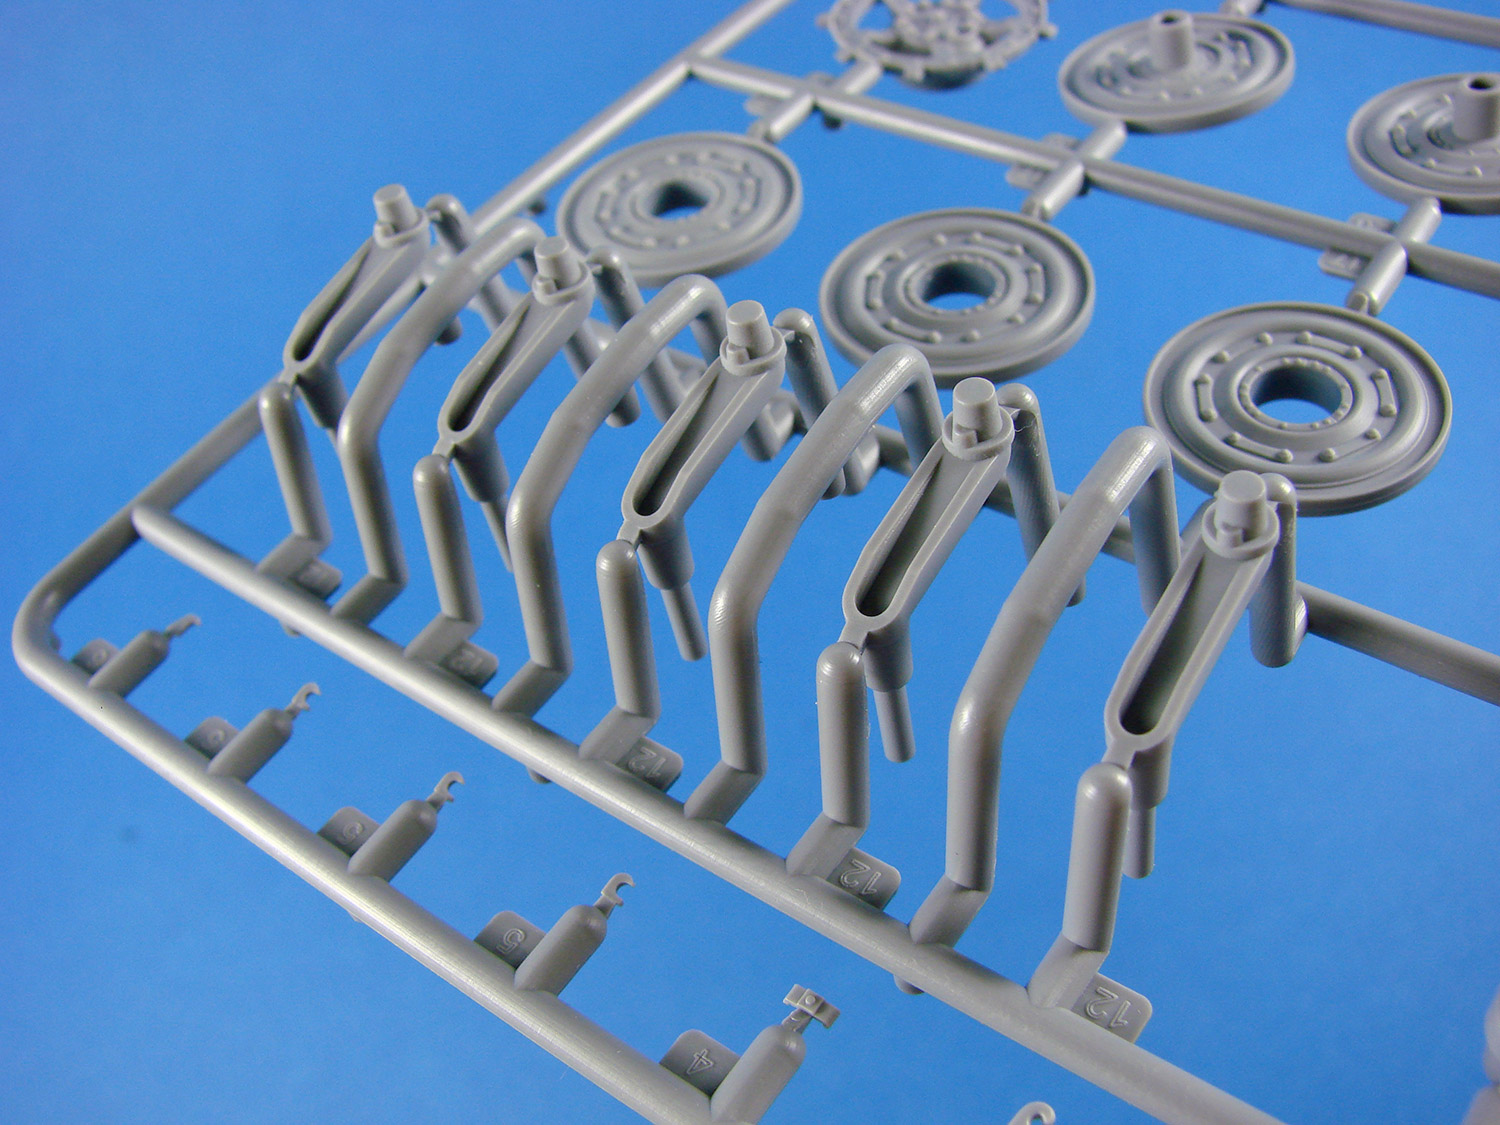
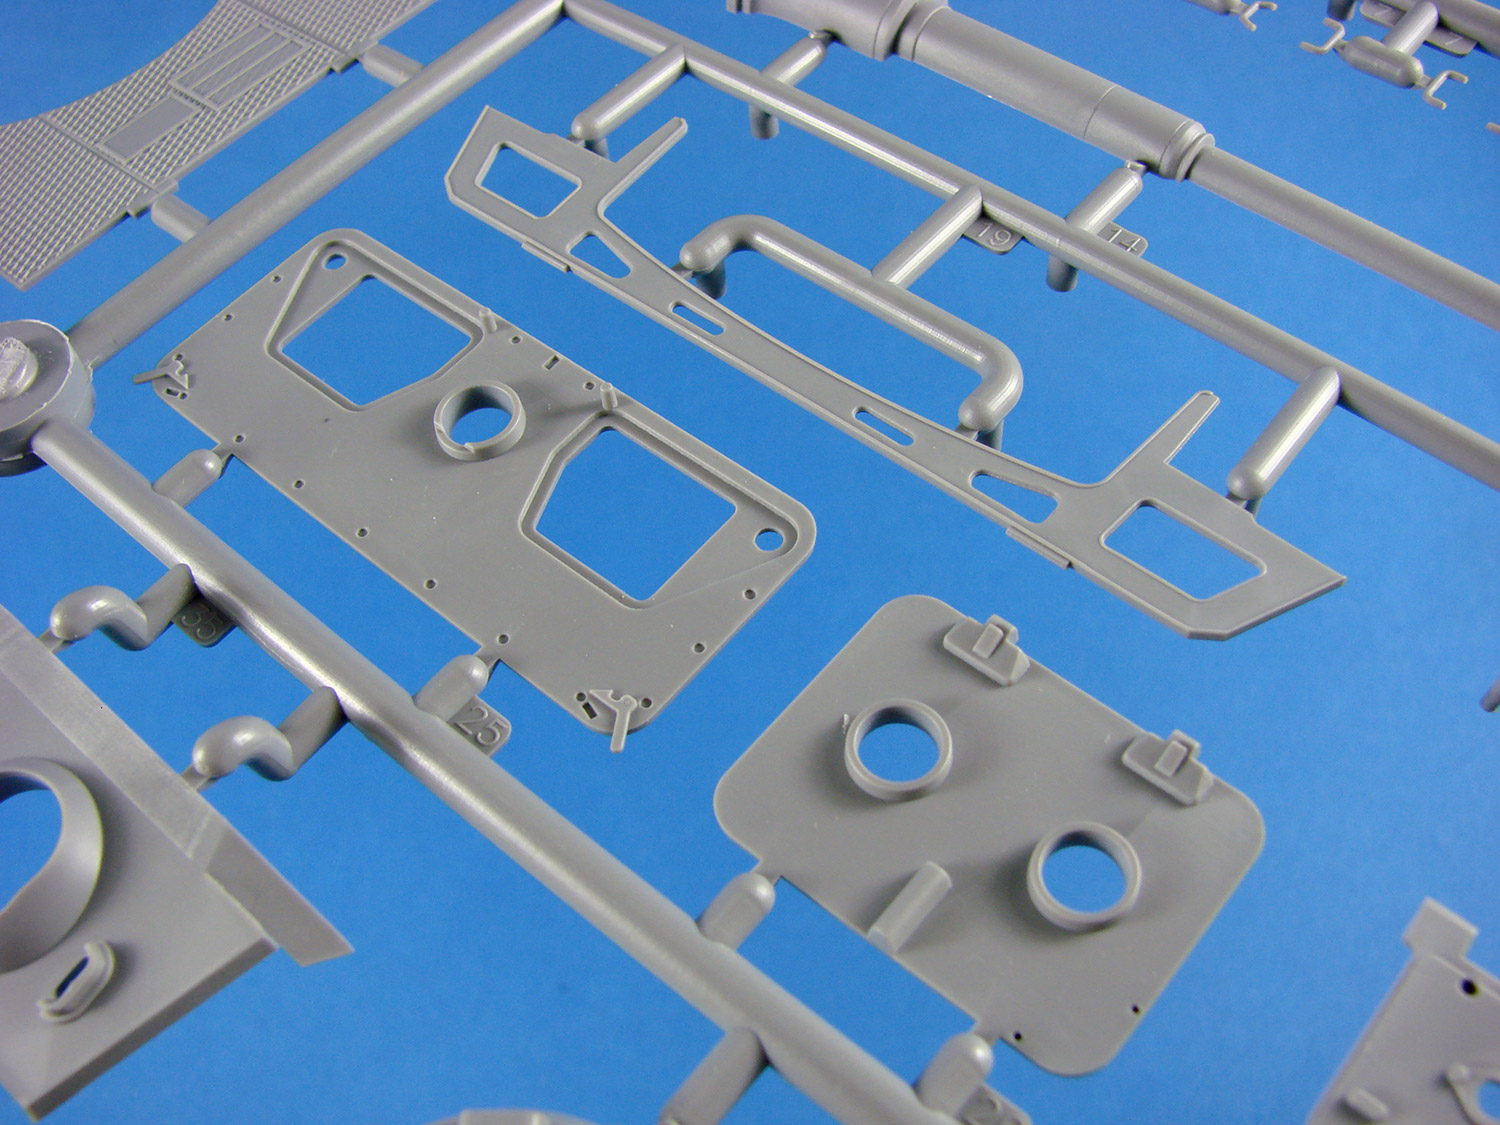
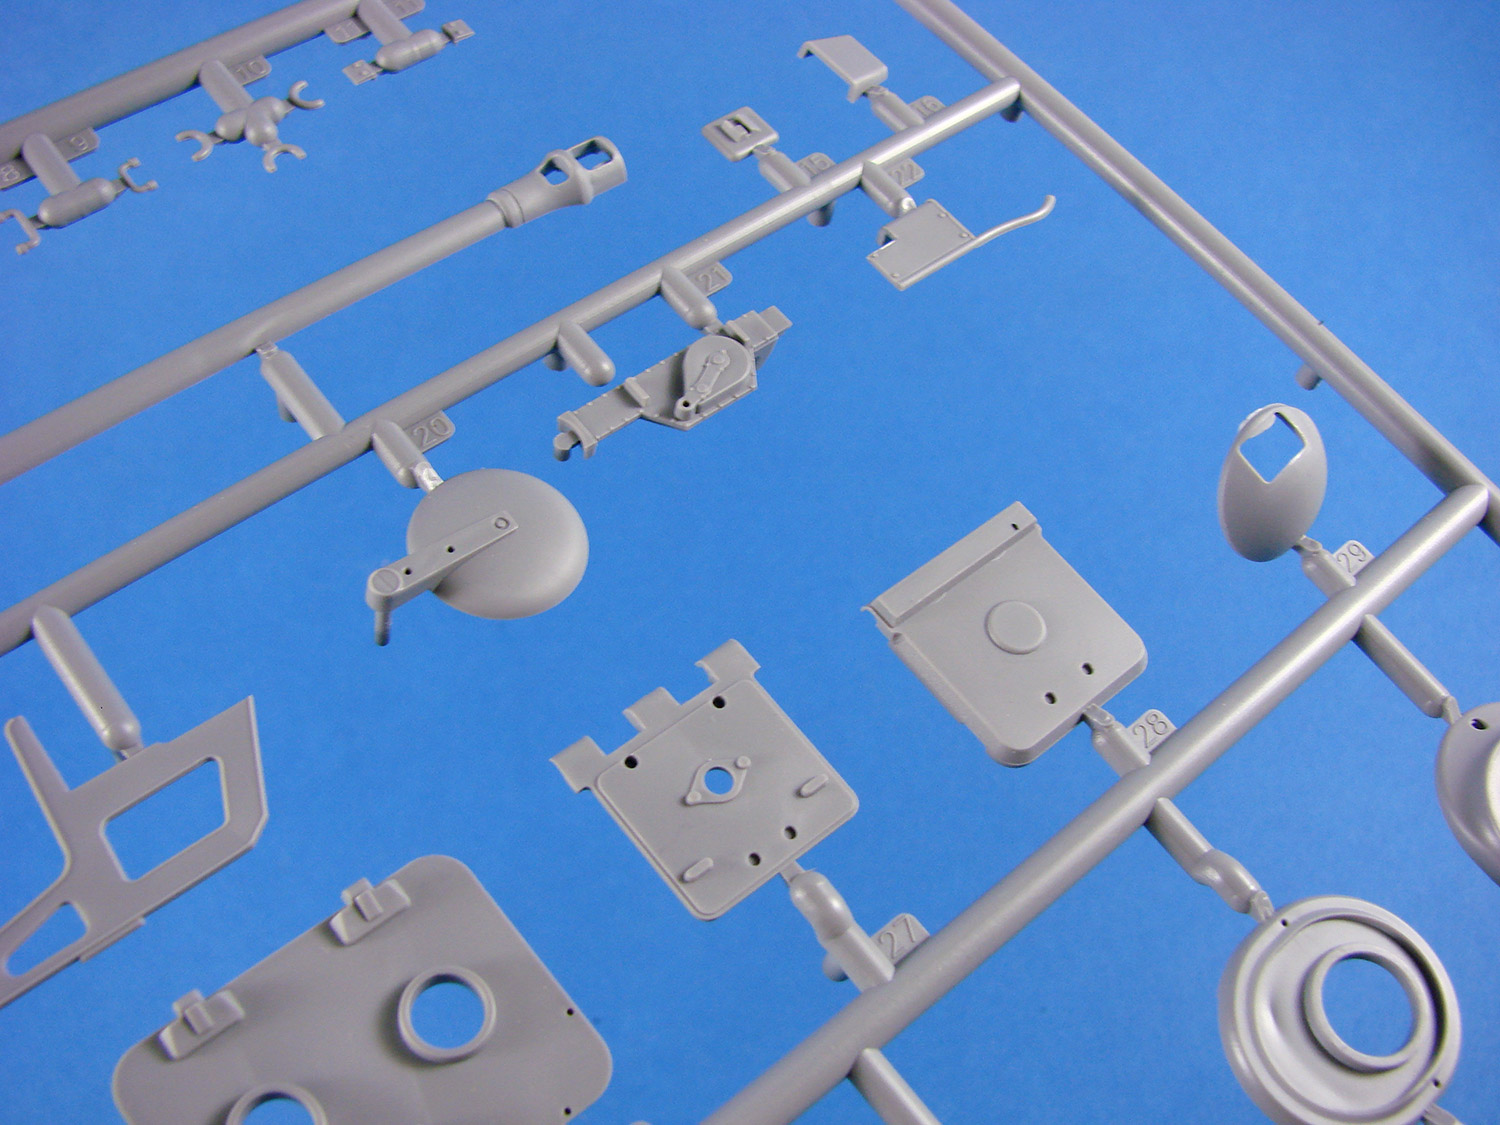
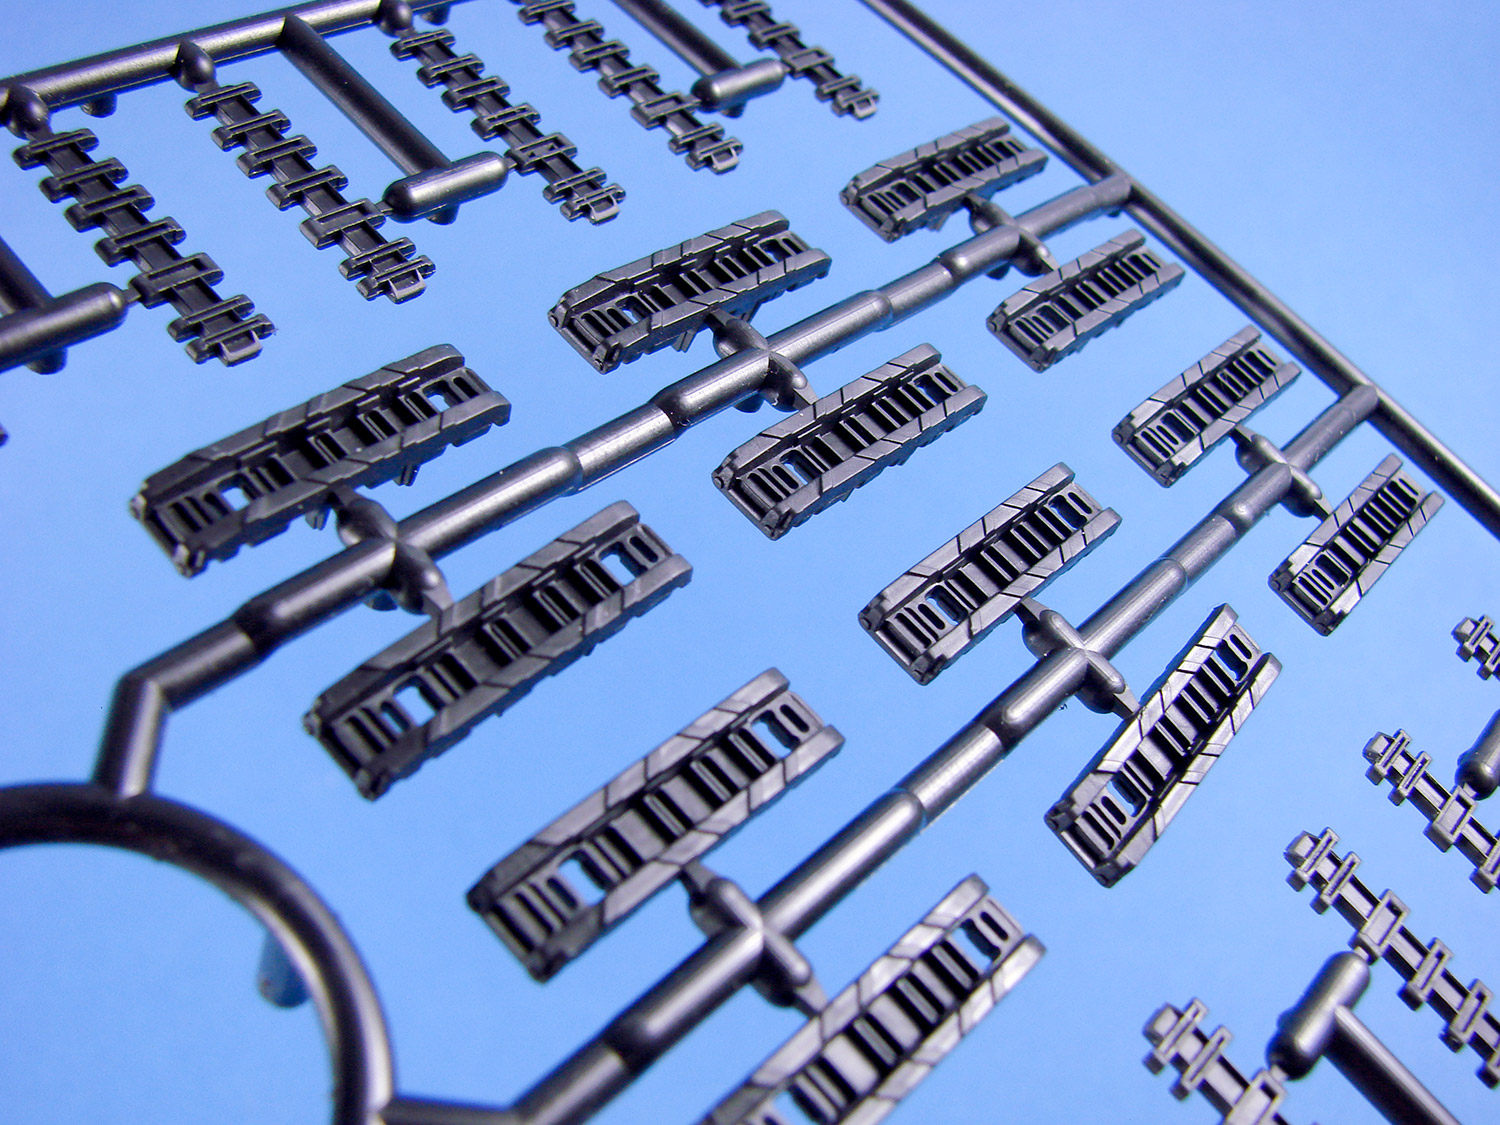
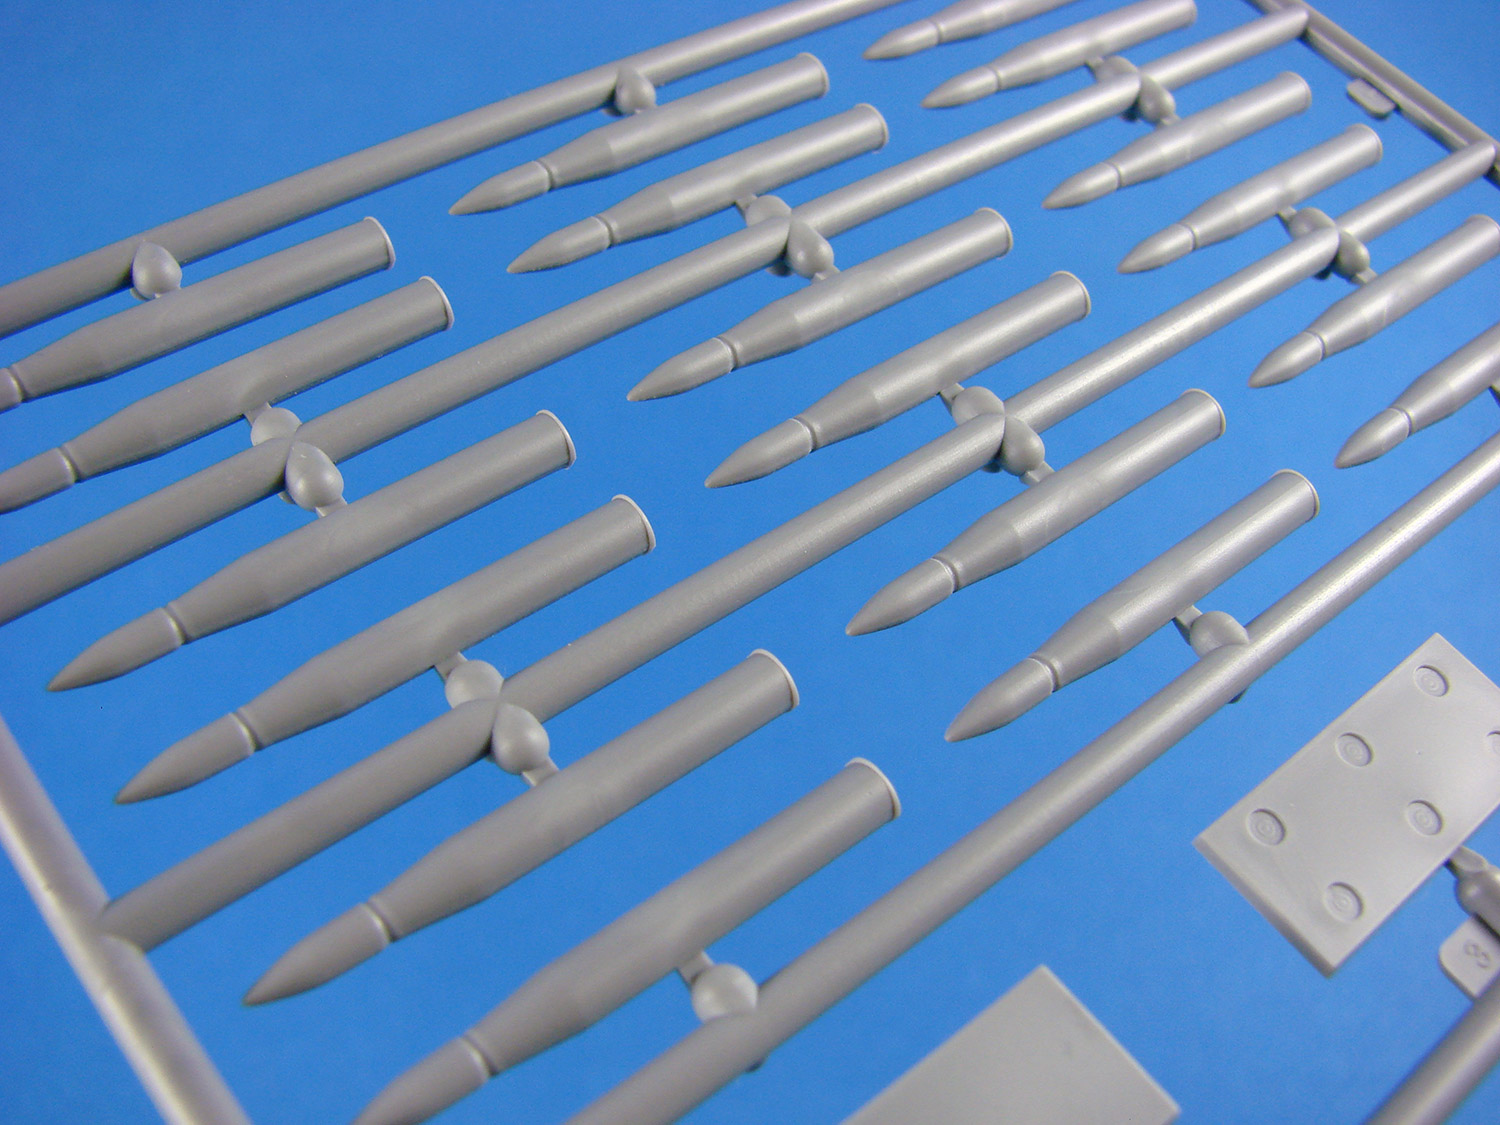
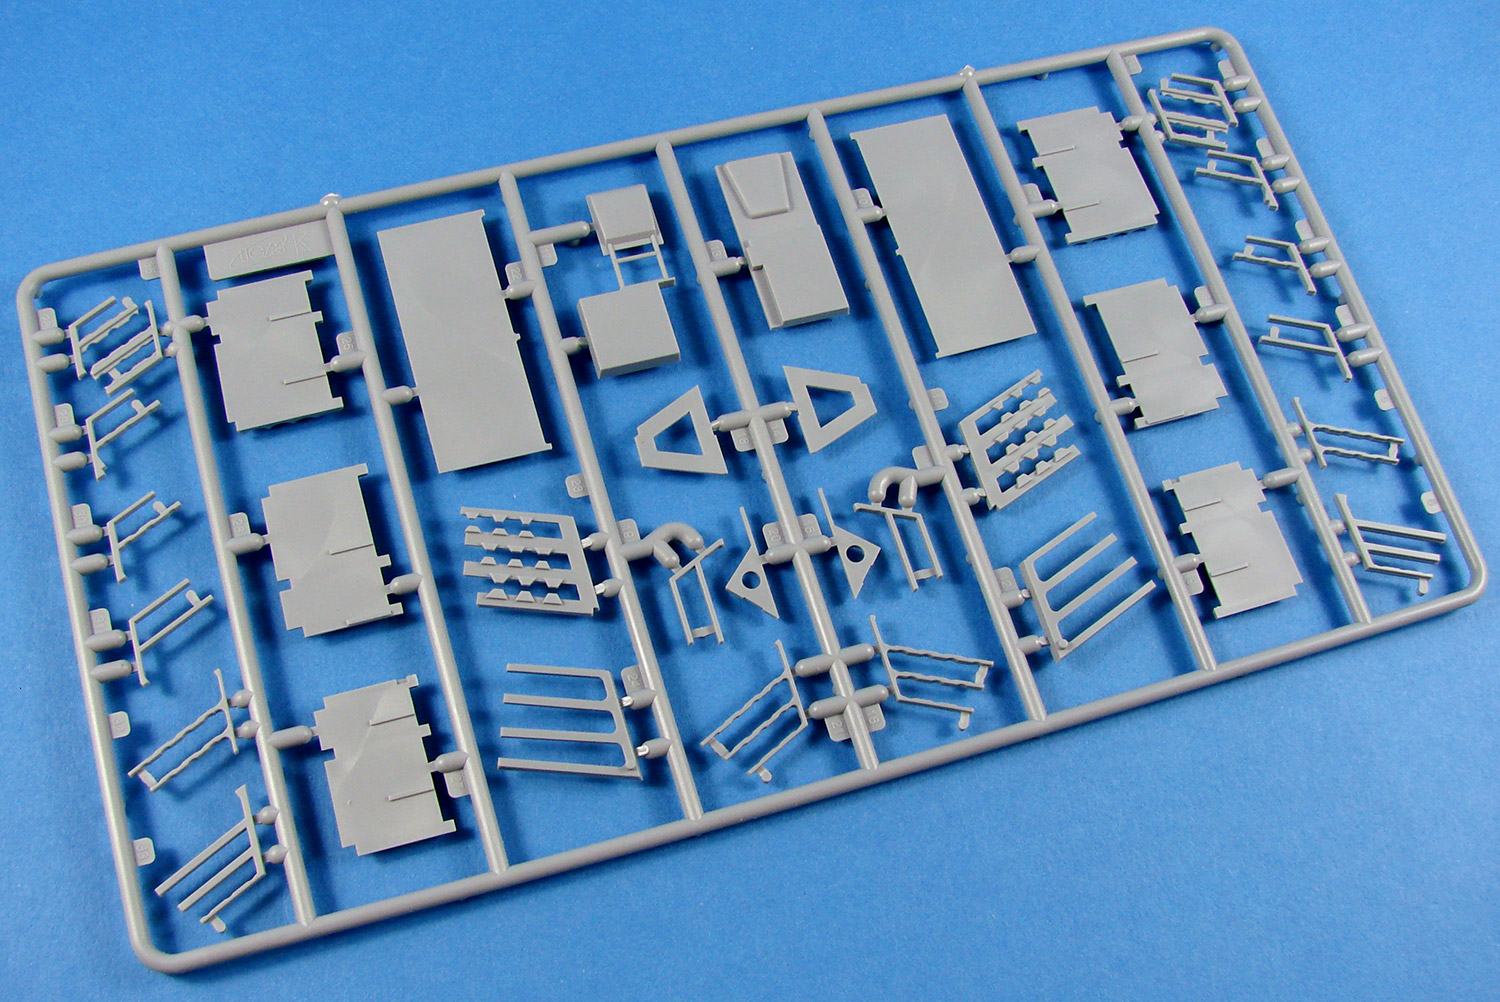
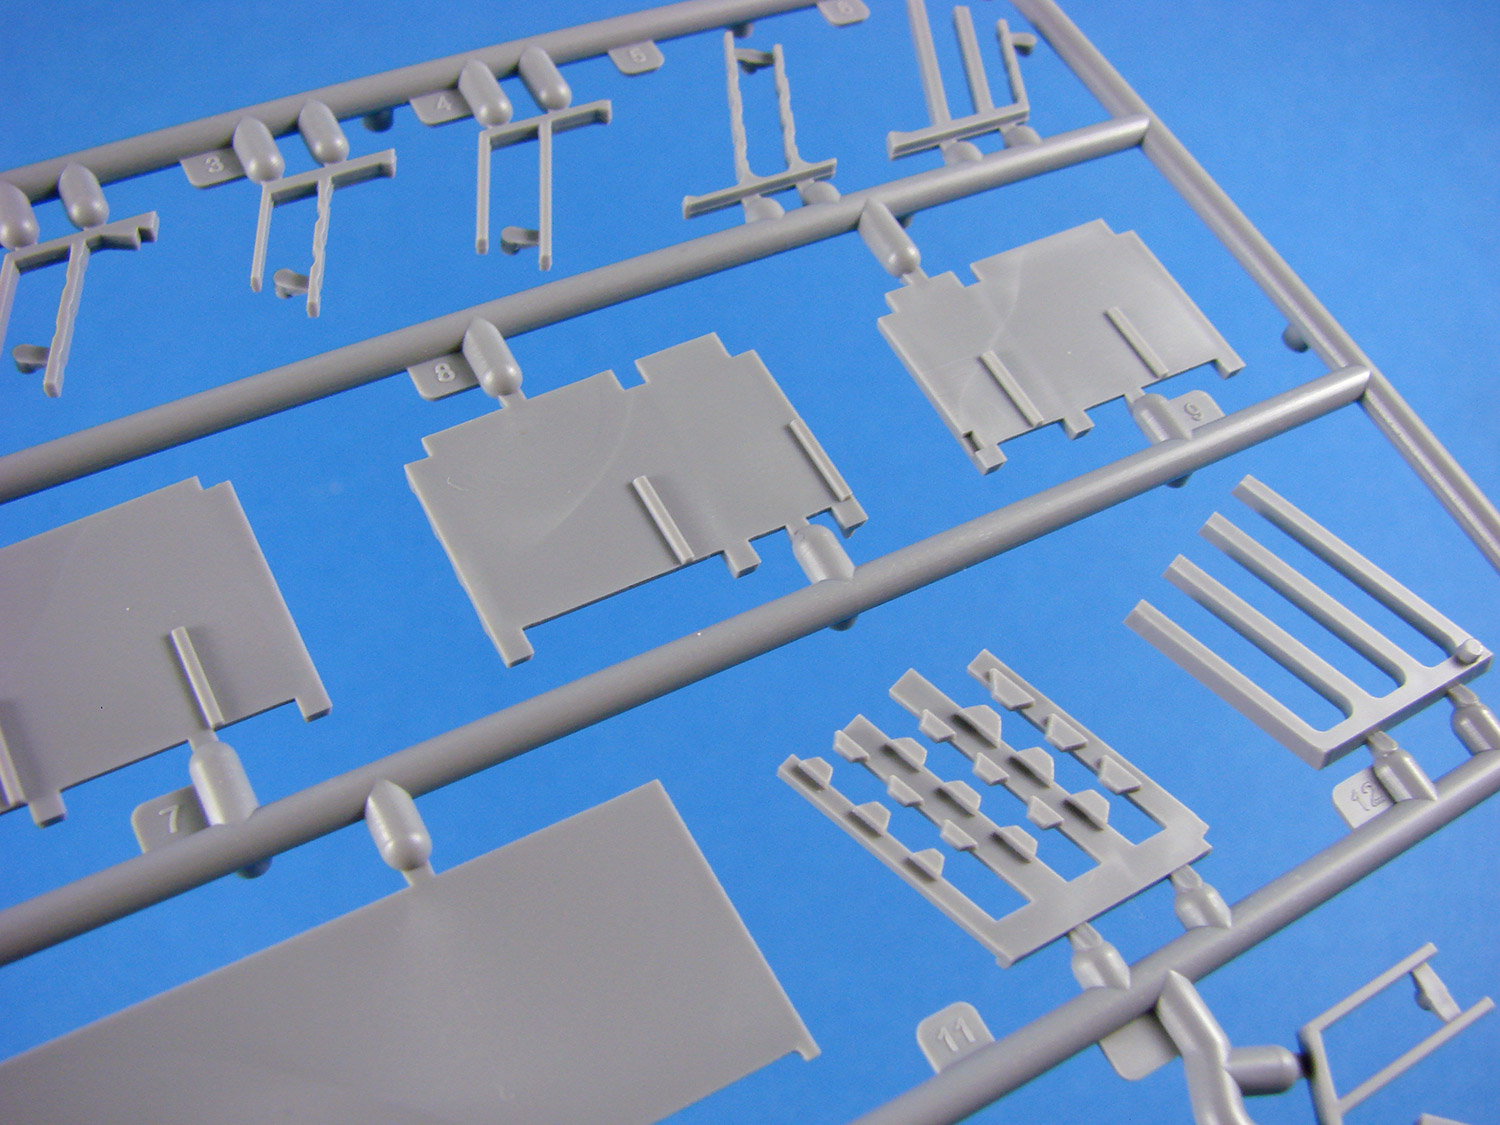
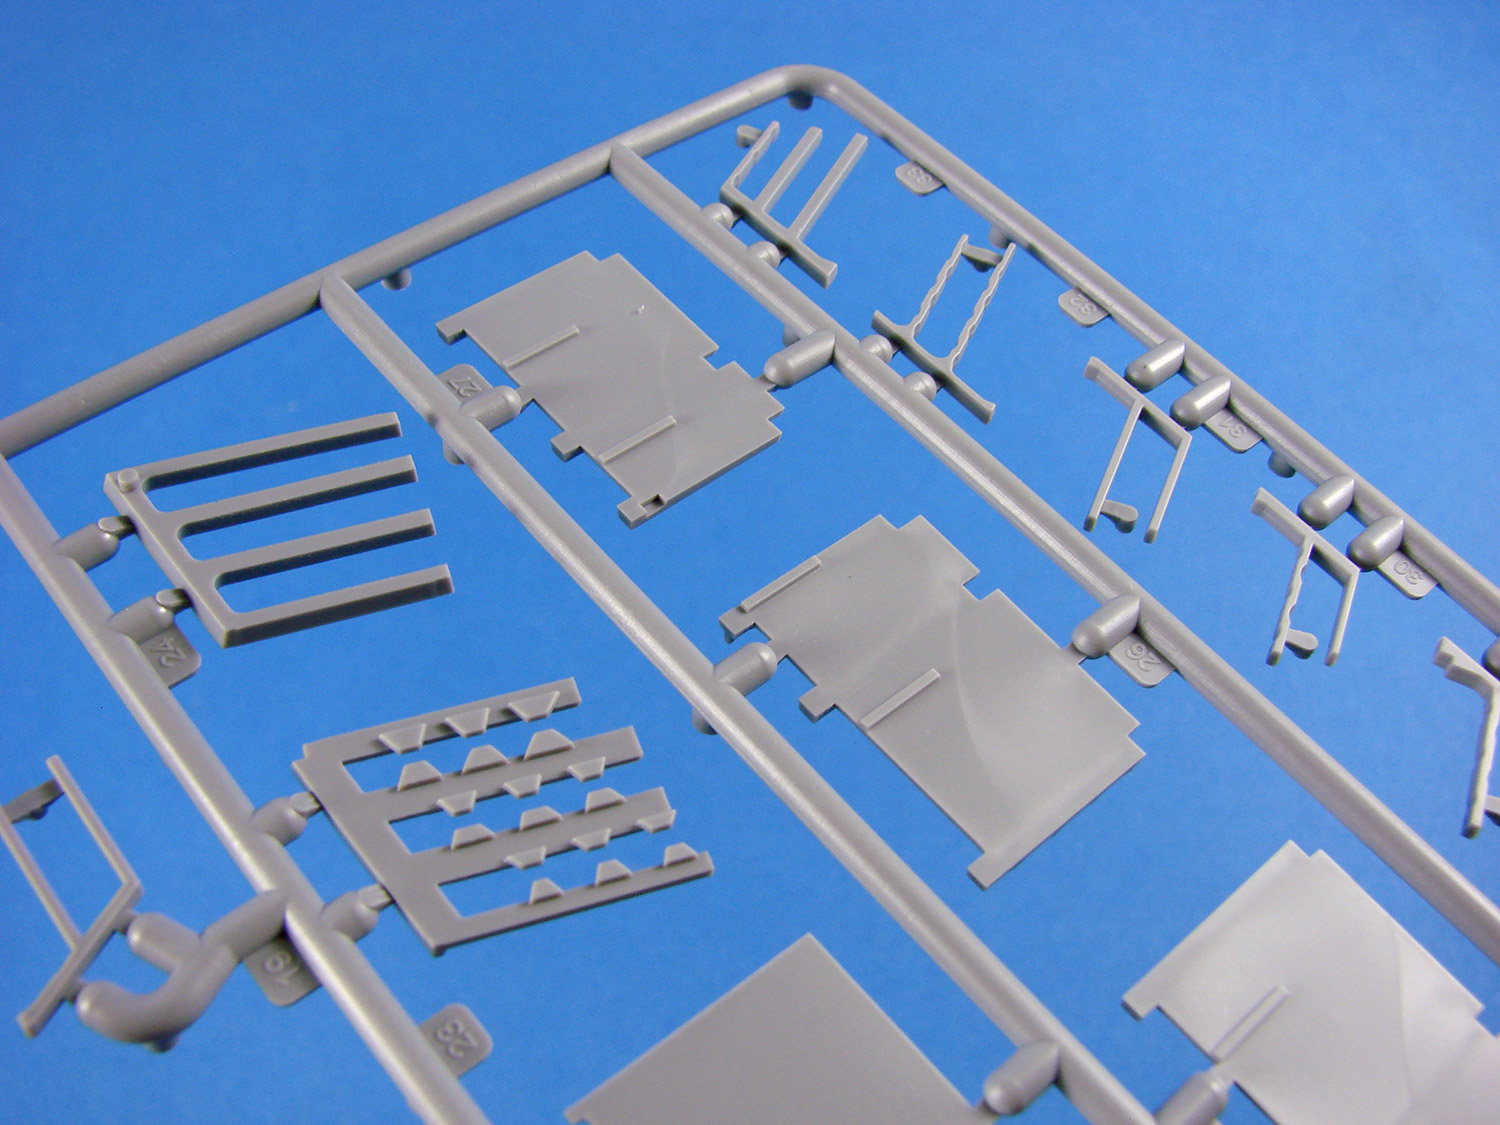
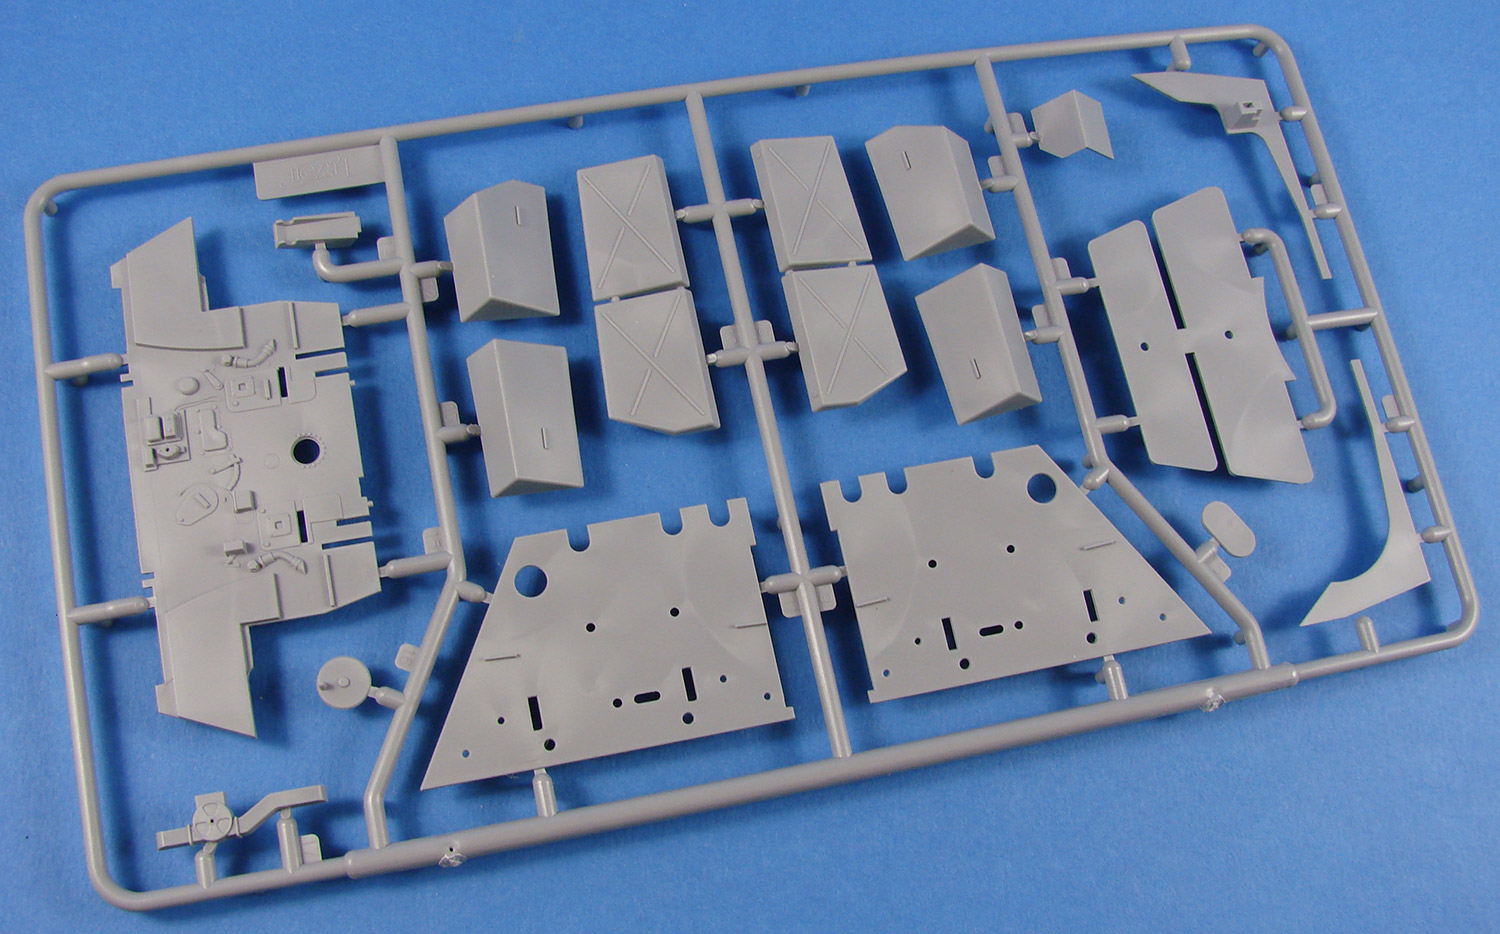
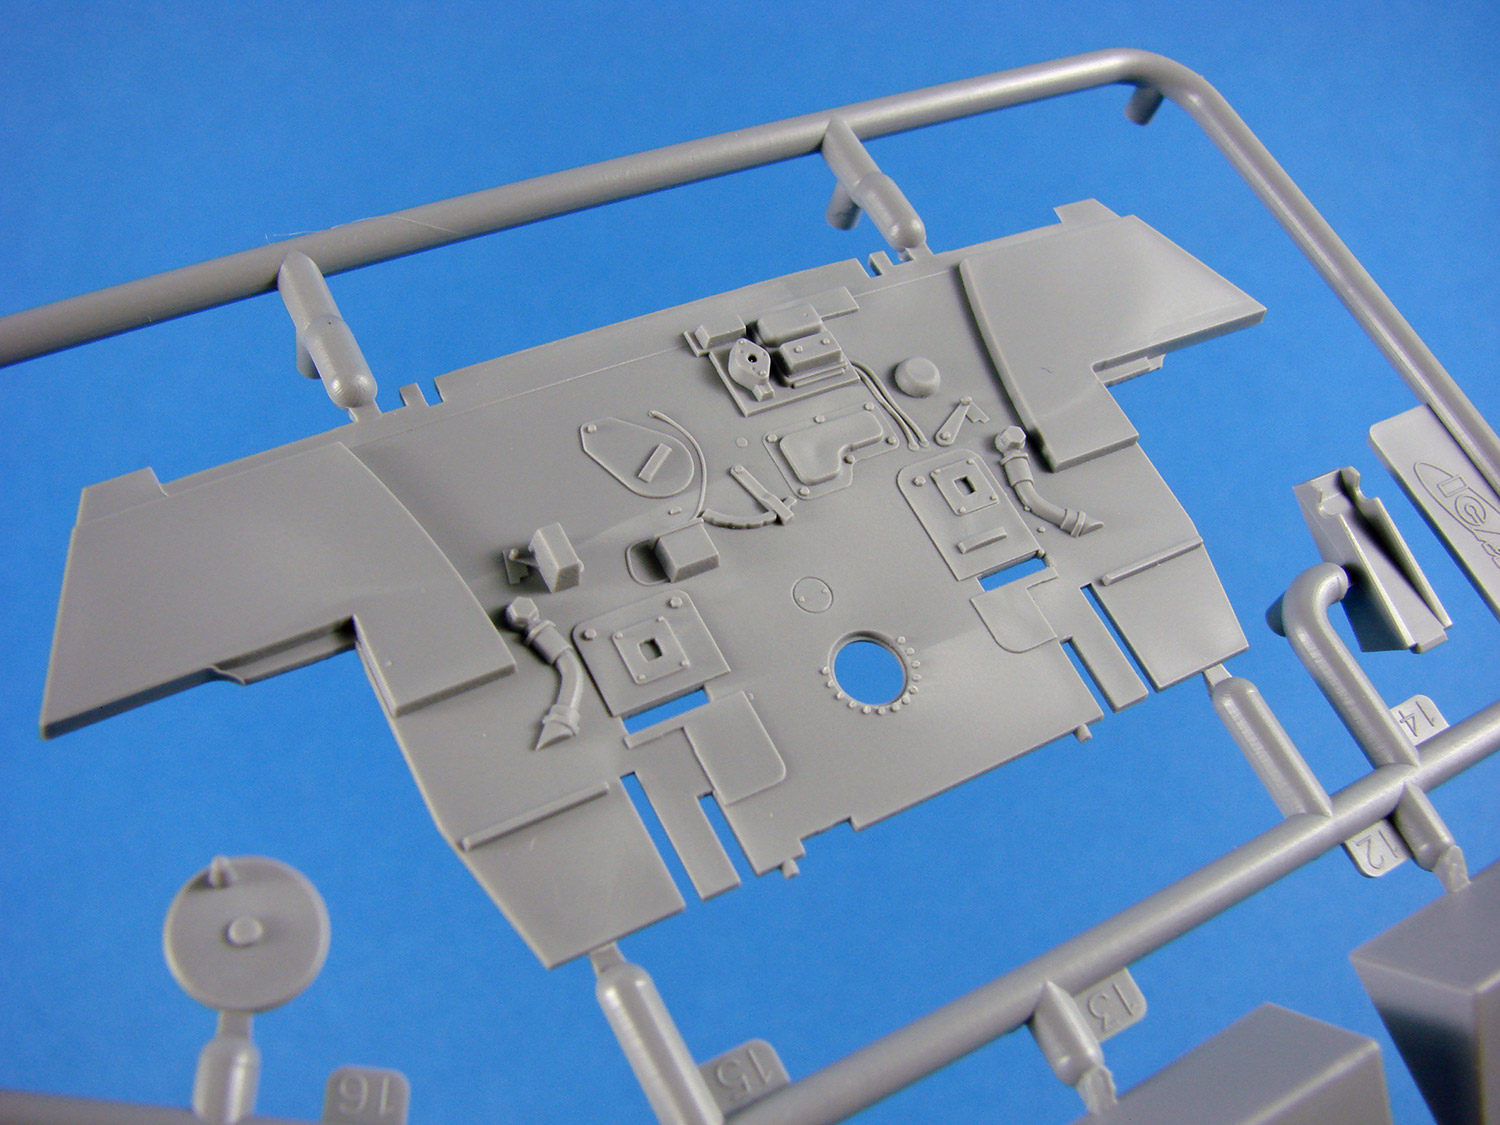
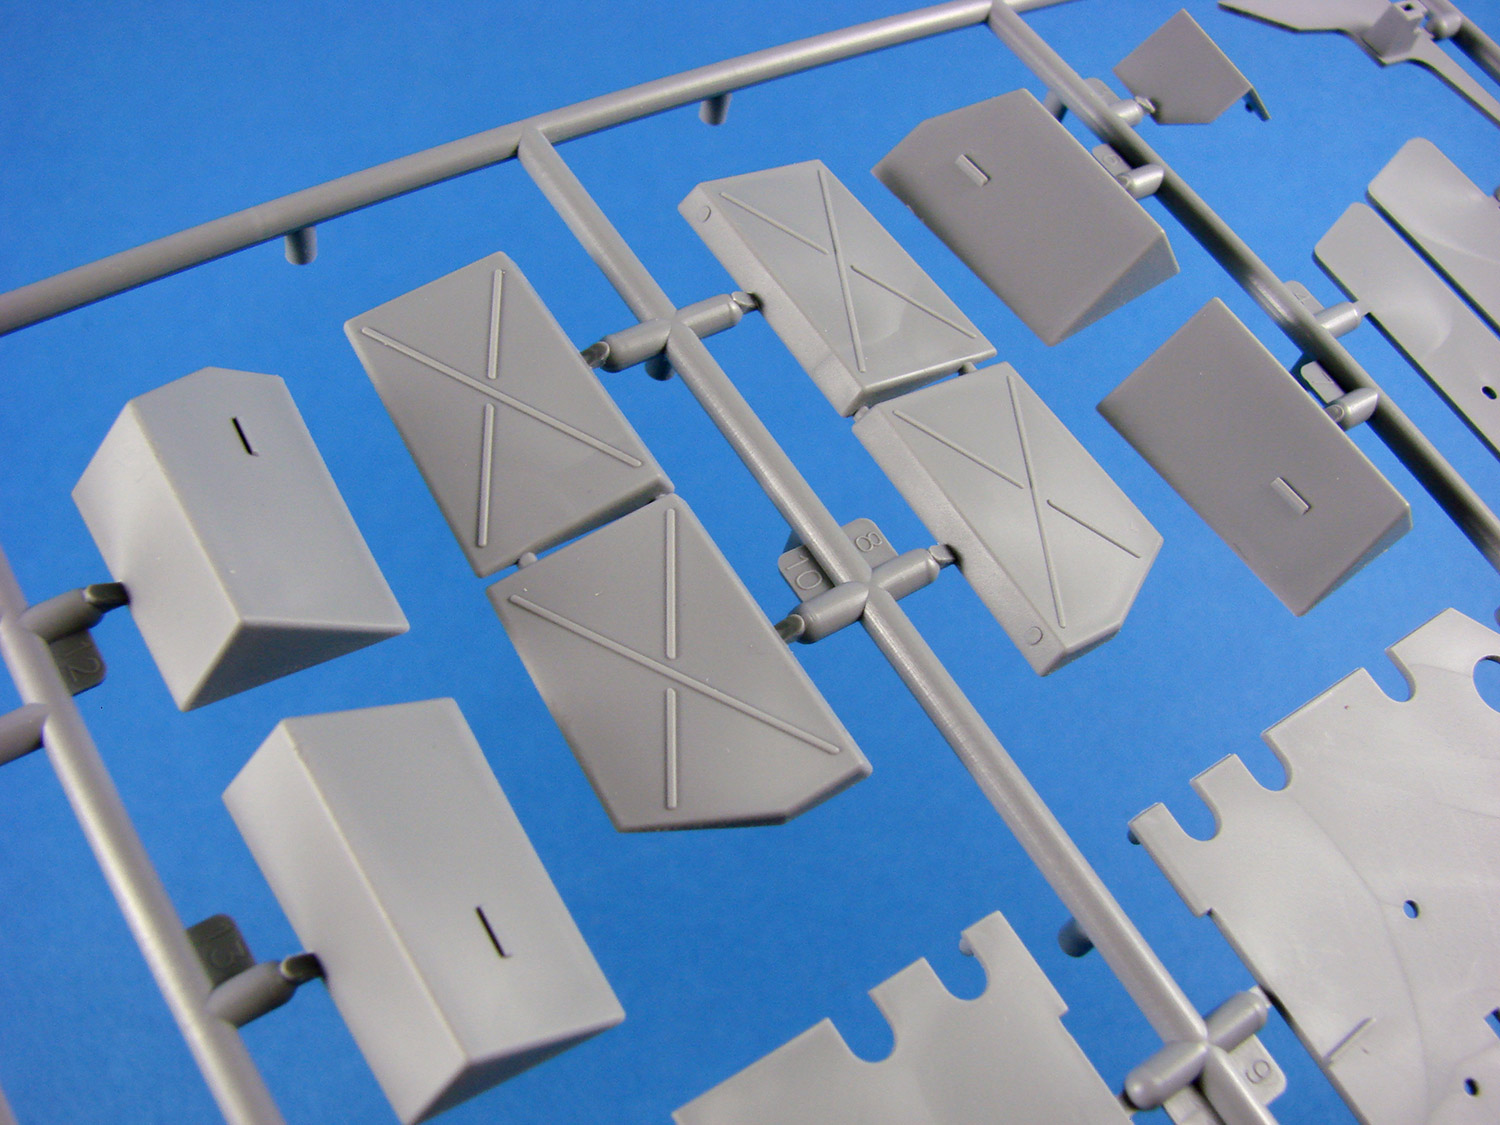
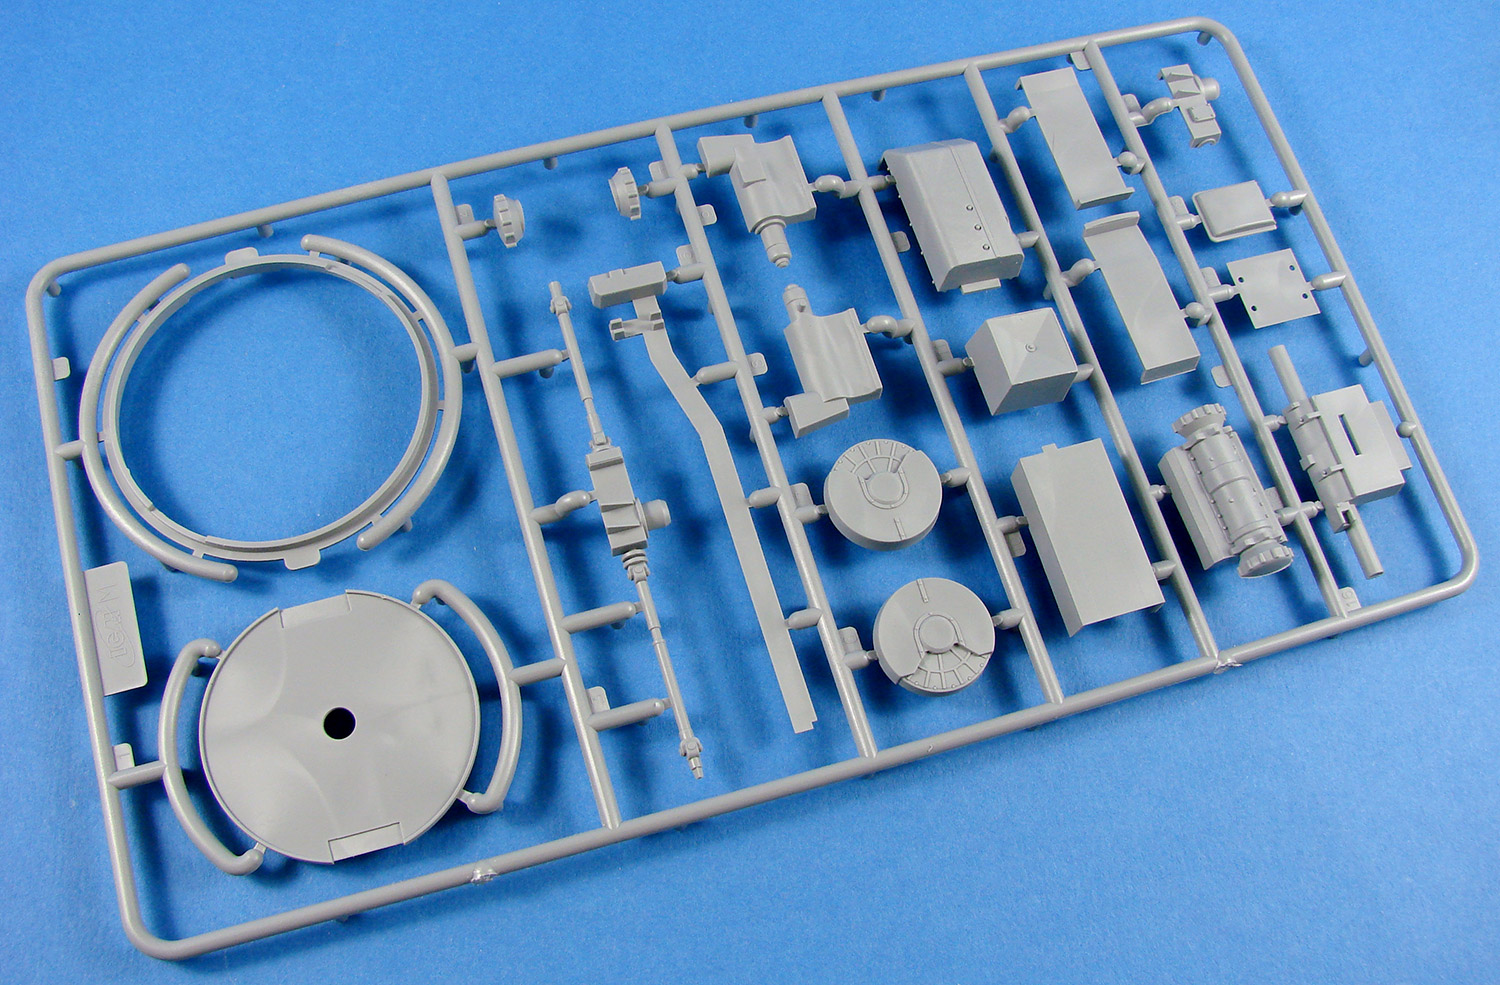
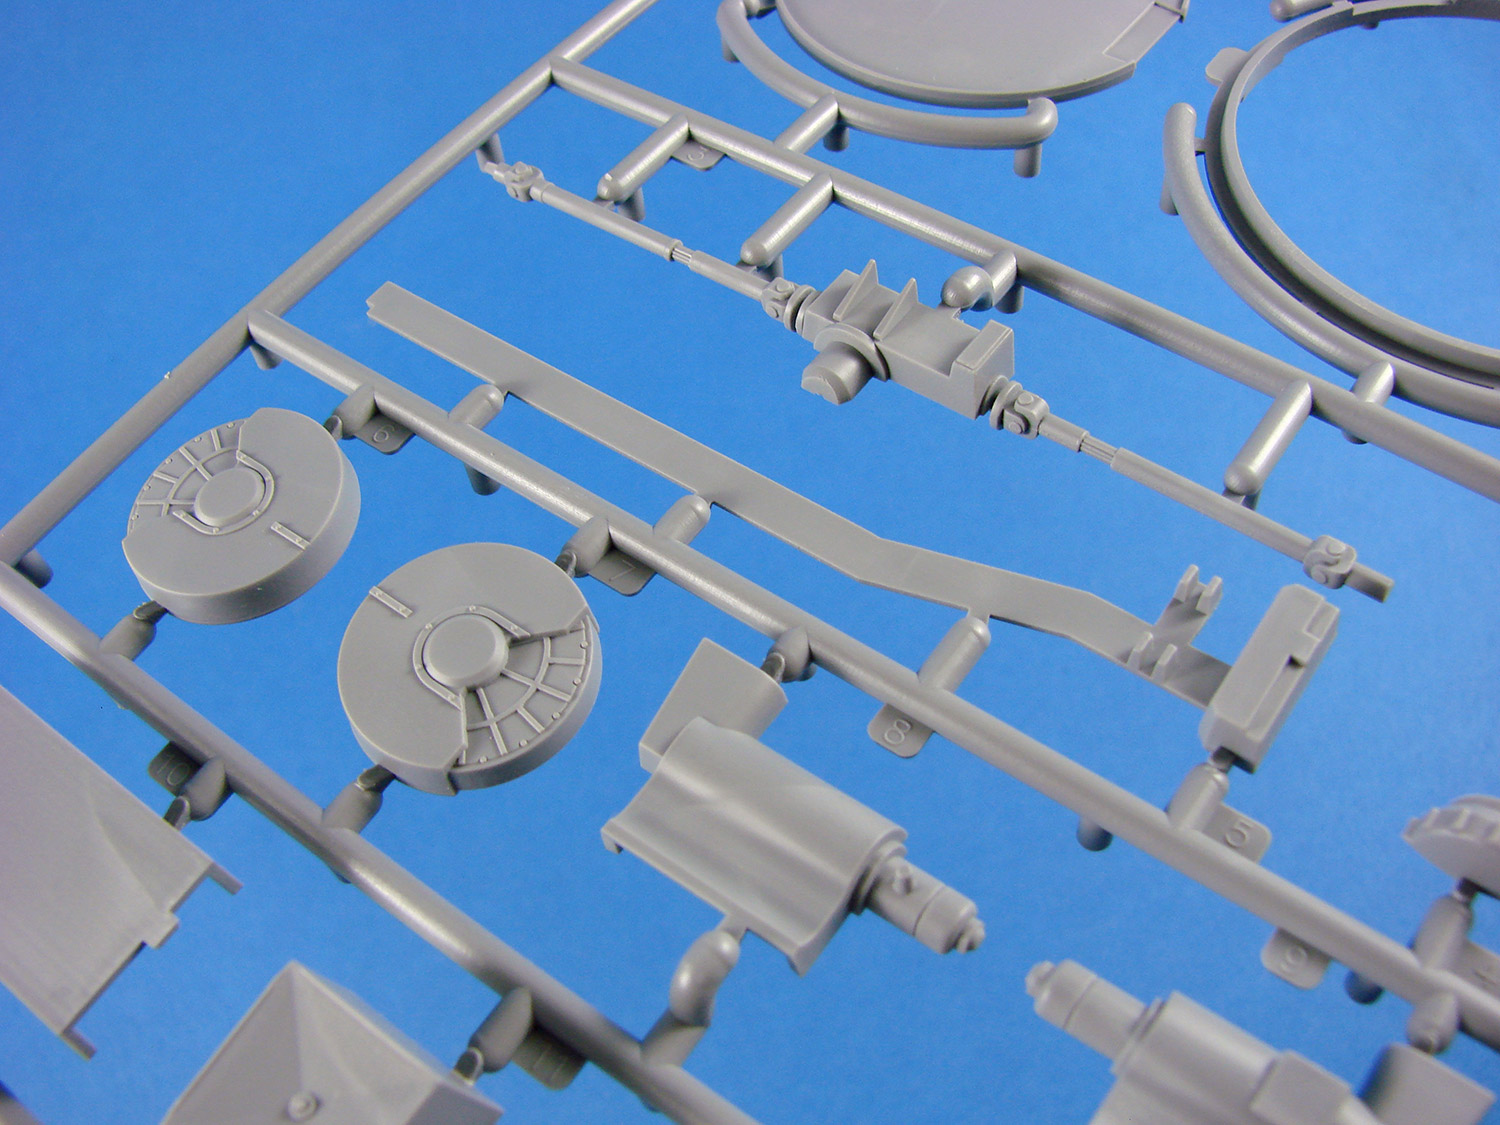
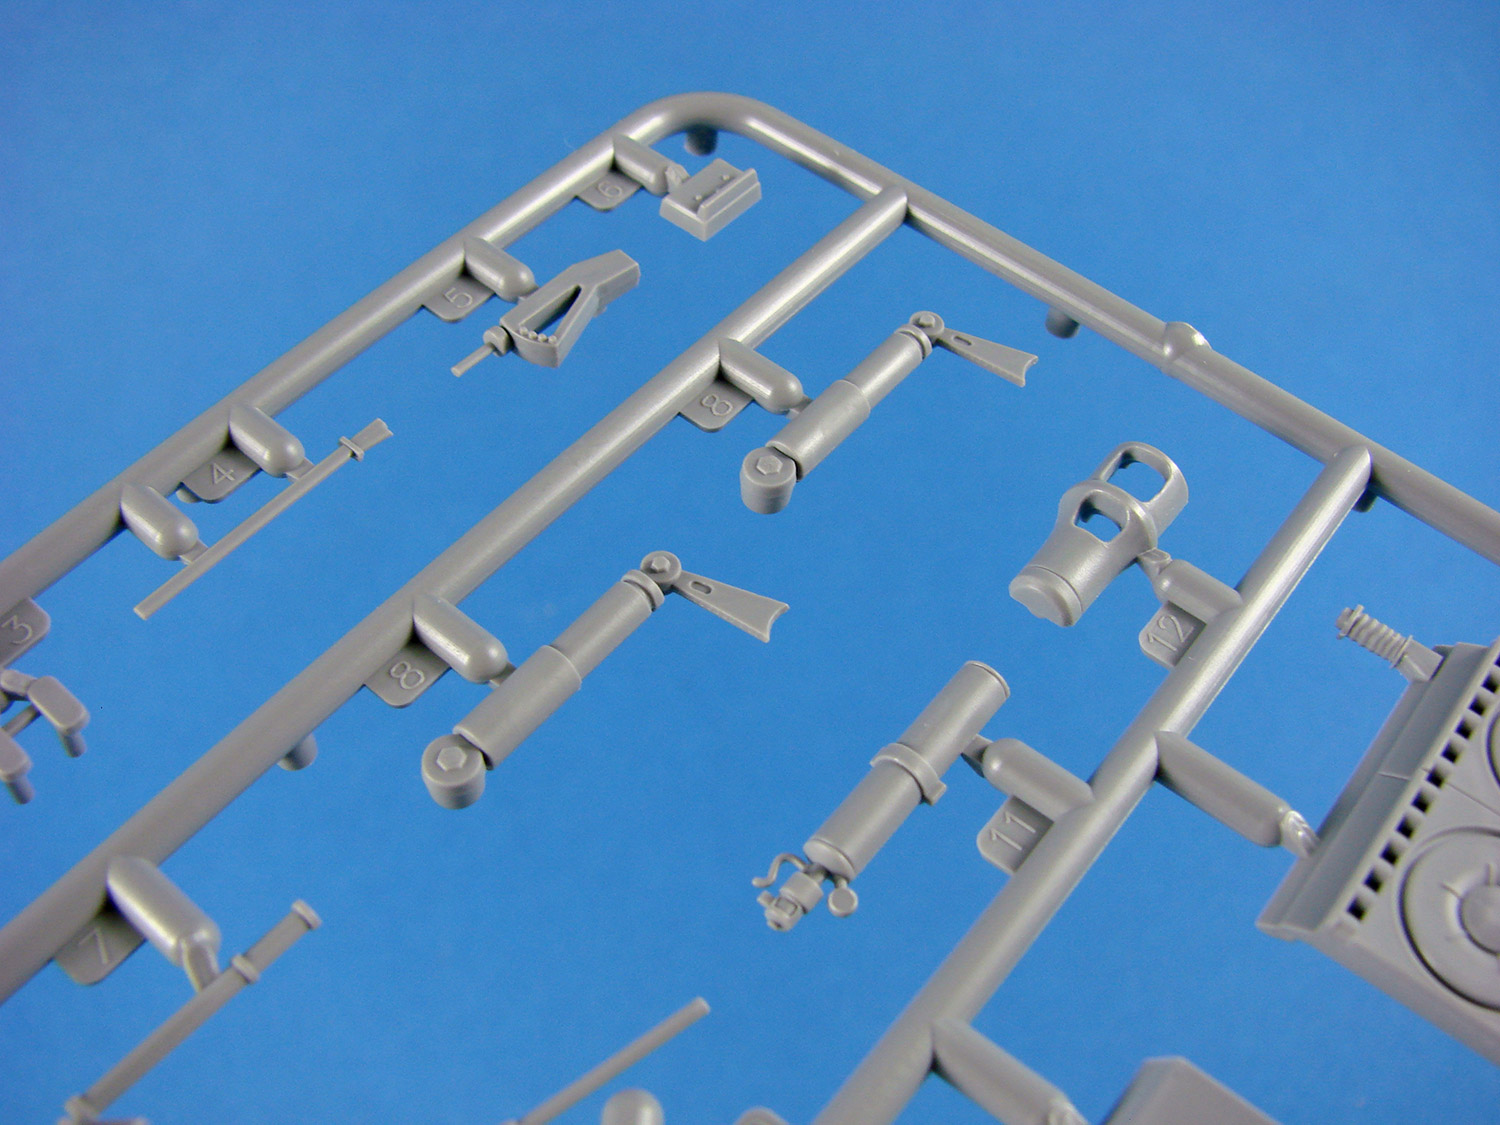
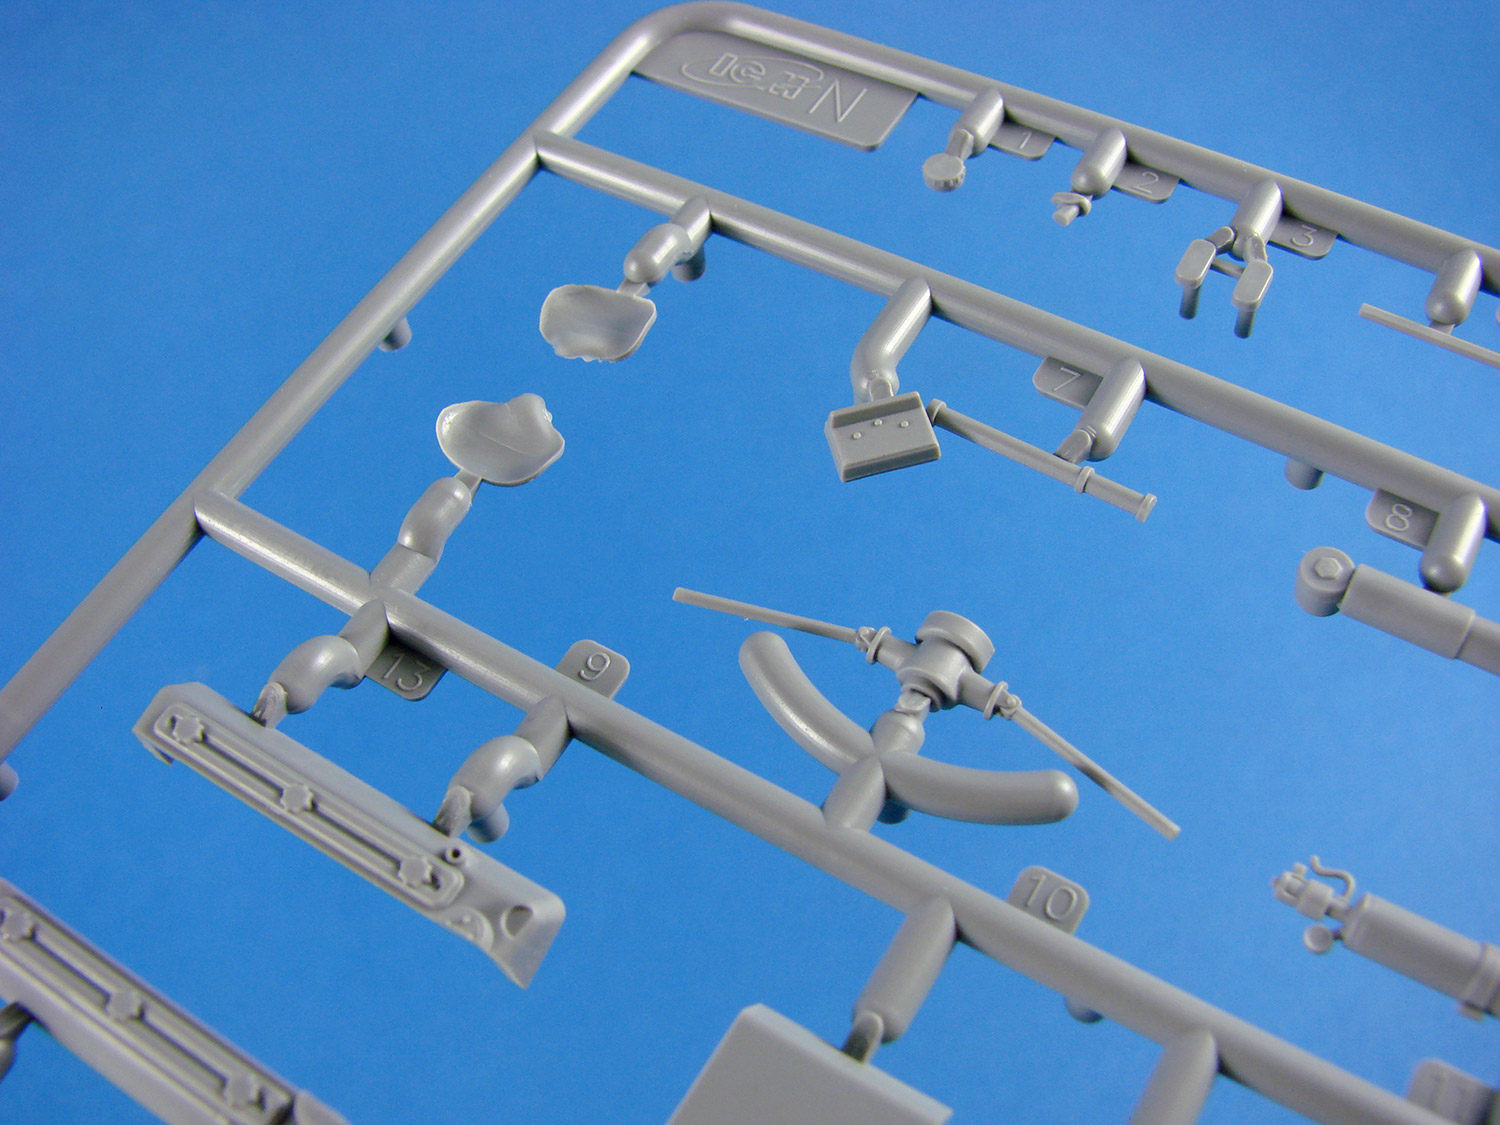
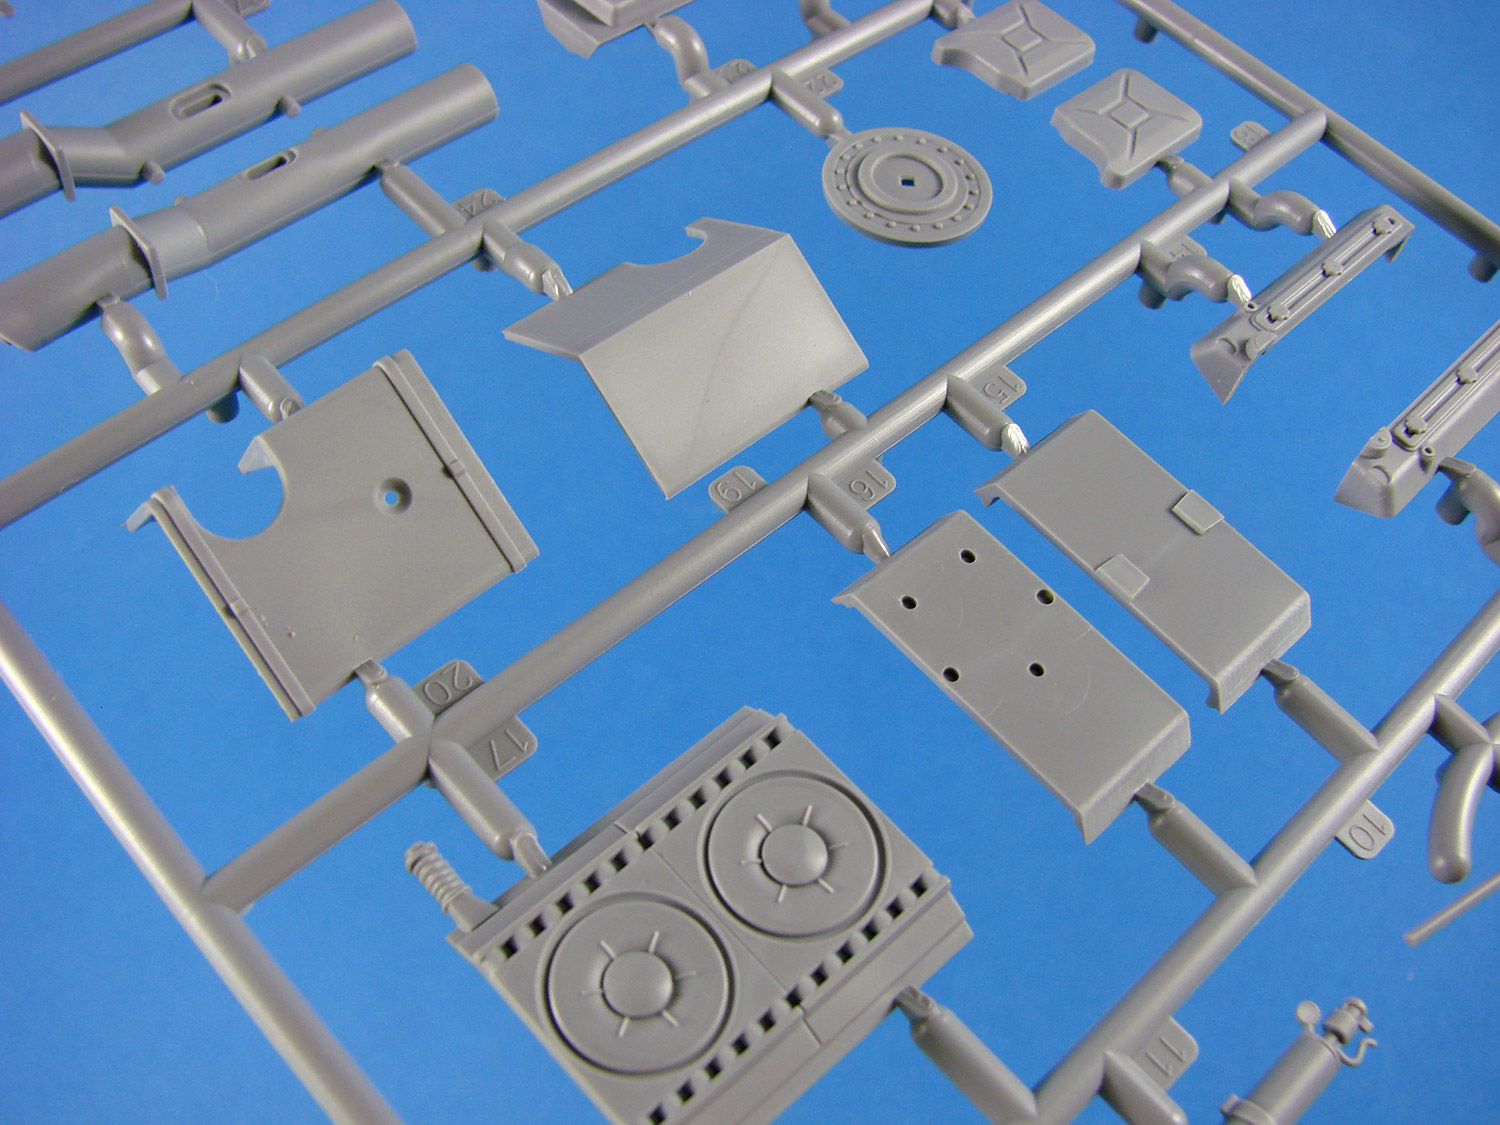
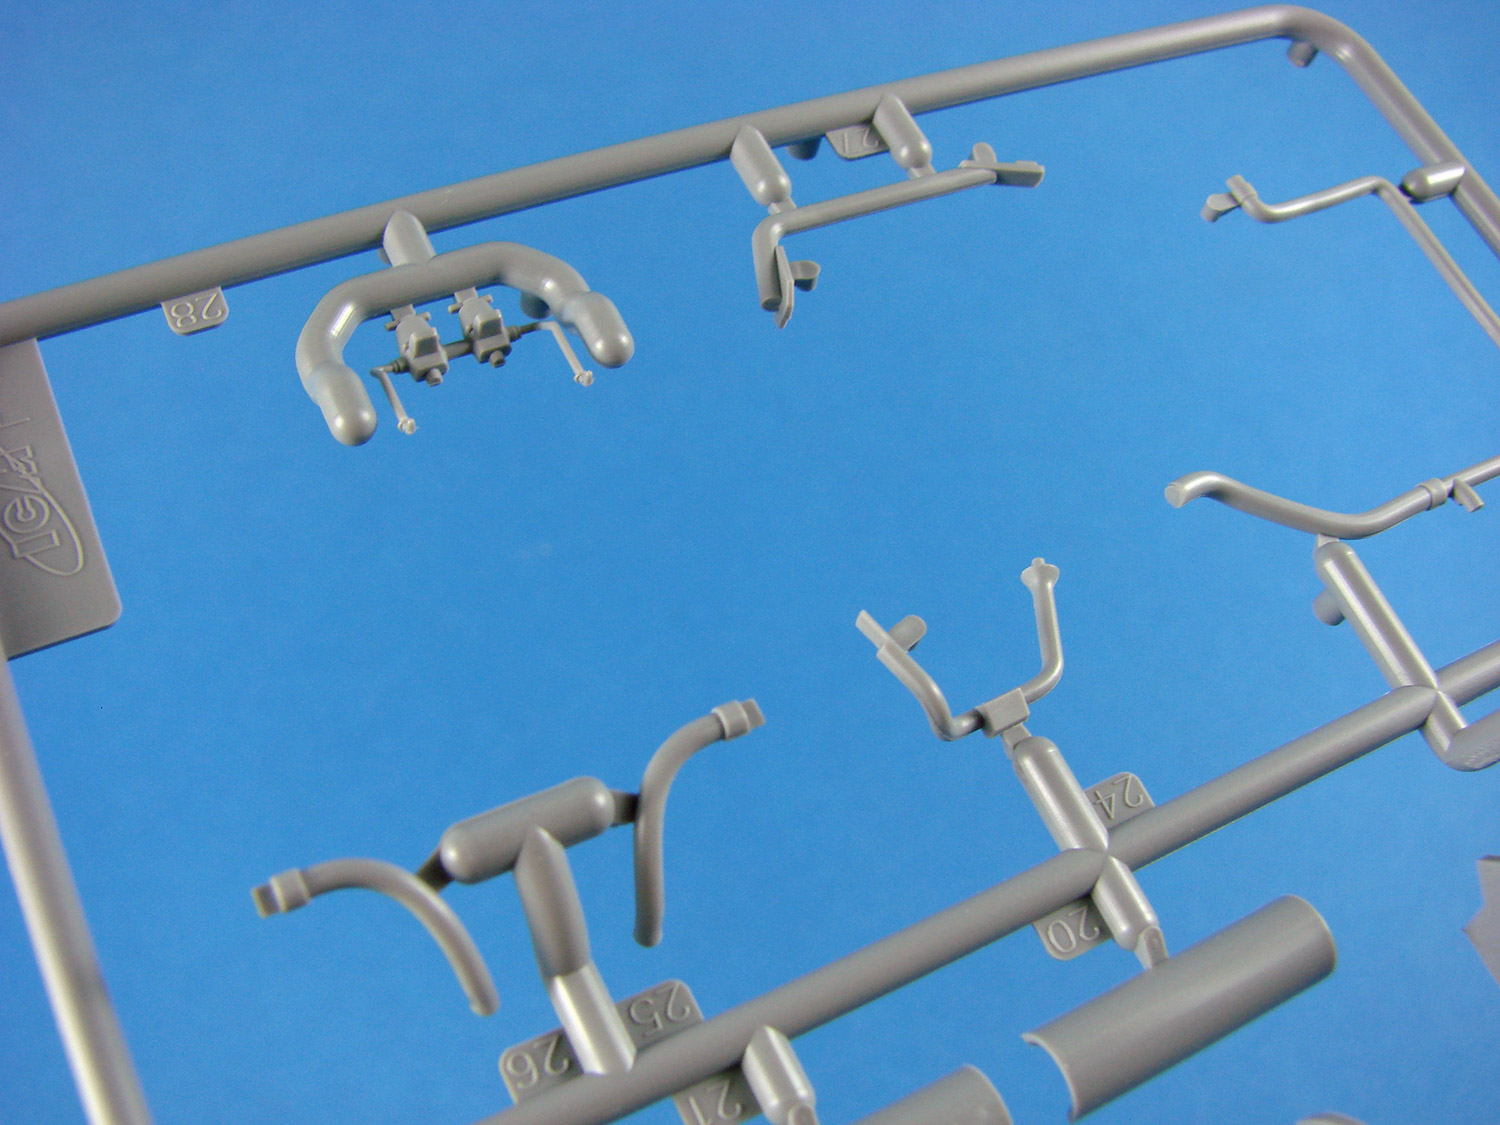
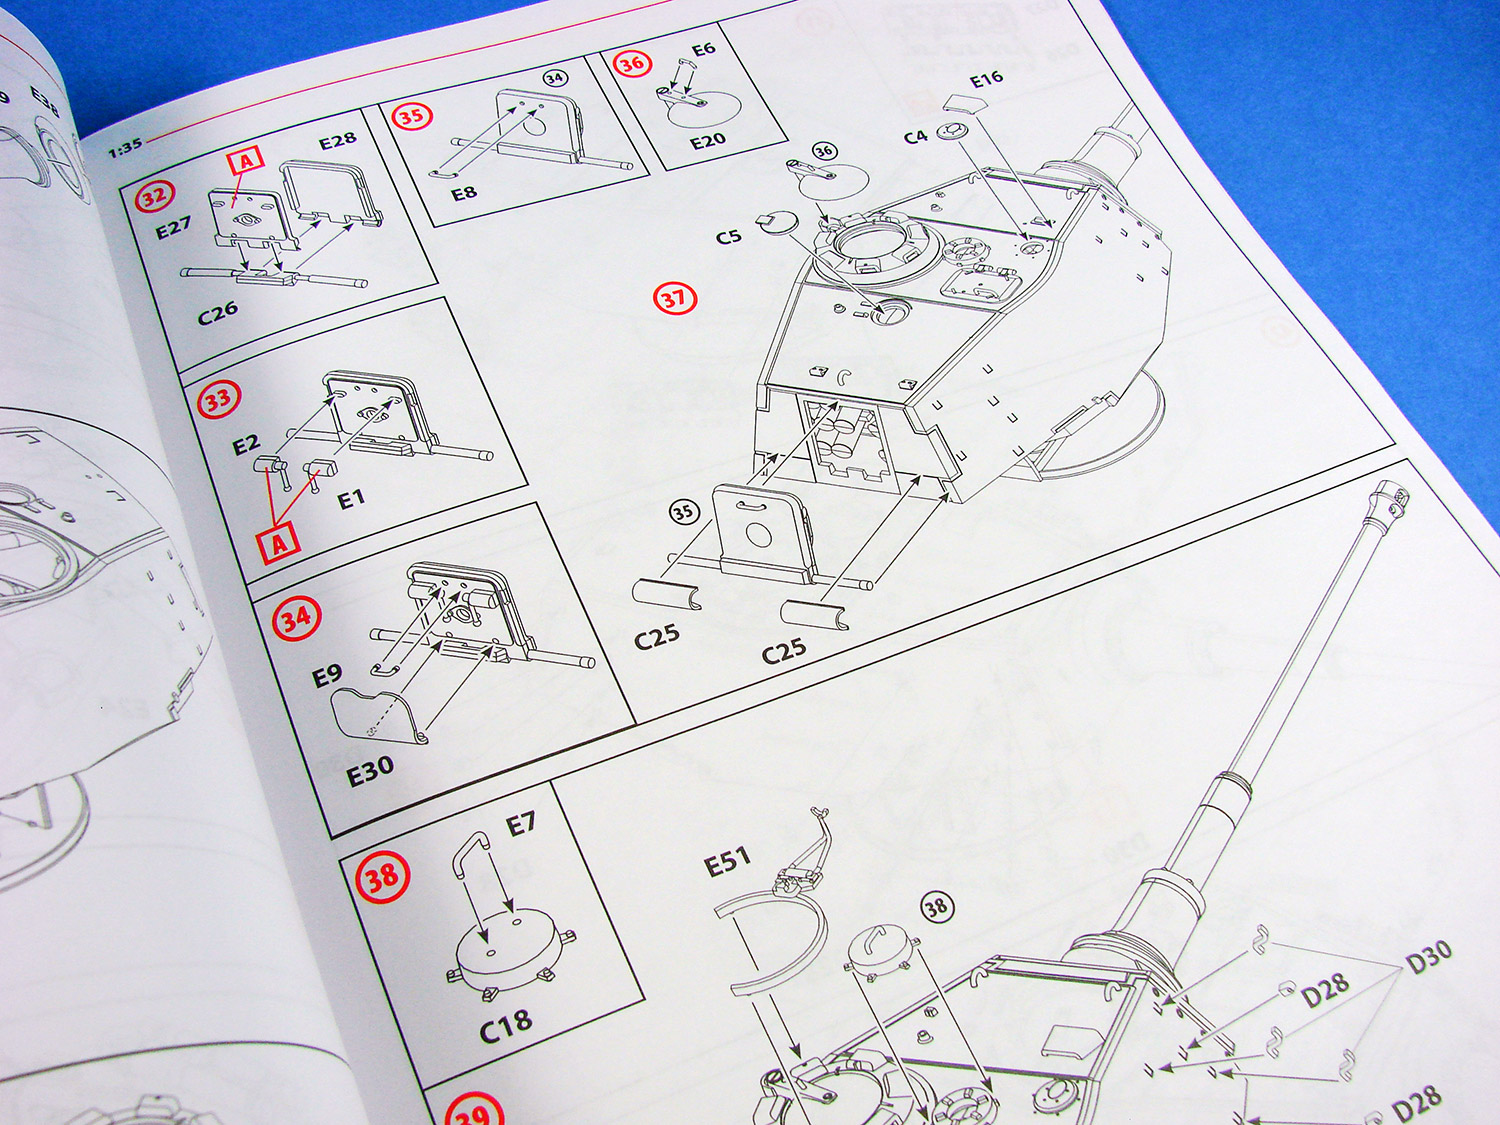
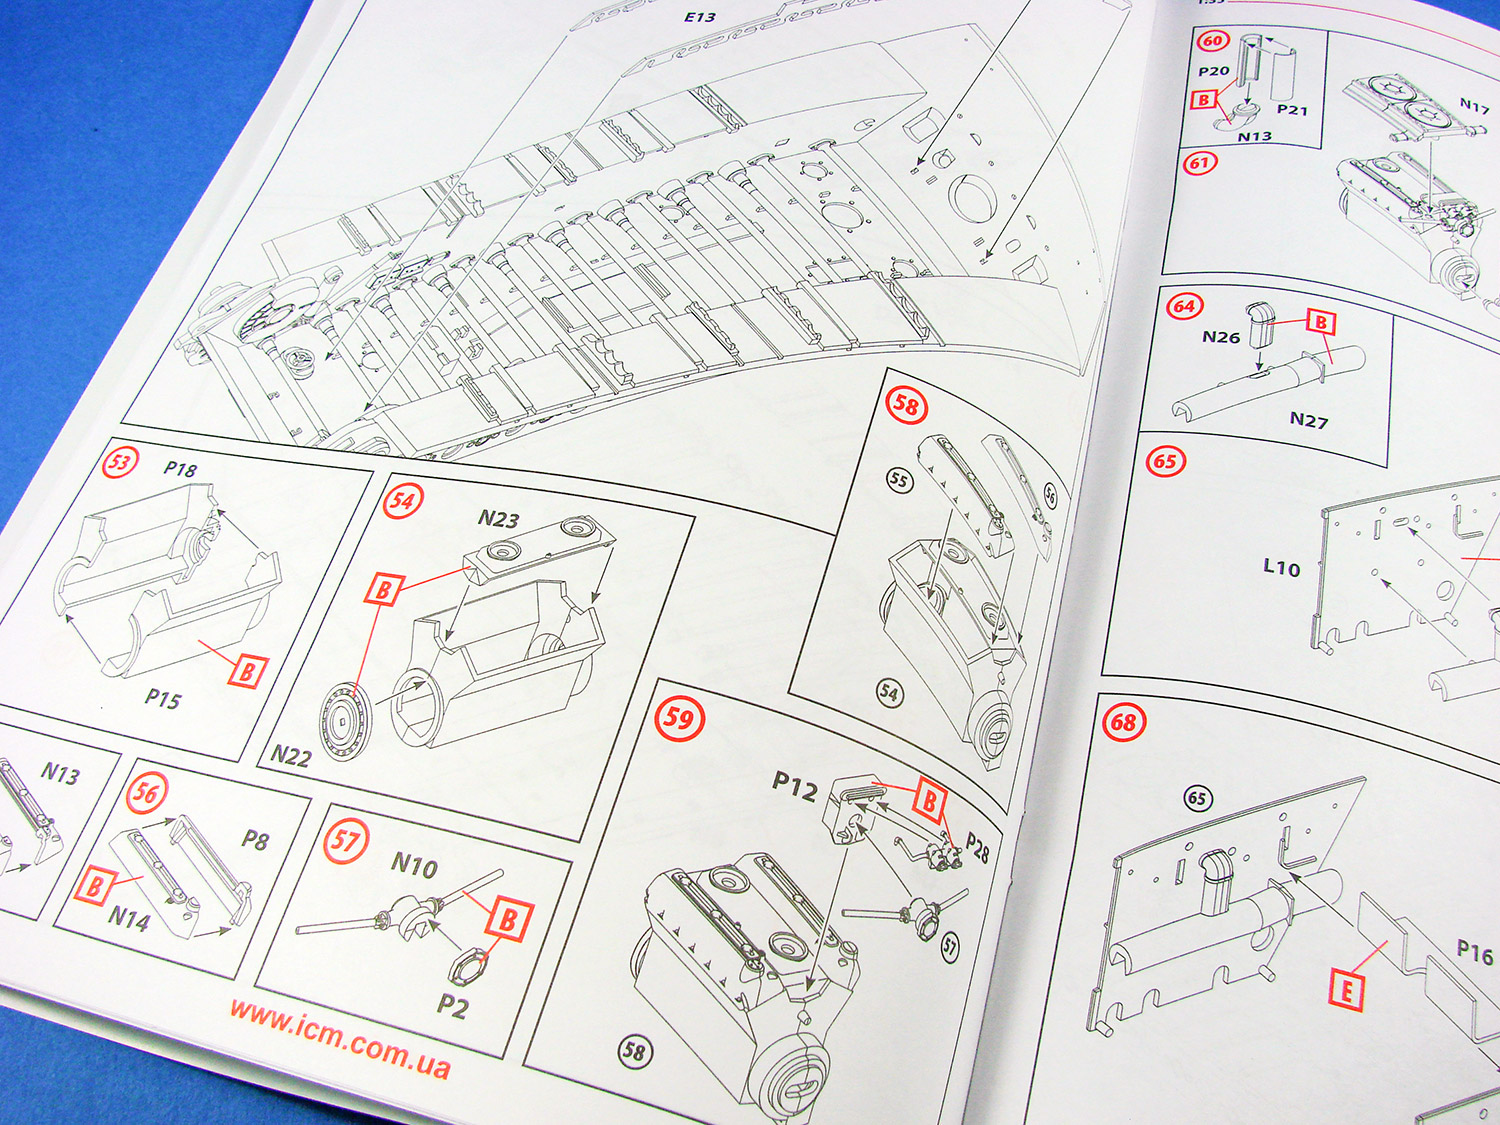
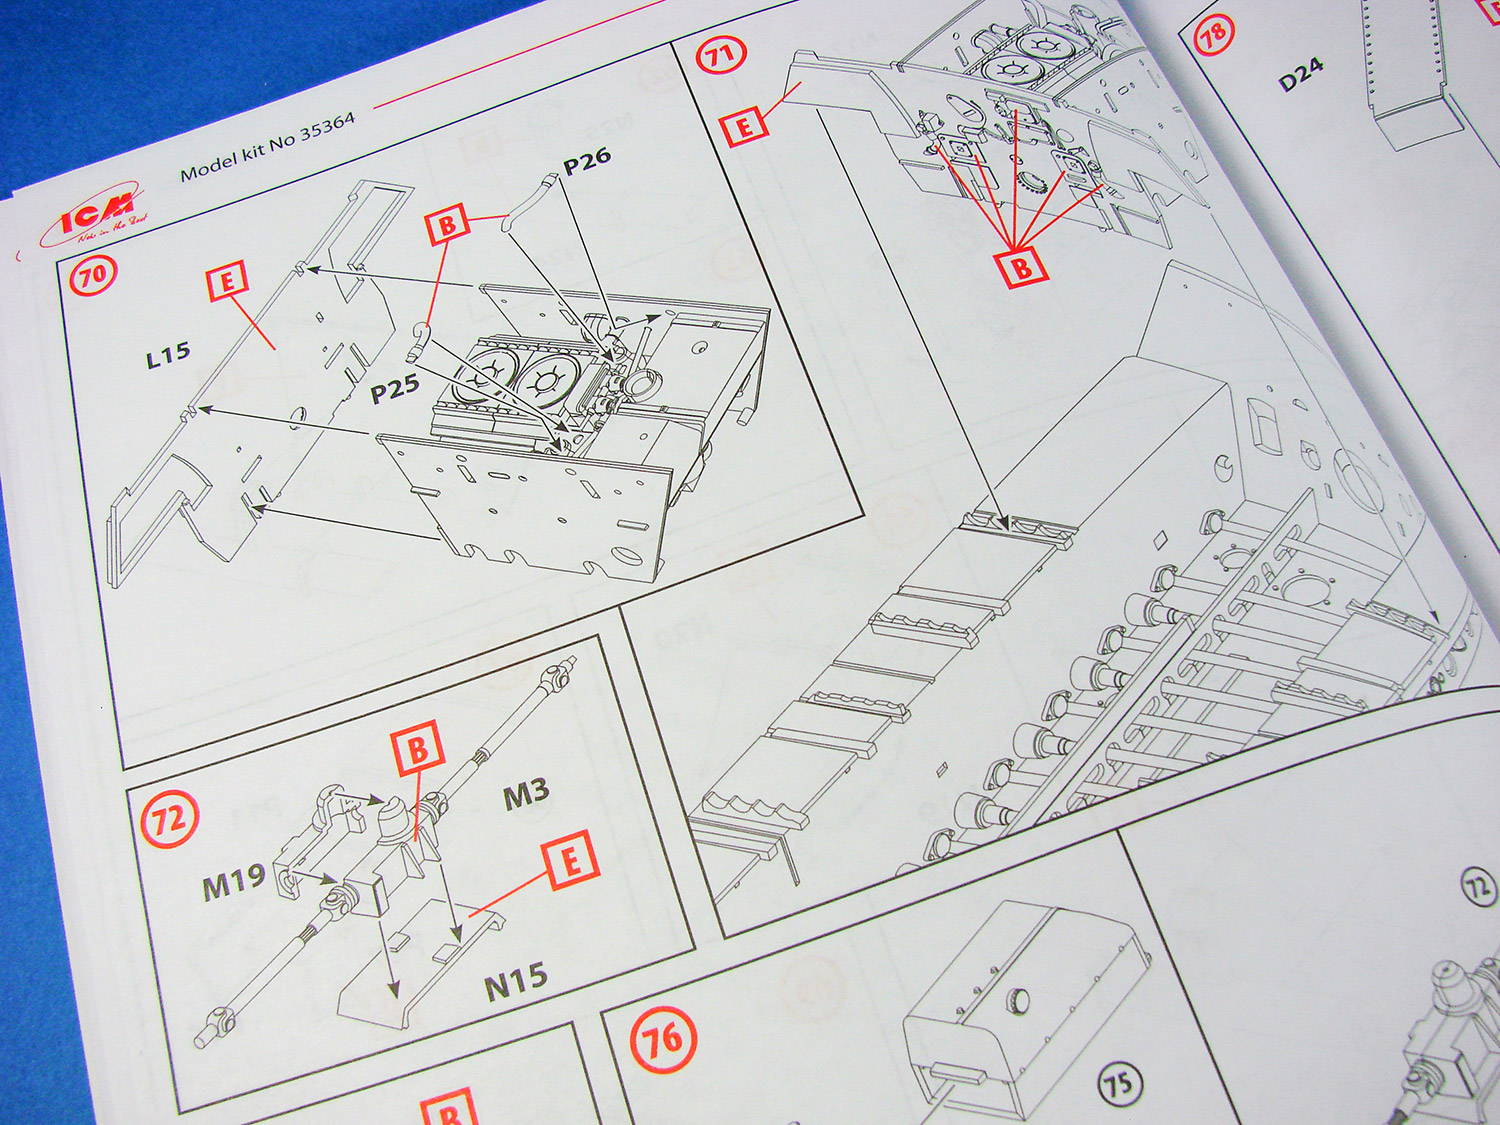
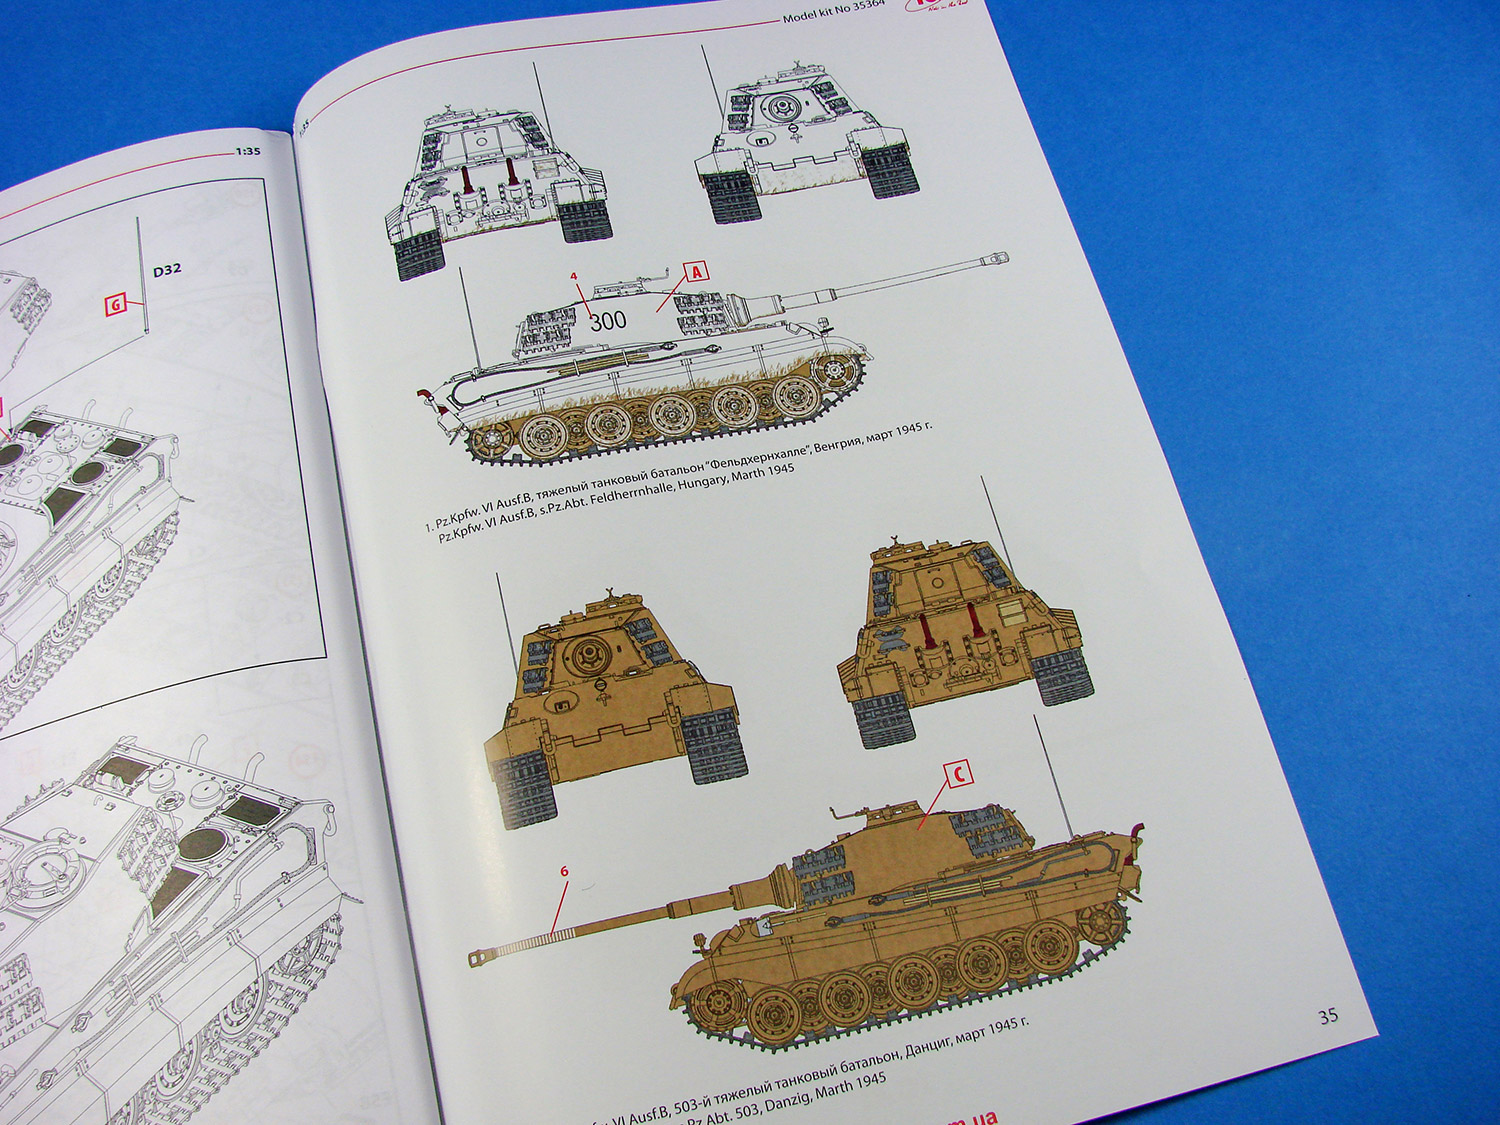
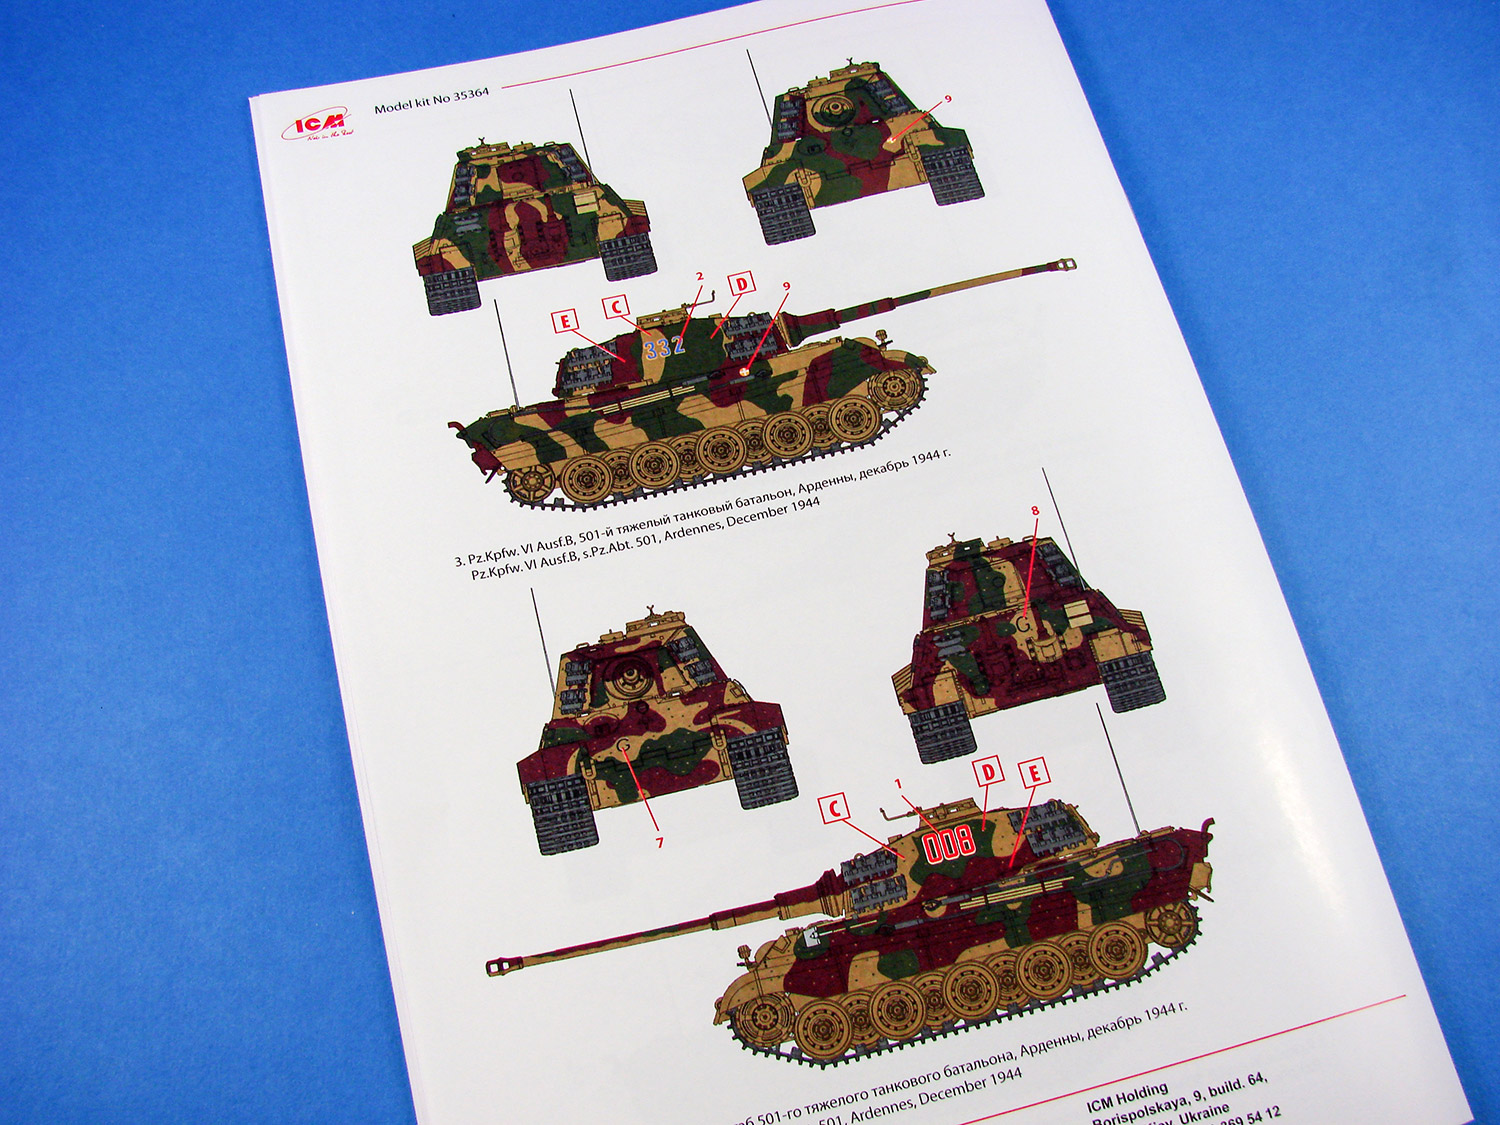
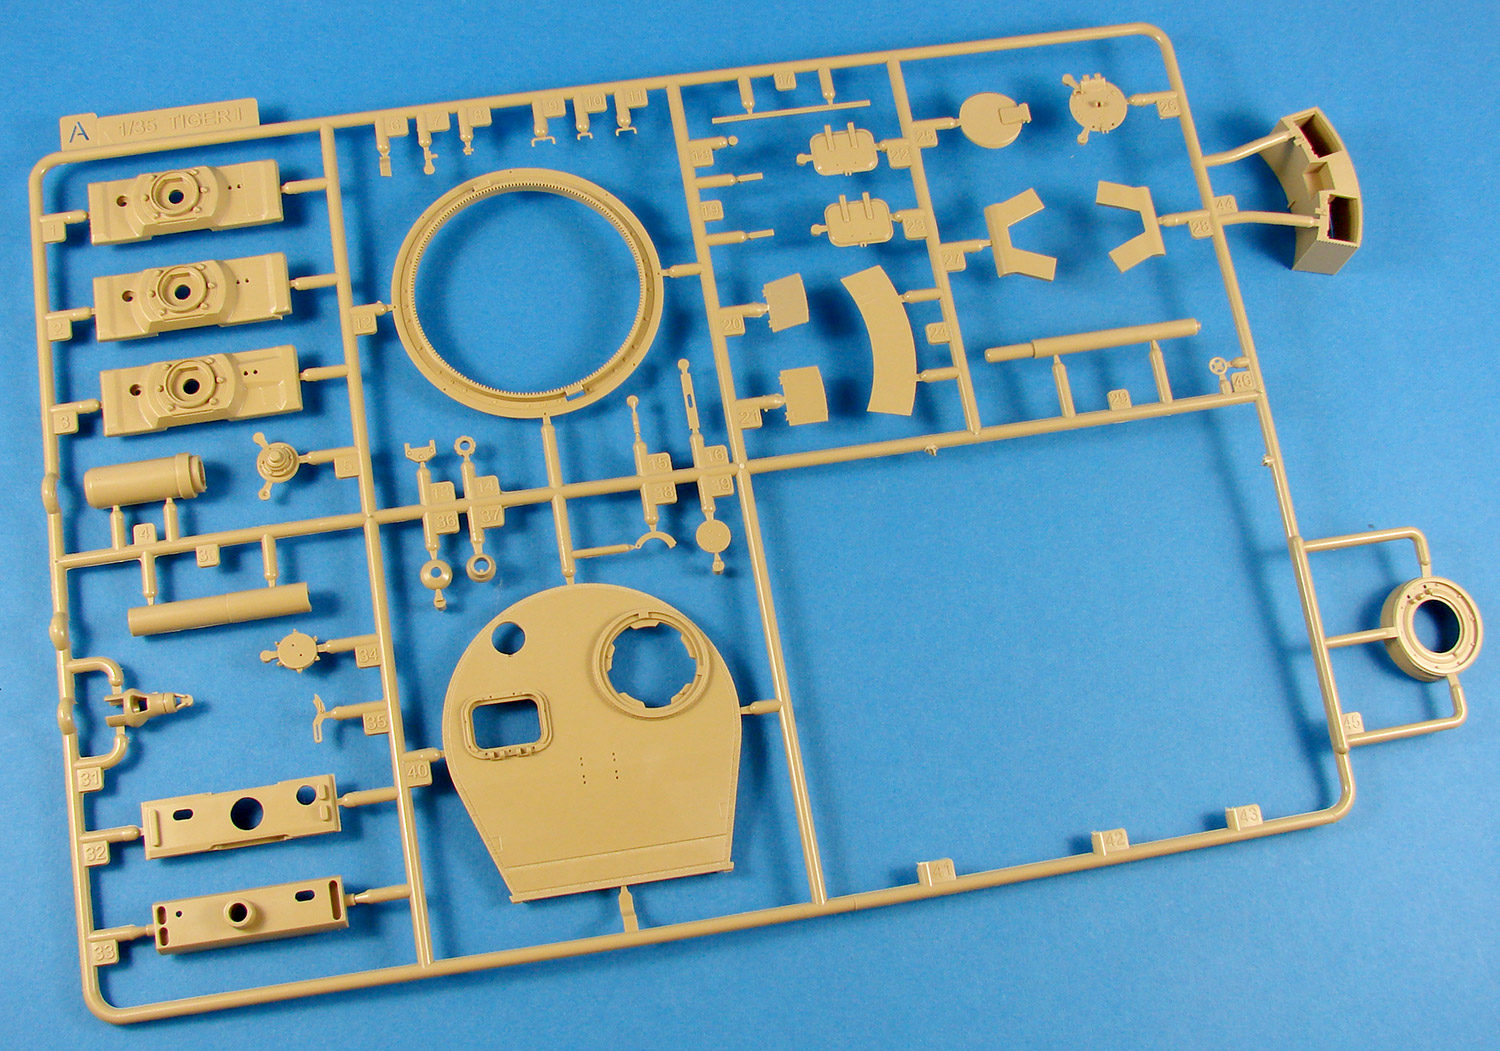
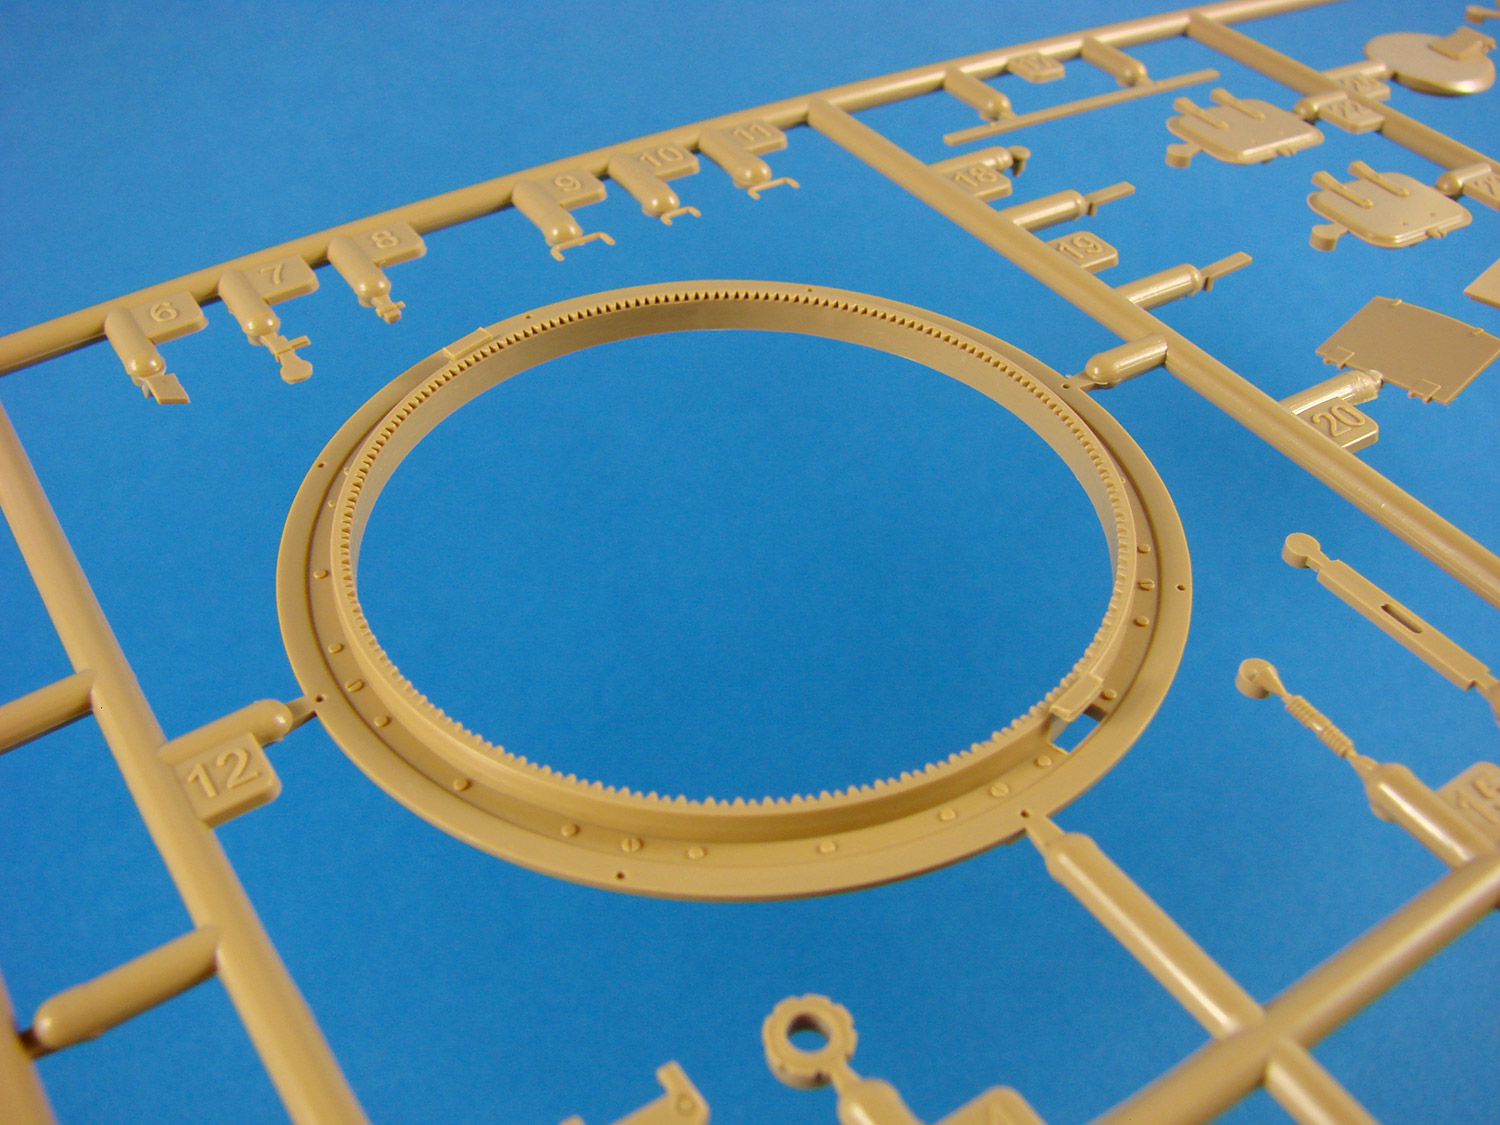
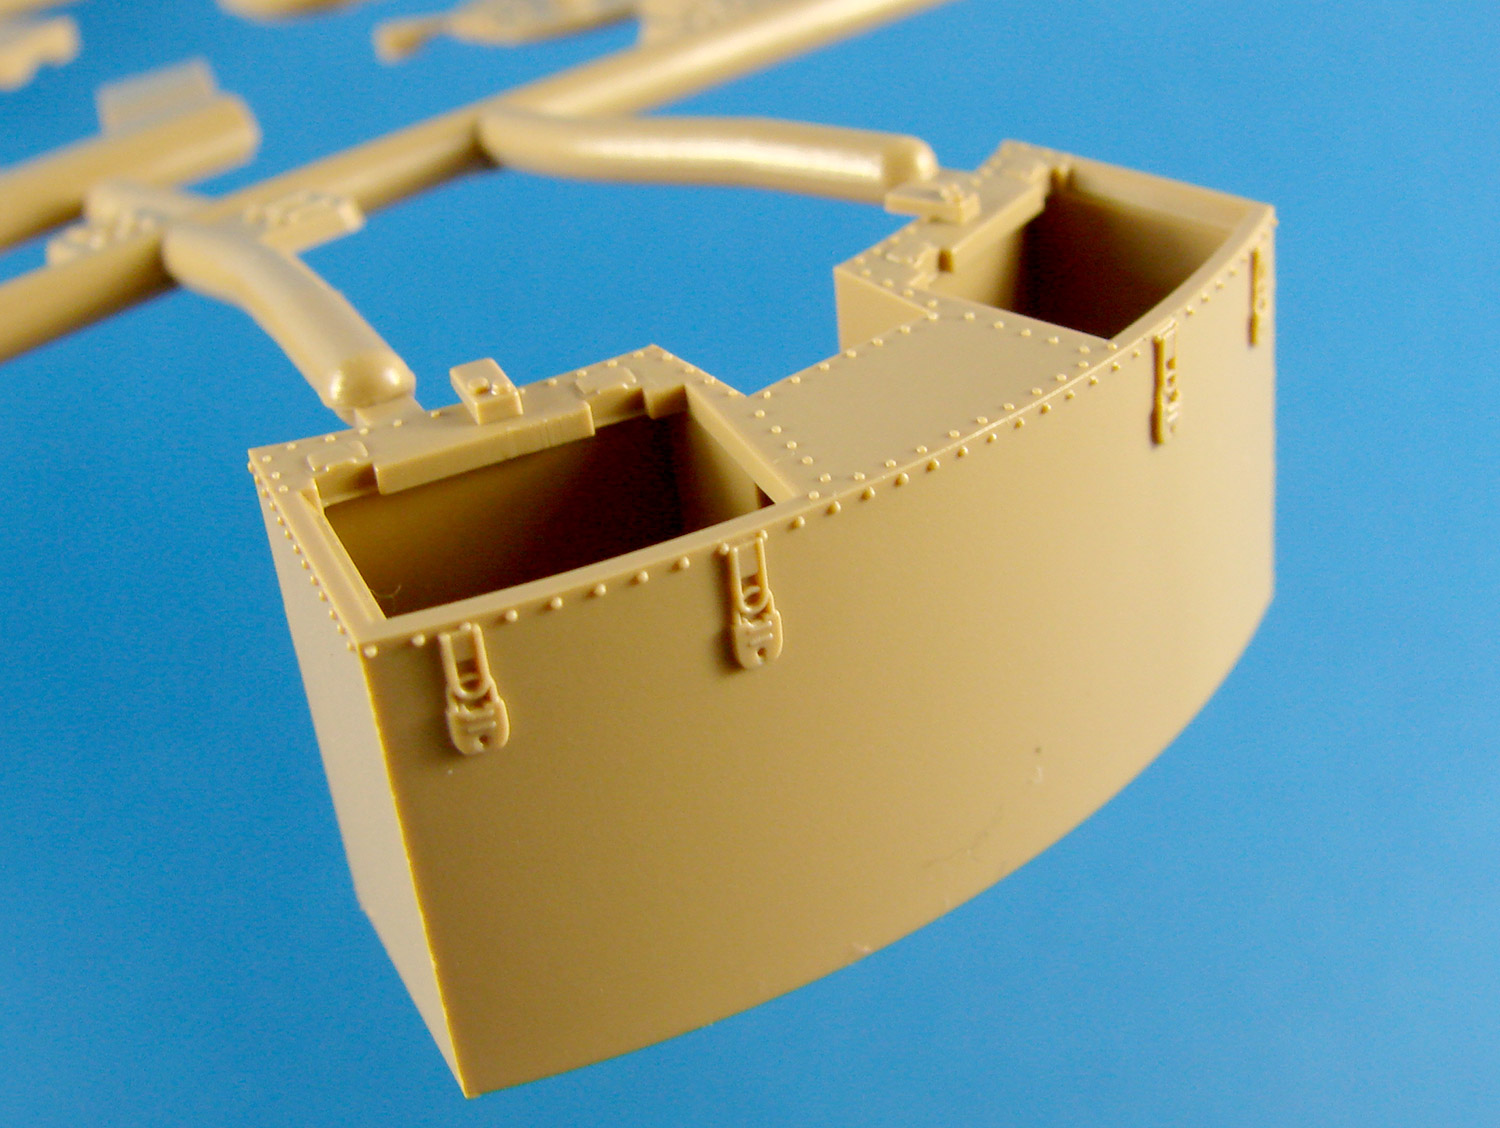
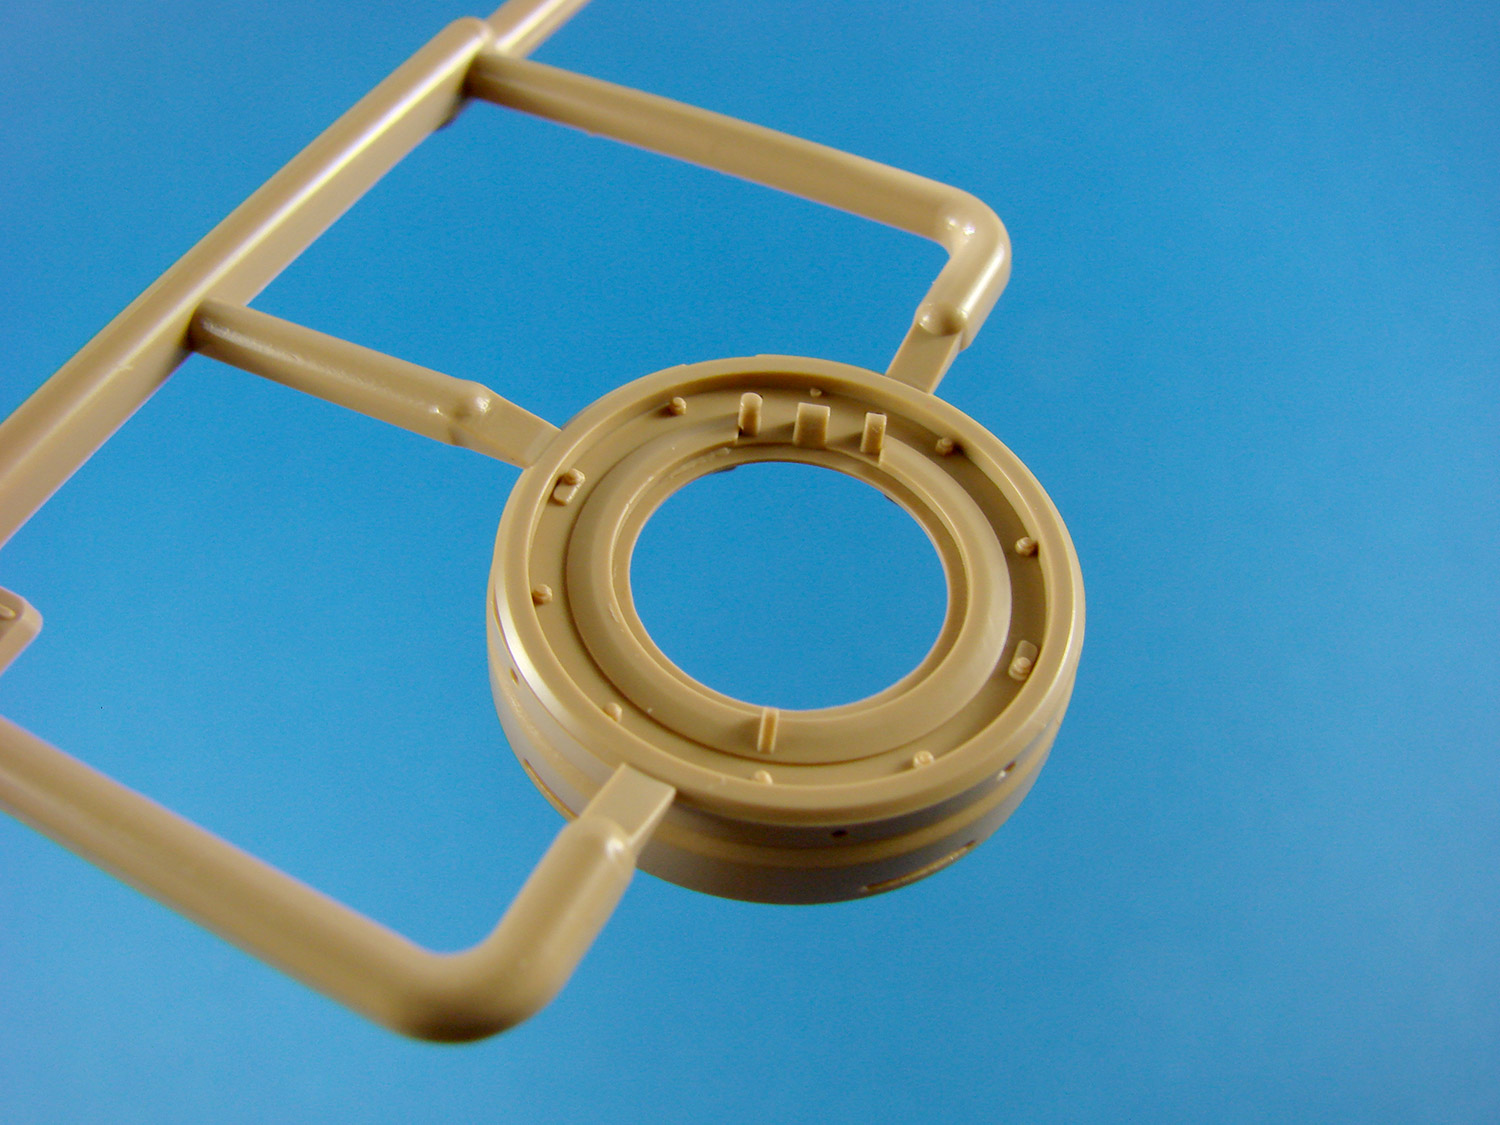
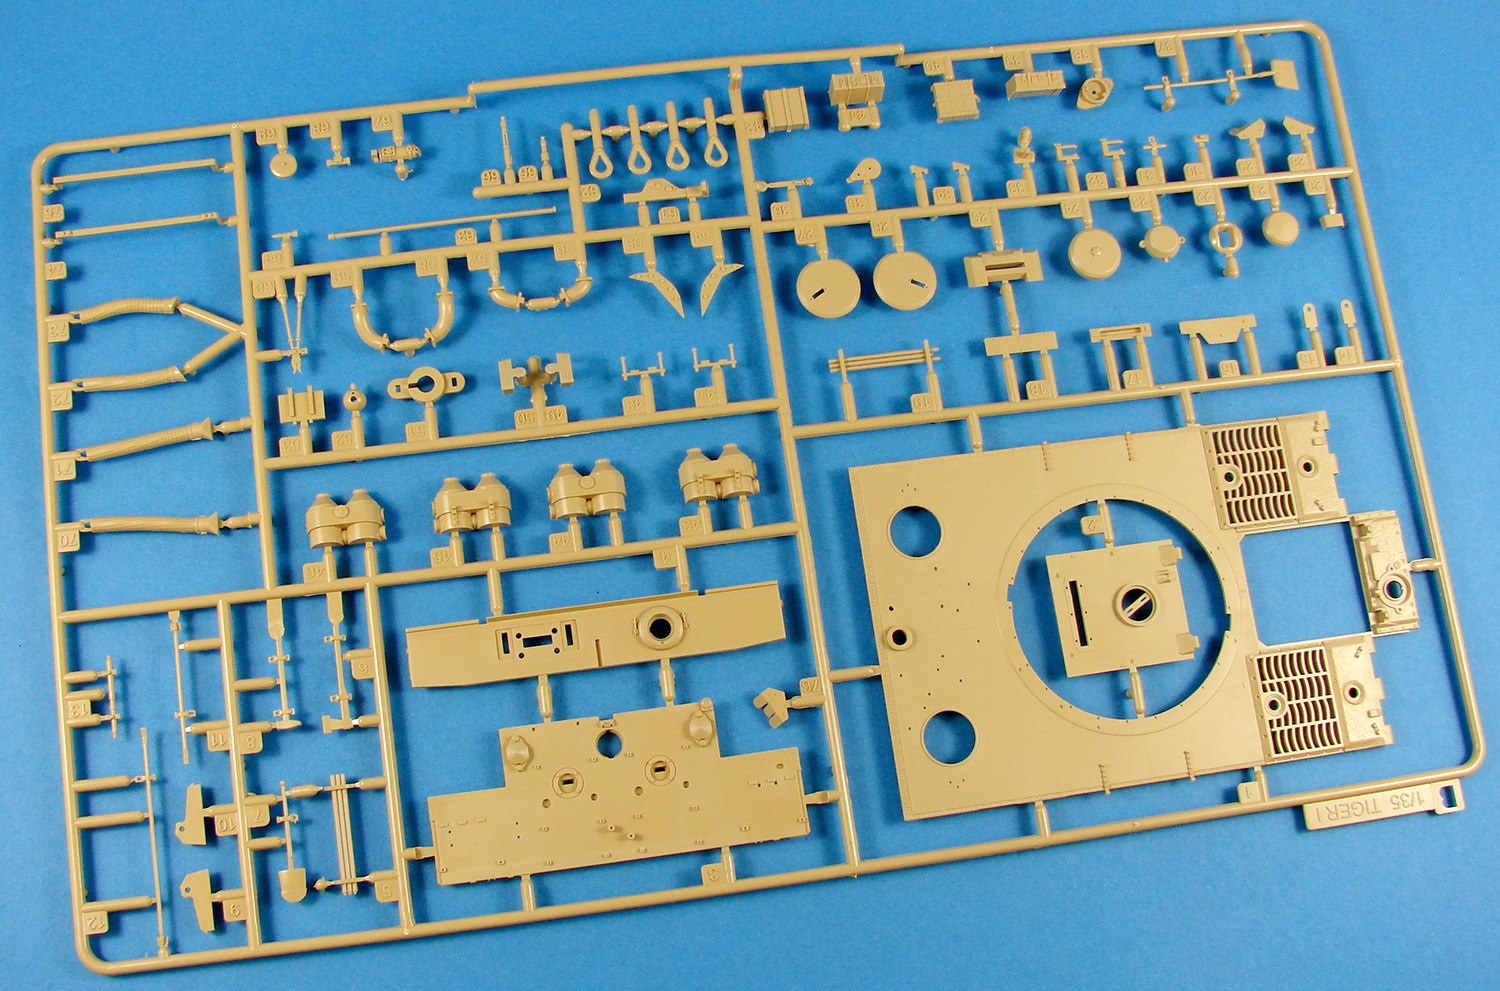
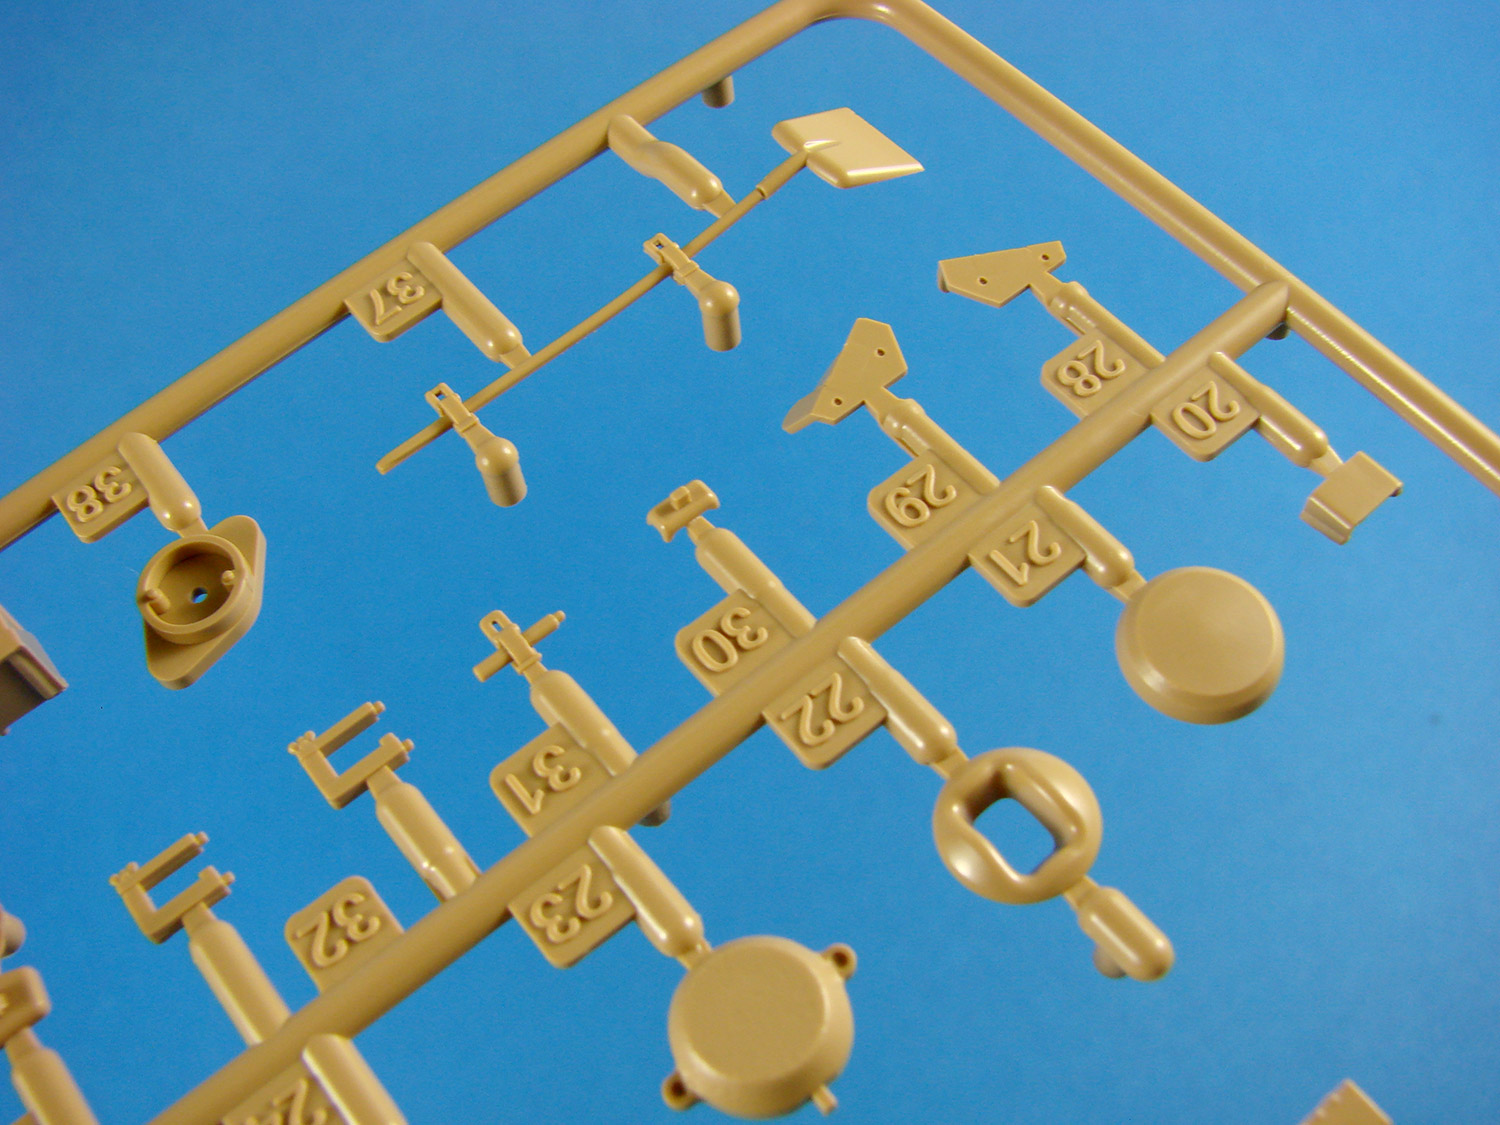
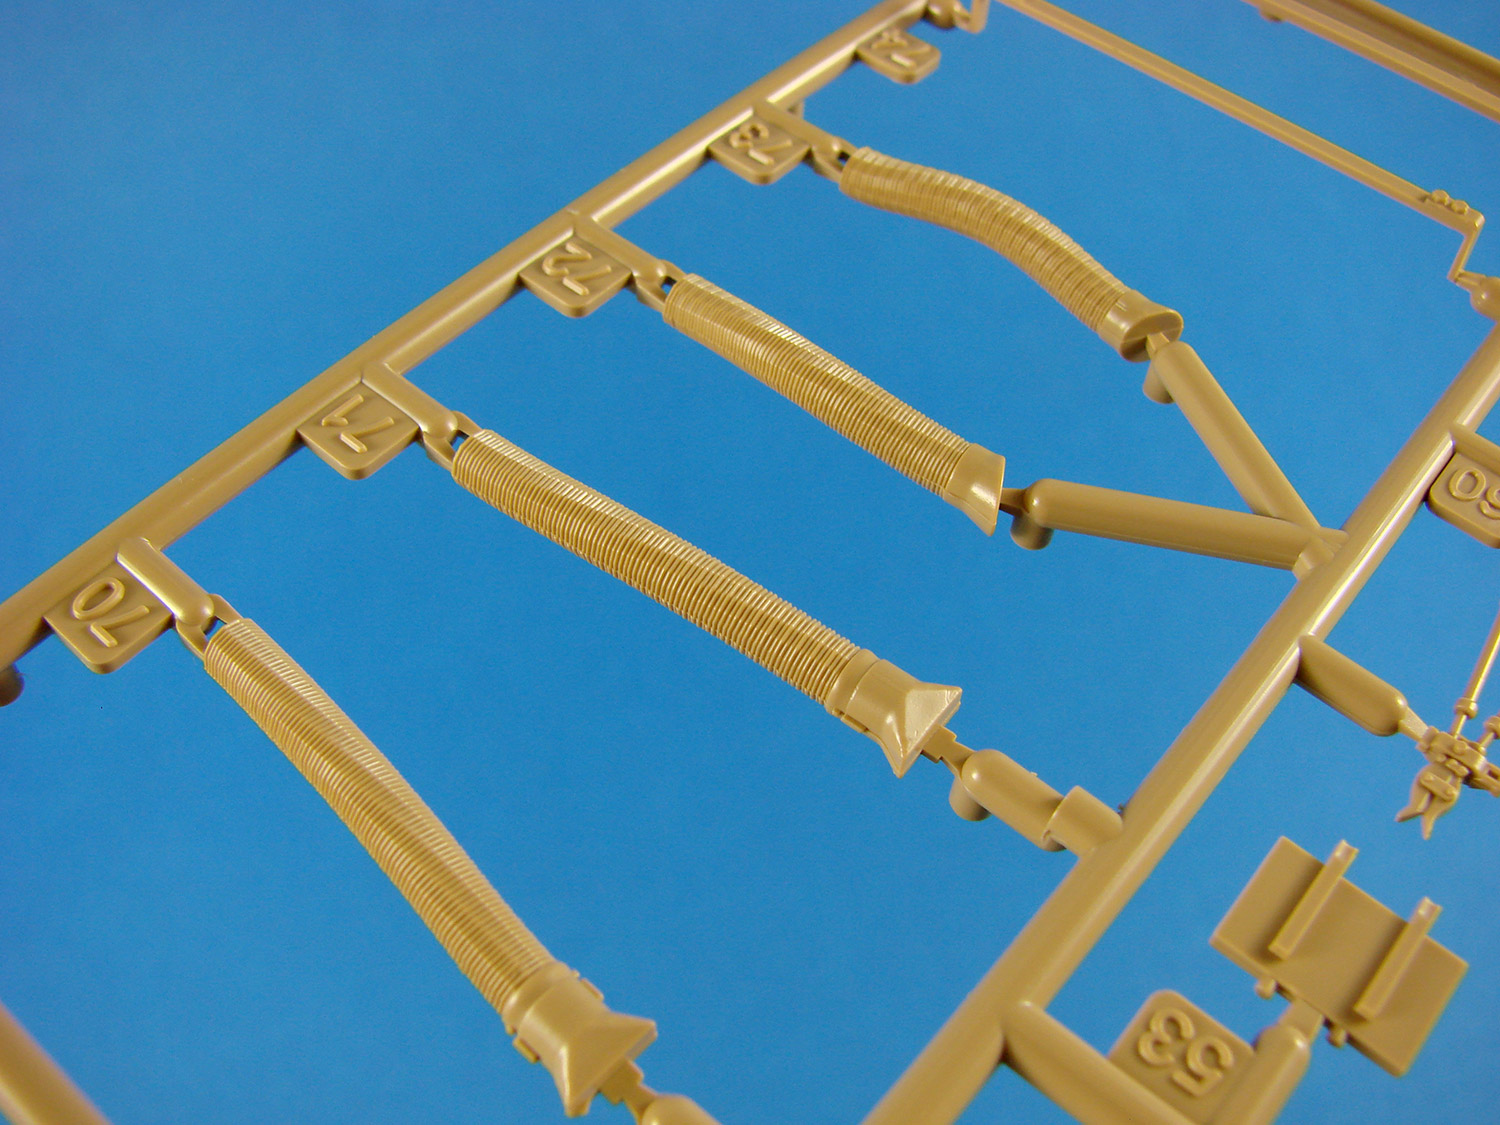
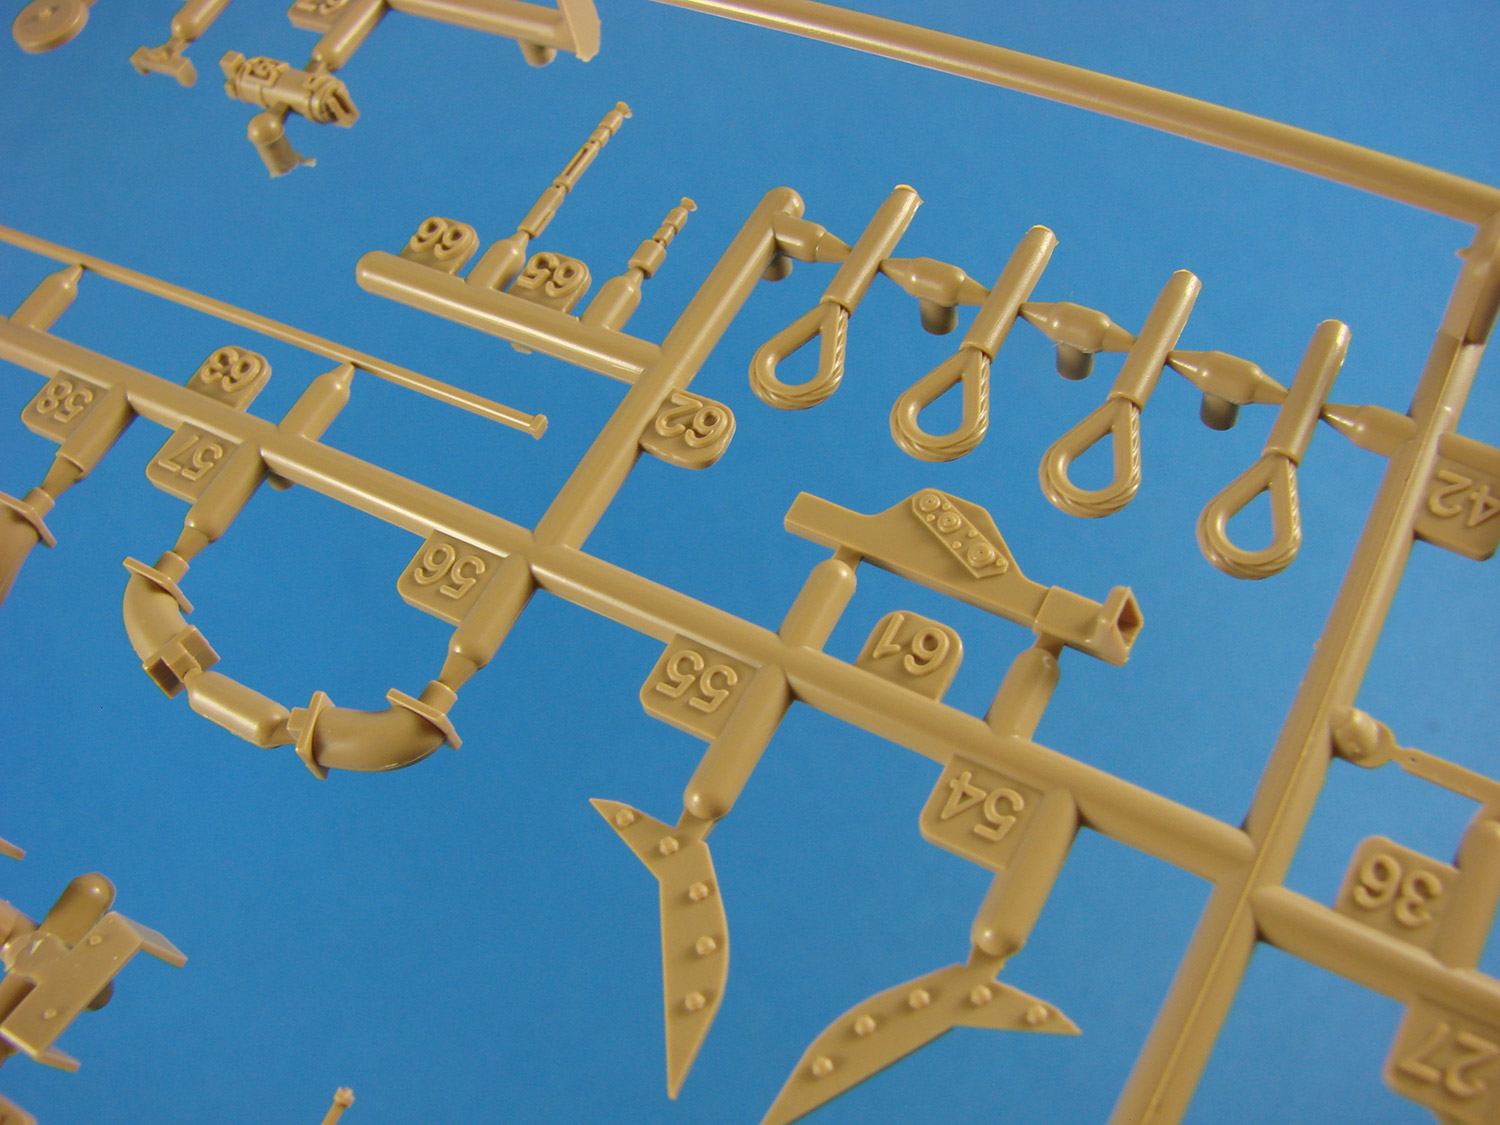
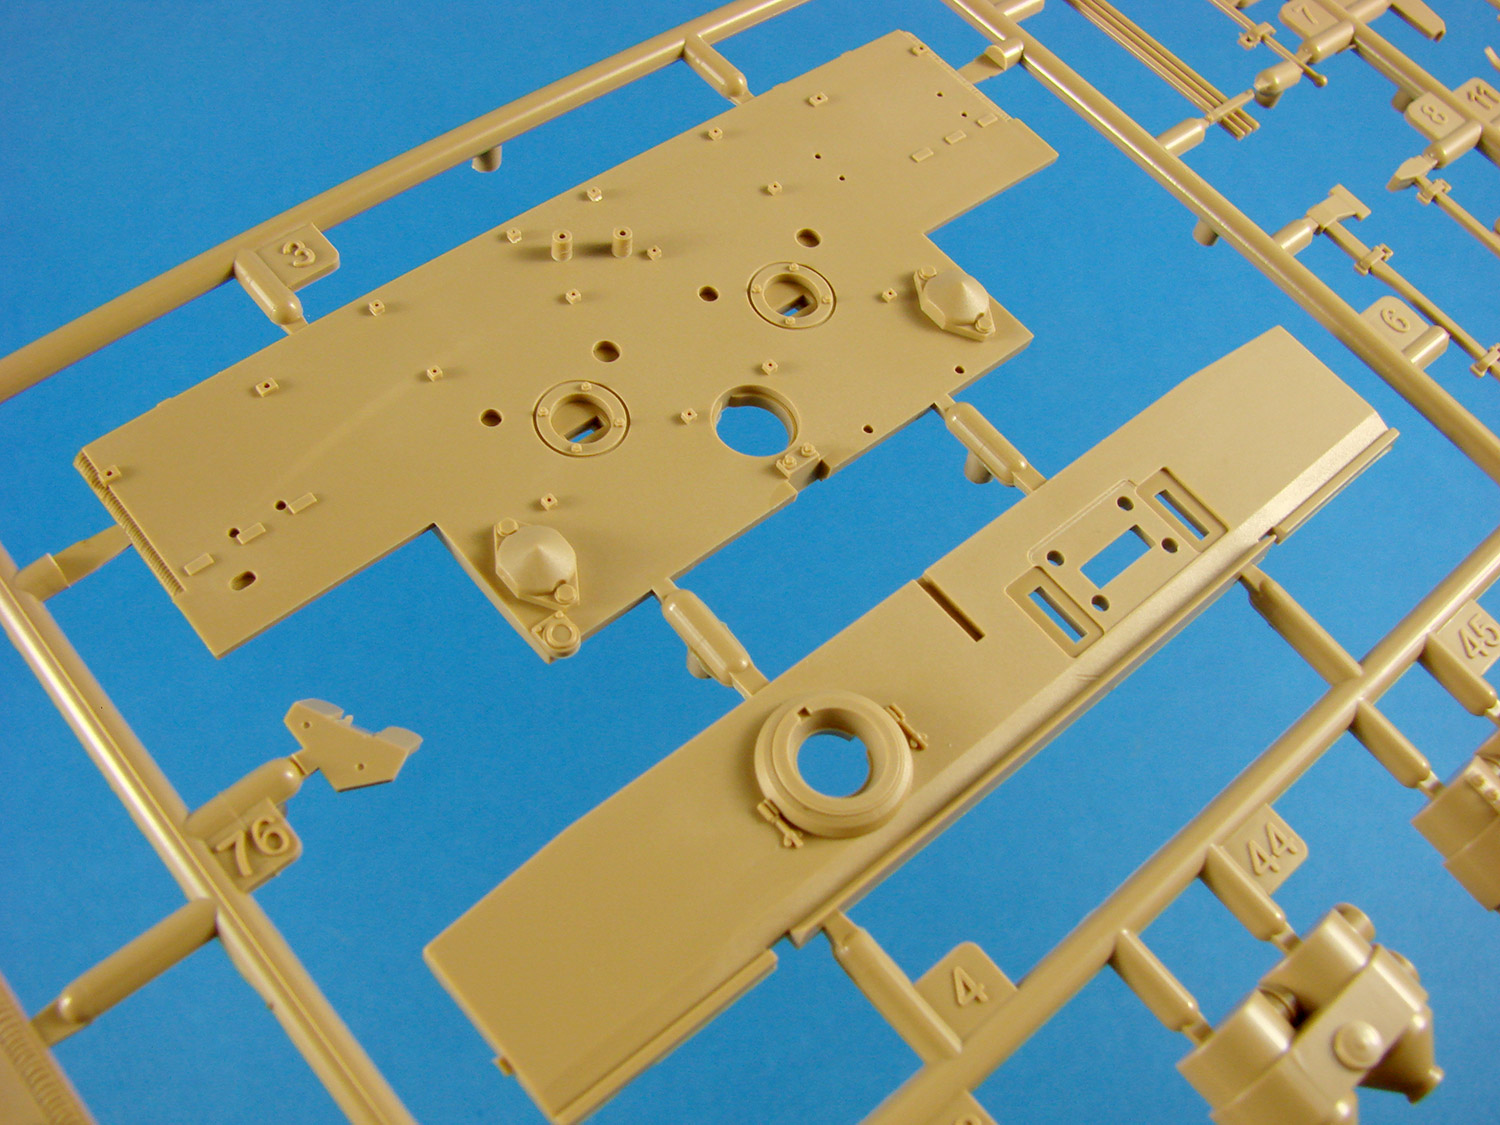
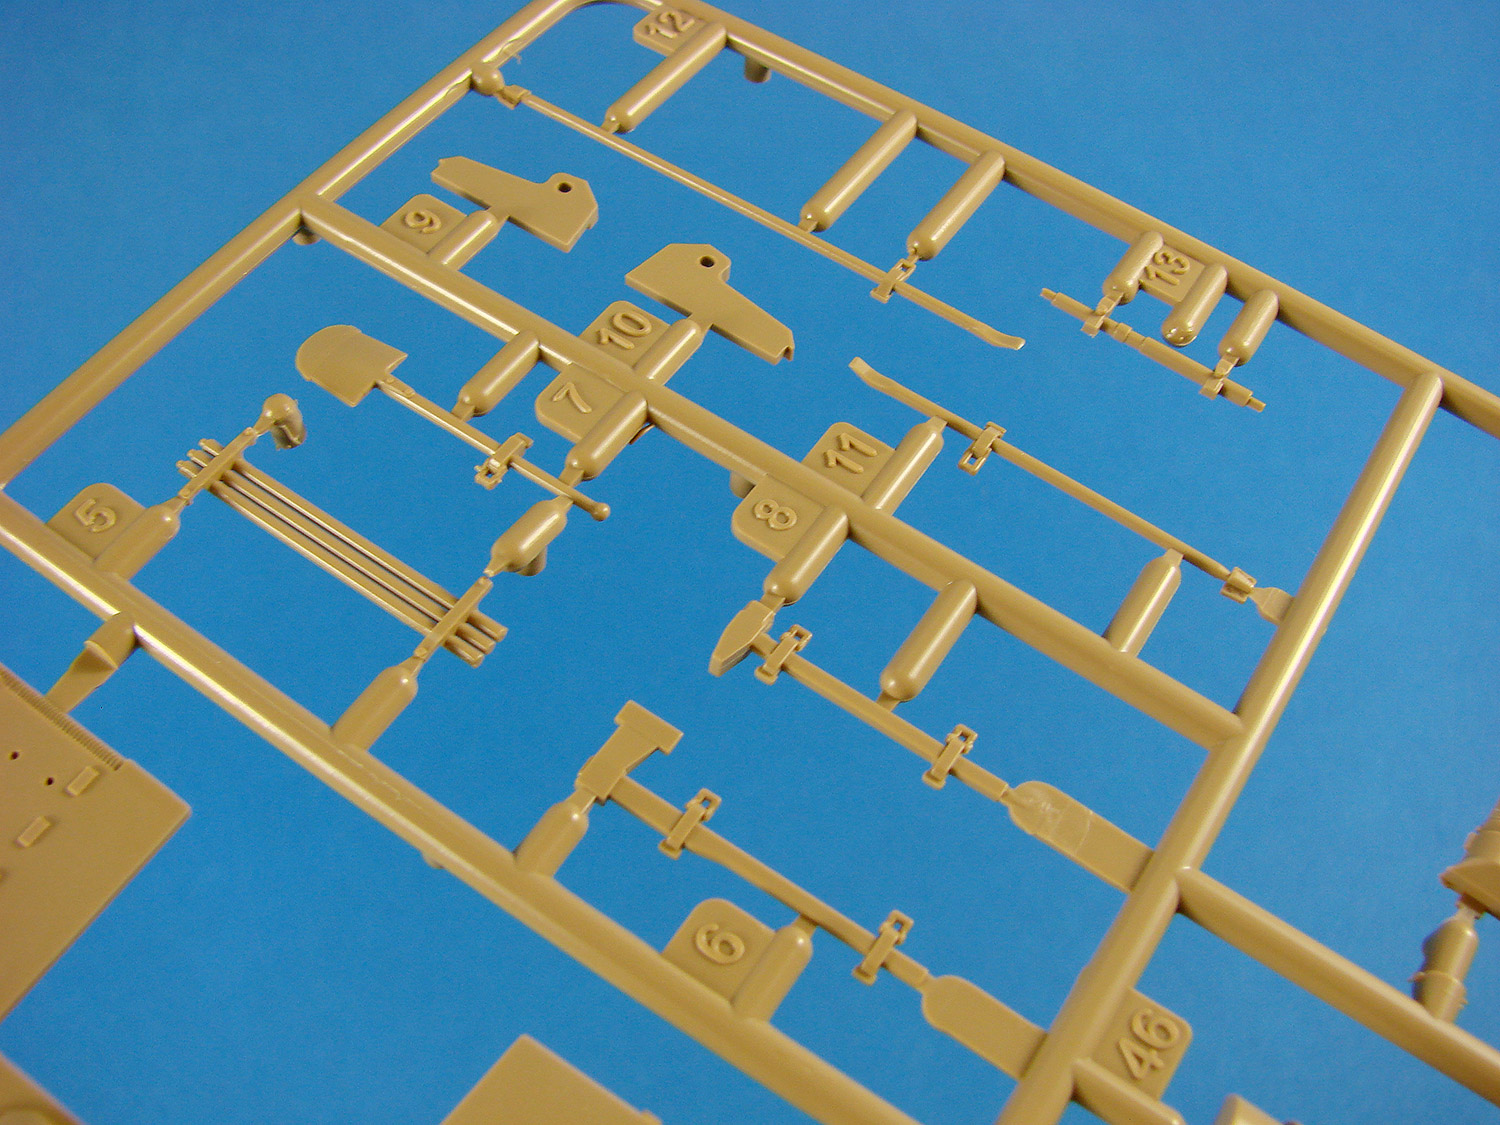
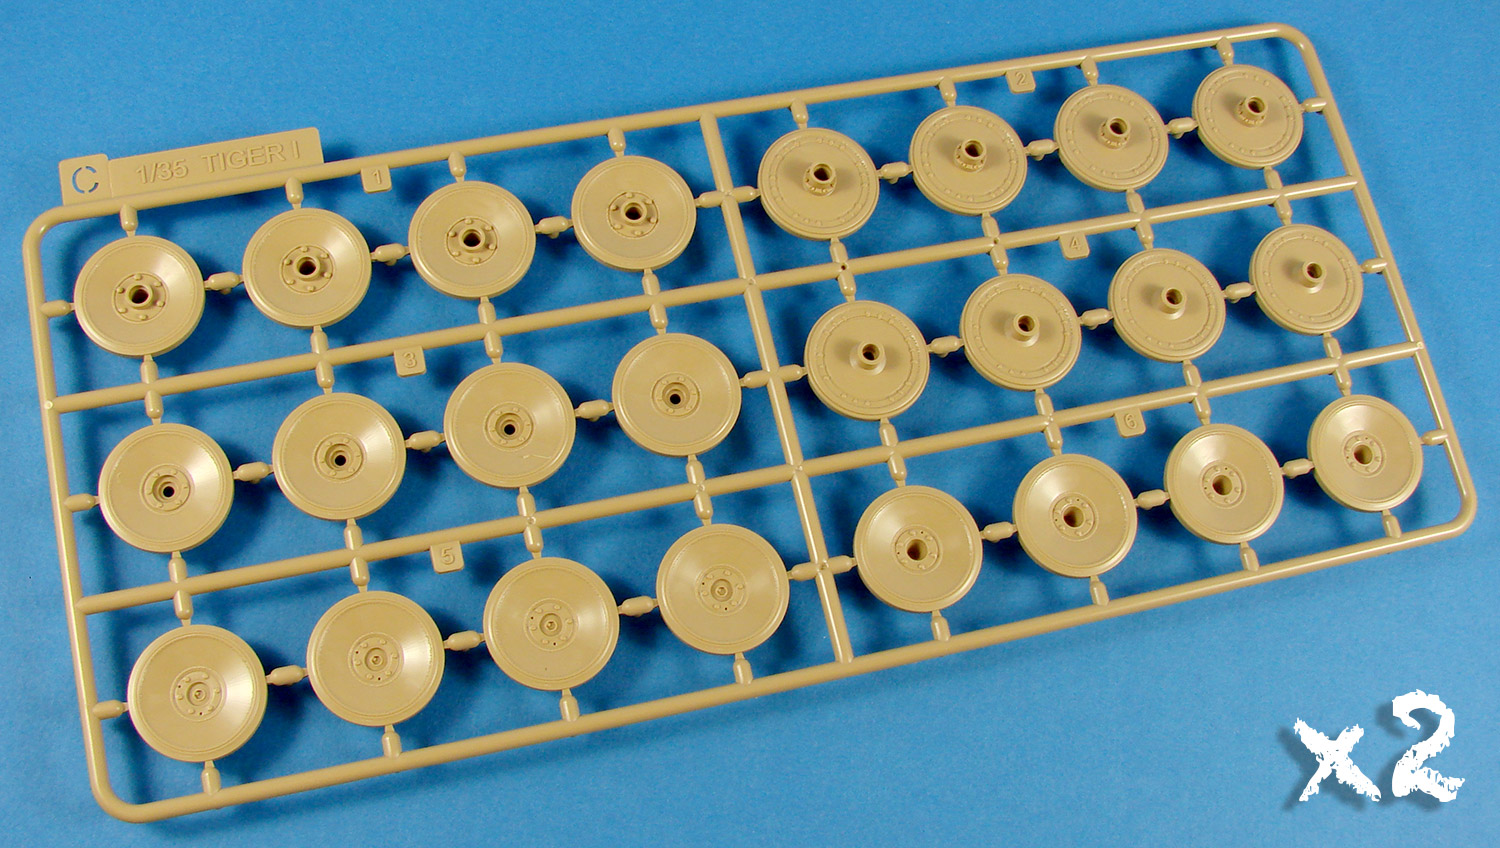
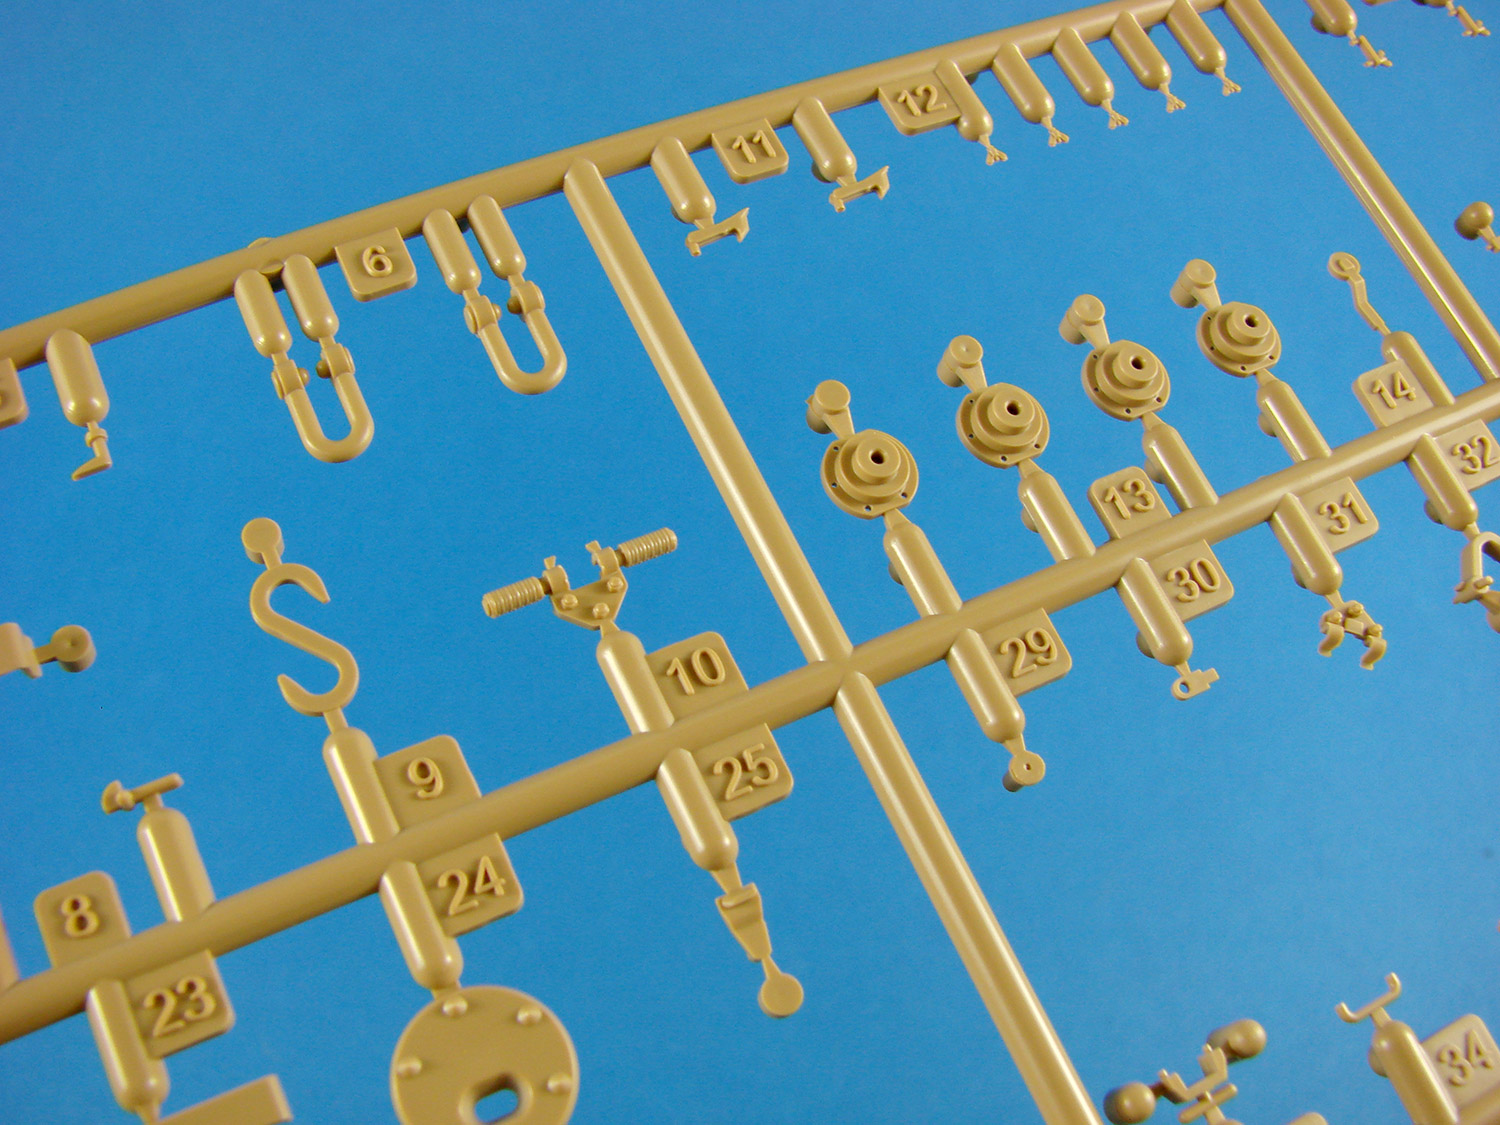
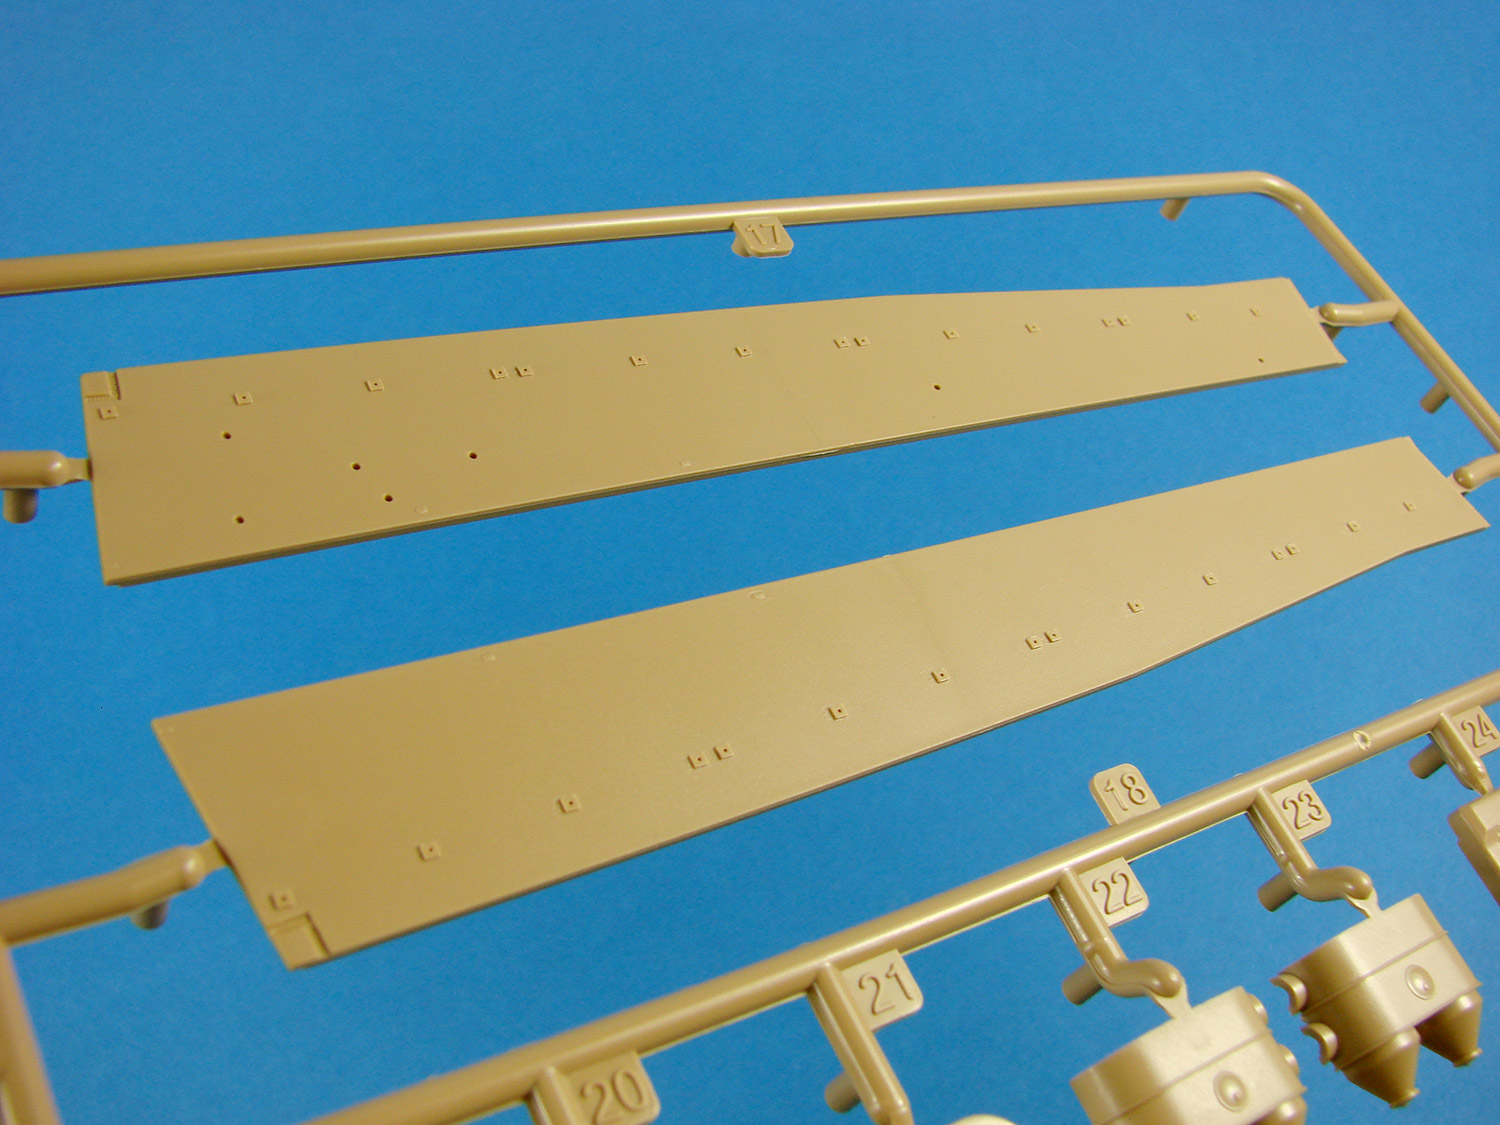
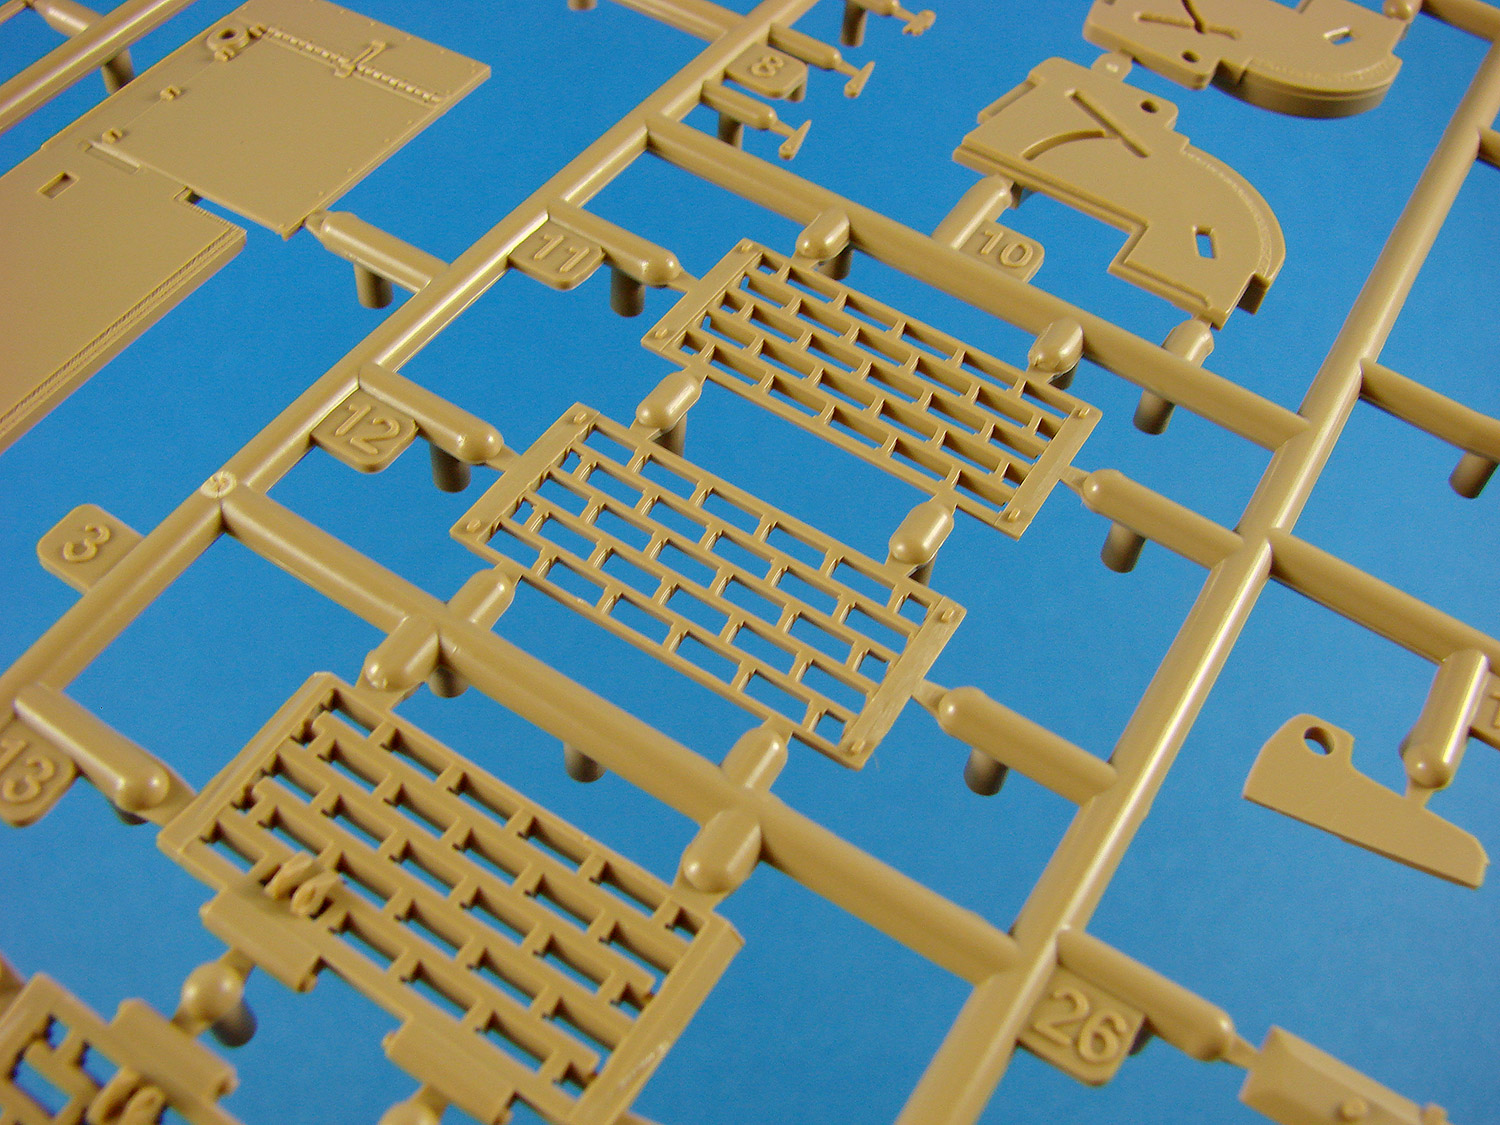
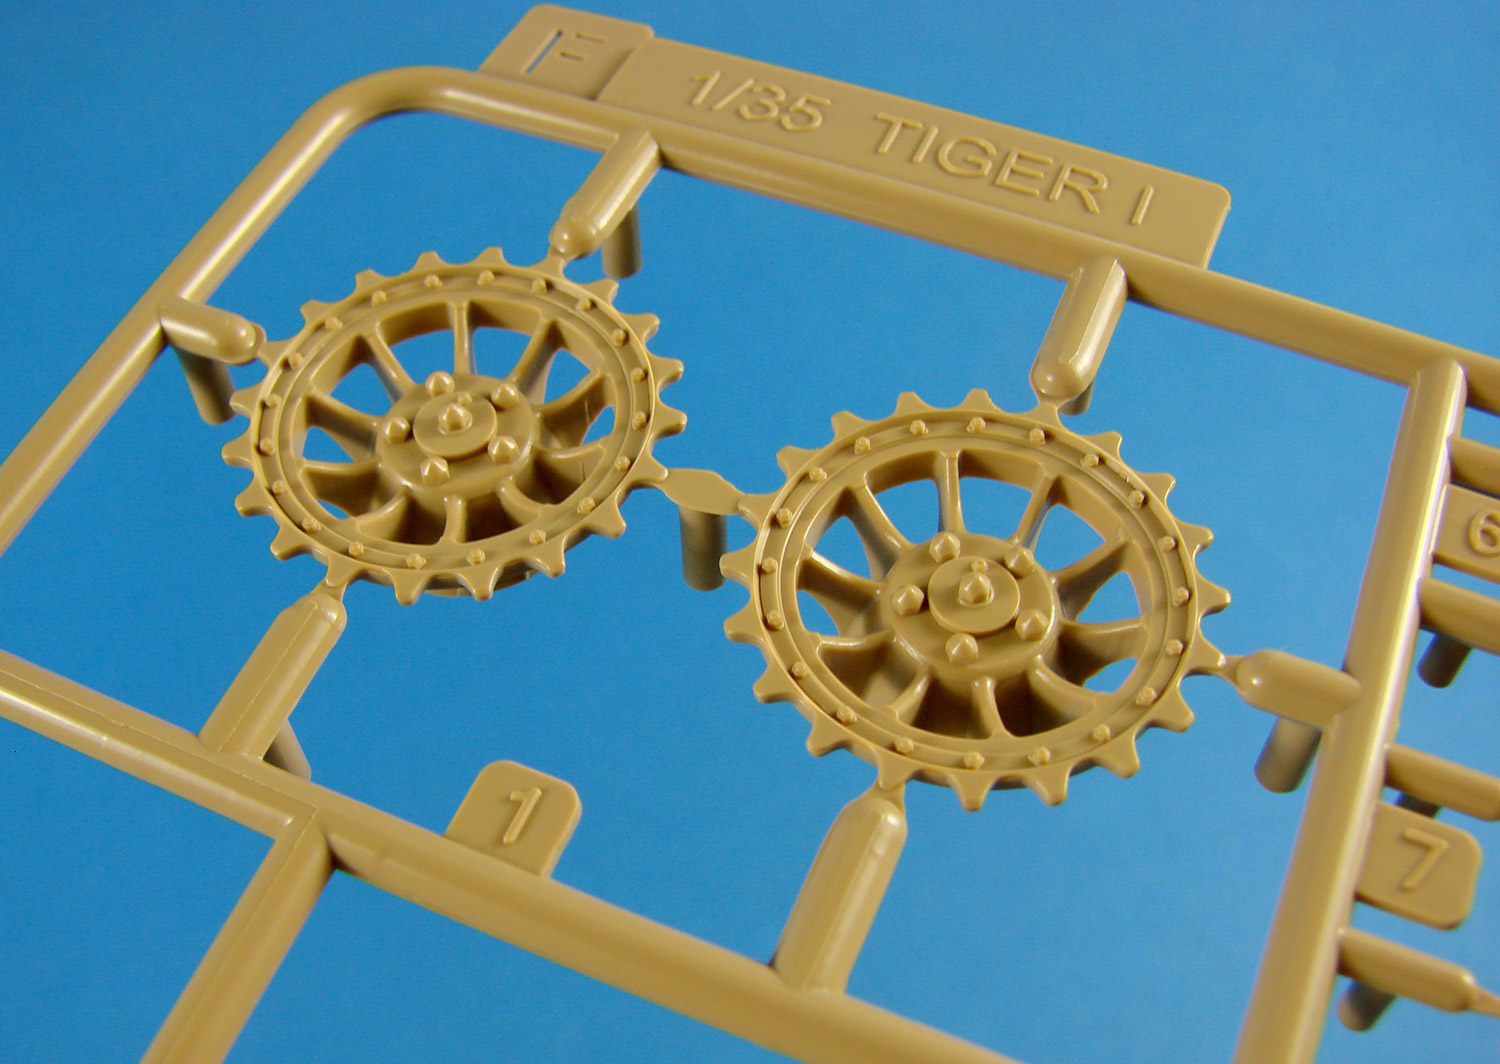
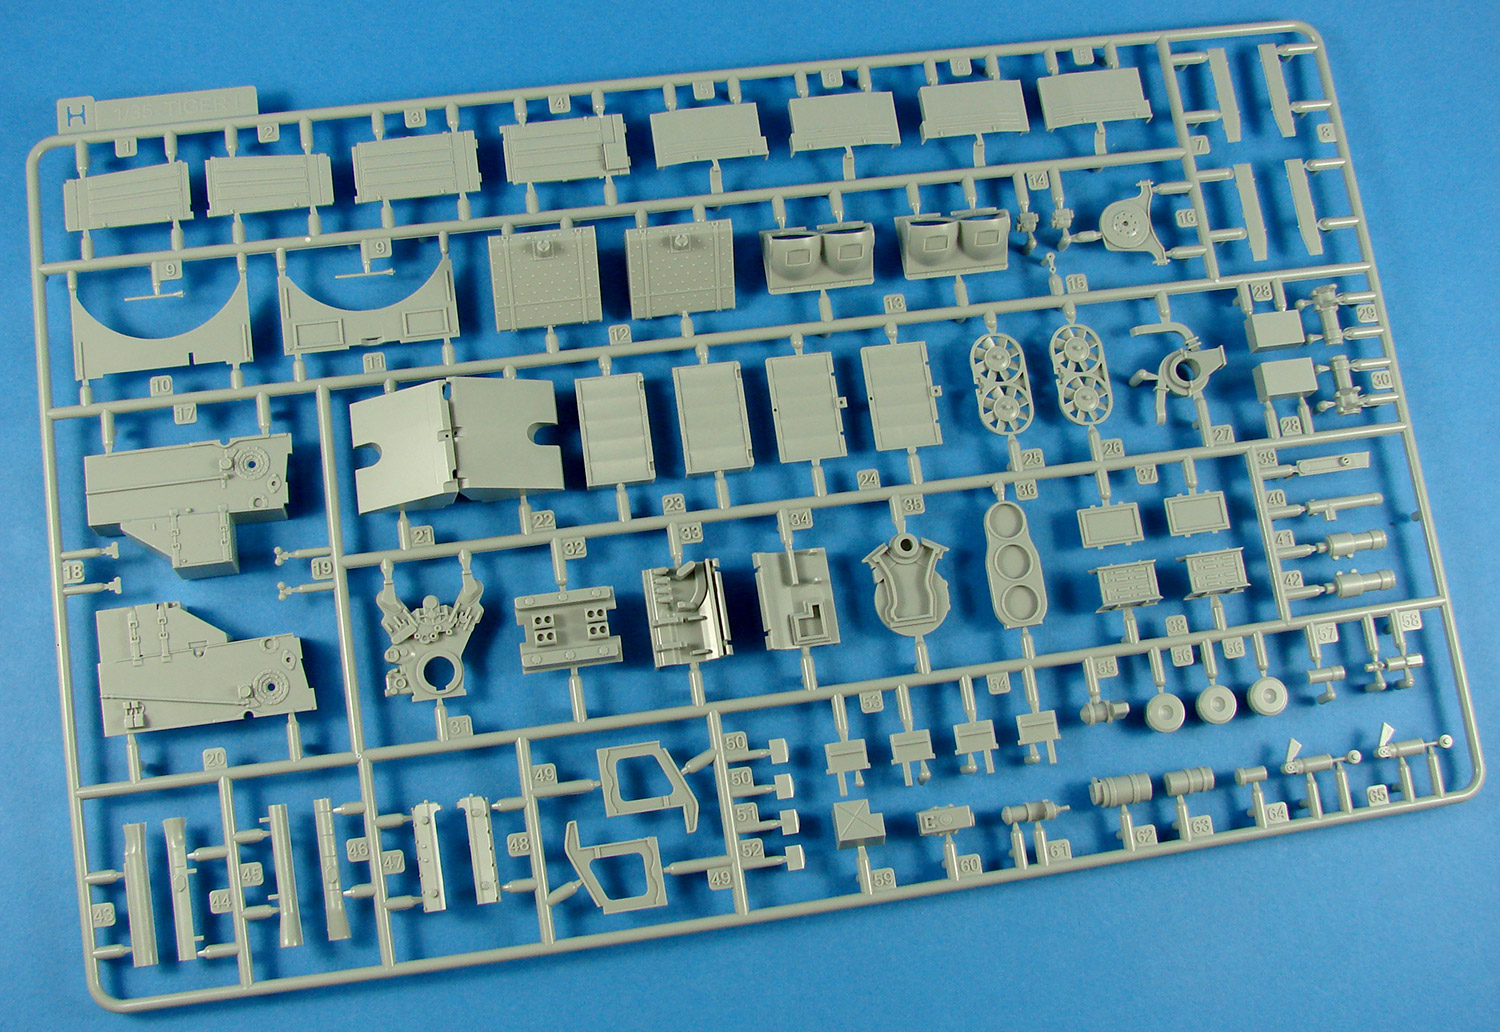
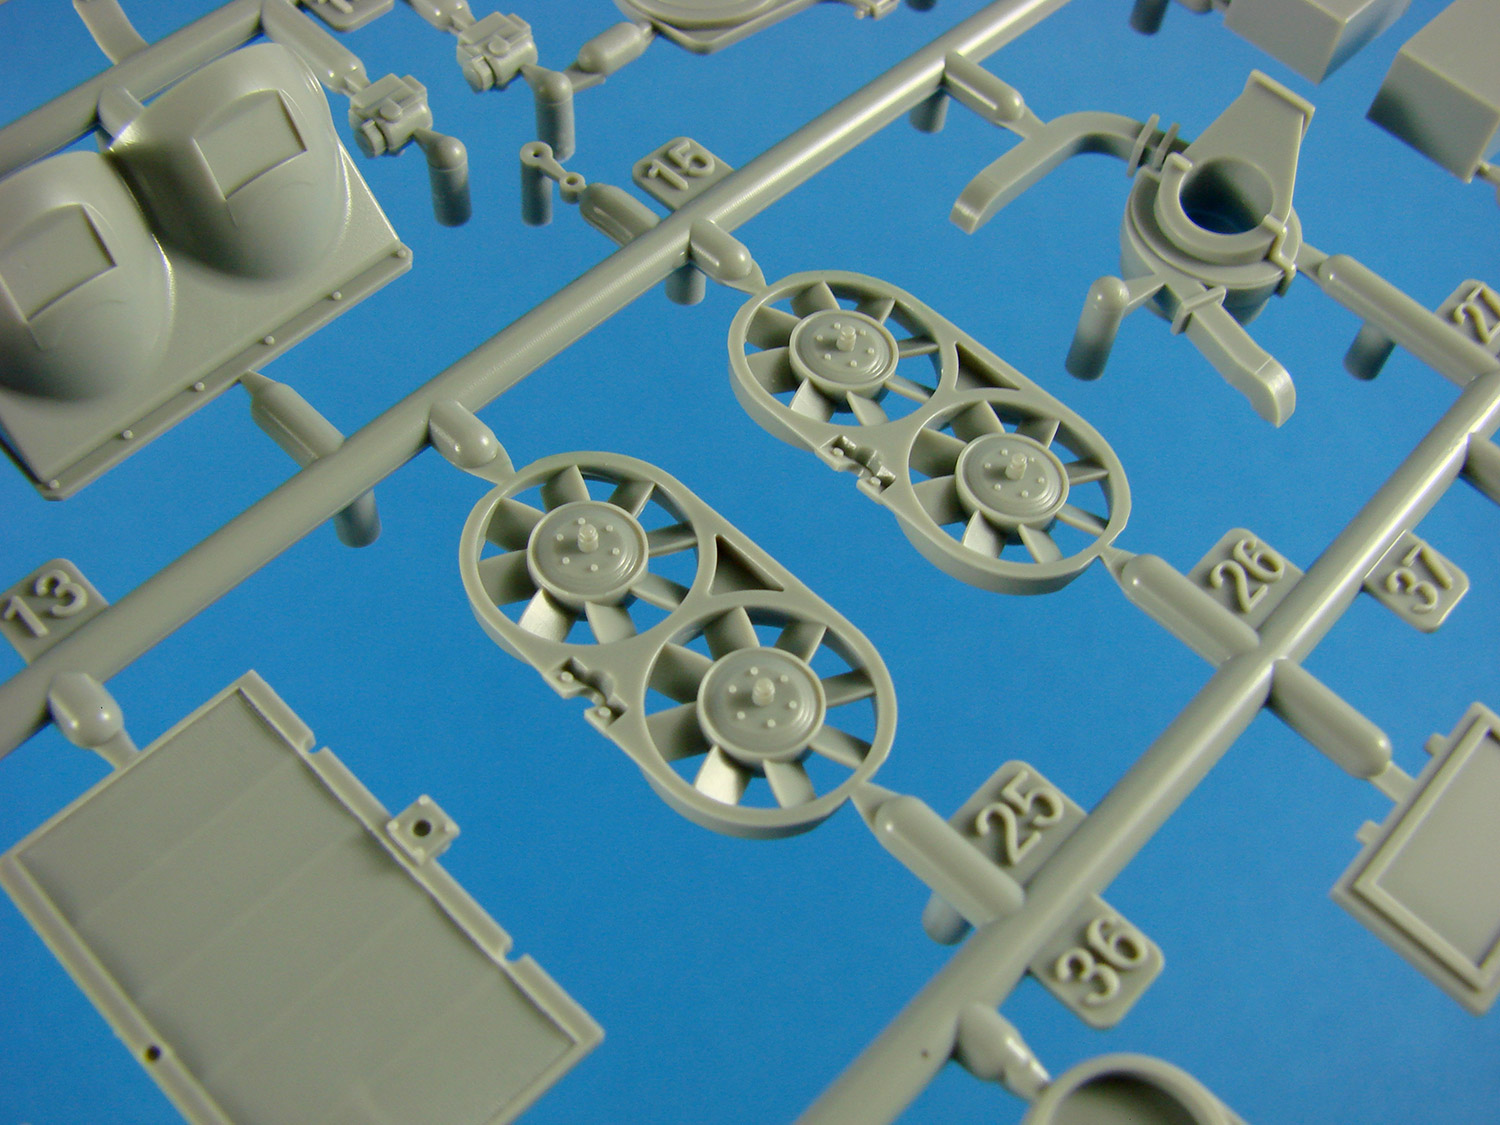
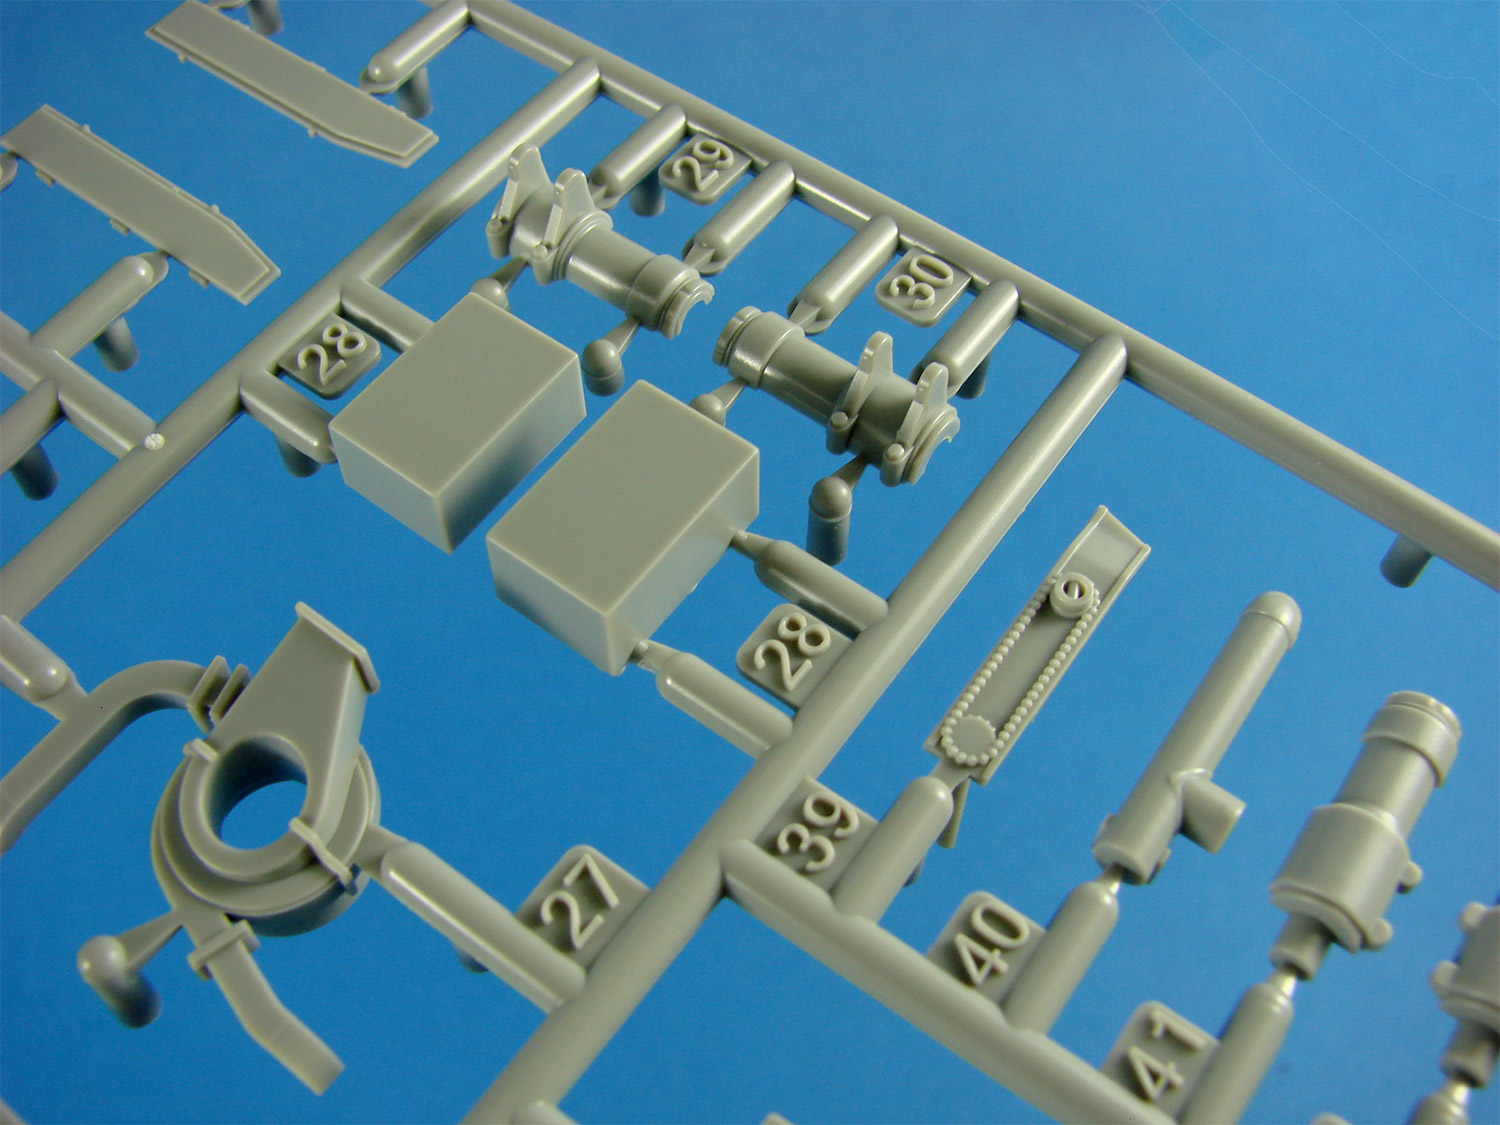
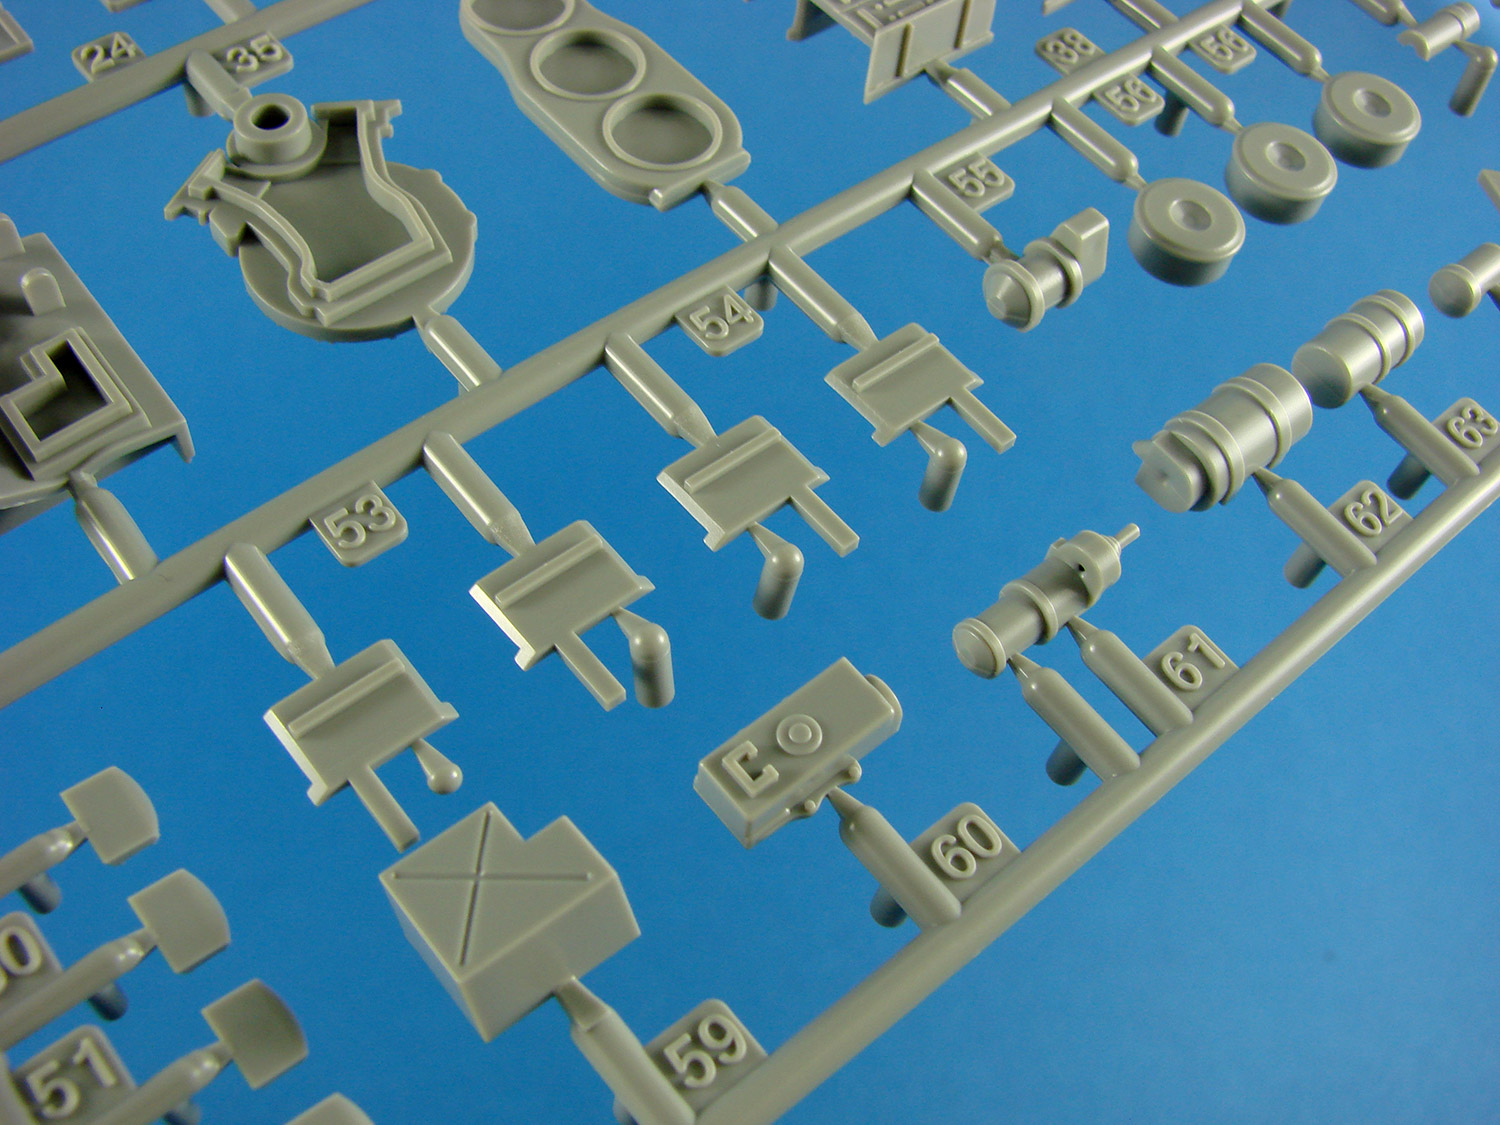
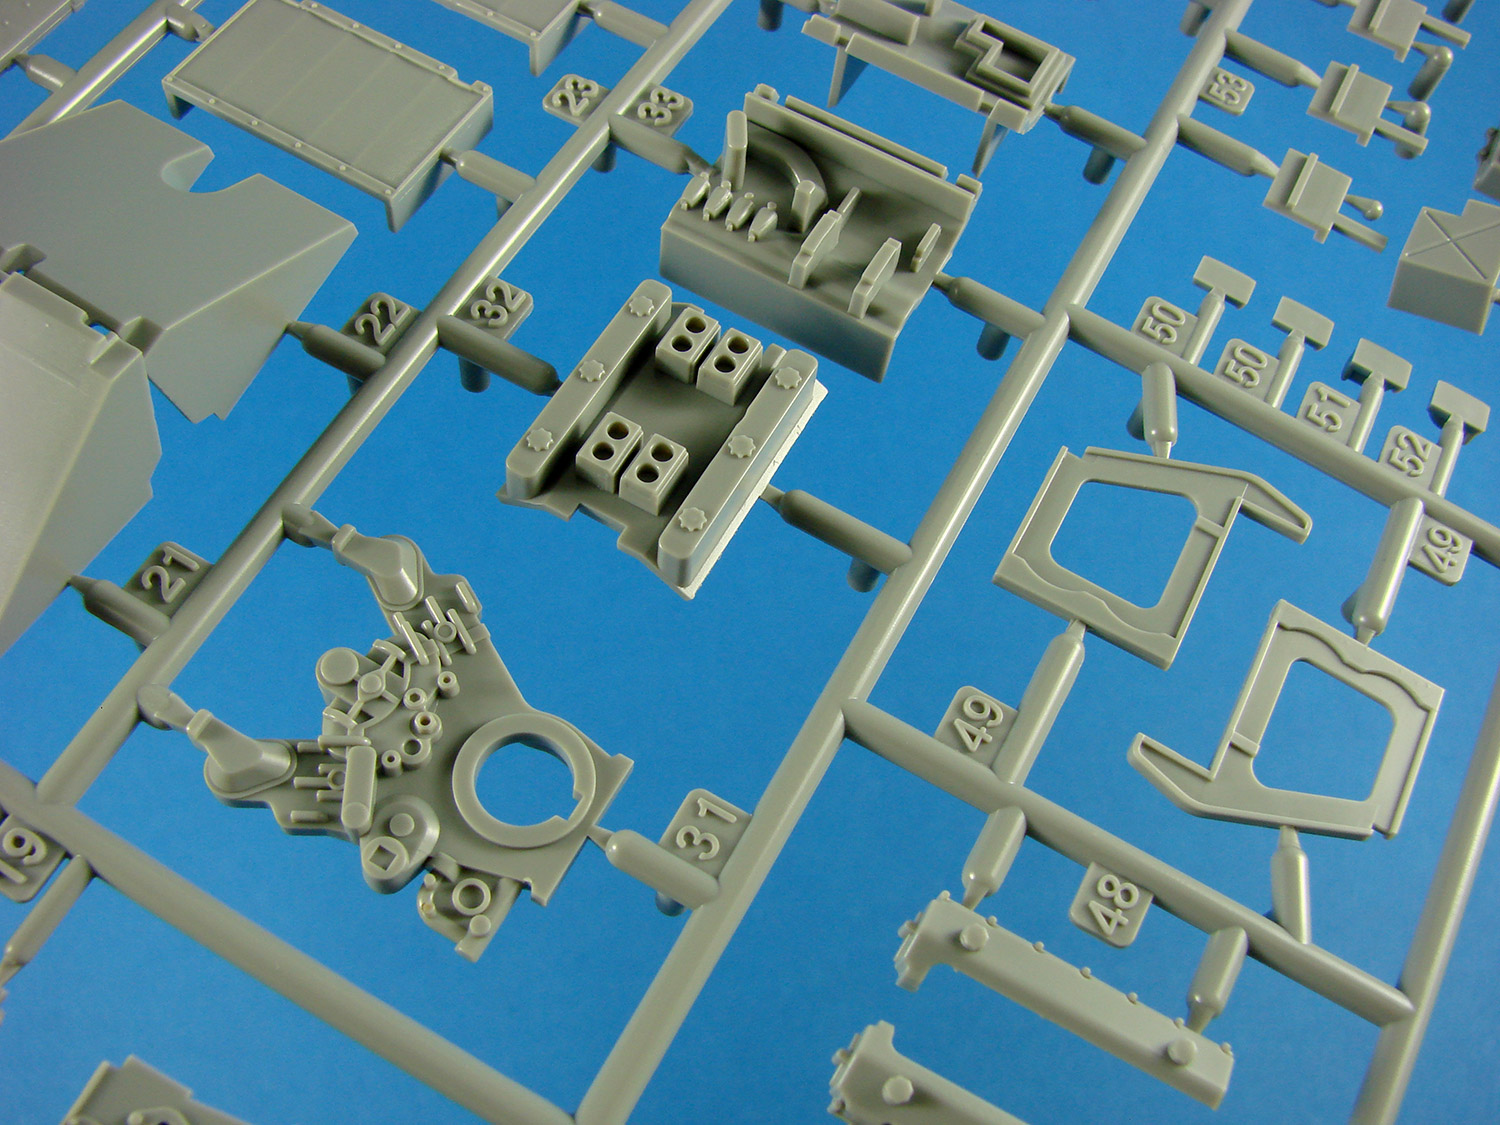
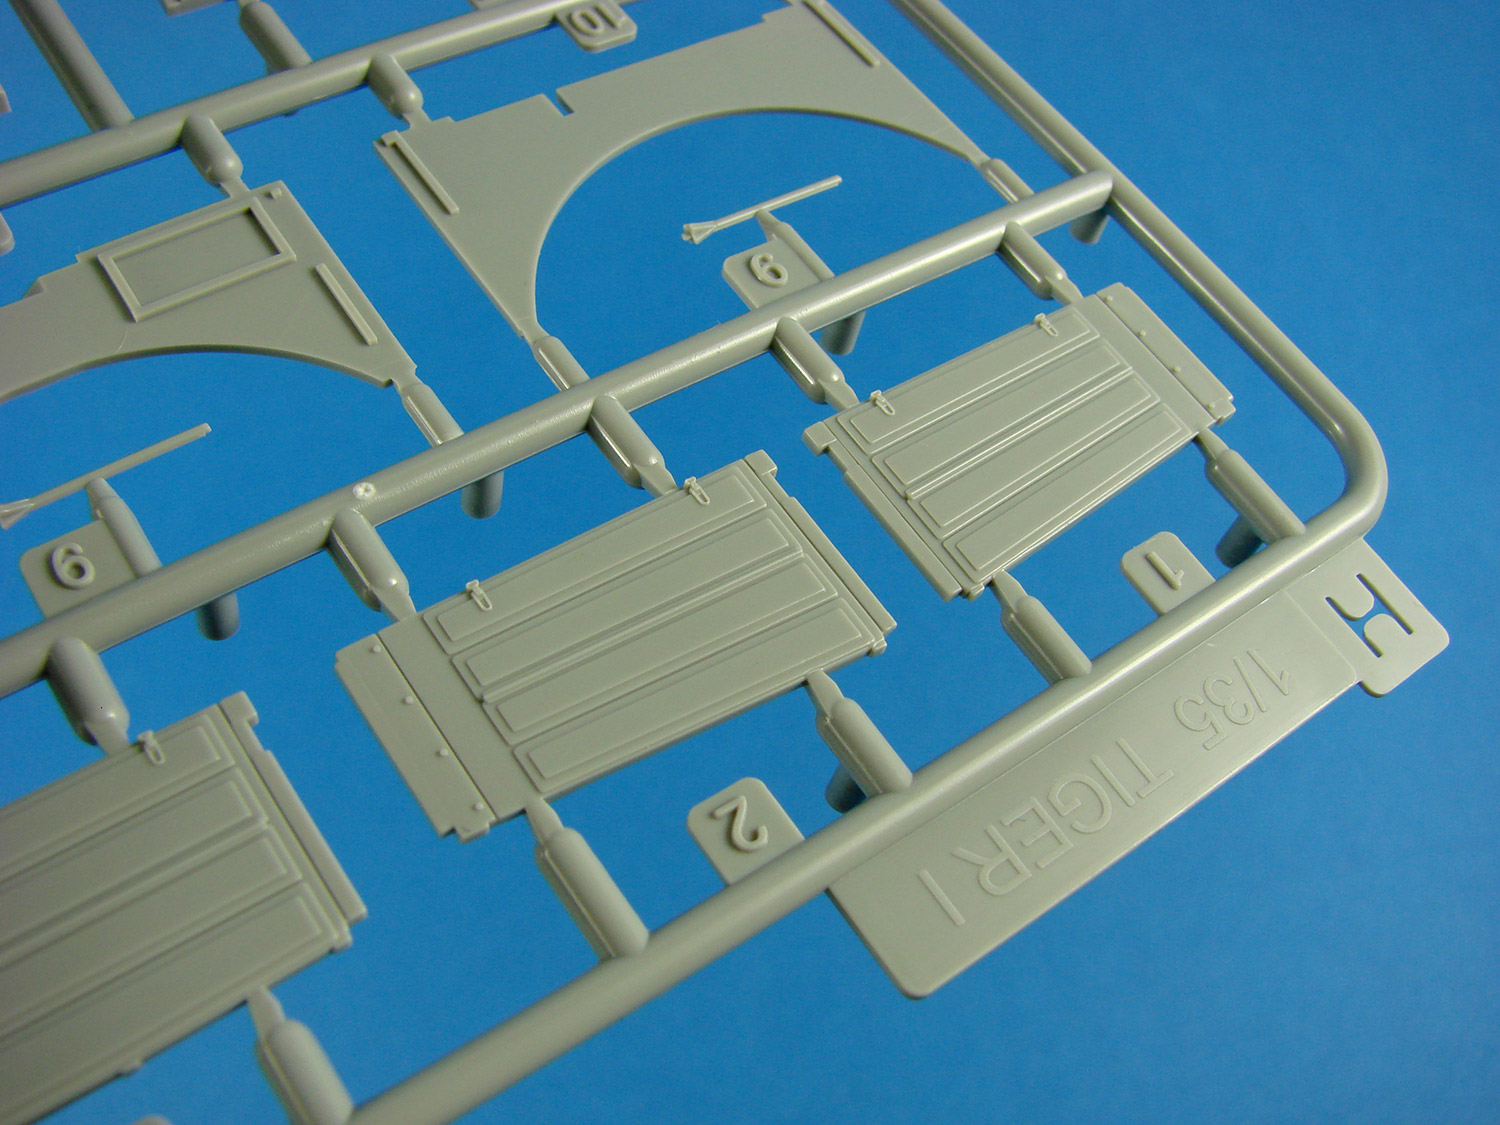
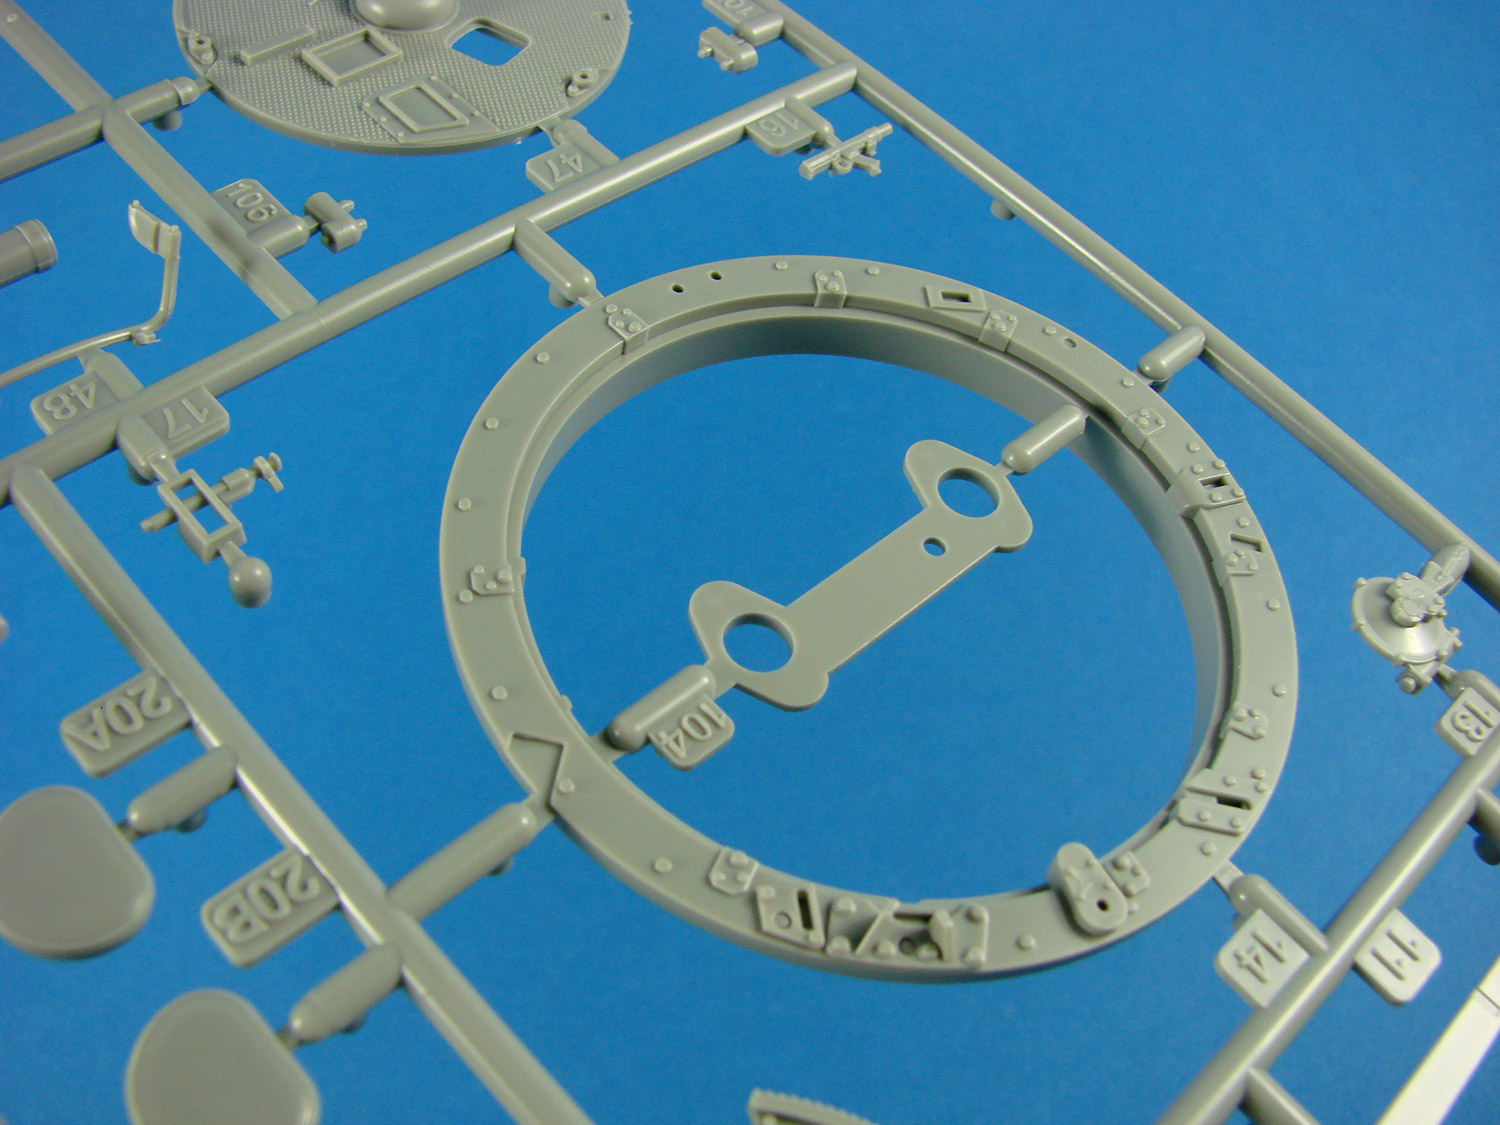
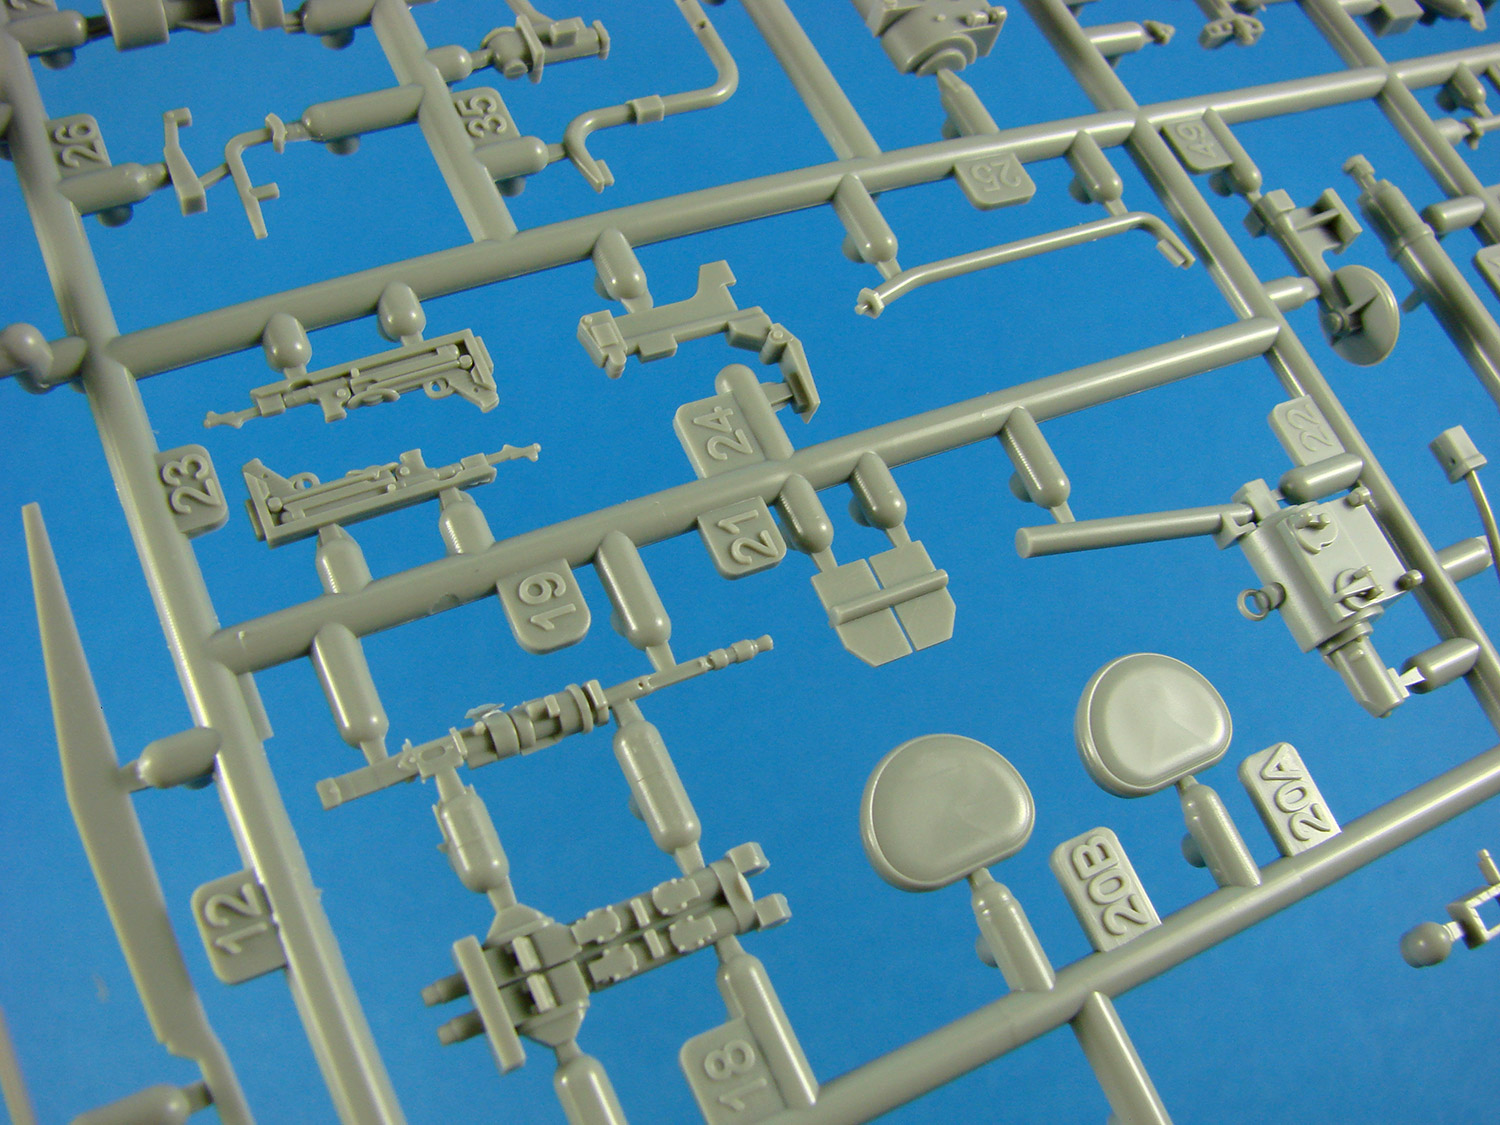
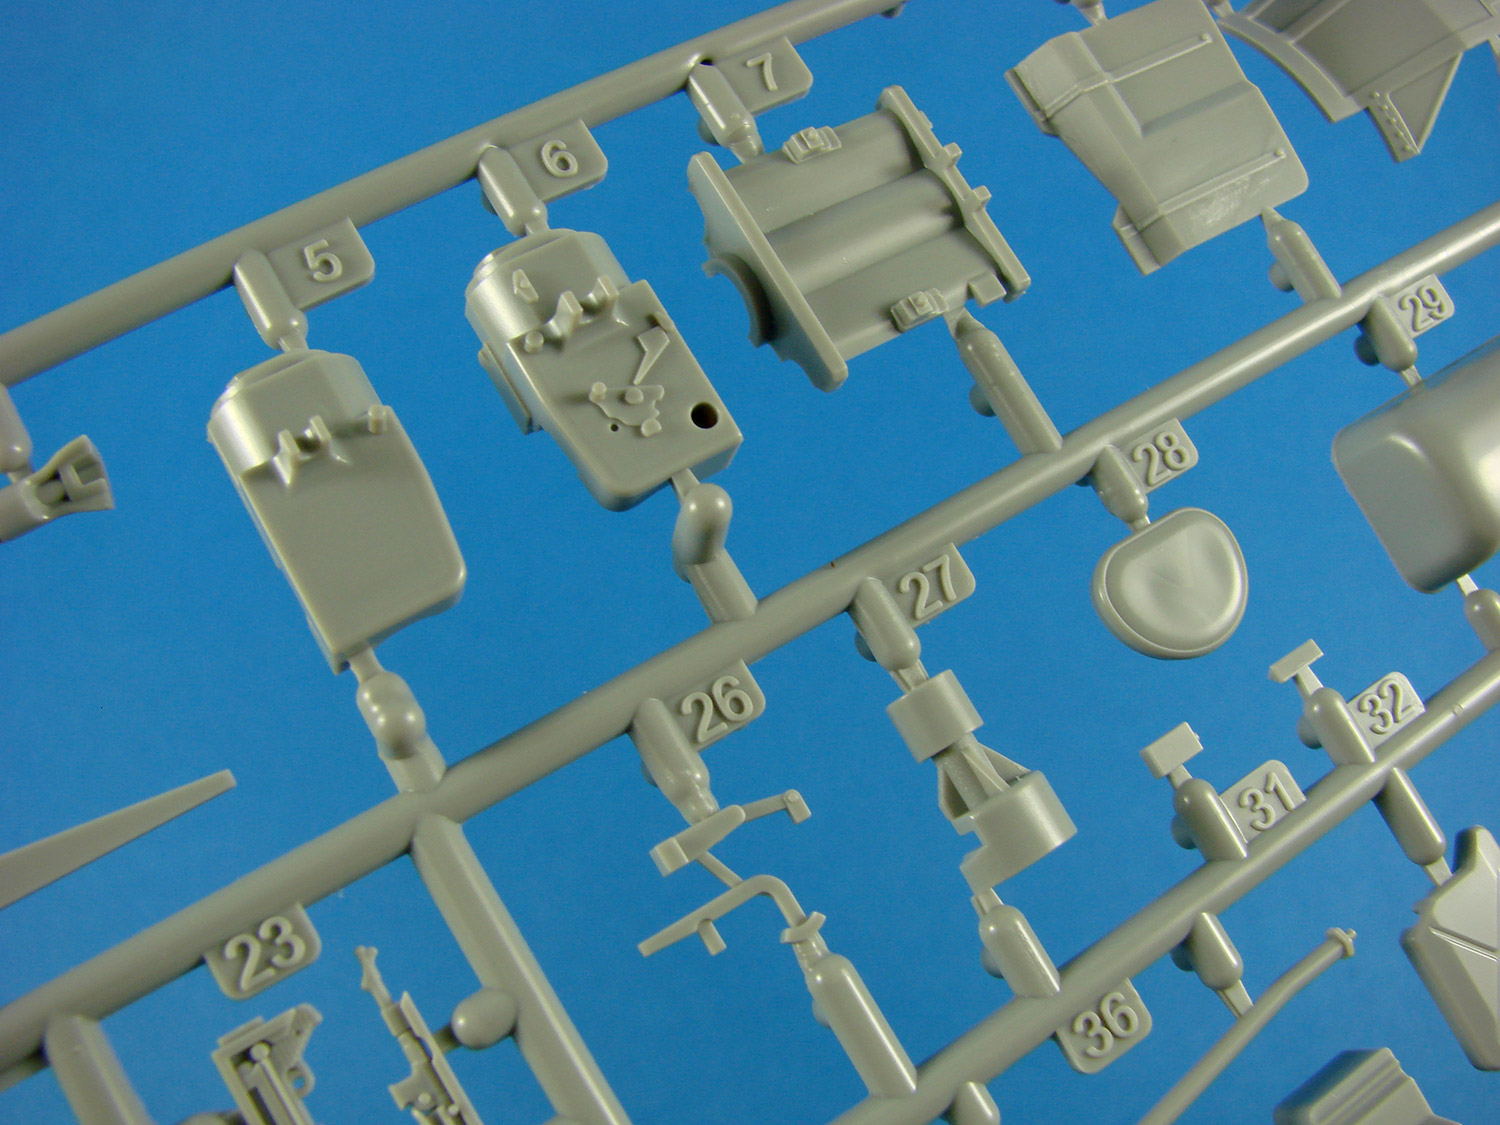
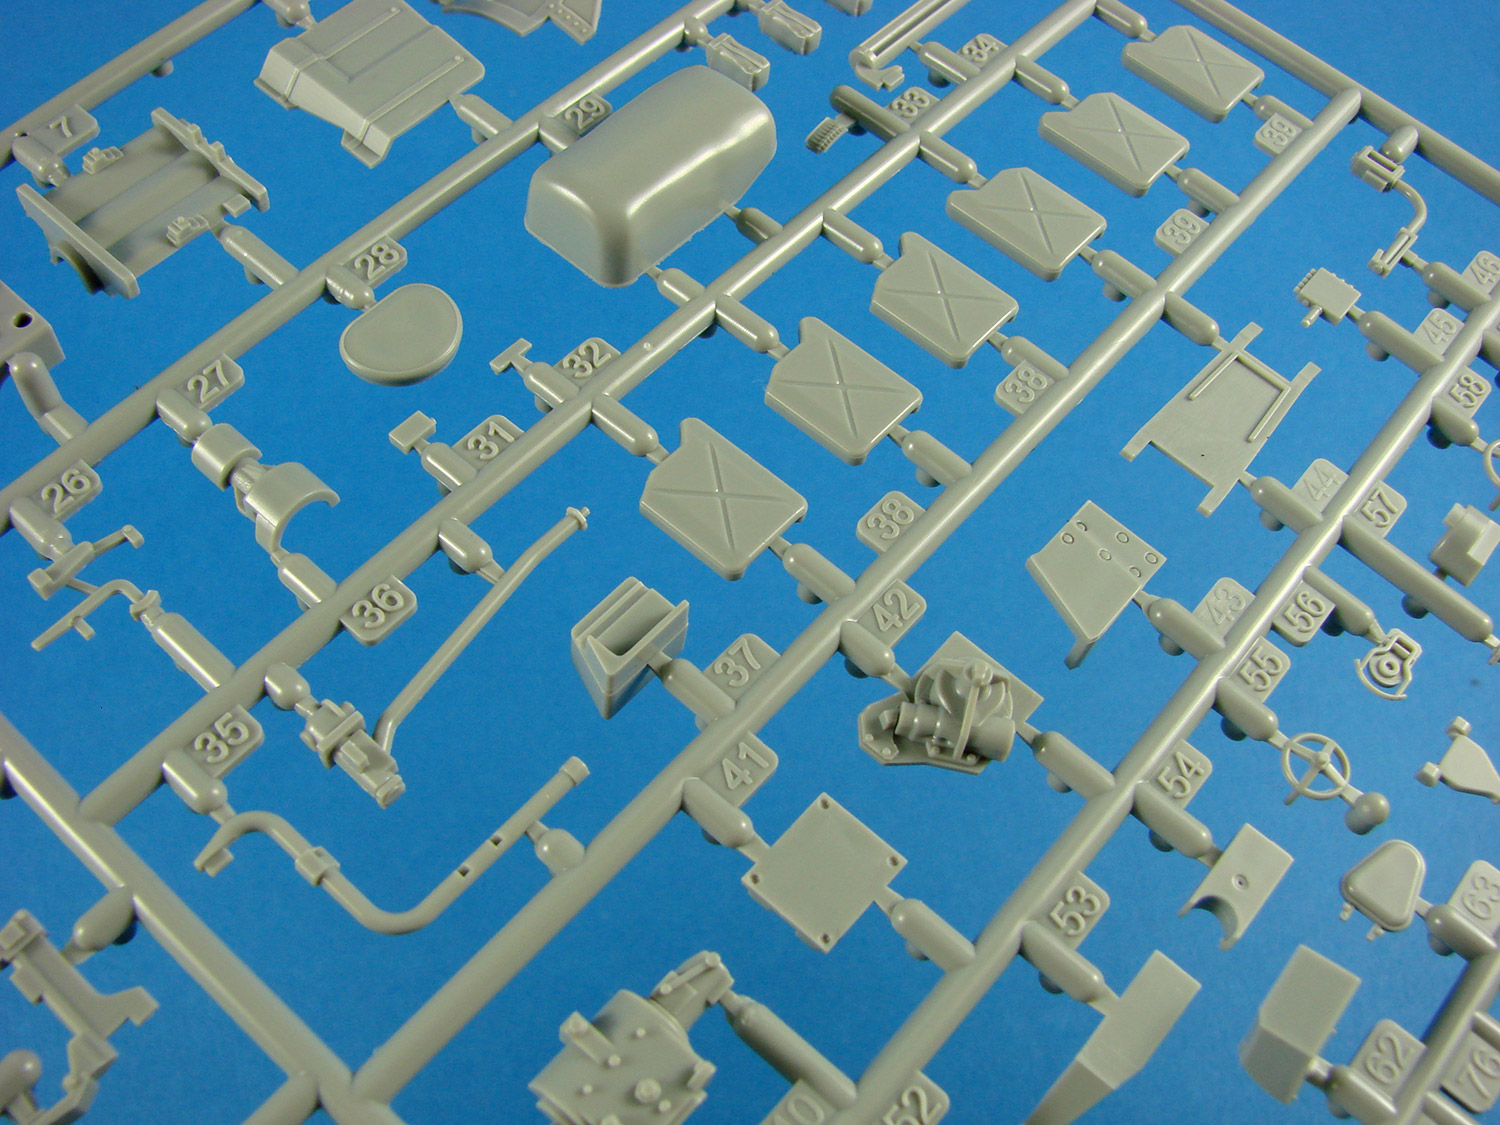
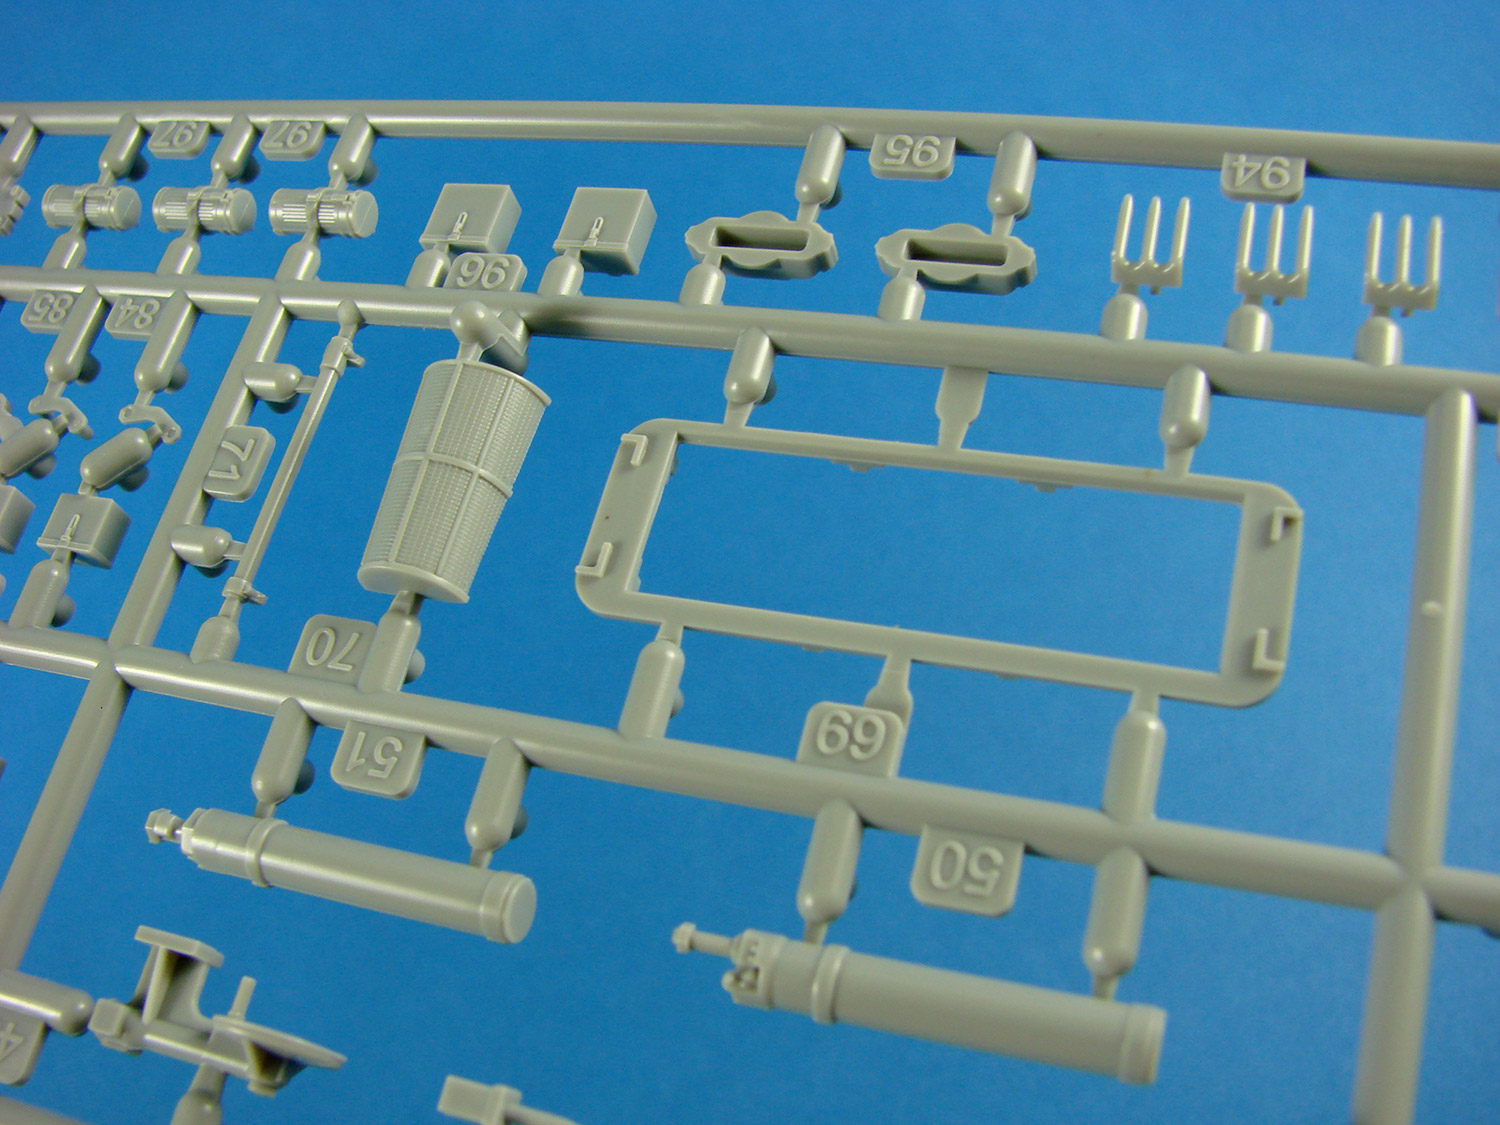
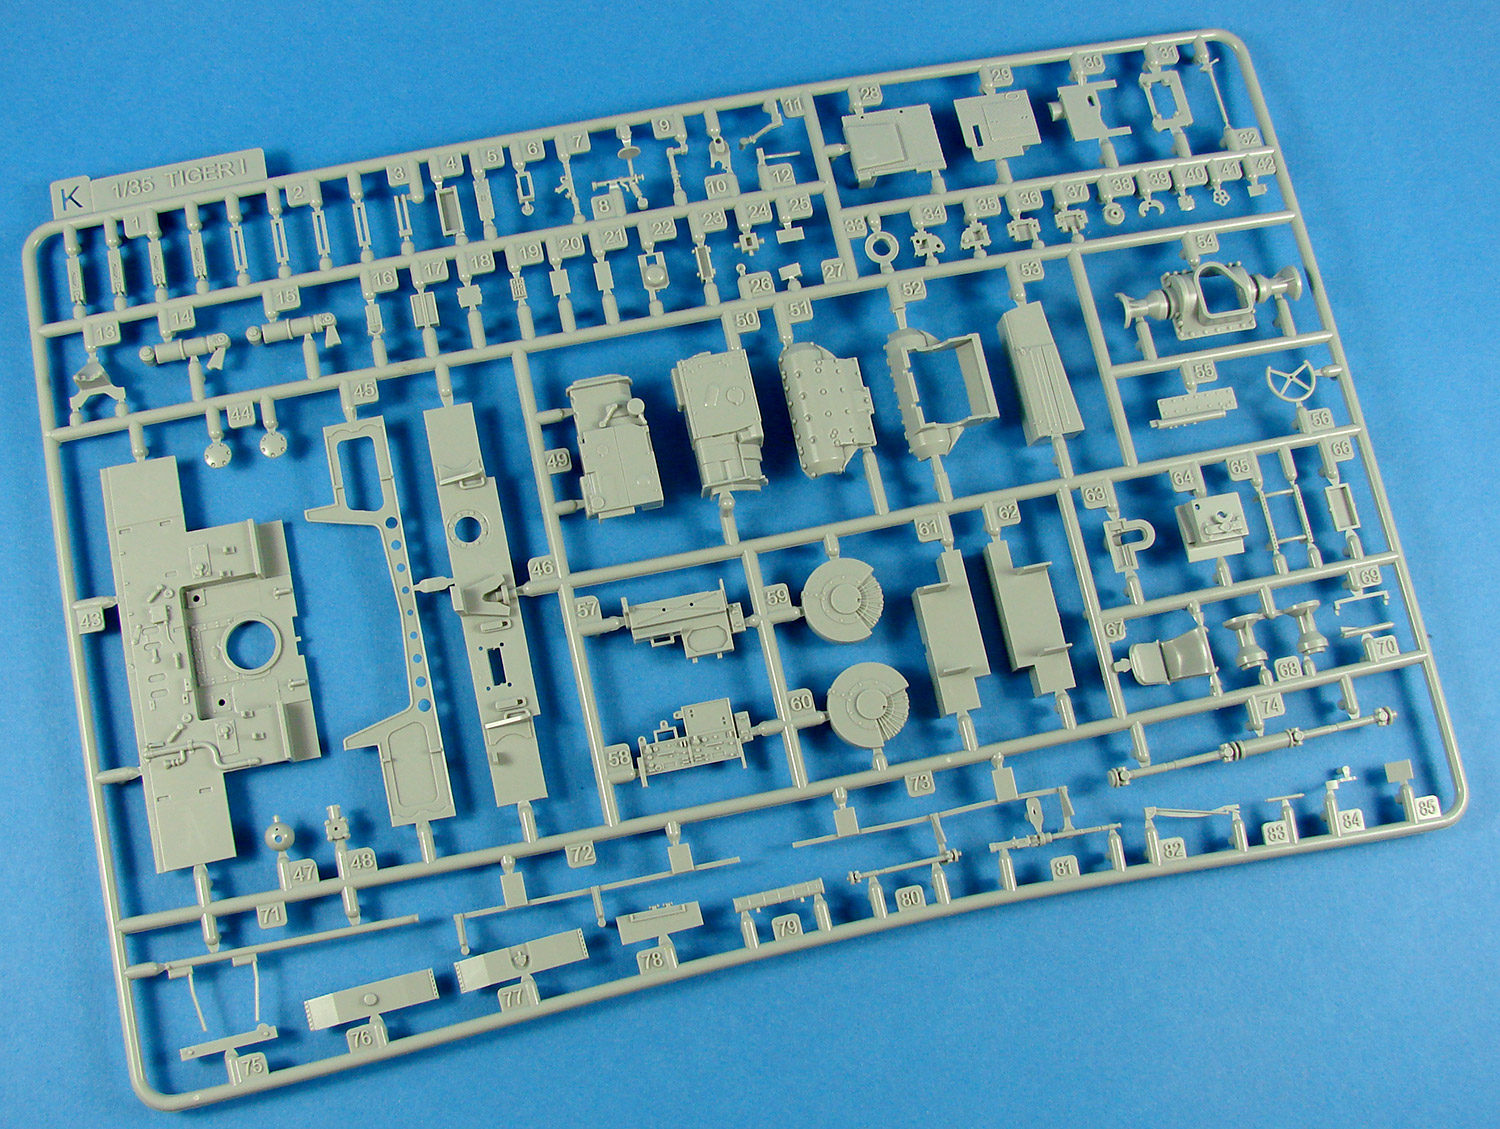
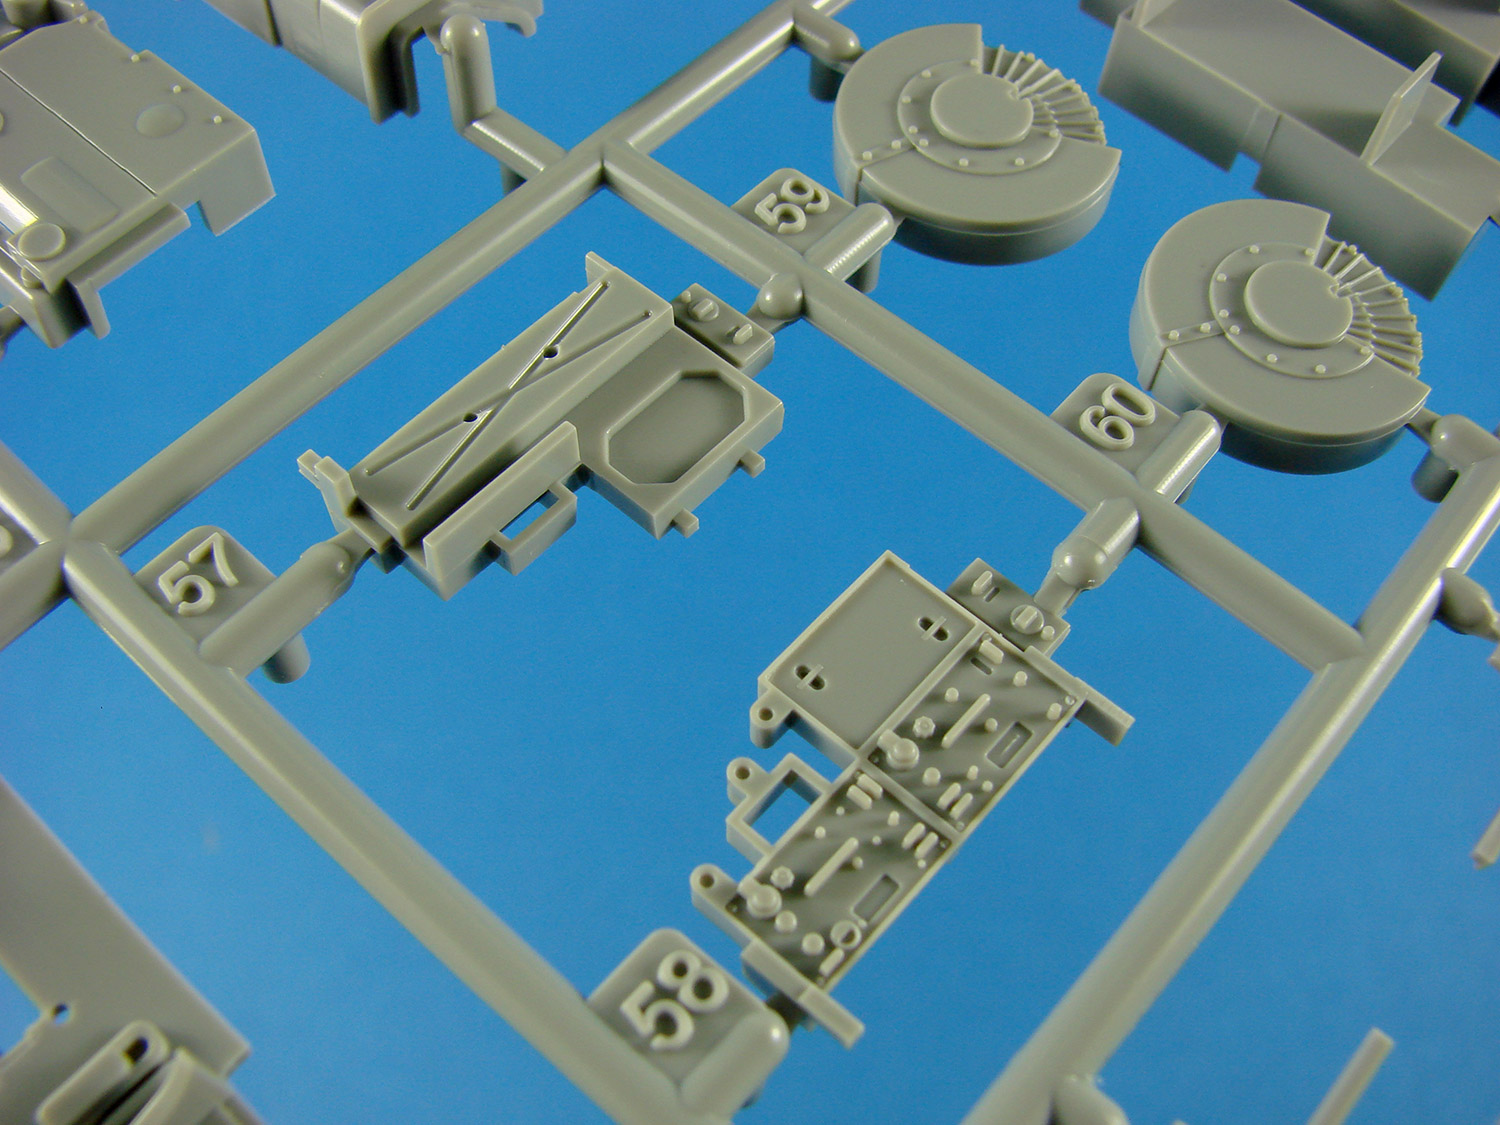
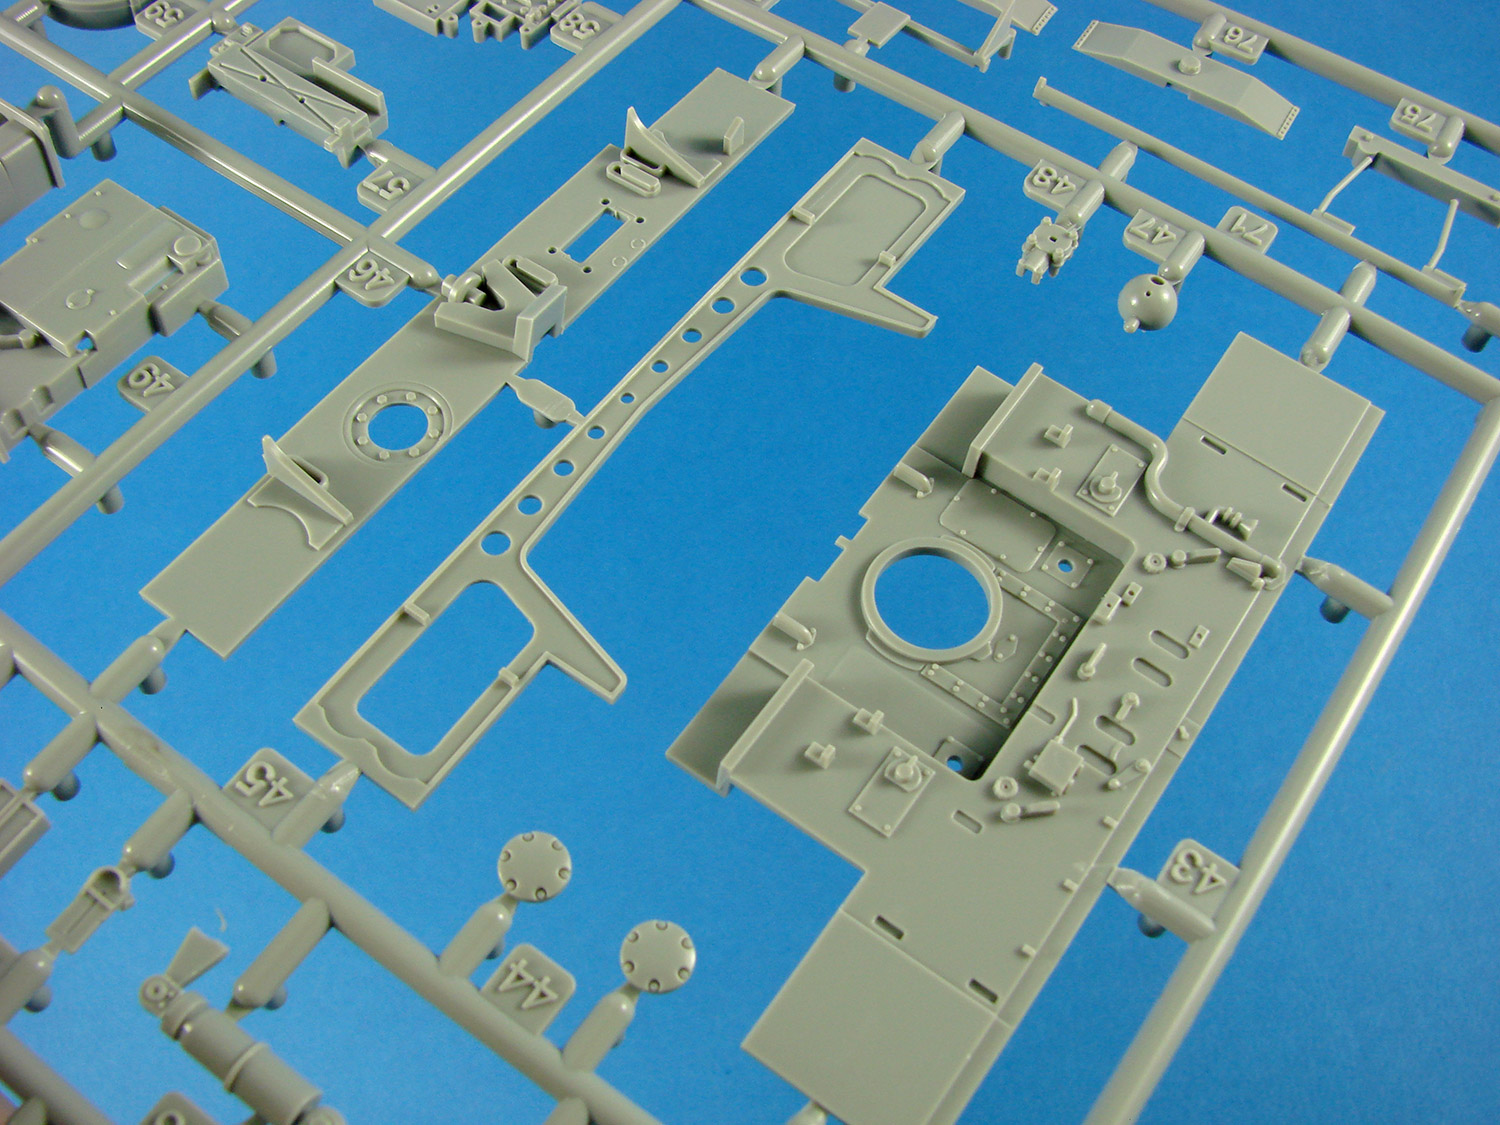
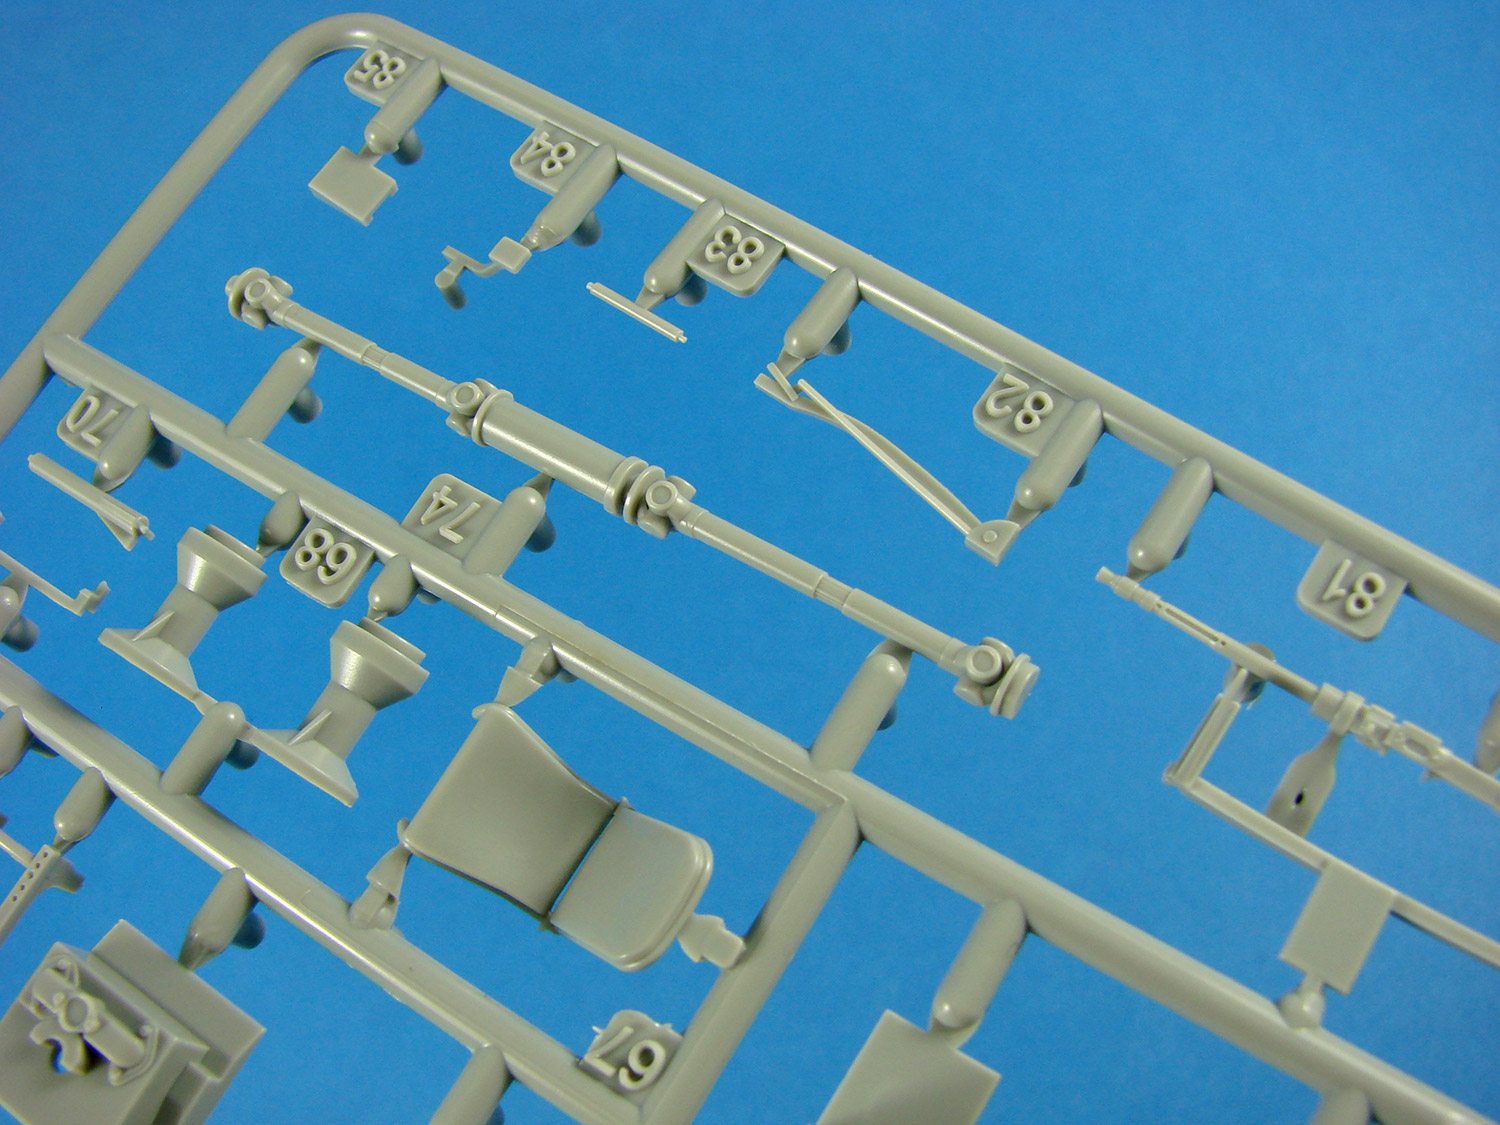
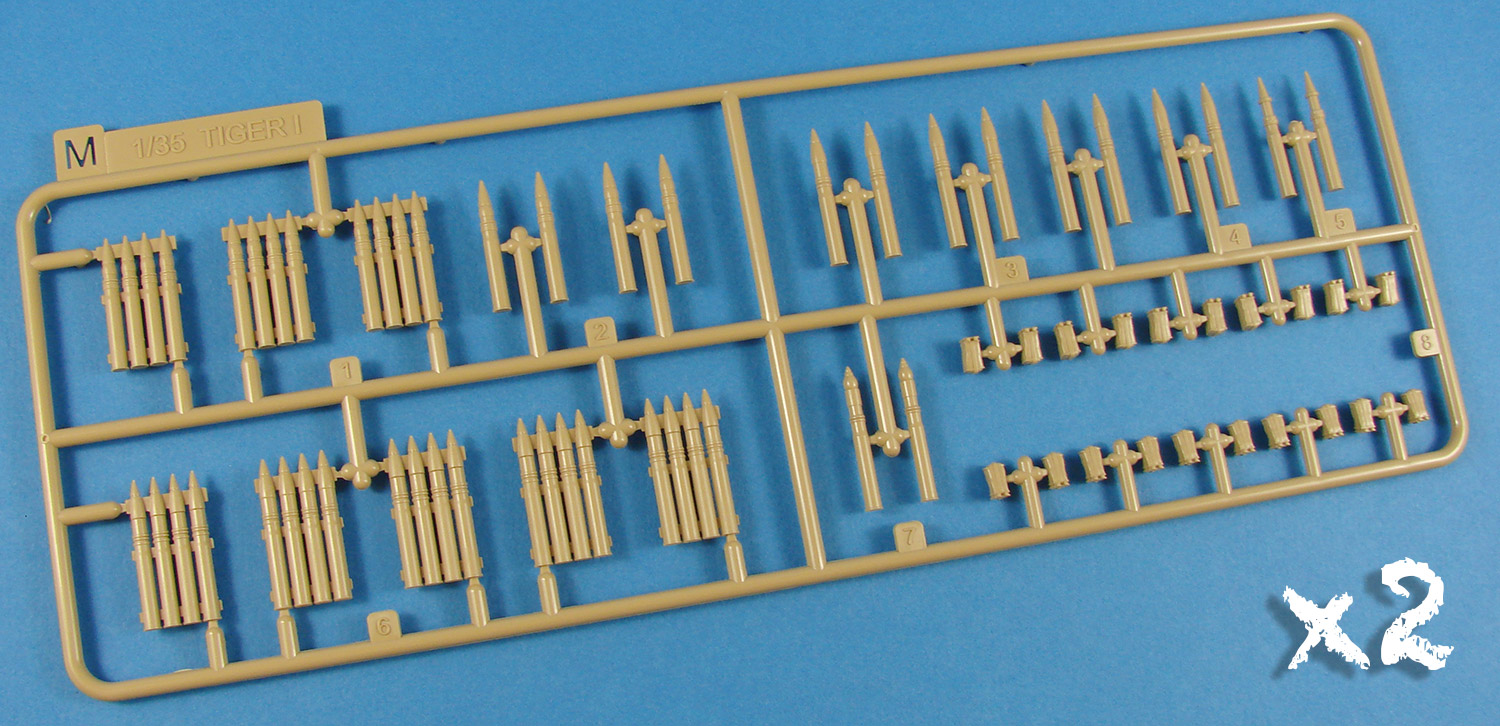
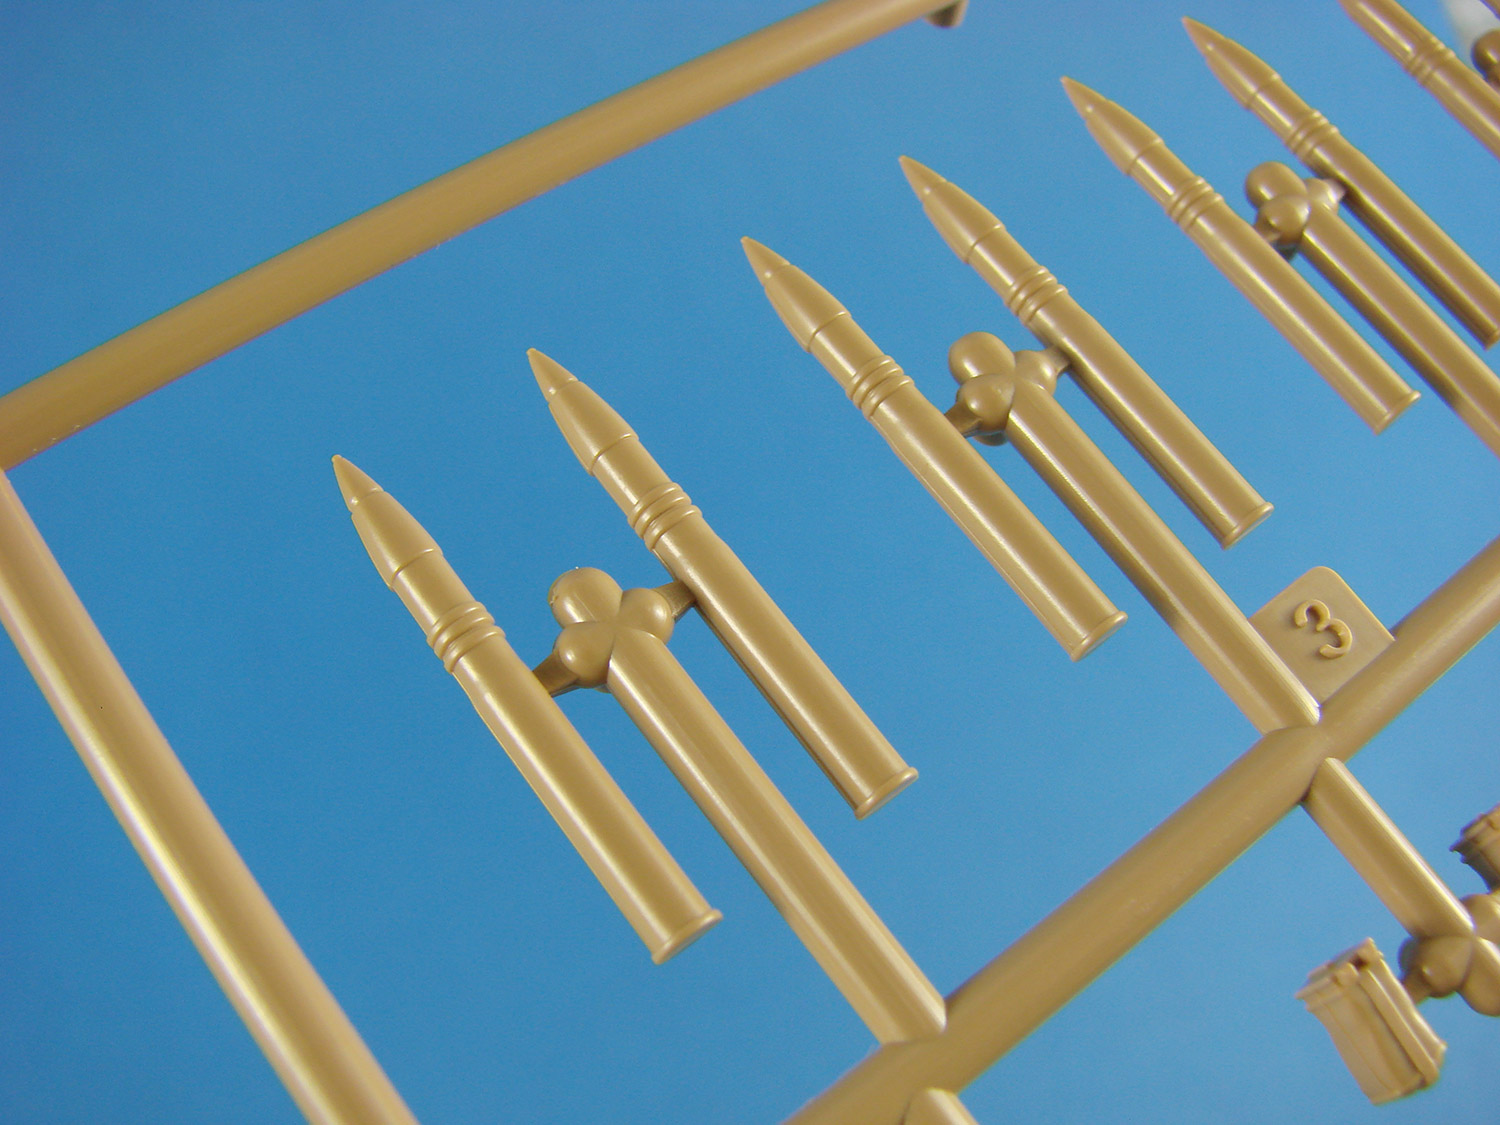
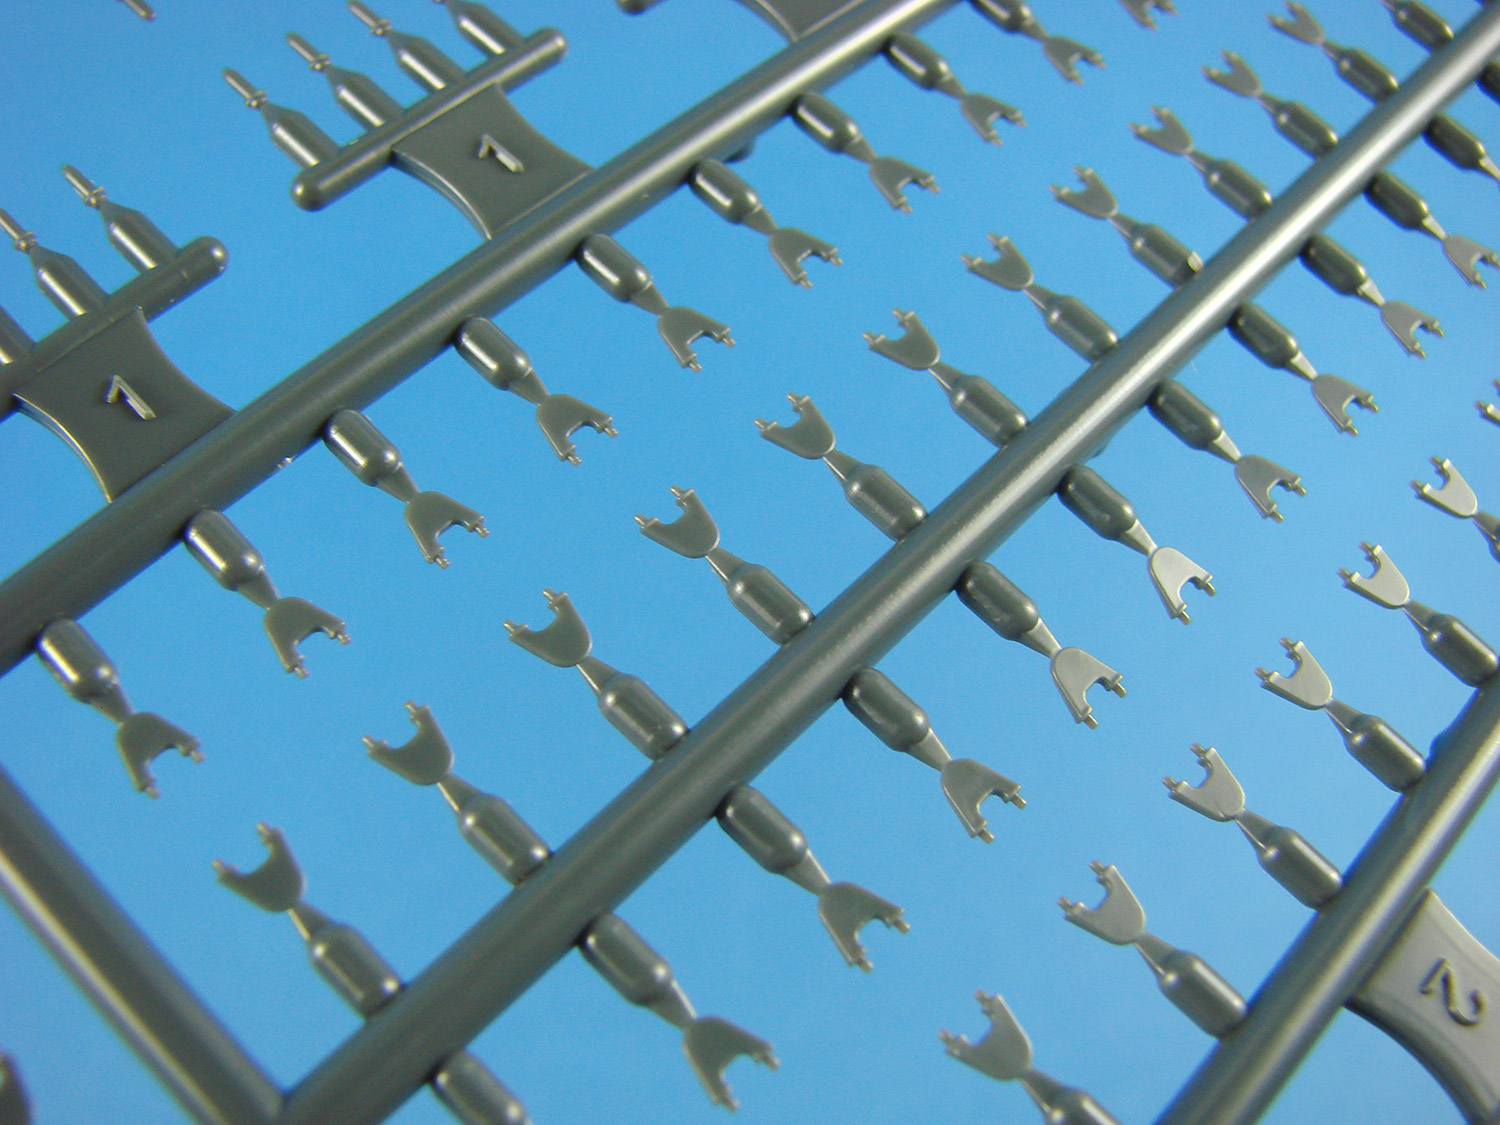
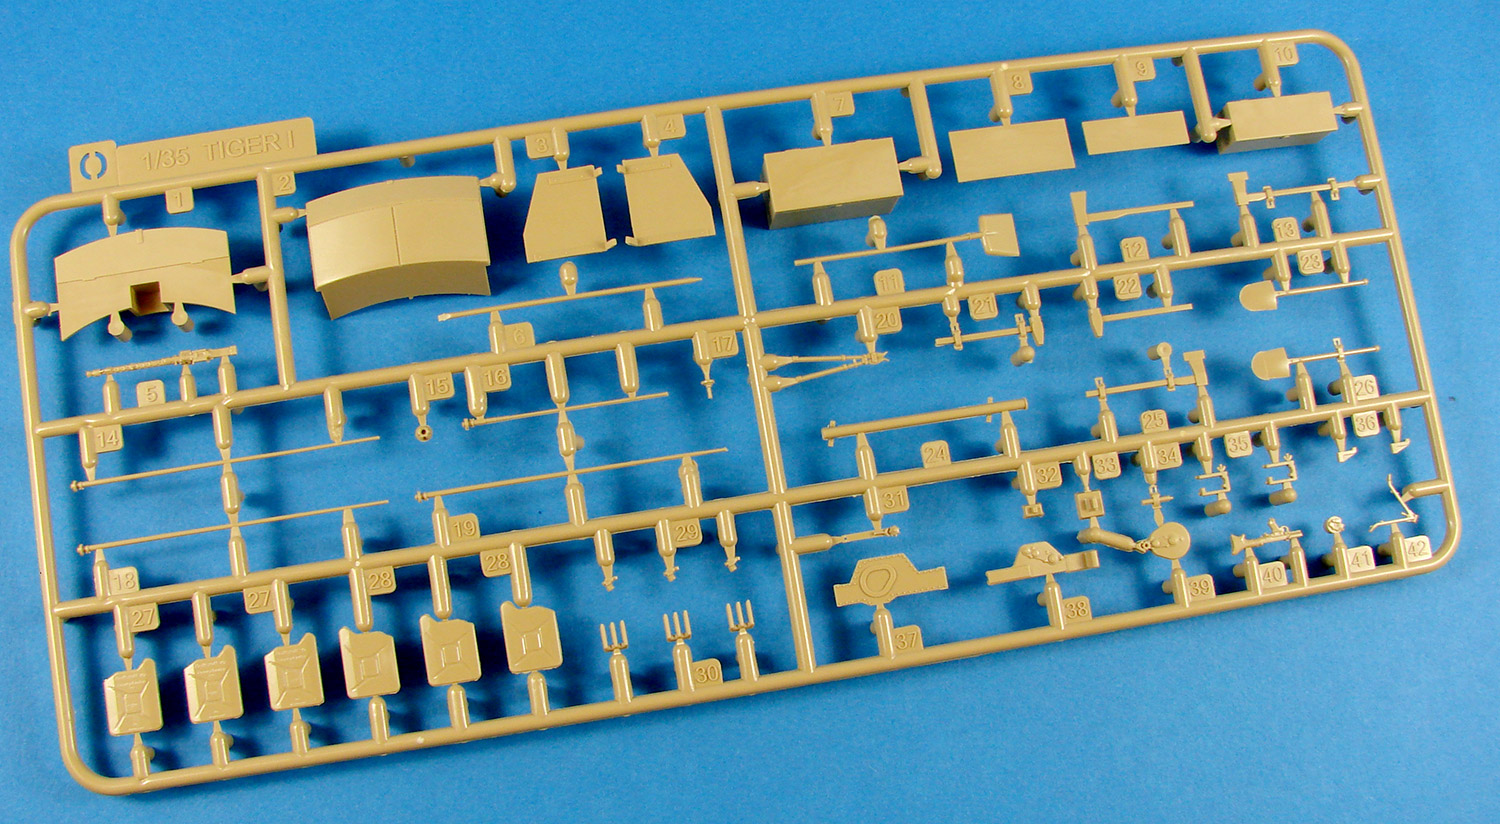
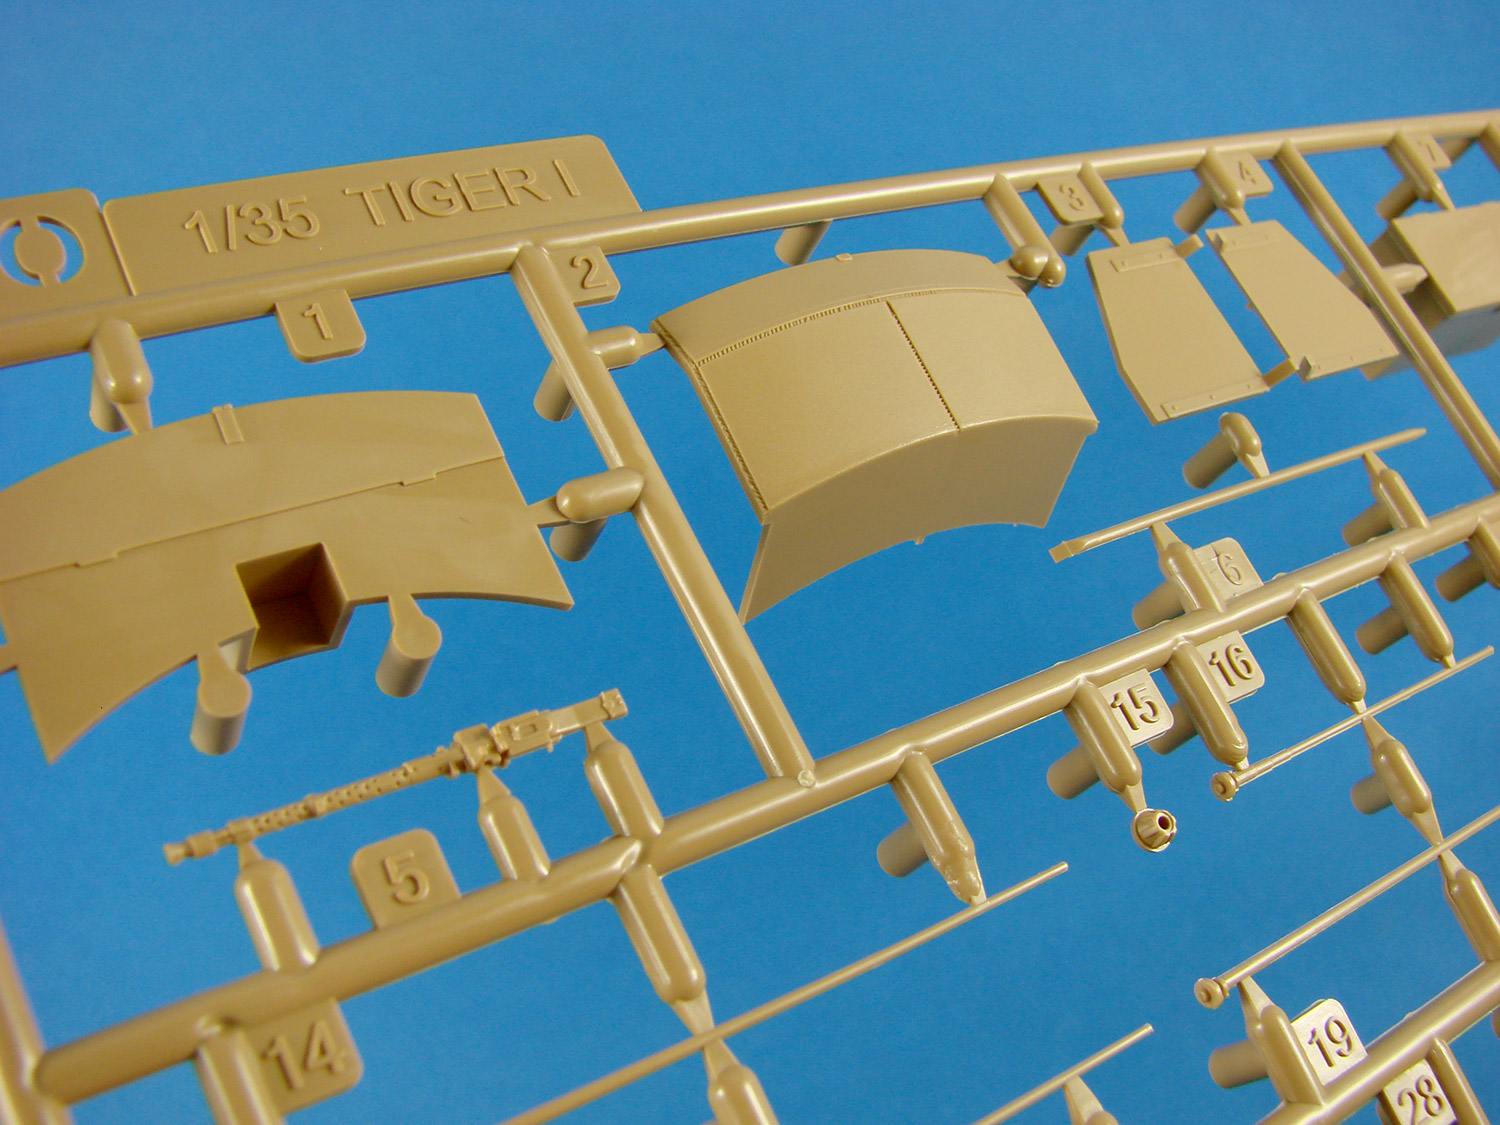
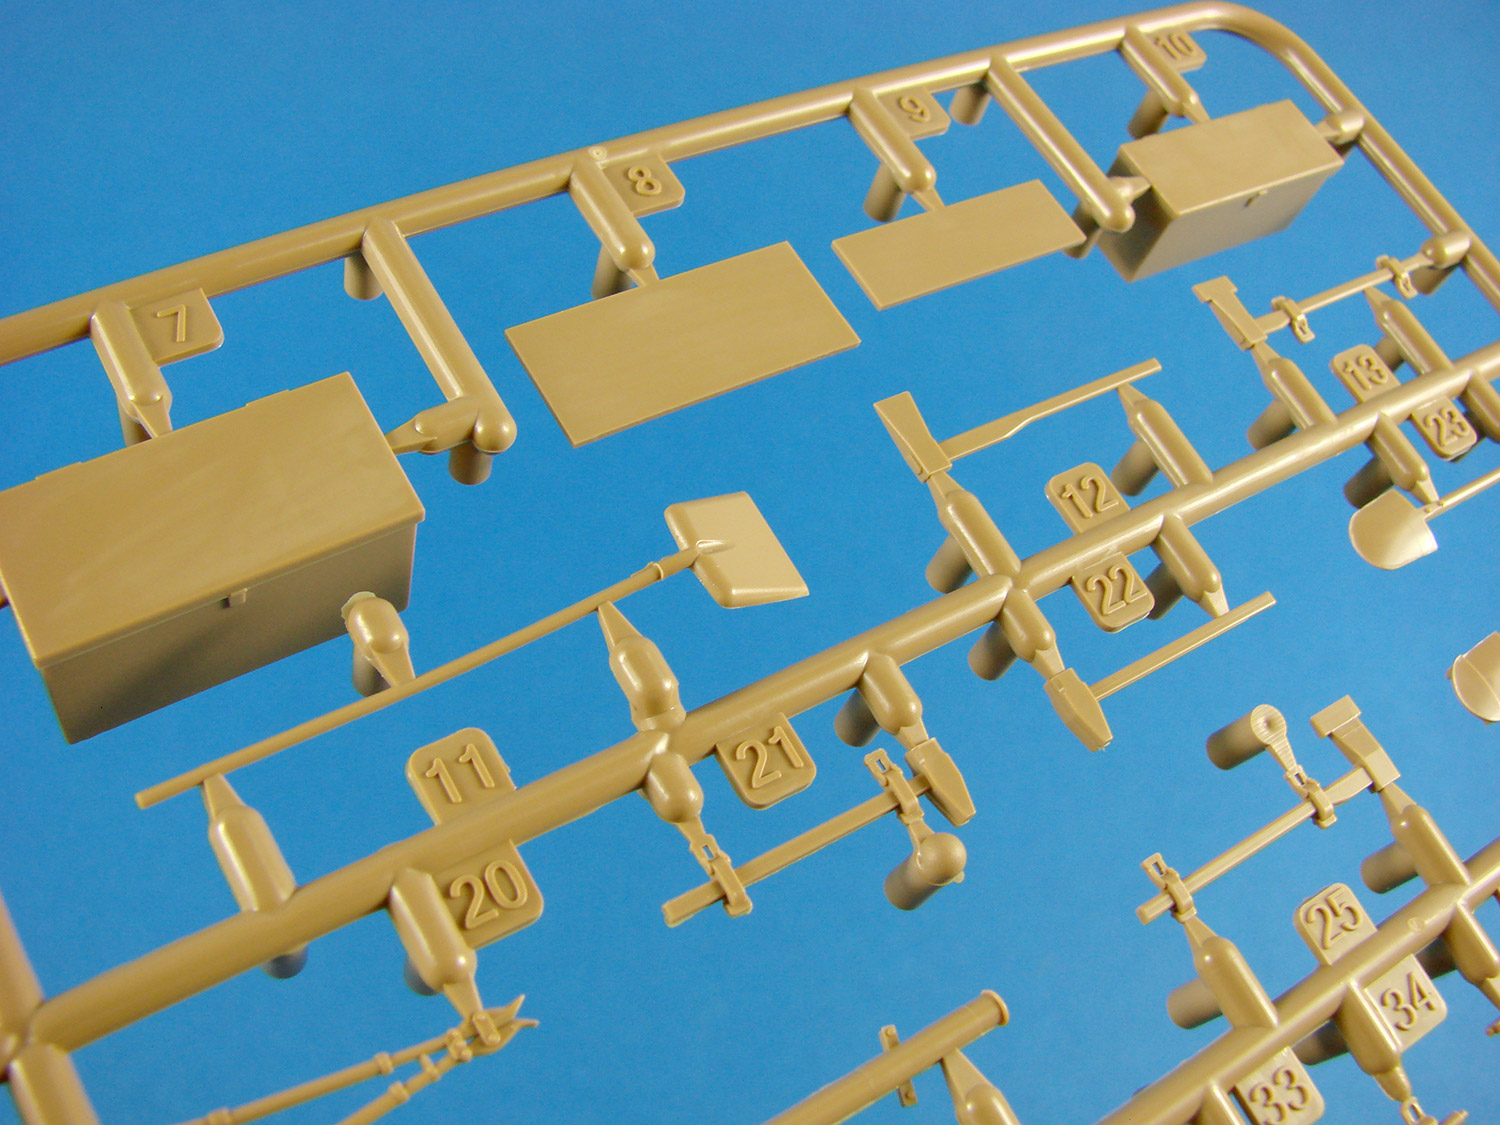
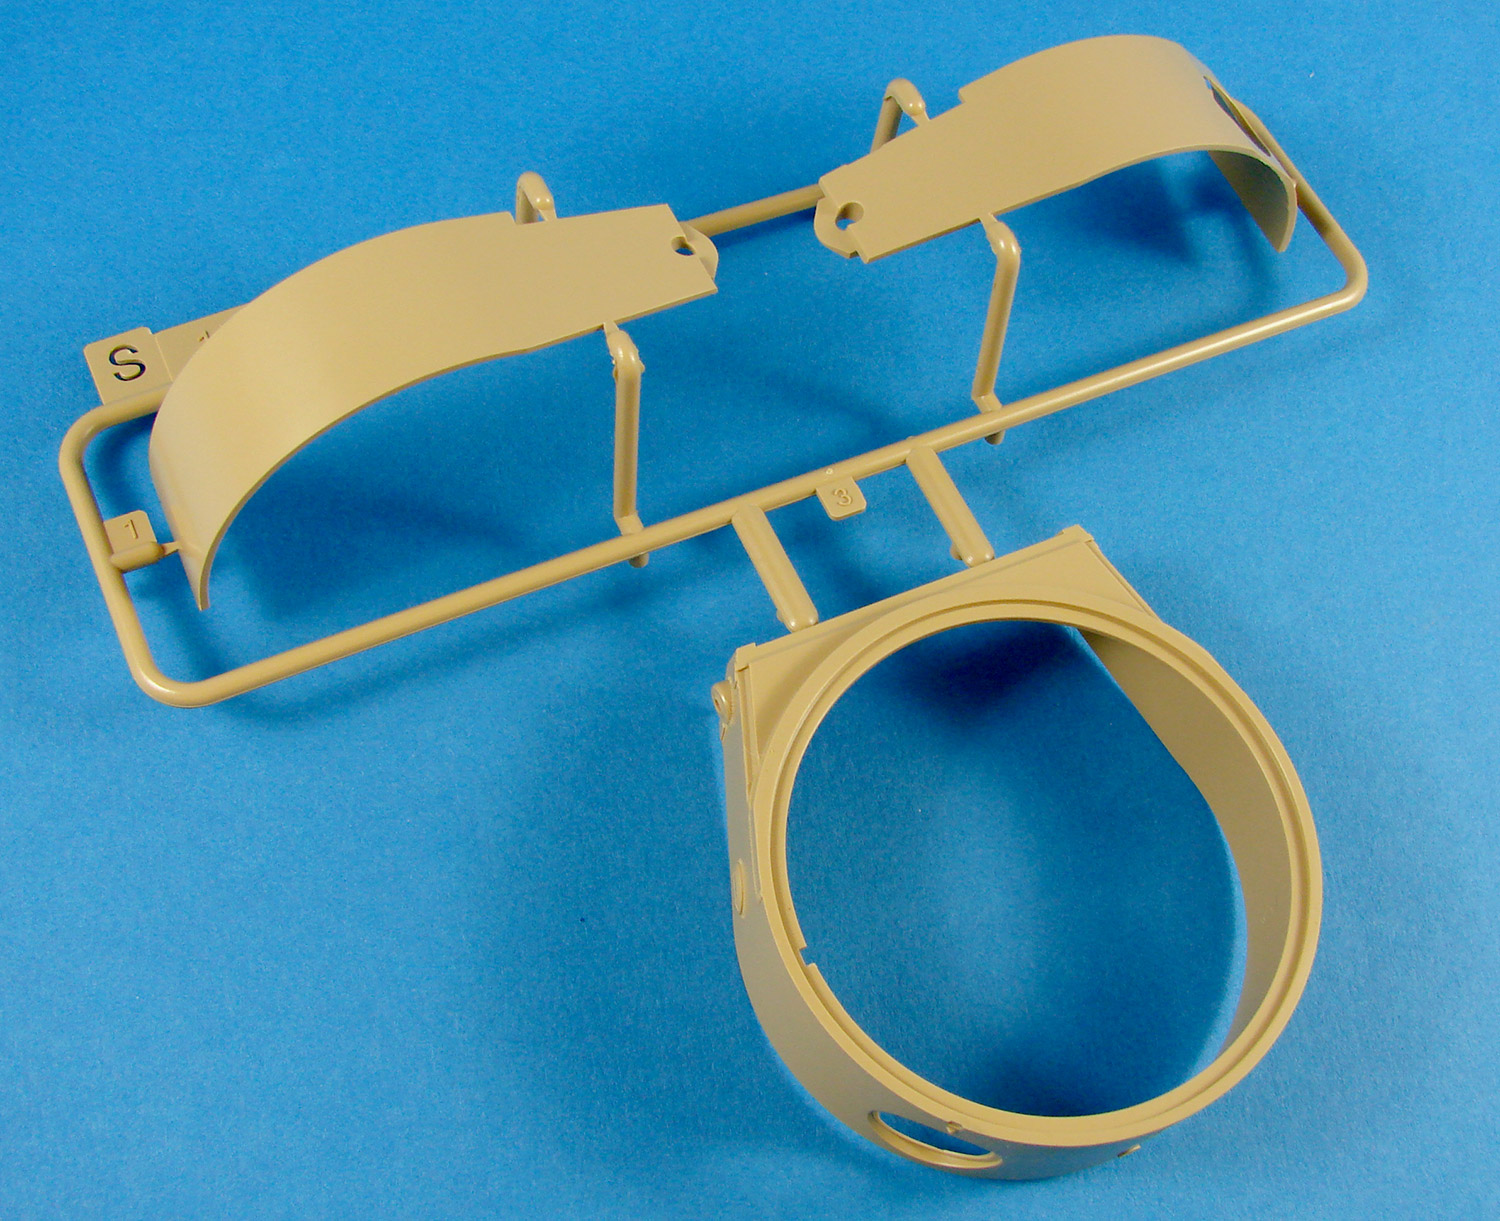
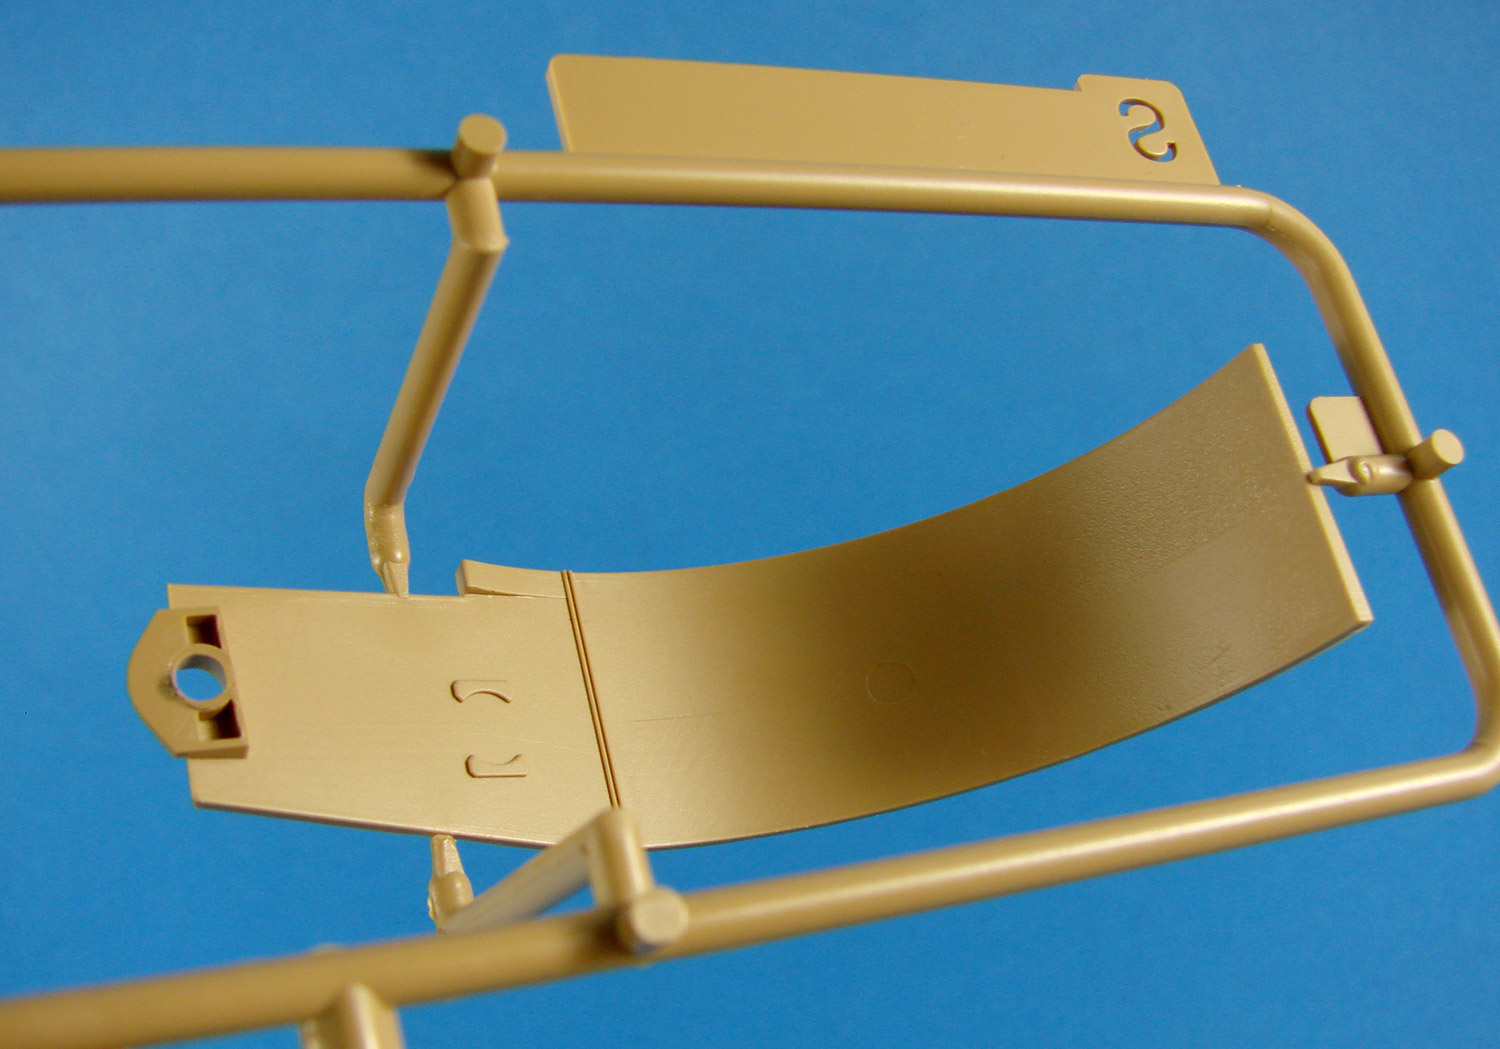
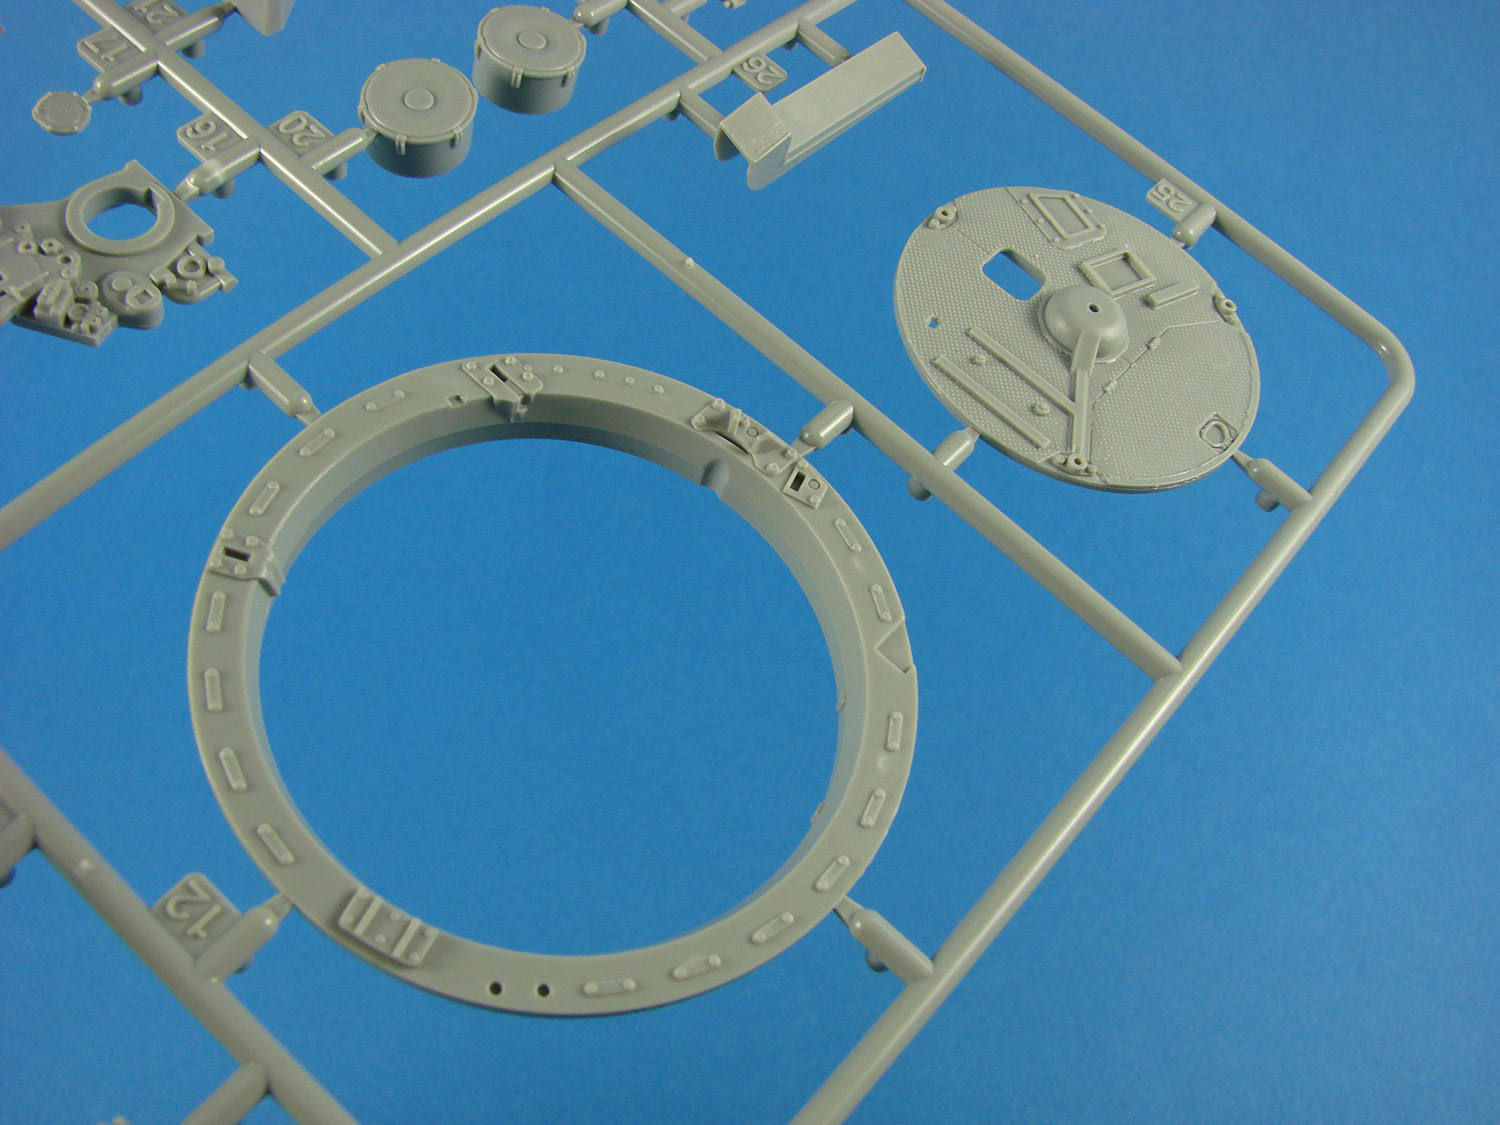
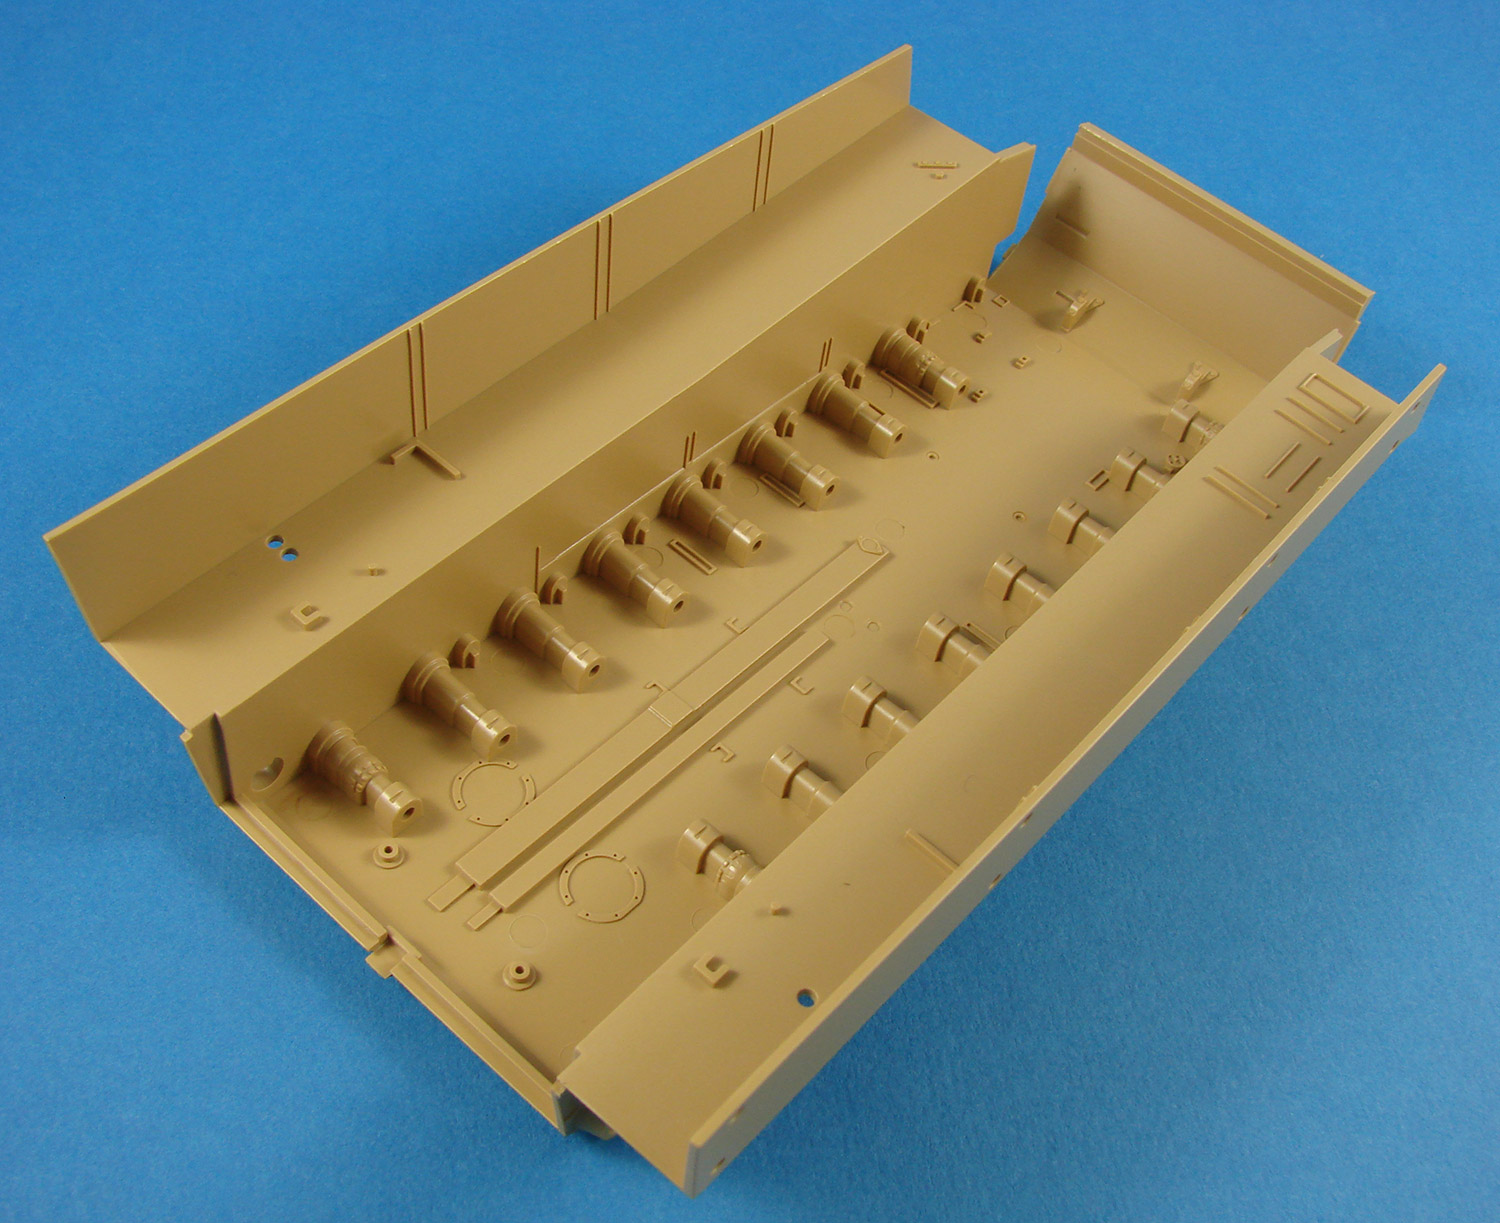
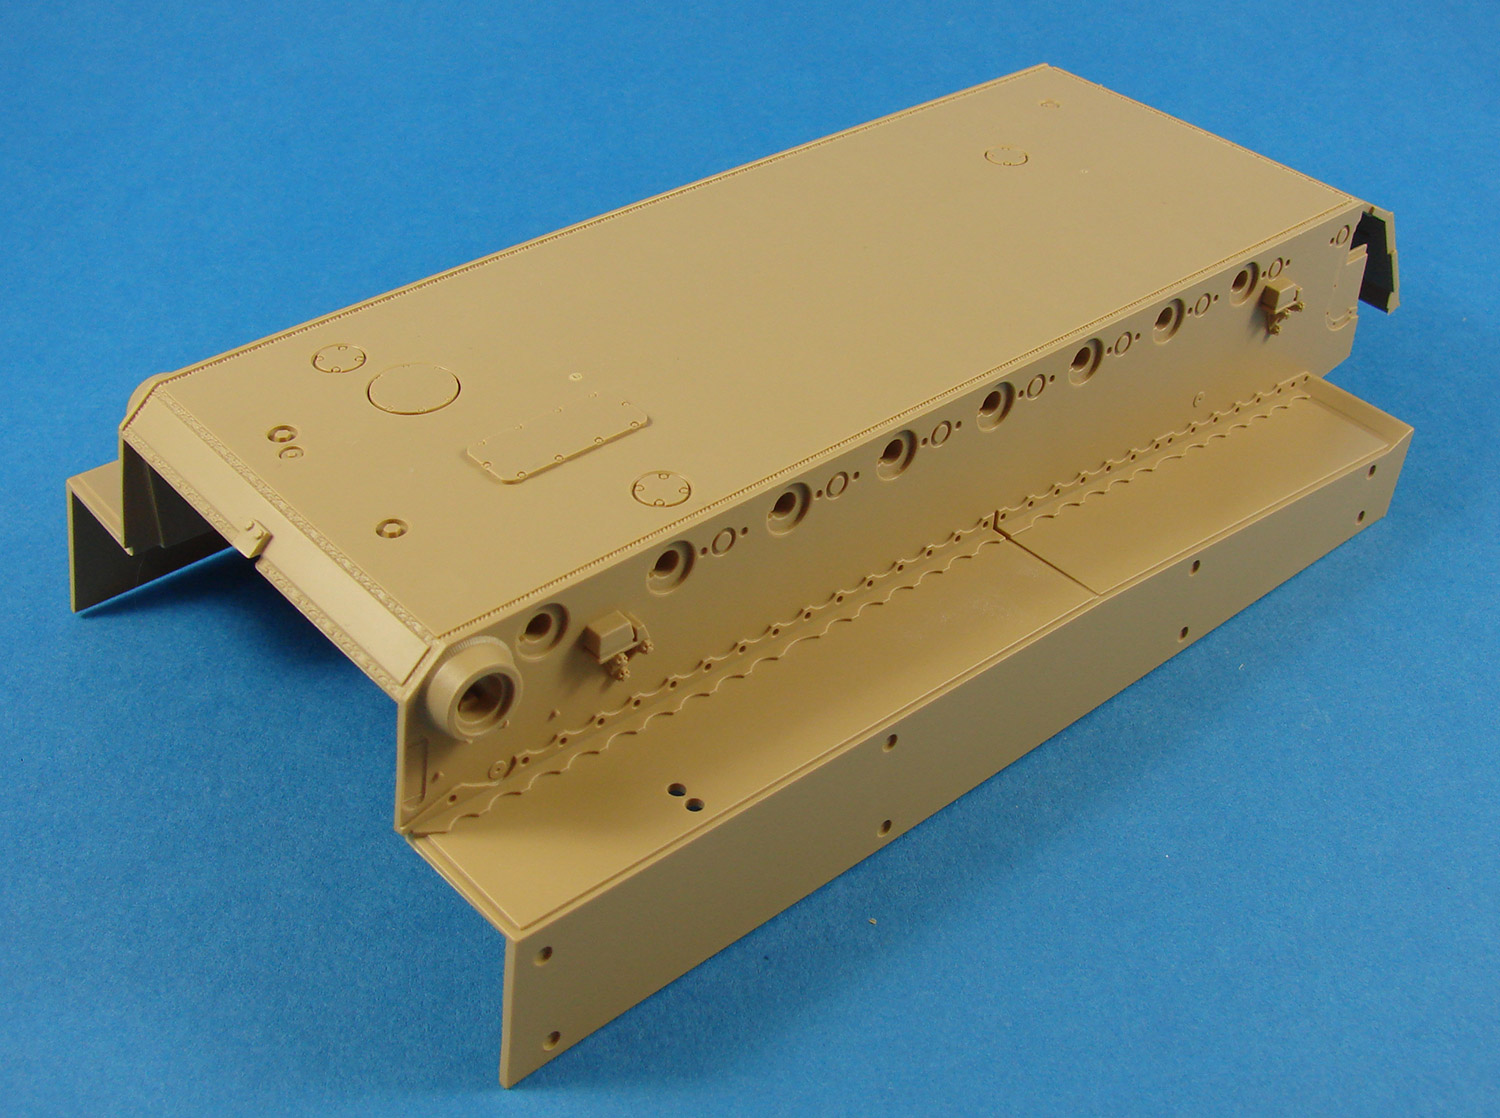
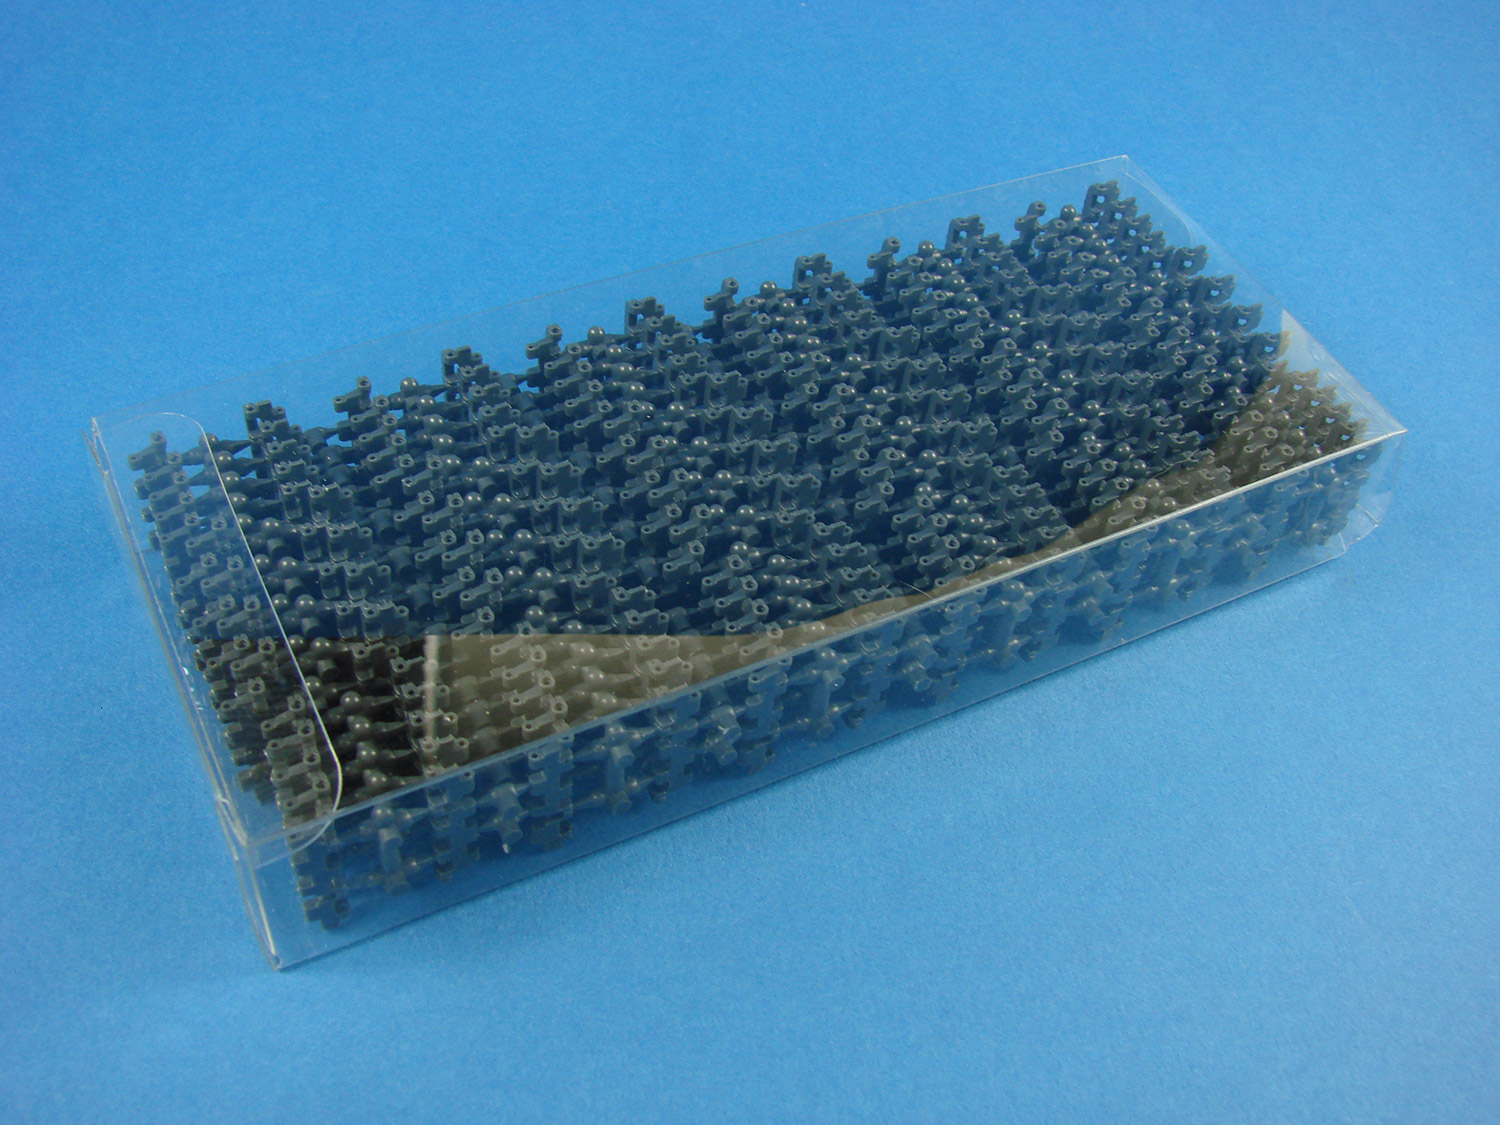
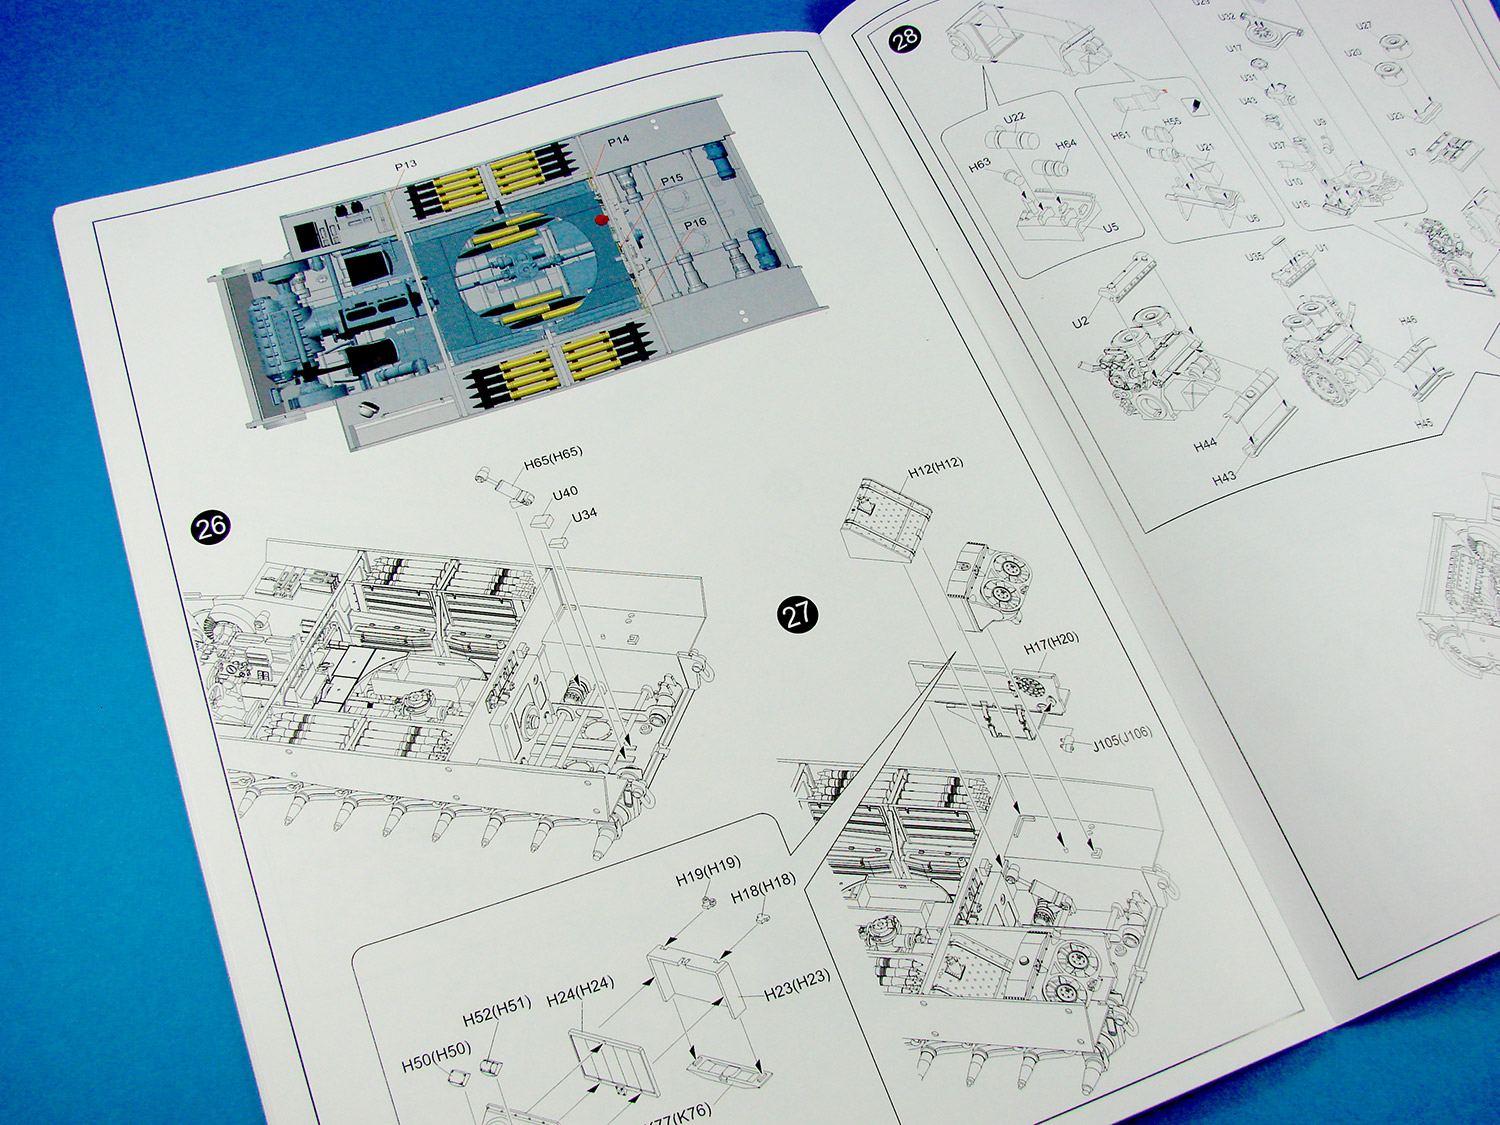
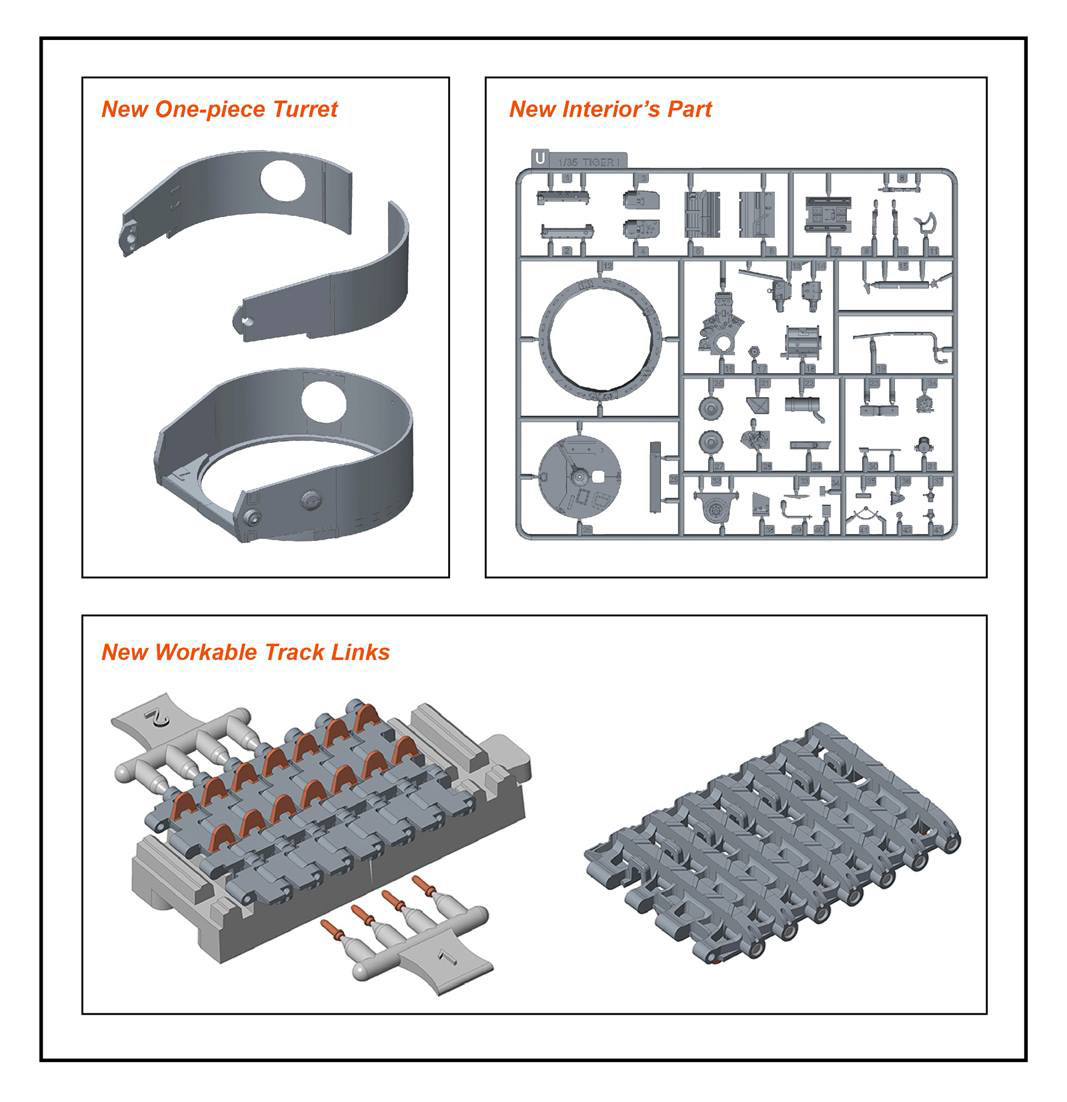
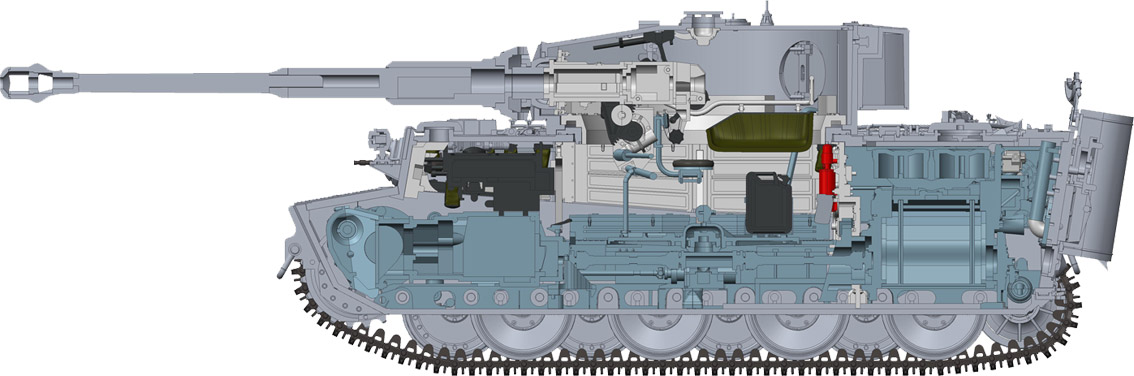
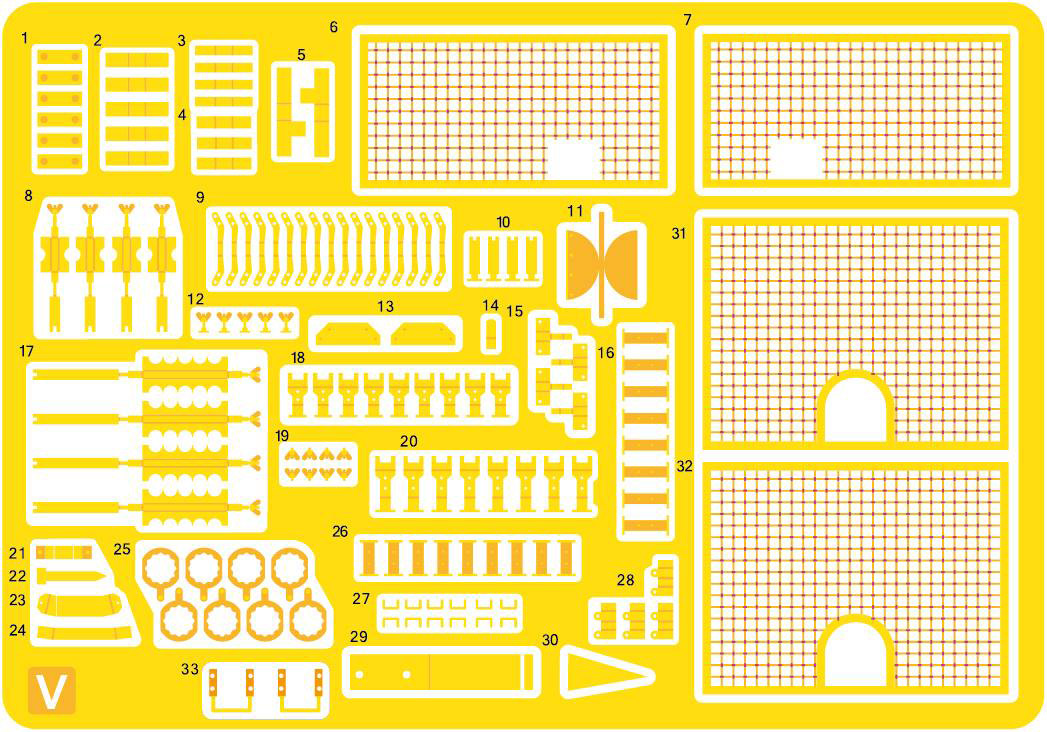
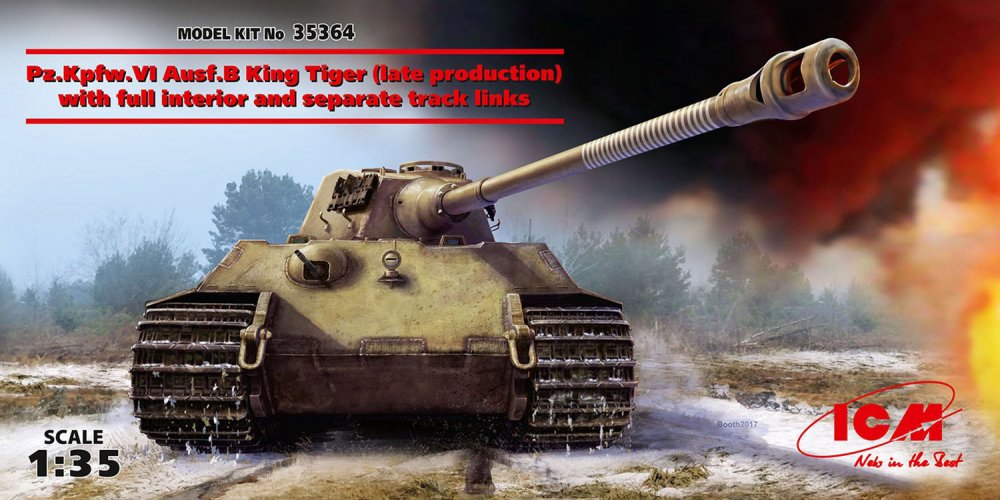
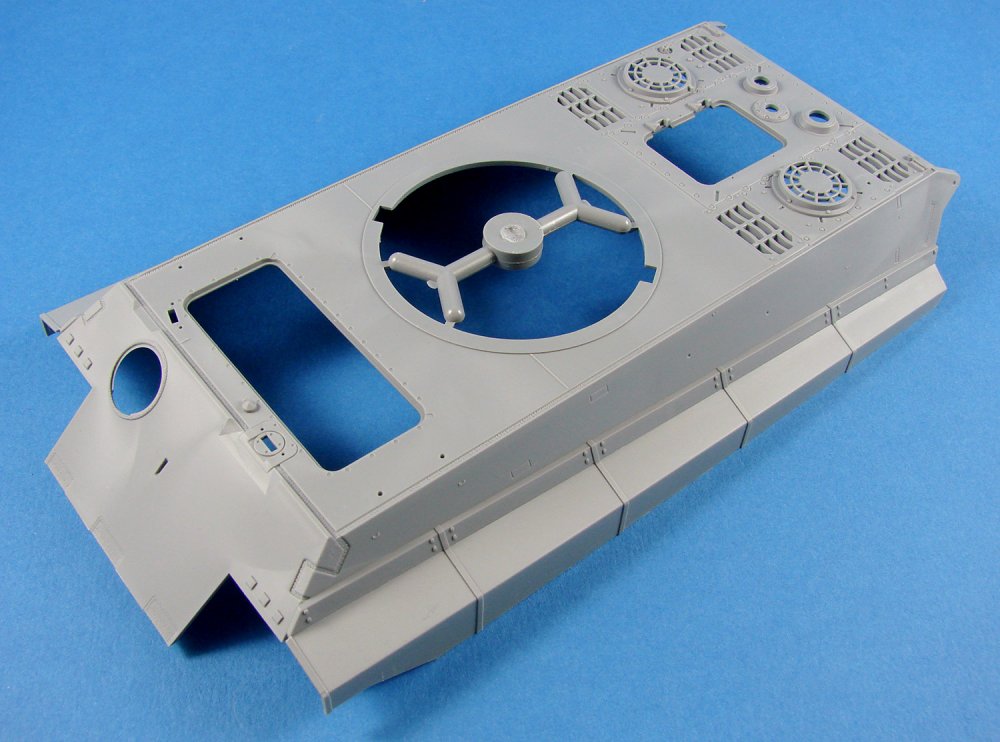
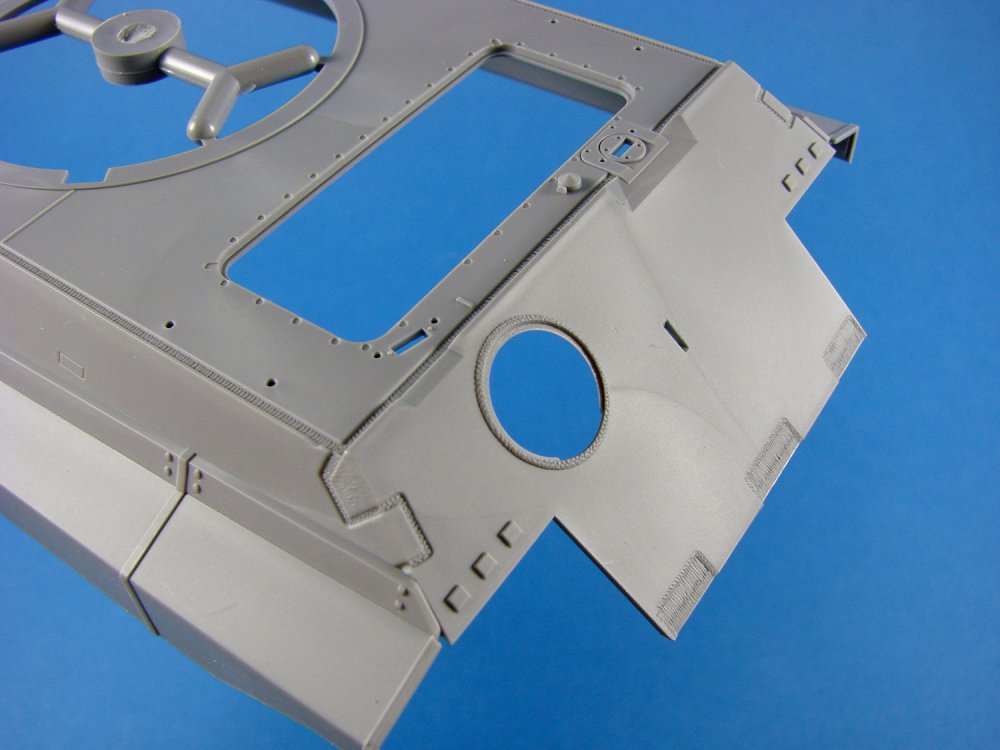
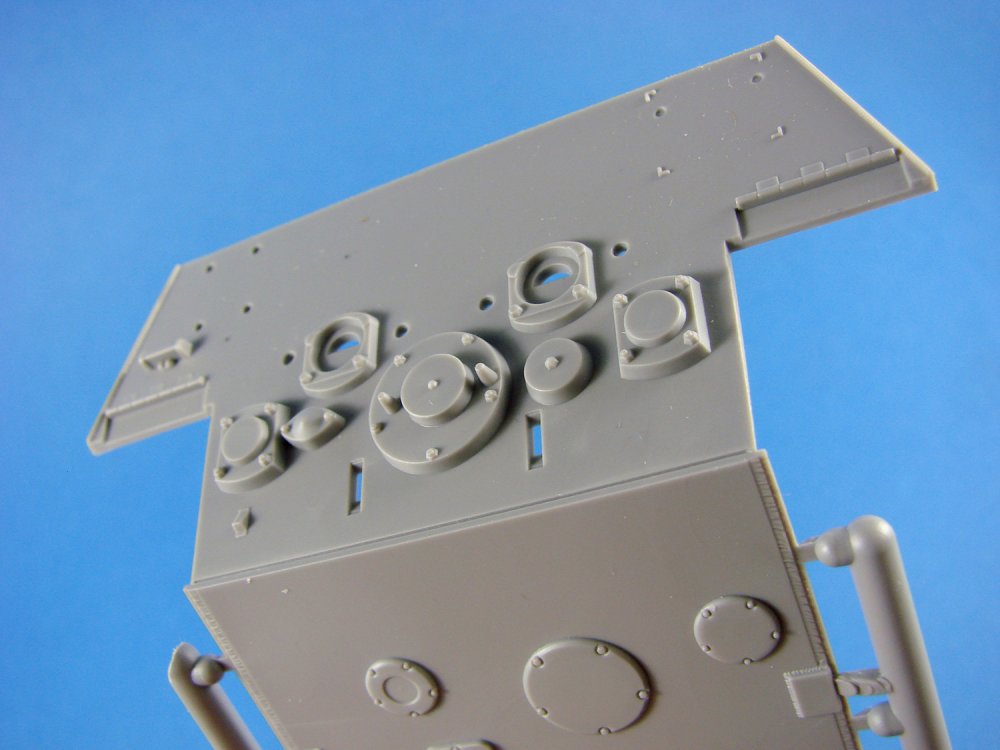
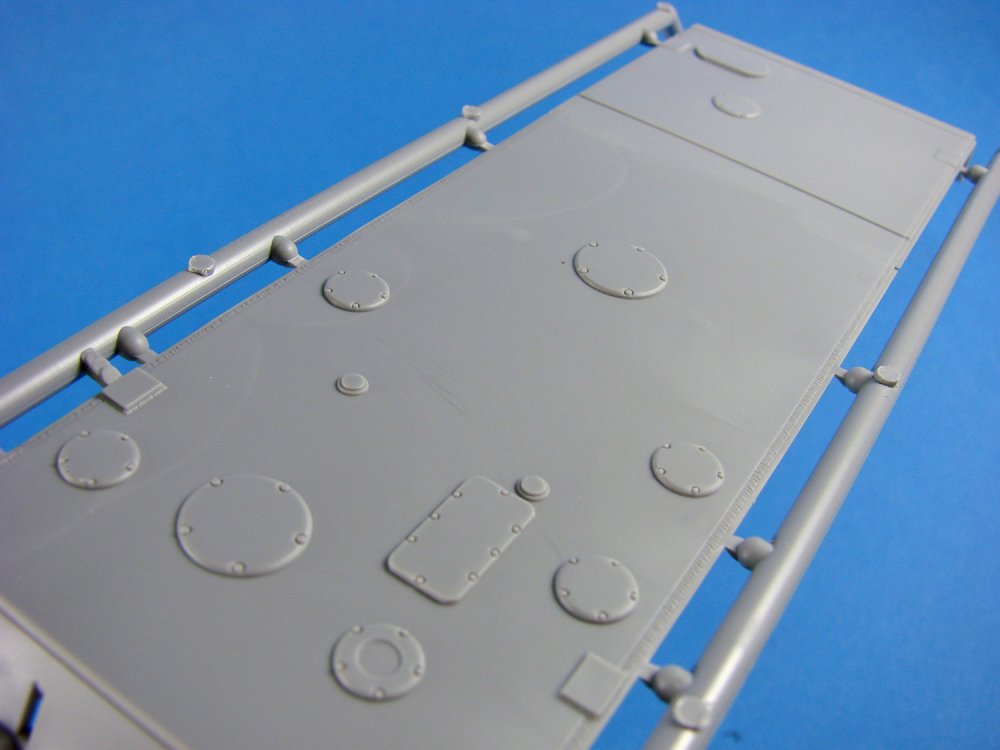
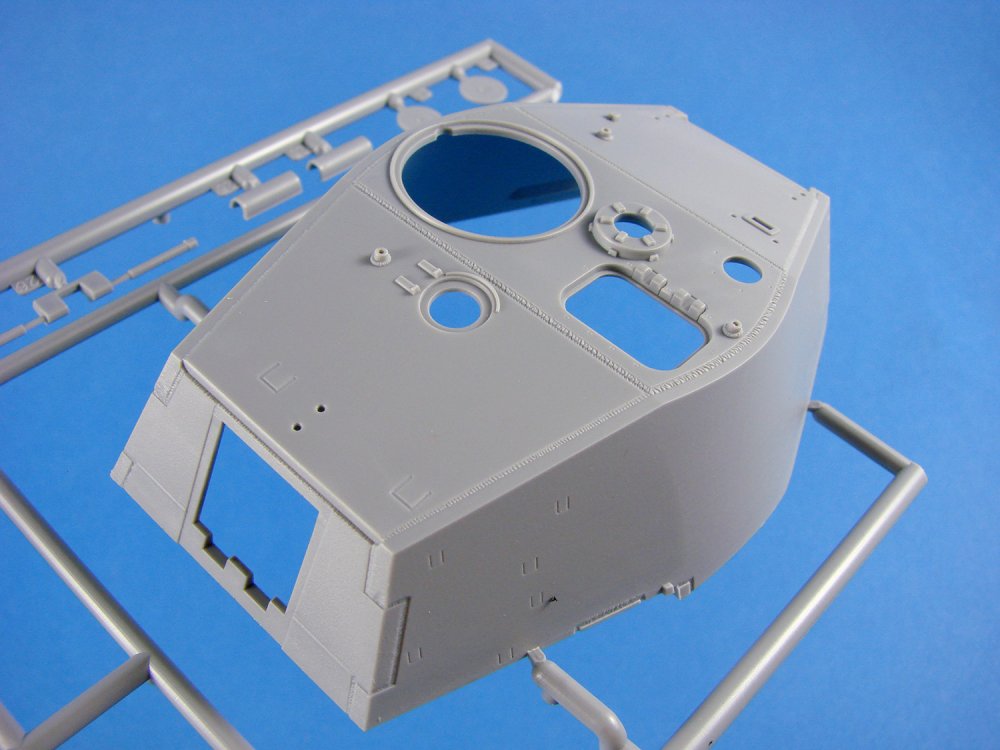
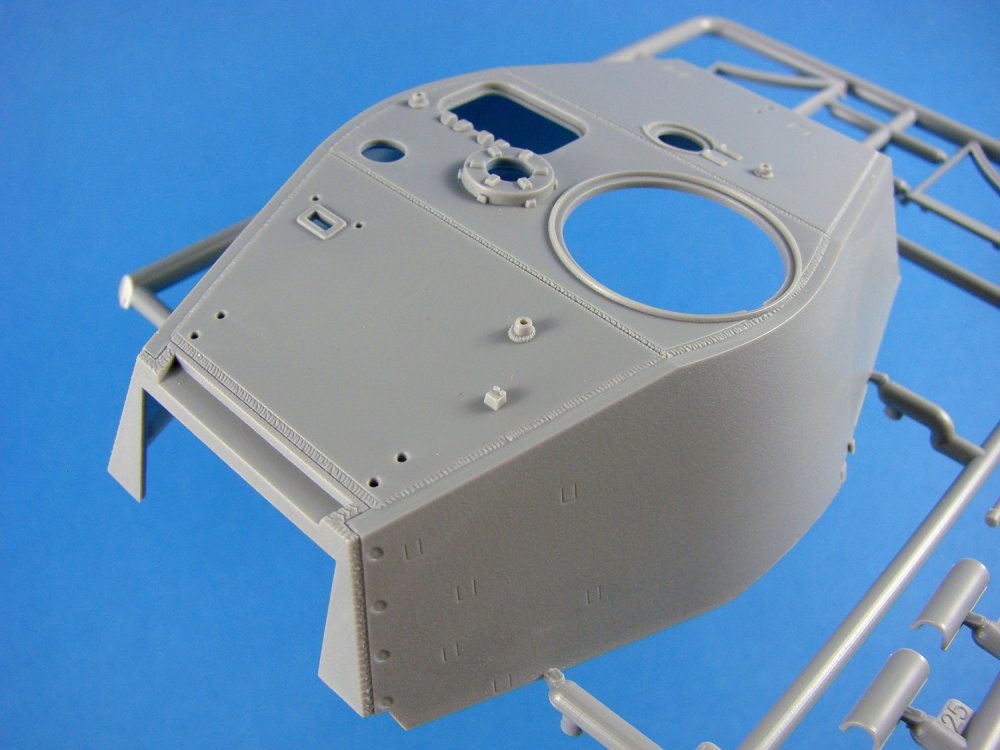
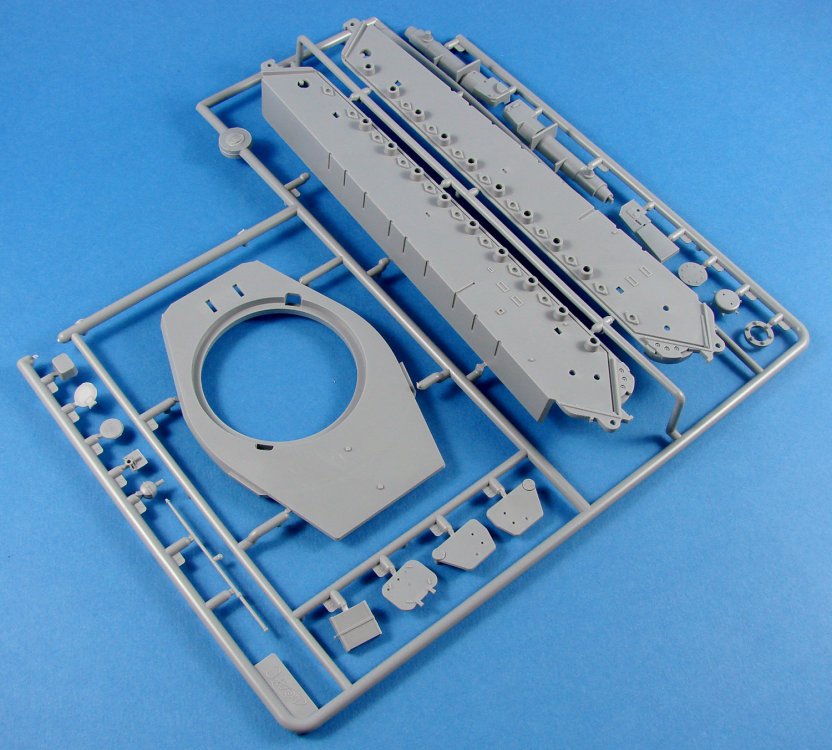
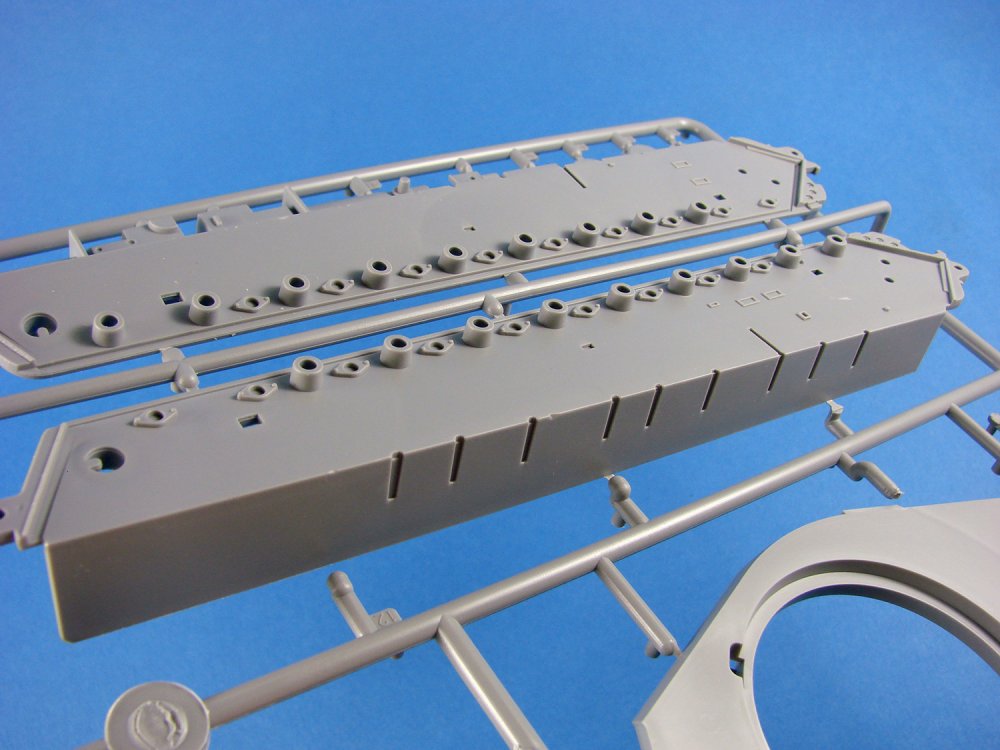
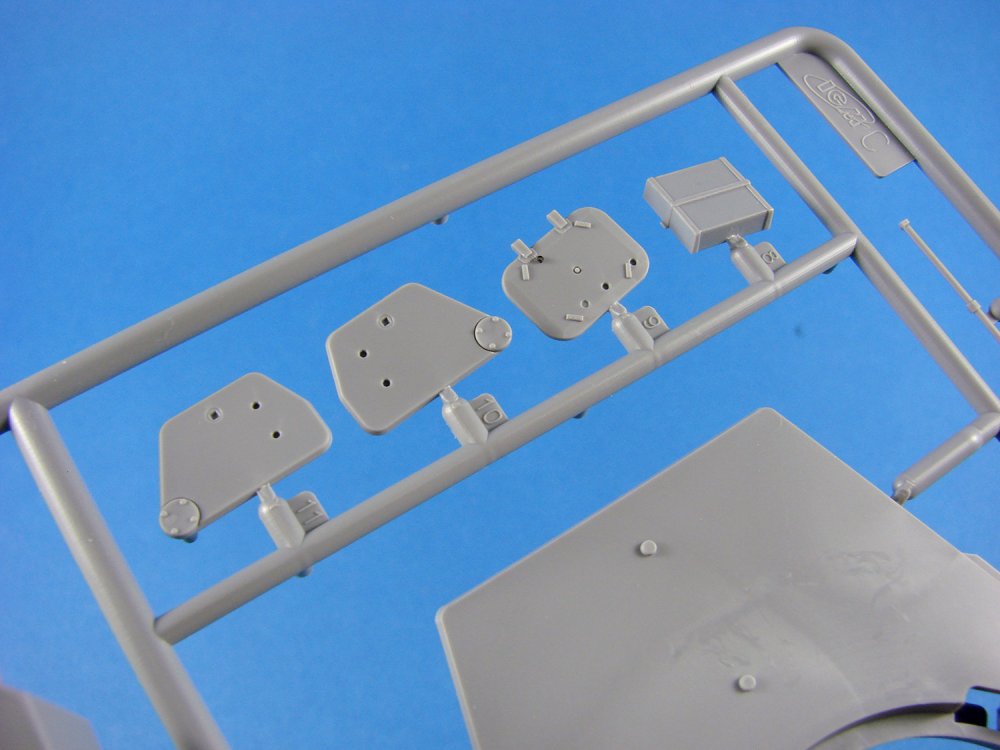
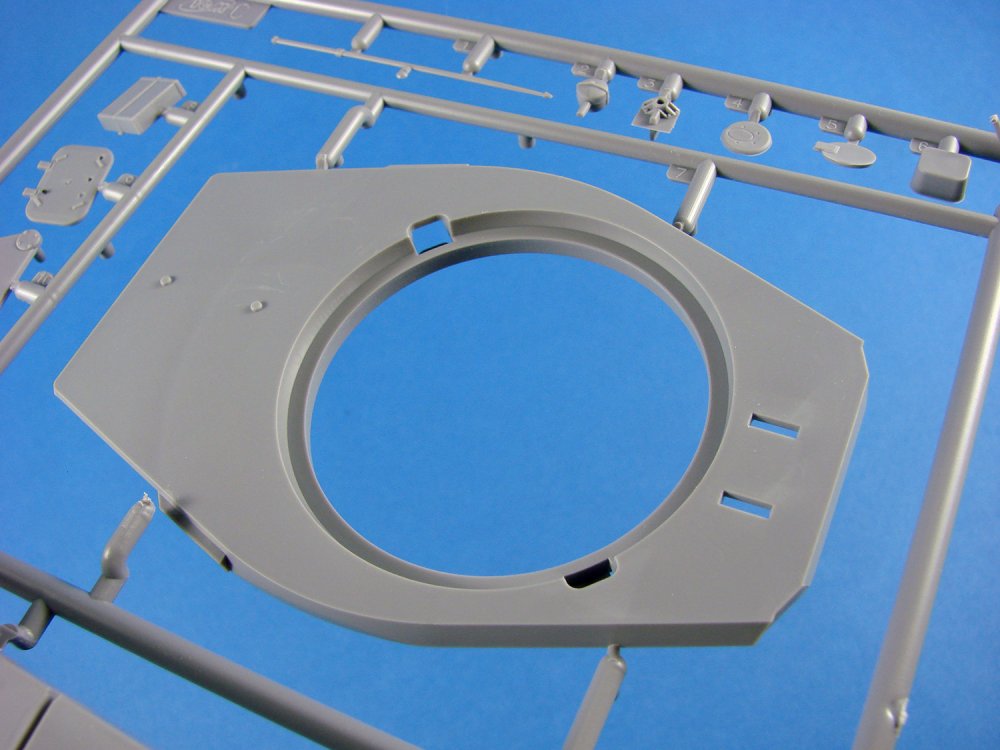
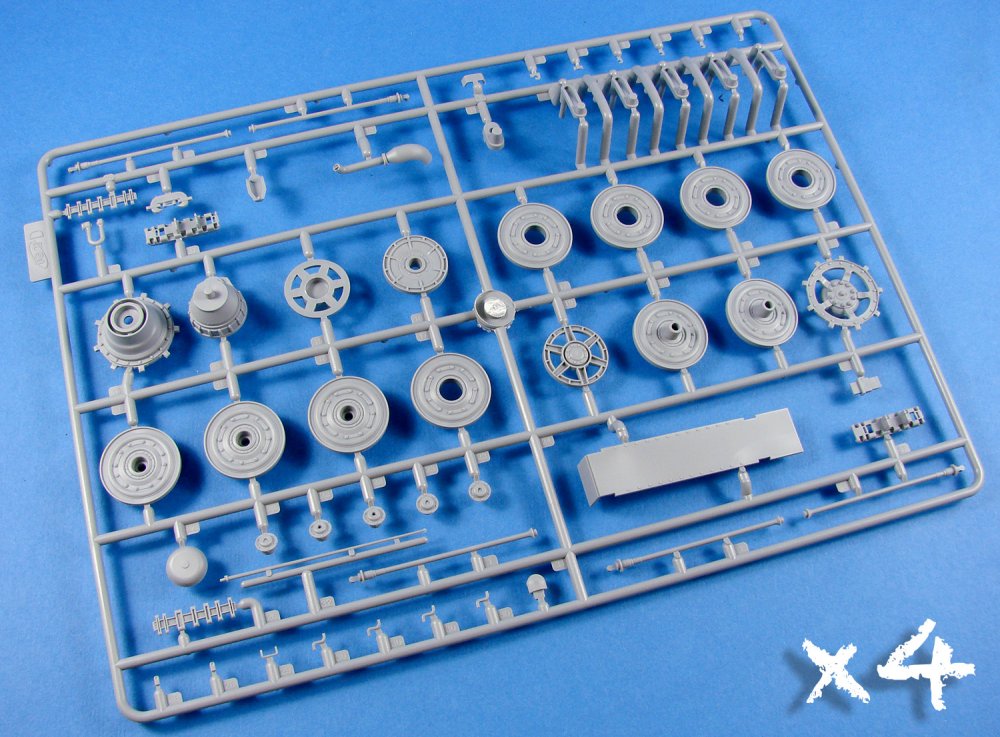
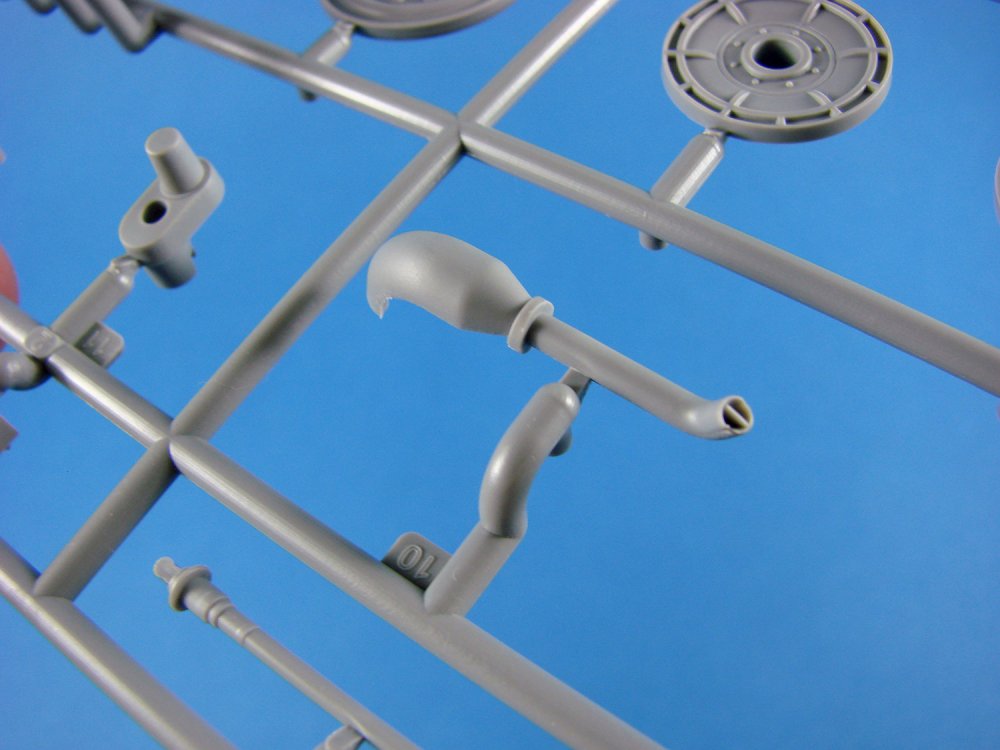
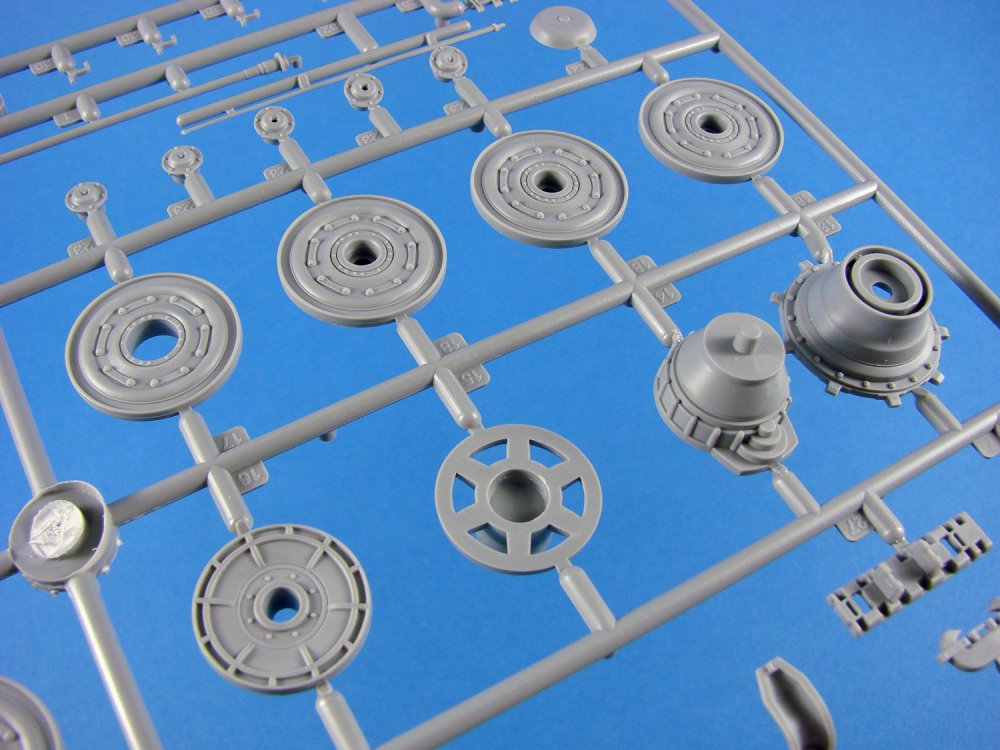
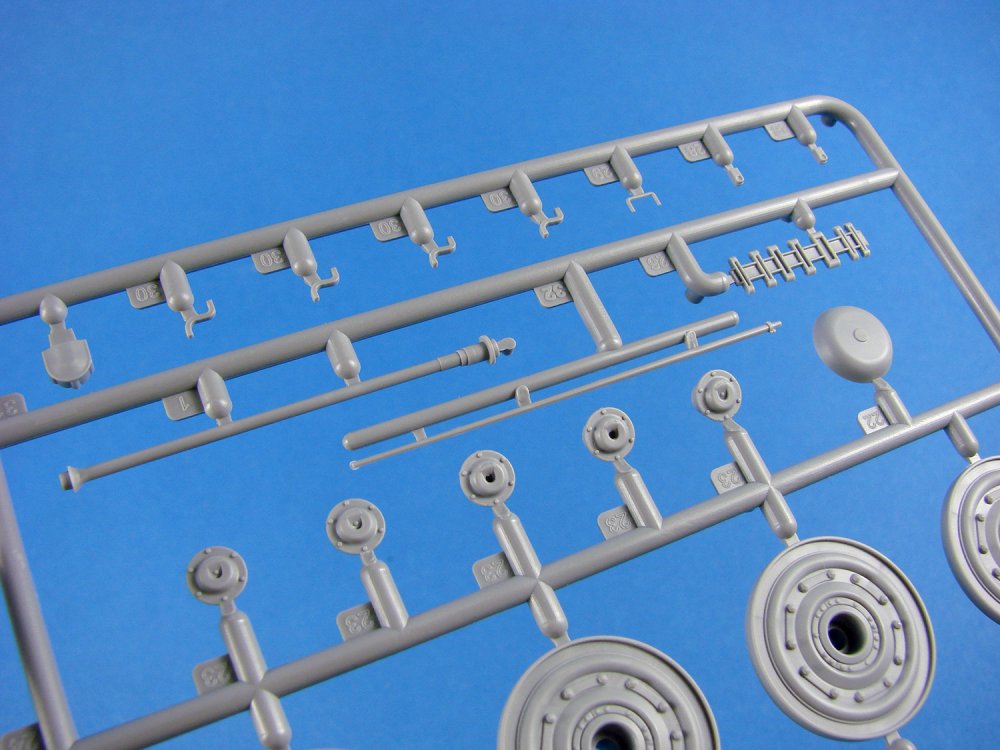
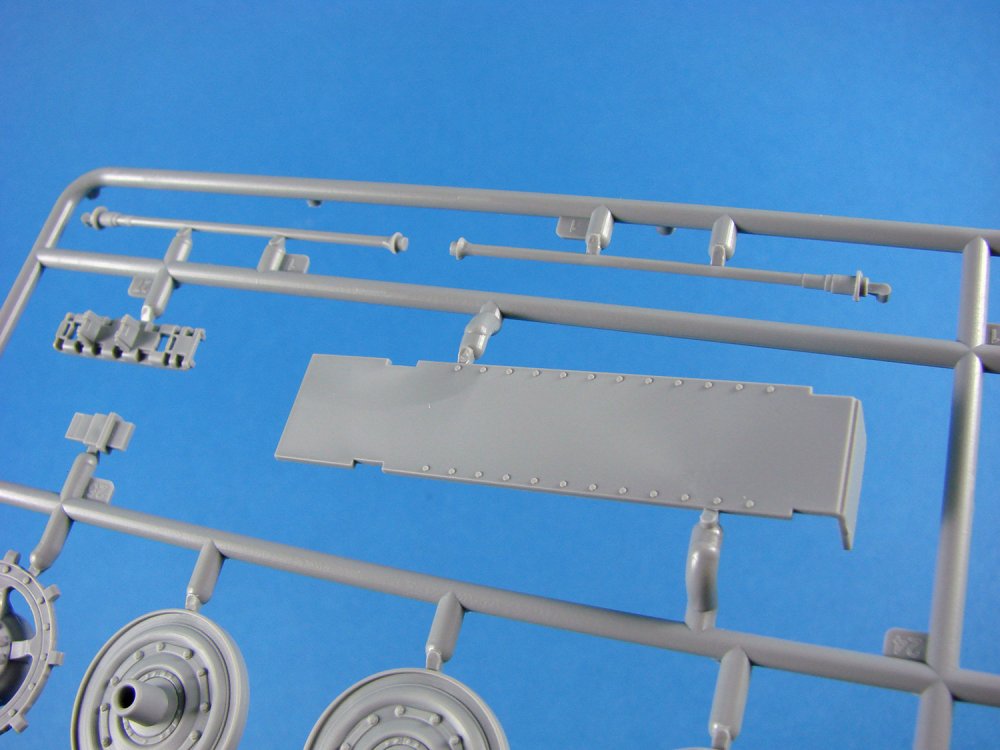
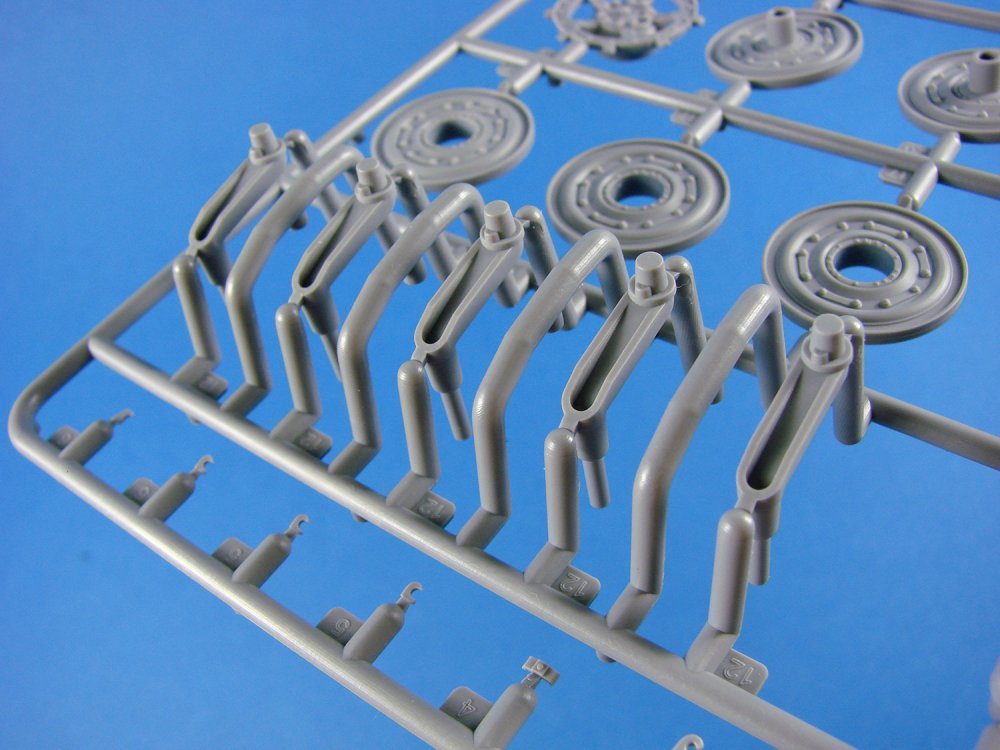
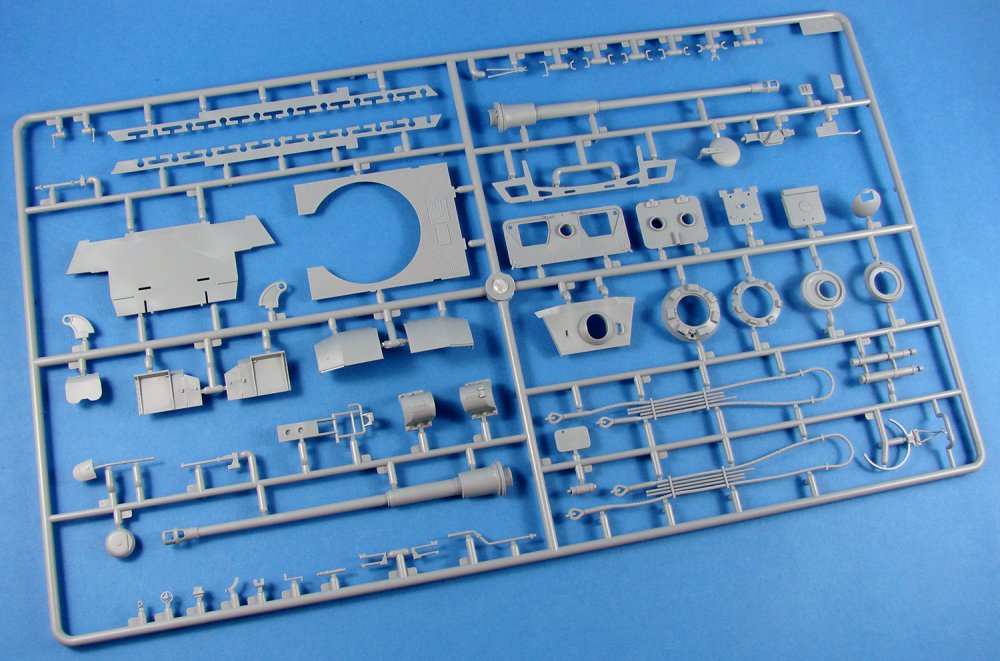
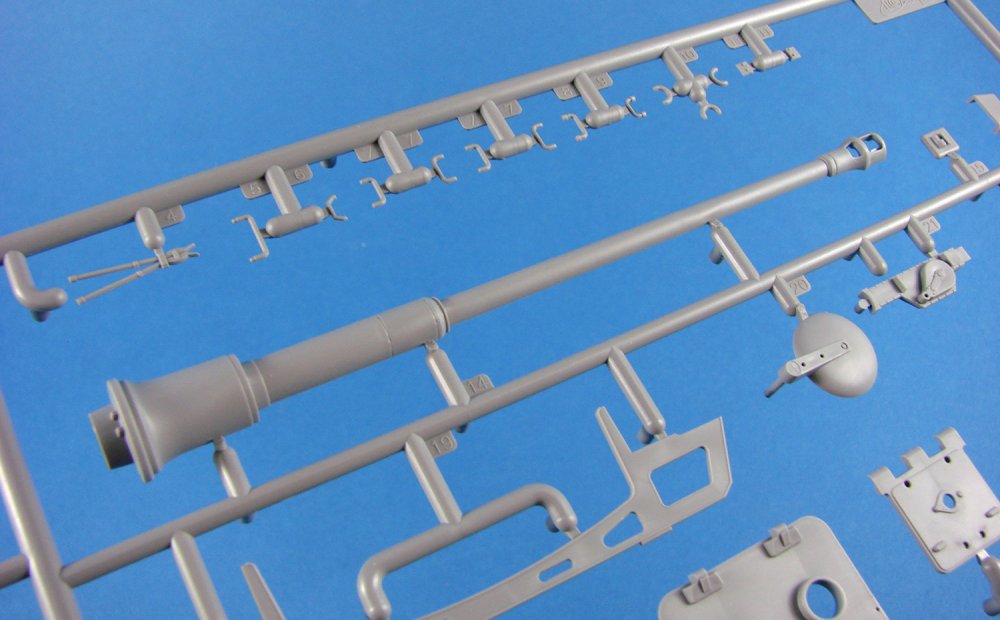
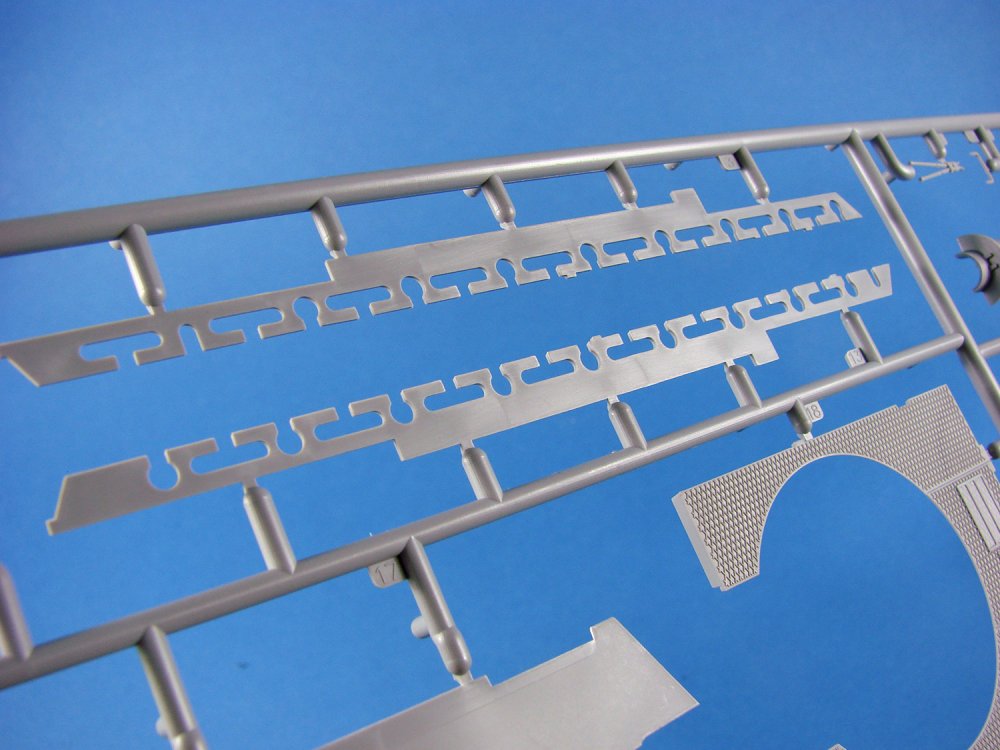
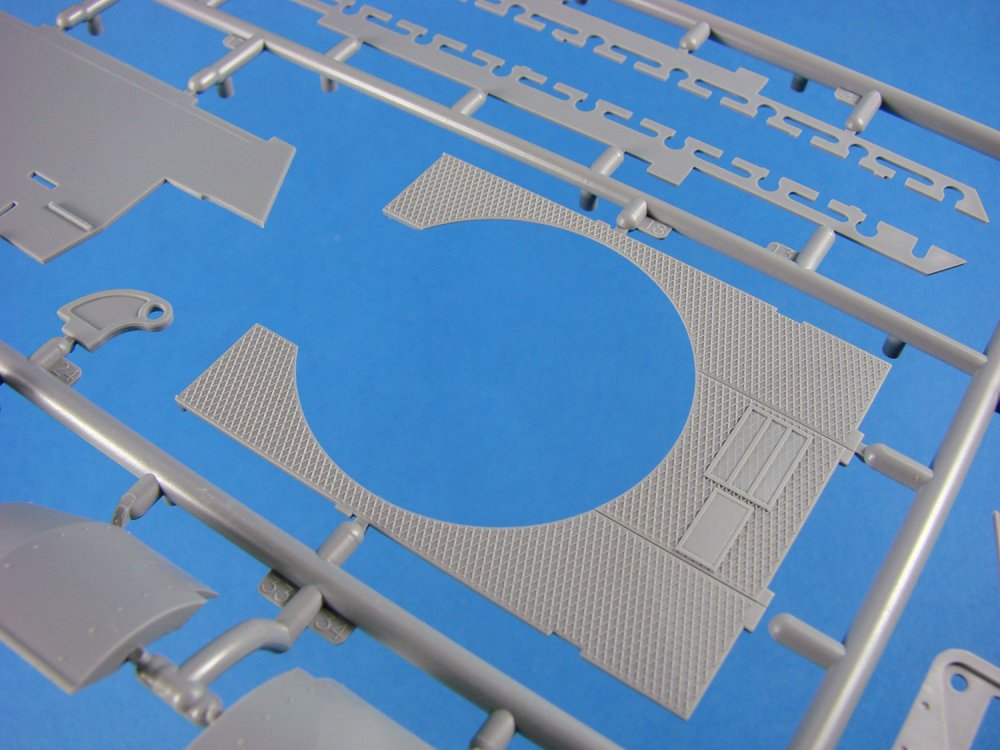
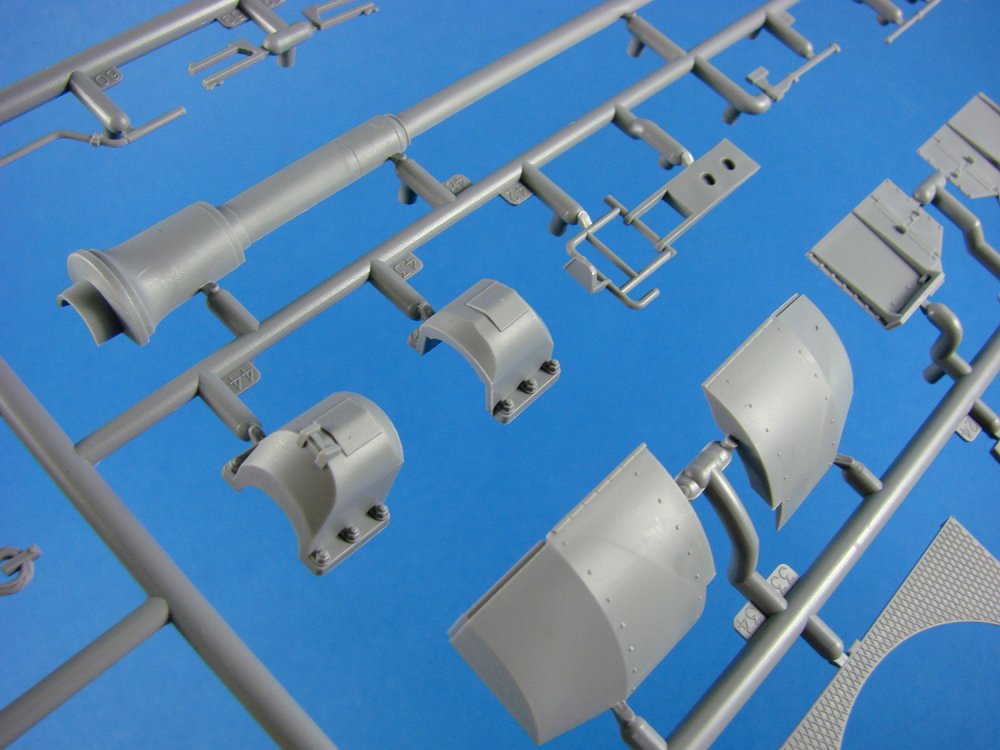
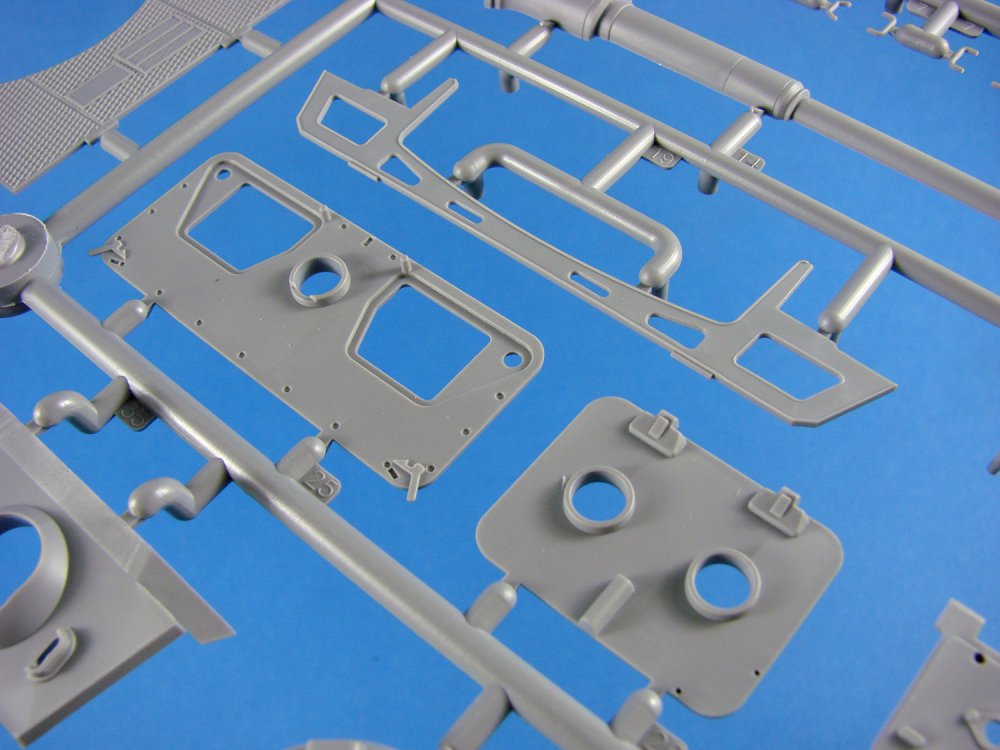
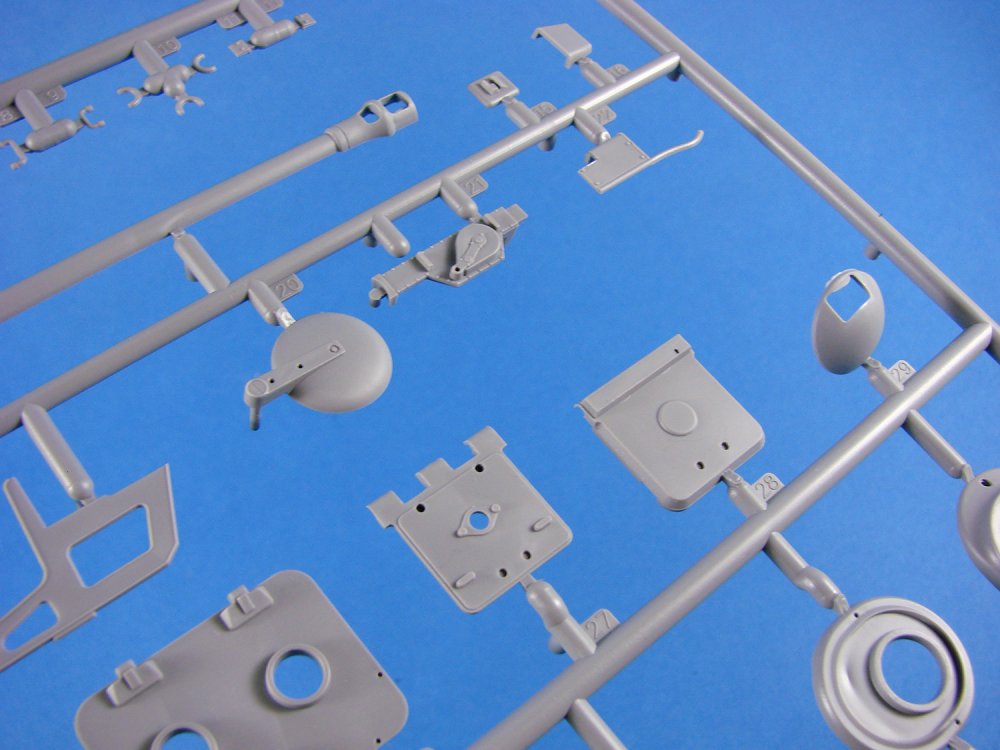
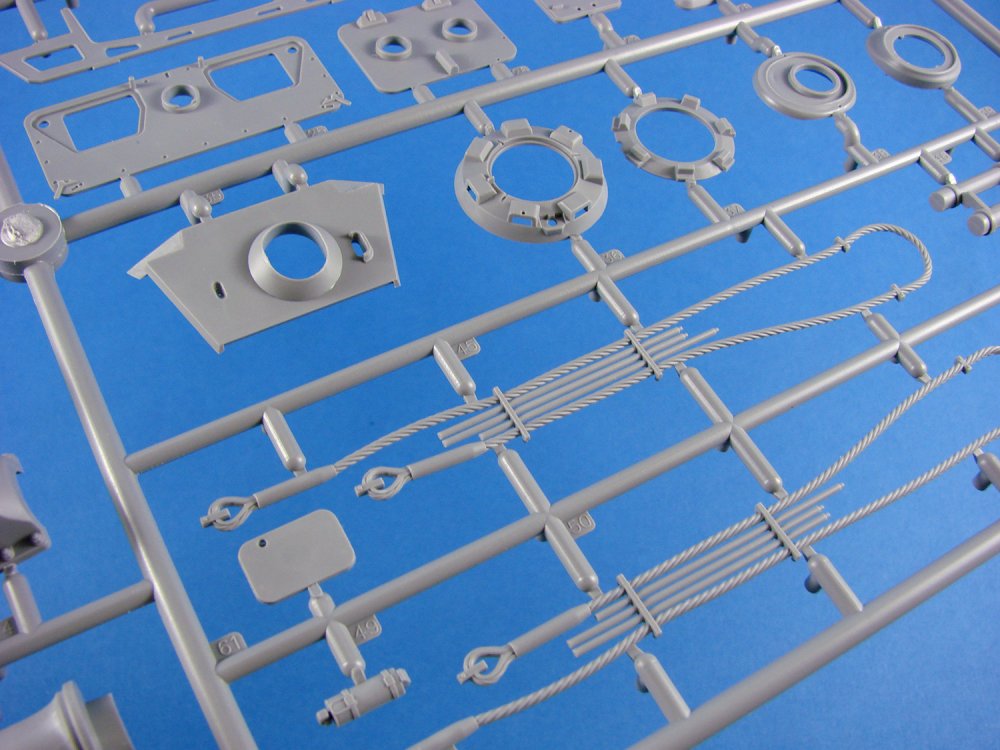
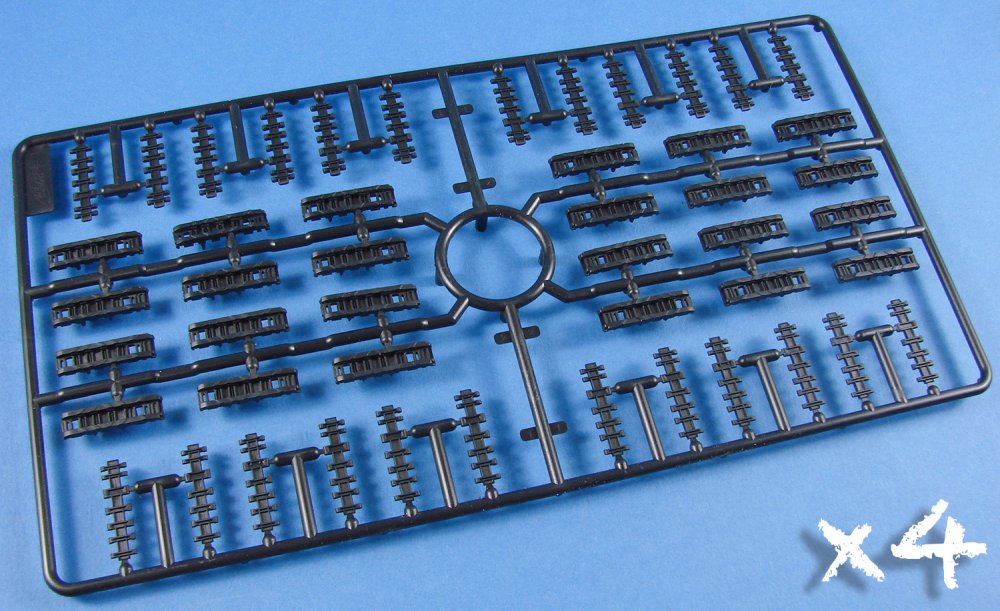
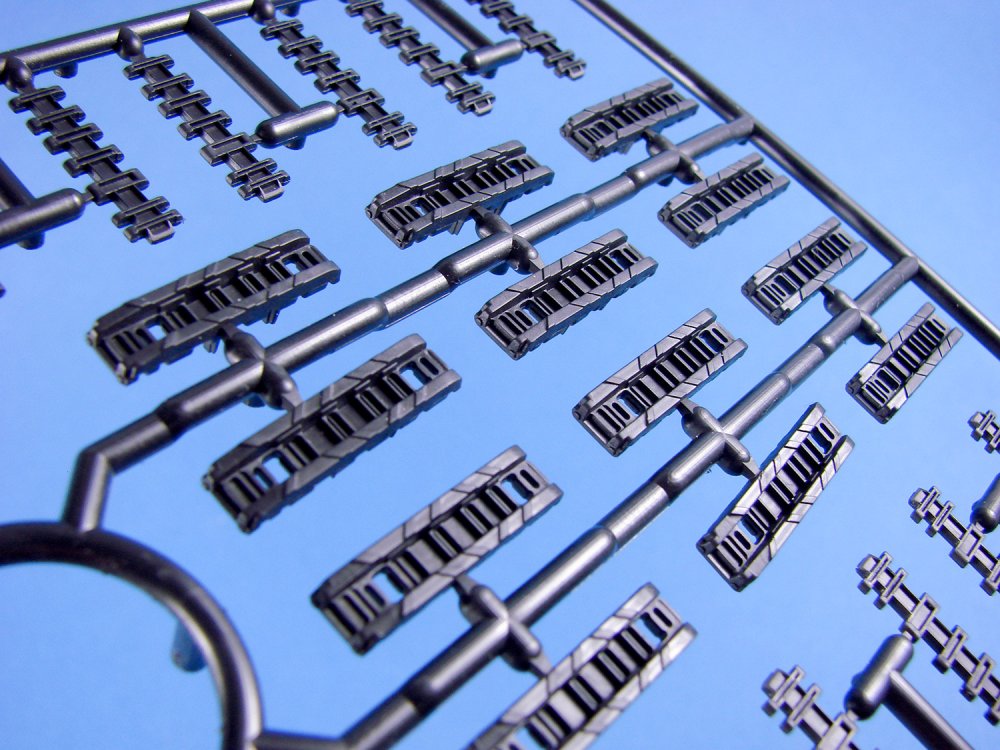
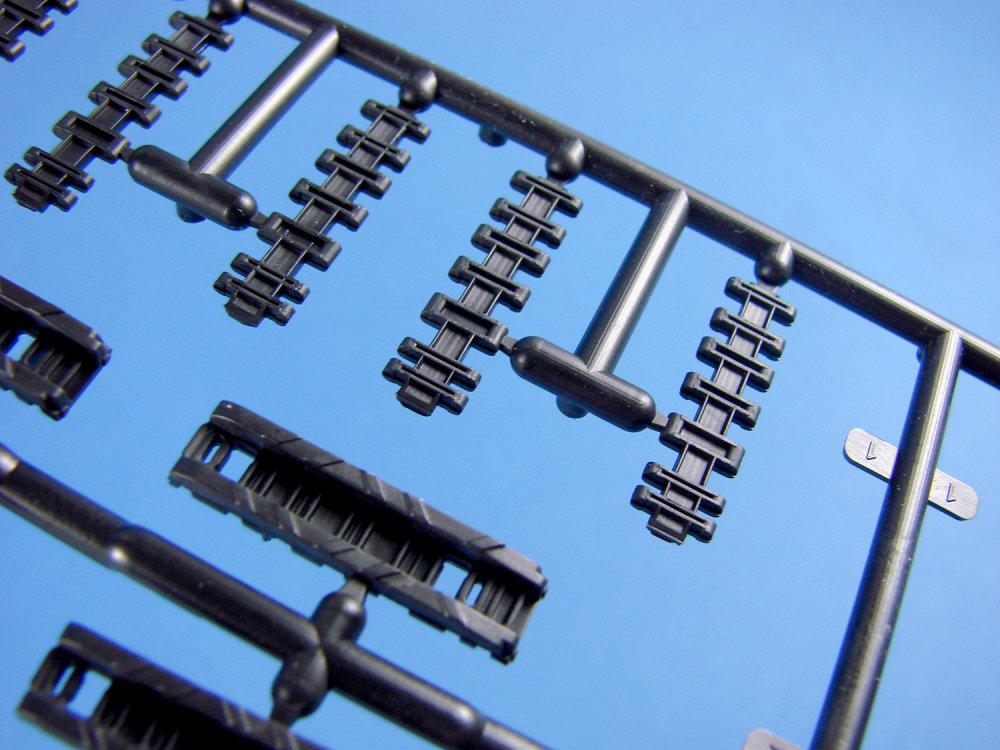
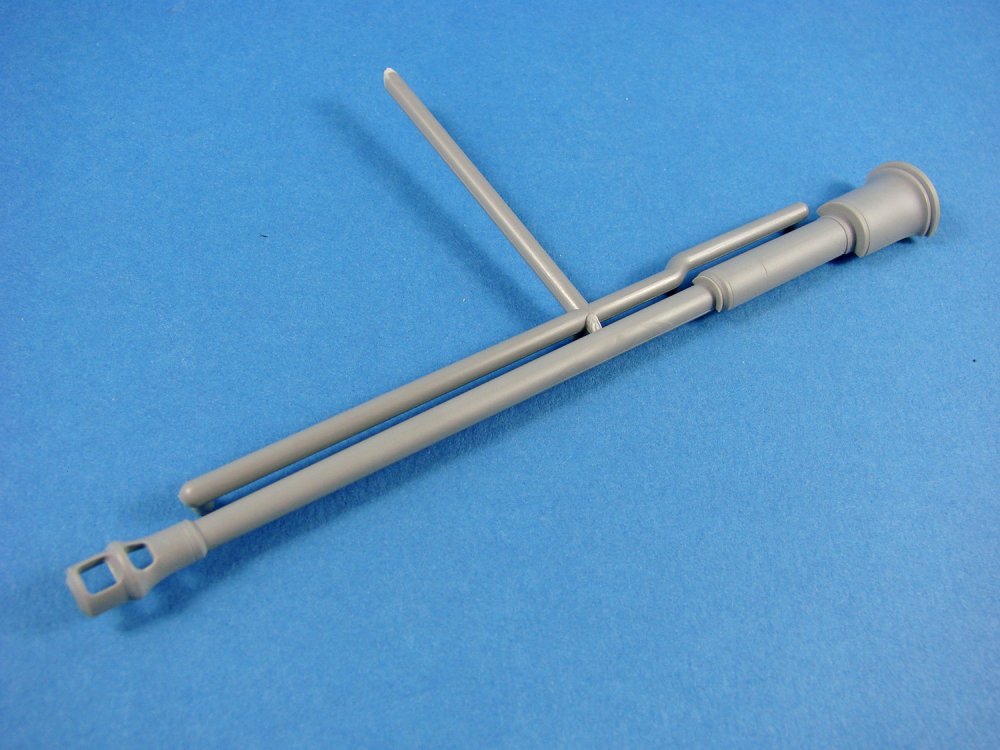
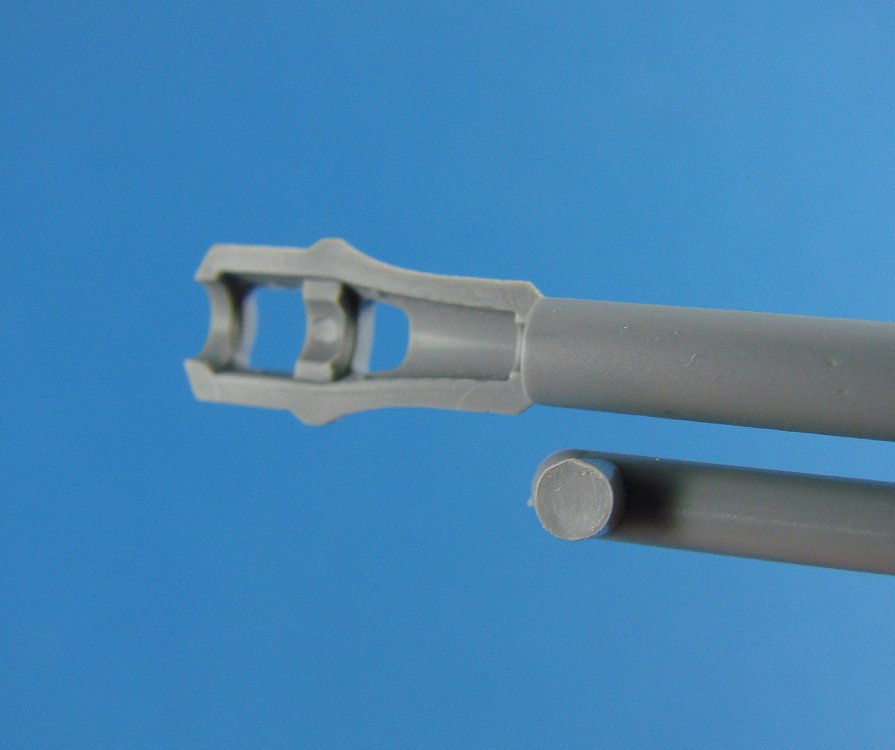
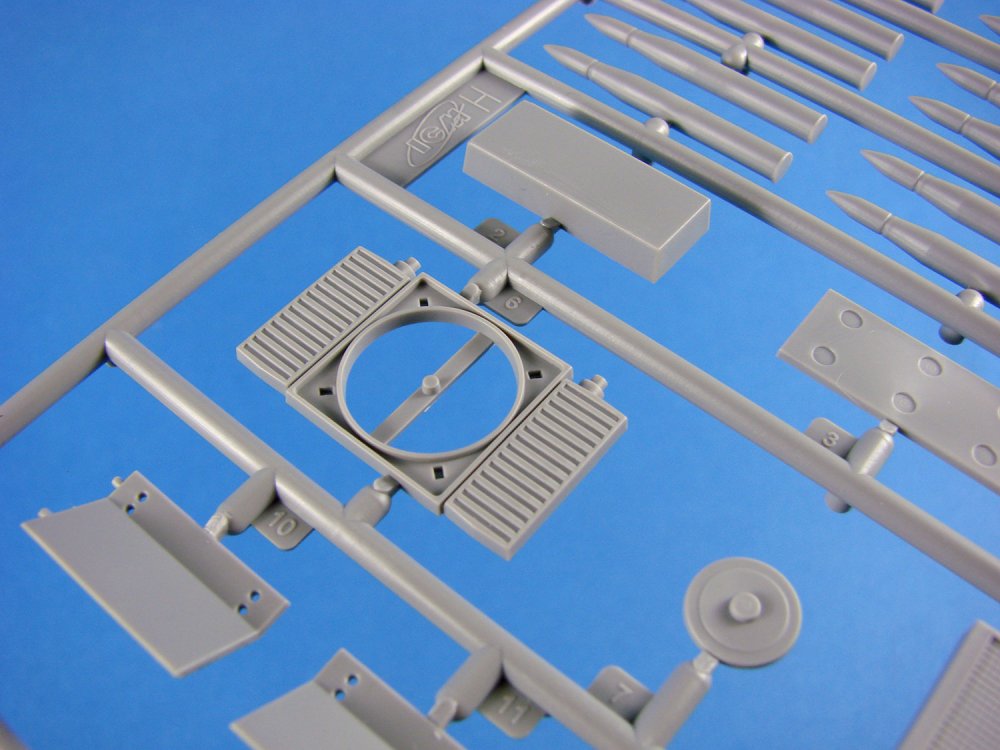
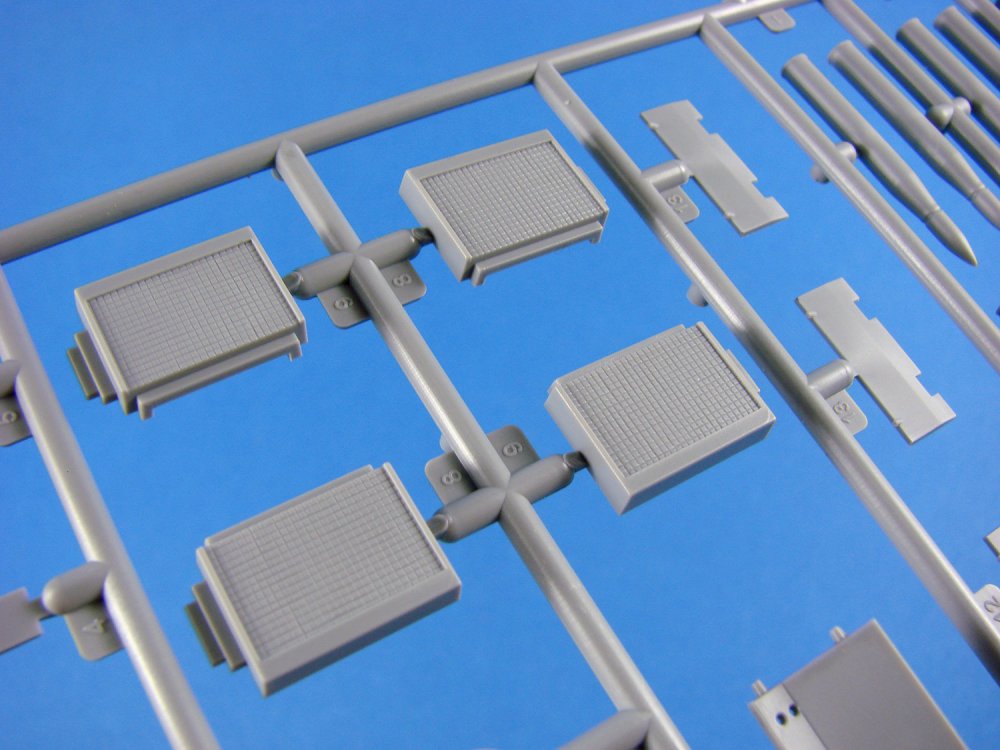
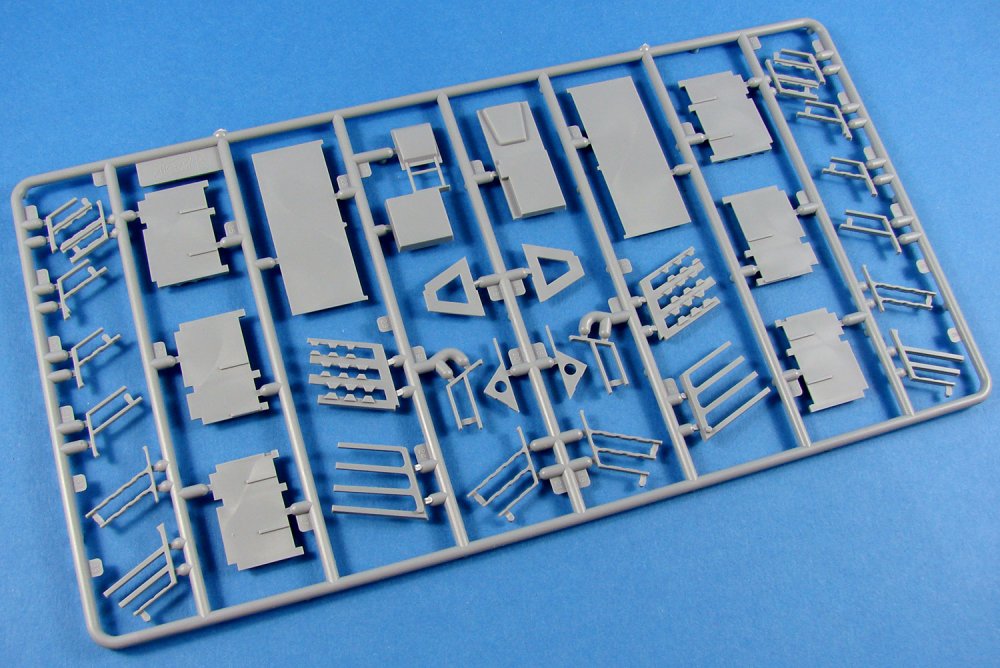
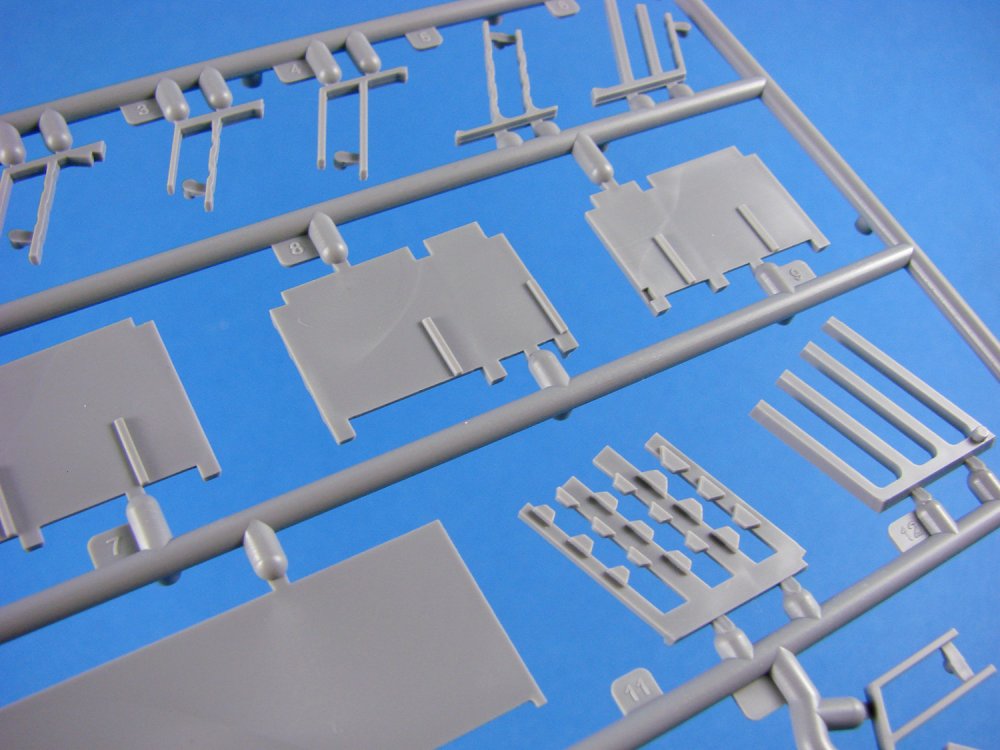
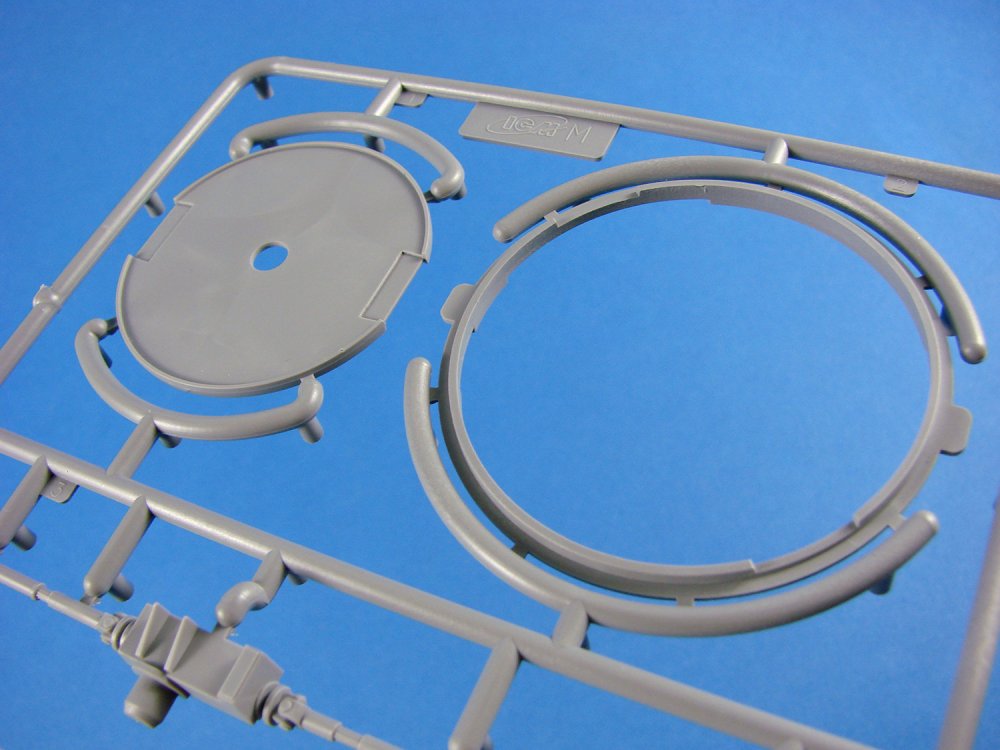
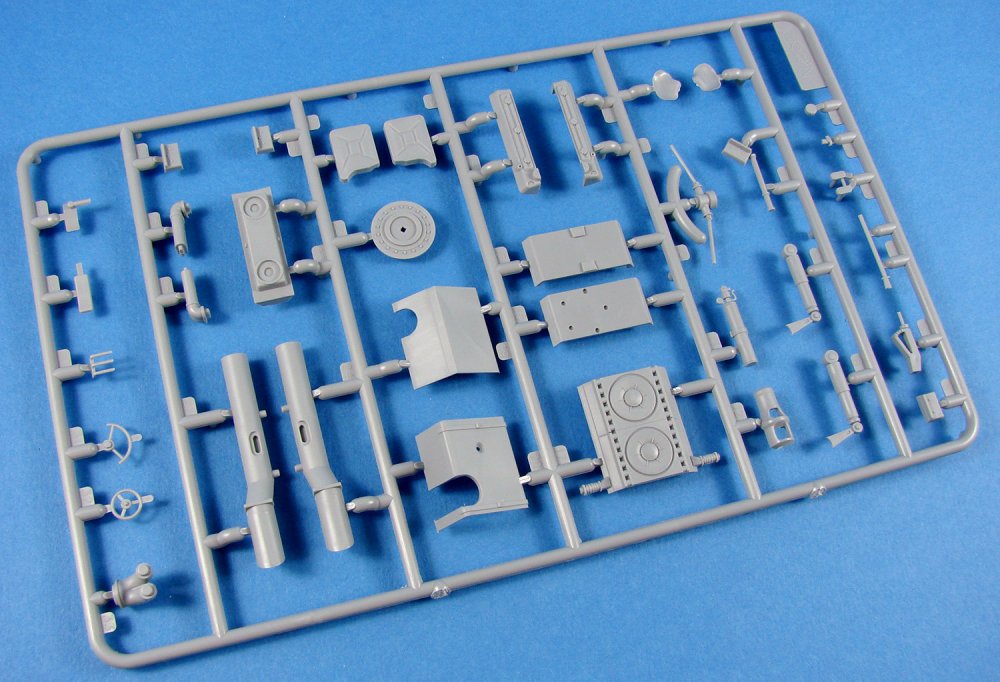
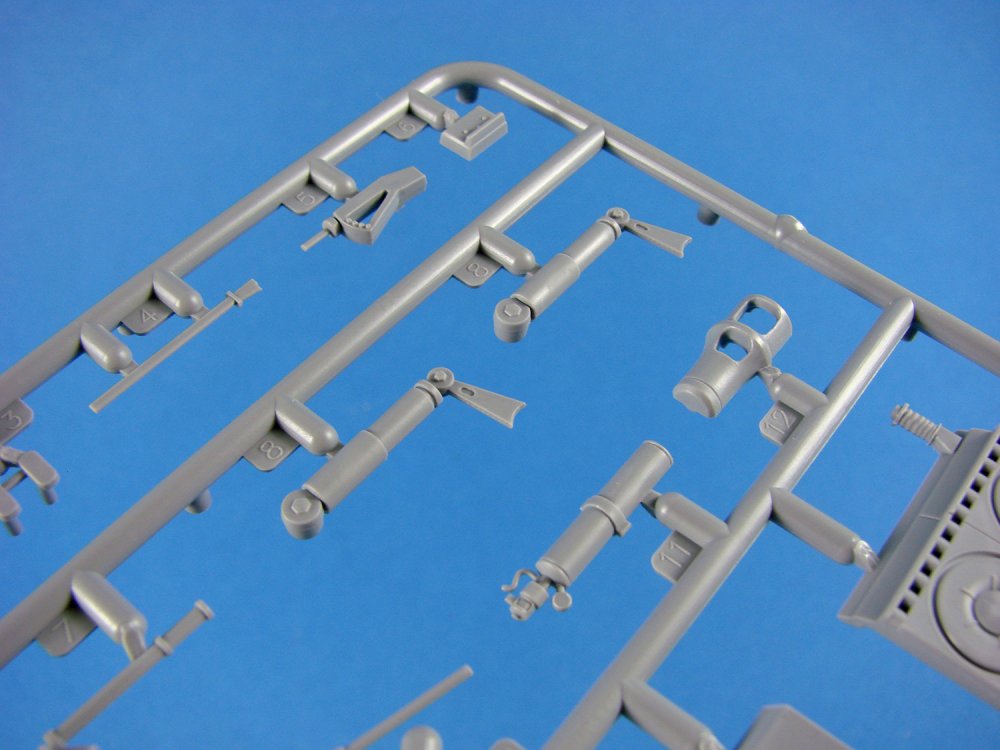
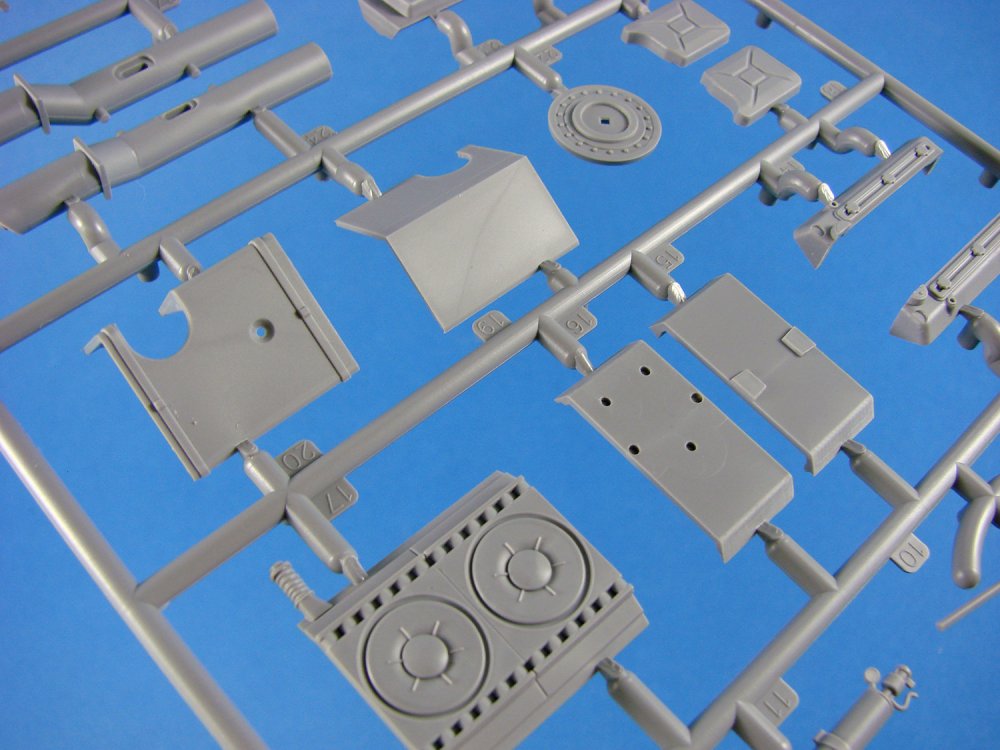
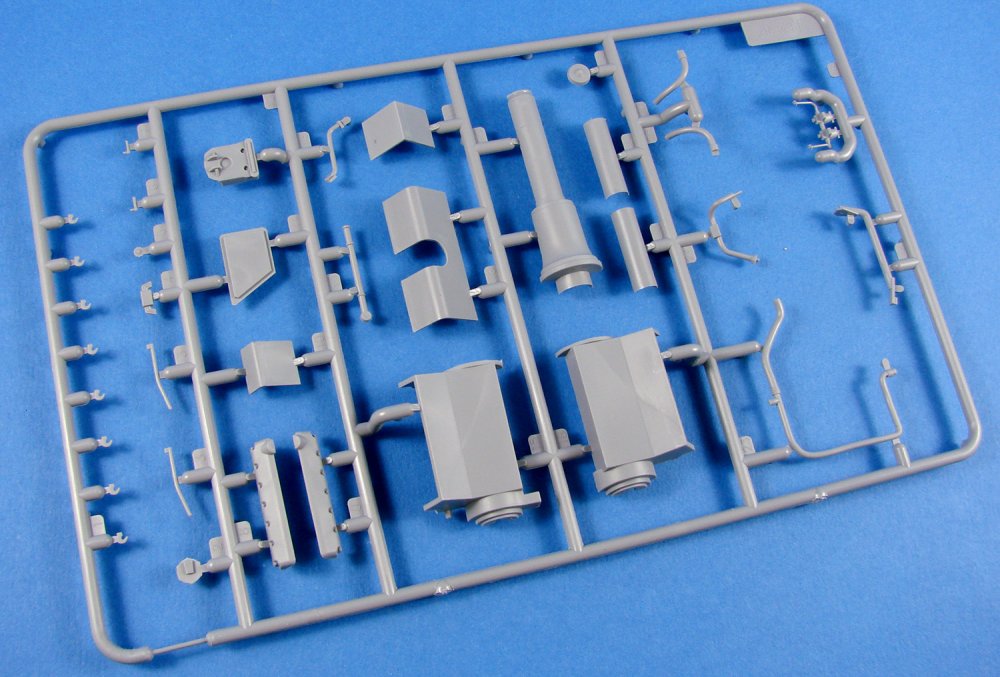
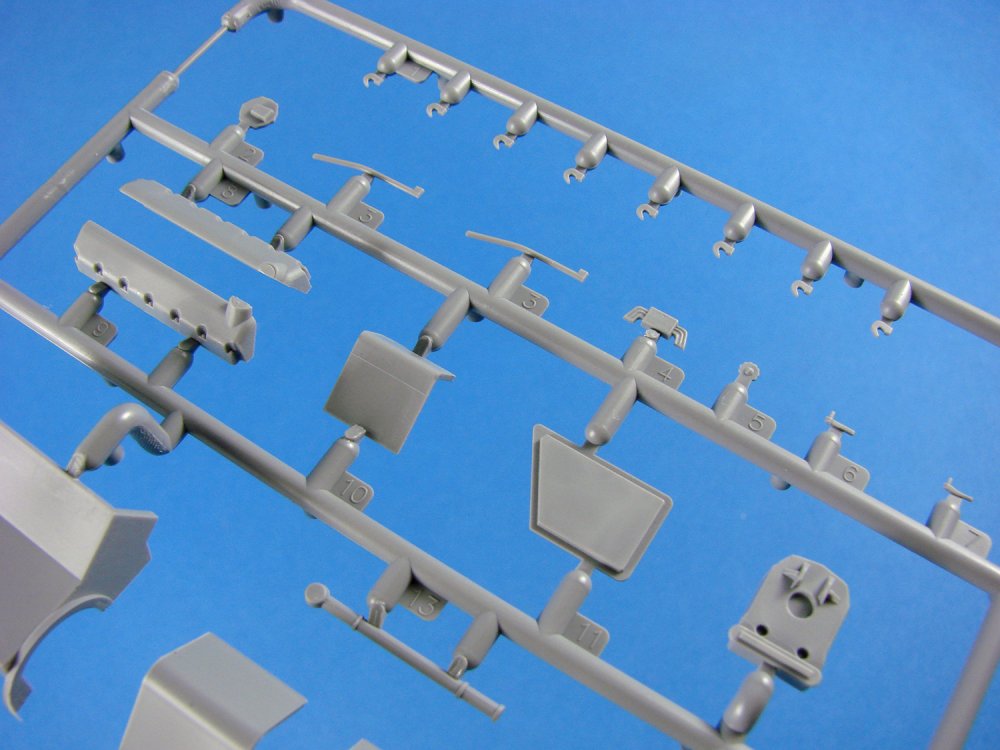
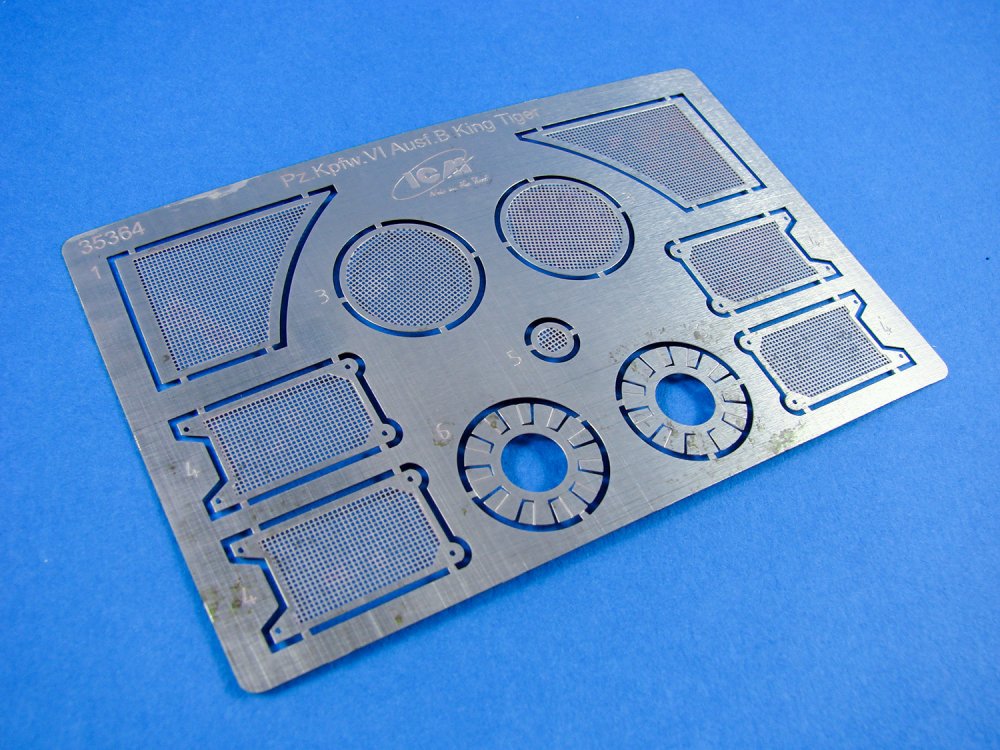
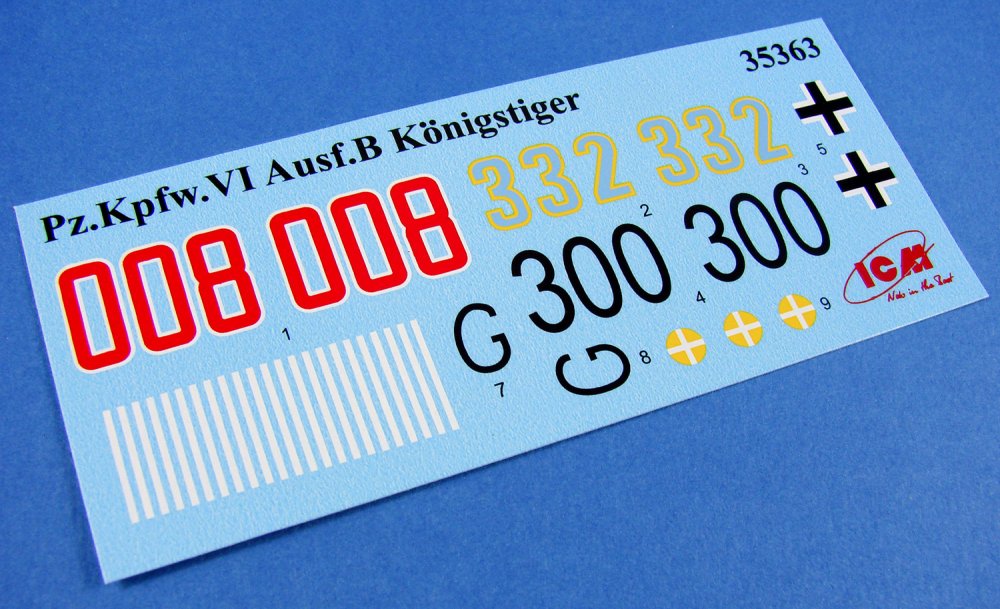
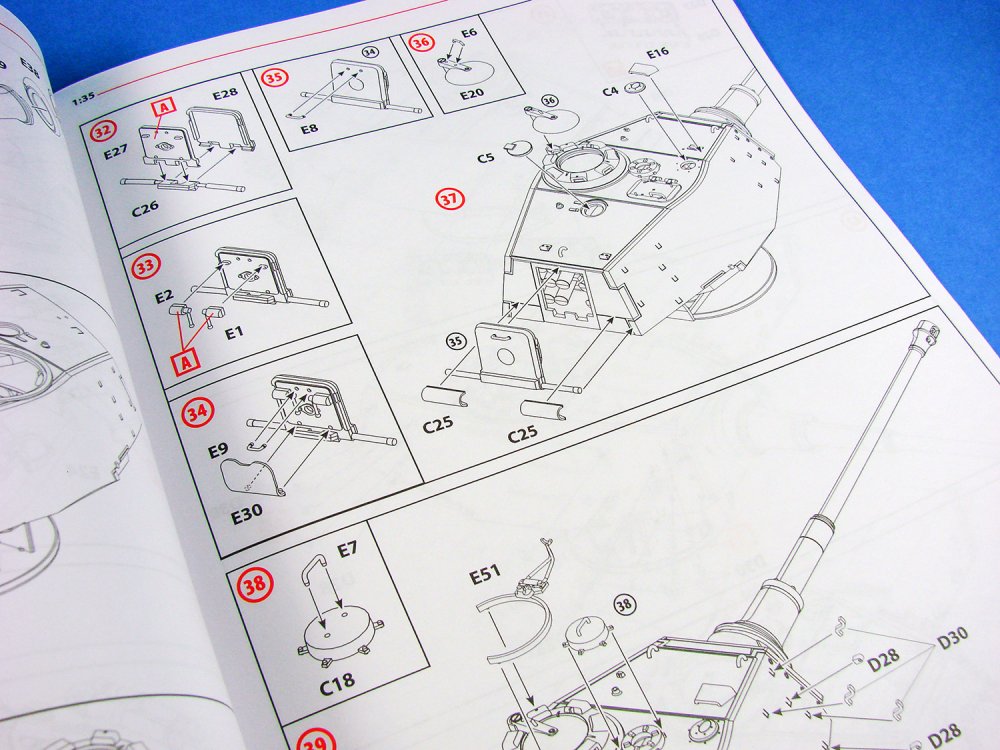
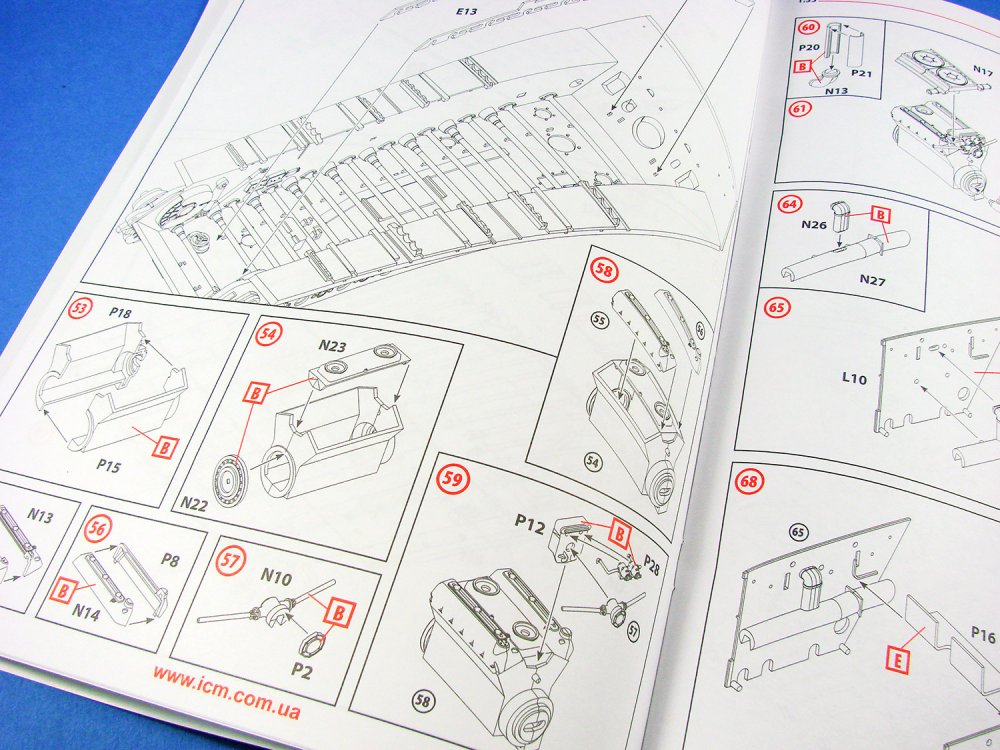
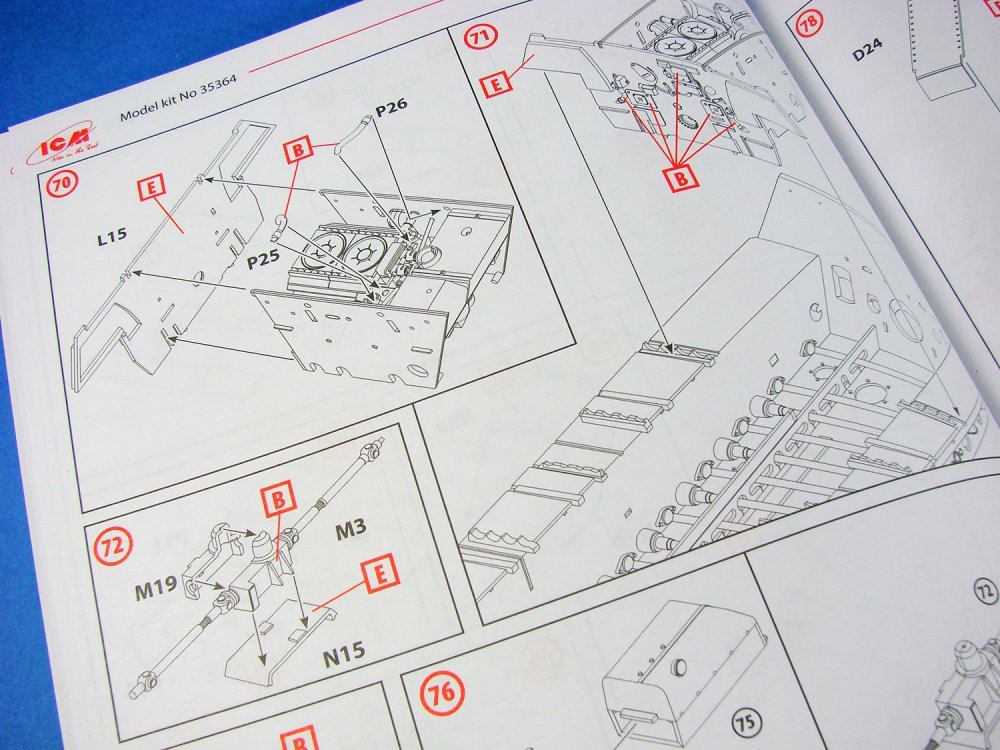
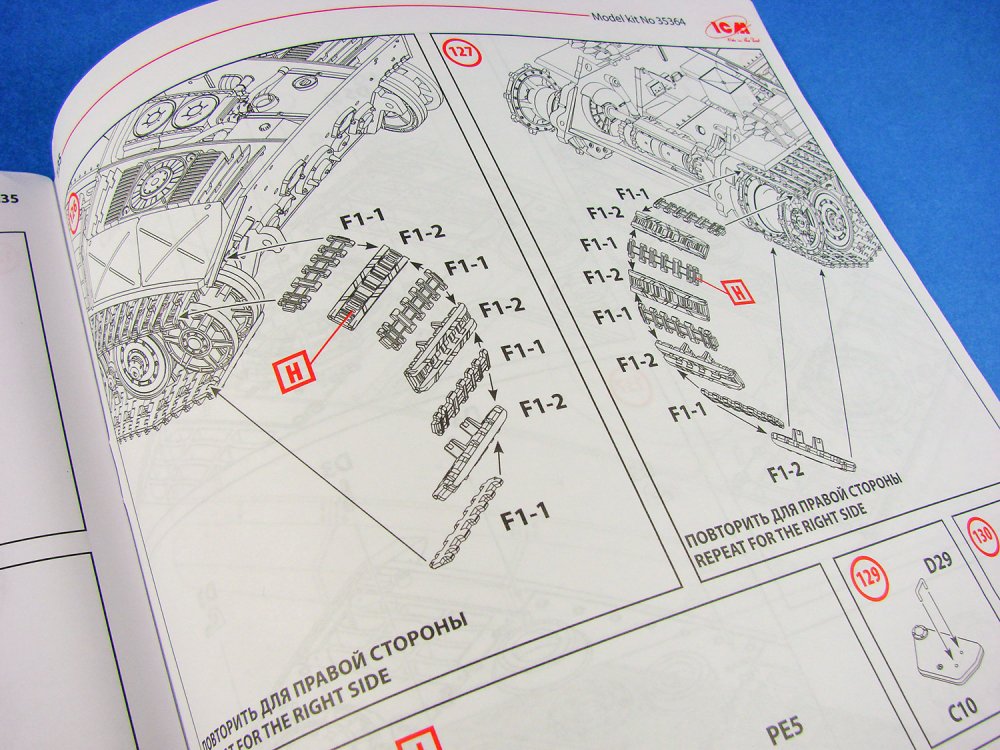
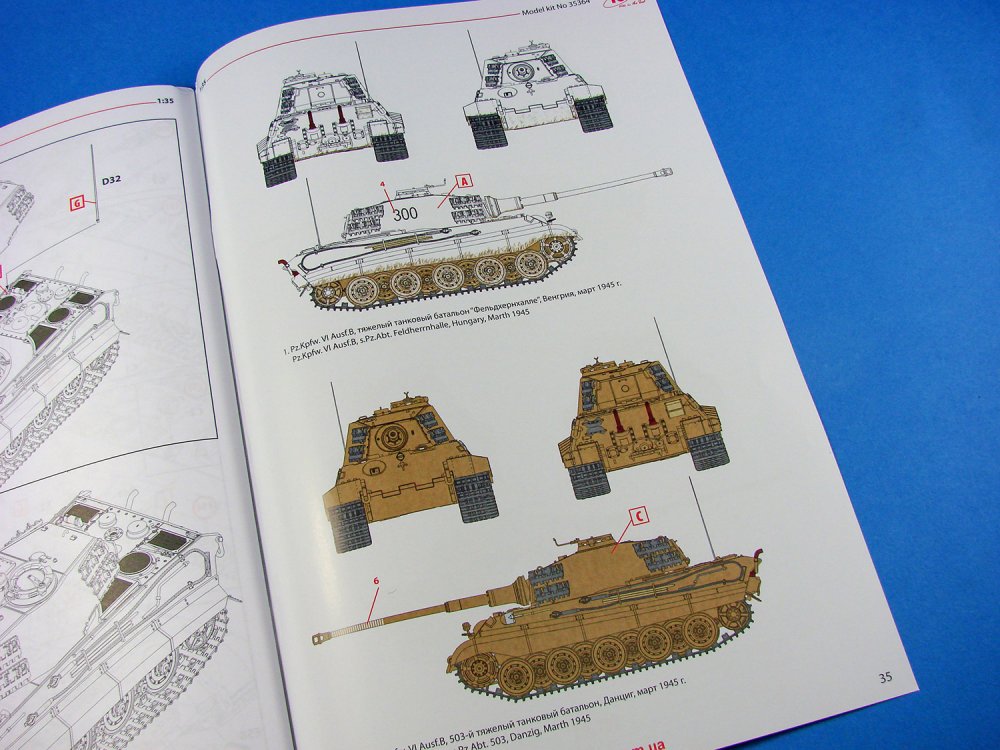
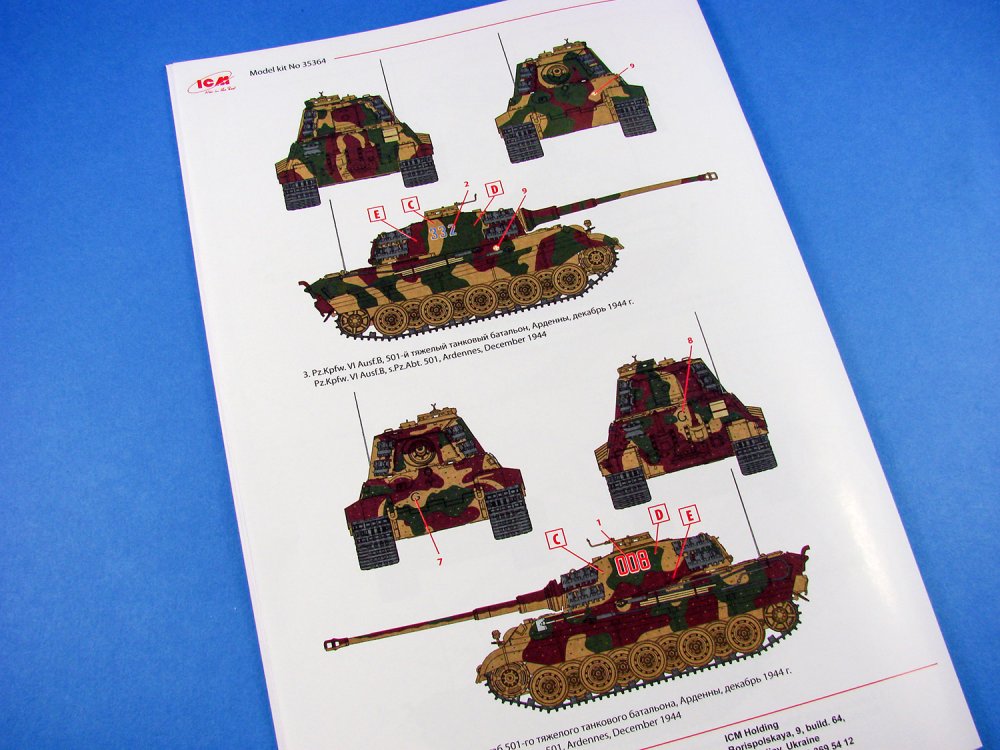
1/35 Pz.Kpfw.VI Ausf.B King Tiger (late production) with full interior ICM Catalogue # 35364 Available for around £38.00 The Tiger II is a German heavy tank of the Second World War. The final official German designation was Panzerkampfwagen Tiger Ausf. B, often shortened to Tiger B. The ordnance inventory designation was Sd.Kfz. 182. It is also known under the informal name Königstiger (the German name for the Bengal tiger), often translated literally as Royal Tiger, or somewhat incorrectly as King Tiger by Allied soldiers, especially by American forces. The Tiger II was the successor to the Tiger I, combining the latter's thick armour with the armour sloping used on the Panther medium tank. The tank weighed almost 70 tonnes and was protected by 100 to 185 mm (3.9 to 7.3 in) of armour to the front. It was armed with the long barrelled 8.8 cm KwK 43 L/71 anti-tank cannon. The chassis was also the basis for the Jagdtiger turretless tank destroyer. The Tiger II was issued to heavy tank battalions of the Army and the Waffen-SS. It was first used in combat with 503rd Heavy Panzer Battalion during the Allied Invasion of Normandy on 11 July 1944, on the Eastern Front. The first unit to be outfitted with Tiger IIs was the 501st Heavy Panzer Battalion, which by 1 September 1944 listed 25 Tiger IIs operational. Henschel won the design contract, and all Tiger IIs were produced by the firm. Two turret designs were used in production vehicles. The initial design is often misleadingly called the "Porsche" turret due to the belief that it was designed by Porsche for their prototype; in fact, it was the initial Krupp design for both prototypes. This turret had a rounded front and steeply sloped sides, with a difficult-to-manufacture curved bulge on the turret's left side to accommodate the commander's cupola. Fifty early turrets were mounted to Henschel's hull and used in action. The more common "production" turret, sometimes called the "Henschel" turret, was simplified with a significantly thicker flat face, no shot trap (created by the curved face of the earlier turret), and less-steeply sloped sides, which prevented the need for a bulge for the commander's cupola and added additional room for ammunition storage. The Tiger II was developed late in the war and built in relatively small numbers. Orders were placed for 1,500 Tiger IIs — slightly more than the 1,347 Tiger I tanks produced — but production was severely disrupted by Allied bombing raids. Among others, five raids between 22 September and 7 October 1944 destroyed 95 percent of the floor area of the Henschel plant. It is estimated that this caused the loss in production of some 657 Tiger IIs. Only 492 units were produced: one in 1943, 379 in 1944, and 112 in 1945. Full production ran from mid-1944 to the end of the war. Extract from Wikipedia The kit This box is about the same depth as many other ICM kits that I’ve seen and handled recently, but it covers a larger footprint, with the box being quite wide. As is standard with ICM kits, the box itself if a rigid, corrugated type with a fold open lid which is locked into place with tongues and a tab. On top of this, the attractive and glossy lid shows a really good artwork of a King Tiger head-on, with its turret turned slightly sideways. I always think a good artwork sets the stall out for a kit. When I was a kid, it was the picture on the box that always grabbed my attention first. Inside the box, a total of TWENTY-TWO sprues are included, moulded in either light grey or black styrene. All of these are packed into two re-sealable clear sleeves. One sprue (A) is actually bisected into 3, to allow the parts to fit in the sleeve, and I have included those sections in the sprue count. Three sprues are simply the upper hull, lower hull bottom, and the new barrel that is specific to this release. In the bottom of the box is a 36-page A4 manual, a single fret of PE parts, and a small decal sheet. There are over 700 plastic parts in this kit, plus the 11 PE parts, so this will be welcome challenge in comparison with the previous ICM release of this kit which didn’t have an interior. That previous incarnation also had the dreaded vinyl tracks, but this new release has separate track links. Simply for ease of reference, here are all sprues and PE in this release, along with notes on how many are included. Sprue A Sprue B Sprue C Sprue D (x4) Sprue E Sprue F (x4) Sprue G Sprue H (x2) Sprue K Sprue L Sprue M Sprue N Sprue P Photo Etch Construction of this model begins with the interior of the Henschel turret. Now, I by no means think that whilst this kit claims to have a full interior, that it does actually have that. What I do think ICM has created here is a very good representation of the main elements of a full interior, but there are omissions that I can see, with my rather limited subject knowledge in this area. I recently purchased David Parker’s excellent book on the 1/16 King Tiger, and although David did super-detail his large-scale kit, it does highlight a few basic omissions in the ICM kit, such as the wooden roller that assists with ammunition loading, the side inner armour plates that flank the ammunition stowage area, and the TzF9B monocular scope. Having said that, ICM’s kit provides an admirable point from which to begin a similar, if somewhat less hard-core journey. The main elements within the turret are indeed there, such as the detailed loading block, main gun recuperator/recoil mechanism, 8.8cm ammunition racks, gunner and loader seats, etc. This kit has a new barrel too, and whilst the old one is still in situ on sprue E, it’s not to be used. Sprue G provides you with the part to be used. This is moulded as a single piece except for the muzzle brake and rear section. There is a faint seam on the barrel itself too. What is unusual about this model is the breakdown of the lower and upper hull. The upper hull is moulded with fenders in situ. Detail is very good with excellent weld seams, fasteners and bolts, plus the engine intake cooling intakes. It might have been an idea to have had extra open panel choices here to show off the interior, but the engine access panel is a separate part. As for clean-up, all there is to remove is the remains of the small moulding sprue that is located in the turret ring area. What is unusual about the lower hull floor is that the sides are moulded separately, whereas the rear plate is included in the floor moulding. The underside of the hull has superbly moulded access panels, and the interior detail ties nicely to those ports and also has the small standoffs for the torsion bars to sit upon. The Henschel turret is also nicely depicted and is moulded with the front section as a separate part, whereas the rear of the turret is in situ, minus the escape hatch. Again, weld seams are depicted with finesse, and the rear plate depiction is excellent, with the keyed joint. Hatches and cupola are separate. Something that this kit doesn’t have is clear parts, so any periscope details won’t have that proper glass appearance. A plastic grey plastic periscope ring is to be inserted within the cupola instead. Ideally, this will need painting black and then a high gloss to simulate the glass. You will notice another unusual engineering quirk in this kit, in that the swing arms are separate to the torsion bars, and these seems to be glued between the two hull sides, with the swing arms also being glued into position at a later stage of construction. So, unlike the likes of Rye Field Model, where you can have the choice of working torsion bars and articulated wheels, with this model, you aren’t given that option. That doesn’t mean that you can’t make these work as you may want. Looking at the parts, I think it’s feasible. Inside the hull, ICM has supplied the modeller with a very busy interior which you may still need to check out against reference for its level of completeness, but however, this area is still crammed with details. The rear hull has the Maybach engine, fuel tanks etc. all nicely detailed, and the intake fans are supplied in PE. All you need to do is to twist the fan blades into position and install them. Quite a nice touch. A detailed bulkhead separates the engine from the rest of the hull. Crew areas in this tank are nicely appointed, with transmission, drive and brake units all included, but there do seem to be some omissions, such as the radio set that took such a prominent position when looking at David Parker’s excellent book on his 1/16 build. No braided copper wire is provided in this kit for external cables. These are moulded in plastic. Also quite unusual are the various pioneer tools having their clasps moulded in plastic, despite the kit containing PE parts for other areas. It would have been good to have seen these are photo-etch parts. I’m pretty sure the tracks aren’t workable, but they do look easy enough to build. This appears to be something that needs to be done in stages also. Four sprues of black plastic contain all the parts for this. A single decal sheet provides all you need for the four schemes on offer here. This is well printed, being nice and thin and with solid colour and minimum carrier film. Everything is also in register. The schemes are: Pz.Kpfw. VI Ausf.B, s.Pz.Abt. Feldherrnhalle, Hungary, March 1945 Pz.Kpfw. VI Ausf.B, s.Pz.Abt. 503, Danzig, March 1945 Pz.Kpfw. VI Ausf.B, s.Pz.Abt. 501, Ardennes, December 1944 Pz.Kpfw. VI Ausf.B, Stab/s.Pz.Abt. 501, Ardennes, December 1944 A 36-page A4 instruction manual details the build over a total of 155 construction sequences, with paint references given for Revell and Tamiya paints. The illustrations are in line drawing format and are easy to follow. There shouldn’t be any ambiguity at all. The kit looks fairly easy to build despite the 700+ parts. A parts map is given at the front of the manual, showing those components not for use in this release. The last two glossy pages are given over to the colour schemes. Conclusion Whilst I really do like this release, there are other ways of creating a 1/35 King Tiger with a full interior, such as the Meng kit which requires their own aftermarket interior set, or with the Takom kit that has the interior included, they are both going to cost you more than this release. That could be up to twice the cost of the ICM kit. If you don’t want to include anything extra to what this kit offers, or you’re happy to do some scratch-building (and relish the extra challenges), then this could well be the kit for you. For a kit that can be bought for £38 (and I have seen it for around £5 less than that), then ICM’s kit represents good value for money and will build up into a very detailed model. The lack of any clear parts is a little disappointing too, especially when ICM has gone to the trouble of creating quite a nice addition to the armour market. In all though, this is a very reasonable release and could really provide the basis for an excellent rendition of the King Tiger. Recommended My sincere thanks to ICM for providing this kit for review.


-
1:48 Do 17Z-7 ICM Catalogue # 48345 Available for around £28 The Dornier Do 17 was designed as a lightweight, fast bomber that could, in theory, outrun any attempts by fighters to shoot them down. The long thin fuselage of the aircraft led to its nickname of ‘flying pencil’, and its shoulder mounted wing carried two engines, whilst its tail design was of twin fin/rudder arrangement, typical of that on the Bf 110. Initially powered by inline Daimler-Benz/BMW engines, but these were changed in favour of two Bramo 323 radials. A crew of three were carried, and up to 1000kg of bombs could be carried internally. Civil War in Spain saw the first baptism of fire for the Do 17, operating with the Condor Legion. Many of these pilots were unknowingly honing their skills for future operations against Poland, leading to the start of WW2, and eventually to the skies over Britain in 1940. It was here that the Do 17 became seriously outclassed by British fighter defence. The main version was the Do 17Z, which is the subject of this kit. The Z-7 variant had a solid nose that contained four forward-firing MG17. The last remaining, mostly intact Do 17Z was recovered from the waters off the Kentish coast and is not being preserved at RAF Cosford. The kit At the time of writing, this is the third incarnation of this 1/48 release from ICM, with this being the first Z-7 variant thus far. ICM’s style of packaging is probably one of my favourites, with the kit being supplied in a one-piece, sturdy corrugated cardboard box with a locking tab, and a separate product lid which sits over this. The glossy lid depicts a single Do 17Z-7 at dusk, in a simple but evocative image. This scheme is also shown on the box side. In fact, there are two schemes with this release, but they are nigh on identical, with only the fuselage code being slightly different. As Henry Ford once purportedly said, regarding his Model T car, “you can have any colour as long as it’s black”. Well, it is a night fighter after all. Inside the box, a total of six light grey sprues are packaged into a single re-sealable clear wallet, and a clear sprue is also slipped into there, protected within its own sleeve. In the bottom of the box, a 20-page A4 instruction manual is to be found, with a small decal sheet tucked within it. This release contains no photo-etch parts, instead leaning on companies such as Eduard, should you want to detail your model further. This certainly helps to keep down overall costs. Sprue A You can certainly see why this aircraft was called the flying pencil when you look at the fuselage halves. This was supposed to be the very essence of the Schnellbomber, but alas, the Do 17 was easy prey whilst undertaking that particular role. The characteristic fuselage is moulded with an open belly for the various loadouts or fuel tank assembly (the latter, for the purpose of this kit), and of course, the upper fuselage is open due to the shoulder-mounted wing that will be fitted here. For the tail-plane, the traditional slots are included on both port and starboard. ICM has created some very fine external detail in the way of panel lines and various access ports and panels. These are both very narrow and even in depiction. They should take a wash beautifully. Note that the airframe is devoid of any rivet detail, leaving a blank canvas for those of us who wish to add this. Internally, the fuselage doesn’t have any detail to speak of, but instead location holes and slots for the separate detail parts. One thing I really do like about this release is the rib and fabric depiction of the control surfaces. This is superbly rendered and doesn’t look at all exaggerated. All control surfaces are separately moulded, and you will find them here, as well as the stabiliser and fin parts. It is worth mentioning too that the Z-10 nose cone is also still on this sprue, as is the clear part (Sprue E) for the infrared detector for target illumination. Without delving further, I’m not sure if a Z-10 can be made from this release, but it does look pretty favourable. All the parts do seem to be here, including bombs (Sprue D) for the Z-2 version, plus the glazed nose (Sprue E). It appears that only the inclusion of the Z-7 nose and the decals are what makes this is a Z-7 release. Other parts you will find here are the fuselage bulkheads and two bomb bay door options (both open or closed). A small number of parts are slated as not for use in this release. Sprue B Only three parts here. These are for the full-span upper wing, and two lower wing panels. You will note that the ailerons are moulded separately, but the landing flaps are integral and not poseable without either aftermarket or with some surgery and scratch-work. ICM has designed the wing so the gear bay openings are moulded into the lower panels, with some rudimentary, corresponding interior detail on the underside of the upper wing panel. The nacelles and the remainder of the detail is separate. Externally, that detail is very neat, with thin and uniform panel lines and port details This model is not riveted, and for me, that leaves things looking pretty bare, so I will add the various rivet and fastener lines when it comes for me to build this kit. Sprue C Parts here mainly concern the engine nacelles and main gear interiors, plus the general internals for both the cockpit and bomb bay. A two-piece fuel tank is found here, moulded with its support straps. This will occupy half of the bomb bay. For the main gear bays, left and right walls are supplied, with moulded structural details, and also forward and rear bulkheads. The idea here is that these will be installed to the wing, complete with the retraction units for the main gear, and then the nacelles are built around these. Looking at the instructions, I do think that the retraction units can be fitted later, or at least I think so (don’t quote me!), making overall assembly and painting easier. Bar a couple of small parts, everything on this sprue is for use in this release. In amongst the numerous parts, you’ll find a lot of components for the cockpit, such as the two-part instrument panel, consoles, seats with their lattice weave, pilot floor and rudder pedals, control stick, avionics, machine guns, etc. Sprue D (x2) This sprue is supplied twice and deals with those items for which multiples are needed, such as the engine, cowls, propeller, spinner, main gear wheels, mudguards, oleo struts, engine bulkheads and mounting frames etc. Bombs are also found here, but these aren’t for use with the Z-7, as are a couple of MGs and saddles, plus the bomb mounting racks. The engine is excellent, and comprises an exhaust system for which separate manifolds and stubs are included. ICM has chosen to depict their wheels without any load, so you will need to sort the weighted appearance yourself. A few seams lines here and there on parts, but nothing out of the ordinary. Sprue E If you hadn’t already guessed, this is the clear sprue, and it is identical to all previous incarnations of this kit, including the glass nose. There are also two different greenhouse canopies included, with only one slated for use with this particular kit release. For use here are the clear blister and separate armoured windscreen that fit to the main greenhouse, as well as the clear parts for around the nose, that will be painted over, and the lower gondola glazing. Transparency is excellent, with reasonably thin, distortion-free plastic that has no visible or unsightly patina. Framing lines are nicely depicted and those frames are frosted. Full marks. Sprue F This small sprue contains one part for the Z-7 nose, complete with nicely moulded apertures for the forward firing MG. No detail is moulded within the nose, and no guns are supplied to fit within this, so to complete this as would be seen, some scratch work will be required, plus a trip to your spares box for the guns and ammunition bins/feeds. This kit does include the MG stubs for you to fit into the apertures. Decals Decals for this release are very basic by nature, with enough for two slightly different schemes. Printing is nice and thin, with solid colour and minimal carrier film. Everything is also in register. No stencils are supplied, but decals are included for the instrument panel. The two schemes in this kit are: Dornier Do 17Z-7, R4+HK, I./NJG2 Dornier Do 17Z-7, R4+FK, I./NJG2 Instructions This is a rather nice 20-page A4 publication with the schemes printed on the glossy cover, and the construction sequence within, broken down into 81 stages. Illustrations are by means of both shaded and line-drawn images, with paint references given throughout for both Revell and Tamiya colours. Conclusion I quite like this release as it gives plenty of detail out of box and still leaves areas to improve further, should you wish to. ICM are surely one of my favourite players in this hobby, releasing the sort of subjects that cry out for my attention. You may have seen their Ju 88 kits reviewed here, both in their own label and under names such as Special Hobby and Revell. Quality is excellent, my experience so far shows their kits to fit superbly. This really isn’t an expensive kit and provides amazing value for money in an age where everything seems to be getting more expensive by the day. I’ve always wanted a reasonably large scale Do 17, and now I have one. I’m certainly not disappointed! Highly recommended. My sincere thanks to ICM for supplying this kit for us to review.
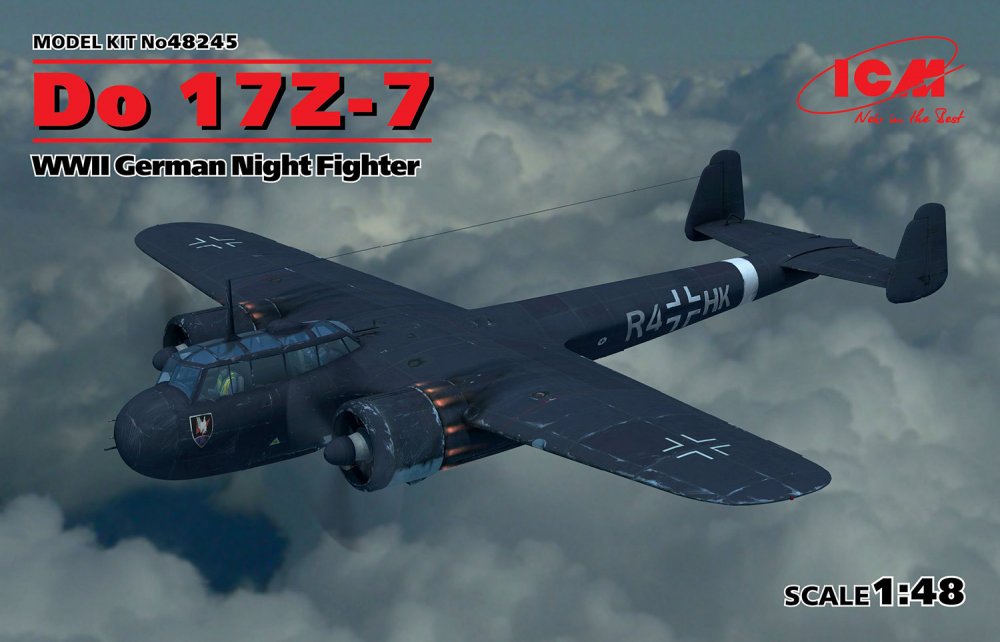

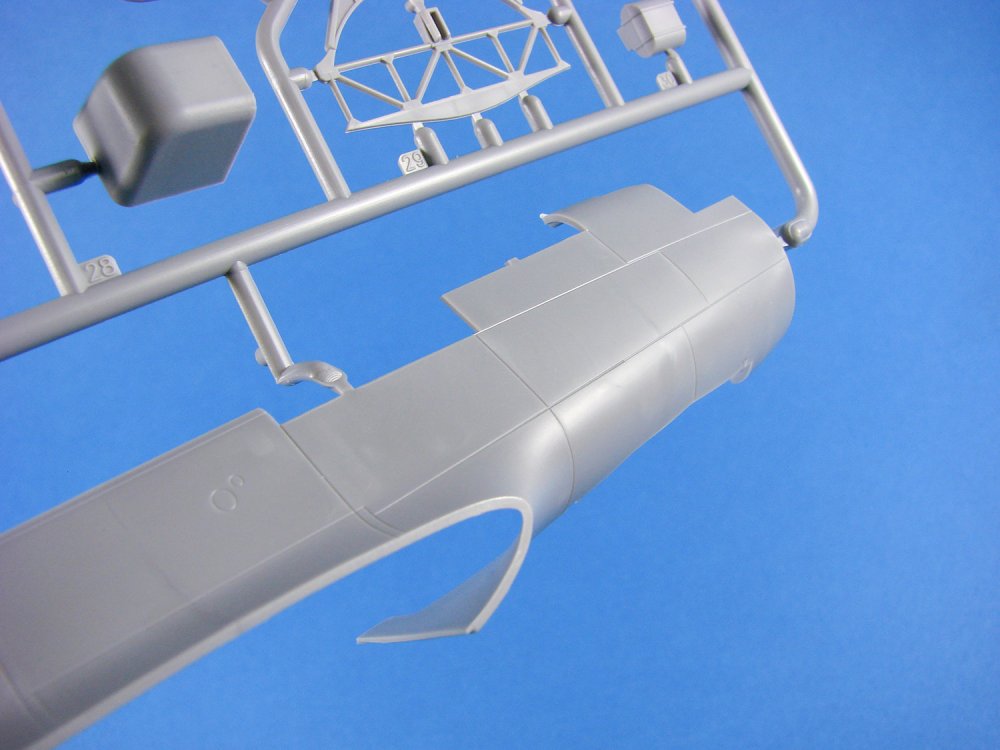
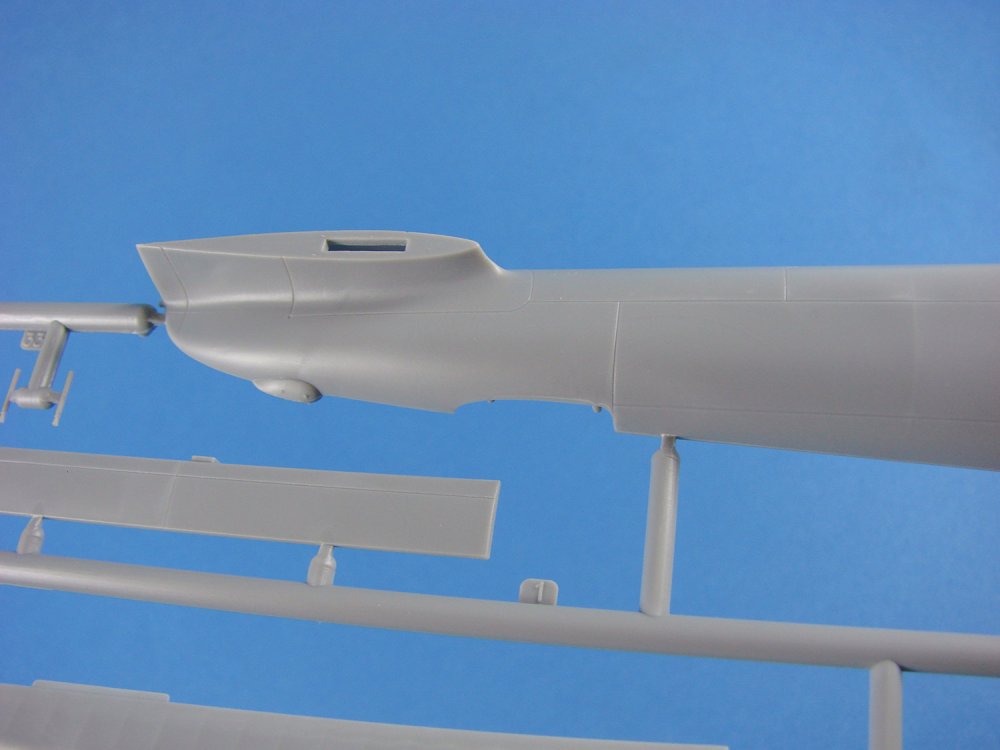
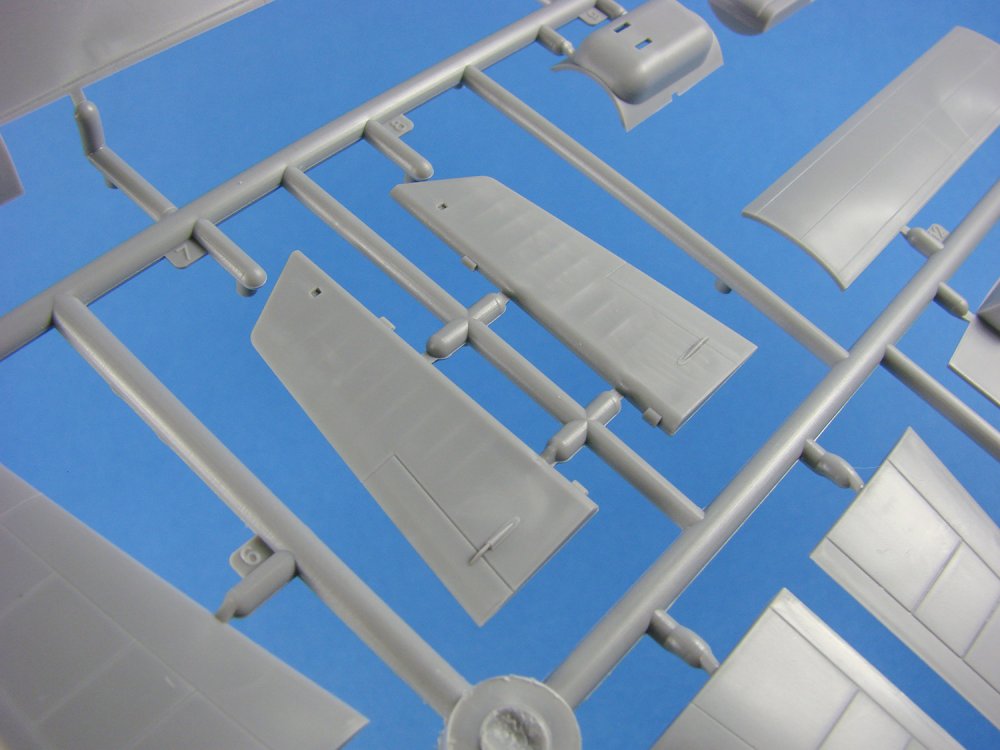
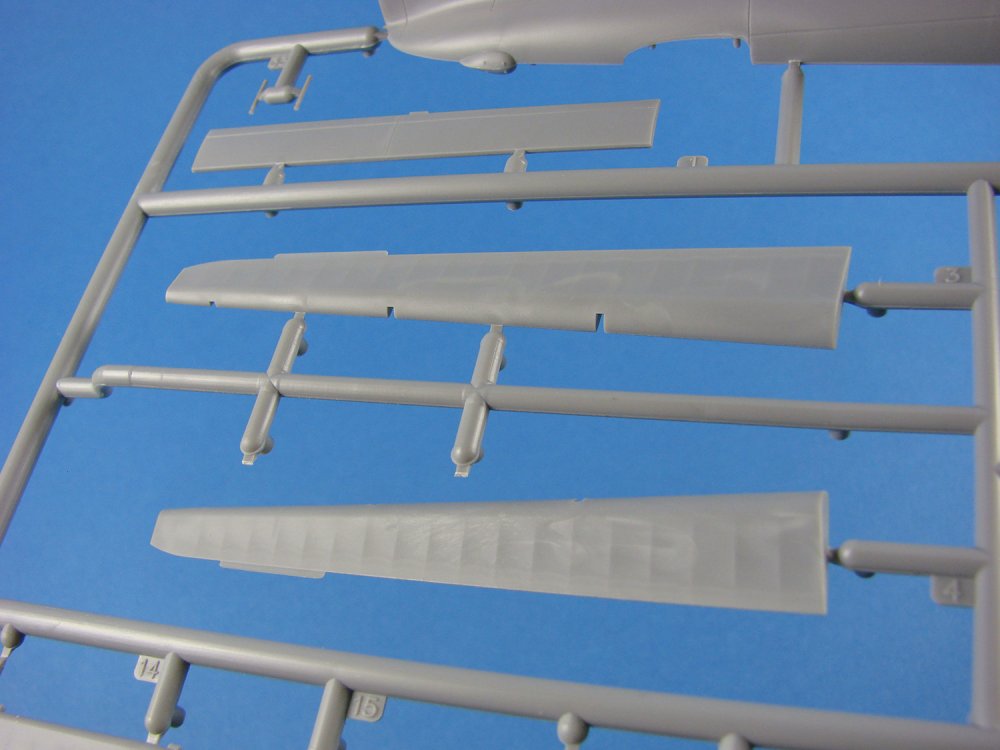

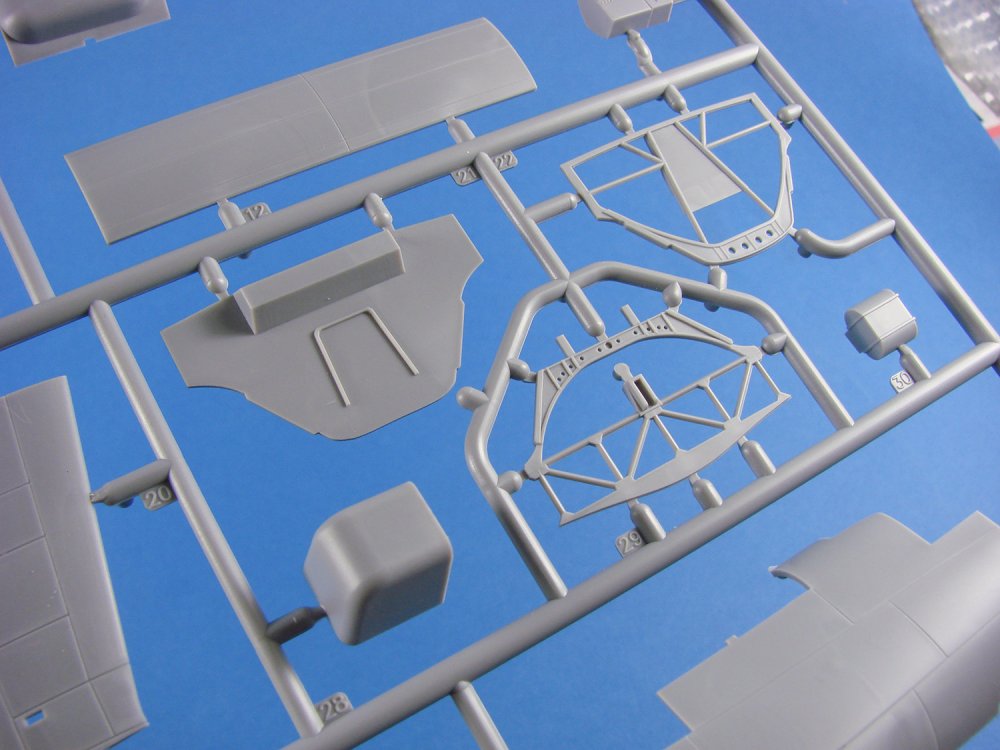
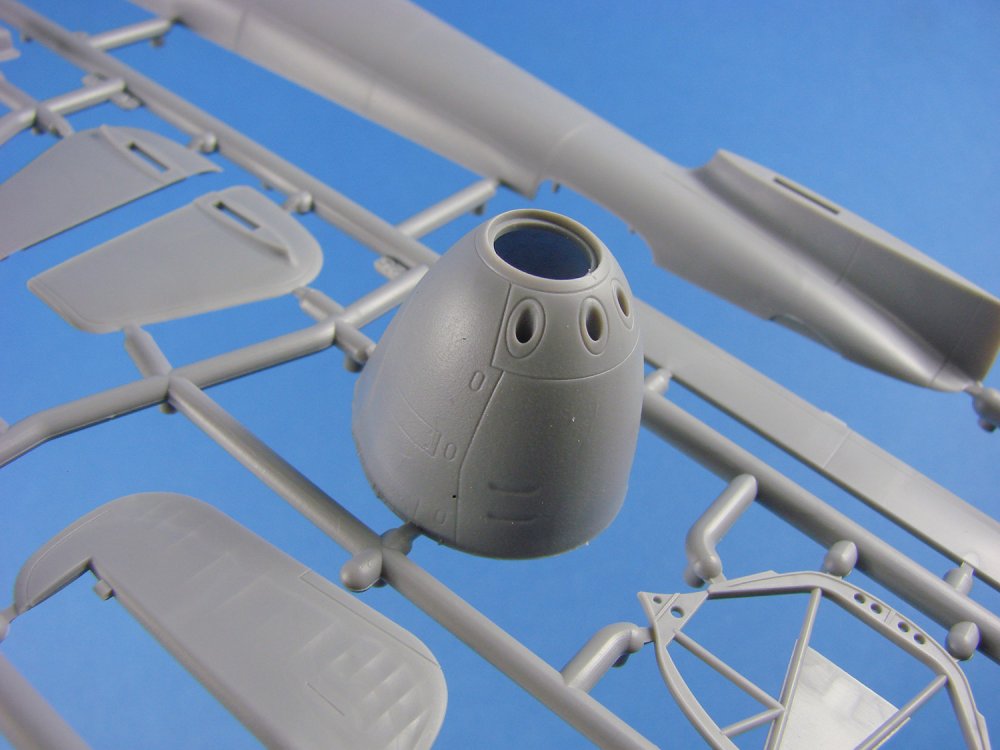
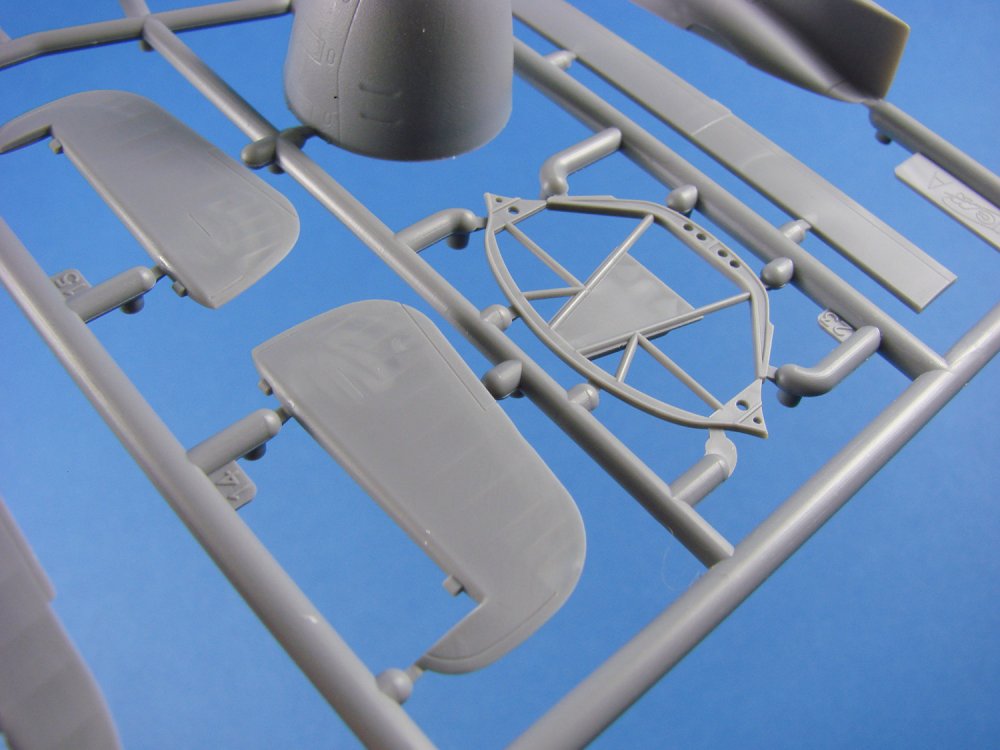
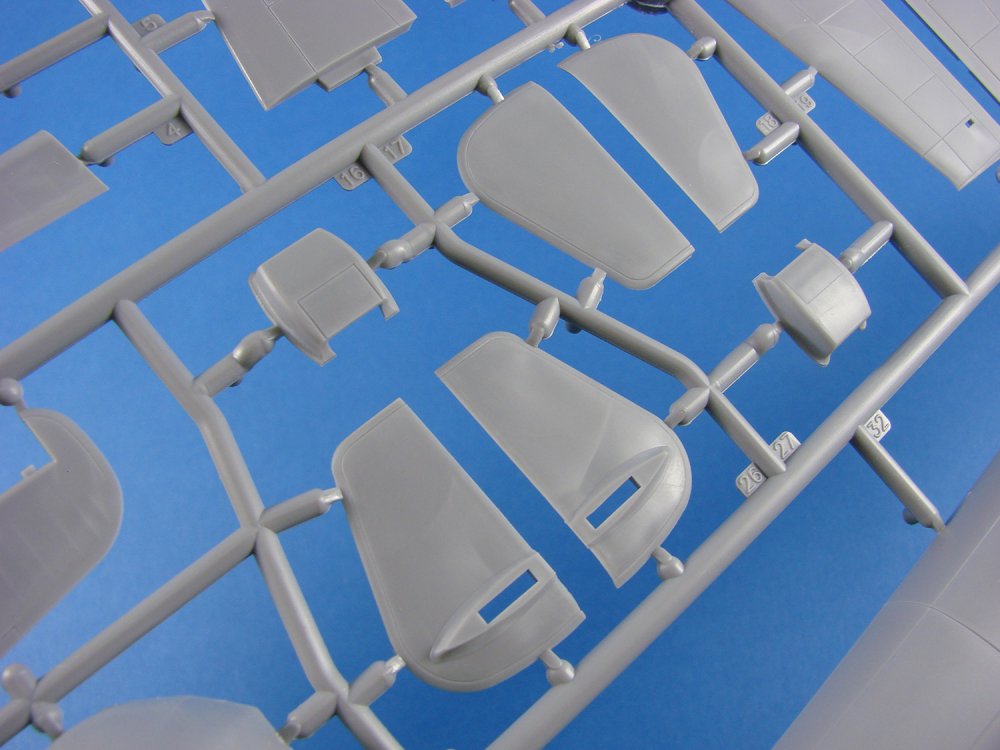

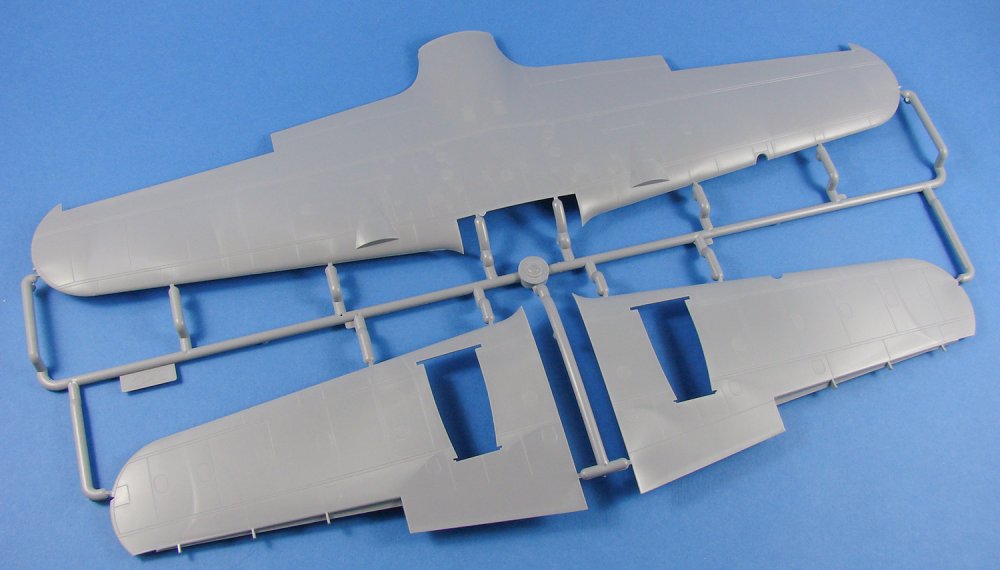

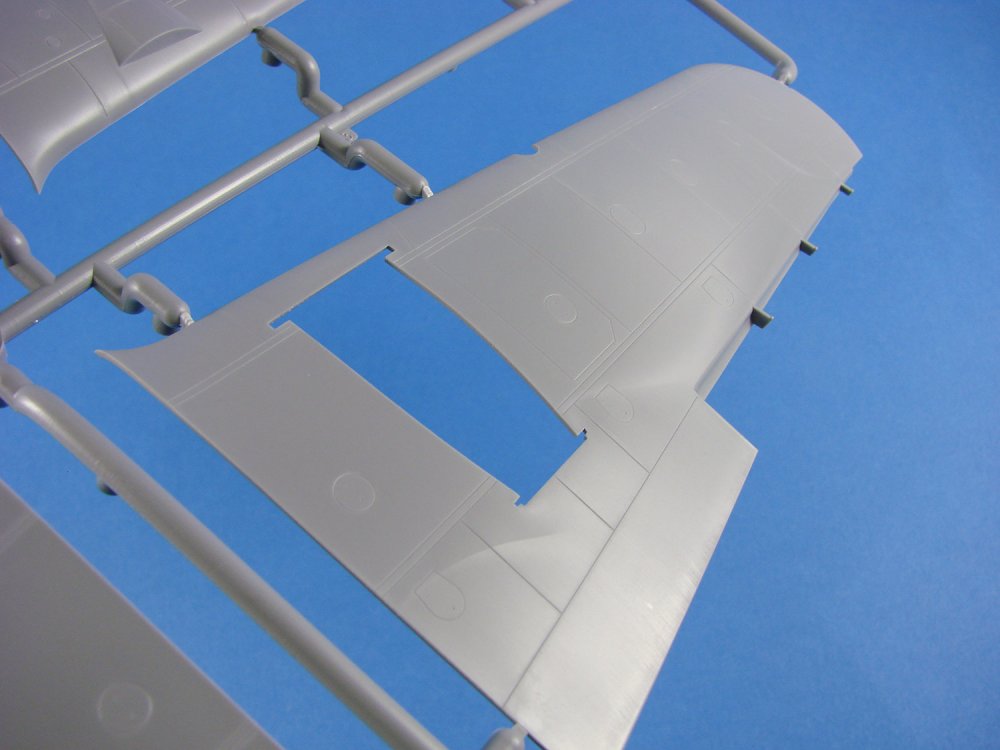

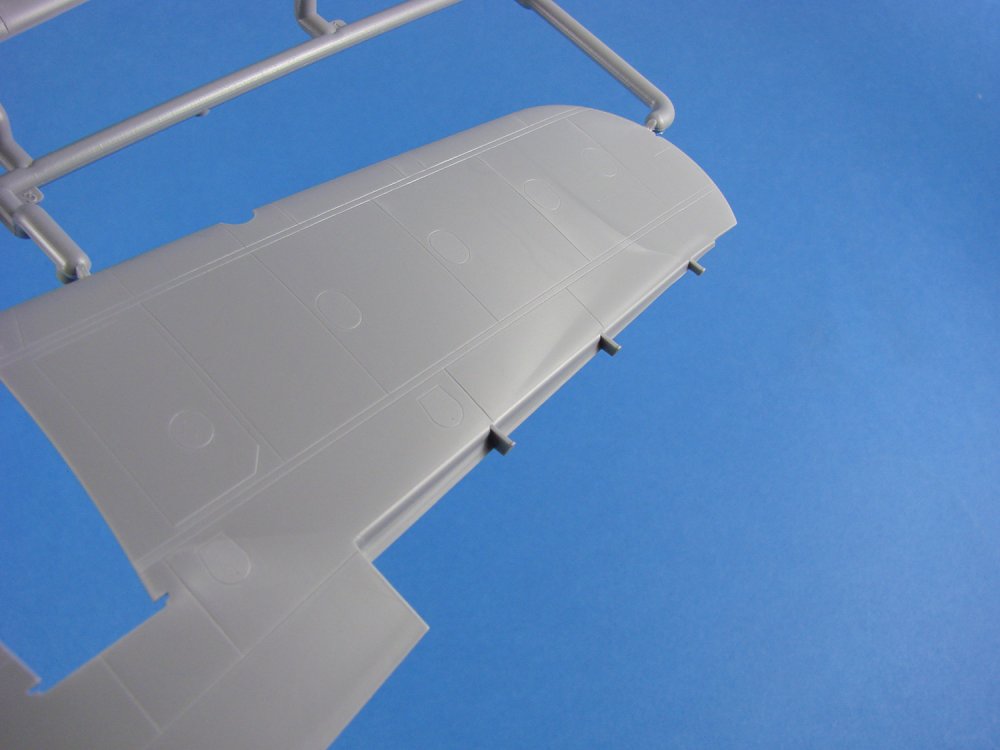

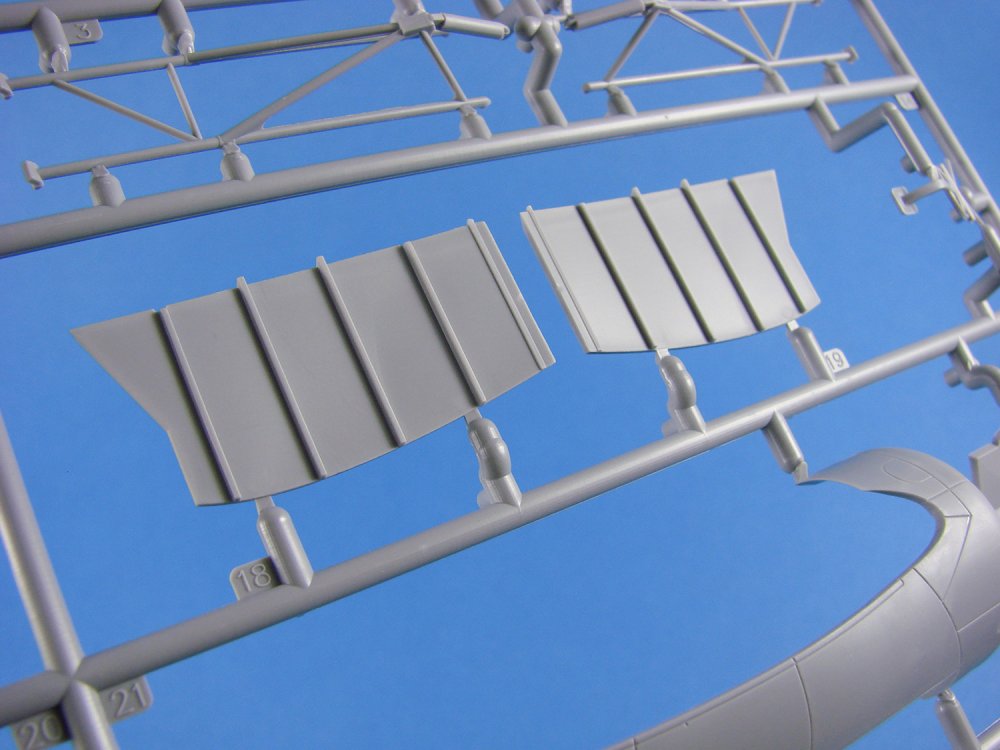

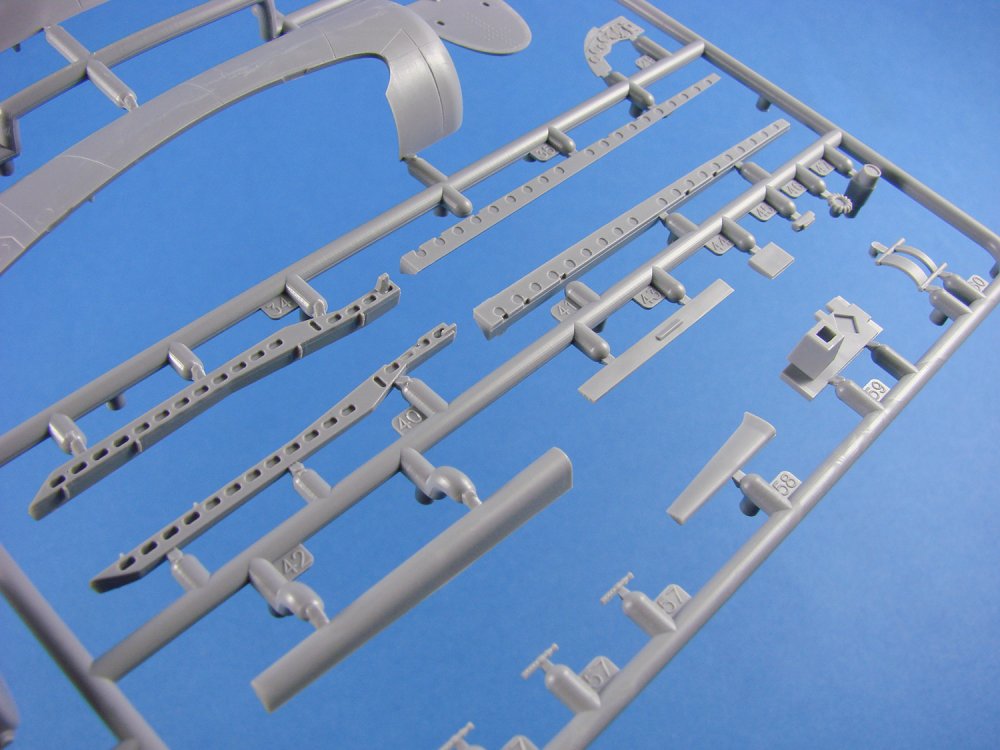
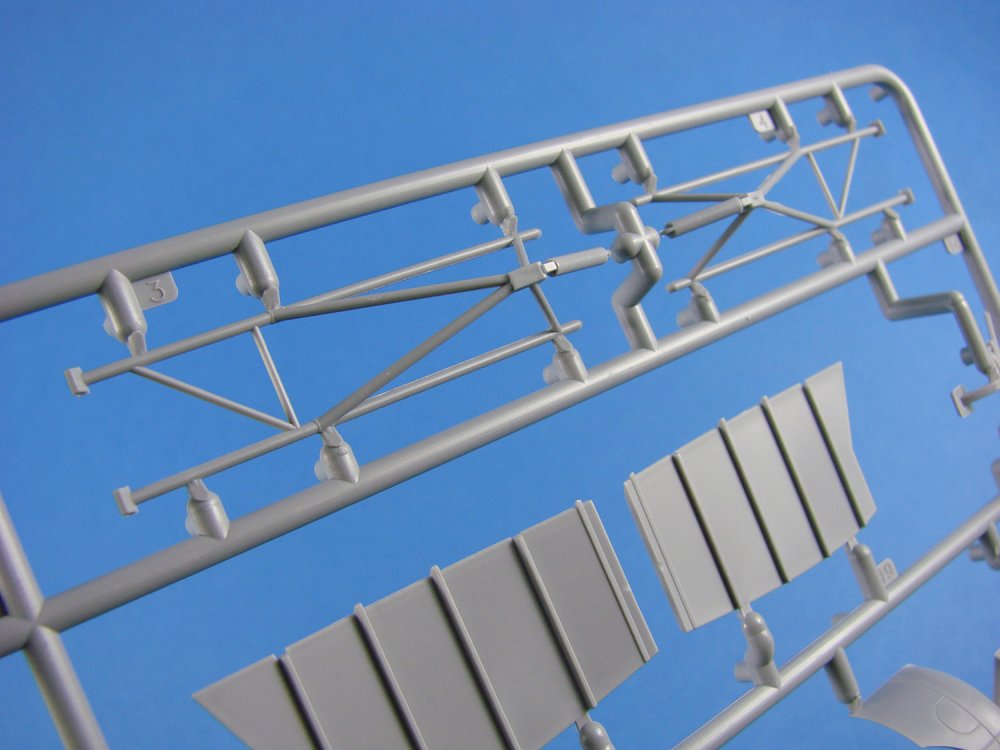

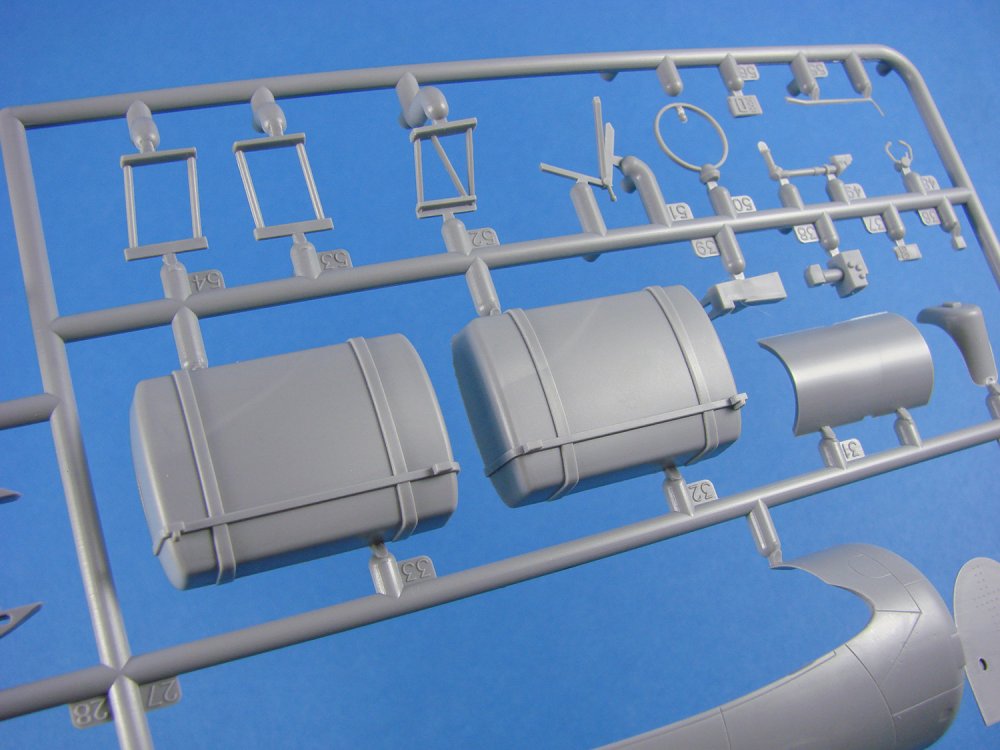
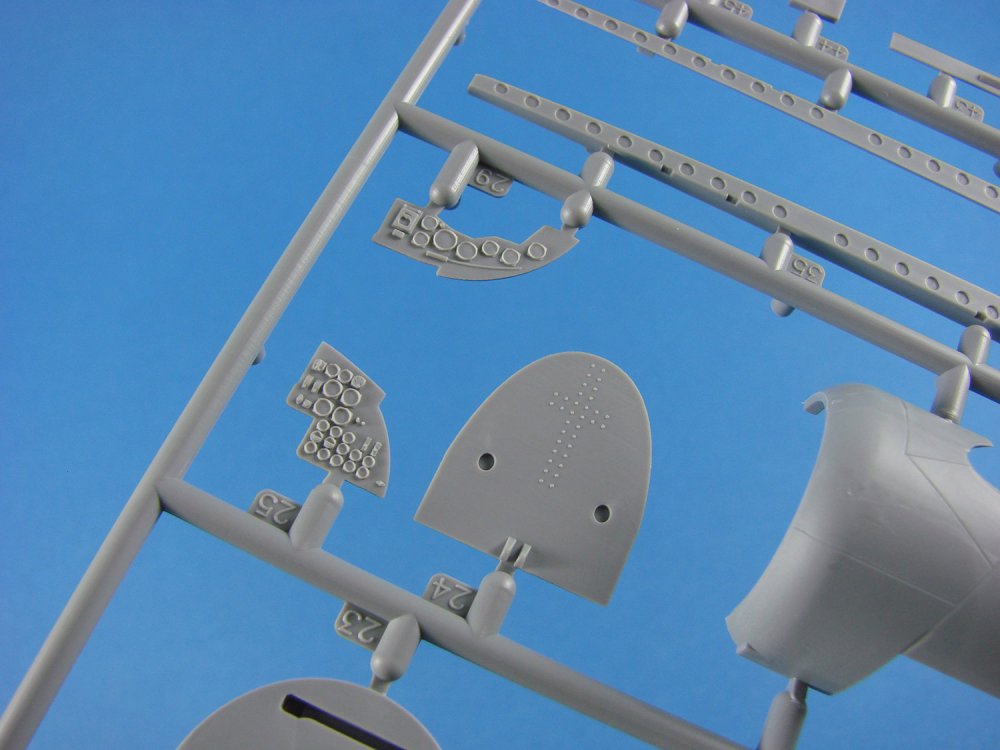
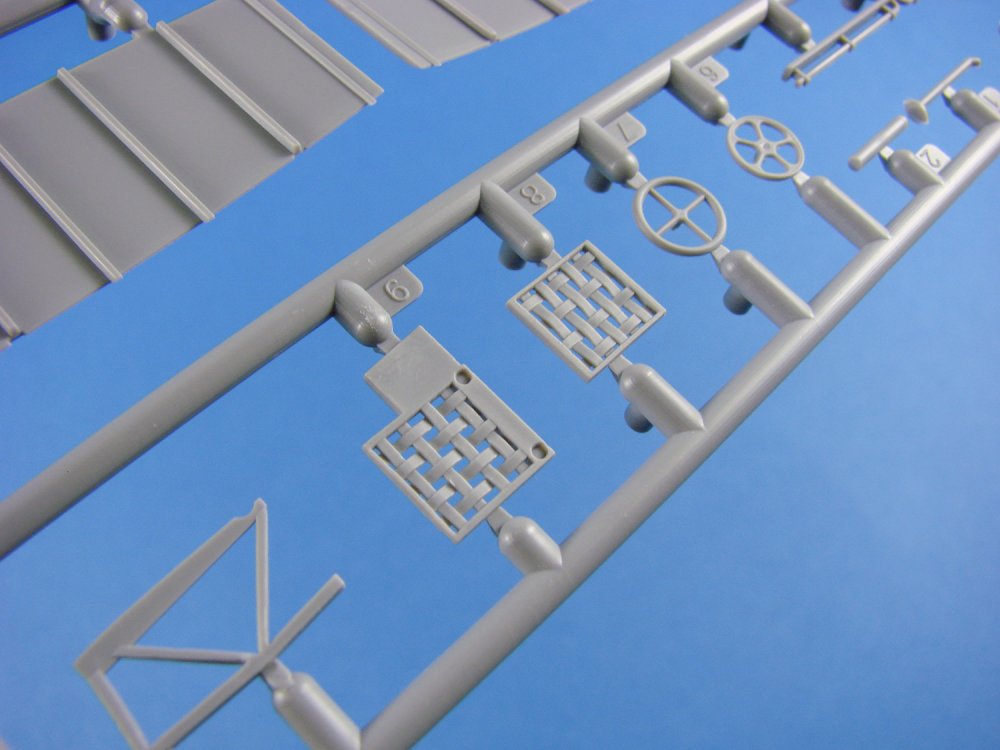
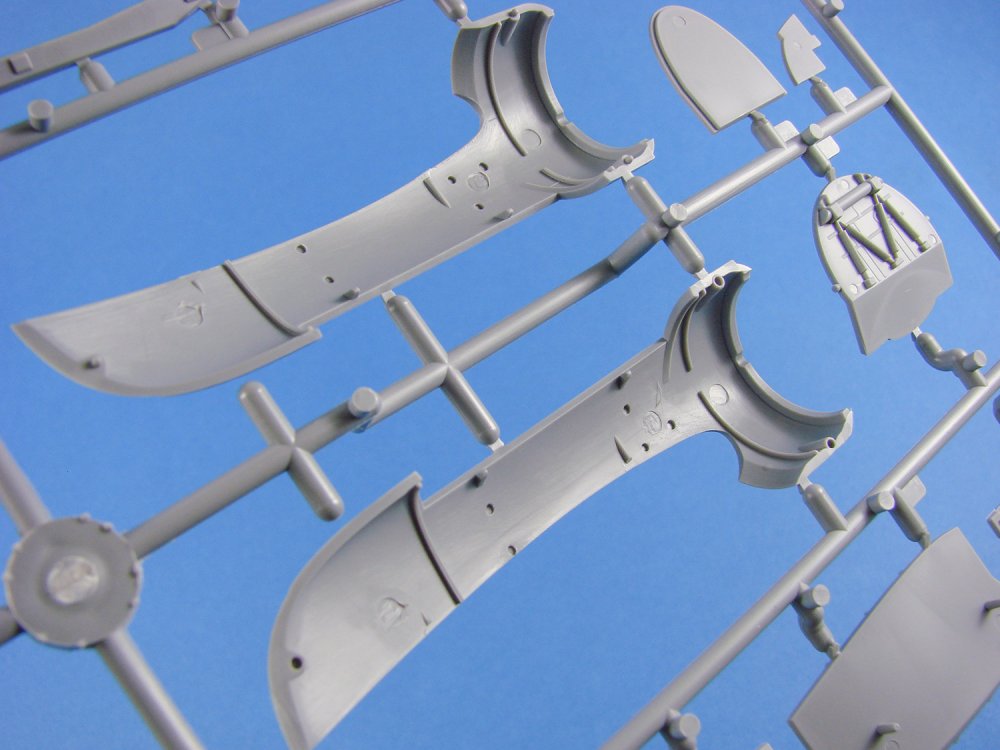
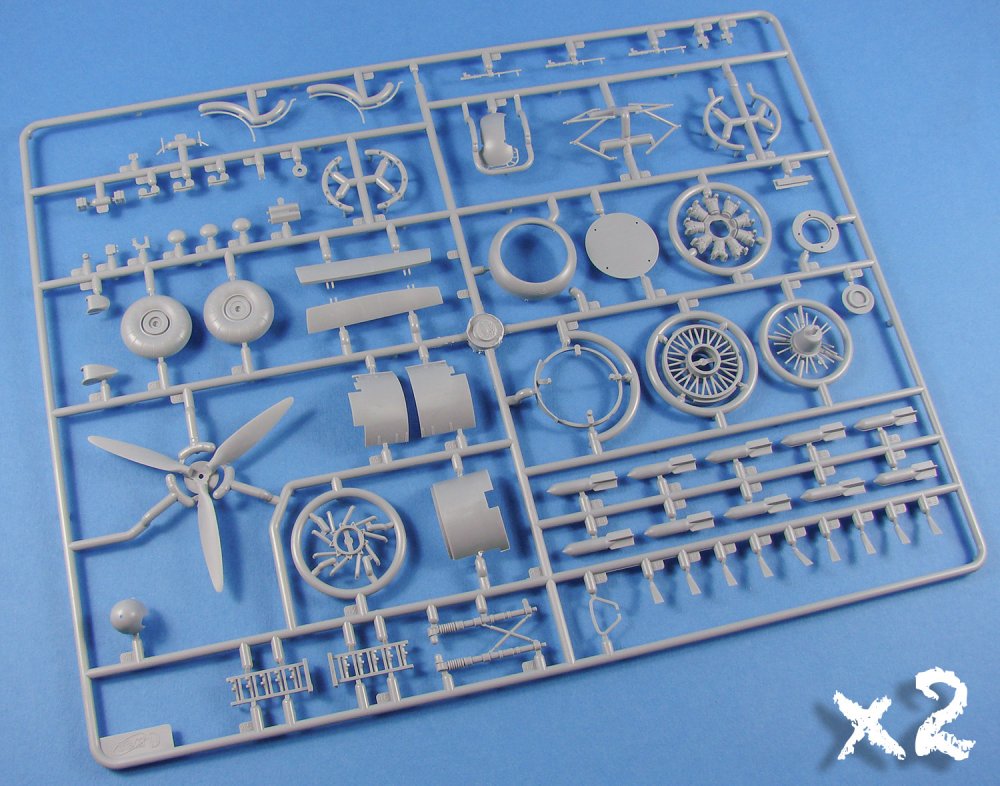
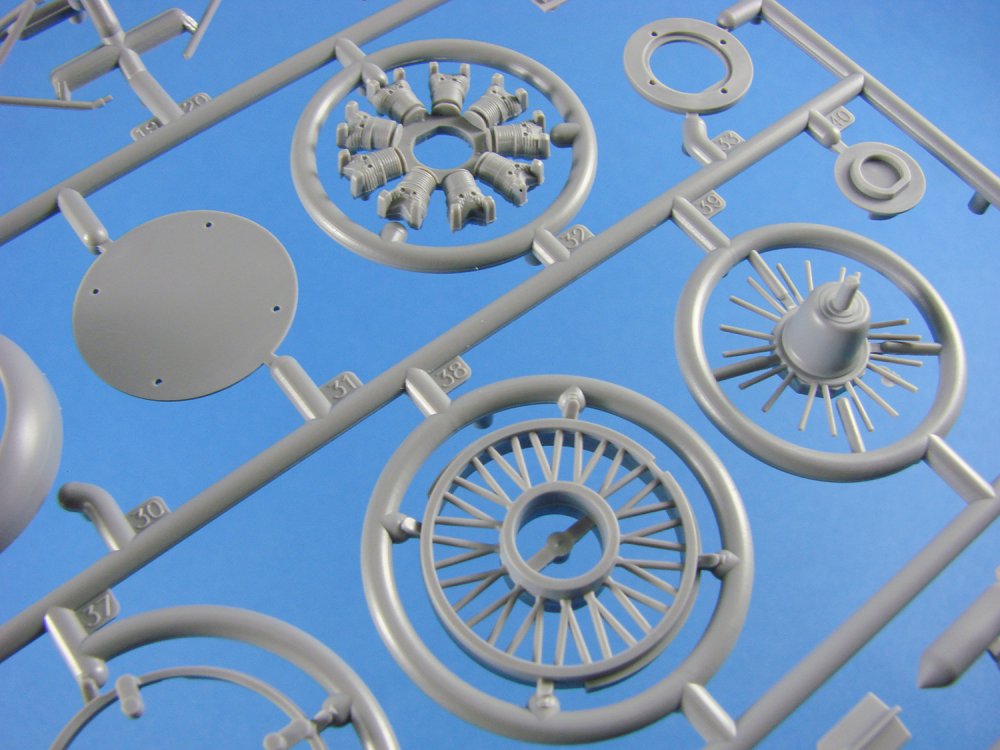
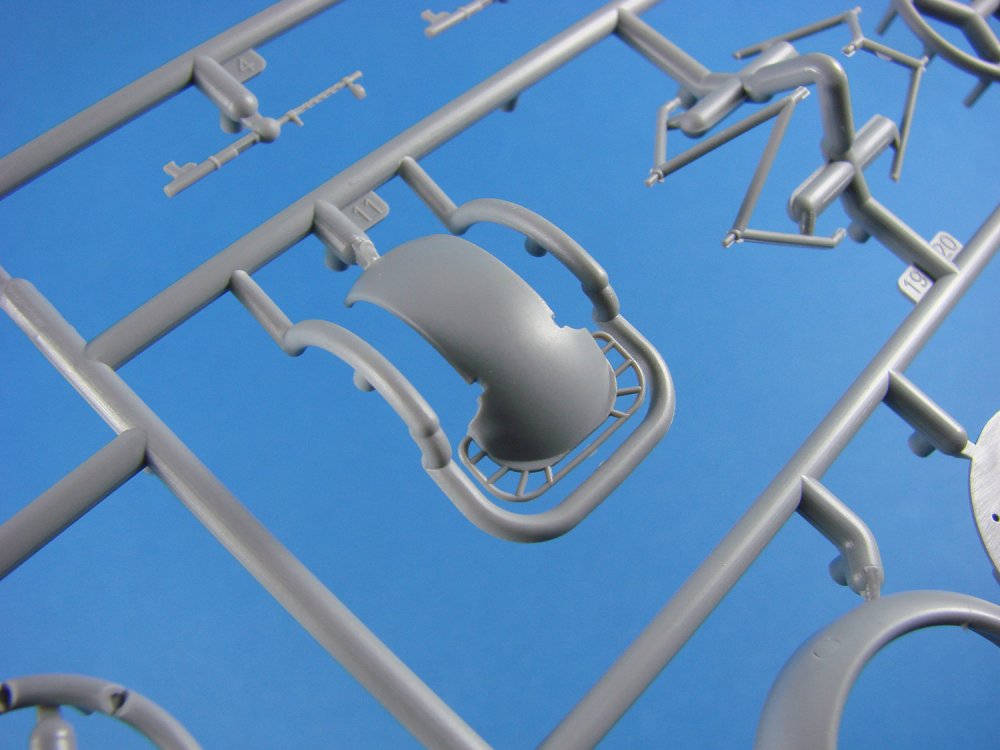
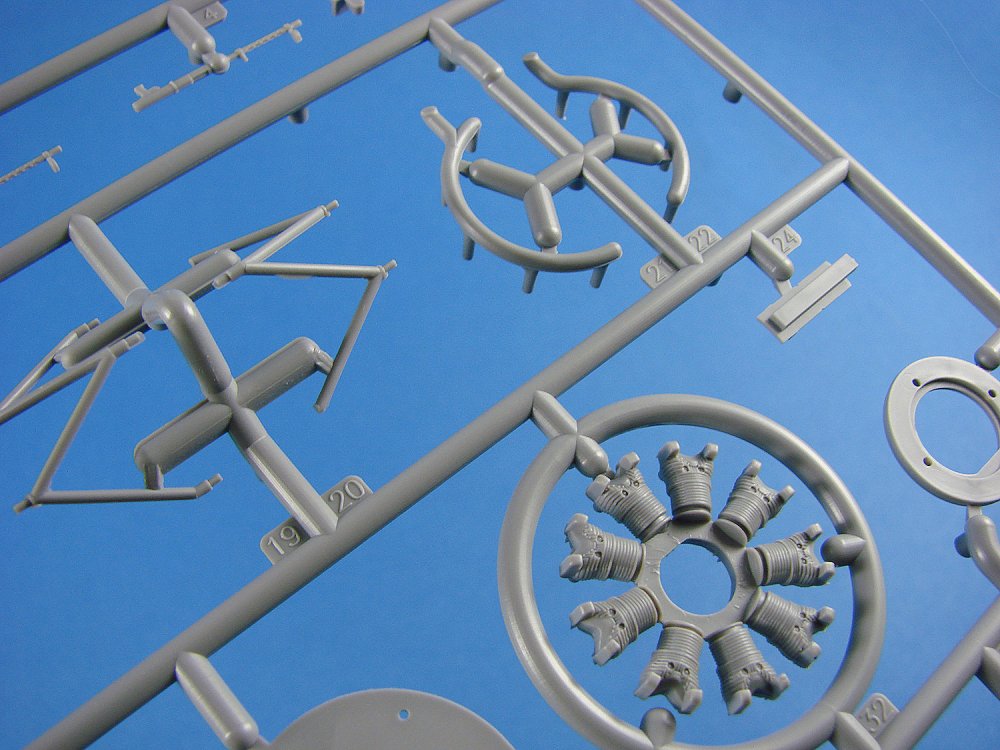
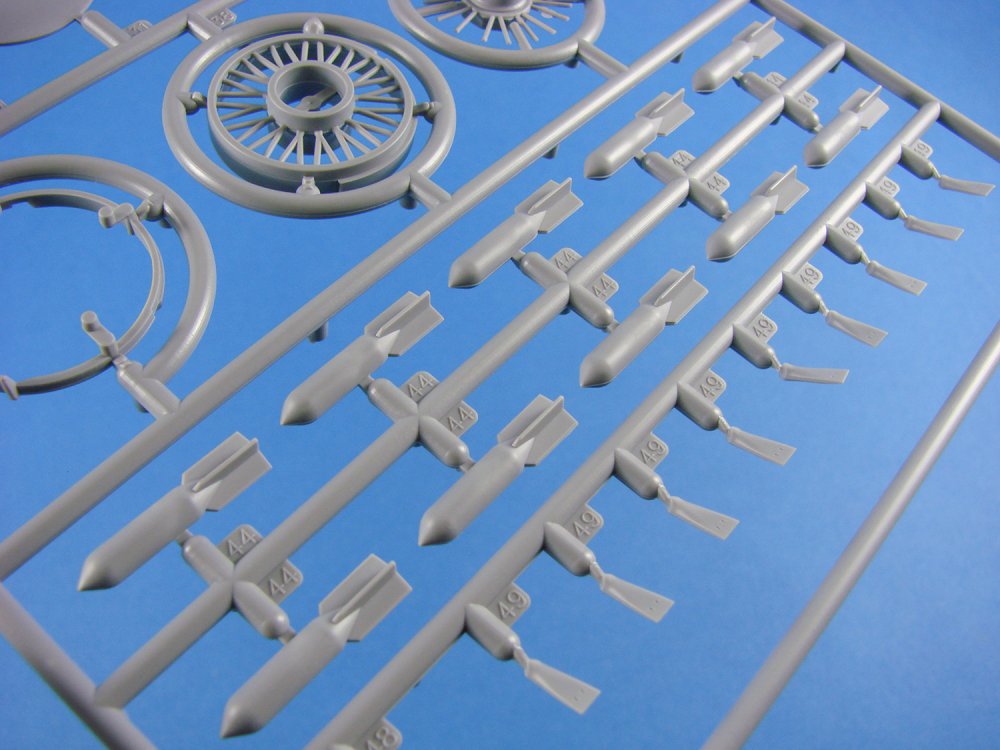
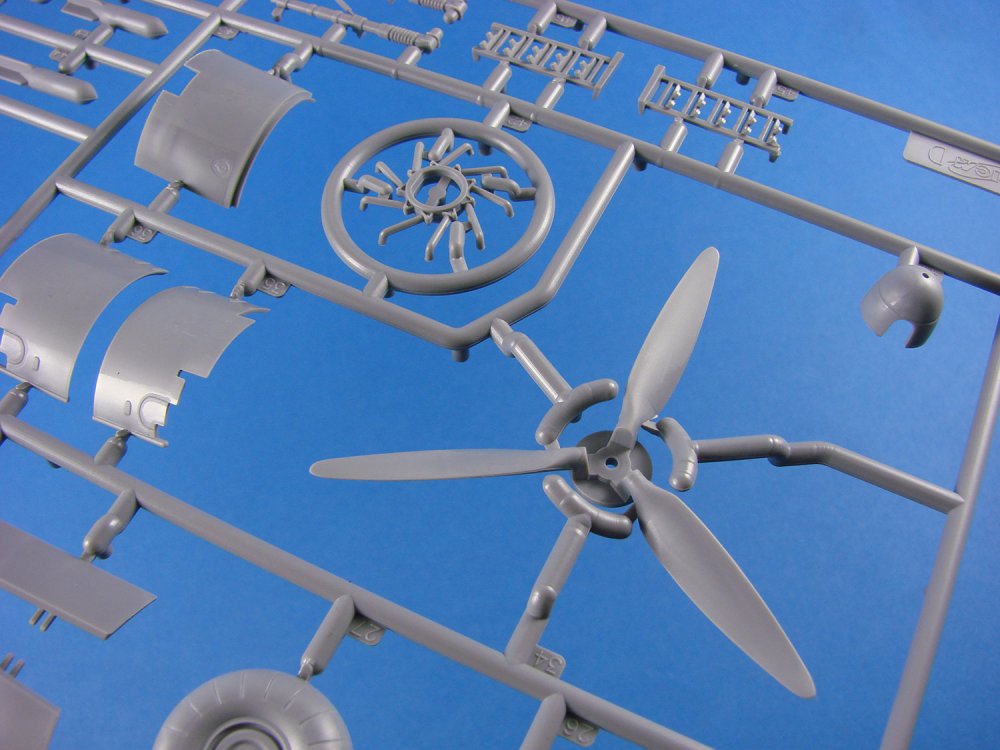
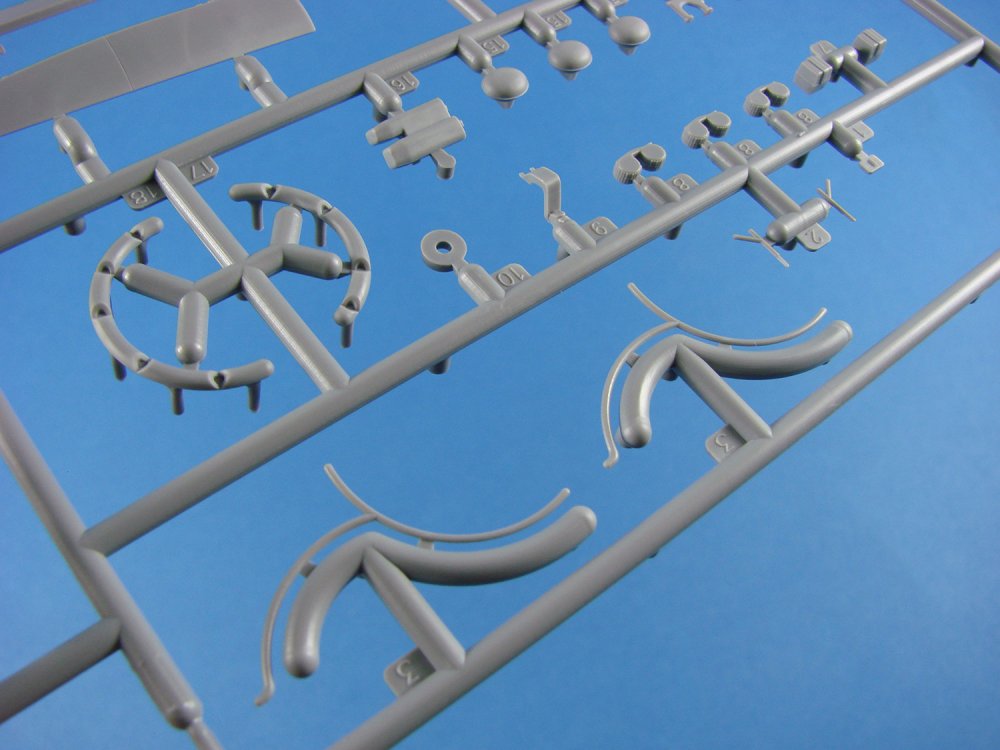

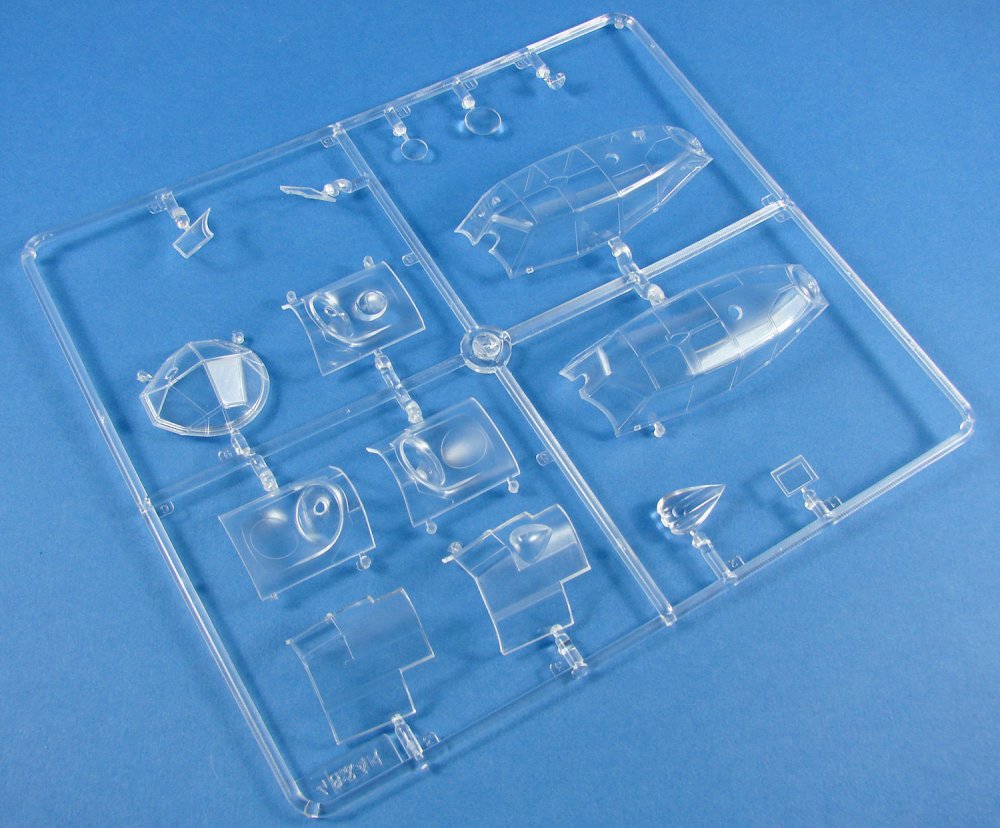
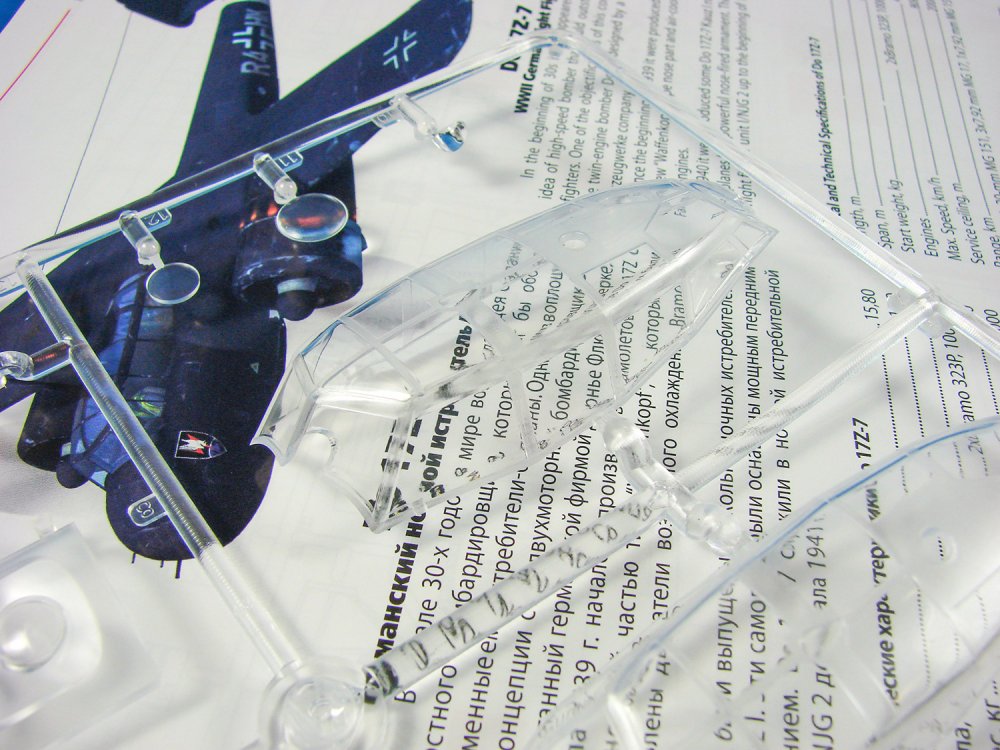
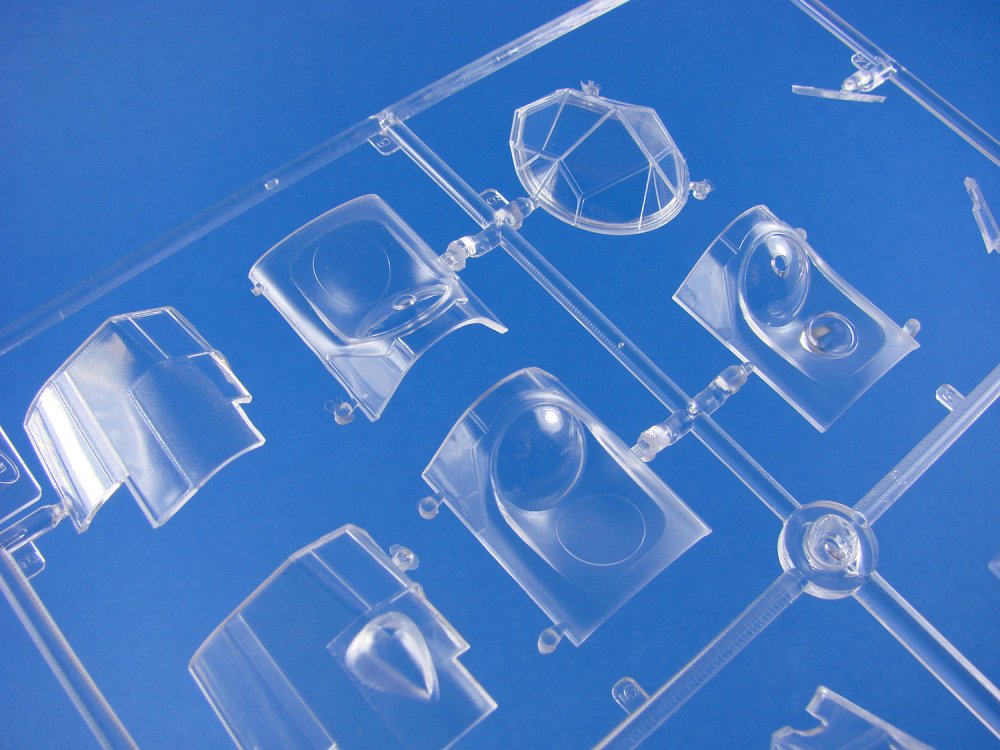
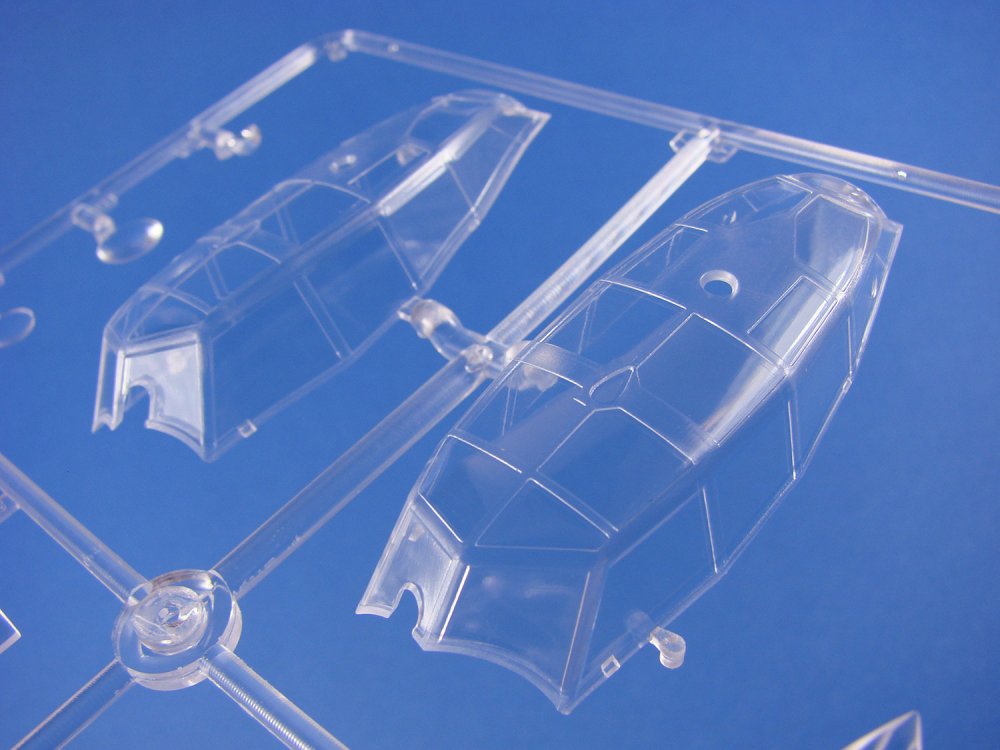

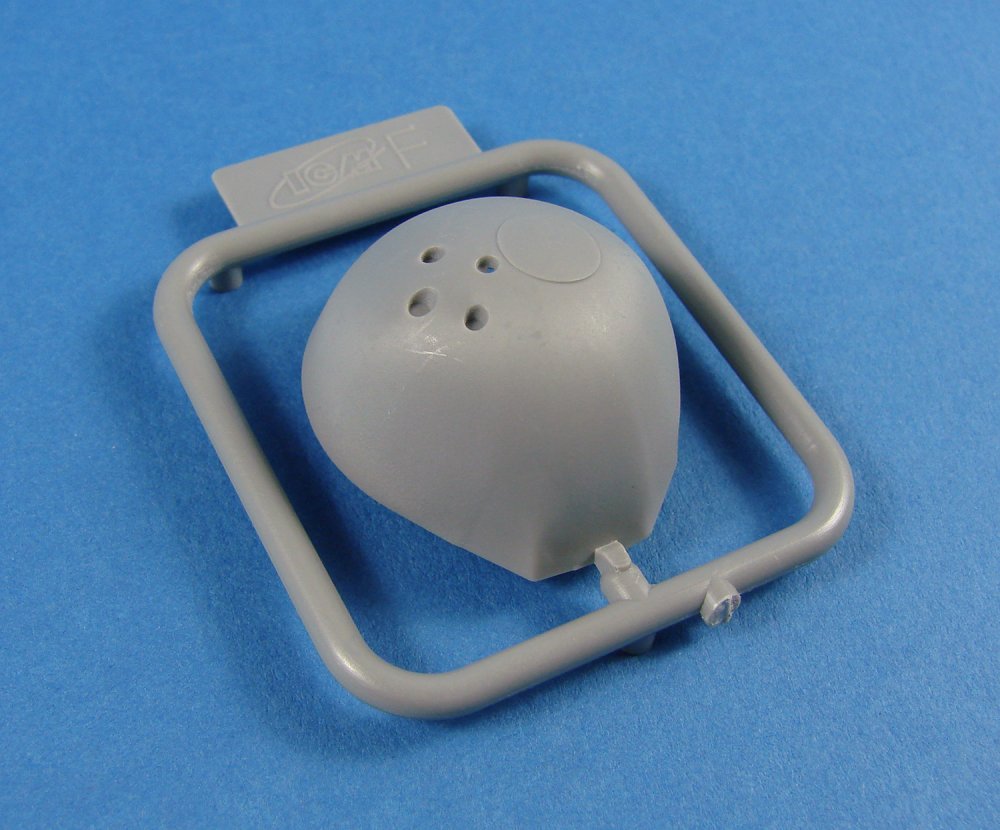
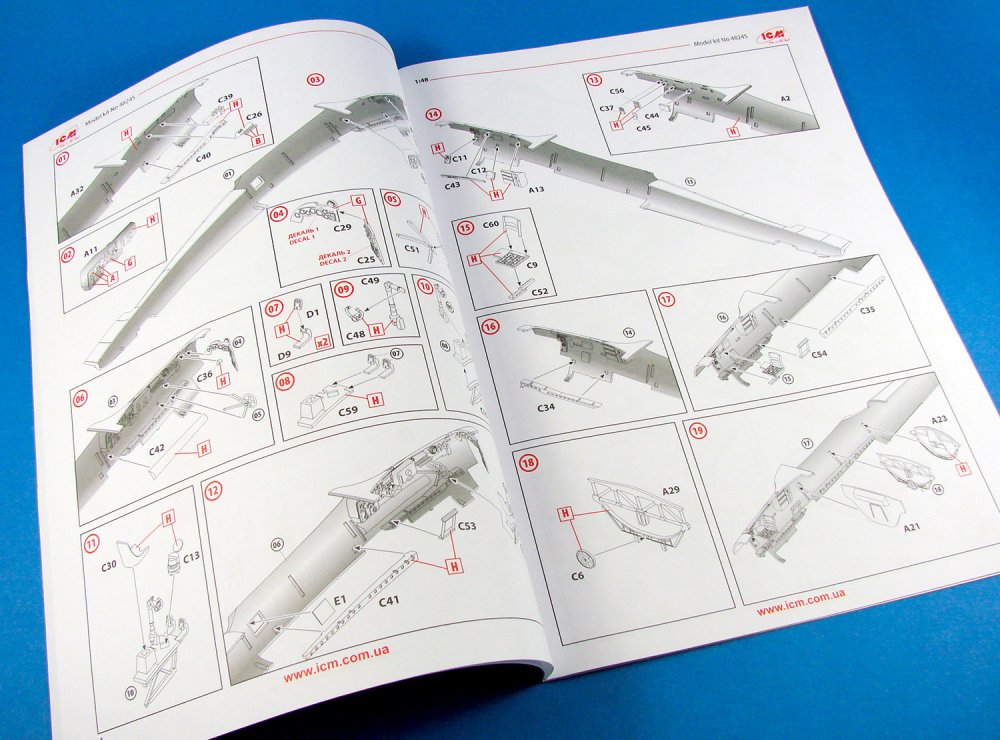


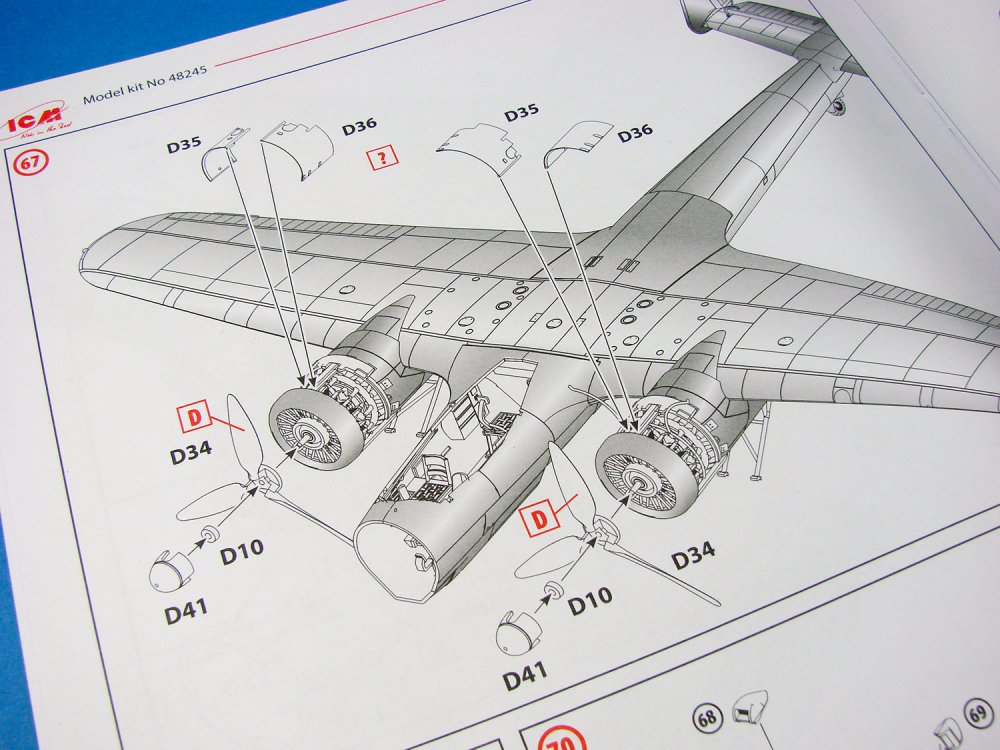
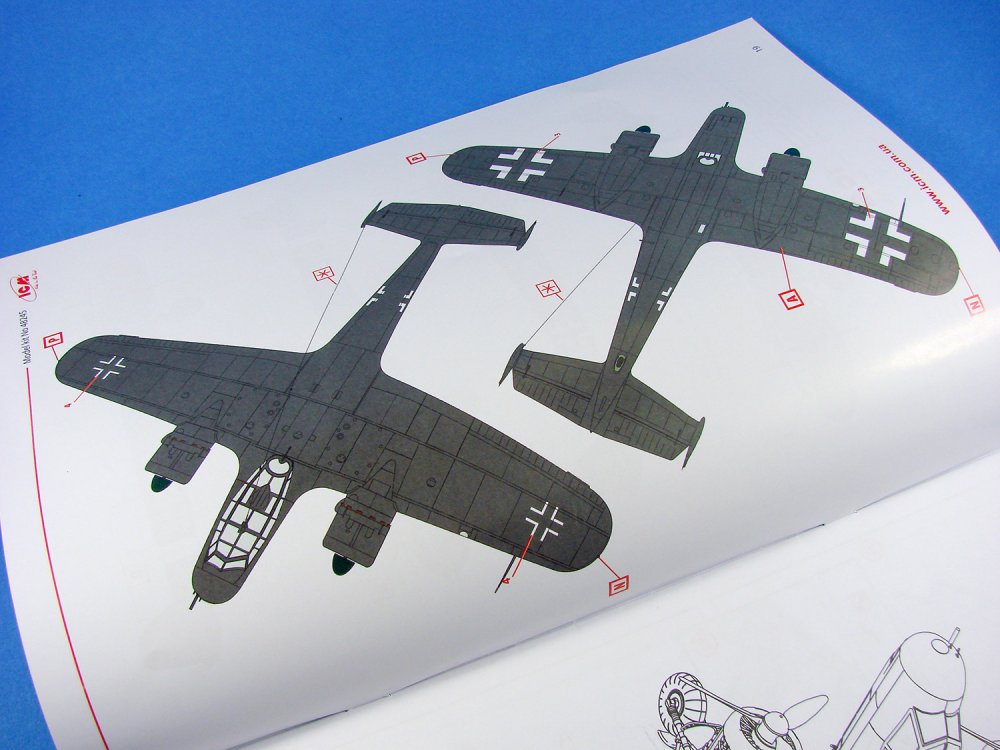


-
Special Hobby 1/32 Fokker D.II “Black & White Tail”
JayDee replied to JeroenPeters's topic in Aircraft Reviews
Looks a lovely kit. Great to see companied like these tackling the lesser-known subjects. Great review and moist photos! -
1/32 IAR-80A Azur-Frrom Catalogue # AZUFR8002 Available from Special Hobby for 1300 Kč (approx. £45 in UK) The IAR 80 was a Romanian World War II low-wing monoplane, all-metal monocoque fighter and ground-attack aircraft. When it first flew, in 1939, it was comparable to contemporary designs being deployed by the air-forces of the most advanced military powers. Production problems and lack of available armament delayed entry of the IAR 80 into service until 1941. It remained in frontline use until May 1945. In 1930, the Romanian government issued specifications for a new fighter. Although the government was not anticipating bids from its own aircraft industry, IAR produced several prototypes in response to the tender. A second contest was also fought between the newer IAR 14 and PZL P.24 designs, and once again the PZL design won a contract for another 50 aircraft. Although IAR's own designs had not entered production, they nevertheless won the contracts to build PZLs and Gnome-Rhone 14K engines under license. As a result of these and other license contracts the company had enough money to fund a design shop even, if its designs never saw production. Despite losing to PZL, an IAR design team led by Dr. Ion Grosu continued work on fighter designs. He was convinced that the low-wing design of the IAR 24 represented a better design than the PZL gull-wing design. Once again, the team studied the new PZL fighter looking to incorporate its best features into a new aircraft, and the result was the IAR 80. By April 1941 the Romanians were firmly in the German sphere, and as a result the Germans released more FN guns for their use. These were quickly installed, and the resulting 80A model finally mounted the original complement of six guns. Armoured glass in the windscreen, seat-back armour, and a new gun sight were also added at the same time, along with the newer 1,025 hp (764 kW) K14-1000A engine. The extra engine power proved to be more than the fuselage structure was designed to handle, and it had to be reinforced with a duralumin "belt" just behind the cockpit (in the first 95 A series aircraft built before the fuselage could be modified). Although the IAR 80A had a more powerful engine, the added weight of the guns, ammunition and armour plating reduced the top speed slightly to 316 mph (509 km/h). Nevertheless, the new model was clearly an advancement, and the A model replaced the earlier one on the assembly line starting with the 51st airframe. Eight of these had been completed in time for the invasion of the Soviet Union on 22 June 1941. FN guns remained in short supply, so throughout late 1941 and early 1942, guns were stripped from PZLs and observation aircraft for use in the IARs. Edit courtesy of Wikipedia The kit We’ve not exactly been endowed with 1/32 kits of this extraordinary-looking fighter aircraft, which is a real shame. When it comes to WW2 protagonists, I suppose we rarely look at participants in the south-east of Europe. Thankfully, with the foresight of Azur-Frrom, and with help from Special Hobby, the stunning IAR-80A is now with us in a real scale! Of course, this isn’t the first of the line from these companies, with two previous incarnations available from them as the IAR-81C, dating back to 2014. This isn’t a simple incarnation of the IAR-81C though. The fuselage and wings are indeed different. Inside the box, this kit is comprised of six sprues of light grey styrene and a single clear sprue. A packet of small clear parts, another of resin parts, plus a wallet with decals and PE, conclude the contents. Oh yes, an instruction manual too! The clear parts in this release are thankfully packed into a separate zip-lock wallet to protect them. The box for this is very attractive too, depicting an IAR-80A from Escadrila 47 Vanatoare, Grupul 9, after a successful combat against a Russian Yak. That’s also a very tight lid to lift from the box…cue package of parts on the floor when it finally comes apart! Sprue A This sprue is very similar to the previous IAR-81C releases, but not identical. I did believe that there were changes in the length of the fuselage on the IAR-81C, but this new kit has the fuselages at exactly the same length. However, there are detail changes around the cockpit opening, in the area to the rear of the opening. I also note that the wing on this seems to be in a very slightly different position to the previous release. Externally, detail is nice and refined, with subtle and even panel lines, with rivets only seen along those panel lines, and not in between. The stiffening strip which runs from the cockpit to the tailplane is also nicely defined, and with rivet detail. Louvre detail just in front of the cowl position, is also very nice, but open. Internally, cockpit wall detail is excellent and very sharp, with nicely defined stringers and former detail. Please note that as is typical of low-pressure injected kits as this, that there are no locating pins to help you align the parts, so care will be needed (i.e. tape one side and glue from the opposing side!). The rudder is separately moulded, and the stabilisers will fit via the traditional tab and slot method. Also on here are the parts for the engine cowl. This is moulded as port/starboard halves, plus the nose cowl ring. There is a very slight short shot to one of the flaps on the rear of a cowl half, but this will be covered by the PE parts that are supplied and help to improve this area. The propeller blades are also moulded separately here, as is the bulbous spinner. Sprue B Again, at first glance, this looks identical to the previous IAR-81C, but it isn’t. The span of this machine was shorter, and this can be seen in the wingtips on this kit. Everything else looks the same except for the fact that the centreline on this lower wing has no provision for the bomb rack that fits to the previous releases. That lower wing is a full-span part with some exquisite panel line and access port detail. As with the fuselage, rivets are only to be found alongside those panel lines and ports. For me, I will most certainly want to enliven the surface by adding extra rivet lines. The main gears wells are just that…..wells, and they are moulded into the lower wing. As is traditional, the upper wing panels are individual pieces, and exhibit some of the very finest in engraved detail that I have ever seen, and I really do mean that. I just hope they take a wash after paint! The wings are moulded without ailerons and landing flaps, and the remaining parts on this sprue cater to the latter and are moulded as upper and lower halves. The frame and fabric depiction is very nice too. As with the fuselage, there are no locating pins on any parts here. Sprue C This sprue is identical to that of the previous release, and contains the ailerons, stabilisers, elevators and rudder. All are traditional construction, i.e. halves, and moulding is very nice indeed with the same attractive fabric and frame rendition on the control surfaces as I noted on the landing flaps. There are a few ejector pin towers on the reverse side, and you’ll need to snip them off before construction. Sprue D Now, unlike the main airframe components with low pressure injection, these are very different in appearance insomuch as the parts are glossy and extremely sharp with no real flash. I came across this sort of thing on the Special Hobby Tempest kits. The reason for the different moulding technique is due to the nature of the parts with them being intricate and relatively small. A good number of the key cockpit parts are found here, such as the upper tub frame, footboards, multi-part instrument panel, seat sides, optional control sticks with both regular stick grip and spade types, forward instrument panel mounting frame and rear frame etc. Also to be found here are the parts for the engine exhaust, control surface horns, and individual engine pushrods...yup, you’re gonna have to apply them one by one, all TWENTY-EIGHT of them! That’s a little different from the regular approach of attaching them to a central hub. Sprue E The clear parts. Special Hobby have packed these into two little wallets, with the canopy parts in one wallet, and the gunsight lense and wingtip lights in another. Clarity is very good, with no visible distortion. Sprue F Another high-pressure moulded sprue here, with many main parts for the IAR K14-1000A engine. The front and rear radial banks are moulded as halves, and the details are excellent with fine cooling fin reproduction and cylinder head details. You will also find the hub here, plus the main exhaust hub section. It’s such as shame that the beautiful hub and its detail will be totally hidden by the shroud which sits behind the spinner, totally obscuring the aforementioned detail. Talking of spinners, the rear plate is moulded on this sprue. The main gear struts are found here, as are the wheels. There is no weighted effect to the latter, so you’ll need to sort that yourself or purchase the resin wheels from CMK. Hub details on these are very nice, but as they are integral to the wheels, you’ll need to mask them for airbrushing. No masks are included with this release. A couple of inner gear doors are moulded here but not for use, and you will also find a few remaining cockpit parts such as sidewall detail and the main seat part. Of note are a couple of parts here at the edge of the sprue, near the engines. The sprue here is cut-out and the delicate parts in that area have suffered some breakage and will need repair or re-fabrication. These parts concern the instrument panel mounting. Sprue G Here we have our last sprue, and this contains, amongst other things, a longer spinner version that that found on Sprue A. The instructions do state that either can be used, but you might want to look at reference photos of your specific machine before committing to either one. Other parts include replacement inner gear bay doors, alternative instrument panel section, under-cowl scoop, and two headrest parts as an alternative to the part on Sprue F. Resin parts Four casting blocks are supplied here, cast from medium-grey resin. Two of these hold the parts for the exhaust manifolds with nicely hollowed out ends, the engine intake and filter, and the last block holds a series of smaller parts. These are for the gunsight (two included), and the gun barrel stubs/muzzles. Casting is excellent, as you would expect from Special Hobby/CMK. Photo Etch This small fret contains the engine cowl louvres, multi-part pilot harness, interior canopy handle and elevator trim tab actuators. Again, production is excellent, and the belt details will look good under a coat of paint. Decals A single sheet, printed by Aviprint, contains decals for all national markings, serials, insignia, stencils and instrument panel gauges etc. Printing quality is very good, with solid and authentic colour, minimal carrier film and perfect register. The decals also look nice and thin too. There should be no error with these whatsoever as Radu Brinzan was involved with their design. I can certainly rest easy with that as Radu is the go-to guy when it comes to this machine. The four schemes supplied are: IAR-80A – “Anghel”, Escadrila 47 Vanatoare, Grupul 9, Pipera, August 1942 IAR-80A – Escadrila 53 Vanatoare, Mamaïa, July 1942 IAR-80A – “Felicia”, Escadrila 47 Vanatoare, Grupul 9, Pipera, Summer 1942 IAR-80A – “Mamy”, Escadrila 47 Vanatoare, Grupul 9, Pipera, Summer 1942 Instructions I quite like Special Hobby’s instructions format. They are clear, concise and the illustrations are easy to follow. This manual starts with a history of the type, followed by a parts map, indicating those components that aren’t to be used. Constructions is broken down into 24 stages, with clear drawings guiding the way, and the use of colour illustration to highlight painting and parts placement. The last pages of the manual contain the scheme illustrations, with good, clear scheme depiction and decal location shown. Conclusion After the IAR-81C, I was thrilled to see the earlier pure fighter version of this kit being released. It has a swarthy appearance and was, by all accounts, on par with the Fw 190A/F series in terms of performance. This is a superbly detailed kit, but perhaps one that needs just a little more attention and skill than your standard off the shelf kit, due to the main airframe components and the alignment and clean-up required. In all though, this is a superb kit of an important and oft-forgotten fighter type, and Frrom-Azue/Special Hobby (with Radu) have given it the attention it truly deserves. For the price, with both PE and resin, this is a very attractive package. All they need to do is fix the break in the sprue on F, that causes those two parts to fracture. Highly recommended. My sincere thanks to Special Hobby for sending out this review sample to us. To purchase directly, click THIS link.
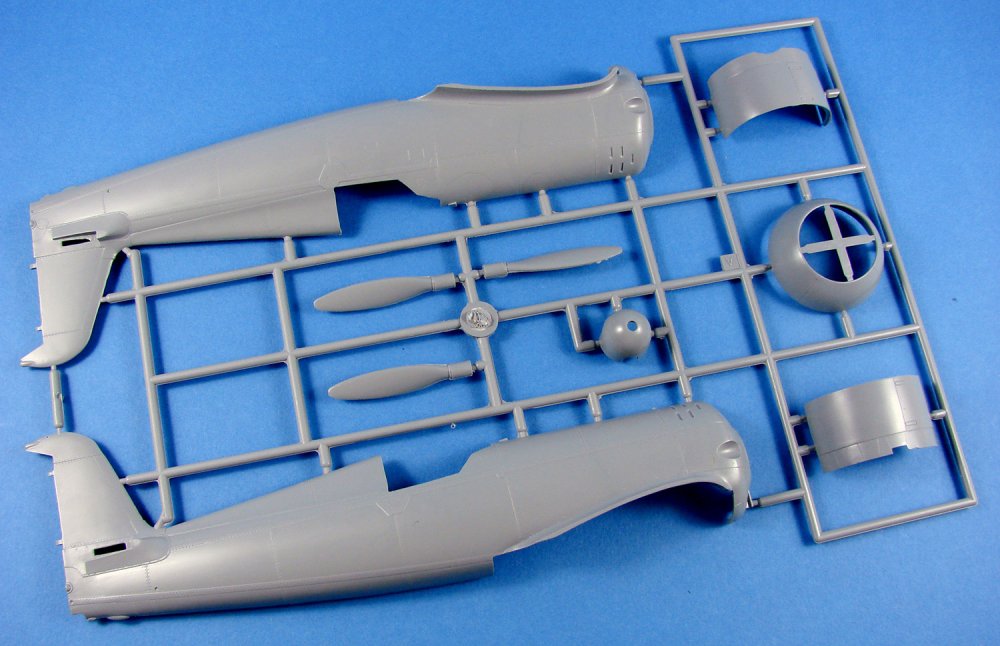

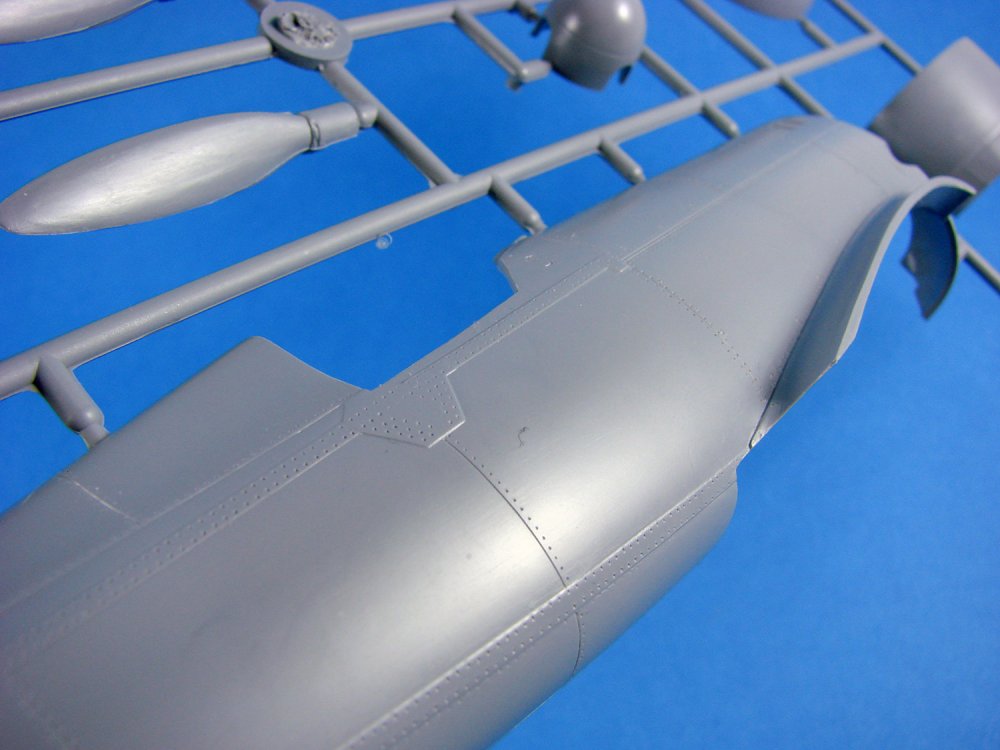


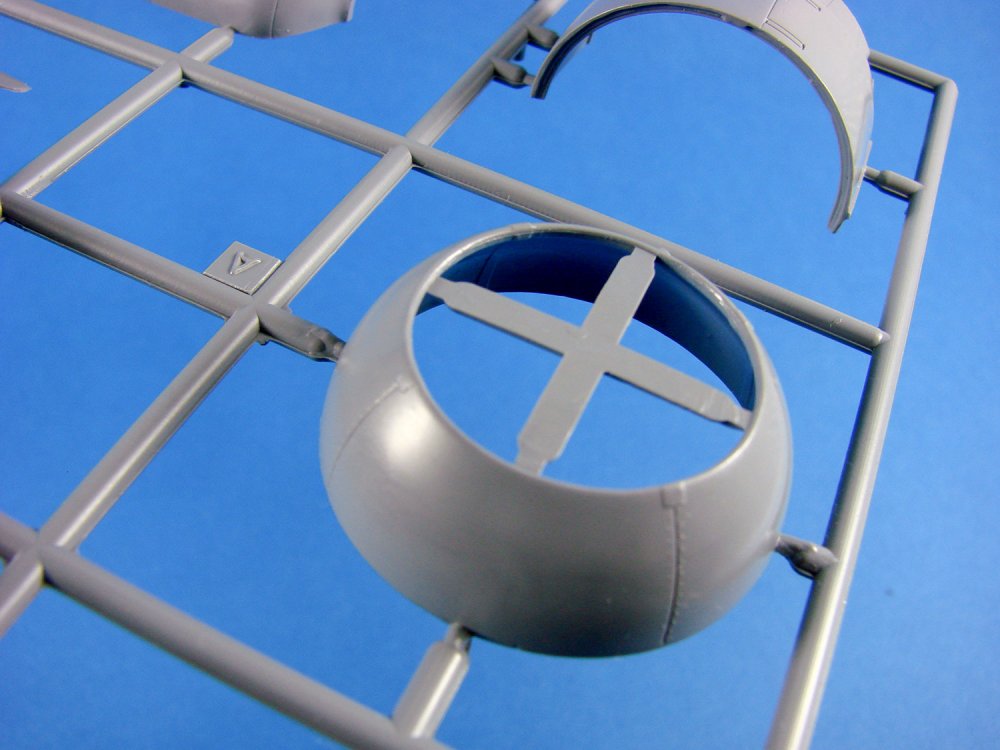
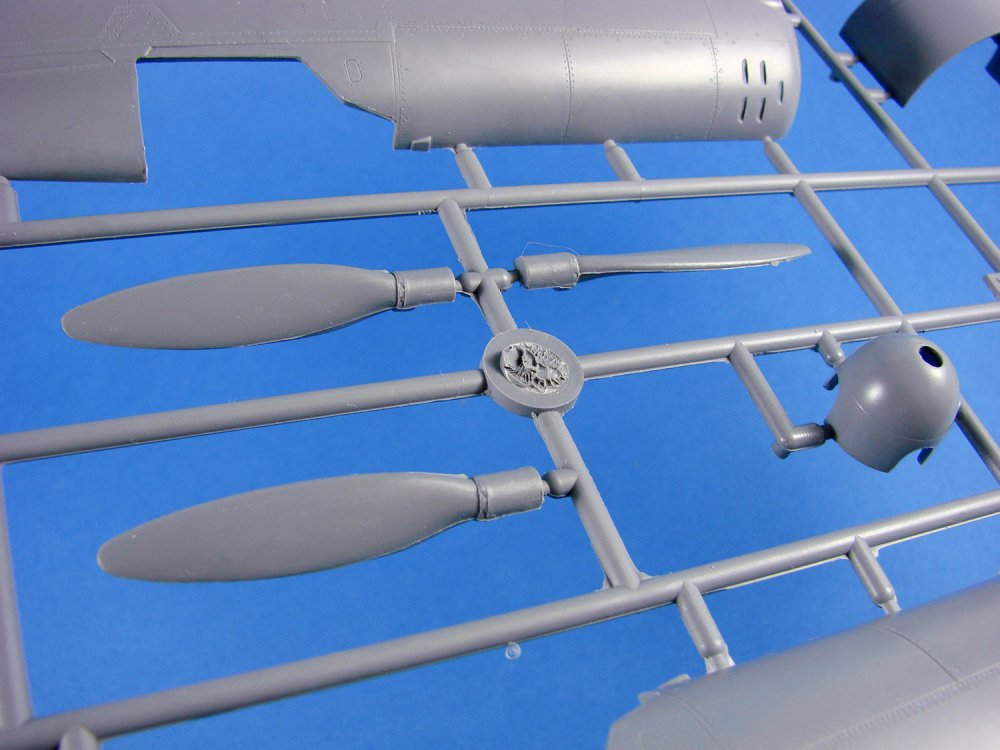
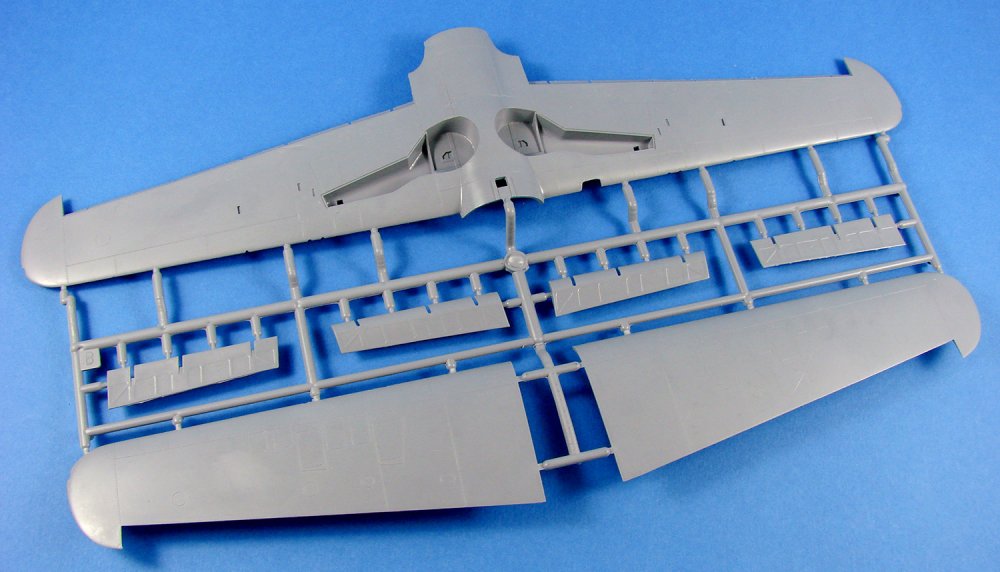
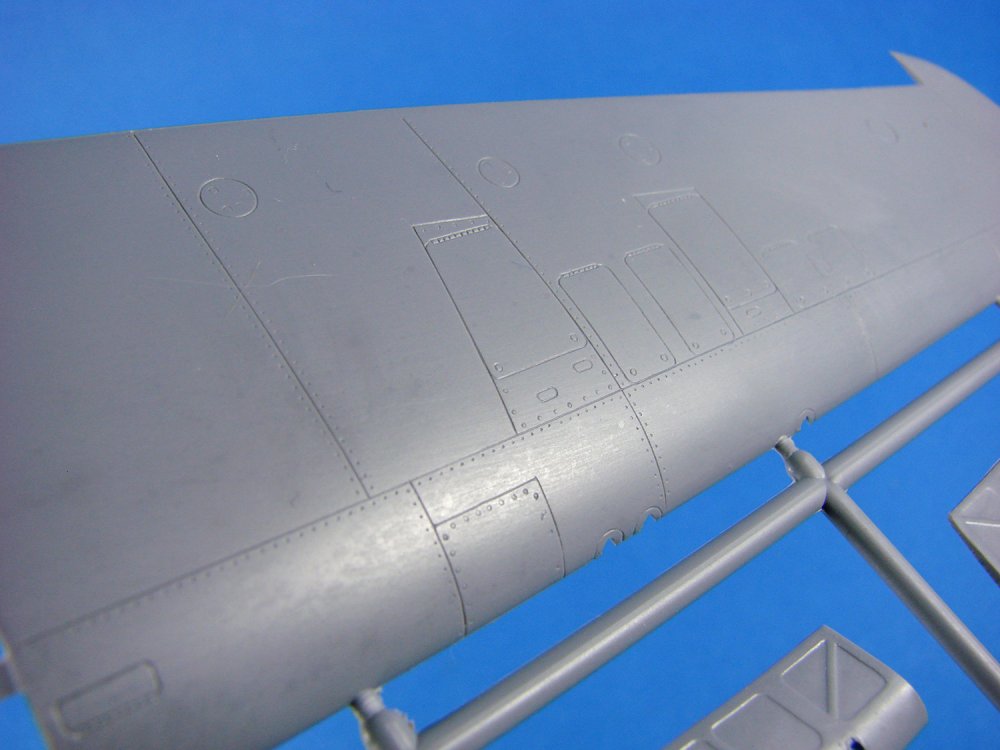
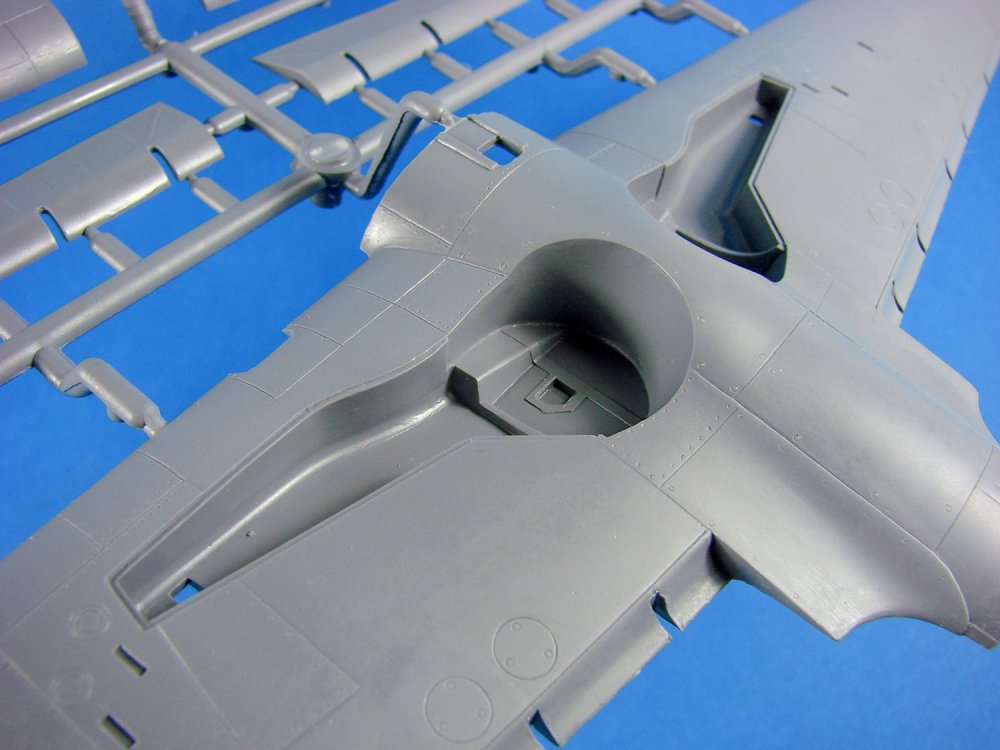
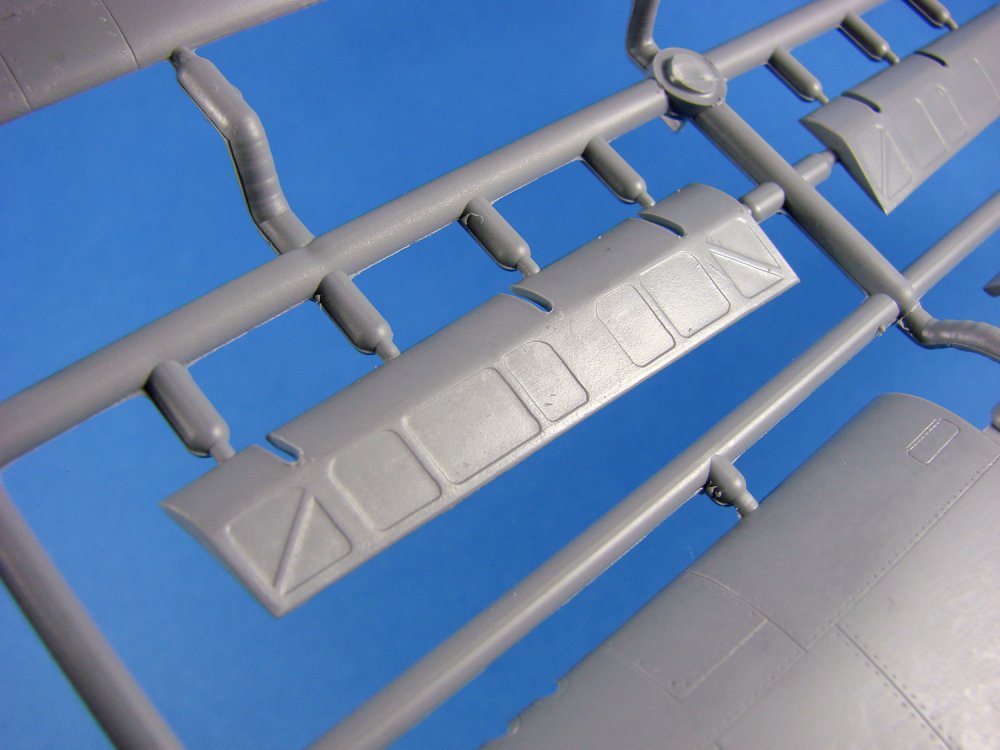
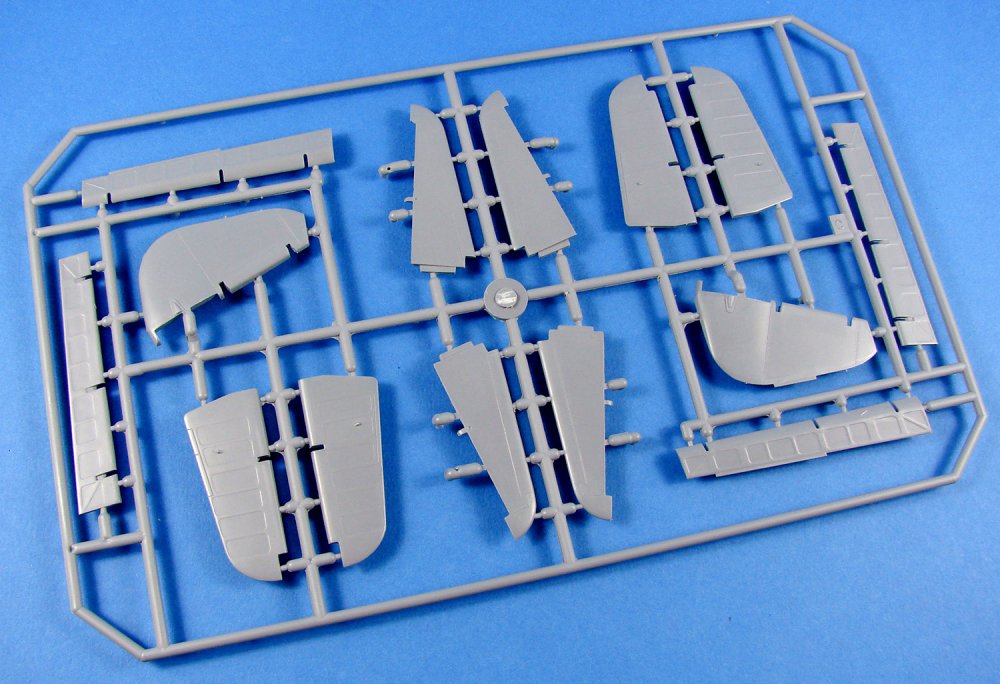
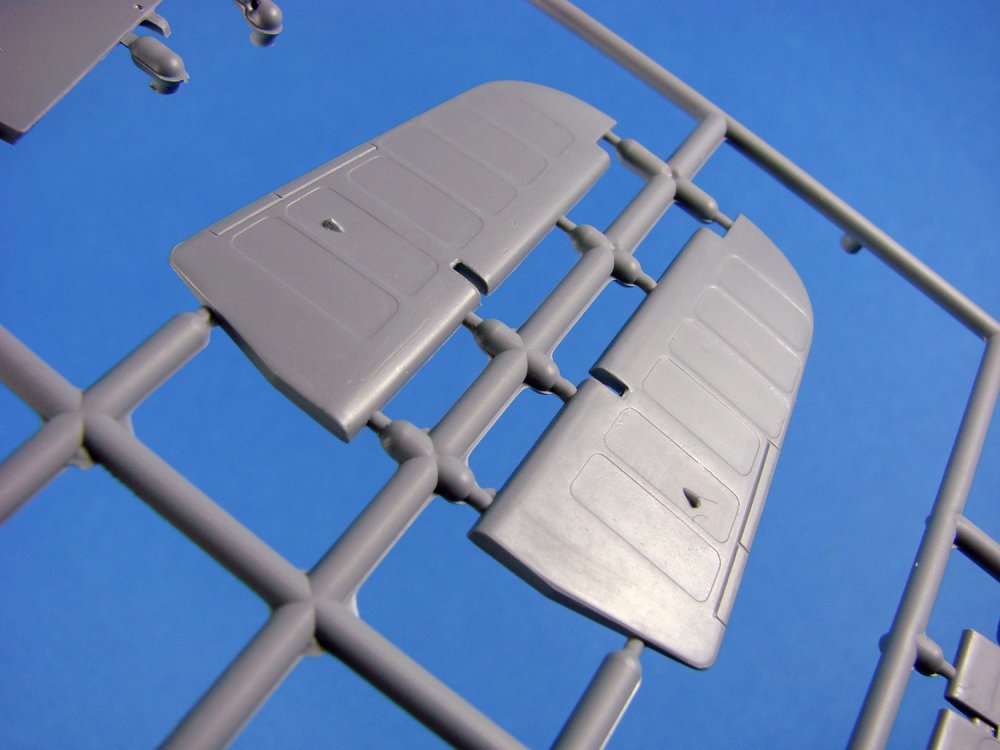
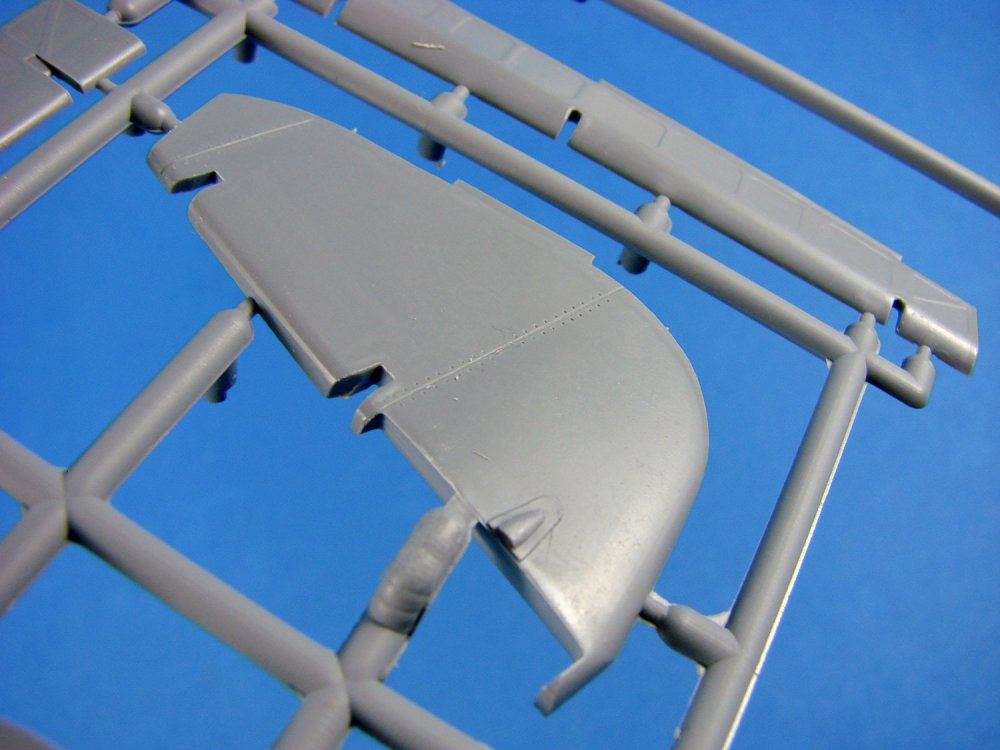

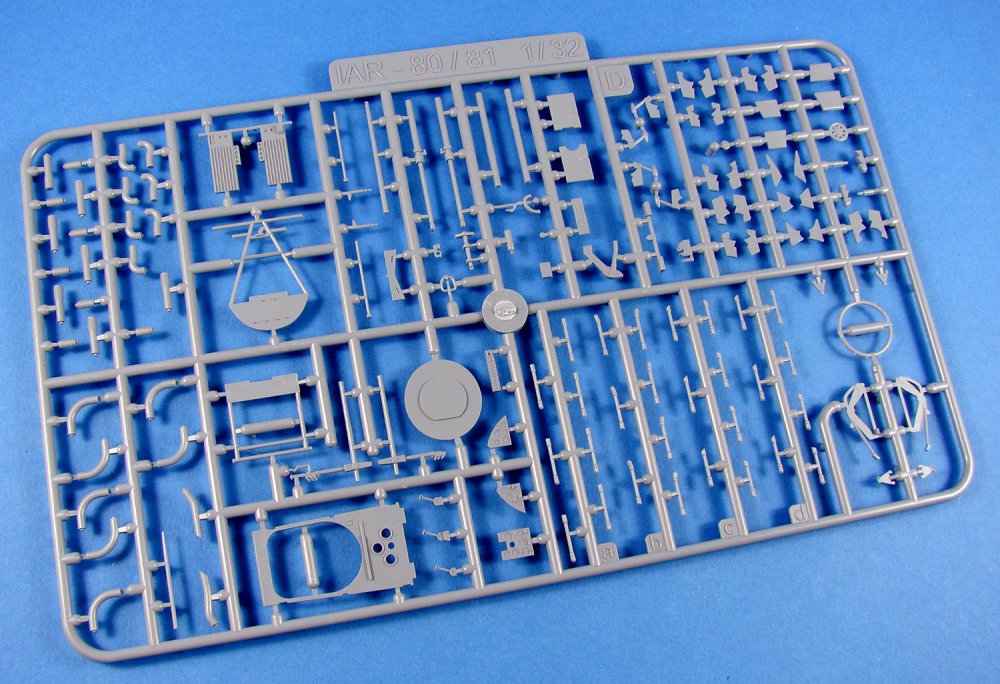


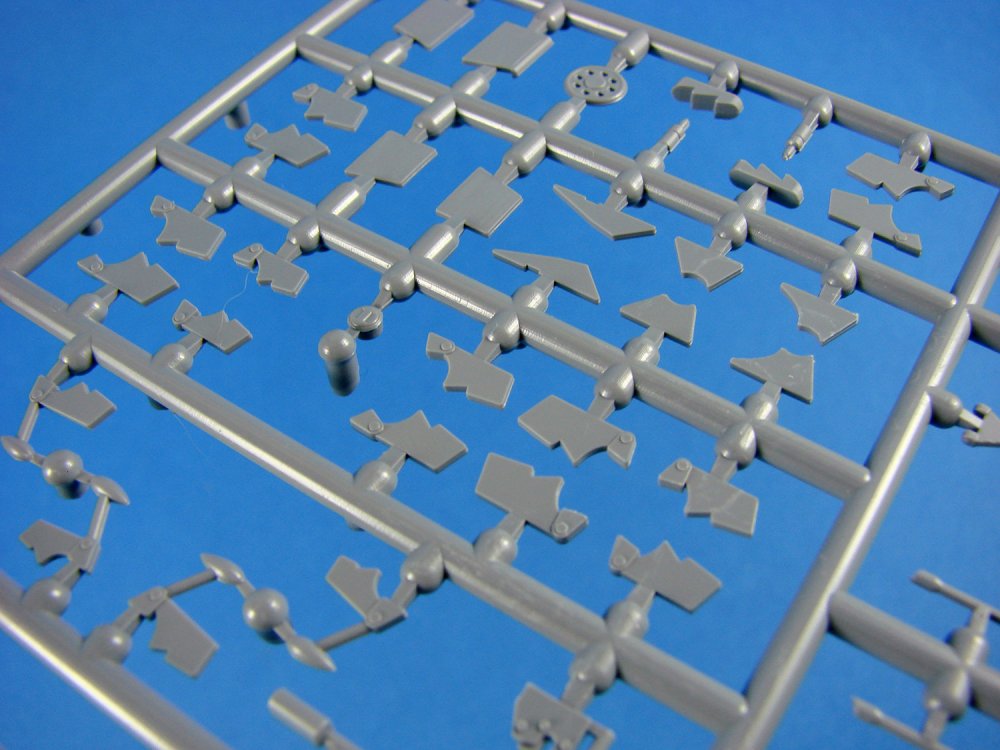
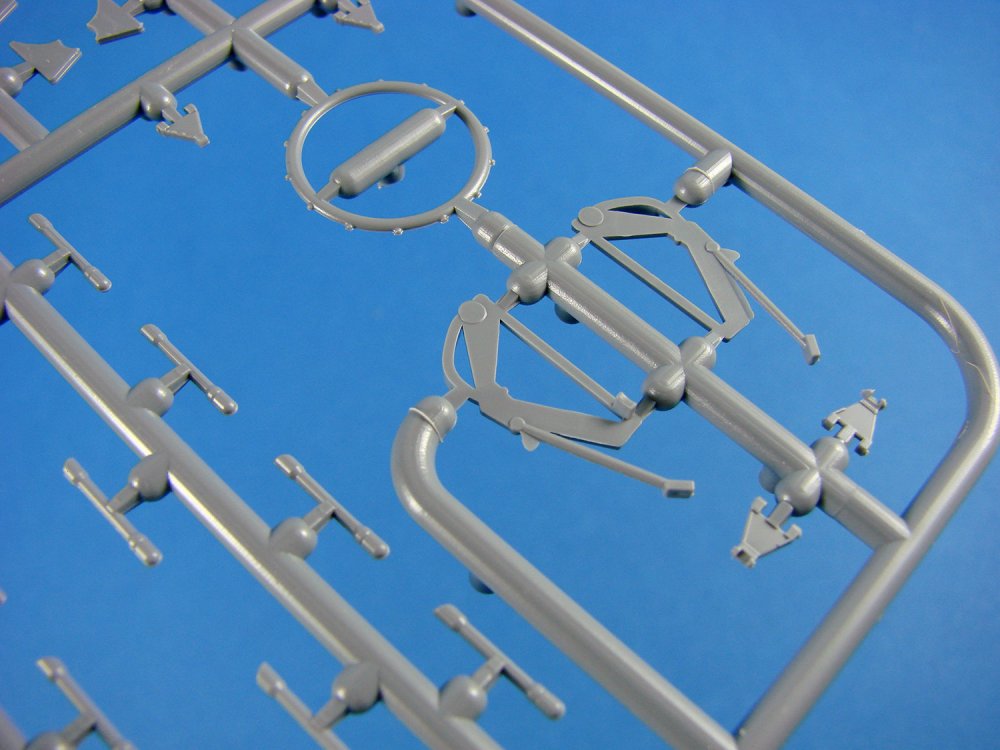

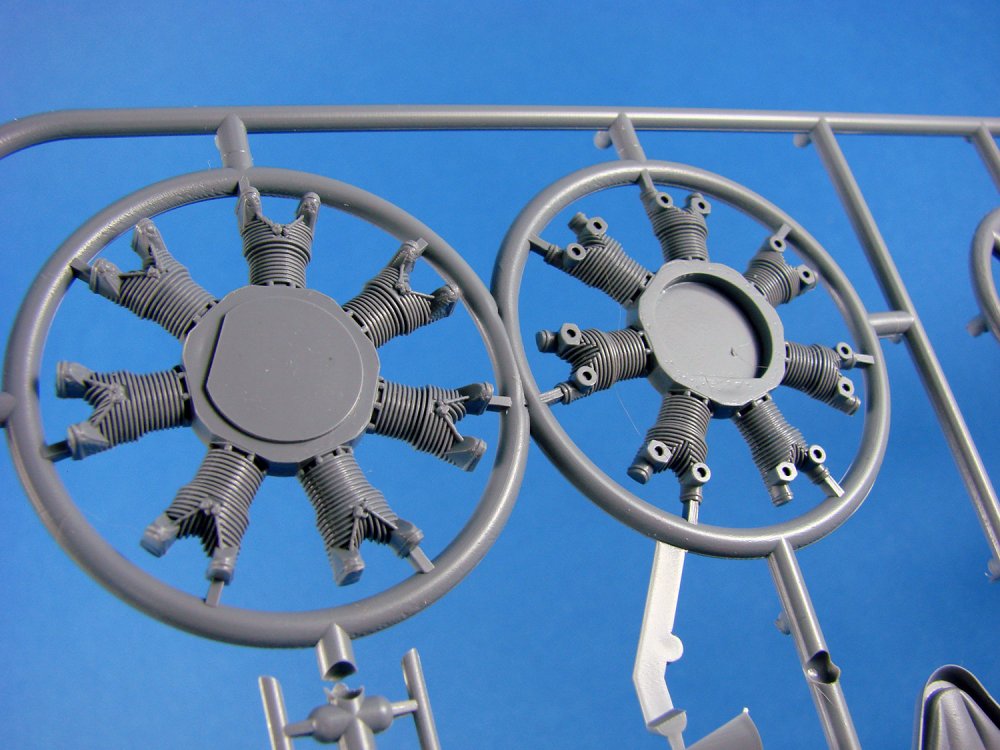
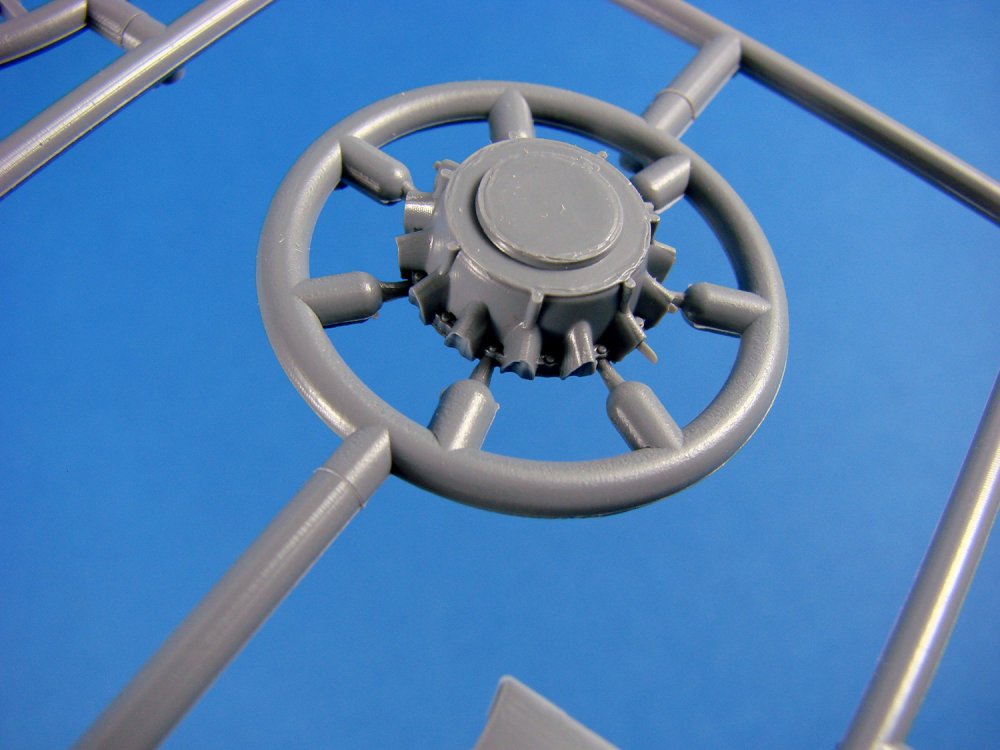
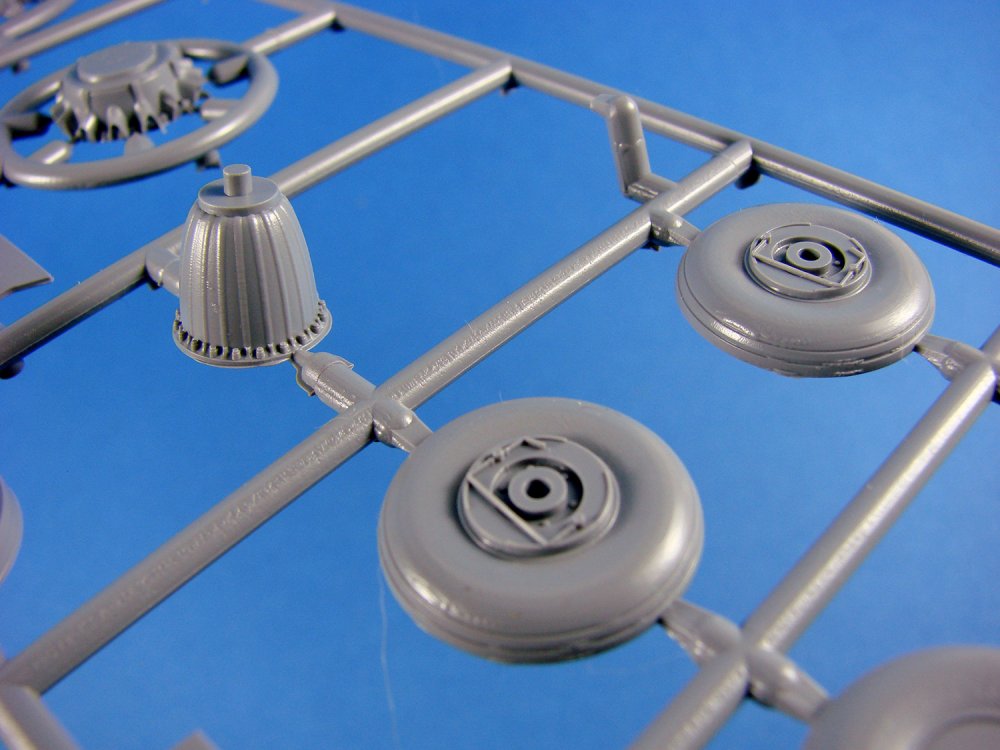

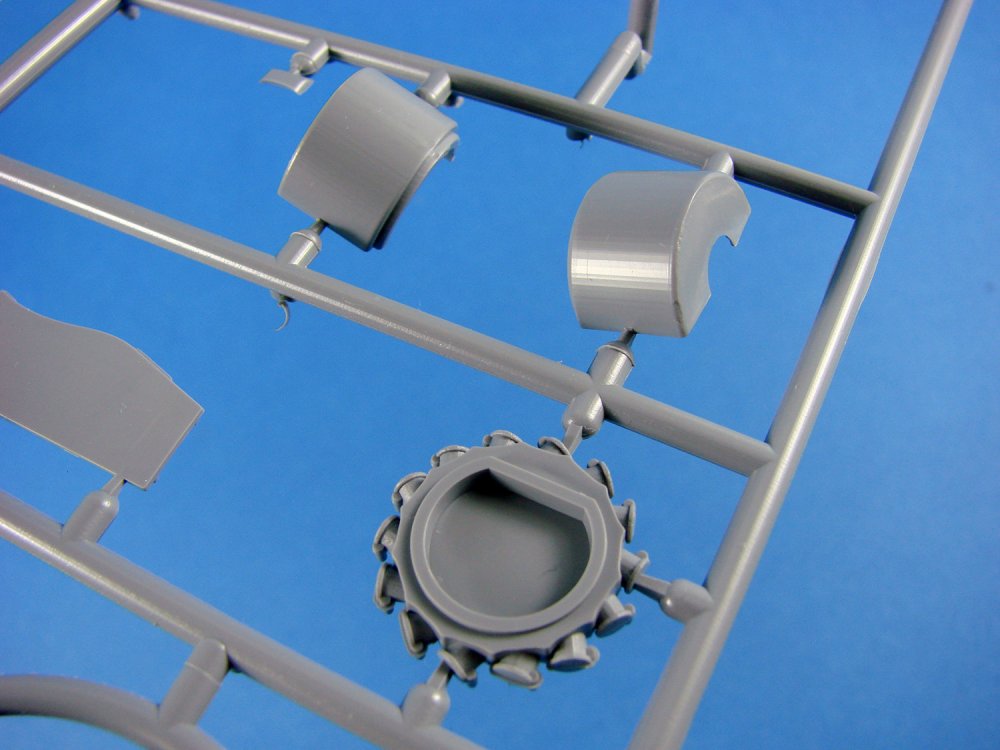
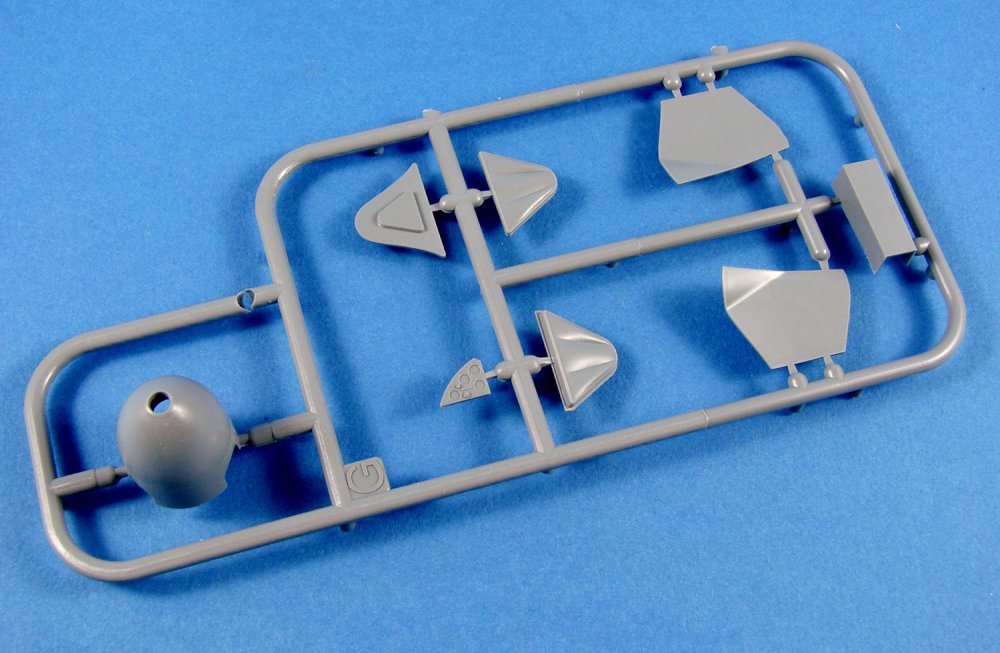
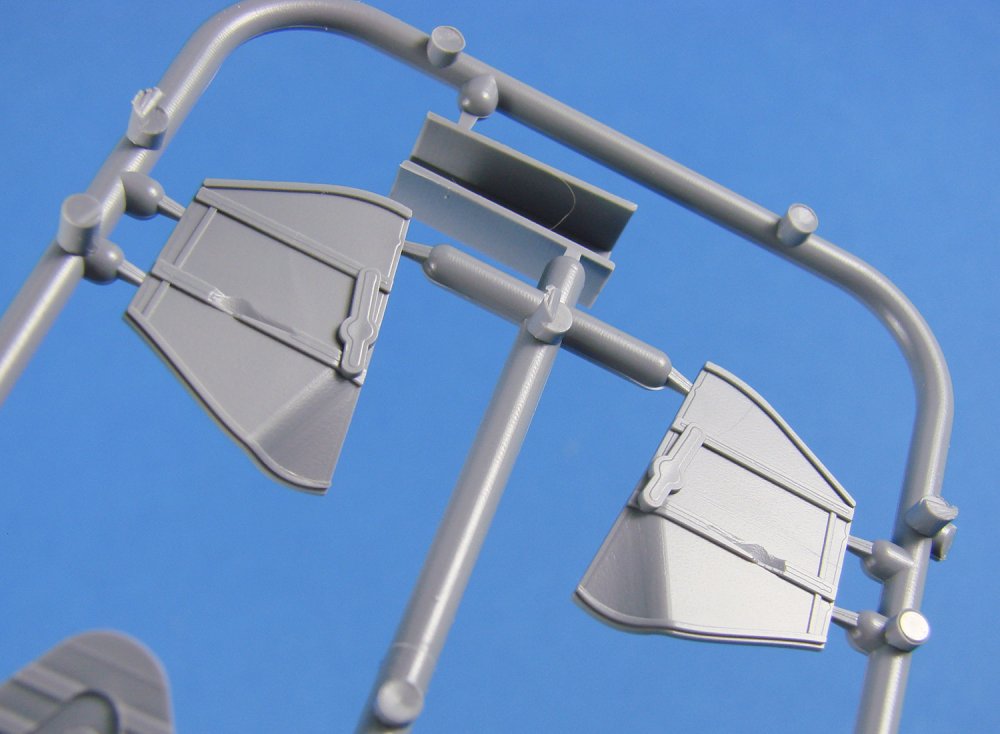
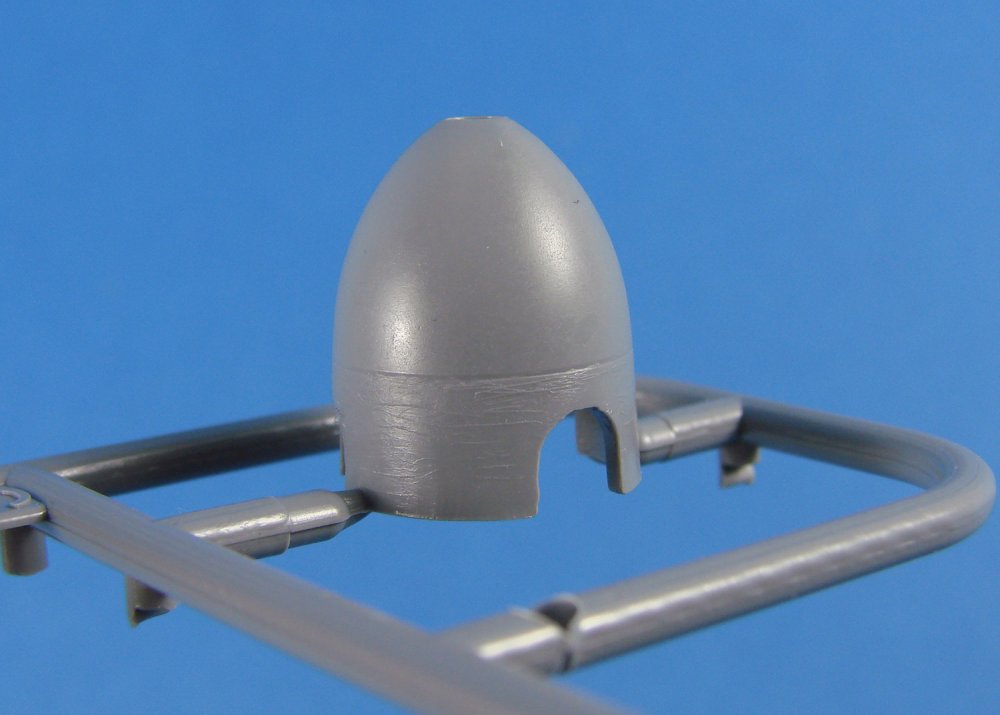


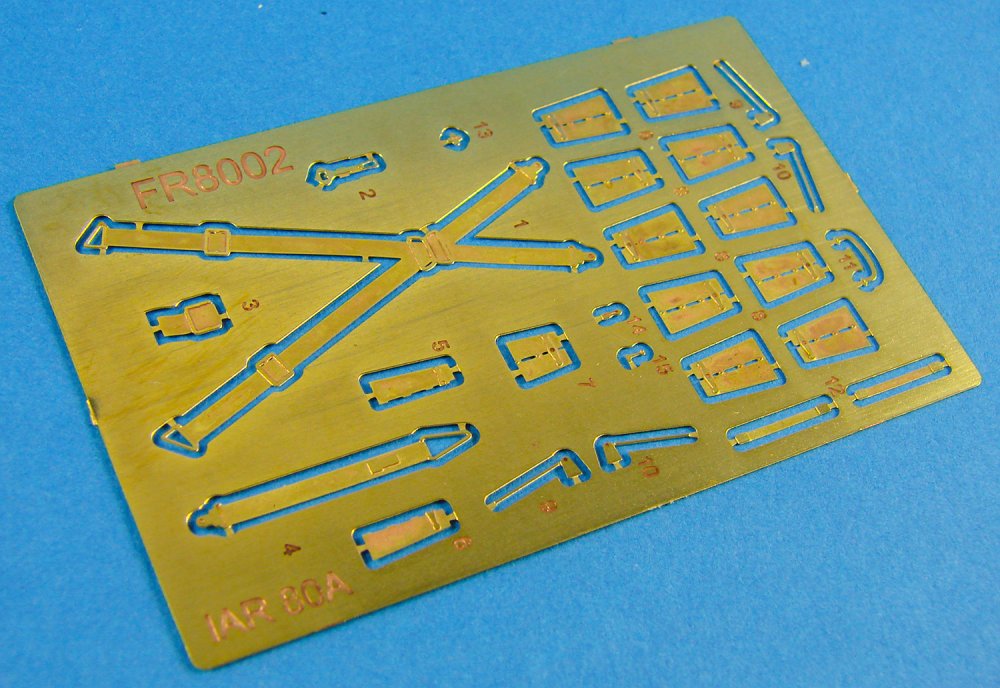
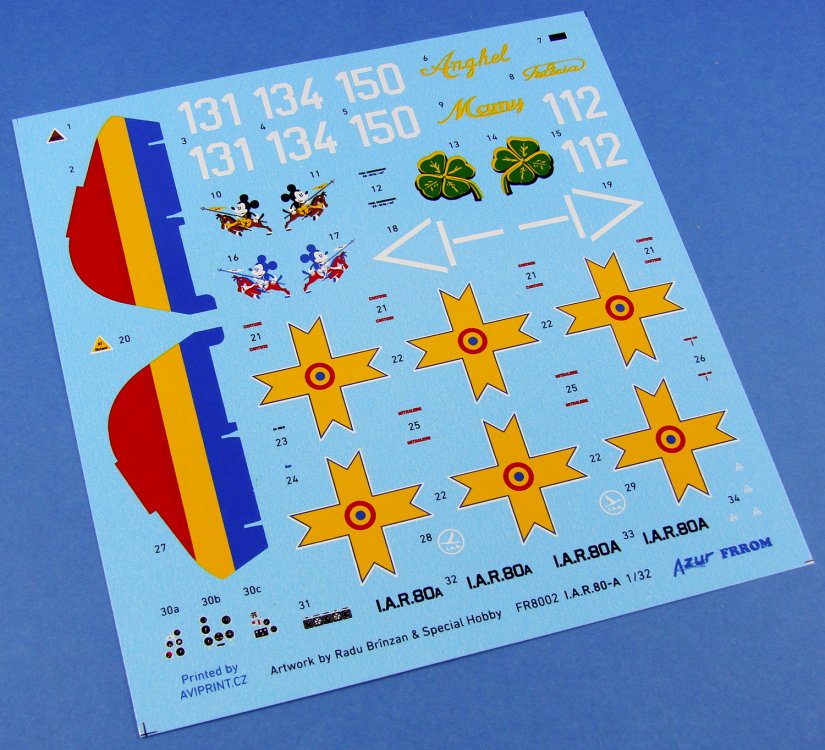


-
Bu - 131 (ICM 1/32)
JayDee replied to Johann's topic in LSM 1/32 and Larger Aircraft Ready for Inspection
Fantastic! Any WIP? -
I really MUST get a copy and put it up for review here. David, would you be able to supply a small number of chosen pages for a review? I can watermark them too.
-
1/48 Wellington Mk.X (He727 NA-K)
JayDee replied to JeroenPeters's topic in LSM 1/35 and Larger Work In Progress
Slick looking PE work and nice call on removing that second pilot position. -
1/35 Tiger I Middle Production Sd.Kfz.181 Pz.Kpfw.VI Ausf.E Rye Field Model Catalogue # RM-5010 The Tiger I is a German heavy tank of World War II deployed from 1942 in Africa and Europe, usually in independent heavy tank battalions. Its final designation was Panzerkampfwagen VI Tiger Ausf. E, often shortened to Tiger. The Tiger I gave the Wehrmacht its first armoured fighting vehicle that mounted the 8.8 cm KwK 36 gun (not to be confused with the 8.8 cm Flak 36). 1,347 were built between August 1942 and August 1944. After August 1944, production of the Tiger I was phased out in favour of the Tiger II. While the Tiger I has been called an outstanding design for its time, it was over-engineered, using expensive materials and labour-intensive production methods. The Tiger was prone to certain types of track failures and breakdowns and was limited in range by its high fuel consumption. It was expensive to maintain, but generally mechanically reliable. It was difficult to transport, and vulnerable to immobilisation when mud, ice and snow froze between its overlapping and interleaved Schachtellaufwerk-pattern road wheels, often jamming them solid. This was a problem on the Eastern Front in the muddy Rasputitsa season and during extreme periods of cold. The tank was given its nickname "Tiger" by Ferdinand Porsche, and the Roman numeral was added after the later Tiger II entered production. The initial designation was Panzerkampfwagen VI Ausführung H (‘‘Panzer VI version H’’, abbreviated PzKpfw VI Ausf. H) where 'H' denoted Henschel as the designer/manufacturer. It was classified with ordnance inventory designation SdKfz 182. The tank was later re-designated as PzKpfw VI Ausf. E in March 1943, with ordnance inventory designation SdKfz 181. Today, only about seven Tiger I's survive in museums and private collections worldwide. The Tiger 131 at the UK's Tank Museum, which was captured during the North Africa Campaign, is currently the only one restored to running order. The kit This isn’t a new release, but one from 2016 and the last of 5 Tiger variant releases from Rye Field Model. This time, RFM has concentrated their efforts of producing a mid-production Tiger I, and with a full interior. We recently reviewed their latest kit, the Panther G, whose review you can find HERE. The box for this kit takes up the same footprint as the recent Panther kit, but it about 20% shallower. However, this box is still crammed with plastic to the point where you need to put the parts back in the box in the same order as you got them out, or you’ll struggle to fit everything in again. The box lid has a superb artwork of No.217 (not Otto Carius due to the incorrect tracks) and this is one of three schemes available out of the box. Under a fairly airtight lid, you will find TWENTY-TWO sprues, moulded in either tan or grey styrene, and also a single-piece lower hull, clear box of track links, two frets of PE parts, PE Zimmerit tools, a single decal sheet, and braided copper wire. A few of the latter are packaged into a single clear sleeve, along with a mini-sprue containing just two parts moulded in tan plastic. Whilst not all sprues are bagged individually (identical multiples co-bagged), all parts are in perfect condition. That’s just as well when you consider that this kit has around 1000 parts! Oh, that doesn’t include the multipart track links either. More on that soon. Lastly, a 28-page colour-printed A4 instruction manual is also included. In all, this is quite a weighty package. The intention of this review isn’t to assess the accuracy of this kit, but instead to provide details of the contents and any options that are available to the modeller. As this kit is now over 12 months old, I will supply links at the end which will supply you with further information as to the accuracy and opportunities offered with this kit. Sprue A This tan-coloured sprue has a large hole in it where parts that are presumably from an earlier release, have been snipped out. Parts here are primarily centred on the multipart gun barrel (made from sections instead of the dreaded halves), turret and mantlet parts. There are actually three different mantlets here but only one (A3) is shown for use with this release. Another large and seemingly unused part is the turret lid. Instructions show one sprue Z as for use. So, some important useful parts for your spares box. Also to be found here are the stowage bins for the rear of the turret and the cupola. Sprue B Some large superstructure parts to be found here, including the upper hull with the larger cooling air intakes moulded integrally. Of course, PE screens are included for these. One of the TWO options for the rear hull plate are included here, catering for the different equipment and exhaust layouts. Also found here are pioneer tools, equipment boxes, various braided ducts/hoses for the Feifel air filters, stowage boxes and the ends of the towing cables with their crimps, and the vertical plate with driver’s vision port and MG position. Sprue C (x2) These two sprues contain all of the road wheels. As this wasn’t one of the retrofitted steel wheel machines, the rims on these were rubber. The manufacturer and wheel size can be clearly read on the rims. Detail is superb, with excellent hex bolt details on the hubs. Circumferential seams are non-existent, but of course, the sprue gate attachments will need to be eliminated. I always find this easiest when the wheels are paired together. Sprue D (x2) Here we have the drive and idler wheels, transmission gear housing, torsion bars and swing arms etc. The torsion bars will work if you make a slight adjustment to each one. There is a small plastic tab on these that locks them into a single position, but removal will make the swing arms move. Ideal for those dioramas. Sprue F There are more unused parts on this sprue, such as alternative side hull walls and yet another mantlet, plus the lower side front hull where the transmission gear housing fits. With the latter, refer to unnamed sprue for the parts we will use with this release. What we will be using, however, are the fenders, engine cooler intake doors, front shelf that sits below the driver’s vision port, and also brackets for the spare tracks which will fit to the turret side. These are moulded as a curve, so you can create the assembly properly before it’s fitted to the turret. Very nice design… Sprue H Moulded in a medium grey styrene, this sprue contains parts for the Maybach engine, petrol tanks and other associated rear hull internals. Sprue J Another grey sprue, appearing to mostly if not exclusively, containing parts for the turret internals. Again, some parts are not for use, such as the internal turret ring and the turret floor. The parts to be used are to be found on Sprue U. Sprue K The genius in me has worked out that all interior parts (generally) are moulded in grey, as we now look at a sprue which contains the Tiger’s transmission, driver compartment parts, disc and steering brake units, wireless radio, bulkheads and firewalls etc. One side of my sprue is curved in through stress, but no damage to parts can be seen. Sprue M (x2) Every tank needs ammunition and here you will find the main gun shells and ammunition pouches for the MGs. Sprue N (x4) These for sprues are moulded in dark grey styrene and are all concerned with track construction. Each link it built from 5 pieces, and here you will find the track pins that are moulded in blocks of four. These are designed to stay on their mini-sprues until after you have inserted them to the tracks and added cement. Only then do you clip the sprue from the assembly. The other track parts are the horns (2 per link). These are going to be seriously tedious to assemble, so patience will be required. Each of the Sprue N has a section of jig which will fit together for you to assemble reasonably log runs of track per time. Sprue O Here we have the 22T jack, external pioneer tools, and jerry cans, which actually fit within the turret! It looks like some parts here aren’t for use, such as an alternative rear turret stowage bin. Sprue S This tiger is moulded with a single piece external turret, but the internal turret details such as the viewing ports, will be fastened to a two-part interior shell that fits inside the exterior once the main turret assemblies are completed. Internally, there isn’t any real detail on the walls as internal stowage, if any, was fitted to the inner rim/floor of the turret. Sprue T The only clear sprue in this kit, containing the various periscope parts etc. Clarity is excellent, and everything is beautifully sharp. Sprue U This grey styrene sprue contains more engine parts and the alternative internal turret ring and floor which should be used with this release. Photo Etch P & V Produced as PE are the engine intake cooler screens, internal hull frames, pioneer tool clasps, etc. To properly identify PE parts in the instructions, I wish RFM had inked them in a different colour to differentiate from the styrene parts. PE quality is excellent, with narrow gates to snip through to remove parts. Photo Etch Y These are the Zimmerit tools, and four different ones are provided. The tooth pitch is the same on all of them, but the scraping faces are different lengths. Those verticals will need to be cut separately, of course. Unnamed Sprue This contains only two parts, and is to be found in the bag containing the decals and wire etc. There are parts which form the front of the lower hull sides, where the transmission gear housing fits. Sprue Z Here we have the slab sides of the tank hull, turret lid (the one that will be used), alternative rear hull panel, two cupola options (both can be used), mantlet (not to be used with this release), engine access door and various external detail parts. Lower Hull A superb single-piece moulding with fine internal and external details. Internal ejector pin marks seem to be placed where the various pieces of equipment will be installed, and if you really want to remove them, they are only superficial. Welding seam reproductions are exquisite, and this is a triumph of slide-moulding technology with beautiful, sharp details on all surfaces. One thing I do note is that the external port detail on the underside rear of the hull, don’t match the port details on the inside. This shouldn’t matter though as the Maybach engine will completely obscure the erroneous details. Tracks (x192) These are supplied in a clear plastic box and are moulded in dark grey colour plastic and are attached in strips of 12, with two small connectors between each one. Moulding really is very nice, but you will need to fit the horns yourself, plus those pins, creating 5 parts per track, and with 96 links per side, that equates to 475 parts for the tracks alone! Patience, Padawan! Cable A single length of braided copper wire is included with this release, listed at 45cm in length. Decals Just a single sheet here for all three schemes. Printed by Cartograf, these are beautifully thin, contain minimal carrier film, and are in perfect register. Colours are nice and solid, and the finish is matt. The three schemes in this release are: No.217, February 1944, Eastern Front No.342, Early Spring of 1944, Belgium/Mons No.321, June 1944, Northern France Instructions I’m a real fan of RFM’s instructions format. This manual is A4 in size, has 28-pages and printed in full colour. The first pages provide a parts map, but no shading for unused parts. Unsually, the next pages contain the three schemes. These are usually found at the rear of a manual. The profiles are said to be provided by Mig’s AMMO, as are the paint references. If you use anything other than that brand, you will need to source your own paint reference codes. Next, various internal assemblies are shown in colour for your painting reference, and then a Zimmerit map which shows the various faces which need to have putty added. I do admit that I’d like to have seen a moulded Zimmerit option, but hey ho! The rest of the manual has the Tiger broken down into 37 constructional sequences, but don’t let that fool you as most sequences are broken down further. Colour again features throughout, not only with more colour subassembly illustrations, but also shaded parts which define parts attachment. The last pages show more colour illustrations of the interior of the Tiger. Conclusion I purchased this kit whilst on a weekender in York, in between the various fine real ales and green tea Lattes, but it wasn’t on a whim. It was only a few weeks earlier that I’d reviewed the brand new Panther Ausf.G, sent to me as a sample from Rye Field Model, and the detail hooked me instantly. A decision was made to pick up the slightly older kit if I ever came across it, and so I did. This one cost me £59.99 at Monk Bar Models, and it was the best money I spent that weekend (next to the real ale!). I’m certainly not disappointed. The superbly detailed full interior, intricate external details and superb engineering. I’m still a little daunted by the prospect of adding Zimmerit myself, having never done this before, but I suppose I need to start learning some armour techniques if I’m to diversify a little. I also find the tracks a little daunting too, with the 5 parts required per link, including the pins, but RMF’s trick of adding them whilst on the sprue and then snipping the sprue from them, is genius. In all, a seriously nice package that I’ll need to restrain myself from starting, until at least the Panther is built. Very highly recommended Review kit courtesy of my wallet and the fine folks at Monk Bar Model Shop, York. Tell them you saw the review on Large Scale Modeller!
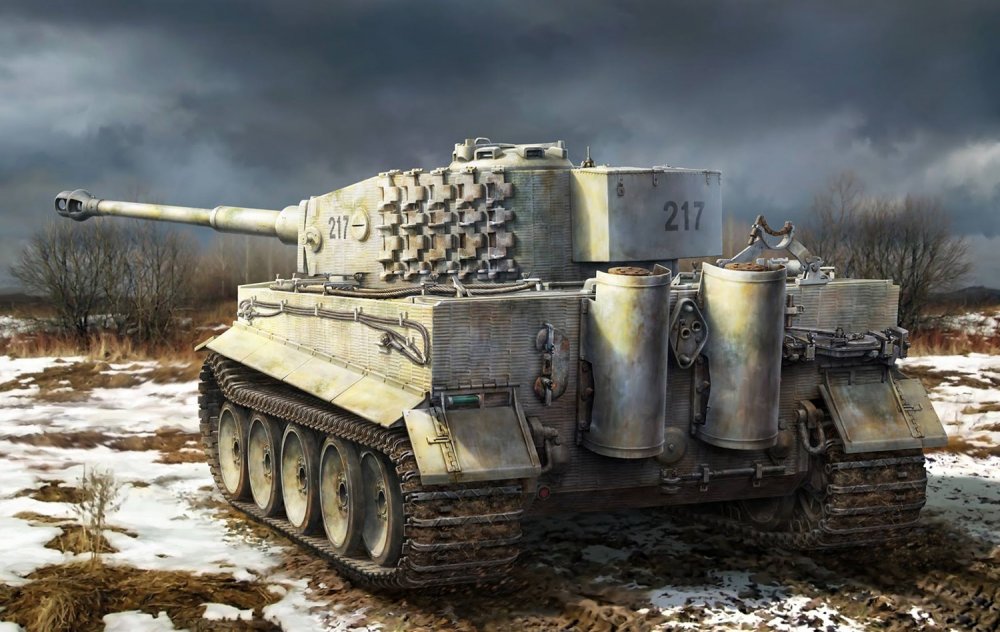
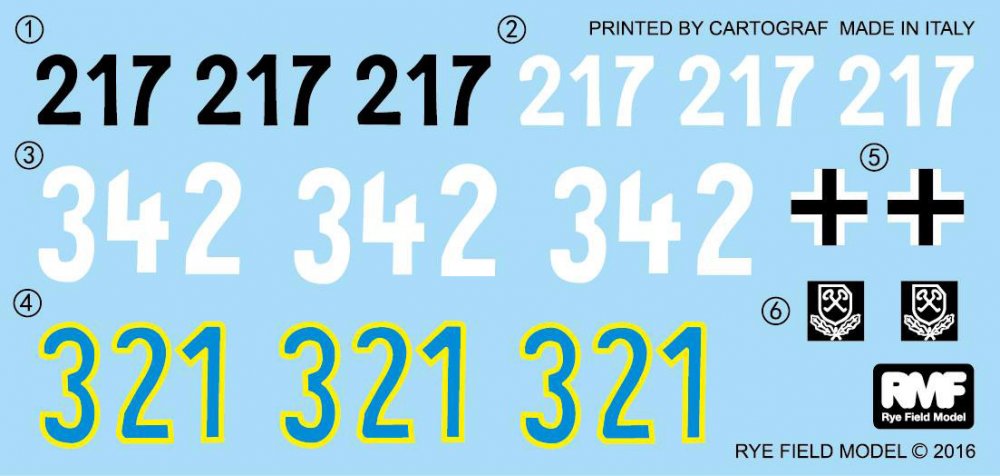

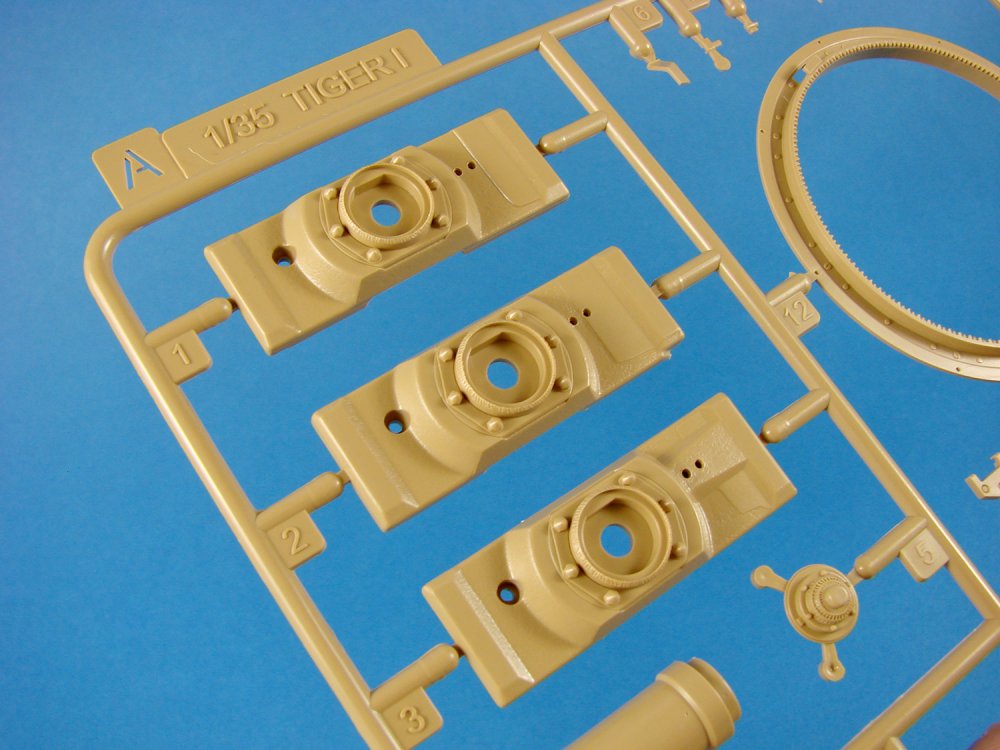

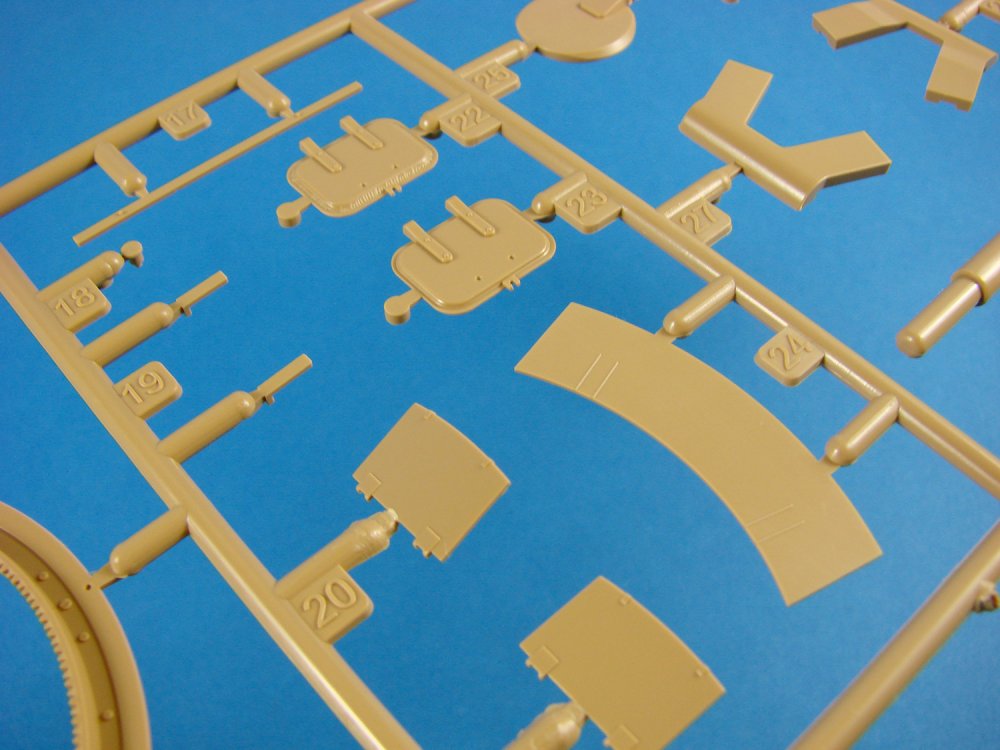

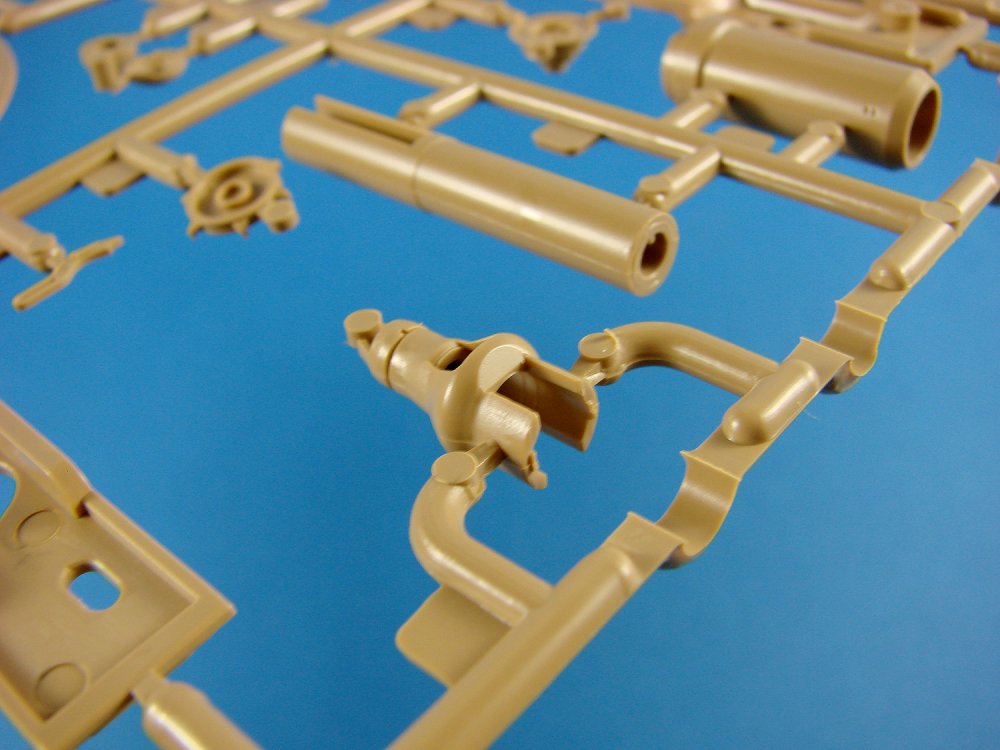


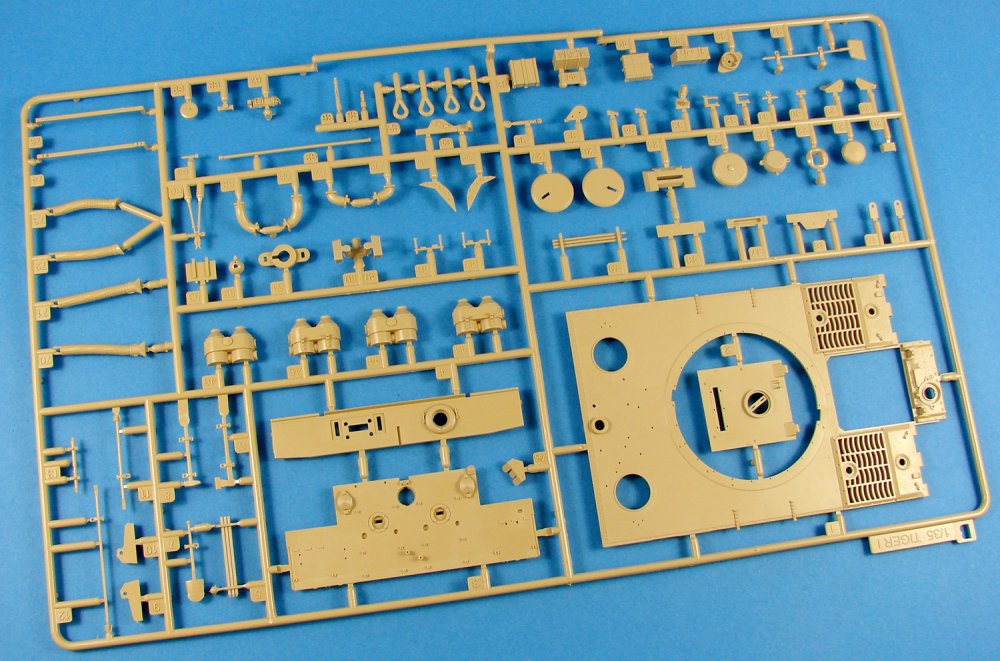
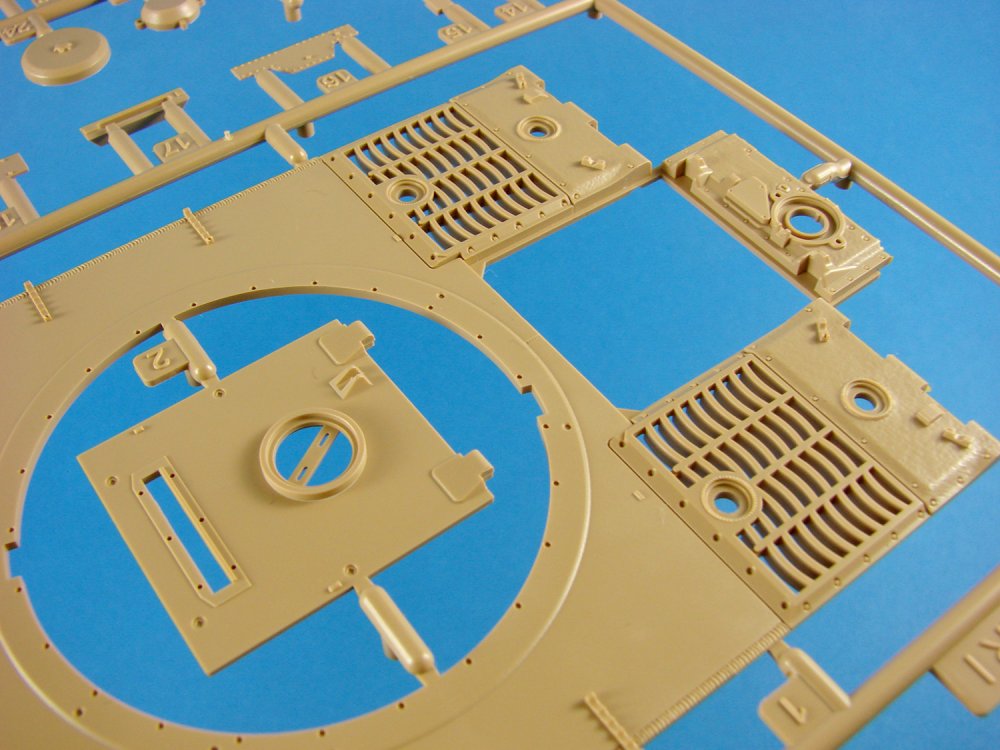
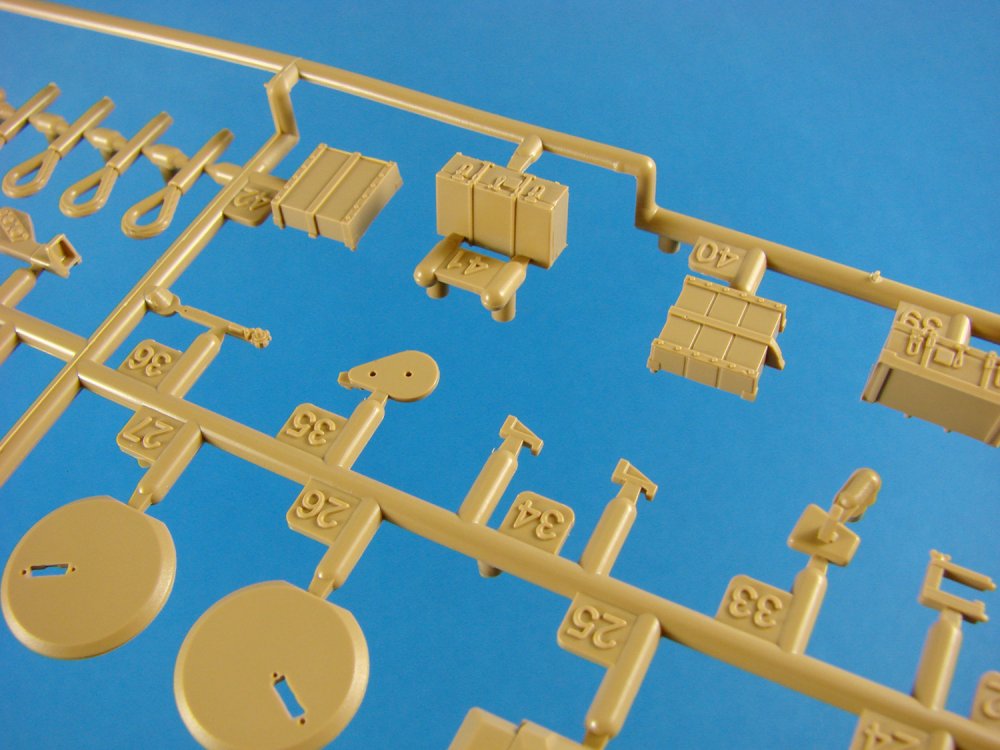

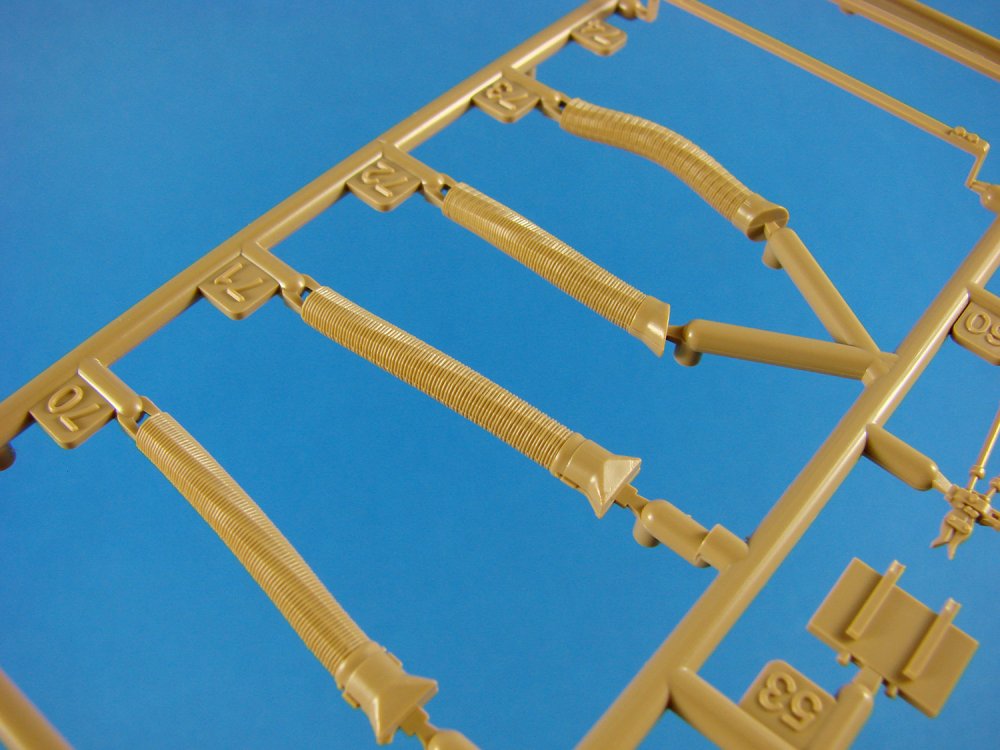
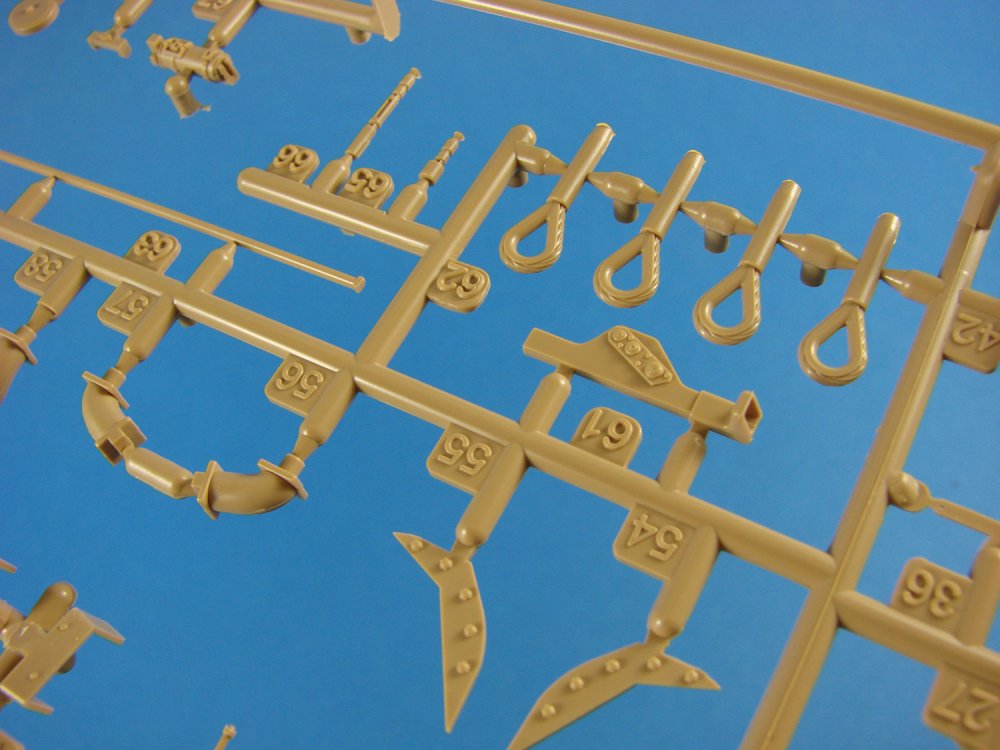
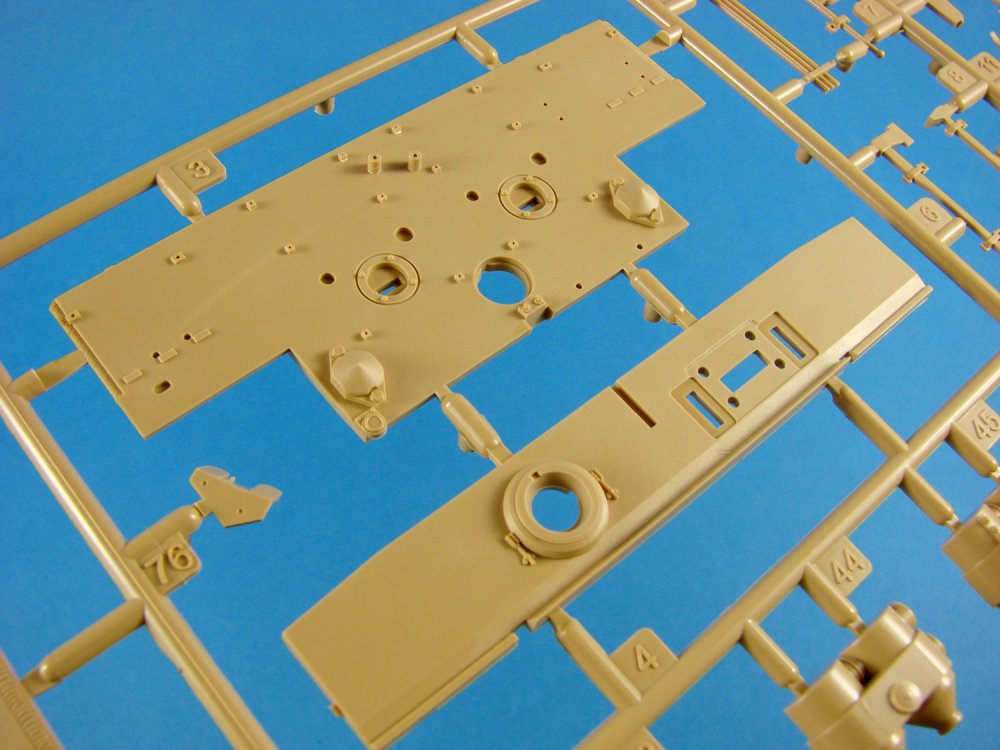
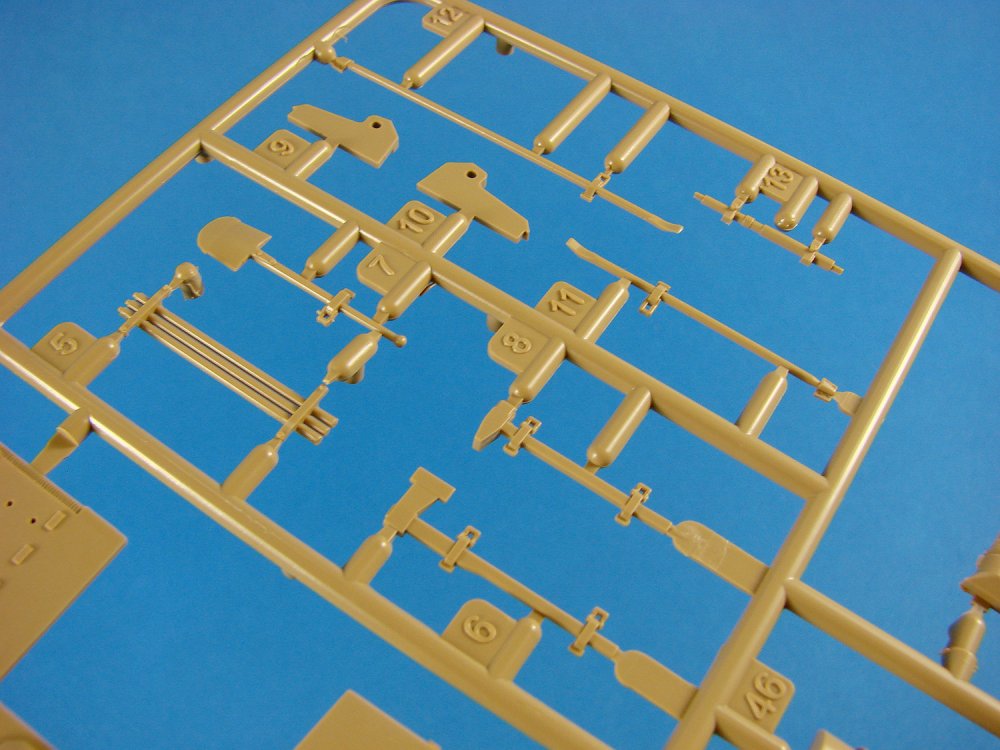
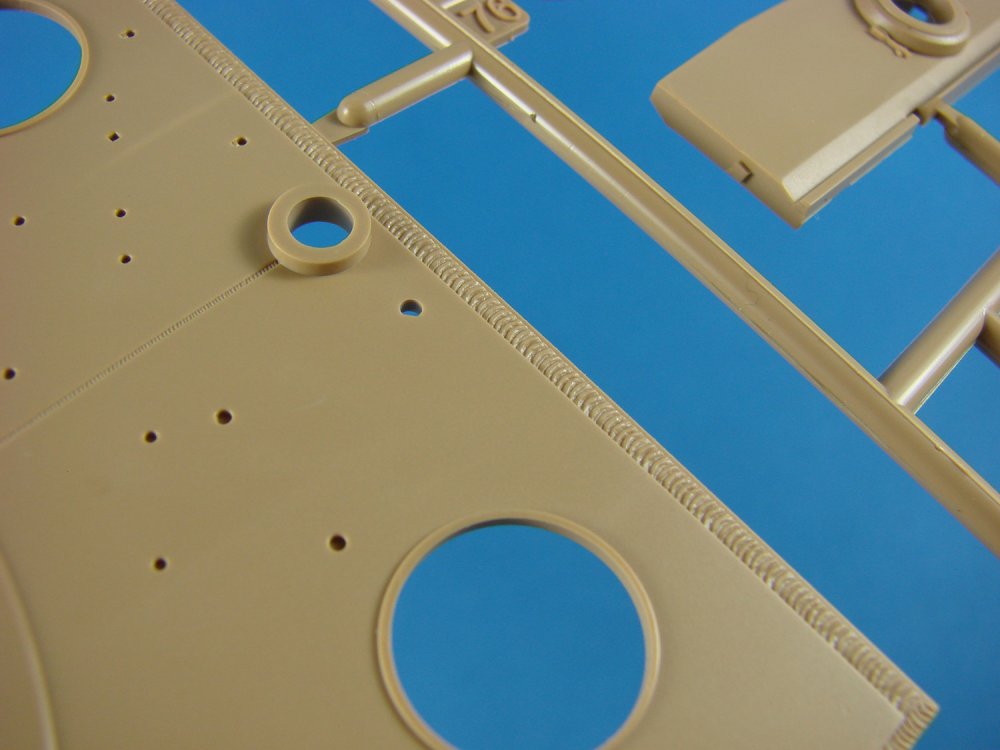
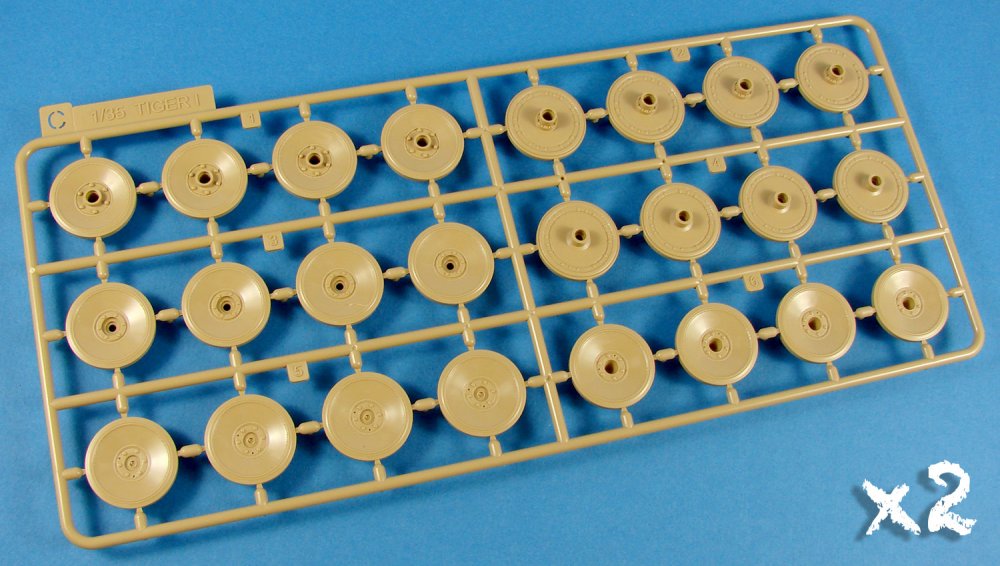
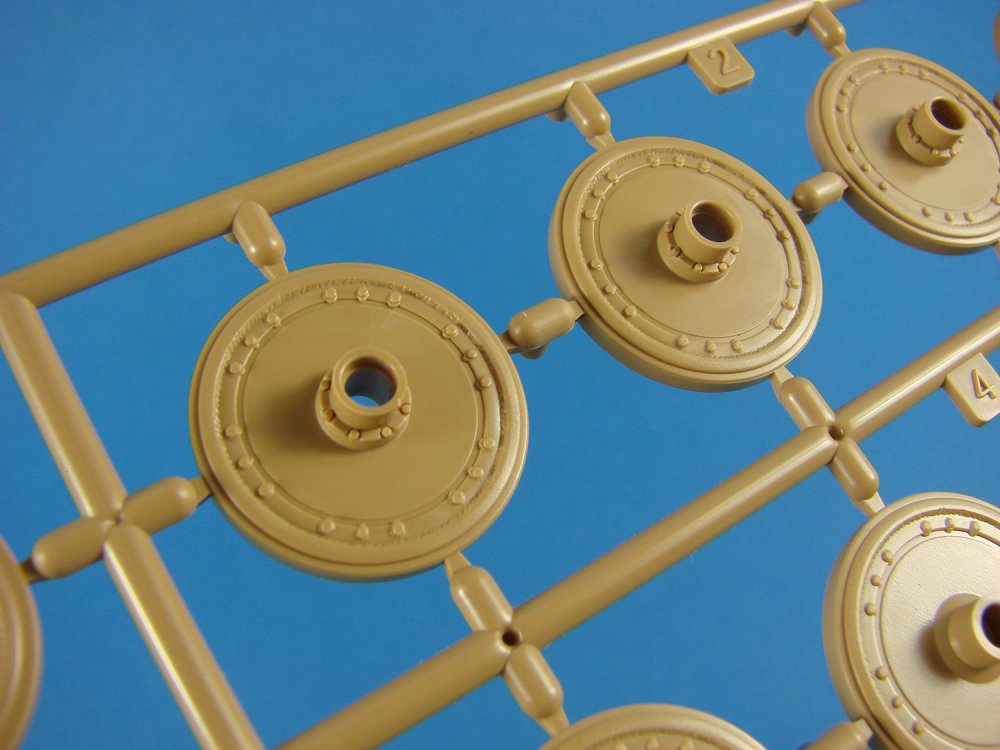


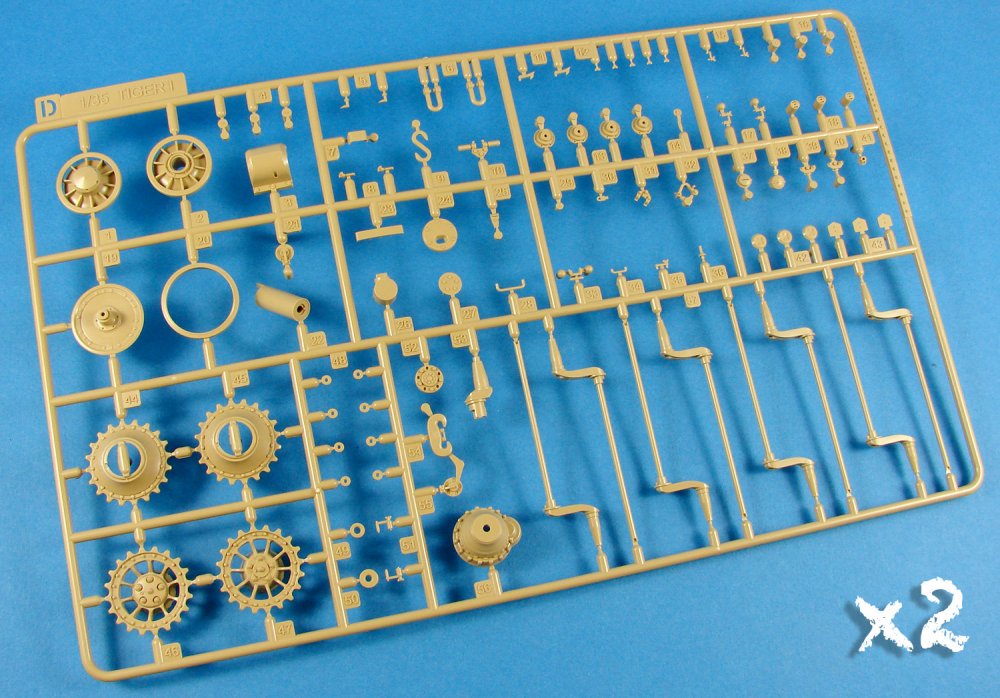
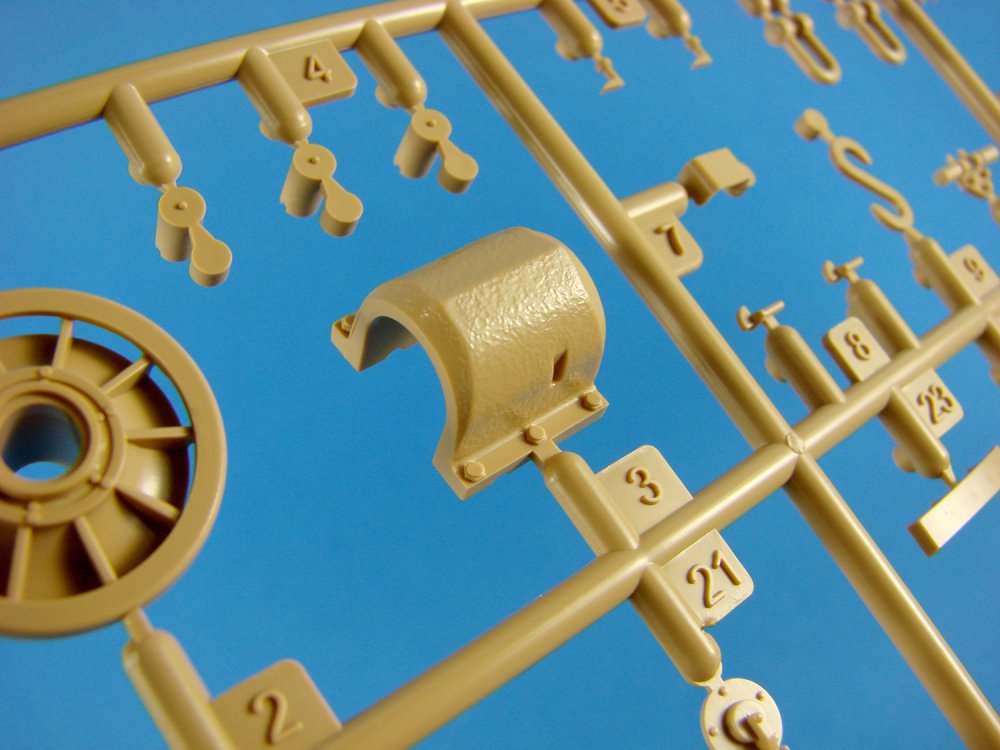

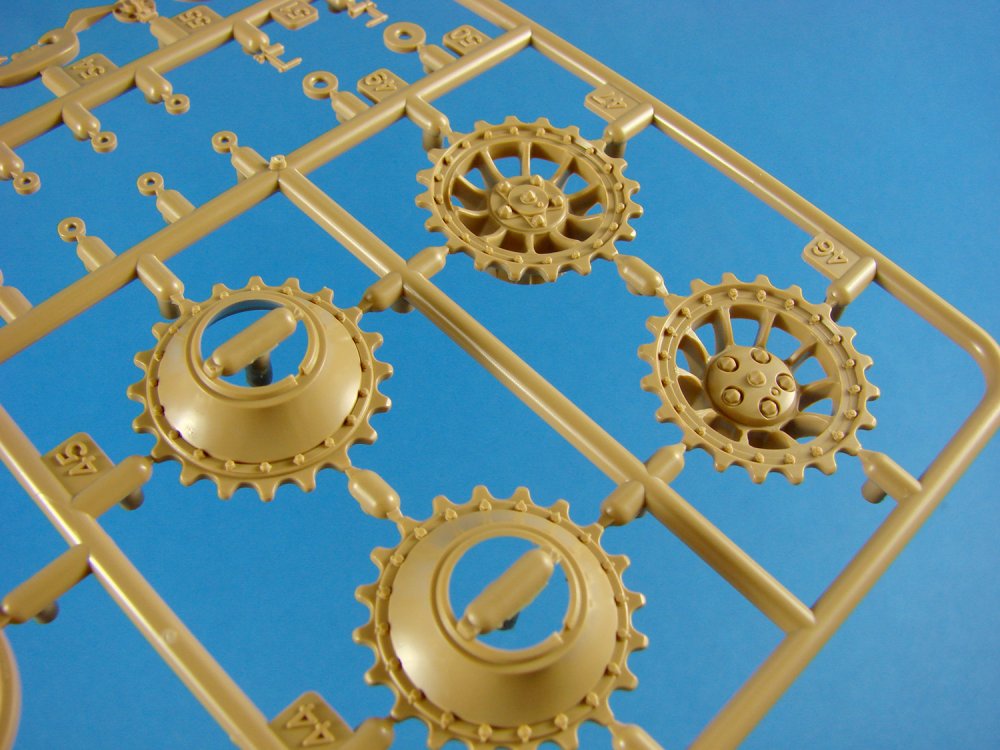
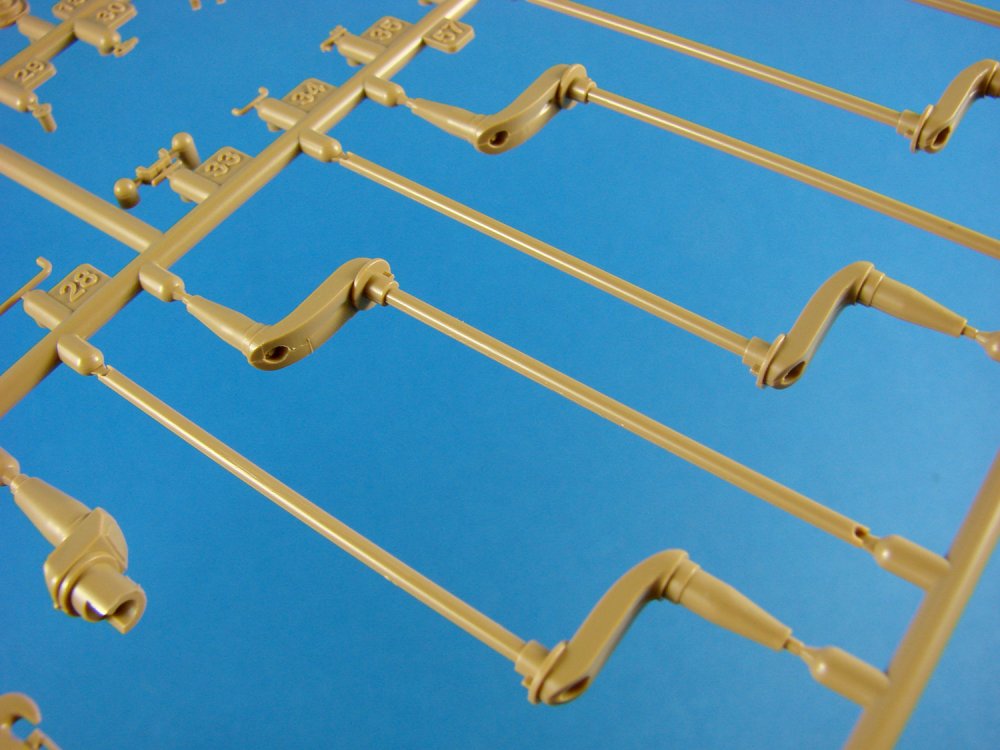
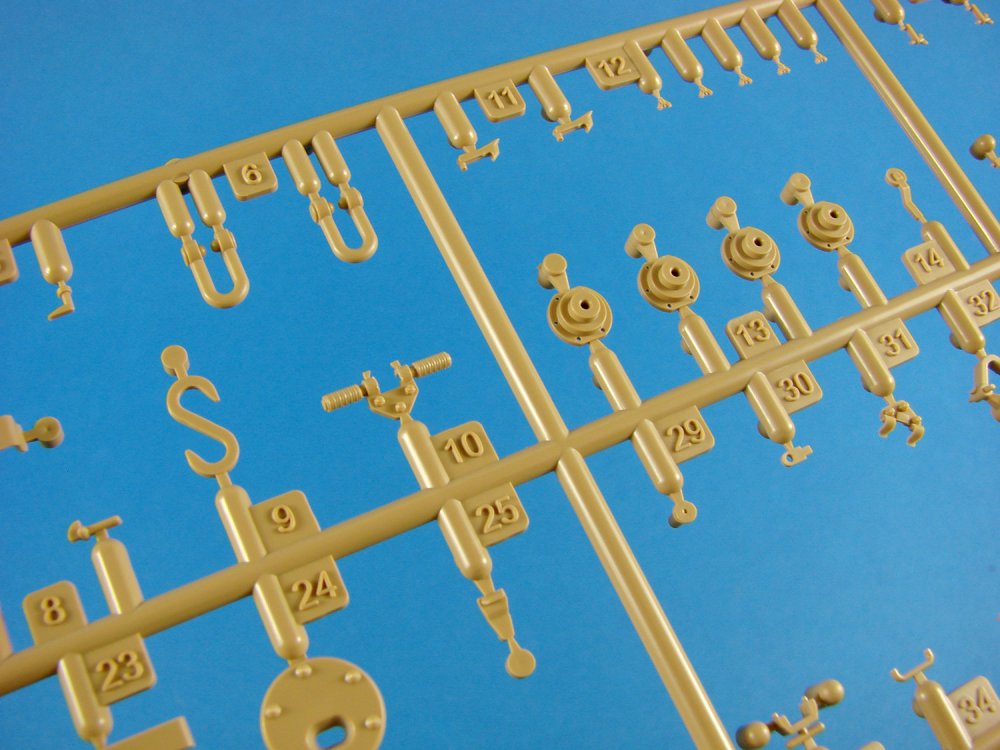
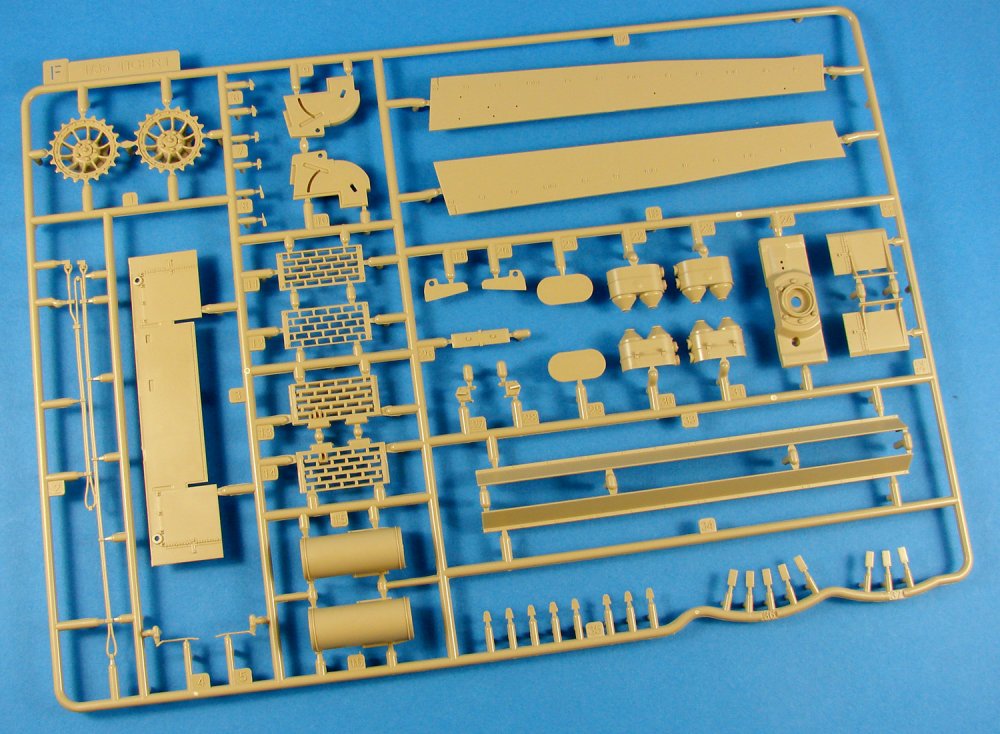
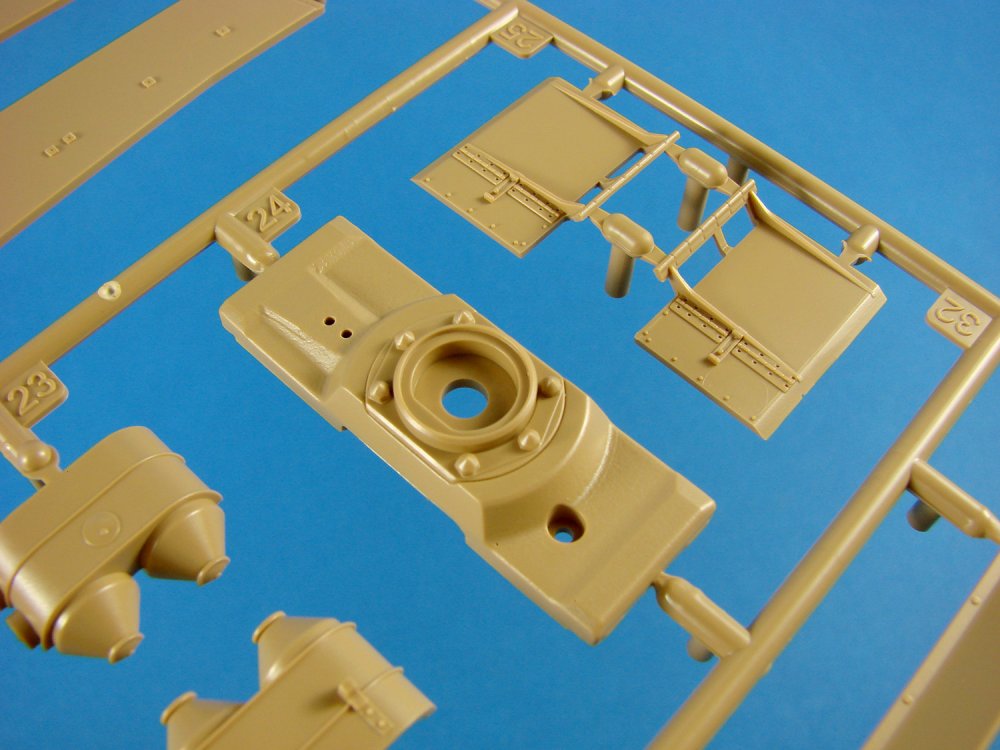

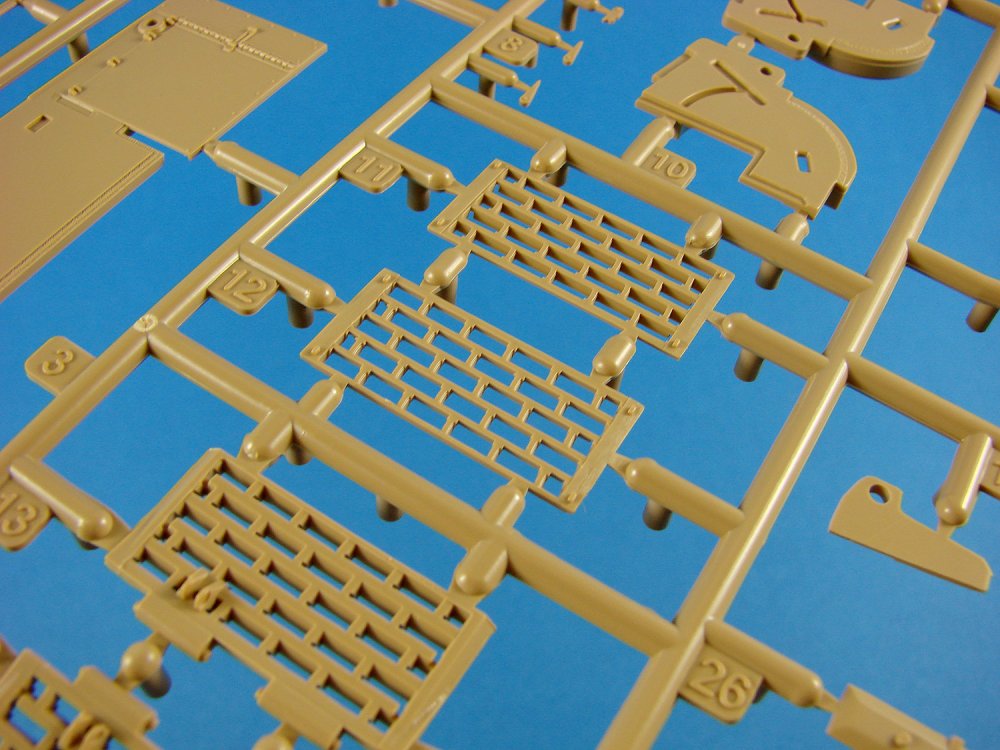
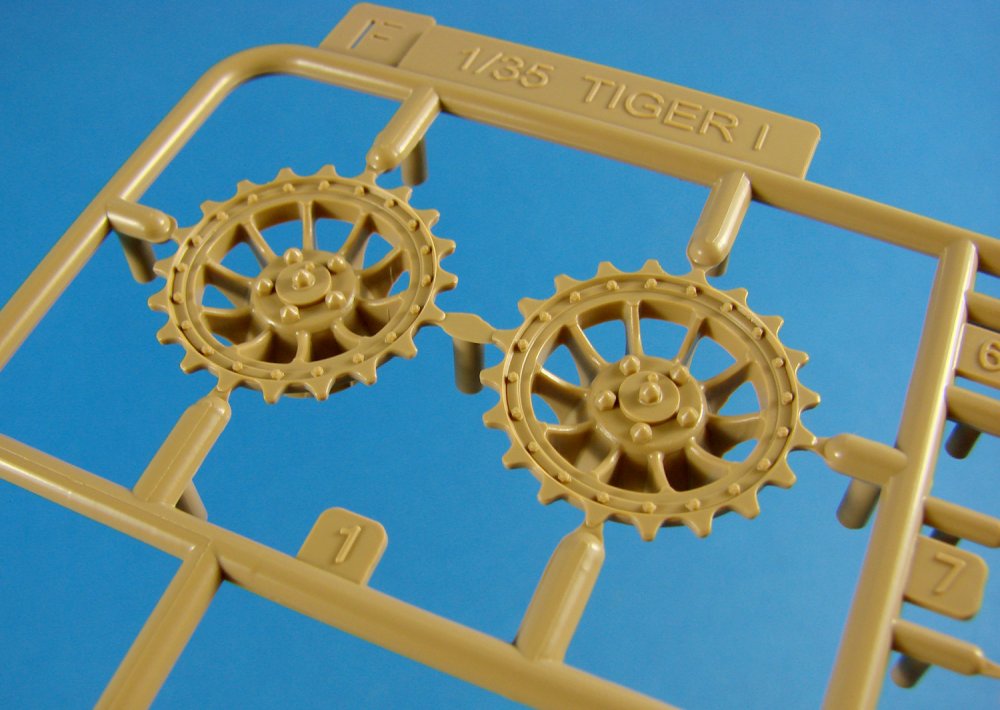
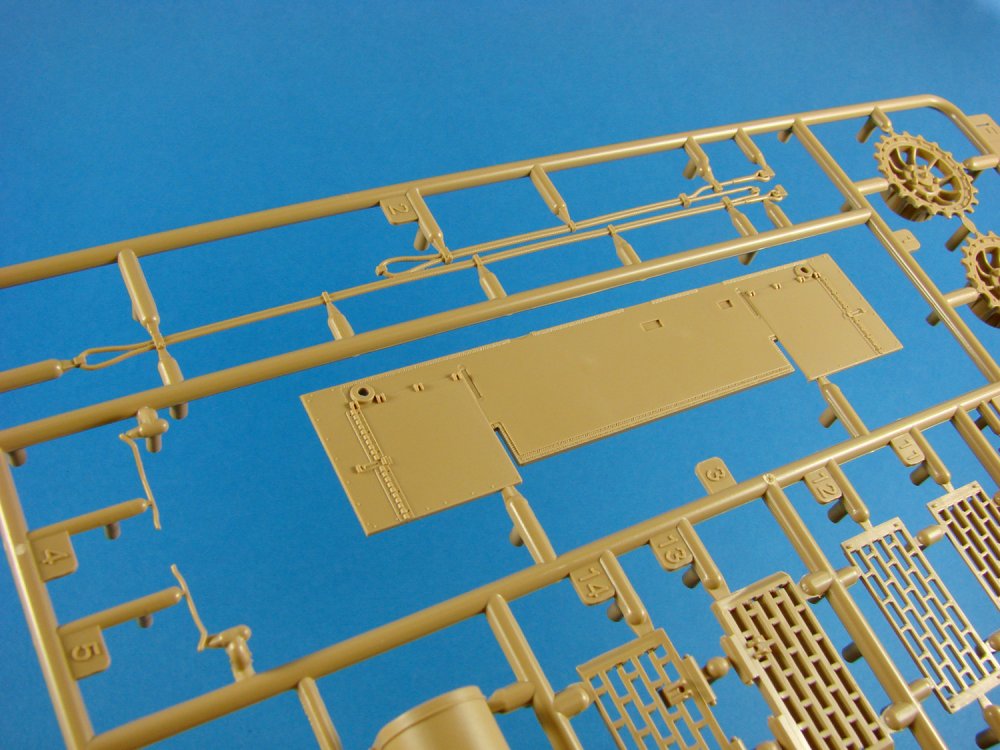
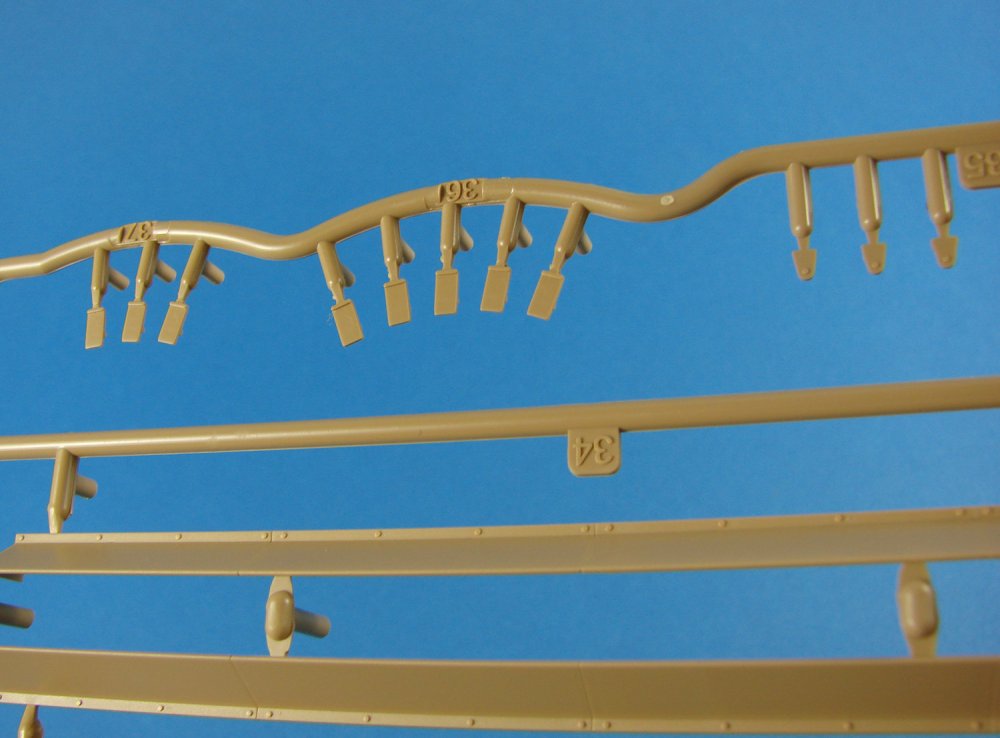
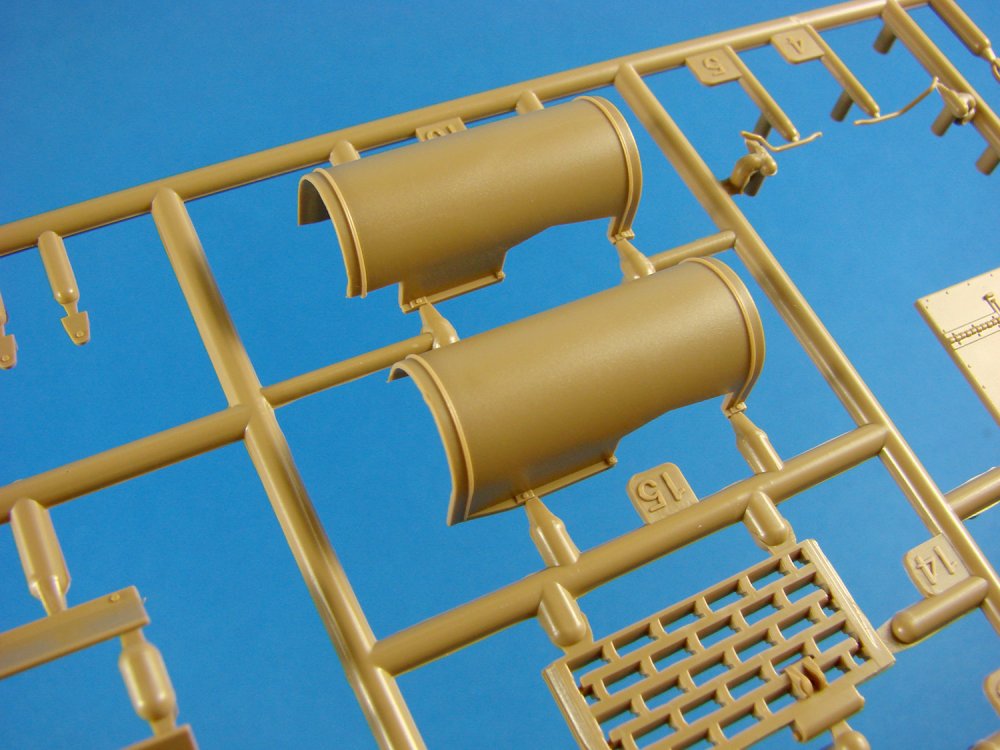
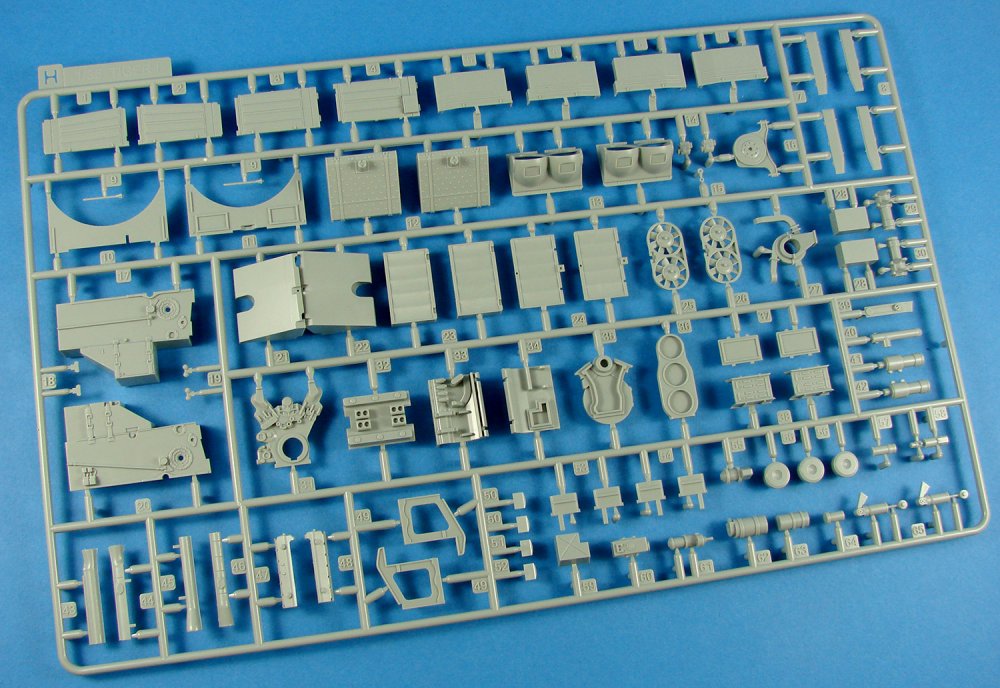
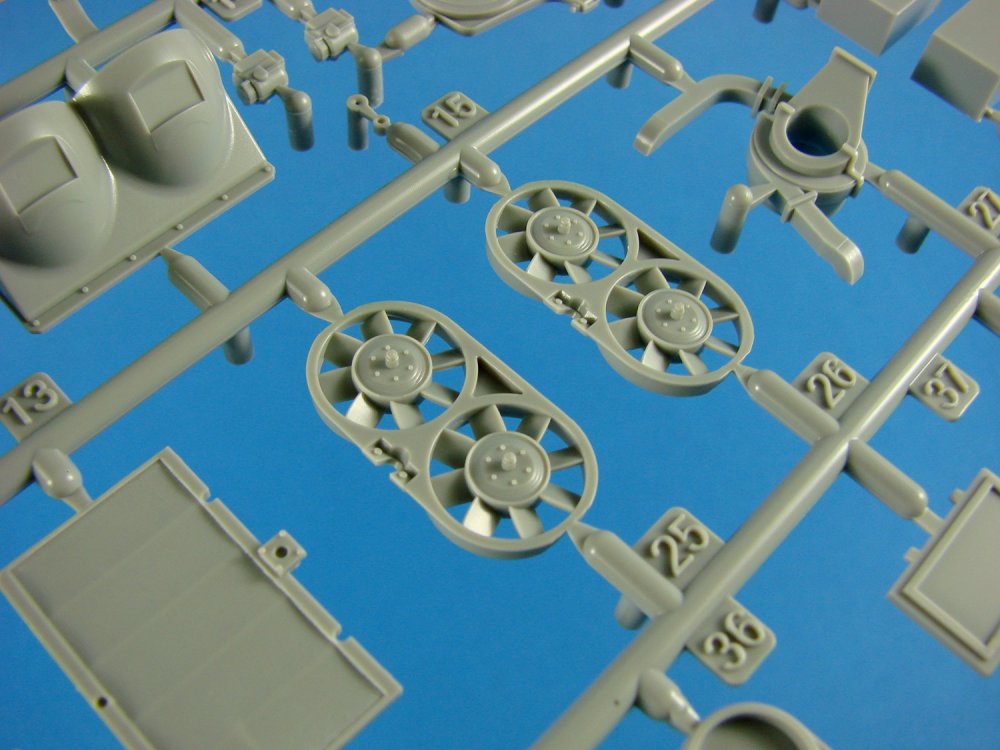
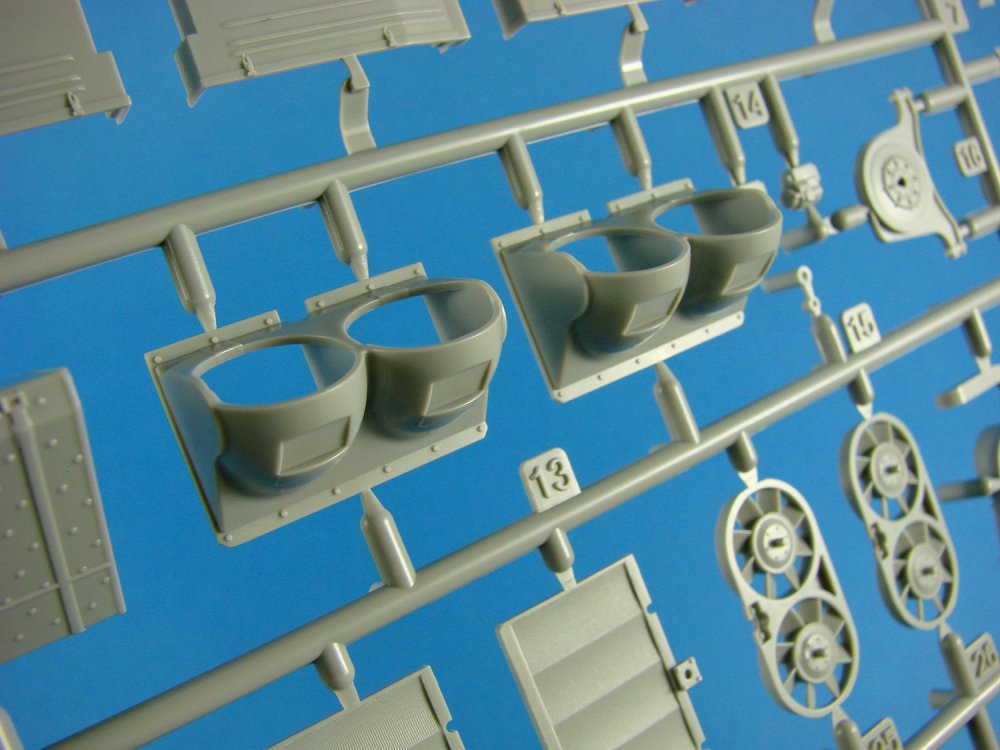
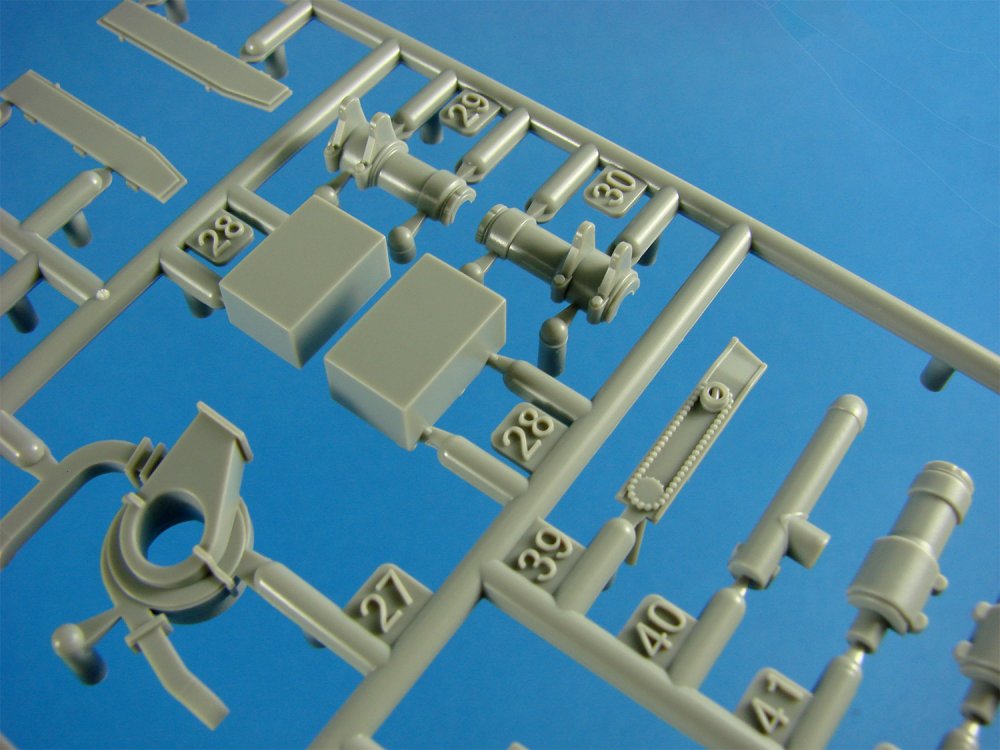
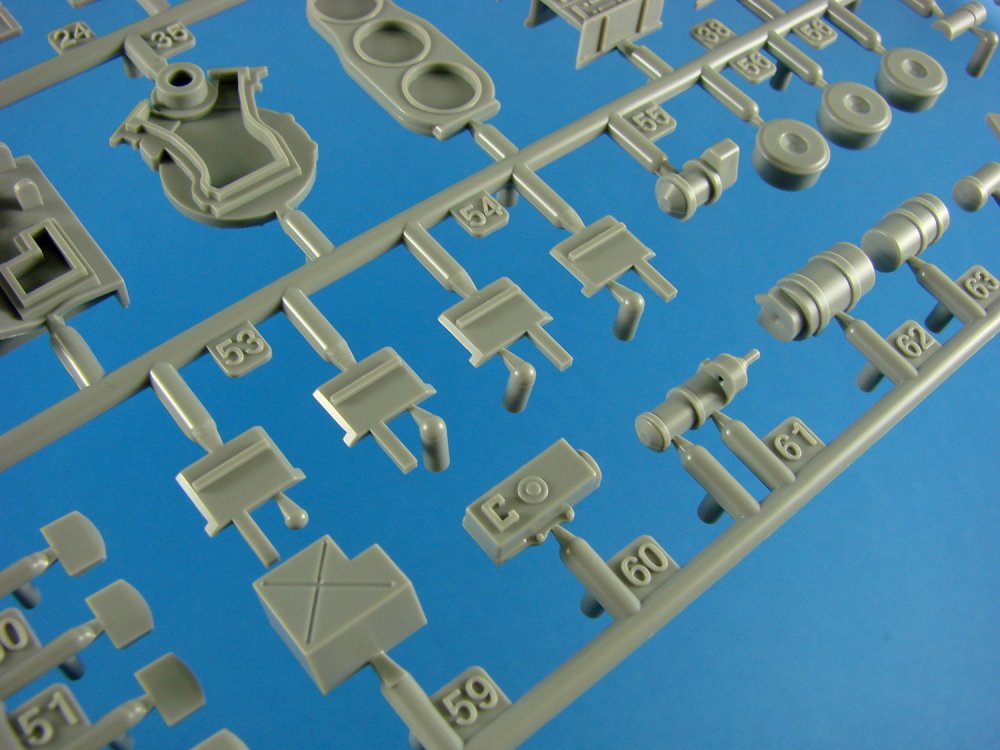
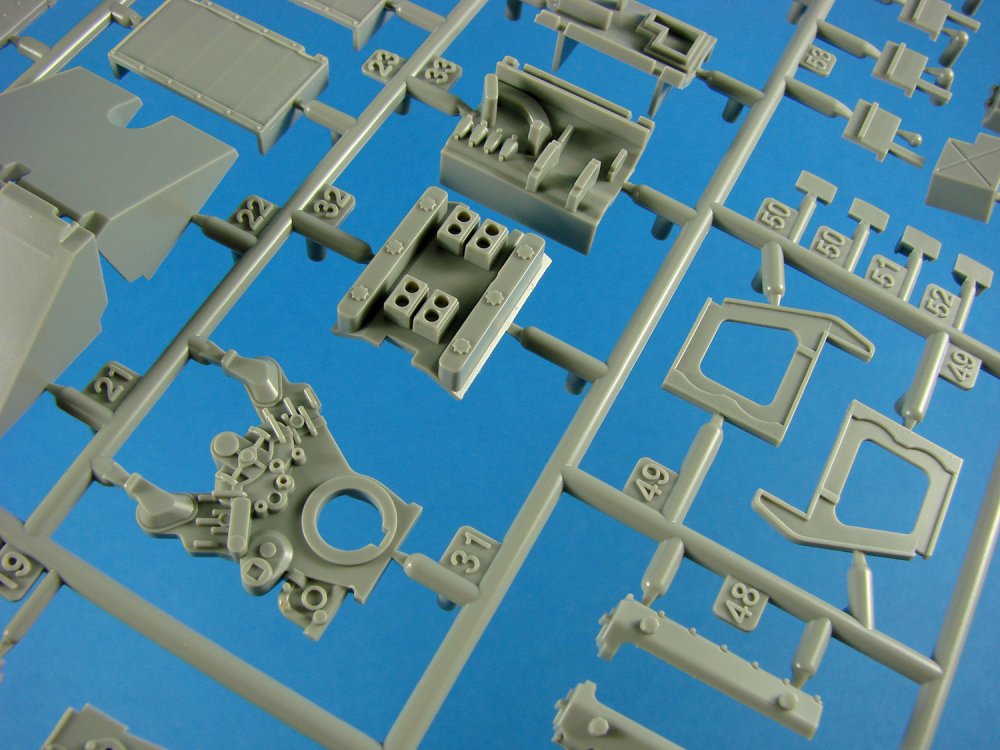
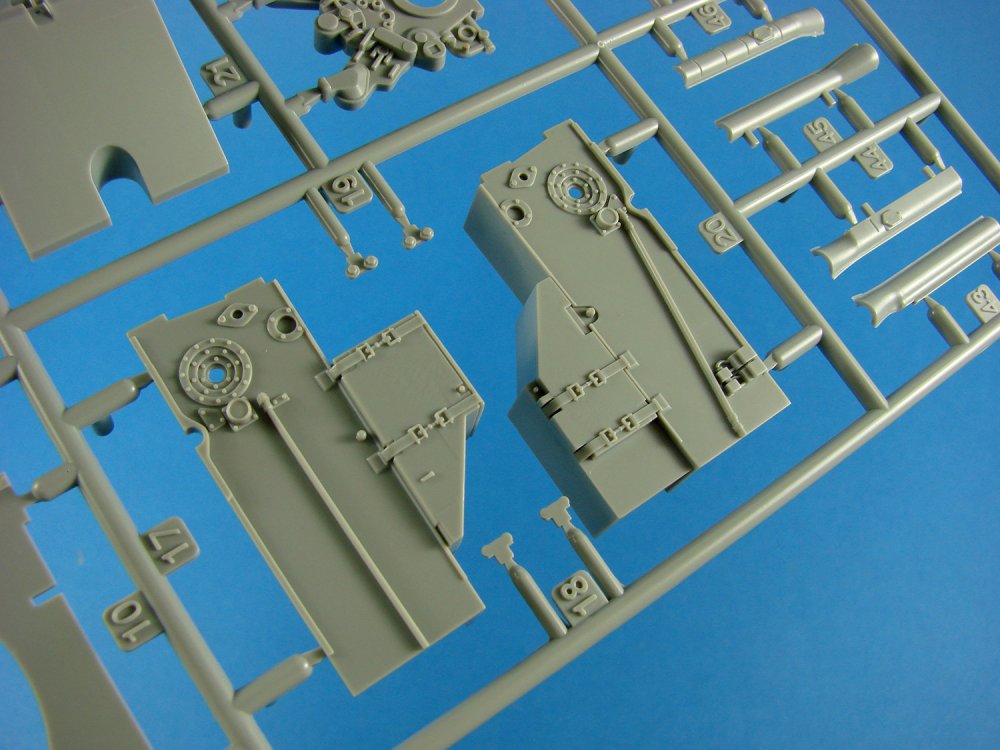

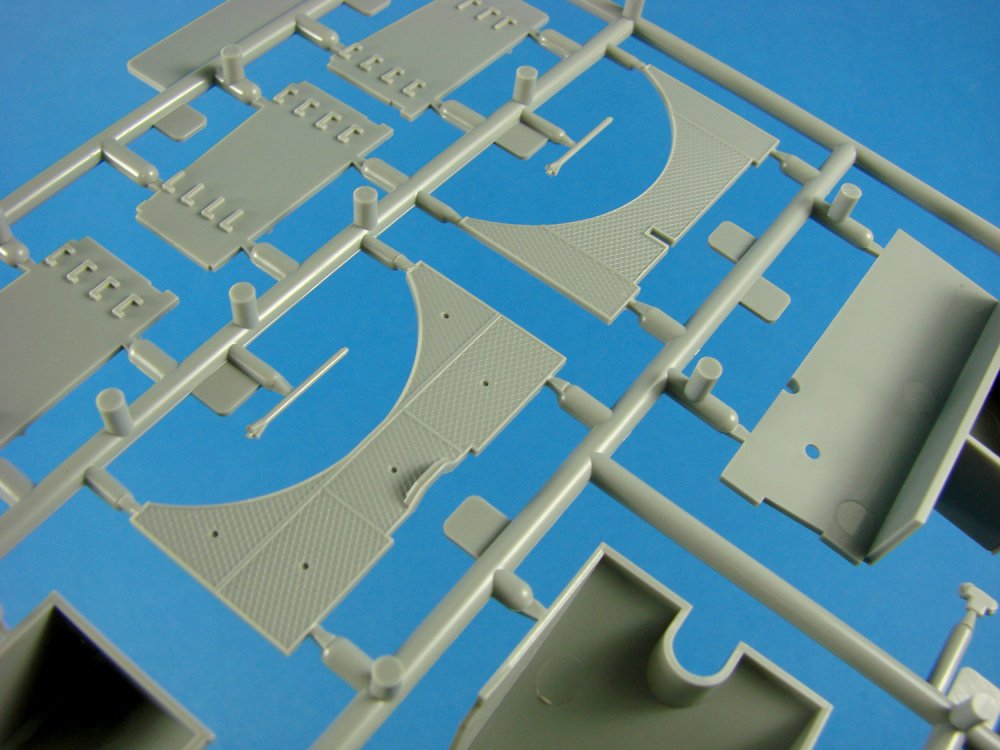
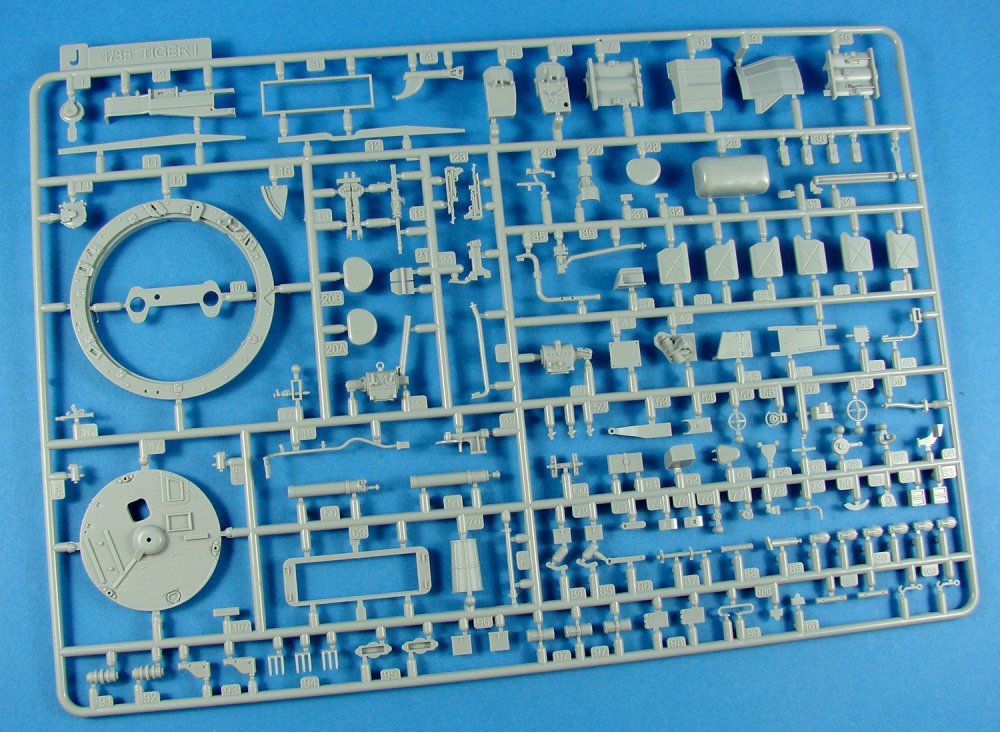

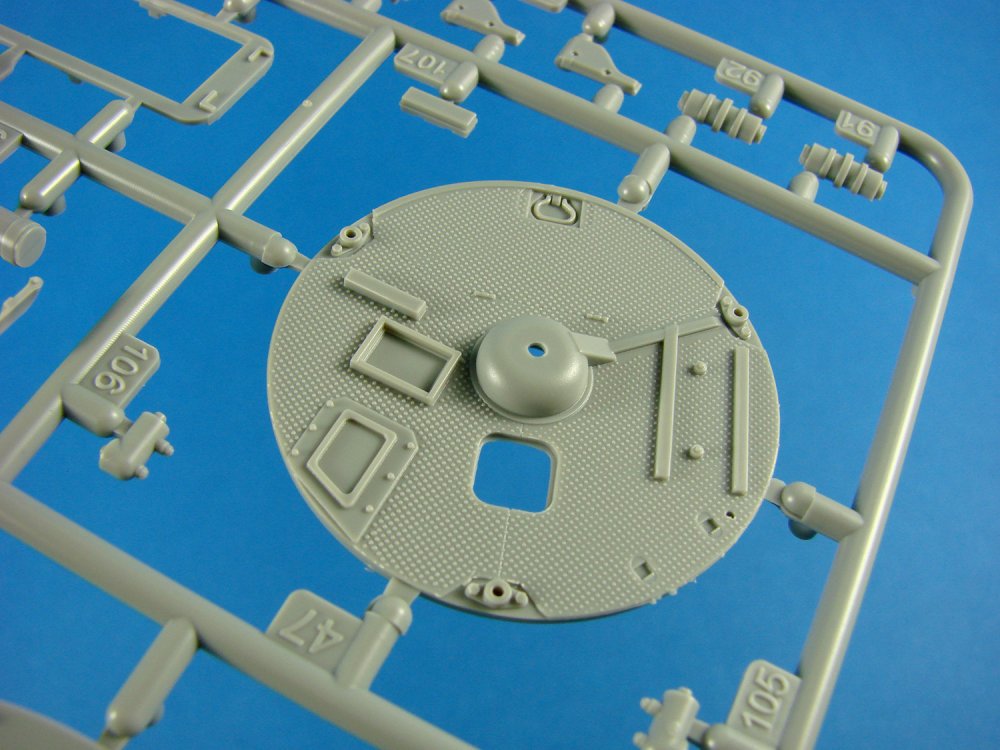

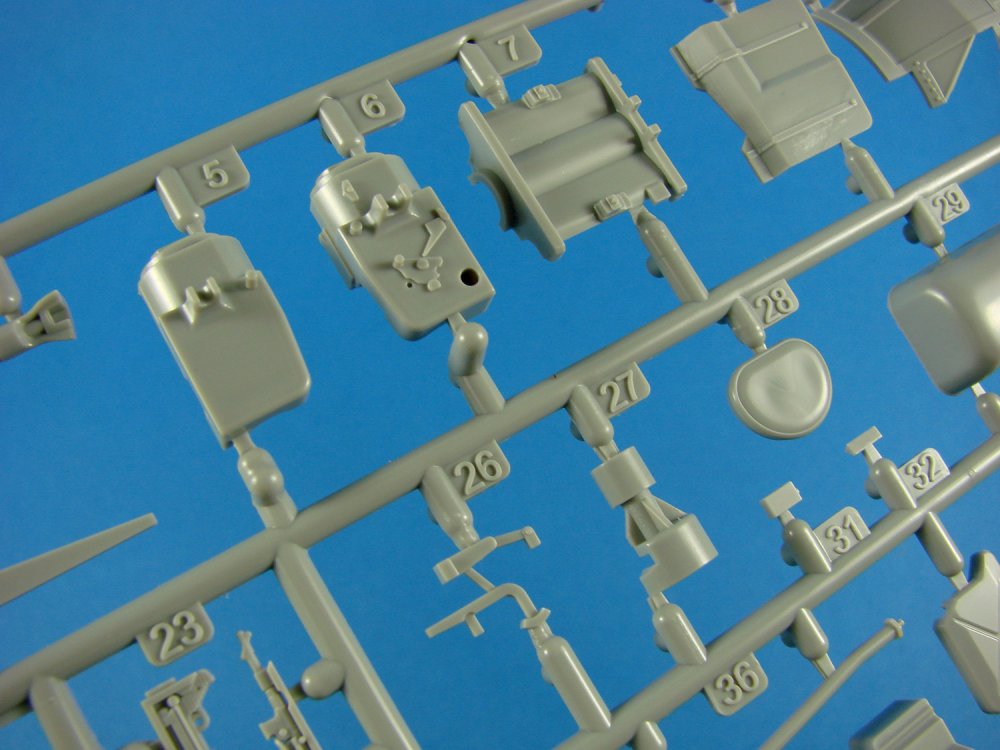

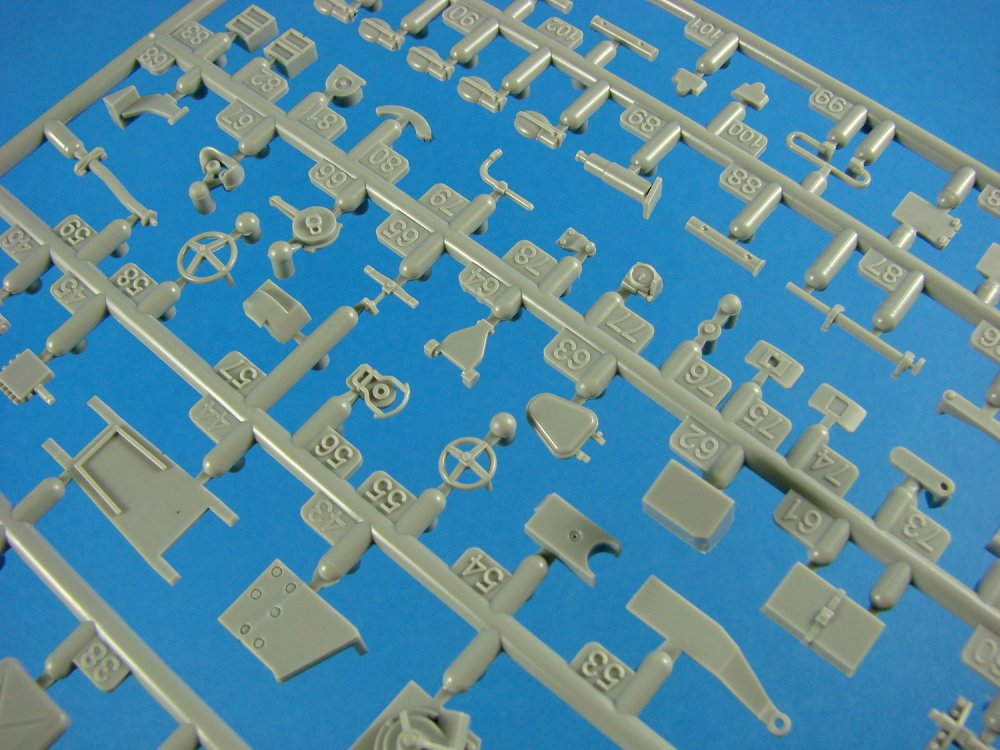
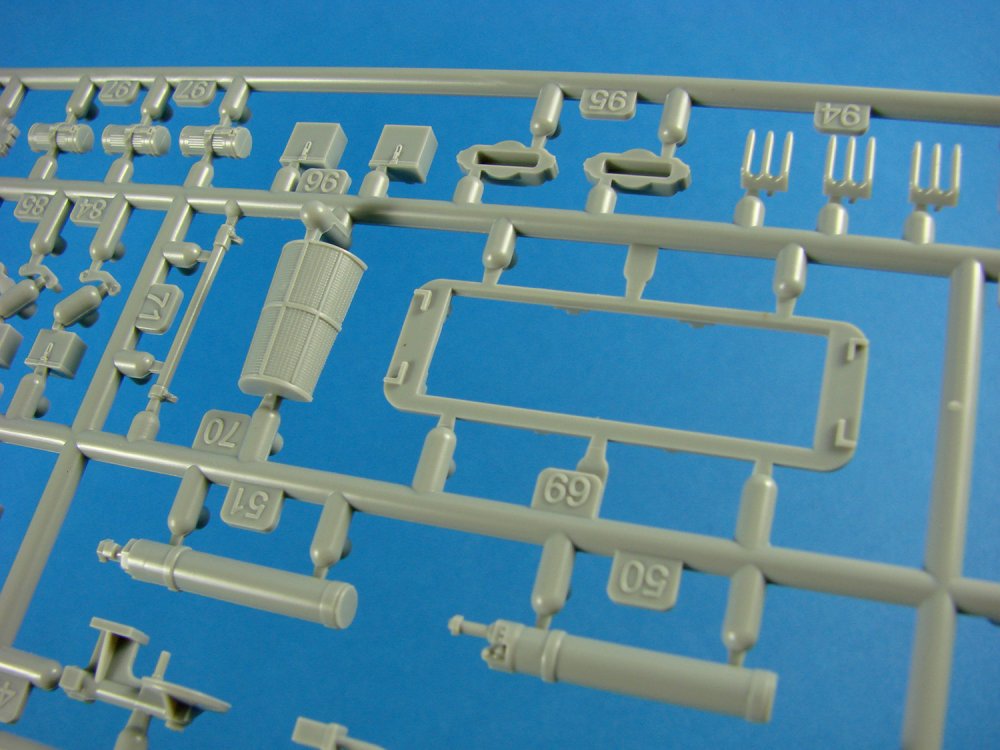

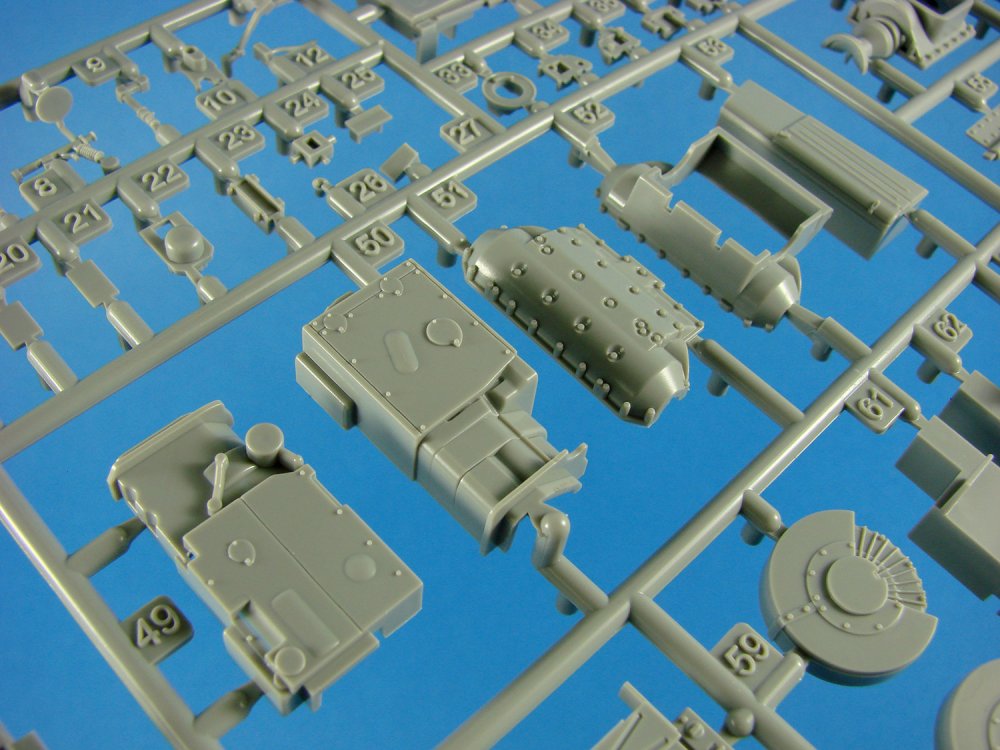
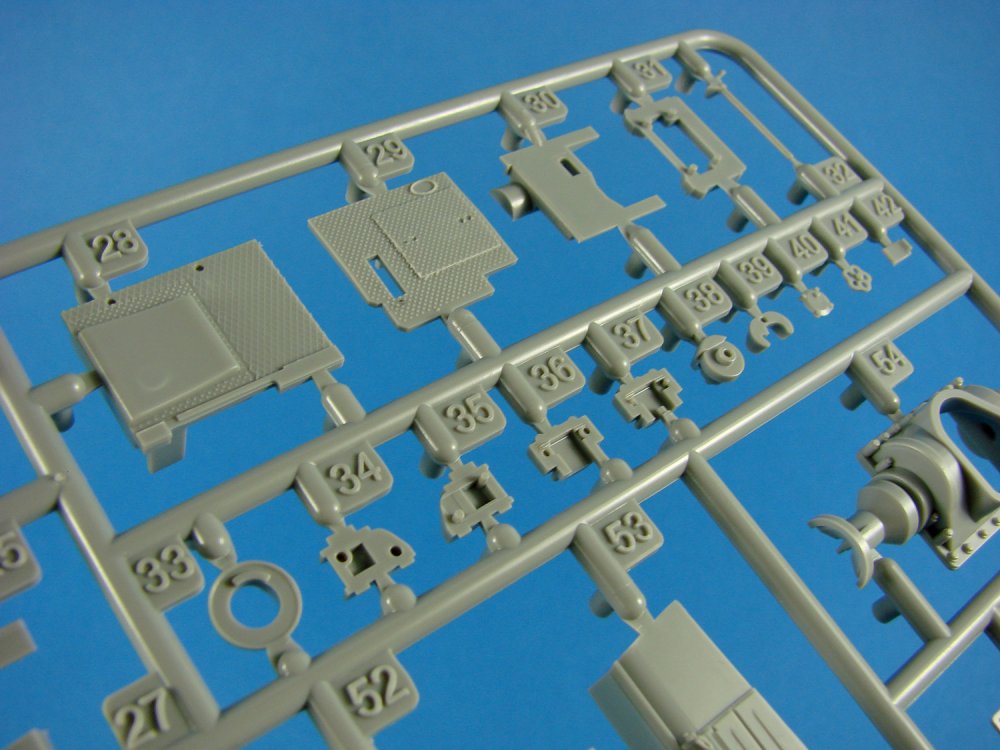
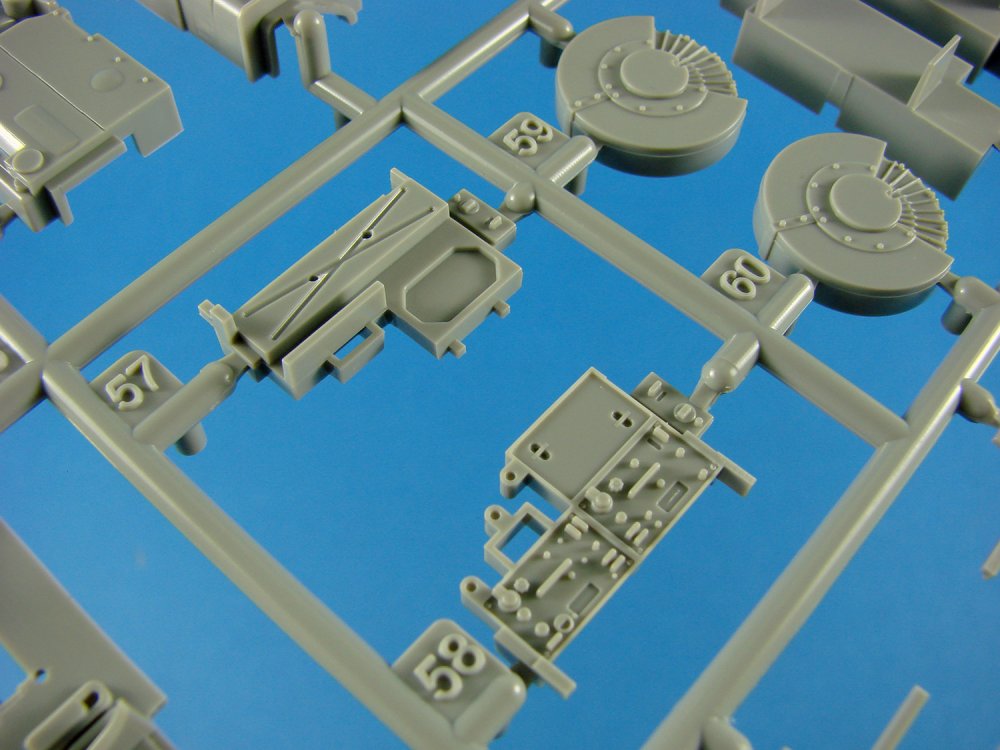
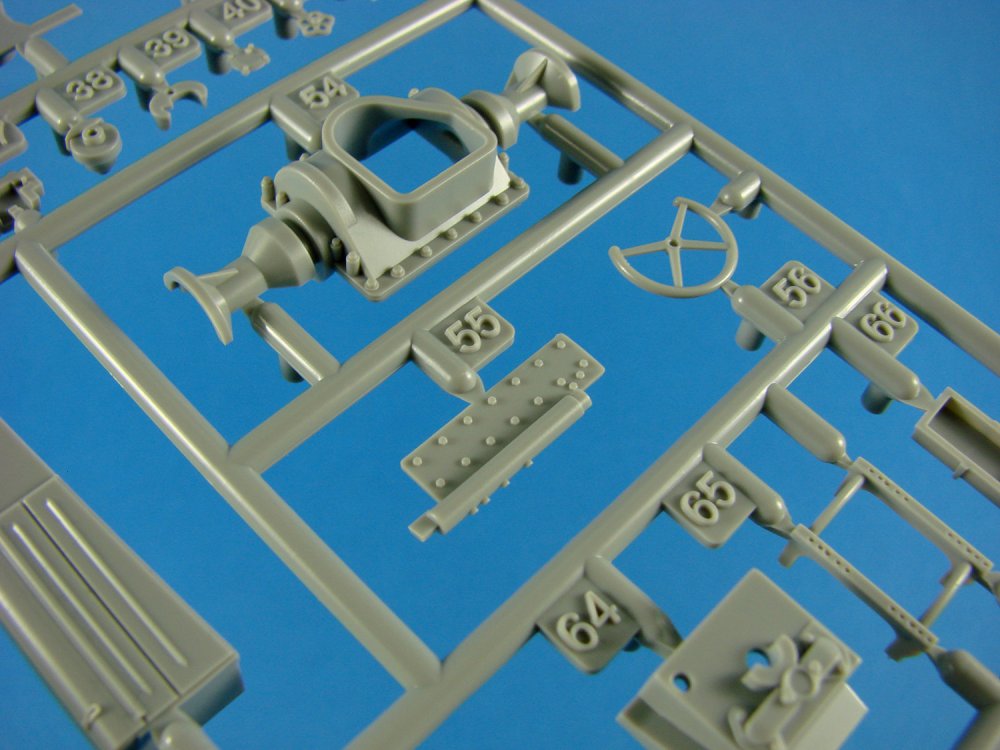

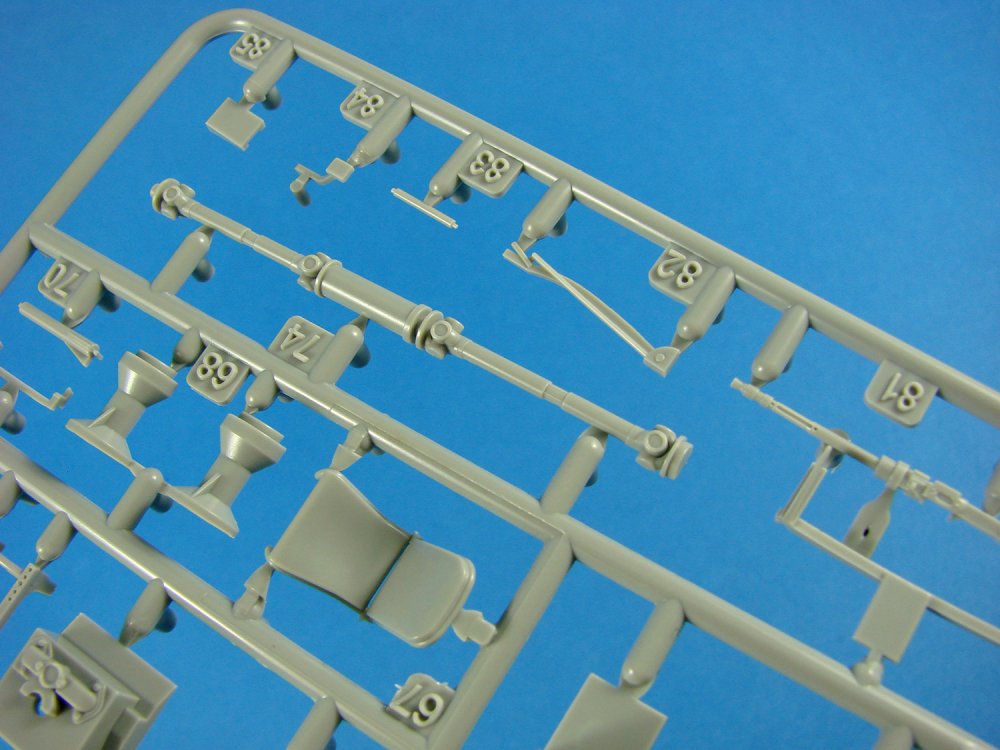
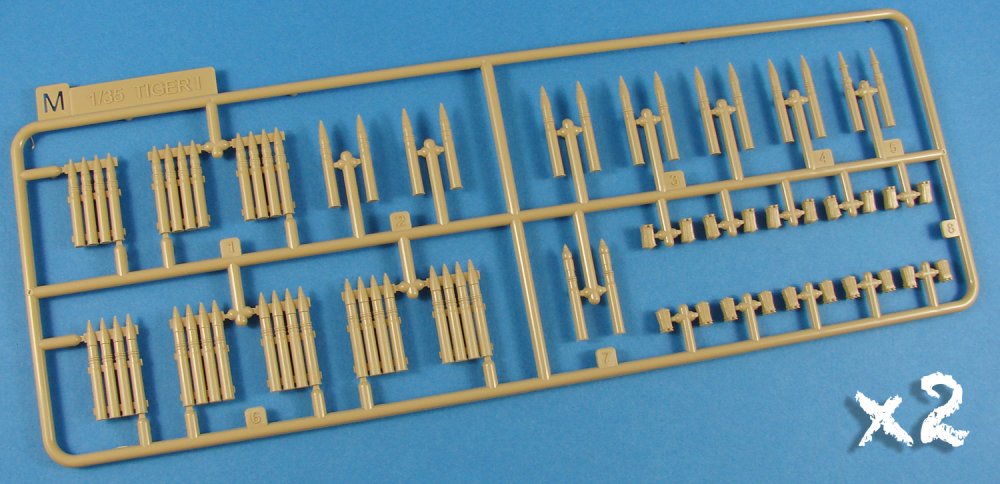
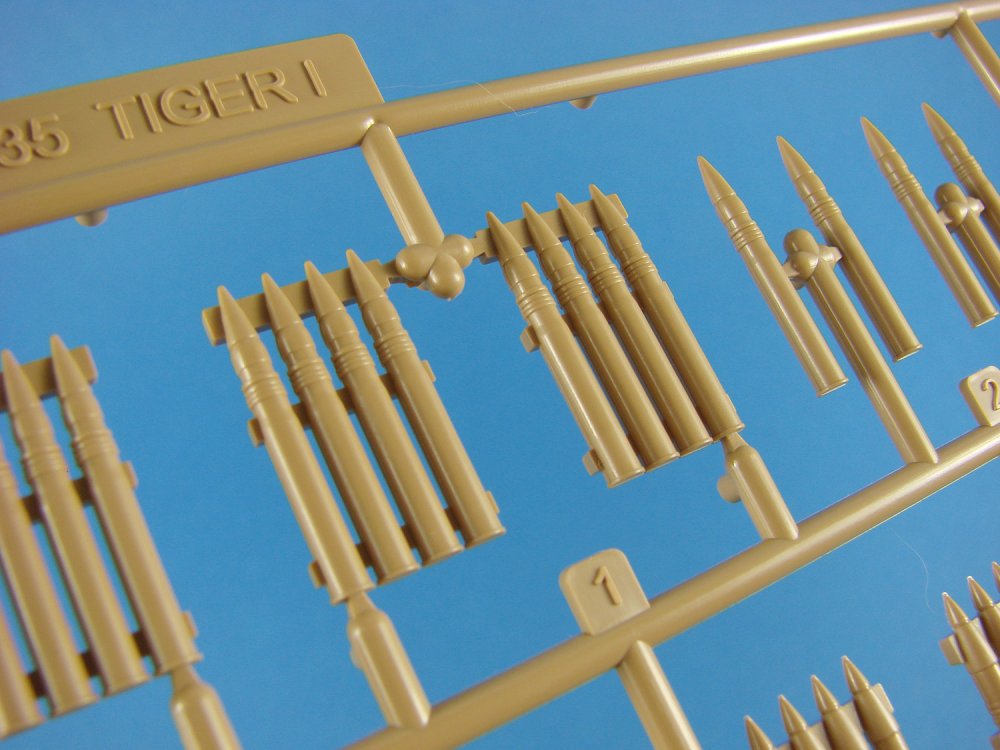
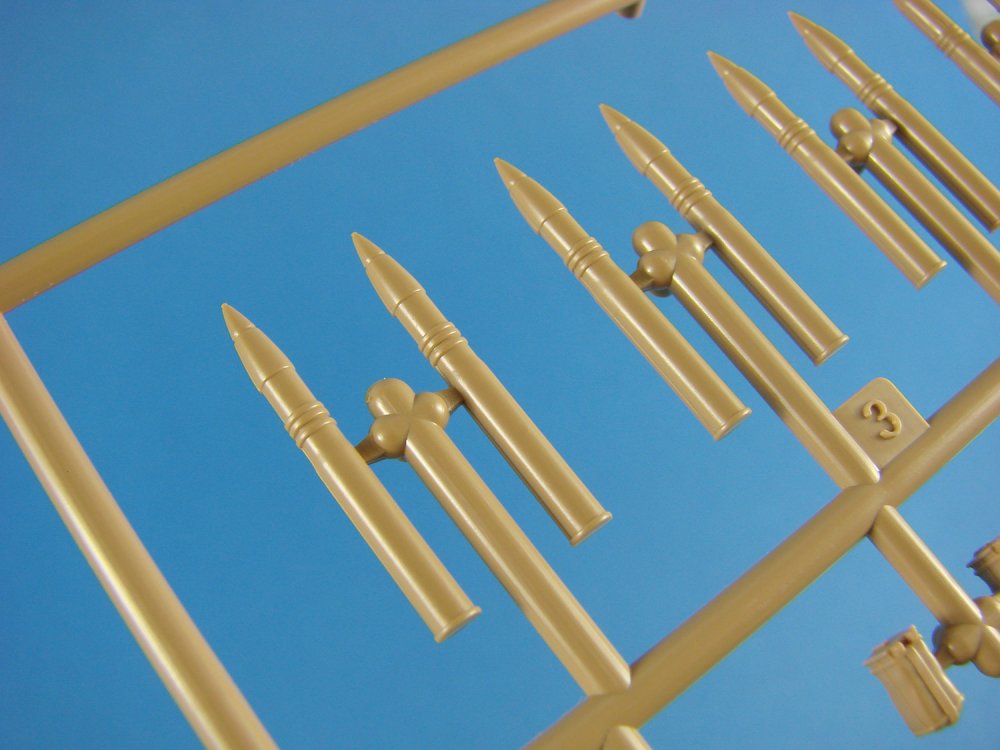

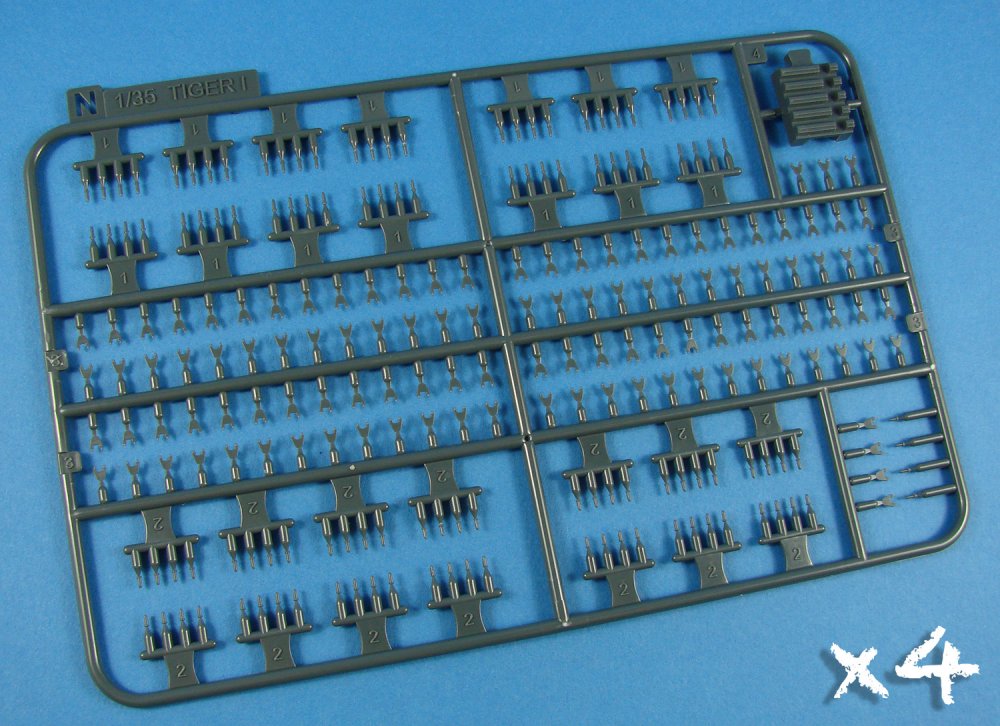
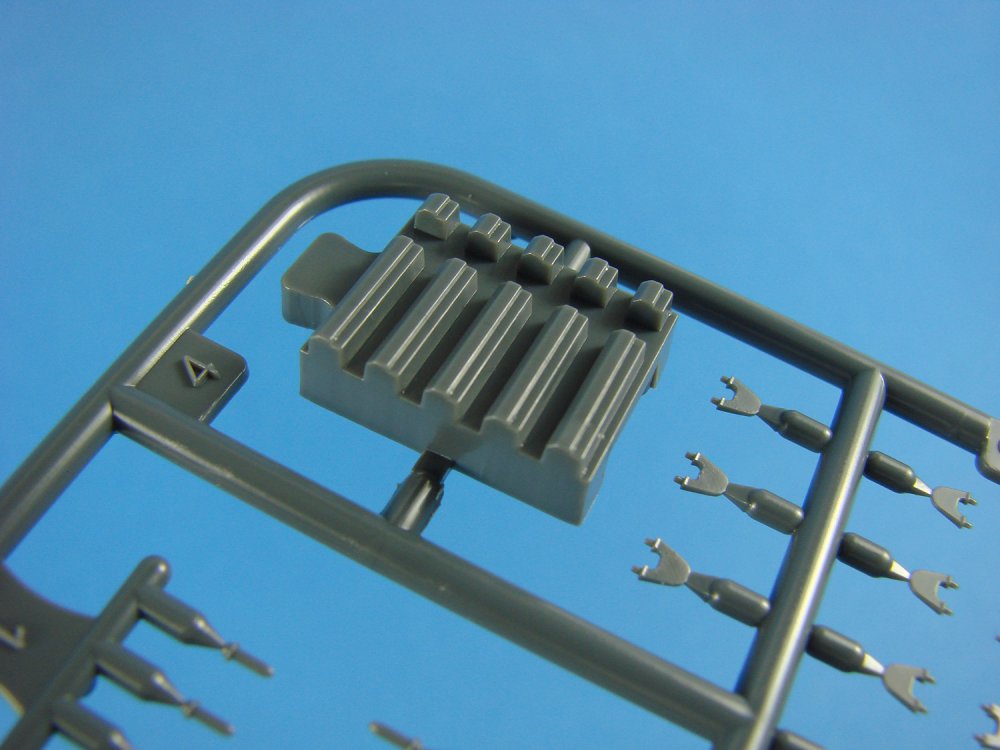
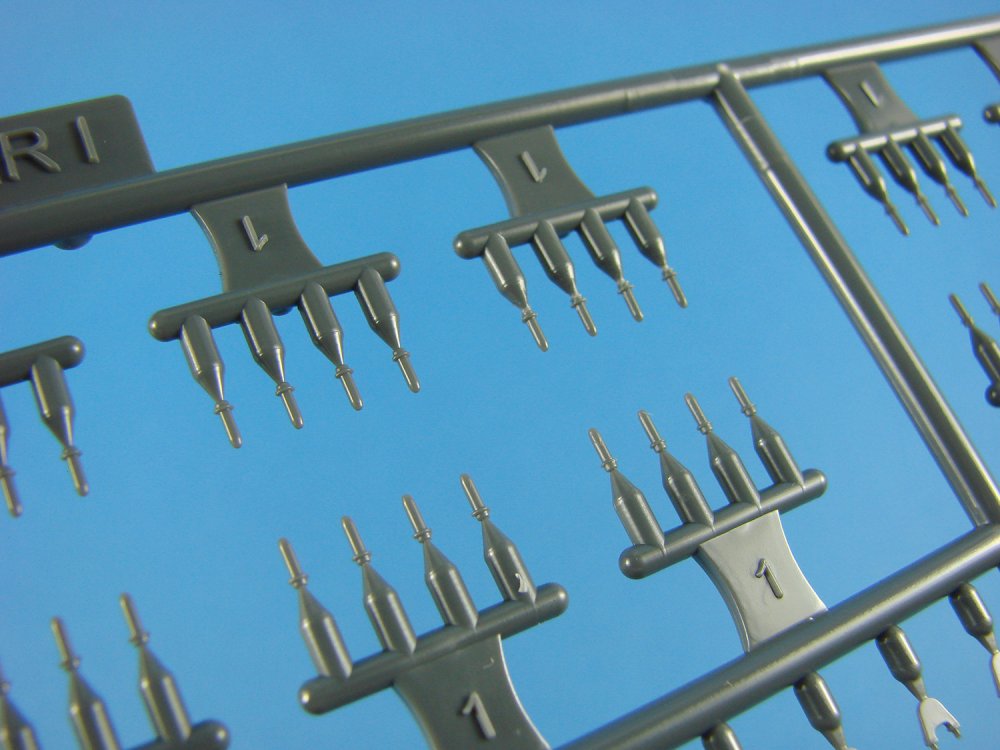

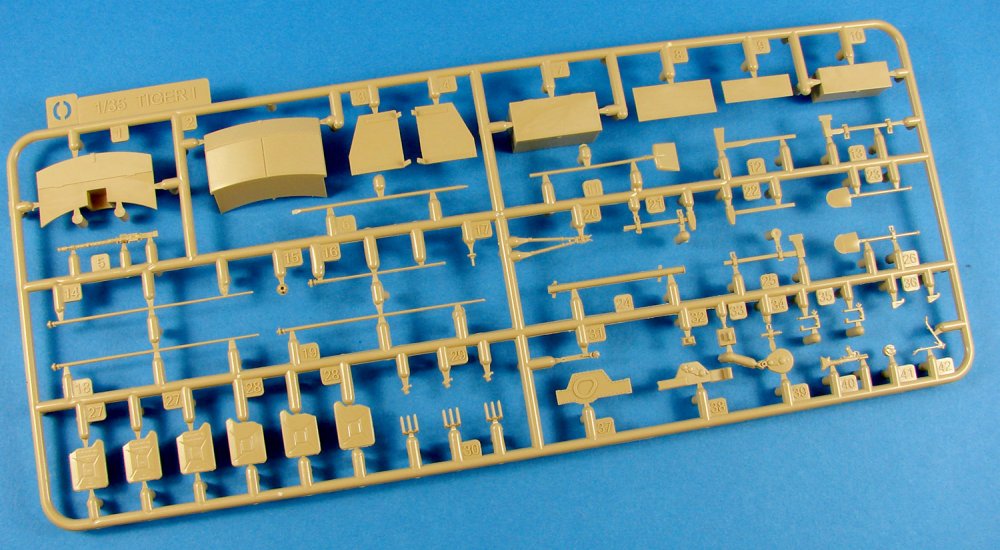
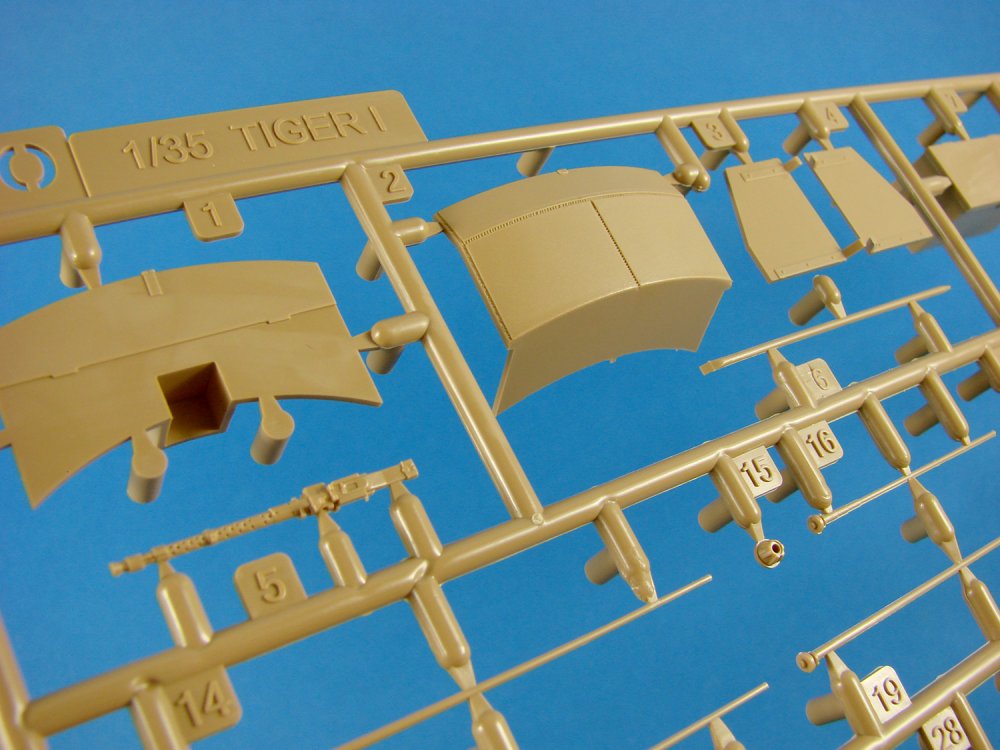
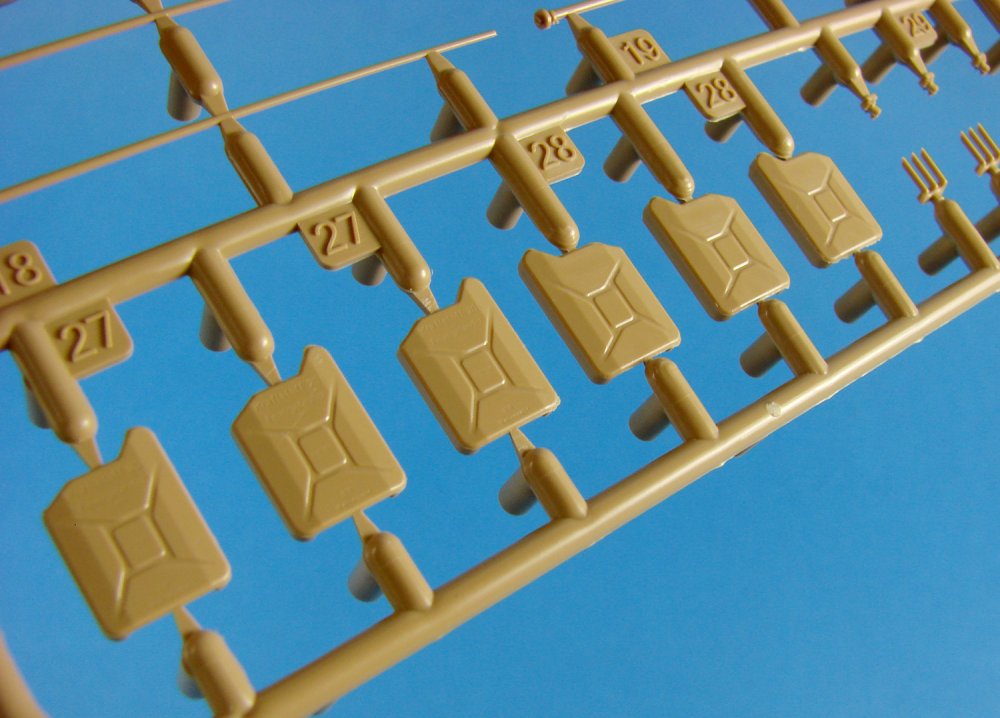
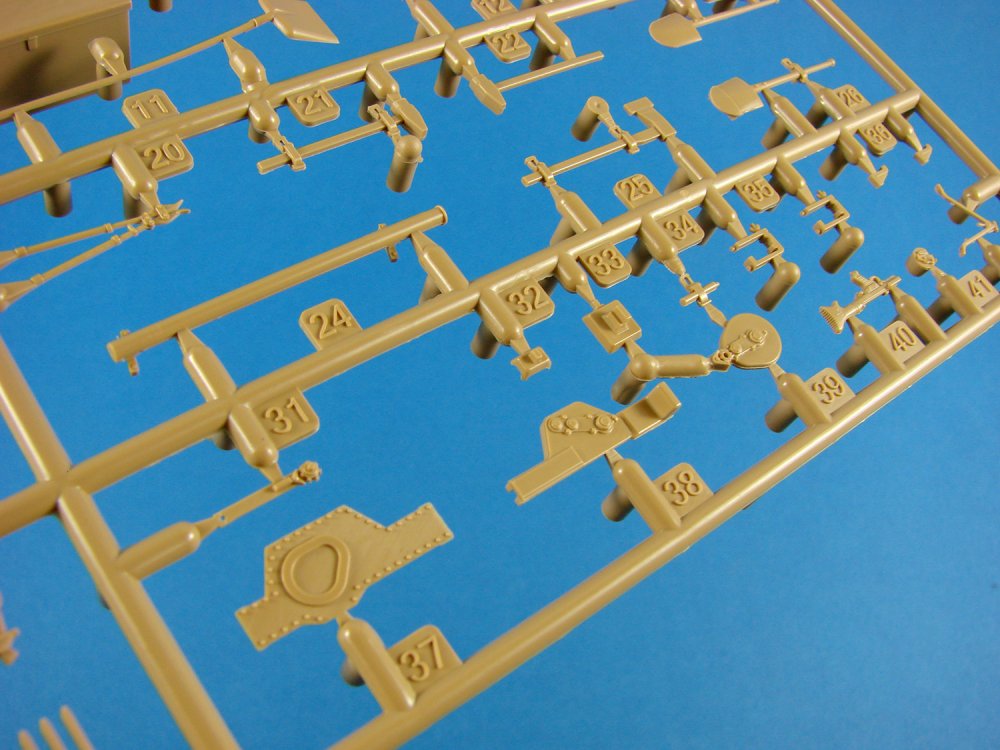


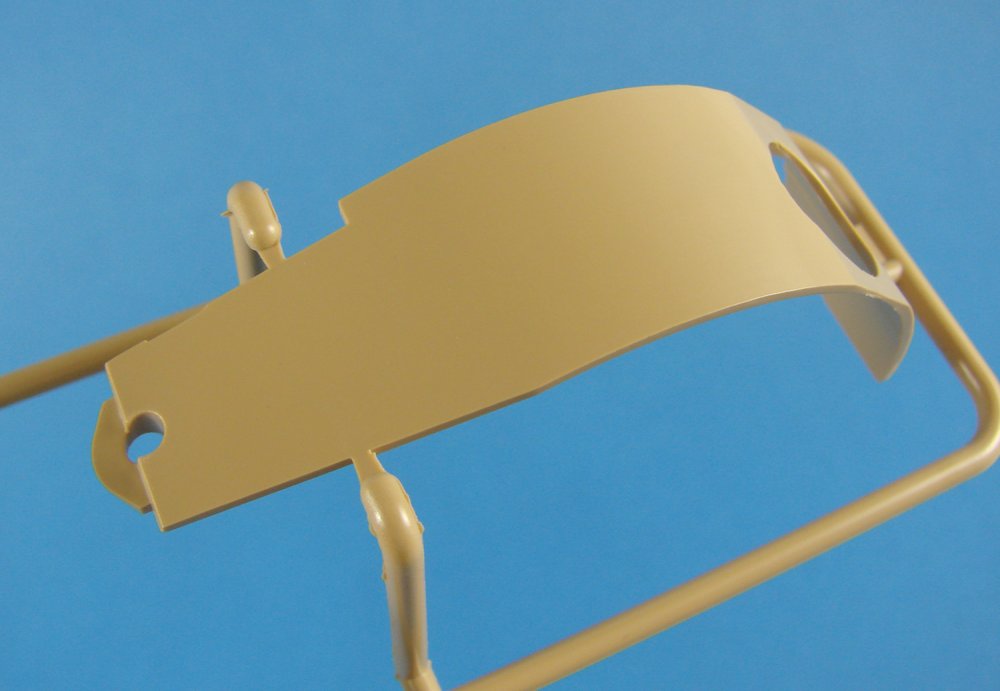


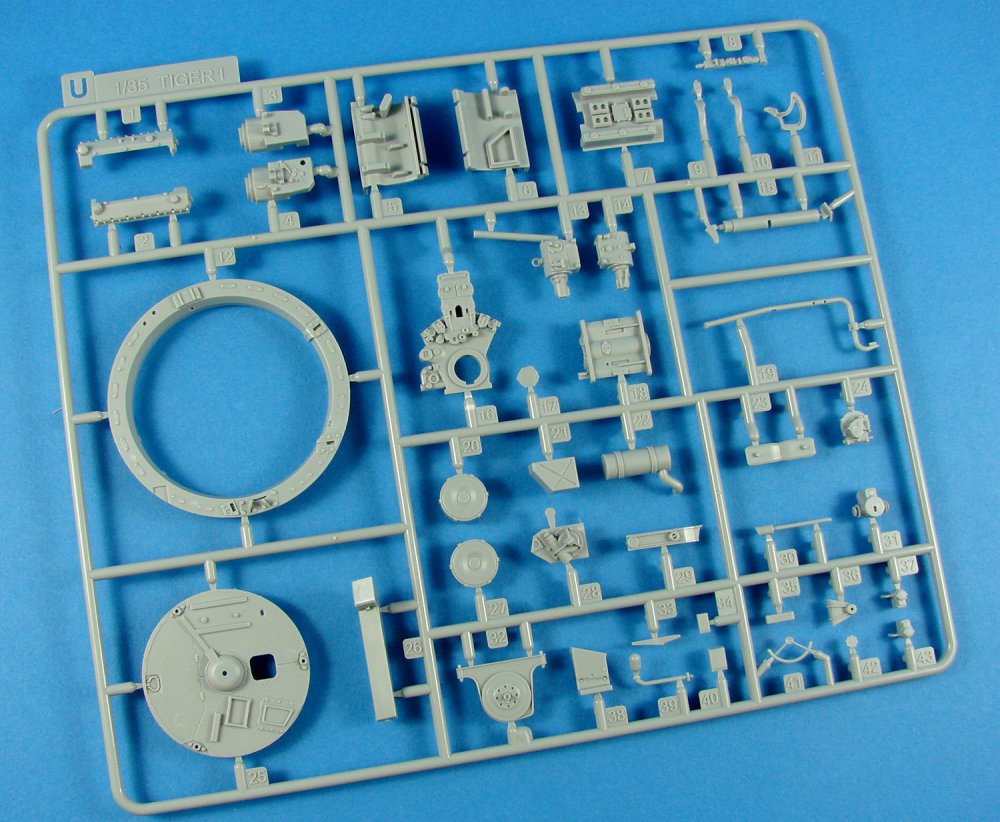
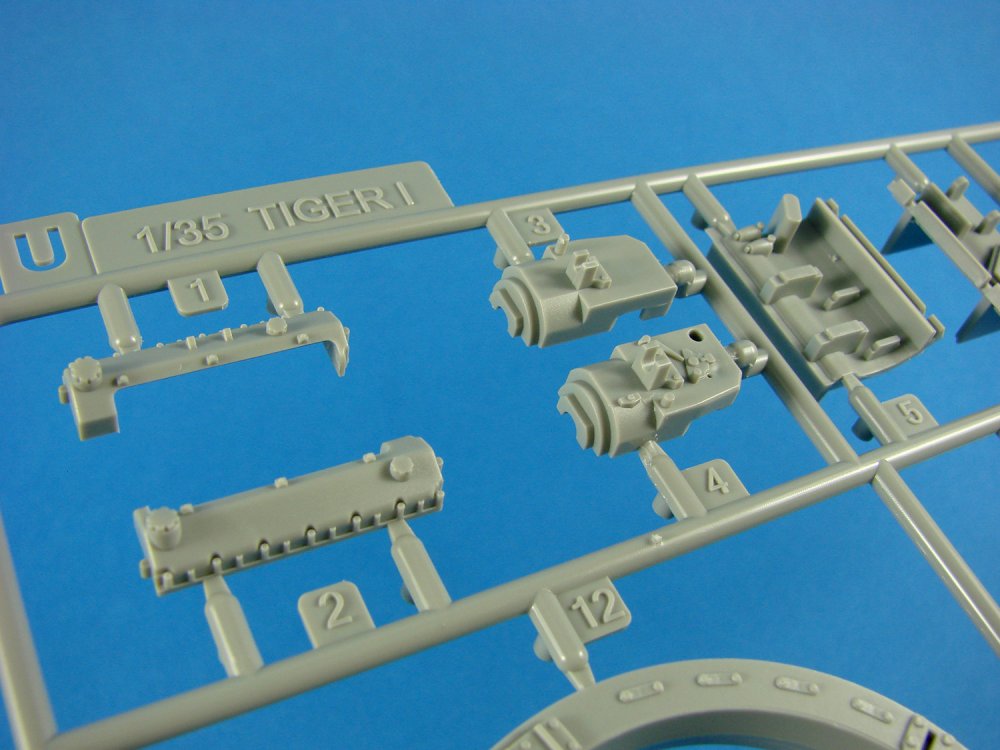
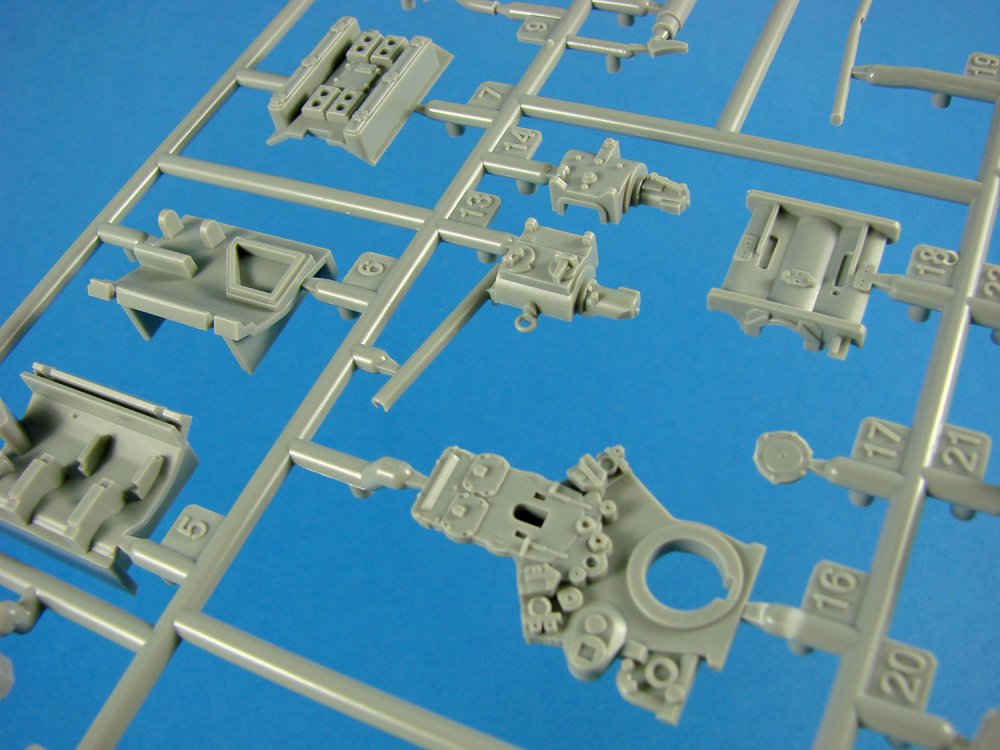
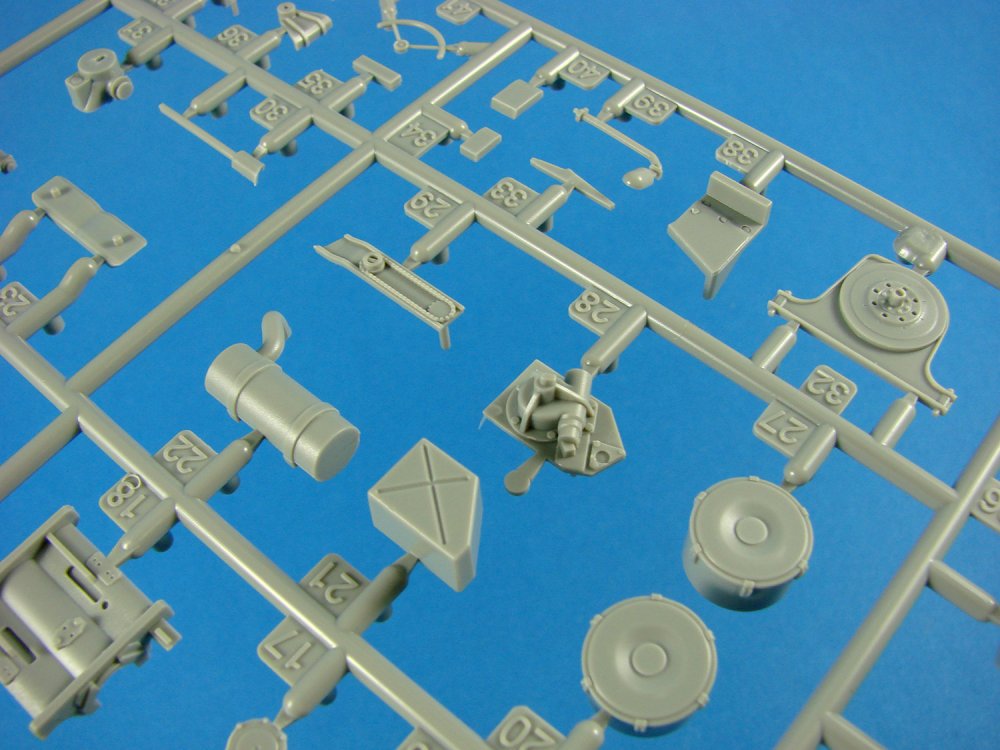
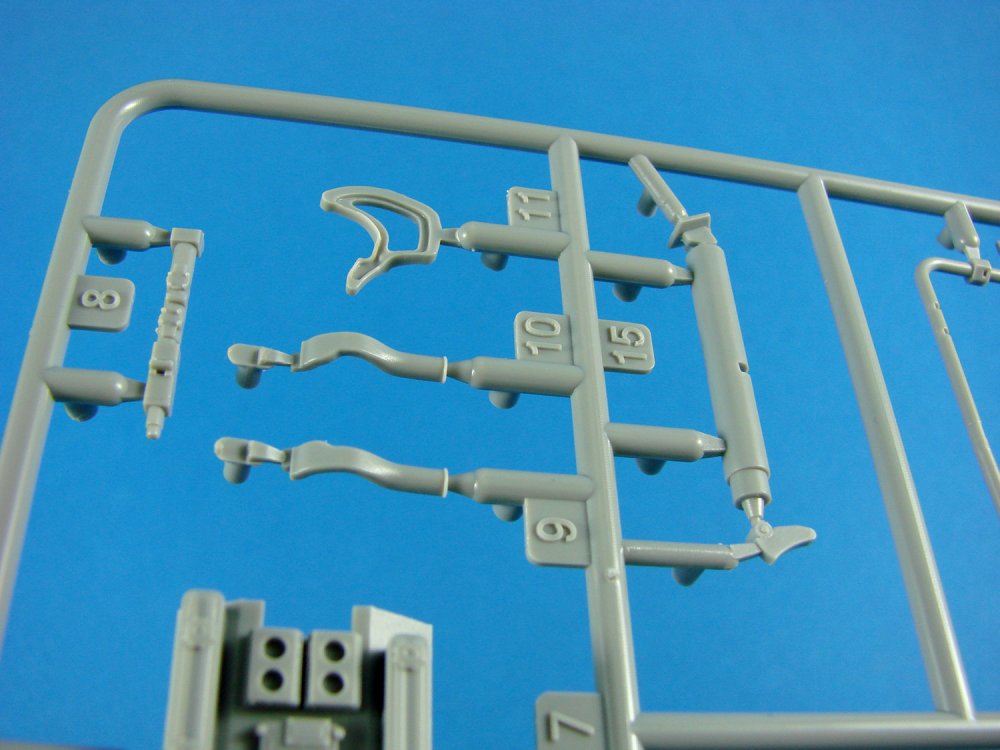

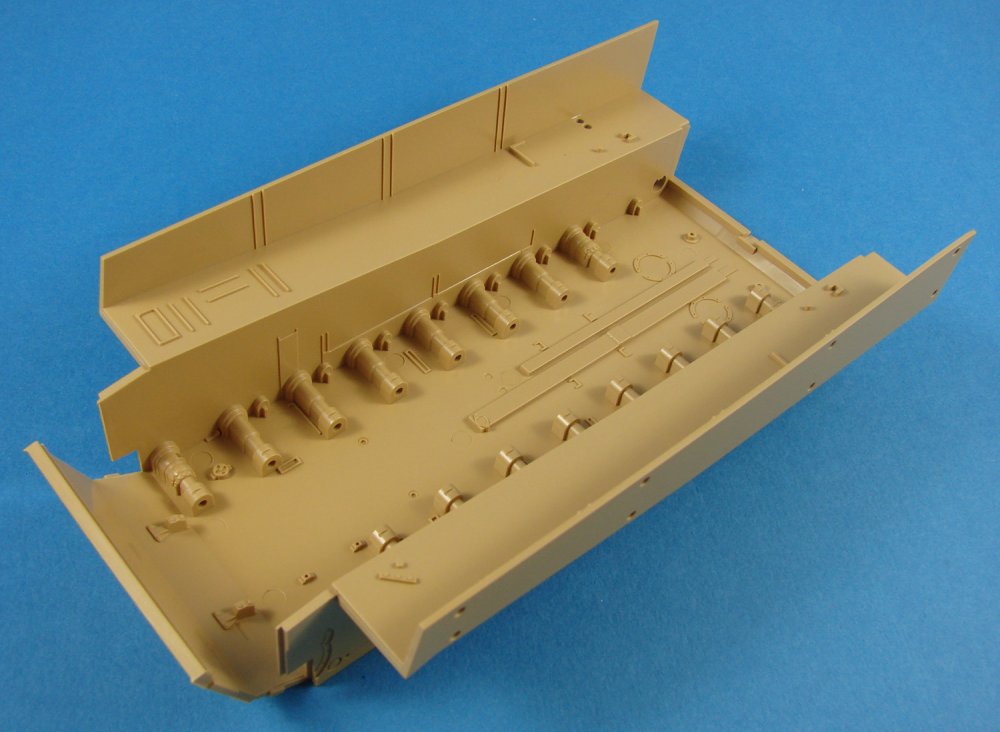


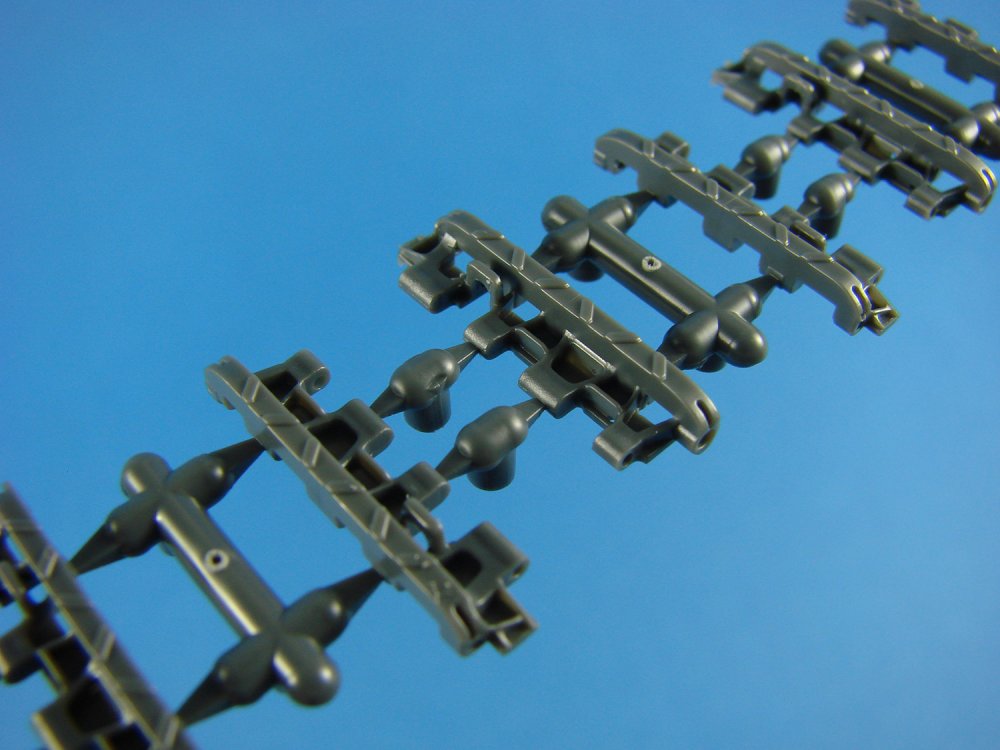

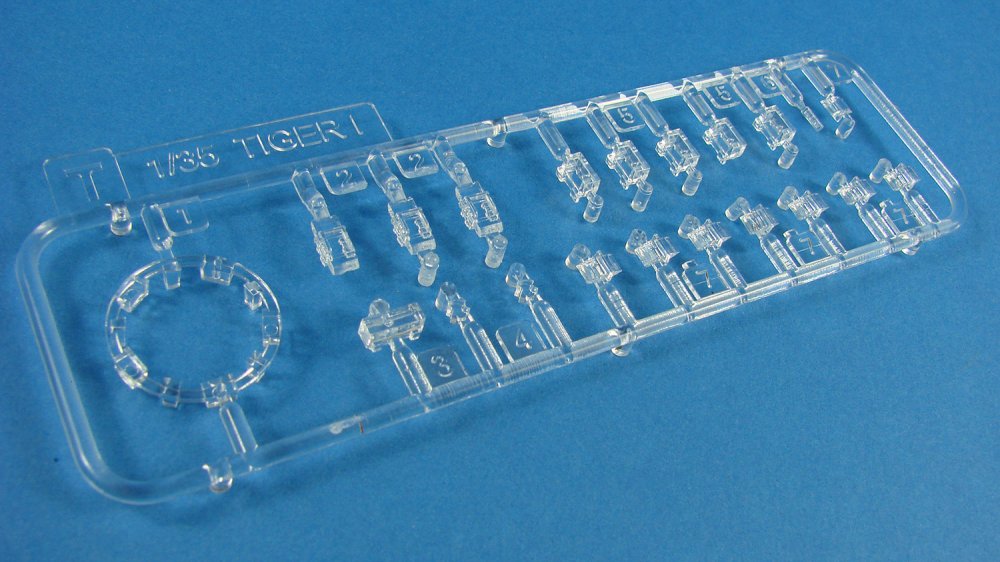
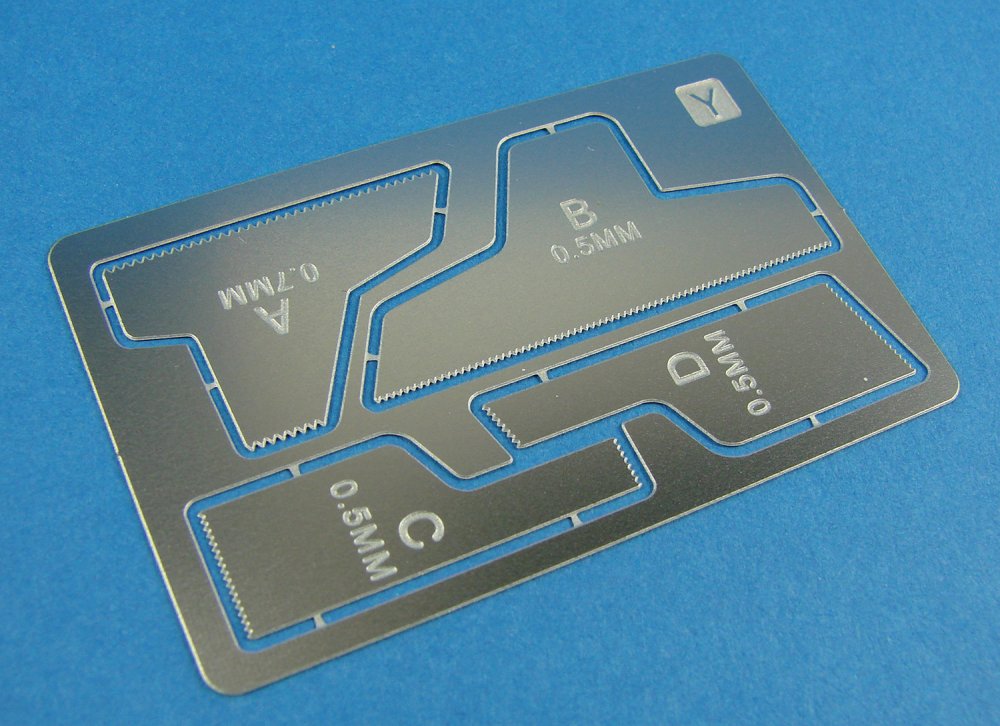
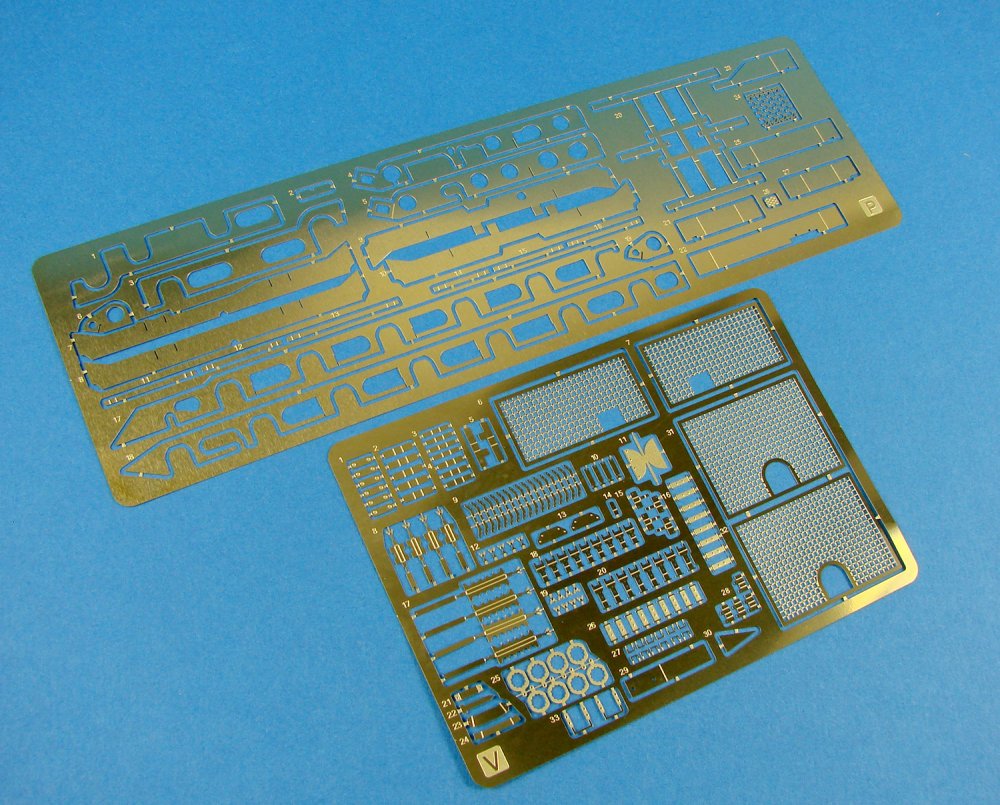
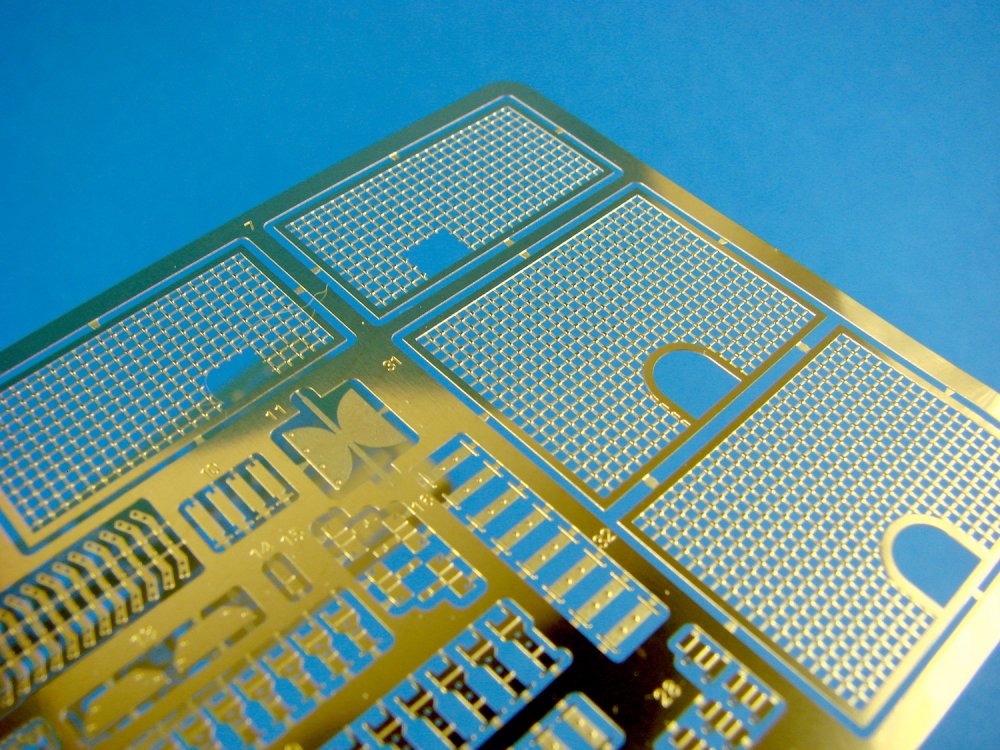
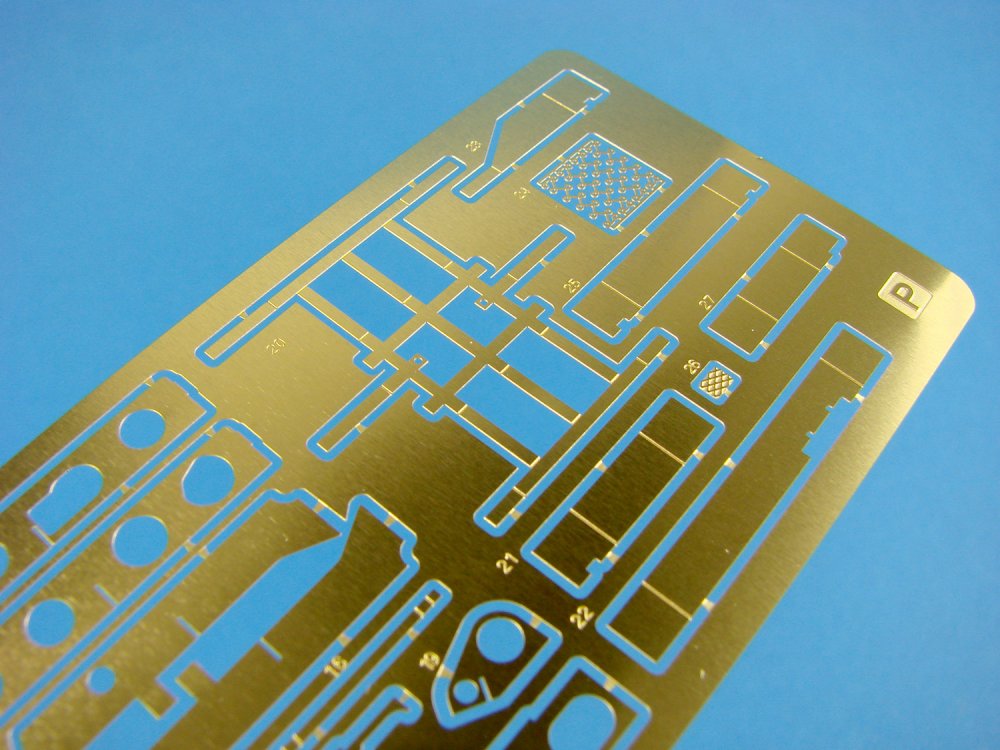
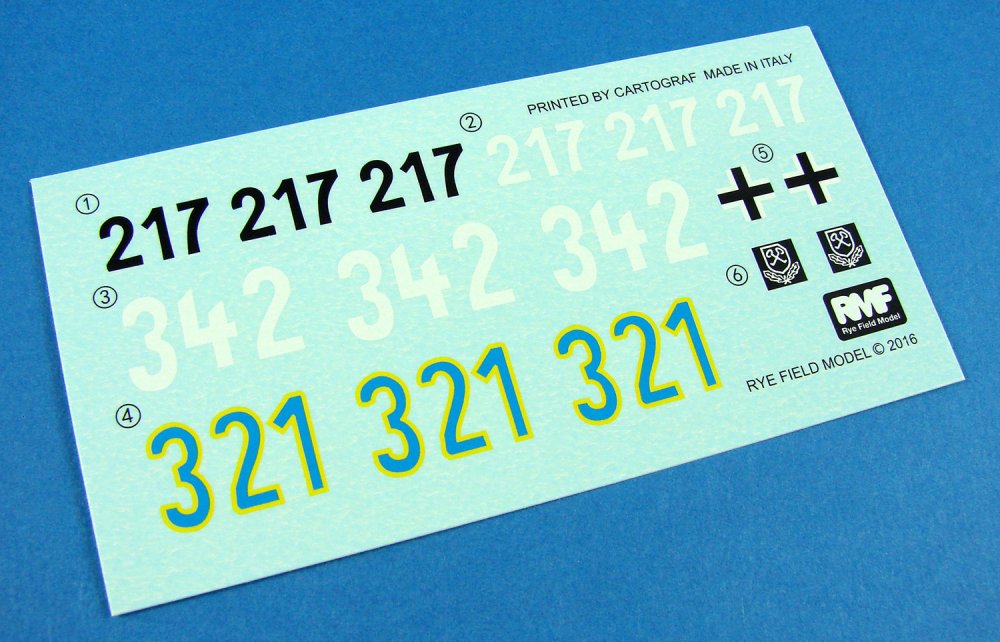


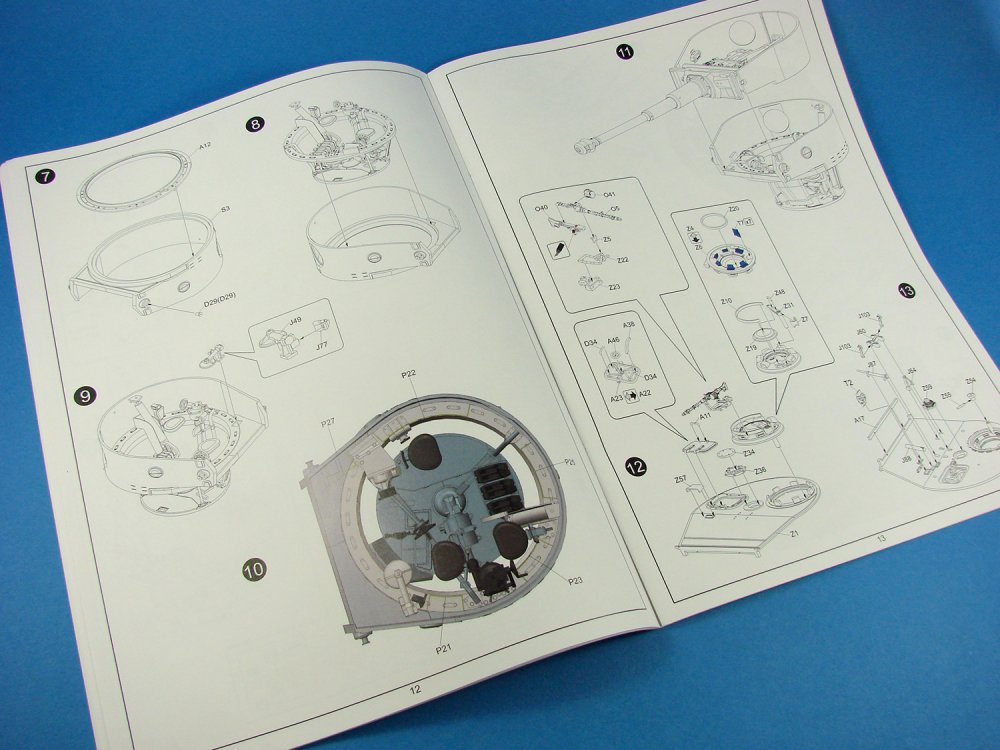


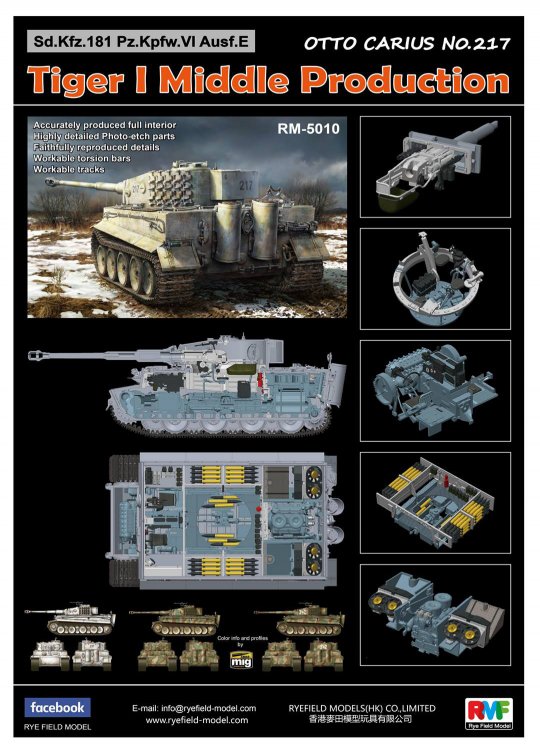
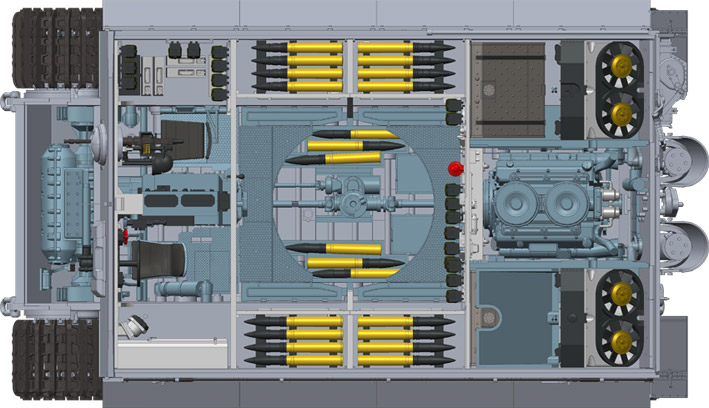
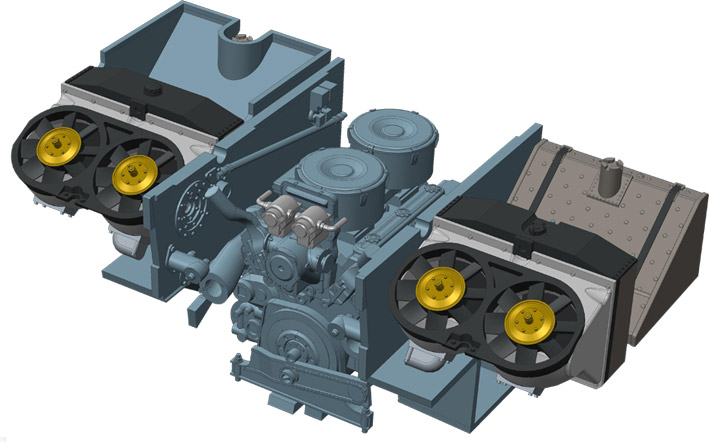
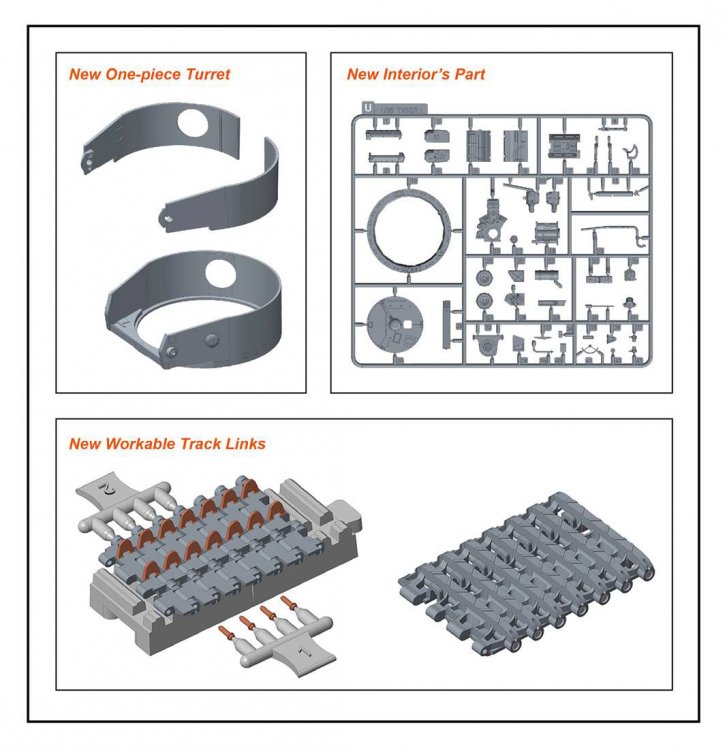
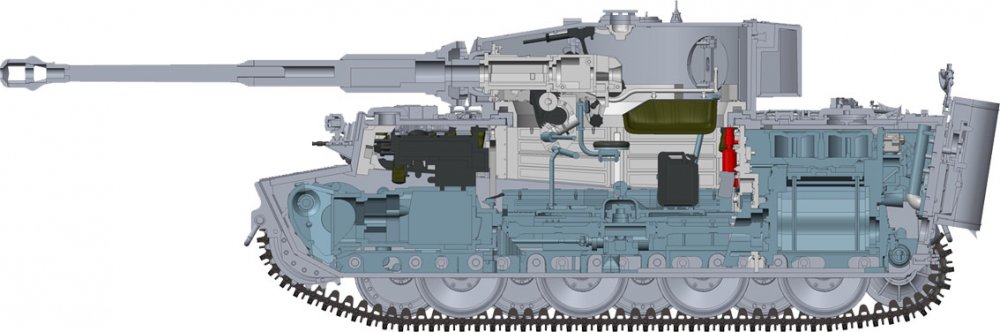
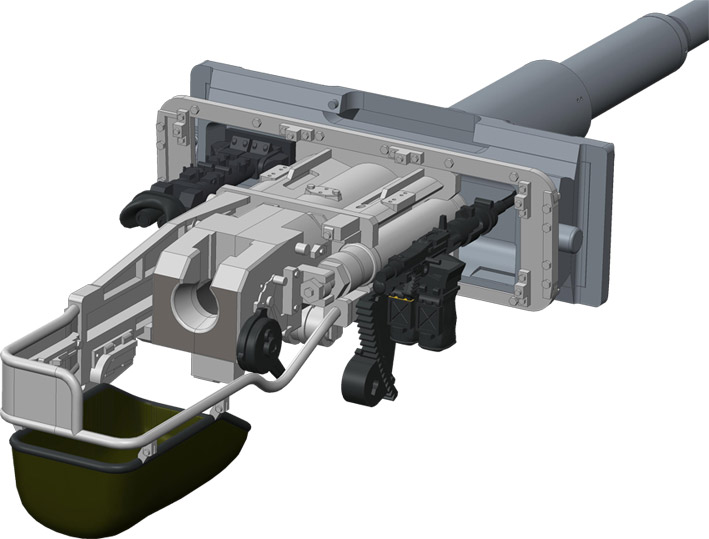
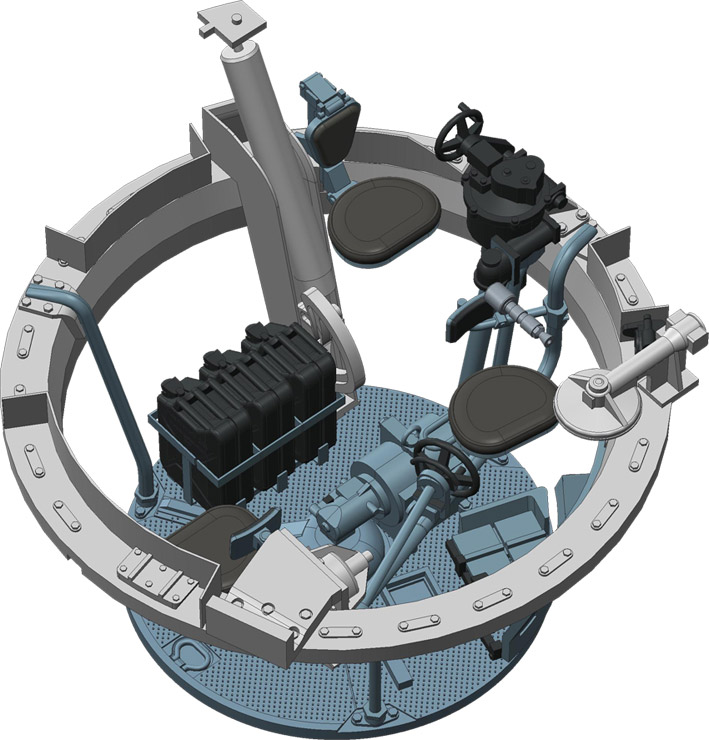
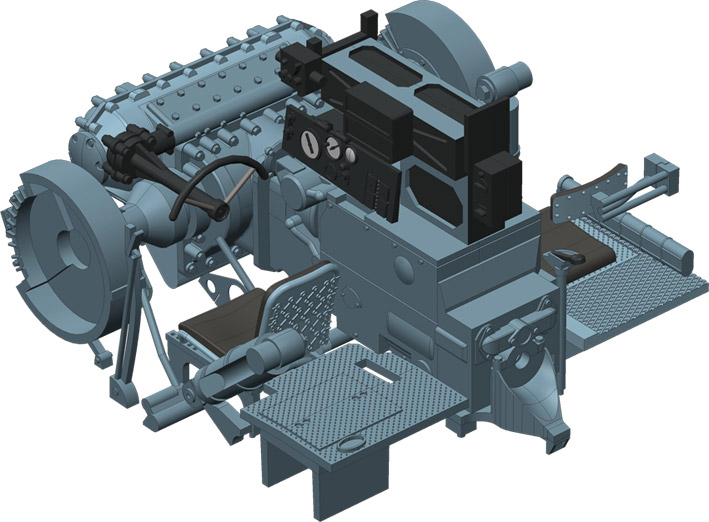
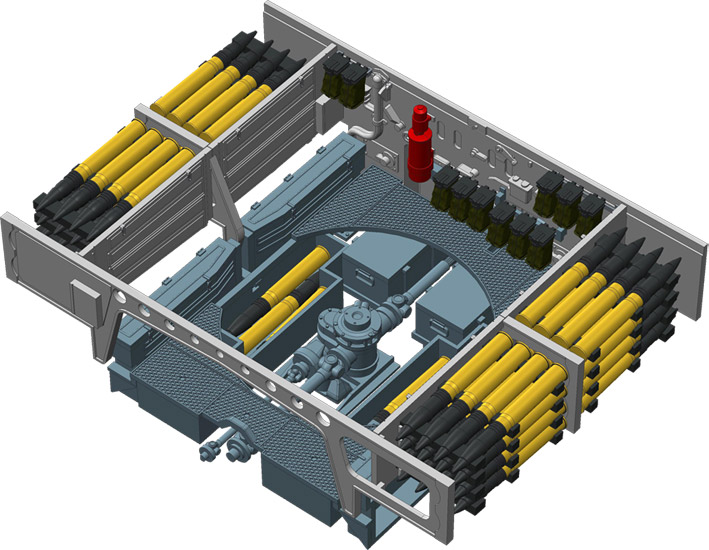
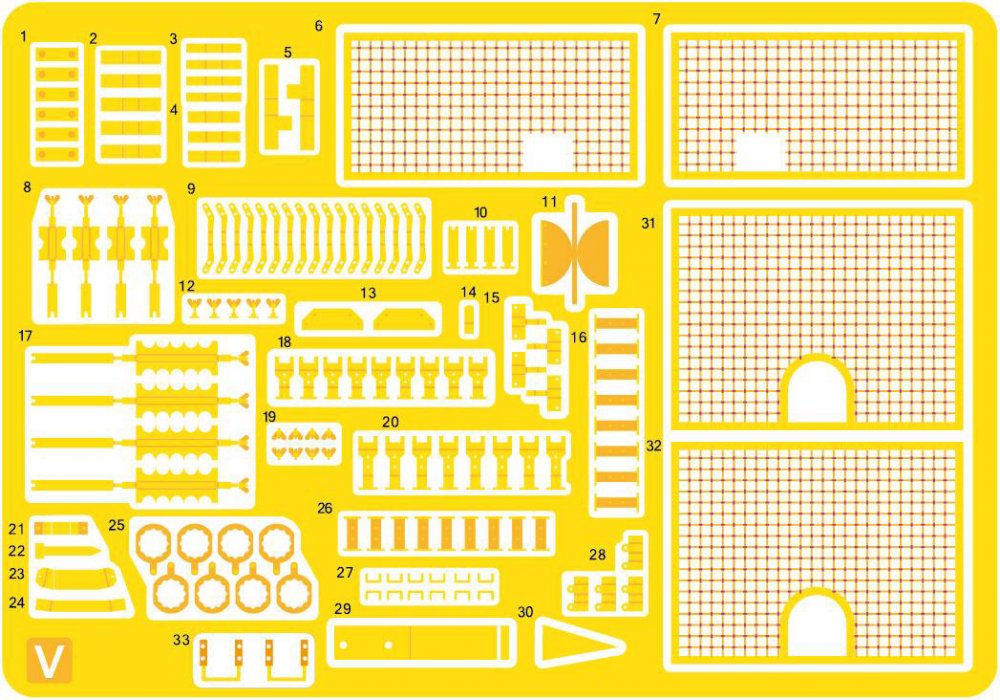
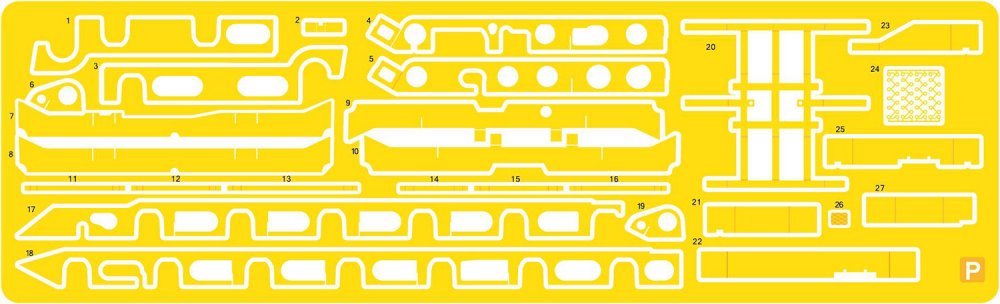
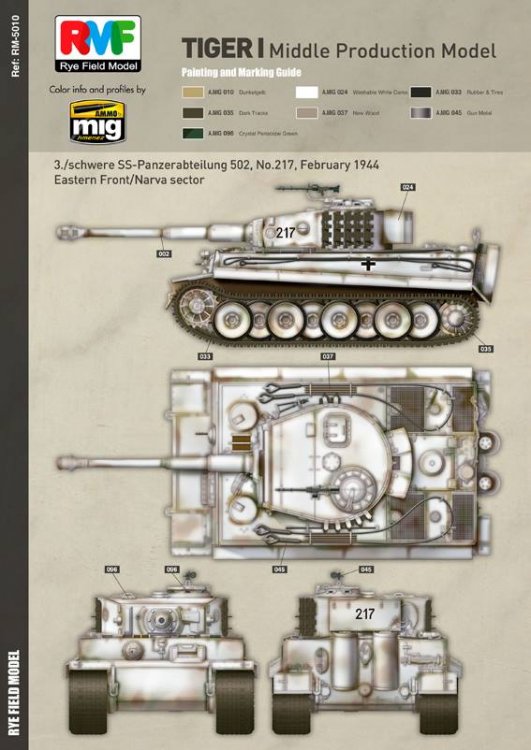
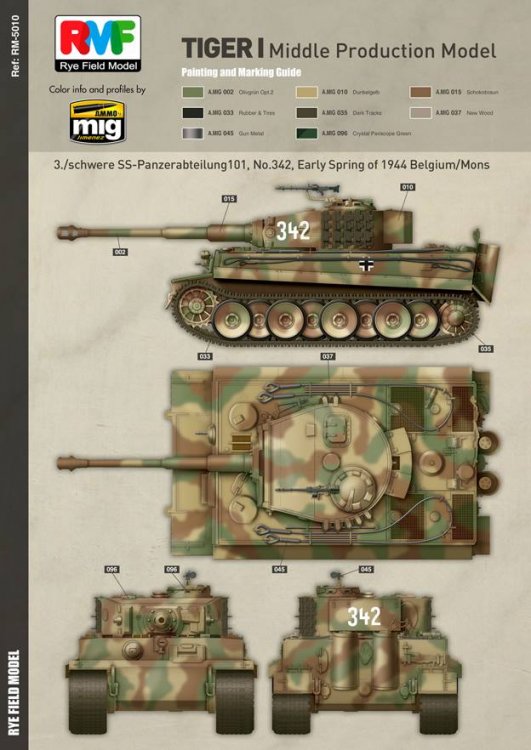
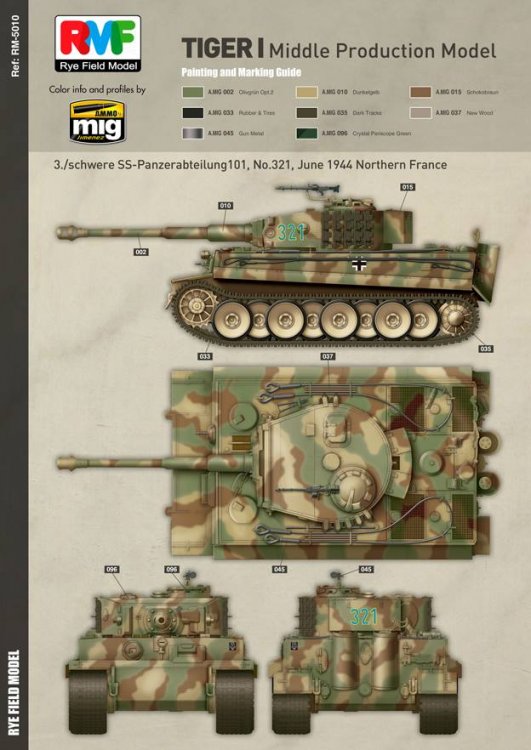
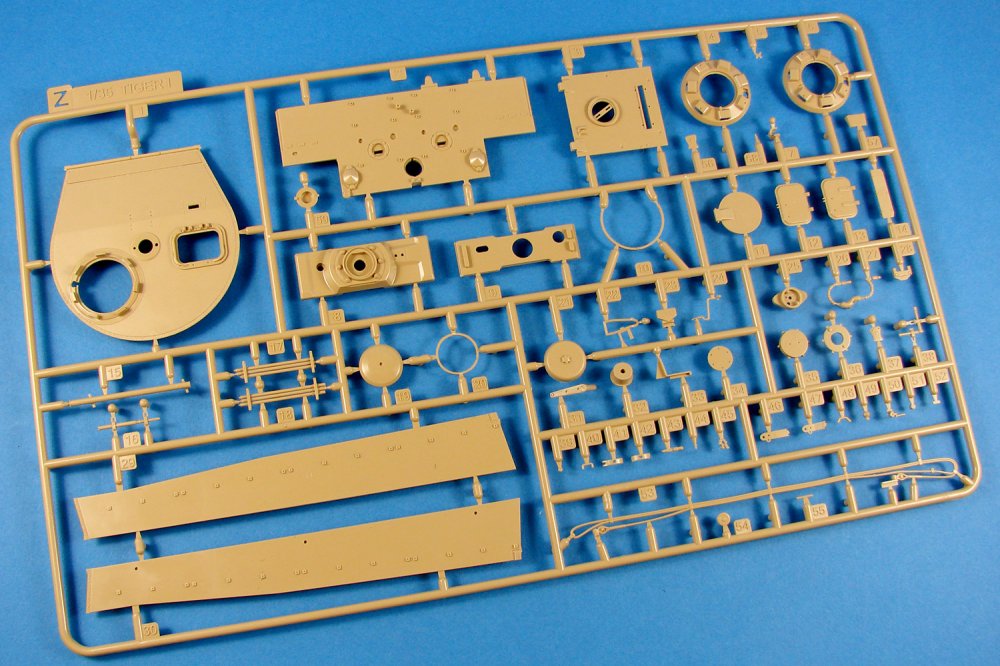

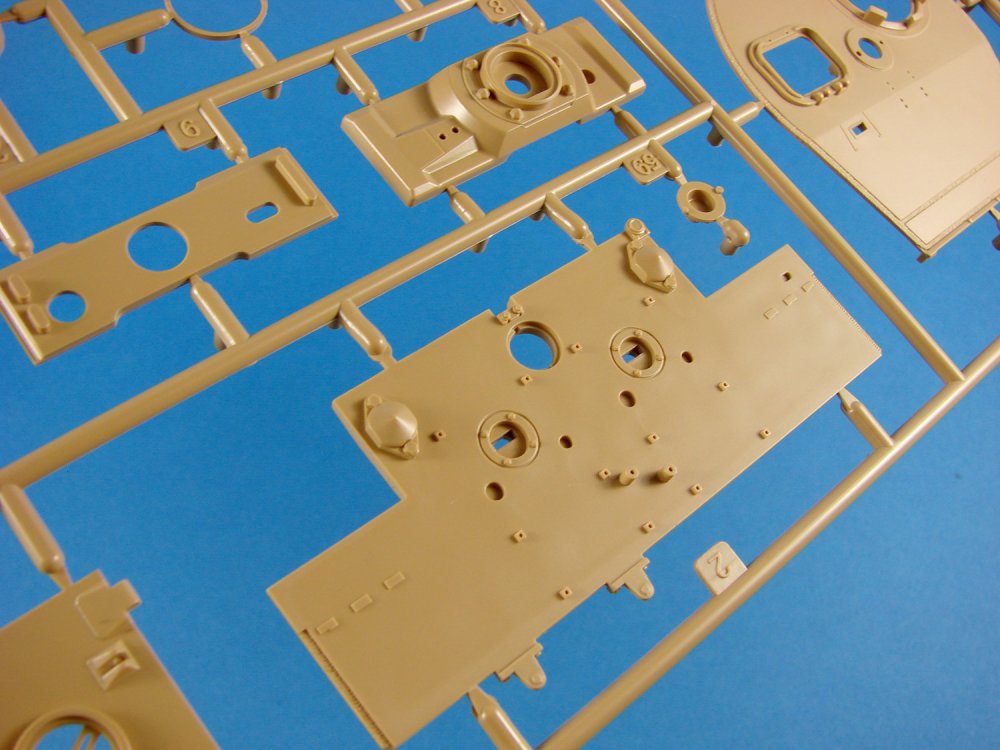

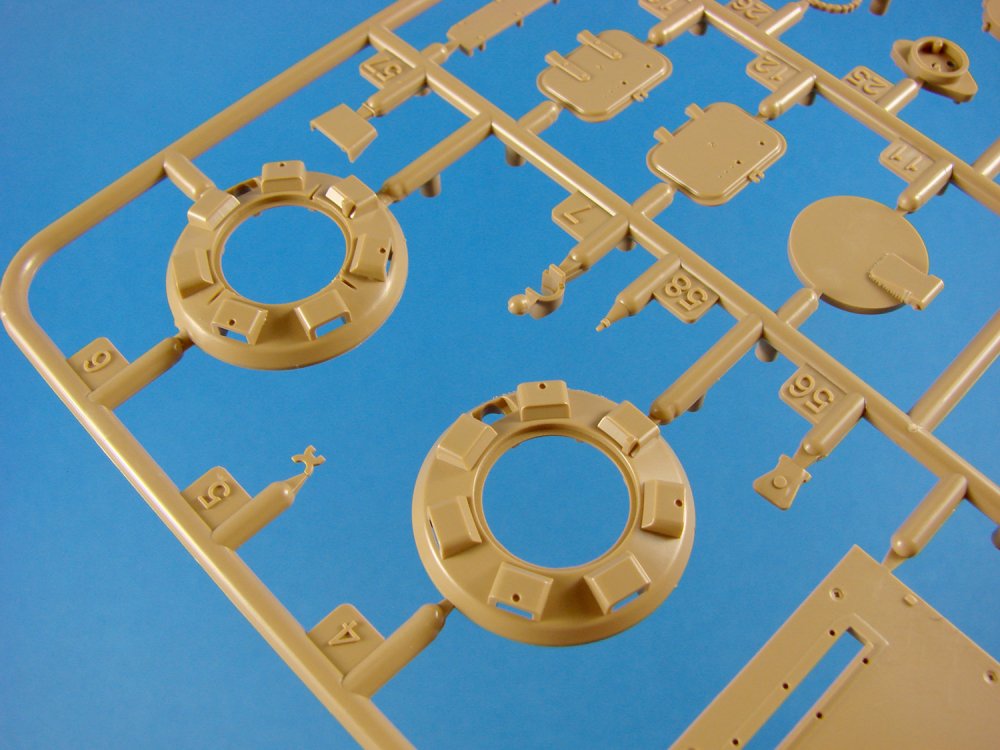
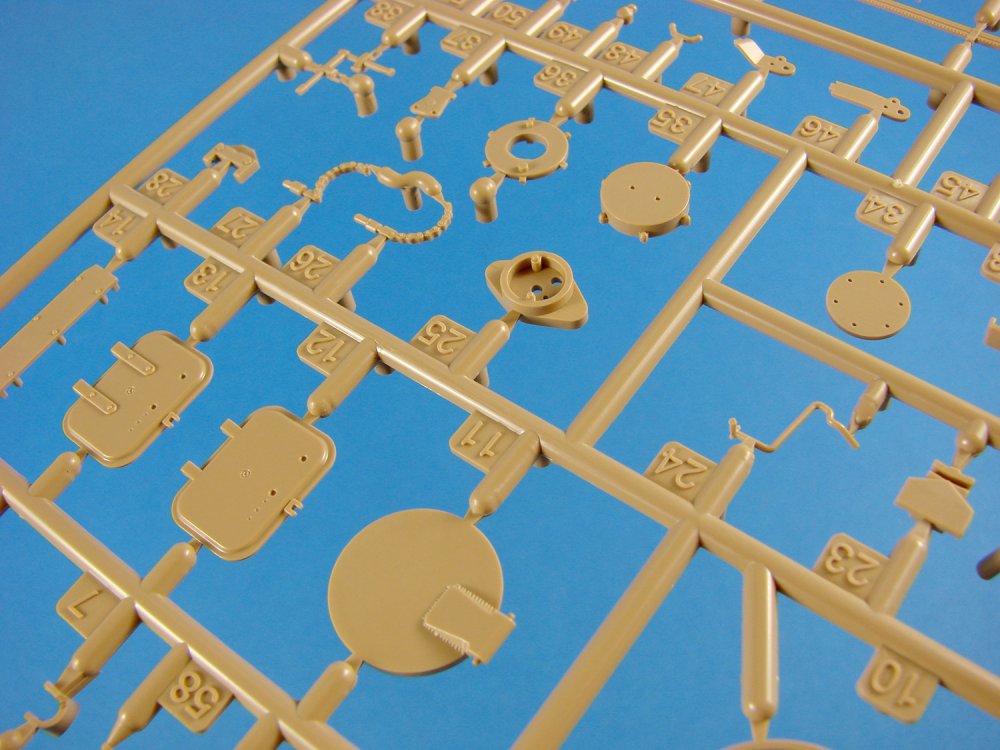
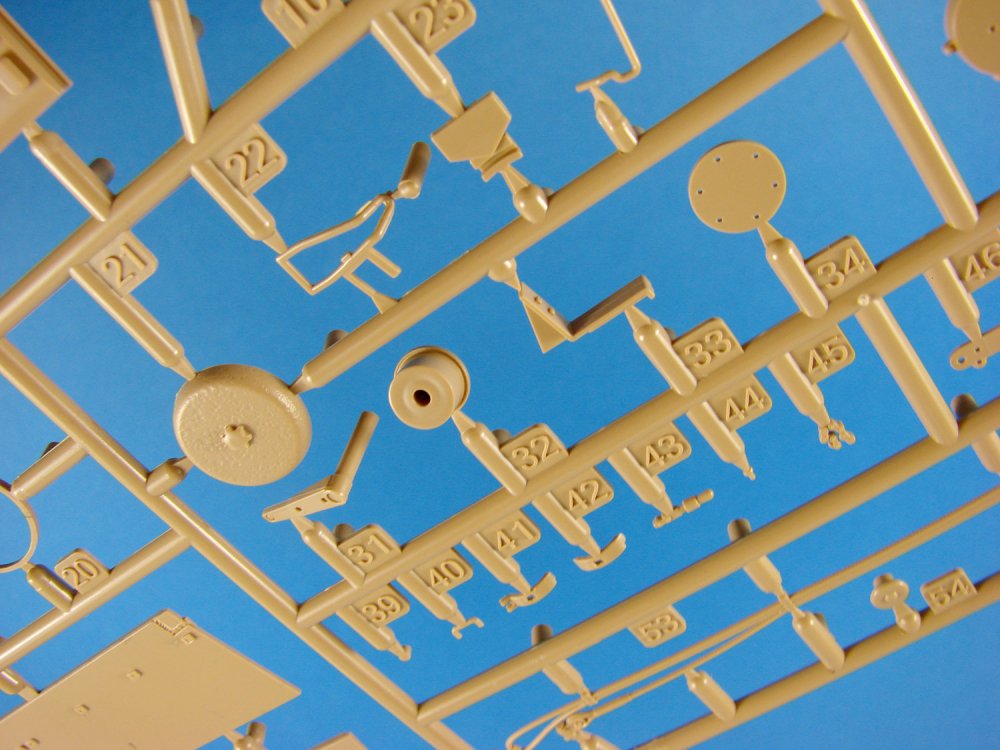
-
hong kong models Dornier Do 335A-12 Trainer
JayDee replied to JayDee's topic in LSM 1/35 and Larger Work In Progress
...beast -
1/48 Wellington Mk.X (He727 NA-K)
JayDee replied to JeroenPeters's topic in LSM 1/35 and Larger Work In Progress
.....and he's off! I'll be disappointed if you don't build the entire geodetic fuselage from PE.- 304 replies
-
- 3
-
-
- wilnis crash
- trumpeter
- (and 1 more)
-
Please try now.