


Wouter
-
Posts
183 -
Joined
-
Last visited
Content Type
Profiles
Forums
Events
Gallery
Everything posted by Wouter
-
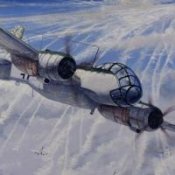
Ju-88C-2 "4D+FH" in pieces
Wouter replied to JeroenPeters's topic in LSM 1/35 and Larger Work In Progress
That's cool Jeroen, I would definitely be interested. -
Hi Cees, the 'M8' and the outlined black line are masks of my own making. The others are from Maketar. Anyway, we're getting there! Almost at the weathering stage. I finished the decals tonight and after that it was time to pull of the canopy masks, oh yes. I also wanted to try out something from Uschi, 'Luftwaffe dashed lines' masks. I wasn't really happy with the kits decals for the dashed lines so I thought why not try the masks. It was a bit of work to put them in place, but boy, these things deliver! Here are the masks in place. Take note that after taking this picture I masked the edges with some Tamiya tape to prevent overspray. I took a light grey instead of pure white. The results are very convincing if i might say so. This is something I'm going to use on a regular basis from now on. Next up was the wheel strut. Some wiring needs to be added and a few more bits and pieces. And the main wheels And this is where I stand now with the build. Coming along nicely Thanks for looking! Cheers, Wouter
-
Hi, can't help on the attacking plastic thing, it's a pretty aggressive paint. If you sprayed directly on the plastic this can happen. But i guess you used a primer. If you used an acrylic you can get issues with Mr paint. Found out the hard way with Vallejo primer and MR. paint on top... cracks all the way. I know use Gunze surfacer 1200/1500. No issues with that. About covarage, your right. Getting an even coat on a light base will take ages and a lot of paint. My advice would be to prime with a dark color grey or black and then build up your topcoat. But the lighter colors do take time to build up, so your mileage my vary. Hope this helps.
-
Ju-88C-2 "4D+FH" in pieces
Wouter replied to JeroenPeters's topic in LSM 1/35 and Larger Work In Progress
That's cool Jeroen, you owe Jim a big one I guess. I was wondering how you acquire those original bits and pieces for you displays. -
Happy birthday James! Cheers,
-
Hi Cees, another way to represent the fabric is cutting small masks from Tamiya tape for the parts where no ribbing is supposed to be. The lower parts if you will. Place those masks and you are left with the ribbing parts uncovered. Now spray or paint some Mr. surfacer 500 where the ribs are. Build op in several layers. After drying remove the tape and blend the ribbing with some careful sanding. When done right, it should be more to scale then using actual tape. About the rivetting, i'm certainly not an expert and have failed many times. But what works for me is taping a piece of dymo tape on the model and use that as a guide. Cheers, Wouter
-
ZMs bat-wing
Wouter replied to ophthoidoug's topic in LSM 1/32 and Larger Aircraft Ready for Inspection
Really very nice models Doug! Have you decided what your next build is going to be? I love the WWI aircraft and I hope to build one of those WNW kits some time, but I have already so may other project waiting in line. I made a start with ZM Ho229 (waiting for some stuff for my Me410) and it sure is a nice kit to build, the best since I started modelling again a few years ago. It is really as if your building a miniature version of the real thing. -
Very nice, that is an eye-catcher for sure! It's interesting to see how the aircraft evolved during the war from this example to the many G-6 and G10/14's build's we see here.
-
Wow, that looks great Marcel!
-
You could use these for rivetting: http://hgwmodels.cz/en/132-scale/320-free-lines-positive-rivets-132-321000.html
-
Thanks gents for checking in, glad you like it so far! Another update, this time it was masking time. Not my favourite part, but hey, pat of the build right. For the particular example I'm building are no decals available so I had to resort to paint masks. Though next time I'll think I will be using decals again. Maybe some wet transfer stuff from HGW. Anyway, they result is convincing enough for me. I have to do some touch up here and there. Especially the horizontal beam over the yellow band. The black part is to thin, but touching will be pretty straight forward. I'm waiting on some free line mask from Uschi for the walk/no walk lines. After those have been painted the model gets a gloss coat and regular decals for the small parts will be applied. In the mean time I will work on smaller details like the remote rearward firing guns and landing gear. I'm really enjoying this part of the build. Seeing the model come to life is very rewarding. Can't wait to remove those paint masks from the cockpit!
-
ZMs bat-wing
Wouter replied to ophthoidoug's topic in LSM 1/32 and Larger Aircraft Ready for Inspection
I would say the liveries are unlimited, let your creativity flow freely! -
Ju-88C-2 "4D+FH" in pieces
Wouter replied to JeroenPeters's topic in LSM 1/35 and Larger Work In Progress
Not sure how I missed this, awesome build Jeroen! Enjoying it so far. -
ZMs bat-wing
Wouter replied to ophthoidoug's topic in LSM 1/32 and Larger Aircraft Ready for Inspection
Very nice Doug, I've started this build to, but it will have to wait for the moment. Sorry Jeroen, but mine will be in wood, just gotta try those wood decals form Uschi. Doug, I would love to see some more pictures from the other models you have there. Really clean builds and nice use of colors! -
Thanks guys! In the end I redid the RLM74 several times and now I'm a happy man again. I did some research on the web on the RLM74 colour. The odd thing is, almost every colour swatch I see says it's a a grey bleu-ish tint. But almost every scale model I found on the web, in this scheme, have a more green tint... Anyway, I found the combination I was looking for. The first picture is not the best lighting but gives a nice overview of the camouflage patern. You'll probably noticed I'm a big fan of the 'Mr.Paint' paint range. This stuff sprays beautiful and you can control every layer. Even better, it dries really quick. 5 minutes after applying you can already pick up the model, though careful. 5 minutes later you can mask the paint and it won't come off afterwards! The finish depends a little on the colour, as you can see the grey has a nice satin sheen on it, the green is more glossy. Below a detail shot from the picture above. I mean, just look at that finish! Buy this stuff. And no, I don't have any stocks Hmm, two more to wet your appetite Cheers, Wouter
-
Jup, the one with the blue band (see what I did there ) is the one I would build. Very cool subject to build and the possibilities are endless. I would love to build one under a He111 but that's something of a long term project...
-
A few steps in the painting process. Started with RLM 76 on the underside and sides. Post shaded with RLM 65 and RAF sky (hard to see in the pictures). Next step RLM 75 on the wings, stabalizer and top fuselage. This was then masked in the appropriate scheme with RLM 74. For some variation I left the rudder aluminium as if it was hastely replaced. If have some reference from a few ME410's outfitted this way. Last but not least the yellow fuselage band was masked and painted. To be honest, I'm not really satisfied. The painting step with the aluminium shades didn't do much for the current look and was a waist of time. Besides that I'm not really happy with the colors RLM75 and 74. I think they are a pretty good match with the real thing, but it turns out pretty dark on the model. There's little contrast. I'm thinking about to possibilities: repaint or adjust with weathering. What do you guys think? I'm open for suggestions.
-
For the next step I was inspired by this picture: I want to use the different shades of aluminium as the real base for my camouflage. For this step I used Alclad II Duraluminium (ALC 102), Mr. paint White aluminium (MRP-9), Anodized aluminium (MRP-81) and Dark aluminium (MRP-146). The colors were sprayed on the the panels allowing the black base to shine through and thus creating a form of pre-shading. The result looks pretty harrowing, but this is just a step in the path to a vibrant, and hopefully subtle, paint job.
-
Ctrl C/Ctrl V from my post on LSP. Black base with Mr Paint Fine surface primer (MRP-85). I've used a entire 60ml bottle for this model!
-
Tom, regarding the canopy, yes I did use CA but only the smallest amount possible. Just a tiny drop of thin CA on the end of a needle or toothpick and then let it flow around the joint. With the part (say a handle) in place, I then used some epoxy on the attachment points and let that dry overnight. Thus, the CA holds the part in place, the epoxy provides the required strength. This way I didn't encounter any fogging issues.
-
Hi all, made an update on LSP. Figured I could post it here as well.
-
Coming! Schatton "Würzburg-Riese" Radar
Wouter replied to JeroenPeters's topic in Modelling Discussion
That's awesome, but not something to build for the faint of heart... -
Yeah, progress! Inching closer to the painting stage. Canopy has been masked and the model got a coat of resin primer. I'm currently in the process of detecting and repairing surface damage, rescribing lost panel lines and rivets. Sorry for the crappy pics, but I wanted to show the progress to you guys. Cheers, Wouter The radiotor flaps are a seriously pain in the ass to build. As a matter of speaking I've lost some PE parts again... grrr.
-
BSMC LAST INSTALLMENT: Belgian Scale Modellers' Club, Dec 13, 2015
Wouter replied to One-Oh-Four's topic in General Discussion
Wow, the quality of most of these builds is staggering! I should visit it next year, looks better then ESM if you ask me.- 16 replies
-
- 1
-

-
- Model Show
- 2015
- (and 1 more)
-
Not at all, but it takes a lot of work. While it looks like it would pretty much snap together, it's quiet the opposite. I've had to adjust almost every part, especially the cockpit area. But seeing it coming together is worth it. Absolutely, here's the paint scheme I will do: I will start with a Mr. Gunze resin primer and after everything is good to go (no scratches, fingerprints, glue etc.) a coat of Mr.Gunze surfacer 1500 Black follows. I've read the some tips from Matt Doogs about this and it's something I want to try. And I really hate pre-shading. After that I will spray a variety of aluminium colors, picking out different panels using Mr.paint and Alclad2. Then I will start with the camouflage. I going to try some of Ralph Rieser's technique with stippling different hues from the same color before spraying the topcoat. Weathering should be restraint, but I'm going for enough visual interest for this rather dull camouflage pattern. The last technique i will give a go is Michael Renaldi's Oil rendering technique. I've some of his excellent 'Tankart' book series which show how to do it. I think there is a place for this on aircraft too, but it should be mire restraint. So, that's the plan anyway