Iceman
-
Posts
155 -
Joined
-
Last visited
Content Type
Profiles
Forums
Events
Gallery
Everything posted by Iceman
-
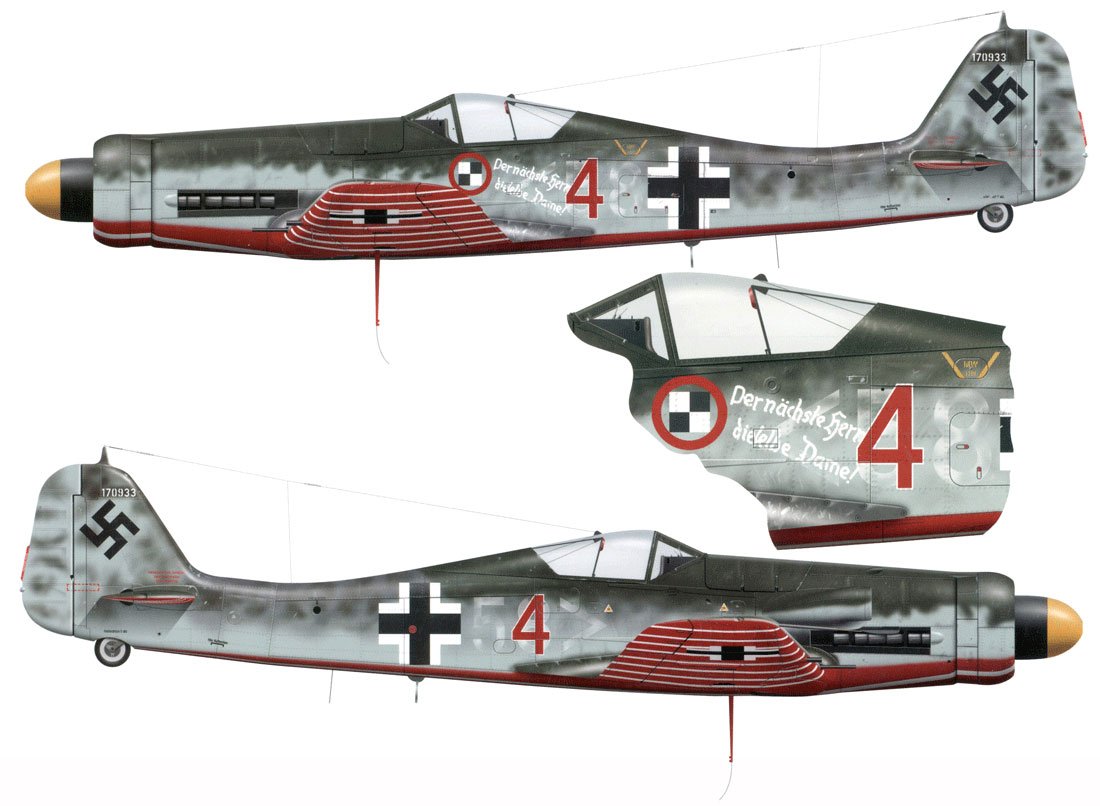
Yellow 12 of JG 300 - Nov. 1944 JG300 is known to be the gaggle of FW 190's that Chuck Yeager tangled with in Nov. 1944. Going to have to build that one to display next to my 1/32 P-51D Glamorous Glenn III.
-
 LOL, So we put Christmas Trump and Hannibal together for a diorama, ingenious
 -
Seriously, is this suppose to be a joke, a compliment or a insult?
-
-
FINISHED!!! Revell 1/48 B-29 finished in Bare Metal Foil
Iceman replied to JohnnyK's topic in Non LSM 'WIP
.jpg.6f393cf000f06435b10fe8fd65931c9f.jpg)
-
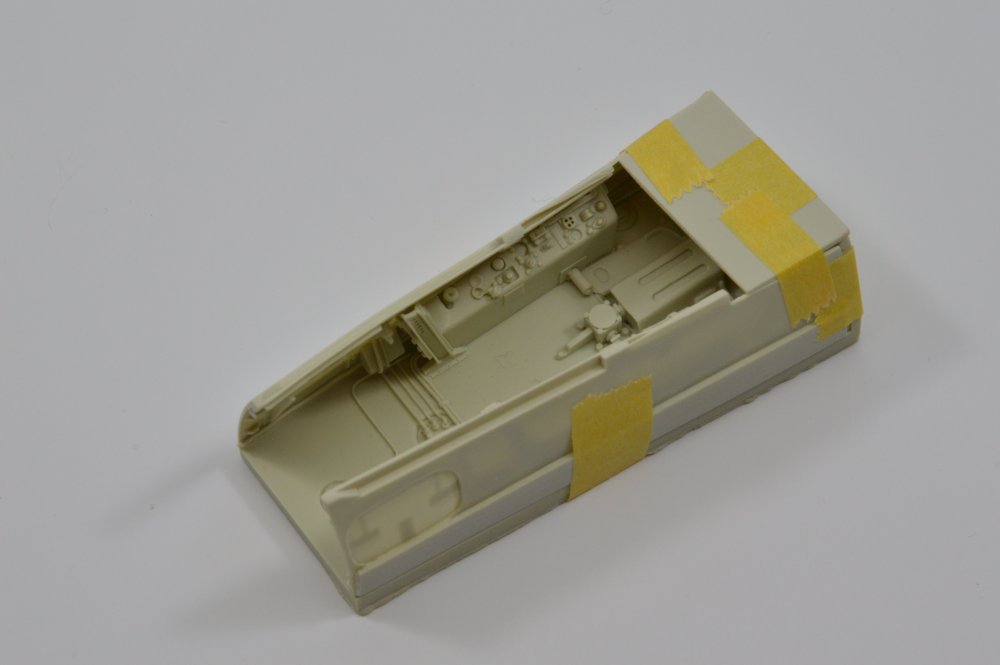
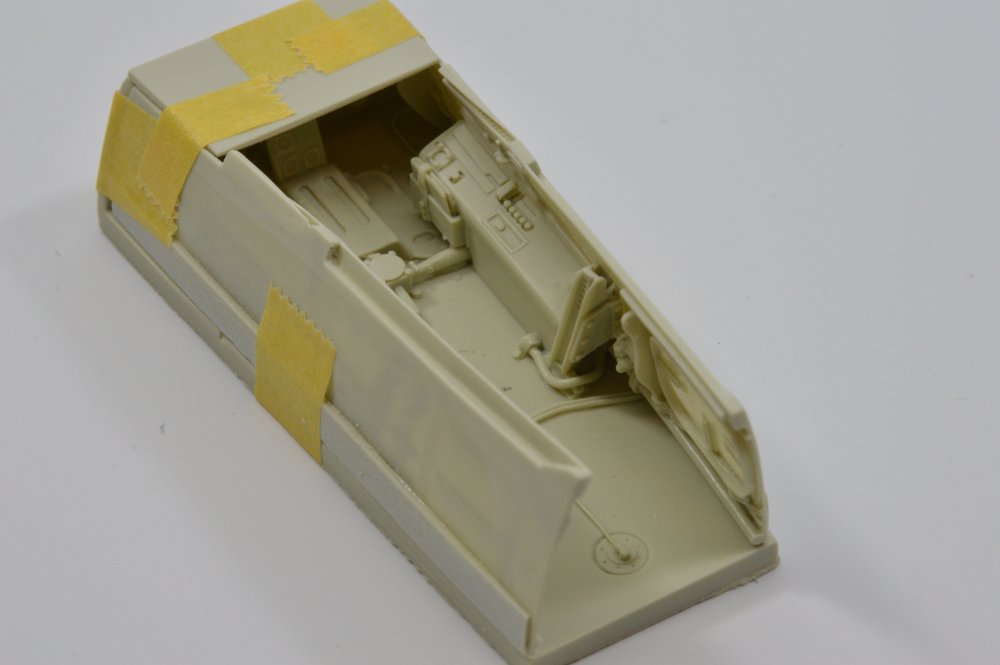
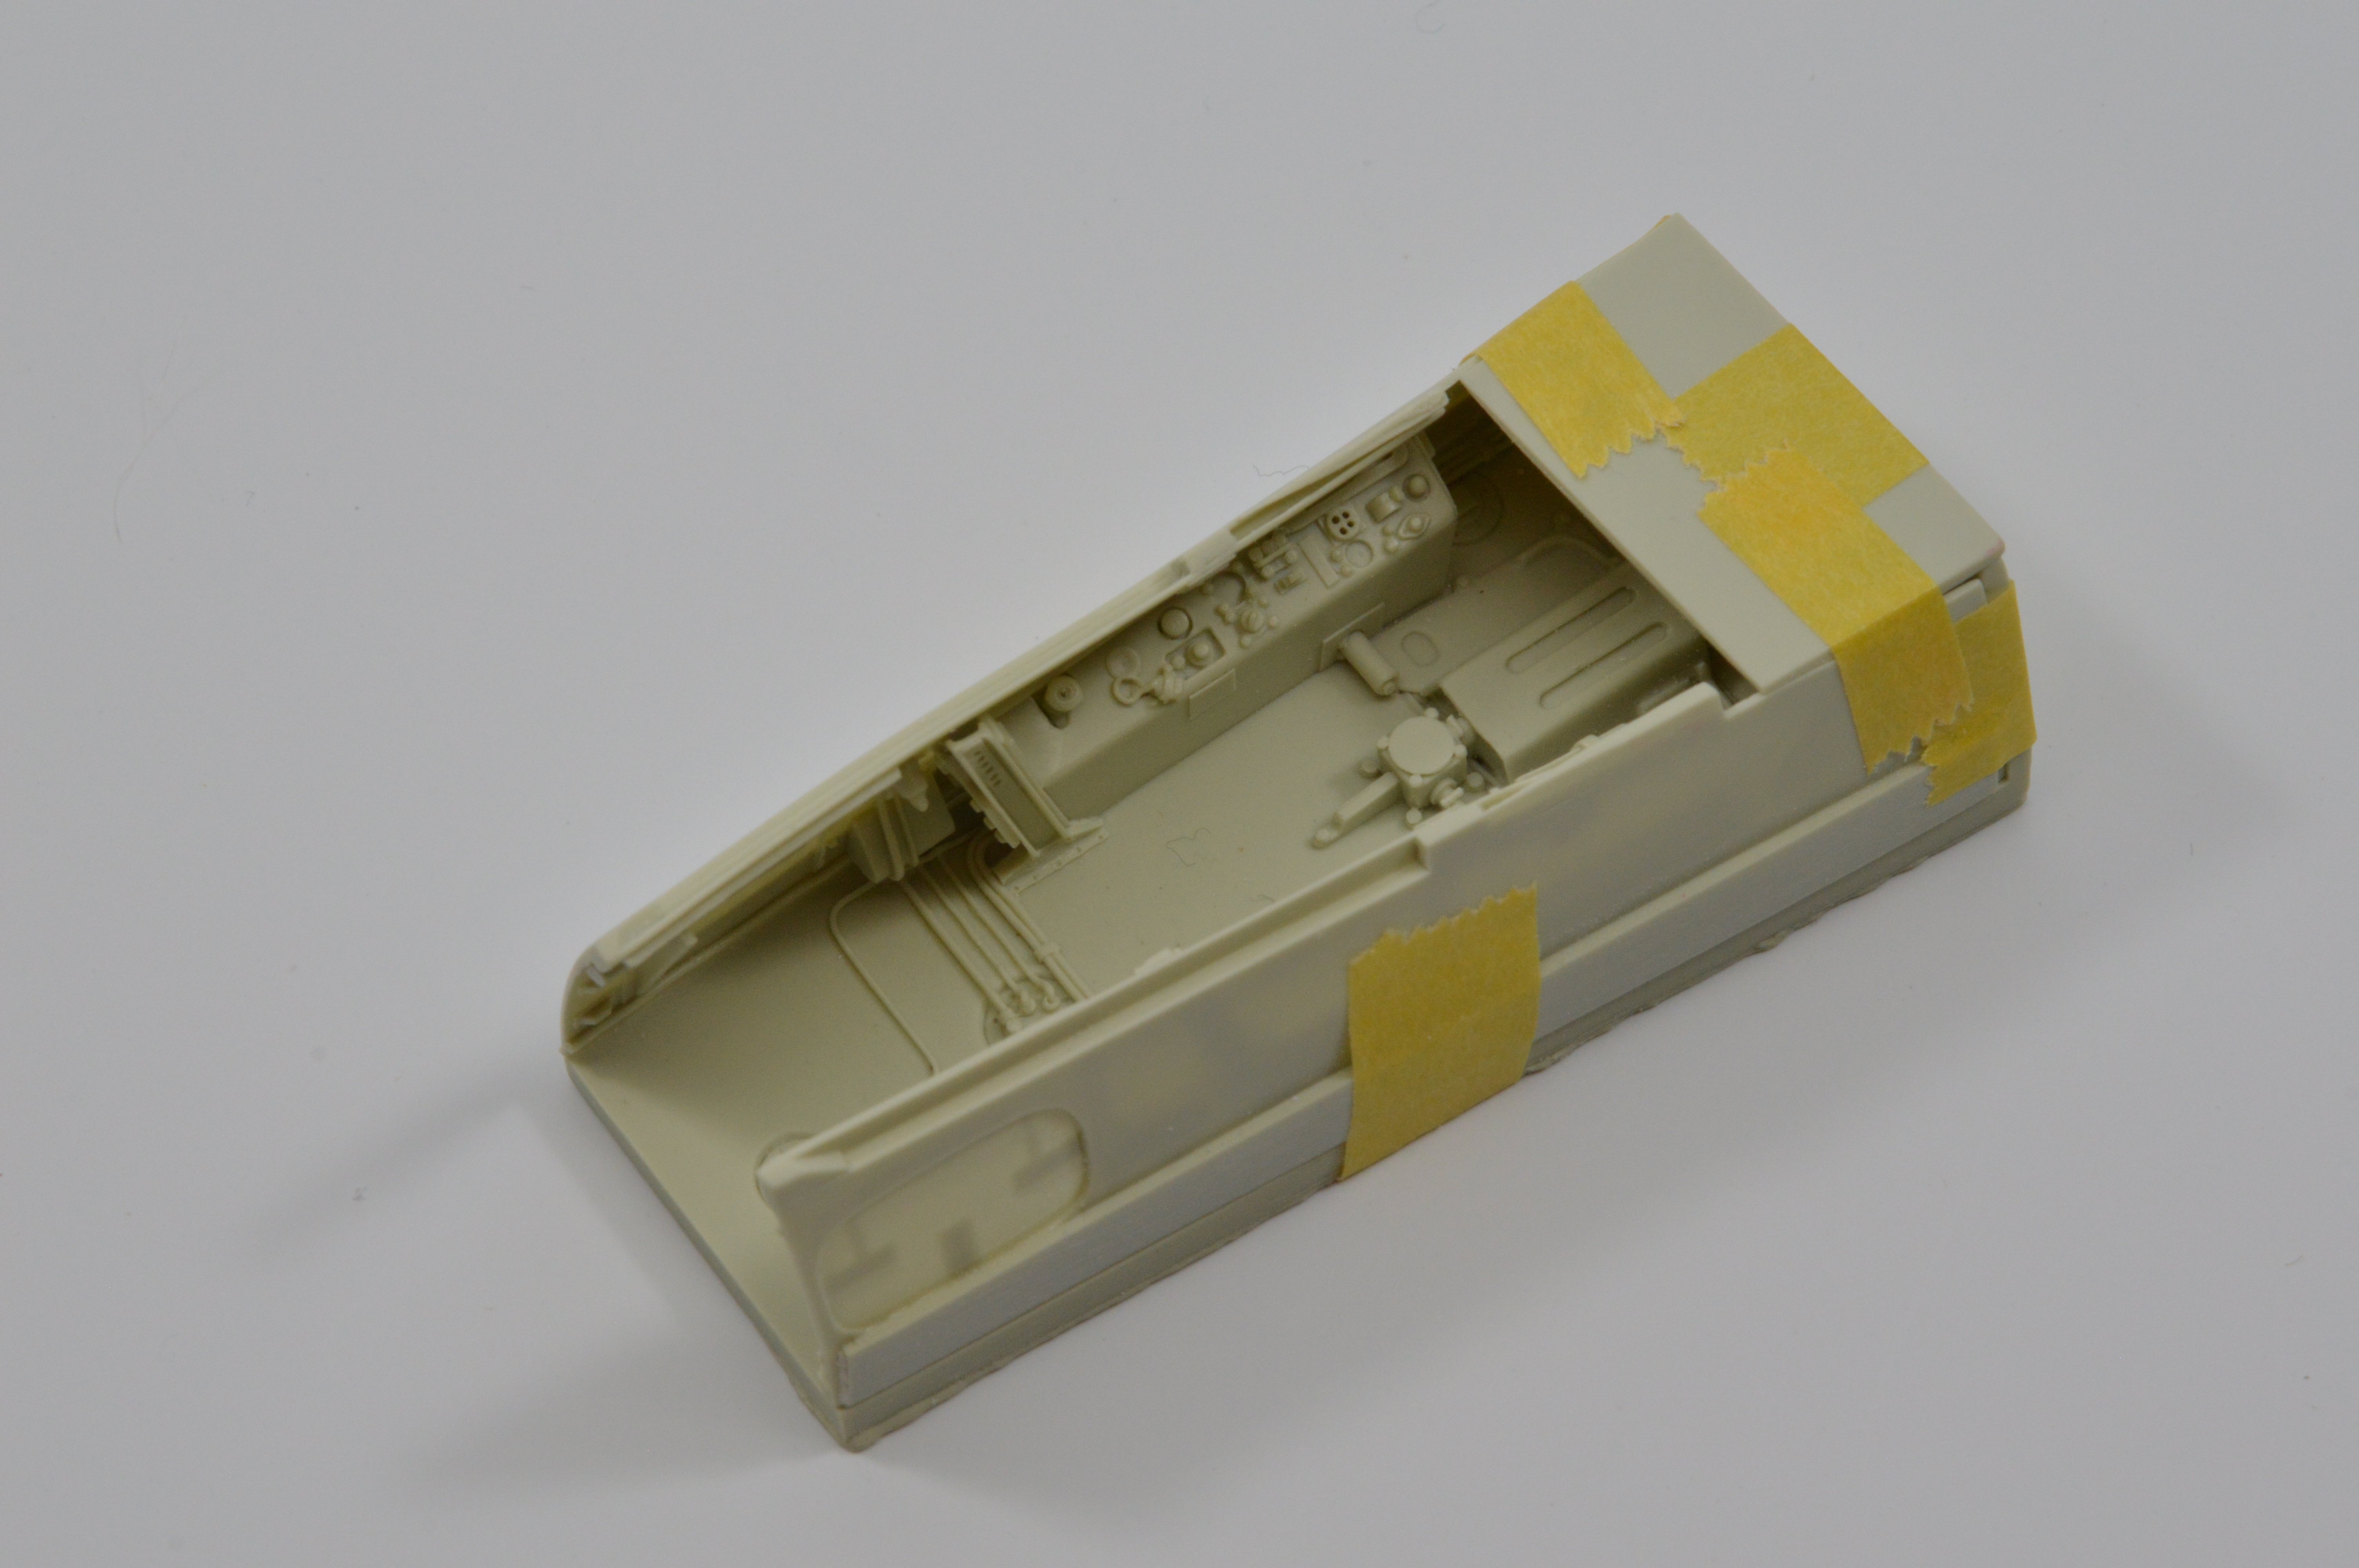
Even the Aires resin tub just doesn't look right, IP seems just to far forward when compared to reference photos, kind of like the pilot has to look down a tunnel to view the IP. The Eagle Edition set appears to have it right and does not have that tunnel effect when viewing the IP. KJ
-
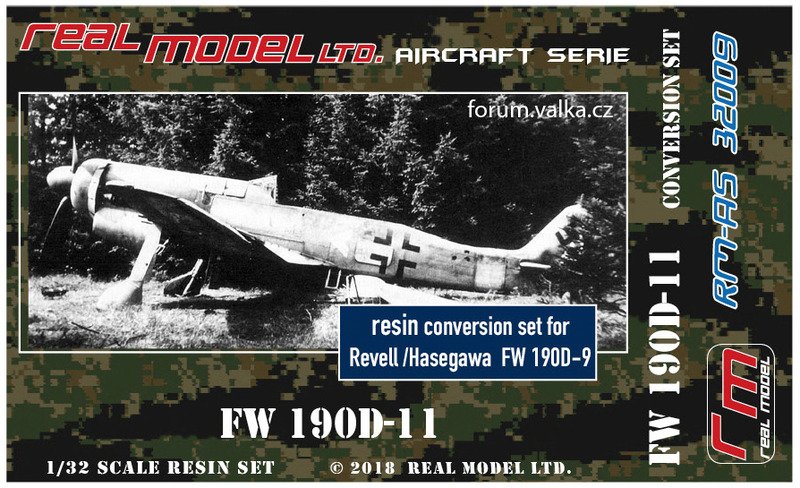
We really do need a new tool Fw 190 D series in 1/32. The Hasegawa kit is a good kit, but it has really been left behind in comparison to the new 1/32 kits. Most kit manufacturers produce what sells, and as many yawn when a new 109, Spitfire, Mustang, etc., is released, they do sell. I always thought Tamiya might be tempted to produce a 190D-9, but nothing yet, so just have to spend the money to buy the extra stuff for the Hasegawa kit. KJ
-
Big Huge Amazingly amazing announcement coming
Iceman replied to Clunkmeister's topic in General Discussion
-
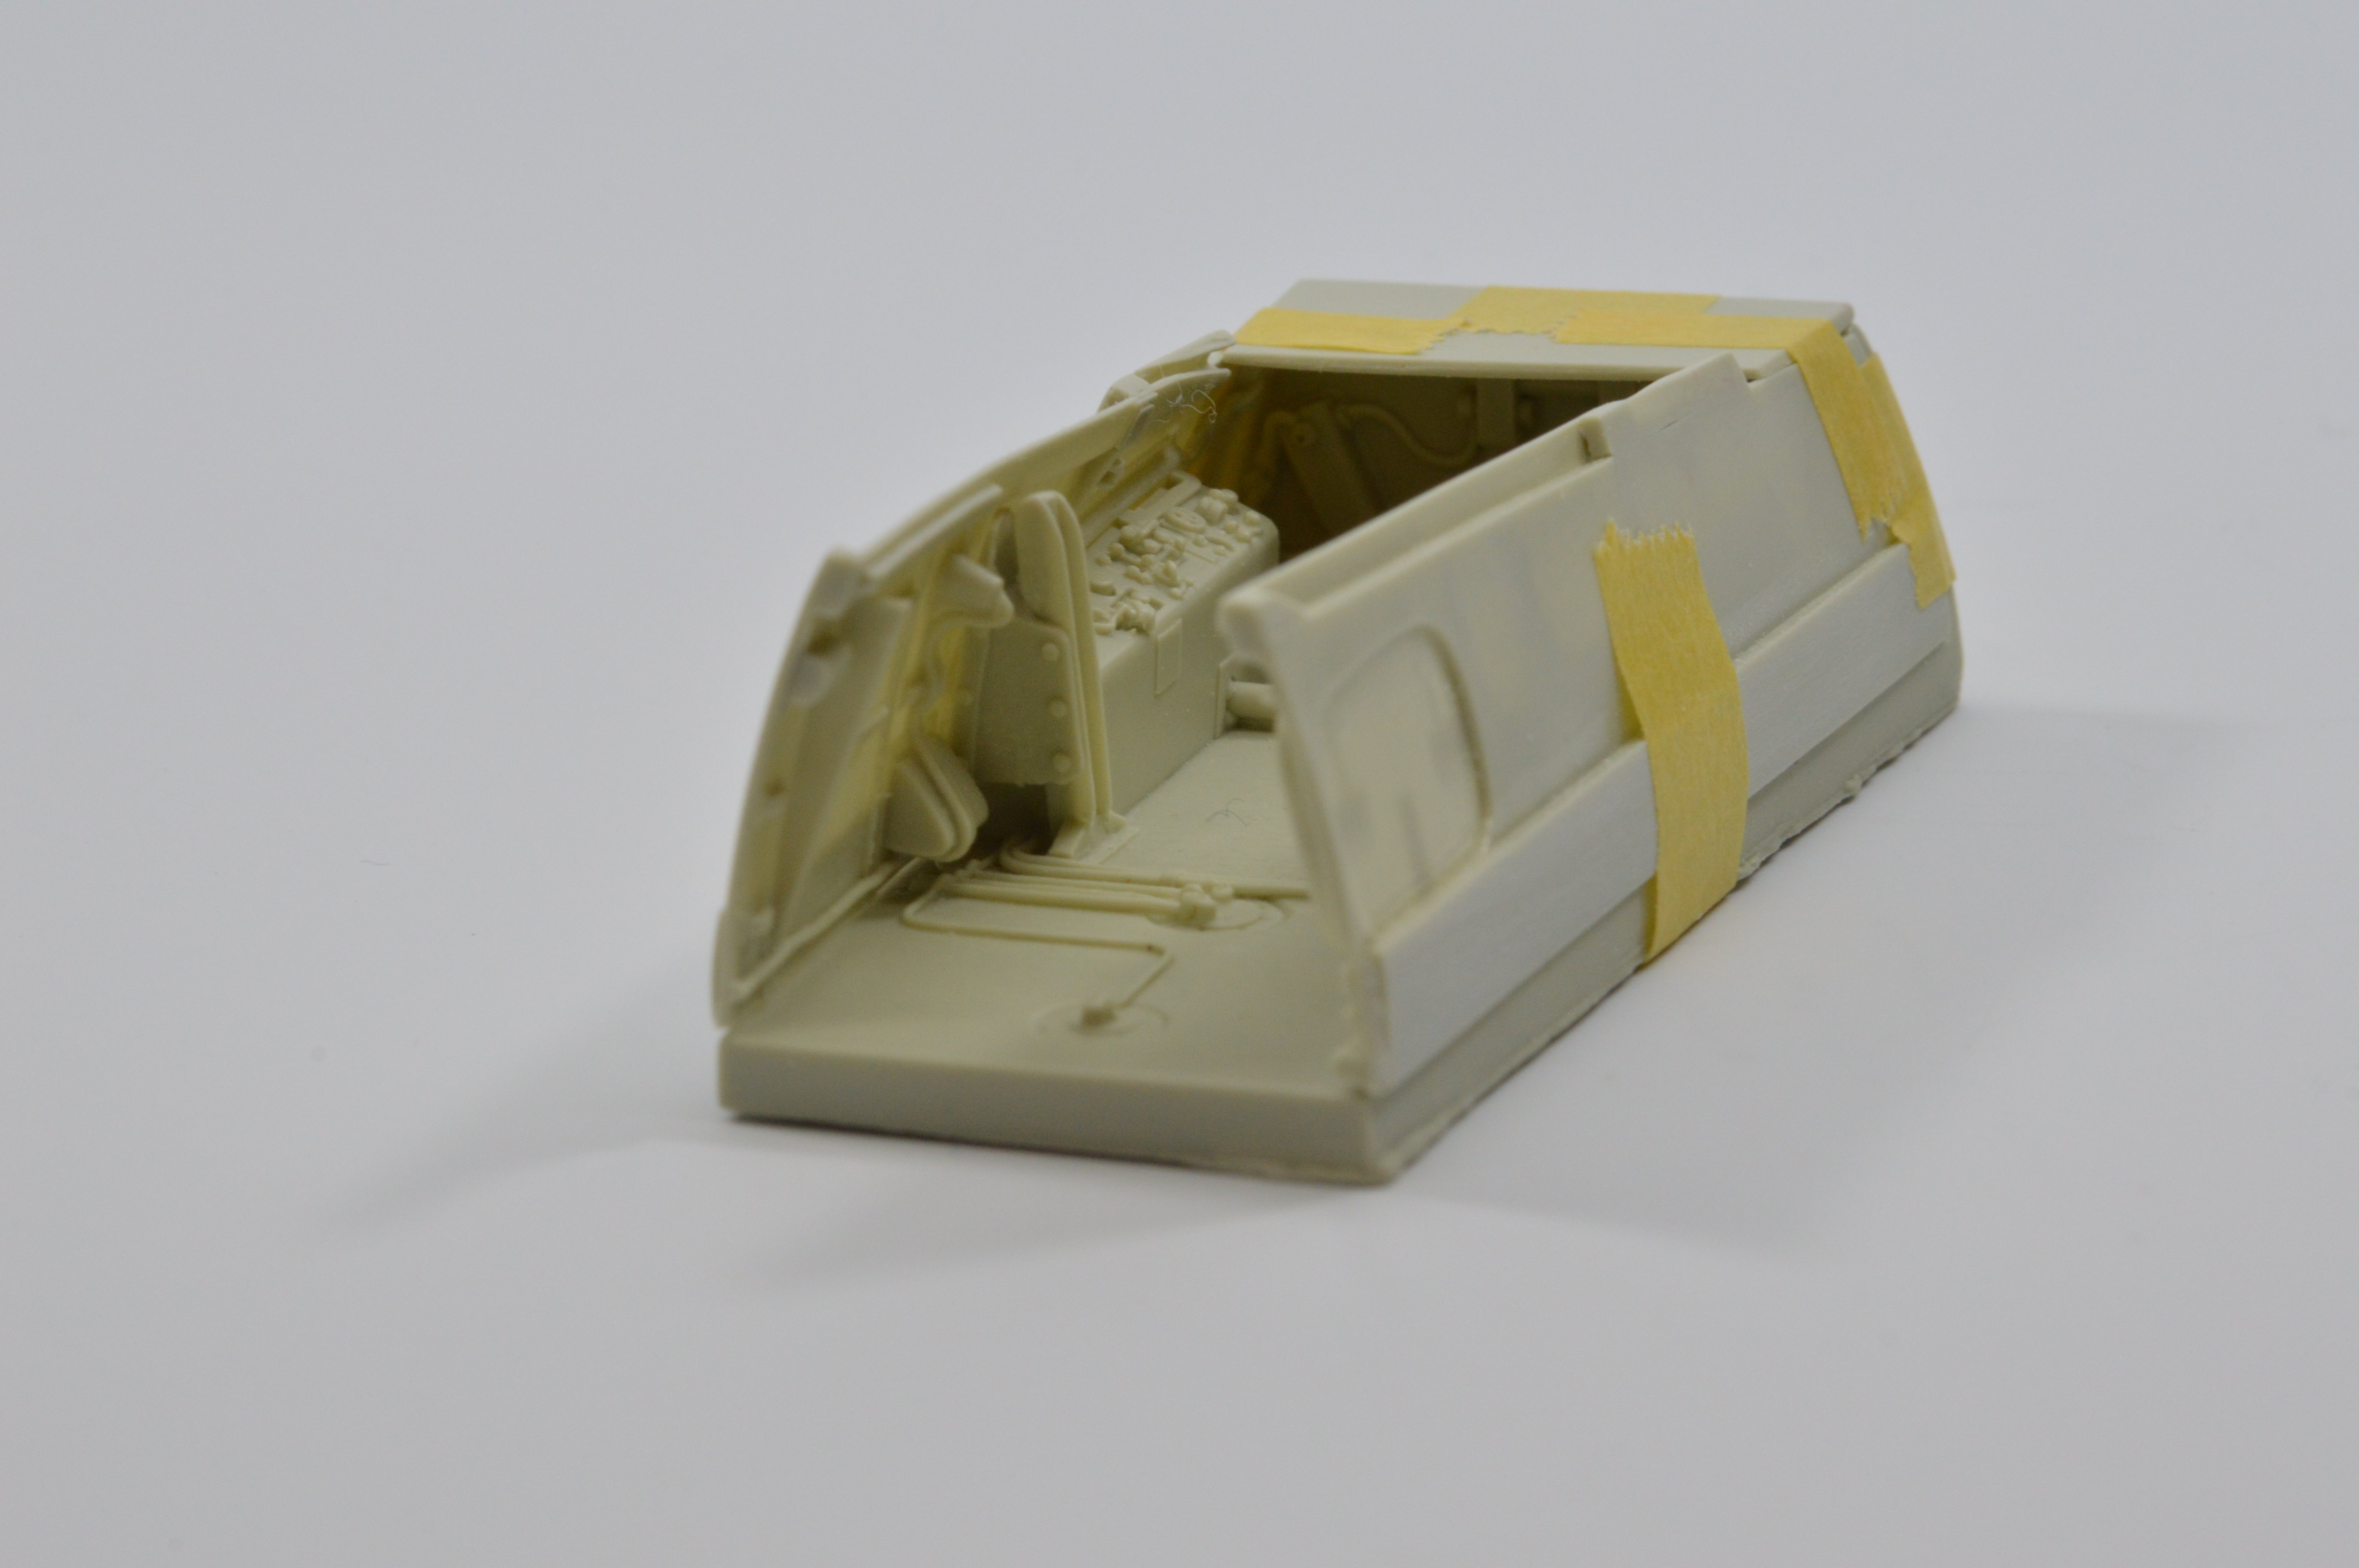
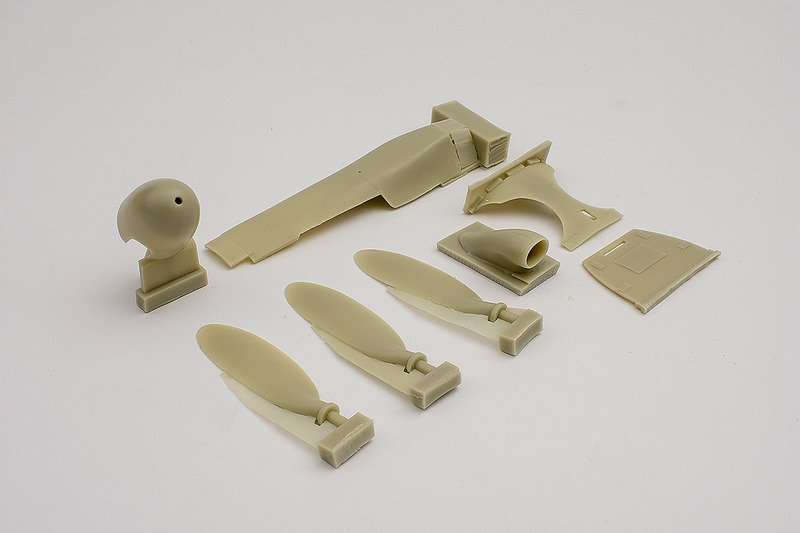
Some progress, decided to use the Eagle Editions cockpit which of course requires lots of cutting, scraping, sanding to make the kit fit the tub. I kicked around the idea of just doing some detailing to the kit cockpit, also did some dry-fits of the AIres resin offering for the D-9, and in the end, the Eagle set was just so far superior in terms of detail and scale that it's going in. And of course, adding more rivets KJ

-
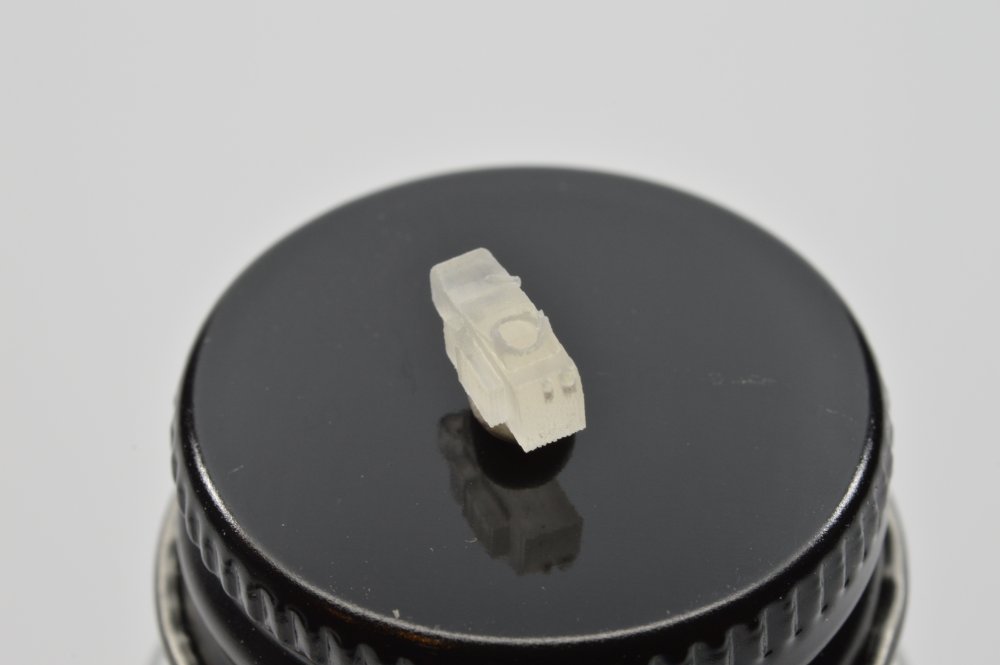
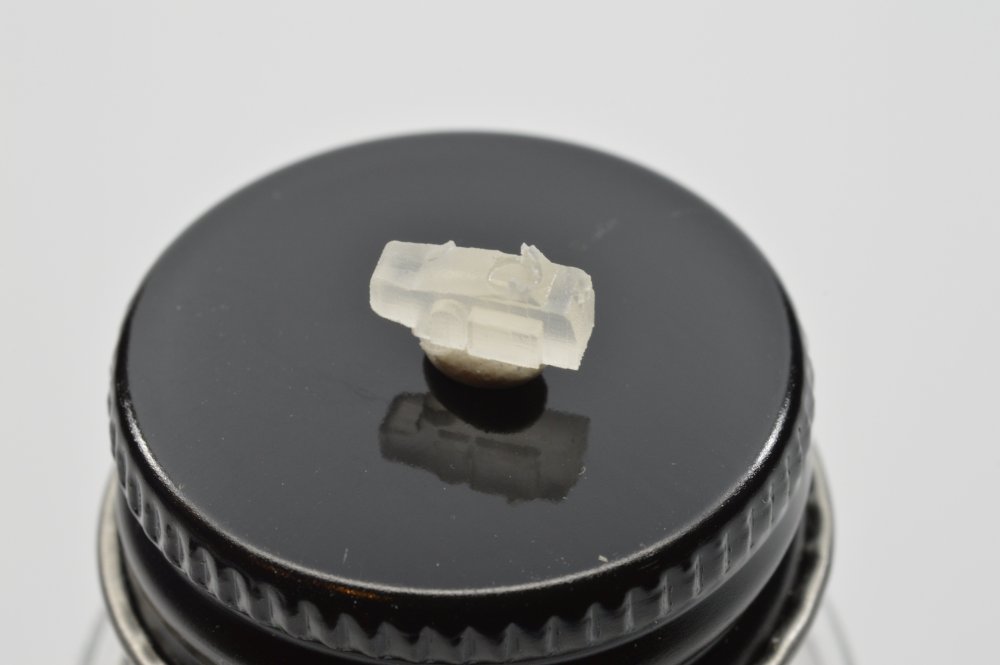
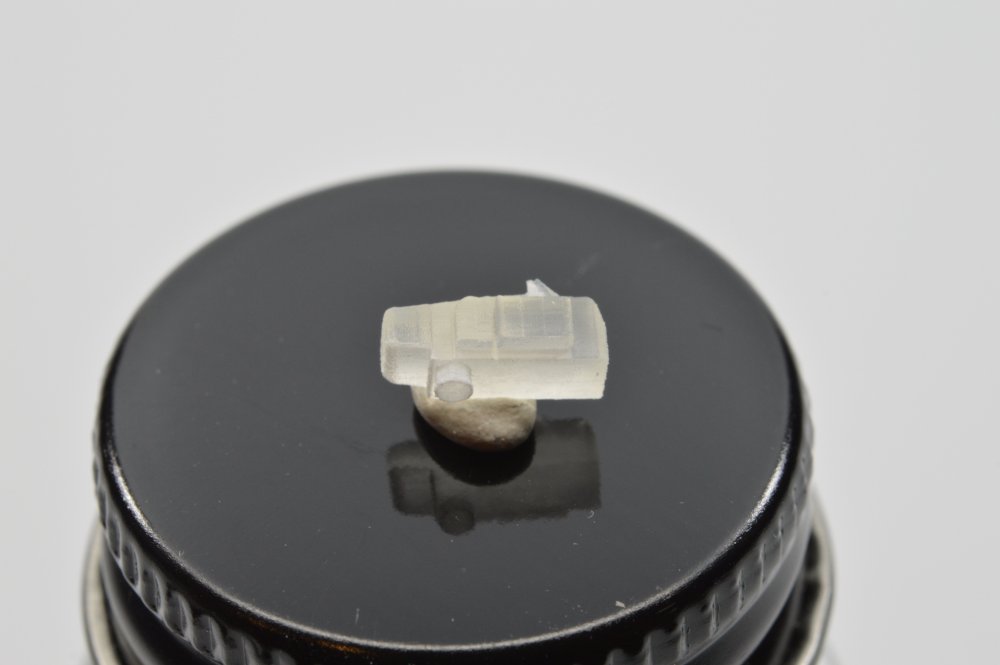
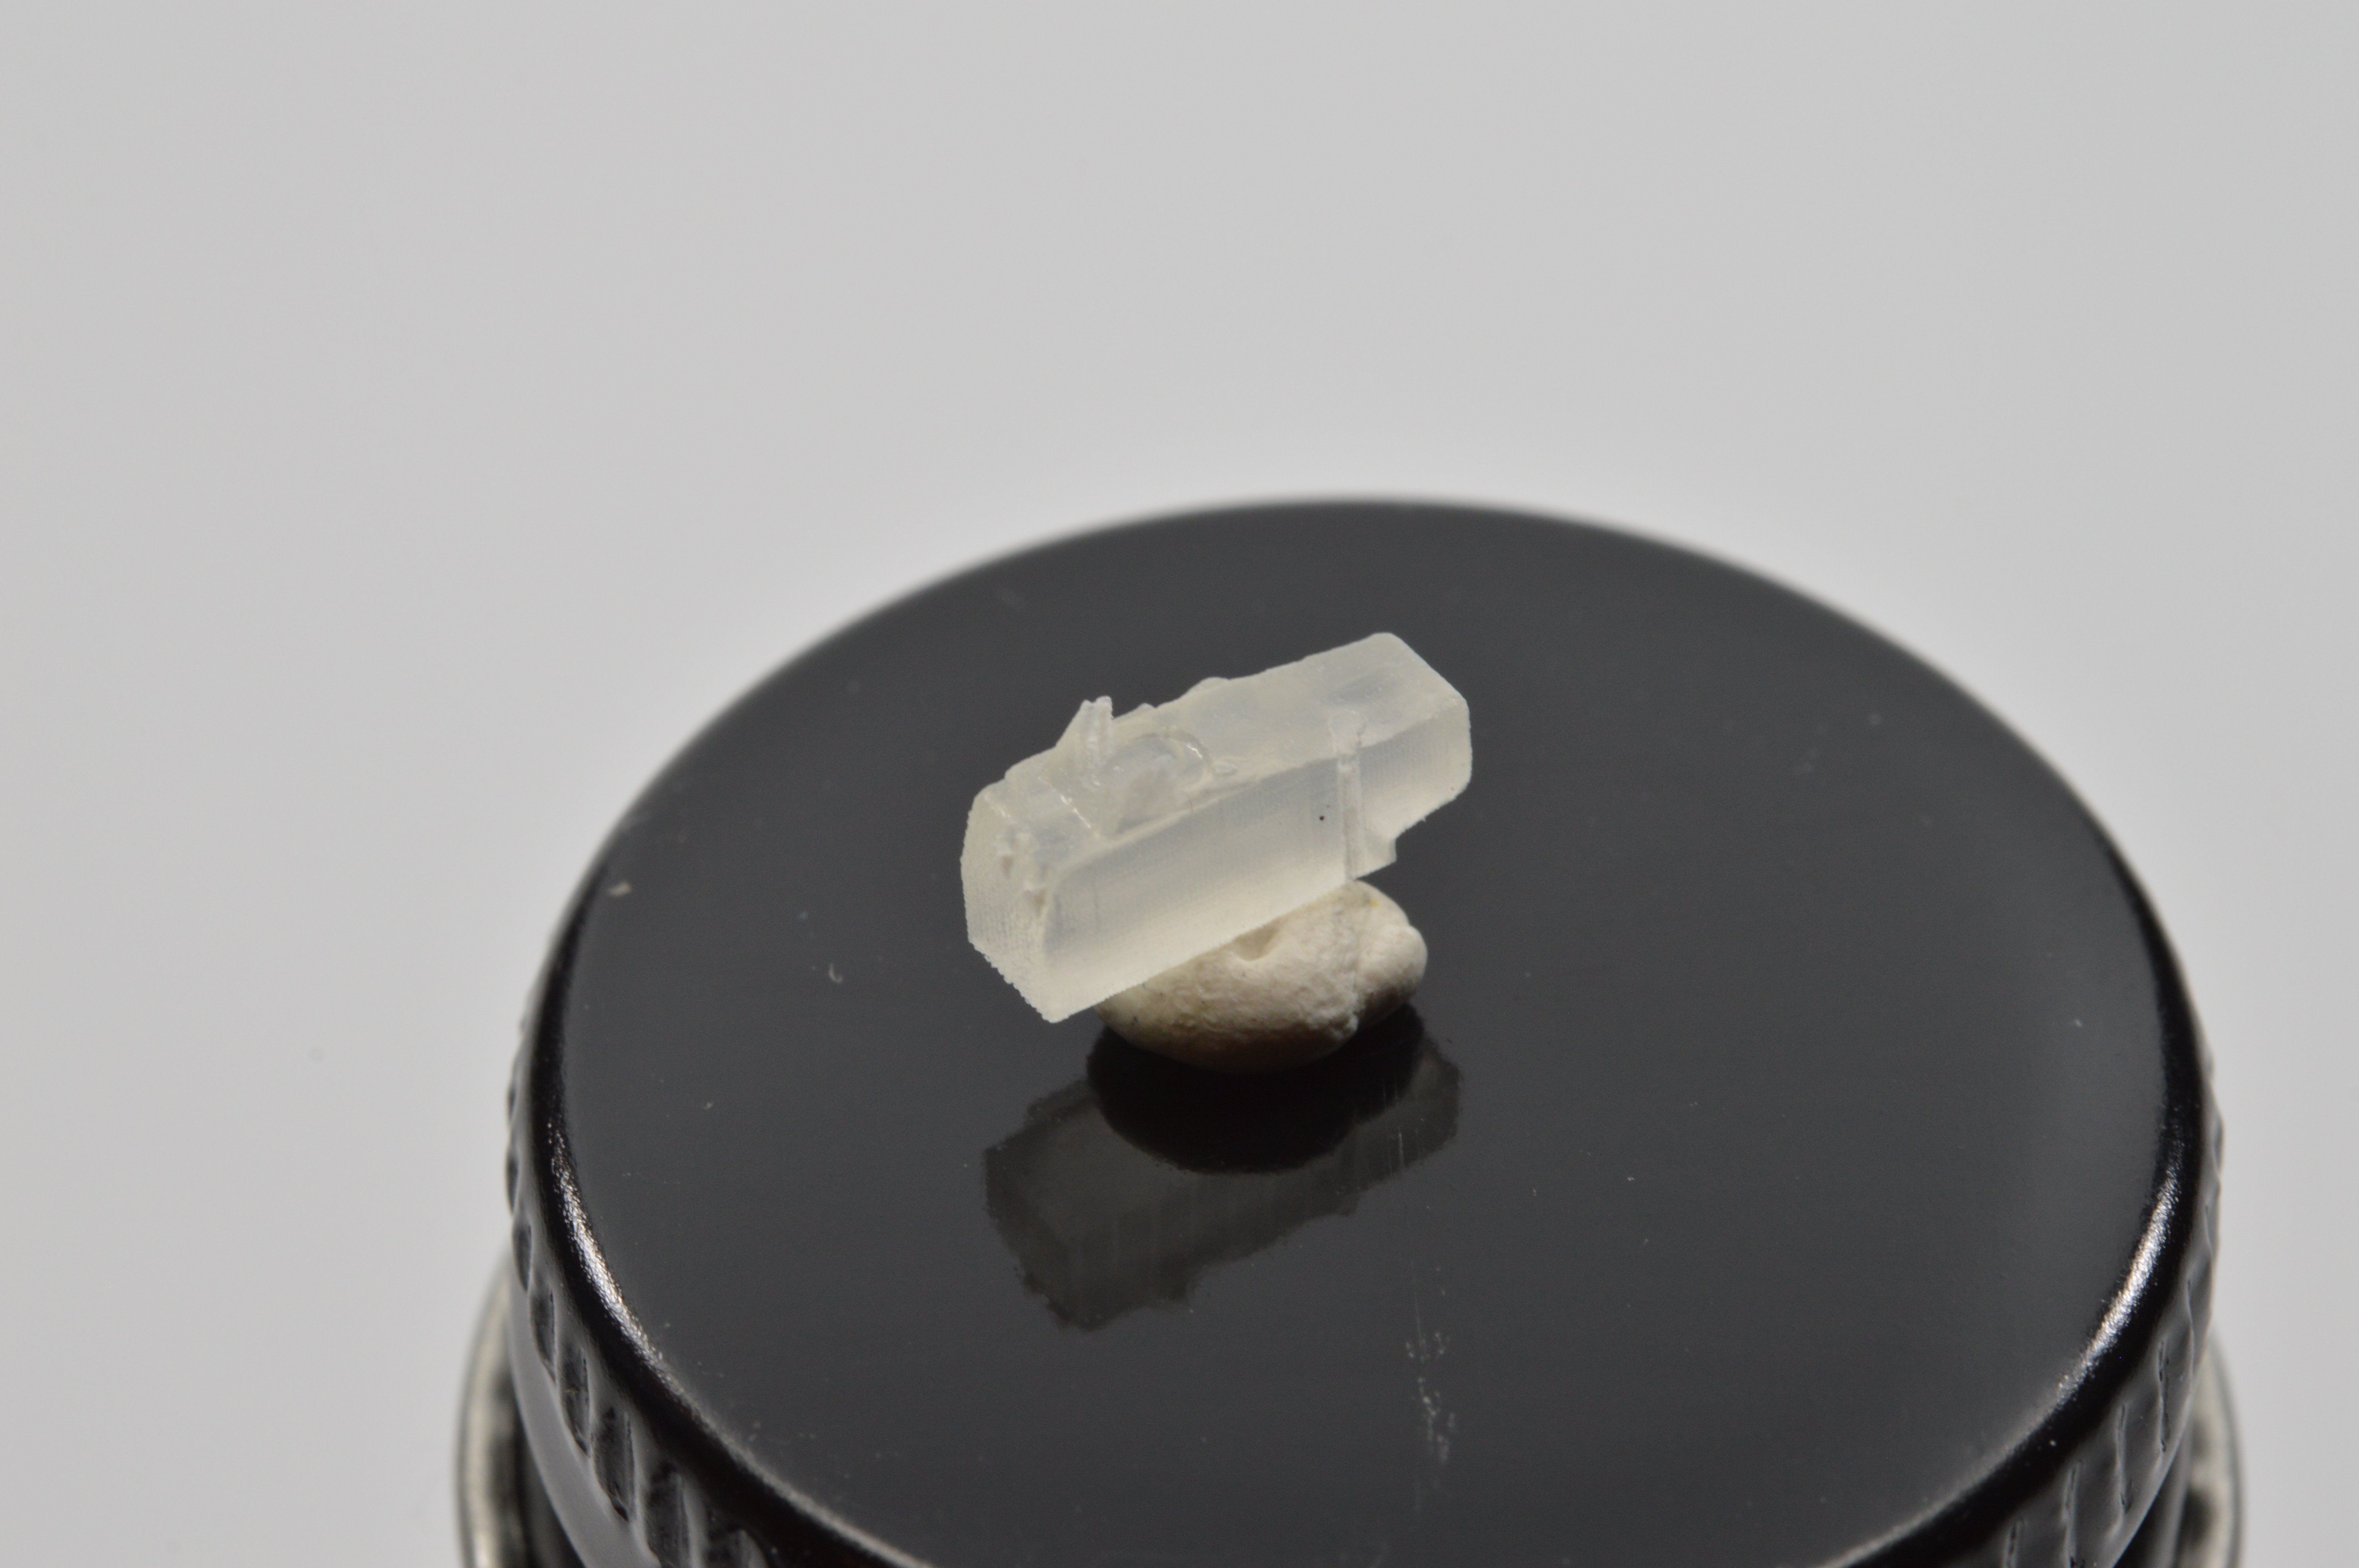
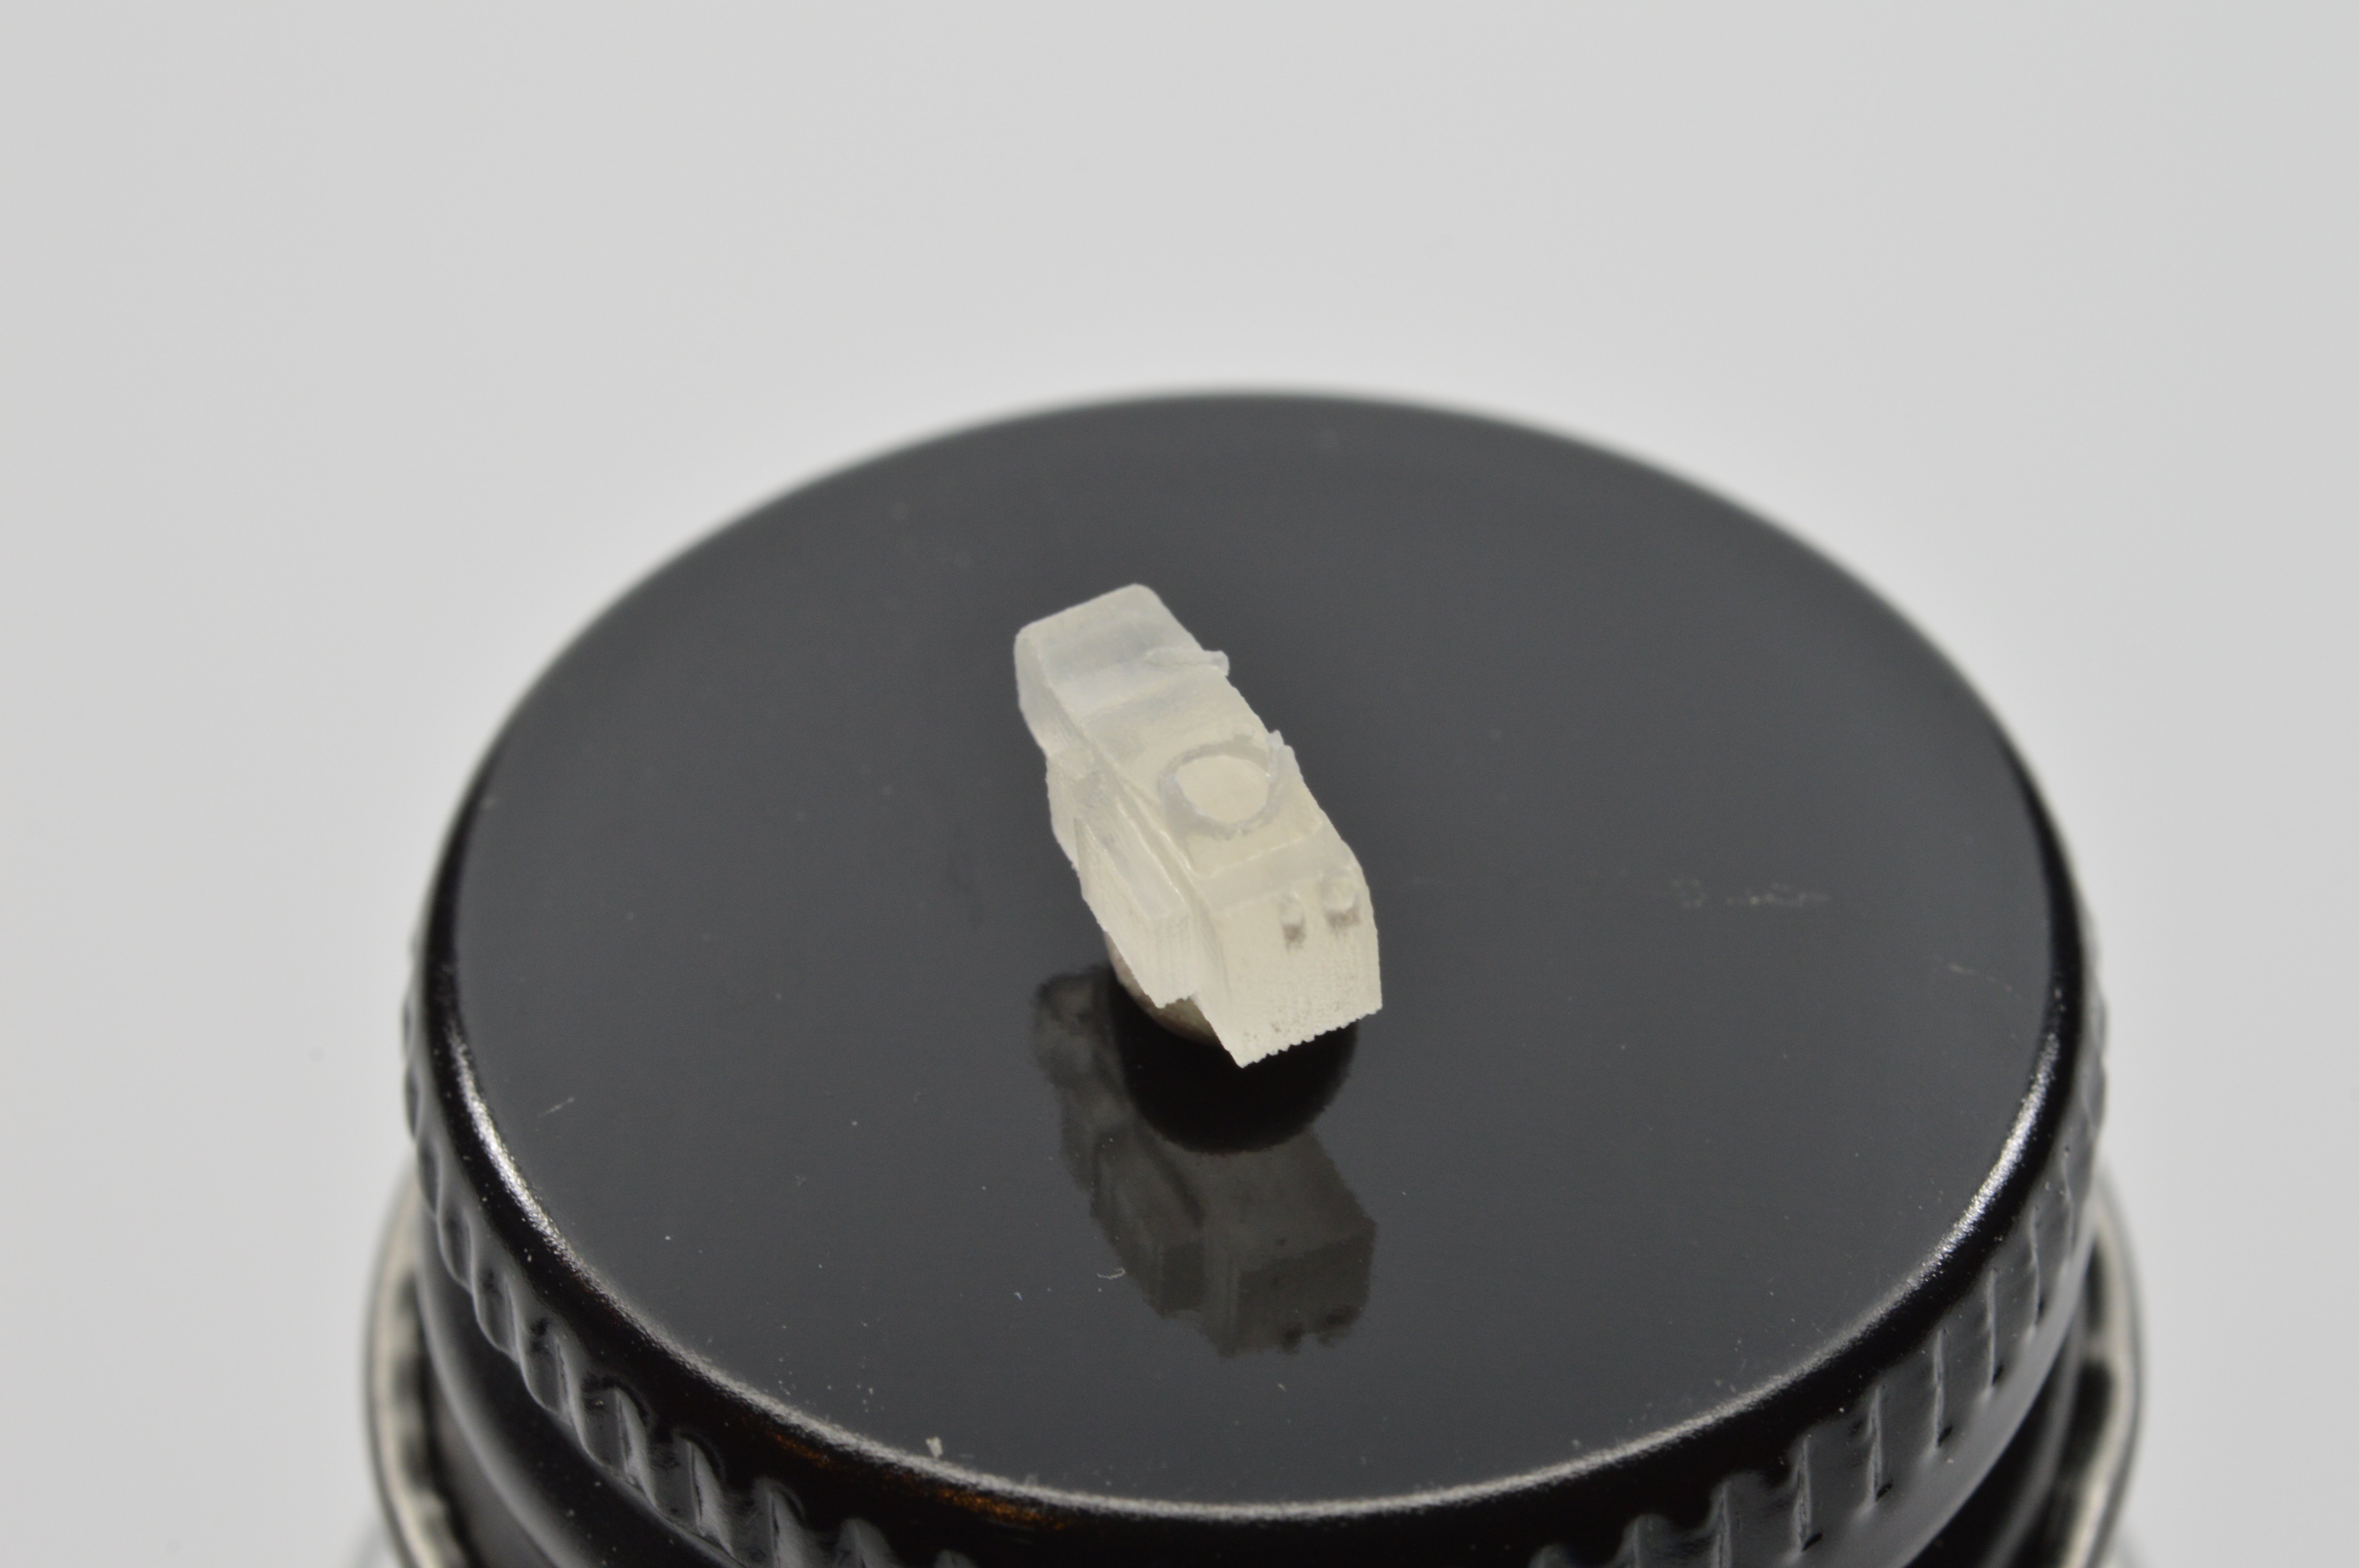
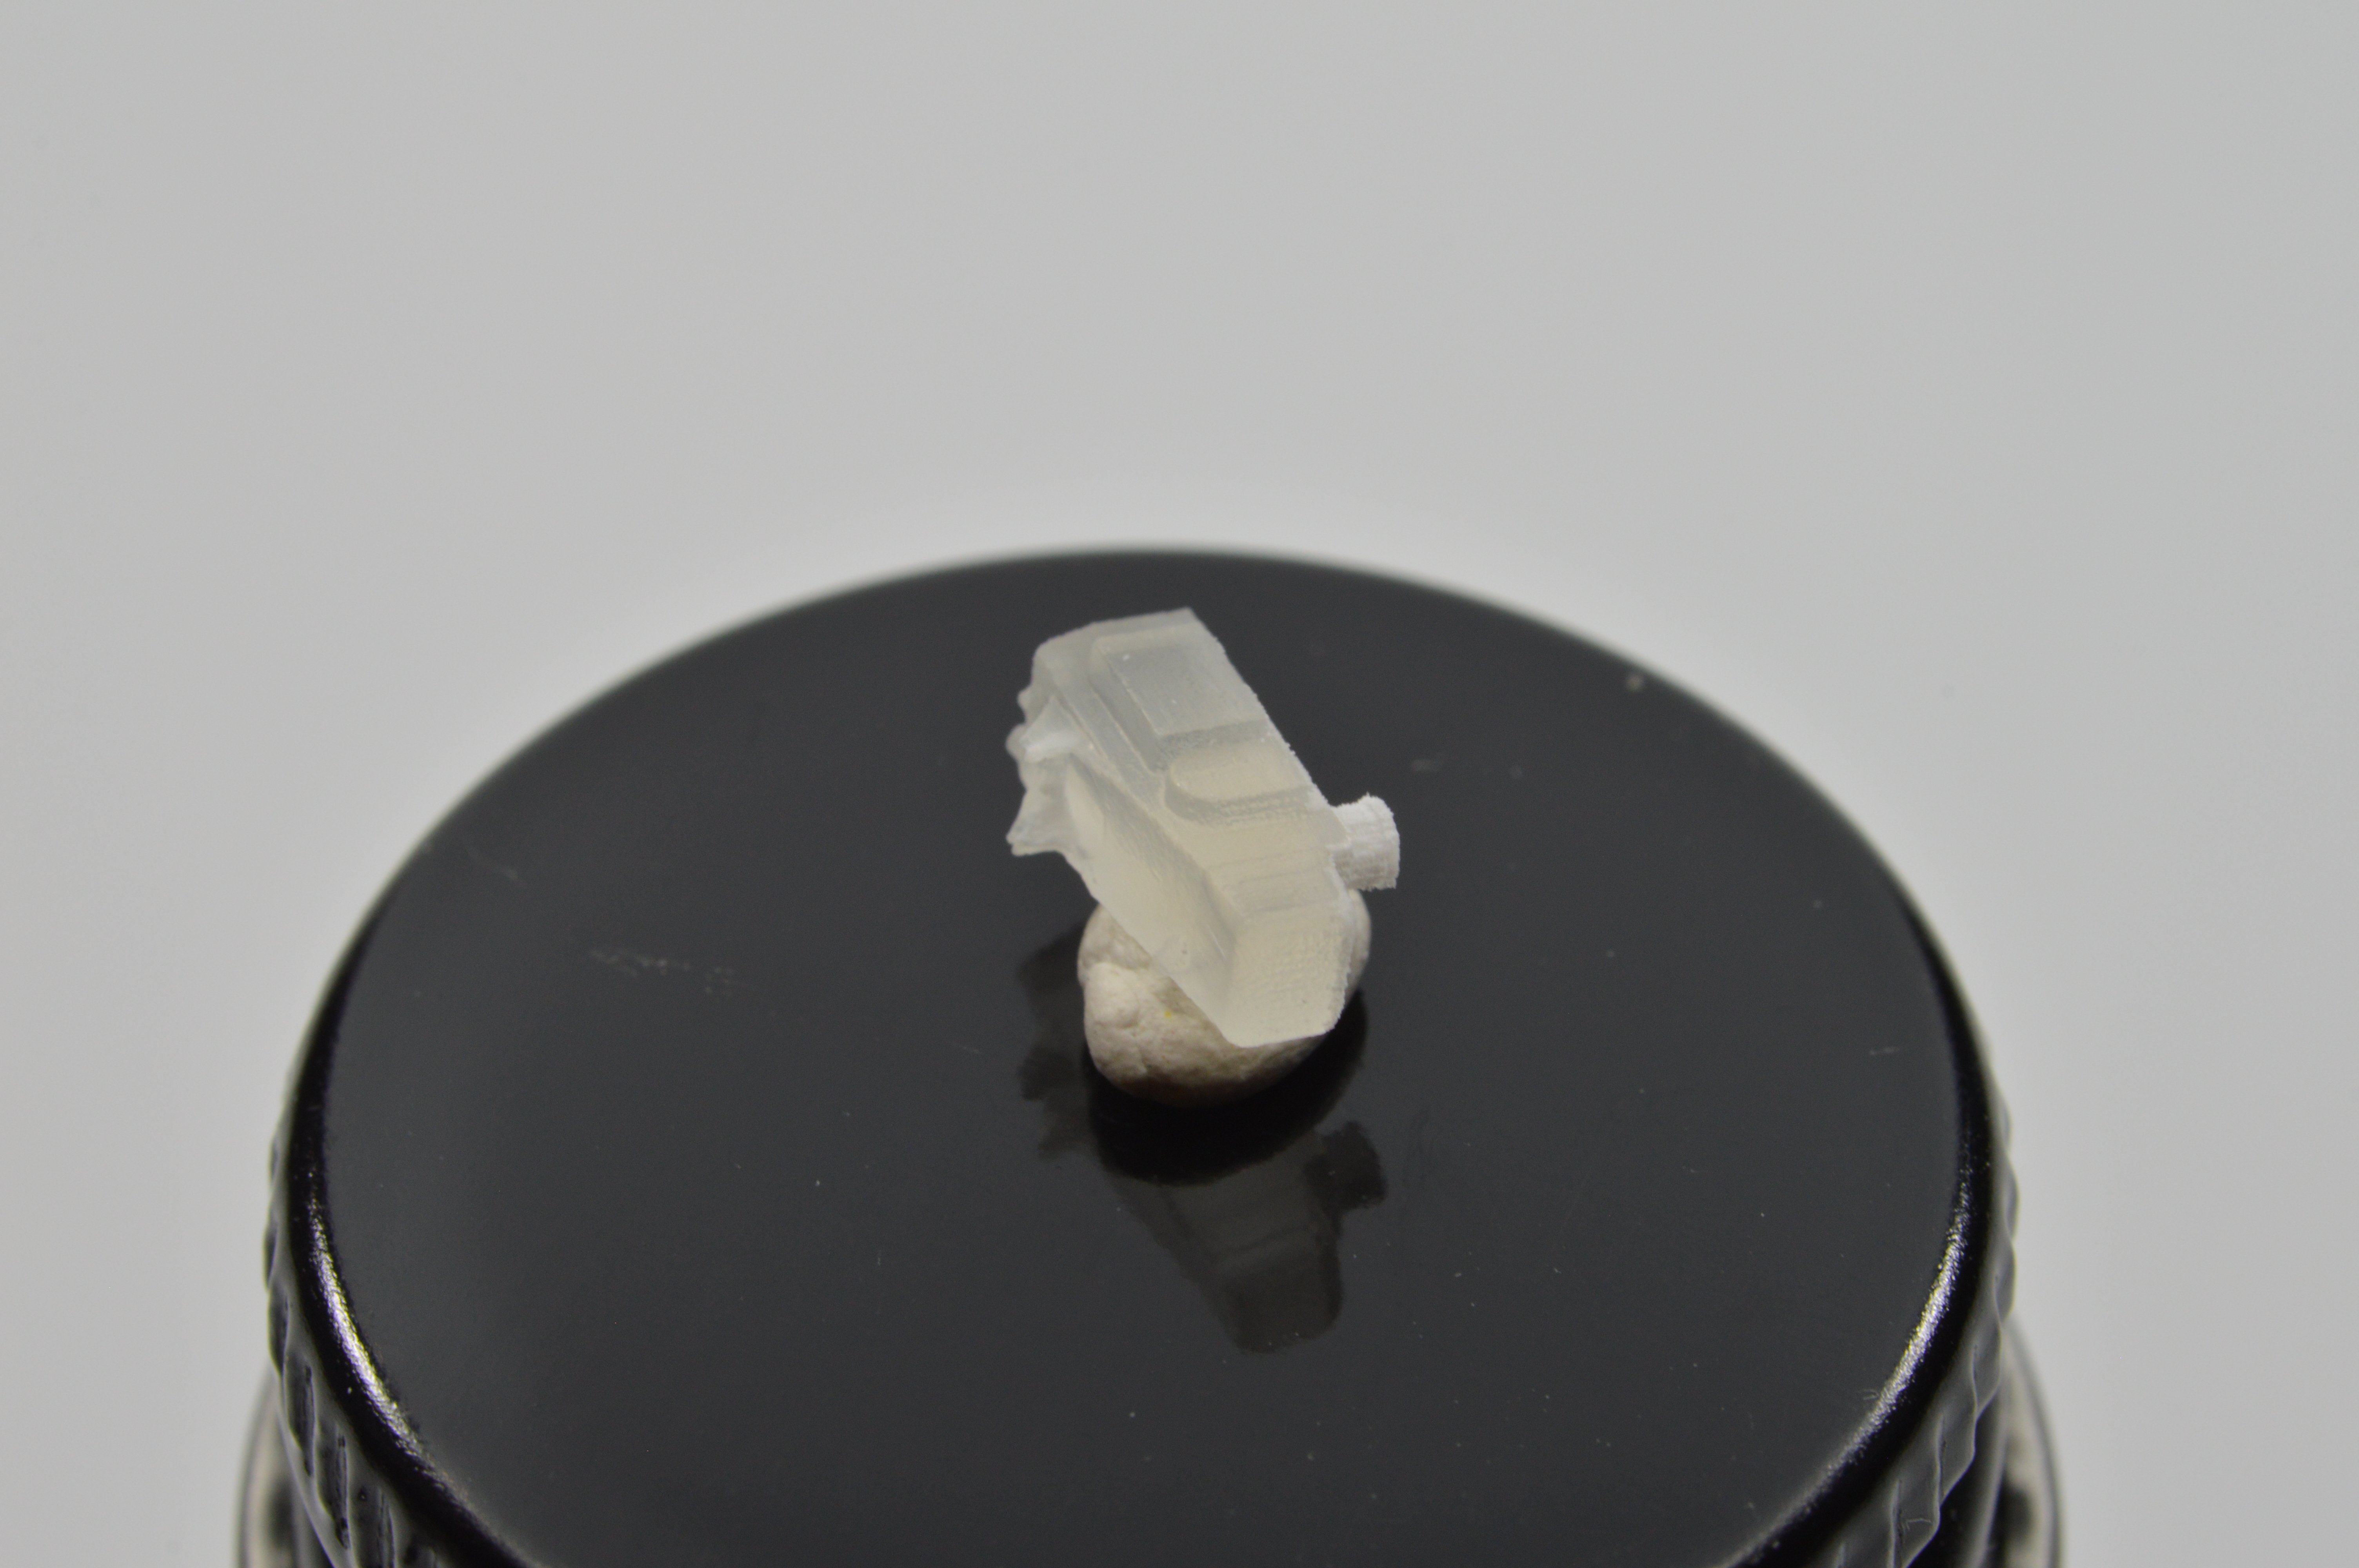
And just like that, a 1/32 3-D printed EZ 42 gun sight.

-
I am kind of thinking something German for the Big T's next release, they have not done a 109, 190 or 262 in the new 1/32 line yet.
-
Isn't about that time that Tamiya hits the market with their next 1/32 Aircraft release?
-
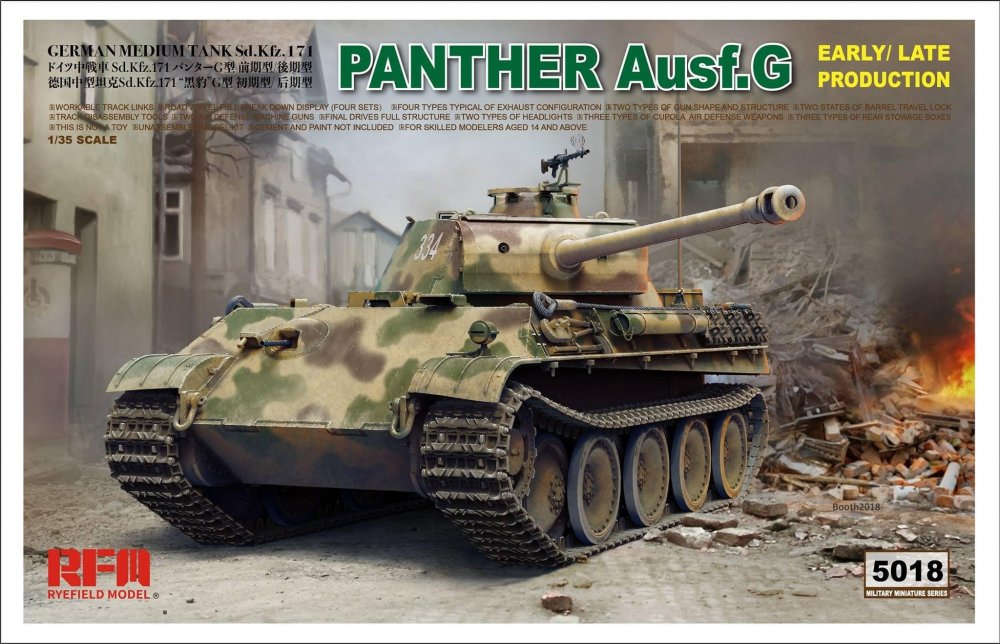
I agree, I have not built a 1/35 armor kit in years, but I did have to breakdown and order the Rye Field Panther G from Sprue Brothers. Just to nice of a kit to pass up on even if it does sit on my kit shelves. Box art is excellent to! KJ
-
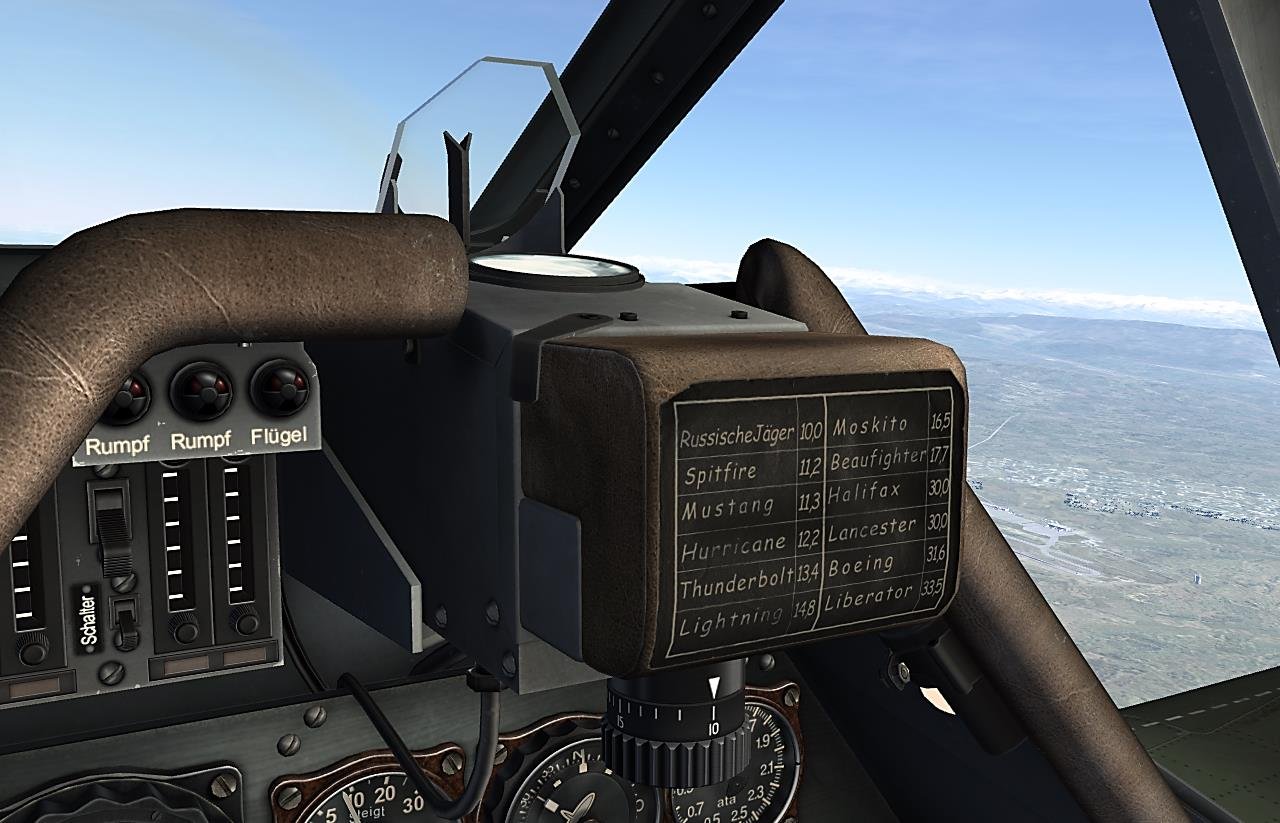
Does anyone on the forum know if the late war German Revi EZ 42 Gyro gun sight has been produced by one of the kit manufactures or resin aftermarket producers in 1/32 scale? Looking for one for my next Fw 190D-9 project, but I may have to end up scratch building one. Thanks, KJ


-
The 1/32 Hasegawa or Revell kits are both good and still hold their own up against the kits produced with today's technology. My only gripe is that surface rivets are not present on these kits, in 1/32 scale that really should have been there. Kirk
-
Building a 1/32 JV 44 Fw 190D-11 just became more of a possibility for me.

-
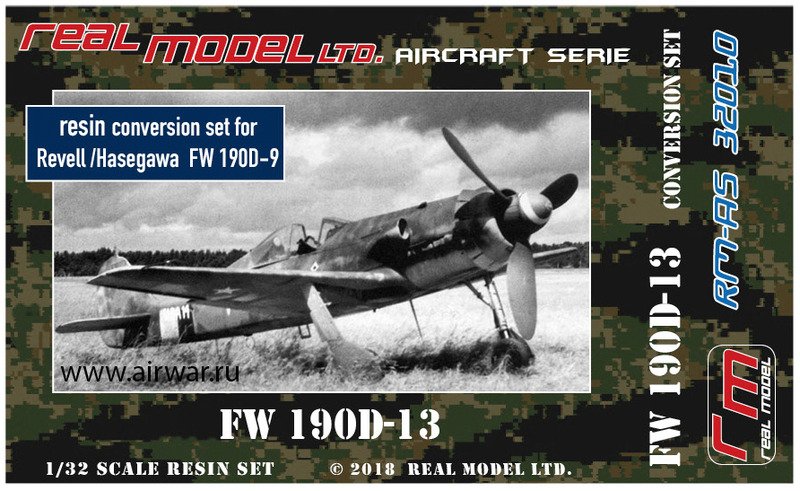
Got it, get out the epoxy putty. I had tried using the Grey Matter Figures D-13 conversion set for the Hasegawa kit a few years ago, but got so damn frustrated with the entire mating of resin fuselage to plastic wings, etc. that it ended up on the permanent shelf of doom. These sets look like a much more reasonable approach with just some epoxy putty sculpting necessary. I would sign up for that. Kirk
-
Does look nice, only thing I am not seeing with these sets is the cowl's side bulges that were a prominent feature of the later D series.
-
The markings of the JG 1 Butcher Birds were stunning, great choice! KJ
-
WOW!
.jpg.d1b8ef9a2bcbf752e05292d85d8041e1.jpg)
- 96 replies
-
- 2
-

-
- 1/32
- special hobby
- (and 1 more)
-
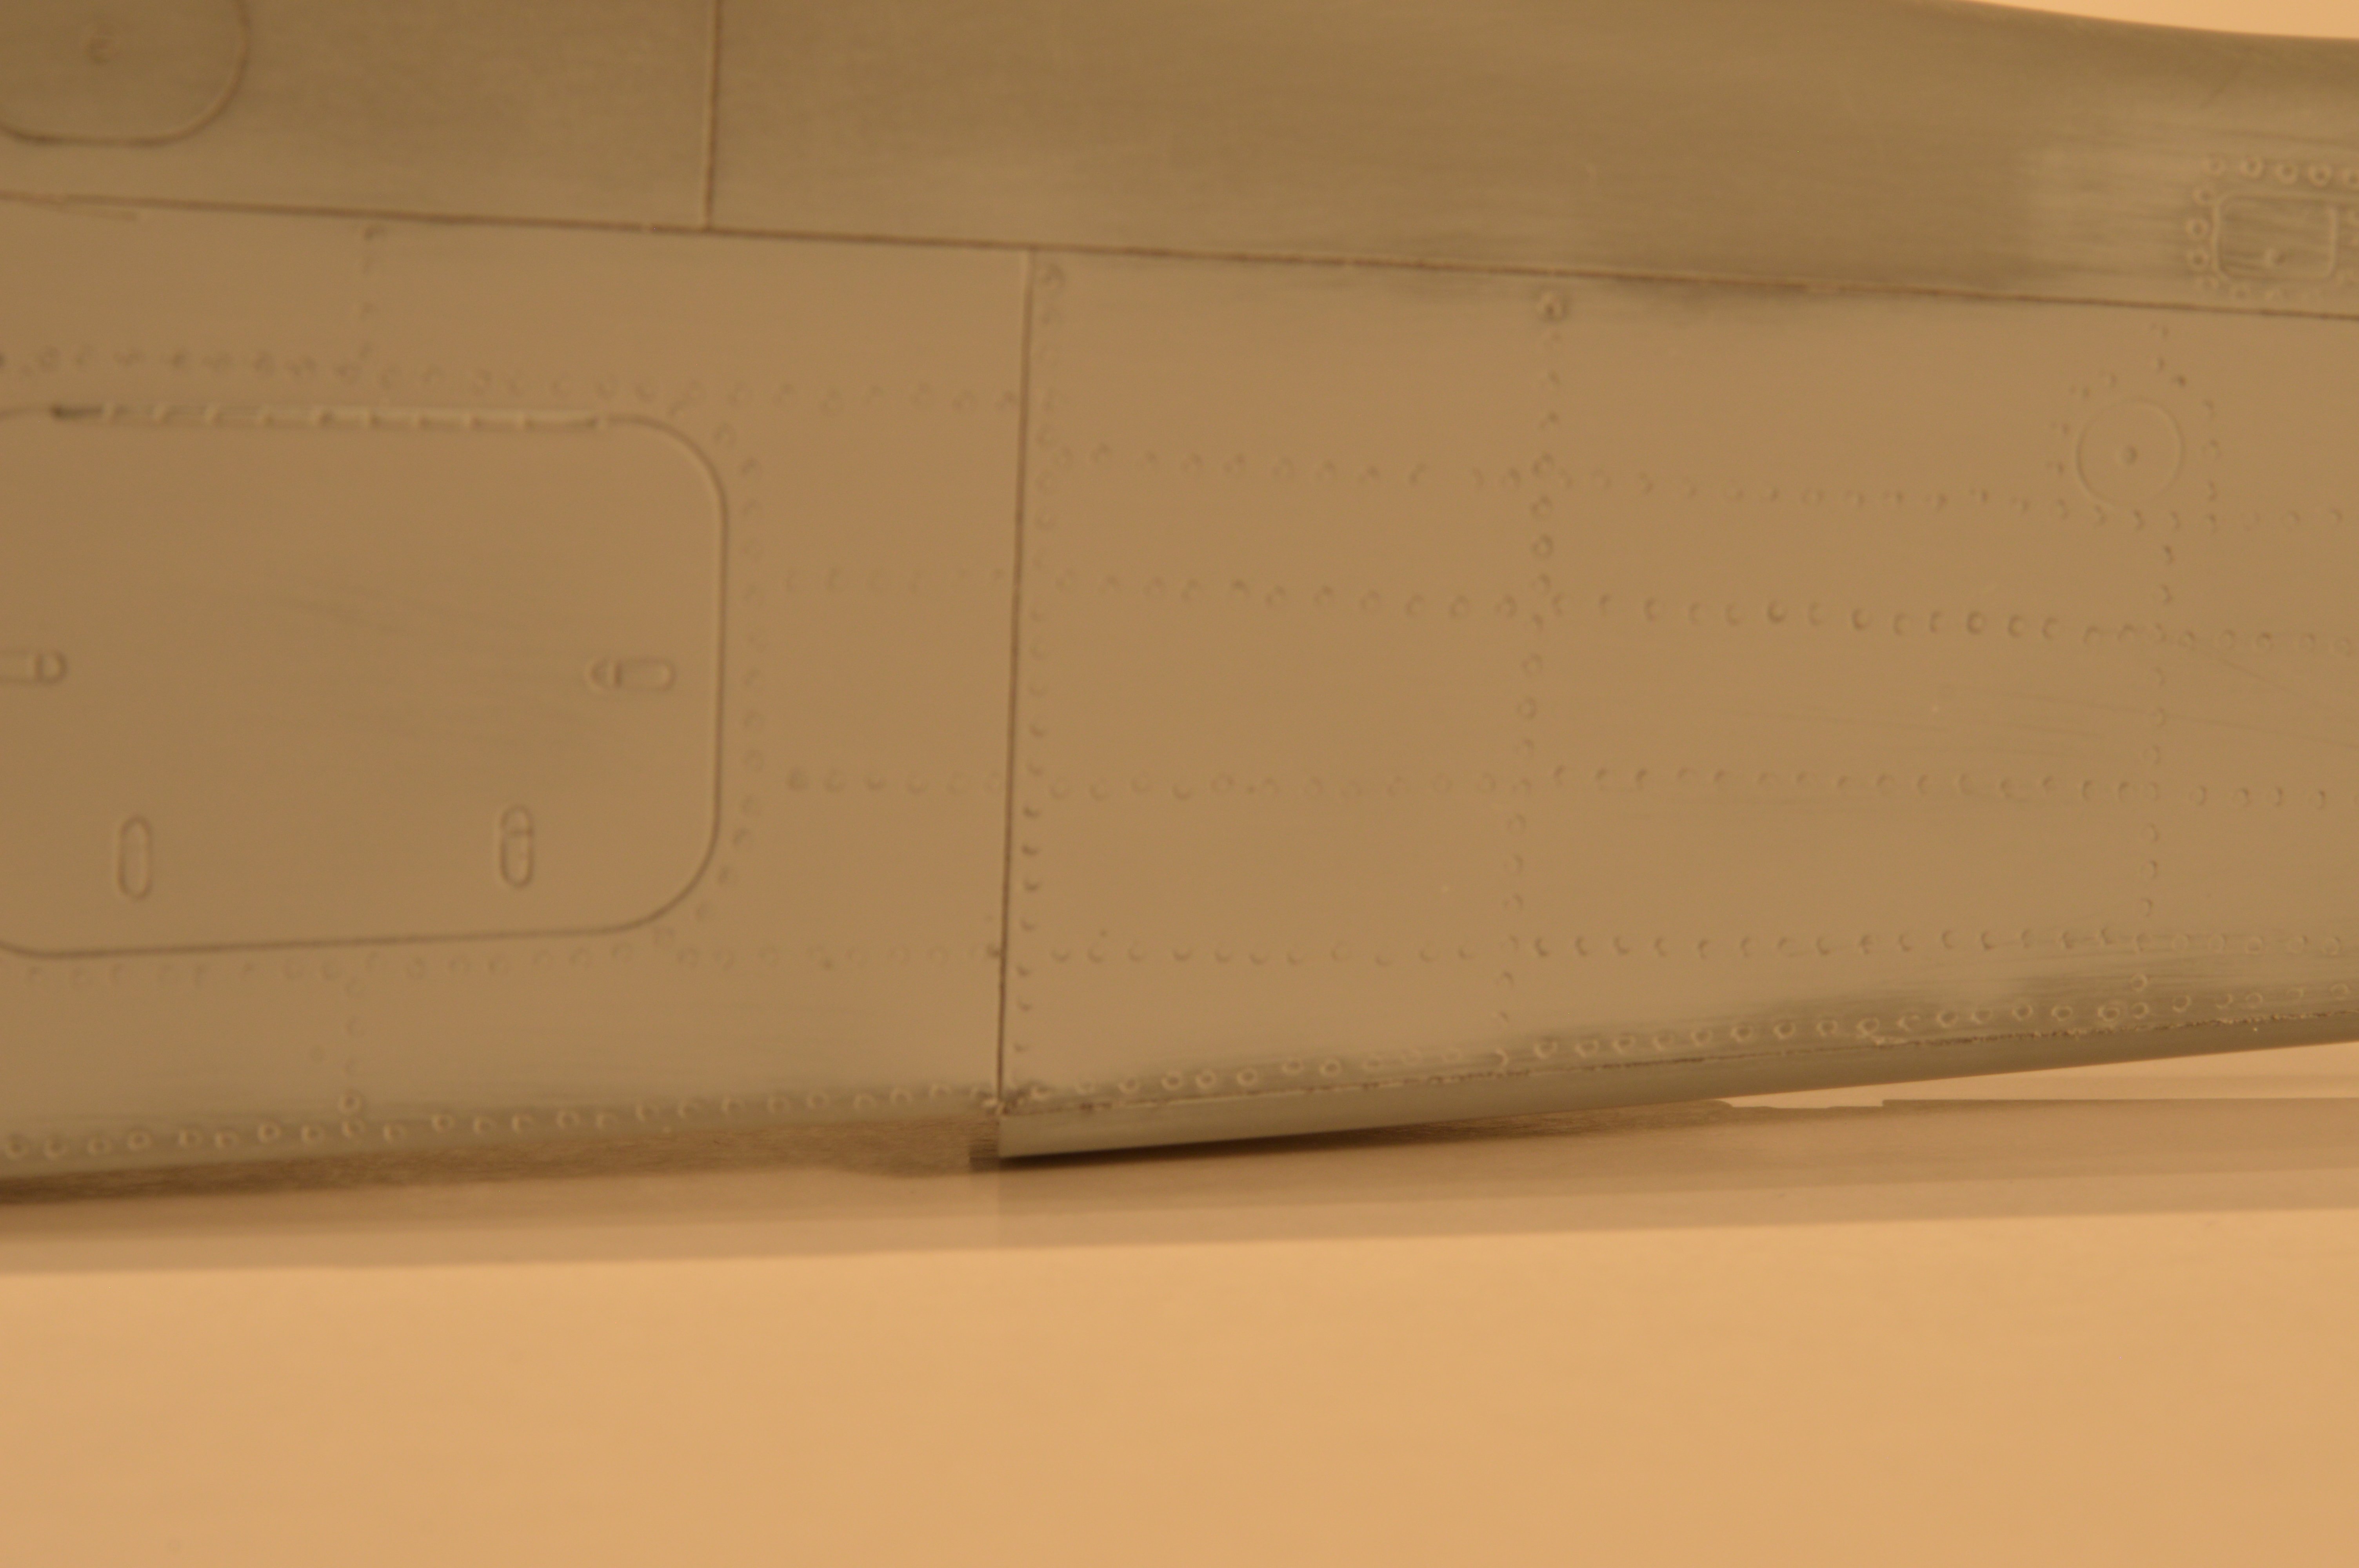
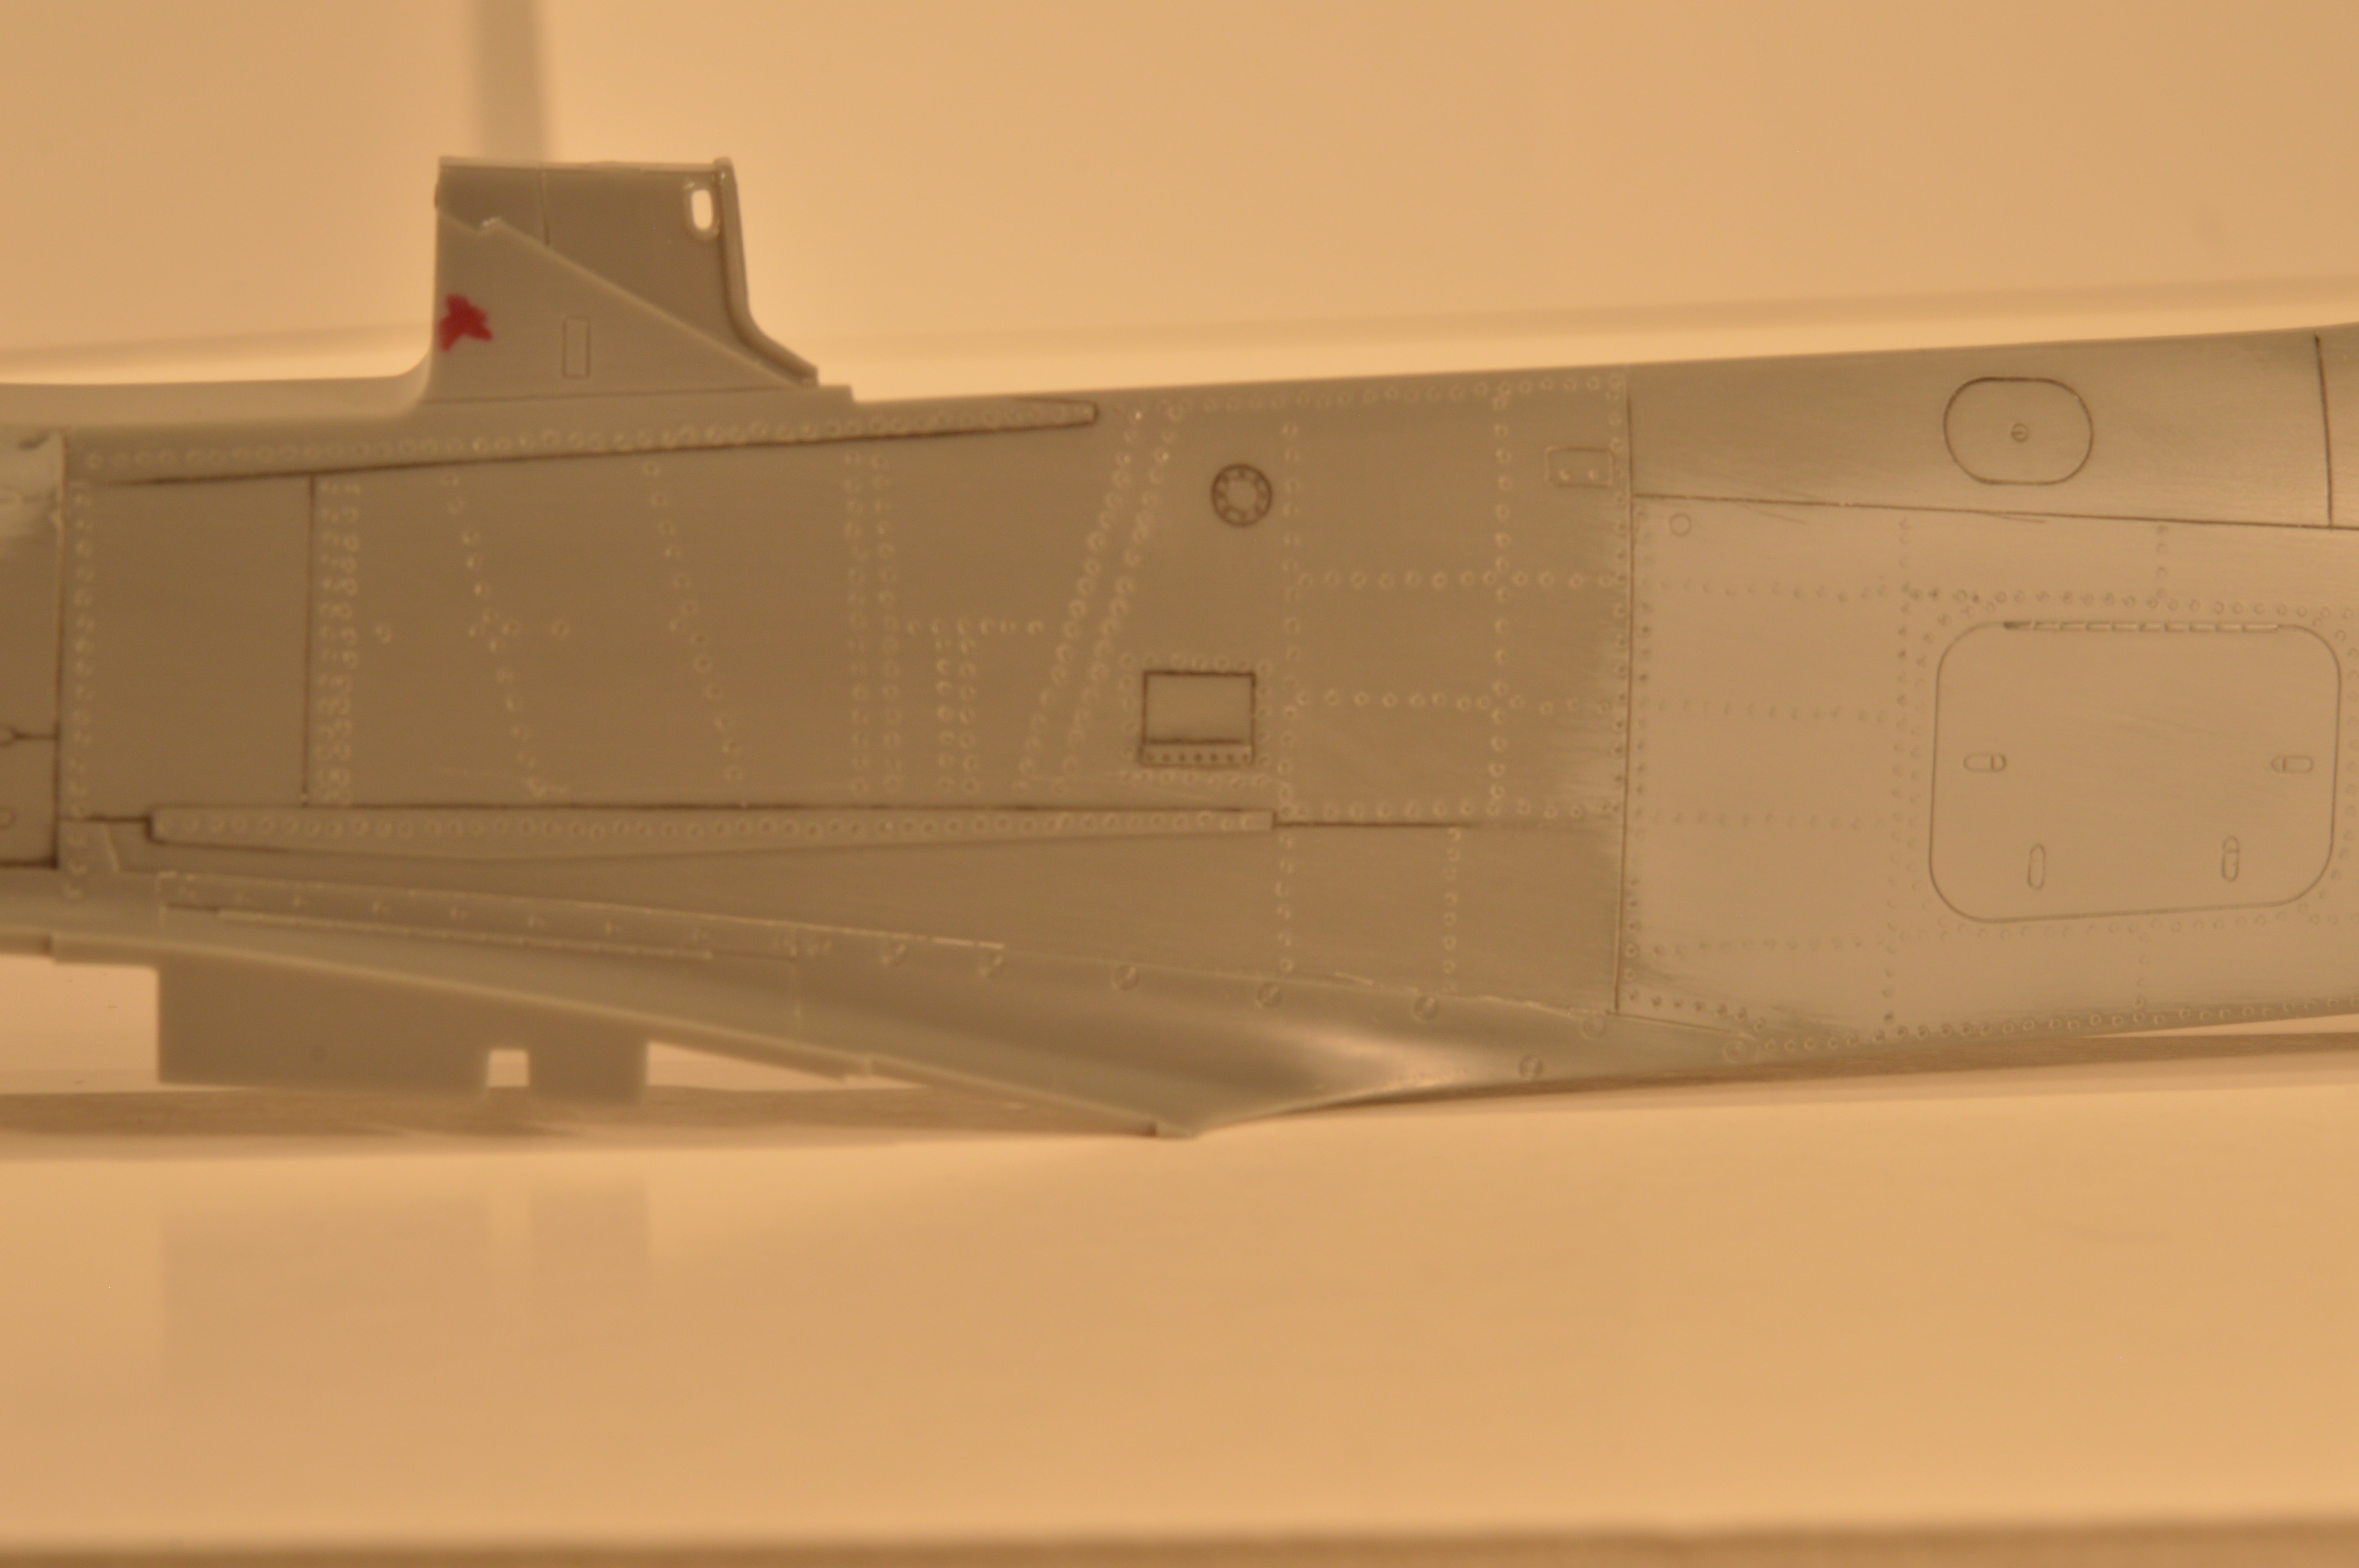
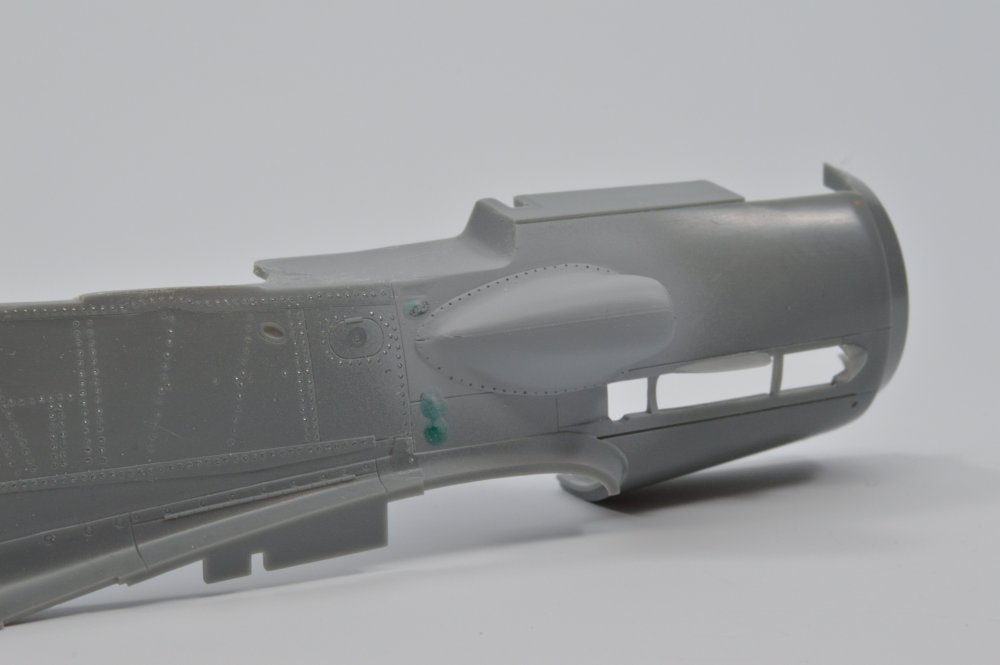
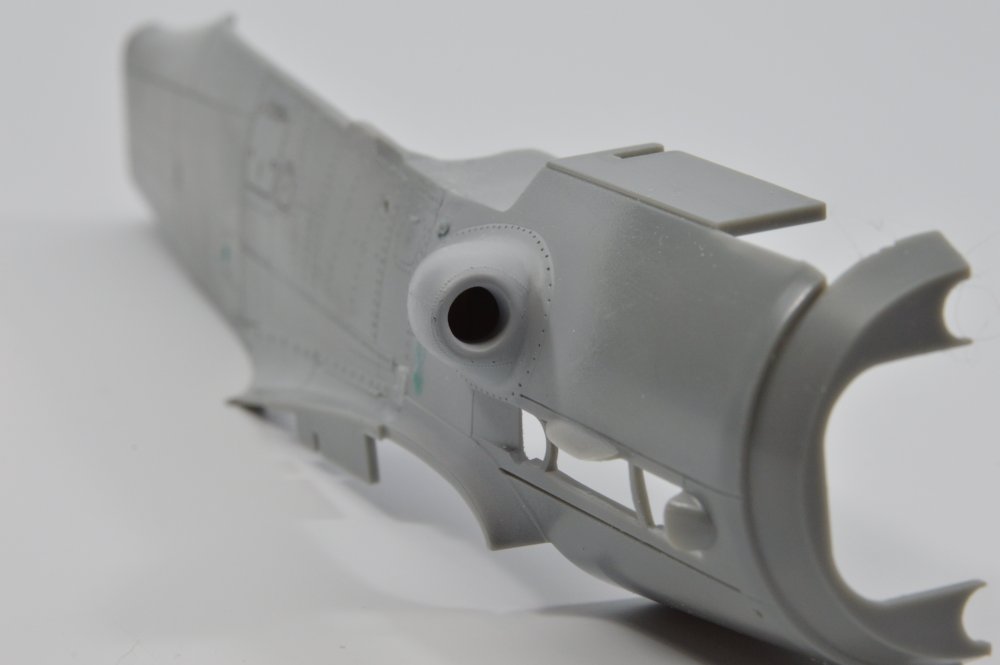
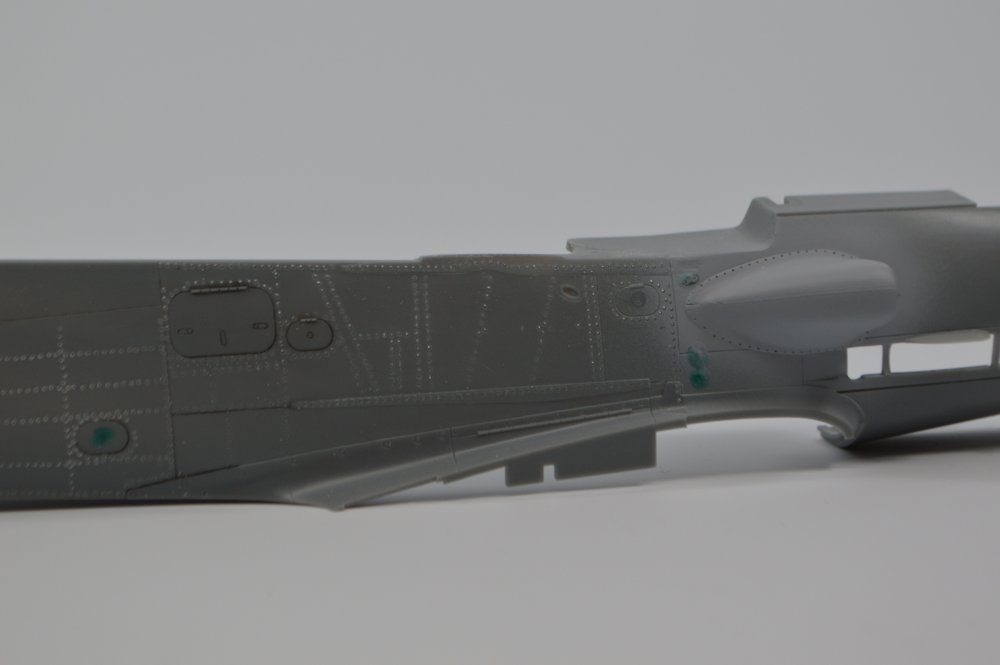
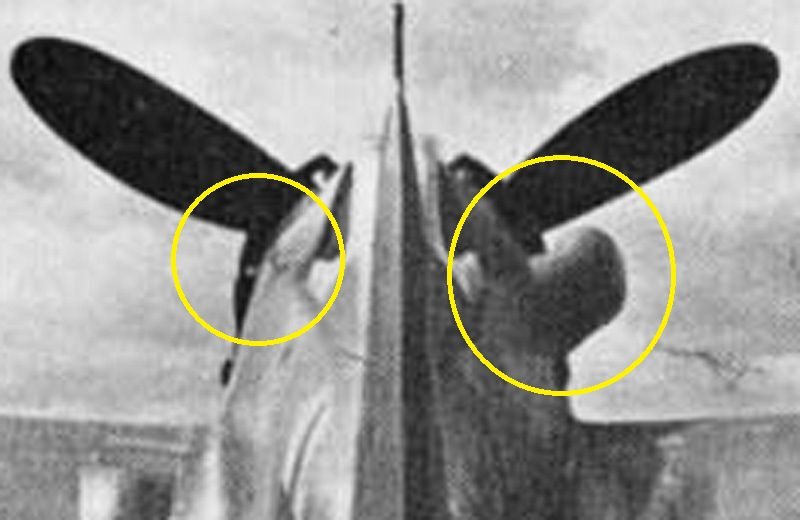
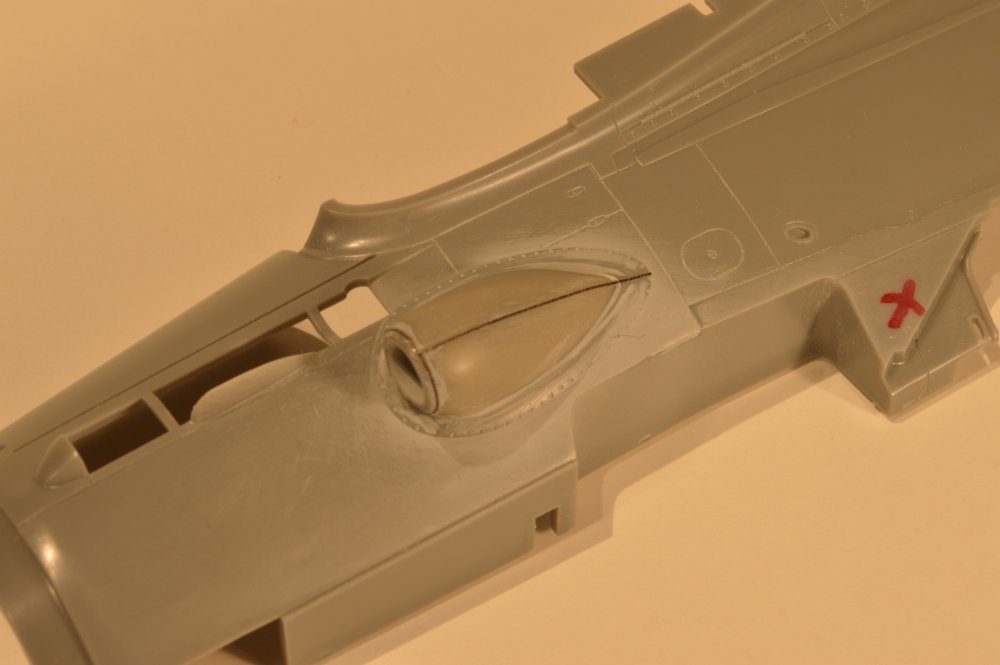
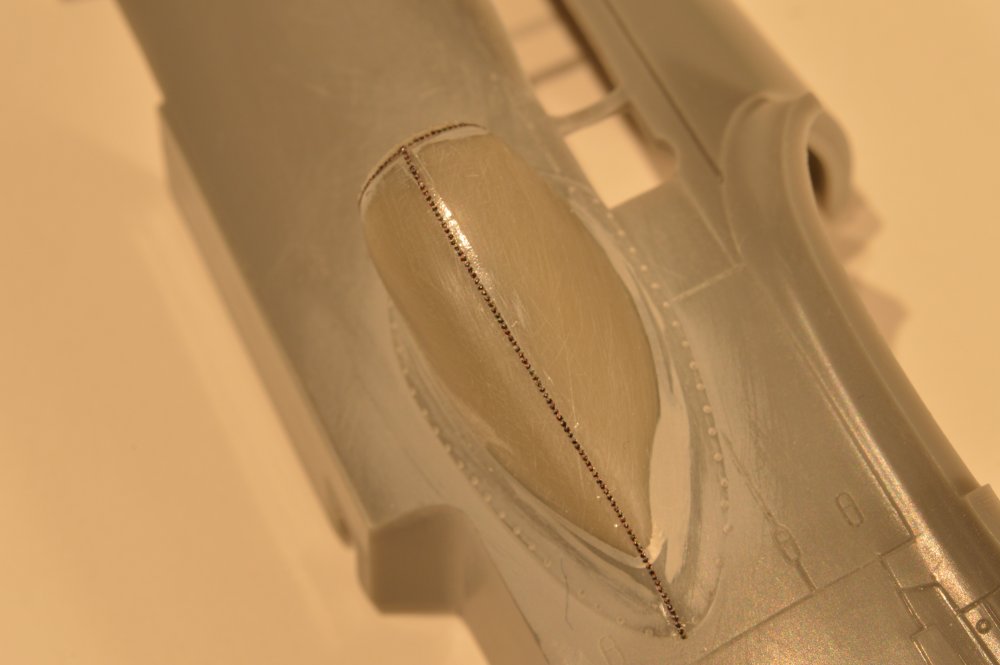
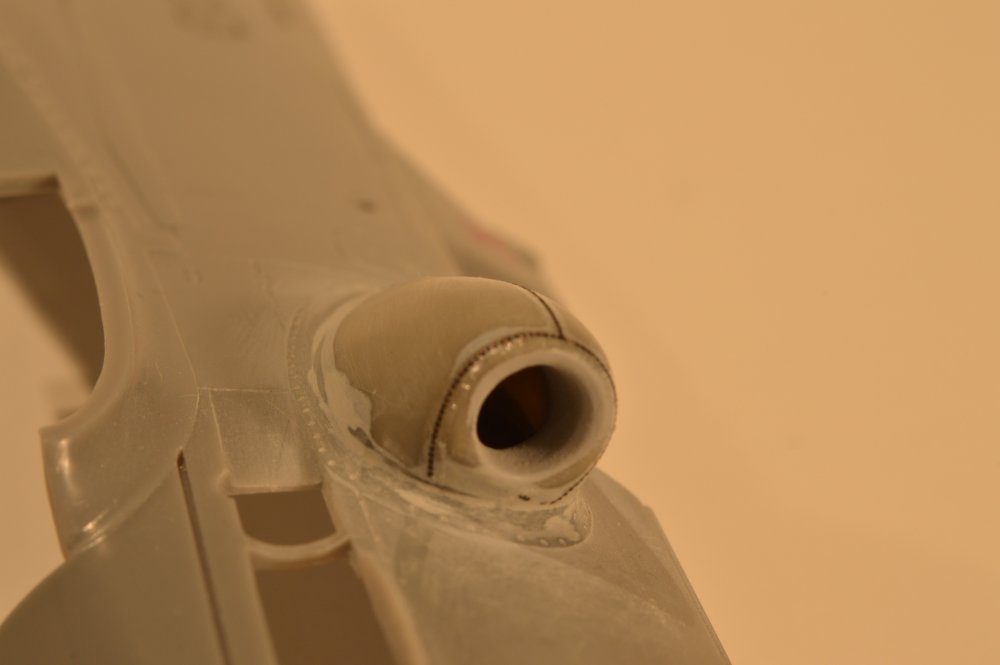
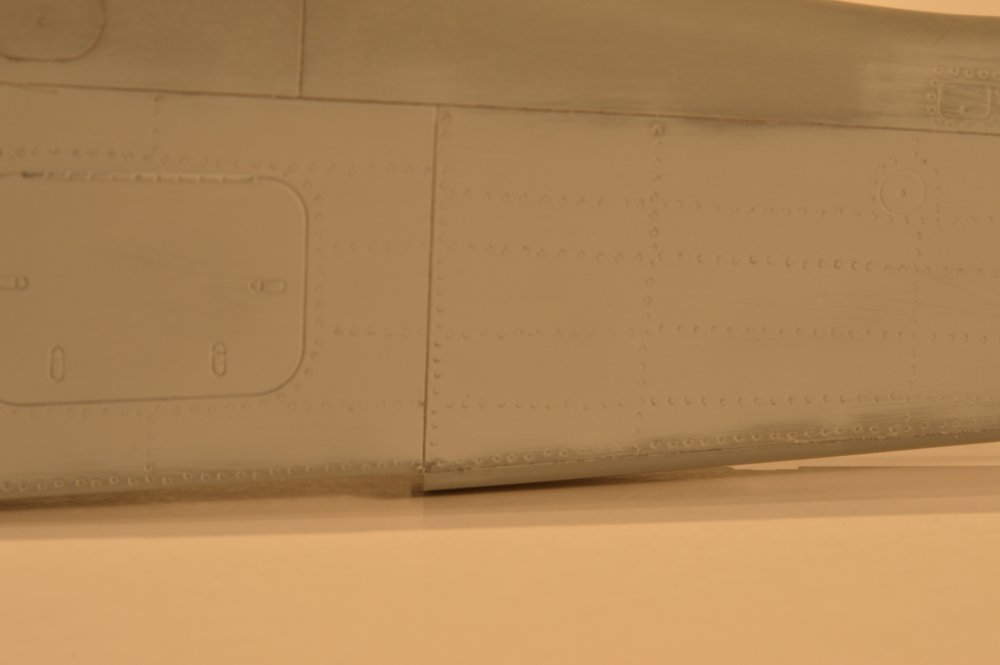
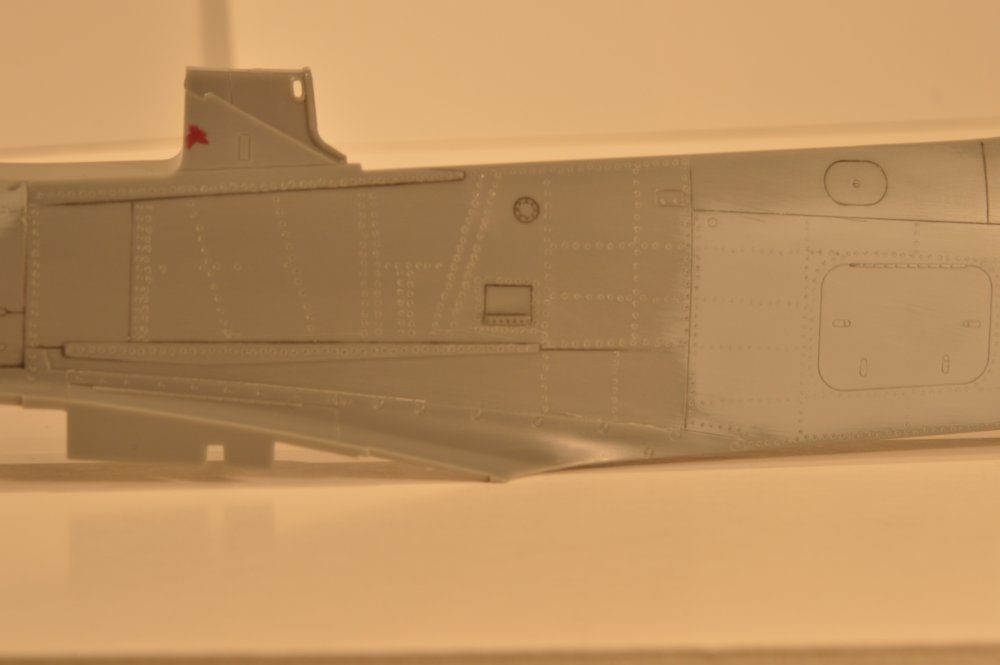
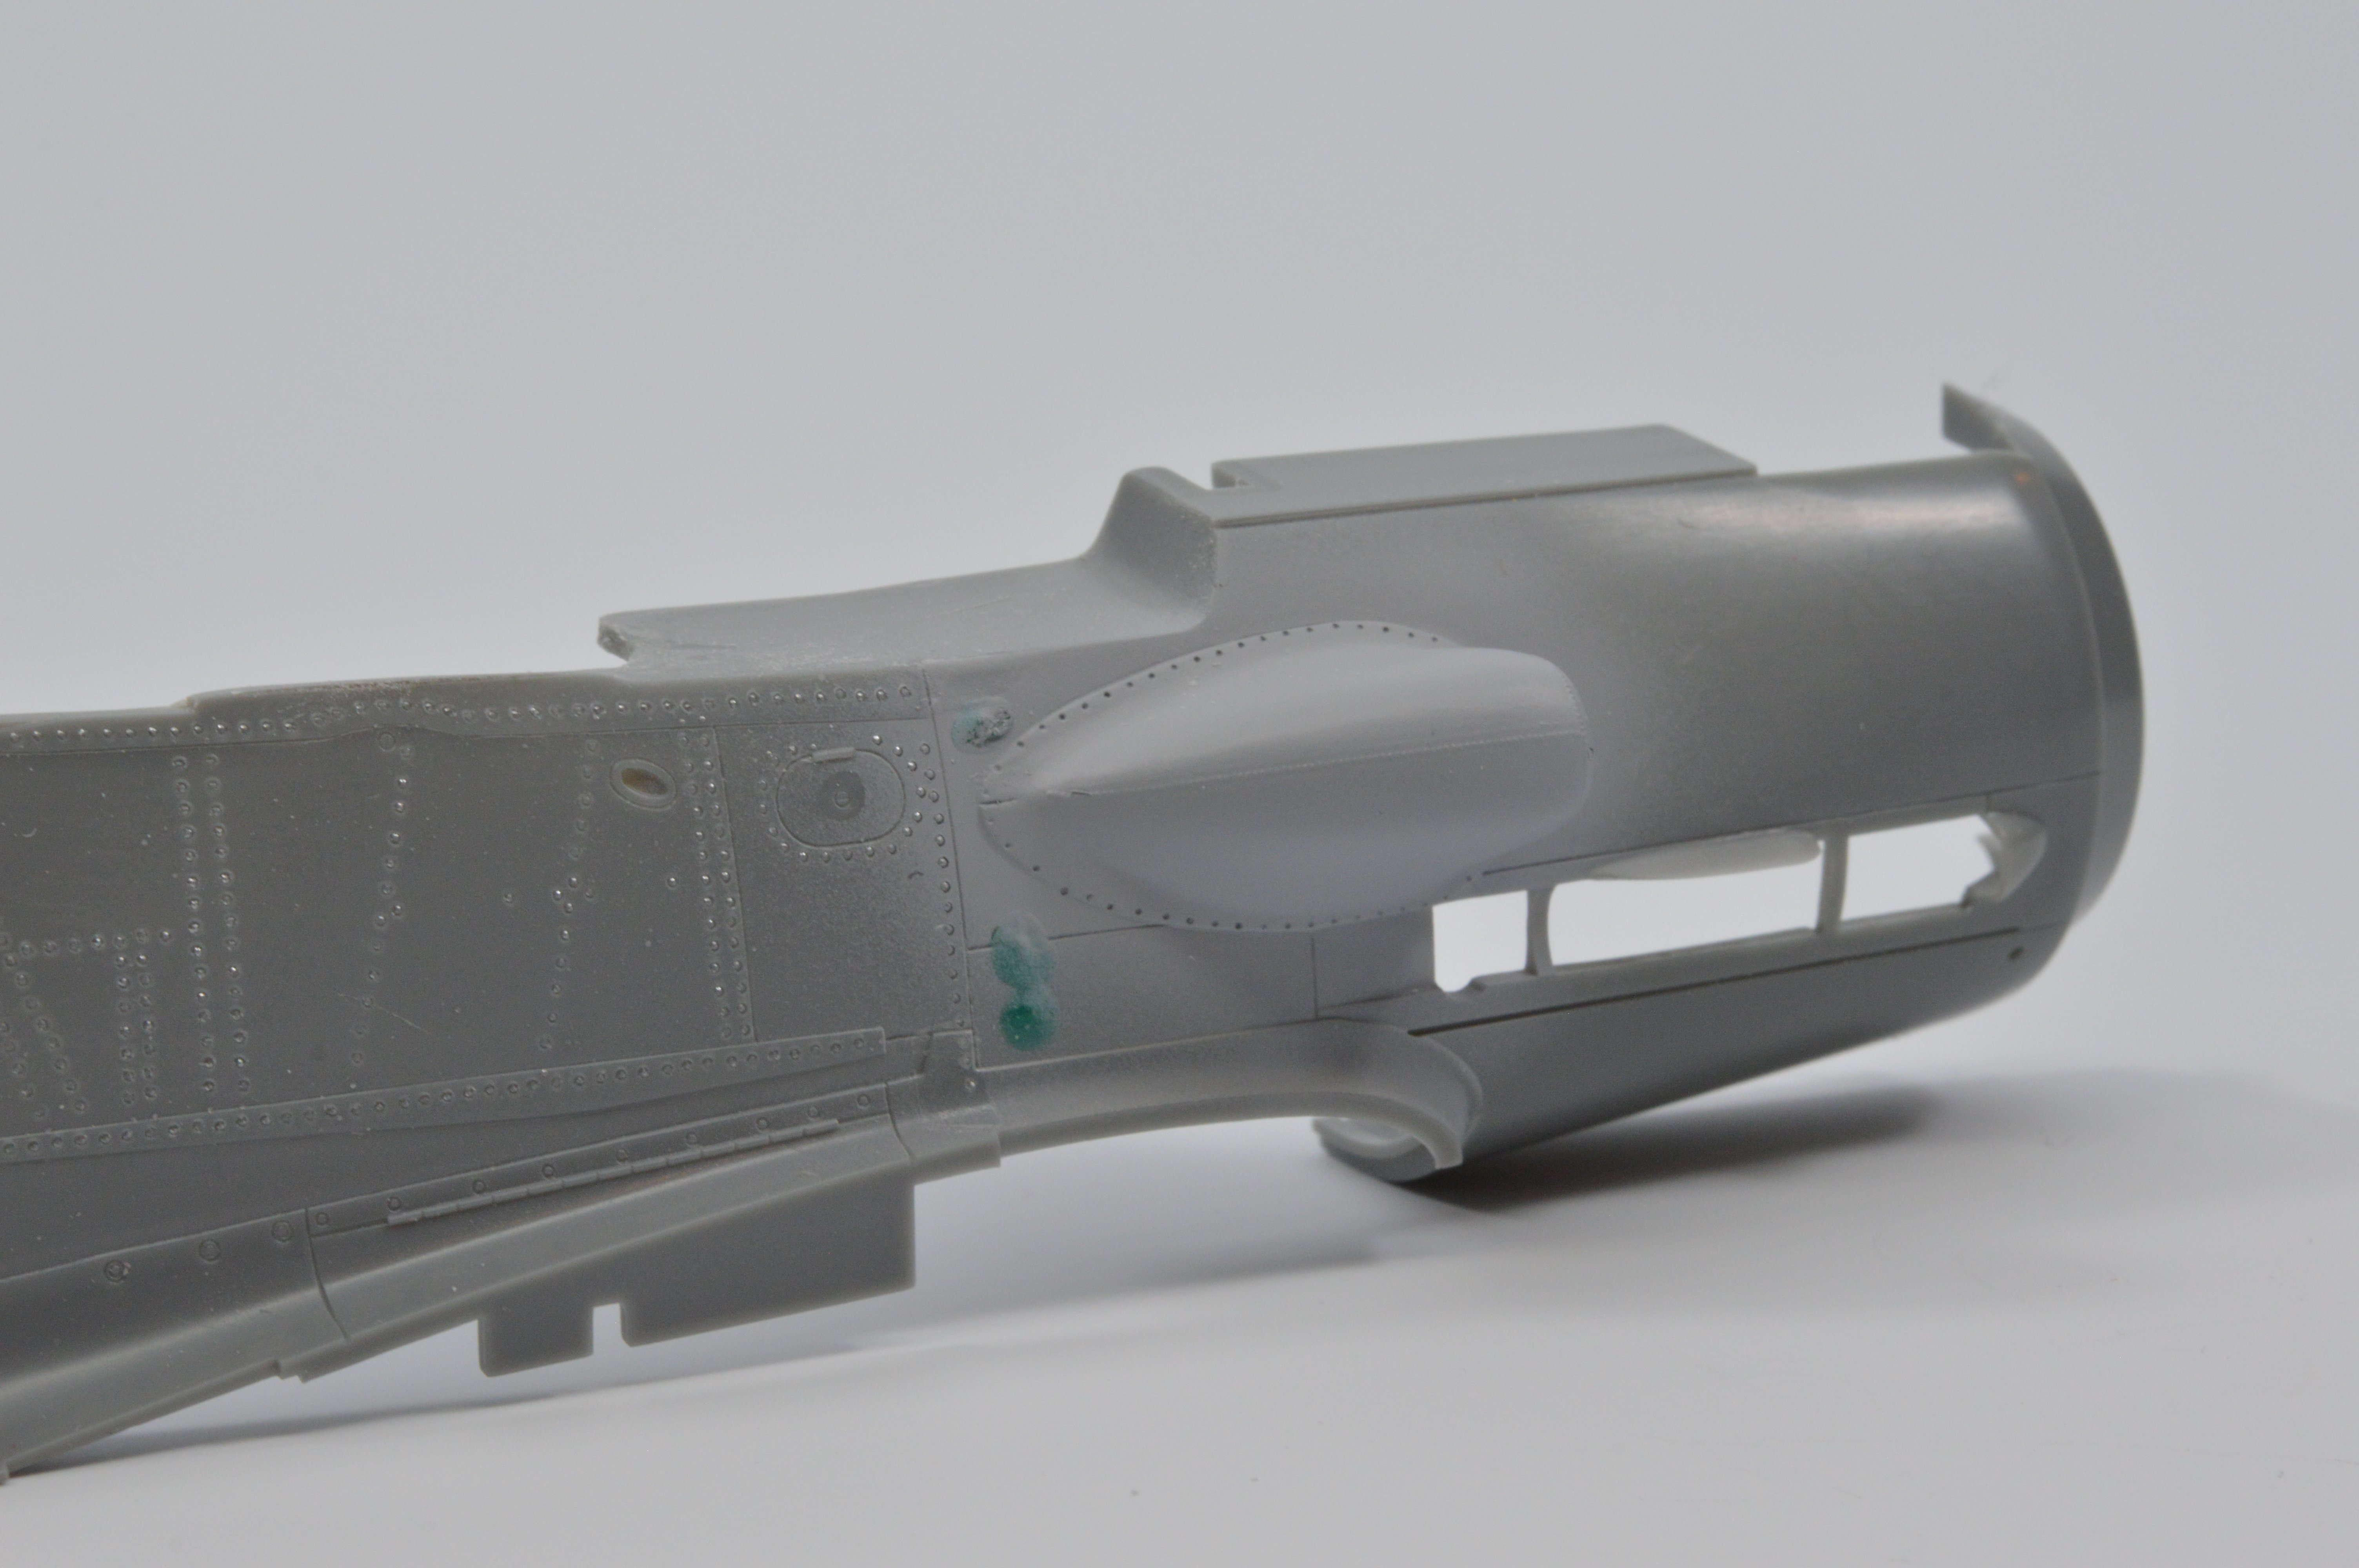
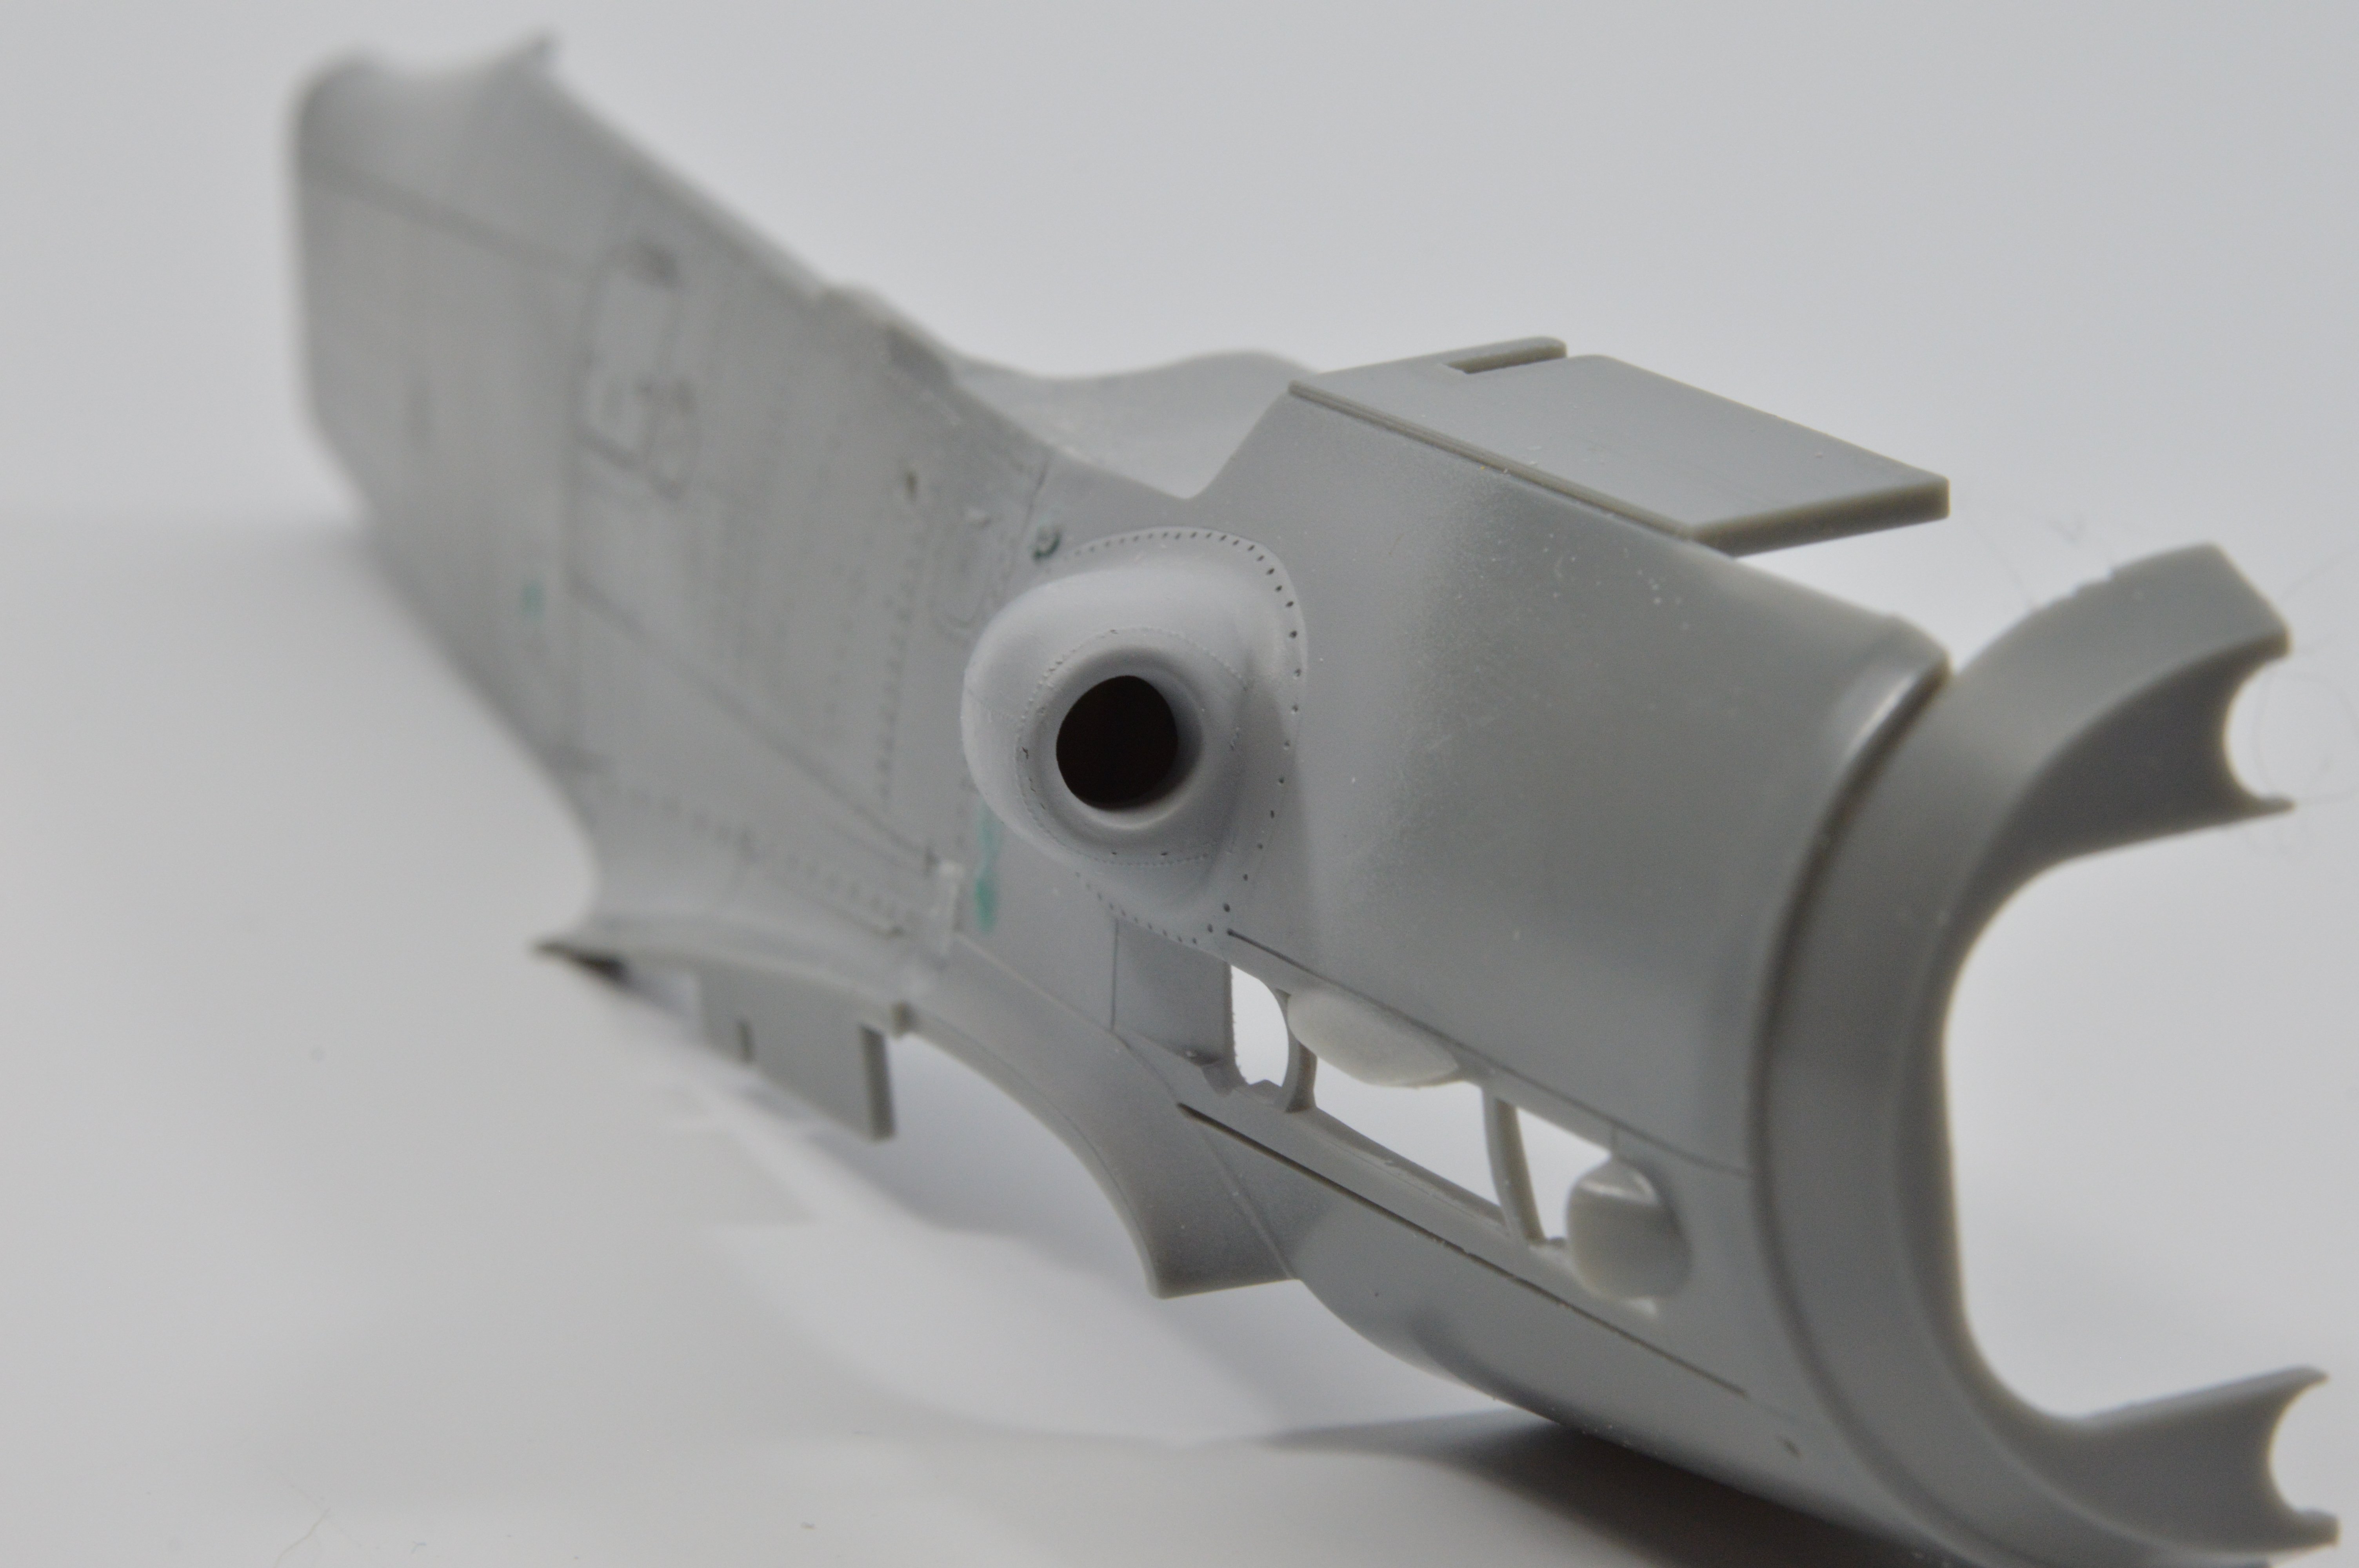
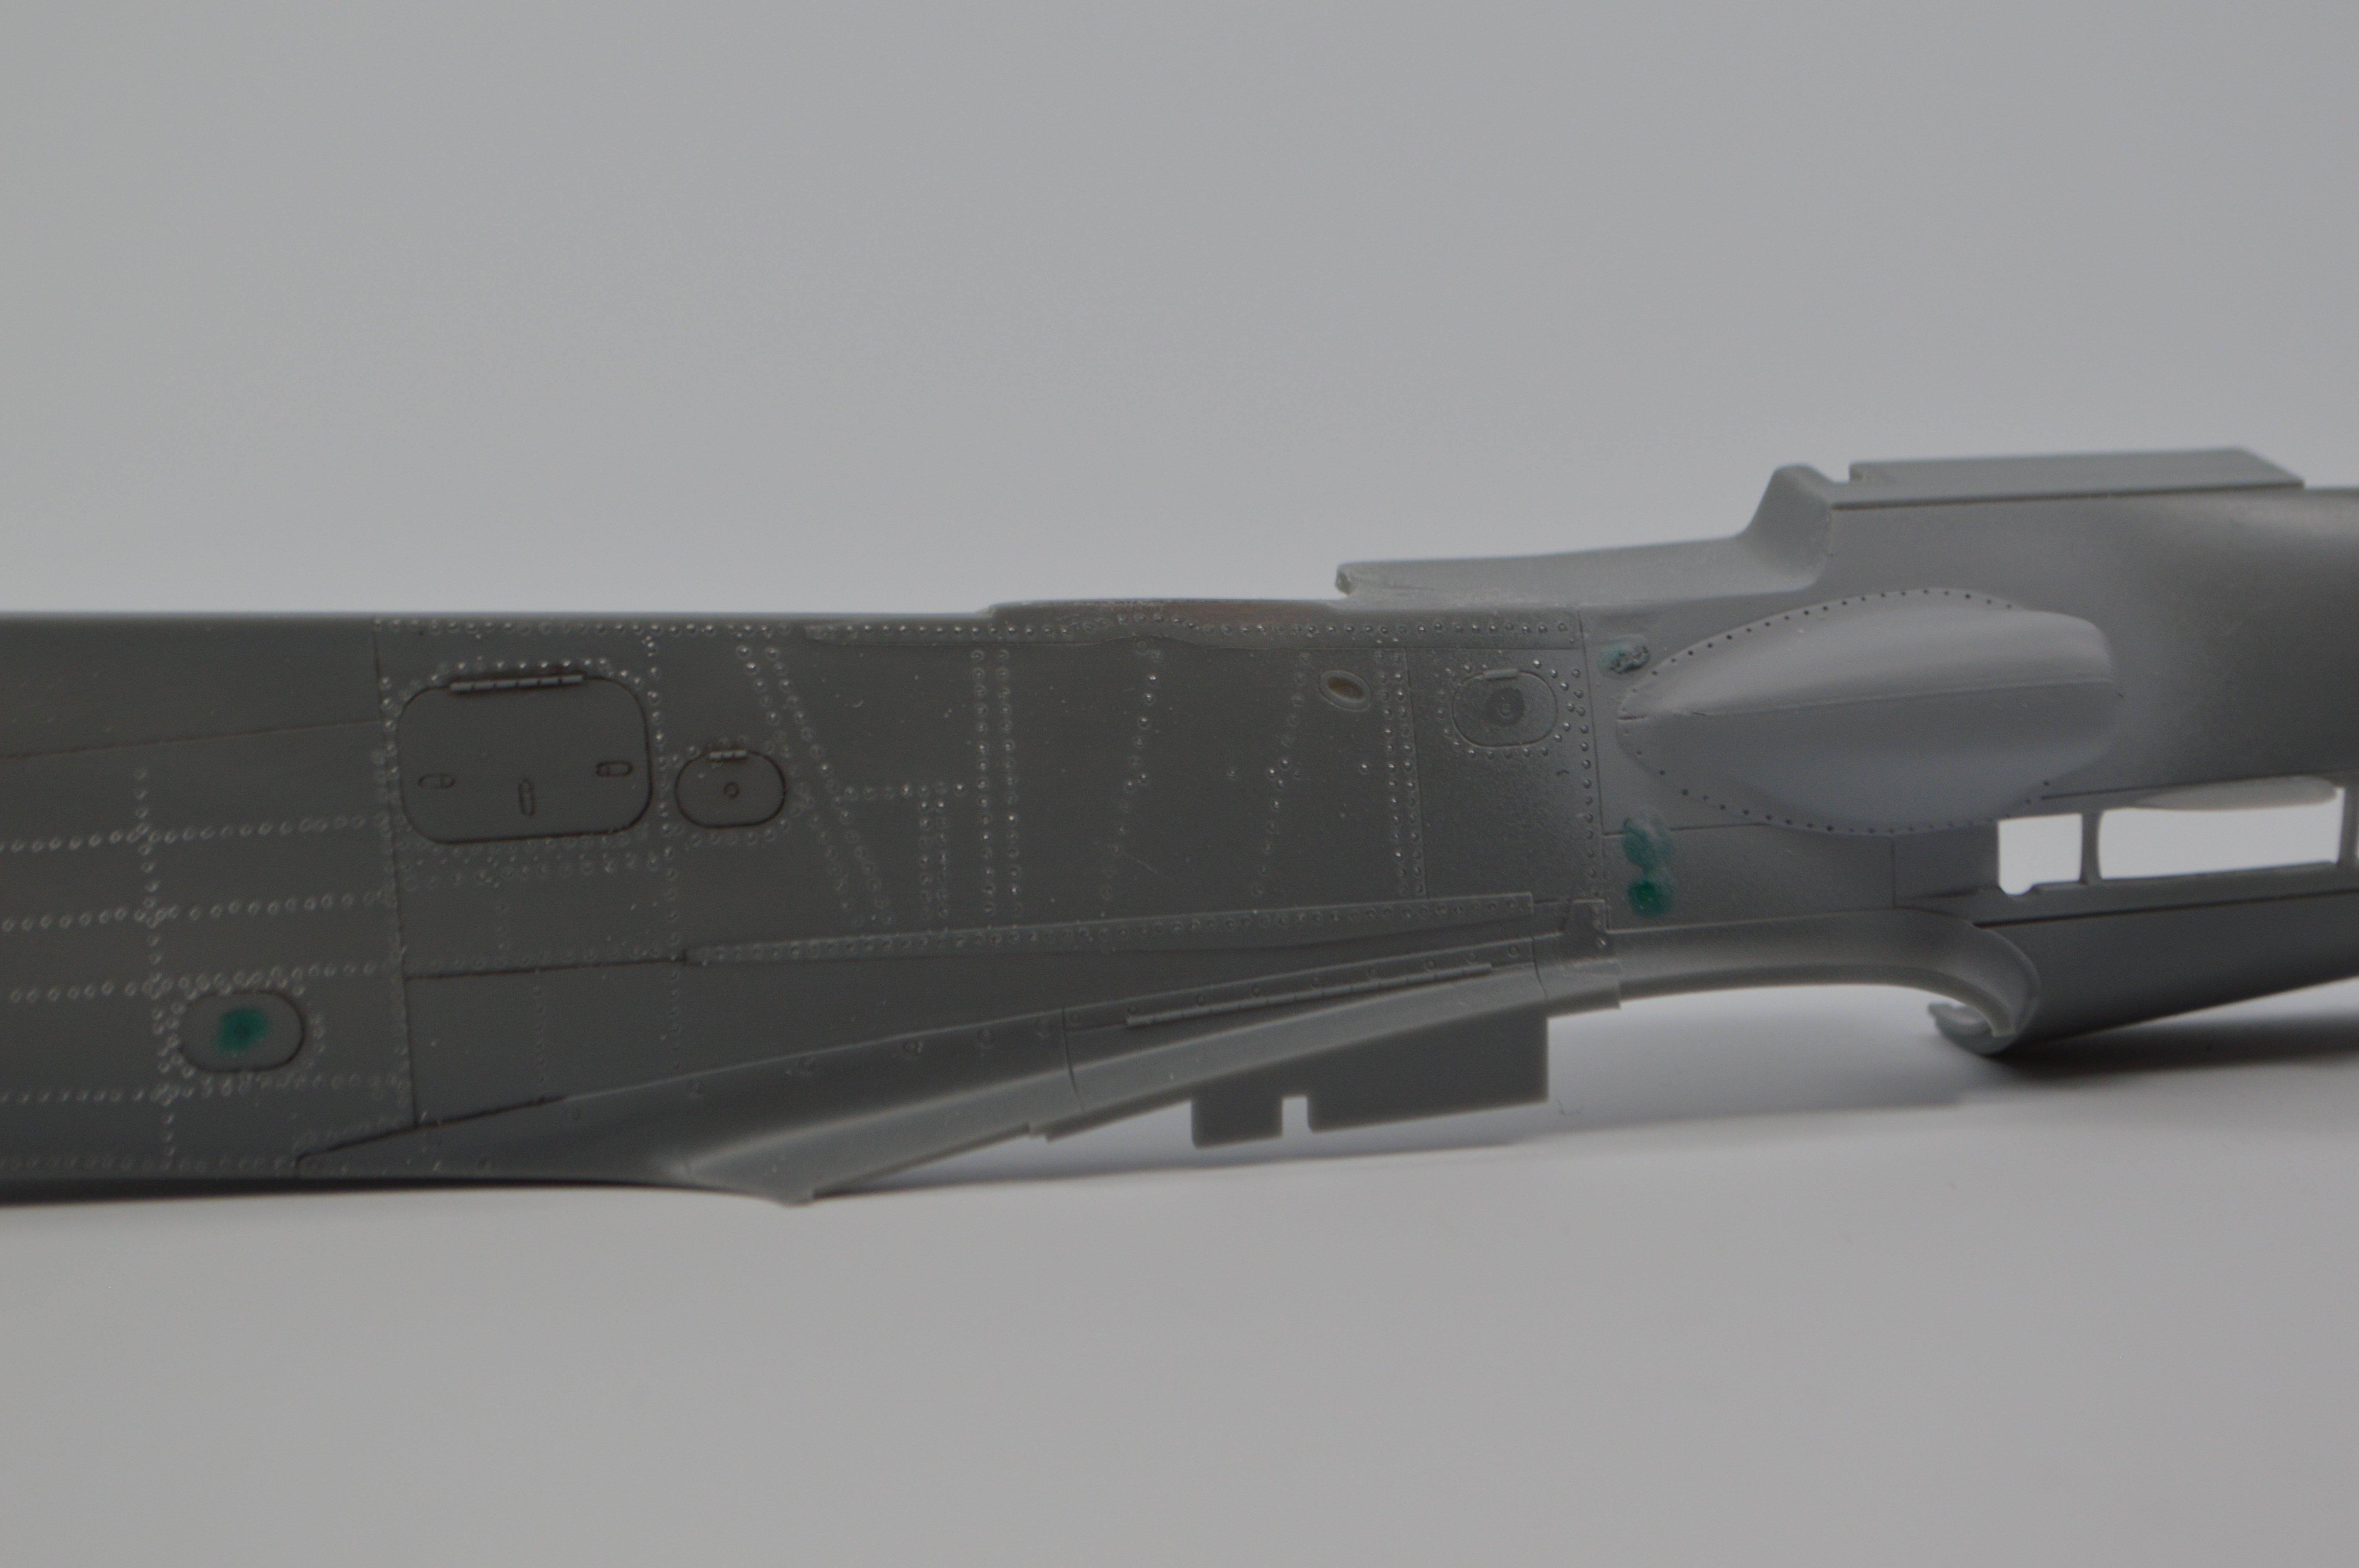
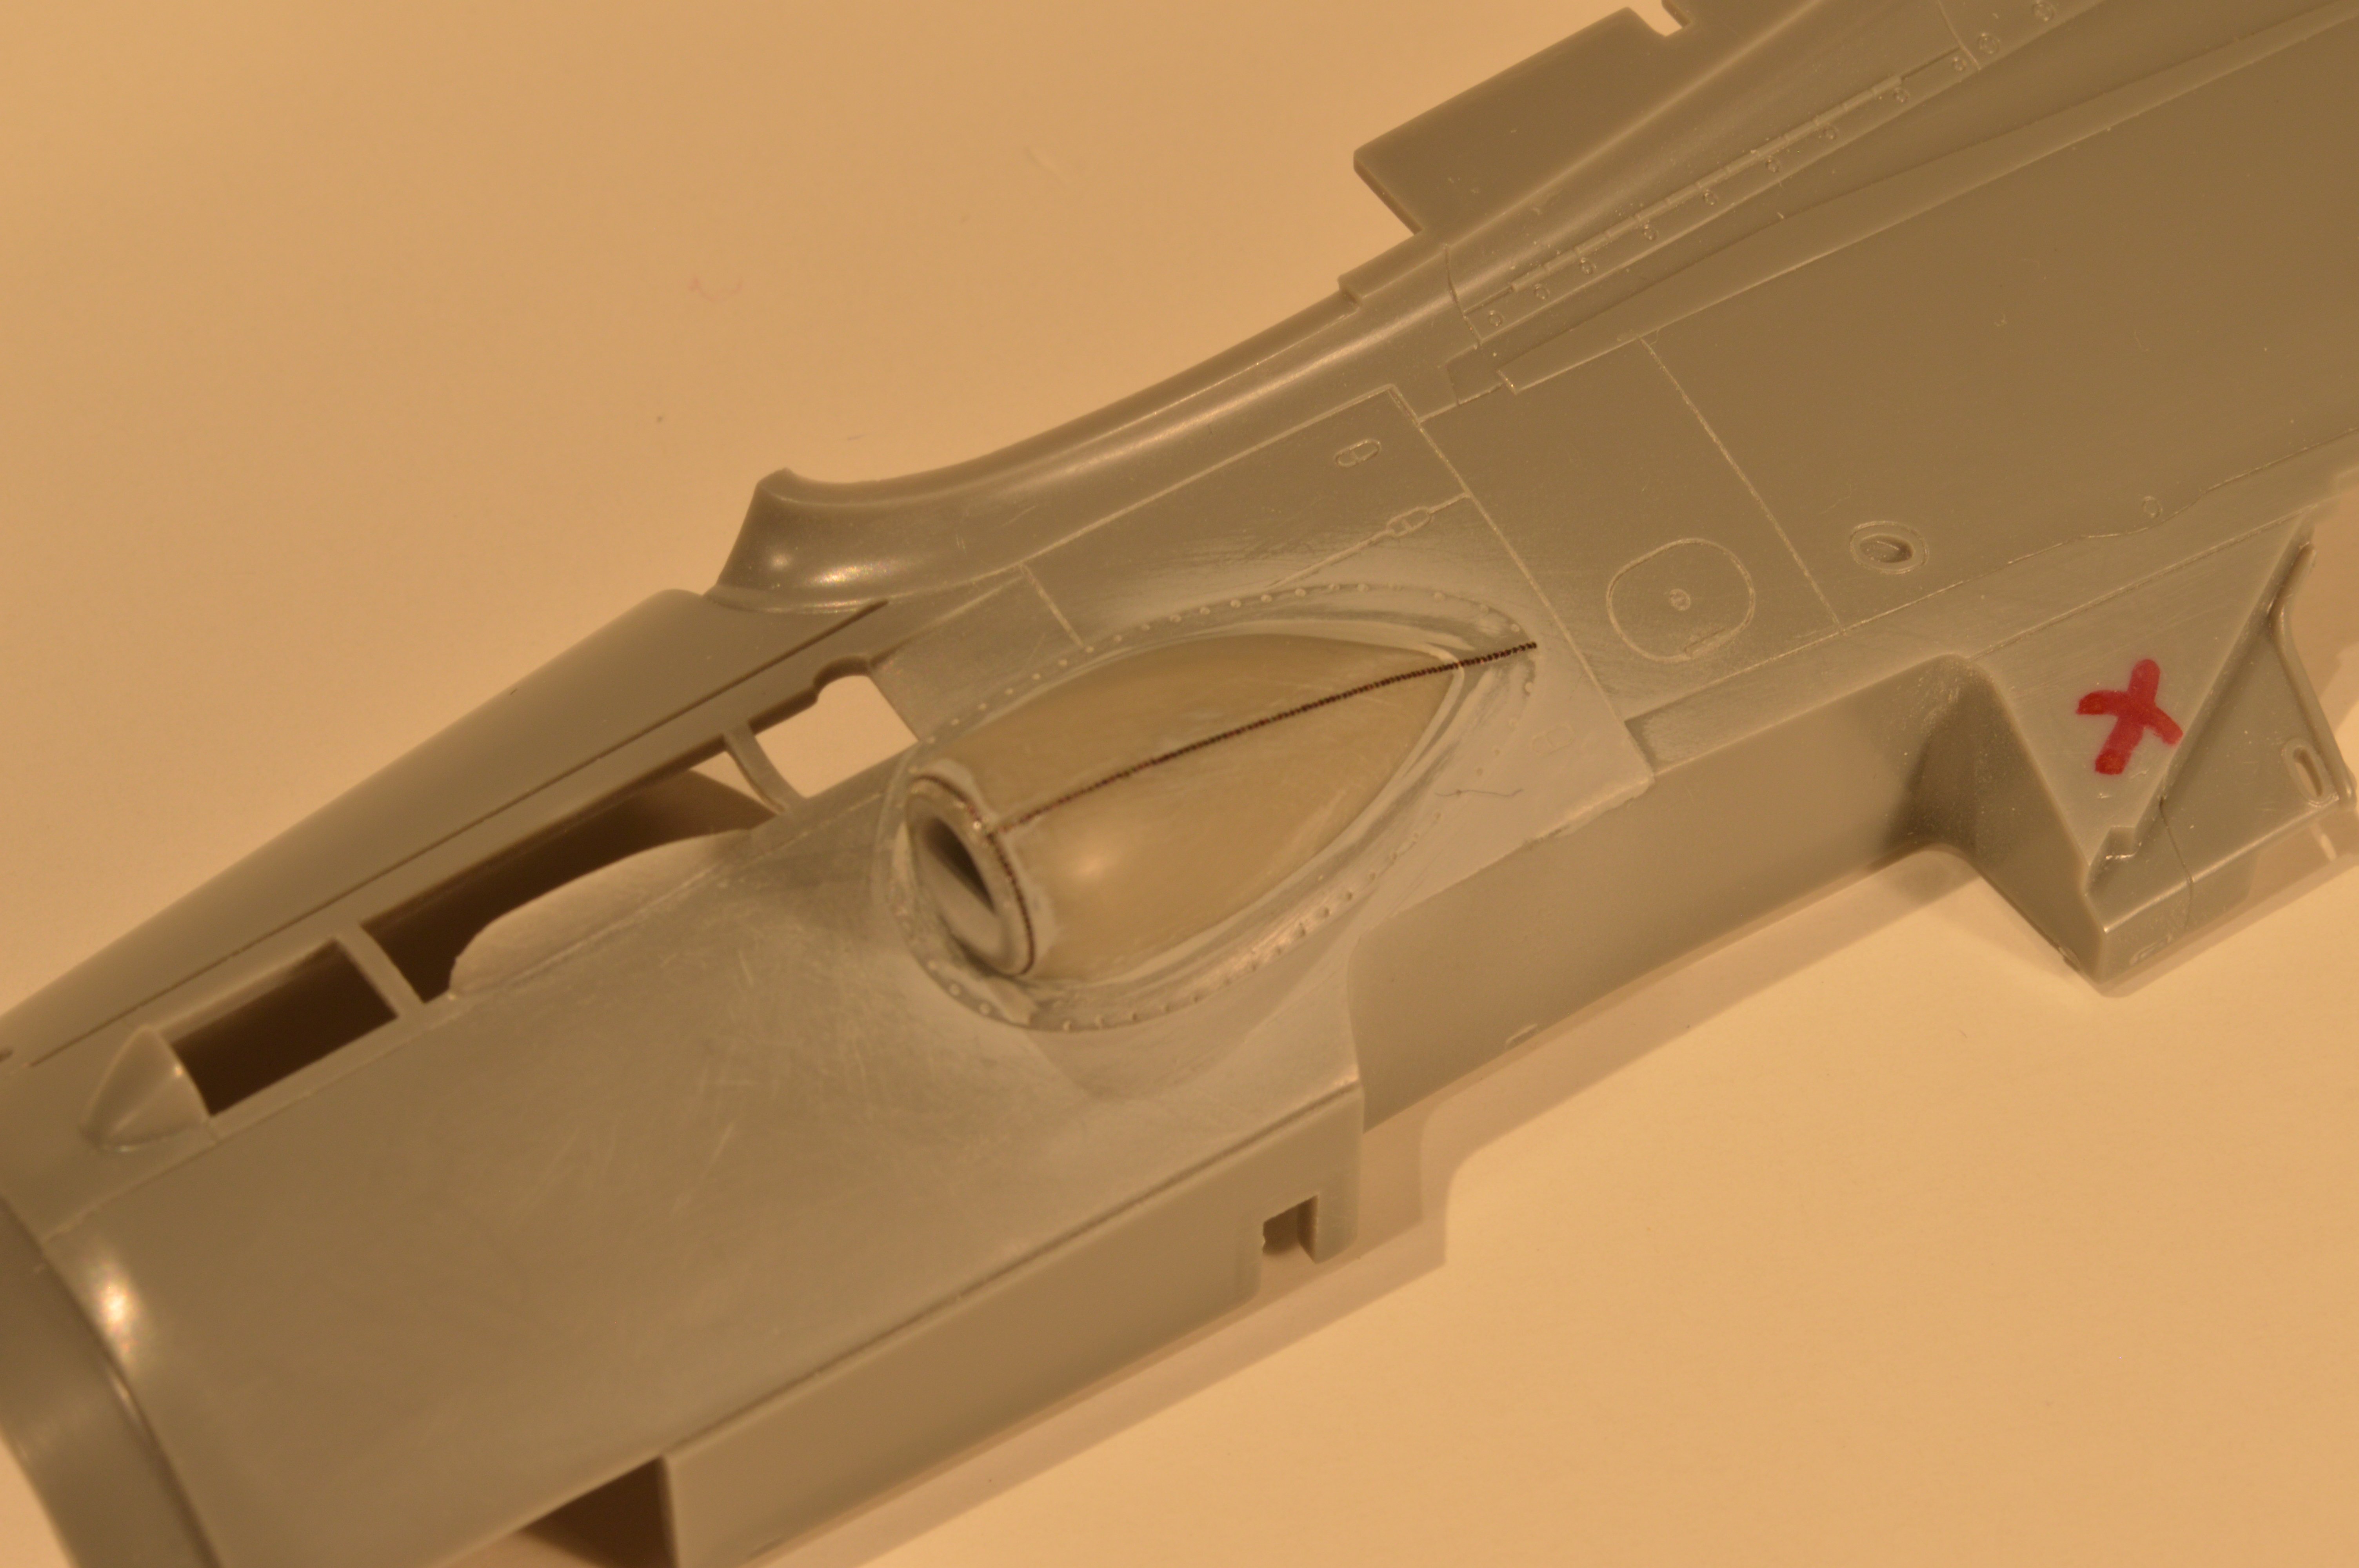
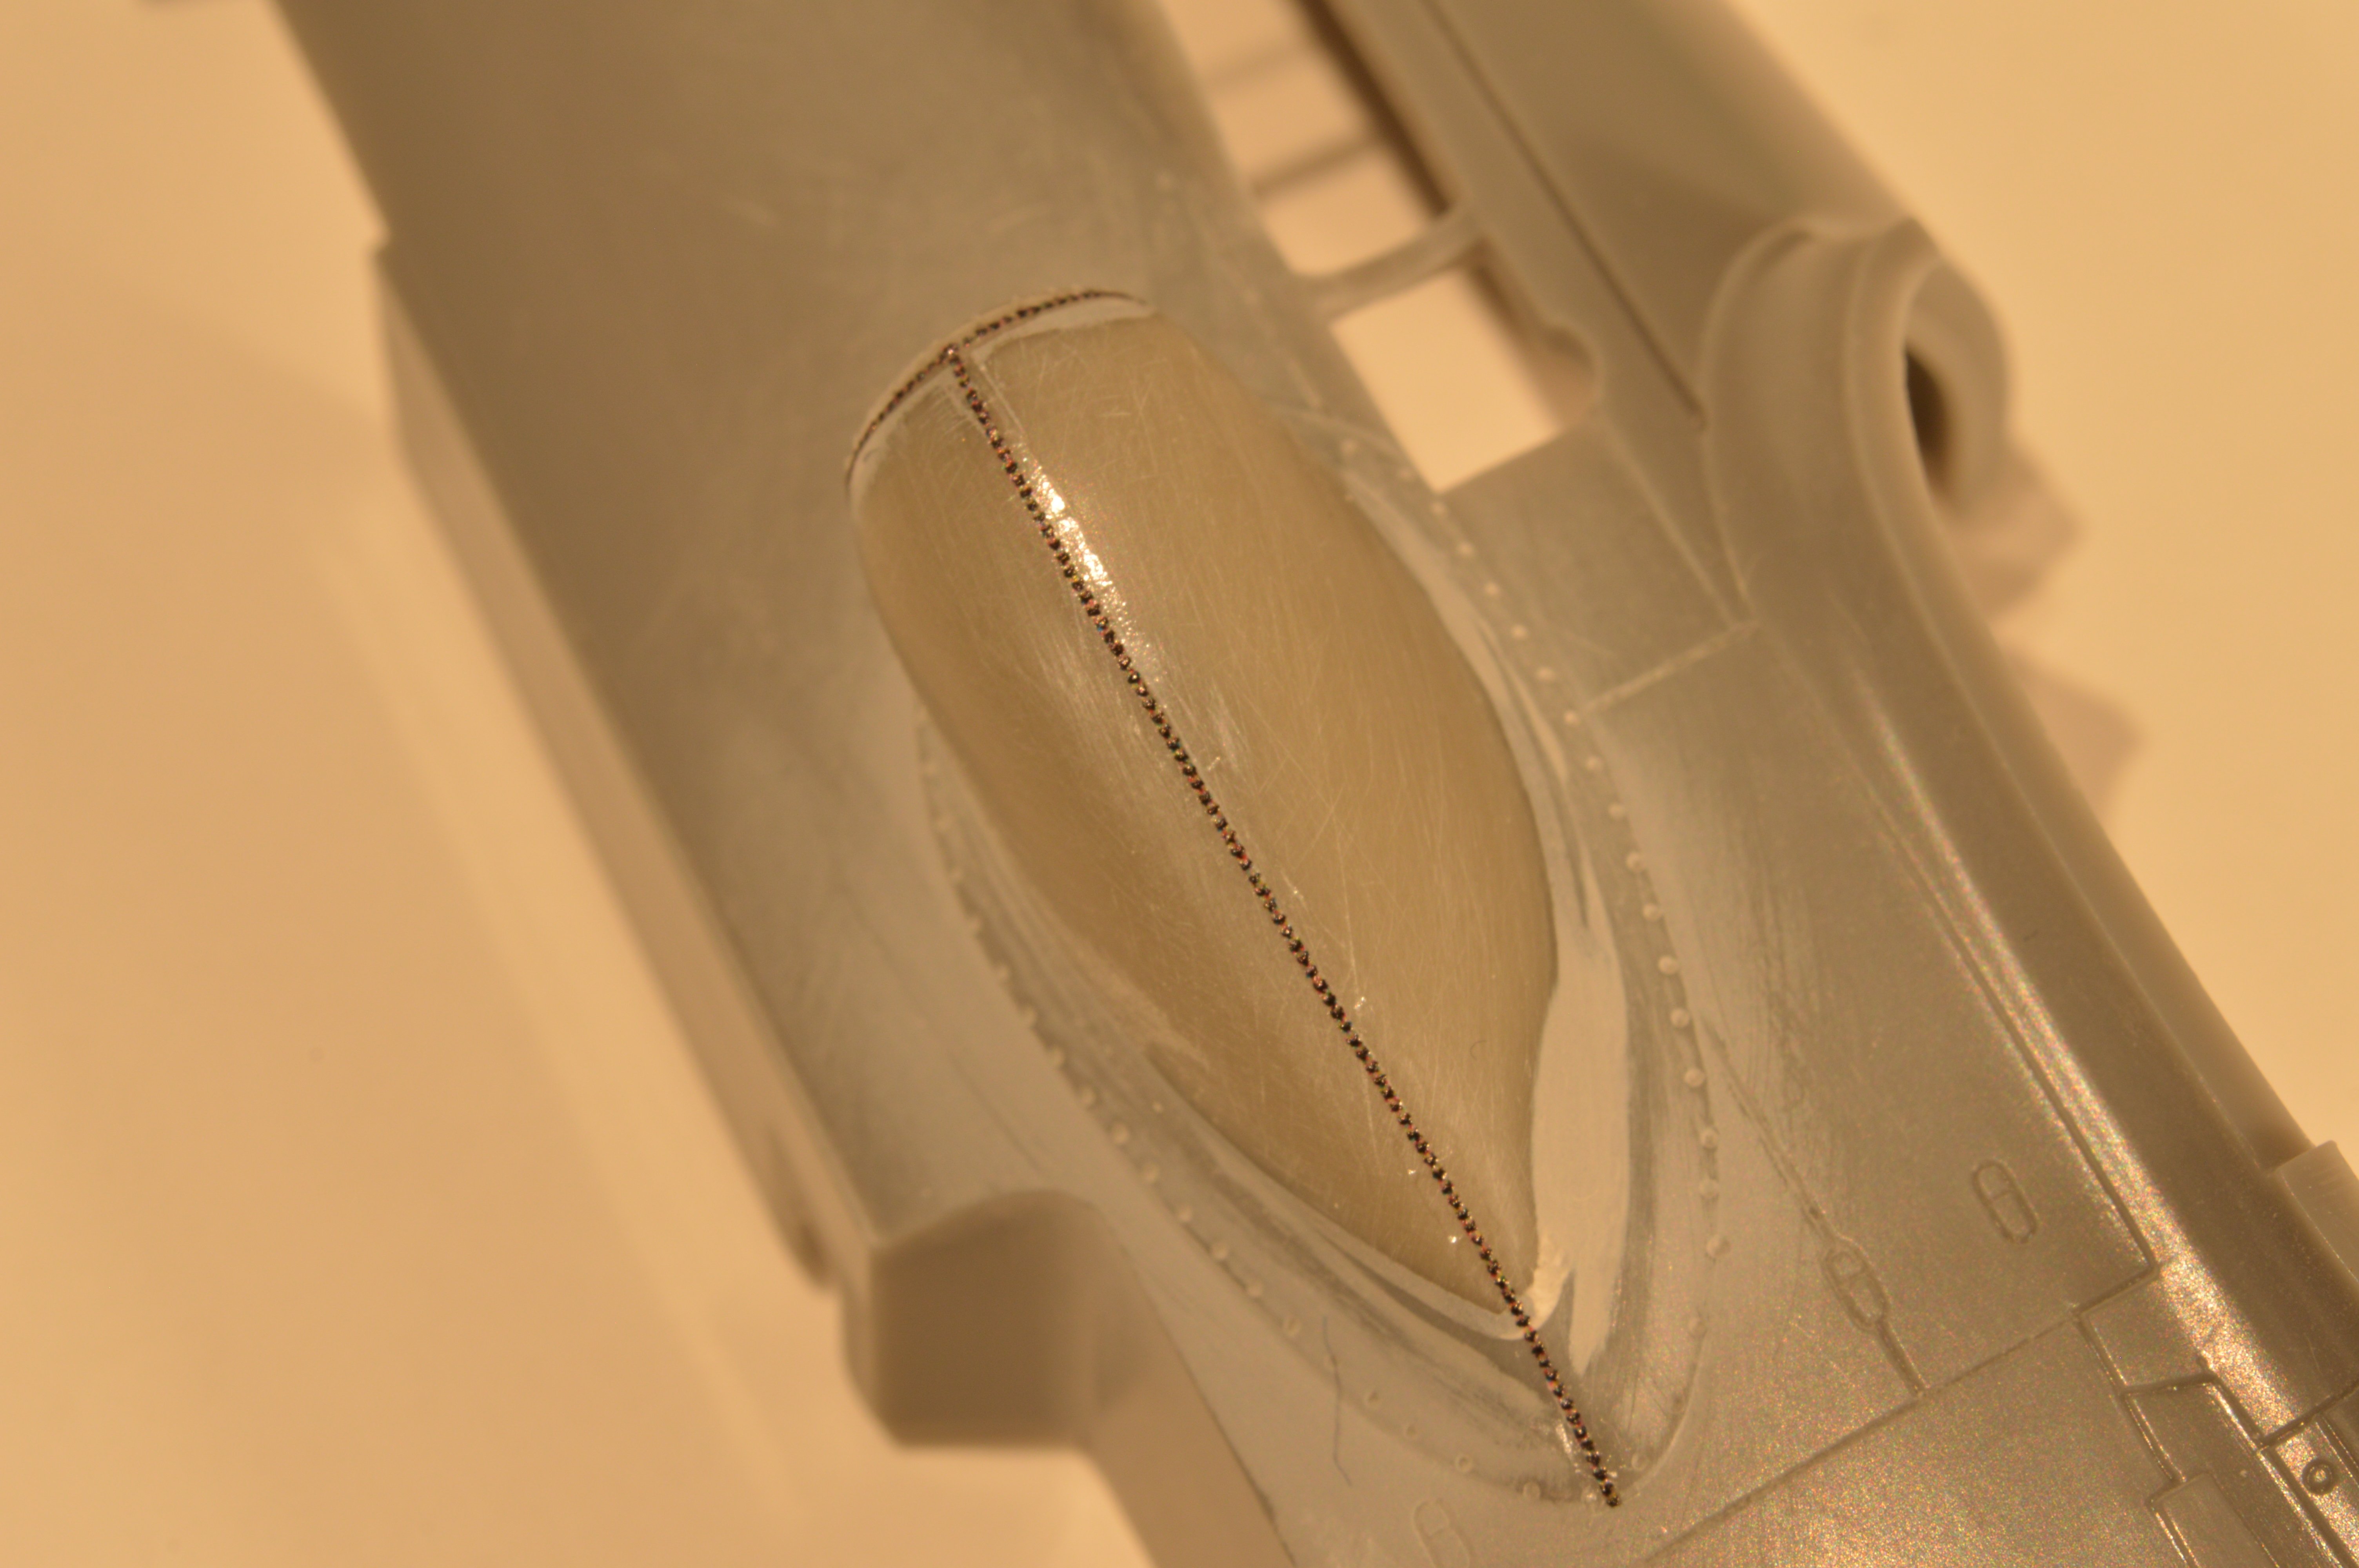
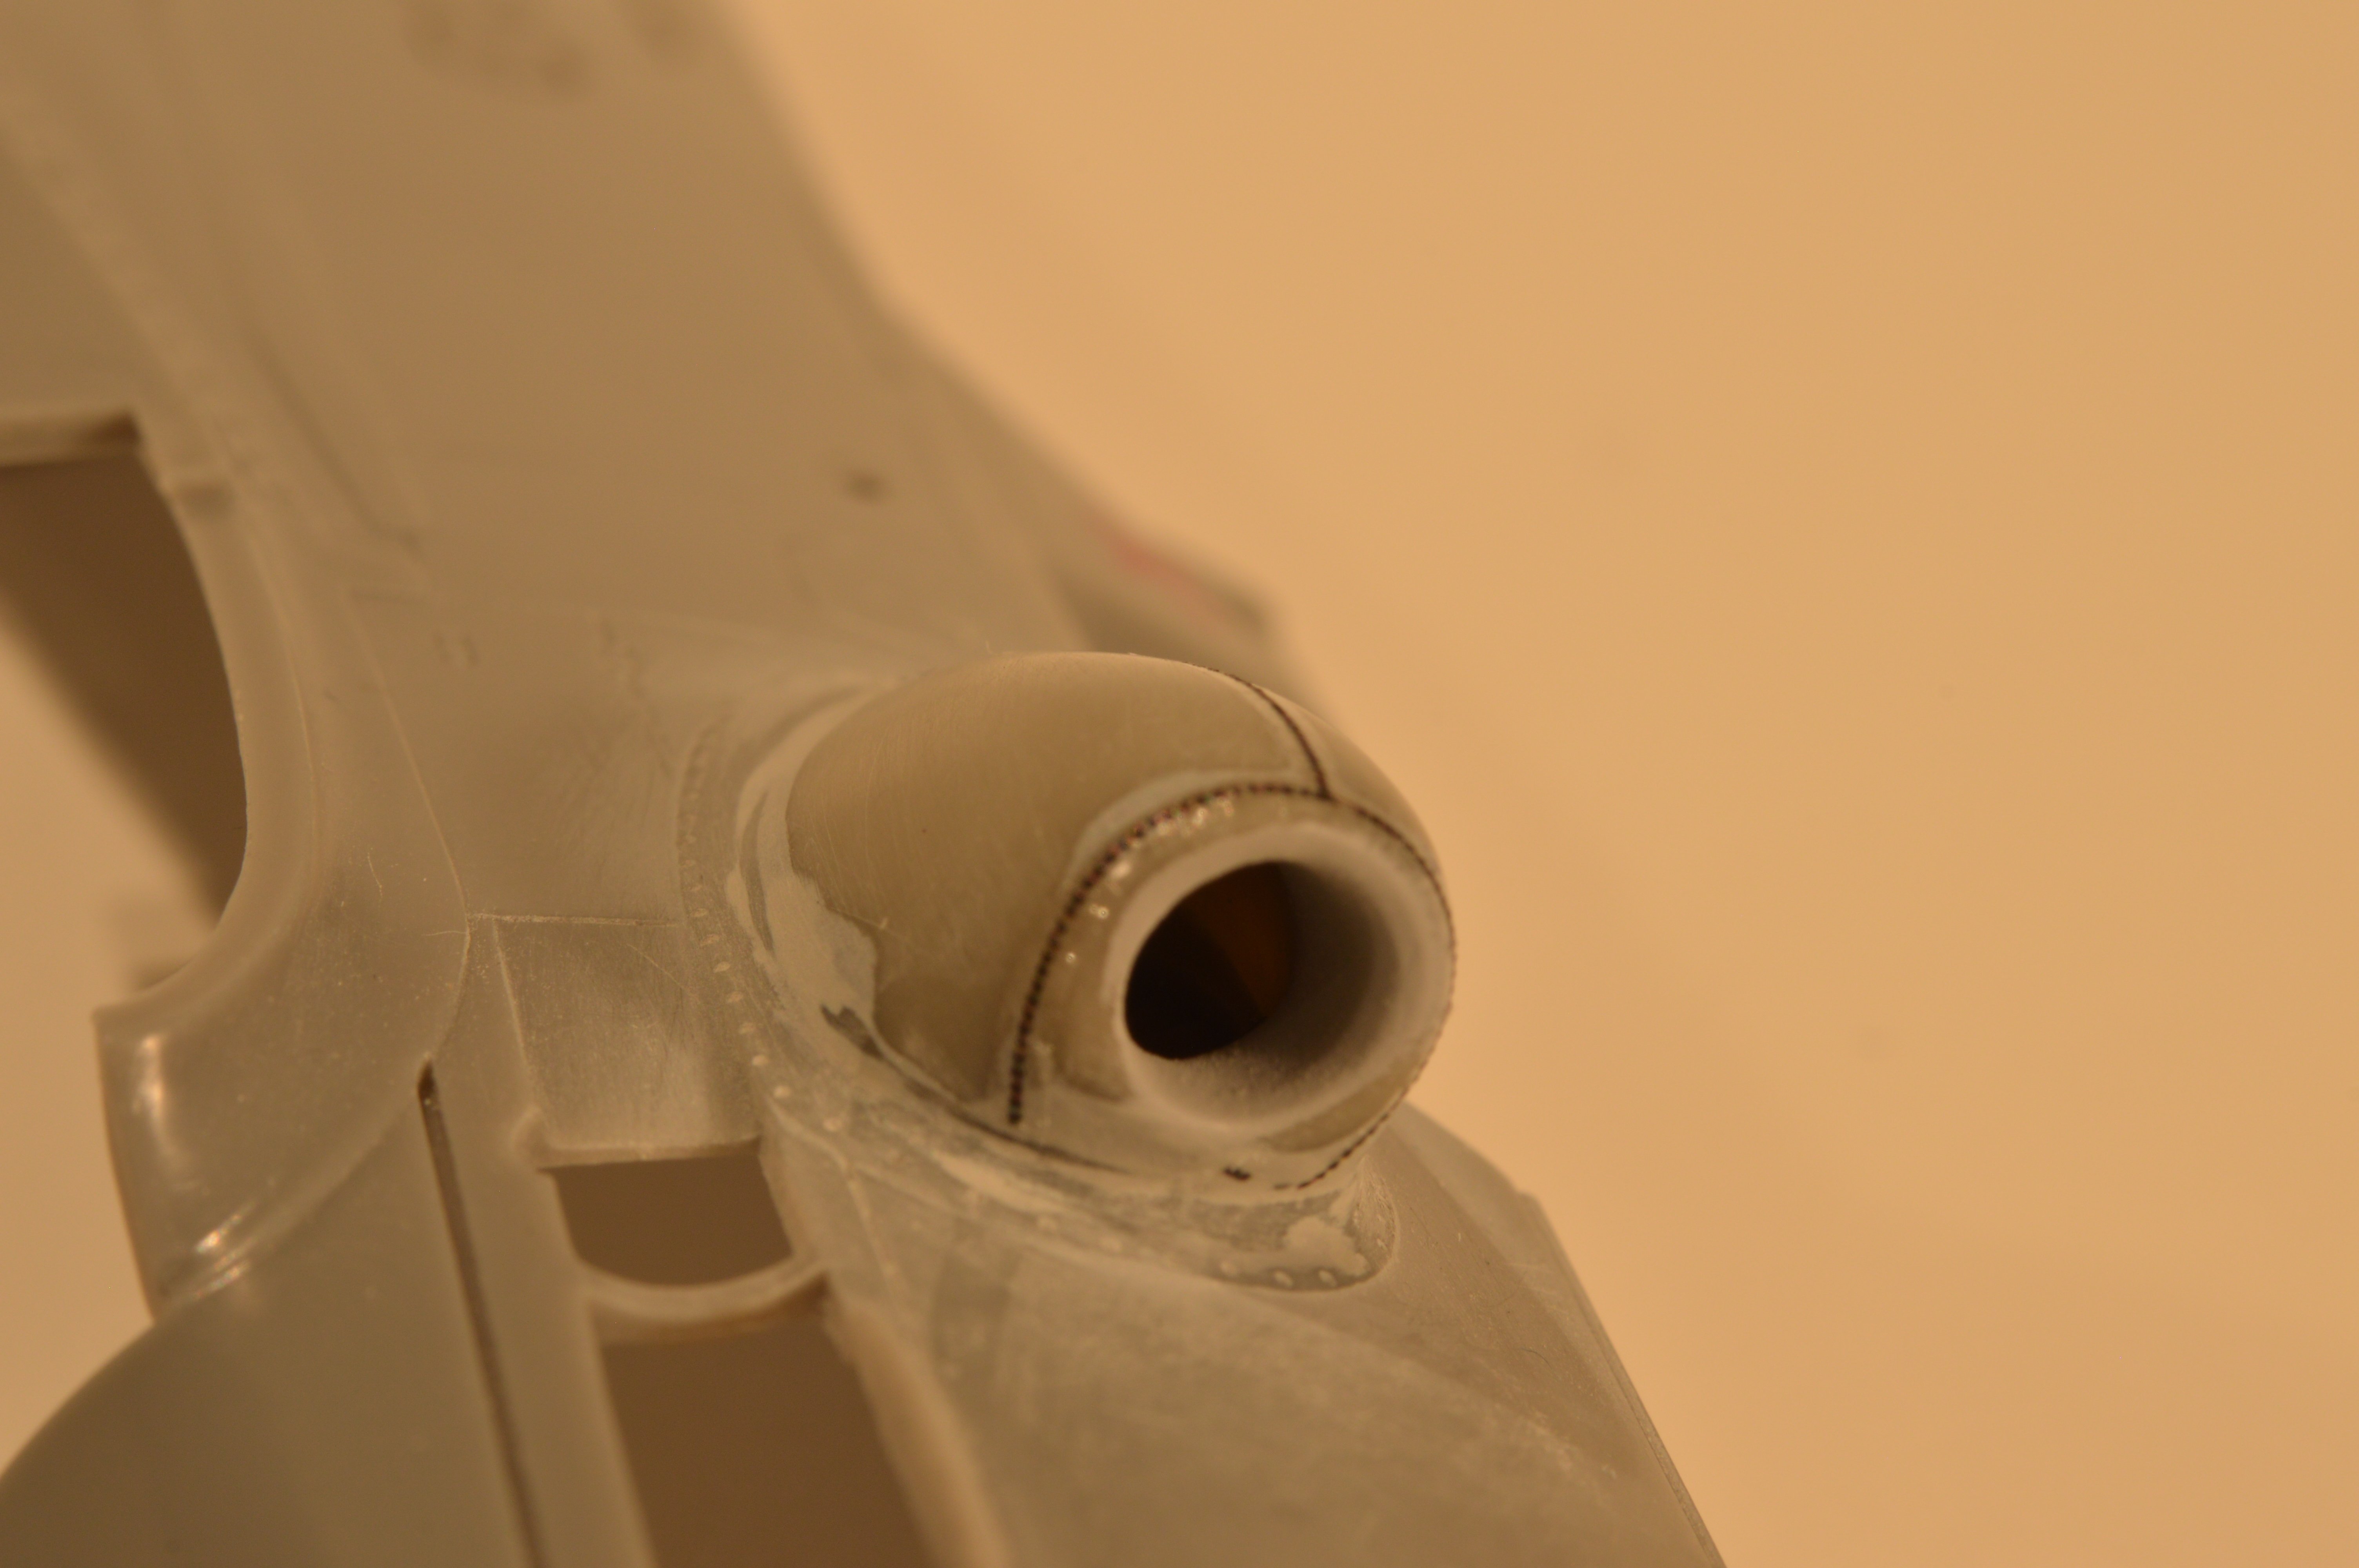
FW 190D-9 Stab/JG4 - Part 1 Getting started on this project, I utilized the Quickboost replacement air scoop which captures the shape of the original much better than the Hasegawa kit part. After hollowing out the resin cast interior with a Dremel tool and a round cutting burr, a few coats of Tamiya putty and Mr. Surfacer 500 blended it in. I also applied the micro weld beads from Archer Transfers and its now ready for a coat of primer. Next up I am starting to apply flush rivets to the fuselage using the HGW positive rivet set for the Fw 190D-9 and the MDC rivet punch tool. I just apply the HGW rivets directly to the bare plastic then once dry I go back over them with the small MDC punch. After a light sanding, the rivets are now flush. First time doing it this way and I am happy with the initial results. Takes a lot of practice to get adjusted to how much pressure to apply with the punch, some areas I went to deep and may have some areas that will require a coat of Mr. Surfacer 500, but practice makes perfect. Continuing on with riveting, then will start fitting the Eagle Editions 190D-9 cockpit set. Kirk
.thumb.JPG.7e74c487c83eb3e9a71a0cb18a22f763.JPG)
-
Beautiful Phantom!
-
HPH PBY-5A Catalina (Cutaway)
Iceman replied to kkarlsen's topic in LSM 1/32 and Larger Aircraft Ready for Inspection
Wow!!!.jpg.4c851bff75b44d3365c3e3b3fb17aca8.jpg)
-
Nice Phantom! Glad the colonoscopy procedure came out well too!


.JPG.06f8055a1d44e69126c851aa172437c2.JPG)