Iceman
-
Posts
155 -
Joined
-
Last visited
Content Type
Profiles
Forums
Events
Gallery
Everything posted by Iceman
-
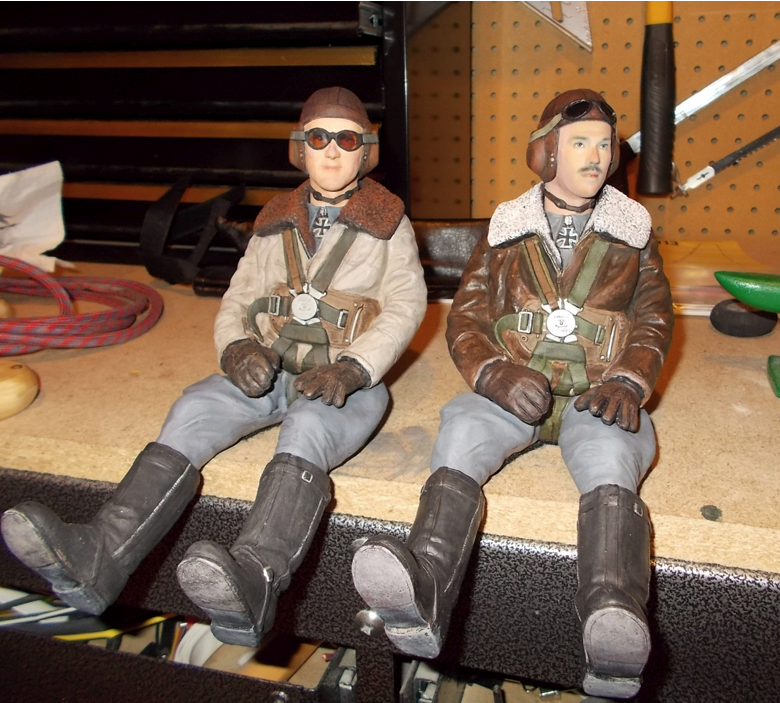
And now for something really different, watch me pull a rabbit out of my hat!

-
These are 1/5 scale figures from Best Pilots for Large scale R/C so no worries. Here is a link to the website, very impressive large scale figures. http://bestpilots.typepad.com/my_weblog/gunther-rall-15-scale-luftwaffe-pilot.html
-
Seems to be a lot of banning going on at the "other site", some really excellent modelers have made an exodus to other sites. Kirk
-
Just a heads up, Walmart has the HPH epoxy listed on the website. Indicates currently out of stock, but obviously they do stock it. https://www.walmart.com/ip/HPH-Model-Special-2-Part-Epoxy-Glue-APXY007G/137418952
-
Thanks Harv, good to be back doing some model building. Kirk
-
Coming back after a very long break from modelling, I will jump into the group build with Fw 190 D-9 of stab/JG4, a Fieseler built D9 discovered intact at Frankfort am Rhein-Main airfield, April 1945. Using the 1/32 Hasegawa D9 kit, lots of resin update goodies, full riveting work on the kit and EagleCal decals.
-
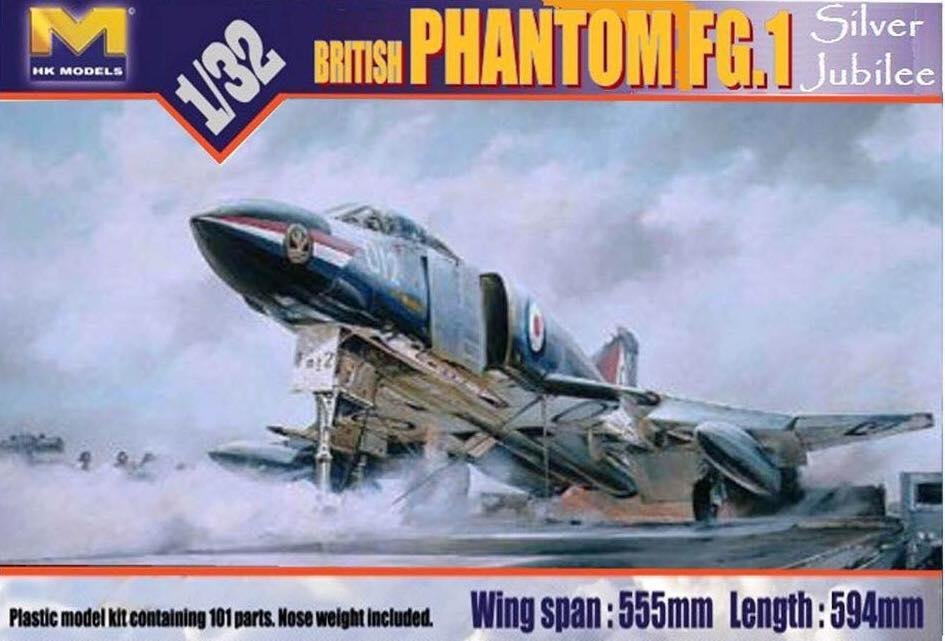
Not sure on the mock up, box art is still offered up on a few vendor sites as a pre-order.
-

1/32 F-4C Phantom - Robin Olds SCAT XXVII
Iceman replied to Iceman's topic in LSM 1/35 and Larger Work In Progress
Just sharing what I consider to be the best reference for the USAF F-4, Jake Melamphy's The Modern Phantom Guide published by Reid Air Publications. Book is currently out of print but I believe there are copies for sale floating around on Ebay and such. Invaluable photo and text reference. -
1/32 F-4C Phantom - Robin Olds SCAT XXVII
Iceman replied to Iceman's topic in LSM 1/35 and Larger Work In Progress
Alberto, I am also using the center line tank from GT Resin and I currently have this on the workbench. Time constraints for me right now have not allowed me to do much in the way of progress photos but I can share what I am doing. The GT Resin tank is actually a copy of the Tamiya center line tank from the F-4J kit so it fits the kit perfectly, other than the fact that it does need to be pinned to the fuselage for added strength and alignment. I am also adding a couple of details that I believe have been missed on many F-4 builds that I have seen along with tweek lists that are out there. (1) The tips of the rear fins of the center line drop tank are in fact held by two small brackets that open up from the fuselage and serve to stabilize the tank from swaying while the aircraft is in flight (2) Four tank stabilizers are located alongside the center line tank that drop down from the fuselage and again serve as sway braces for the tank while in flight, these are very similar to the sway braces found on the wing pylons and MERs and TERs. Here are photos of the center line sway braces. And some photos of the fin sway braces When you look at the underside of the Tamiya wing/fuselage you will see that these panel openings have been incorporated on the kit, they just need to be opened up and the details made and installed. The center line tank will need to be mounted so that the fins to line up with the doors as provided in the kit, but as the GT Resin tank is a copy of the F-4J tank, it is not much of a problem for everything to line up correctly. Kirk -
1/32 F-4C Phantom - Robin Olds SCAT XXVII
Iceman replied to Iceman's topic in LSM 1/35 and Larger Work In Progress
I agree, I have several different sets from GT Resin and in my experience the castings tend to be hit and miss, some are very good, others are very rough with considerable pitting and flaws, but not really something unexpected from the smaller producer companies. I do overall like the sets they produce as they tend to pick up some of the details that other companies have missed in their sets along with doing some subjects and corrections for several of the 1/32 Trumpeter kits, like the F-105F & G, along with a complete F-4G and F-4S conversion sets for the Tamiya F-4s. Current finishing up and painting the ordinance load and drop tanks that I will be using on this project and getting started on the wing construction, should have some updated photos posted soon. Kirk -
1/32 F-4C Phantom - Robin Olds SCAT XXVII
Iceman replied to Iceman's topic in LSM 1/35 and Larger Work In Progress
Alberto, The GT Resin kit has very nice detail incorporated into the instrument panel, of which I just highlighted the smaller details and I did use Airscale's cockpit instrument decals for the larger instrument dials. The bonus with the GT Resin cockpit set is that in has the correct Mk. 5 ejection seats that were installed in all the F-4Cs, including Old's aircraft, big difference between the Mk.5 and Mk.7 ejection seats as installed in the F-Ds. Kirk -
Tamiya XF-7 or X-7 Red toned down with a little XF-10 Red Brown works well, you can also add a touch of XF-3 Yellow to get more of a deep orange hue. Recommend staying away from any tints to the white or buff tones as it tends to give the red a pink hue to it. If it looks right to your eye after applied, than it's right. Kirk
-
Well, off on a new modeling project and work is underway on the Tamiya F-4C/D kit. My subject is Robin Olds F-4C, SCAT XXVII which was a early block C production aircraft and along with multiple corrections that need to be made to the older Tamiya kit to bring it up to standards, the cockpit was a good starting point. I am using the 1/32 early F-4C cockpit produced by GT Resin as it does correctly depict the early cockpit along with the correct Martin Baker Mk.5 ejection seats and not the Mk.7 version that is included in most other replacement sets that are available. Detail is very good, castings were a bit rough but fit was very good and is a direct replacement for the kits cockpit which meant no griding and sanding to make it fit. Painting is about complete on the cockpit tub, other than the ejection seats, and moving on to replace the kits intakes with resin seamless versions and starting correction/detail work on the tail and stabilizers. [/uR [/u[/ [/uR [/ URL]L]URL]RL]L]
-
I have been using mine for little over a year, love it! Kirk
-
F-4C Phantom II tamiya
Iceman replied to CruZz's topic in LSM 1/32 and Larger Aircraft Ready for Inspection
Wow, nice! The Tamiya F-4 is one of my favorites and very happy to see vol.2 coming out soon. -
I have used the HGW rivet sets which are wet transfers and had good success with them. While I have not used this particular product on a painted surface, rather these sets are applied to the bare plastic then painted surface applied over top. However end results should not matter if you have a smooth paint finish whether using gloss products or simply polishing the surface with superfine grade sanding film. (1) Smooth Surface. (2) Apply Gunze Sangyo Mr. Mark Softer (Green label) generously to surface where transfer will be, and I mean generously, not a wimpy coating. (3) Soak transfer for a few seconds in clean warm water. (untreated pure or distilled water works best) (4) Apply transfer to surface. (5) Once in place and settled in, carefully push down transfer and smooth it out with cotton bud or similar without removing to much of the softer. (6) LEAVE IT ALONE for 3-4 hours or even longer, then carefully pickup up a end of the outer transfer film with fine tipped tweezers and gently remove the carrier film by pulling it back over itself. (7) Lastly using clean water with a small drop of dishwashing detergent, gently clean the surface on and around the transfer with just a damp cotton bud. What you should now have is a perfect transfer onto the surface. One last tip, seal transfers with a good quality clear gloss and you should not see any clear carrier film, air bubbles, etc., if you do, let the clear gloss completely dry then using a super fine sanding sponge or film (2000-3000), lightly polish the surface of the transfer area then hit it again with clear gloss. That should take care of it. Hope this helps Kirk
-
Good to know, thanks, I do use some of AK Interactive weathering products and swear by the older MIG neutral and dark washes, love those for general weathering. I just have not had good success with airbrushing water-based acrylics, I use three different Iwata airbrushes with .23 mm, - .5 mm. nozzles, varying air pressures and different thinning agents from window cleaners to pure water but just do not care for the finish I achieve. Guess I am just old school, I can get Gunze and Tamiya lacquer acrylics to behave and finish just like two part automotive lacquers with either the Gunze 250 thinner with the retarder product mixed in or the 400 leveling thinner for really fine spraying, but just cannot get use to the pure water based acrylics. Looking forward to your reviews, will look for them. Thanks, Kirk
-
Has anyone had any experience with the newer company K4 line of paints? Interested in the sets they have available for WWII Japanese aircraft, but as they are water based acrylics I am some what skeptical of what to expect with them. I am pretty well dedicated to and convinced on lacquer based and acrylic lacquers for airbrushing that I really hesitate anymore to try something else. Do use water based acrylics for brush painting but just have never been successful with using them for airbrushing. Thanks, Kirk
-
Incredible realism and excellence at it's finest!!
-
Eagle Editions has an excellent cockpit set for the 1/32 D-9 which I can highly recommend, along with their upper cowl replacement, they have other replacement items for the D-9 too. Also, if you want to go the extra mile (or kilometer) you can replace the entire prop and hub with the Henri Dahne set which is absolutely stunning and of course apply all the riveting. HGW has a complete water-slide decal set for the fuselage and wing rivets that is specifically designed for the Hasegawa/Revell Fw-190D-9. Plenty of extra rivet decals are included so that you can utilize it on the D-9's that had the Ta-152 metal tail or sand the tail flush for the wooden tail version. Hope this helps. Kirk
-
HK Models B-17E/F release - A quick preview
Iceman replied to JayDee's topic in Modelling Discussion
Excellent Preview James, good to see that HK corrected some of the small issues with the late G release. Looking forward to this kit being released, the early G model with a retro fit Cheyenne tail turret is the one I have wanted to build, now will have the parts to do so. -
Flak tower - Berlin 1945
-
Mattel has announced that the 3D printing Thingmaker will be priced at $300.00 when released. Depending on just how sophisticated the software is, the days of scratch building and resin casting kit parts at the workbench may be coming to end. May be able to produce more detailed parts right from the workbench with this, very interesting. Kirk