JohnB
-
Posts
7,267 -
Joined
-
Last visited
Content Type
Profiles
Forums
Events
Gallery
Everything posted by JohnB
-

Revell P-51D "Short Fuse" finished
JohnB replied to JohnB's topic in LSM 1/32 and Larger Aircraft Ready for Inspection
Thanks Peter. I appreciate the nice comments. I'm pleased with the way the model turned out. I'm considering another "B" conversion but need another Revell "D" fuselage to take the nose off for transplant on to a Trumpeter "B" fuselage. I hate to buy a kit just to use the nose but maybe someone here might have what I need. We'll see. -
Revell P-51D late Iwo Jima done
JohnB replied to JohnB's topic in LSM 1/32 and Larger Aircraft Ready for Inspection
Thank you! -
Revell P-51D "Short Fuse" finished
JohnB replied to JohnB's topic in LSM 1/32 and Larger Aircraft Ready for Inspection
Thank you Rockie! -
Revell P-51D "Short Fuse" finished
JohnB replied to JohnB's topic in LSM 1/32 and Larger Aircraft Ready for Inspection
Thank you! -
All done with this one! https://forum.largescalemodeller.com/topic/19070-revell-p-51d-short-fuse-finished/
-
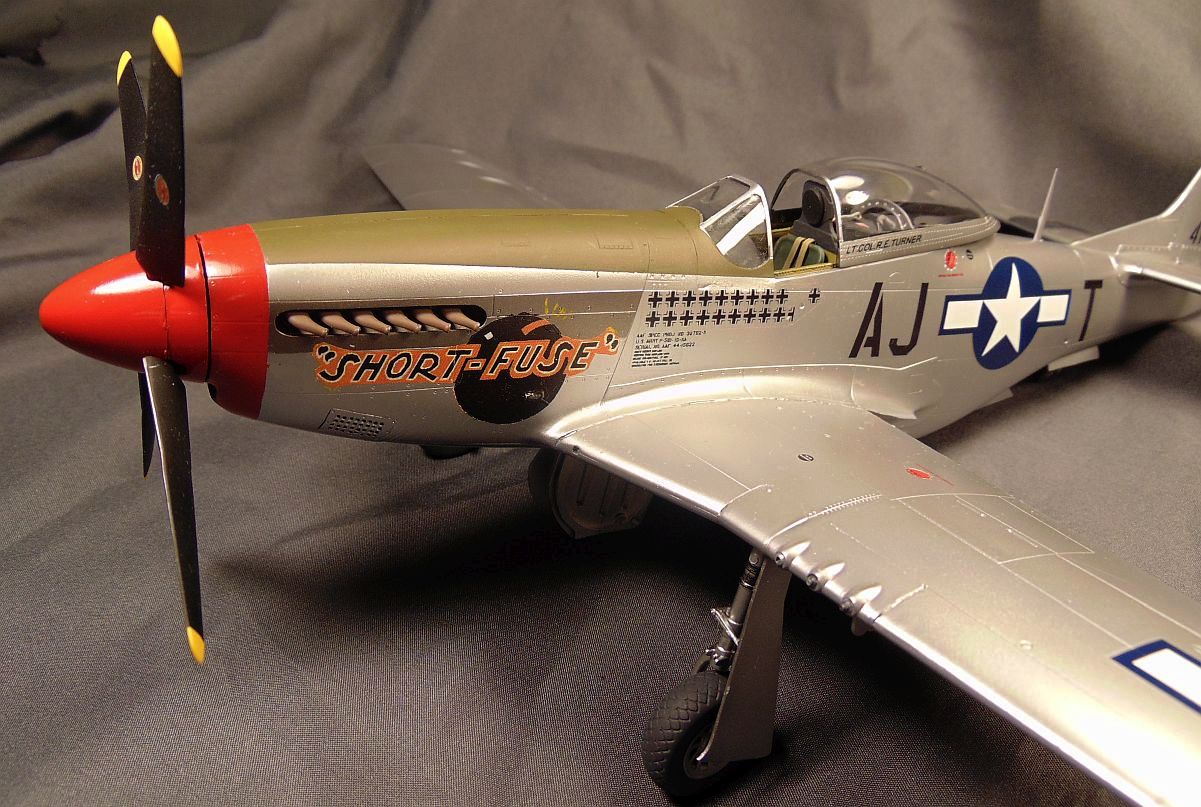
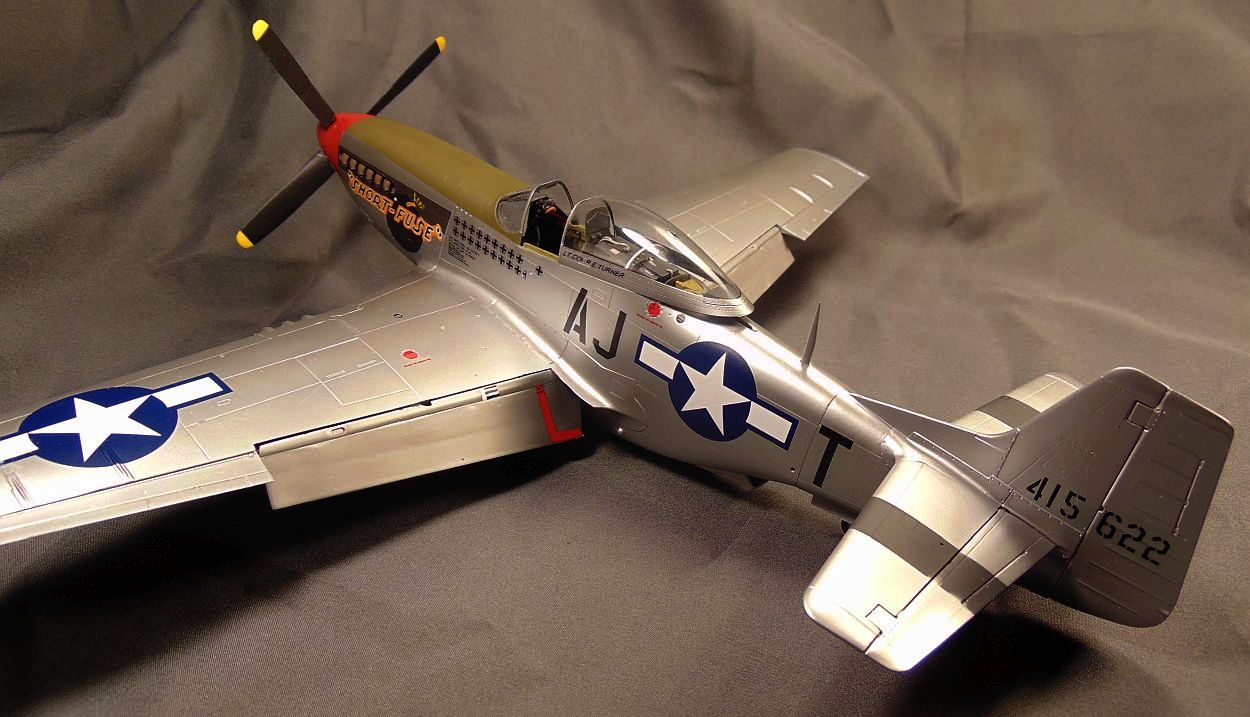
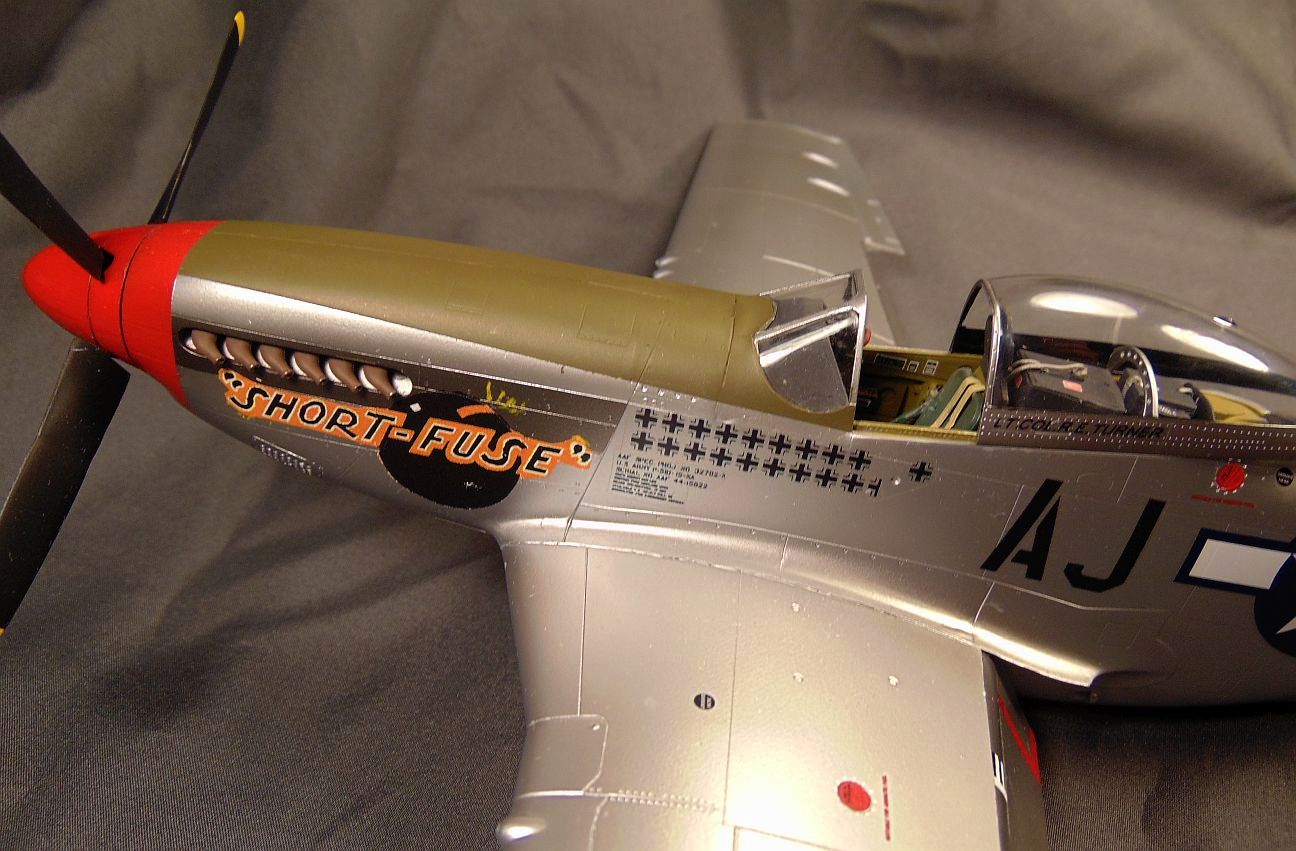
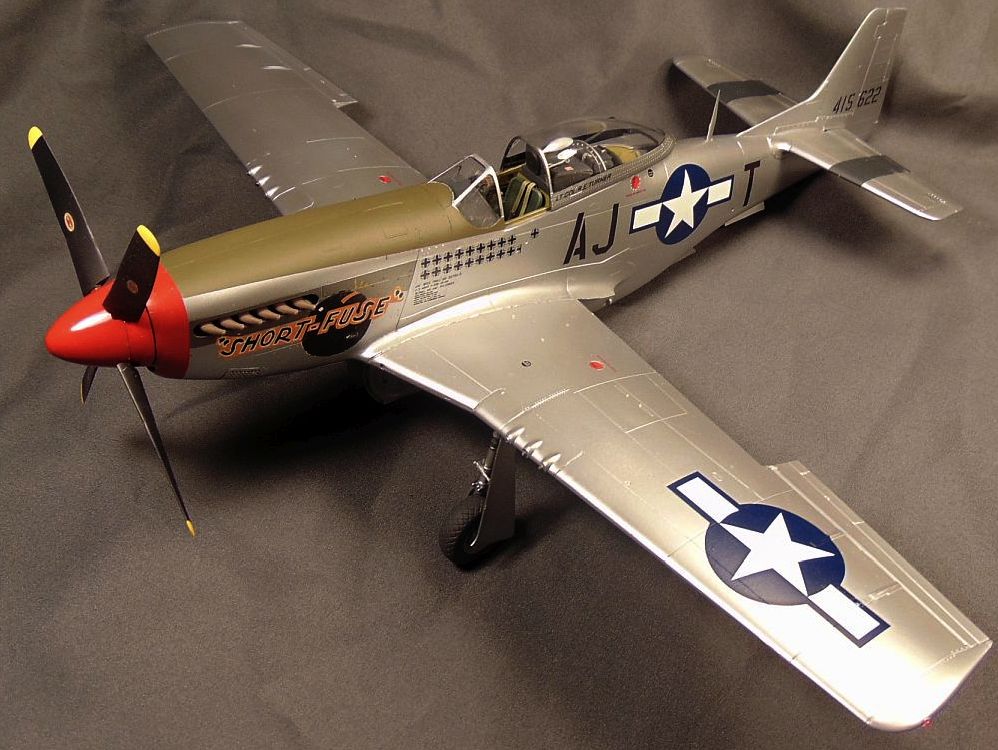
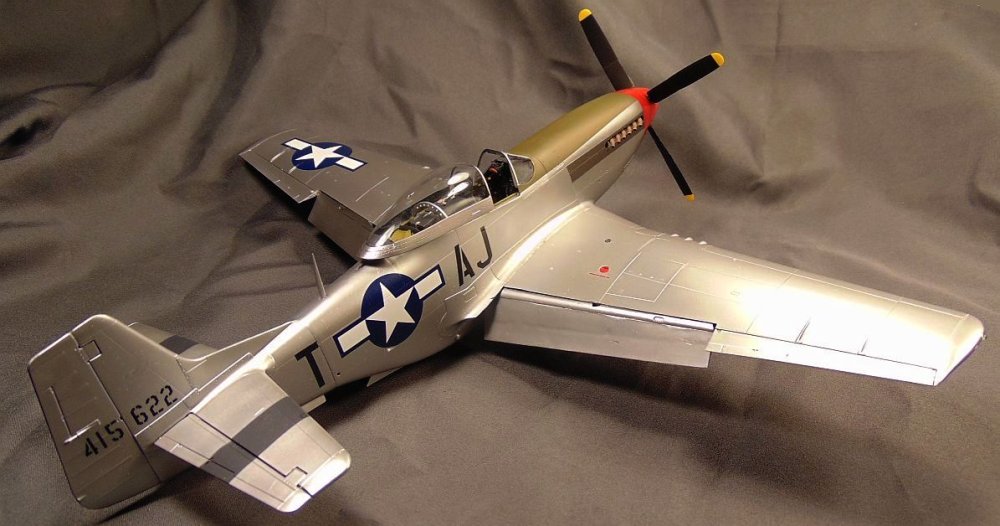
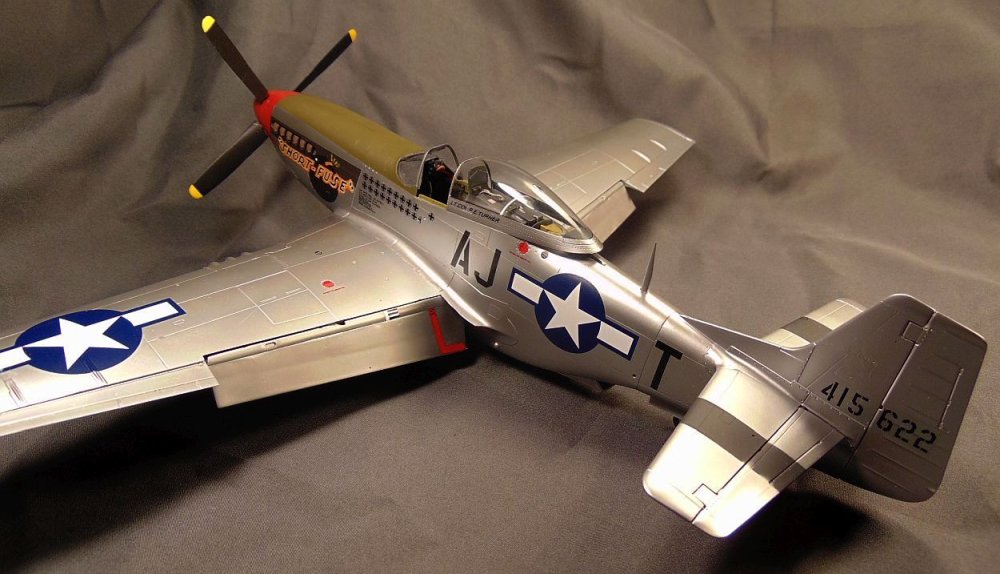
Calling this one done. Those Revell kits are nice but they do have their problems. See here for "fixes": https://forum.largescalemodeller.com/topic/19047-more-revell-p-51d-fixs/ I decided to model Dick Turner's last a/c "Short Fuse". There are no decals in 1/32 for it so I made my own using my computer and laser printer. I'm pleased with the final results (after re-doing the name about a dozen times!). Painted with Alclad. National insignia is from the kit. I hope you like it!


- 11 replies
-
- 11
-

-

-
That's a bummer Phil. 🙄
-
Revell P-51D late Iwo Jima done
JohnB replied to JohnB's topic in LSM 1/32 and Larger Aircraft Ready for Inspection
Thanks MARU! I appreciate that. -
Thank you MARU. I appreciate that!
-
I forgot this was gonna be a non-camo bird. When I think Kingfisher I automatically have a mental vision of some of them in 3-tone camo. 😄 I still look forward to seeing the completed model!
-
Tamiya USA puts a couple of 1/32 kits on sale like this from time to time. I picked up a couple of Mustangs a couple of years ago so I would doubt they are liquidating as opposed to selling off some of the slow movers. I guess you could call that a form of liquidating.
-
The Mk VIII I ordered arrived yesterday. At $99 and free shipping it's a opportunity not to miss.
-
I remember you told me you were looking at re-doing the dive flaps. Here's a photo that might help. Maybe maybe not! LOL Click on it for better resolution.
-
Gonna be a outstanding model Peter. I really look forward to seeing the finished bird.
-
Looking good Peter. I look forward to seeing the camo applied!
-
Thanks Chris. I'll check them out. Just might be the way to go!
-
For sure Peter! LOL
-
I received the P-51 kit this morning so now I can concentrate on finishing "Short Fuse".
-
Revell P-51D late Iwo Jima done
JohnB replied to JohnB's topic in LSM 1/32 and Larger Aircraft Ready for Inspection
LOL Kevin. The Iwo based P-51 groups had some really colorful a/c. -
Thanks Kevin. I like it okay but it appears a little too heavy on the instrument outlines. Kit decal.
-
Thank you Gaz!
-
Aerocraft huh? Do you have a link? I'd like to check them out.
-
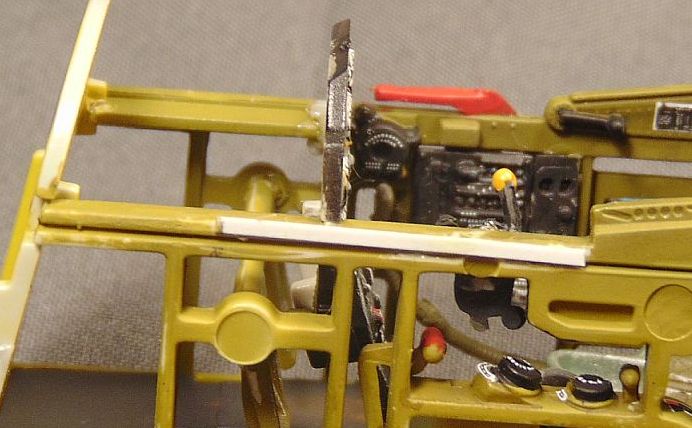
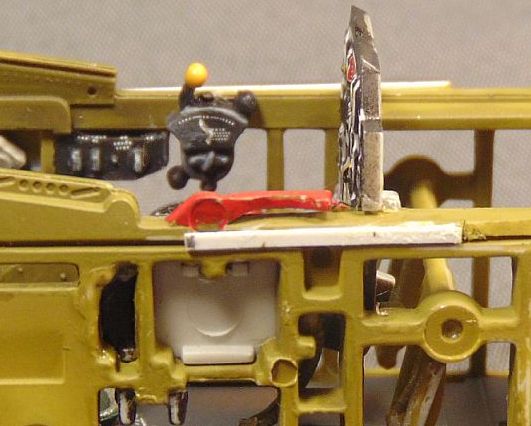
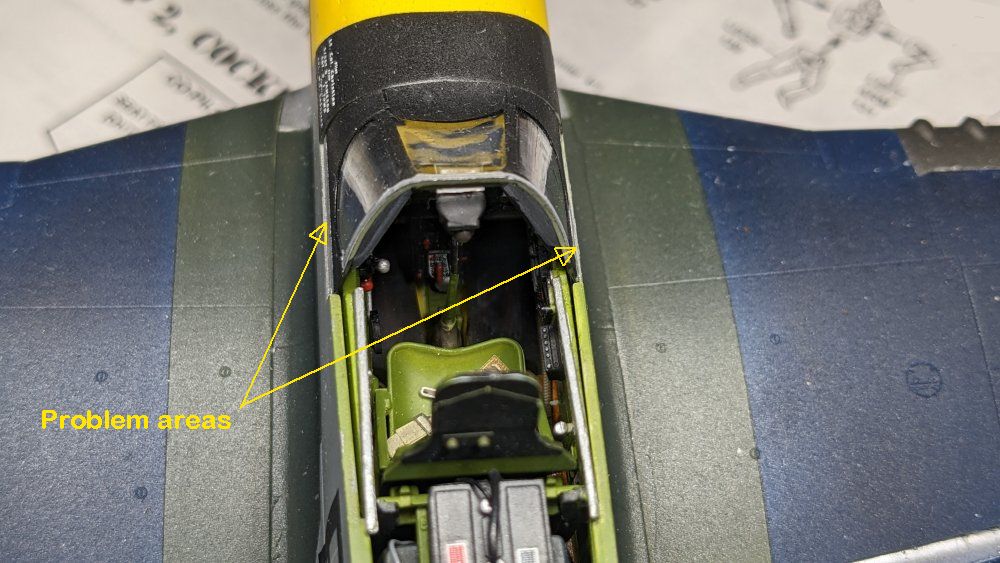
I've had problems with the windscreen on all my Revell P-51's. Here are the areas I am referring to. The windscreen is slightly too narrow and needs those strips to "spread" it slightly. Looks like the one in your 2nd photo fit okay.
-
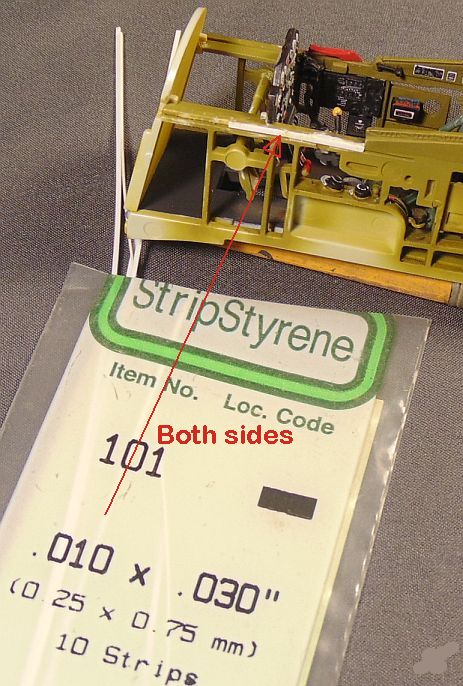
Here's another problem fix for this kit. The windscreen piece is just slightly too narrow and leaves noticeable gaps on each side when in place. My remedy is this: Cement in place a couple of short strips of thin styrene (about 1" long) as indicated by the arrow. This will go a long way in fixing THAT problem.