


GazzaS
-
Posts
6,396 -
Joined
-
Last visited
Content Type
Profiles
Forums
Events
Gallery
Posts posted by GazzaS
-
-
I think the blue is in keeping with the pics, Kai. Or course... if you were feeling bold, you could modulate it with some oils later. Besides... once you hit it with a matte coat, things will change.
Keep up the excellent work!
-
 2
2
-
-
Fifty... a great age. In Australia you get your first bowel screening test kit from the Gov't. Happy Birthday Carl!
-
 5
5
-
 1
1
-
-
Happy Birthday Carl!
-
3
-
 1
1
-
-
Your decal work looks excellent, Kai! No flaws visible. Stunning!
-
1
-
-
Brilliant looking interior, Mark! Hope it all fits!
-
2
-
1
-
-
15 hours ago, nmayhew said:
TopNotch will make to custom order, and i have used them for three previous projects
for this one, they goofed the sharkmouth (only did one side, and that wasn't a close representation of the real thing either) and upper wing roundels too small, which they are working to correct; I should point out that the masks remained unopened by me for 7 months, and only then did i see their errors - I won't make that mistake again!
my strong advice is get yourself a silhouette cutter thingy - it's what i've just done. Jennings (from LSP) is the only guy i have ever found to cry 'cant make them work' - I just haven't tried yet lol...i have zero patience to learn stuff, and just want to know how to 'do'
i think this Youtube vid may be the solution:
Hope this helps
Nick
Love your work! I am a Silhouette portrait user. A lot of it is similar to working with MS paint. I never mess with the setting and use Oramask 810. I love the import function. You can import any jpeg or png file and then use the copy function. Then just drag and drop into the working area.
I haven't seriously modelled any desert war aircraft before. I've always wondered how beat up they got from flying sand. Sadly. super close up photos of wing edges aren't plenmtiful.
-
2
-
1
-
-
16 hours ago, Kaireckstadt said:
Ltn. Weiroster looks really awesome Gary. The uniform and the face are spot on.
Good surgery also on the wingroot.
Looking forward to seeing the progress of 4 days lockdown…
Thank you, Kai. Is it me, or does his uniform look like velvet?
2 hours ago, Peterpools said:Gaz
What an eye for detail, looking just so good.
Keep 'em comin
Peter
Thank you Peter. It's all part of my plan to improve.
2 hours ago, Martinnfb said:Looking good

Thank you, Martin! Damn, man! You certainly have a great collection of images!
-
2
-
1
-
-
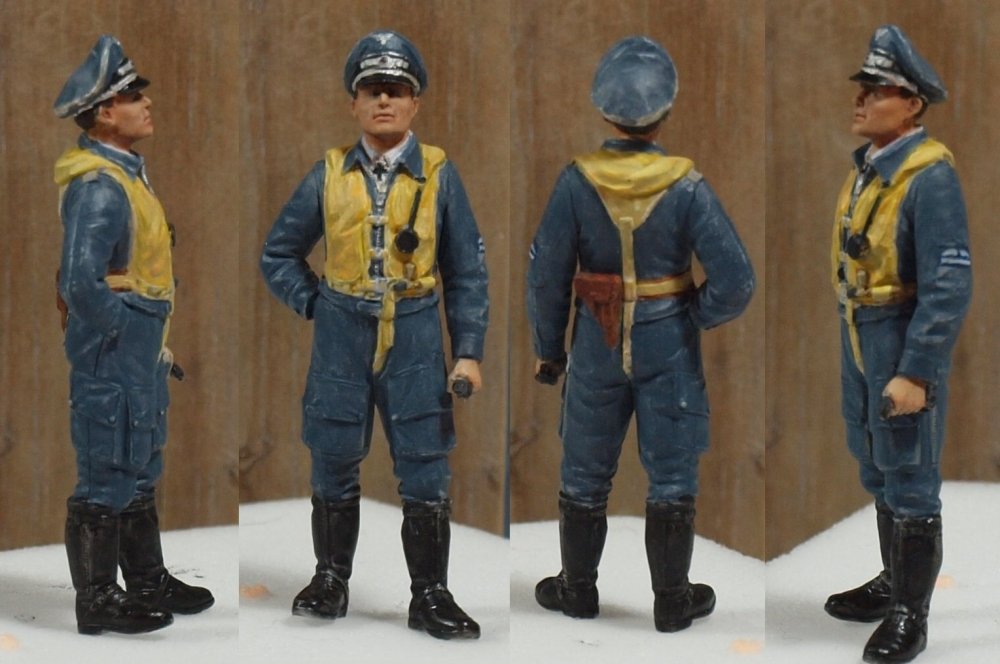
After a uniform correction pointed out by a friend, and another dose of matte coat, our pilot's uniform looks much different:

By eliminating the glare, my attempts at shading finally show. I just wish he had a younger face. He looks more like Geschwader Kommodore material.
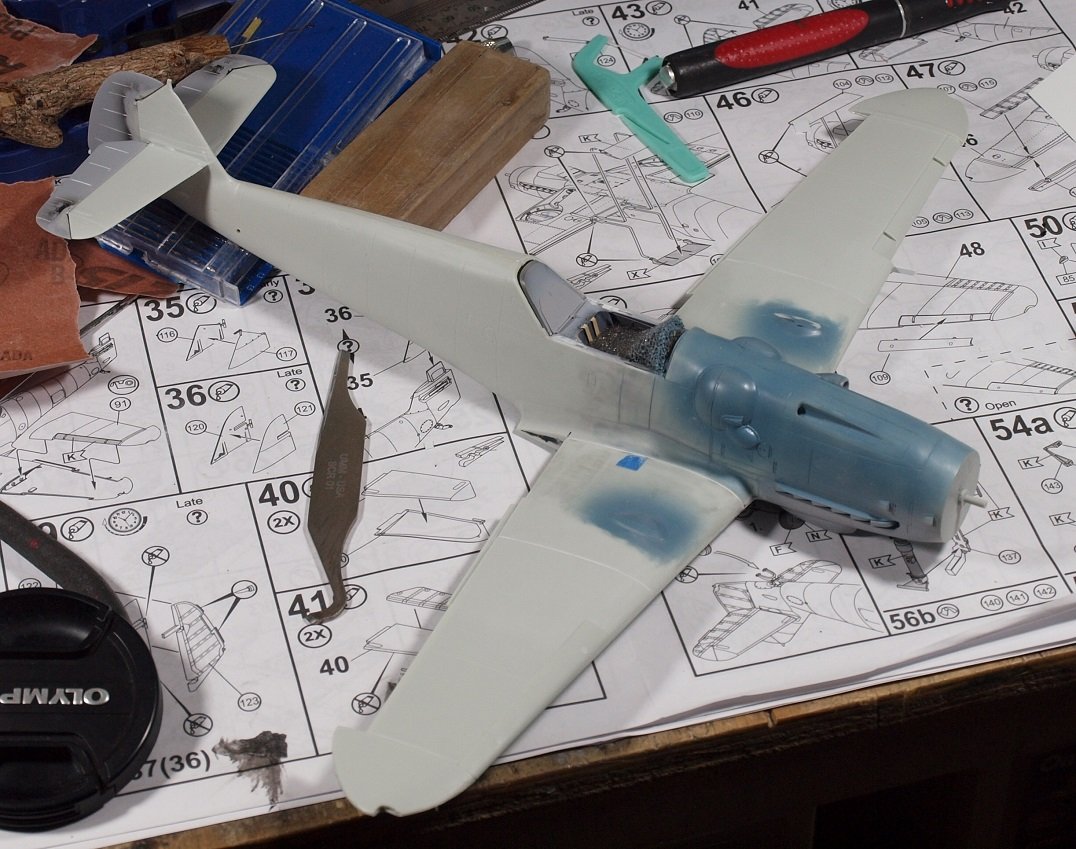
Heady stuff... wings and empennage on.
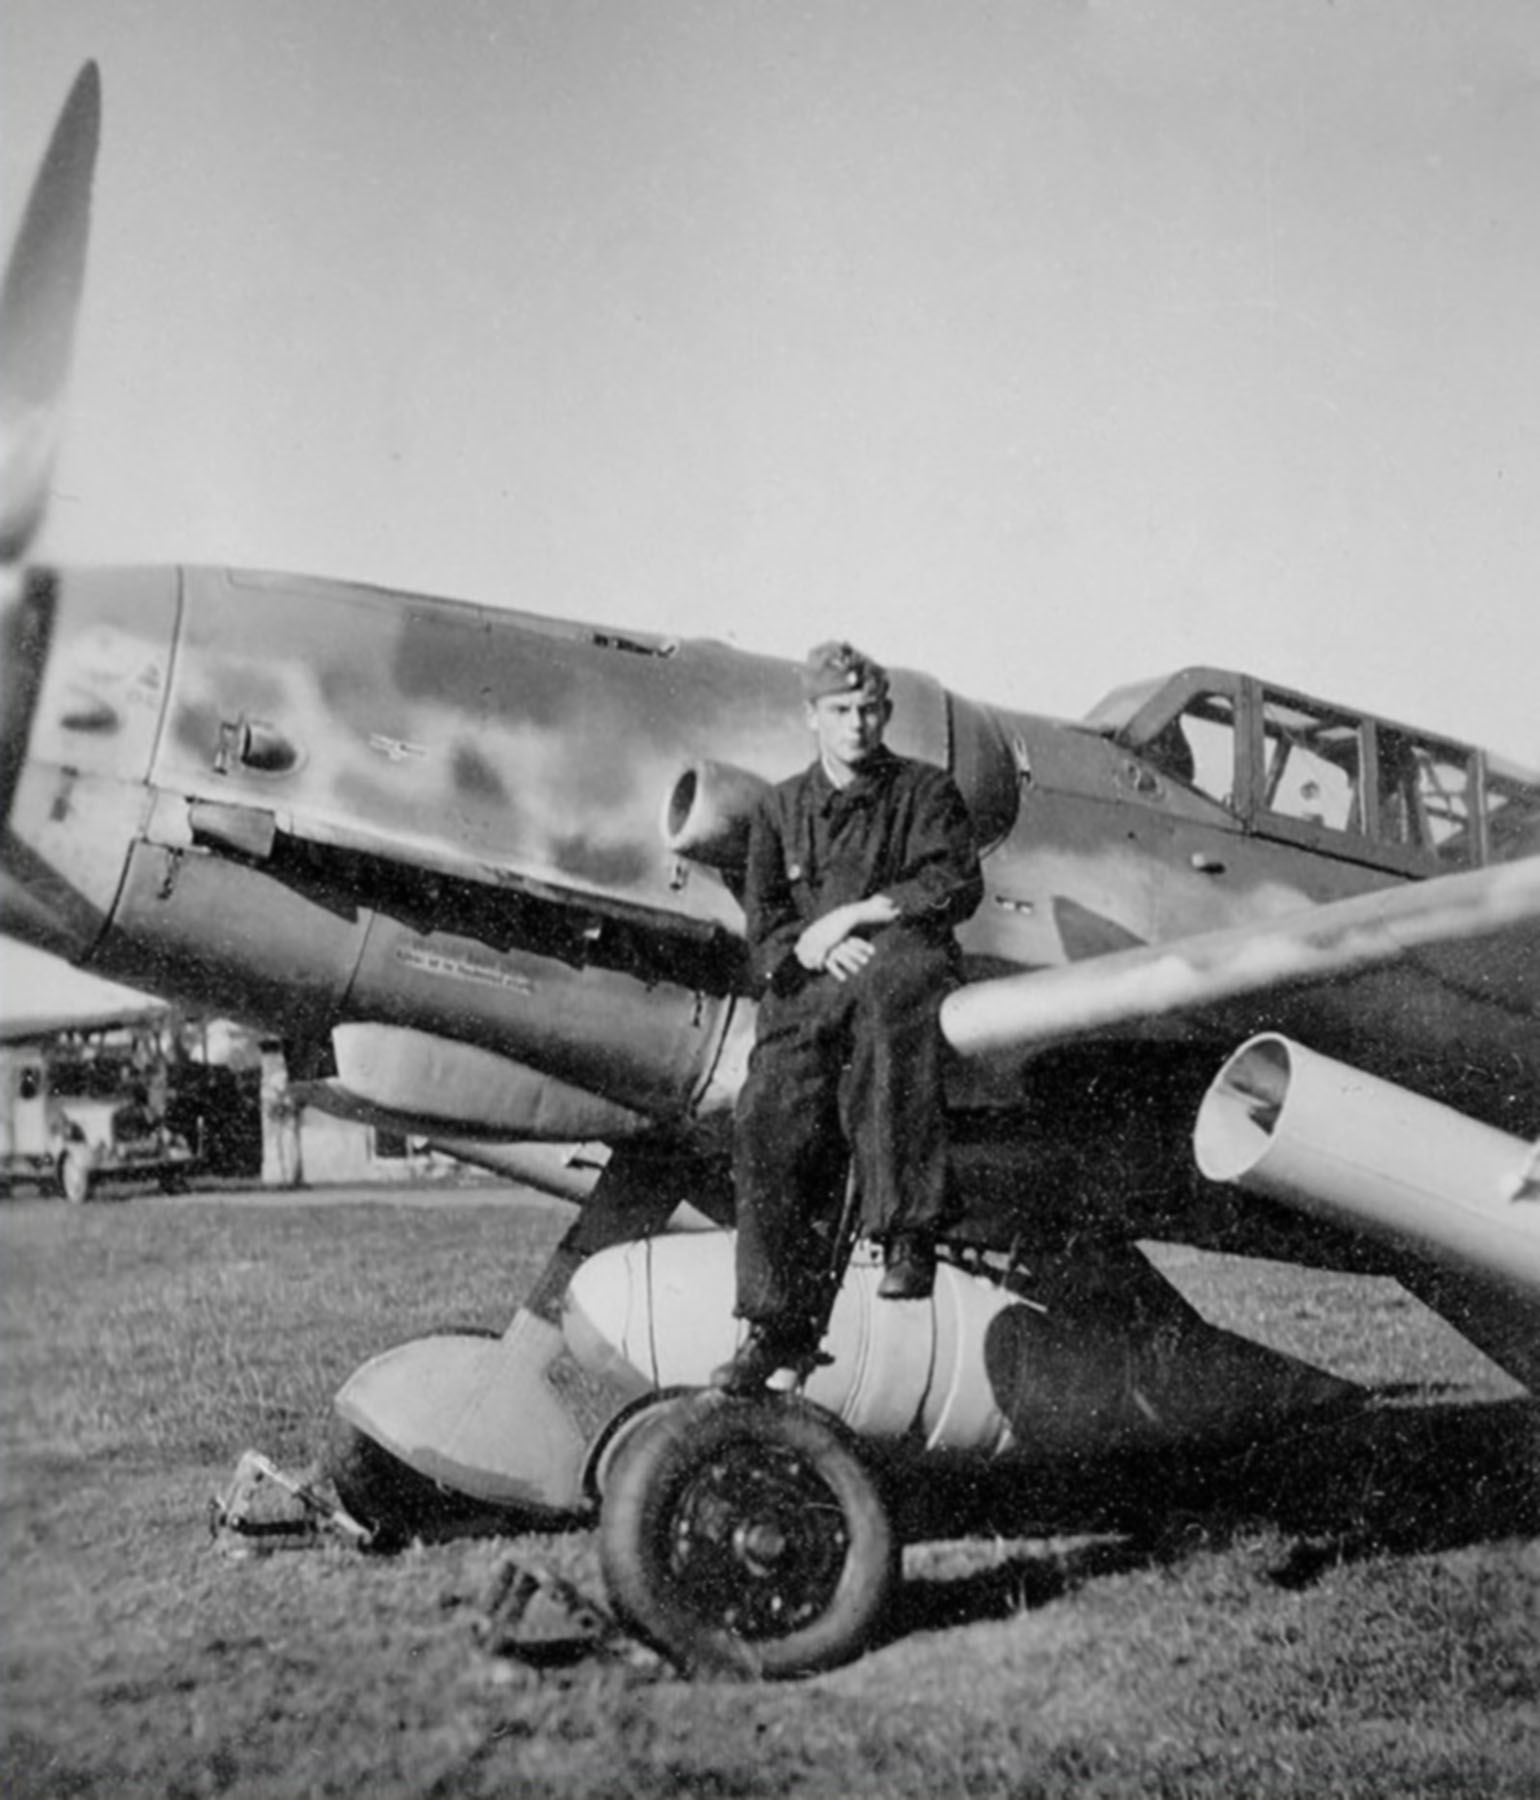
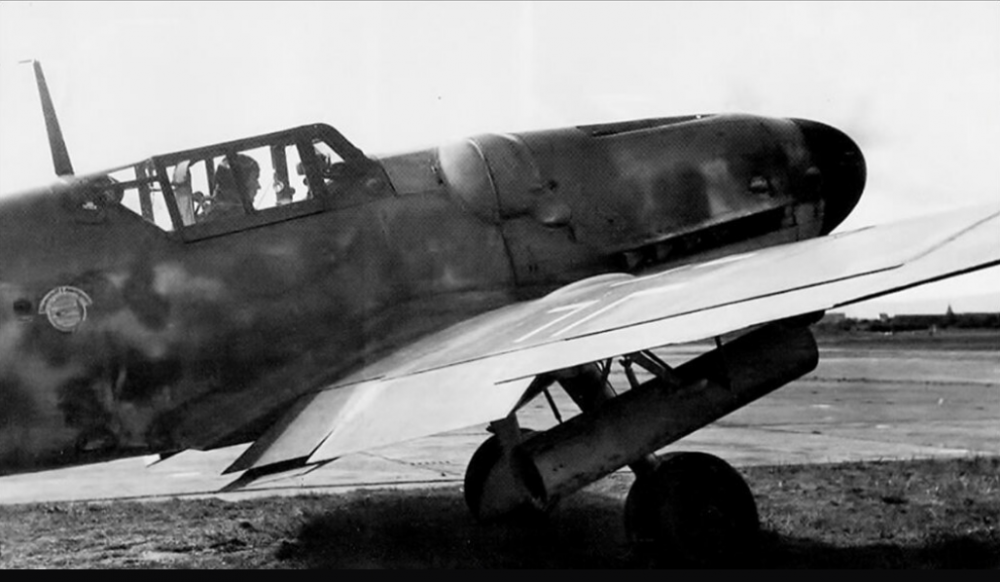
I decided to look at Herr Weiroster's 109 and noticed that in photos, whether he's chilling in his custom lawn chair, leaning on vertical stab, or preparing to take off, the position of flaps and cooling flaps on his radiators is consistent.
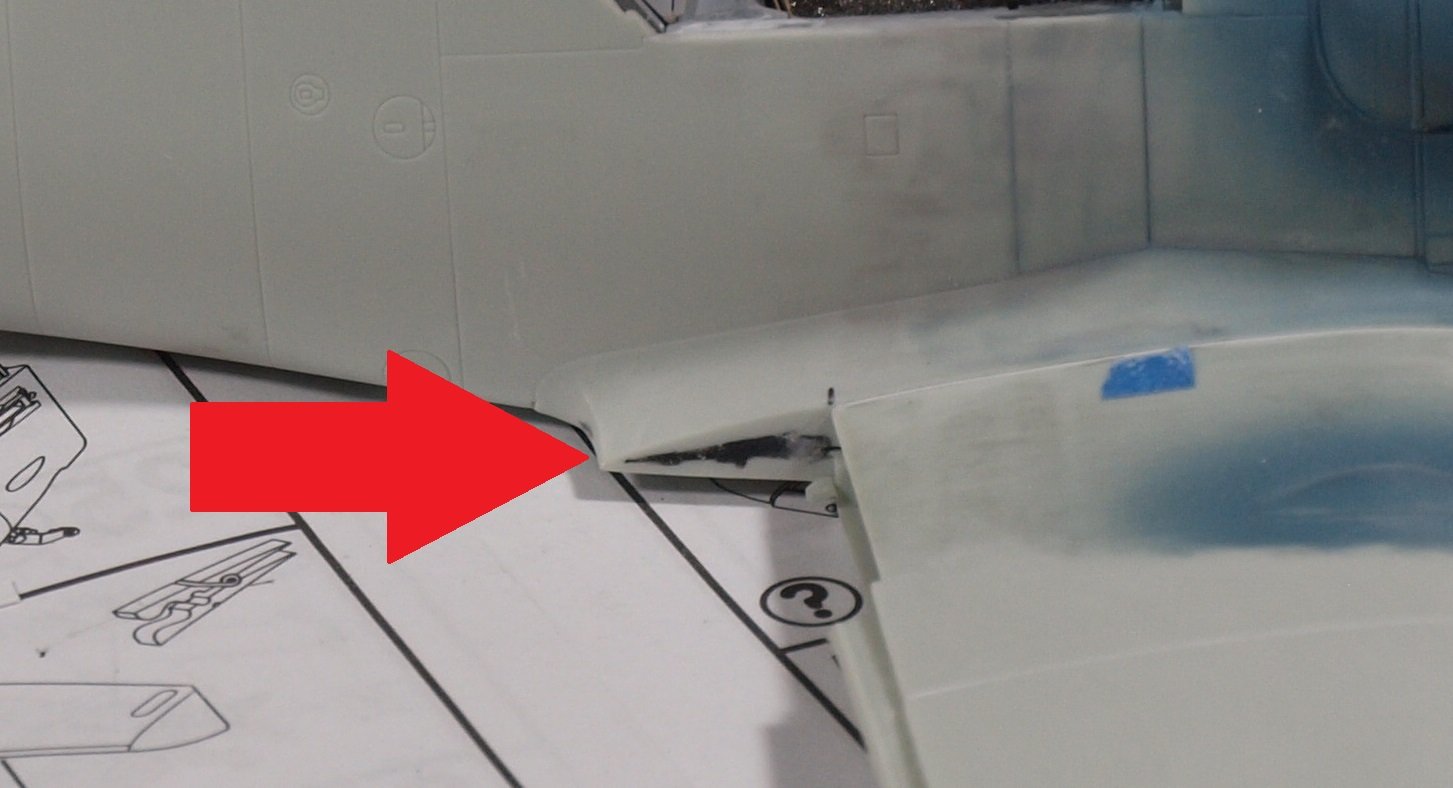
So... the point is that part of the wing root is visible. You can see I filled that joint with black CA and sanded it smooth. But I will have to paint test it tomorrow... or later.

After work tomorrow, I'm on a four-day weekend. I hope to make major progress.
...We'll be in lockdown... I'll be short of excuses.
-
8
-
-
Beauty!!
-
3
-
1
-
-
19 hours ago, Drifter said:
I built the Trumpeter 1:24 P-51D IV. was not bad at all.
My biggest problem with Trumpeter is the rivet holes. On both the P-40 and the 109F(G), many of the rivet holes are elongated because the riveter doesn;t always come from a direction perpendicular to the Aircraft's skin. So... you get some holes near the bottom and top of the fuselage that are very oval. Twice-bitten, permanently shy.
-
2
-
 1
1
-
-
Very nice cockpit, Mark! Really love the way you've highlighted the rivets.
-
3
-
1
-
-
Nice work, John. You are flying!
-
6
-
-
On 8/2/2021 at 8:32 AM, BradG said:
A vaccine so safe we need to indemnify the doctor from liability if he kills you.....yeh, that's really encouraging for people....yeeeesh. From what I hear from friends, you get asked 15 questions relating to your health and clotting now, which I think both my parents would fail.
I am also opposed to this vaccine passport they want to introduce. What a good way to create two classes of people within society and what about those who do not carry a smart phone, like me.
Smart-clay-tablet?
-
3
-
-
1 hour ago, HubertB said:
Your figure is hundred times better than what I could achieve. From what I read from the experts like Marion Ball, the secret with acrylics is to use multiple very diluted layers to achieve the same blending effect as with oils.
Keep going. You’ll prevail on that pig of a kit in the end.
Hubert
Thank you for the very kind words, Hubert. I was actually trying to emulate the technique. But it just doesn't look the way I'd like. Perhaps my layers were too heavy. I just end up with textures I don't want.
-
1
-
-
ZZZZZZZZZZ No guns, no fun.
-
1
-
5
-
-
2 hours ago, Peterpools said:
Gaz
Your figure looks so good and I completely agree a semi matte finish would be the way to go.
Never a fan of movable control surfaces as they create more problems and fit issues then they are worth. Glad to see you’ve taken the 109 to task again - looking mighty goggKeep ‘em comin
Peter
Thank you, Peter.
-
3
-
-
Getting those small details right is the difference between something that makes you happy, and something that makes you look at all of the mistakes, however small. Keep up the excellent work!
A while ago I tiled our ensuite bathroom from ceiling to floor. Whether I'm shaving or shitting... I often look around at my errors.
-
3
-
2
-
-
Very nice paint work, Peter! She's gonna turn out awesome!
I've actually been beneath an F4. Wish I could remember some useful detail. But all I remember is white paint.
-
2
-
-
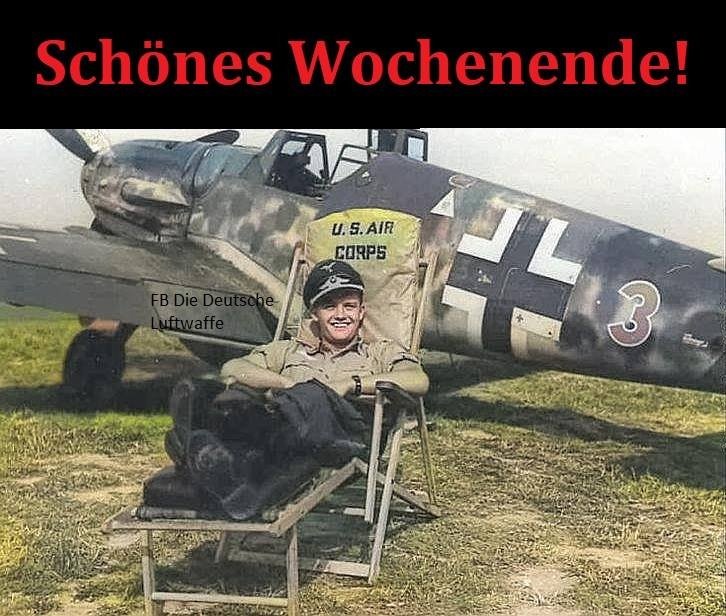
45 minutes ago, Kaireckstadt said:
Found a foto Gary:
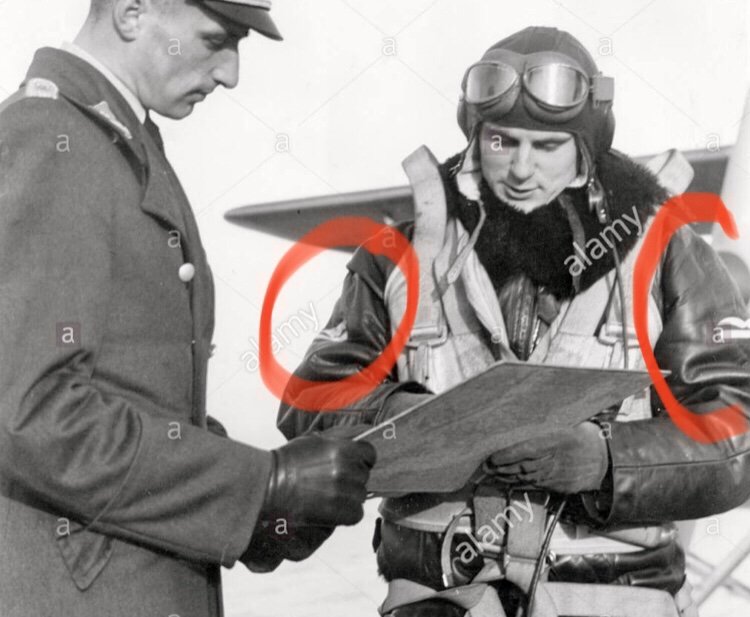
Thank you, Kai! I had a look at photos, too. Not many had the sleeve chevrons. This one is particularly interesting because the insignia are on the leather jacket.
-
2
-
-
3 minutes ago, Kaireckstadt said:
Leutnant Weiroster is really looking very good! Like the way he is painted. I‘m with you that his clothes should be a little more matte. Will you add the Leutnant-rank also on the right arm?
Very well painted on the left arm!Nice progress also on the plane. Good decision to refuse and rework the movable control surfaces!
Looking forward to seeing the next update!
Thank you Kai!
Honestly... I didn't know the rank badge was on both sleeves. It's only on one sleeve on any of the figures that have it.
-
1
-
-
Thank you, Kevin!
If you don't mind, I segue straight into an update.
I wanted to post an update yesterday, but I had to wait for the acrylic paint on our pilot to dry so I could matte coat.
Then... this morning while I'm spraying said matte coat... I observed that I had forgotten to paint his hair!
Anyway... Once matte coated, I painted his hair and put a little Future on the visor of his cap and on his boots. Some things should always shine!
To complicate matters, while I was painting his Mae West yesterday, I noticed that the valve assembly for the Mae West's air bottle had broken off. Very flimsy it was. So, I made a new one out of stretched sprue and hurriedly painted it.
He's still got a little sheen. I may hit him with more matte coat later. I'm always afraid to spray too much at once and end up with a foggy layer. I did it once before, and have dreaded it ever since.
Even though I used oils for the skin tones, I used acrylics for everything else. But I'm not sure I'm totally happy with the finish. I think I'll go full oils on y next figure. Seems like oils allow you create subtle differences better.
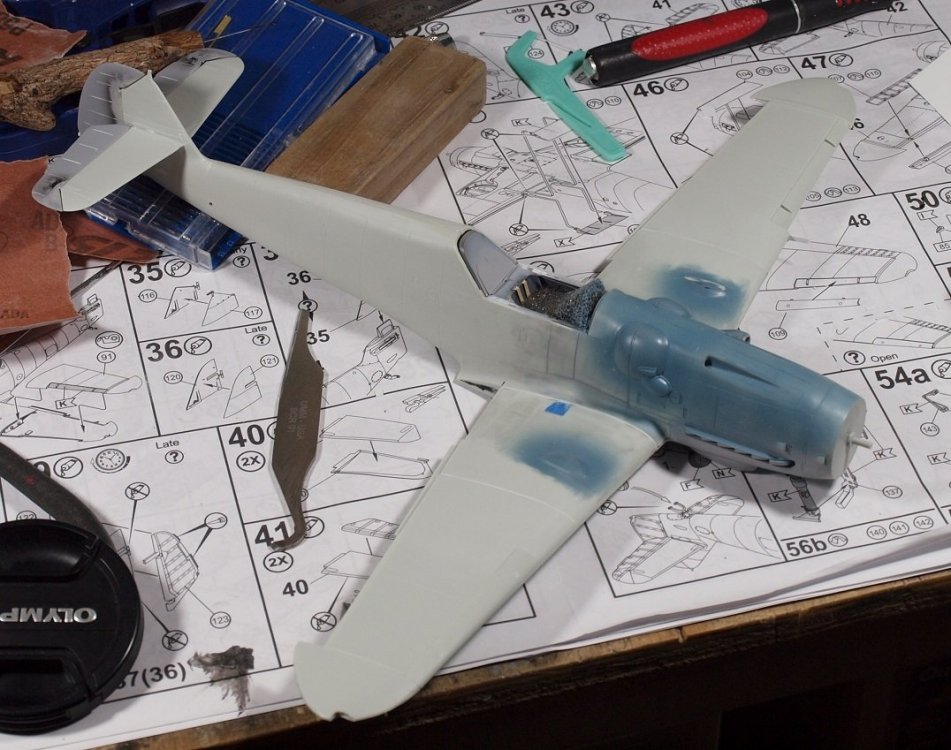
And I got back to the plane this morning!
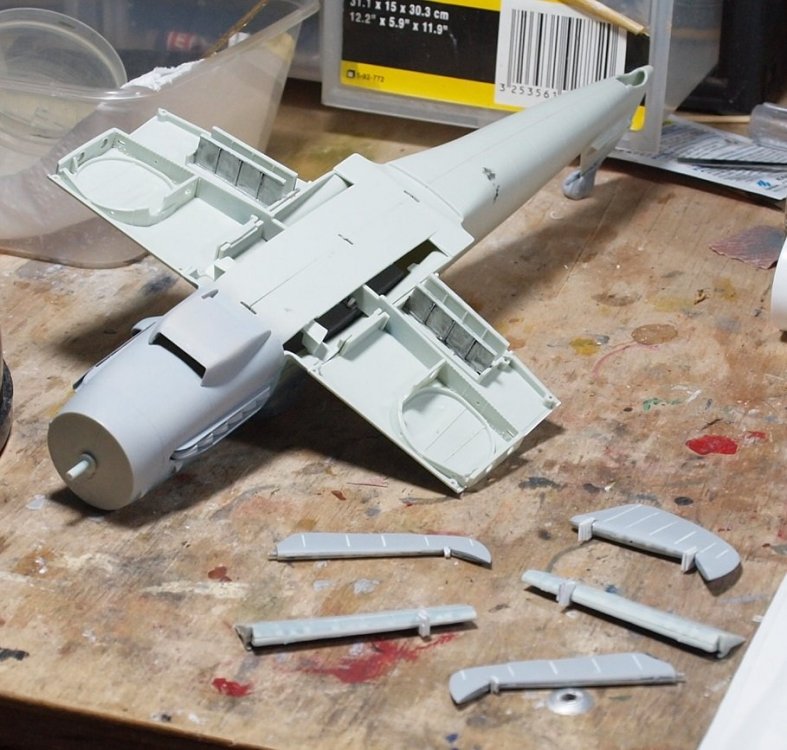
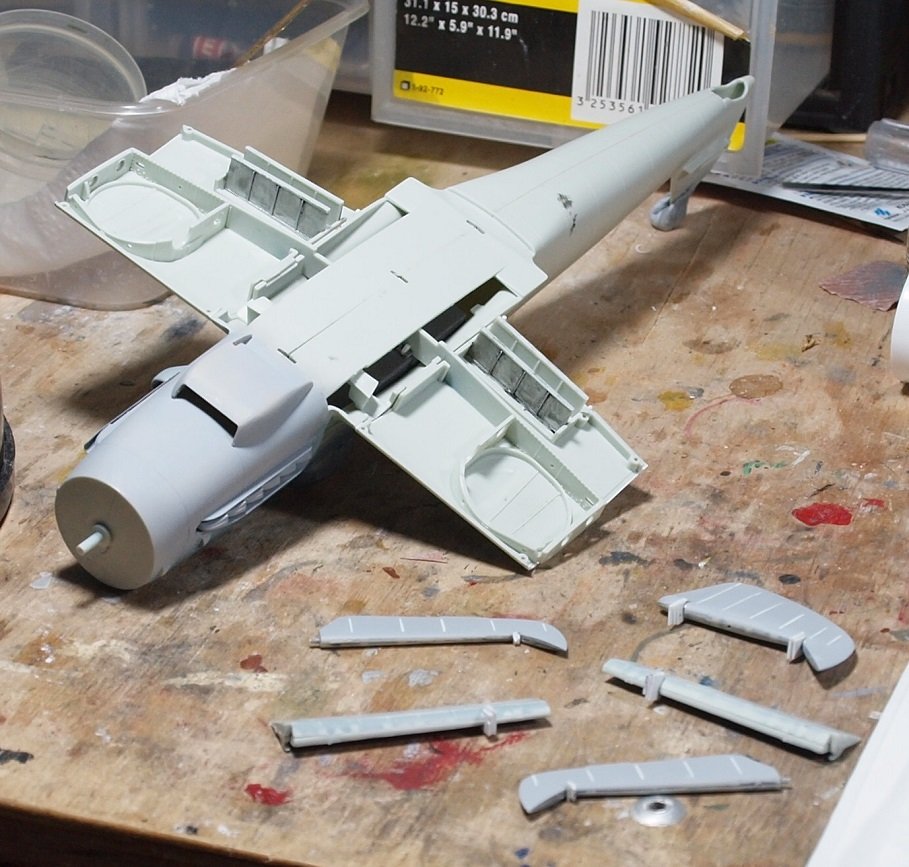
Revell... for some reason felt the need to make the surfaces moveable. So, to get them right, you have to slice off a few parts, and fill others. Here, I've used Evergreen sheet to stuff into the square notches. In a while, I'll shave them with a knife, fill the tiny crevices that may be there with black CA and sand off.
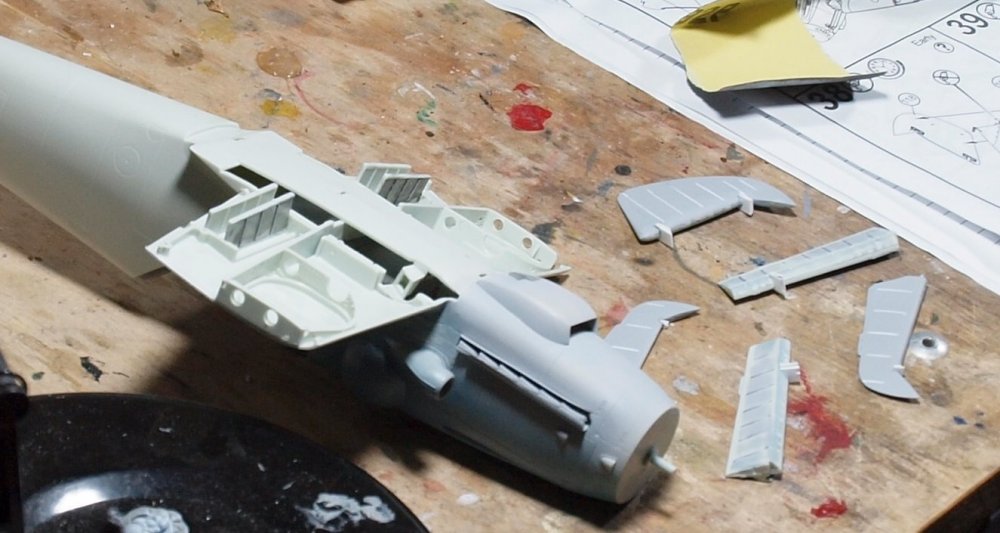
I also added the three parts required to each wheel well.
And started gluing the lower wings on...

I'm happy to be done with the pilot, and looking forward to closing up the fuselage in a week, or two.
Happy modelling!
-
7
-
-
Nice wiring harness, John!
-
6
-
-
Can;t wait to see that fifth wheel greased up!
-
3
-
-
Excellent!
-
2
-
1
-


Gottfreid Weiroster Bf 109G6 R6 Revell 1/32
in LSM 1/35 and Larger Work In Progress
Posted
Thanks for the great pics and video, Martin. Fewer G-rated things look better on film than a sleek fighter aircraft.
I've just run into an unhappy situation. I've realized two things about this 109 kit. The first is that the shape at the forward part of the wingroot and fuselage is all wrong. The wing comes up too much up front extending the fuselage area behind the oil cooler. But... I sanded a lot of it away.
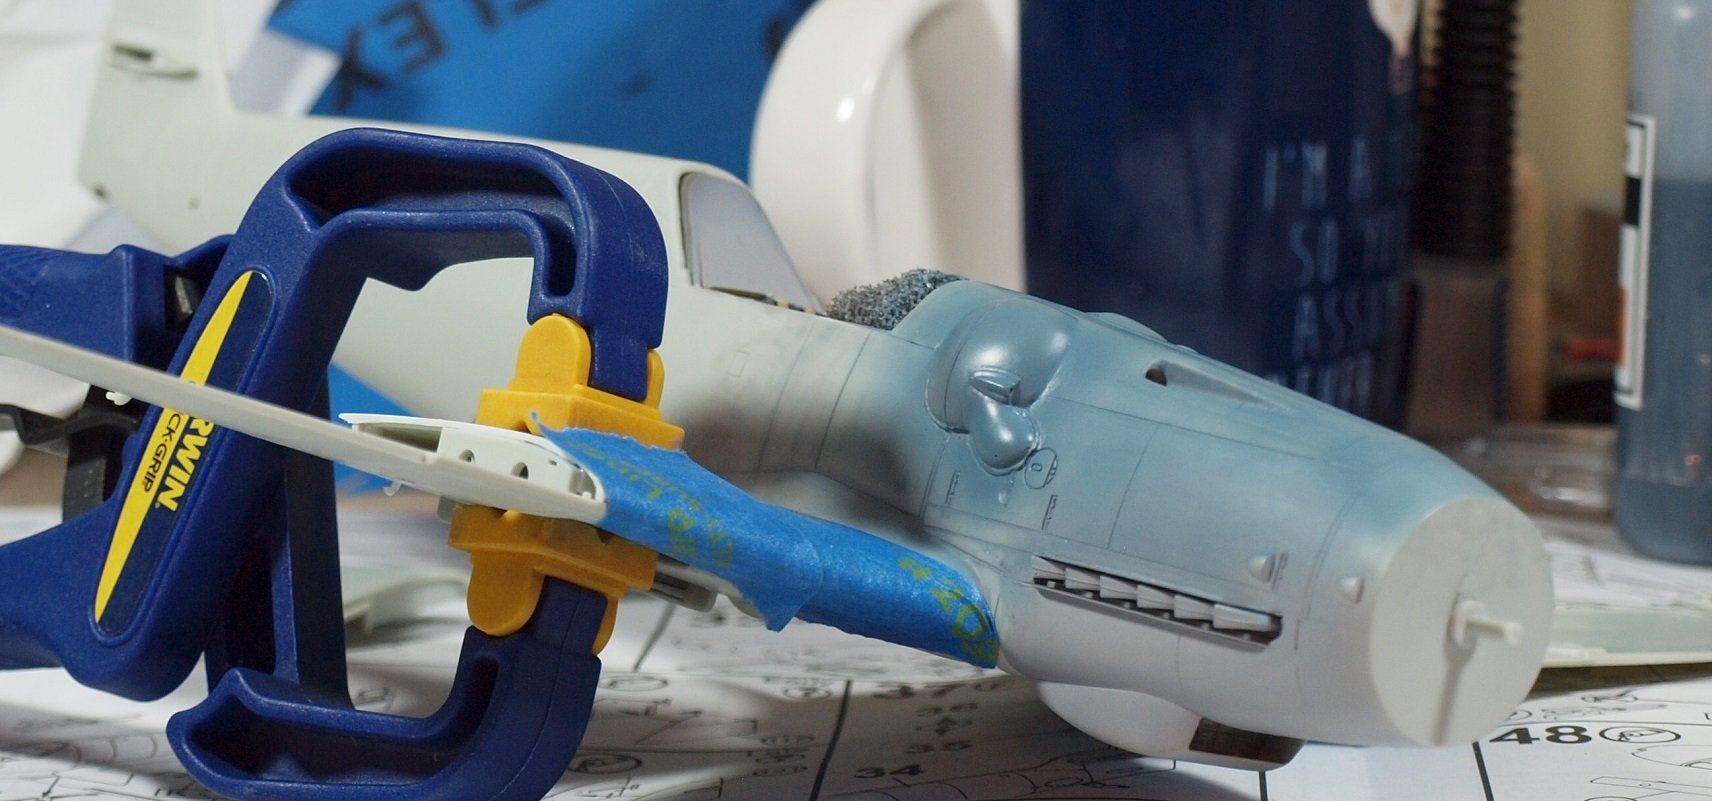
Worse still is discovering that both wings have a bow in them. So... port wing was worst, so I broke it apart and now it is clamped, glued, and taped, hopefully drying in a straight shape.
This in one of those situations where I need a kit to ruin before I build one, right. Sadly, I spent too much on this one to justify binning it.