


GazzaS
-
Posts
6,396 -
Joined
-
Last visited
Content Type
Profiles
Forums
Events
Gallery
Posts posted by GazzaS
-
-
Nice looking details, Kai. Tanks and rails look especially nice.
-
 3
3
-
-
Glad I'm not going to Victoria. As an NFL fan, I generally prefer getting into the 'Red Zone'.

Taken from Farcebook.
-
3
-
-
Just an update, friends. My replacement kit is on the way for a bit less than retail... including postage. I'm no longer certain how much money I have spent on this one. But money is just a means to an end. And that end is building models.
So hopefully next week, I'll return to assembly.
-
8
-
-
That is an odd fit issue with Dragon.
-
1
-
-
Very nice work, Mark! You're not taking any models with you? Gonna buy some on Vacation... don't forget your knife and nippers.
-
2
-
 3
3
-
-
On 8/8/2021 at 8:07 AM, BlrwestSiR said:
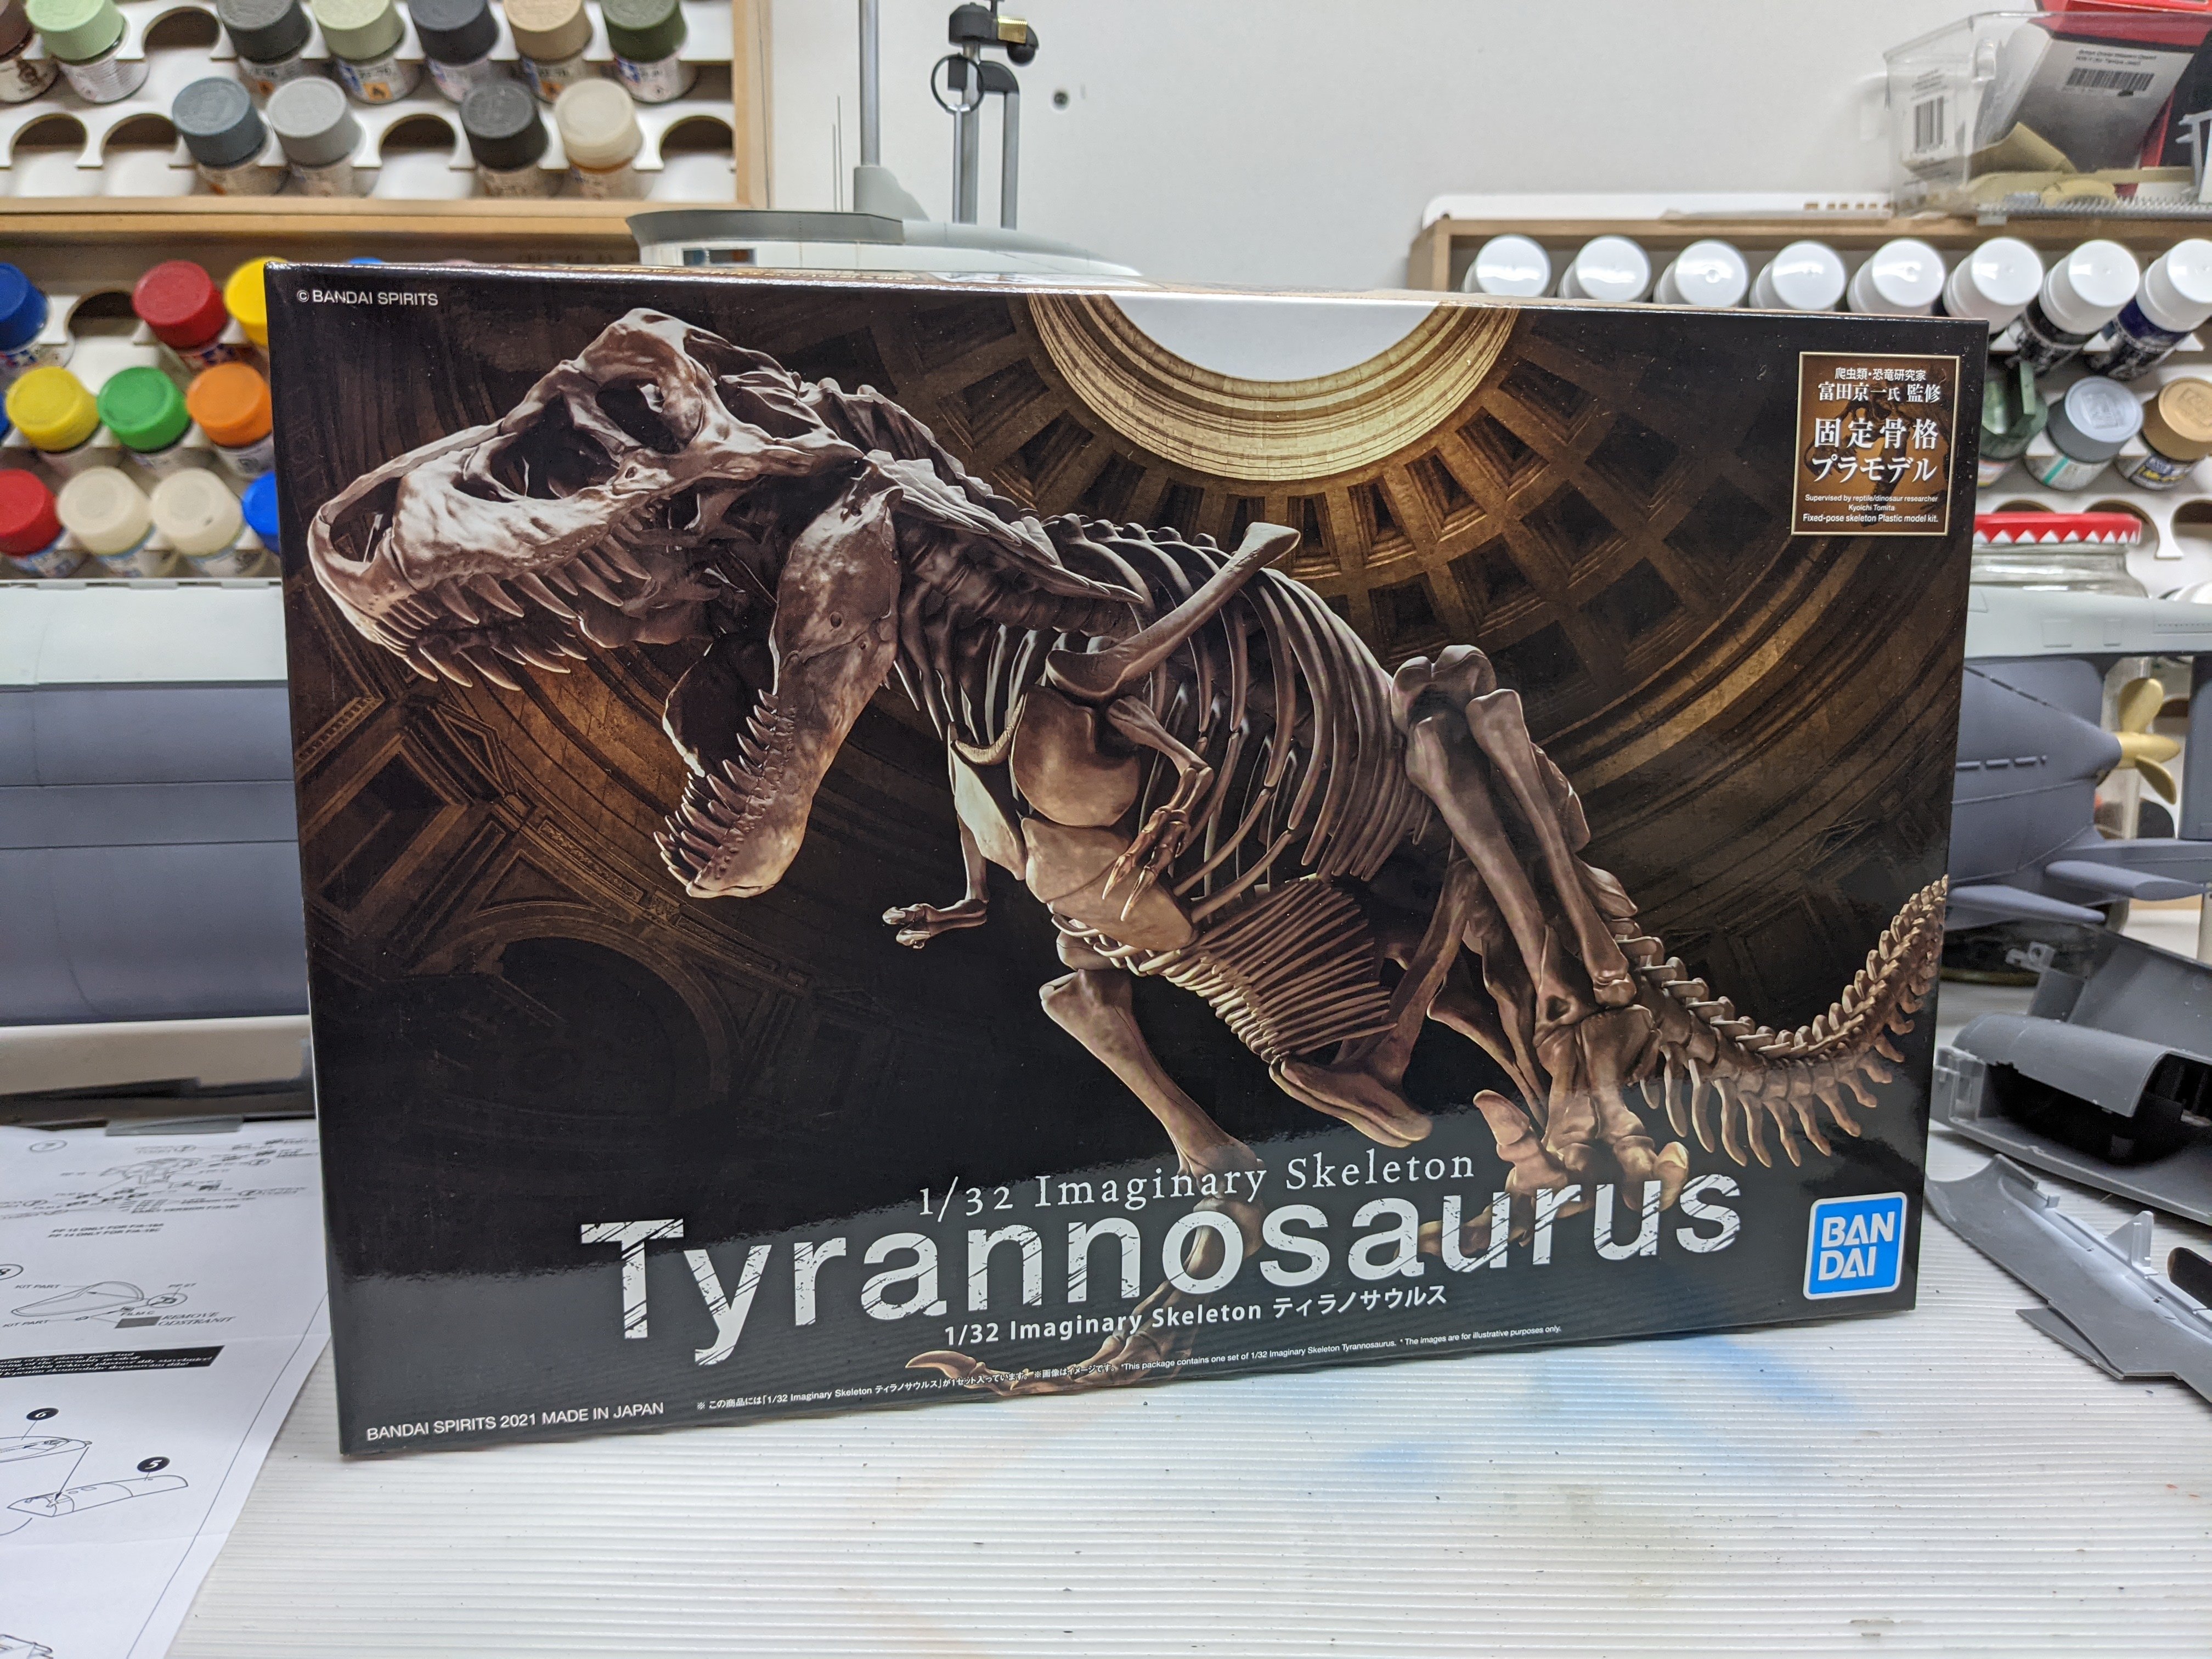
Got a package from HLJ the other day. A bit of variety in terms of subjects.
https://qmhe.com/competition-details/qmhe-competition-form/

Lastly, another Zoids kit. They've got great box art that's for sure.
Oh, I like that skeleton. I hope to draw my granddaughter into the world of models with Dino models...
-
3
-
-
John,
You're smashing it! Everything looks great! Foil?
-
3
-
-
Nice work! I built a Dragon Tiger with the DS tracks and was never satisfied with them. I have this set of Friuls... It's been on another tiger, and now rents space on a Sturmmorser.
-
1
-
-
17 hours ago, Peterpools said:
Enamel weathering does look good and seems to offer a whole new set of tools for the weathering tool box.
Keep ‘em comin
Peter
Thank you! After doing this kind of stuff mostly with oils or acrylics in the past, I gotta say it may become a preferred technique. I had hitherto been thinking of not getting any more enamels after these were gone/dried up. But I think I will keep the basic colors on hand for this kind of stuff.
13 hours ago, Martinnfb said:I really like the subtle chipping effects .
Thank you, Sir. My motto: too little is better than too much.
9 hours ago, Kaireckstadt said:That looks great Gary! Used this method of weathering for planes with raised panellines. Works very well!
Thank you, Kai. I will have to try it on planes, too.
-
2
-
-
-
9 hours ago, Kaireckstadt said:
- Weather the panel lines where crossed by decals with a pencil
Very interesting! I've never heard of nor tried this. Would love to hear more when you do it.
-
4
-
-
Nice start, and I like the Zimmerit. I have made my own in the past, but I think I would rather have it there, already.
-
1
-
-
Hola Amigos y' constructores de maquetas!
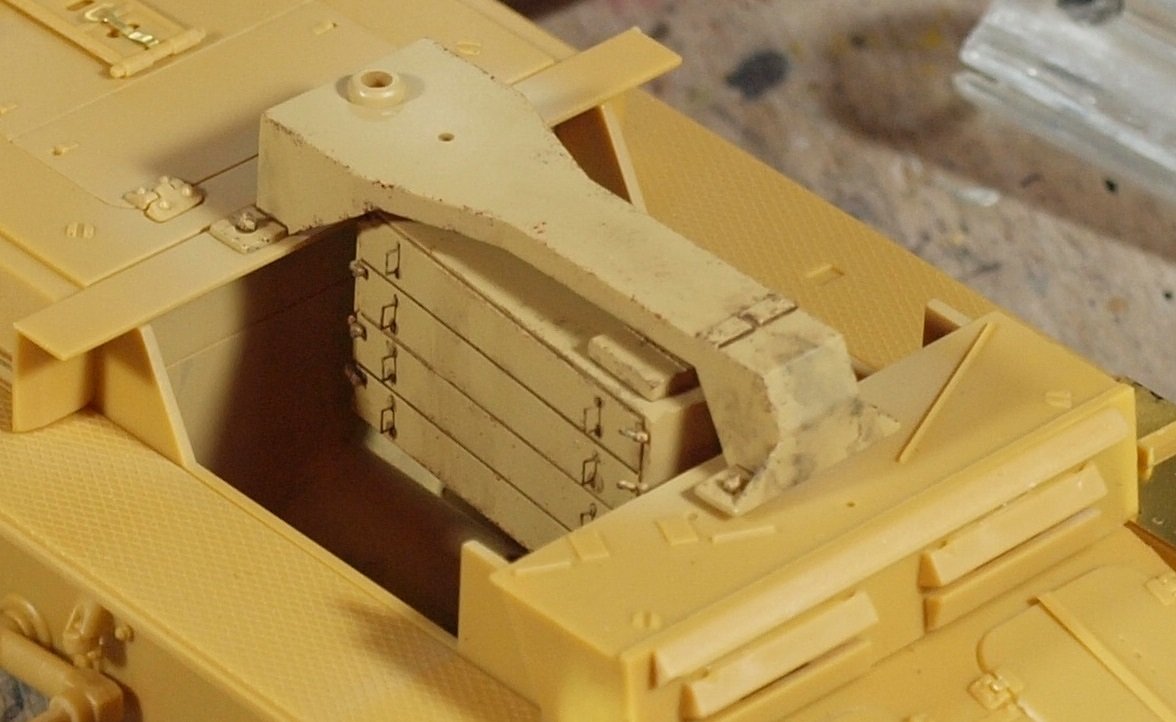
Not a lot of time for modelling on work nights... So, a little experimental enamel stains and enamel sponge chipping using Tamiya enamel paints on the ammo box and gun support.
I haven't used enamels for the before. But I'm quite happy how it turned out and how quick it was to do.


I imagine gun oils and perhaps even ersatz coffee would have been spilled into many a fighting compartment.
Anyway... if you have any ideas to add... lemme know.
I'm sure a more efficient modeller would save a step like this for a time when the gun, shields, and other interior stuff was done. But I think one has to do things when the brain is in a fervor to do the deed. Waiting until later isn't any fun.
Happy modelling!
-
6
-
-
Very nice detailing, Kai. Too bad about the first missile rails. Don't rush for Hubert's sake.
-
4
-
-
15 hours ago, Bomber_County said:
I have the same mentality as you Gaz, will I knock that part off before spraying….?.?.?…also the blutack anti carpet munching device is always being used….looking good……
11 hours ago, Kaireckstadt said:That’s my mentality too! Looks very good Gary! And thanks for the tipp with the Blue Tack!
6 hours ago, Peterpools said:Gaz
Nice progress and nice to see the Marder back on the bench
Keep 'em comin
Peter
6 minutes ago, DocRob said:Good to see you back on the Marder Gaz. After the maybe disaster with the 109, it should be good for some breathing room. There seem lots of tiny parts involved and being open topped, there will be lots of detailing, but going through it will pay in the end.
I like the Blue Tack idea and use sometimes adhesive tape for the same reason, which works even better with PE-sheets, where tiny pieces also have the tendency to go airborne while cutting.Cheers Rob
1 minute ago, mark31 said:nice work you show here and a lot off small parts
Sometimes i think there is a competion between model makers how can make the smalest parts in plastic.
Keep it up
Mark
Thank you for the kind words, everyone!
Coping with smaller parts is something I want to do before I lose the ability. And these open-topped vehicles seem so much more interesting than a regular enclosed tank. Plus... it's like a new country for me. New shapes... and Bronco plastic is a lot thinner than Tamiya. So though I may curse and swear the entire time... I feel like I'm doing something fun and challenging.
-
5
-
-
Very nice looking weapons!
-
2
-
 1
1
-
-
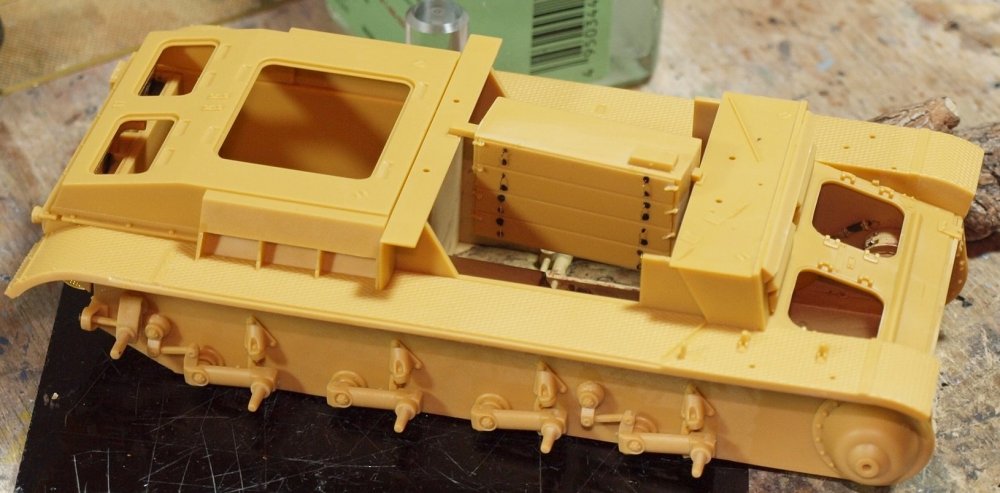
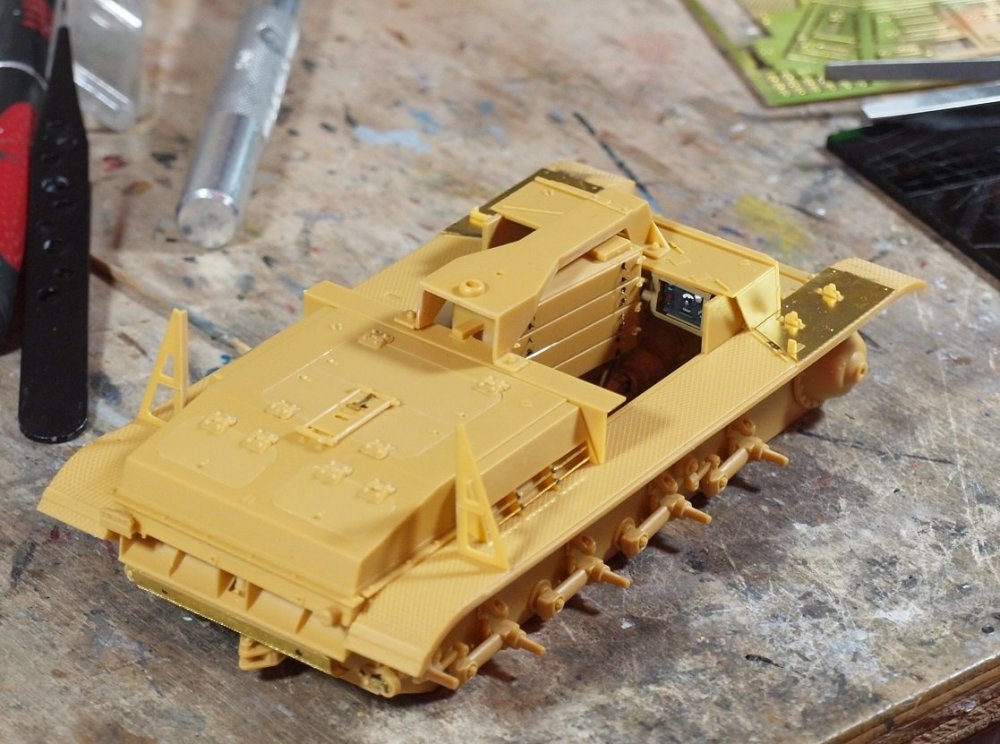
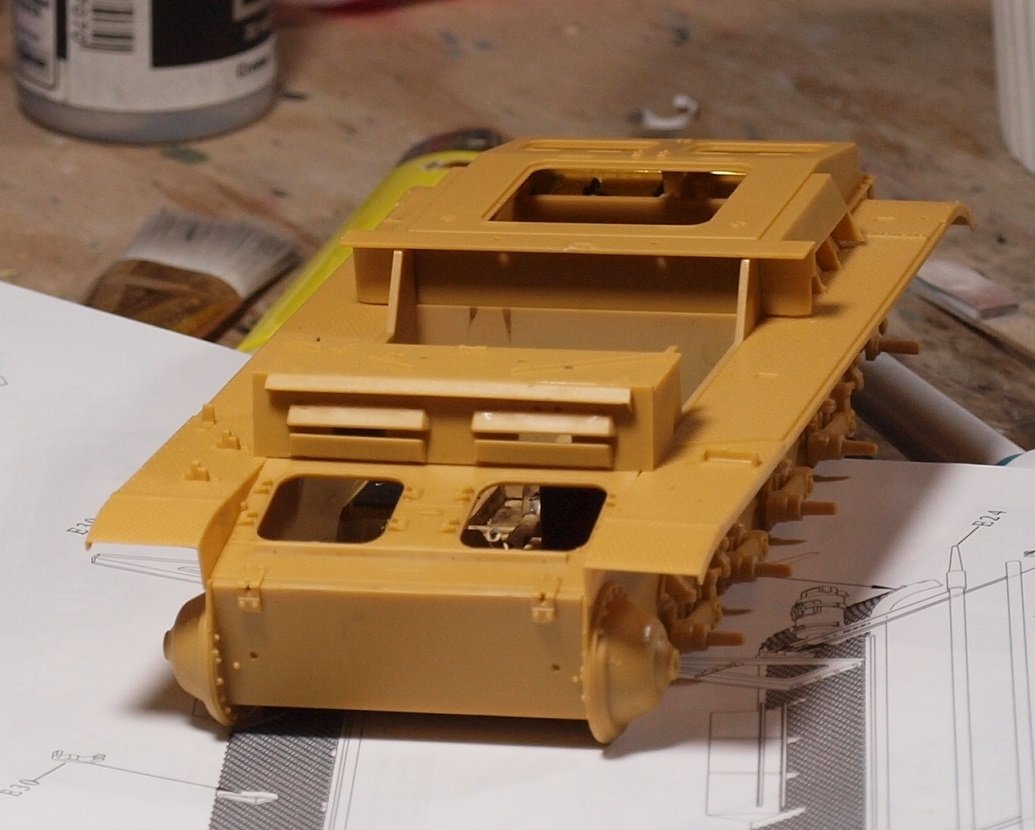
Welcome back, friends! We've returned to the Bronco Marder after a bit of a break. Directions... the beautiful directions... if you follow them to the letter, you add a lot of fragile, protruding parts long before necessary. So, I'm doing a lot of flipping back and forth with the directions as I try to build from the inside out and bottom up.
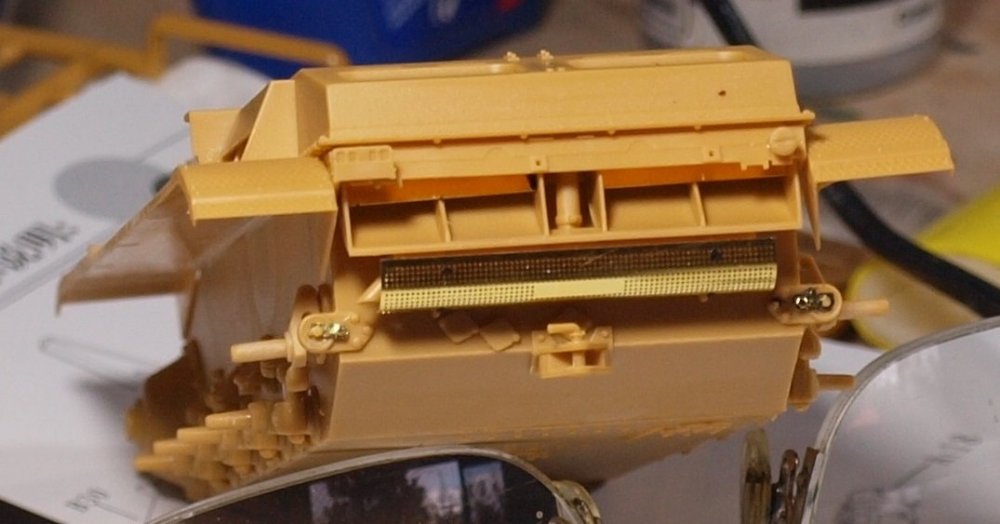
First on the block was the rear end with it's shielded muffler, taillights, and small brass parts.
Then I added fenders and forward glacis parts as well as the over-engine parts.

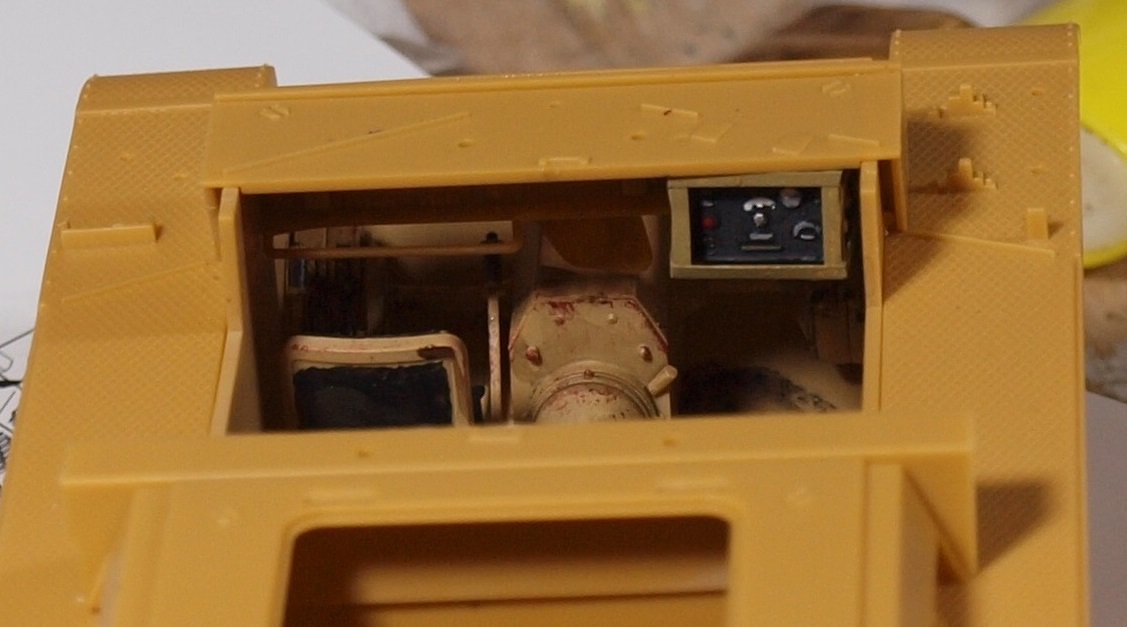
I positioned the driver's and radio operator's armored vision slots open.
Then it was time for the radio in it's PE box. All hand painted.

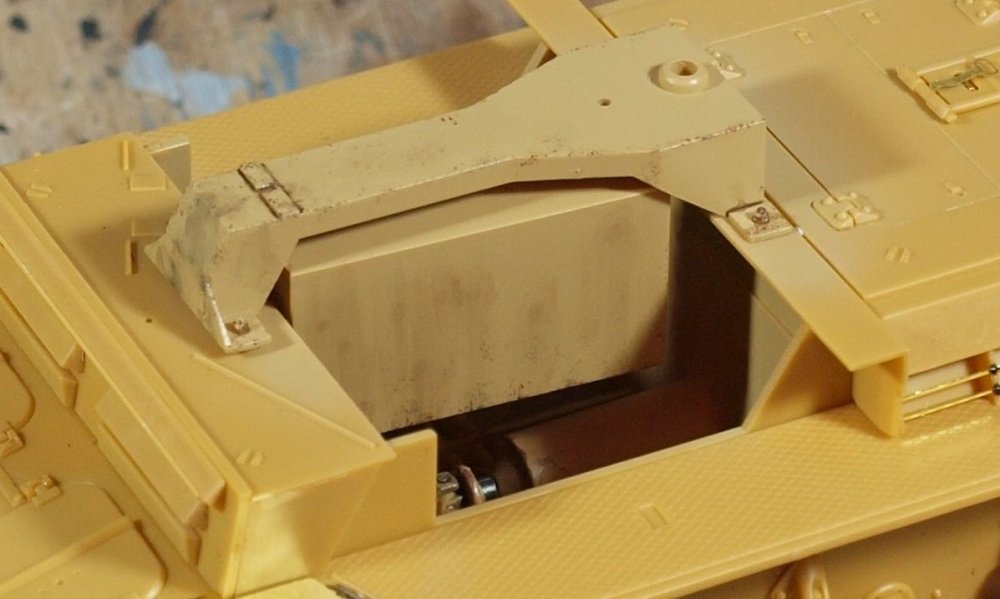
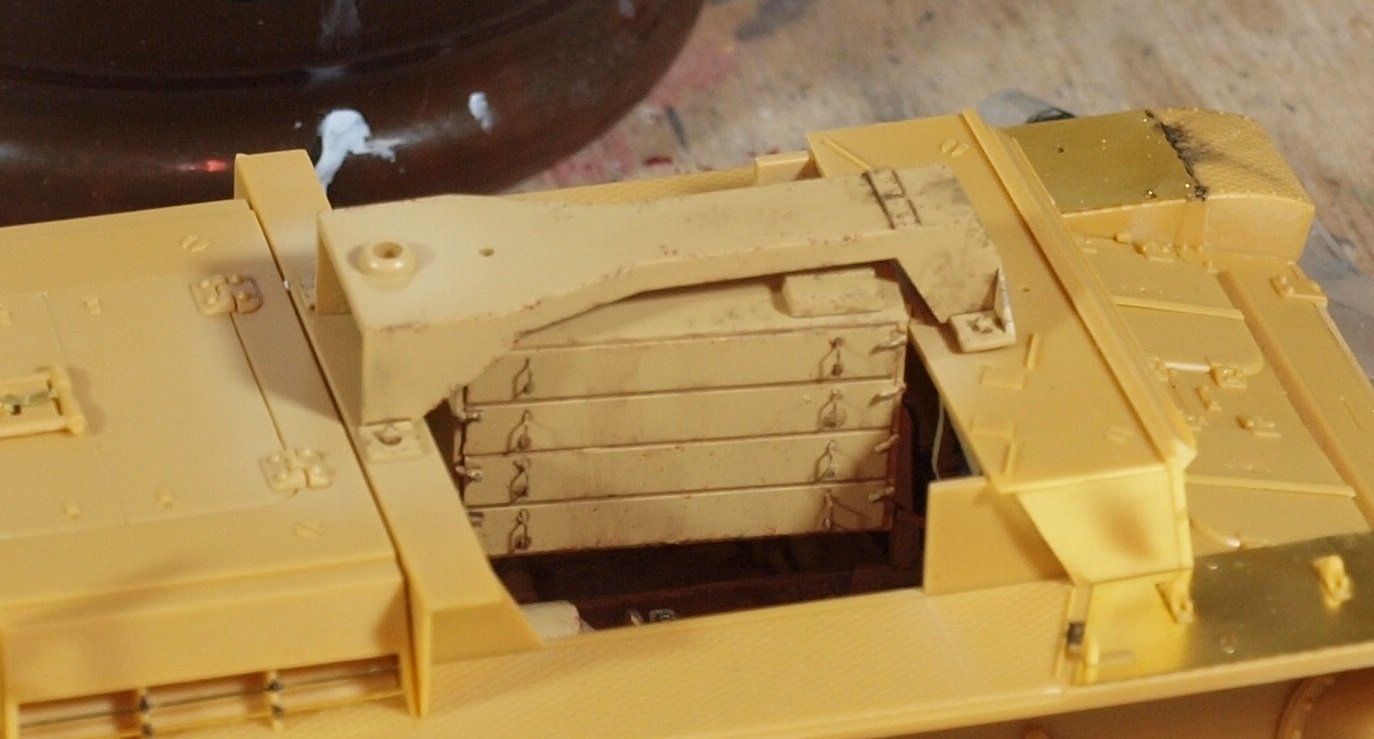
Next up was the Gunner's main ammunition storage that hangs beneath the breach of the Pak36r.
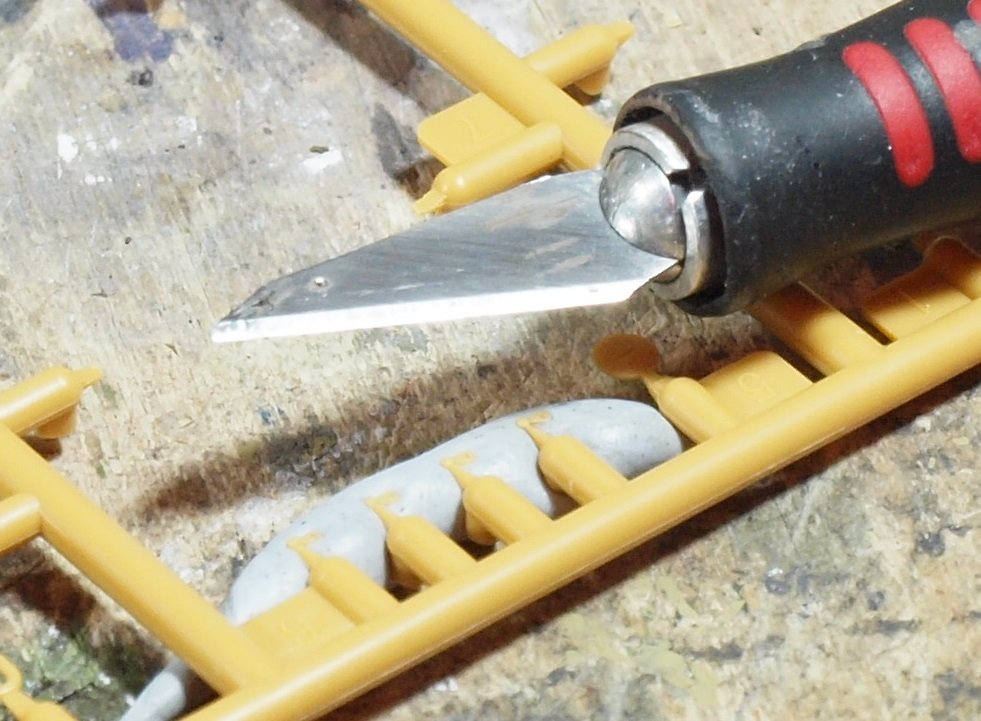
As you can see there are a lot of tiny parts. Some plastic, some PE. I didn't dare try to shave off any nubs off the PE.
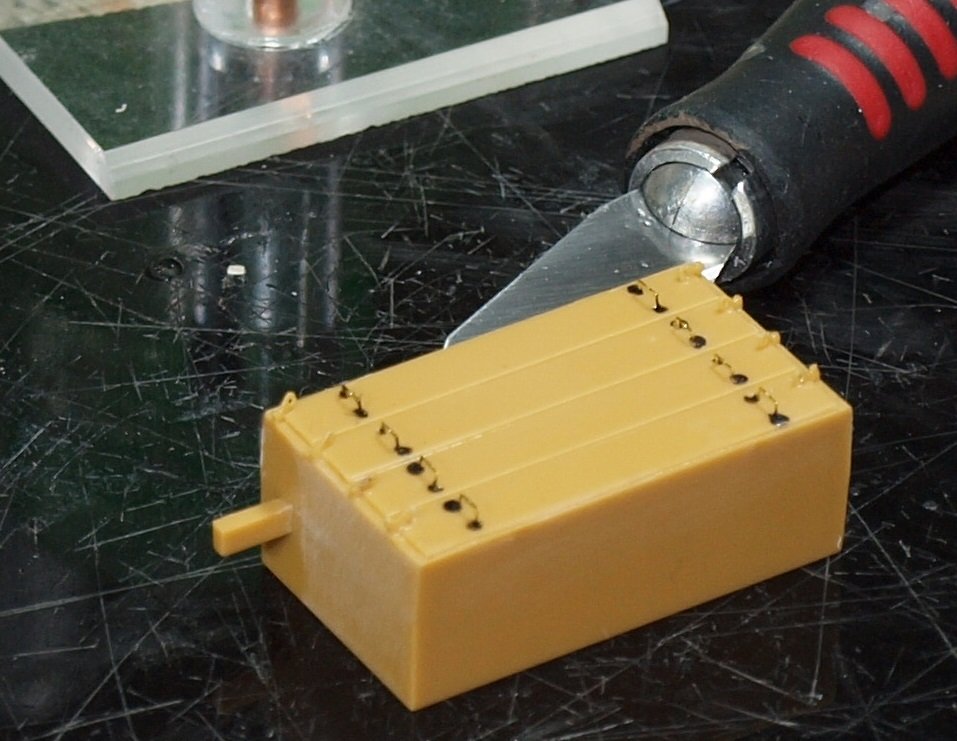
For removing the tiny plastic parts from the sprue, I embed them in a worm of Blutack so that when I slice through the sprue gate, the part doesn't go flying into the ether.
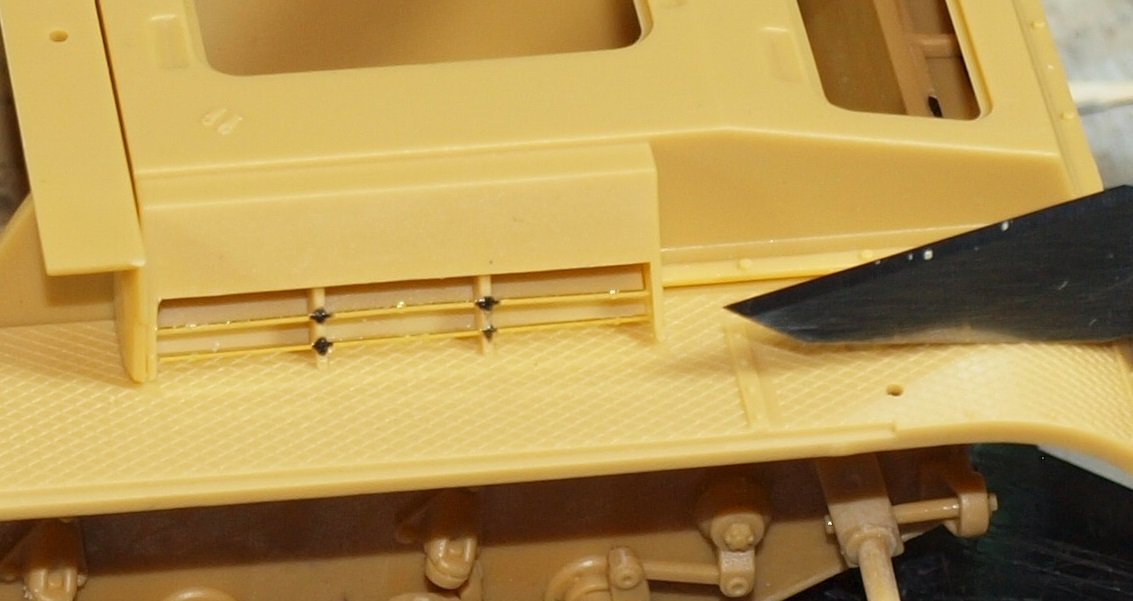
I also added these thin pieces over the engine cooling louvres which will disappear behind the armor shielding.

They're far to thin and fragile to trim. Unless one of you know some technique??
Then I started adding hatches and hinges. All small, thin parts.
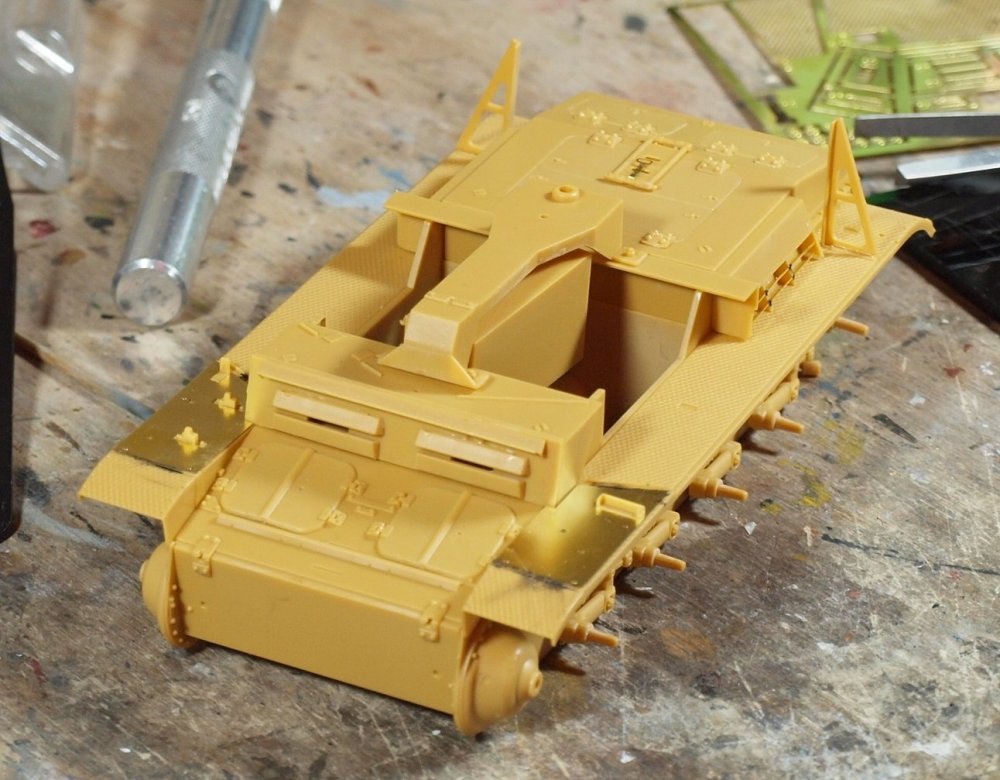
The support for the main gun and the ammo container are only dry-fitted here. I will have to paint and weather the Ammo box, even though I'm 99% certain that none of it will be visible later.
Happy Modelling!
-
5
-
-
Congrats!
-
1
-
-
11 hours ago, Bomber_County said:
Gaz, man that sucks…….hate it when whatever you do or try doesn’t fix it, quite the opposite…….time to do something else for awhile………..
Thanks, Phil. Fortunately I have plenty other choices.
9 hours ago, Kaireckstadt said:That’s sad to hear Gary! Then it’s really better to put it aside!
I have another G6 plus the Alley-Cat set in my stash. Do you want that Gary? If you‘re interested please PM.
Other possibility: use the inserts you refused to use?
Kai, that's a very kind offer. Thank you. But that would cost a lot more than it would cost me to buy a new kit here. I still have a Hasegawa G6 I could attach to the pilot.
Other possibility: If you saw the fit, you'd be dissuaded. The Starboard side has a terrible profile, and two of the four corners on the port side don;t match.
6 hours ago, Martinnfb said:What parts do you need?
Martin,
I haven't even started to separate the parts yet. As I have attached everything quite firmly, it's hard to know what will happen. I already broke a few parts and re-glued them together getting the bow out of the port wing. Again, shipping would be expensive from overseas. I'm not totally out of options locally. I jut have to avoid rushing.
-
3
-
-
Well... I'm at the place where I didn't want to be from the outset. Sanding, scribing, fixing, filling, scribing in the wing root for fricking ever. I've ruined surface detail I wanted to avoid touching from the get-go.
To make matters worse, I've ruined the profile of the wing. It's all my fault, I'm sure. I could hide it with clever photography... but I'm just getting tired of it. So, I'm going to set it aside until I can find another Revell G6 to rob for parts.
-
2
-
 3
3
-
-
Coming to life, Kai! Looks brilliant.
-
3
-
-
18 hours ago, Peterpools said:
Hi Gaz
over the years, I’ve settled into using four double action air brushes:
Priming and clear cotes - Iwata Revolution with. .5 tip
All color cotes - Two H&S Infinity CR Plus with a .2 and .4 tip
Model Air Paints - Grex with a .3 Tip
Absolutely not necessary at all - just seems to work for me.if I was going to use just one air brush, any double action AB with a tip either .3-.35 fills the bill nicely.
Keep ‘em cominPeter
17 hours ago, mark31 said:you cant go wrong with H&S
I have two and very happy with them
Before i had a badger not bad but when i had my H&S wow what a difrence
Mark
12 hours ago, Bill_S said:Gaz, For priming and covering larger area, I use my very first air brush - a single action, siphon feed Badger 350 with a medium nozzle. For priming, I've come to rely on Mr. Surfacer 1500 (black); I read somewhere that it contains very fine particles of granite. I won't run it through my Iwata. The Badger is cheap, and mine's been working well for over 30 years.
Guys,
Thank you for your thoughtful answers.
-
1
-
-
1 hour ago, DocRob said:
I like the look of the figure, no strange hue on the pics to be seen, at least to my eye. Colors tend to change a lot under different lighting conditions and even more when photographed. There is no digital true or false to it, it's always an interpretation.
Cheers Rob
Thanks, Rob. I haven't taken any natural light photos of him, yet. I like natural light the best.
-
4
-
-
Hi guys and gals.
I want to get an airbrush with a broader coverage for priming and other applications. I hate trying to prime with coverage of only 3-5 mm wide strips. Of course... I have to buy what I can find here in Australia. What kind of setup should I get? Needle thickness? And what else should I know? I watched a Paul Budzick video on airbrushes once and he recommended an airgun for the purpose. Airguns seem to be quite expensive. What do y'all say.
-
1
-


Gottfreid Weiroster Bf 109G6 R6 Revell 1/32
in LSM 1/35 and Larger Work In Progress
Posted
Since you mentioned pain...
I rebuilt all of the legs of the WfGr. 21 rocket launchers. It's all I accomplished today... because I spent a lot of time watching NFL pre-season football games. At least I know now that the tubes won't fall from the legs.
I drilled deep holes into the raketen and sunk in fine copper wire. Then I added .7mm brass tube around the copper wire. It looks virtually the same and is no straighter or perfectly aligned then it was before. But at least it's done.
Happy modelling!