


GazzaS
-
Posts
6,396 -
Joined
-
Last visited
Content Type
Profiles
Forums
Events
Gallery
Posts posted by GazzaS
-
-
Great to see an update, Carl! Engine looks nice tucked in there!
-
 4
4
-
 1
1
-
-
Whoa! that cockpit is smokin'!
-
5
-
-
15 hours ago, Martinnfb said:
What aircraft?
8 hours ago, JohnB said:Who cares?! LOL
 4 hours ago, Jeff said:
There's an aircraft in the pic??? Where??
 2 hours ago, BlrwestSiR said:
That's what I was thinking.
Exactly! Sorry...it was really just a poor excuse to interject some TNA into the forum.
-
 3
3
-
-
OK... reread the OP... how's this?


You might find more you like at Skytamer.com.
https://www.skytamer.com/1.1.htm
-
1
-
-
Sorry... the best I could do.

-
1
-
3
-
-
I know... it's a bit hard to see... and there are some distractions.... But...what the heck is it?

-
5
-
-
Great looking wheels, wells, and struts, Peter. Your painting ability shines here.
-
5
-
-
Little bit, by little bit, Kai. She'll be a winner.
-
3
-
-
21 minutes ago, DocRob said:
I have something like this and for the few occasions, it worked good with decals and 0,5 mm styrene. The punches are sharpened and the brass part is a spindle to turn the punch, when pressing the handle. It was very cheap, but is useful.
Cheers Rob
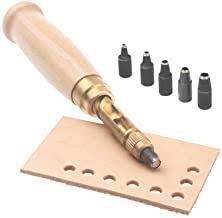
What is is called.Rob?
-
2
-
-
22 minutes ago, Kaireckstadt said:
I would solve the problem in 2 ways depending on the progress of the build:
If the 2 assemblies are not glued together I would shim the part at the engine deck, cut it to shape and sand it a little. The rest of filling the (very small) left gap will be done by the glue.
If they are glued together already why not use sprueglue for closing the gap? This will for sure close it in a way that you won’t see it afterwards.
And - as Doc Rob said - I don’t think either that it will be at least visible in the end...
They are clued at the engine end. Only in the cockpit area is it not glued. Otherwise, that was my plane... to use superglue. My favorite filler.
-
3
-
-
4 minutes ago, Kaireckstadt said:
Really good fotos Gaz!
Taking into account the diameter of the bezels I won’t do anything. I don’t think that the eye of the viewer will realize that when the whole thing is installed in the pit.I also avoided up to now to buy a punch-and-die set. They are so expensive and I don’t need them very often.
What helps me is a hole maker you use to make holes into a belt or a jeans. The variety of diameters is not great but within an acceptable range and I had no problems to die out holes in sheet of 1/2-3/4 mm thickness.
And the biggest advantage: It is not that costly and your wife is happy and you can pay it out of the monthly budget of the household...
")
Kai,
That's a great idea. Thank you. I'm just wondering if it will pierce acetate.or stretch it. I'll experiment with the tools I have... I might not do anything for a while.
I really need to learn the ins- and outs- of acetate as it looks like a superior way to make WWI windscreens.
-
3
-
-
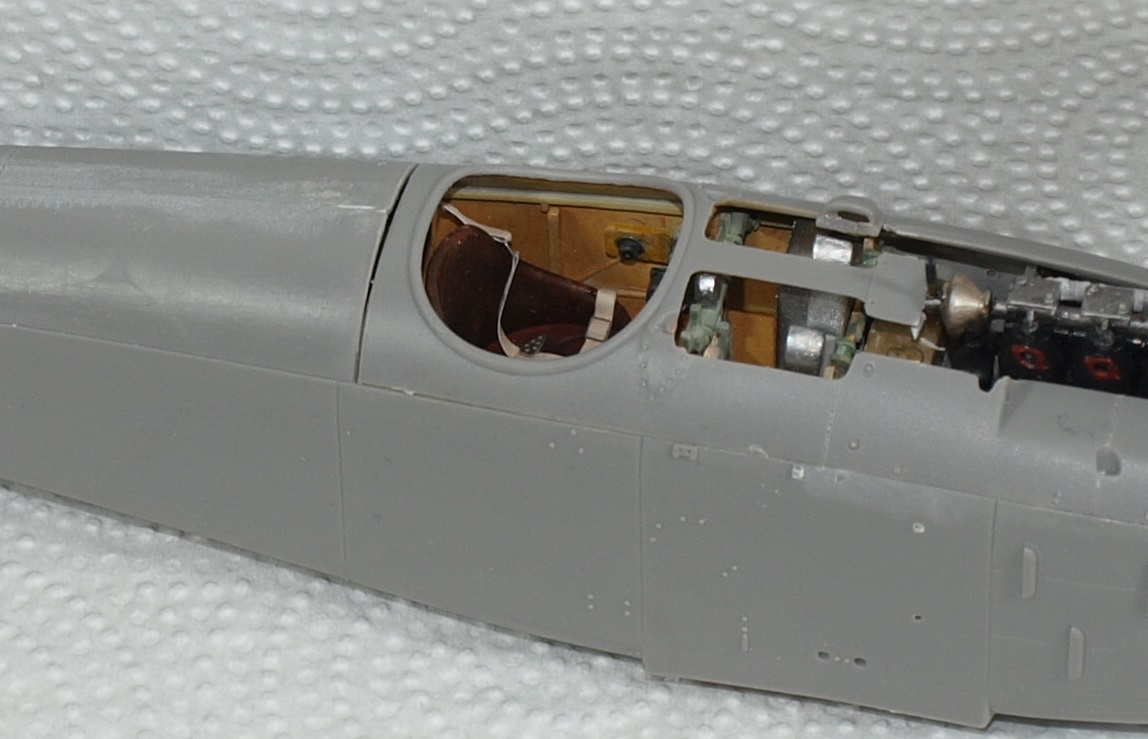
Happiness is closing up a fuselage... at least for us on this forum, it's a major step on the road to completion. I'm almost there....
After a short tussle, I got the HGW fabric belts into shape. They are really a pleasure to work with compared to PE belts..... and... they'll never get the sprung look if they become disconnected.
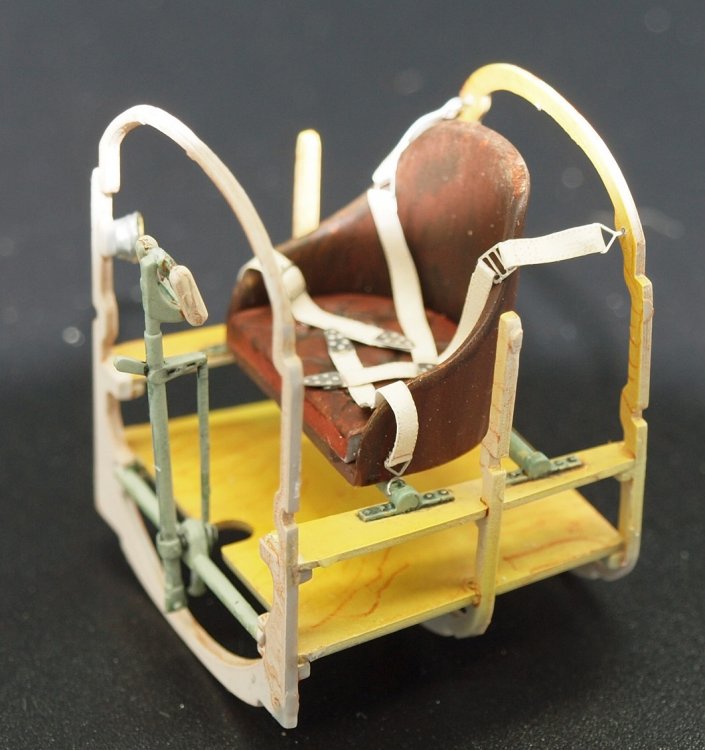
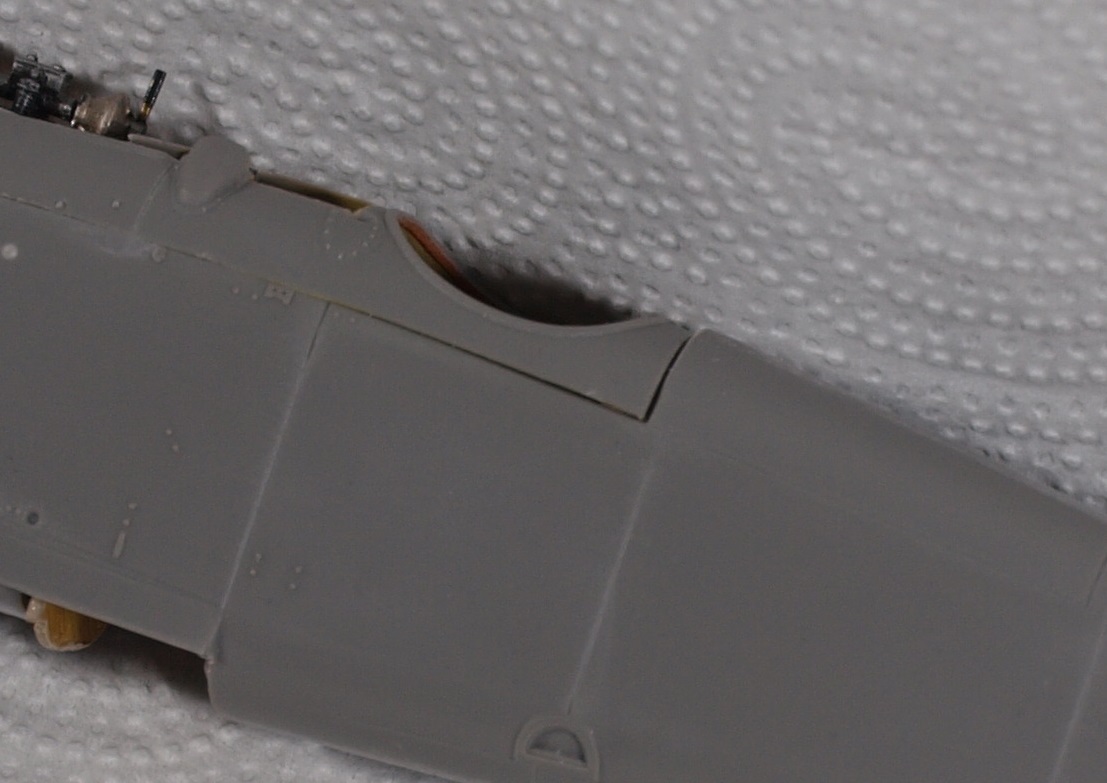
While adding the engine deck, I realized that all wasn't perfect.

If I cement the engine deck to the fuse, there will be quite a margin between both turtlebacks. Sanding the aft section will result in having some dangerously thin material. Because of the visible nature of the cockpit, there are complications... so, I can't just fill it with putty and walk away.
A: I have no idea what the putty will look like on the inside of the cockpit.
and B: No idea if I can make it look good or, unnoticeable.
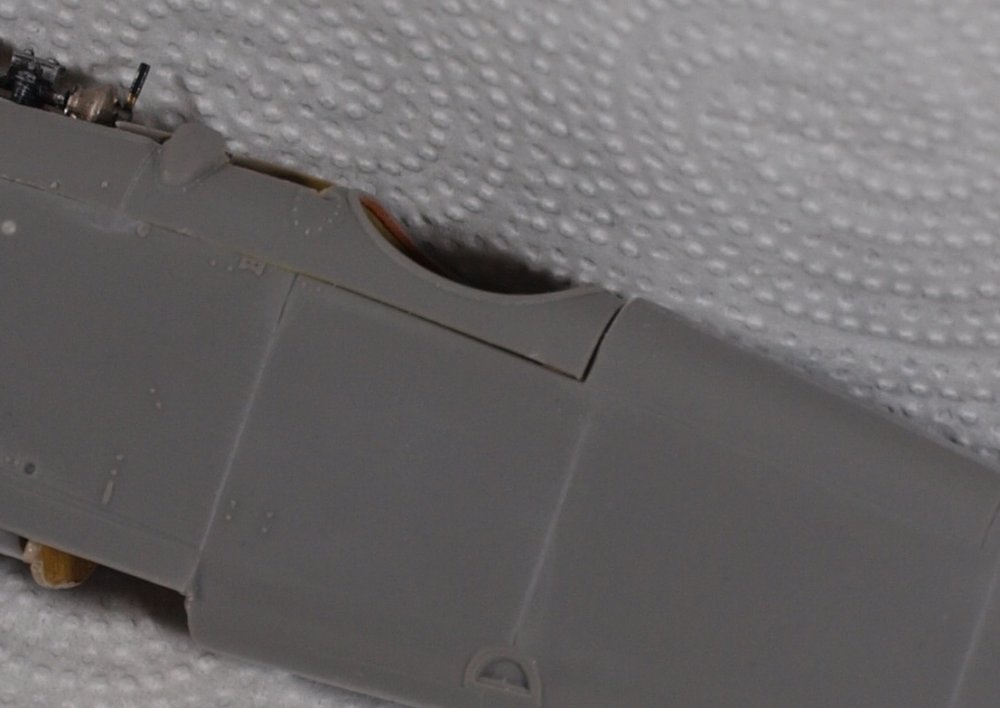
So.... my current plan is this:
1. I'll put a narrow shim near the back corner of the gap, and use CA to make the first thin skin which once dried will hopefully support the raised turtleback. I'll let it dry overnight to be certain. That means I have to wait until tomorrow so I am certain that I won't dislodge the new joins by adding the shims.
2. I'll fill in the area where the shims were with CA... and let them dry overnight.
3. I'll reverse the wood grain painting process on the CA barrier in the gap, starting with Tamiya clear yellow, and then my wood color.
4. Continue filling in with CA until I can sand it smooth.
Anyway.... that's the plan.
Thanks for looking!
-
4
-
1
-
-
6 hours ago, Peterpools said:
Gaz
Italeri didn't miss a single opportunity
Keep 'em comin
Peter
Their 104 was such a nice kit. It's a shame, really.
-
3
-
-
Excellent! Looking forward to commissioning day!
-
2
-
1
-
-
5 hours ago, DocRob said:
Very nice, the modulation in the white camo came out great.
Cheers Rob
Thank you, Sir!
-
6
-
-
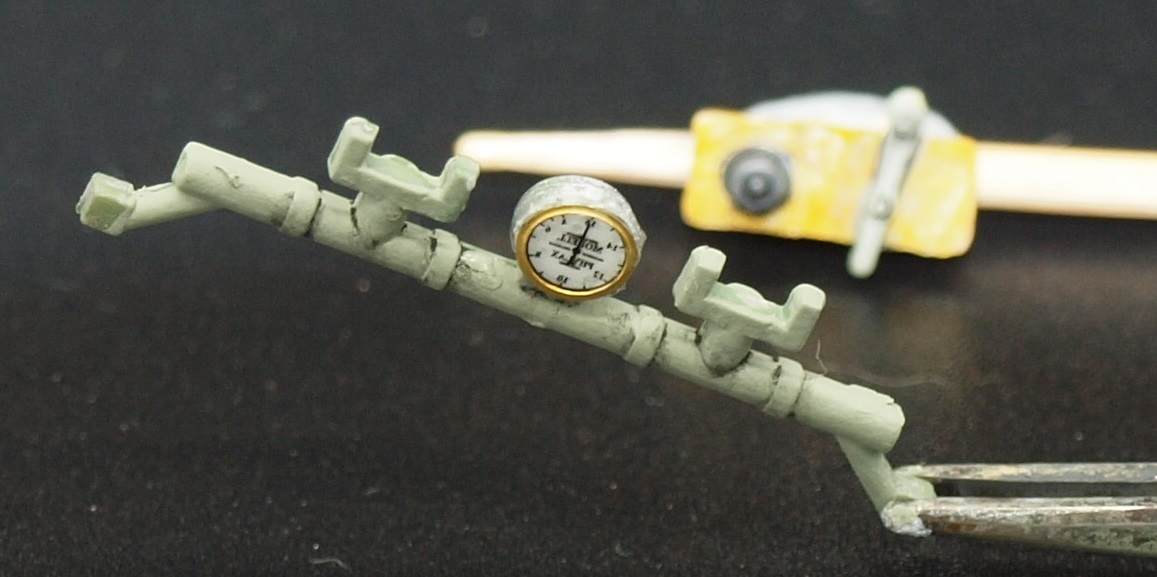
This is more like it!

To take photos like this, I had to put my light box on top of a large storage container on the dining room table.
Then I put the tripod on the table with the legs un-extended. This allows me to put the lens only centimeters from the part I want to photograph.

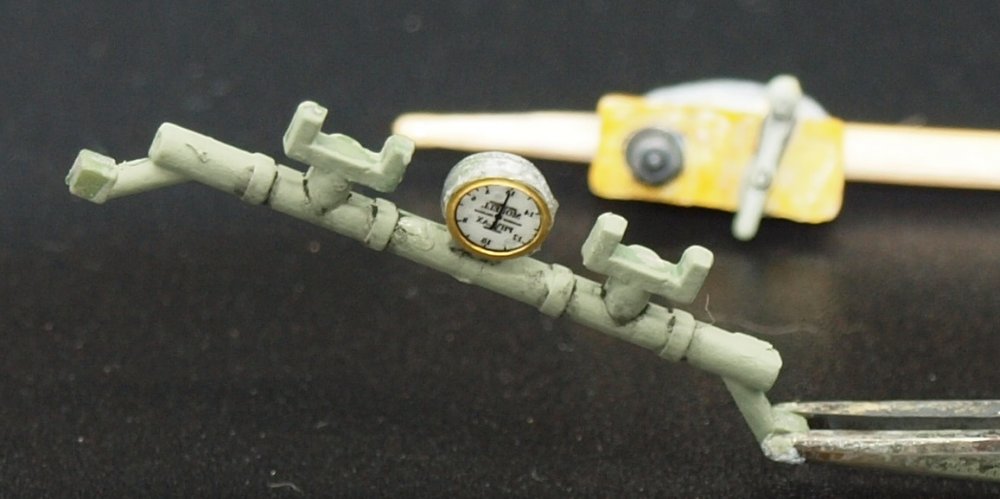
I used oils to form some false shadows.
You can see there is some 'fluff' around the outer edges of the bezels. I will tell you, these things are tiny. Probably only 5mm across. I tried to trim them close enough with scissors, but probably failed. I have a punch and die set, but it's an automotive set, and not a modellers set. I will experiment with it with some left-over material and see if it responds well to punch and die... then i'll bite the not-inexpensive bullet and buy a punch and die set made for modelling.
-
5
-
-
Thank you Rob! The art PE was nice first off... well, the 3 bezels I cut from the fret came off nice and easy. There is a lot of PE there. I donlt mind having spare parts.
One of their "things" is stuff that is made of layers of PE. Five or six flat parts stacked to make a three dimensional object. They even include things like a PE flight column. But it's too flat to look right. But there are parts to dress up everything. Well worth the investment as these Roden kits can only be improved by a little brass.
-
5
-
1
-
-
Kai,
I'm glad to see more seams and faults eliminated. The canopy is a bummer... but a common occurrence, unfortunately.
You're getting closer.
-
2
-
-
Hello Friends,
More work... some of the most tiny kind.
If you follow the directions, they would have you attach both fuselage halves to lower wing at the same time.
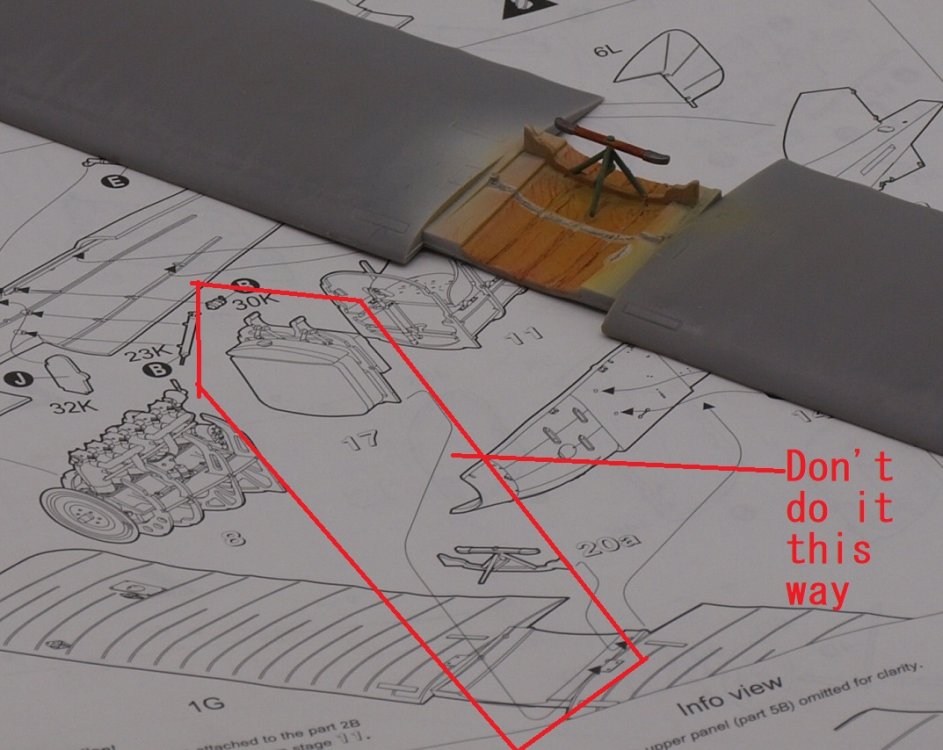
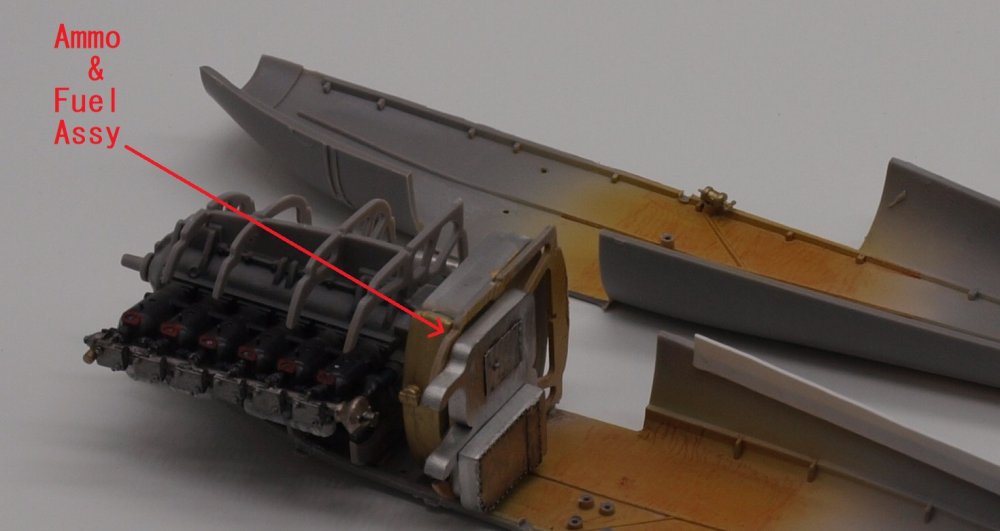
If you're like me and think that would be a bit awkward, don't attach the ammo and fuel assy as the directions say. I found this out the hard way on my first Roden Alby.
So, I attached it to the fuselage... because there is a rib that runs the length of each side of the fuselage.
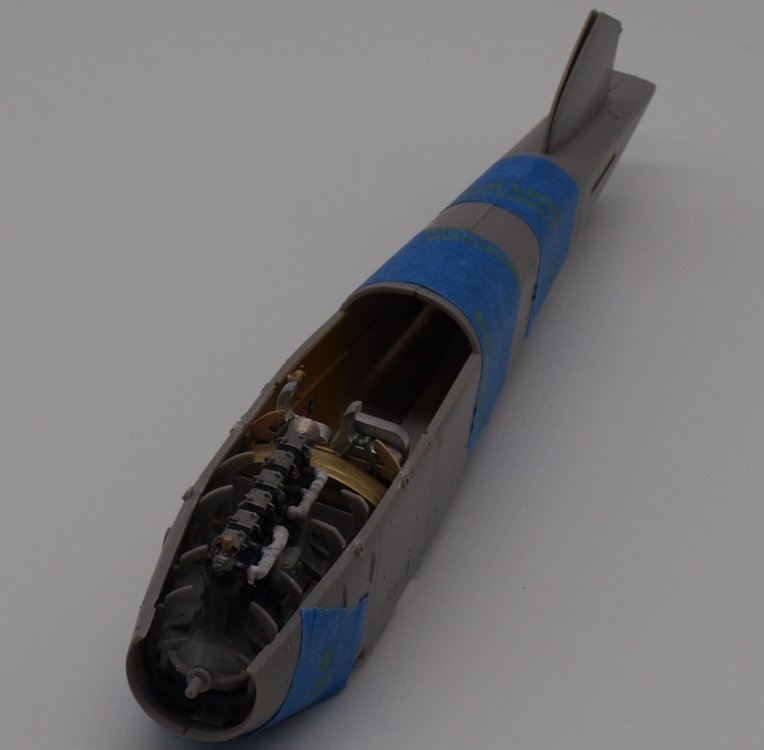
I also added stiffeners to the dorsal and ventral fuselage seams.
The Roden plastic is pretty soft. I set the fuel and ammo assy last night between the halves and let it dry as it didn;t want to stay in place any other way.
The fuselage is made to fit the Alb. III. So, you need to remove the cabane strut bases.
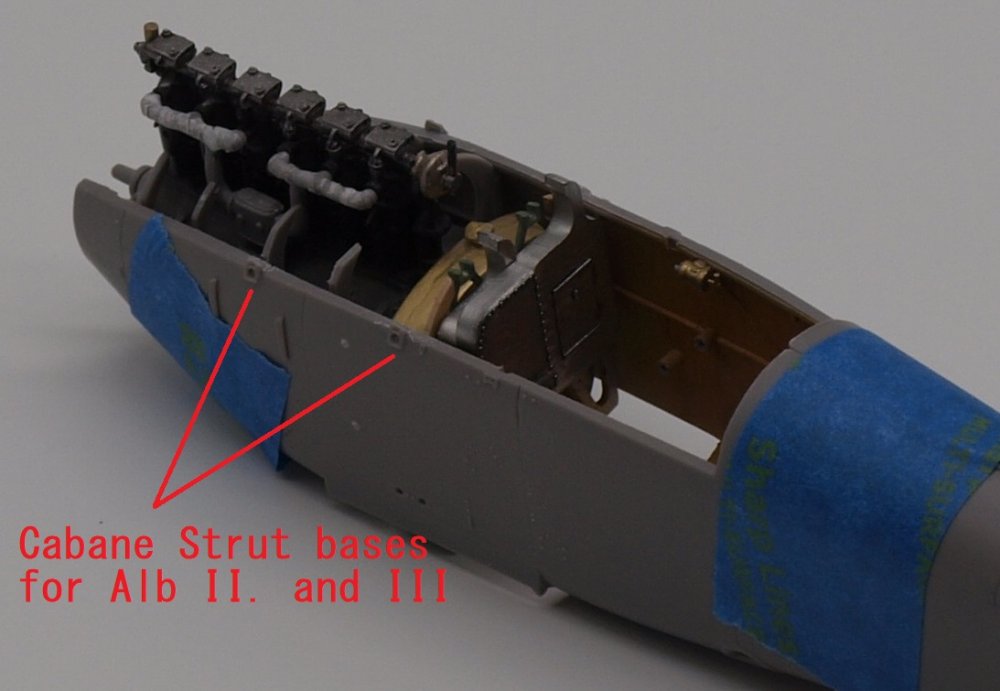
Believe it or not, there are enough parts in the box to make a D.II out of this kit without buying the Encore kit. The only parts you need to alter are the length of the wing struts. The II and III cabanes are already in the kit.
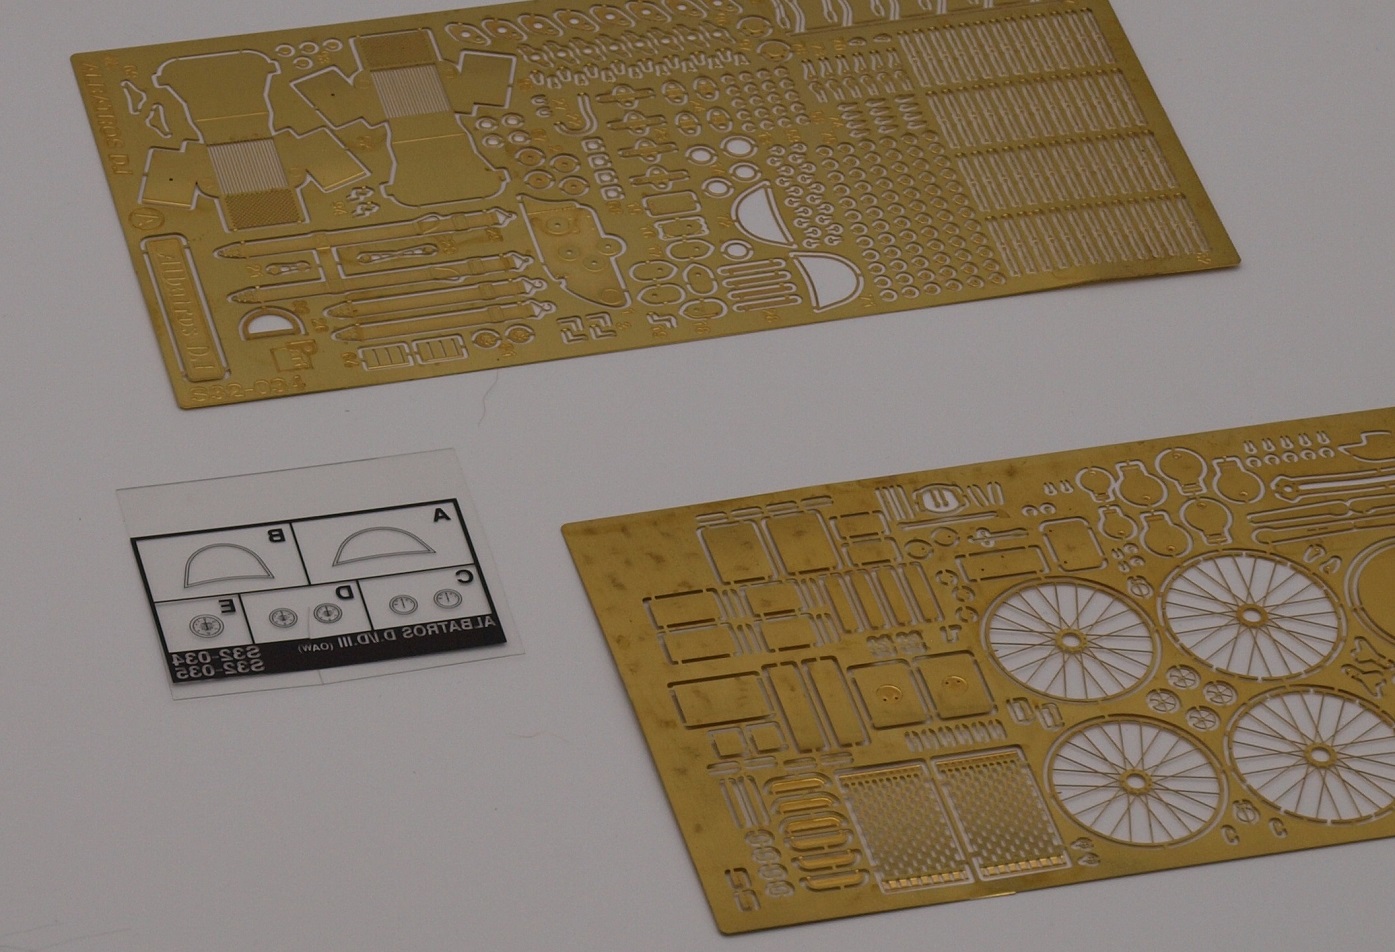
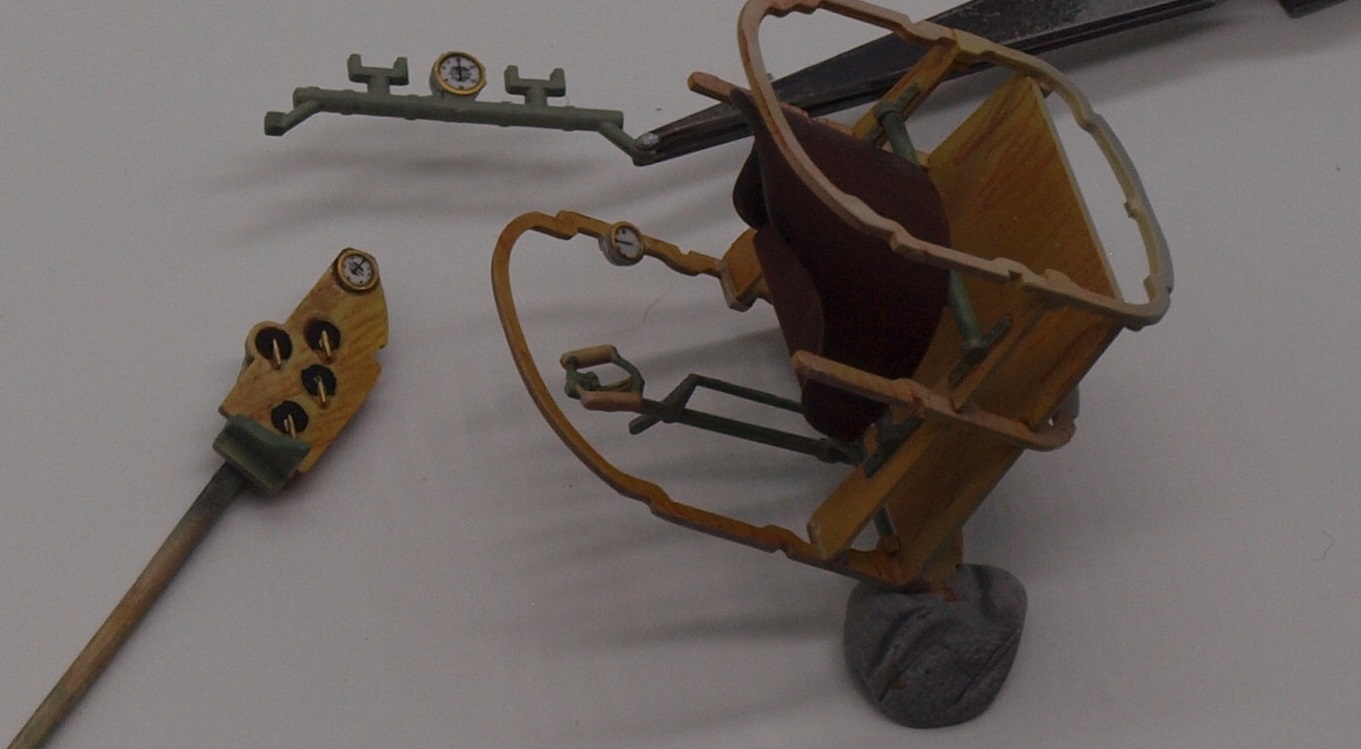
You want some detail?
Part (that's the company name) makes a boffo detail up set. It has an acetate sheet and skads of PE.

Now... this is a completely new thing to me. I even had to put on my custom readers at 4.82X to do it.
Brass bezel rings over acetate guage detail, over the plastic parts:

The pictures are horrible. The white background makes everything look horrible. Once I do the oil detailing I'll put up some better pics.
Thanks fer looking!
-
7
-
1
-
-
7 hours ago, Peterpools said:
Gaz
Holy Cow - brilliant work. Enjoying following your progresss.
Keep 'em comin
Peter
4 hours ago, SapperSix said:Good job as always Gaz. Thanks for the wood working testing. I will be needing that information pretty quick here. The completed Albatross is a fine looking model. I would gladly fly it around the room making airplane noises. Looking forward to more on this build.
Thank you, Guys!
-
2
-
-
Good job! Congrats!
-
5
-
-
Wow! Great start!
-
5
-
-
8 hours ago, Jackster said:
Very nice job, the figures add atmosphere!
Cheers
Kev
5 hours ago, Peterpools said:Gaz
Beautiful work .. what a build - love the weathering and effect.
Keep 'em comin
Peter
Thank you, fellas!
-
2
-
-
3 hours ago, Kaireckstadt said:
You can really call this one done Gaz!
As I already said: Awesome work!

The pictures are a little too dark from my point of view (but this hides the inner drive spockets
).
Thank you, Kai. I played around with the camera a bit later and figured how to help with that problem to some extent.
-
2
-


Atlas Cheetah E Scaleworx Conversion
in LSM 1/35 and Larger Work In Progress
Posted
Nice work on the office.