


GazzaS
-
Posts
6,396 -
Joined
-
Last visited
Content Type
Profiles
Forums
Events
Gallery
Posts posted by GazzaS
-
-
2 hours ago, Peterpools said:
Gaz
What a change from the cameo scheme and I tend to like the white finish - looks so good
Keep ‘em comin
Peter
Thank you, Peter!
-
 2
2
-
-
2 hours ago, Peterpools said:
Gaz
The FW 190 looks great and I can feel your pain with the end of the line fit issues.
Looking forward to following your next build with great interestKeep ‘em comin
Peter
Thank you, Peter! Always glad to have you around.
-
3
-
-
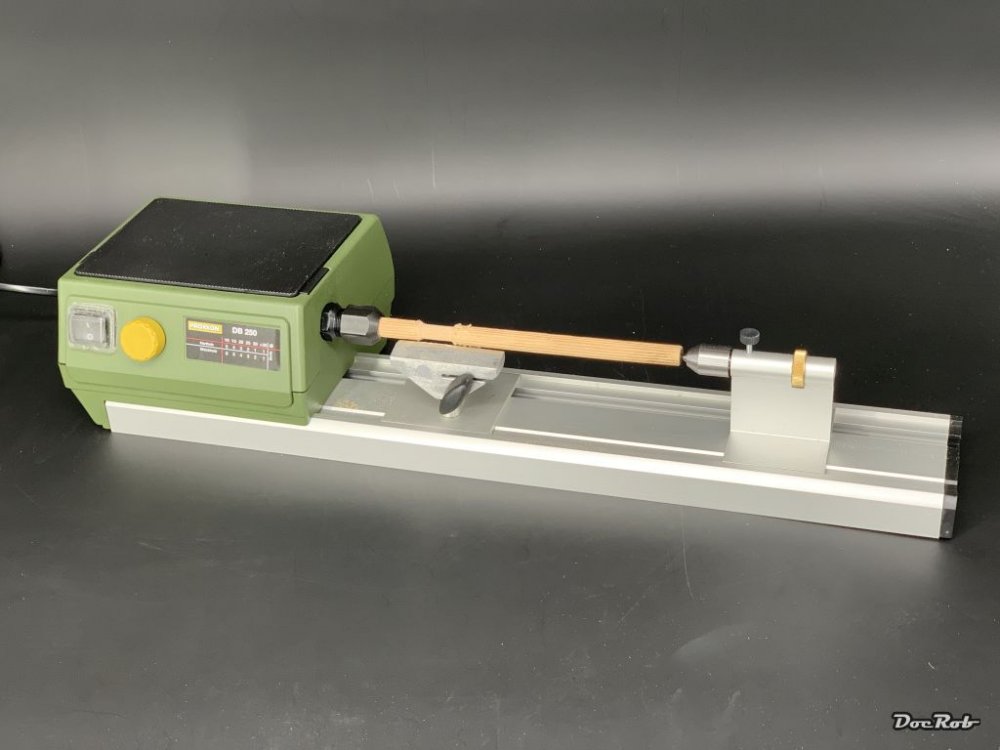
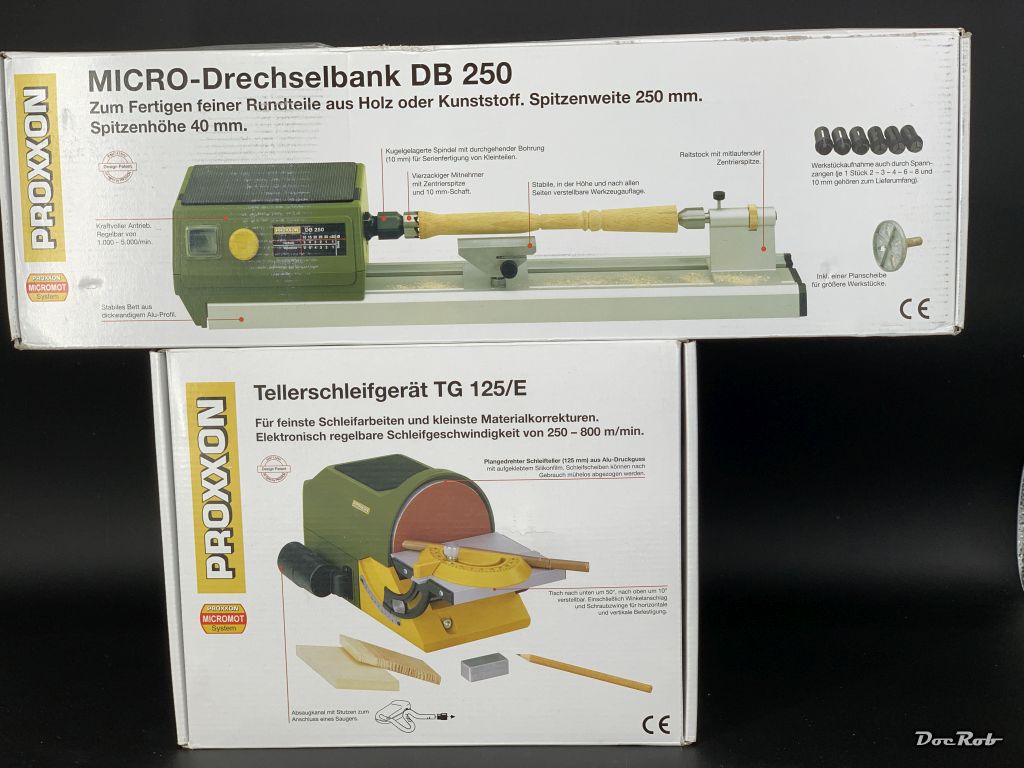
9 hours ago, DocRob said:
What is better than tools, right guys, machiiines. Today, I received my Proxxon Lathe and disc sander, which will be very helpful for my wooden ship projects.
The sander is equipped with adhesive sanding discs, which are easy to interchange. the adjustable table and the tiny gap, will make it ideal for sanding planks and other small parts and the best, it's relatively quiet.
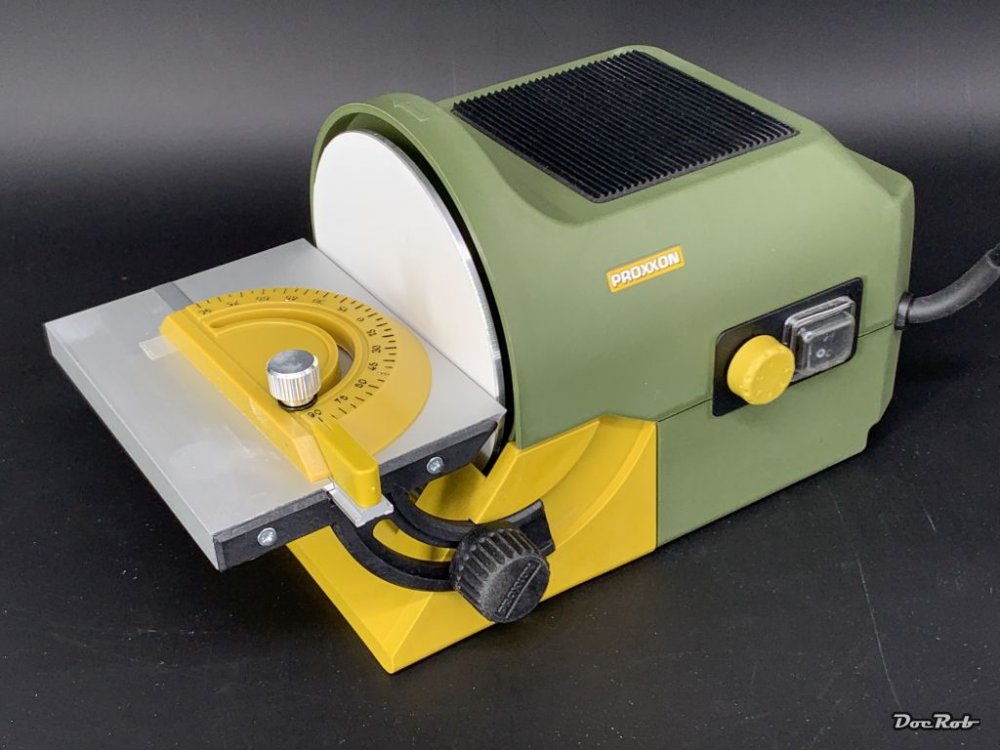
The lathe will be helpful shaping the masts with different diameters and sanding the yards conical.
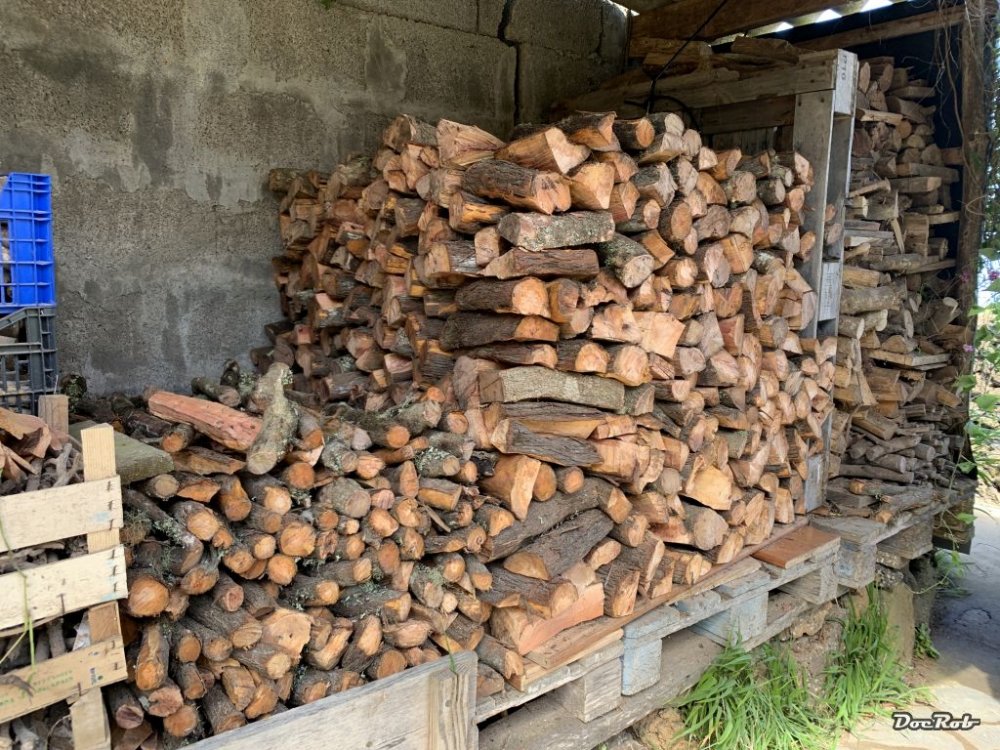
To add to the woodworking experience, I recieved almost two tons of firewood today. Finest Brezo and Haya wood, which are different types of beechwood. My back can tell you something about the two tons
 .
.
Cheers Rob

Oh, you must tell me about your lathe! Is it usable for metal parts? I've been tempted to get a lathe for ages.
-
3
-
-
Keep up the goodwork! Painting looks great!
-
3
-
-
Heh... You guys posting all of those great new models... almost makes me ashamed of my little book.

Had a leaf through it. Some great info and great profiles. The coolest fact I got from the first page I read was that to claim a kill, the pilot had to submit his info on a standard form as well as a sketch of his aircraft and the colors of the aircraft. Most of the records were lost in the final days of WWII when the archive was bombed. Otherwise we'd know what every claiming pilot's aircraft looked like.
I ordered it from Amazon on March 18. From Kentucky to my door in Australia in 11 days.
-
11
-
-
-
Awesome job, John! Quite an attractive finish thus far.
-
3
-
-
4 hours ago, JohnB said:
Nice work Gaz. Came out just fine!
")
Thank you, John!
-
4
-
-
23 hours ago, DocRob said:
Congrats Gaz, under the matte coat, everything clicked together, you built a beauty. Isn't it fully rewarding to have a build with so many obstacles ready to display. Like Kai said, I like the chosen plane with its unique scheme.
Cheers Rob
Thank you, Rob! I'll admit that some things are rewarding. But sometimes the battle lasts too long for my limited attention span.
23 hours ago, Bomber_County said:Gaz.....stunning, congratulations on a beautiful build. I can’t even get single colour schemes correct, let alone three. This is another bird I haven’t built. If ZM ever release a 190 I will definitely build one......
Thank you, Phil! I truly am an exteriors guy. I just don;t have a love for interior parts.
21 hours ago, Old Dog said:Nice paint work and weathering !
Thanks, Mate!
10 hours ago, harv said:I really like this one my friend. You nailed it.......harv

Thank you, Harv!
-
4
-
-
19 hours ago, DocRob said:
The winter wash looks perfect, you can't beat hairspray for these type of camo, although, I will at least try the washable white on a dummy part.
Good to know, that Panzer Putty is such a menace with lacquers. I used it with acrylics until now and had no problems at all. Like Kai said, the residues will be mostly hidden and a nice winter camo needs a healthy dose of slush and mud") .
.
Cheers Rob
Thank you, Rob. I don;t know why the panzer putty acted this way. Maybe because it absorbs the over spray it has developed a penchant to be attracted to other paints. Anyway... it's gone.
I don't have any washable white. I'm tempted to get some. But I was hoping to get away with using some oils.
-
2
-
-
19 hours ago, DocRob said:
Great fix with the canopy. and a nice journey to follow your build, but as an 'Alter Preuße', I will be in the front row of your next build. With brass and rigging involved, which only raises even more interest.
Cheers Rob
Thank you, Rob! I have always had a great fascination with the Hohenzollern's.
-
3
-
-
14 hours ago, Jeff said:
I'm gonna follow along with the next build as well,, the Albatros is one of my top fav's too, and I, along with Kai, will learn lots and put it to good use when I try my hand at my Albatros..... the FW is top drawer, Gaz
Thank you, Jeff!
-
2
-
-
19 hours ago, Kaireckstadt said:
Very nice looking Albatross!
The rigging is the point why I didn’t build any WWI planes so far.
And it‘s not that easy as your example shows!
Thanks for all the informations !
Thank you. Rigging isn't difficult at all once you provide yourself with three things:
A: A workspace where the area to be rigged is at eye level.
B. Plenty of light, behind the model as well.
C: Magnification.
The rest is all tweezers and super glue. Most German fighters have blissfully little rigging. You really should take the chance and let your creative juices flow. Remember... I am a big, clumsy guy with no previous hand talent like playing the flute, guitar, or banjo.
-
3
-
 1
1
-
-
7 minutes ago, Kaireckstadt said:
This is an interesting subject Gaz. And the camo seems to be a real challenge!
Will follow that for sure!How is the quality of the Roden kit?
Kai,
It's not quite as nice as a WNW kit. But it is workable. The only thing I dislike about Roden kits are the small gluing surfaces between struts and aircraft surfaces. I believe I will make some brass struts as Rob did for his Fokker D.VIII. Oh... and the decals are less than trustworthy.
This is Karl Bolle's D.III I built from the Roden kit as my first 1/32 scale WWI subject. I rigged it with EZ line, and it eventually collapsed because the LG legs are a little weaker than the WNW legs, and the connecting surfaces are far too small.
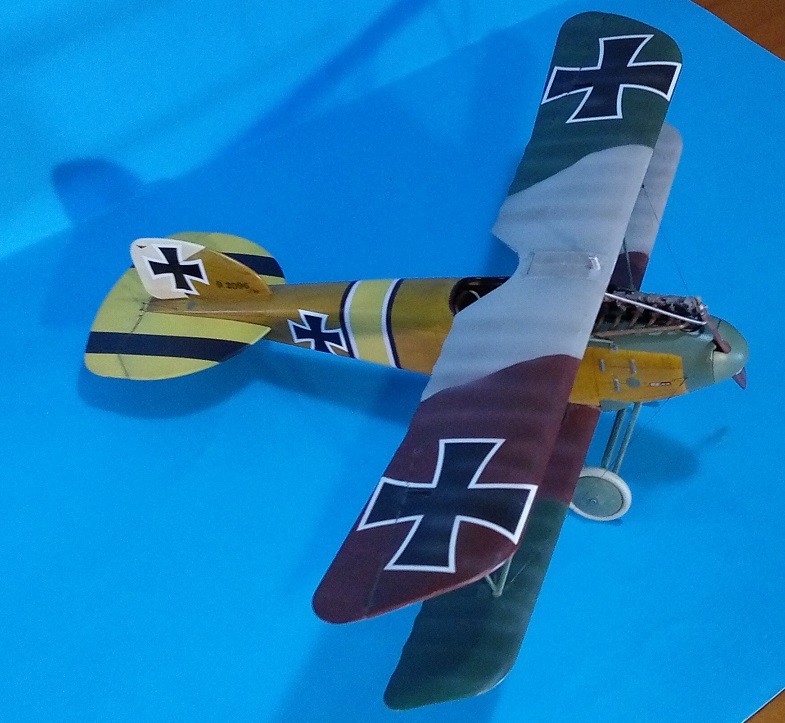
I had a heck of a time rigging it because the top wing kept popping off. But this D.I will have pinned parts. I have learned!
The Albatros is my favorite WWI aircraft. I also have this one in my stash:

....as well as two WNW D.Va's.
-
4
-
1
-
-
Nice work, Kai! Those oils bring the shapes into nice relief!
I'm curious, do you press the parts into the styrofoam, or attach them some other way?
-
4
-
-
1 hour ago, Kaireckstadt said:
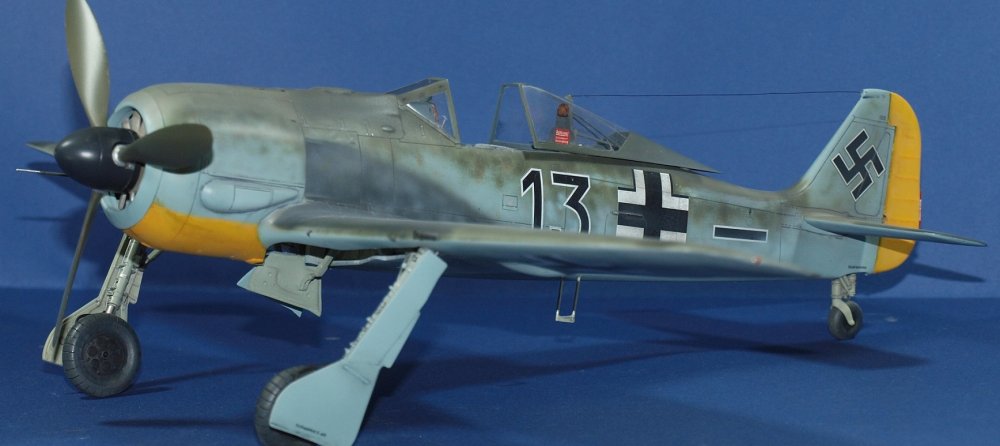
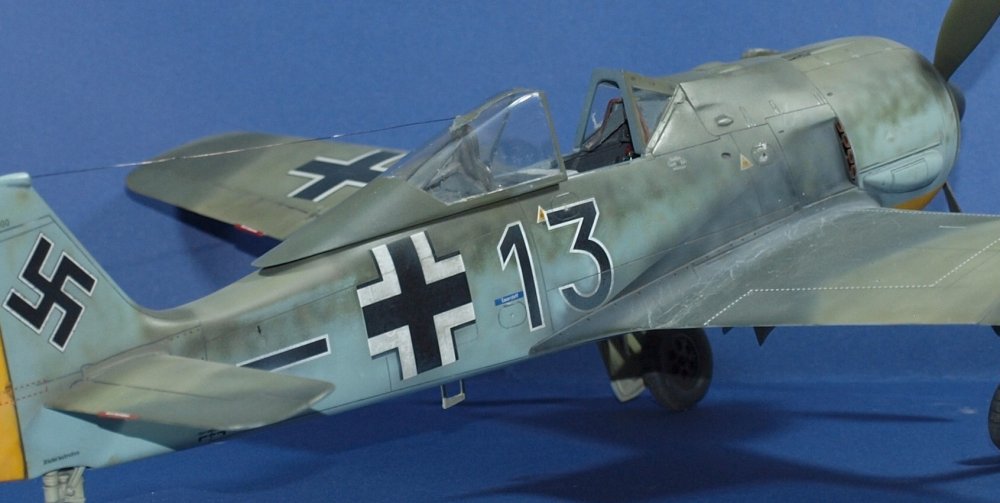
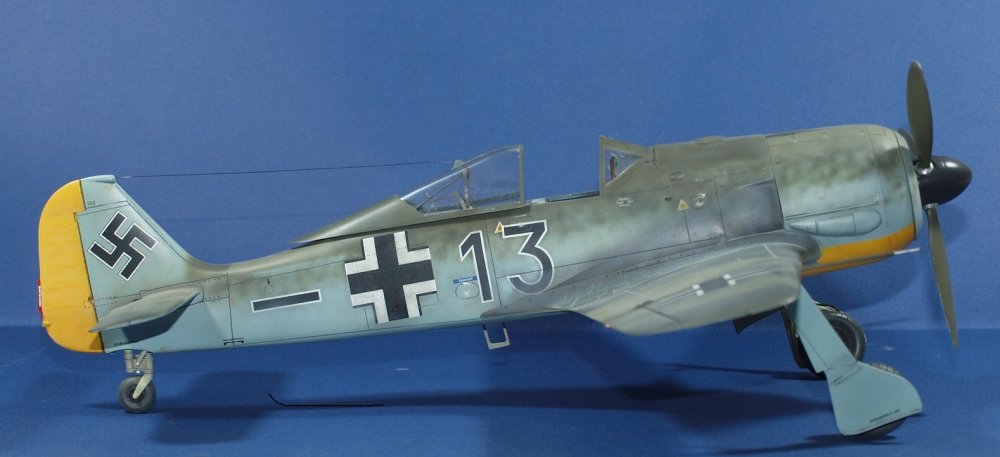
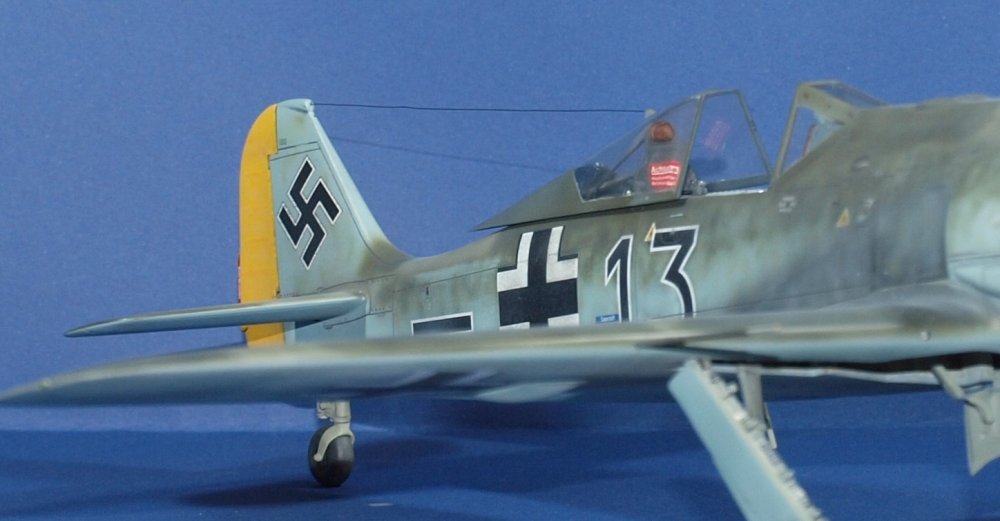
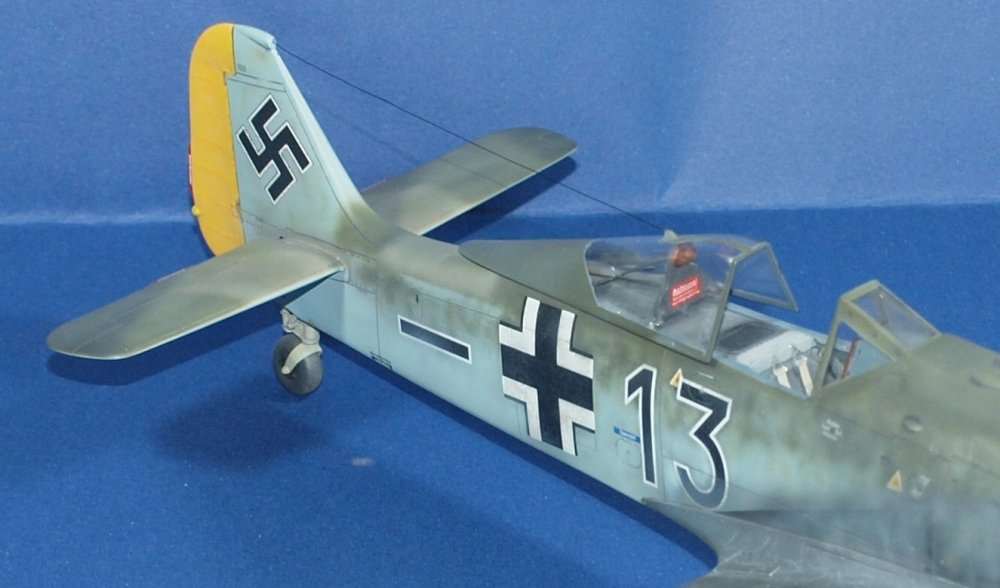
After all the work you invested the Würger is finished! And from my point of view it fully pays off.
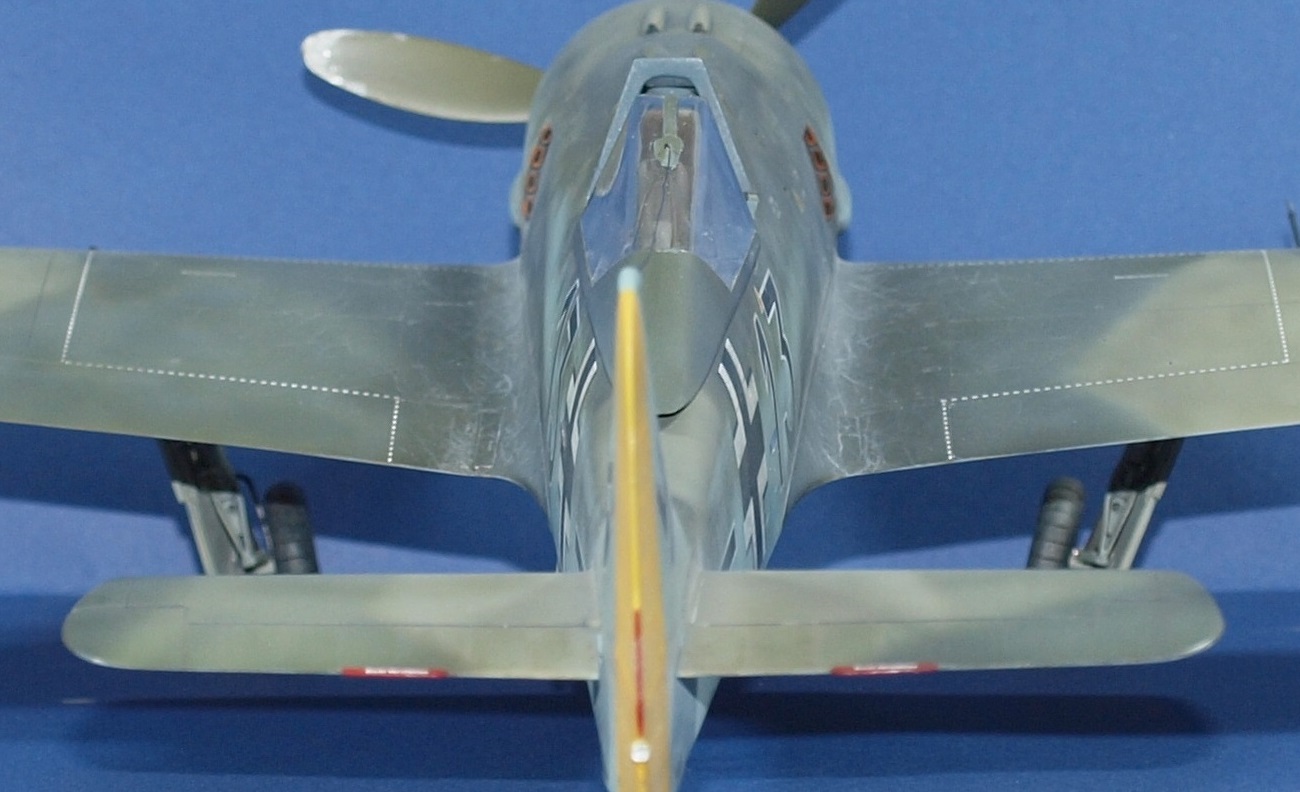
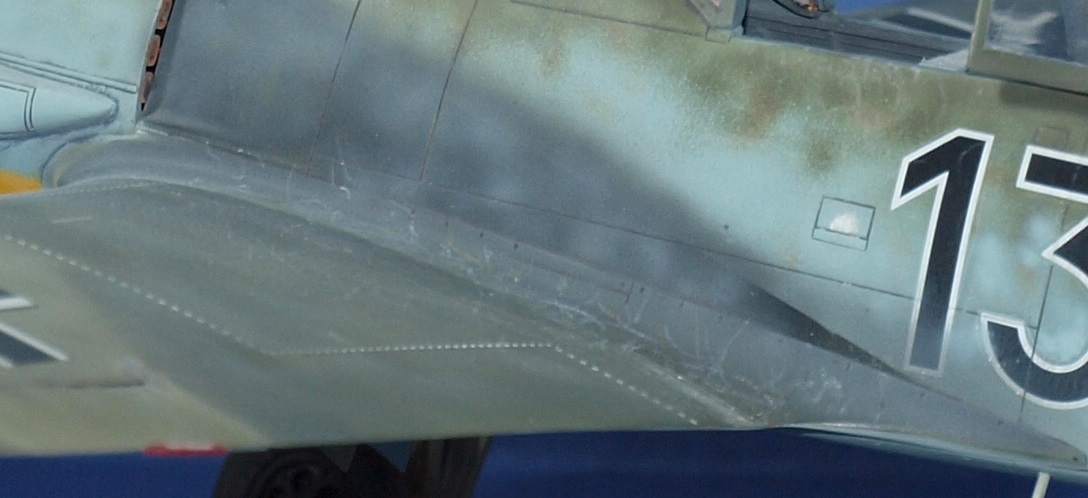
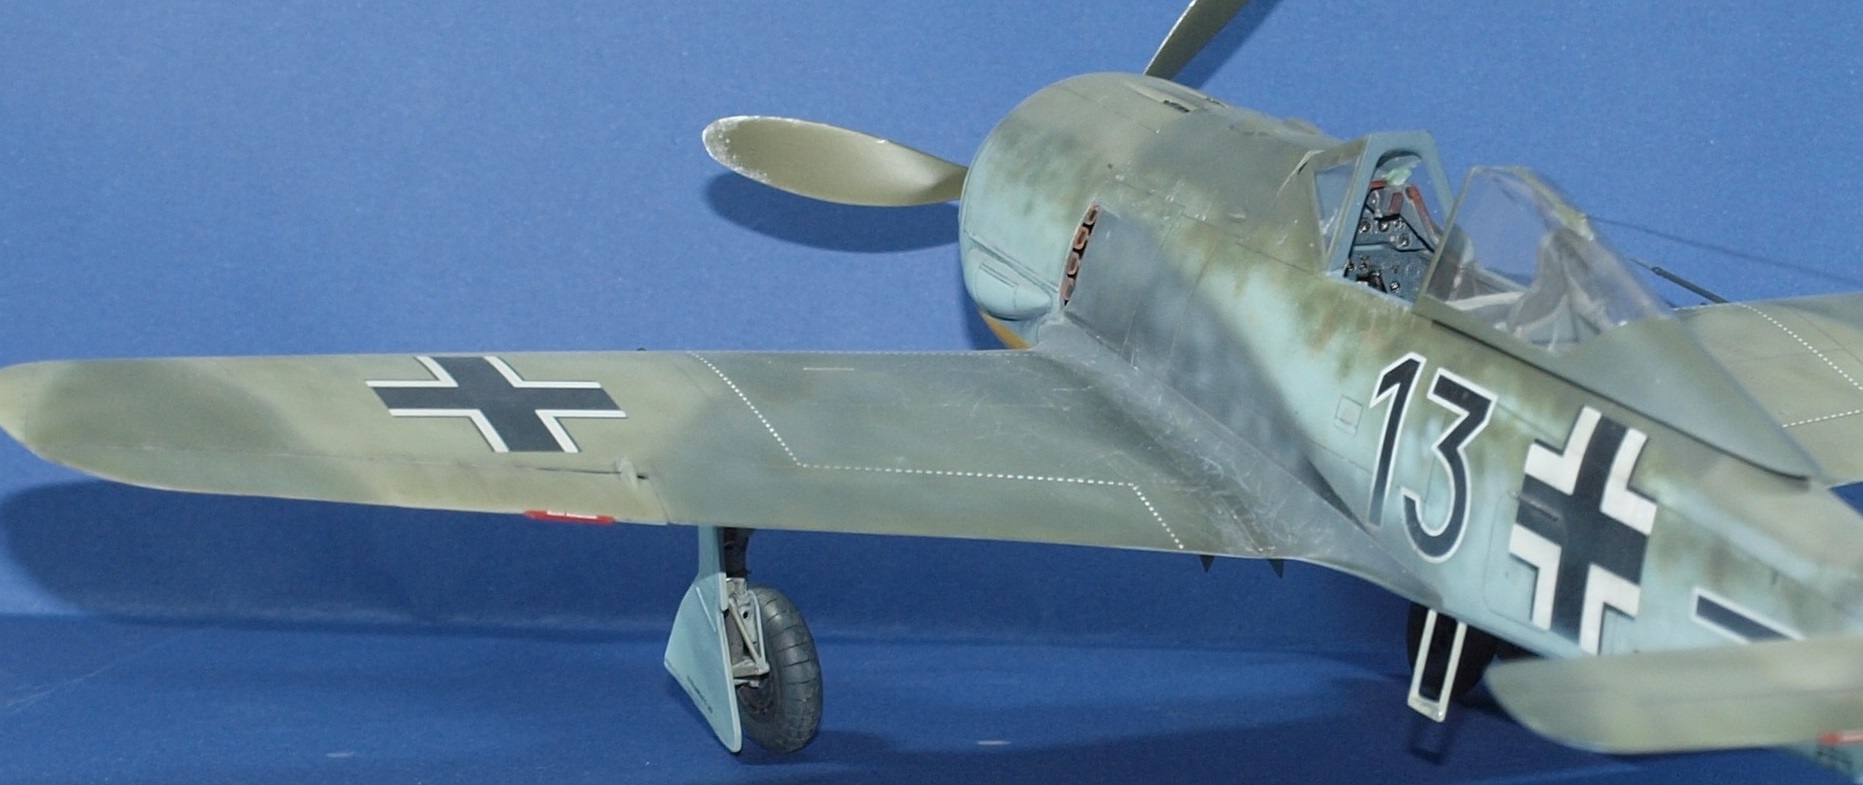
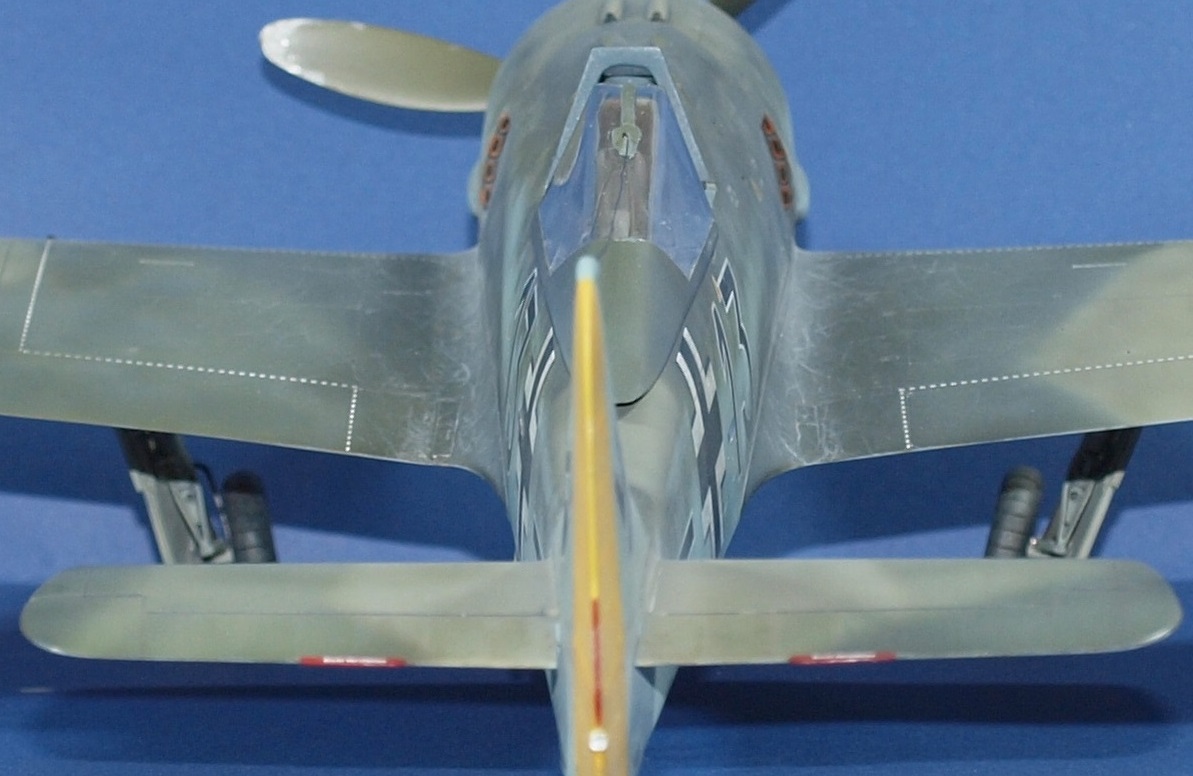
This is a stunning build with an awesome result Gaz! Camo and weathering are spot-on! Looks like the real thing!
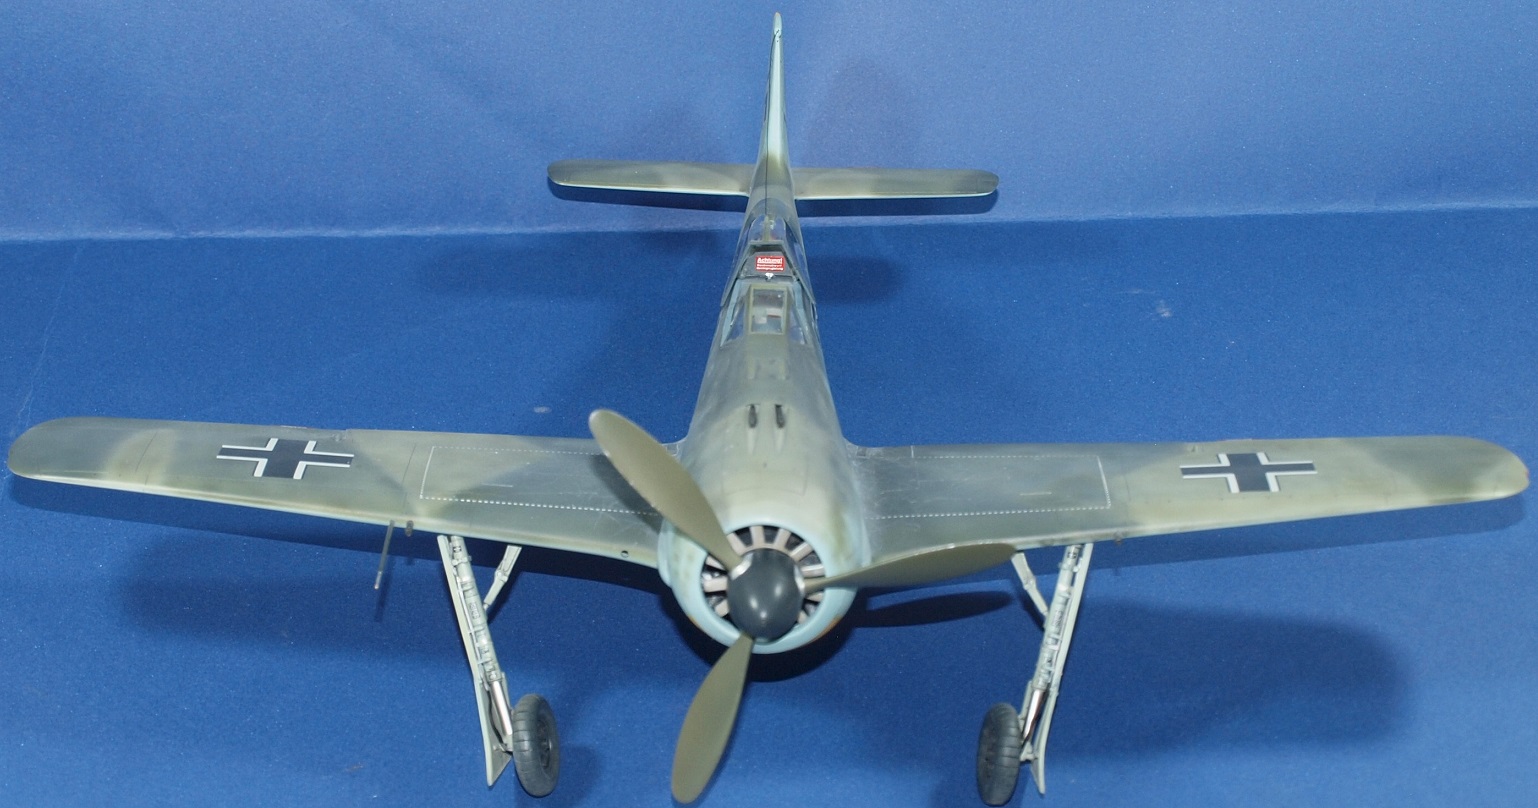
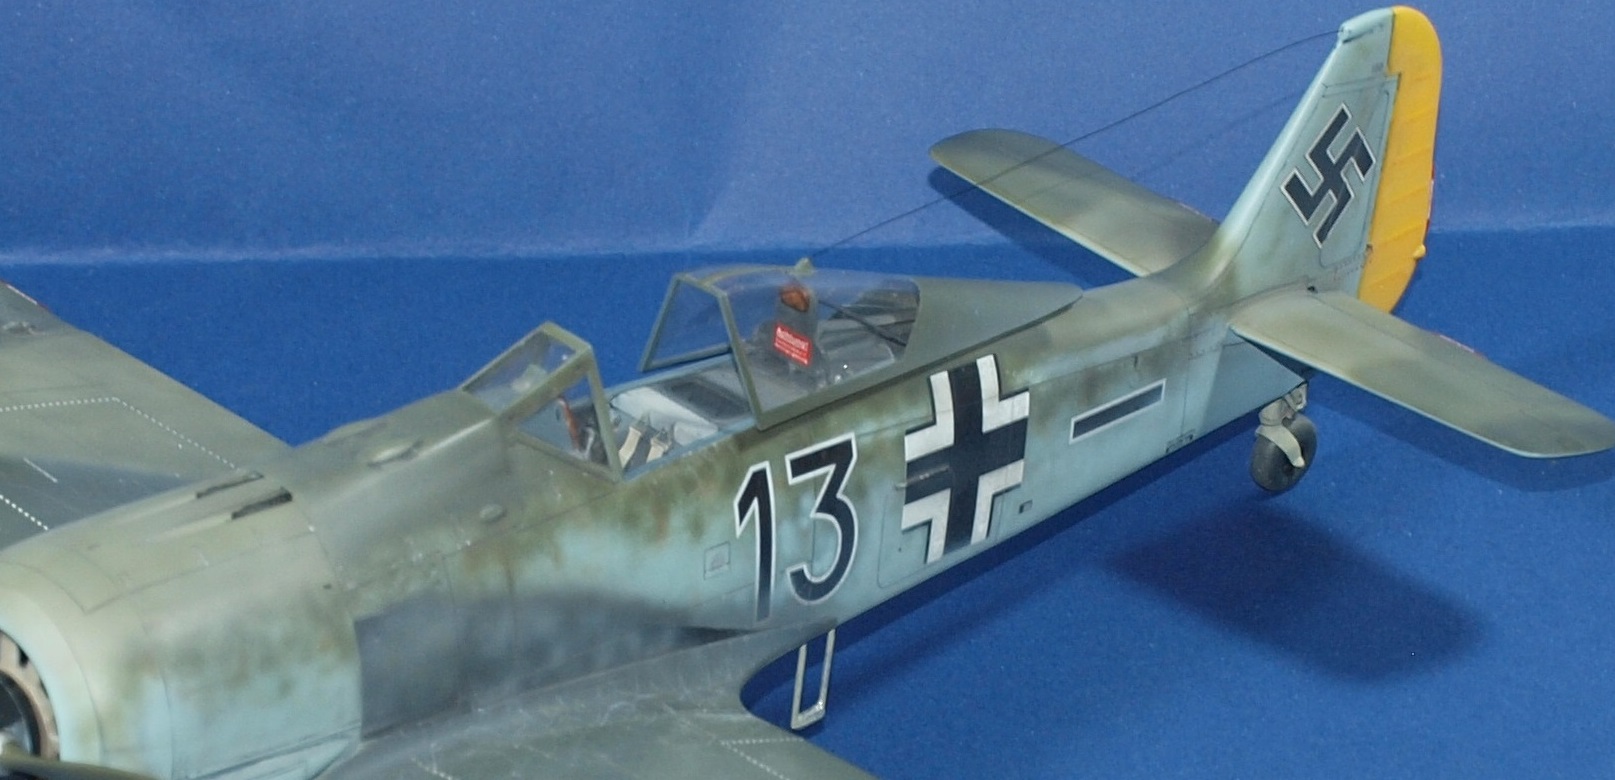
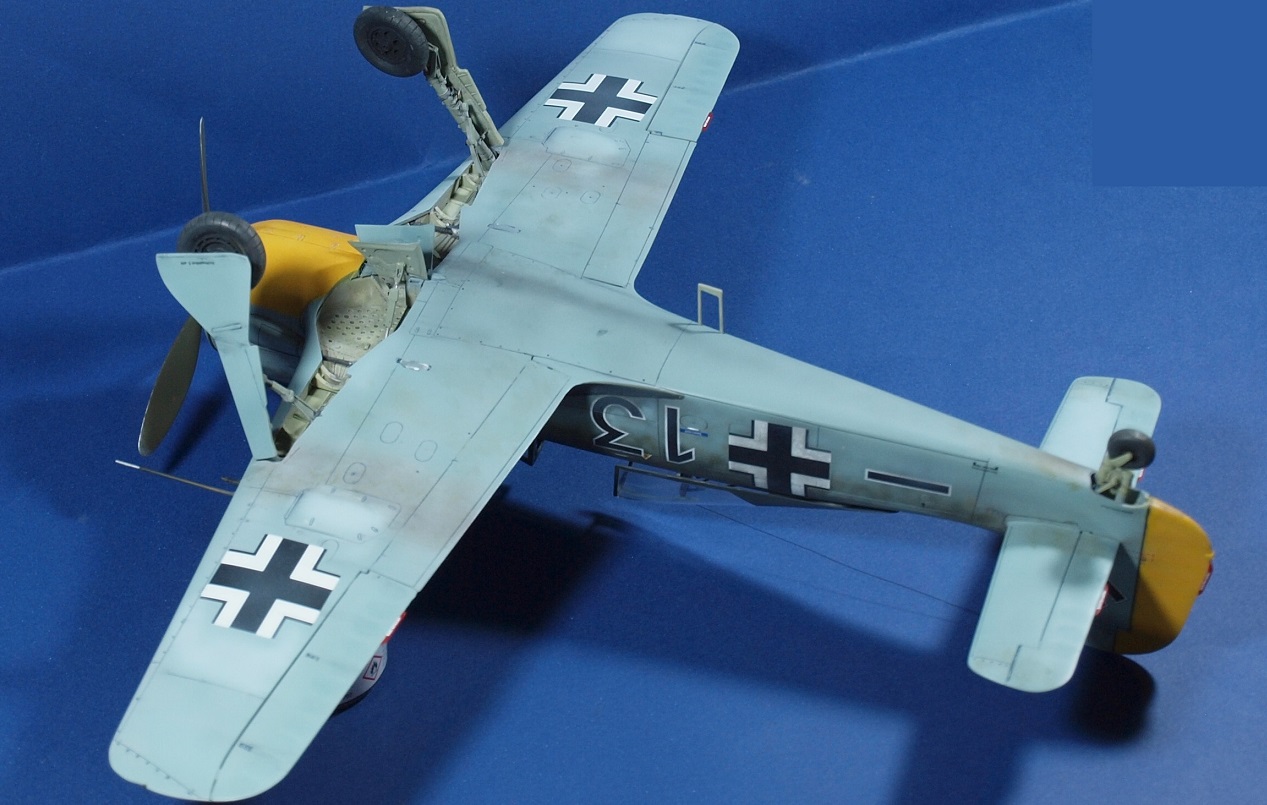
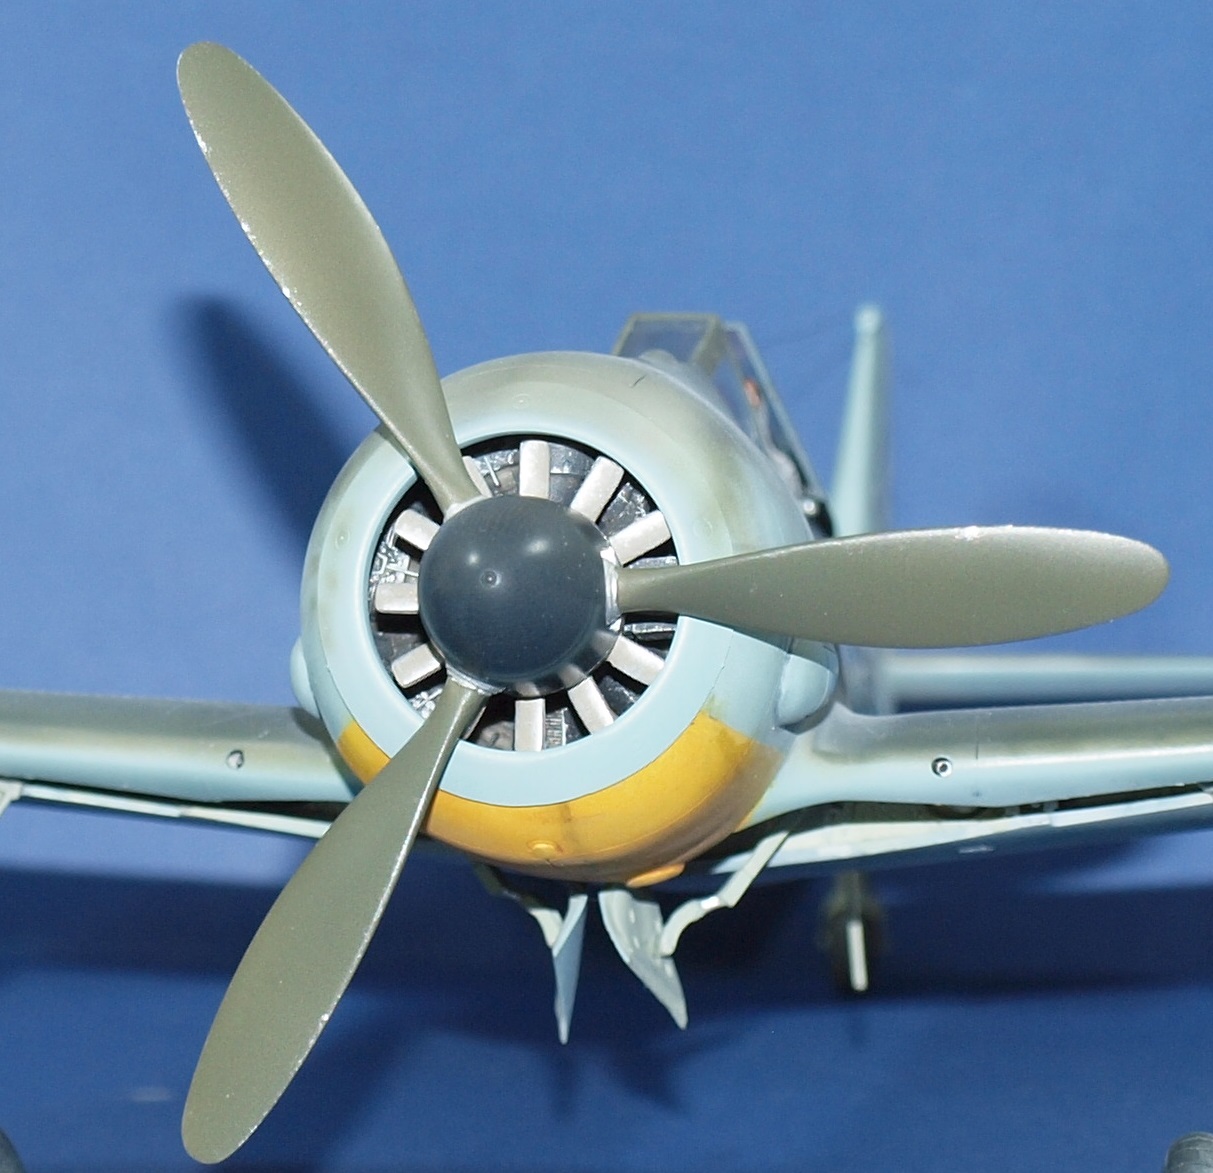
The subject you chose is a very special one since it has 3 (!) upper surface colors. Have never seen that before on a 190!Keep em coming!
Thank you, Kai! Fortunately for both of us, the community came together and provided me with useful photos and information.
This pic was instrumental in helping me to be so adventurous:

Note the MG151 bulge!
-
5
-
2
-
-
1 hour ago, Kaireckstadt said:
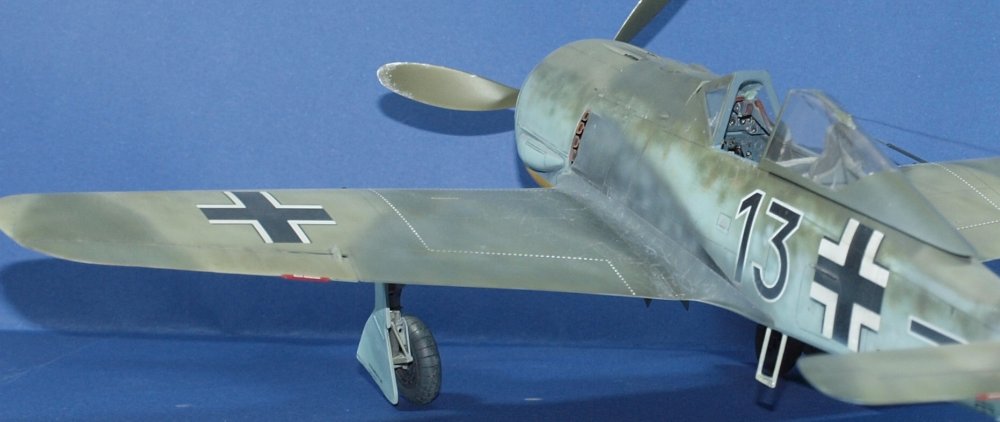
Looks perfect with the final flat varnish! Great idea solving the problem with the canopy!
This is a real beauty and it was a joy following your build.
I learned new techniques and many things about the 190.What will be the next bird on your bench?
Thank you, Kai.
My next bird will be the final mount of Prinz Friedrich Karl von Preußen.

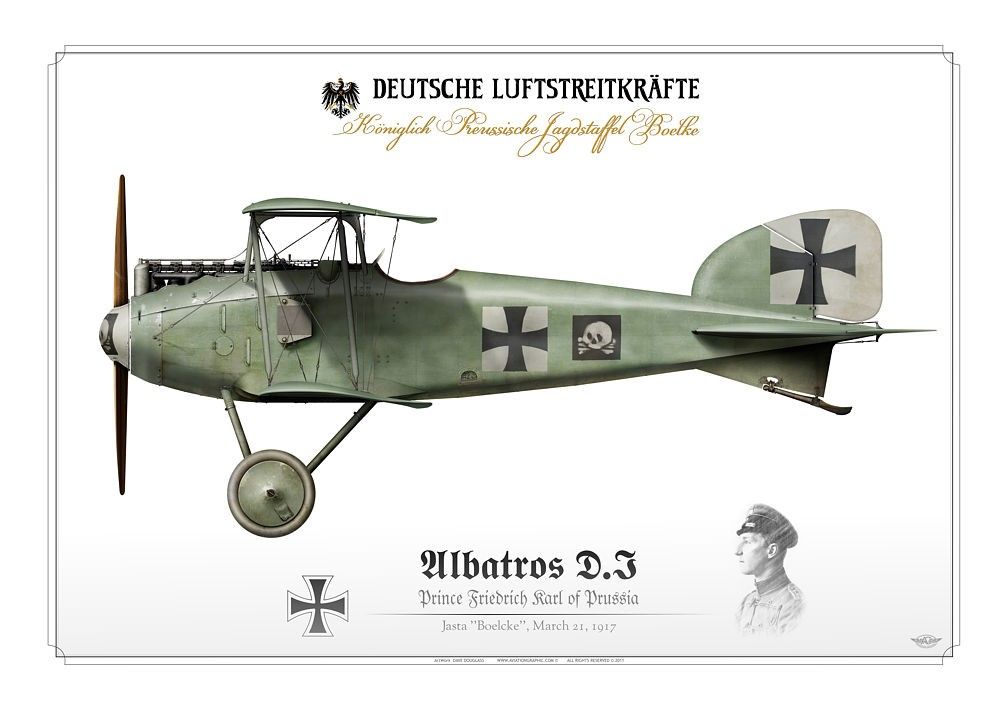
There has been a lot of ugly illustrations of the green used for the fuselage. I will use some form of fledgrau. Roden will supply the plastic, and hopefully at least the Albatros factory decal is still usable. I have some resin parts to dress up the engine and I'm not sure what I have for Spandau's. But I will use PE jacketed versions for sure.
Apparently the the machine belonged to Boelcke and the Prinz would borrow it once Boelcke got a D.II to fly.
-
3
-
1
-
-
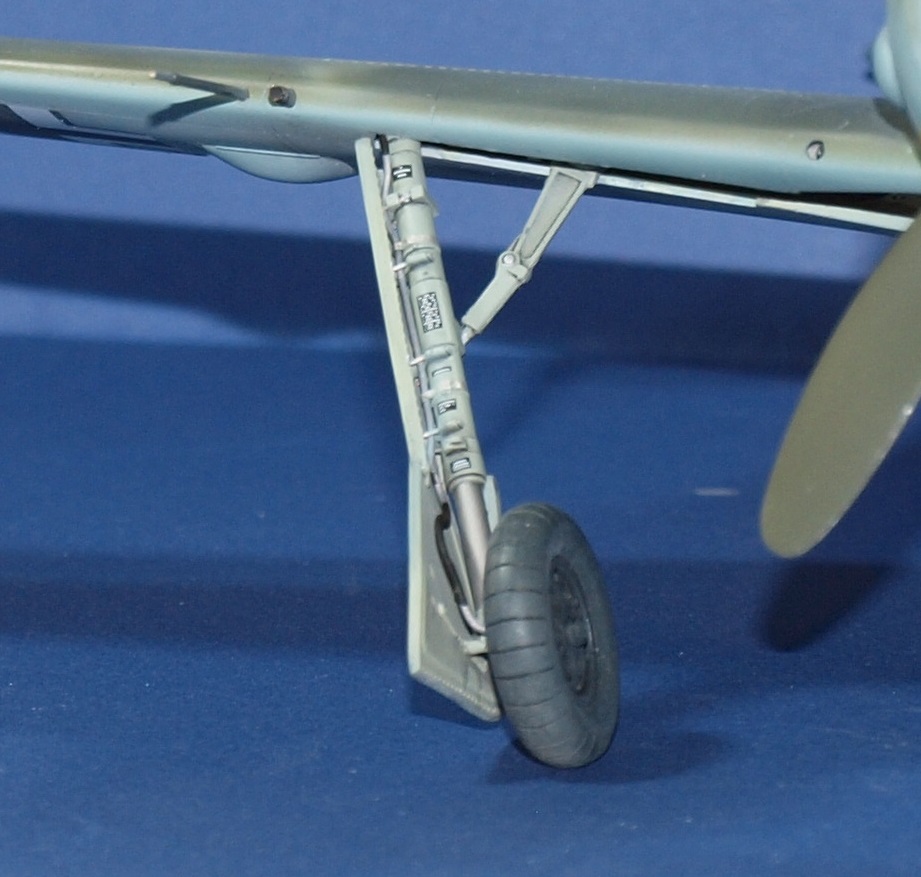
Well... for better or worse... it's finished. As I went to attach and unmask the canopy, all of my best-laid plans seemed to come apart. The canopy didn't fit closed, and attaching it open kept failing because other parts didn't fit, and the glue joins were too tiny to allow for fine adjustment. In the end, I used blutack to fix the canopy in place so that I could add the aerial.
Anyway... you can see the RFI photos here:
And... who knew... you can see past the engine fan...

-
3
-
1
-
-
-
A learning experience, for certain, this kit allowed me to try out a few new techniques as well as suffer through a few problems associated with short run kits.


-
13
-
1
-
-
5 minutes ago, Kaireckstadt said:
And when you cover all Panzer Putty with superglue (and accelerator)?
Interesting. I hadn't thought of that. Thanks.
-
2
-
-
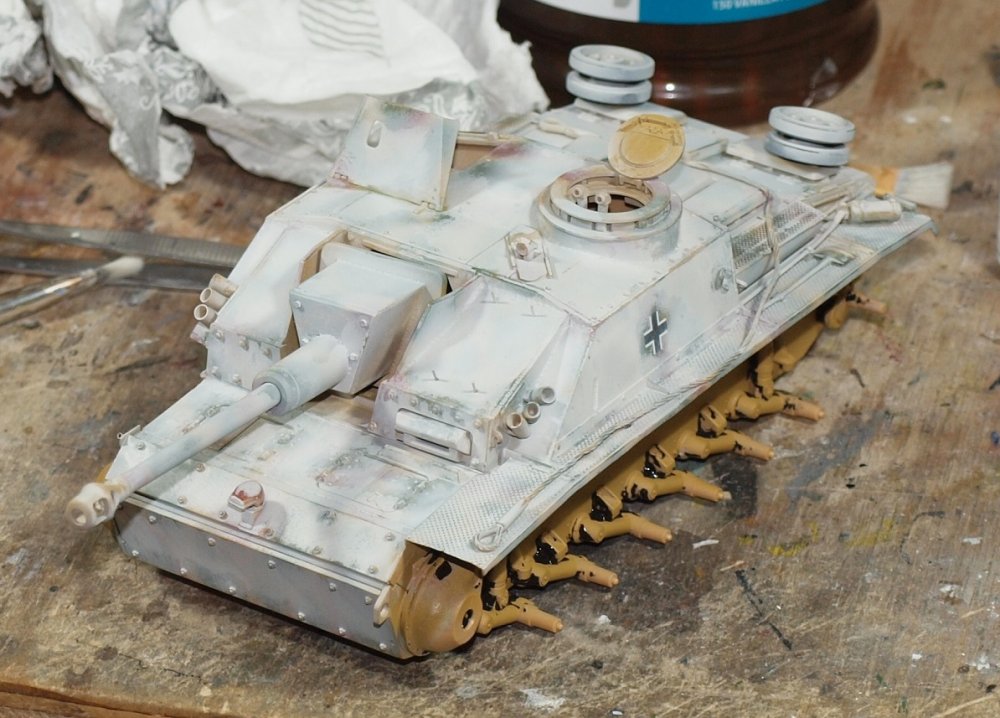
15 minutes ago, Kaireckstadt said:
You got the wintercamo spot-on, Gaz! The basic camouflage is shining through irregularly and even in some places completely to be seen. In my eyes it’s really stunning up to now.
Is the Panzer Putty on the model really a mess? I think it’s hardly to be seen when all the wheels and the track are assembled. And when you cover it with dirt nothing will be seen of it anymore. But that’s only my opinion.
Thank you, Kai.
That Panzer putty is more of a threat because I don't know what will happen to it later. Will it migrate? Ooze? I know most of it will be hidden by the wheels and tracks. It's just very annoying is all.
-
2
-
-
Thank you, Peter.
After stripping the hull and repainting, I've done three rounds of winter white (a bone color) and hairspray chipping.
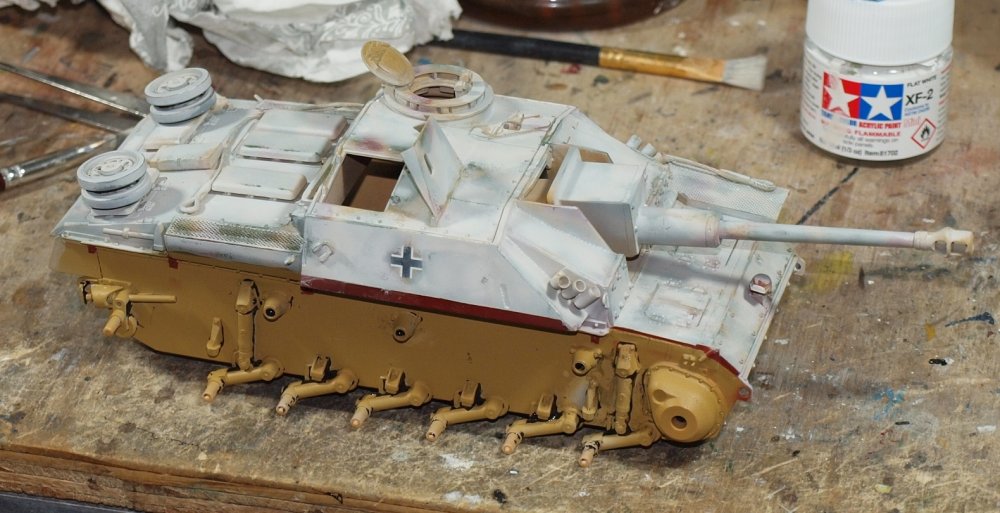
I've added some more parts and you might notice in the first foto that my Notek light is turned.
I've left plenty of options for sponge chipping and mapping effects.
You'll notice some black bits trapped in the chassis. This really gives me the shits. It's Panzer Putty. I had it stick once in aircraft wheelwells where I'd painted with Tamiya acrylics and left it in there for a couple weeks. On this occasion, it's bound to lacquer paint in less than 6 hours.
I've tried heating it out by putting the model in the oven, freezing it out and even a couple substances. Goof off had no effect, and Isopropyl turned it into and oily mess whilst stripping the paint. As I'm opting for a muddy winter base, I can use mud effects to hide it. I've thrown Panzer Putty in the trash. As long as the stuff doesn't go mobile after I add mud effects, i won;t bin the model.
Happy modelling!
-
3
-
1
-
-
Nice turret details!
-
4
-


Israeli Mirage III C with Atar9C
in LSM 1/35 and Larger Work In Progress
Posted
Kai,
Those wheel wells look quite nice. Tell me... have you ever considered the Molotow chrome pen to highlight those hydraulic lines? Most metal paints just don't look too great painted on small parts. I really like my pen. I find it's a nice piece of gear.