


GazzaS
-
Posts
6,396 -
Joined
-
Last visited
Content Type
Profiles
Forums
Events
Gallery
Posts posted by GazzaS
-
-
Amazing stuff!
-
 5
5
-
-
I can;t imagine trying to skin that truck! Can;t wait to see how you go!
-
3
-
-
1 hour ago, Peterpools said:
Gaz
Winter cammo is so goooooood - lookingfantastic
Keep 'em comin
Peter
Thank you, Peter!
-
3
-
-
Kai,
Nice work beating this one into shape.
I can remember another long build of an Italei Mirage, and the LG legs looked more like chicken bones than machine tooled parts. That guy actually spent a couple years on the build but really did a great job hyper detailing it.
.... so, now that you know what SOD stands for, how would you say it in German?
Gaz
-
2
-
-
2 hours ago, Kaireckstadt said:
That looks stunning Gaz! You are a real artist! Perfect winter camo and weathering!
2 hours ago, DocRob said:And the pictures tell a great story Gaz, I really like your wintery outfit for the Stug.
Cheers Rob
Thank you, fellas!
-
5
-
-
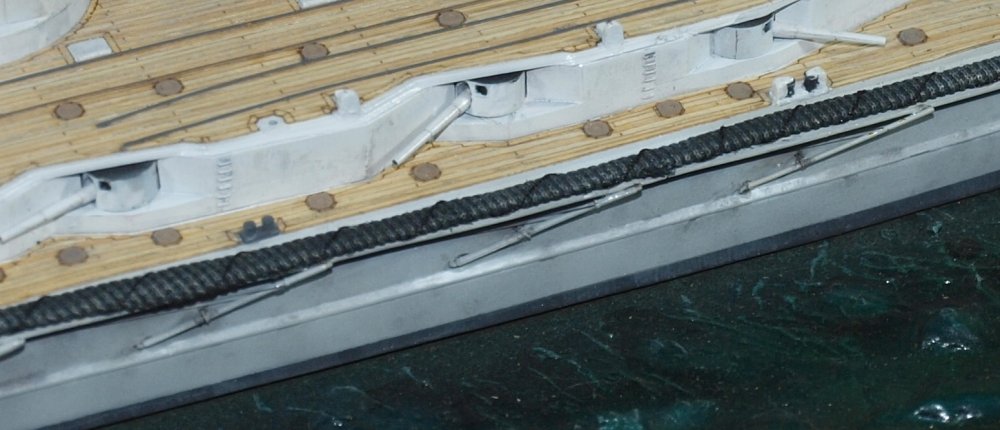
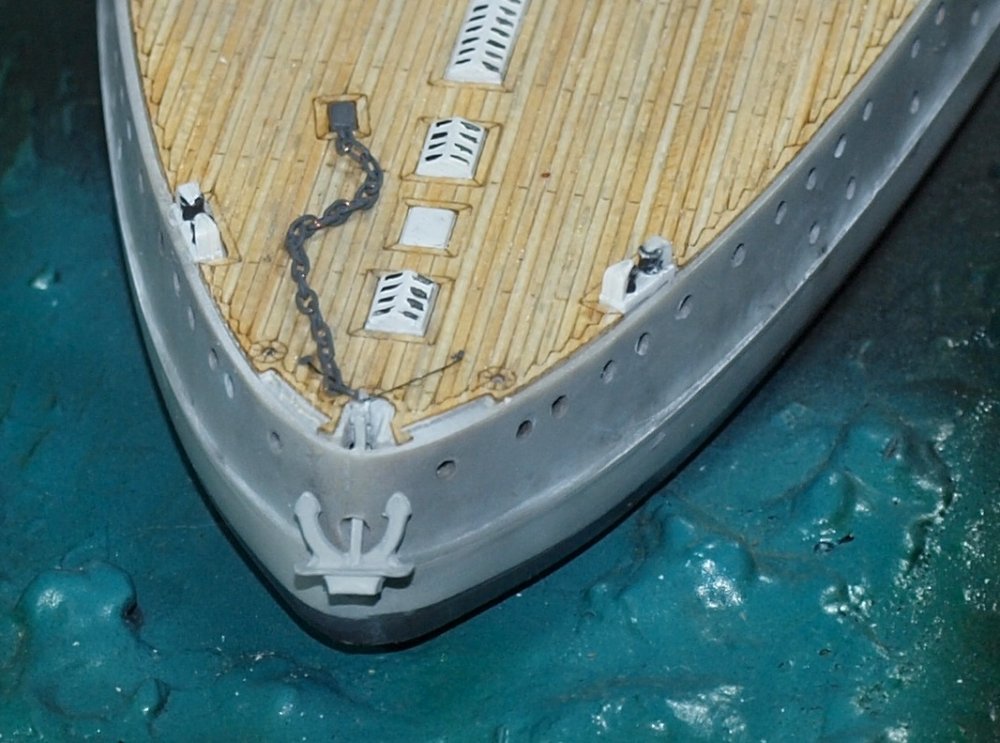
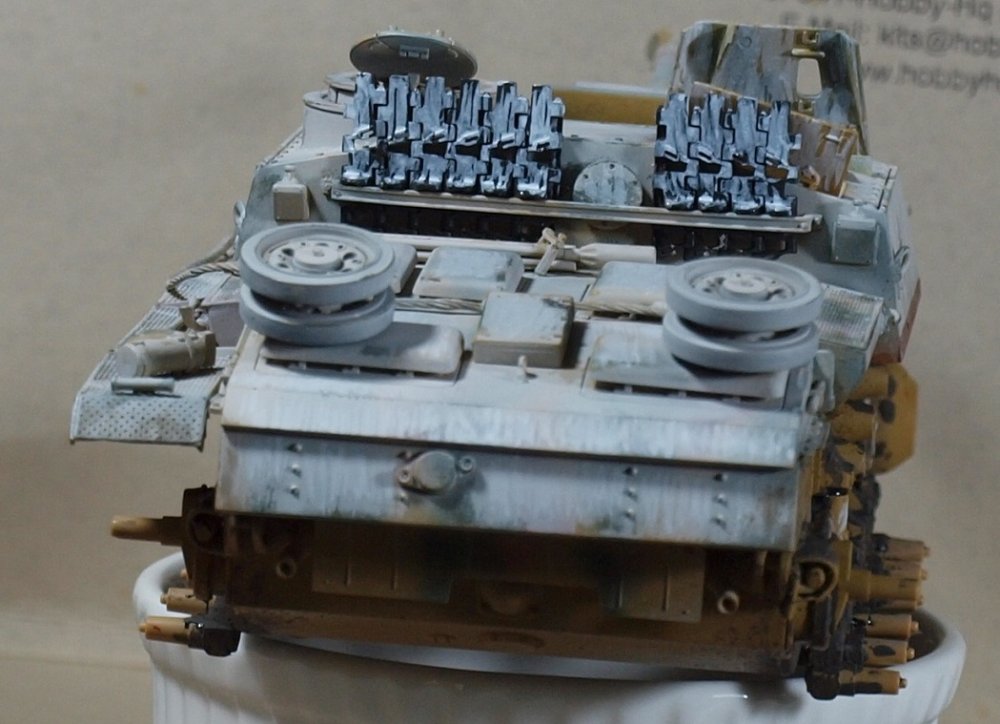
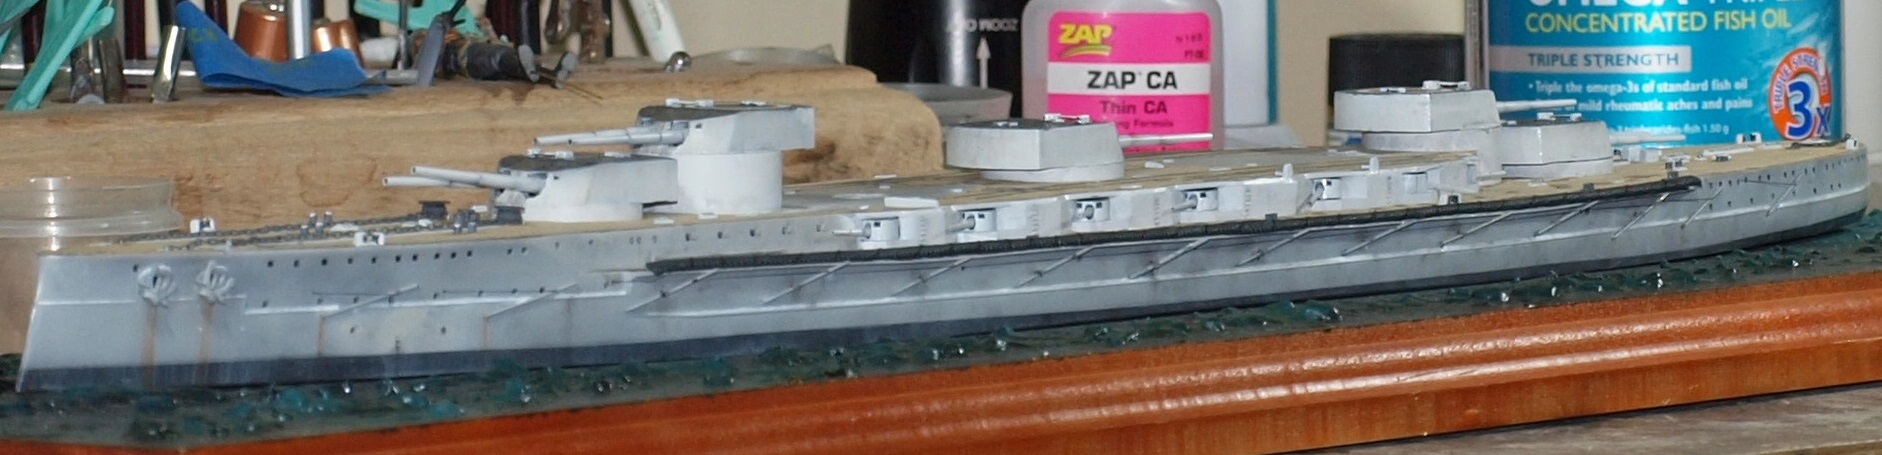
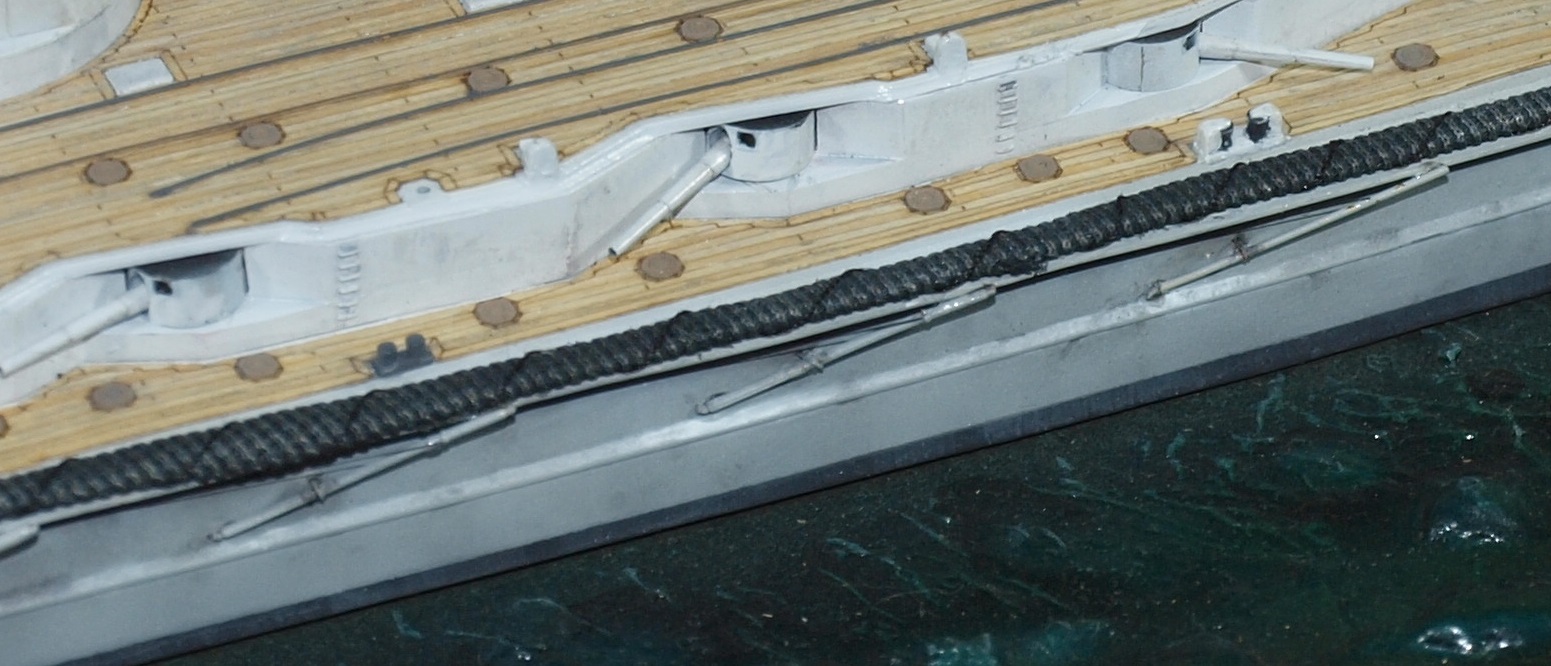
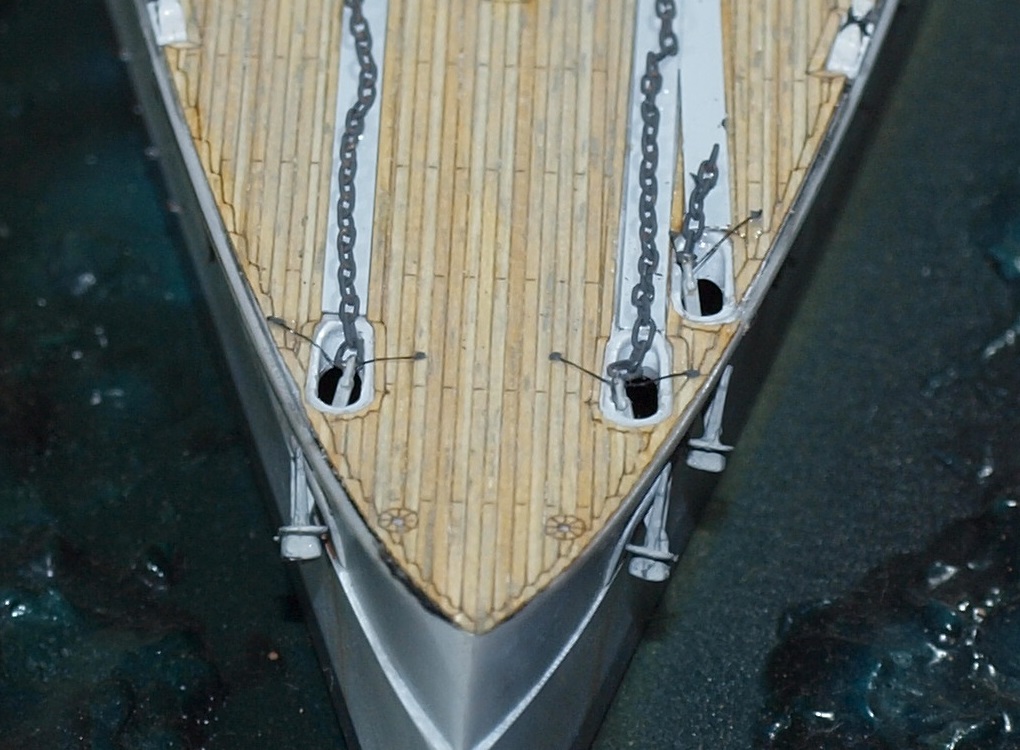
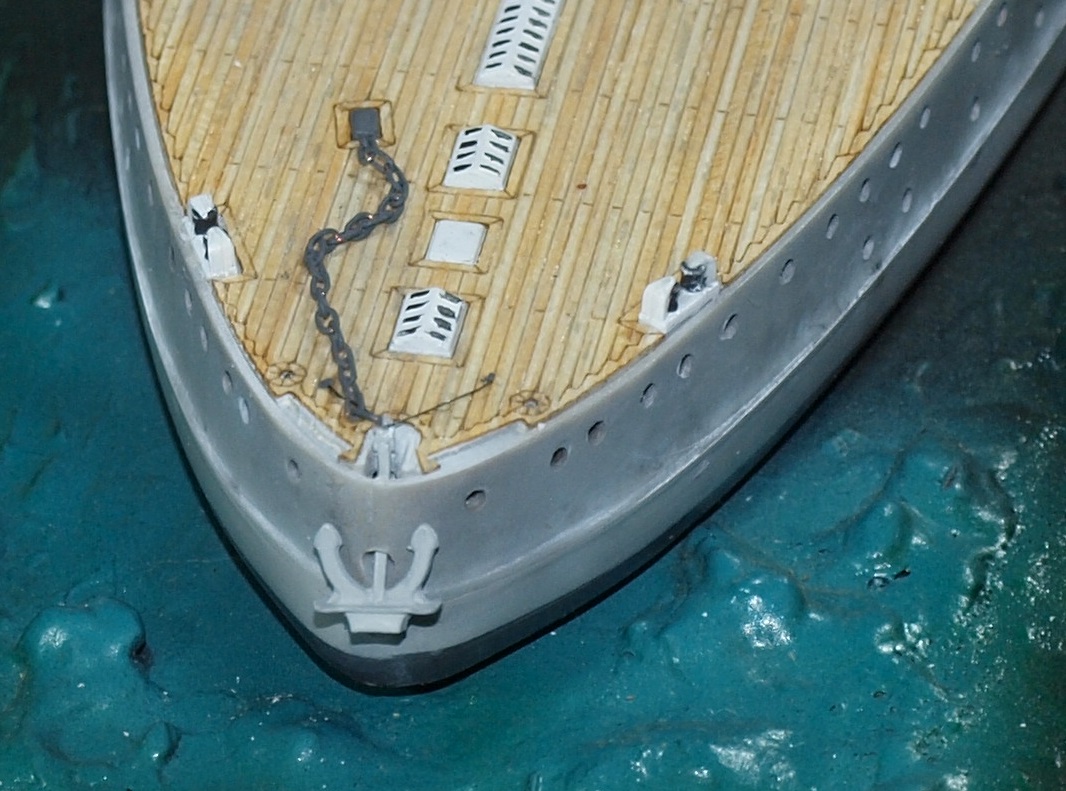
I think ship models may be too much for those with attention deficit like myself. I've spent probably ten or more hours adding the rolled up torpedo nets, Anchors, Chains, and anchor retention chains.
I didn't have any finer chain than the anchor chain, so I used rigging thread to play the part of retention chains. If I did have any finer chain... I wouldn't have been able to use it. Working with links that are from 3mm to 4mm long is about the limit imposed by my brain and dexterity.


-
8
-
-
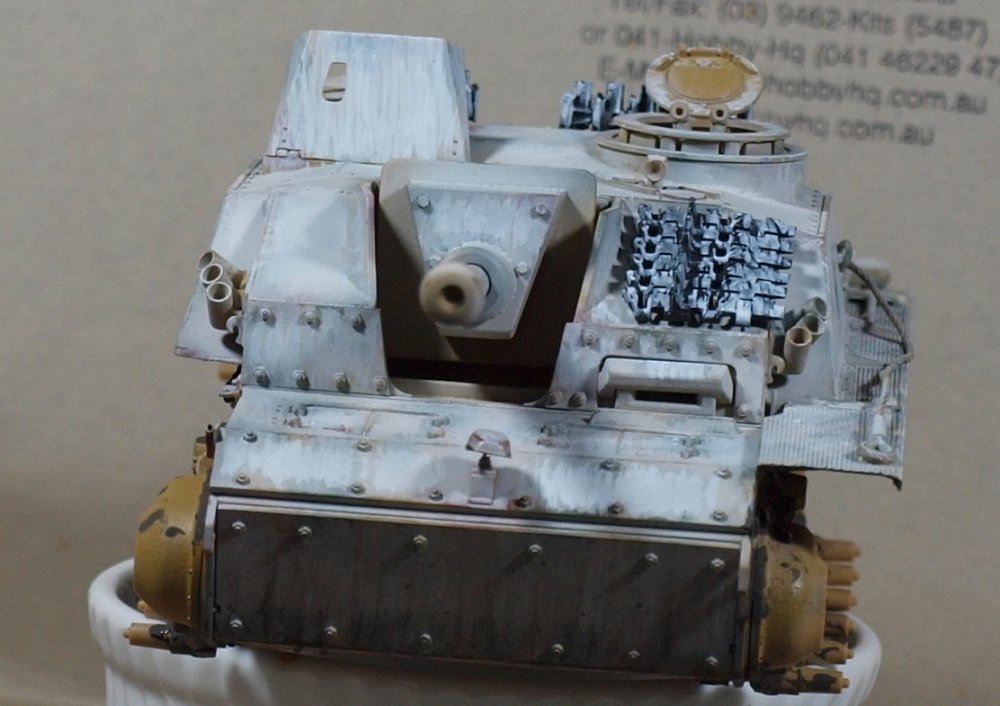
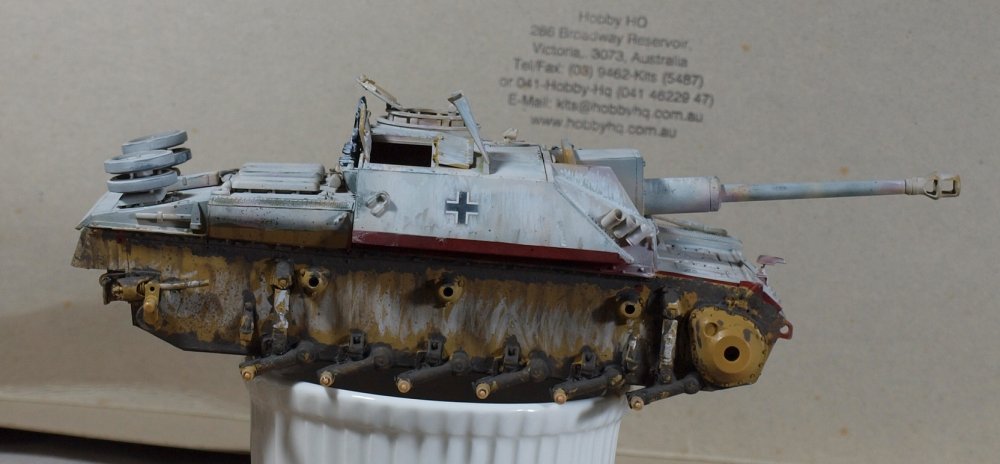
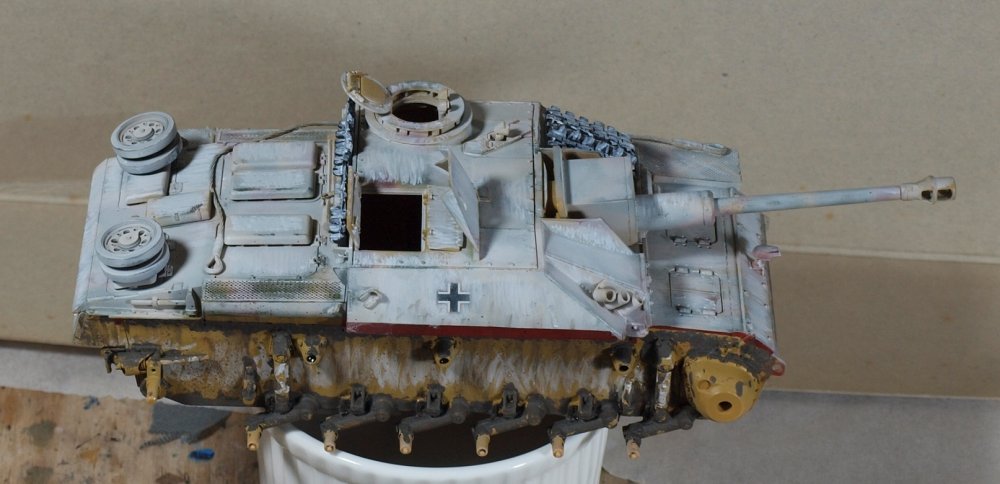
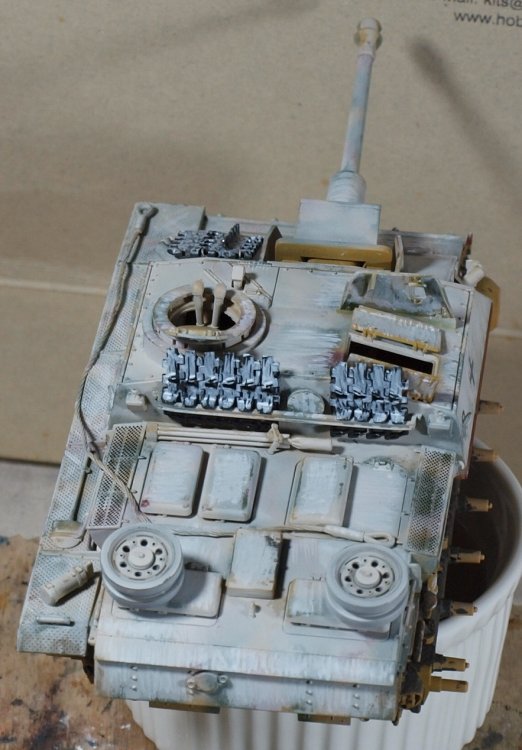
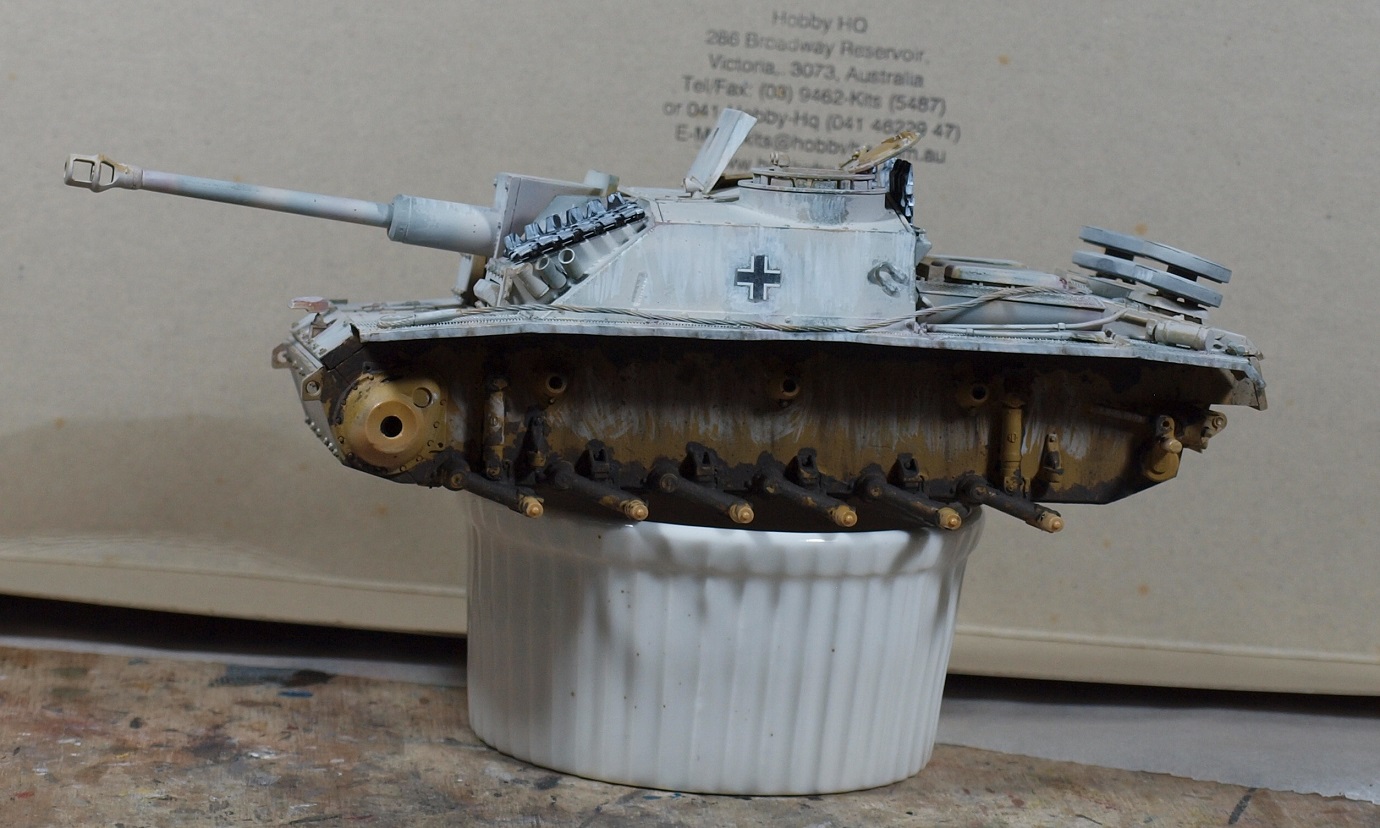
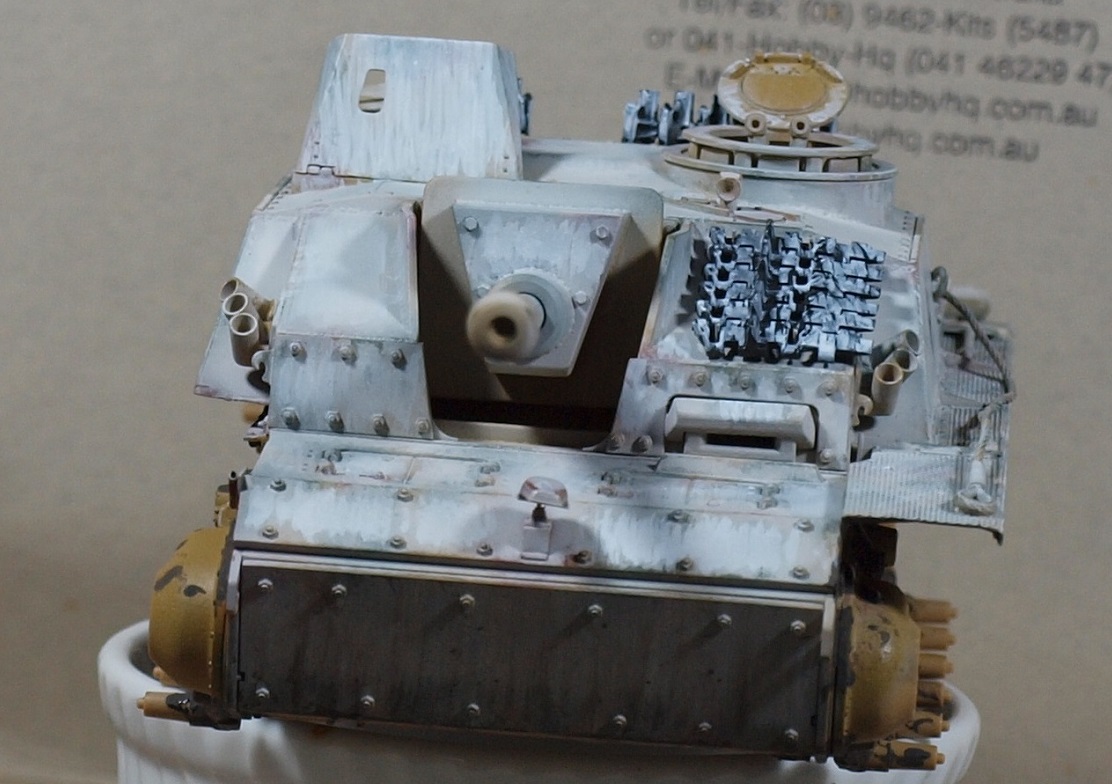
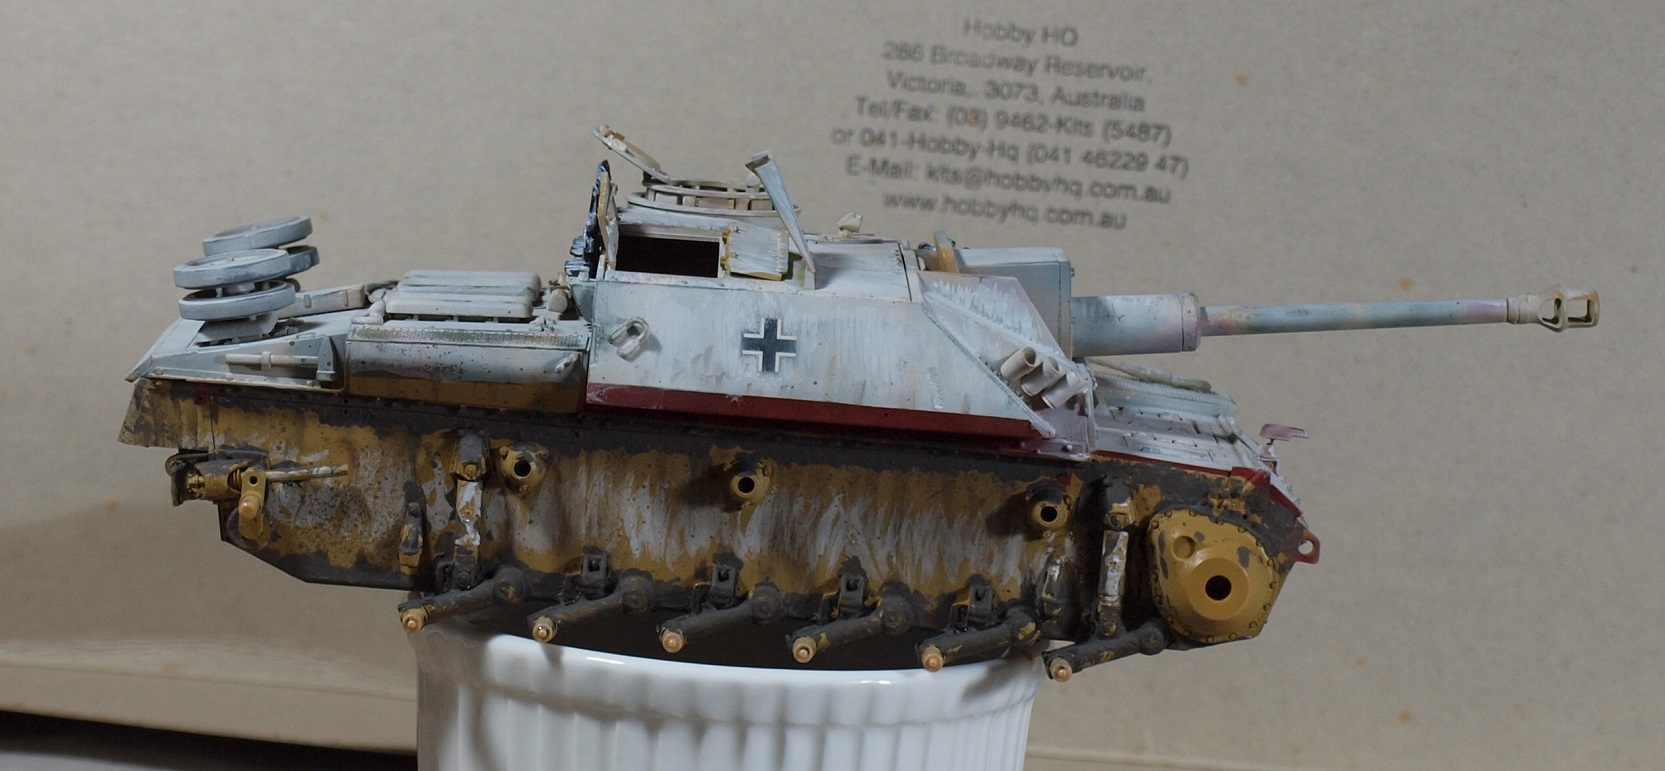
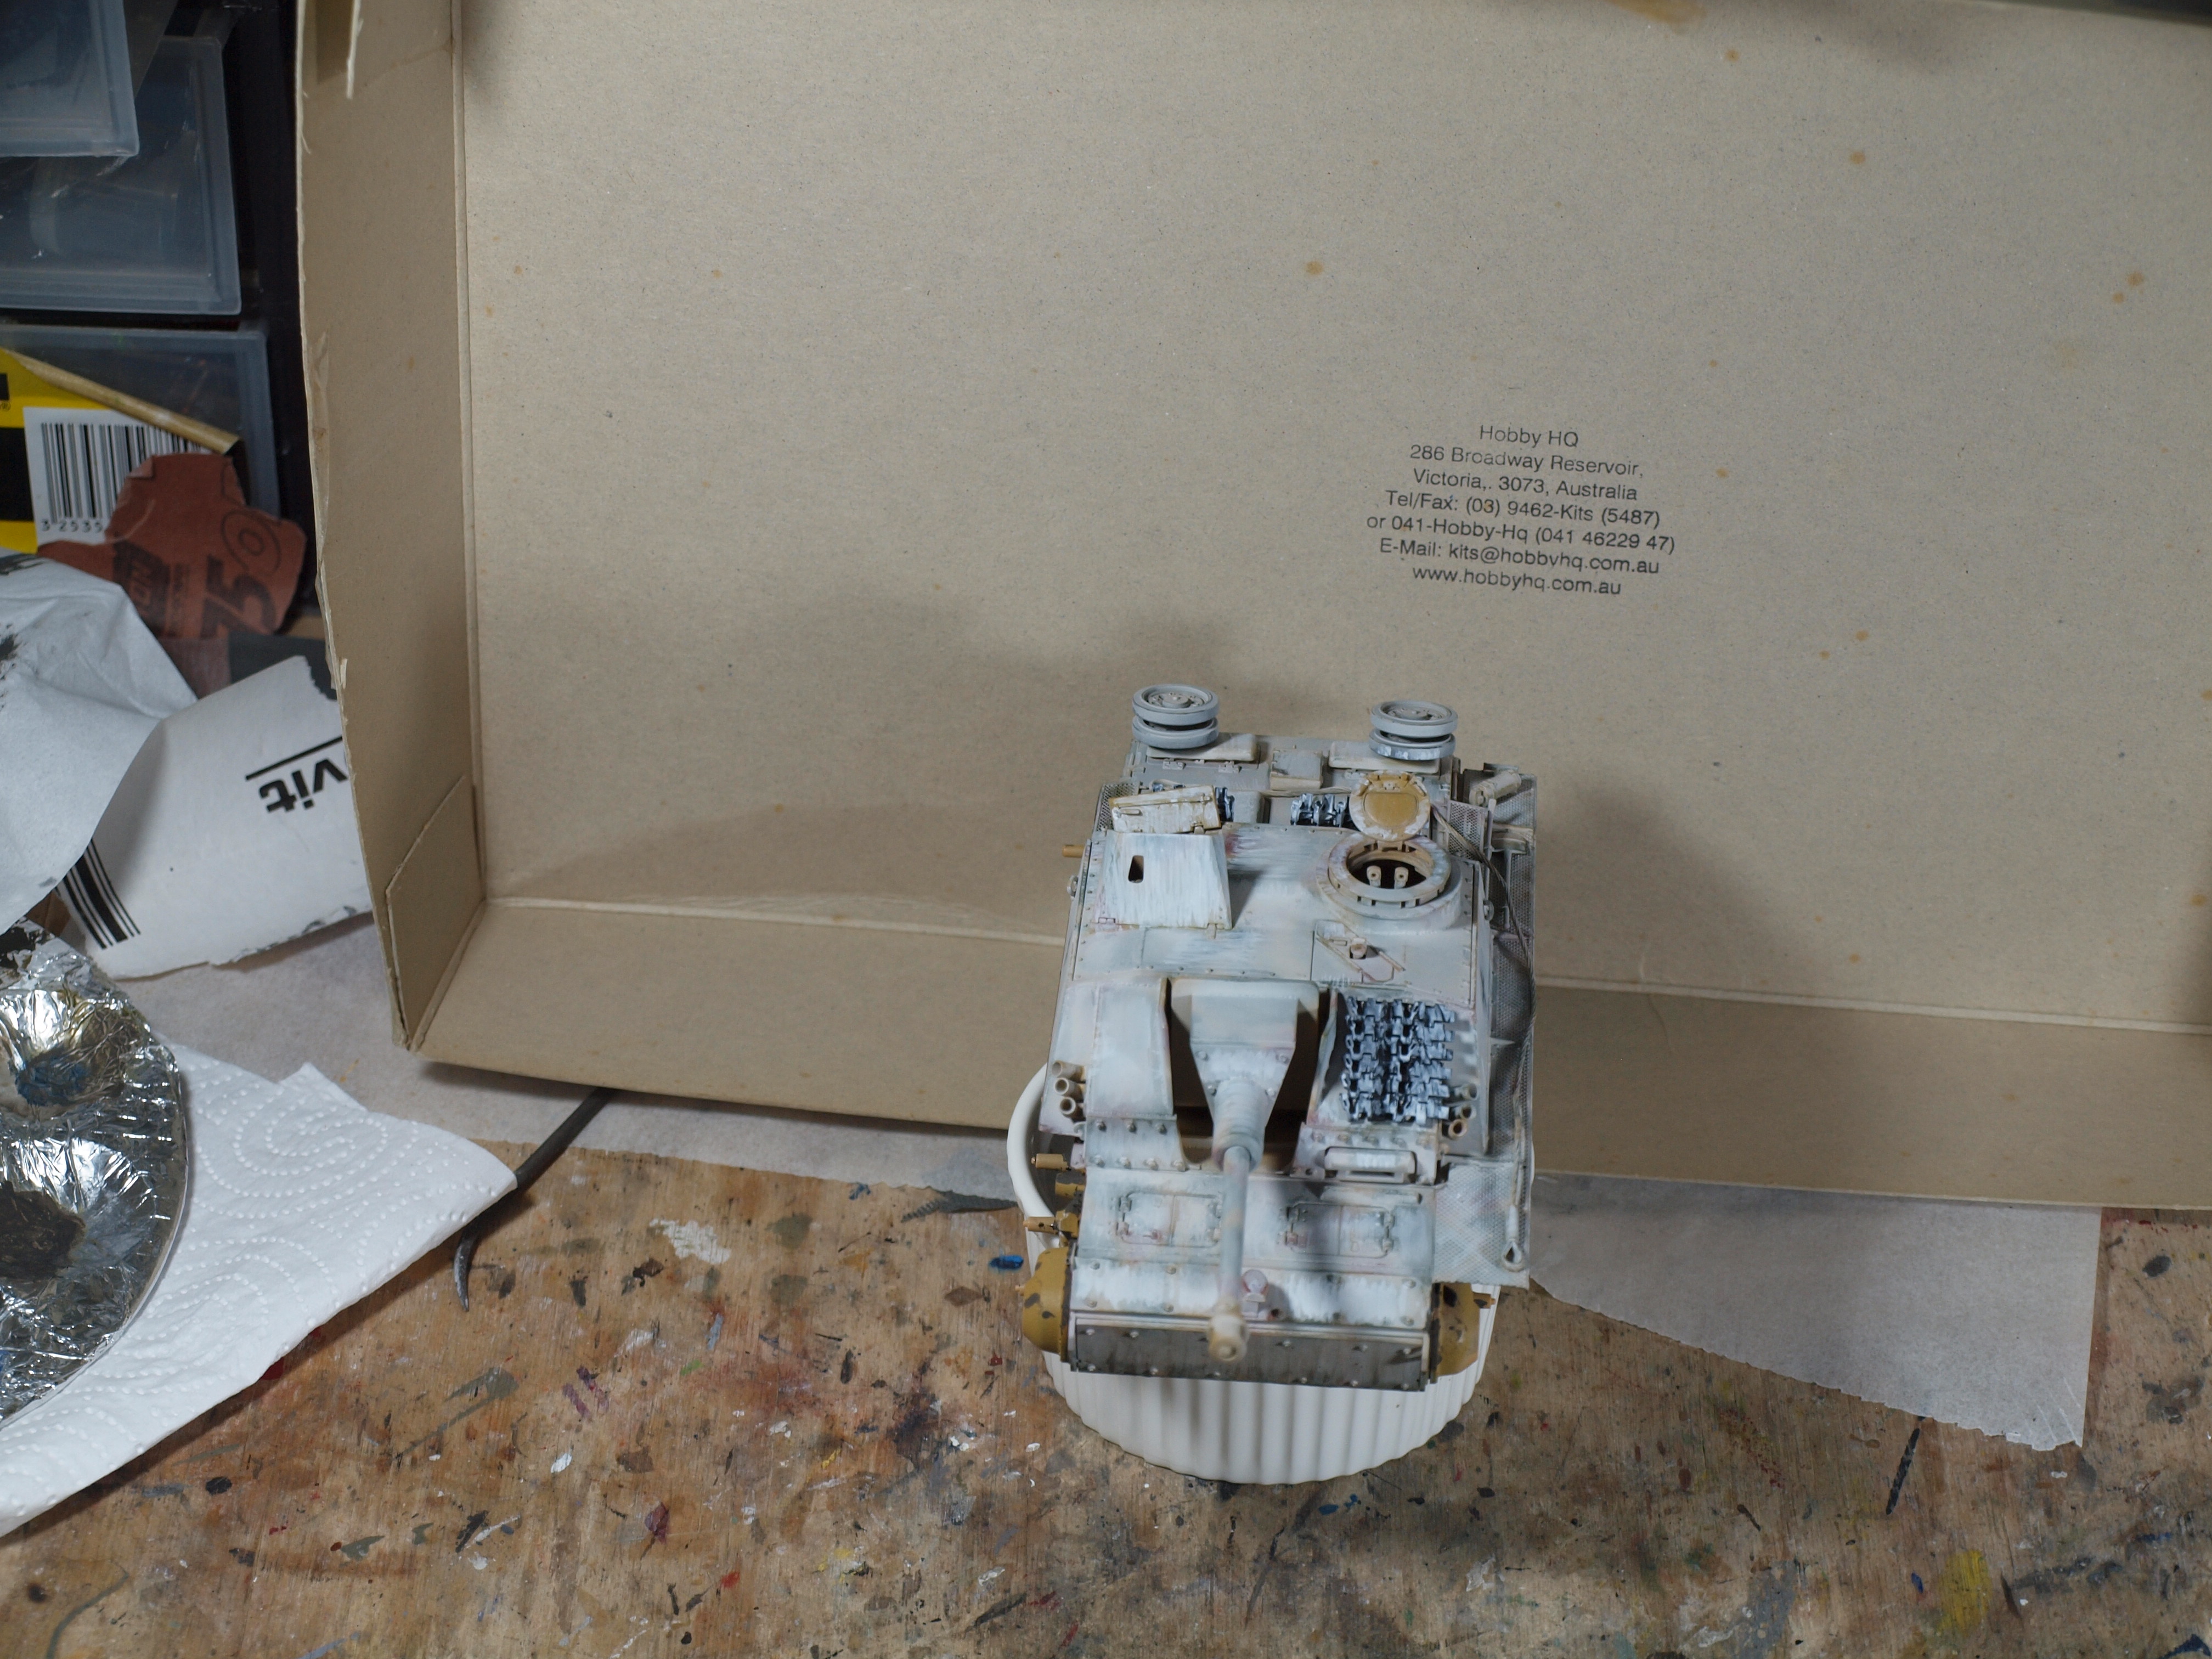
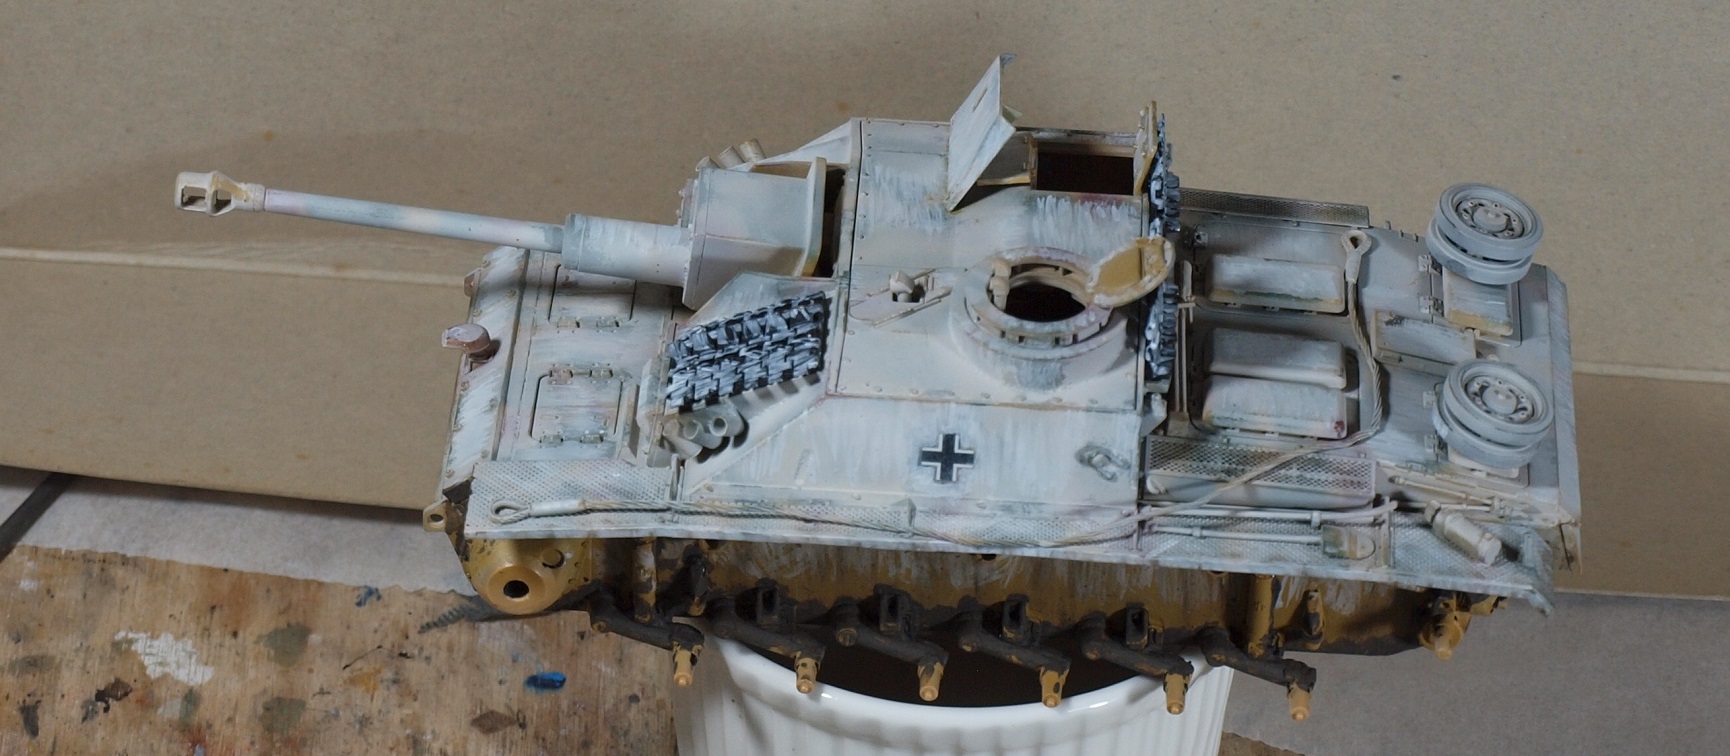
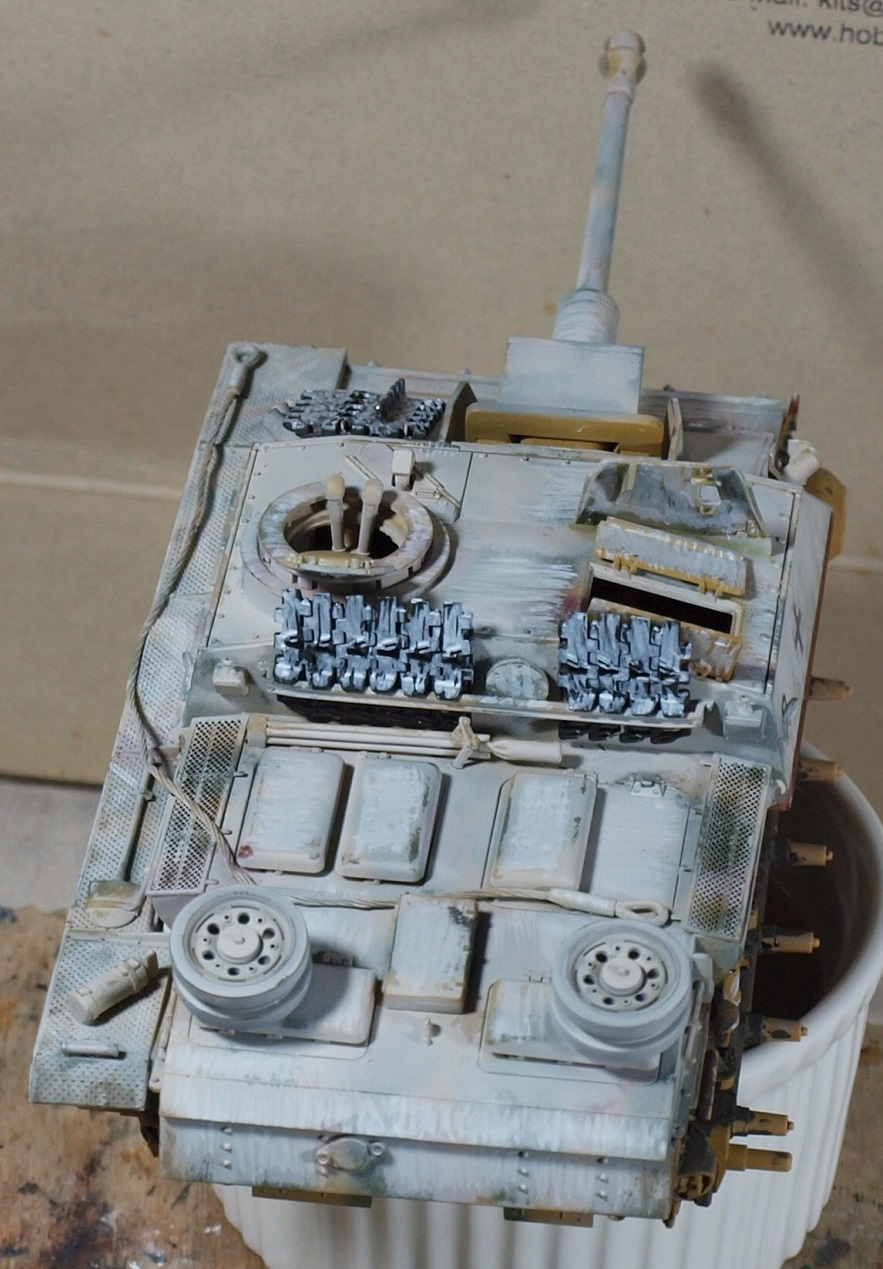
Hello friends,
Would you like a ramekin of StuG with your steak, sir?
Today I did some mapping with the winter white as well as some textured mud and oil streaking for the mud. I did some light speckling, too. Not much I can say that the pictures won't.


-
9
-
-
That is stunning, Rob! Might be an interesting technique to try.
-
2
-
 1
1
-
-
29 minutes ago, Wumm said:
So many questions Gaz...
Was you seller local or from Overseas? Are they an official distributor? Were they guaranteed supply of the goods before offering them at pre-order conditions? It is illegal in Australia to offer goods for sale that a Retailer knows they cannot supply, or not be able do so within a reasonable time frame.
https://www.accc.gov.au/consumers/sales-delivery/non-delivery-of-products-services
By the sounds of your story, if another local Retailer has the item in stock 5 months after you paid for the item, and your Shop still cannot supply you, you are well within your rights to ask for a refund.
Perhaps they forgot to cancel your order after refunding you. Maybe they just let it go through in the name of goodwill. Or possibly someone on the other side of the Globe just had their kit get mangled in transit, and the good Karma blessed you this time around.
I would pass it on. Especially if you don't intend to build another example of the subject. Gift it to a Member's Son or Daughter at your next Model Club meeting; if they'll wash the dishes nightly for a month for Mum or Dad, or something similar.
S
When the item was offered for pre-sale, the seller claimed to be the sole-distributor. But apparently that fell through as other model sellers in Aus like BNA complained. I got the feeling like they were more like the least favored child.
Anyway... I don't know of any young modellers. But I'll search around. Most aircraft modellers I know face to face seem to prefer 1/72 scale. I'm wishing there was a wanted adds for model-builders.
-
1
-
-
Way back in the earliest weeks of January 2019 I pre-ordered a kit. It never came, and soon it became apparent that other stores in Australia and around the world were selling them. There followed a flurry of e-mails where I asked for them to expedite my shipment or for a refund and they responded saying it was my fault for ordering something 'not-in-stock', or it's not their fault that the supplier (a company in Ukraine with a three-letter name) hadn't sent them one.
Five months after the pre-order was made, and two months after they had started selling at Sprue Bros and Hannants, and over a week since they were listed as in-stock at another Aussie model seller, they claimed that there was no way another retailer in Australia had the kit. So, I ordered one, and sent them a copy of the 'shipped' notification. Again, I asked for a refund and got it.
Now... on April Fool's day, I finally got the kit that I had pre-ordered over two years ago. I've had nothing to do with the supplier, as I had classified them as unworthy of my time, even putting their e-mail address on the blocked list. So, now I am looking at communicating with them again, and then going through the bother of shipping it back. Life is full of hassle... how much more do I need?
I already built the kit that I ordered from the other seller. It was fun, but I hadn't any plans to build another any time soon.
My Missus thinks it's some good will gesture and/or not to worry about it.
Waddya think?
-
1
-
-
8 hours ago, Kaireckstadt said:
Sounds very interesting Rob!
I will order both and give it a try.
Especially when seeing the results on your Ammoknight!Usually a matte coat is enough to make it look less brilliant.
-
2
-
1
-
-
Your wintergarten is looking awesome! Will there be any figures on deck?
-
3
-
-
Tres bon! Tres Bon! Love it, John!
-
5
-
-
Just now, DocRob said:
Working with lathes on metal does include a lot of learning and understanding of the different metals and their characteristics. Metallurgy is a wide field and you absolutely need the knowledge, to get decent results, guess how I know
") .
.
Cheers Rob
Well... a lathe really opens up your ability to scratchbuild. Gun barrels, masts... all of that cool stuff. I once tried to scratchbuild a Type 36A (Mob) Zerstorer in a scale somewhere between 1/48 and 1/72. Carved the barrels by hand puttied them to get rid of the woodgrain, and sanded smooth. But they just never had that machined look. Some things just can't be faked.
-
5
-
-
2 hours ago, HubertB said:
I can already give you the answer to that, Gaz, and it’s a flat « no », unfortunately.
A metal lathe requires a vey rigid chassis, torque more than speed, a strong attachment point for the cutting tool, i.e. a travelling chariot rather than a tool support like Rob’s new baby, micrometer advancement settings for the tool, a strong chuck, etc. The only way to machine metal on a wood lathe is to have a very soft metal like aluminium (and then not all aluminiums alloys) and use a file. You cannot do much this way.
You can find some new, small dimensions, metal lathes - made in China - in a price range between 500 and 1000 USD. For the price, they can be surprisingly precise ( the key criterion being concentricity tolerance). And then you can also look for second-hand ones.
The small Unimat 1 could do some small-diameter metal work, provided you changed the motor, and added stiffener plates everywhere, or changed the plastic chariots to metal ones. Not really cheaper than a dedicated small metal lathe as described above, in the end. And it still lacked the bulk and weight of a the small metal lathes you can find on the market.
On a machine that exerts cutting and tearing forces on metal, mass, that increases inertia, dampens vibrations, and is also a signal of the size of the chassis, and therefore of its rigidity, is actually a helping factor. The Chinese-made small dedicated metal lathes weigh around 50 kg and up.And, btw, conversely, do not expect to turn wood on a metal lathe. Plastic, yes, perspex yes, soft metals or steel yes, on these cheap-end metal lathes, but not wood... Ask me how I know
So that means two lathes if you want to turn wood and machine metal (the semantic difference is actually meaningful)
Hubert
PS: nice little machines, Rob. These Proxxon machines are actually fairly good, robust and precise for modelling.
Thank you for that, Hubert. I am still tempted to buy a metal one... but short on space and fearing anything that I have to buy sight-unseen that costs that much.
-
4
-
-
42 minutes ago, Kaireckstadt said:
Thanks for your feedback Gaz!
I have the 1 and 2 mm Molotows which I mainly use for oleos of undercarriage legs. Good idea from your side.
I have tried them also for the pipes but to my personal gusto it’s too bright.
The original pipes in the plane are made of steel and are exposed to the elements and tear and wear. Therefore they appear to have a more matte appearance. See example in the attached foto.
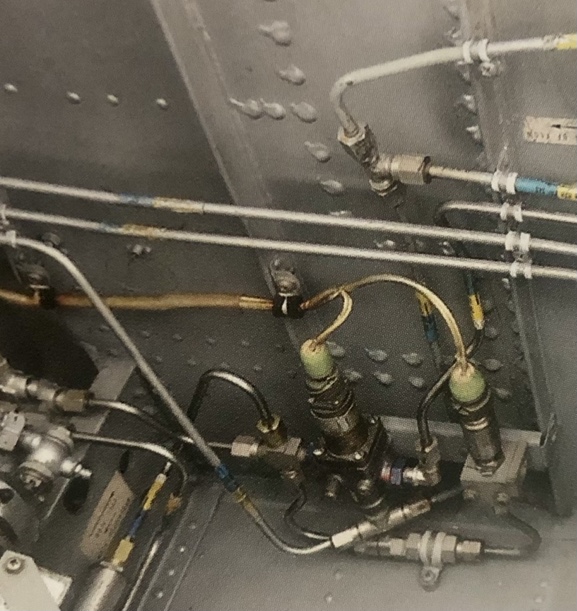
A clear coat will tone them down, and still leave you with a slight lustre. I just find too many metallic paints turning to gray once everything is done.
-
3
-
1
-
-
Kai,
Those wheel wells look quite nice. Tell me... have you ever considered the Molotow chrome pen to highlight those hydraulic lines? Most metal paints just don't look too great painted on small parts. I really like my pen. I find it's a nice piece of gear.
-
3
-
-
2 hours ago, Peterpools said:
Gaz
What a change from the cameo scheme and I tend to like the white finish - looks so good
Keep ‘em comin
Peter
Thank you, Peter!
-
2
-
-
2 hours ago, Peterpools said:
Gaz
The FW 190 looks great and I can feel your pain with the end of the line fit issues.
Looking forward to following your next build with great interestKeep ‘em comin
Peter
Thank you, Peter! Always glad to have you around.
-
3
-
-
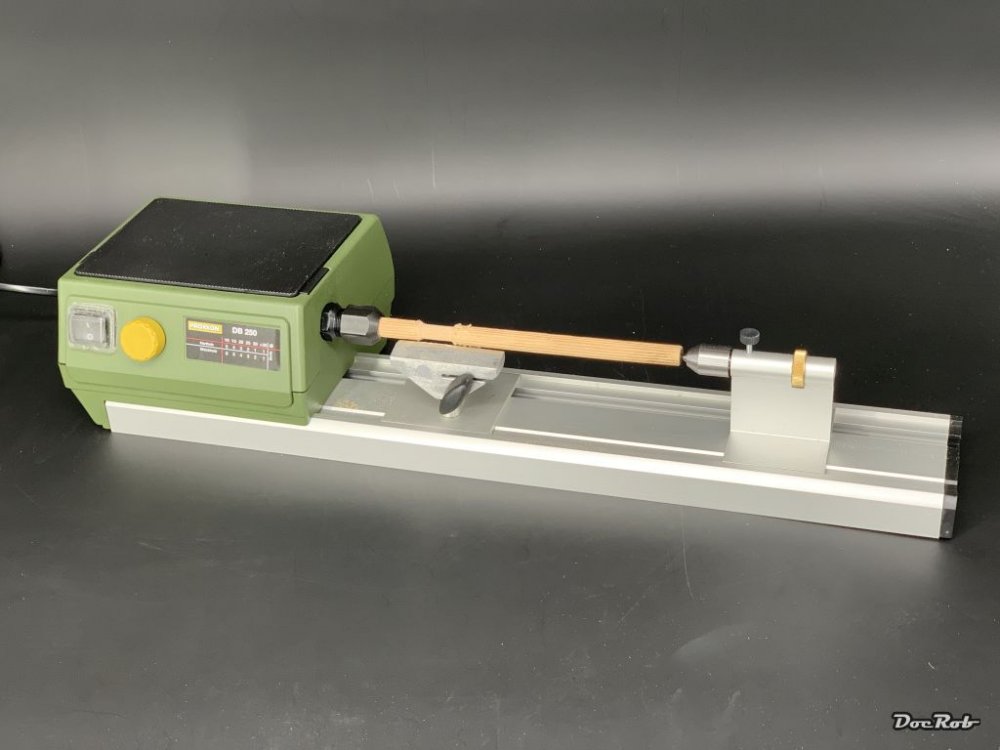
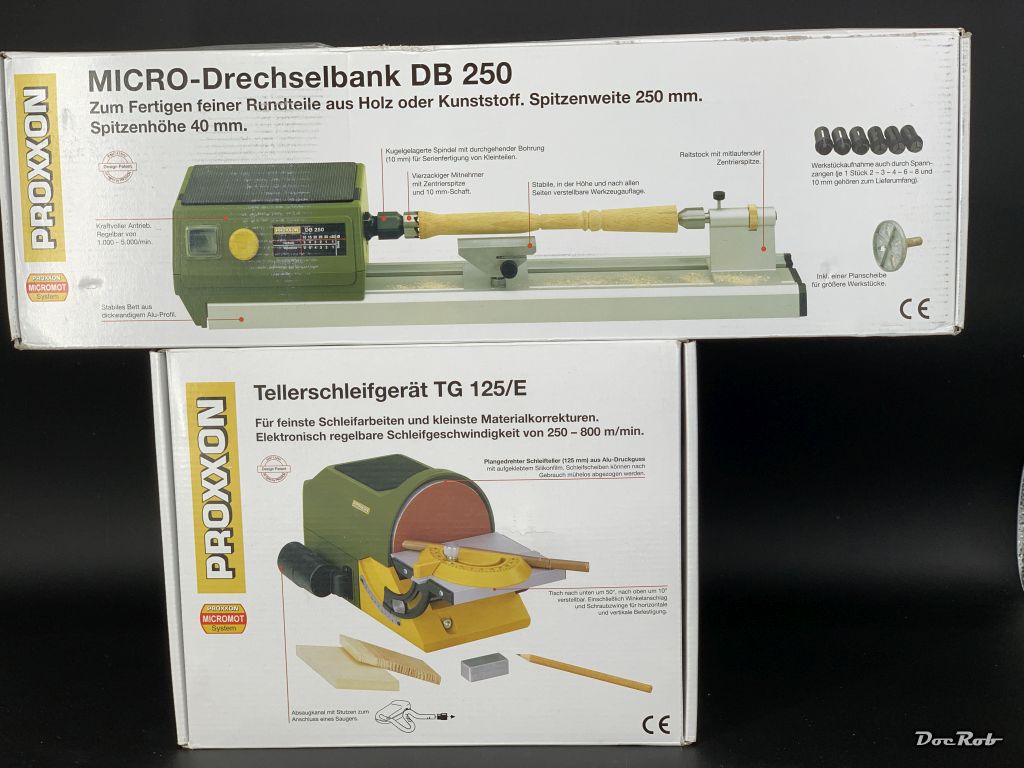
9 hours ago, DocRob said:
What is better than tools, right guys, machiiines. Today, I received my Proxxon Lathe and disc sander, which will be very helpful for my wooden ship projects.
The sander is equipped with adhesive sanding discs, which are easy to interchange. the adjustable table and the tiny gap, will make it ideal for sanding planks and other small parts and the best, it's relatively quiet.
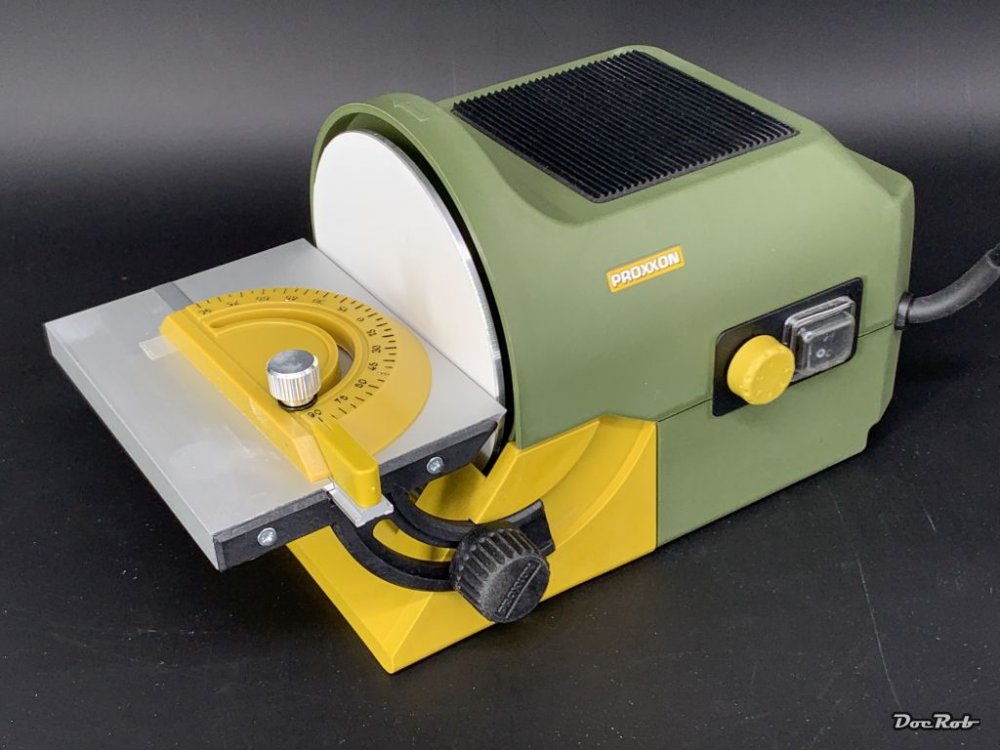
The lathe will be helpful shaping the masts with different diameters and sanding the yards conical.
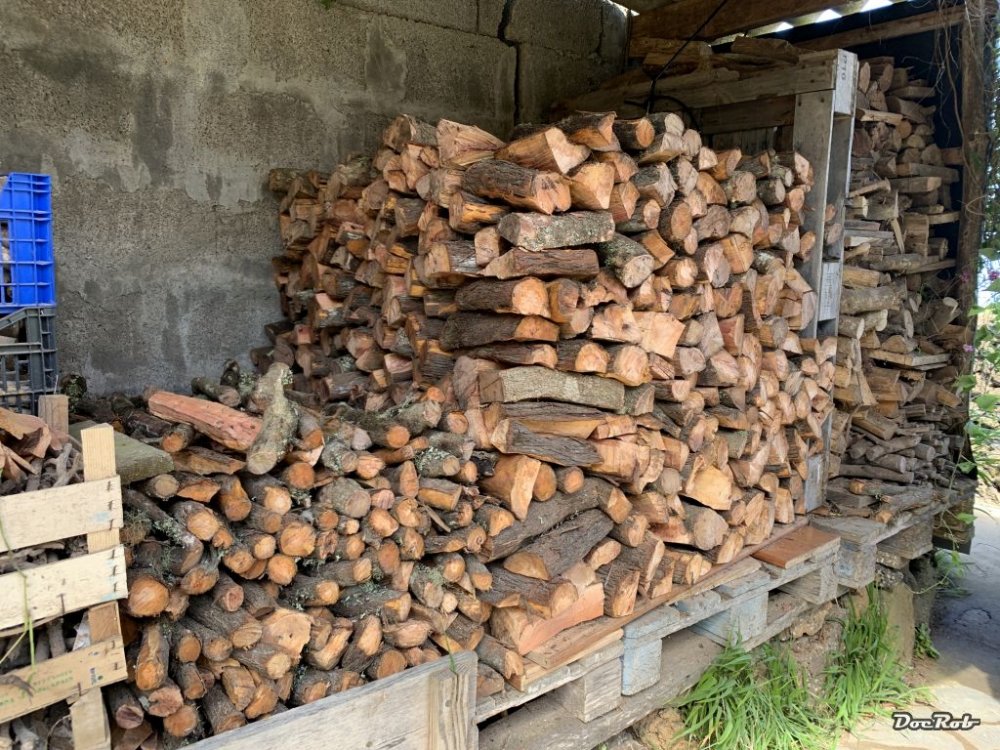
To add to the woodworking experience, I recieved almost two tons of firewood today. Finest Brezo and Haya wood, which are different types of beechwood. My back can tell you something about the two tons
 .
.
Cheers Rob

Oh, you must tell me about your lathe! Is it usable for metal parts? I've been tempted to get a lathe for ages.
-
3
-
-
Keep up the goodwork! Painting looks great!
-
3
-
-
Heh... You guys posting all of those great new models... almost makes me ashamed of my little book.

Had a leaf through it. Some great info and great profiles. The coolest fact I got from the first page I read was that to claim a kill, the pilot had to submit his info on a standard form as well as a sketch of his aircraft and the colors of the aircraft. Most of the records were lost in the final days of WWII when the archive was bombed. Otherwise we'd know what every claiming pilot's aircraft looked like.
I ordered it from Amazon on March 18. From Kentucky to my door in Australia in 11 days.
-
11
-
-
-
Awesome job, John! Quite an attractive finish thus far.
-
3
-


Tamiya 1/12 Porsche 934
in LSM 1/35 and Larger Work In Progress
Posted
Although the rust effects are cool... My Porsche loving eyes want to weep!