GazzaS
-
Posts
6,396 -
Joined
-
Last visited
Content Type
Profiles
Forums
Events
Gallery
Everything posted by GazzaS
-

Clear the Bench! It's Kotare Spitfire time!
GazzaS replied to GazzaS's topic in LSM 1/35 and Larger Work In Progress
Thank you, Peter. I actually was wondering how everything would have looked had you done it. Those Quinta sets look nice... But I won't buy anything from Russia. -
Clear the Bench! It's Kotare Spitfire time!
GazzaS replied to GazzaS's topic in LSM 1/35 and Larger Work In Progress
It's really a great kit so far and the color call outs are very useful. All I've used to paint the details is the color call outs... since every spitfire pit I looked at on the web is for later models. -
Clear the Bench! It's Kotare Spitfire time!
GazzaS replied to GazzaS's topic in LSM 1/35 and Larger Work In Progress
Thanks Guy. I there are ejector pin marks. But all very cleverly placed. I haven't sanded one, yet. The IP decals are sometimes in small groups, and sometimes 1 X 1. There are about 4 that just cover the surface of a small knob. Two of which I lost. -
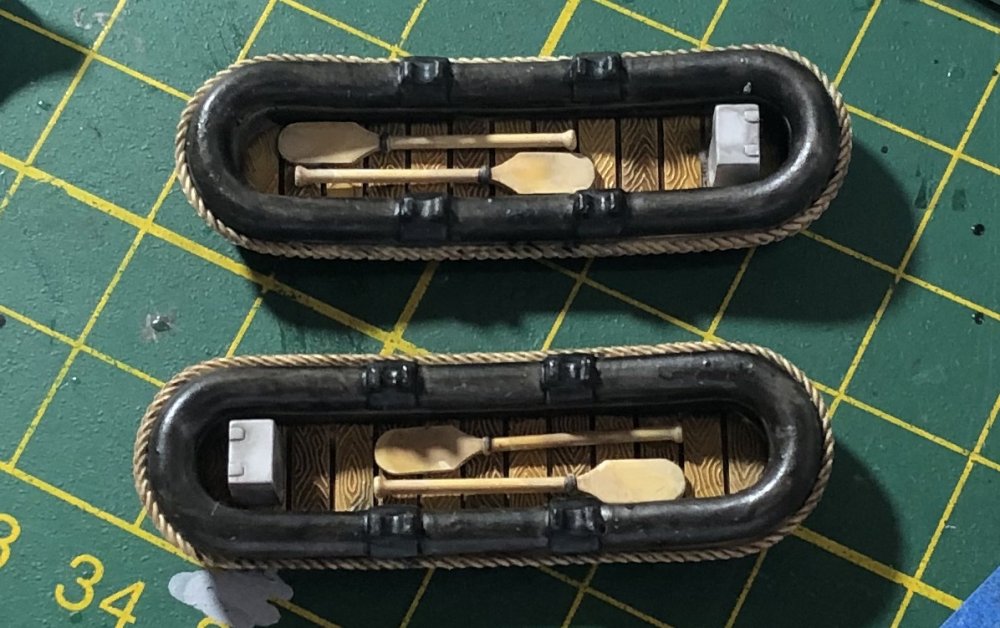
Hi Rob, My painting isn't affected so much... but my clear coats sometimes fog when it's disgustingly humid. The rafts themselves are pretty oddly shaped. Kind of deep and rectangular in cross section. Just another of those details I didn't want to redo.
-
February and March are our worst months for in my corner of Oz. Humidity... which adversely affects clear coats is very high. And all that is left on the boat is clear coats, transparent parts, rigging, and final assembly... then, I can work on the water base. All I've managed in the last few days are these two inflated rubber rafts. I don;t know why Airfix put oarlocks on them. And I was just too lazy to take them off, once i realized they shouldn't be there.
-
Clear the Bench! It's Kotare Spitfire time!
GazzaS replied to GazzaS's topic in LSM 1/35 and Larger Work In Progress
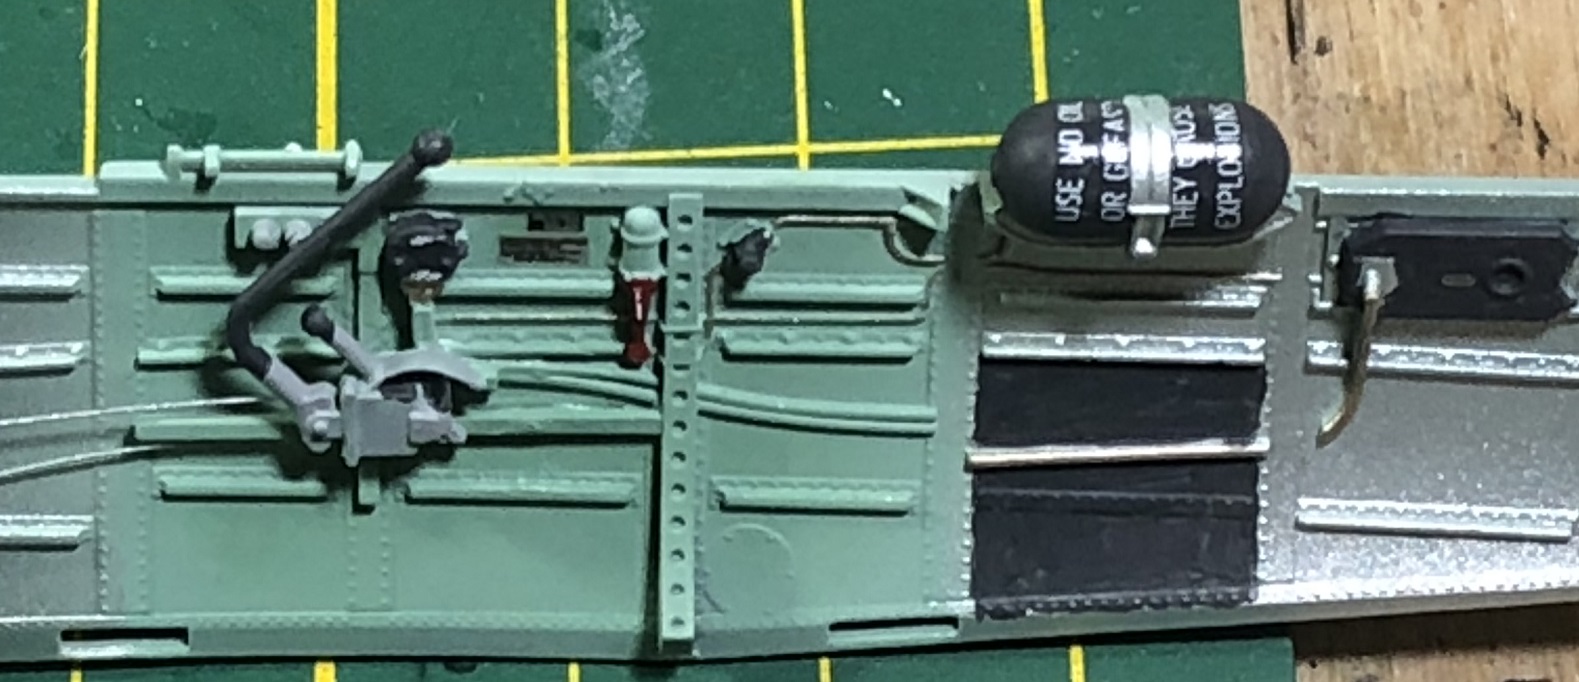
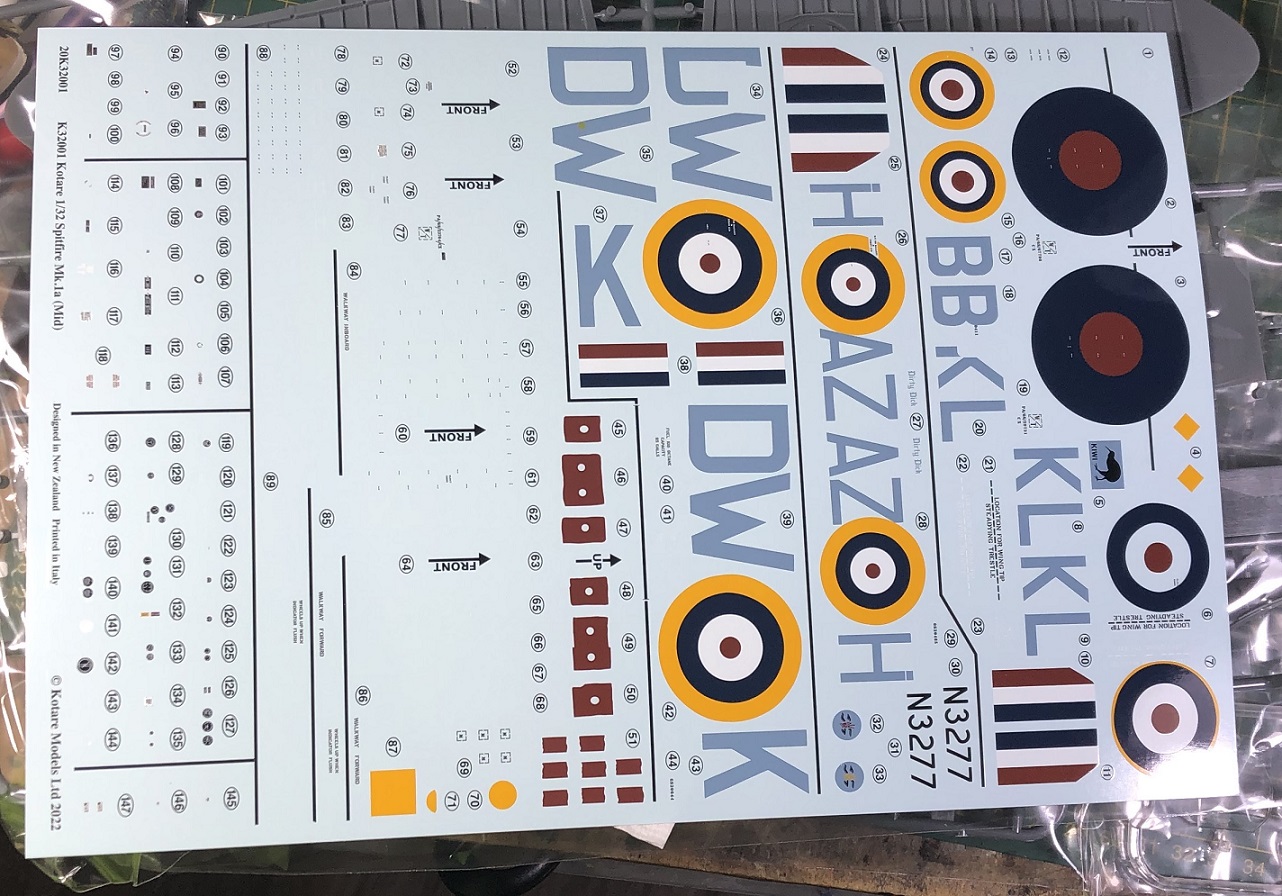
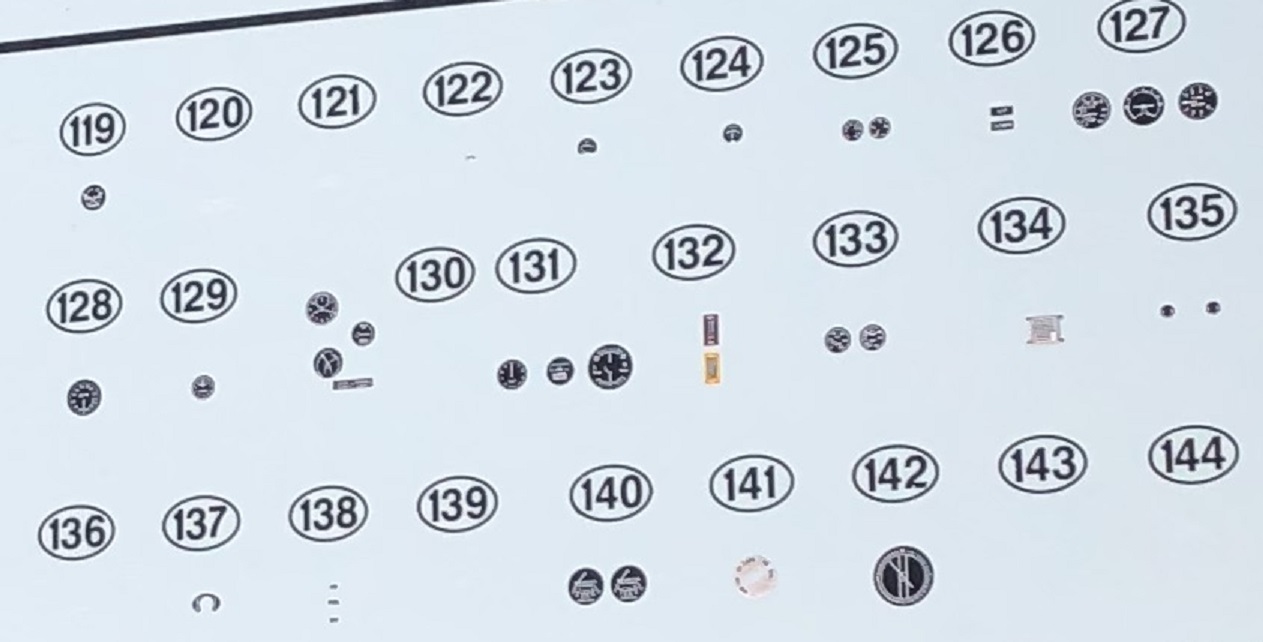
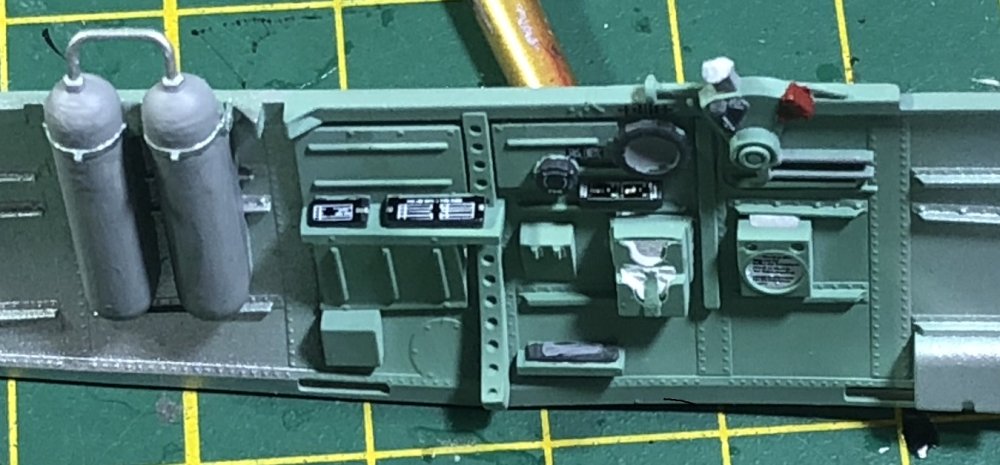
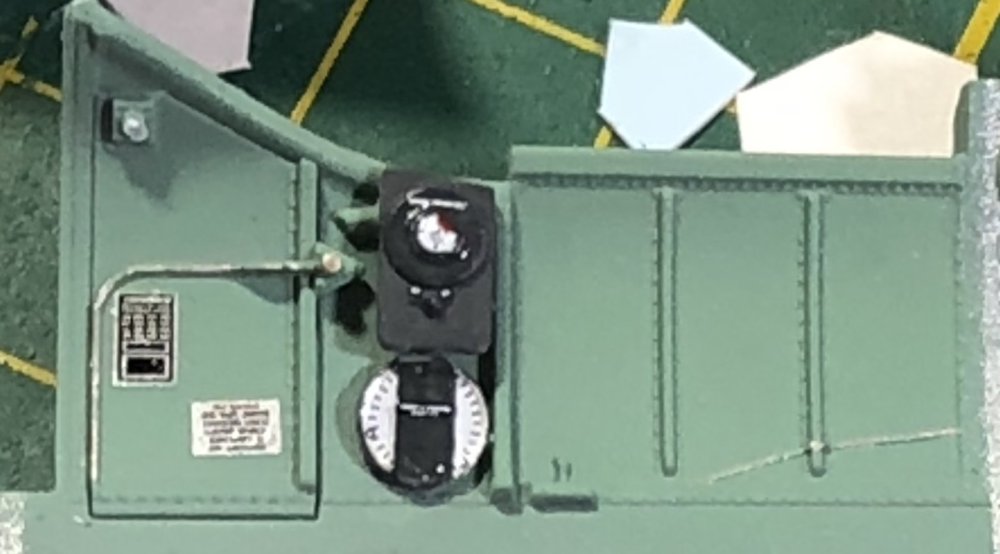
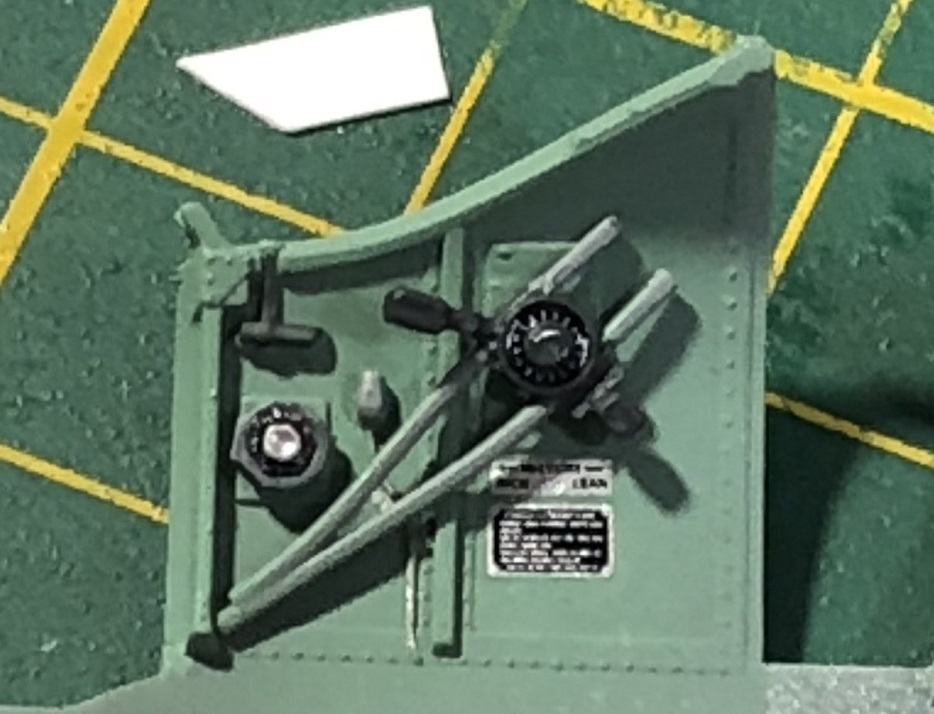
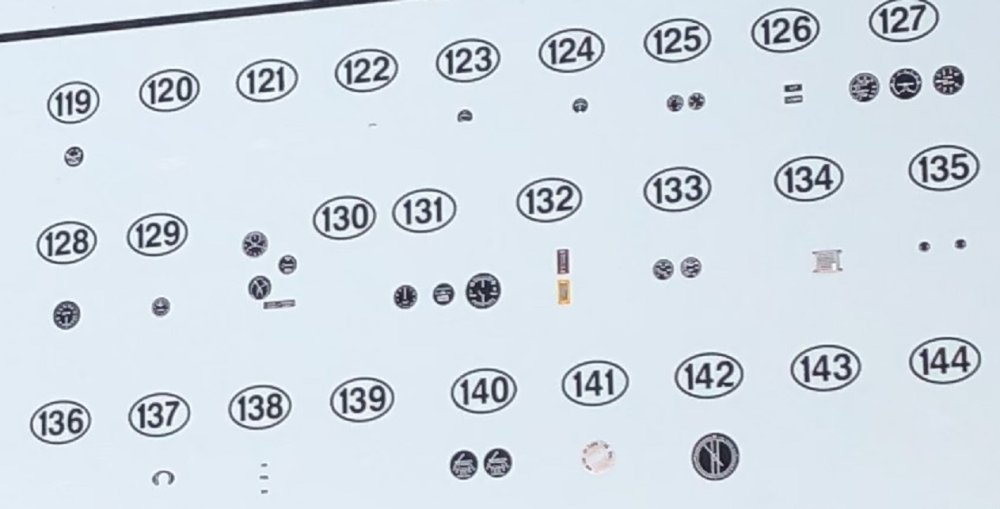
G'day! The would-be Kotare Spitfire builder will have to place 49 decals into the cockpit before they can weather it. The decals are wonderfully thin and perfectly in register. They also lay in very well and conform to surfaces easily... unlike Tamiya or Hasegawa's. Some are very tiny though, so my hat's off to anyone who can avoid losing any. I lost two, both of which were the size of an average comma. I found a tiny mistake in the directions. It involves the placement of the large compass decal 142. They accidentally tell you to put 141 in that location. Fortunately, I had already placed 141 in the correct position. These pictures aren't very good. But I wanted to show the decals before I weather the pit.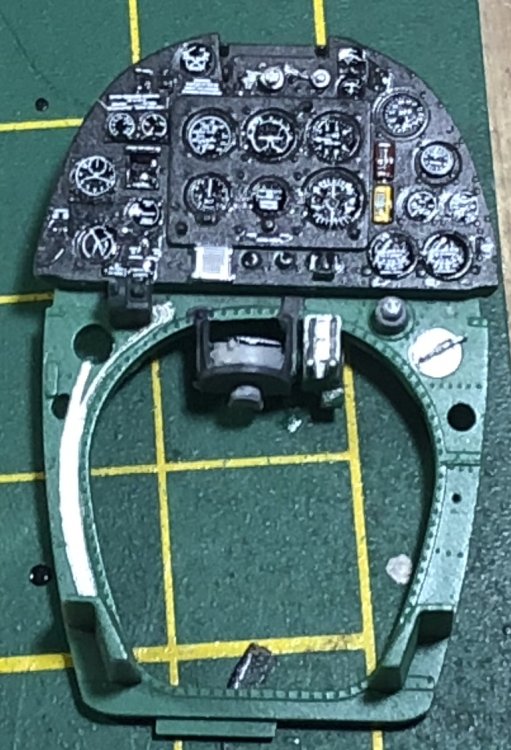

- 104 replies
-
- 13
-

-

-
Revell 1/32 Spitfire Mk IIa
GazzaS replied to Peterpools's topic in LSM 1/35 and Larger Work In Progress
Looks brilliant, Peter! -
1/48 Revell MDD FG1 Phantom 892 Sdn FAA 1972 RFI
GazzaS replied to PanzerWomble's topic in Archived GB's Sub Forum
Brilliant job, Guy! Really love how this one turned out.- 13 replies
-
- 3
-
-
- phantom fg1
- revell
- (and 2 more)
-
Oh, nice! You must build it next.
-
Revell 1/32 Spitfire Mk IIa
GazzaS replied to Peterpools's topic in LSM 1/35 and Larger Work In Progress
Hey Peter, Are you using an AM tailwheel and gear? The Kotare wheel and gear is a one-piece deal and I may upgrade it if I can find the parts. Nothing at BNA I'm afraid. -
Clear the Bench! It's Kotare Spitfire time!
GazzaS replied to GazzaS's topic in LSM 1/35 and Larger Work In Progress
I'm glad for those positive comments... i just don't know enough about the bird, yet. -
Clear the Bench! It's Kotare Spitfire time!
GazzaS replied to GazzaS's topic in LSM 1/35 and Larger Work In Progress
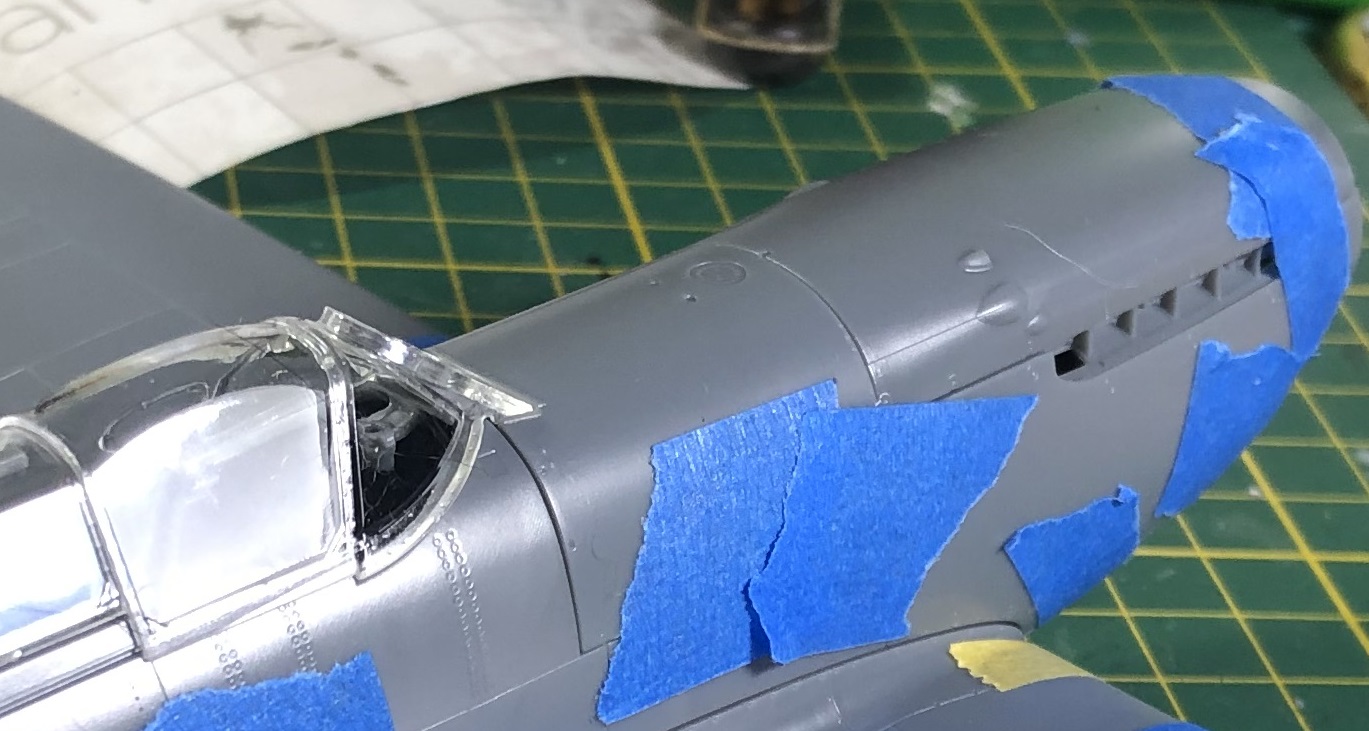
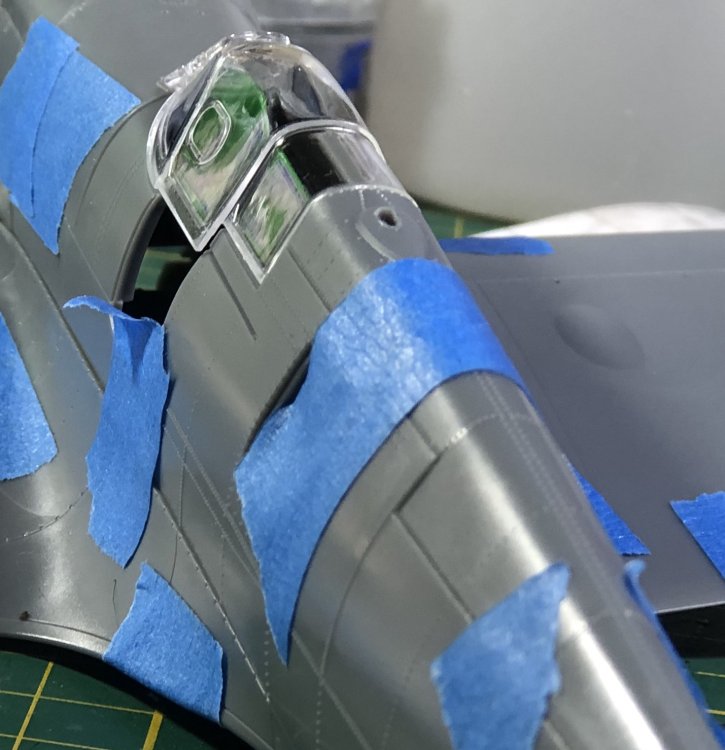
I haven't removed the open canopy from the sprue yet. I wanted to save that for later so I didn't have those parts floating around. Gonna start playing with the interior bits tomorrow... there is some rigging to do inside. -
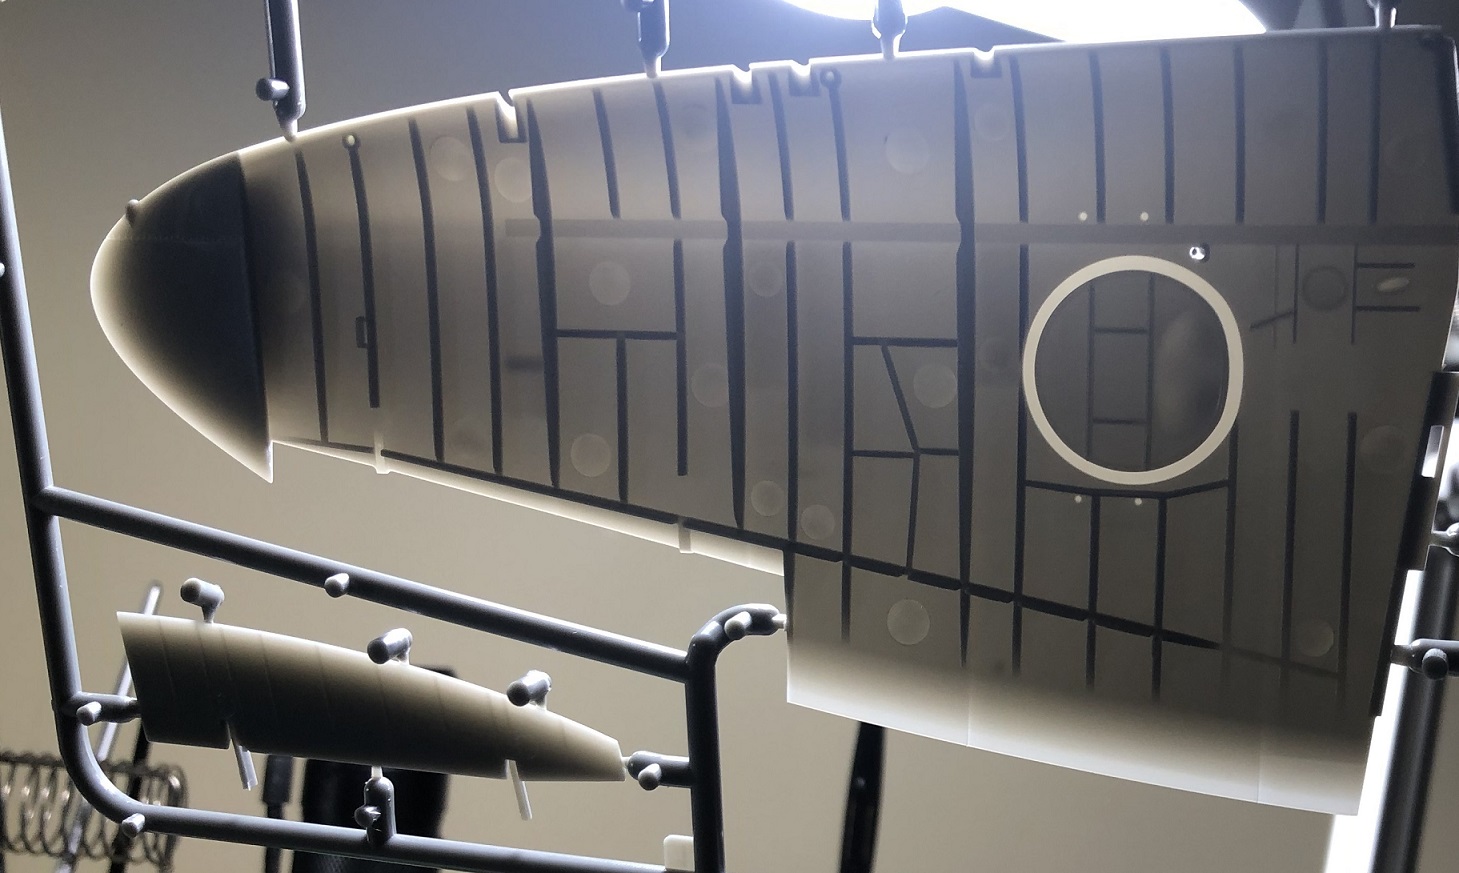
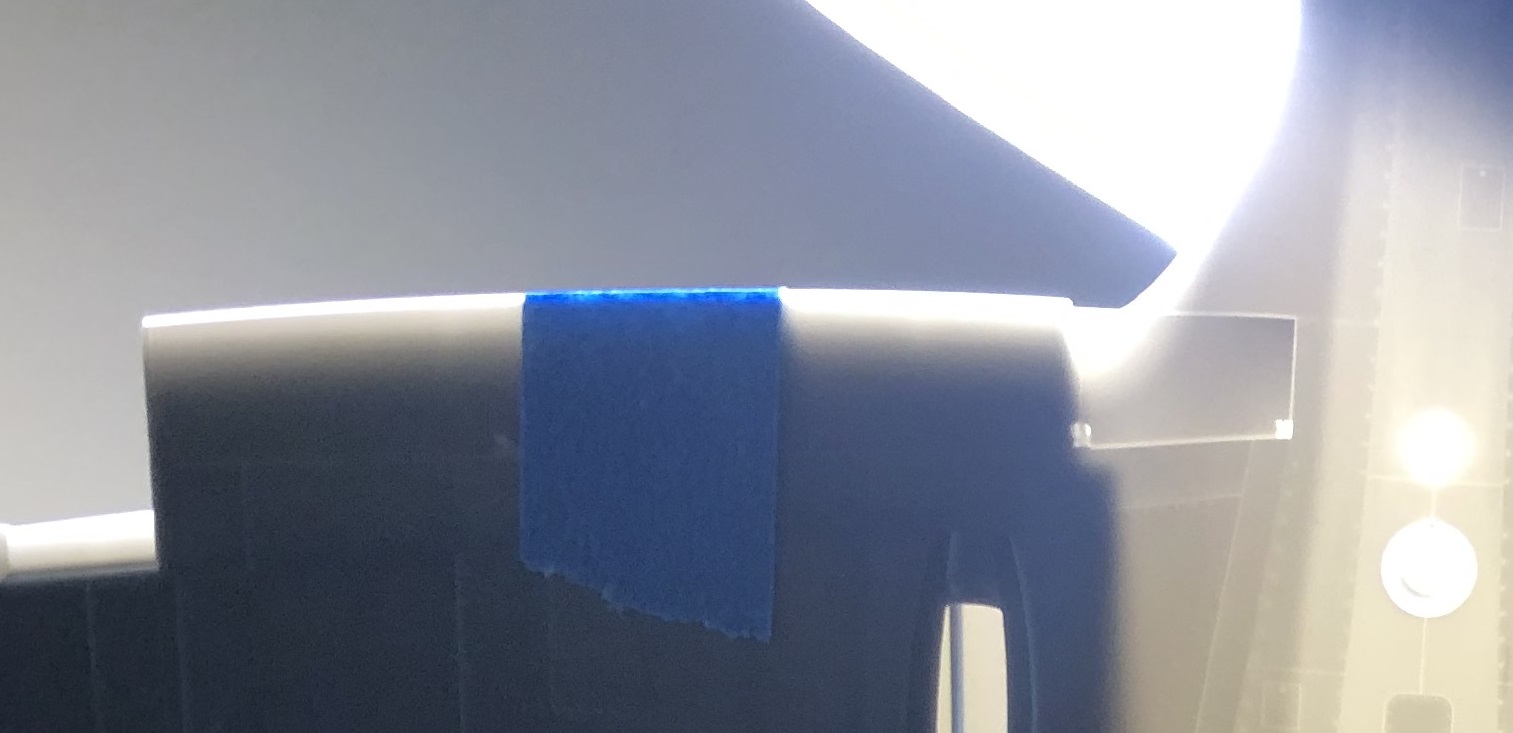
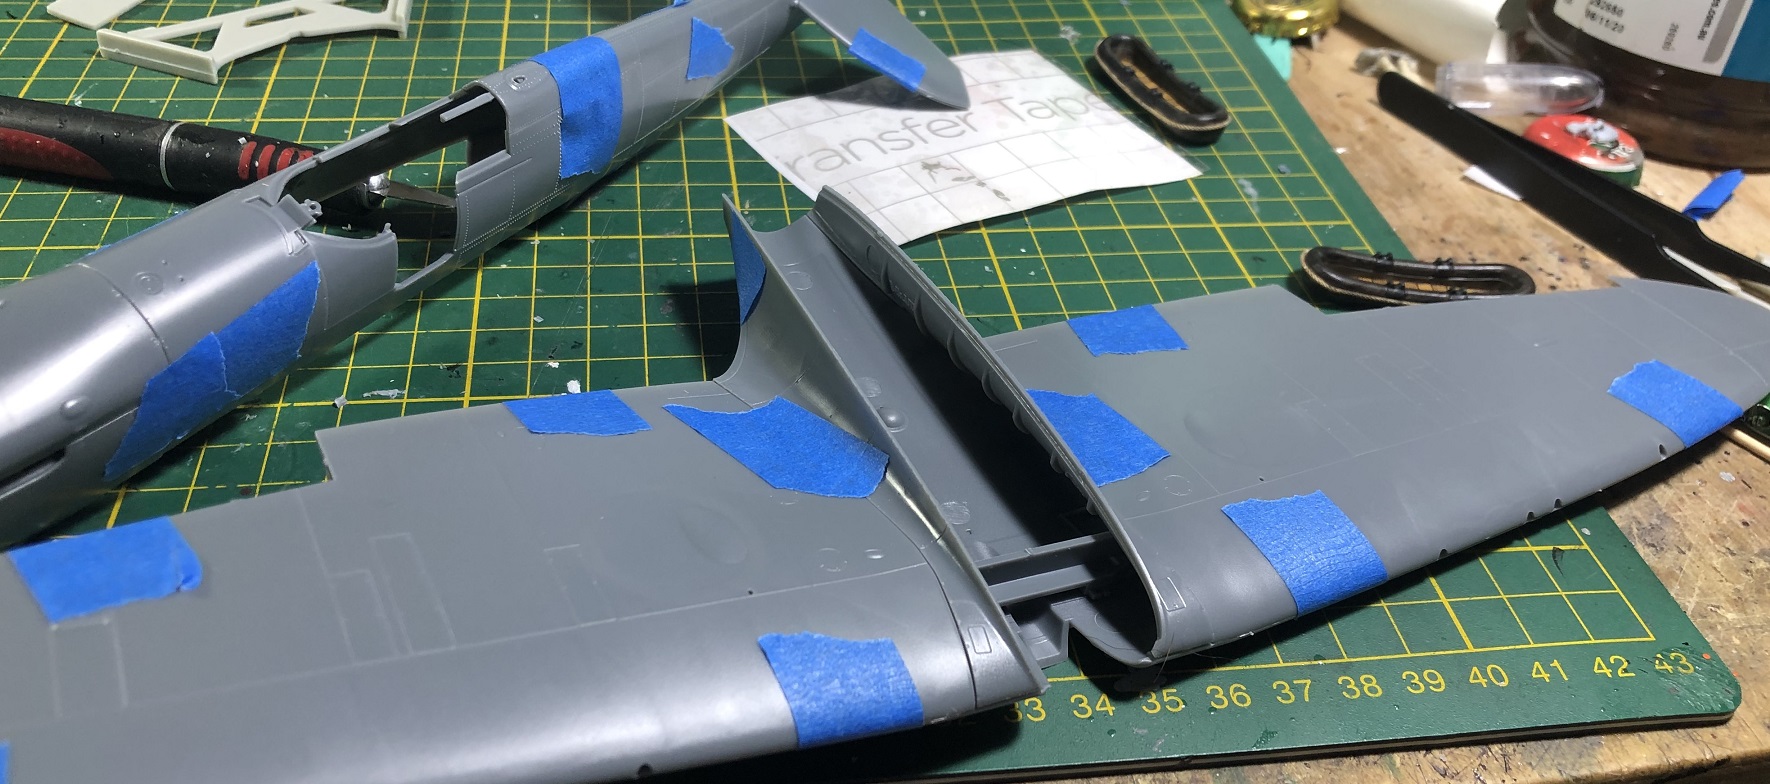
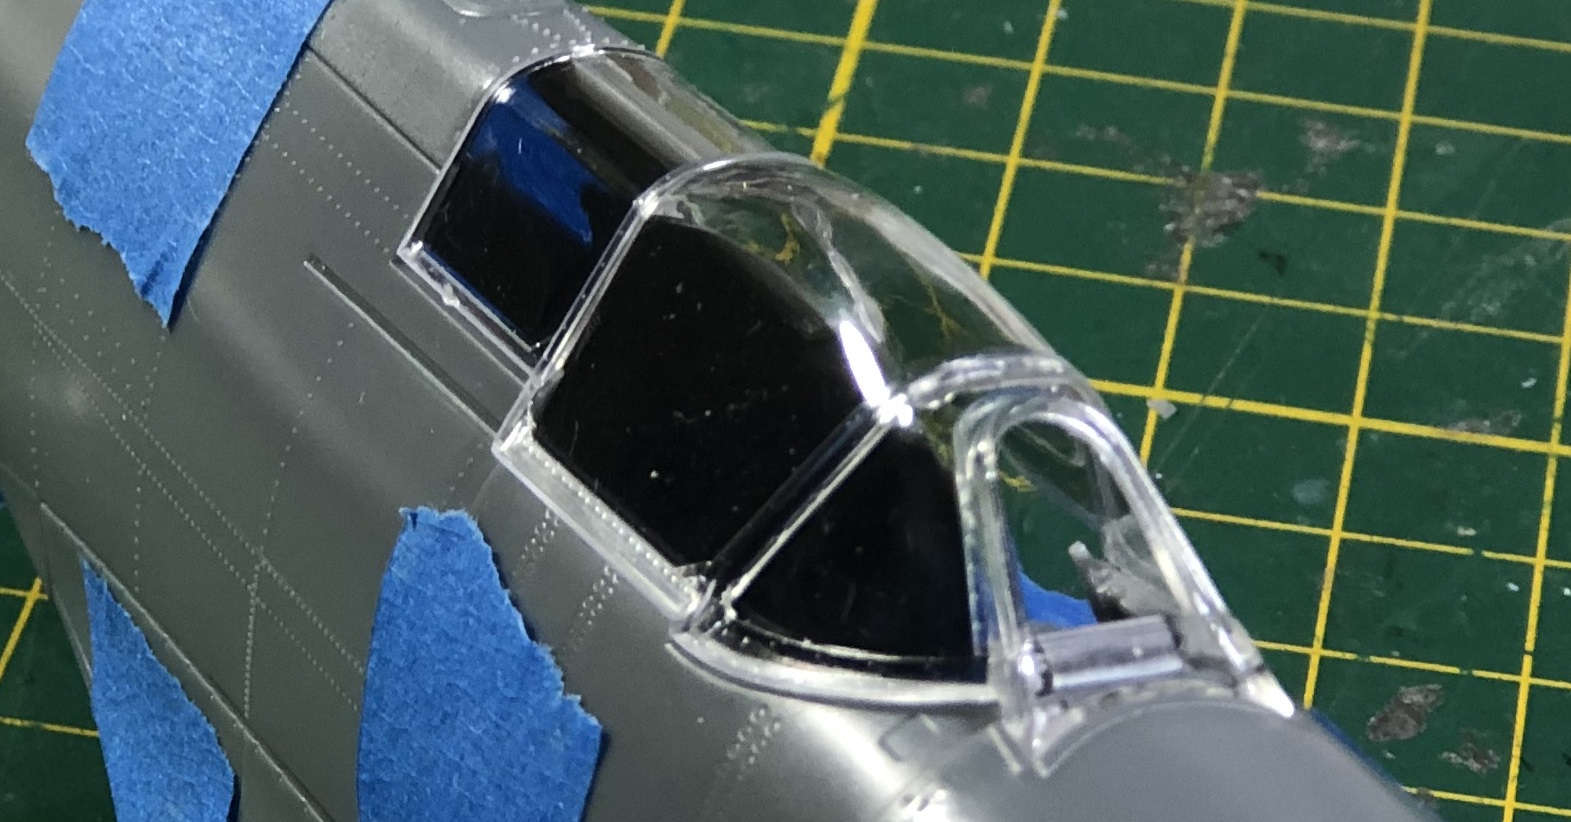
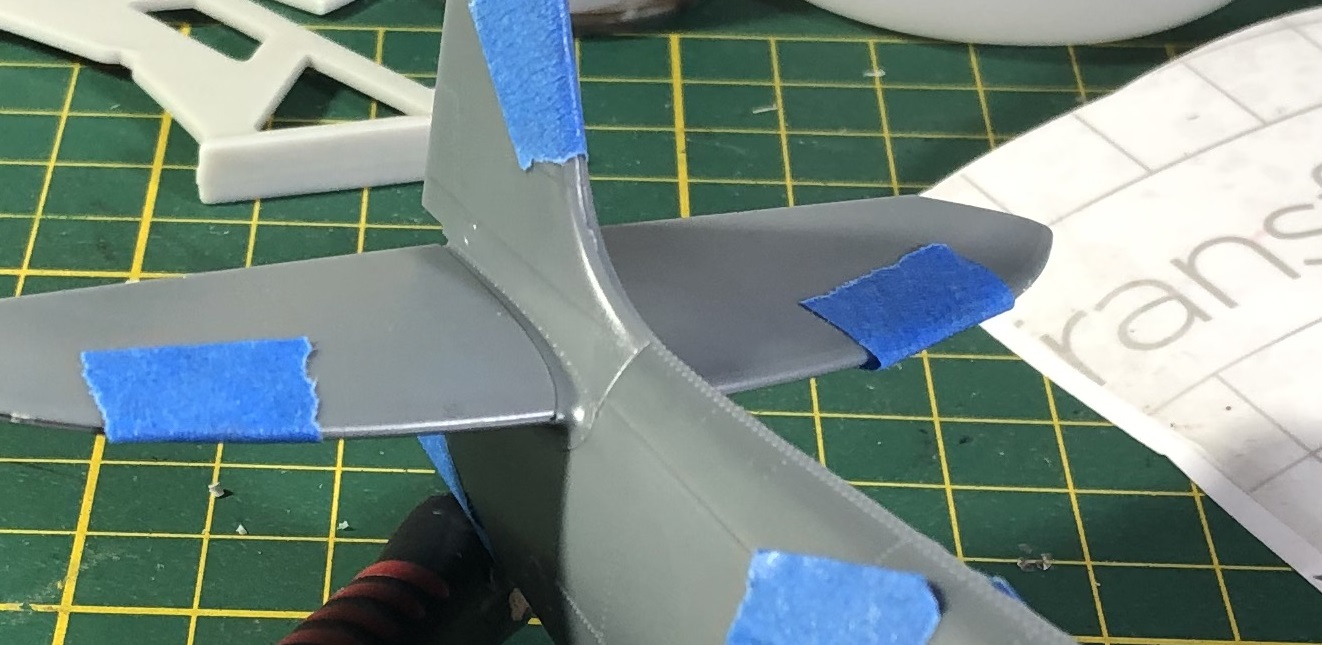
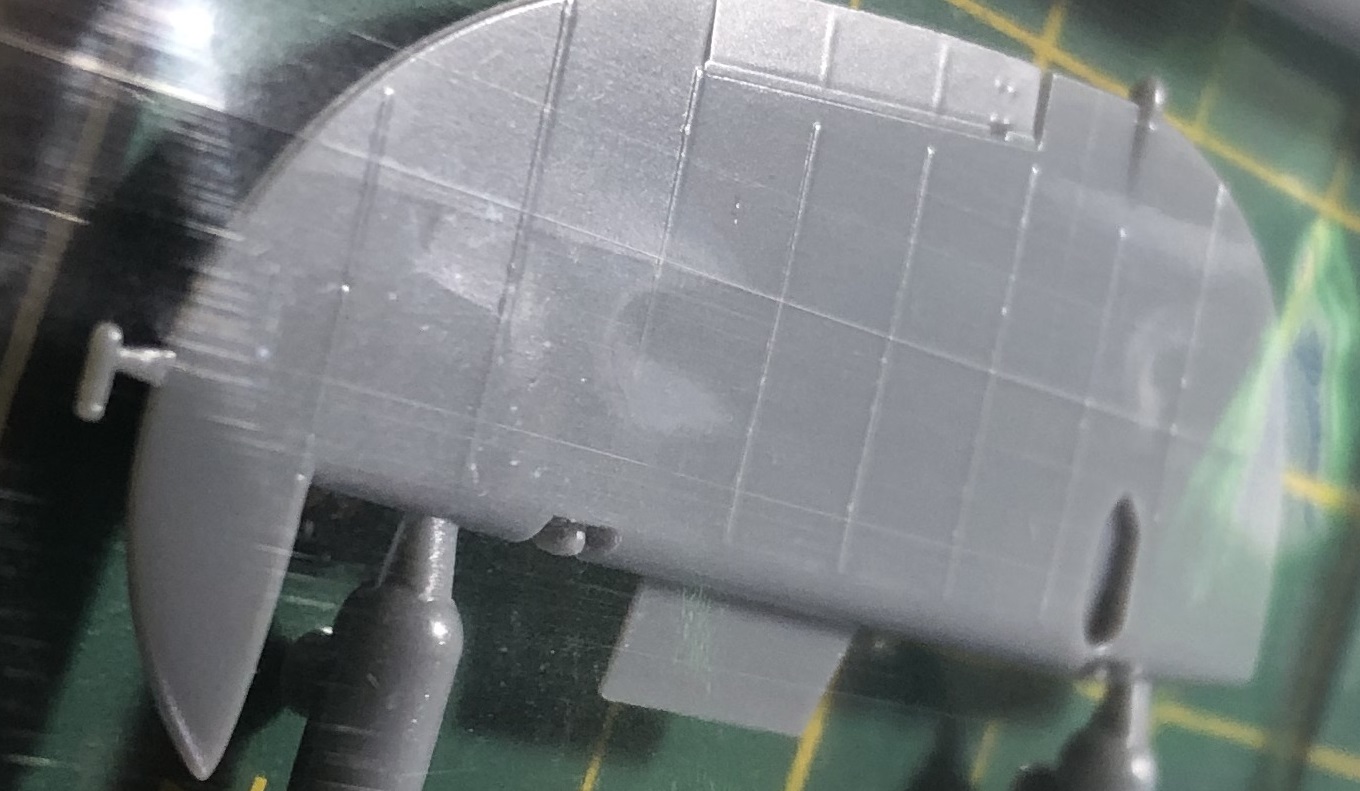
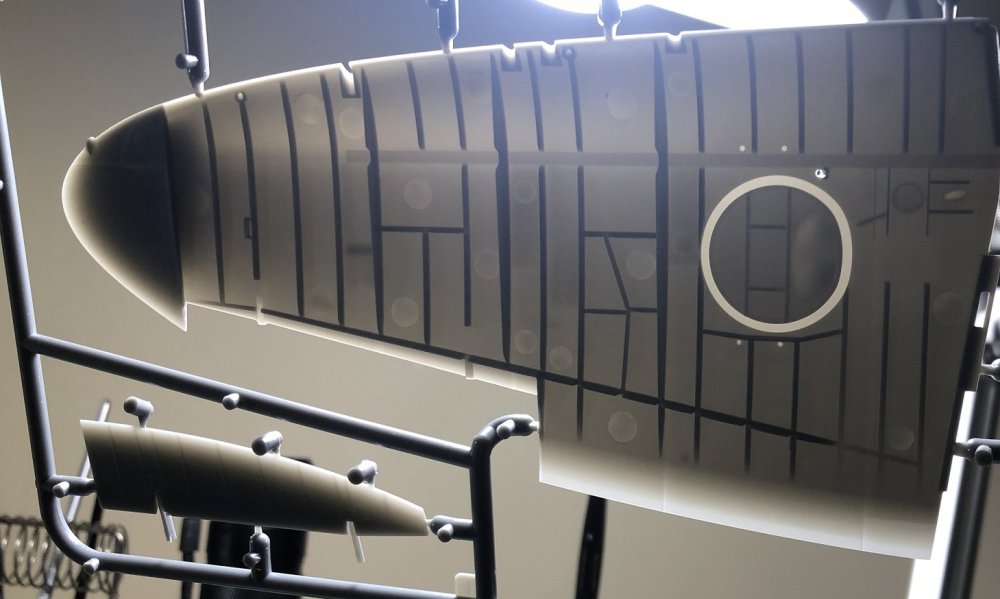
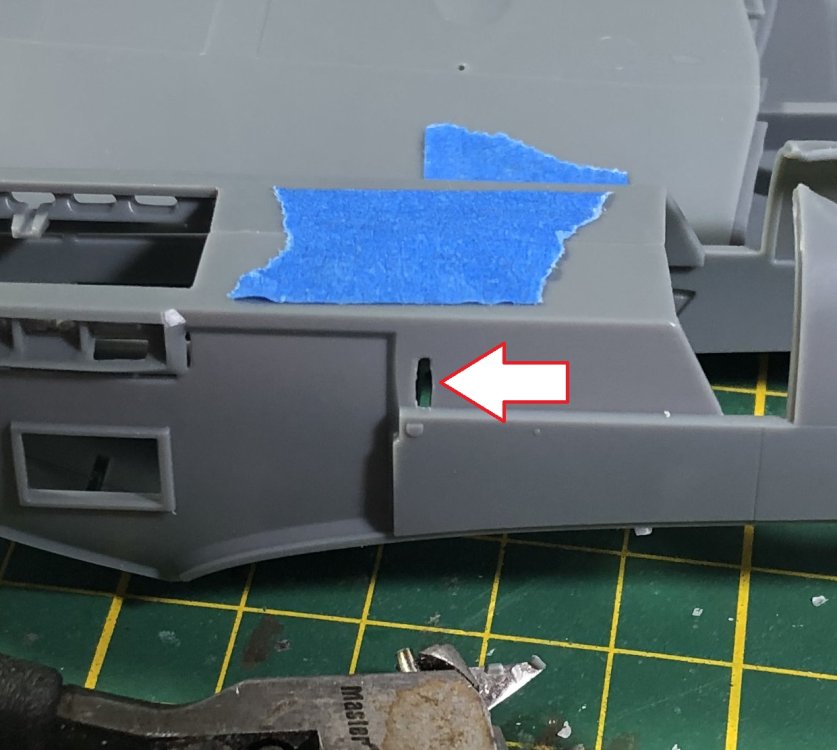
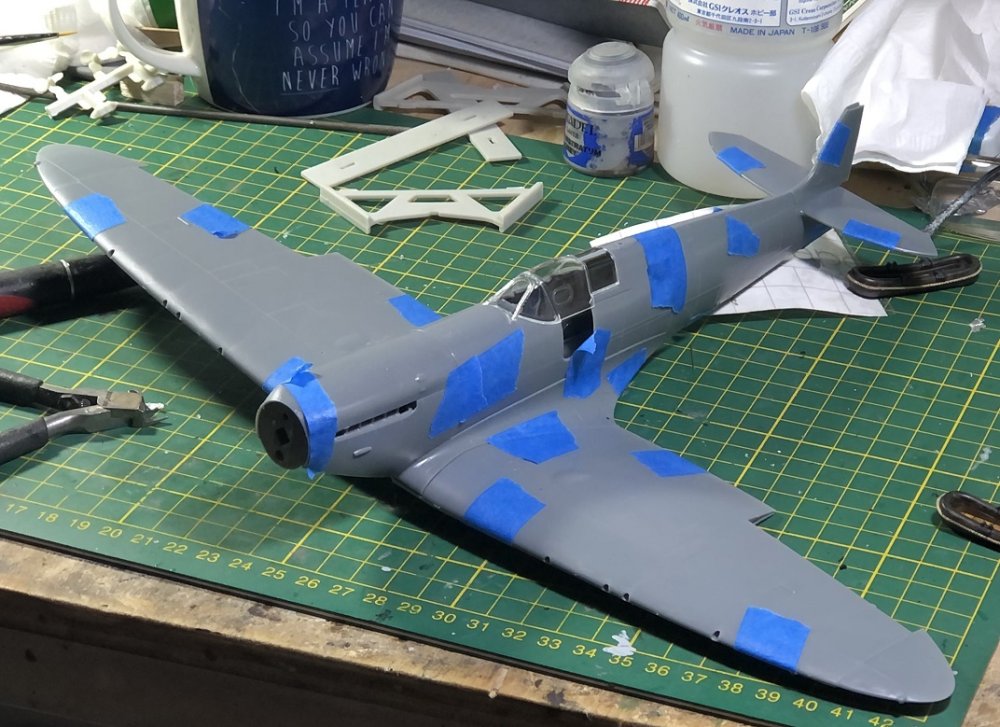
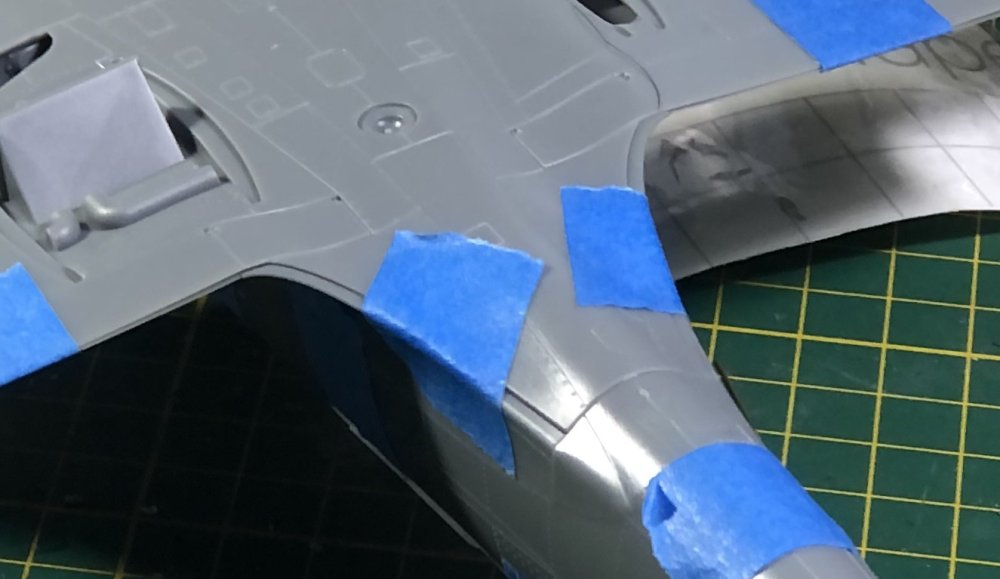
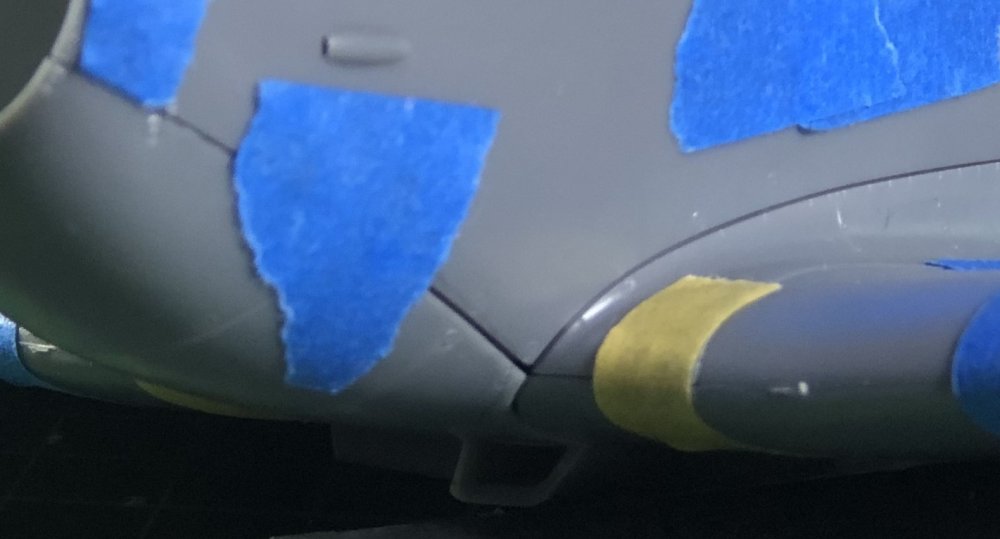
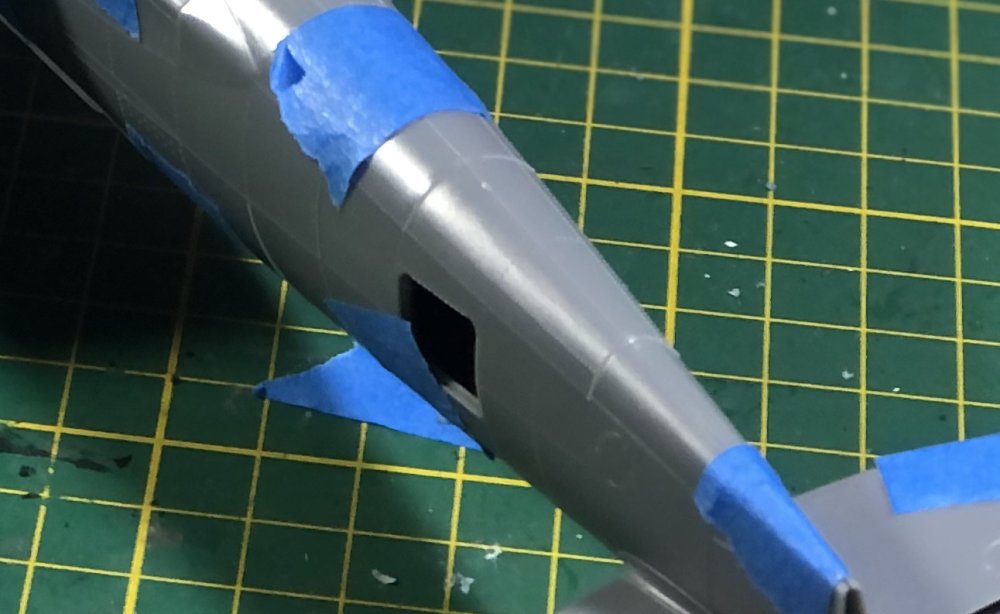
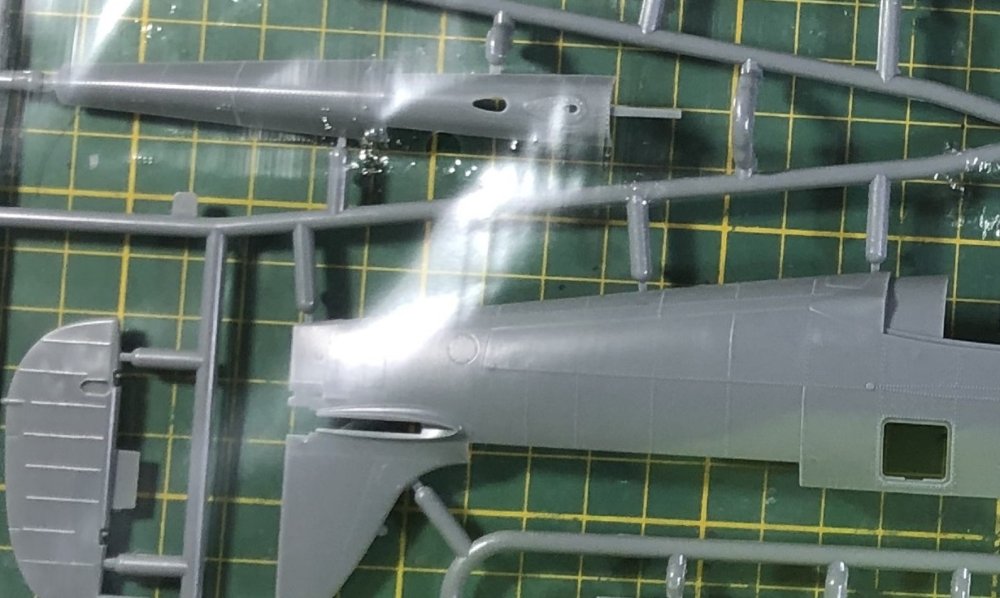
Hi guys, This is my first Spitfire since the monogram kit I built in 1978 or 79. So be patient... I'll try not to paint the cockpit in RLM 66. Anyway... enough with my bio and habits... Let's dry fit. You'll notice how the light passes through the plastic. The trailing edges are rapier thin. Even with the wing taped together, light passes through. But the flaps are molded 'up' for you. The fuel tank cover was a little reticent to fit... this is the only trimming I did to get stuff to fit. I widened the hole by the arrow with a hobby blade. The wing fillets have to be attached to the wing to attach the fuselage... otherwise, the contact area is very tiny. Somebody will wonder about this area... This looks really 'stepped' at the moment. Tape just can't do what Tamiya extra thin can. The closed canopy is friction fitted... The wing roots are a joy to behold... Likewise the fit of the tailplane. The aft fuselage has a lot of surface detail... Anyway... that's it for now. Pretty awesome, eh?


- 104 replies
-
- 15
-
-
-
I got no notice. It was just sitting outside my door.
-
Looks excellent, Mike. Shame to close it all up.
-
F-15A Improved Baz 1/32 Tamiya
GazzaS replied to Pete Fleischmann's topic in LSM 1/35 and Larger Work In Progress
Wow! Amazing! -
haha... how bout I do a big dry fit of the spar and all external components? Will that suit? I'd hate to let all of Edgar Brooks work go to waste.
-
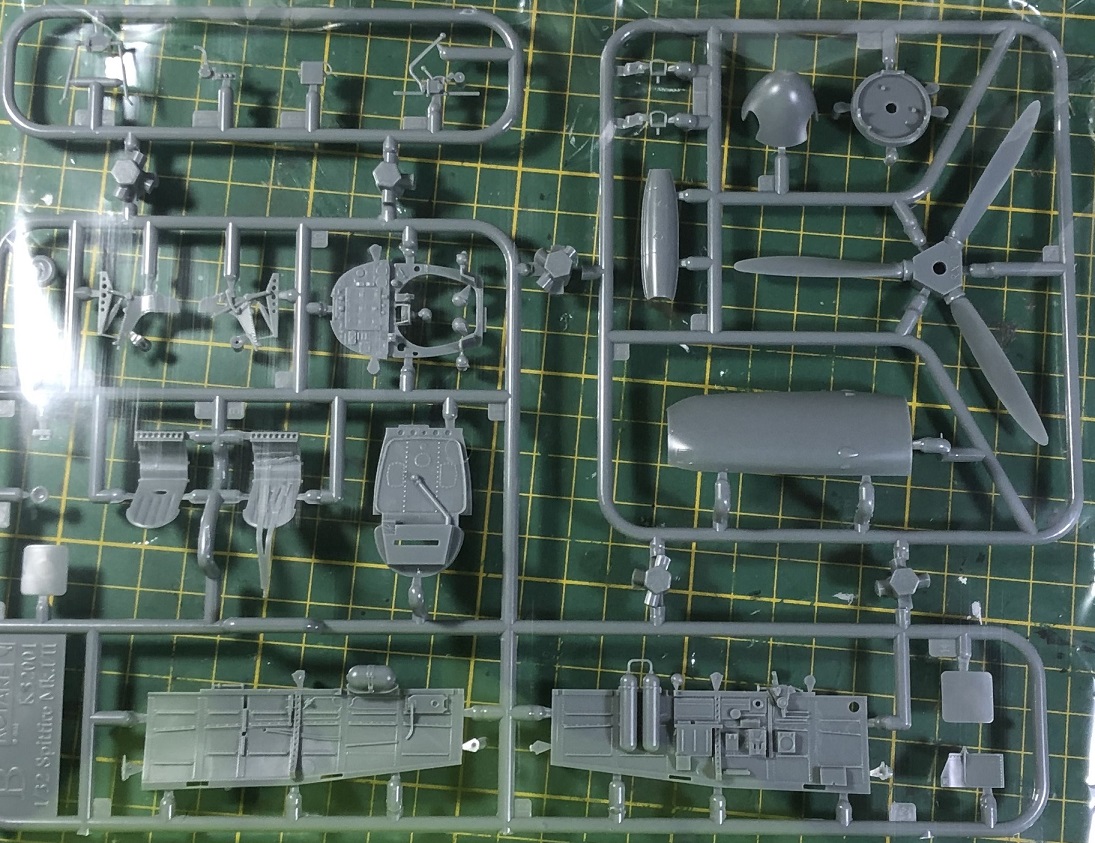
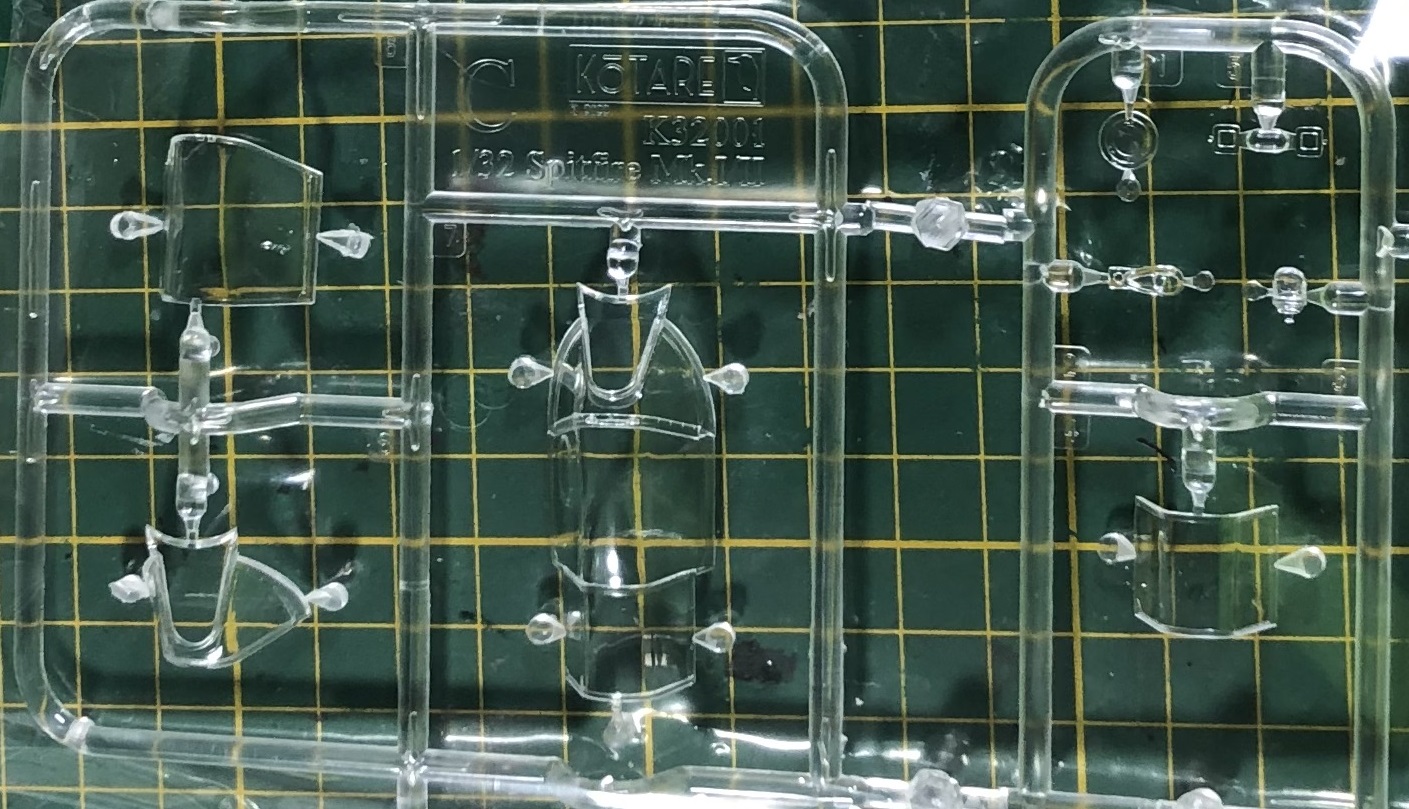
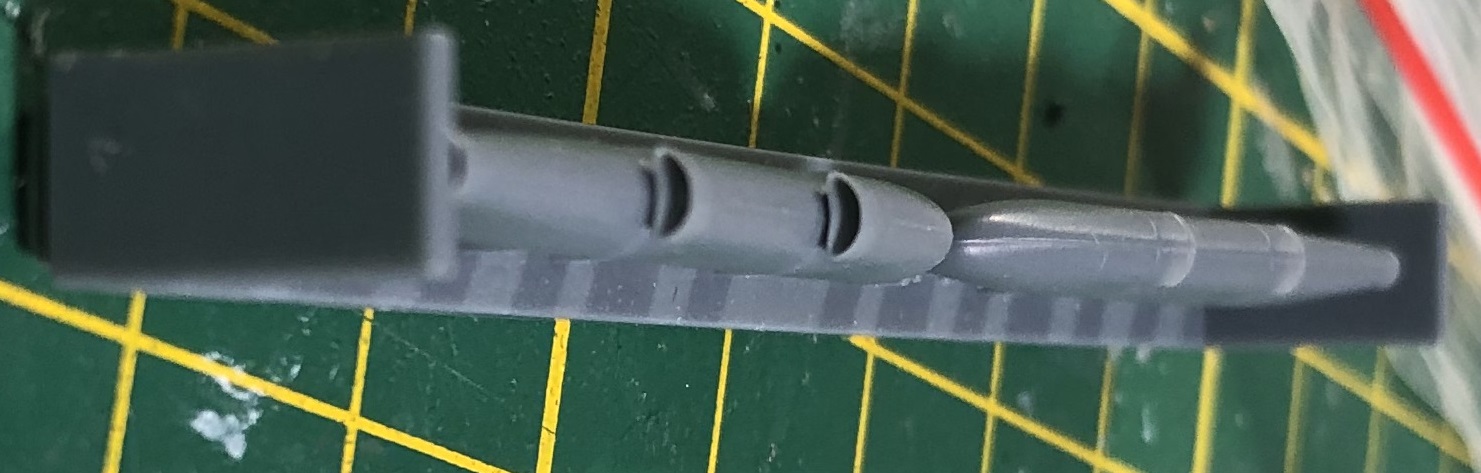
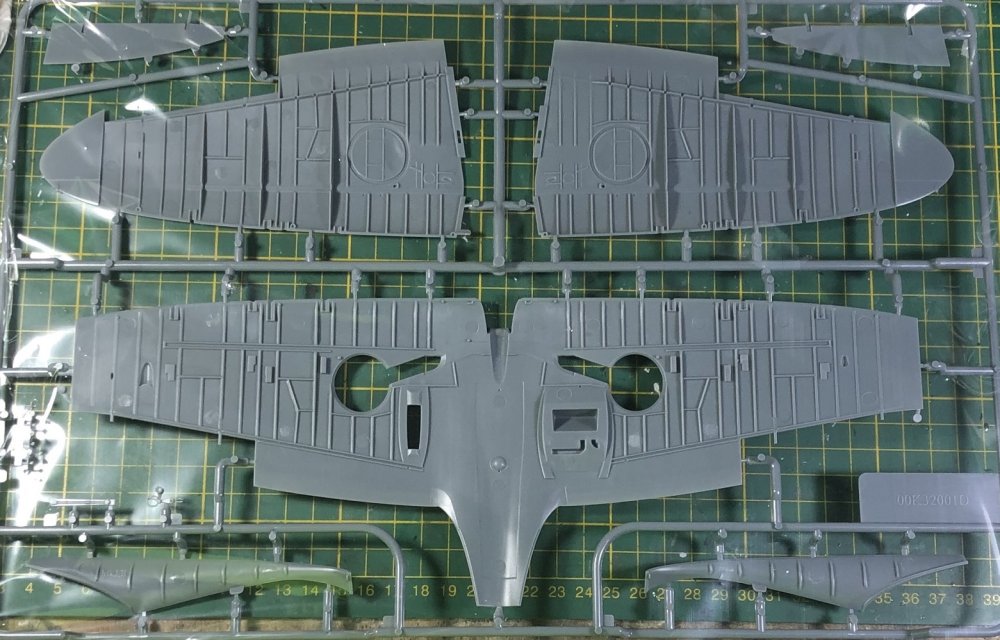
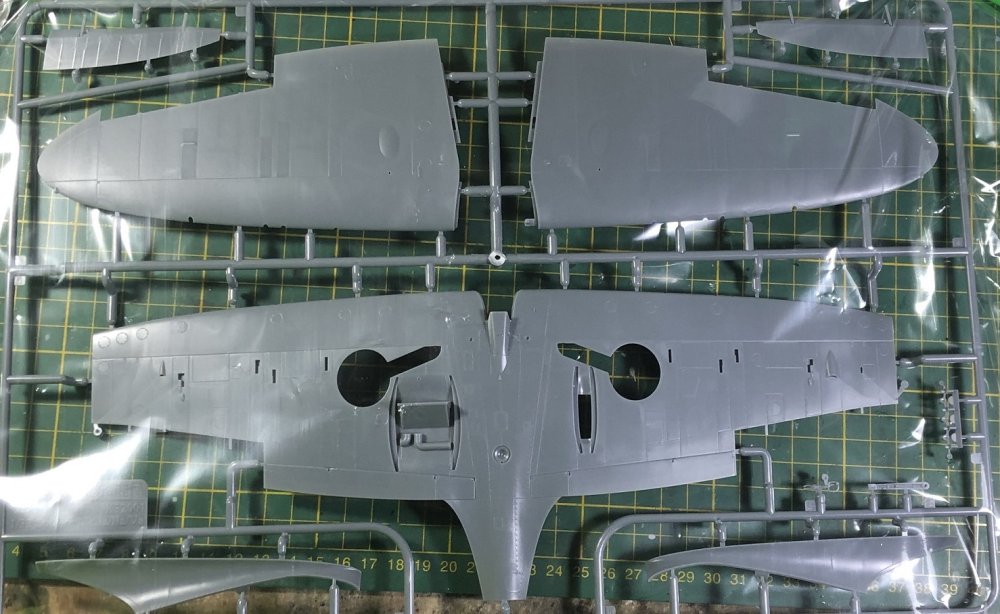
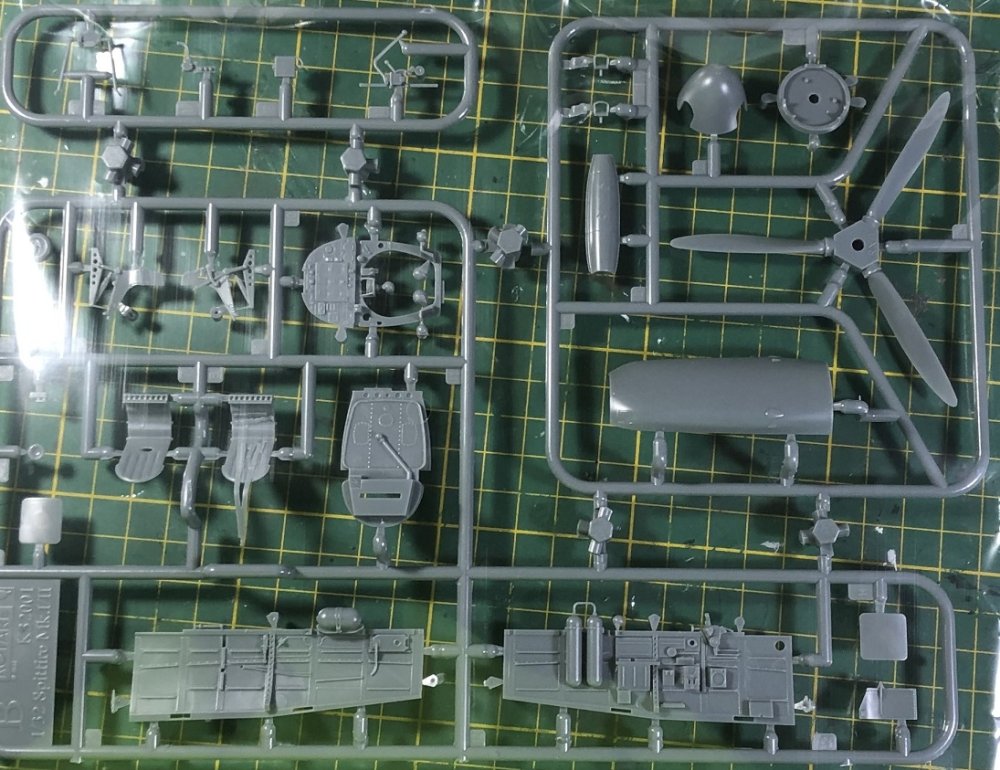
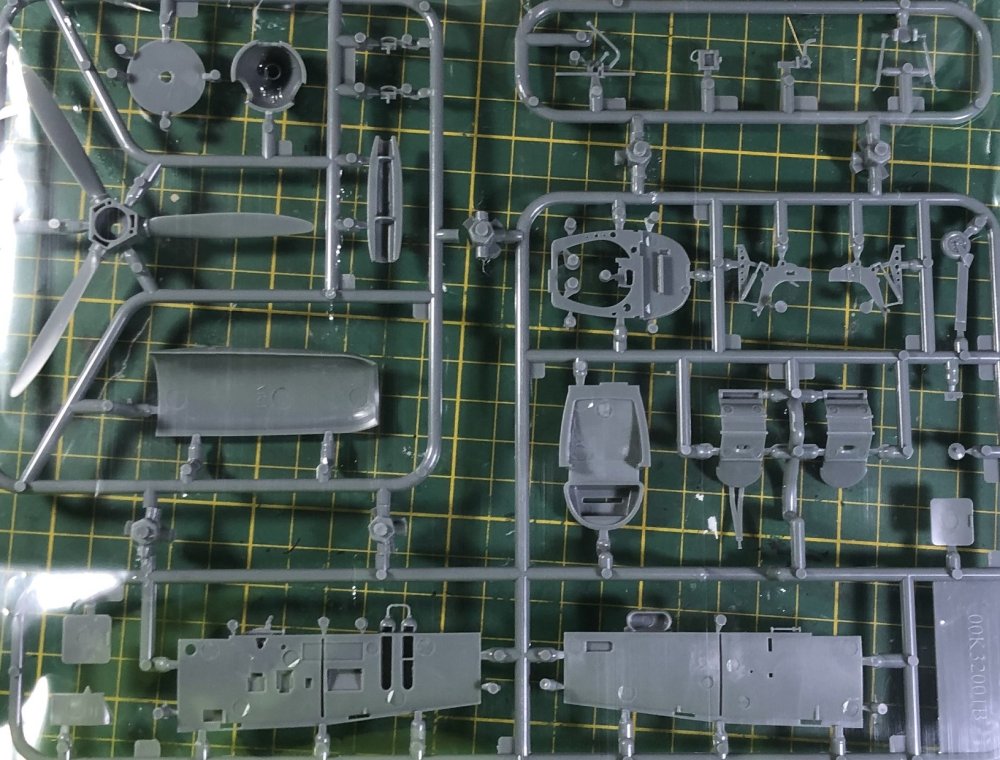
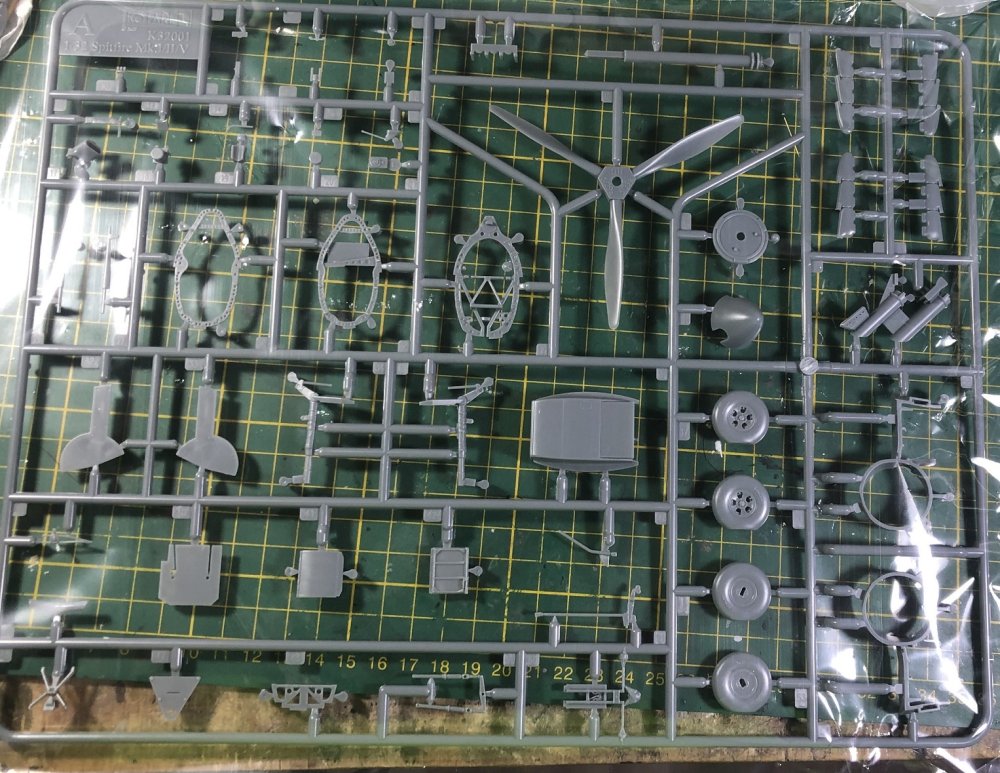
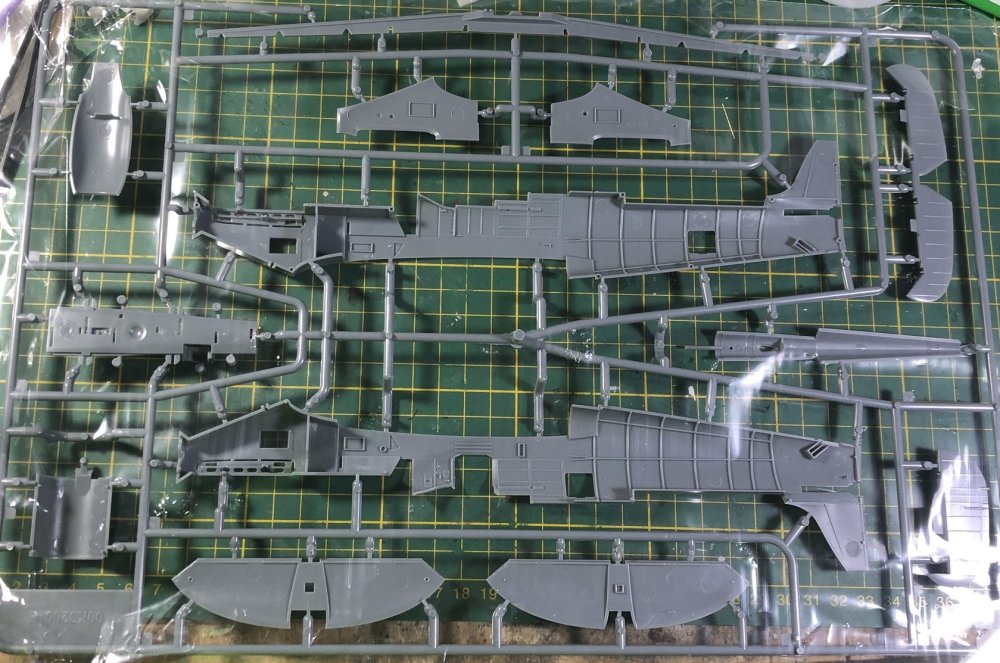
Sprue shots.... Dekkels.... The IP decals are in little groups, it seems... I LOVE the separate wing root fillets. You can have a seat with molded belts... or none at all. Nice! Pretty simple windscreen sprue... The promised resin exhaust stubs with deliciously thin walls... Did I mention two props and two spinners.... No dorsal seam to worry about on this kit. And here is some close up fuselage detail. With some pretty noticeable raised rivets. I know... my photography sucks. Another thing I really like... very light rib tape details on the control surfaces... unlike my last Revell build... And finally.... a shot of the instruction booklet...


-
It's here...
-
Looks like just hair to me.... no peaks, points, nor enough height above the crown to be anymore... probably a couple of Bavarians who wanted to feel the wind through their hair.
-
Thanks, Guy. I might have done better... but I didn't want to expend the time and effort.
-
Thank you for the interesting facts. Amazing the traditions connected to Nelson.
-
- 329 replies
-
- 5
-
-
-
- uss arizona
- eduard
- (and 1 more)