GazzaS
-
Posts
6,396 -
Joined
-
Last visited
Content Type
Profiles
Forums
Events
Gallery
Everything posted by GazzaS
-

Dragon Jagdpanzer IV 70 (A) Kit 6015 COMPLETE
GazzaS replied to GazzaS's topic in LSM 1/35 and Larger Work In Progress
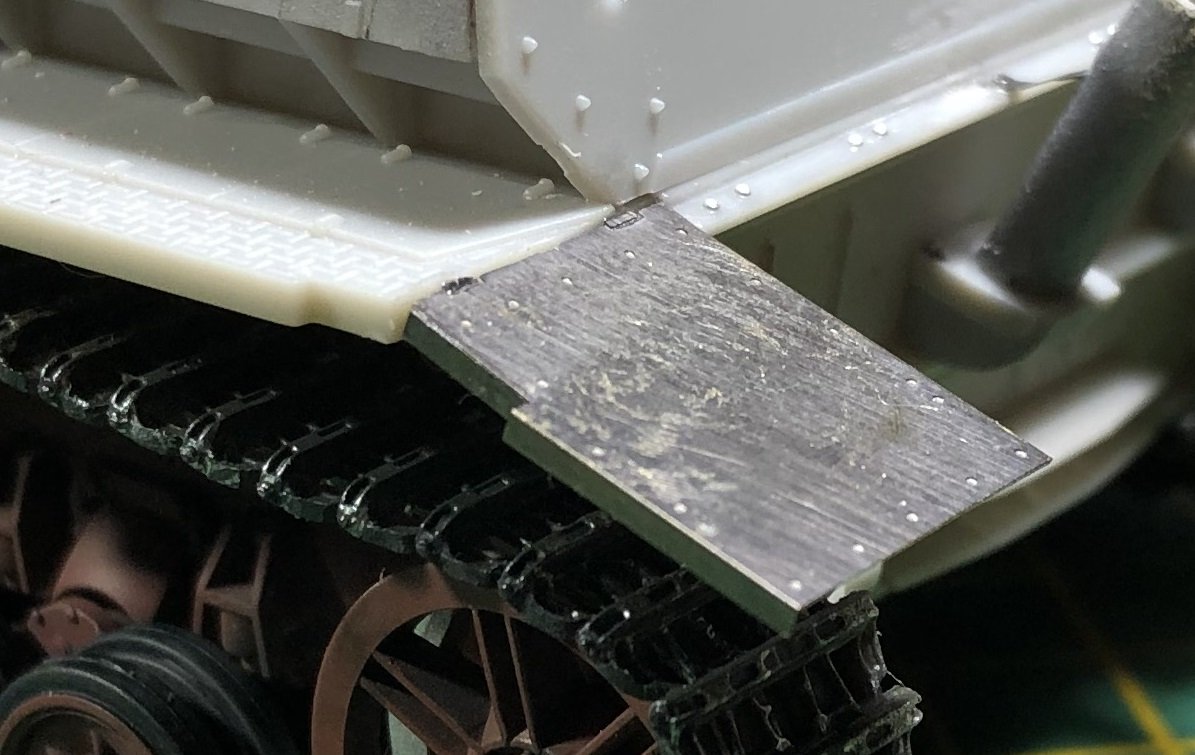
Thank you, Peter. There are some small half "ovals" required for the hull. The kit PE supplied doesn't seem to bend right for them. So. I will attempt to make my own from Brass foil. -
Dragon Jagdpanzer IV 70 (A) Kit 6015 COMPLETE
GazzaS replied to GazzaS's topic in LSM 1/35 and Larger Work In Progress
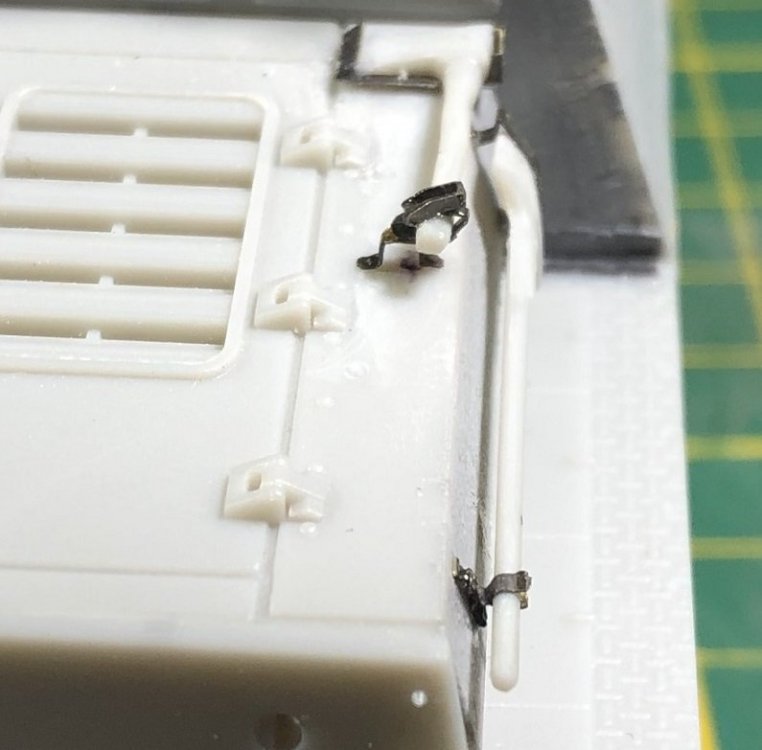
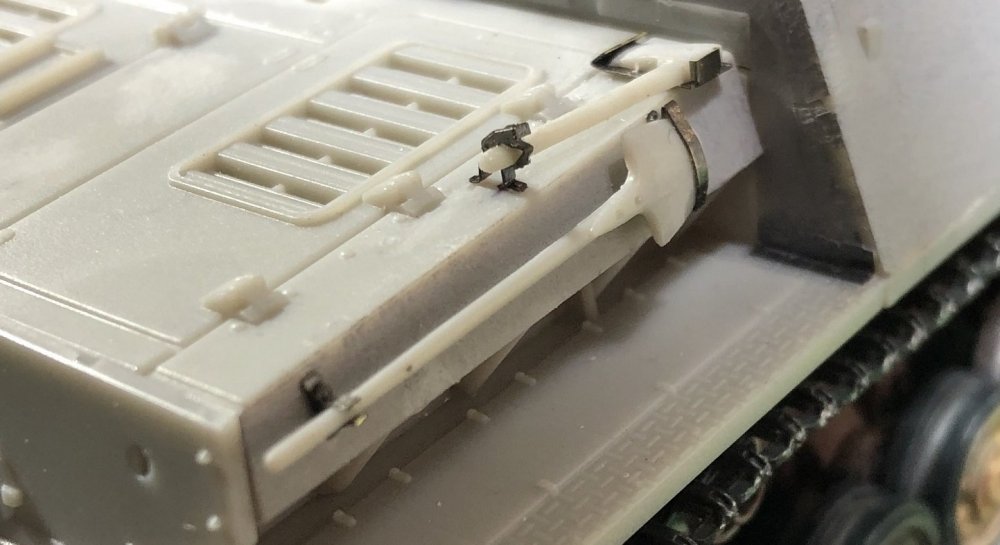
Despite having the day off work, I only managed the jack brackets and the wire cutters. The wire cutters had to be rebuilt. The only part of the original wire cutters I kept was the head. I used styrene rod and brass tube for the rest. Happy modelling!
- 130 replies
-
- 10
-

-
ICM 1/48 He-111 H-6 N.Africa campaign-Finnished
GazzaS replied to KevinM's topic in Everything Ukraine Group Build
It's looking very nice, Kevin. Can;t wait to see it with decals on. -
That is a convicted bin diver for sure.
-
Dragon Jagdpanzer IV 70 (A) Kit 6015 COMPLETE
GazzaS replied to GazzaS's topic in LSM 1/35 and Larger Work In Progress
Very nice, Martin! -
Duchess of Kingston - Beauty of the Seas - Wooden Sailing Ship 1/64
GazzaS replied to DocRob's topic in Non LSM 'WIP
All of the work looks magnificent, Rob! Will you put some crew and passengers on? Filled sails, slack, or furled? It's good to see the deck in this state... before all of that other stuff occludes it. -
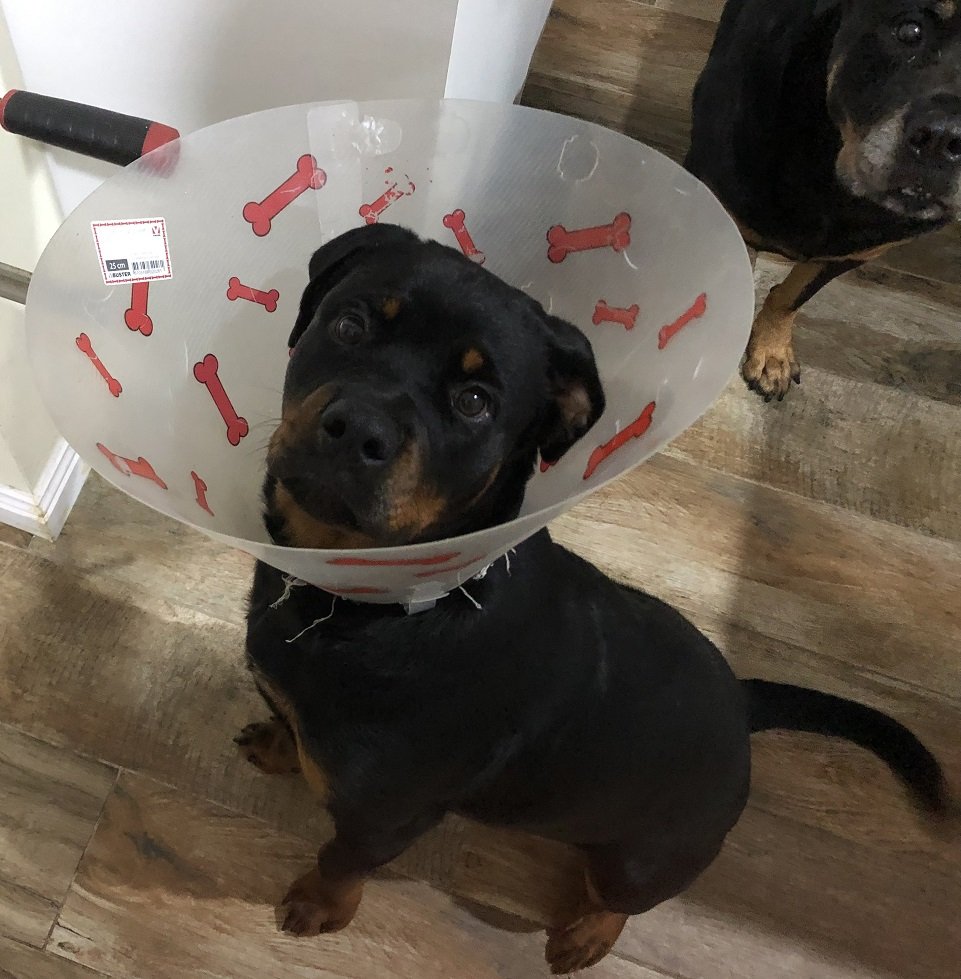
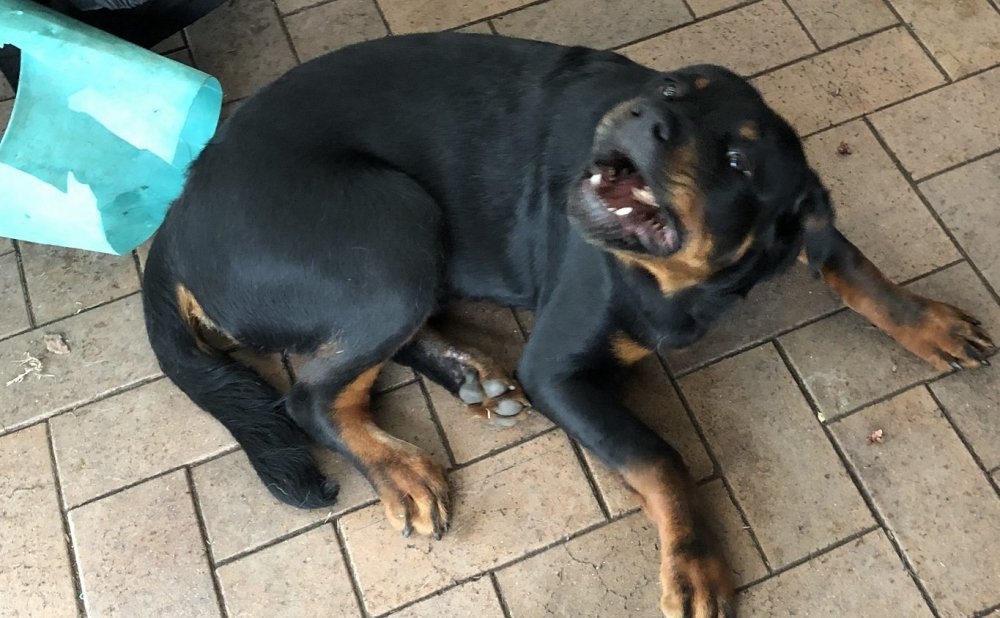
Here is Kaiser at 6 months. He's had his dew claws removed and is a few days from getting the stitches out. Almost once a day, my dogs get a real bone with meat on it to chew. Here he is enjoying some beef marrow bone. Sadly, he is only partially potty trained. As the livingroom is his enclosure when unattended, we have him trained not to go in there unless we lay puppy pads down. Still, he thinks the rest of the house is fair game. I've never had this much trouble with potty training a dog. Today, he found my wife's brand new, still in the box, Go Pro. I don't know if he's destroyed it... i only picked up pieces that may have been attachment stuff. As you can see in the top picture, he's almost as tall as Gypsy. I hope his head broadens to at least the width of hers. Hers was very large for a female. As you can see above... no two-gallon bucket is safe.

-
Dragon Jagdpanzer IV 70 (A) Kit 6015 COMPLETE
GazzaS replied to GazzaS's topic in LSM 1/35 and Larger Work In Progress
For those of you following this build.... I just want to write a note about my dog Satan... I mean Kaiser. I pray every day that he doesn't get to my bench. He's already cost me a detail paint brush, a roll of fine twine, and a bag of wooden coffee stirrers. He's smart and energetic.

-
Dragon Jagdpanzer IV 70 (A) Kit 6015 COMPLETE
GazzaS replied to GazzaS's topic in LSM 1/35 and Larger Work In Progress
Thank you, Phil. I won;t say too much until I'm happy the way they look under paint. I think the dark color of the plated PE hides things. -
Dragon Jagdpanzer IV 70 (A) Kit 6015 COMPLETE
GazzaS replied to GazzaS's topic in LSM 1/35 and Larger Work In Progress
Thank you, Rob. I have to admit that the detail is much better at this level, and am happy to have got so far. -
Dragon Jagdpanzer IV 70 (A) Kit 6015 COMPLETE
GazzaS replied to GazzaS's topic in LSM 1/35 and Larger Work In Progress
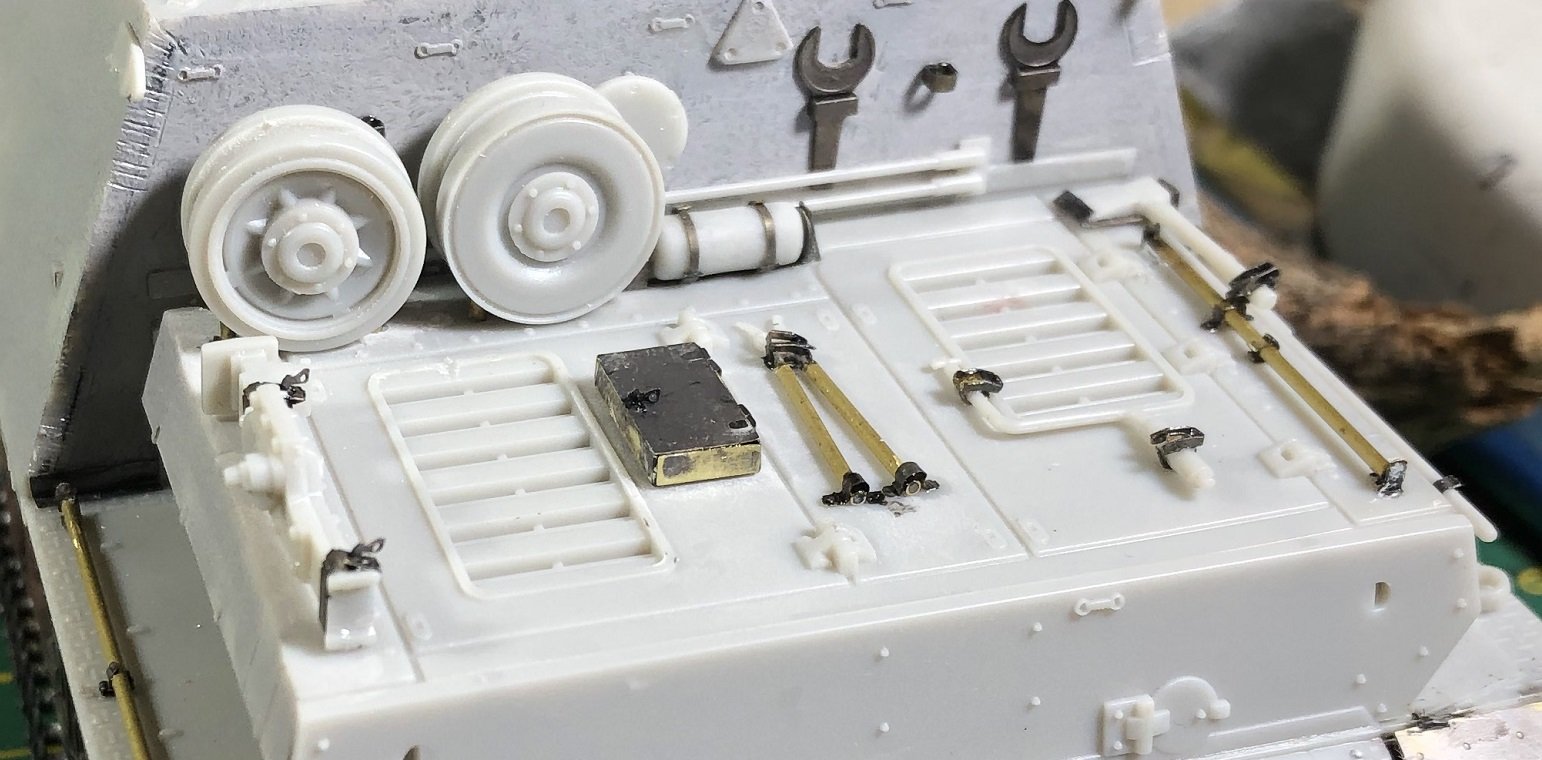
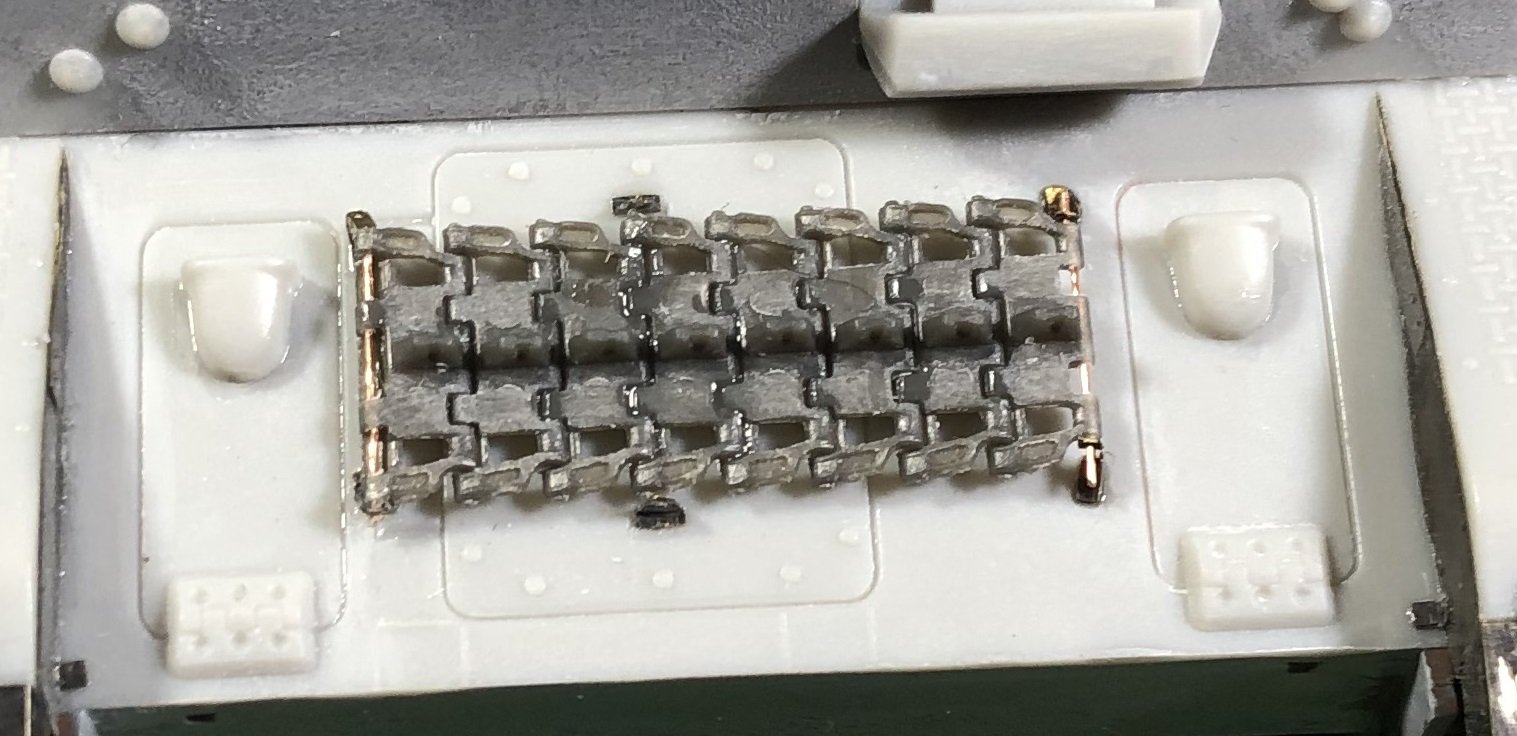
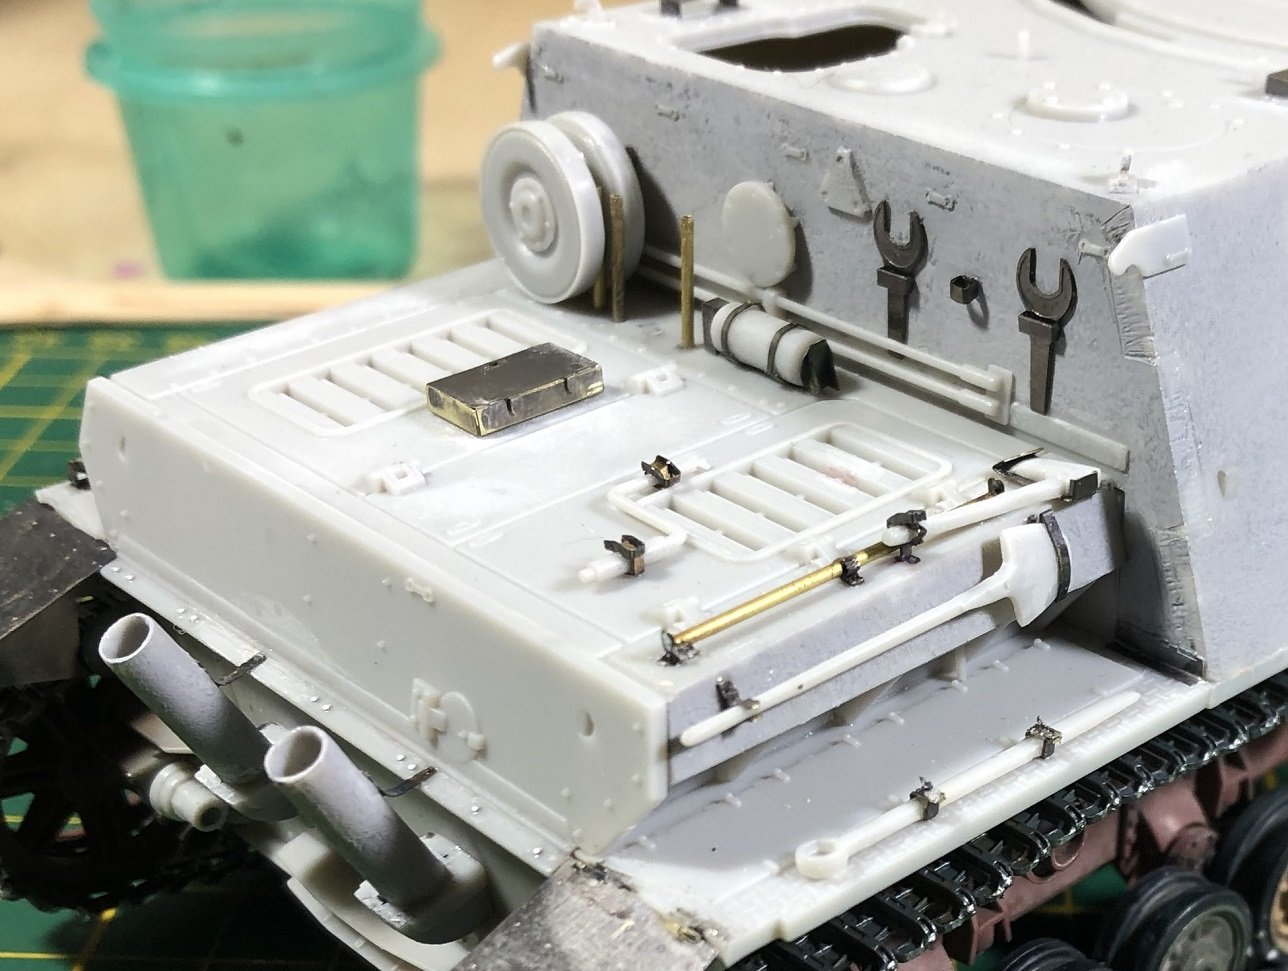
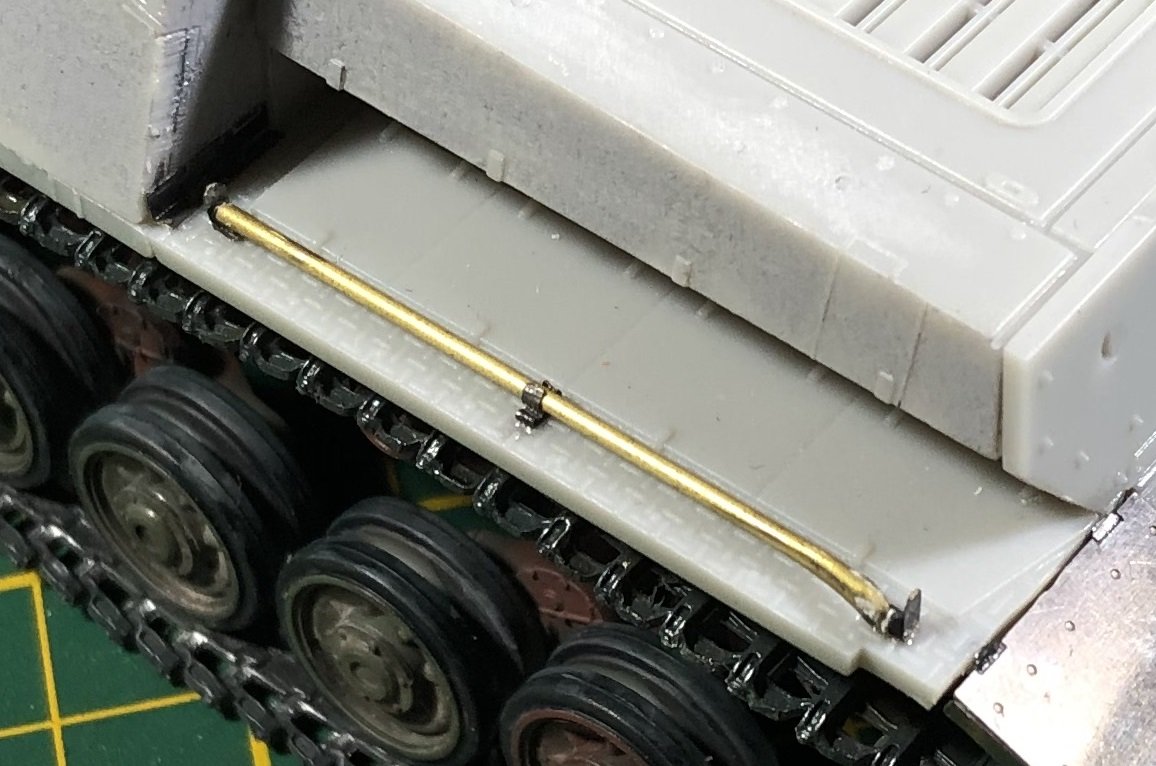
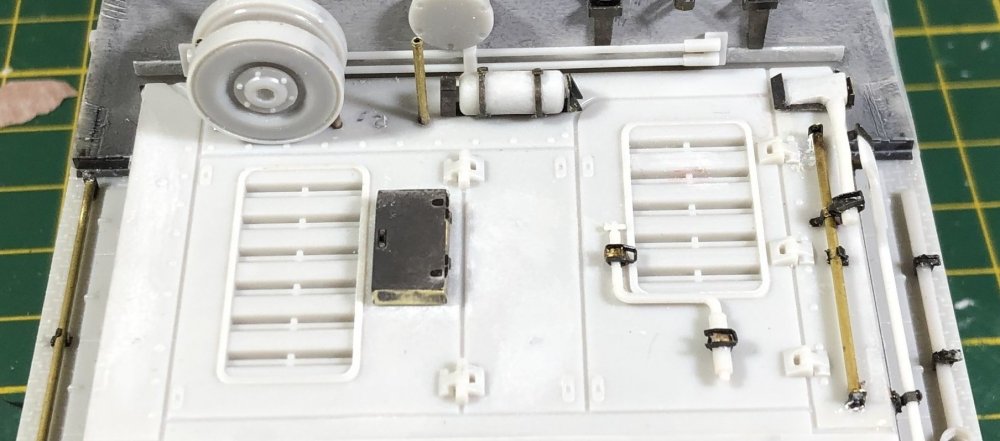
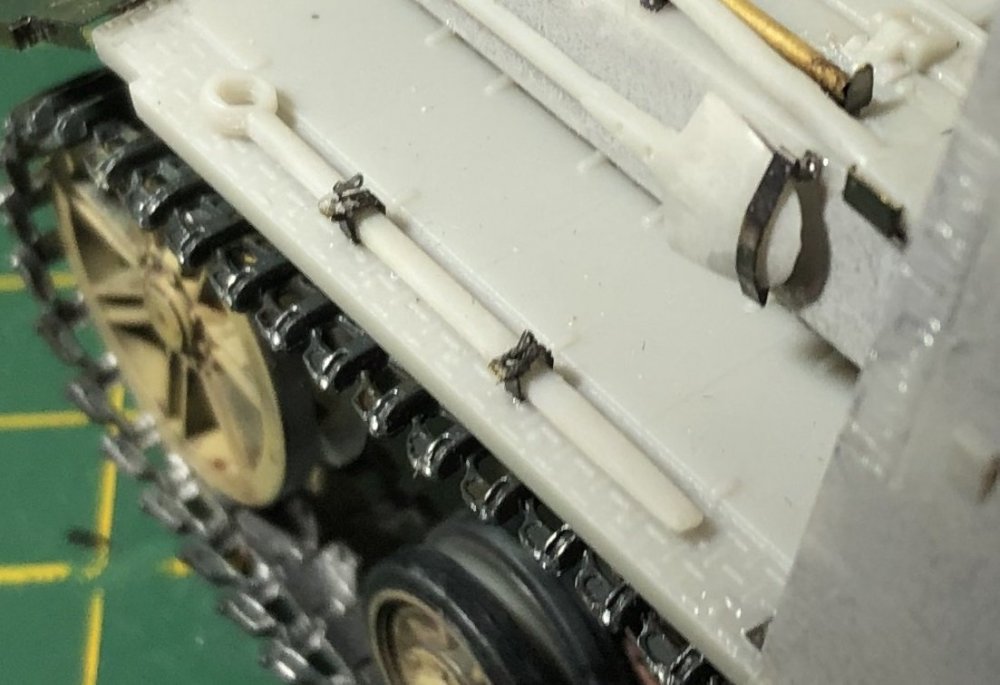
And finally, friends... another update to close out the weekend. Not surprisingly, more tools. I did the fire extinguisher and starting crank handle last night. Only to realize this morning that I had assemble the PE on the starting crank handle backwards. So, I started out my day fixing things. One onerous part of the task was removing the unwanted plastic from relatively small parts. The starting crank handle was very thin and took some care not to break. Some of the simpler parts I replaced with some brass rod. You'll see it in the pics. I'd say the part that went easiest was the fire extinguisher. Here are pictures from the back deck. whe One of my pet peeves for a while now is things that seem to hand on by friction alone. How many of you have built some form of panzer where some of the spare tracks were just glued on. I know I certainly have. So, today I drilled through the tracks... all the way through. and used thin copper wire to fit them into the brackets. It was fiddly business... and I had to relocate two of the six brackets. But I'm glad to have it done. Doing photo-etch is one of those 'stalling points' where I tend to dither around instead. Accomplish nothing. But once I got rolling on it this weekend, I found I didn't want to stop. I still have the jack to do. And then I can start on the Schurzen brackets. Unfortunately I have some unanswered questions about where they hook up to the hull. Catch y'all later!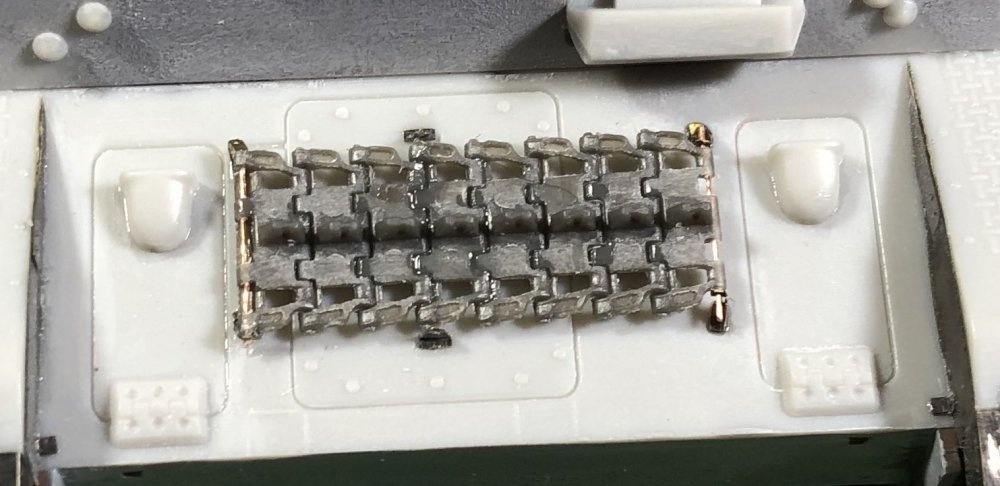


-
Dragon Jagdpanzer IV 70 (A) Kit 6015 COMPLETE
GazzaS replied to GazzaS's topic in LSM 1/35 and Larger Work In Progress
Thank you, Kai. It makes me feel quite Benedictine being down on the floor. Thank you, Phil! Hopefully it will get easier. I'm still finding it rough going. Thank you, Rob! Hey, I actually found a build video of your kit on youtube. I don't think there is a single part in common between our two kits. Scalemates said 'new parts'. But they should have said 'new molds'. There are parts on my kit that I'm not fond of. But, it'll do. Thank you, Kevin. -
Duchess of Kingston - Beauty of the Seas - Wooden Sailing Ship 1/64
GazzaS replied to DocRob's topic in Non LSM 'WIP
OSHA: Occupational Safety and Health Administration -
Dragon Jagdpanzer IV 70 (A) Kit 6015 COMPLETE
GazzaS replied to GazzaS's topic in LSM 1/35 and Larger Work In Progress
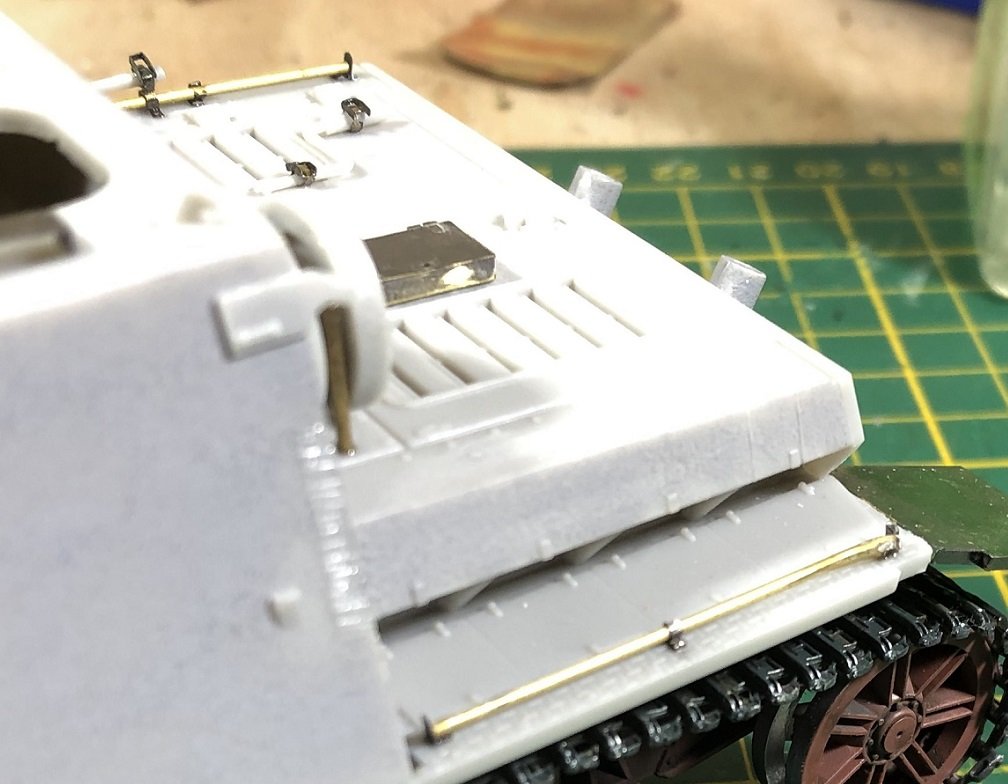
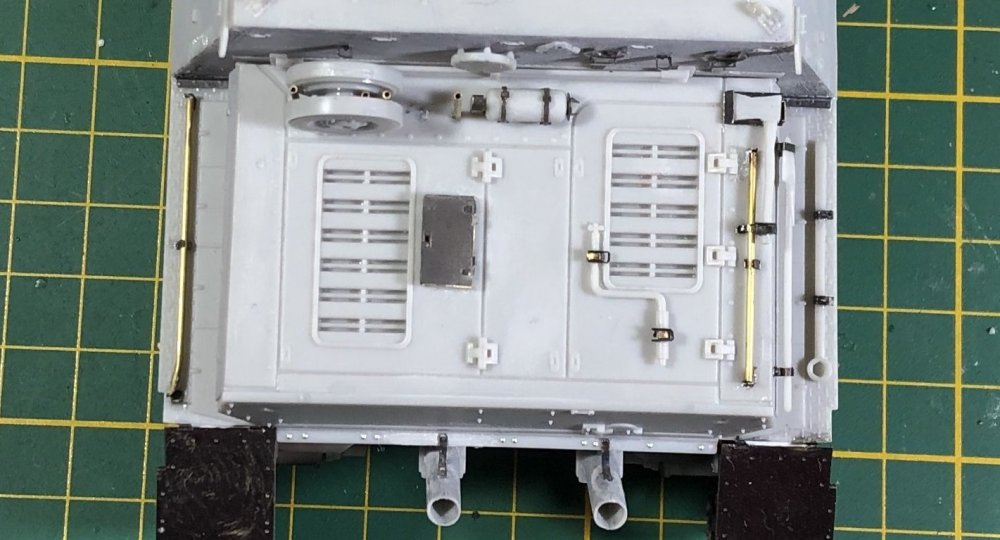
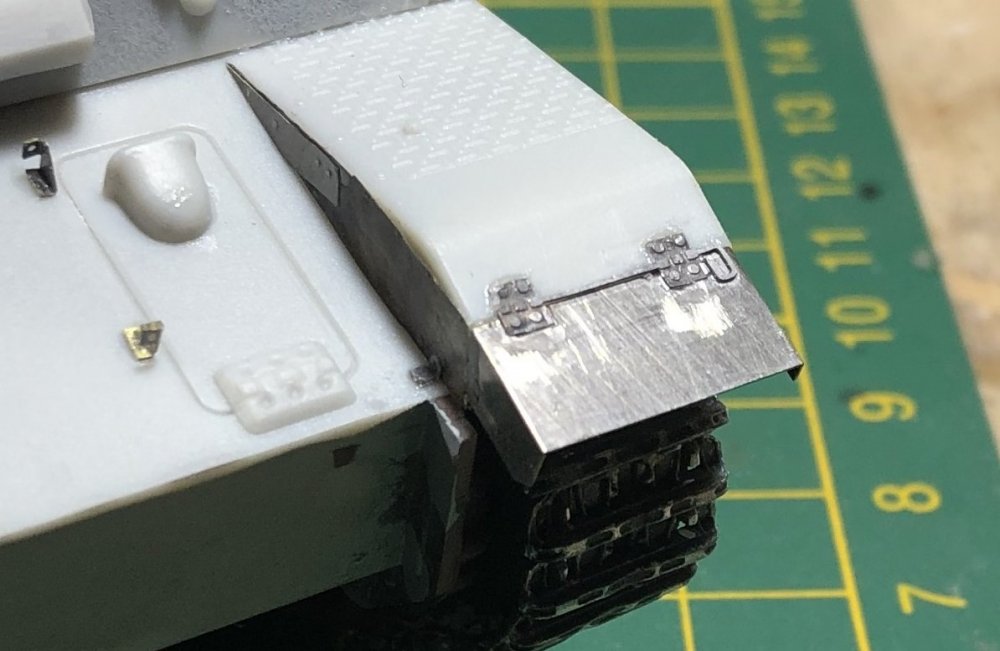
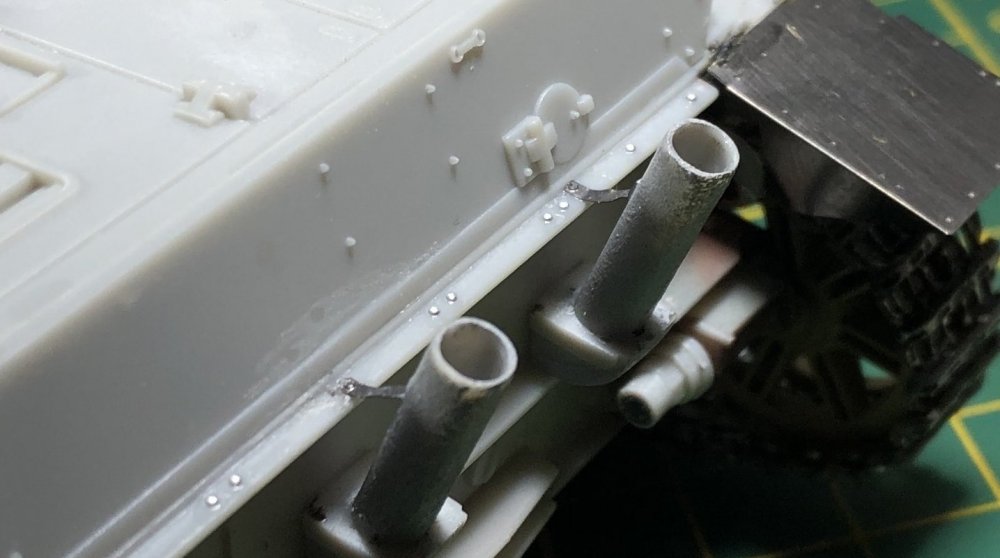
Welcome back to the show, my friends. I am currently fighting the battle of Photo-etch-zina. Yep, just west of Putinistan. I'm making it work, but the results aren't always pretty. I did the fenders last week, but didn't do an update. I also added these bolt heads. They are made from .3mm thin aluminum sheet that I have punched out with the back end of a drill bit into an rubbery eraser. I'm not quite happy with the straps holding the exhaust pipes. Today was the momentous decision to do the tool. The shovel and axe are molded the same way as they are on just about every other panzer kit you've ever built. But on the sole surviving example (At Saumer), they are elevated from the hull. But all of my straps and clamps look like shit. Hopefully my skill will improve over time. Those two tools are about 3 1/2 hours of work. ...including time spent on hands and knees looking for itty-bitty parts.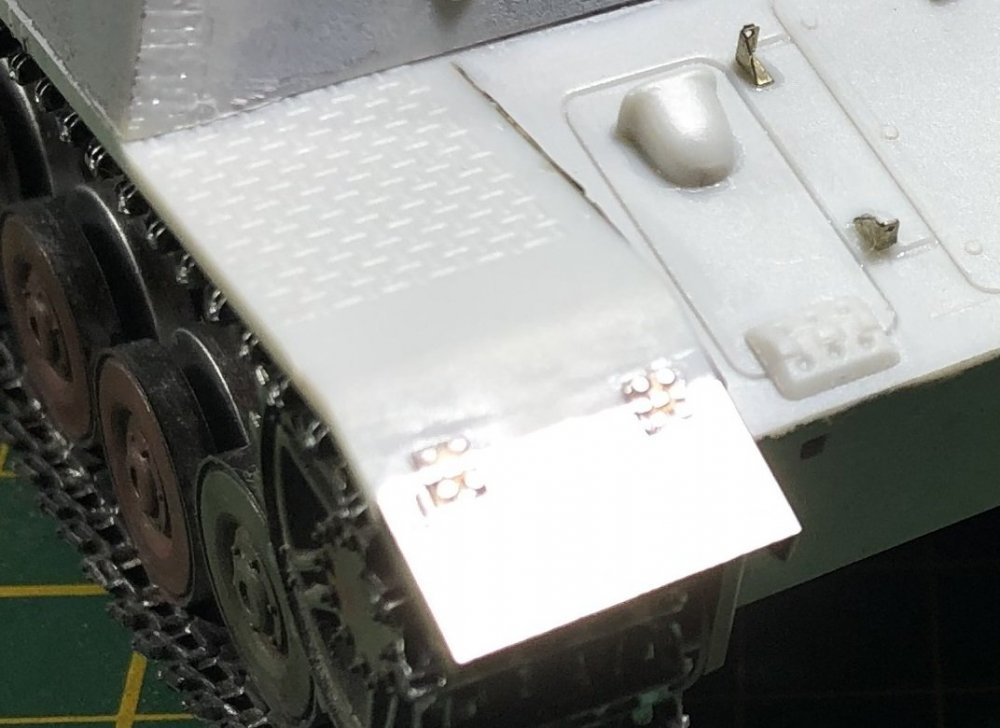

-
Dragon Jagdpanzer IV 70 (A) Kit 6015 COMPLETE
GazzaS replied to GazzaS's topic in LSM 1/35 and Larger Work In Progress
I understand, Peter. I'm the same, online I do more research. That being said, I've gotten most of my stash from friends either in trade, or at amazing discounts. Usually around 1/2 price. I really only have a handful of 'wanted kits', ATM. Being in a club was the best thing that could have ever happened to fulfill my modelling desires. -
Duchess of Kingston - Beauty of the Seas - Wooden Sailing Ship 1/64
GazzaS replied to DocRob's topic in Non LSM 'WIP
Well Rob, what can I say. Those cannon look quite awesome. But there are a lot of tripping hazards there, I'm thinking she won't pass and OSHA inspection. Keep it rollin'! -
Dragon Jagdpanzer IV 70 (A) Kit 6015 COMPLETE
GazzaS replied to GazzaS's topic in LSM 1/35 and Larger Work In Progress
Hi Peter. I've been known not to research before I buy. And then there are deals you just don't turn away from when you see that coveted model. I actually got this kit from a fellow club member who was helping liquidate the stash of another club member who had passed away. It already had a metal barrel in it plus an Eduard update set in addition to the kit's PE. All of that for about $14 US. Couldn't wait to get it into my hot little hands. -
Dragon Jagdpanzer IV 70 (A) Kit 6015 COMPLETE
GazzaS replied to GazzaS's topic in LSM 1/35 and Larger Work In Progress
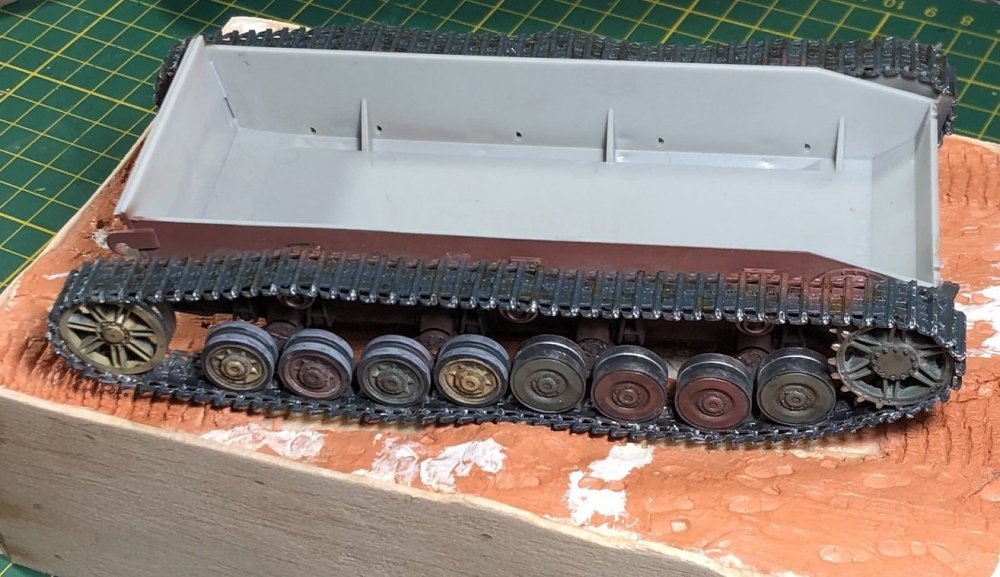
My kit had indy links on the sprue. And now assembled, I can't really complain. They are unusual because they have areas hollowed out as a weight reduction method. I've tried to show it in the way I painted the tracks. Though, I reckon they may show better once I graphite them. The tracks I have are a little soft on the detail. I imagine yours look better. That's the beauty of it, the 'in-elegance'. I have found the same boxing as mine for sale... but not the newer. And since I already have it... no point in looking again. -
Duchess of Kingston - Beauty of the Seas - Wooden Sailing Ship 1/64
GazzaS replied to DocRob's topic in Non LSM 'WIP
Love all of those deck details! Nice work! The cannon are especially nice. -
Dragon Jagdpanzer IV 70 (A) Kit 6015 COMPLETE
GazzaS replied to GazzaS's topic in LSM 1/35 and Larger Work In Progress
Yes, you have a newer boxing than mine. Mine was the 1994 original. In the two successive boxings, there were some great upgrades. But the new ones are hard to come by. Did you get a metal barrel with it? -
Dragon Jagdpanzer IV 70 (A) Kit 6015 COMPLETE
GazzaS replied to GazzaS's topic in LSM 1/35 and Larger Work In Progress
Thank you, fellas! -
Dragon Jagdpanzer IV 70 (A) Kit 6015 COMPLETE
GazzaS replied to GazzaS's topic in LSM 1/35 and Larger Work In Progress
Do you have the nylon mesh, or a metal mesh? Mine doesn't even look woven. -
Dragon Jagdpanzer IV 70 (A) Kit 6015 COMPLETE
GazzaS replied to GazzaS's topic in LSM 1/35 and Larger Work In Progress
Thank you, Peter. Still, the most difficult trials lie ahead. -
Dragon Jagdpanzer IV 70 (A) Kit 6015 COMPLETE
GazzaS replied to GazzaS's topic in LSM 1/35 and Larger Work In Progress
Thank you! Yes, Rob that is exactly what it is for. The gap between the wires is only .4mm which is correct for scale. The fly-screen that comes with the kit has gap of more than 1mm. -
Dragon Jagdpanzer IV 70 (A) Kit 6015 COMPLETE
GazzaS replied to GazzaS's topic in LSM 1/35 and Larger Work In Progress
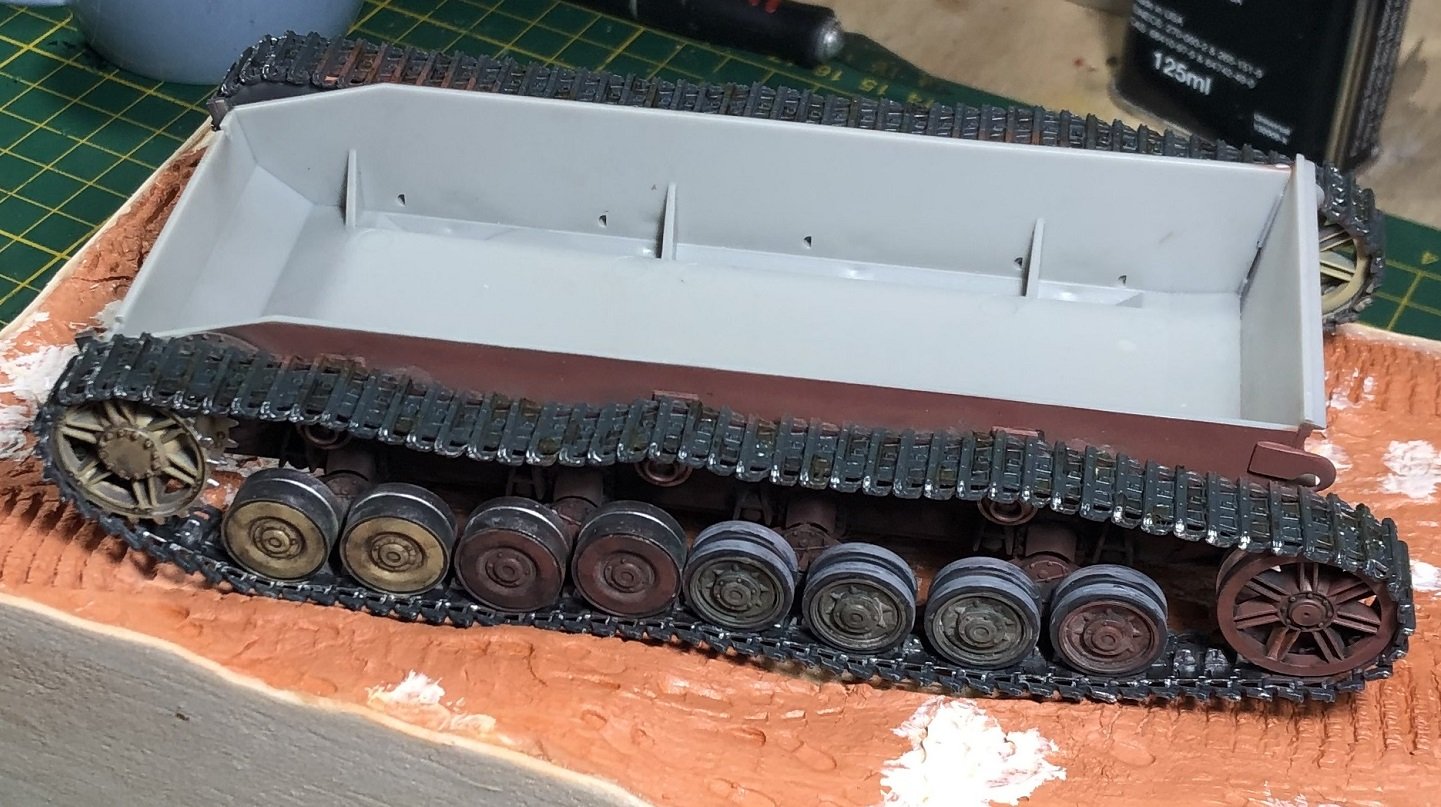
Hello friends! Modelling has been a bit slow lately. Not because I haven't had much time. I've been using a bit of my spare time playing Verdun on the Xbox One. It the first console game I've ever really gotten into. Anyway... onto the model... It took a bit of searching, but I've finally found some brass mesh that's in-scale to the model. The only problem is, that I had to order it from the People's Republic. There were two shipping options, and the quickest and most expensive only guaranteed it's arrival five days earlier than the standard rate... which is scheduled to arrive June 24. But that's OK. I still have a lot of work to do, and other kits to build. So, after adding the tracks and shaping everything to the base, I was able to apply the camo. The colors are definitely not in my usual pallette, but correct for the period for when this vehicle was built at Alkett. Then, I did some enamel washes to give a patina of old grime. Then I did a detail paint with aqueous acrylics. I even used a little bit of pigments here and there. I'm doing all of this to the chassis now, because afterwards there is a lot of fragile photo-etch to add. And I want to avoid knocking pieces off if possible. Tomorrow, I will add a few more bits of enamel wash and then attach the superstructure. There'll be a bit of seam work, too. Thanks for looking!