GazzaS
-
Posts
6,405 -
Joined
-
Last visited
Content Type
Profiles
Forums
Events
Gallery
Everything posted by GazzaS
-

Dragon Panther A with Zimmerit
GazzaS replied to GazzaS's topic in LSM 1/35 and Larger Work In Progress
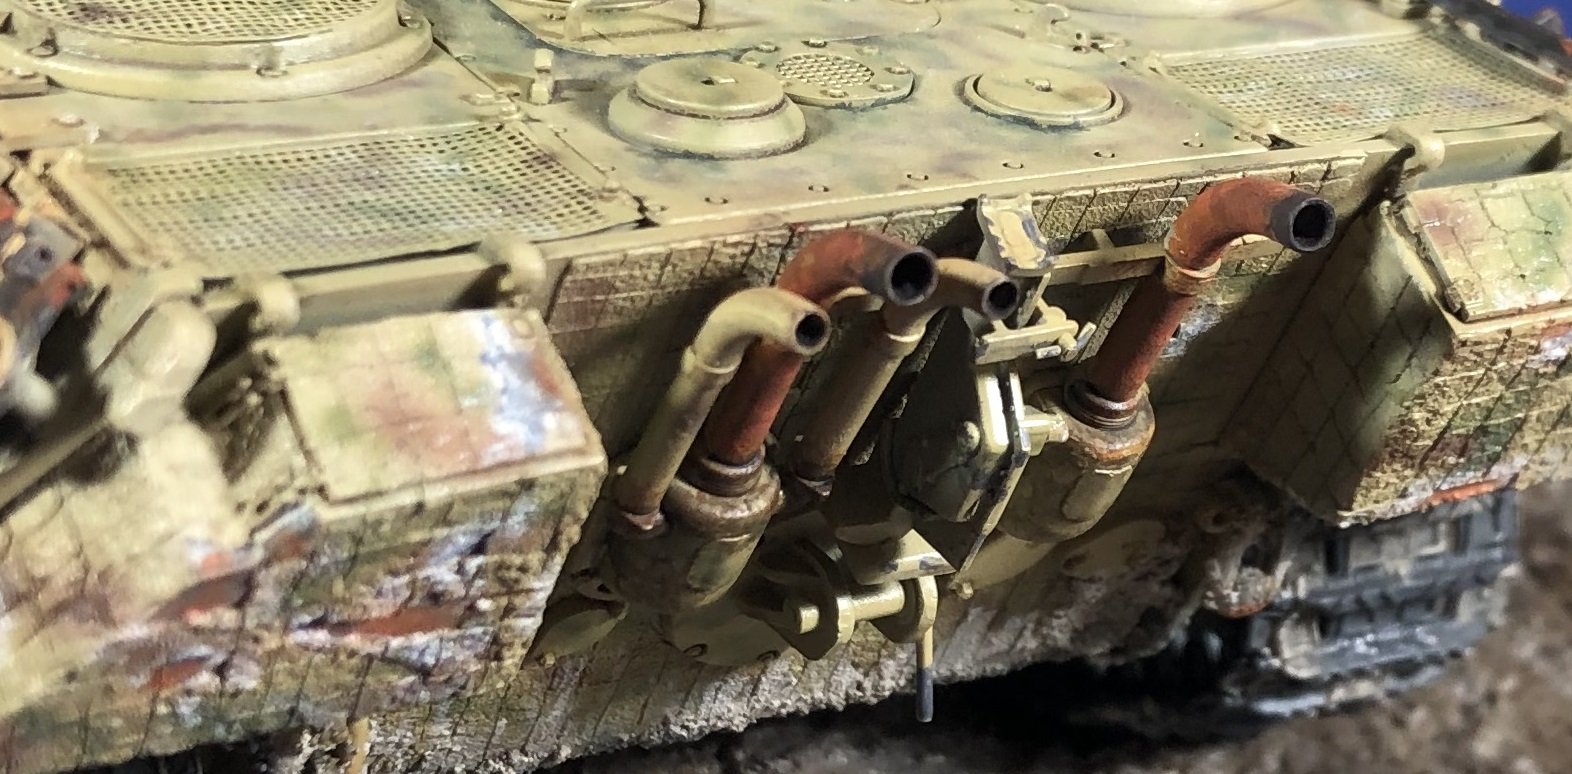
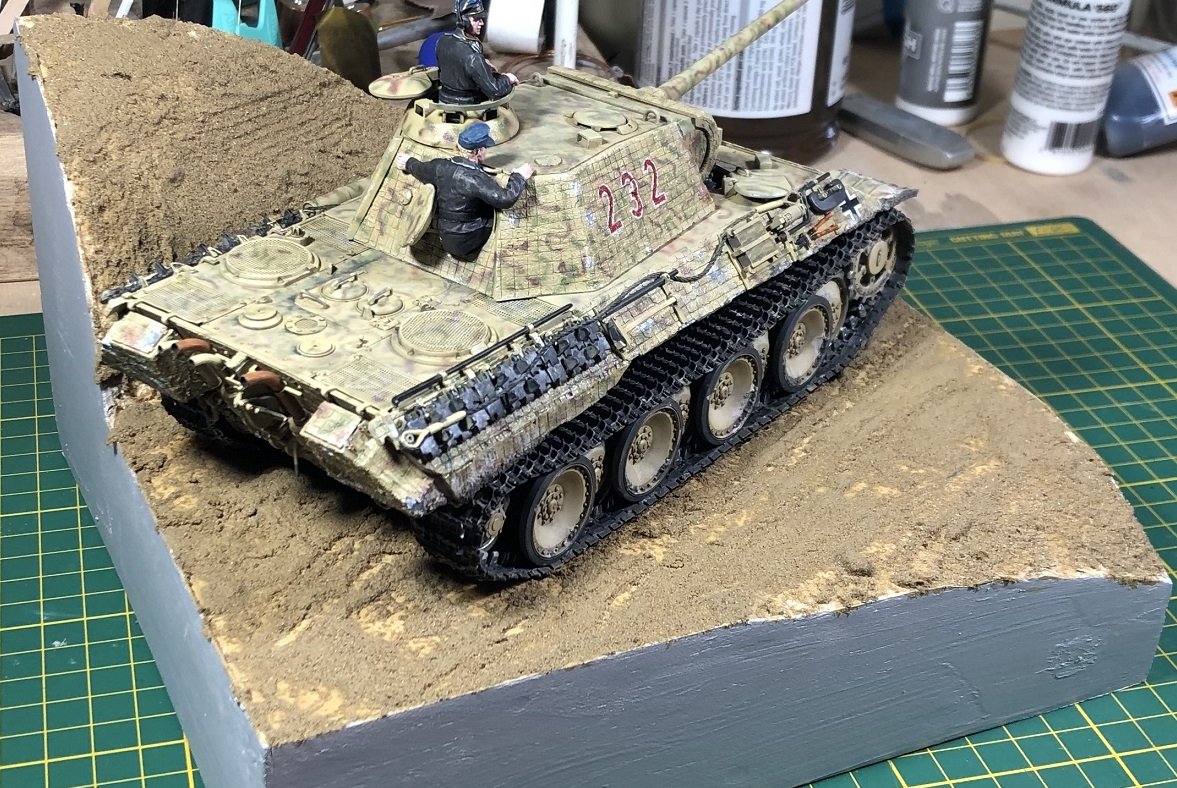
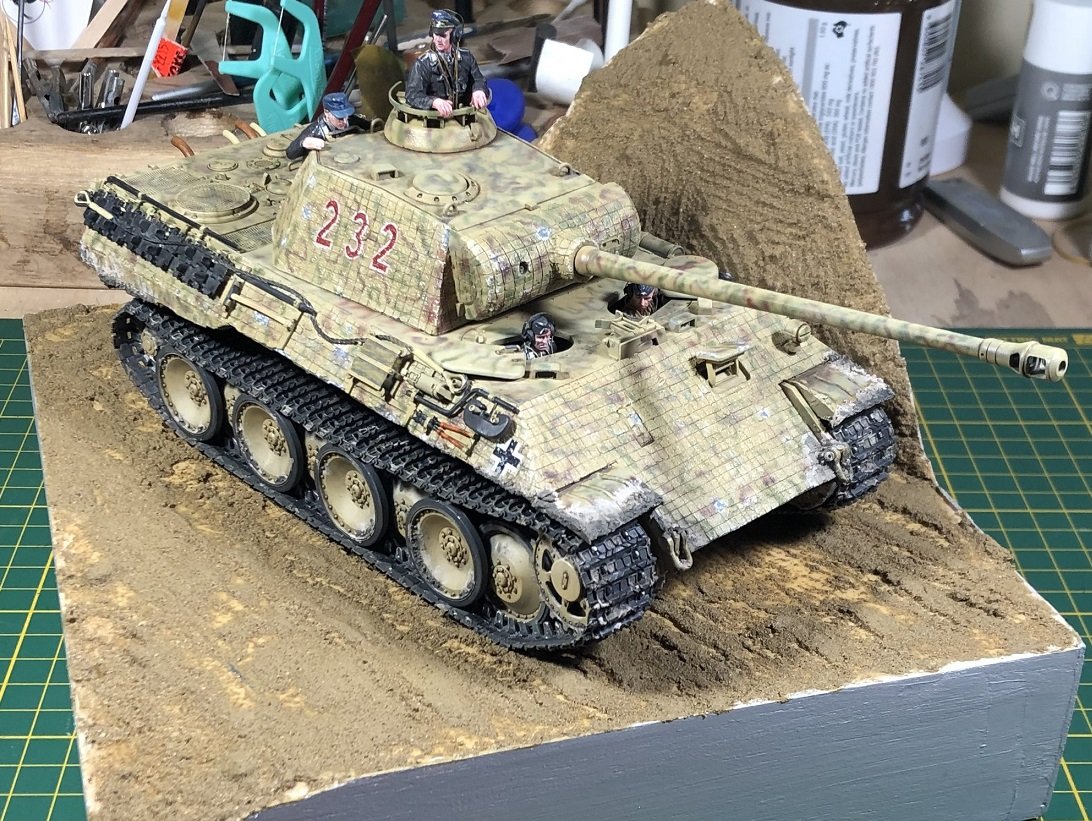
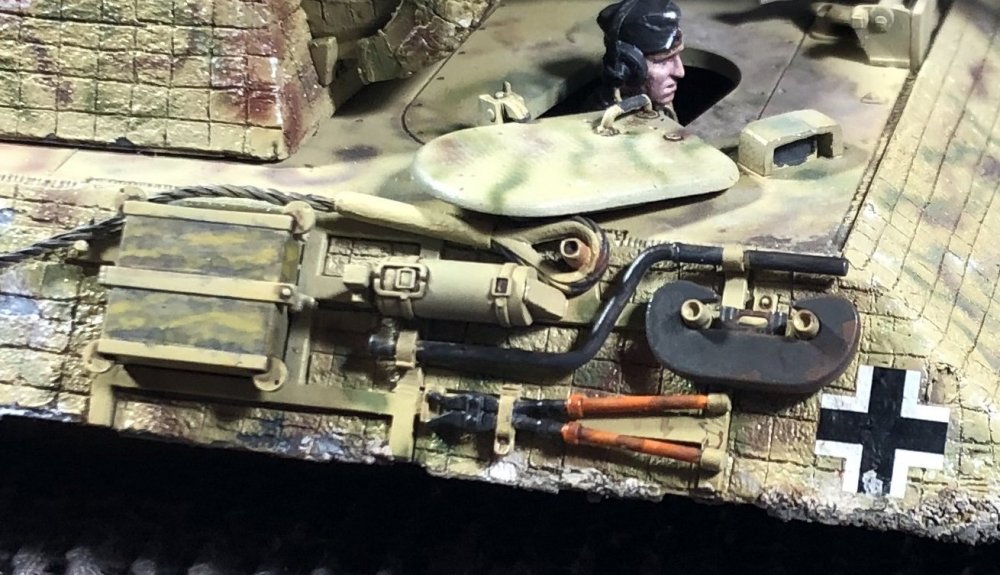
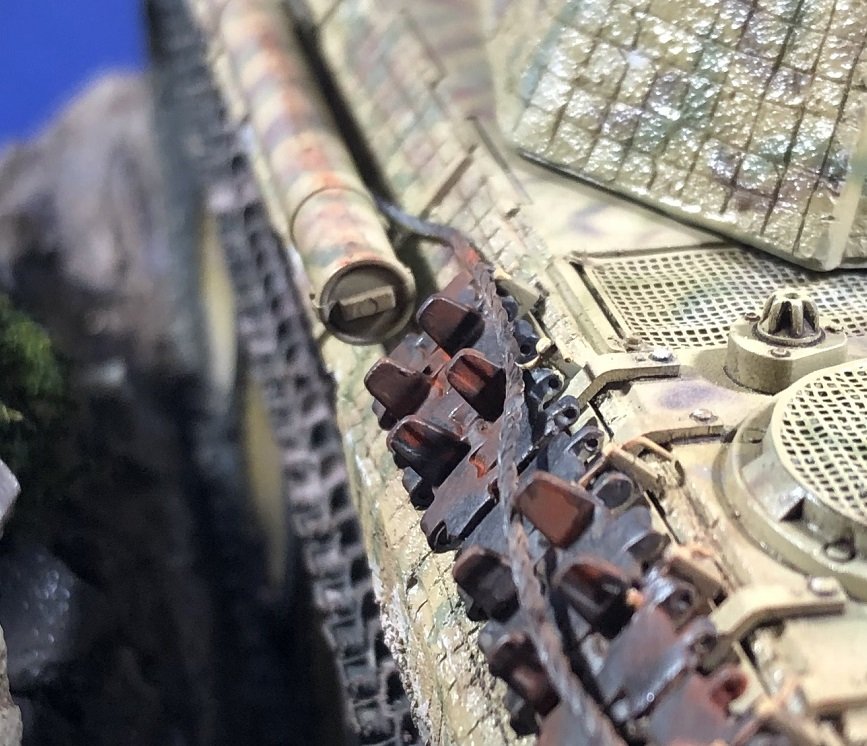
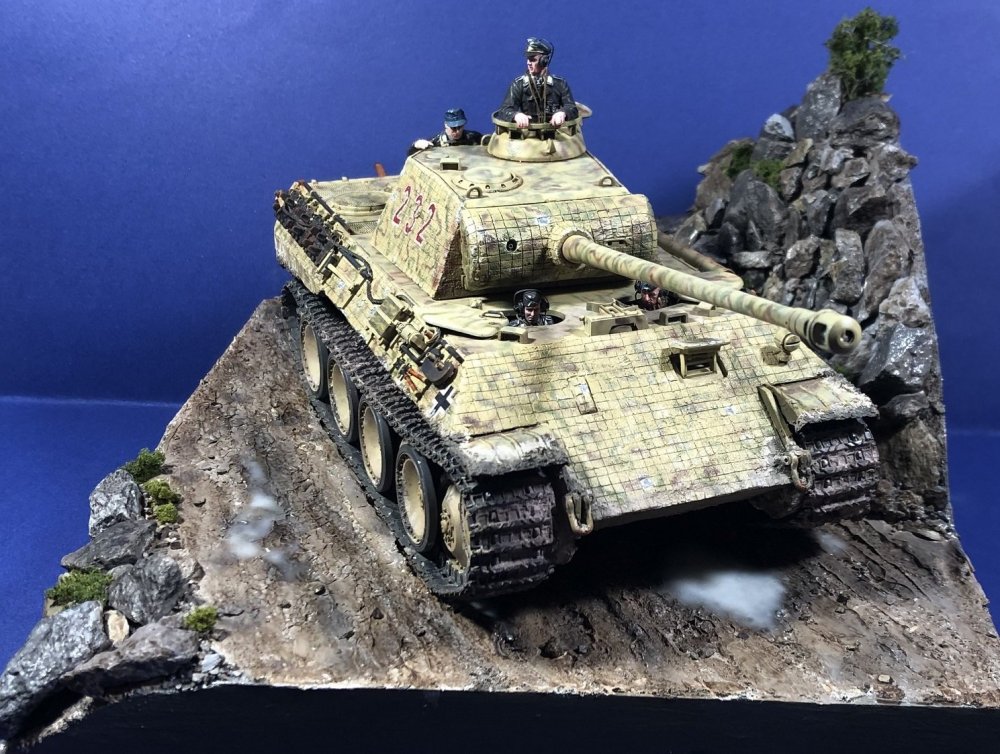
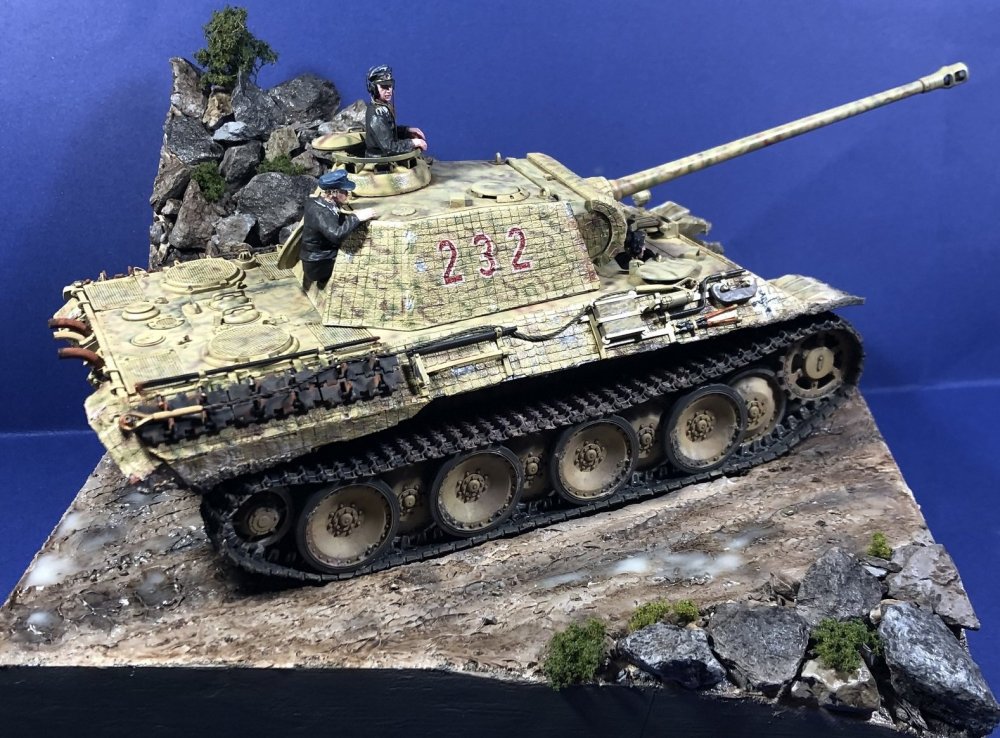
Hello Chaps... That's such a British thing... Chaps. But aren't those the leather pants open at the back, popular at some night clubs? Anyway... I digress from the reason for this post. Today I did a bit more to the build. i started by using pigments to add rust effects on extra track links, selected tools and towing equipment, the exhausts, and the stowage bins. And in previous days, I've worked on the base. I added stones collected from my yard, acrylic paint, Citadel washes, and some faux vegetation. I imagine... that you're wondering about the cloudy white on the base. That's actually acrylic media. I've had some kicking around the house for a while that I decided to use it to make some shallow puddles. I had originally gotten it to make water bases for ship models. Hopefully when it is dried, it will be clear. The next operation is to finish the tank, glue it to the base, and then, add mud that should appear as if it's been squeezed to the sides of the tracks. I don;t really have a plan for that yet. Hopefully I can come up with something that looks real. Any ideas? Happy modelling!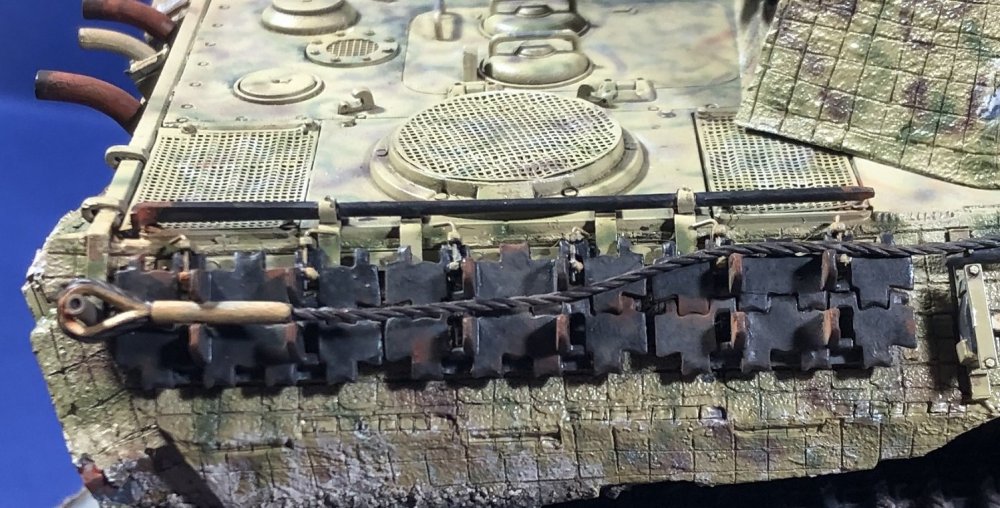


-
Fw-190 A-8/ R-2 "Sturmbock" Revell 1:32
GazzaS replied to Sasha As's topic in LSM 1/35 and Larger Work In Progress
cockpit looks sweet! -
Looking good!
-
Tamiya 1/12 Ferrari 312T
GazzaS replied to Peterpools's topic in LSM 1/35 and Larger Work In Progress
Wow, Peter! Looks like a good reason to build tanks. I look forward to future progress. -
Looks like an interesting project, Bill. It'll be cool to see what the PE does for the kit.
-
Nice! Foil?
-
Duchess of Kingston - Beauty of the Seas - Wooden Sailing Ship 1/64
GazzaS replied to DocRob's topic in Non LSM 'WIP
Very nice progress, Rob. -
Very well done, john!
-
Nicely done!
-
Dragon Panther A with Zimmerit
GazzaS replied to GazzaS's topic in LSM 1/35 and Larger Work In Progress
Thank you, Peter. -
Dragon Panther A with Zimmerit
GazzaS replied to GazzaS's topic in LSM 1/35 and Larger Work In Progress
Thanks for your input, Rob. The color of the soil isn't determined as of yet. The stuff I mixed from Sand, paint (very cheap paint), Future, and acrylic putty is just the first layer. It's really too grainy for it's intended purpose of vehicle mud. I'm just kinda fudging my way through it with stuff around the house and trying not to buy those products made for modellers to buy. -
Duchess of Kingston - Beauty of the Seas - Wooden Sailing Ship 1/64
GazzaS replied to DocRob's topic in Non LSM 'WIP
The first planking looks great, Rob. I'm sure the second will be even better! Copper bottomed hull? -
Dragon Panther A with Zimmerit
GazzaS replied to GazzaS's topic in LSM 1/35 and Larger Work In Progress
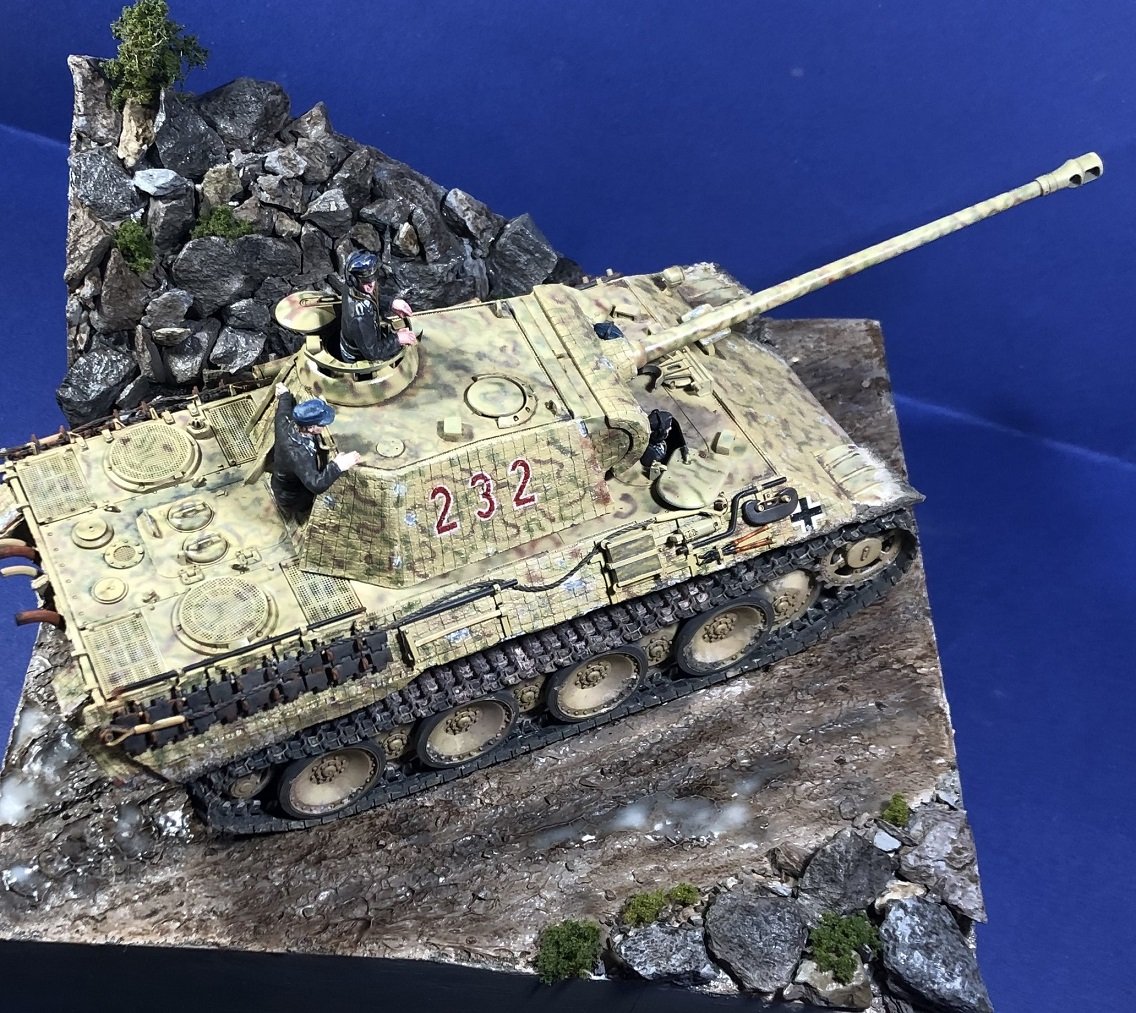
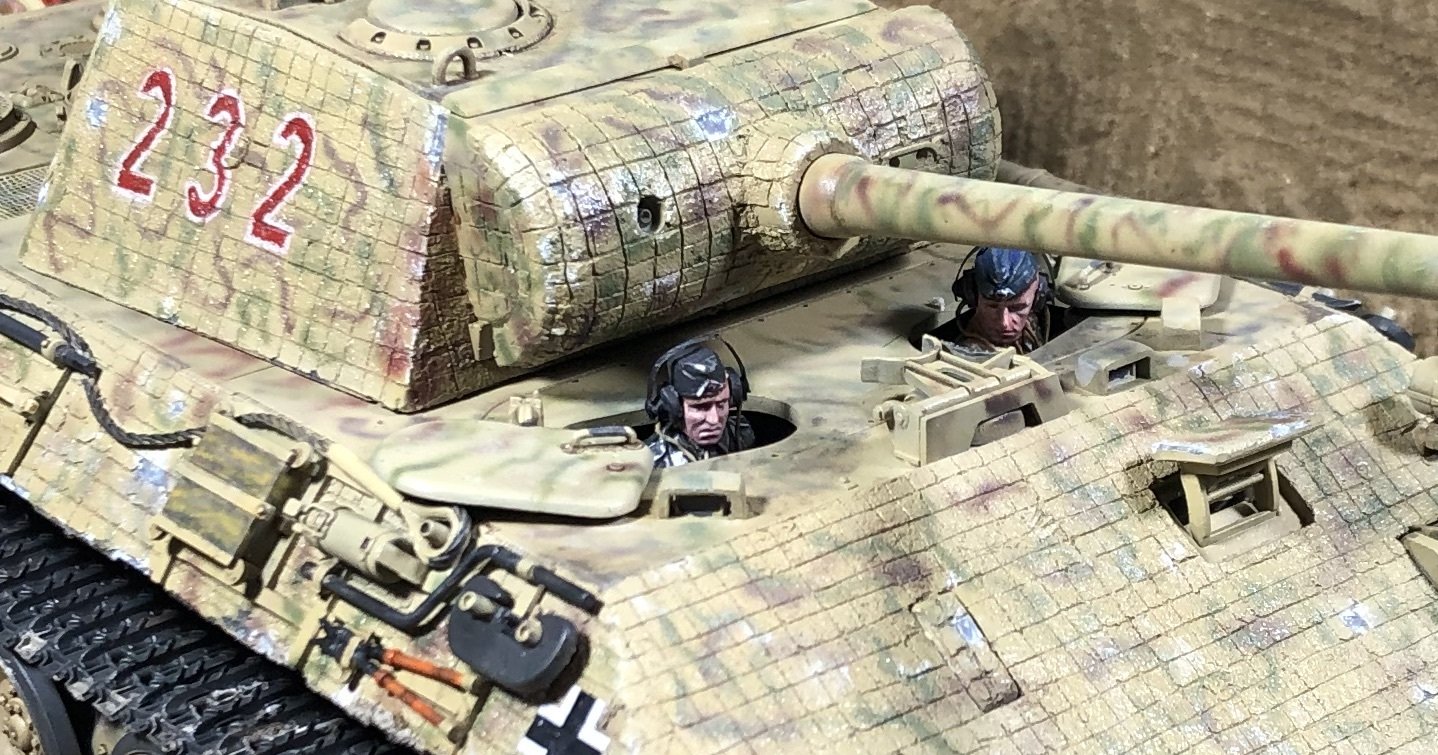
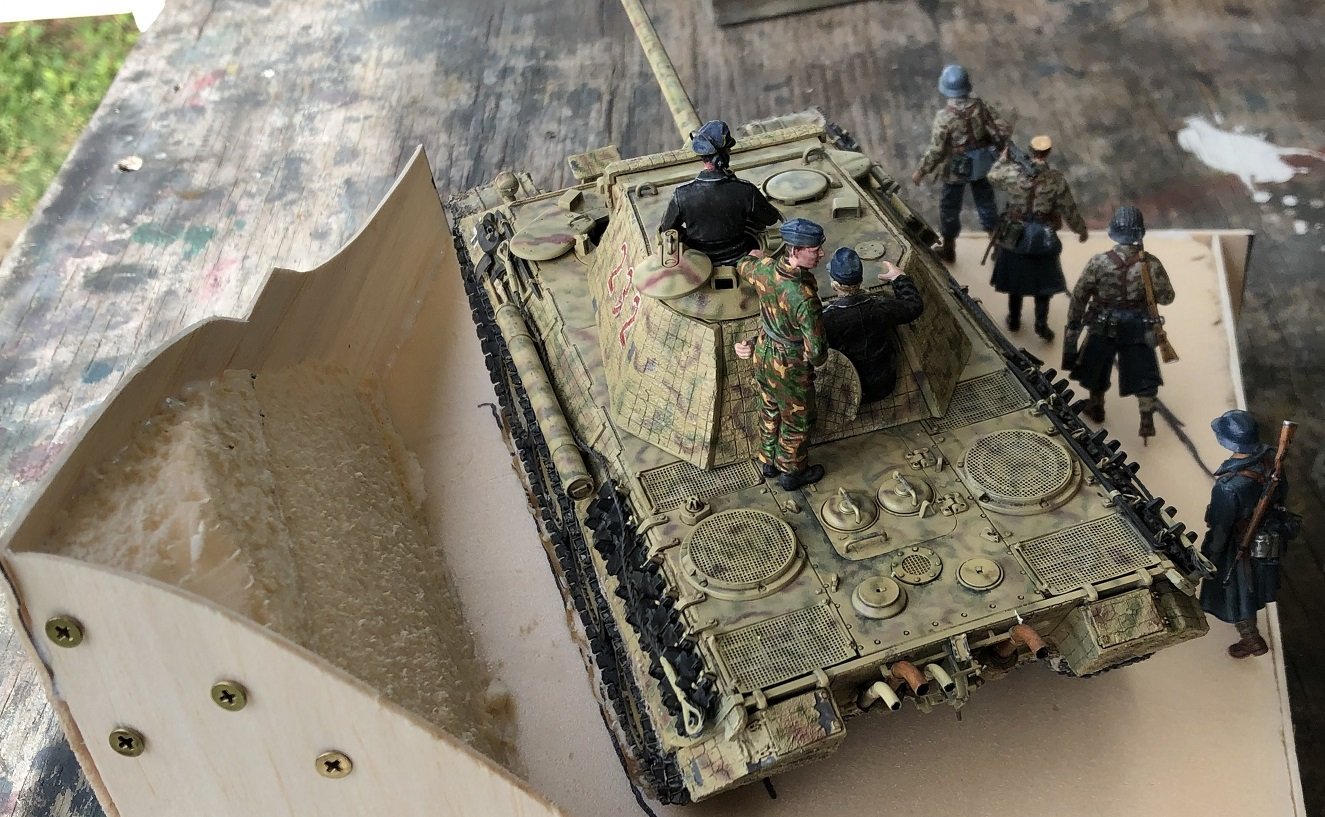
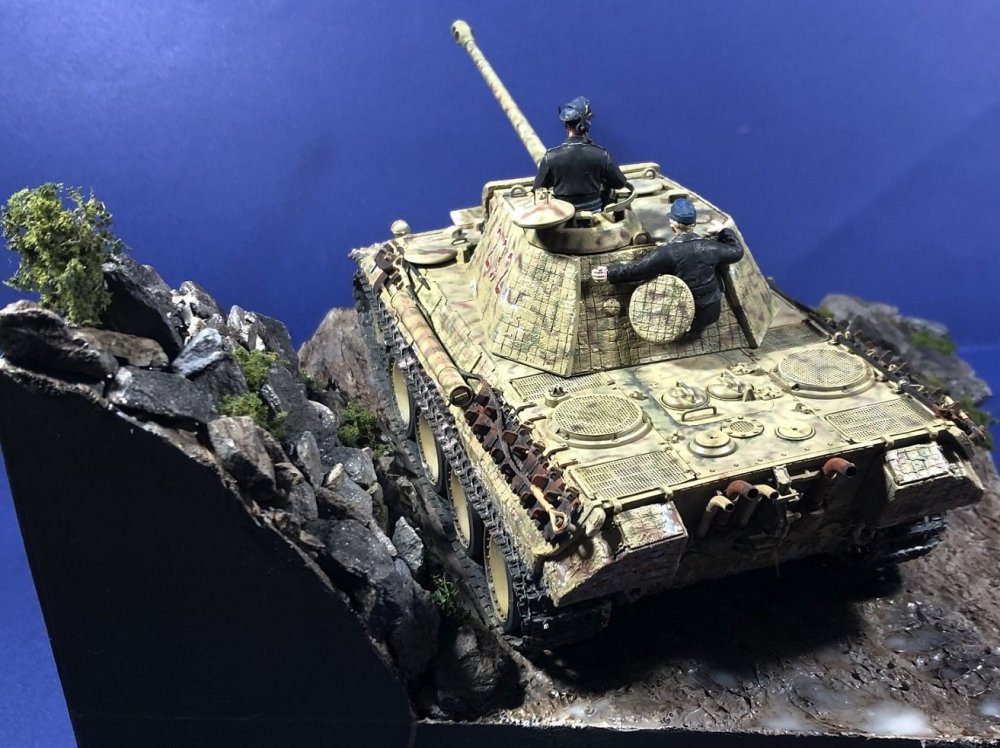
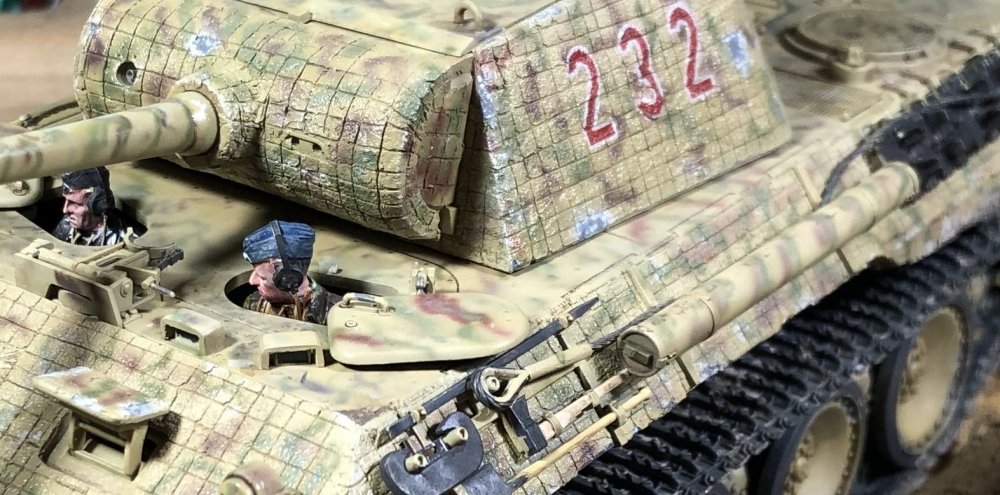
Anyway... I've decided not to put foliage on this tank. It is something i should have prepared for from the beginning if I were to do it. So today I did the next to last thing on the tank excluding the matte coat. I used paint to simulate the damaged bits of zimmerit paste which is damaged and not painted over. I also worked on the base. Puttying, sanding, and adding some textures to the ground. I'm not sure about the external color of the base. Many use black. But it seems very stark. I have used silver here. What do you guys think? Happy Modelling!


-
Dragon Panther A with Zimmerit
GazzaS replied to GazzaS's topic in LSM 1/35 and Larger Work In Progress
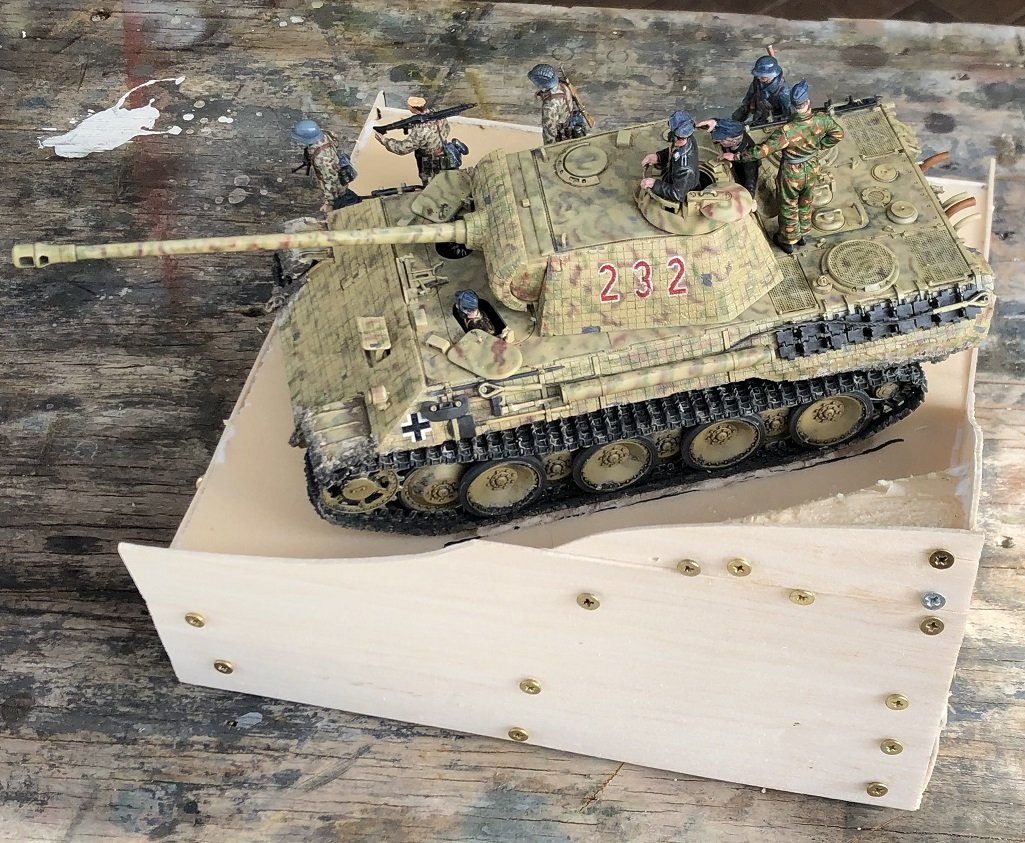
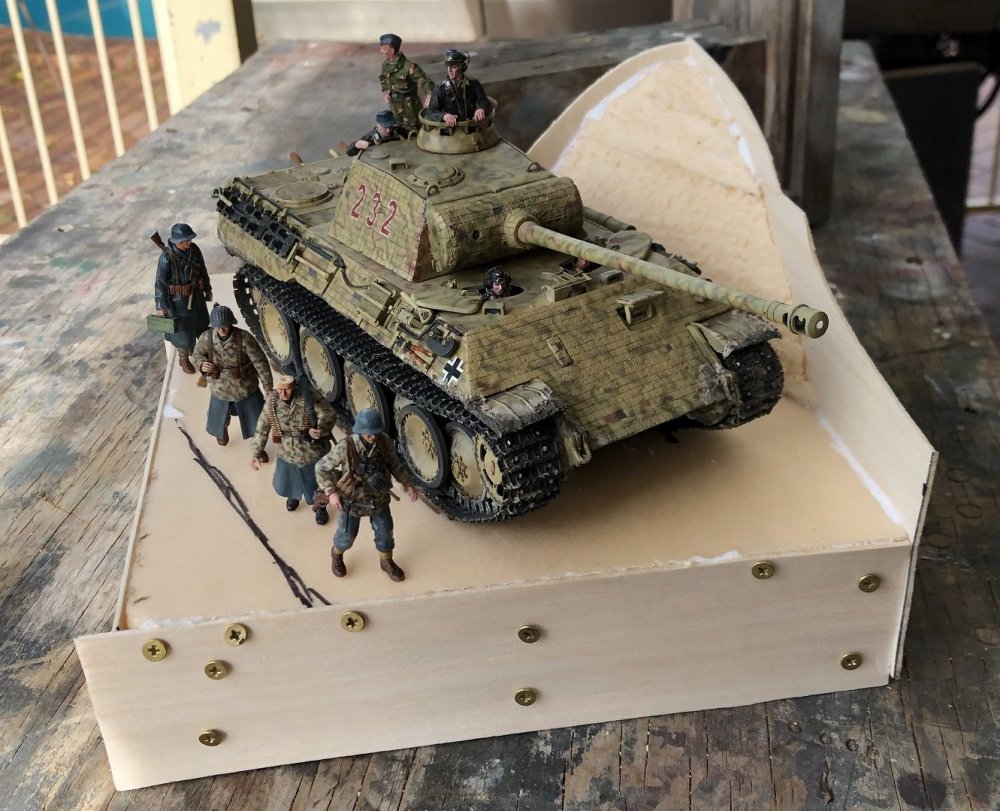
Thank you, Phil. Doing nine guys was a big jump for me. I did 4 and then 5. It's still a bit torturous for me. I separated the two groups inadvertently, but I think since they had so much uniform (clothing) differences, it worked out better. I accept less than perfect results with each one hoping that I learn a little bit with each figure and maybe get a little bit better. Last thing I want is to get bogged down in the search of perfection. I'd look forward to your build as I want to get into artillery builds, too. Artillery is always manpower heavy. -
Duchess of Kingston - Beauty of the Seas - Wooden Sailing Ship 1/64
GazzaS replied to DocRob's topic in Non LSM 'WIP
Rob, . The ends of the ship are always the most "fun". It's probably a lot worse when you have to worry about planks that need to show an look good. But never trust your spell check. -
Duchess of Kingston - Beauty of the Seas - Wooden Sailing Ship 1/64
GazzaS replied to DocRob's topic in Non LSM 'WIP
This was back in 1987 Rob. I have nothing from that time except for memories. I had to work from pretty lame line drawings in library books. Only to discover that I had a lot of it wrong. -
Dragon Panther A with Zimmerit
GazzaS replied to GazzaS's topic in LSM 1/35 and Larger Work In Progress
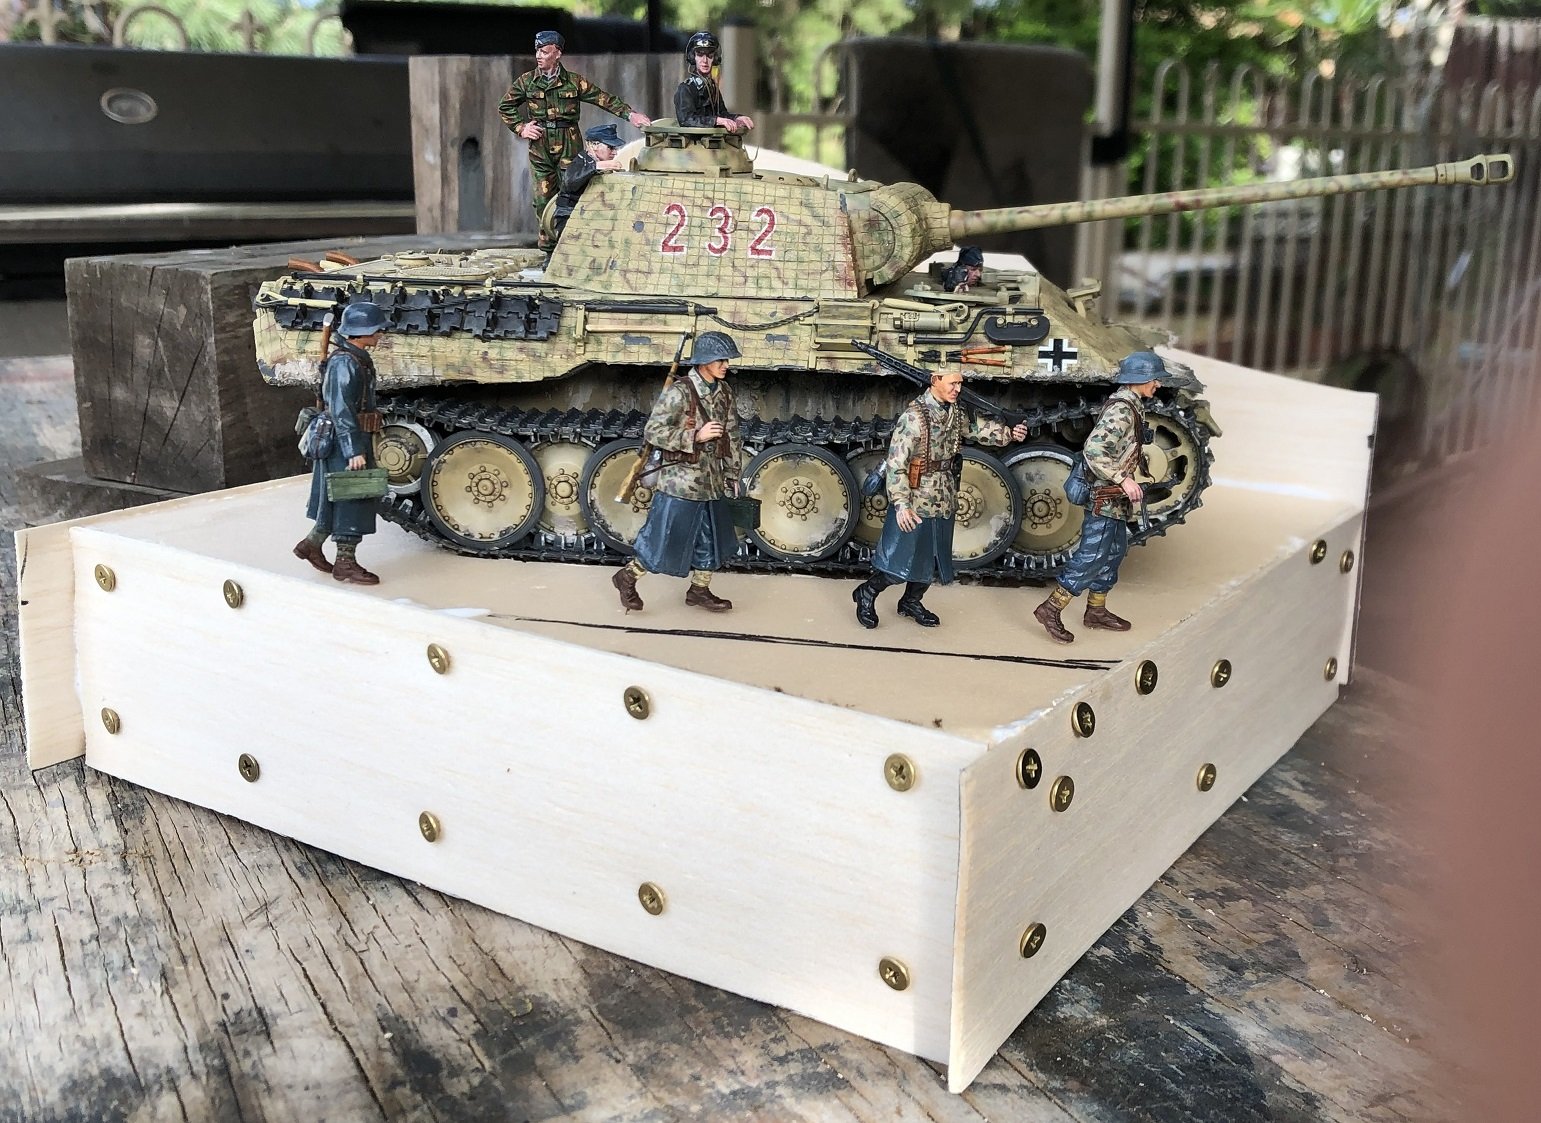
Welcome back, my friends! One of my birthday gifts was a gift certificate for a local art store chain. So today I went and bought some very expensive Windsor and Newton sable brushes. I also went to the LHS and bought some sheet balsa and a few bottles of paint. Perused a few interesting kits... but I wasn't interested in the prices. So, I set about to work on the base. After attaching the first panel with PVA, I realized I didn't have any thumbtacks to hold the balsa to the foam. I clamped the one side, but then realised that it was both a clunky method, and couldn't cover enough points around the perimeter. I sent a hurried text off to the missus who is out having a spa day asking for some tacks... but being impatient as ever I really wanted to have this thing dry in the morning. ... so, I looked about and discovered a had a fair few 3/8" brass wood screws. Here is the newer layout. Happy modelling!


-
Dragon Panther A with Zimmerit
GazzaS replied to GazzaS's topic in LSM 1/35 and Larger Work In Progress
Thank you, my friend! -
Dragon Panther A with Zimmerit
GazzaS replied to GazzaS's topic in LSM 1/35 and Larger Work In Progress
Thank you fellas. Still more to do... including a base and some minor work on the spots where the Zimmerit has chipped off. -
Another Trumpeter P-51C air racer WIP
GazzaS replied to JohnB's topic in LSM 1/35 and Larger Work In Progress
Looks quite sharp, John. Any racers ever have the 'Malcolm' hood? -
Tamiya 1/12 Ferrari 312T
GazzaS replied to Peterpools's topic in LSM 1/35 and Larger Work In Progress
Nice start, Peter! You have some nice clamps. -
Duchess of Kingston - Beauty of the Seas - Wooden Sailing Ship 1/64
GazzaS replied to DocRob's topic in Non LSM 'WIP
That's nice looking work, Rob! I did a scratch build (never completed) of SMS Seydlitz with a meter long hull using balsa. I used plastic-wood for filler... I needed lots of it! -
Duchess of Kingston - Beauty of the Seas - Wooden Sailing Ship 1/64
GazzaS replied to DocRob's topic in Non LSM 'WIP
Very nice planking, Rob! Starting to look very ship-like.