
Rodolfo Torres Vazquez
-
Posts
138 -
Joined
-
Last visited
Content Type
Profiles
Forums
Events
Gallery
Everything posted by Rodolfo Torres Vazquez
-
 Thanks for your kind comments friends! Regards! Rodolfo
 -
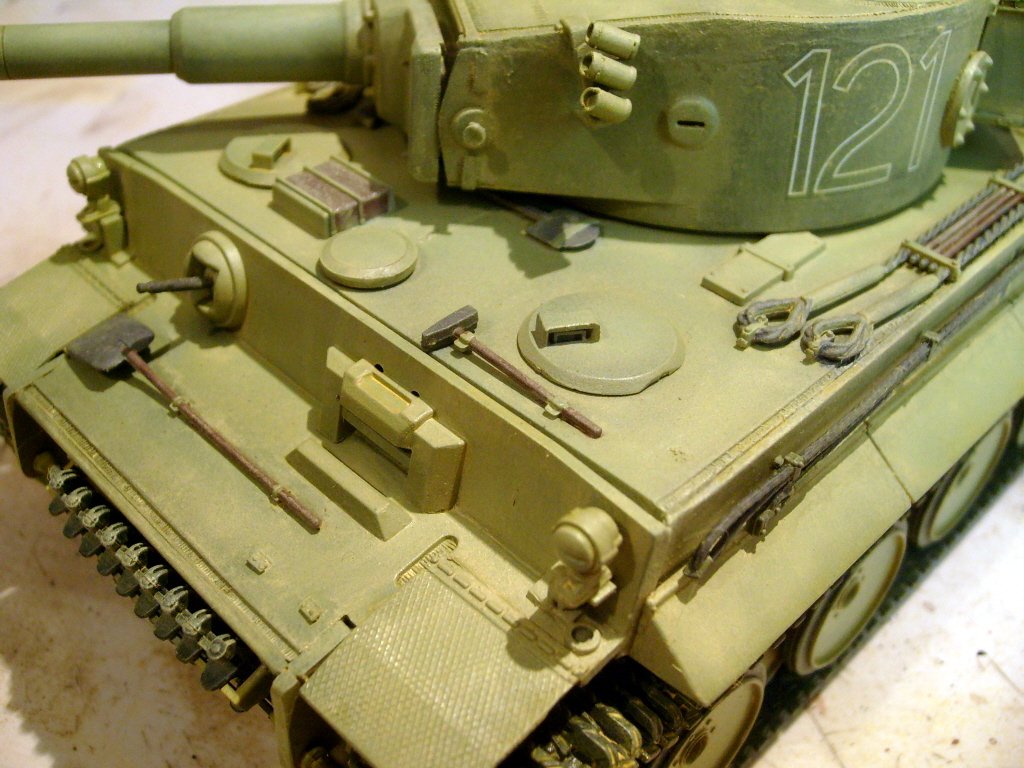
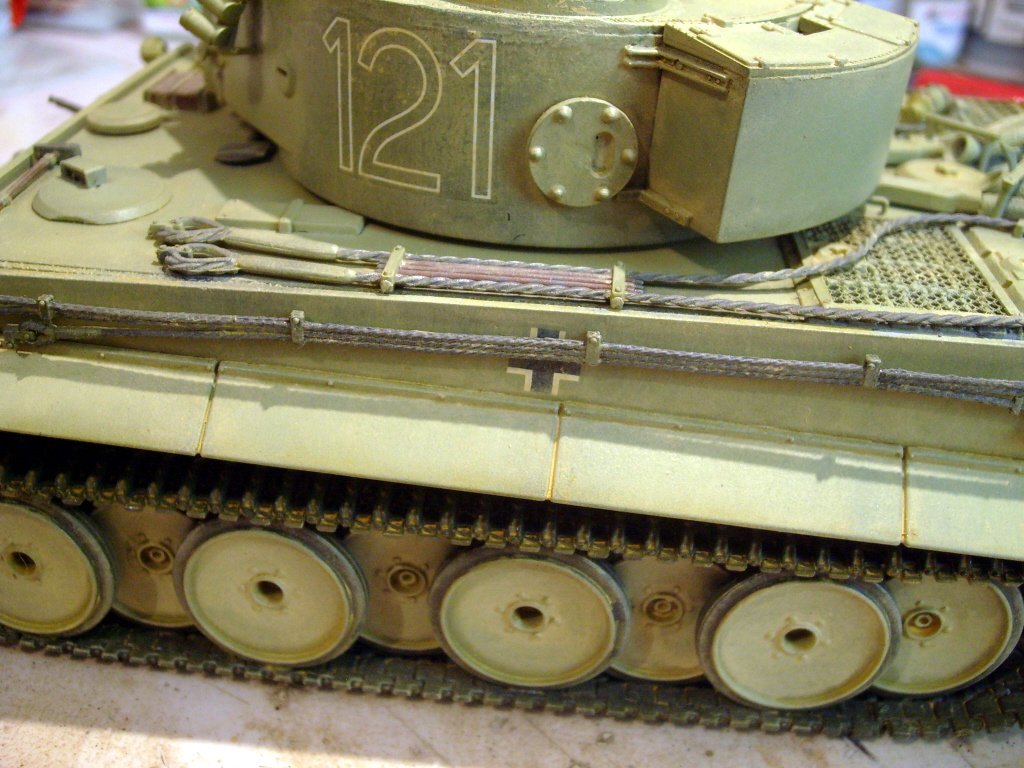
Thanks again for your kind comments @Jeff More pics: I applied a ligth weathering with solvent spirit and oils with yellow naples. Next step: working the tracks and after I will outline or retouch with pigments and final weathering with airbrush. Regards! Rodolfo


-
Thank you my friend! Regards! Rodolfo
-
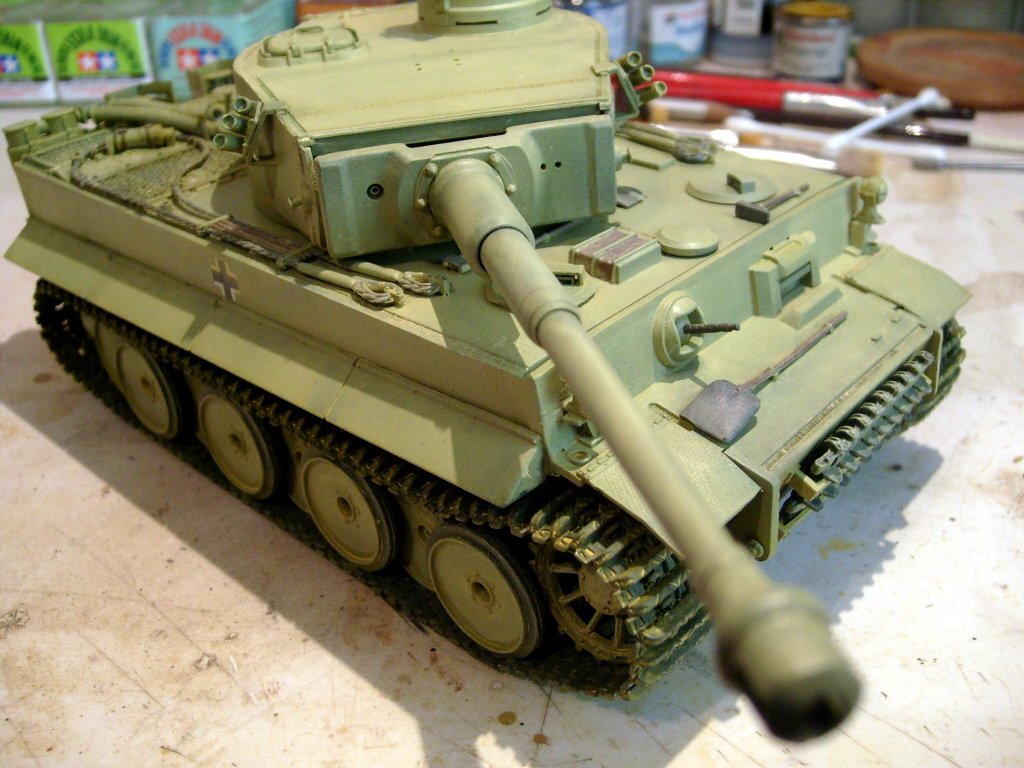
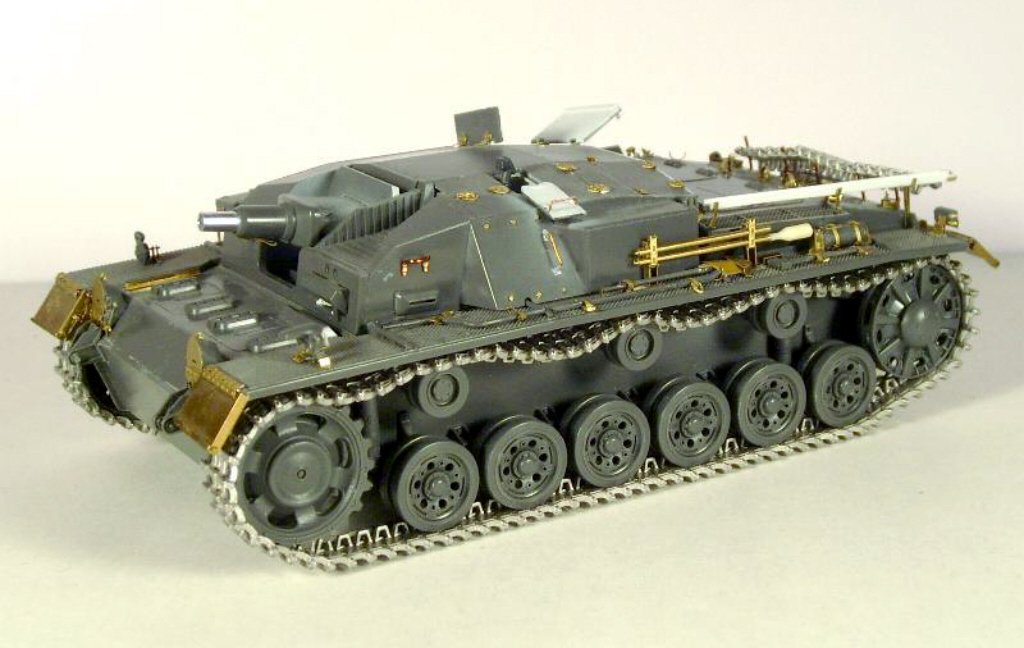
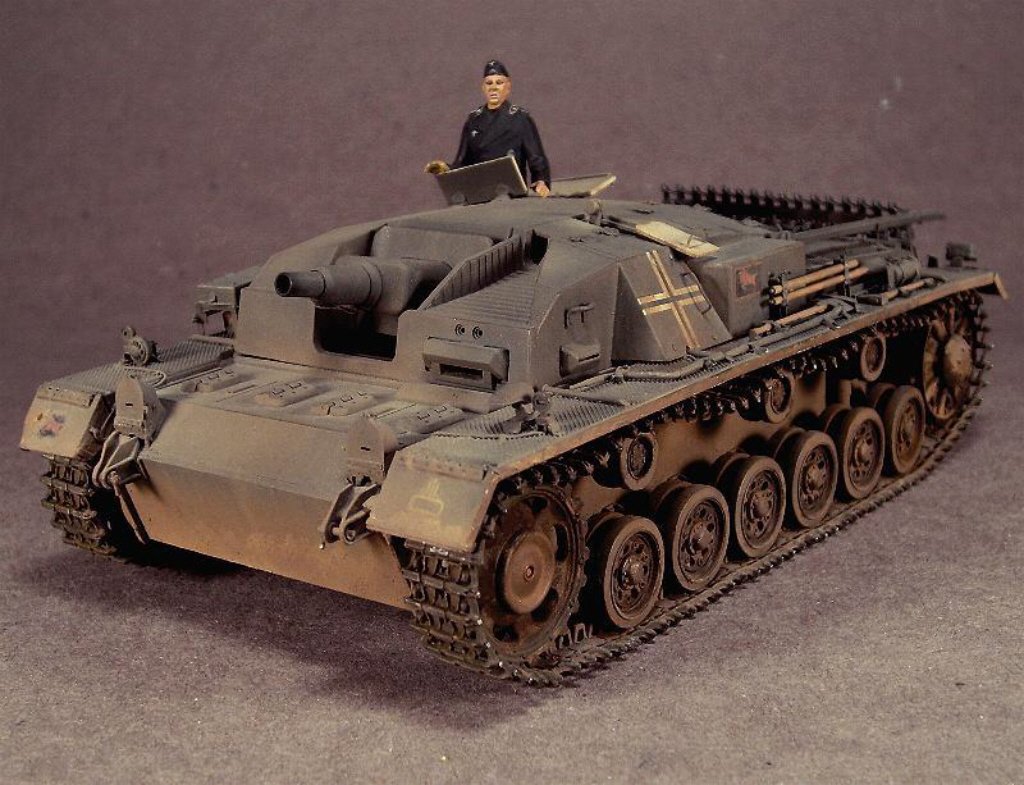
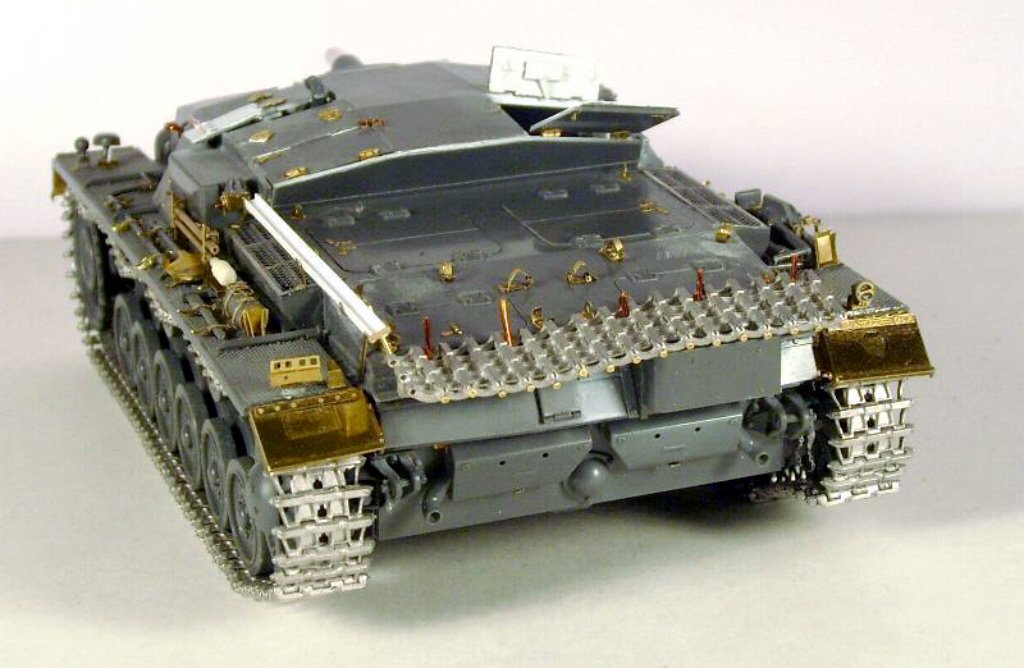
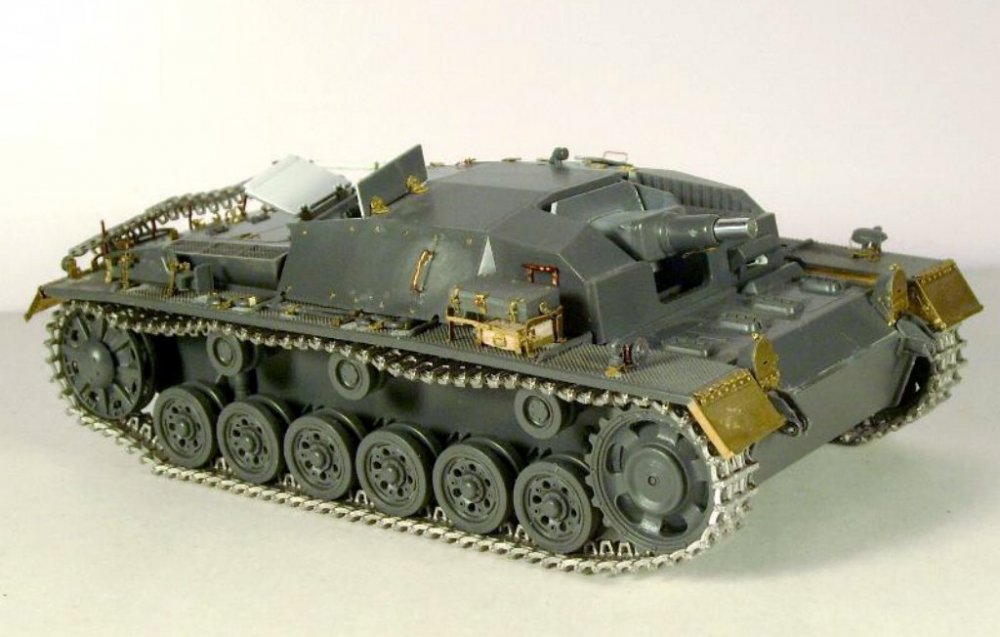
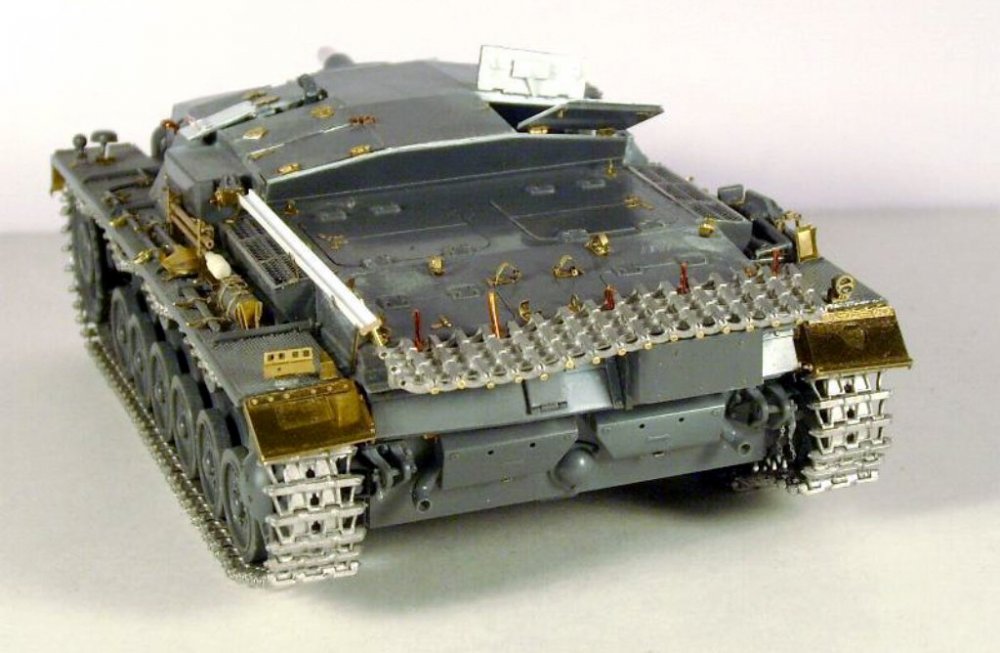
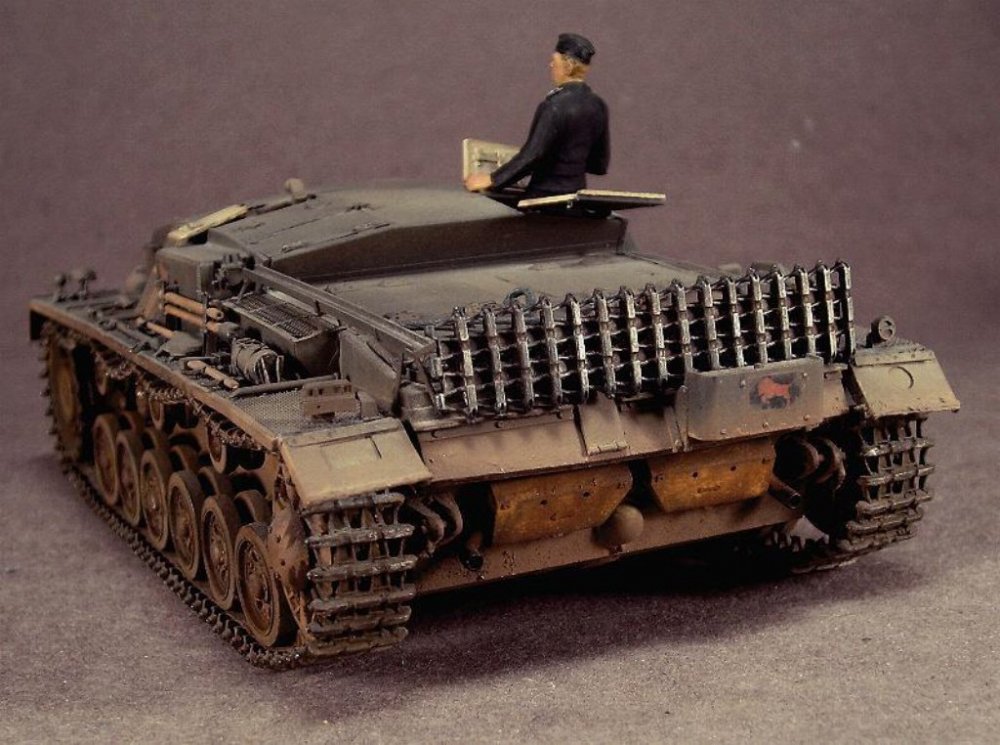
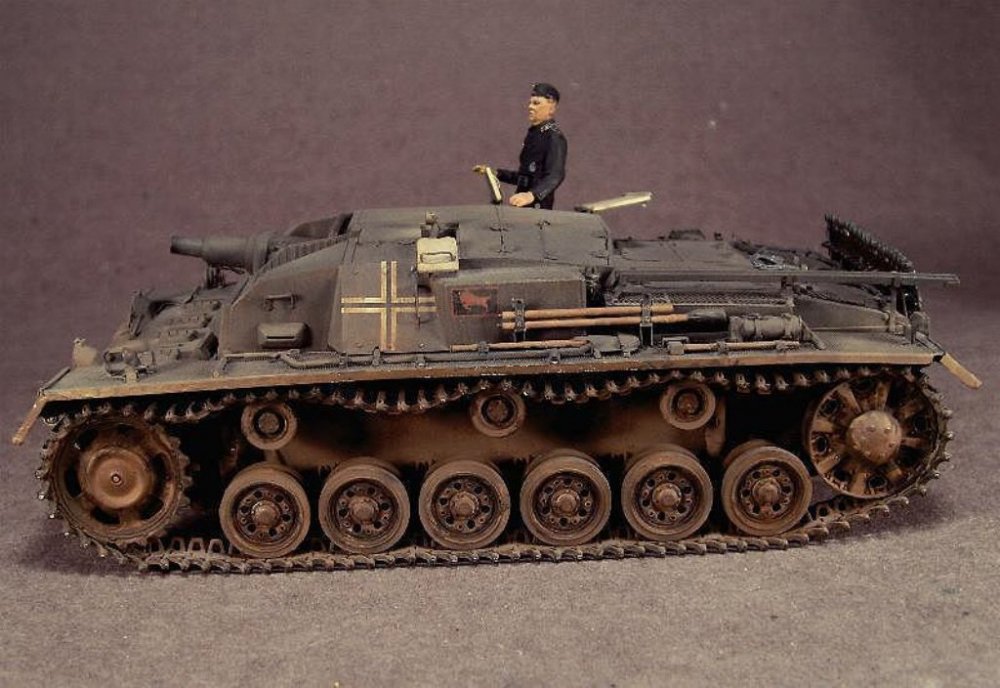
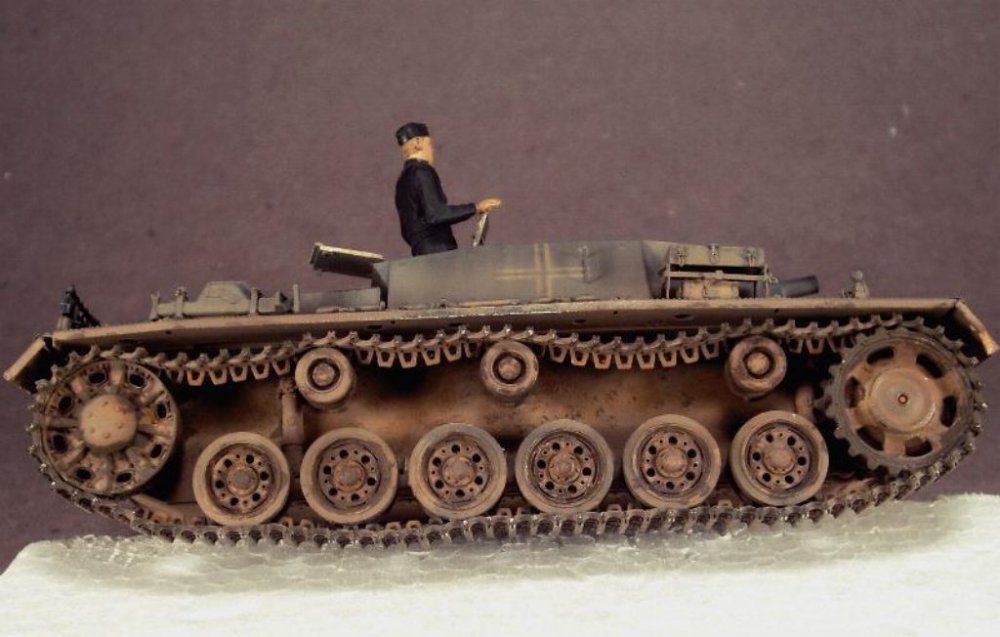
I want to share with us one of my past works. I hope you like it!. Tamiya 1/35 -Voyager Photoetched and tracks of Friulmodels Blitzkrieg! - Greece 1941 Painting: 1.- I started to paint. First I applied the white color as coat base because grey over the plastic grey not is very recommendable 2.- Painted the model with grey-panzer Decals: Of the kit using "Micro Sol" before to add the decals and "Micro Set" for fix them. Detailing and Weathering: I applied during three days 3 filters and the results was a little change in the color, please check the following pics with the previous before of the filters. The tools were painted too. I Added a little impact on the front fender. Filters: I used turpentine spirit 95% mixed with humbrol 5% - 1st. dark earth (gloss) #10 - 2nd. matt iron-grey # 92 and 3rd. matt steel grey # 87. Tools: Jack, metal bars, metal box and hooks with Humbrol mettalic gunmetal # 53, wooden bars and box with matt white # 34 first and over it leather brown # 62 and finally the tweezers with Vallejo orange-brown # 981 I made a weathering in the hull and surface using a mixed of turpentine spirit and oils. In the chassis and wheels was added a mix of white pigments and Mr. Surfacer 1000 of Gunze for make a dry earth. For the tracks I used Metalcotte black (special for the metal pieces) and after dry I added a light touch of leather brown of Humbrol and painted with Vallejo chocolat-brown. Finished with airbrush of Tamiya's buff and flat-earth. Pigments on the muflers Regards! Rodolfo


-
Dragon/Tamiya T-34/43 complete 18/Mar/19
Rodolfo Torres Vazquez replied to GazzaS's topic in LSM Armour Finished Work
Great work, the detail of the tank going up the hill is excellent! Regards! Rodolfo -
Thanks for your kind comments @Jeff . Normally I paint the wheels and tools for separate, sometimes not. I am returning to build again after of 4.5 years and I commeted one mistake with the front of this Tiger. All we have talent, it is only patience and relax NOTE: Sorry, I forgot to remove the front support for tracks, remove now is to destroy the front and re-start again , I prefer to use adding the tracks . I proceeded to make a light wash with "matt trainer yellow" Humbrol #24 thinned with Enamel Thinner of Humbrol. As you see, the colour has been changed satisfactorily to the color I was looking for.. Next step: Weathering. Regards! Rodolfo
-
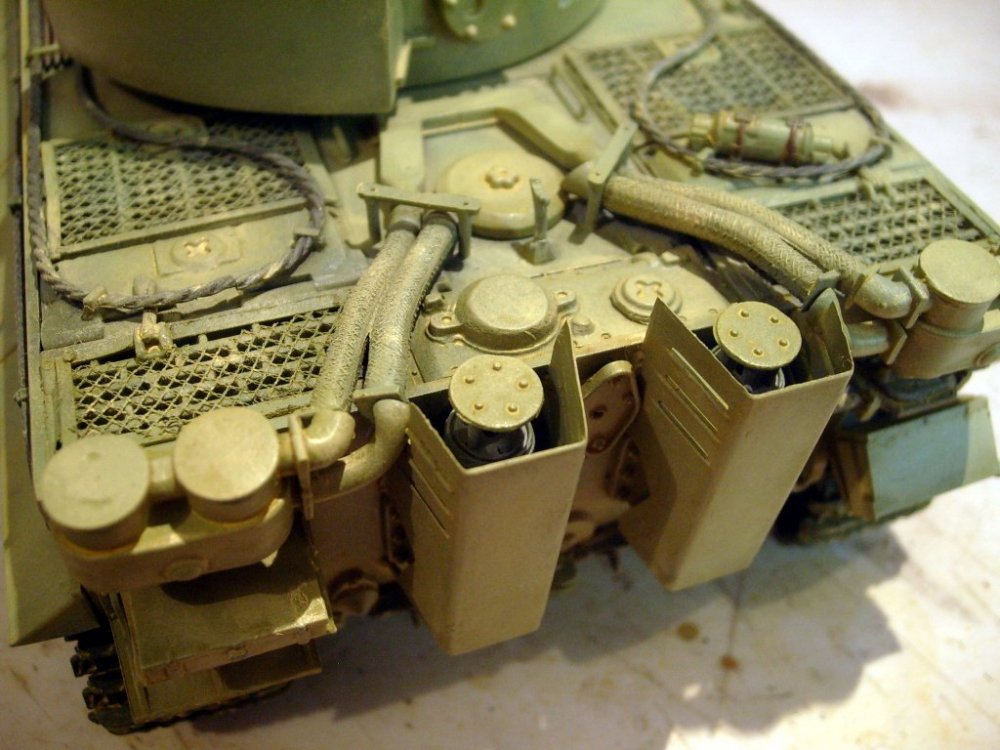
Thanks for your kind comments Phil!. More pics! Details of tools, wheels and tracks!. I will retouch 1 tool. Next step: Coat of Satin Varnish of Vallejo and Decals. I do not recommend using matt varnish because it can whiten the model. Using the satin varnish is better because the washes "runs" for better down or where you want the filters Regards! Rodolfo
-
Super-sherman, nice version; I like Tamiya, the quality is always very good!. Excellent WIP. Regards! Rodolfo
-
Hello friends! More pics!. Ready the paint work, I mixed Duck-egg-green 75% + Tank green 25% of Vallejo: Next step - I will detail the tools, wheels and tracks! Regards! Rodolfo
-
Thanks for your kind comment Martin!. Here is the first application of painting using for shades "tank-green" of Vallejo. Applied "tank-green" of Vallejo in all surface without affect the shades. Regards! Rodolfo
-
Yes, I will add them before to start the weathering. I corrected some imperfections using Putty of Vallejo and adding some rough surface above of the turrer for the weathering. Regards! Rodolfo
-
Hello friends! Before to start the paint, I applied a coat of Surface Primer of Vallejo. Regards! Rodolfo
-
Ready for paint!. I have built this Italieri Tiger in simple form without complications in order to recover my "sleeping skills", hee,hee. Conclusion: I will need more patience than before and more attention to detail in my next project. Next step: I will see how I am in the matter of painting. I have checked my compressor and it is okay and my airbrush apparently fine after of 4.5 years without use. Regards! Rodolfo
-
takom 1/35 Panther Ausf. A Early Production, full interior
Rodolfo Torres Vazquez replied to JayDee's topic in Armour/AFV Reviews
Thanks my friend!. I will build another projects before of this. Regards! Rodolfo -
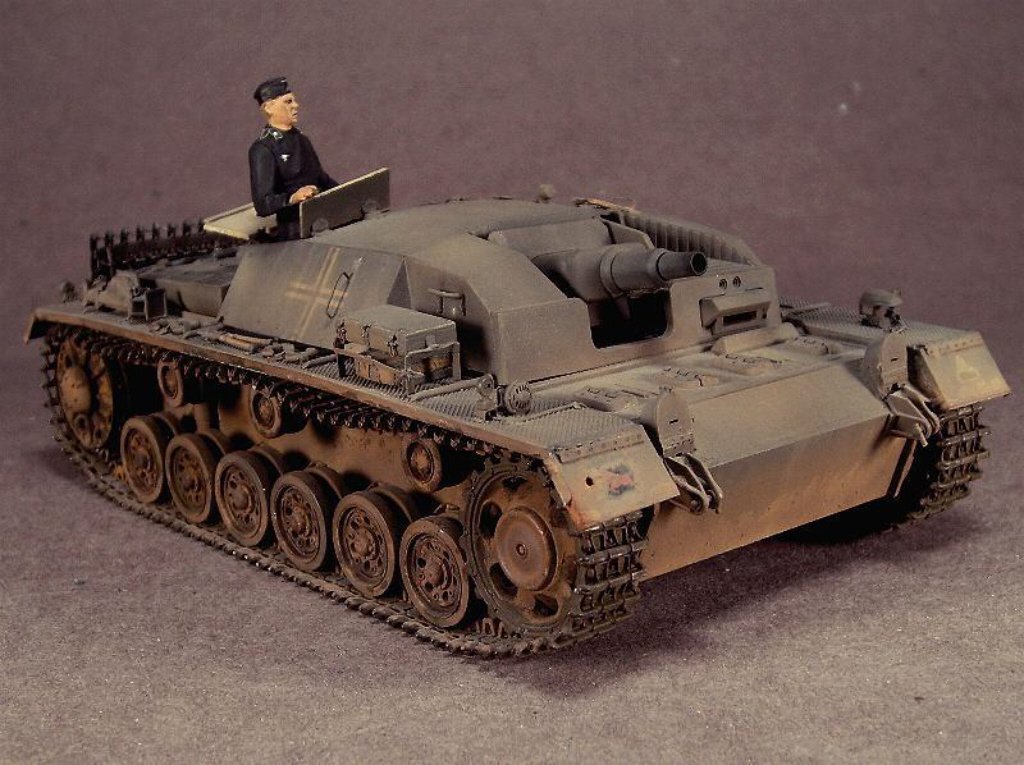
Hello friends! More pics!. I applied a weathering using ATL (Mexican) pigments and pencil-pigment Koh-I-Noor - Hardtmuth from Czech Republic. Regards! Rodolfo
-
takom 1/35 Panther Ausf. A Early Production, full interior
Rodolfo Torres Vazquez replied to JayDee's topic in Armour/AFV Reviews
thanks for your help friends!. @JohnB I think that is not necessary to send scans, now I have the panoram clear, but if you want the scans please confirm, thanks again! Regards! Rodolfo -
takom 1/35 Panther Ausf. A Early Production, full interior
Rodolfo Torres Vazquez replied to JayDee's topic in Armour/AFV Reviews
Thanks!, but the rest of the instruments what colors?, except periscope that is the same than others. Regards! Rodolfo -
takom 1/35 Panther Ausf. A Early Production, full interior
Rodolfo Torres Vazquez replied to JayDee's topic in Armour/AFV Reviews
Great review!!!. Today arrived my new kit, but I have checked the instructions sheet and I saw that it not have include the Interior colors of the upper part of Turret, any idea of this?, what colors must be use for it?, thanks! Regards! Rodolfo -
New Member From Mexico
Rodolfo Torres Vazquez replied to Rodolfo Torres Vazquez's topic in General Discussion
Yes, Guadalajara, Monterrey and Mexico the people are very impatient and sometimes aggressives, the pay motorway are excellents, but the free motorway sometimes are a nightmare, but the important is enjoy! Regards! Rodolfo -
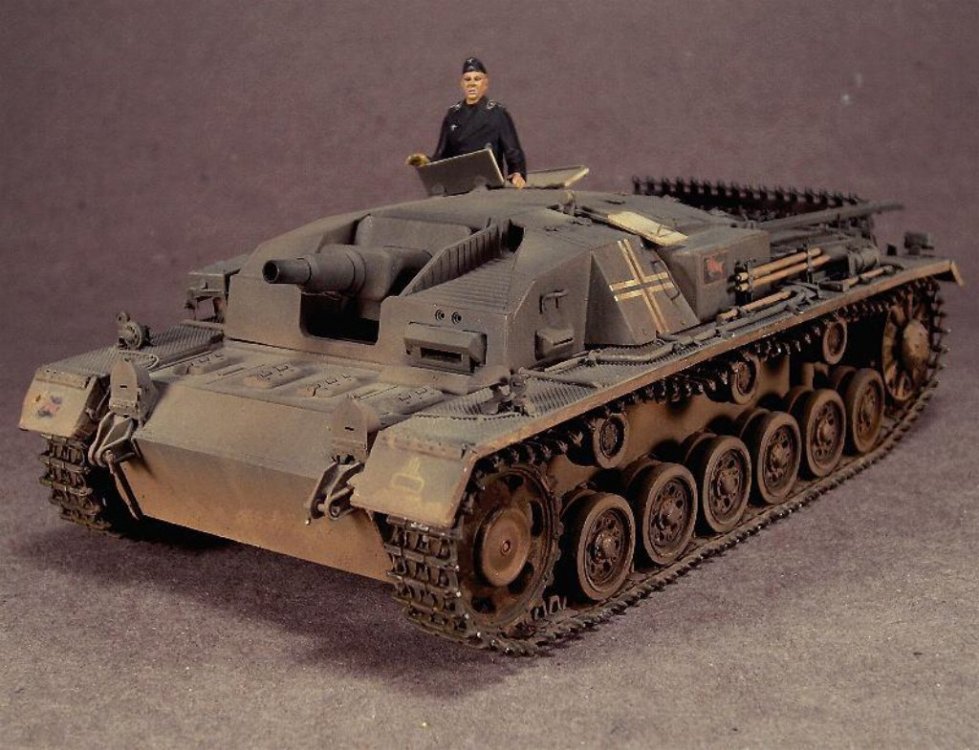
Thanks for your kind comments! More pics! Painted interiors of turret with Vallejo; I cut the muzzle break for adjust with the Jordi gun barrel. I will add a light weathering before to glue the turret. Regards! Rodolfo
-
New Member From Mexico
Rodolfo Torres Vazquez replied to Rodolfo Torres Vazquez's topic in General Discussion
Thanks for your welcome @Ivan Ivanovich @bluebottle you have many patience, many hours in the car! Regards! Rodolfo -
New Member From Mexico
Rodolfo Torres Vazquez replied to Rodolfo Torres Vazquez's topic in General Discussion
Cozumel and the Costa Maya are beautiful!, thanks for your welcome and visited my Country! Regards! Rodolfo -
Tiger 503 In Normandy
Rodolfo Torres Vazquez replied to Rodolfo Torres Vazquez's topic in LSM Armour Finished Work
Thanks for your kind words friend! I forgot add the link of my work, you can see it at: Construction, paint and Weathering. Regards! Rodolfo -
New Member From Mexico
Rodolfo Torres Vazquez replied to Rodolfo Torres Vazquez's topic in General Discussion
Thanks for your welcome friends! Regards! Rodolfo -
Thanks for your kind comments!. @Bomber_County - In my computer I can see the pics very good, but maybe is because I am using pics uploaded in my site. More pics of my work: Tools mounted without problems, except the extinguisher that I placed in oposite side. Beginning the turret with bad luck, in one side plentiful scratches and holes, and the other side is normal. In order to solve this I used Plastic Putty of Vallejo. Regards! Rodolfo