Landlubber Mike
-
Posts
1,277 -
Joined
-
Last visited
Content Type
Profiles
Forums
Events
Gallery
Everything posted by Landlubber Mike
-
ZM Bf 109G Hartmann
Landlubber Mike replied to Peterpools's topic in LSM 1/35 and Larger Work In Progress
Wow, what a fantastic build Peter!! Beautiful work! -
Wow, really nice looking model there Kevin. Great job!
-
Arado 234 Nachtigall on Speed
Landlubber Mike replied to DocRob's topic in LSM 1/35 and Larger Work In Progress
Somehow missed this one Rob, but read through from the beginning. Very impressive! Your canopy work in particular is really incredible Looking forward to seeing this cross the finish line! Primed and smooth as a baby's bottom! -
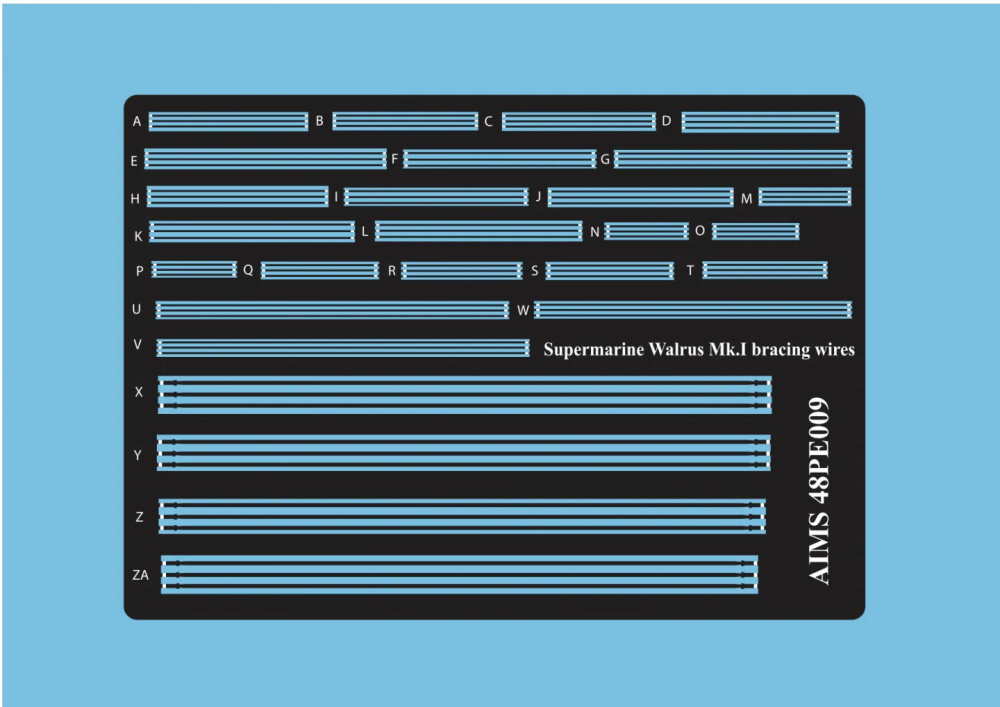
I haven't glued those points in yet, but I believe I removed some of the plastic points in preparation for the Eduard parts so will need to use the Eduard PE at this point I suppose. My guess is I will need to drill holes whether I use the AIMS wires or elastic rigging, just so there is a little more security with the bond. I'll have to play around with it. A big reason why I put the Walrus down and started on the Albatross 😞
-
Thanks! Good to know. Kit part looks awfully plain, hmm...
-
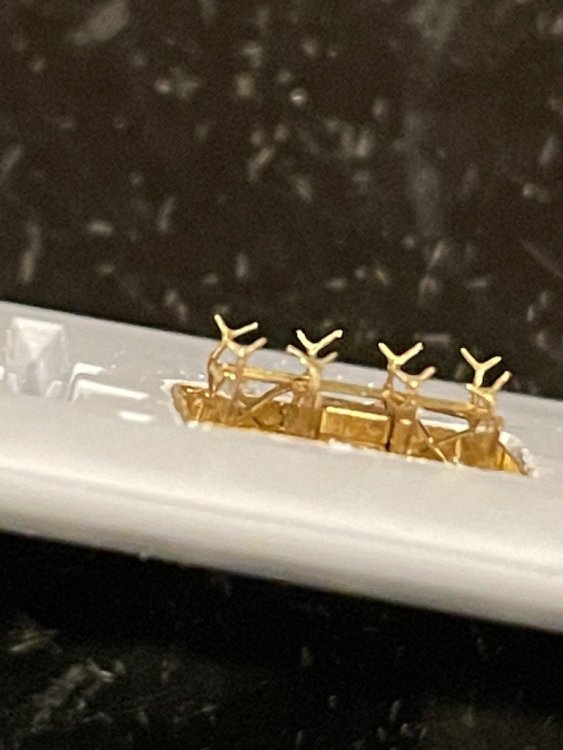
Thanks Rob! I kinda enjoy working with PE, as it's like a puzzle often times. Of course I hate it when I drop parts and spend an hour on my hands and knees looking for them on the floor. CA and I have a better understanding these days, as if the CA is not behaving, I threaten it with accelerator. Makes for a nicer relationship. That was the sense I got from the AIMS instructions as well. What will be tricky I think is slotting the ends where they should connect with the Eduard PE attachment points (see picture below). I think it's just a matter of drilling a small hole in the center of these PE parts, and then running the AIMS wire ends into the hole. I'm probably overthinking this. On my first plastic builds in coming back to the hobby after 30 years, I had stainless wire aftermarket from Starfighter that I added to my 1/72 F4B-4 and P-6E builds. It was really tricky adding them, given that if you didn't fit them just right, the wires would bend. The parts were double wires which made things even worse. Hopefully at this scale and the fact that the Walrus rigging involves single wires, the AIMS set should be easier.

-
Wow @DocRob, those wheels look fantastic! I picked up a couple of spoked wheels from UMM (the spokes are in brass), but will have to look at Copper State's offerings too now that I see your pictures. @ScottsGT, that camo scheme is incredible! Good thing I don't build modern fighters, as I'd be tempted to buy a kit just for that scheme, but that still is awfully tempting!
-
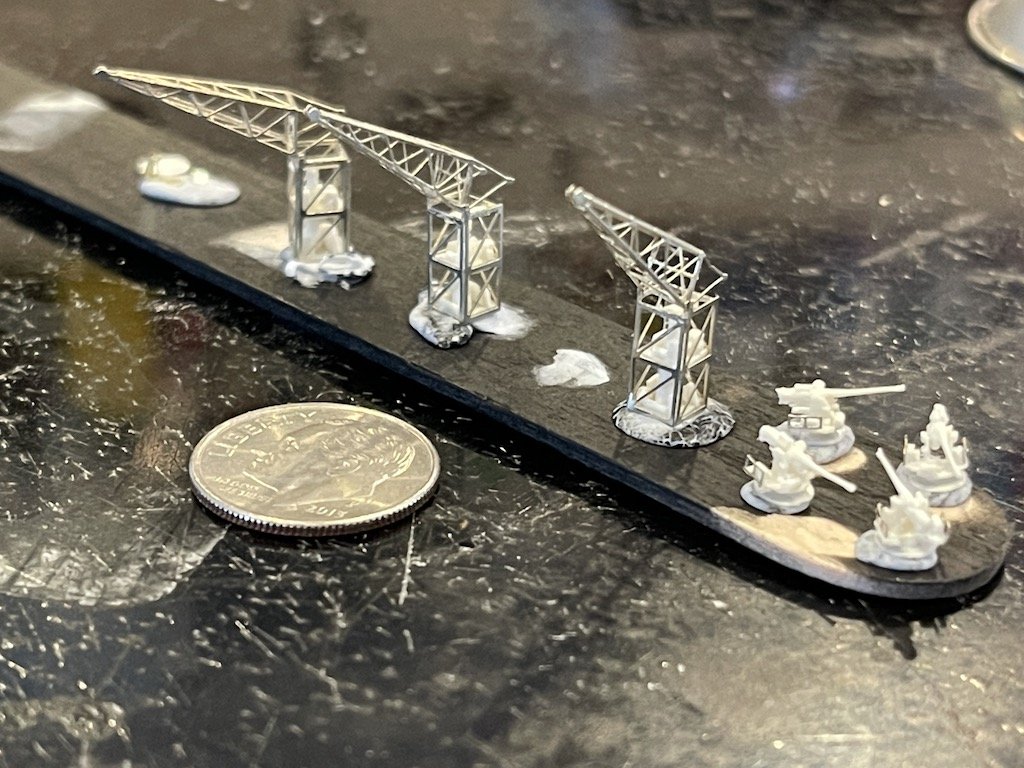
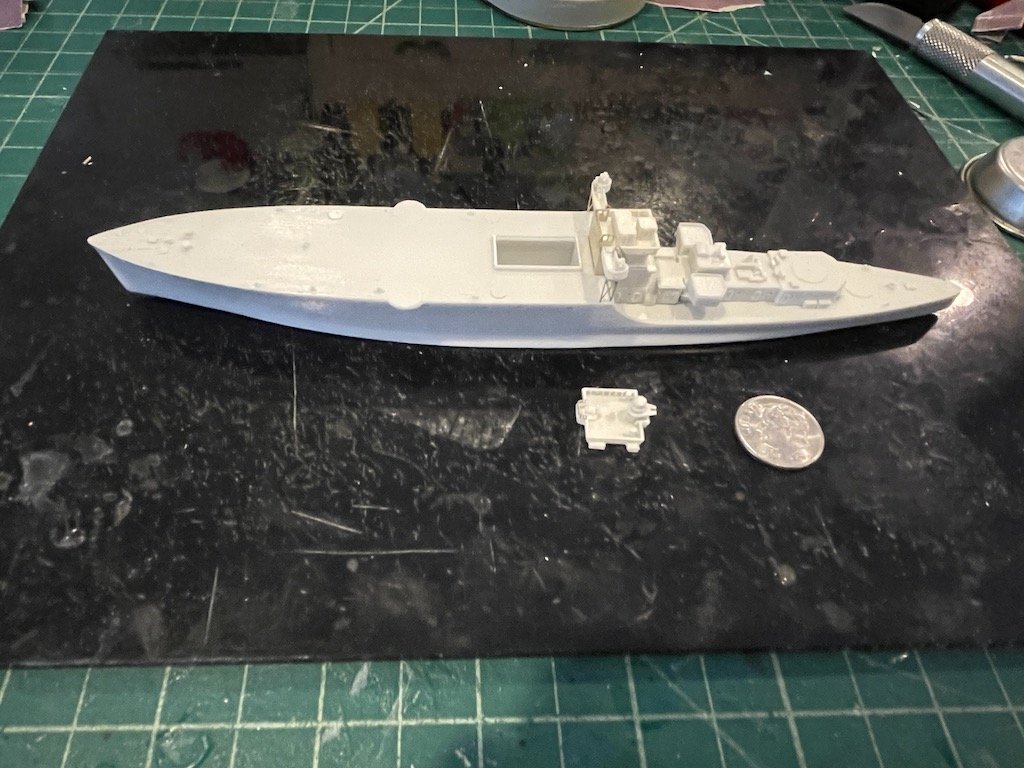
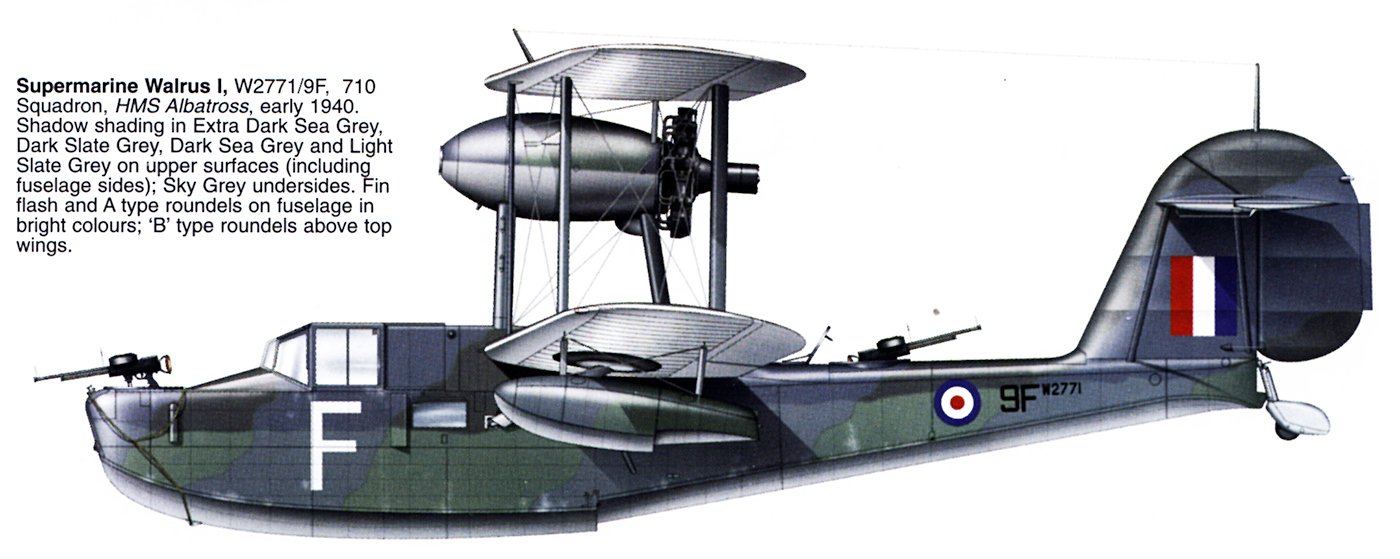
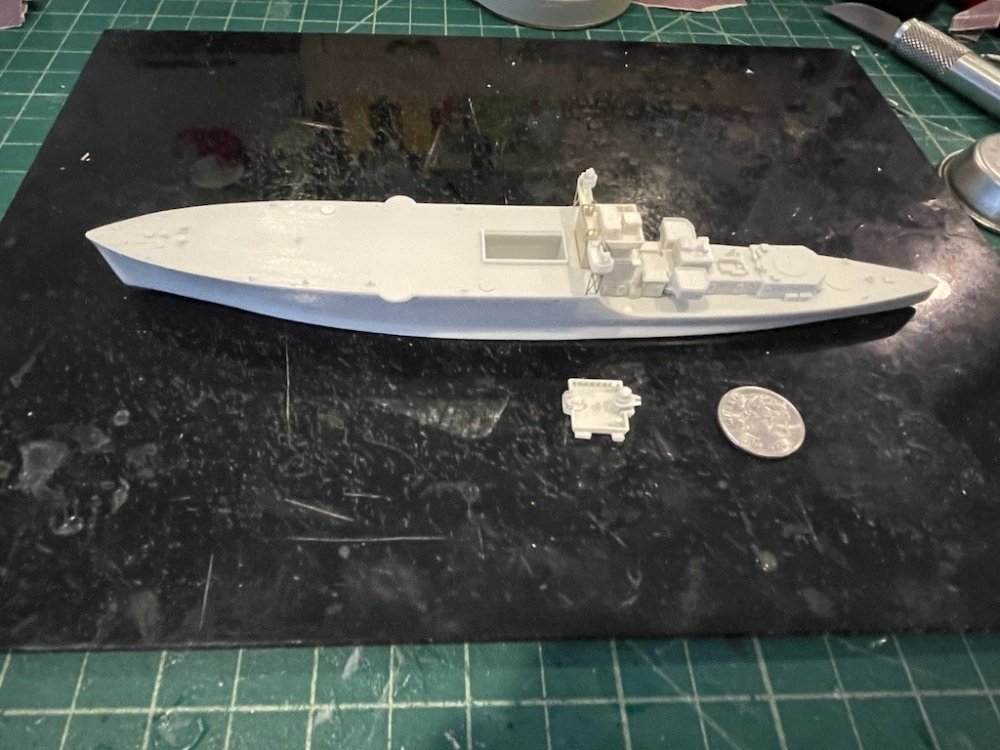
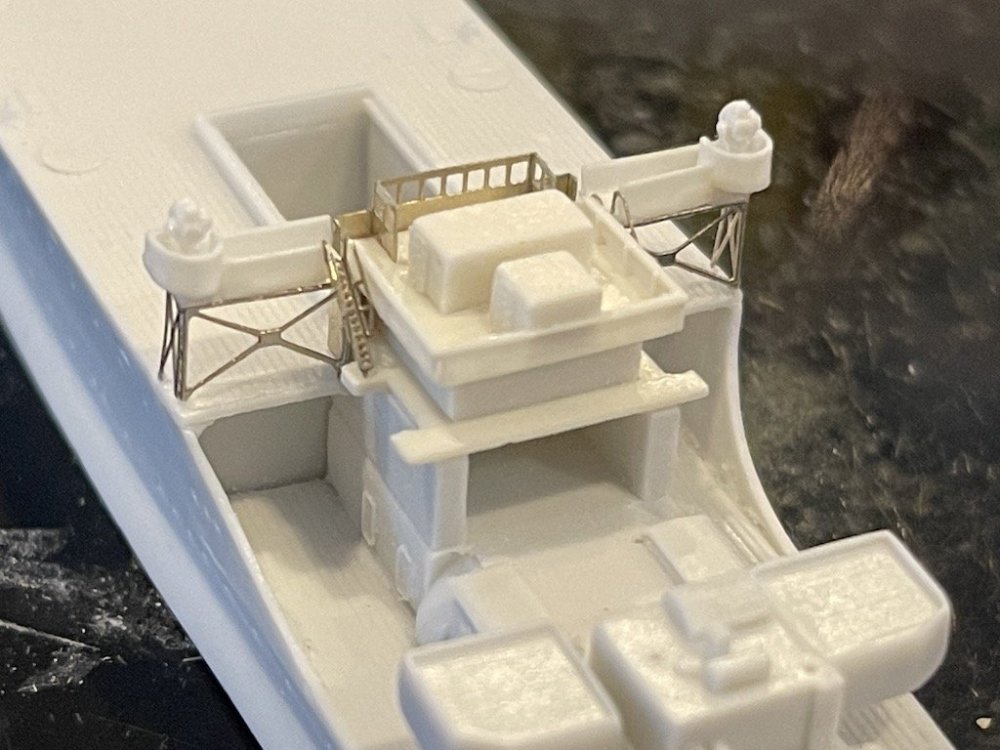
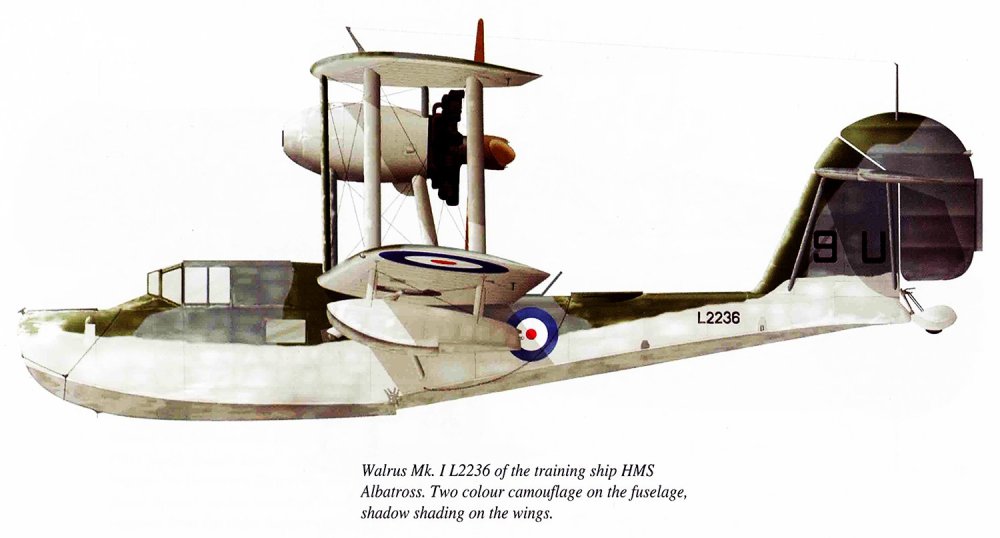
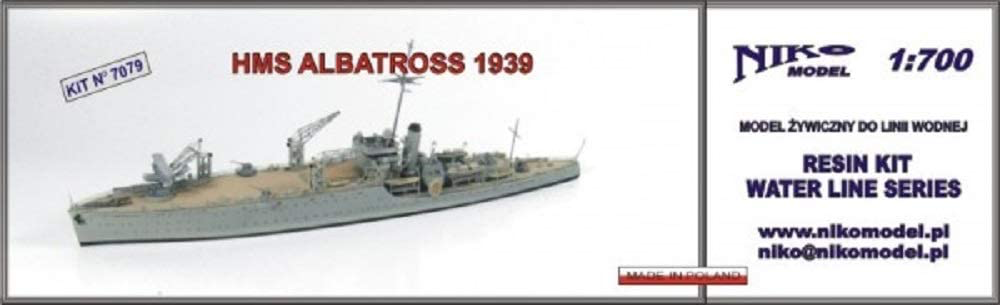
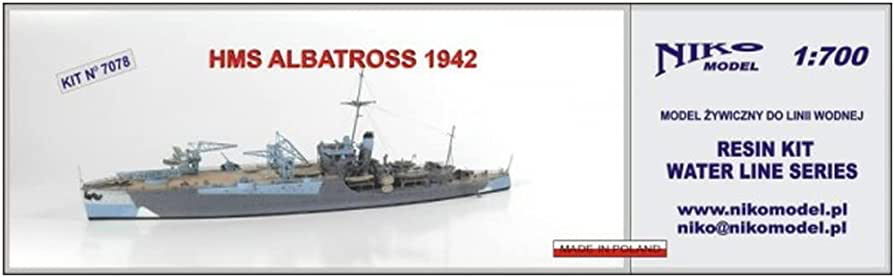
While putting off thinking about the rigging, I did start on the Albatross build. I didn't realize this, but Niko makes two kits for this ship - one from 1939, and the other from 1942. The 1939 version has a plain gray camo scheme, while the 1942 version has the more intricate dazzle scheme. Otherwise, except for a few minor modifications, the kit/ship is the same between the two versions. I have the 1939 kit - fortunately or unfortunately - which matches up with the 1939-1940 schemes for the Walrus I'm planning to model. I still haven't fully decided which of the two versions I'm planning to model. I'm heavily leaning towards the 9F (first below) over the 9U, as I have the 1/32 HpH Walrus on the shelf and the scheme I like from that kit is very similar to the 9U. Back to the Albatross, the Niko kit is very nice. It's a mostly resin kit with a sheet of PE. It's a welcome change from having a plastic kit where you need to eliminate details to replace them with tiny PE parts that you need to glue and fold together. Building guns in 1/700 using PE is not fun! Much easier when the guns or other parts are already fully, or mostly fully, molded in resin. The hull is nicely cast, and didn't require much cleanup. There is a small tab on the stern platform that you need to remove, but that's about it. I gave it a lot of thought, and whereas some builders first paint the hull, then add the various details, I decided to add as many details as I can, then will paint the hull -- first painting the wooden decks, and then taping it and painting the rest of the ship. I think in the long run that will be easier, though there are always advantages and disadvantages to either approach. I built most of the bridge and side platforms up. Here's where I was glad I took the approach of building before painting as it's pretty fiddly trying to get all the various parts to line up. If I painted the bridge assembly first and then tried to install it, there was a good chance it wouldn't fit right. That being said, I'll add the top level of the bridge separately after priming with black primer as there are lots of nooks and crannies that I might not be able to get to with the top level installed. I also built up the AA guns, and mostly built up the three bow cranes which will get cables and hooks. Very nice details on these parts. Thanks for looking in!


-
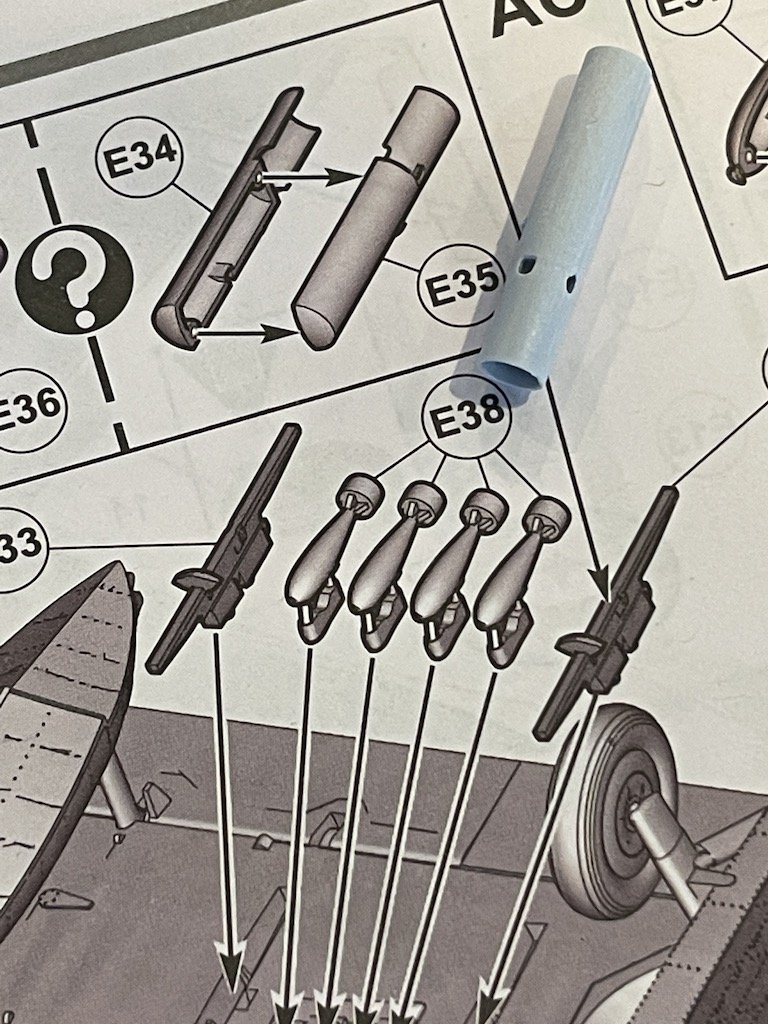
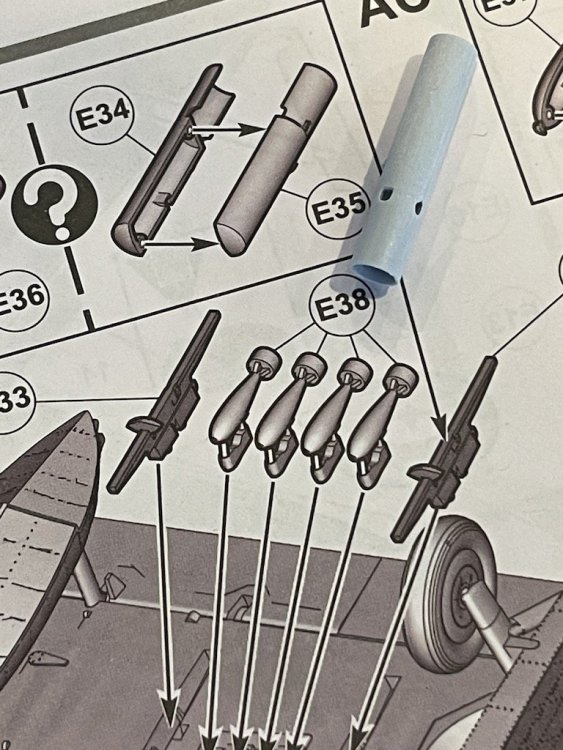
Anyone know what Parts E34 and E35 are intended to be? It's some kind of tube that fits on the under-wing bomb racks. I wasn't planning on adding bombs to the build (at least not the E38 small bombs), but might add this tube thing.
-
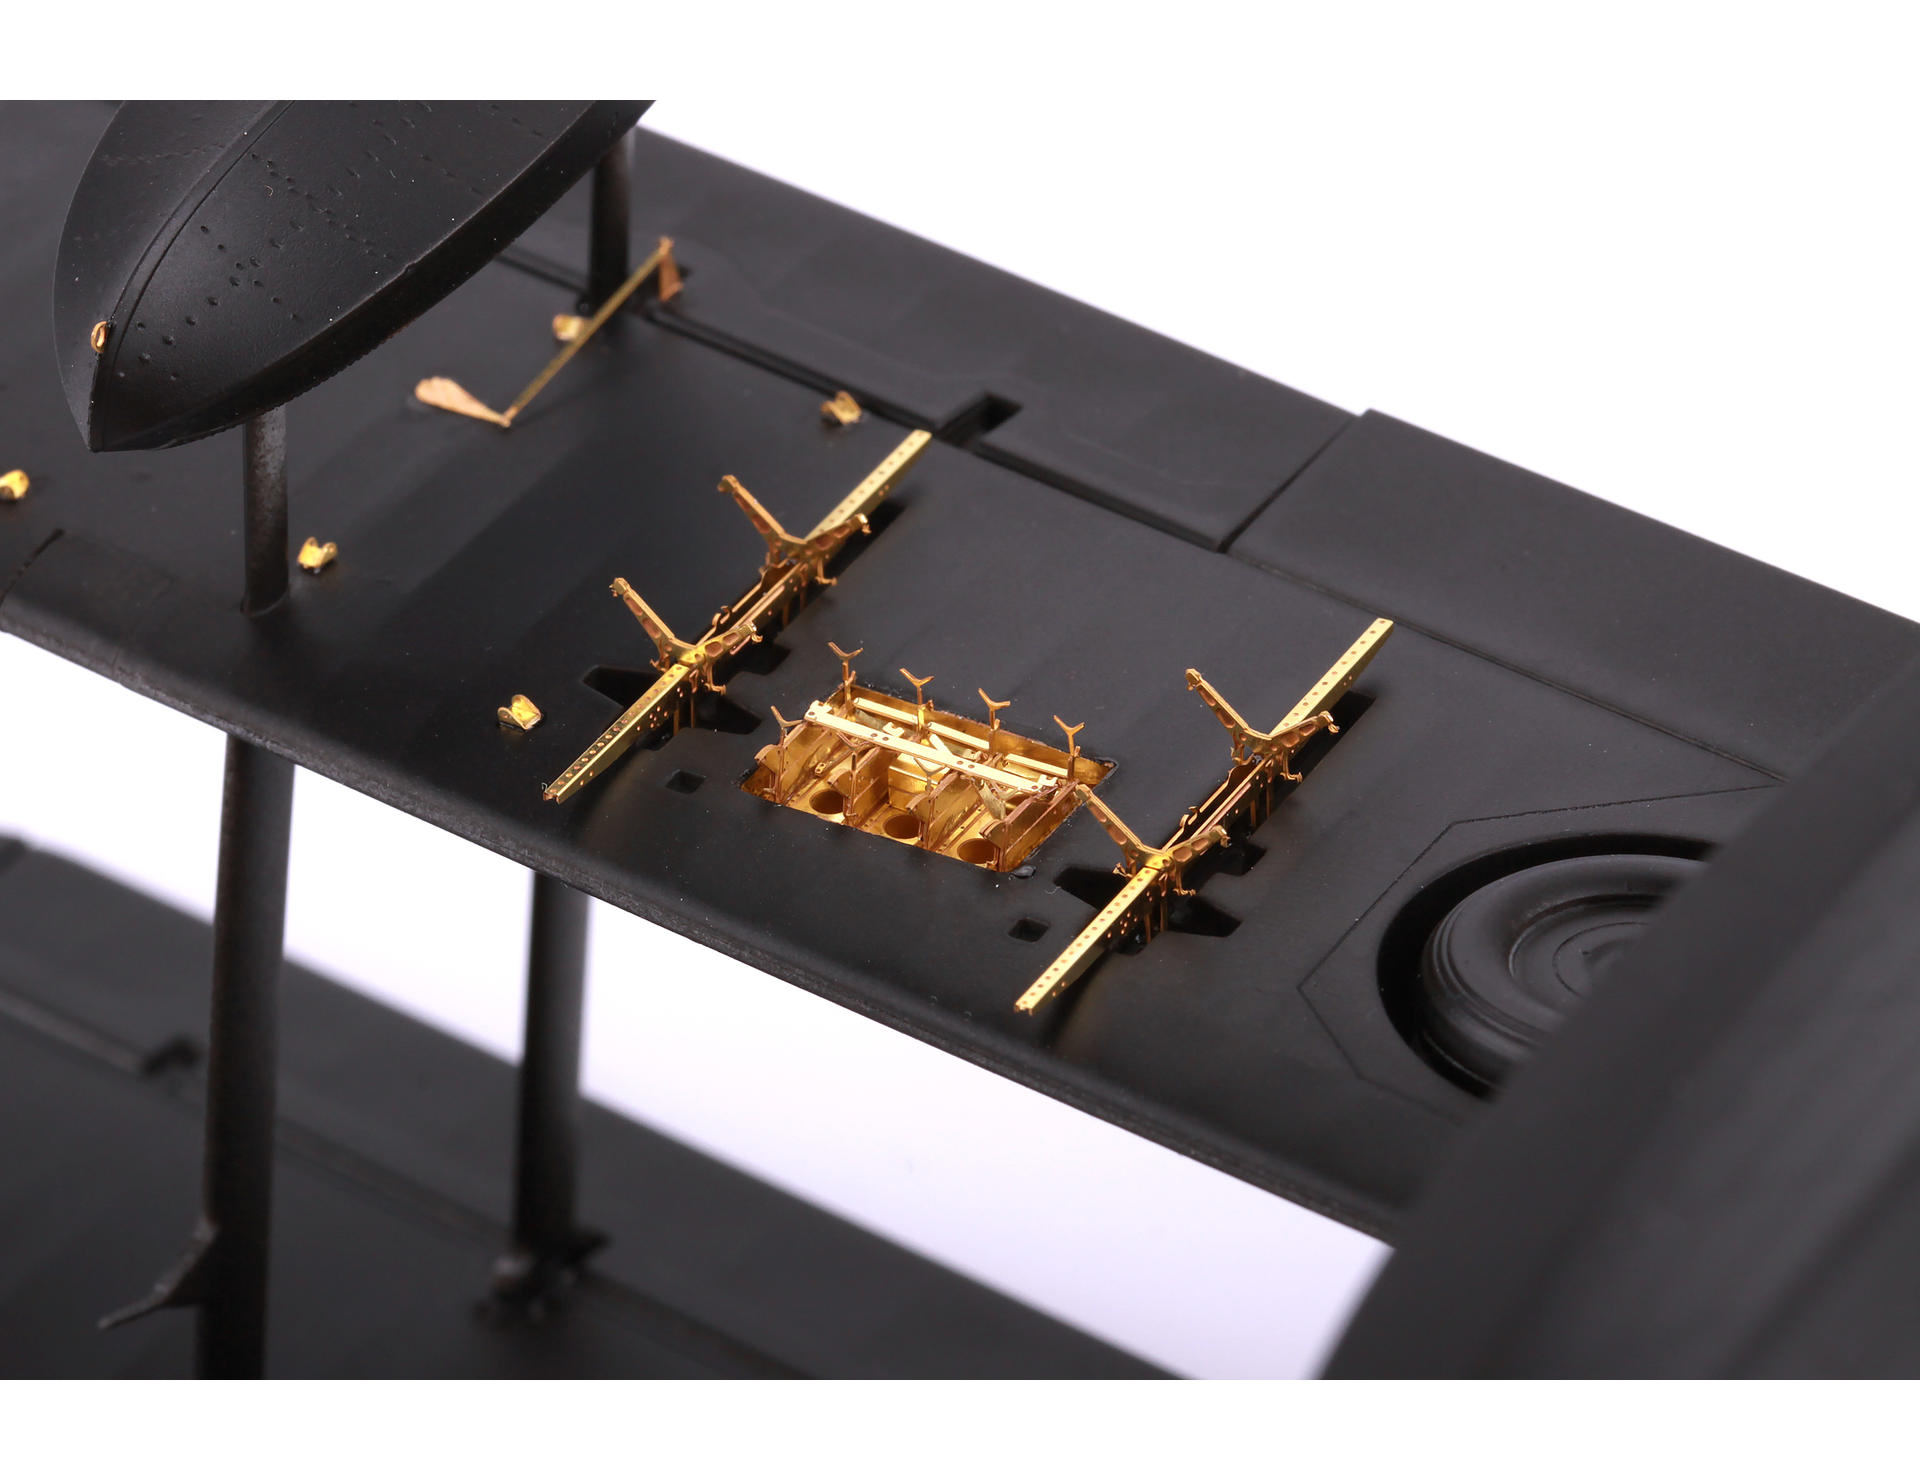
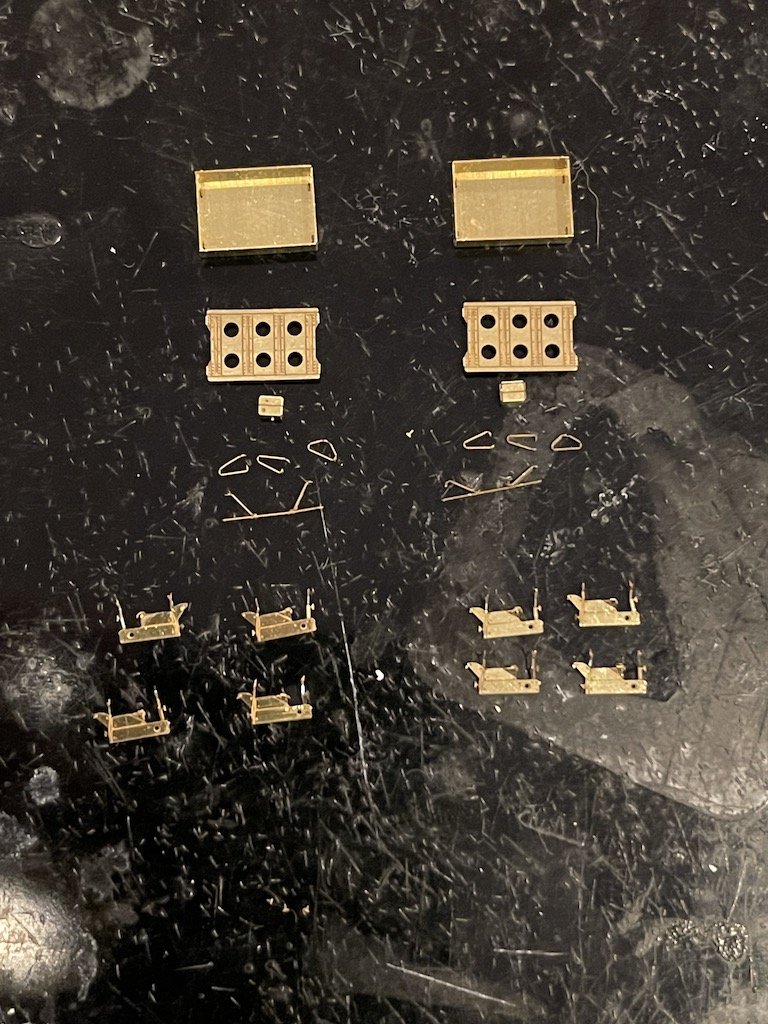
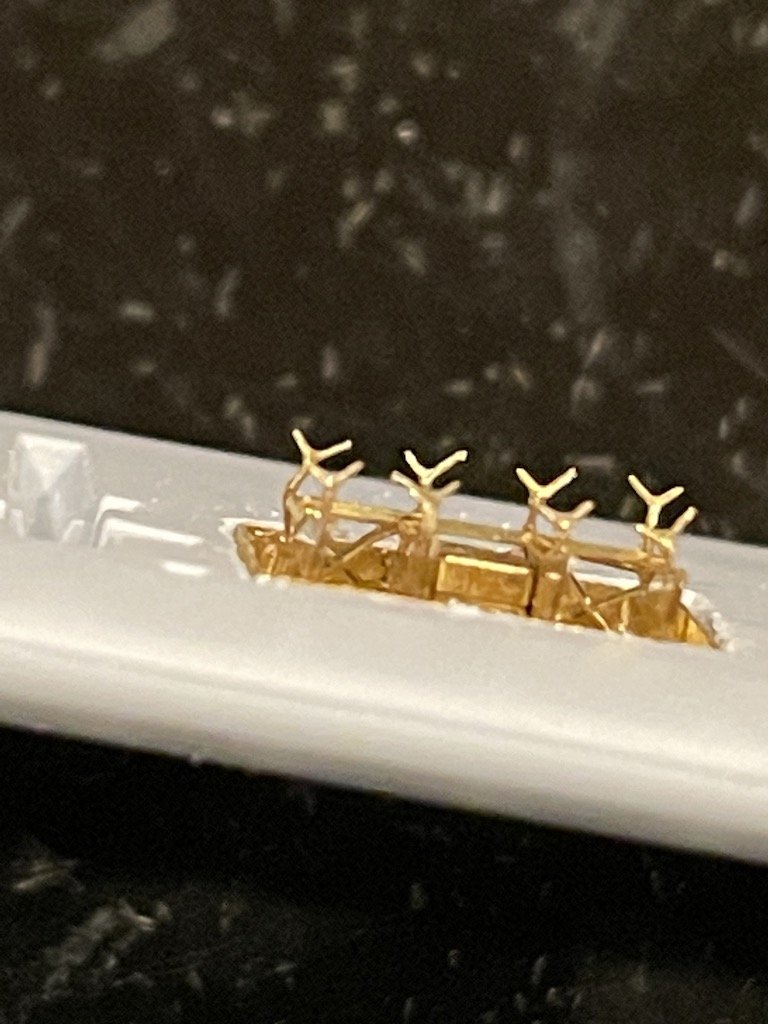
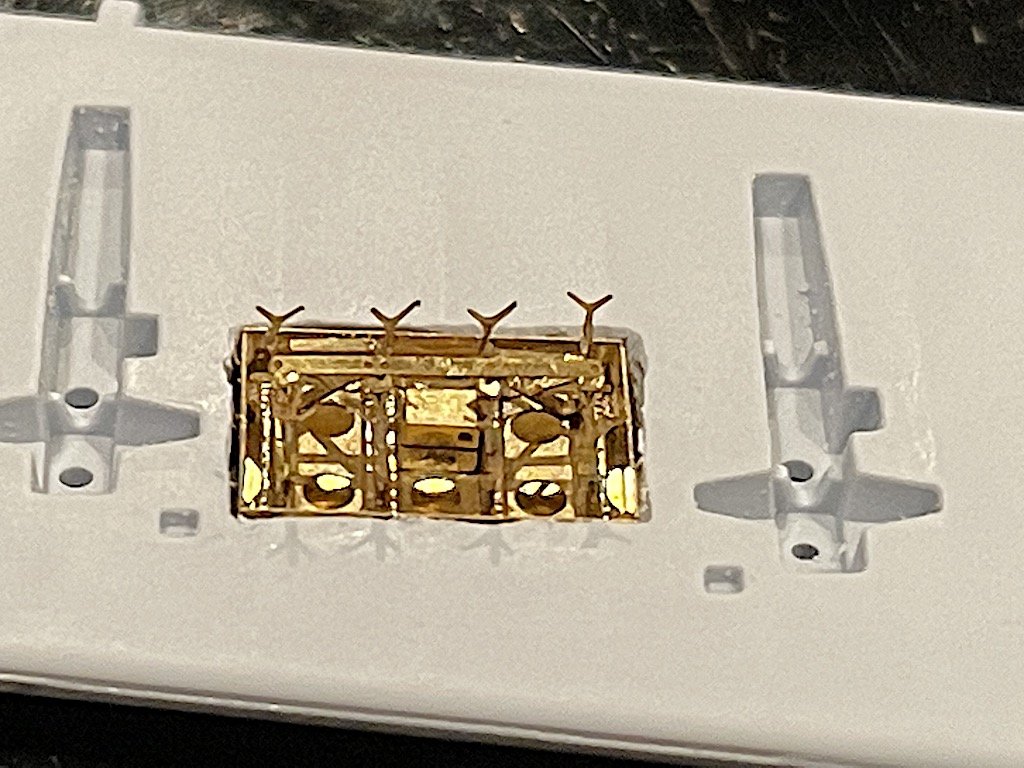
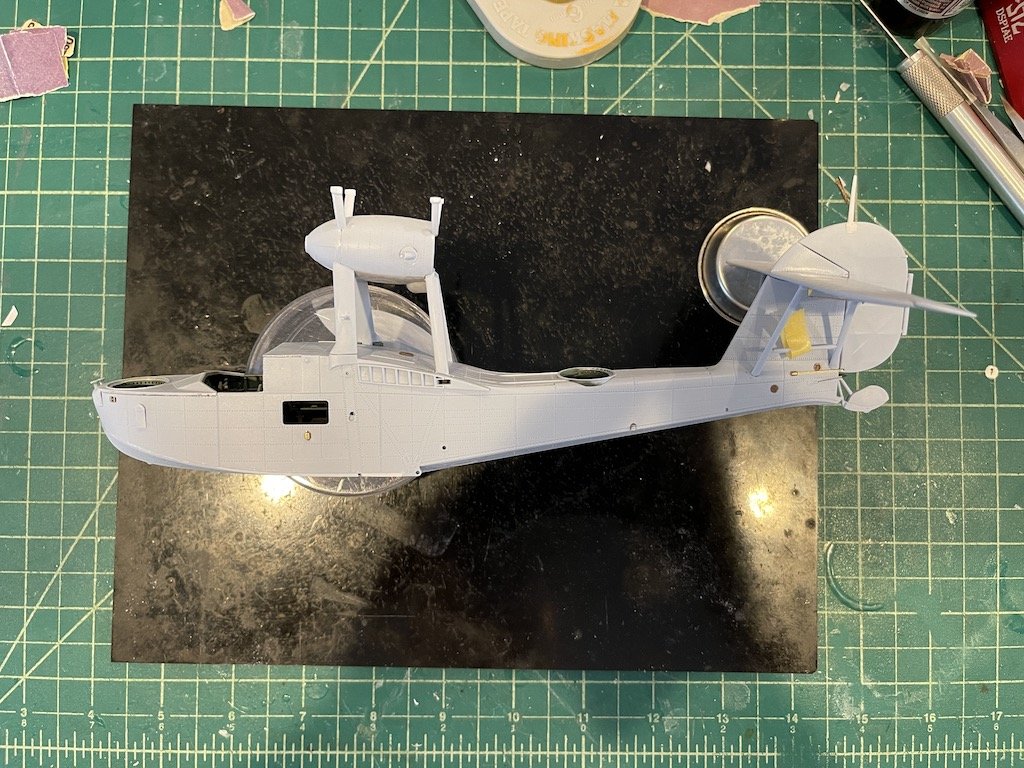
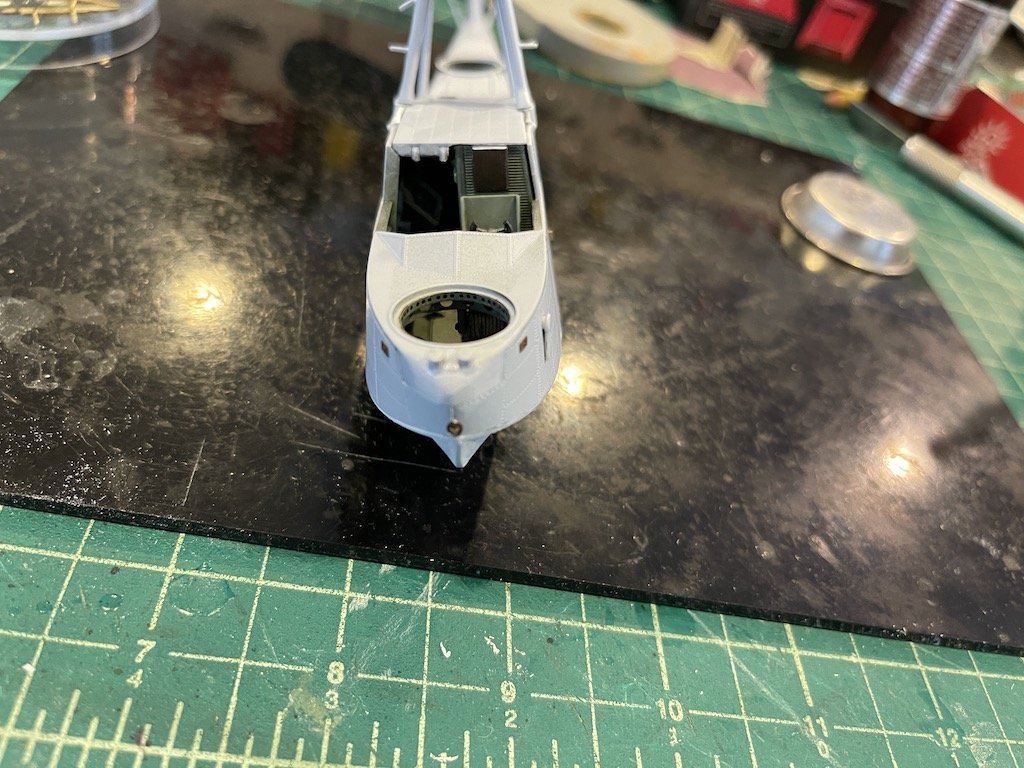
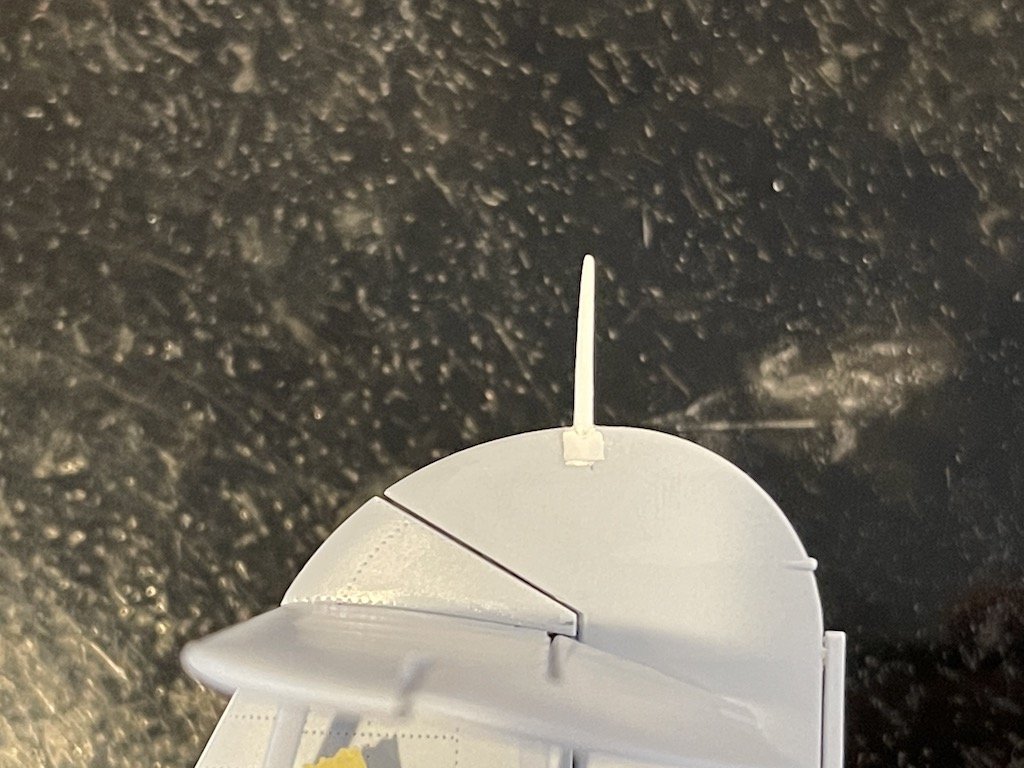
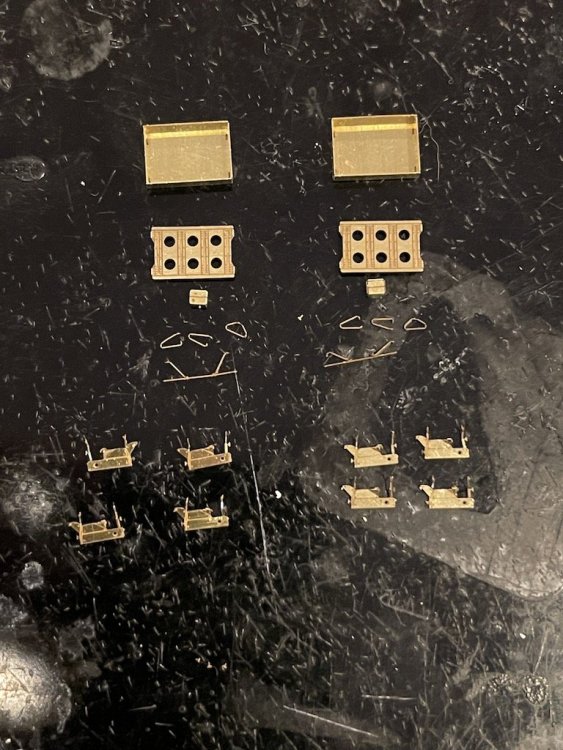
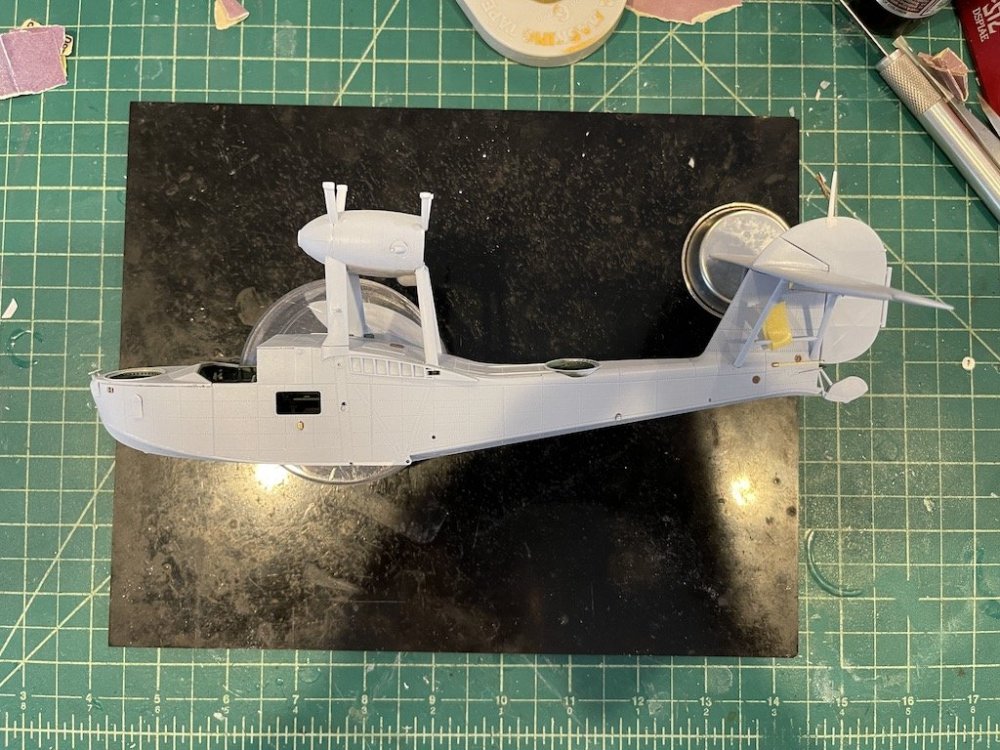
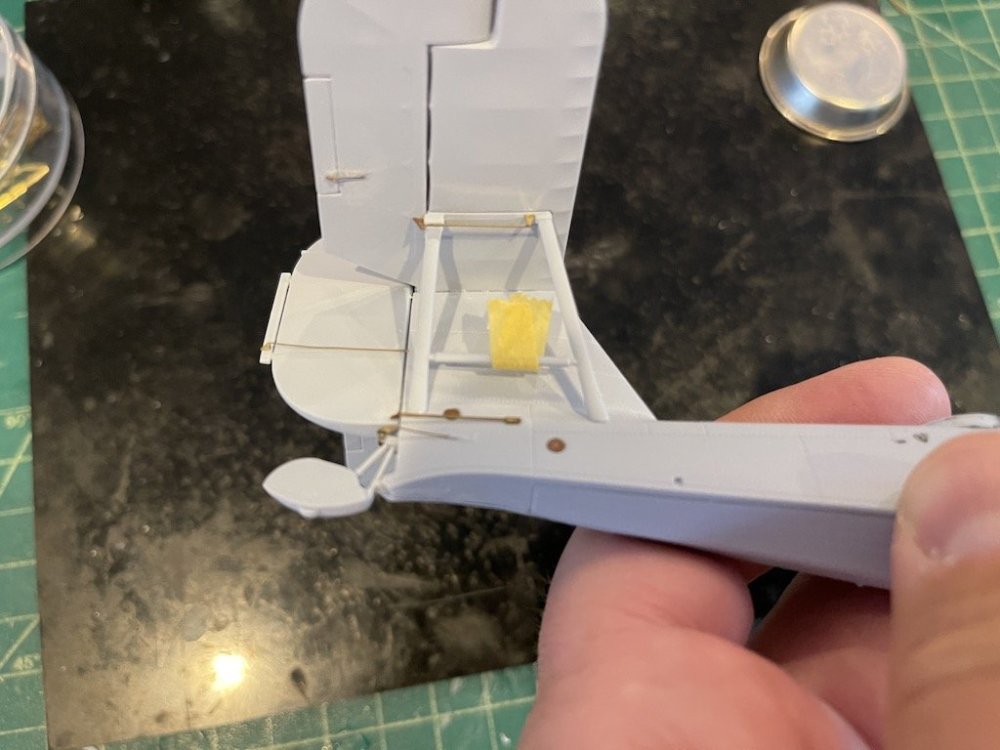
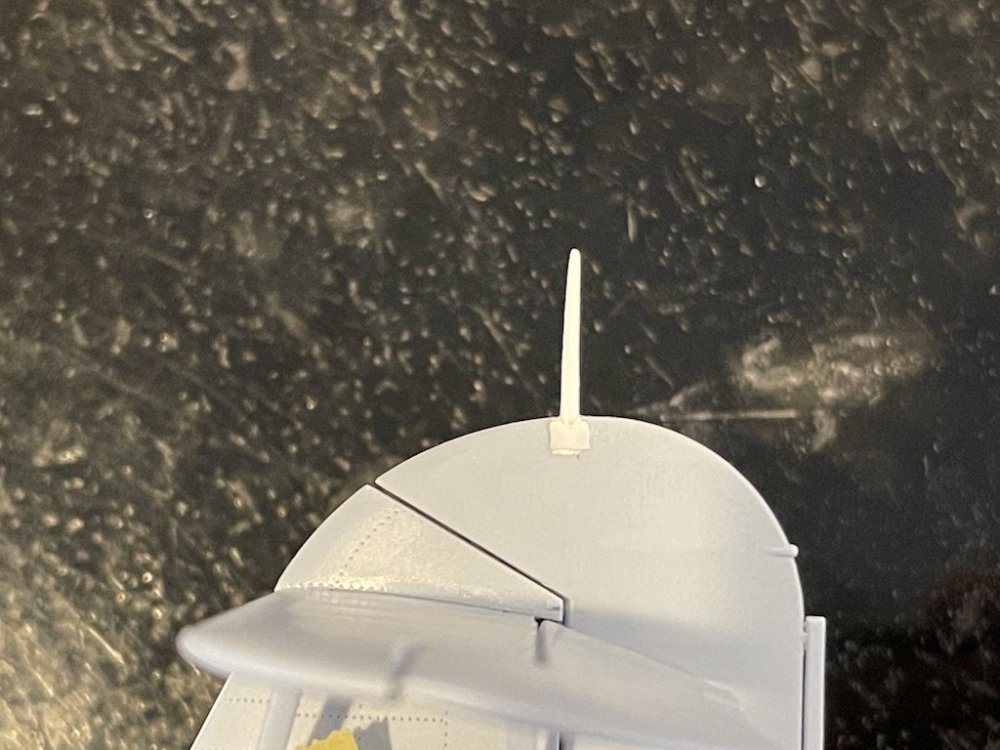
I've been slowly making some progress on these builds over the past couple of months. Managed to get the fuselage buttoned up and attached a lot of the exterior Eduard photo etch which adds some nice details to the model. Fit was very good, and it almost snapped together perfectly. I did find that there was a bit of an overhang at the front section where the side fuselage halves met the bottom fuselage part, so I feathered in a thin strip of card which eliminated the step. One odd omission in what has so far been a really well done kit is the lack of the rudder antennae post. It was fairly easy to add one: Another project in itself was building up the wing bomb bays using the Eduard PE set. A fun little side project which adds some extra detail to the model: At this point I'm a bit stuck as I'm trying to figure out what to do about the rigging. Eduard adds some PE attachment points that give a little more detail than the kit parts, but I think I would need to drill holes through the PE into the wings in order to fully seat the rigging. On the rigging, I have this AIMS PE set, but need to measure to make sure that they all fit as they are supposed to. One build log said many of the wires didn't fit. Two others I came across said they were a Godsend. Hopefully they work, otherwise I need to figure out an alternative.


-
New Research and Documentation Forum area
Landlubber Mike replied to Clunkmeister's topic in General Discussion
Great idea guys! -
Funny, I sometimes prefer using tube cement over Tamiya extra thin (usually for areas needing heavy bonds like locator pin holes, etc.), but this past week I was noticing my Testor's was stringy like crazy. I might have to try the Revell Contact.
-
I've got this one in the stash as well. Looking forward to seeing your progress and hearing your thoughts on the kit!
-
RFI 1/48 Jagdpantherette diorama , Belgium Sept '44 Completed
Landlubber Mike replied to PanzerWomble's topic in Non LSM 'WIP
Really well done PW! Love it! -
Looking really great! Can I ask how you go about cutting the piano wire? I didn't know if special tools were needed, and if you have to smooth out the ends and make them round again if you use a crushing-type of cutter. Thanks in advance!
-
Well done Rob!!! Looks fantastic! Love the figures adding to the liveliness of the model. Great job!
-
ZM A-1H Skyraider
Landlubber Mike replied to Peterpools's topic in LSM 1/35 and Larger Work In Progress
Amazing start Peter. I managed to get this kit with all the upgrades off eBay for a steal a couple of years ago, but don't have the Quinta set. I might have to add it after seeing how detailed it looks. Are you going to do the toilet version? I think I got a toilet from Brengun for it. -
Super cool Scott! Nice job!
-
1/350 Trumpeter Narvik Class Zerstorer Z30 RFI
Landlubber Mike replied to PanzerWomble's topic in Archived GB's Sub Forum
Wow P-W, that came out great! Nice job! -
ZM Bf 109G Hartmann
Landlubber Mike replied to Peterpools's topic in LSM 1/35 and Larger Work In Progress
Looking good Peter!! Looks like you've sorted out those odd issues. I have a few Z-M kits on the shelf, now I'm not so sure I'm as looking forward to them as I once was. -
I have those punches - you'll really like them, well made.
-
Nicely done man! That must be pretty large at 1/24!
-
From the SOD: ICM's 1/350 scale Großer Kurfürst
Landlubber Mike replied to GazzaS's topic in Non LSM 'WIP
Looking great! A beauty off the SOD that didn't deserve to be there!