Landlubber Mike
-
Posts
1,277 -
Joined
-
Last visited
Content Type
Profiles
Forums
Events
Gallery
Everything posted by Landlubber Mike
-
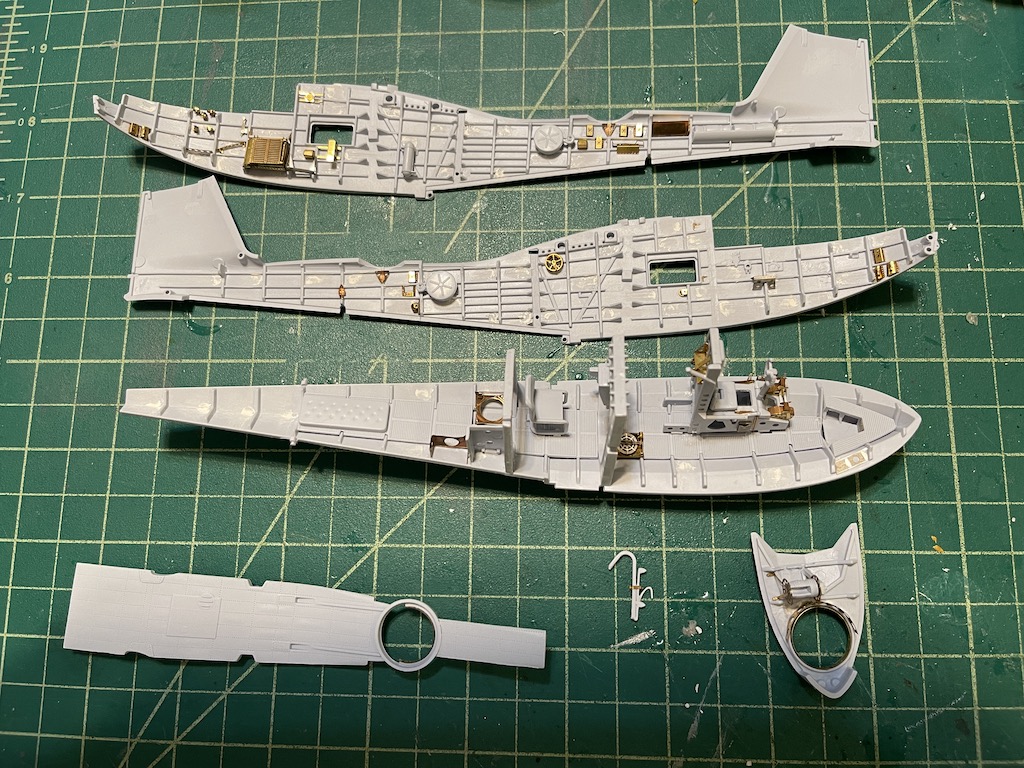
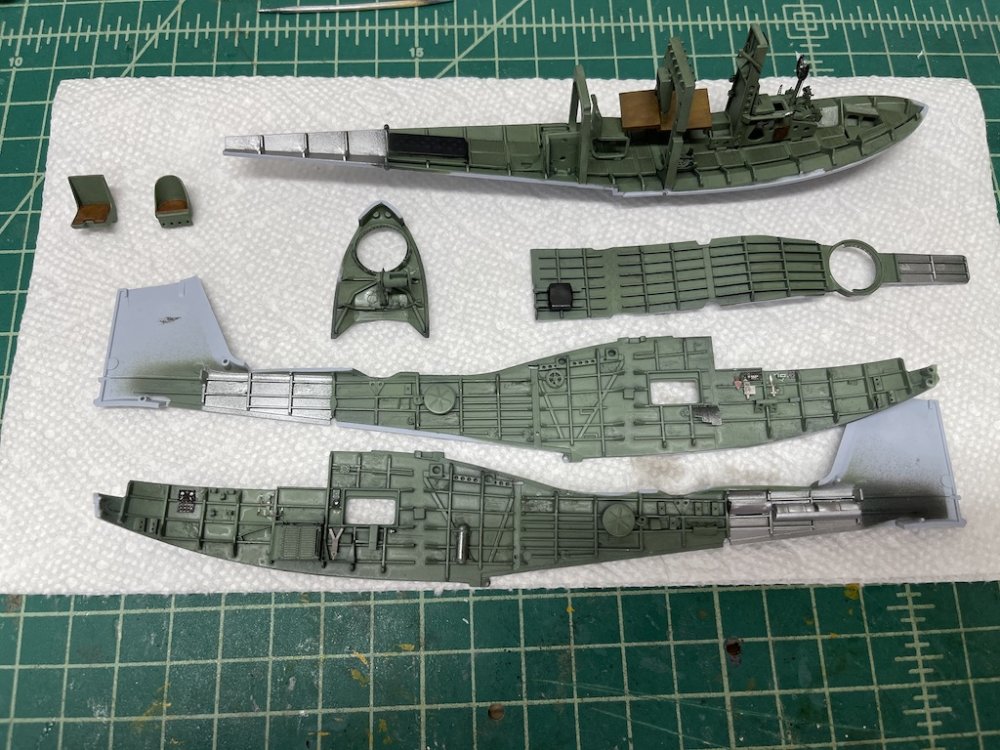
Making some progress on the Walrus. Managed to get the interior base coat paints down along with the color PE parts, and started a little bit of the weathering. Should be able to button it up in the next couple of days.
-
Nice score!! At 1/24, must be a monster!
-
Not sure how I missed this PW - great job!! Love your dioramas - they have a lot of interesting details which let the mind wander thinking about the story being told. Very cool man, thanks for sharing!
-
Hasegawa 1/72 Japanese codename "Emily"
Landlubber Mike replied to KevinM's topic in Let’s Get Wet Group Build.
I definitely wouldn't build a model with this many windows without getting a mask set! -
Hasegawa 1/72 Japanese codename "Emily"
Landlubber Mike replied to KevinM's topic in Let’s Get Wet Group Build.
I think the guns are Type 99 guns - at least that is what Eduard sells as part of their upgrade package for this kit: https://www.eduard.com/eduard/h8k2-emily-guns-1-72.html?cur=2&listtype=search&searchparam=h8k2 -
Mr Color Levelling Thinner is way too expensive to use it to clean out the airbrush. I use it to thin (not clean) Tamiya and Mr. Color paints - works great! They don't call it bottled unicorn things for nothing! Did not know that about using Tamiya lacquer thinner with Testor's dullcote - will need to try that. I usually use Mr. Color products for clear coats through the airbrush (or their rattle cans), and Testor's if I need to hand brush a small detail. Never thought I could airbrush Testor's, good to know!
-
Agree with you PW - seems more cost effective if you can get the same unbranded chemicals. Peter, like you I use Mr. Color Leveling Thinner for thinning Mr. Color and Tamiya paints. For Vallejo, I also use the Vallejo brand thinner for thinning in the airbrush - for airbrush cleaning, I have just been using water and a brush to physically remove any remnants.
-
Are you guys using the Tamiya Airbrush Cleaner as actual cleaner, or are you using it as glue in place of Tamiya's Extra Thin Cement? I just use IPA and lacquer thinner as cleaners - seems much more cost effective.
-
What do you think of the kit? I don't want to get into helicopter models, but if I had to build one, it would definitely be the Apache. Kinda like where I am with modern day aircraft - I don't want to get into them, but did get a Trumpeter A-10 kit.
-
Mclaren F1 GTR 1/12
Landlubber Mike replied to mark31's topic in LSM 1/35 and Larger Work In Progress
Nice Mark! Those MFH kits look really sweet. -
Italeri 1/35 Elco 80' Torpedo Boat PT-596
Landlubber Mike replied to Bomber_County's topic in Let’s Get Wet Group Build.
Those guns look really sweet B-C, nice job! -
Revell-S-100 Schnellboat-1/72
Landlubber Mike replied to KevinM's topic in Let’s Get Wet Group Build.
Wow, great job Kevin!! Very nice! -
Back to our regularly scheduled program….
Landlubber Mike replied to ScottsGT's topic in General Discussion
Nice area! Love the beer and gas signs. Well done! -
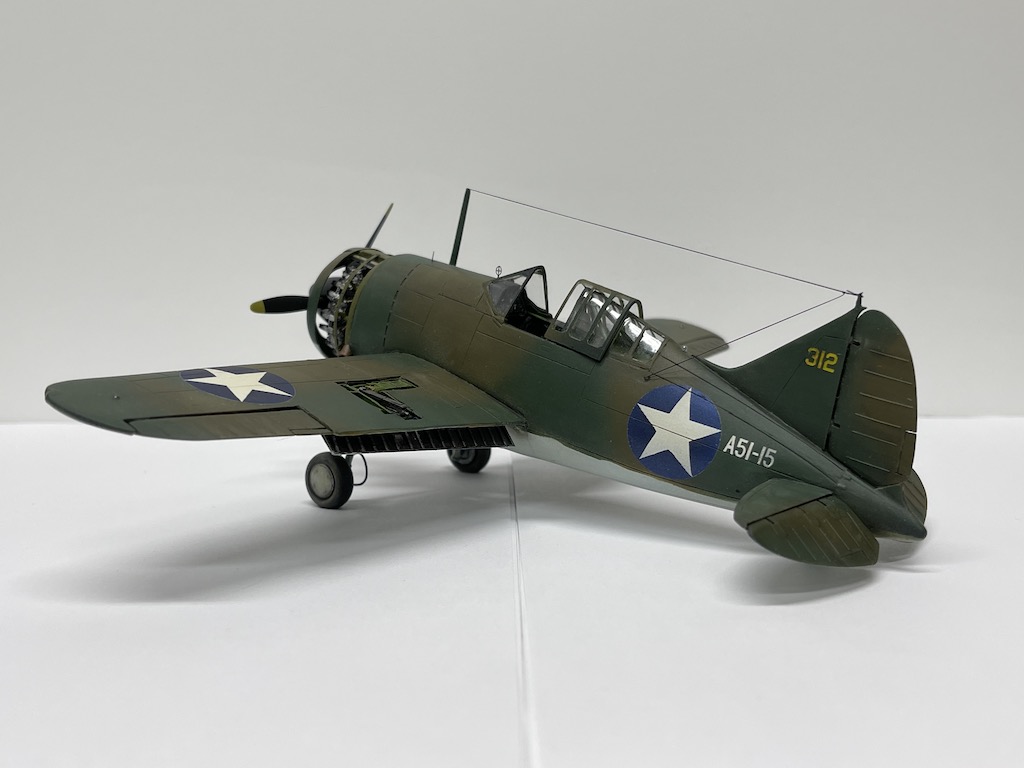
I used Montex masks for the insignia and numbers on my Buffalo build. They worked great and I didn't have any warpage, residue, or other issues. I'm a big fan having used them with similar great results on some F4F builds.

-
An interesting night here last night…
Landlubber Mike replied to Clunkmeister's topic in General Discussion
Wow, glad you and Joy are ok. That hail is insane! -
Revell-S-100 Schnellboat-1/72
Landlubber Mike replied to KevinM's topic in Let’s Get Wet Group Build.
Looks great Kevin!! -
Thanks Peter, I think I'm leaning that way. There is a lot of detail in the front turret with the anchor and winch and some other items. Shame to close it all up!
-
Thanks Peter, you've convinced me on the windows! My thought is that from the pictures, just because a Walrus was on the catapult didn't mean it was about to launch. Some of the pictures I've seen don't seem to show a sense of urgency or anything in the scene. Windows are open, pilots are waving, etc. Now I have to think about the turret openings. All the pictures I've seen have them closed. But, there is a lot of cool detail in there with the gun, anchor, framing, etc. Some other models have put the Walrus on catapults with the turrets opened, so maybe I'll just do that.
-
Thanks B-C! I saw some Walrus on catapult pics, and it looks like it was not uncommon for various windows in the cockpit and even the ones further back to be open. So I might actually try to model the Walrus with some of the windows open. That will help expose more of the interior, and just make things more interesting. Not sure if I will model the plane with the turrets open and guns set into position in the turrets. That I haven't seen in pictures, but maybe this model will just show the Walrus with various things open and out, wings folded, on catapult, etc. Would be more visually interested than just a buttoned up Walrus sitting on the catapult.
-
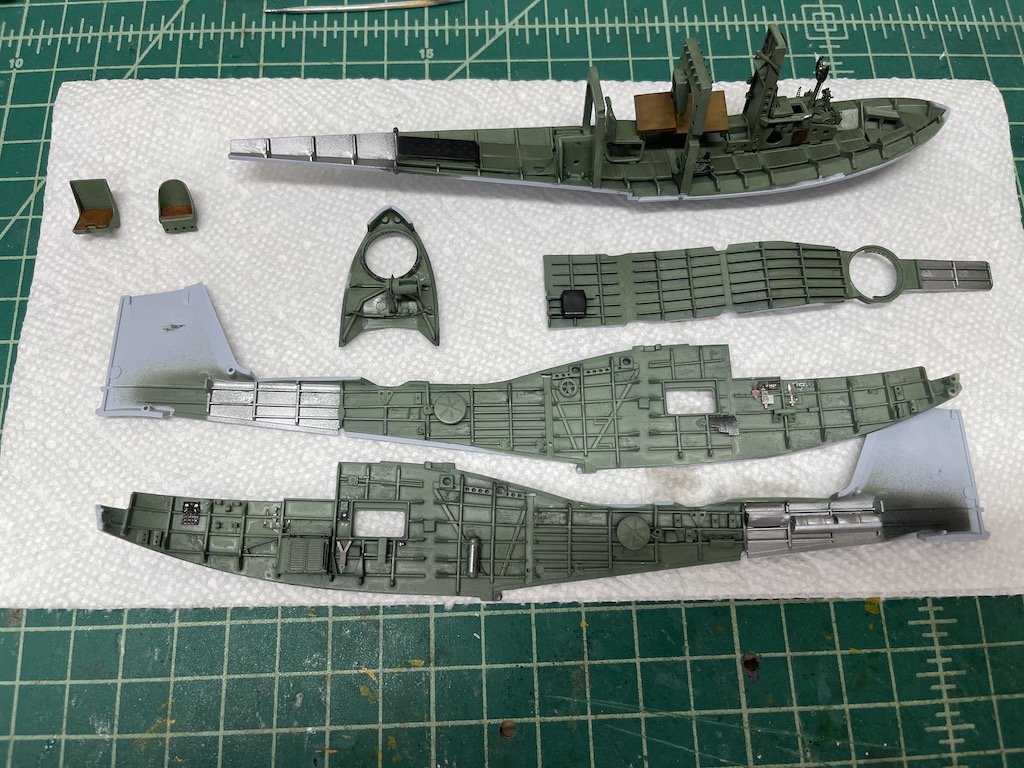
I think even seeing 5% is going to be fairly generous, with the bulkheads and limited windows. Probably can see a little with the greenhouse type main canopy I guess, and then you can see a bit into the rear seats through the window. Eduard puts out a lot of cool PE interior sets, but if the plane is buttoned up, you never can see the pieces. I did end up recently getting a 1/72 Kawanishi H2K8 Emily kit with a full Eduard upgrade - I think I'm going to try to model it as a cutaway, with one side fully closed up, and the other open so you can see the interior and various personnel activity in the plane. Otherwise, a waste of the PE I think. Eduard's interior PE does have side window frames that you can add in a closed or open position. If I wasn't modeling the Walrus on the catapult, I'd consider opening one or both windows. I didn't add the frames in the closed position because they didn't quite fit evenly in window recess in the hull. They fit perfectly, but the bottom of the frame stuck out a bit and the upper frame did not, so it would have looked a little odd if I included it. Got these pieces primed and the base coat over the weekend. I'll add the colored PE in the next couple of days, add a touch of some highlighting and shading, and then button her up. I was going to try out MRP paints on this as a first build, especially since I found a log that posted the paints used, but instead I'm going to go with Vallejo except for Mr. Surfacer primer on the exterior. This model is so small it didn't seem to warrant spending the money on MRP paints when I don't have any near term plans to use similar colors.
-
Finally got through assembling most of the interior. The Eduard interior PE set is pretty intense with a ton of pieces (close to 100 if not more if I remember correctly). Probably took a good 3-4 evenings of work to get in, and my guess is 95% won't be seen. But, good practice I suppose. I've gotten a little better with some of the types of PE that have vexed me in the past, including circles/rounds. Had a few to do here with the two gun cockpits, and improved my skills there. Here are the pieces with the Eduard interior, minus most of the pieces from the colored PE fret that will go on after I paint these interior pieces: That little piece in the middle of the bottom row is actually the ship/boat's anchor - interesting! After taping the various edges, I ended up priming these pieces and a few other interior pieces this evening. Then it's onto painting the interior green, adding the remaining Eduard pieces, and a bit of weathering. Thanks for looking in!

- 112 replies
-
- 10
-

-
It's called "work hardening" or "strain hardening" apparently. Bending the copper causes defects or "dislocations" in the cubic crystal structure, making it harder. Annealing it removes these defects or dislocations. At least that is what I gathered from here: https://www.materialseducation.org/educators/matedu-modules/docs/Work_Hardening_and_Annealing_of_Copper.pdf Yay science!
- 329 replies
-
- 3
-
-
- uss arizona
- eduard
- (and 1 more)
-
One of my other hobbies is bonsai, where you use annealed copper wire to wire your trees. From what I understand, the copper is looped in coils and heated to anneal the copper. When you buy the coils, the copper is soft and easily workable. Once you start uncoiling the wire and using it, it hardens quickly - a very good quality for wiring your trees because the wire locks into position. That's why you have to be very careful of any bumps to the pre-used coils, as the wire hardens and the thicker diameters get very hard to use. Not sure if this is what happens to brass that is annealed then worked. Very different from using aluminum wire on your bonsai, which is easier to bend and manipulate, but doesn't harden on use thus having lower holding power at the same gauge. Sorry for the digression Rob!
- 329 replies
-
- 4
-
-
- uss arizona
- eduard
- (and 1 more)
-
Hang in there Harv! Go play golf, join a gym, find a club or other similar activity. You can always go for retail therapy and buy lots of kits - or live vicariously through the others of us on here that do so
-
Rob, that's looking spectacular. It's not easy getting those masts and their platforms looking so perfect - what a wonderful job! I haven't annealed before - do you just hold the part over a flame for a couple of seconds? I might have to try it some day. So far I've been fortunate that the PE I've used has been thin with pre-fold channels to make it fairly easy to bend with tweezers or a hold and fold.
- 329 replies
-
- 3
-

-
-
- uss arizona
- eduard
- (and 1 more)