Landlubber Mike
-
Posts
1,277 -
Joined
-
Last visited
Content Type
Profiles
Forums
Events
Gallery
Everything posted by Landlubber Mike
-
The Scharnhorst 1/200 by Trumpter-Operation Paderborn
Landlubber Mike replied to KevinM's topic in Non LSM 'WIP
Beautiful Kevin! Stellar work my friend! I don’t know if North Star is still in business, but years ago I had placed an order and they stiffed me on half of it. They apologized saying it was an oversight and so I placed a small second order - stupidly - and told them they could include the missing items from first to save shipping. Then they stiffed me on that one. Ion figures are some of the best out there. I’ve only used them on 1/350 and 1/700 builds but would assume that the 1/200 ones are equally good. -
Thanks Martin! I feel like I should get these done before cracking open the Me410 boxes, if anything to have more bench space. I’m really quite close to the finish line with these so I just need to put my head down and get to work I think.
-
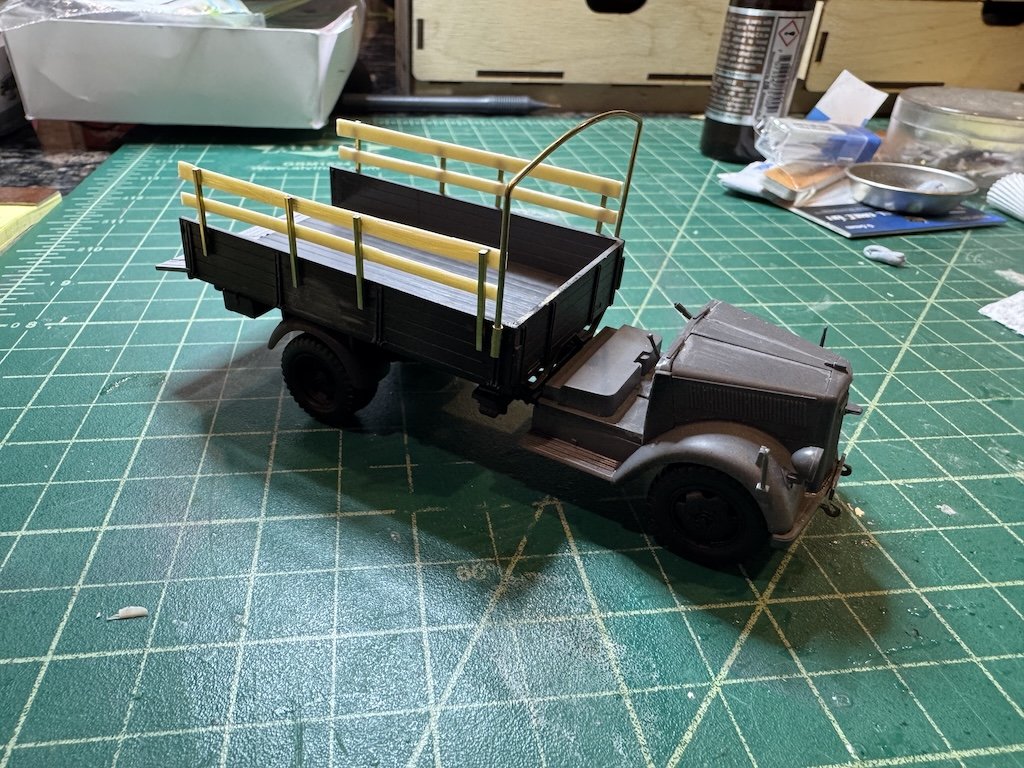
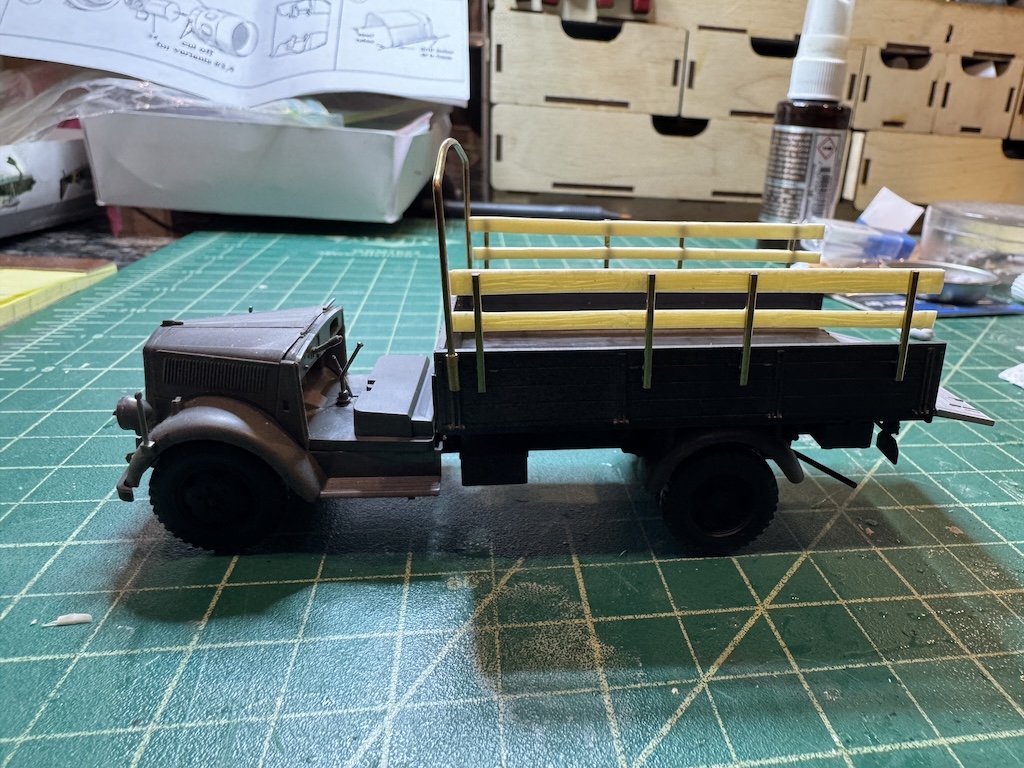
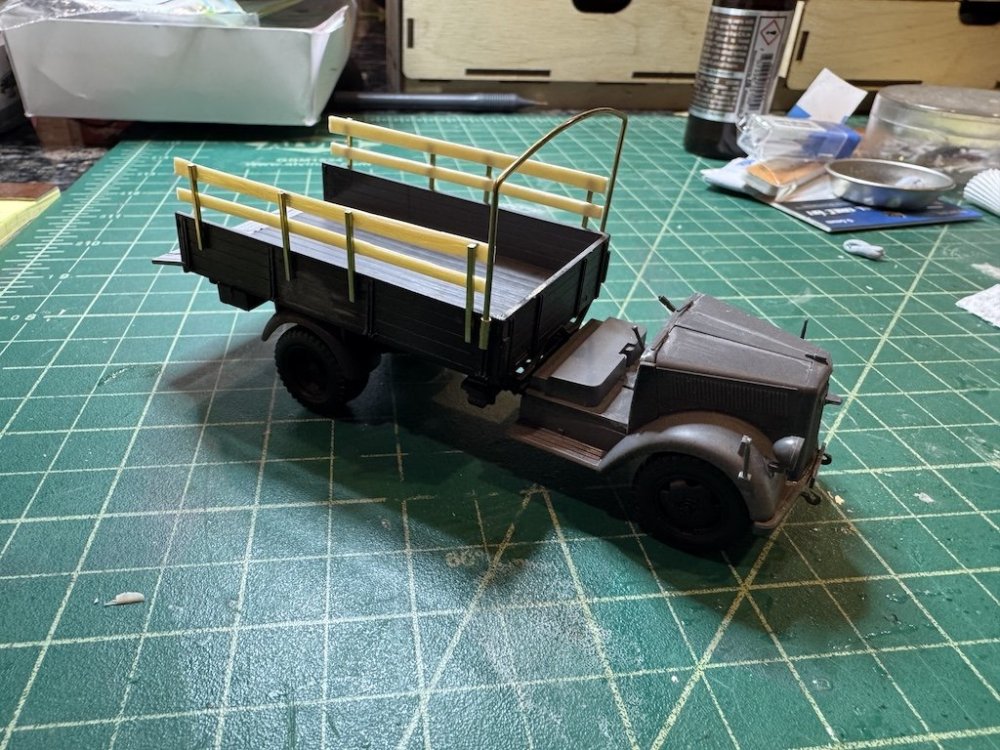
For some reason, I kinda lost interest in finishing these two dioramas over the past few months in part trying to decide what to do with the Opel Blitz truck and in part with the next step of painting and decals. I did turn back to them more recently as interest returned. I mentioned before that the SOL Opel Blitz kit was a total mess with fragile parts, warped parts, etc., so I broke down and bought the Tamiya kit. Wow, the Tamiya kit went together like a dream! Perfect fit, great instructions, etc. I built up most of the kit a few months ago, but then had to figure out how to modify the kit to match the picture in the towing diorama. Today I finish the modifications, which included using brass rod (round and square) and some of the wood planks from a Sol Model Opel Blitz kit. I'm pretty happy with how it turned out. I primed it and the various cab parts tonight, so hopefully can get started on painting it later this week. Thanks for looking in!

-
Looking good! You're really moving along quickly! Hope the trip was fun.
-
Brabham BT45 - Model Factory Hiro - 1/12
Landlubber Mike replied to DocRob's topic in LSM 1/35 and Larger Work In Progress
Wow Rob, you've really built up a beauty there! The white makes for a really sharp looking subject in my opinion. Great job as always! I can't believe you're already done. Did you decide on a next subject? -
Brabham BT45 - Model Factory Hiro - 1/12
Landlubber Mike replied to DocRob's topic in LSM 1/35 and Larger Work In Progress
Looks so good Rob - the level of detail is incredible on this kit! You're doing a masterful job. -
Dragon Bf110E - Wolfgang Falck - Finished
Landlubber Mike replied to denders's topic in LSM 1/35 and Larger Work In Progress
Wow that came out great! Nice job! -
Brabham BT45 - Model Factory Hiro - 1/12
Landlubber Mike replied to DocRob's topic in LSM 1/35 and Larger Work In Progress
Those belts look really nice! -
Yes, I use an optivisor, good lighting, and very precise tweezers. Still not easy!
-
Brabham BT45 - Model Factory Hiro - 1/12
Landlubber Mike replied to DocRob's topic in LSM 1/35 and Larger Work In Progress
That looks incredible Rob! That must have been a really satisfying step of screwing the tub into the floor plan. It's been interesting following you along on these MFH builds. The amount of pre-assembly part work and test fitting seems to be a big difference over your standard plastic kit. Looks like a lot of fun though! -
I'm working on an IJA aircraft carrier in 1/700 that carried autogyros and reconnaissance planes - they have to be assembled with probably a dozen parts each of PE. I think I went half blind trying to finish them.
-
ProModeler 1/48 PBY-5A Catalina + Goodies, RFI
Landlubber Mike replied to CANicoll's topic in Let’s Get Wet Group Build.
Awesome Martin, looking forward to seeing what you do with it! -
Look great! Planes in 1/700 are no joke!
-
Montex MM48188 has masks for the spirals: https://www.scalemates.com/kits/montex-mm48188-me-410b--198914
-
Thanks for those pictures Martin! Interesting that the socket is on the fuselage versus the engine pods as with the Hs129. Unless planes at that time had a few different sockets?
-
The Scharnhorst 1/200 by Trumpter-Operation Paderborn
Landlubber Mike replied to KevinM's topic in Non LSM 'WIP
That looks great Kevin - nice closeups! Excellent work my friend! -
No clue off hand. I found a picture for my Hs 129, so maybe just try a google search? I think the Hs 129 opening was on the engine pod.

-
Brabham BT45 - Model Factory Hiro - 1/12
Landlubber Mike replied to DocRob's topic in LSM 1/35 and Larger Work In Progress
Wow, that looks fantastic Rob! Thanks for sharing your painting technique - especially with how you use the Number Five paints (and, I didn't realize that about resin and static). I'll have to look into those paints. -
Nice! That will look really cool. I’m using a power cart like the one in your Tamiya set for my second Hs129. Just remember that you might need to open up a panel if you want to show it plugged in.
-
I have to do that myself for one of my Hs 129s. It was being towed so the cockpit and the engines were wrapped. I’ll be curious to learn from you how to do it. No pressure now!
-
For what it’s worth, one of my Hs 129 has the top half of the propeller cone painted a different color than the bottom. It’s been a royal pain to try and mask and get them painted. I couldn’t imagine doing a swirl like yours without a pre-cut mask.
-
Yeah no doubt. Thankfully I drive to work as it’s really hot out there. Would die if I was on the Metro.
-
Looking great! You're moving along quickly!
-
Martin started a Pro Modeler/Revell Me 410 buddy build about a month ago - Kevin and I are hoping to join in soon:
-
Lukgraph J2F-5 Grumman Duck
Landlubber Mike replied to ScottsGT's topic in LSM 1/35 and Larger Work In Progress
Looks great, thanks for posting this log. I'm a bit surprised they ship it with the 3D printing frames still attached? Doesn't seem too big for 1/32. Maybe I'll upgrade from my 1/48 I Love Kit...