Landlubber Mike
-
Posts
1,277 -
Joined
-
Last visited
Content Type
Profiles
Forums
Events
Gallery
Everything posted by Landlubber Mike
-
Wow, nice job Hubert! Looks fantastic! That should add a lot more structural strength for sure.
-
Westland Wyvern S.4 late- 1/48 Trumpeter
Landlubber Mike replied to BlrwestSiR's topic in The Sandbox Group Build.
Looks fantastic!! -
Brengun 1/32 Rutan Quickie.
Landlubber Mike replied to HubertB's topic in LSM 1/32 and Larger Aircraft Ready for Inspection
Love this one Hubert!! The figure is a great touch! -
Westland Wyvern S.4 late- 1/48 Trumpeter
Landlubber Mike replied to BlrwestSiR's topic in The Sandbox Group Build.
Looking really sharp! Fantastic paint job! -
Thanks Kevin! If others need more time for their builds, I certainly wouldn't pass that up. I don't want to be the only one as I benefited from the last GB extension 🫣 It's possible I can get the two planes done if I pull a couple of all nighters, but getting the dioramas and accompanying pieces done might be pushing it. I probably could get everything done on the two dioramas by the end of this weekend which would help me be a little more conservative when it comes to painting/drying times.
-
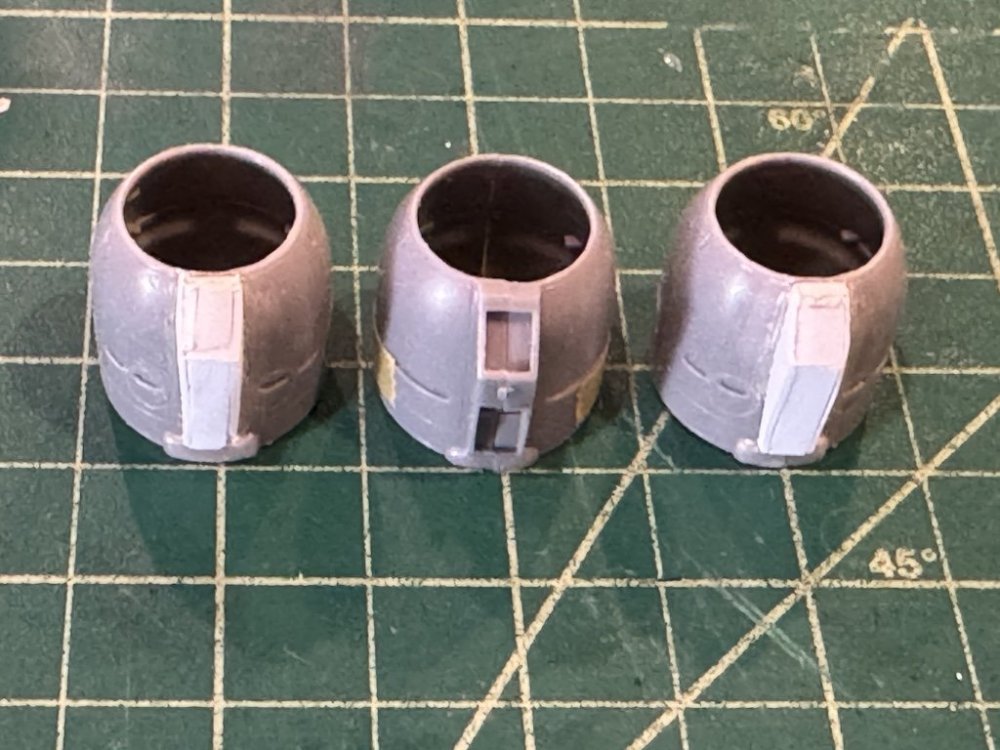
I forgot to reply to this part. After all I'm doing with the various aftermarket sets, you're right that I could have just bought the ZM Hs 129 kit in 1/32 scale and had an easier time. Funny thing is I'm using the ZM instructions quite a bit to guide me on things like locations, colors, accuracy, etc. Looks like you can open up the ZM kit a lot more than I did with my half dozen aftermarket sets! This is the first Verlinden set that I used, though I have some others in the stash. I've heard that other more recent AM companies are a little better, but so far this Verlinden set has been pretty good. I'm in the process today of adding some of the Verlinden open-engine parts (rear part of the engine, exhaust ring, etc.) to one of the Vector engines at the moment, so we'll see how that goes. Dry fitting things look pretty good thus far.
-
Yep, that's it! And the video (along with their others) is very helpful. Sold me on trying out their Modeling Paper. I heard of VMS somewhere online, and was interested in trying them out as they seem to have configured their adhesives (in particular, CA) specially for modelers. I used their clear parts glue on the canopy of my JRS-1 and it worked very nicely. I bought direct from them earlier this year, but I believe they might have a US distributor now. Since you're always kindly offering to let me try out various things you have on the shelf, you're welcome to try out the VMS or other stuff I own.
-
Thanks very much Hubert and Rob! The little square area along the center hub in the engine was probably no bigger than 1.3mm x 1mm. I barely could get two 0.4mm holes side by side. When I tried opening them up with the 0.5mm bit to fit the rod, that's when the holes merged. Given the angle I would have to drill with the cylinders in the way, as well as the very hard Vector resin, I was worried about breaking the drill bits and spending hours drilling all 54 holes by hand. A few years ago, at the recommendation of someone on the MSW sister site, I splurged on a micromotor made by Nakanishi. Costly, but an incredibly useful machine. It's like a Ferrari versus a Dremel which comparably is like a Ford Pinto. The stylus is much smaller and lighter than the Dremel. Given the size and weight of the stylus, you can do a lot of detail work without your hand getting tired. Speed is easy to control on the main box, and I use a foot pedal for control. Speaking of control, there is zero vibration on these machines, so I didn't have the issues Hubert you mentioned relating to weight, torque and vibration. I think it's very telling that even with the weird angle I had to drill half the holes for the rear cylinders, I didn't break a single bit drilling out all 54 holes. I use it for drilling, sanding, sawing, and grinding. It's come in really handy where I need to saw, sand, or grind off aftermarket pieces off their resin plugs - I can do those tasks really quickly and more accurately than if I tried to hand sand the pieces. I set my shop vac nozzle in a vise on my workbench, and cut/sand/grind the pieces right in front of the vacuum nozzle to essentially eliminate the resin dust. Again, these aren't inexpensive machines, and they seem to have jumped considerably in price since I bought mine a few years ago, but it's been worth every penny. There are some less expensive Chinese machines on eBay, but like most Chinese tools, it's buyer beware.
-
Hey Chris, thanks for the kind words. I thought the exact same thing about the fuel bowser lol Looks very strange but I guess it served a purpose! For the pushrods, I ended up using my micromotor to drill 0.4mm holes for the rods in the center section. The idea was that if the holes had a little depth to them, I wouldn't have to cut the rods exactly to length. The concept generally worked, though I was using 0.4mm brass rod for the rods and the holes were too small. I tried going up a size and the holes ended up merging into one bigger hole. That actually worked out just fine. Gave me a little more room to play with, and I just used CA to fill in the gaps. For the tarps, I got a product from VMS when I was placing an order for some of their glues to try them out. I'll let you know how they go. Good Christmas here. Finally a couple of weeks of no work, kids have practically no activities, etc. Almost too quiet! Of course I thought I was going to get these dioramas completed and a host of other things done, but between catching up on sleep, honey-dos, and taking care of stuff on my to-do list, I haven't had as much time as I'd hoped. It's all good though. Hope you had a good Christmas! Happy New Year to you too neighbor!
-
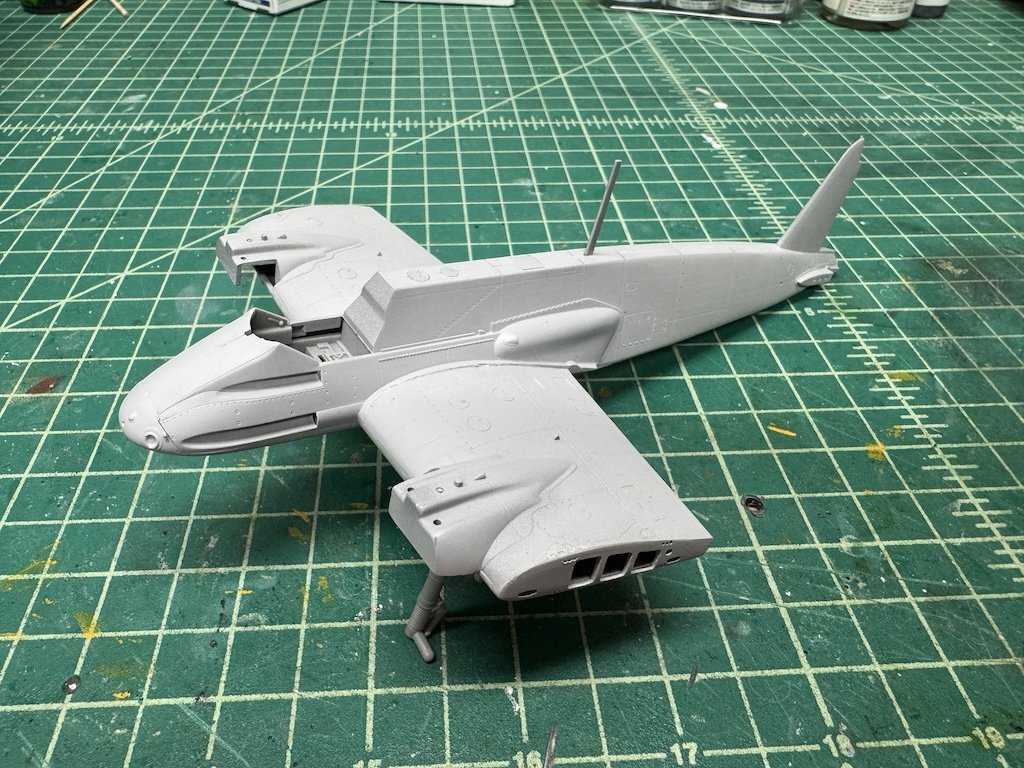
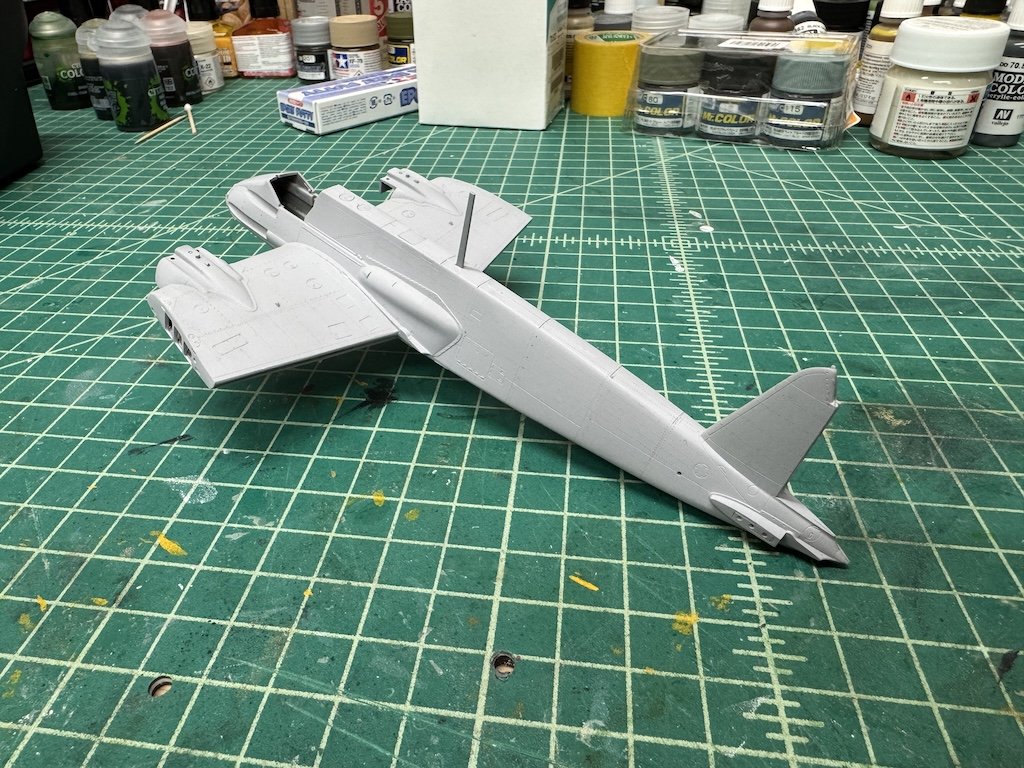
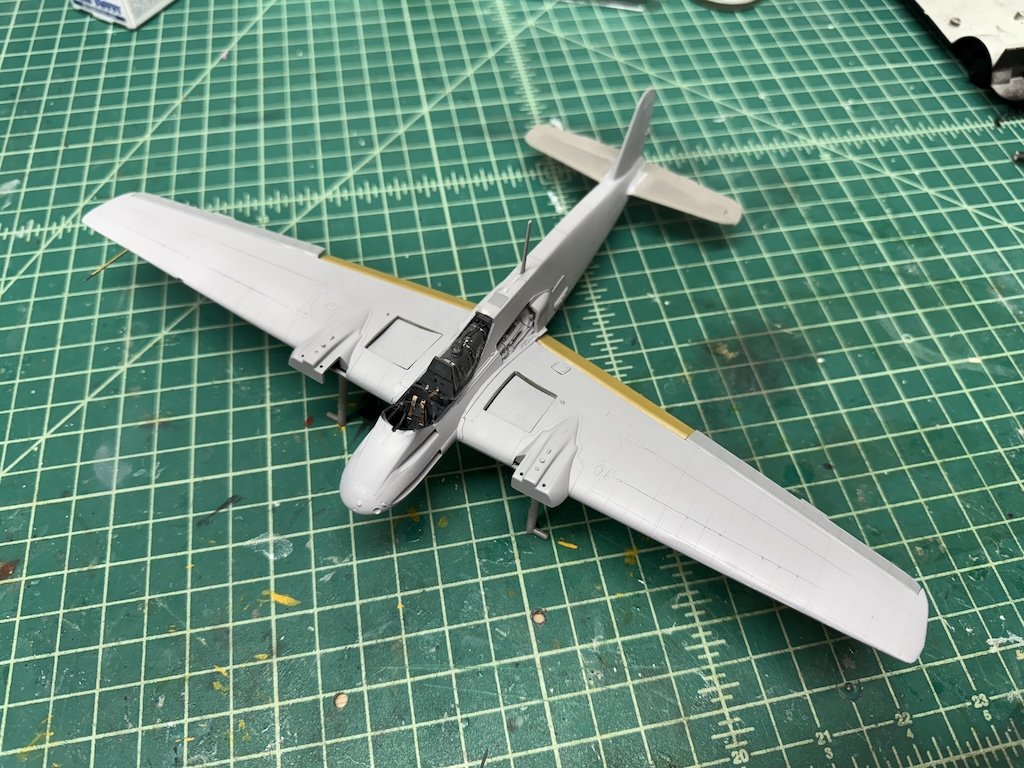
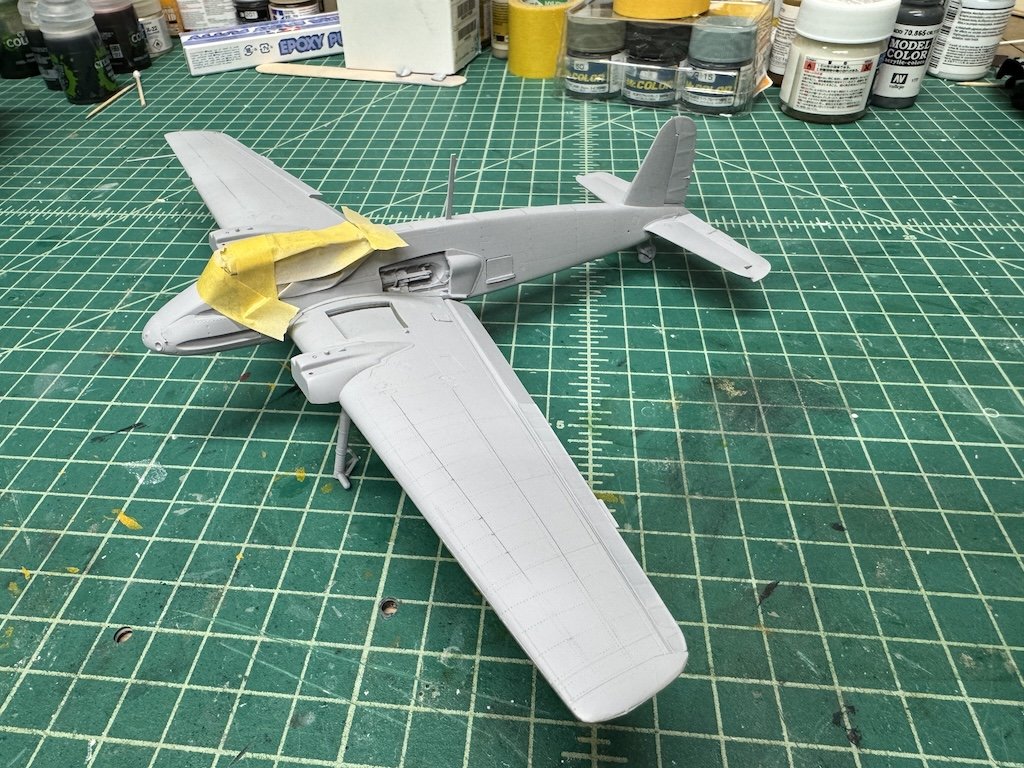
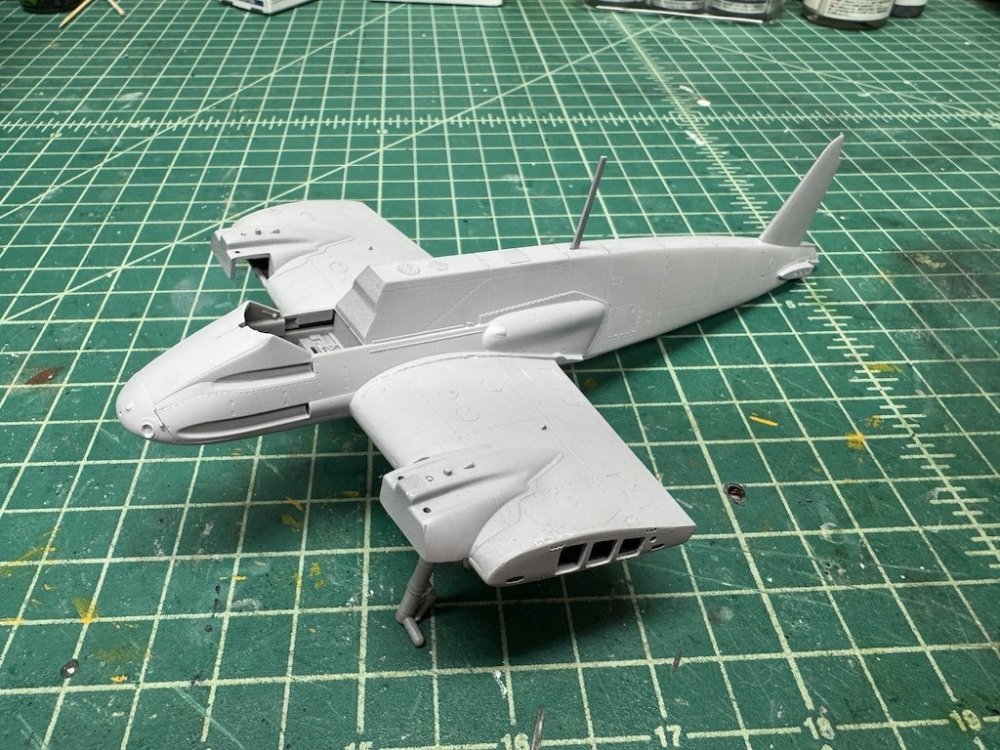
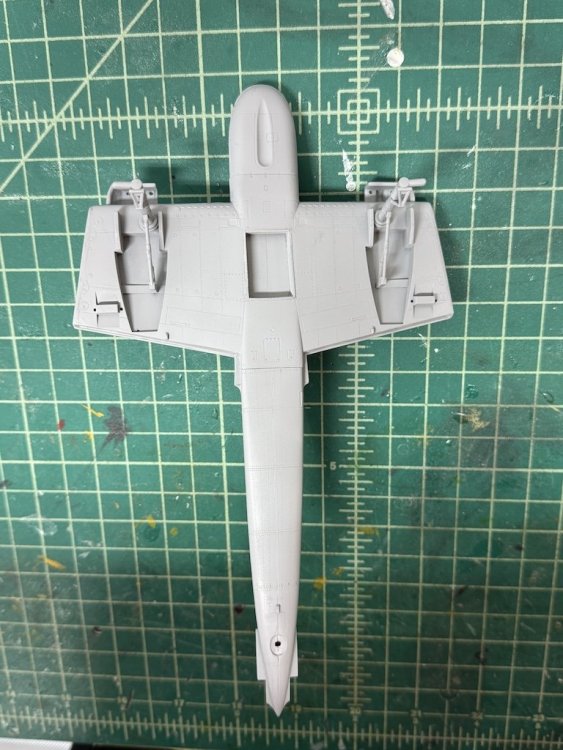
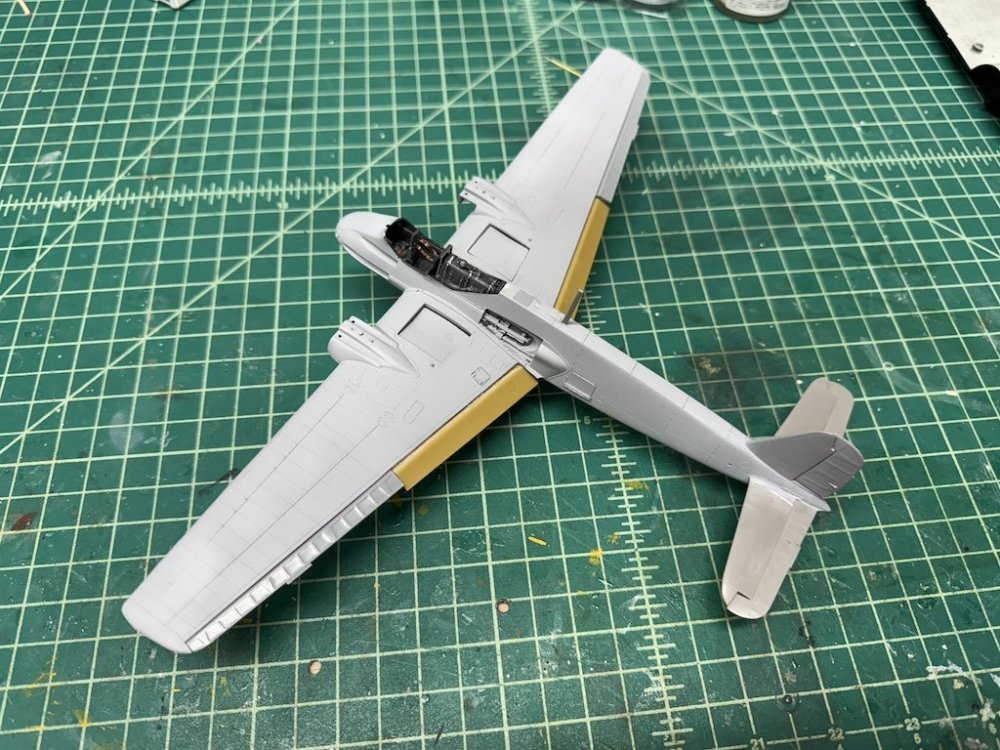
The second plane has been a little easier. I did realize that the cowling shapes differed between the B-1 which was my kit versus the B-2 which i am modeling. It helped a lot having the Hobby 2000 B-2 boxing for the other model so that I had a model to convert the B-1 cowlings. It wasn't too difficult, and I didn't try to make them absolutely perfect given that the engines are going to be tarped anyway (all I needed was the general shape): With the cannon pod removed from the plane in this diorama, I realized that all that would be remaining would be the cannon rack as well as the open space in the bottom of the fuselage for the ammo, etc. So, I cut open the bottom of the fuselage similar to how I did the other. Much easier this time around as I didn't have the various aftermarket detail pieces in the fuselage so the fuselage was essentially hollow. After cutting, all I really had to do was line it which was fairly easy. I'll scratch the cannon rack and add it separately at the end of the build. This model is also primed, so I can start throwing on some color tomorrow: Thanks for looking in!

-
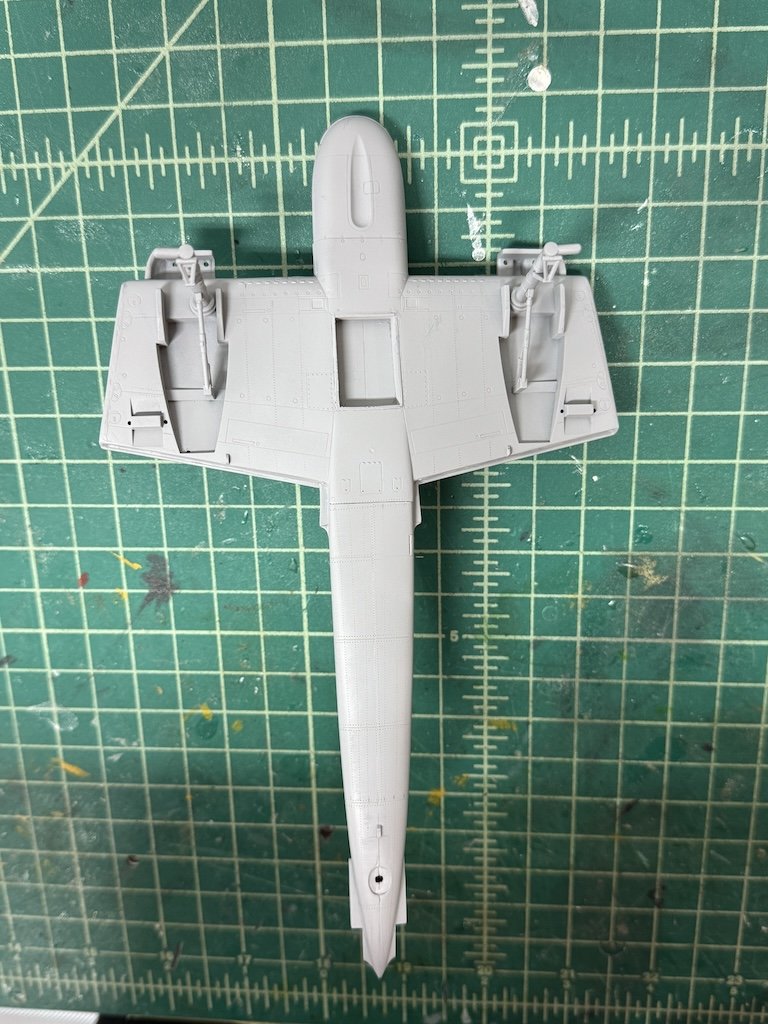
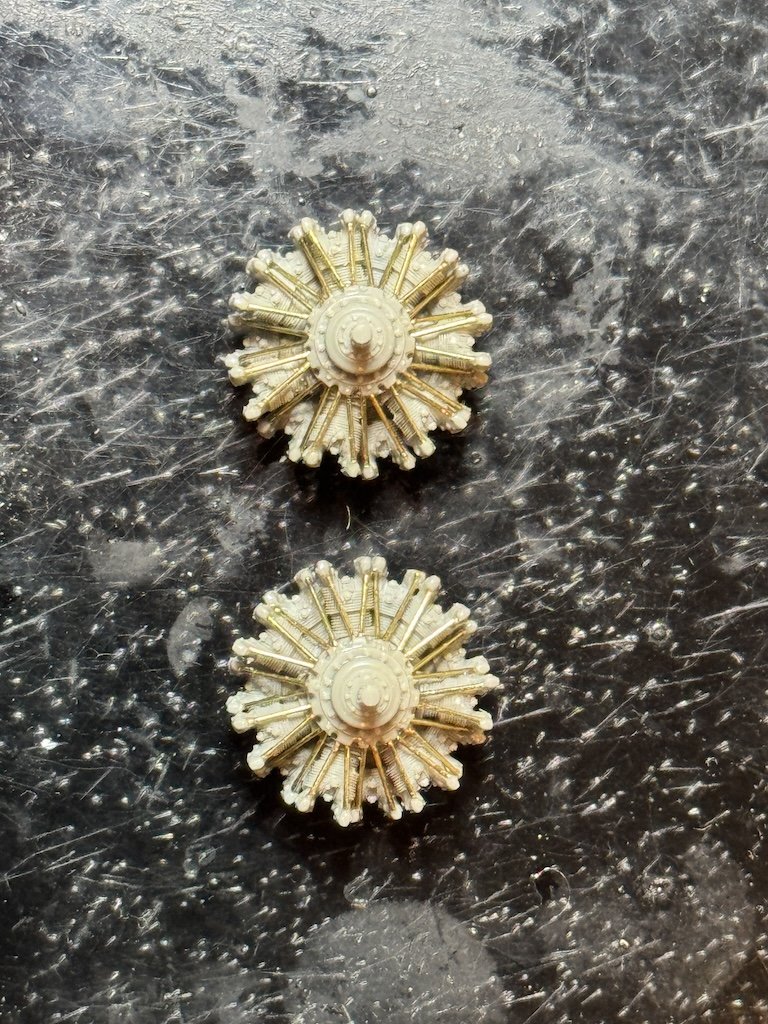
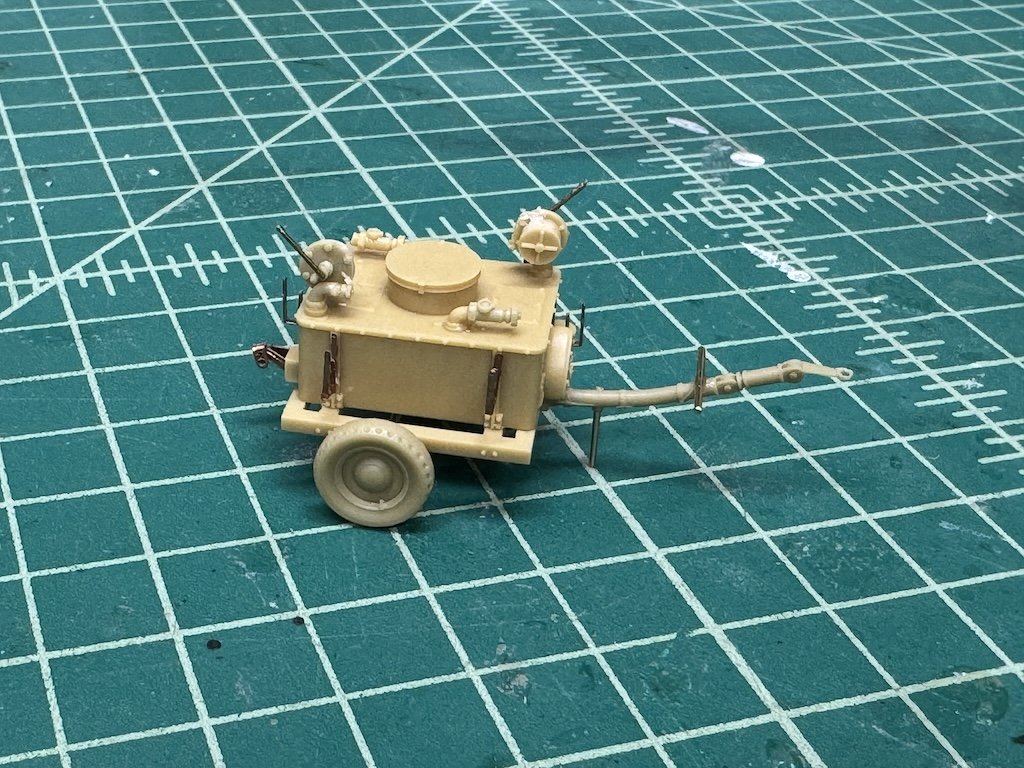
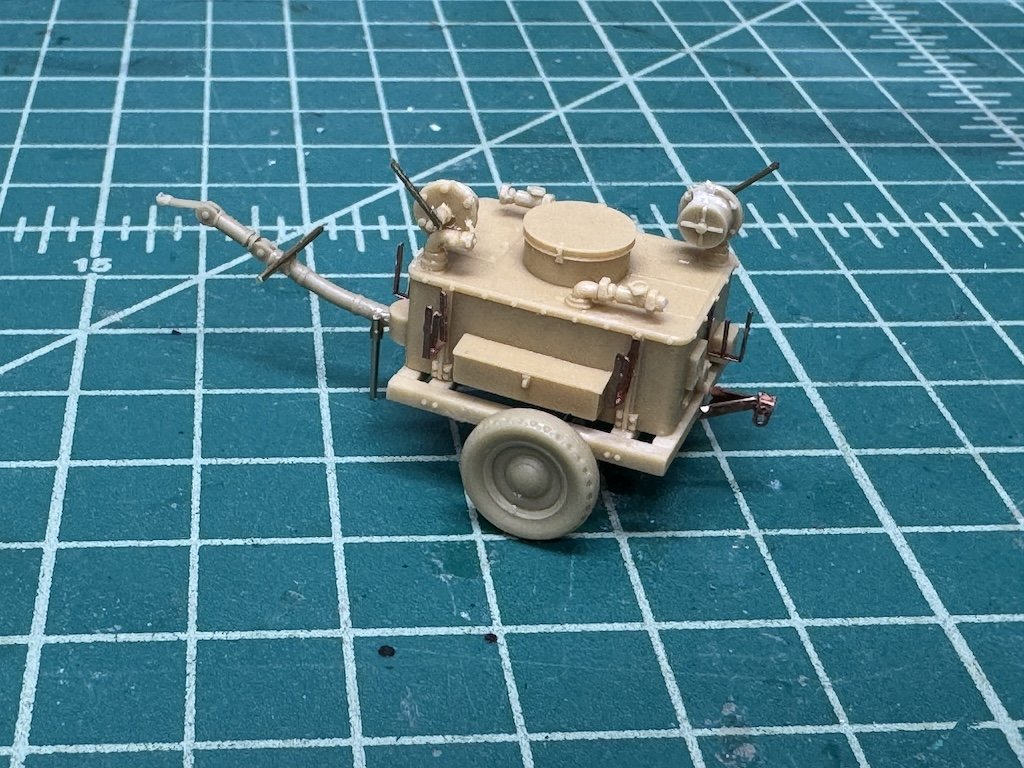
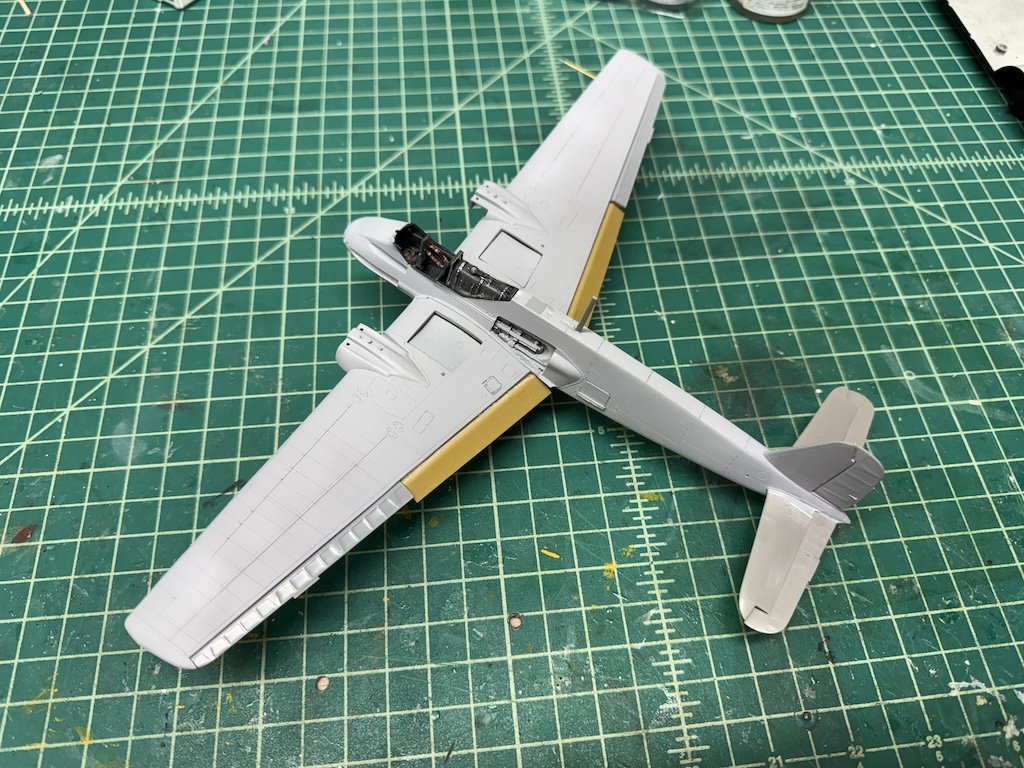
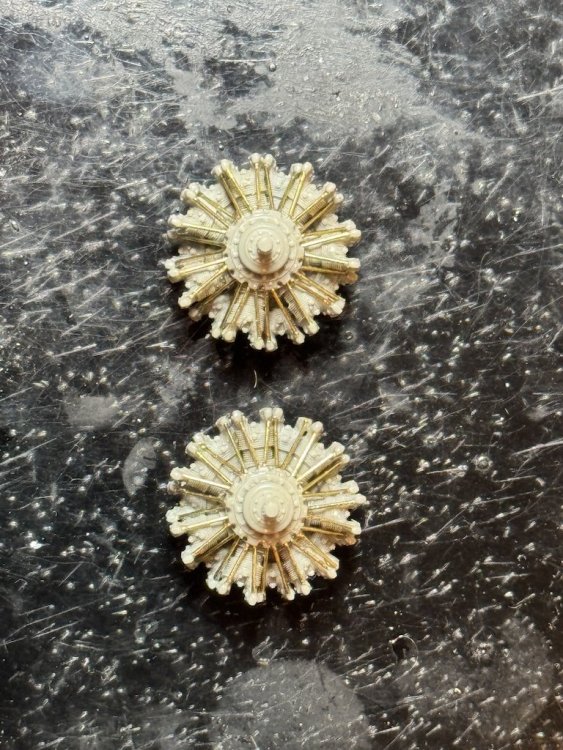
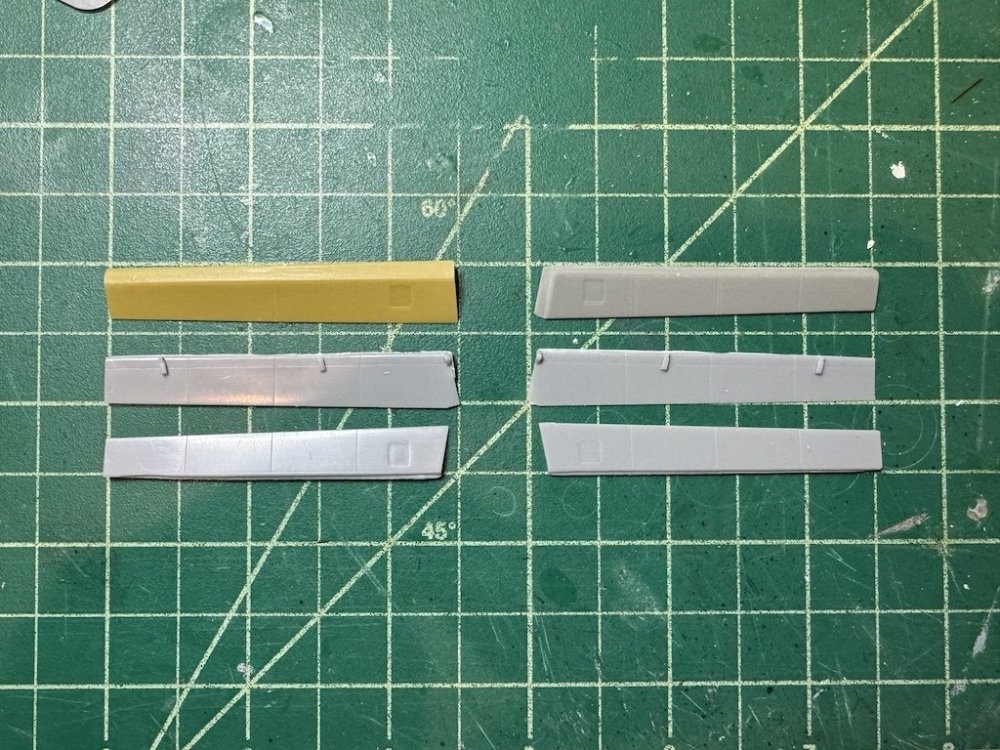
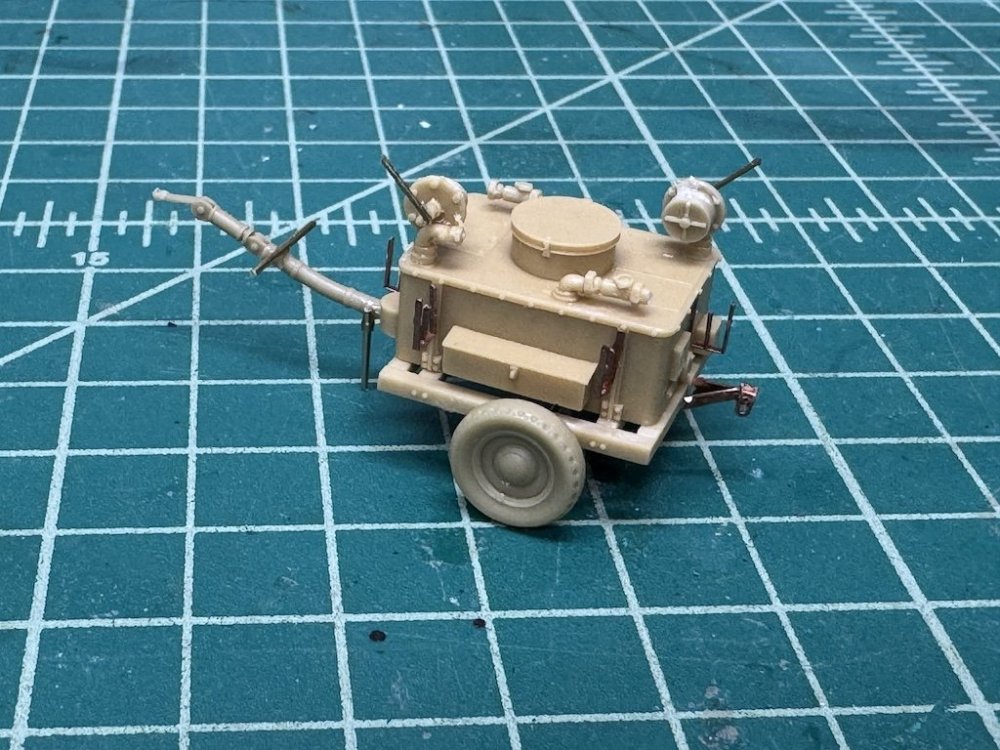
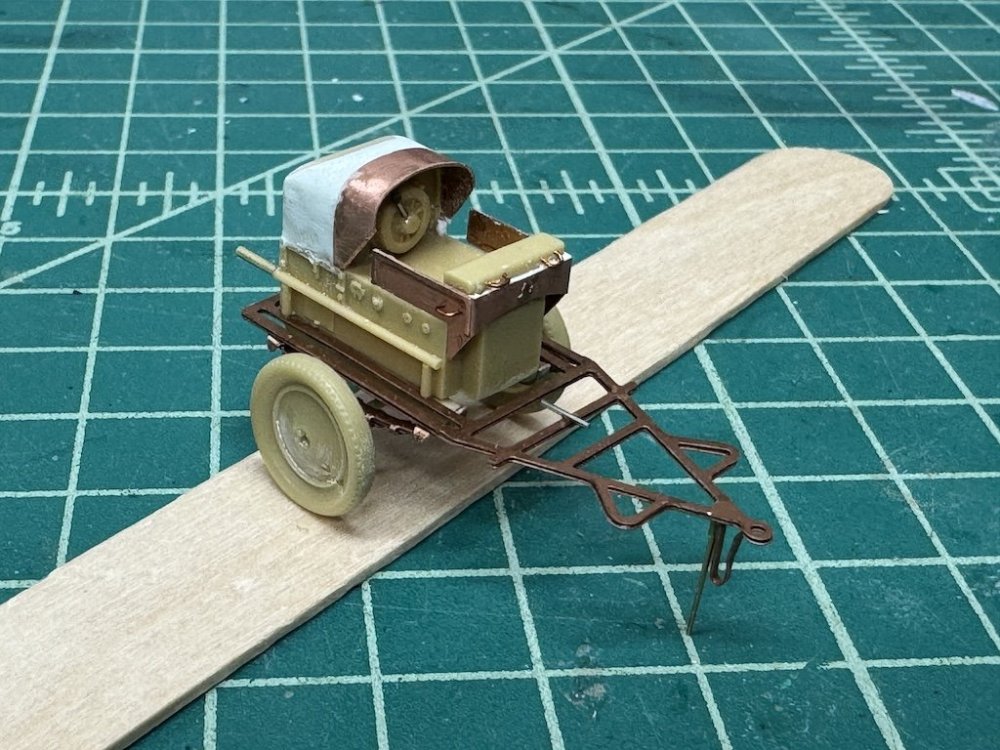
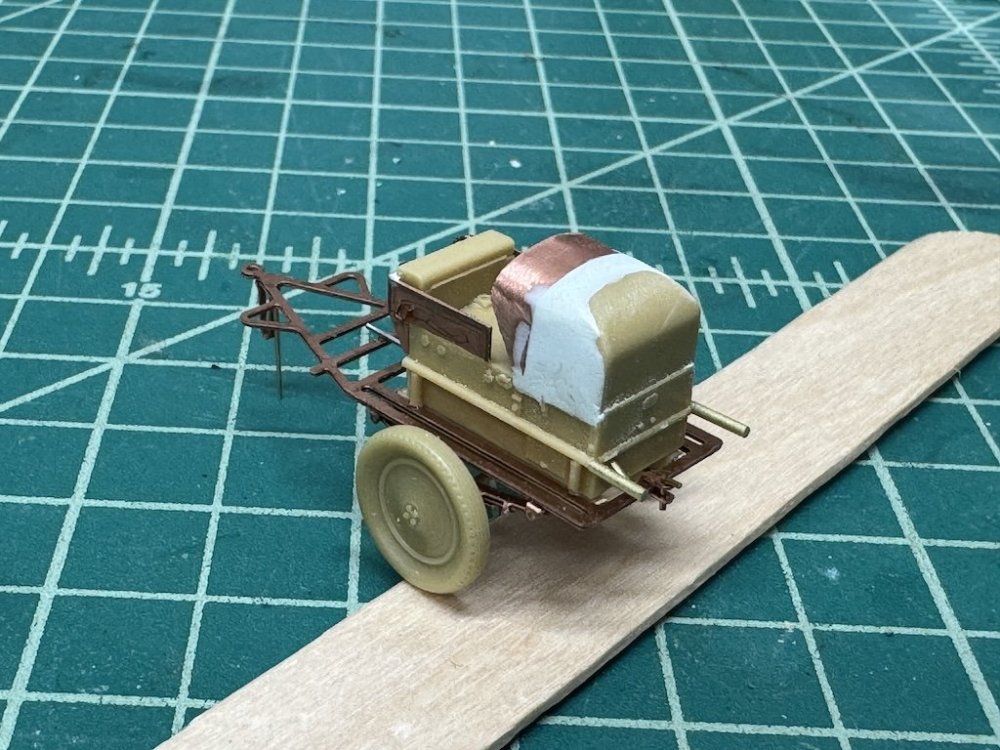
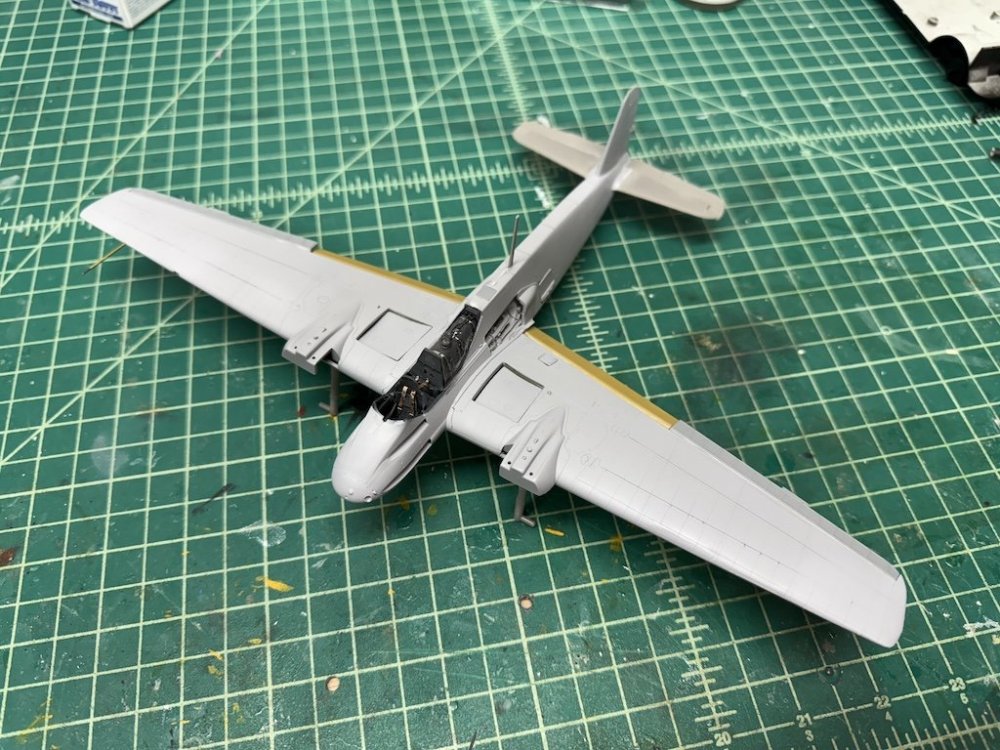
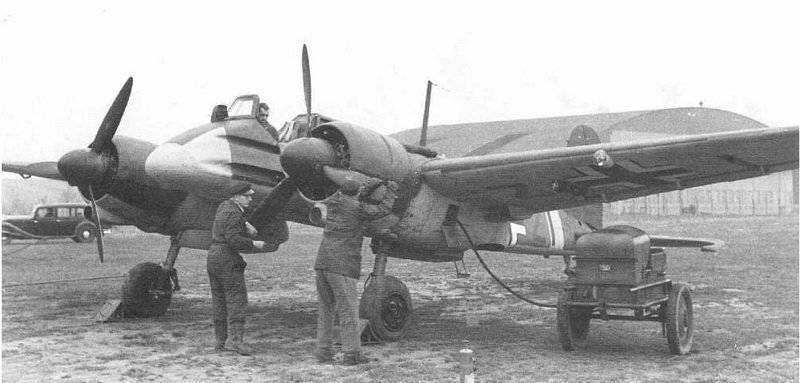
Sandbox deadline is coming up quickly, so I've been trying to get my two models done while things are fairly quiet. For the first diorama, I've gotten the plane and most of its parts primed. The flaps gave me a little issue as I was planning to use the CMK flaps so cut them off the kit wings. Well, as you can see in the picture below, the CMK flaps (upper right) are too short relative to the kit parts I cut off (bottom two on the right). Thankfully I remembered I had the Verlinden set which had flaps that were the proper size (top left, relative to the kit parts I cut off immediately below it). I finally got the pushrods added to the Vector engines. A real pain, but I eventually figured out a way to get them installed - only 28 per engine! But, the engines look pretty good now. I had toyed with the idea of adding a small connector at the ends of each rod using minuscule pieces of brass tube, but I dropped that idea quickly as it was just going to be too difficult and take way too much time. Here are pictures of the plane almost completely assembled, and later primed: I also remembered that I had a Verlinden "Luftwaffe Airfield Carts" that is a multimedia set that allows you to build an oil cart (first two pictures below) and a power supply cart (second two pictures below). Took much longer than one would think, but the two came out really nice I thought: I'll probably use one of these in the diorama, as I found this picture: Thanks for looking in!


-
Westland Wyvern S.4 late- 1/48 Trumpeter
Landlubber Mike replied to BlrwestSiR's topic in The Sandbox Group Build.
Looking good! -
These are the times of the build where I feel like I put in all this time for little to show for it, which gets me discouraged -- even though these are probably the most critical points of the build. Nice job!
-
Nice pickup Rob! Very cool subject. My interests these days go more towards working vessels than the X number of cannon English warships. Looking forward to seeing you work your magic on this kit!
-
Nice! Always love a yellow wing!
-
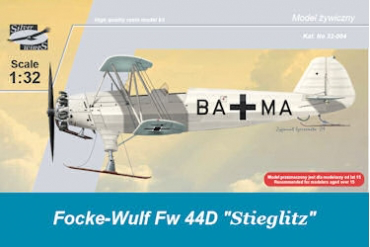
Since my family was begging me for gift ideas, this showed up under the tree. I've always loved the color scheme and skis on this one. Still thinking about that MFH Corvette C.1 though...hmmm....
-
Merry Christmas everyone!
-
Rob, this is such a cool, unique, creative diorama! Tells an interesting story for sure. The skeleton is such a great touch. Well done!!
-
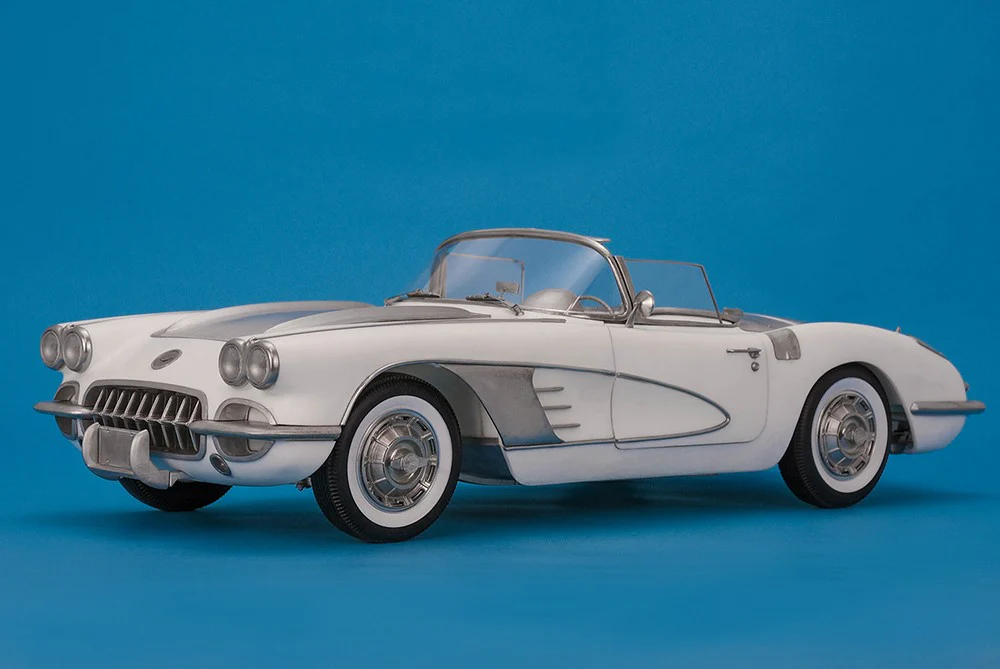
Congrats on the self-present Rob! Too bad about the Tipo 33 - what an amazing looking car, damn! Never knew these existed. Though, I wish I didn't see your post. I went to the MFH website and the website of a US distributor and see they are taking preorders for a 1/12 1960 Corvette - I might have to break my New Years resolution on not adding to the stash!
-
I was going to say Avenger too. I have a 1/48 Accurate Miniatures kit on the work bench that I want to start in the near future. On converting a F4F-4 to an FM-1, I recently did just that in 1/48 using the really nice Tamiya F4F-4 kit coupled with the Wolfpack FM-1 wing fold set. If you're looking to go with a smaller scale like 1/48, I'd highly recommend the Tamiya kit. It goes together really nicely. I wanted mine with a wing fold, but you can easily modify the wings as Martin noted if you don't want to display the model with the wings folded.
-
So sorry to hear. What a pretty cat! The death of pets hits really hard, my condolences.
-
McLaren MP4/6 Ayrton Senna Fujimi 1/20
Landlubber Mike replied to DocRob's topic in LSM 1/35 and Larger Work In Progress
Good to know Chris. Sounds like something to use as an absolute last resort! What decals had you tried it on? -
1/32 Curtiss SC-1 Seahawk
Landlubber Mike replied to BlrwestSiR's topic in LSM 1/35 and Larger Work In Progress
Santa would totally understand my attempted restraint if he saw my stash -
1/32 Curtiss SC-1 Seahawk
Landlubber Mike replied to BlrwestSiR's topic in LSM 1/35 and Larger Work In Progress
I've had my eye on this kit for a while now. The pictures you show are amazing, I'll have to resist the temptation and live vicariously through you...great job so far!