Landlubber Mike
-
Posts
1,277 -
Joined
-
Last visited
Content Type
Profiles
Forums
Events
Gallery
Everything posted by Landlubber Mike
-
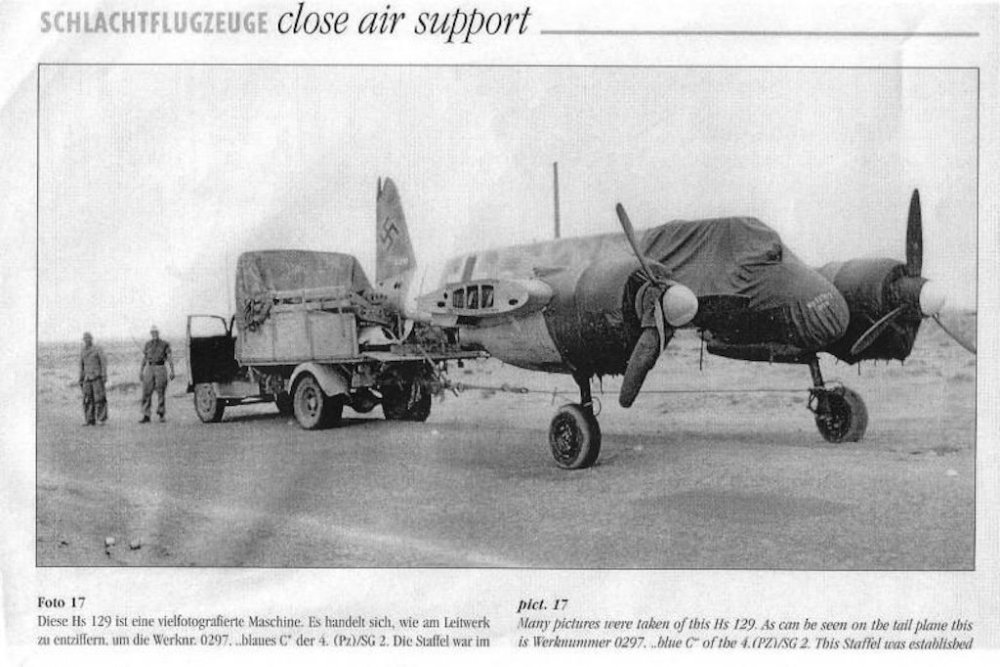
I'm not sure if they were more or less defined on the real thing. A bit hard to tell on the photo: This profile interpretation seems to suggest softer edges: I'm certainly no expert, so always open to suggestions

-
'91 Honda Beat
Landlubber Mike replied to BlrwestSiR's topic in LSM 1/35 and Larger Work In Progress
Cool looking car, looking forward to seeing it come alive. I'm a big fan of these small two-seater roadsters. -
Thanks Kevin! I didn't have much to go on for the splotches on the first one except for the picture at the top of this page and the very angled pic of the real thing (and only on the right side of the plane). I tried to make the right side match up with those pictures, and just took a stab at the left side. That being said, the pictures I've seen for this particular plane isn't the coolest looking camo schemes that I've found, compared to other planes with splotches. I might take another look at them though and see if there is anything I can do to get back in your graces on that one
-
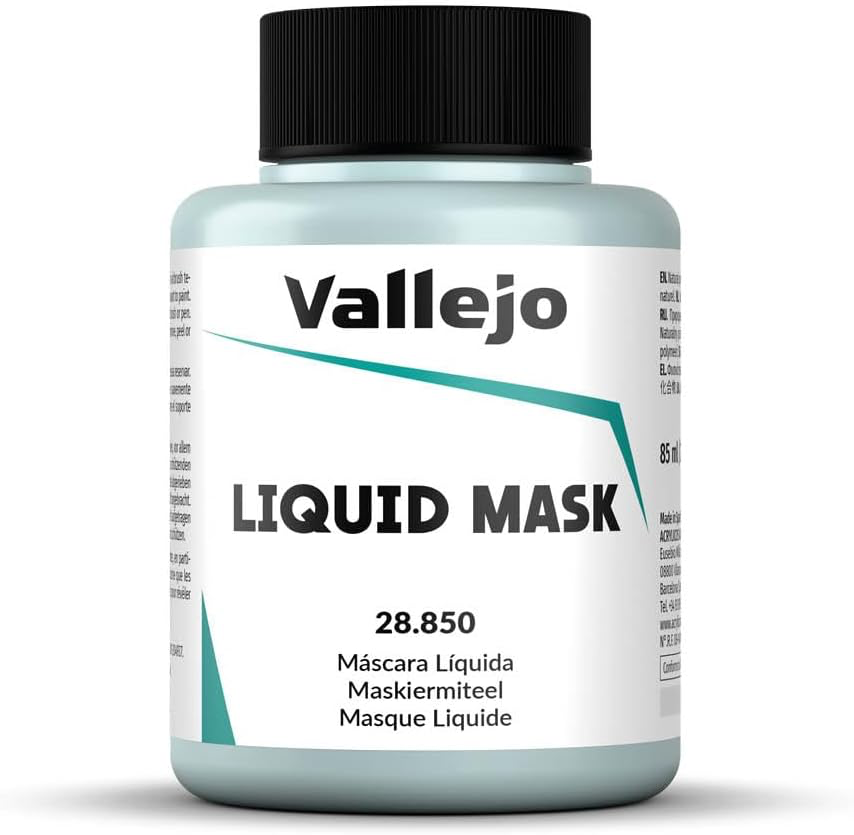
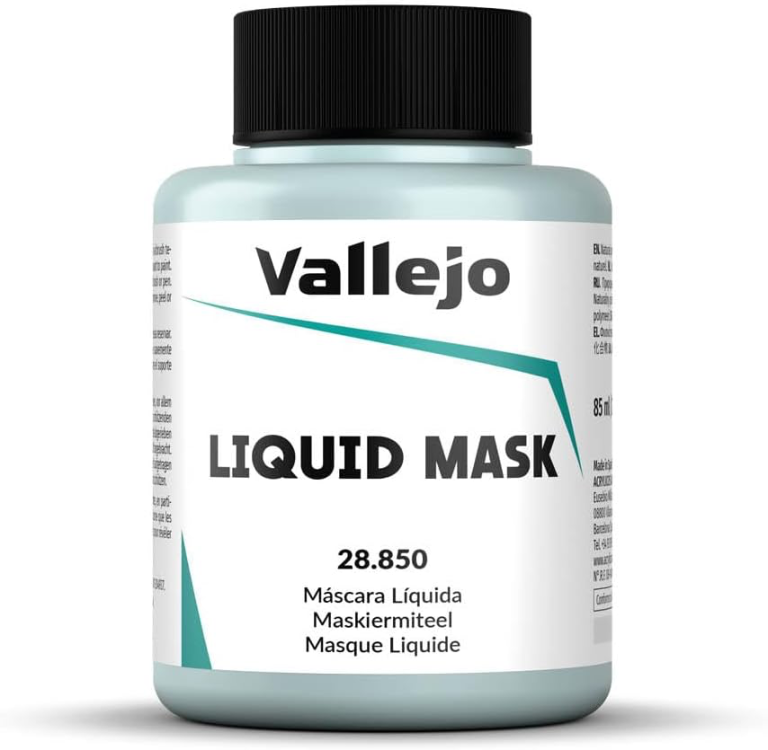
Hey Chris, thanks for the kind words! Looks like I need to bend a couple of the wires i attached, but otherwise I'm happy with how the engines came out. Those took a lot of work to get the rods and the wires in, but I think worth it. For the airbrush, I bought this one (or maybe an older model) from Spraygunner. From what I understand, these are made at the same factories in Japan as I think Iwata. I can tell you that it is every bit as good as my Iwata Eclipse CS. I like how it has a control knob at the end of it to limit how far you can pull back on the trigger to give you even more control. For the splotches, I turned the compressor down to 12-15 PSI, and I believe I used Vallejo paints. https://spraygunner.com/products/ps771-gsi-creos-mr-airbrush-custom-0-18mm?_pos=3&_sid=c5a9fec8e&_ss=r For the masking solution, this is what I ended up using: It was very easy to apply, and I would have no hesitation using it on a 1/72 aircraft. Funny you mentioned your Hien as I have a 1/32 Hien in the stash and was thinking that I now have the solution for those similar paint schemes. Definitely get a set of silicone brushes - they are fairly inexpensive, as they are used in things for painting fingernails. If you use a regular paint brush, it will start leaving clumps in the bristles and ruin your brushes (some people though suggested you can dip your brushes in Dawn soap and that won't happen). It takes a bit of practice, but you'll find the brush that works best and figure out how to apply. For example, sometimes I'd get a dab on the brush, put a heavy dot on the model, and then pull the solution into shapes using the brush or a toothpick (especially for the very thin lines). Trust me, it's very easy though certainly does take time. Probably took me a good 1.5-2 hours to apply, and then a good hour to pull off by scraping gently with a toothpick and using tweezers to grab and pull the mask off. It did not pull off any paint at all, worked a treat!
-
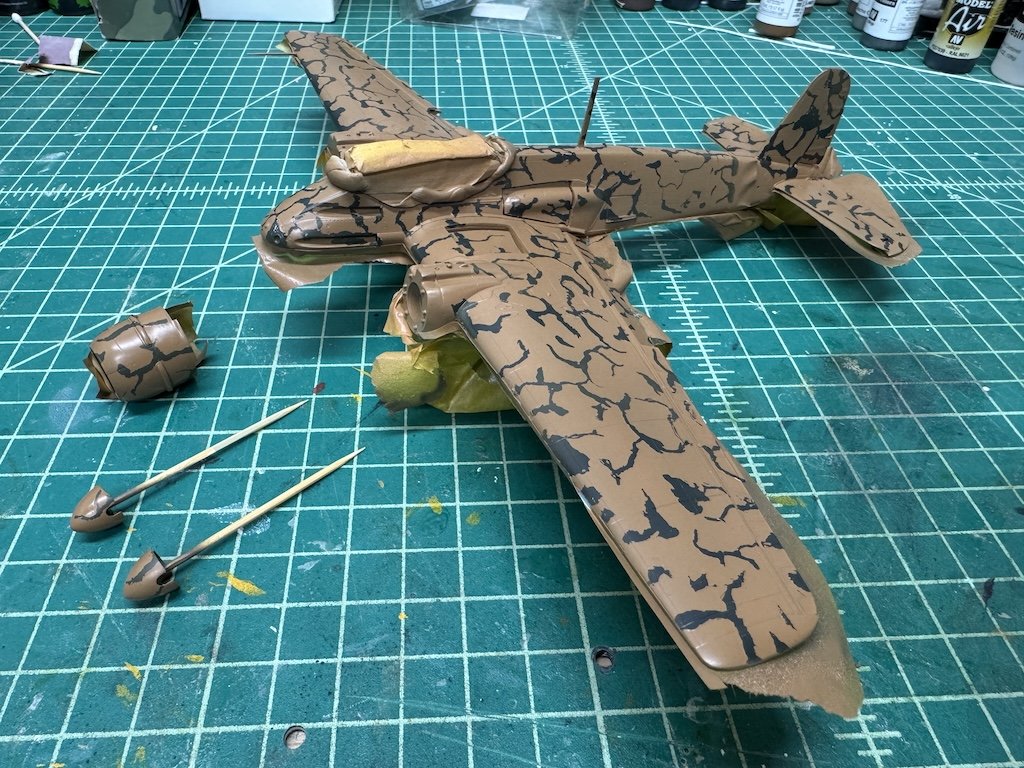
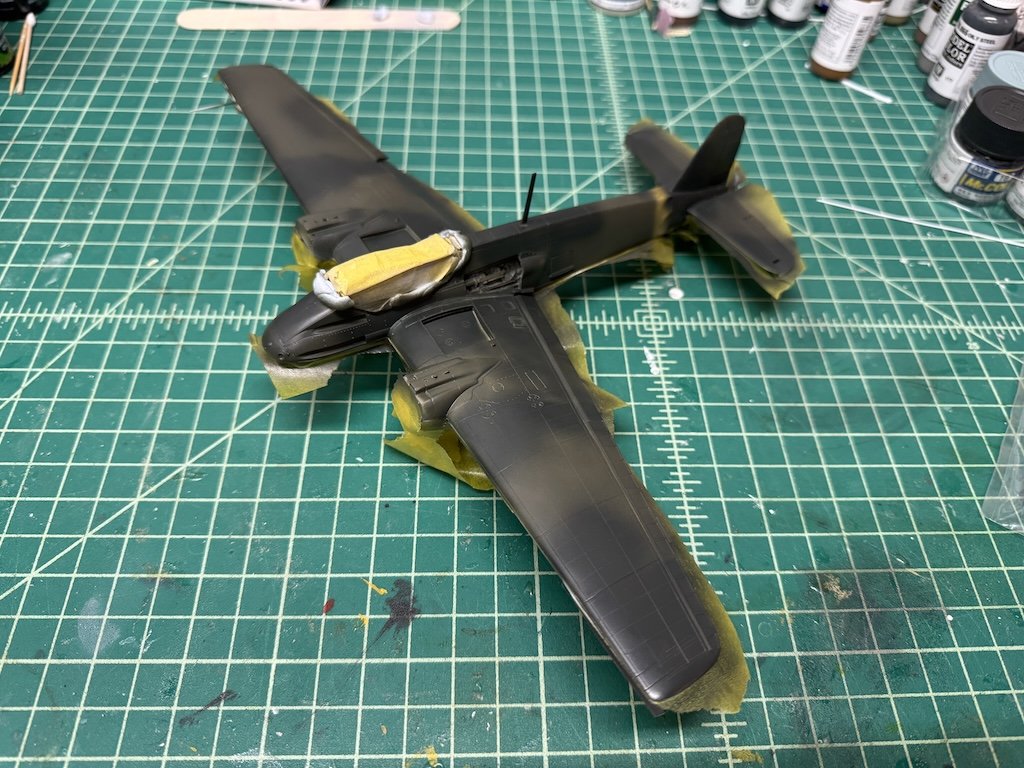
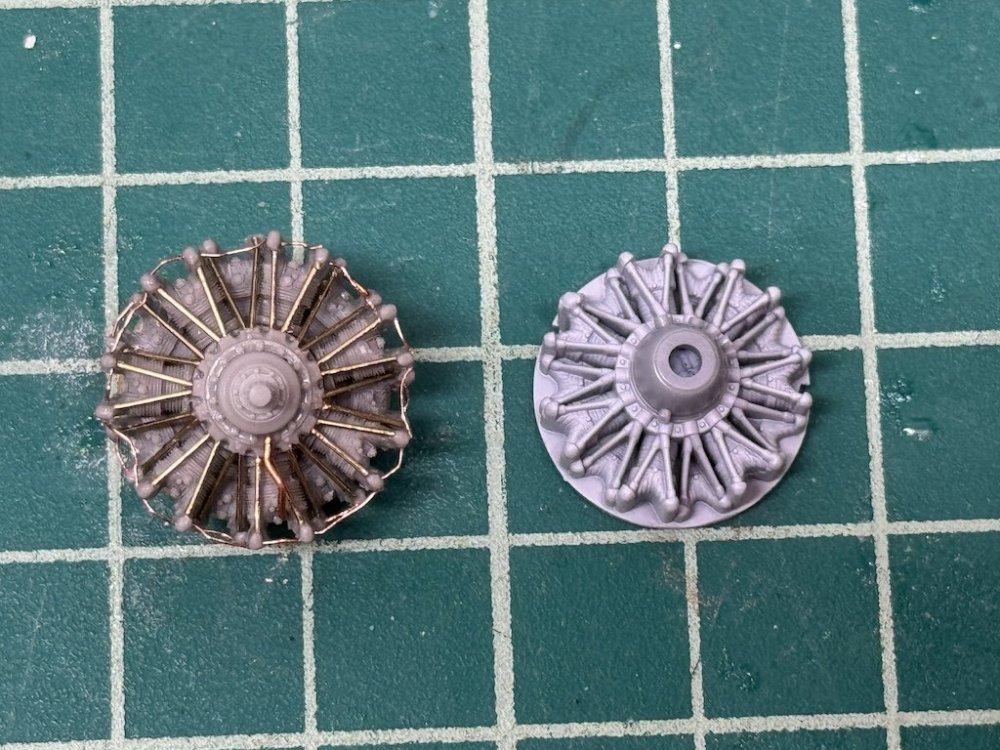
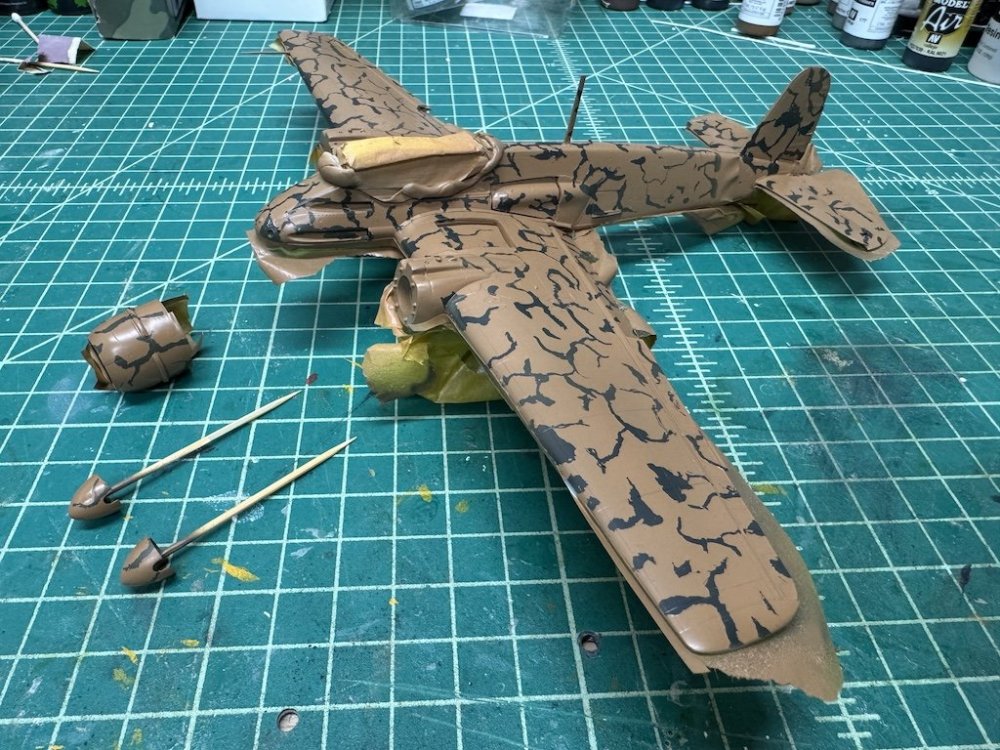
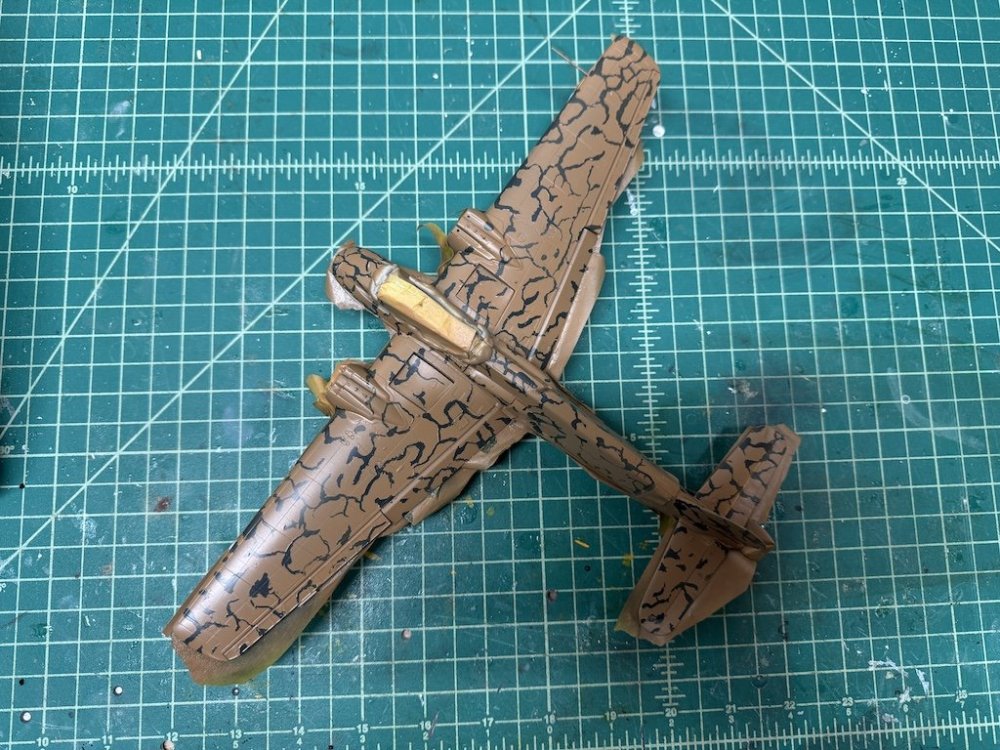
I'm slowly getting closer to the finish Iine. I spent some time detailing out the Vector engines for the first model according to some pictures of the Gnome-Rhone 14M engines. The Vector engine is on the left, and the kit engine (which is pretty nice) is on the right. I'm at the painting stage now. I first started with the second Hs 129, and used a 0.18mm airbrush to brush on the green splotches: I then tackled the first Hs 129. I had used Mr. Hobby paints for the undercoat European scheme (I figured Mr. Color would have a strong adhesion than Vallejo). Then I sprayed a light coat of Mr. Surfacer semi-gloss for a little added protection. I struggled with how to do the camo scheme, and eventually settled on using liquid masks. I did a bunch of tests first using Mr. Hobby - Mr. Masking SOL R and Vallejo Liquid Mask. I tried them both out with sprays of Mr. Color and Vallejo paints on top as I wasn't sure if the Mr. Color would dissolve the Vallejo. Turned out both were completely fine and compatible with each other, with Mr. Color on Vallejo's mask and Vallejo on Mr. Hobby's mask. I ended up going with Vallejo as it was slightly easier to apply as it's a little less viscous compared to Mr. Masking. One tip I found online was to paint masking solutions using silicone brushes. They made it much easier to apply - just apply to a section, wipe the brush (because the masking solution starts drying pretty quickly), and repeat. Still took hours to do, but well worth it with no aggravation. I was really surprised how easy it was. One thing to note is that I read that it's better to not leave masking solutions on for too long. Some said a week or two and it was hard to get the mask off. Others said they've left masks on for months and had no problems. I ended up going with Mr. Color for the Mr. Color RLM 79. I have the Vallejo equivalent to do touchups as I find Mr. Color doesn't brush as easily. Anywhere here are the pictures. Thanks for looking in!

-
Thanks Martin! How is yours coming along? I paused my 1/32 Buffalo build (in a separate log) to work on the last two GBs, but hope to turn to it later this year.
-
Looks great Rob! Nice work on finding a way to lower the cylinders. Nobody is going to notice that fix with all the detail with the engine. I'd rather do that than mess up the hood trying to shave it down for clearance.
-
Eduard Spitfire Mk. XVI Bubbletop 1/48
Landlubber Mike replied to CANicoll's topic in LSM 1/48 Work in Progress
Looking really good! The harness looks fantastic! -
Hope you have a shovel and boots Kevin! That's crazy!
-
McLaren MP4/6 Ayrton Senna Fujimi 1/20
Landlubber Mike replied to DocRob's topic in LSM 1/35 and Larger Work In Progress
With the holidays I missed that you had finished this one. Stellar work! Really nicely done, wow! -
For sale - HpH Walrus kit in 1/32
Landlubber Mike replied to Landlubber Mike's topic in Buy, sell, swap, seek
Me 410 is sold, but still have the Walrus for sale in case anyone is interested. -
Looking fantastic Hubert!
-
Wow, looks fantastic! Even at almost 50 years old that kit holds up nicely.
-
Wow Rob, that is a tight fit. Is it possible to somehow lower the engine a tad, maybe shaving off a tiny bit from the underside of the tray where those cylinders sit (sorry, I don't know the technical terms)? Has anyone else posted similar issues? This similar to those nerve-wracking times I've found trying to add AM sets to kits where you try to find what is causing the issue and take risks to see if you can improve the fit. Good luck my friend! Looks like you've just about resolved it.
-
Those details look really good Rob! Nice job!
-
Eduard Spitfire Mk. XVI Bubbletop 1/48
Landlubber Mike replied to CANicoll's topic in LSM 1/48 Work in Progress
Ugh, sorry to hear man. Hope you feel better soon! -
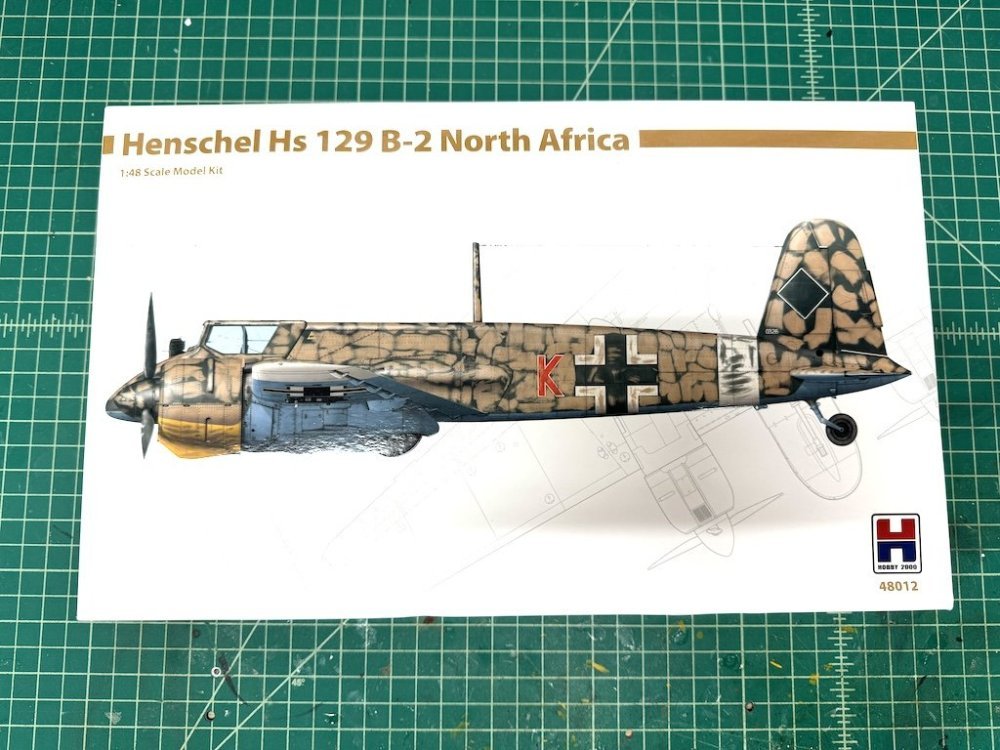
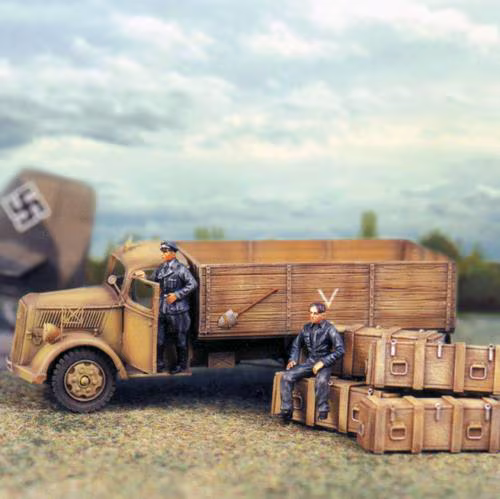
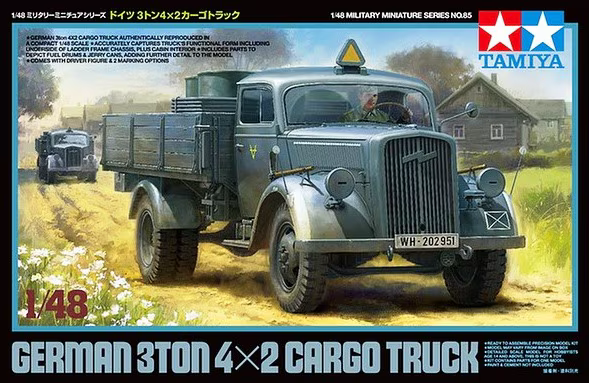
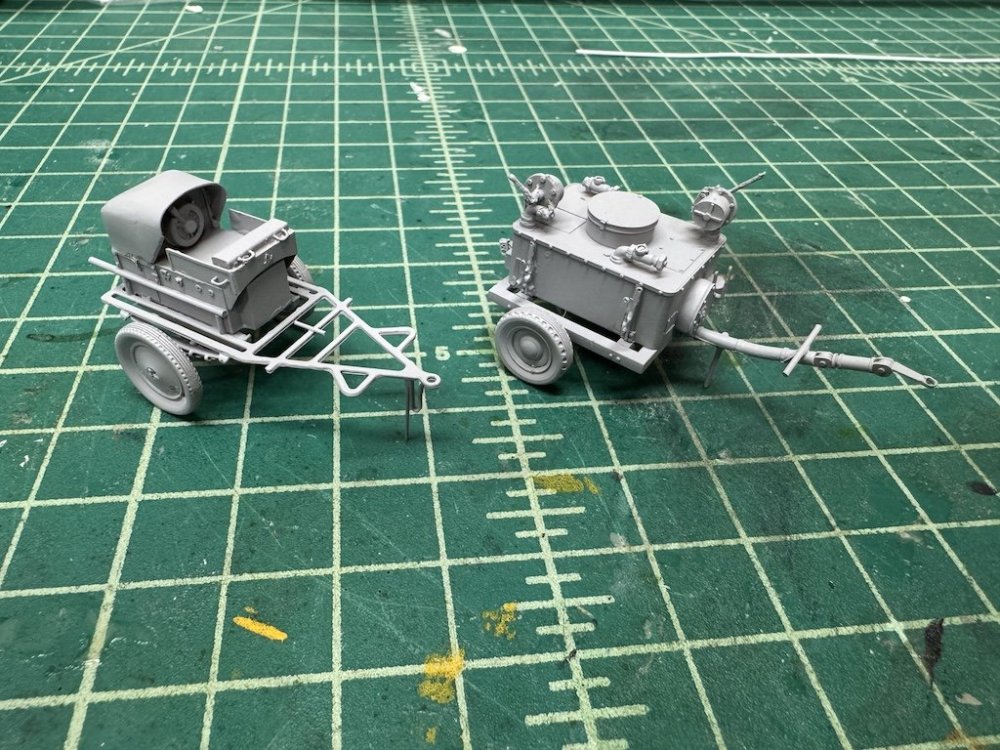
Moving along at a decent pace on the painting. I have the undersides of the two models painted in Hellblau Light Blue (RLM 65), along with their bands. For the first diorama, I'm doing this scheme which is German Sand Yellow (RLM 79) painted on top of the typical RLM 70/RLM 71 scheme: Since the RLM 70/RLM 71 scheme will barely peak through the Sand Yellow (and are quite similar in hue), I went ahead and free hand painting the underlying scheme. For the second plane, I'm doing this scheme: I took a different approach and just painted the topside with RLM 79 (Sand Yellow), and will add the splotches after: I used Mr. Color for the undersides and top coats on both planes. I think I might try using Vallejo for the Sand Yellow (first plane) and splotches (second plane), as I can scratch off the excess fairly easily without mucking up the Mr. Color underneath. I'm dreading the first scheme, but have some paint mules to practice on. The second diorama will have an Opel Blitz truck. Originally, I was planning to use this truck from SOL Models for which I somehow had two kits of in the stash: The truck isn't bad, but it's resin, and very fragile. I broke the roof section off BOTH cabs 🤬 at the windshield pillars when trying to clean up flash. For the windows, I'd have to cut them out myself out of included clear plastic sheet. And the undercarriages of both kits were warped, and had a slight bend no matter how much I soaked them in hot water. Given all that aggravation, I broke down to save my sanity and ended up buying the Tamiya kit below. After an evening, I'm almost done assembling it, and will post pictures later. It's a very, very nice kit that goes together easily and perfectly (thank you Tamiya!). I might actually use the figures and crates from the SOL kit as they are really well done, so I guess not all is lost with the SOL kits. I thought about toughing it out and finishing the SOL kits, but I just want to get these dioramas done and move on to other projects. These trucks were fairly prevalent in the various war theaters, so I'm going to put them aside and maybe use them as secondary pieces in later builds. The SOL instructions weren't the most clear, especially for the undercarriage, so while I'm working on the Tamiya kit I might just pre-assemble the SOL undercarriages while I know how the undercarriage should be configured. Thanks for looking in!


-
Eduard Spitfire Mk. XVI Bubbletop 1/48
Landlubber Mike replied to CANicoll's topic in LSM 1/48 Work in Progress
Nice subject Chris! I like the scheme you are thinking of. Looking forward to seeing this one come alive! Nothing like a snow day to get the modeling juices going! -
I can only dream! Once the kids are out of college, I can retire and then move someplace like that. I just blew out the snow in the driveway - man, it's heavy! So glad for the snow blower. Though, we live on a hill and I went to blow out the neighbor two houses up the hill and felt like I was going to die dragging the snow blower up the street. I did my good deed for the month!
-
Thanks! Took a while to work all the AM in, but I think I'm on the home stretch now. Good luck with not having snow. If we get more than 2" here, the DC area shuts down completely. It's a bit ridiculous but we just don't have all the snow removal resources that areas north of us get. Having grown up in NYC, it still amazes me how people freak out down here.
-
Thanks Chris! Looks like we got a good 6"+ here in Arlington. Thankfully I managed to get my snowblower serviced over the weekend, so it should be good to go when I head out to shovel in a bit. I've got a house with a detached garage in the back of my lot (the long way on the rectangular lot), so I've got a 100' driveway to shovel. I've only had to use it three or four times in the last 15 years, but after I heard a client died shoveling out his driveway, I broke down and got one. Still no plows on our street here, so my guess is kids will be off tomorrow as well. Hope it's not too bad out there for you!
-
Hey Kevin, thanks! Funny you should mention the antenna - I was wondering the same about inserting them at this stage, and I actually broke both off a few days ago 🤬 There was a decent sized nub but still cracked off. So, I went ahead and drilled a 0.5mm hole a few millimeters up into the antenna, and inserted a steel rod to make a new post. It should be a lot more sturdy now, though I'm being ultra cautious in how I handle the models. The pitot is scratch built - steel rod that goes fairly deep into the wing with a brass tube over the external wider section. That definitely isn't going anywhere. I like installing as many details now so that I can paint and weather all at once so parts look consistent, and not have to worry about getting glue smears, etc. down the road. Plus, I feel like glues adhere better between unpainted parts than painted parts, but I could be mistaken about that. Of course, you then have to be very careful in handling the model.
-
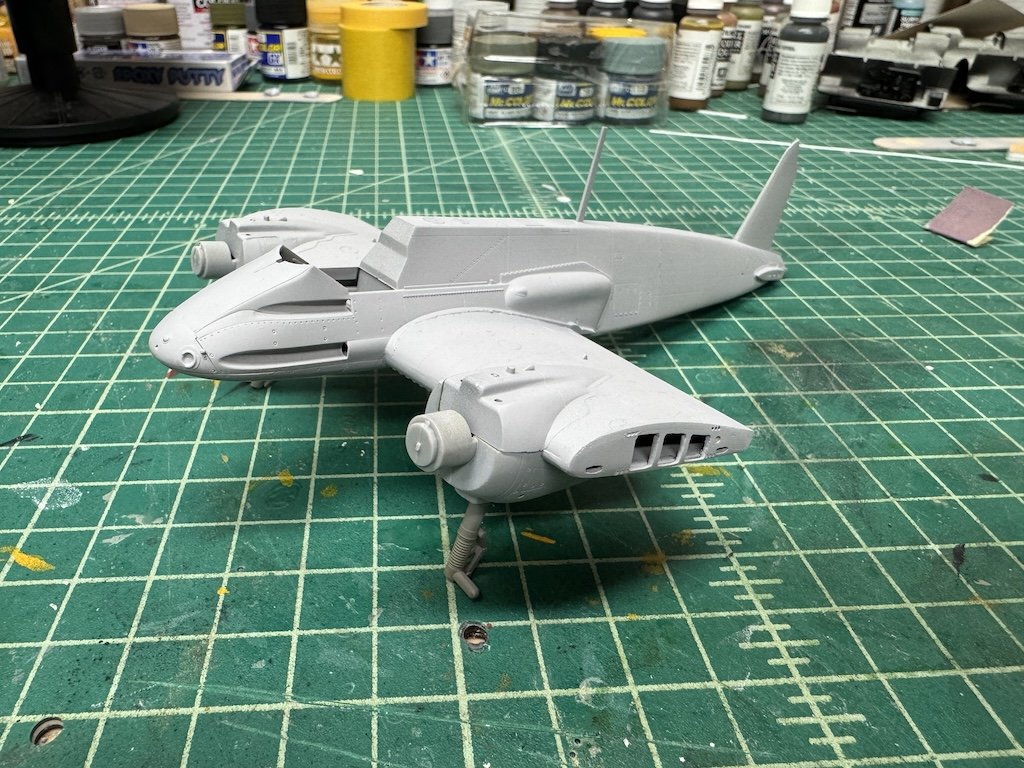
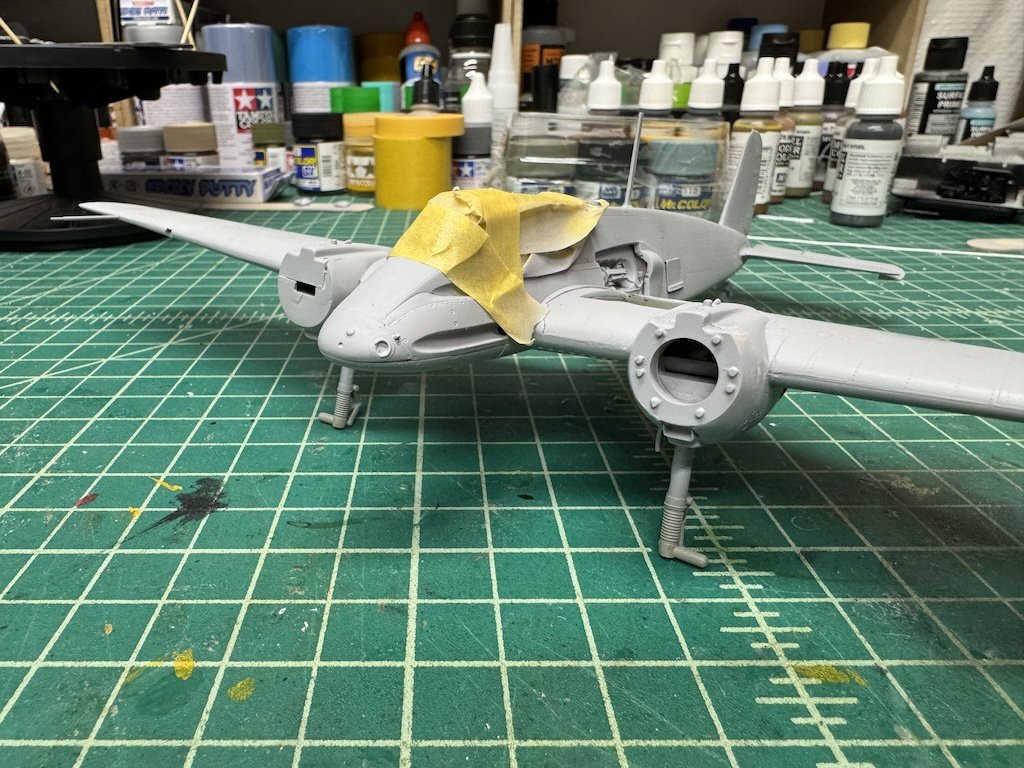
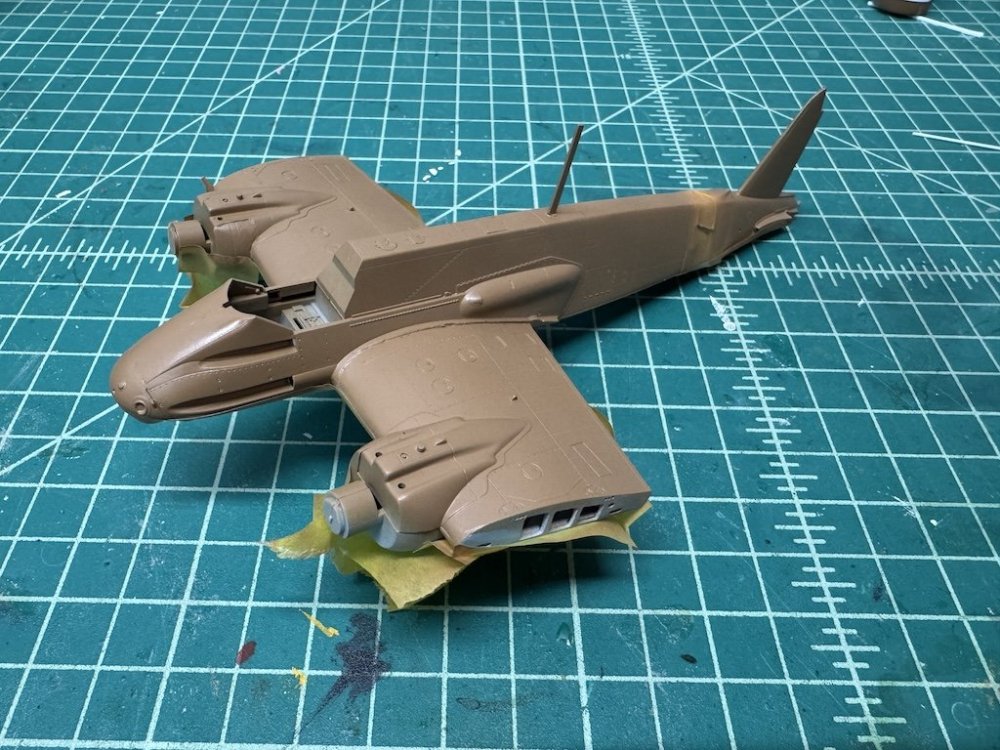
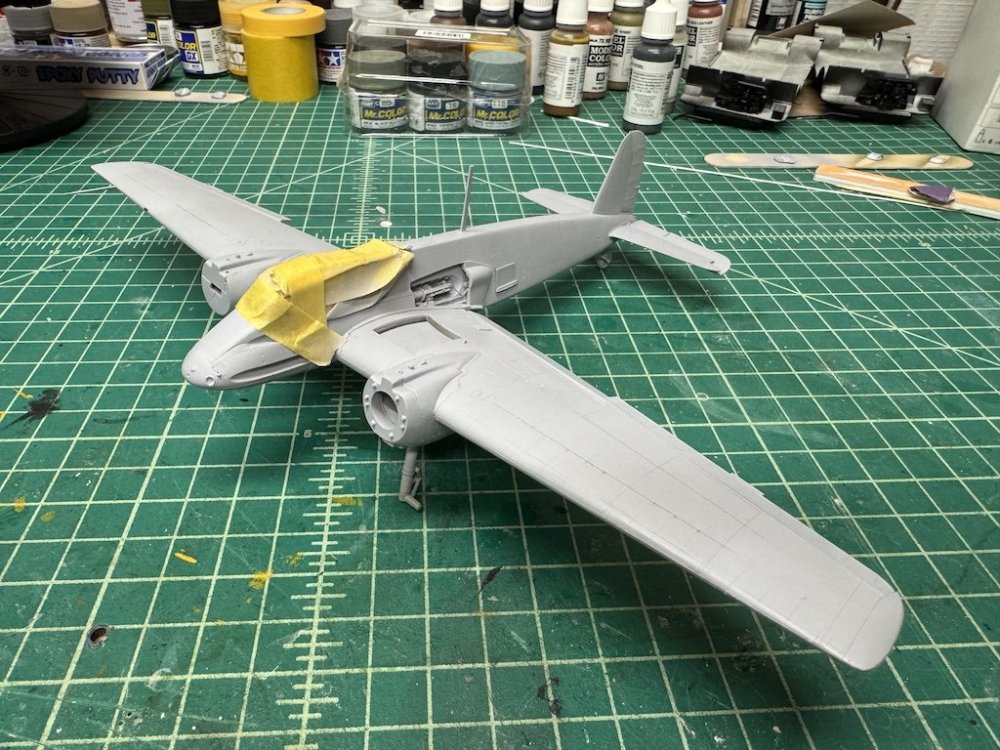
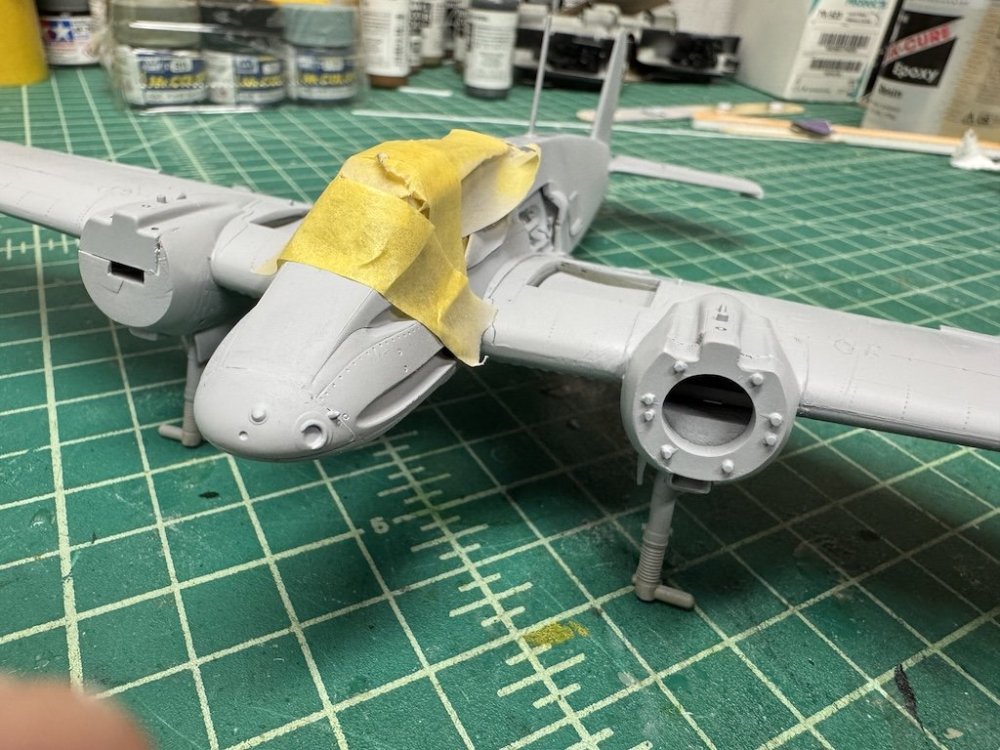
Even though I missed the deadline, I'll keep adding to the build log here in case anyone ever decides to build this kit. I've made some good progress the past few days. I've got both planes mostly built up and a few rounds of primer and sanding to get them ready for actual painting: One of the trickier parts of the build was to modify the left nacelle be able to show an exposed engine. Verlinden provides a full engine, the exhaust ring for the engine, a mounting ring for the engine all in the same Hs 129 upgrade set so you have a one-stop shop for this. Things are a little more complicated for me because I decided to use the very nice Vector engine along with the CMK external set which replaces the parts for the undercarriage and nacelle. After some putty, everything is looking pretty good - you can see the Verlinden engine mount ring on the left nacelle and the CMK nacelle front on the right nacelle: I think Verlinden vastly oversimplified the engine mount ring. Looking at schematics and the Zoukei Mura kit, the ring is actually just a smaller diameter ring supported by a lattice type structure of frames inside the nacelle. Where this matters is that the rear part of the engine actually hangs down on the other side of the ring into that bottom vent piece you see in the Verlinden ring. That was going to be way too complicated to replicate, so I just stuck with the Verlinden mount ring. What's interesting is that Verlinden provides the back pieces for the engine that would feed down into the bottom vent piece, but you can't really use them because the Verlinden engine mount ring is not accurately configured. One other note - the CMK undercarriage set provides more details for the landing gear bay for sure, but if I had to do it over, I don't think it's a set worth adding. It's a lot of work to add the CMK parts for details that will not really be visible. In addition, the kit has a very secure way of installing the landing gear legs where they are locked into position into the wing. For the CMK set, you can only glue the flat end of the leg against the nacelle, so it's definitely a lot less stable and not as easy to lock into the proper orientation. I ended up using two-part epoxy glue to make sure that the legs are securely fastened to the undercarriage bay. Thanks for looking in!


-
My modeling interests have changed a bit, so I figure someone else might want to build this beautifu HpH kit in 1/32 scale. It's , full multimedia kits with resin, PE, HGW belts, masks, etc. so no aftermarket is needed. HpH Walrus https://www.largescaleplanes.com/reviews/review.php?rid=1083 Prices is $350 for the Walrus plus shipping from Virginia (zip code 22205). Willing to entertain reasonable offers. Ideally would prefer to sell in the US if possible. Just as an FYI, this kit is cross-listed on other sites. Drop me a PM if interested. Thanks! Mike
-
Nice work Rob - seems like a lot of work on such an expensive kit, but maybe that's part of the charm?