Landlubber Mike
-
Posts
1,276 -
Joined
-
Last visited
Content Type
Profiles
Forums
Events
Gallery
Everything posted by Landlubber Mike
-
I've had nothing but great interactions with Sprue Brothers. I'm a very happy customer.
-
A little frustrated with Kitlinx. Back in December, I ordered what were supposed to be their last two Taurus gnome engines in stock. Rest of the order, which included other Taurus aftermarket, arrived no problems. The Taurus engines, however, were not in the box and as everyone knows, they aren't exactly inexpensive. I've now sent four or five emails directly to Loic without any response. I've bought from Kitlinx in the past and never had a problem. Even on a prior order, I had purchased a resin figure set which was missing some parts and a replacement was sent. So, my money will go elsewhere. Just wanted to pass along my experience so others aren't similarly impacted.
-
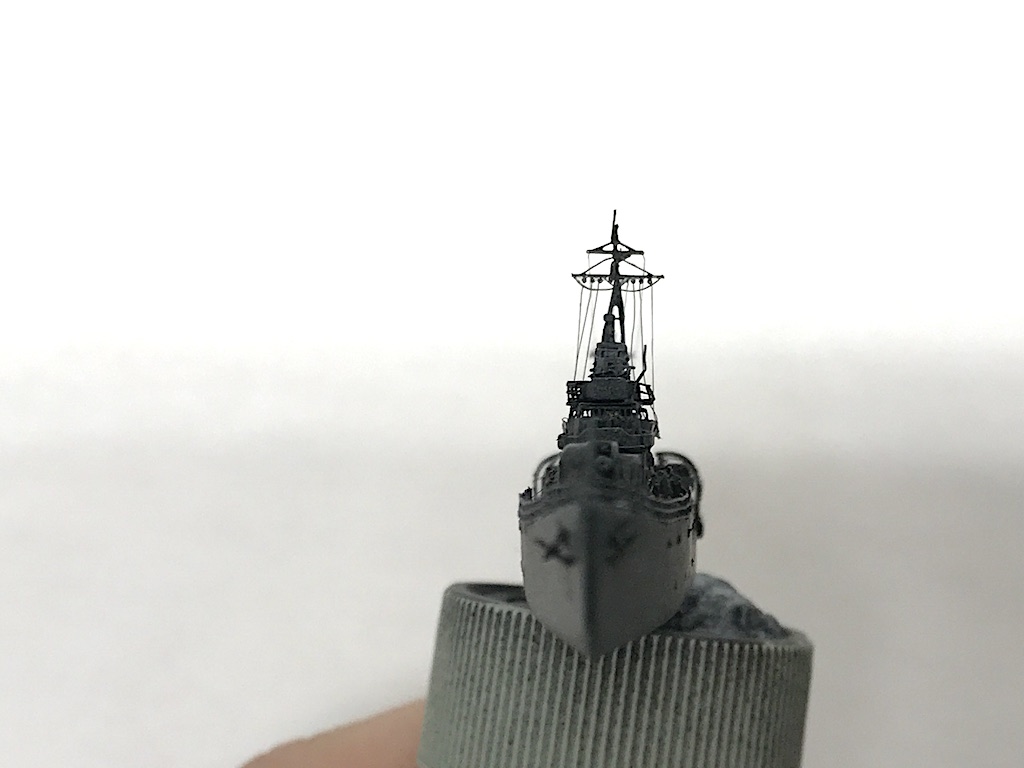
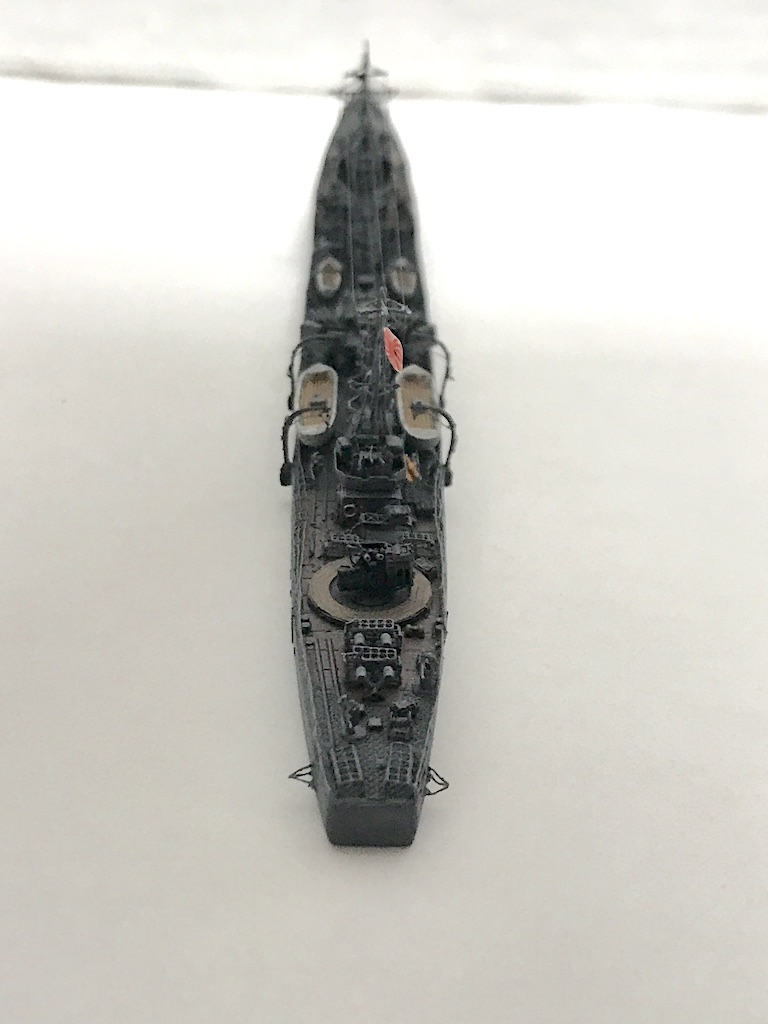
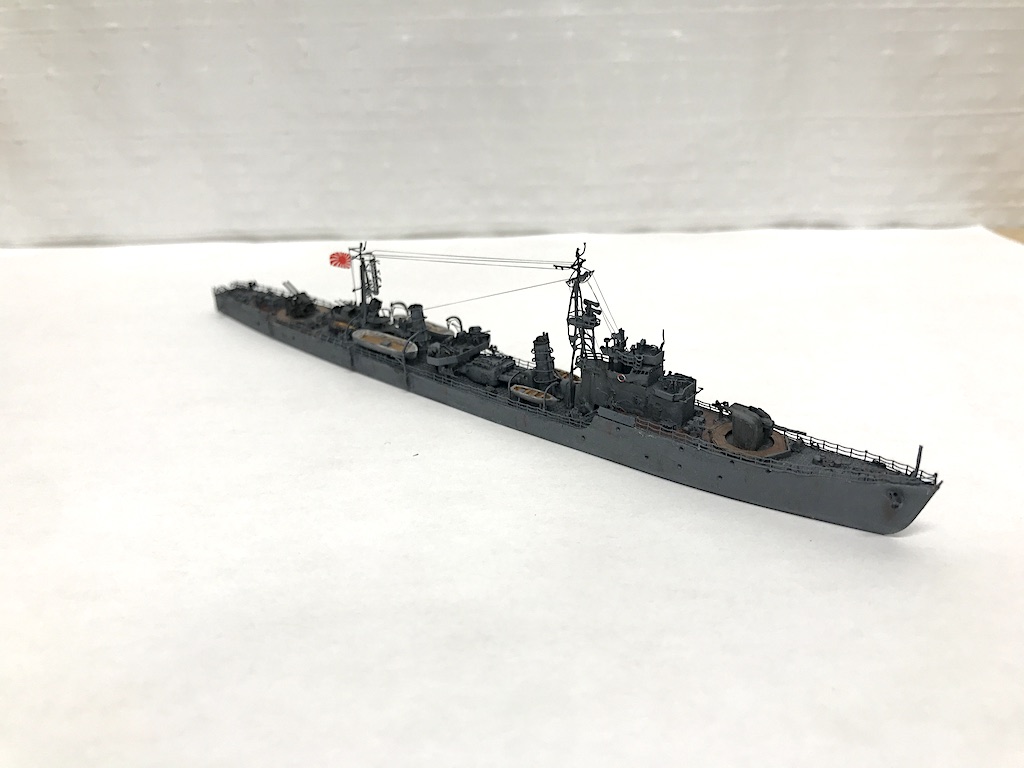
Ouch, looking at these closeups I realized that the back railings must have gotten pushed in. Couldn't see it with the naked eye, but the pics certainly showed the issue. A little toothpick action and she's back to normal
-
HPH Cutaway Catalina
Landlubber Mike replied to Trigger's topic in LSM 1/35 and Larger Work In Progress
Holy cow Frank, amazing work! I didn't realize such a model existed. I came close to bidding on a Pro Modeler Catalina, but I might instead keep my eyes out for one of these. Talk about an epic build of a really cool subject! Nice that the wings are truncated too - this subject at 1/32 must be a monster, especially with the full wings included. I just noticed that HpH has a full Catalina also, but I think I'd go with the cutaway. -
Thanks Peter, appreciate the kind words. At some point I'll have to work on something at a larger scale instead of these puny ones
-
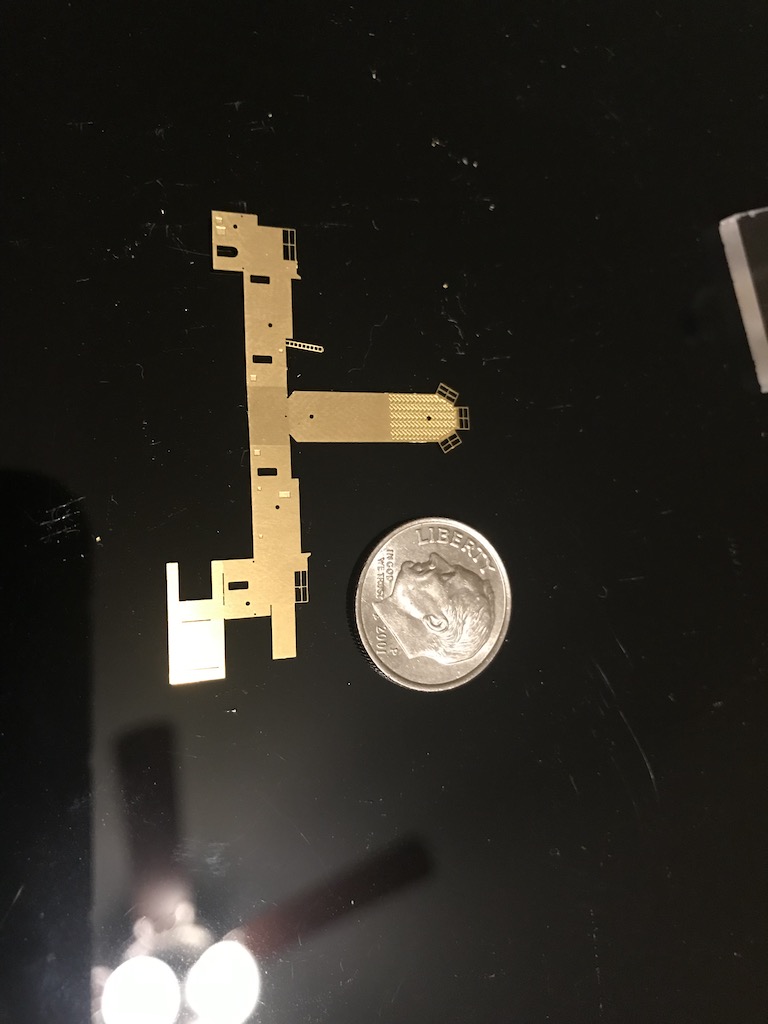
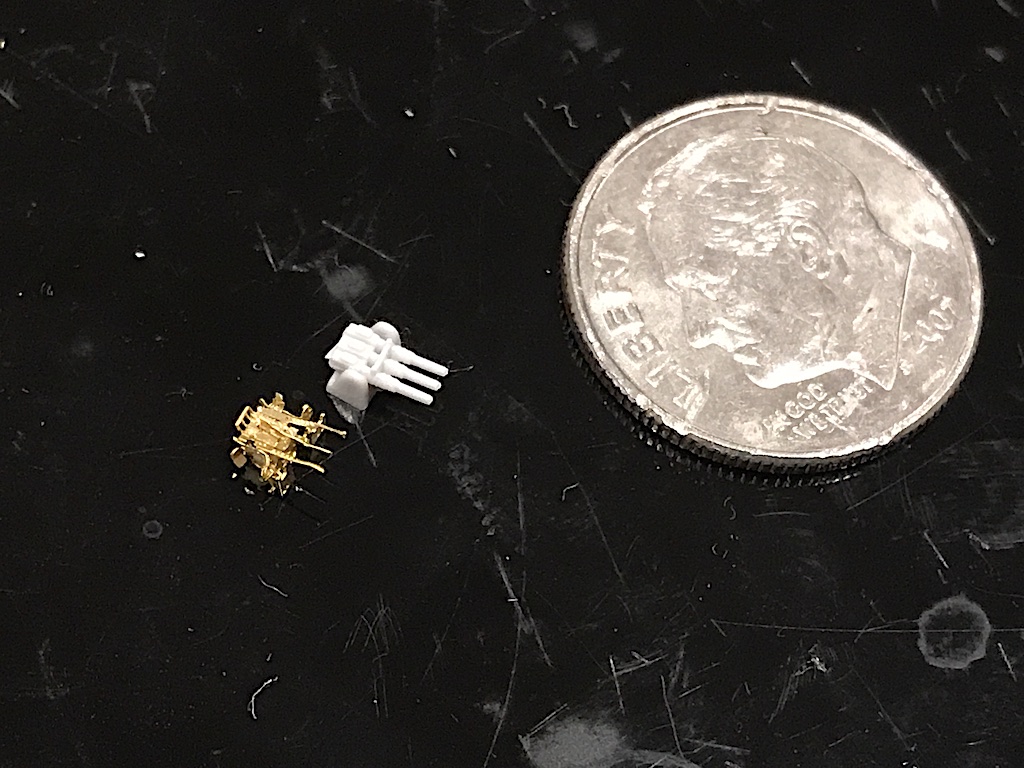
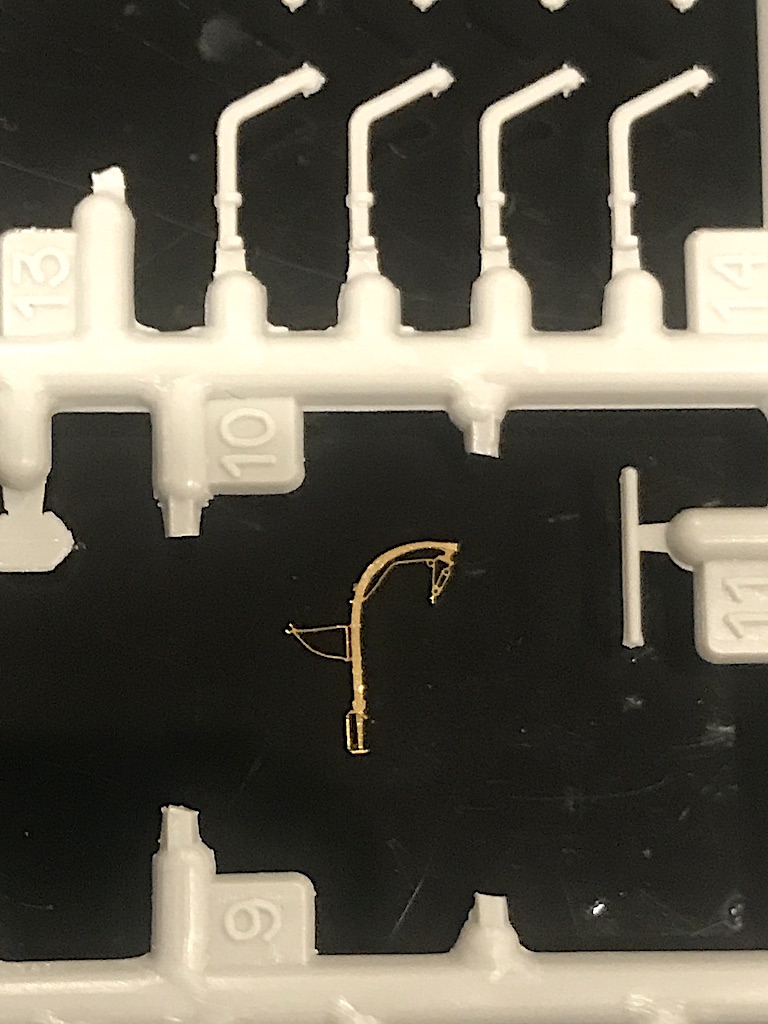
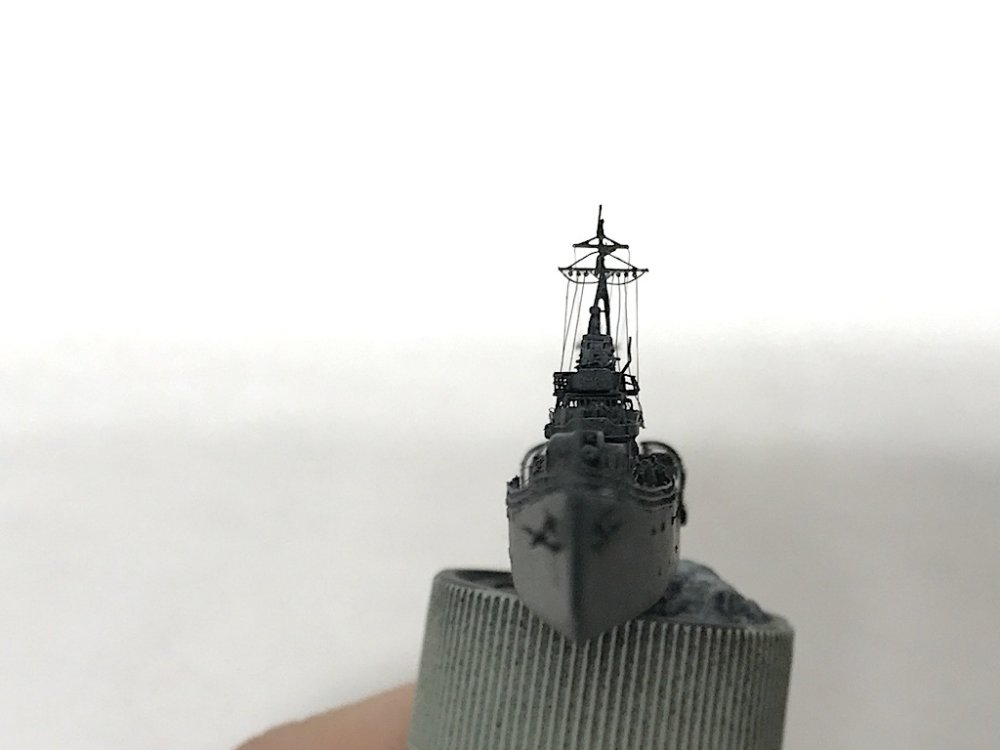
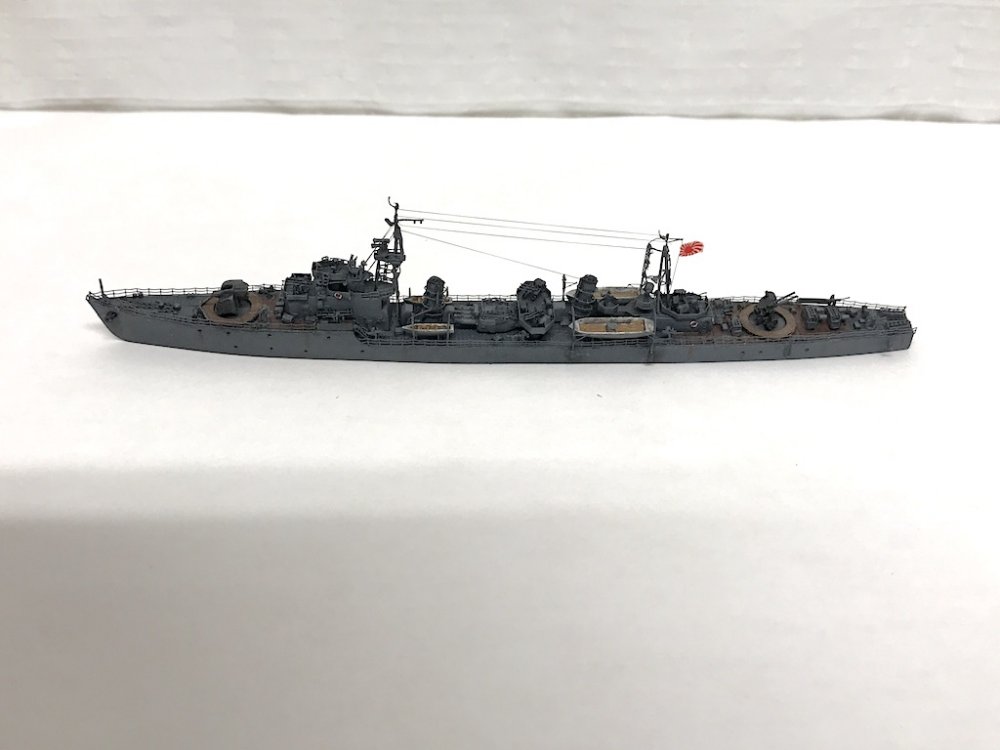
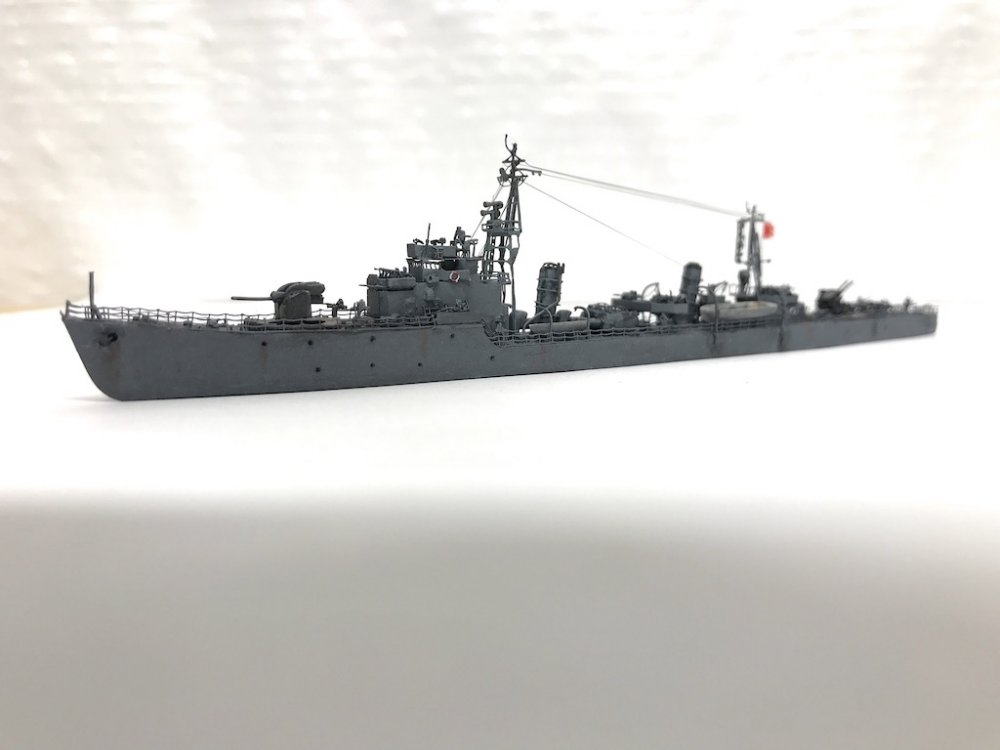
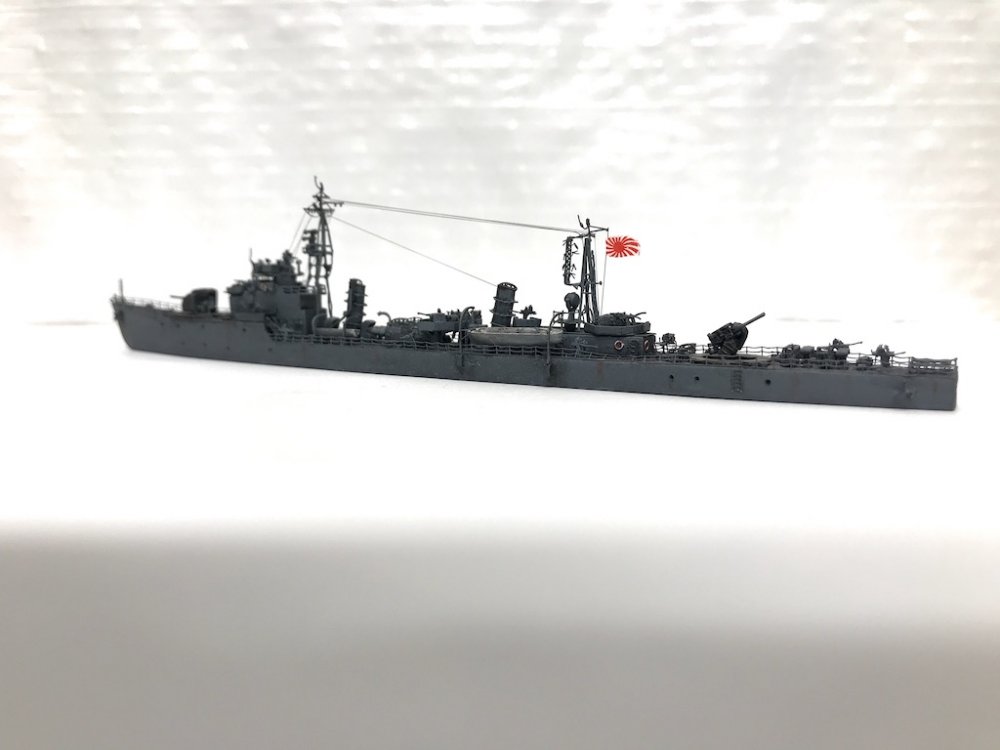
Thanks guys! Rob, the 1/700 isn't all that bad as long as you have an Optivisor and good tweezers. Even better, they take up minimal bench space. Probably because the pieces were so ridiculously small, I didn't beat myself too much when it came to trying to put it together as perfectly as possible. The pictures make the model look rough, but they are taken at pretty significant magnification. From a normal viewing distance, it actually doesn't look half bad. So come in and join us, the water is fine I've got a bunch more in the stash, but ultimately working to get my skills up to where I can tackle this one - IJN Ise carrier battleship. This one will be a doozy with the pagoda style bridge, lattice work, etc.
-
Nice work Rob!
-
F.A.Q. Figure Painting Techniques By Kiril Kanaev
Landlubber Mike replied to Fran's topic in Tools, Books & Misc.
Wowzers, what a book! I see AK put out a few other "F.A.Q." books - does anyone have them and have any thoughts or recommendations? This one looks like a real excellent how-to.- 15 replies
-
- 2
-

-
- ak-interactive
- kiril kanaev
- (and 3 more)
-
Very cool - i'll have to look into them!
-
That's really great Fran, nice job!
-
Nice! What kit is that?
-
Thanks guys! Harv and Fran, break out the Optivisor and get going! If I can do it, you most definitely can!
-
Aussie T610 SAR truck
Landlubber Mike replied to mark31's topic in LSM 1/35 and Larger Work In Progress
Masterful PE work there, wow! -
Very interesting, thanks for the clarification. Looking forward to this build!
-
Looking forward to this one! Great Spitfires and the art work is nice as well... Those Quinta 3D decals look fantastic. Are they applied as decals, or are they glued on?
-
I love it! Great model and great diorama! I've always been scared away from those Aires and other figures, as the boxes make the figures look a little rough. But they seem to actually be quite nice with crisp details.
-
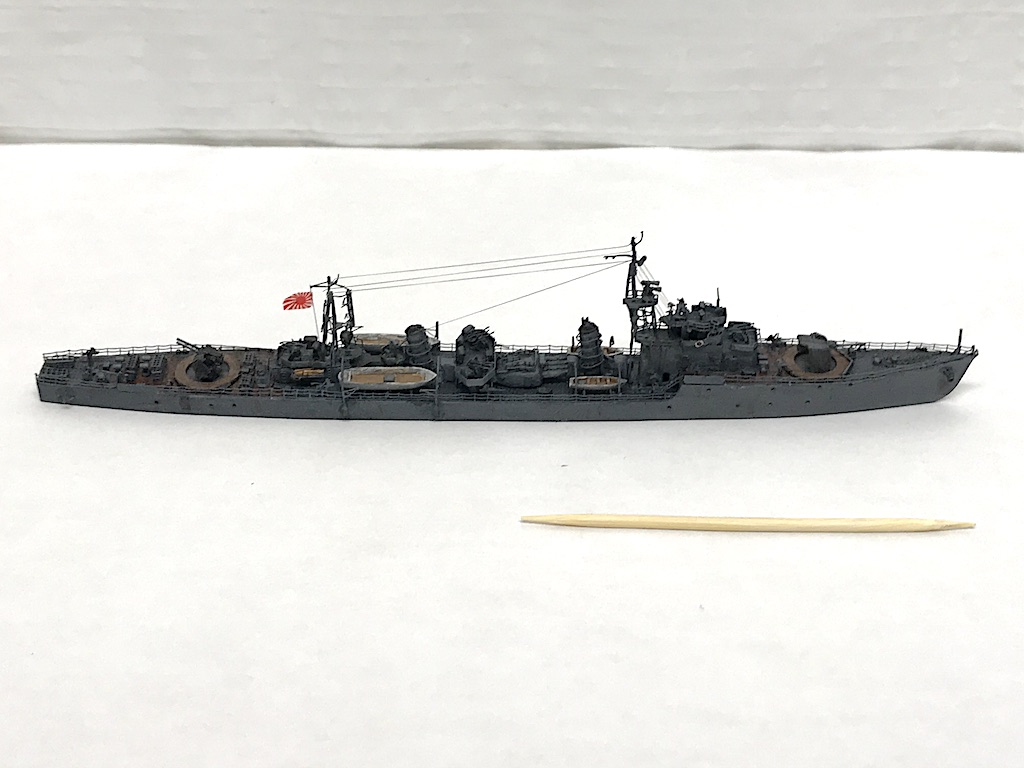
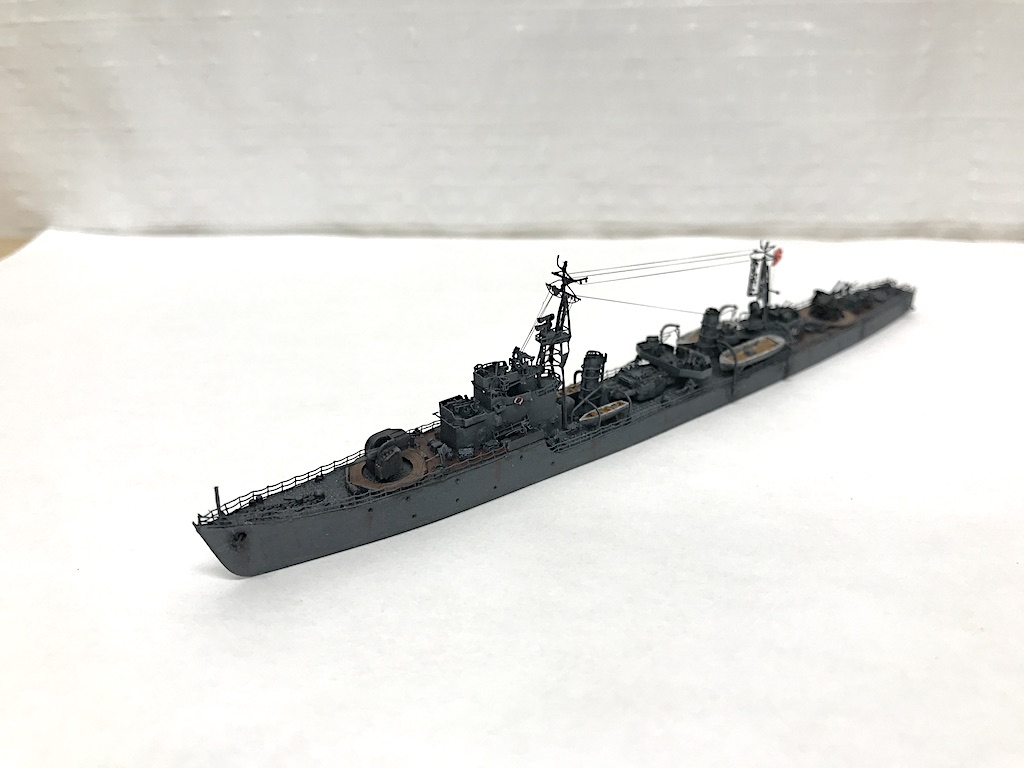
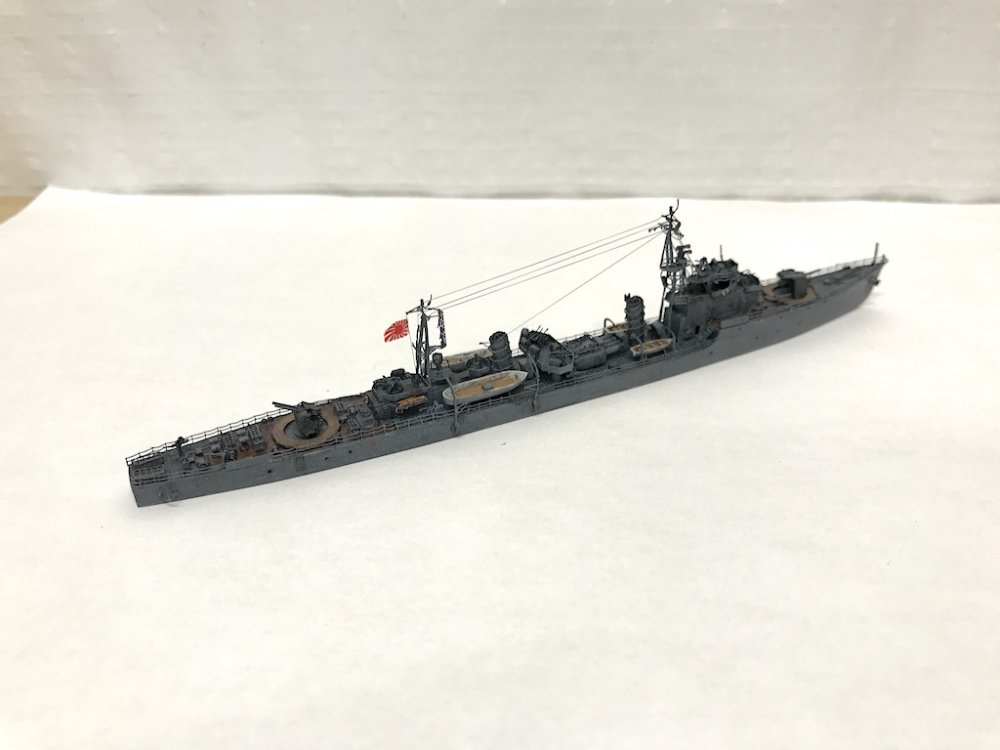
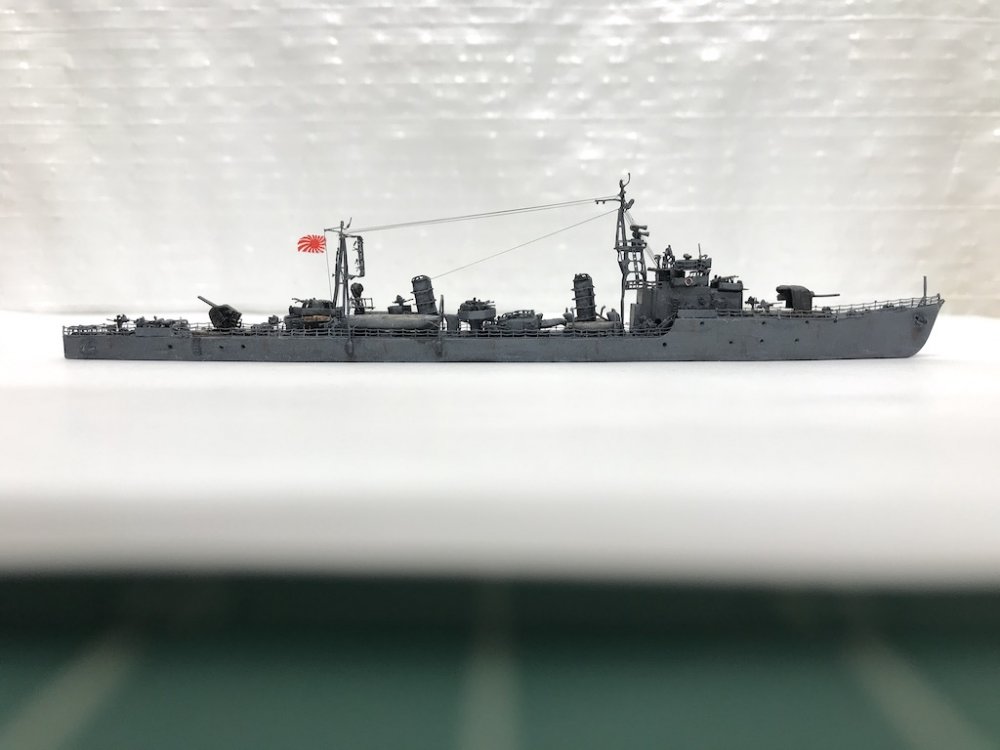
Some final shots. At some point I'll likely put it in a waterline diorama, but I'll do that when I have a batch of completed models I think.


-
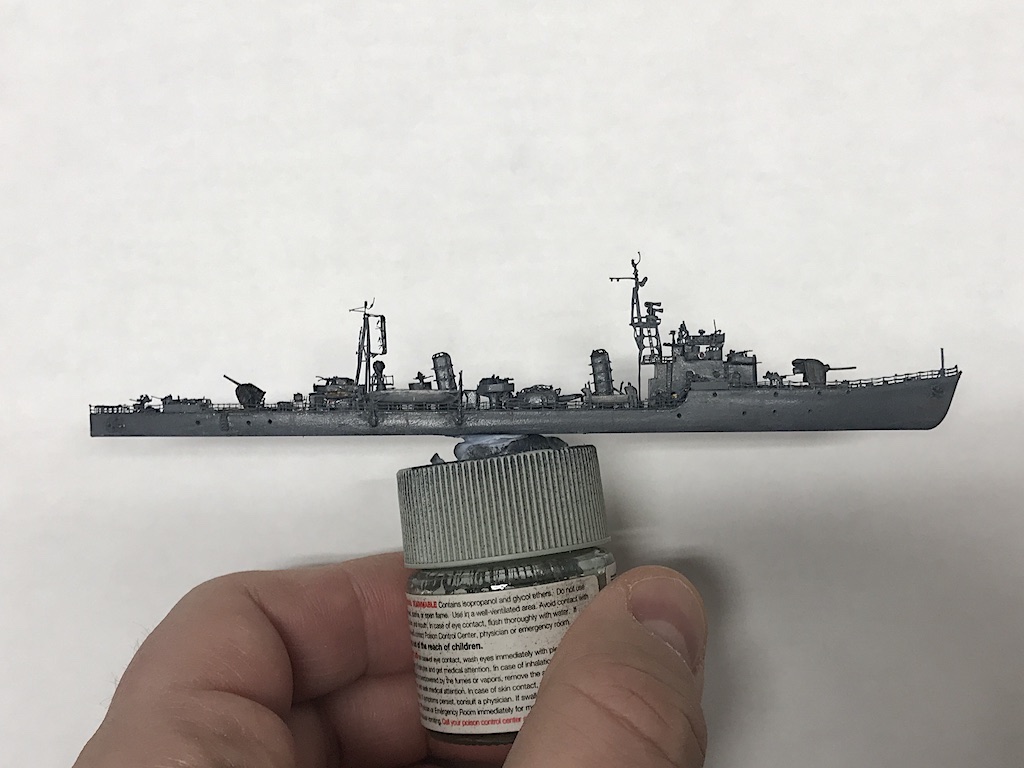
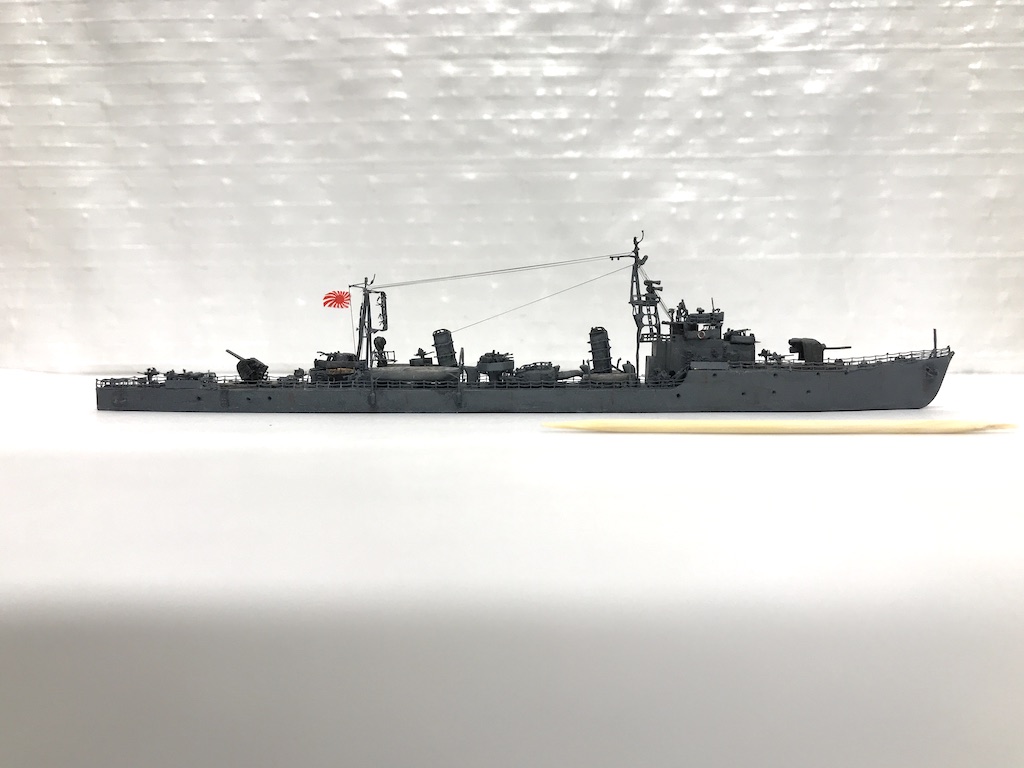
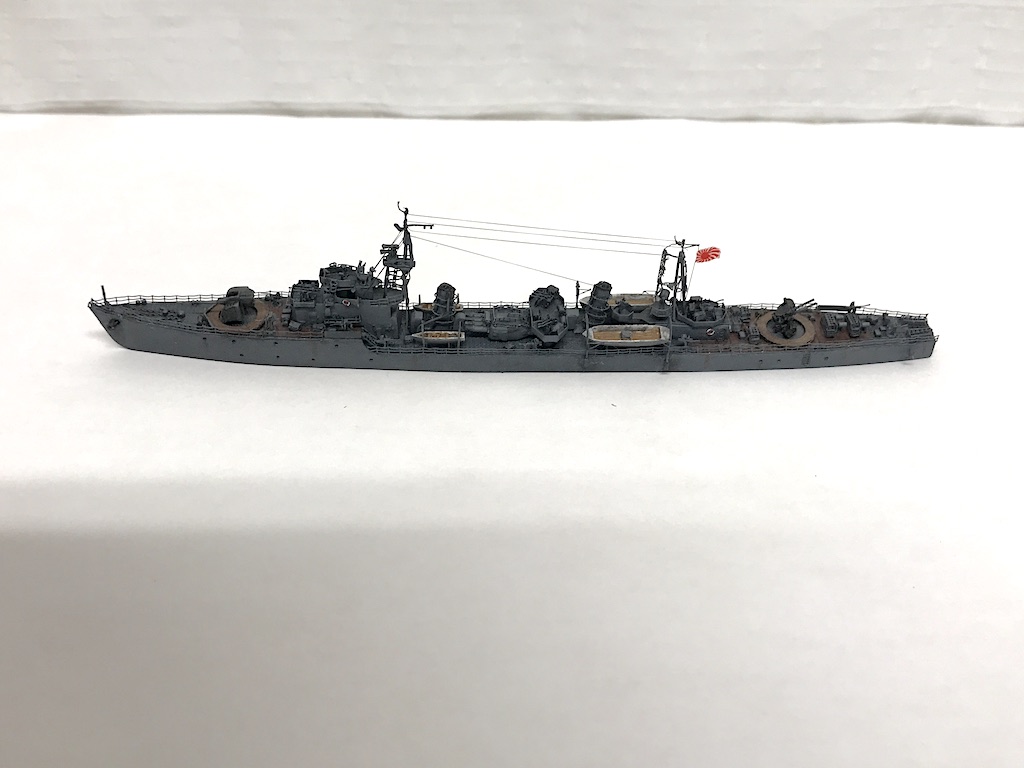
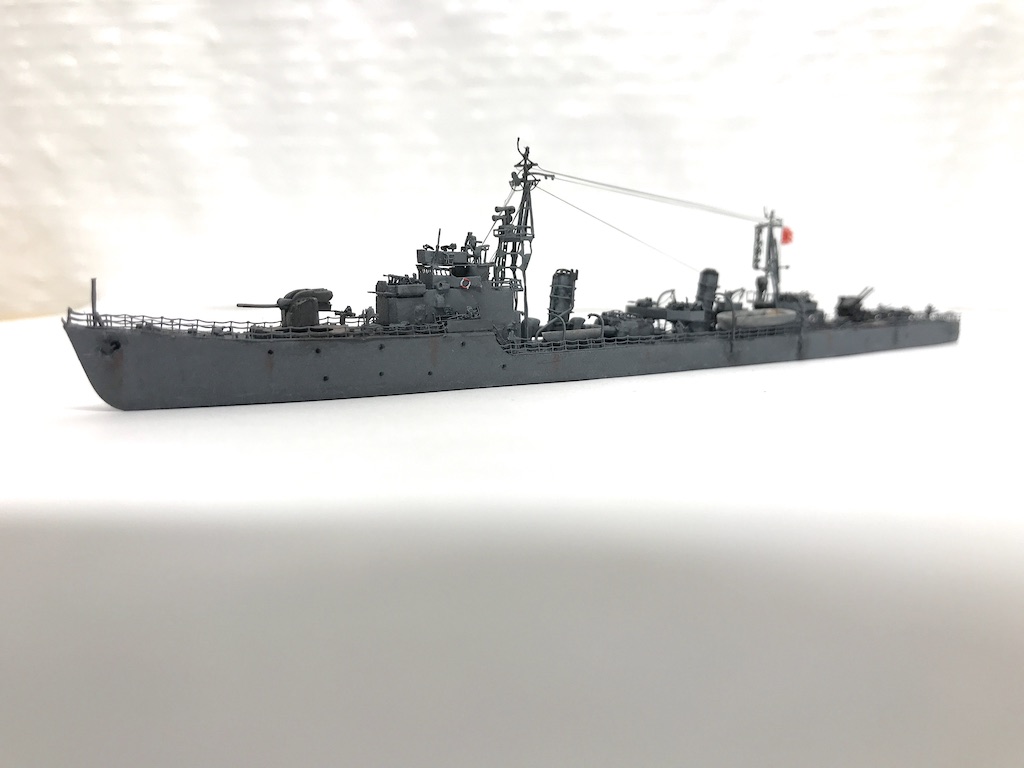
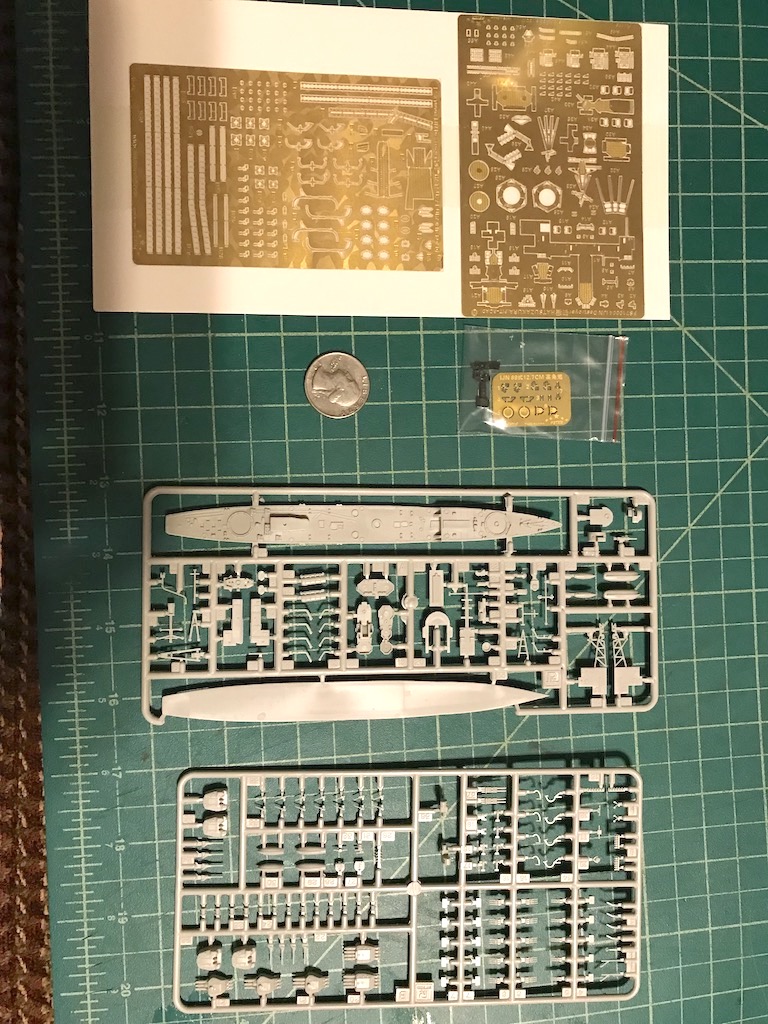
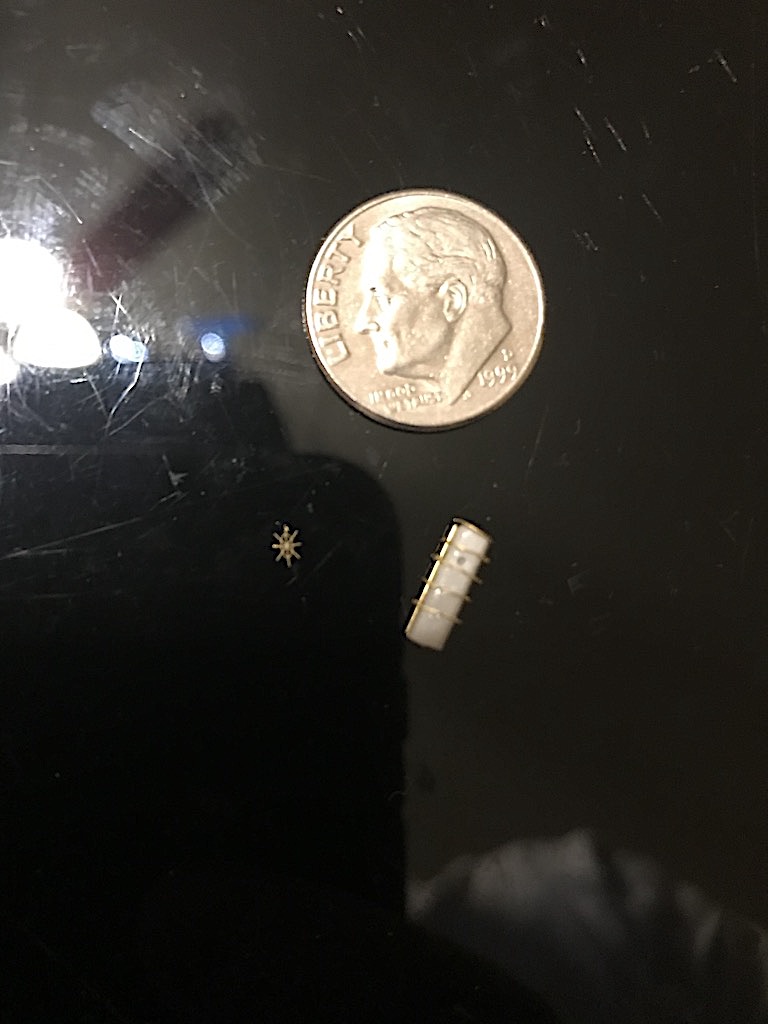
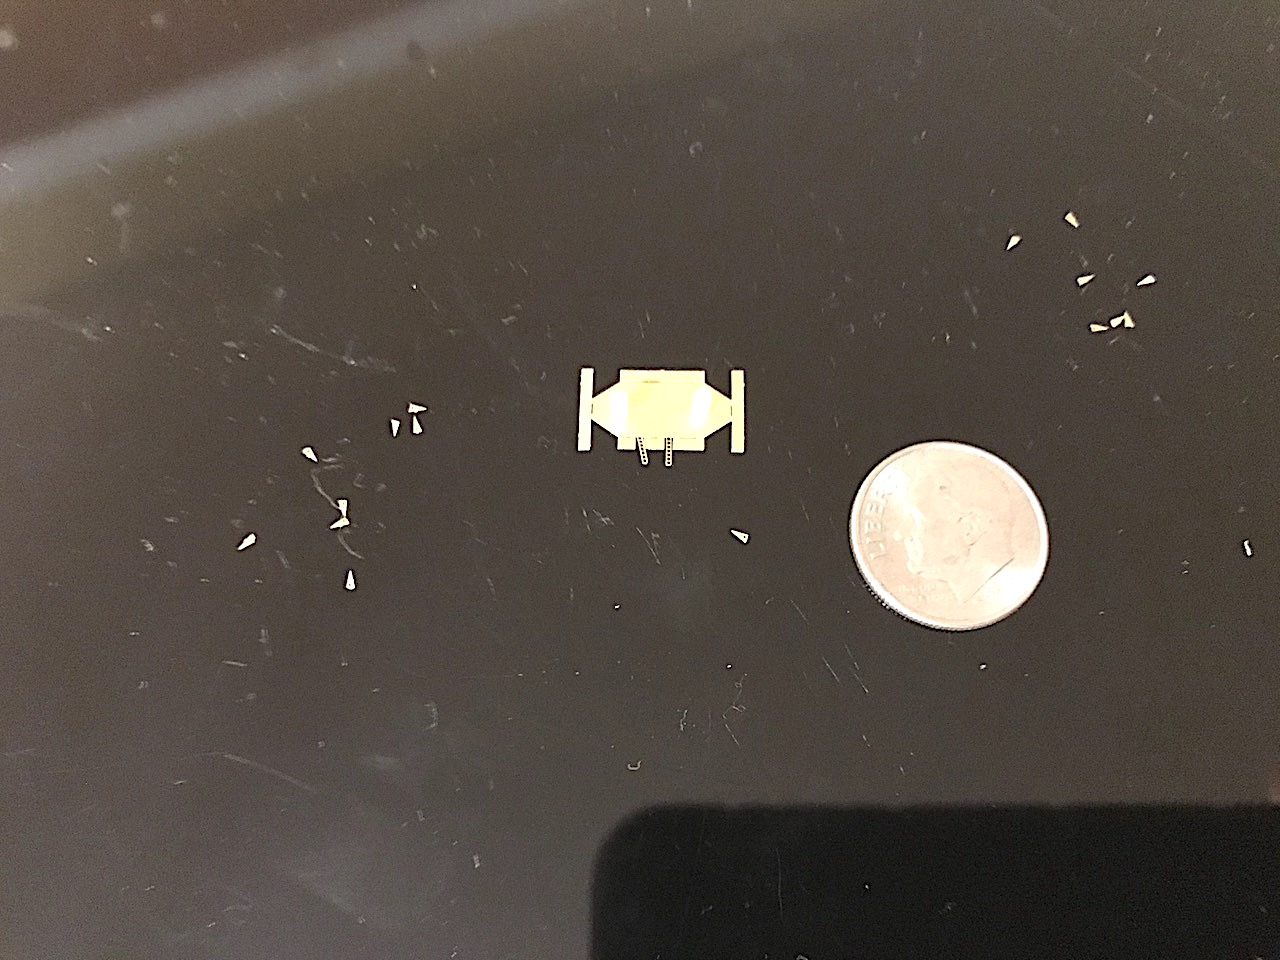
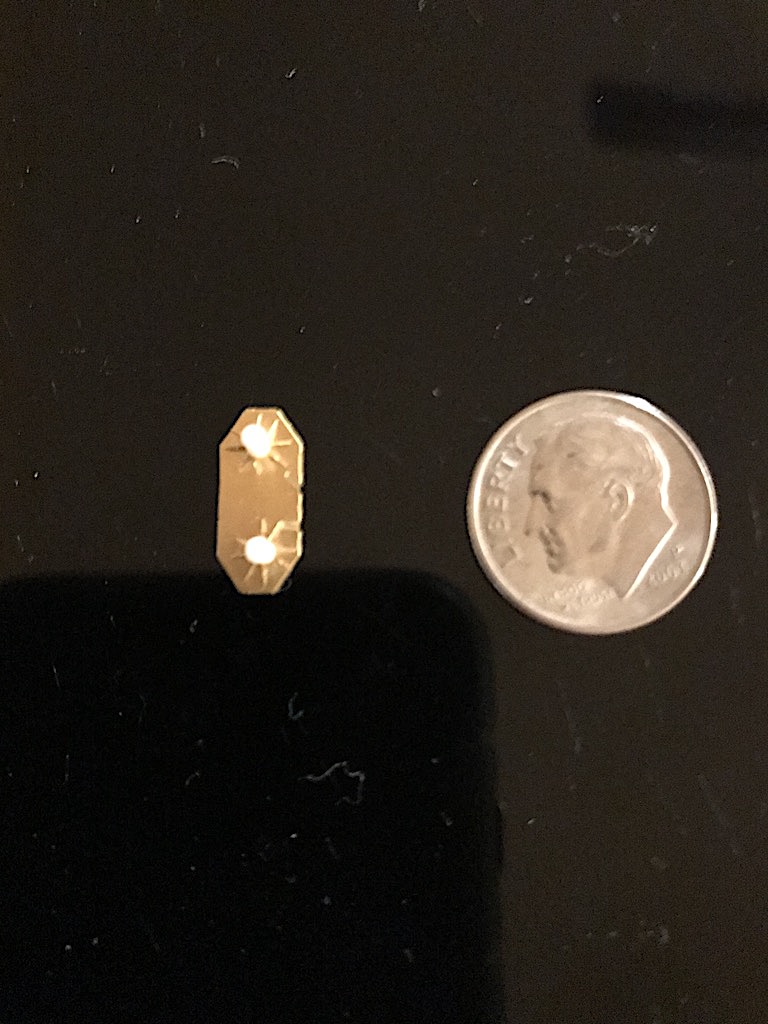
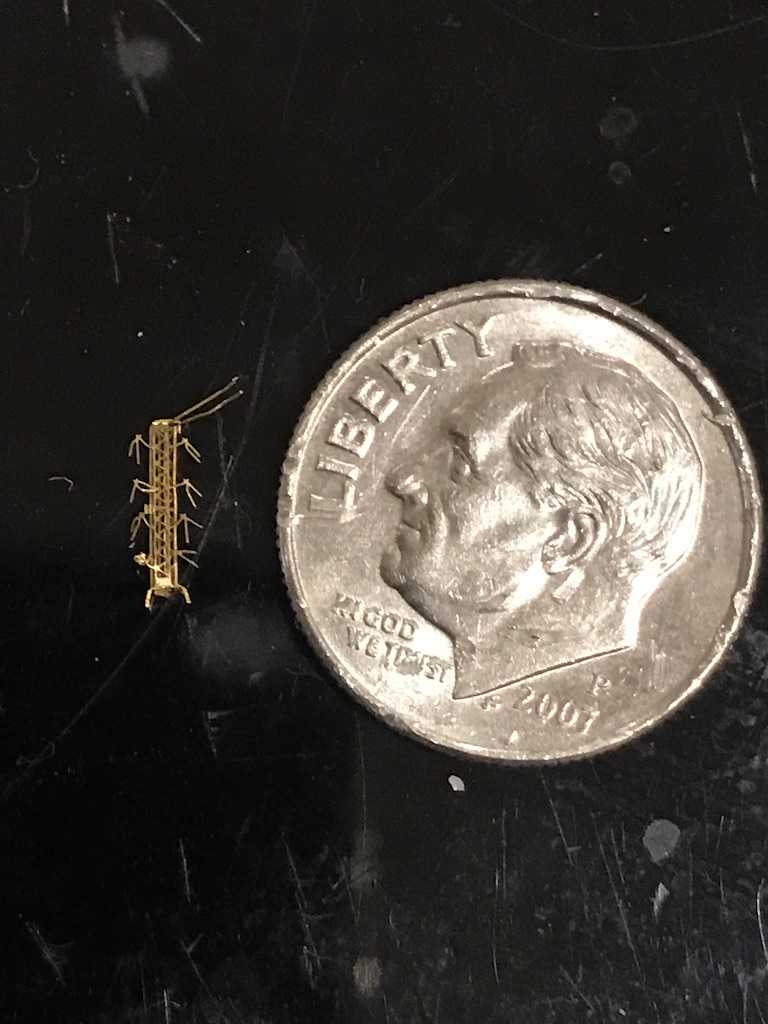
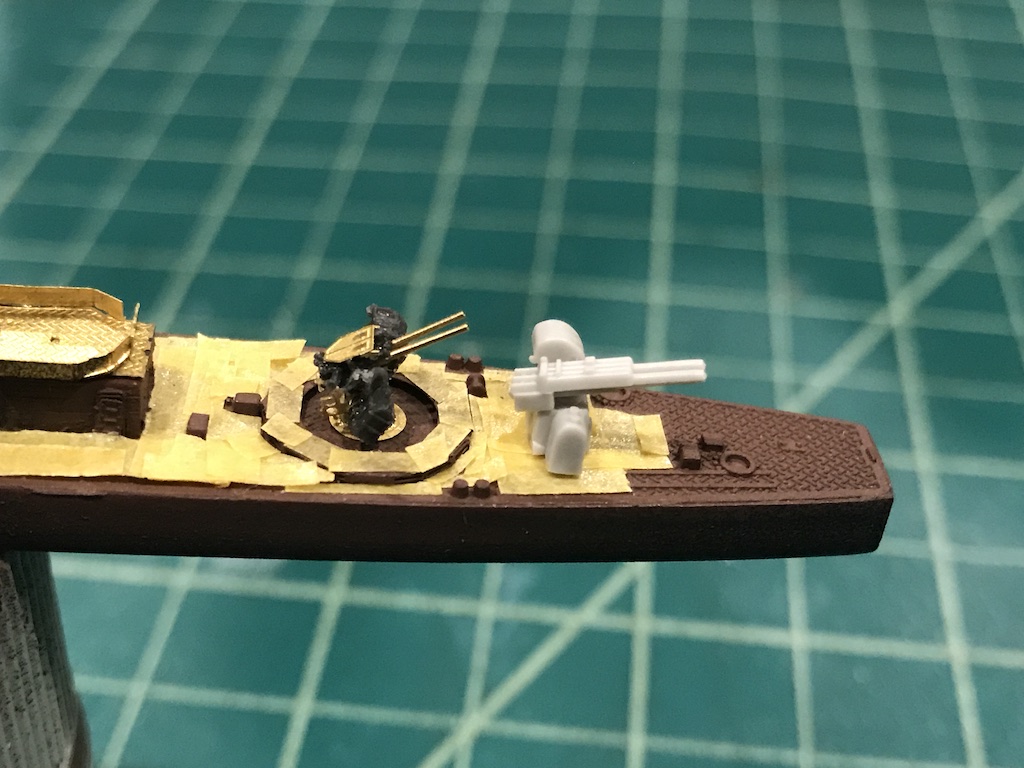
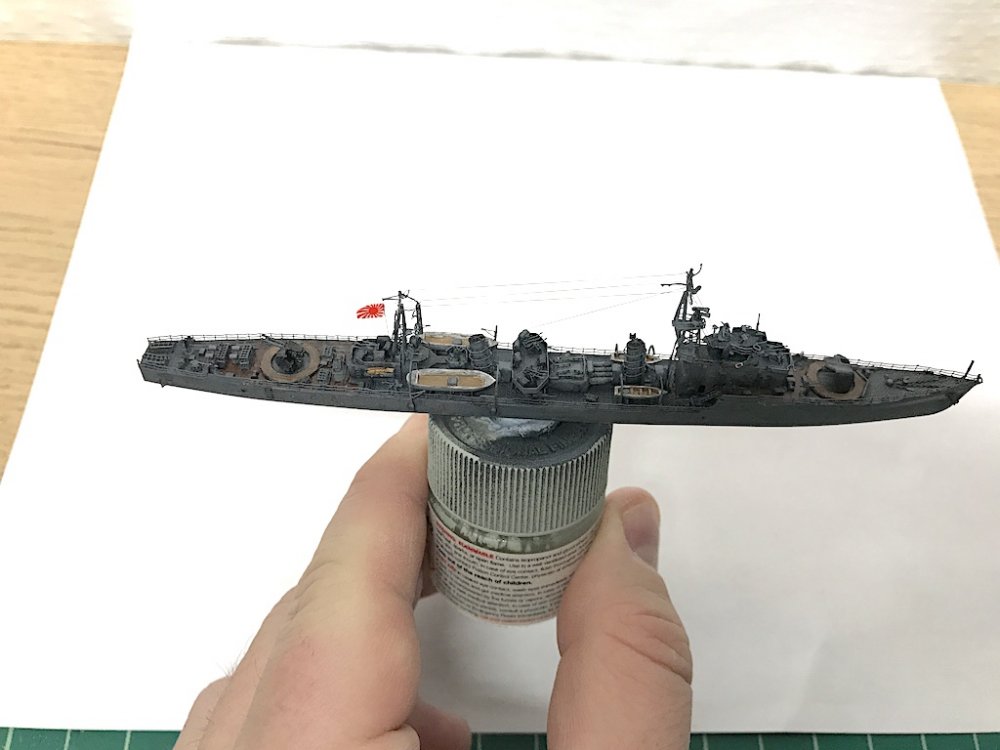
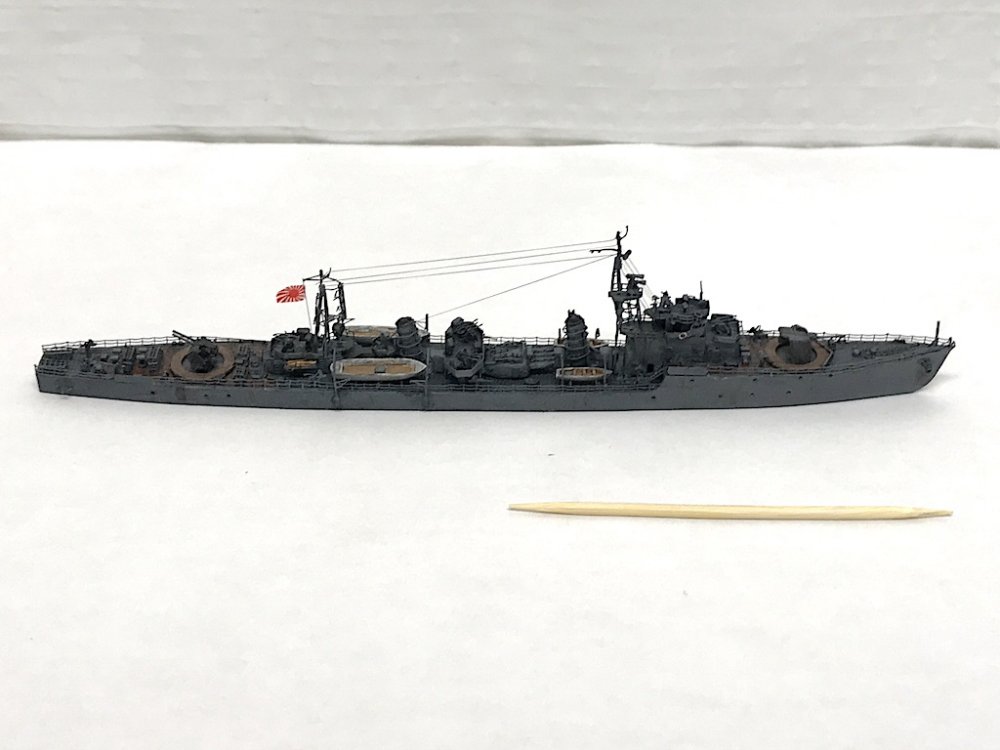
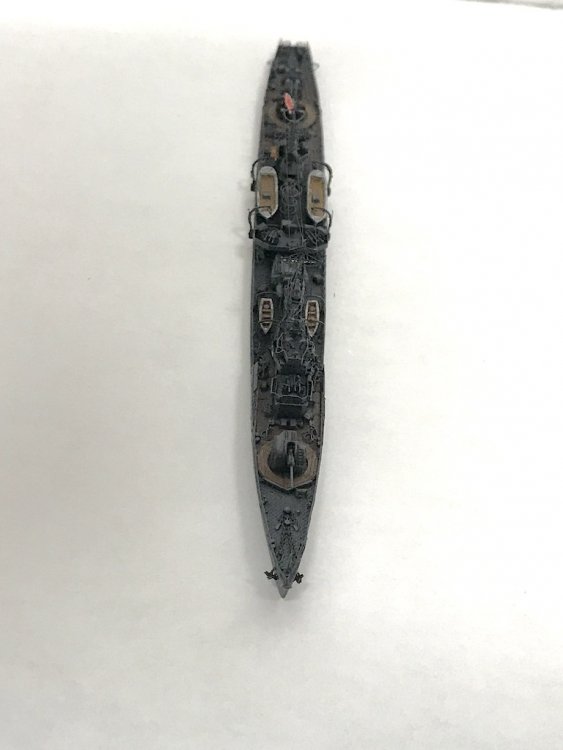
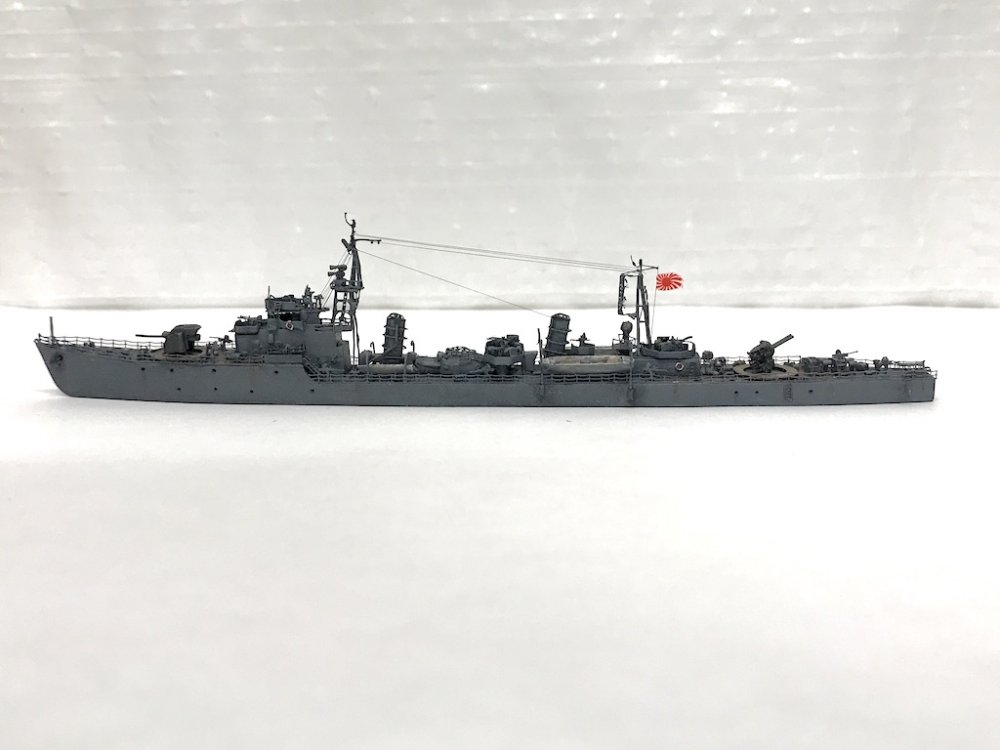
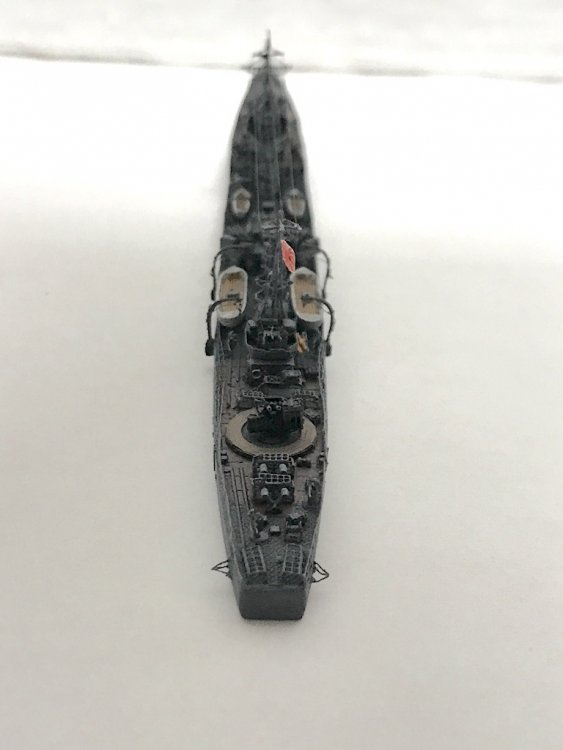
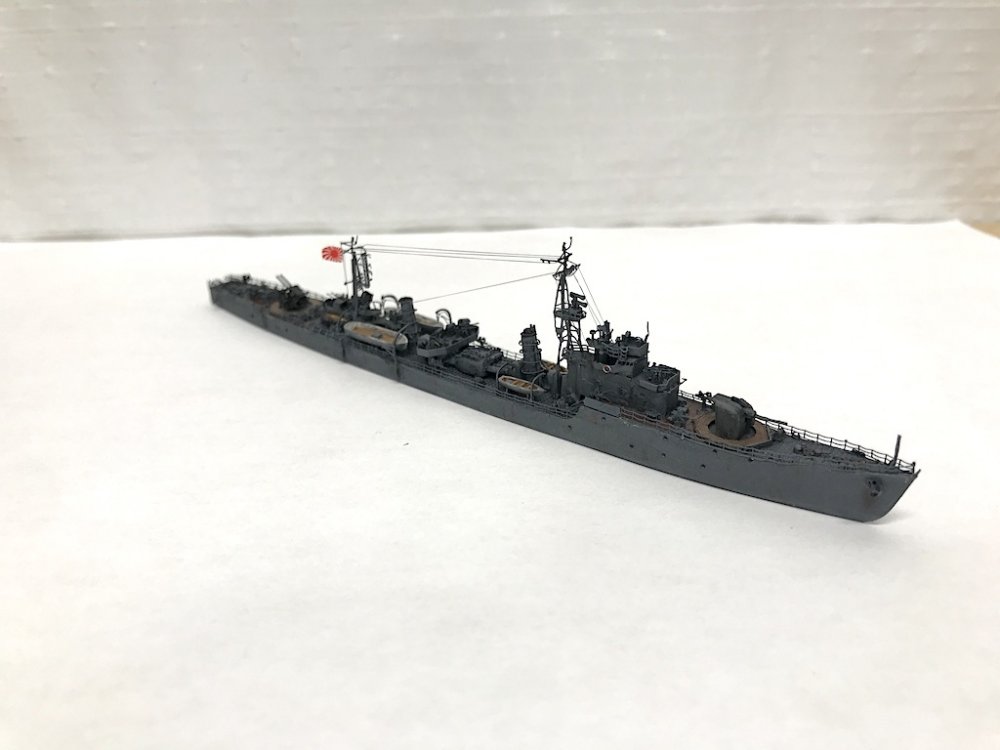
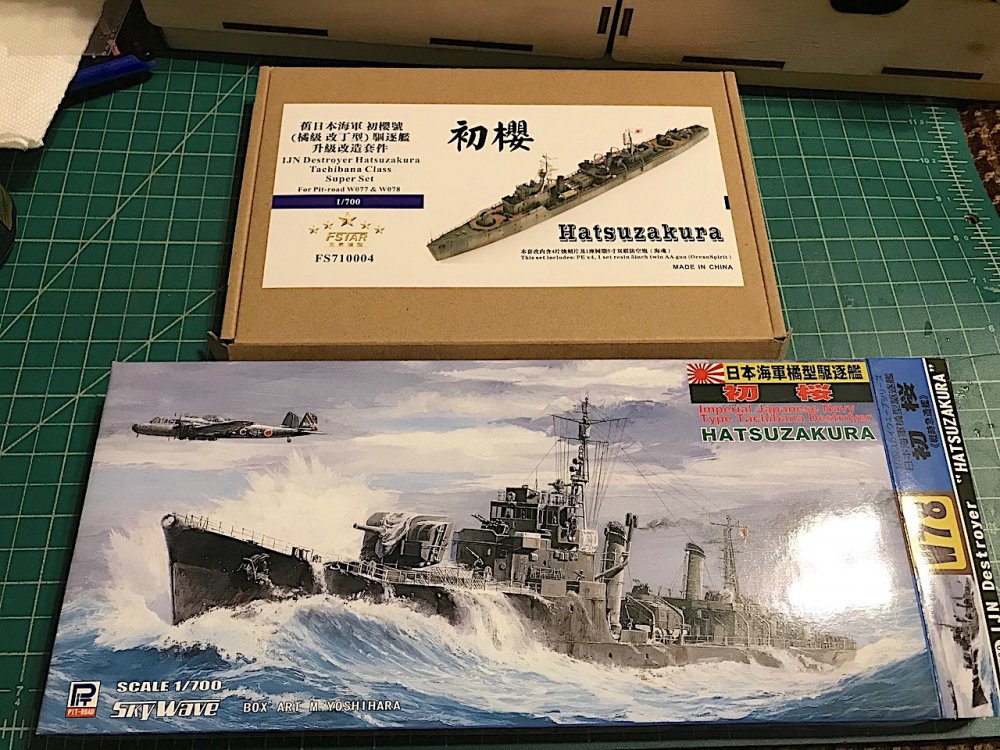
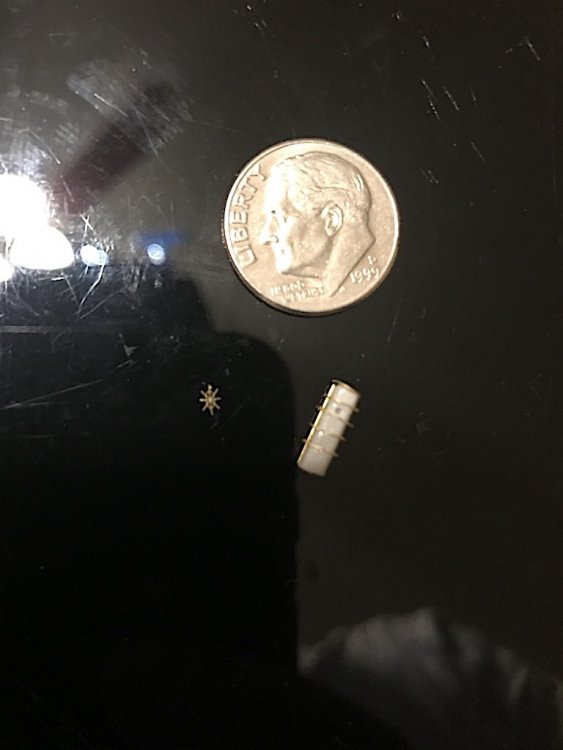
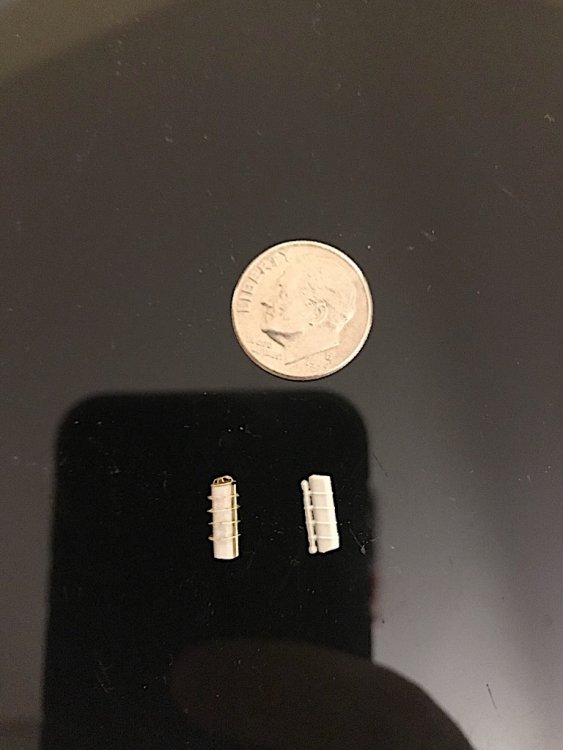
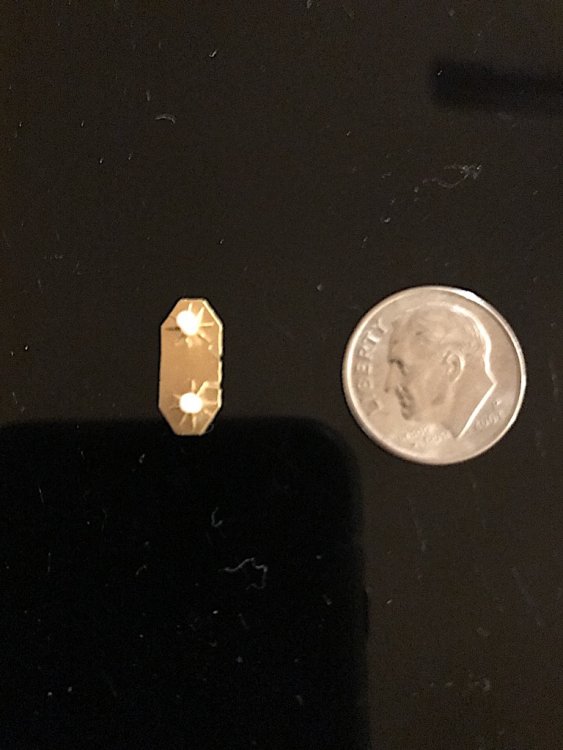
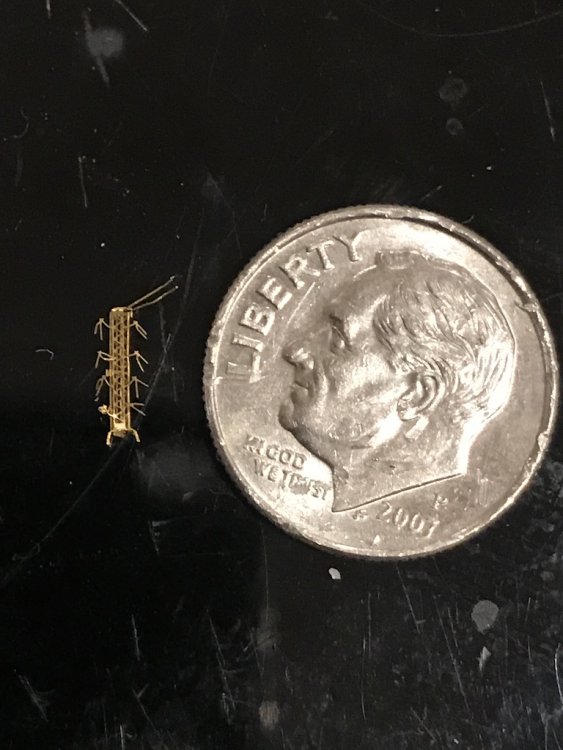
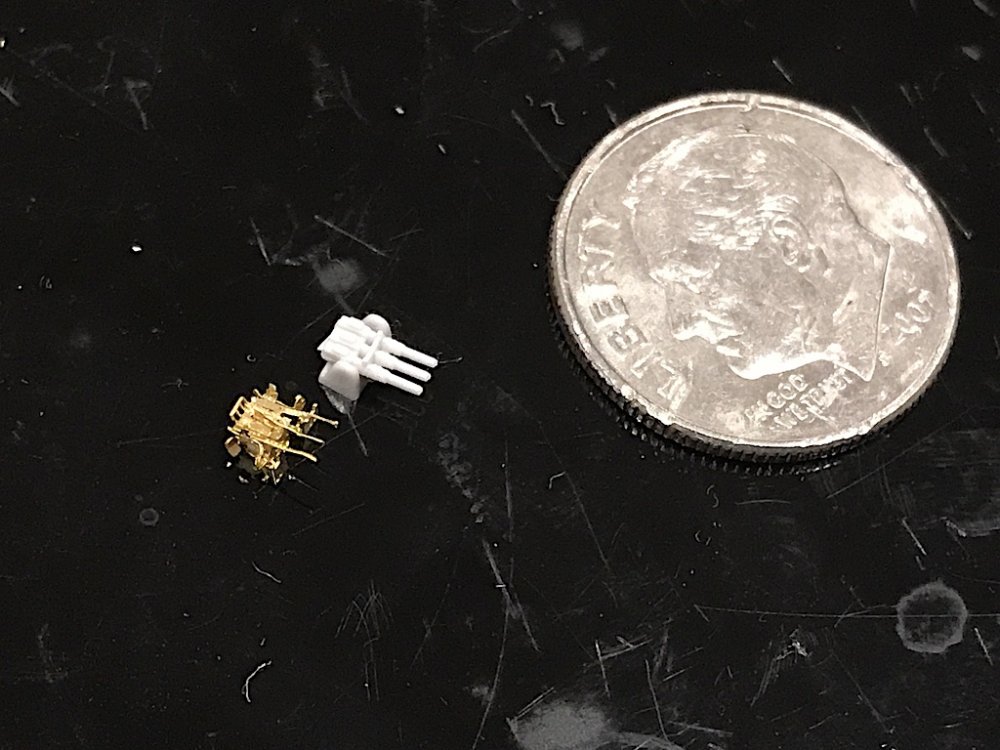
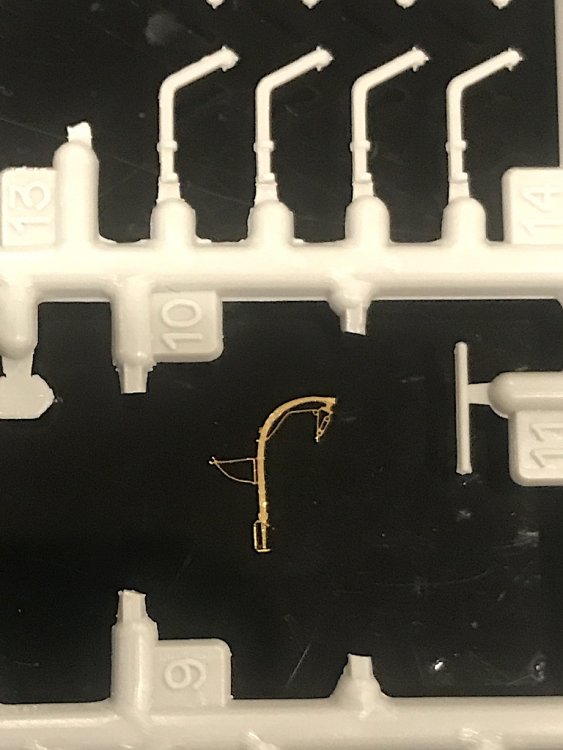
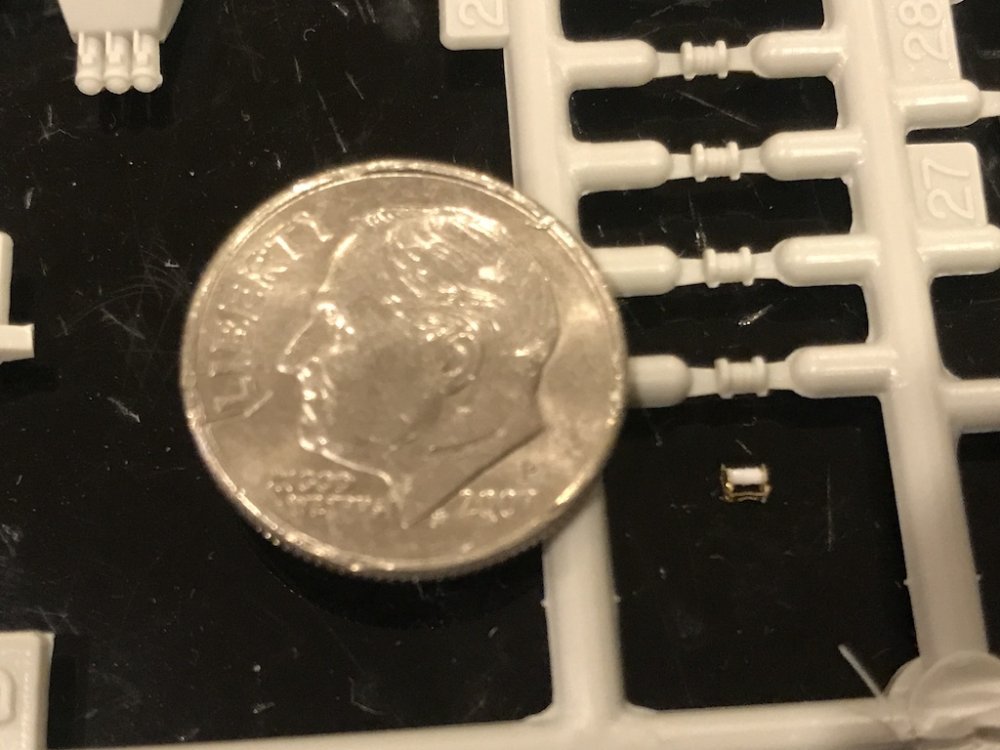
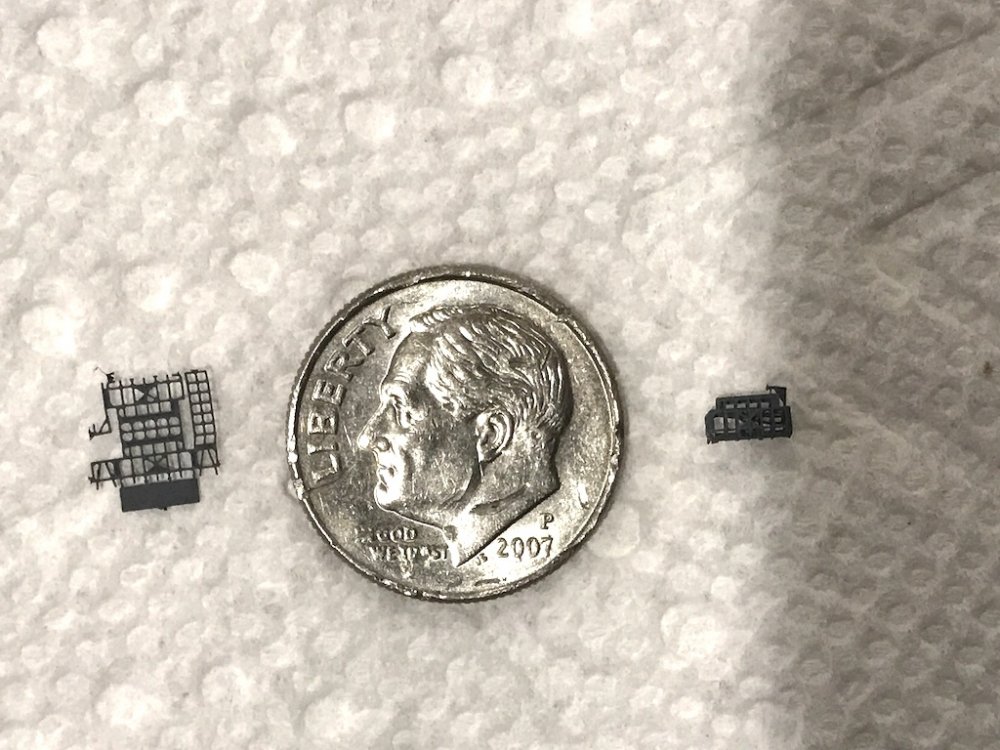
At the risk of getting tossed off this board for going small instead of going big, here is my first 1/700 ship. It's the PitRoad Hatsuzakura ("year's first cherry blossom") with Fivestar full upgrade set. I have a few nice 1/350 and larger kits on the shelf with full aftermarket upgrade packages, but thought I would start with something relatively small and inexpensive to learn how work with PE so that I could do the larger kits justice. Let's just say the PE is so small that I now feel comfortable handling anything in the larger sizes. But, I really had a blast building this one, and will build others in the future. There is such more variety of ships at the 1/700 scale it's incredible. In particular, there are tons of auxiliary vessels you can build. I'm a little more partial to subjects that are on the odder or more workhorse side, than something bristling with a million guns. As you can see, fine tweezers and an Optivisor are a must!


-
1:32nd scale Roland D.VIa
Landlubber Mike replied to sandbagger's topic in LSM 1/35 and Larger Work In Progress
Really amazing work. Those scarpf joint decals are fantastic! I have to say that I wasn't sure if the Rexx products were worth the price, but wow, that exhaust pipe is incredible! -
Thanks for the kind words Peter. I feel like I'm still very much an amateur. You should see some of the work posted on MSW - there are some world class artists there.
-
Couldn't agree more about the techniques crossing model types. I certainly will approach some of my wooden models differently after learning techniques from the plastic side. I'd really love to sometime build a weathered wooden fishing or Dutch commercial vessel in a waterline diorama setting.
-
Thanks for your thoughts Rob. When I first picked up the Badger kit, I was starting from square one - had no clue about tools, adhesives and other materials, paints and finishes, etc. Also, it had been close to 30 years since small plastic kits I did as a kid, so I didn't fully appreciate more complicated modeling techniques like jigs, etc. I read a few of the beginner books out there, but thank God for the internet! I'd be lost without the help from kind-hearted fellow modelers. With all your skills and experience, you'll be able to jump right in and go to work. I hear you on the larger vessels. Ship modeling involves a lot of repetitive tasks - in some ways you can get in a groove and it's therapeutic in a way, while in others, building yet another cannon and rigging it with 2mm blocks gets old quickly. Can't wait to see your work! Good luck with the build!
-
Thanks Mike, really appreciate it.
-
I thought Peter Jackson pulled the plug. He's sorta THE key player as he's the funding source.
-
That Felixstowe looks incredible, wow! I see work like this and it makes me think about hanging up my airbrush for good.