


CANicoll
-
Posts
1,930 -
Joined
-
Last visited
Content Type
Profiles
Forums
Events
Gallery
Everything posted by CANicoll
-
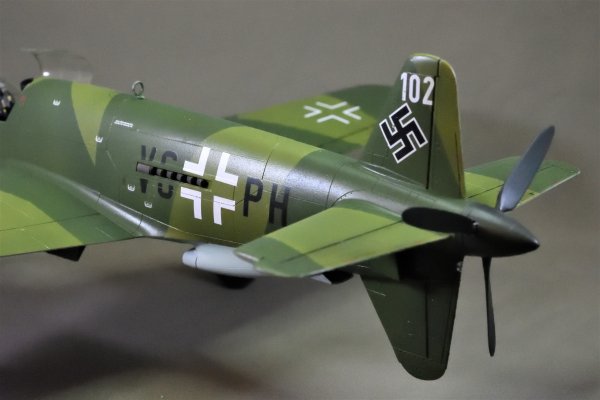
From the album: 1:48 Tamiya Do-335A
-
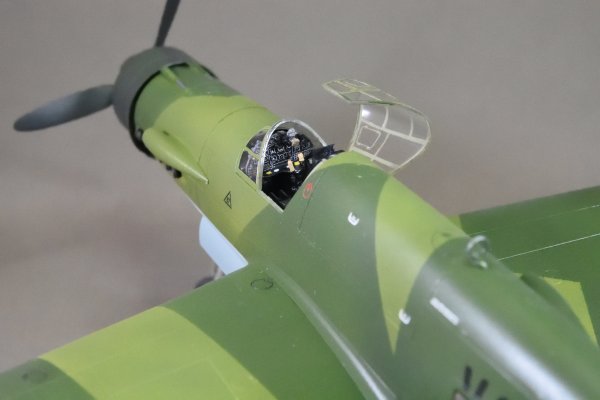
From the album: 1:48 Tamiya Do-335A
-
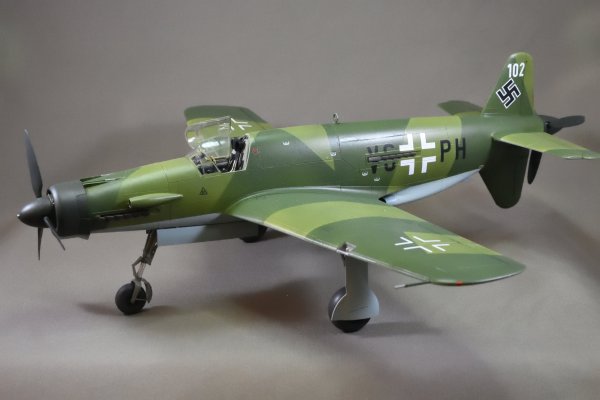
From the album: 1:48 Tamiya Do-335A
-
Ernie - Gotcha! With a smile on my face. No 1/72 Serian. Hmm. Let me see what I can post... Thanks for the humor!
-
Sorry, what is TOS? I think I'm missing something good. 🙂
-
Agreed on Roy's stuff is great. I met him ages ago and was impressed at his level of detailed knowledge and the quality of his work. Glad to see he's still cranking things out and even happier he's joined the forum here. I'll definitely be doing some ordering. And I seem to remember ordering a resin nose from Roy for my Tempest. A few weeks after receiving the part, another one showed up in the mail. Apparently the first one (which I really had not bothered to look at very closely) had a defect. Barracuda sent a new one, on their own. That cemented my opinion of Roy and his company.
-

VFB-88 FG-1D completed
CANicoll replied to JohnB's topic in LSM 1/32 and Larger Aircraft Ready for Inspection
Beautiful! I've never attempted a folded-wing Corsair, and probably won't. Nice job on yours, John. -
Revell/SH Hawker Tempest in 1/32-Finished
CANicoll replied to KevinM's topic in LSM 1/35 and Larger Work In Progress
Notice how clean the airframe is, and the paint, and then the wing walkway has the foot prints on it. GREAT picture!! The hard edge of the camo is very apparent. Kevin, Nice job on your build, as well. It is coming along very nicely. From these pictures, not sure how much weathering is going to be needed. Chris -
Question, for the Gallery, can any scale build be put into the gallery or just larger scales? Asking for a friend...
-
Excellent work Admins, and thank you for keeping the site updated and fresh. Much appreciated!! Chris
-
1-24-typhoon-7.jpg
CANicoll commented on JayDee's gallery image in Gallery of COMPLETED Aircraft models
 Beautiful job, James! She's amazing in the detail and the finish. Nicely weathered and the engine is fantastic.
 -
GB Award for modeling greatness decided
CANicoll replied to Clunkmeister's topic in Let’s Get Wet Group Build.
What's another week among friends?? Plus, next week is a holiday here so 7 days, 10 days.... what's a few more days, anyhew? Can't wait to see all the builds... -
Revell/SH Hawker Tempest in 1/32-Finished
CANicoll replied to KevinM's topic in LSM 1/35 and Larger Work In Progress
I have the SH Mk V with the updated Barracuda resin nose... Looks terrific and thanks for all of the commentary and step-by-step. It helps a lot! -
Rob, This is one of my favorites F1 cars. I hear you on the colour of the paint - hard to match! Now if I could find one of the Orange and Blue GULF Porche 917s....
-
GB Award for modeling greatness decided
CANicoll replied to Clunkmeister's topic in Let’s Get Wet Group Build.
Dammit, I thought I was a shoo-in for last place. I want a recount! Definitely agree with Scott, Ernie, thanks for your generosity and all the work you put into the site, and this GB. It was fun! Chris -
Fran, Personally I love the Airacobra sets. Did you use any of the decals? I wonder how well they go down, and react to setting fluid? Thanks for the review, Chris
-
Summer project Kawasaki KI-61, Tamiya 1/48
CANicoll replied to DocRob's topic in LSM 1/48 Work in Progress
AHH!! I missed that you used the wet transfers. Hmm, wow. I have very limited experience with the wet transfers, and experiences like yours keep me from diving in. Thanks for sharing, and your bird still looks terrific. Chris -
Sasha, Beautiful build and the weathering is super. It is almost a shame to put the plane on its wheels and hide those oil streaks. Very well done - not too heavy. But your faded paint really makes the build special - lovely work!
-
Summer project Kawasaki KI-61, Tamiya 1/48
CANicoll replied to DocRob's topic in LSM 1/48 Work in Progress
Rob, I did this in 1/72 scale and also had a few problems with the camo decals. But overall pretty happy with the result. Of course, used about half a bottle of Micro Set. Tried to use Micro Sol but the decal could not be moved at all. Yours looks super! -
Hasegawa Fw-190A5... or 6.
CANicoll replied to GazzaS's topic in LSM 1/35 and Larger Work In Progress
Man, we all seem to be falling apart! Hang in there Gary and hope the wrists work out ok. Question - do you always sand down your plastic with 12000 before priming? I don't but wonder if I should. I see that it does help pick up problem areas. Agree with Peter on the prop sink marks. UGH!! And well done on the windscreen. Whew. All the best! Chris -
Keeping Diane, and you, in my thoughts and pulling for the best outcomes. Bench time can wait, but good to see you still on the forum. I need to do that. Nothing on the bench at the moment, but I do miss being here so will endeavor to get better at posting. Chris
-
Tim Well done and terrific! If I can help in anyway (admin, writing, updating, proofing the Website/links/text) I'm ready to help. Congrats on the new endeavor! Chris
-
Hasegawa Fw-190A5... or 6.
CANicoll replied to GazzaS's topic in LSM 1/35 and Larger Work In Progress
One of the more frustrating things about detailing the front office! But you have the pictures to show its there. Really nice work and you are definitely the master with those %$!#@!! HGW seatbelts. Yours always look terrific - pulling the detail out of the belts that I've never successfully been able to do. -
Peter, Very happy to hear that Diane is back home and doing well. Sorry to hear about your ongoing issues. Hang in there. Interesting you mention about not taking advantage of the Tamiya optional wheels up/down thing. I have two of the Tamiya builds and after a few goes at swapping out the parts within a few months of completing the builds - both birds have stayed on their wheels ever sense. Which means for years. Hmmm. Might just put the wheels up on one of the planes if for no other reason than to clear some shelf space underneath. Similarly - do you ever pull the nose engine covers off for display? What issues are you having with the radiator? Very interested to see what colors you use for the wings. Something I've never gotten right, I think. No more Tamiya Mustangs in the stash, just one more Revell, with all the AM bits. Great seeing your work on this build - and esp your Quinta cockpit. Such nice work and beautiful results. Stay well my friend! Chris
-
That is an amazing tiny ship!!!

