JeroenPeters
-
Posts
4,867 -
Joined
-
Last visited
Content Type
Profiles
Forums
Events
Gallery
Everything posted by JeroenPeters
-
Cheers Cees! Got some more AM today: Aires MG15 set: And I found a bag of resin wheels for the He111 in my AM stash. No idea how i got it!
-

Ohka Model-11 (Cherry Blossom) in 1/32
JeroenPeters replied to TOMc's topic in LSM 1/35 and Larger Work In Progress
Really cool execution! It could use a wooden base to do it justice. Also like how you've added the transport trolley on the train bed. Cheers! -
Seatbelts fastened! Man... Always so glad this part is over.
-
Wow... just love that grimy cockpit. And the rest! Well done. Now to get you a proper base
-
HK Models`two-seat Do 335 box art! In very first hand!
JeroenPeters replied to Fran's topic in Modelling Discussion
Supercool.... -
Ju-88C-2 "4D+FH" Finished!
JeroenPeters replied to JeroenPeters's topic in LSM 1/32 and Larger Aircraft Ready for Inspection
I'm getting production quotes as we speak. -
I never buy CMK stuff without eye balling it first. Some cockpit upgrades offer minor detail enhancements over the kit parts. I usually only buy gunboats, gear bays, open panels/ hatches and engines. They're pretty good and fit better than Aires stuff. Bought this today. Oops! You were there when I bought it!
-
Ju-88C-2 "4D+FH" Finished!
JeroenPeters replied to JeroenPeters's topic in LSM 1/32 and Larger Aircraft Ready for Inspection
Hi Dennis, That was quite a ride. I took the drawings for the artwork from the Luftwaffe Maintenance manuals. I have them all in PDF. Then had them printed on the wood with a professional surface printer. A huge contraption at my brother's workplace. I'm still trying to get a good adress for wooden bases so I can maybe sell some of them. Maybe with WW2 maps printed on them. Or other technical drawings. -
Well ok! Mixing the Revell, Eduard and HGW stuff:
-
YES! Great news! Can't wait to fumble fresh plastic!
-
As you can tell from the title I haven't gotten the concept of this build down yet. Only that it will be a P and that I will use some accumulated After Market. And as you can see i once again managed to buy a set double... I also have the Eduard interior set. Somewhere Mr. P
-
Ju-88C-2 "4D+FH" Finished!
JeroenPeters replied to JeroenPeters's topic in LSM 1/32 and Larger Aircraft Ready for Inspection
Cheers! Next is the He-111P. I somehow mysteriously obtained a few relics for it. I mean.... from it -
Ju-88C-2 "4D+FH" Finished!
JeroenPeters replied to JeroenPeters's topic in LSM 1/32 and Larger Aircraft Ready for Inspection
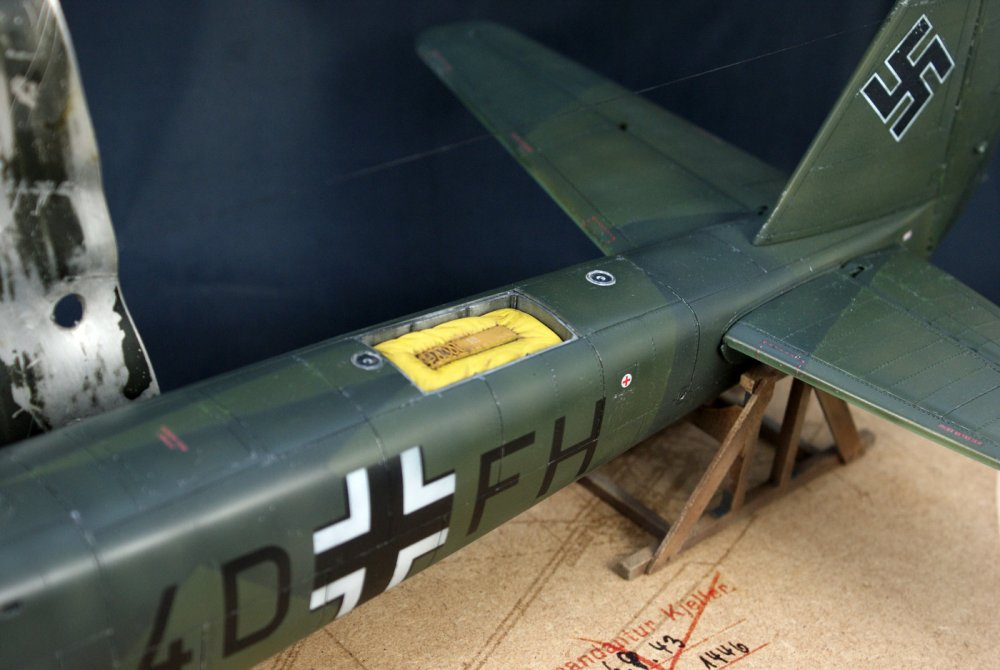
Thnx! Yes. The four knuckle joints do the job. In the WIP I've placed some detail drawings and photo's. -
1/32 P51 Mustang Double Trouble Two
JeroenPeters replied to Corsair Experten's topic in LSM 1/35 and Larger Work In Progress
And it's good to have you here! -
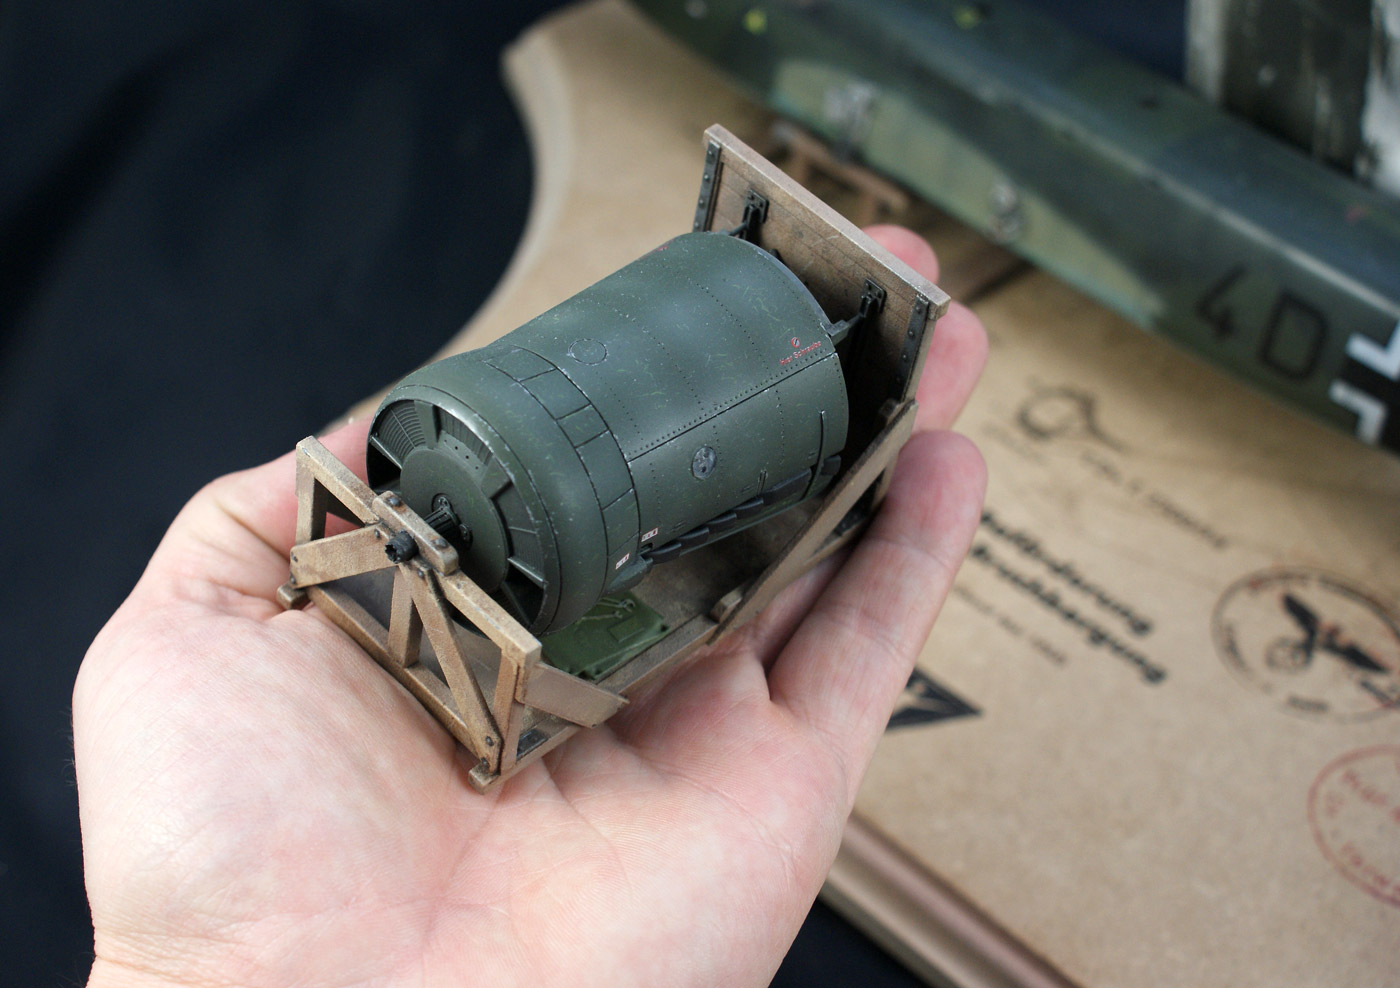
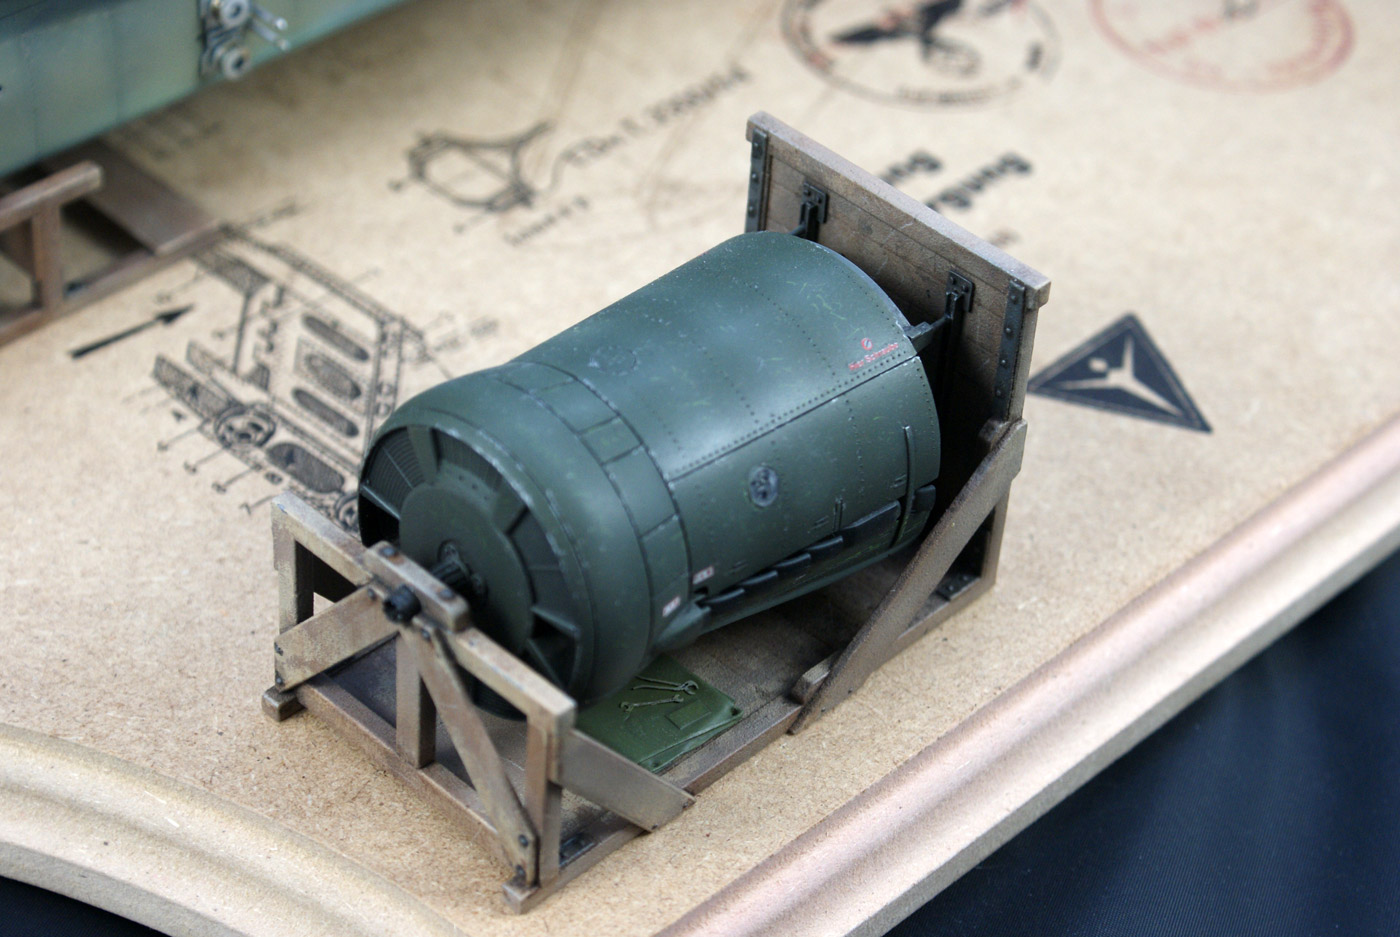
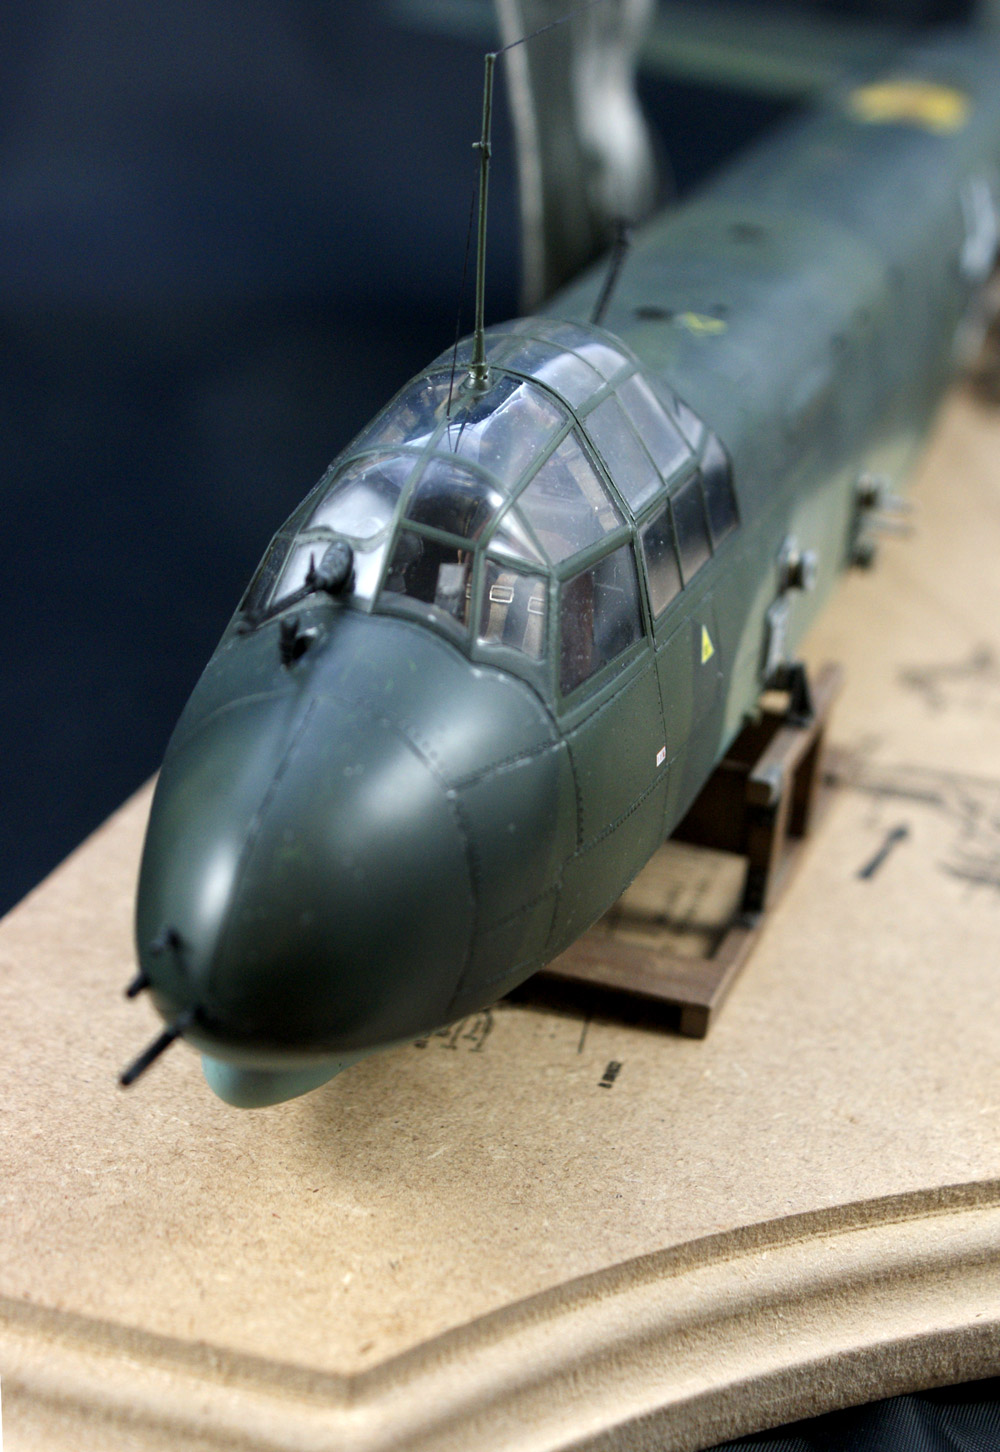
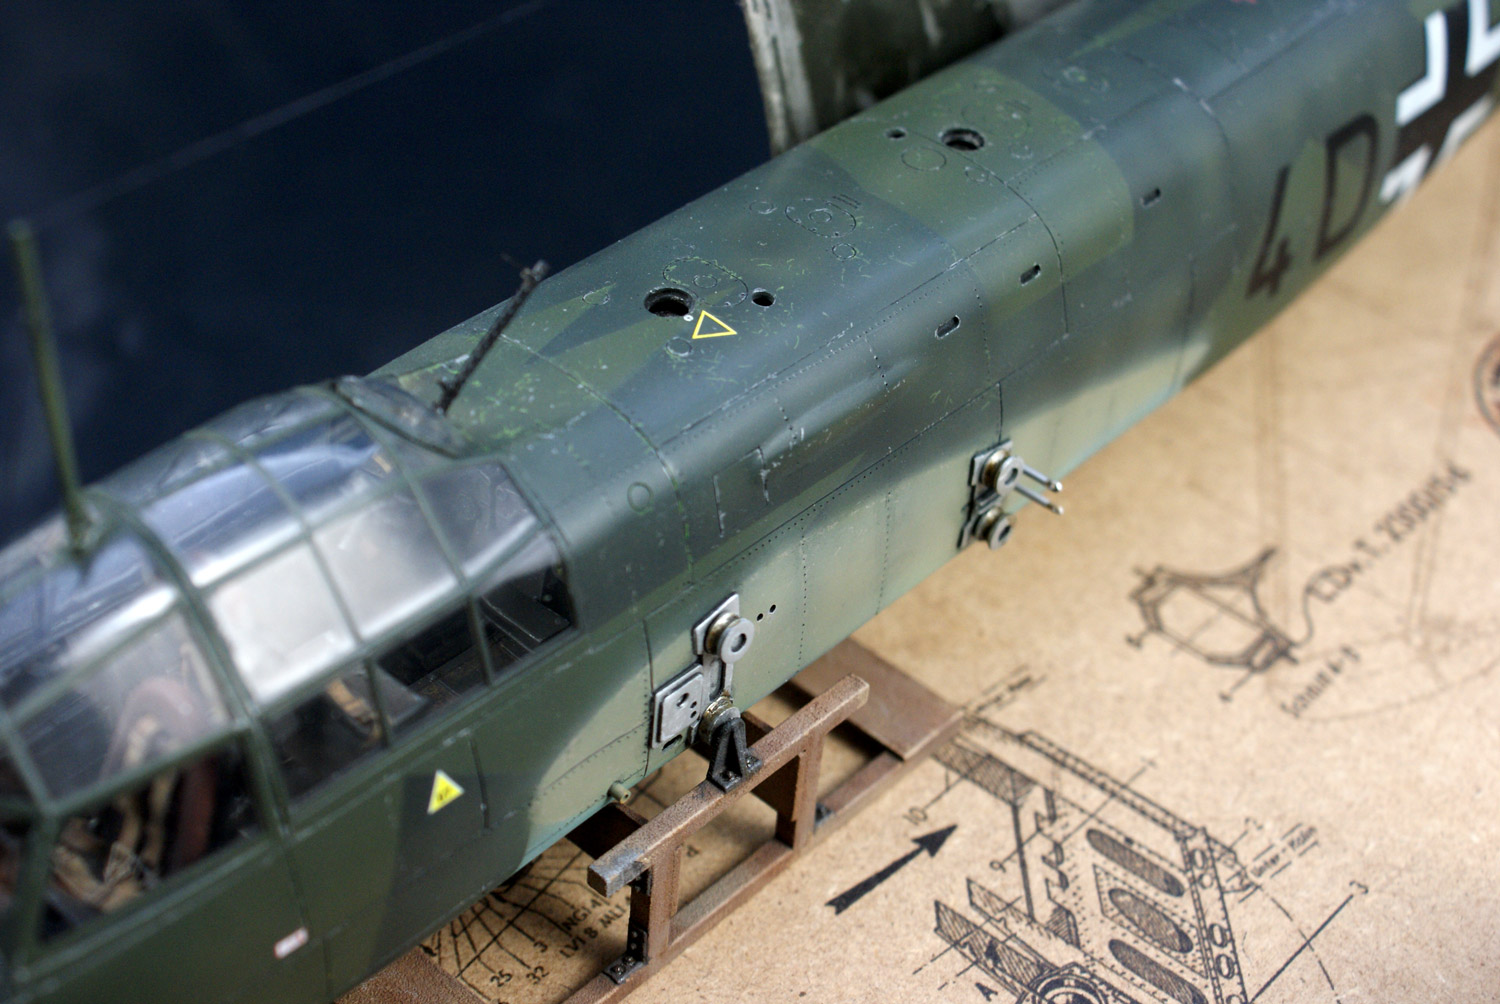
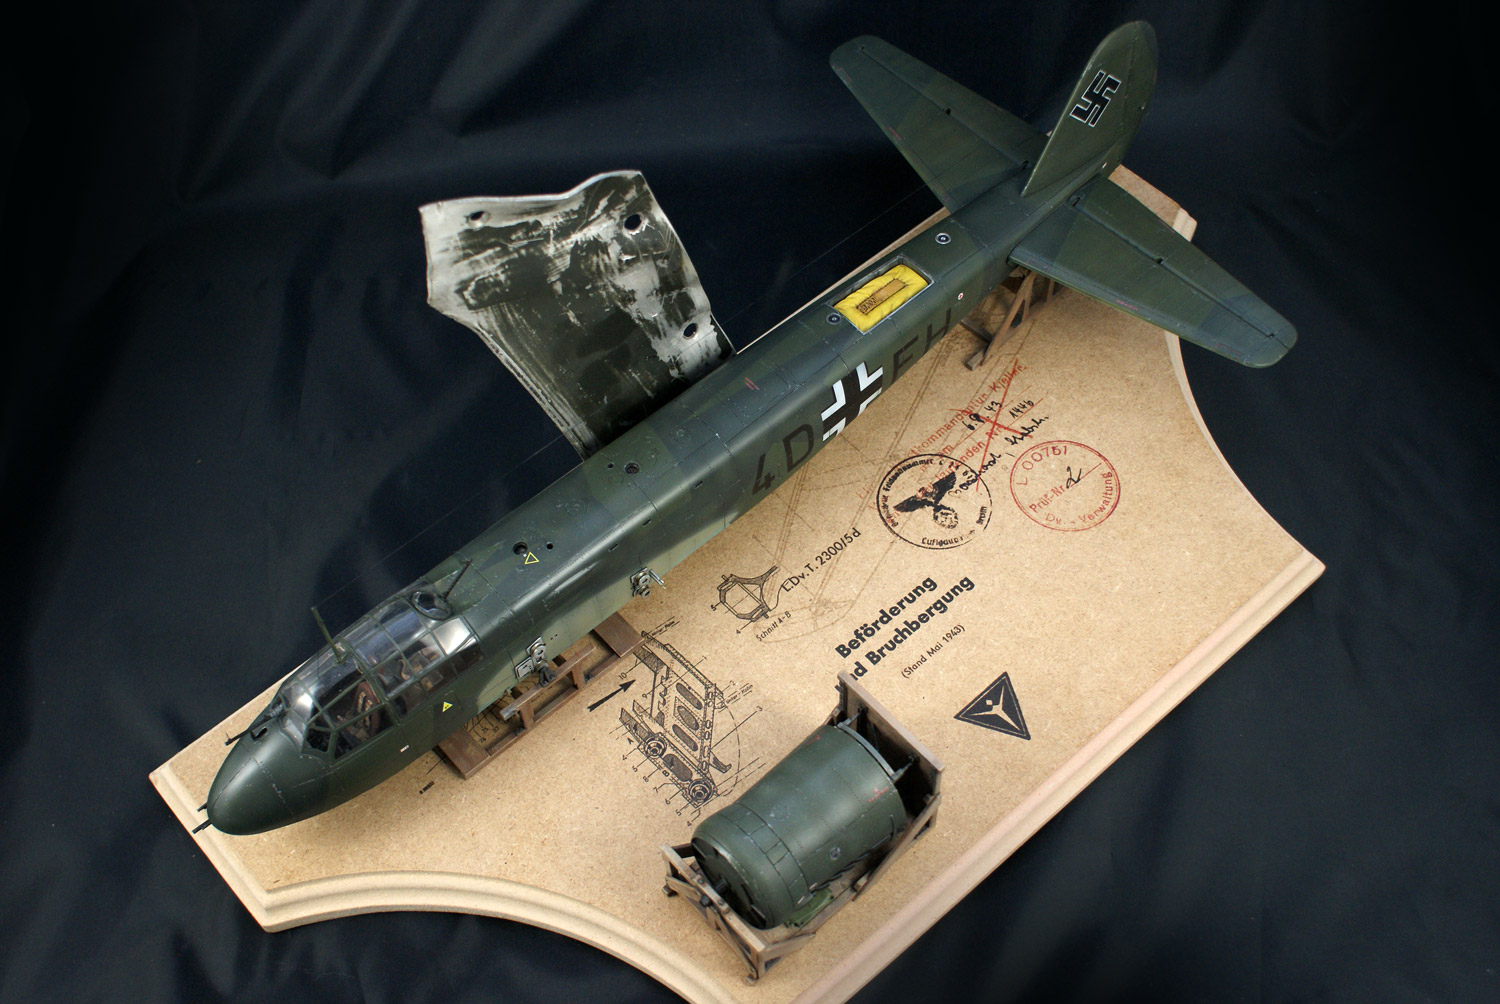
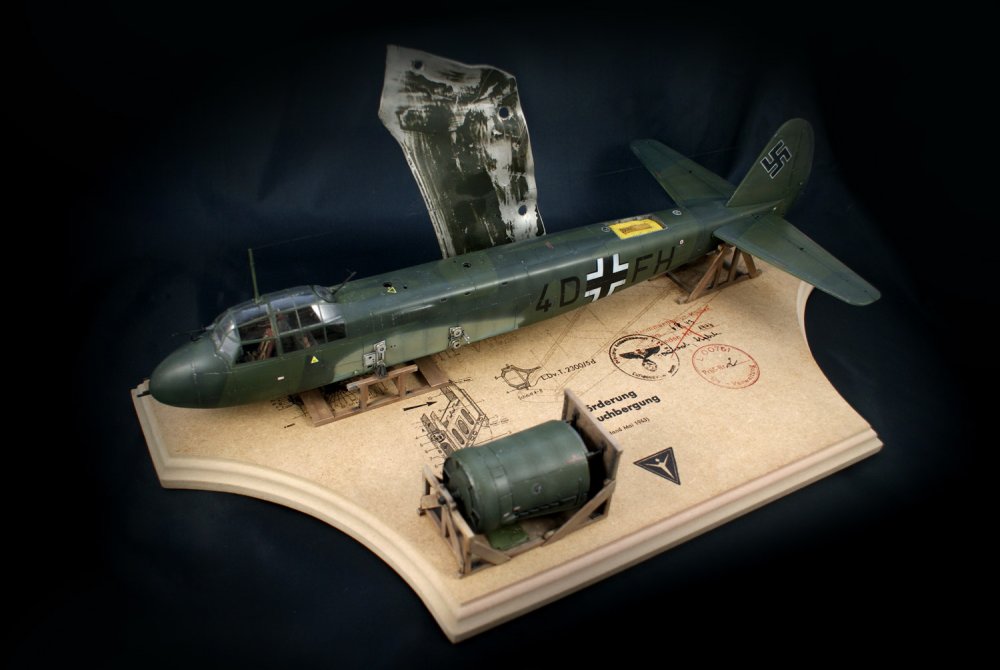
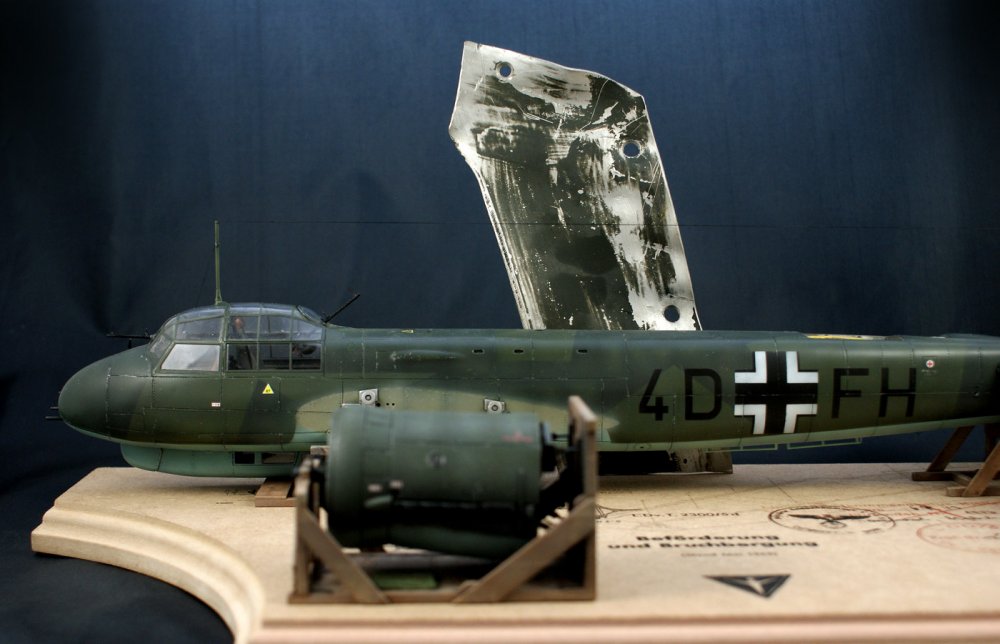
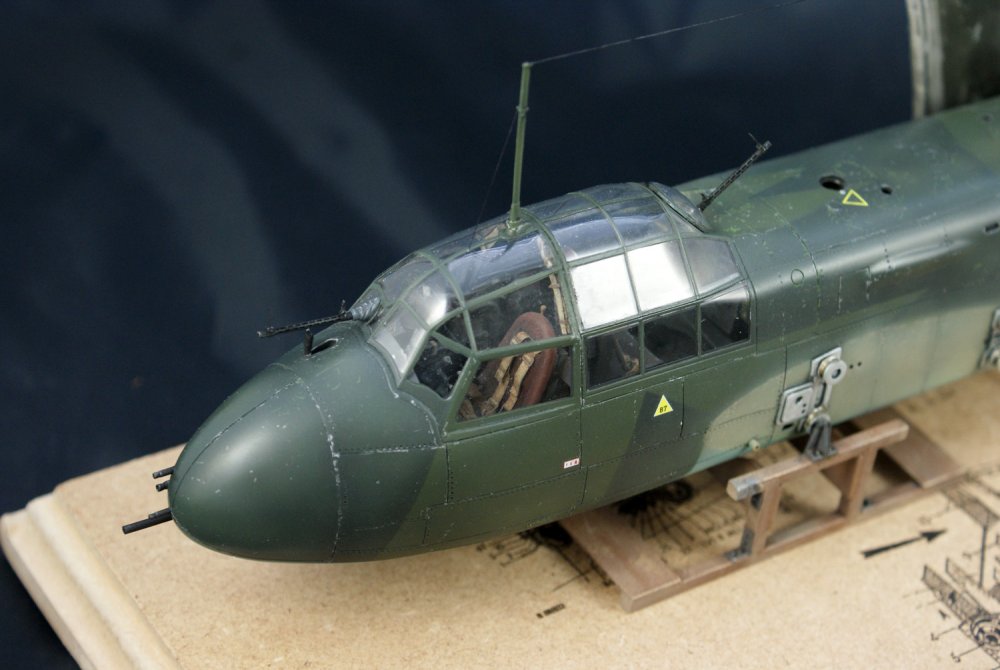
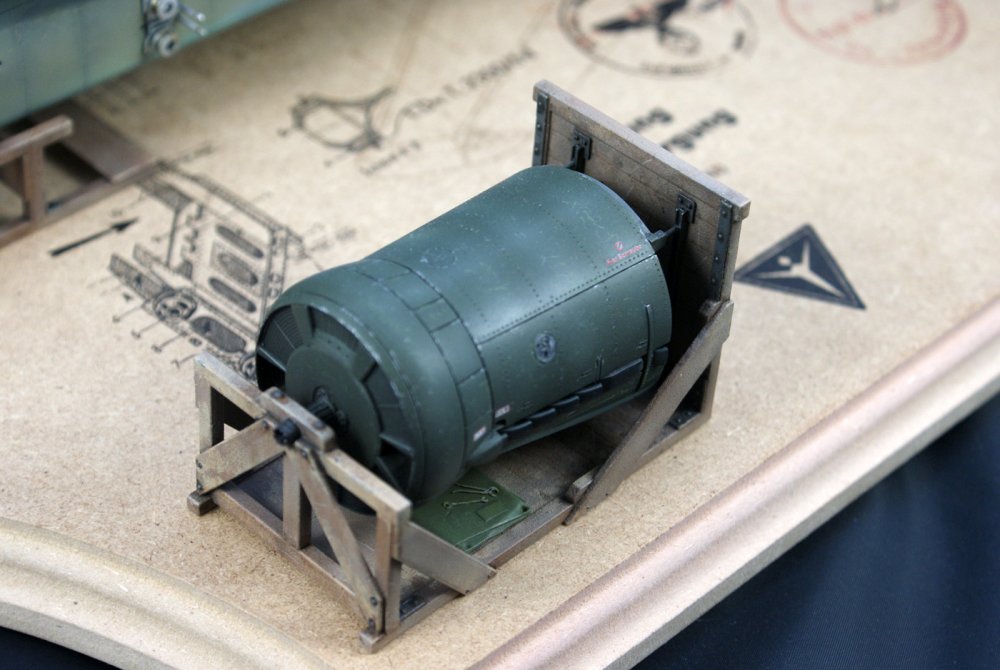
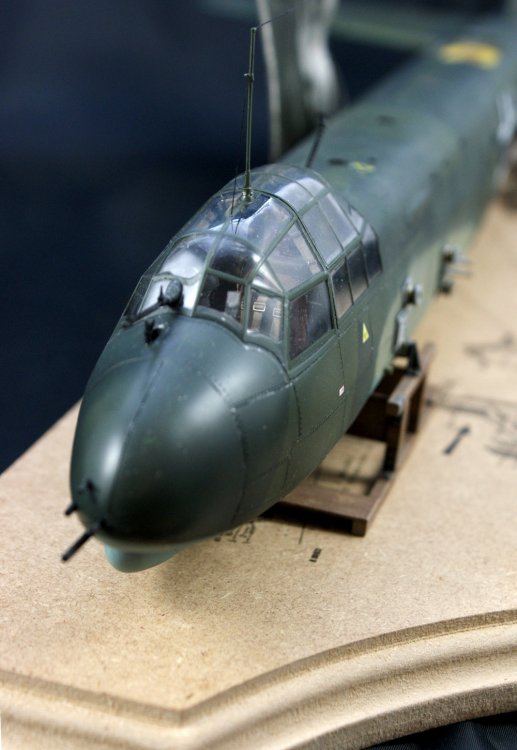
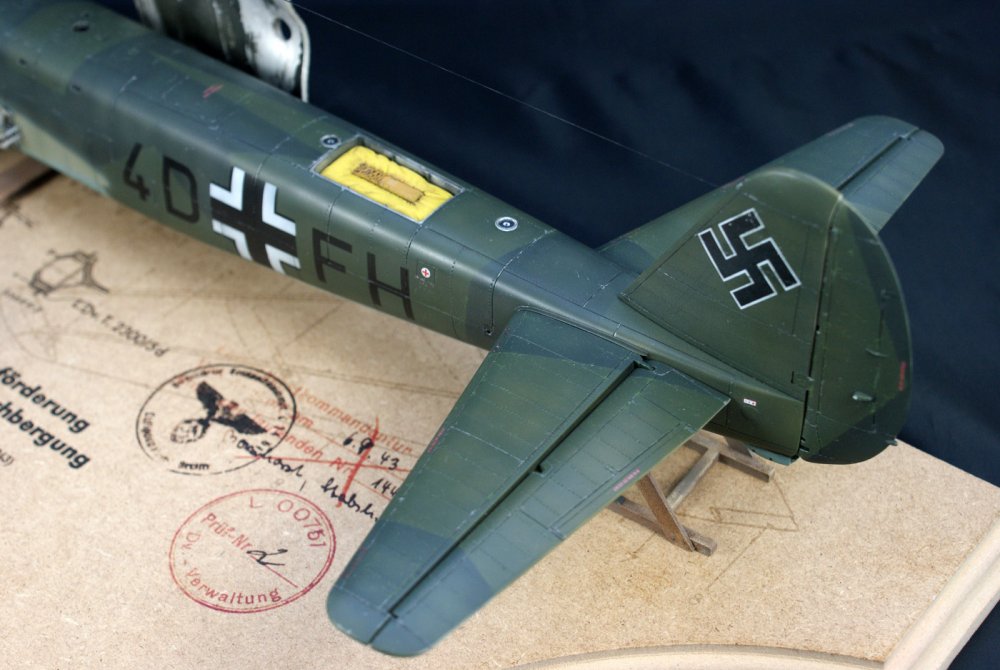
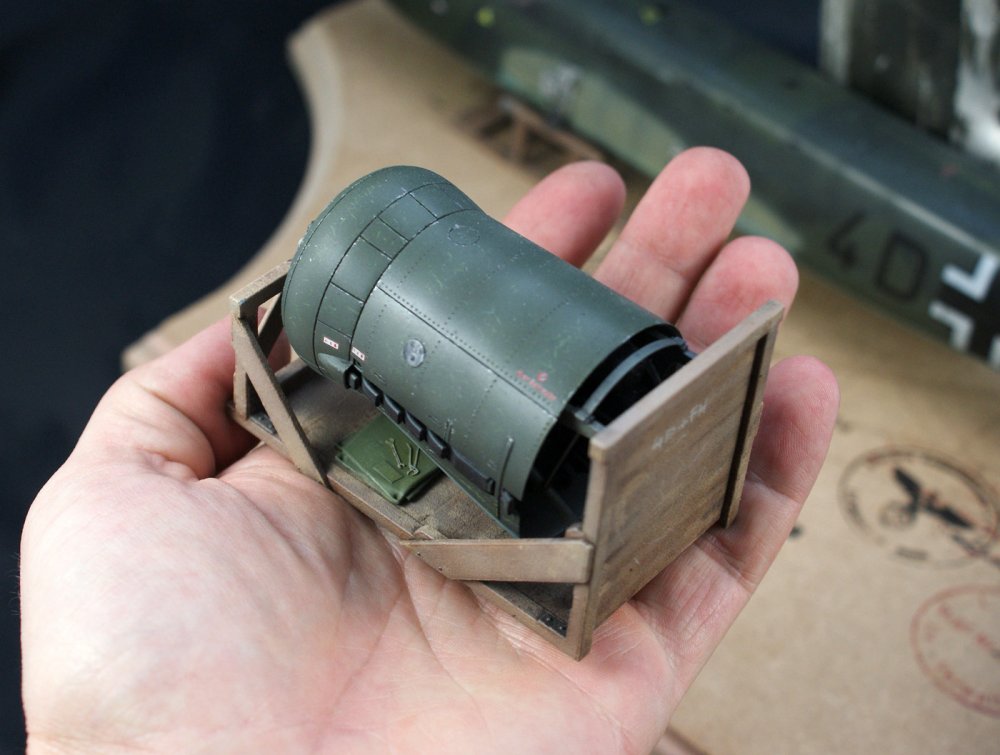
After months of resisting distractions I'm finally calling this one done! What I used: • Revell Ju-88A1 kit • A part of the original 4D+FH window frame generously donated to me by James Hatch. Cheers bud! • CMK C-version conversion • AIMS interior gun arrangement • Quickboost ammo drums • CMK Radio set • CMK fuel filler and life raft set • HGW Seatbelts • Maketar Paint masks • Master gun barrels • 3D designed and printed cradles • Verlinden tarp and tools • Custom printed wooden base • I scratch built the wing root detail. I used the excellent Mr. Paint range for the camo and AK Interactive panel line washes and weathering agents. Build log here: http://forum.largescalemodeller.com/topic/3882-ju-88c-2-4dfh-in-pieces/page-1 More pics later on... Hope you like here!


- 26 replies
-
- 17
-

-
Something different! Love the bright colors. Nice one.
-
1/32 P51 Mustang Double Trouble Two
JeroenPeters replied to Corsair Experten's topic in LSM 1/35 and Larger Work In Progress
Love it! I can see the envious look from the F1 Rothmans car in the parts bin... -
Aeronaut books The Blue Max Airmen - Vol 7 - Aeronaut Books
JeroenPeters replied to Fran's topic in Tools, Books & Misc.
Nice one! Some cool photo's in there. Lovely. -
Pocket Rocket
JeroenPeters replied to ophthoidoug's topic in LSM 1/32 and Larger Aircraft Ready for Inspection
Nice one! It indeed is a sweet little kit. Another set back is the lack of cockpit detail. -
Ju-88C-2 "4D+FH" in pieces
JeroenPeters replied to JeroenPeters's topic in LSM 1/35 and Larger Work In Progress
Aaaaaaalmost done! -
ACES HIGH Magazine ‘Silver Wings’ (AK 2912 Issue 7) Publisher: AK Interactive Chief editor: Daniel Zamarbide Available from AK Interactive for € 9,00 Silver Wings! That’s this edition’s topic. One of the most difficult finishes on a model. No real wiggle room for small mistakes since you can’t weather it away or obscure it like you can easier do with camo. The reason behind this topic is no doubt the new Metallic paint range by AK: Xtreme Metal. Not so long ago the only way to achieve a convincing paint finish was bare metal foil, Alclad or some obscure rub and buff agents. Today we are spoiled with easy to use, fast drying, strong adhesive and more forgiving options: like Xtreme Metal. No need to thin, just drop it in the airbrush and go. Previous Aces High titles I have reviewed are: Aces High 4: The Mediterranean Aces High 5: Vietnam Aces High 6: Battle of Britain The magazine is available from the AK Interactive website for € 9,00 euro’s. You may think that that is steep for a magazine, but only if you view this publication as such. I tend to keep these titles and grap one when covering a certain subject or trying a new technique. Every build is accompanied with step by step tutorials, that will pull you out of your comfort zone. So what do we get with this issue? A sturdy glossy cover, binding 82 quality glossy pages. A poster in the middle (as always). Restrained advertorial space, many tutorials and techniques, and well designed lay-outs. Let me walk you through it: Index: • B26 Marauder “The Flying Barracuda” (1/72 Hasegawa B-26 by Fernando del Pino) You might remember Fernando from last editions He-111 in 72nd scale. I called it the best 72nd scale He111 I had ever seen, and I will call this the best 72nd B26 I have ever seen. The fun thing is that I have seen this build somewhere on Facebook. Back then it made me wonder how the intricate riveting was achieved. And here it is. Explained in detail. The extra detailing, polishing, masking and Xtreme Metal finish is amazing. The finished model photo’s will make you guessing for it’s scale. The only reason I wouldn’t guess it’s in 32nd scale, is because… it doesn’t exist! (Yet • Mig-21 Magyar Silver Arrow (1/32 Trumpeter Mig 21 by Bera Karoly) This Hungarian builder goes to town on the venerable Trumpeter Mig 21 and finishes it in the colours of his home country. Daniel Zamarbide certainly has a good pick when it comes to superb modellers… It’s nice to see the old salt mask technique again and some quality pre-shading. Two techniques that seem to die out at the moment. The same goes for the sponge chipping technique. Bera is old school but really makes it look great. Pretty impressive and useful stuff. • P-51D “The Mighty Mustang” (1/32 Tamiya P-51D by Michael Rosiak) I’ve seen a lot of great builds from this kit. It’s almost impossible to mess it up. And this is another fine example of how it’s done… The poster (again) is from the hand of Romain Hugault. One of those ‘comic’ book artists that will make you buy his comics, even if that’s not the sort of thing you’d normally buy! The topic is a Marilyn Monroe-type pin up, crawling out (or into) the pit of a cold war jet (F-80). These posters are perfect to adorn any self respecting man-cave! And don’t worry about tearing out use ful articles: the rear contains advertisements. • F9F Panther “Blue tail fly” (1/32 Fisher Resin F9F Panther by Daniel Zamarbide) Again: I’ve see this build on Daniel’s Facebook page. Daniel is an ‘all round’ modeller that is good at building, figure painting, detail painting and weathering. This really is an EPIC build with pretty cool step by step sequences (like painting the pilot figure and instrument panel). • F-101 C Voodoo “One-Oh-Wonder” (1/48 Kitty Hawk F-101C by Jordi Lario) Jordi hasn’t been featured in the Aces High Magazine before, but kicks off his debut with a delicate build of this Voodoo. Very subtle weathering on the aluminium panels and great masking of the colourful tail. The one thing that scares the heck out of me. Pulling off that mask at the end in the fear of peeling of precious paint. • Techniques in Detail This section explains how to successfully paint fuel tanks in all scales. Interestingly this deals with using Black base or spray the Xtreme metal directly on the plastic. Verdict A very shiny edition of this quality mag! No ‘ground section’ subject this time (normally an armour or figure topic is included). Personally: when I buy an aircraft mag, I don’t want to see any armour topics, so no tears here! Another thing that is worth mentioning is that all builds are done with Xtreme Metal. This is logical, since Aces High is an AK Interactive publication, but in previous editions other brands were thrown into the mix. Something I applauded. Other than that, this is another seriously mindblowing edition. A must have when you plan on building something shiny! Another very highly recommended! A special thanks to AK Interactive for the review sample. Available here. Jeroen Peters
-
Ju-88C-2 "4D+FH" in pieces
JeroenPeters replied to JeroenPeters's topic in LSM 1/35 and Larger Work In Progress
Nice! Taken in Berlin? Could have used this sooner!! -
Nice! Love the poses.
-
Topdrawings #30 (7030) Dornier Do 17z/Do 215 Publisher: Kagero Written by: Mariusz Łukasik Available here from Kagero for € 18,24 This book will make you long for an inevitable Do-17 release in 32nd scale. Trust me. Let’s hope Revell gives it the same treatment as their excellent Ju-88 and He-111 range. Size won’t be an obstacle, since the wingspan is quite equal to the Ju-88. Sales won’t be an issue, since this is a plane that saw a LOT of variations and was used in the Battle of Britain. In other scales Hobbycraft (hmmmm), Classic Airframes and recently ICM (Yes! The Do-17Z10 and Z2) released their version in 48th scale. And when you want to save on display space you could tackle the Flying Pencil in 72nd scale, as offered by Airfix (Do17z, Do17E/F), Revell (Do17Z), ICM (Do17B-4, Do17Z10), RS Models (Do17P, Do17K), Matchbox (Do17Z2), etc.. etc… Perhaps the reason the Do17 or Do215 hasn’t been done in ‘our’ scale yet is the fact that there are no survivors remaining today. Only some large pieces or relics in museums or private collections. Or is there?.... In 2010 the RAF Museum announced that they had discovered the largely intact remains of a Do17Z (Werknummer 1160) off the coast of England. Today the wreckage has been carefully lifted of the seabed and is undergoing preservation and restoration in the RAF Museum in Cosford. The remains undergoing preservation treatment in 2013: The book These Topdrawings titles are really written and published with the modeller in mind. If features drawings of all the different versions of the Do17 and Do215 in 72nd scale which not only show panel lines, but also rivets. I myself mainly use these drawings for my riveting. Apart from this also showed are cross sections of the fuselage and wings. This should appeal the 3D modellers! Throughout the book we stumble on 7 colour profiles of a Do17Z-7, Do17Z-2, Do-17Z-1 (with top, bottom, left and right profiles in Desert Scheme), Do-215B-5, Do-215B-4, Do215B-1 and Do-17Z-2. The drawings inside the book are all in 72nd scale. Each version of the plane has a small text explaining the structural differences. If you are interested in the history of the plane or it’s operational use, this is not the book for you. If you want to check whether your model is accurate in shape or if you want to detail it up and/or rivet it… this is a must have. The book is as always accompanied by three large sheets with drawings. Printed front and back. It features drawings of the Do-17 from the top, bottom, front and side profiles in all three scales (32, 48 and 72). If we look at the 32nd scale drawings, the first thing you’ll notice is the massive size of the plane. To check whether I was going grazy, I grabbed the wing sprue of a 32nd scale Ju-88 kit and placed it on top. See for yourself: the size is quite similar. I think the visual impact is caused by the long chord of the wings. Quite like the huge wings on the He-111. And like I said in the introduction: these drawings will make you hungry for a 32nd scale version of this plane. A Ju-88 wing on top of the drawings: If the drawings don’t do it for you, perhaps the recent 1/48 completion of the ICM kit by Italian builder Paolo Portuesi will! Verdict One of those ‘need to have’ titles when tackling the Do17 / Do215 subject! The prize of 18 euro’s sure won’t be a show stopper. It won’t take up a lot of space in your book case. Let’s all buy it and pray for Revell to step up their game. I remember reviewing the Ta154 book by Kagero and guess what? I now have a 32nd scale Ta154 in my stash! Highly recommended My sincere thanks to Kagero Publishing for this review sample. To purchase directly, click THIS link. Jeroen Peters
- 4 replies
-
- 3
-
-
- topdrawings
- do215
- (and 2 more)
-
'Tribute to Sheperd Paine' (1/48 B-17 Flying Fortress)
JeroenPeters replied to kkarlsen's topic in Non LSM 'WIP
Yes! The first photo i saw made me think it was Shep's work! Great stuff..