mark31
-
Posts
1,404 -
Joined
-
Last visited
Content Type
Profiles
Forums
Events
Gallery
Everything posted by mark31
-
Thanks and yes i know i will need sotware But what software to use i know there is cad and other brands So what is user friendly And with the printers like you said it all depends on how crazy you whant to go I would like to use to print some figures at the first place from already exsisting files And trying in the mean time to learn how to draw on the pc. There are also difrent types off resins out there ranging from 30 euro for 1kg to 150 euro Also looking for more info on the curing progress its done with uv light some people using a special case for it others let it cure in the sun. So i think still off resaerch ahaed and learning Mark
-
Any one here is printing in resin? Im thinking on gettig one already didt resaerch on the net. But still have some questions. So i hope some one can help me out Thanks Mark
-
thank you here a update now on the ip Still needs more work before the pit is ready. But thats for next week Mark

- 206 replies
-
- 12
-

-
Mirage 2000D saved from the shelf
mark31 replied to mark31's topic in LSM 1/35 and Larger Work In Progress
still having fun now with the first decals in place Not happy on the kwality off the decals the decal setting isnt great i think the are thick already didt one screw up the red line aint in the right place but i leave it like it is.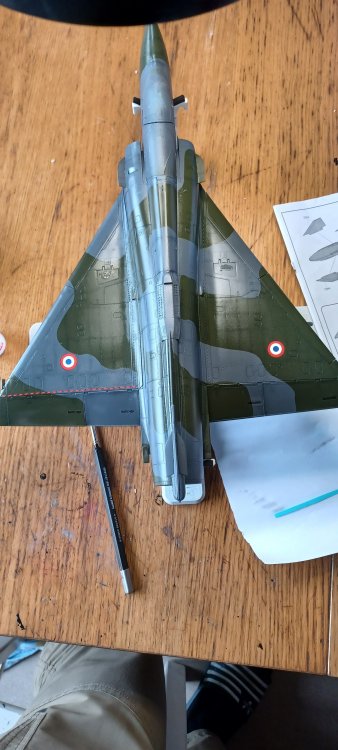
-
Mirage 2000D saved from the shelf
mark31 replied to mark31's topic in LSM 1/35 and Larger Work In Progress
Thanks for the kick Kai Today only clear on Not much in the mood off doing a lot. Just need time to rest after a hard week at work had a few days off 20 hours so I hope to put some decals on next week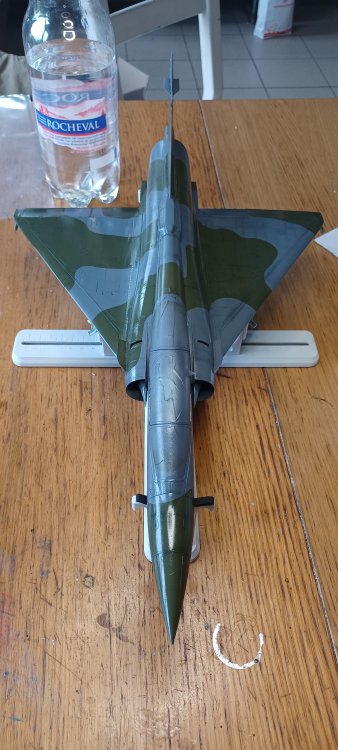
-
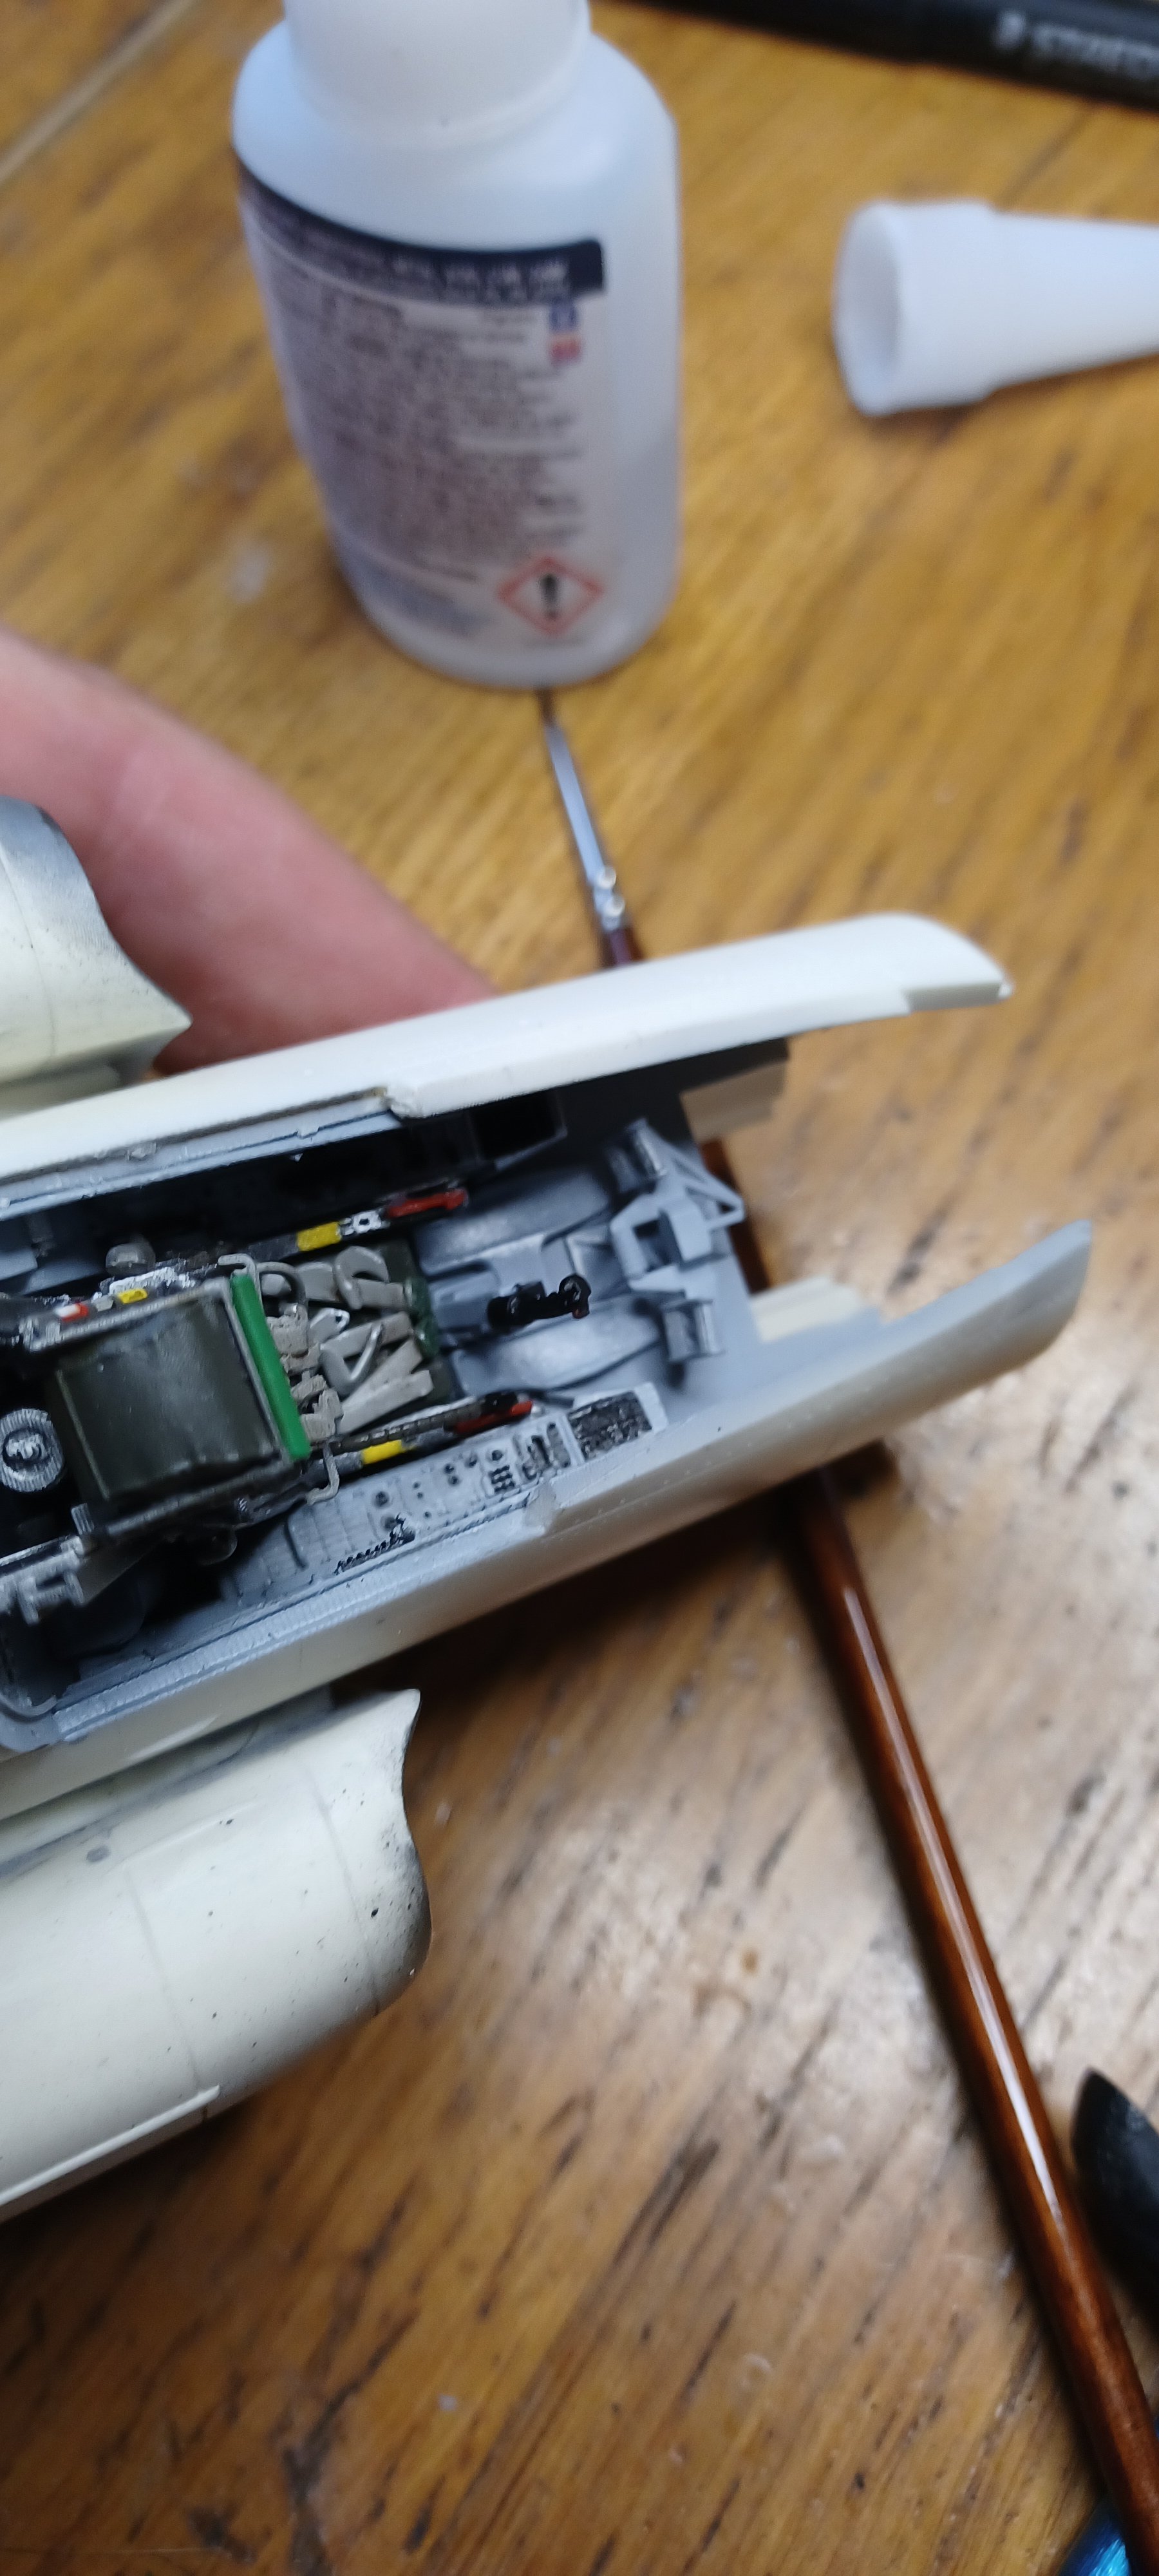
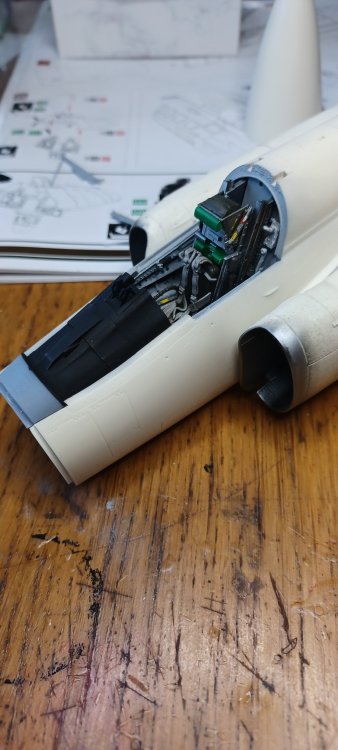
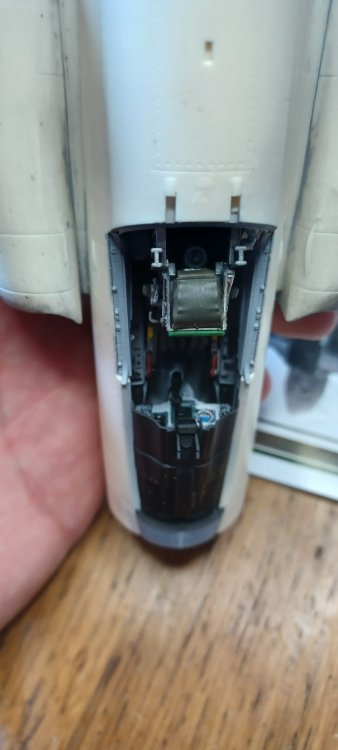
everything is on hold at the moment but i have to pic it up evreything s maskd for the wheelbays after that clearcoat and decals. Maybe this weekend So progress off the week further with the cockpit Next up front ip iff i find time Mark

- 206 replies
-
- 10
-
-

-
What is on your bench right now ? Share a picture :)
mark31 replied to Martinnfb's topic in Modelling Discussion
Still having fun
-
+1 Mark
-
great start on a great kit loe the work that you have done on the pit looking forward to see the engine Mark
-
first when wnw anouncd the kit i whant one. Now im going to pass just to big but i love the details im seeing. Mark
-
What is on your bench right now ? Share a picture :)
mark31 replied to Martinnfb's topic in Modelling Discussion
nice one Mark -
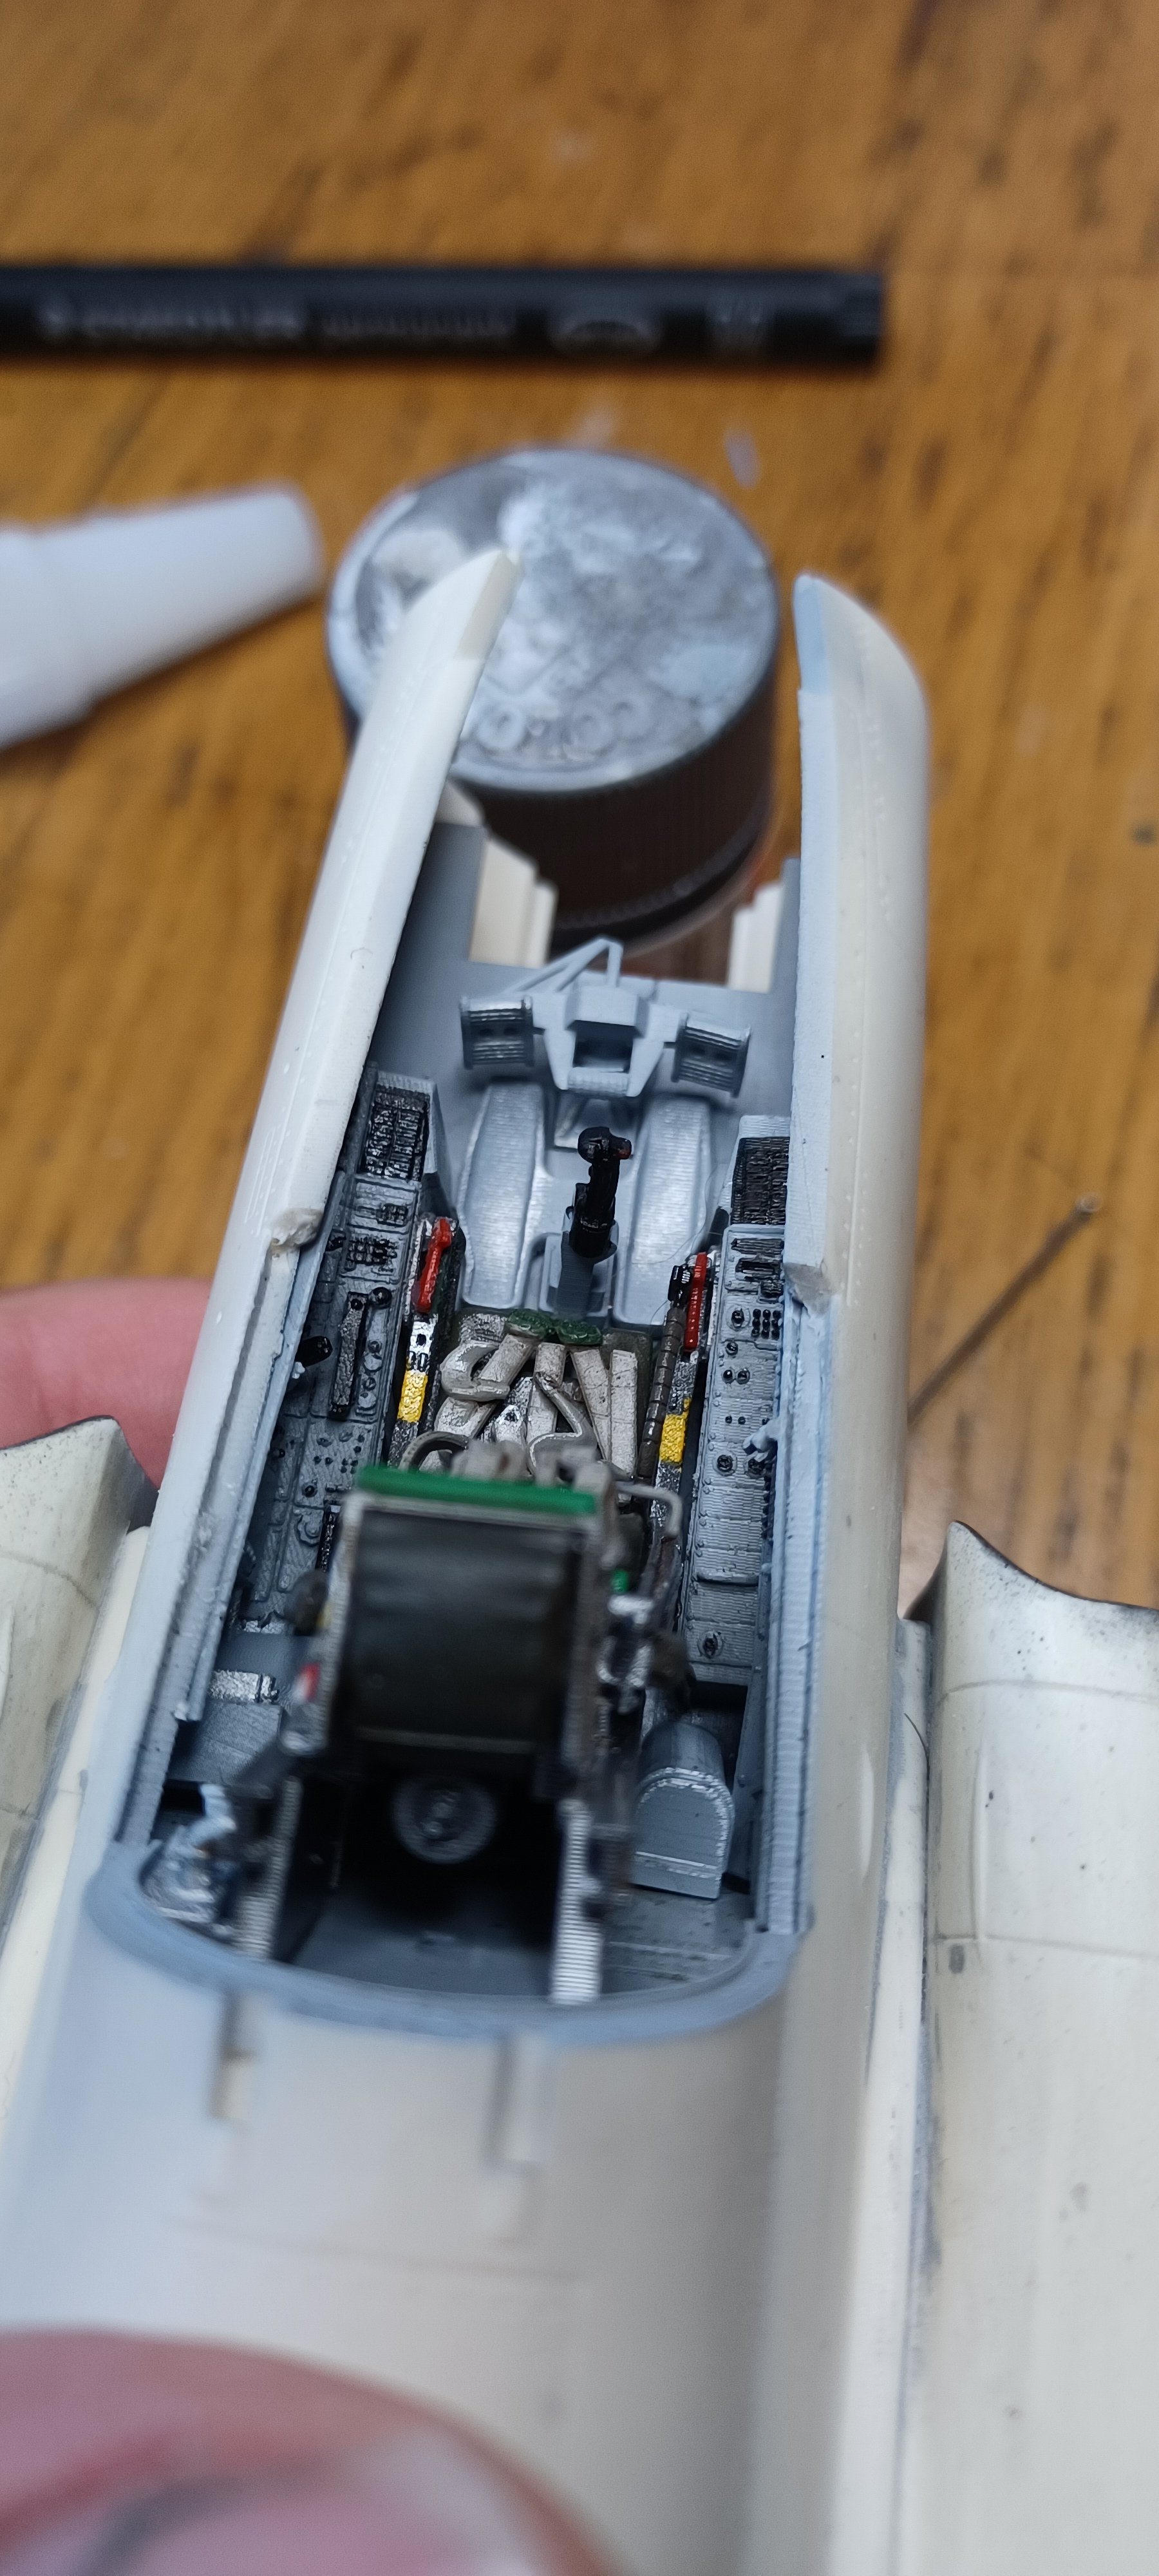
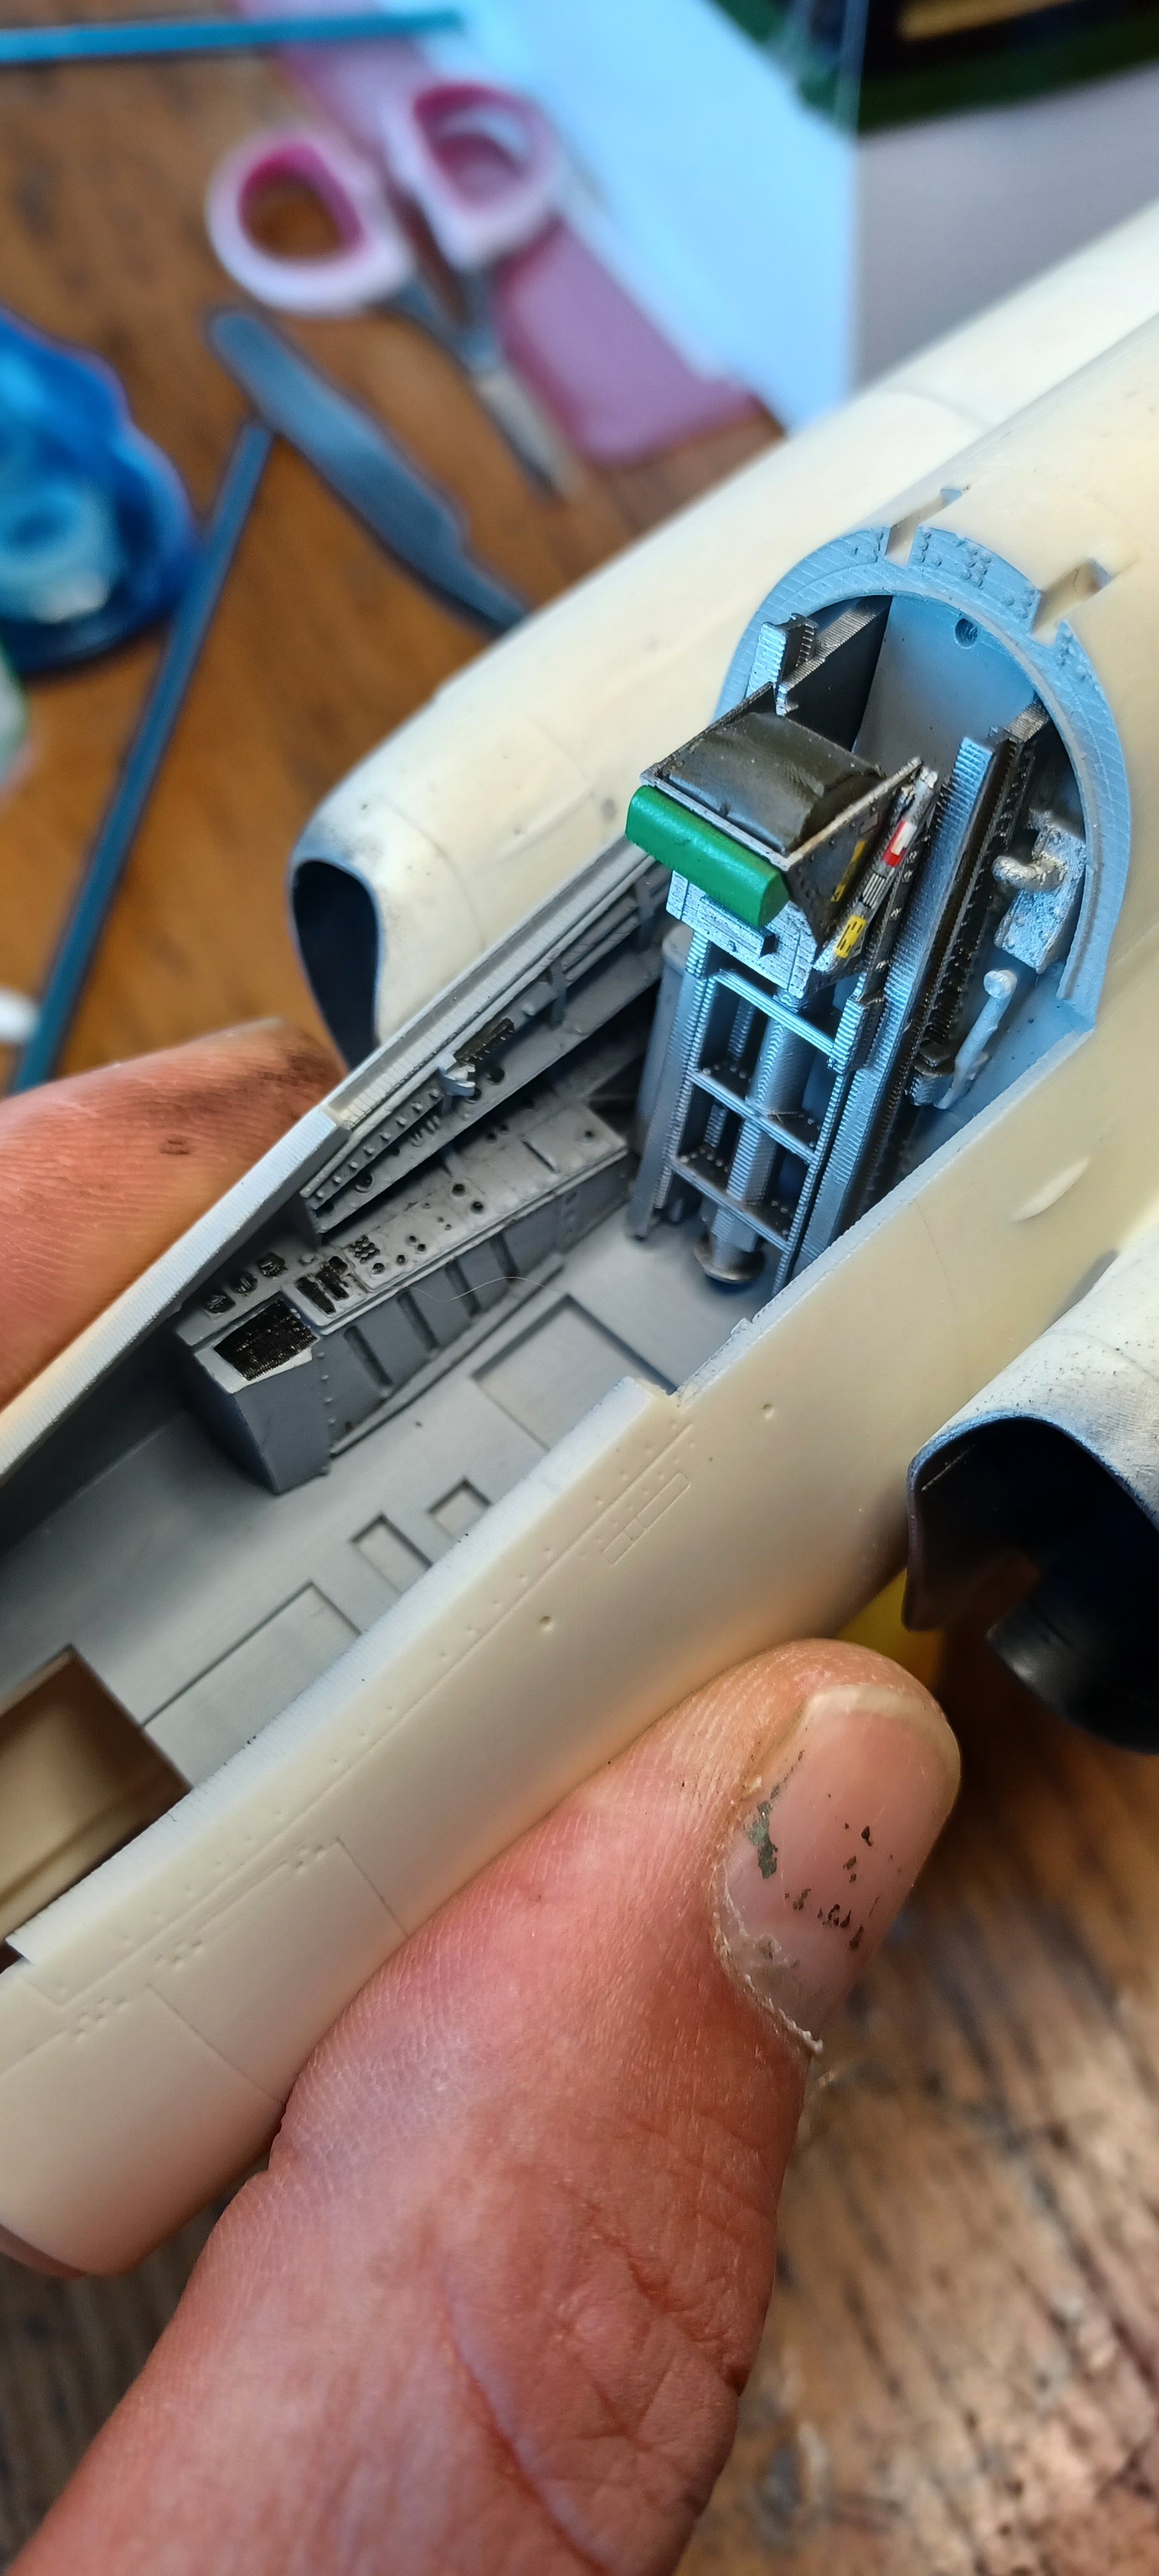
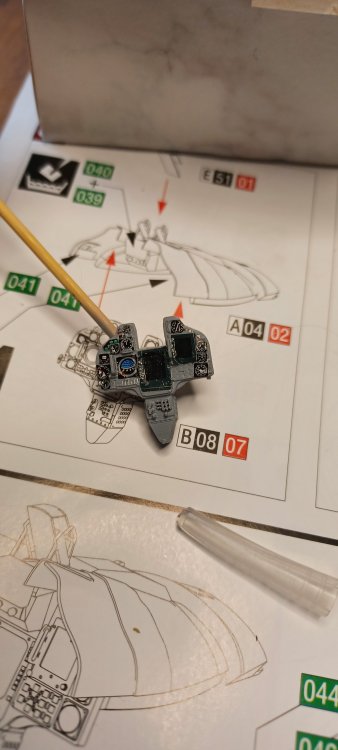
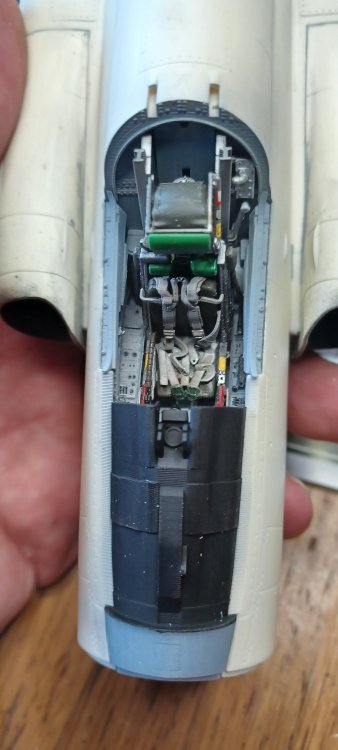
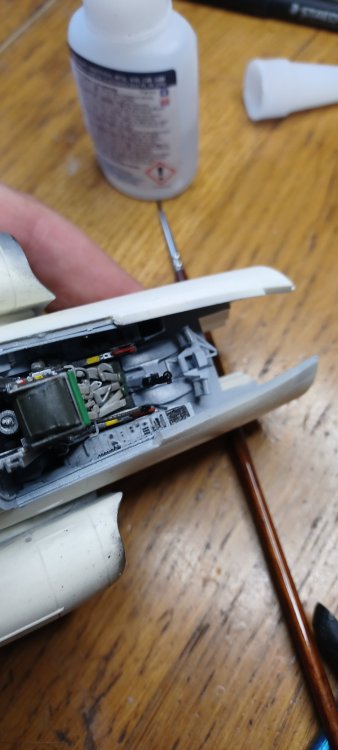
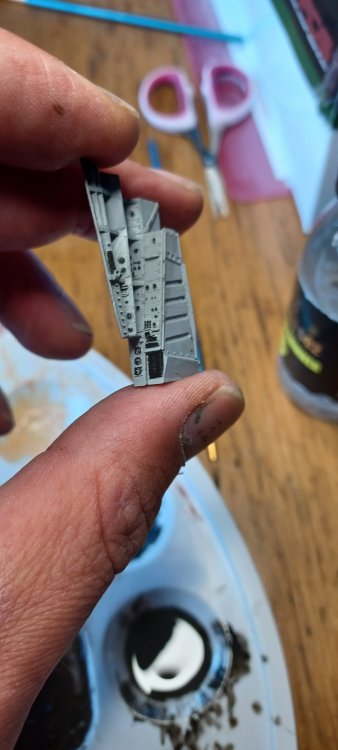
thank you all here small progress on the pit the side walls one side inplace and a prt off the seat Thats it for now Mark


-
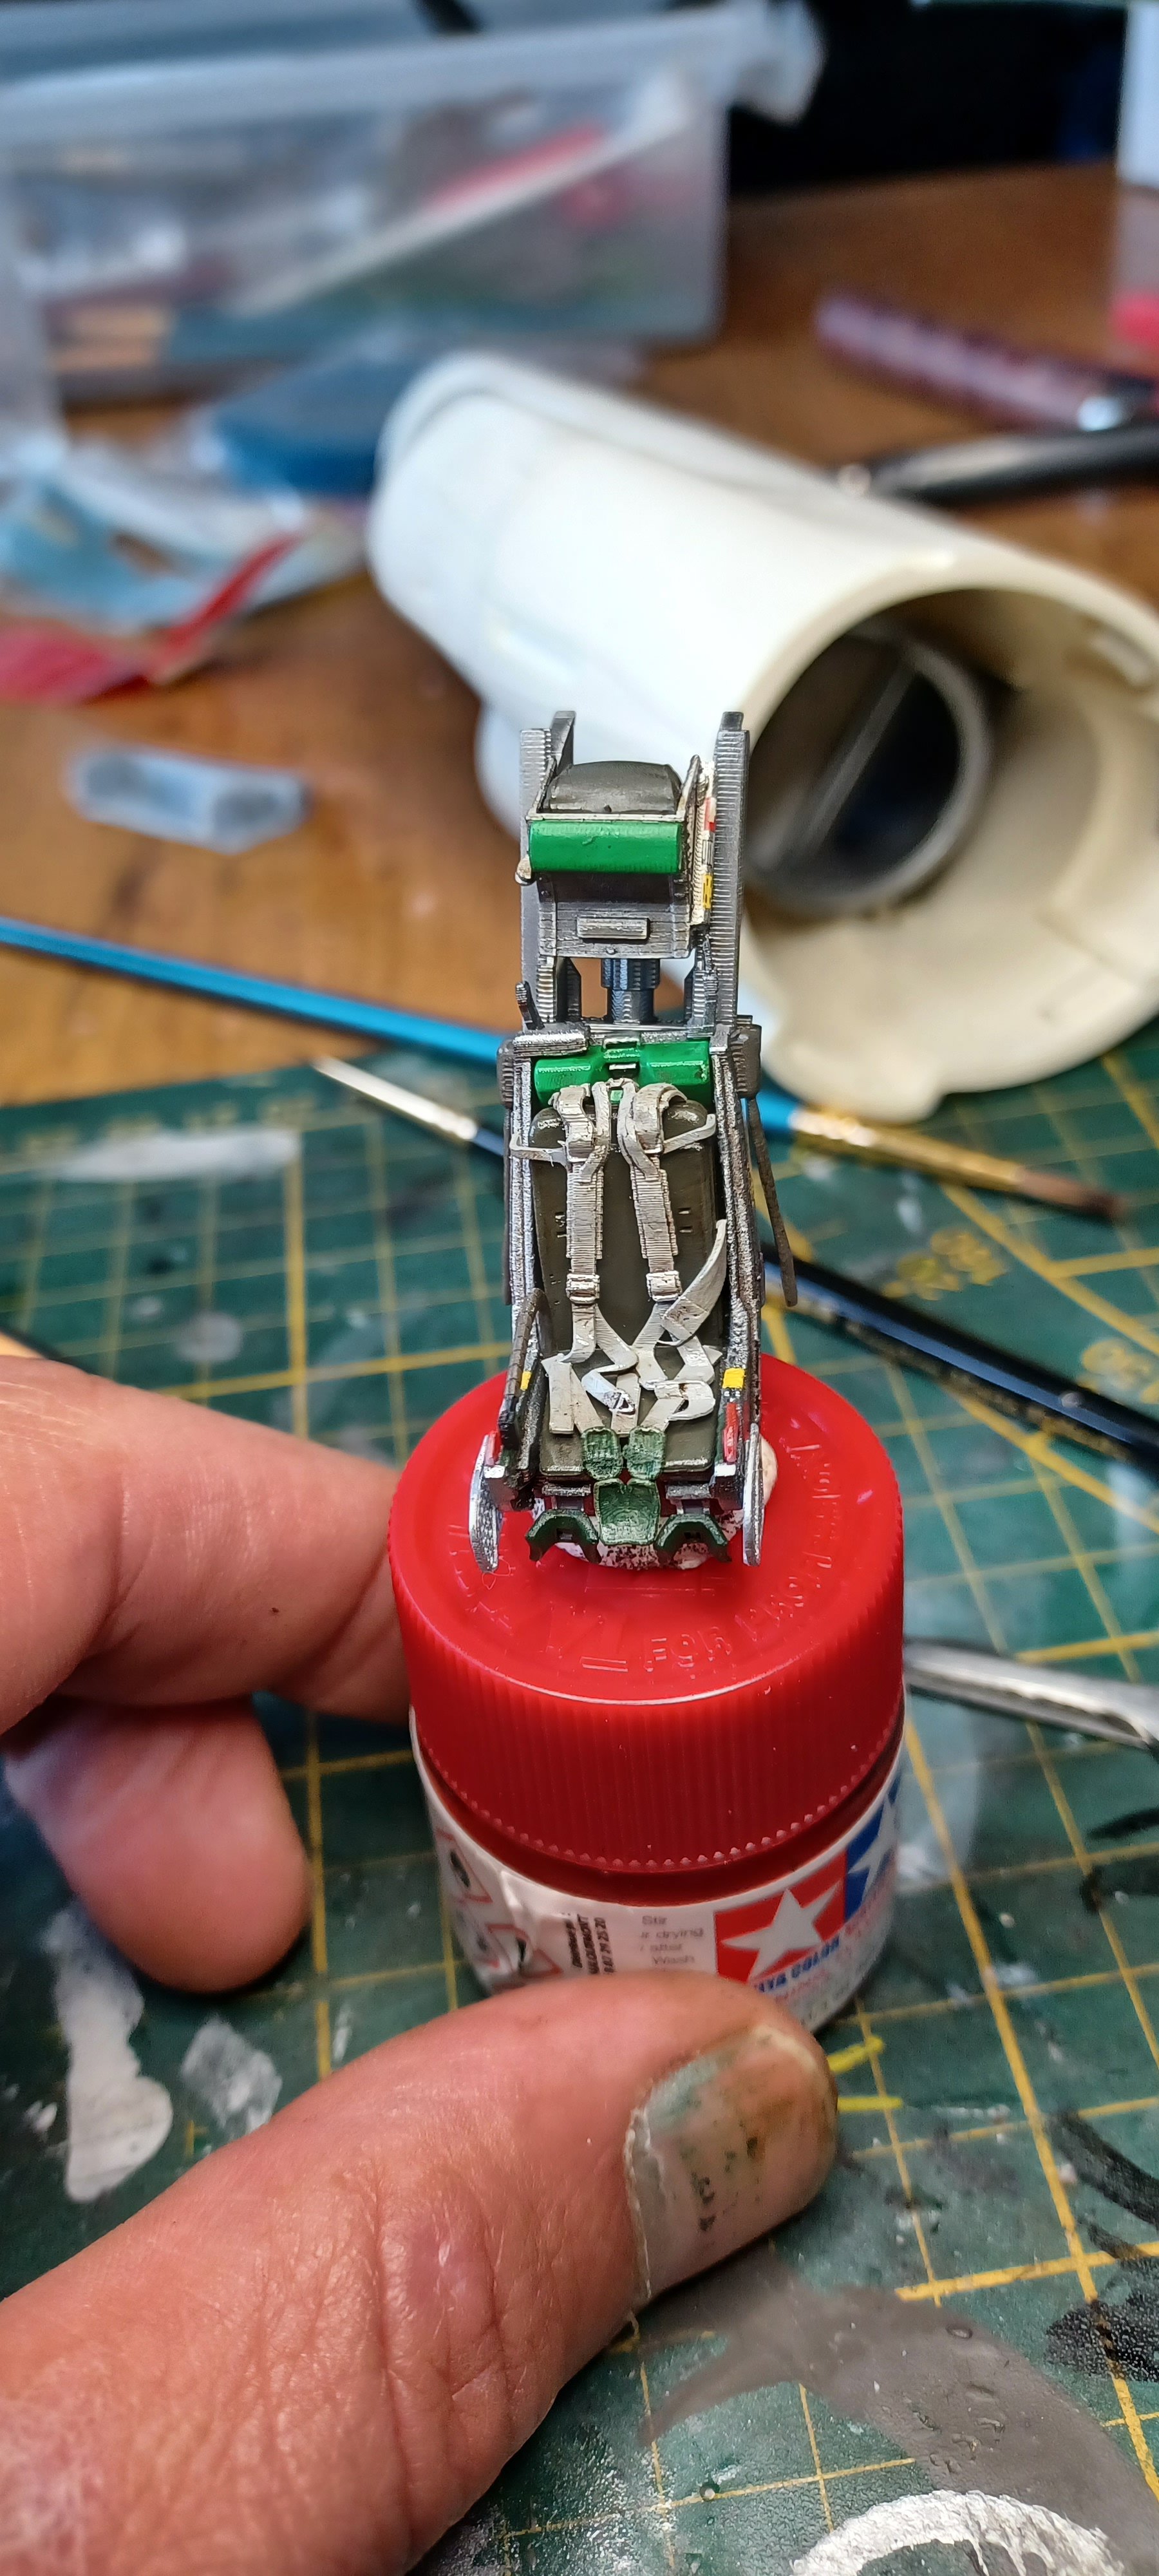
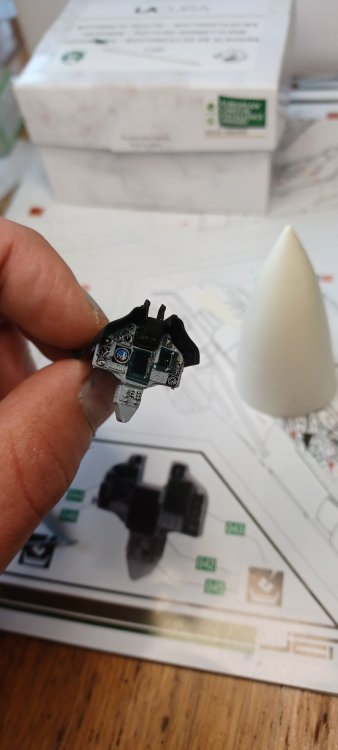
yes indeed all is there yes the head rest and also the safty handele between iff i install it now i probly brake it off during building Like it is on the pic the seat is armed iff you turn it to the rght the seat is safe you are welcome thanks
-
yes indeed bring on the D
-
i also have seen the topics if tru it will be big Mark
-
Gottfreid Weiroster Bf 109G6 R6 Revell 1/32
mark31 replied to GazzaS's topic in LSM 1/35 and Larger Work In Progress
very nice work -
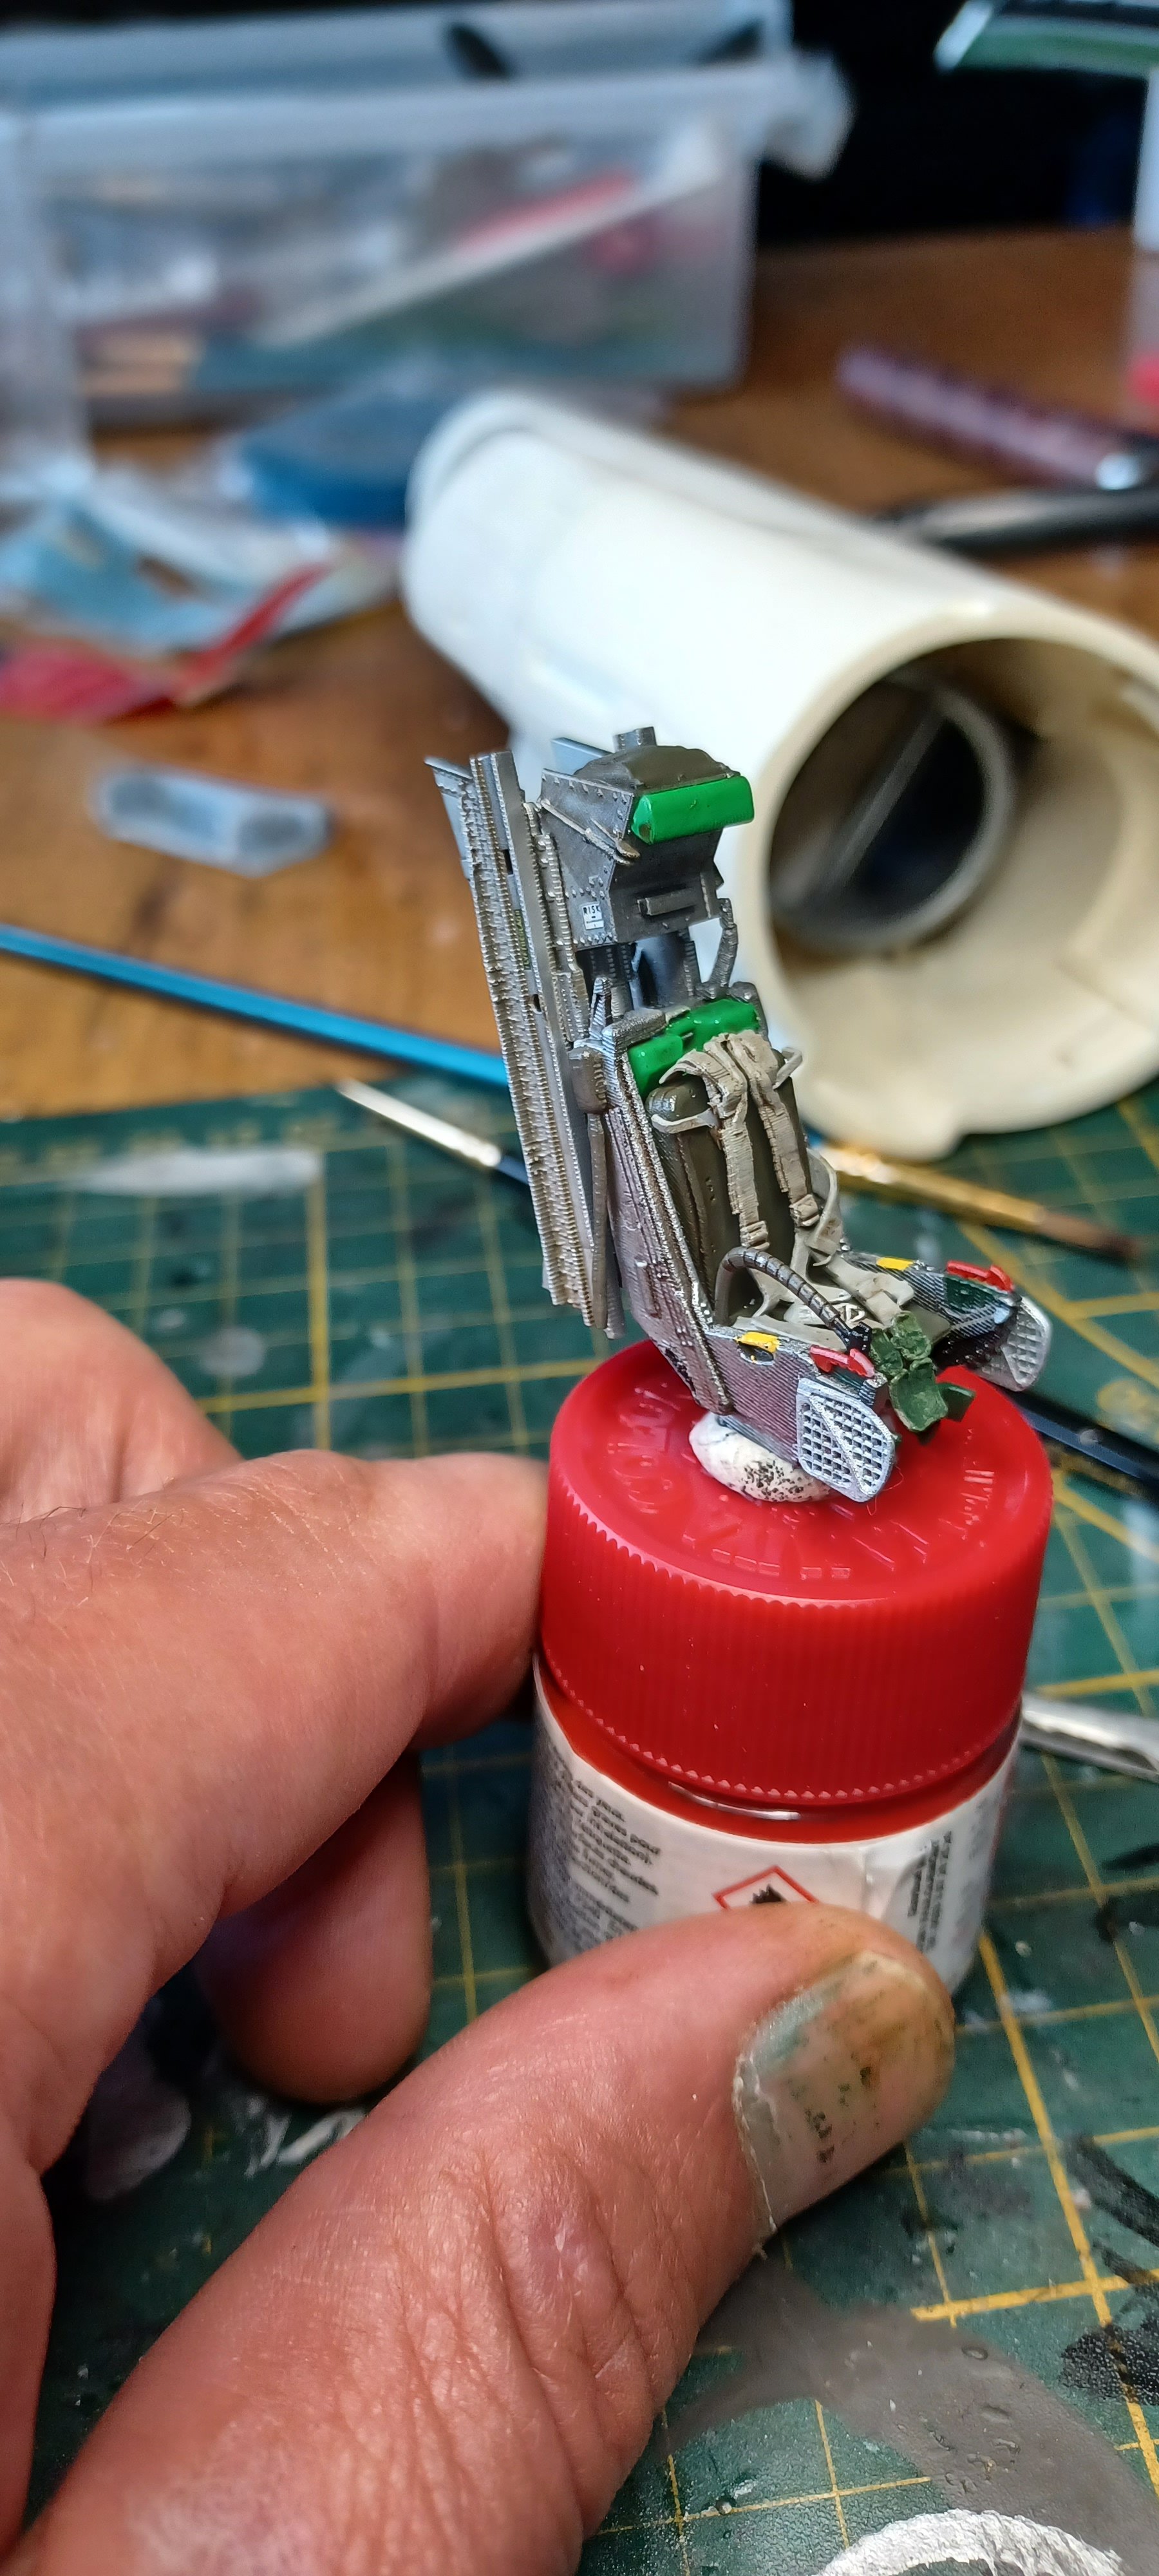
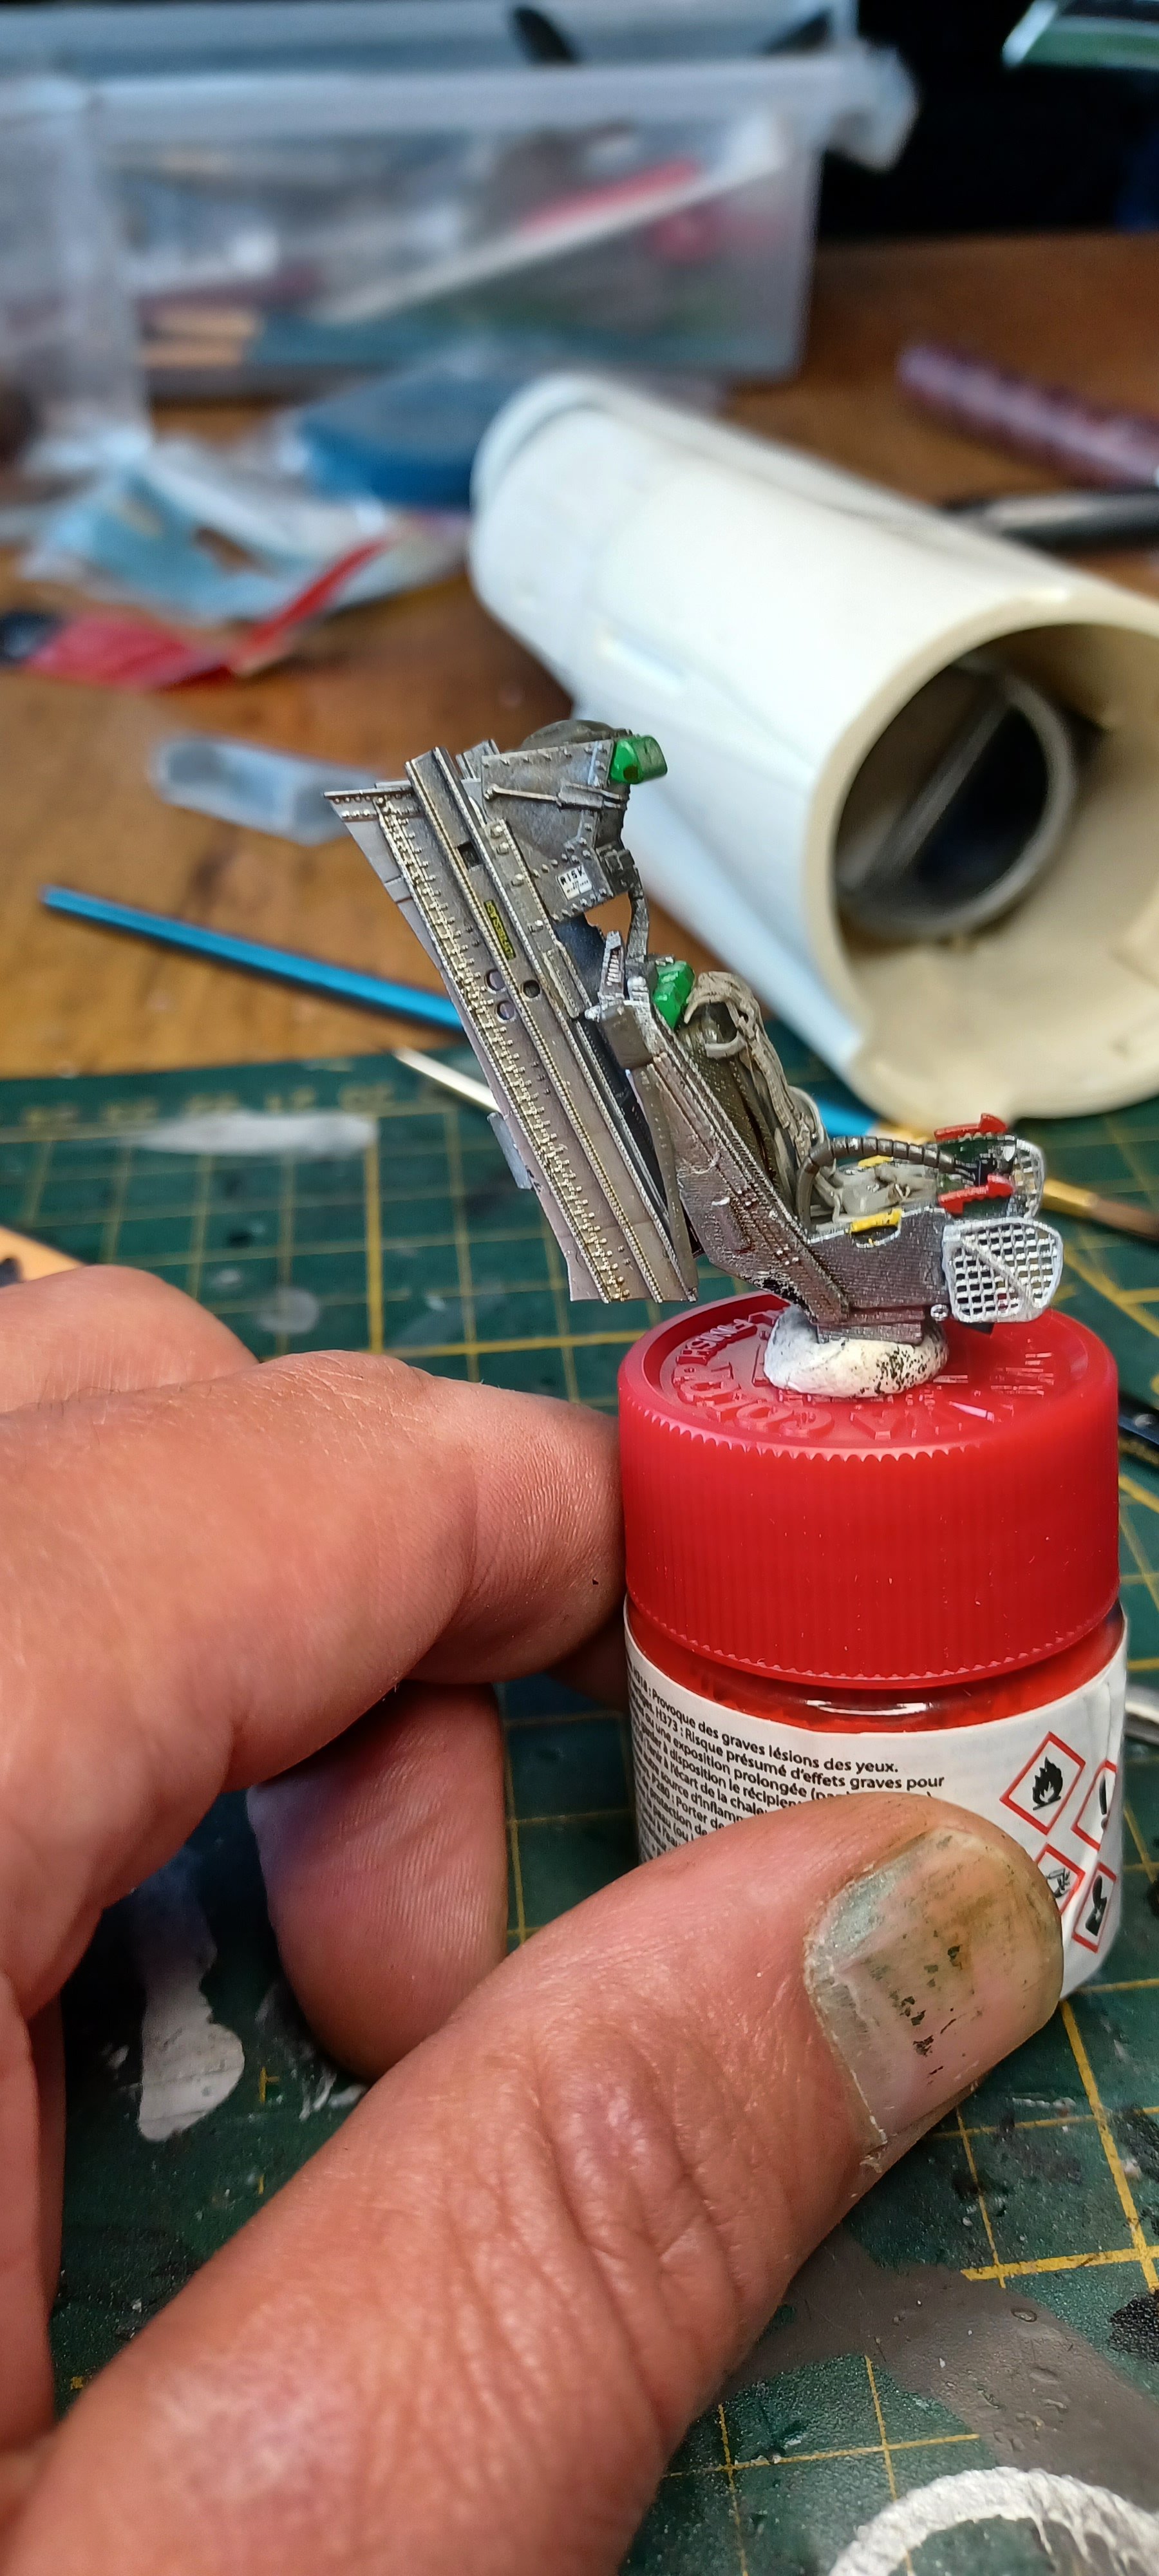
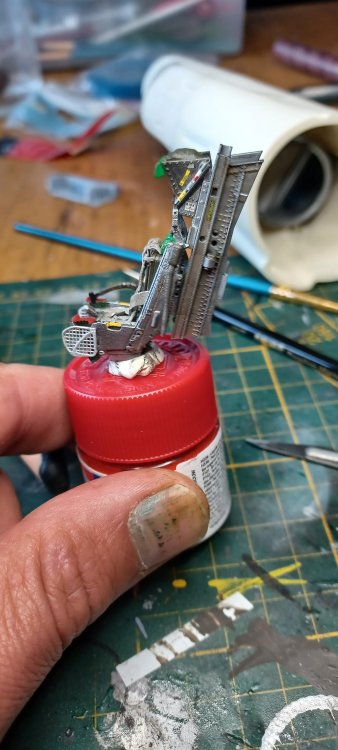
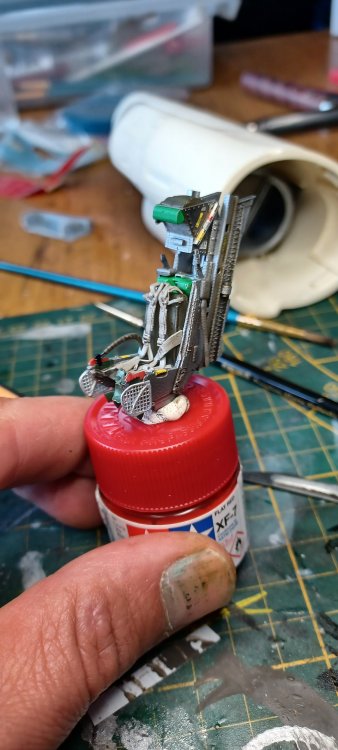
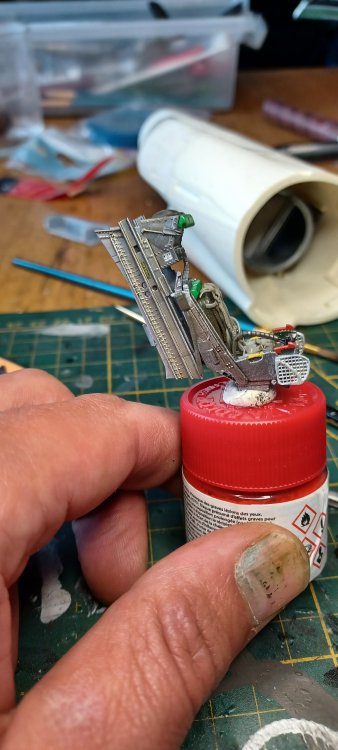
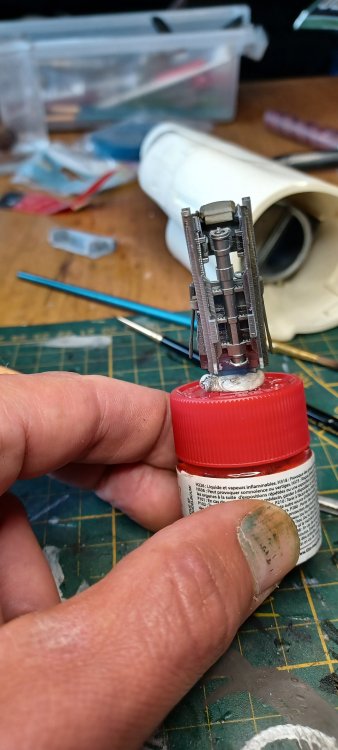
Thanks Kai here is the seat just missin 2 parts that still needs to put in place so far almost 20 parts on this Next up rear wall off the pit Mark


- 206 replies
-
- 11
-
-
-
You are not alone Yes indeed much better with paint on You are welcome Thanks and yes its worth the money Will apriciat iff you can provide the numbers from the ak range Mark
-
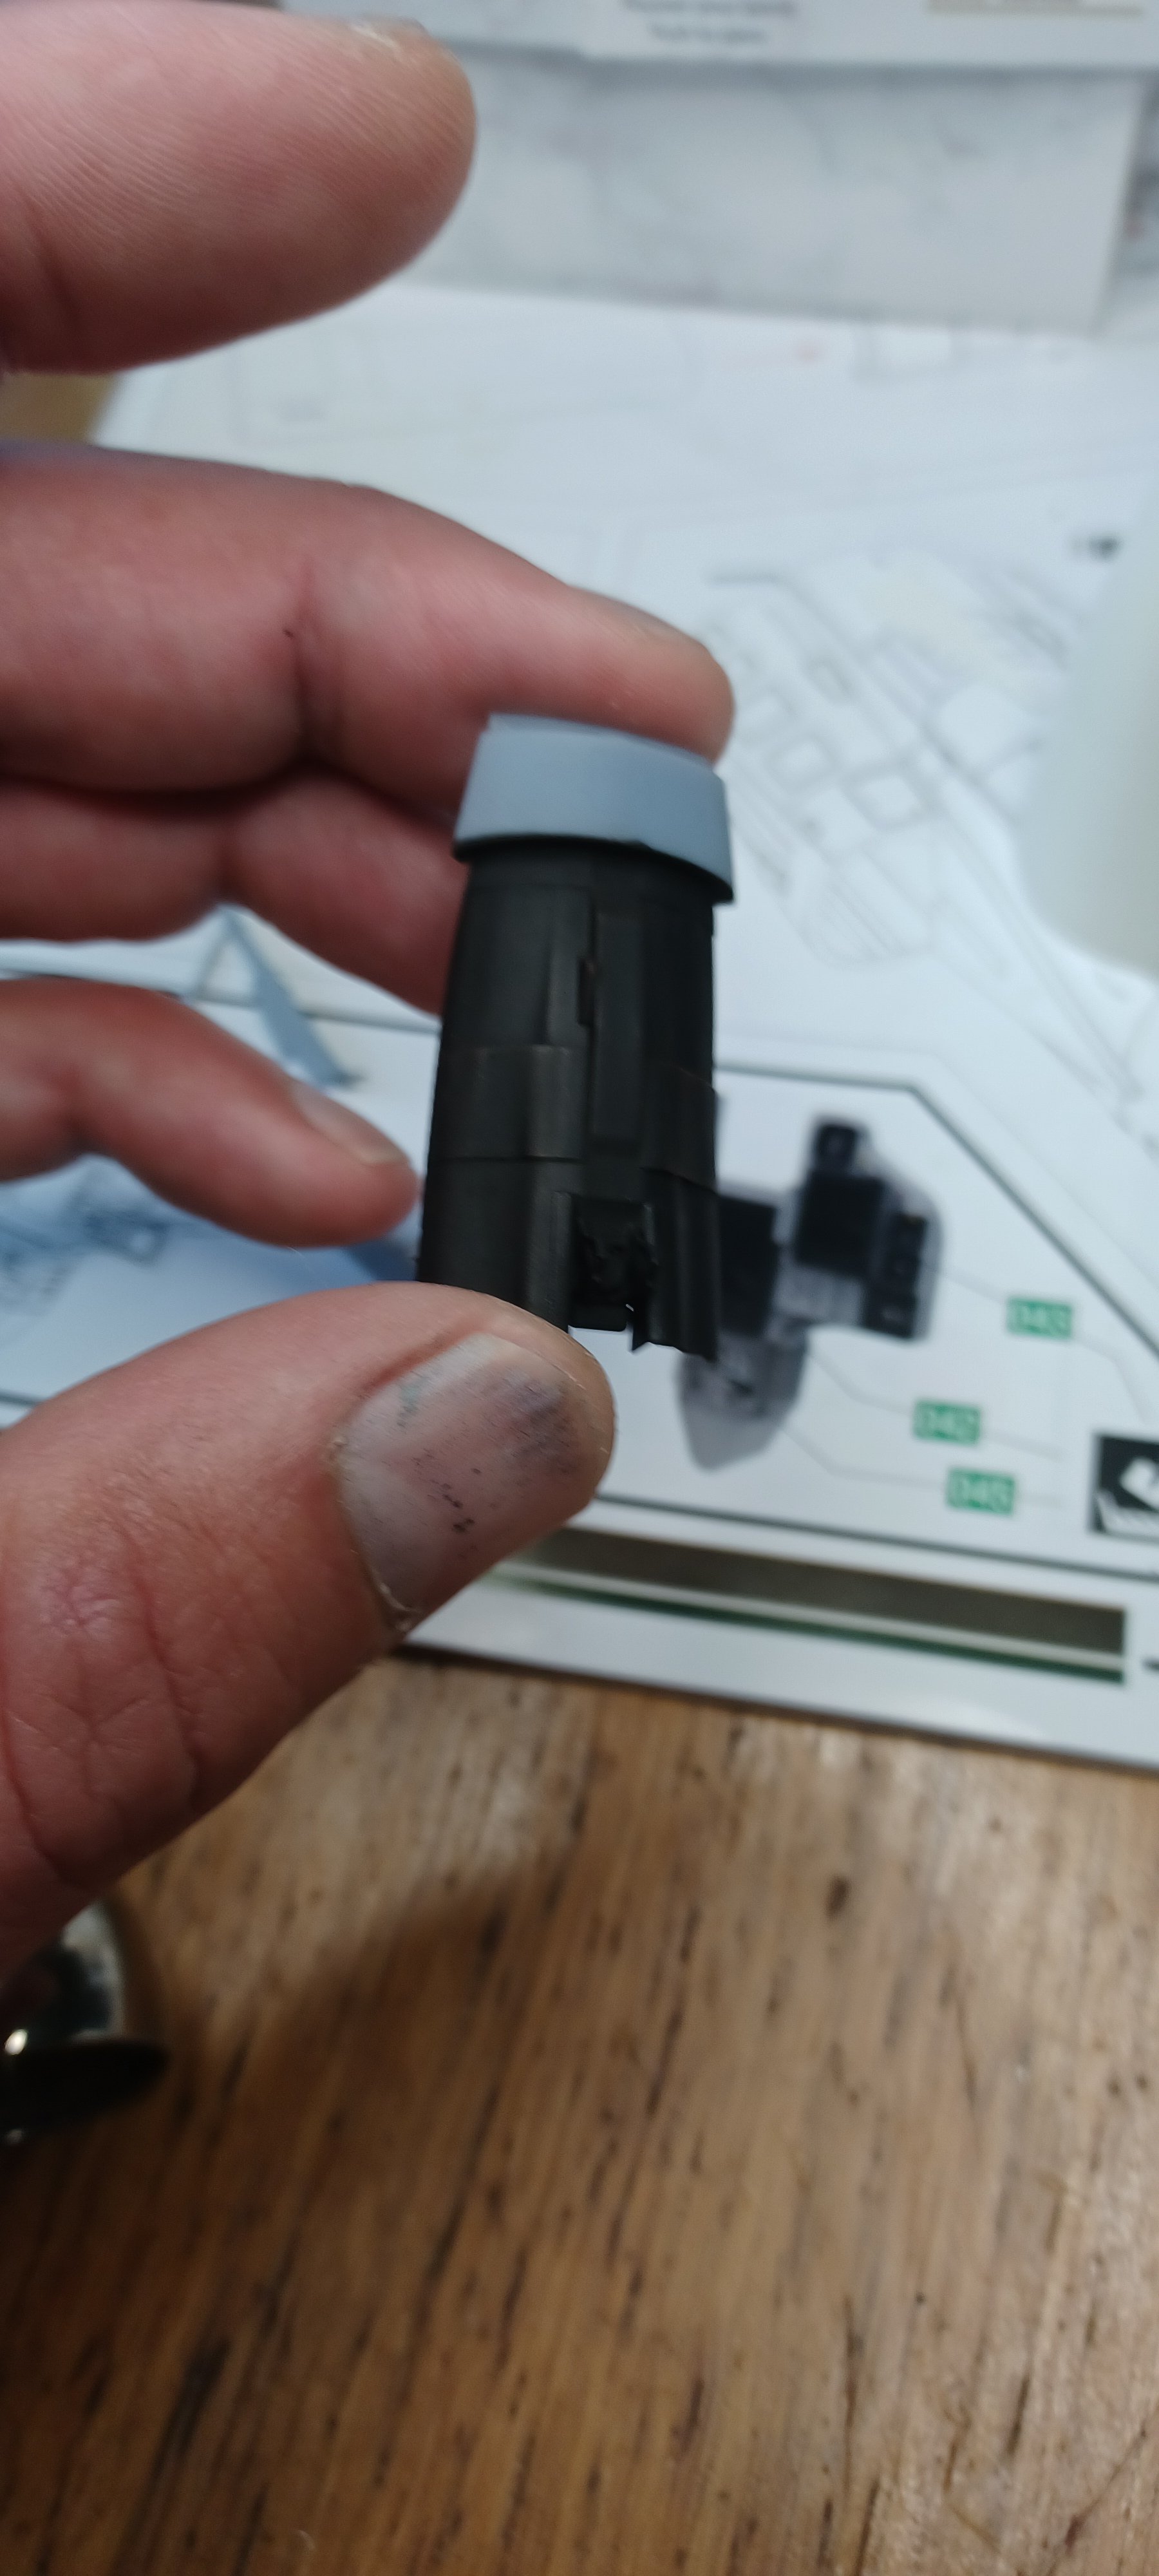
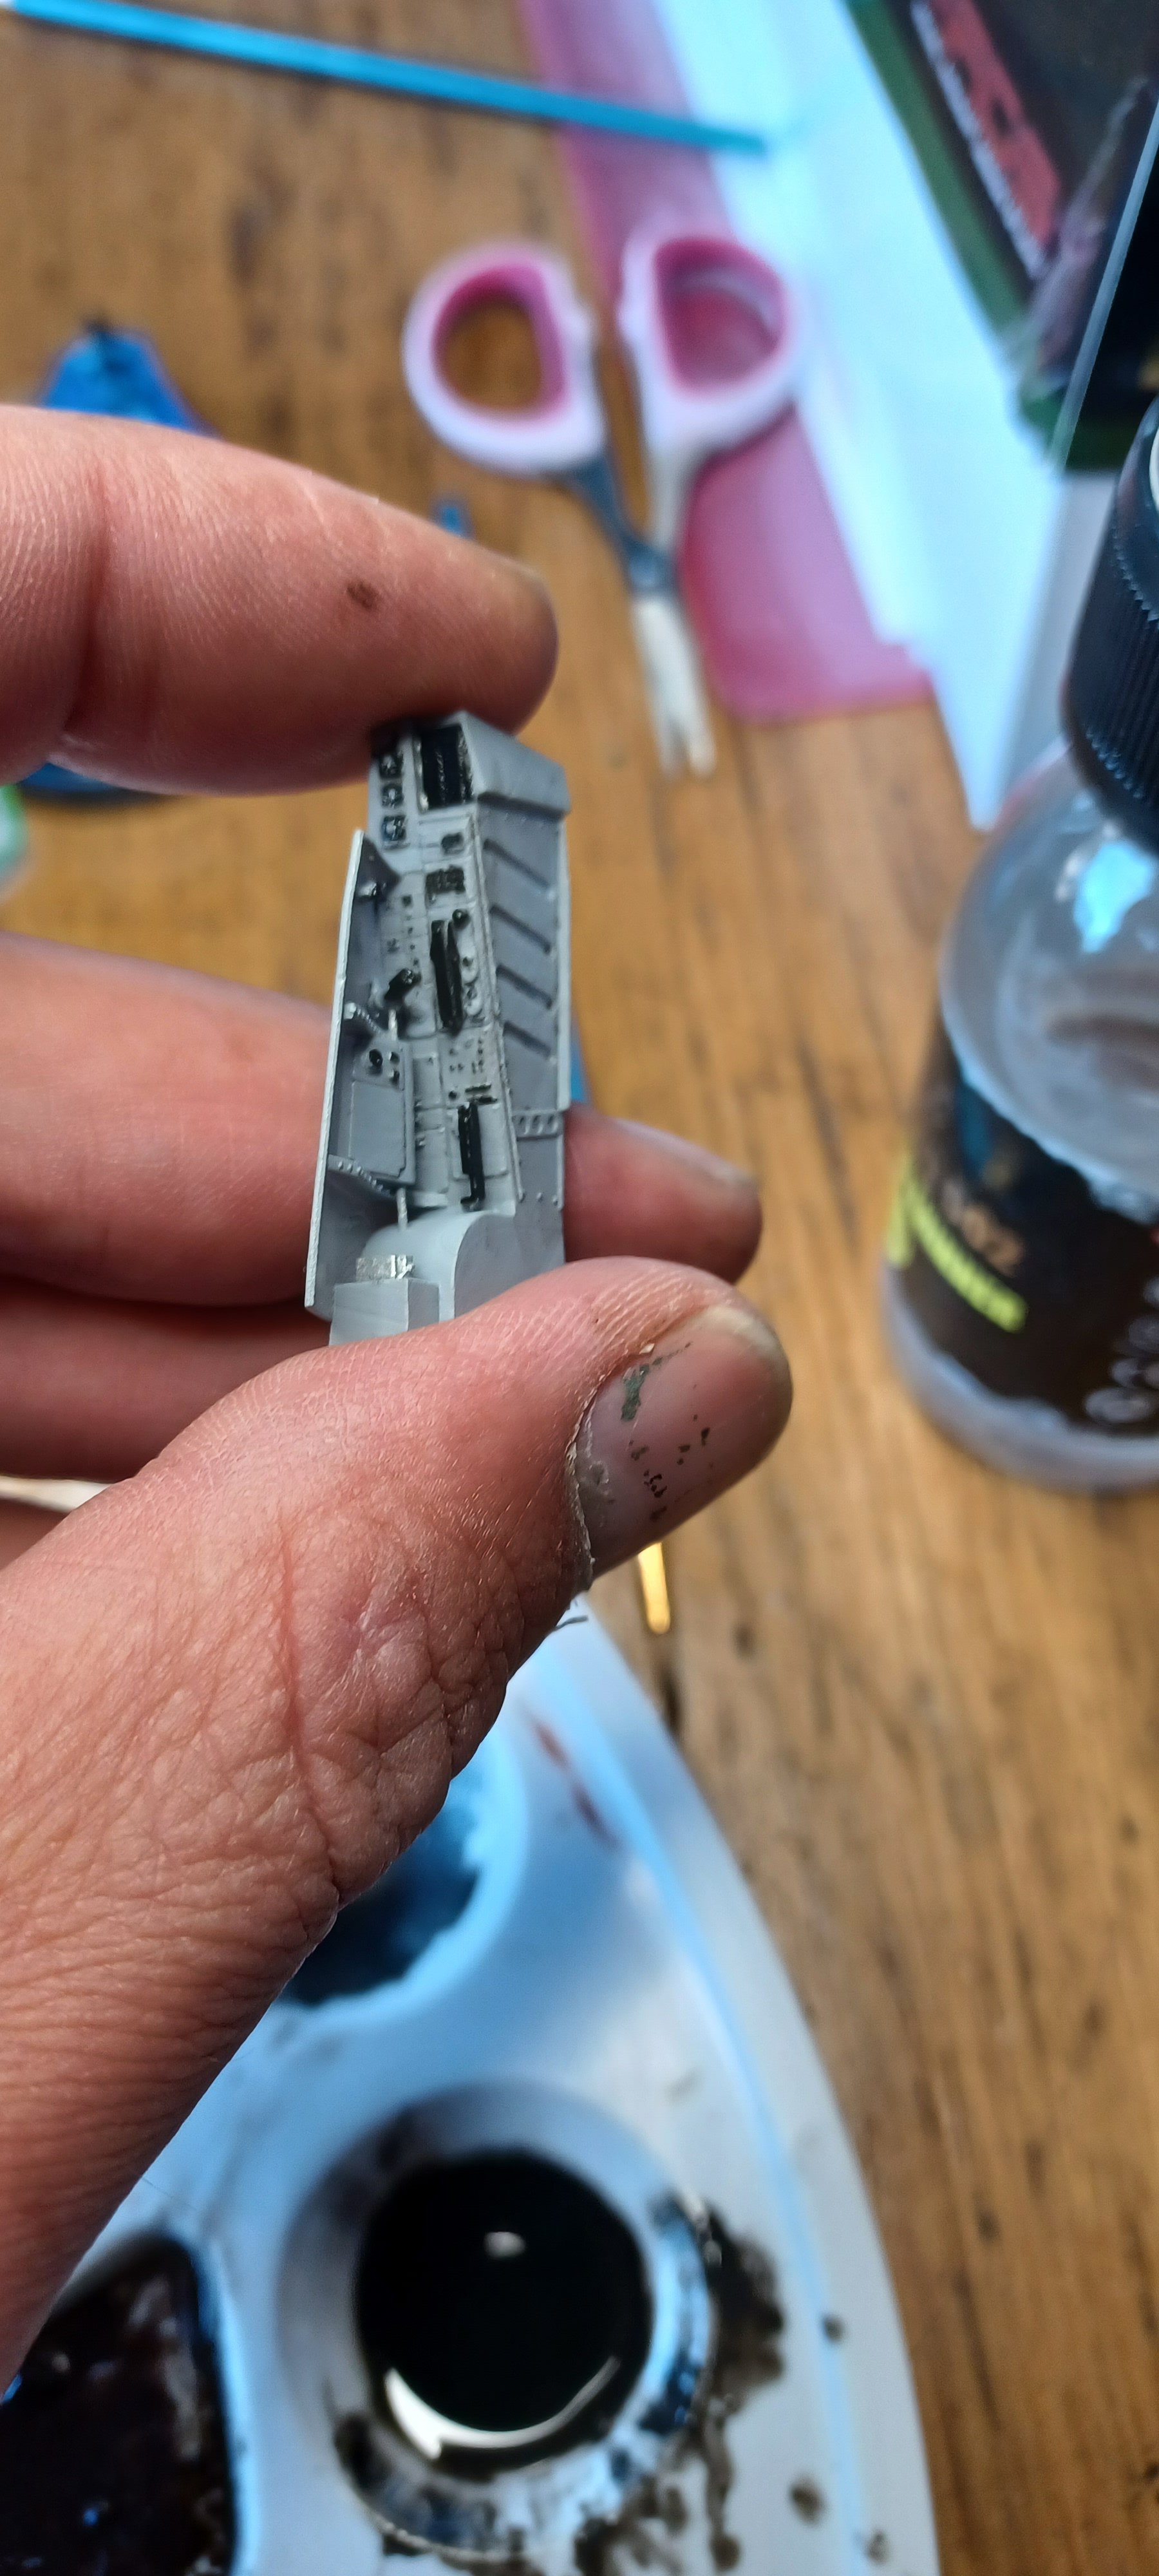
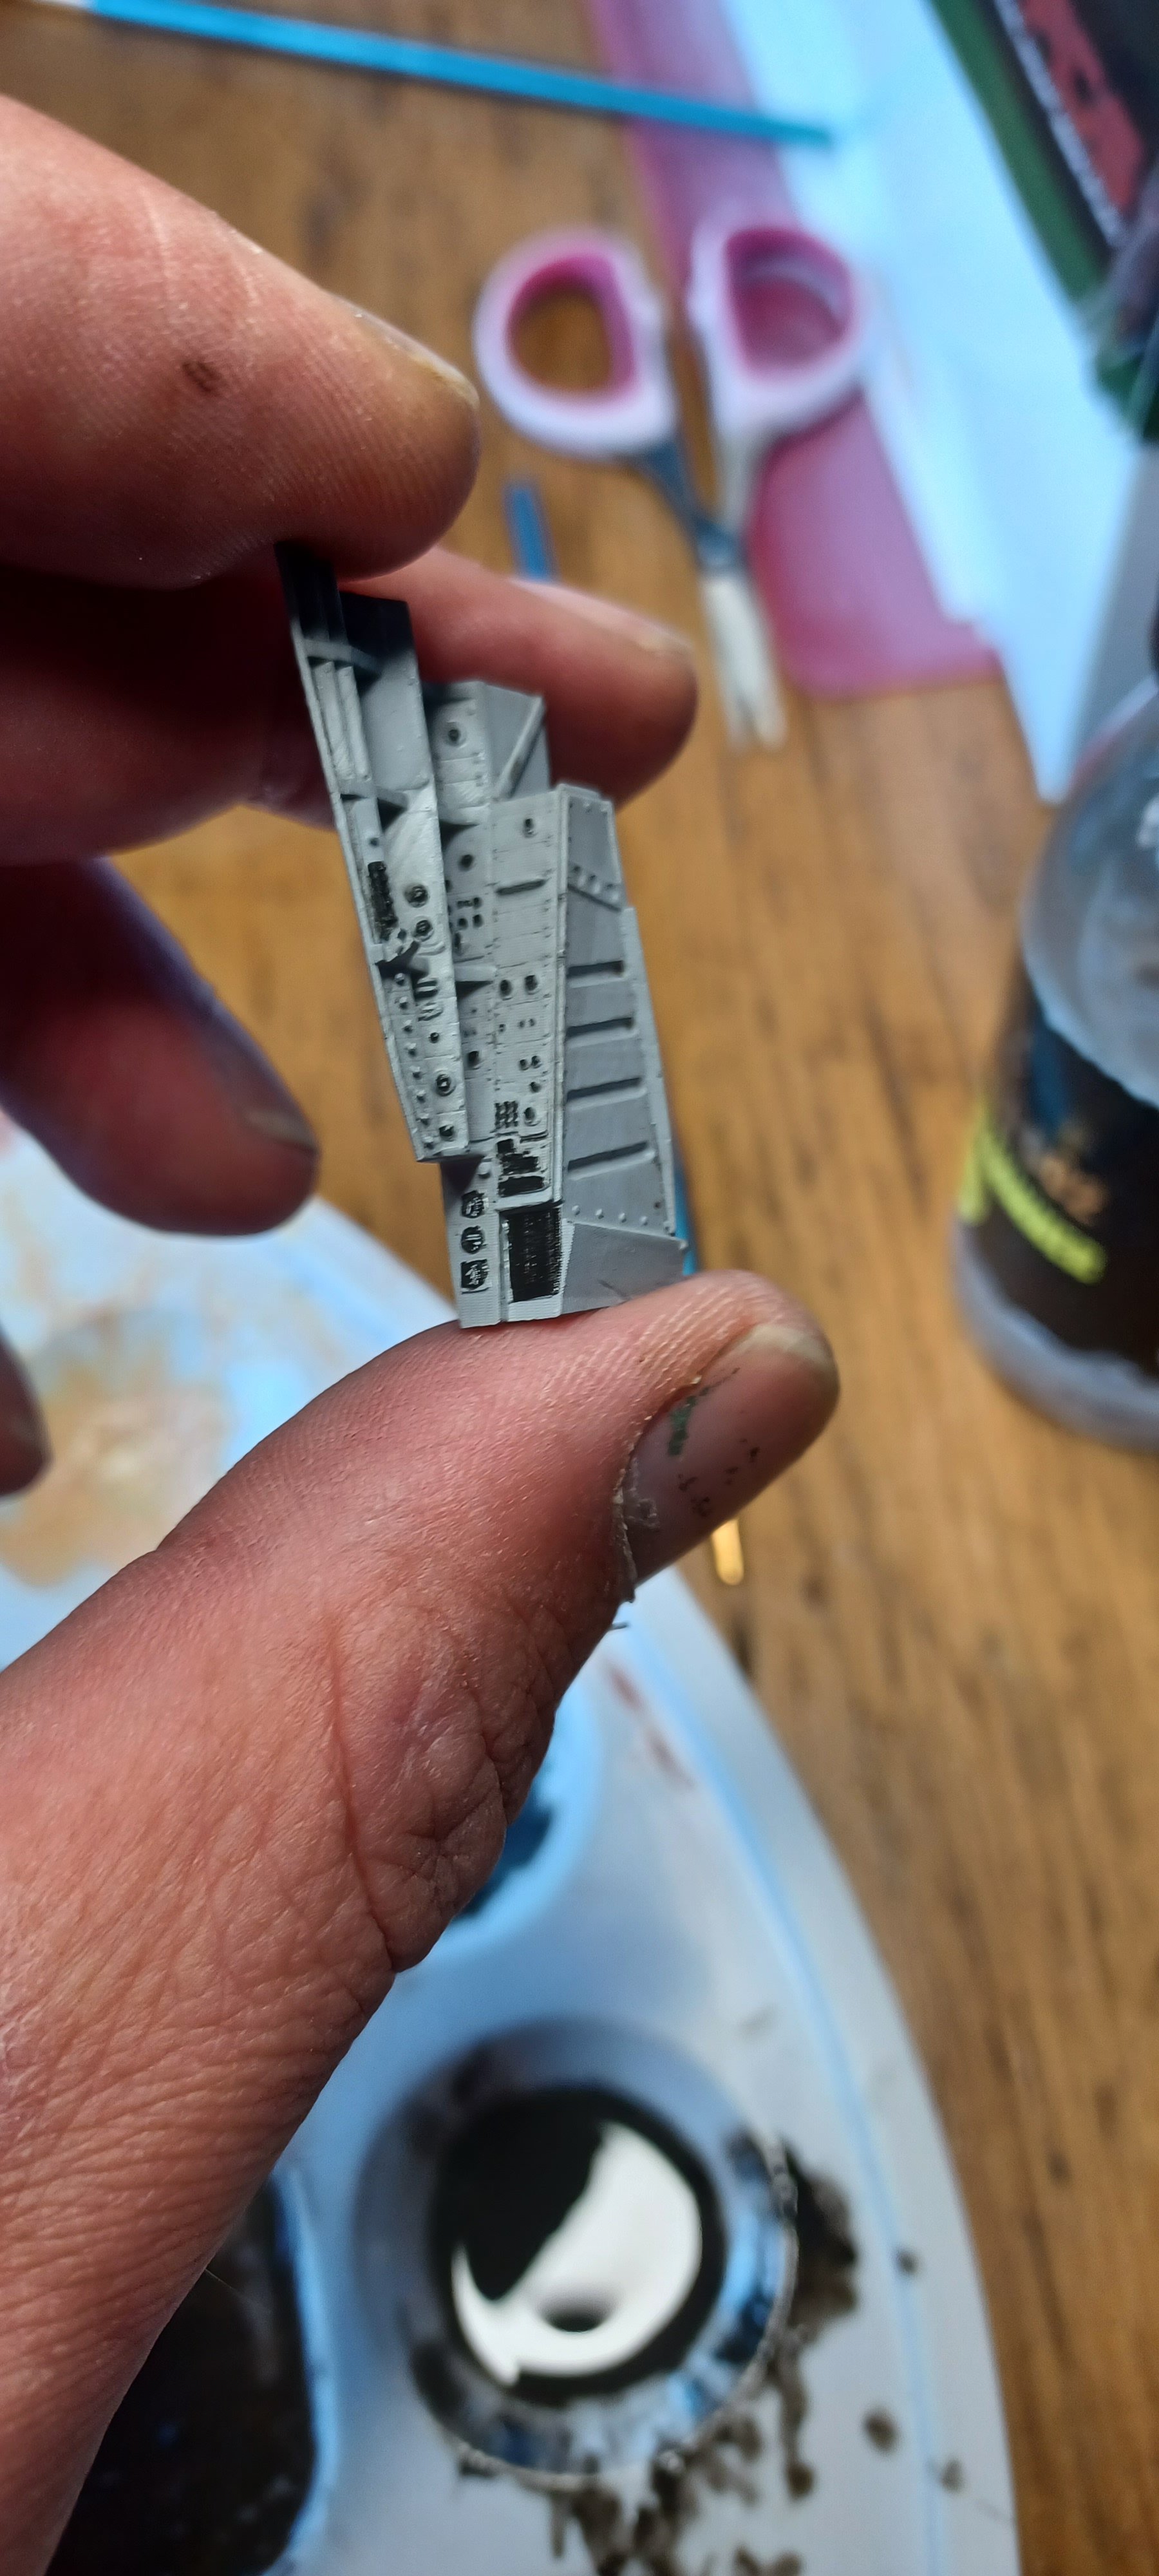
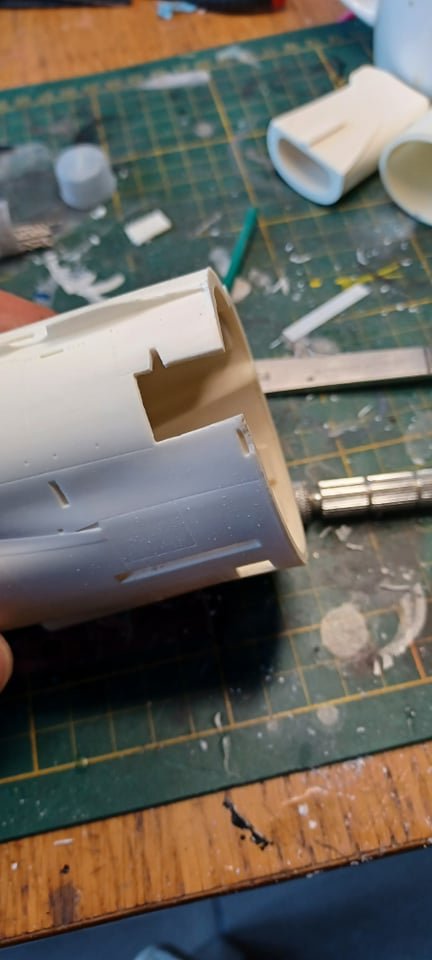
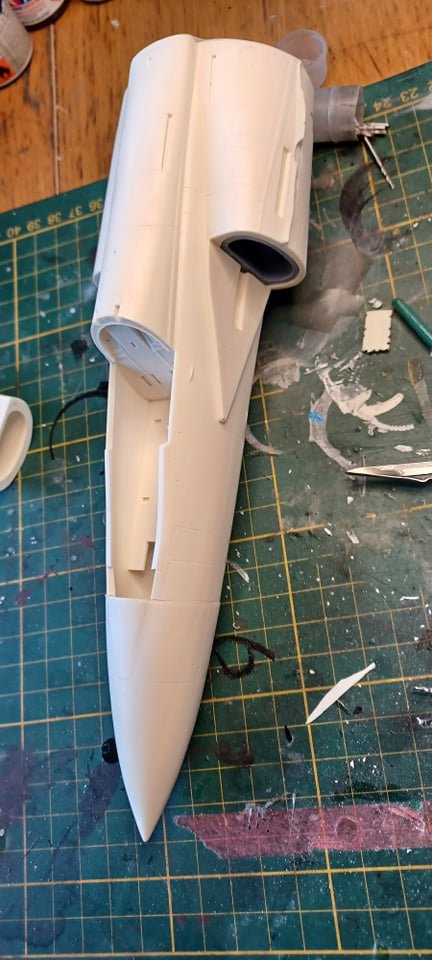
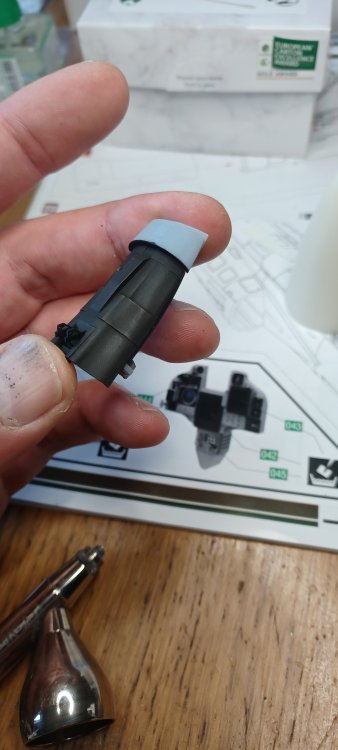
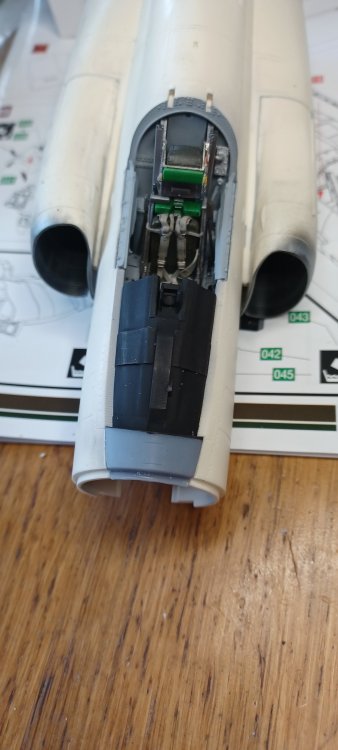
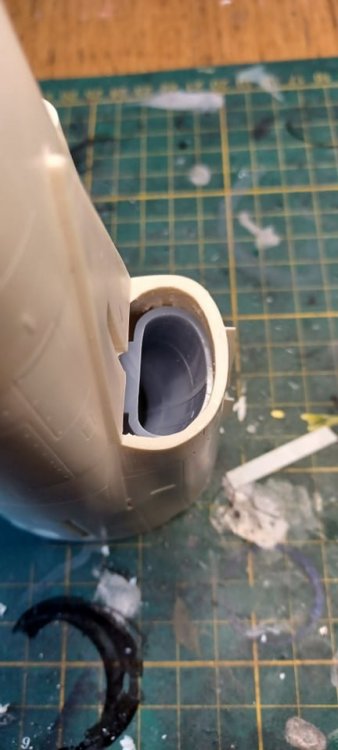
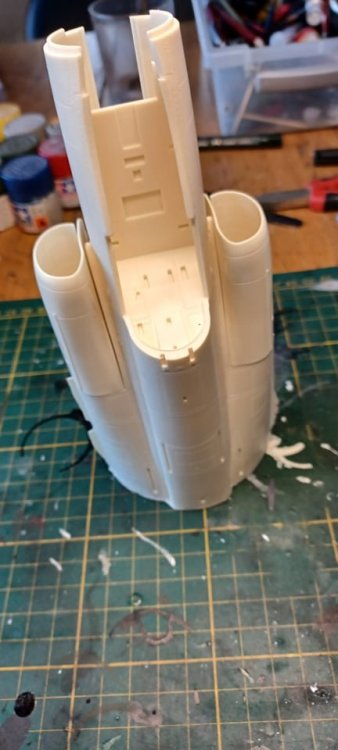
So like i have promised here a update on the intakes Just love the details time to put them in place front part and after filling and sanding Thats it for now now going for the bang seat Thanks for looking Mark
- 206 replies
-
- 11
-
-
get well soon Harv Mark
-
thanks and yes take a seat on this episode off building a viggen. The only thing i have to do is order the paint. Only dondt know what rand to go for mrp,hataka,ak ThanksHarv and nice you are going for the X3 thats one i will pass for. Ihope to have a update up later today Now back to the bench for a bit off sanding Mark
-
CF-18 439 Sqn Tiger Meet
mark31 replied to BlrwestSiR's topic in LSM 1/35 and Larger Work In Progress
taking shape nice going Mark -
SH Tempest Mk.II HIgh Tech Kit
mark31 replied to Peterpools's topic in LSM 1/35 and Larger Work In Progress
sorry to hear but then its better to take some distance from the kit before it gets airborn. Mark -
Thanks Yesit will be spintercamo yes indeedbut notting to bad so far we can handel a bit off putty and sanding its a part off the fun Yes the tail is 3D printed but i think the master for the resin also iff you look at some places Yes it willbe pic havy because i know you all whant to know whats happening. and no secrets this is just the basic off sanding and dryfitting The gleu i use is ca from coll21 and works great. you are welcome and yes this is just a master piece off modelling. Mark
-
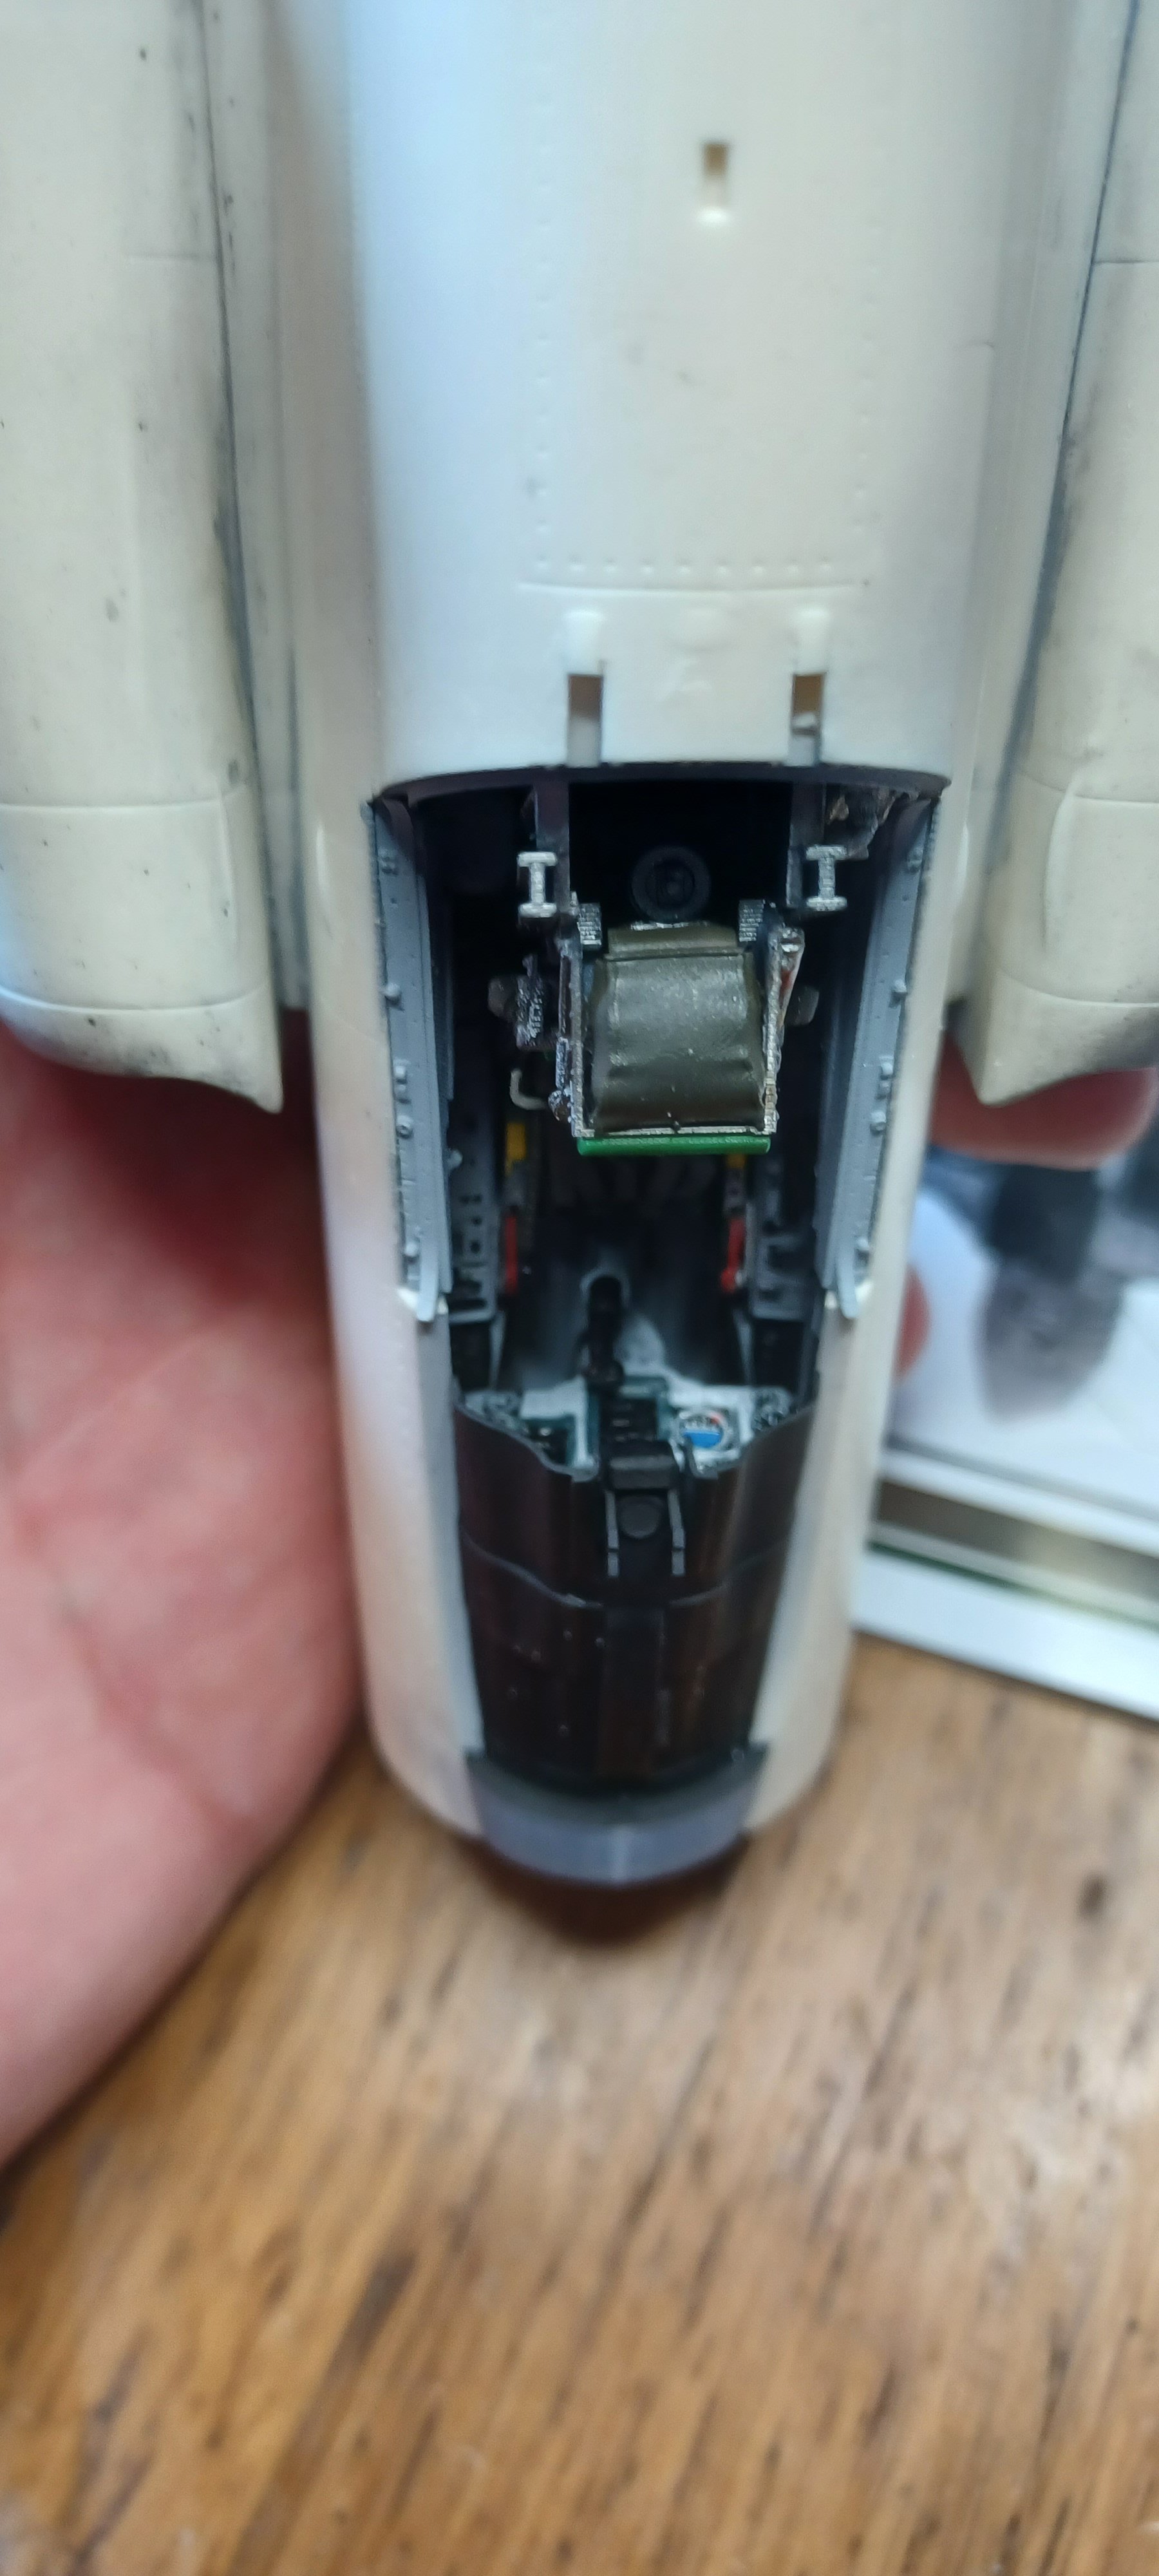
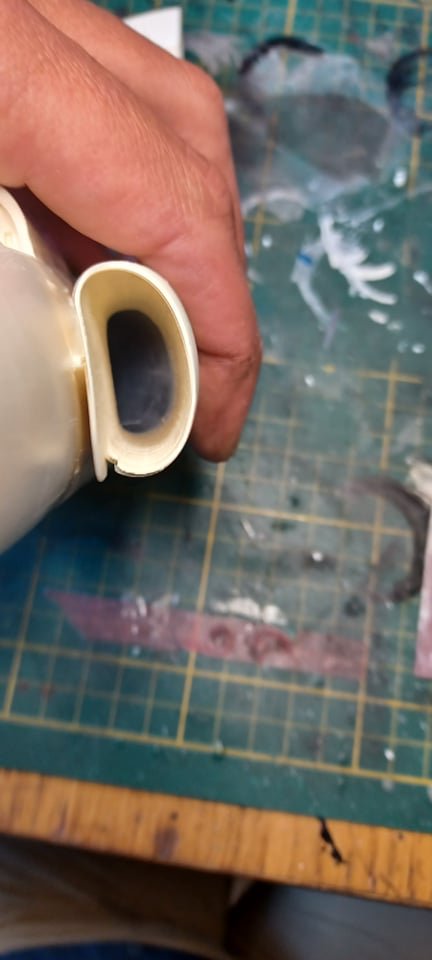
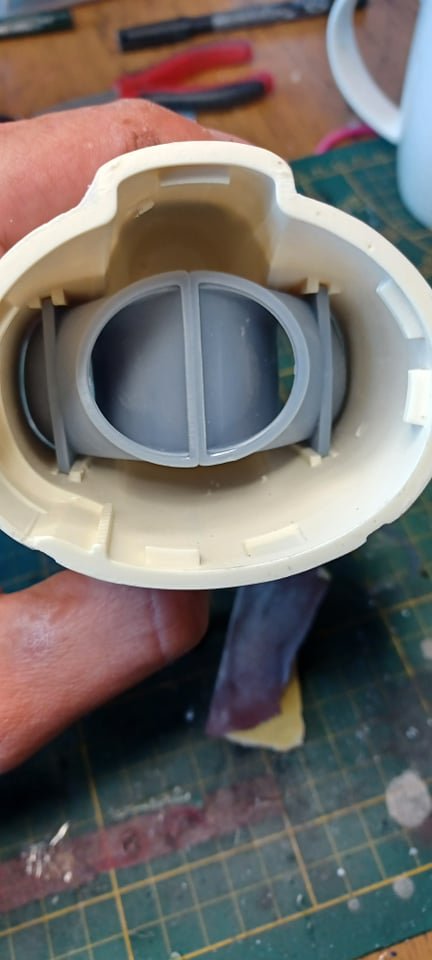
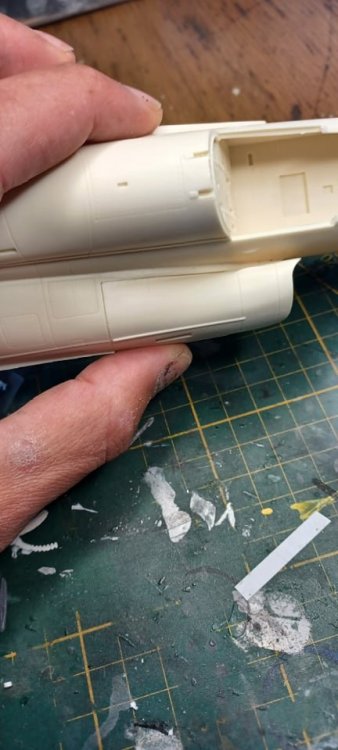
The other side the same open up the rat door Dryfit off the nose Now to the paint job for the intakes Mark


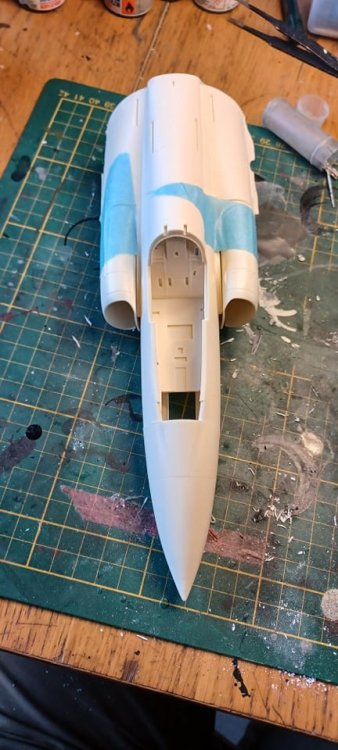
- 206 replies
-
- 14
-
-