Clunkmeister
-
Posts
7,200 -
Joined
-
Last visited
Content Type
Profiles
Forums
Events
Gallery
Everything posted by Clunkmeister
-
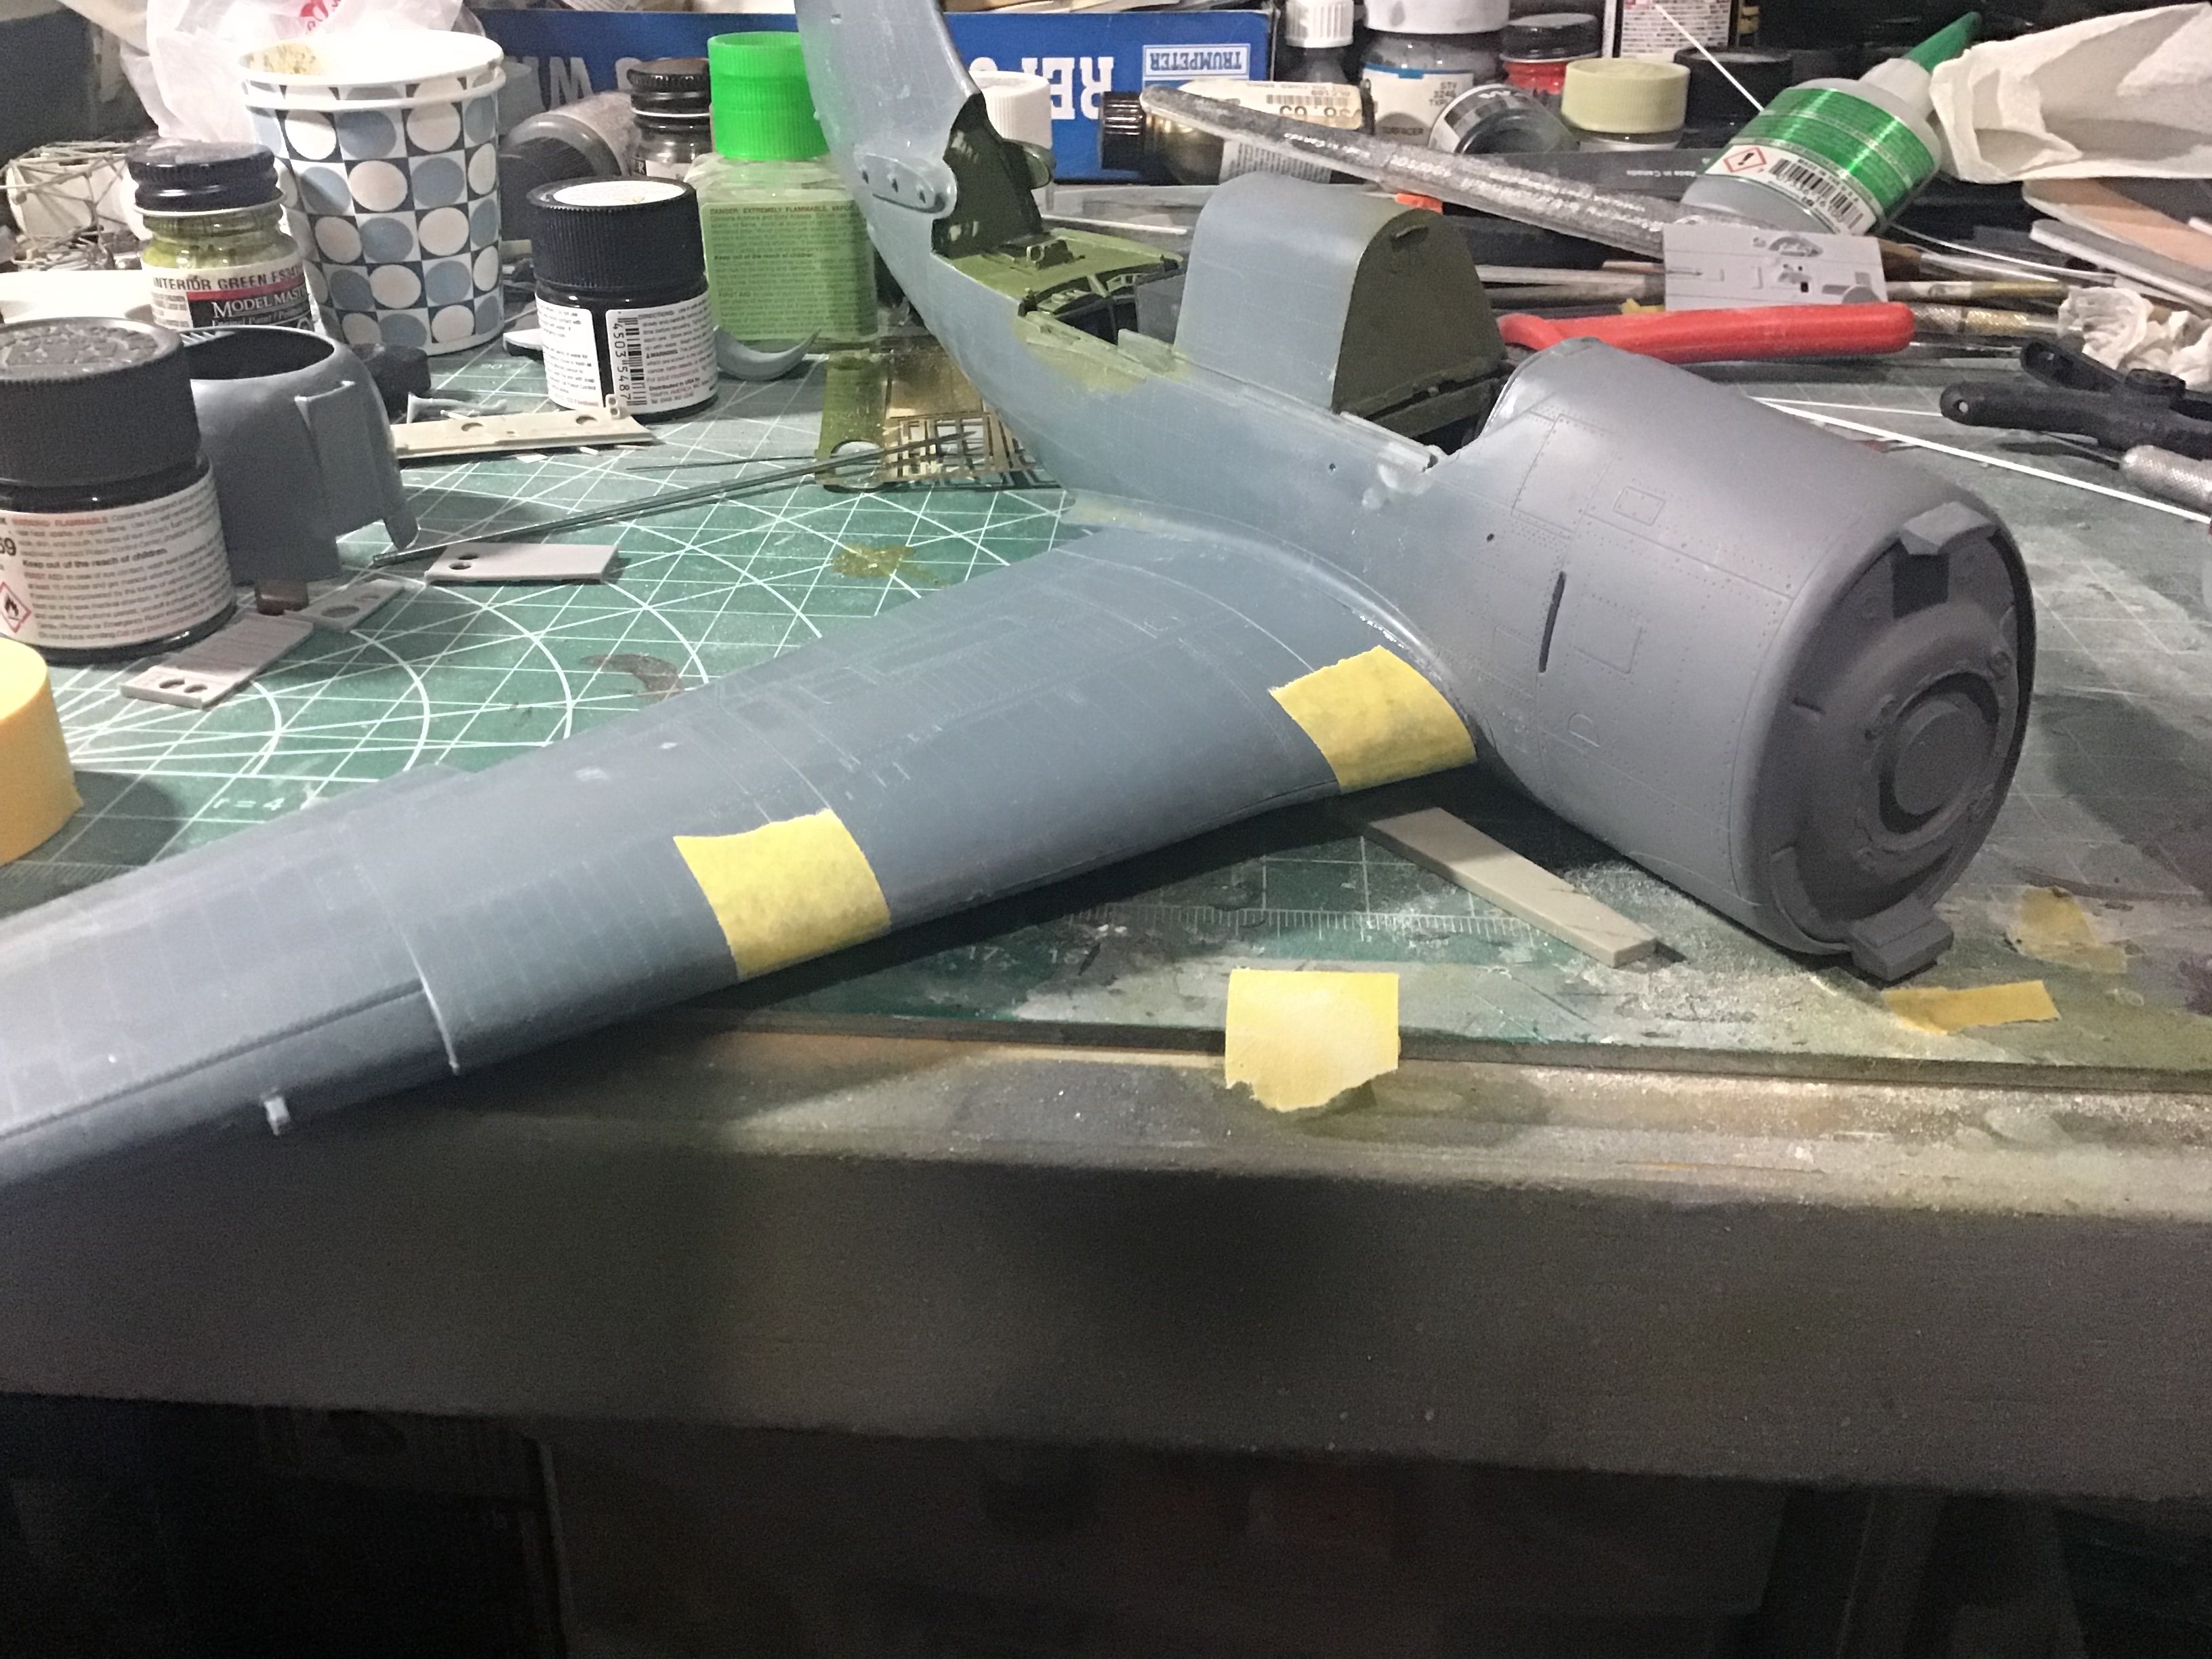
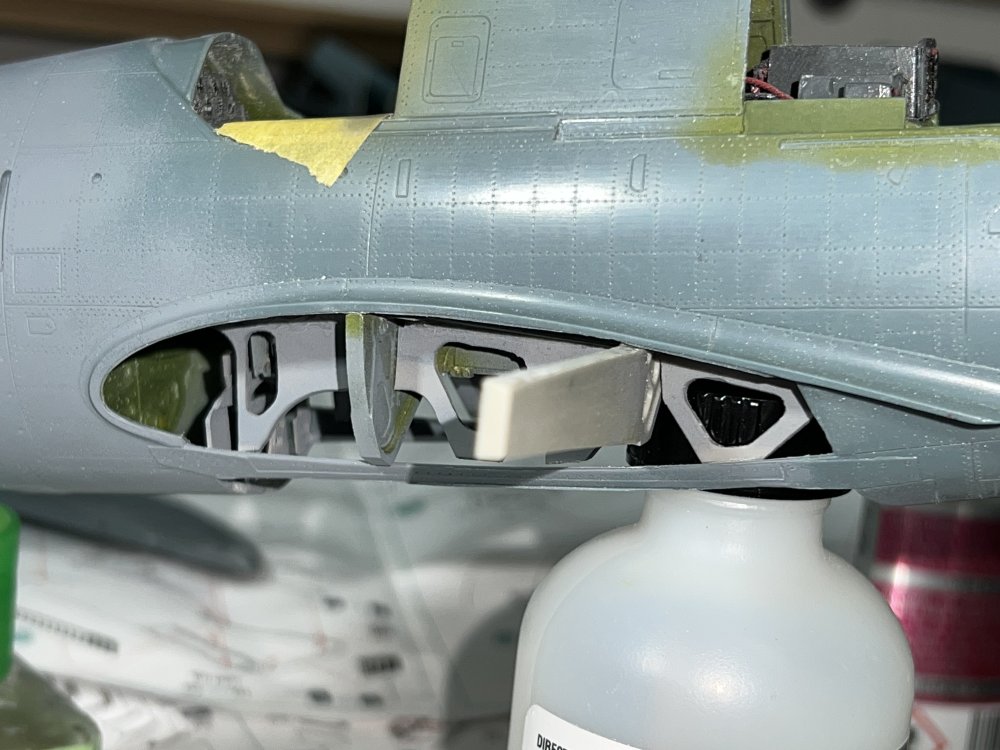
 I’ve heard all kinds of horror stories about the wing to fuselage joint. First, the top half is a total butt joint. No tabs, nothing. The bottom half slots in.. but the airfoil on the wing won’t quite be perfect to the fuselage so you’ll need to fill it, so instead, install the top half first, starting at the front, and use Ca. 1/4” at a time, with Zip Kicker, and make tour way along the wing, forcing it to conform. Once it’s in place and you’re happy with the fit, install strips of styrene on the inside of the joint to strengthen it, and Ca the crap out the support spar. After that, the bottom literally drops on and it will have NO gap at the wing root between the halves. The perfect fit is there, you just gotta work for it.
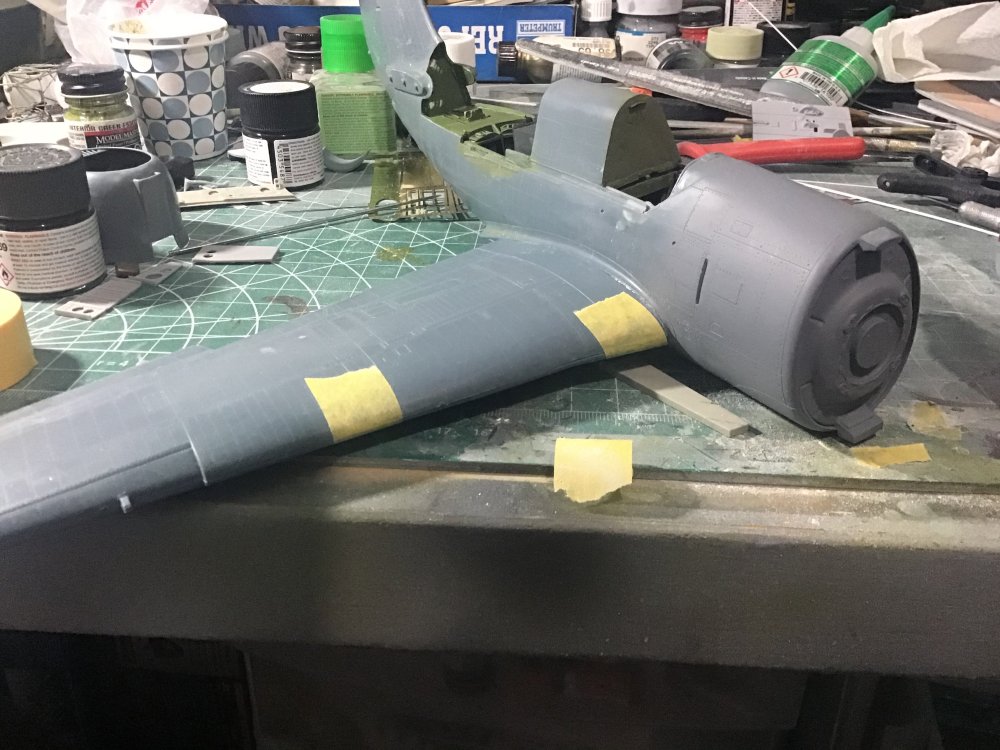
-
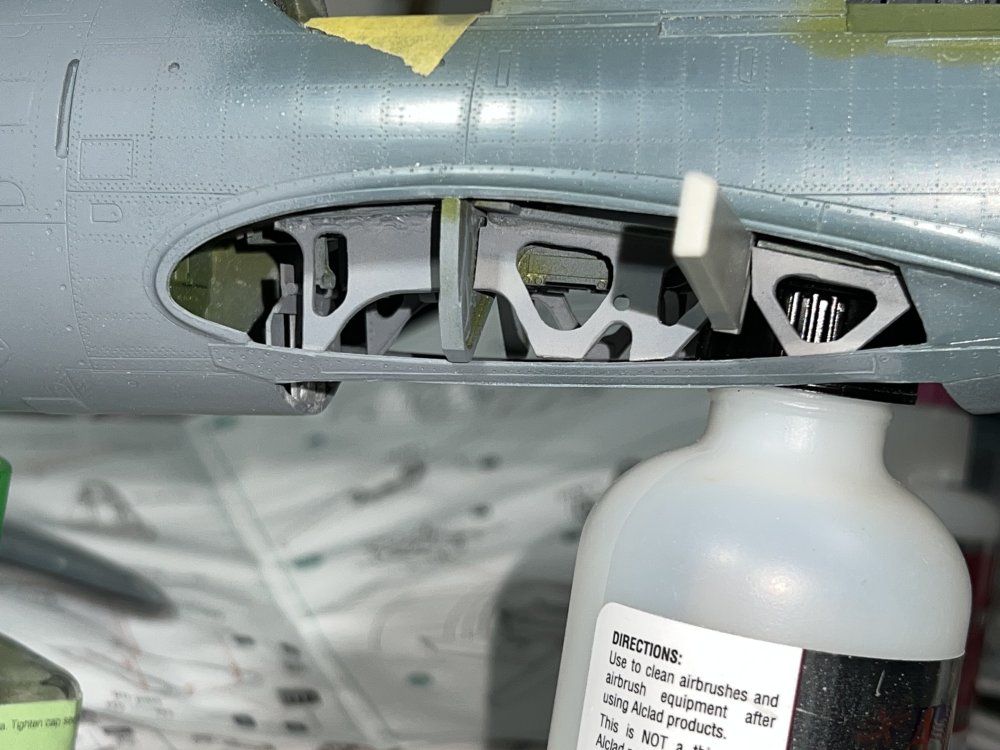
Another thing that would be well served with an AM piece: wheel wells. The kit construction is tedious, and every single piece must be modified to fit.
-
No kidding. If there ever was a group of kits where the Chinese manufacturer snatched away and tossed away the the greatness built in by the designers and researchers, it is Kitty Hawk. Their closest to perfection in the props was the T-6 and T-28, but they still got shoved down by the Chinese. Even Floyd Werner and his team of researchers could only do so much for Kitty Hawk. Their Sikorsky S-60 series and Little Birds are absolutely the best helicopter kits ever produced by anyone, anywhere, but the overseas production idiots still screwed the instructions and decals. Those Helicopters, Floyd Werner, and Glen Coleman should have secured the future of that company. But instead they just prolonged the inevitable. I mean, a 1/48 UH-1D? Really? Sigh….. Now, ICM is gonna take the spot that should have been Kitty Hawks.
-
And then there is the Harvard series built at Noorduyn and then CCF. The late Harvard lVs in particular, are an almost new design in many ways. P-51 tailwheel, completely modernized interiors, cockpit heating, etc, etc,etc
-
Hey Scott, this is looking GREAT! I’ve built numerous KH kits, including a couple T-6s as well, and the biggest thing to watch is part numbering. Often times the left and right sides will be reversed. Certainly not unique to KH (Dragon Bf-110?), but just pay attention. The locator pins on KH are ALWAYS suspect, so unless you know 100% for sure, Ignore them. I found it was easiest to assemble the cockpit framing before painting, but you nailed it! Cowls on these can be a mumbler’s delight. 🤯😬🤬. Go slow. There is ALOT of questionable engineering around their radial engine mounts and the cowls. As far as the T-6 itself goes, they’re like early Mustangs and 57 Chevys: they’re so popular and there are so many out there, and many more being rebuilt almost daily from literal piles of junkyard scrap on the shop floor, that finding an actual correct original is almost impossible, and it pretty much takes a pedigree to prove it’s original. I’d say 90% of flying T-6s out there have been rebuilt at least once in their lives, so pretty much anything goes on these. References are your friend if you are looking for authenticity to a specific prototype.
-
Wanton destruction of Government property anyone? But it could be the joke’s be on you, because right underbeath the roll cage lives a nice, big, LEAKY fuel tank.
-
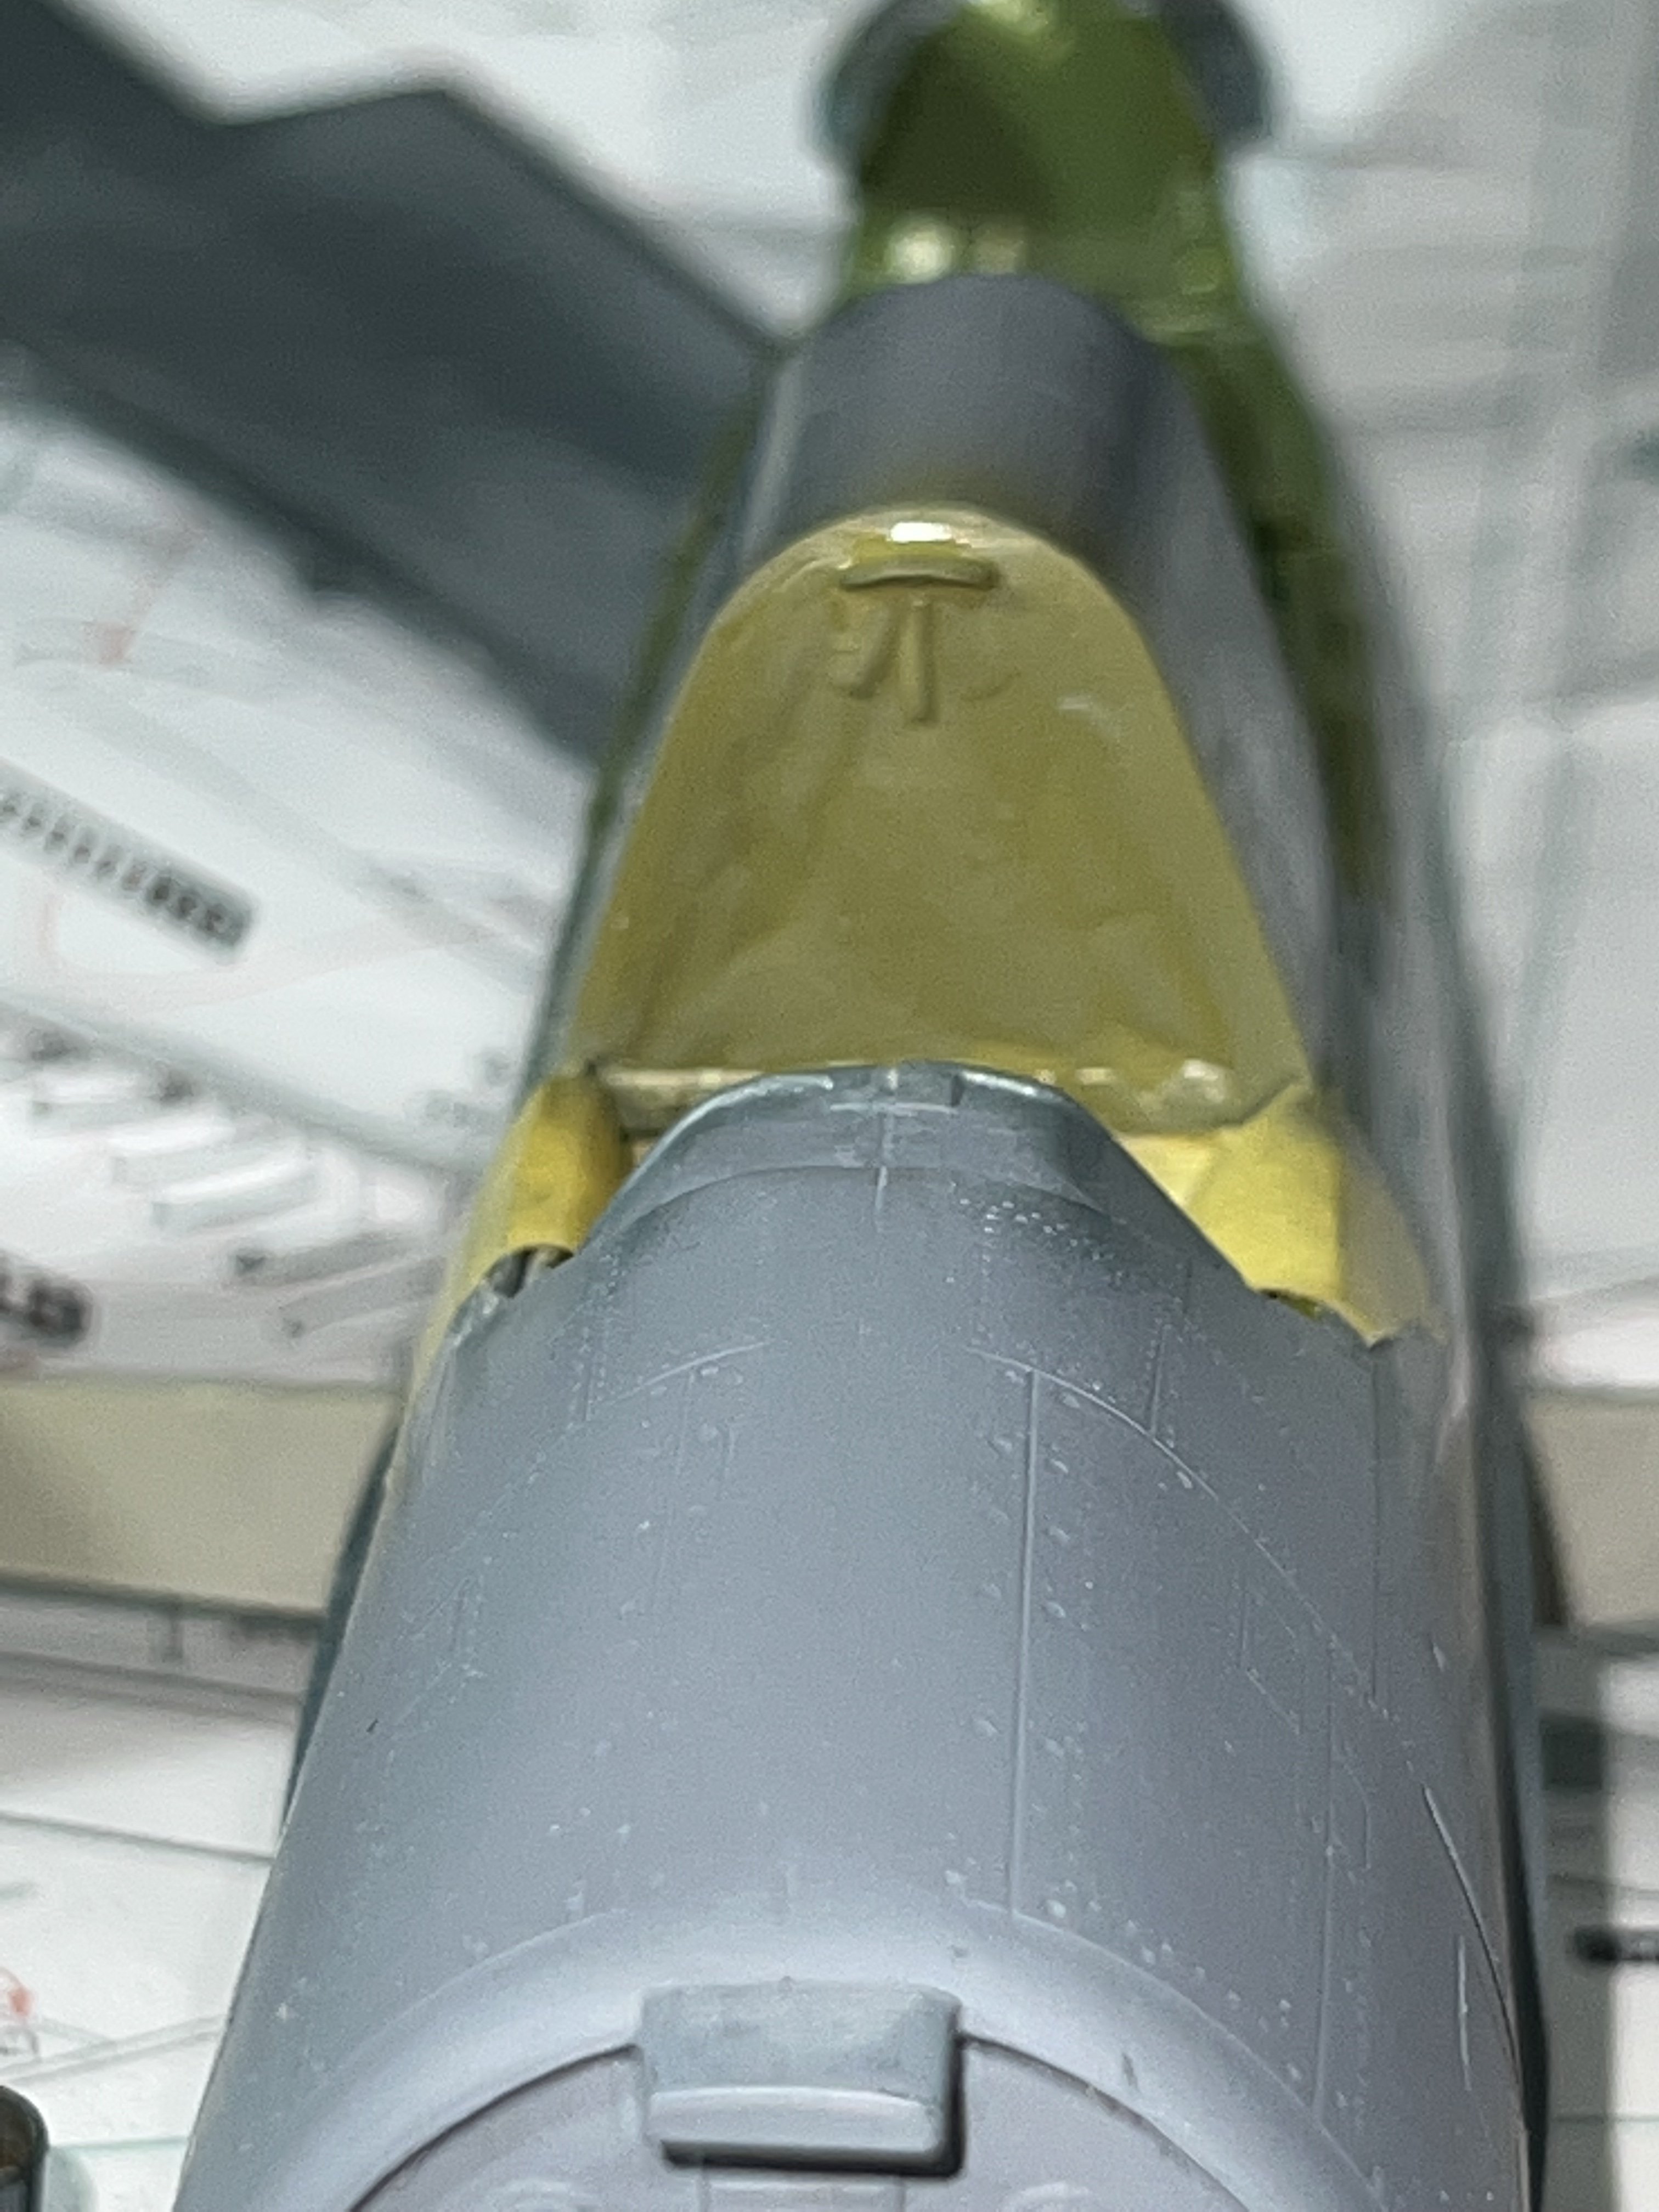
The bulkhead behind the seat is actually a riveted open frame with a triangular rollover cage attached right behind it between the seats. The open frame is covered by a windscreen on heavy canvas to prevent the area between the seats from becoming a wind tunnel. So I looked for a suitable weathered green canvas color and tried this. I think it looks good, and after suitable shading, should look the part, different from the aircraft framing. The little lip poking out up top is actually the forward top shoe of the rollover cage. It needs to be interior bronze green.
-
The detail added by the bomb bay kit is certainly worth the expense. It’ll be visible through the gear wells Nicely done, HPH!
-
“The A-Team” had a per show ammo budget larger than the Canadian Army’s annual ammo budget, and despite continuous FA fire for half the show, still only puffed up dirt around people’s feet and holed bumpers. I’d feel pretty safe with George Peppard or Mr. T shooting at me.
-
Chris, that looks great! I see the yellow and prop as being improbably clean, that’s it. The rest looks great. Everytime I try 1/72, I make a mess of it, my eyes just ain’t there anymore. Stunning build!
-
Spent some time on it today. Working on the landing gear bays part of me feels like we’re over the hump, but we still have the cowl and glass to do yet. I left the rudder alone, but will split the elevators to post them drooped. The rudder is almost never seen deflected, but the elevators? Hey, they droop, much like I do these days
-
Peter, I remember you building that kit and combating a few pinholes. It was a stellar build of an RCN classic, and got me pining for a 1/32 late Banshee in RCN clolors to complement the Sea Fury. And a Firefly, and an RCN conversion for the Trumpeter Avenger….
-
The more you look at that B-24, the worse it gets, but Brian said exactly the same thing about the A-26, and he’s seriously stepped up for that one. I’m doing a standard A-26, plus my Grail A-26K once the stuff comes out for it. The A-26K is one of those I’ve waited for for years.
-
Nice to see this build back up and running, Sir!
-
I never did get the AM resin turrets. One of biggest regrets regarding AM for this thing. I’m trying to convince Brian at Resin2Detail to at least take a look and see what he can do with the wing/fuselage join area so it can at least be viewed from above. I’m also working on him to take a look at the HKM B-17 nose section. That should be an easier job than the B-24, with the only caveat being that a new instrument panel and part of the windshield will need to be scratched.
-
For y’all’s convenience, I pinned this. For now. I’m mulling making this a separate thread, but I think probably not. I did edit a couple things for clarity.
-
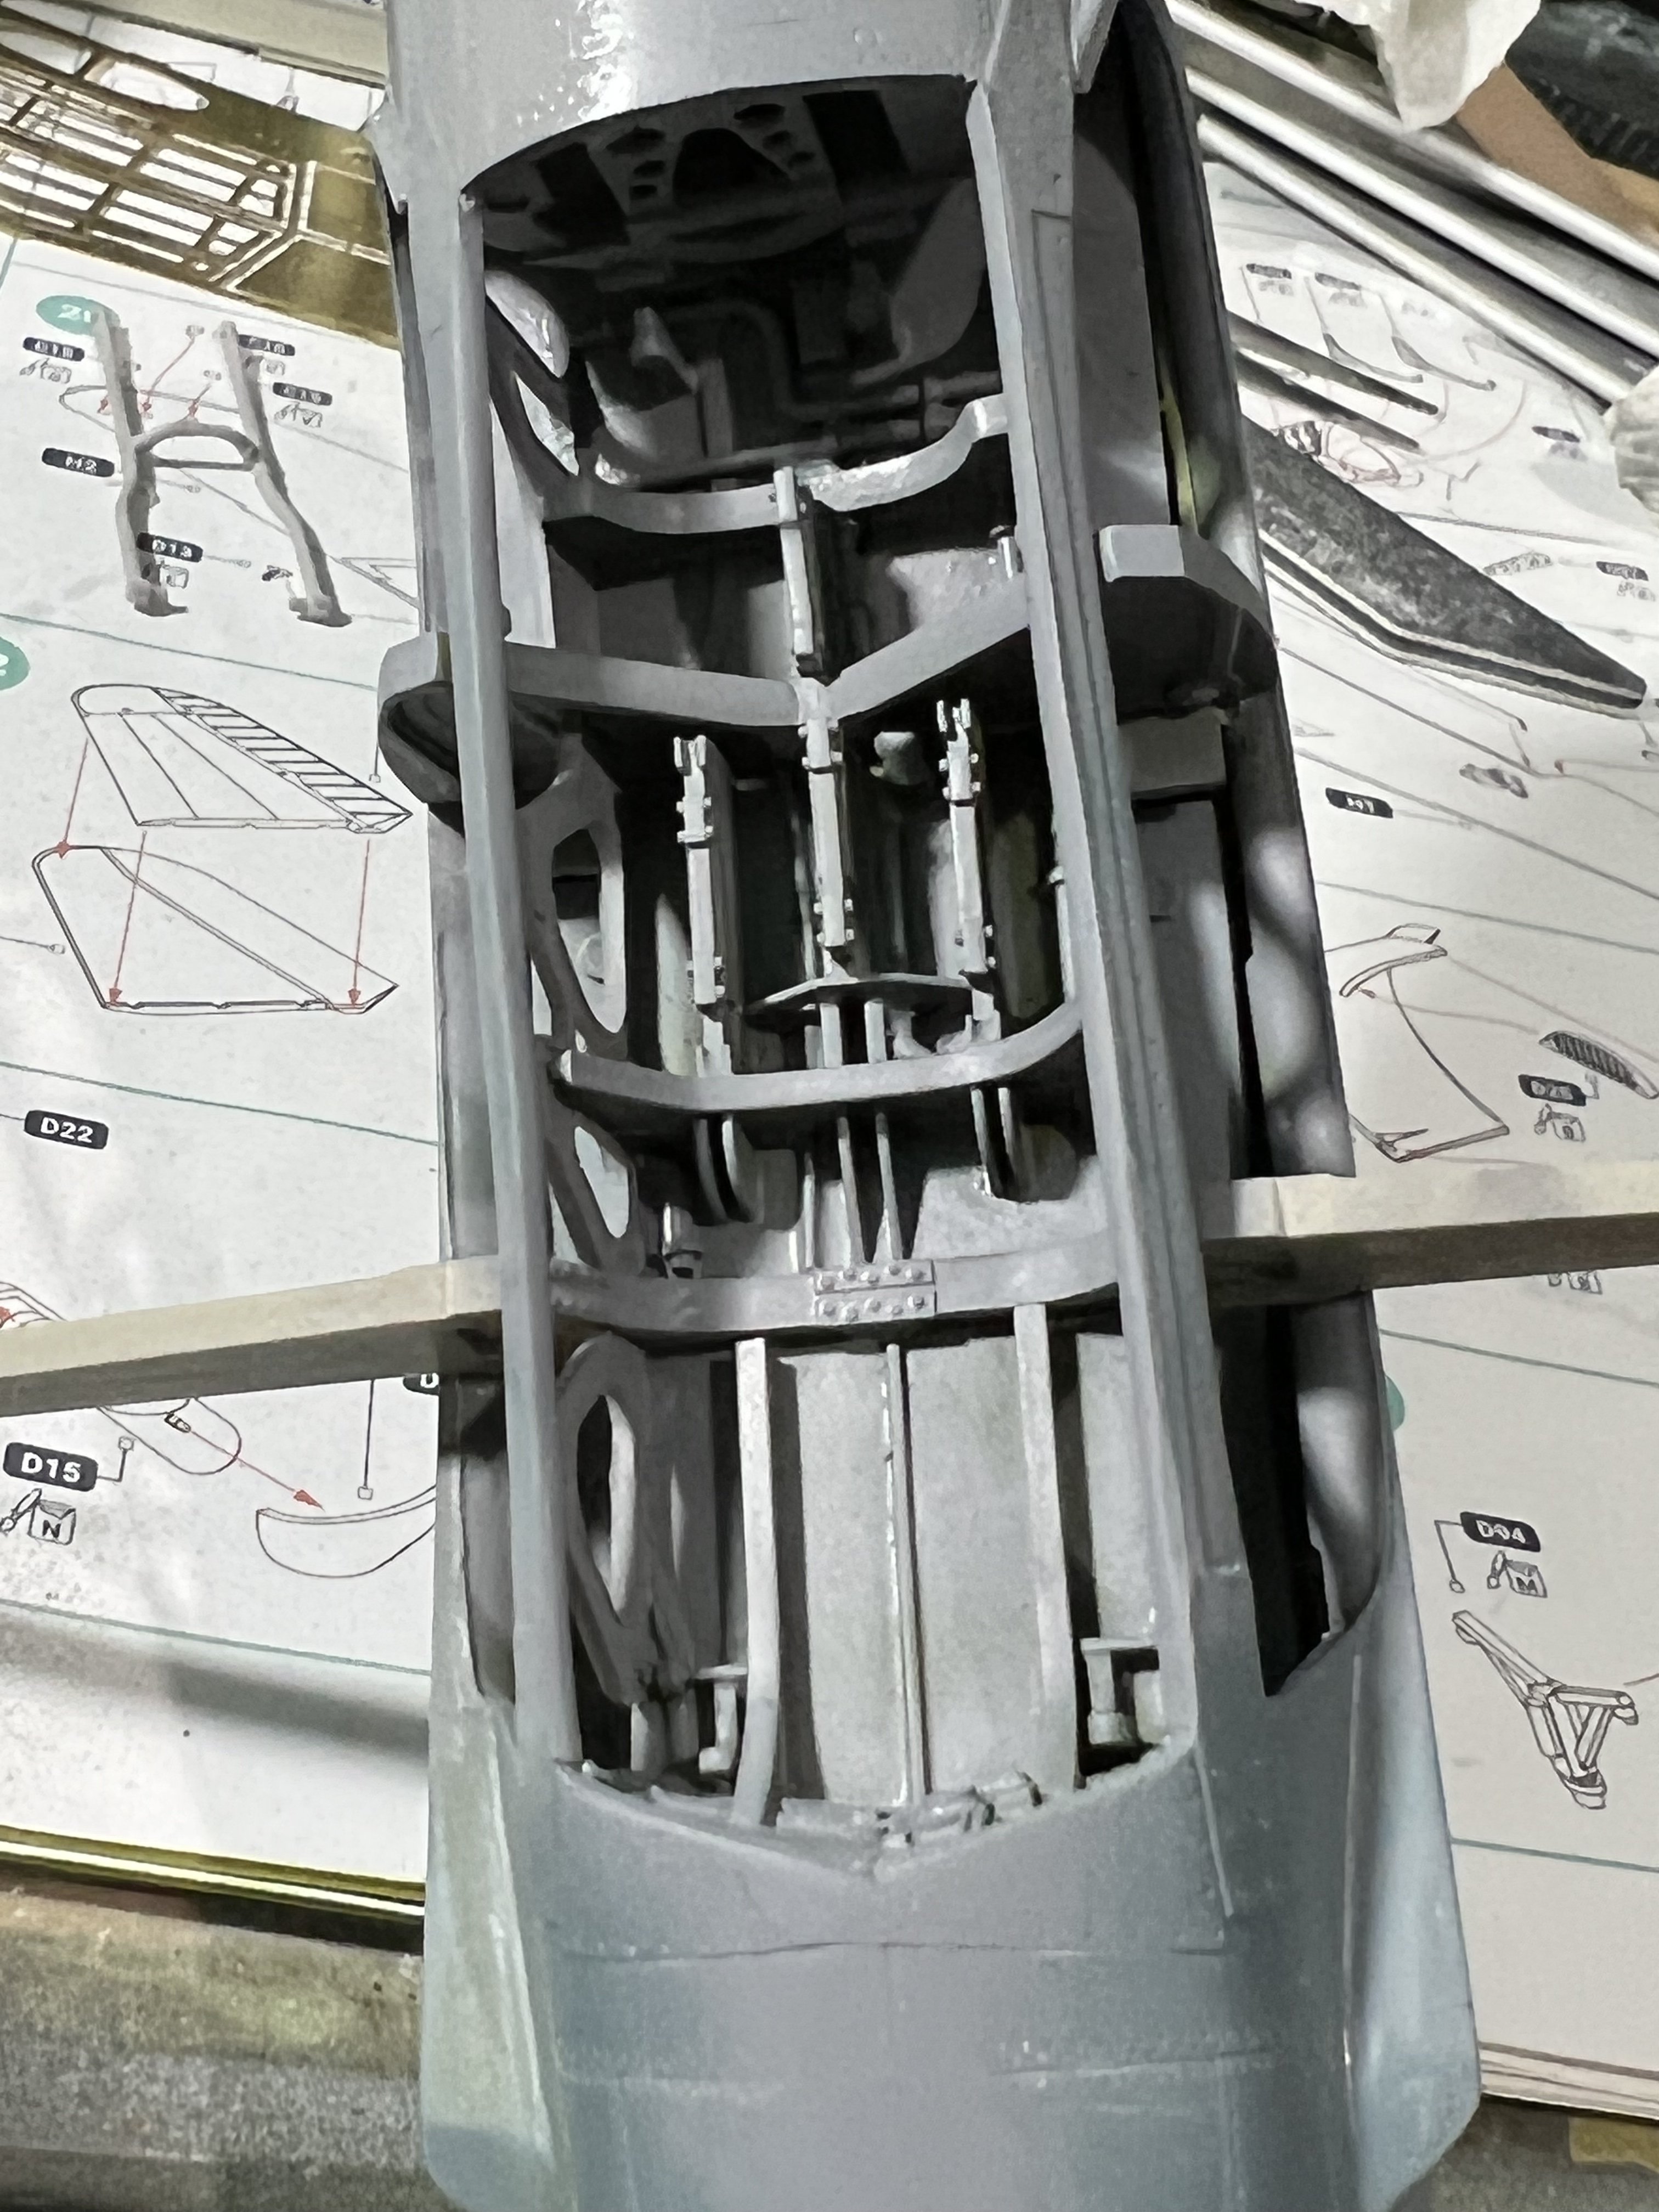
So for anyone co templating this, let me save you my agony. EVERYTHING here keys off that pass-through spar, so do this: 1. Take the rear bulkhead/rear floor piece and test fit it in the rear opening, shaping the resin as needed. 2. Install the rear bulkhead/rear floor piece with the bulkhead flush inside the rear of the bay opening and so the front rests on the stub molded into the spar. Note that the spar MUST rest on the upper wing opening (bottom of cockpit floor) and that the bomb bay ceiling will not be flat here, but angle up from the rear bulkhead to the spar. 3. After those two pieces are in place, simply build forward in order of appearance until you reach the front of the bomb bay. 4. Then install the side ribs. 5. Detail and paint, then install ordnance if desired. 6. Leave the bay doors and actuators till you’re done the model. Doing it that way should take you a maximum of 60 minutes.
-
Yes I do. Mike printed me a basic form by blowing up the 1/72 3D stuff out there. I’m still plucking away at my Super Universal, and once that’s done, I’ll be visiting the big Hun…
-
My Holy Grail kit is on my bench right now: the SB2C Helldiver. For years we’ve had just about every WW2 USN aircraft offered in 1/32 in some form or another, but no Helldiver. And now, thanks to HPH, I’m building my dream. Another Grail kit turned out to be a colossal bust: the B-24 Liberator. Hobby Boss completely borked that one and there it sits, waiting.. I built another Grail kit two years ago: the 1/32 PZL P.11c. Don’t ask me why, but I’ve always loved that little Polish fighter, and first Silver Wings, then IBG gave us two amazing kits. Now give me a decent large scale C-46 and a CF-100 and I’ll die happy and fulfilled.
-
Sherman Smoot, Czech Mate Lost in Test Flight Crash
Clunkmeister replied to Martinnfb's topic in General Discussion
This really, really sux! Sherman Smoot was one of the best air race pilots in the world and he was pretty much the only pilot for Czech Mate. Rest In Peace, Mr. Smoot! Now you fly without man made wings. Sherman Smoot and Czech Mate were hands on favorites to win at Reno two weeks from now. Just getting the Yak competitive was a many year project which was finally about to pay off. Easily the world’s fastest propeller driven Yak. -
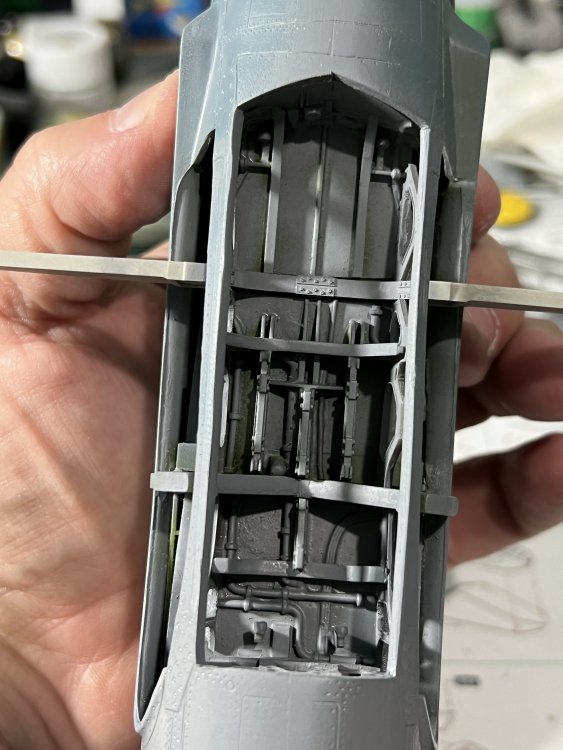
What I can say with 100% certainty is that I will absolutely FLY through my next build of this kit. Once you understand the relationship of how these parts fit to each other, it’s child’s play. Imagine trying to build a Tamiya Corsair or Mosquito with no locator tabs, no positive locator slots for the parts, and with an instruction book that might have been drawn by a 5 year old coming off a 10 day drunk. You’d be in the same place…
-
The entire bomb bay needs to be built in situ, so after figuring out what is up, I did just that, and followed it all up with a quick coat of One Shot Primer. Once I knew how everything was situated and how it all aligned with each other, the entire thing almost fell together. It was literally a half hour operation. A couple of the small side pieces were too short, but I think that was more my fault more than anything else. I’ll lengthen them 1/8” with a bit of styrene and be done. HPH Resin is and has always been amazing stuff, and the scale fidelity is STUNNING!

-
Thanks Martin! The Dean of the Obscure comes through again! You, Sir, are a World Treasure. I don’t know HOW you do it, but you do. Maybe some of your Eastern European contacts and search Engines have different parameters, no clue, but either way, it’s PERFECT.
-
I’ve been trying to piece together how on Earth the bomb bay is supposed to fit into the model. It’s a true Chinese Puzzle with an instruction sheet with what appear at first glance, to be straightforward line drawings. But once reality is exchanged for fantasy, then an extra helping of Fairy Dust mixed with Unicorn breath would be beneficial. Reality bears nothing more than a passing resemblance to the instructions. Like comparing an RD180 rocket motor to a bottle rocket. Eventually, I found these two pics on Britmodeler, and these two pics alone have probably saved this build from doom. Notice the downslope (or up, depending on perspective) of the rear bomb bay ceiling? That isn't mentioned or shown anywhere, and trying to get everything to line up was becoming an exercise in idiocy. So after a suitable cooling down period of a couple hours, I’ll jump back on it.
-
Well, in other news, I’m looking into a better “bronze green” to highlight what is visible. Old pics are always a bit suspect, but the interior on my build certainly needs a little more something in it. We’ll figure it out. And along the same path, the add-on open bomb bay kit supplies some gorgeous resin castings, but once again, their fit is more of a good humor suggestion than an actual fit. So I feel that tacking each piece in place and filling in myriad gaps is the new battle plan. The biggest issue is the lack of period photos. I don’t trust restoration pictures, and originals are kinda scarce.