JohnB
-
Posts
7,296 -
Joined
-
Last visited
Content Type
Profiles
Forums
Events
Gallery
Everything posted by JohnB
-

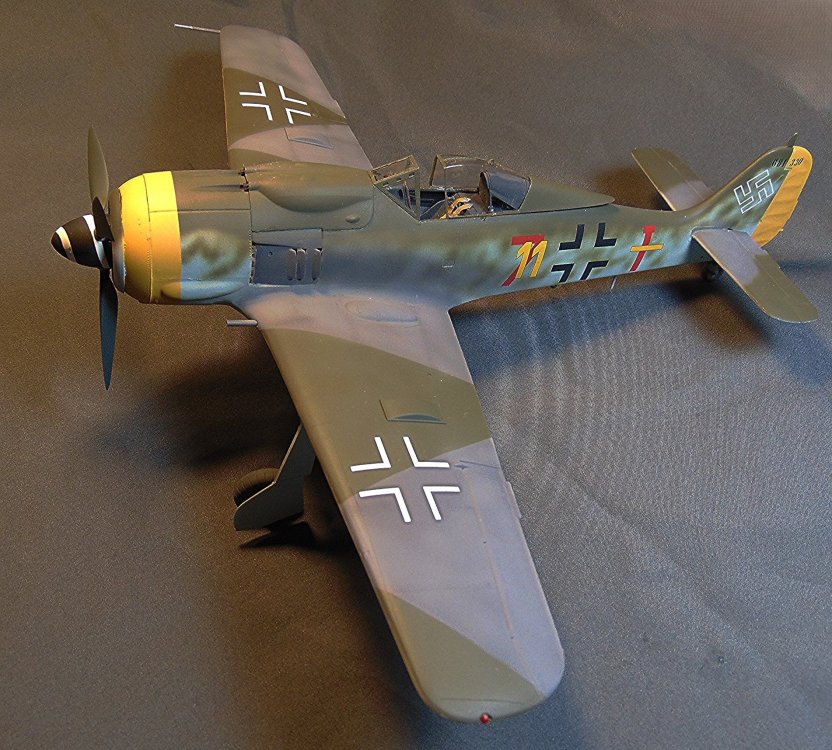
Old mold Revell FW-190 completed and RFI
JohnB replied to JohnB's topic in LSM 1/32 and Larger Aircraft Ready for Inspection
Thanks!! I'm pleased that you like the results of my labors! LOL Maybe you could resume work on the Typhoon now? Difficult but not impossible. -
Old mold Revell FW-190F8 next
JohnB replied to JohnB's topic in LSM 1/35 and Larger Work In Progress
Done and RFI!!! https://forum.largescalemodeller.com/topic/20423-old-mold-revell-fw-190-completed-and-rfi/ -
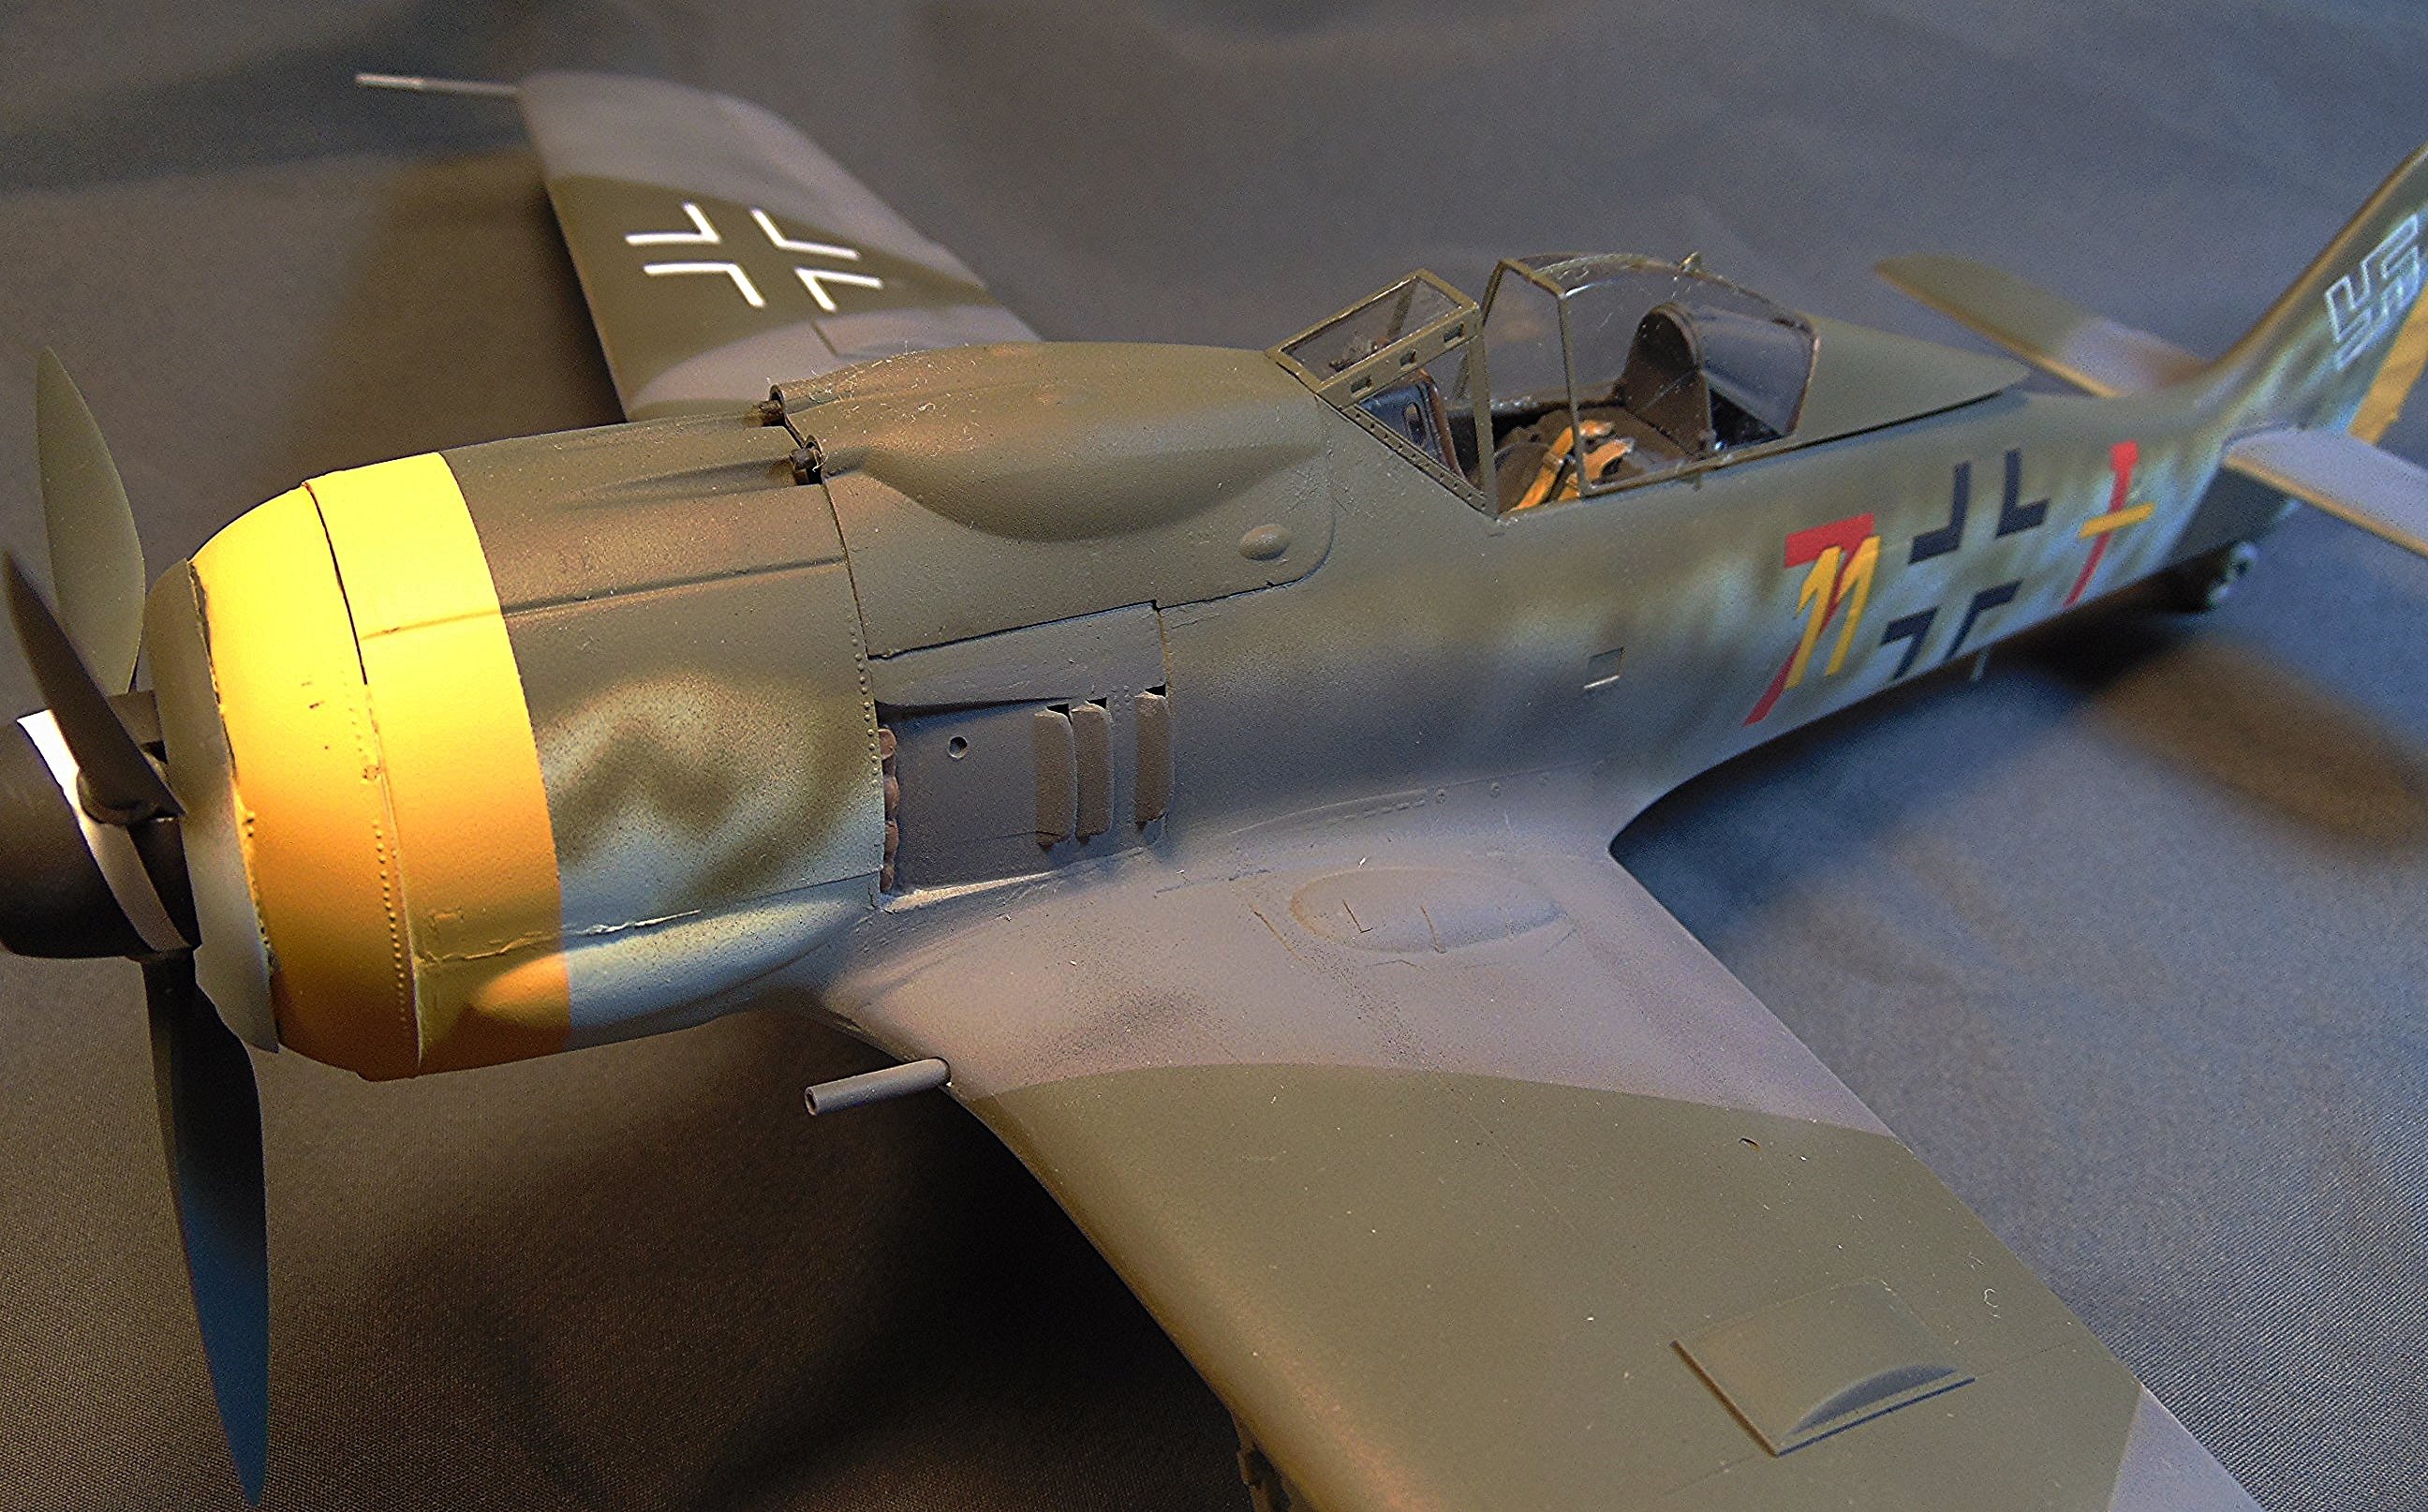
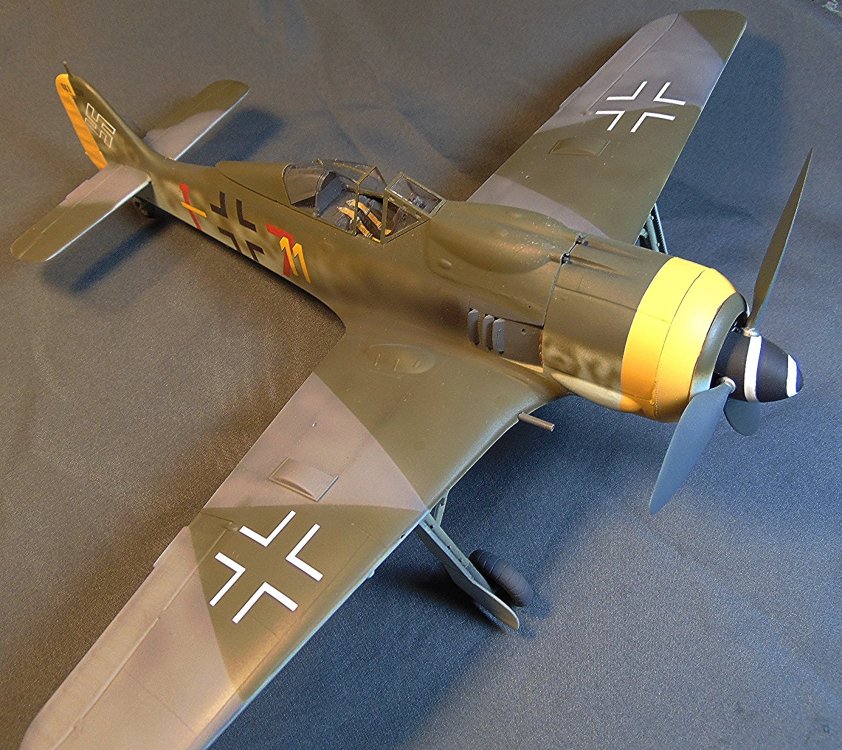
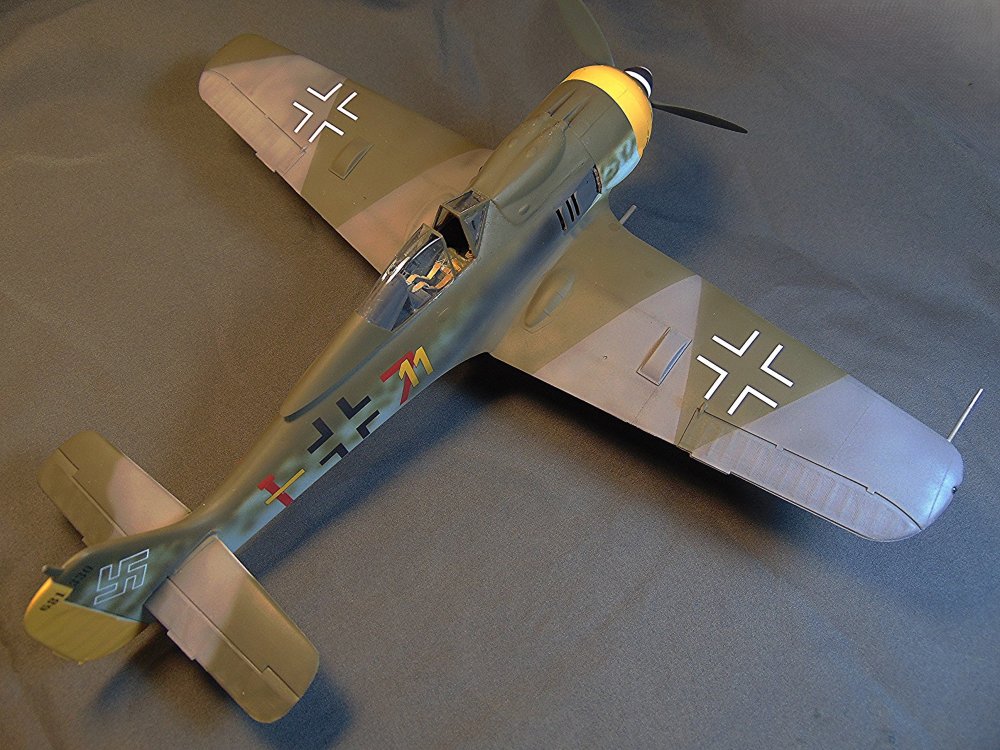
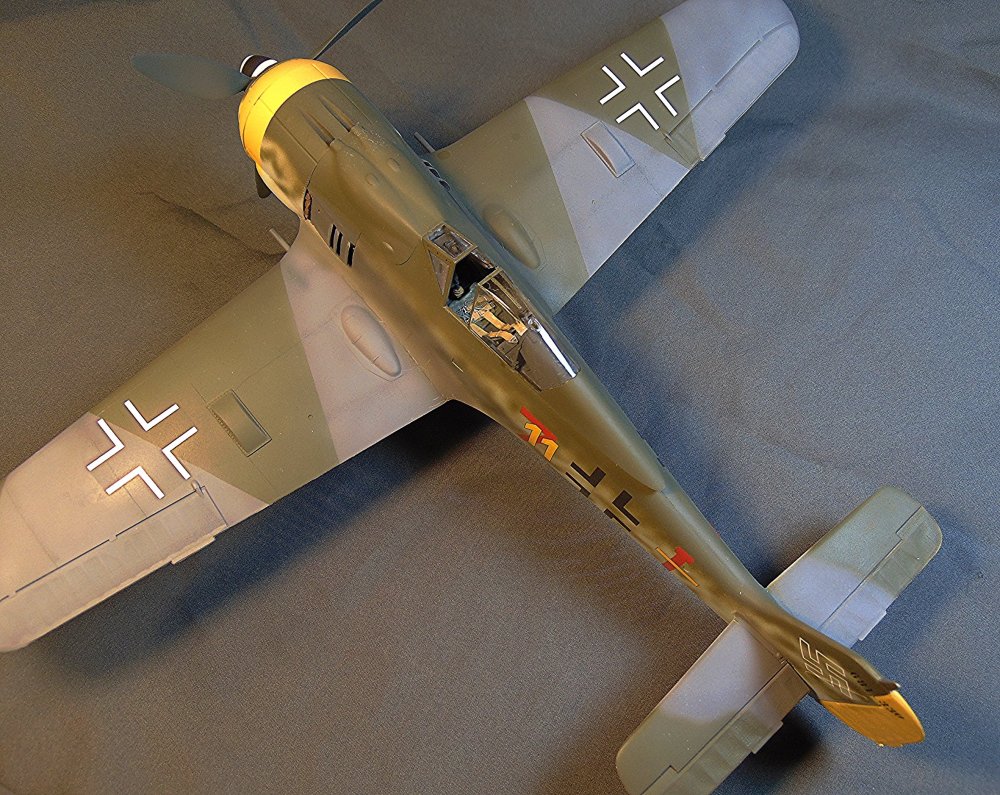
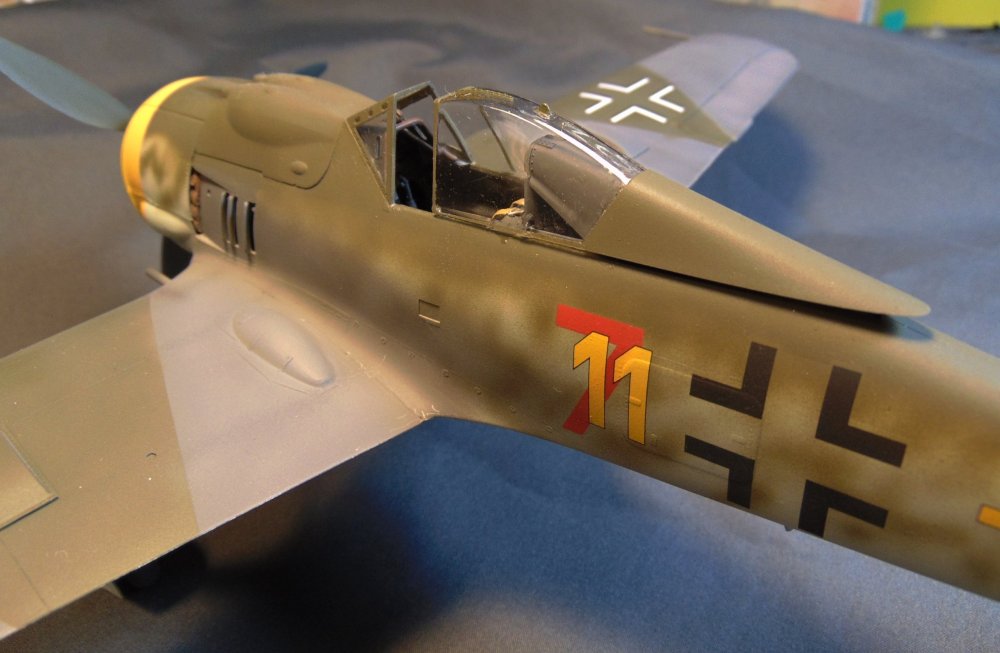
Calling this one done! I wasn't real sure I wanted to build this old mold kit with the plethora of raised rivets etc but finally decided to go on and try it. I'm glad I continued with it as I think it turned out fine. Here's a list of the modifications I made: 1. Replaced canopy with a Hasegawa item. 2. Replaced canopy headrest, etc with correct Eduard detailing parts. 3. Replaced cockpit with Eduard resin set. 4. Added FineMold belts. 5. Replaced centerline bomb/drop tank rack with Hasegawa ones. 6. Sanded off ALL raised rivets. 7. Lightly scribed panel lines. It had many fit problems, especially with the Eduard cockpit set. The set was made for one of the new tool kits and, since this is a old tool kit, it just did not fit without a lot of work. Painted with White Ensign Colourcoats, Testor's, Humbrol, and Tamiya. Decals are Eaglecals. I hope you like it!

-
Old mold Revell FW-190F8 next
JohnB replied to JohnB's topic in LSM 1/35 and Larger Work In Progress
LOL Dennis. Silk purse from a sow's ear. Thanks! 🙂 -
Old mold Revell FW-190F8 next
JohnB replied to JohnB's topic in LSM 1/35 and Larger Work In Progress
Thanks Ralph. 🙂 -
Old mold Revell FW-190F8 next
JohnB replied to JohnB's topic in LSM 1/35 and Larger Work In Progress
Agreed Kevin. 🙂 -
Old mold Revell FW-190F8 next
JohnB replied to JohnB's topic in LSM 1/35 and Larger Work In Progress
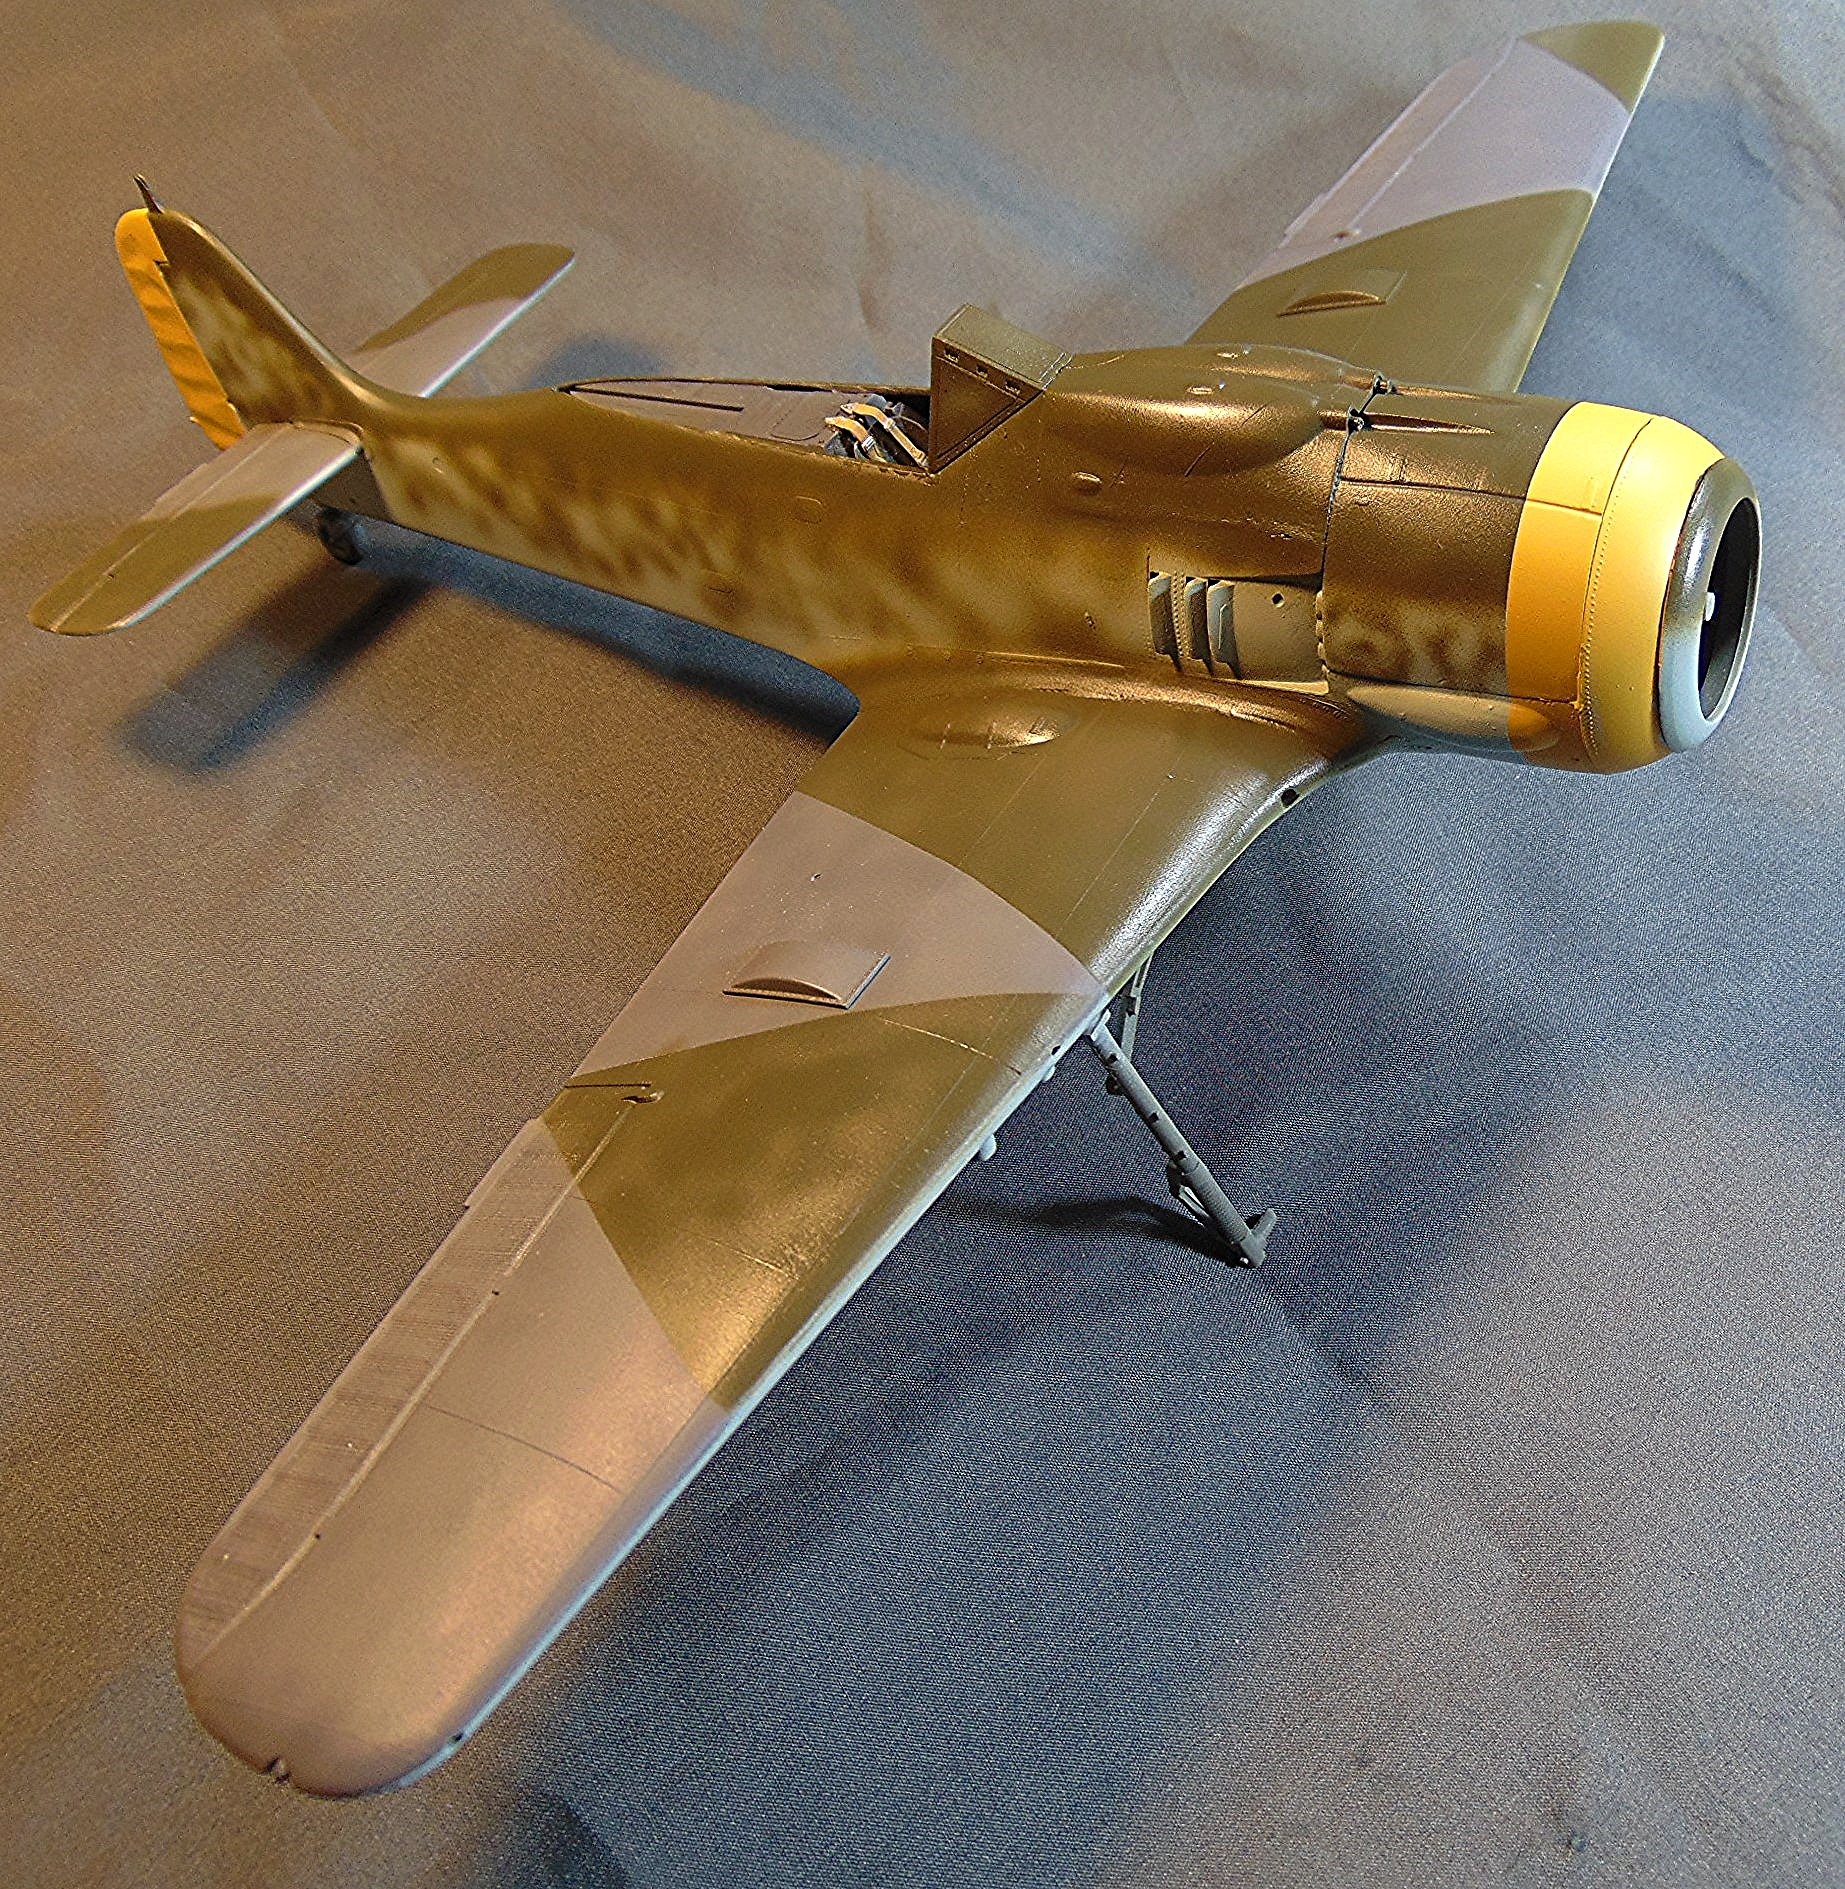
Thank you Kevin (I think!). I thought my previous mottling jobs looked good......... Did they look "wrong"?🙄 -
Old mold Revell FW-190F8 next
JohnB replied to JohnB's topic in LSM 1/35 and Larger Work In Progress
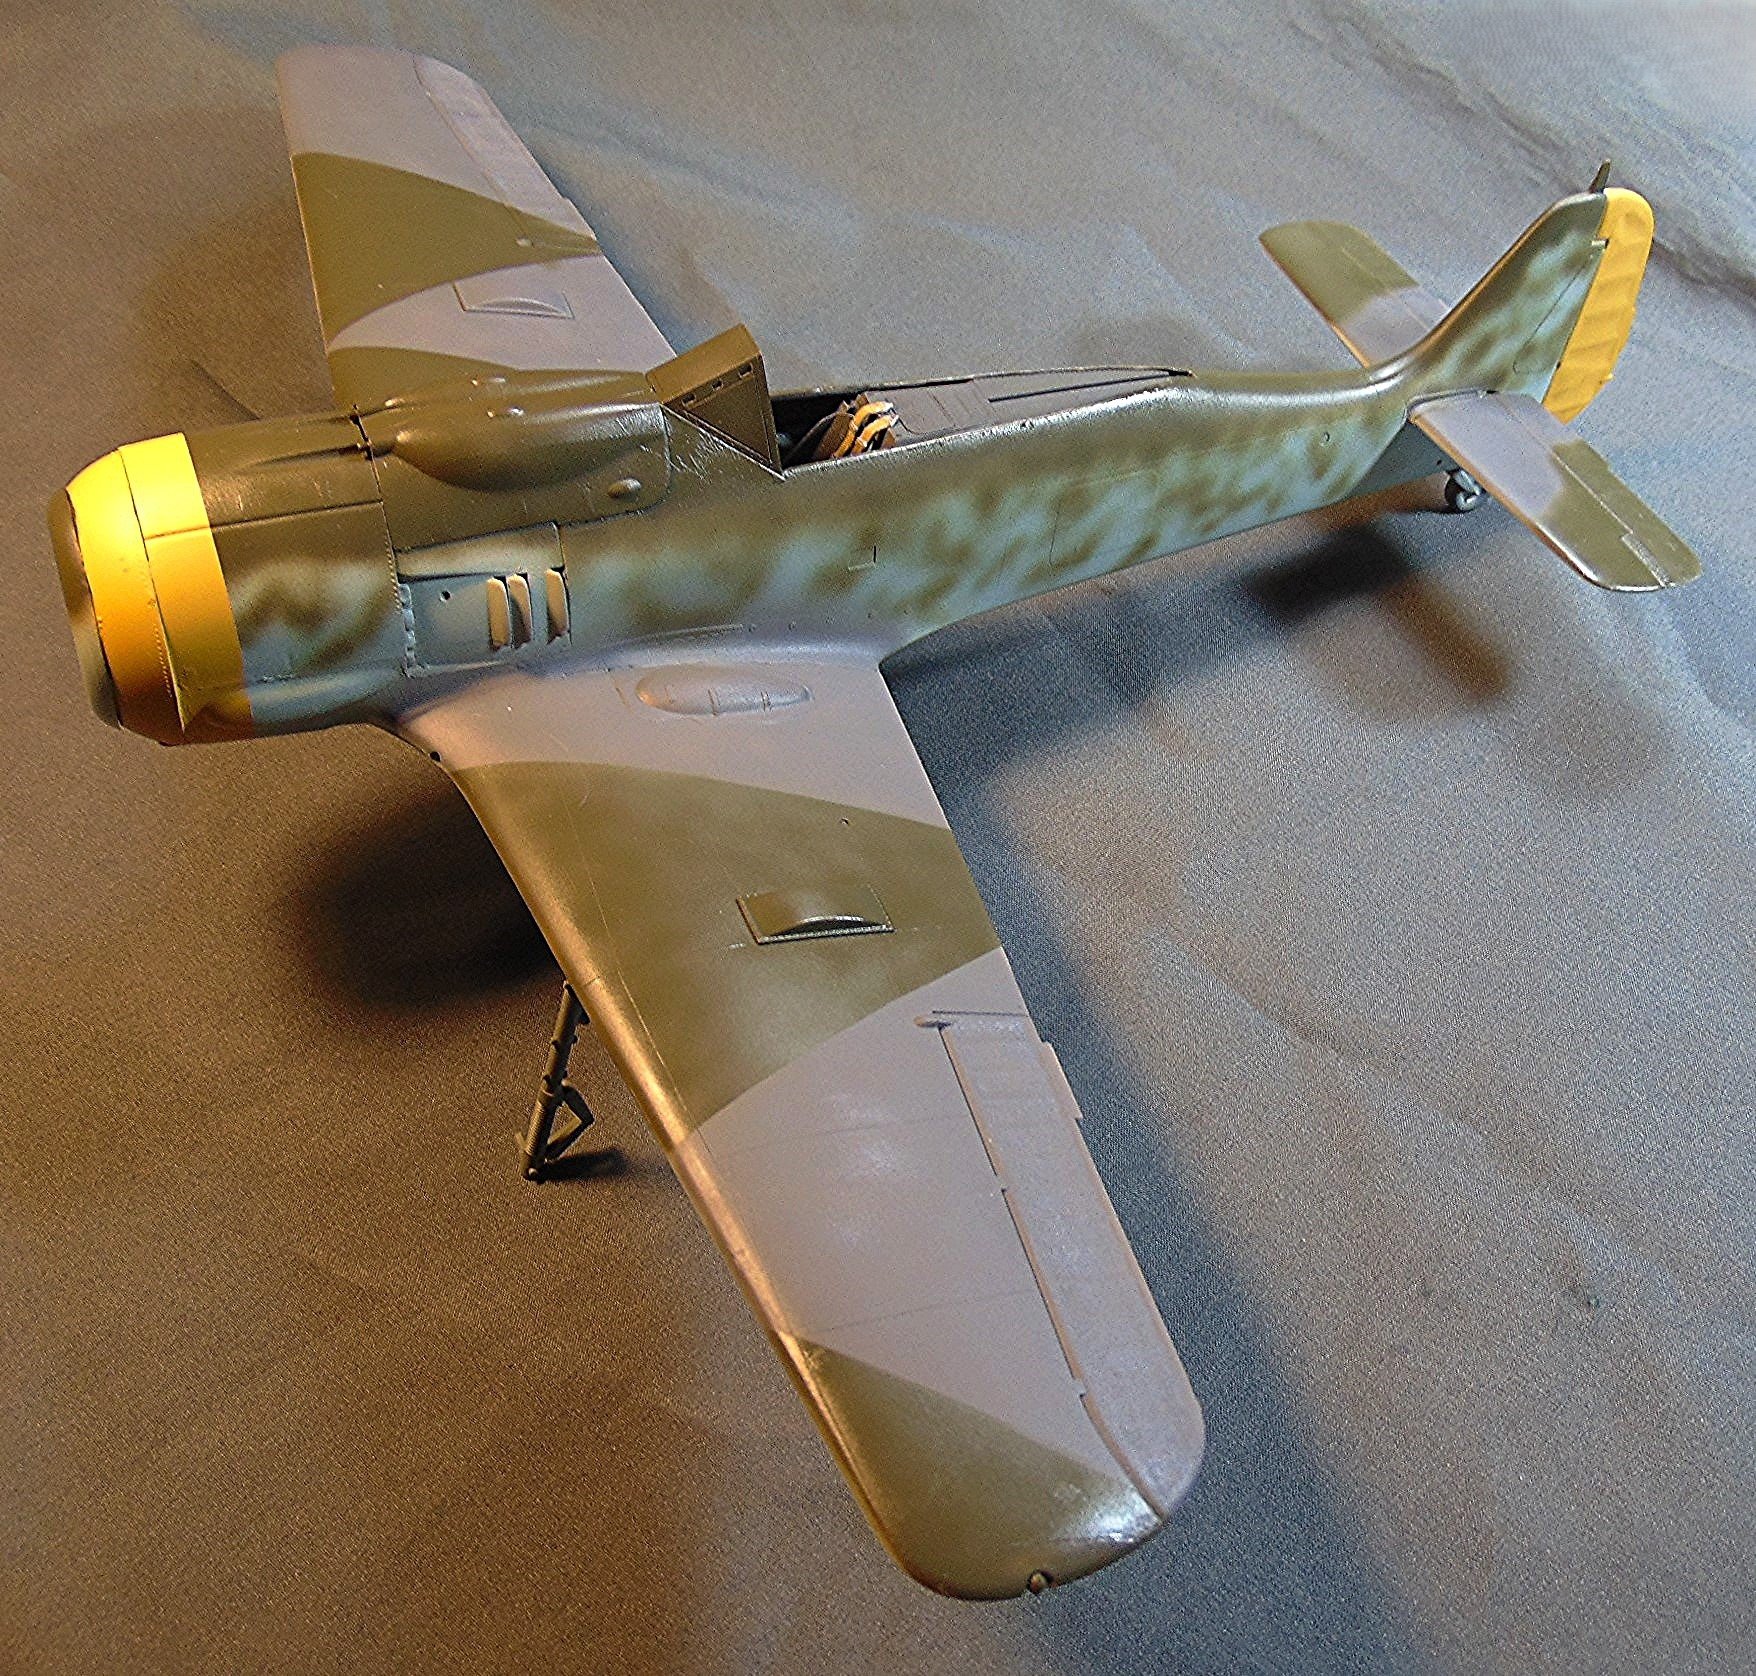
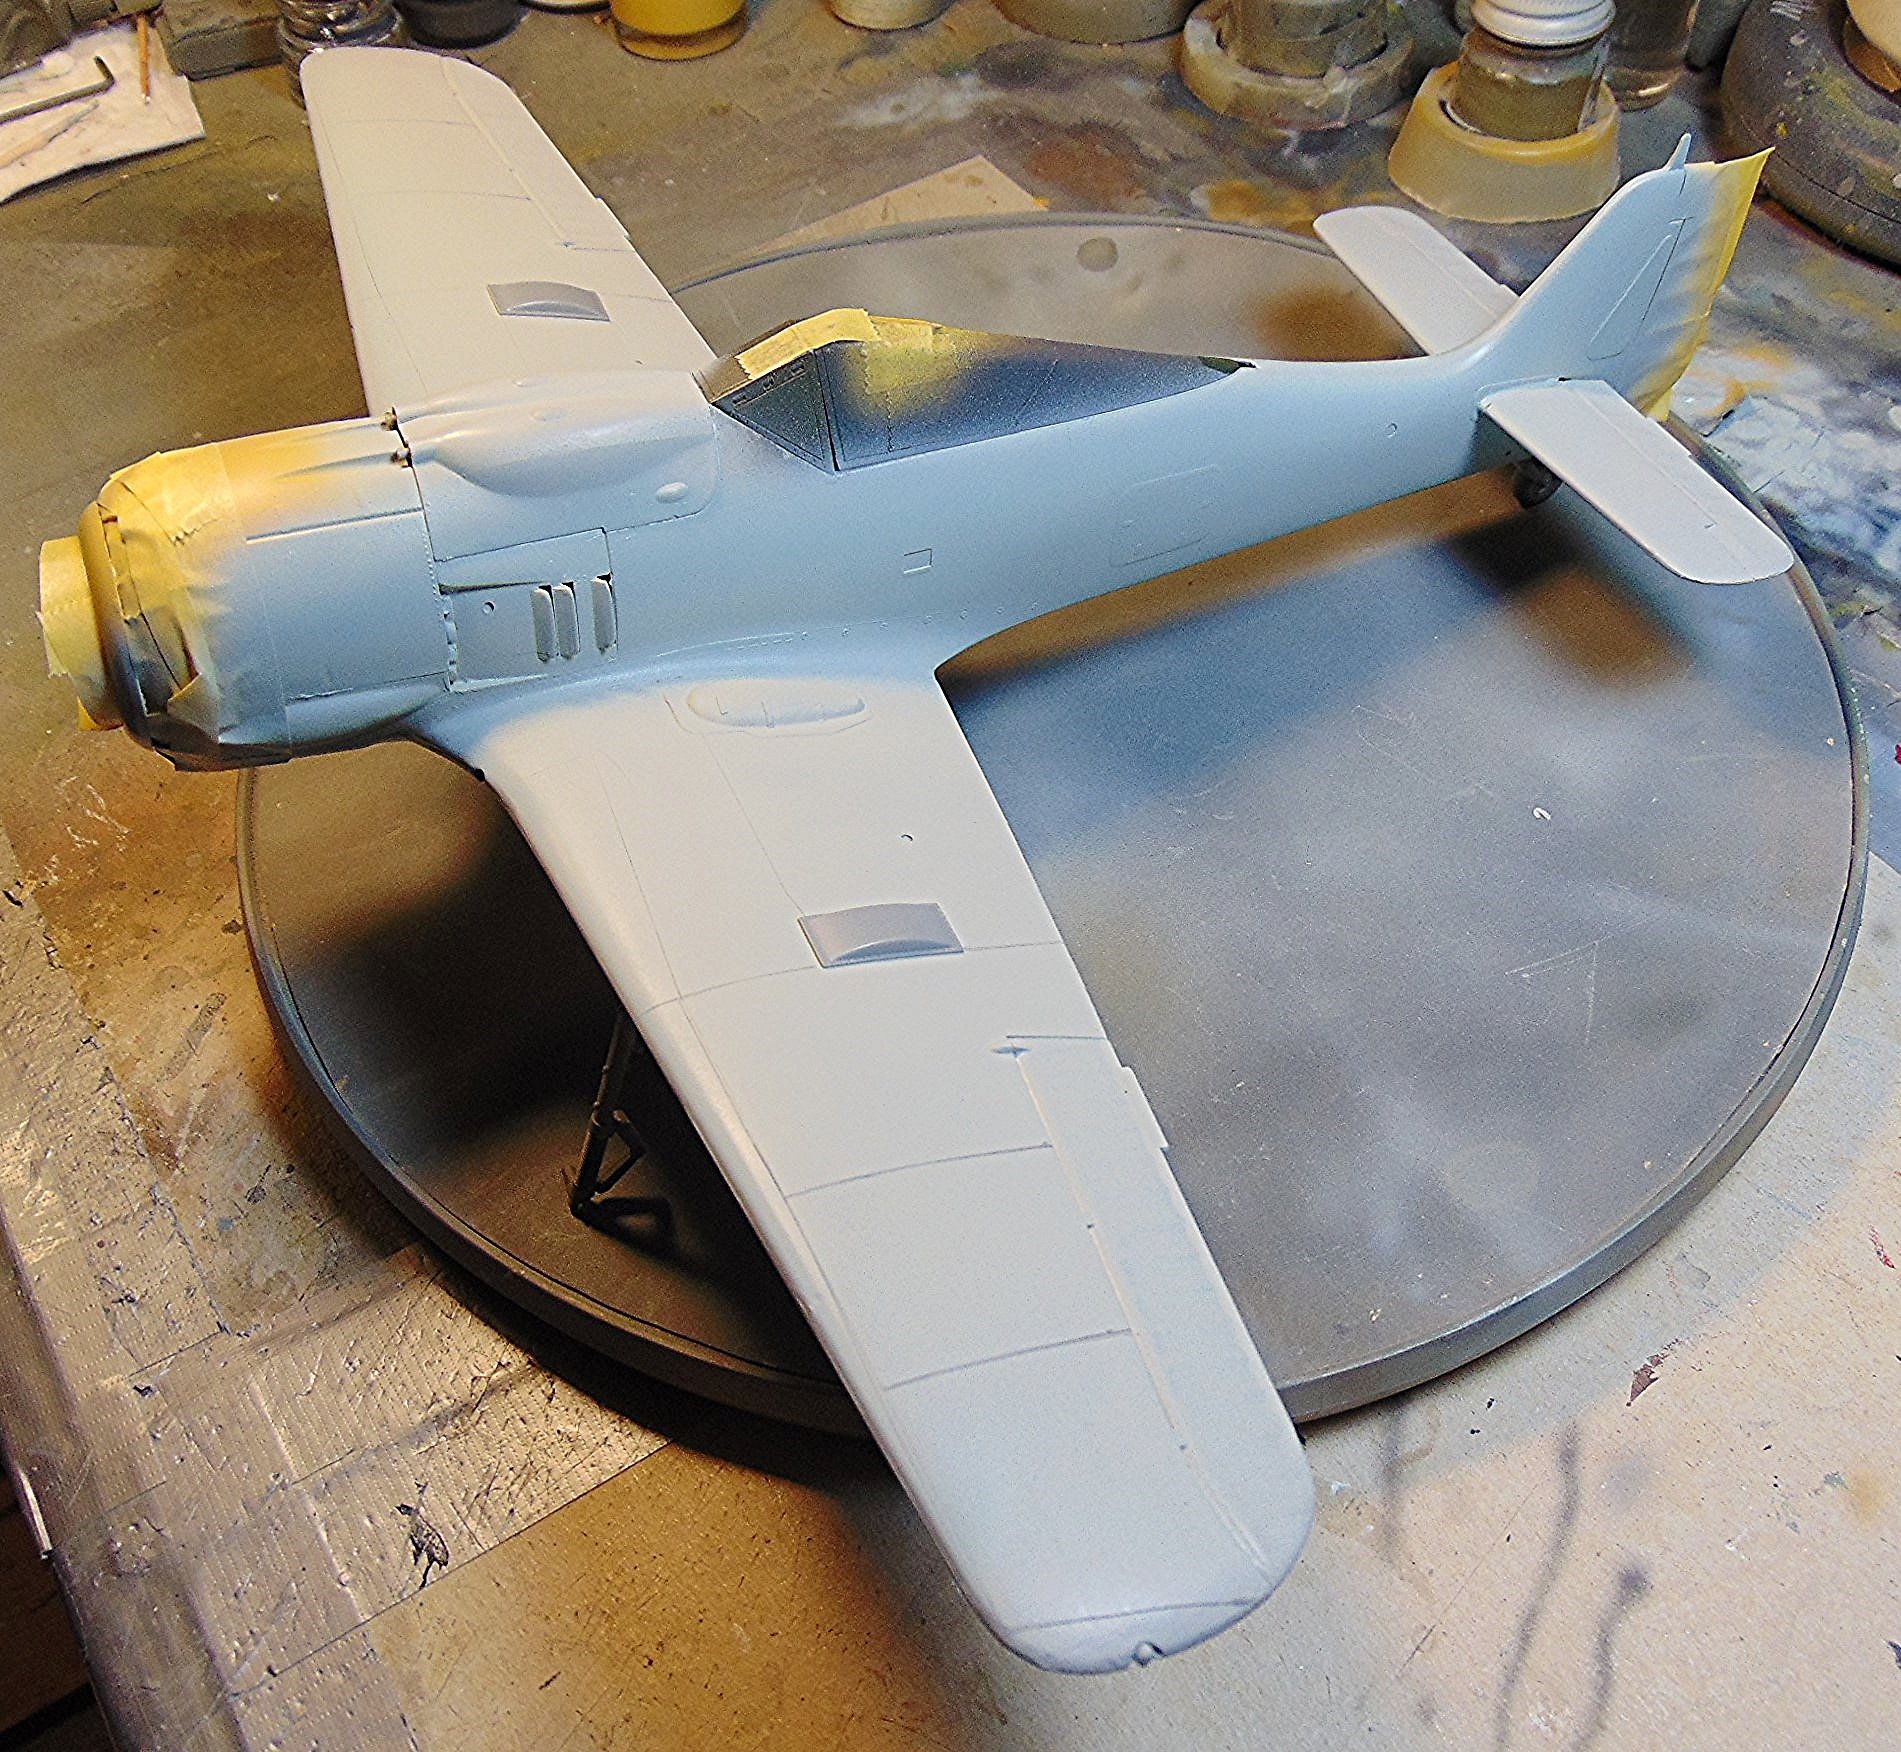
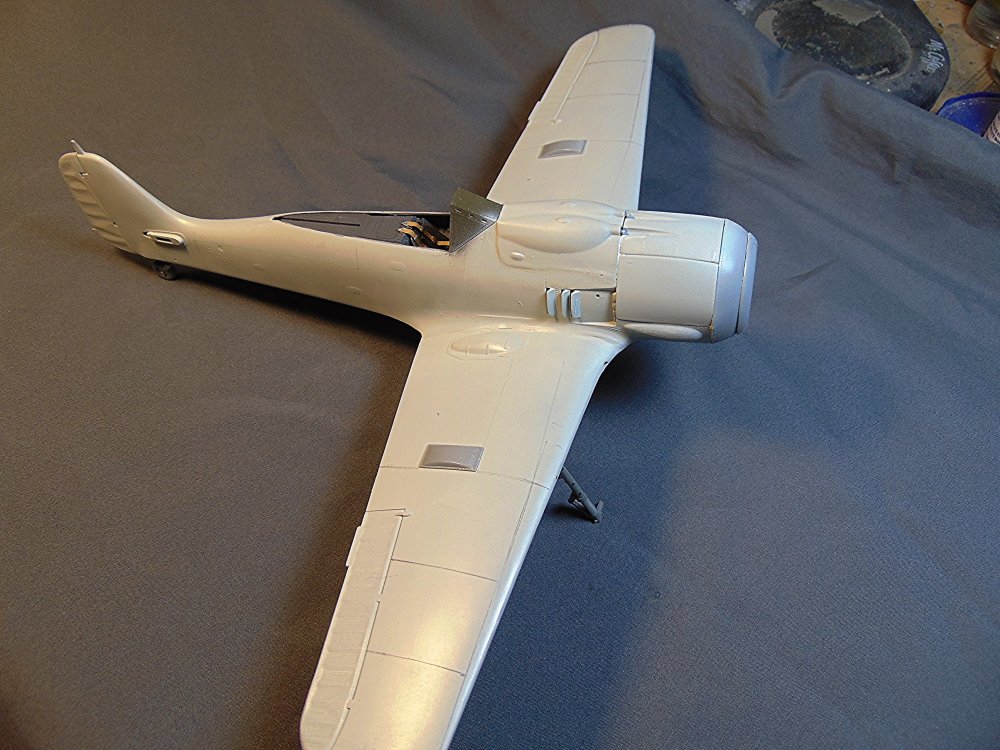
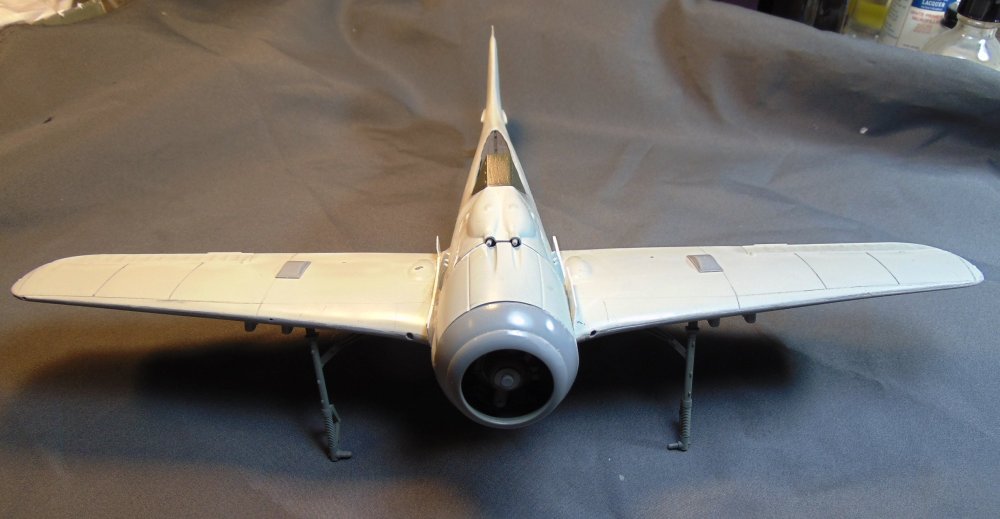
Most of the painting is done. I still have to go back and paint the gear wells and re-paint the struts. Also paint the black panel behind the cowling. Some touchup then overspray with clear gloss. Decaling and weathering to follow.

-
Old mold Revell FW-190F8 next
JohnB replied to JohnB's topic in LSM 1/35 and Larger Work In Progress
Painting under way.
-
Old mold Revell FW-190F8 next
JohnB replied to JohnB's topic in LSM 1/35 and Larger Work In Progress
Took lots of taming too! LOL -
Old mold Revell FW-190F8 next
JohnB replied to JohnB's topic in LSM 1/35 and Larger Work In Progress
When I started this build I had no idea what problems with fit there would be. If I'd known it would likely still be on the shelf! LOL It appears at this point it will turn out okay but I'm not counting my chickens just yet! -
Old mold Revell FW-190F8 next
JohnB replied to JohnB's topic in LSM 1/35 and Larger Work In Progress
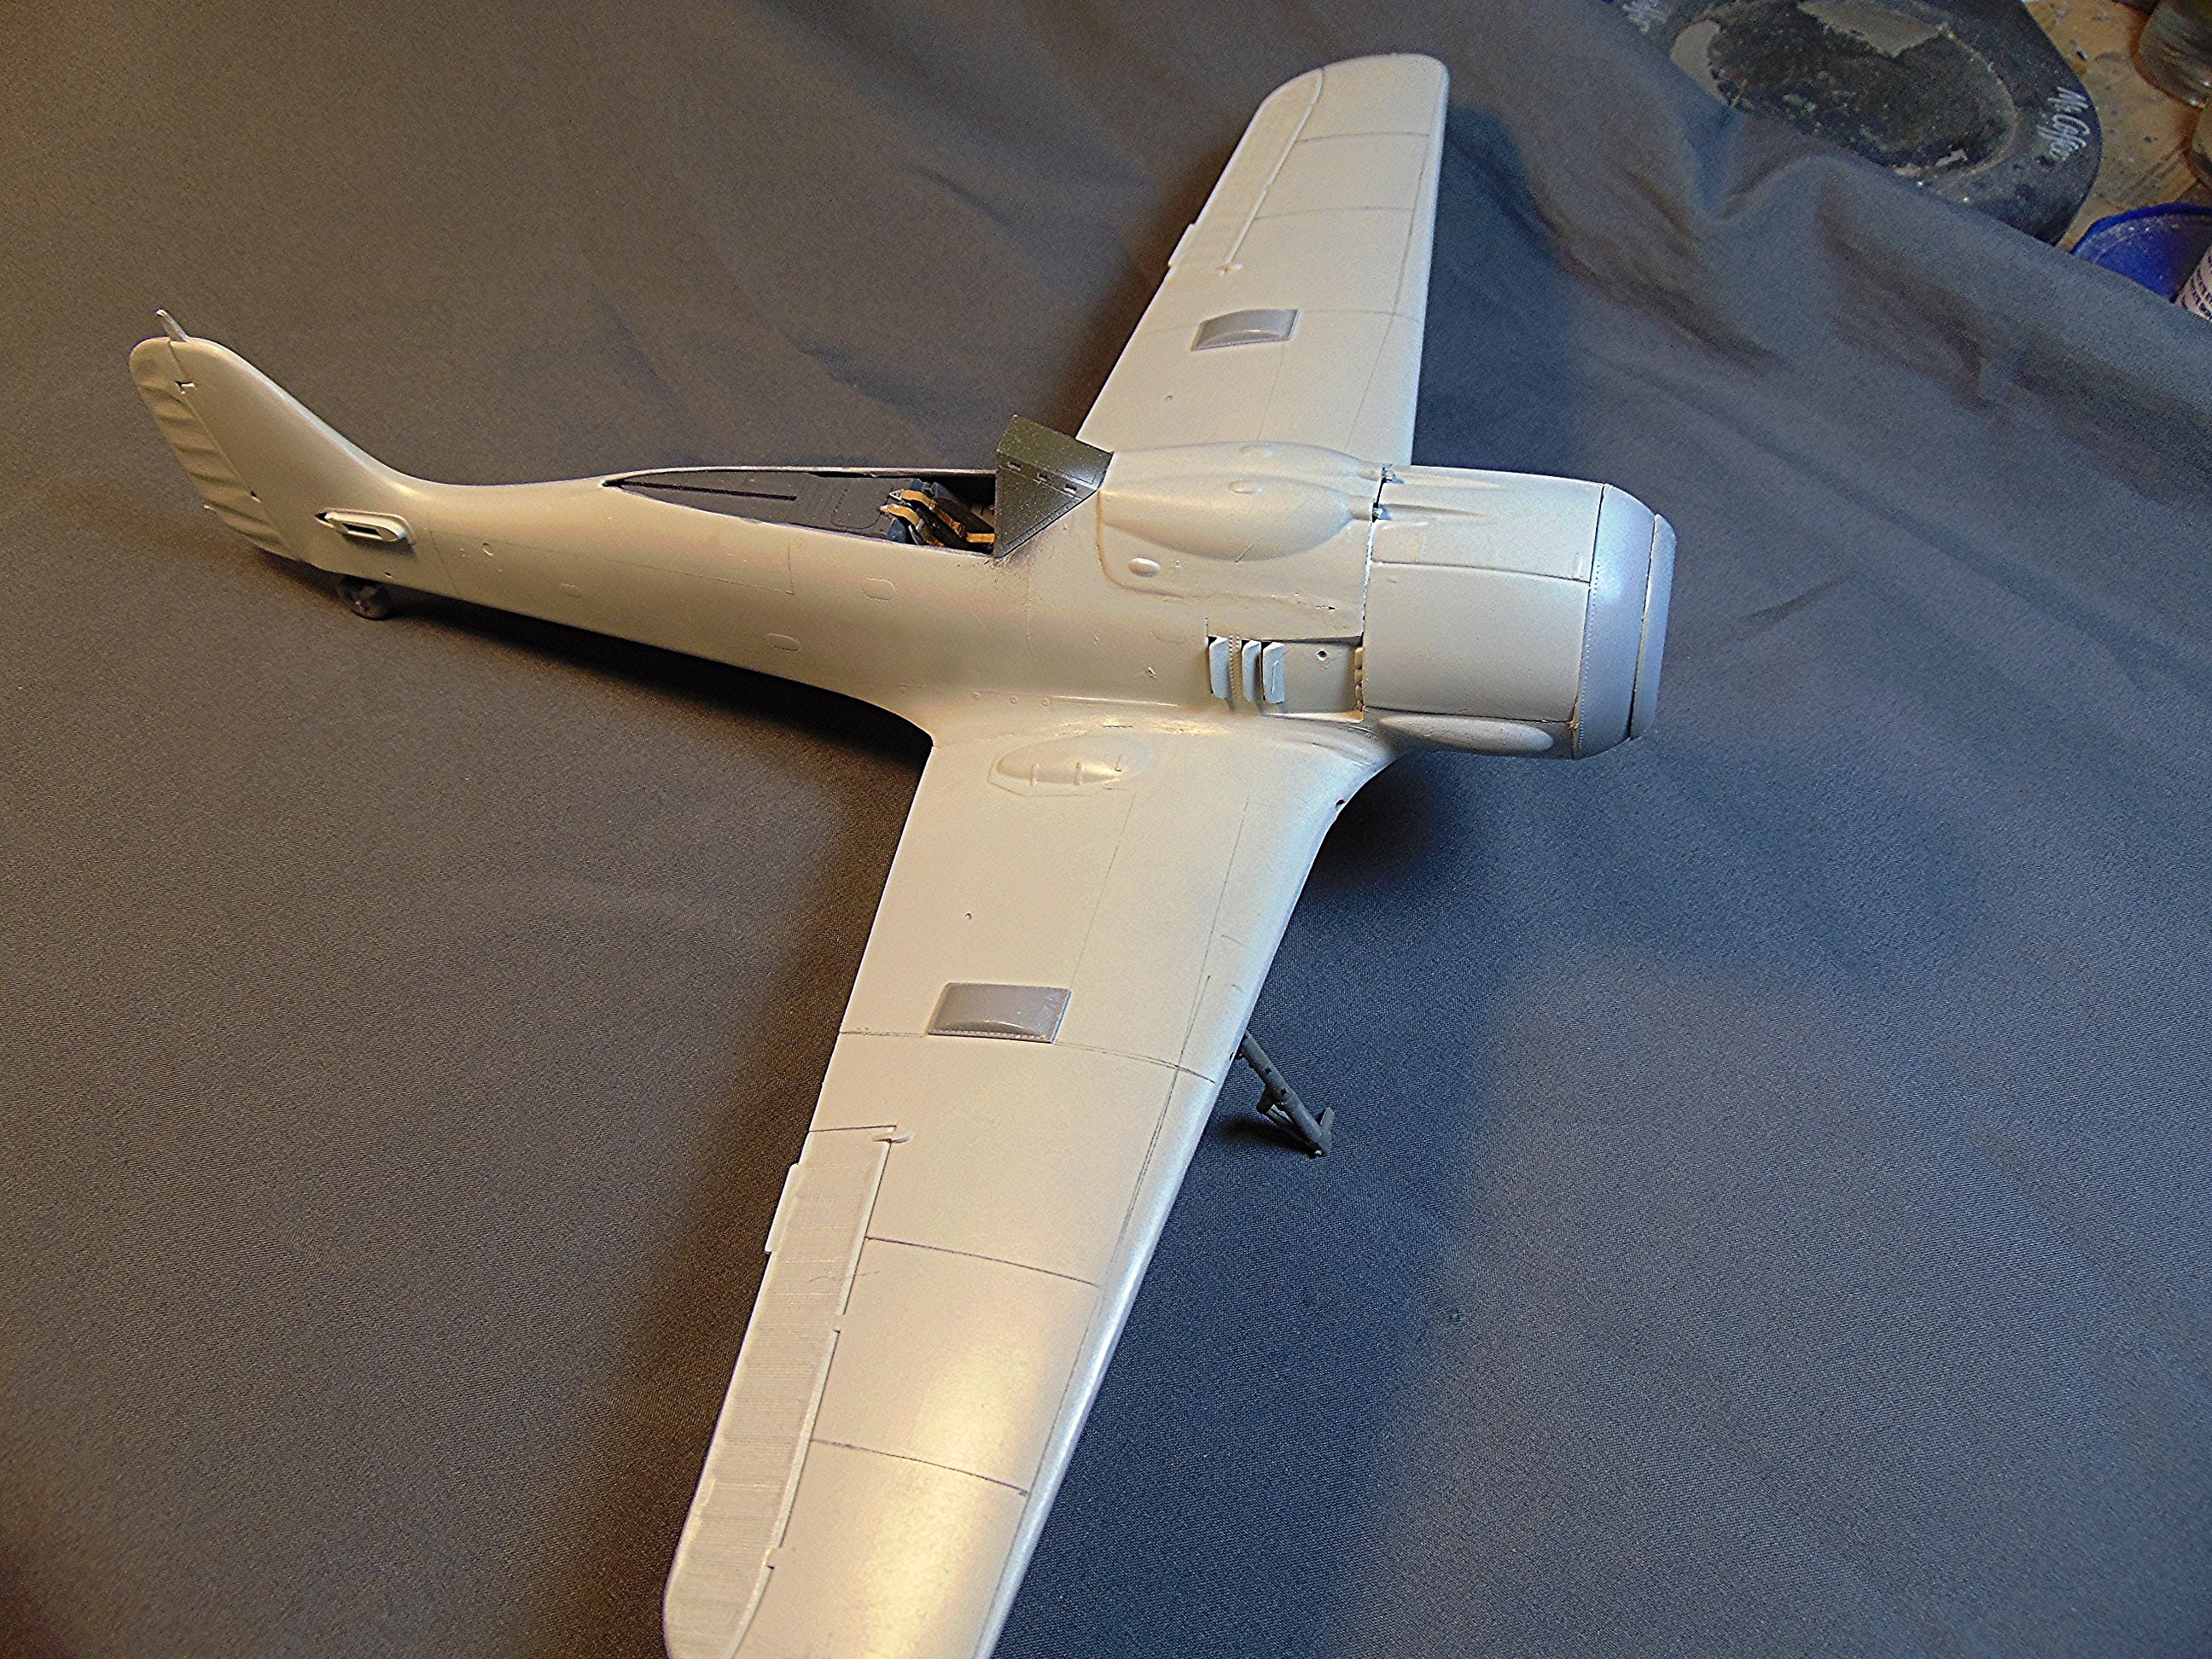
I think it's ready for some paint! 🙂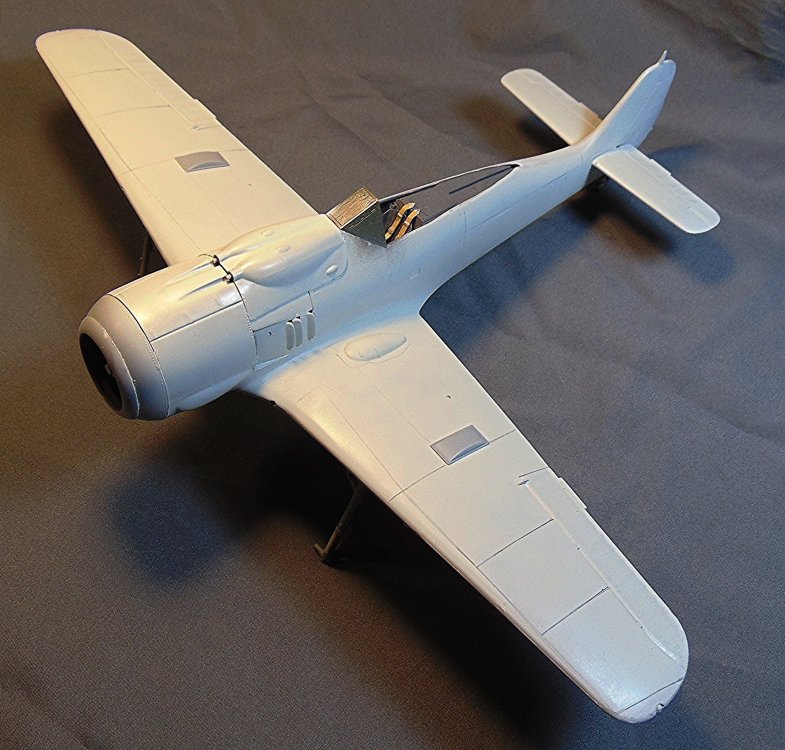
-
Old mold Revell FW-190F8 next
JohnB replied to JohnB's topic in LSM 1/35 and Larger Work In Progress
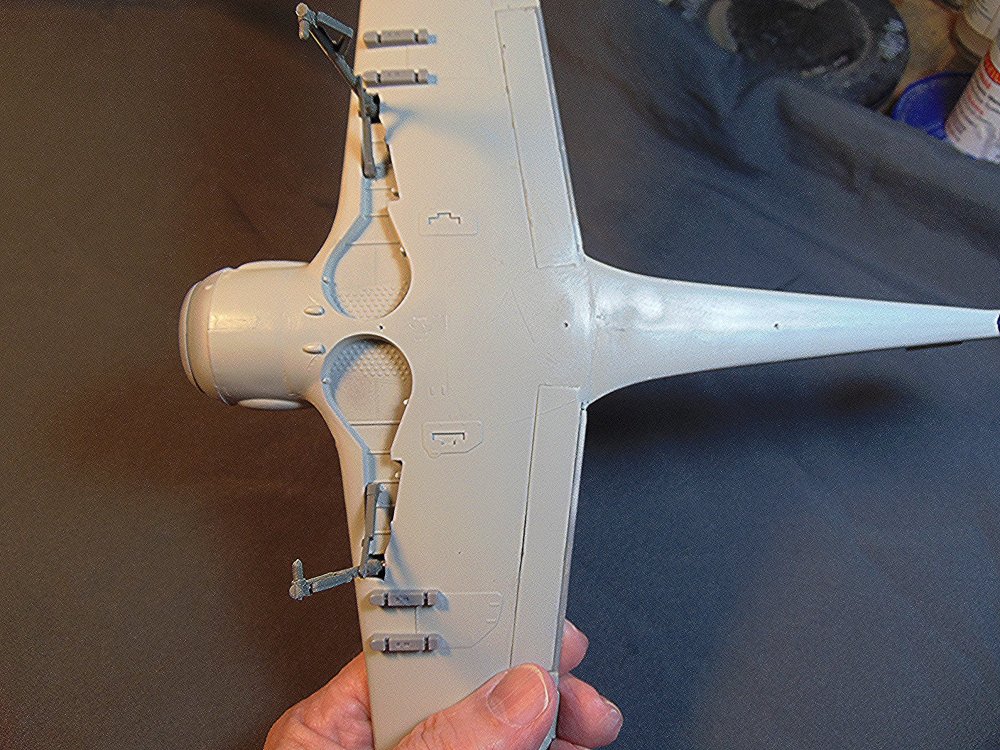
Got the sanding and priming done. Not anywhere near perfect but it'll have to do.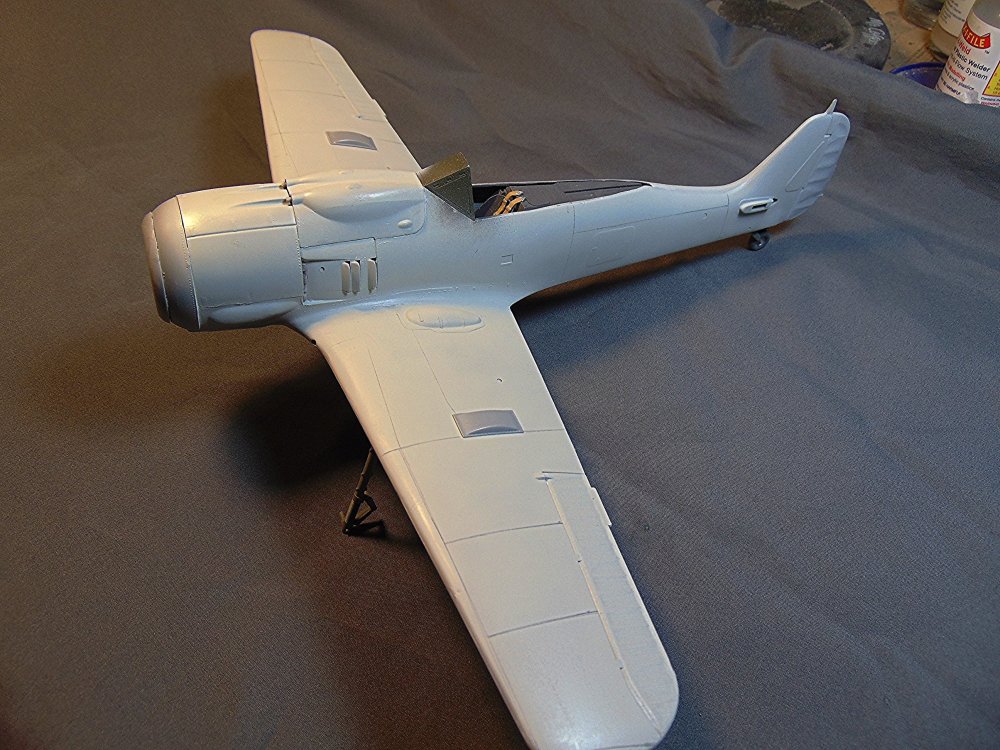
-
Old mold Revell FW-190F8 next
JohnB replied to JohnB's topic in LSM 1/35 and Larger Work In Progress
LOL One of THOSE builds! -
Old mold Revell FW-190F8 next
JohnB replied to JohnB's topic in LSM 1/35 and Larger Work In Progress
Yes indeed and NOT my favorite thing to do. 🙄 -
Old mold Revell FW-190F8 next
JohnB replied to JohnB's topic in LSM 1/35 and Larger Work In Progress
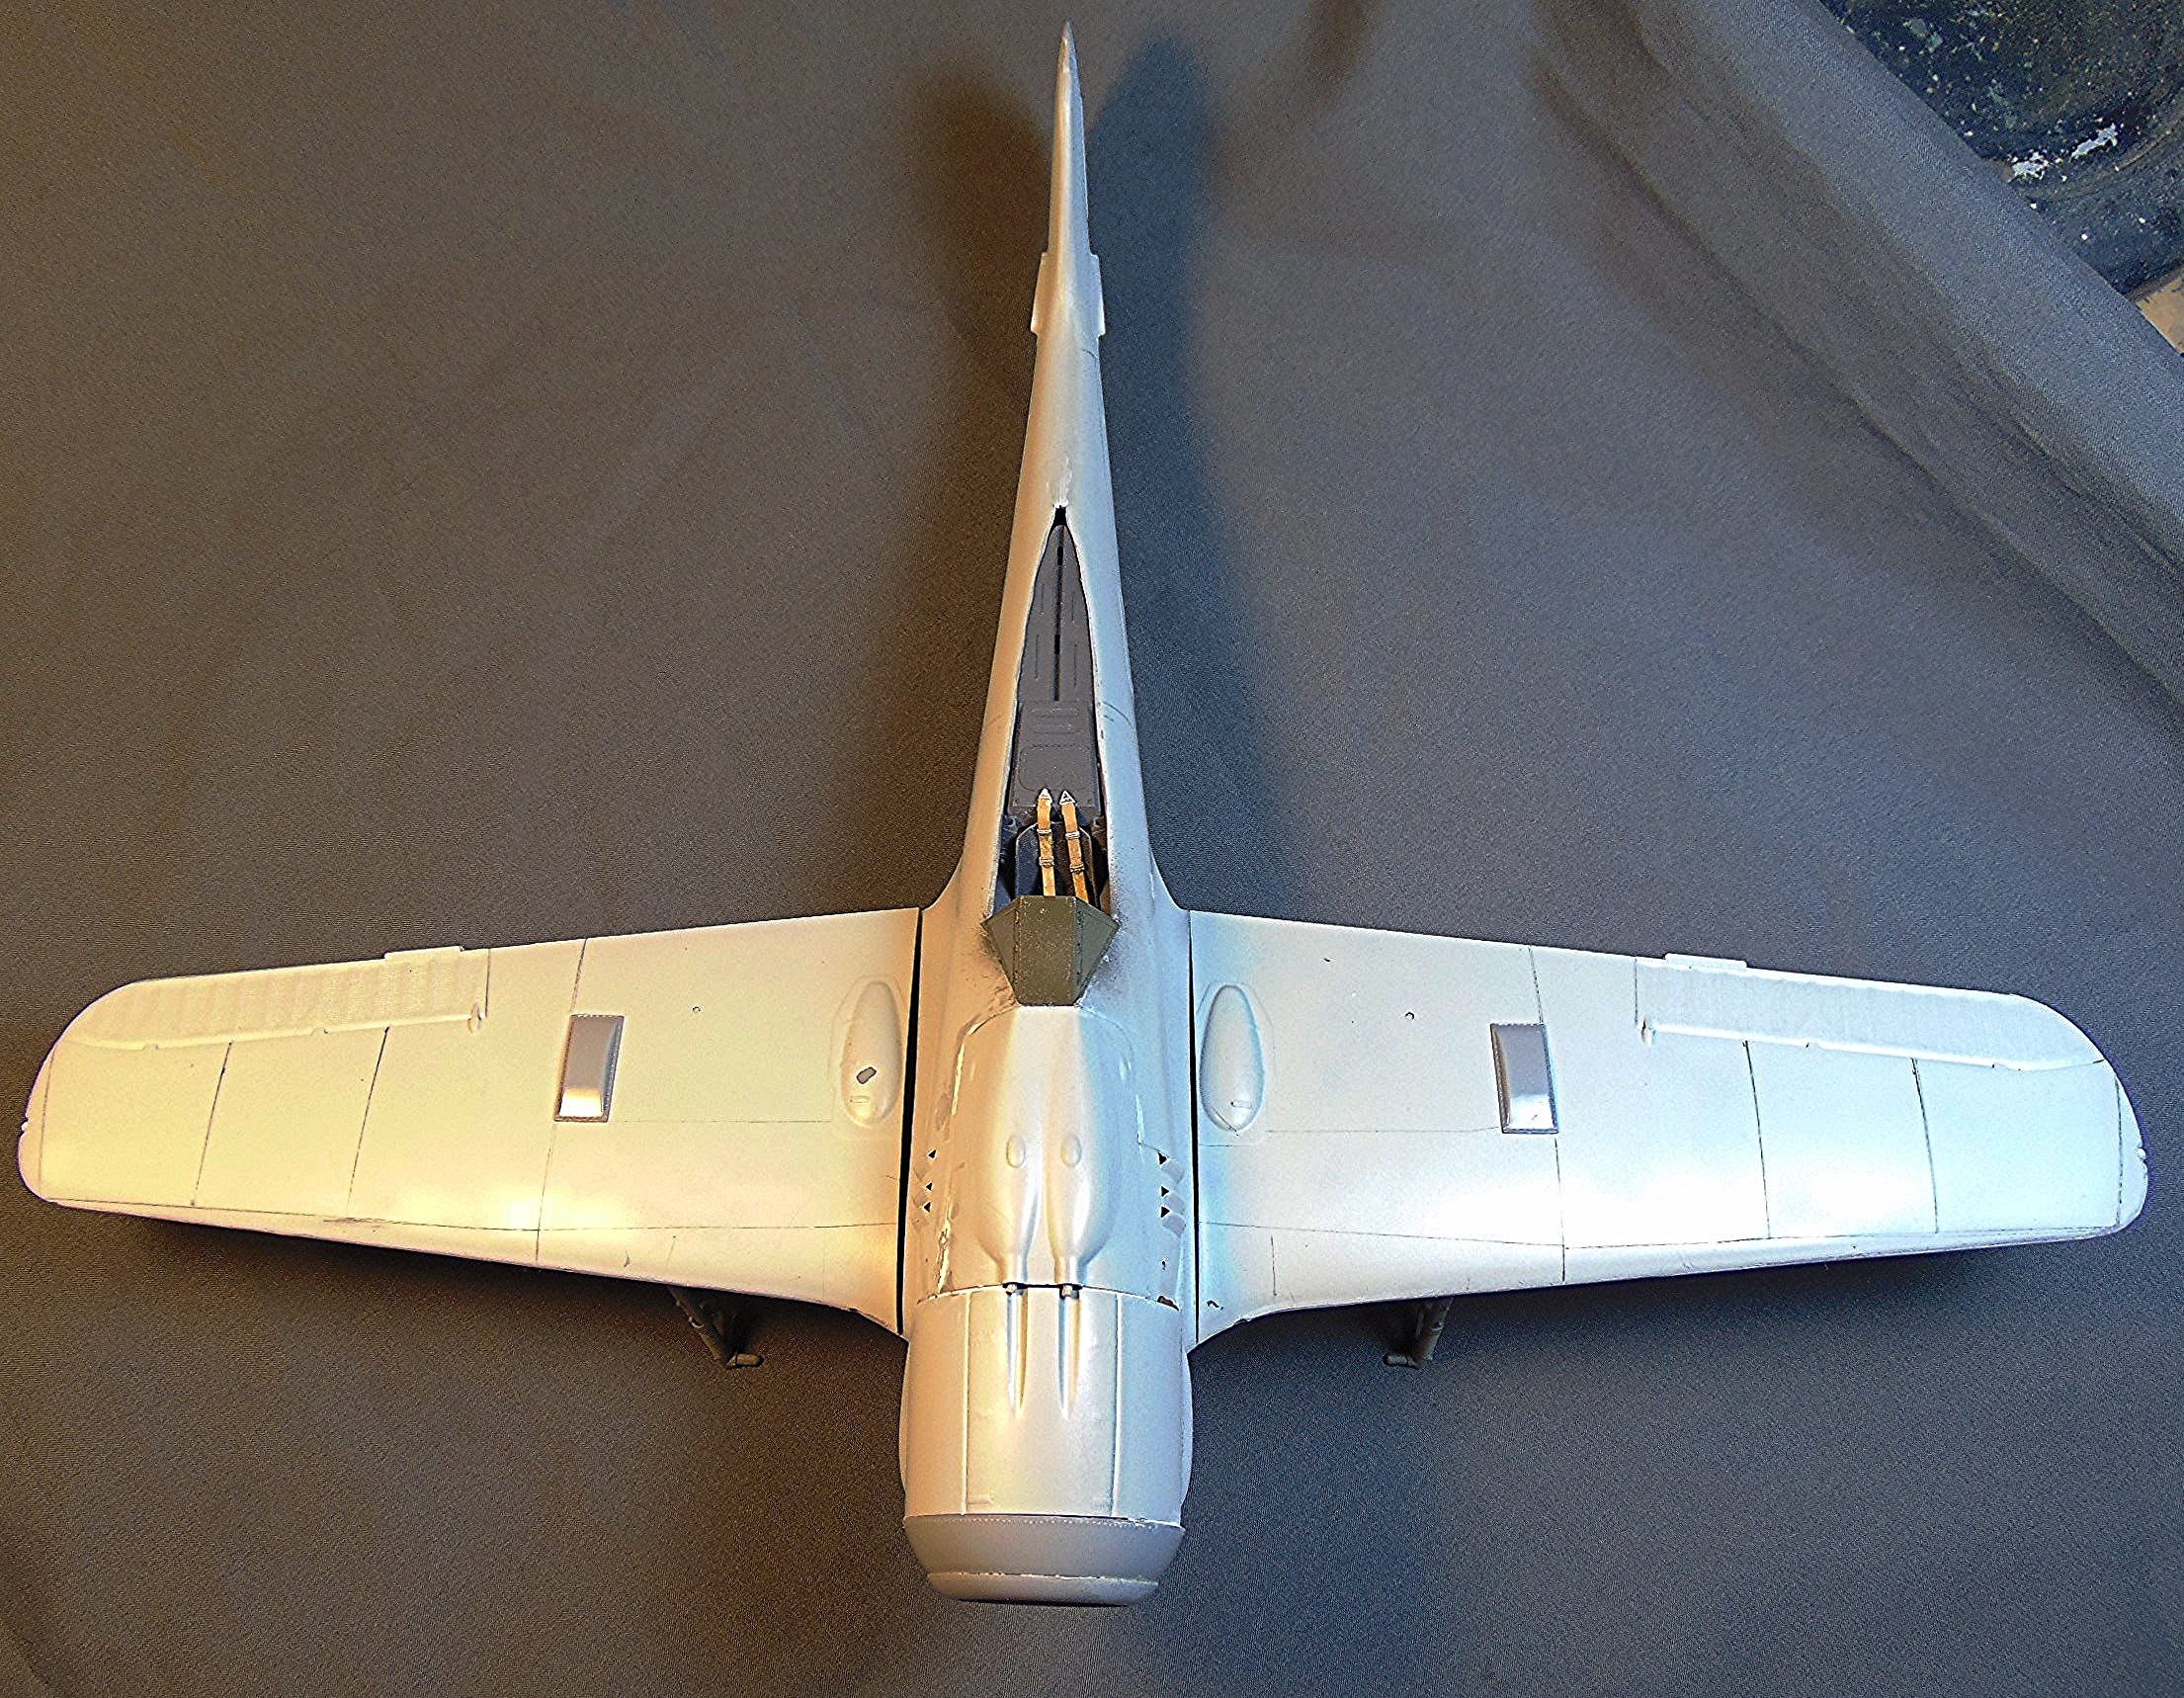
Puttied up and waiting for sanding out.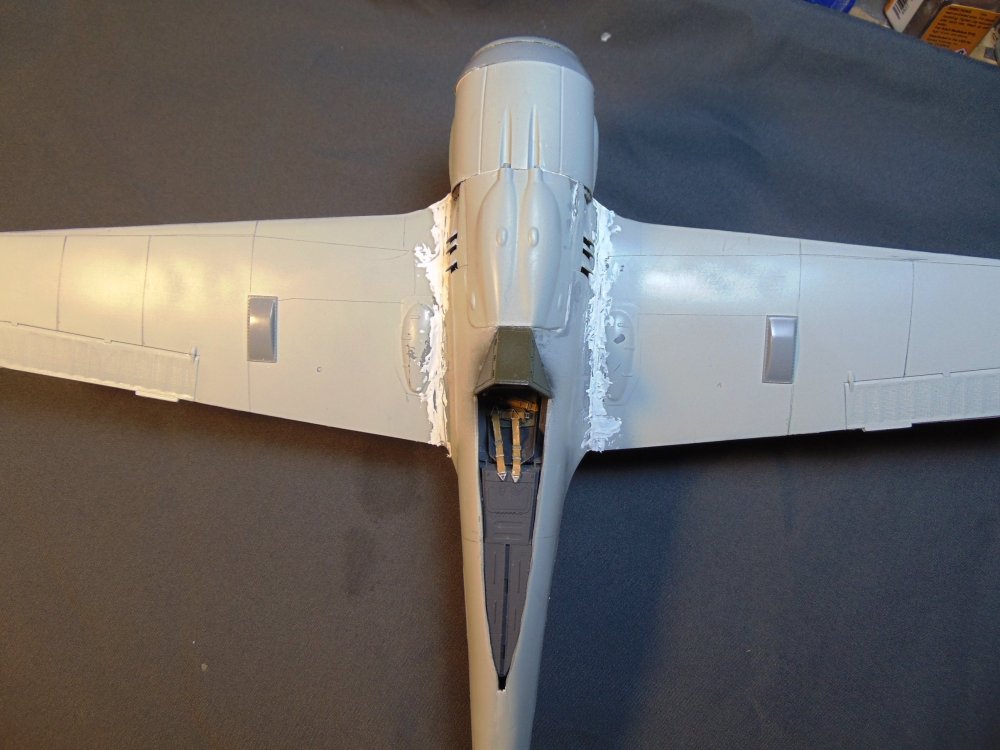
-
Old mold Revell FW-190F8 next
JohnB replied to JohnB's topic in LSM 1/35 and Larger Work In Progress
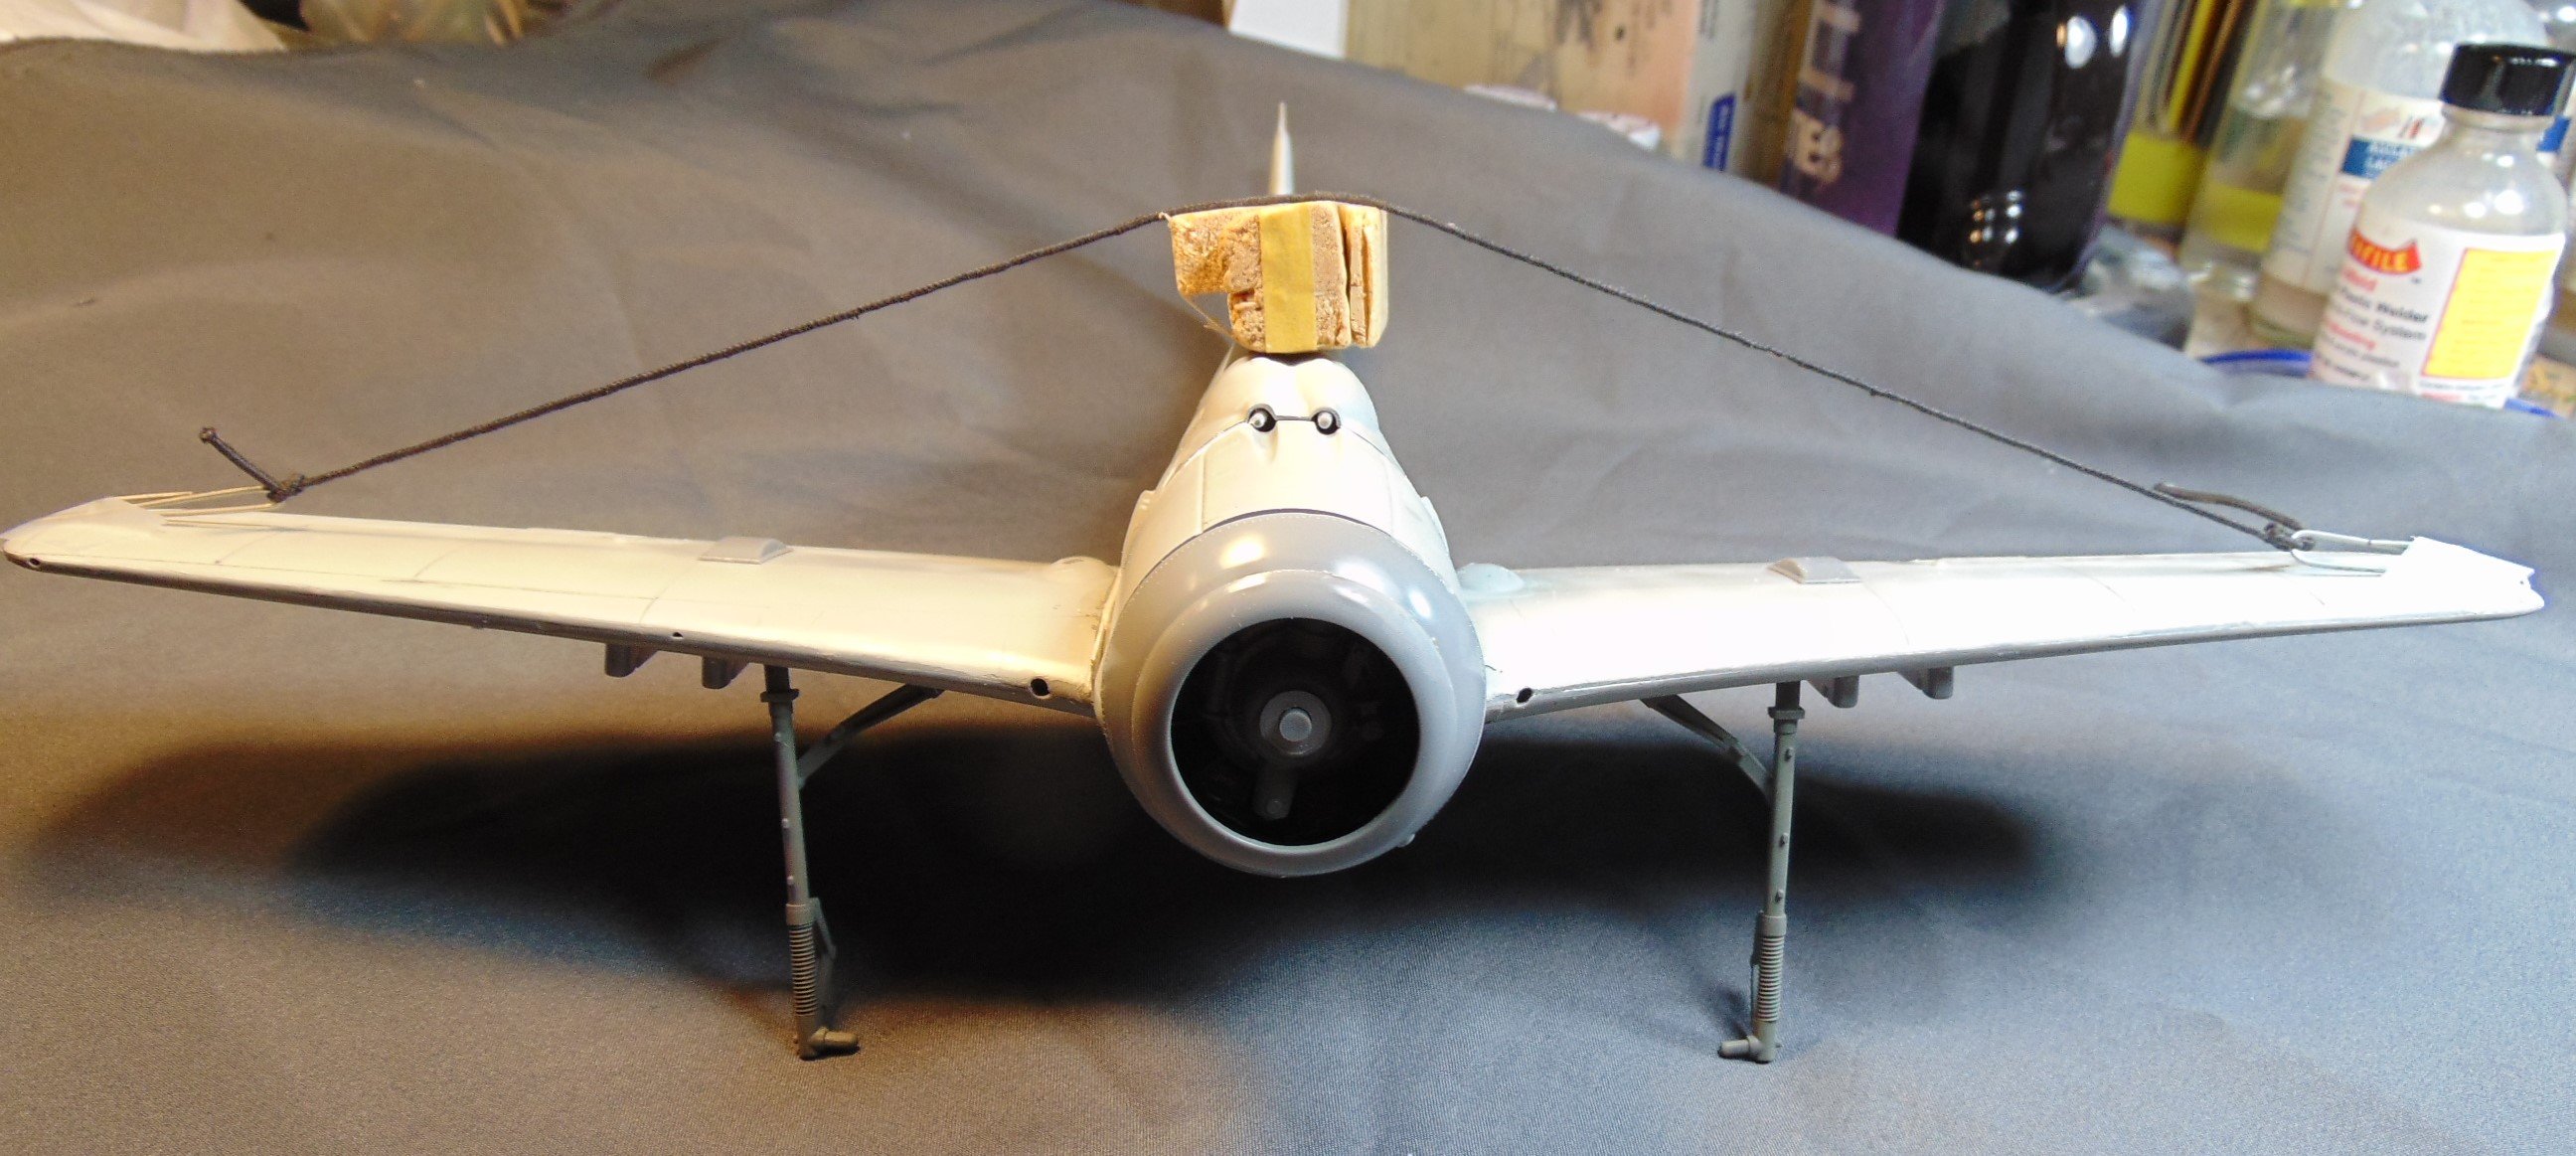
After trimming the strip plastic I decided to try to get a bit more dihedral. I'll let it sit for a while then go back and see how it looks now. No Peter, the cowl ring is from the kit.
-
Old mold Revell FW-190F8 next
JohnB replied to JohnB's topic in LSM 1/35 and Larger Work In Progress
I think the elastic helped with the dihedral. Next I'll trim the strips I put in and do some puttying.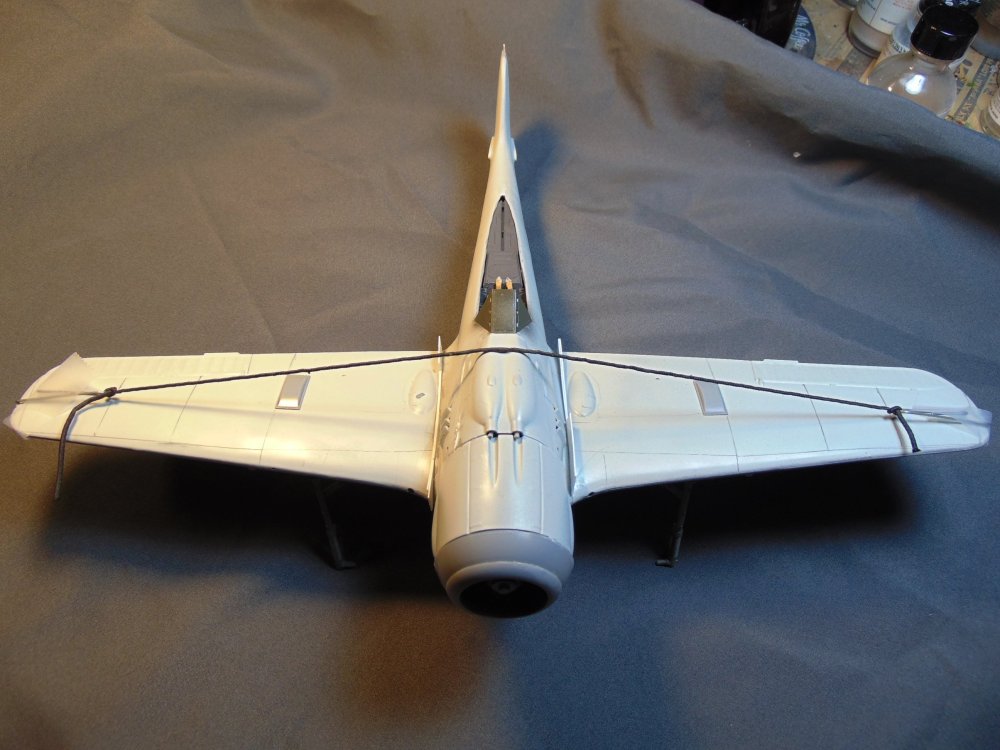
-
Old mold Revell FW-190F8 next
JohnB replied to JohnB's topic in LSM 1/35 and Larger Work In Progress
I'll go see how well my "adjustments" have helped and post a couple more pics. 🙄 -
Old mold Revell FW-190F8 next
JohnB replied to JohnB's topic in LSM 1/35 and Larger Work In Progress
I put in some styrene strips last night so this morning I'll trim the excess and see what else is needed. -
Old mold Revell FW-190F8 next
JohnB replied to JohnB's topic in LSM 1/35 and Larger Work In Progress
Thanks Dennis. It has had it's moments! 🤪 -
Old mold Revell FW-190F8 next
JohnB replied to JohnB's topic in LSM 1/35 and Larger Work In Progress
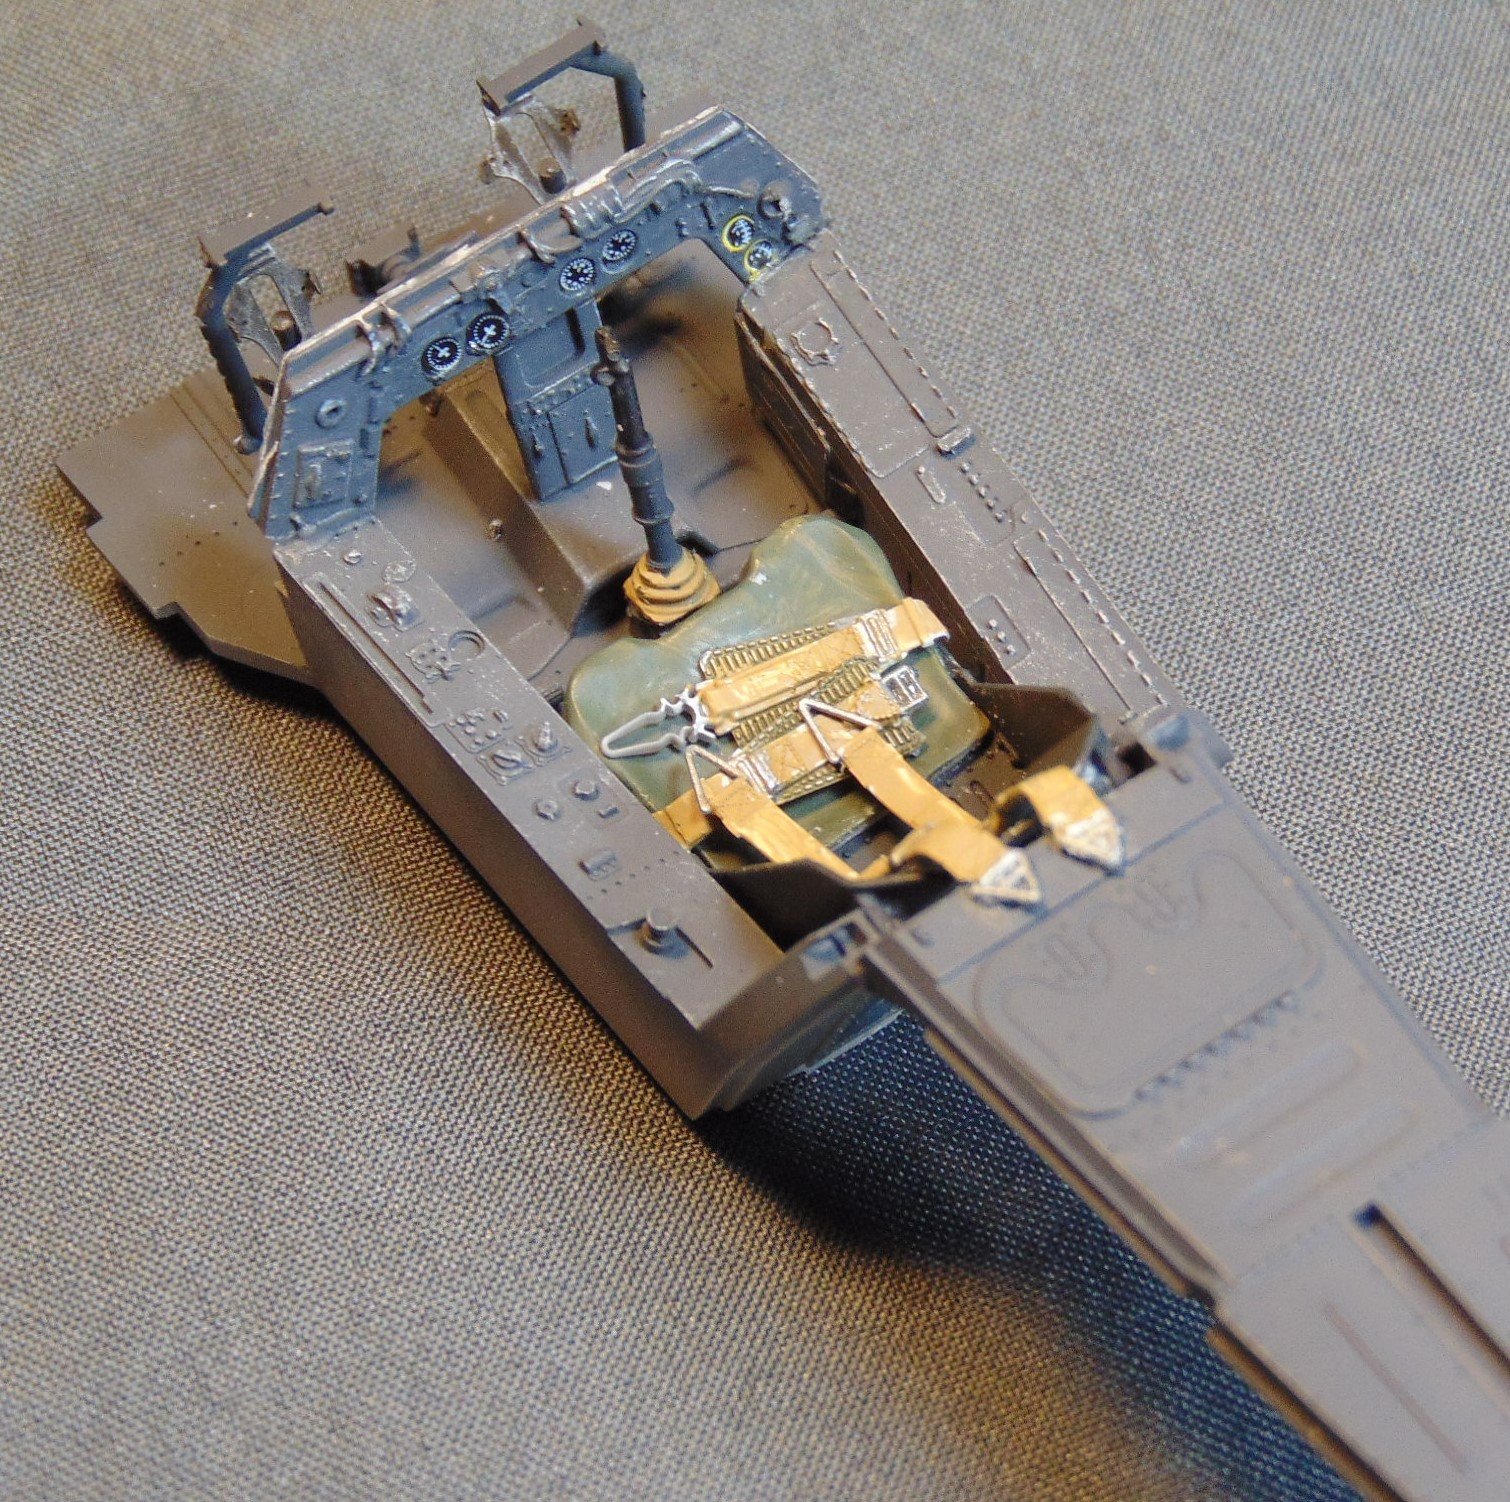
Finally got the instrument panels and windscreen attached. Attaching the wings is next. Not what I'd call perfect fit!!!🙄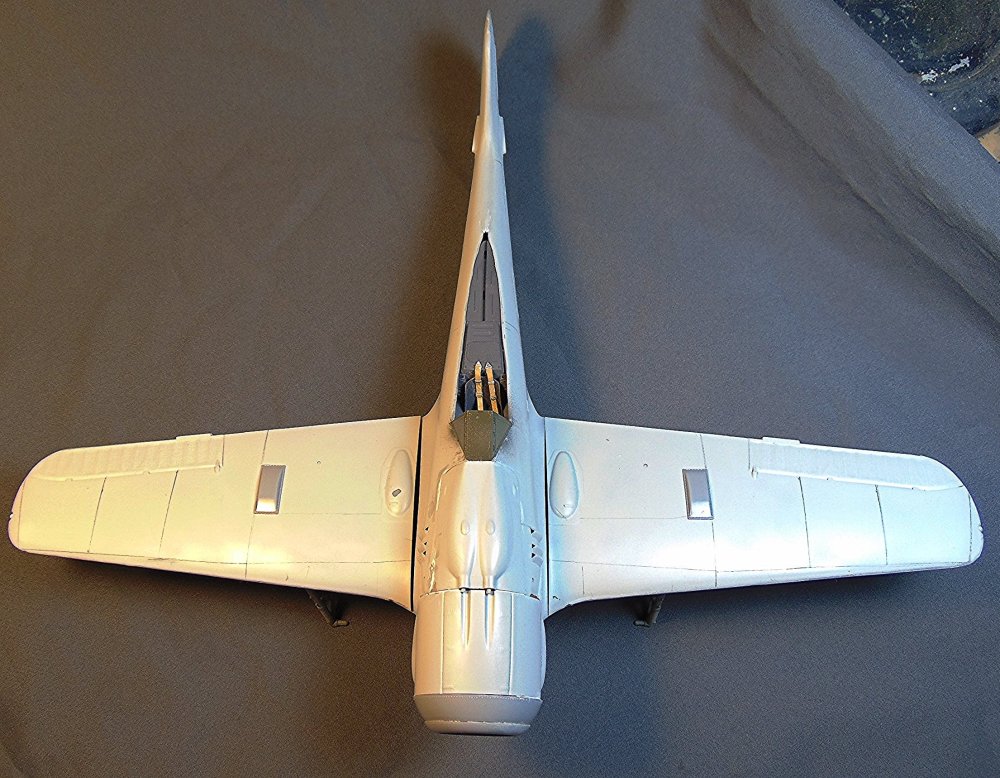
-
Old mold Revell FW-190F8 next
JohnB replied to JohnB's topic in LSM 1/35 and Larger Work In Progress
Adding the instrument panels was a tedious process, especially the top panel. Thanks to strip styrene and CA everything is installed. I just hope they STAY there.🤪 -
Old mold Revell FW-190F8 next
JohnB replied to JohnB's topic in LSM 1/35 and Larger Work In Progress
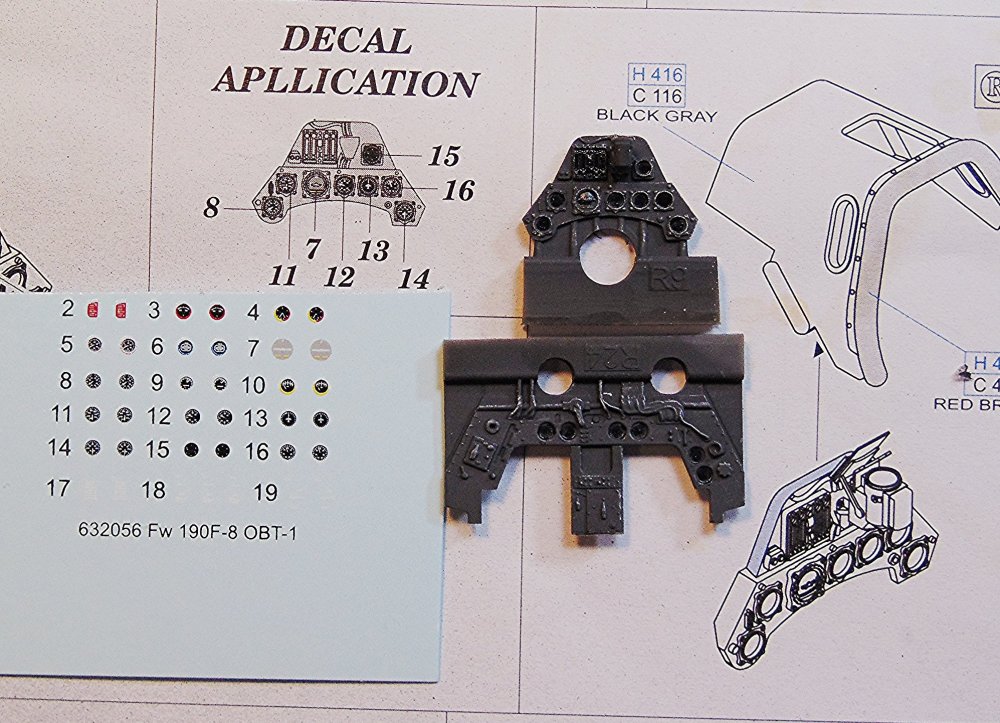
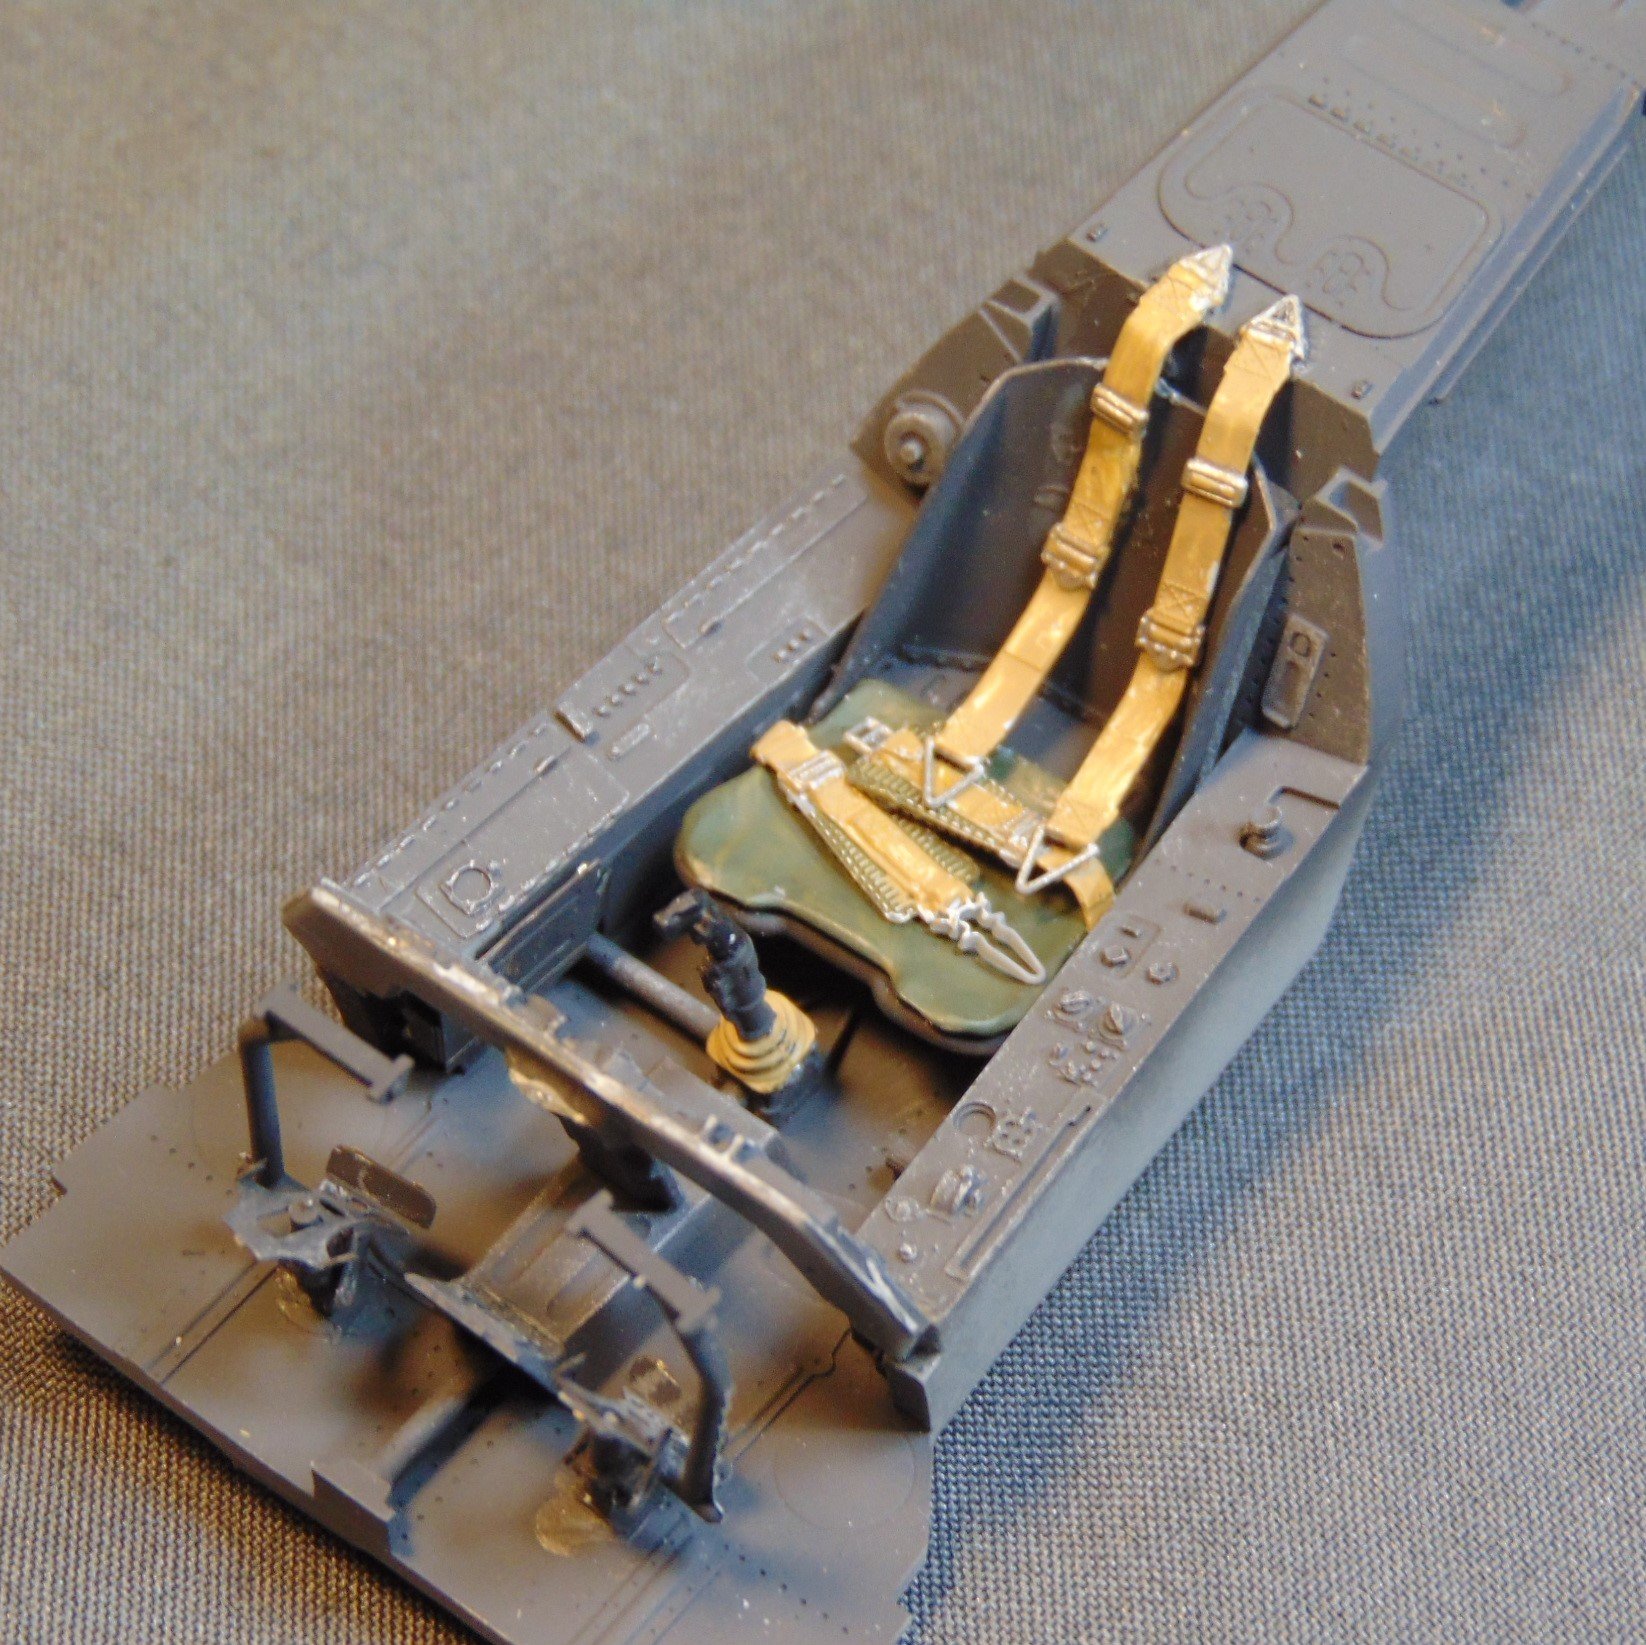
Got most of the cockpit tub done. I plan to go ahead and cement it in place then see about getting the upper instrument panel, etc in place.

-
Old mold Revell FW-190F8 next
JohnB replied to JohnB's topic in LSM 1/35 and Larger Work In Progress
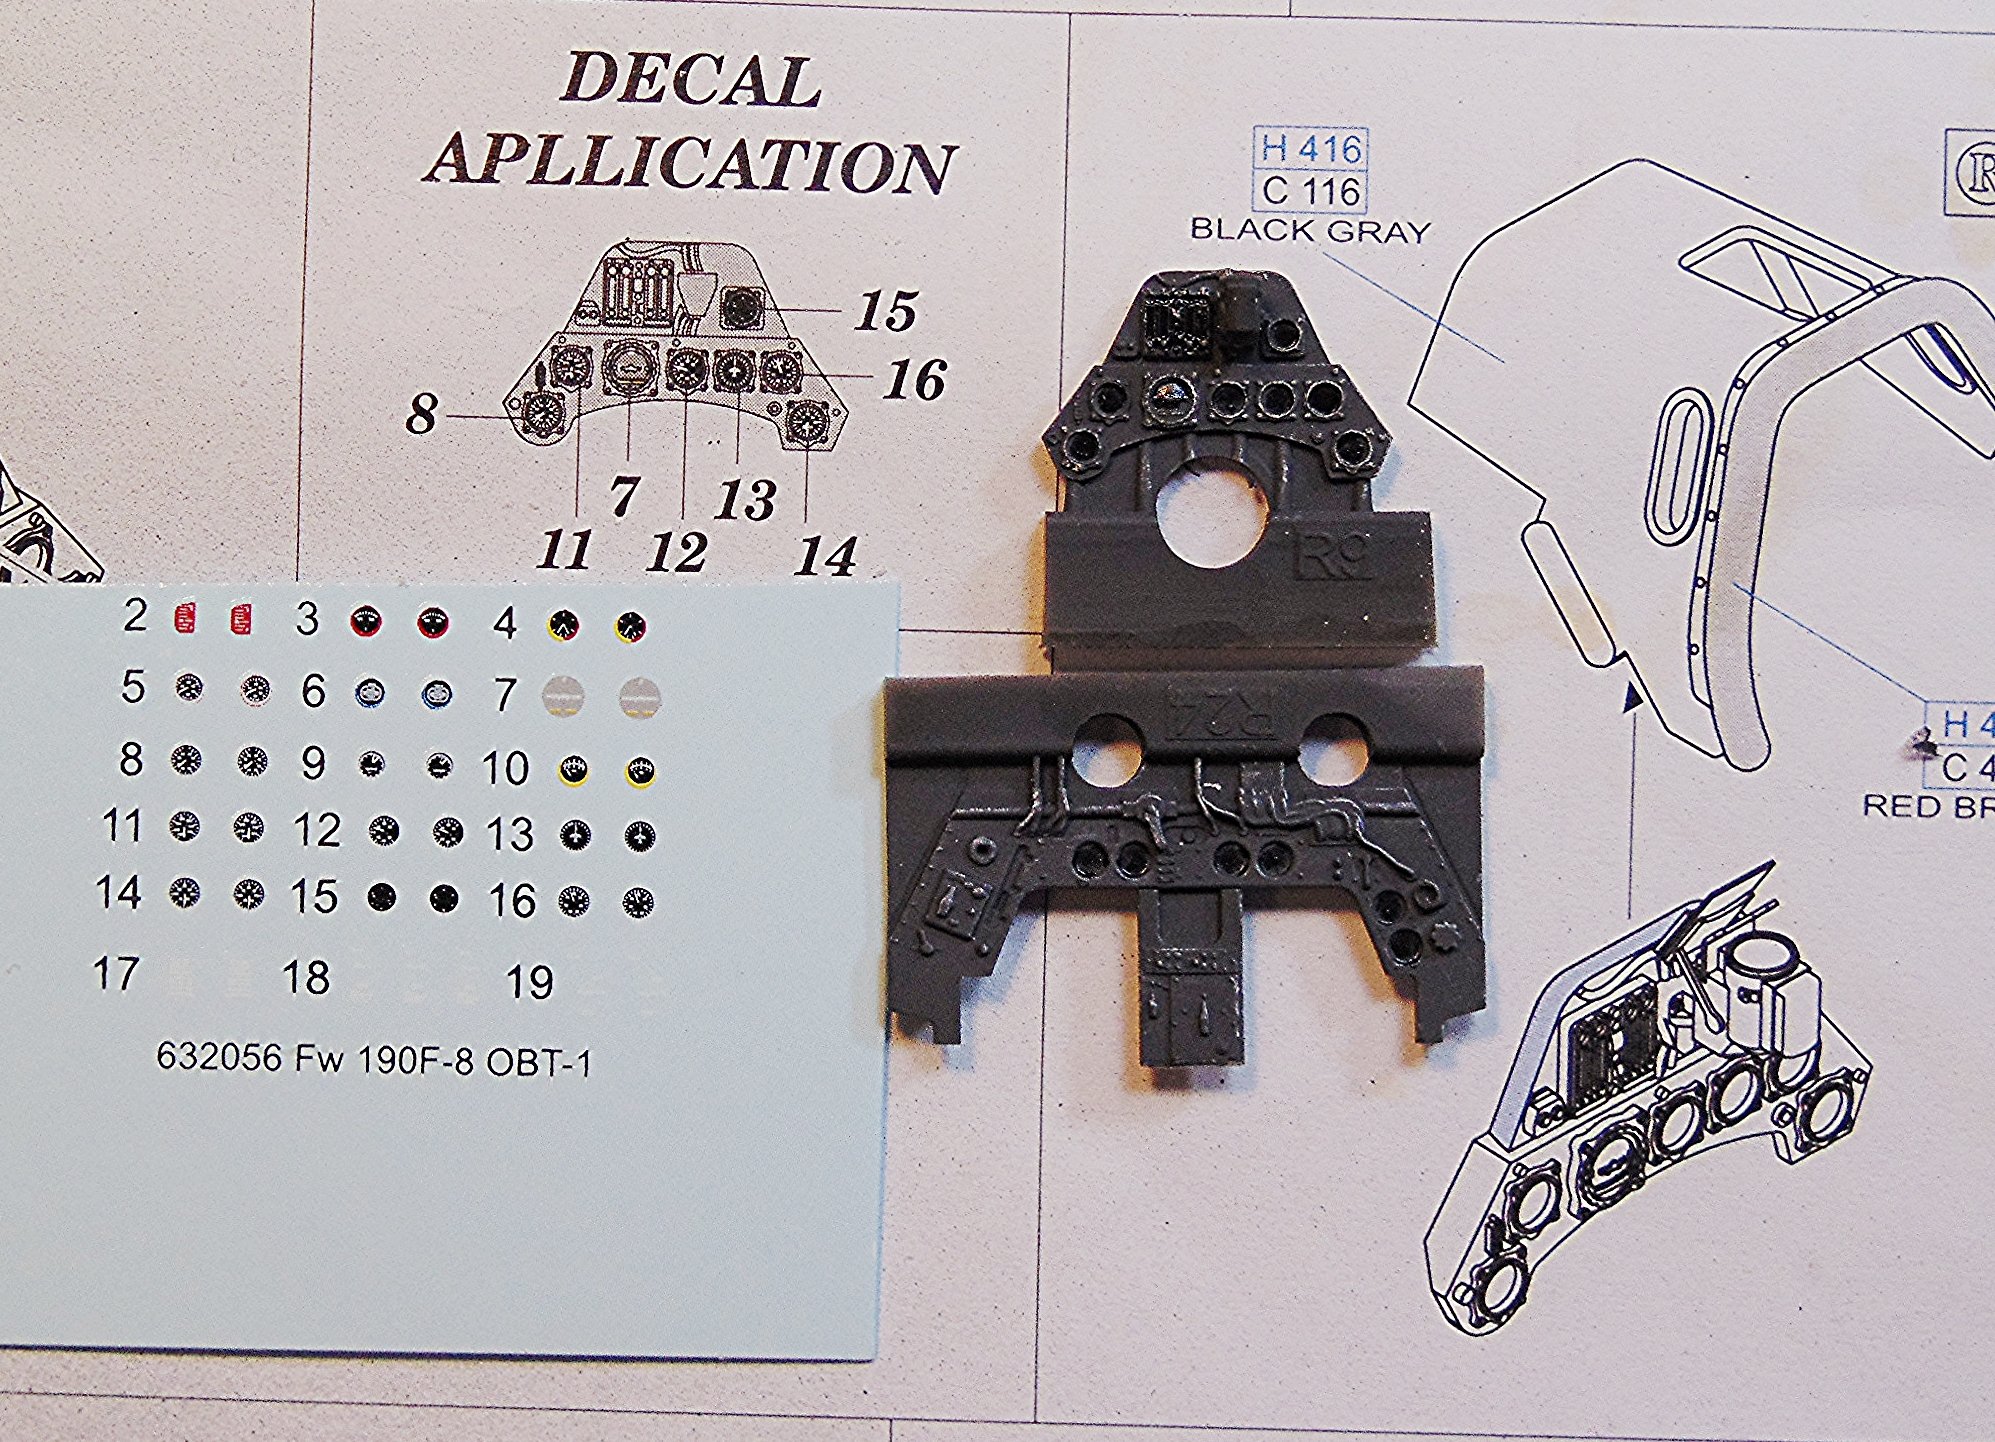
Time to add the instrument faces.