JohnB
-
Posts
7,223 -
Joined
-
Last visited
Content Type
Profiles
Forums
Events
Gallery
Everything posted by JohnB
-

WestLand Whirlwind 1/48 Classic AirFrames-Finnished
JohnB replied to KevinM's topic in LSM 1/48 Work in Progress
I built that kit a few years ago and it turned out very well. I think you will enjoy the build. -
Hasegawa 1/32 Spitfire Mk V Malta
JohnB replied to JohnB's topic in LSM 1/35 and Larger Work In Progress
A nice change from green/grey and dark earth, etc. -
Hasegawa 1/32 Spitfire Mk V Malta
JohnB replied to JohnB's topic in LSM 1/35 and Larger Work In Progress
Even though it's a oldie it's still a nice kit. Raised panel lines and all LOL. -
Thanks. This is one I will be working on off and on in between other builds. Not a "primary" build right now. 🙄
-
Hasegawa 1/32 Spitfire Mk V Malta
JohnB replied to JohnB's topic in LSM 1/35 and Larger Work In Progress
Thanks Kevin. I've made a lot of progress on the build since it's such a simple and easy kit to build. And everything fits. I'll start painting soon. -
Hasegawa 1/32 Spitfire Mk V Malta
JohnB replied to JohnB's topic in LSM 1/35 and Larger Work In Progress
Thanks Bill. I'm going to build it with the clipped tips so no need for the replacement pieces. I appreciate the offer though! Thanks!! -
Hasegawa 1/32 Spitfire Mk V Malta
JohnB replied to JohnB's topic in LSM 1/35 and Larger Work In Progress
Thanks Dennis. It sure is a simple kit to build and should go fast. I'll have to do it as a clipped wing bird as the longer wing tips are missing. I have no idea what became of them but clipped wings will still be good. -
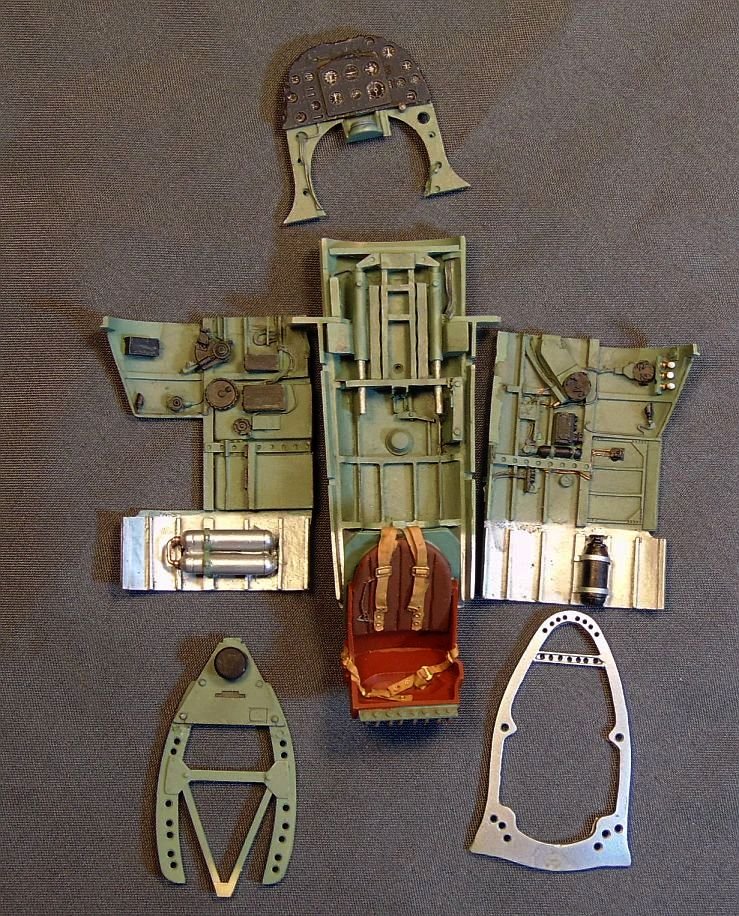
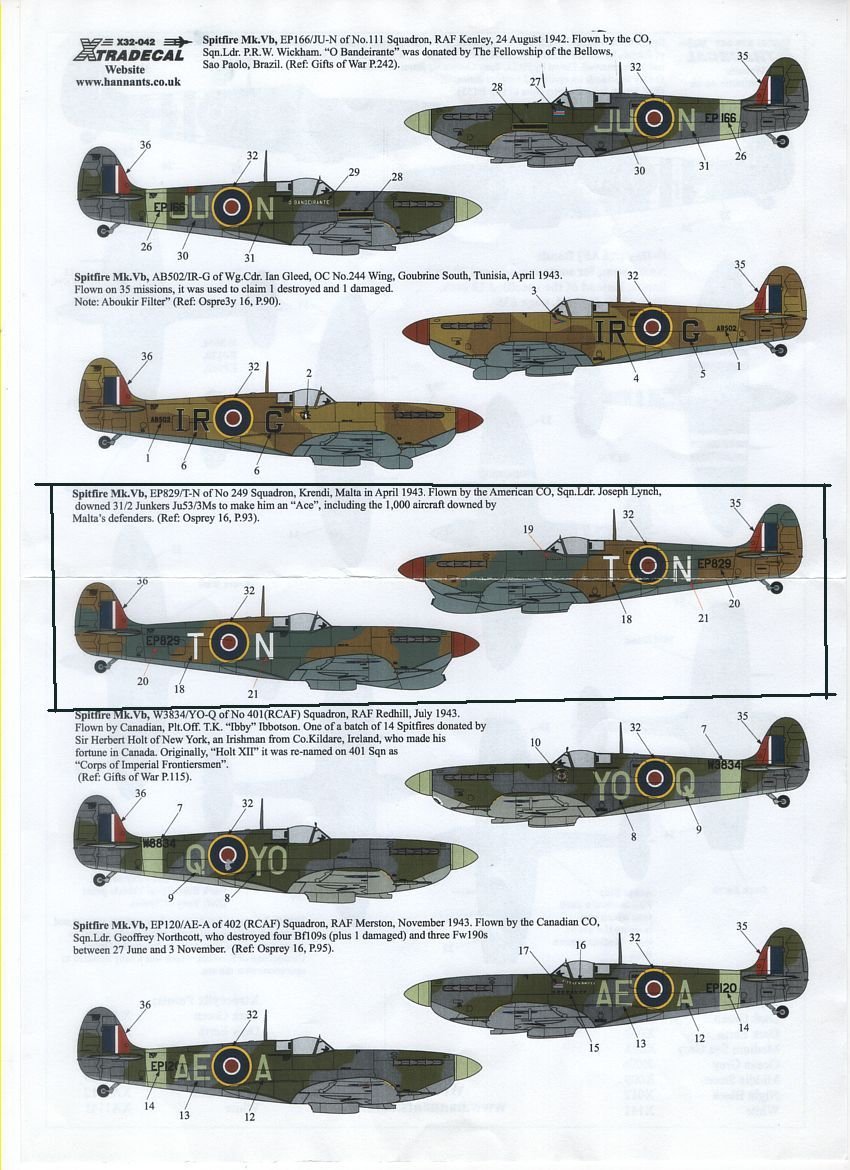
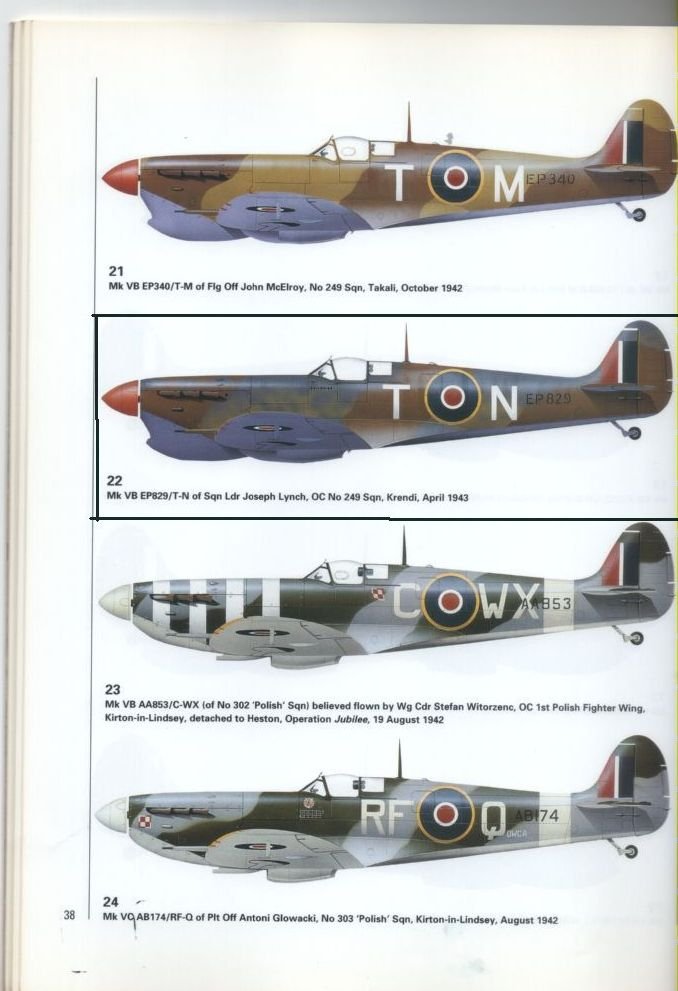
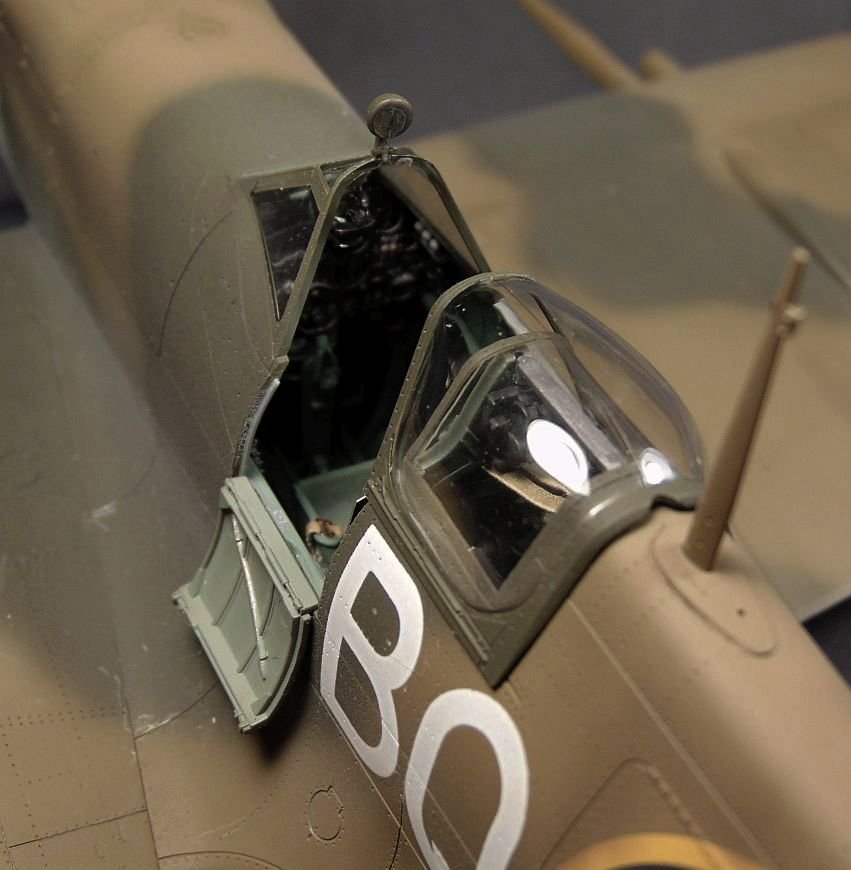
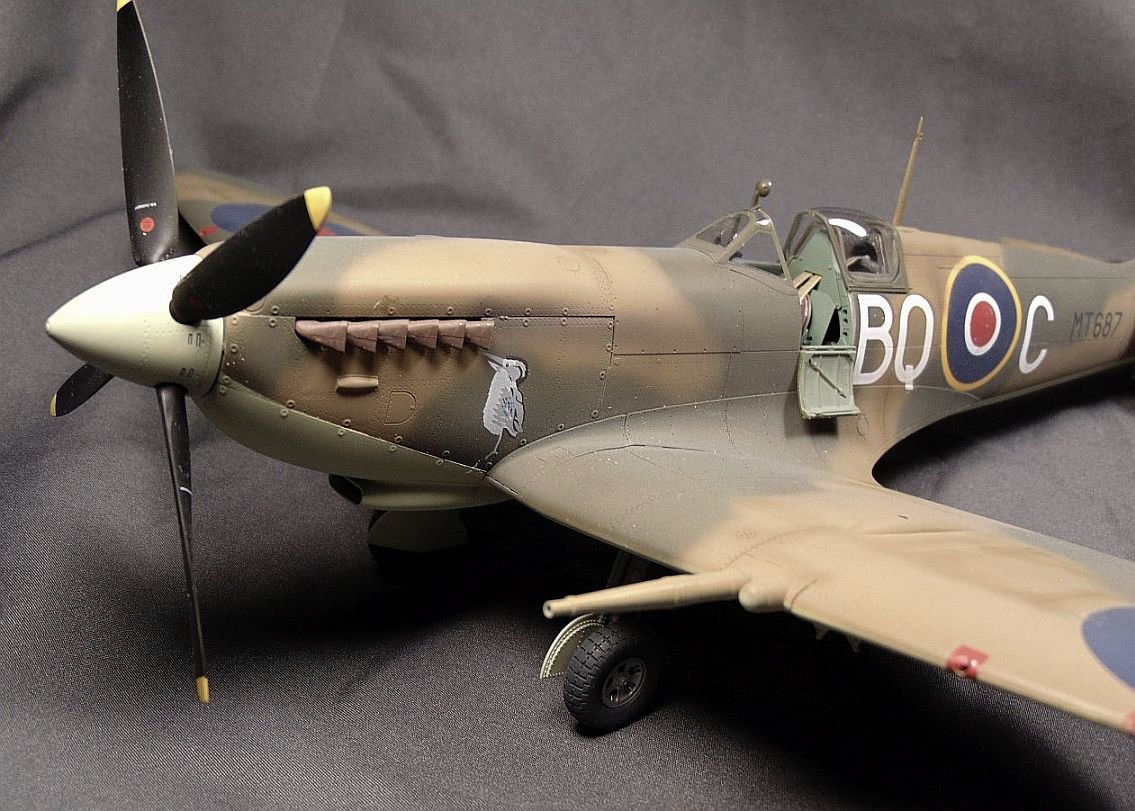
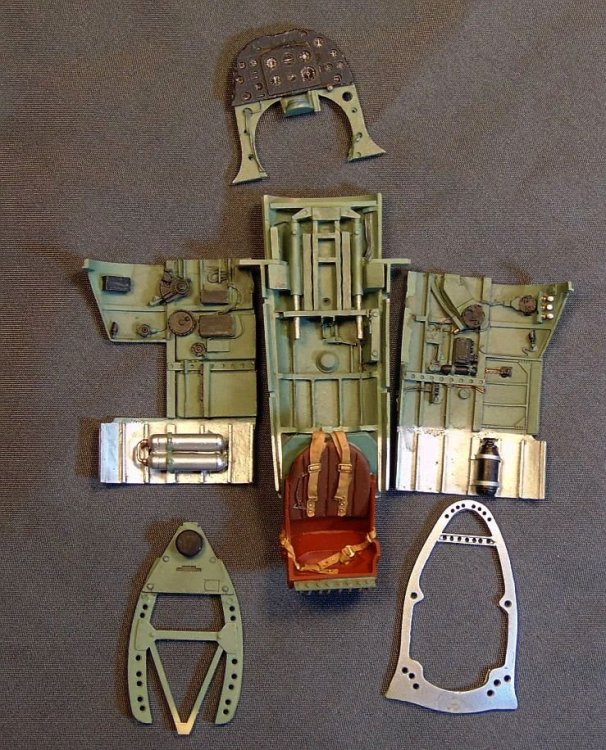
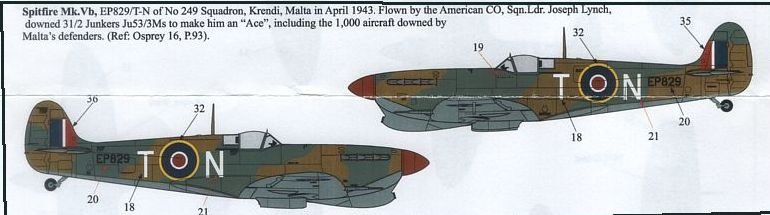
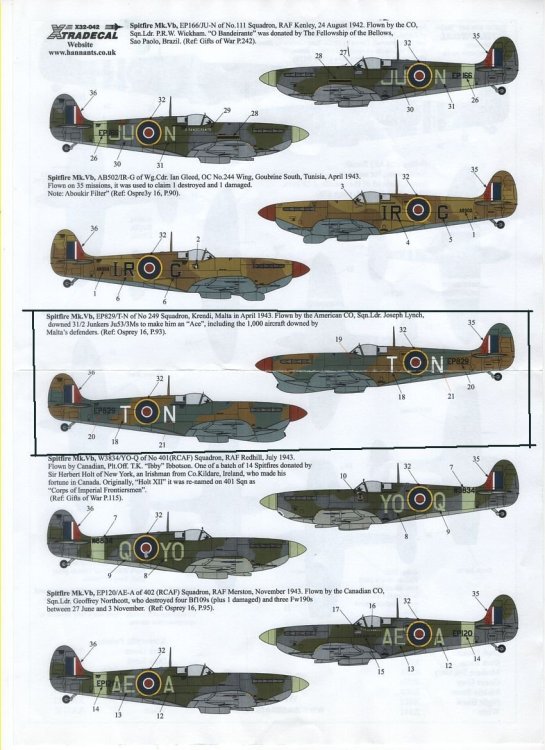
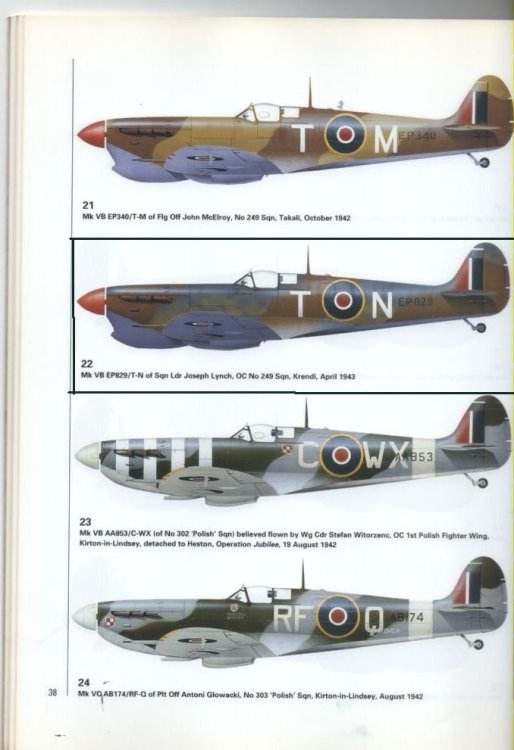
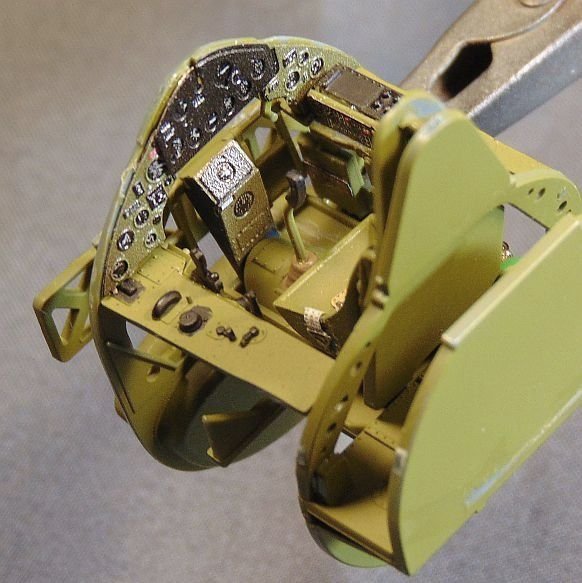
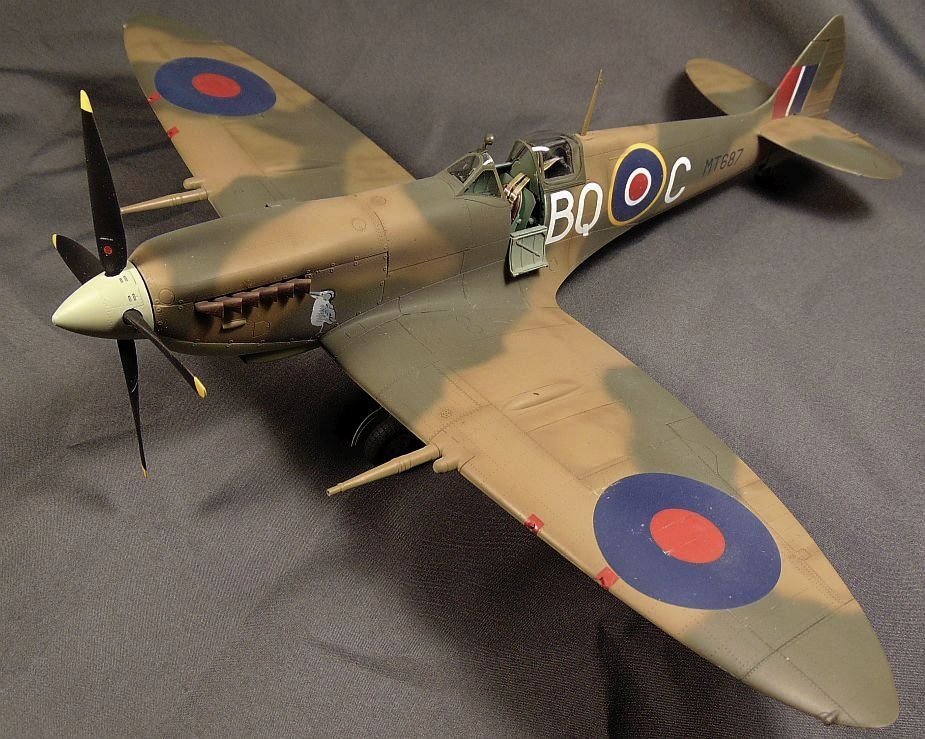
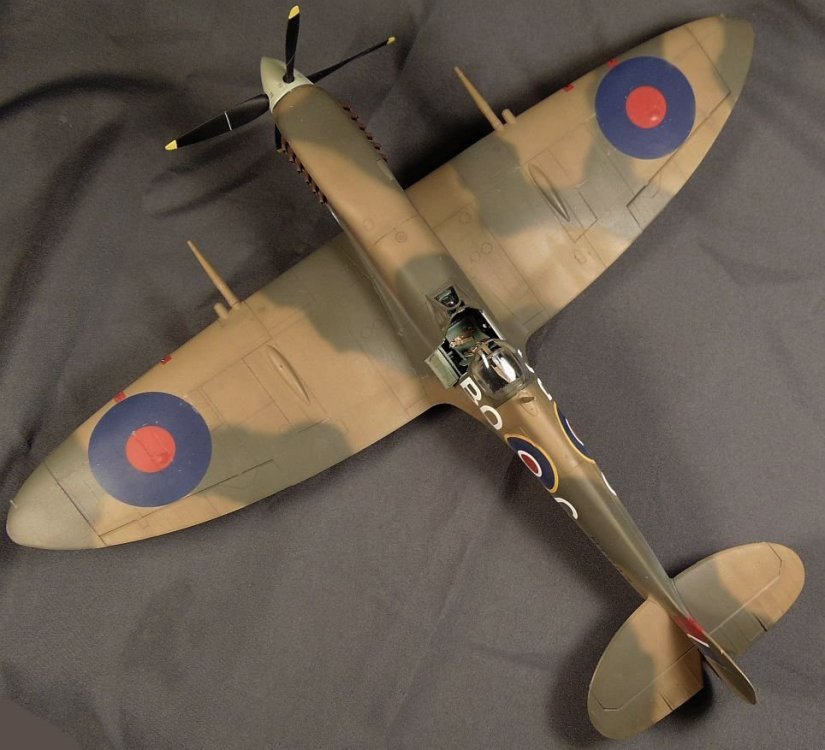
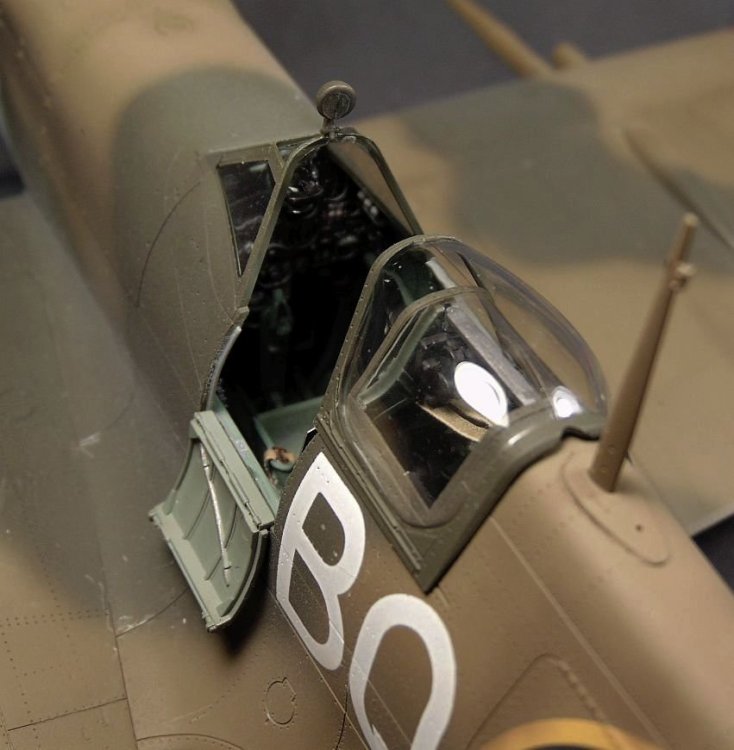
I decided to embark on building the old Hasegawa Spitfire that's been on my shelf for many years and do it as Lynch's a/c he flew from Malta. I'll be using this Aires cockpit set since the kit one is very basic, etc. I'm not 100% sure his a/c had the sand filter, standard wing tips and grey blue/brown camo so I'll be giving that some extra thought. However, I DO like the artwork on the Xtradecal sheet so I might go on and do it like that. We'll see.
-
Good luck!
-
Sounds like a candidate for the SOD Peter! 🤪
-
I'm finding 1/48 a bit more difficult too due to the smaller size of the parts. So much harder to focus on than 1/32.
-
That's a beauty Peter just as I knew it would be. Well done!
-
There is a nice article in Fine Scale Modeler magazine on this a/c. He did a outstanding job on the build but I'm not real sure about a couple of things he did such as standard wing tips and the earlier Rotol prop. Maybe right, maybe wrong. https://cs.finescale.com/fsm/modeling_subjects/f/2/p/191787/2210745.aspx
-
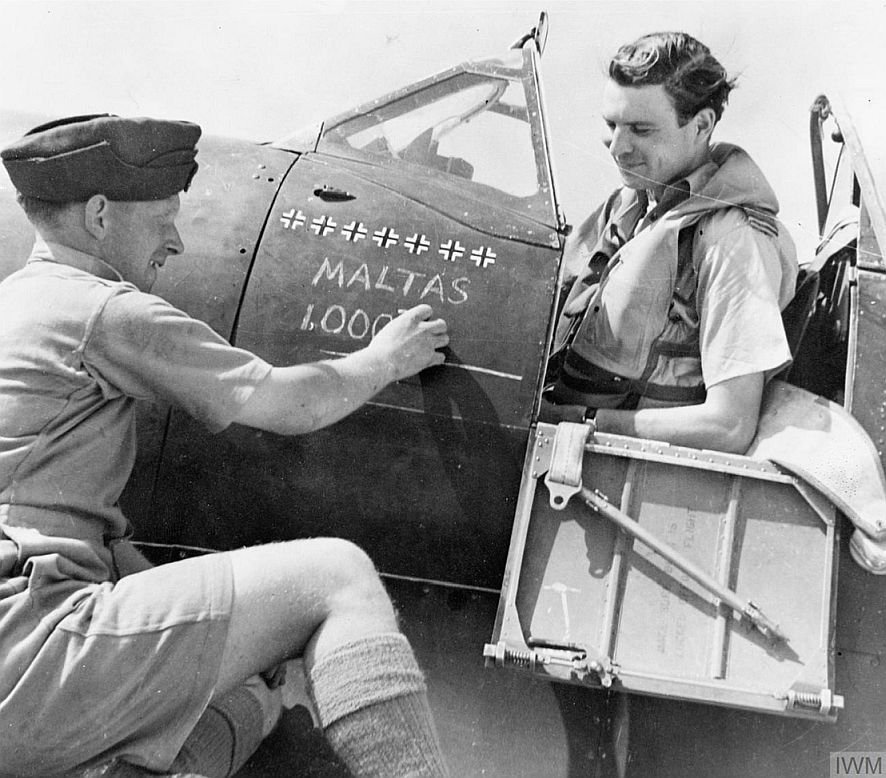
Thanks Dennis for the info. It seems to be one of those situations where we can't be sure what's correct and what isn't. I've seen some of the photos you mentioned and the a/c all looked to have a dark color over all. However, the serial number isn't visible so we can't be sure about the scheme and whether or not it's the N*T Lynch flew. I think what I'll do, unless additional info comes along to the contrary, is I'll stick with the Extra Dark Sea Grey/Dark Slate and either Sky or Azure Blue undersides. No sand filter. I'm pretty sure the "Malta's 1,000" etc was just chalked on for a photo op and didn't stay there after that. Just my estimation. Again, thanks for the info! It IS a big help. John

-
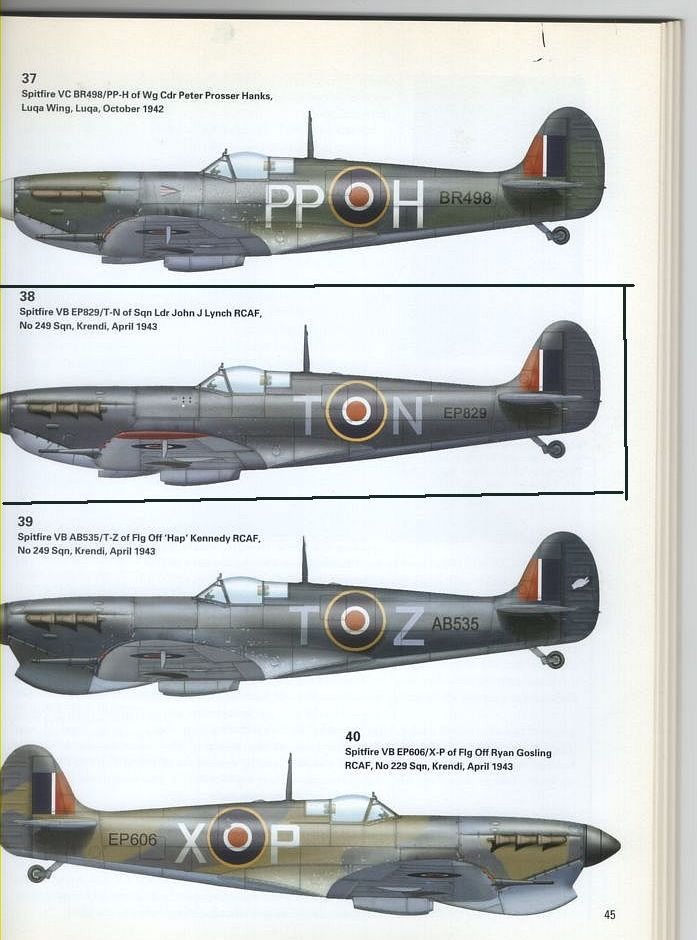
I'm thinking this might be my next build but have questions about the camo scheme. I have a Xtradecal sheet that shows a dark blue/brown scheme which I like. I also have two Osprey books that show this a/c. One book shows the blue/brown scheme, the other shows it as overall blue. It's also shown with and without the sand filter installed. I'm leaning toward the blue/brown scheme with the sand filter on the Xtradecal sheet. What do y'all think? Blue/brown or overall blue? Thanks. 🙄

-
Spitfire Mk VIII RFI
JohnB replied to JohnB's topic in LSM 1/32 and Larger Aircraft Ready for Inspection
Thank you Phil. I like it too. -
The smaller scale takes a lot of getting used to but I don't plan to make it my "main" scale although that was the case some years back. I look forward to your Sea Fury update.
-
Spitfire Mk VIII RFI
JohnB replied to JohnB's topic in LSM 1/32 and Larger Aircraft Ready for Inspection
Thank you Carl. -
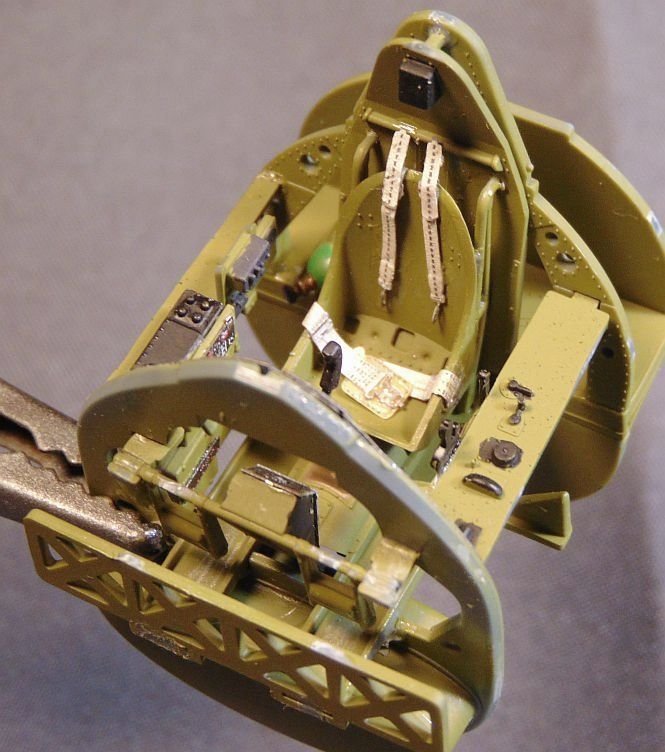
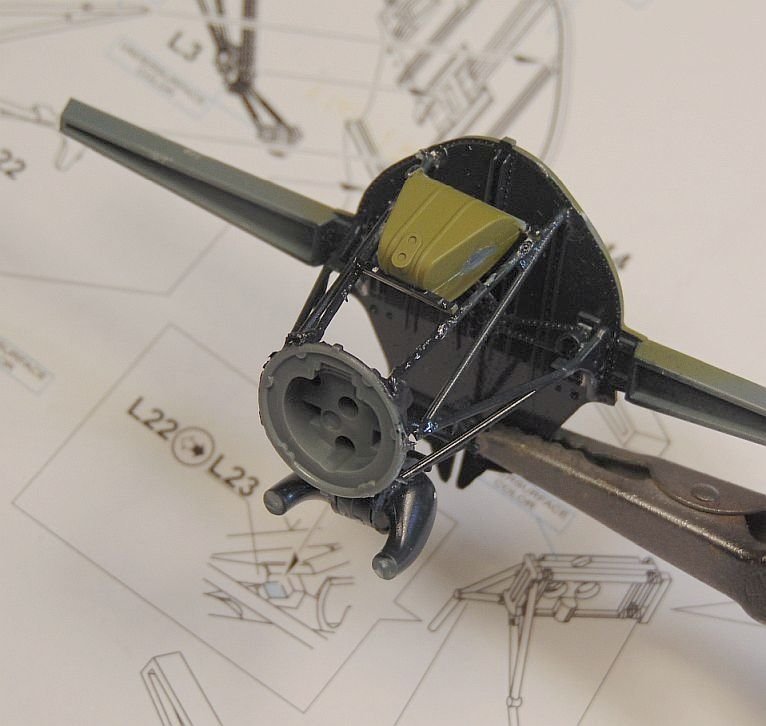
I've been working on the framework that holds the oil tank and other items. VERY fiddly and has a fairly high cuss-factor (at least for me.) CA cement and Zip Kicker helps keep things where they are supposed to be. But it's going to need some cleanup. 🤪
-
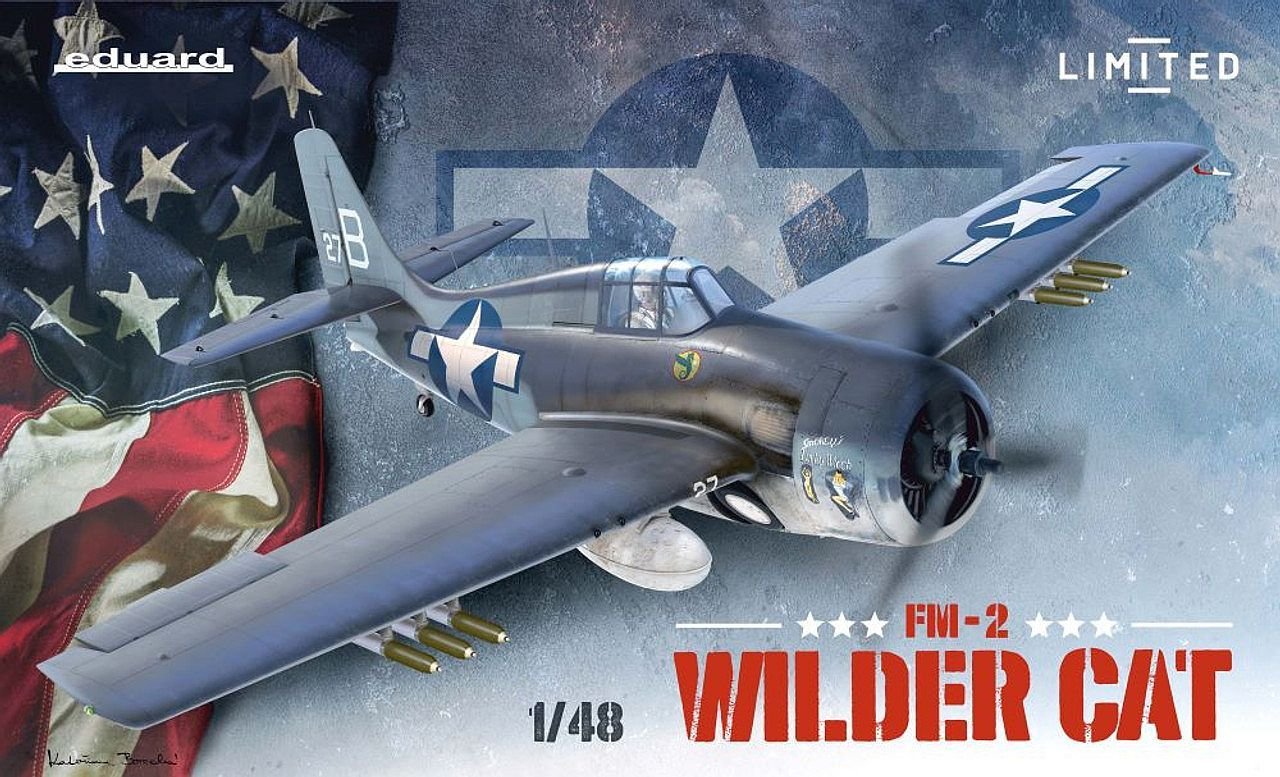
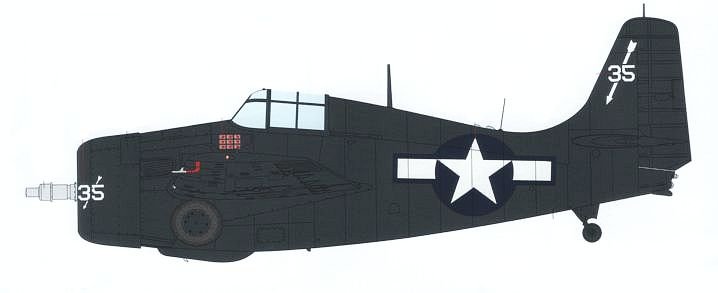
I've been tinkering with this one off and on for three or four weeks. My old eyes have a difficult time with those smaller parts but I still plan to keep on it from time to time until I get it finished. I've always liked the FM-2's and feel that a good kit was long overdue. (Would be nice to have one in 1/32.) This is the one I plan to do.


-
Spitfire Mk VIII RFI
JohnB replied to JohnB's topic in LSM 1/32 and Larger Aircraft Ready for Inspection
Thanks Dennis. I'm pleased you like it. -
Thanks again Peter!
-
Spitfire Mk VIII RFI
JohnB replied to JohnB's topic in LSM 1/32 and Larger Aircraft Ready for Inspection
Thank you Peter. I'm glad you like it. -
All done: https://forum.largescalemodeller.com/topic/19631-spitfire-mk-viii-rfi/
-
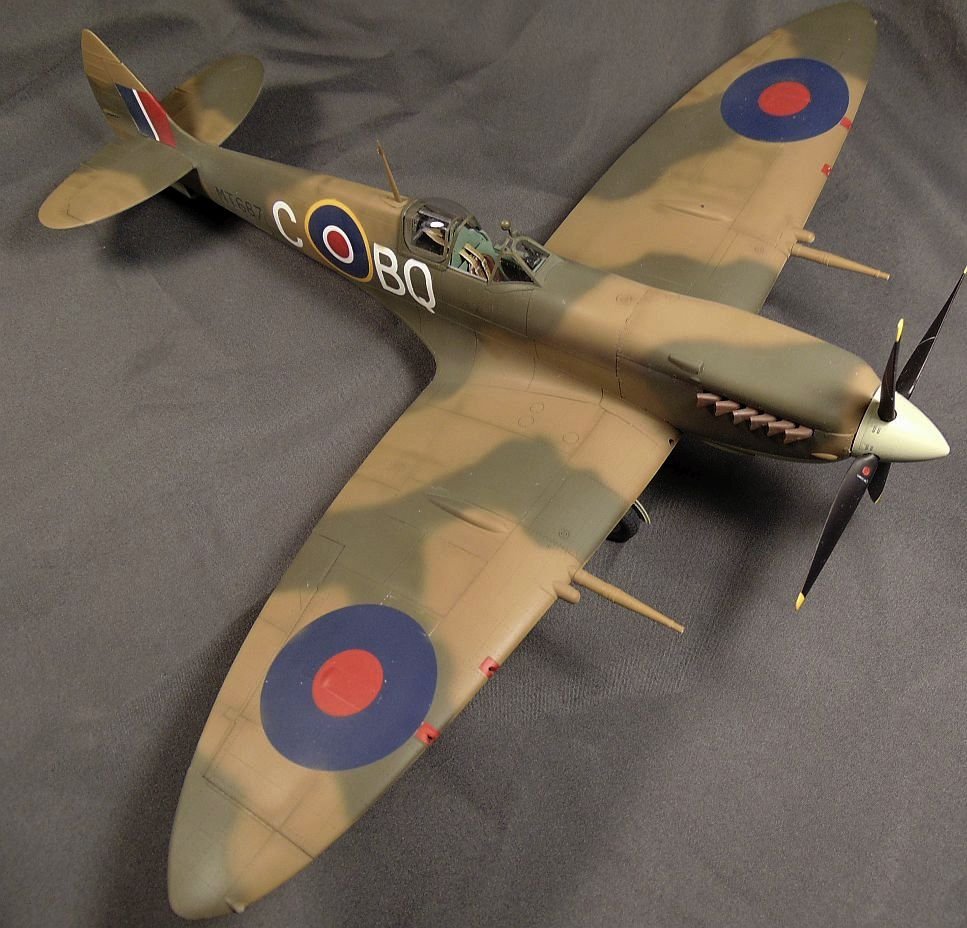
Ready for inspection. The Tamiya 1/32 Spitfires, Corsairs, etc are all a pleasure to build. This one was no exception. It went together very well and needed very little filler. I used the Quinta cockpit set and Barracuda wheels. Painted mostly with Xtracolor. Decals are a combination of one's that come with the Kagero Topcolors book on the Mk VIII, kit decals, and some from my stash. I hope y'all like it. As always please click on the first photo for best resolution and to view as a slide show. THANKS!


- 12 replies
-
- 11
-

-