JohnB
-
Posts
7,226 -
Joined
-
Last visited
Content Type
Profiles
Forums
Events
Gallery
Everything posted by JohnB
-
Guys I need a set of guns for this build. Quick Boost, CMK or any other manufacturer. Can someone recommend a source, preferably in the US? Thanks!!!!!!
-
-
The Whirlwind has always been one of my favorites too Dennis. I hope it turns out nice!
-
Thanks Carl. I'll make a note of it. The fewer headaches the better!
-
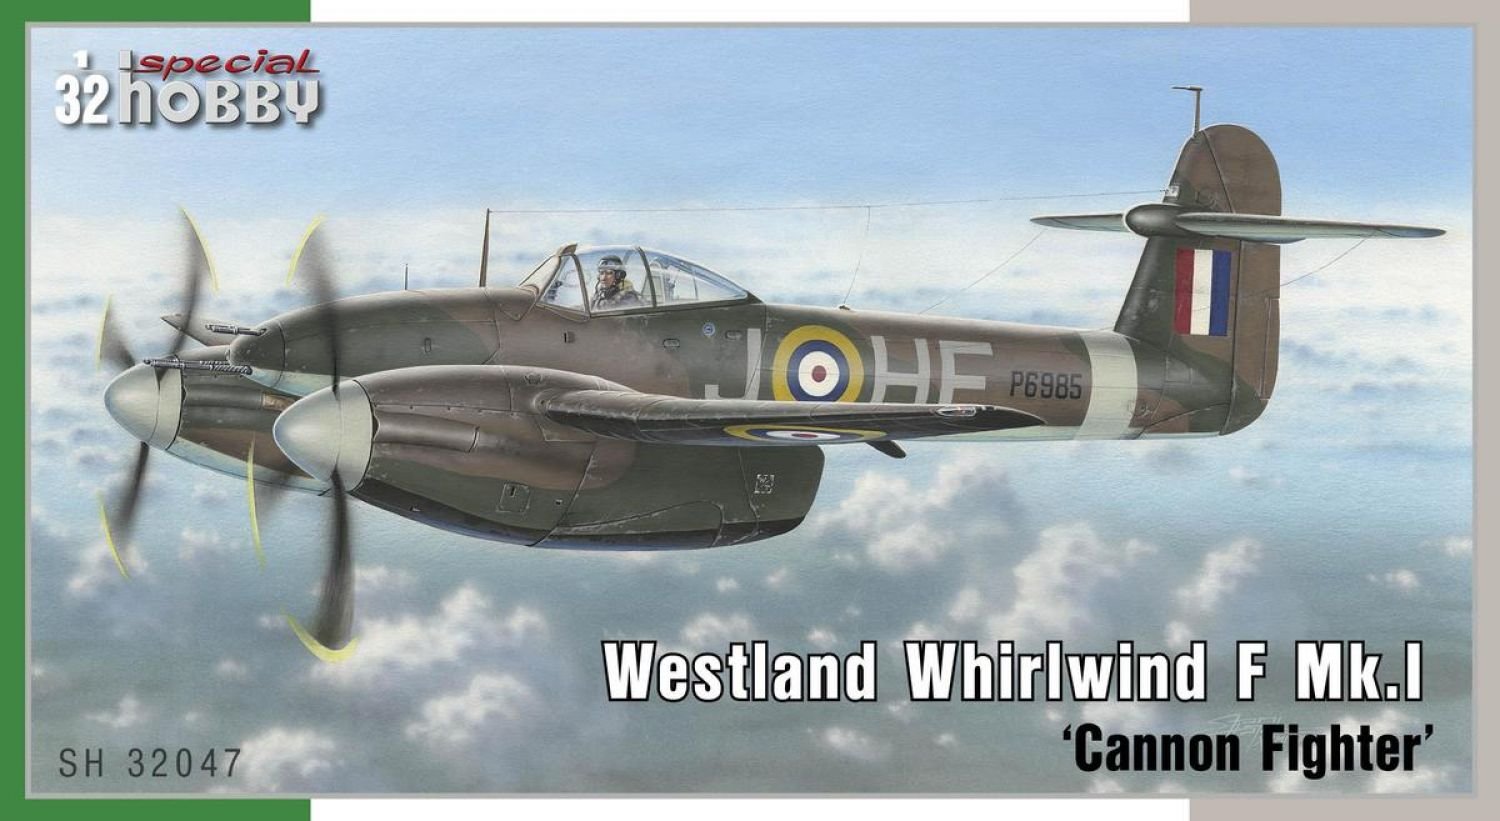
I may be sorry but this kit has been on the shelf too long so now I think it's time to build it. I know it has some problems but I'll try to work around them as it should make a really nice model. This is the one I have in mind. (I saw a post on FB where a group is rebuilding a REAL Whirlwind using parts from one that crashed. I think that is great and hope we will see a full size Whirlwind at some point.)

-
After resuming work on this kit I've AGAIN decided to put it on the SOD. At least for a while until I feel like having a high cuss factor build. LOL NOW I remember why I put it away in the first place. Not only the very poor fit but also the lack of details and accuracy. If I go on and finish it it just wouldn't be a really satisfactory model. Just too many uh oh's to contend with. I'm not saying it's never going to get built, just not any time soon. 🤪 (I MIGHT do a little on it from time to time but not as a full time build.)
-
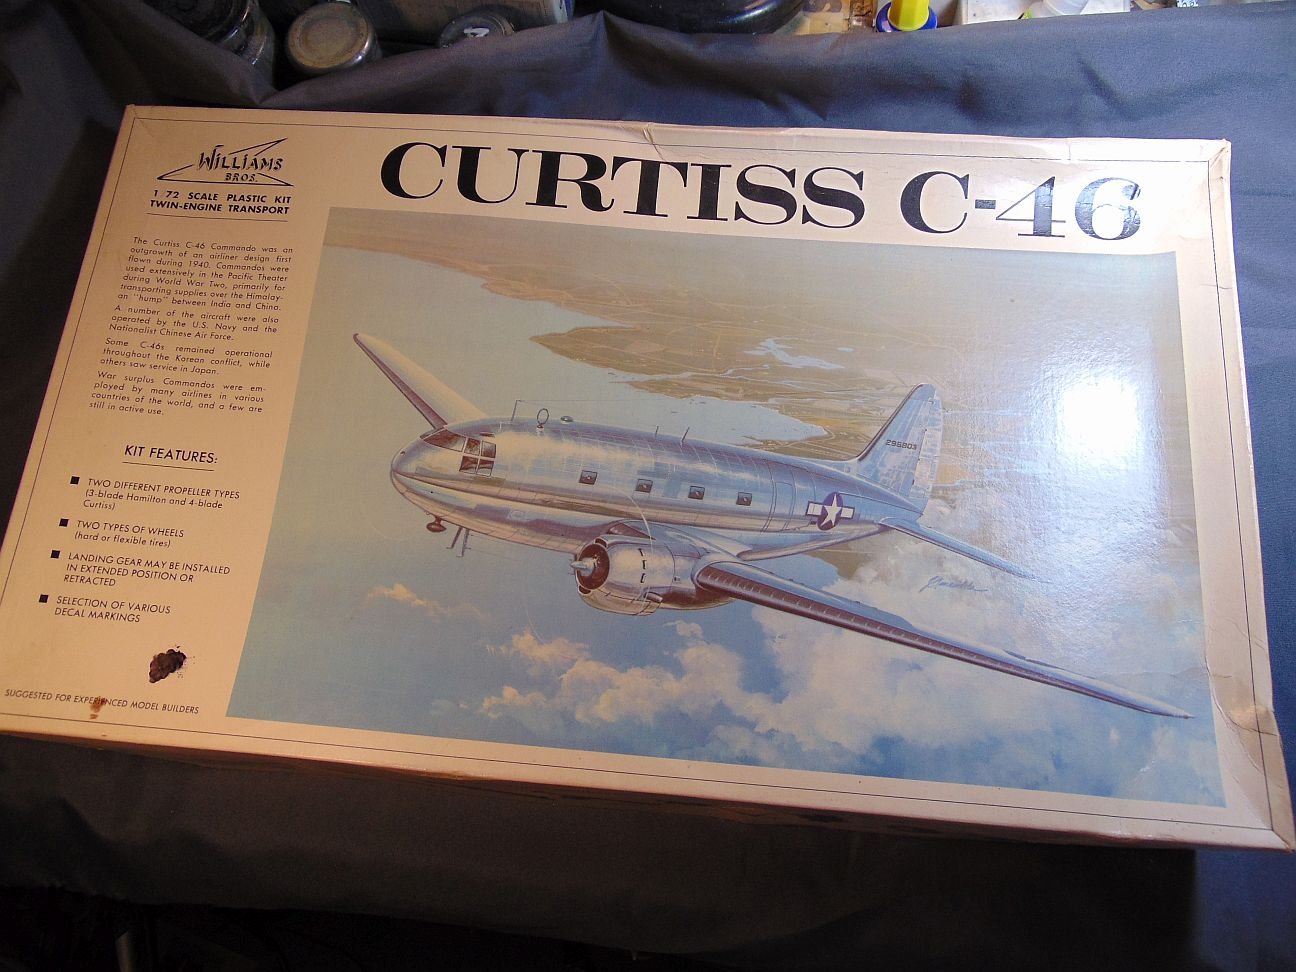
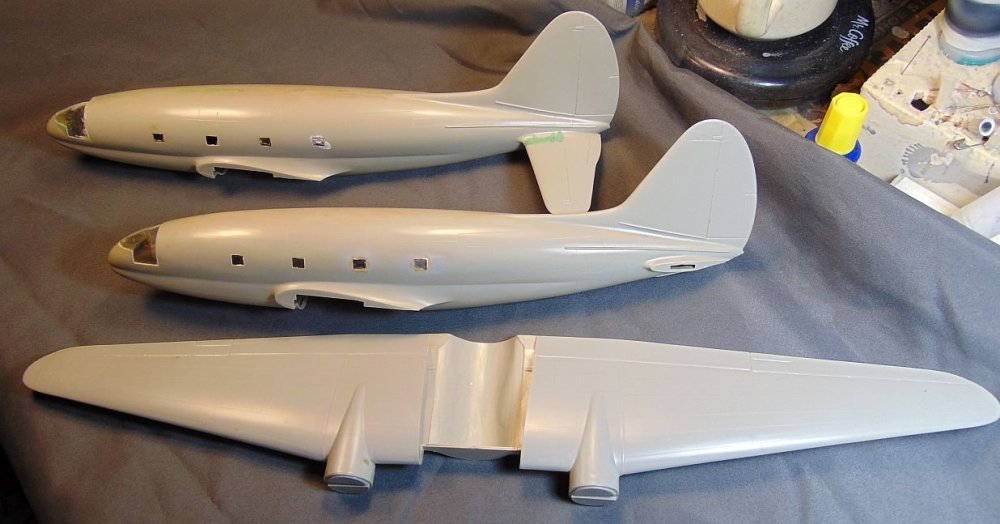
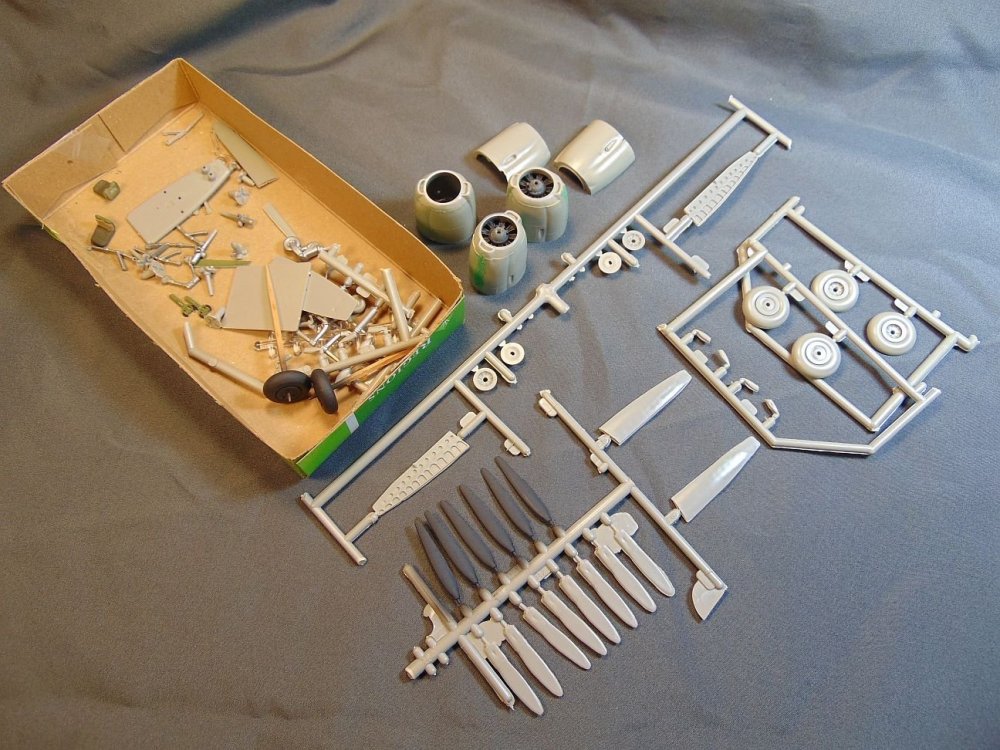
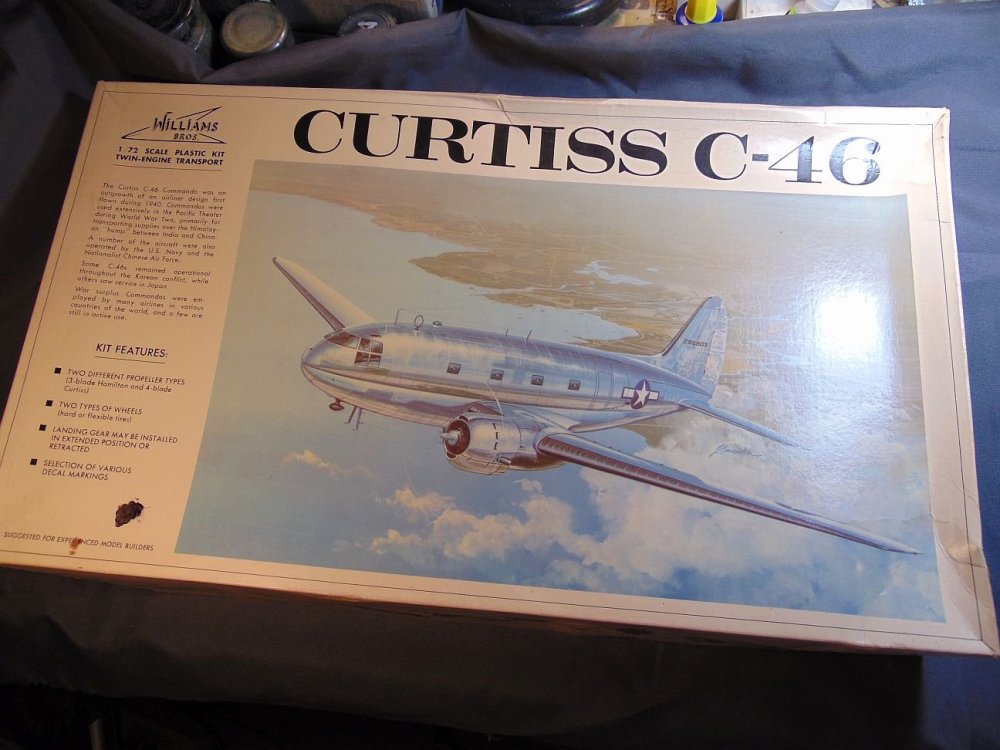
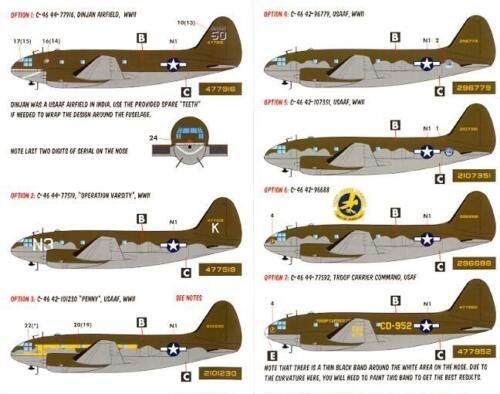
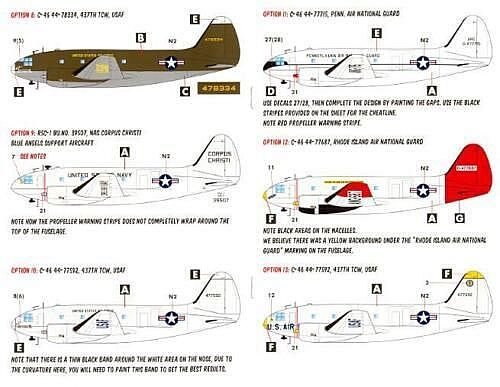
I'm calling this a salvage build because I've had two partially built William's Bros. 1/72 C-46's in my closet for ages. I plan to make one model by salvaging parts from both so I hope to be able to get one fairly decent model built. I have some Caracal decals ordered so should be able to find a subject on there that is satisfactory. Stay tuned sports fans and athletic supporters!
-
I'm pleased that you like it Mike! Thank you.
-
Thank you Peter!
-
Thank you Peter. I'm pleased with the model since it's such a "unusual" looking a/c, etc.
-
Thank you Paul.
-
Sounds like a good mojo rejuvinator Peter. It'll be a beauty!
-
Thanks Scott. Unusual bird for sure. I've always liked it's looks and finally decided it was time to build the kit I'd had for YEARS. LOL
-
Thanks Kevin! I'm glad you like it.
-
Thank you Gaz. Very much appreciate the nice words.
-
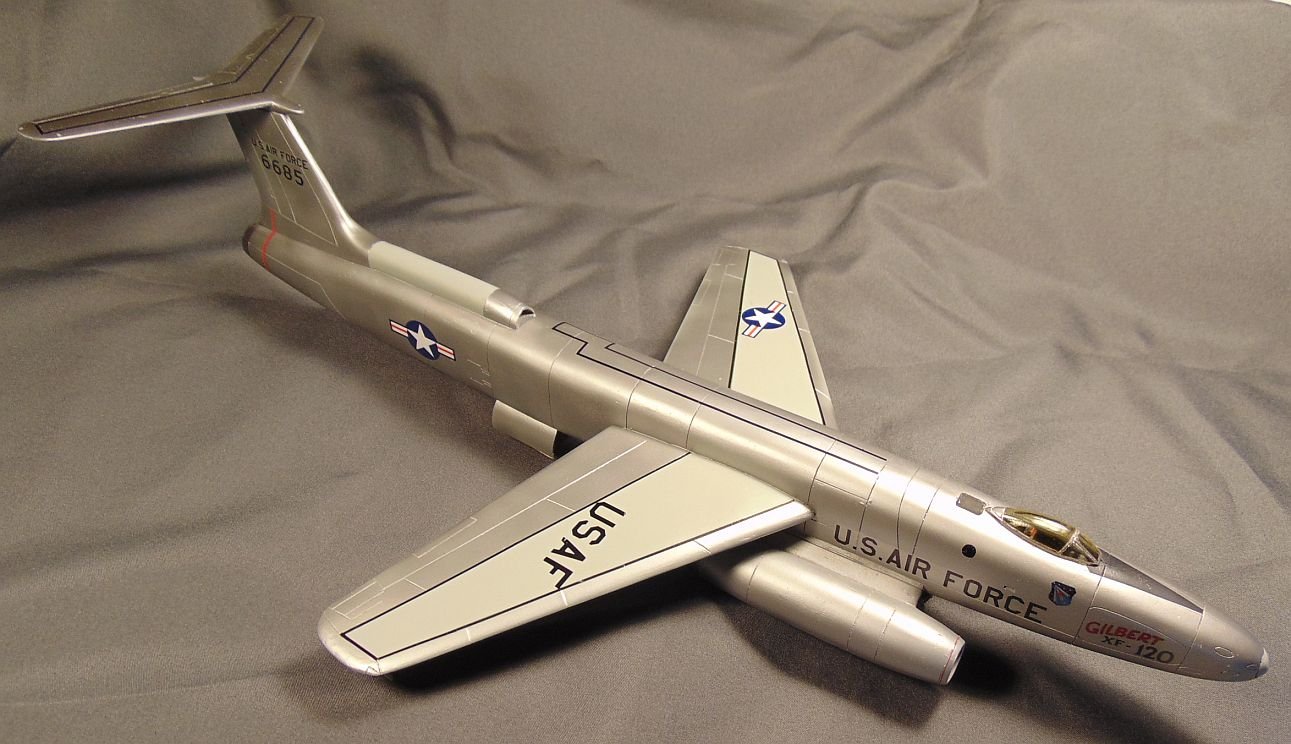
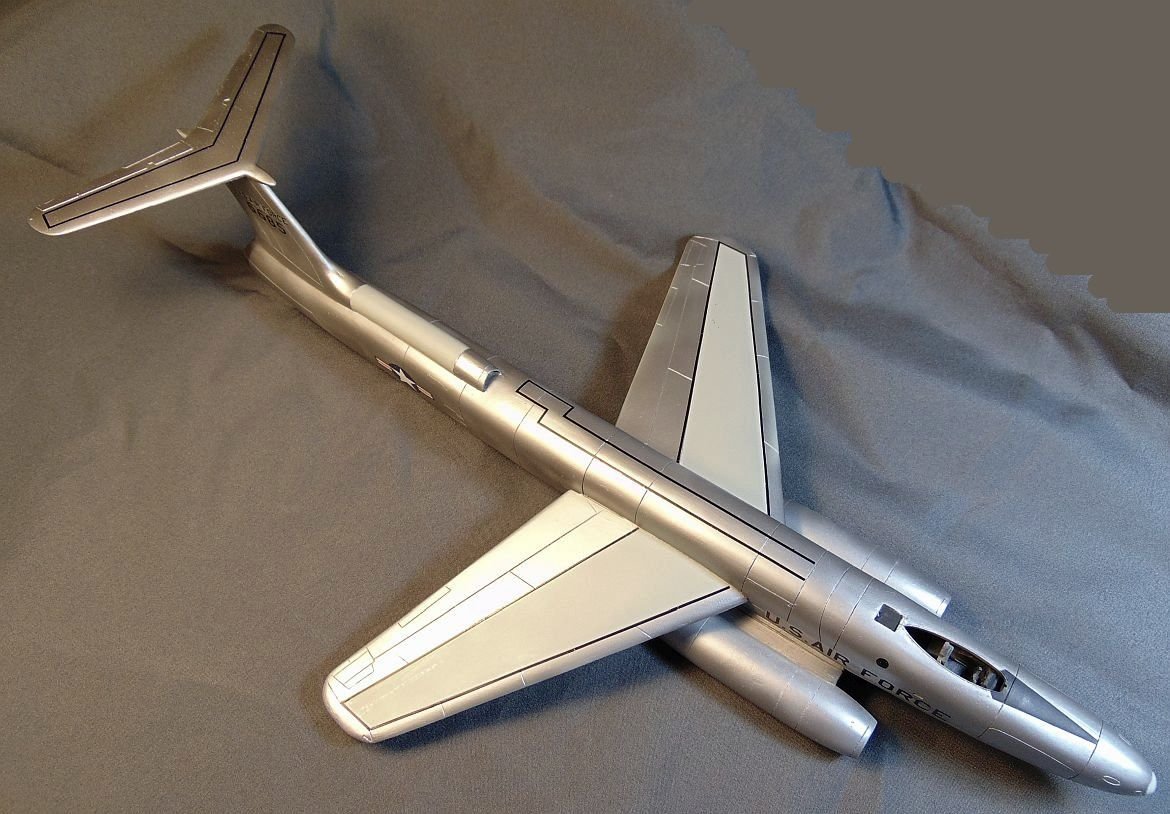
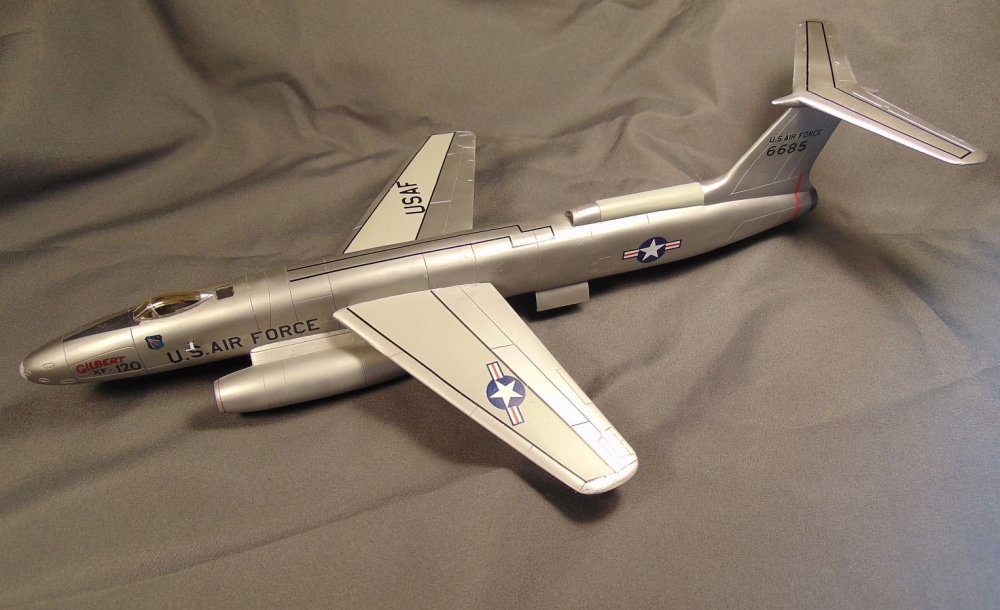
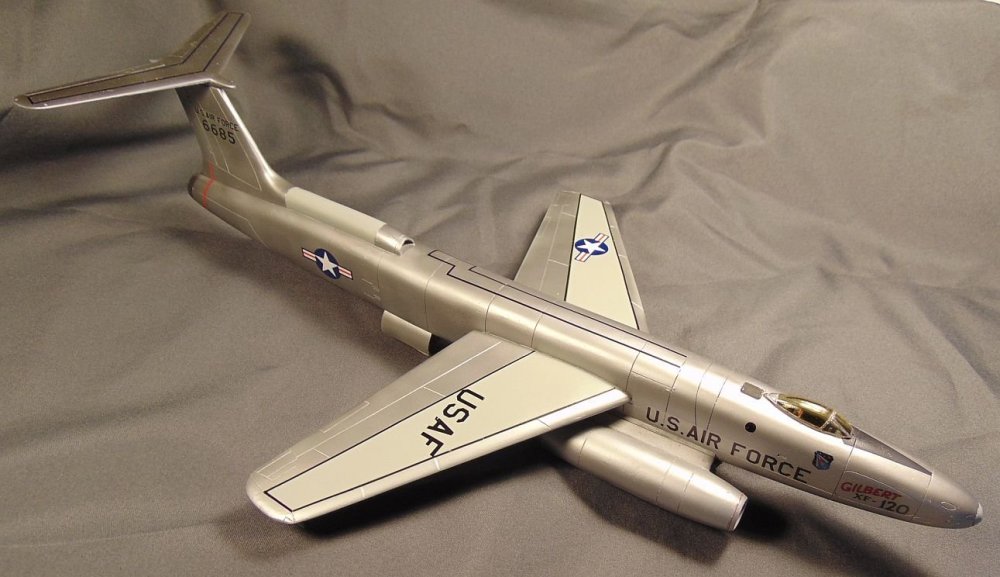
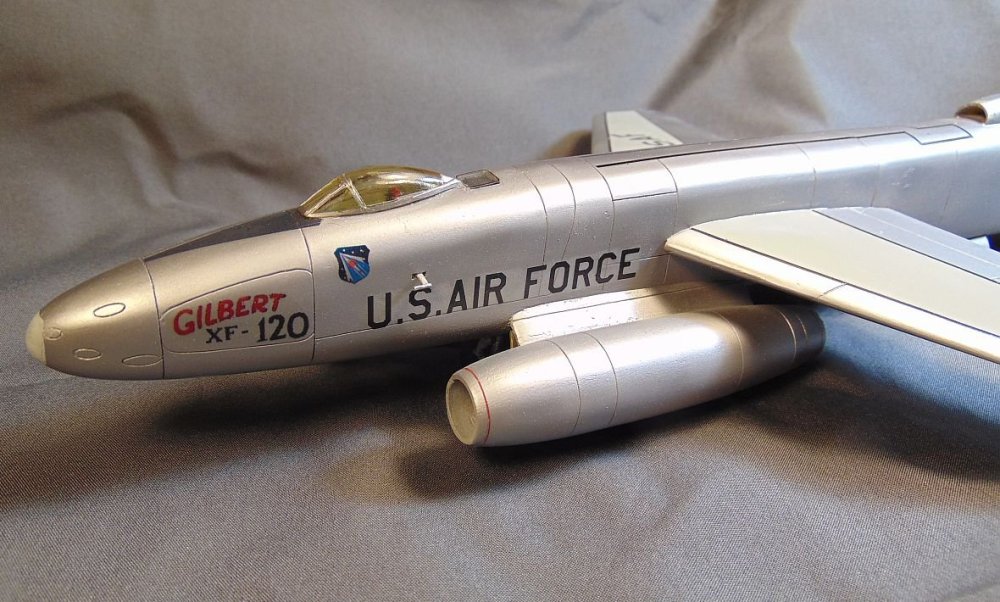
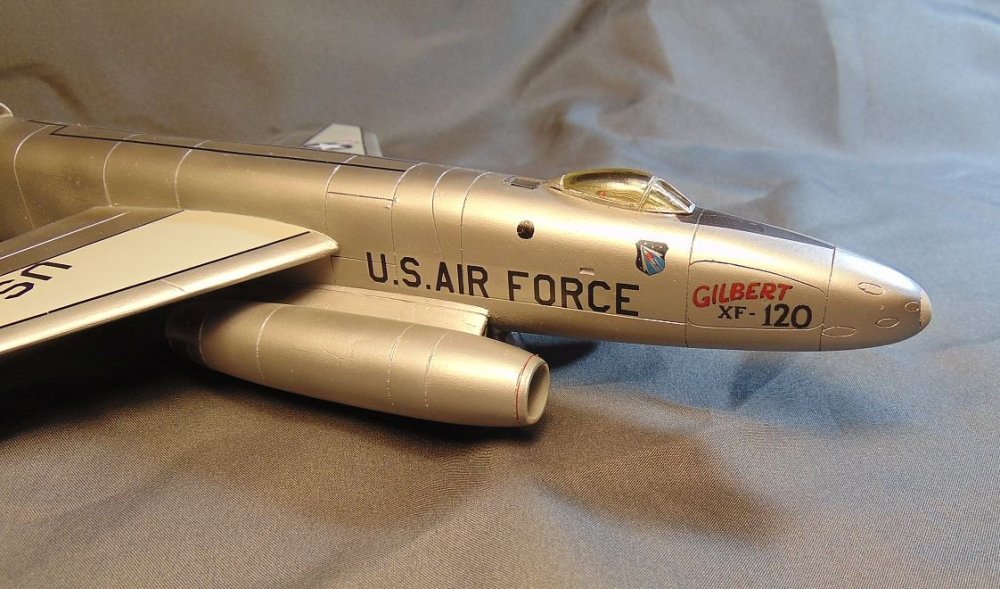
Done with this build. https://forum.largescalemodeller.com/topic/19485-anagrand-172-martin-xb-51gilbert-xf-120-finished/
-
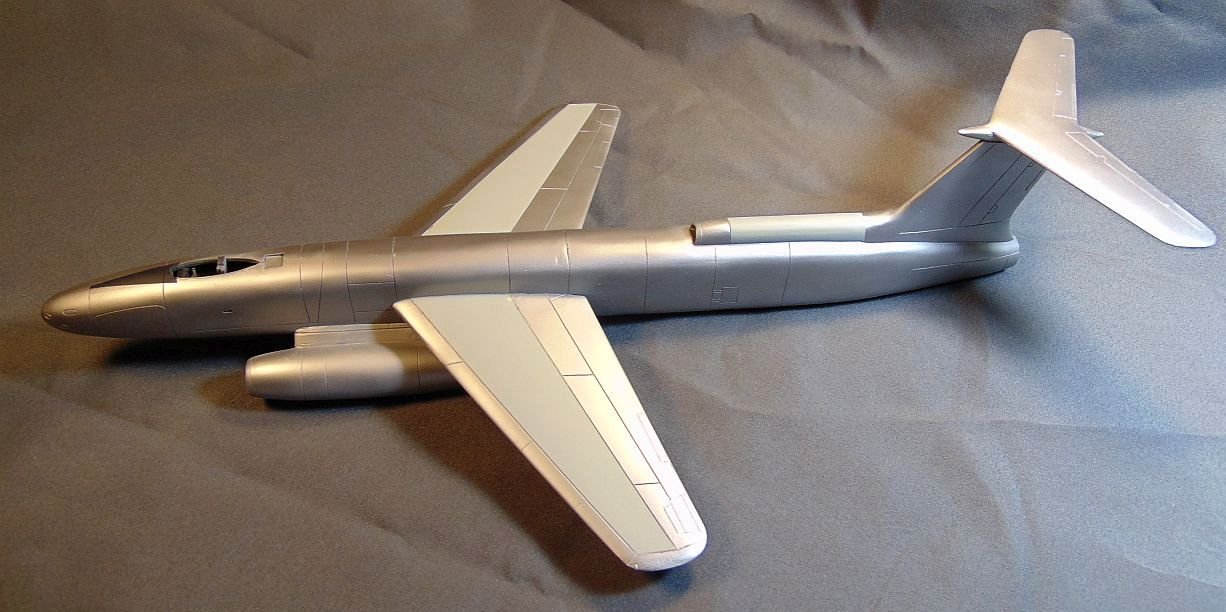
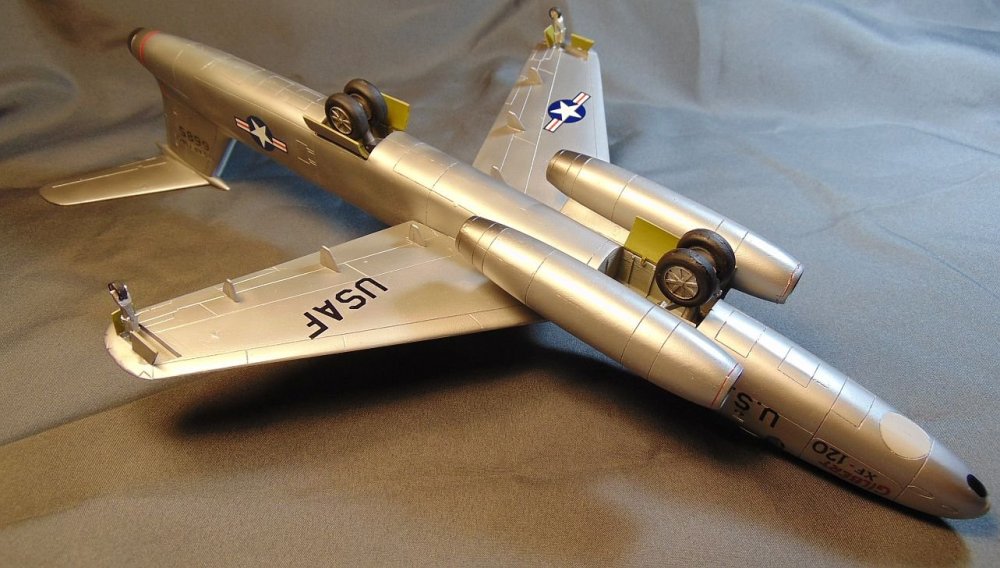
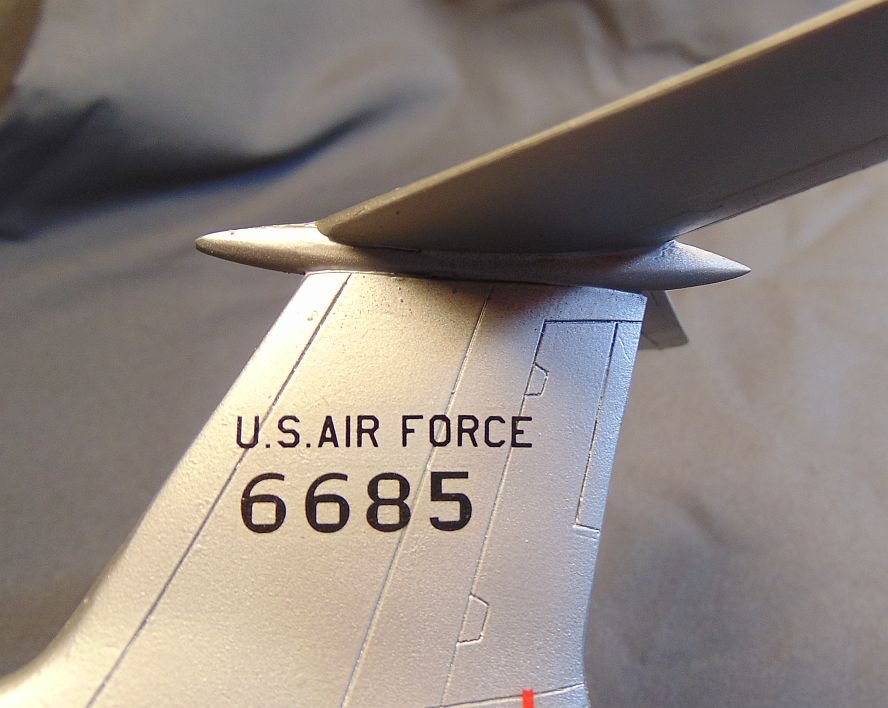
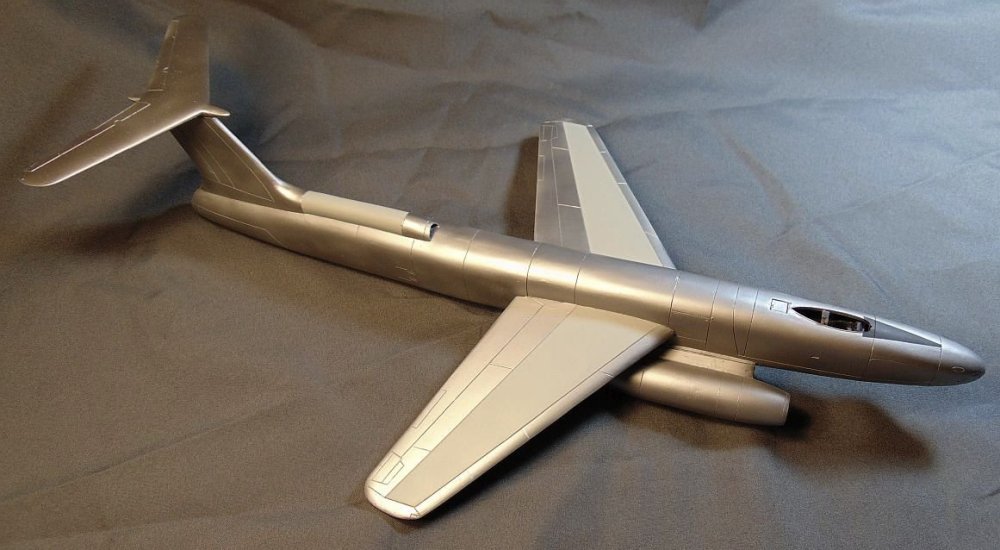
Calling this one completed. A fairly simple build with the only problem being some warpage of the forward fuselage halves. I decided to depict the Gilbert XF-120 as seen in "Toward the Unknown". I think it was a very cool looking airplane and it's too bad both prototypes were lost. Since the a/c depicted in the movie had the tail cone mod, which the kit didn't have, I had to scratch that using a couple of rocket bodies, putty and a lot of sanding/shaping. Nearly all the decals except for the "Gilbert XF-120" were from my decal stash. The "Gilbert XF-120" I made using my computer and laser printer. I used Alclad for most of the painting and some Mr. Color for the gray wing areas. I hope y'all like the results of my efforts! Let me recommend again to click on the 1st photo for best resolution and to view as a slide show.
-
Thanks Gaz. I agree about the warp. Now that the wings and engines are attached it's hardly noticeable. I'll be posting some RFI pics shortly.
-
Right now all it needs is a correct pitot tube which I will attach shortly.
-
Thanks!!! I've now got everything done except painting the canopy frame and attaching the gear doors. Should have it completed some time today.
-
Coming along well. Decaling nearly completed but still several more to apply.

-
Me too Hubert. I've always liked the looks of it and watching it fly in the movie shows how maneuverable it really was. It's a shame they completely lost out to the Canberra. Sure would have been nice if they had bought a couple dozen or so.
-
Painting in progress. I plan to apply a couple of different shades of aluminum, etc. (I watched my disc of "Toward the Unknown" a couple of nights ago for a little "inspiration". LOL Some really outstanding flying sequences there!)

-
Thanks Paul. I feel like it will make a neat looking model. Something out of the usual, etc.