JohnB
-
Posts
7,247 -
Joined
-
Last visited
Content Type
Profiles
Forums
Events
Gallery
Everything posted by JohnB
-
I hope we will be able to find what we need sooner than later. Fingers crossed. (I know Biggtim is working on remastering a -2 night fighter conversion so maybe someone will come up with the ones we want too.)
-
I'd like to convert my Trumpeter -4 to a -5 or -5N (optimally my Tamiya -1D if possible). I'm wondering if there's a conversion out there I could pick up. Thanks for the help!
-
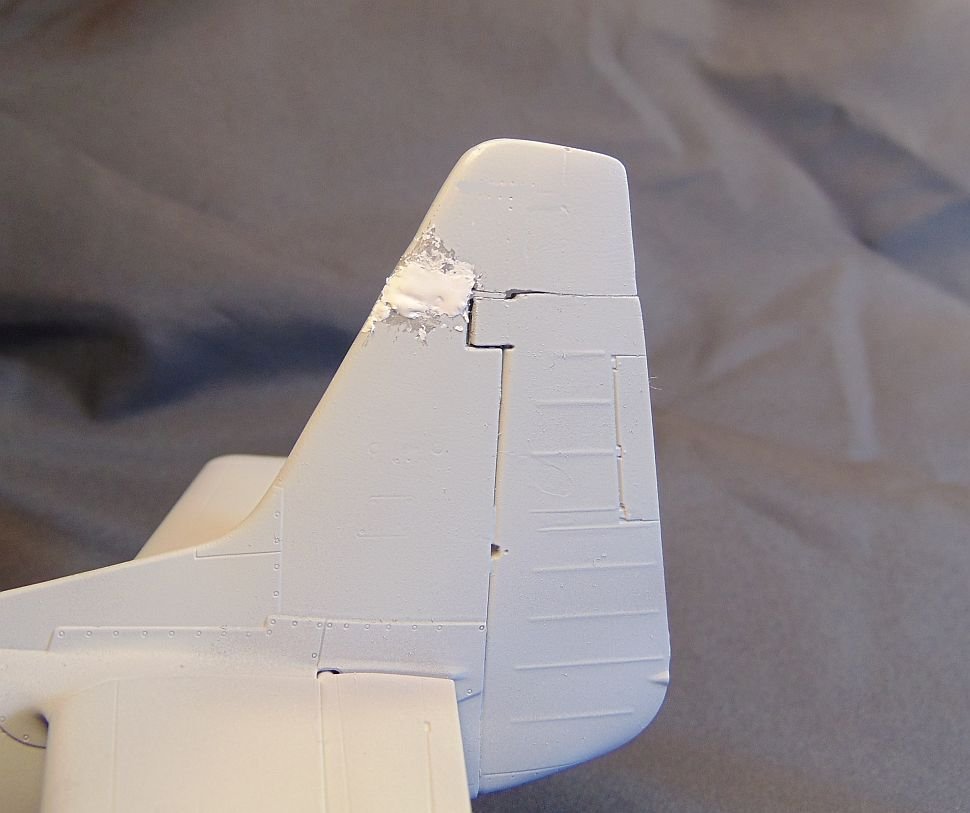
If it's not one thing then it's something else! While I was spraying some gray primer I knocked the fin extension off on one of my lights. Just another high cuss factor thing.


-
Personally I could do without ANY cuss factors but if we have to have 'em I'd prefer the low variant. LOL
-
It's coming along but getting the wings to fit the fuselage has been a big problem. Something wasn't "right" and I had to do a lot of trimming and test fitting to finally get the wings attached. High cuss factor at times!!! 🤪
-
Thank you Carl. Most appreciated.
-
Thanks Kevin. So far so good!
-
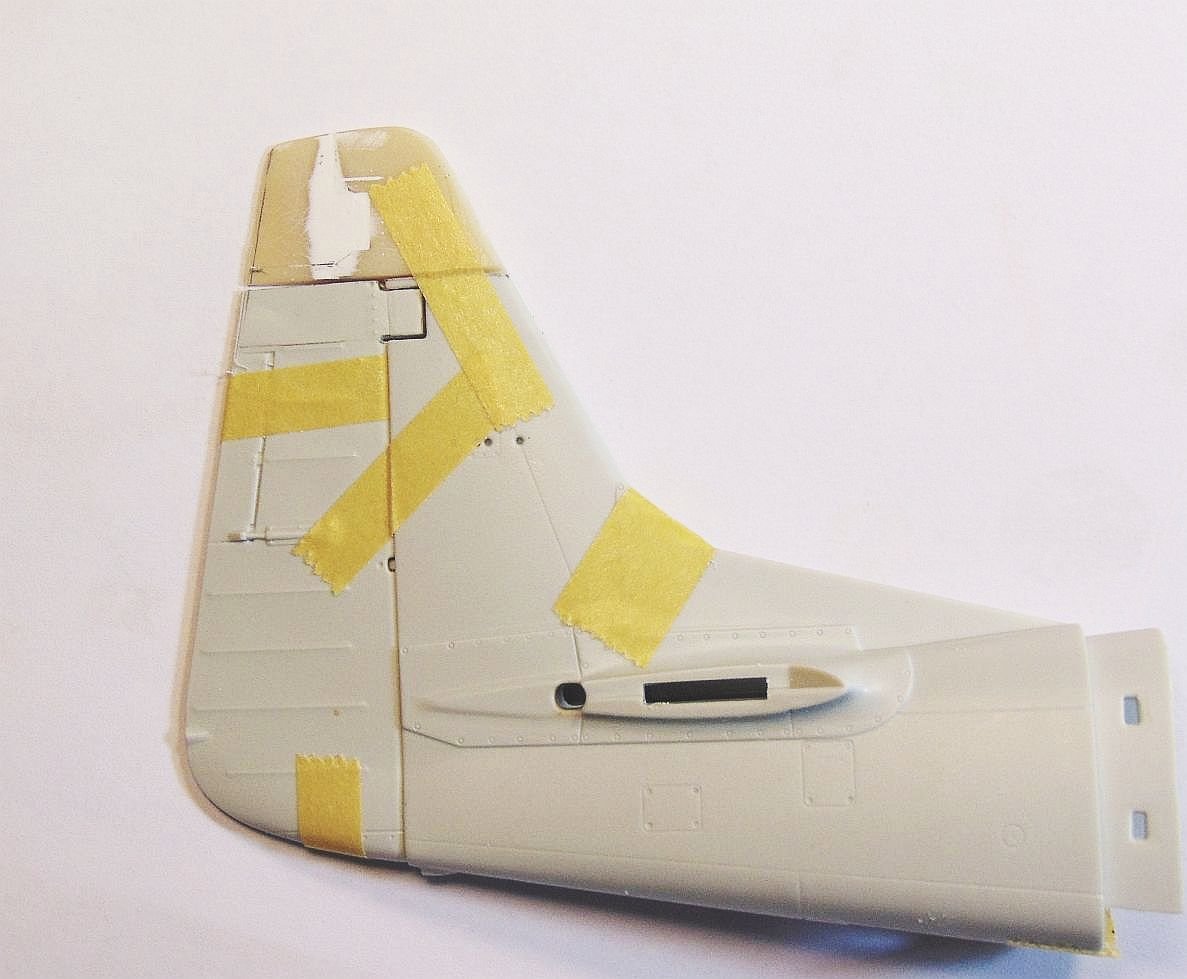
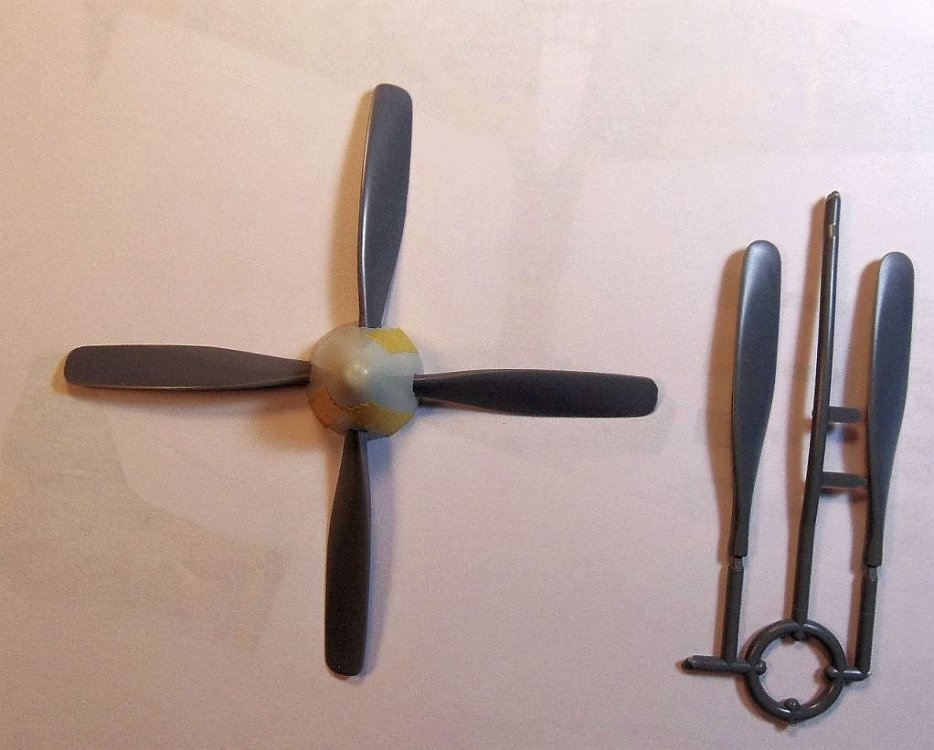
Making some nice progress so far. I think the fin extension will work out okay.

-
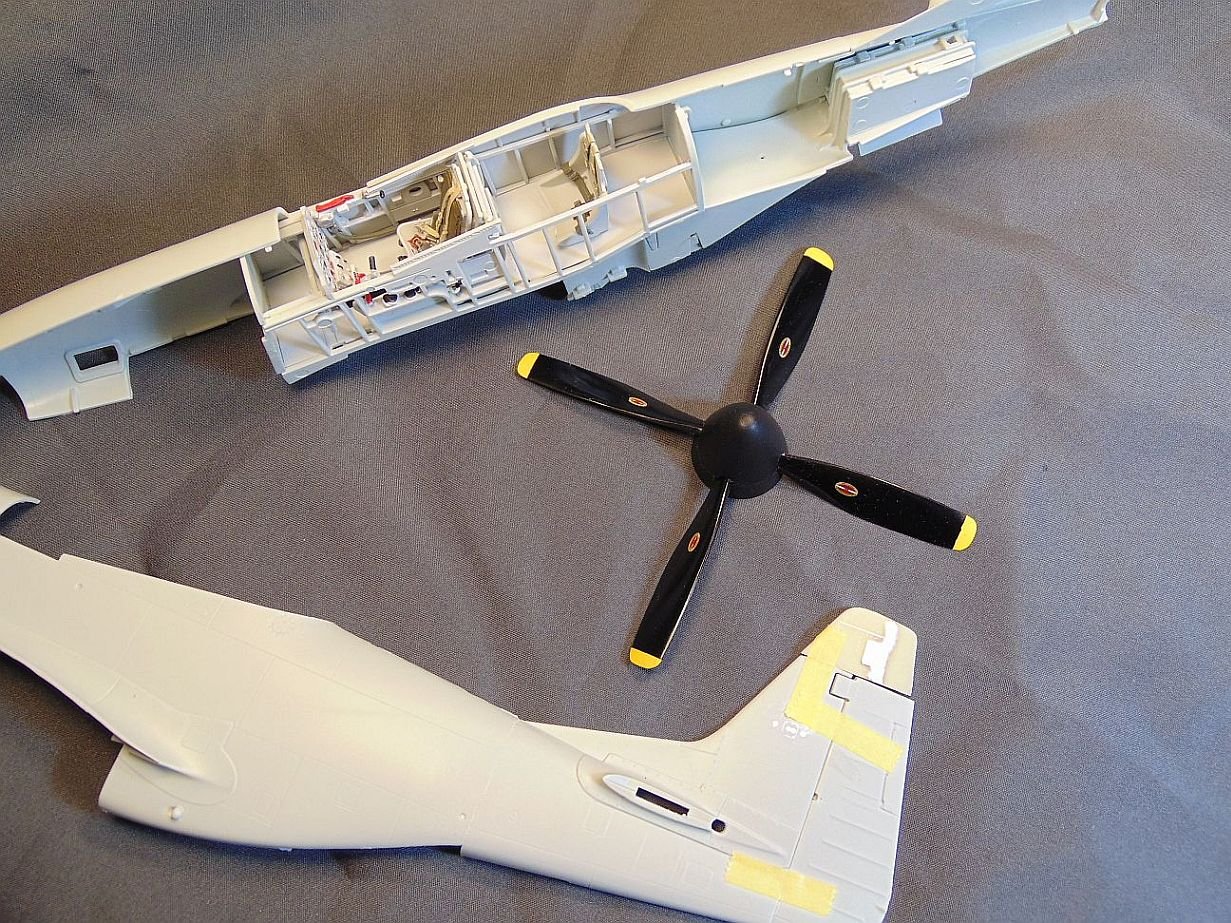
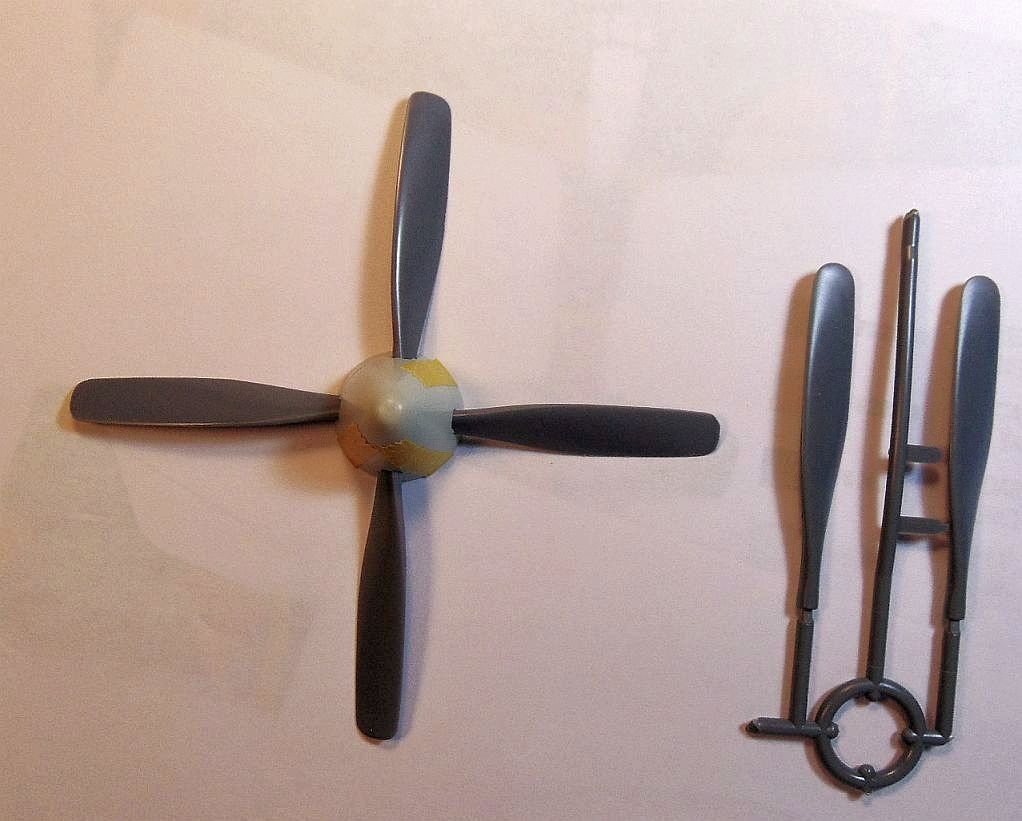
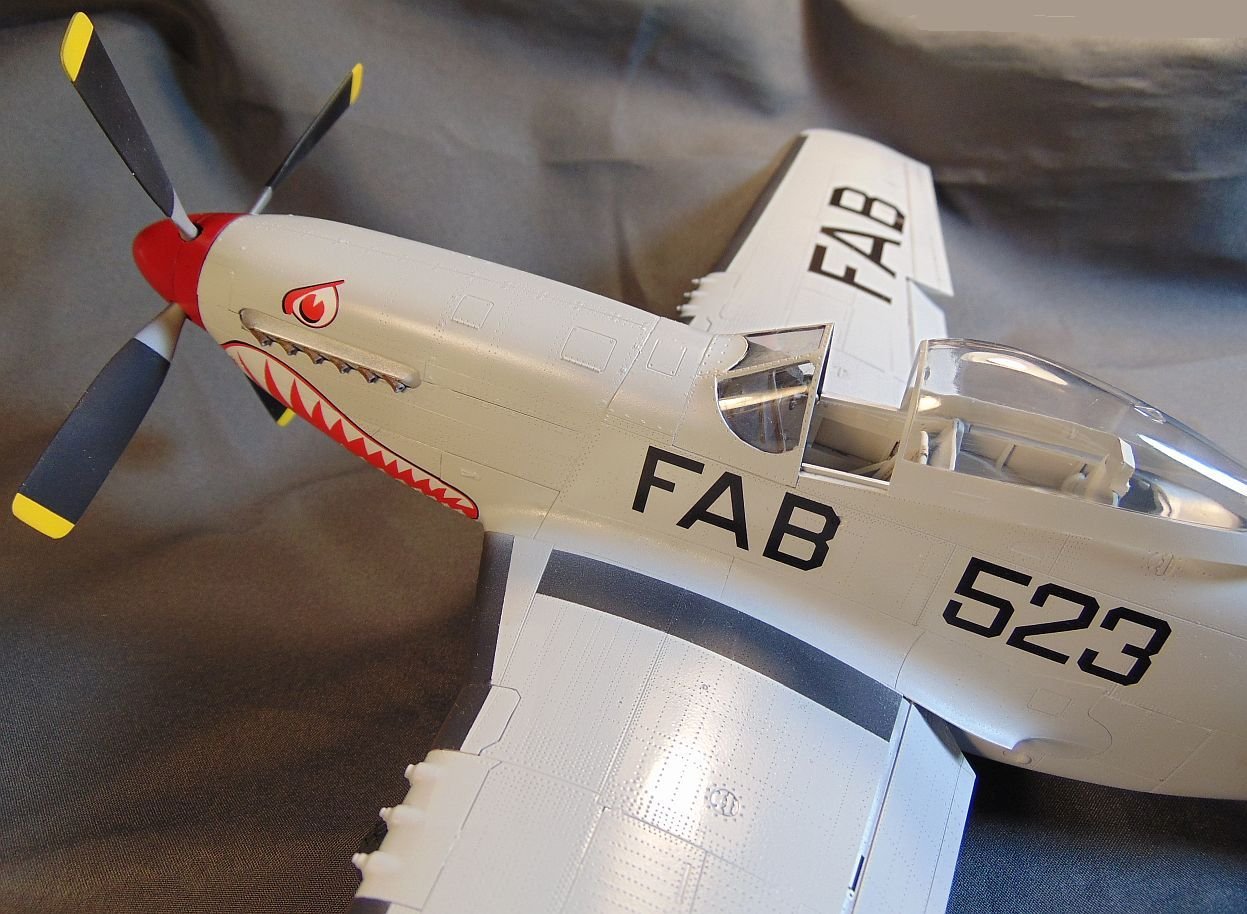
LOL Carl! Fingers crossed the tail extension works out okay. The props are done and installed in the spinner since they looked okay.
-
I have no doubt you will get it figured out.
-
Fin extension piece done. Looks like it will fit the Revell tail okay (fingers crossed).

-
Looks great Bill! Very nicely done.
-

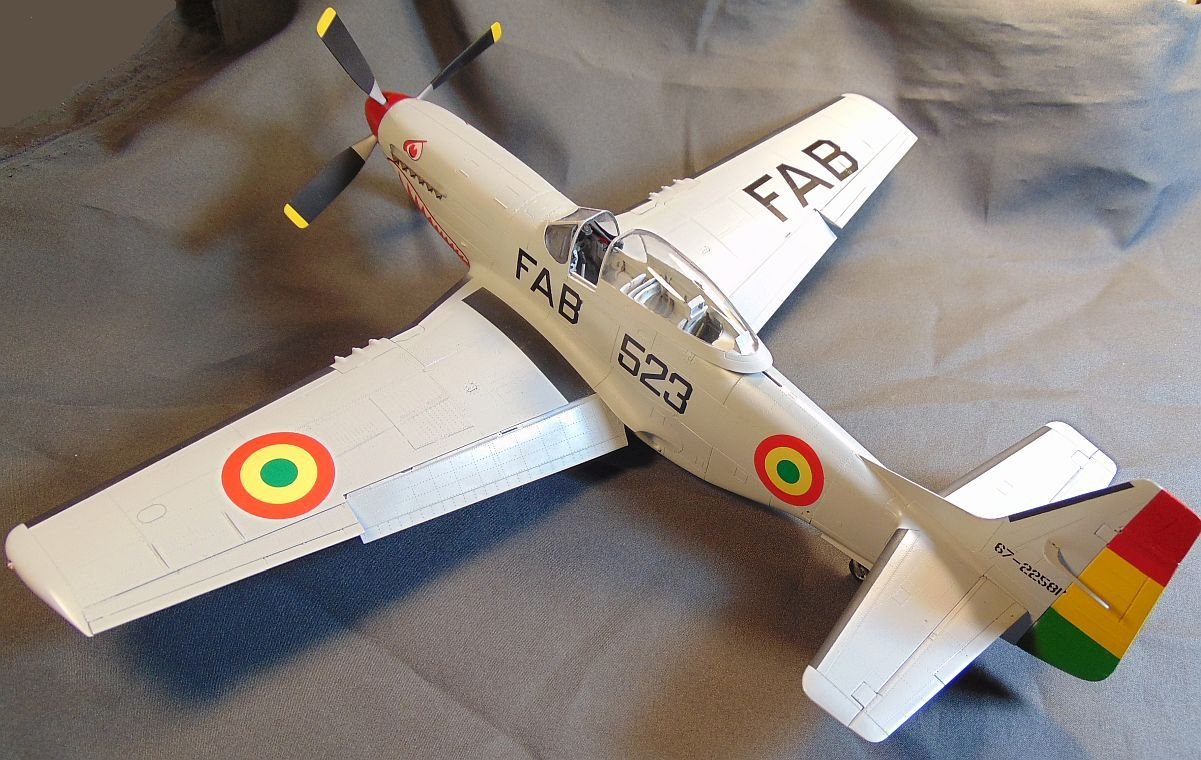
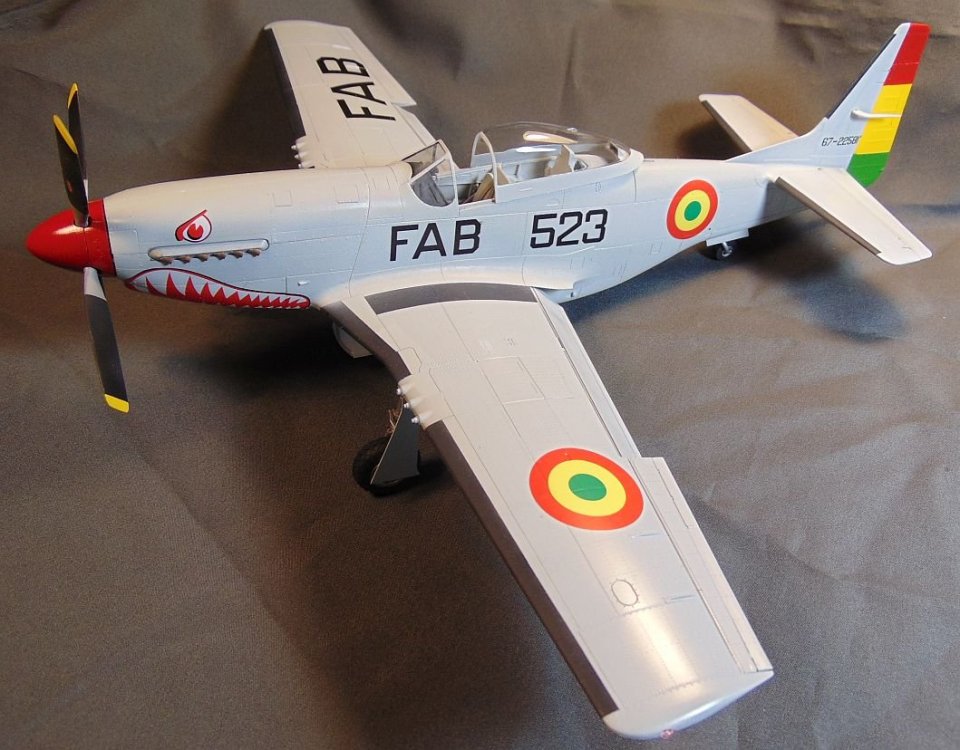
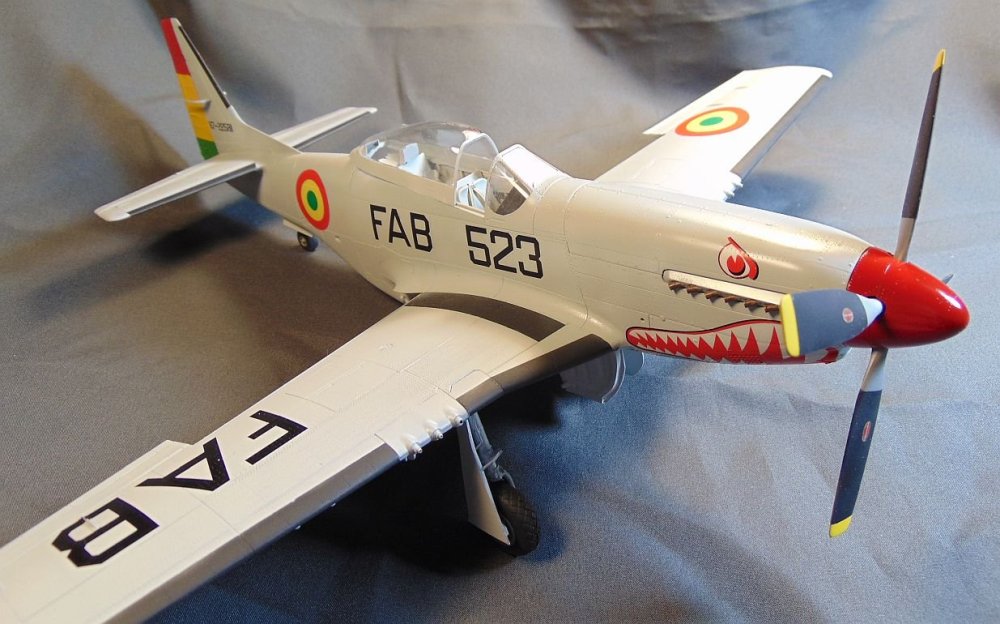
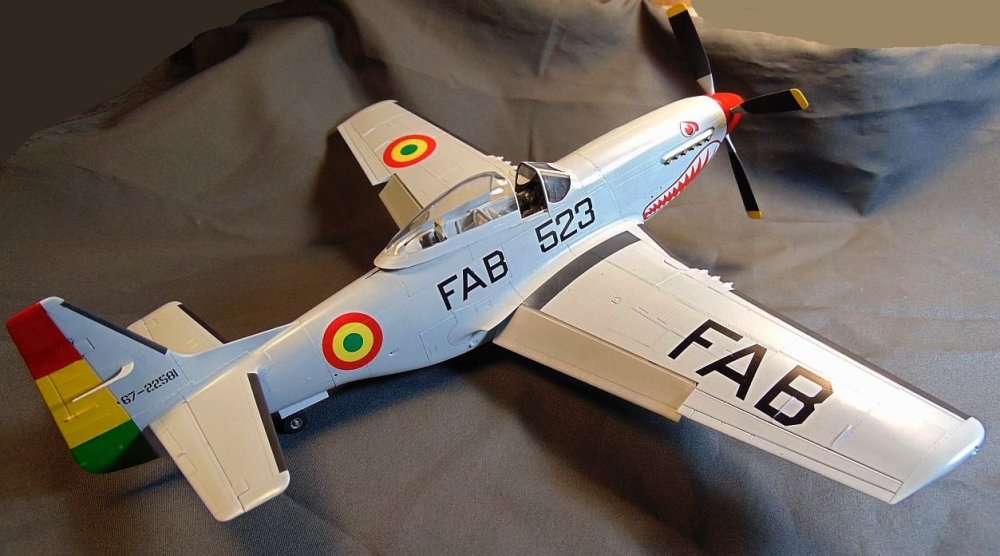
Bolivian AF Cavalier F-51D done
JohnB replied to JohnB's topic in LSM 1/32 and Larger Aircraft Ready for Inspection
Agreed Peter. I intend for the next one to be in camo. -
Bolivian AF Cavalier F-51D done
JohnB replied to JohnB's topic in LSM 1/32 and Larger Aircraft Ready for Inspection
Thanks Paul! Catching up to all my Corsairs LOL! -
Thanks Peter. Yep, it looks like the fin extension and "chisel blade" prop are going to work out. Not quite 100% right now but we will see. When it comes to the Lanc, if it was me, I'd leave the cowl off of only one! 🤪
-
I'm not particularly enamored with the turbo prop versions either. Ruined the lines of the airplane.
-
Bolivian AF Cavalier F-51D done
JohnB replied to JohnB's topic in LSM 1/32 and Larger Aircraft Ready for Inspection
Thanks Gaz! -
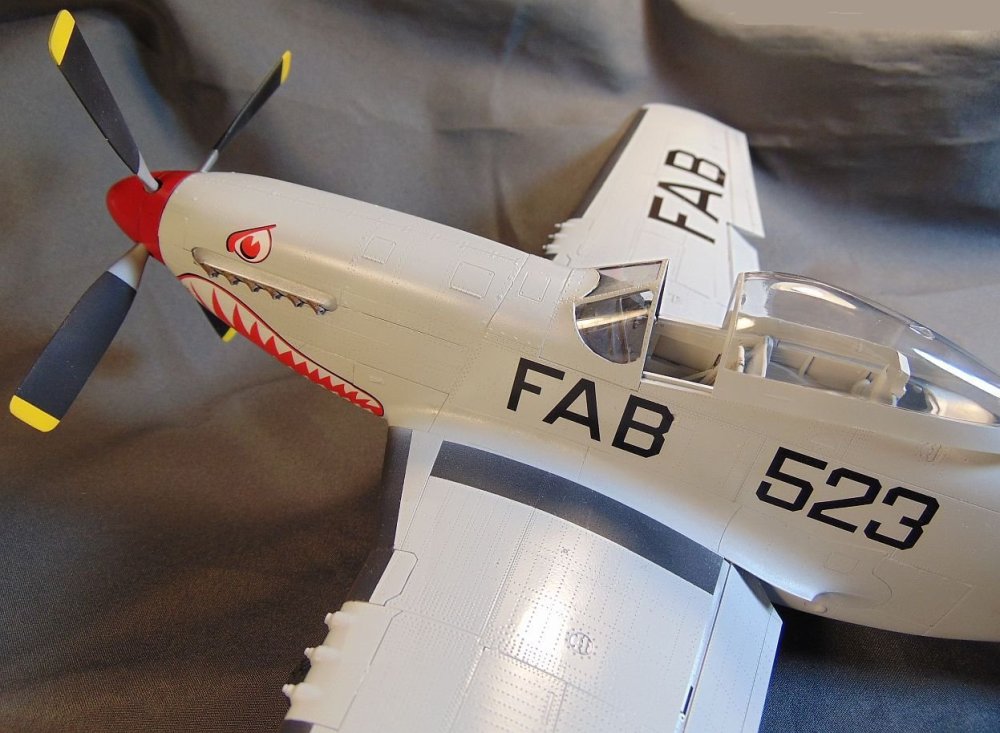
Most of those a/c had the "chisel" type Hamilton Standard prop. Since I don't have one I trimmed and reshaped some left over Aero Products blades to make what is needed. Close enough I think. (They are not attached but just set in place as a test fit.)
-
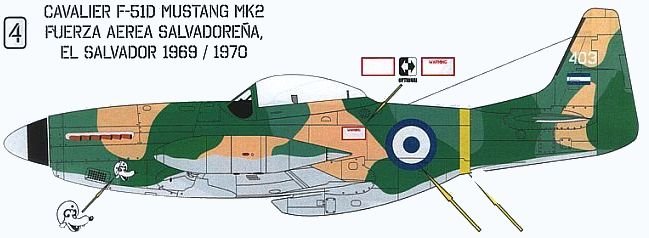
Since they supply us with nice tip tanks and decals in this Halberd kit I decided to build up another Cavalier F-51D model. The main potential problem is what about the fin extension? I'm going to scratch build one using the finished Bolivian AF model as a guide. I have some resin tail parts that I think I can modify and adapt to the right profile, height, etc. We'll see how it goes and if it works out okay I'll continue with the build.
-
Bolivian AF Cavalier F-51D done
JohnB replied to JohnB's topic in LSM 1/32 and Larger Aircraft Ready for Inspection
Thank you Peter. I'm pleased it came out as well as it did and is such a eye catcher. -
Bolivian AF Cavalier F-51D done
JohnB replied to JohnB's topic in LSM 1/32 and Larger Aircraft Ready for Inspection
Thank you Kevin. Something a bit different. -
Finished with this one. https://forum.largescalemodeller.com/topic/19430-bolivian-af-cavalier-f-51d-done/
-
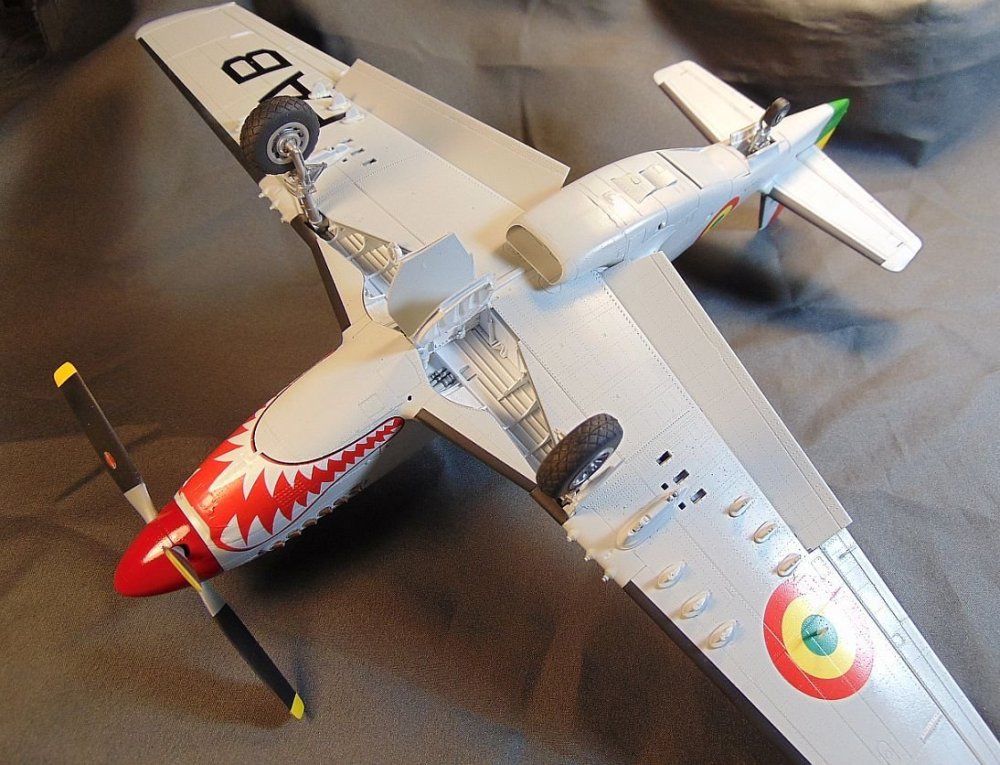
All done with this one. I used a Tamiya P-51D kit with the Halberd Cavalier F-51 conversion set to make this Bolivian AF F-51D. The only after market item was a new rear seat from my stash of unused parts and of course the supplied Halberd stuff. Painted with Mr. Color, Compucolor, and Testor's. I replaced the Halberd rocket stubs, which seem to be a bit over size, with some from my stash of unused parts. I decided to keep the a/c "clean" with no weathering. I hope y'all like the results of my efforts.

-
I've been trying to figure out what will be needed for the tail extension. That's the only "problem" I see to doing another Cavalier '51 so we will see. 🙄
-
Thank you Carl. I left it with the rivets showing. Too much work to cover 'em up. I tried it on a earlier build and it just wasn't worth the effort.