GazzaS
-
Posts
6,396 -
Joined
-
Last visited
Content Type
Profiles
Forums
Events
Gallery
Everything posted by GazzaS
-
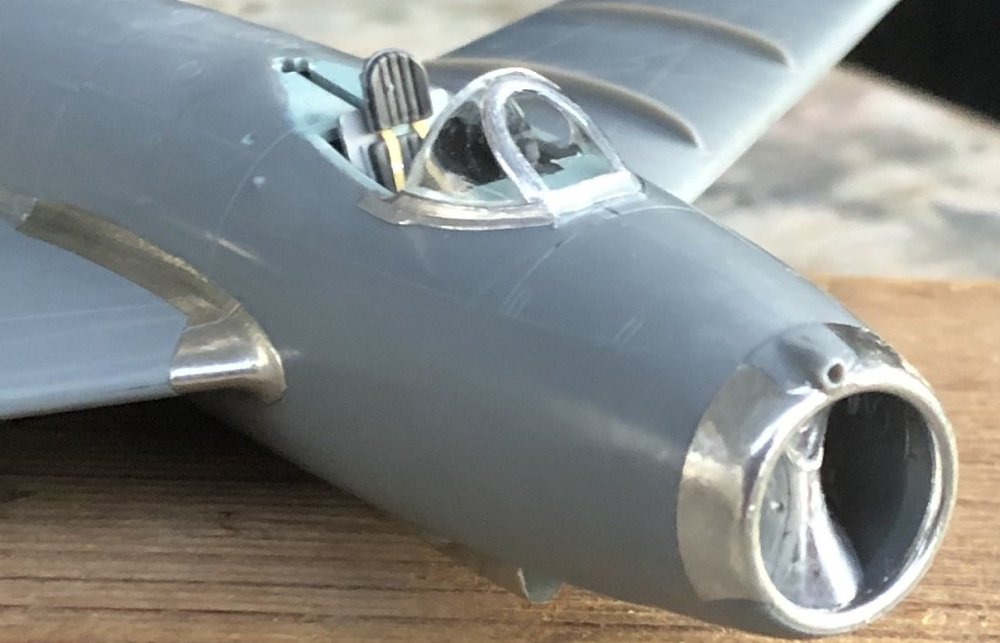
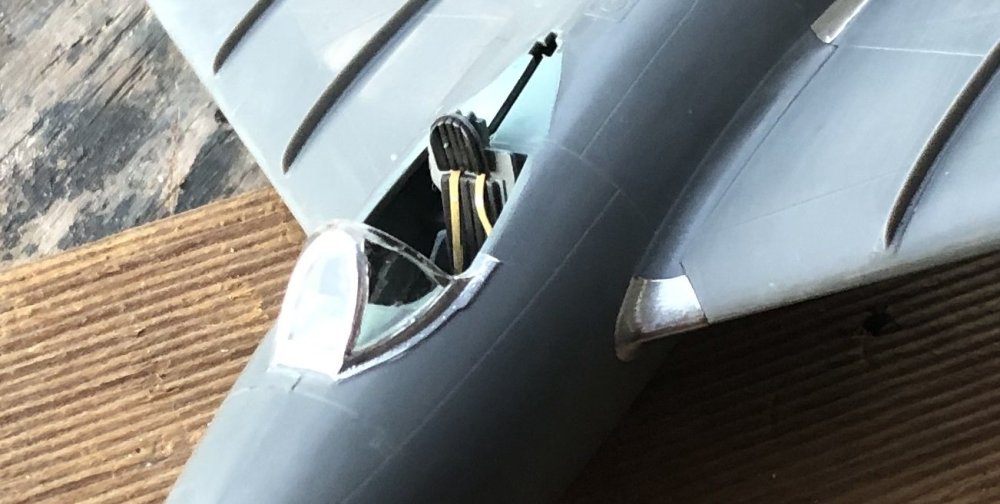
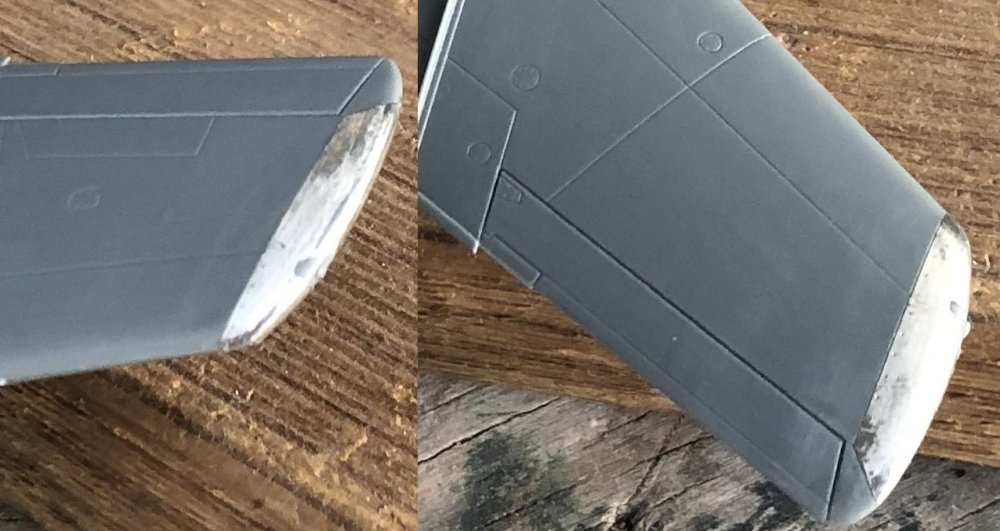
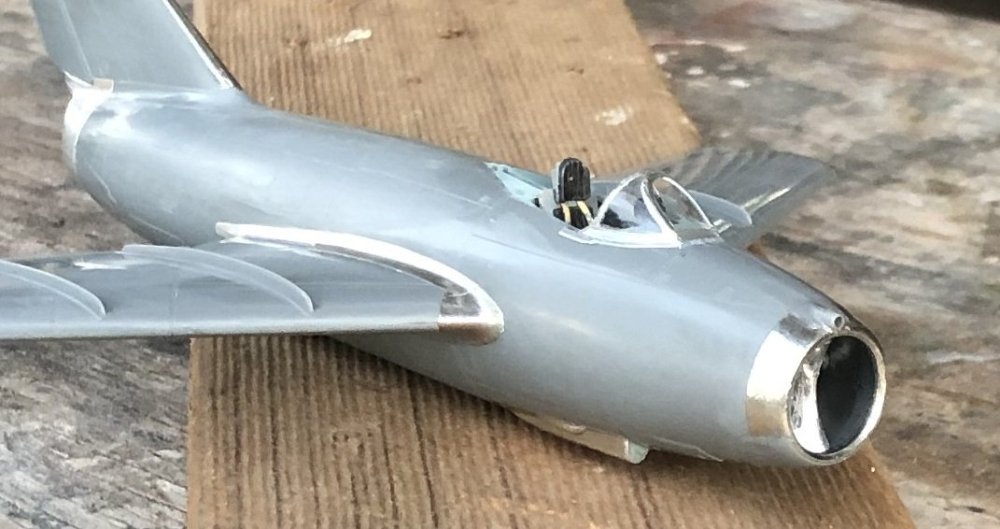
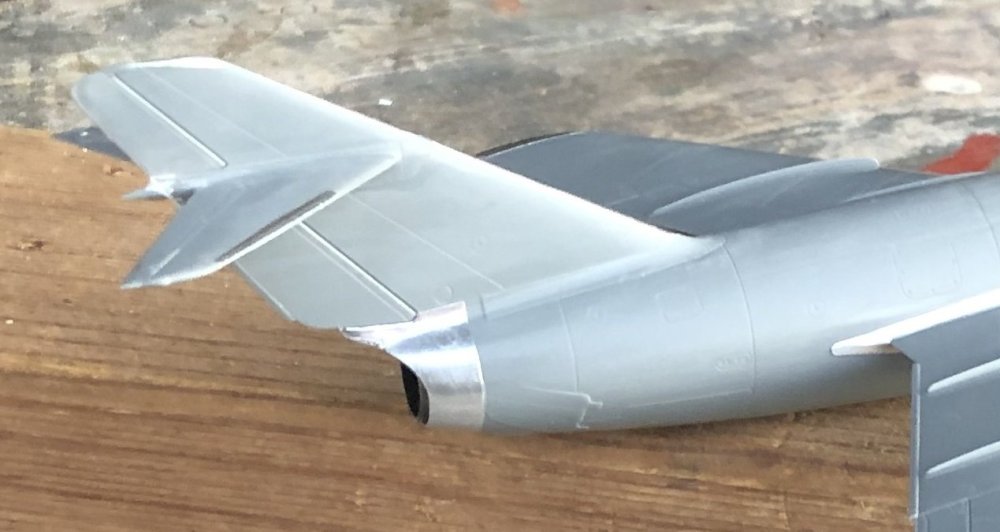
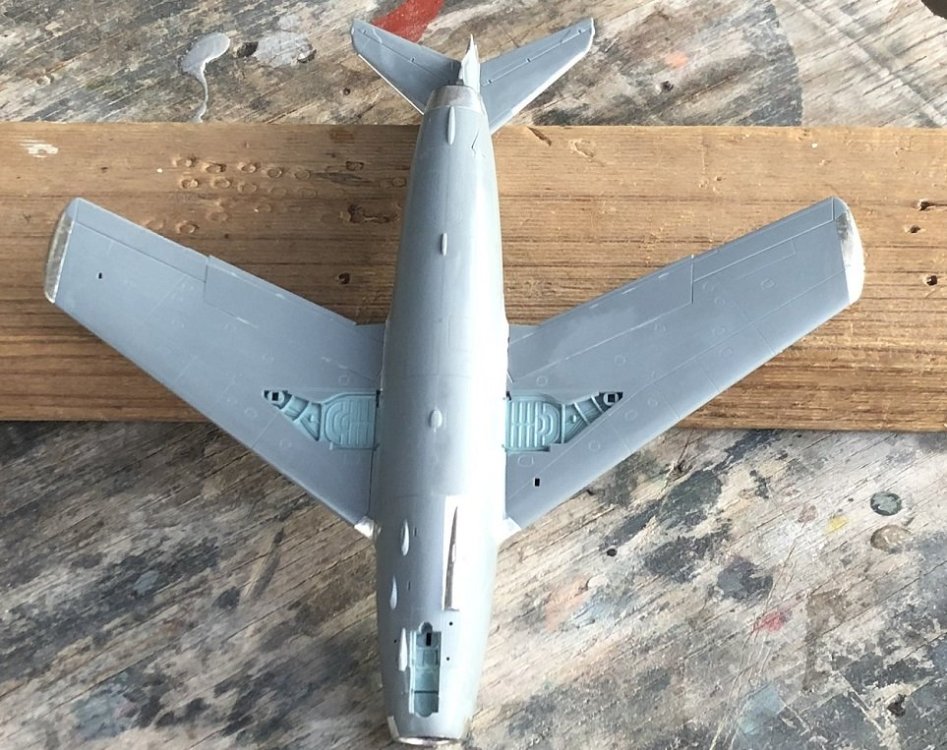
First of all.... What is 'bis'? I know there were other planes from other countries that also got the 'bis' designation. Anyway... hello friends. Foiling a plane is one of those things that requires a particular mood. At first, it's really difficult until you get the hang of it. After that, each model gets easier and if you don't wait too long, you won't lose the muscle memory in your hands. A tiny mote of dust.... or a little tear can result in you peeling off a panel, swabbing off the glue with isopropyl alcohol. And repeating the whole process again. But the magic of real metal.... how the light moves across it as your viewing angle changes.... can't be mimicked by any shiny paint. This Tamiya model didn't come with seat belts... I made them with Tamiya tape with painted buckles. Making the foil bend across and around complex curves is a skill that takes a little time to learn. This is one wingtip. The starboard wingtip viewed from above and below. And it's covered by one piece of foil. The cowl ring is also one piece. But I must admit that the exhaust end is two separate pieces. But that's ok. There is a seam line that facilitated making it in two pieces. As you can see, I have a long way to go. The best way to foil, is to master the hardest pieces first. Wing roots, Wing tips, Canopies, and cowlings are the most difficult. After them... The rest is easy. I hope you enjoy the trip with me.
-
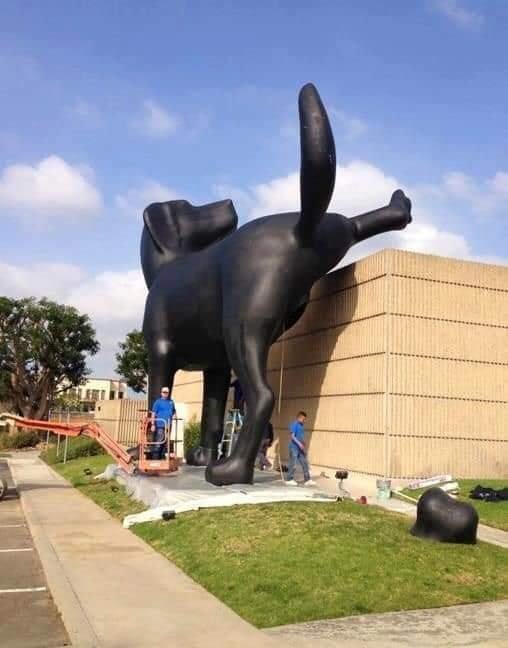
Not much better than coming home to unwrap presents!
-

Tamiya Spitfire MK XVIe
GazzaS replied to Peterpools's topic in LSM 1/35 and Larger Work In Progress
I actually get mine from a local hardware giant store in the paint department. Amazon has it, too. Though I'm not sure where it's shipping from. Here is one at Home depot. https://www.homedepot.com/p/Max-Pro-10-oz-Isopropyl-Alcohol-Precision-All-Purpose-Cleaner-ISO-3467/319907805 -
Tamiya Spitfire MK XVIe
GazzaS replied to Peterpools's topic in LSM 1/35 and Larger Work In Progress
Peter, I'm sorry you had to strip your model. But I understand if you're not happy with it. If you can find 100% isopropanol alcohol, you will find it strips Tamiya paints and MRP lacquers with ease. And...it's not 'hot' enough to harm the plastic. I love the stuff! There's no doubt in my mind, that had you used it, you would have save a lot of time. I'm guessing you're not a paint mixer. I thrive on it, and it saves me time and money because I don't have to go chasing hither, thither, and yon for little bottles of color in this new covid-upset world. If you save your empty paint bottles, you can save your new colors easily. All you have to do is experiment a little, and trust your eyes. It doesn't take long at all. Certainly not as long as UPS or the USPS. And you might be able to use those AMMO paints instead of letting them go to waste. Anyway... just my 2 Cents. -
Duchess of Kingston - Beauty of the Seas - Wooden Sailing Ship 1/64
GazzaS replied to DocRob's topic in Non LSM 'WIP
Rob, Great figures make figure painting much easier. Ambiguous details are so much more difficult to make look right. Sometimes it its good to practise in really big figures, too. I need to do another 1/16scale figure, I think. -
Duchess of Kingston - Beauty of the Seas - Wooden Sailing Ship 1/64
GazzaS replied to DocRob's topic in Non LSM 'WIP
Wow, Rob! Great job on those figures! They really are nicely made for that scale. You keep impressing me. -
Looks like it's all coming together, Phil. The paintwork looks excellent.
-
Duchess of Kingston - Beauty of the Seas - Wooden Sailing Ship 1/64
GazzaS replied to DocRob's topic in Non LSM 'WIP
More great detail, Rob. Are you using hardware store polyurethane or something sold to us hobbyists? -
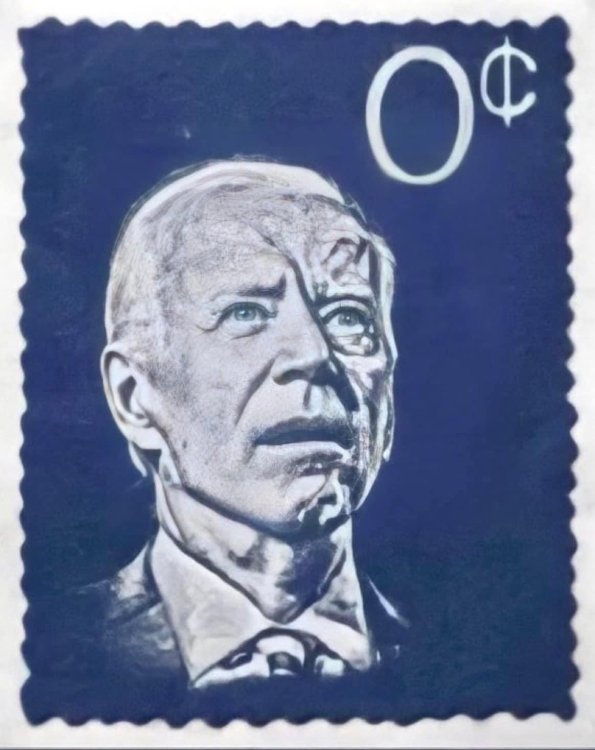
A new US Presidential Postage stamp, coming soon.
-
Trumpeter F4F-3 Late - 1/32nd
GazzaS replied to Bomber_County's topic in LSM 1/35 and Larger Work In Progress
Looks great. Phil. I’d be interested to see how dirty these birds got underneath. Recently I’ve rediscovered a fondness for pastels. Ima gonna try some on my next aircraft model. -
As usual…. I’ll try to keep up with the updates.
-

- 2,035 replies
-
- 8
-

-

-
- car related stuff
- anything about cars
- (and 6 more)
-
Duchess of Kingston - Beauty of the Seas - Wooden Sailing Ship 1/64
GazzaS replied to DocRob's topic in Non LSM 'WIP
It's good to see progress, Rob. The masts look great! I'll be interested to see how you go with those figures. -
ZM Skyraider finished
GazzaS replied to JohnB's topic in LSM 1/32 and Larger Aircraft Ready for Inspection
Well done, John! Glad you didn't have to put it on the SOD again. -
Nice work so far. Look forward to seeing this come together.
-
ZM A-1 Skyraider back on tap!
GazzaS replied to JohnB's topic in LSM 1/35 and Larger Work In Progress
Back on the SOD, yet? No? OK. Looks good, John. -
Trumpeter P-51 "American Beauty"-Finished
GazzaS replied to KevinM's topic in LSM 1/35 and Larger Work In Progress
VEry sharp! -
Now that is a bummer.
-
One Month Challenge: COMPLETED
GazzaS replied to GazzaS's topic in LSM 1/35 and Larger Work In Progress
Thank you, John! -
One Month Challenge: COMPLETED
GazzaS replied to GazzaS's topic in LSM 1/35 and Larger Work In Progress
Thank you, Mike! I'm glad you like it. After laying down the air-dry clay and putting a lot of footprints with a left and right leg from other figures, I paint the base a light blue-gray color. After that, using thinned PVA applied with a paintbrush, sprinkle the snow material over the PVA shaking off the excess. The footprints themselves get no snow. To them, I add a little white paint to make them less distinct. I build up Layers of snow with more PVA where desired. Finally, before placing any figures or equipment, airbrush the surface with a thin white filter to blend the colors a bit.