
FlyinBryan
-
Posts
17 -
Joined
-
Last visited
Content Type
Profiles
Forums
Events
Gallery
Everything posted by FlyinBryan
-
 Gorgeous outcome. I'm about to embark on building #2 on that decal sheet - Slick Chick as I want to do a NMF razorback and something not in the standard ETO livery.
 -
Those wood floors look super!
-
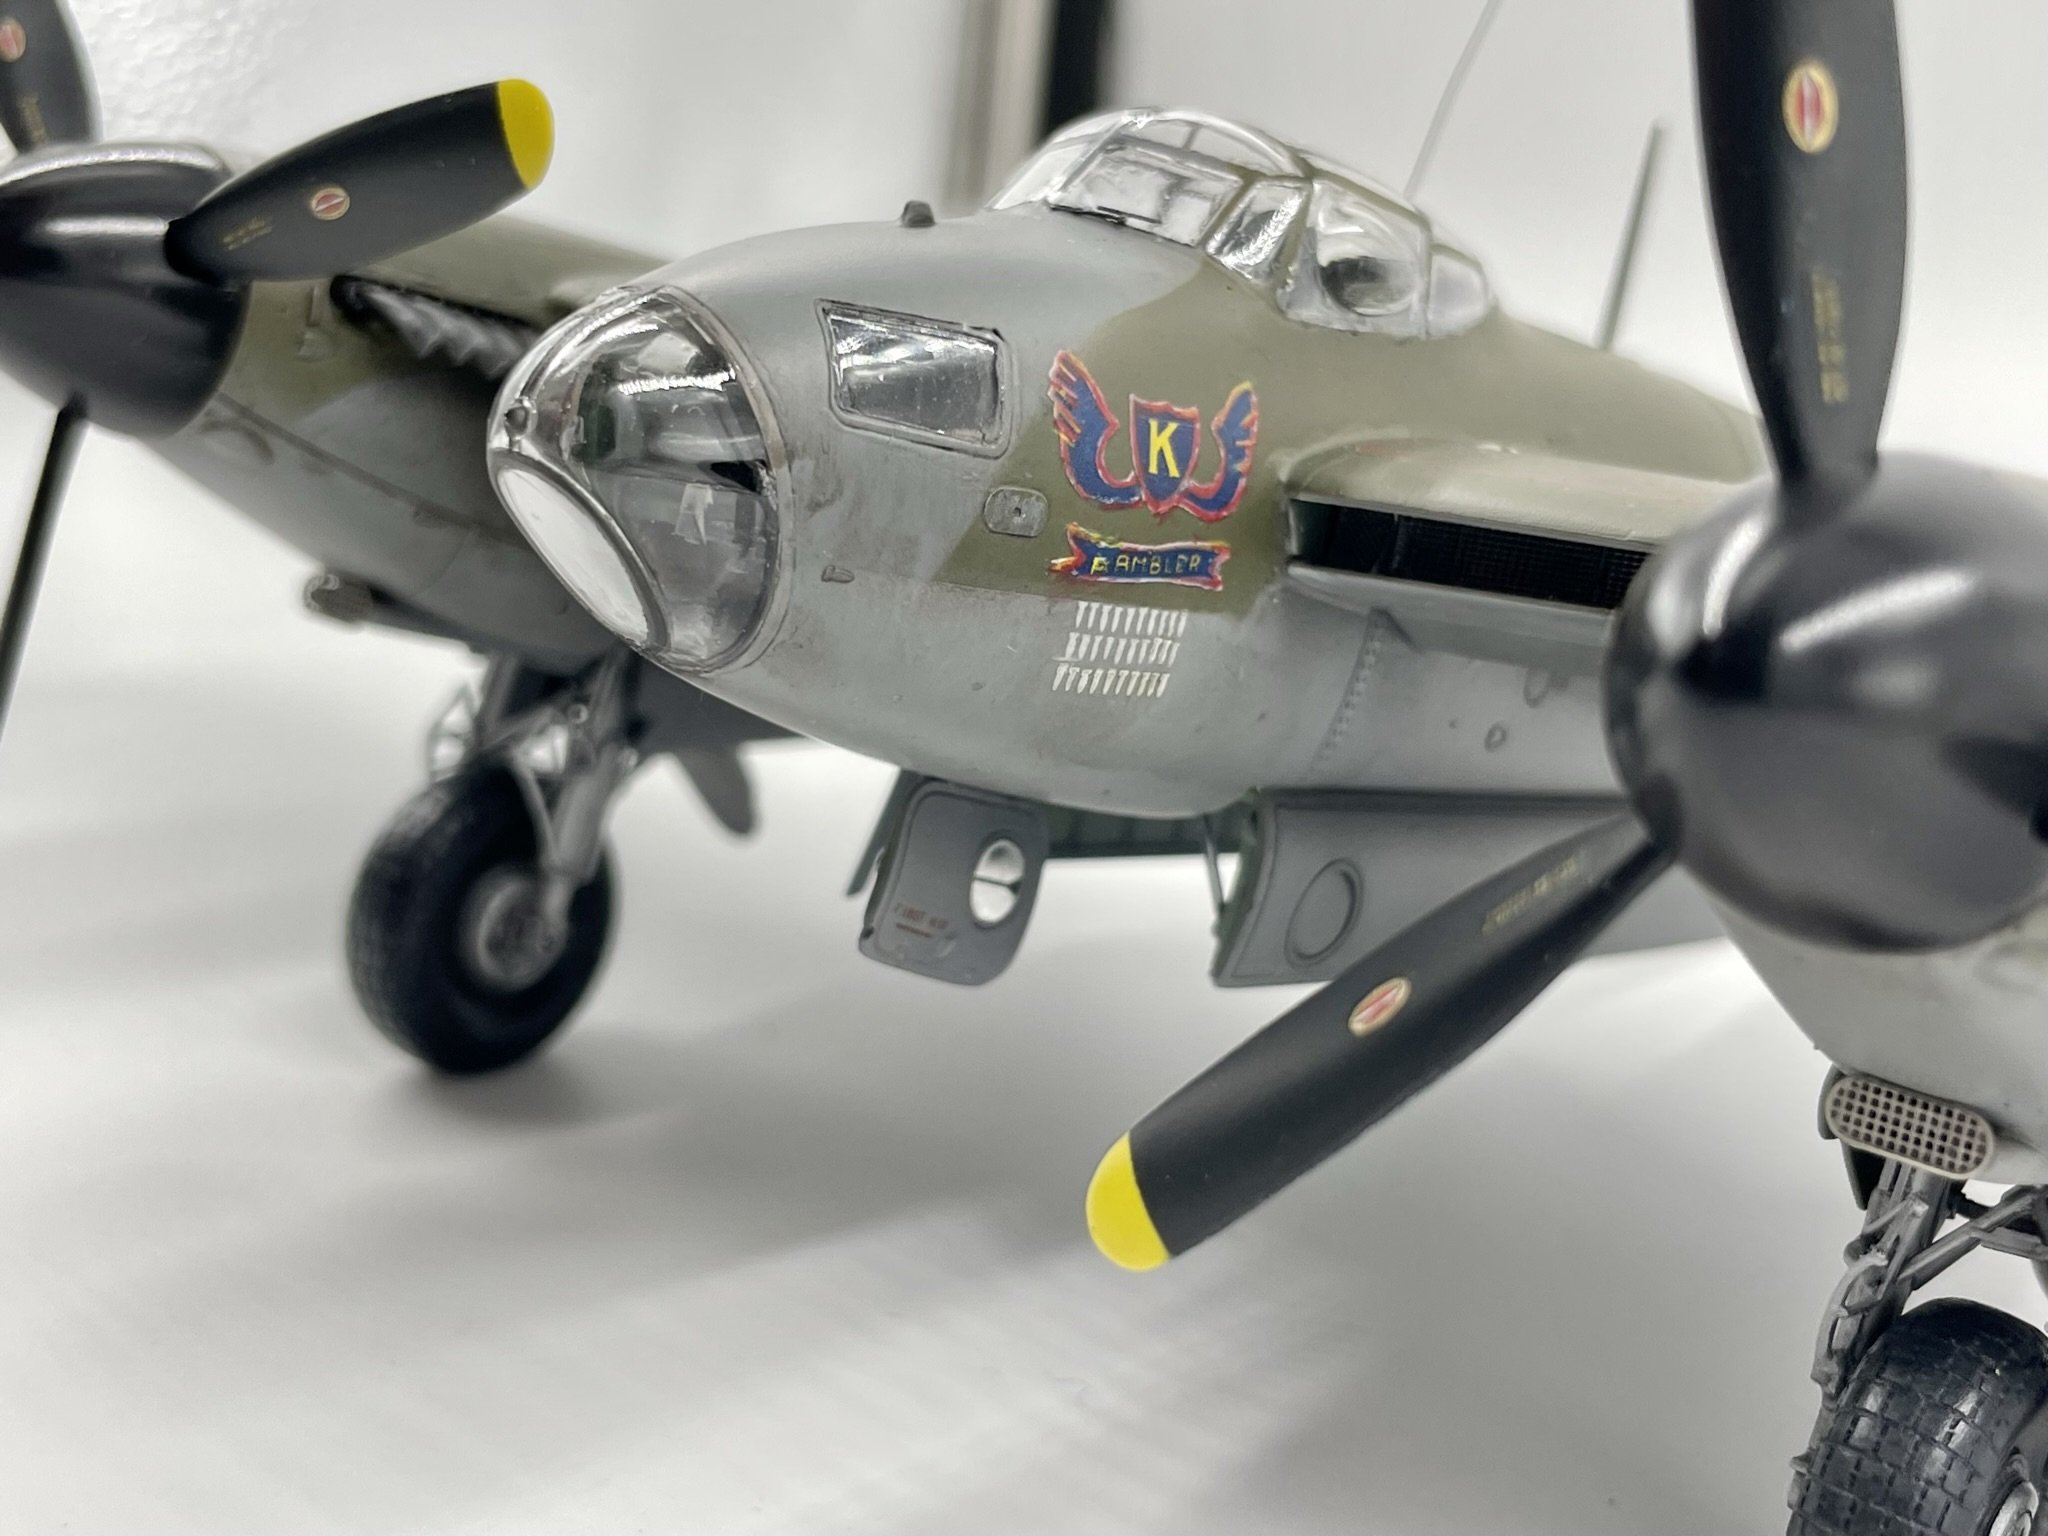
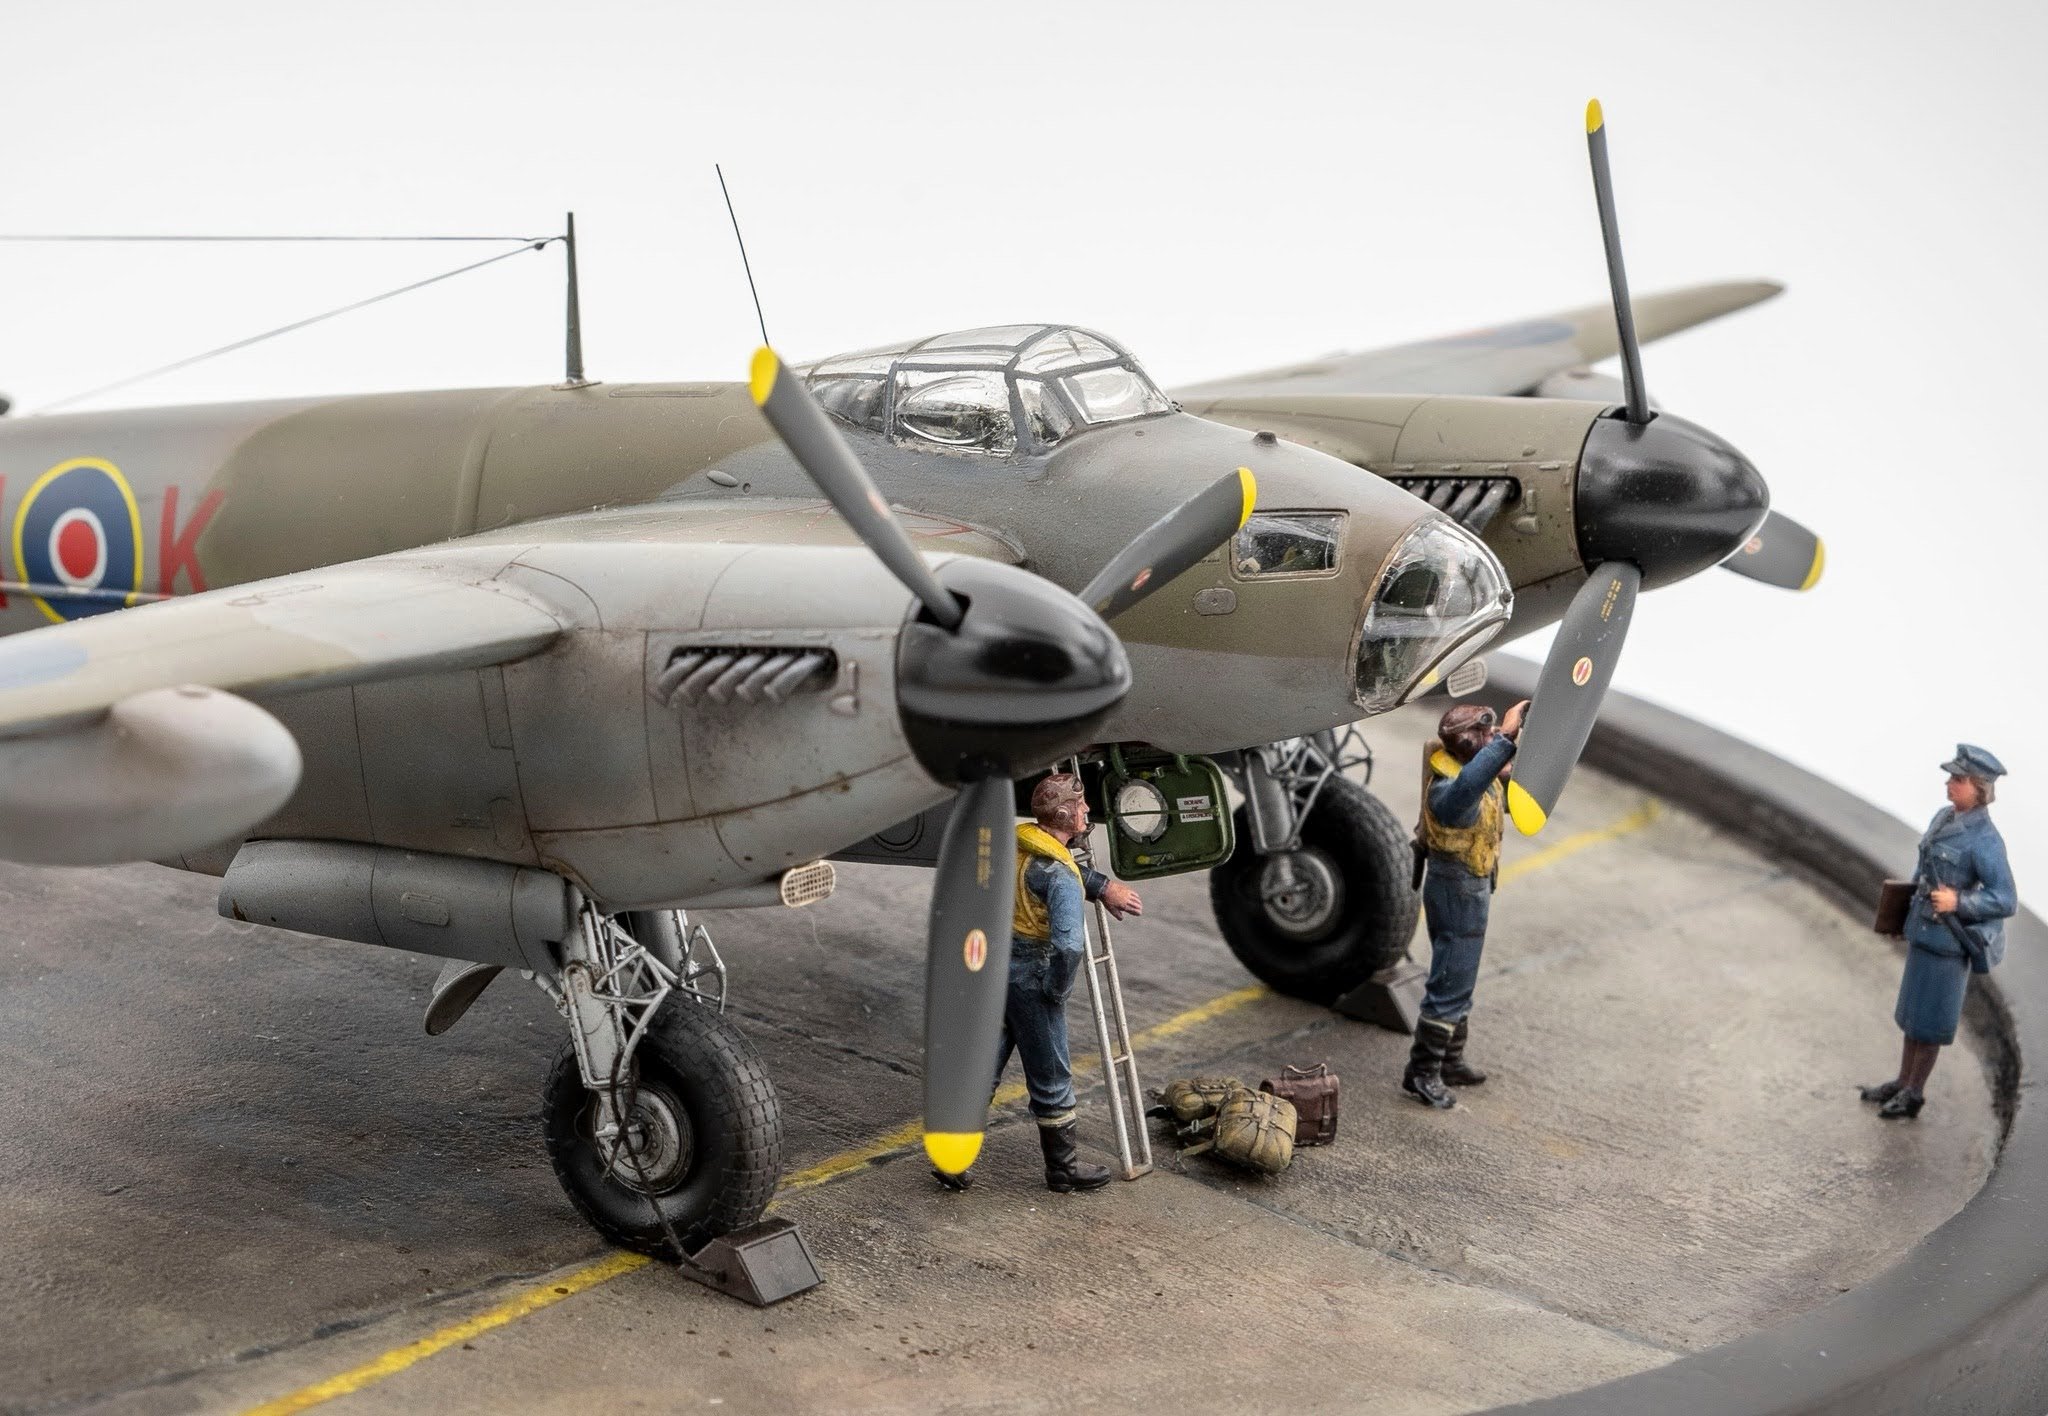
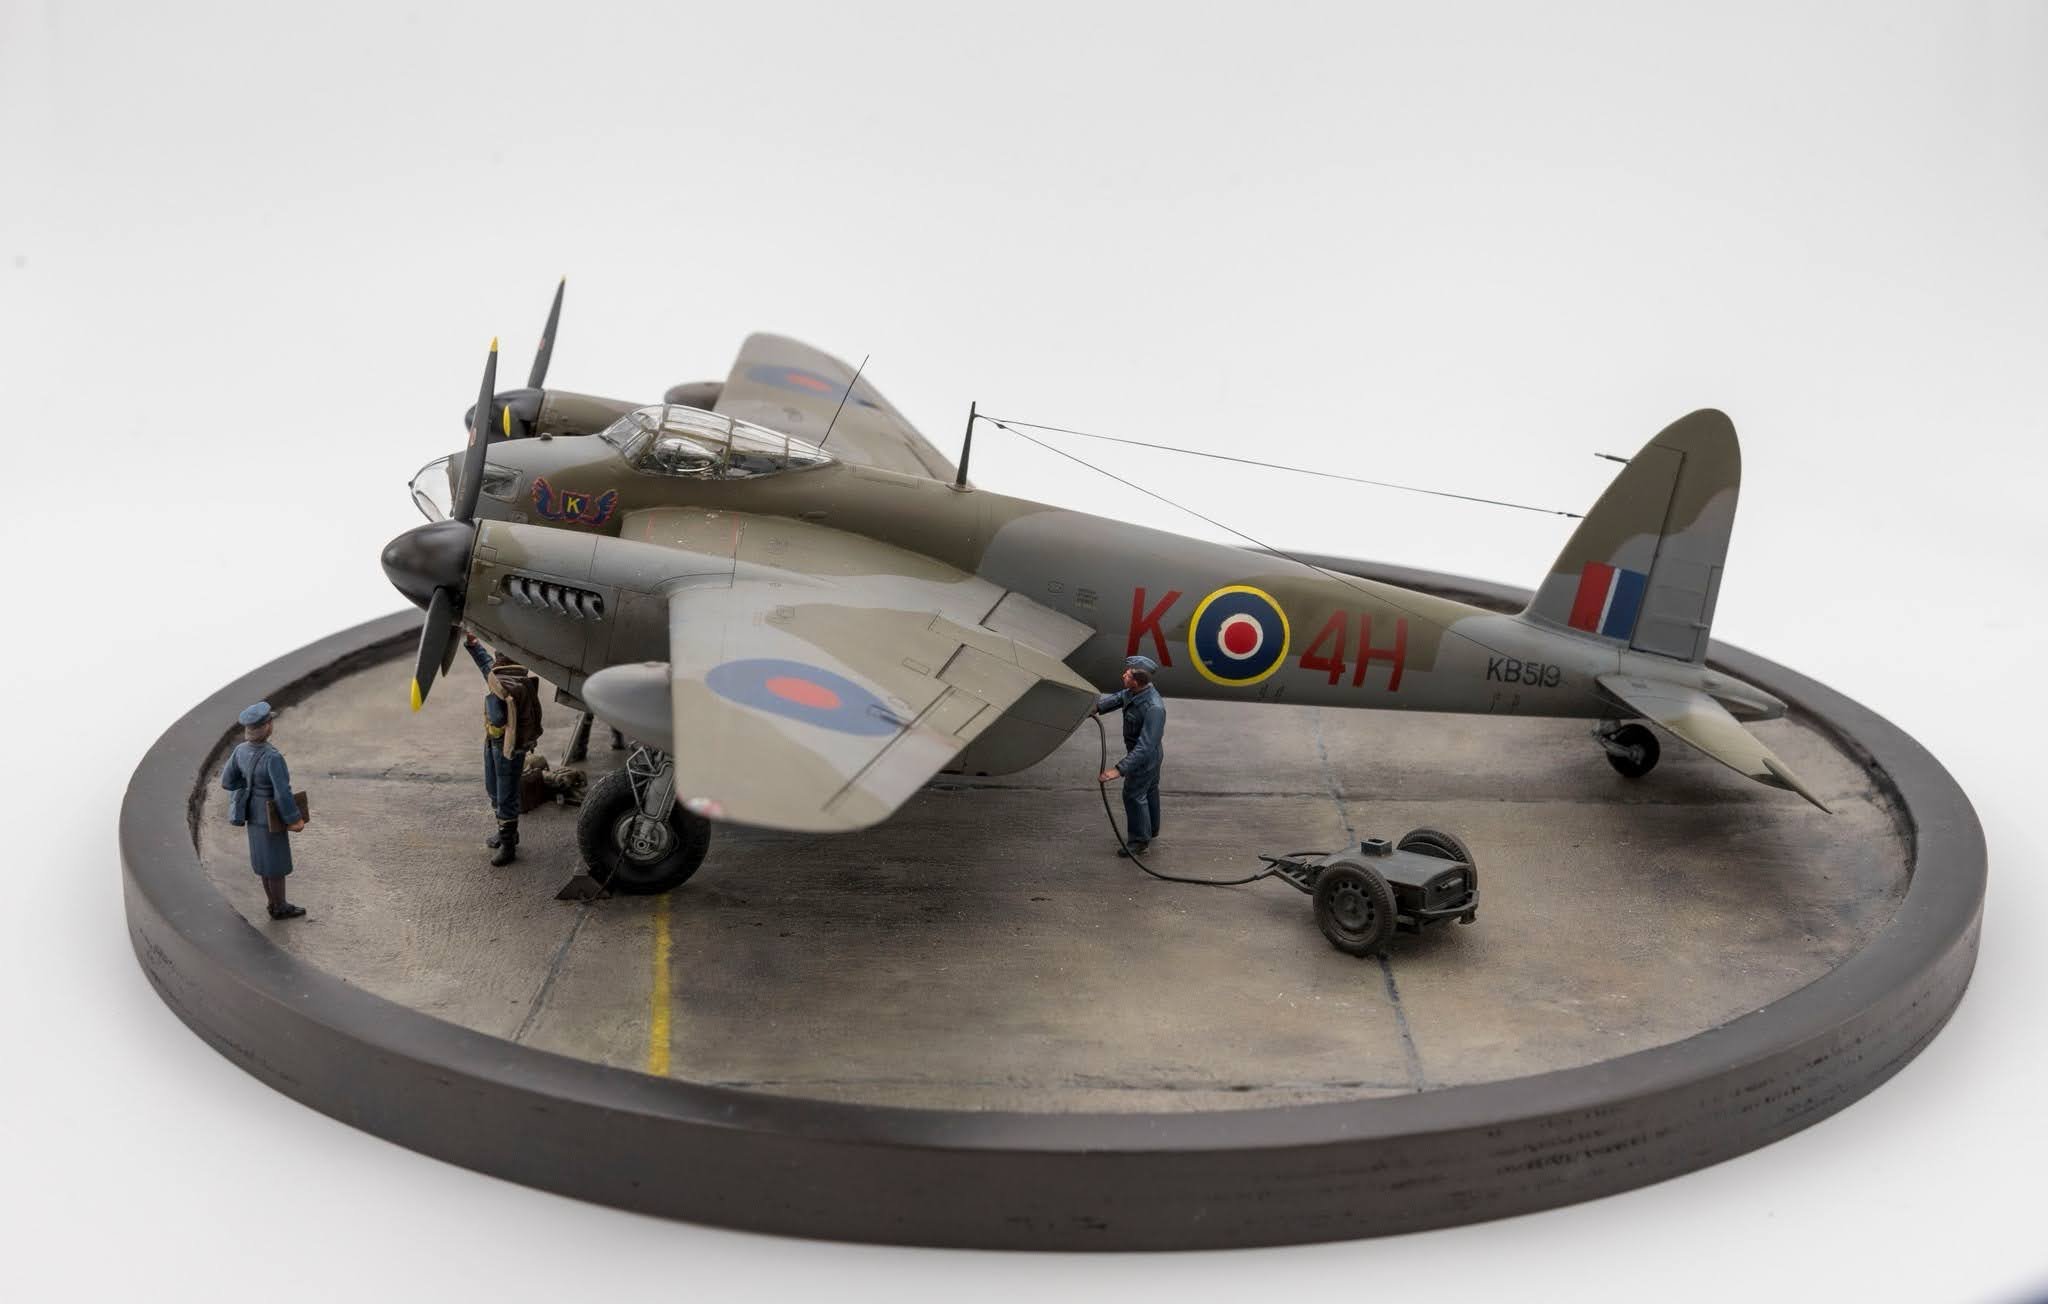
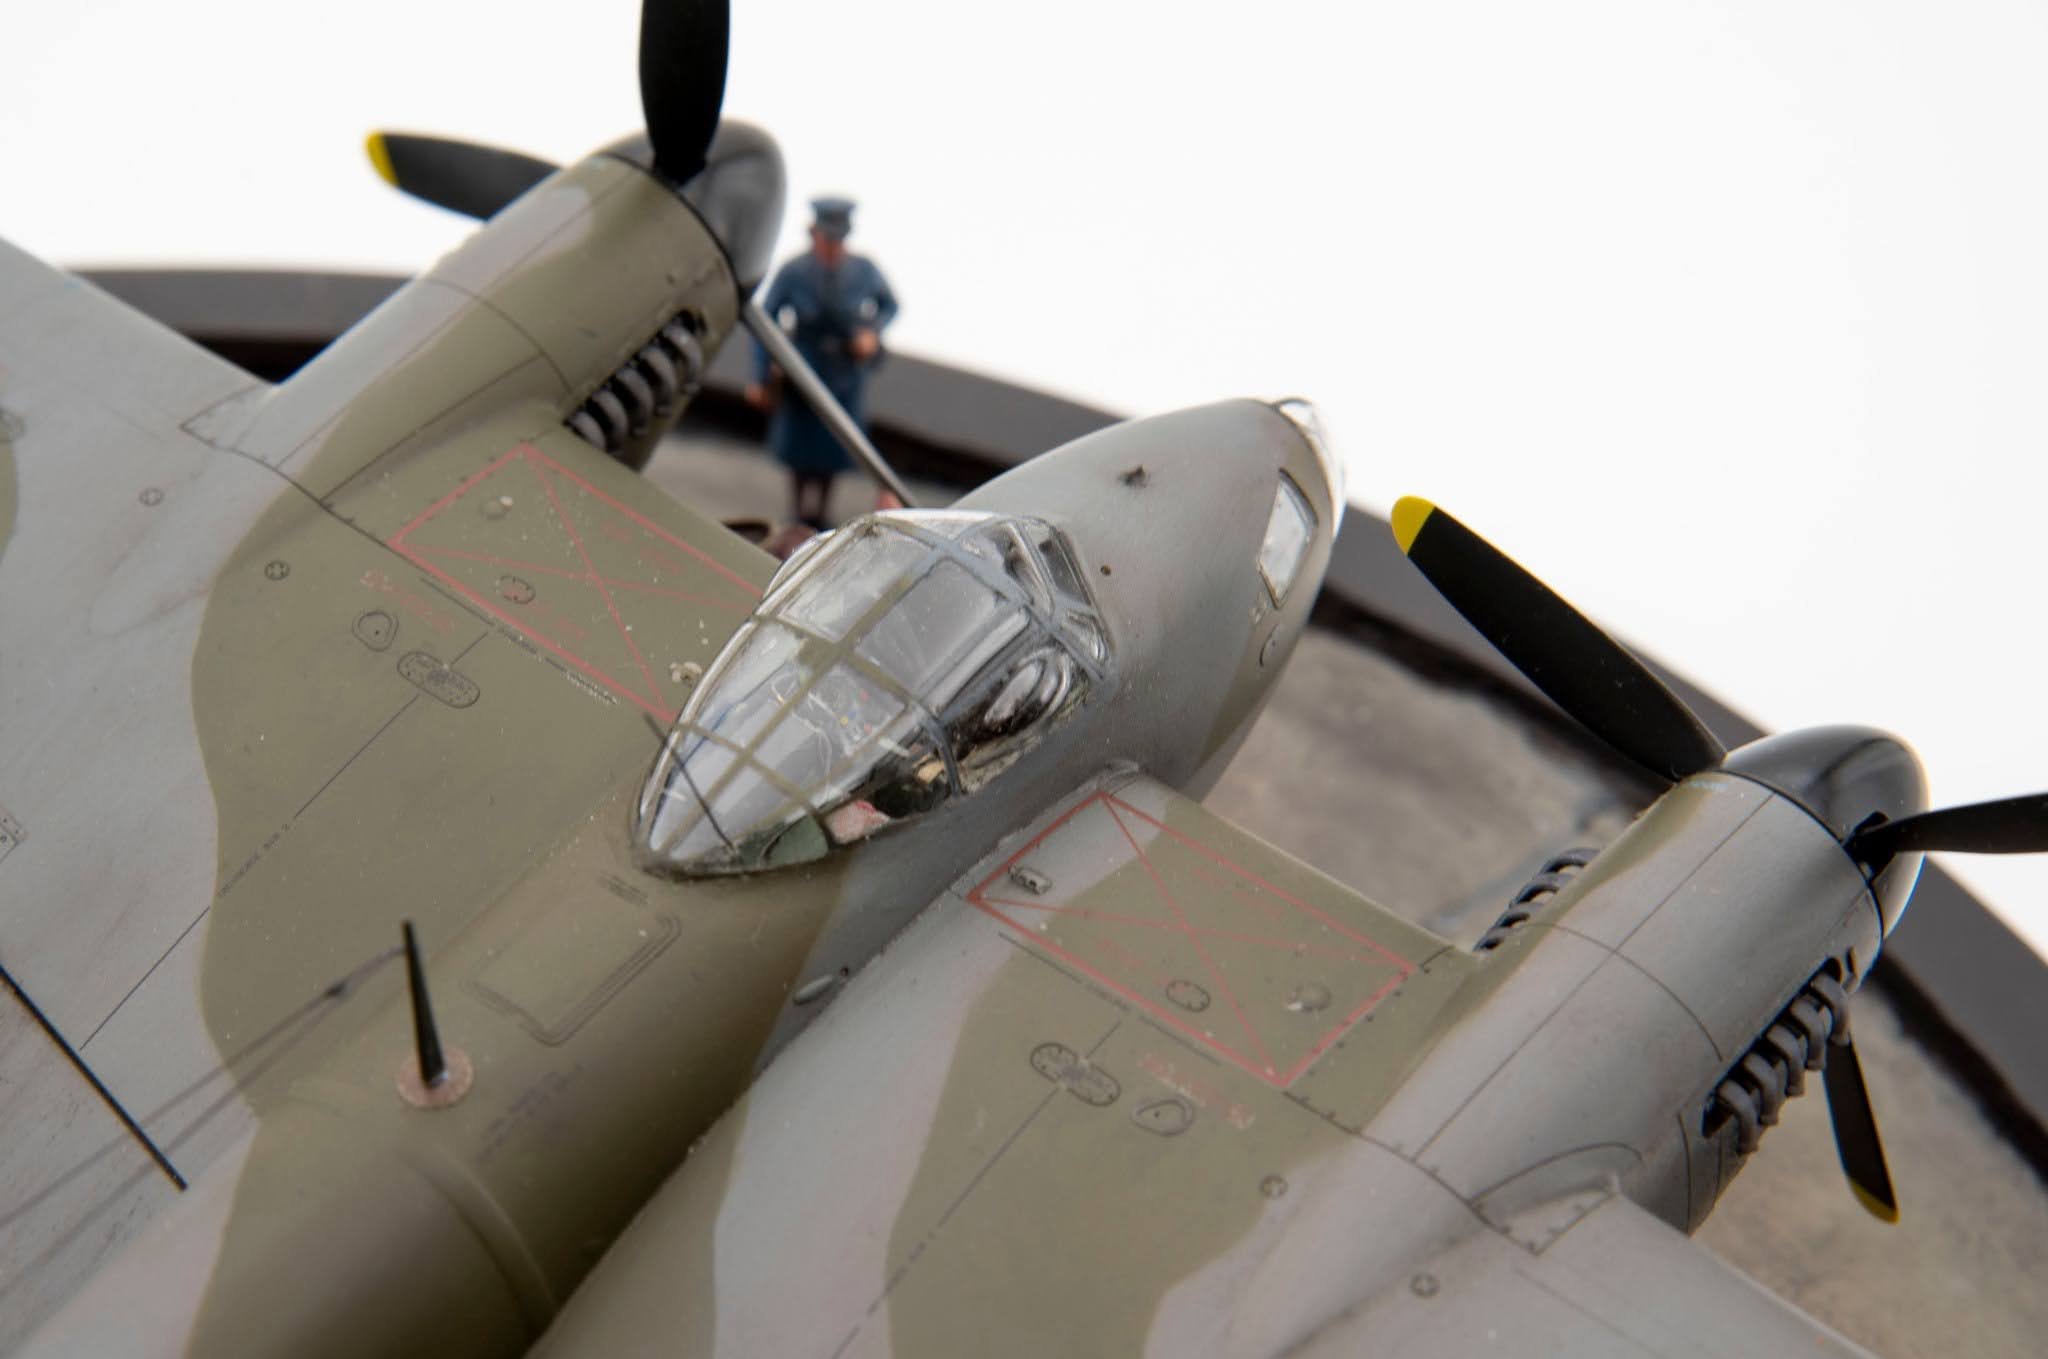
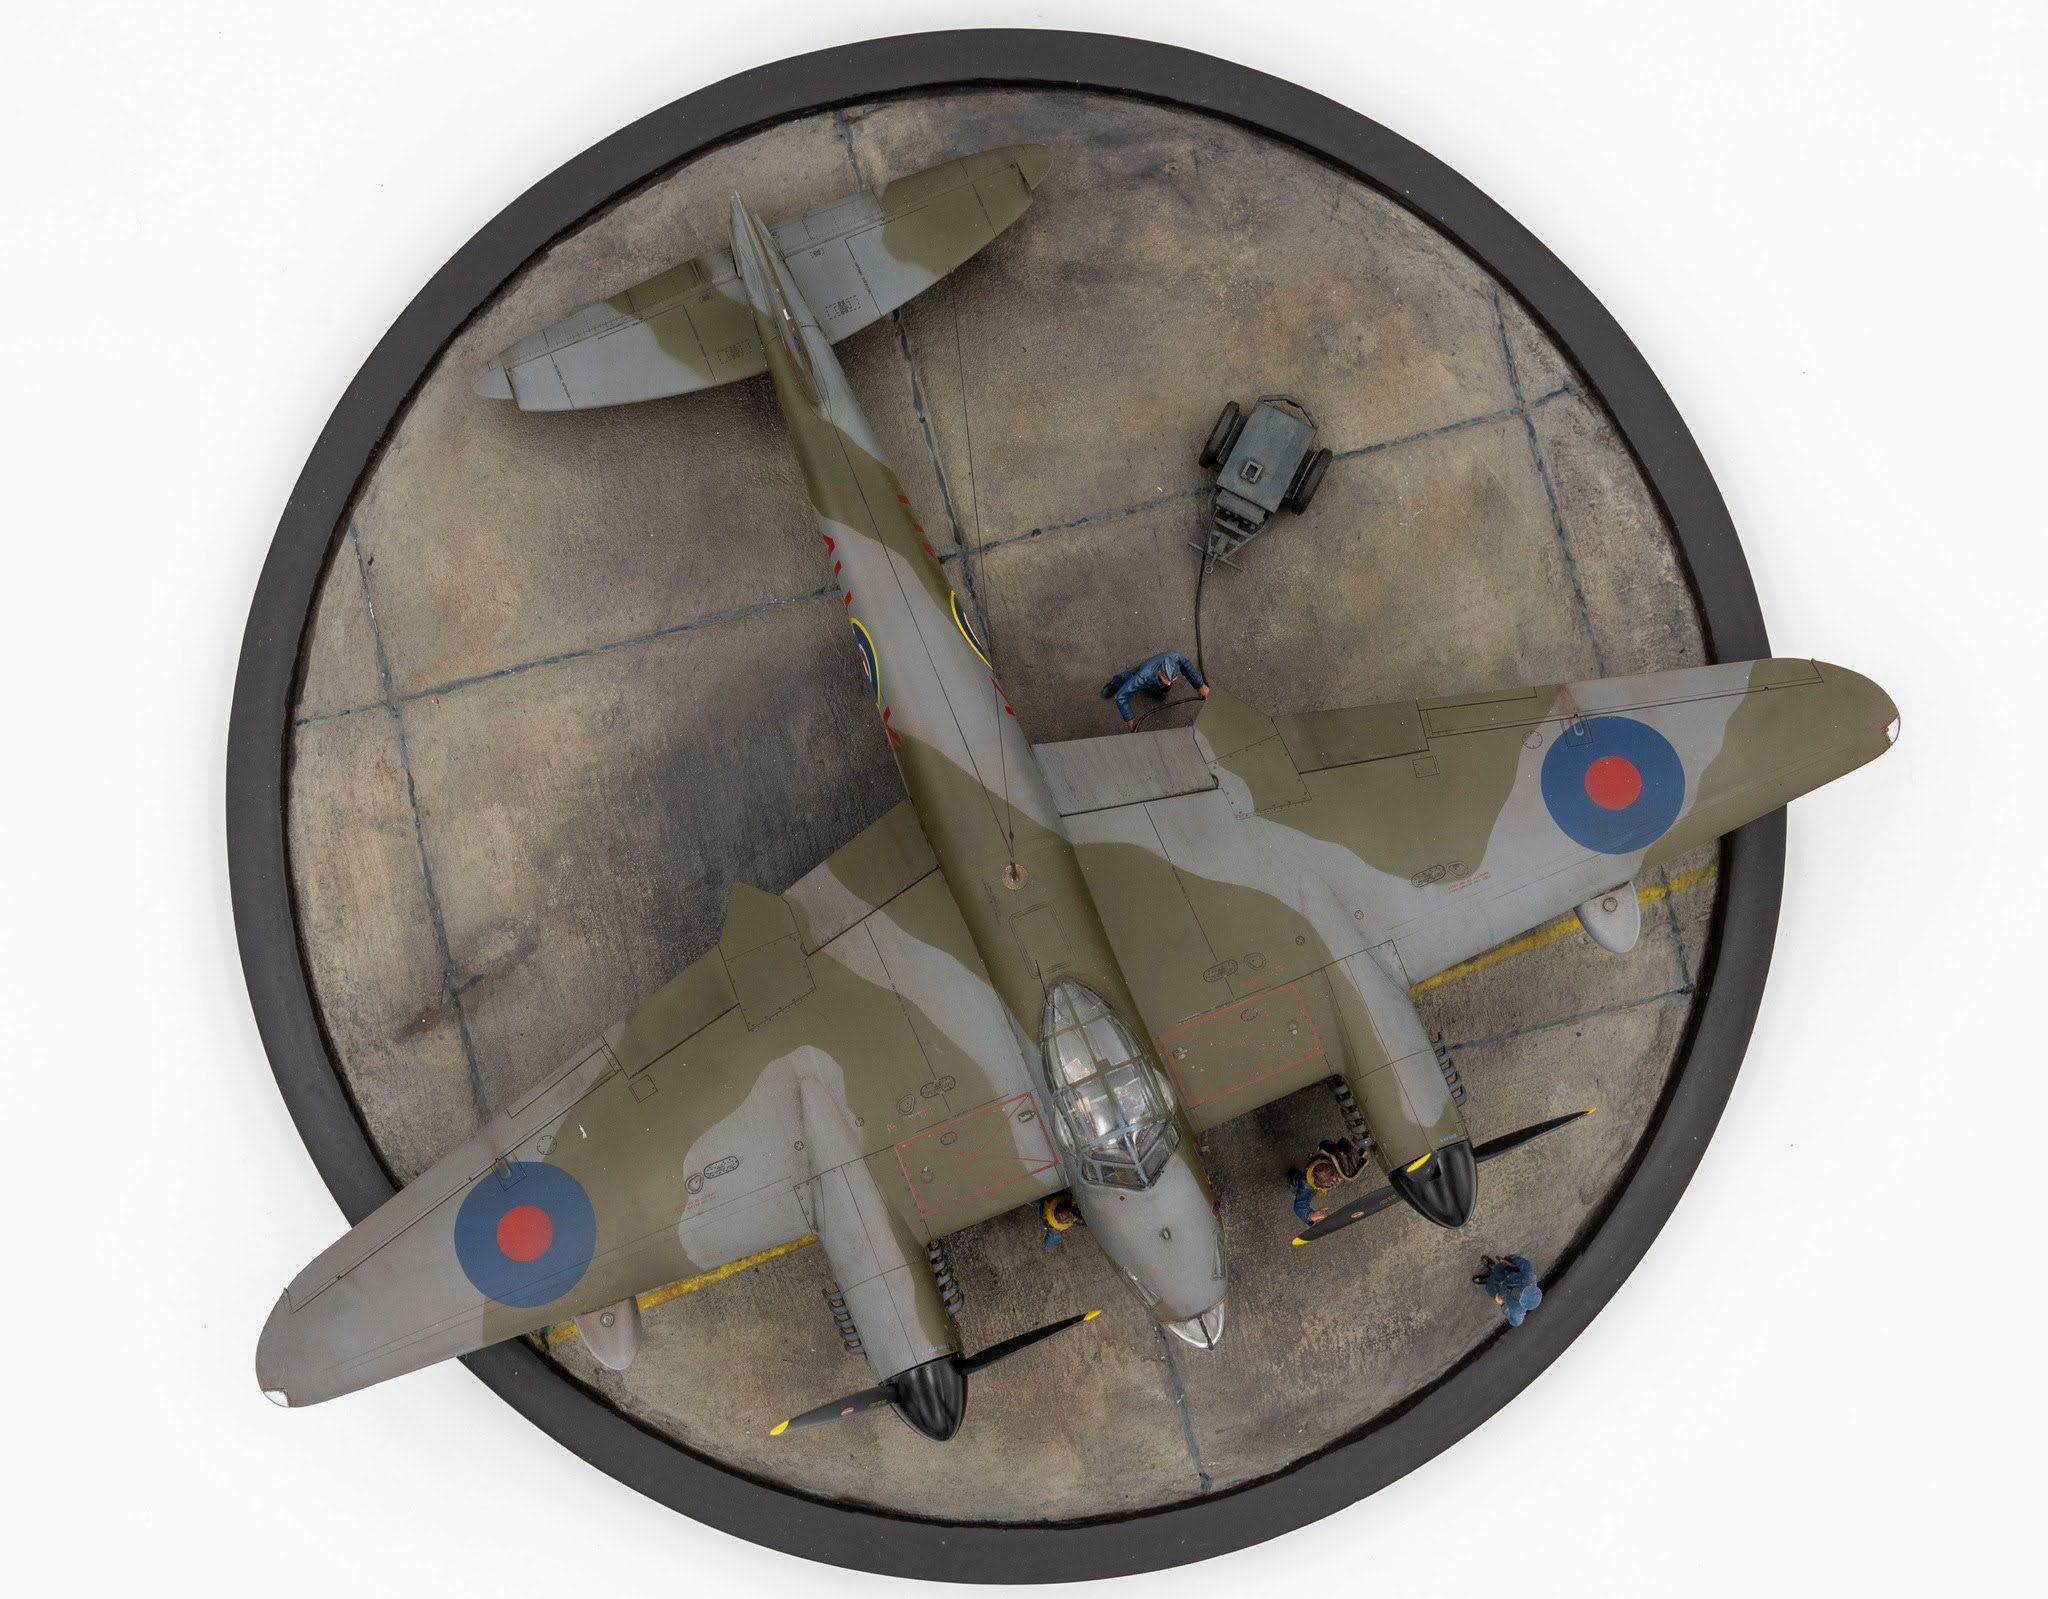
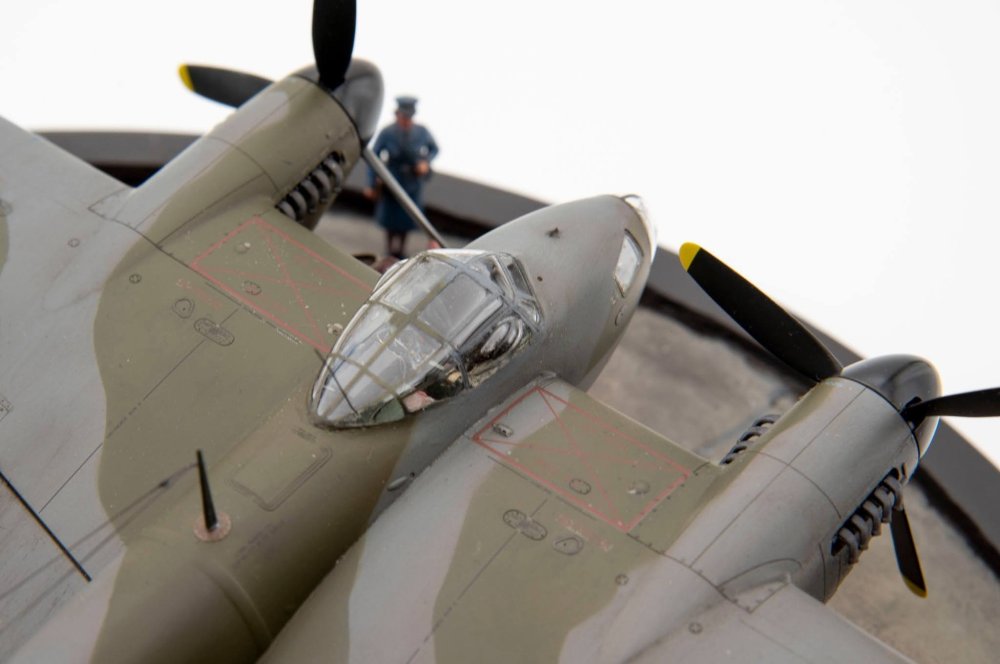
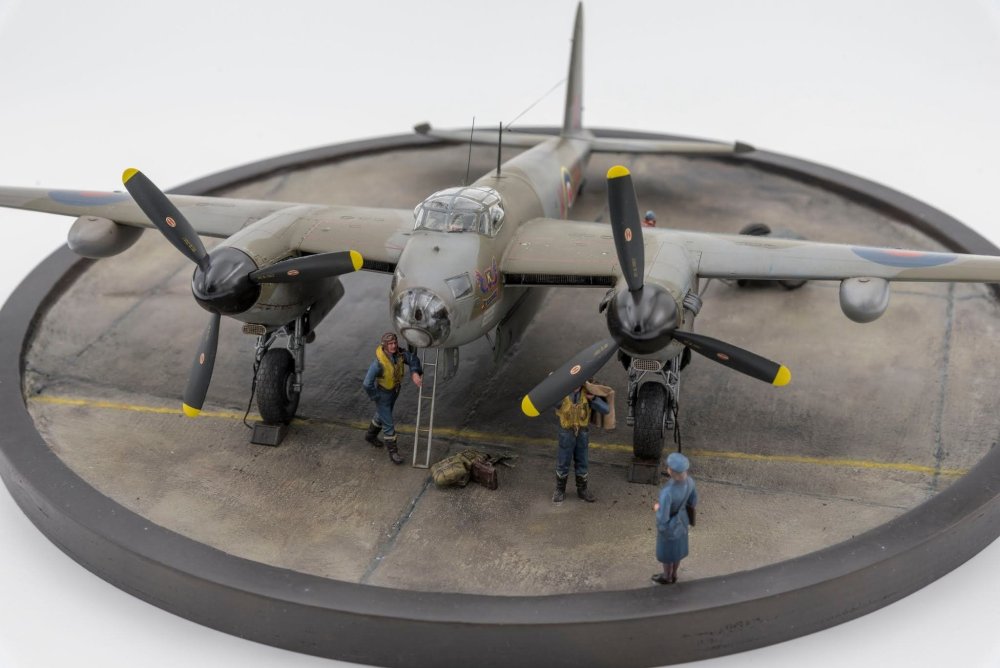
Finished this a few months ago, just slow in adding photos. It's Canadian built B.25 (or XXV) modified from the Tamiya B.IV kit with Aries interior, my own designed and 3D printed GEE boxes and chocks, Rob Taurus Vacuformed canopy, Ultracast wheels, 100 gal fuel tanks, mudguards and exhaust stacks, Eduard Brassin bombs, Look instrument panel and PE set, and a set of Barracuda Studios stencils. The noseart was made in PhotoShop based on photos of the real thing and a bit judgement as to colors and printed on Mr Decal Paper. The mission tally bombs, insignia, letters and numbers painted with Oramask stencils cut on the Portrait 3. Added in a bit of scrtach building for the cockpit (never to be seen), landing gear legs and GEE antenna. The RAF Trolley Accumulator is from Aircraft In Miniature and the figures are mainly from ICM kits with Tamiya fighter pilots on the crew. The base came from Hobby Lobby and I used a mix of spackling and AK concrete texture and it's painted with mix of Tamiya/Gunze paints and weathered with various pigments and oils. Hope you enjoy.


-
I hear you and agree.
-
That looks outstanding, the daylight shots of it all together really make that NMF and black sections pop.
-
Very cool! I have one in the stash to build. Found a photo in my dad's photo album from his time at NKP showing 64645 with a hole in the vertical fin from a 37mm cannon.
-
Tamiya Mosquito FB Mk VI 60326 - 1/32
FlyinBryan replied to Bomber_County's topic in LSM 1/35 and Larger Work In Progress
Nice! It comes with the front faces of the receiver and display (Type 92) for the GEE (the two non back pieces). I 3D printed those for 1/48 Tamiya B IV that I'm building as a B.25 -
F4U-1A Corsair Tamiya 1/32
FlyinBryan replied to DocRob's topic in LSM 1/35 and Larger Work In Progress
That's a good tip as those HGW belt are frankly frightening, especially under 1/32 scale. -
Wow! The plethora of boxes, rods and miscellaneous objects from the Evergreen plastic is mind boggling. This thing looks amazing - that would take me about 8 months...
-
What?! These photos are awesome! Clear, in focus and free of background clutter and a joy to look at (not that the excellent build/painting job in the image isn’t enough). and enjoying this build and catching up (and obviously rereading a few sections 🙄). Bryan
-
Bf-110C with friend
FlyinBryan replied to Rod Bettencourt's topic in LSM 1/32 and Larger Aircraft Ready for Inspection
Like everyone else, had to look twice to realize it was a model. Impressive all around. The dimpling/oil canning on the wings is amazing too. -
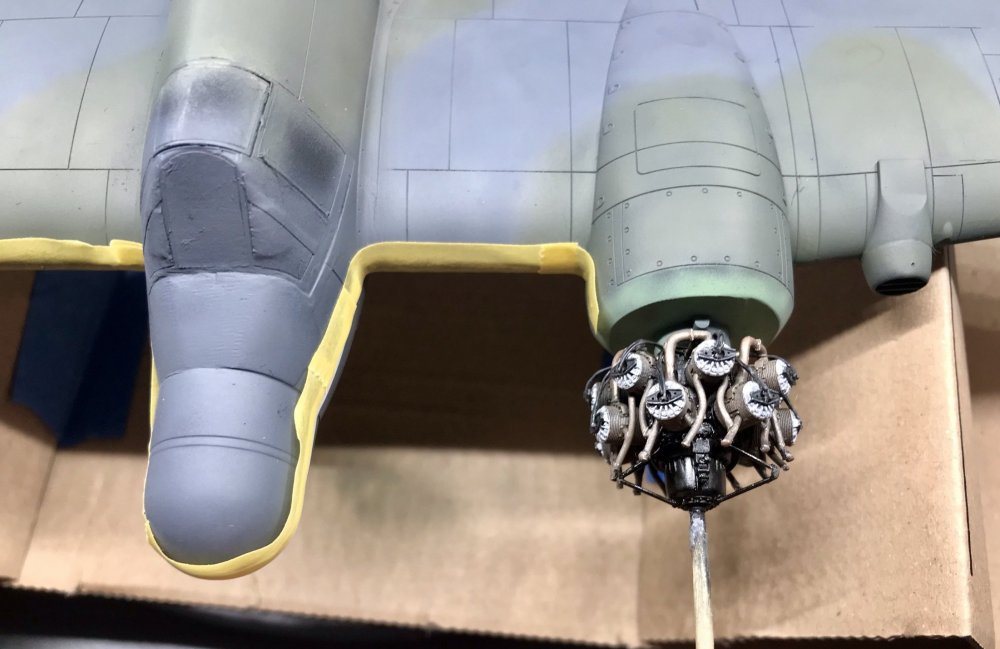
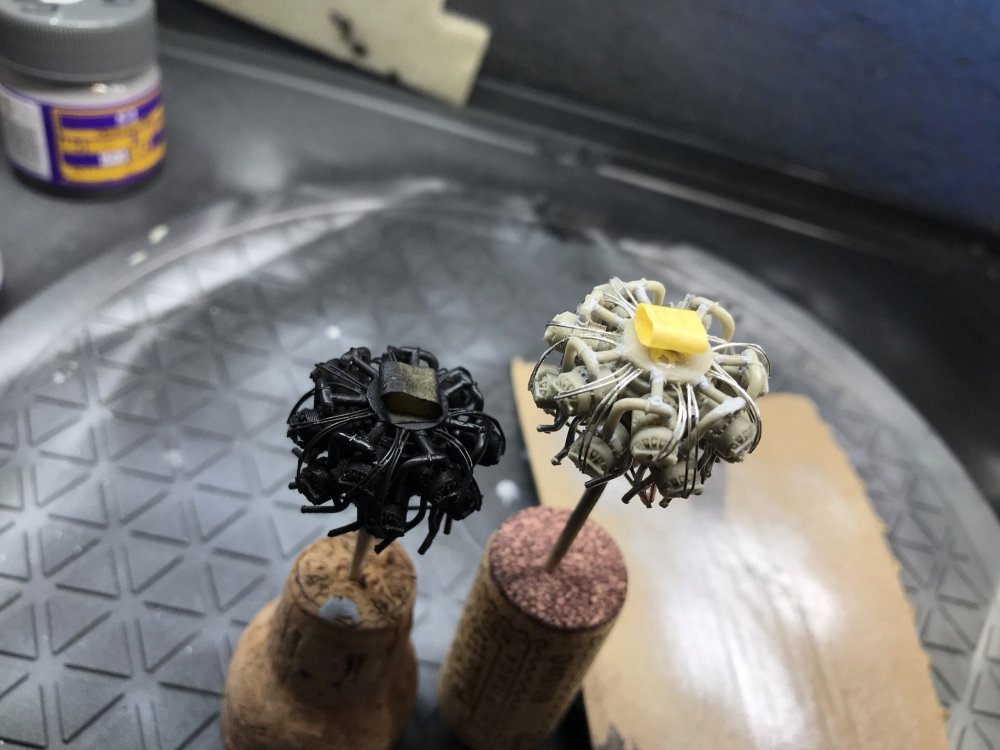
I used 0.3mm solder wire for the Hercules wires on my 1/48 Beaufighter. Learned a lot with 2 for 28 cylinders....will use lead wire next time as others have mentioned, it's soft and malleable. The wire I used was a bit springy. Used PVA glue for the spacers on the pairs. The exhaust pipes (the Vector engines only came with intakes) were 0.8mm lead solder wire.
-
Short Sunderland MkII
FlyinBryan replied to ThomasProbert's topic in LSM 1/35 and Larger Work In Progress
Good reason for a few pints - painting aids... -
a D out of a G.... HK's B-17 conversion
FlyinBryan replied to brahman104's topic in LSM 1/35 and Larger Work In Progress
Binge following/catching up here...but had to chime in to say your metal work here is phenomenal on top of the incredible scratch building and 3D printing work.- 167 replies
-
- 2
-

-
- B-17
- scratch built
- (and 1 more)
-
Wow! Phenomenal following this. Mine just arrived Monday and not been so excited to start a build in a while. It'll be a nice change after I finish my Dragon Ju-88A4. Appreciating the tips from brushes to seatbelts as you go!
-
Stunning work. Like the American movie team with the Bf-110 the most.