
Fran
-
Posts
2,234 -
Joined
-
Last visited
Content Type
Profiles
Forums
Events
Gallery
Everything posted by Fran
-
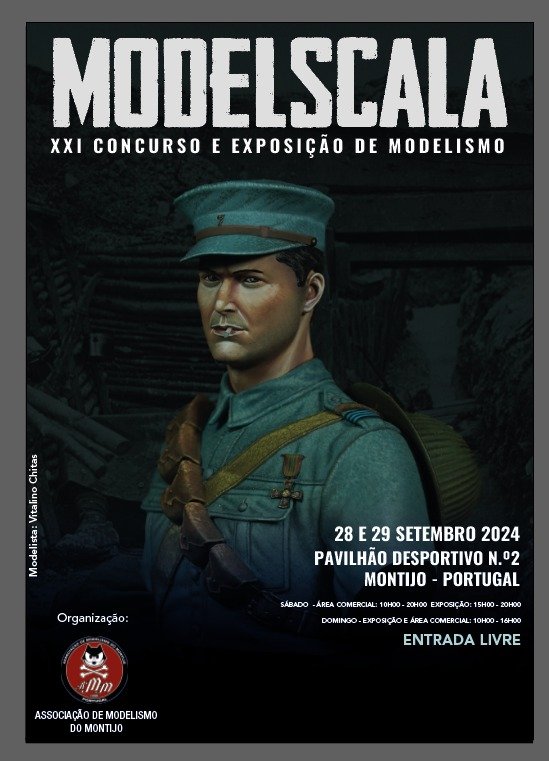
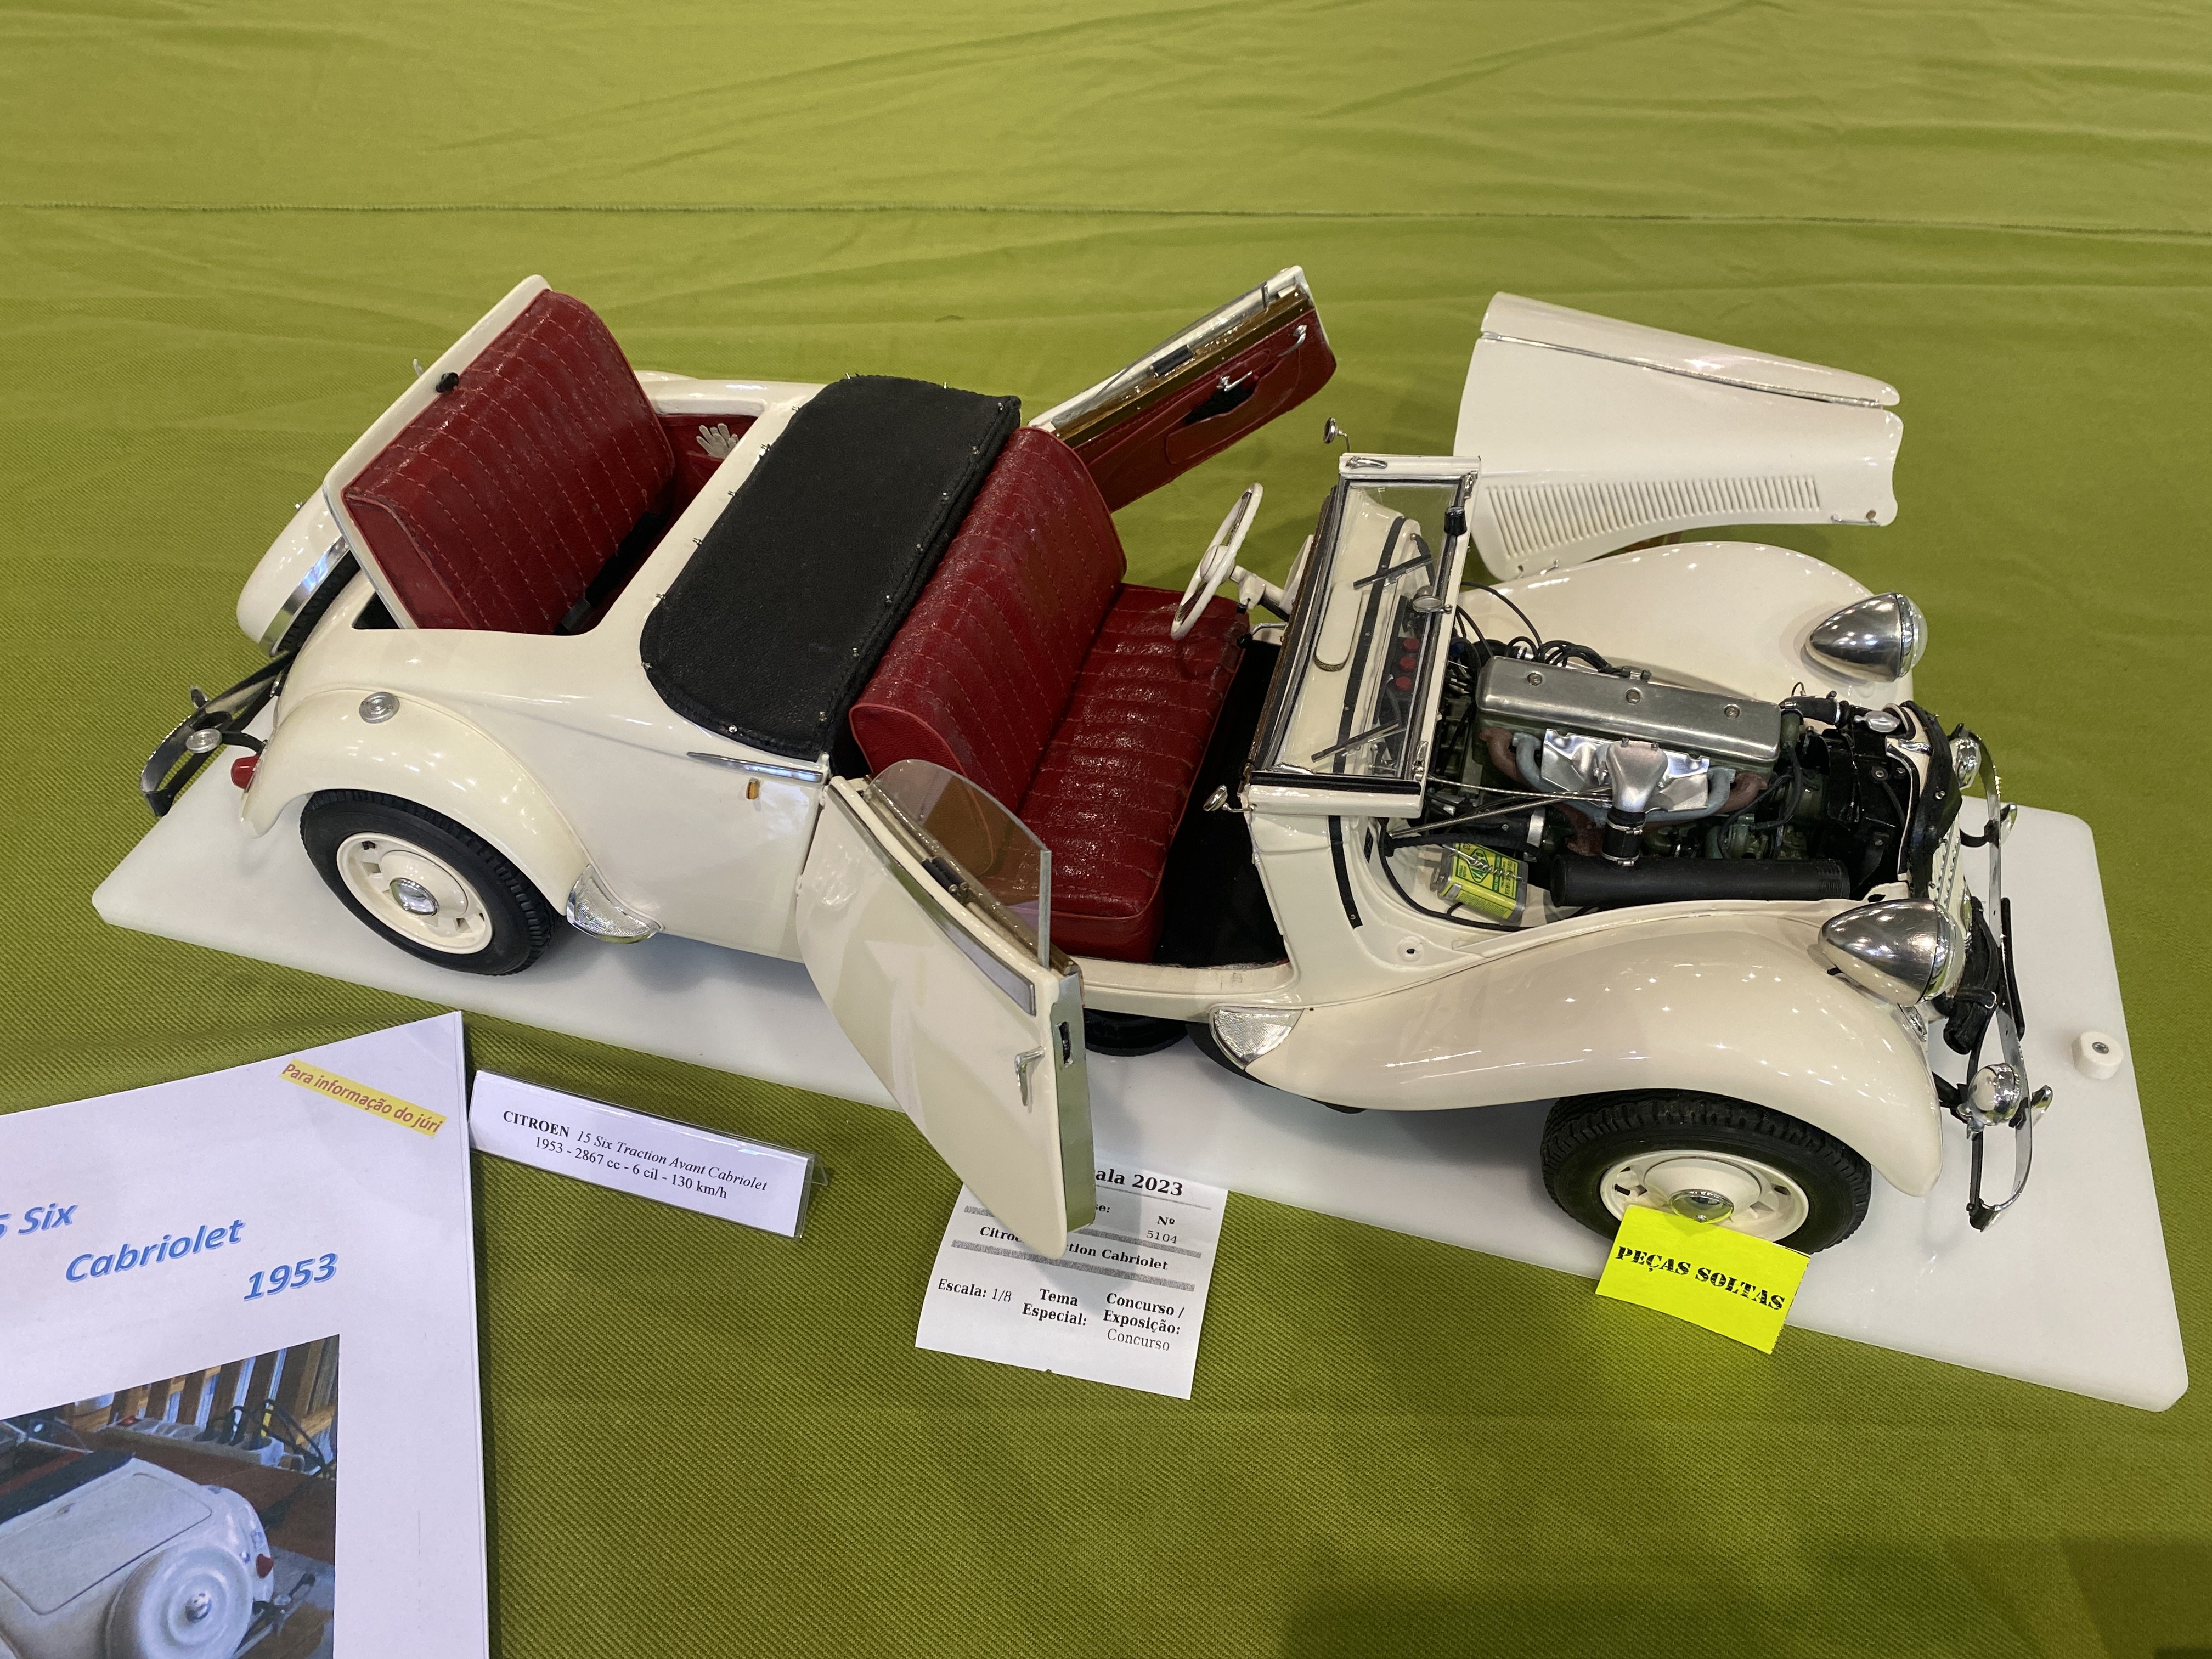
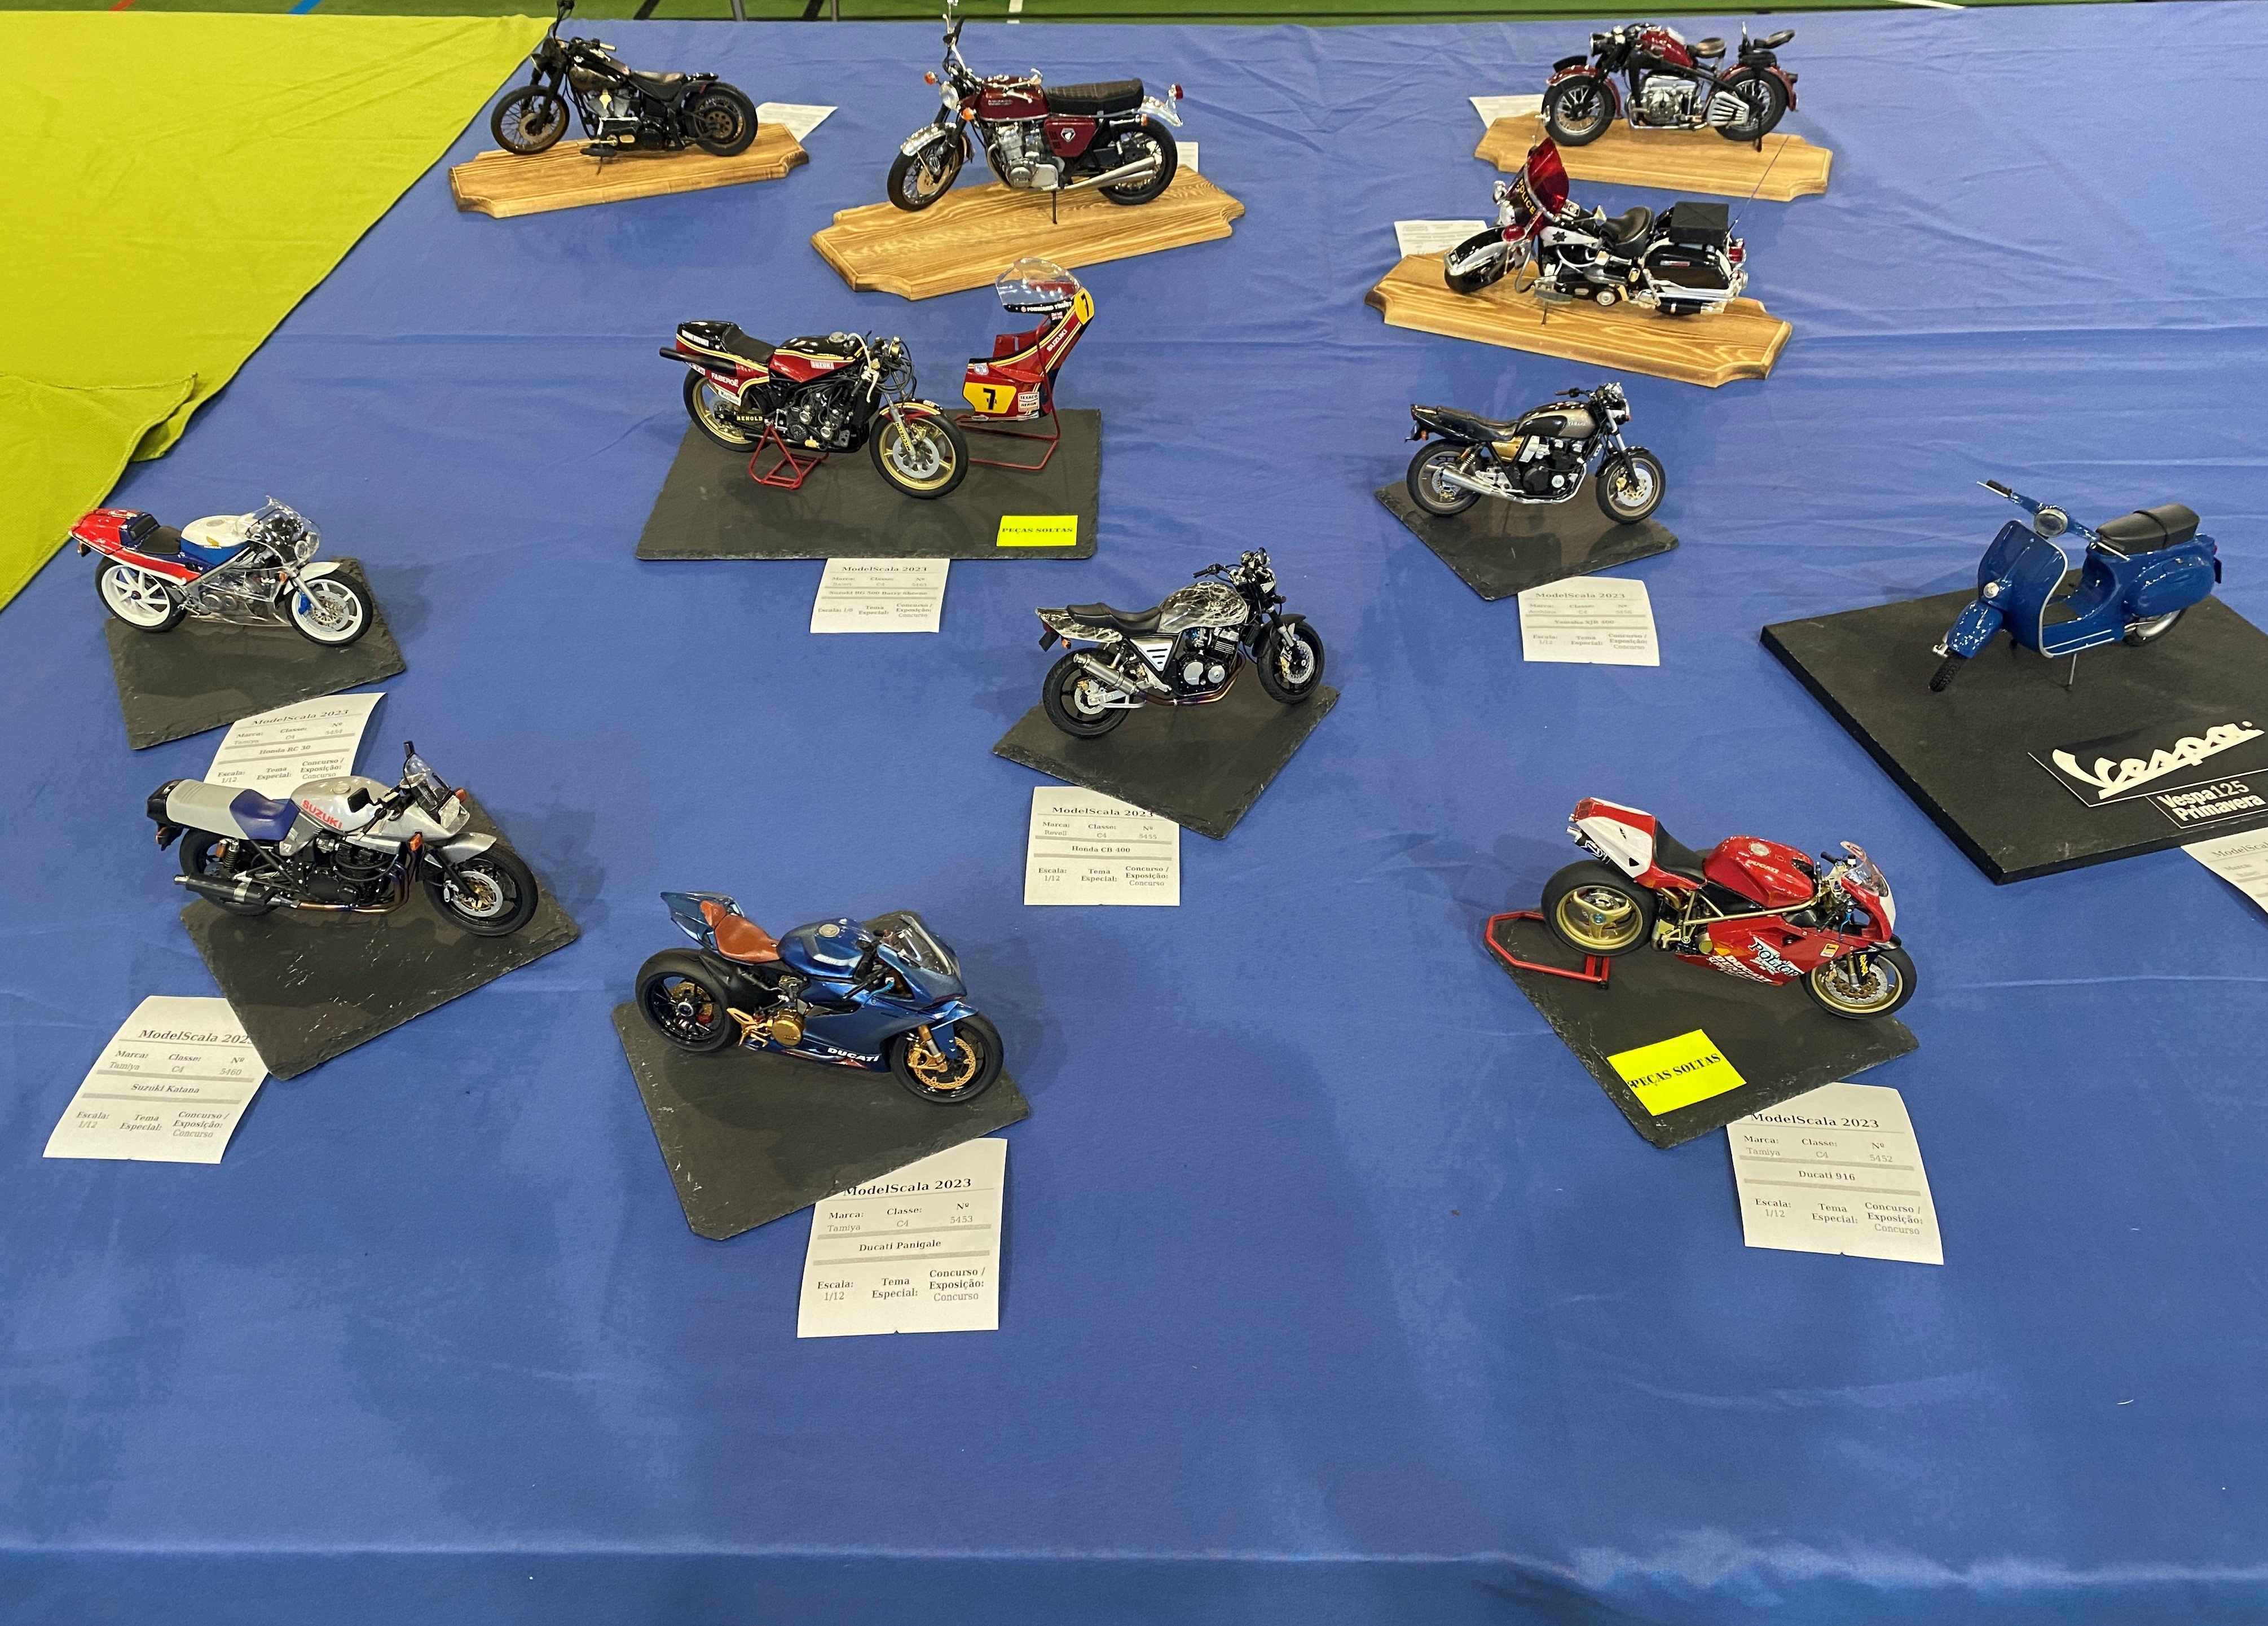
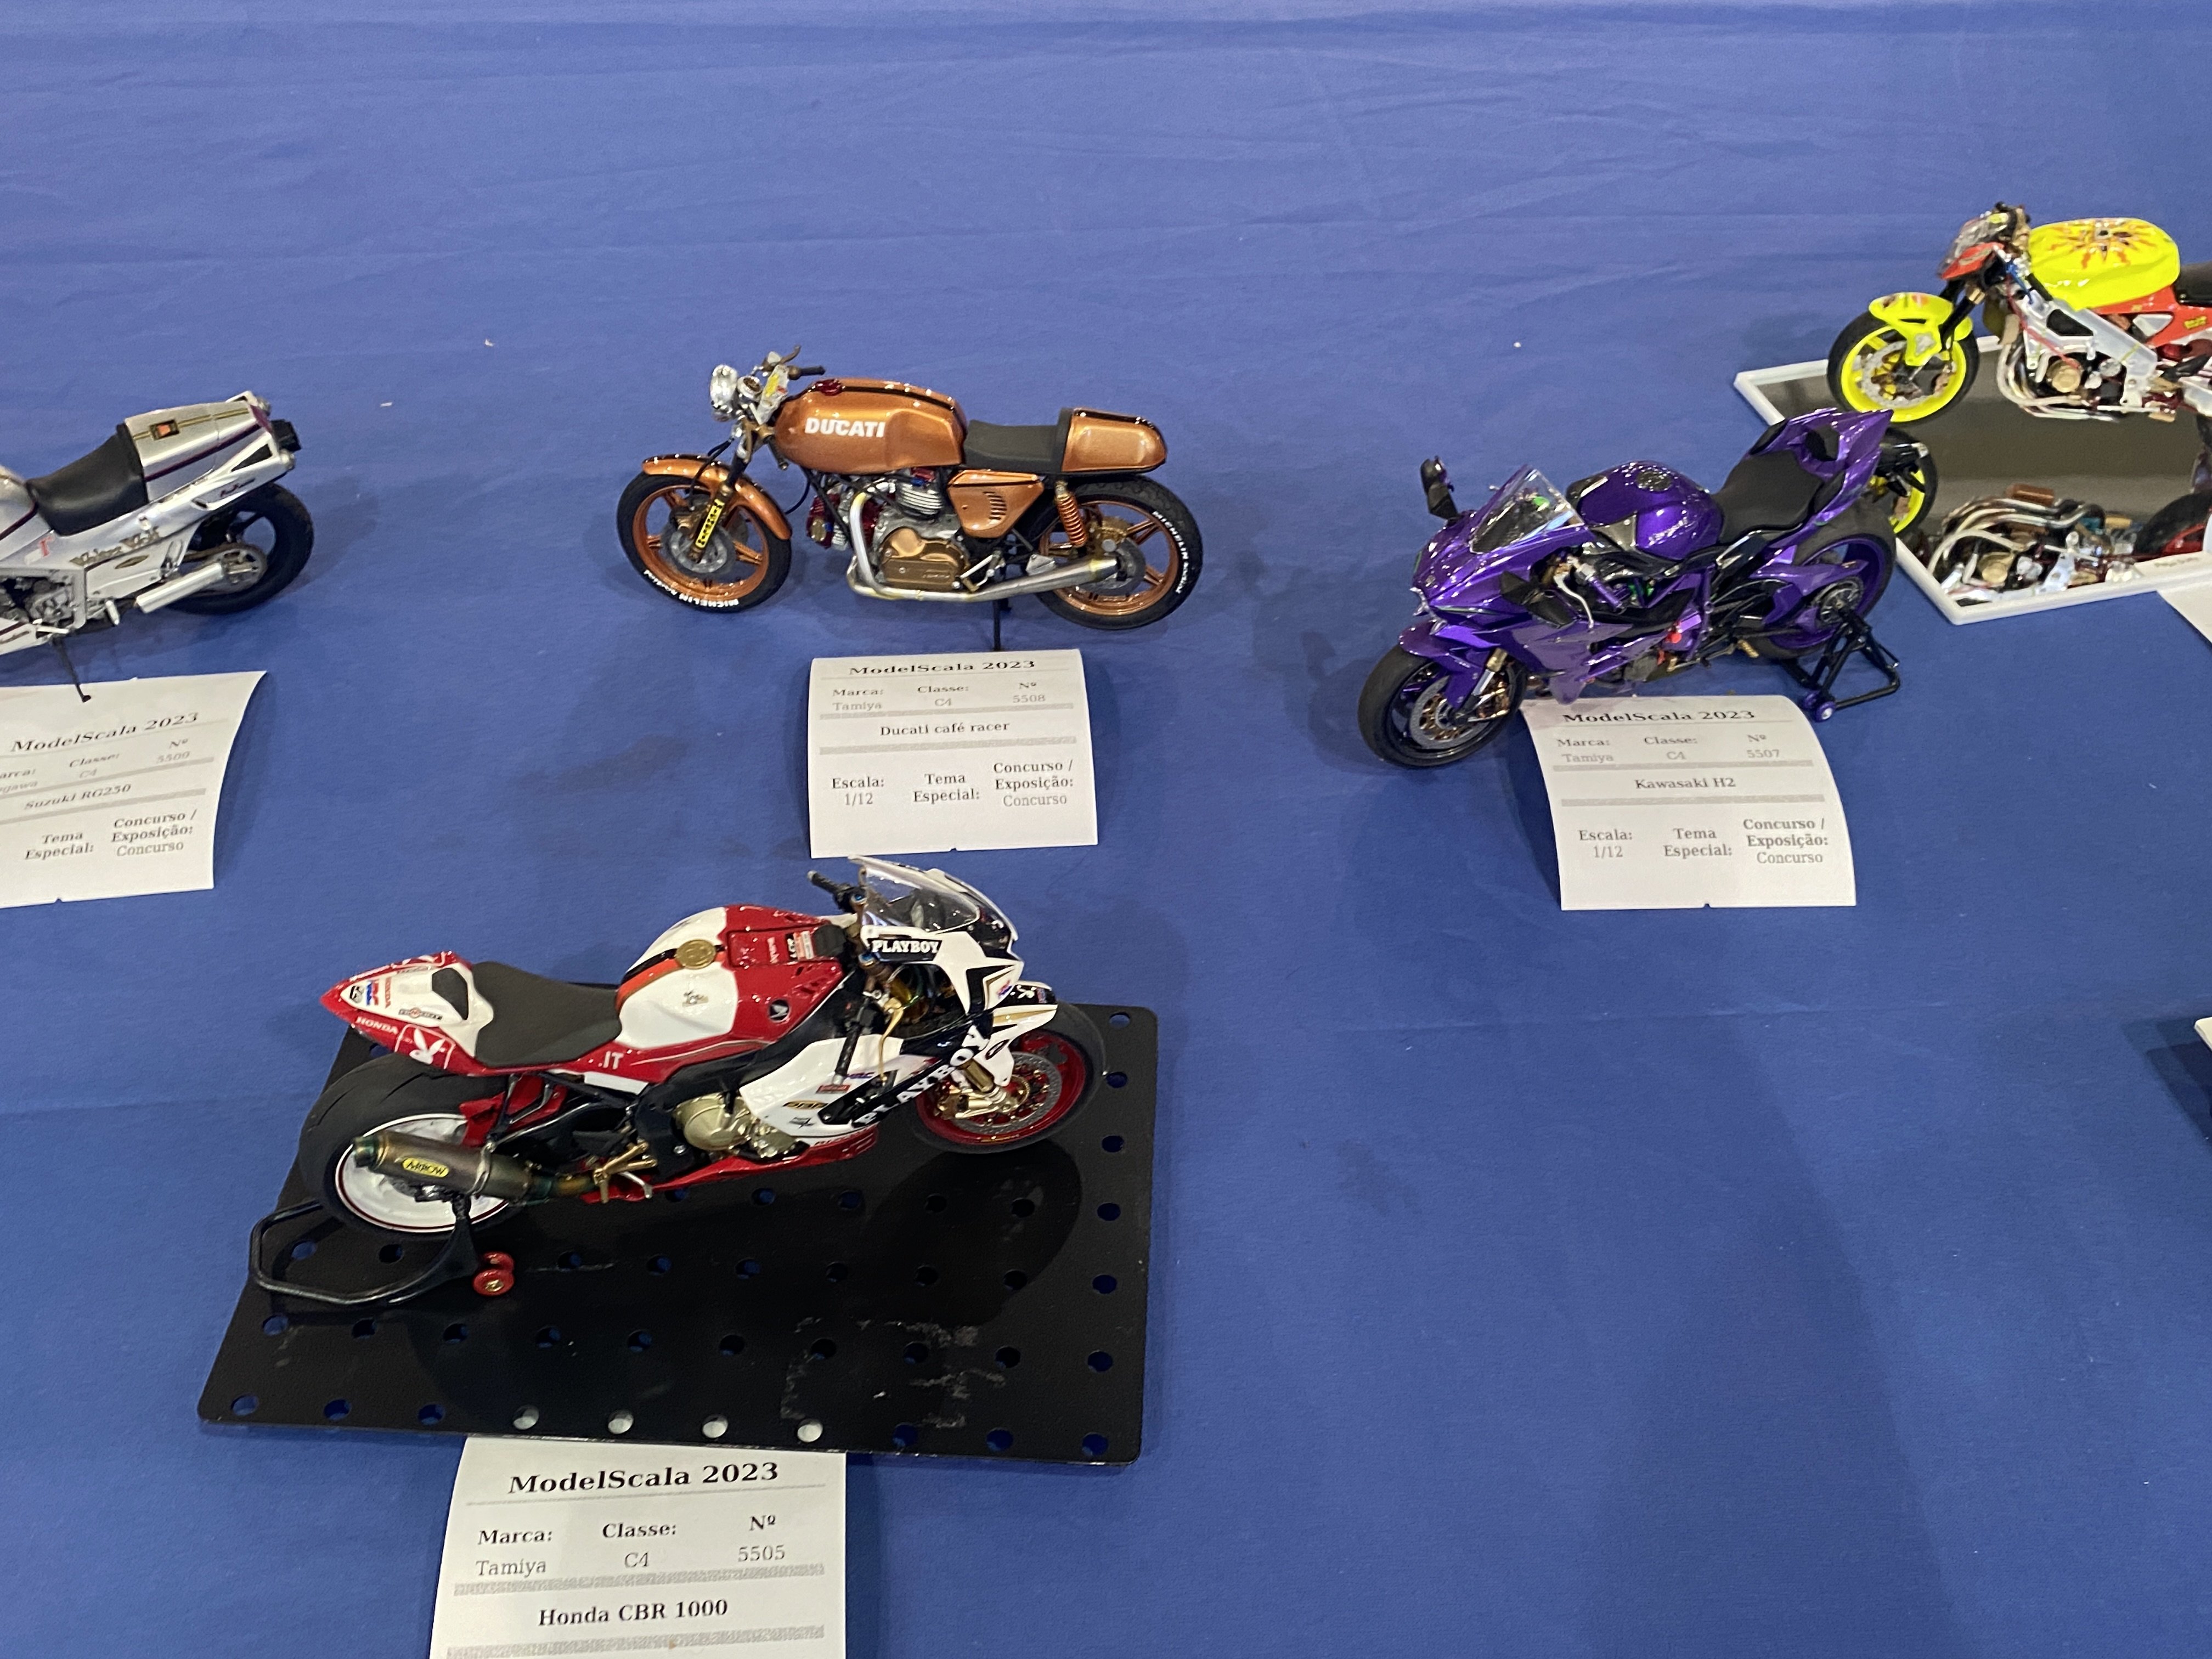
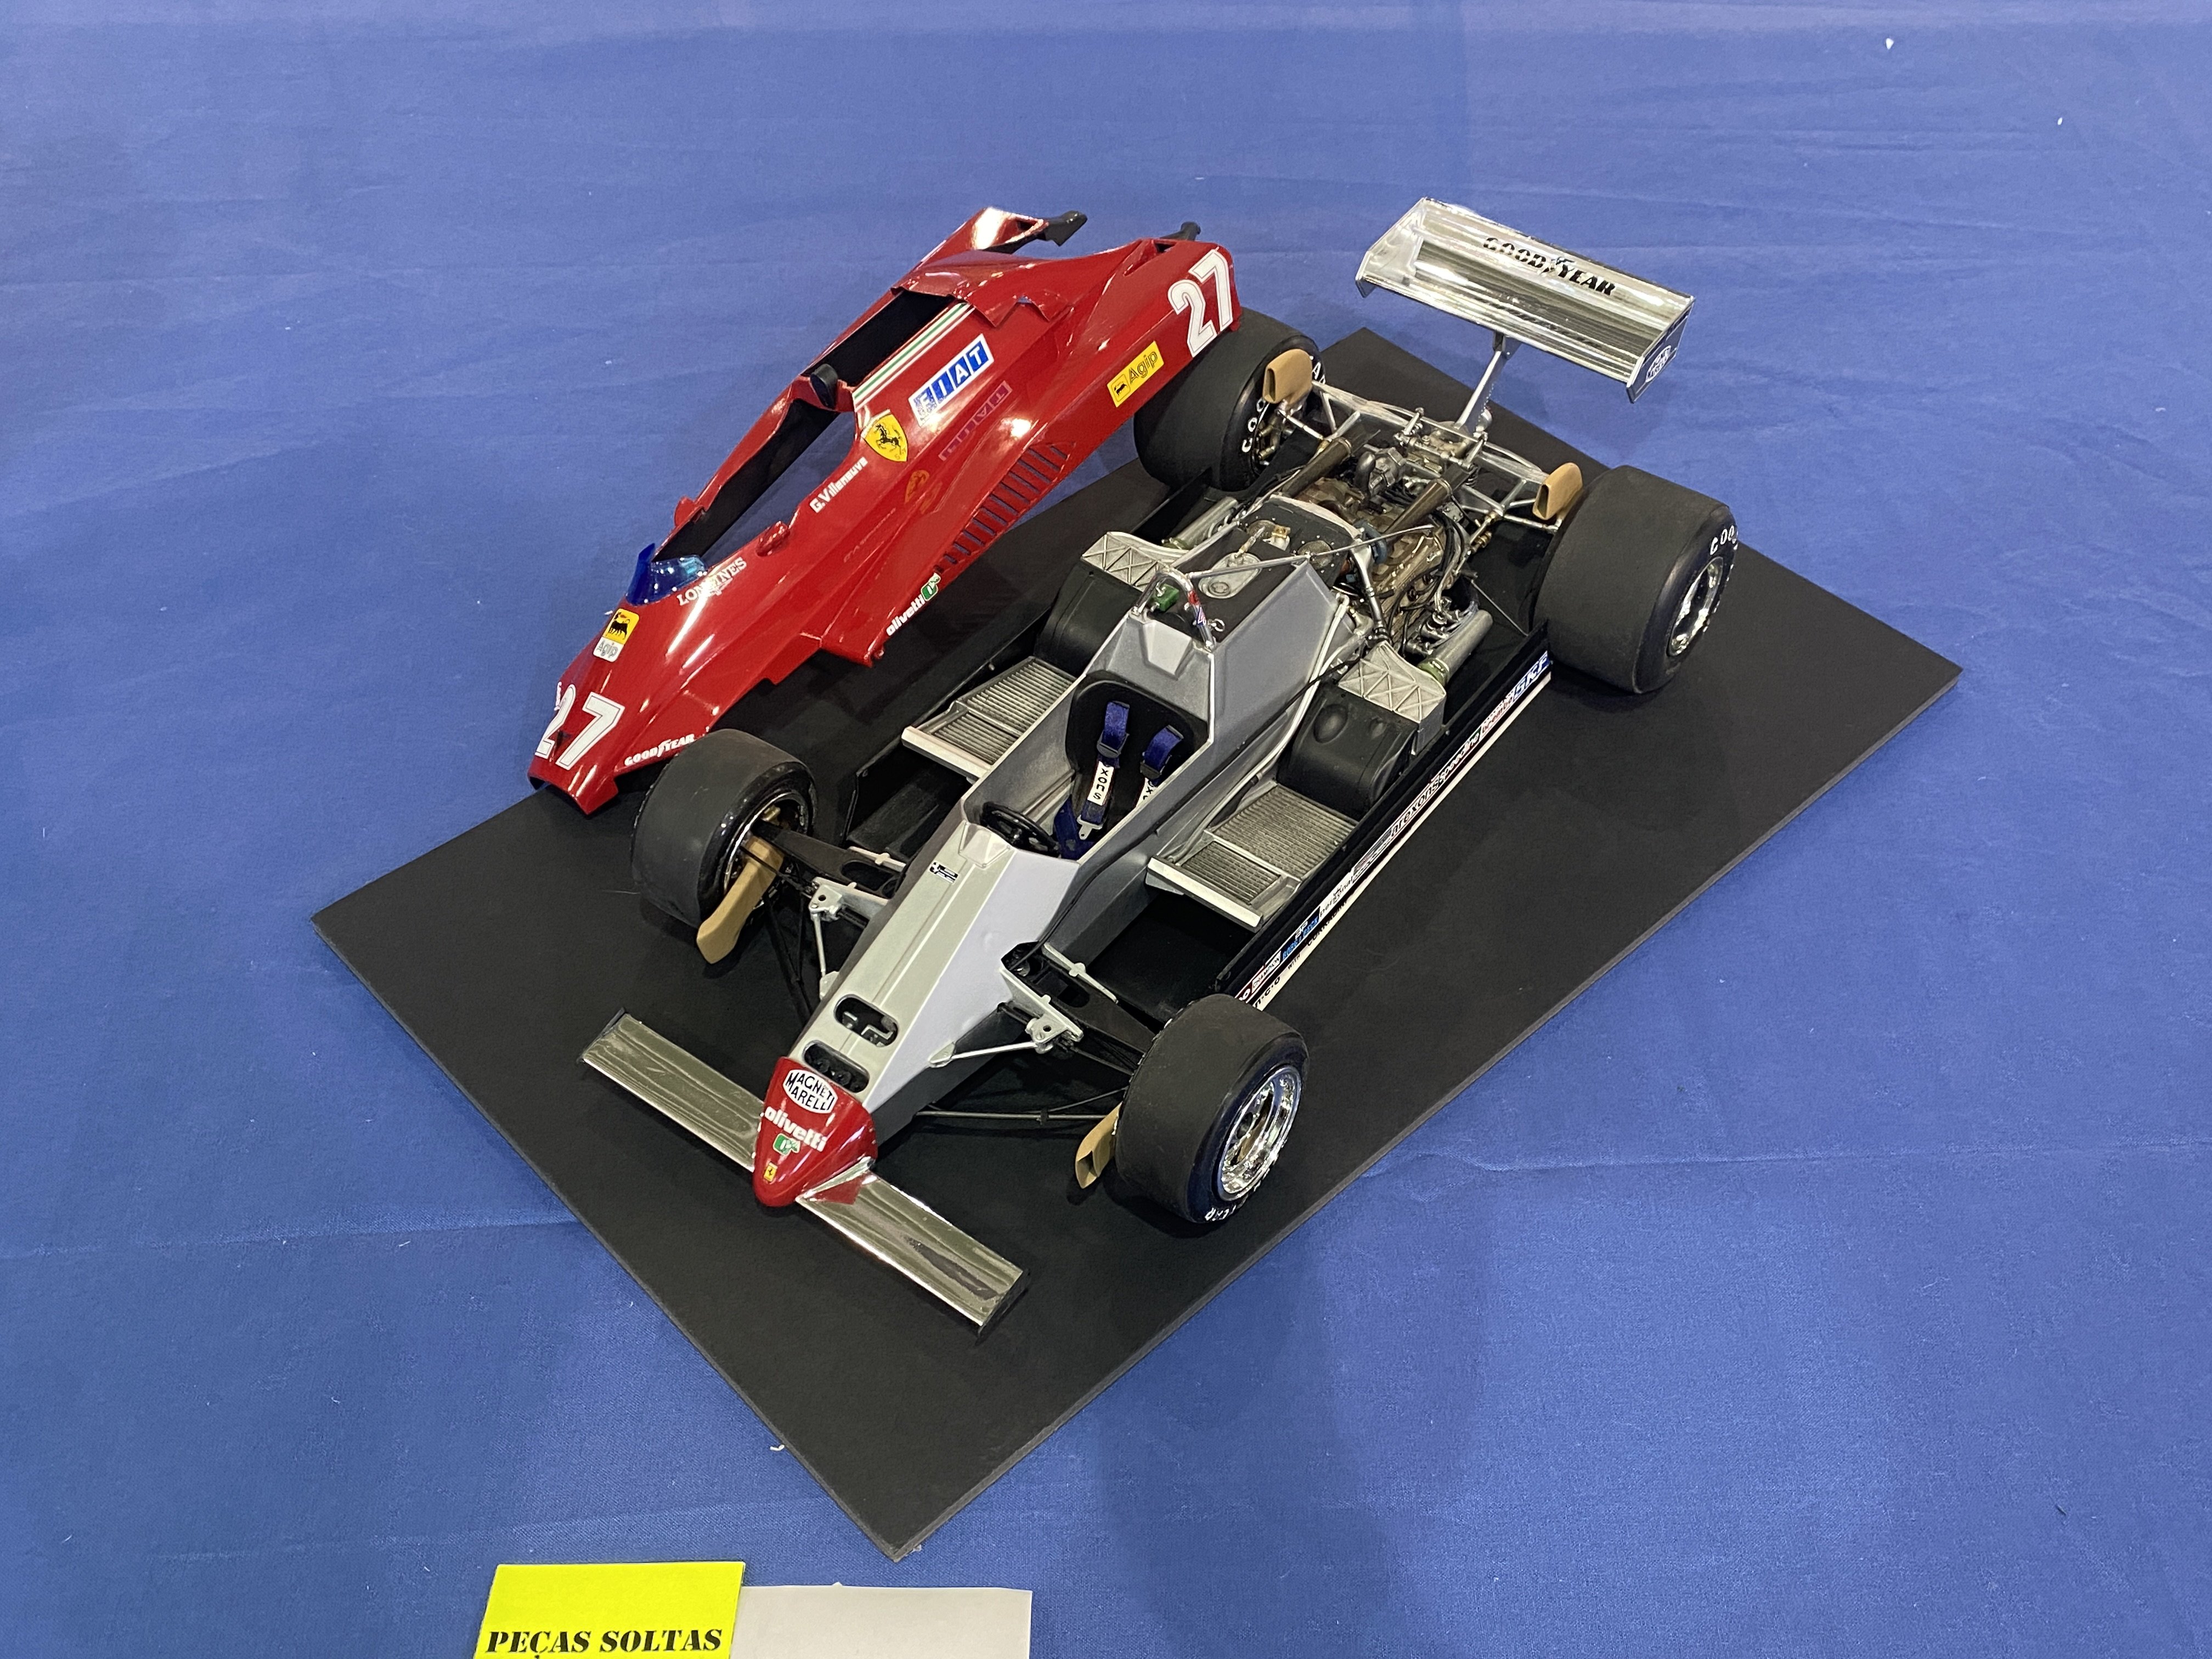
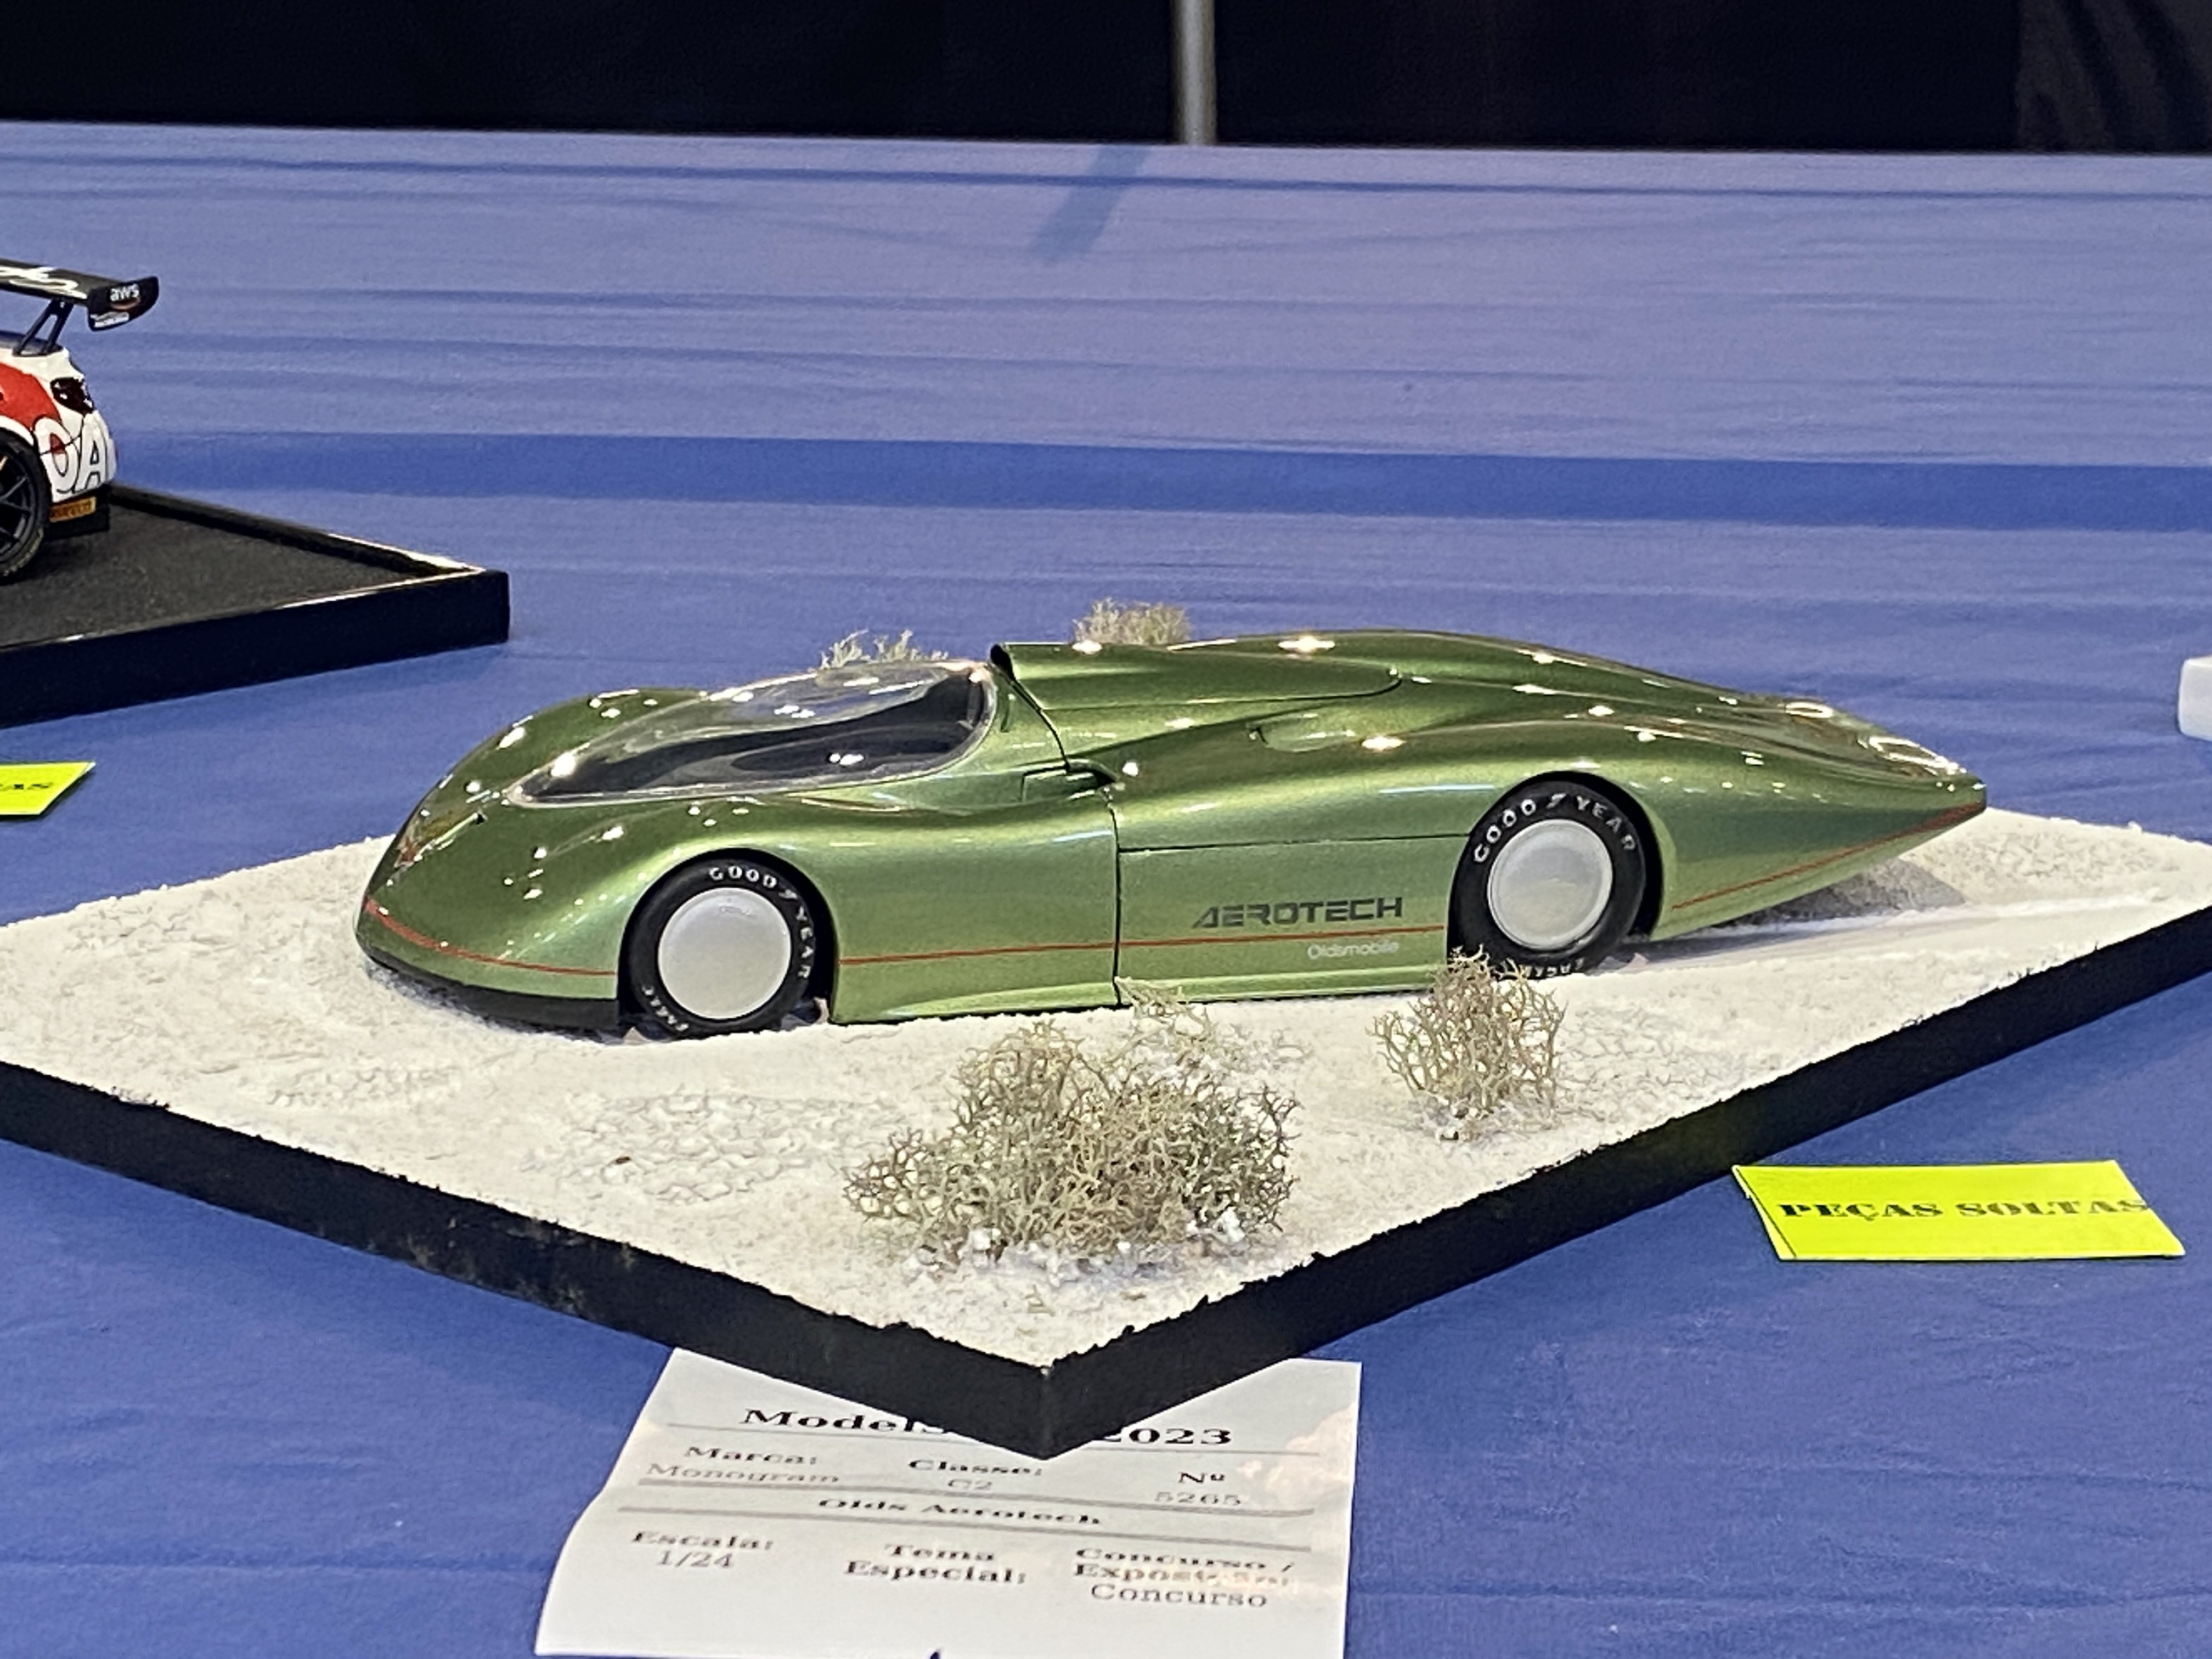
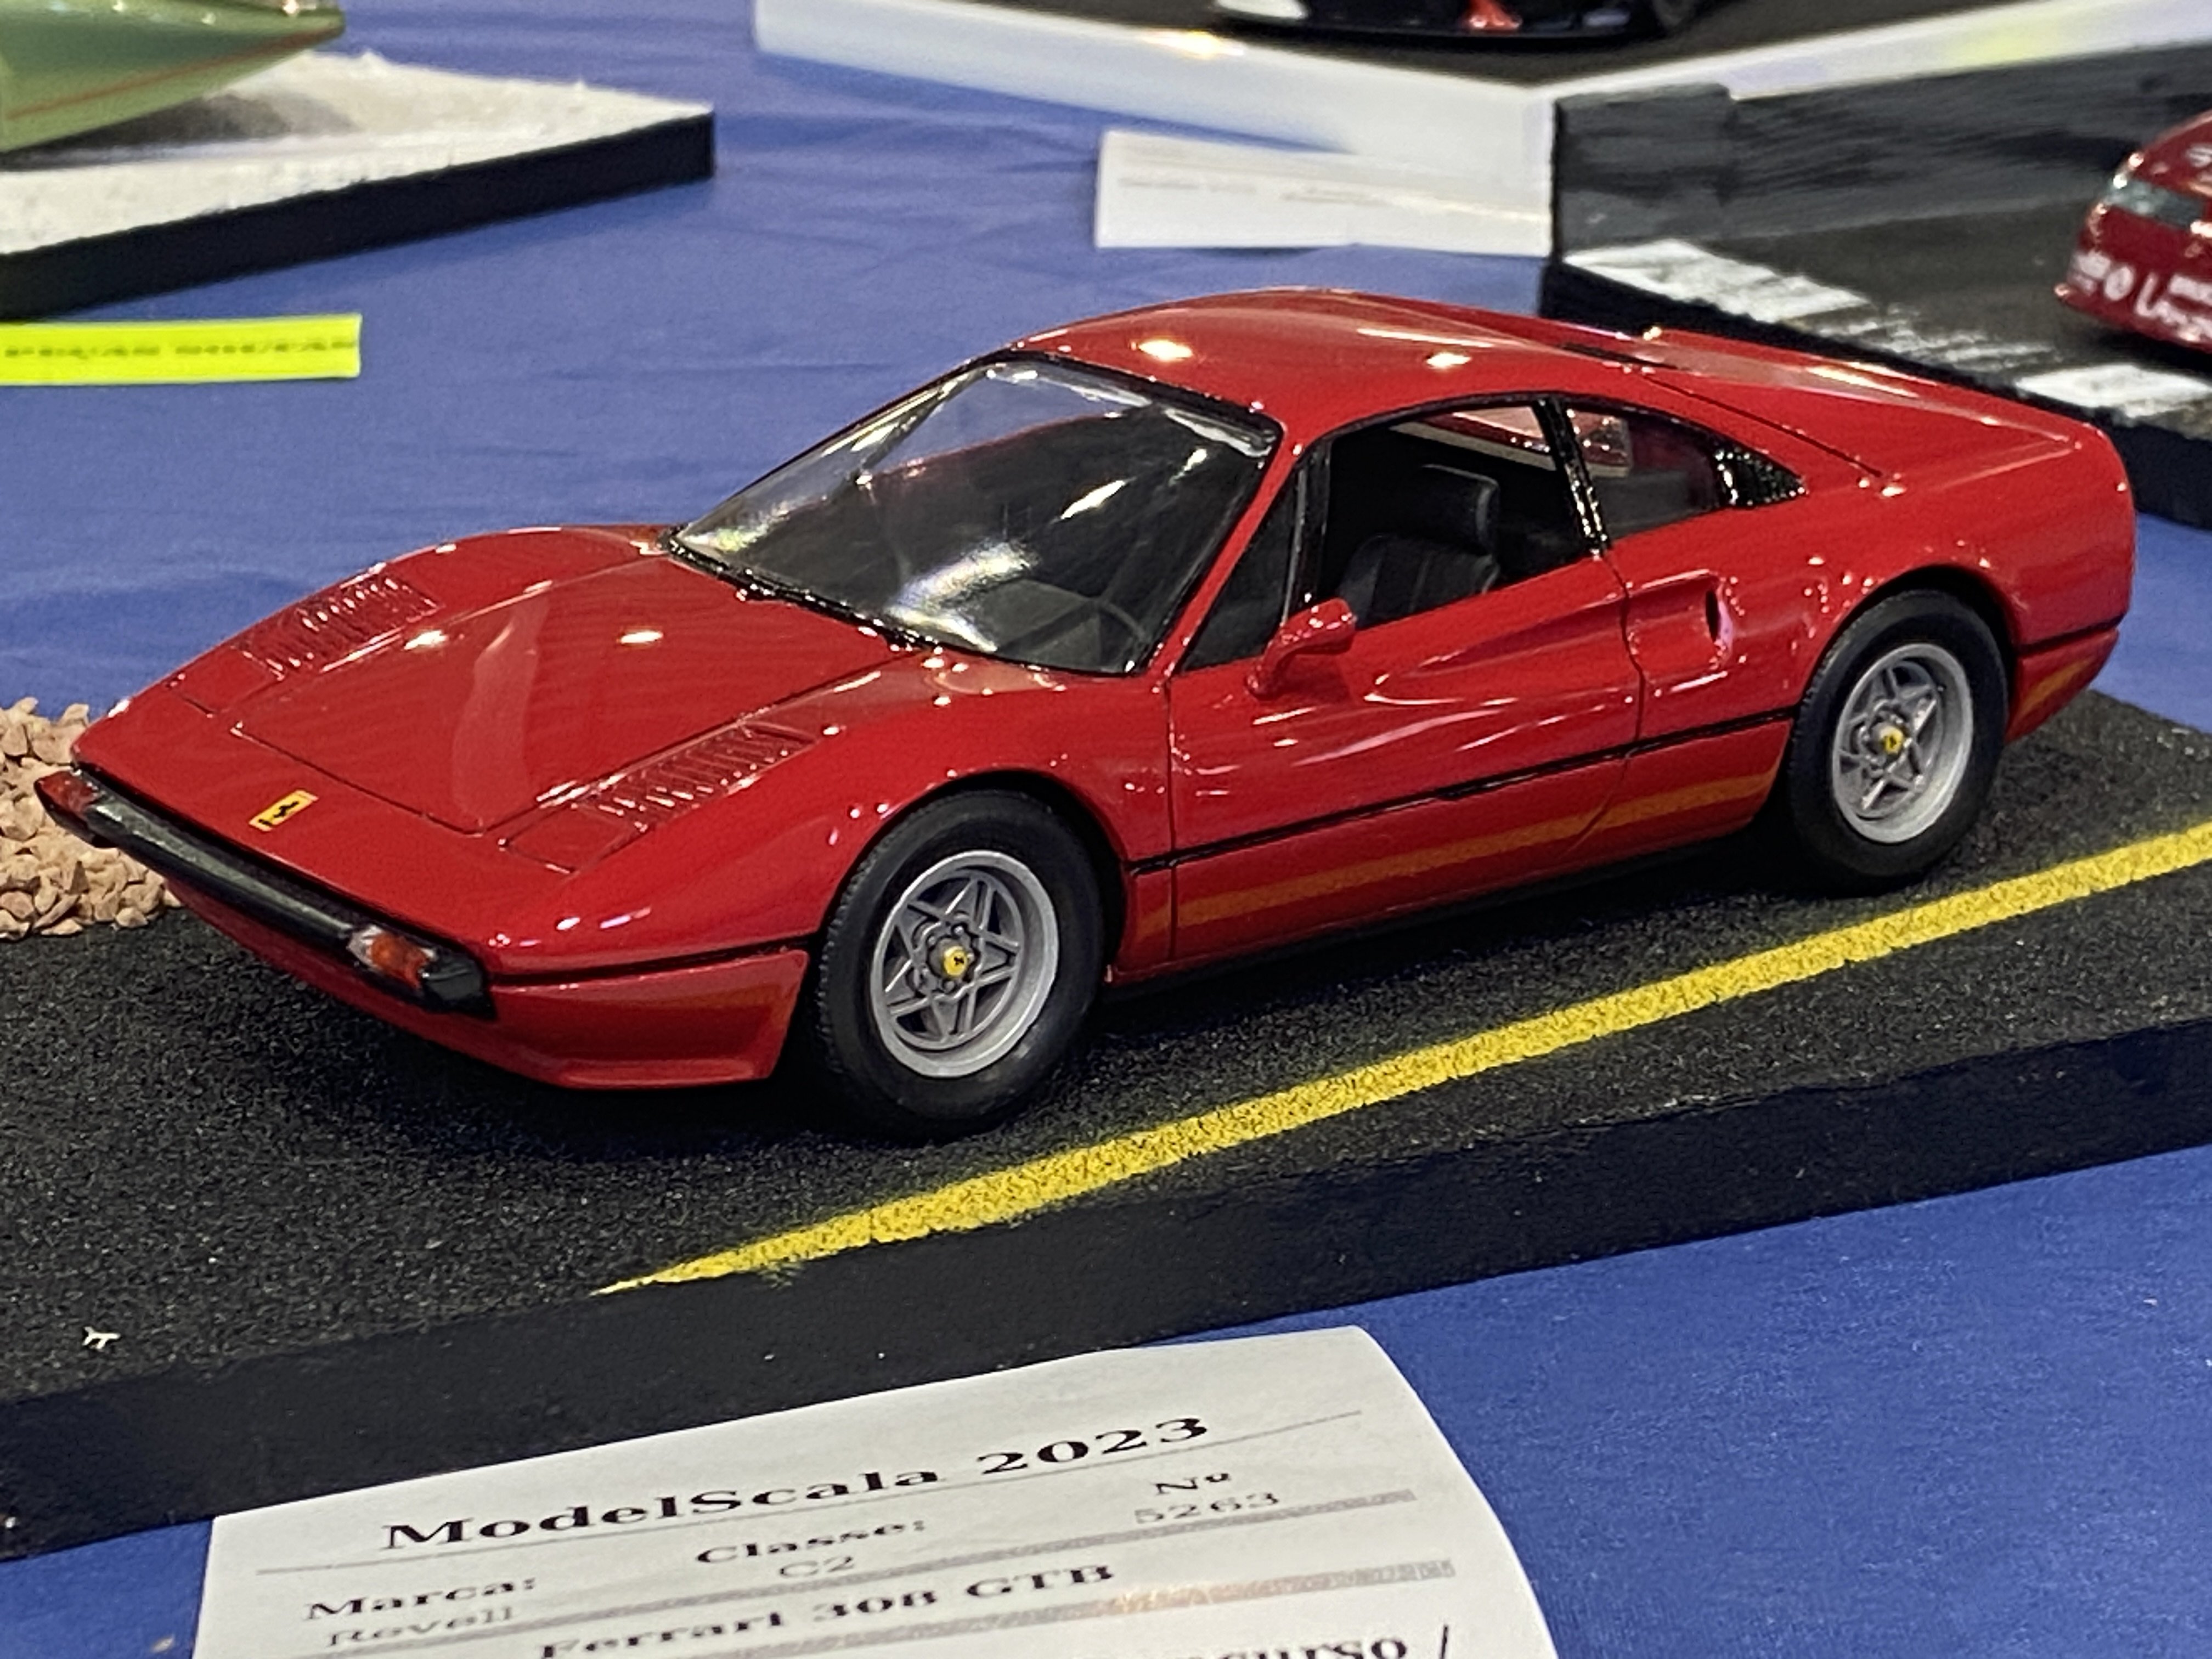
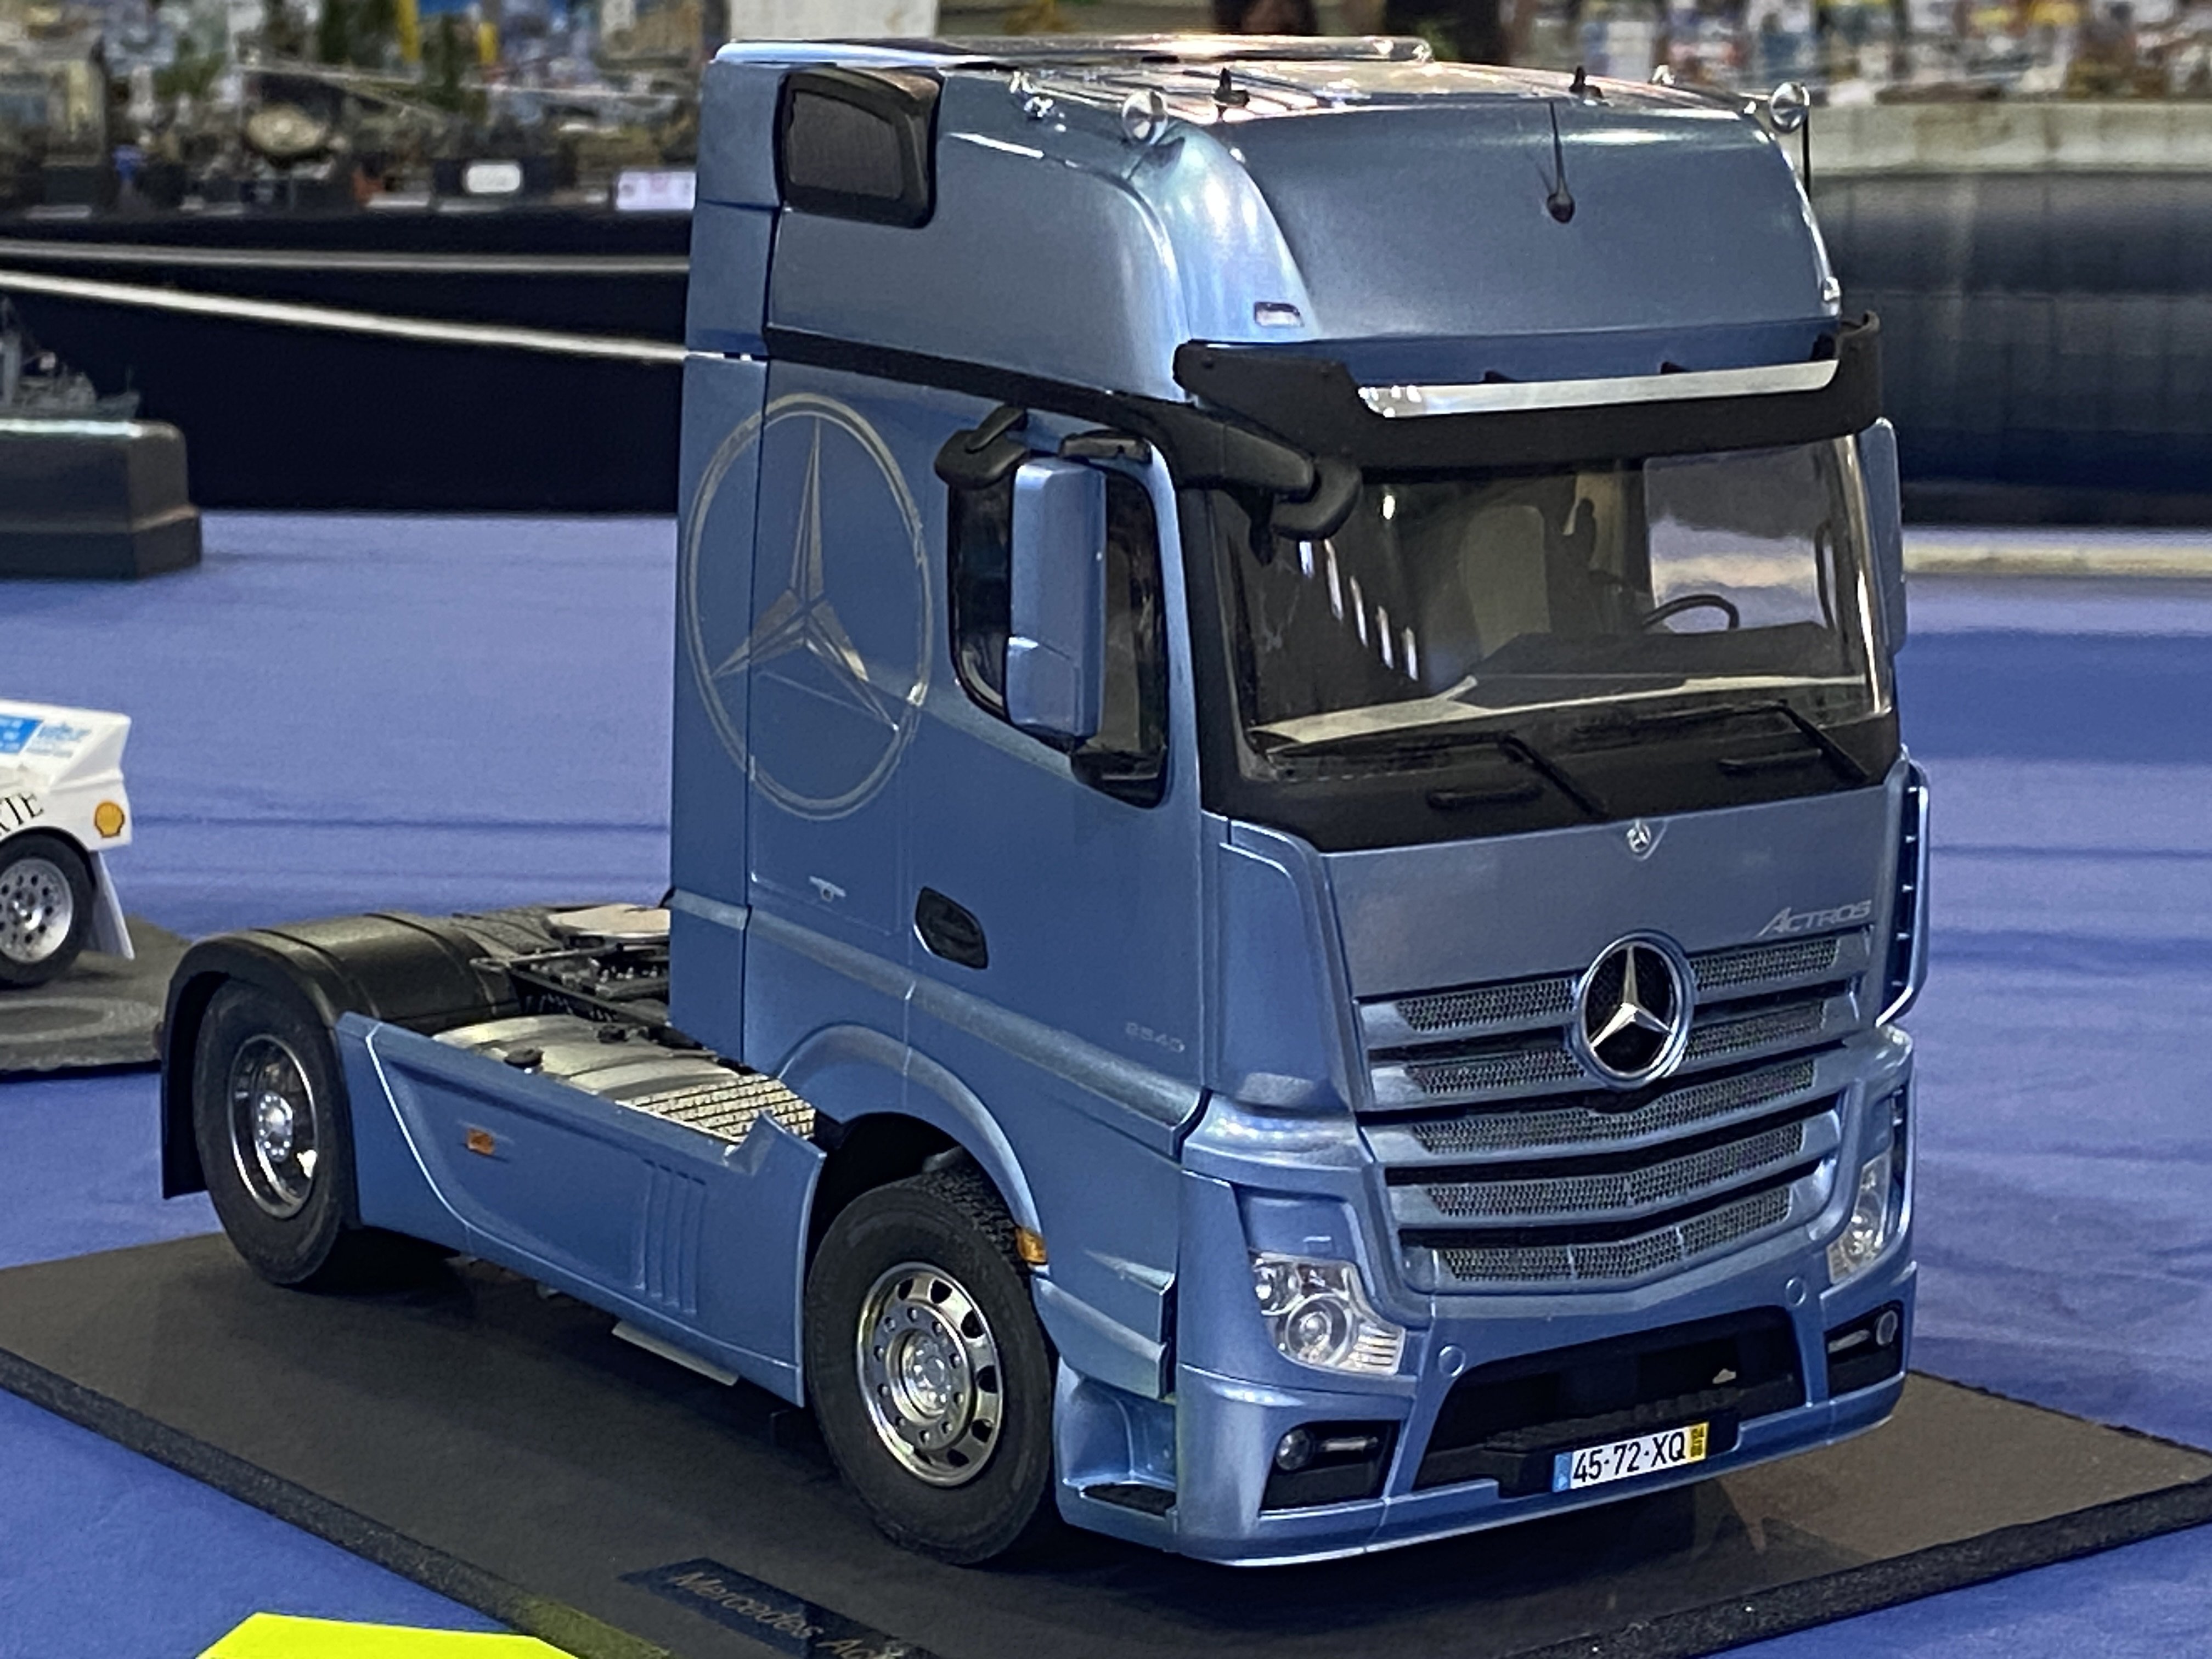
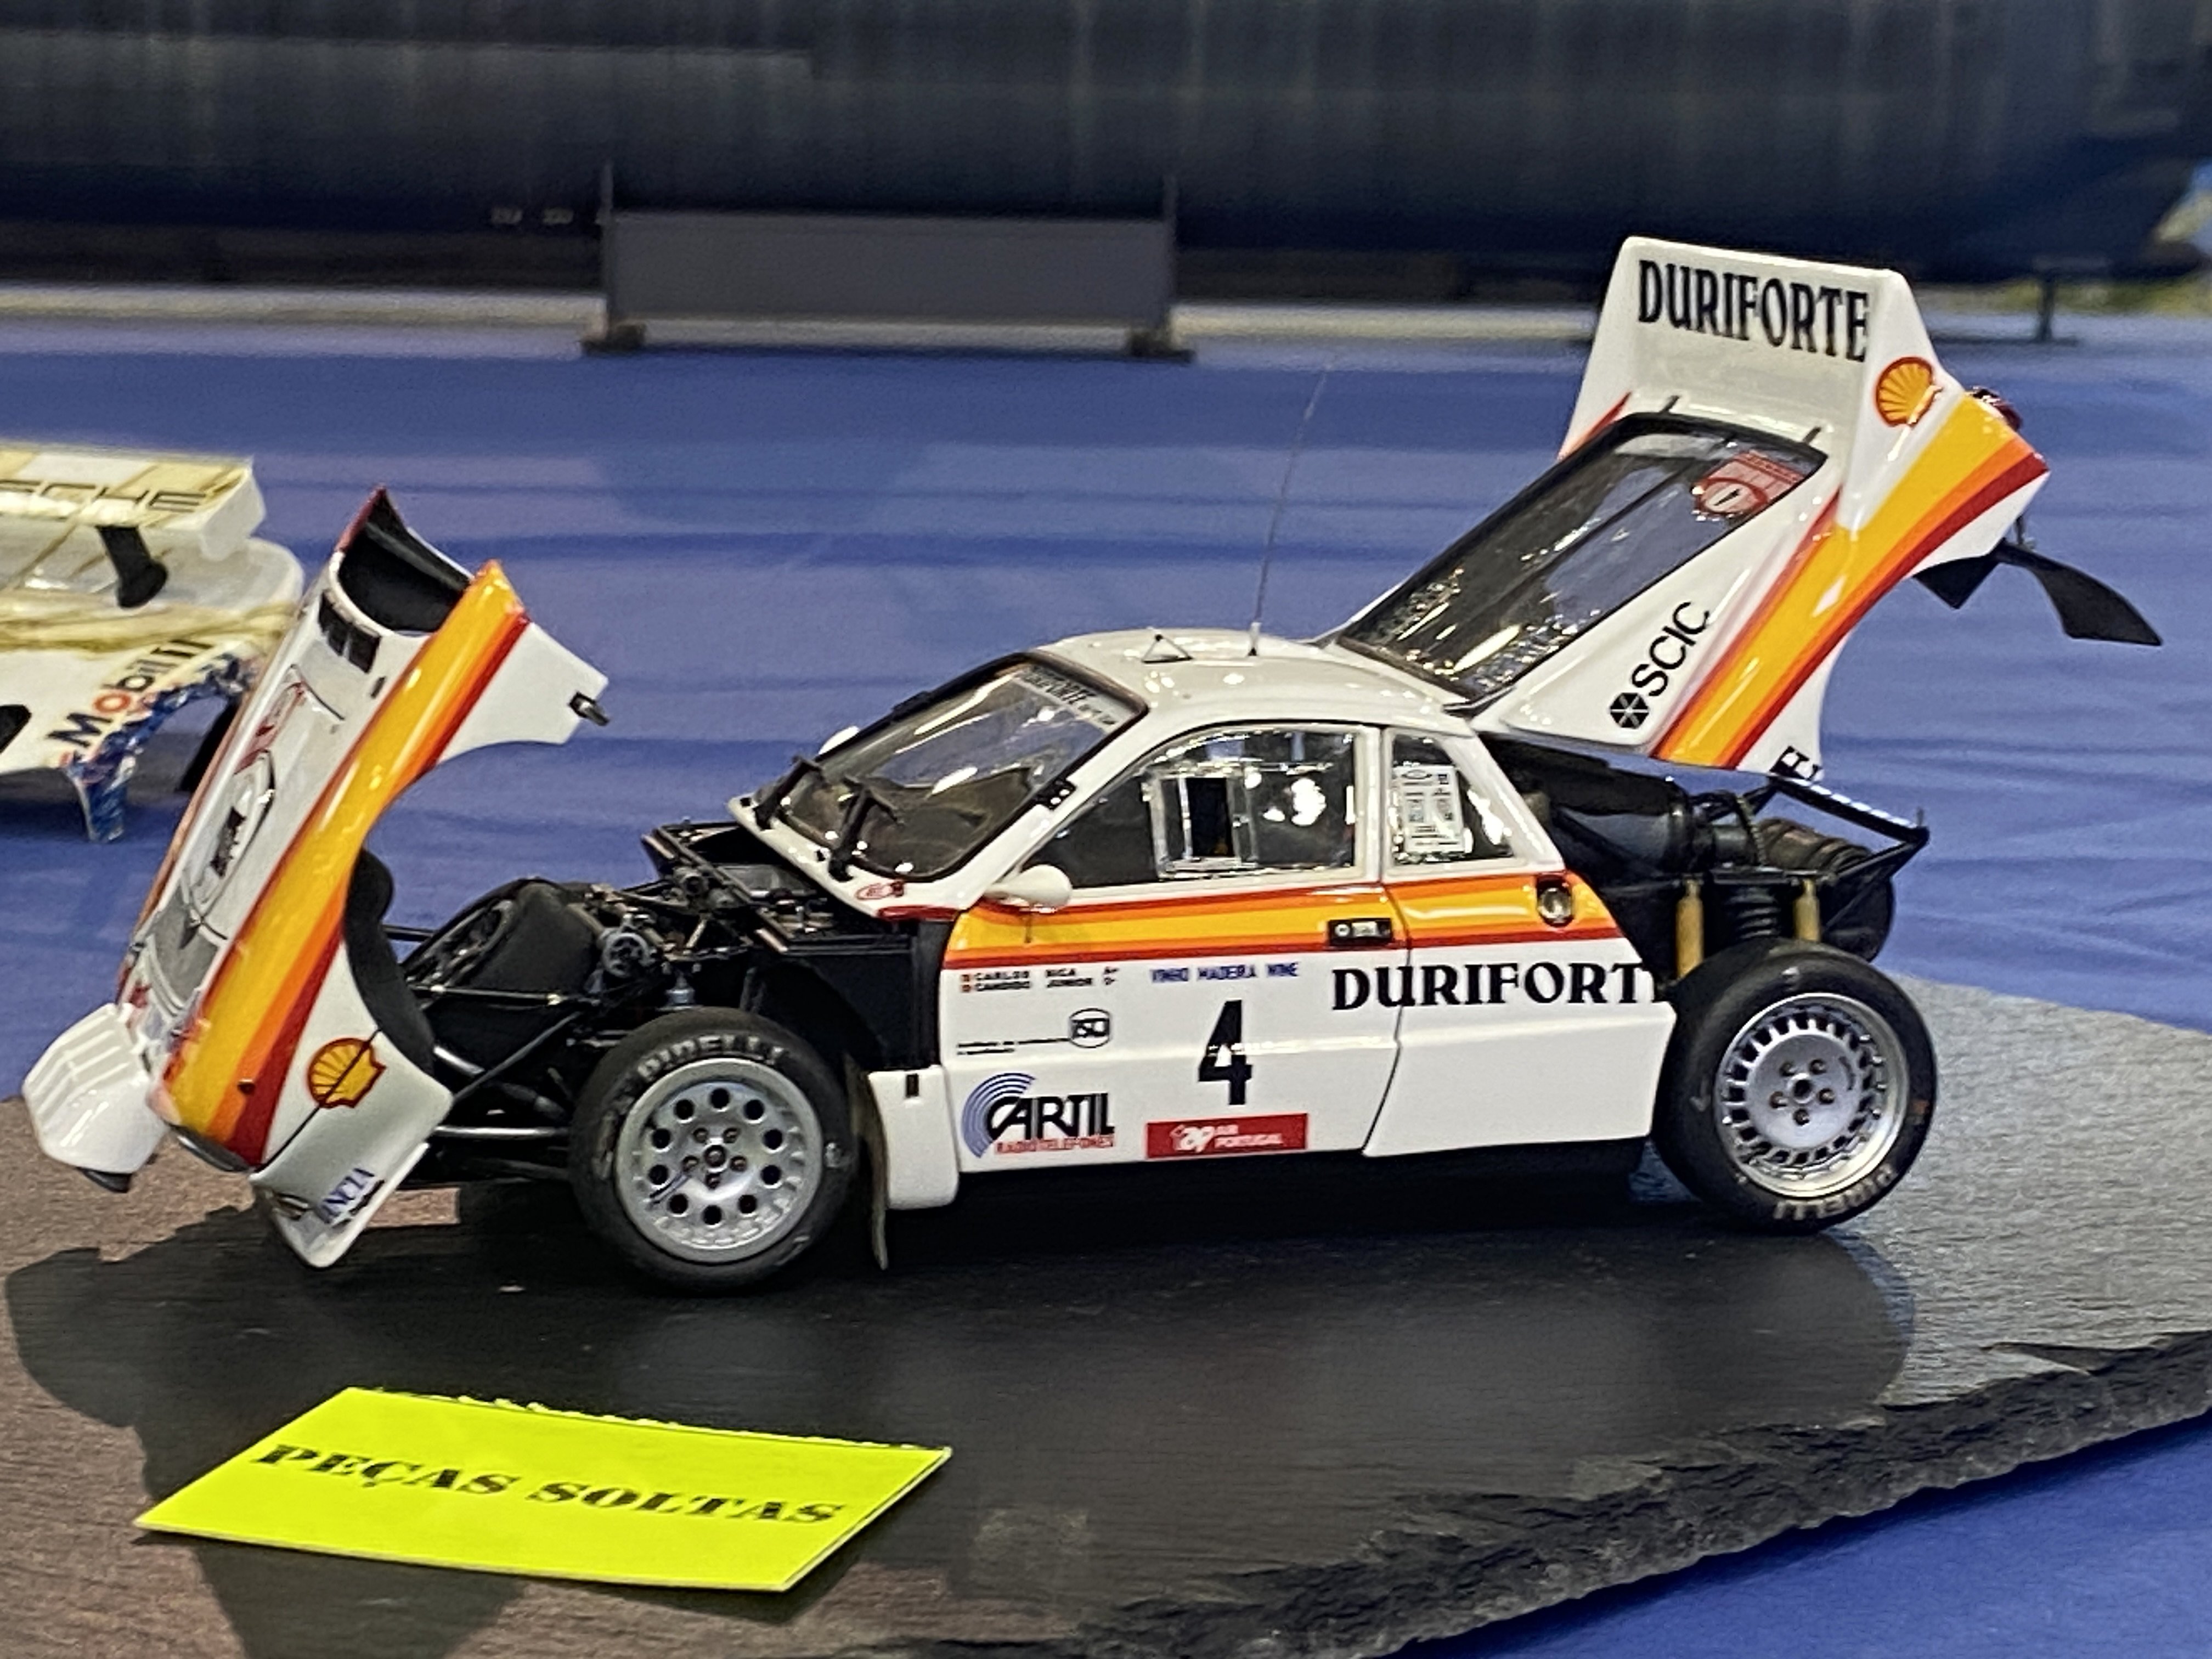
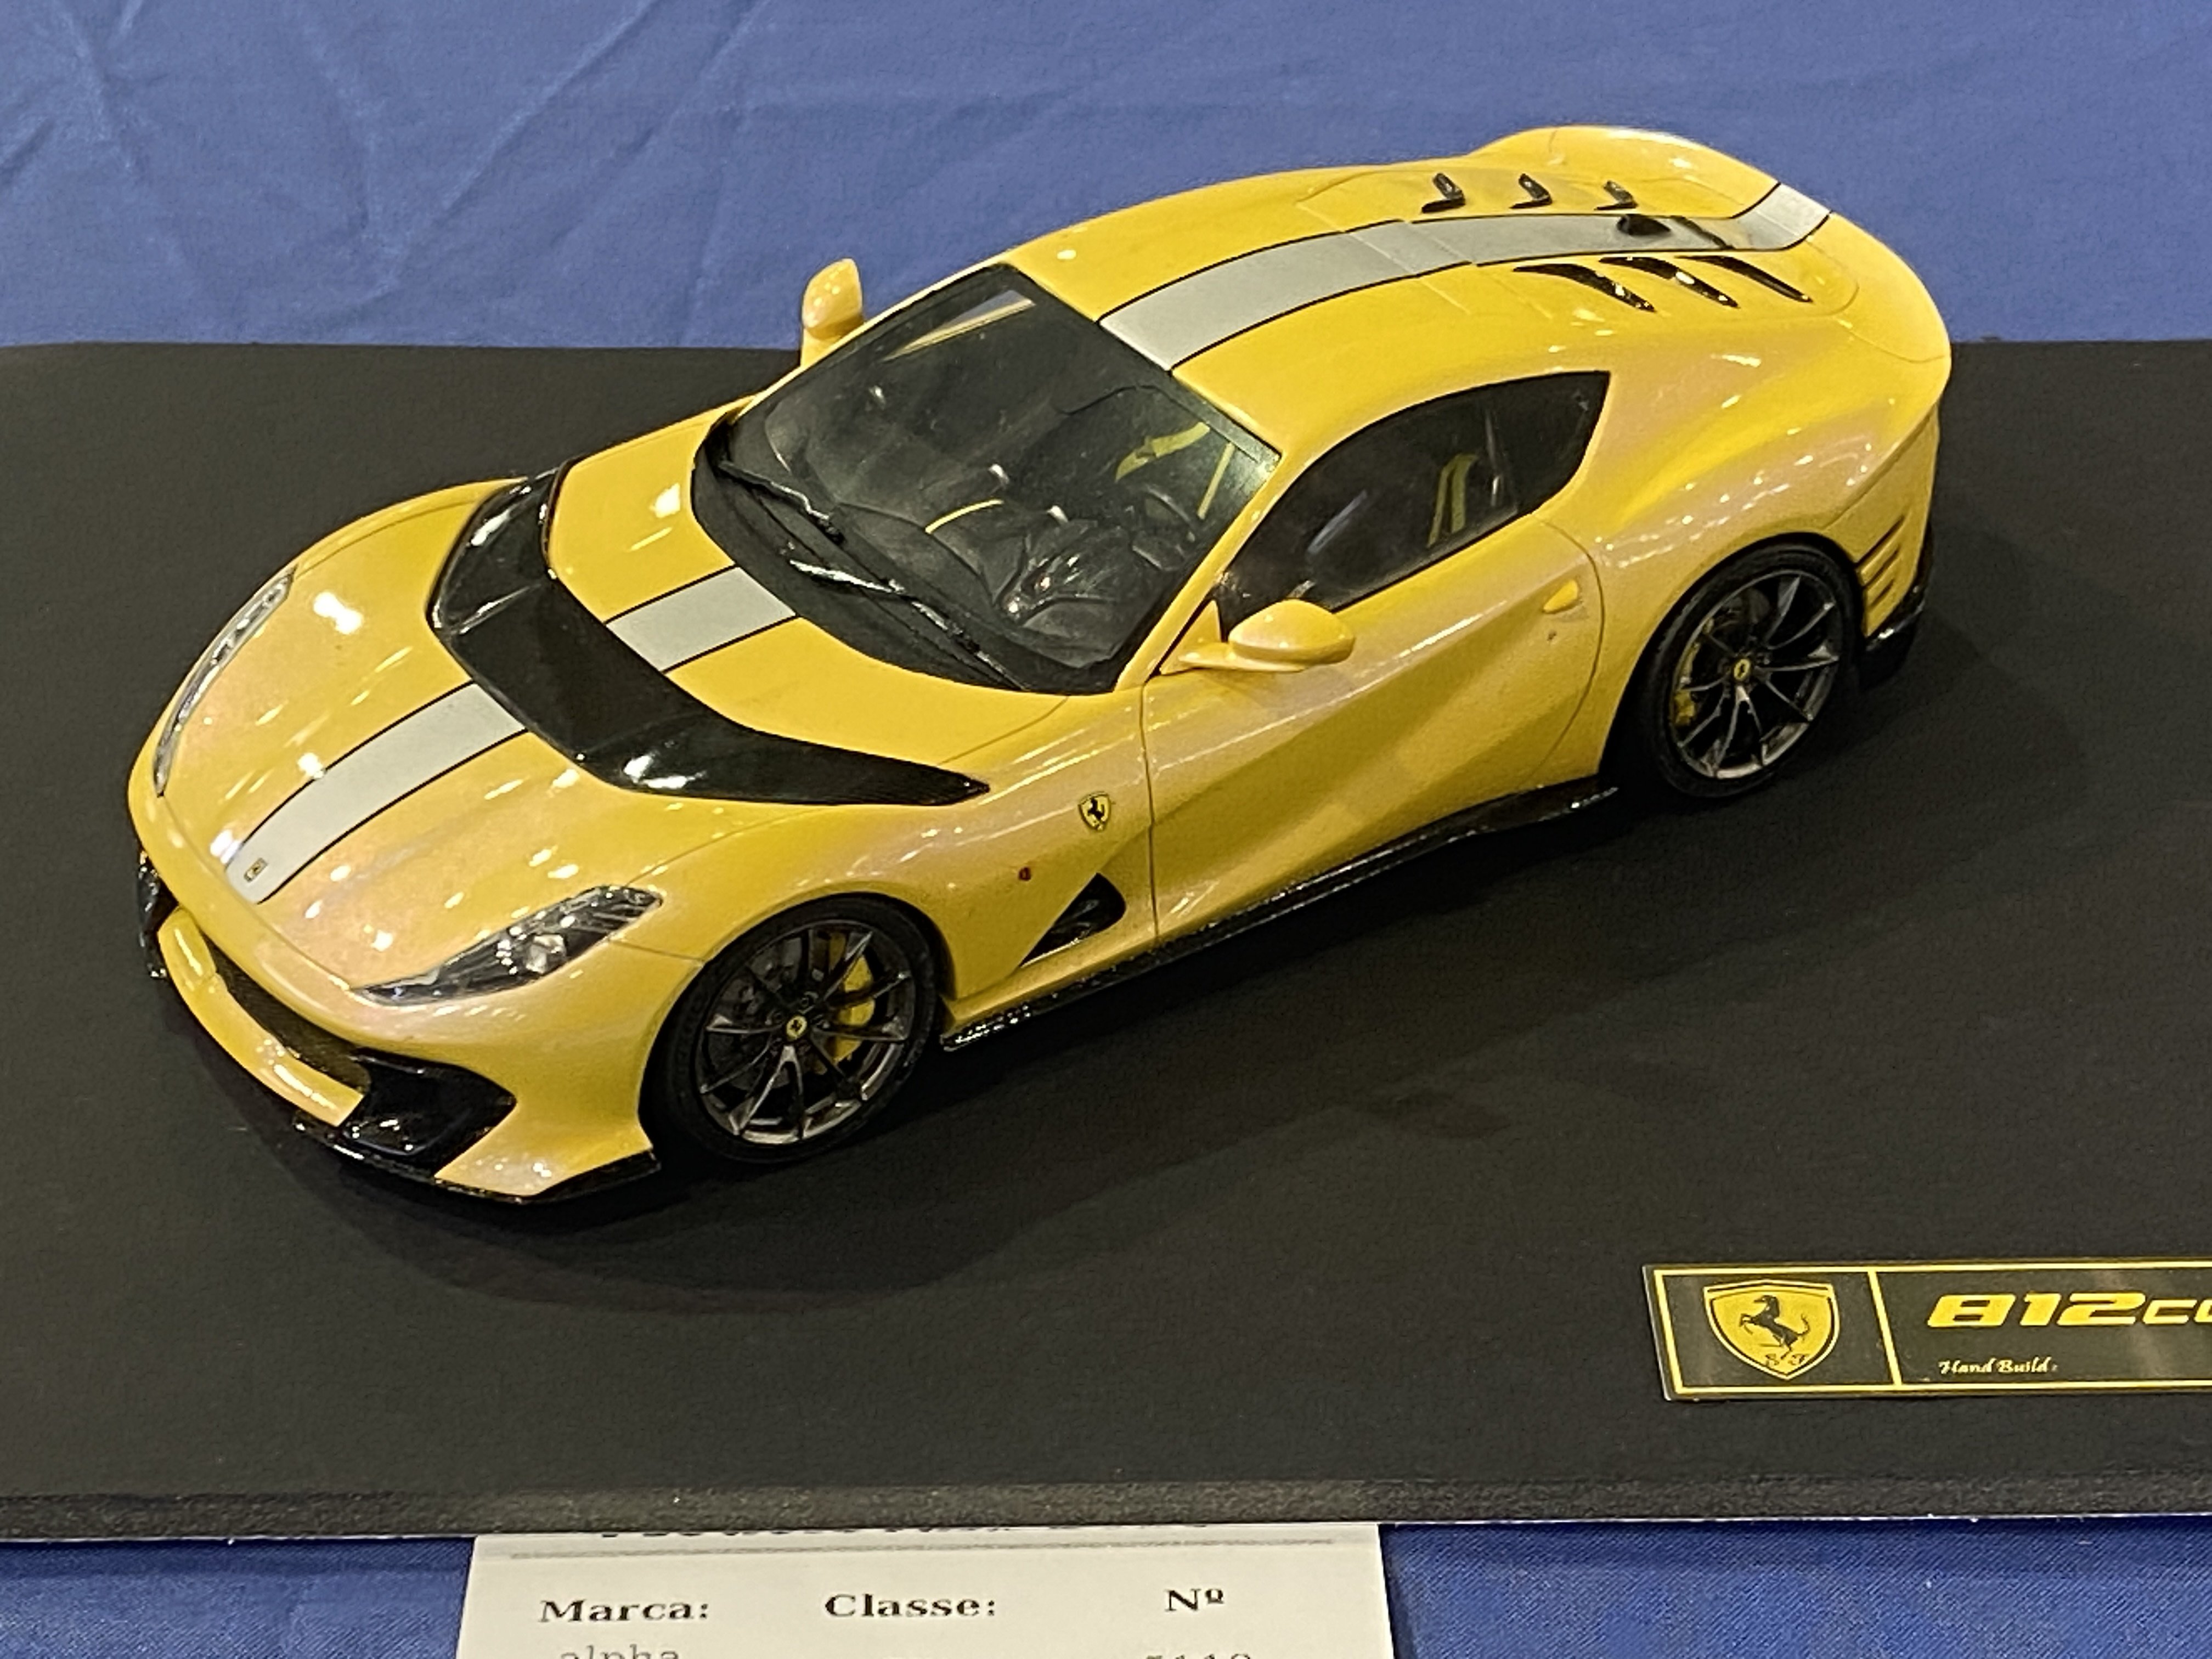
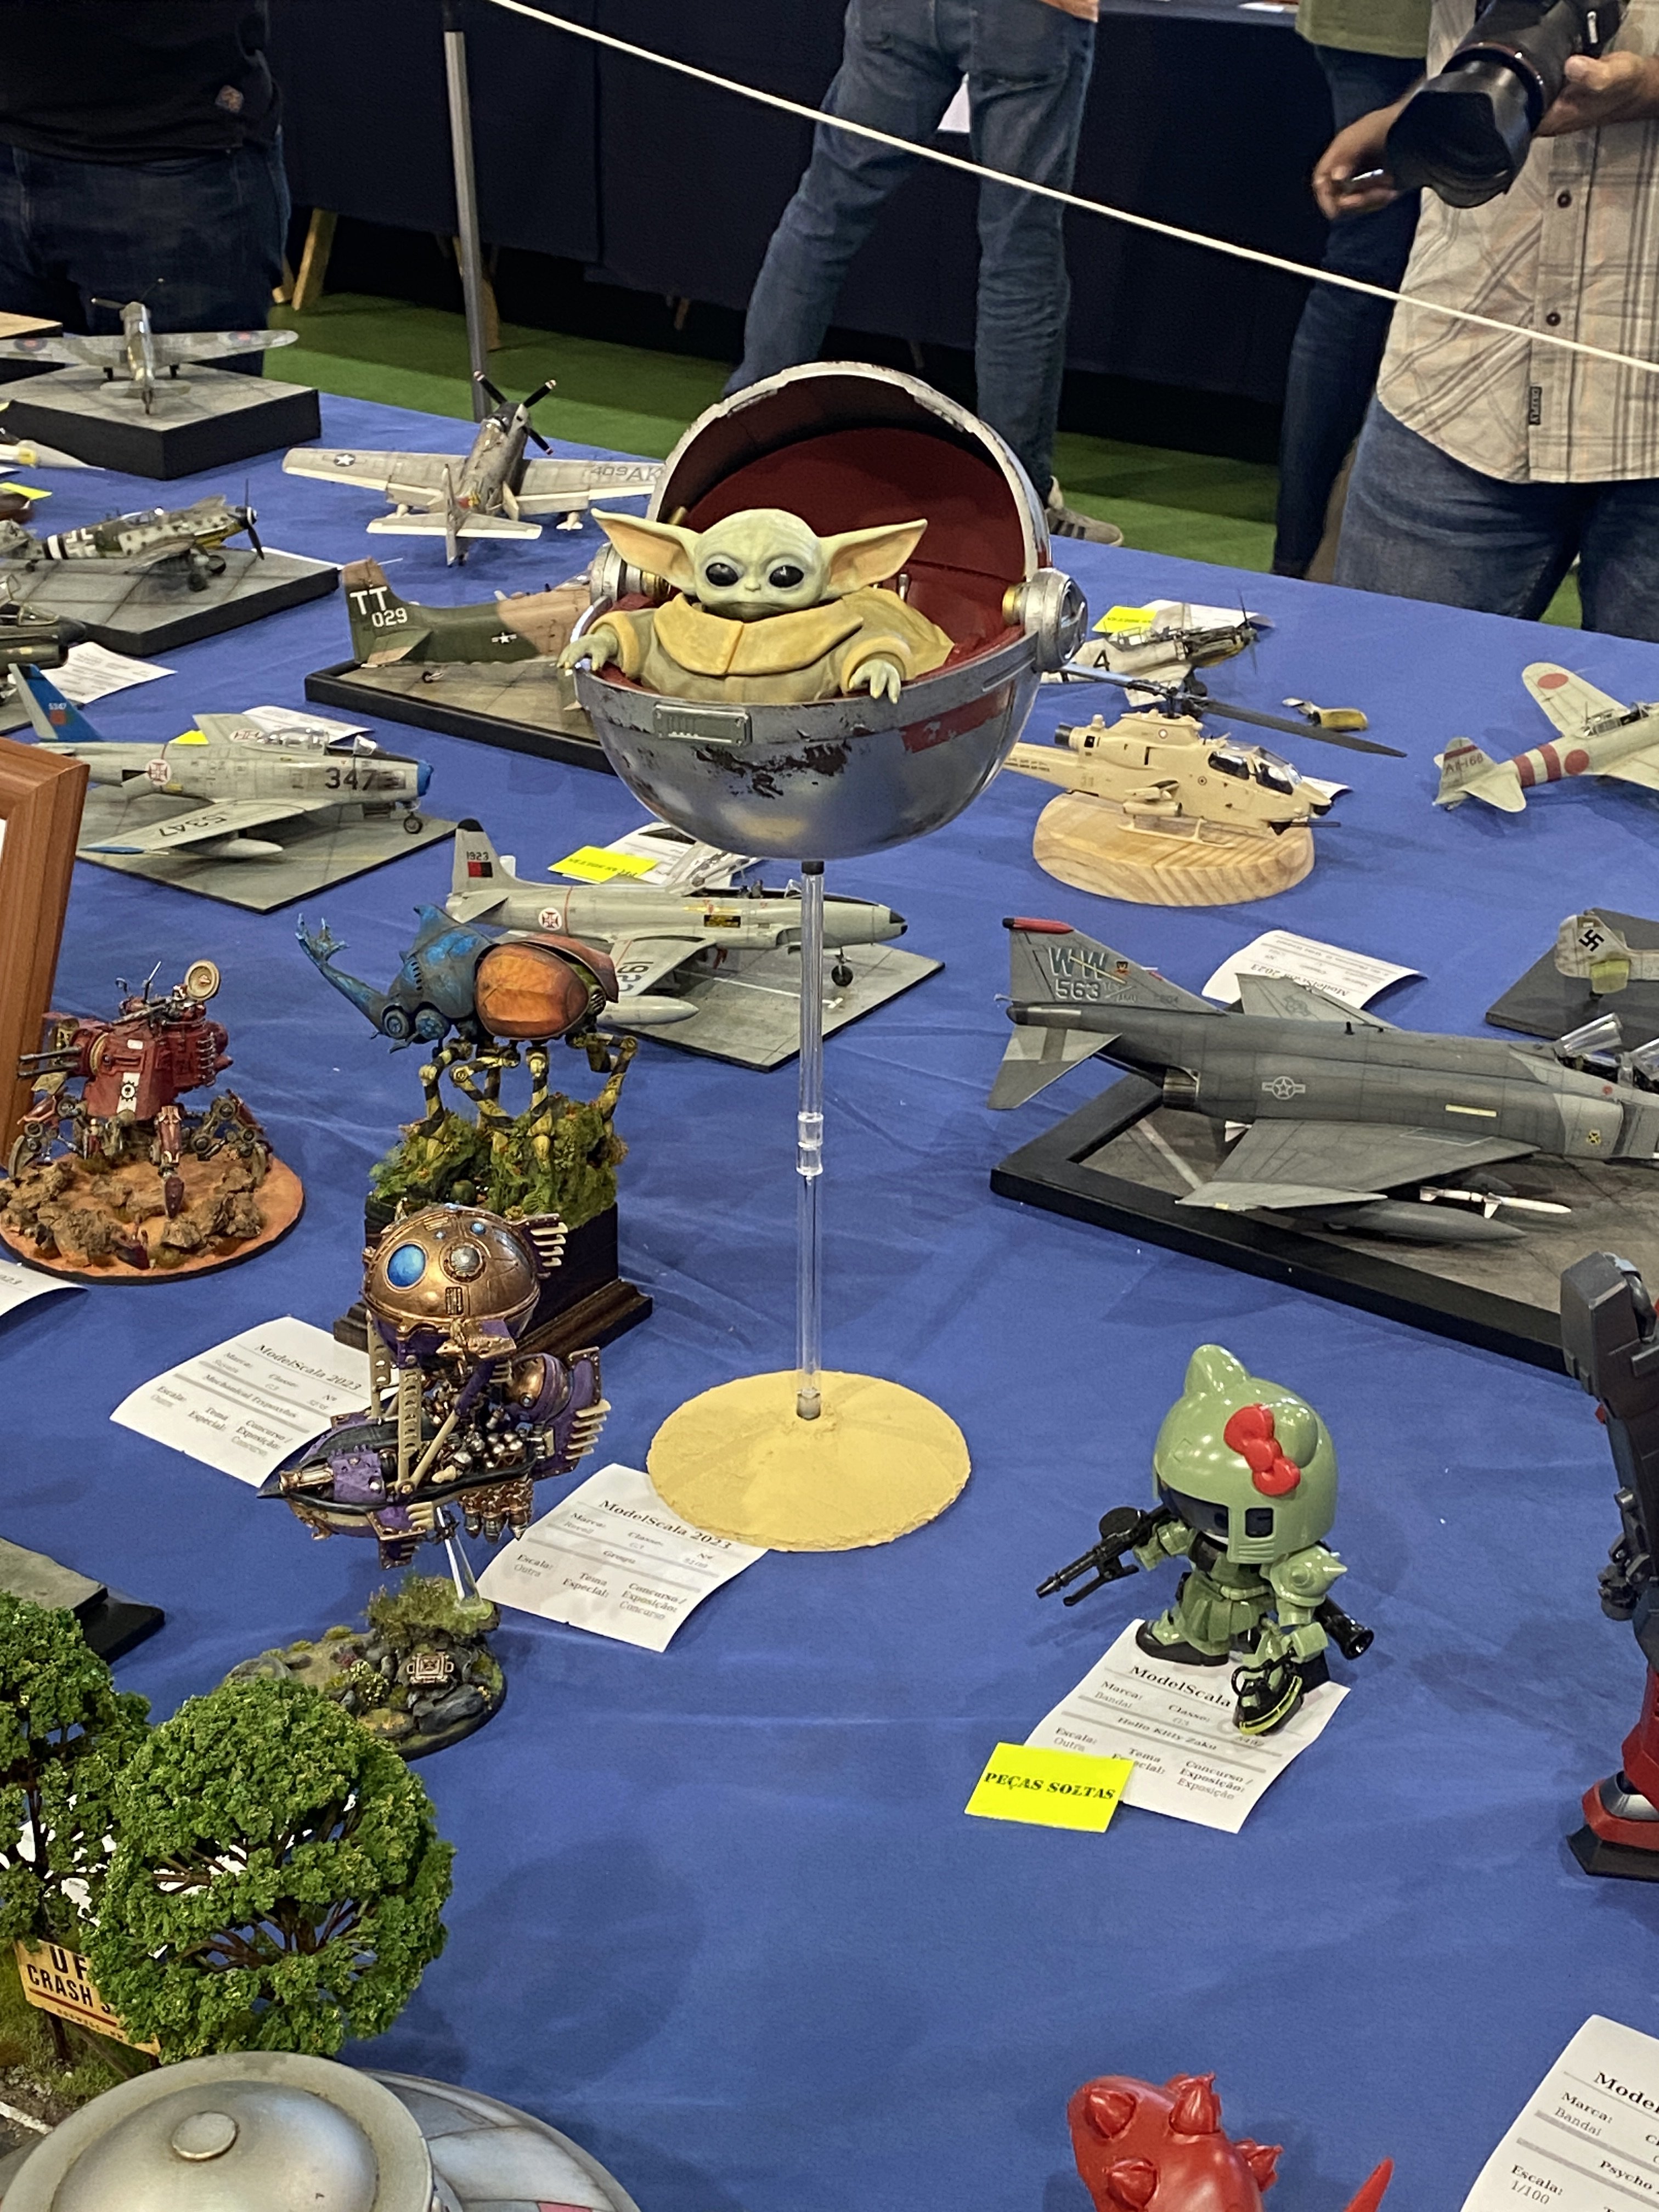
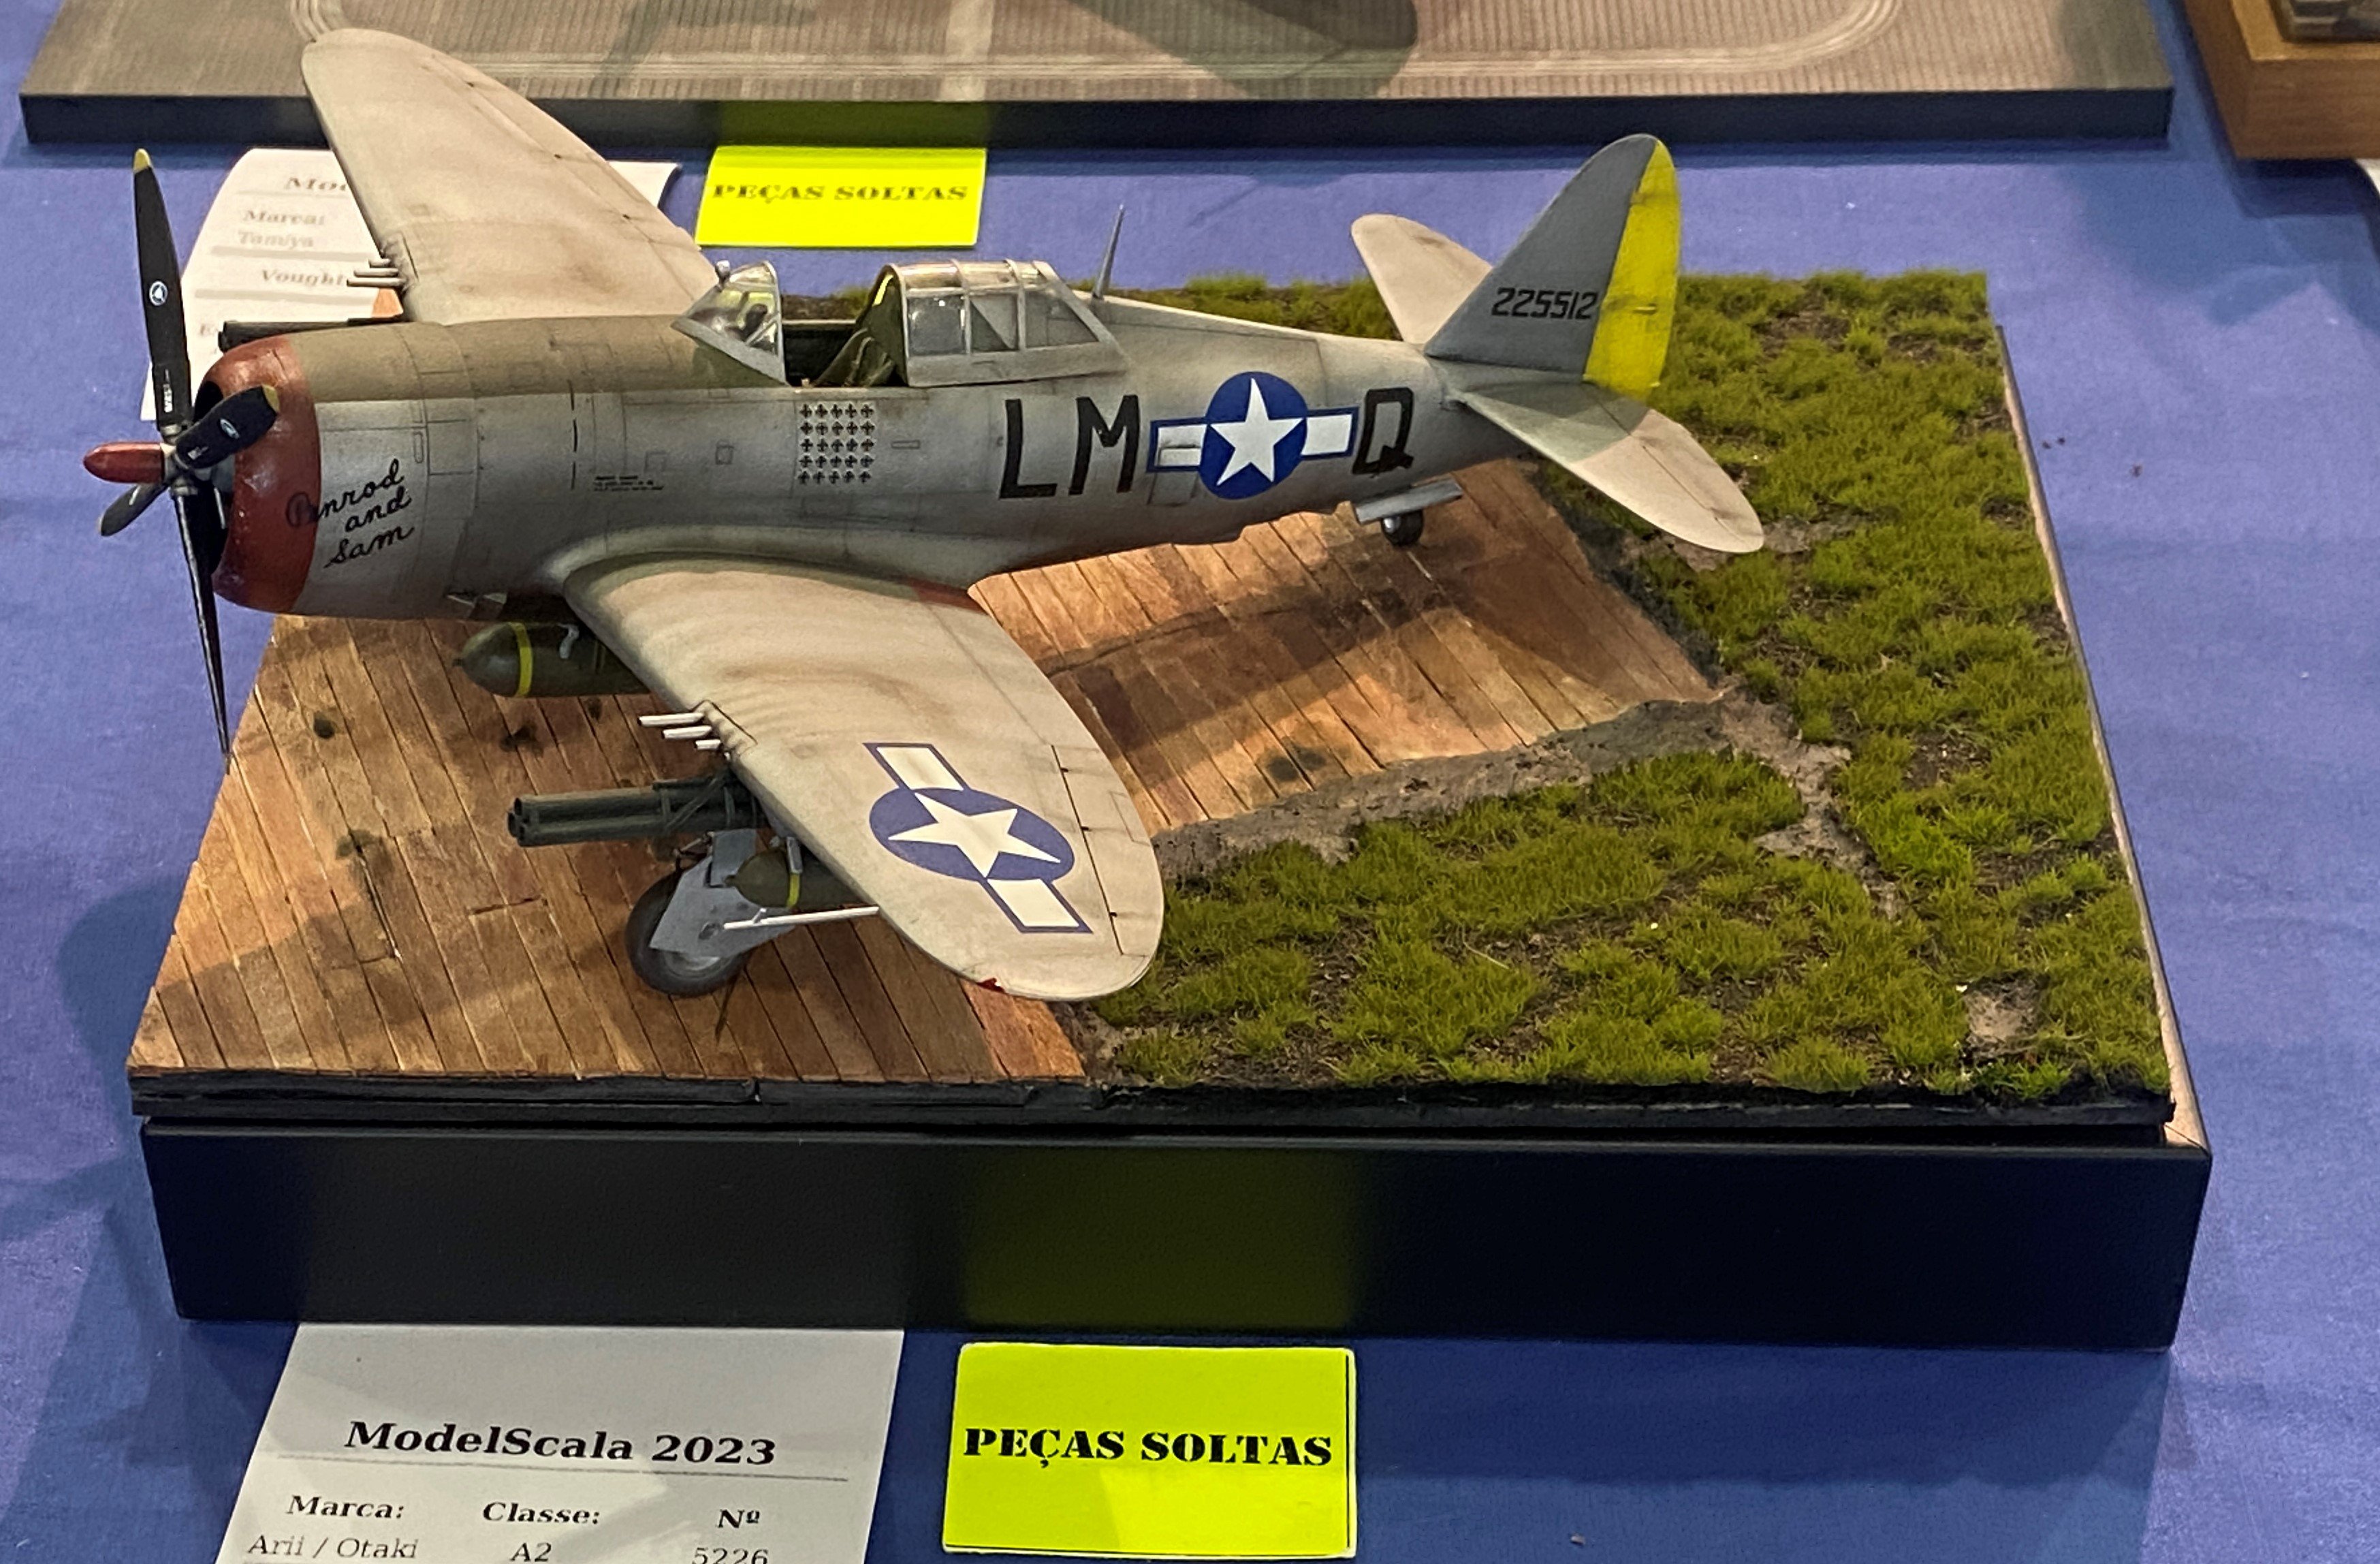
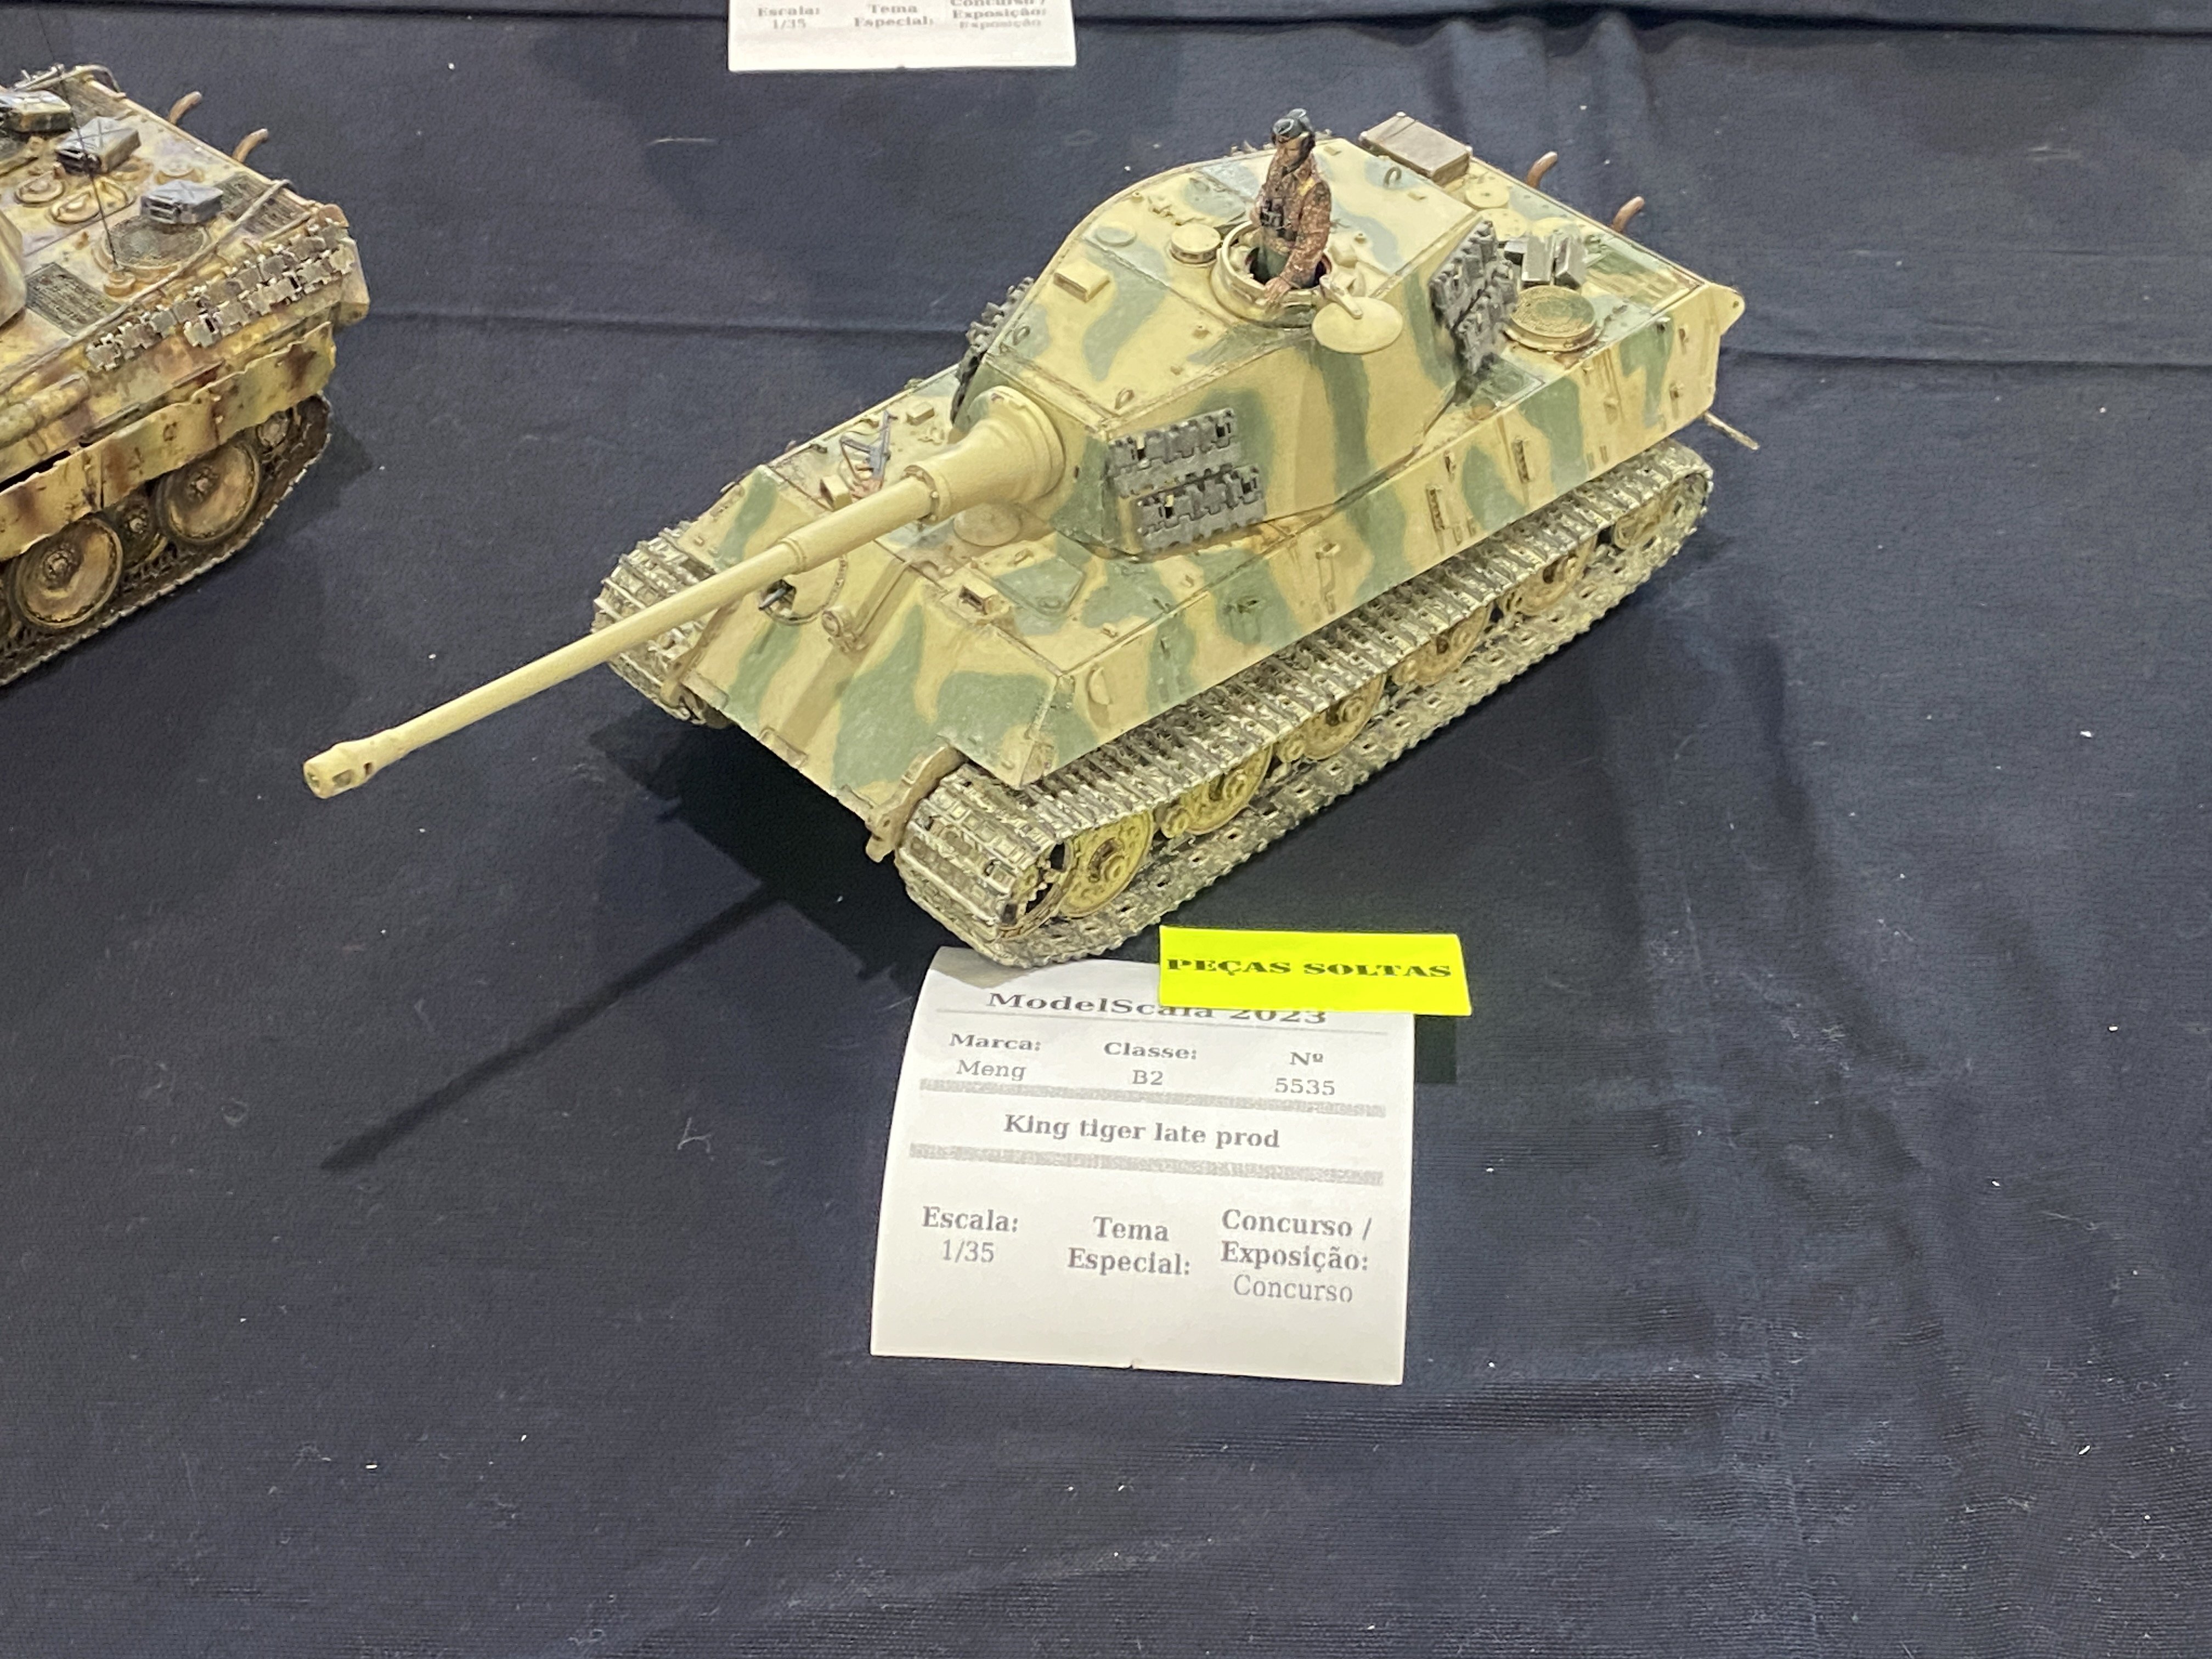
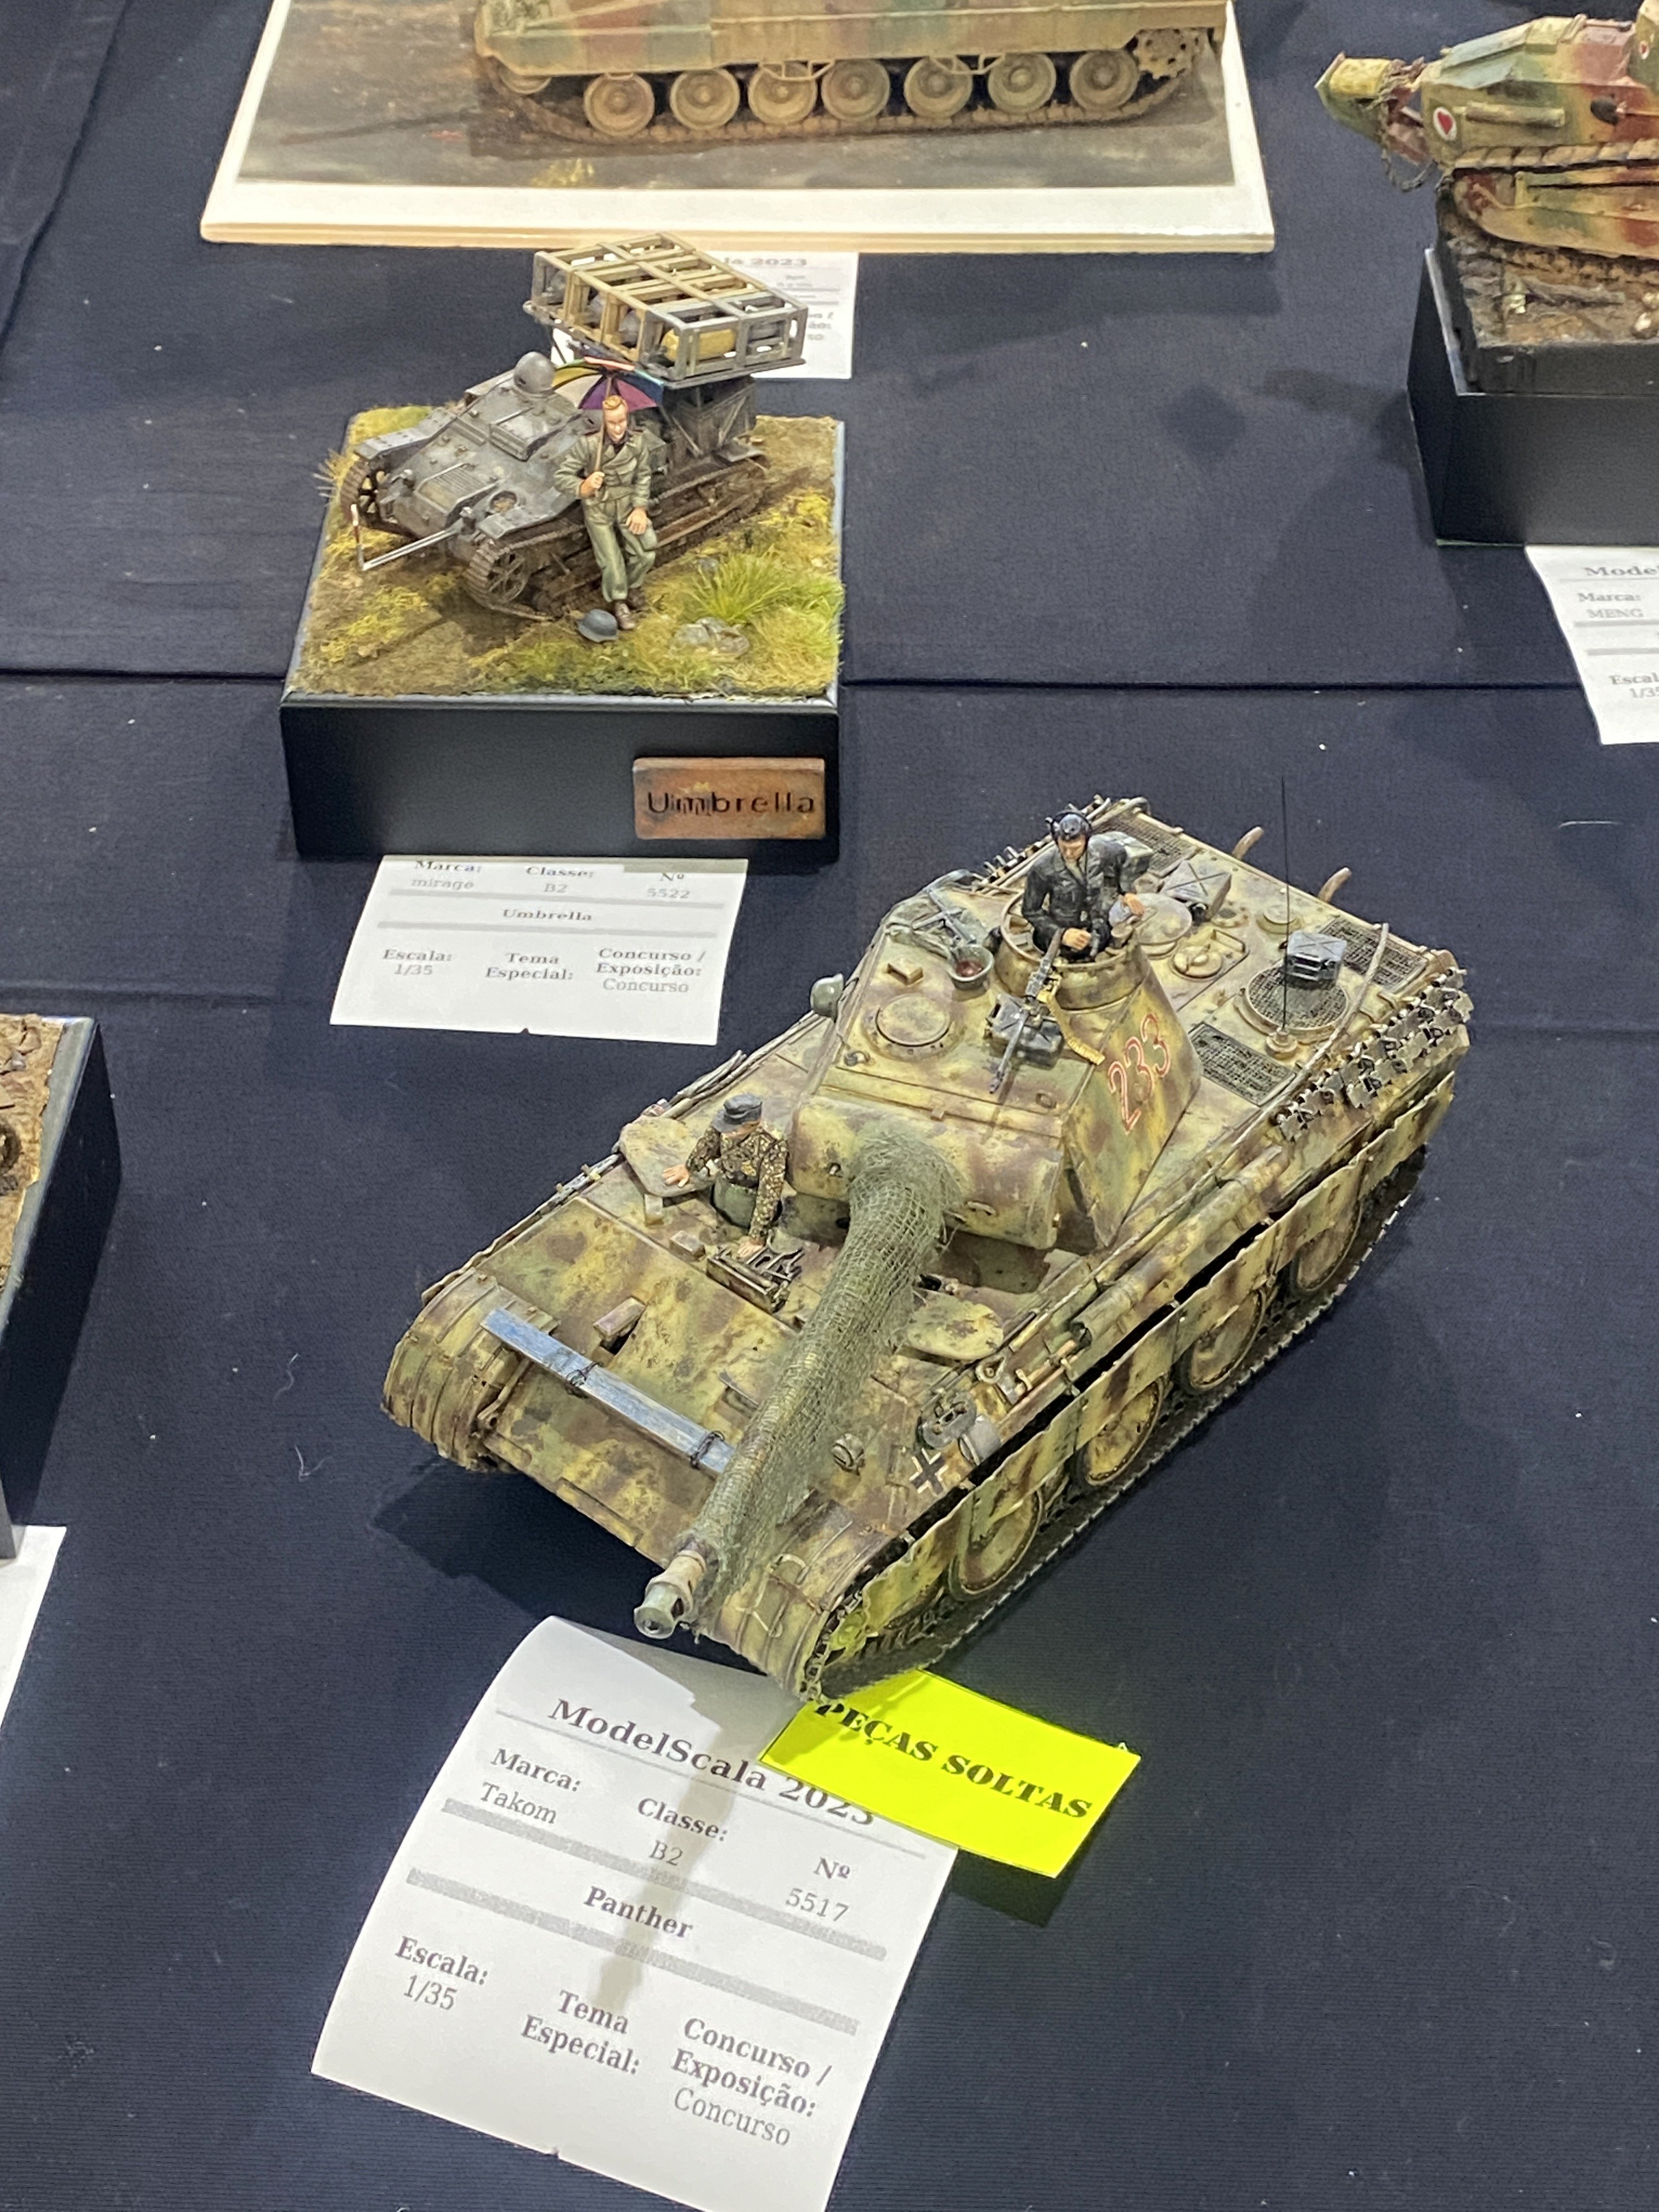
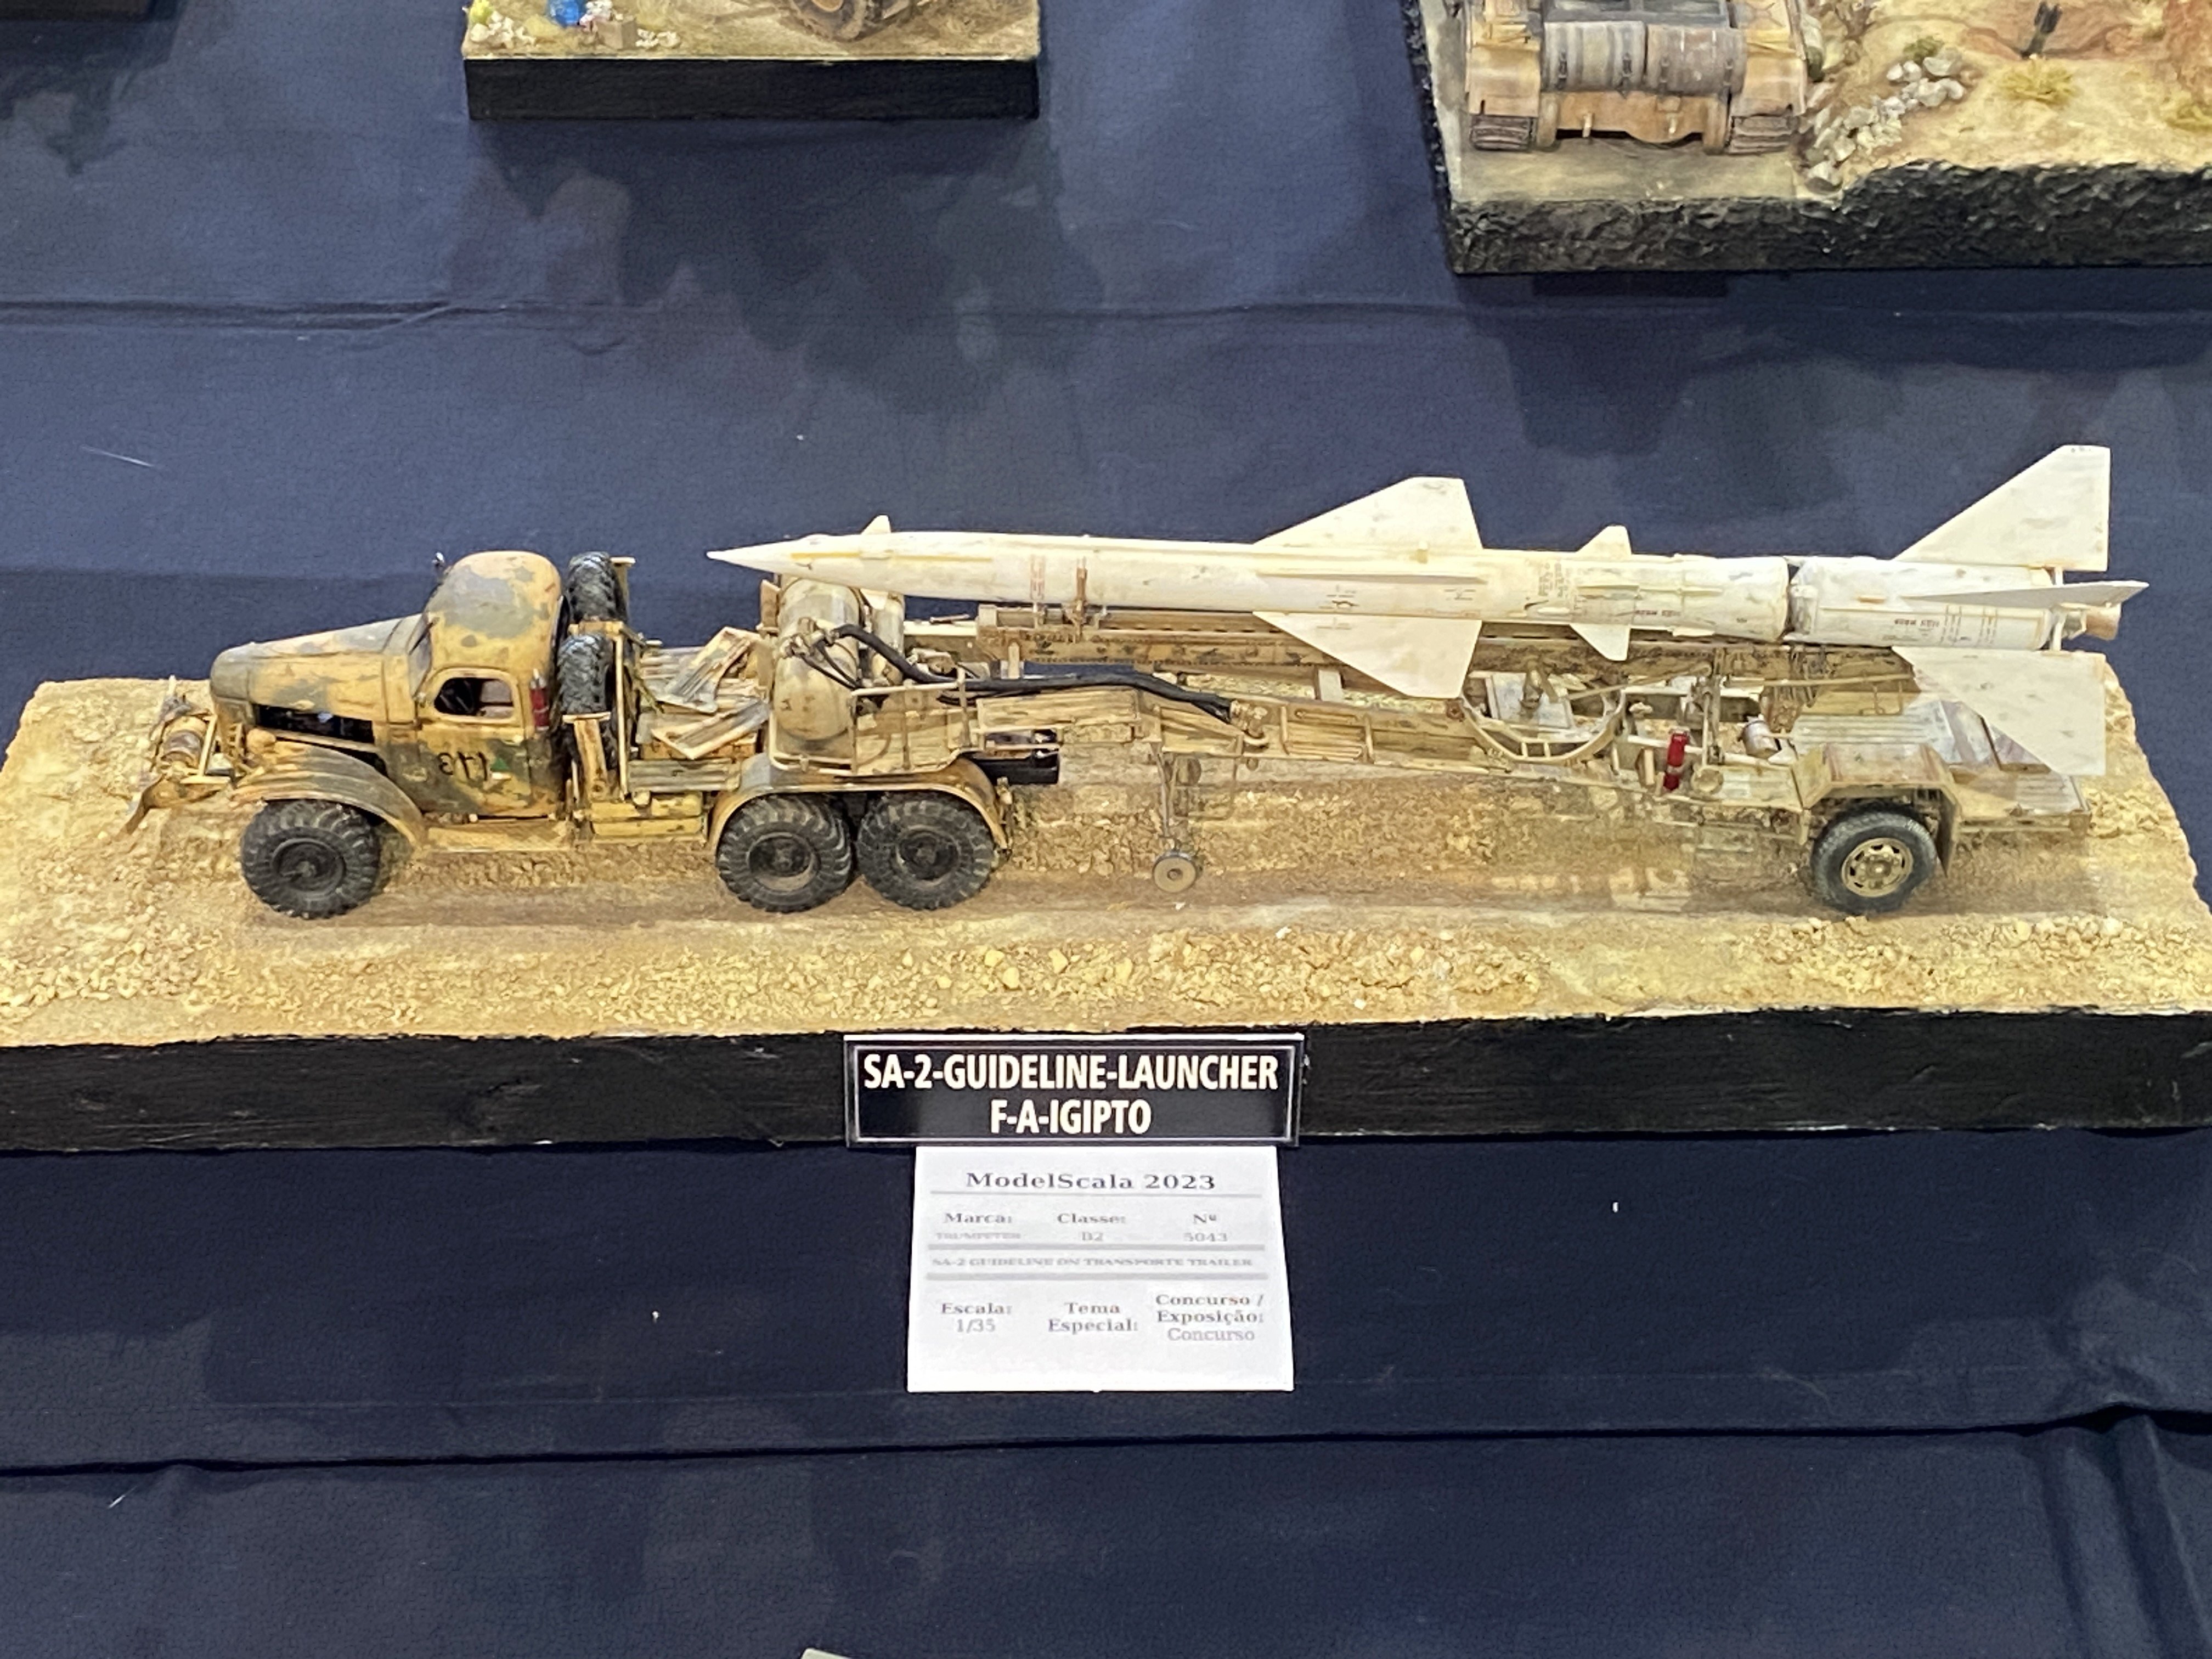
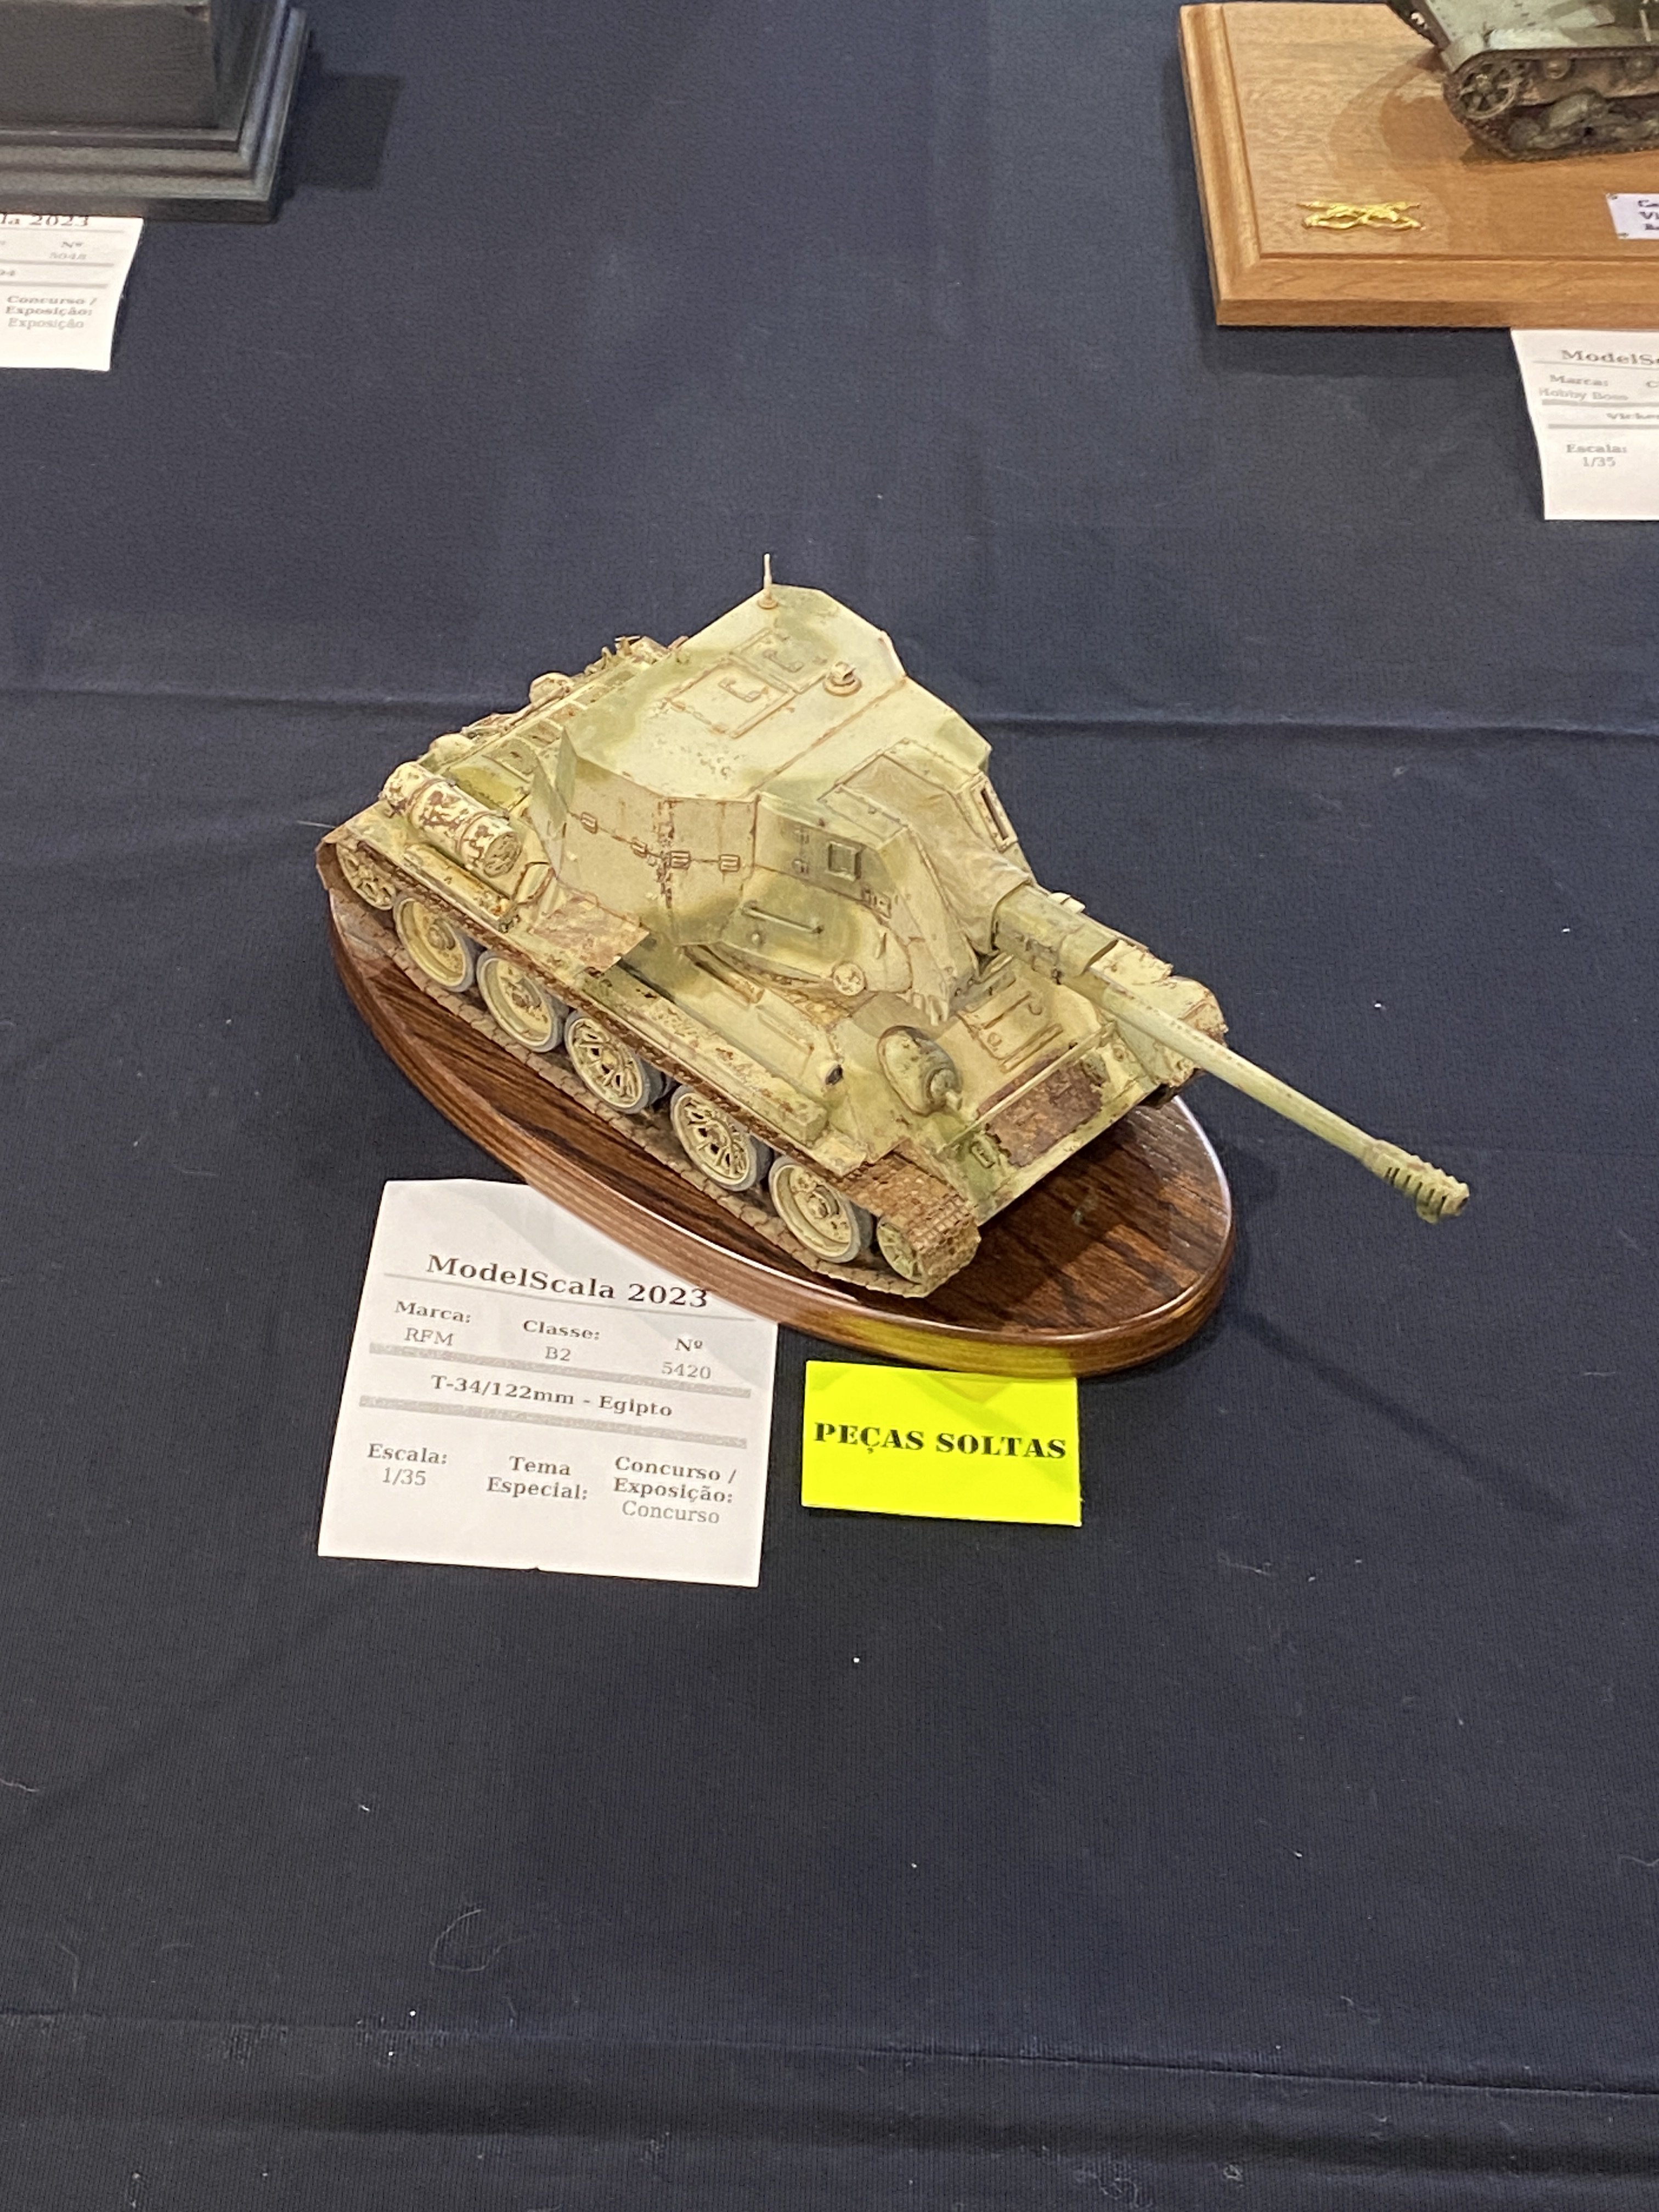
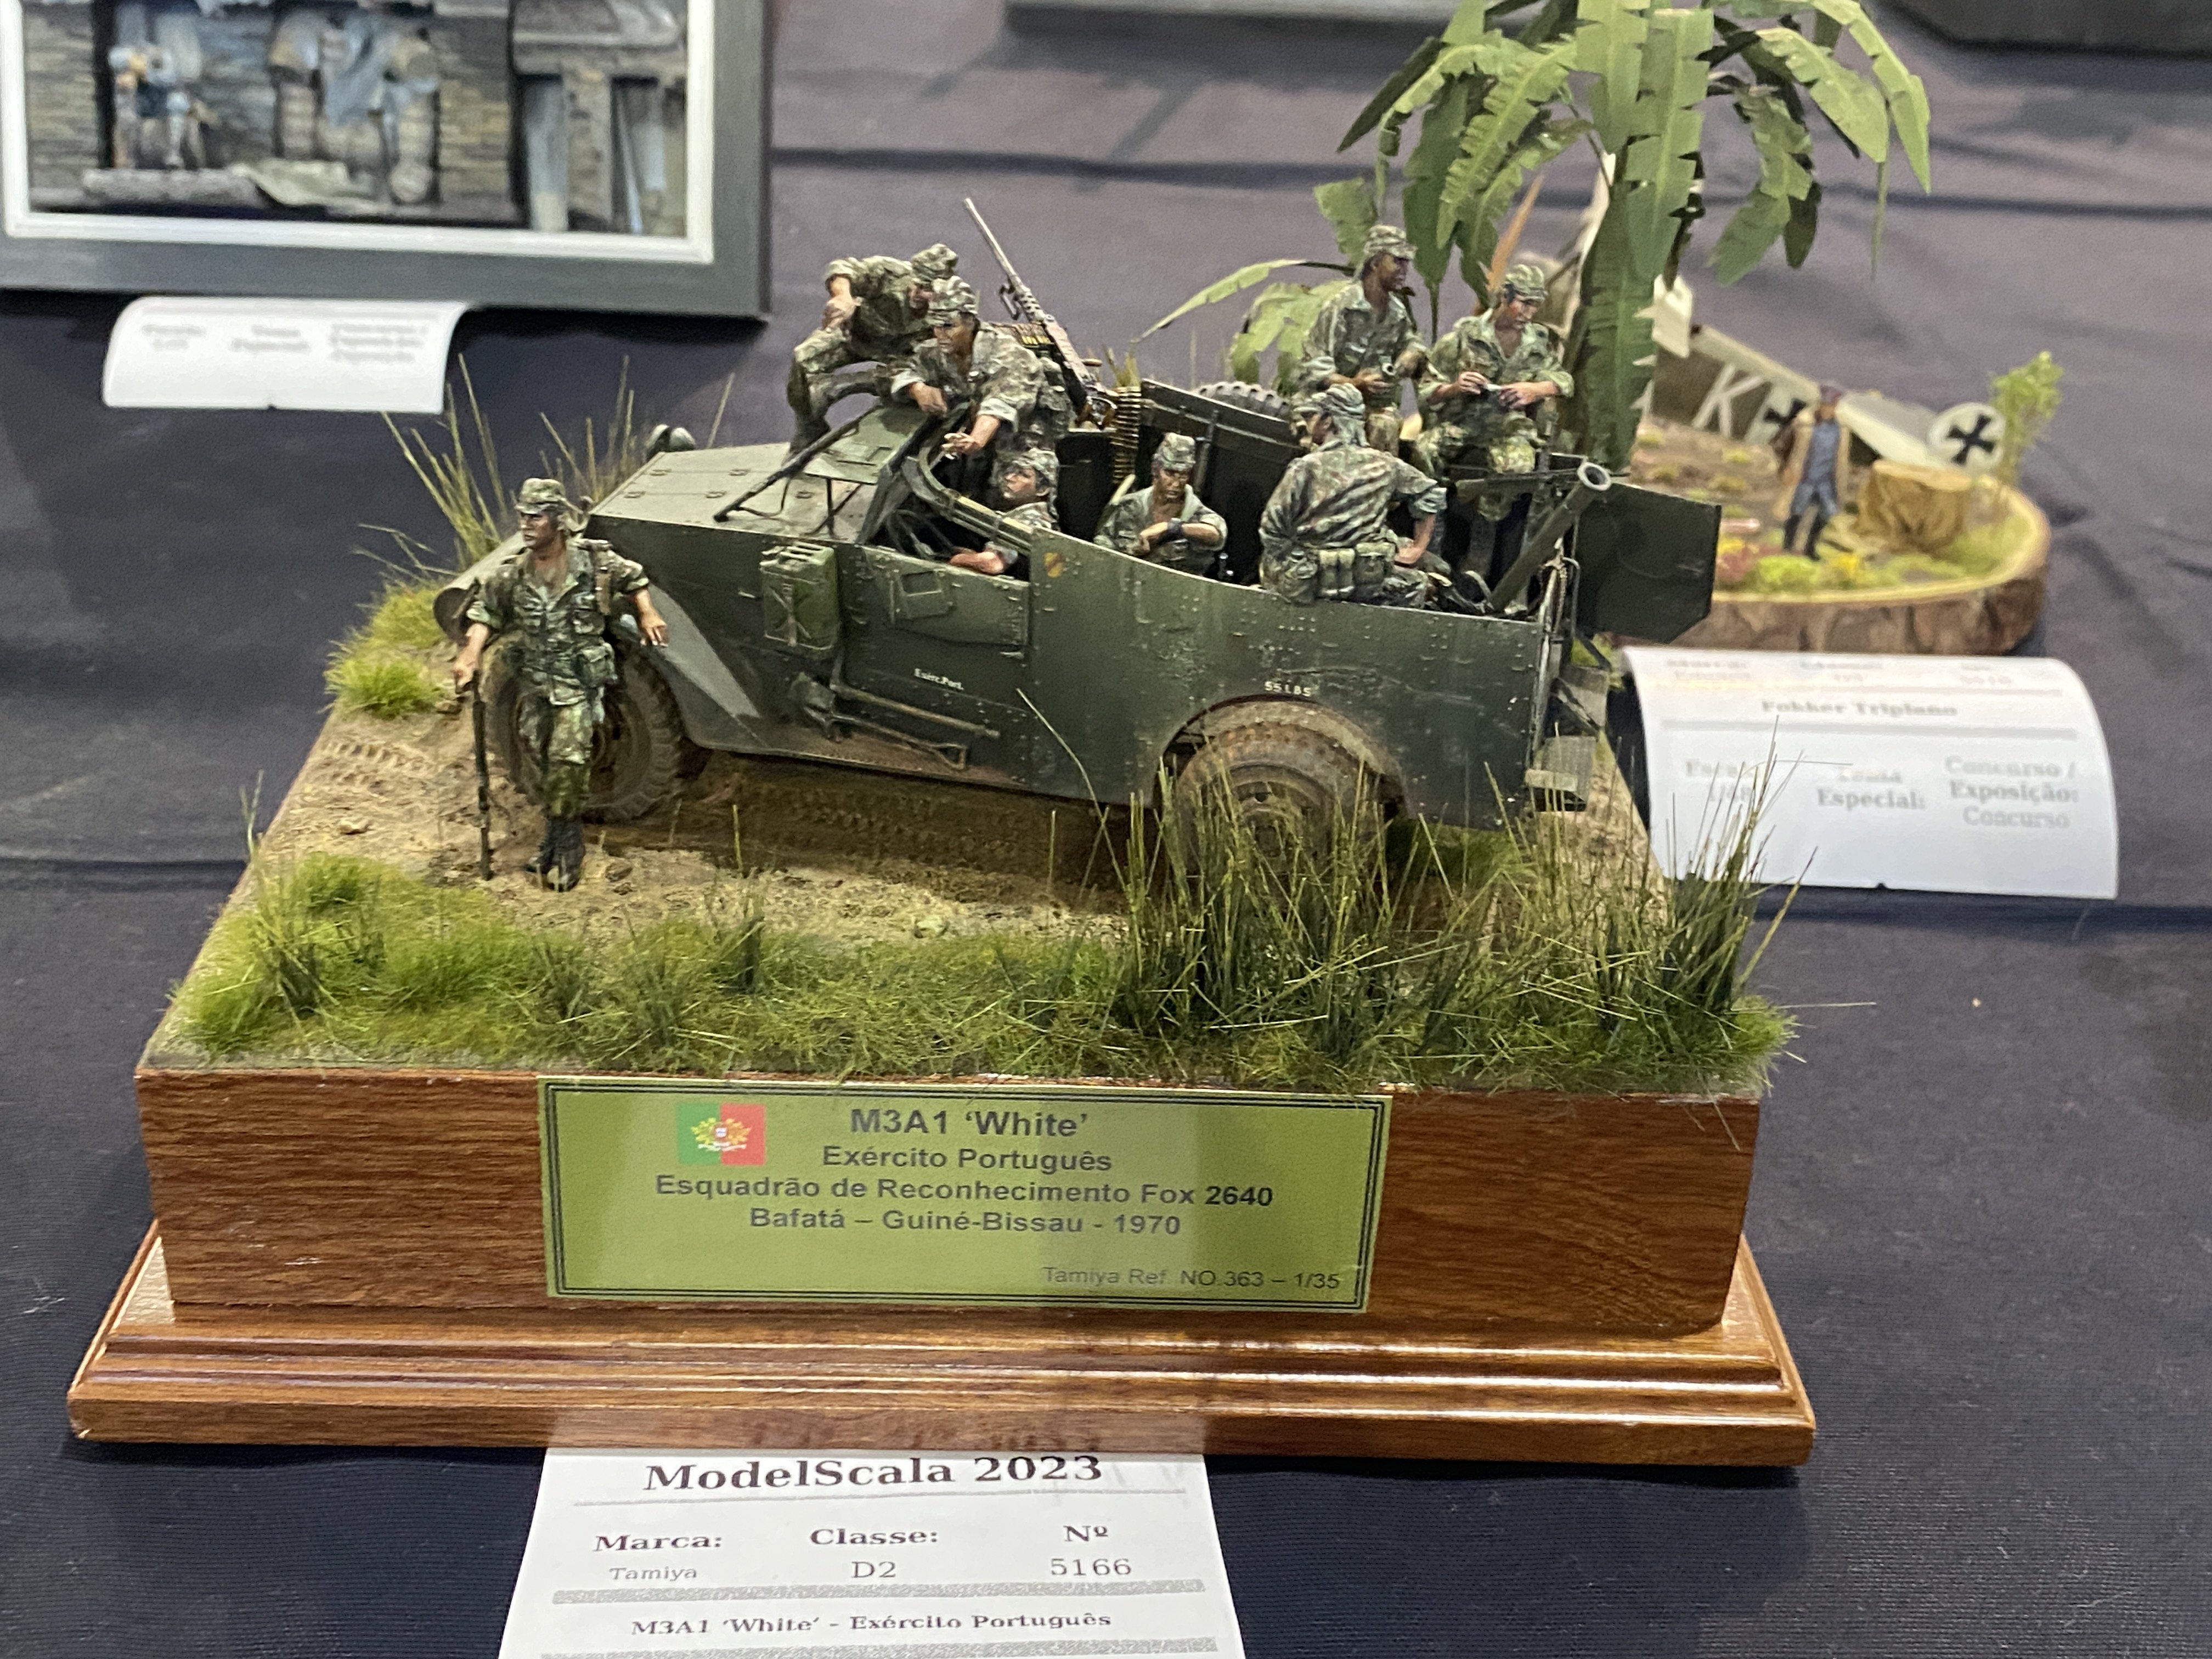
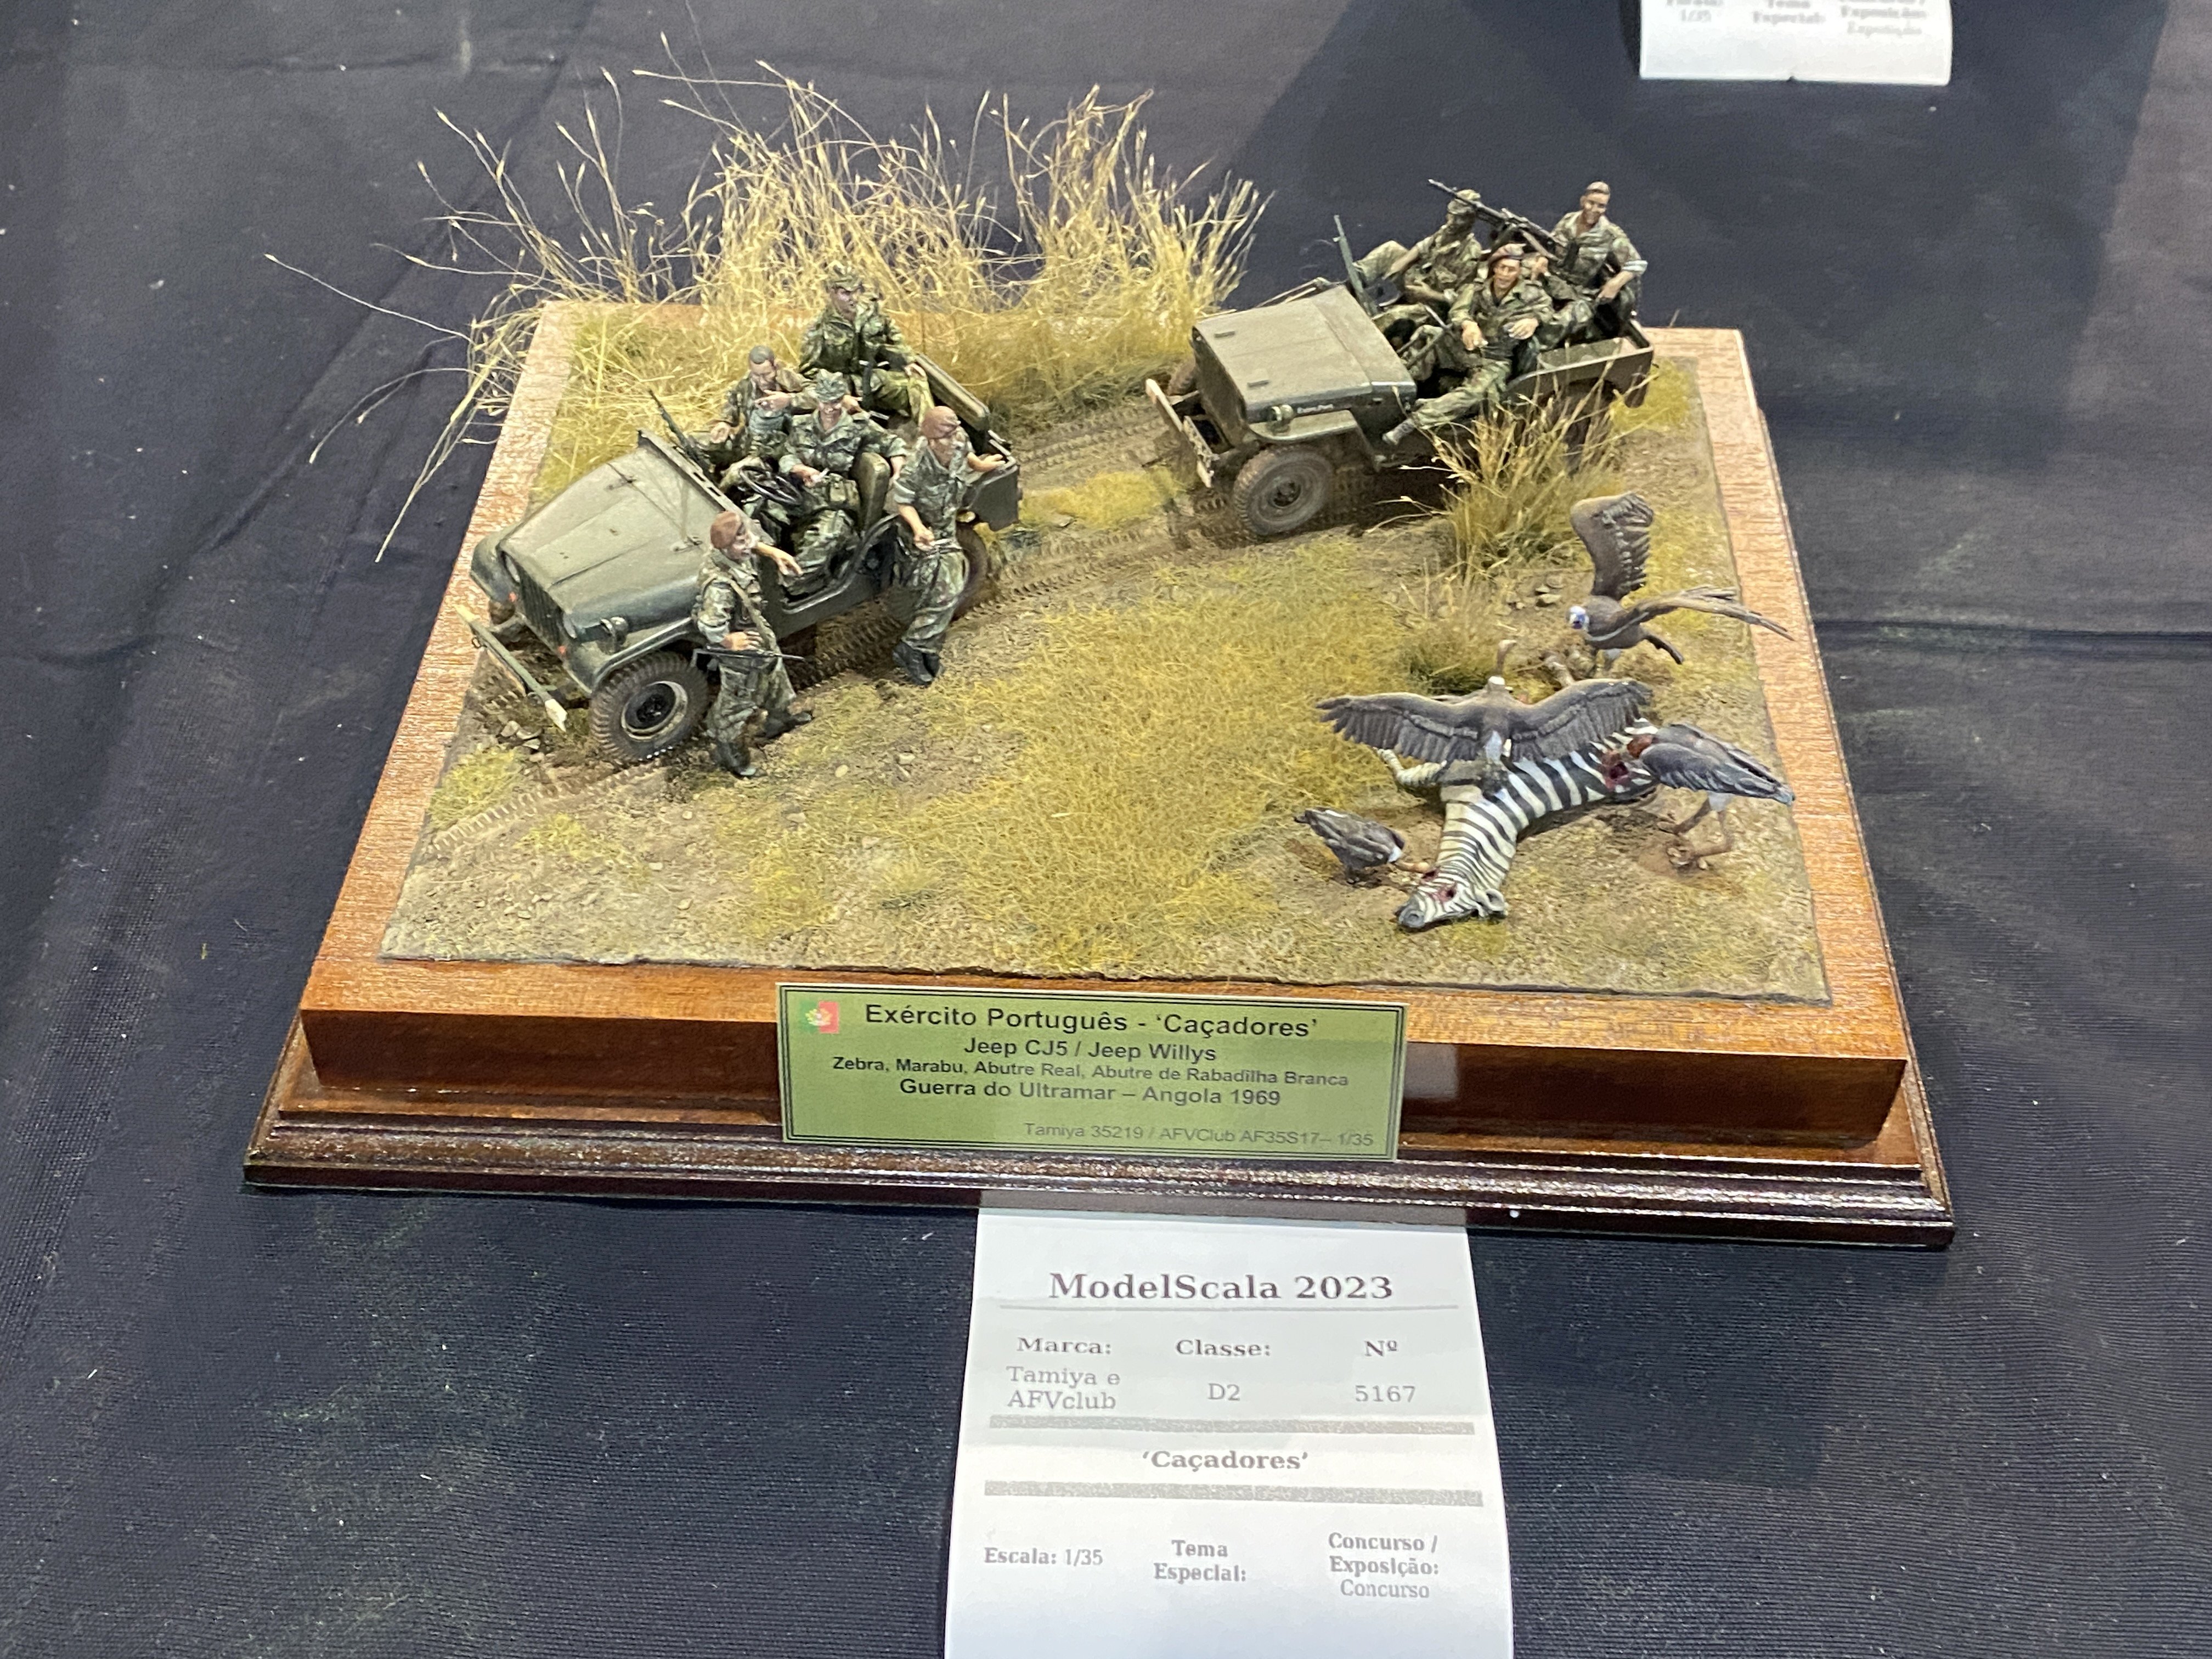
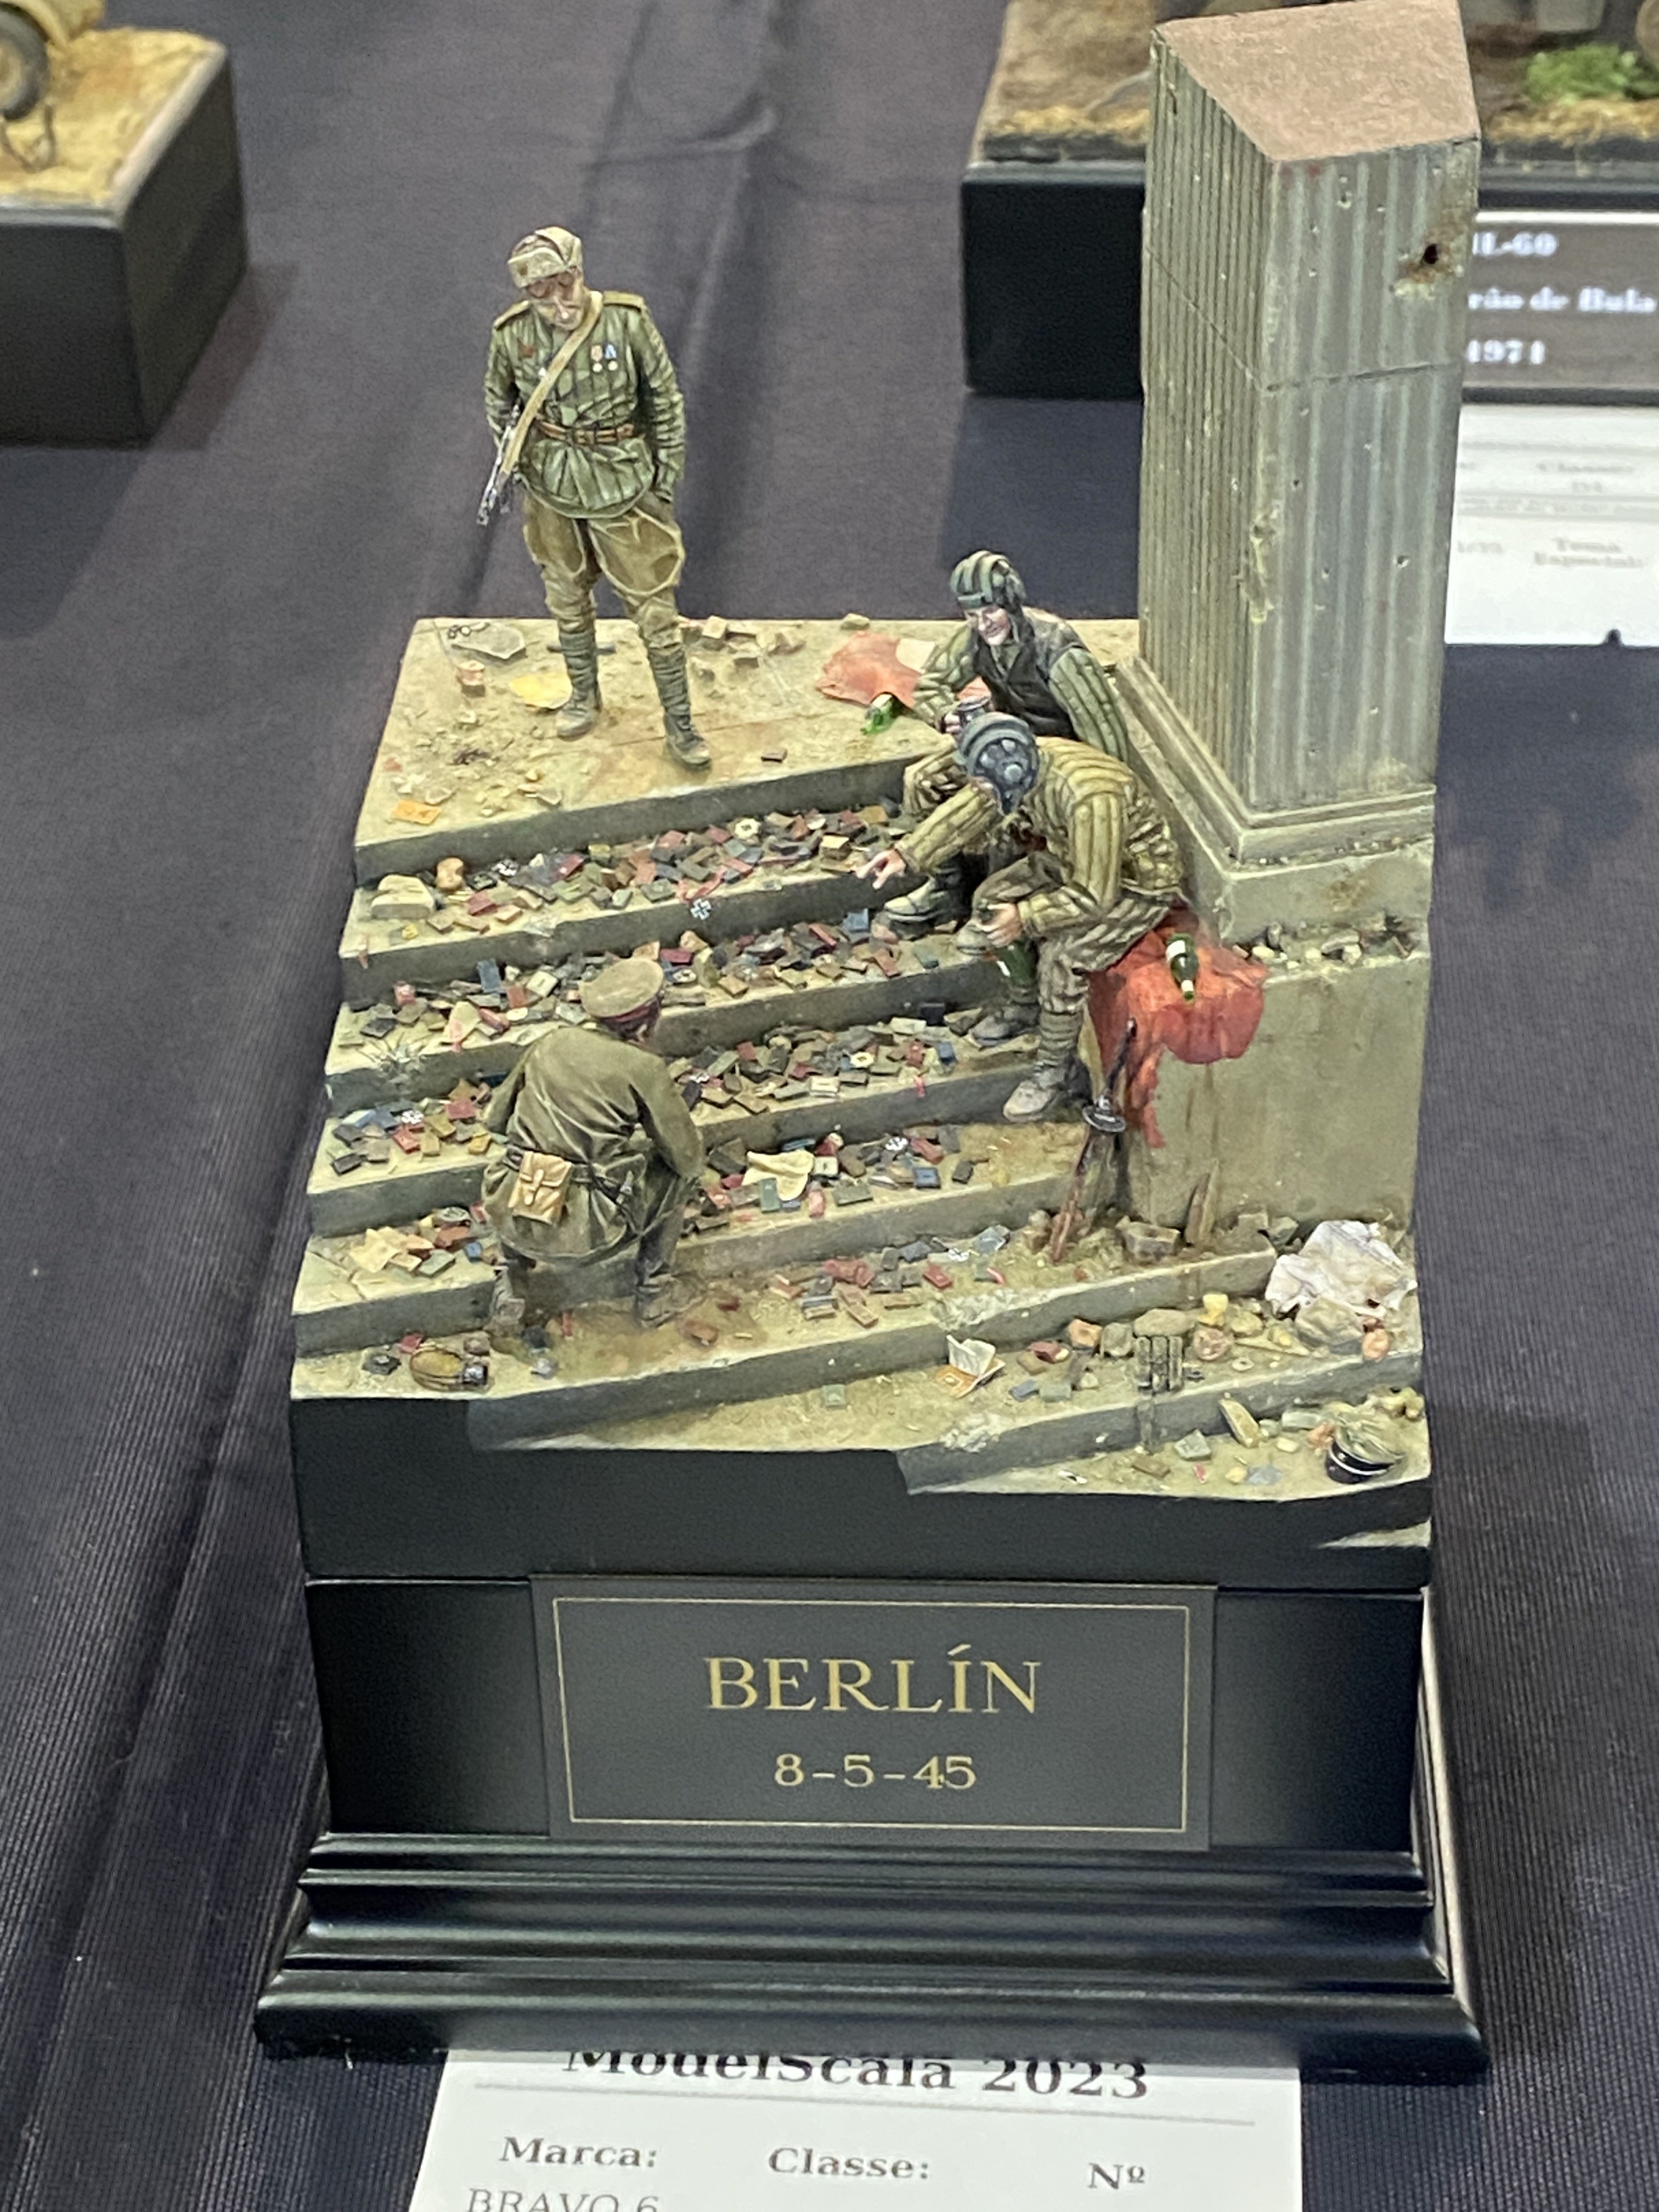
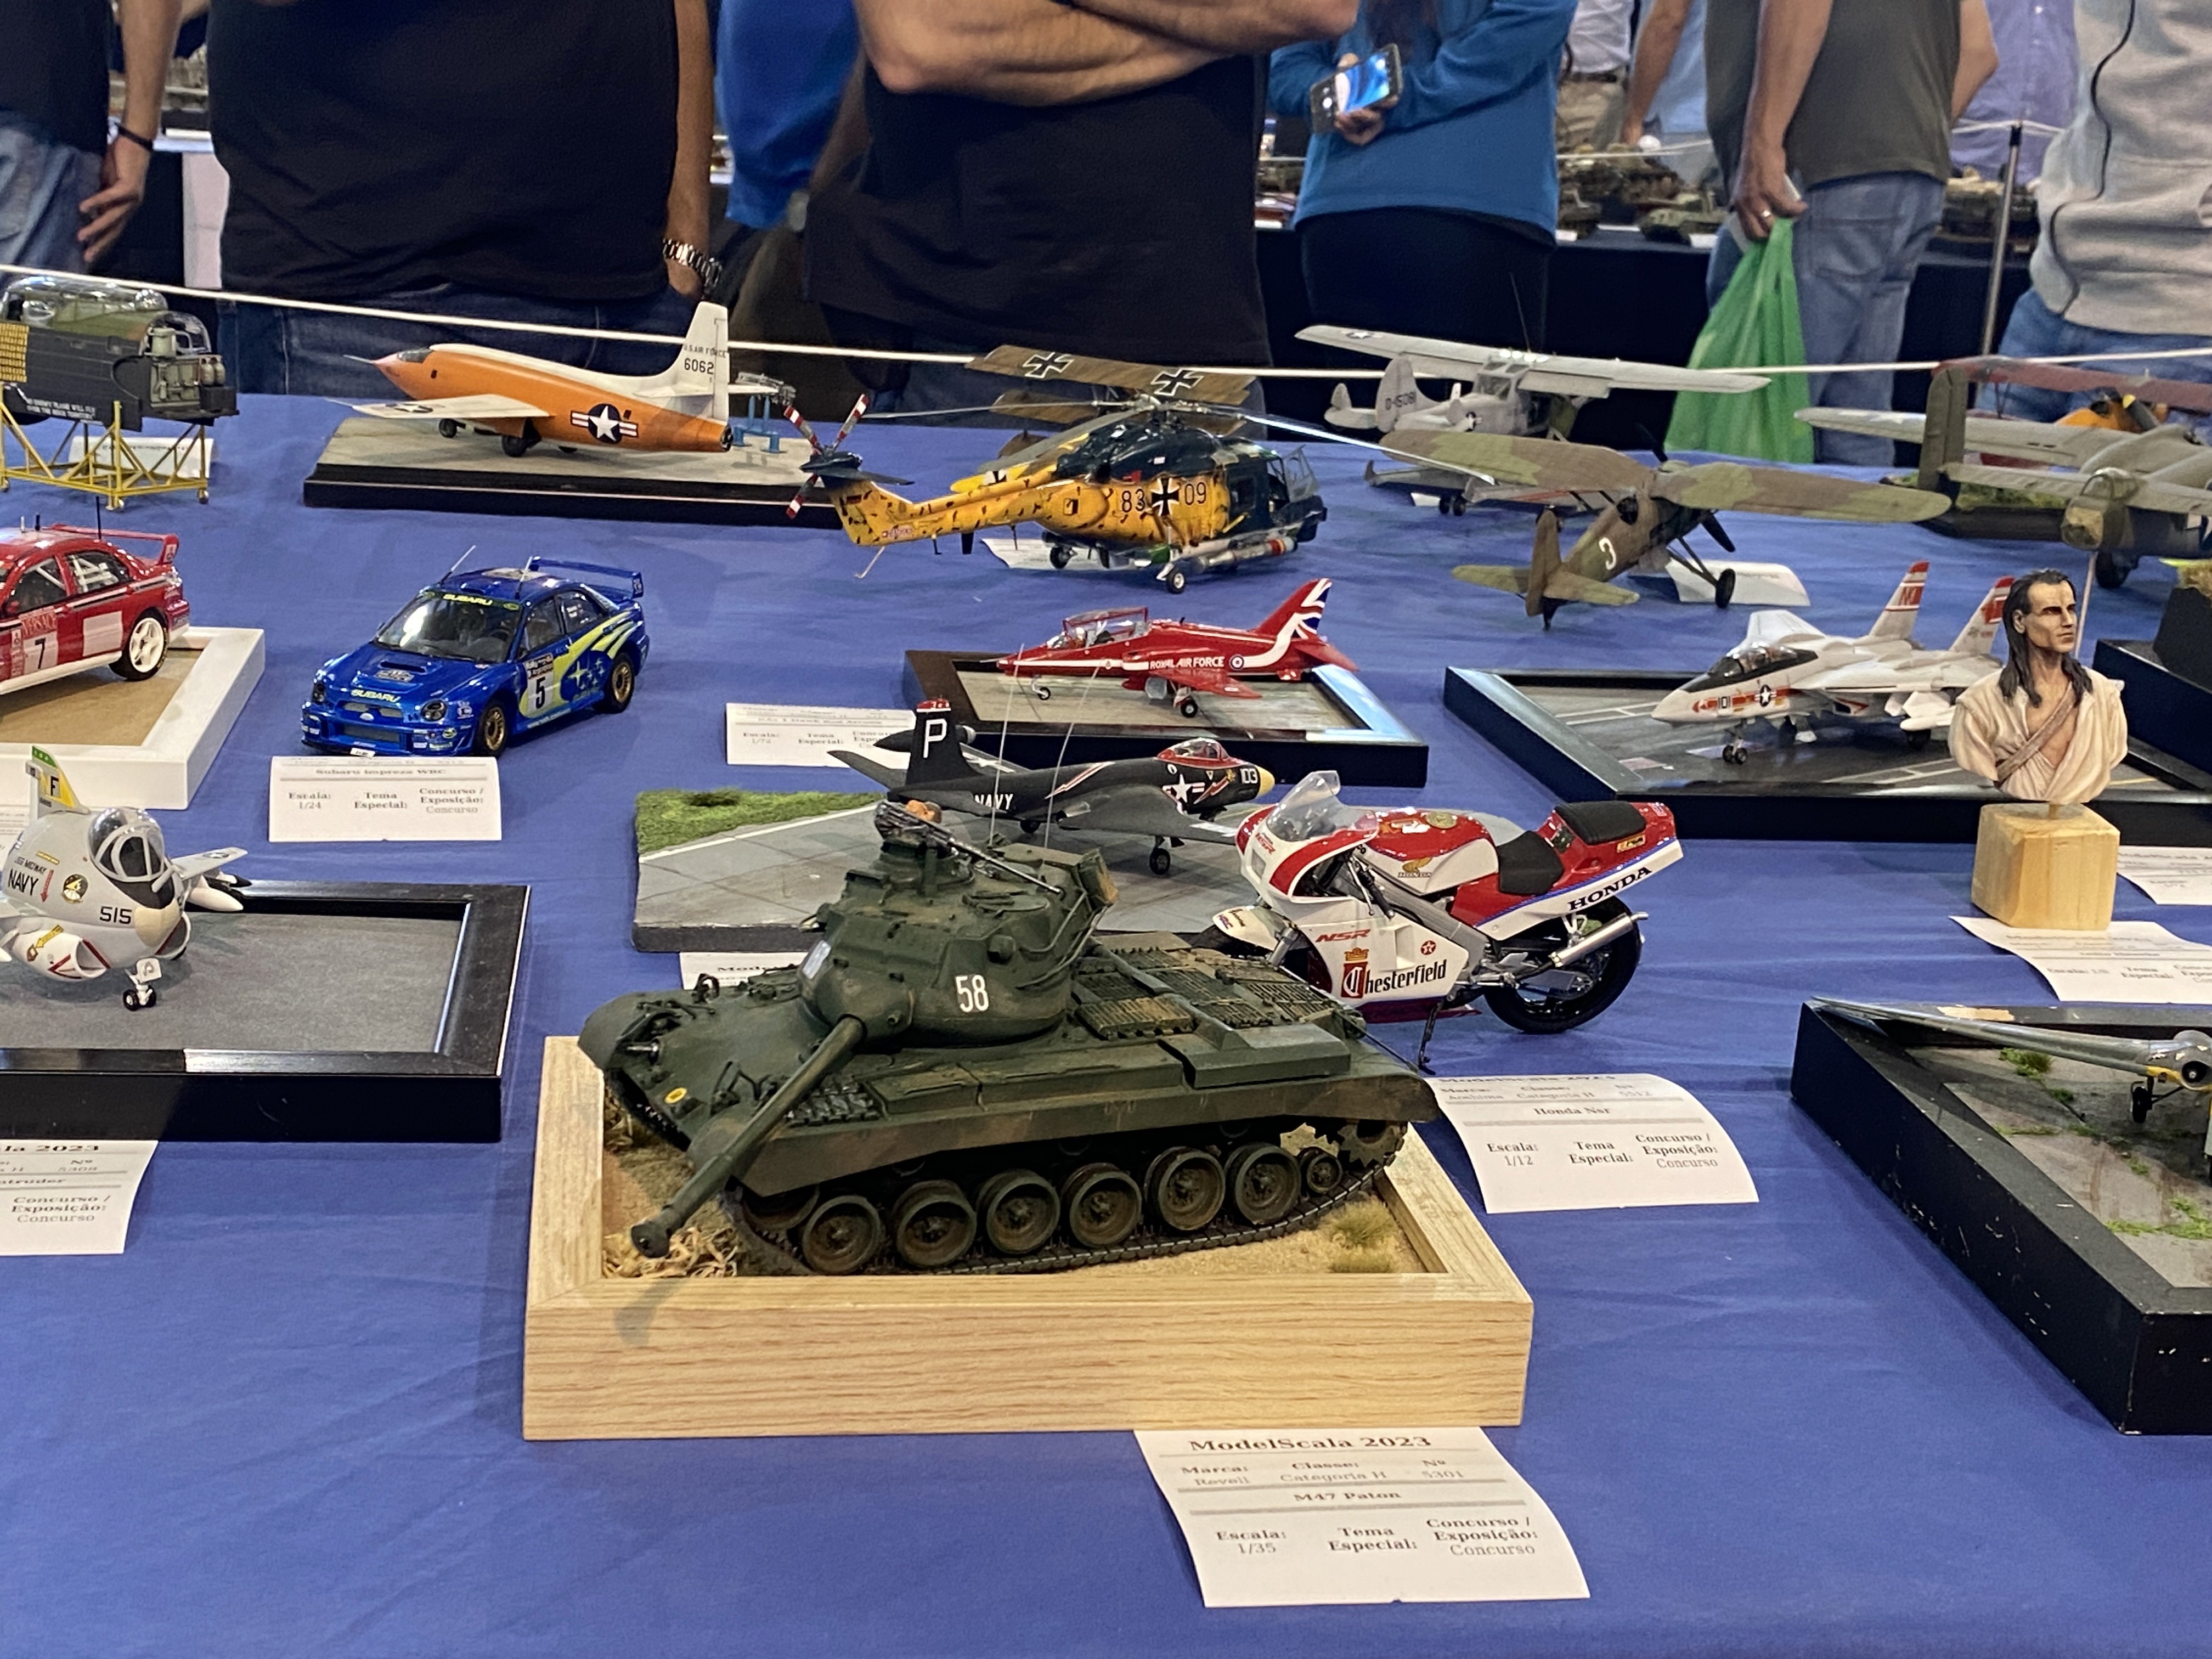
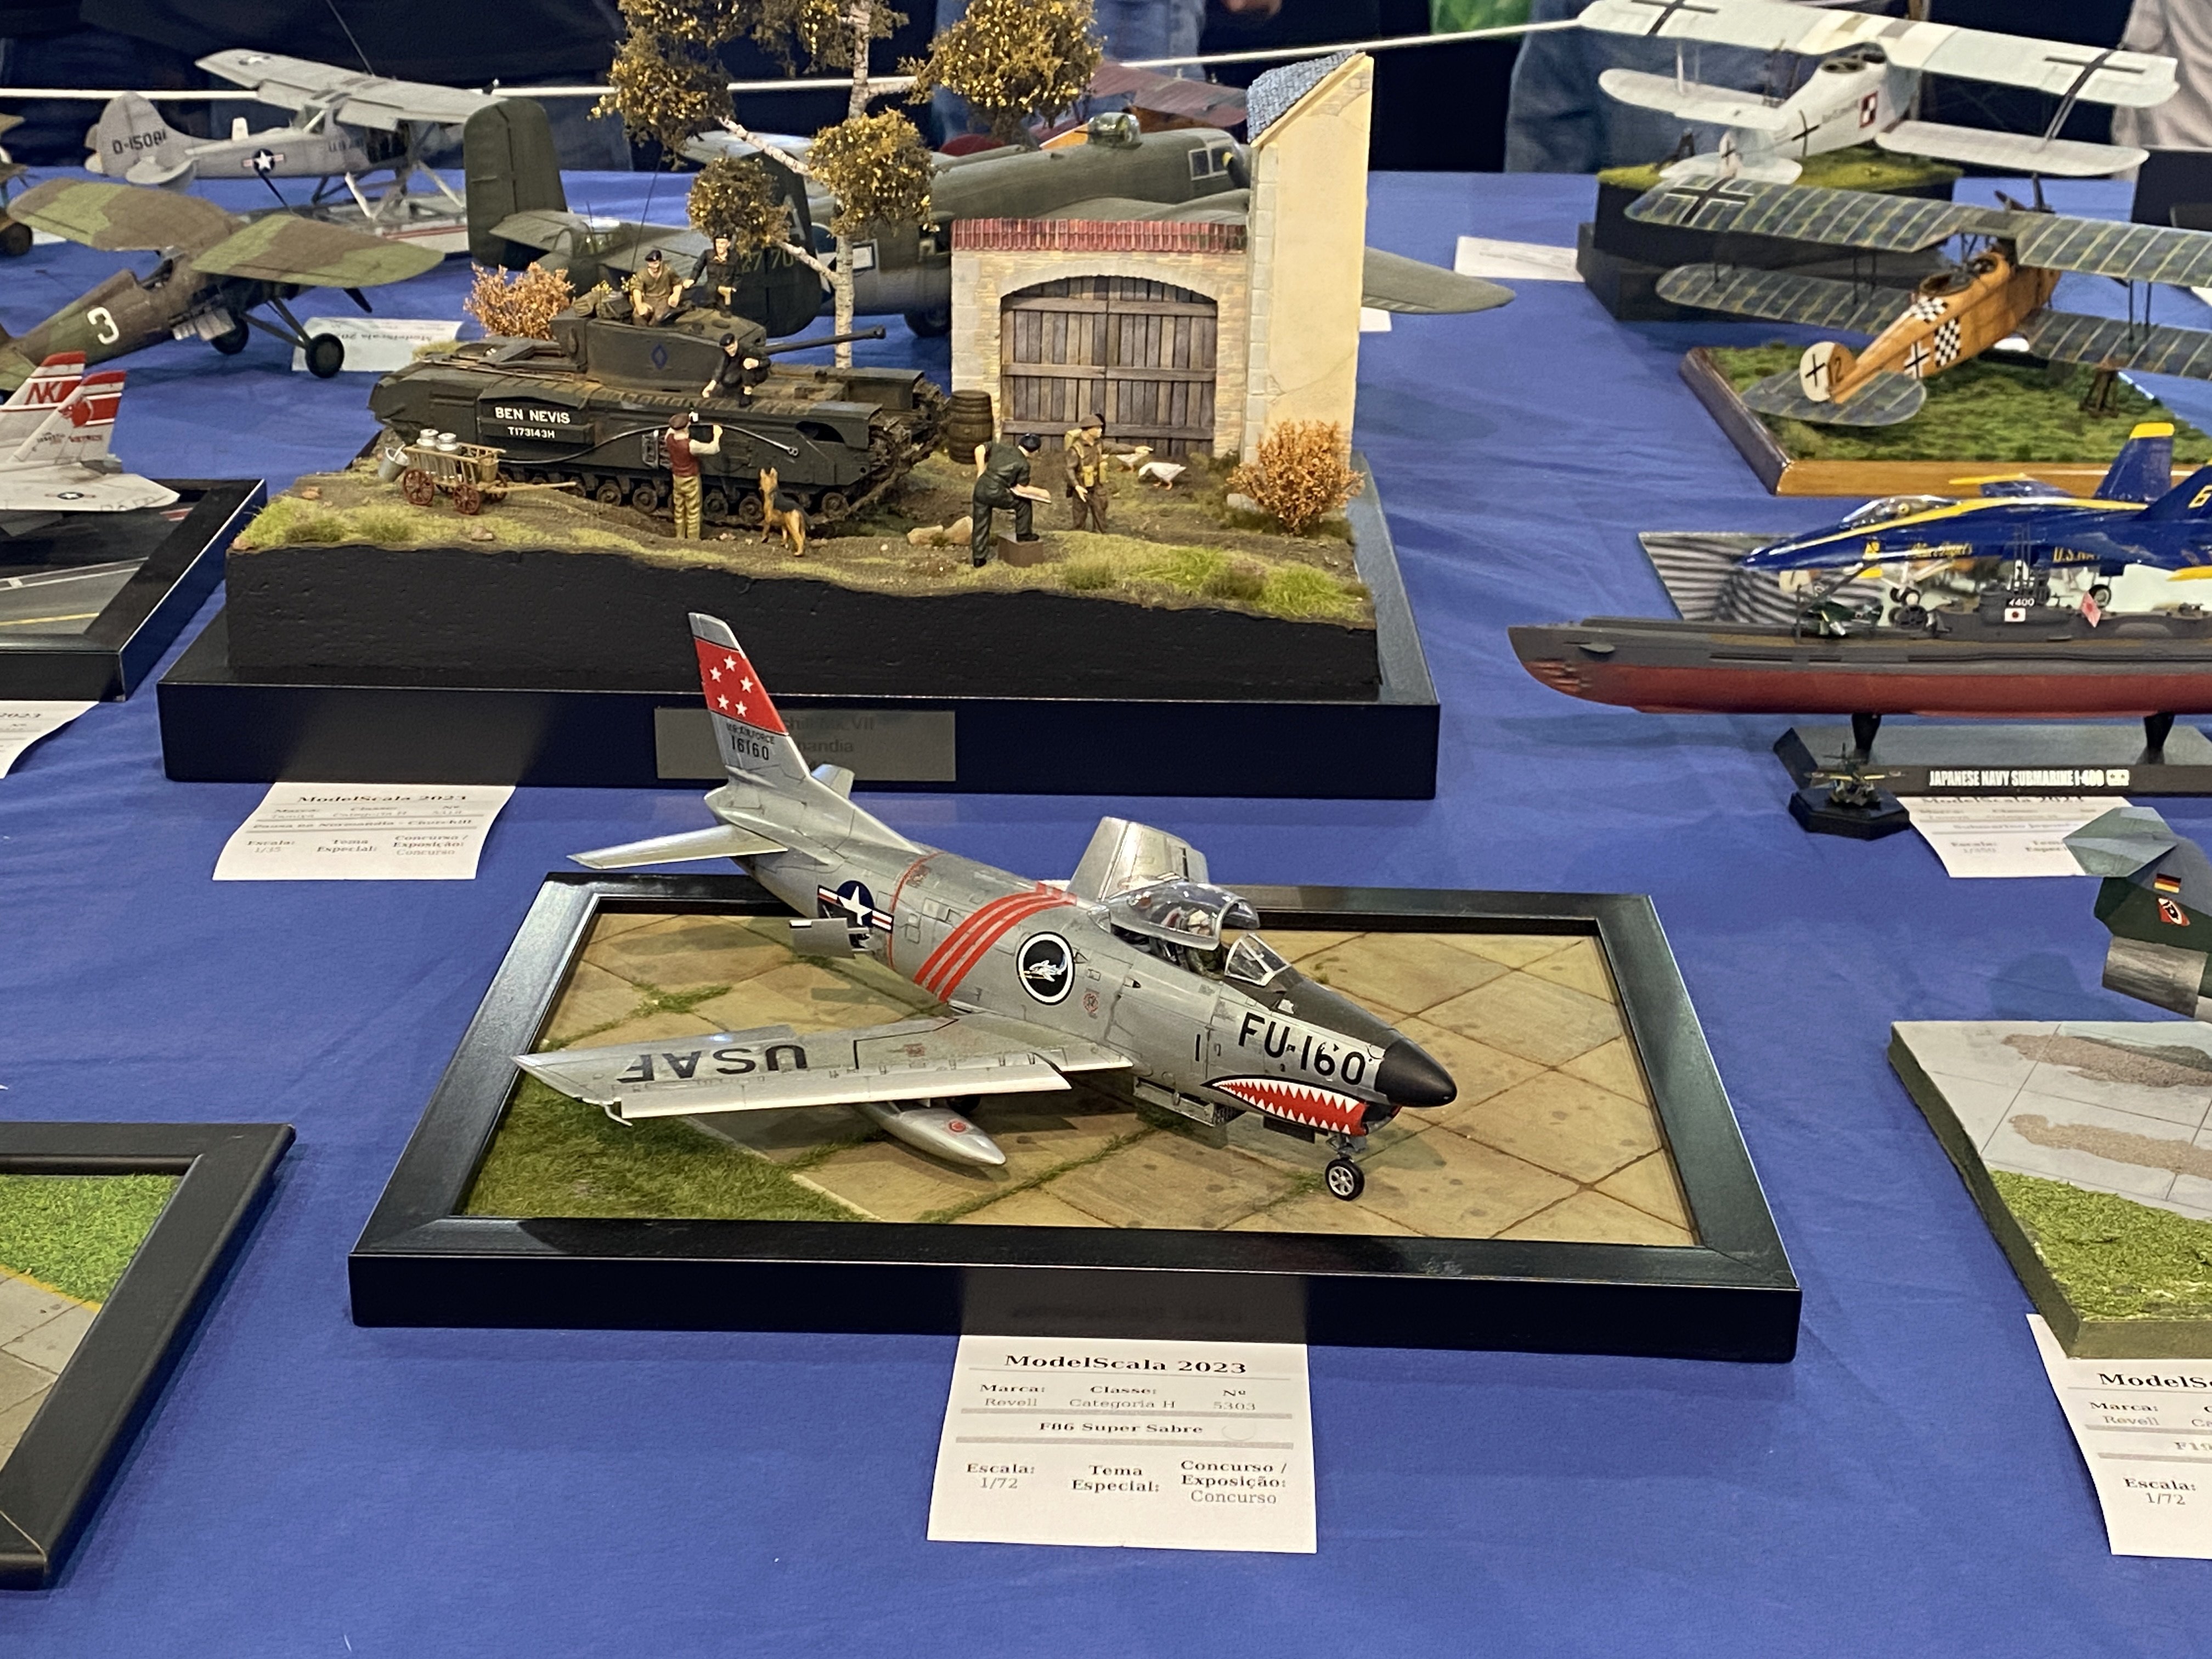
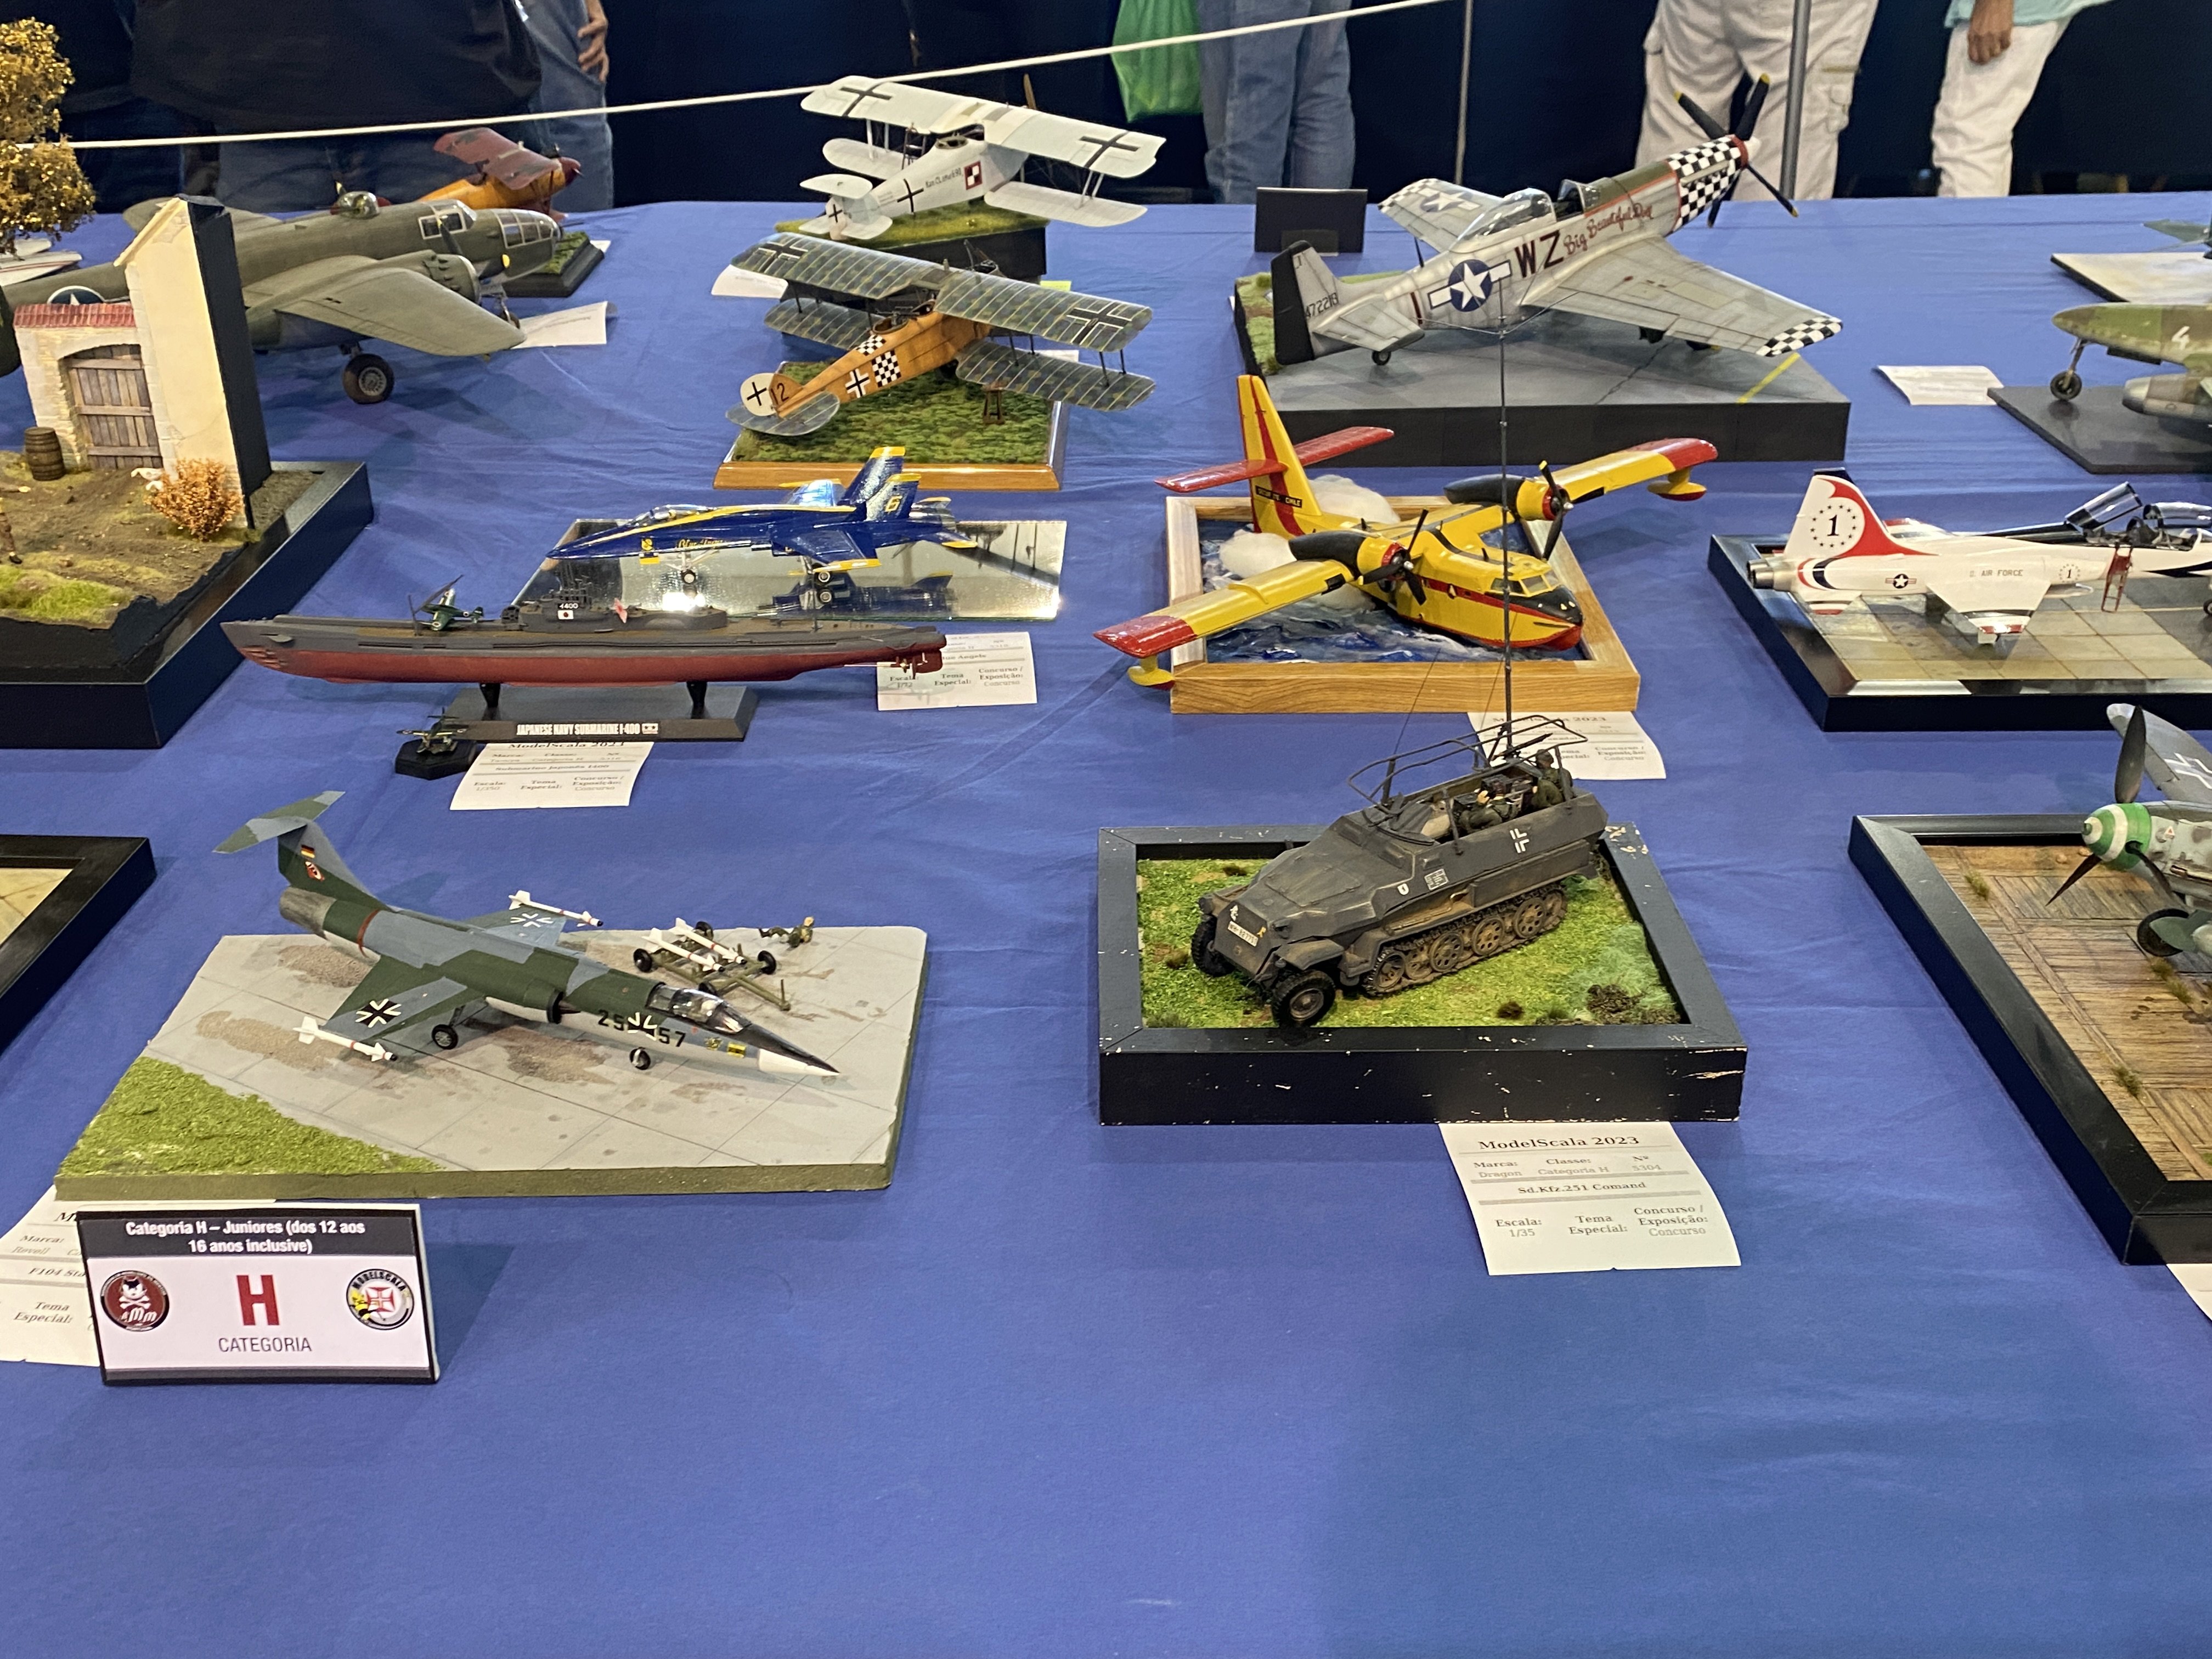
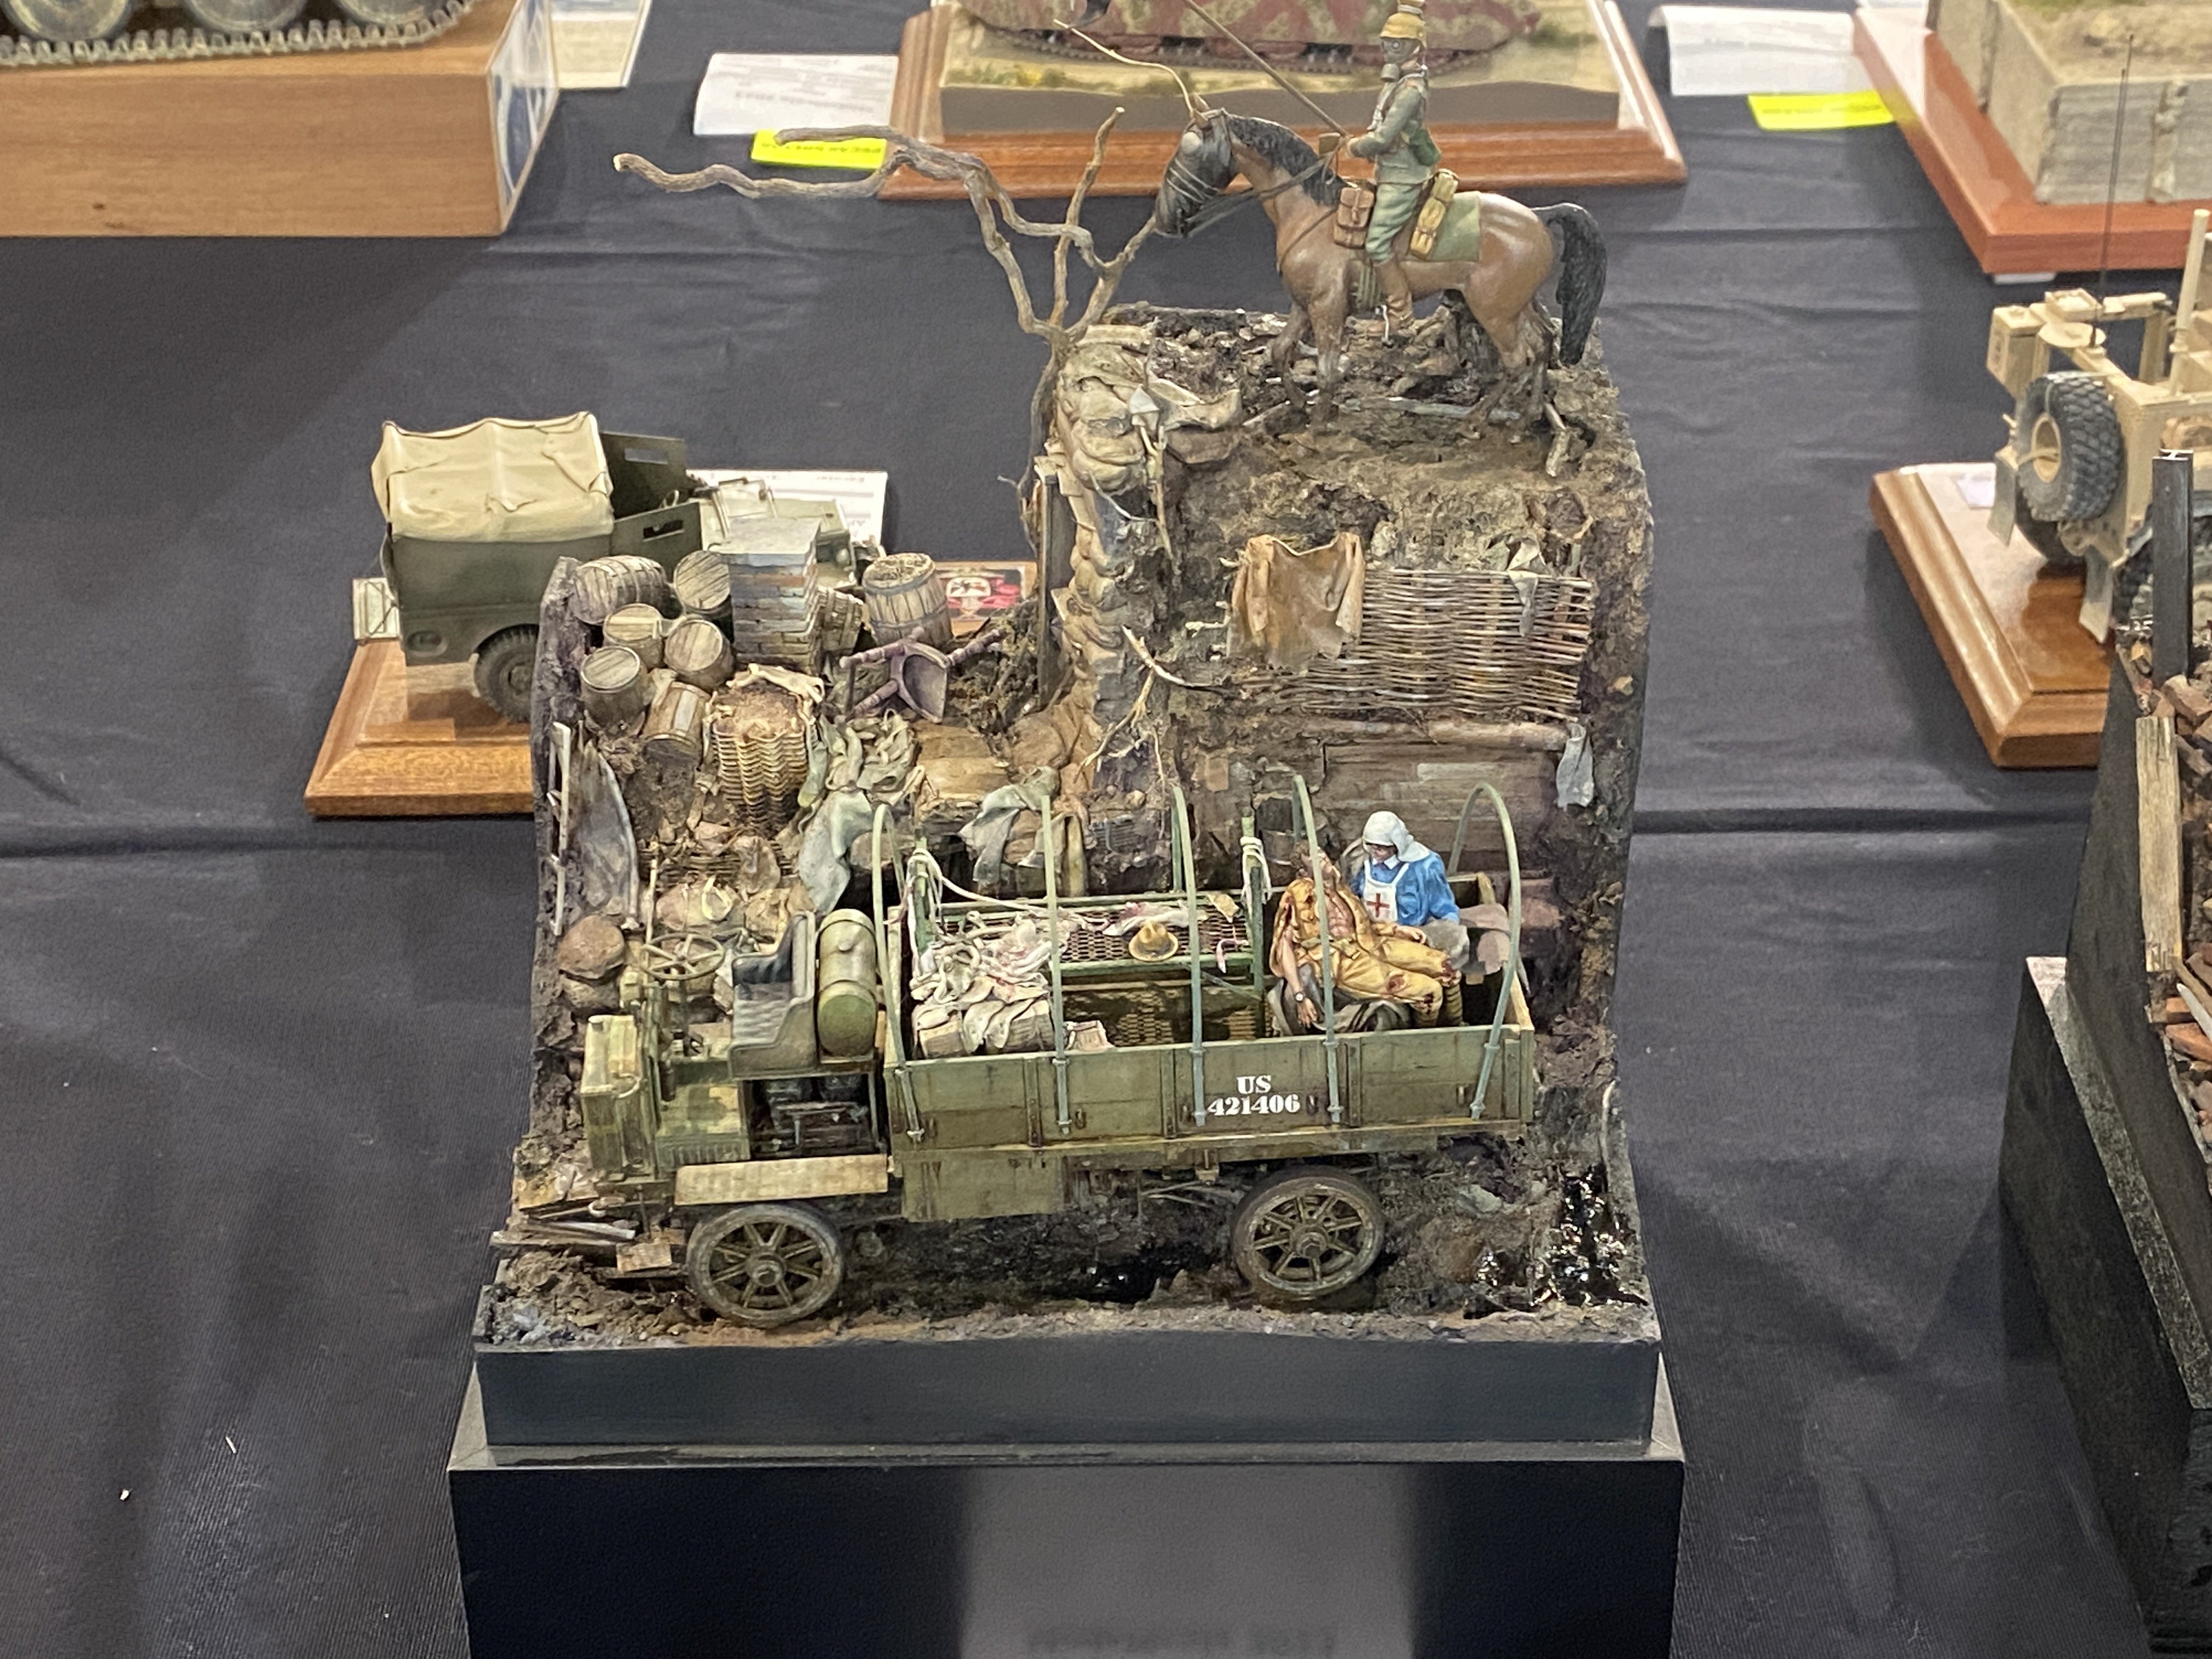
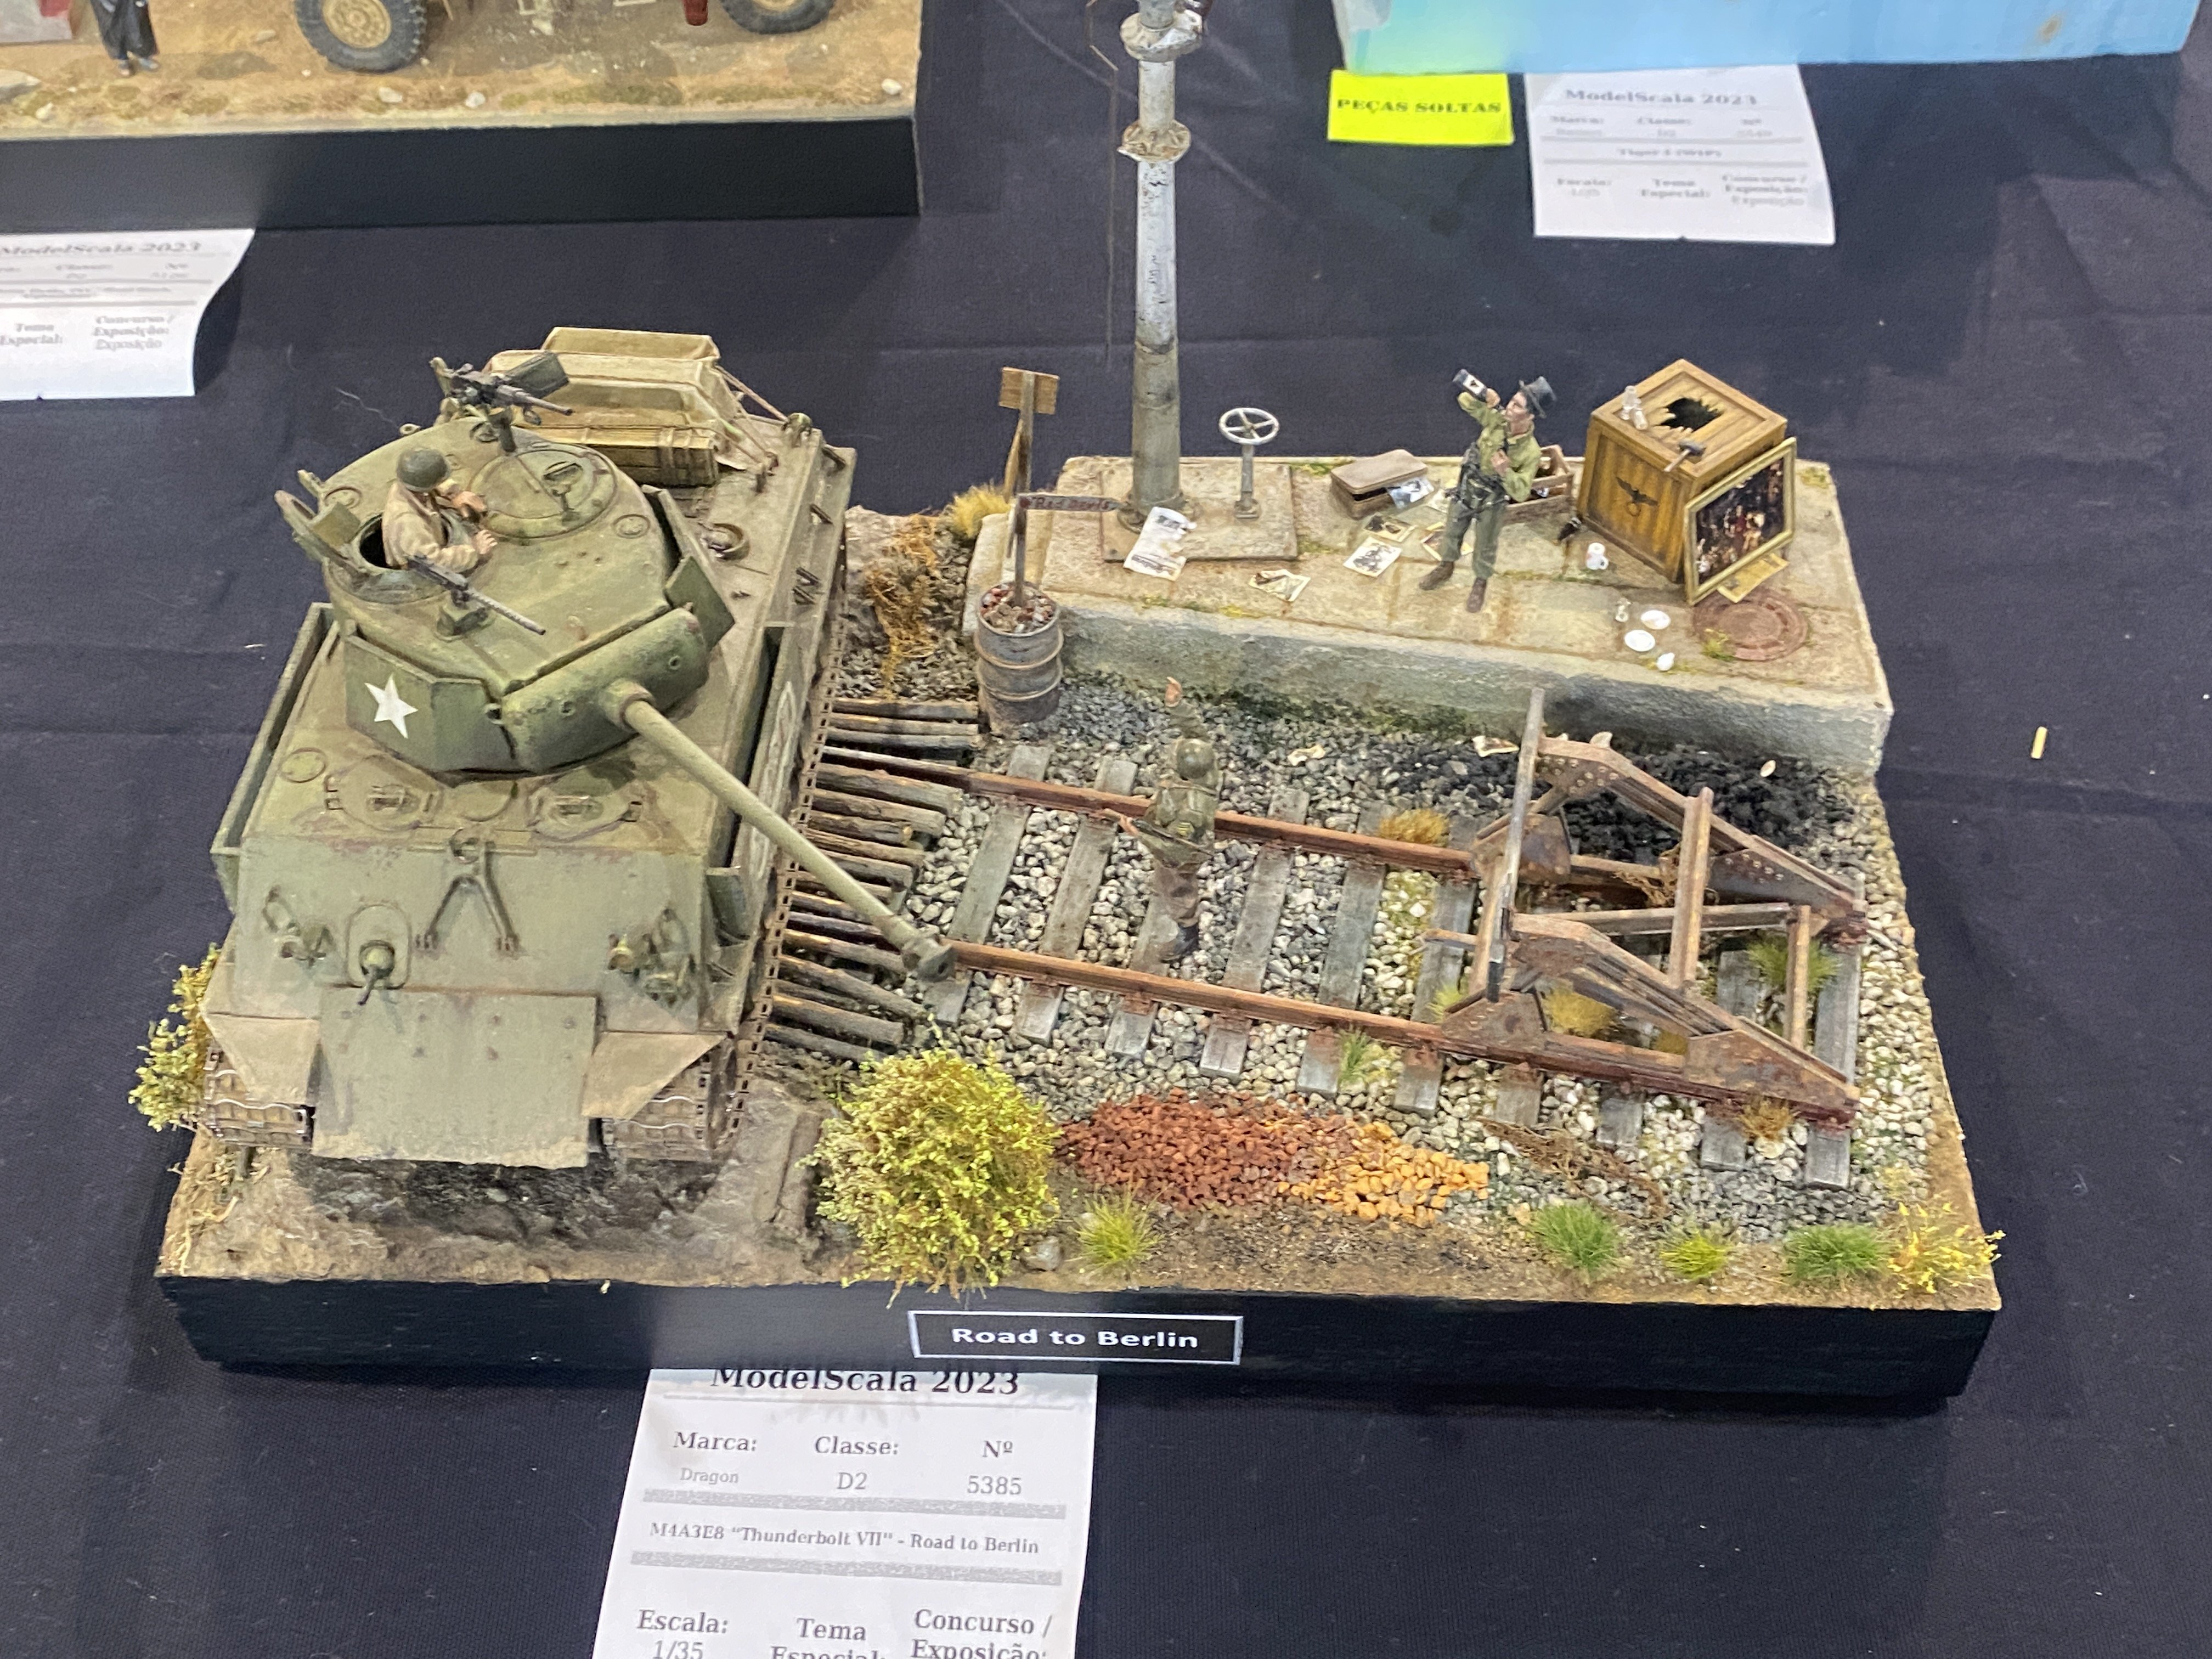
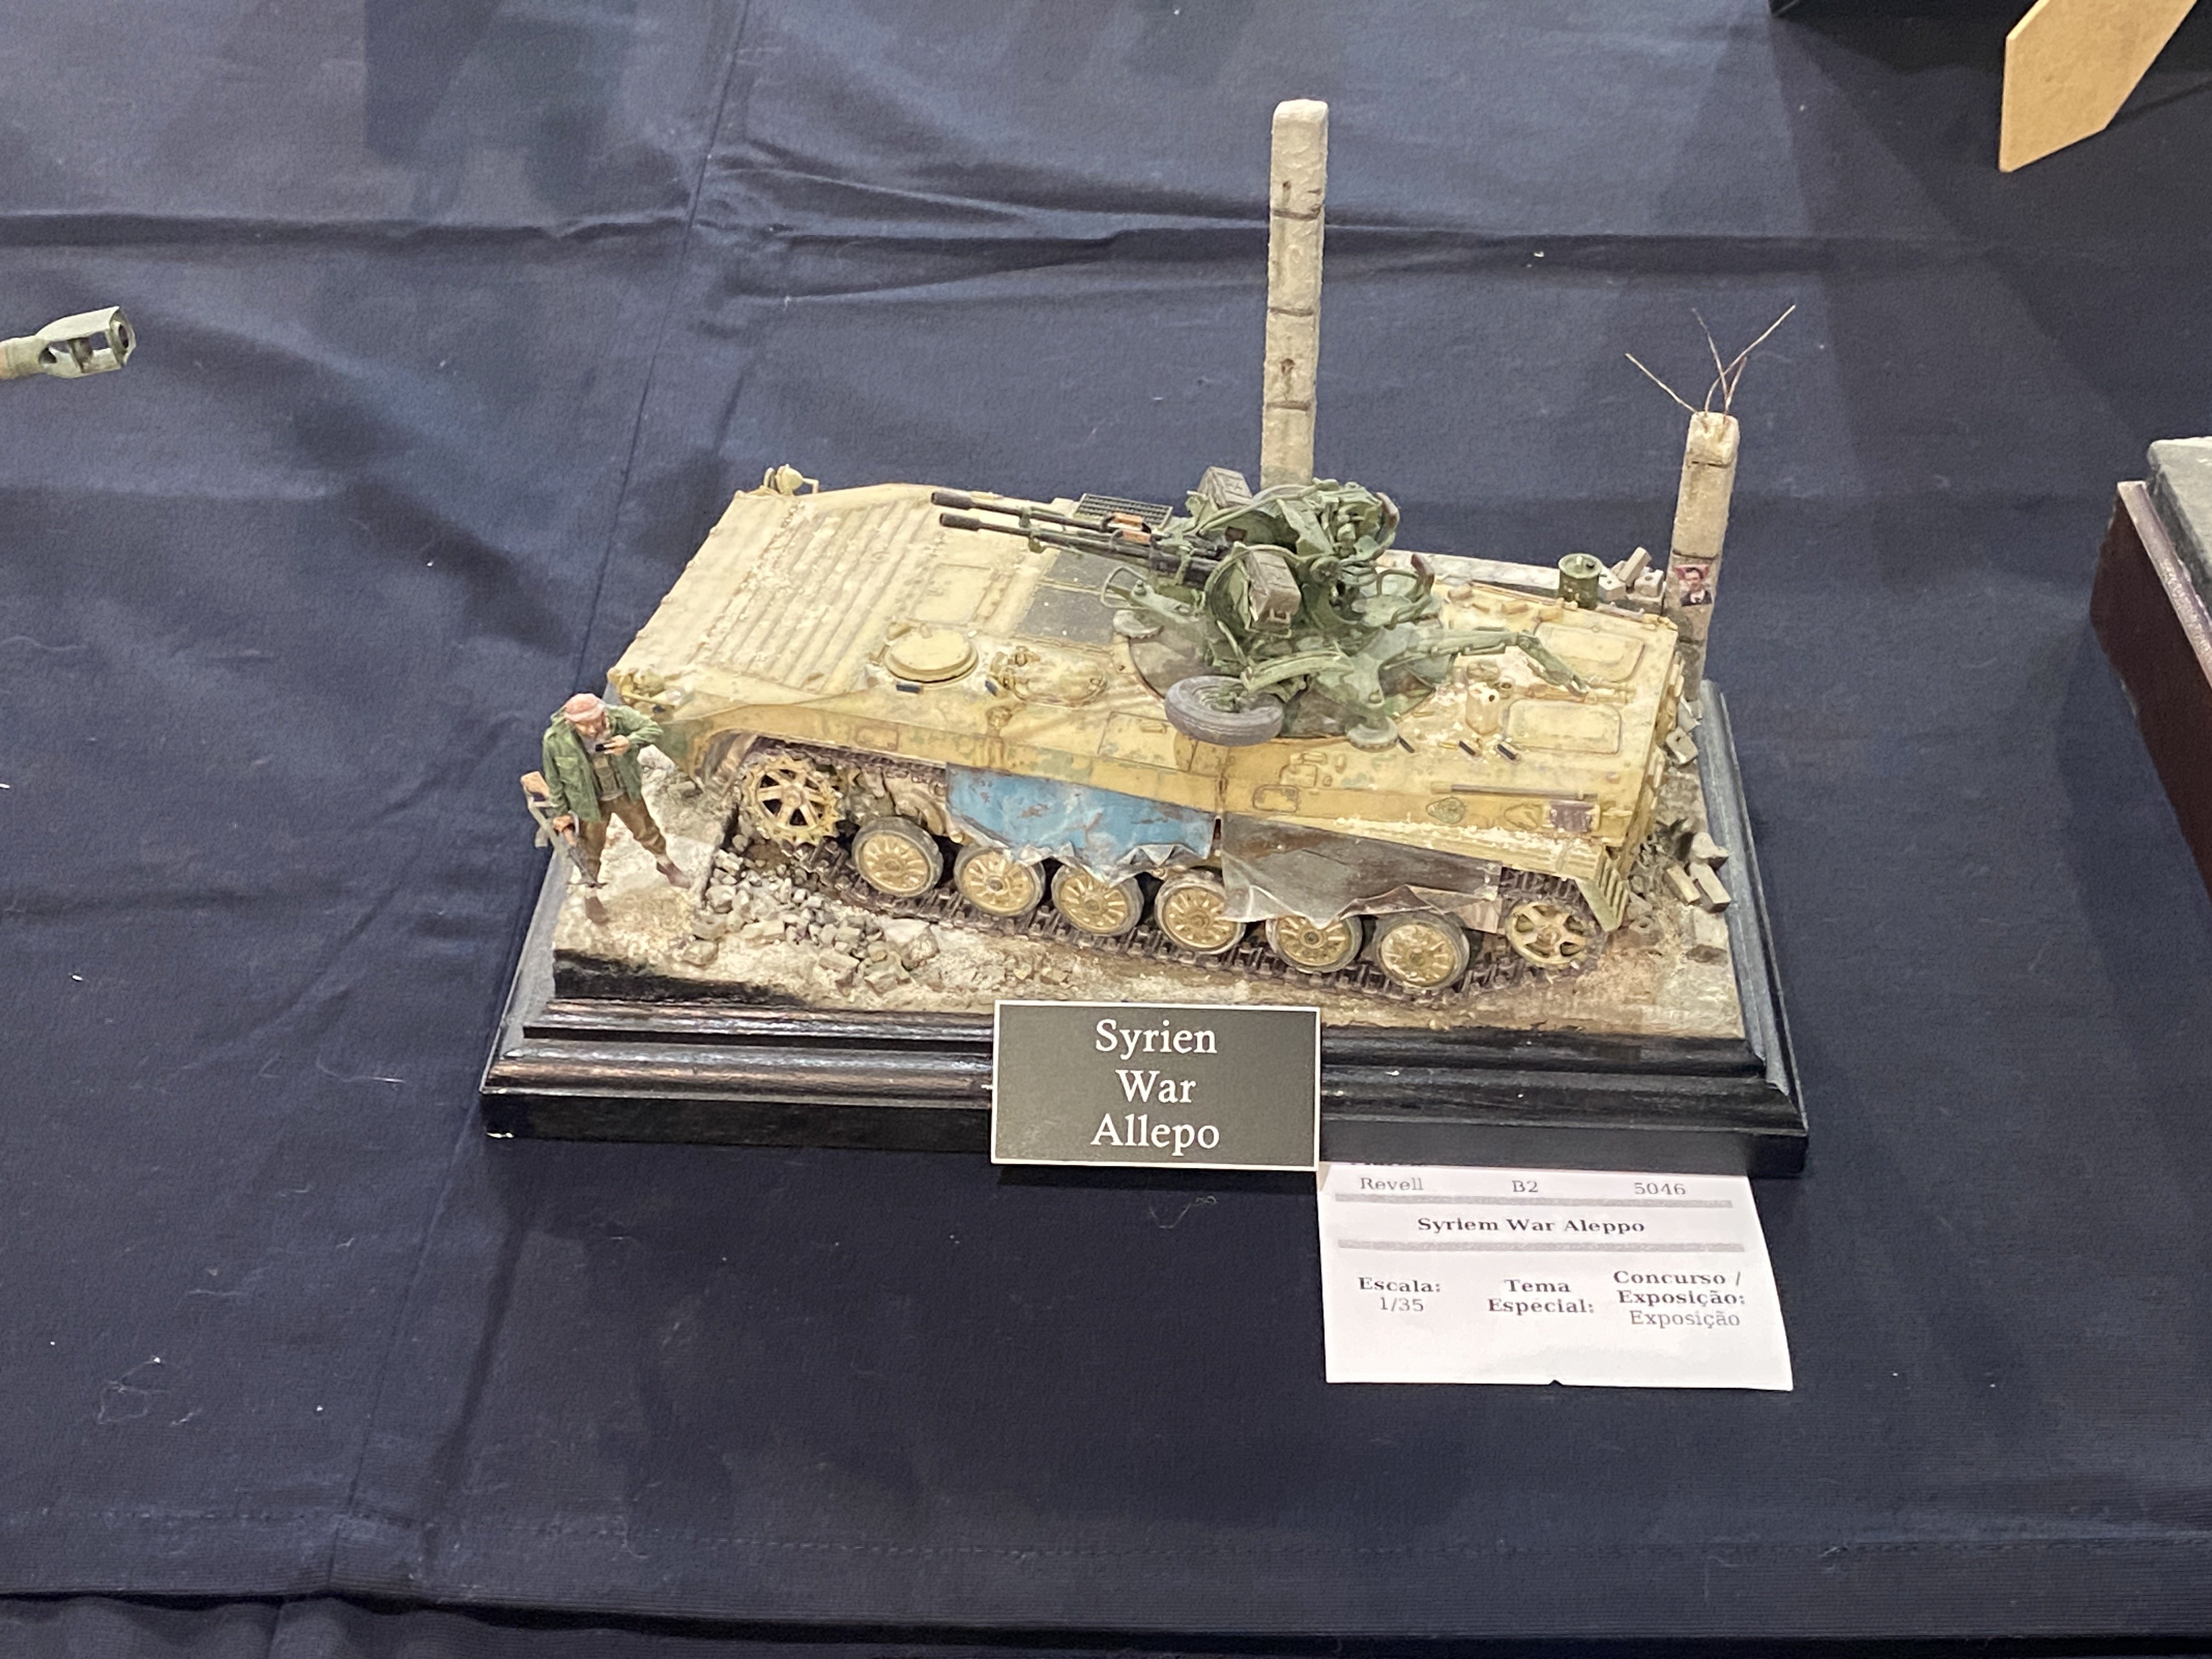
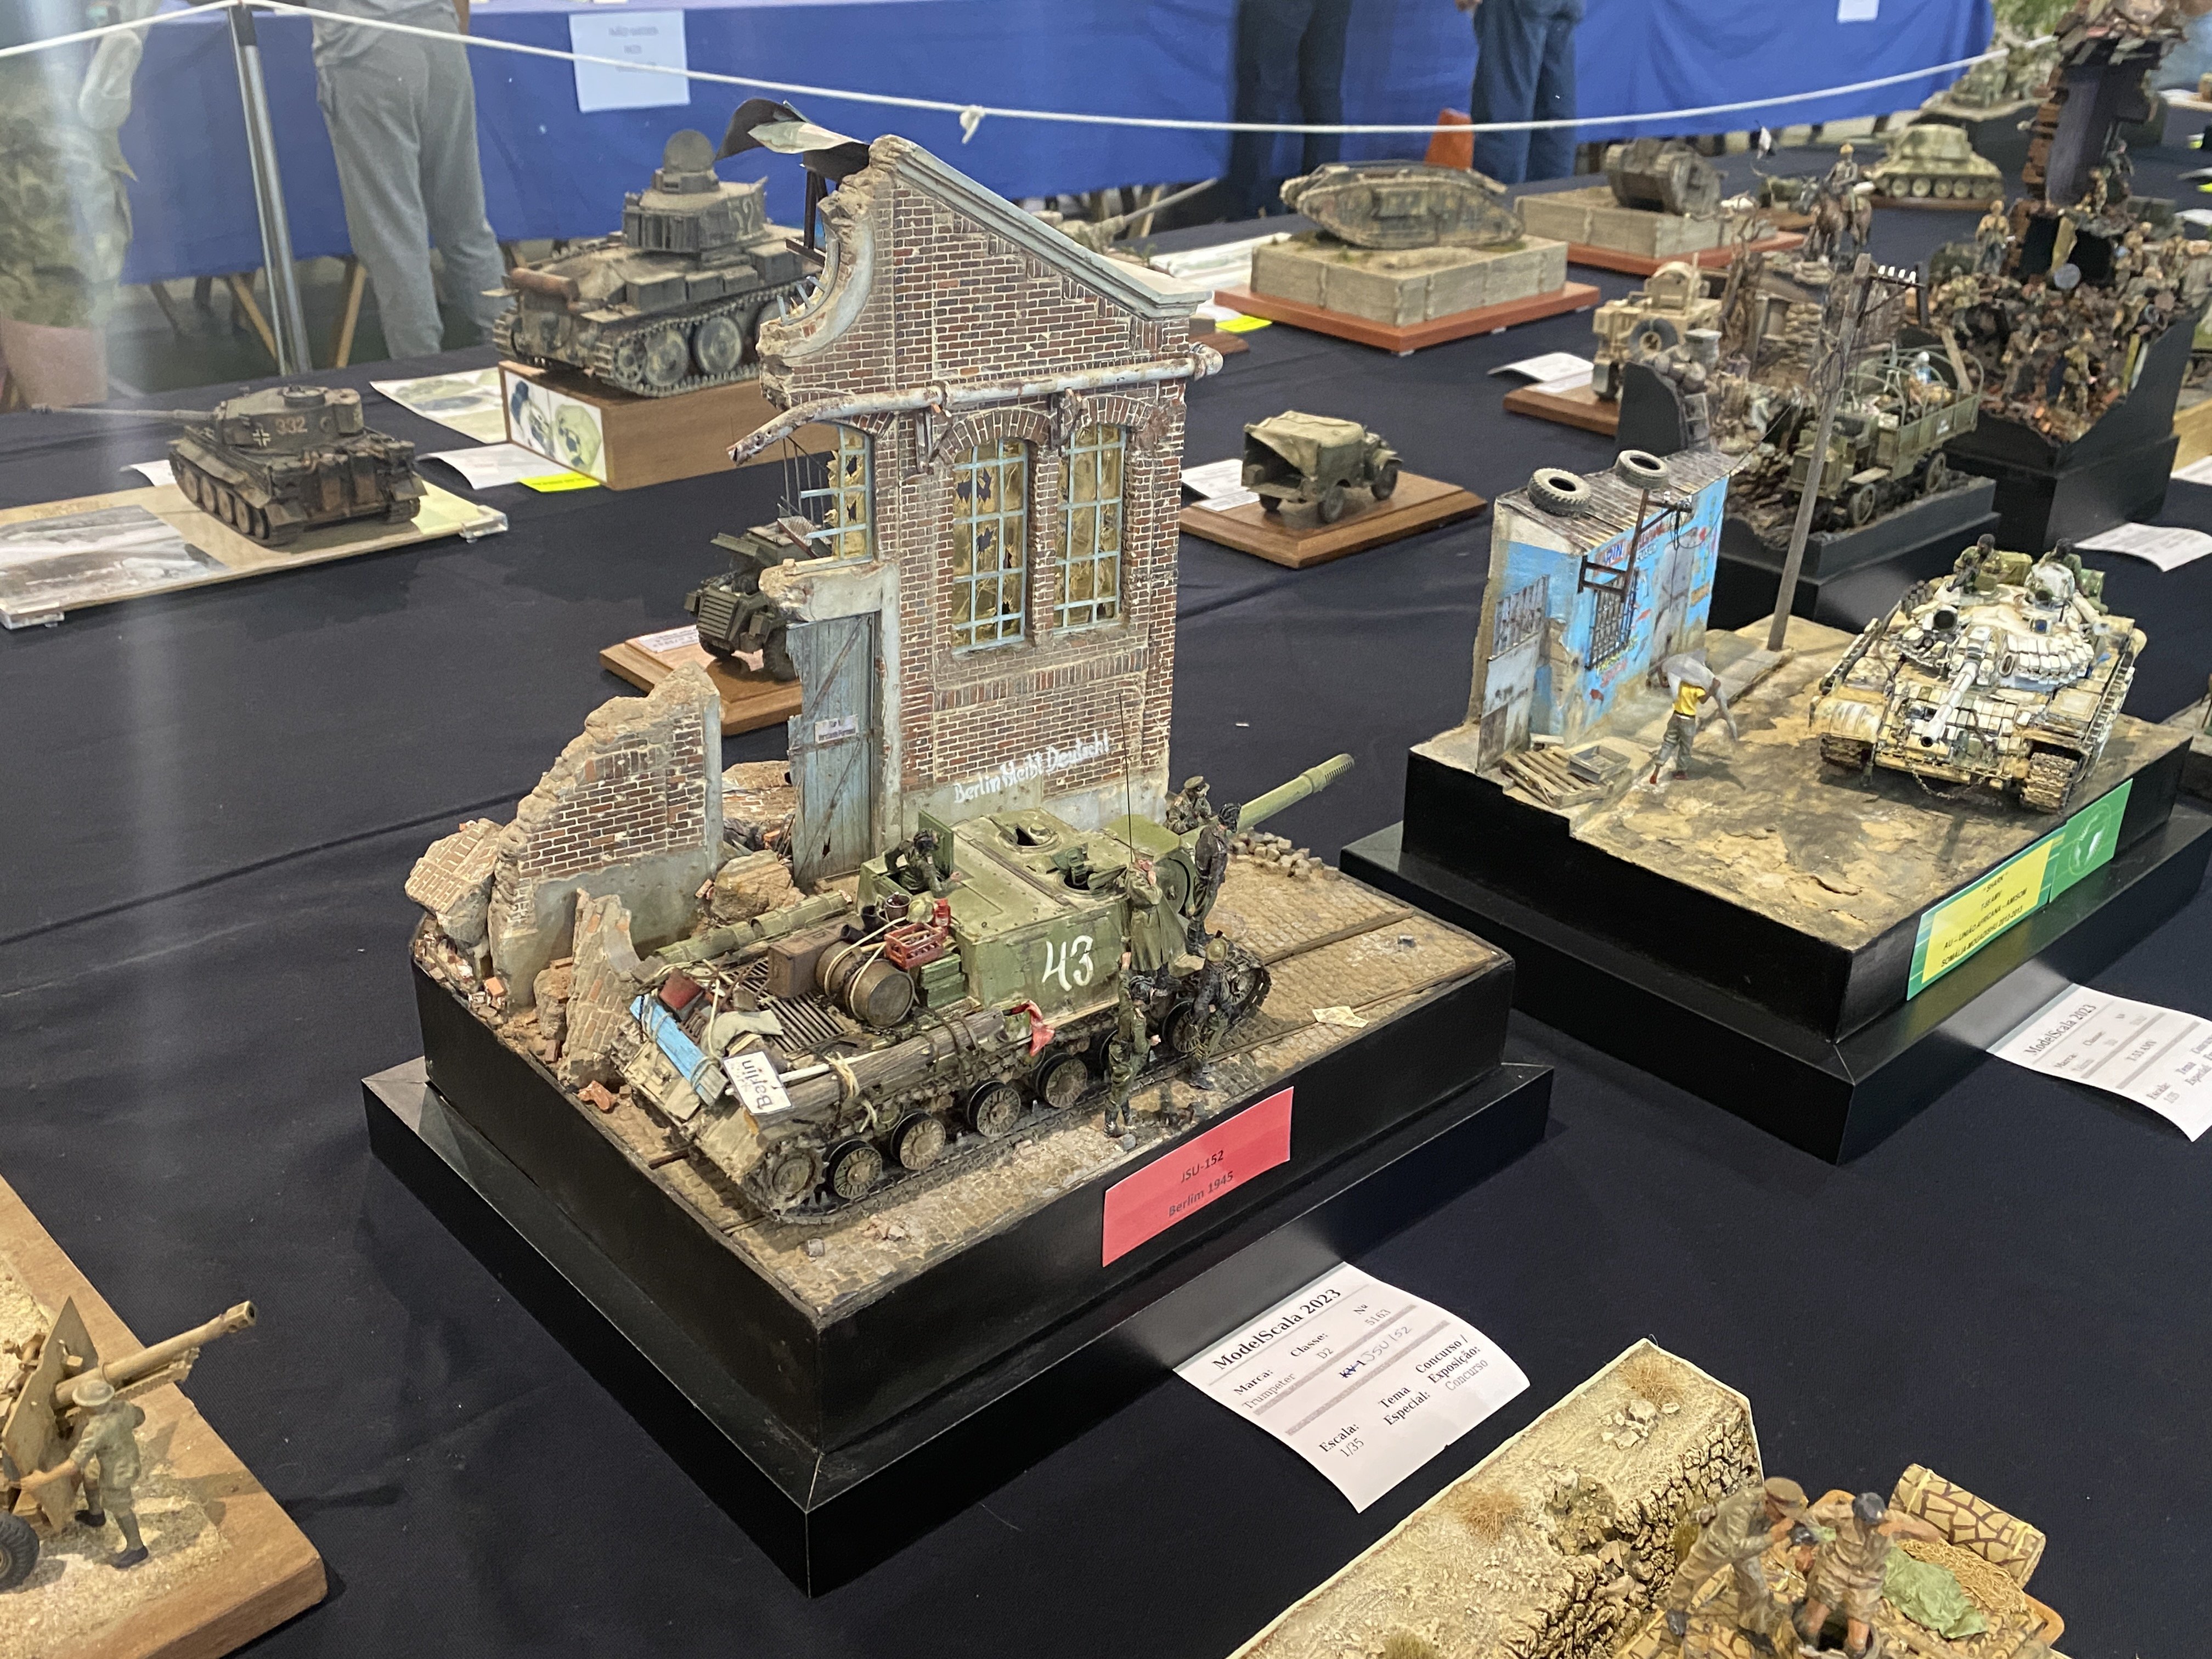
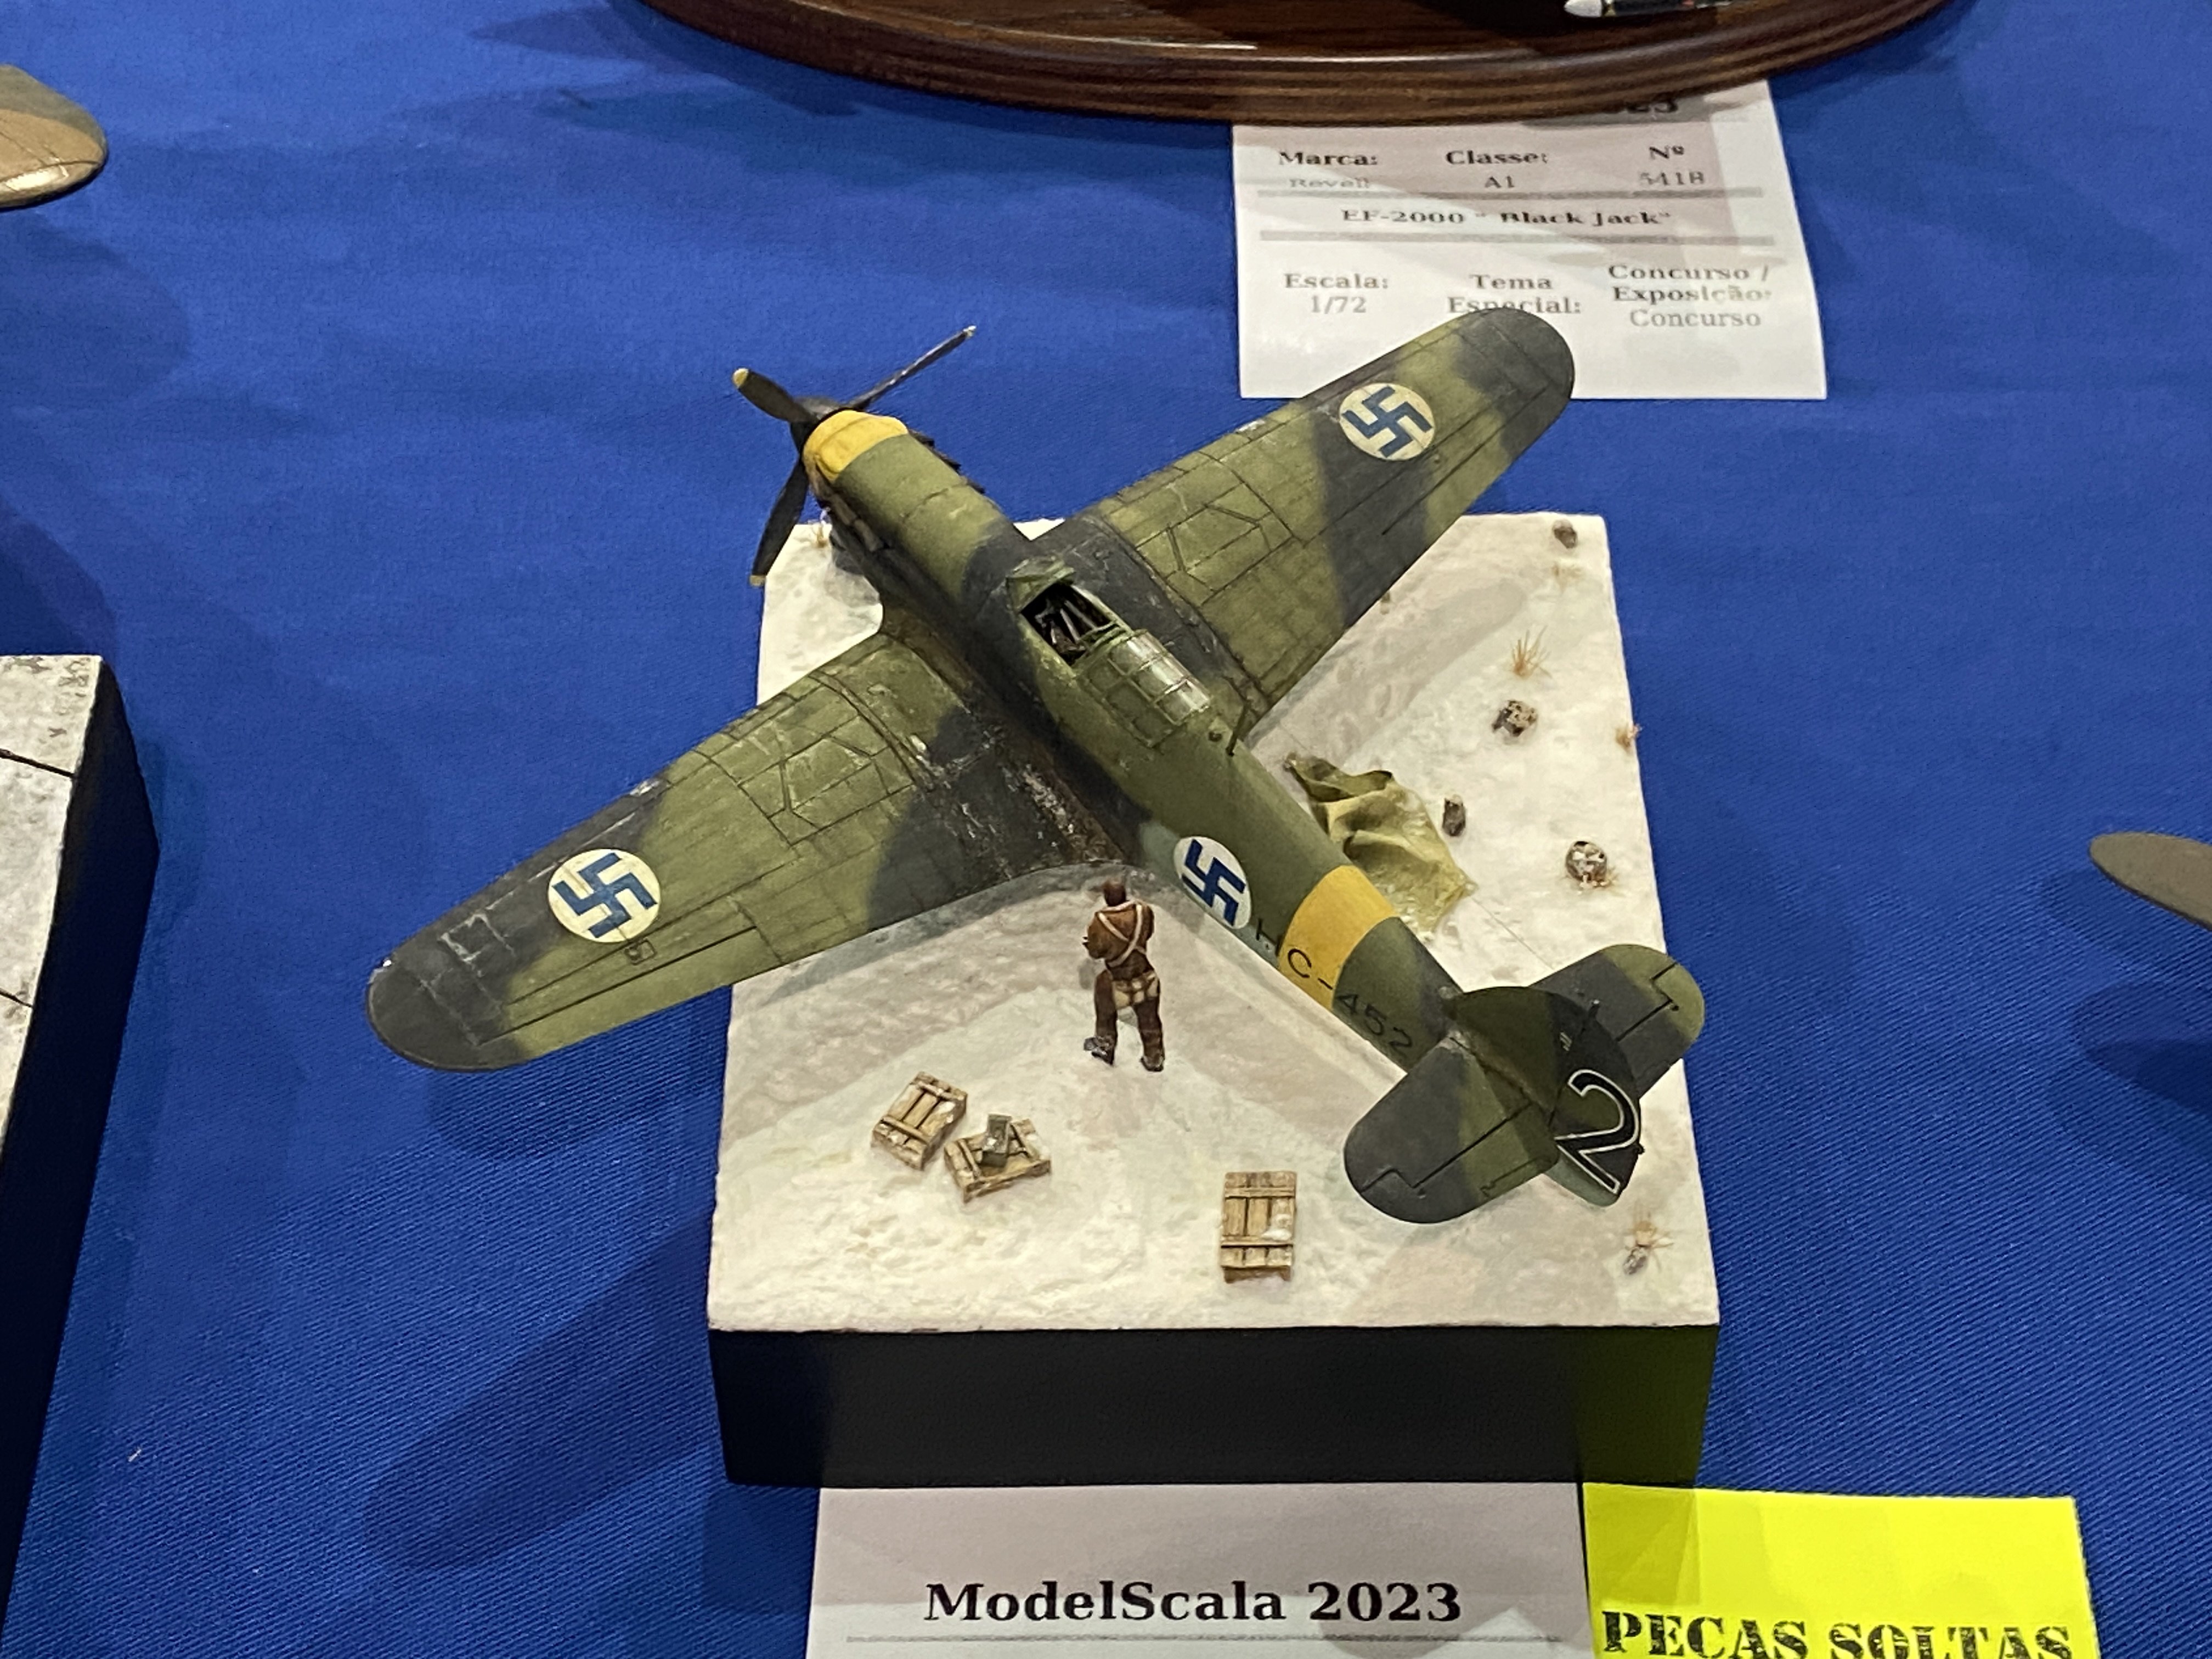
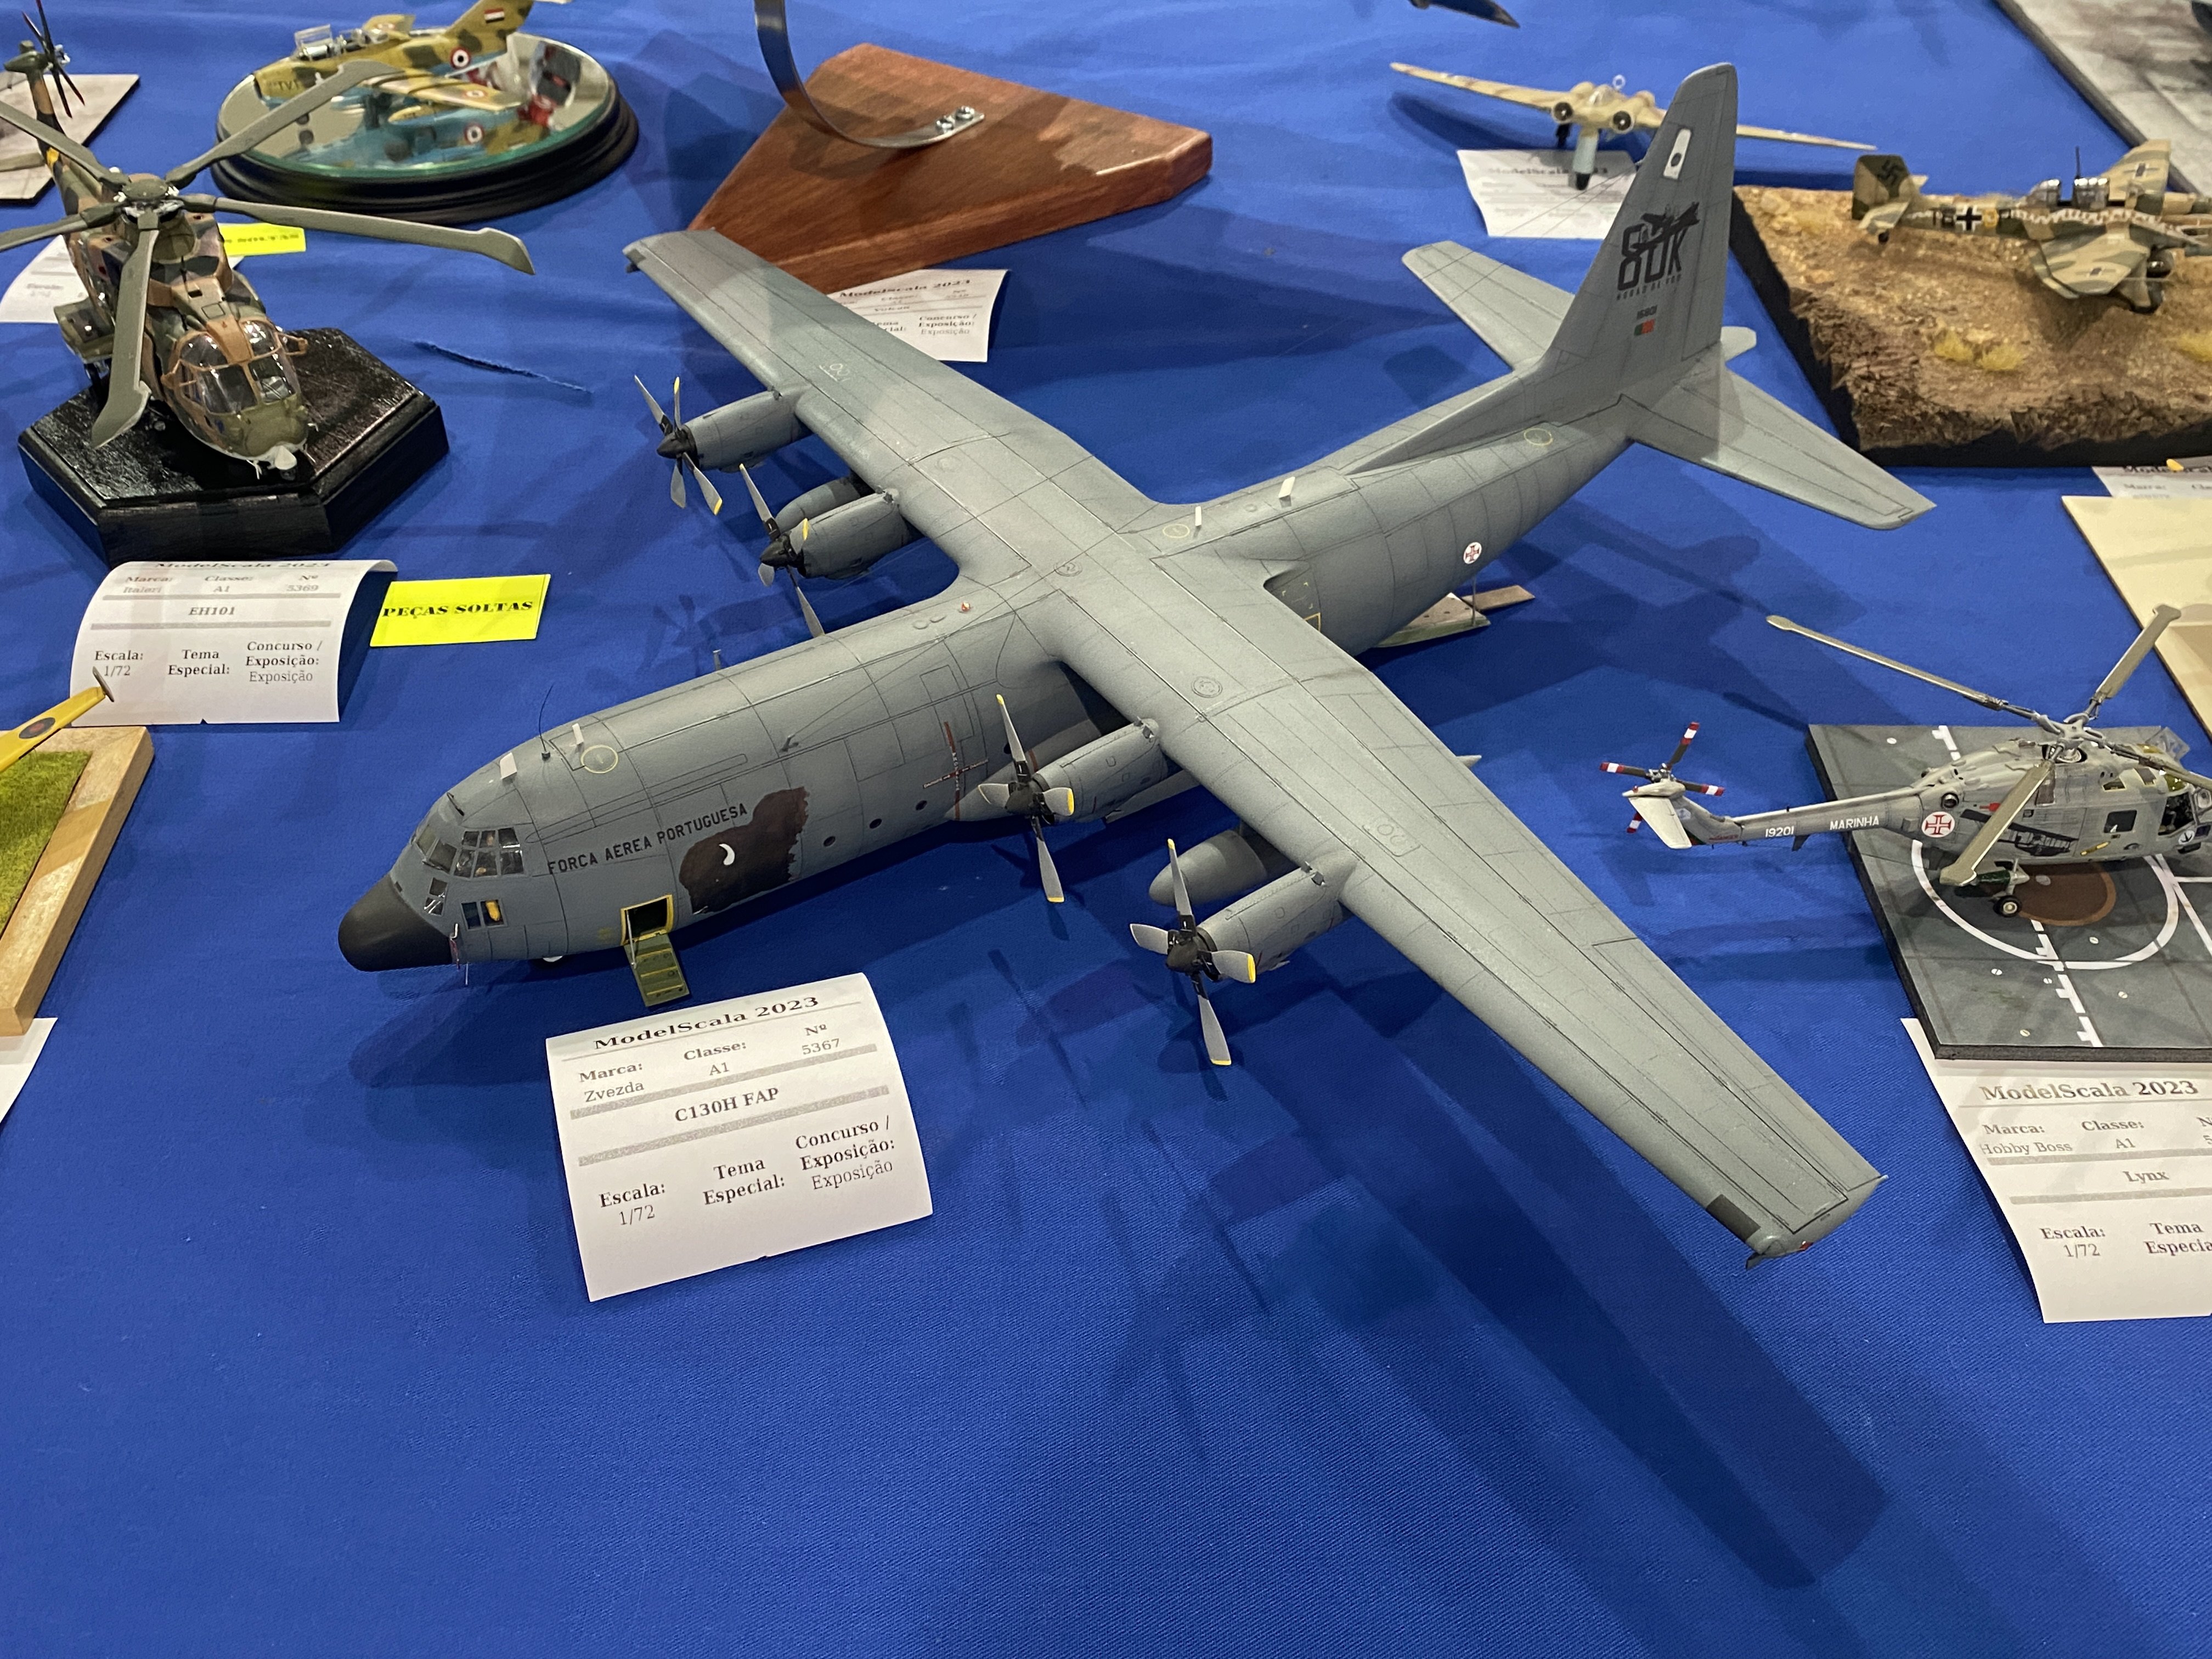
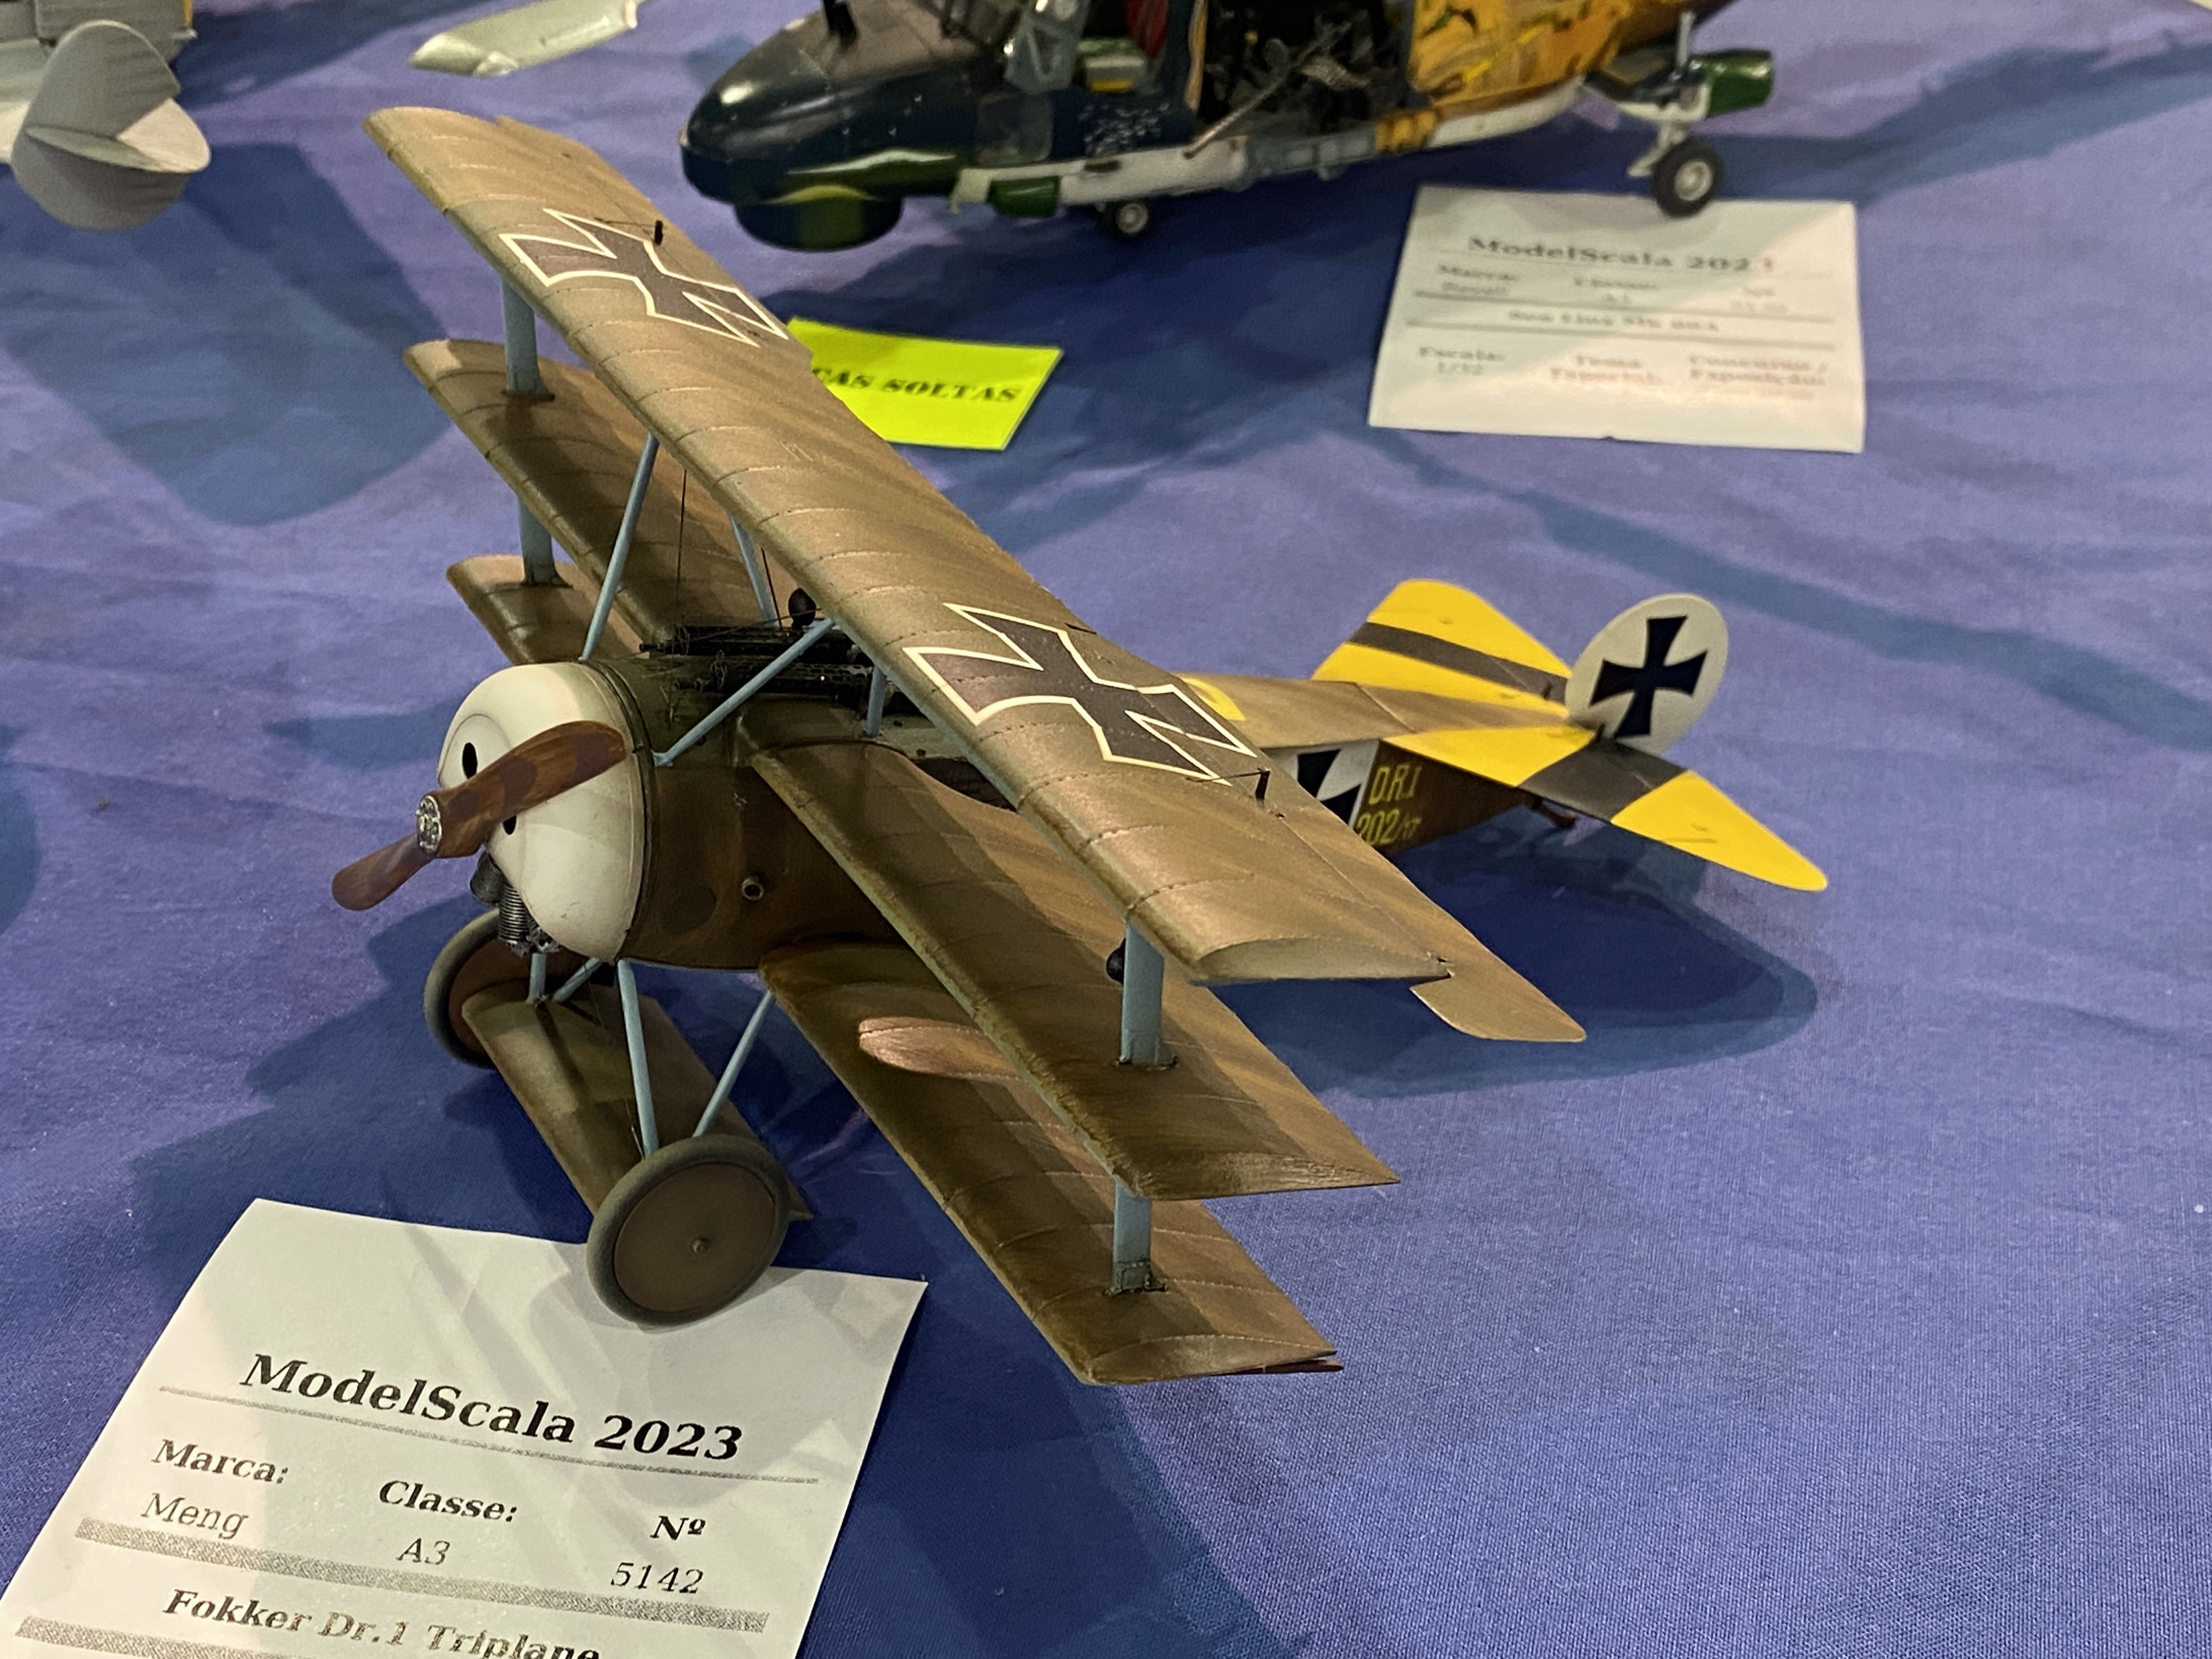
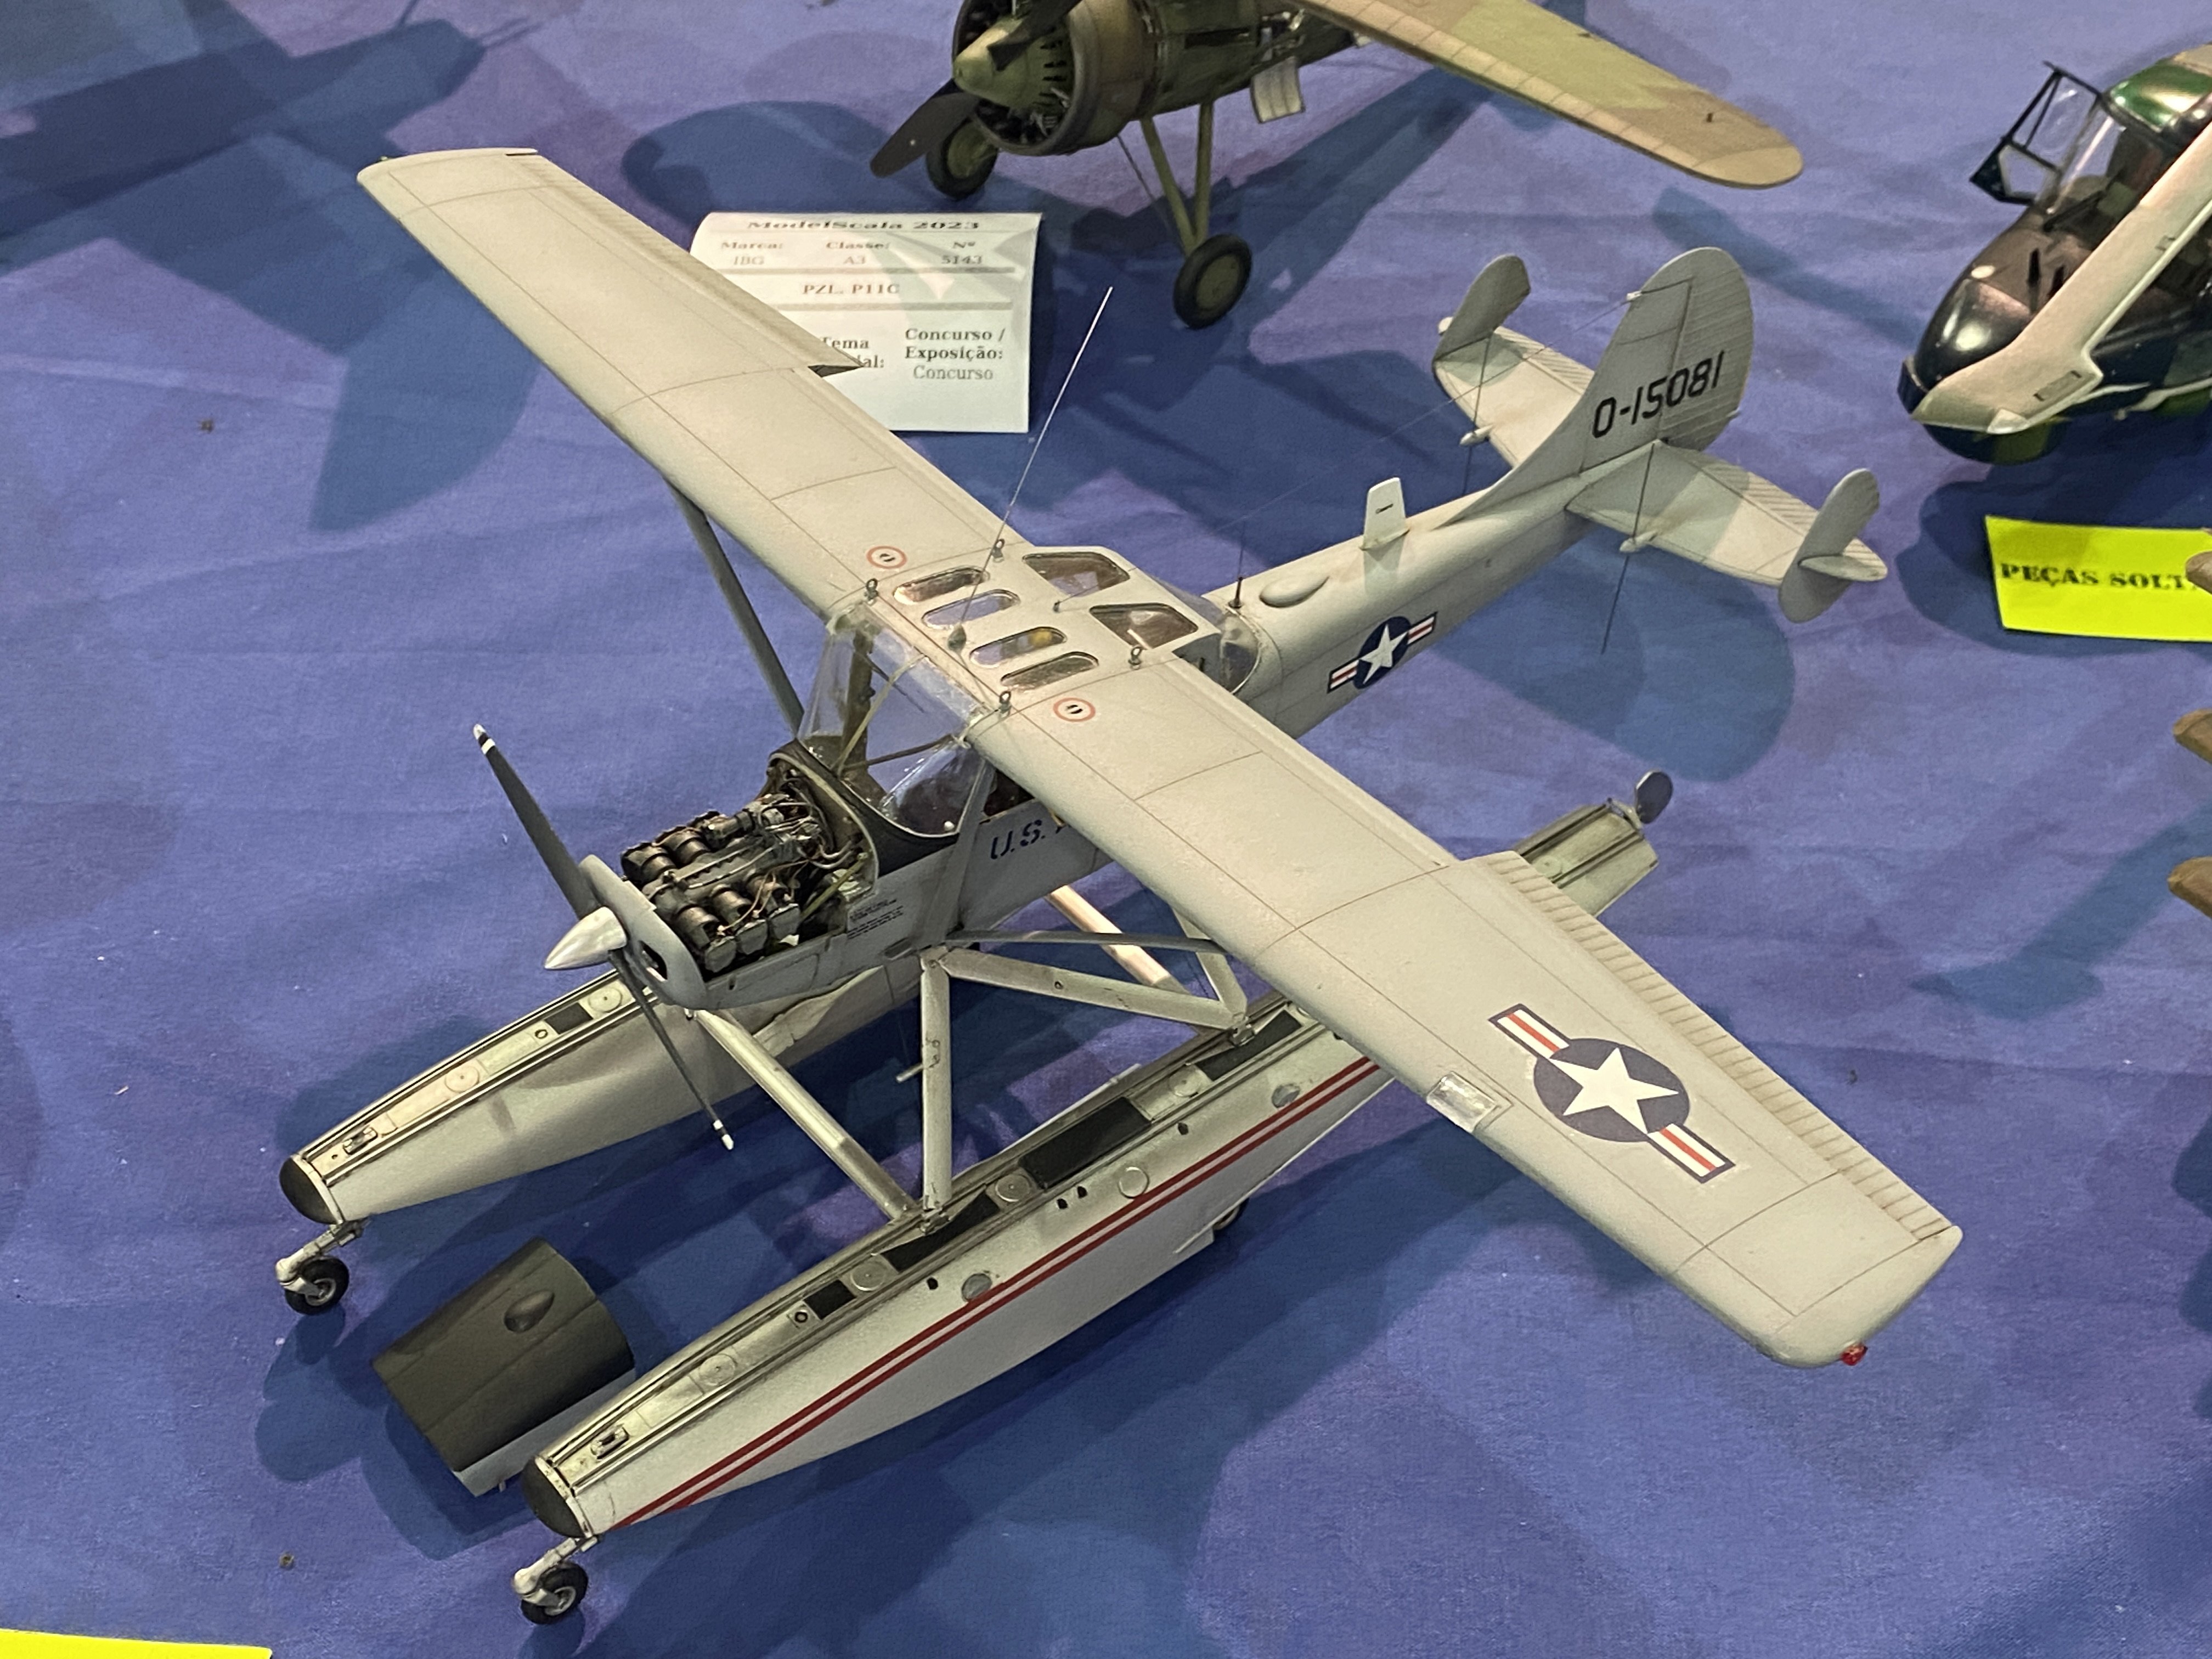
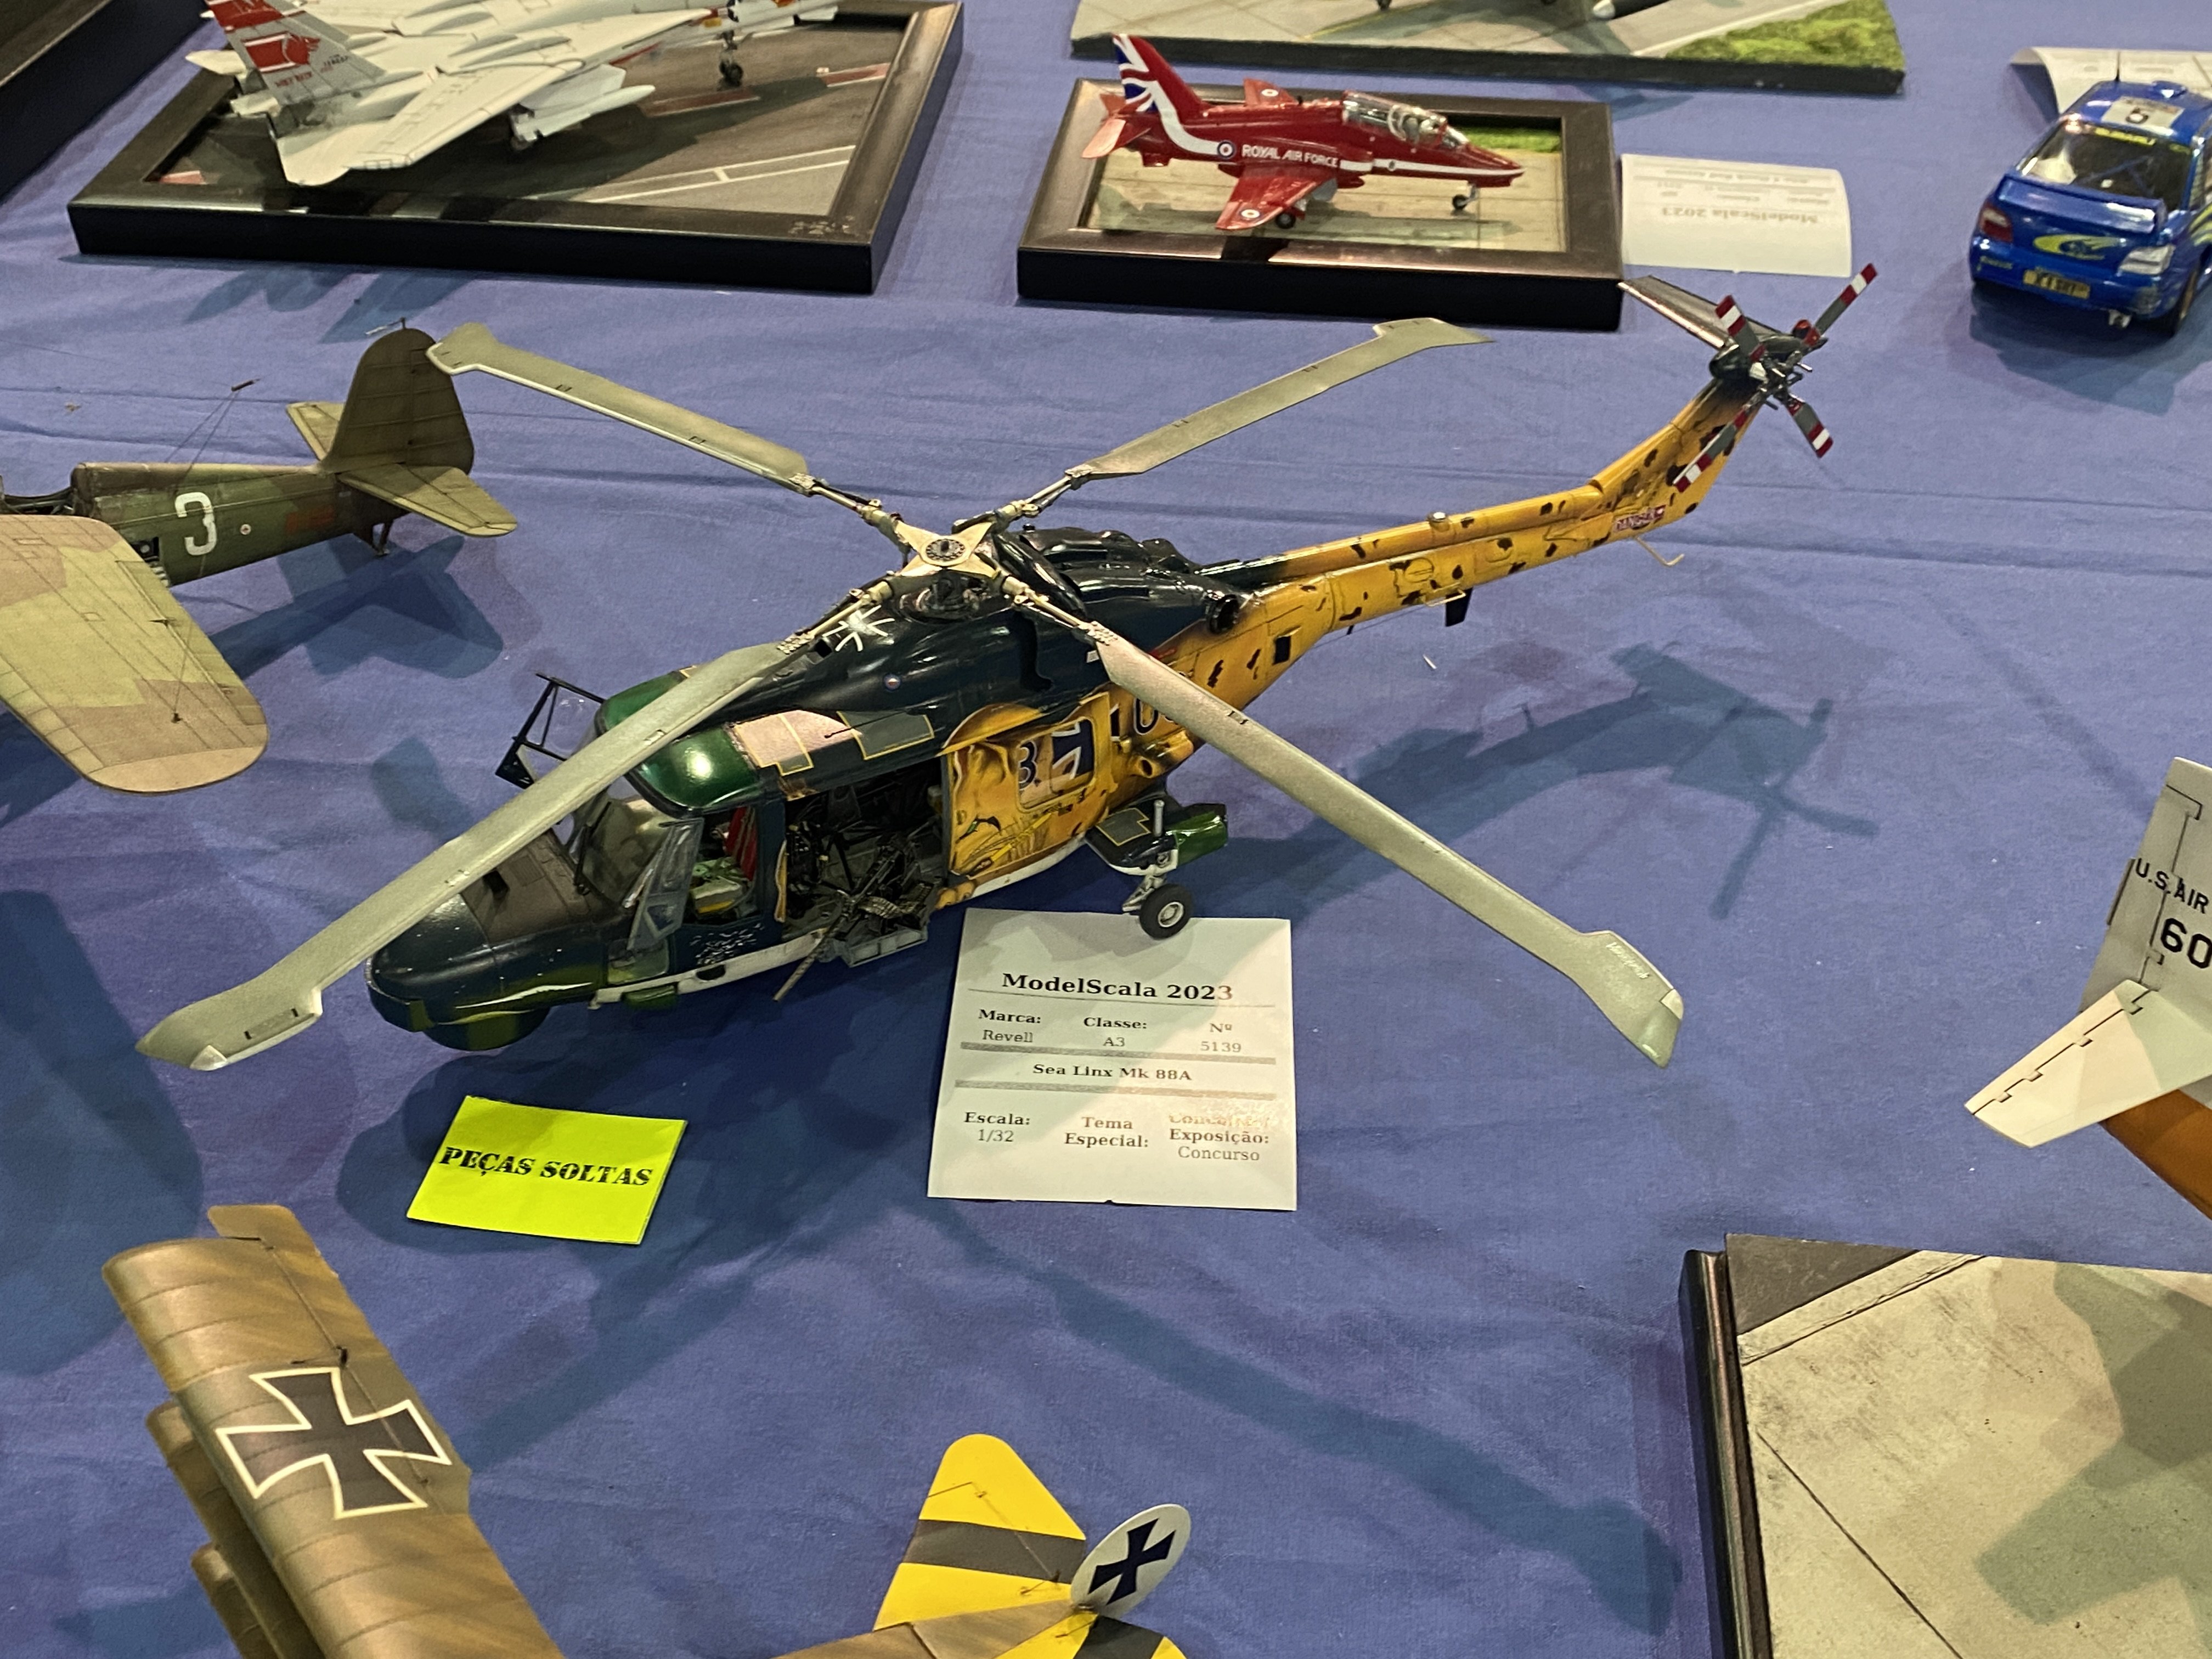
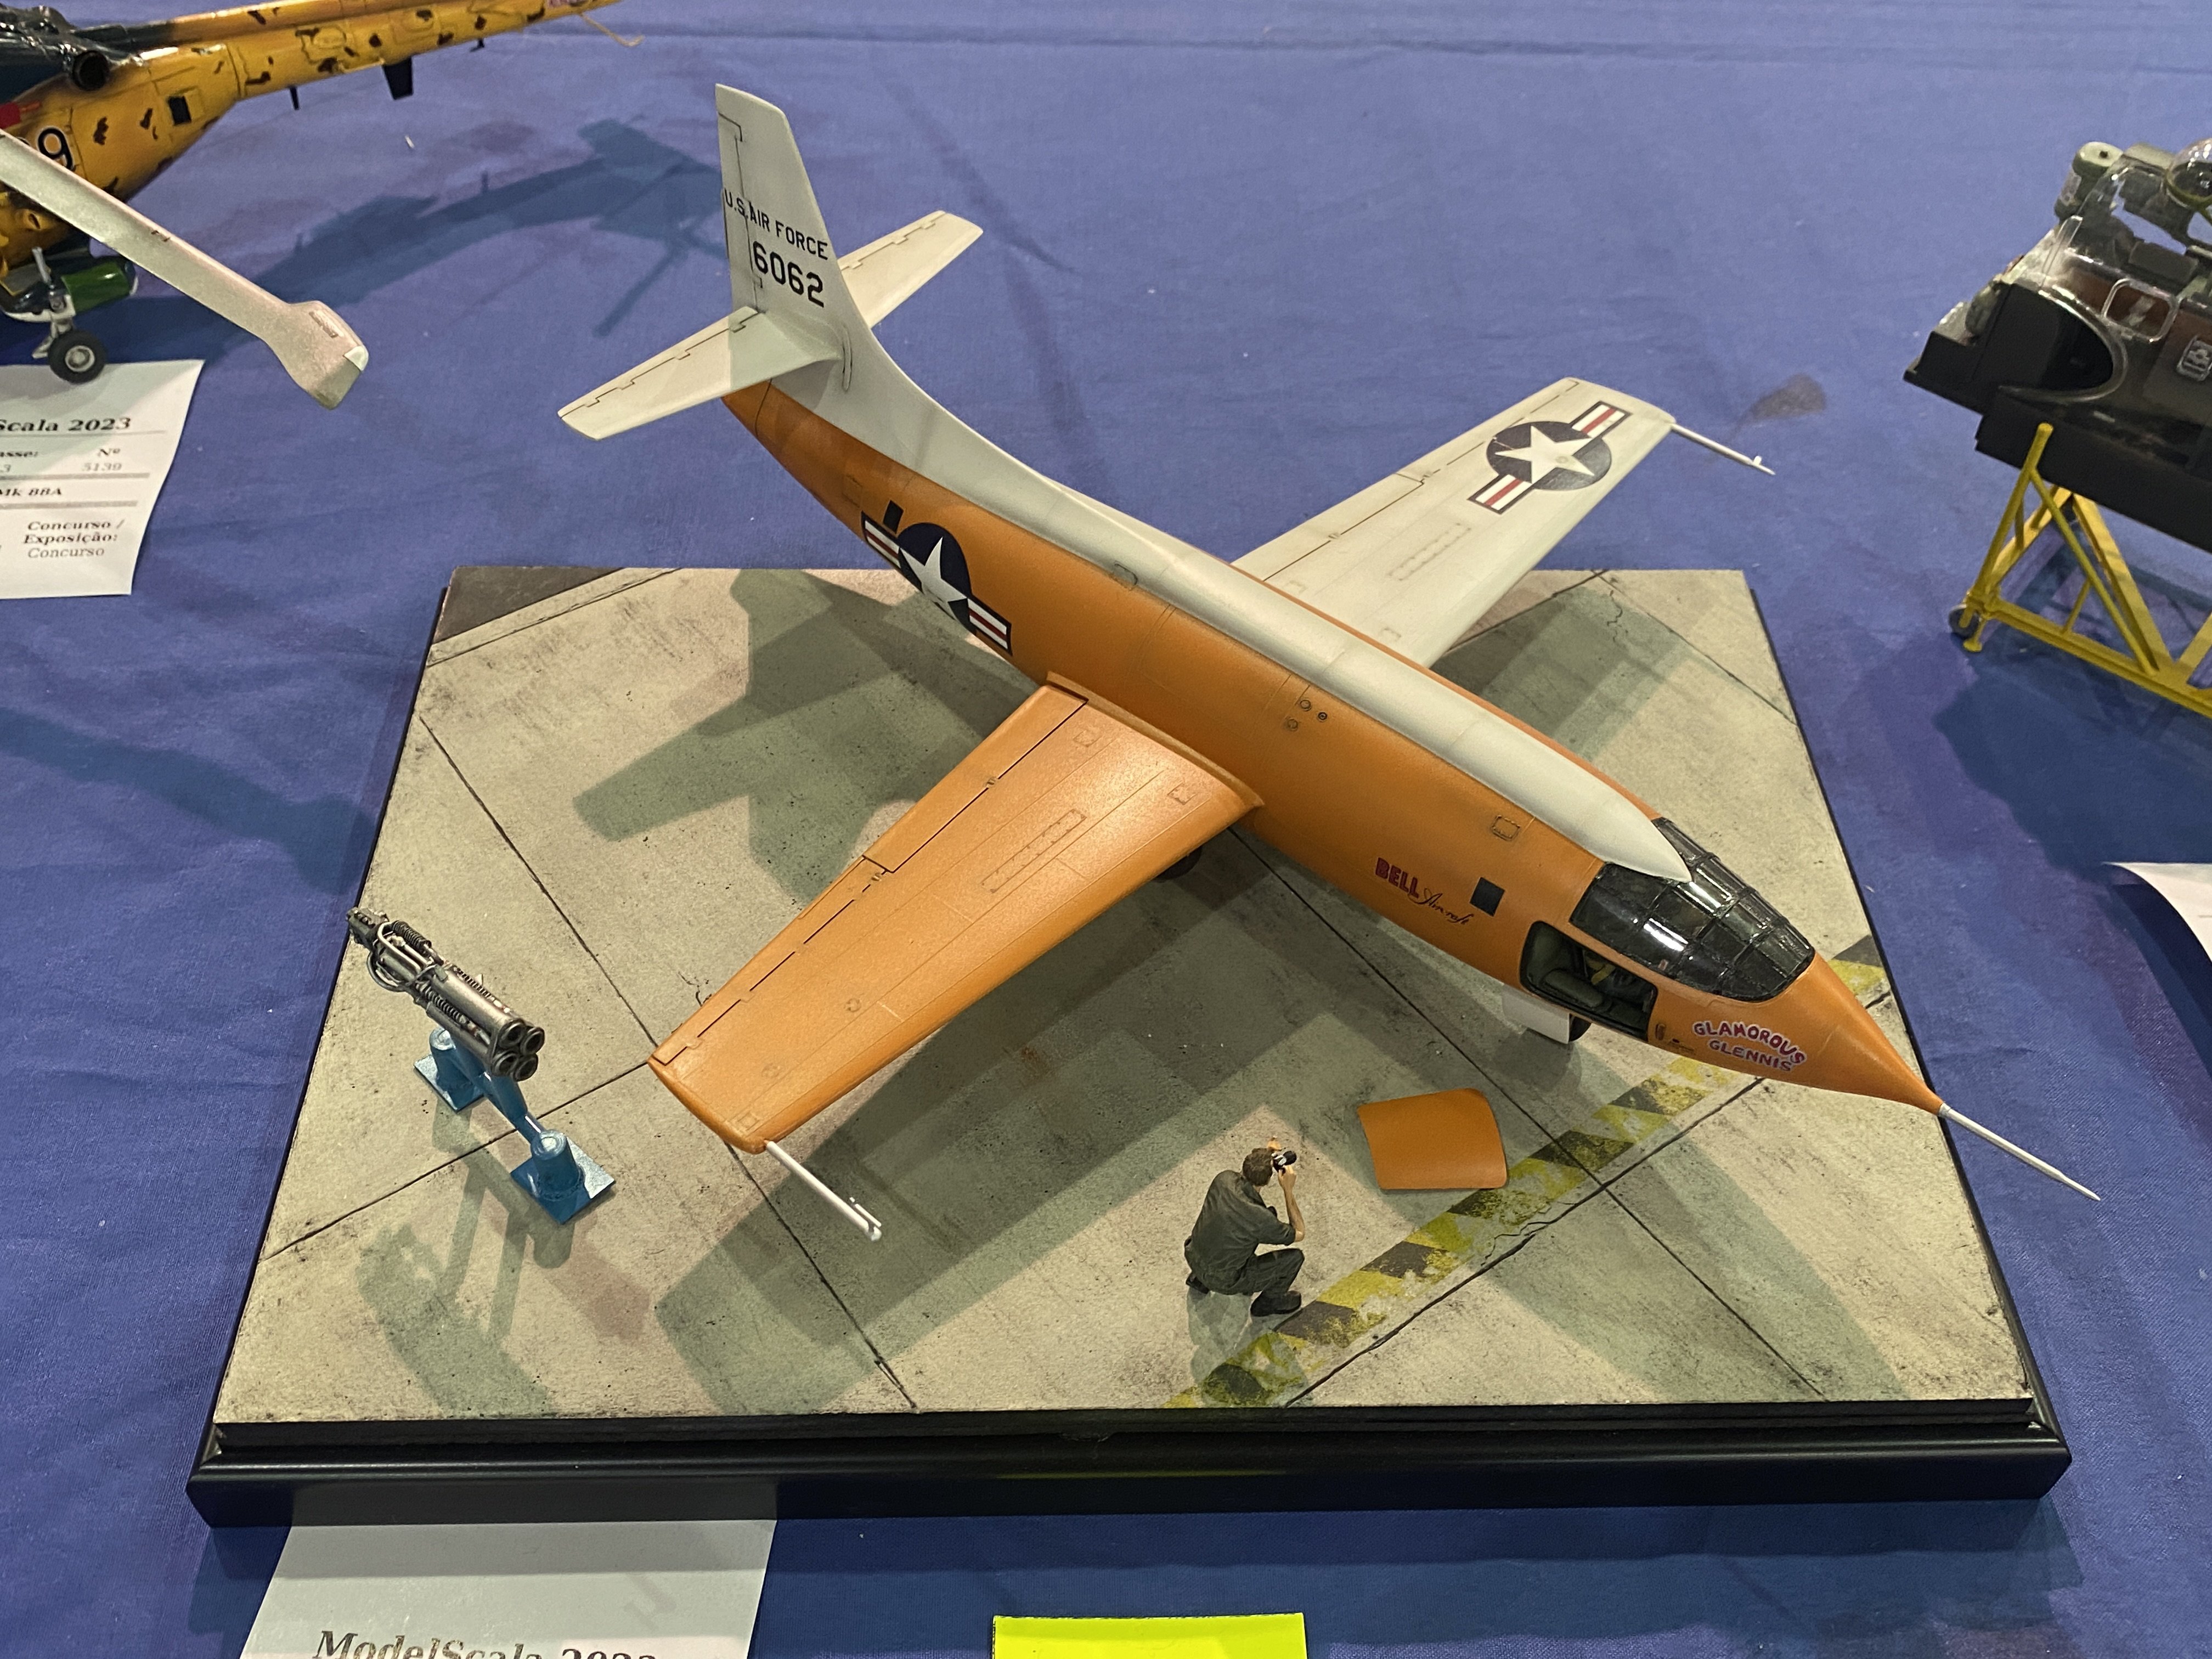
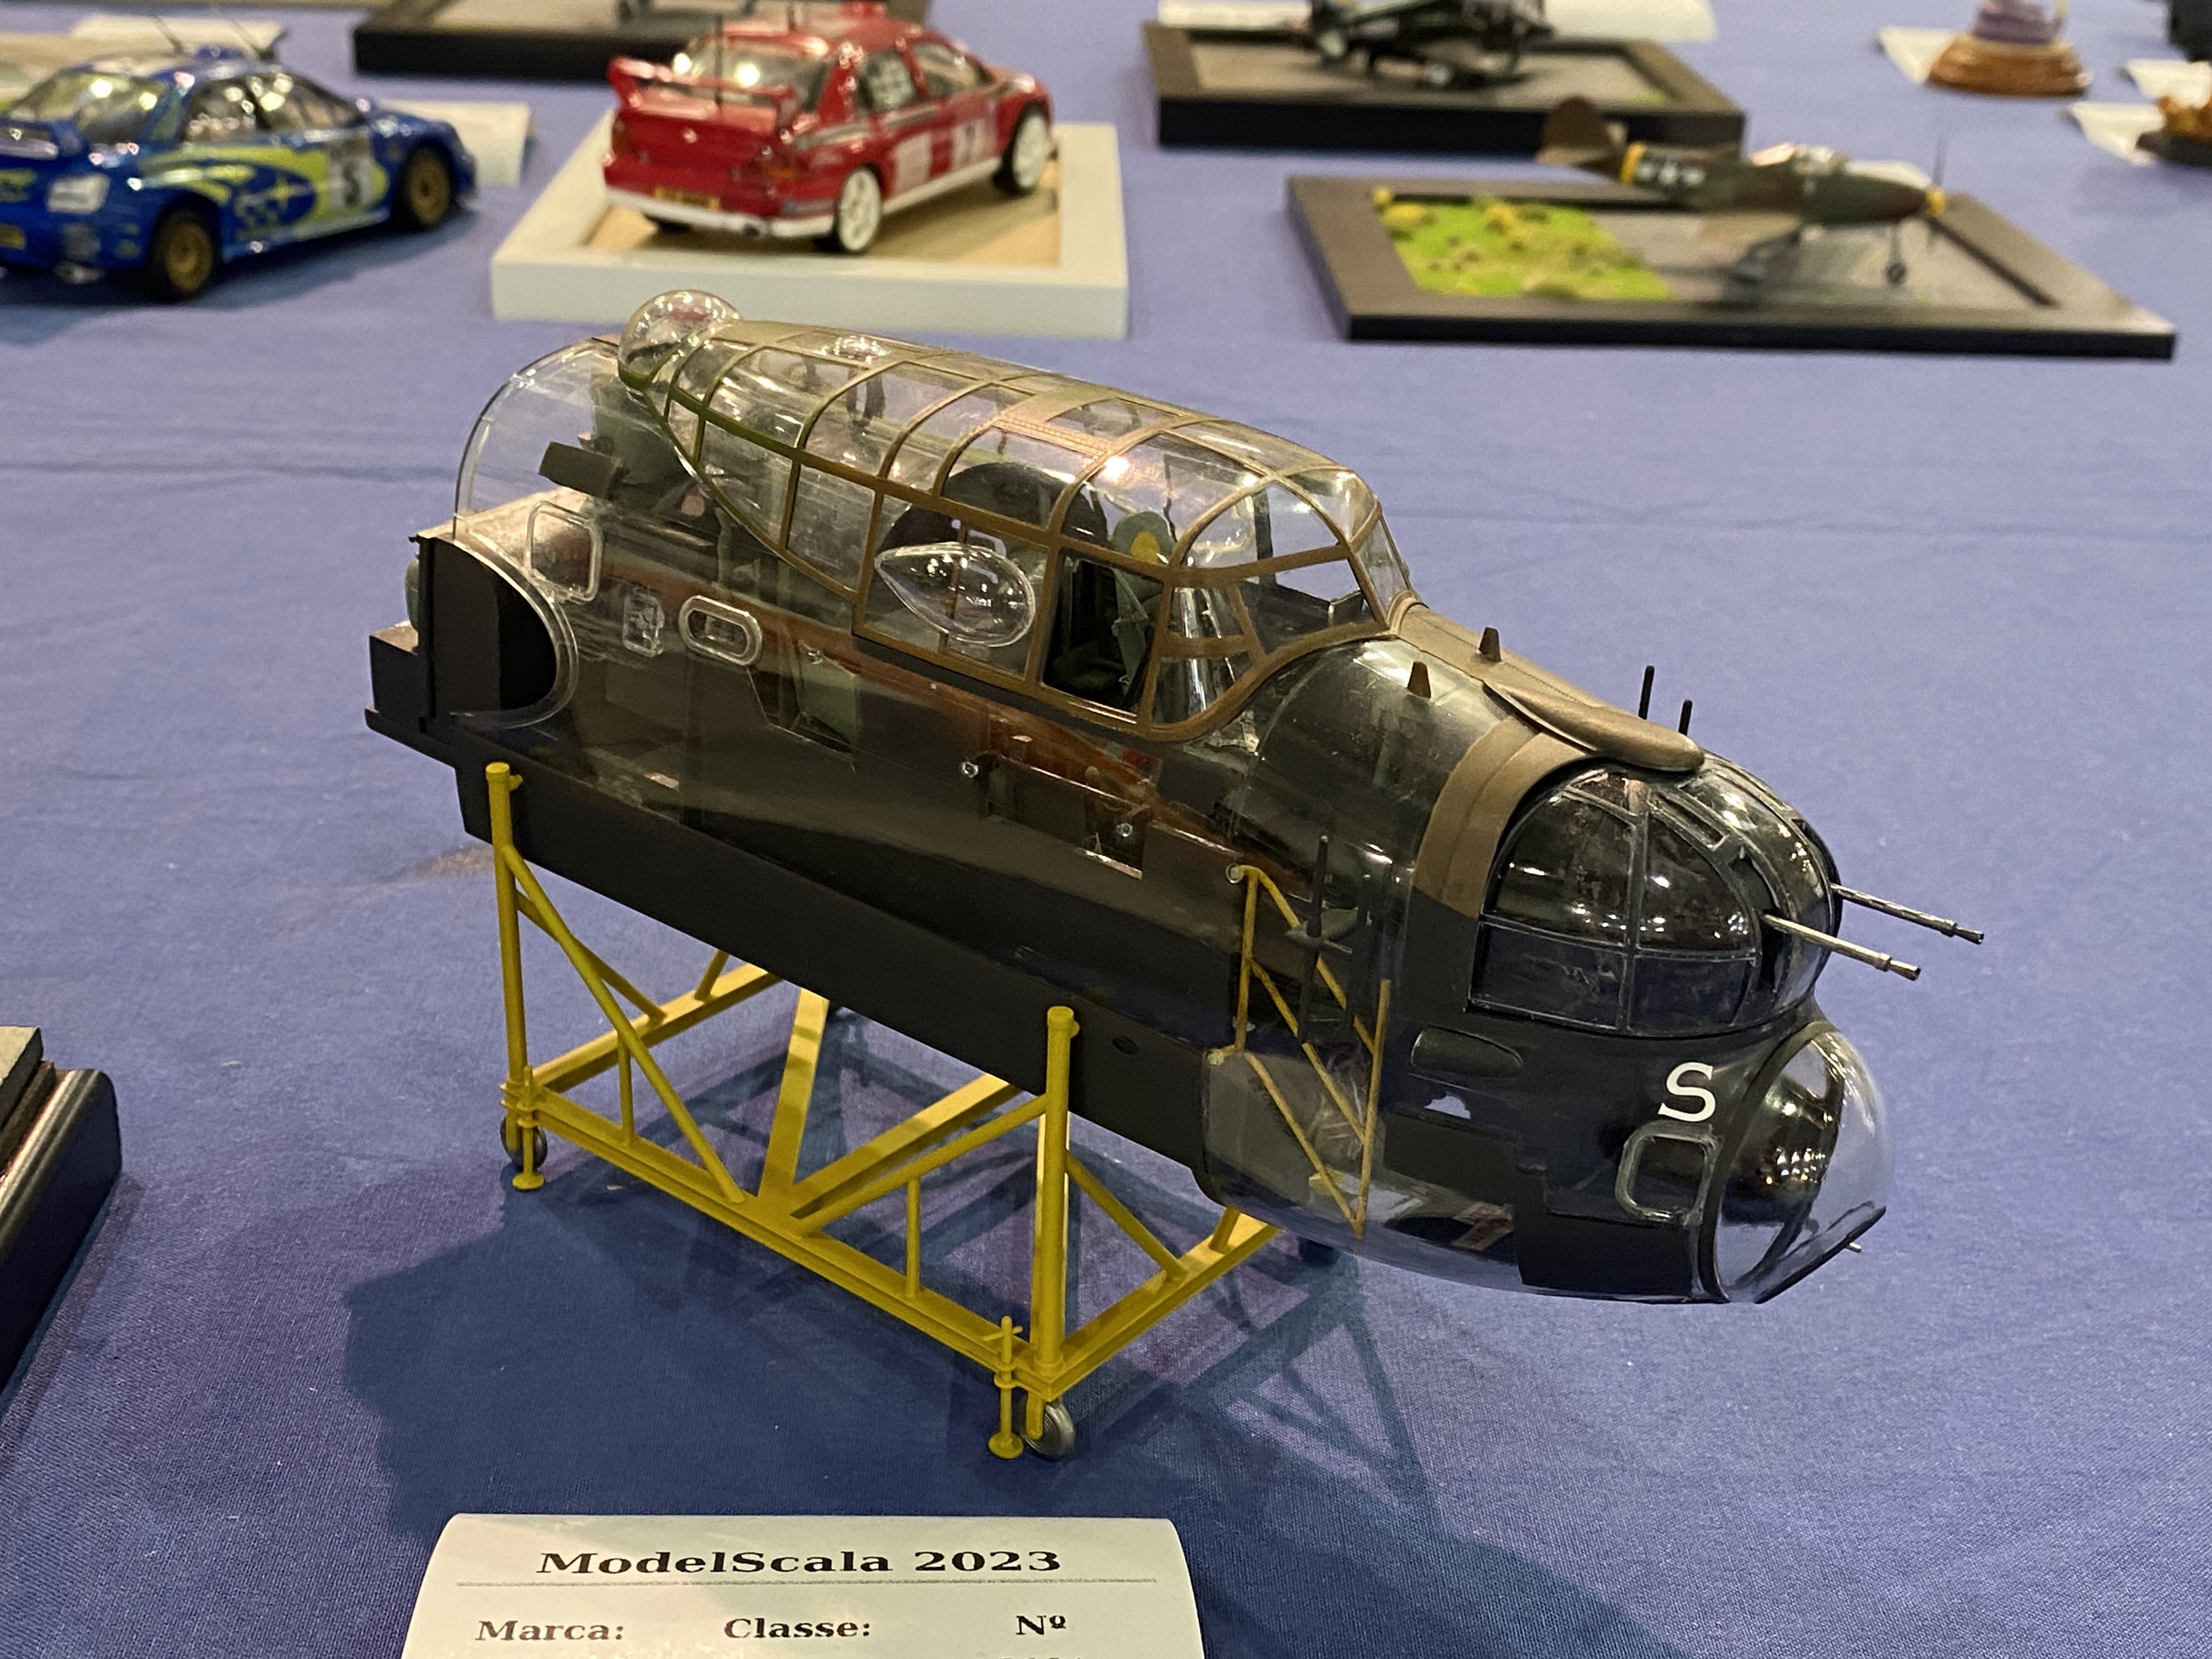
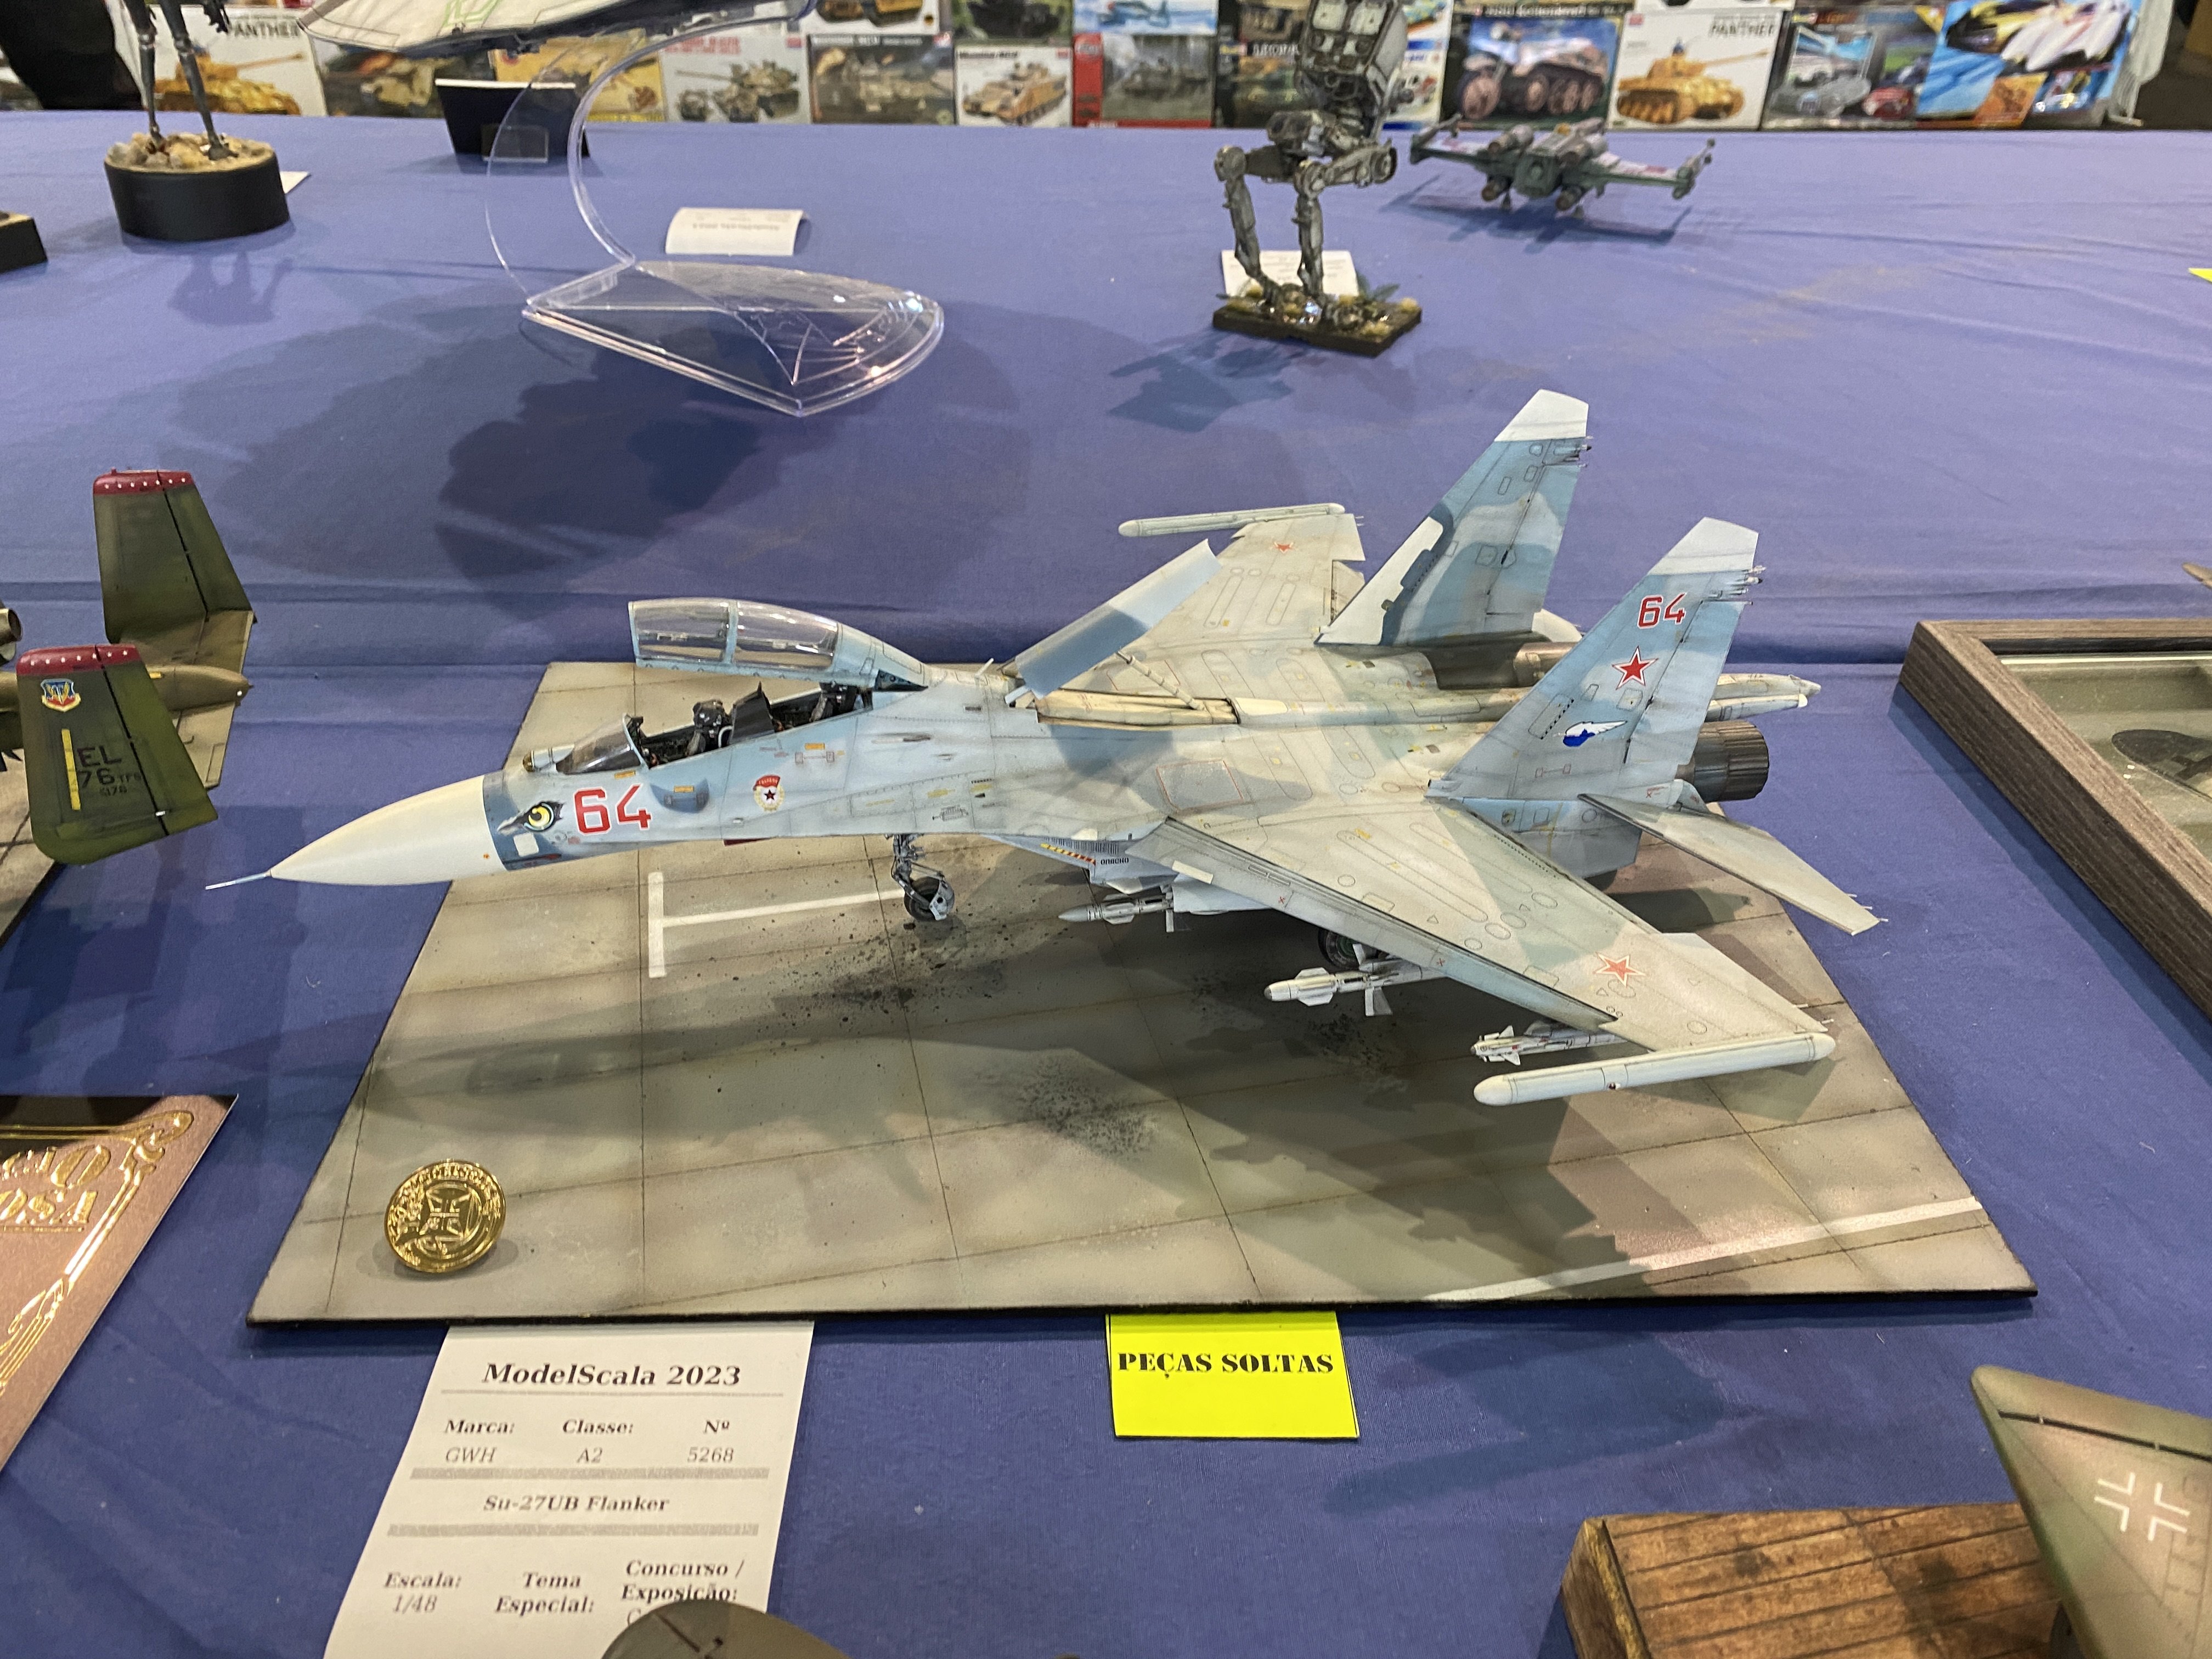
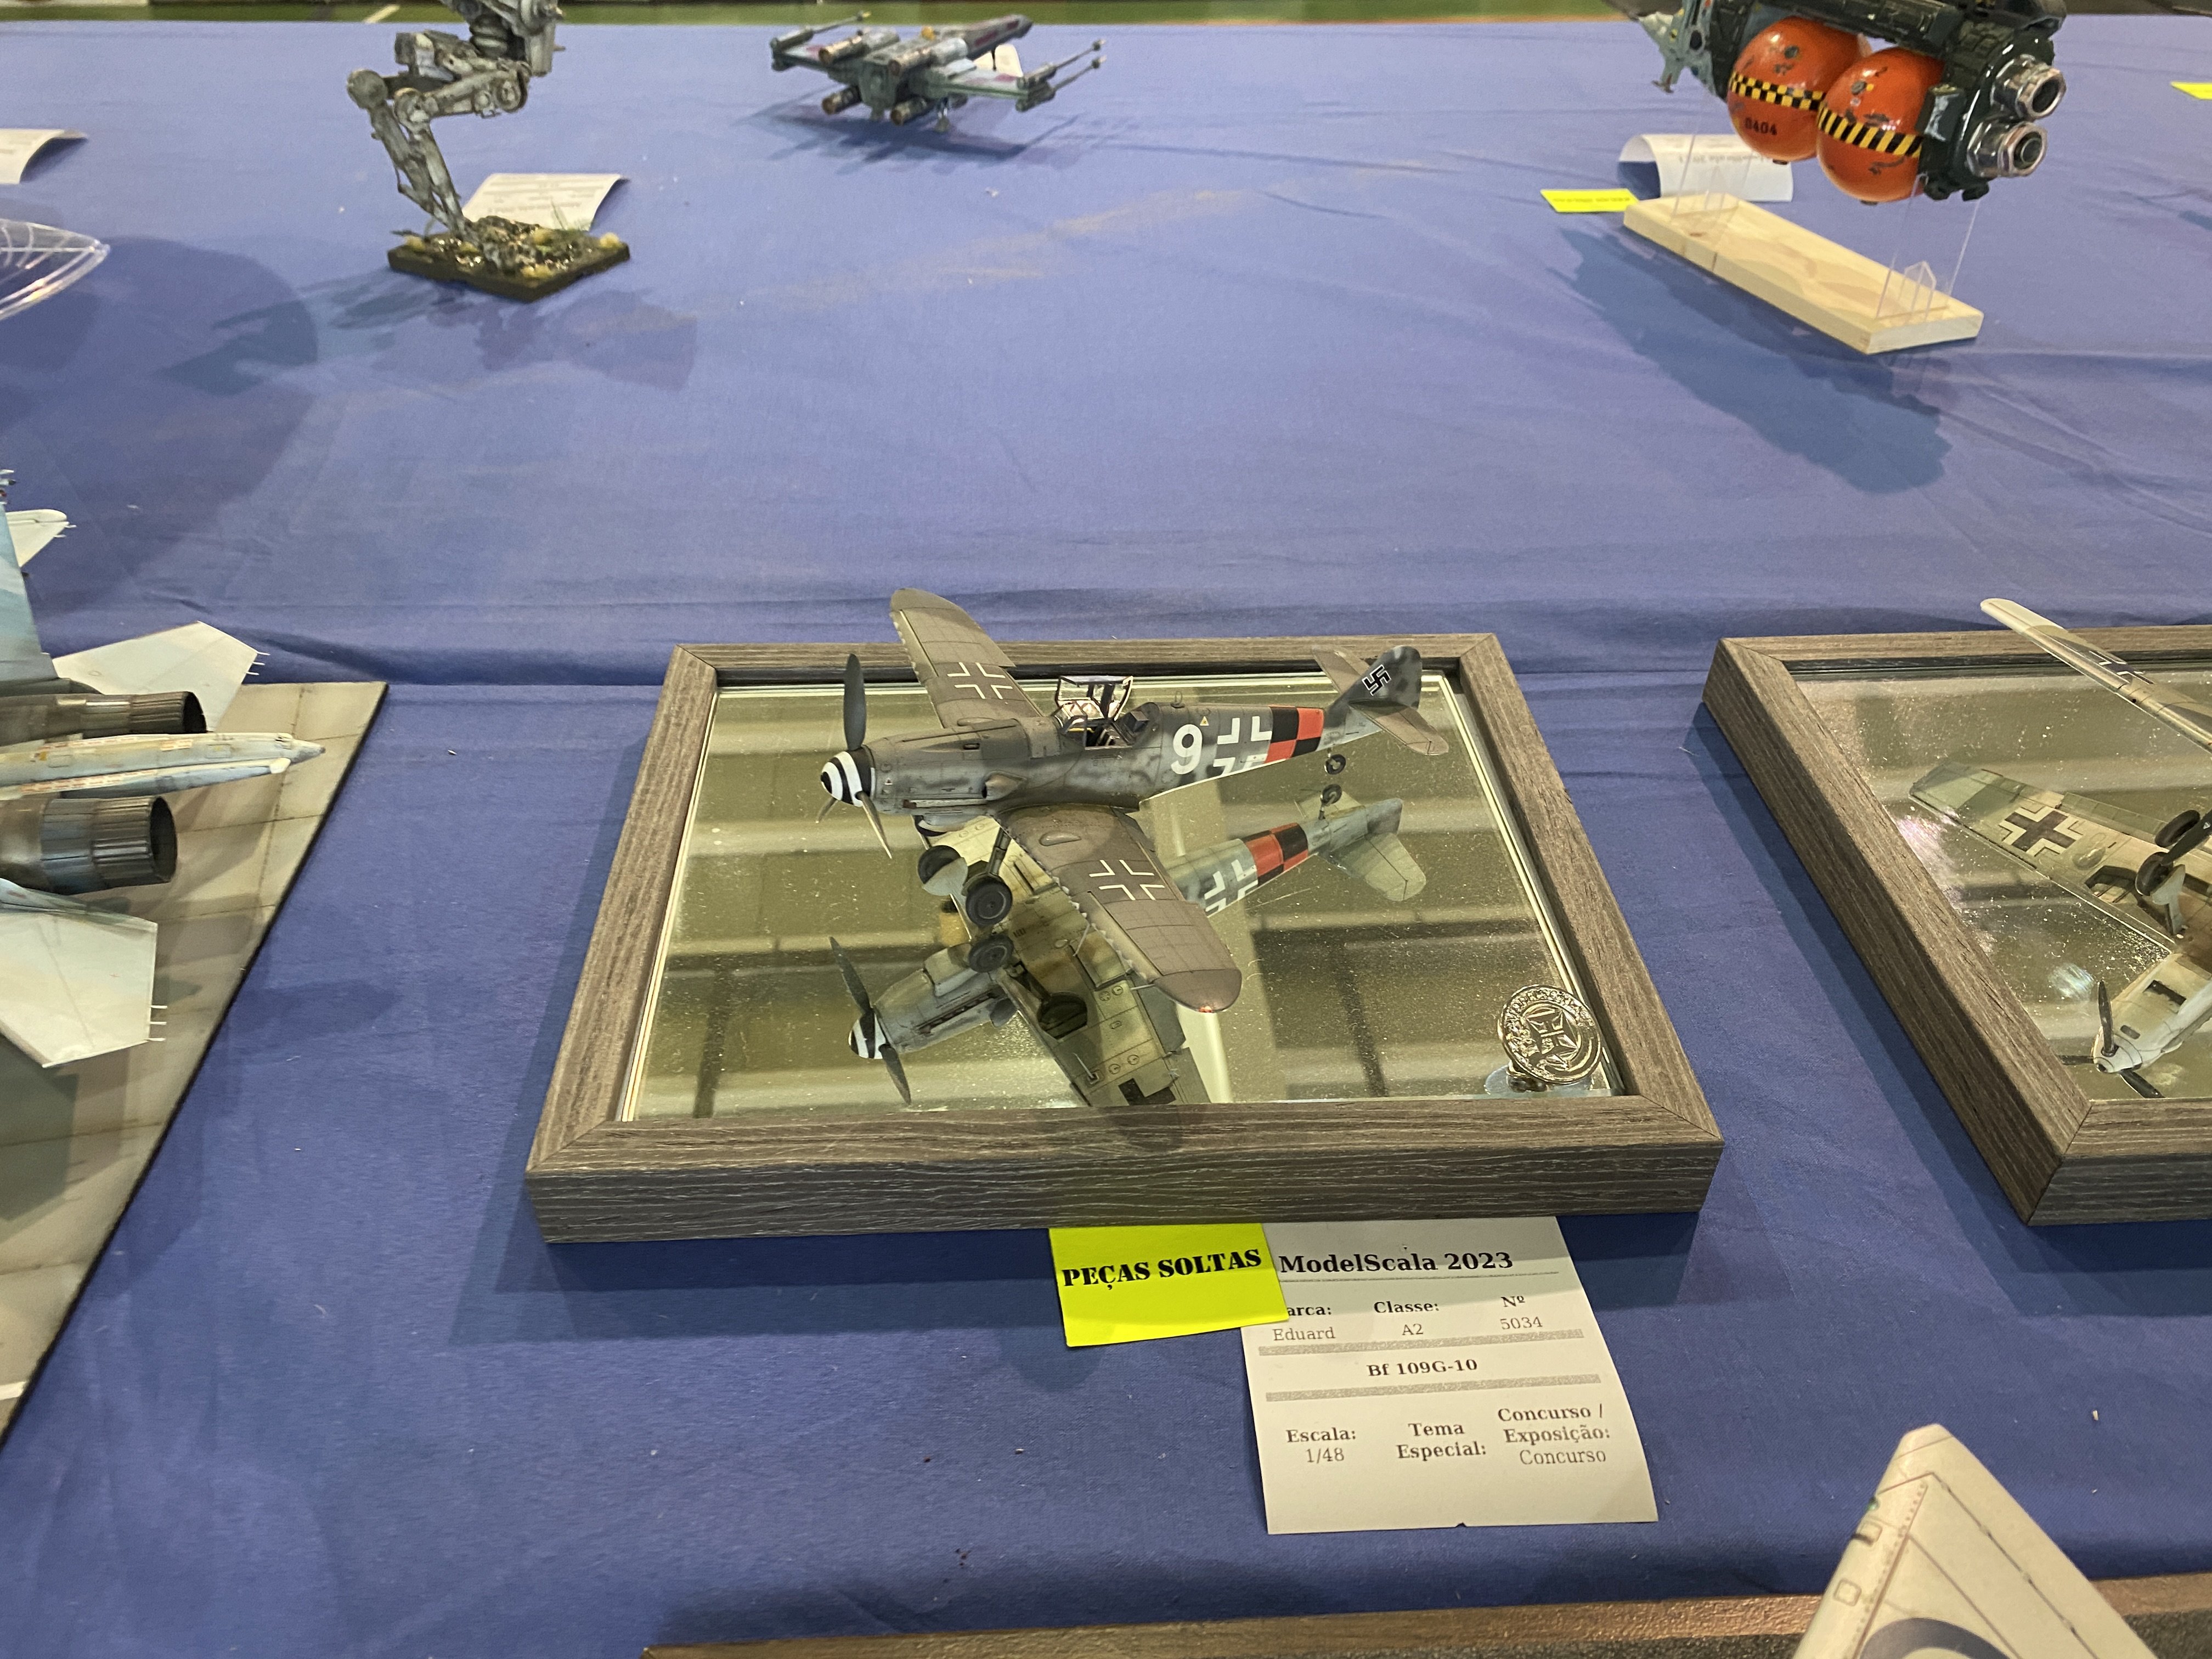
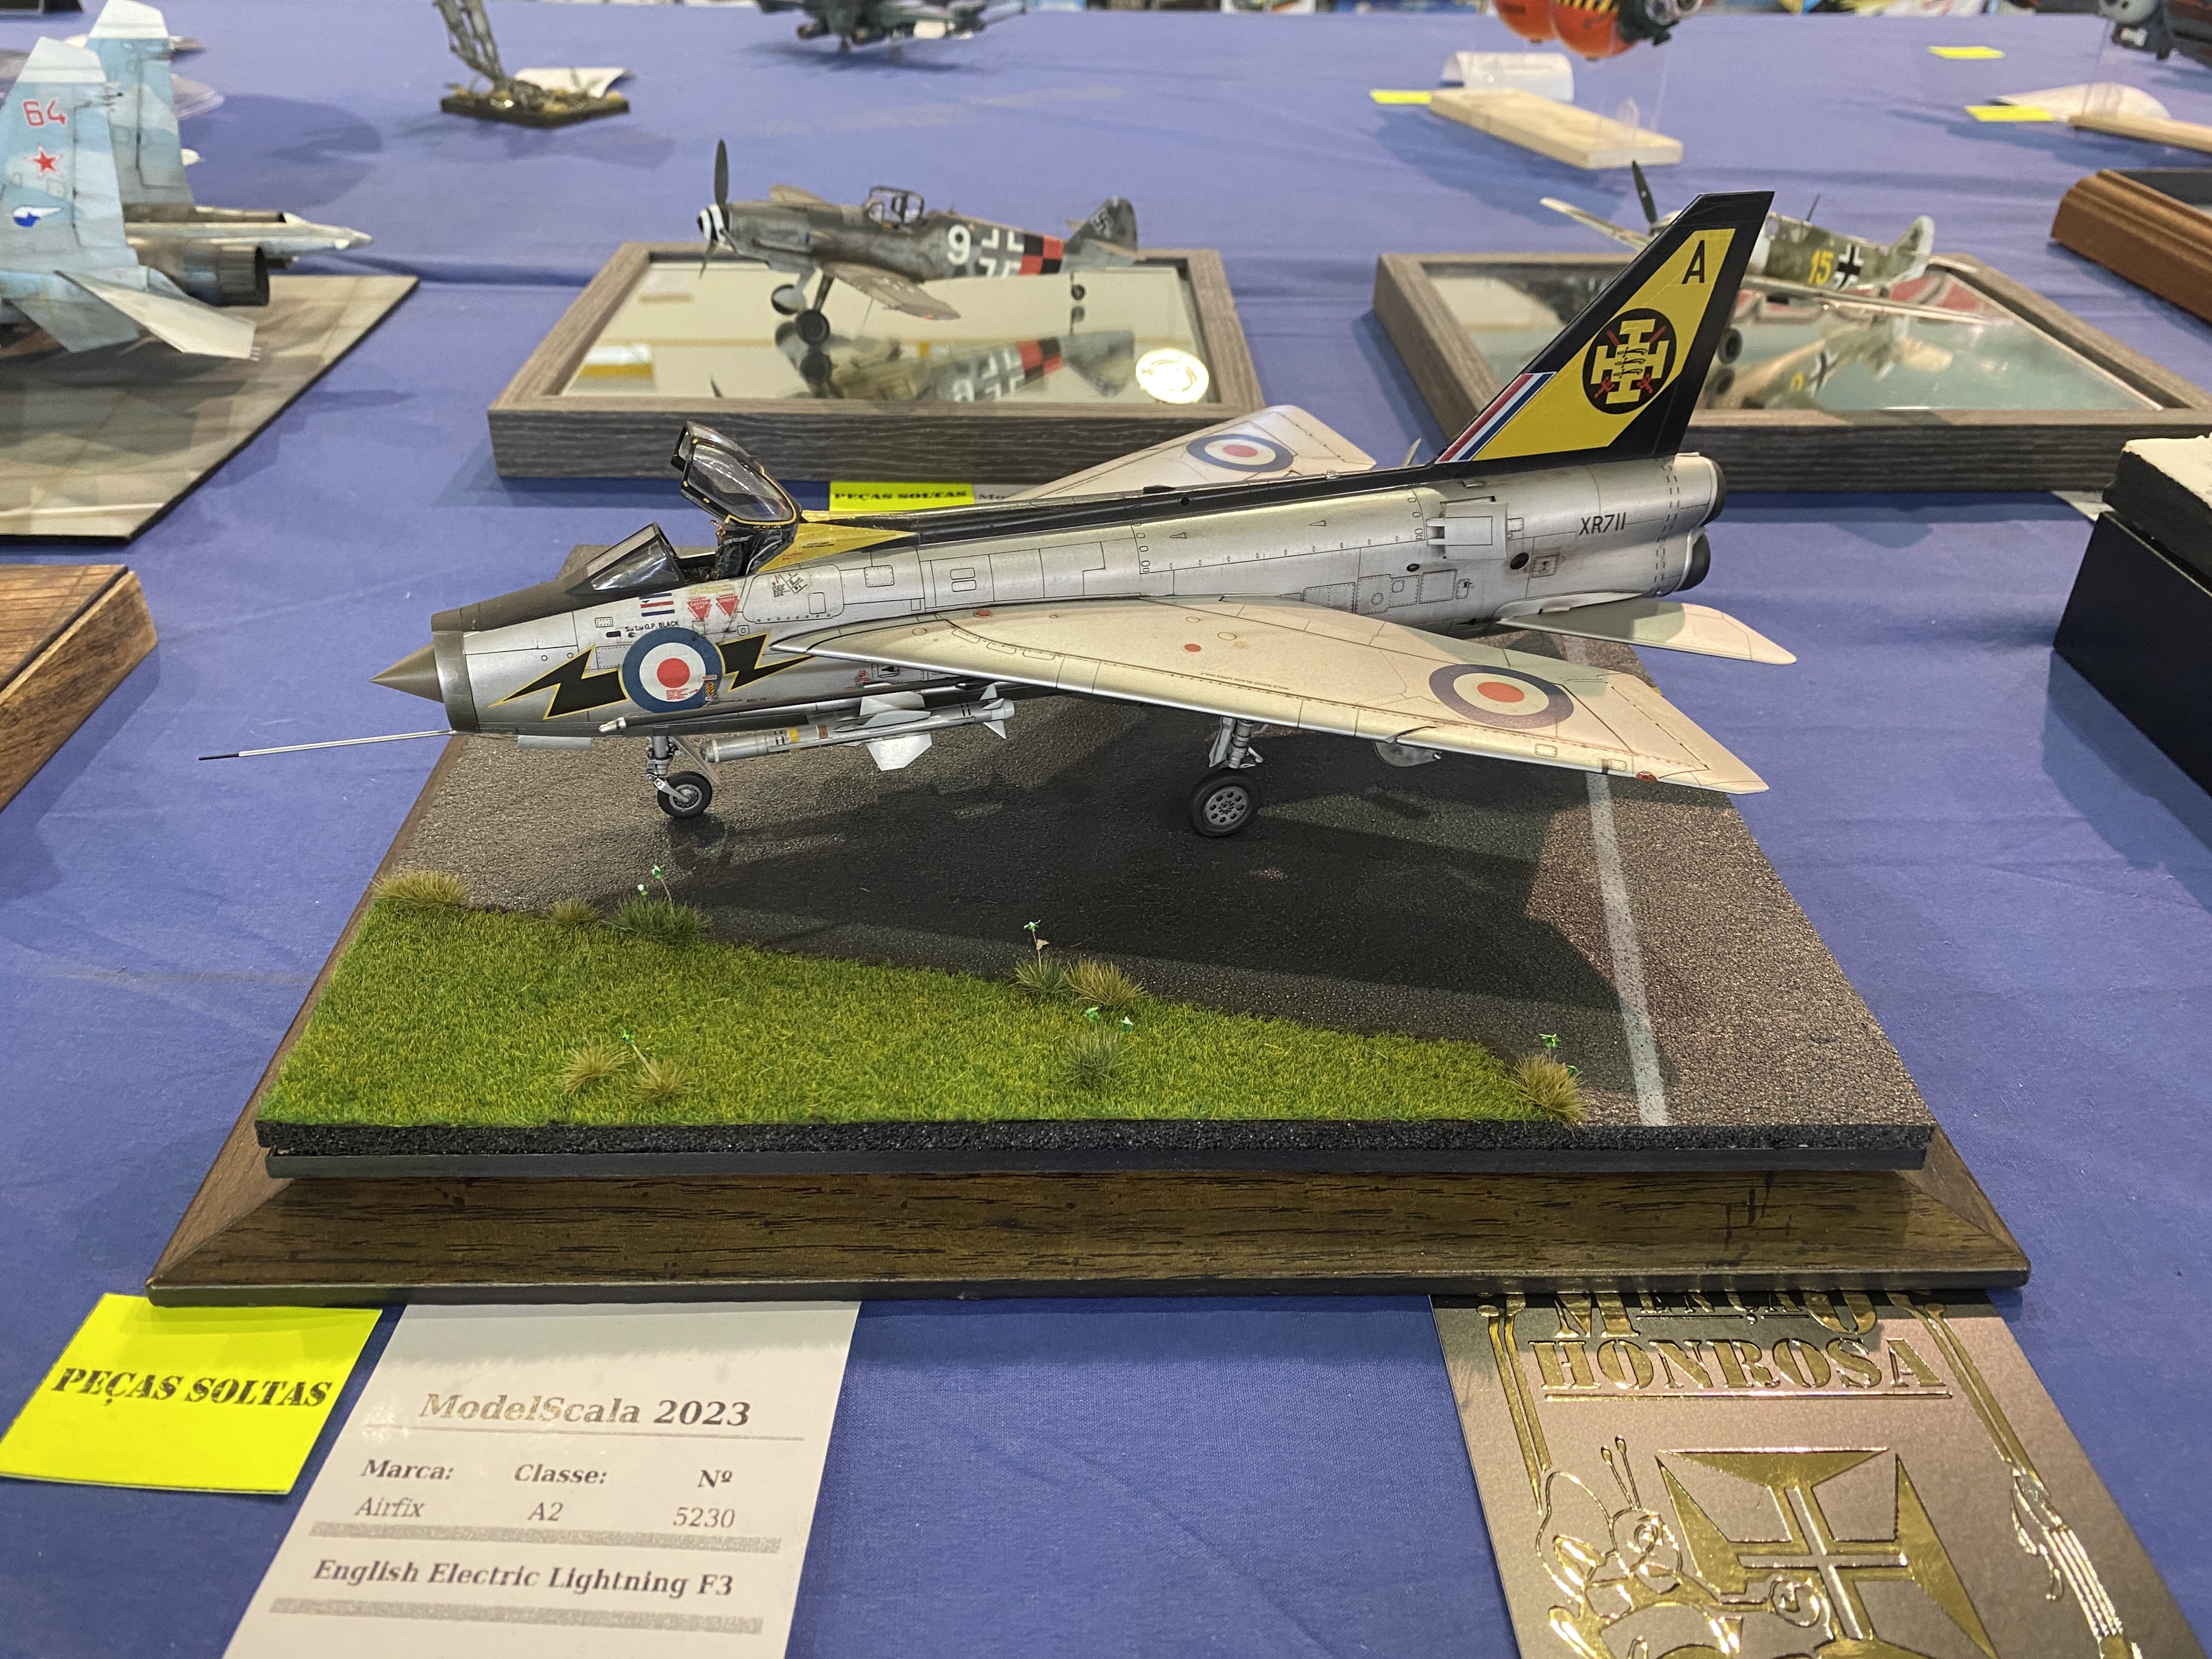
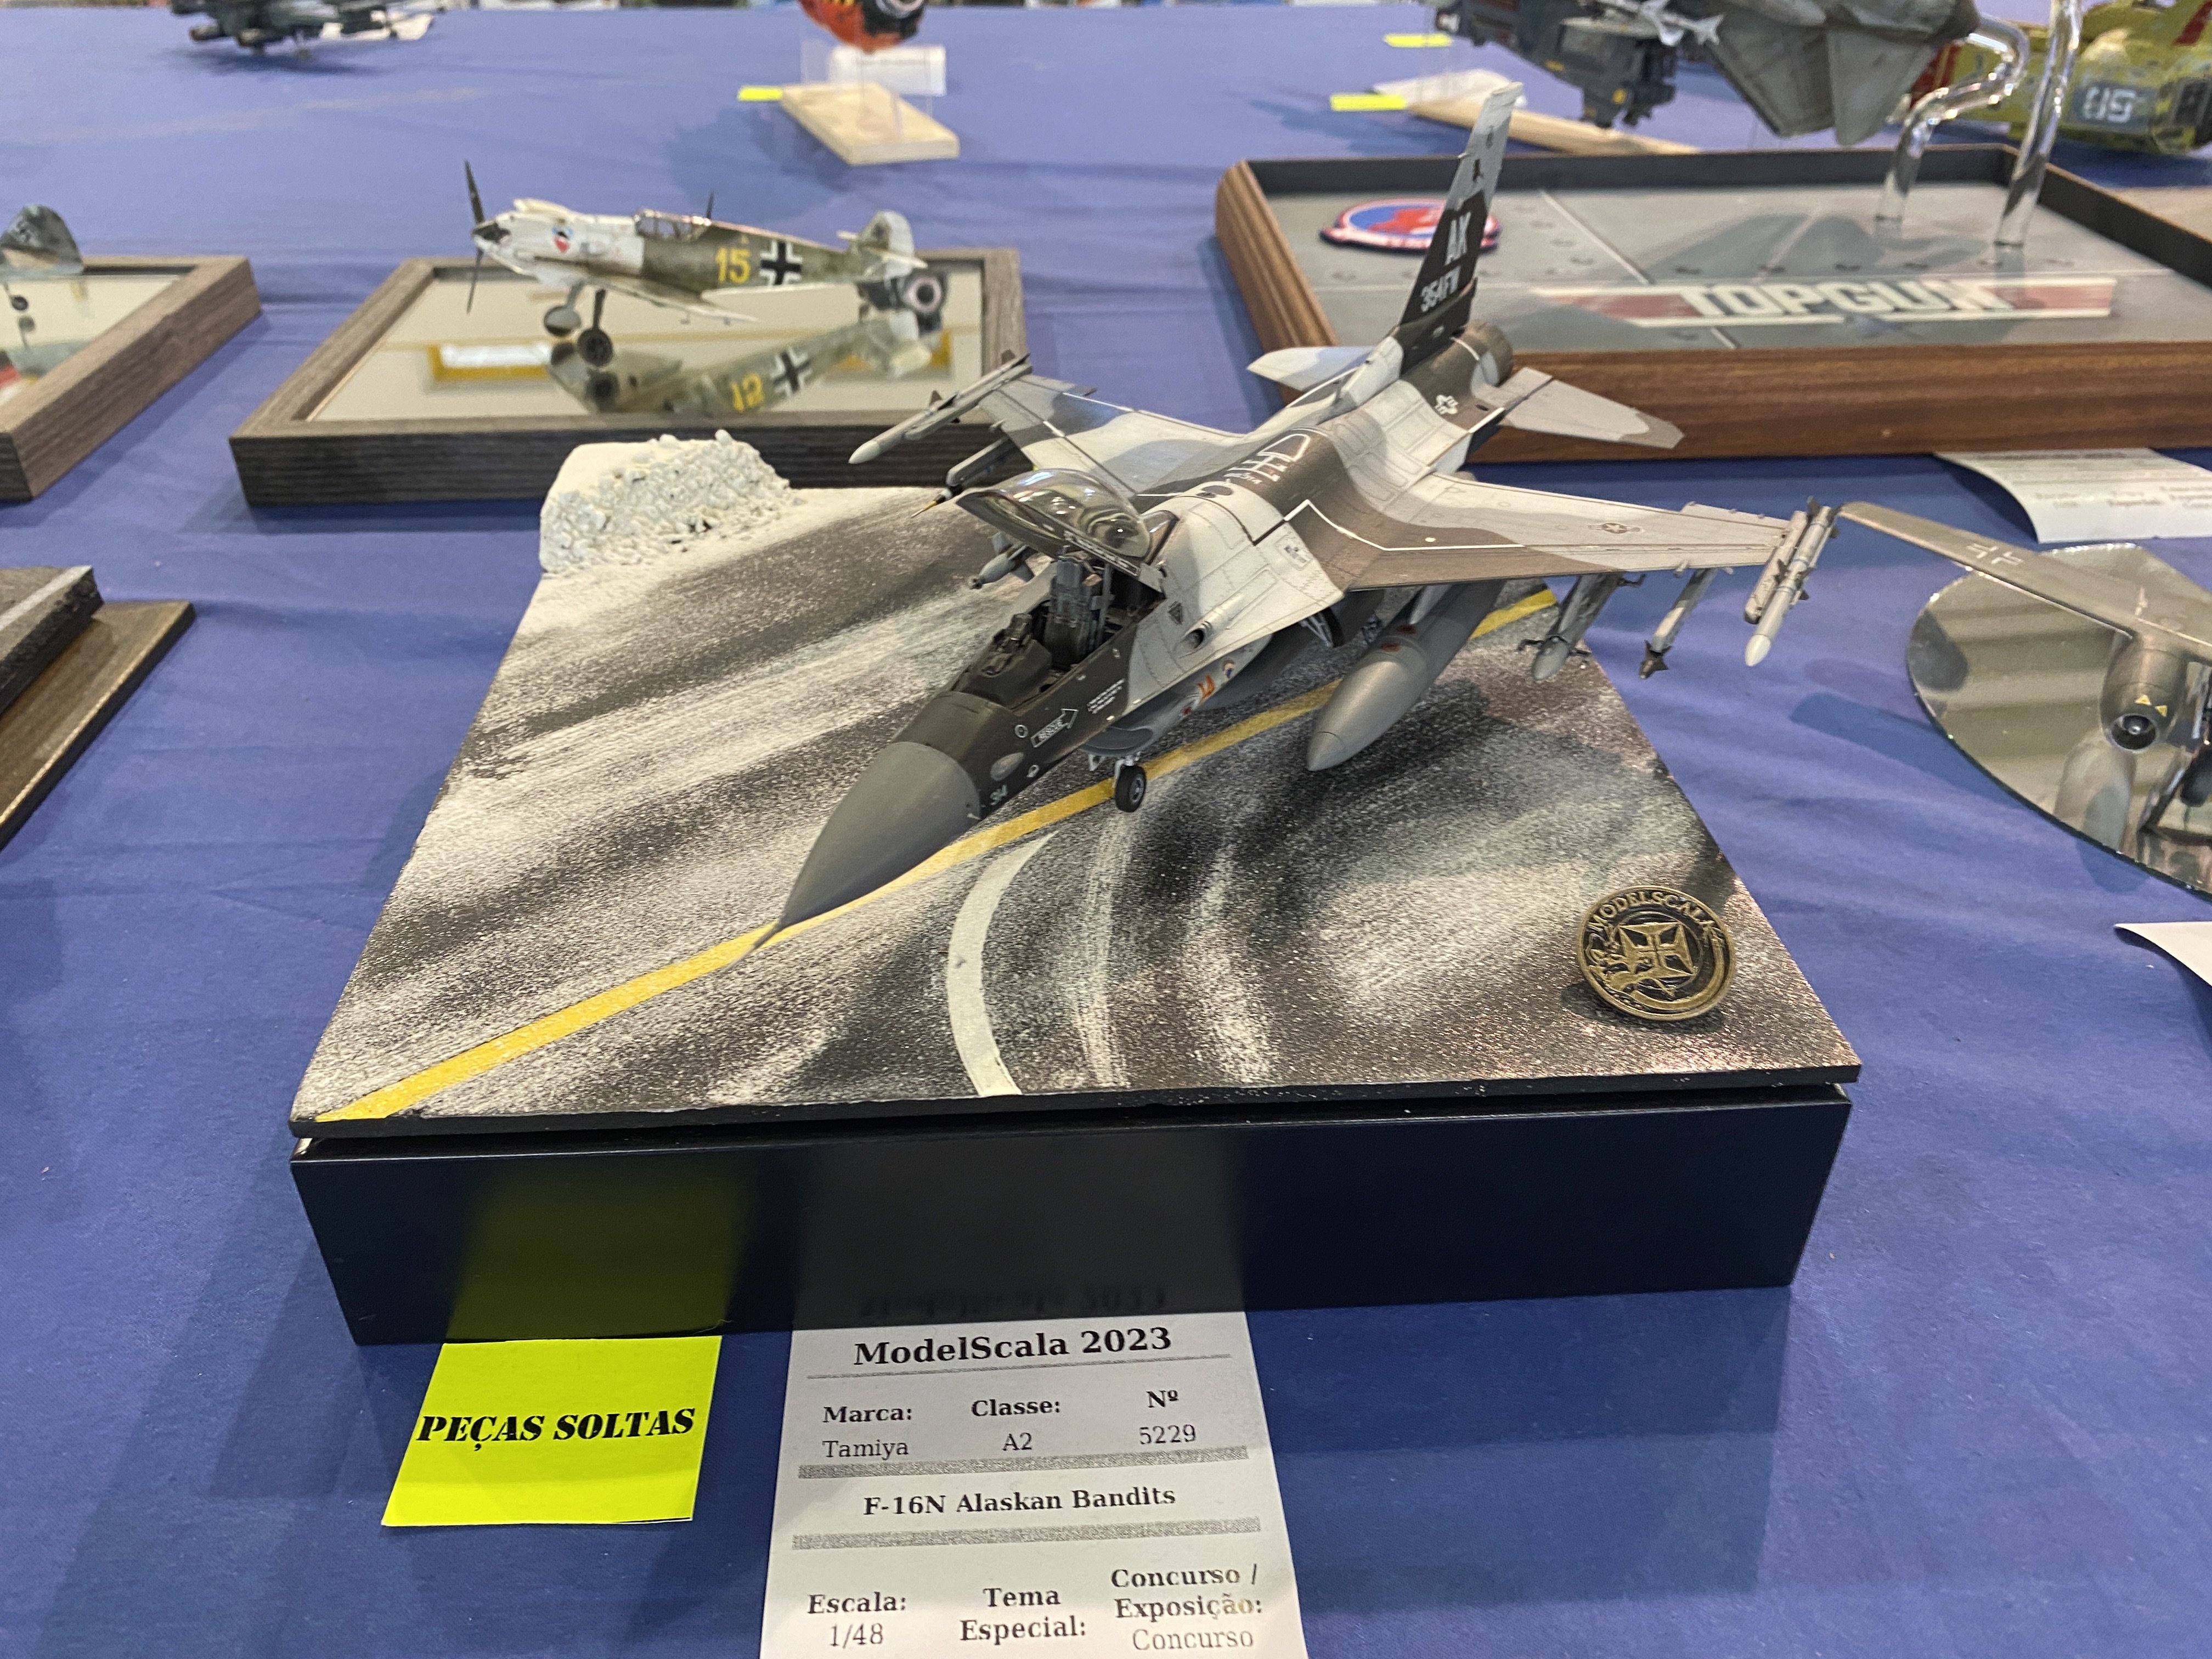
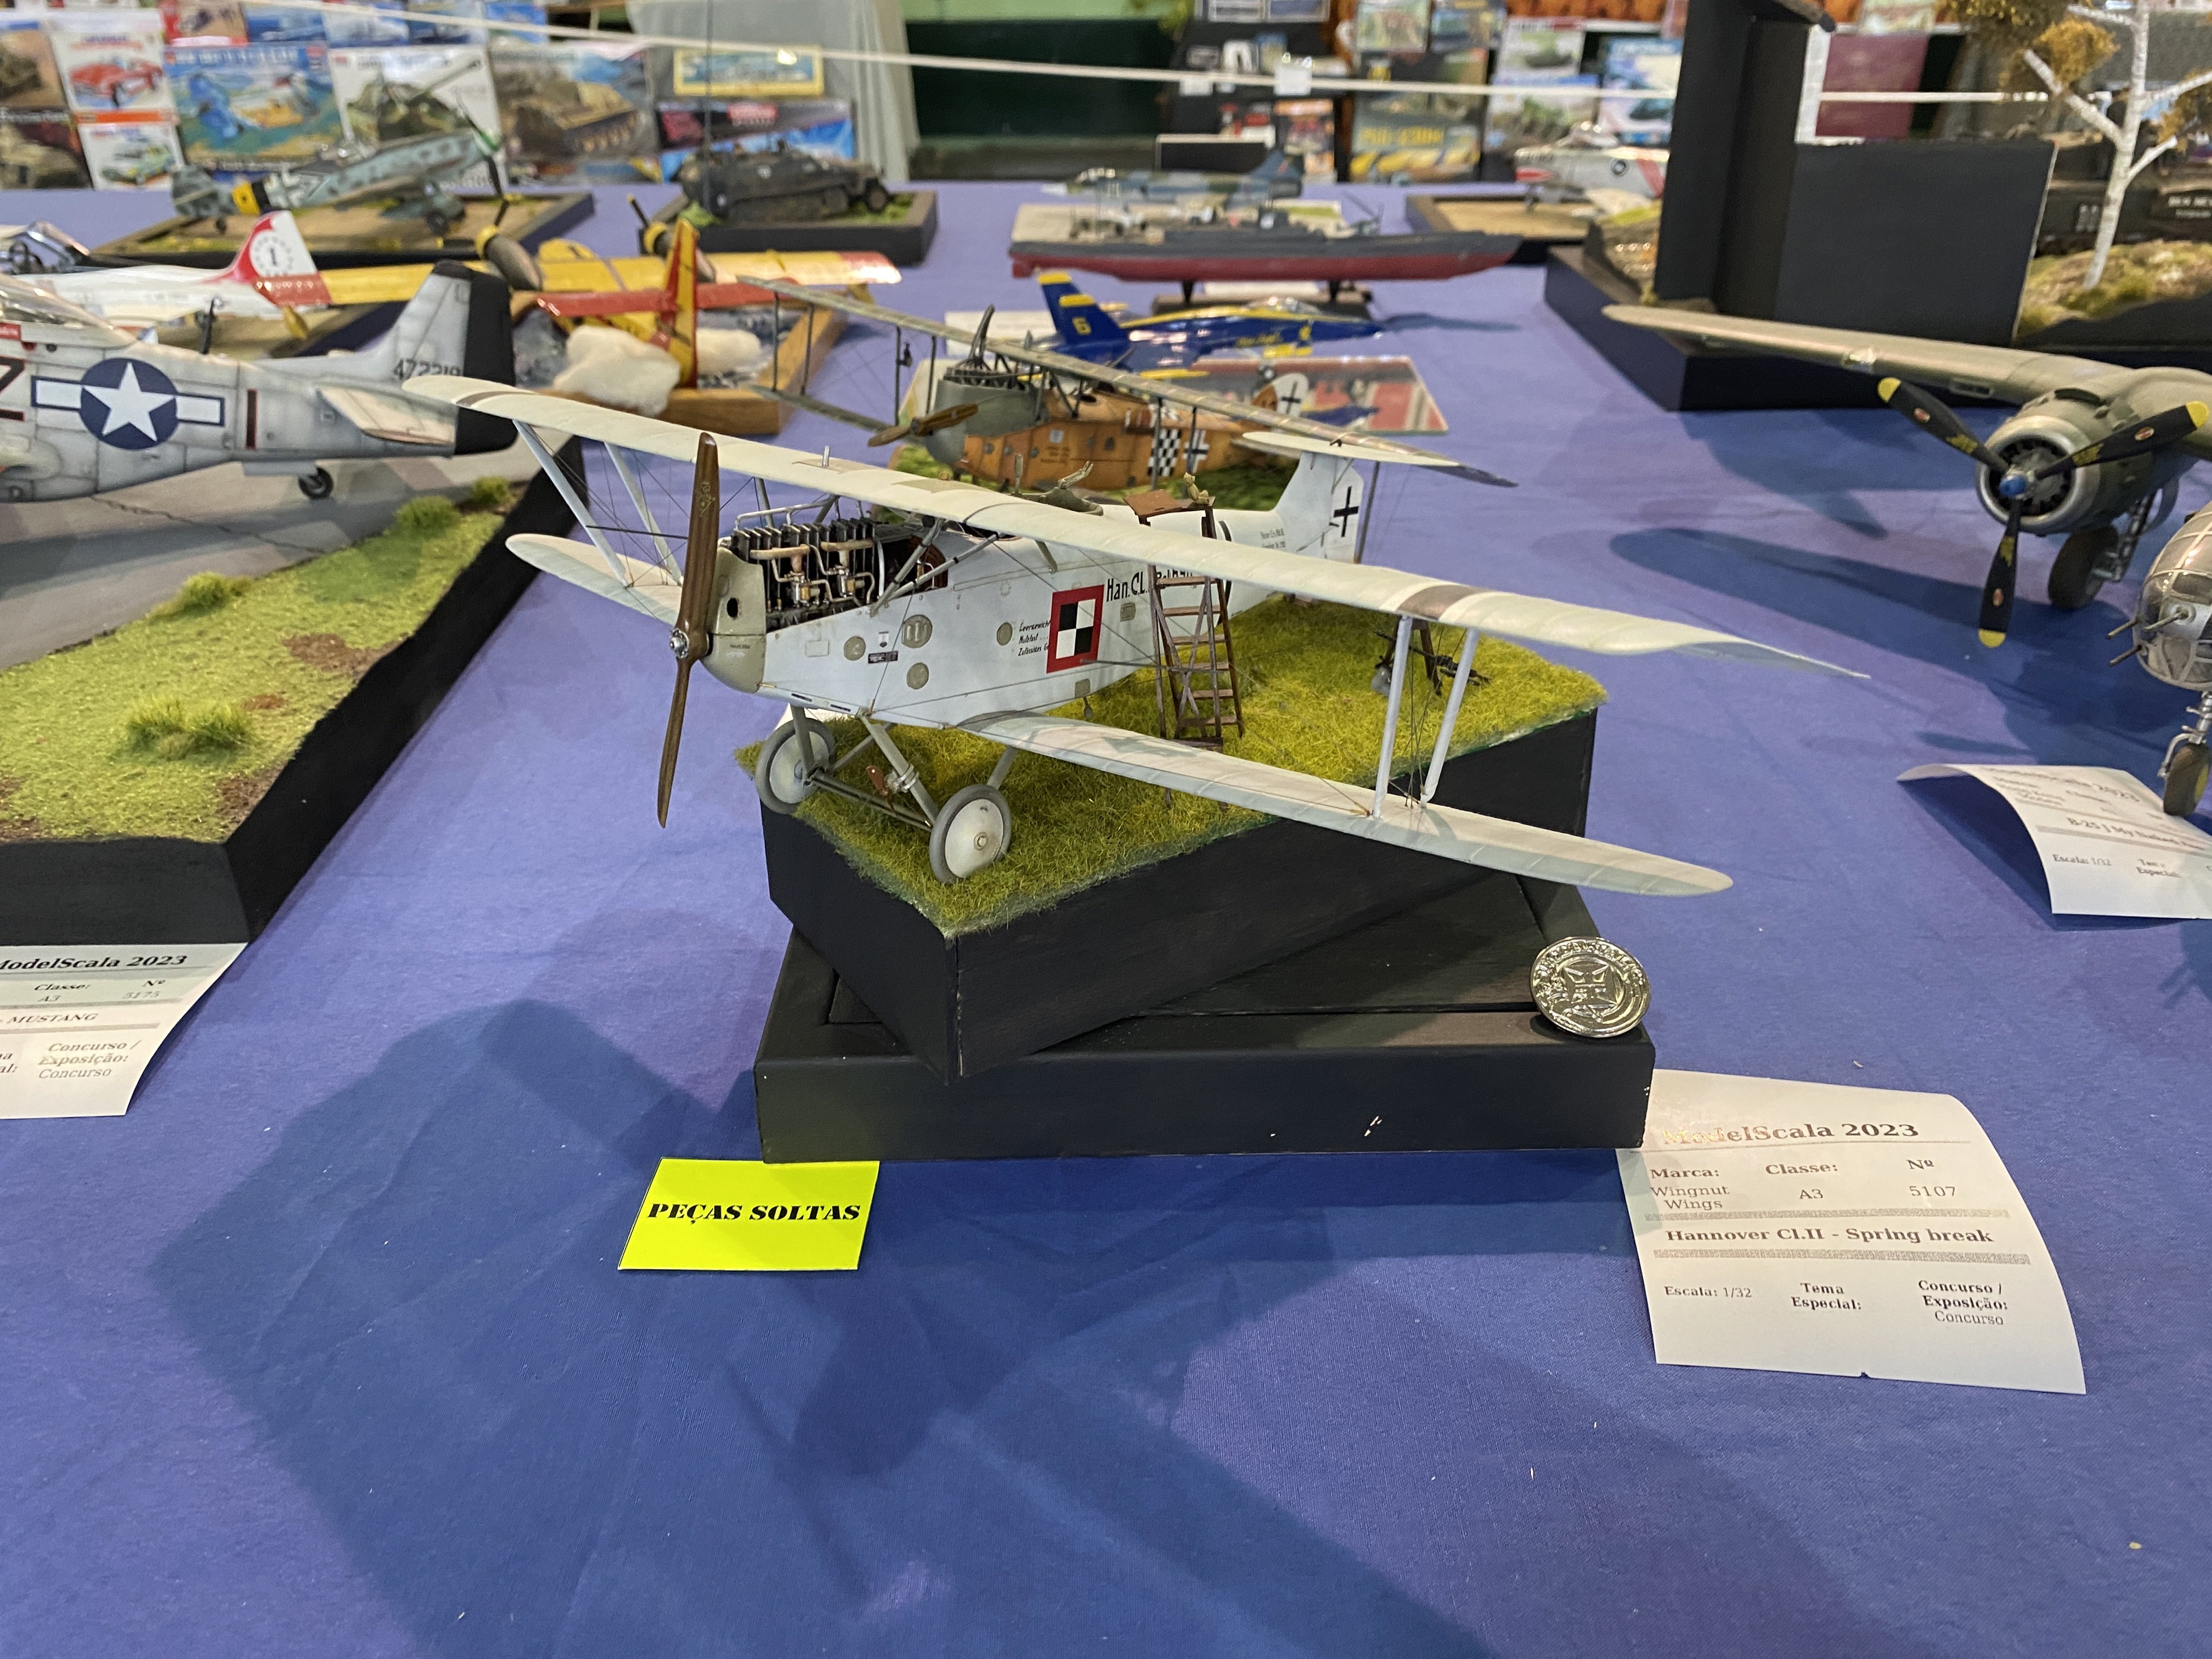
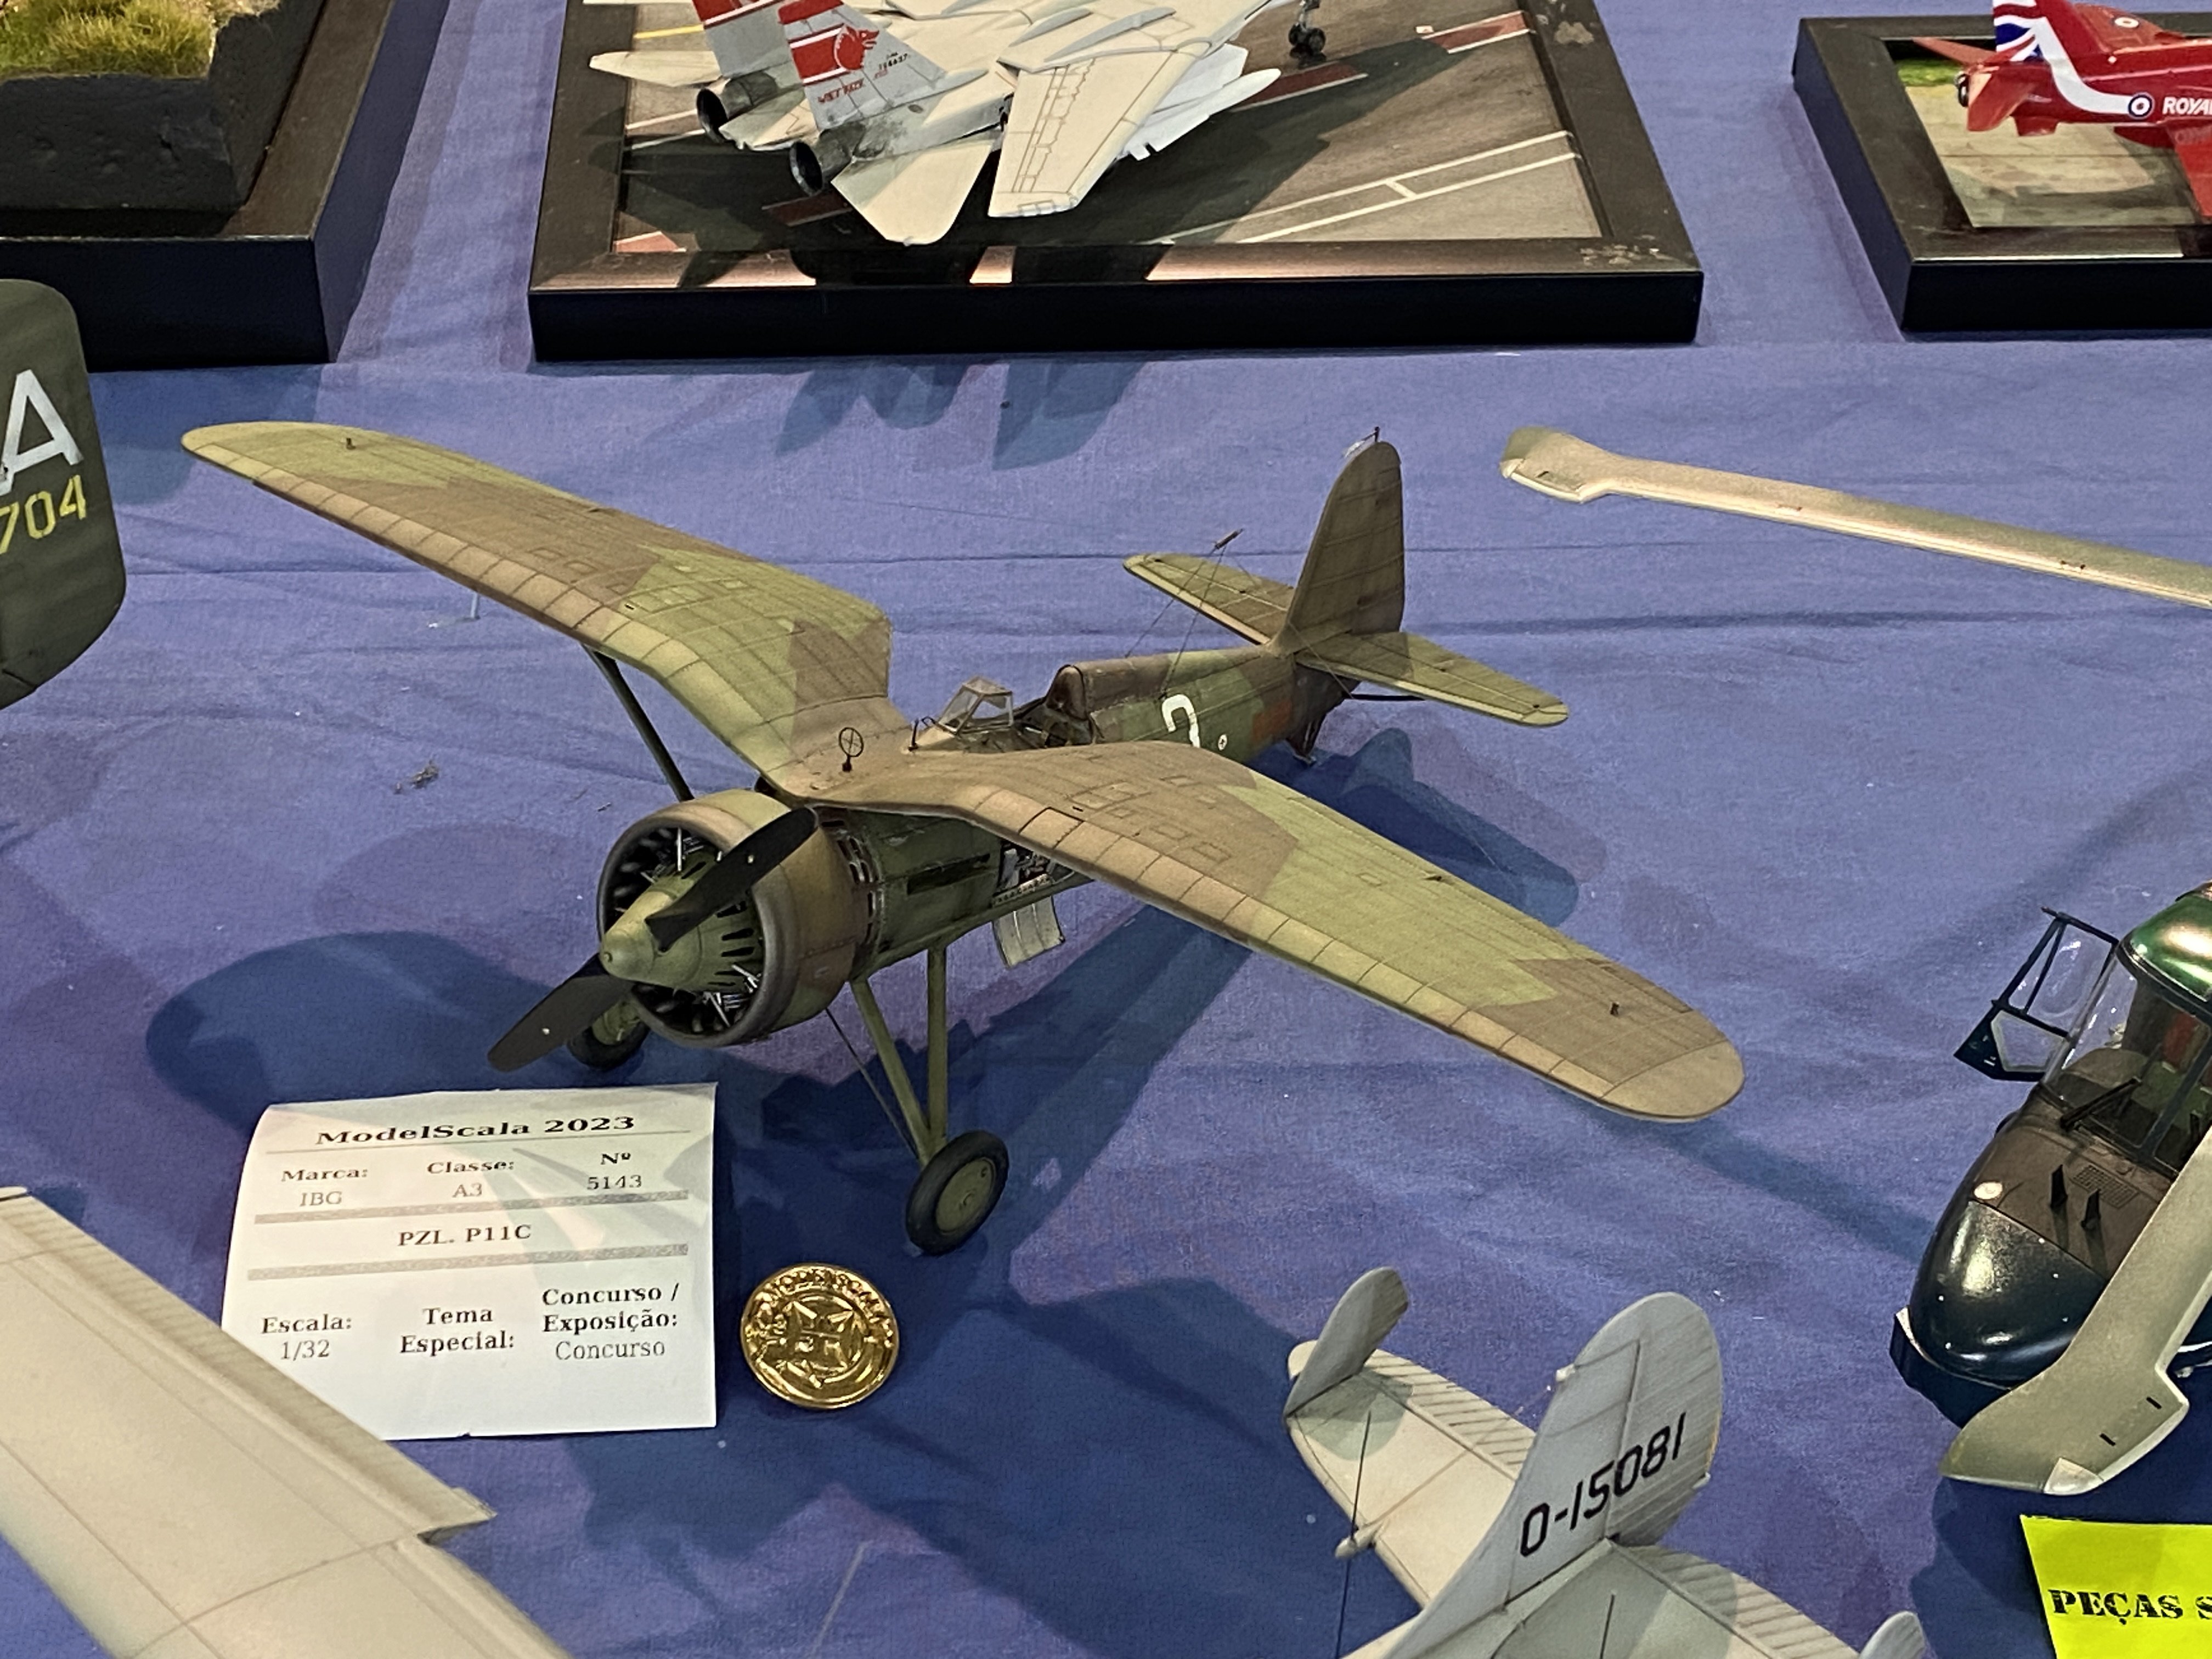
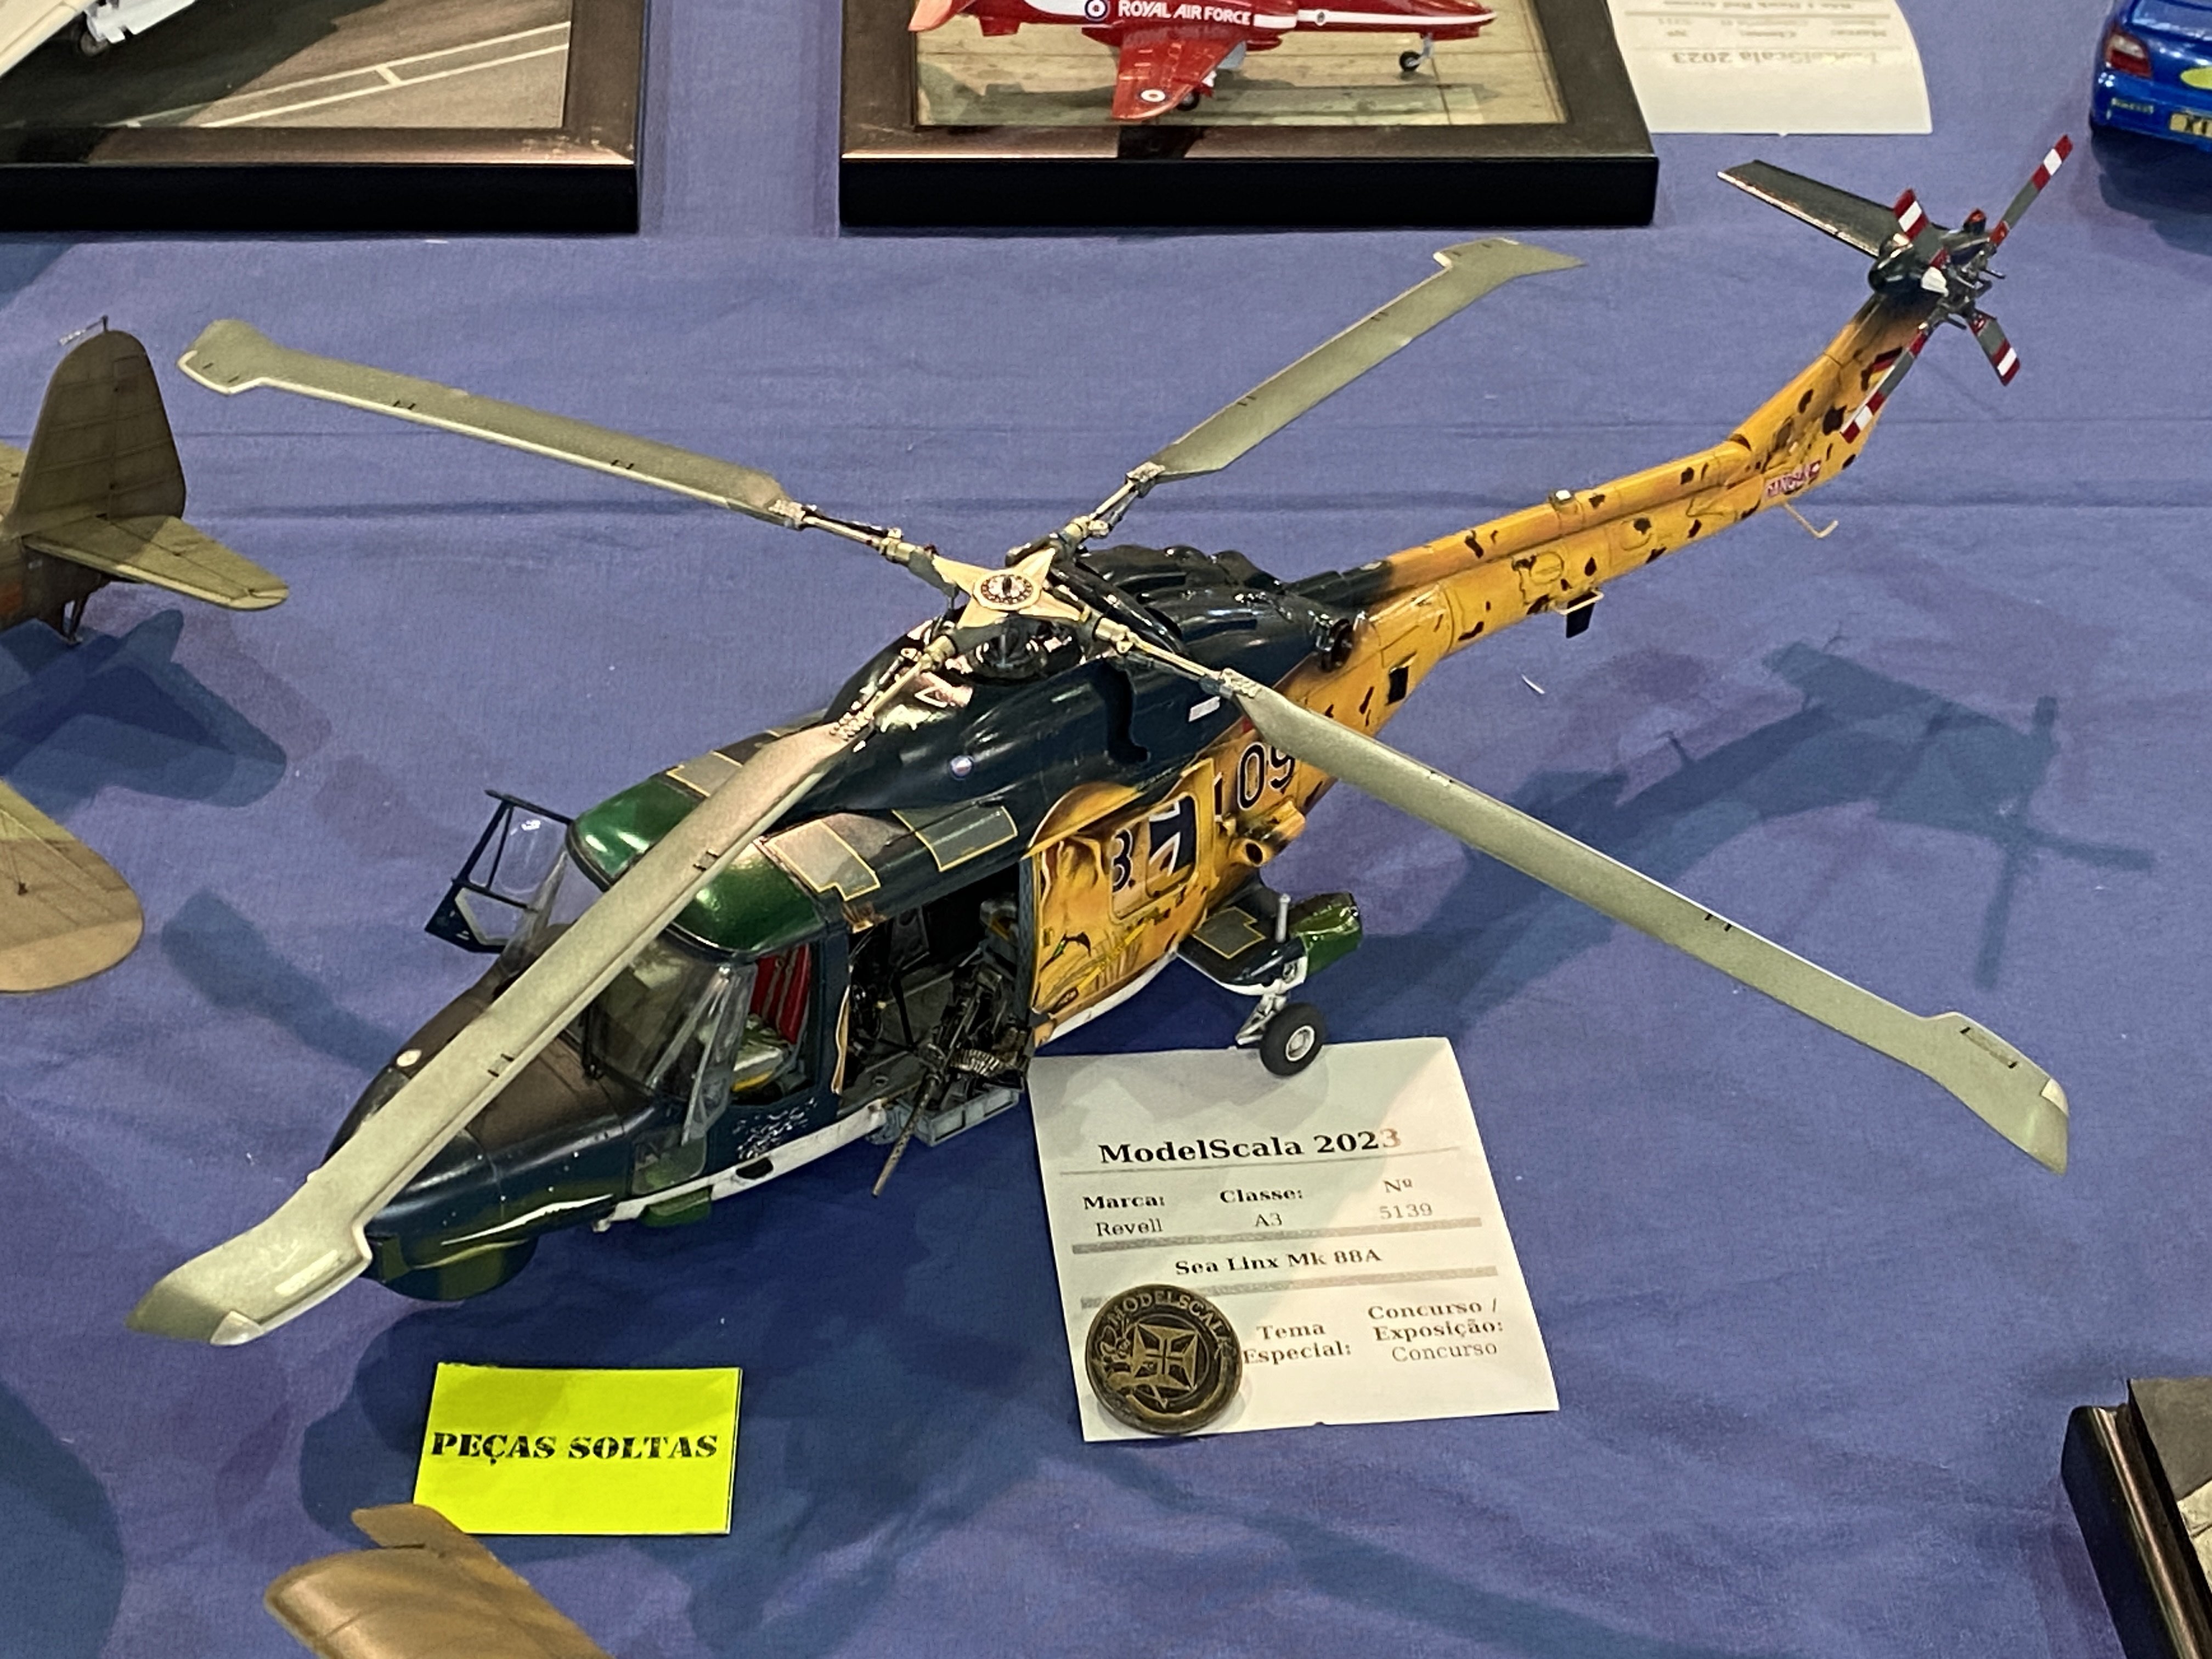
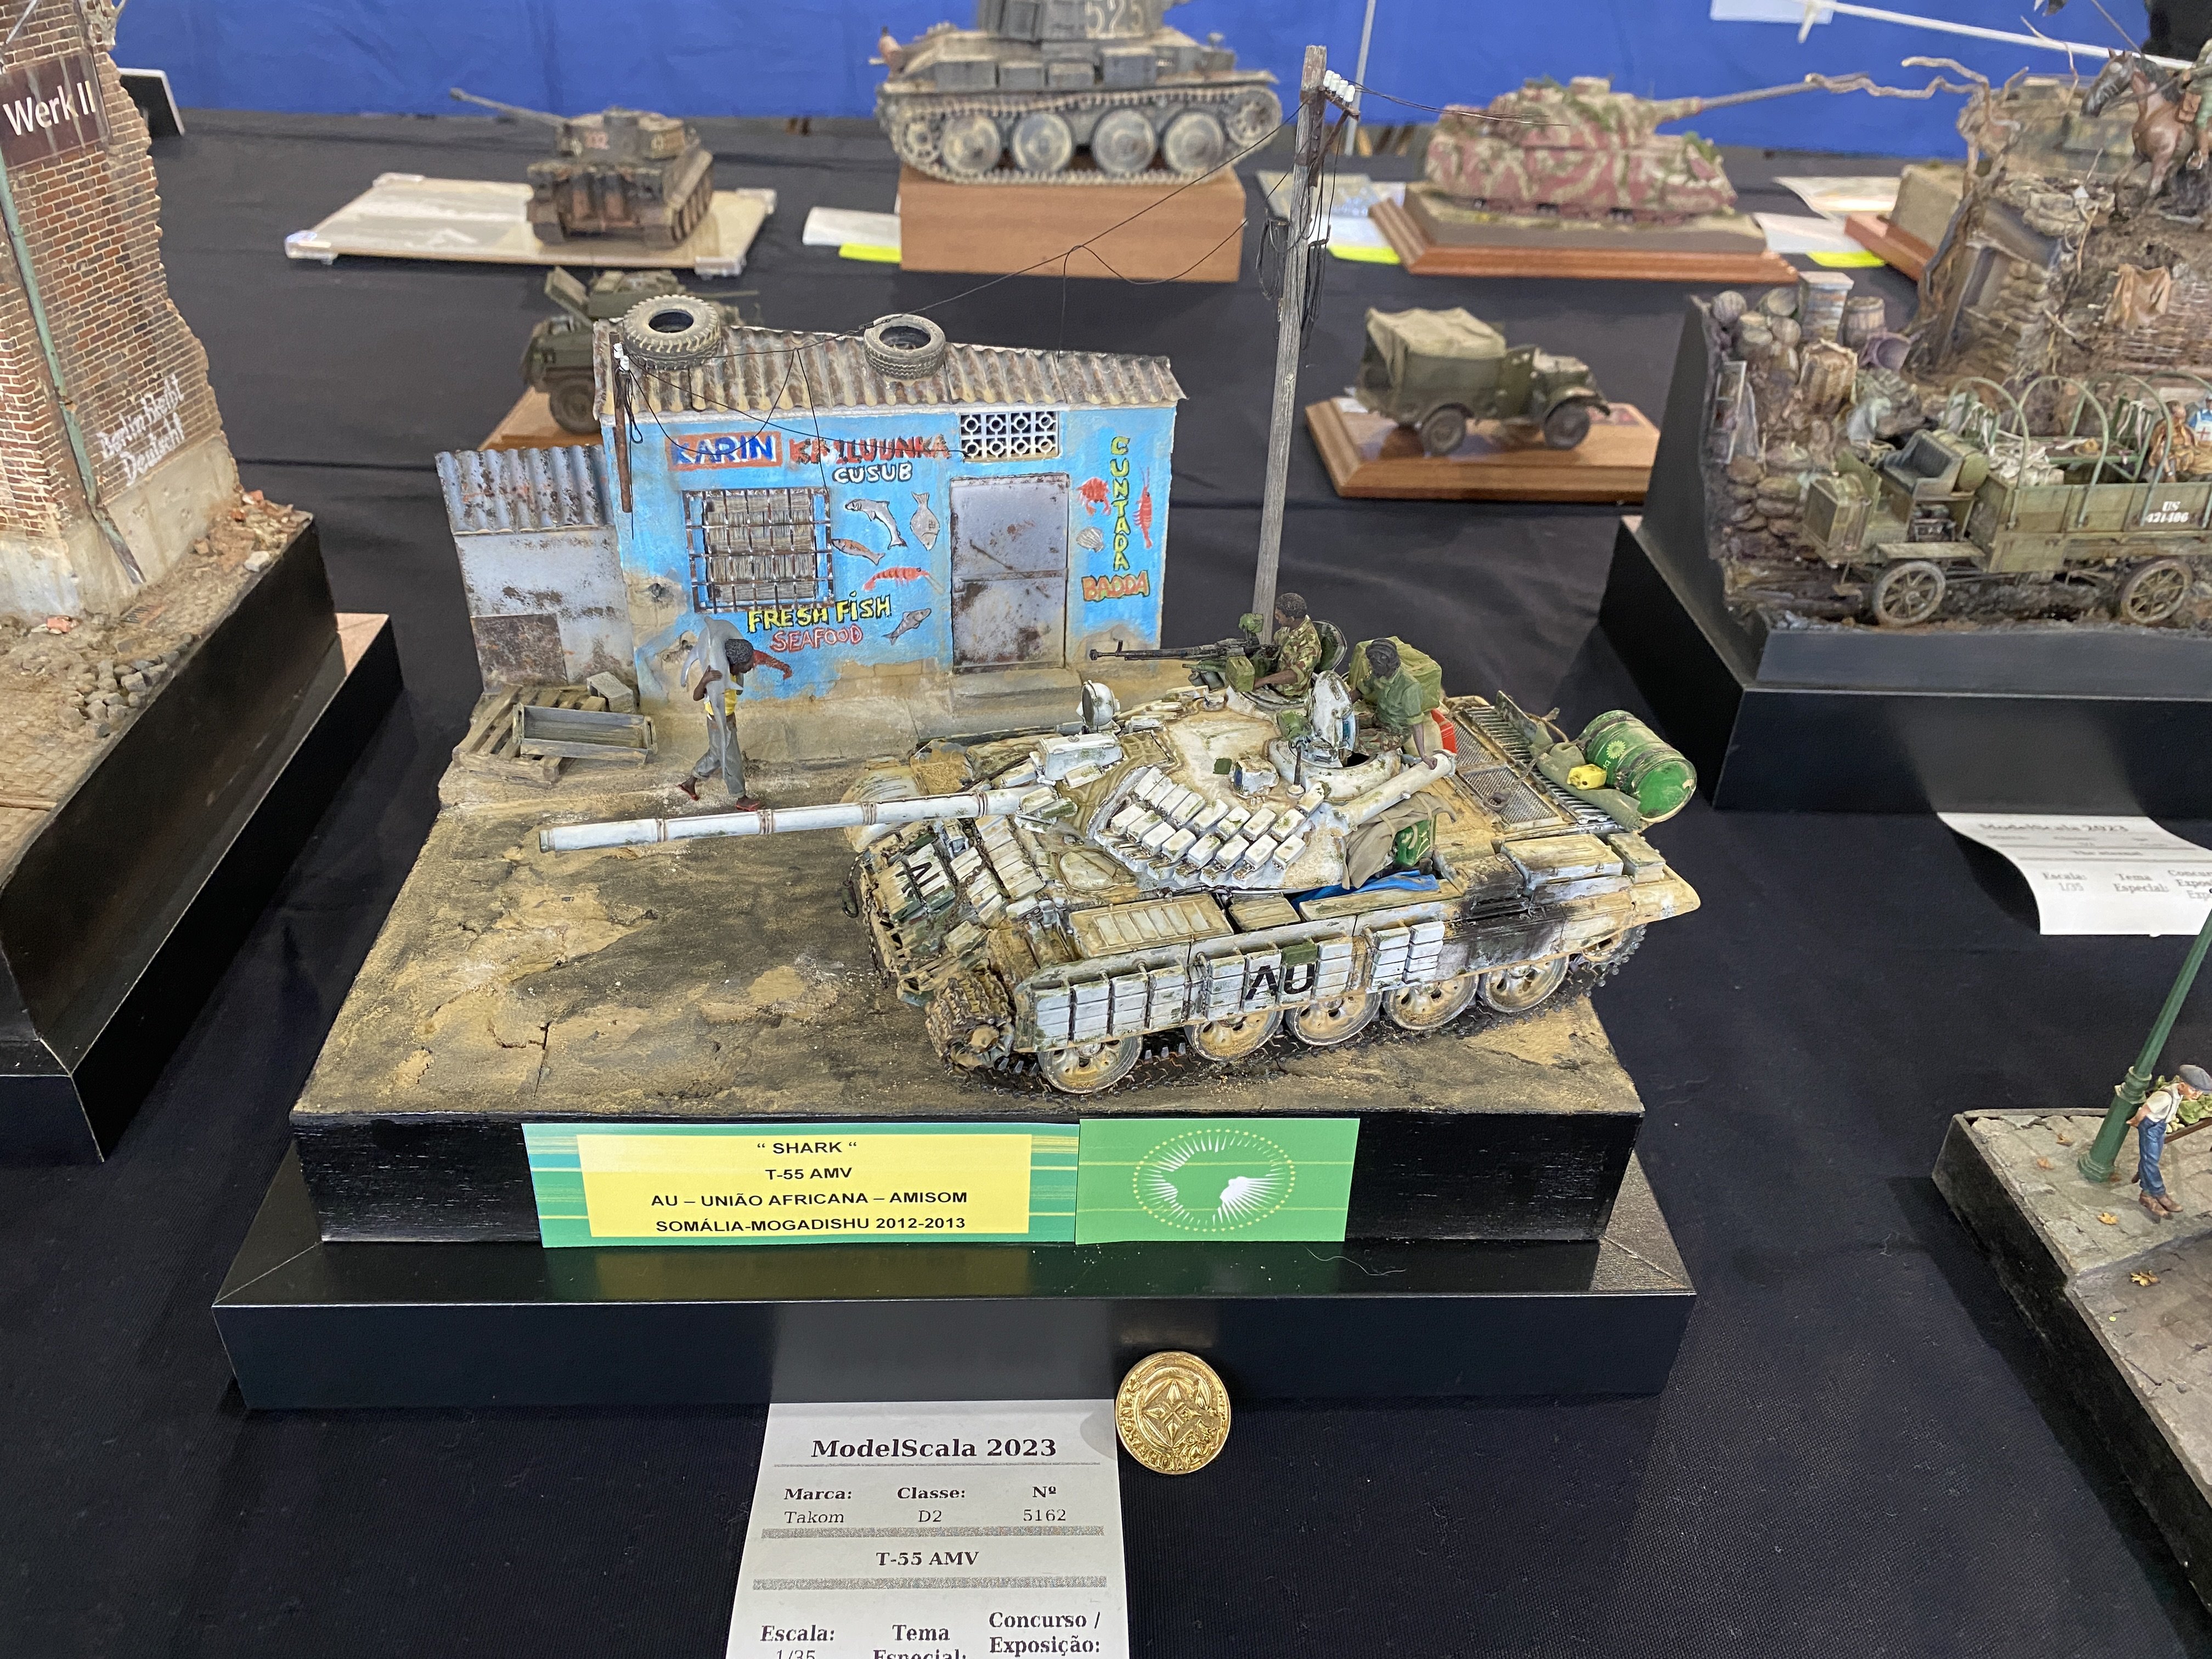
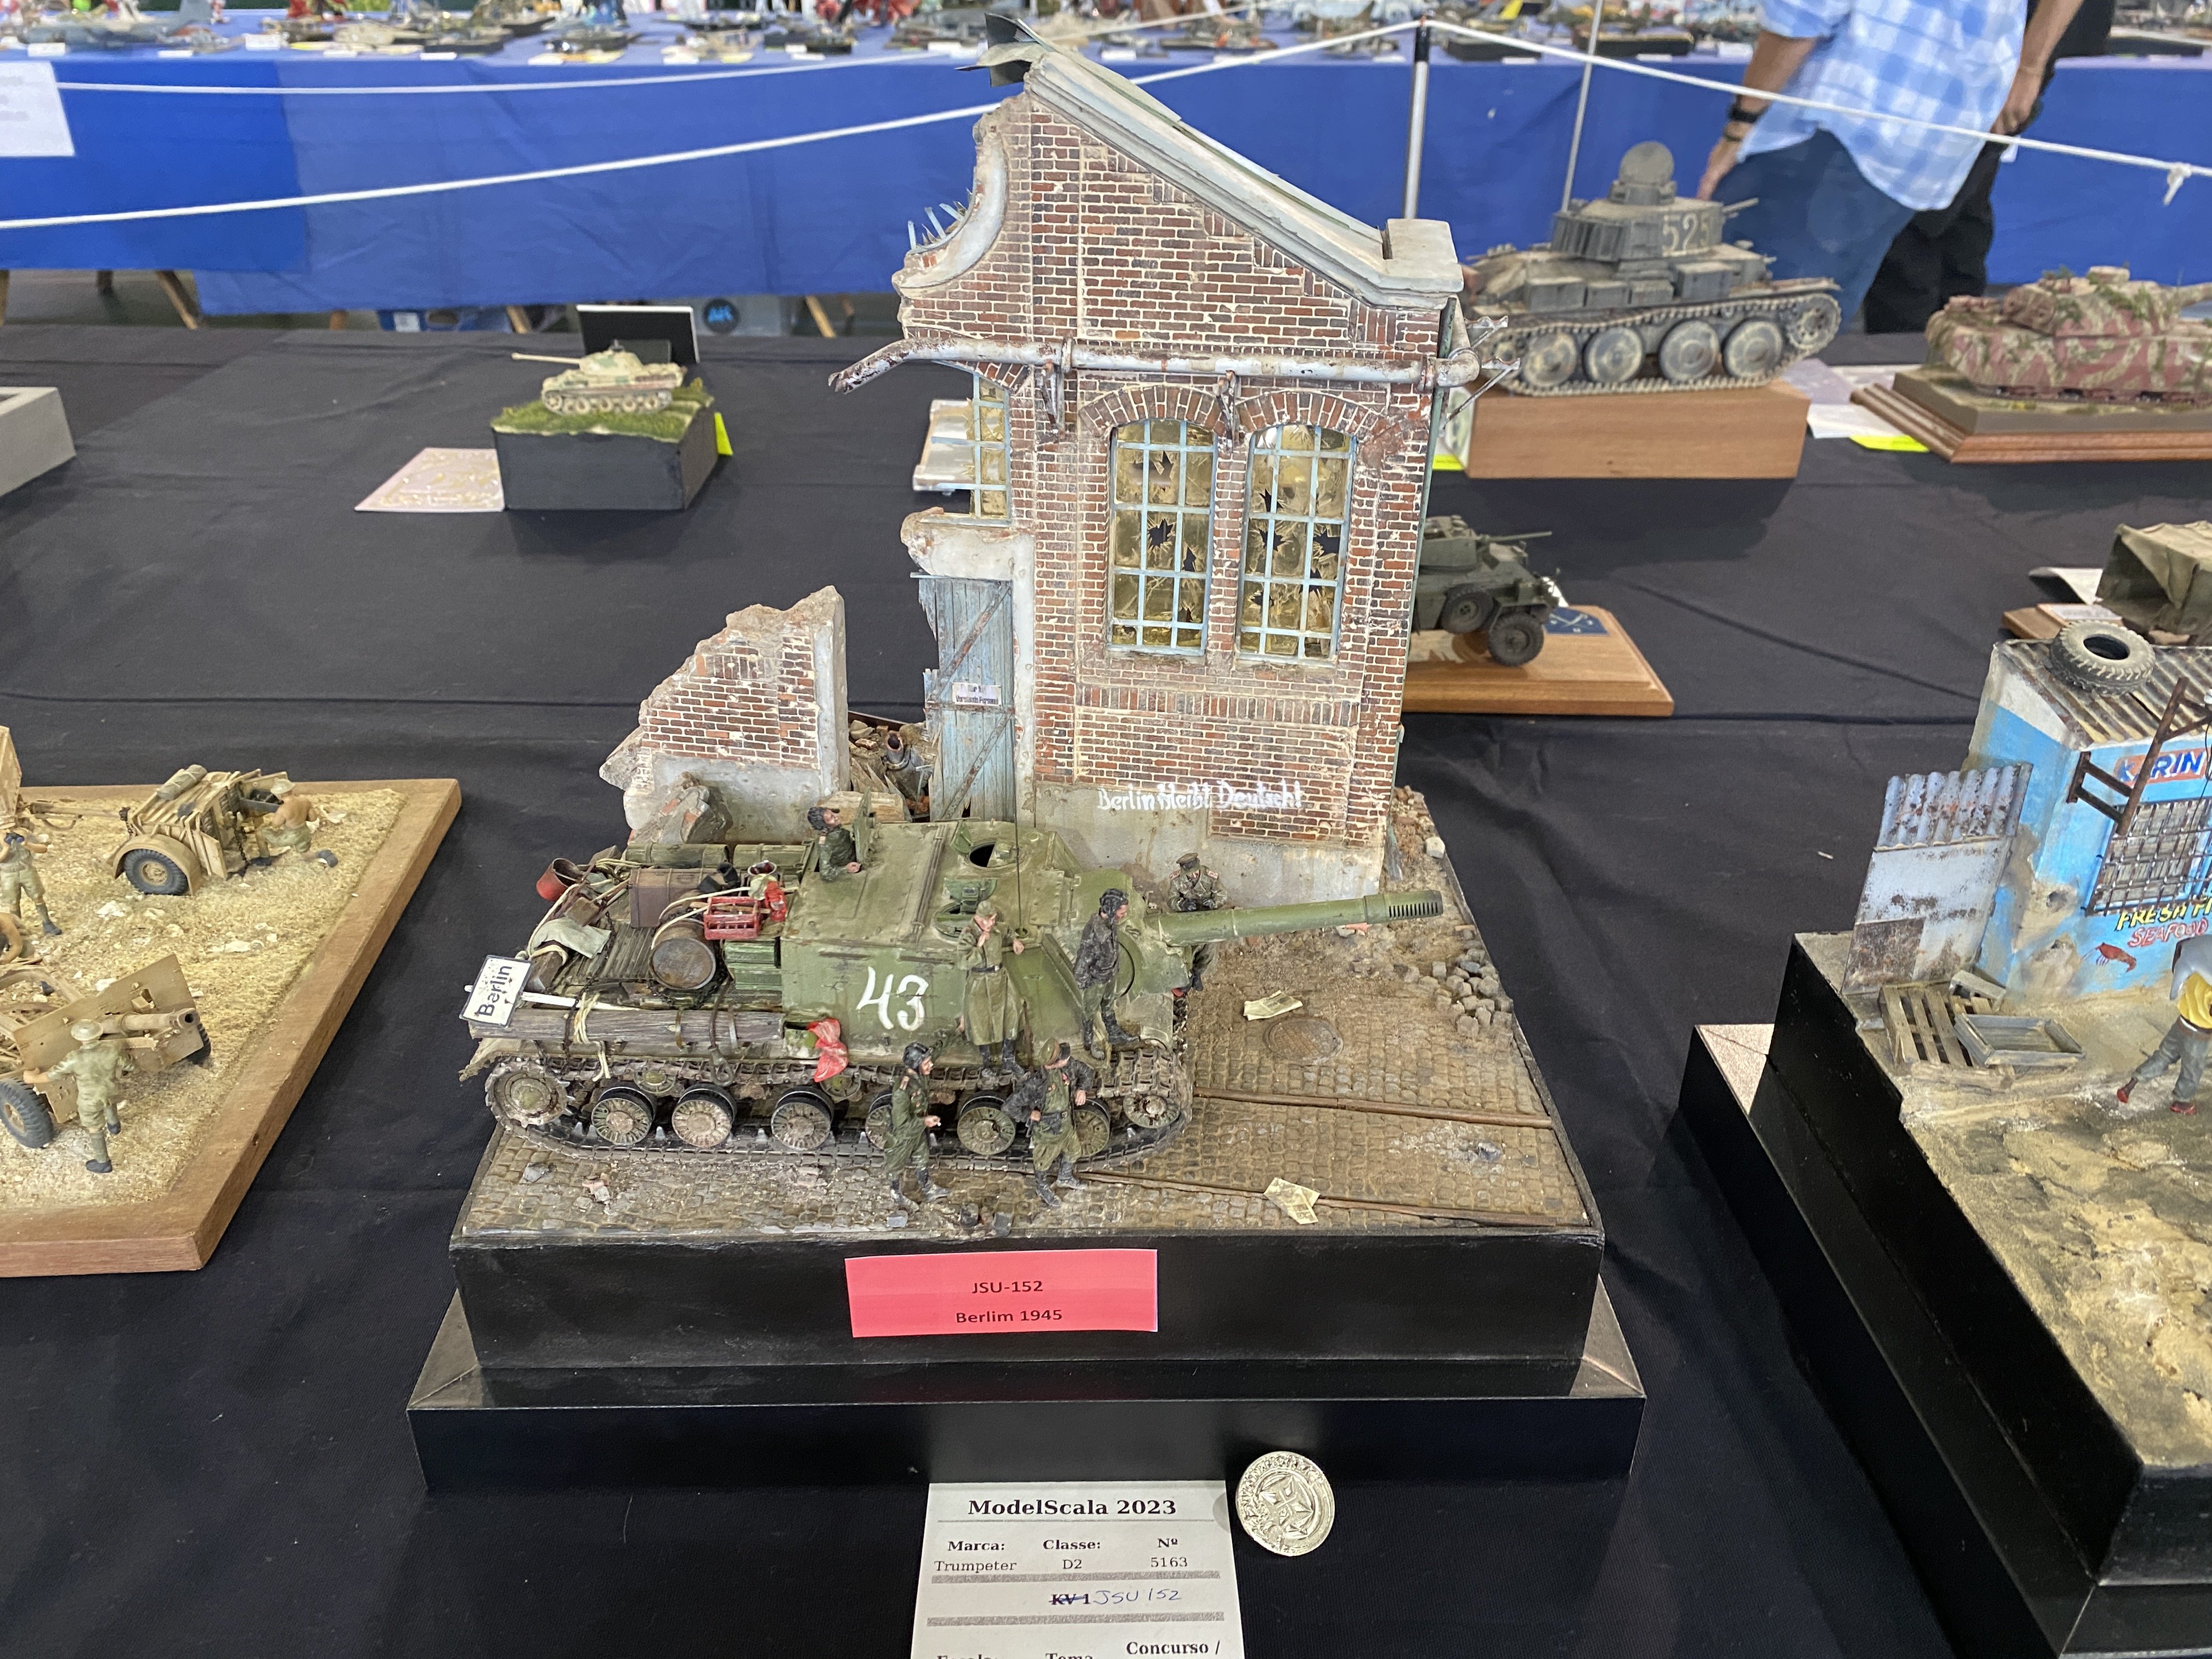
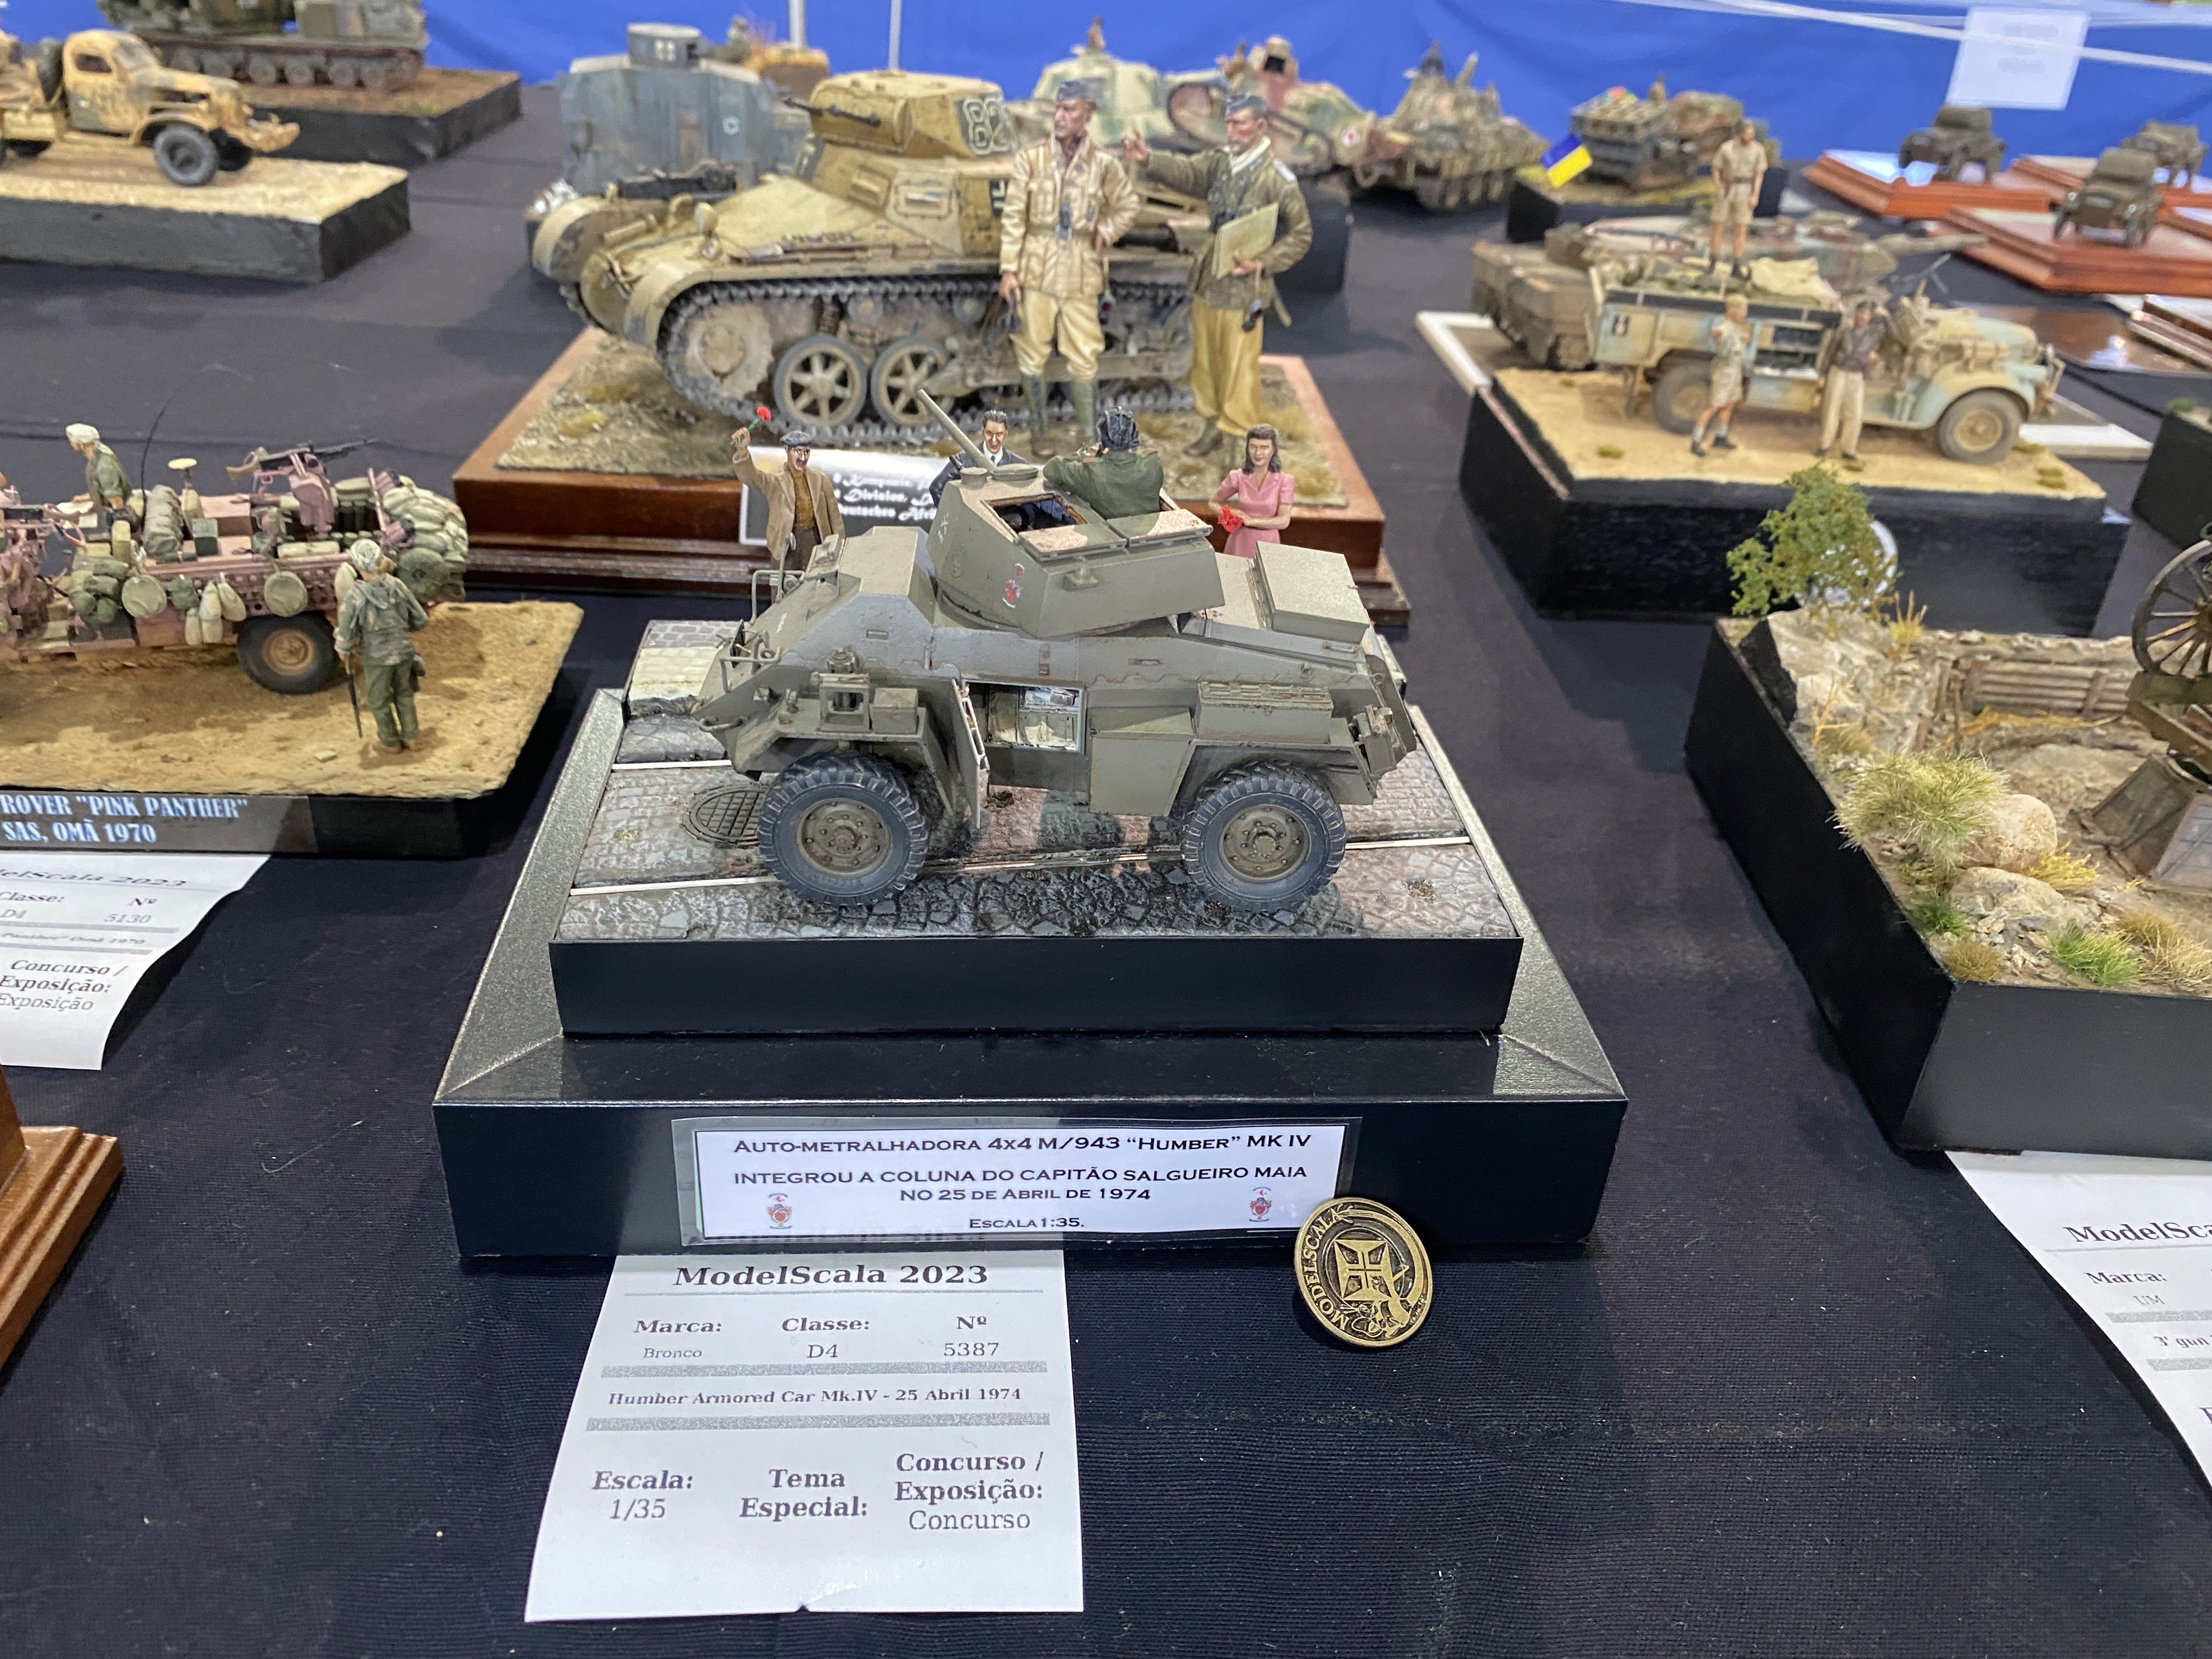
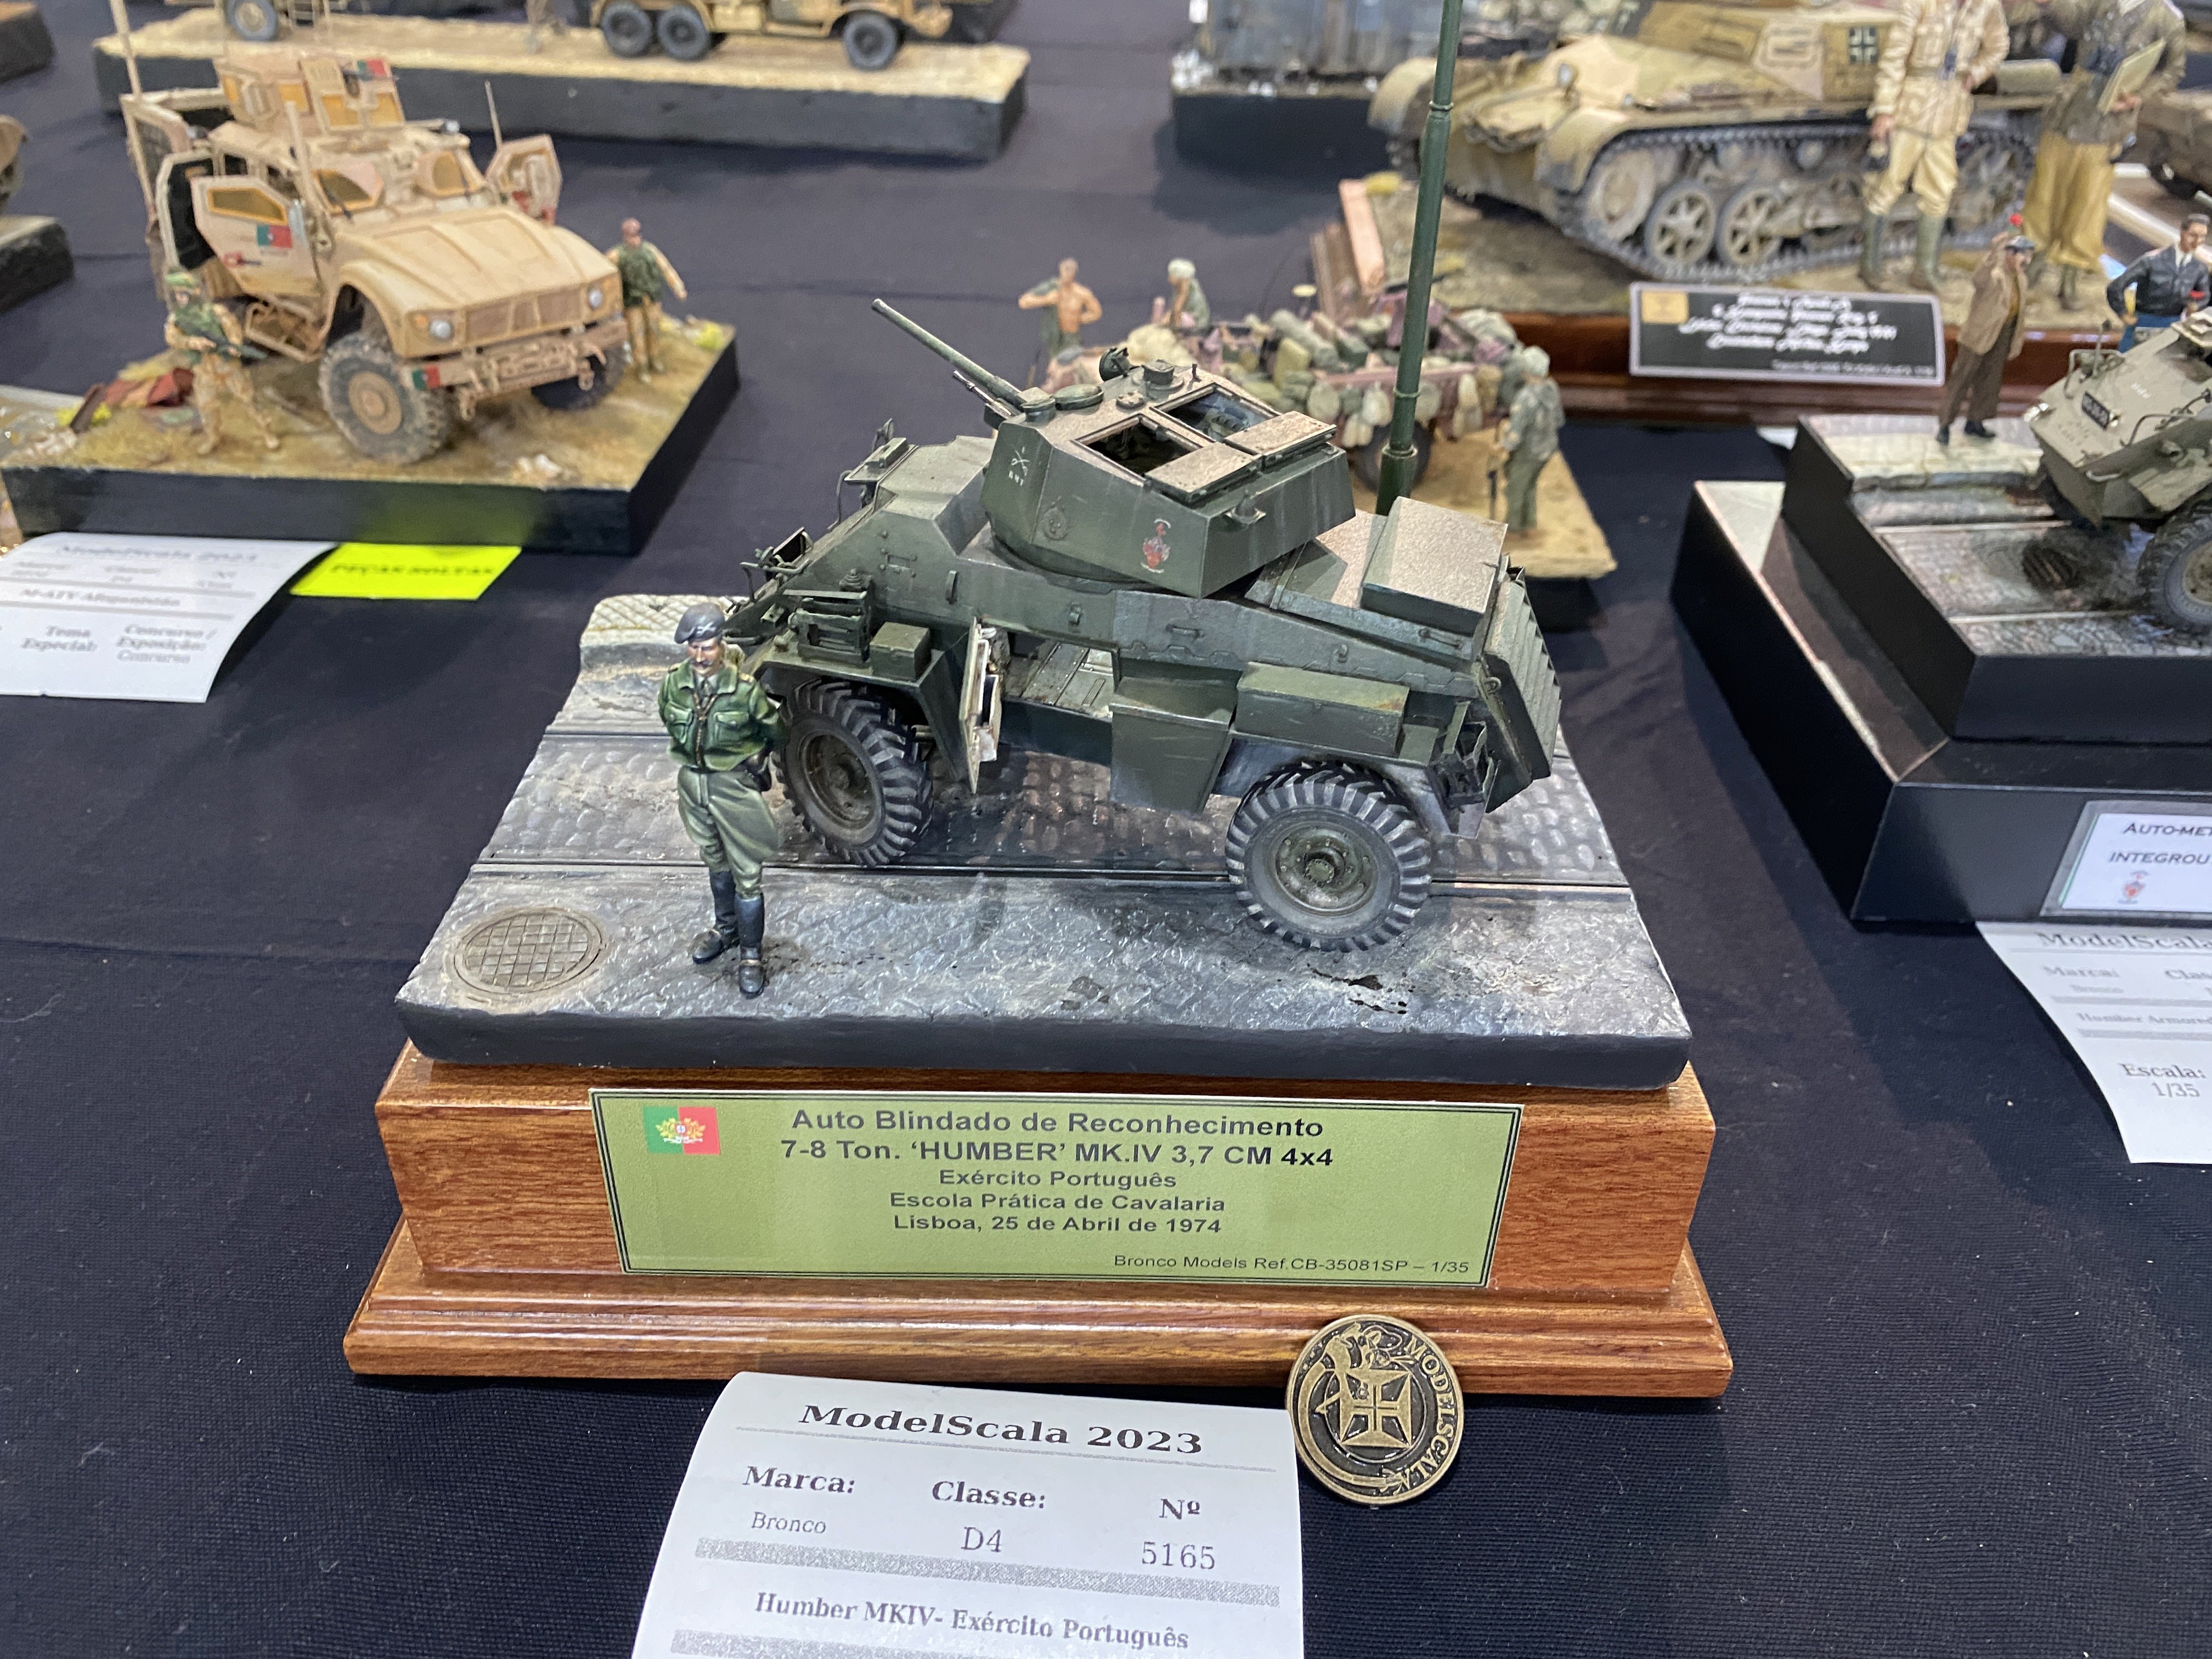
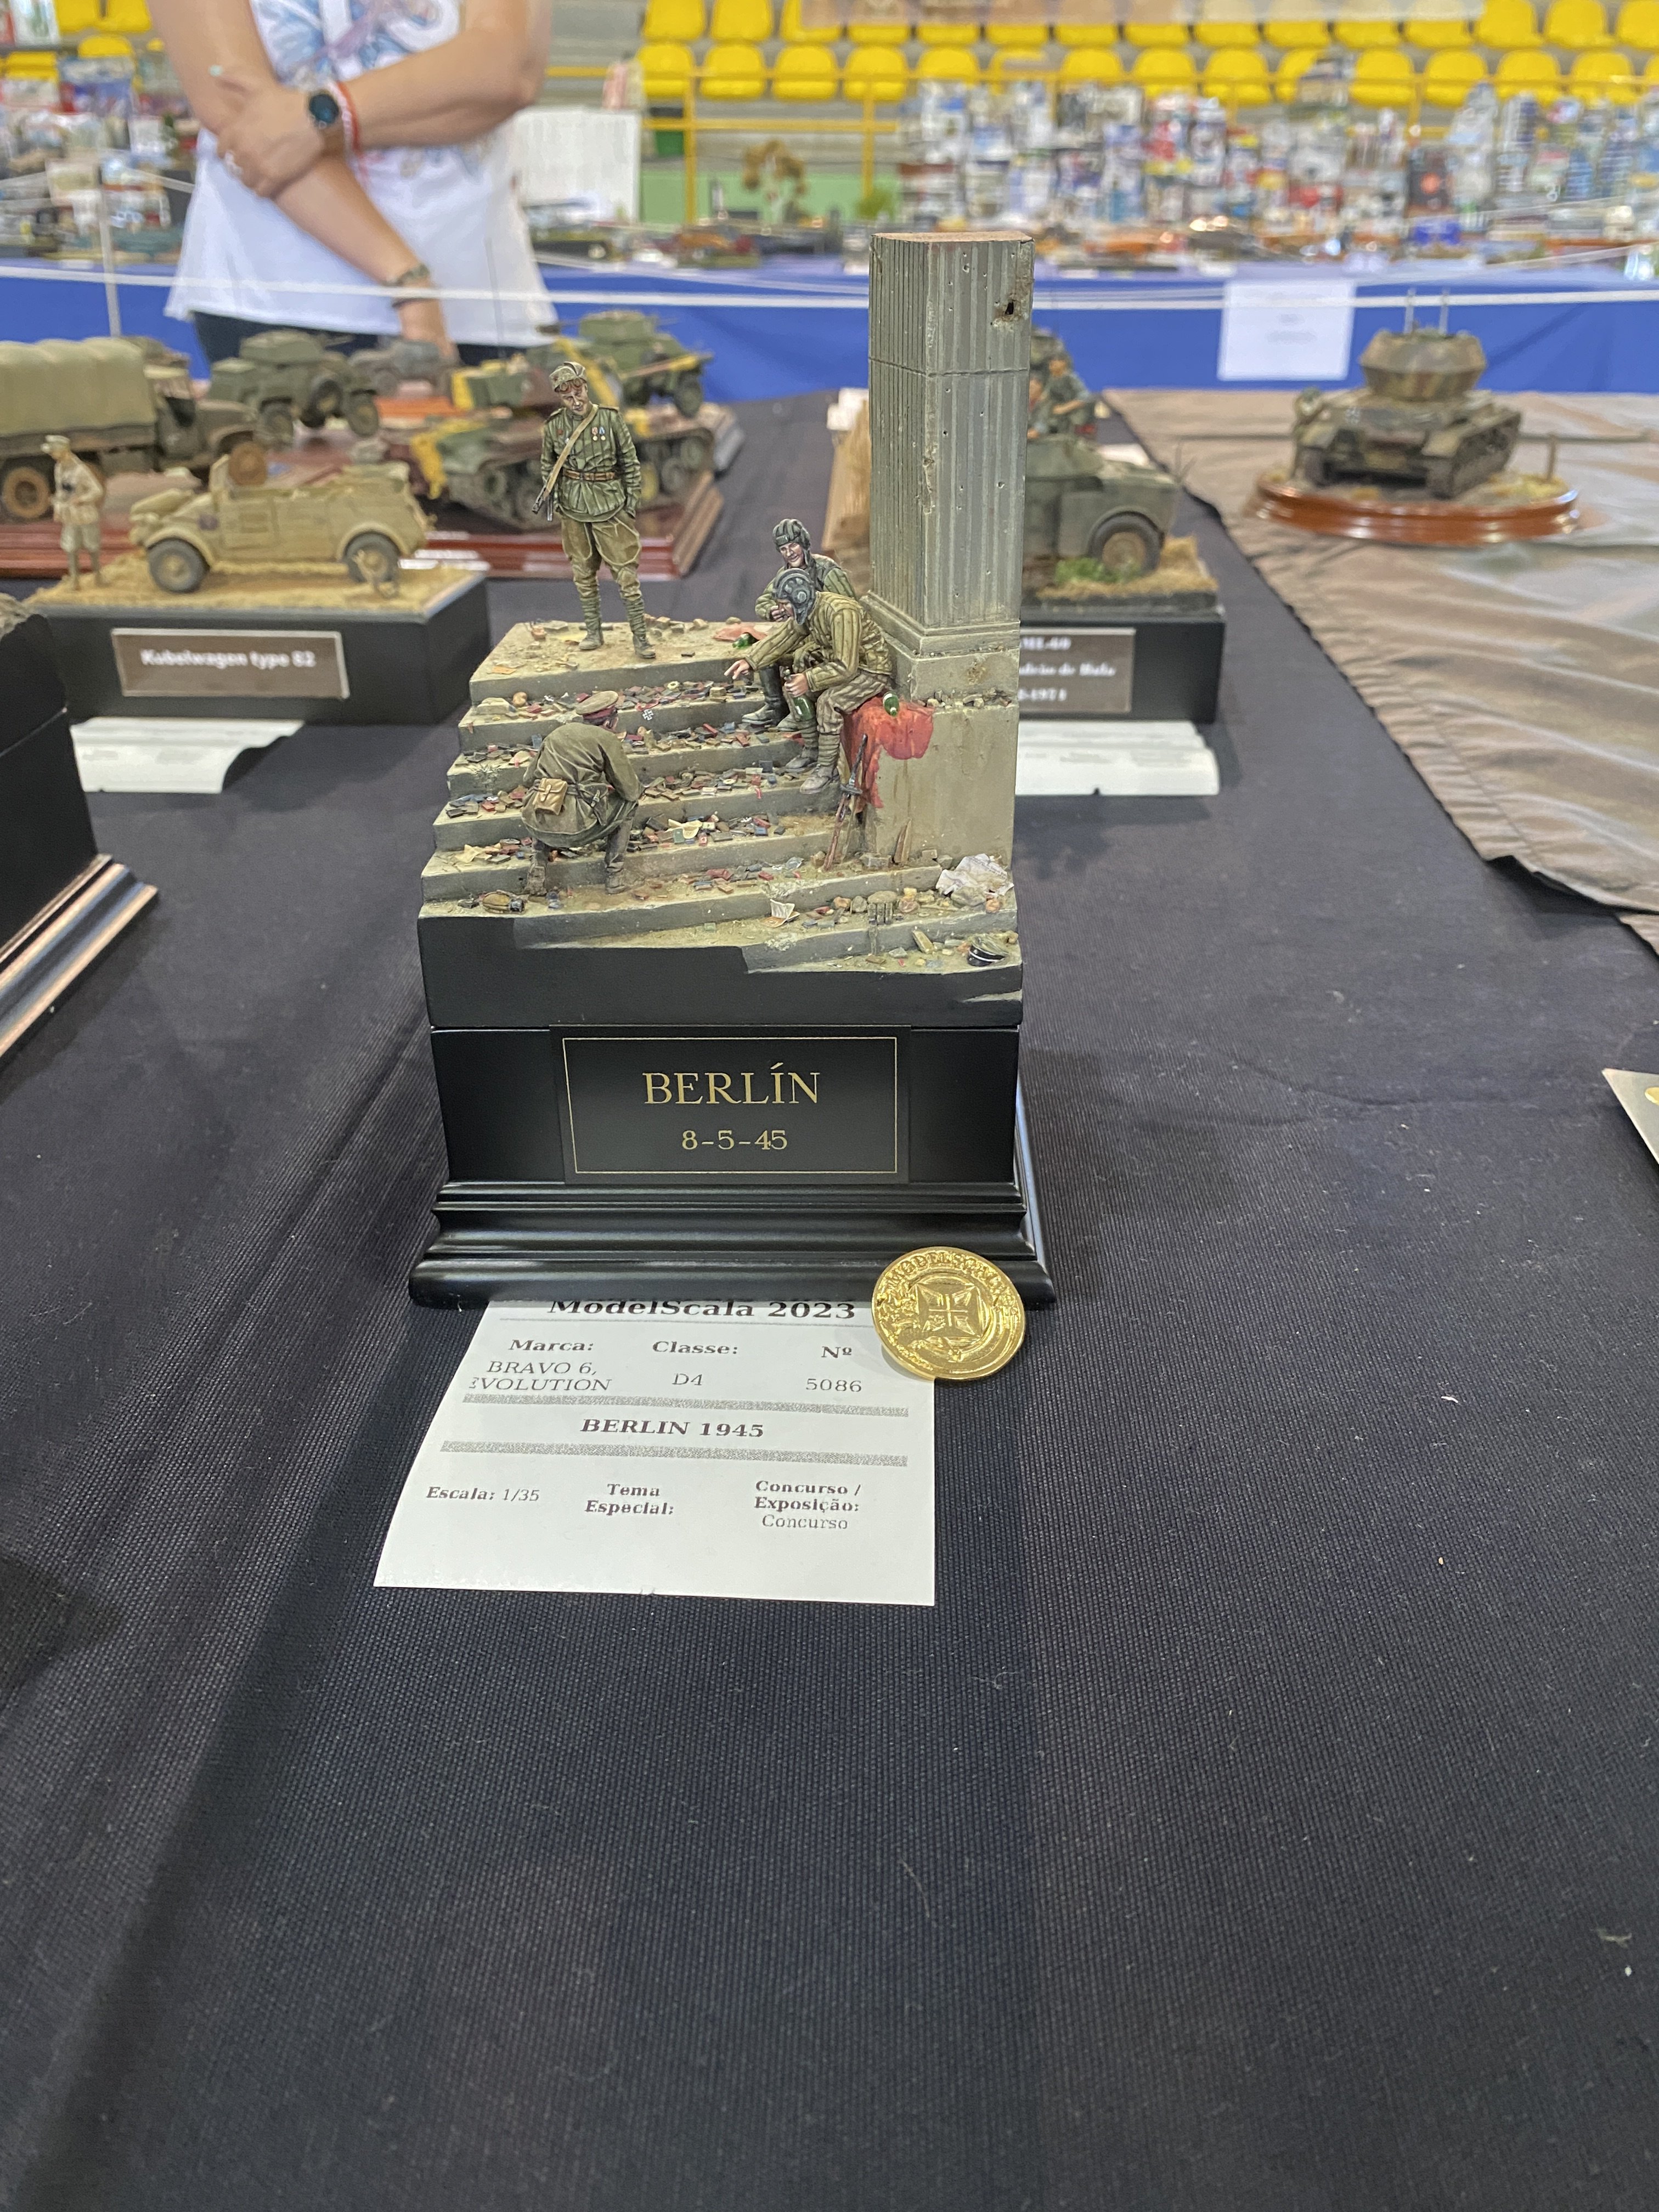
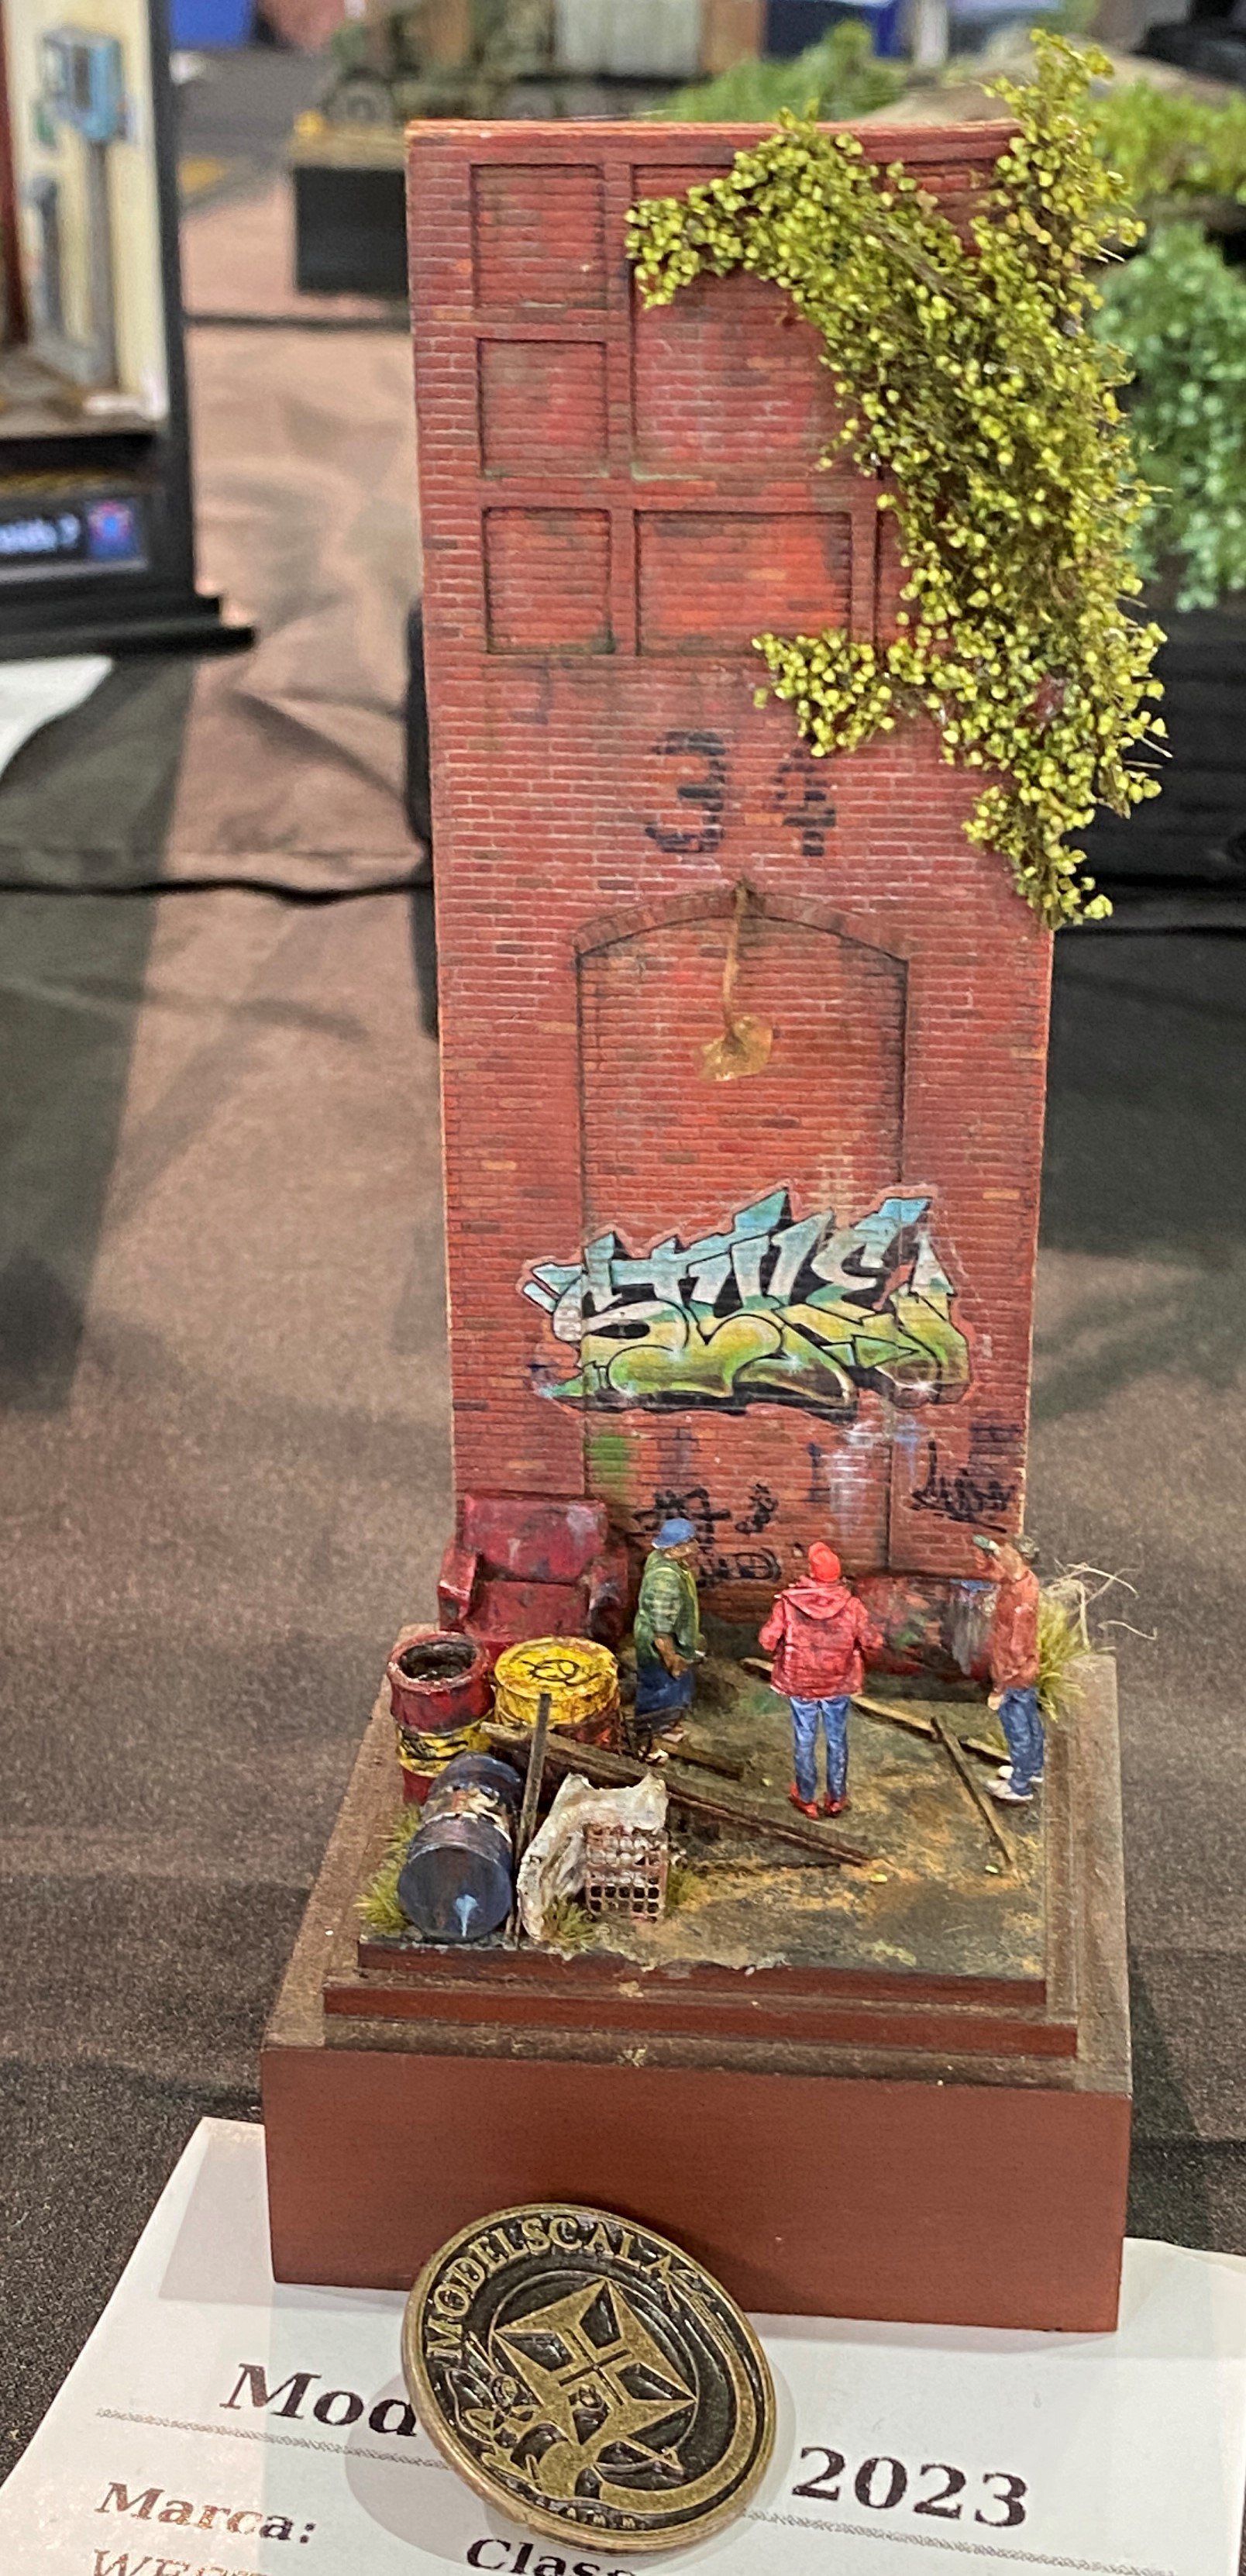
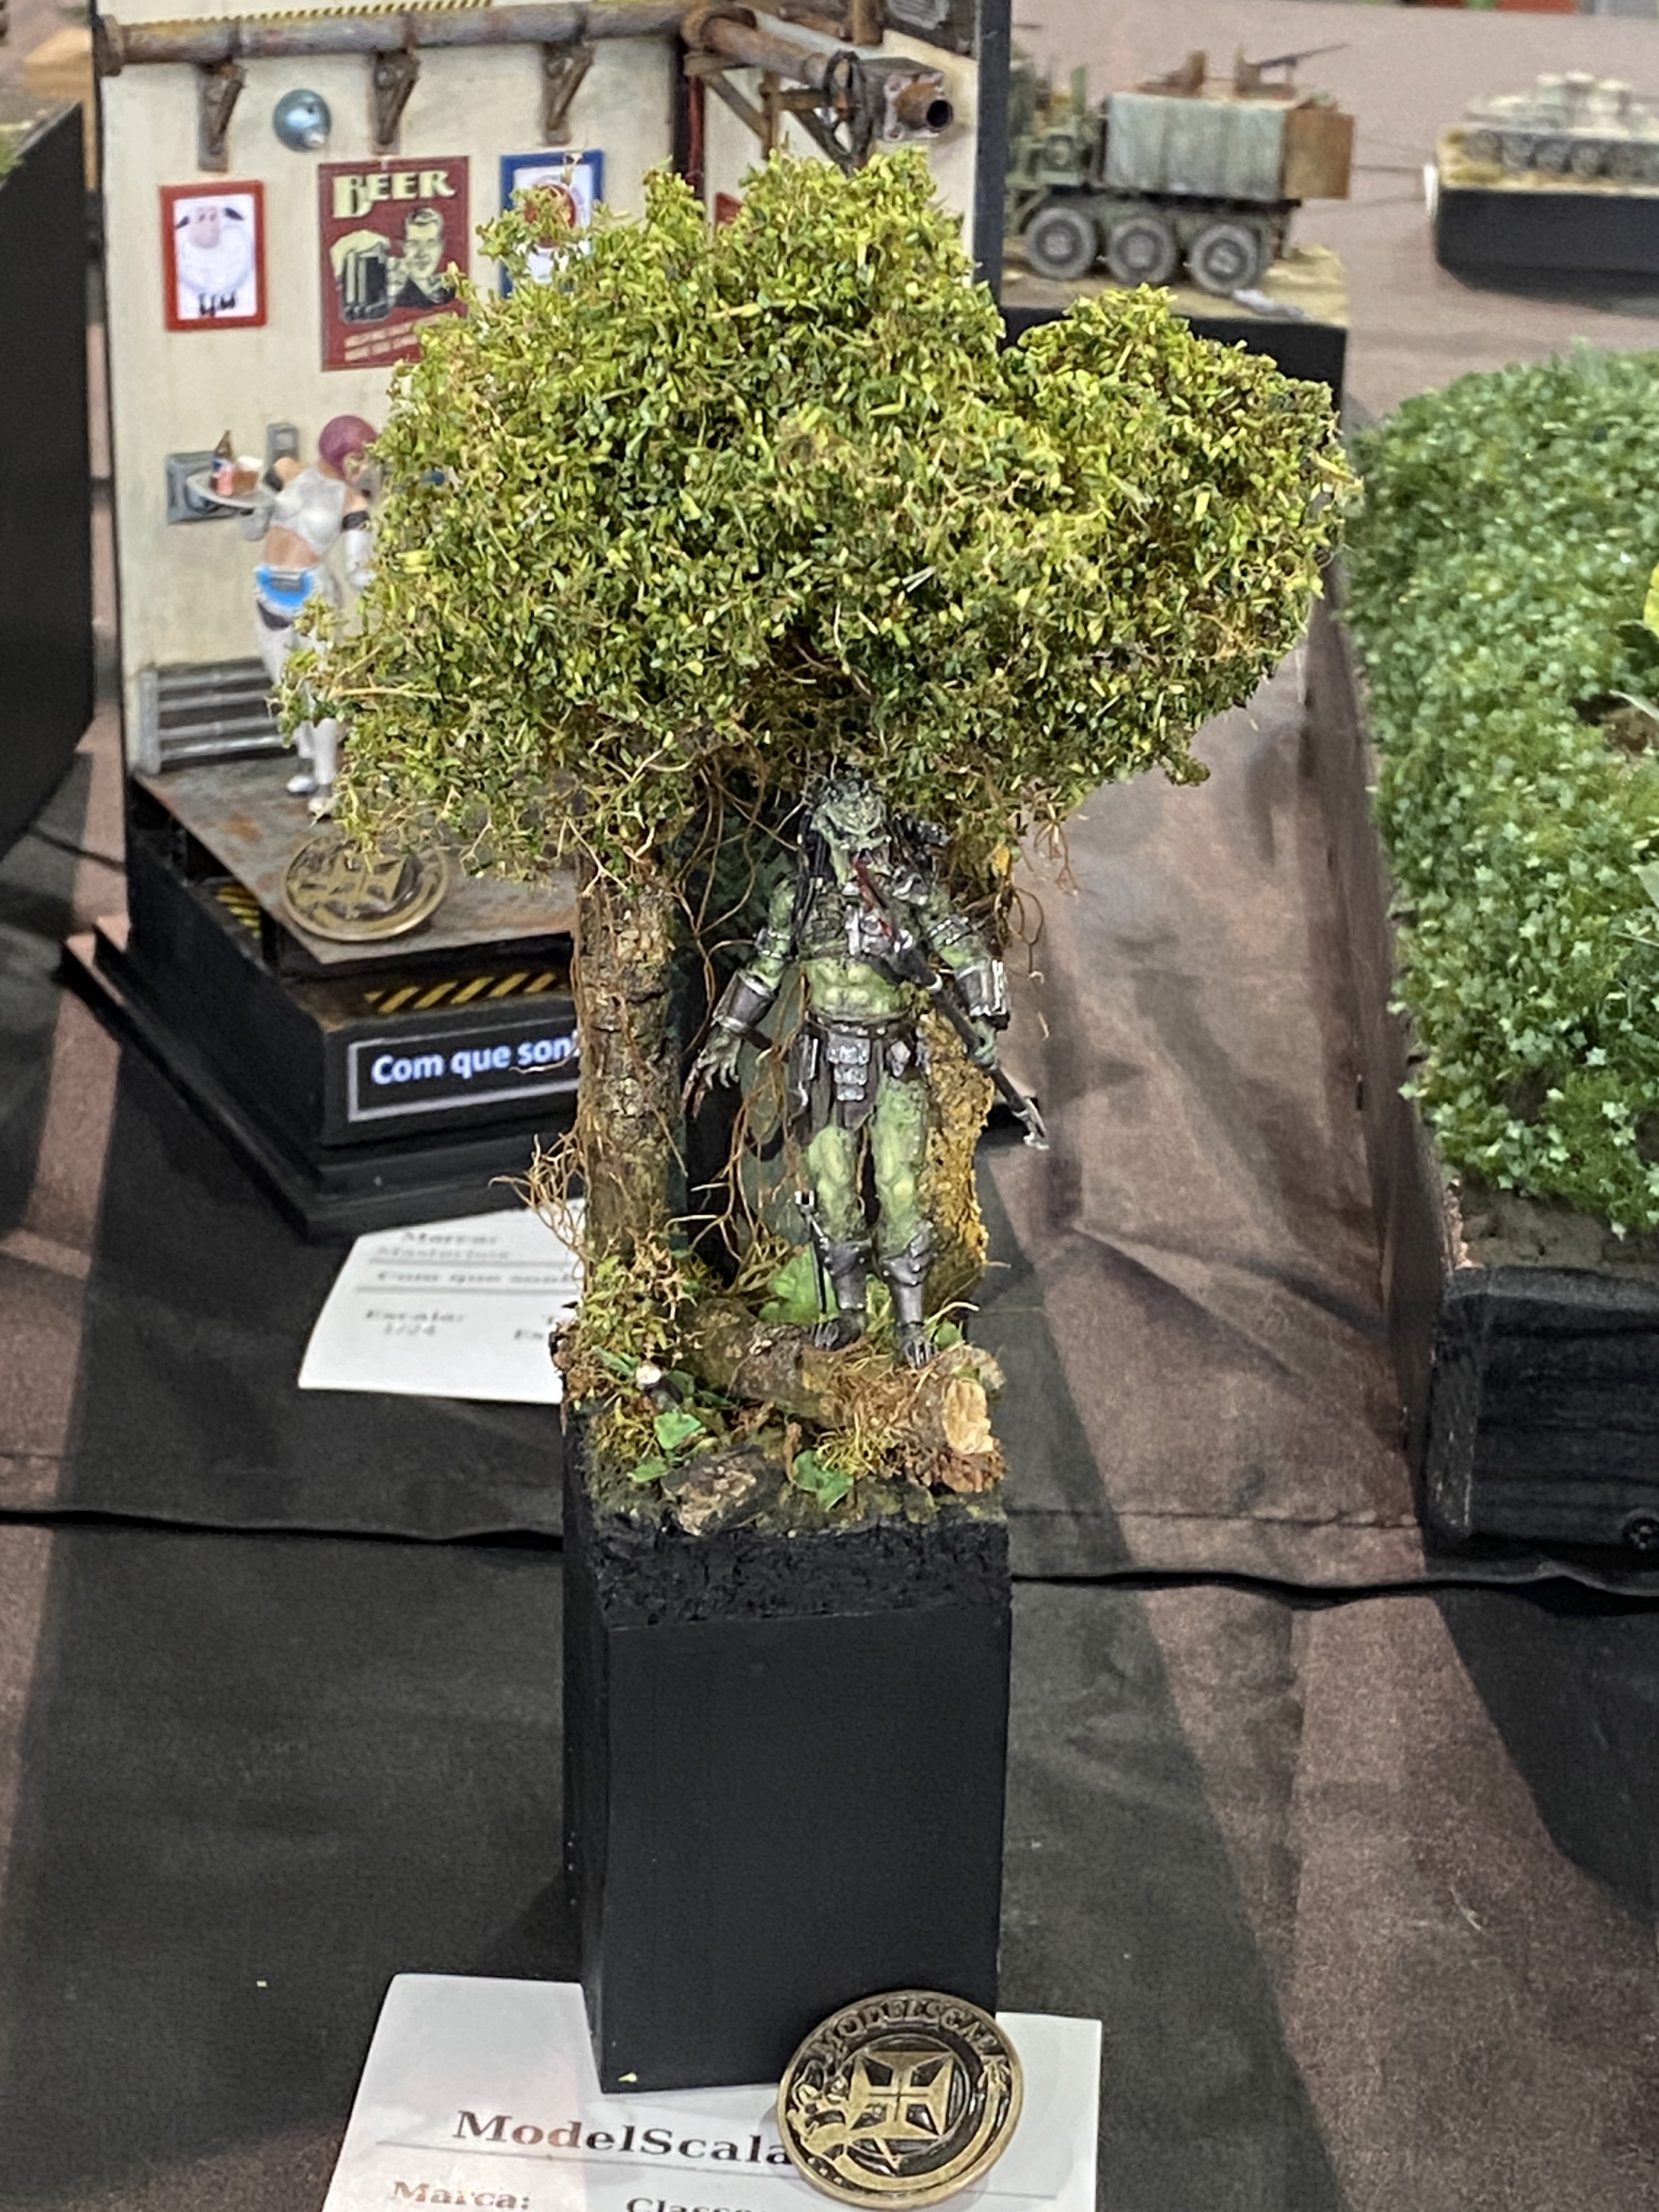
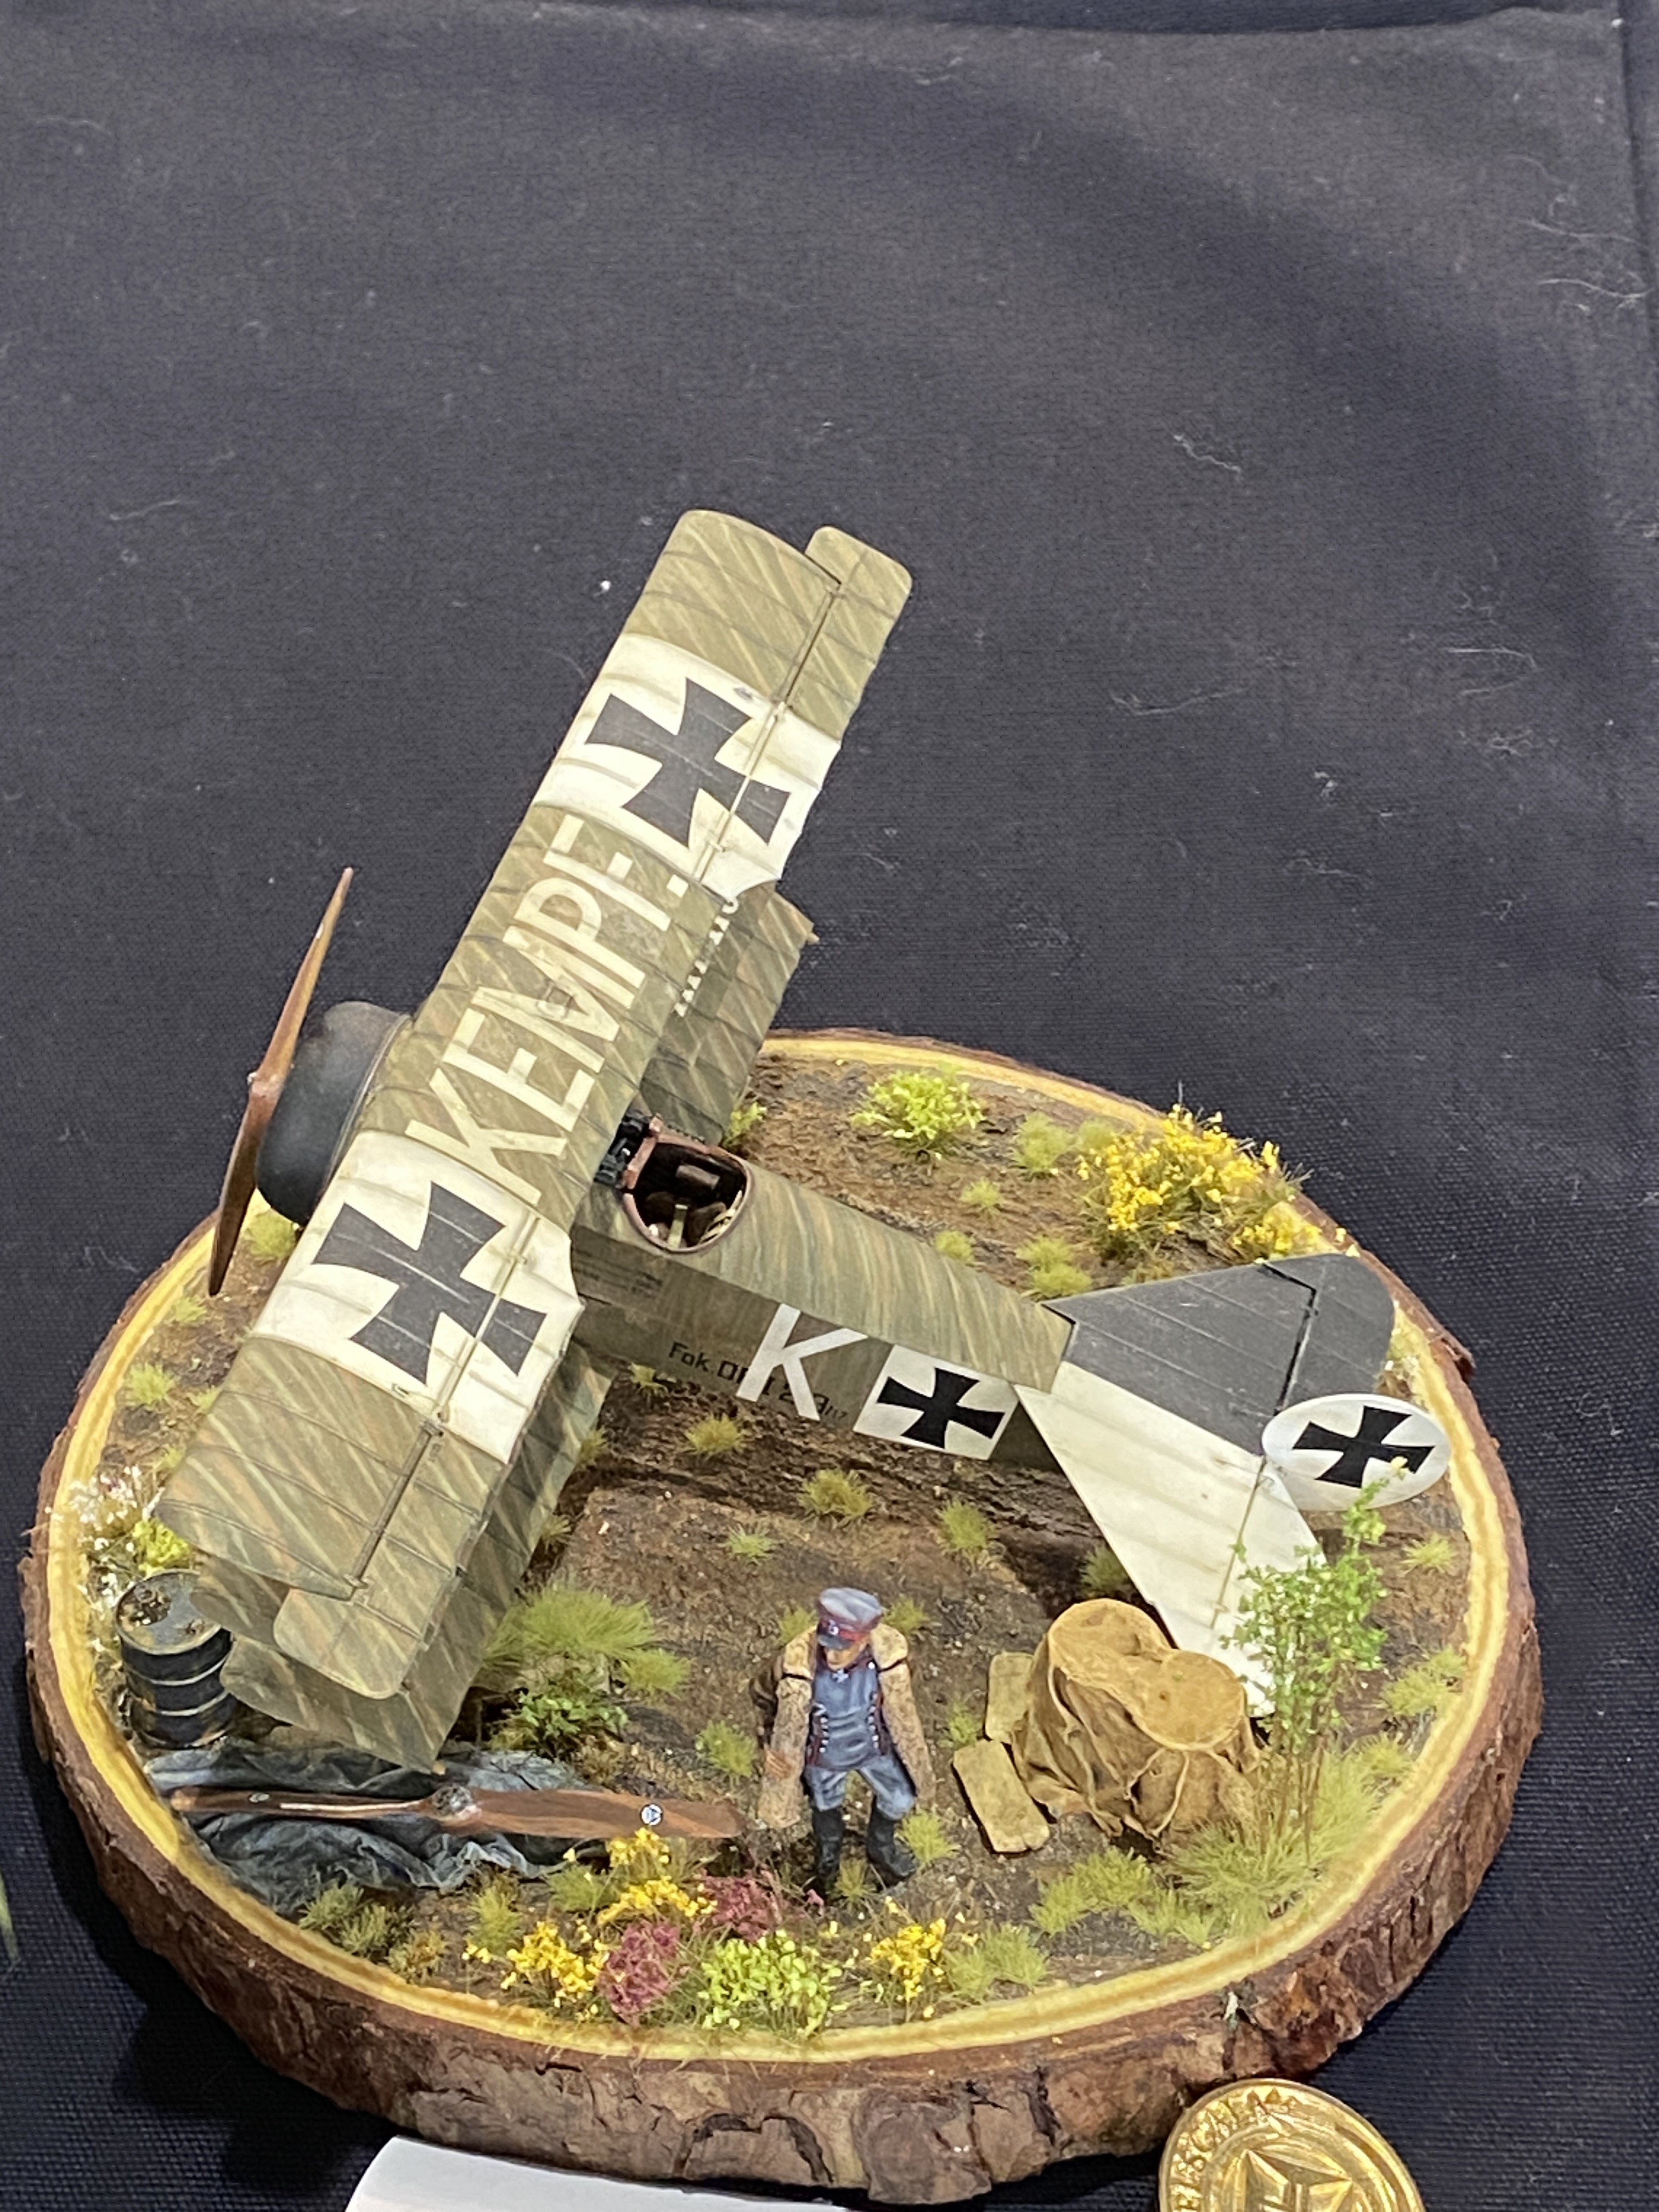
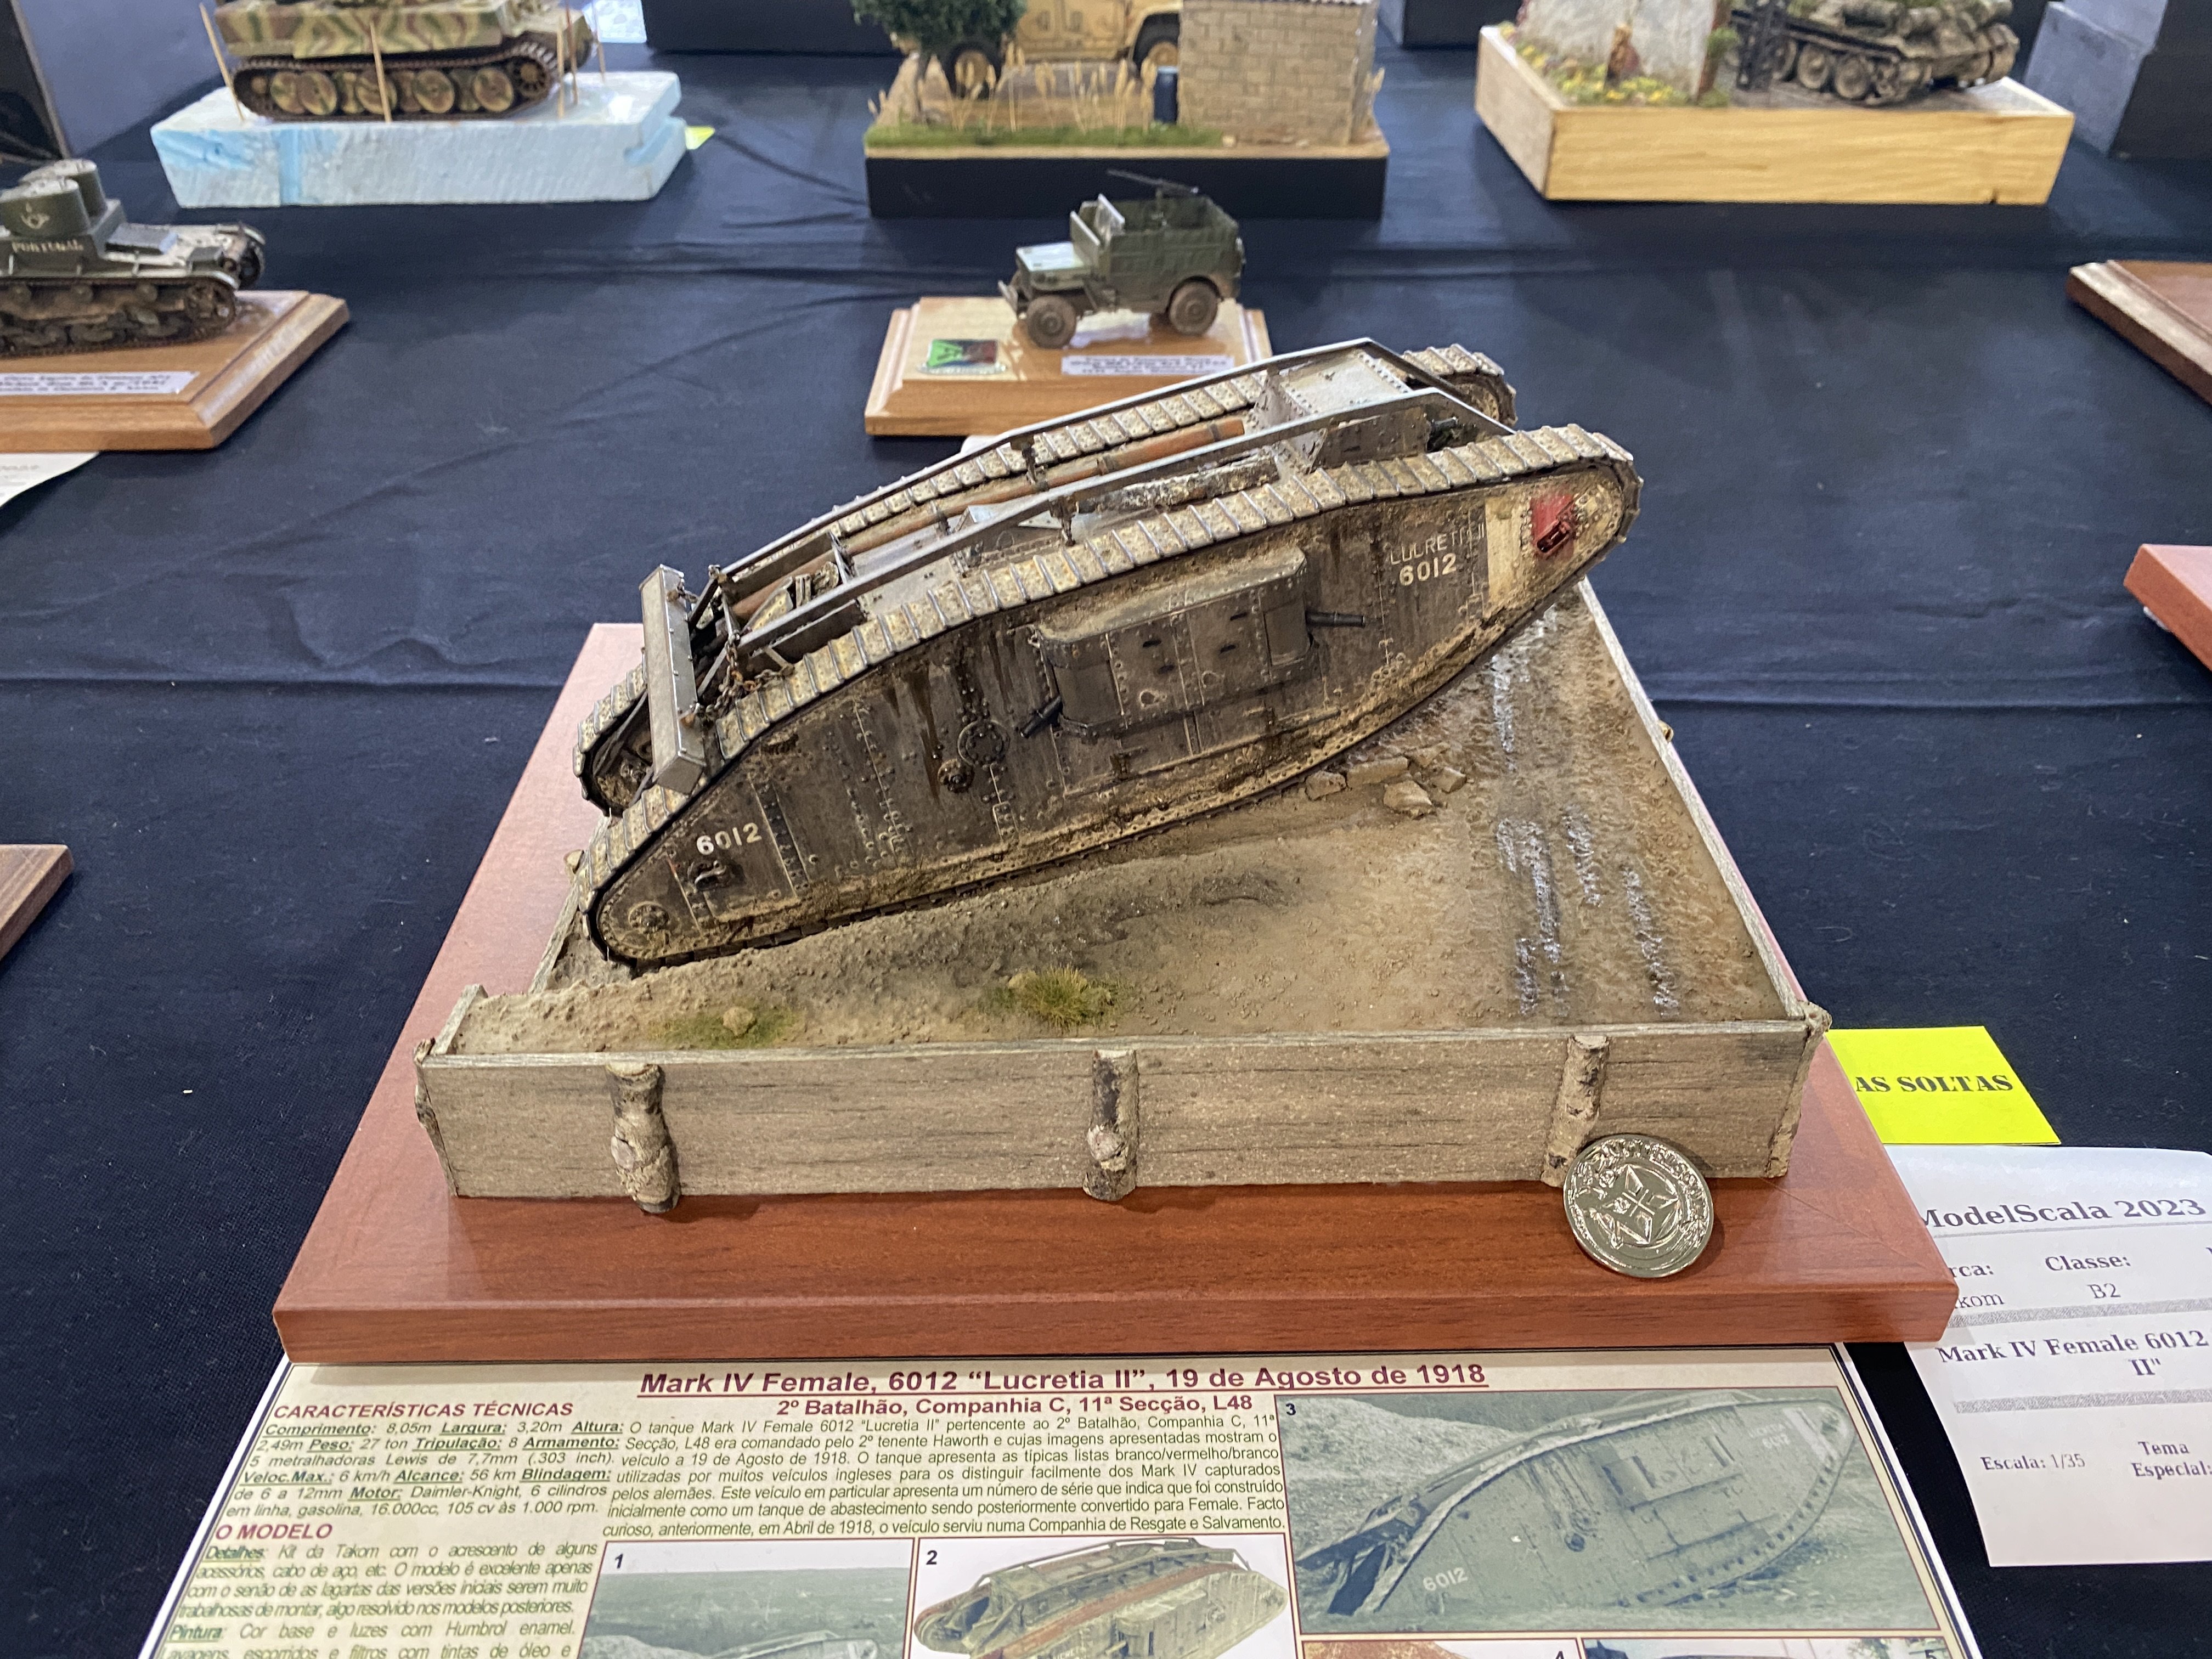
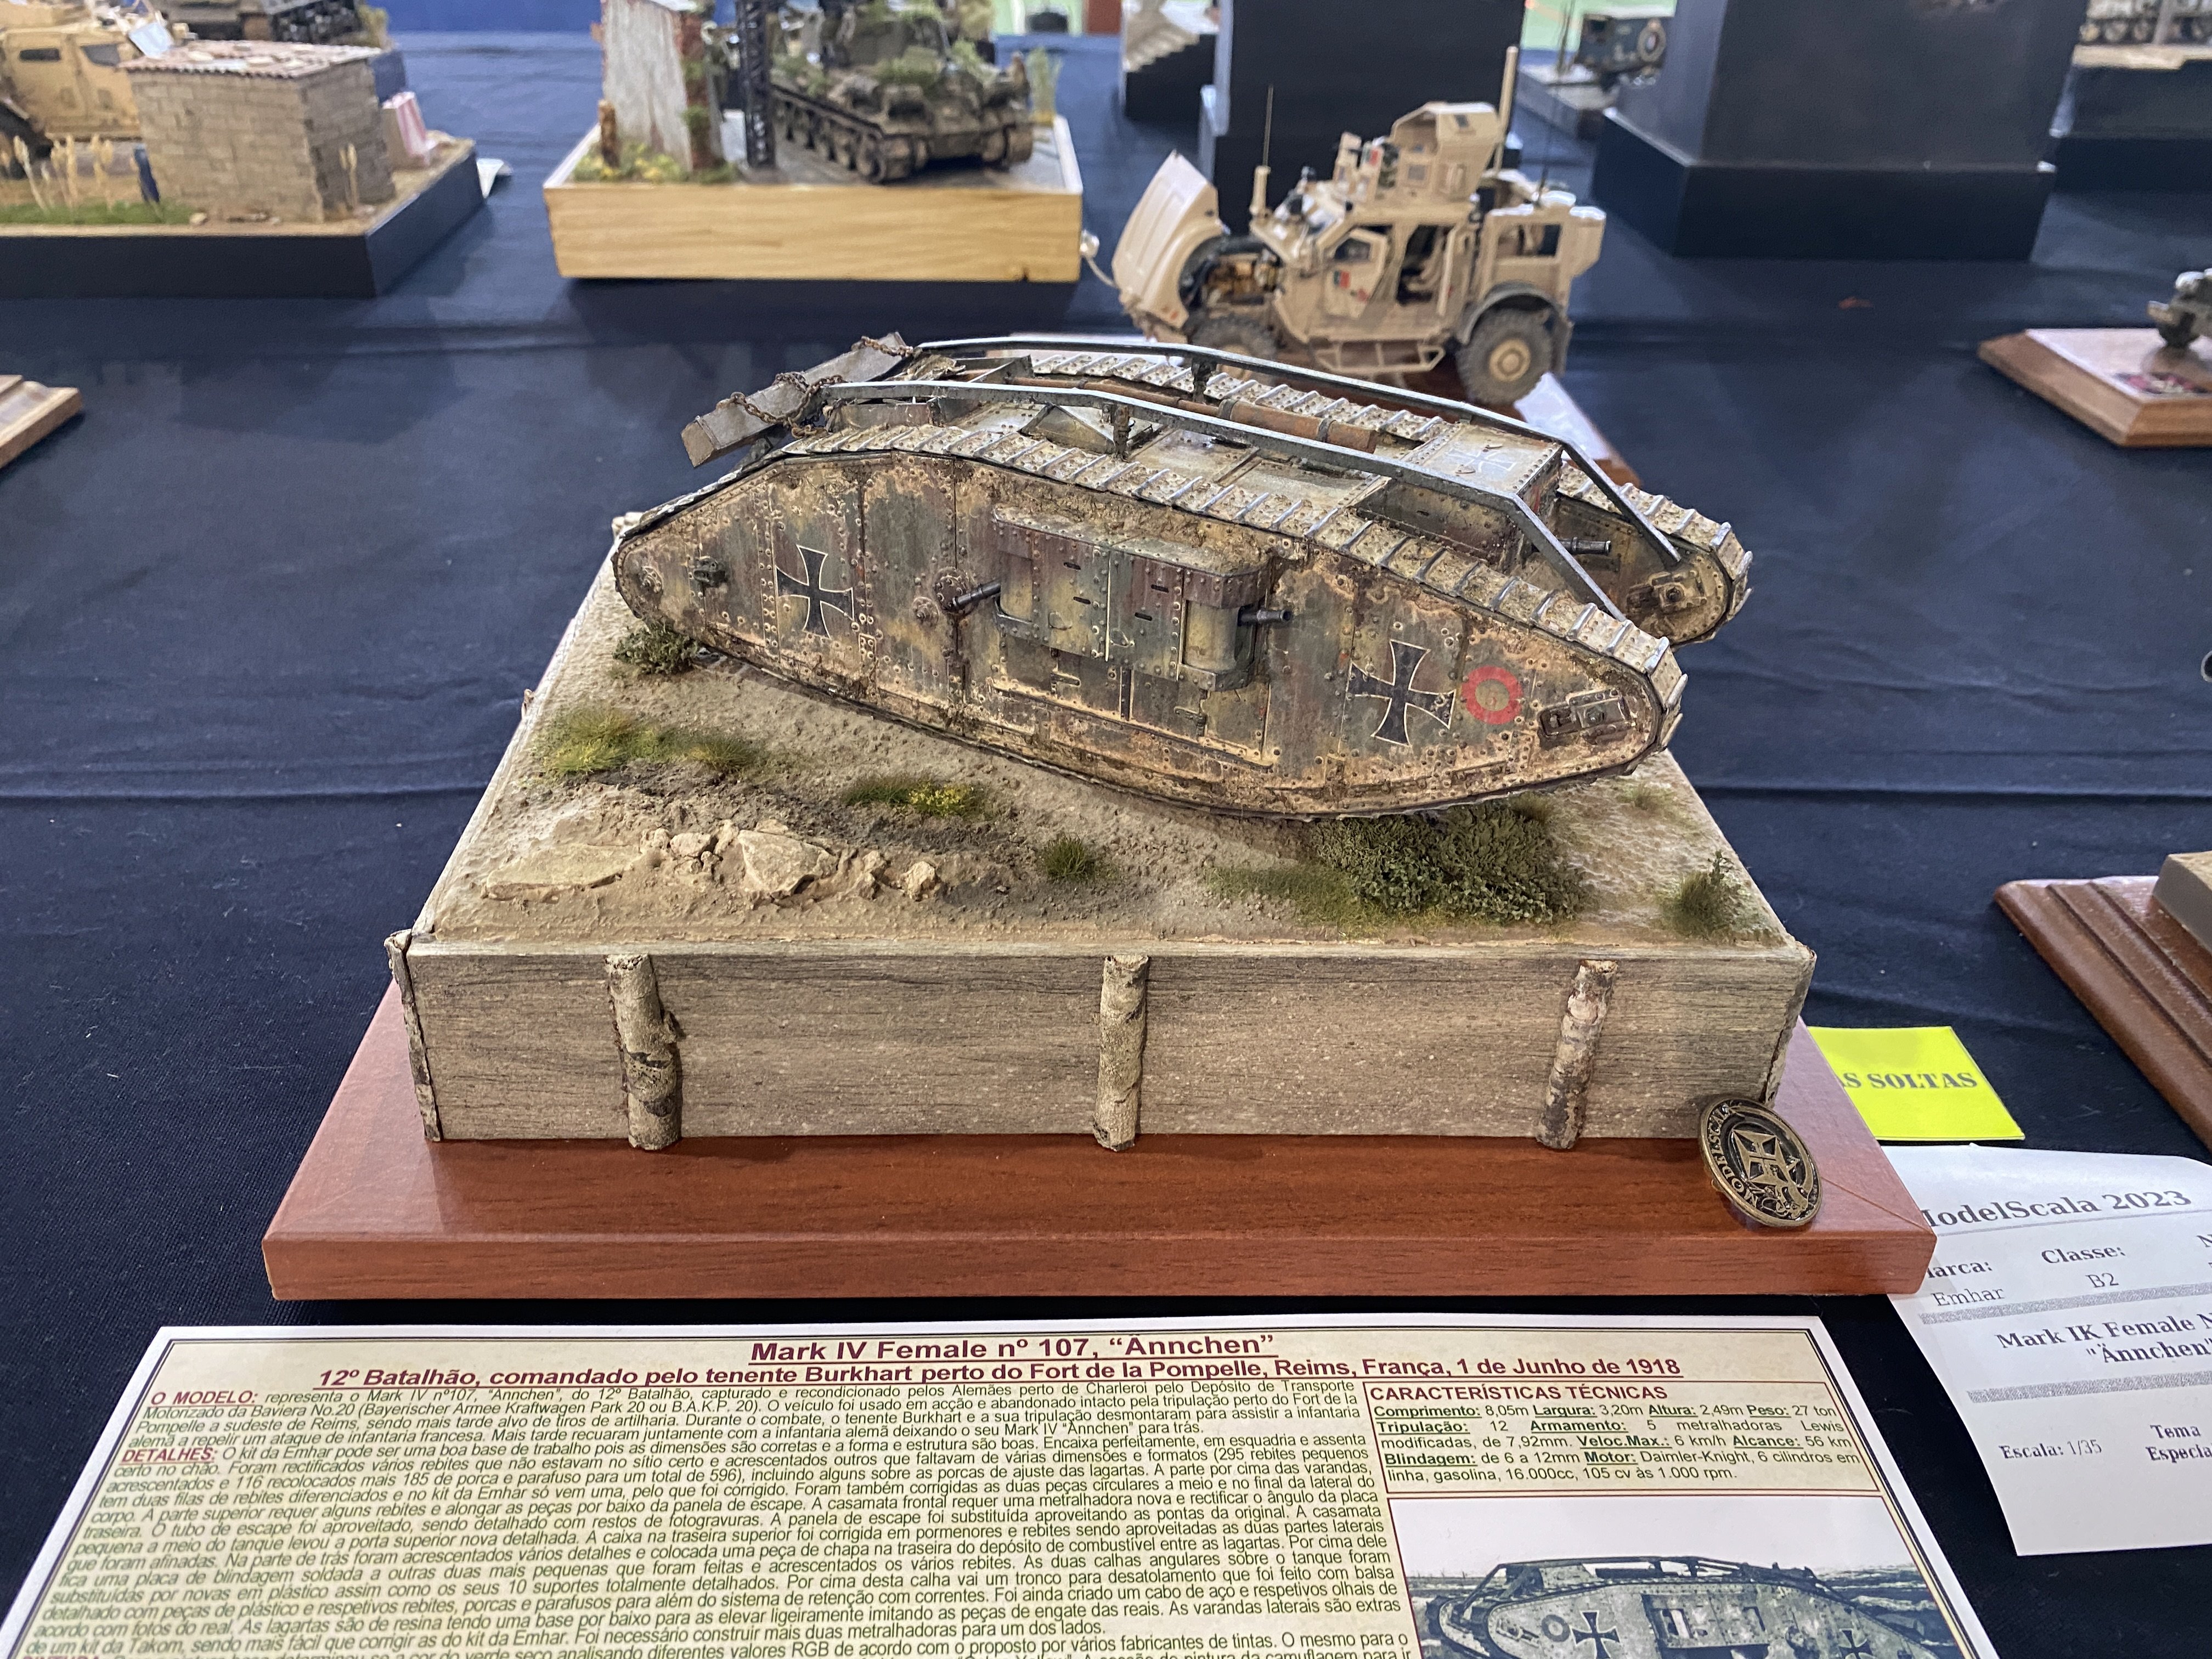
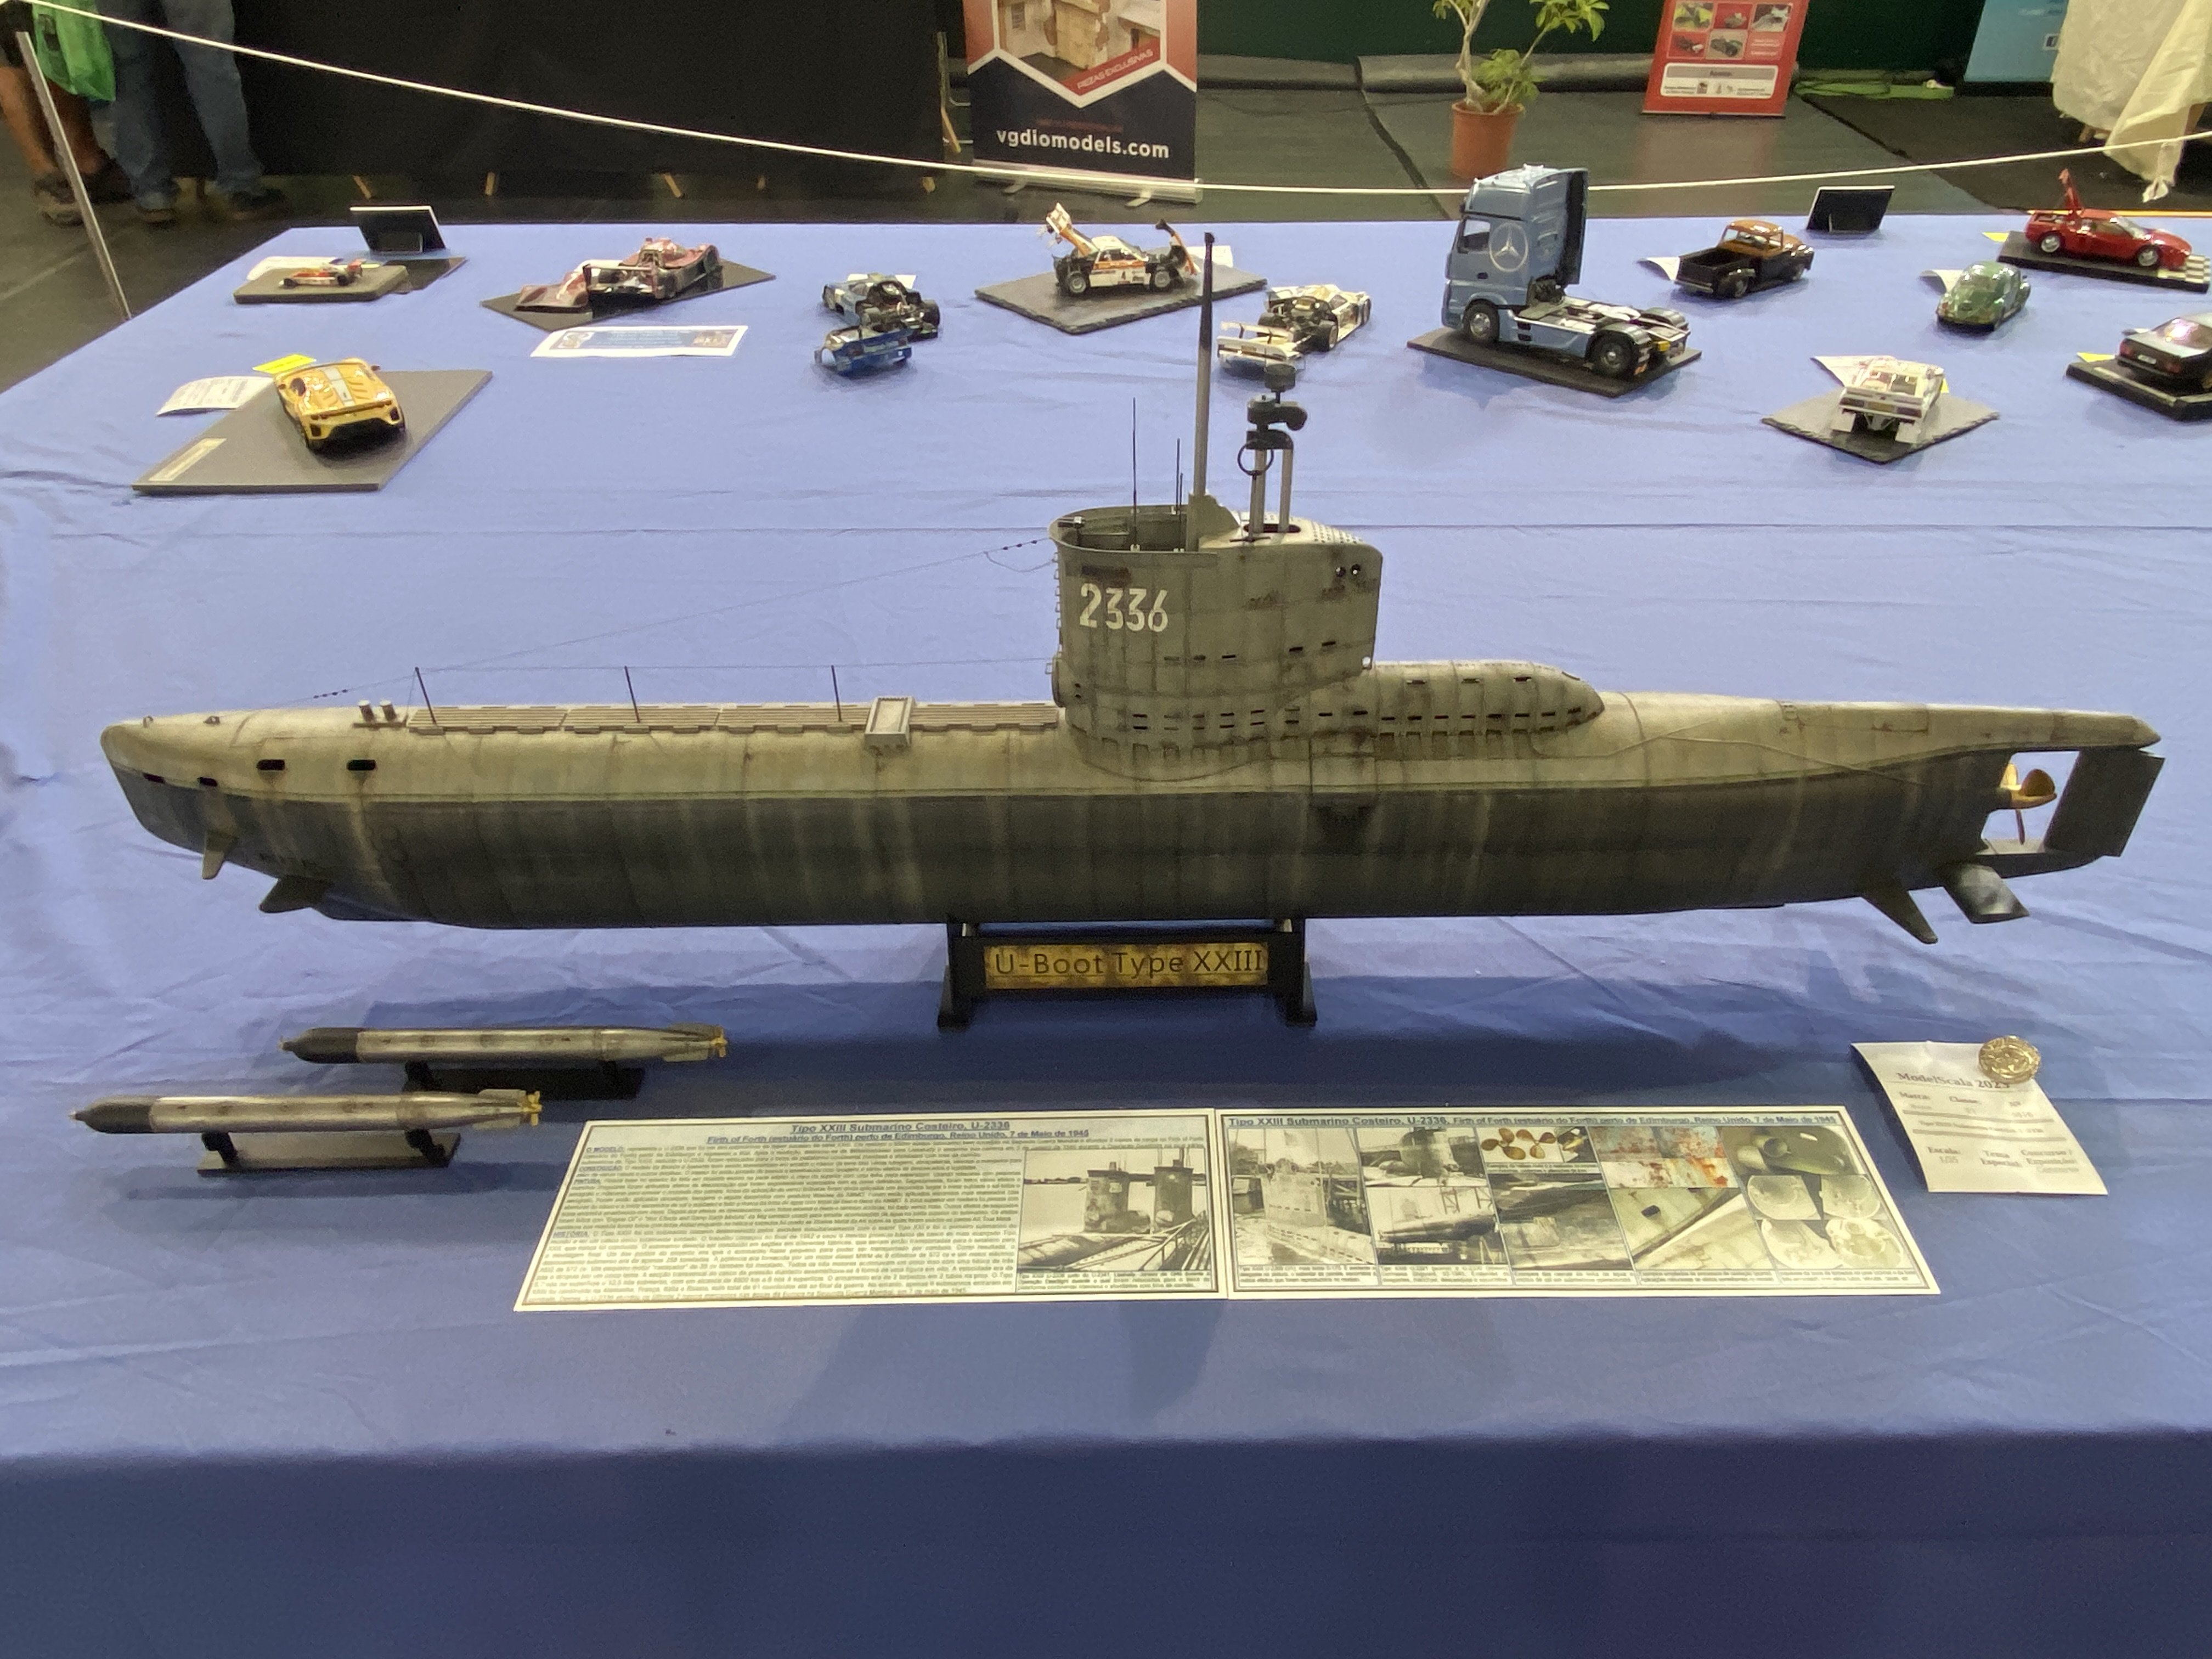
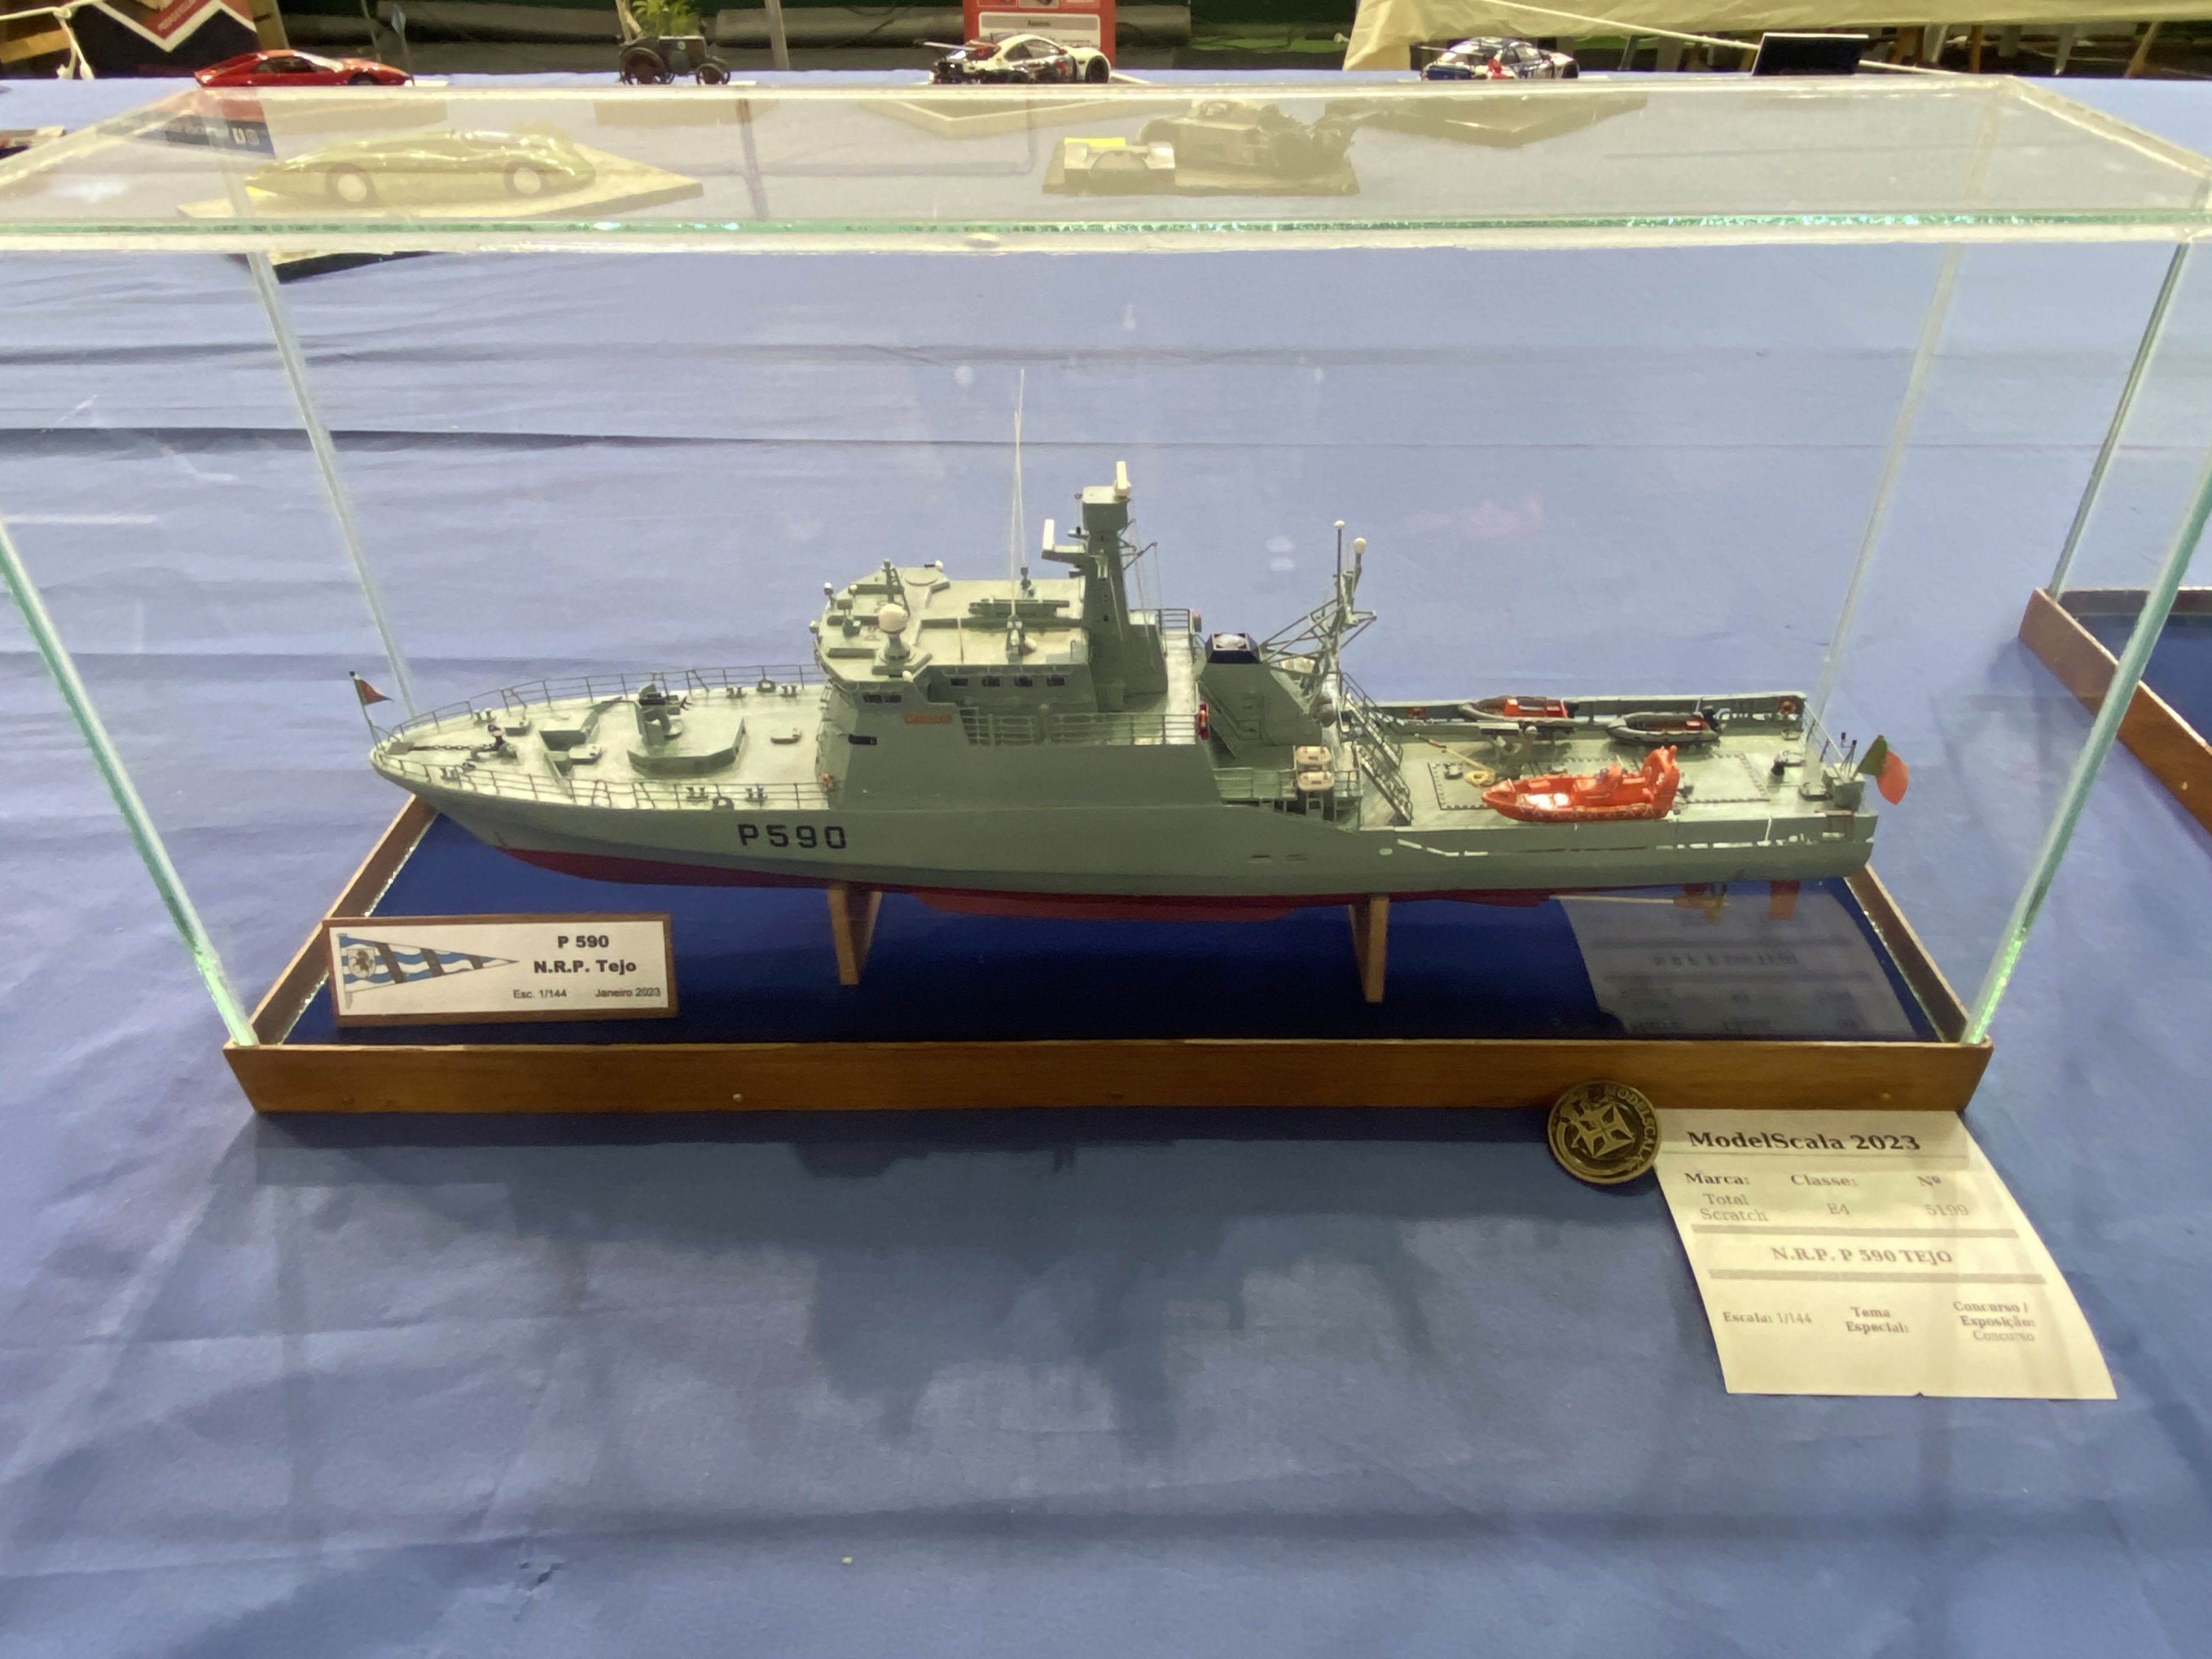
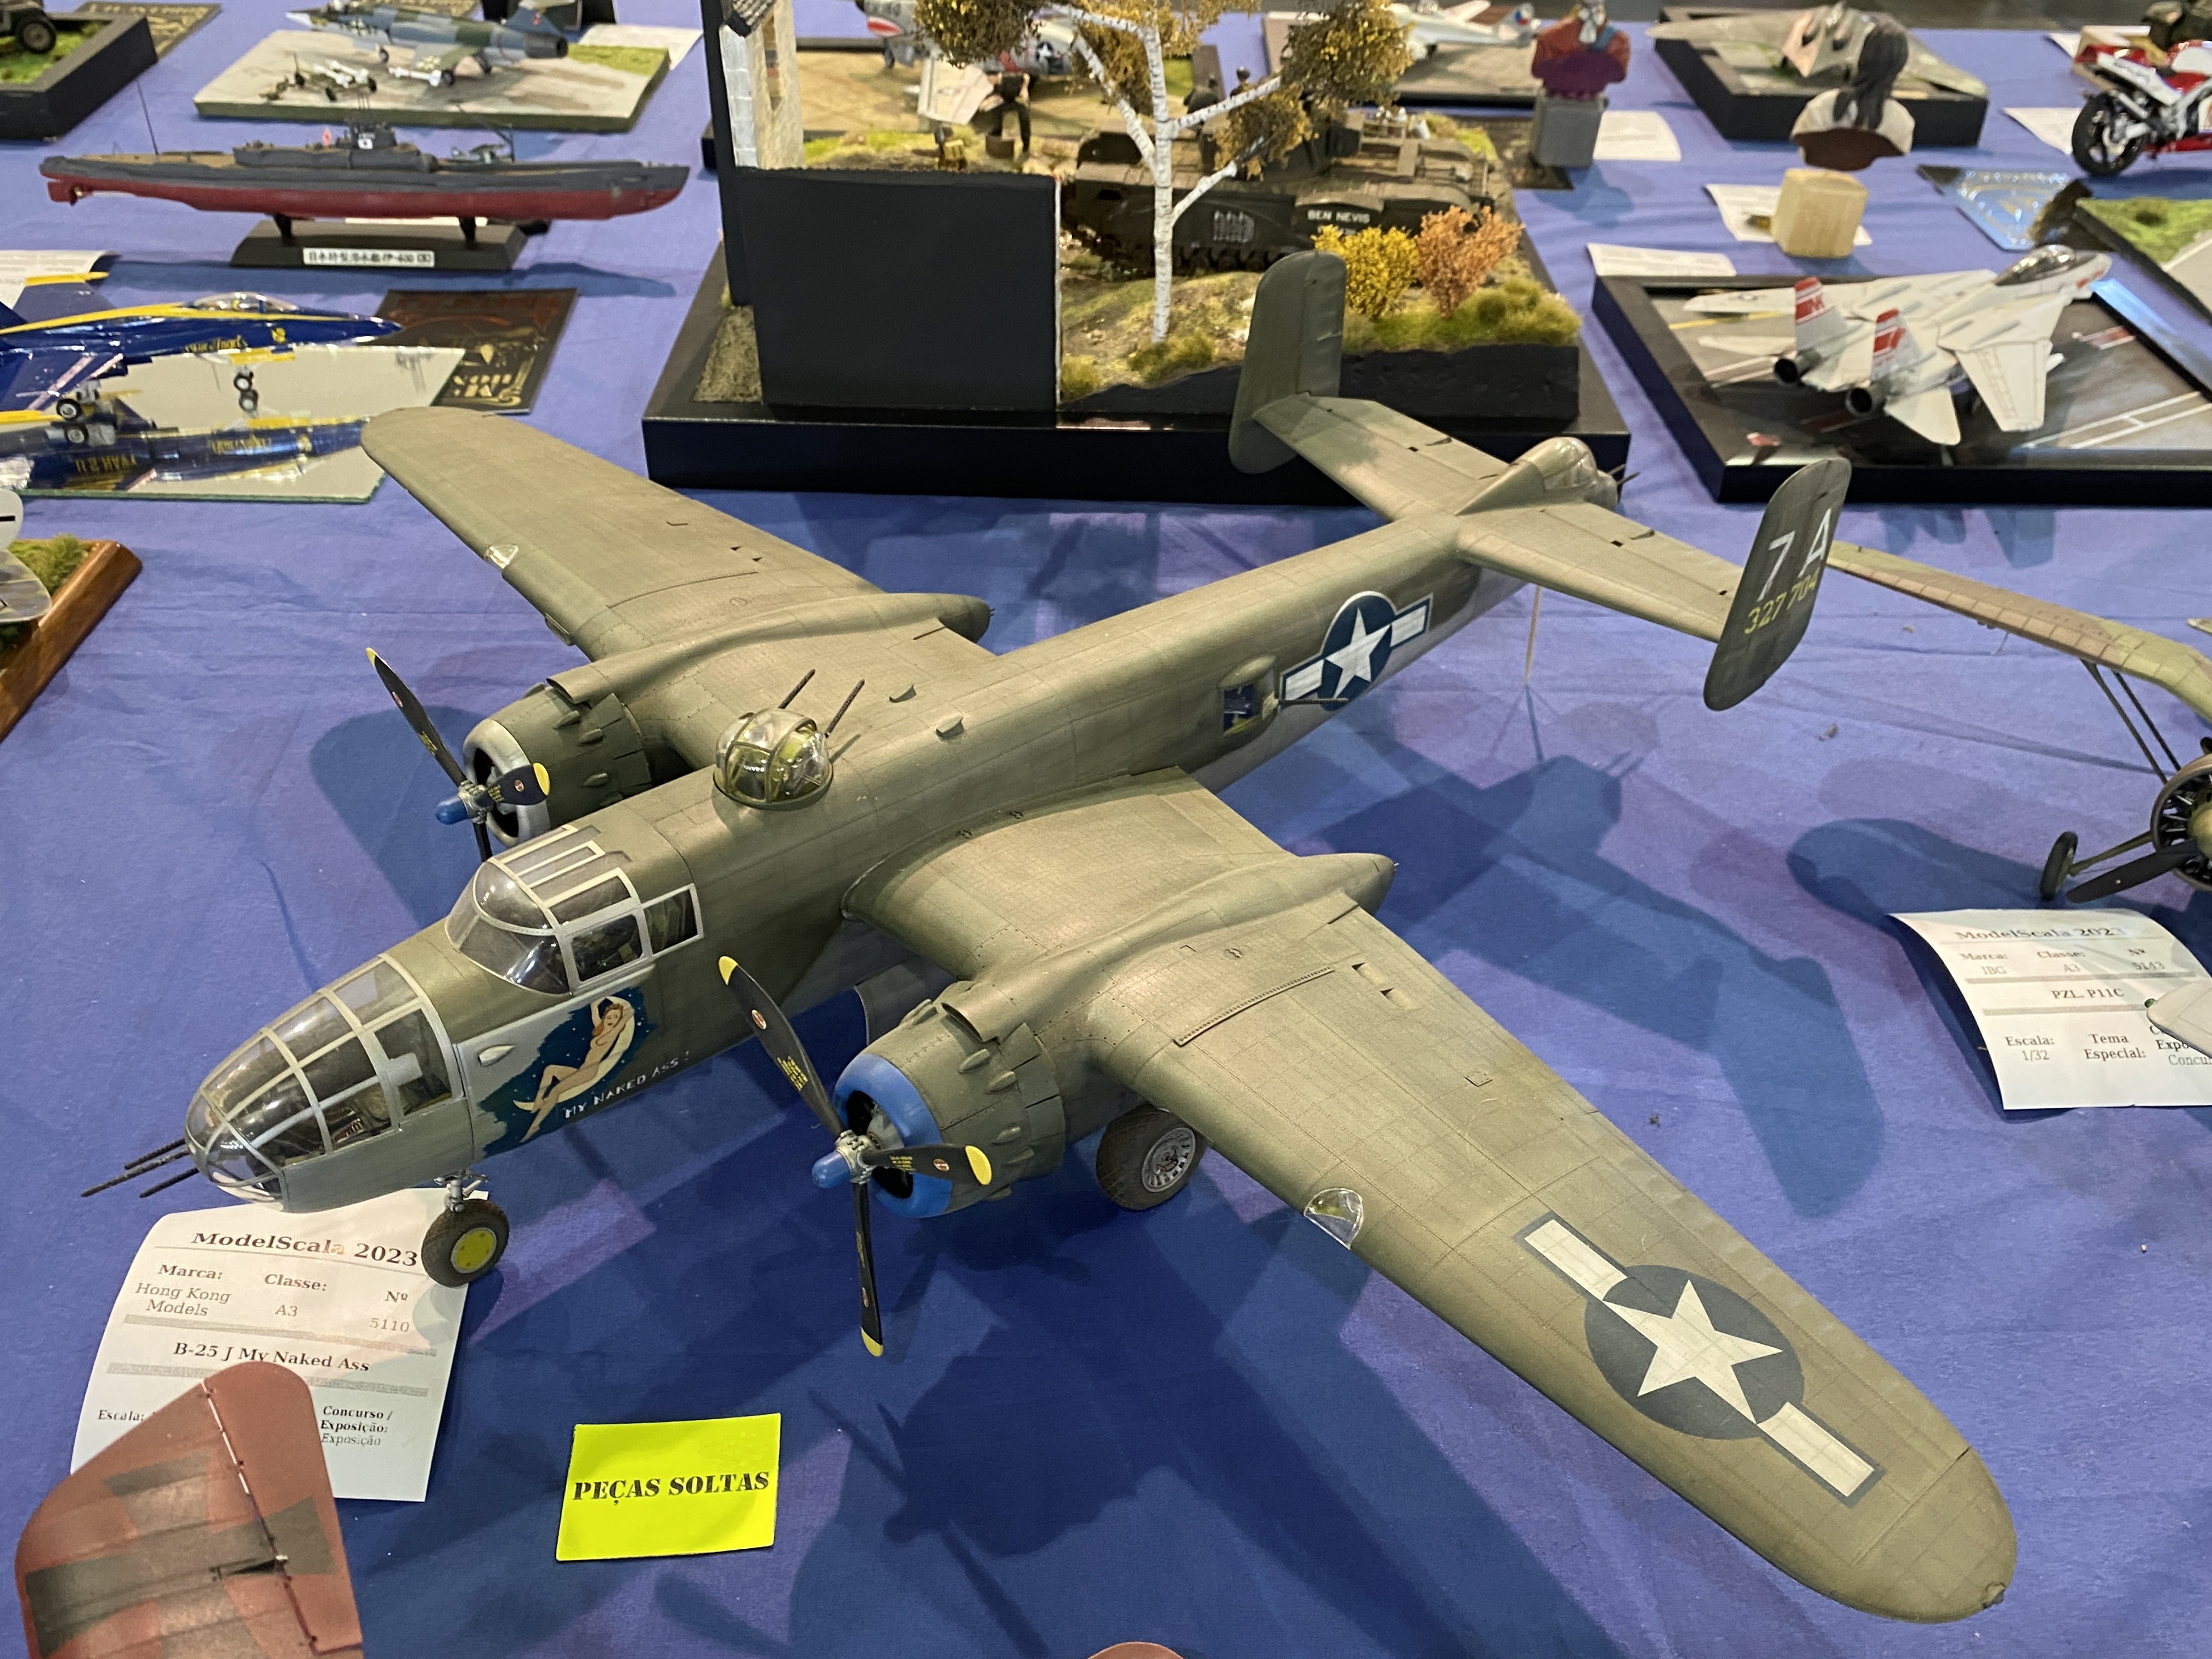
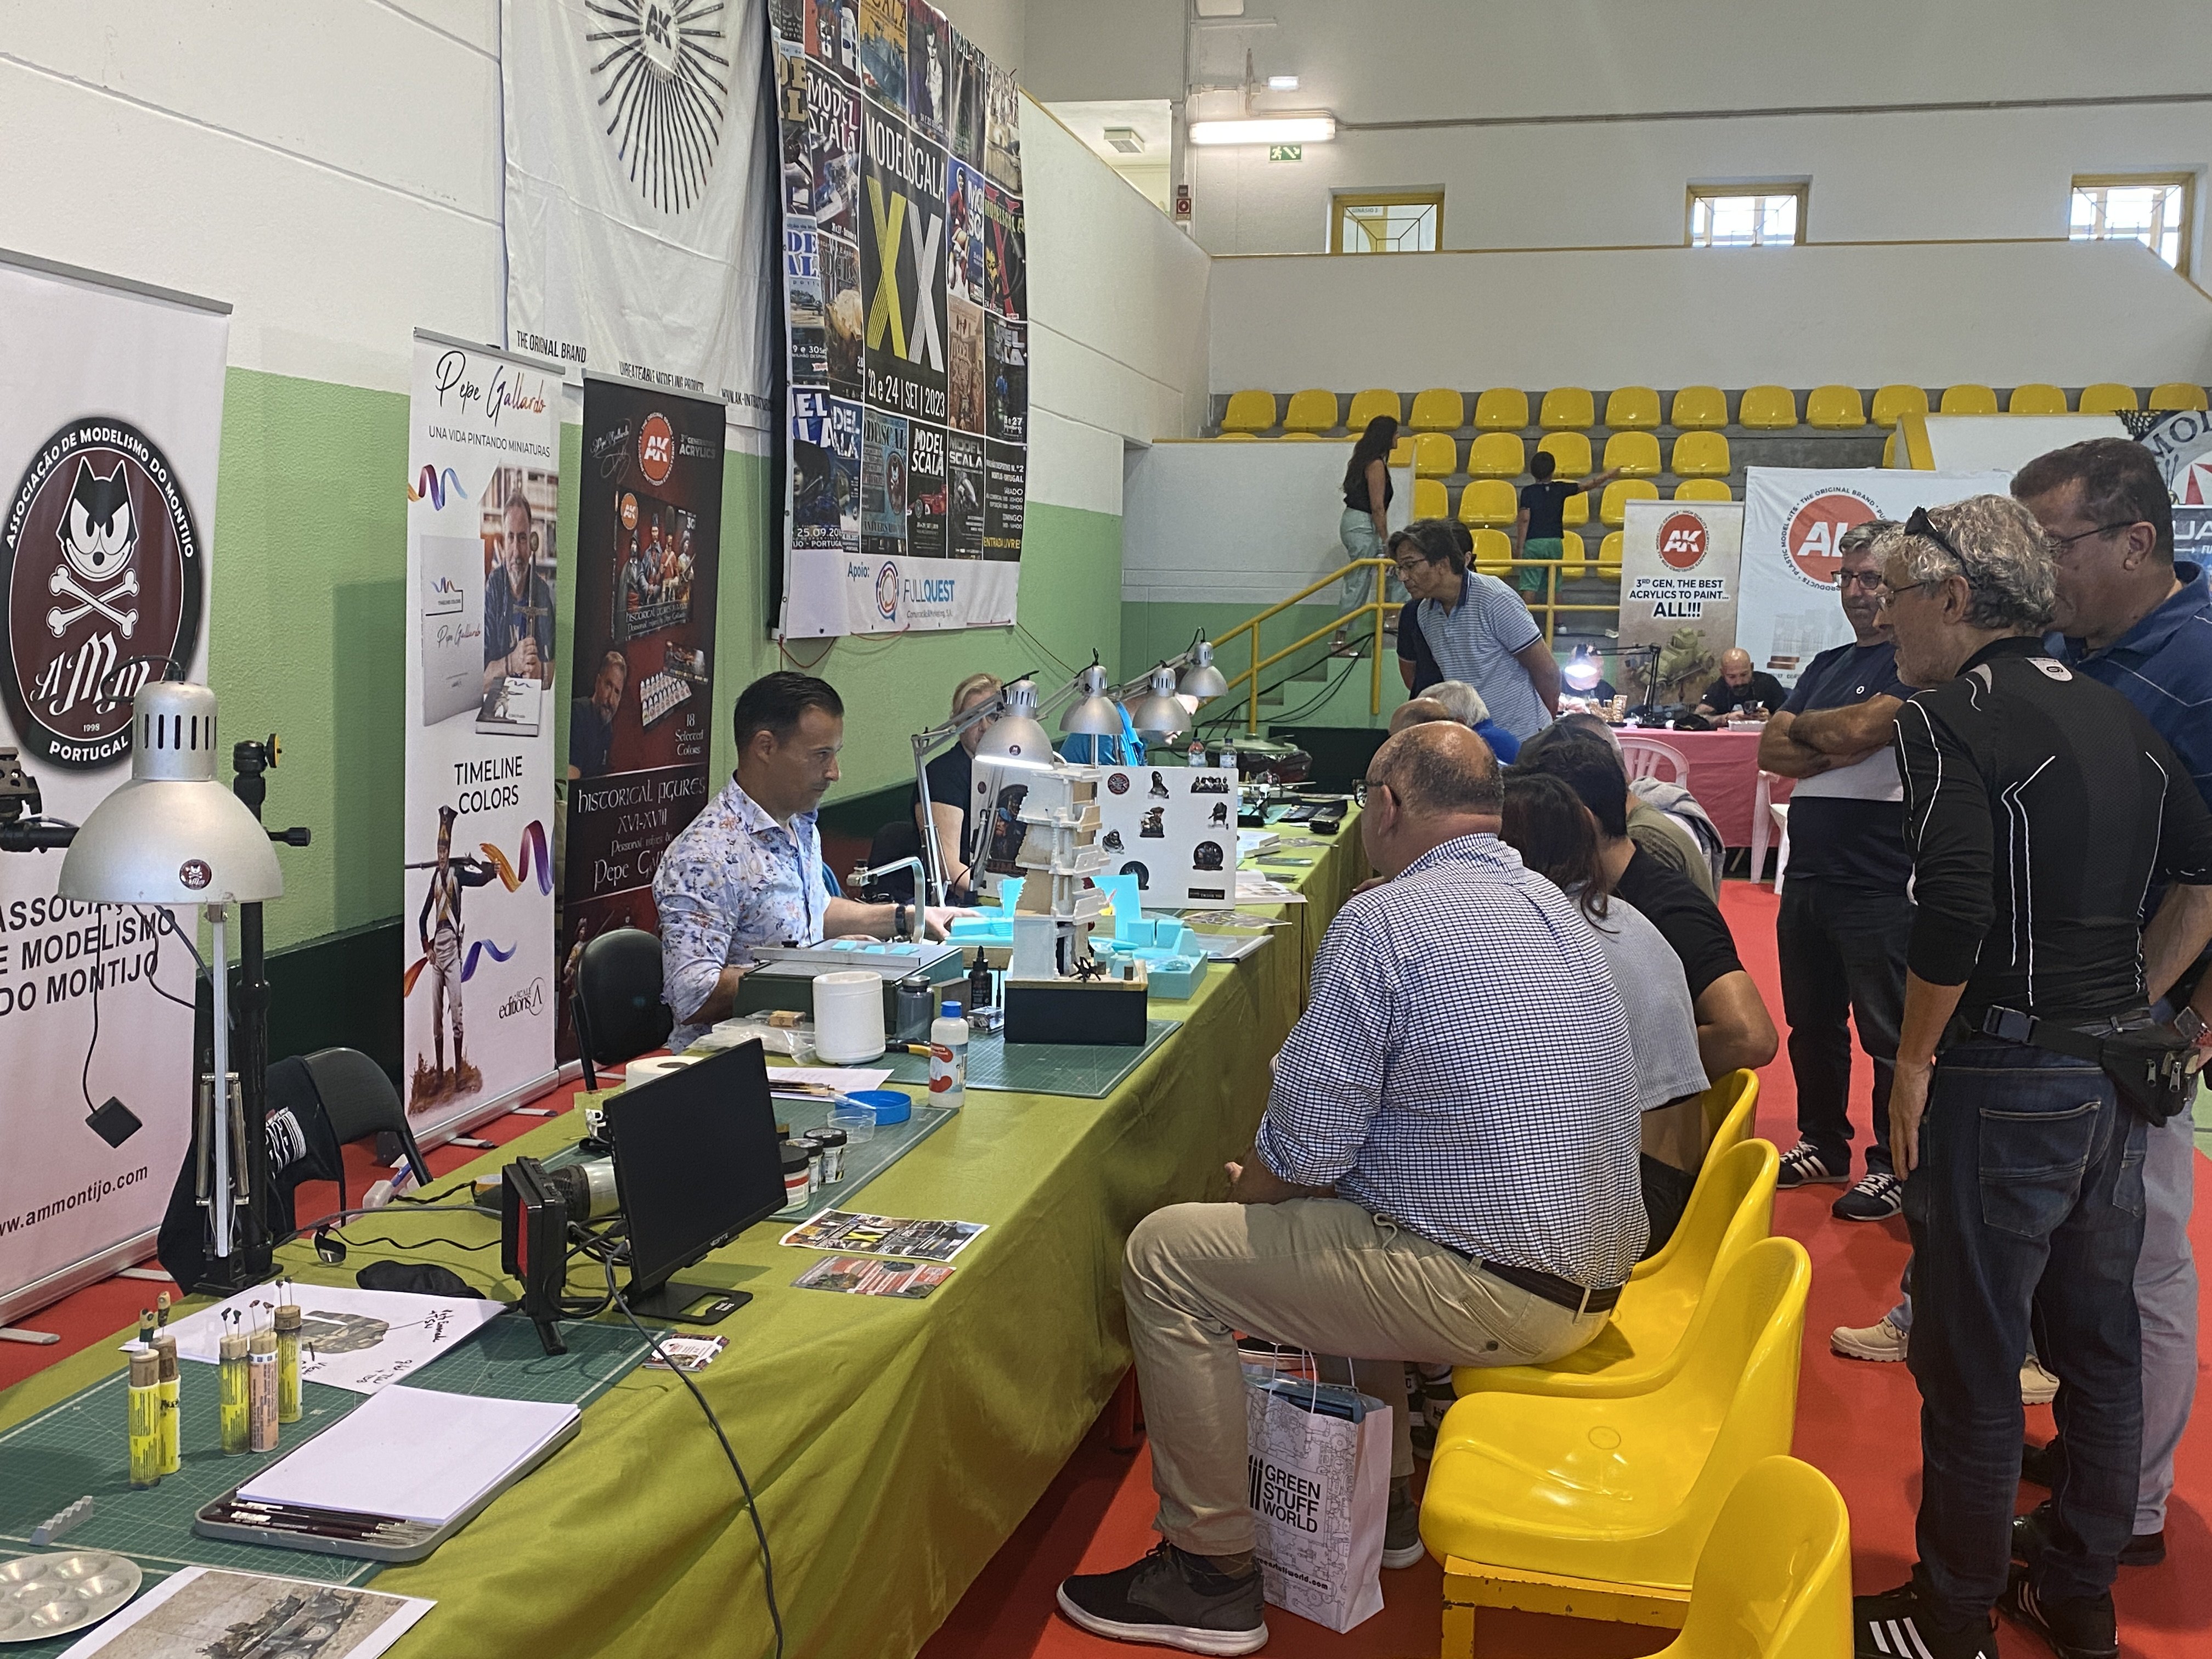
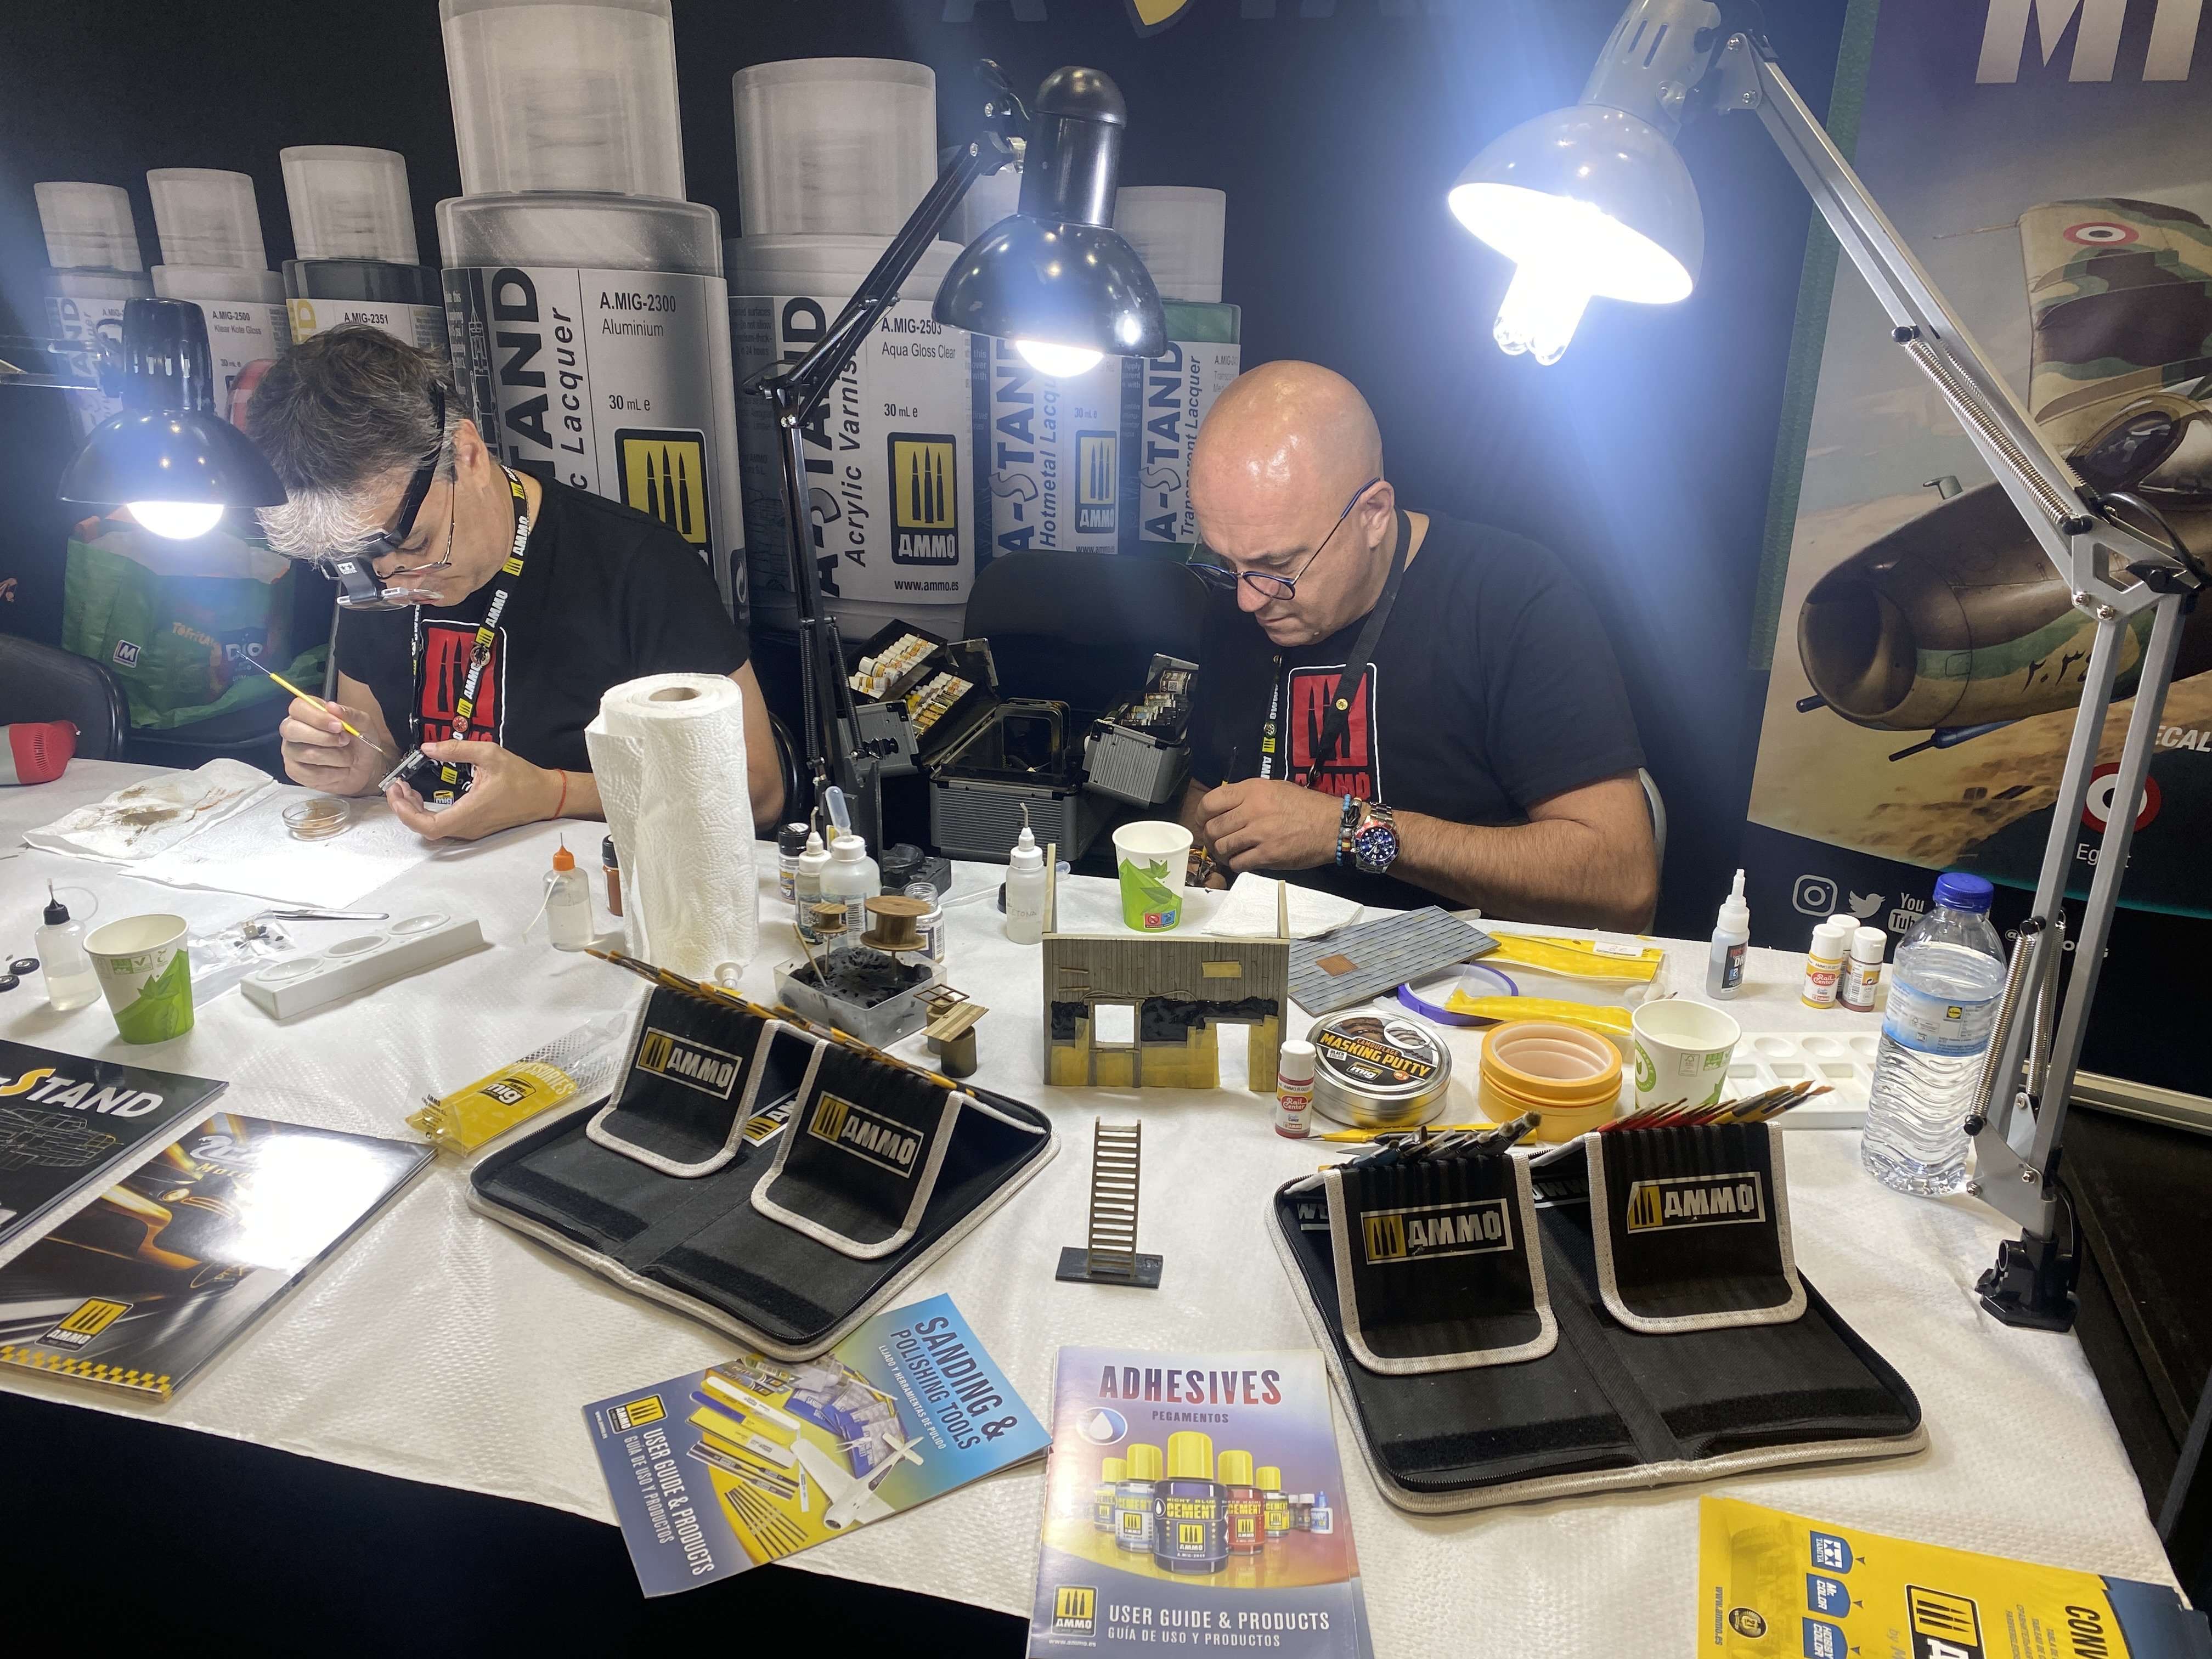
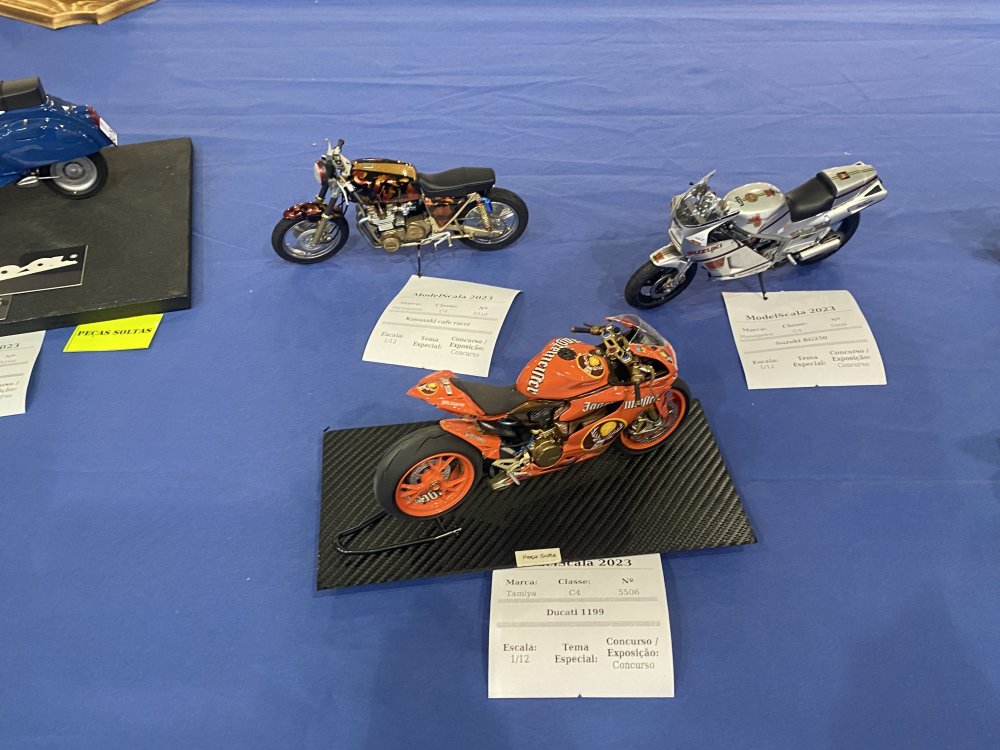
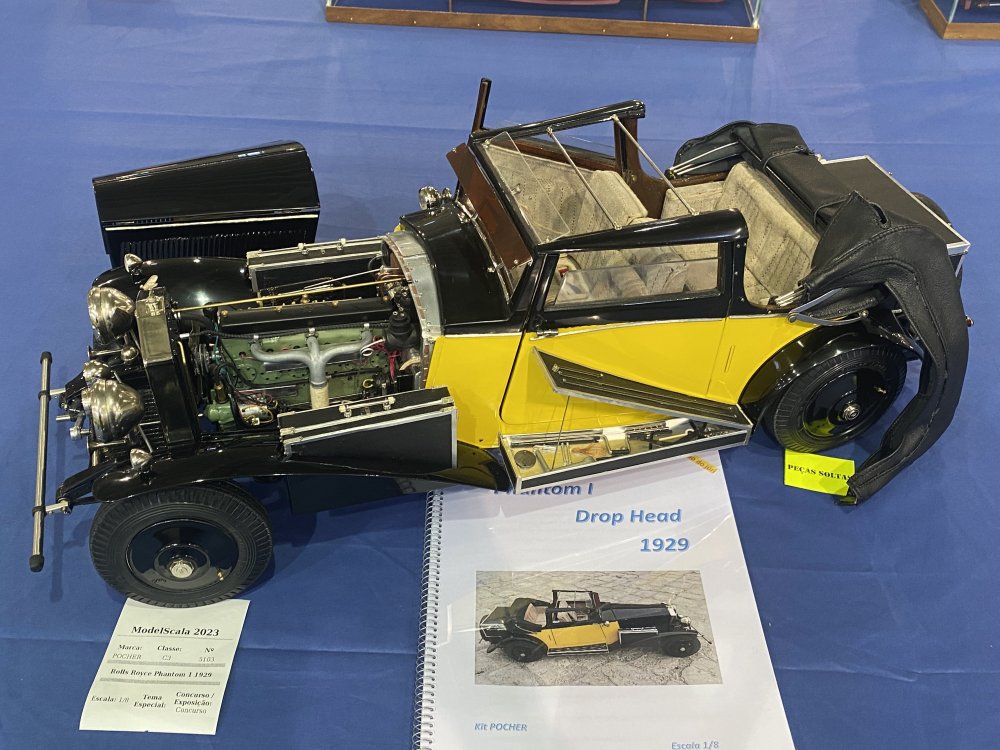
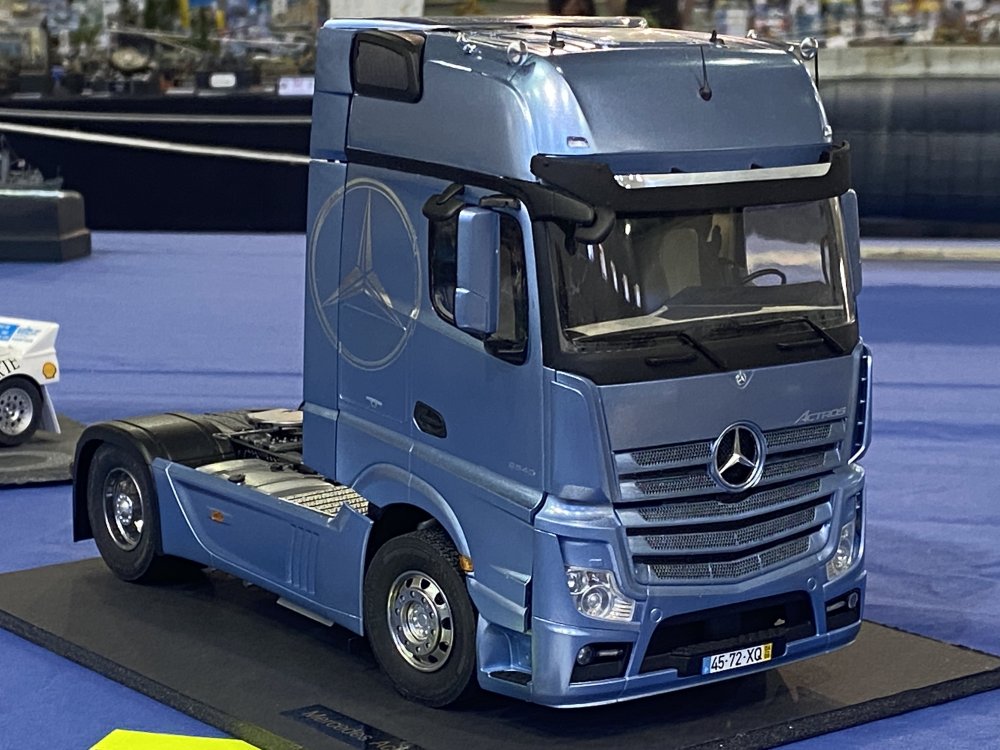
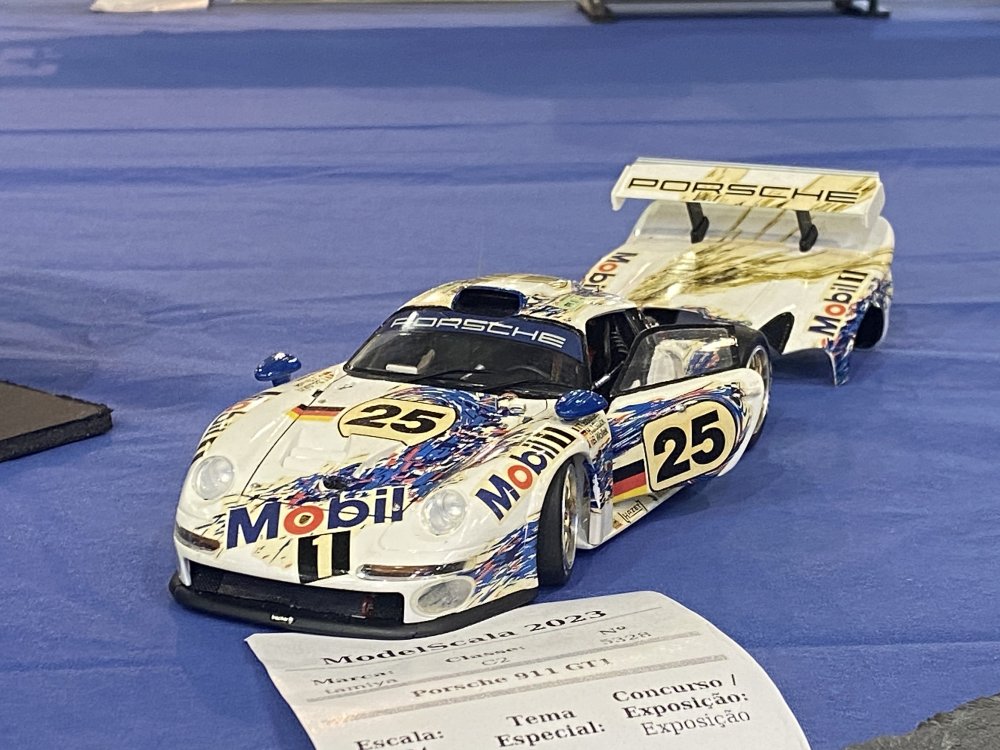
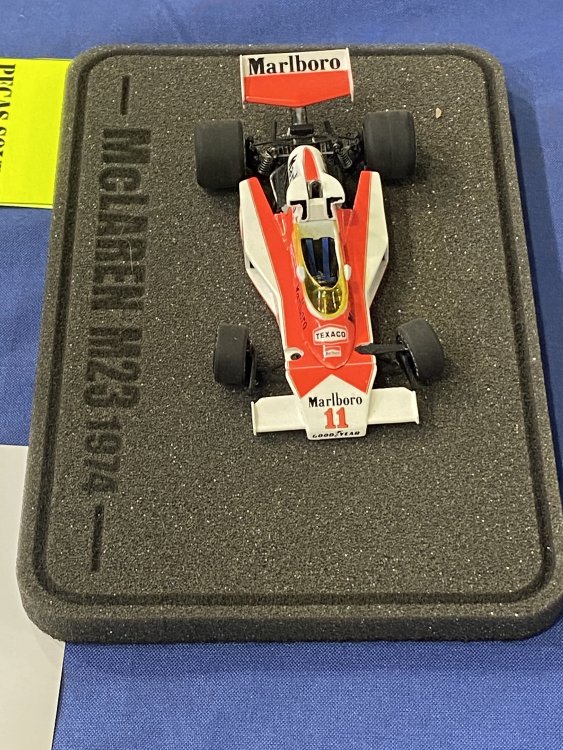
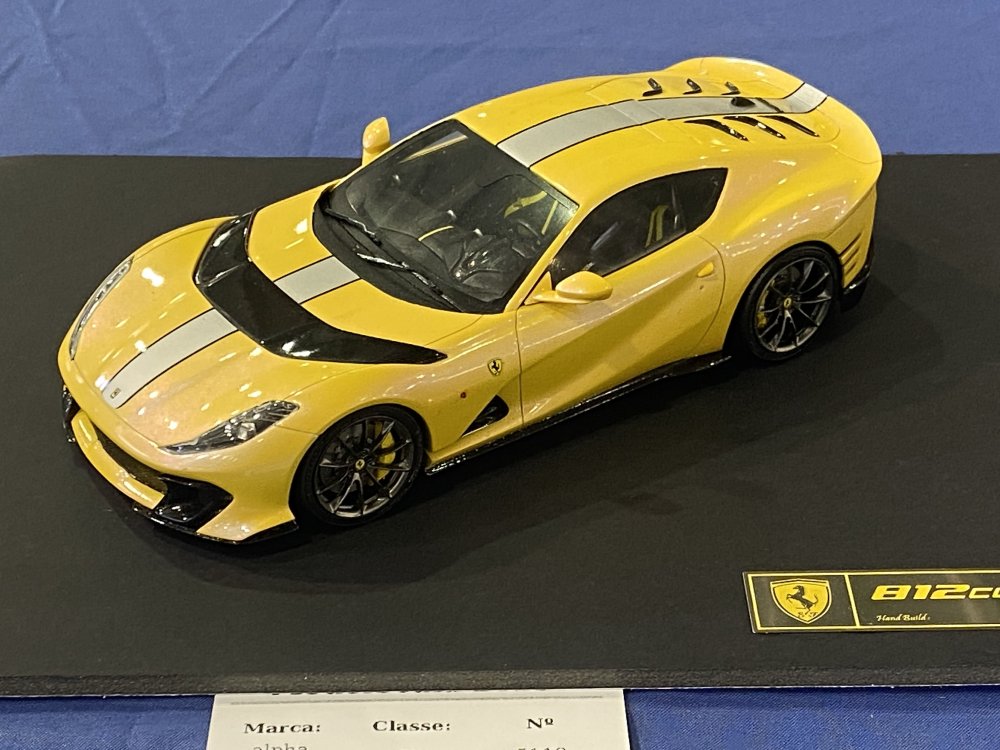
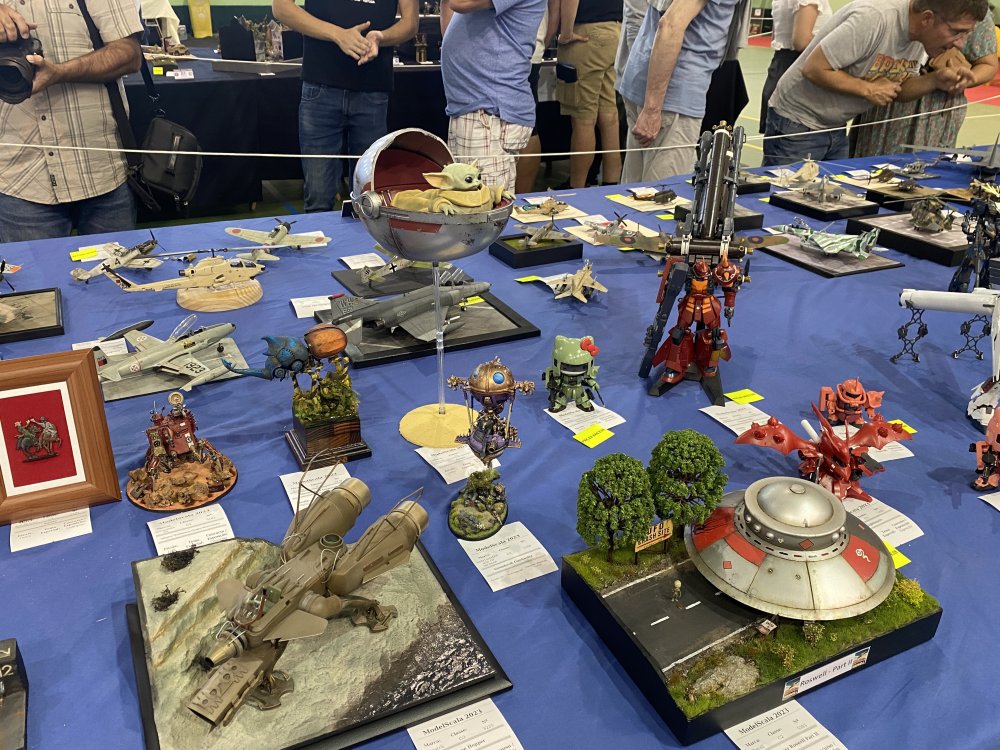
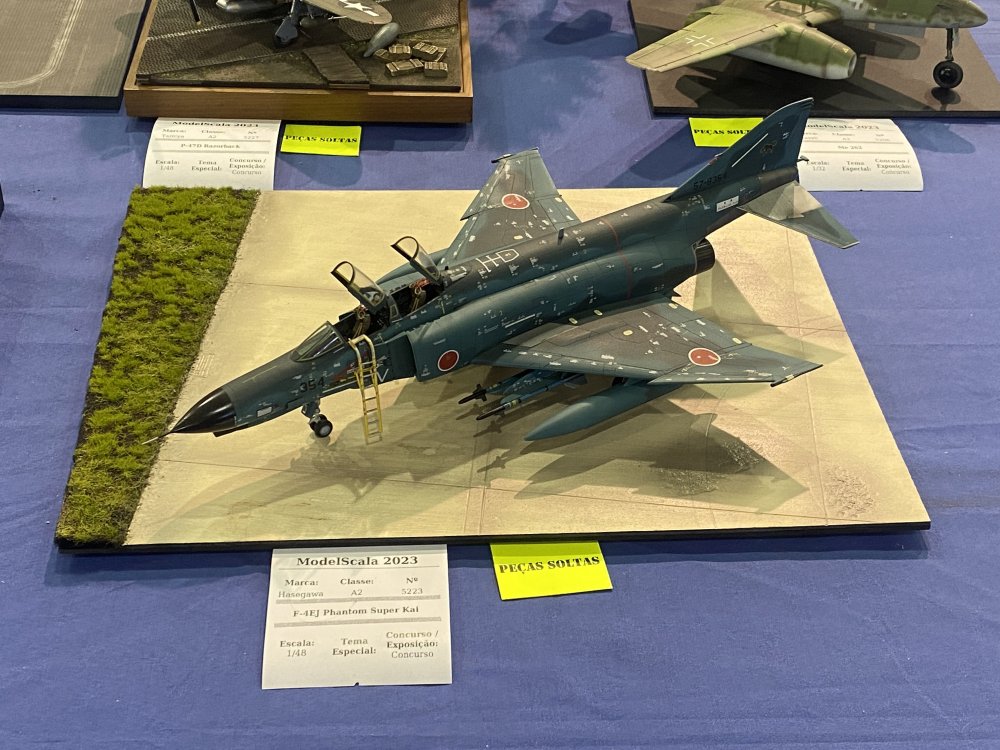
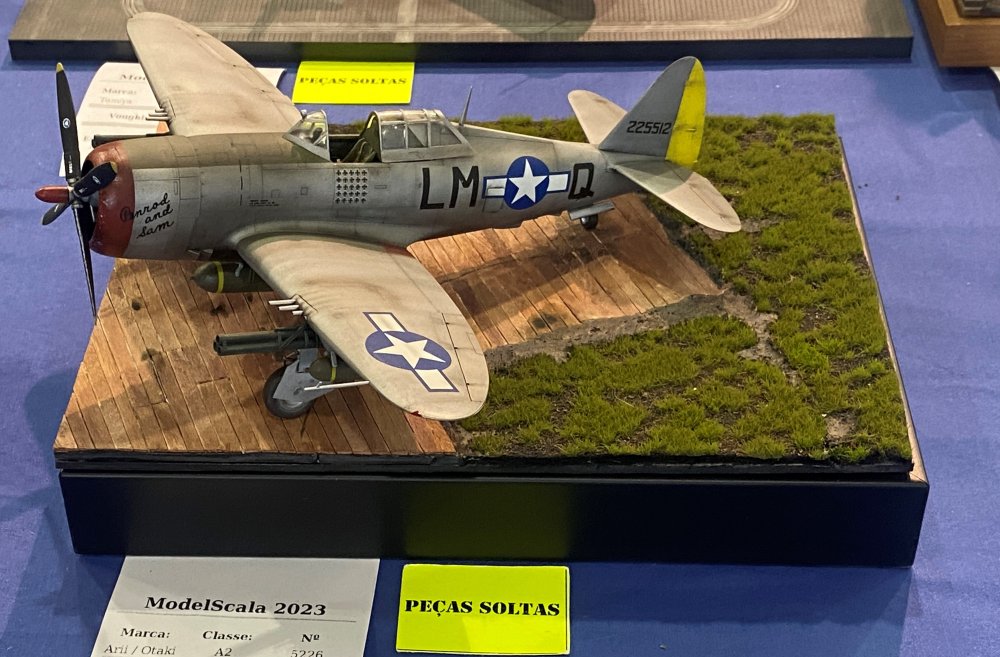
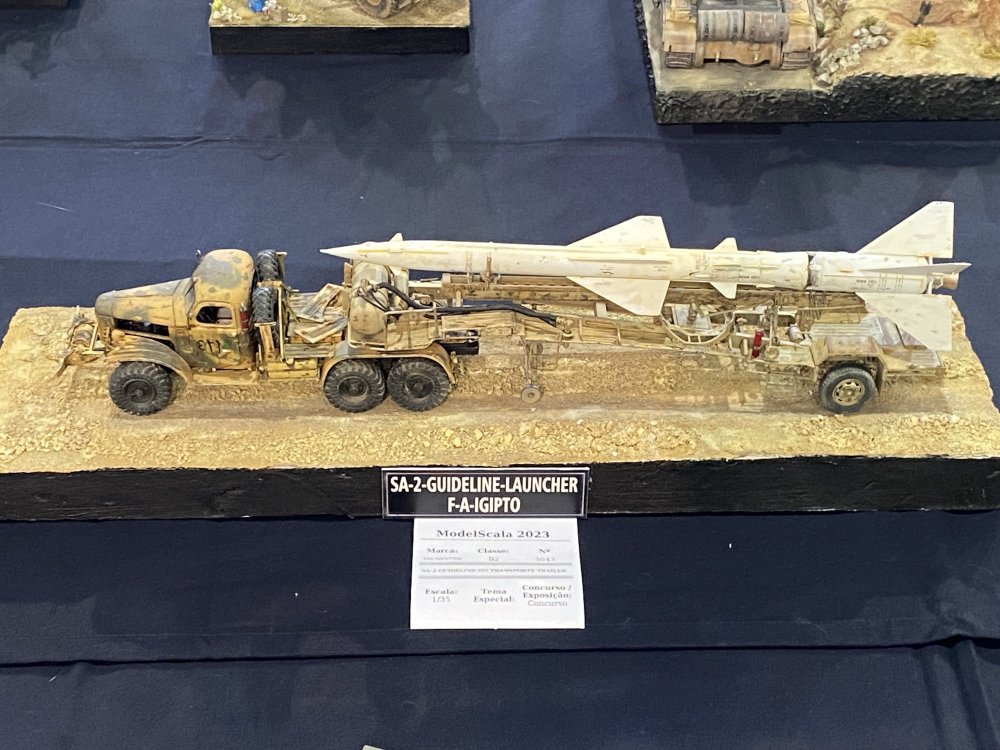
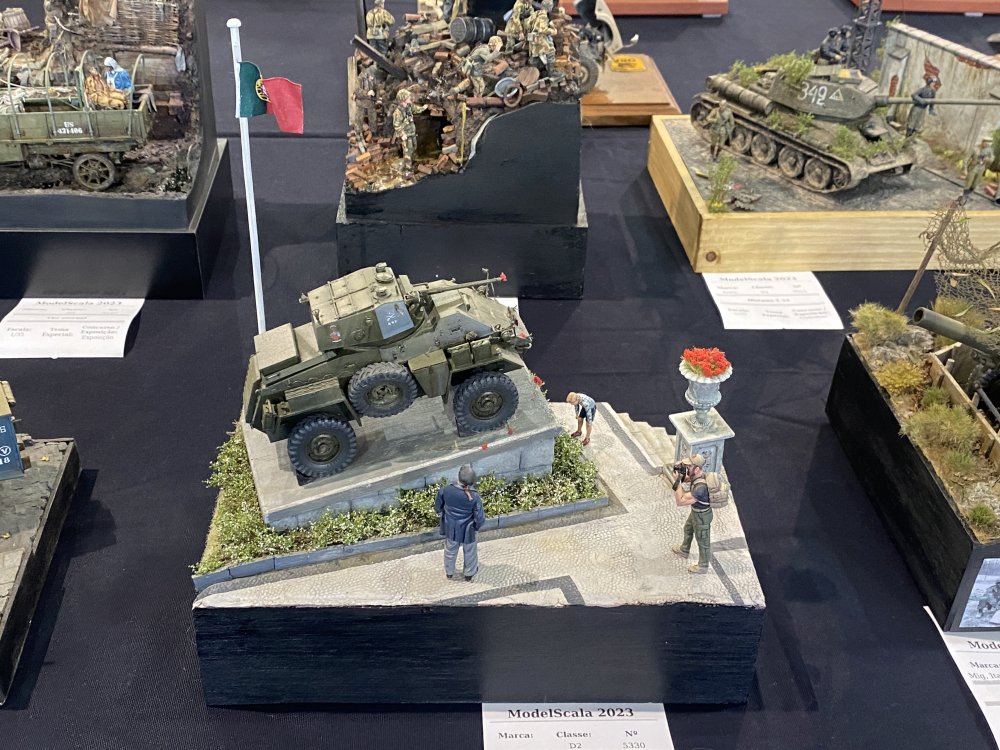
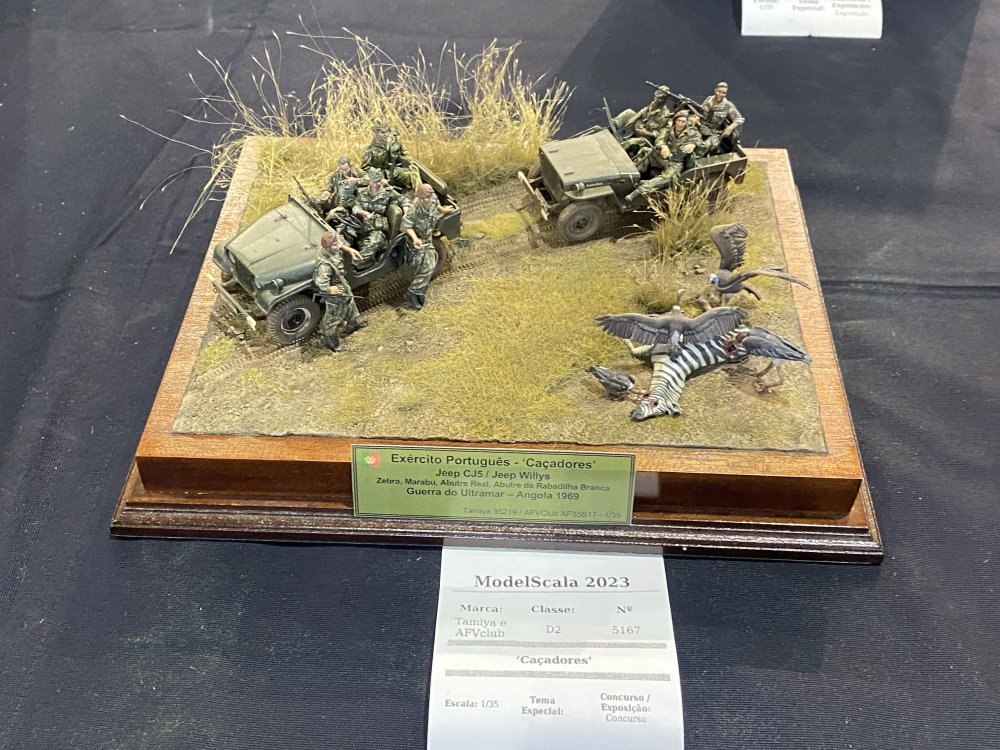
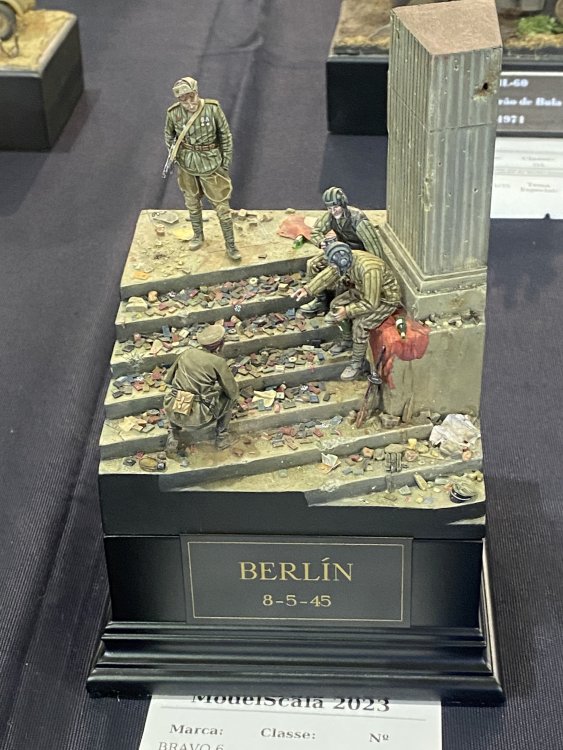
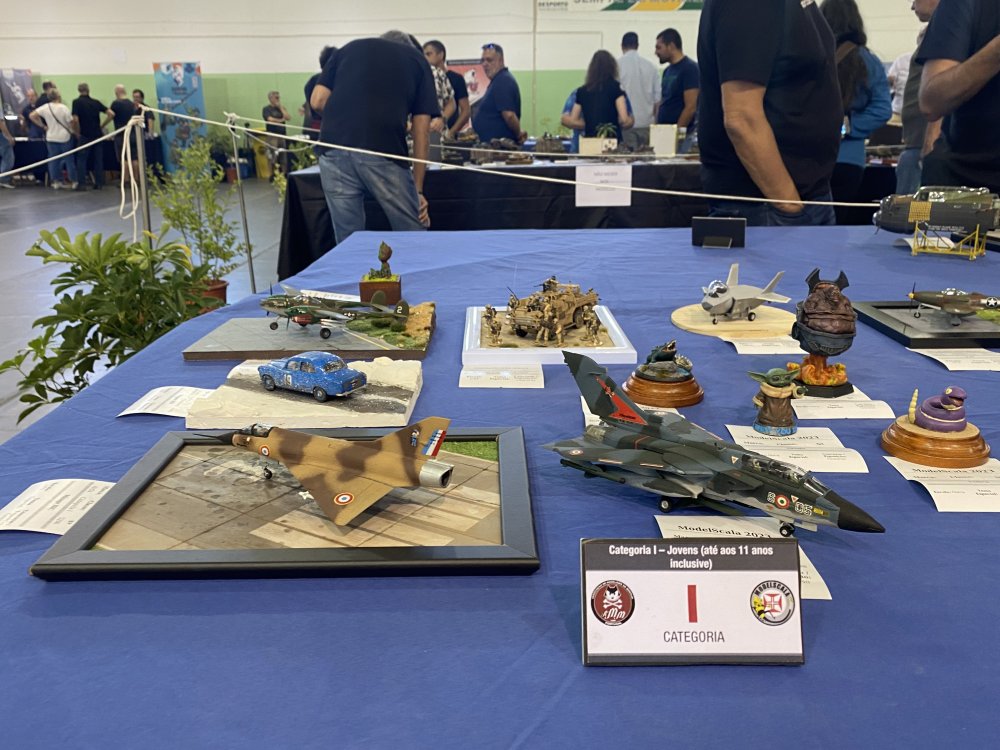
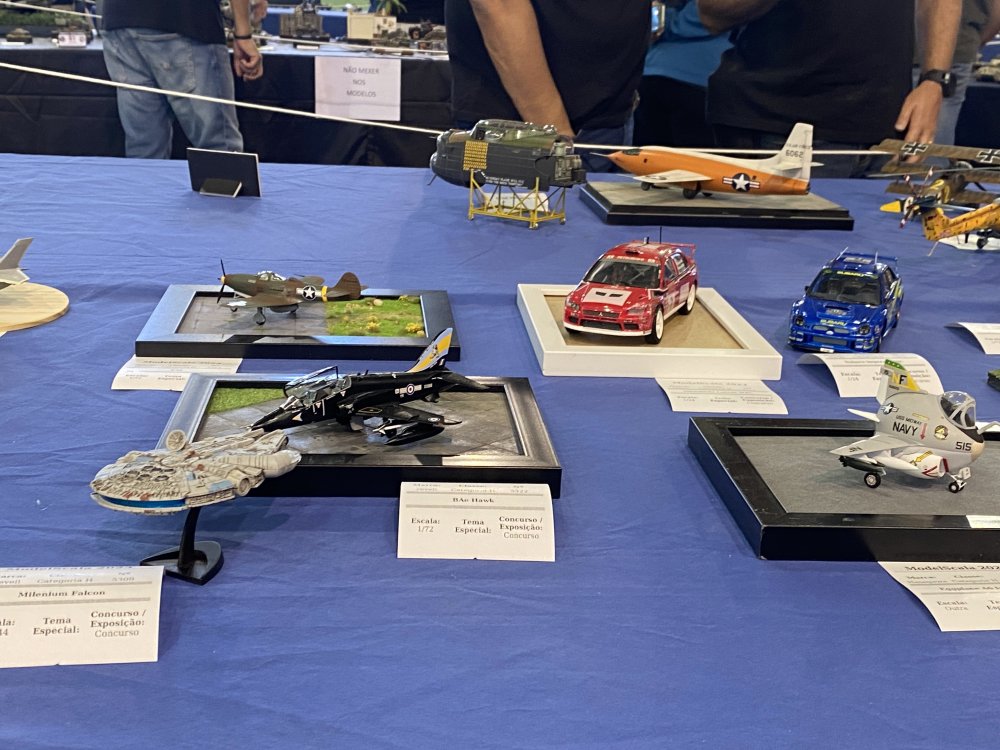
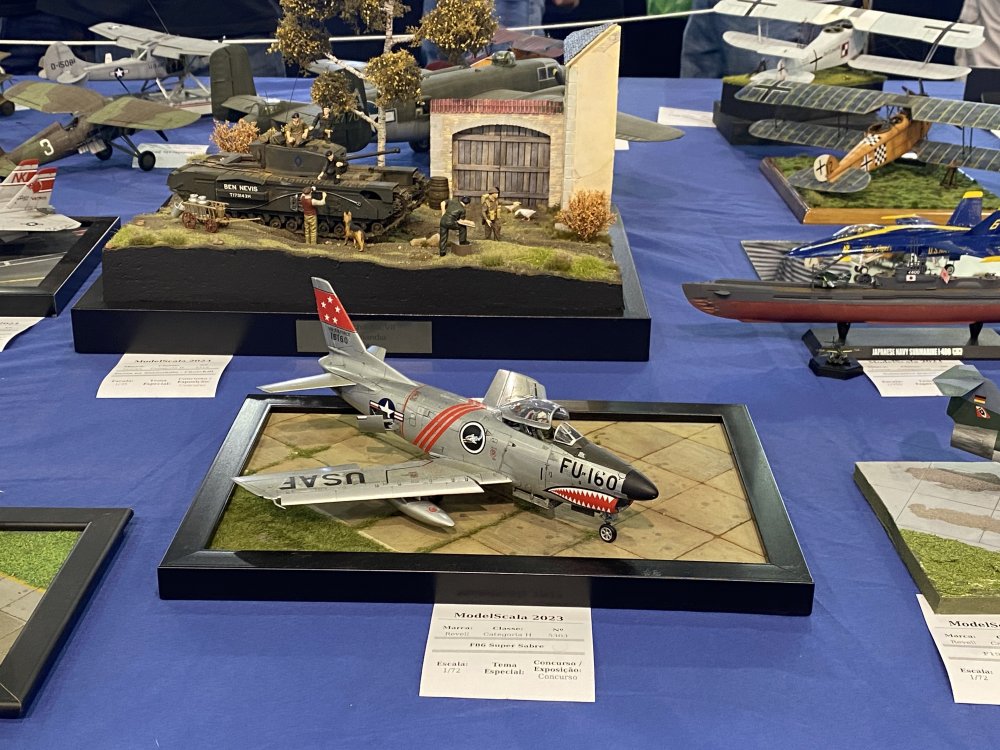
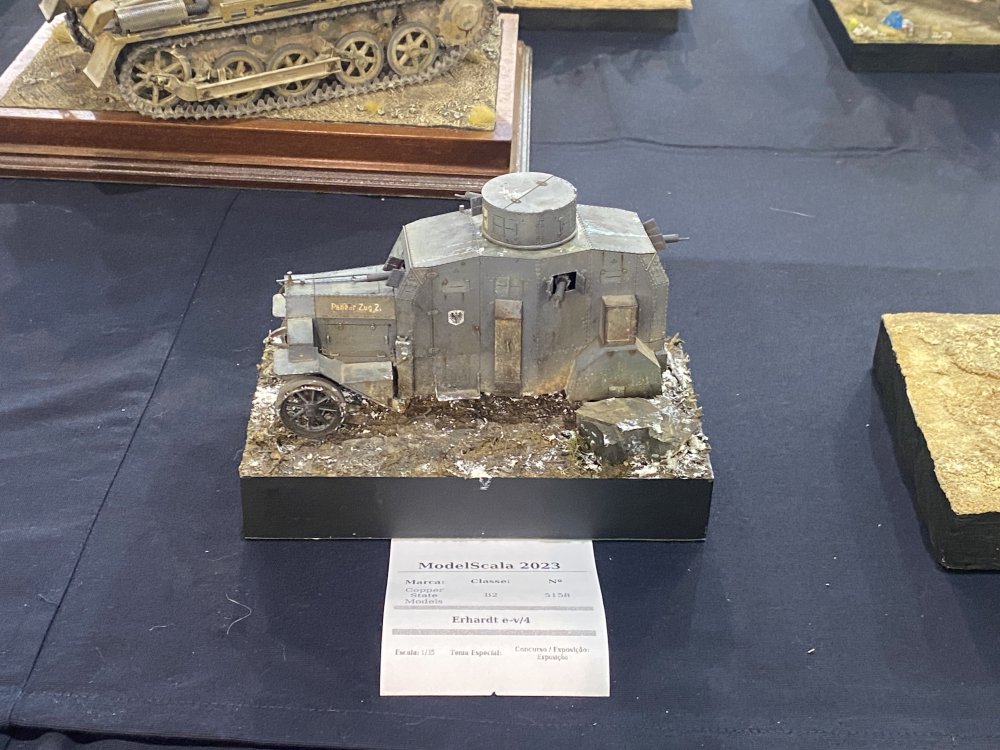
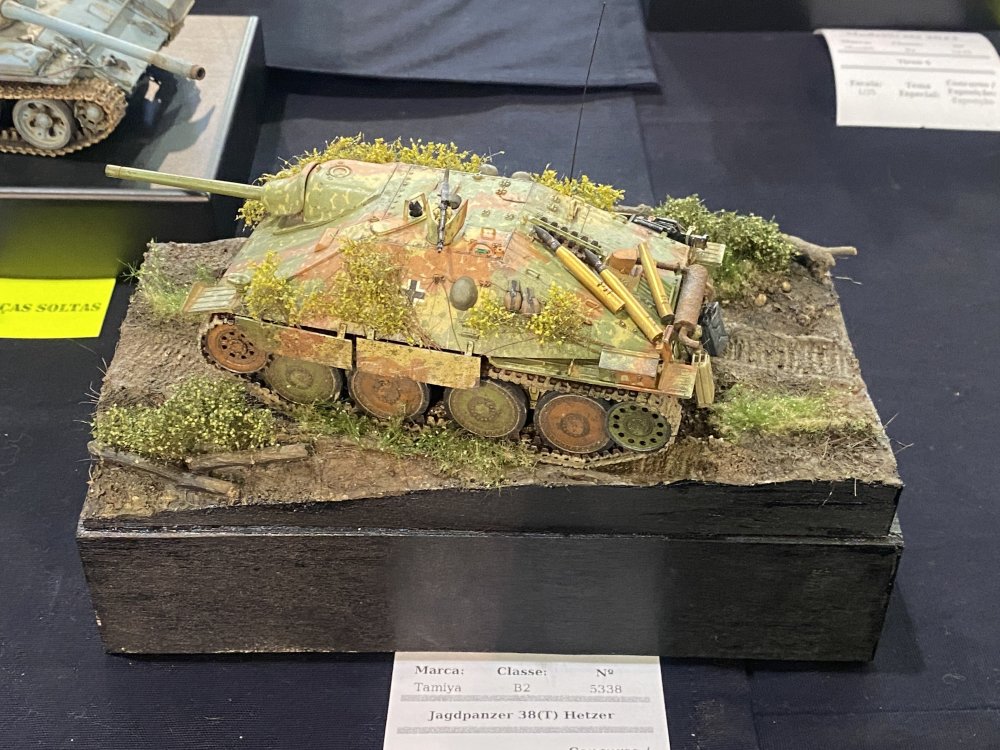
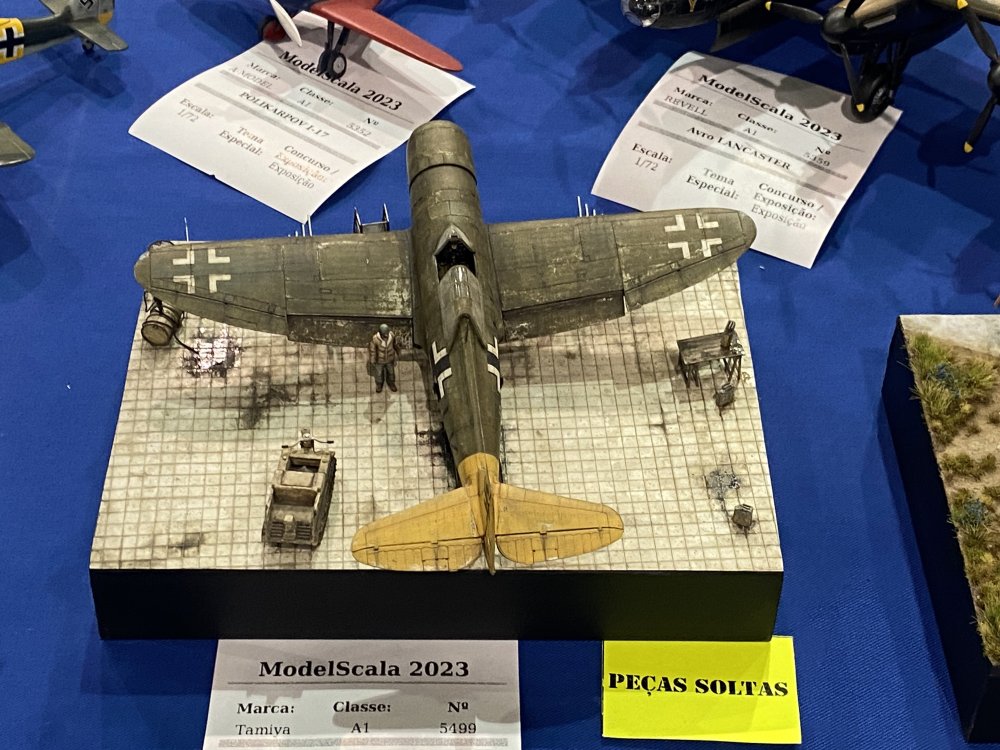
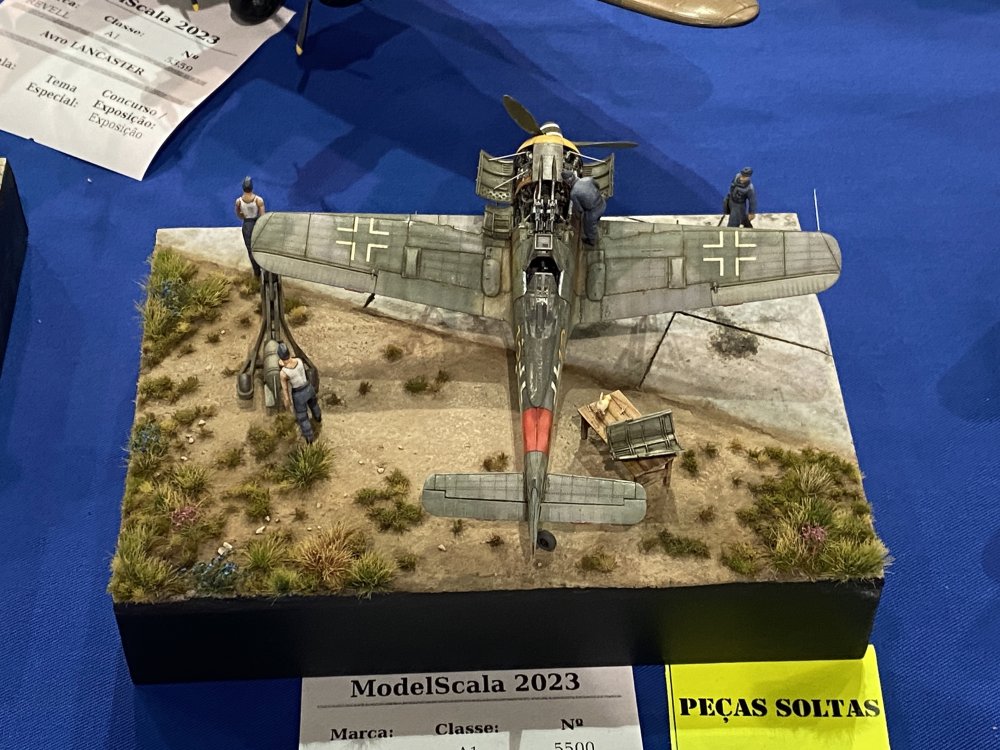
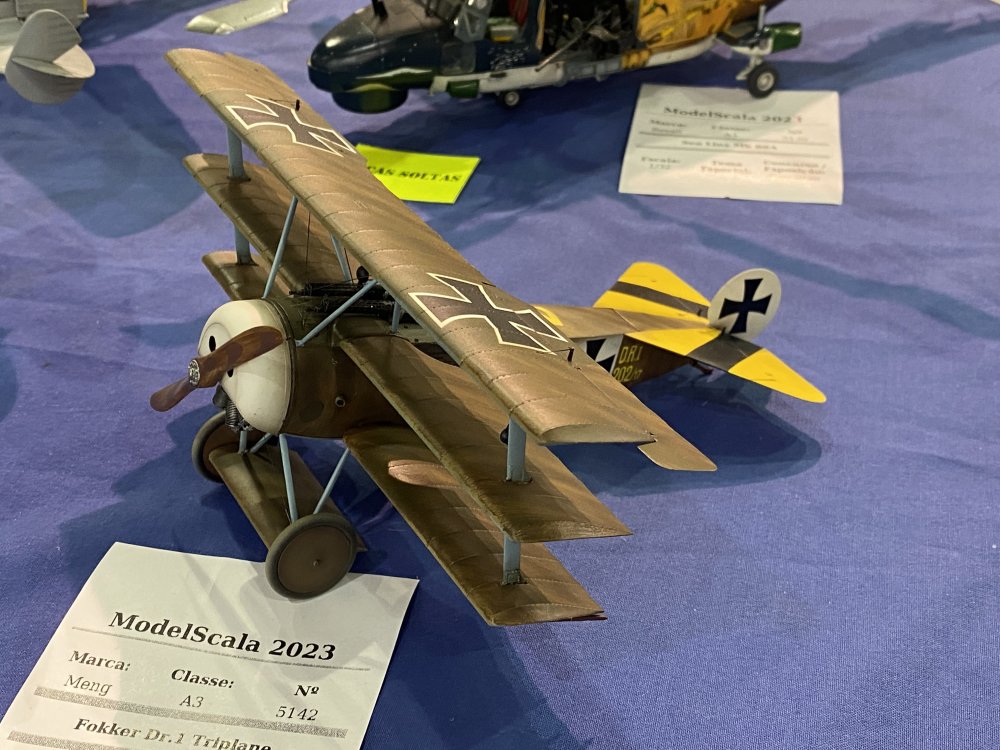
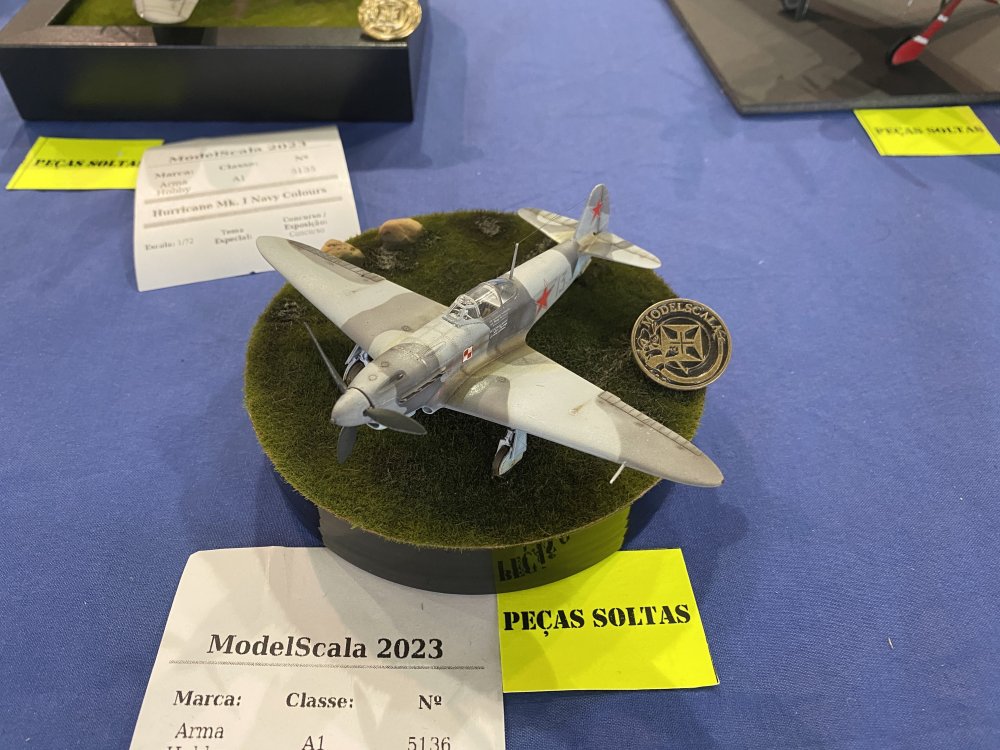
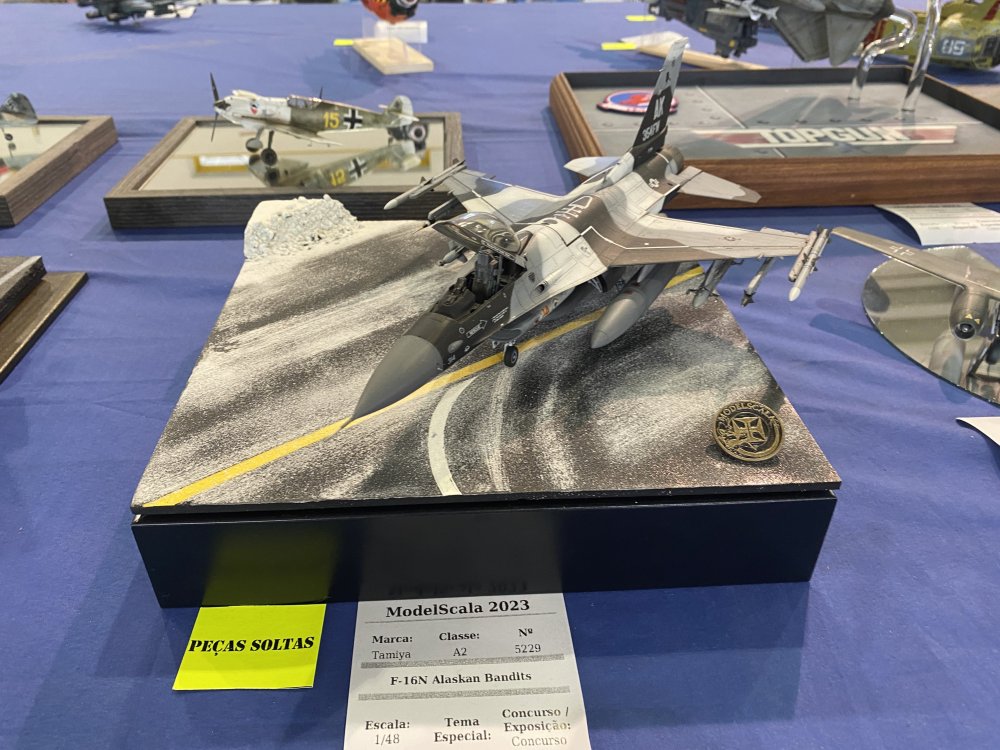
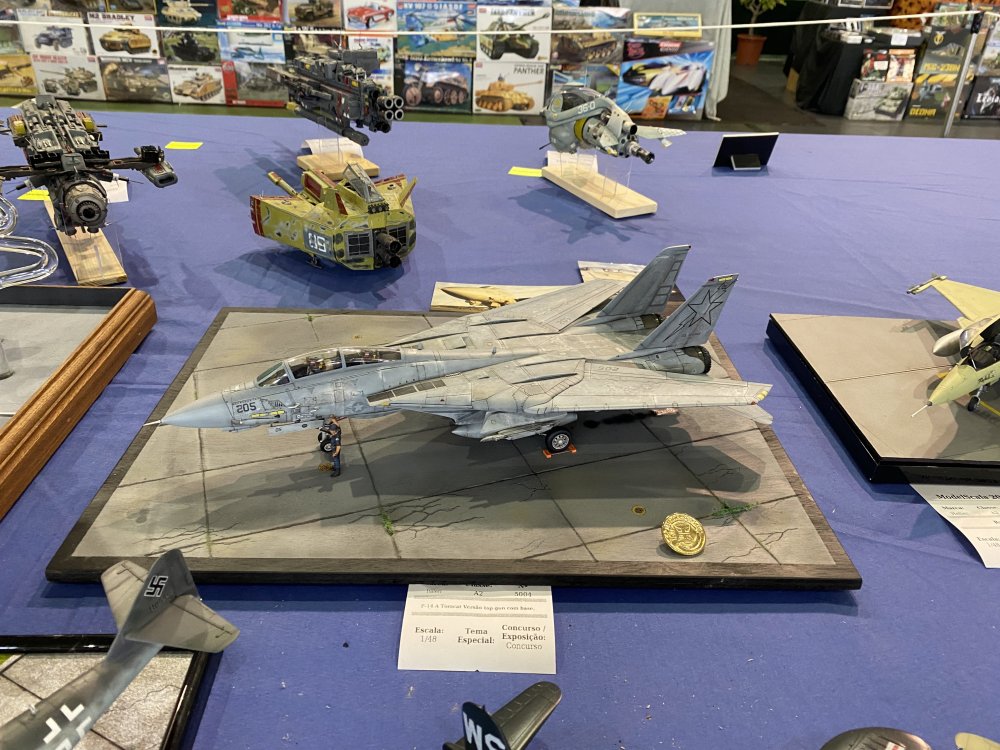
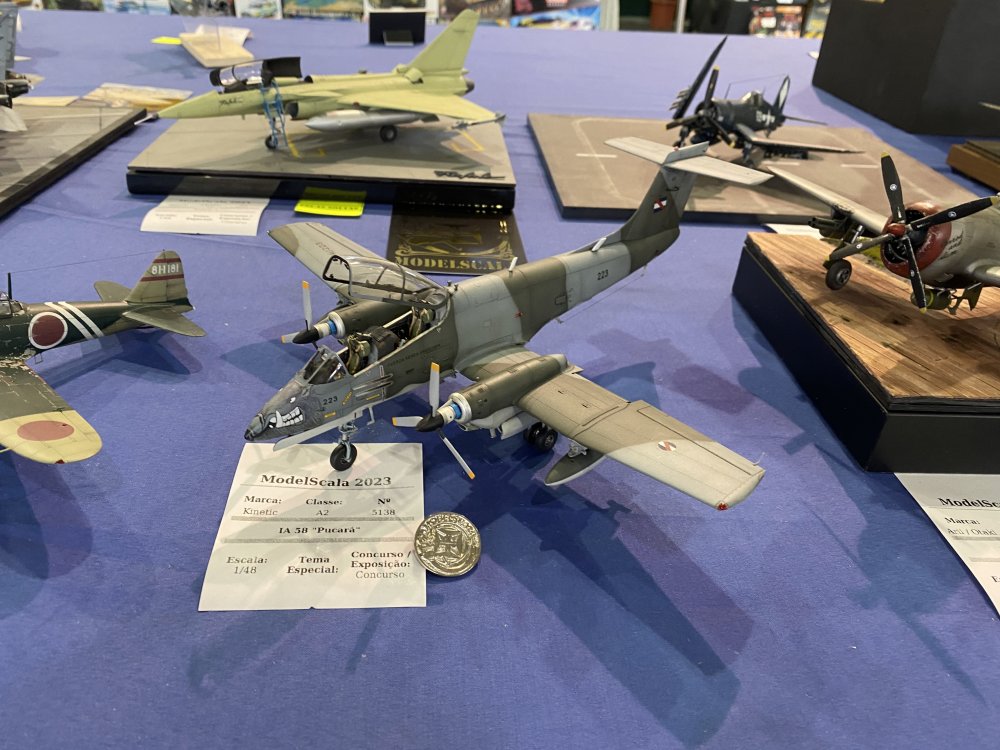
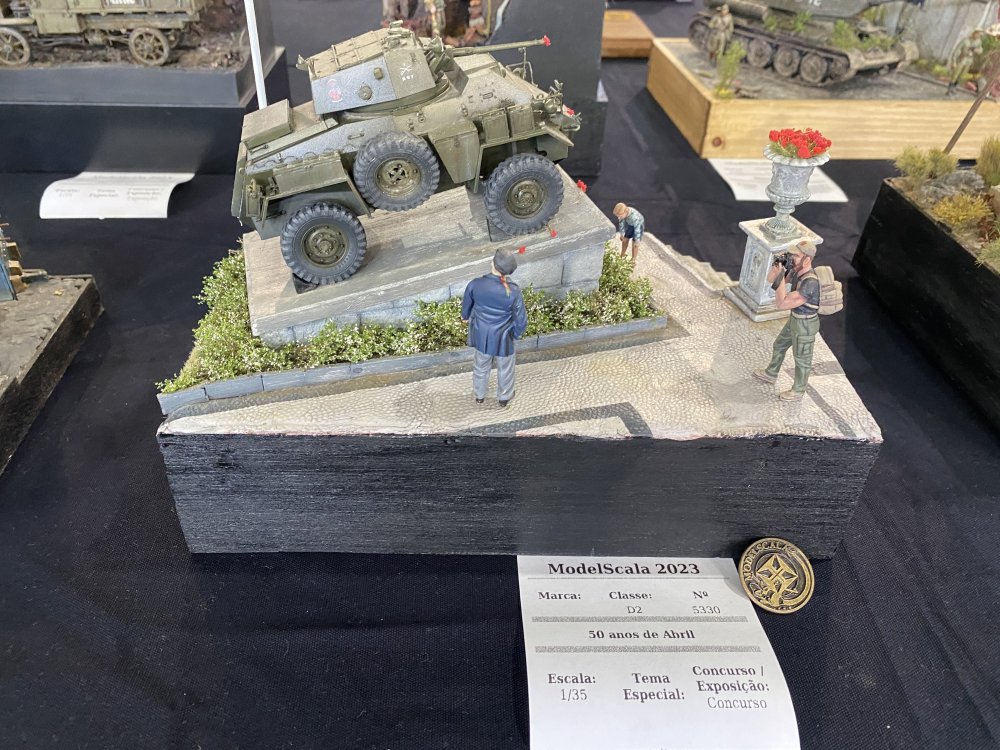
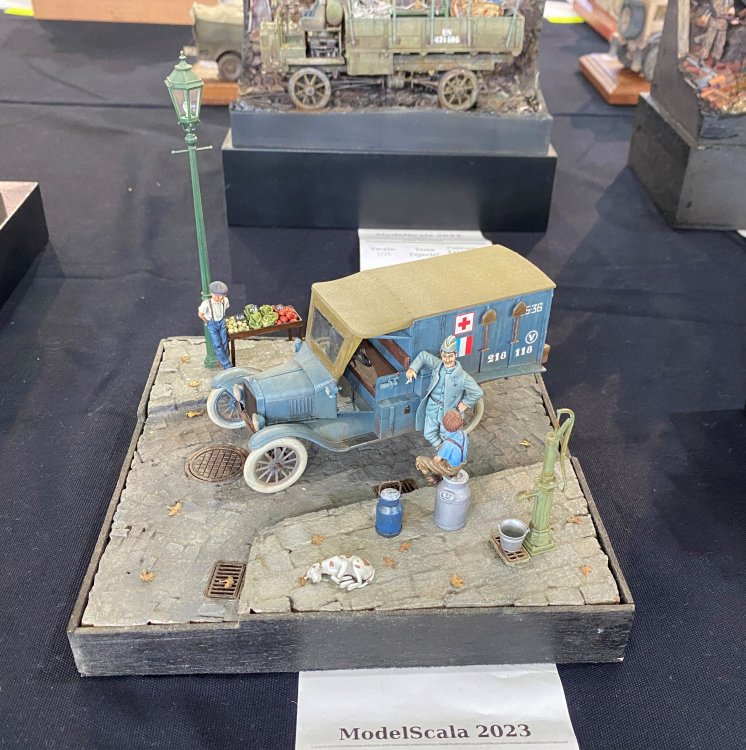
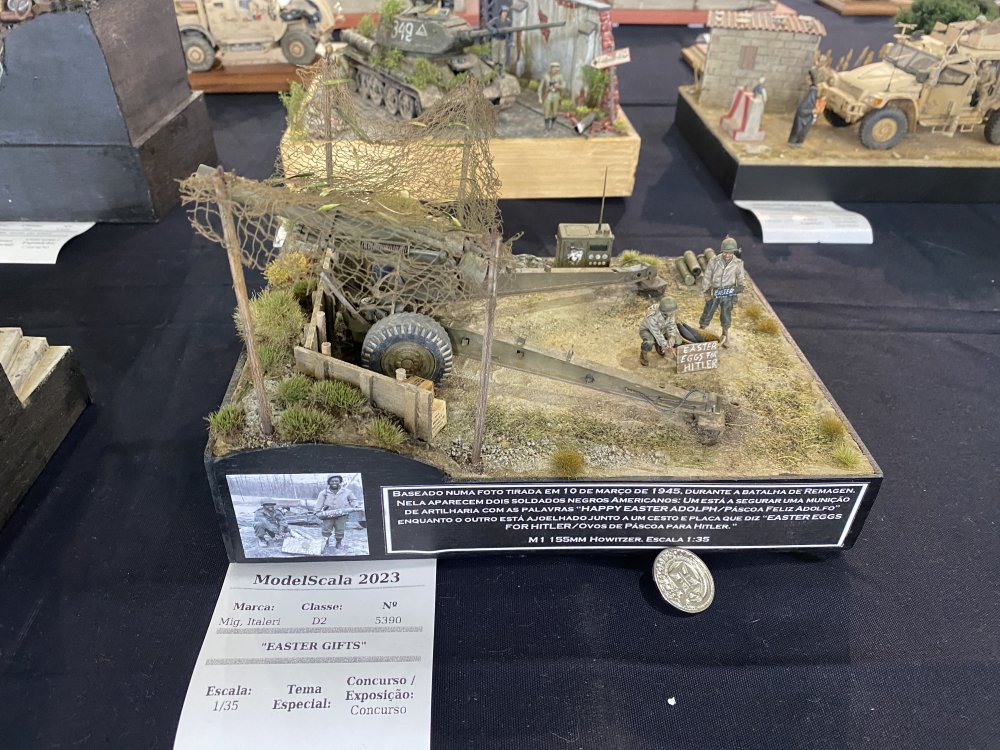
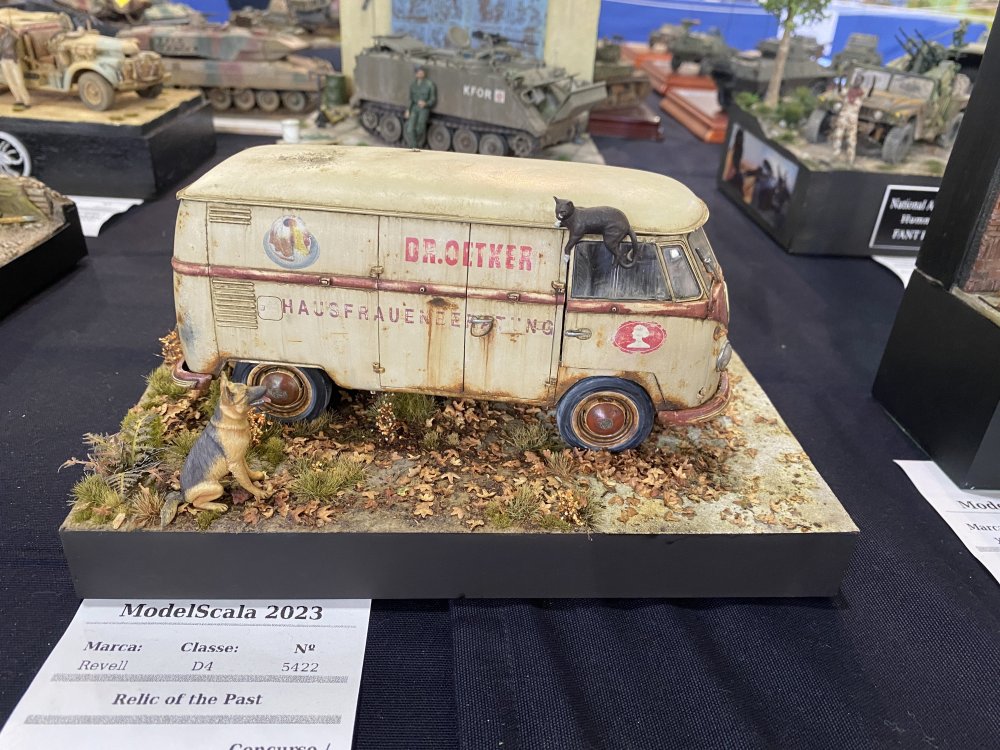
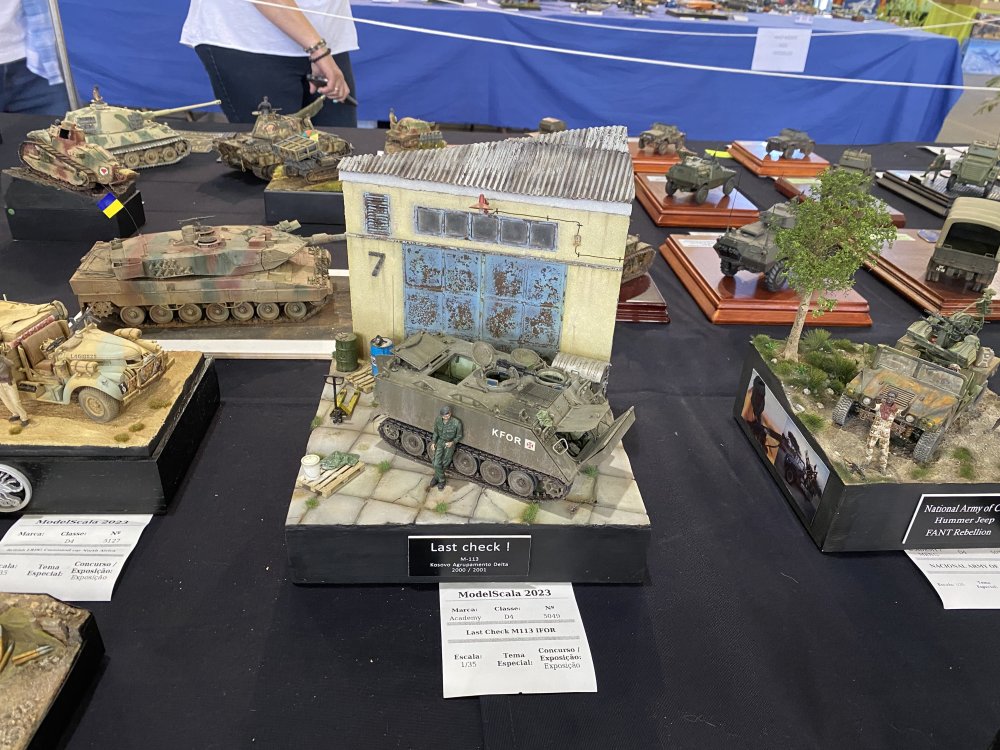
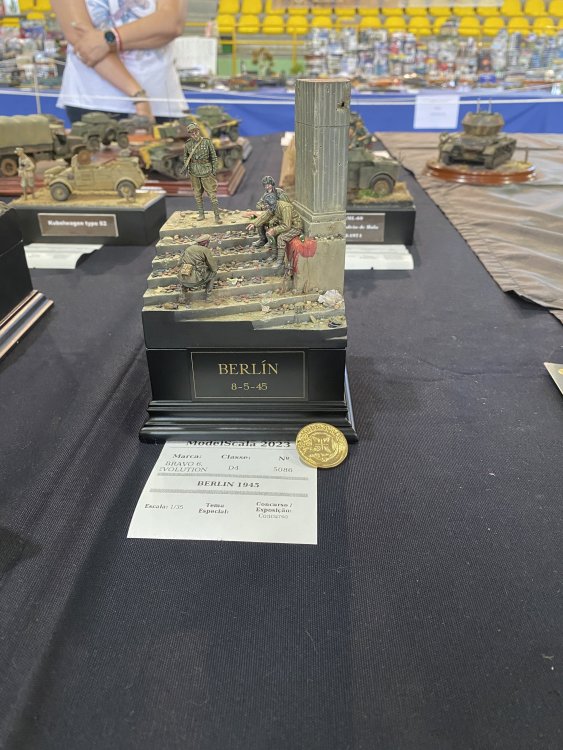
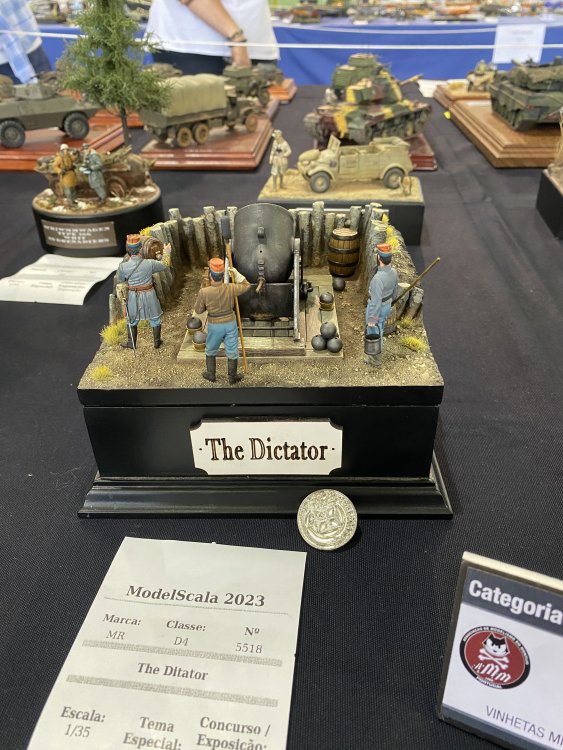
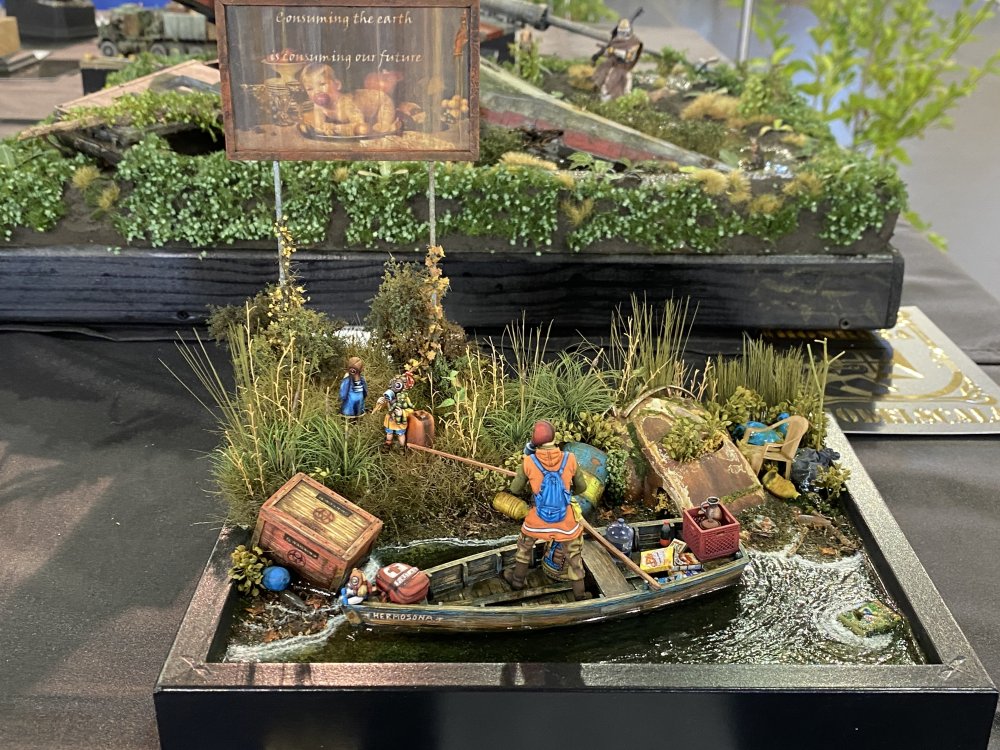
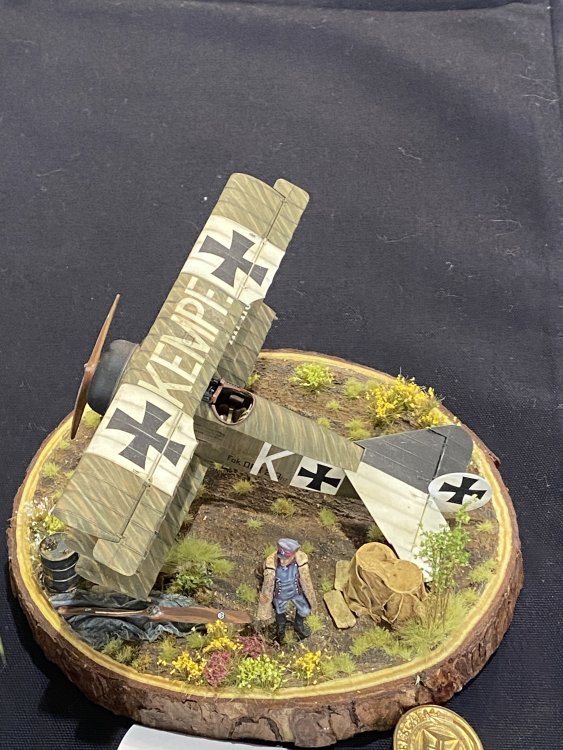
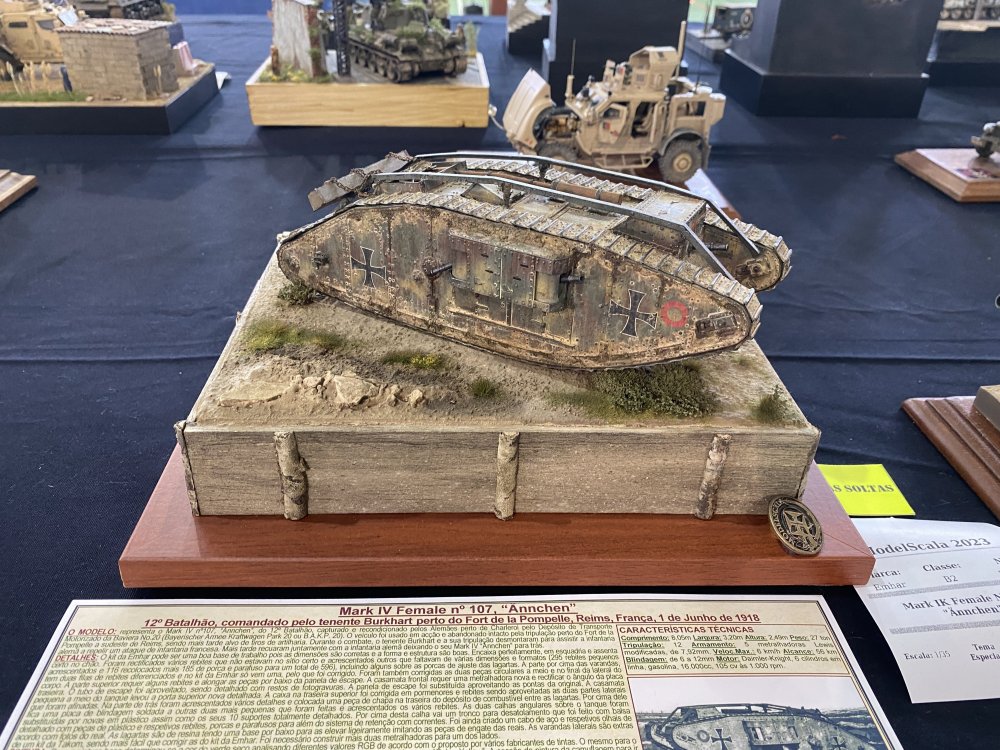
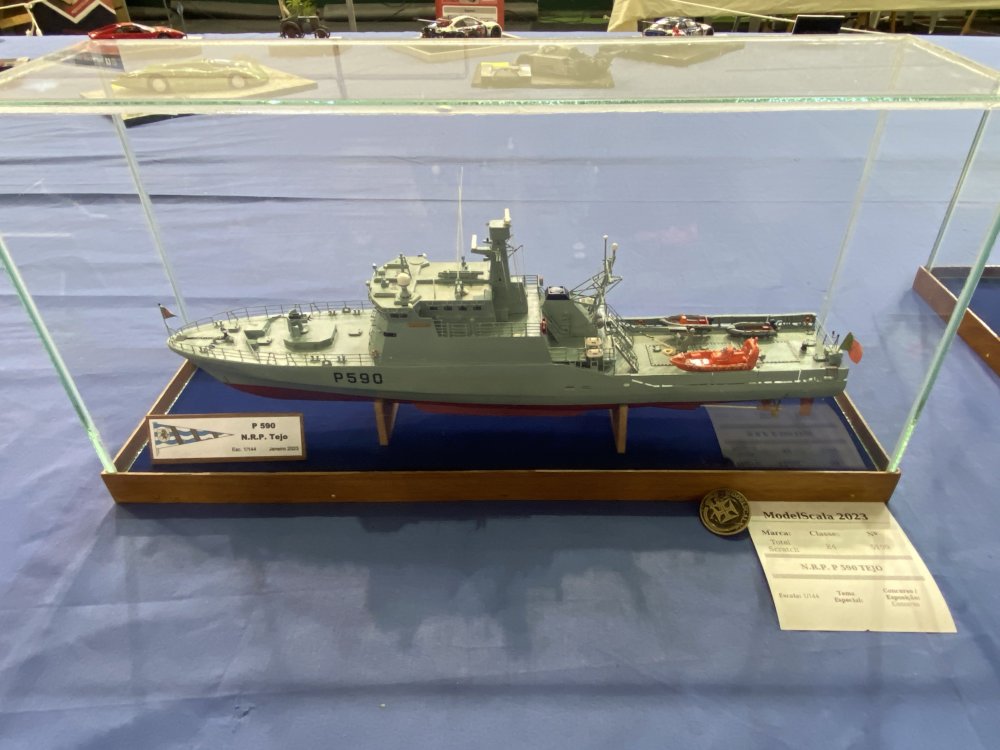
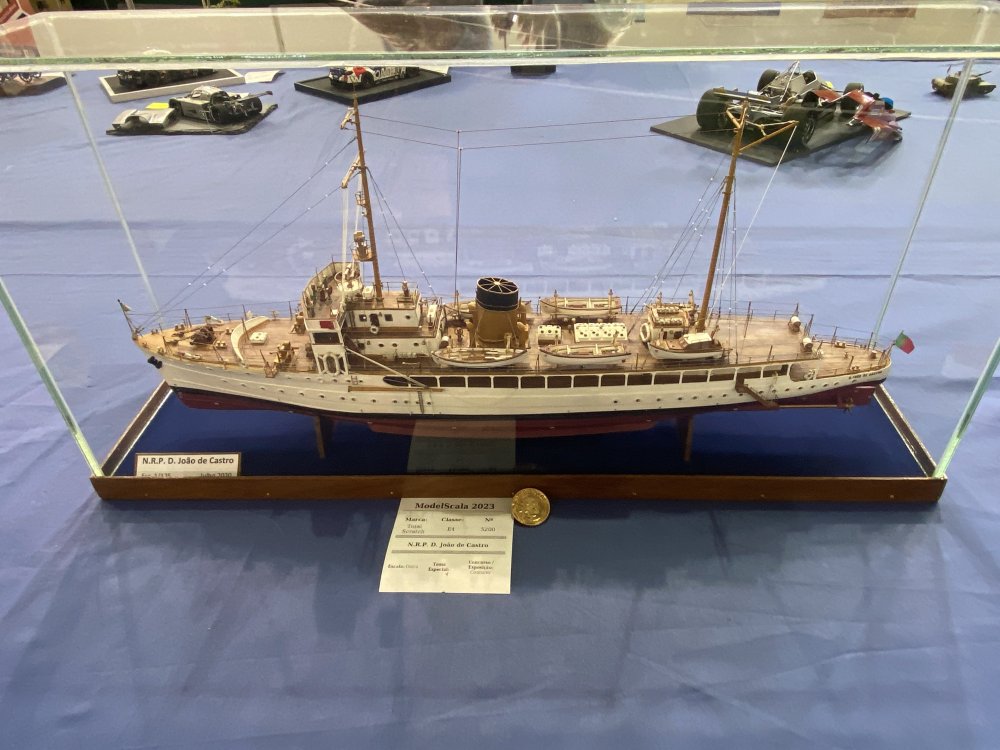
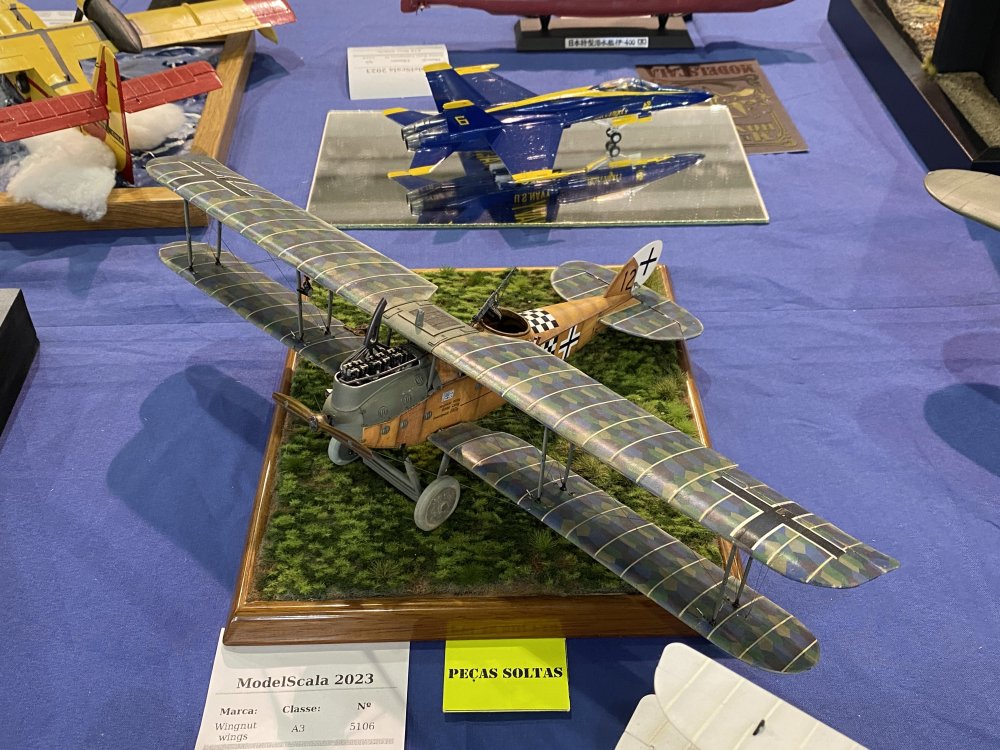
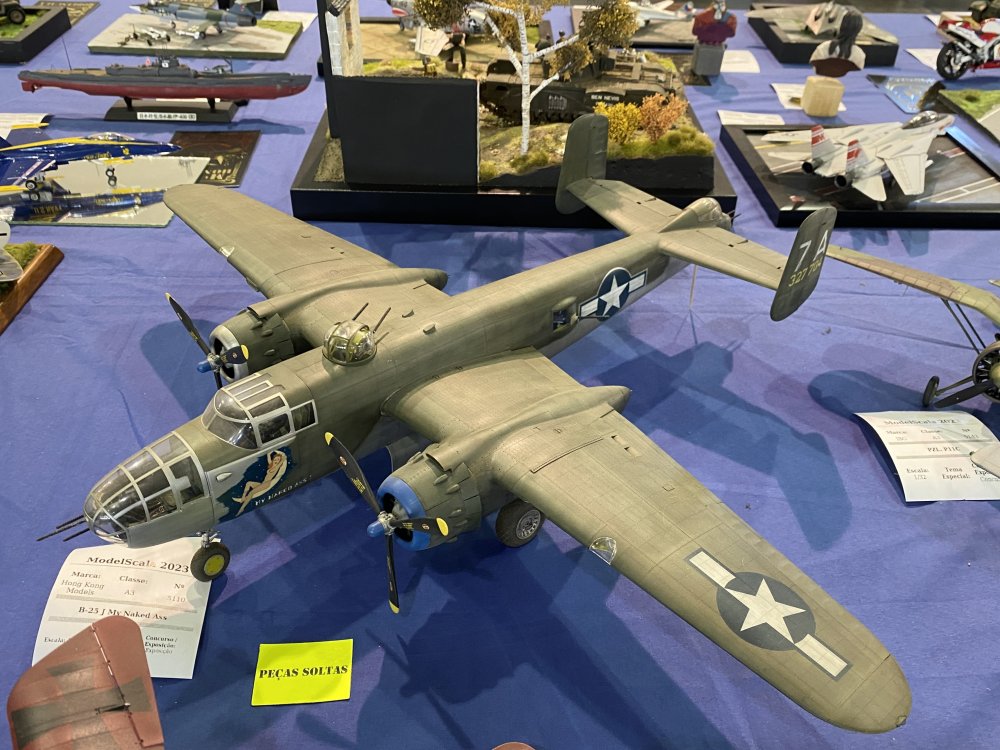
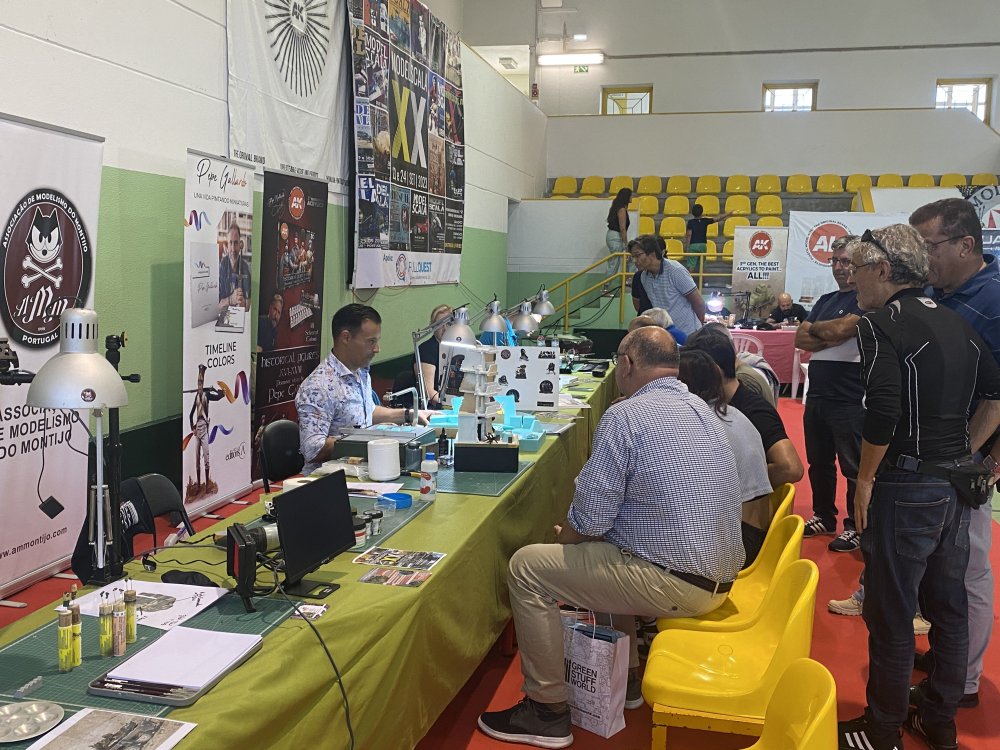
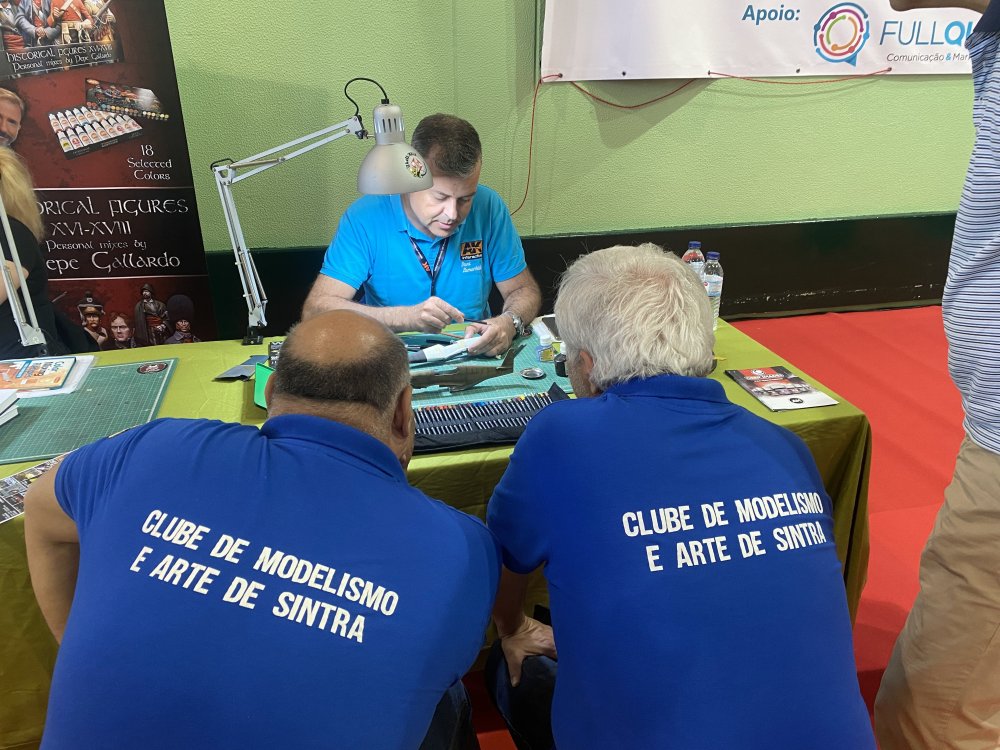
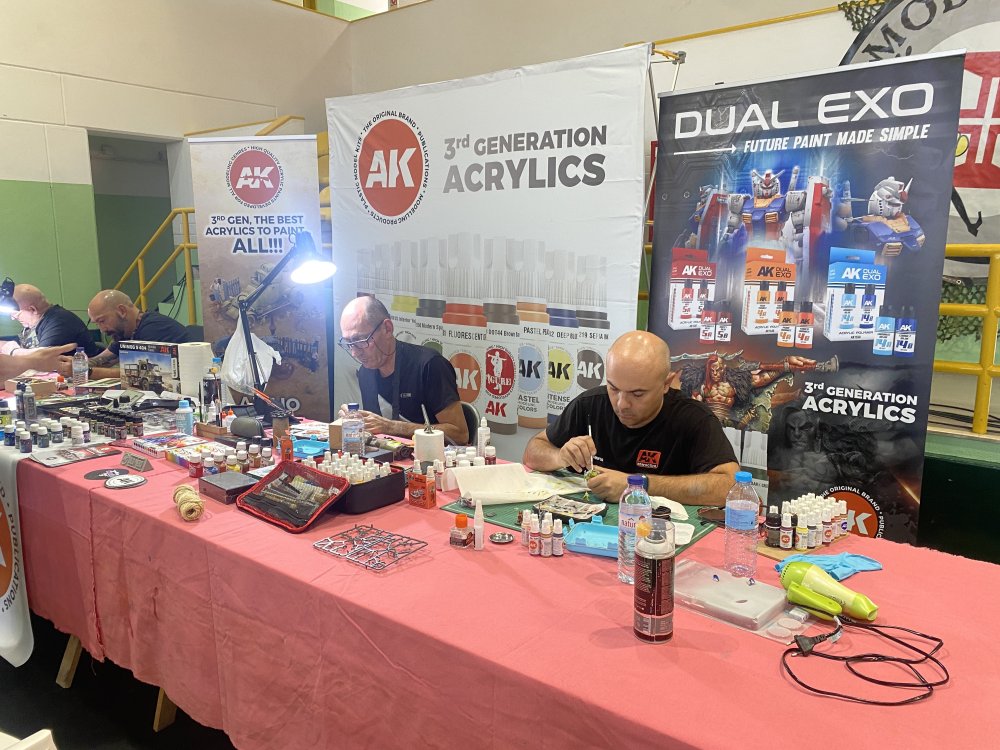
Last weekend, I went to Montijo, Portugal to be on ModelScala XX (20th Edition) Modelscala is held by Associação de Modelismo do Montijo and it takes place always in September in the city of Montijo, at around 50 km of Lisbon Airport. This year was a special year because it was their 20th edition and it did have some special guest with great workshops like José Brito, Pepe Gallardo, Dani Zarmarbide and Emilien Pepin. Also AMMO and AK did make their presence with both modellers teams working and showing their products all weekend. The result: a spectular event. Next year, XXI edition in 28 and 29th September. I leave you some pictures (cellphone sorry):


-
REally nice Trio!!! Good work!!
- 1 reply
-
- 1
-

-
 I have had the pleasure to see with my own eyes, this fantastic build!!! It`s already a beauty!! When complete ti will be epic!
 -
Fantastic work my friend!!!!
-
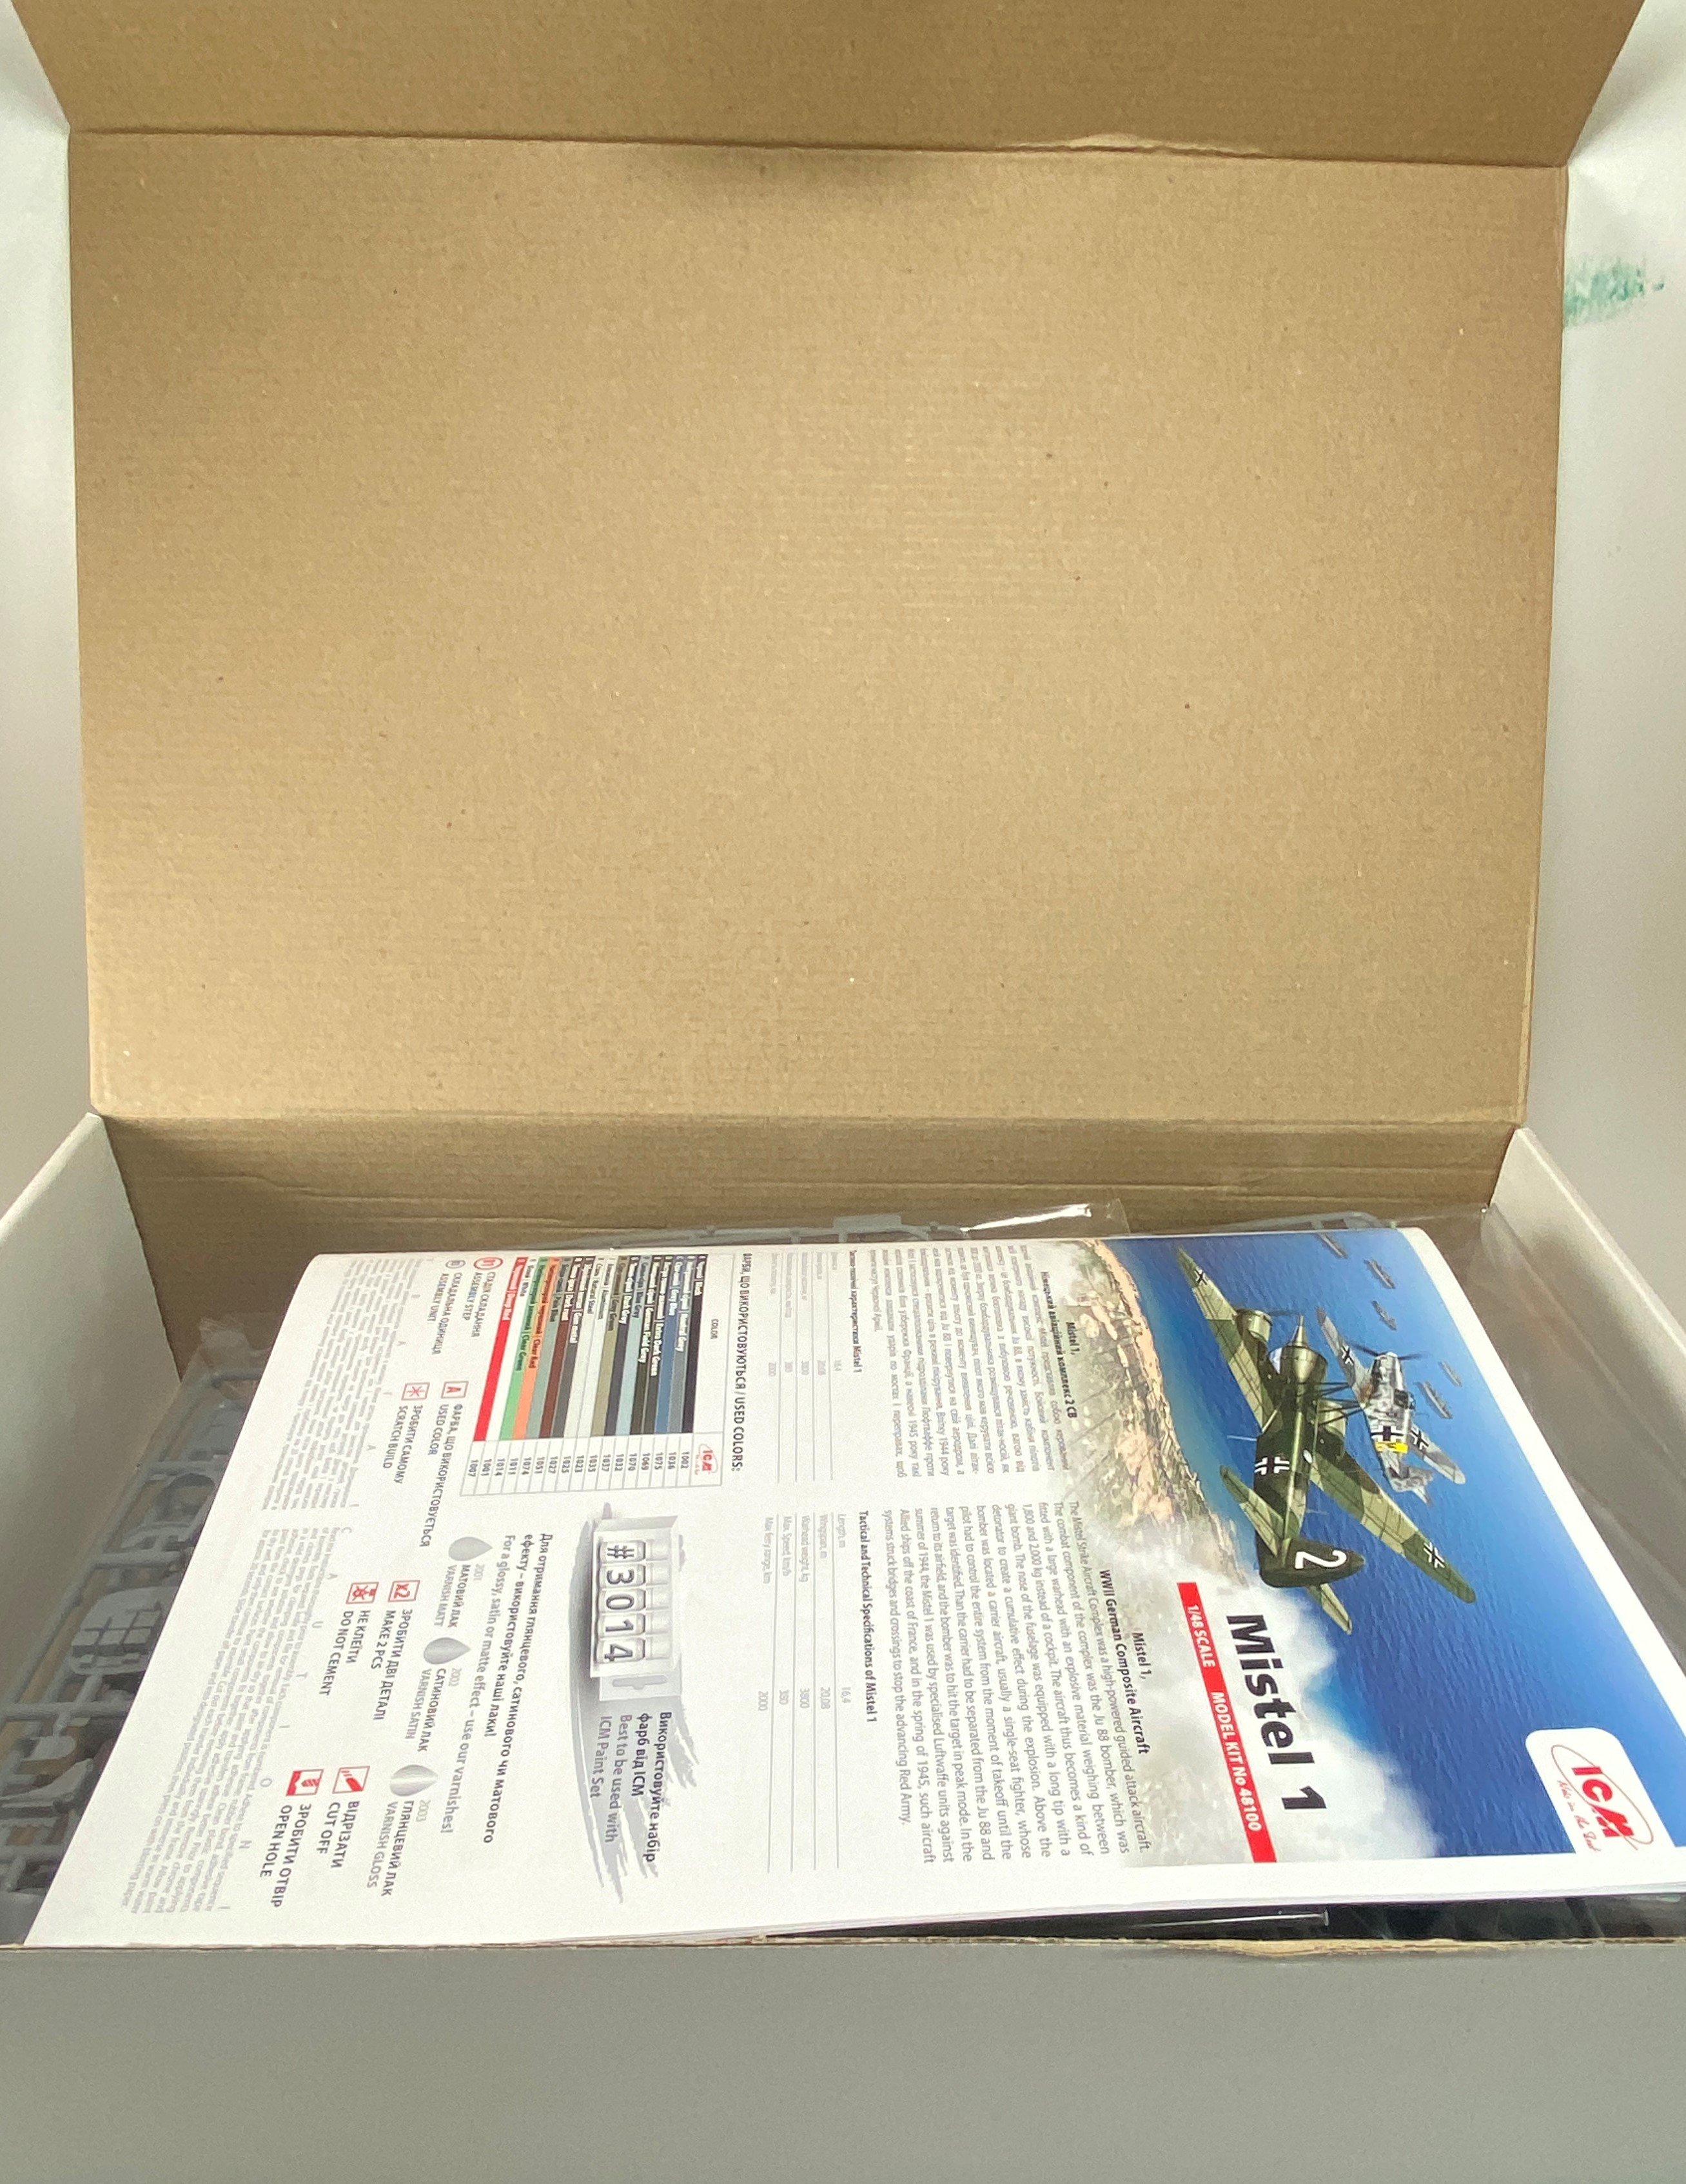
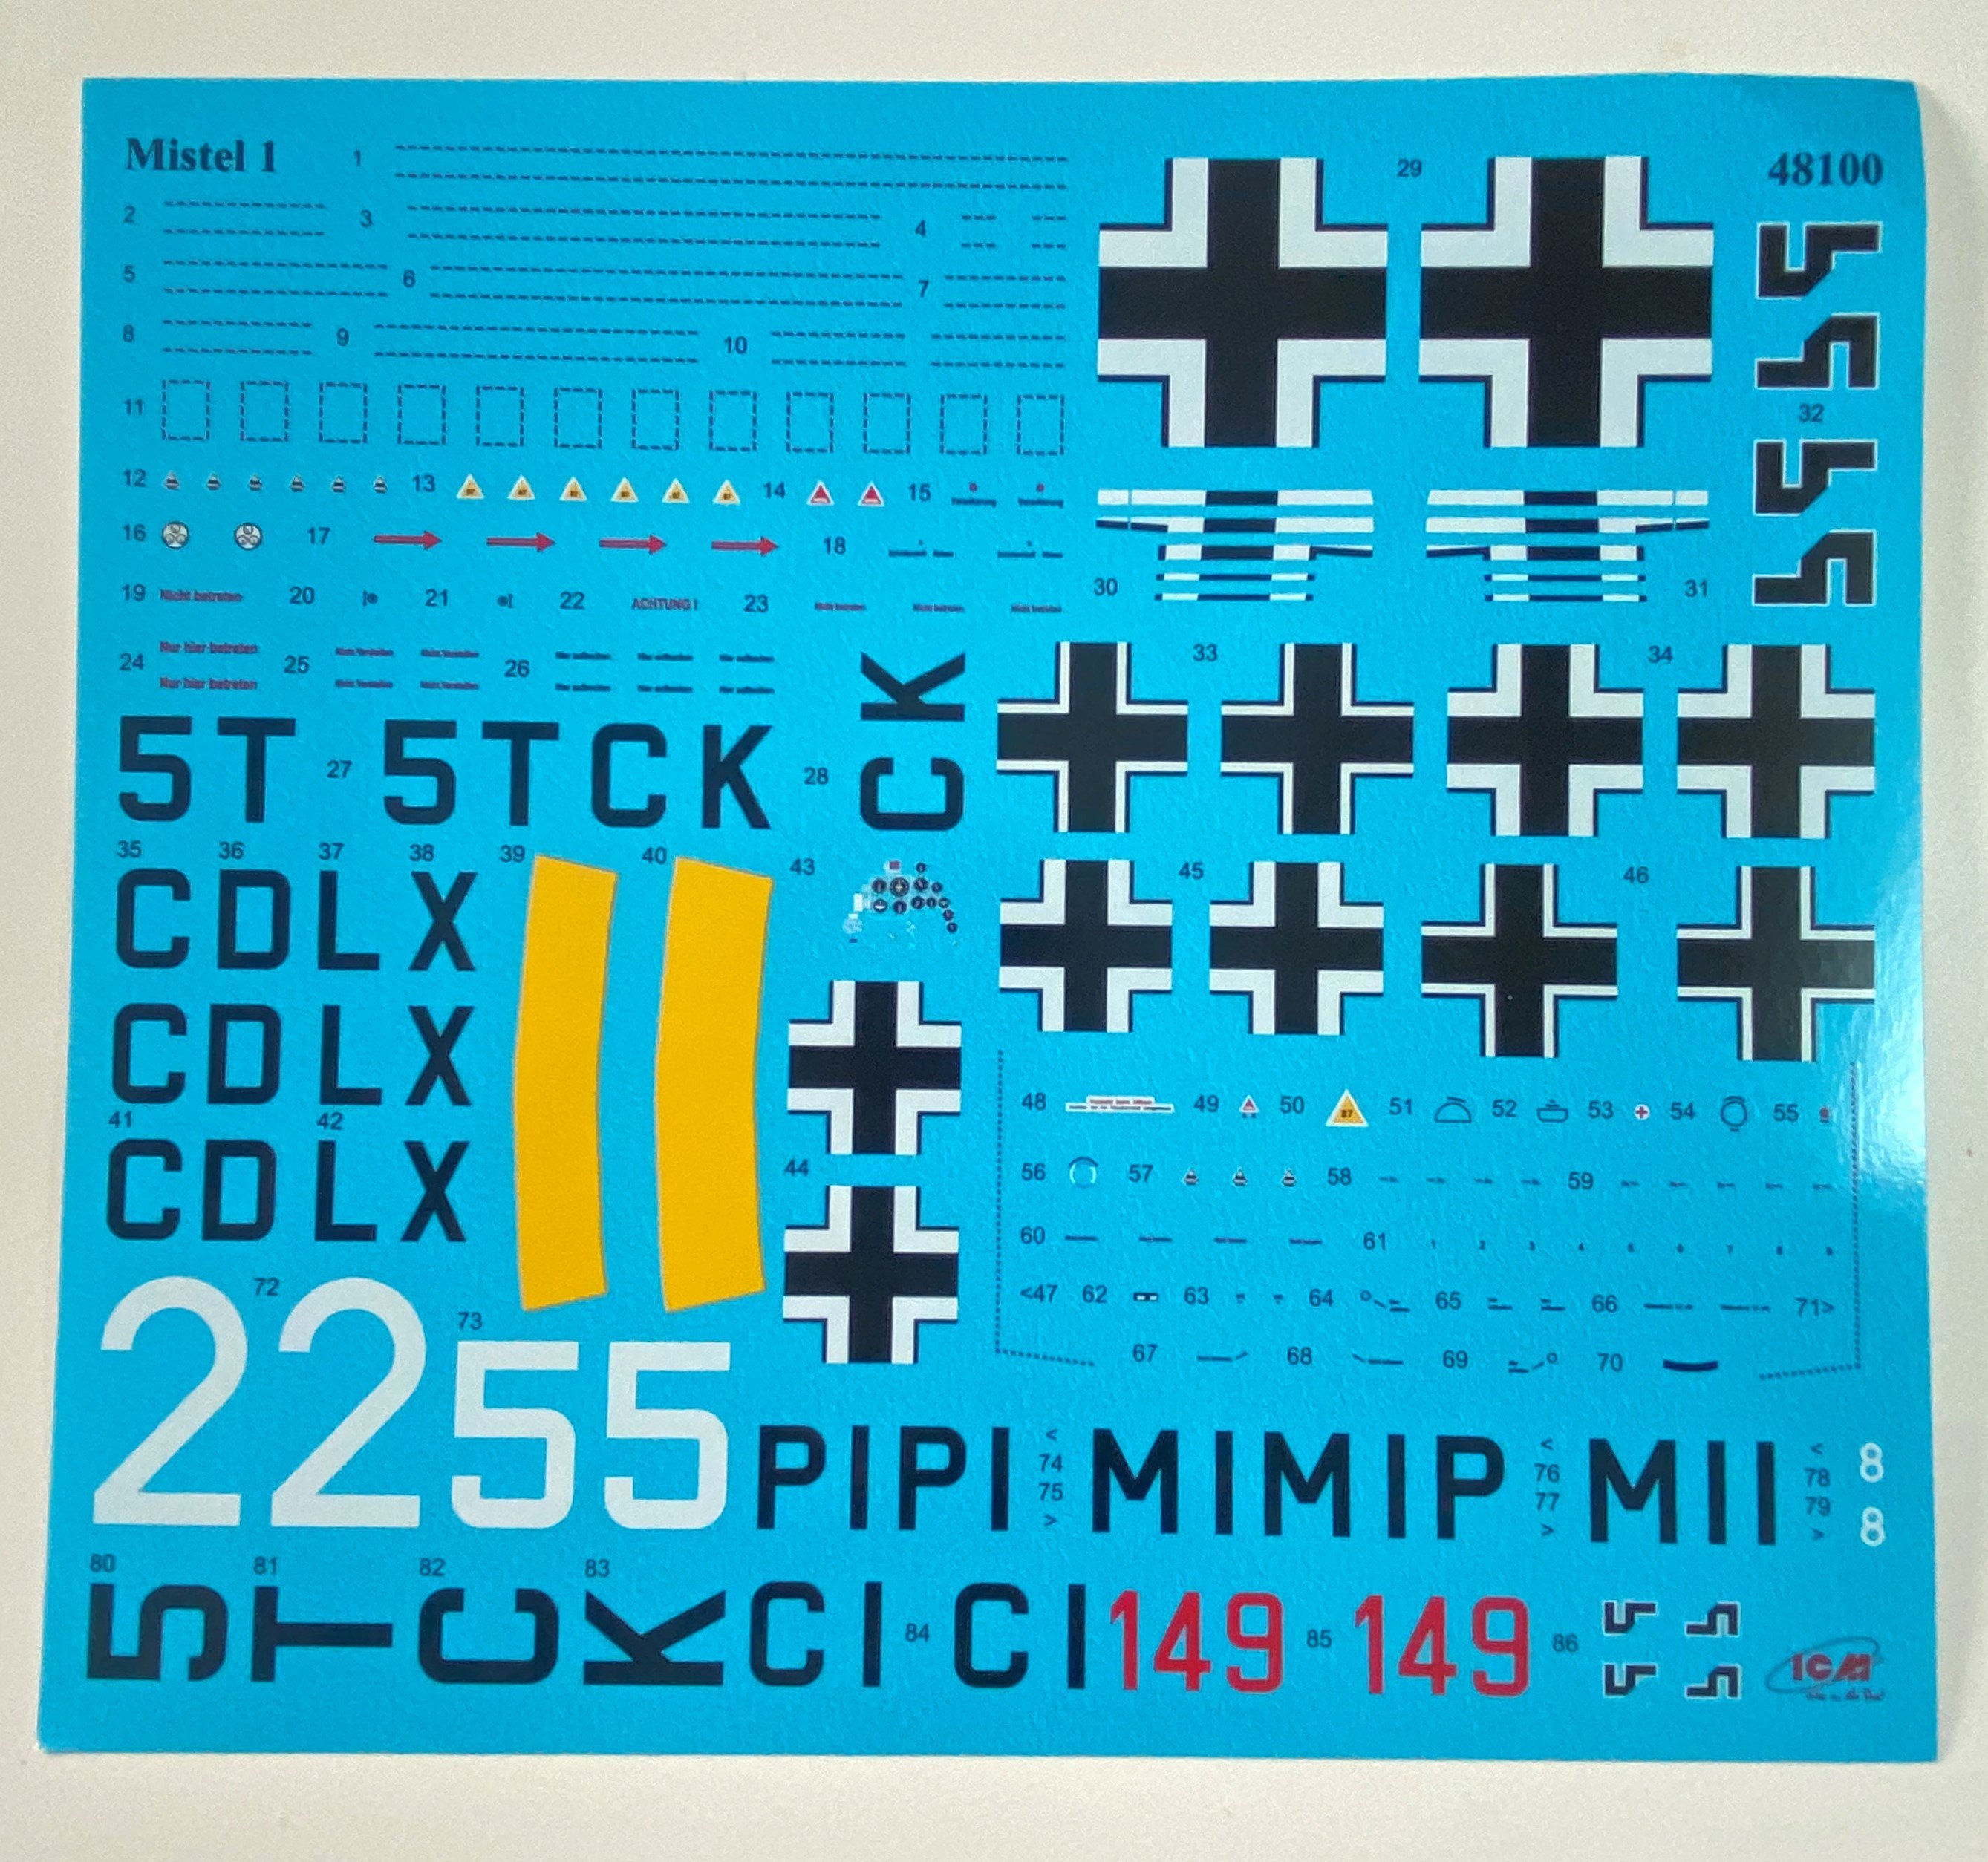
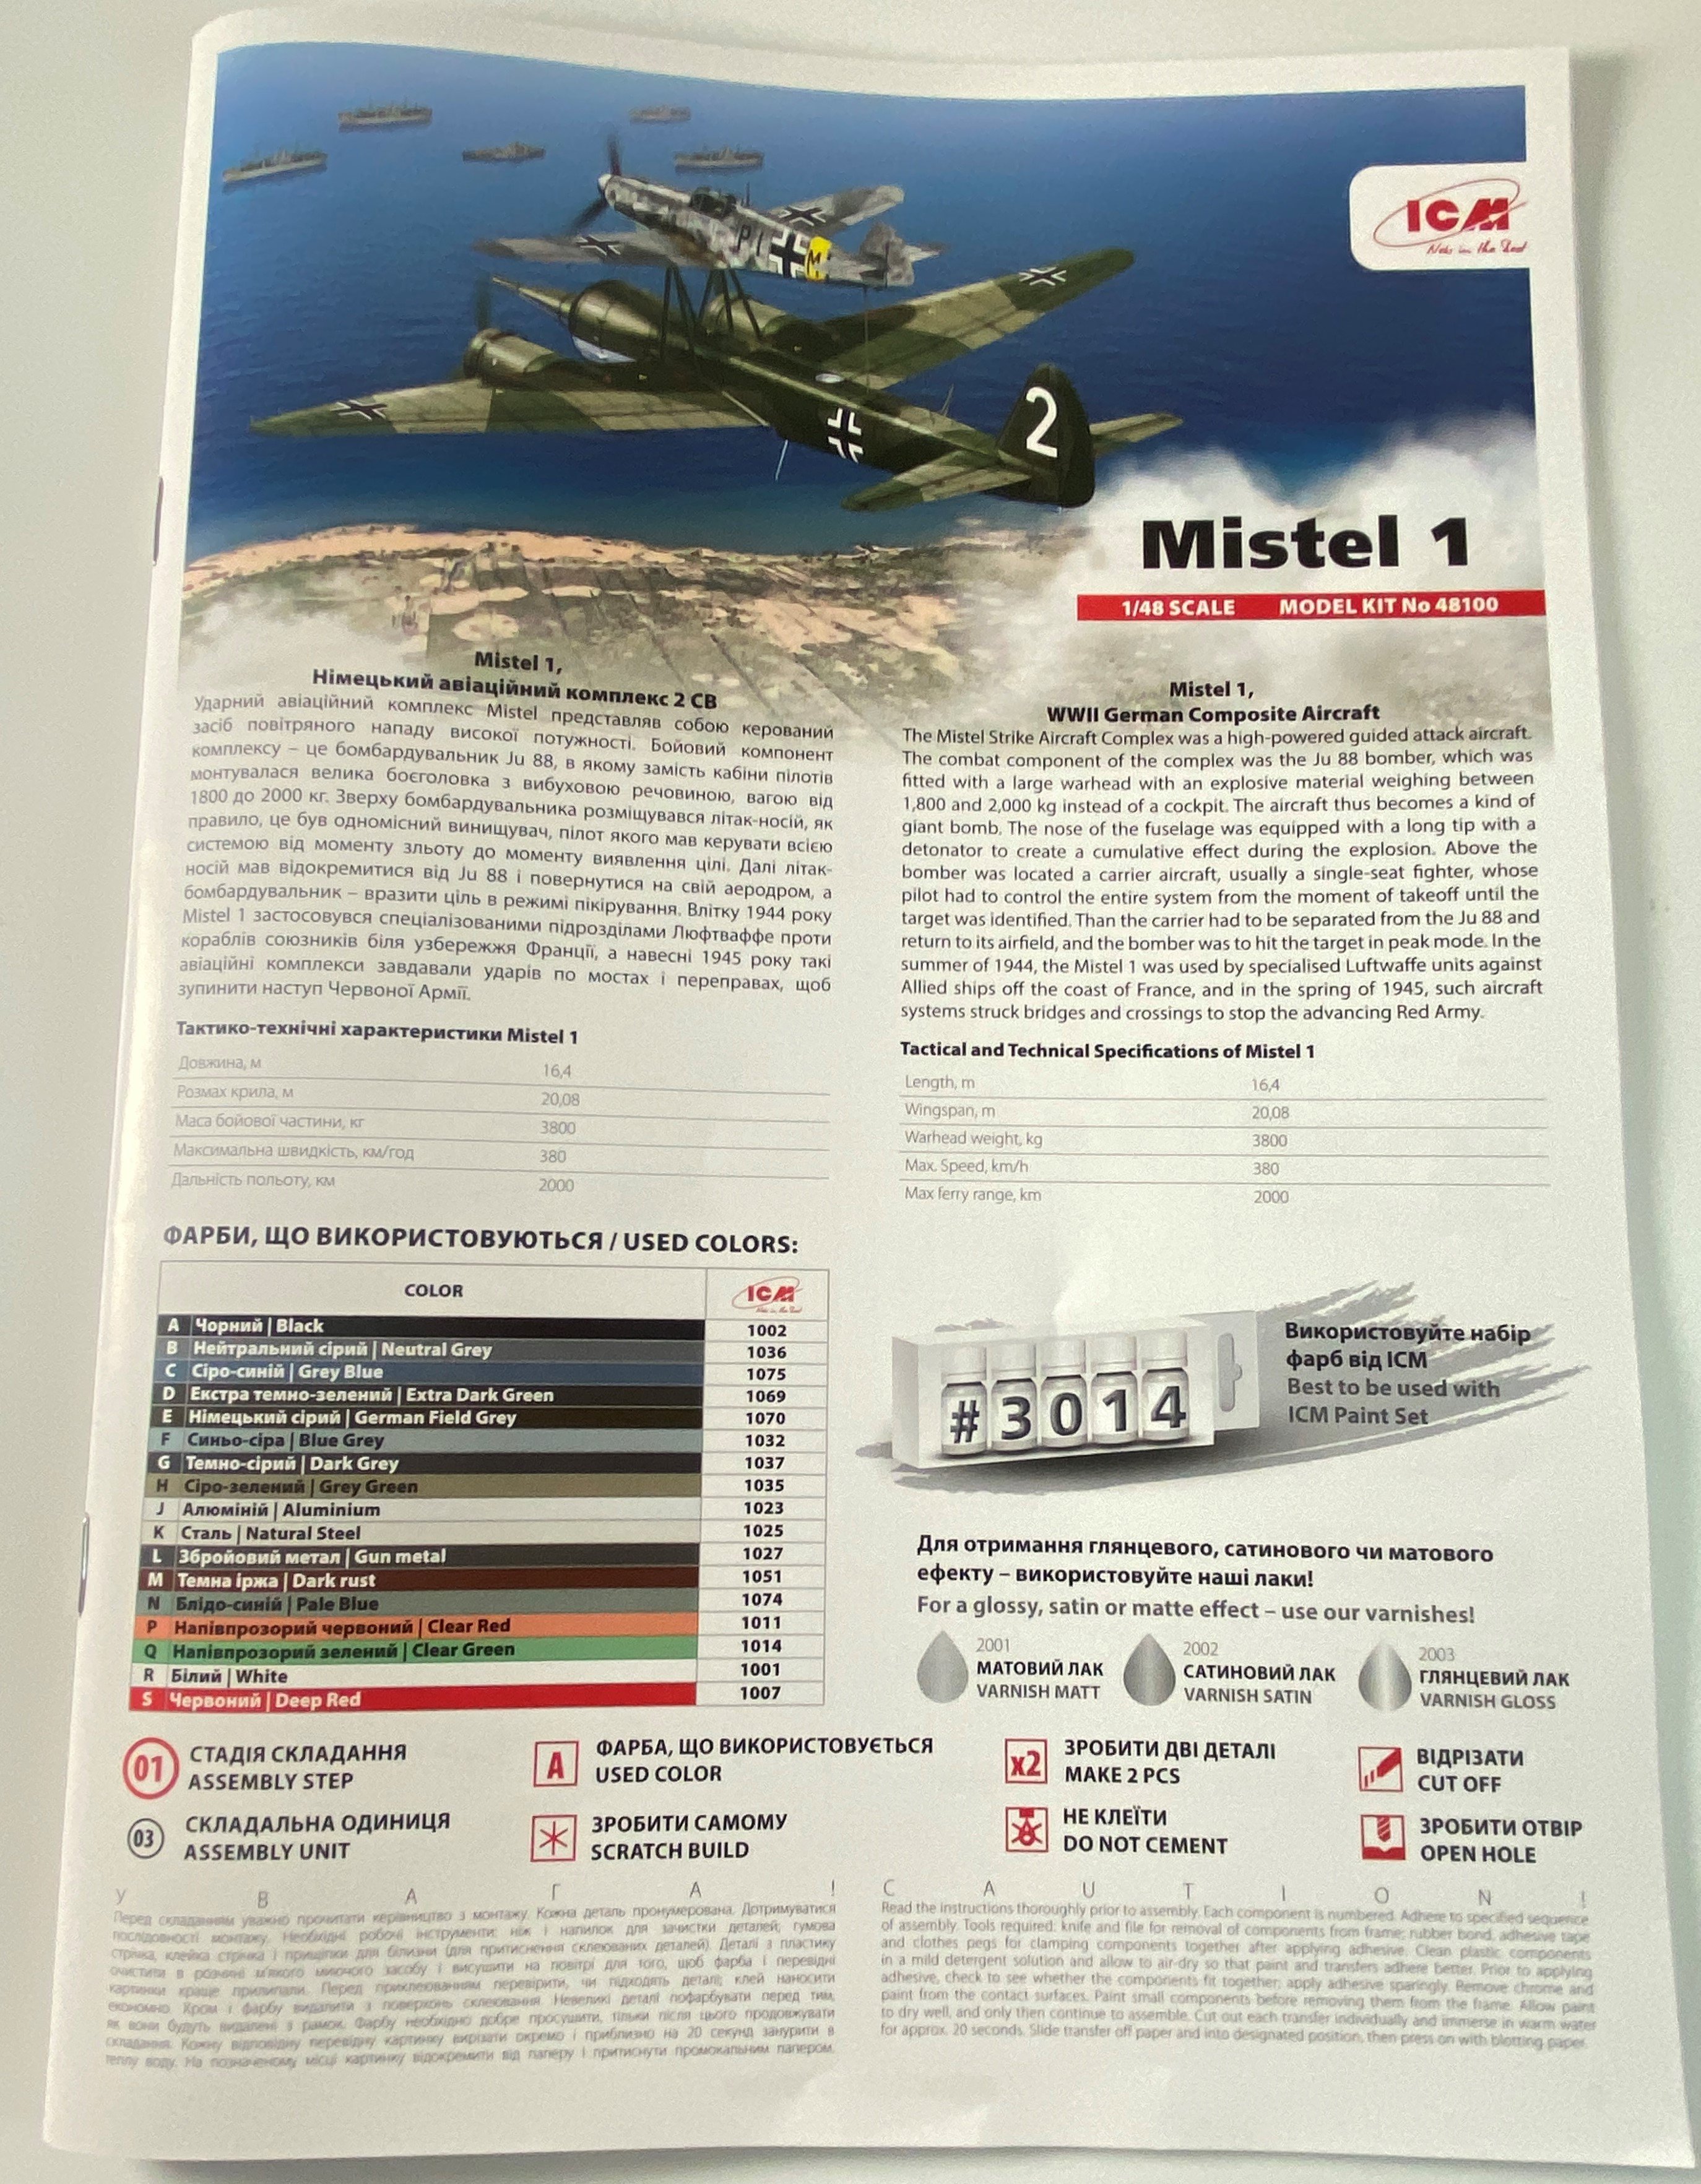
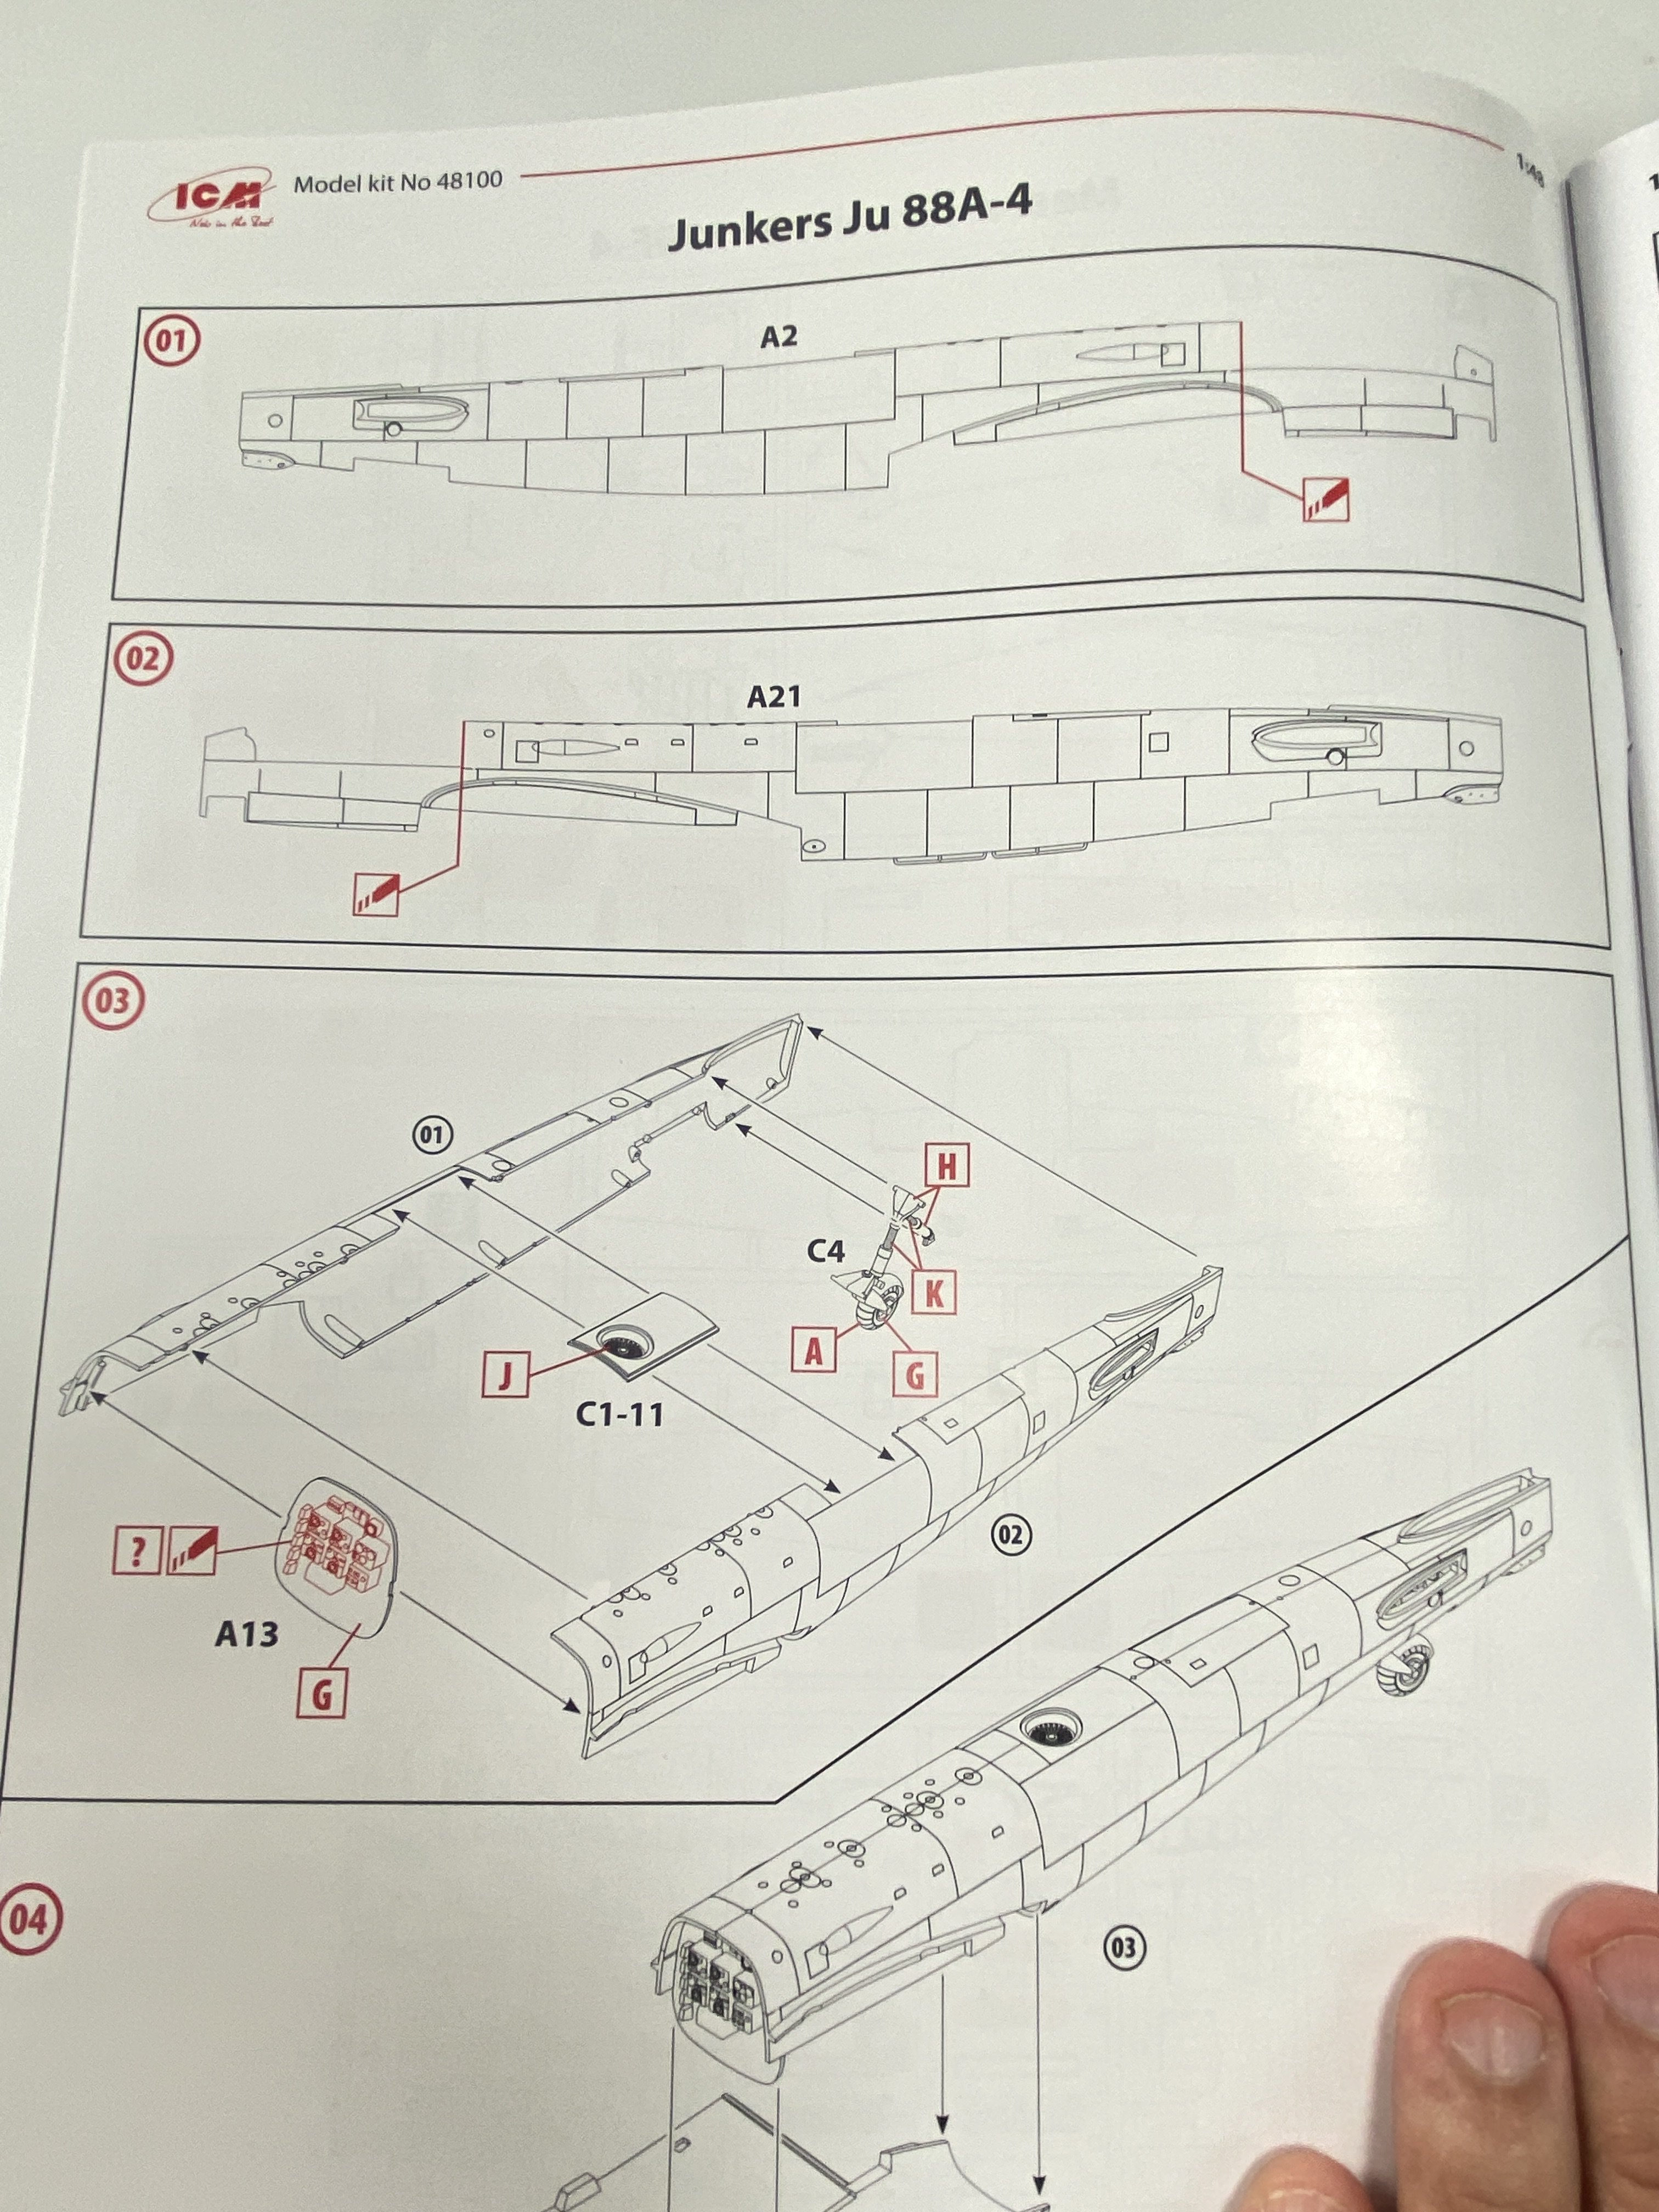
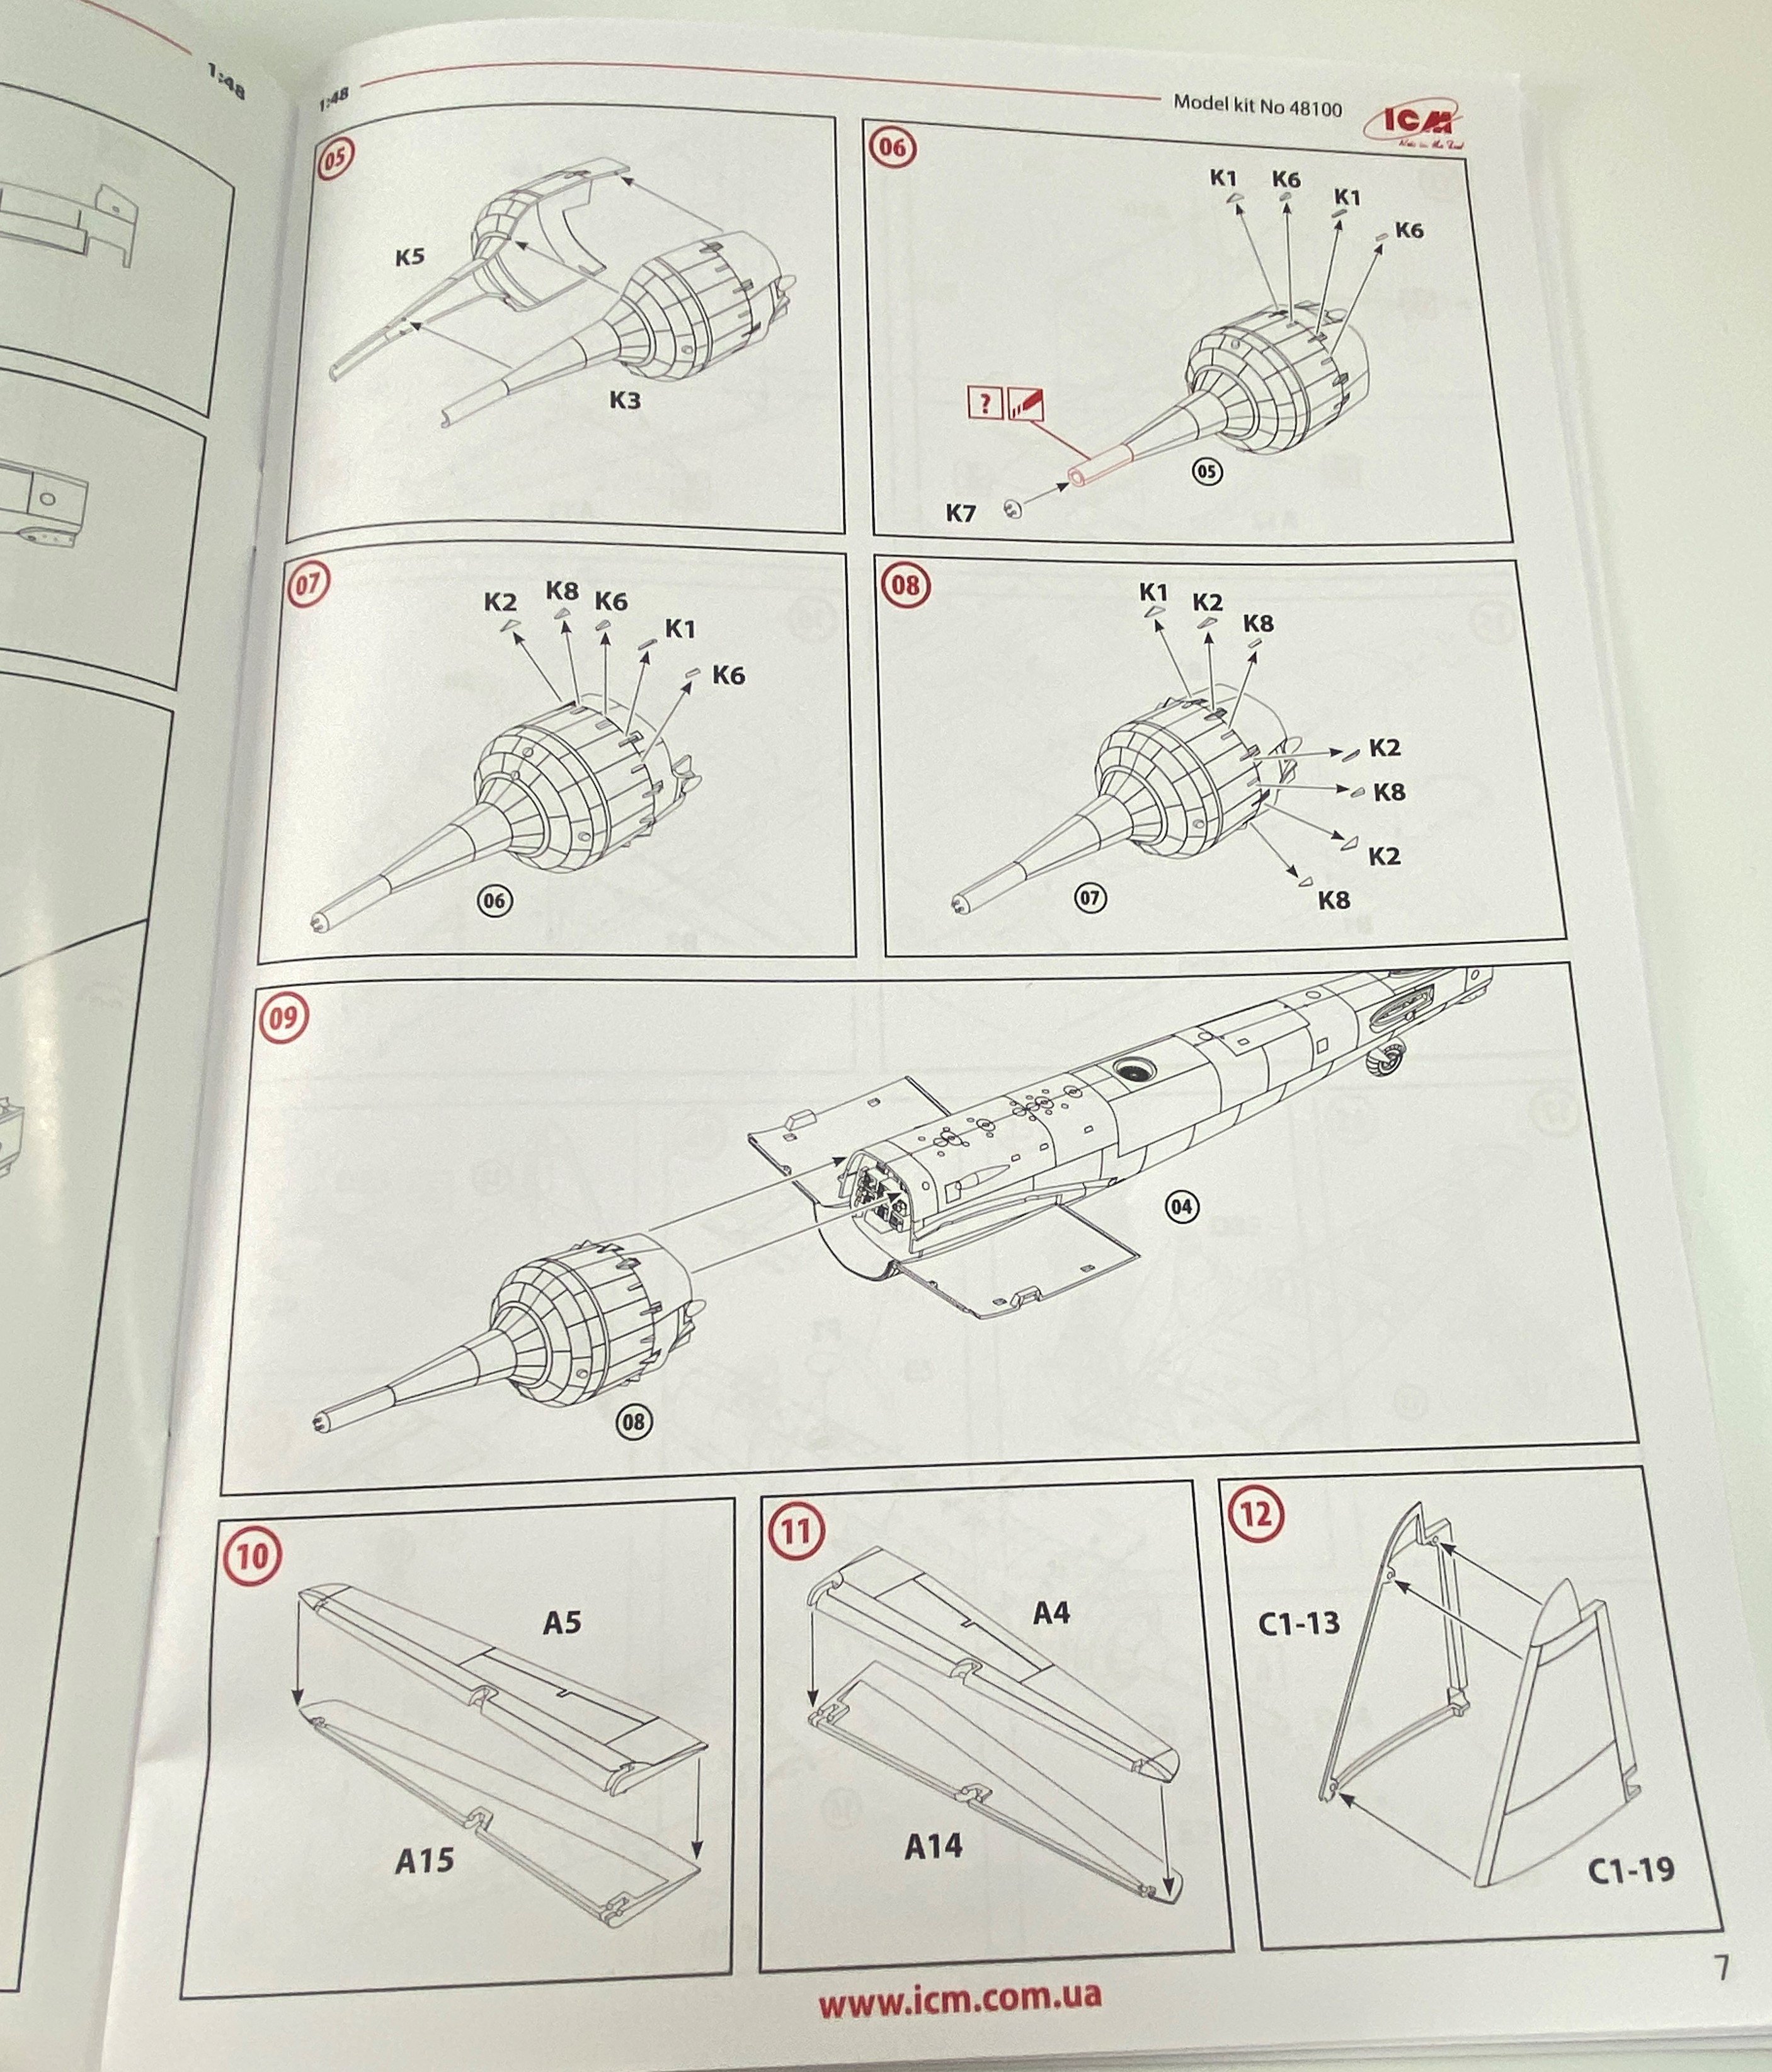
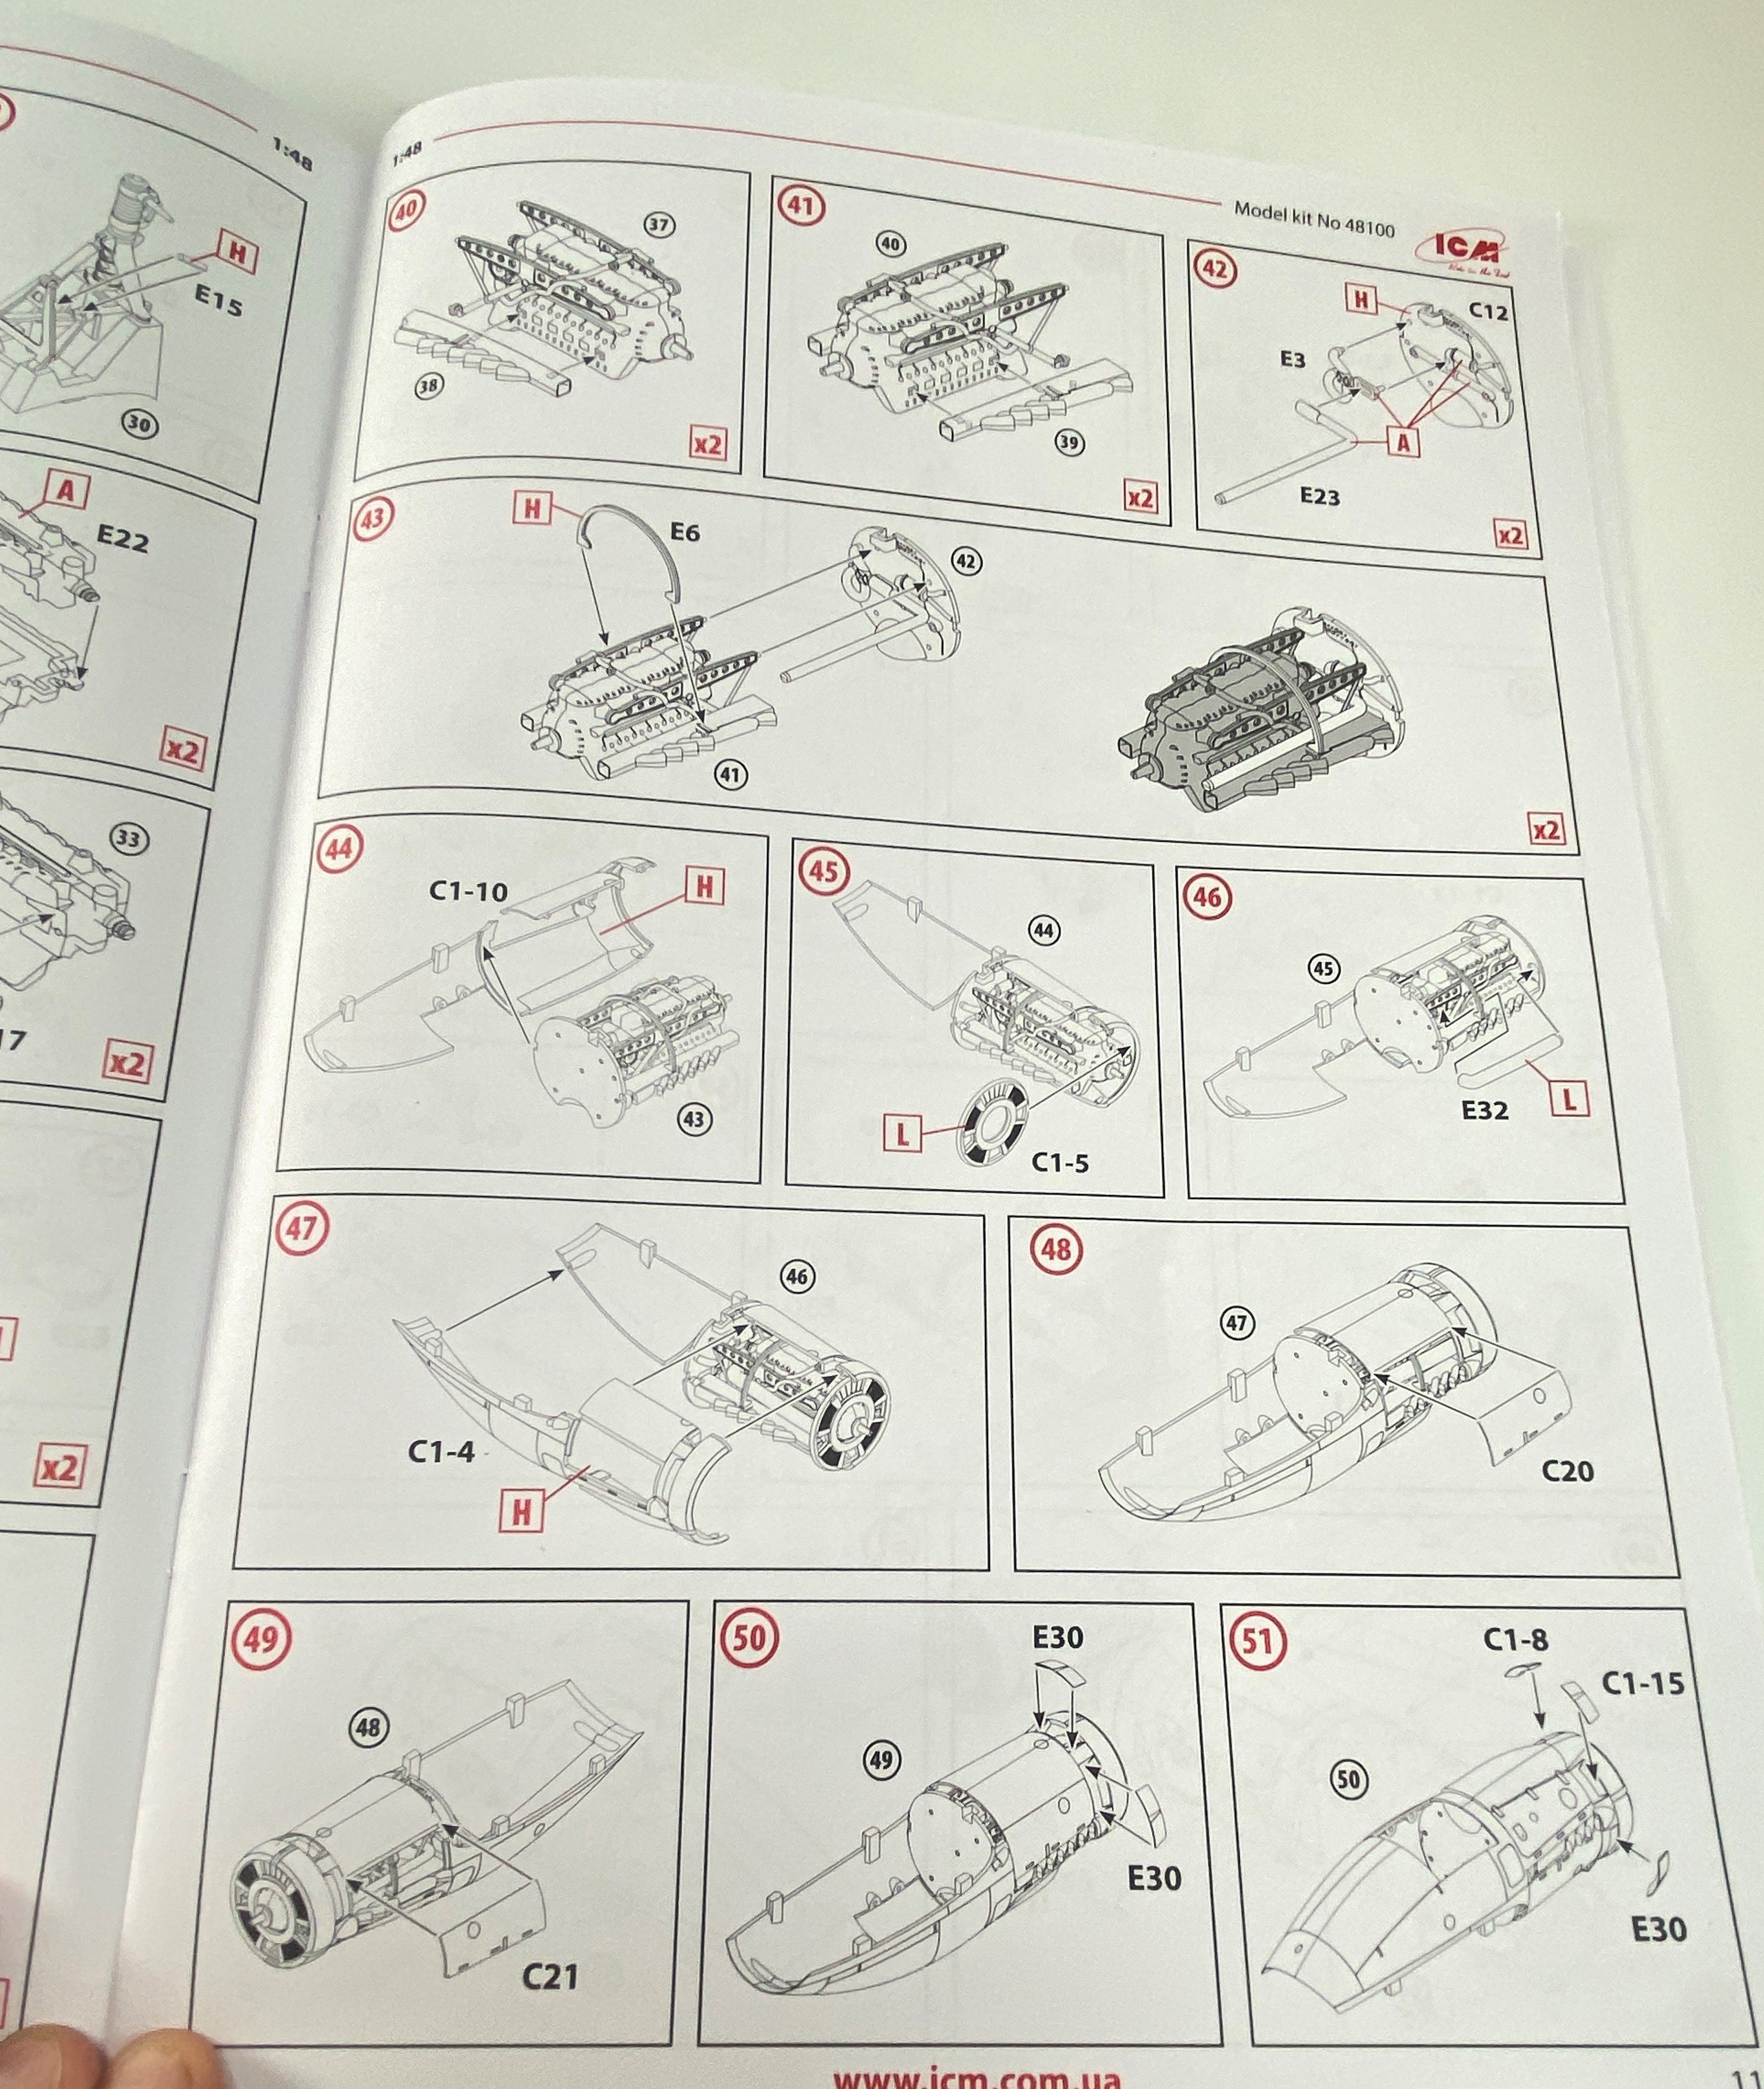
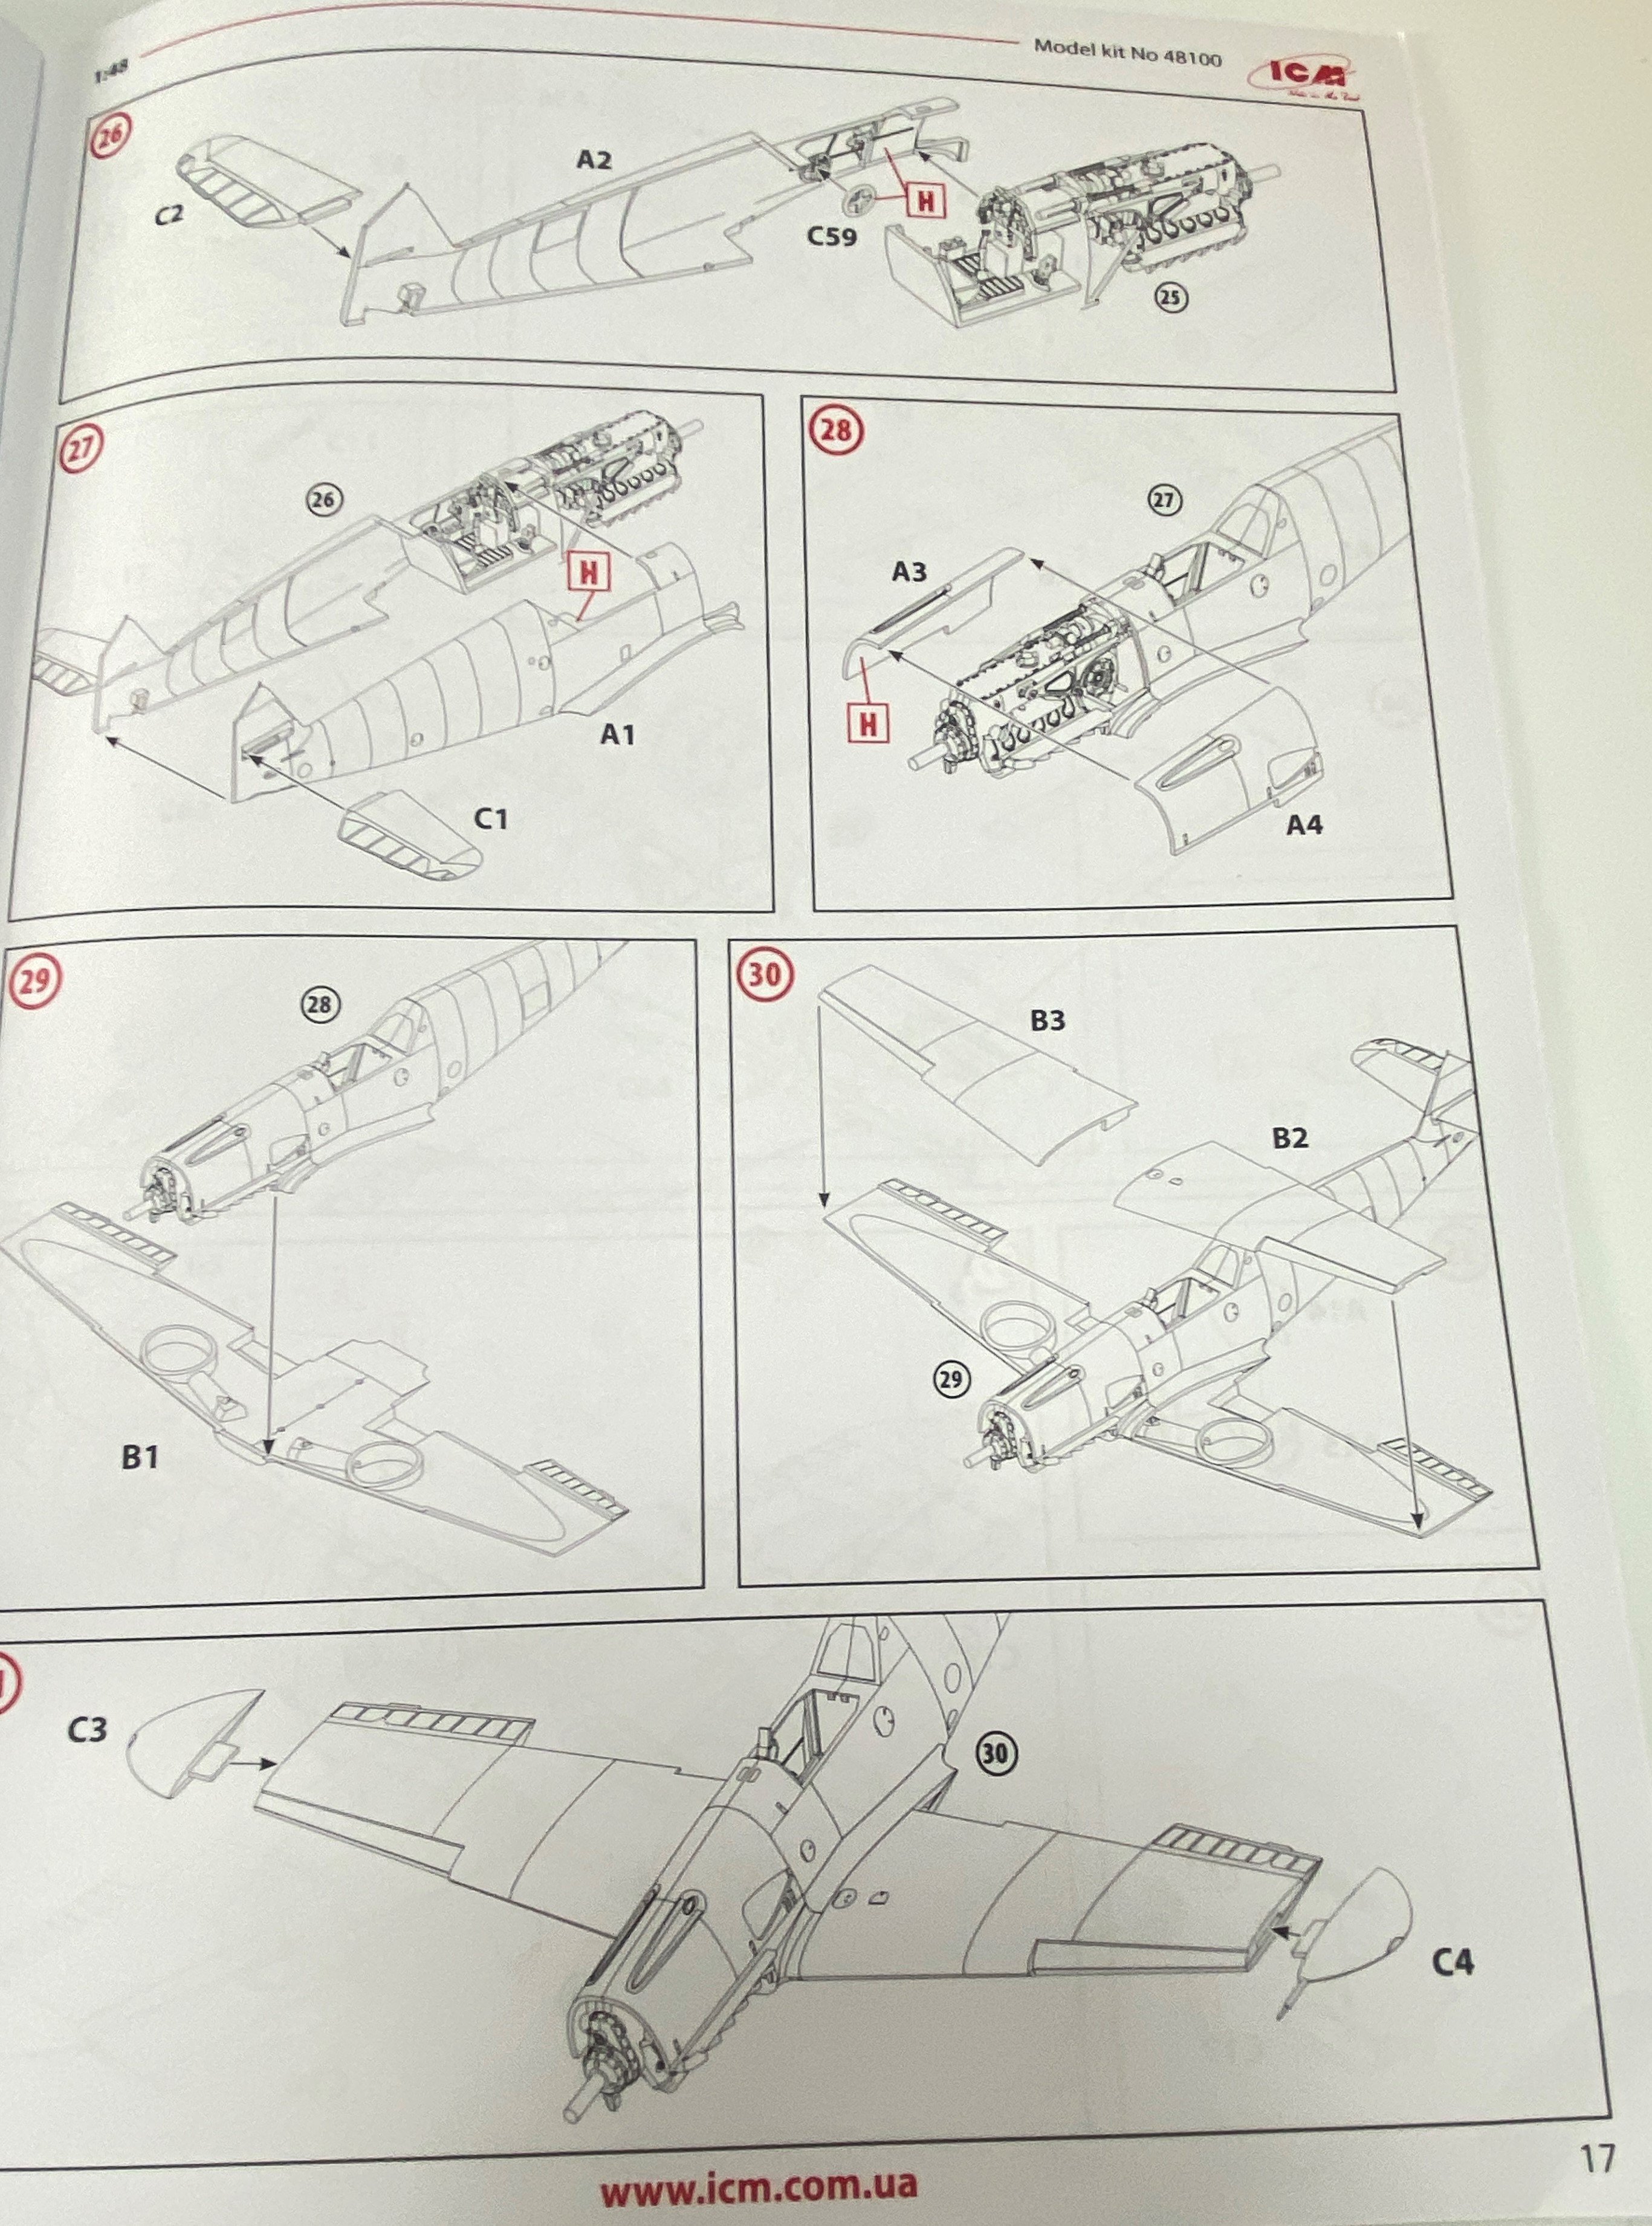
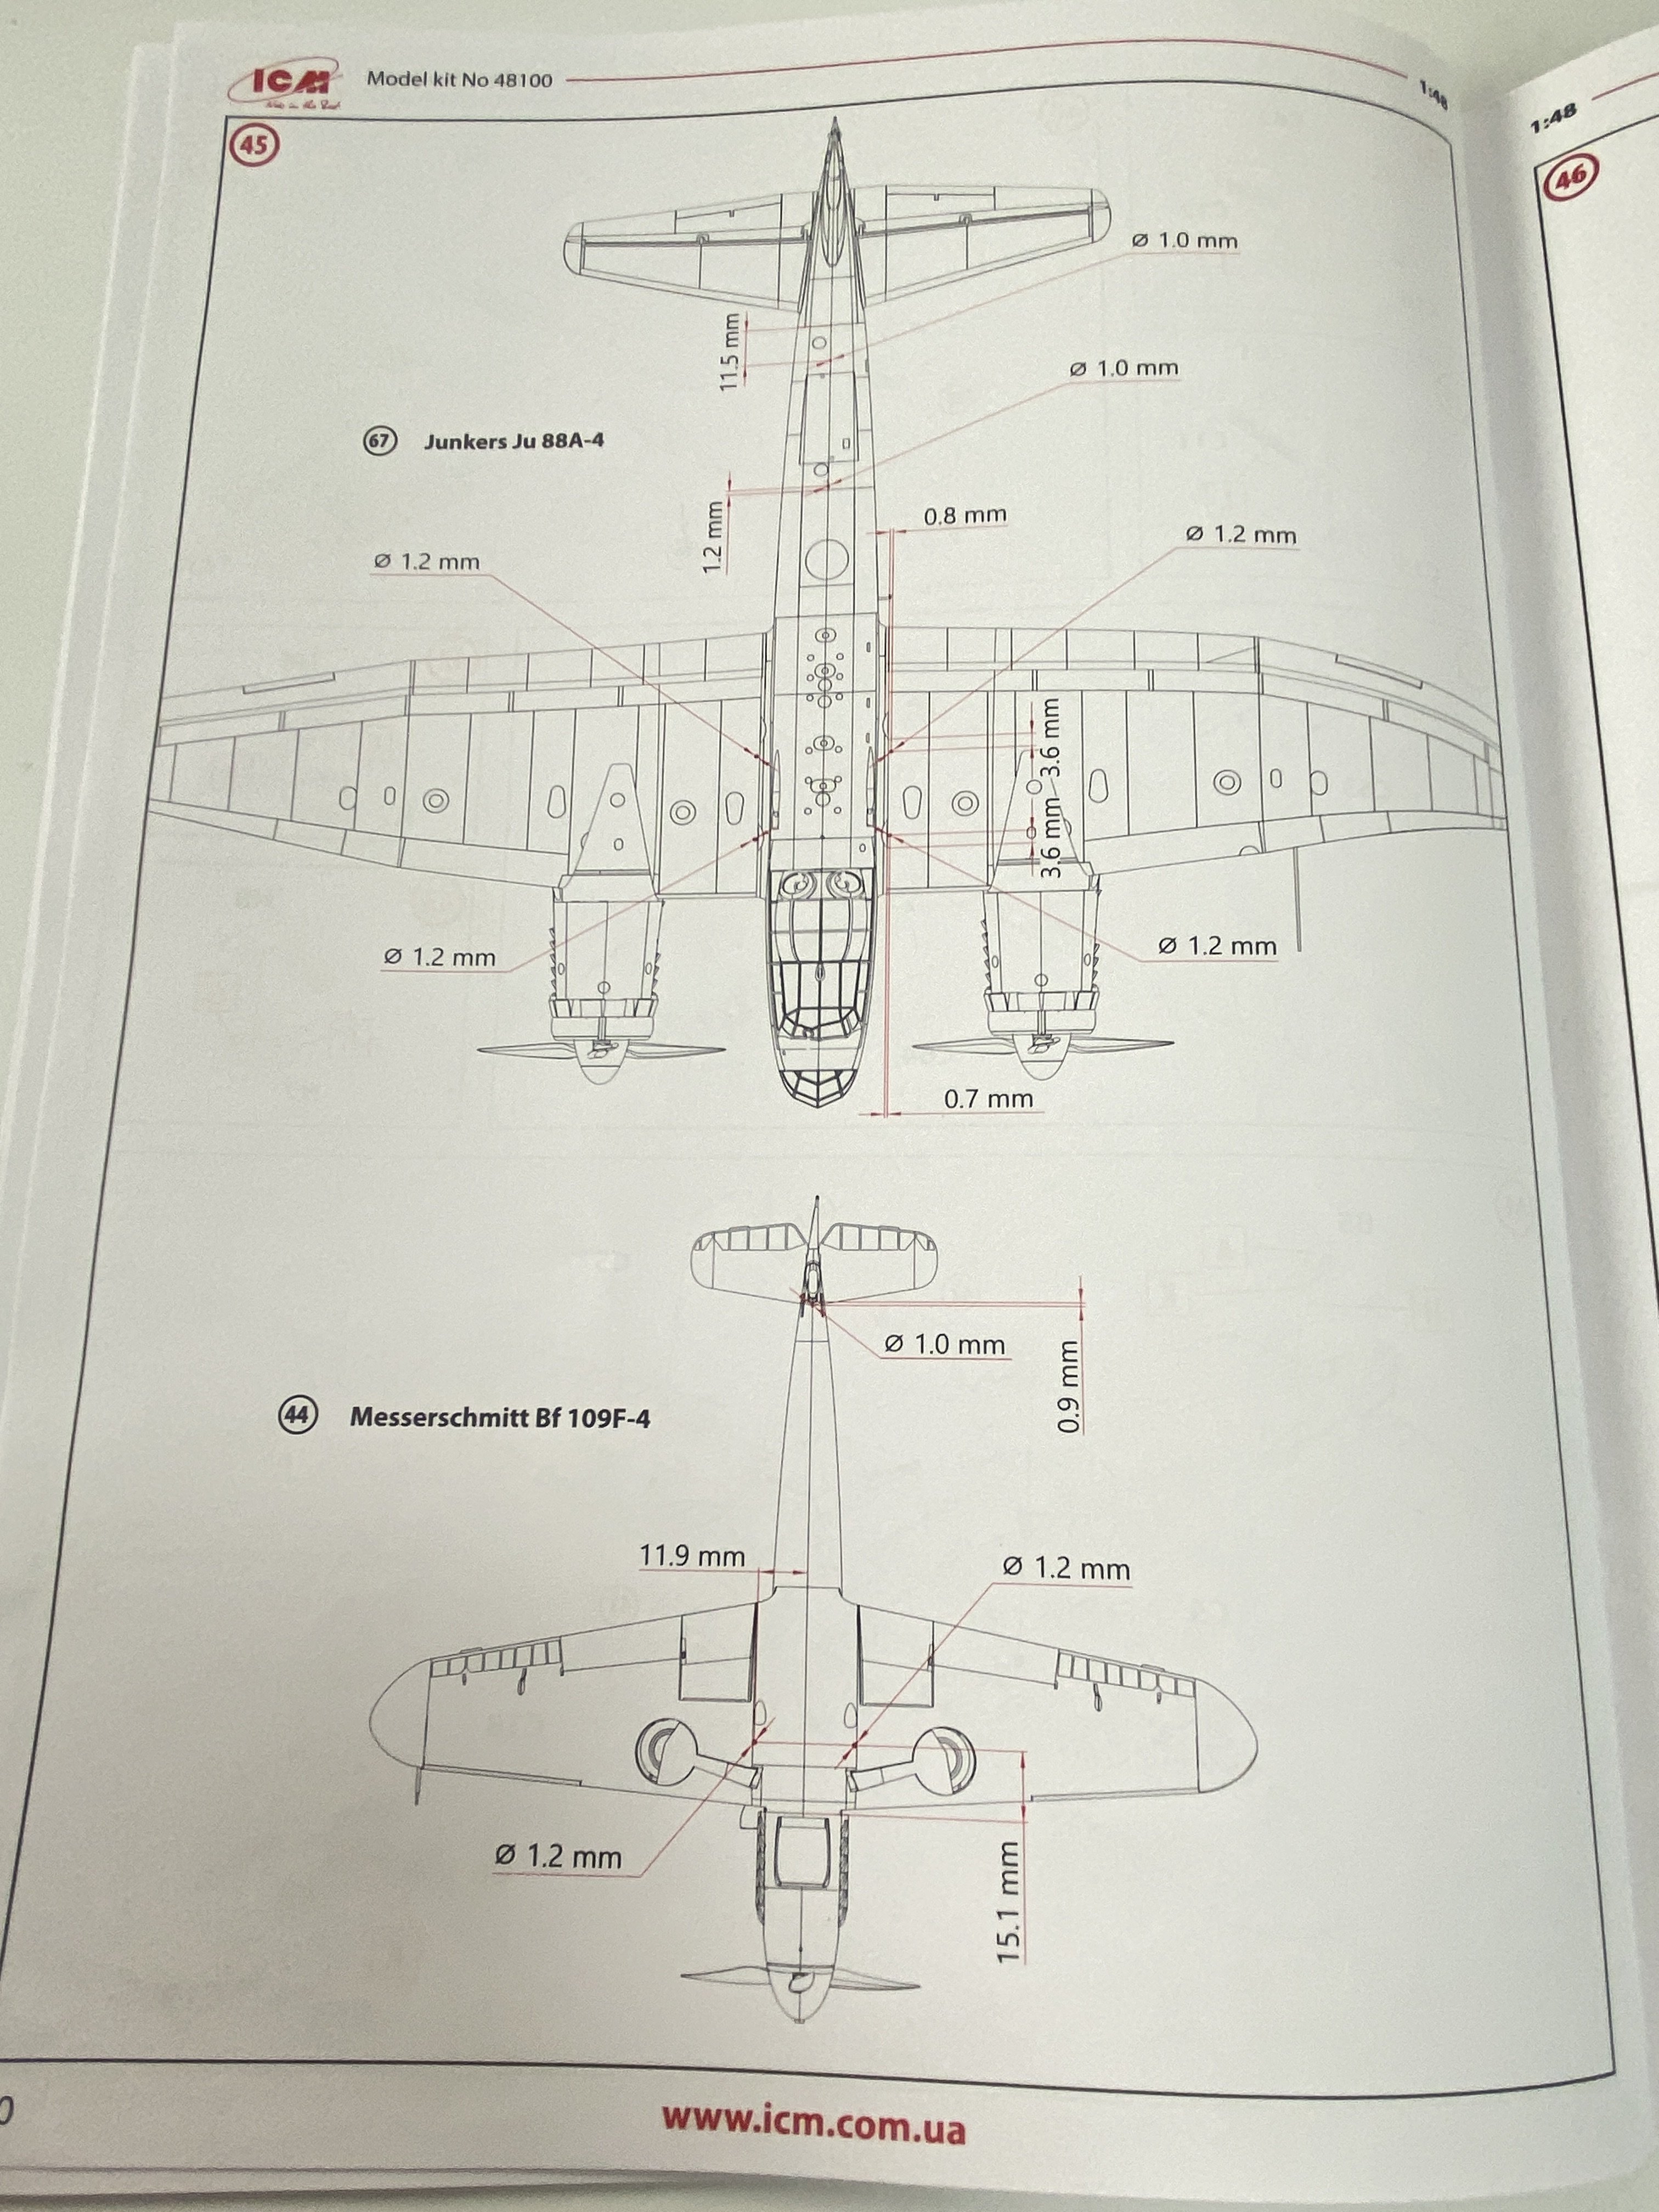
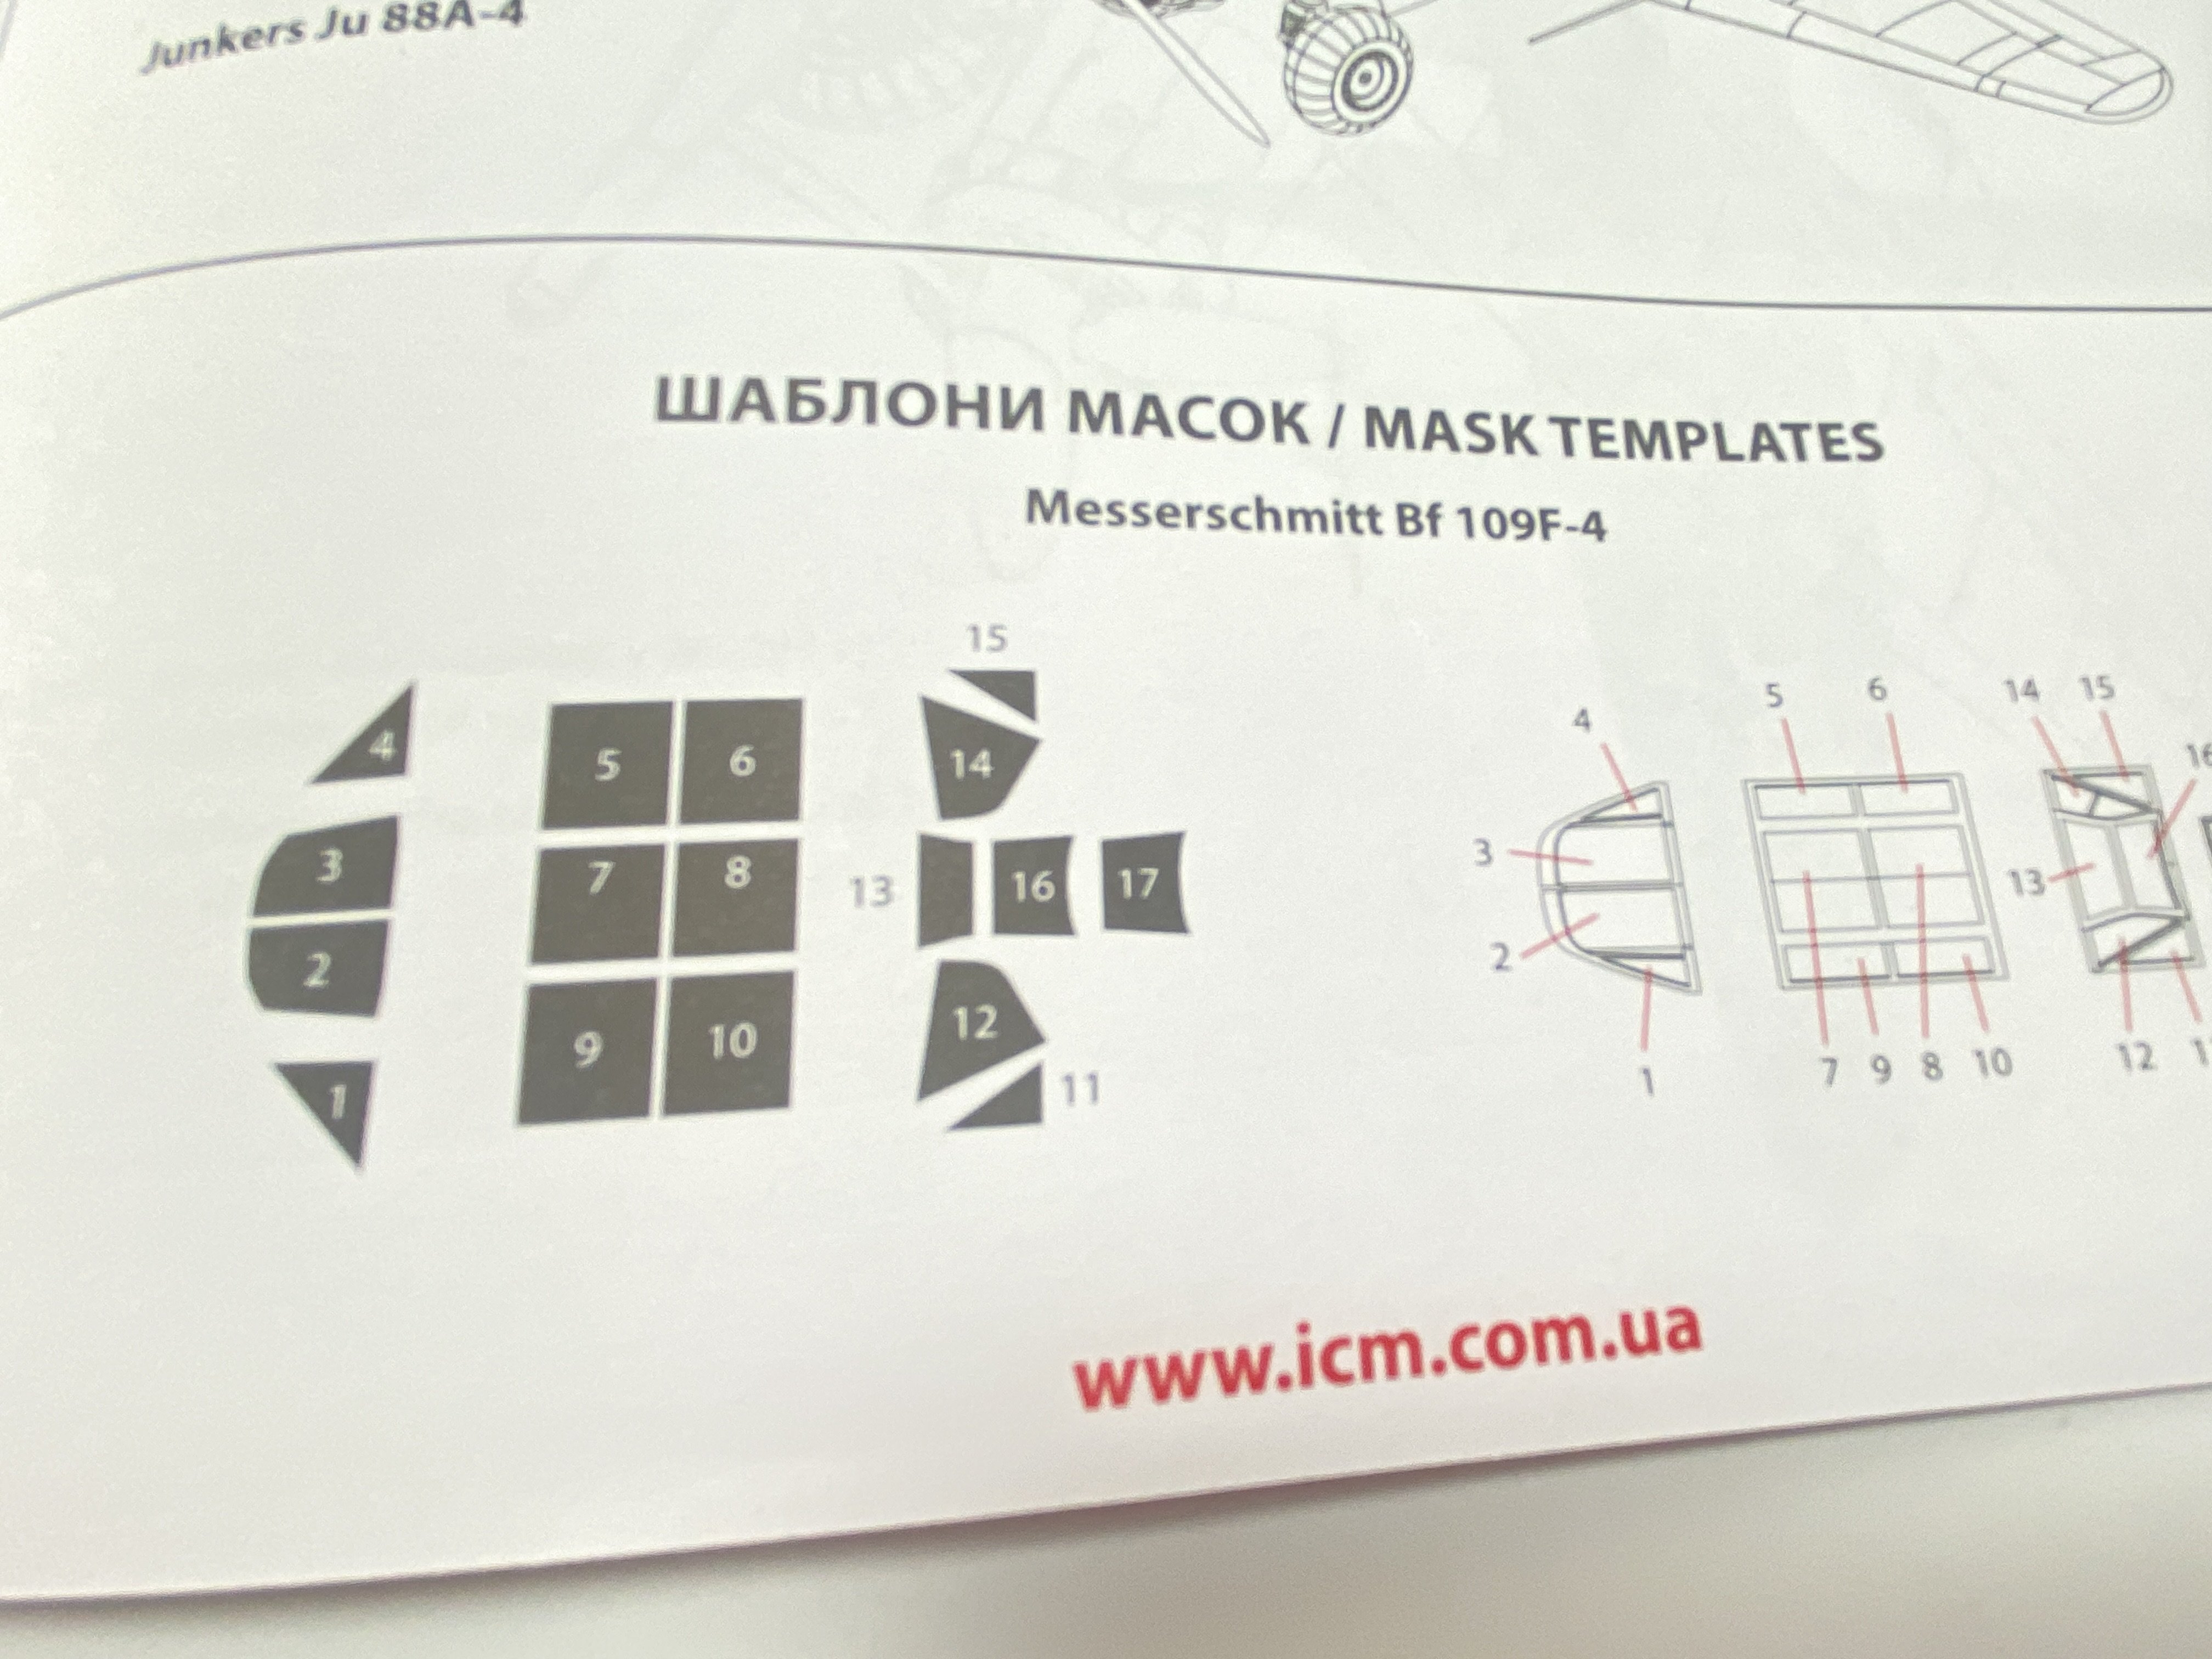
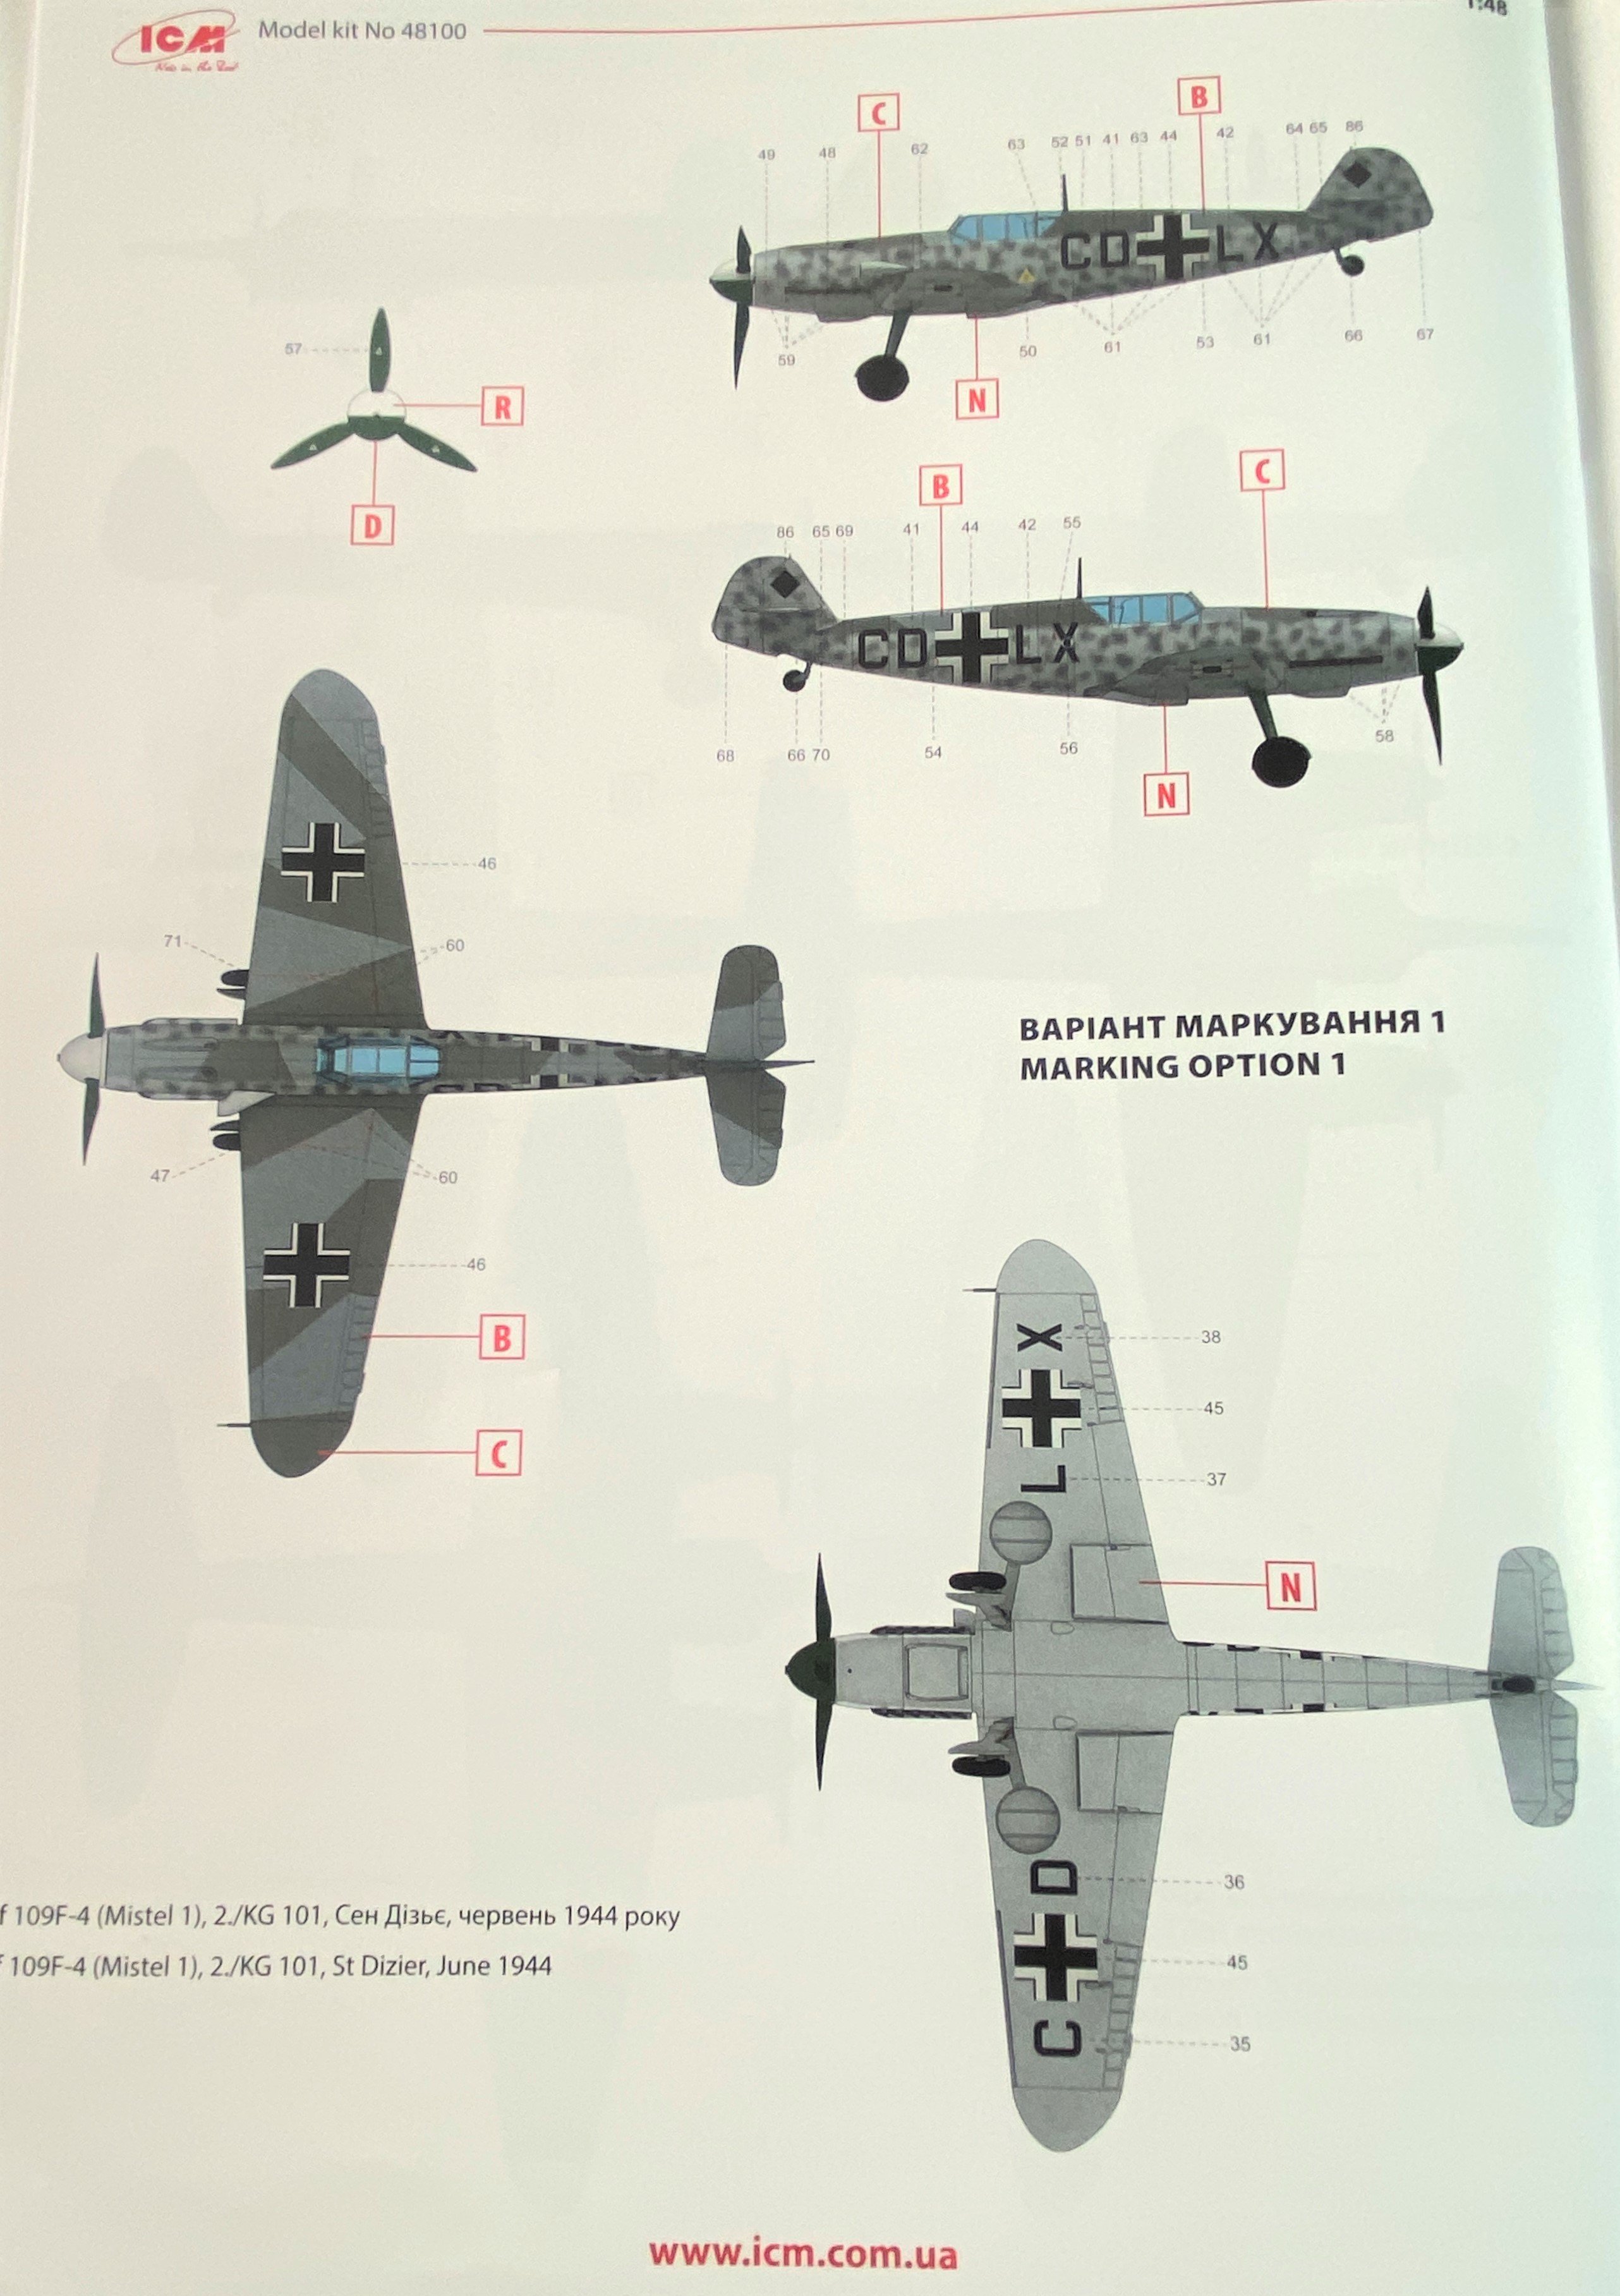
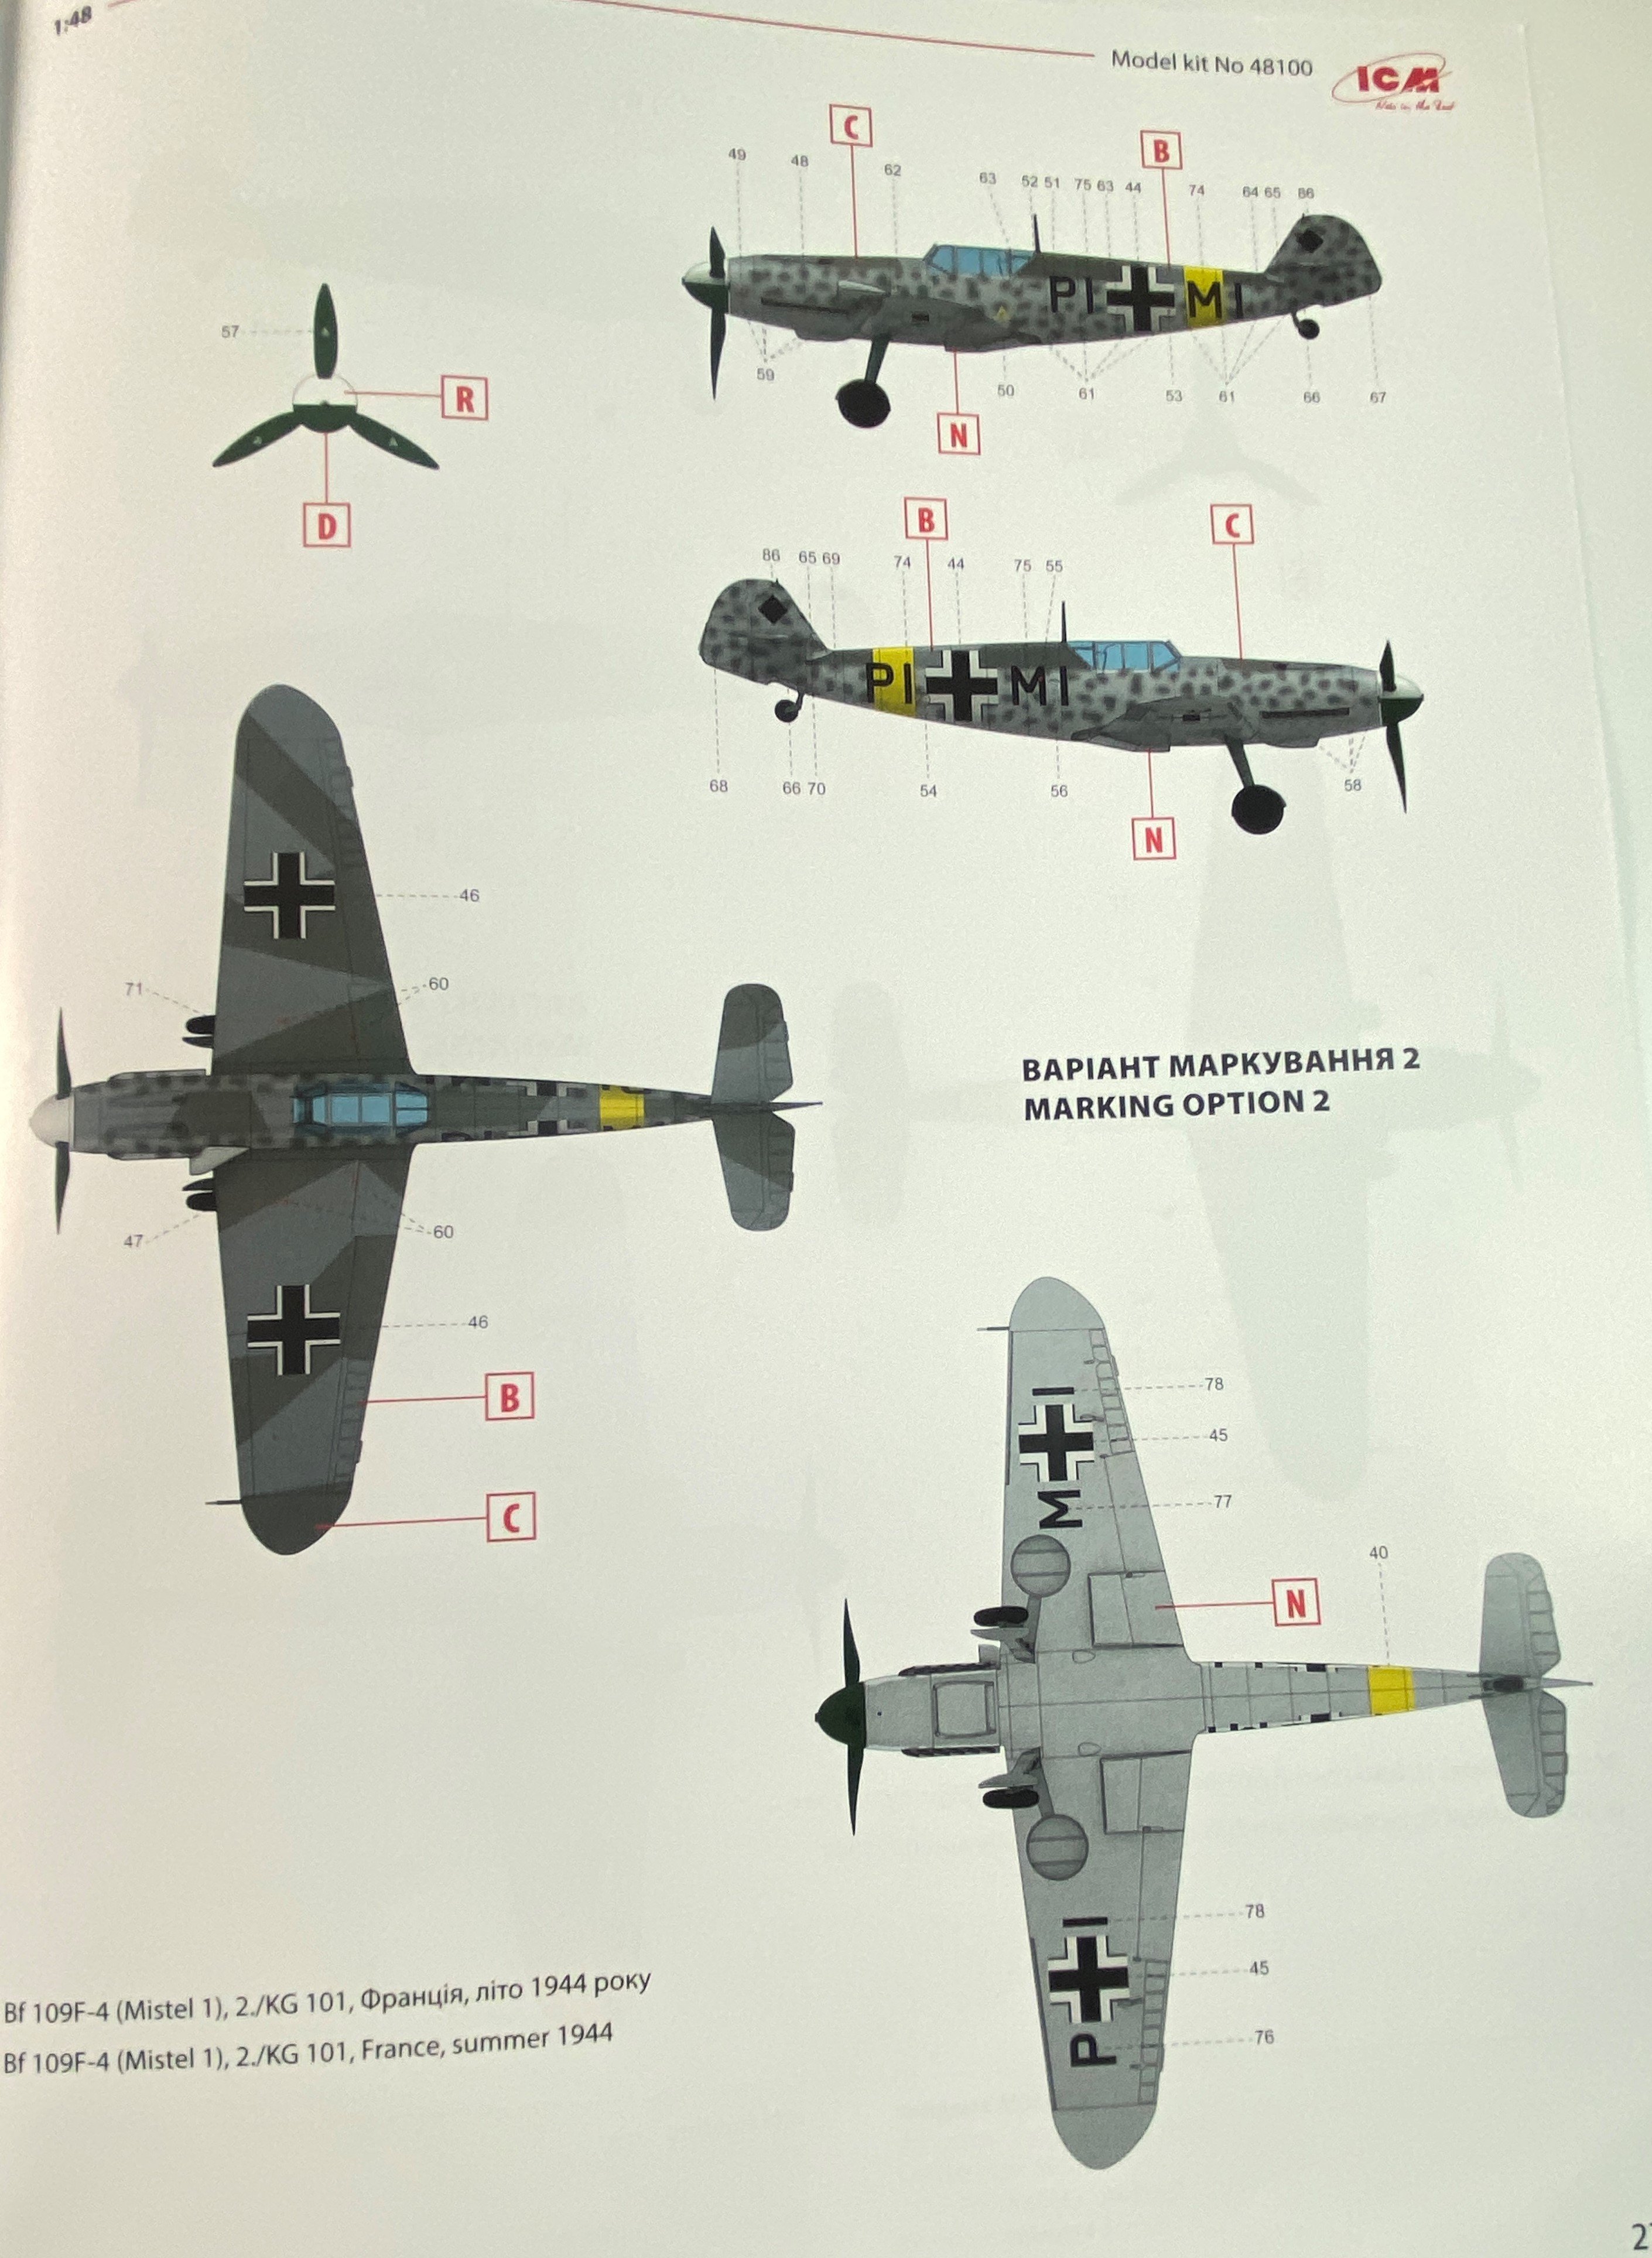
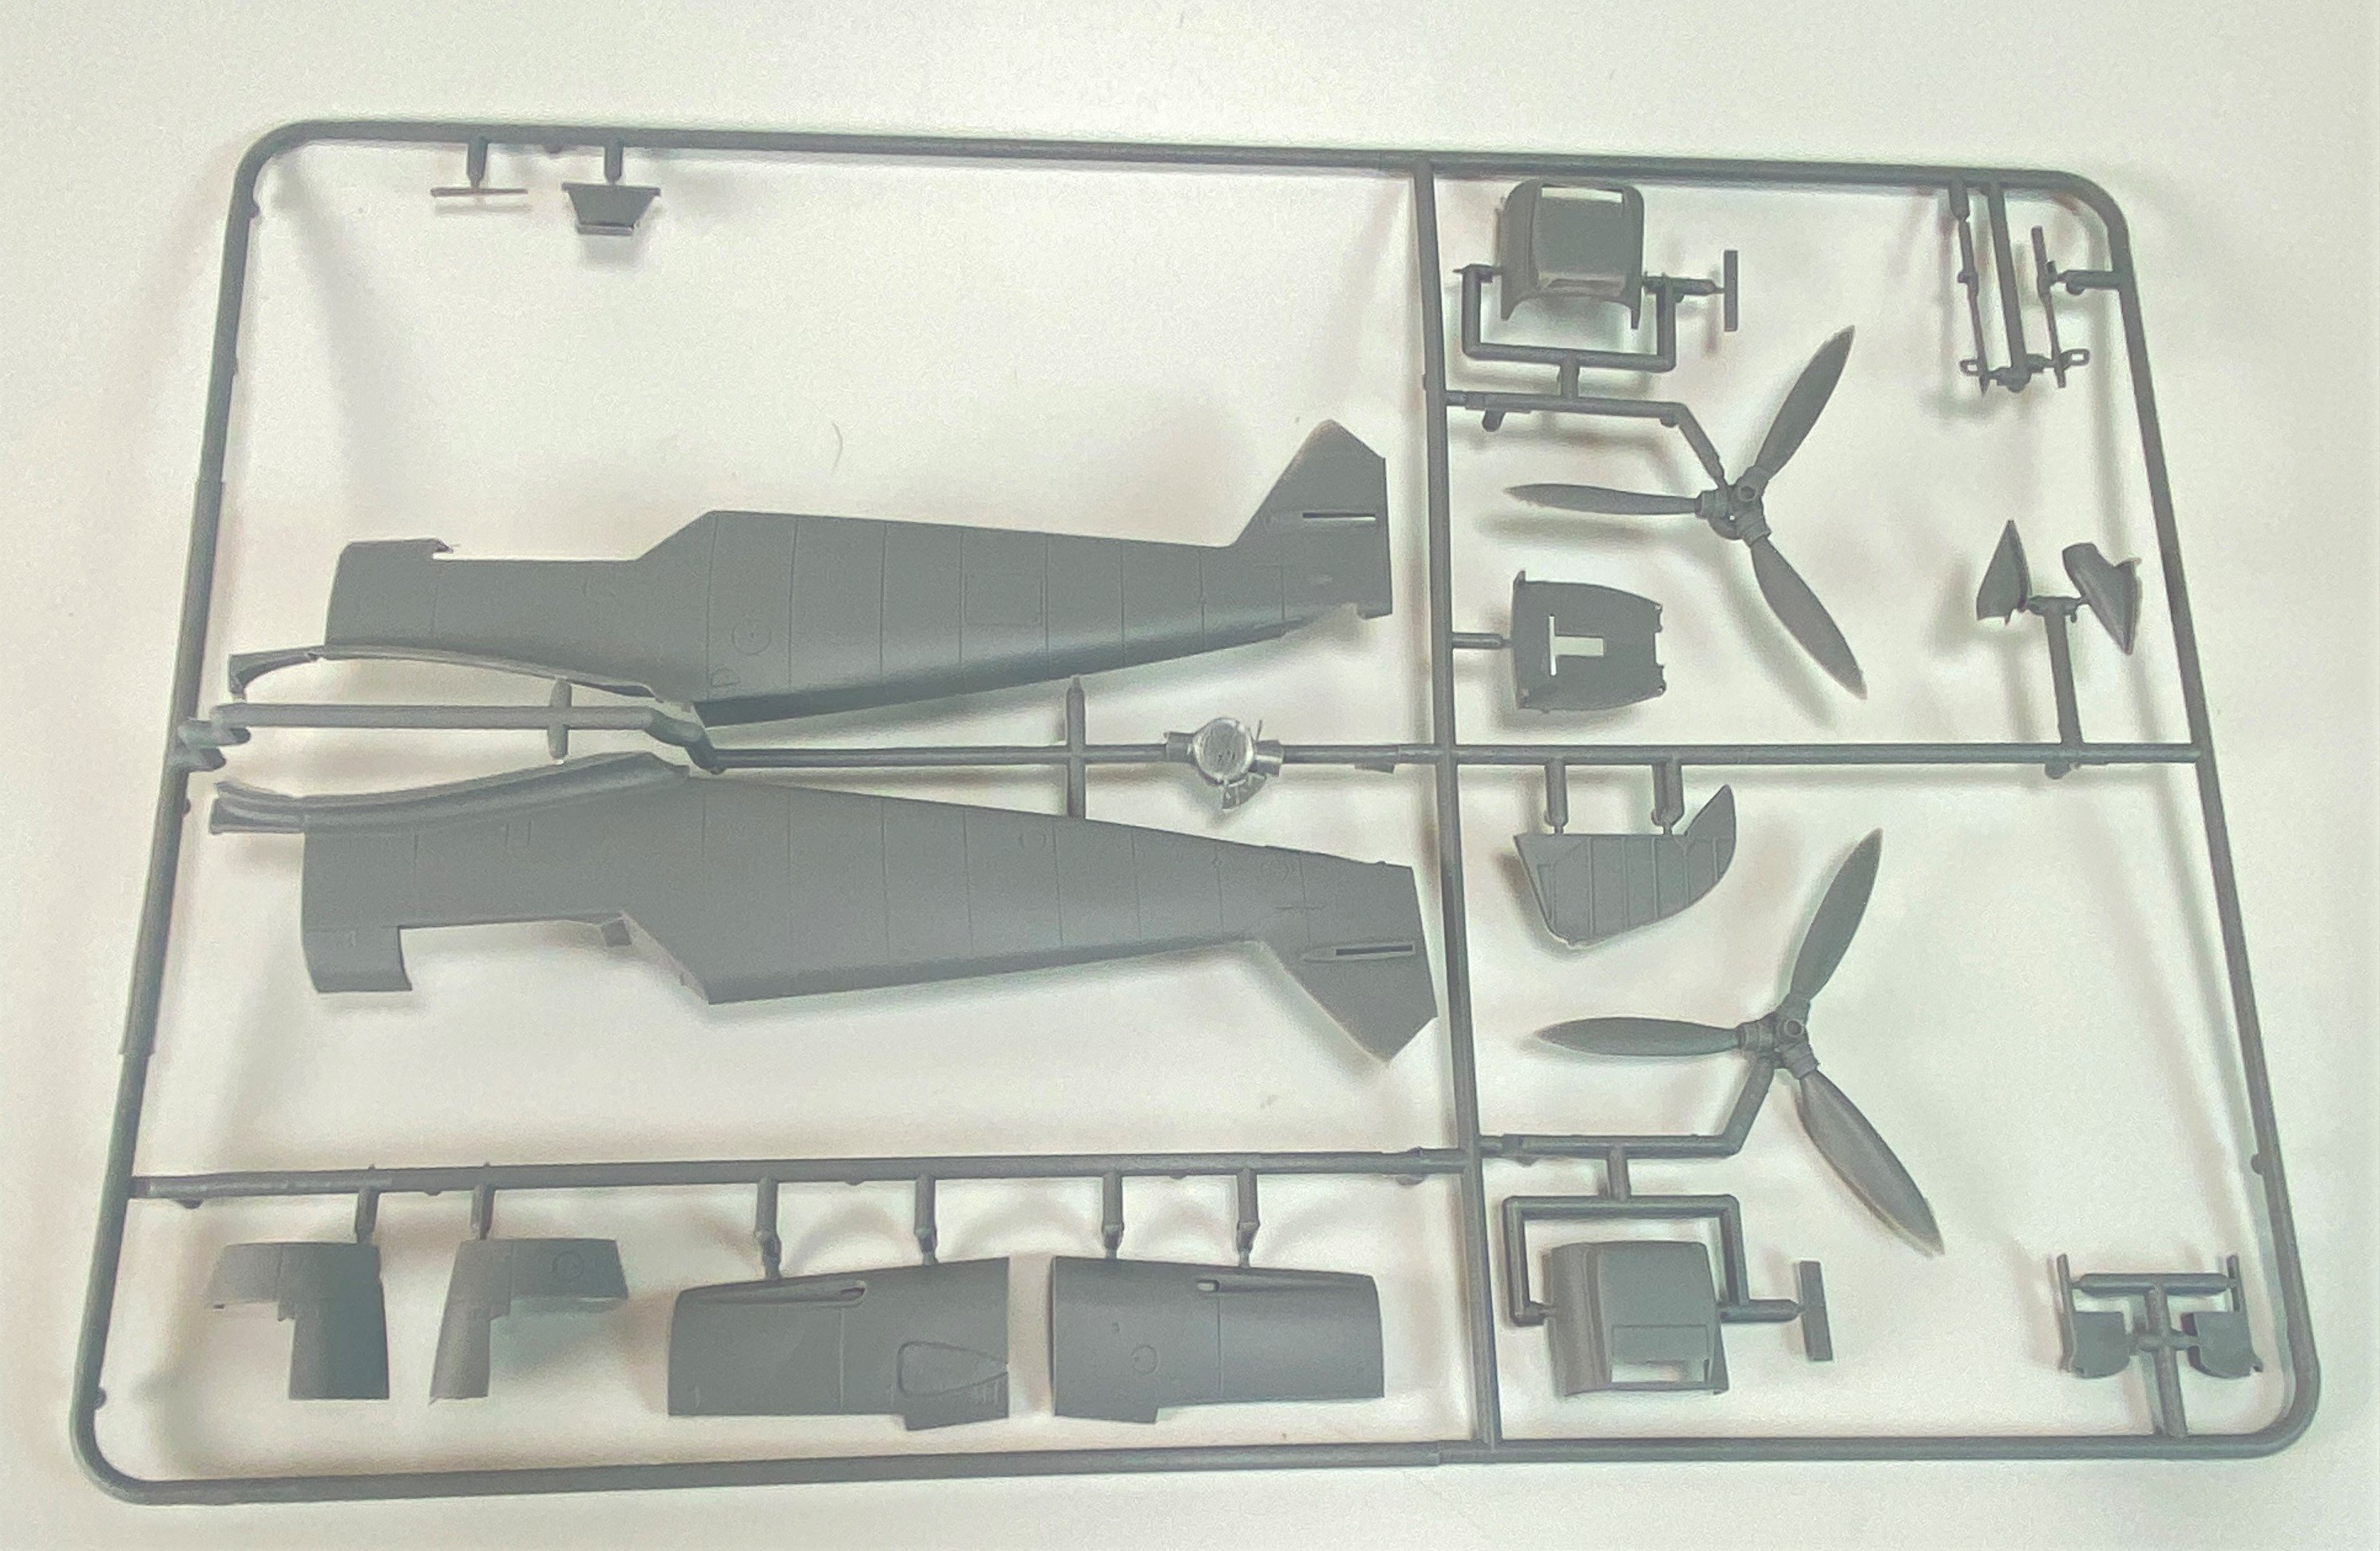
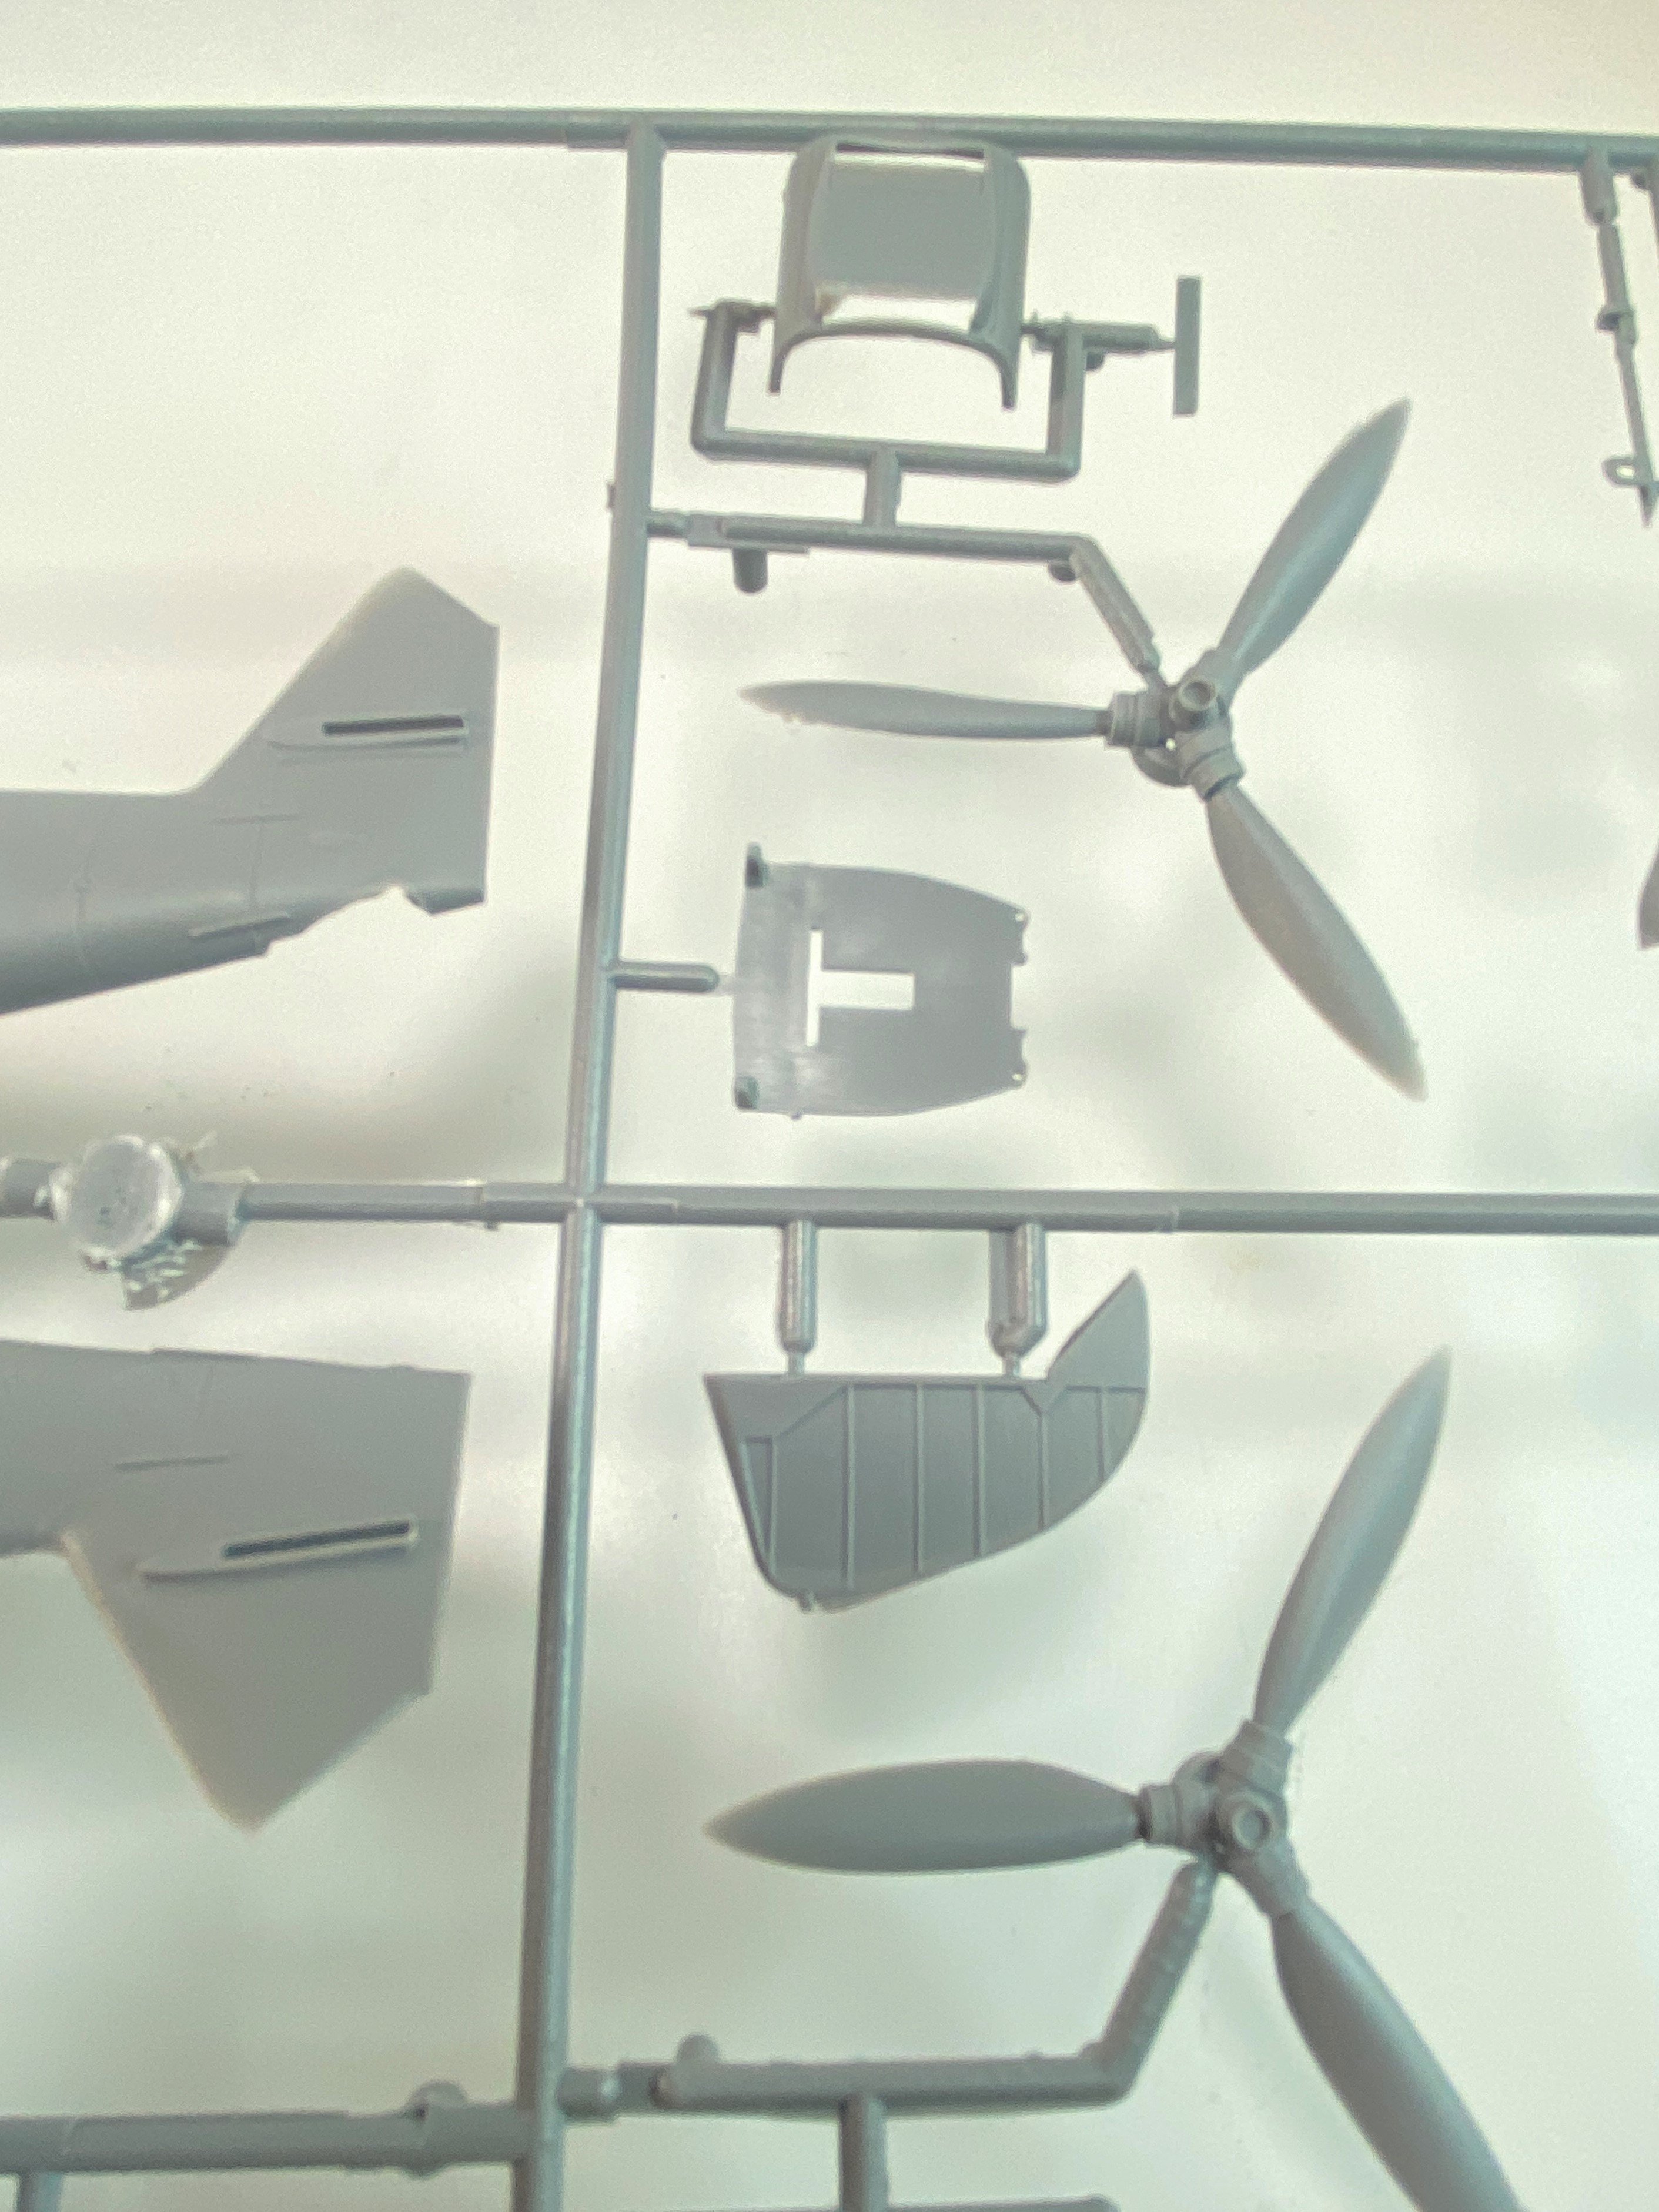
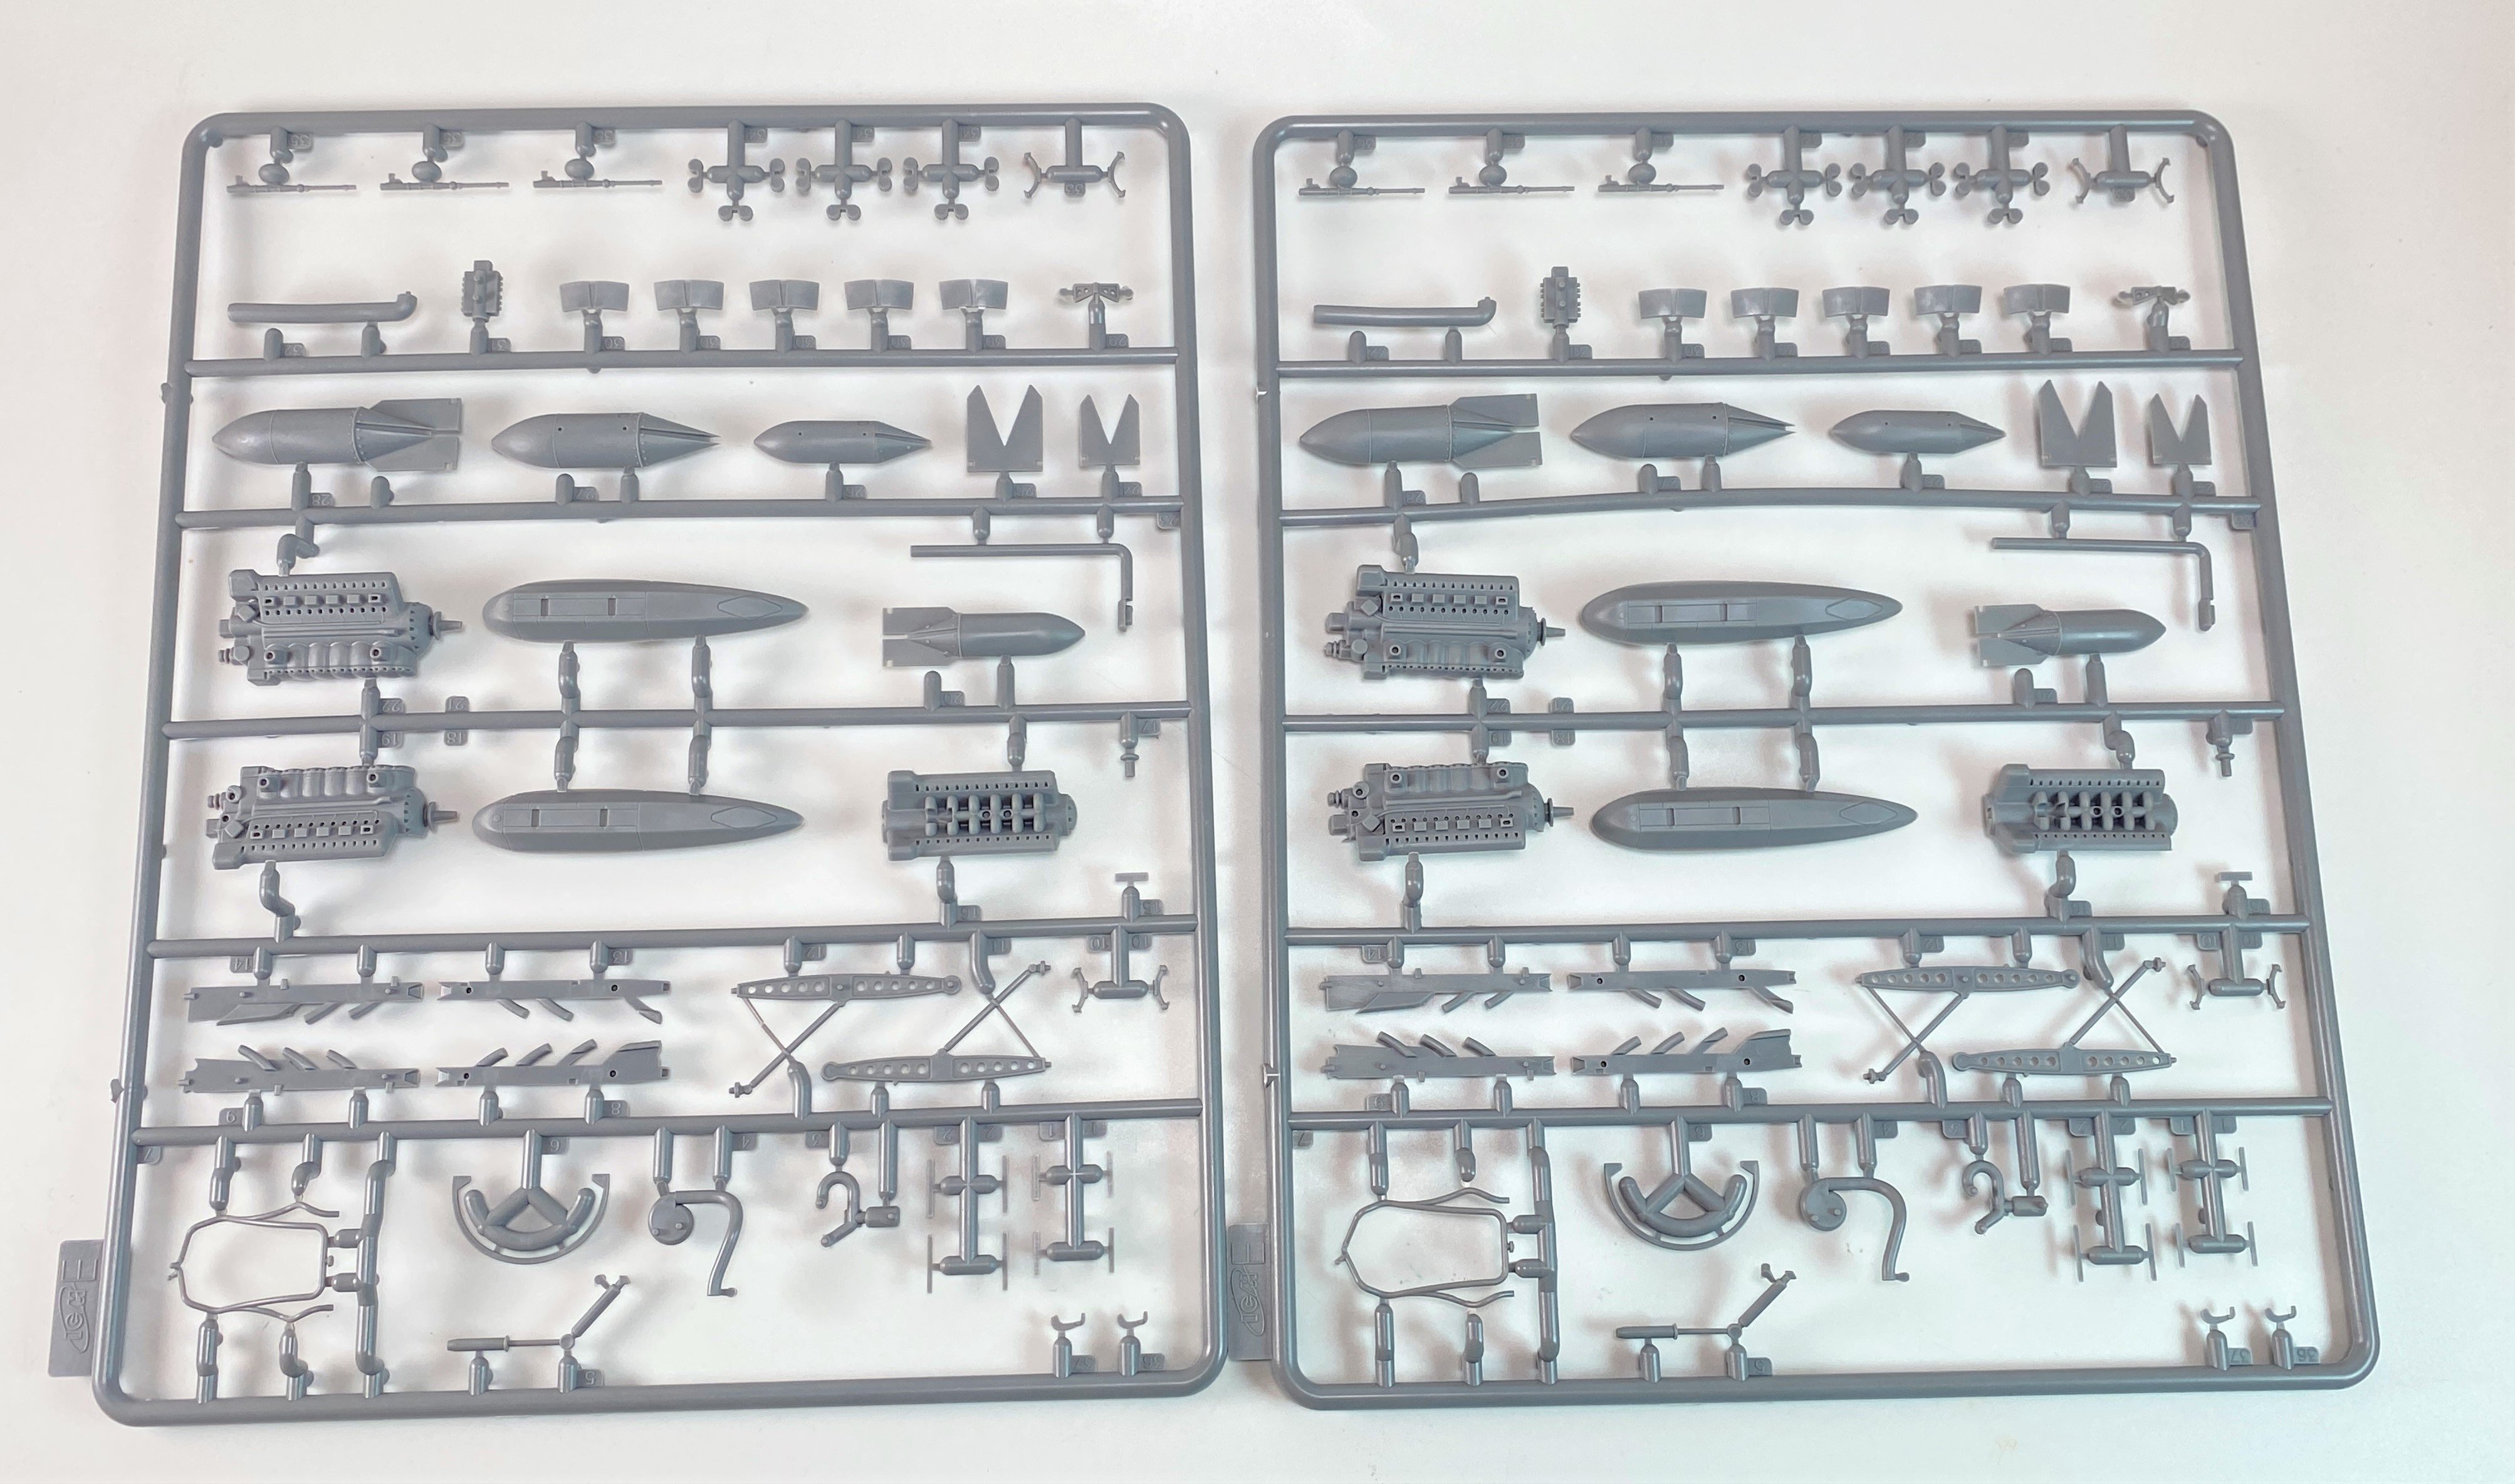
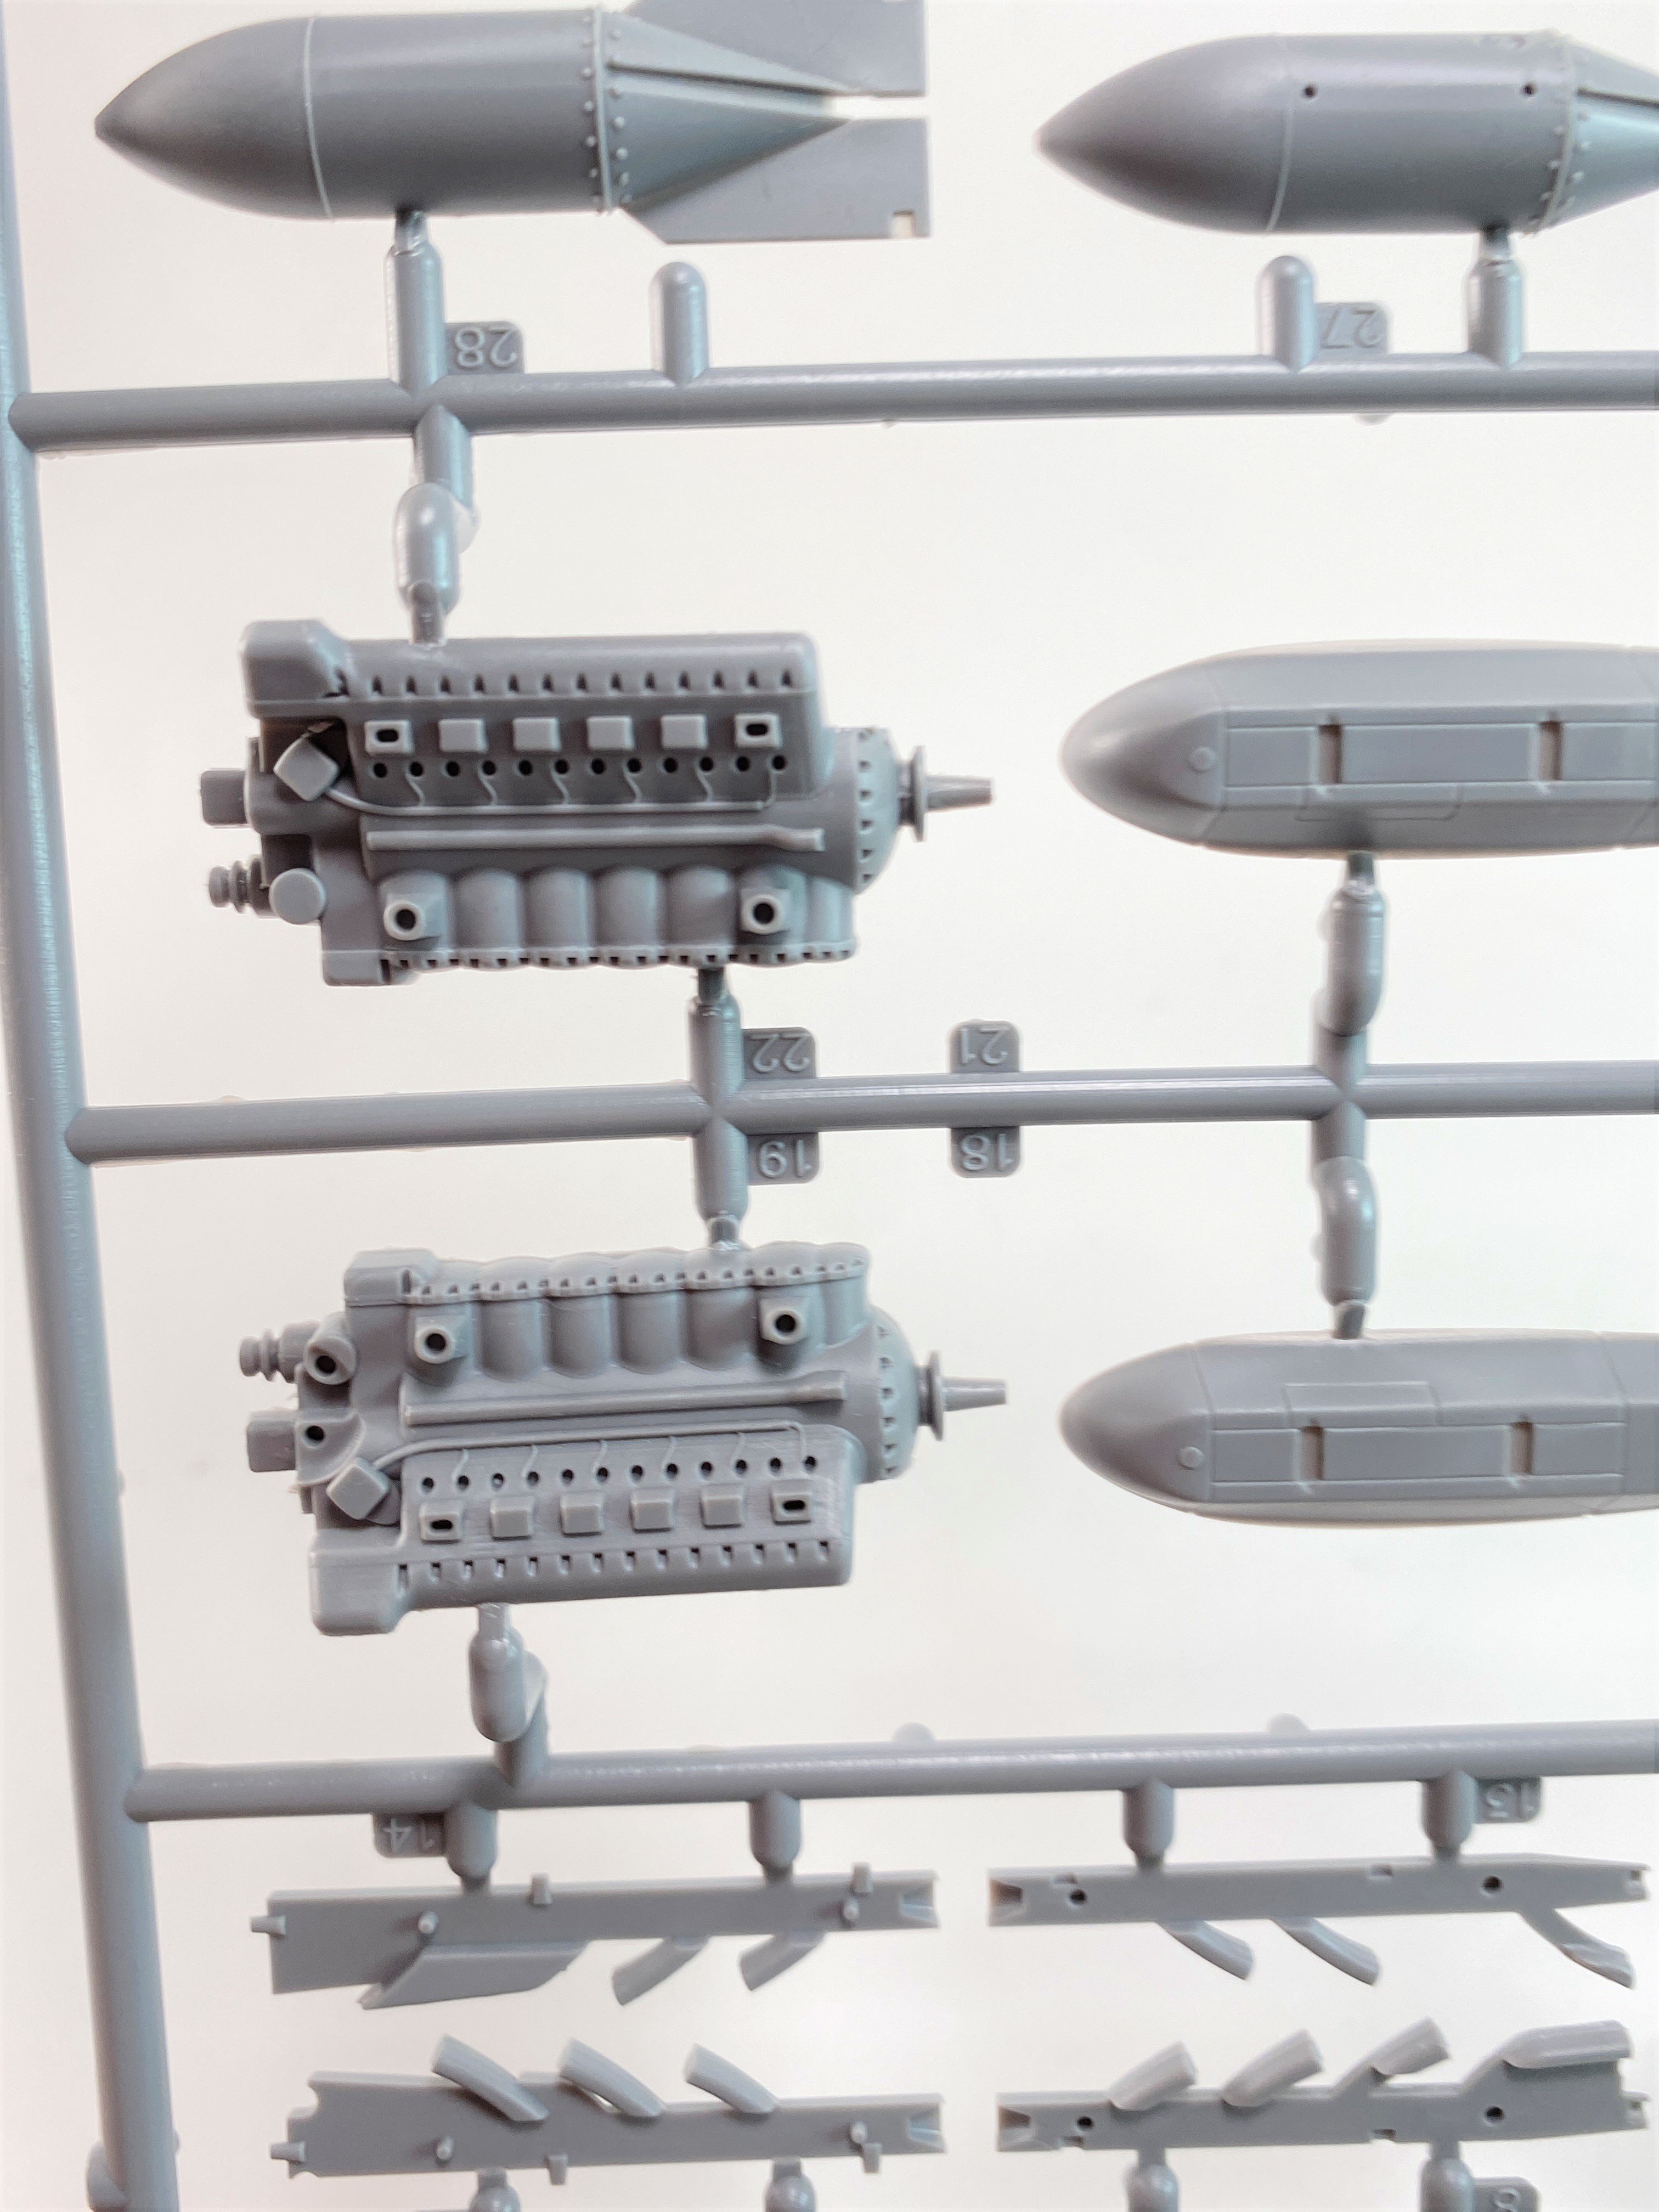
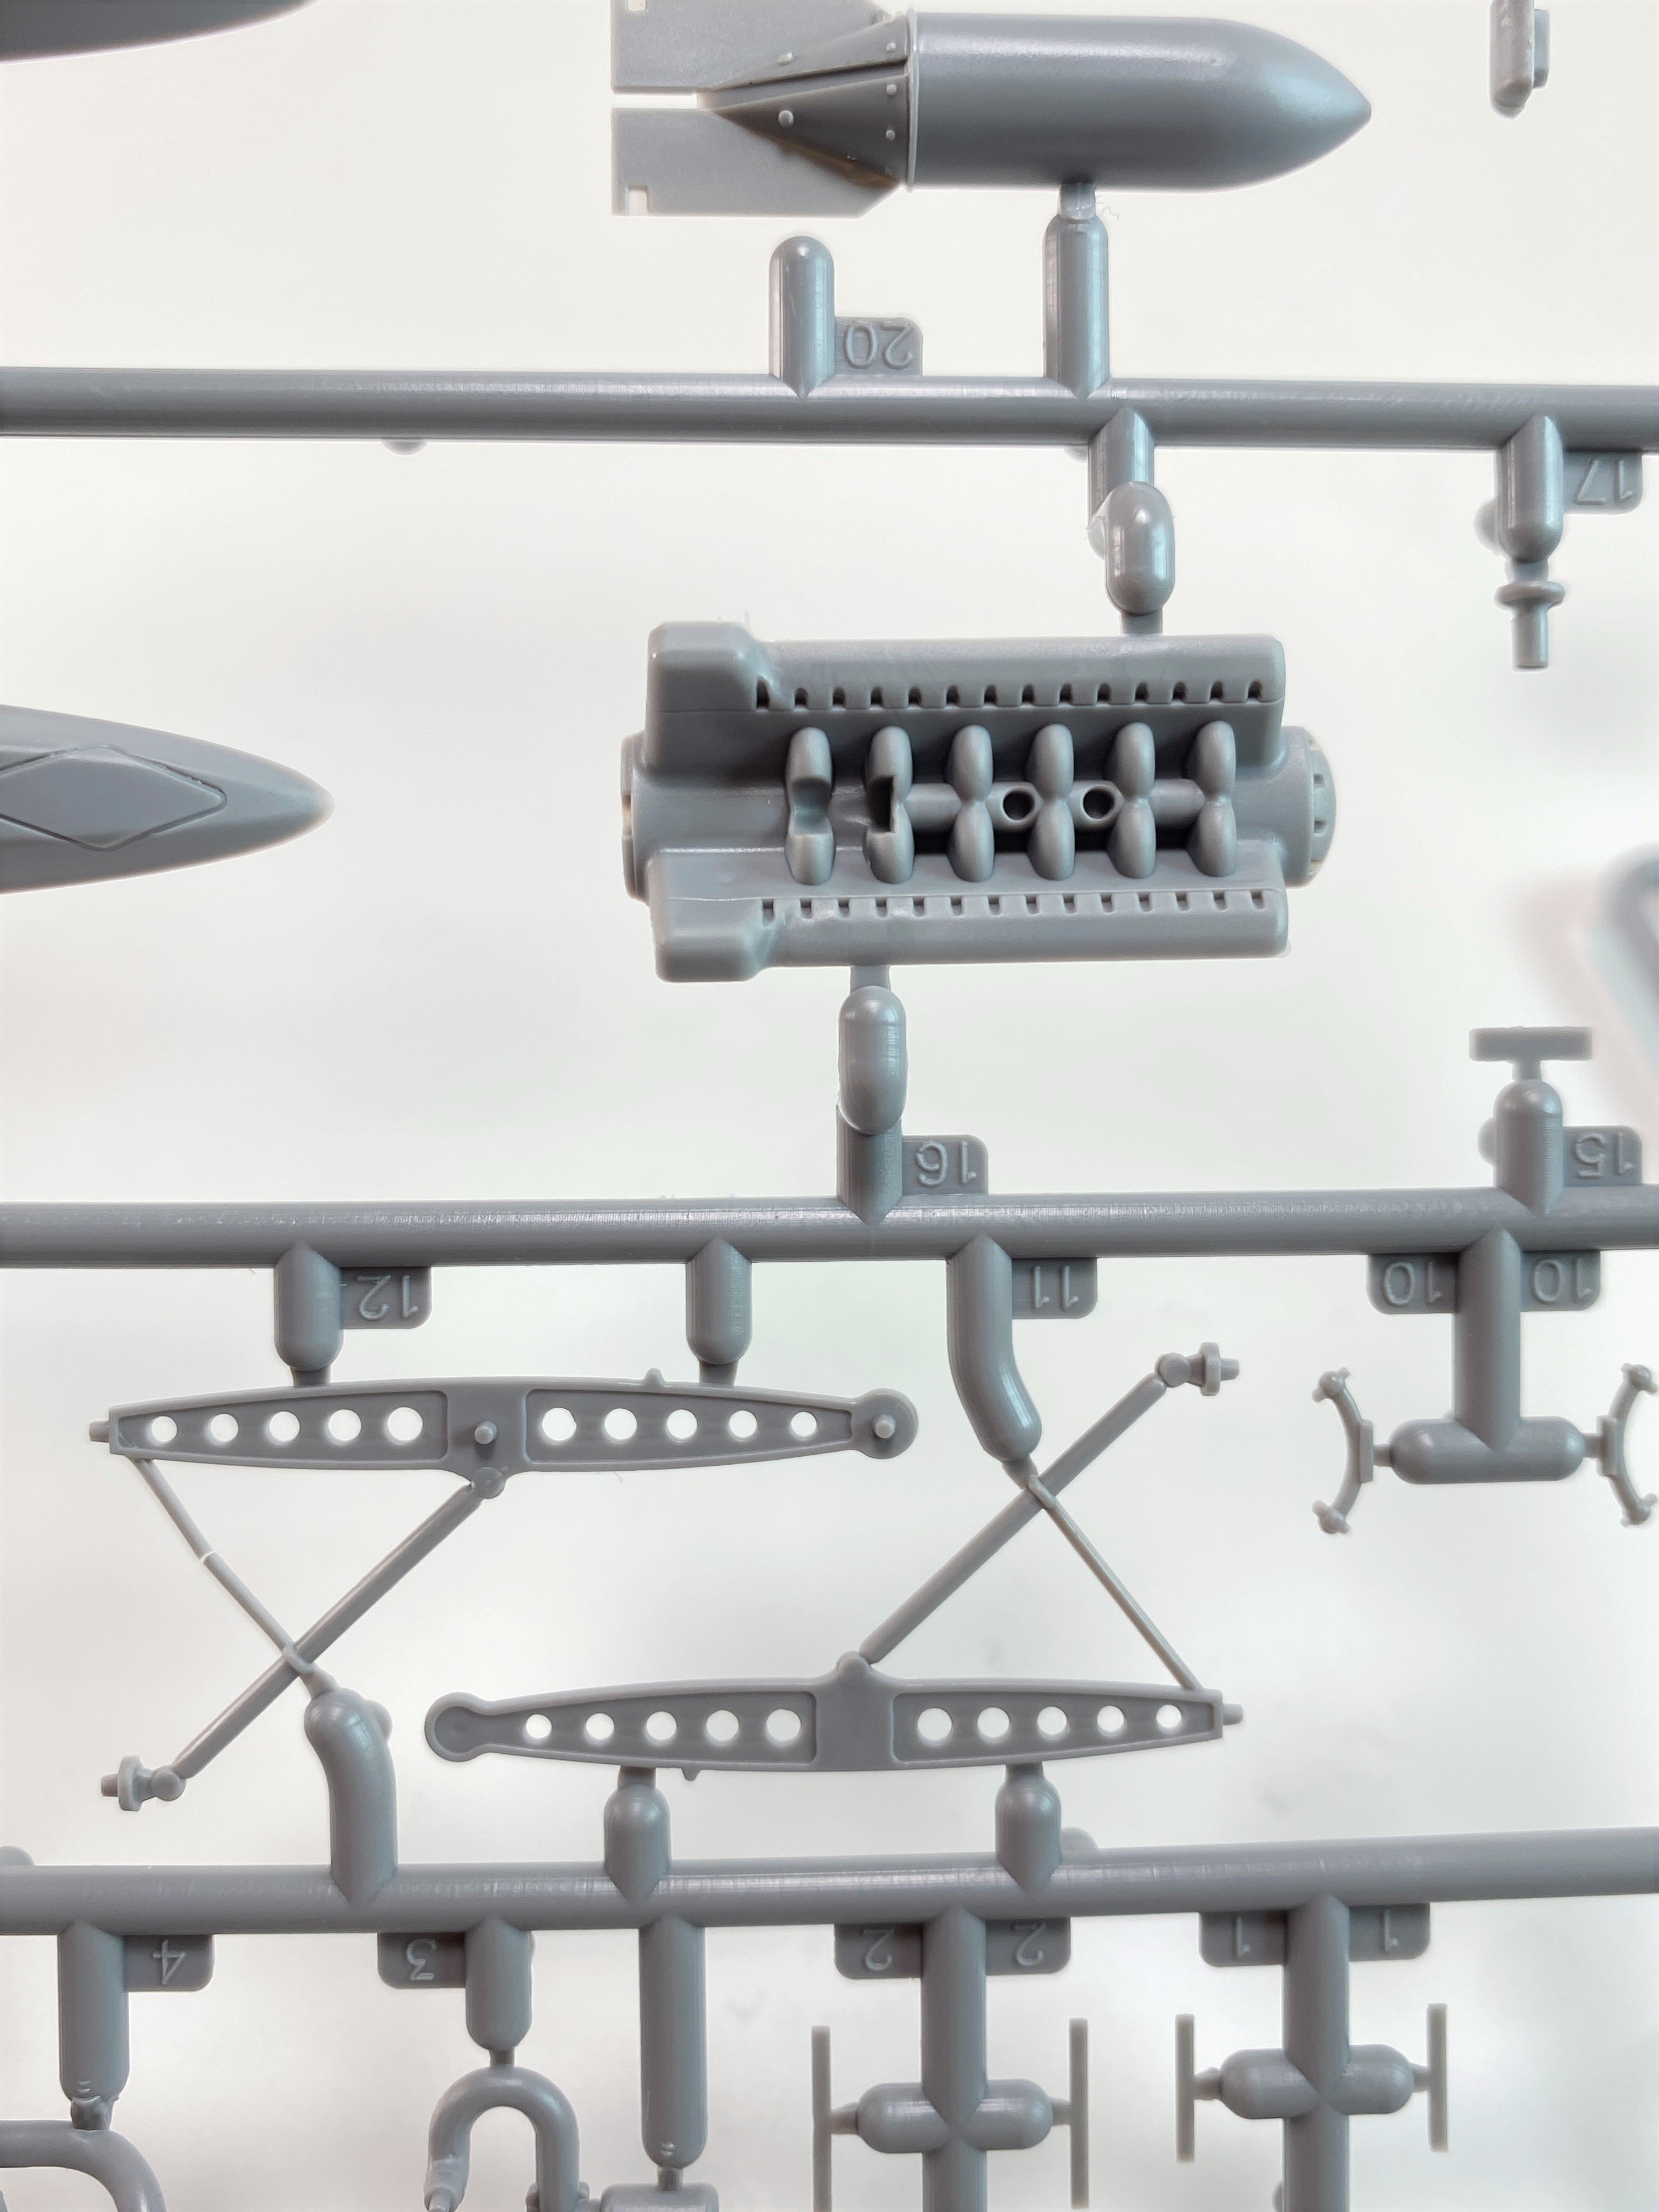
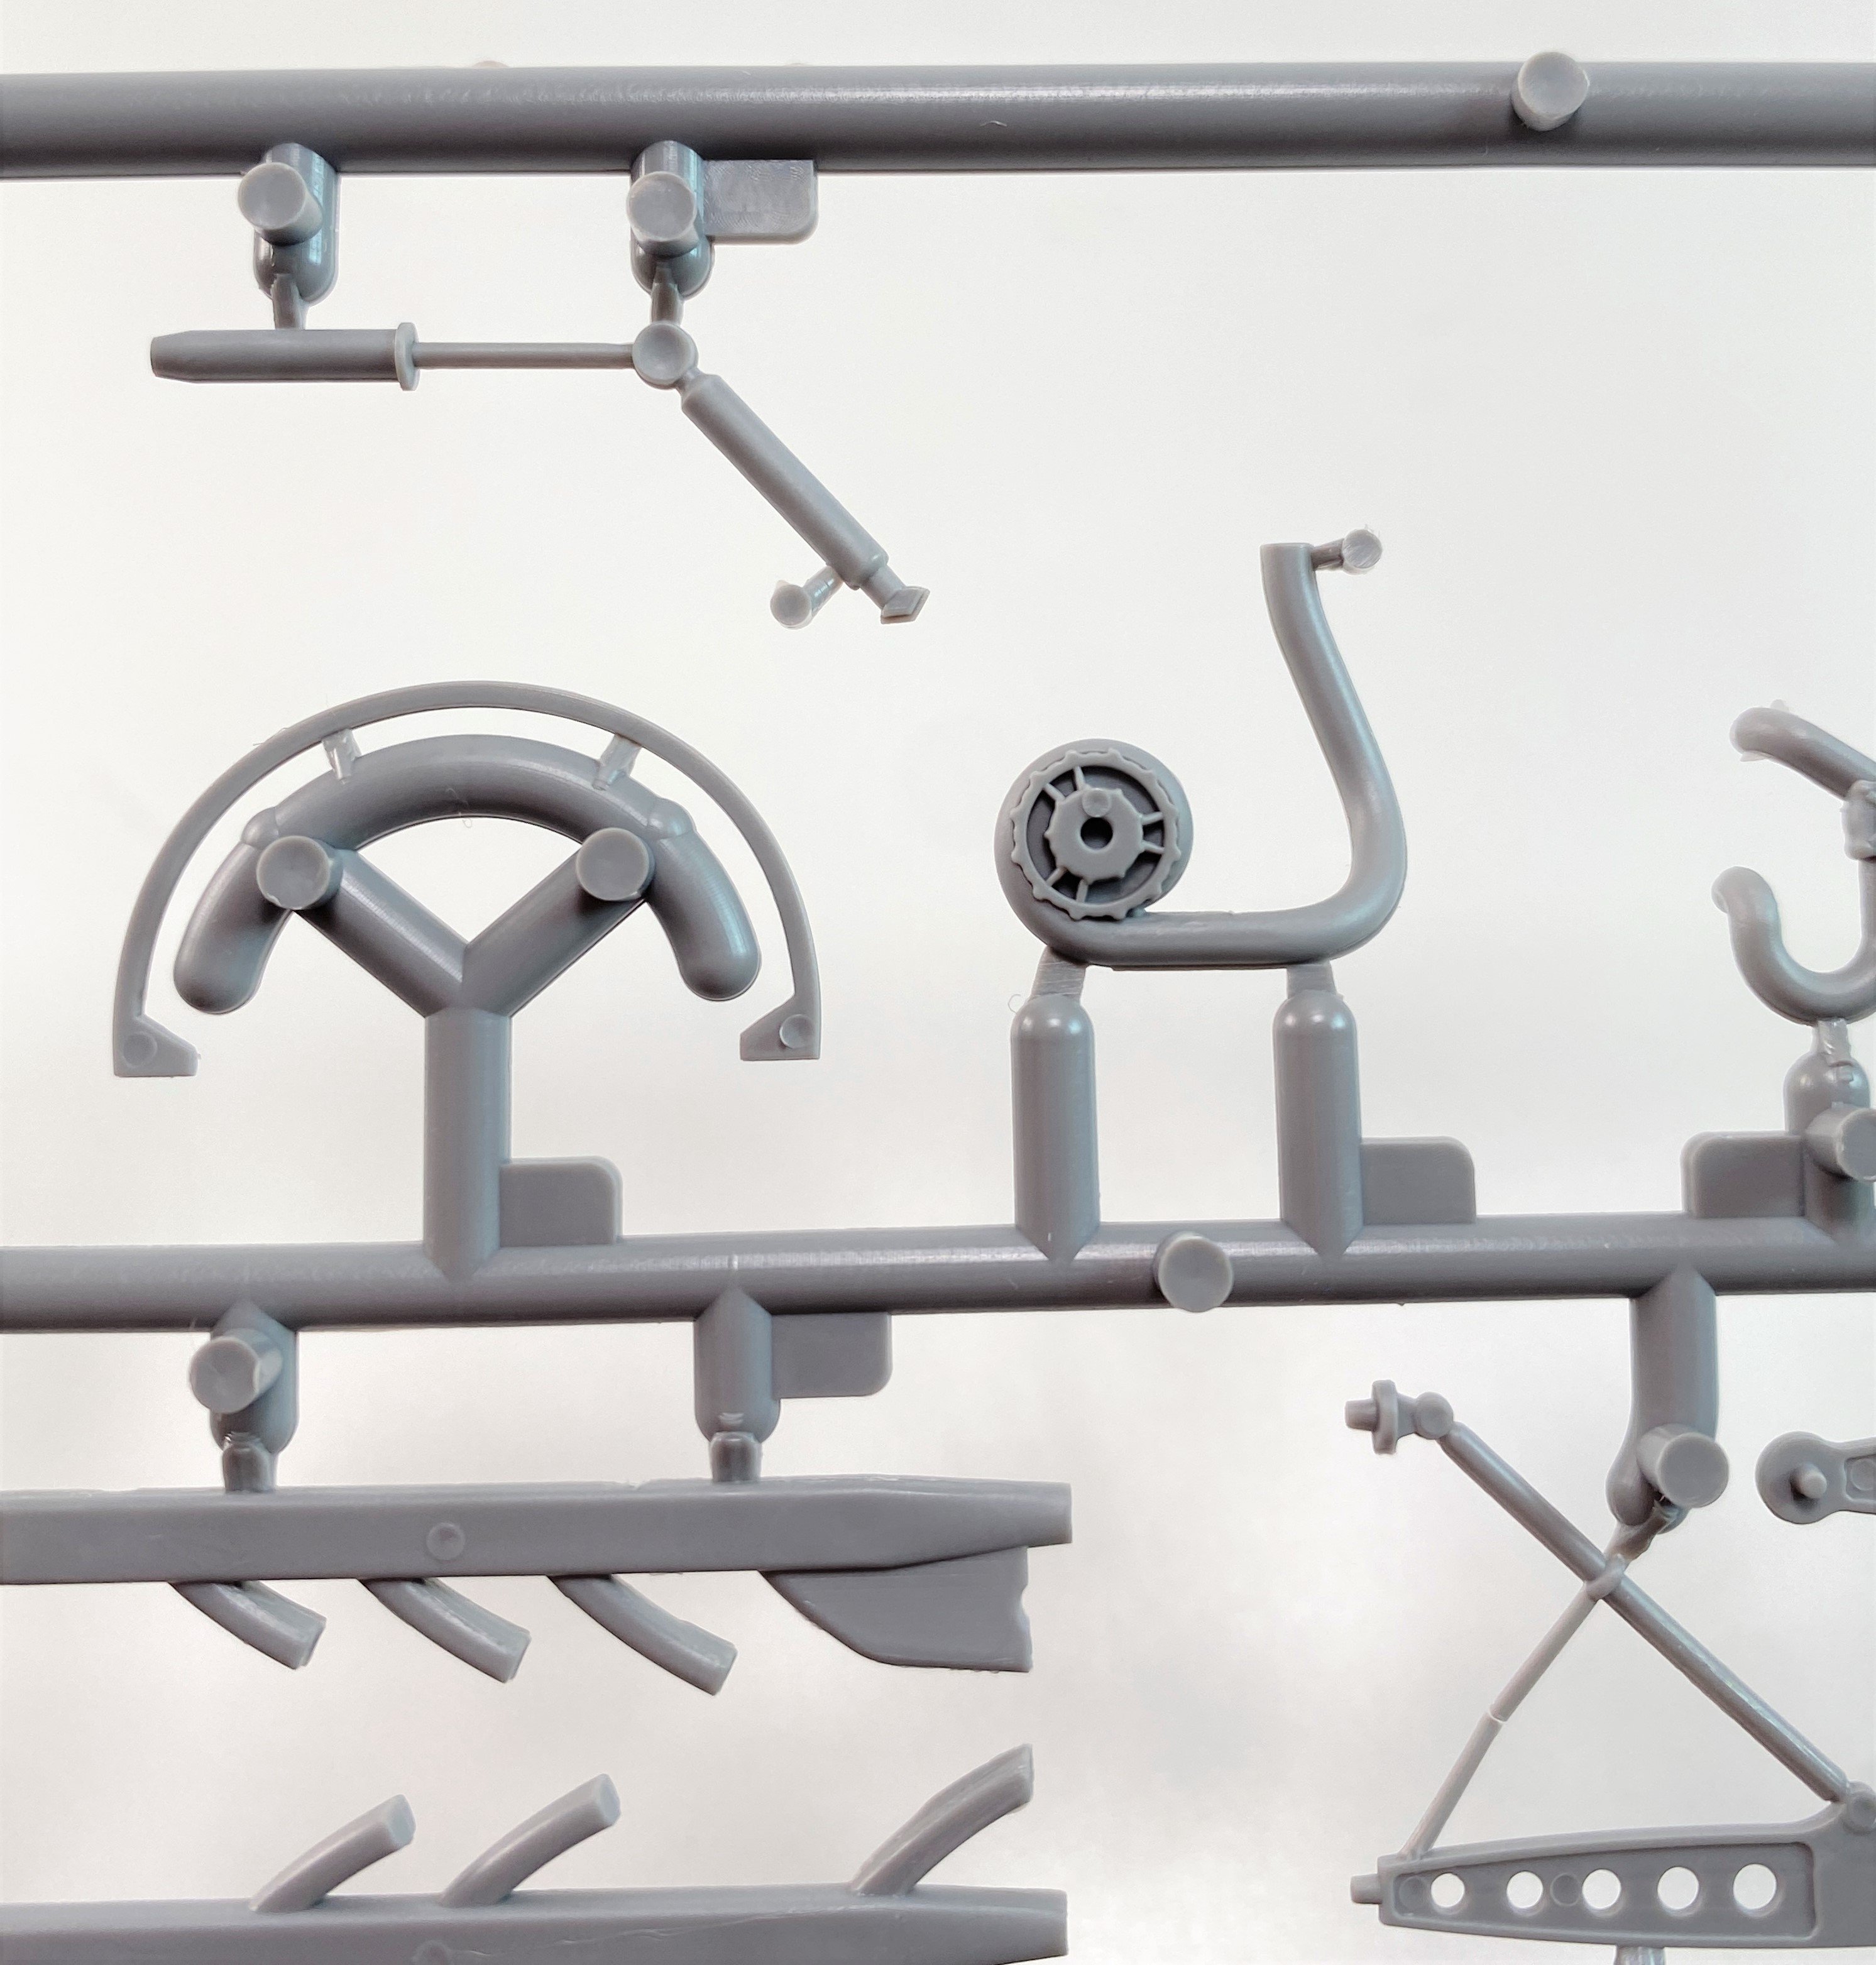
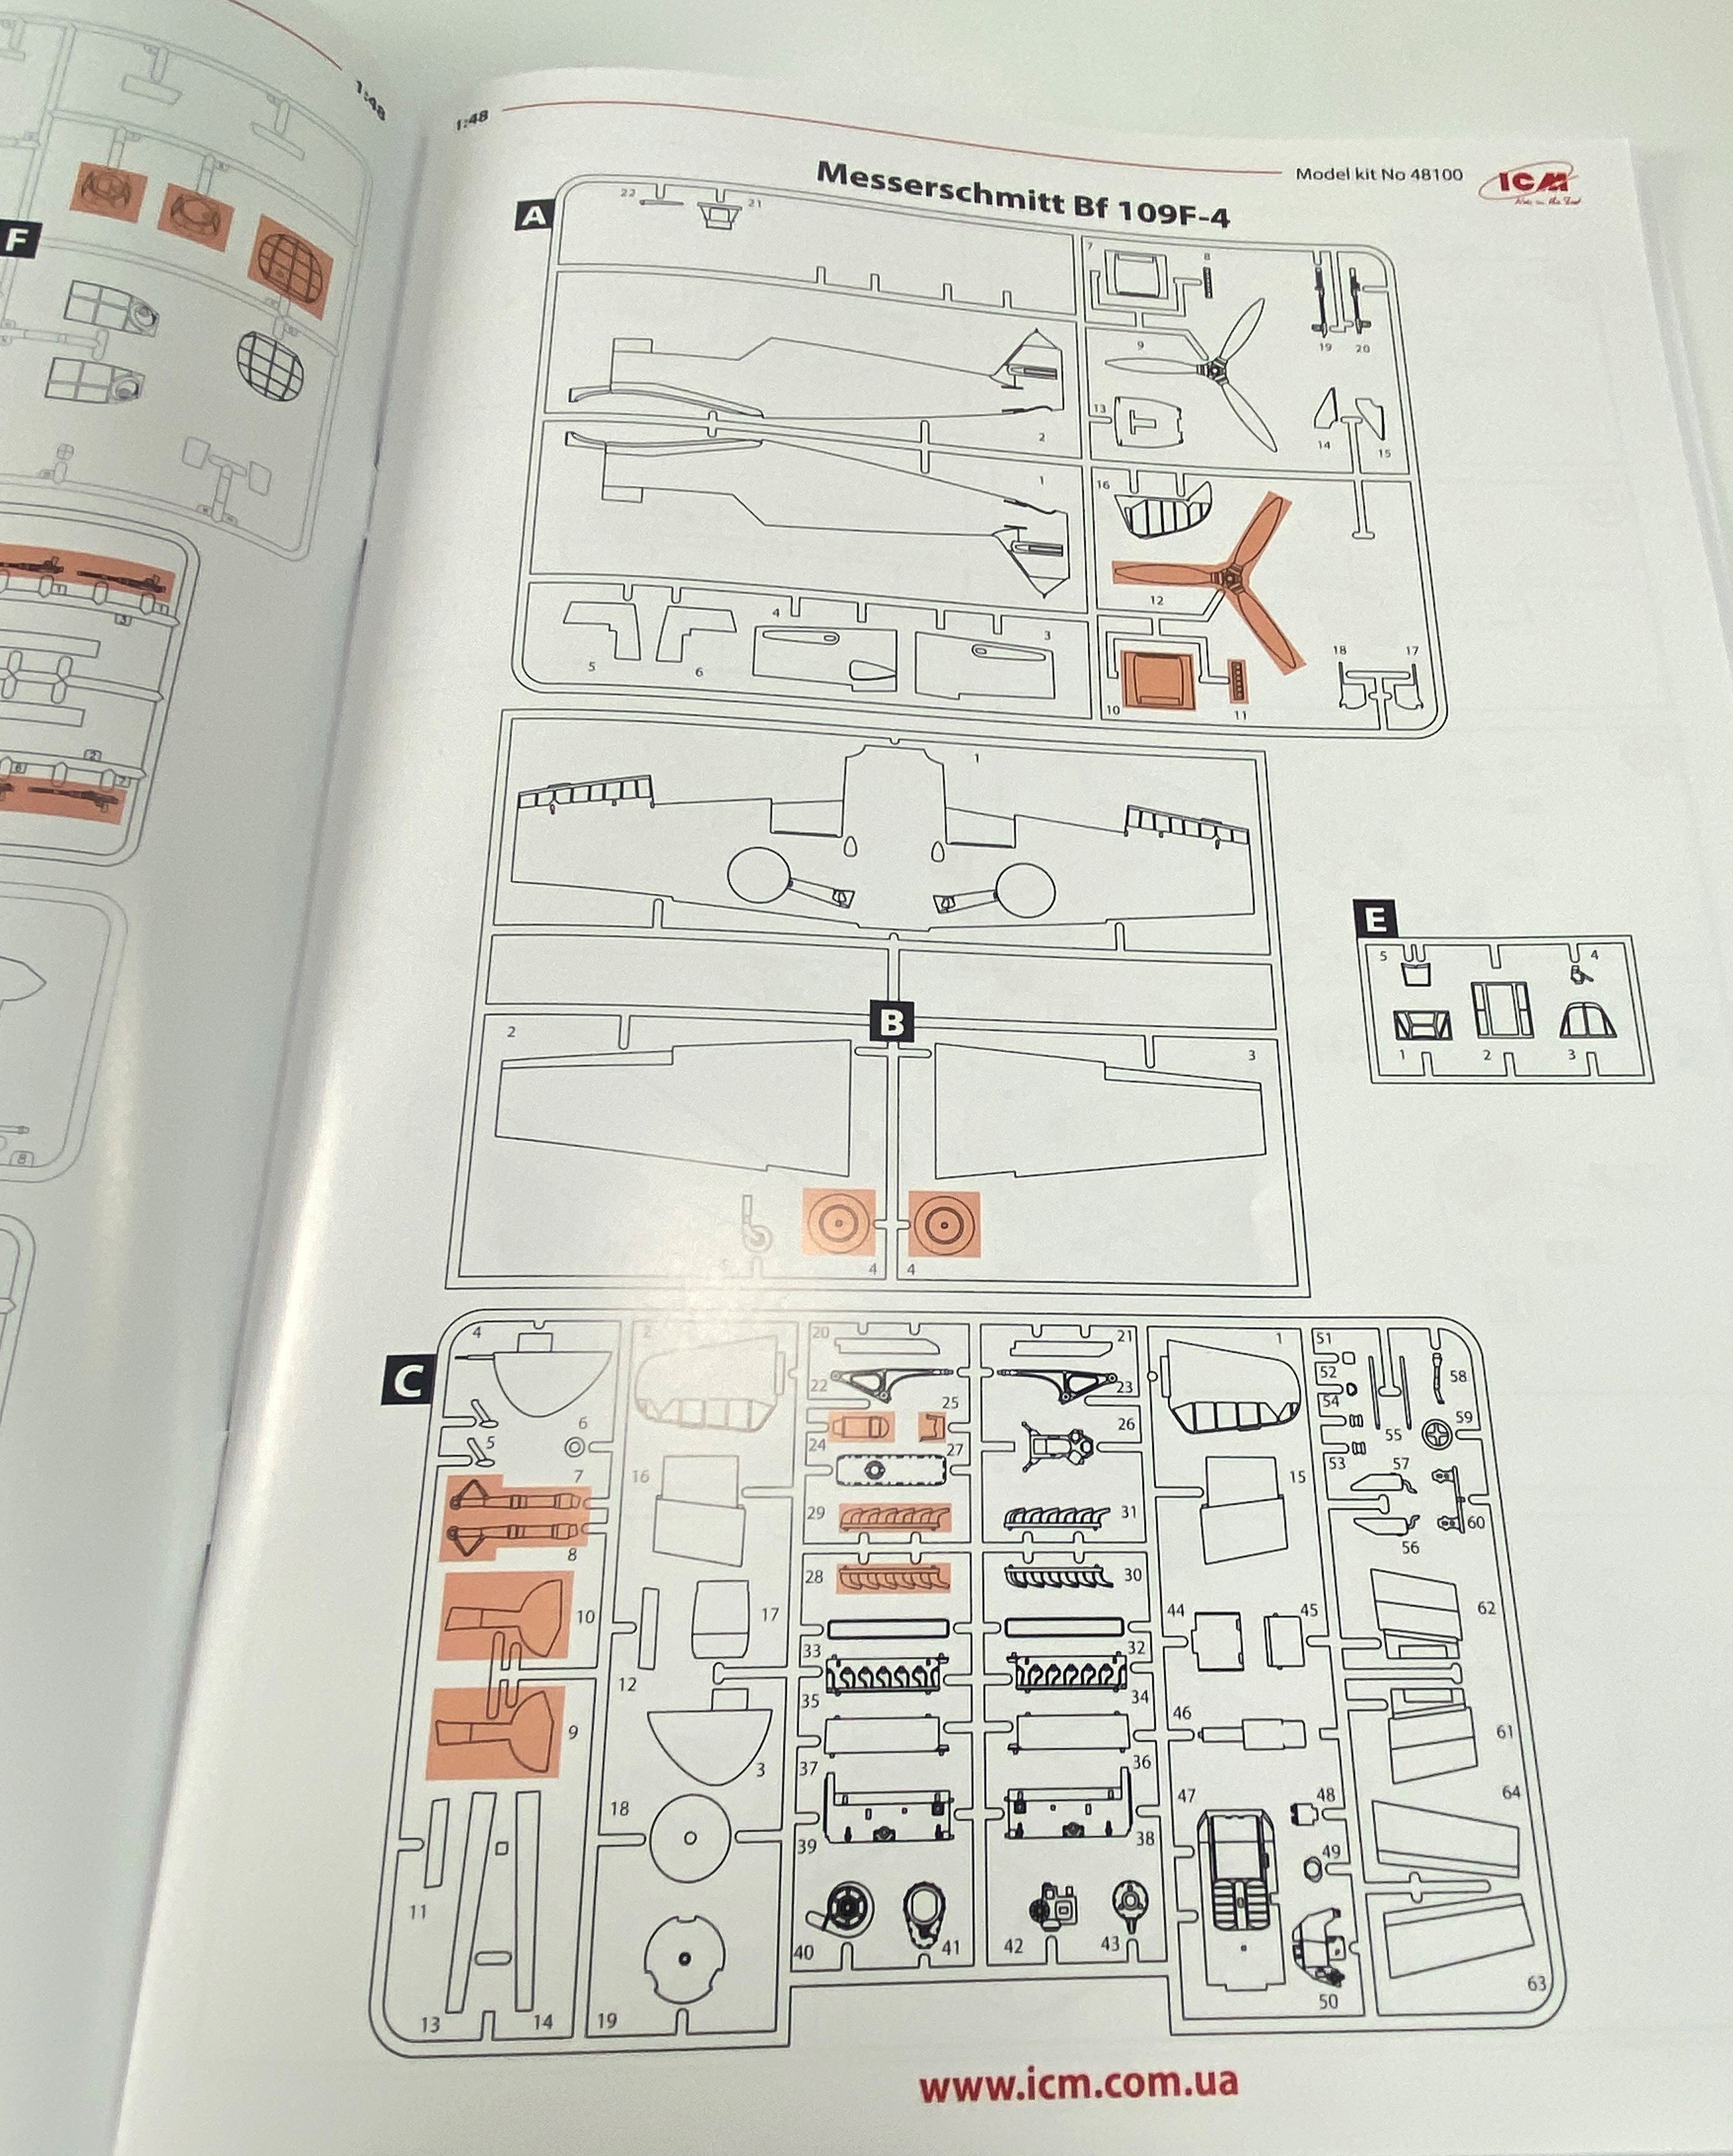
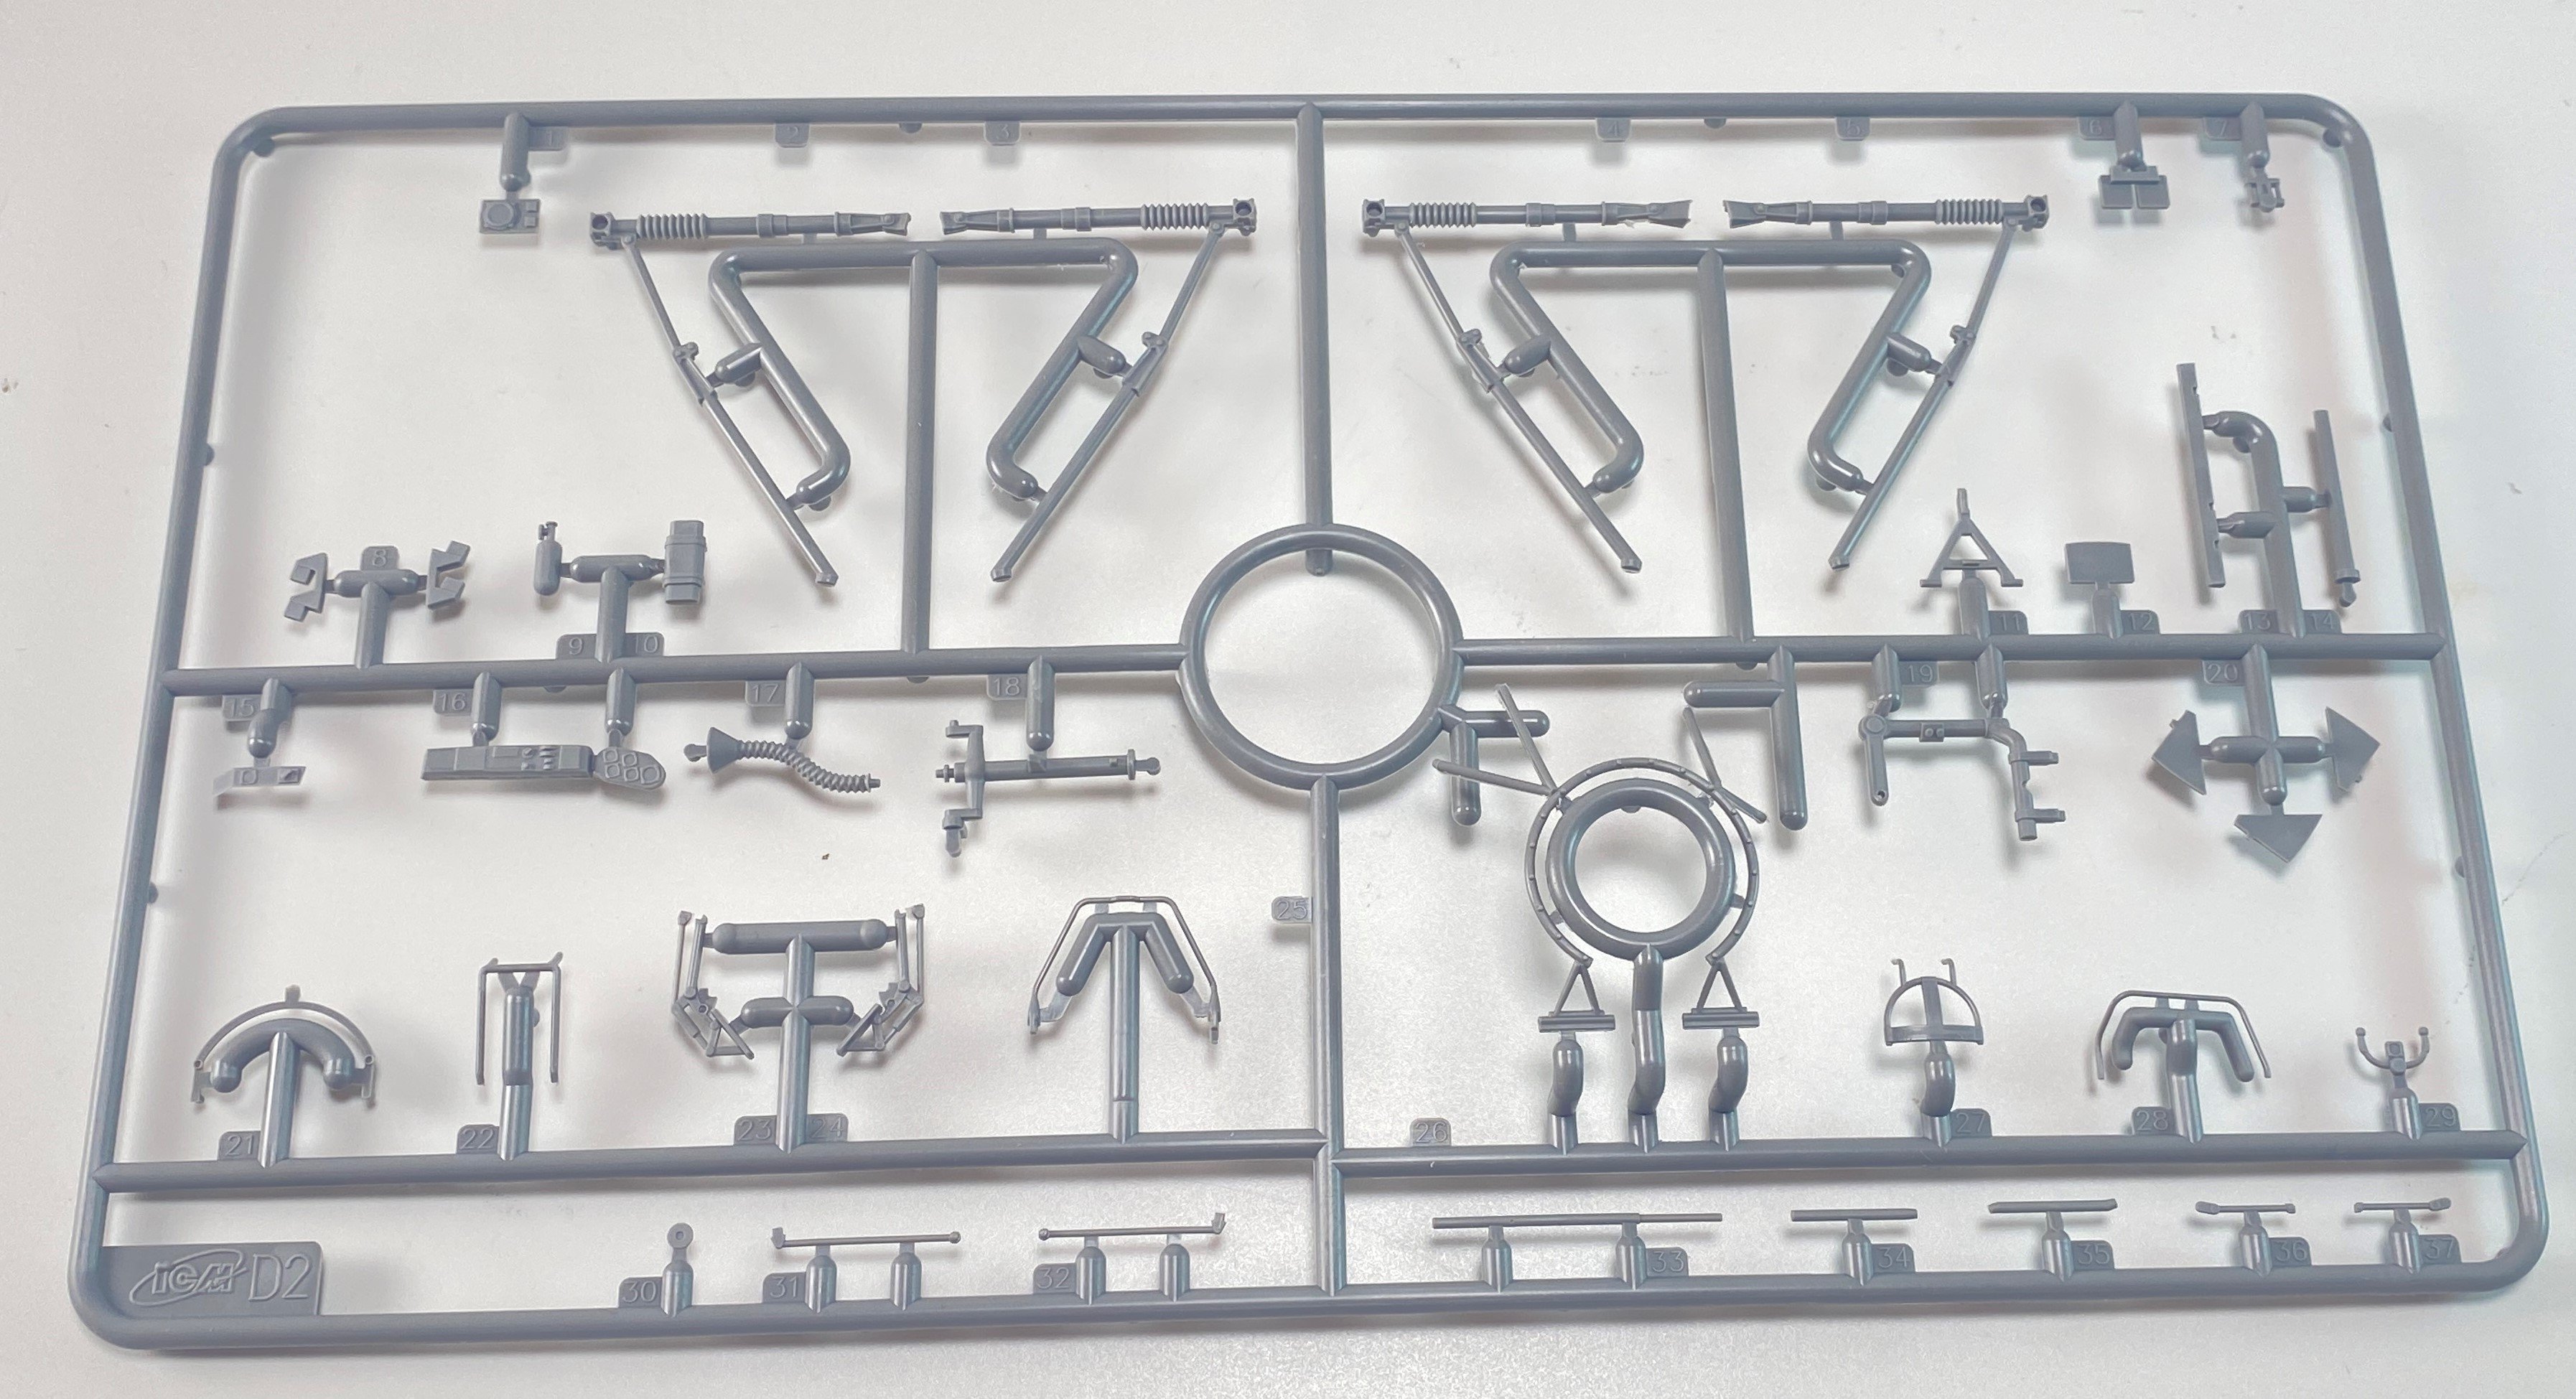
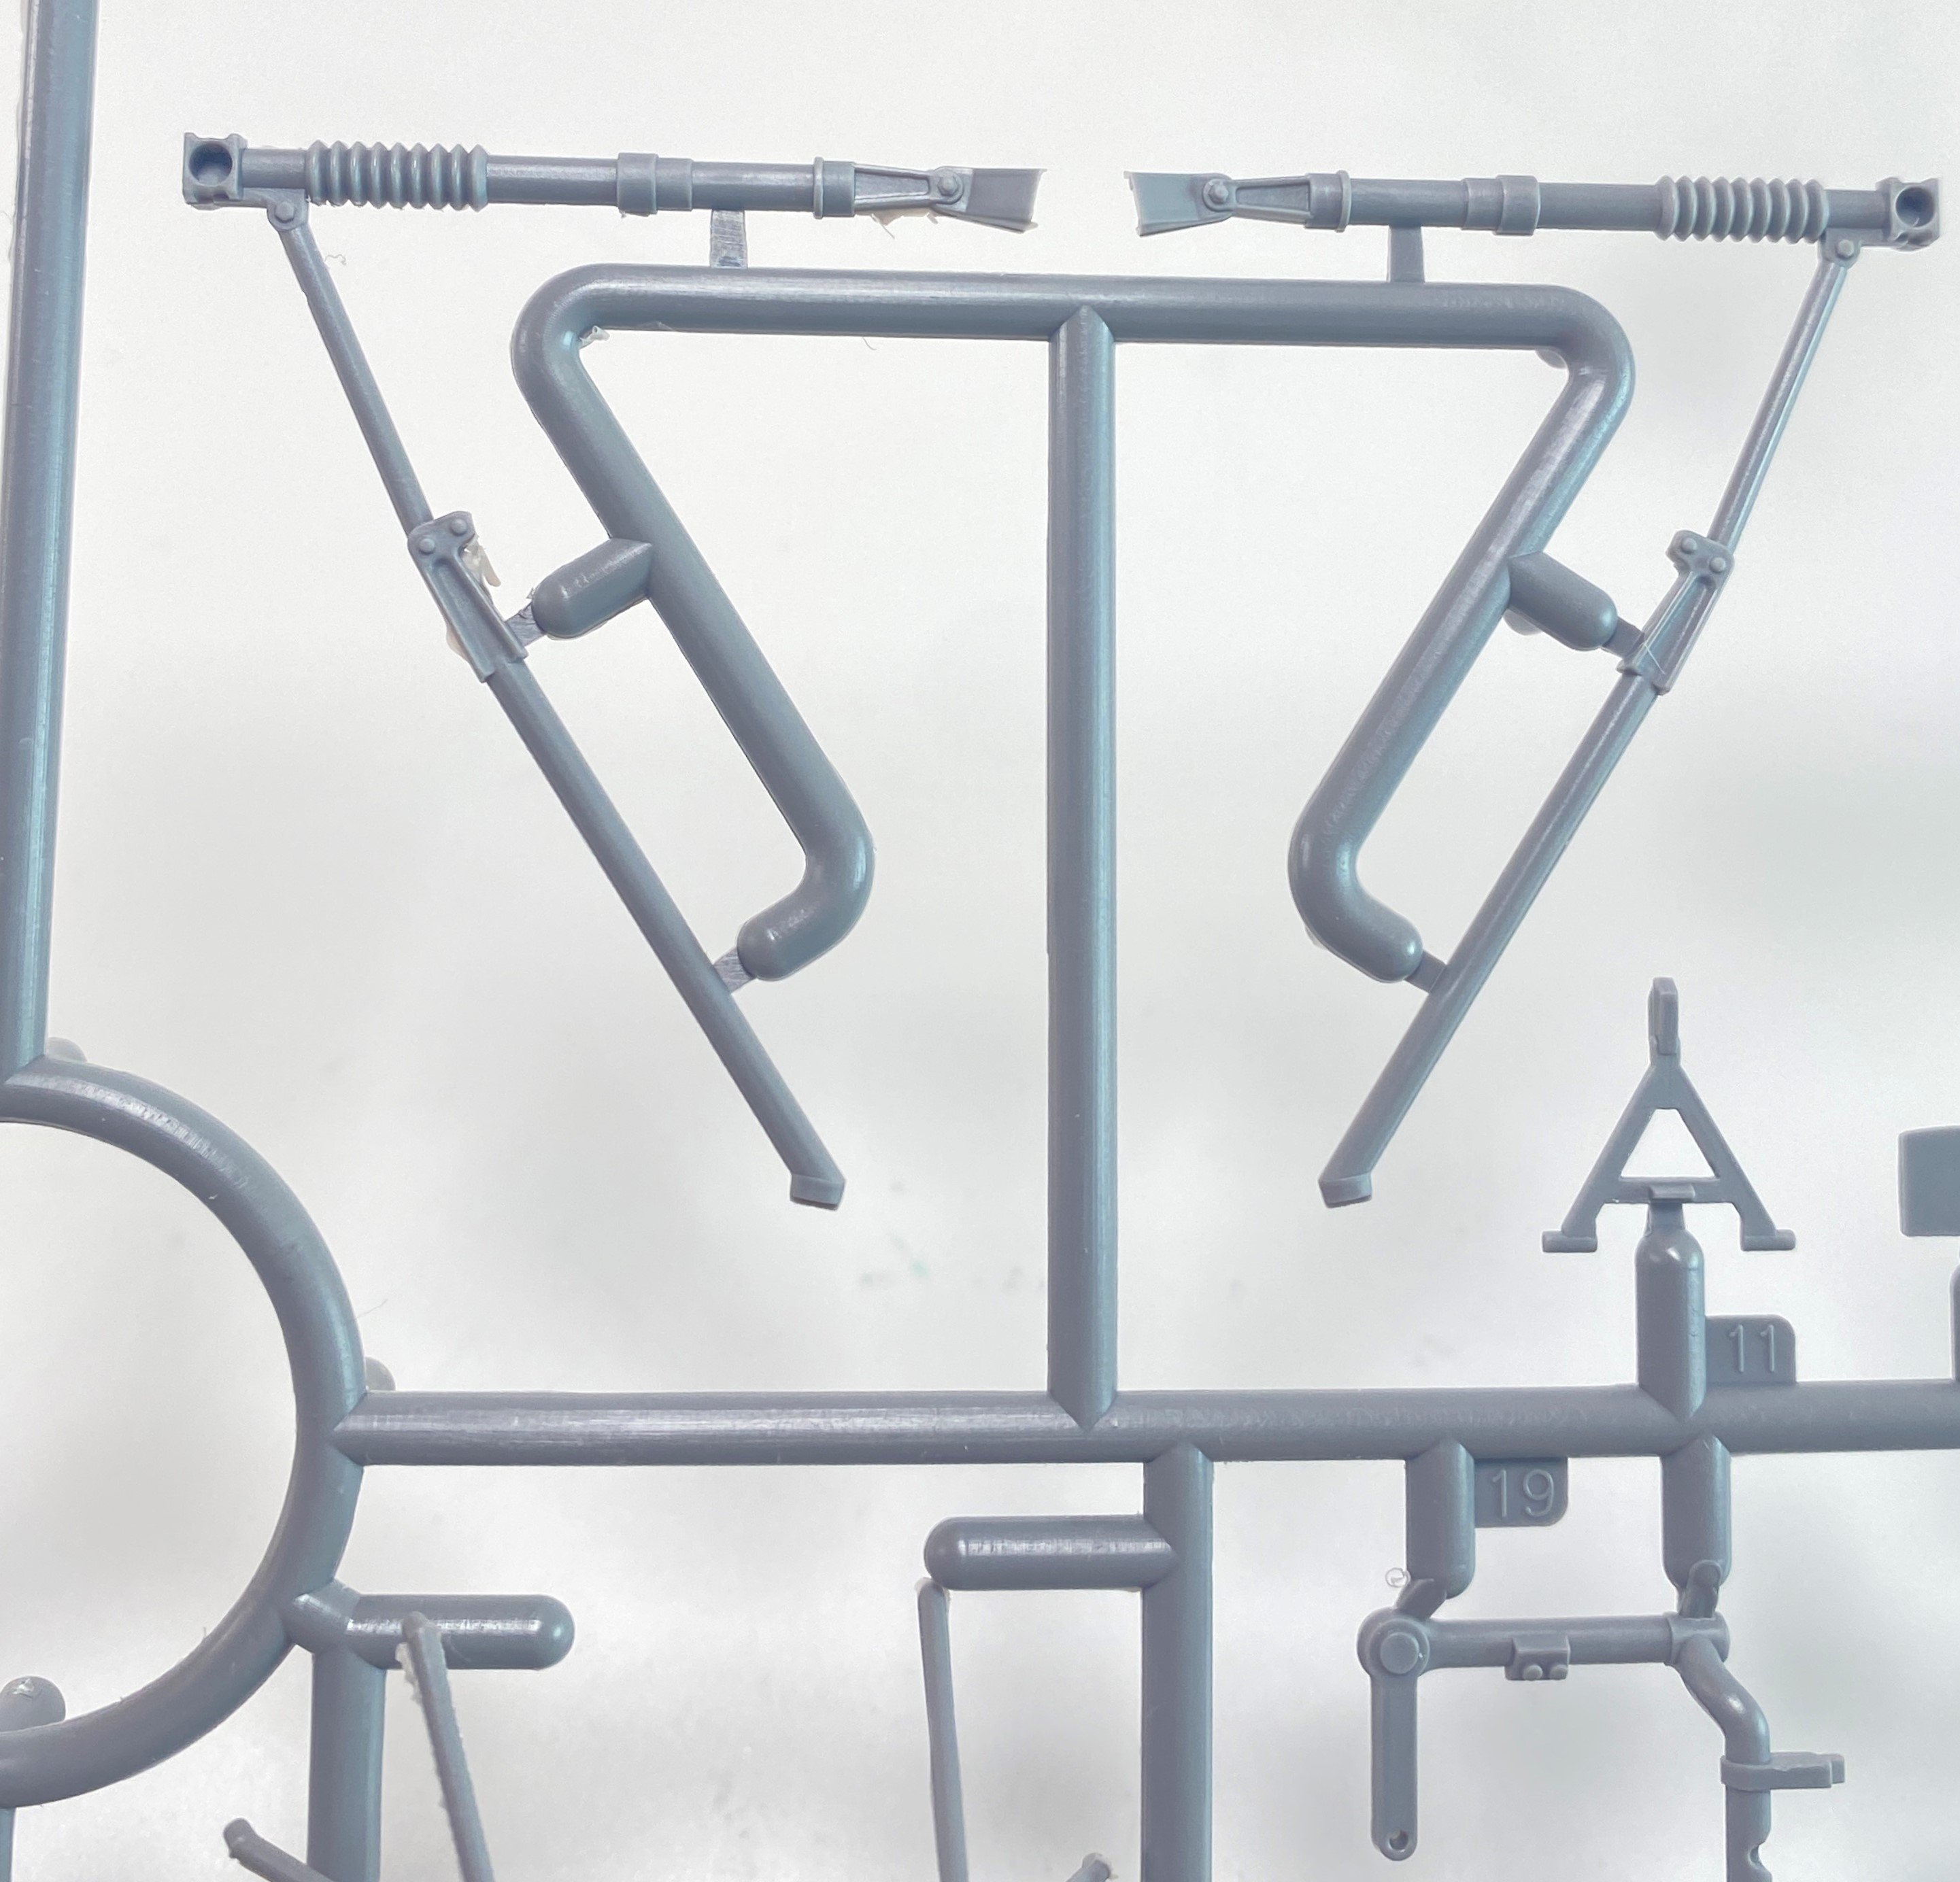
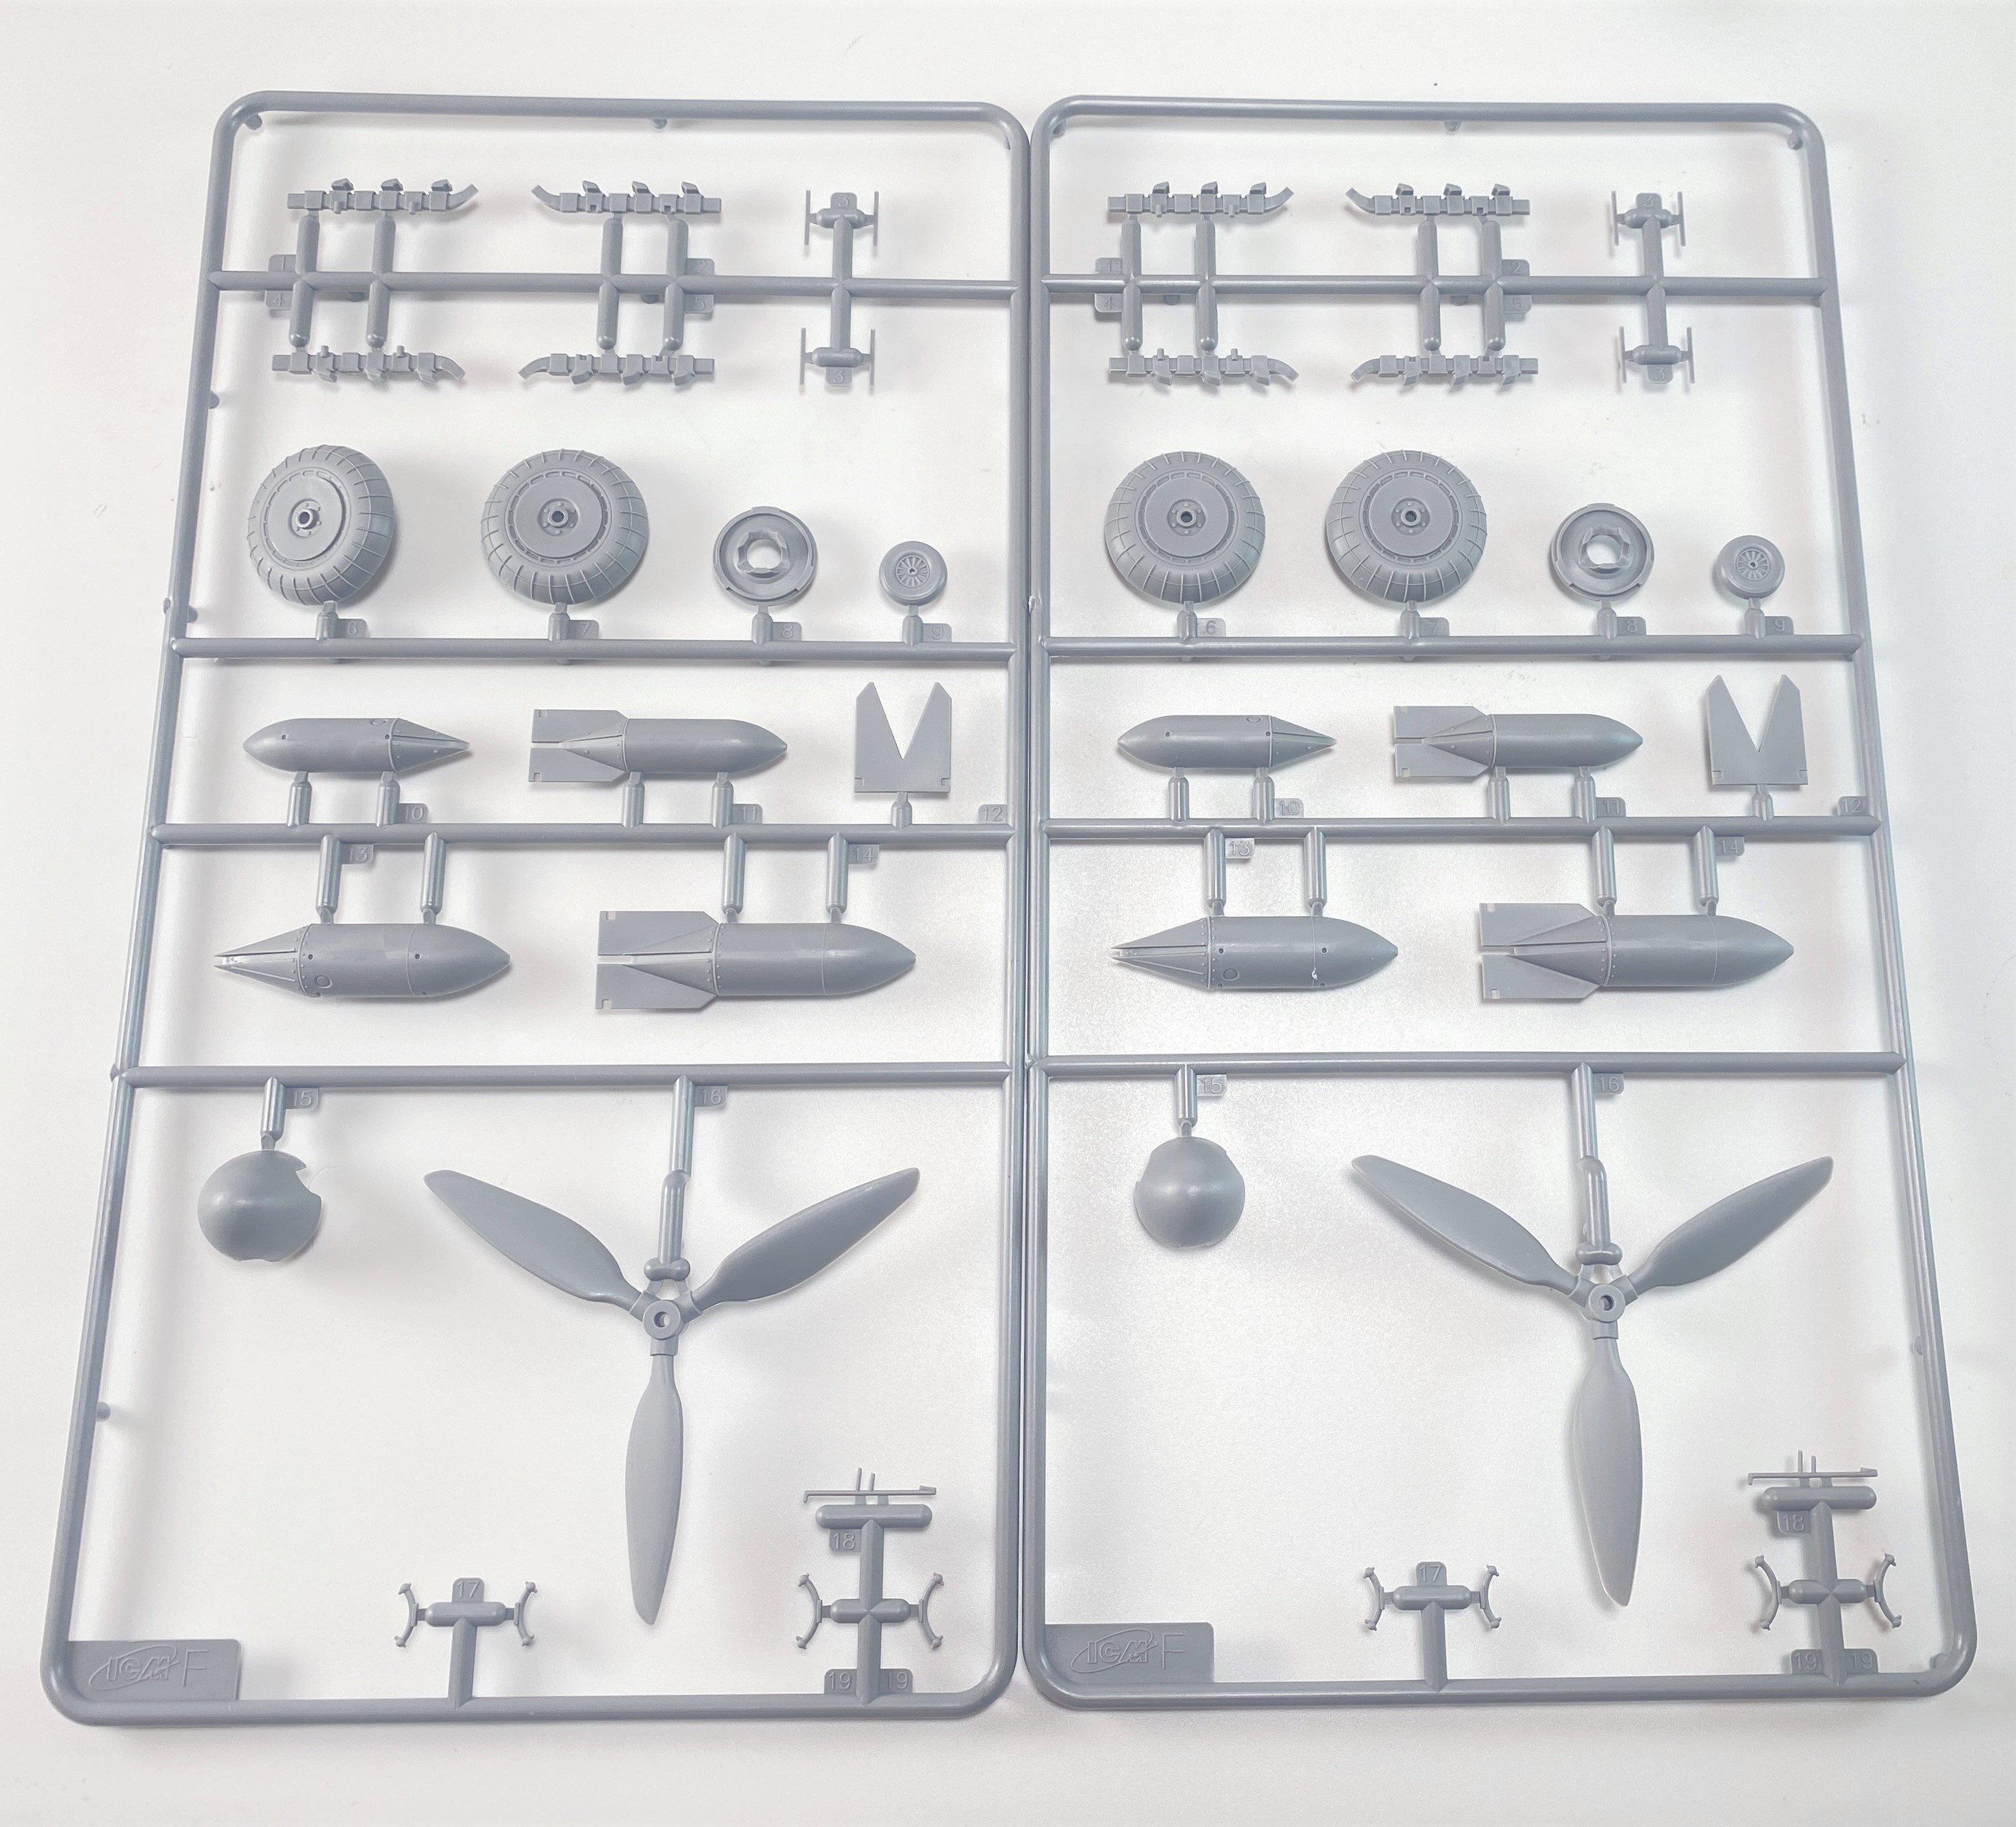
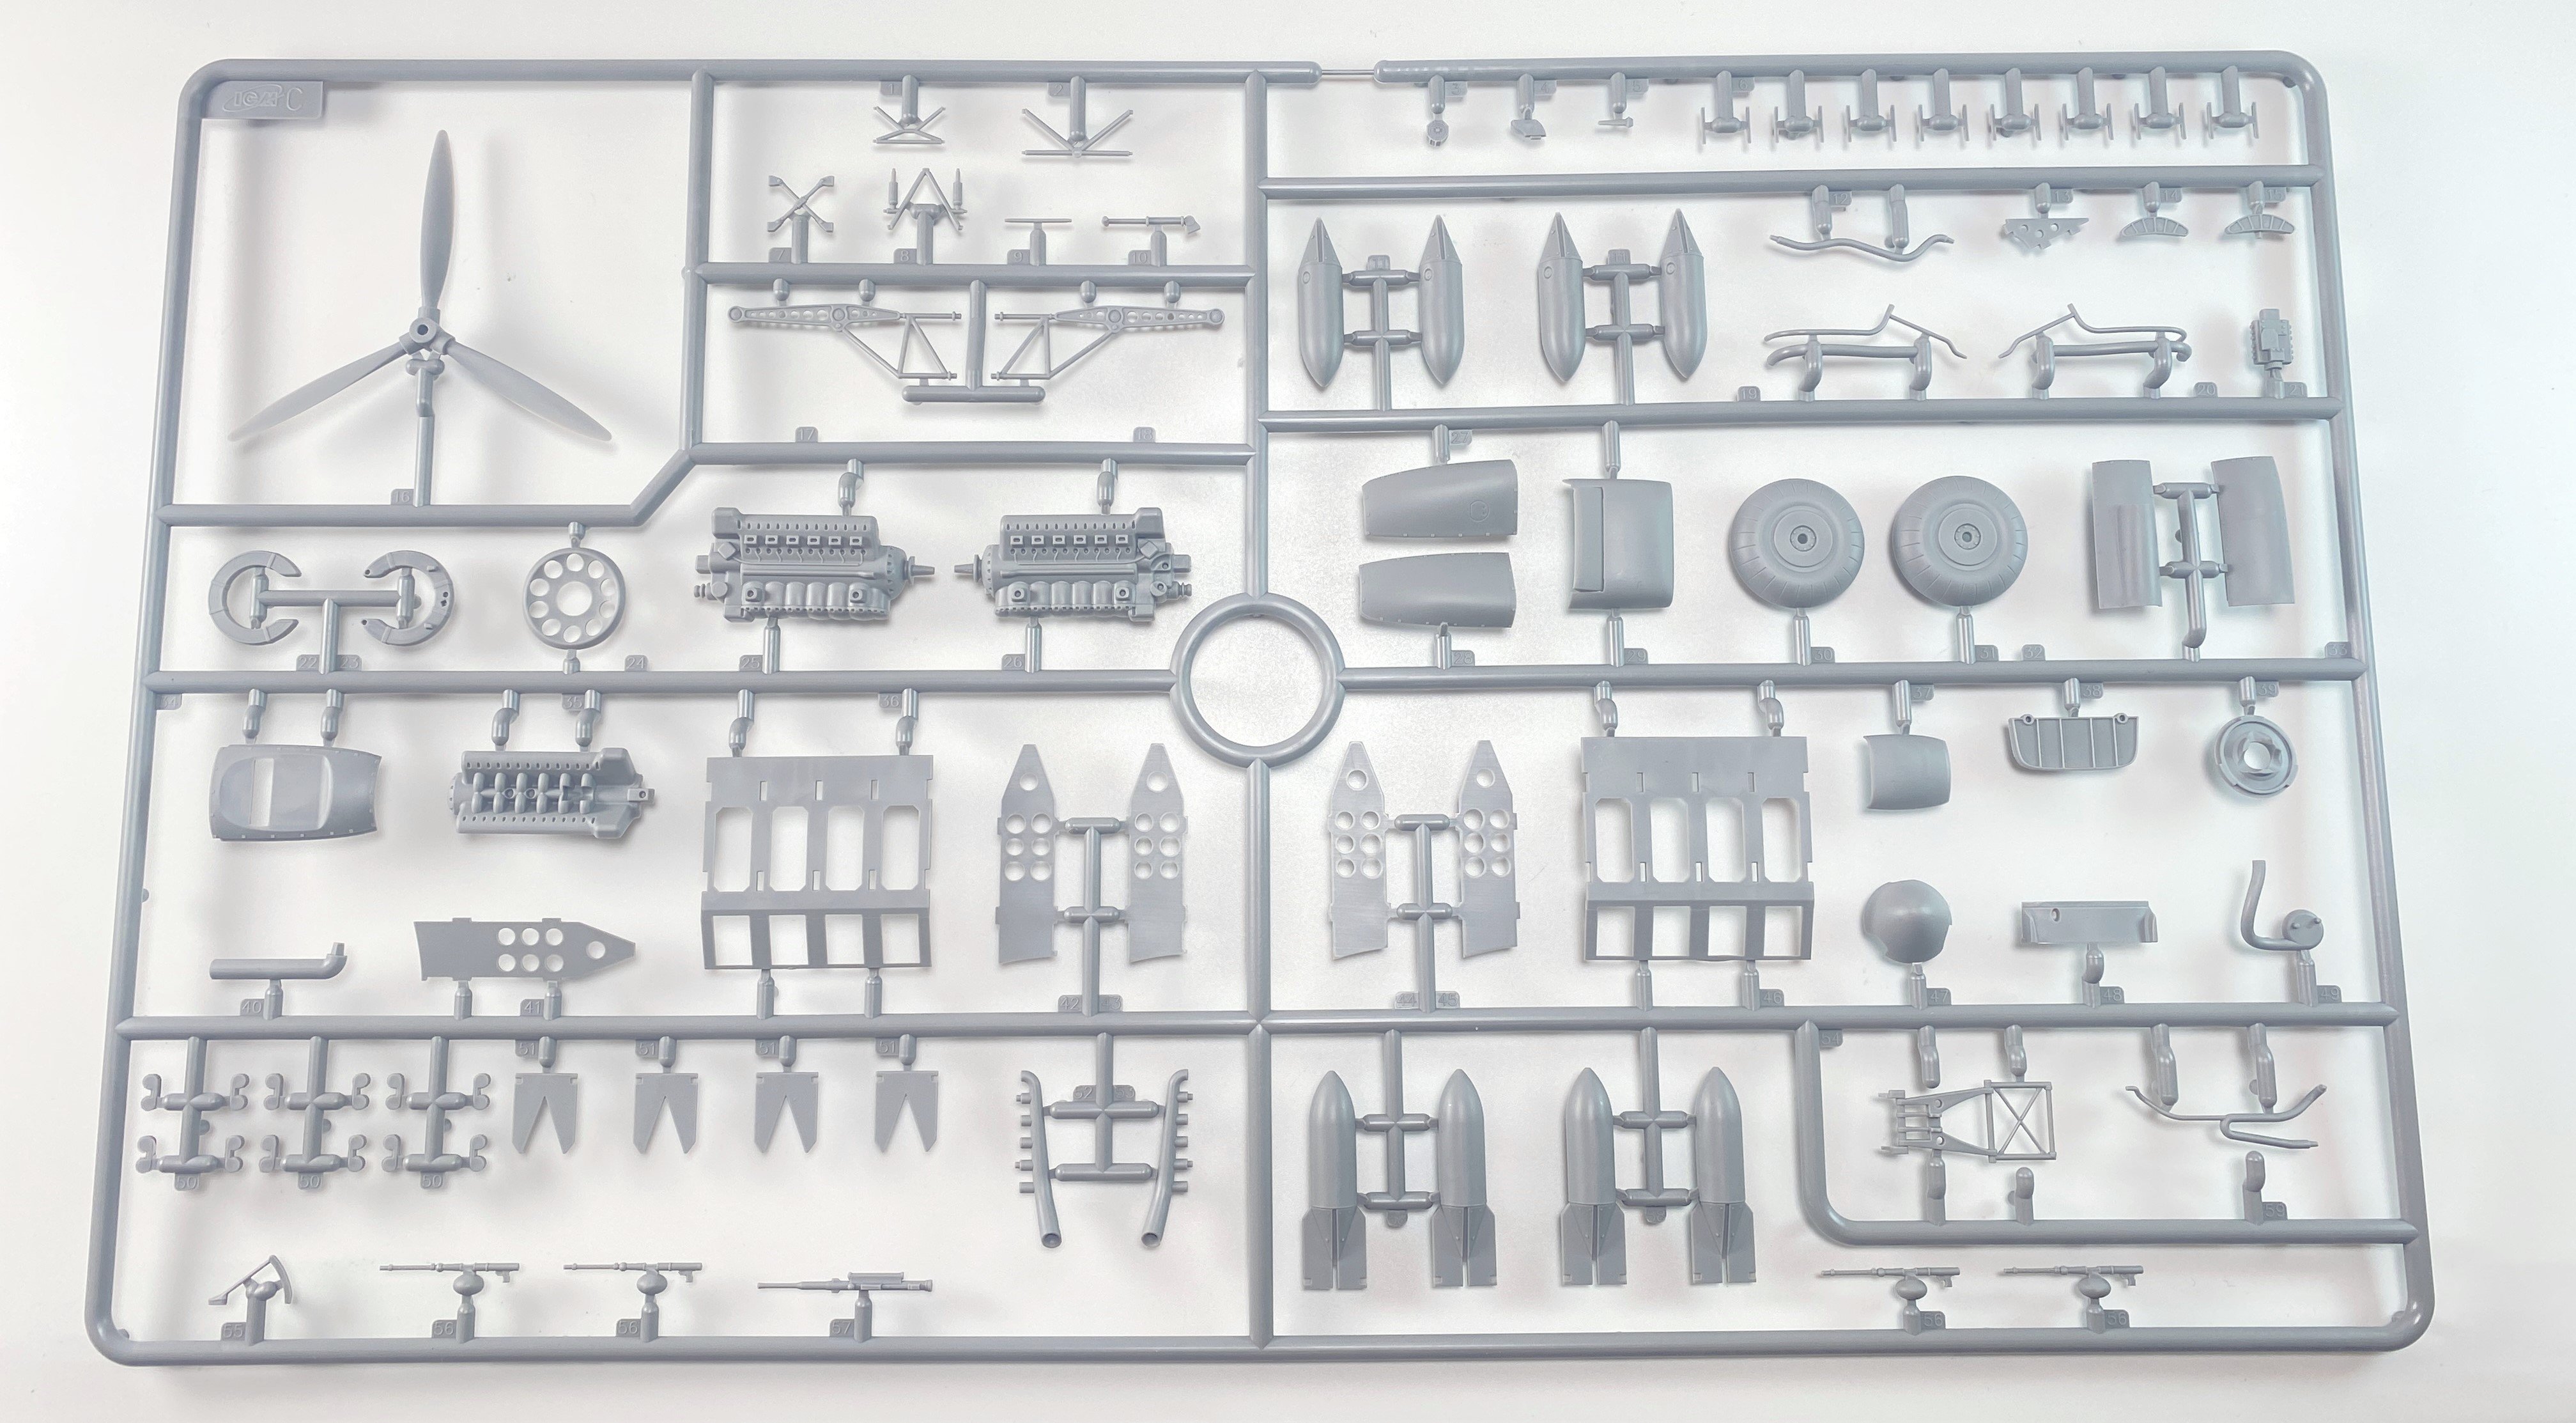
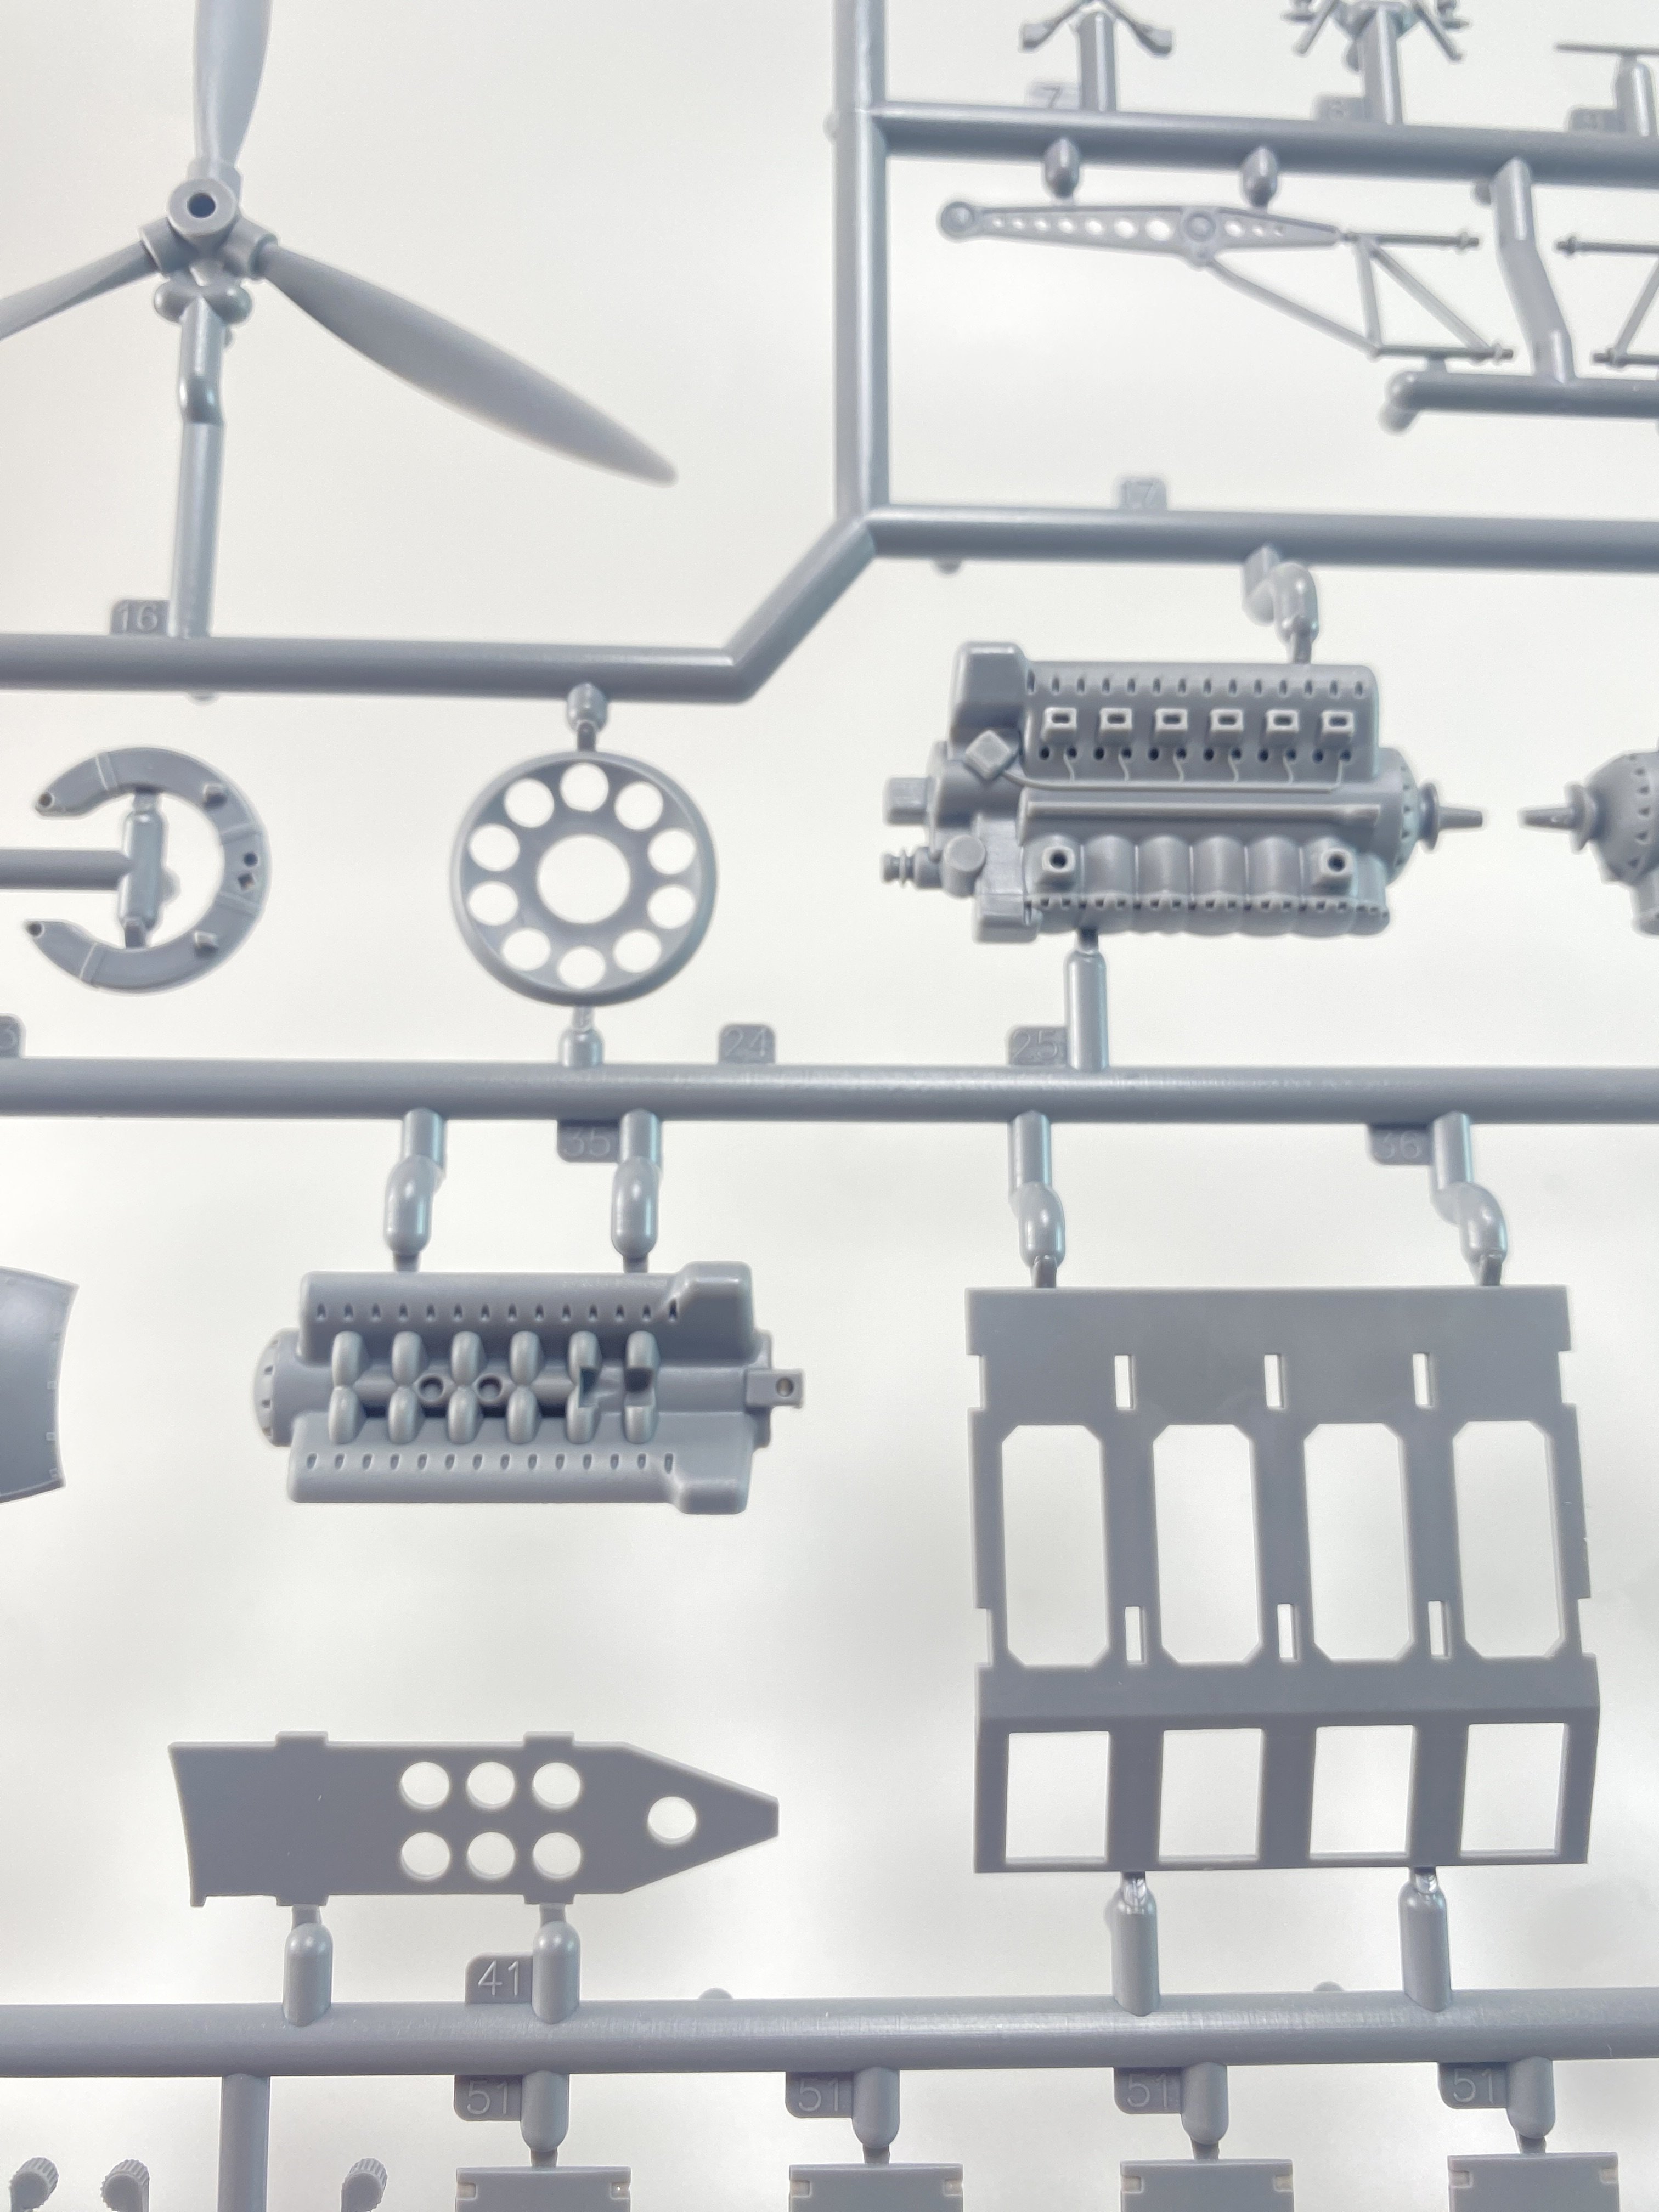
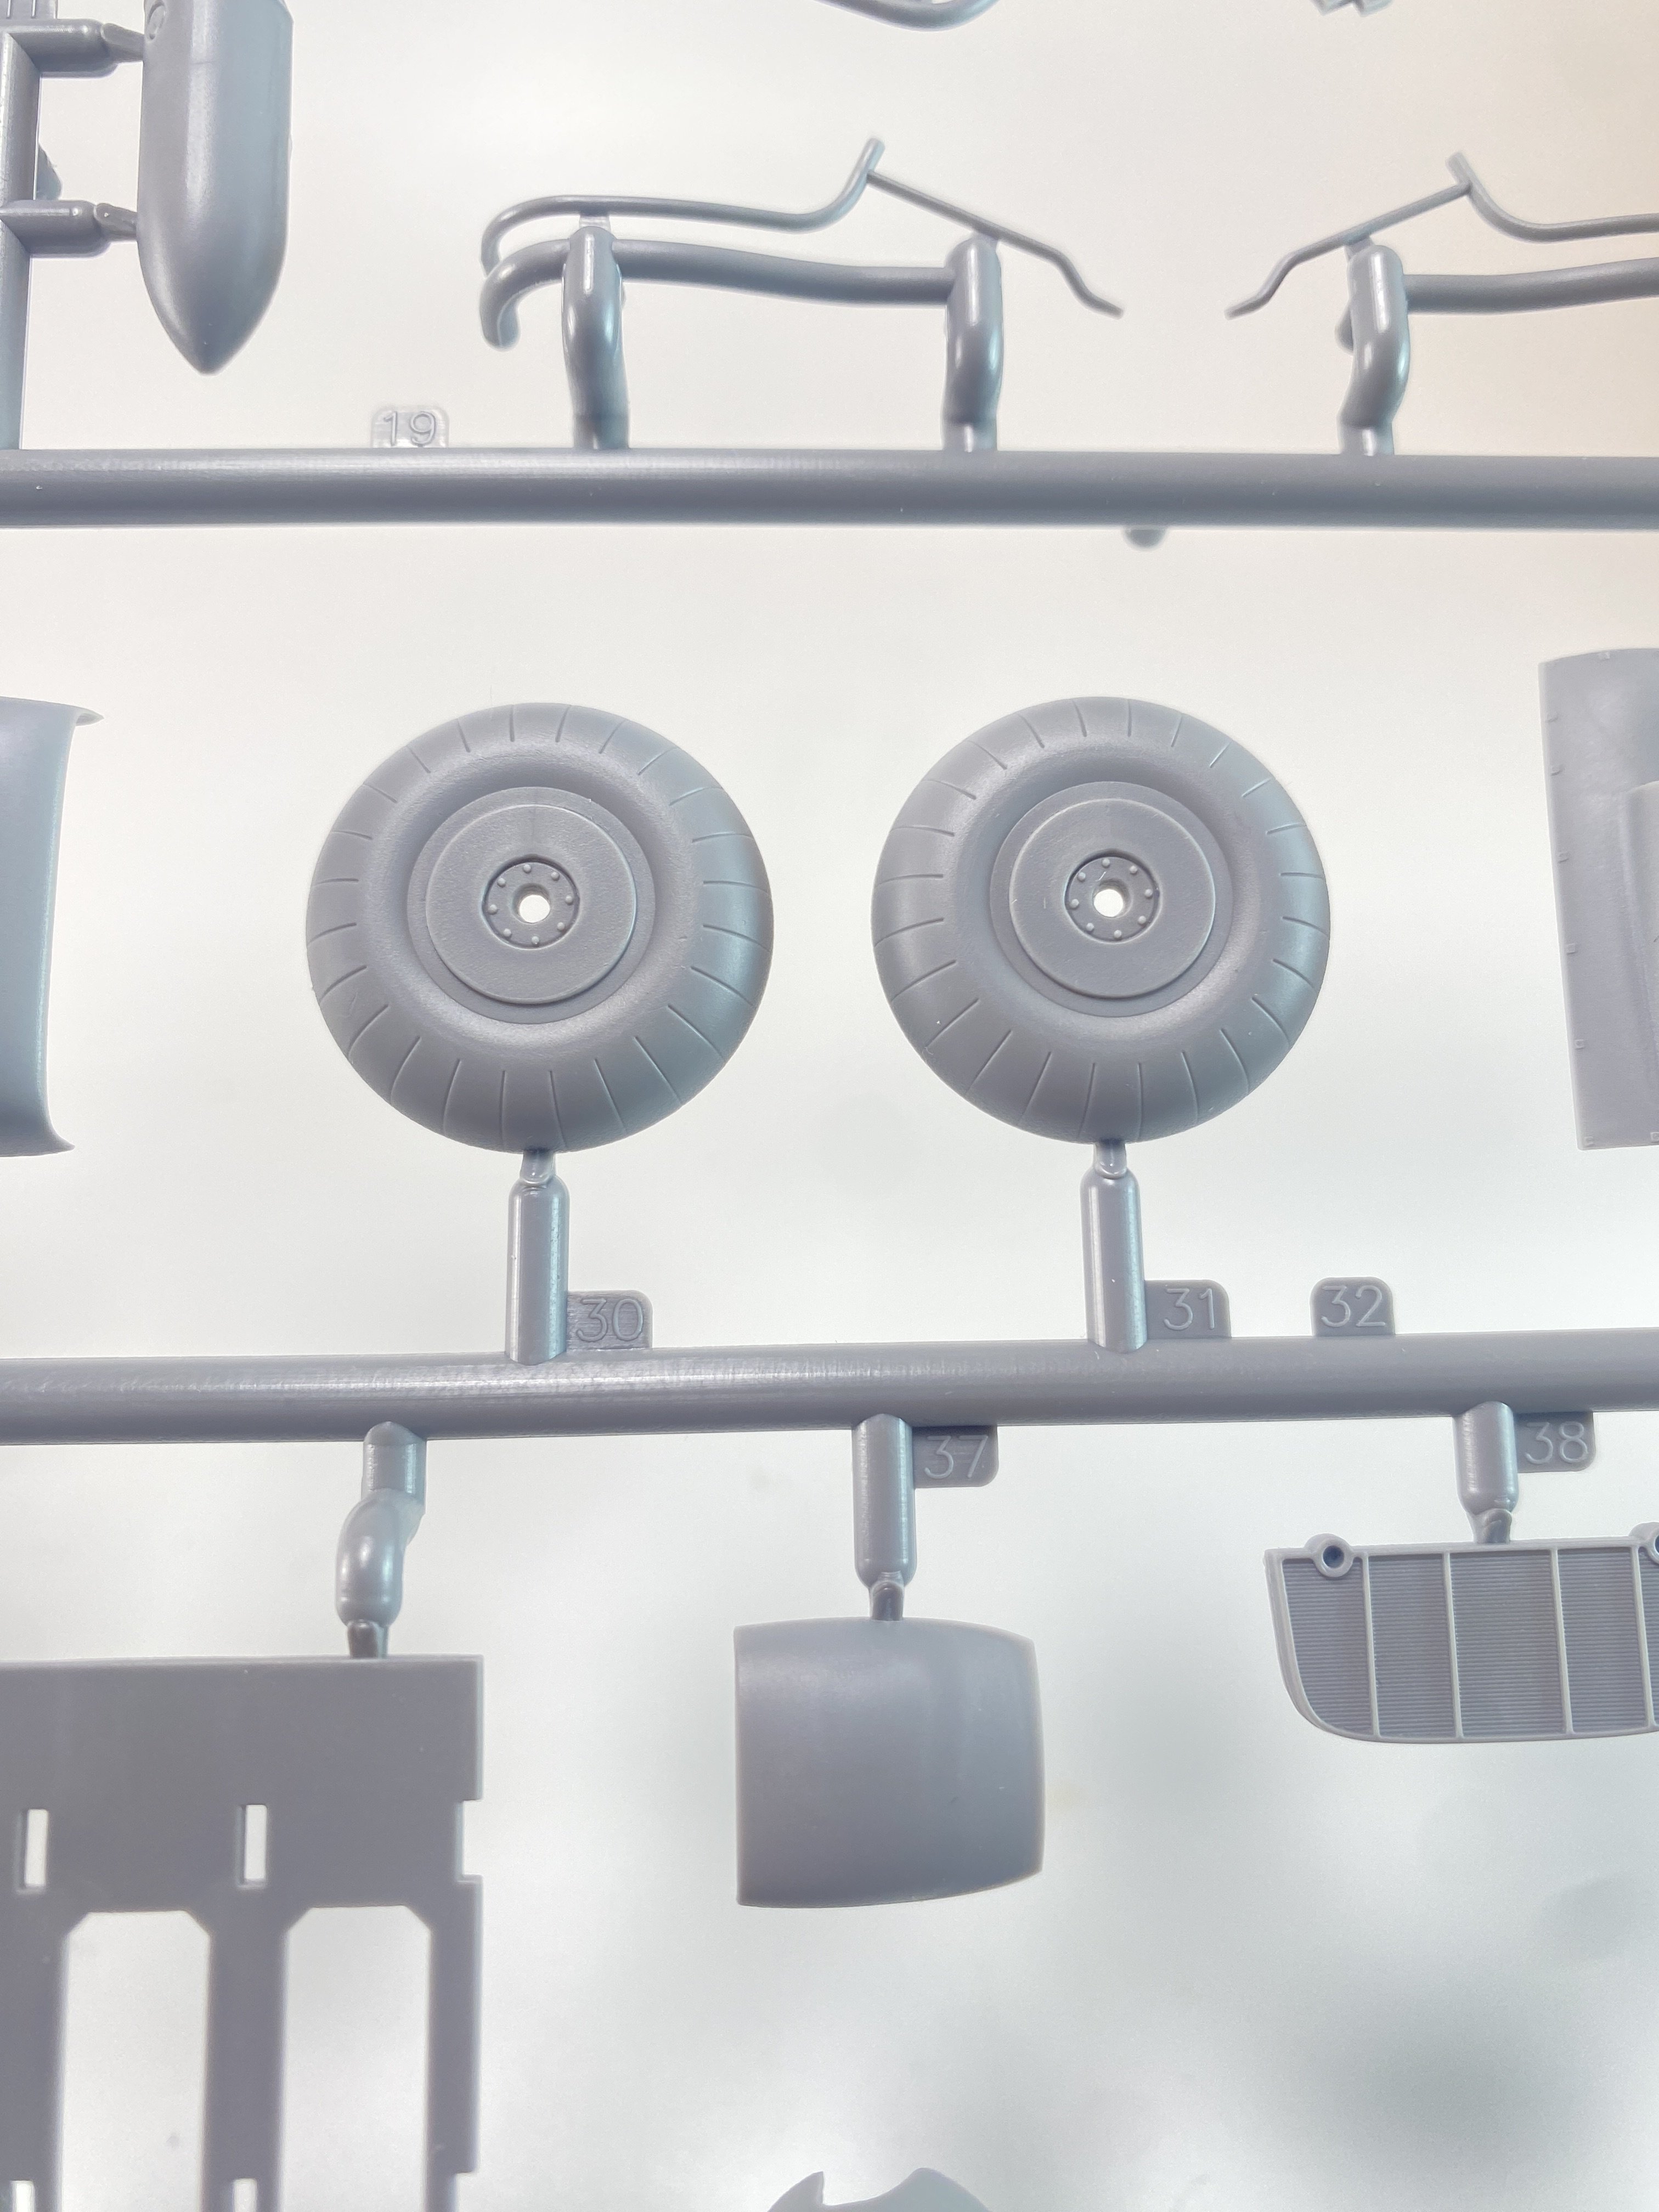
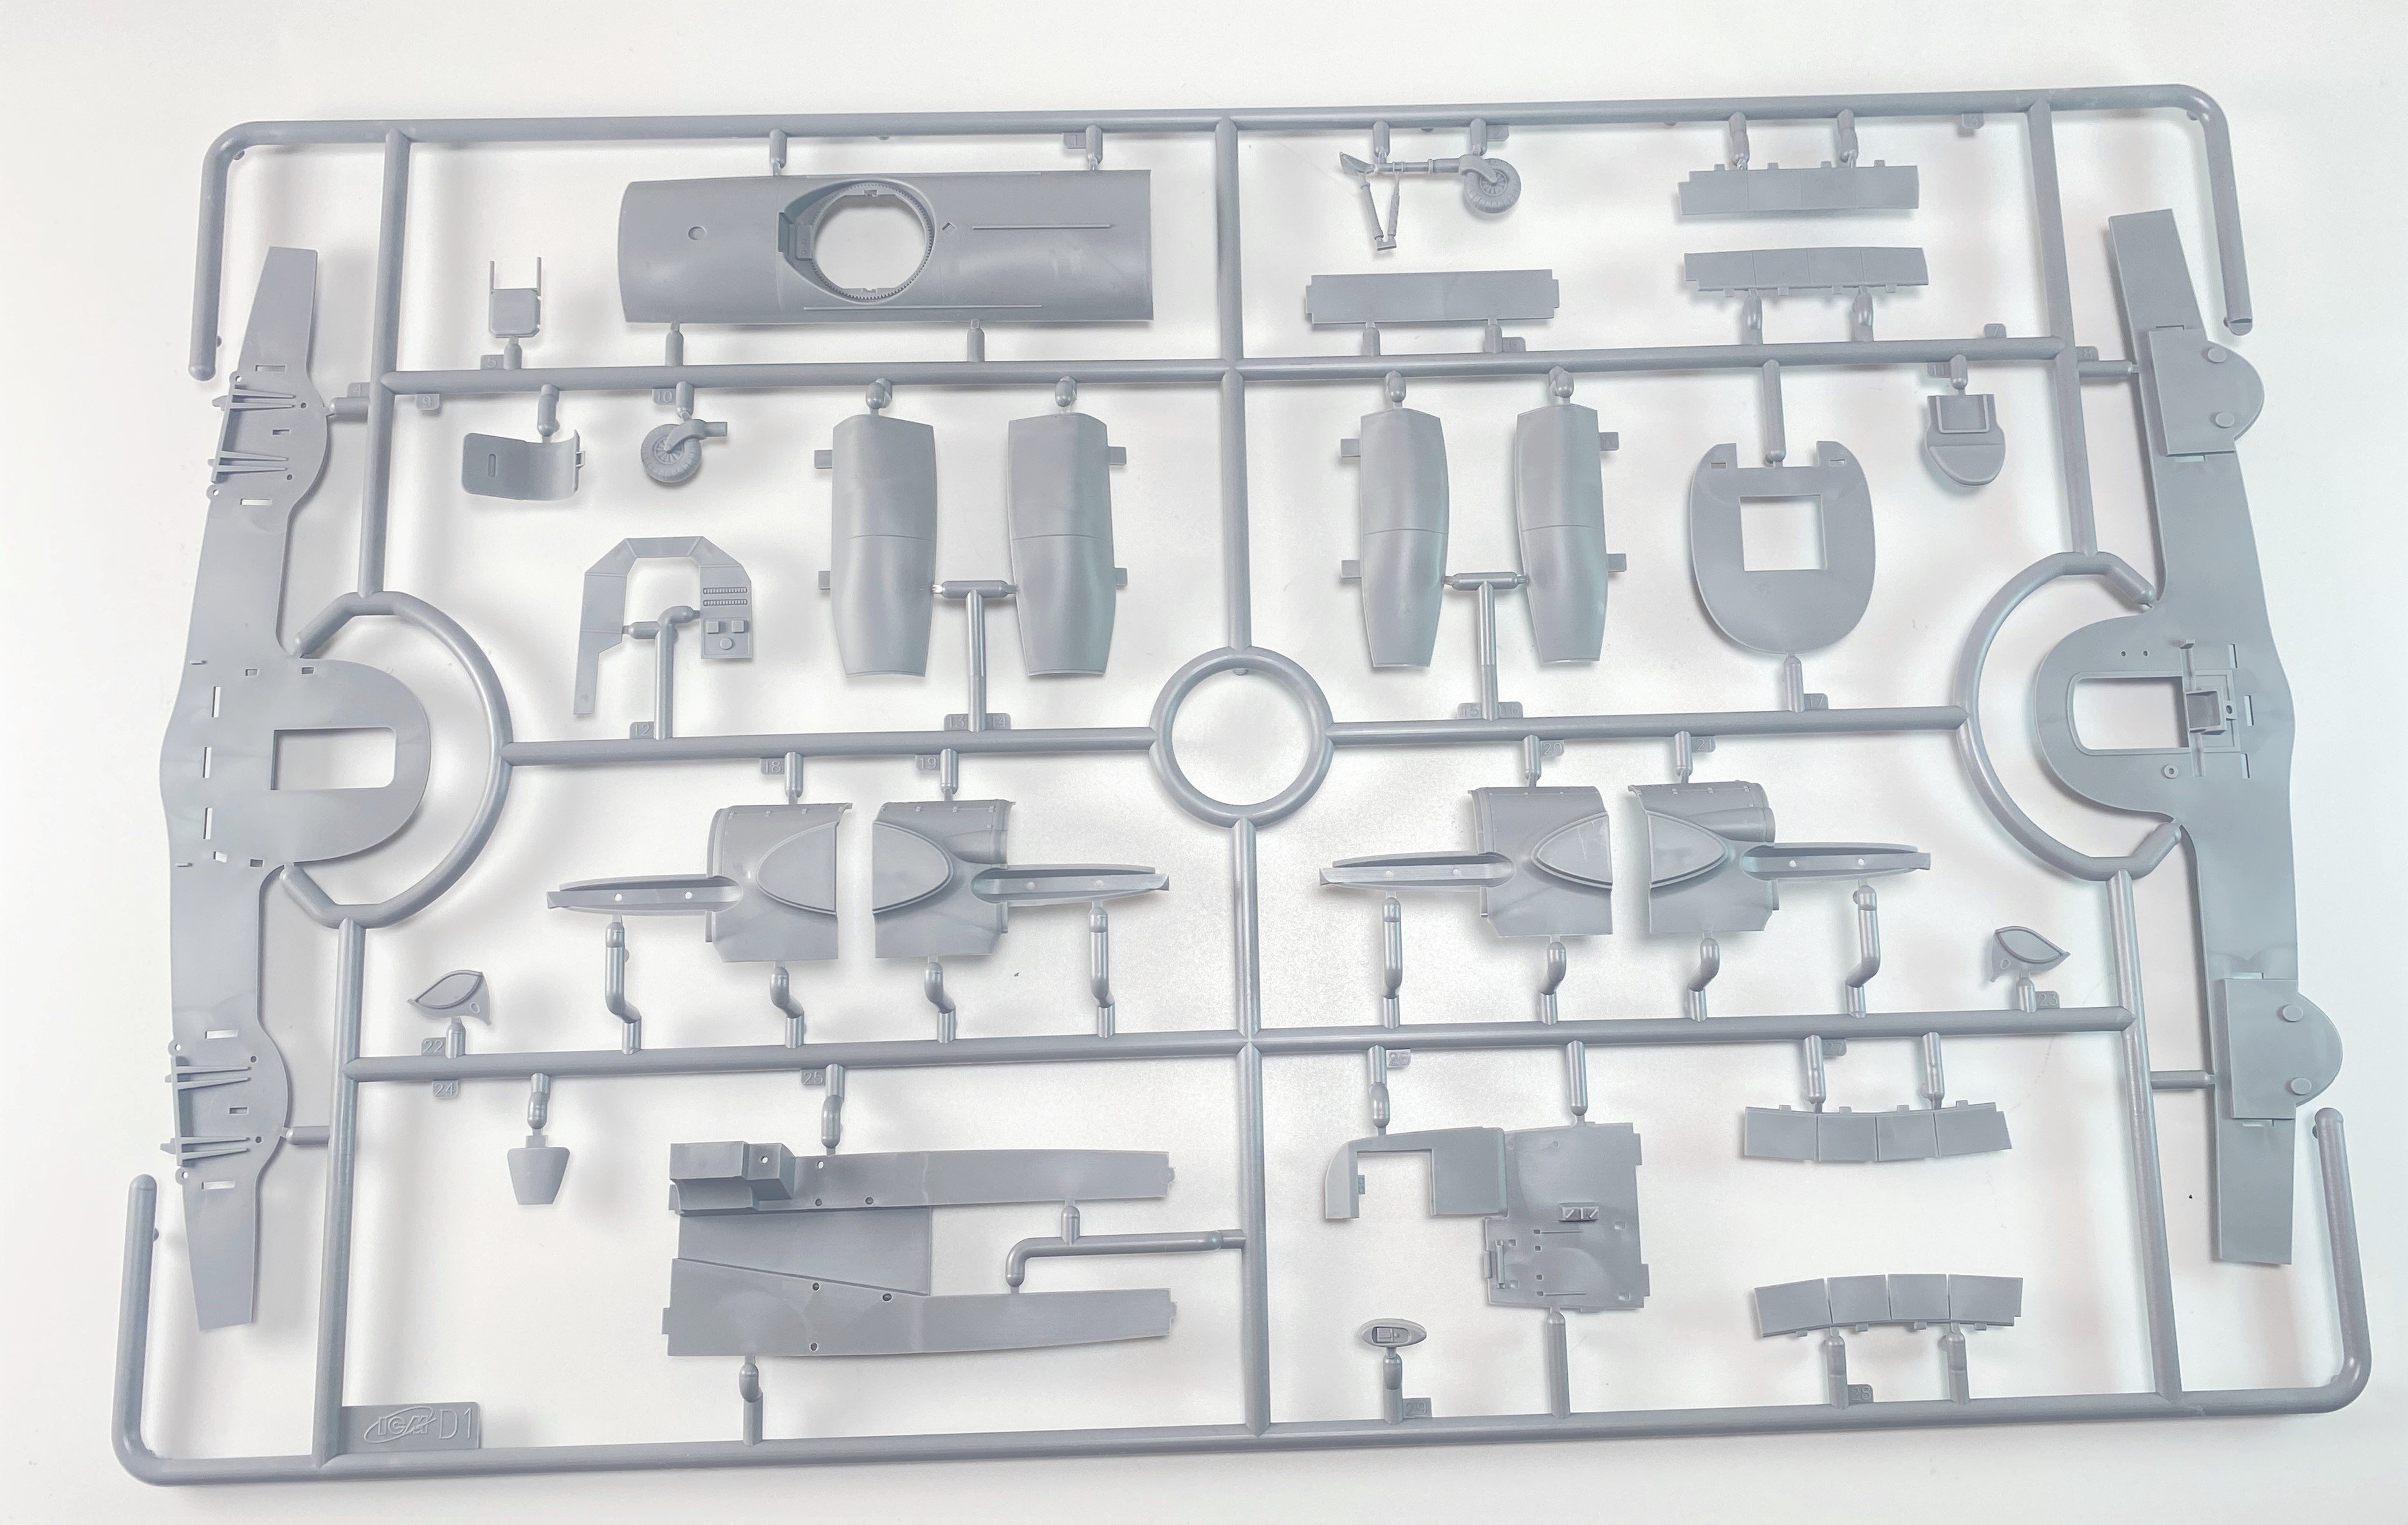
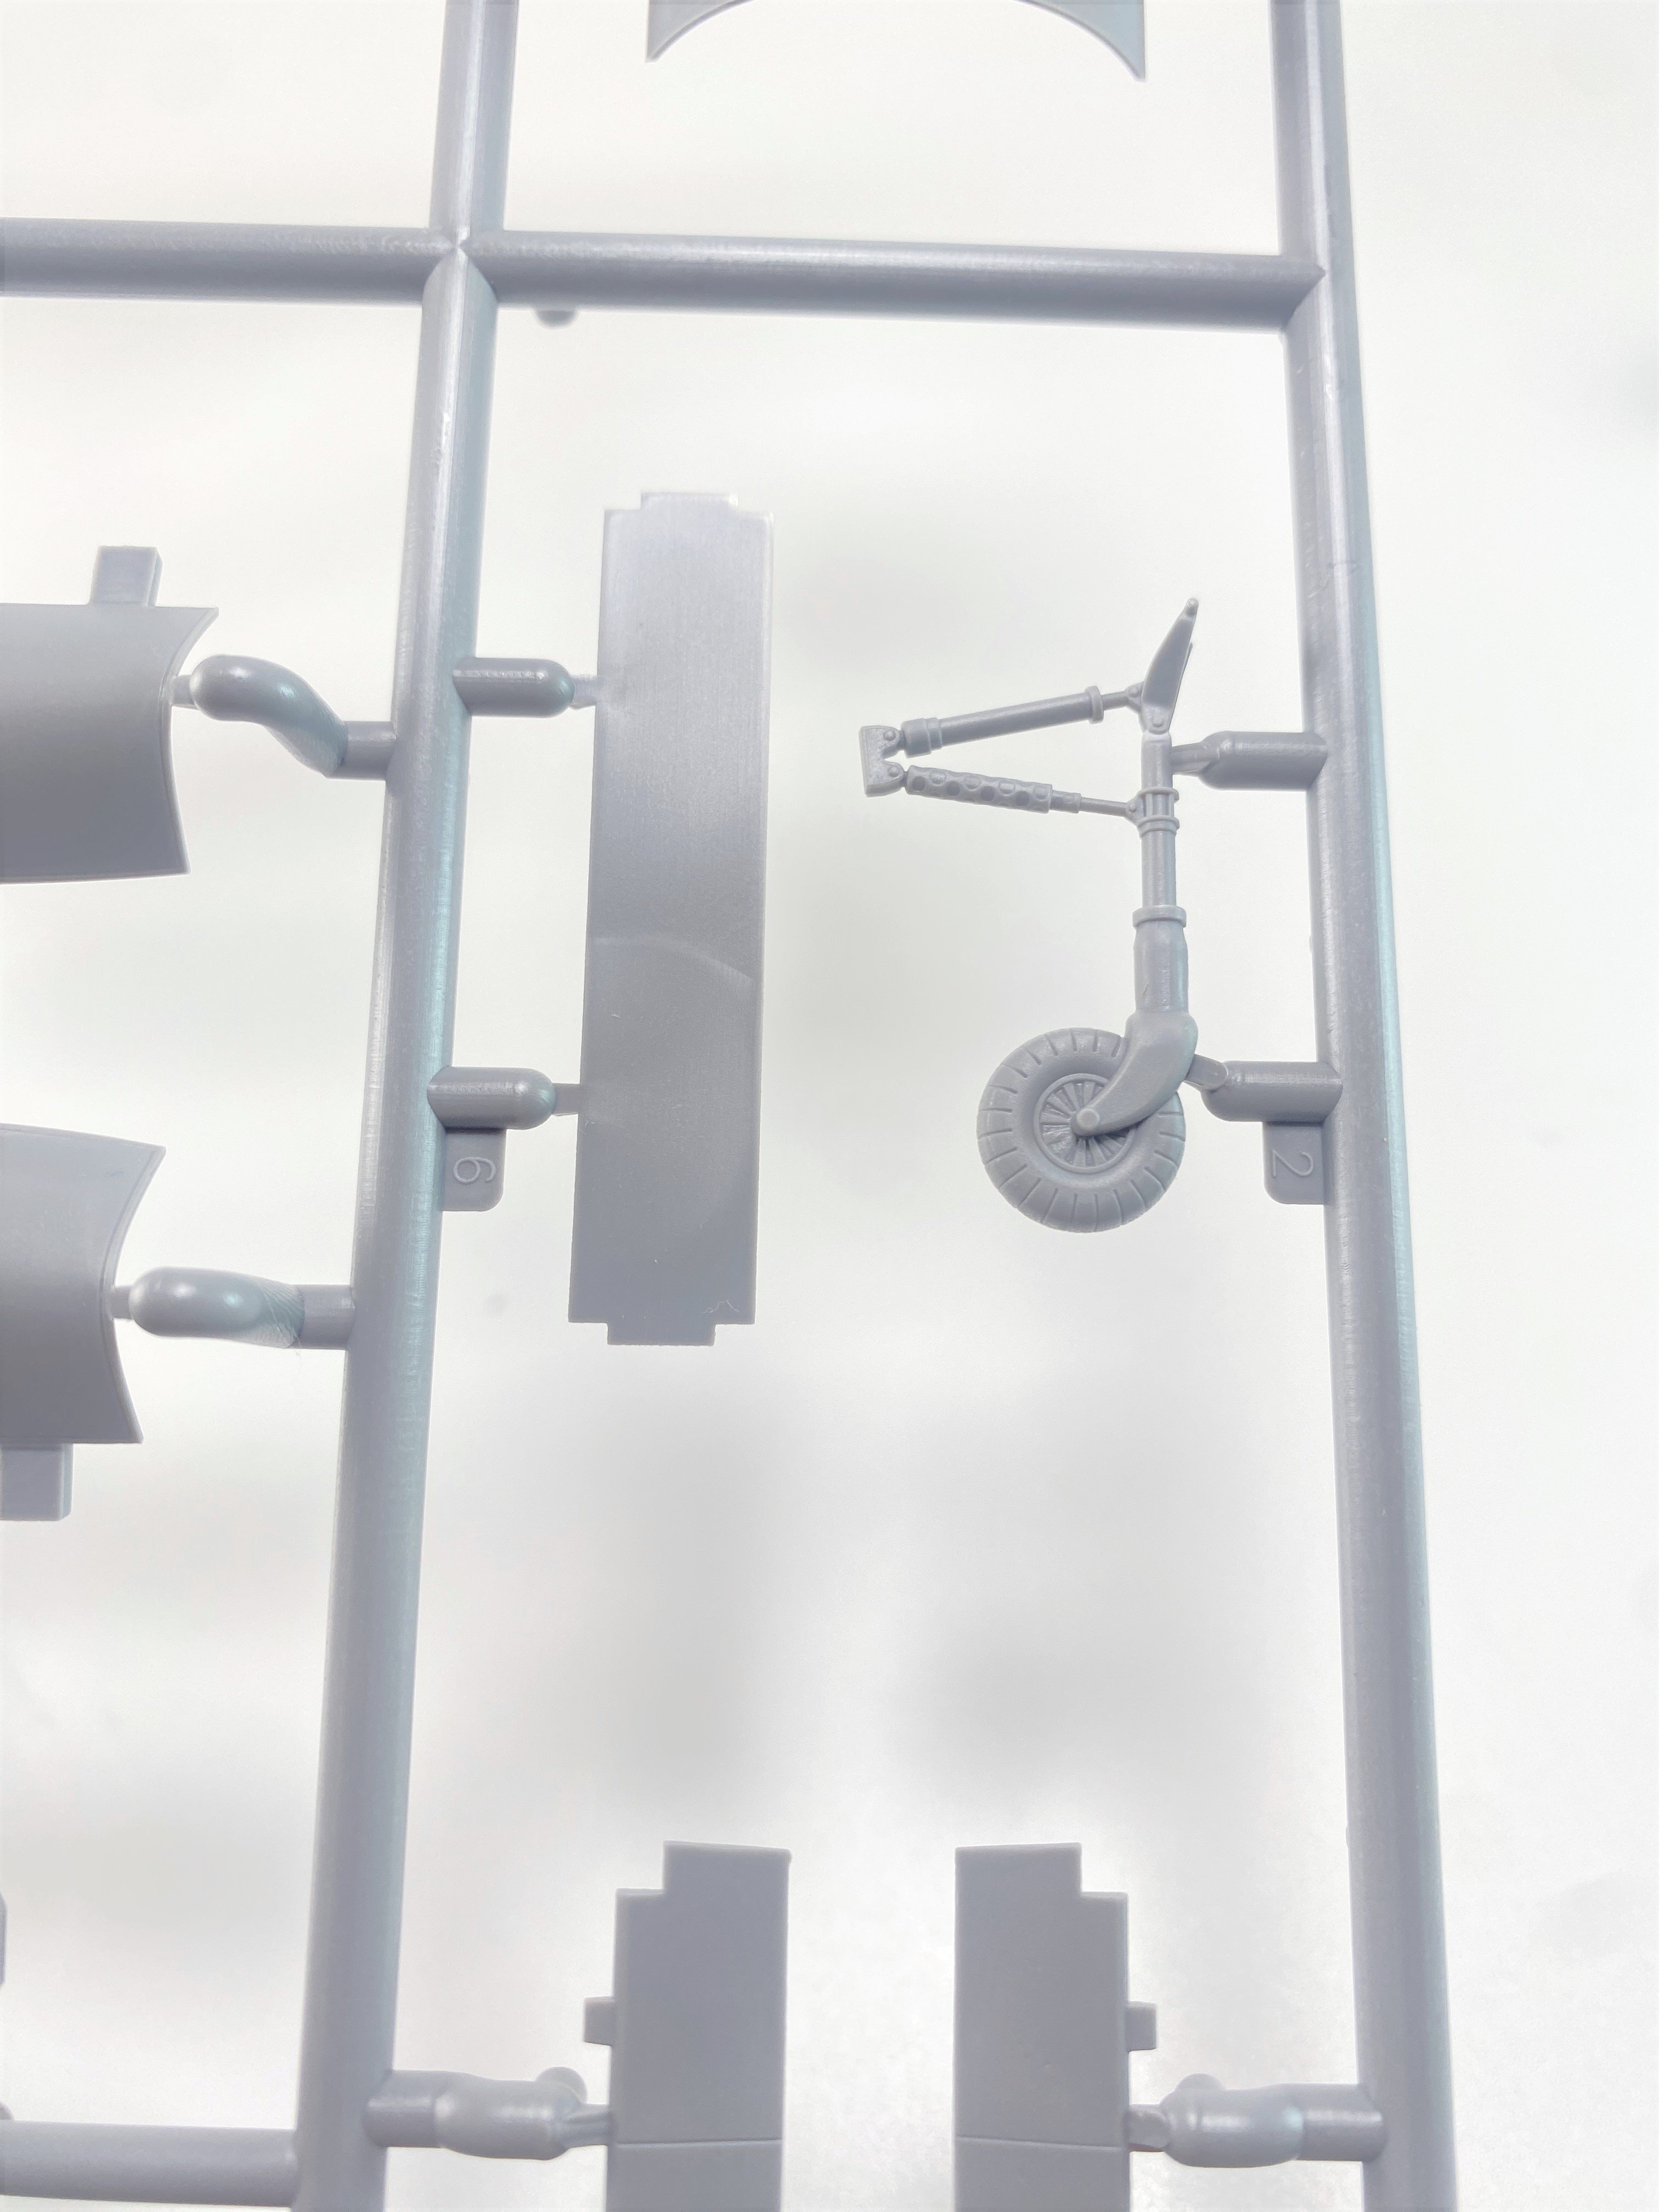
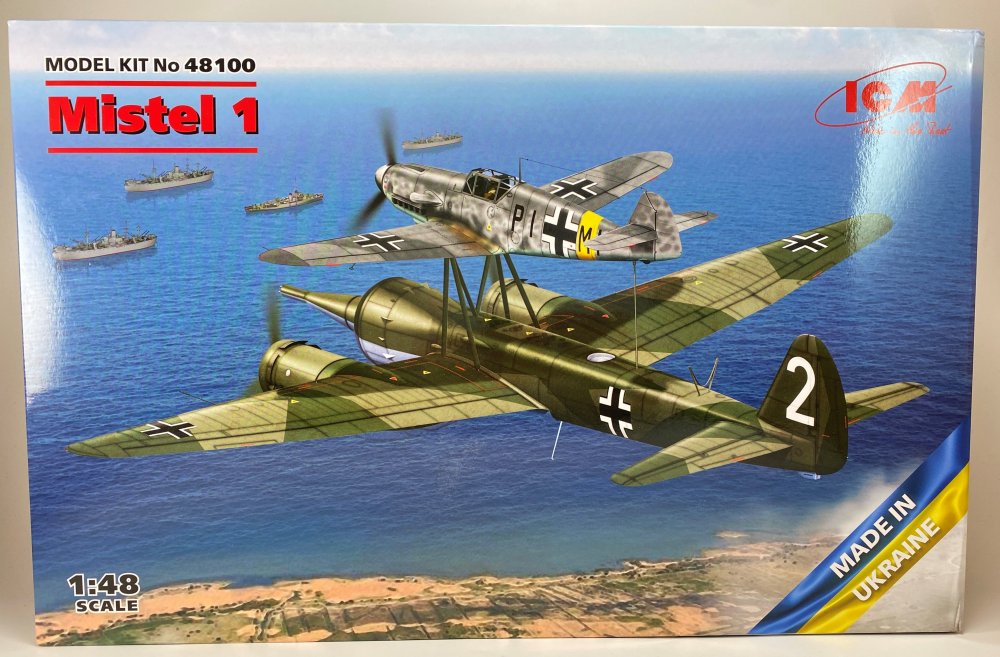
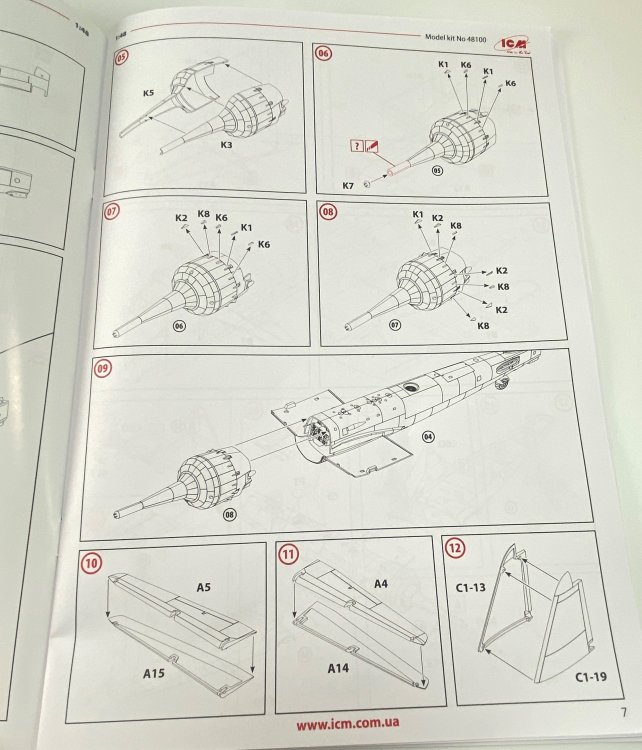
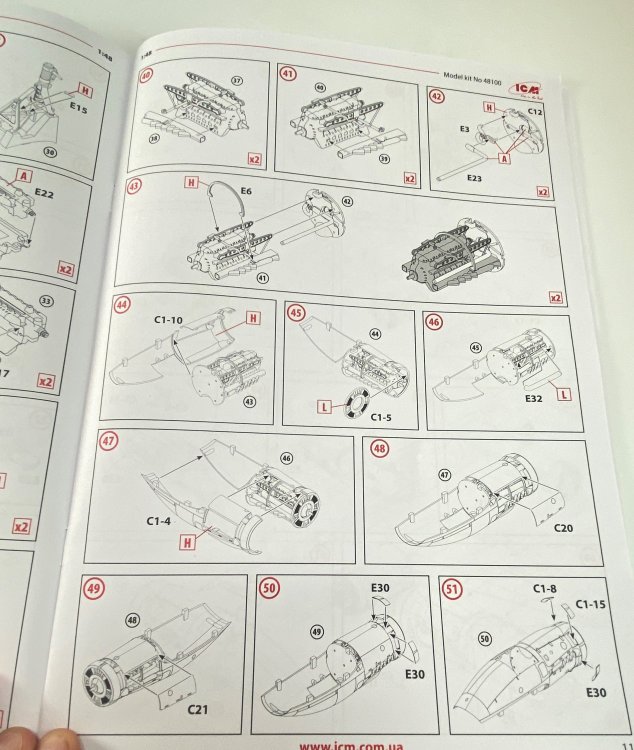
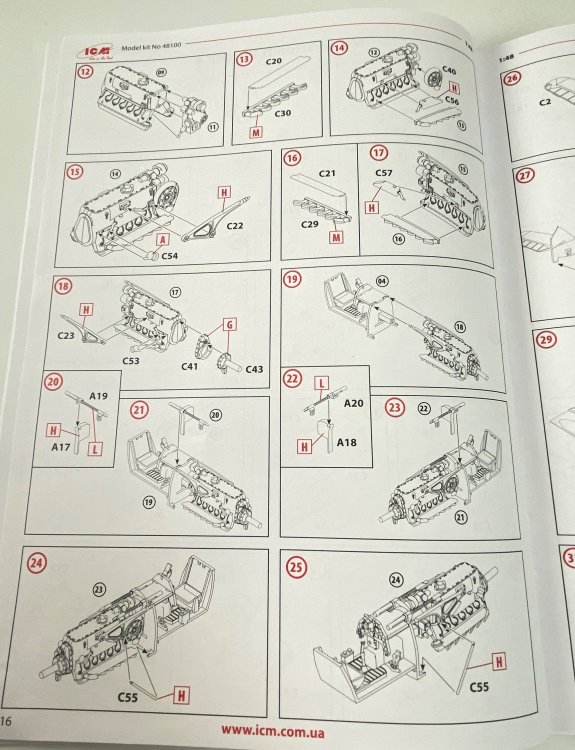
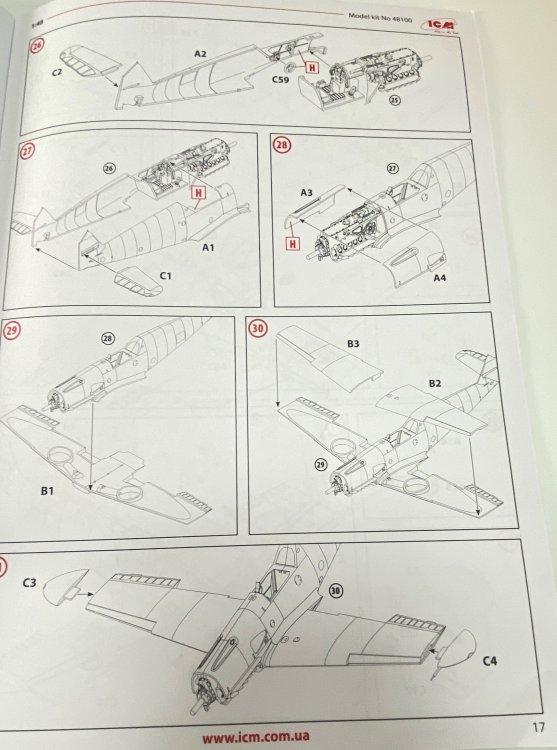
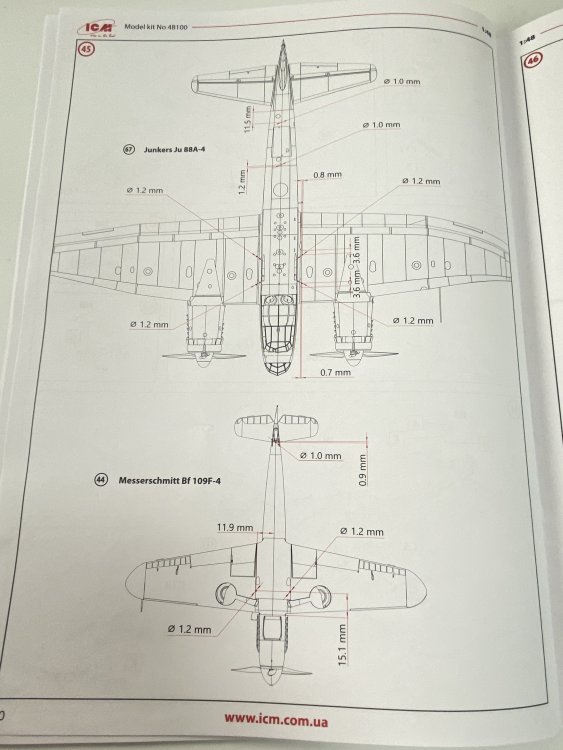
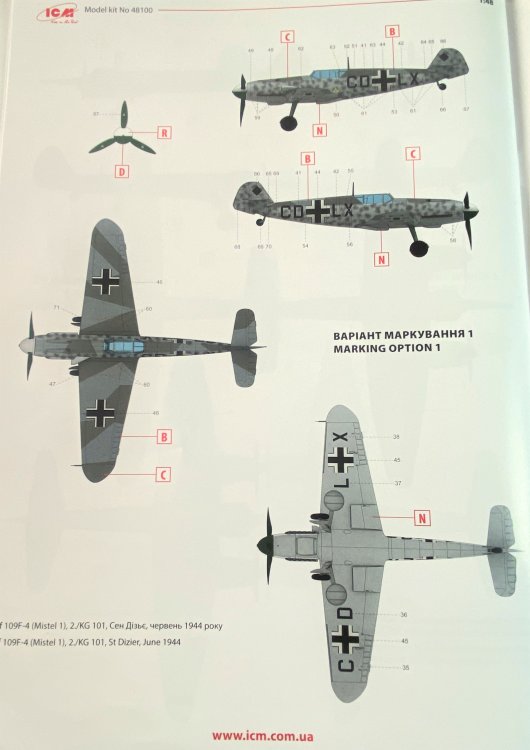
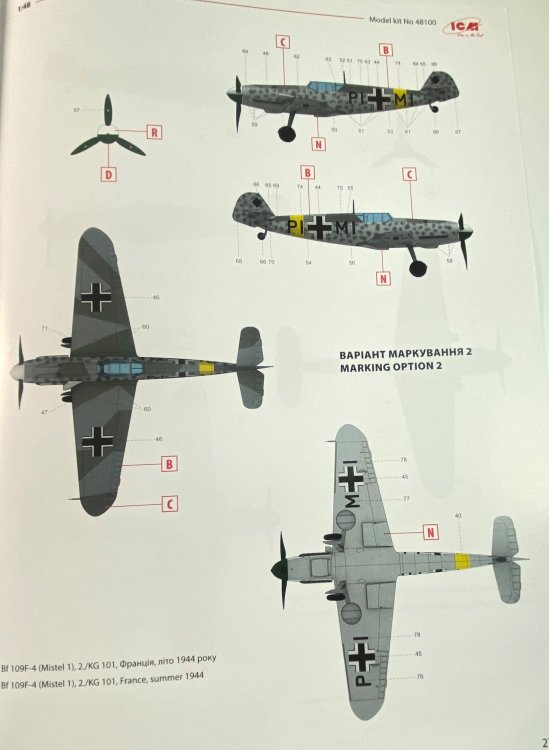
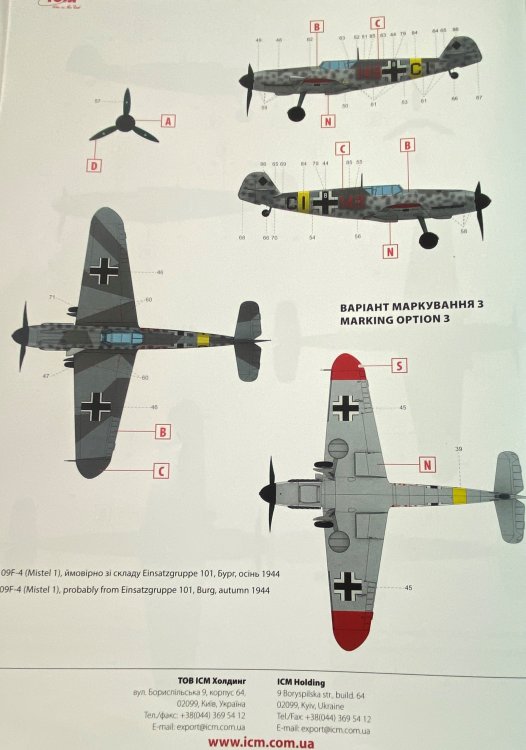
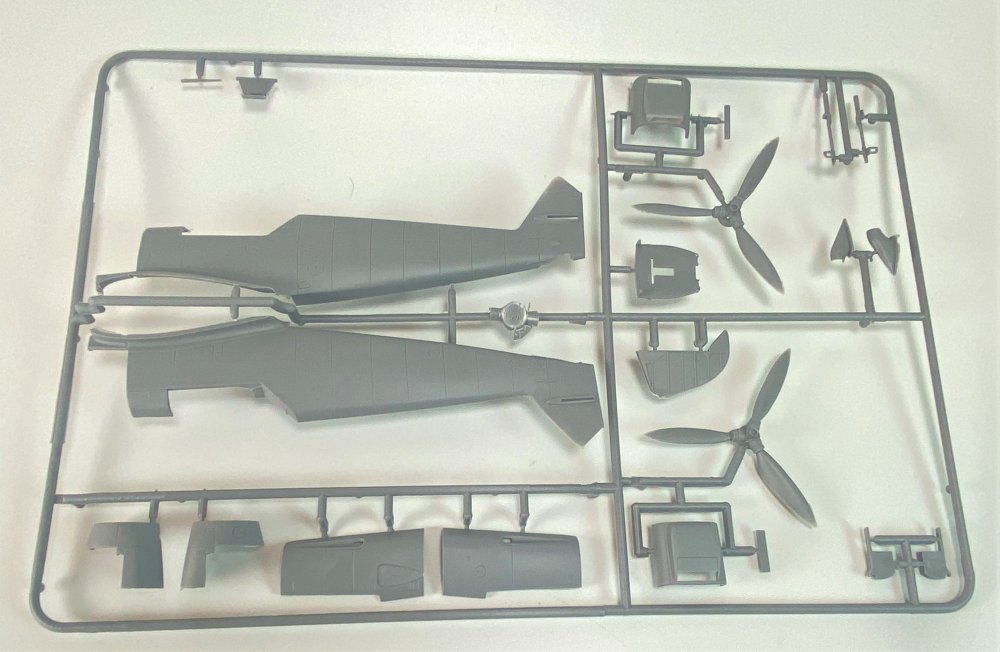
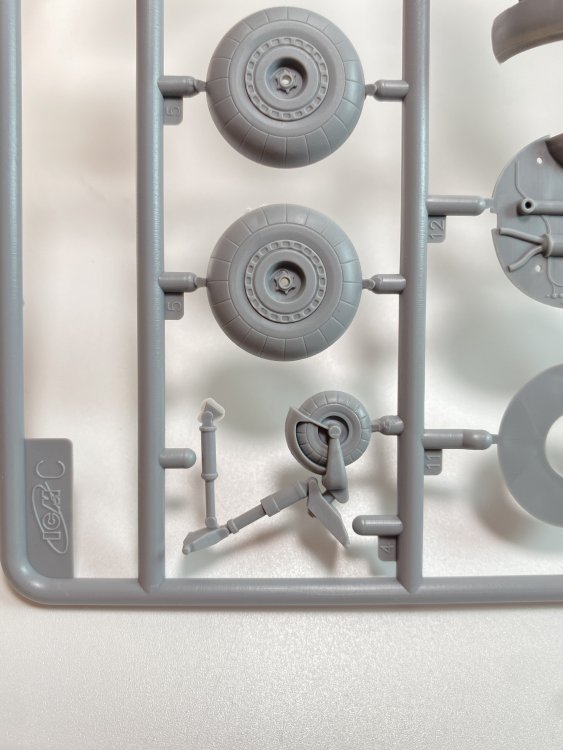
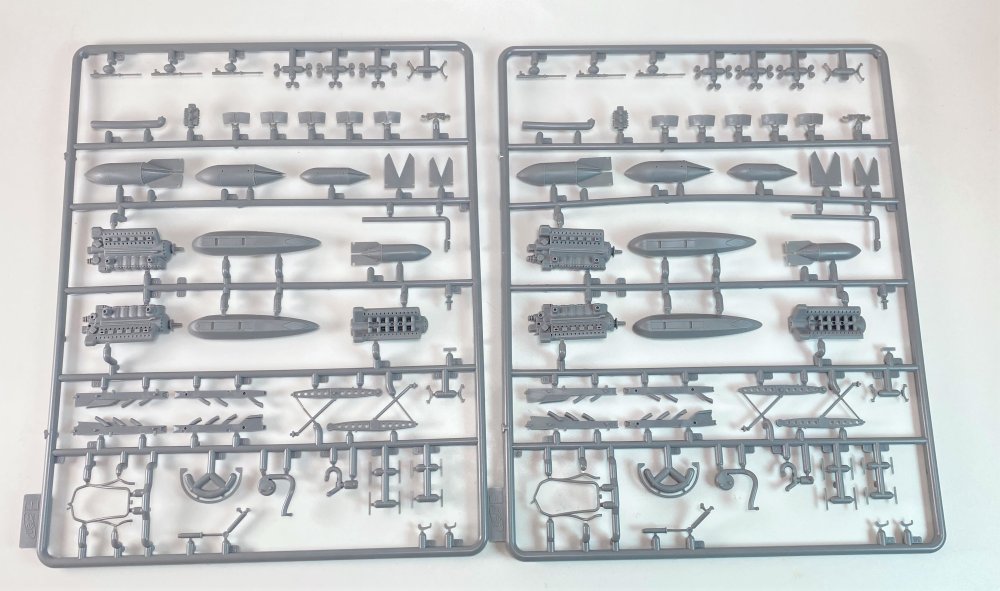
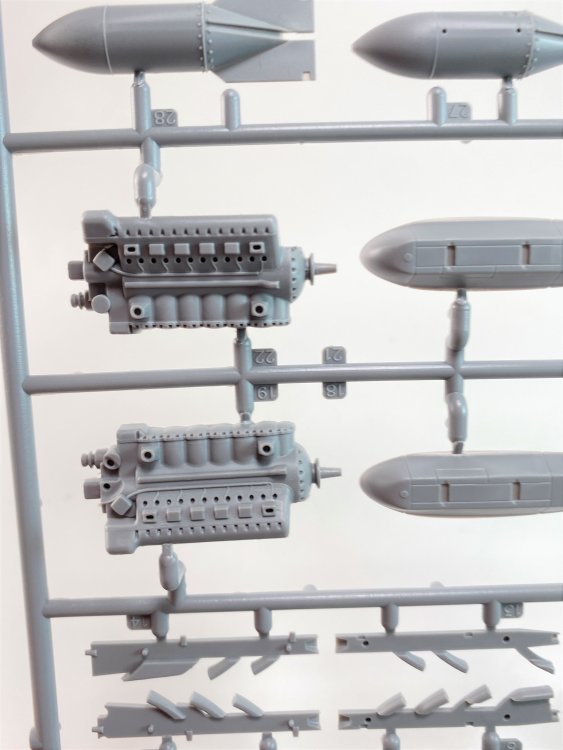
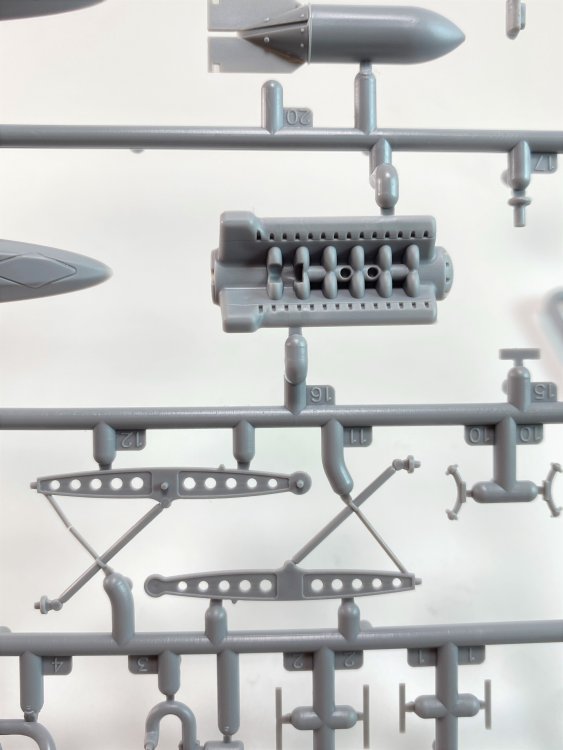
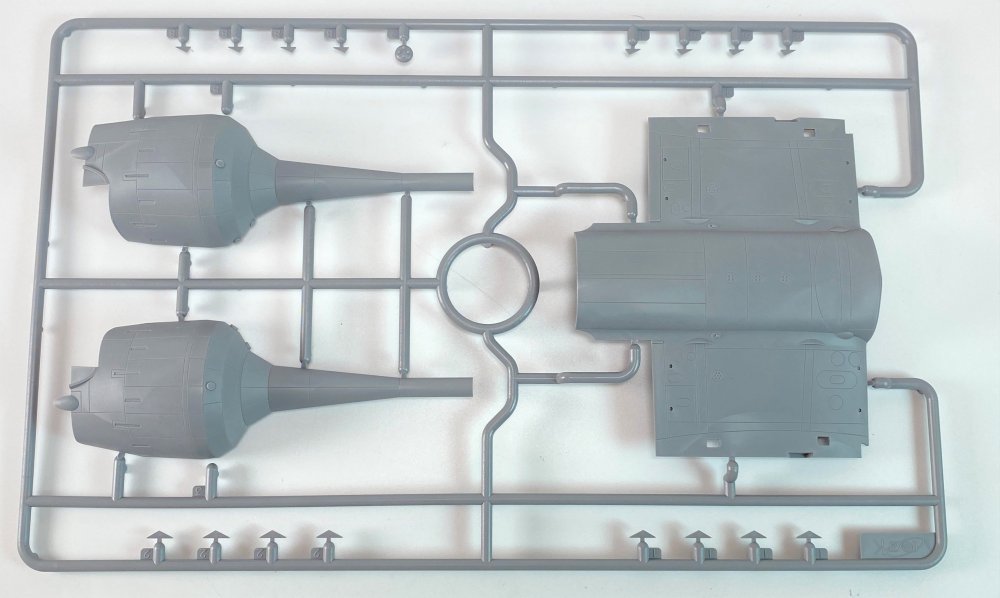
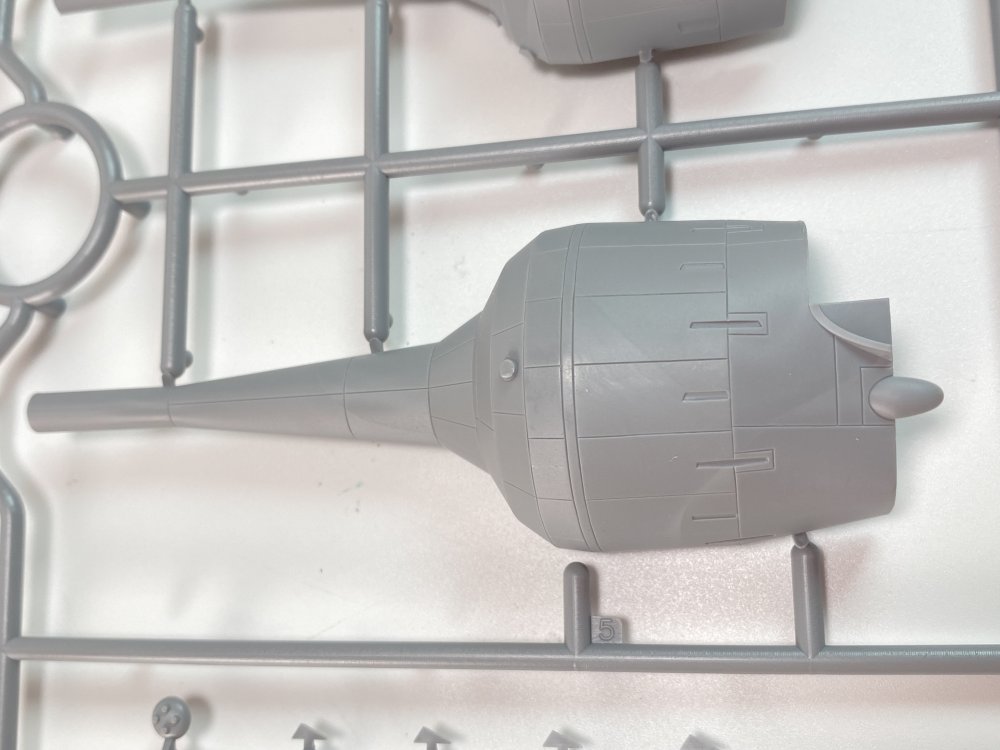
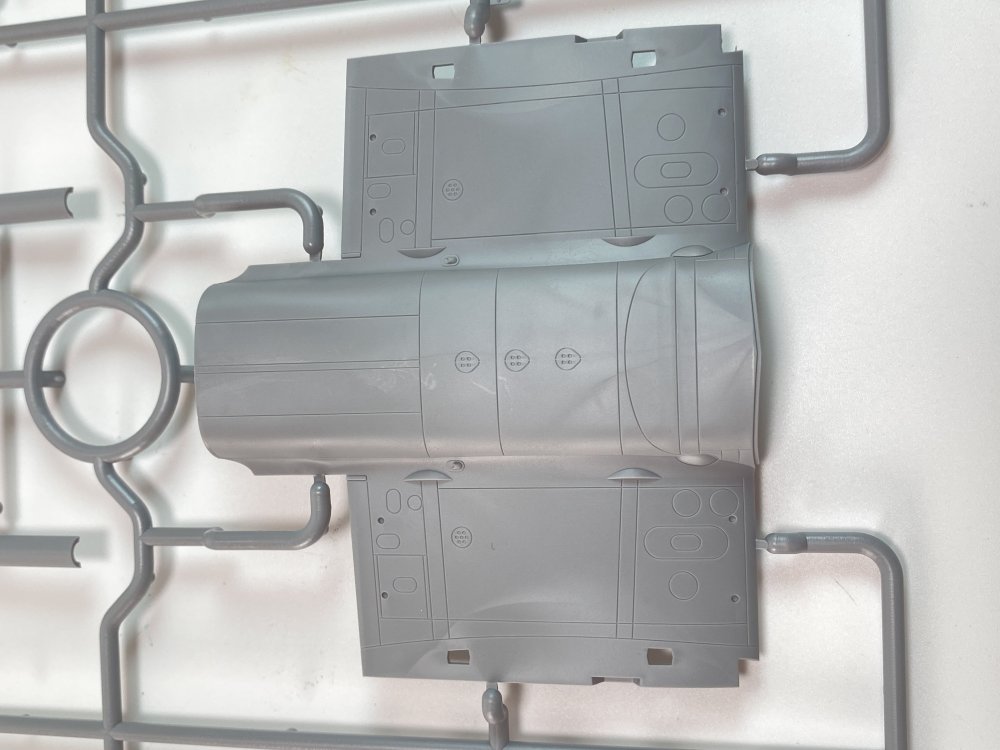
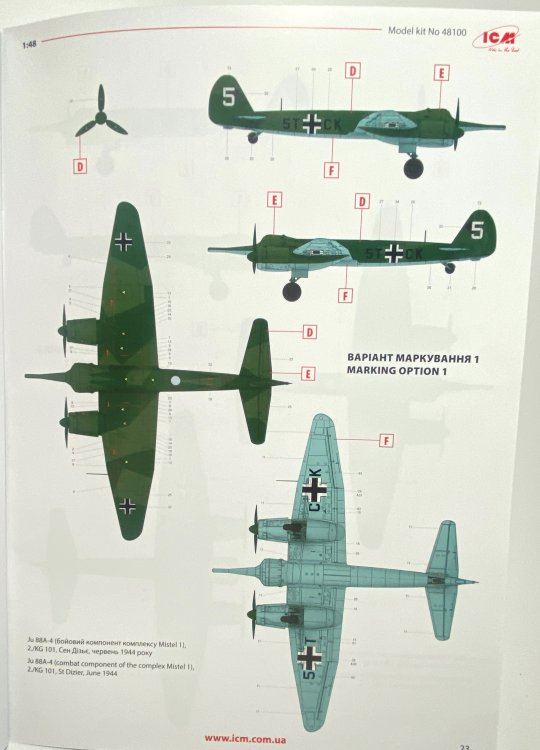
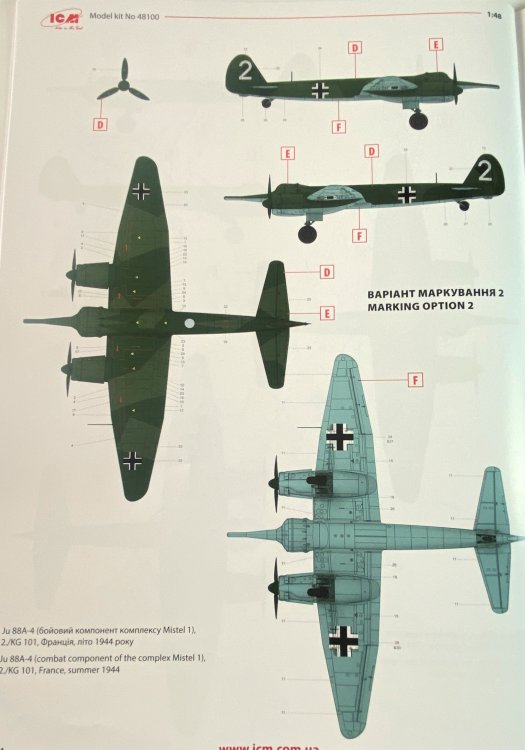
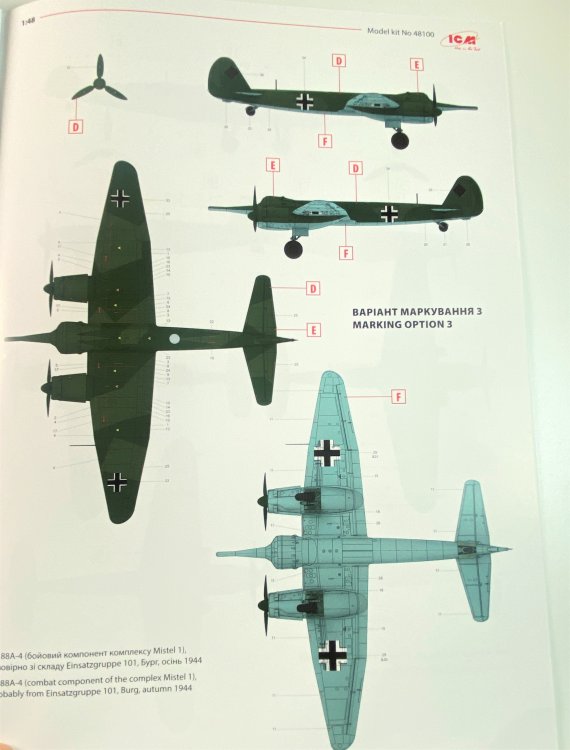
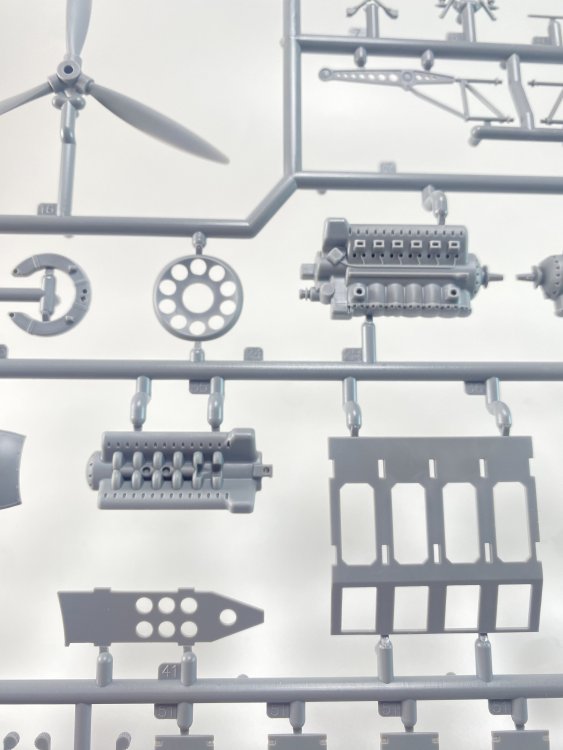
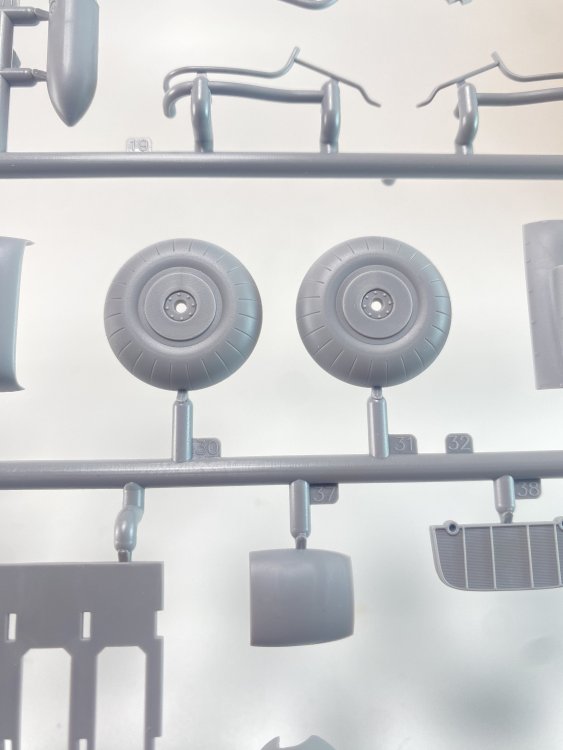
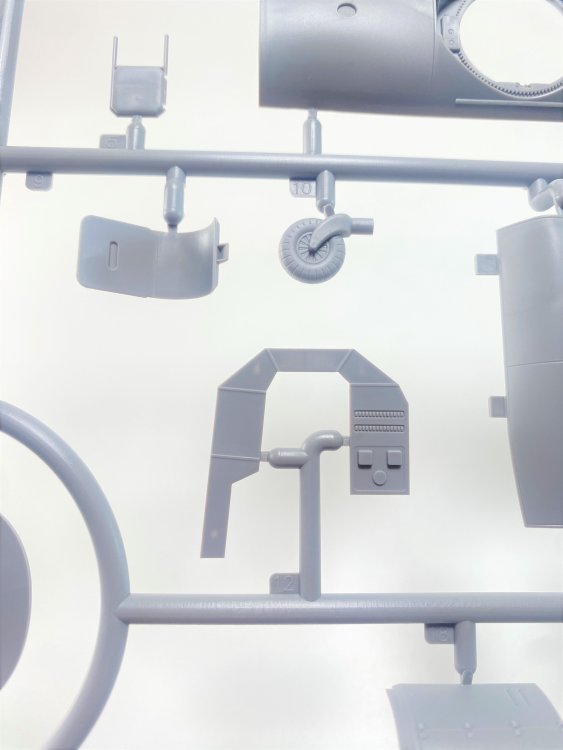
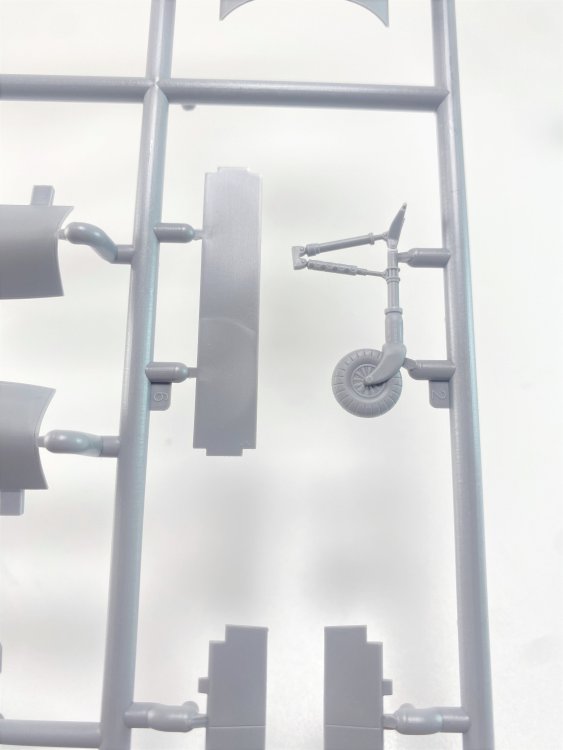
Mistel 1 ICM catalogue number 48100 Price: €62,20 Last week, I have had the pleasure of listening to “Models For Ukraine” podcast with the interveiew of ICM sales director, Valerria Buzina. It`s a fantastci interveiew and a new look to inside ICM, a model company that wants to make everything inside the house, which is quite impressive. So, 3D design, tool making, injection, instrucitons, decals, and now thy start with paints… It`s quite unusual in model company but looks like it work perfectaly with ICM. In the past year, ICM has release to the market several very original releases. And the one that we are about to see is no expection. A Mistel 1 in 1:48, straight from one box?? ICM make it possible using their Ju-88 and 109 F, making the particular nose of the Mistel 1. After the Mistel S1 release, I was really hoping for the Mistel 1, knowing that ICM had to make a new nose for the Ju-88. About the Mistel 1, “Mistel (German for "mistletoe", a parasitic plant) was the larger, unmanned component of a composite aircraft configuration developed in Germany during the later stages of World War II. The composite comprised a small piloted control aircraft mounted above a large explosives-carrying drone, the Mistel, and as a whole was referred to as the Huckepack ("Piggyback"), also known as the Beethoven-Gerät ("Beethoven Device") or Vati und Sohn ("Daddy and Son"). The most successful of these used a modified Junkers Ju 88 bomber as the Mistel, with the entire nose-located crew compartment replaced by a specially designed nose filled with a large load of explosives, formed into a shaped charge. The upper component was a fighter aircraft, joined to the Mistel by struts. The combination would be flown to its target by a pilot in the fighter; then the unmanned bomber was released to hit its target and explode, leaving the fighter free to return to base. The first such composite aircraft flew in July 1943 and was promising enough to begin a programme by Luftwaffe test unit KG 200, code-named "Beethoven", eventually entering operational service.” If you want to know much more about Mistel, you need to get a long gone Mistel book from Classic publication. And to know a bit more of KG200 unit, you must get the even more rare, KG200 book from Hikoki Publications Inside the box, several sprues with quite a lot of plastic, with good sinjection. I didnt found any flashes. The injection, per si, look perfect. As expected, you get in fact, two models: a Ju-88 and a BF-109 F4. The Ju-88 is much newer than the Bf-109 in the market and you can see ICM evolution between both. For me, in review is the first time that I have in hands a ICM Ju-88. Starting with it, and checking the surface detail and recessed panels, the engraving is quite good, with sutble surface detail. Has I saw in the He-111 H-8 (reviewed here) ICM used again the same method on the wings provinding a good area of attaching be giving centre portion of the lower wing extending beyond the bounds of the fuselage. The flight control surfaces have all been provided separately and so can be positioned as required by the modeller. There is two new sprue new sprue between that Ju-88 -A and the Bf-109 F-4 – Sprue H e K. The Sprue H are the parts for the connection structure for the Ju-88 to the Bf-109 and also undercarriage doors and wheels for the Bf109, if you want to put the undercarriage down. The sprue K the new nose and a new under wing fuselage. I order to get Mistel design look you will have to make a small surgery to cut a portion of the fuselage. The cut is well located and it should be quite straigthforward. I was quite suprisse to see two full Jumo engines. The engine detail, at first glance, looks quite good, straight from the box, but there`s a lot of room to improve it, with scratchbuilding and aftermarket. I confees that i really like that because I always had a Mistel diorama project, and full engine open is a must in that project. To get it even better, the 109 was have a full Daimler-Benz DB601E engine. Also here, even with a very good detail engine straight from the box,. There is room for some extra detailing like wires. The 109 is not at the same level of some 109 that are in the market (the cokpit could be much more detailed, there`s no seatbelts) but it still a good replica, so you can stay with this 109 or get a 109 from Eduard. However I will probably chose for the Eduard one with all goodies in it… full open with the engines of both airplanes open… The instructions also give masking templates for the 109 Like on the He-111 H-8 Paravane release, the instalation of the structure to unite both planes will demand some serious measuring. Those measurements in millimeters with no guide point on the model wing surfaces themselves so that must be the first to do, just start with measuring and making the holes and then checking the construction to see if everything align correctly. You will need a digital caliper!! The instruction manual is detailed and easy to follow. It includes step-by-step assembly diagrams, color callouts, and decal placement guides. However, the instructions is a mix of the Mistel S and Mistel 1. Beause of that, there is two imprecision, that don`t have the influence the modeller, if not beginner. The F sprue(clear parts of Ju-88) is referer that only two parts is not to use when in fact, is almost all of them, as this Ju-88 have a completly new nose with no glass at all. So only F1 part is to be use. Again, at the end, in the diagram drawings of the measuring to make the holes to put the mistel structure, is the drawings of a ju-88 with the normal nose and not the concrete Ju-88 special bomb nose. The decals are from ICM and they are correct and have very good color registration. Three markings options are given 1. Mistel 1 – 2.Kg 101, St. Dizier, June 1944 2. Mistel 1 - 2./KG101, France, Summer 1944; 3. Mistel 1 – probably from Einsatzgruppe 101, Burg, Autumn 1944 Conclusion The ICM 1:48 Mistel 1 is fantastic!! I always love the Mistel concept and now wehave a brand new, 21th century model kit of the Mistel 1. Not perfect, yes, but a very good one. The structure will not be easy to install but an expert modeler (even an intermediate) will handle it with no big issues. The detail out of the box is very good and it will make a very good replica. For the expert and keen modeler some AM will make some extra detail to make this beauty into a masterpiece. Highly recommend this to intermediate/expert modeler


-
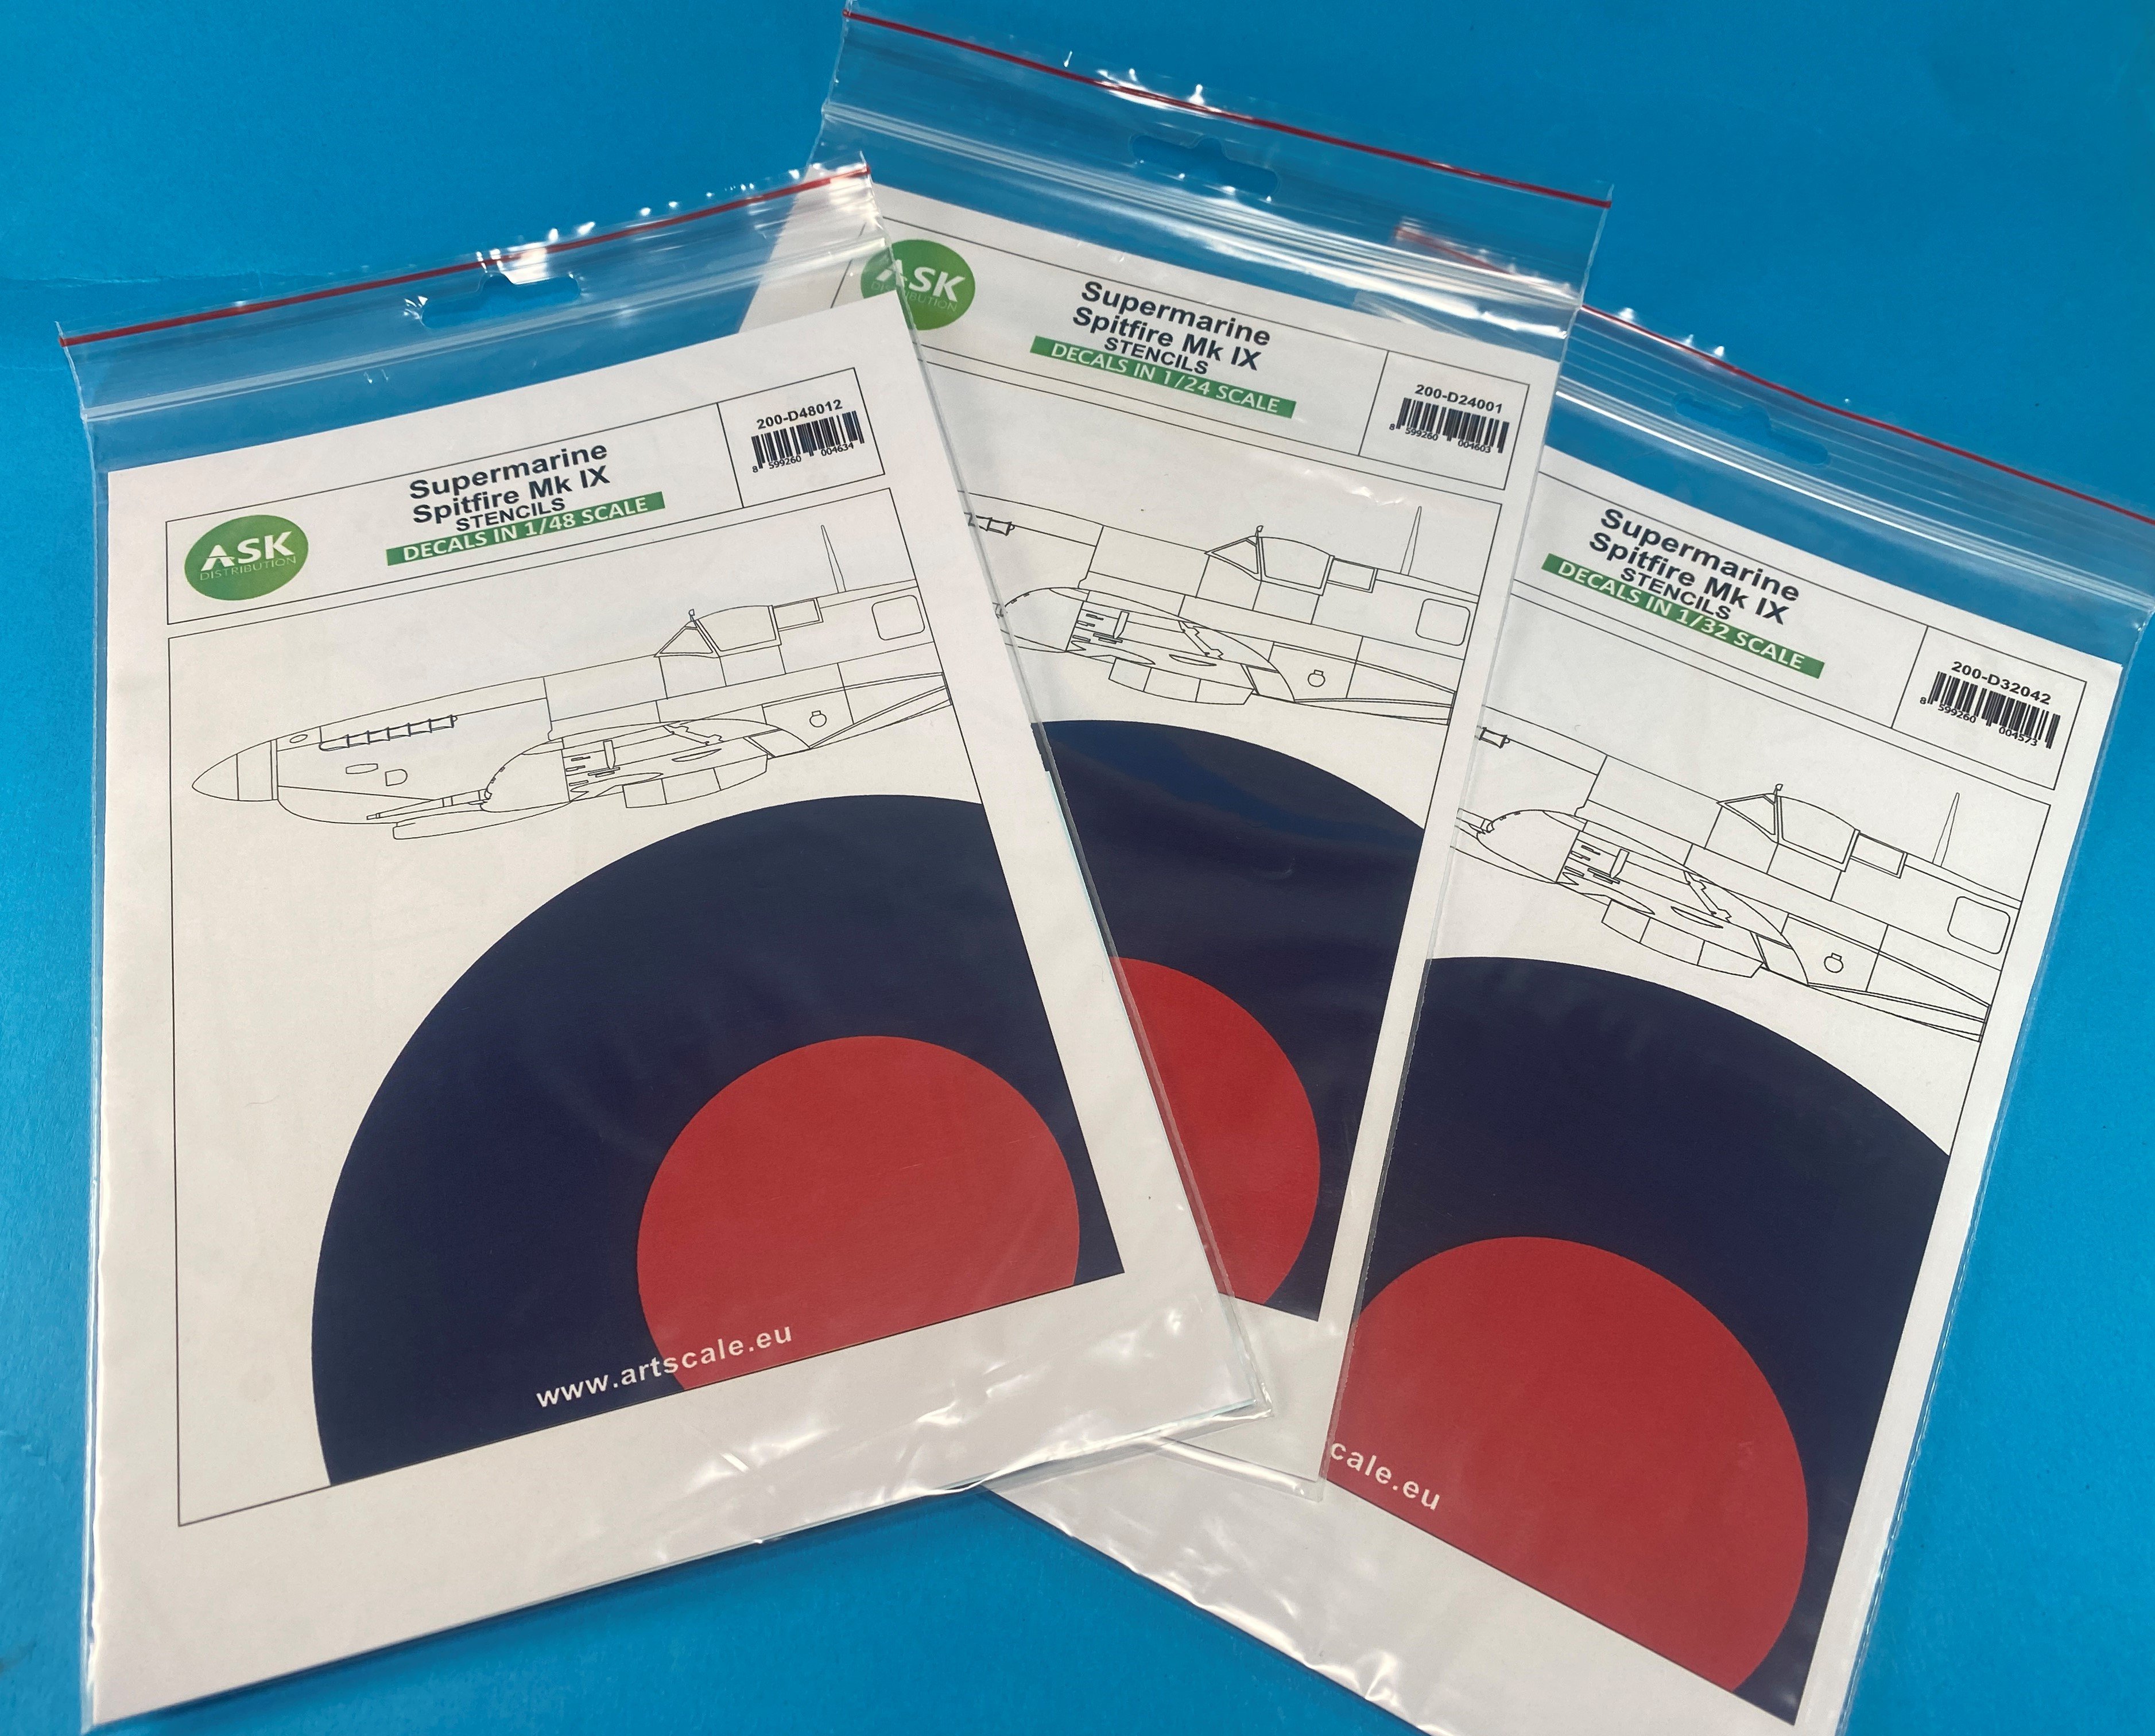
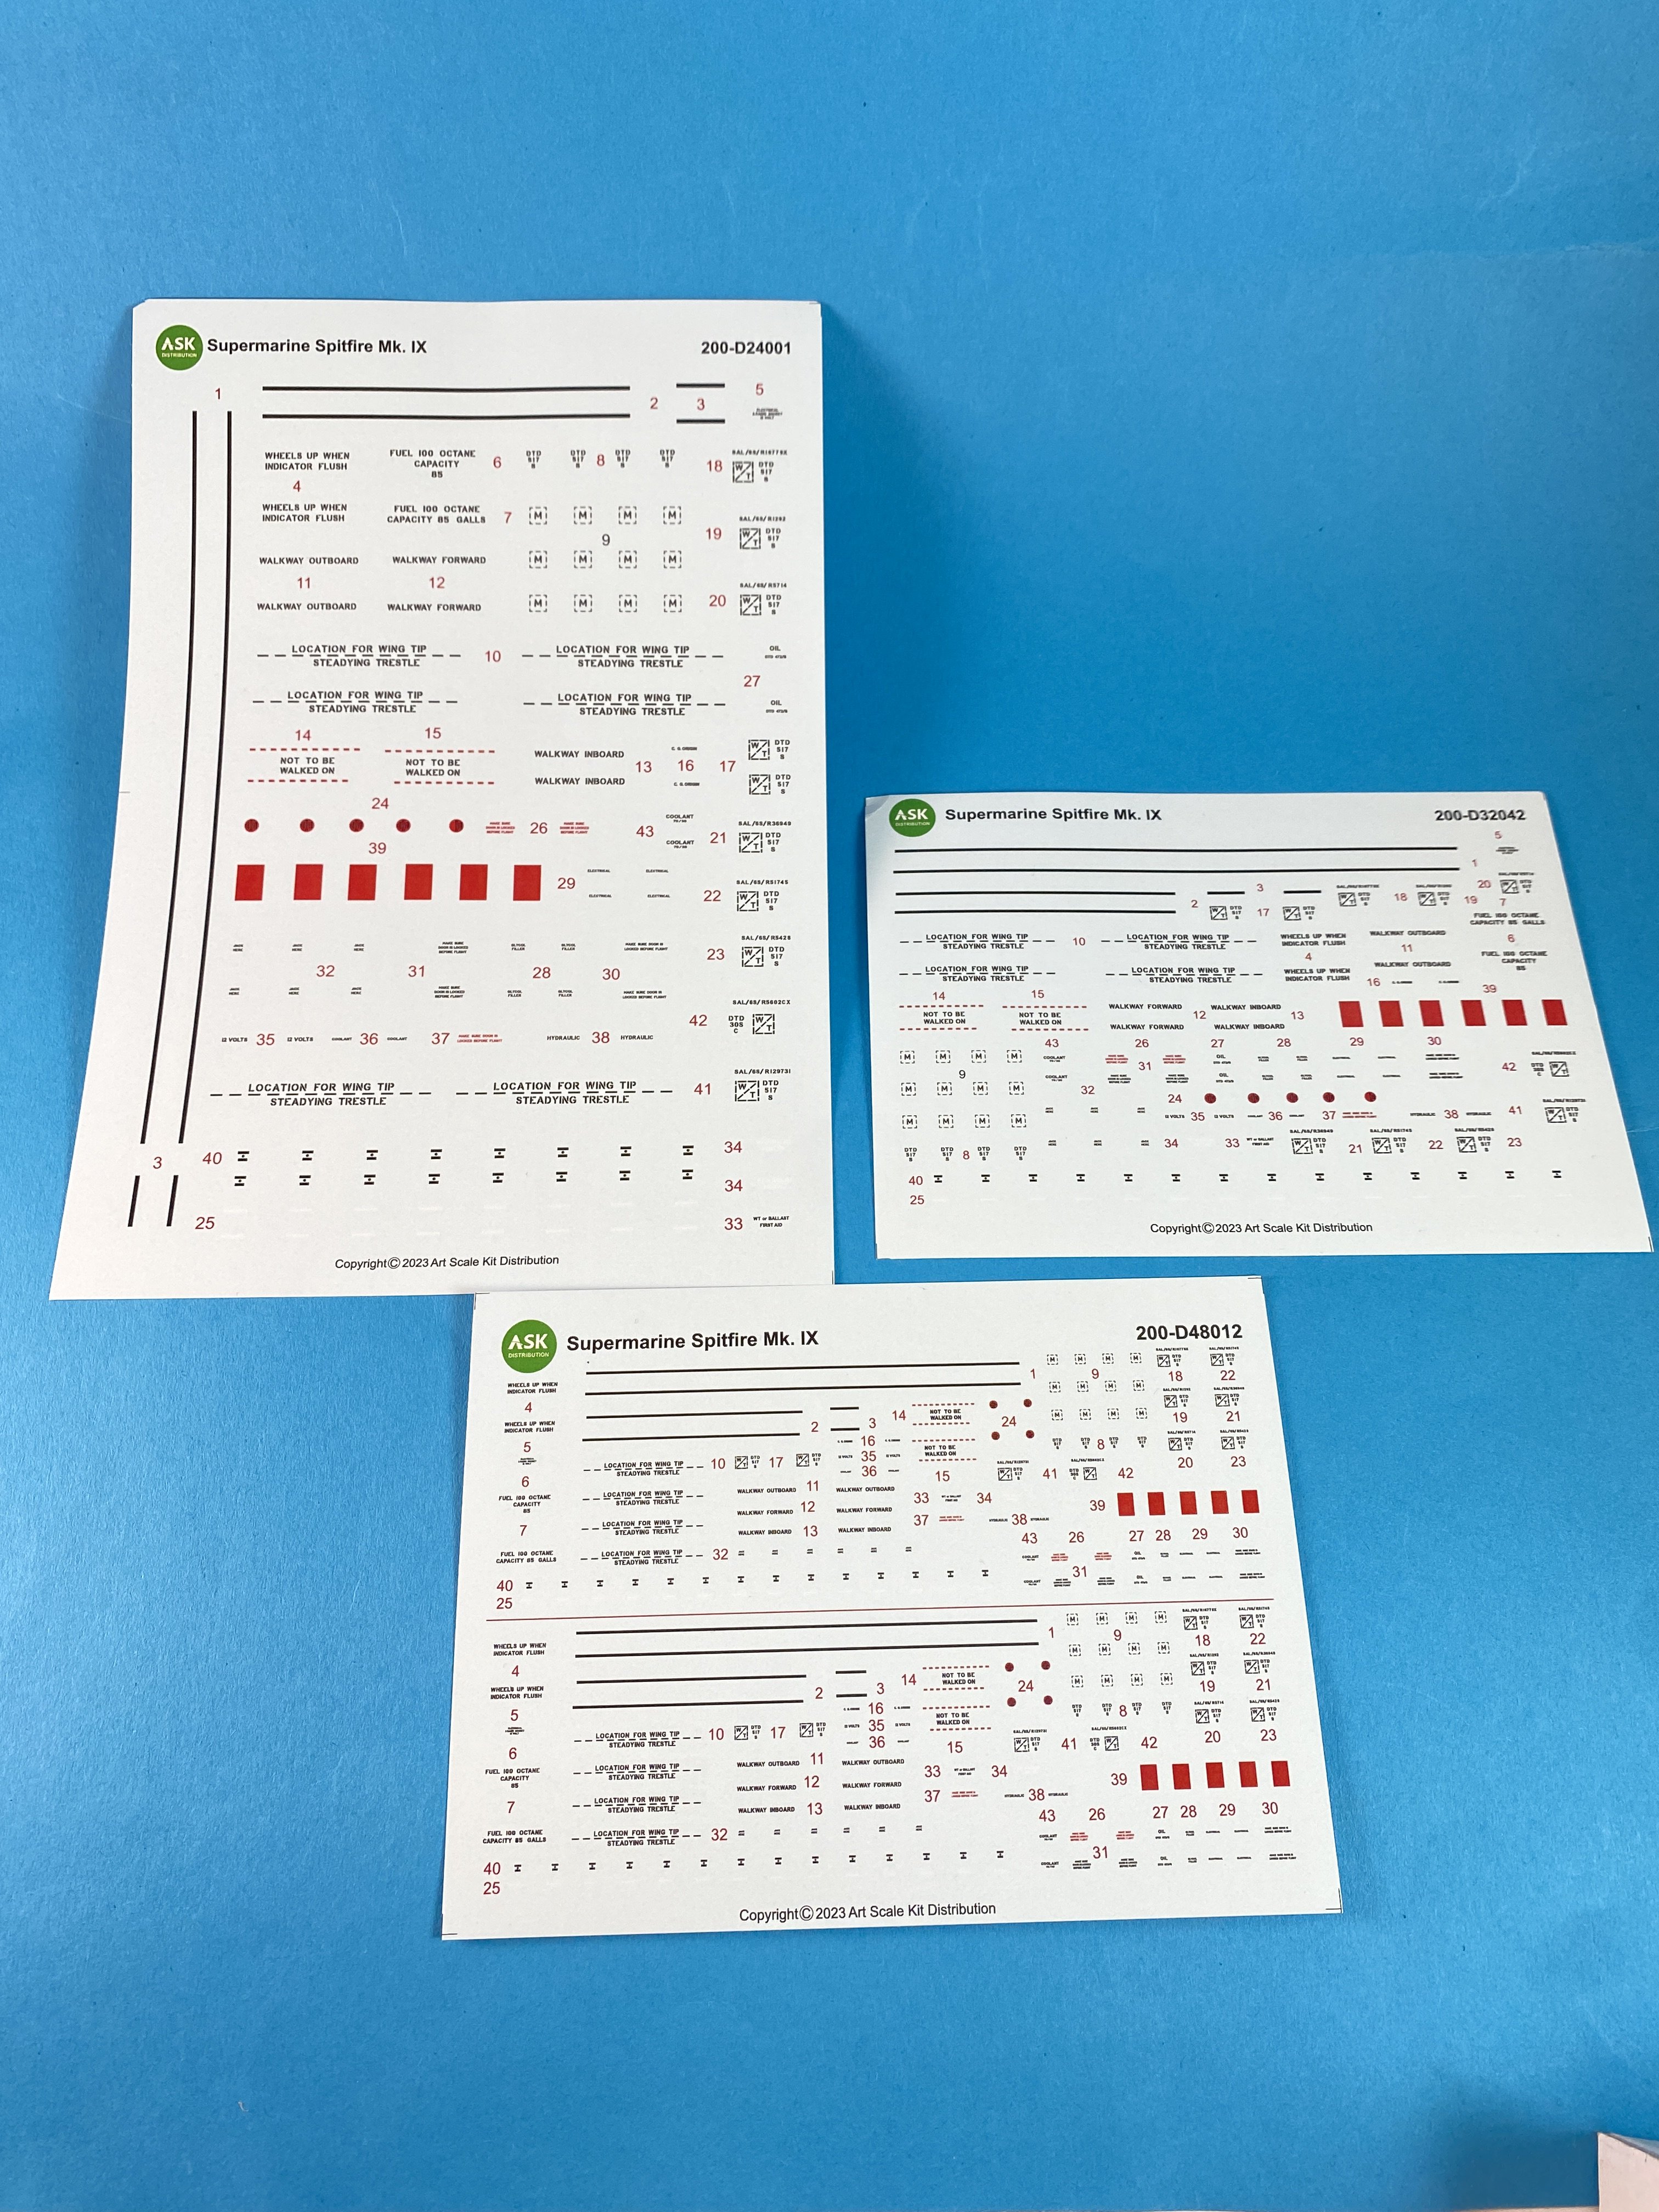
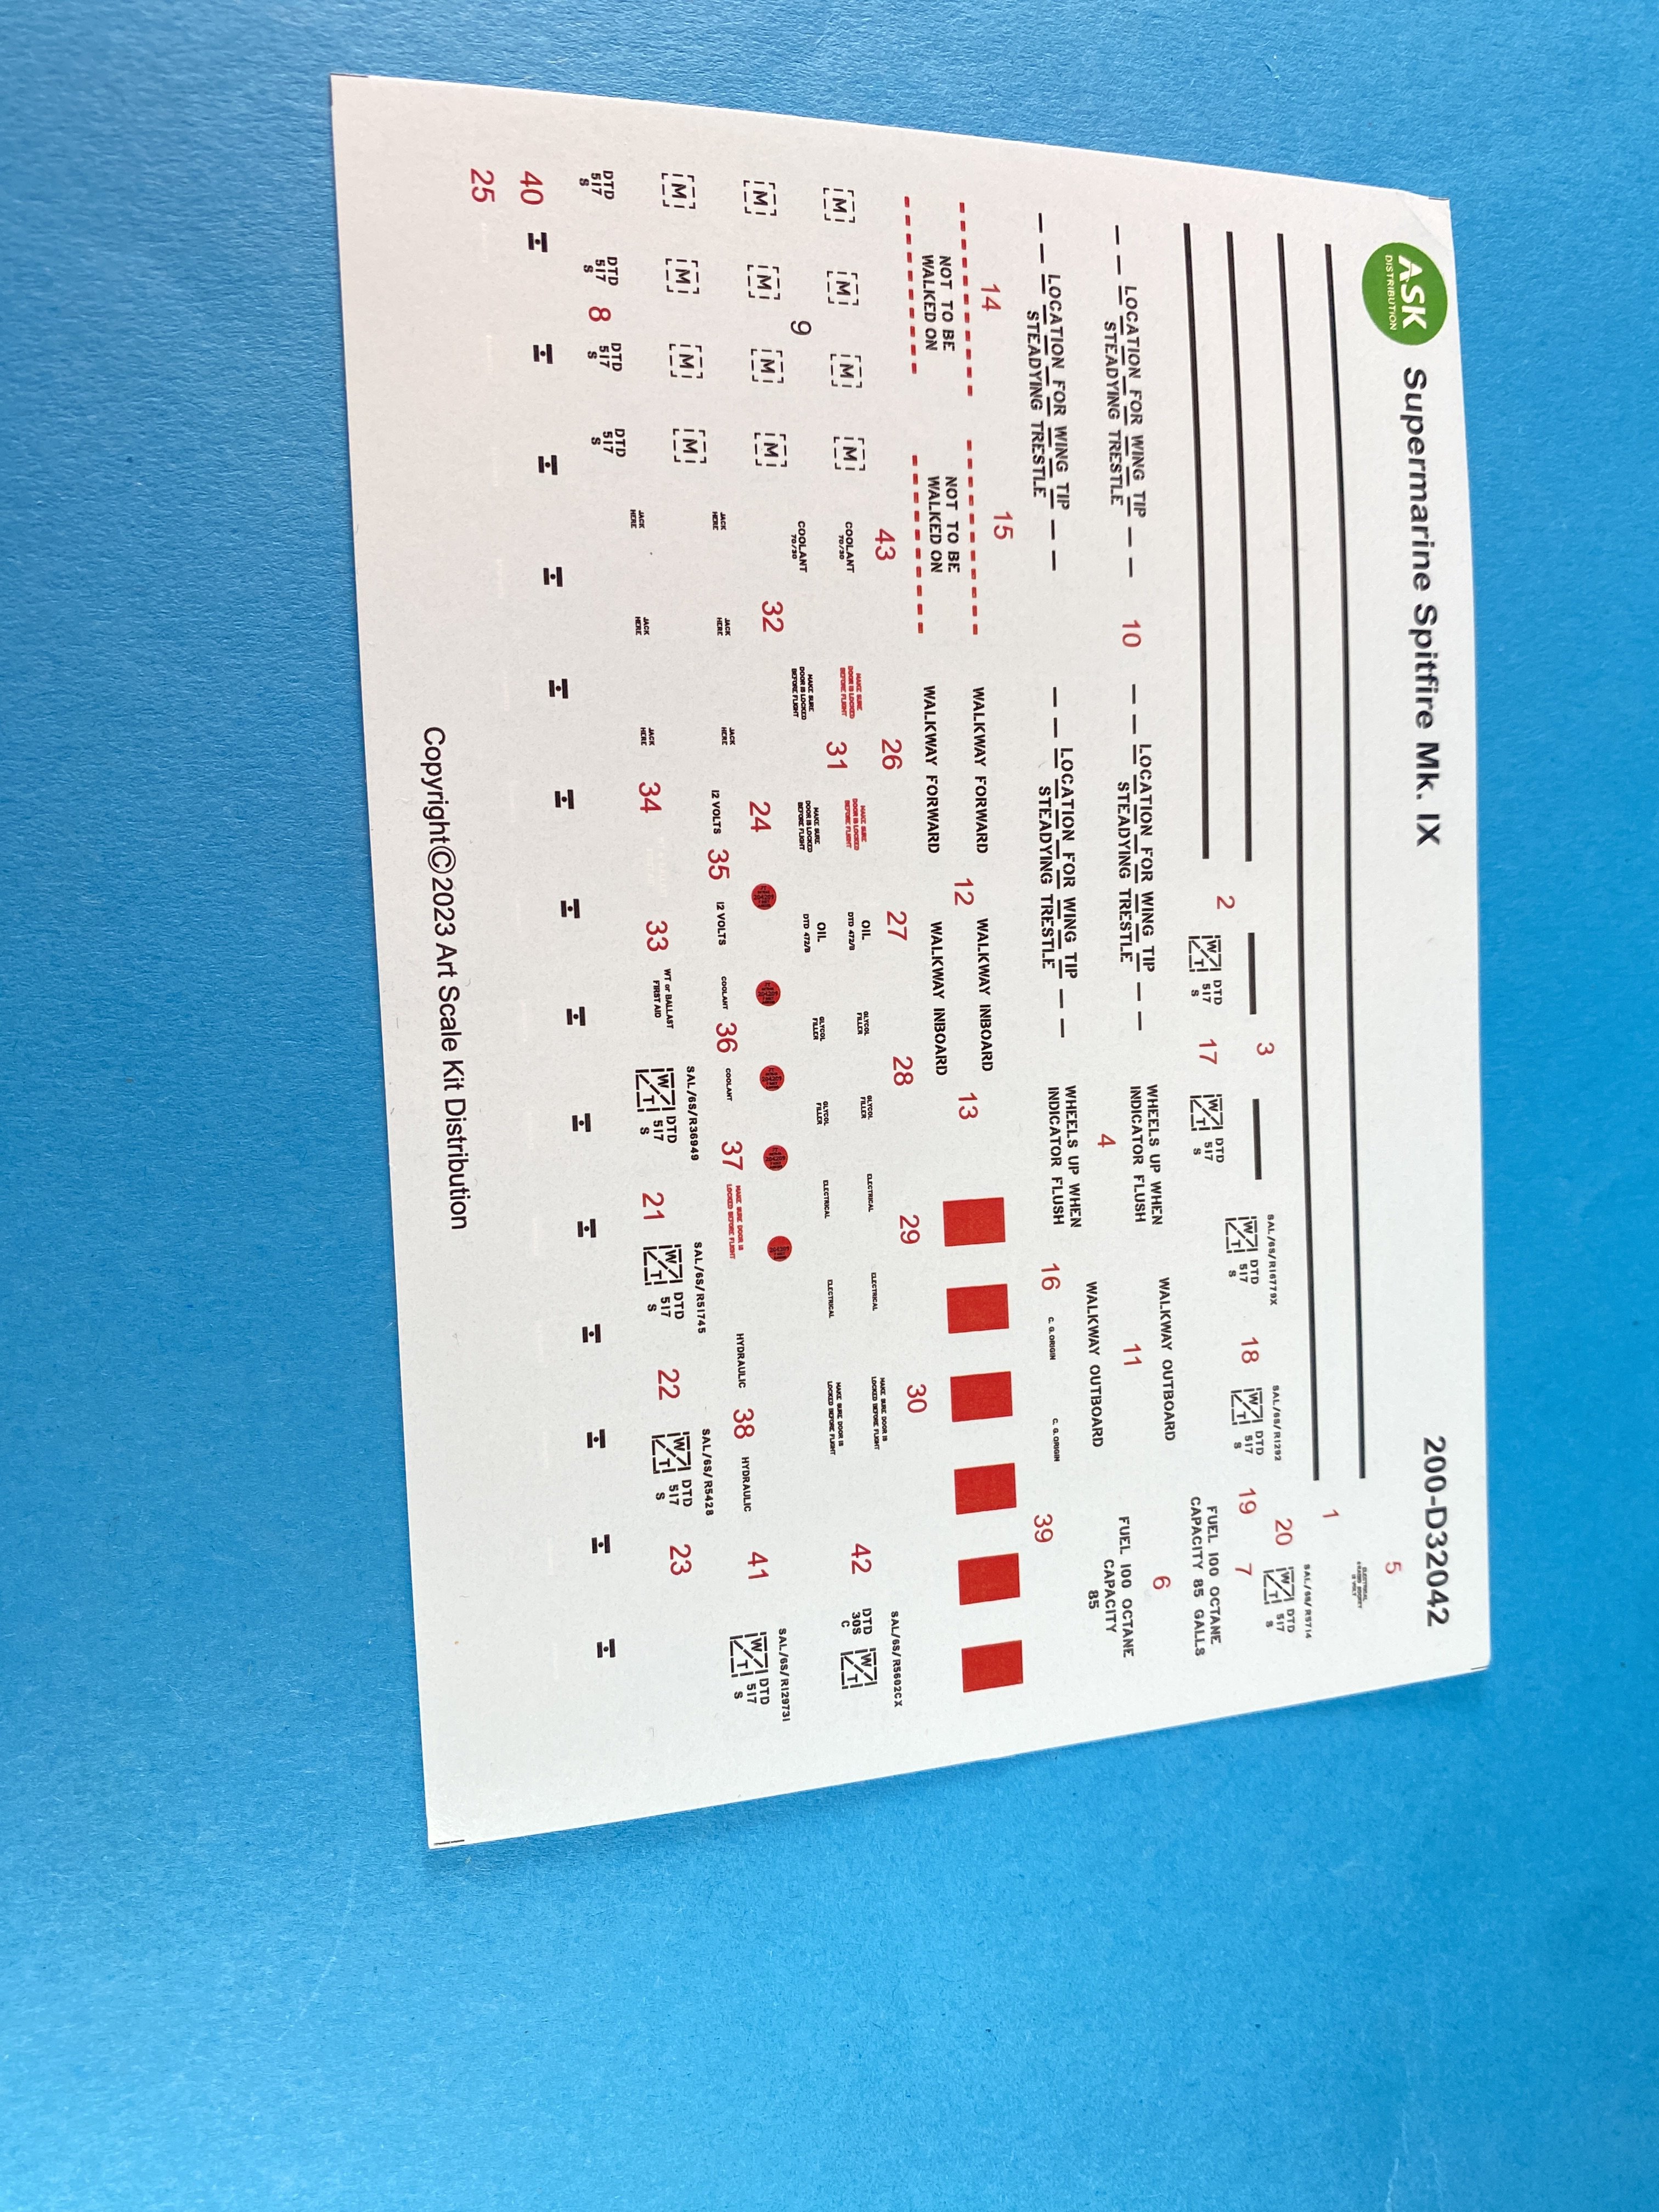
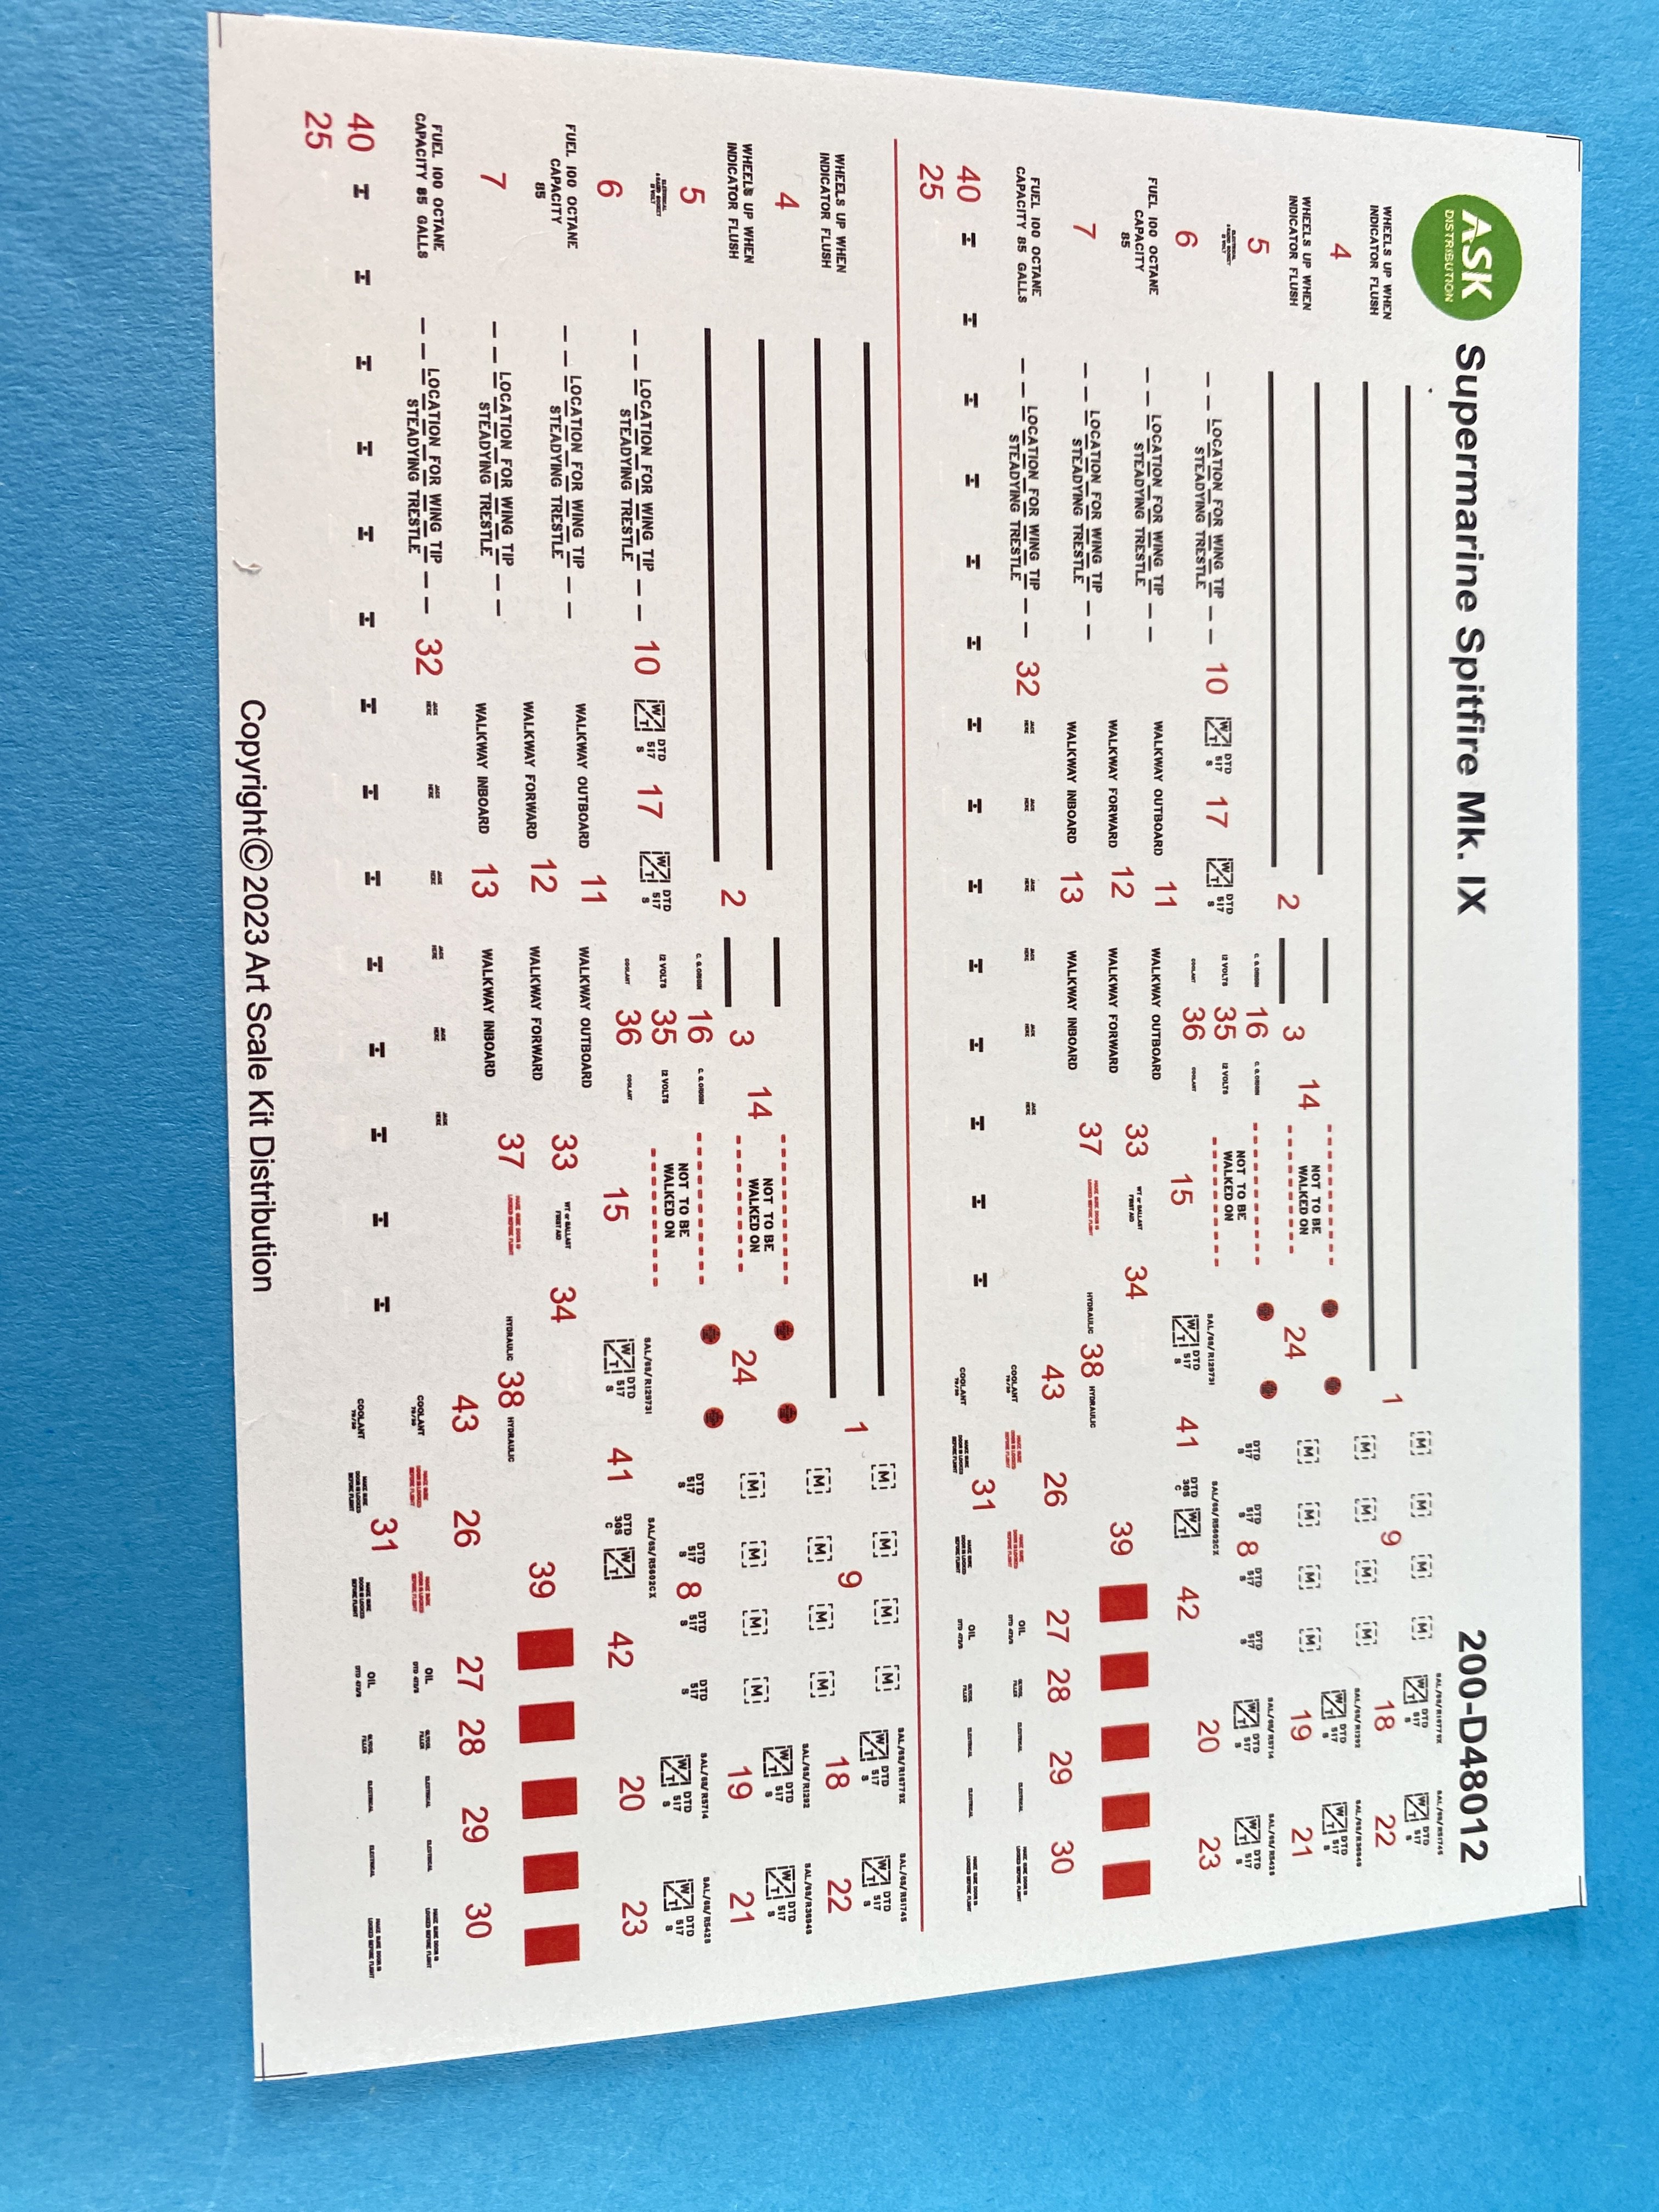
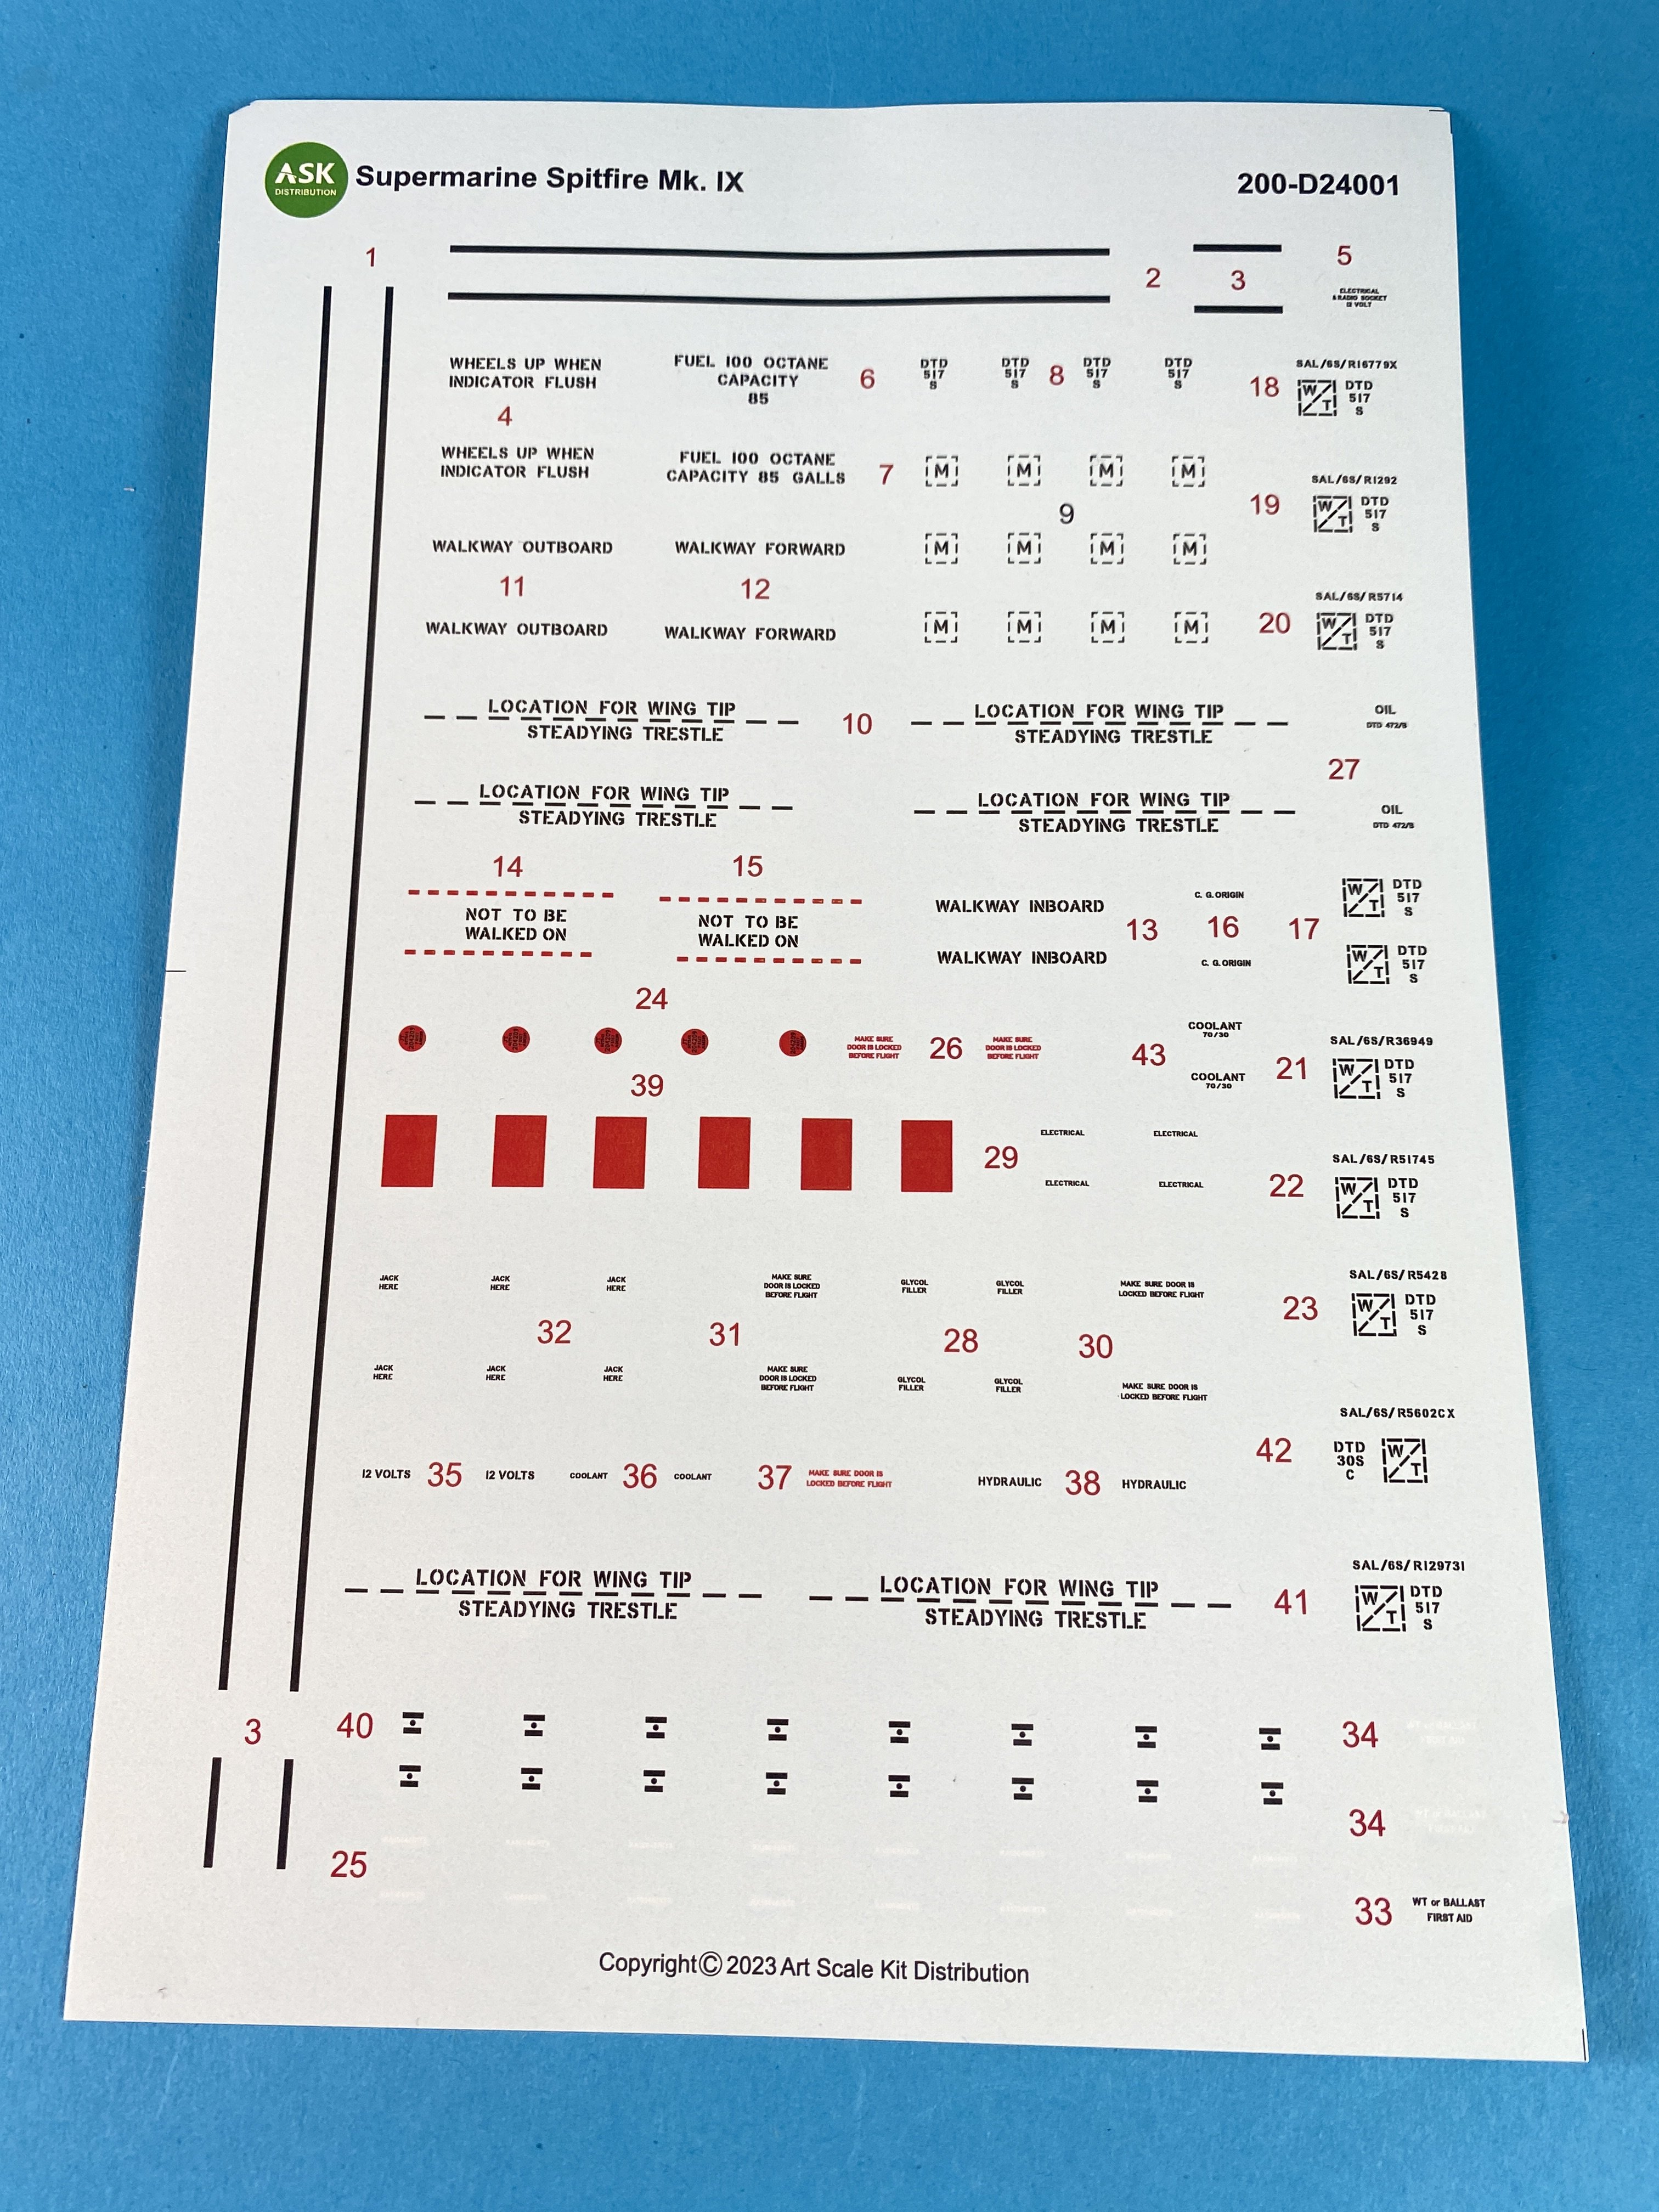
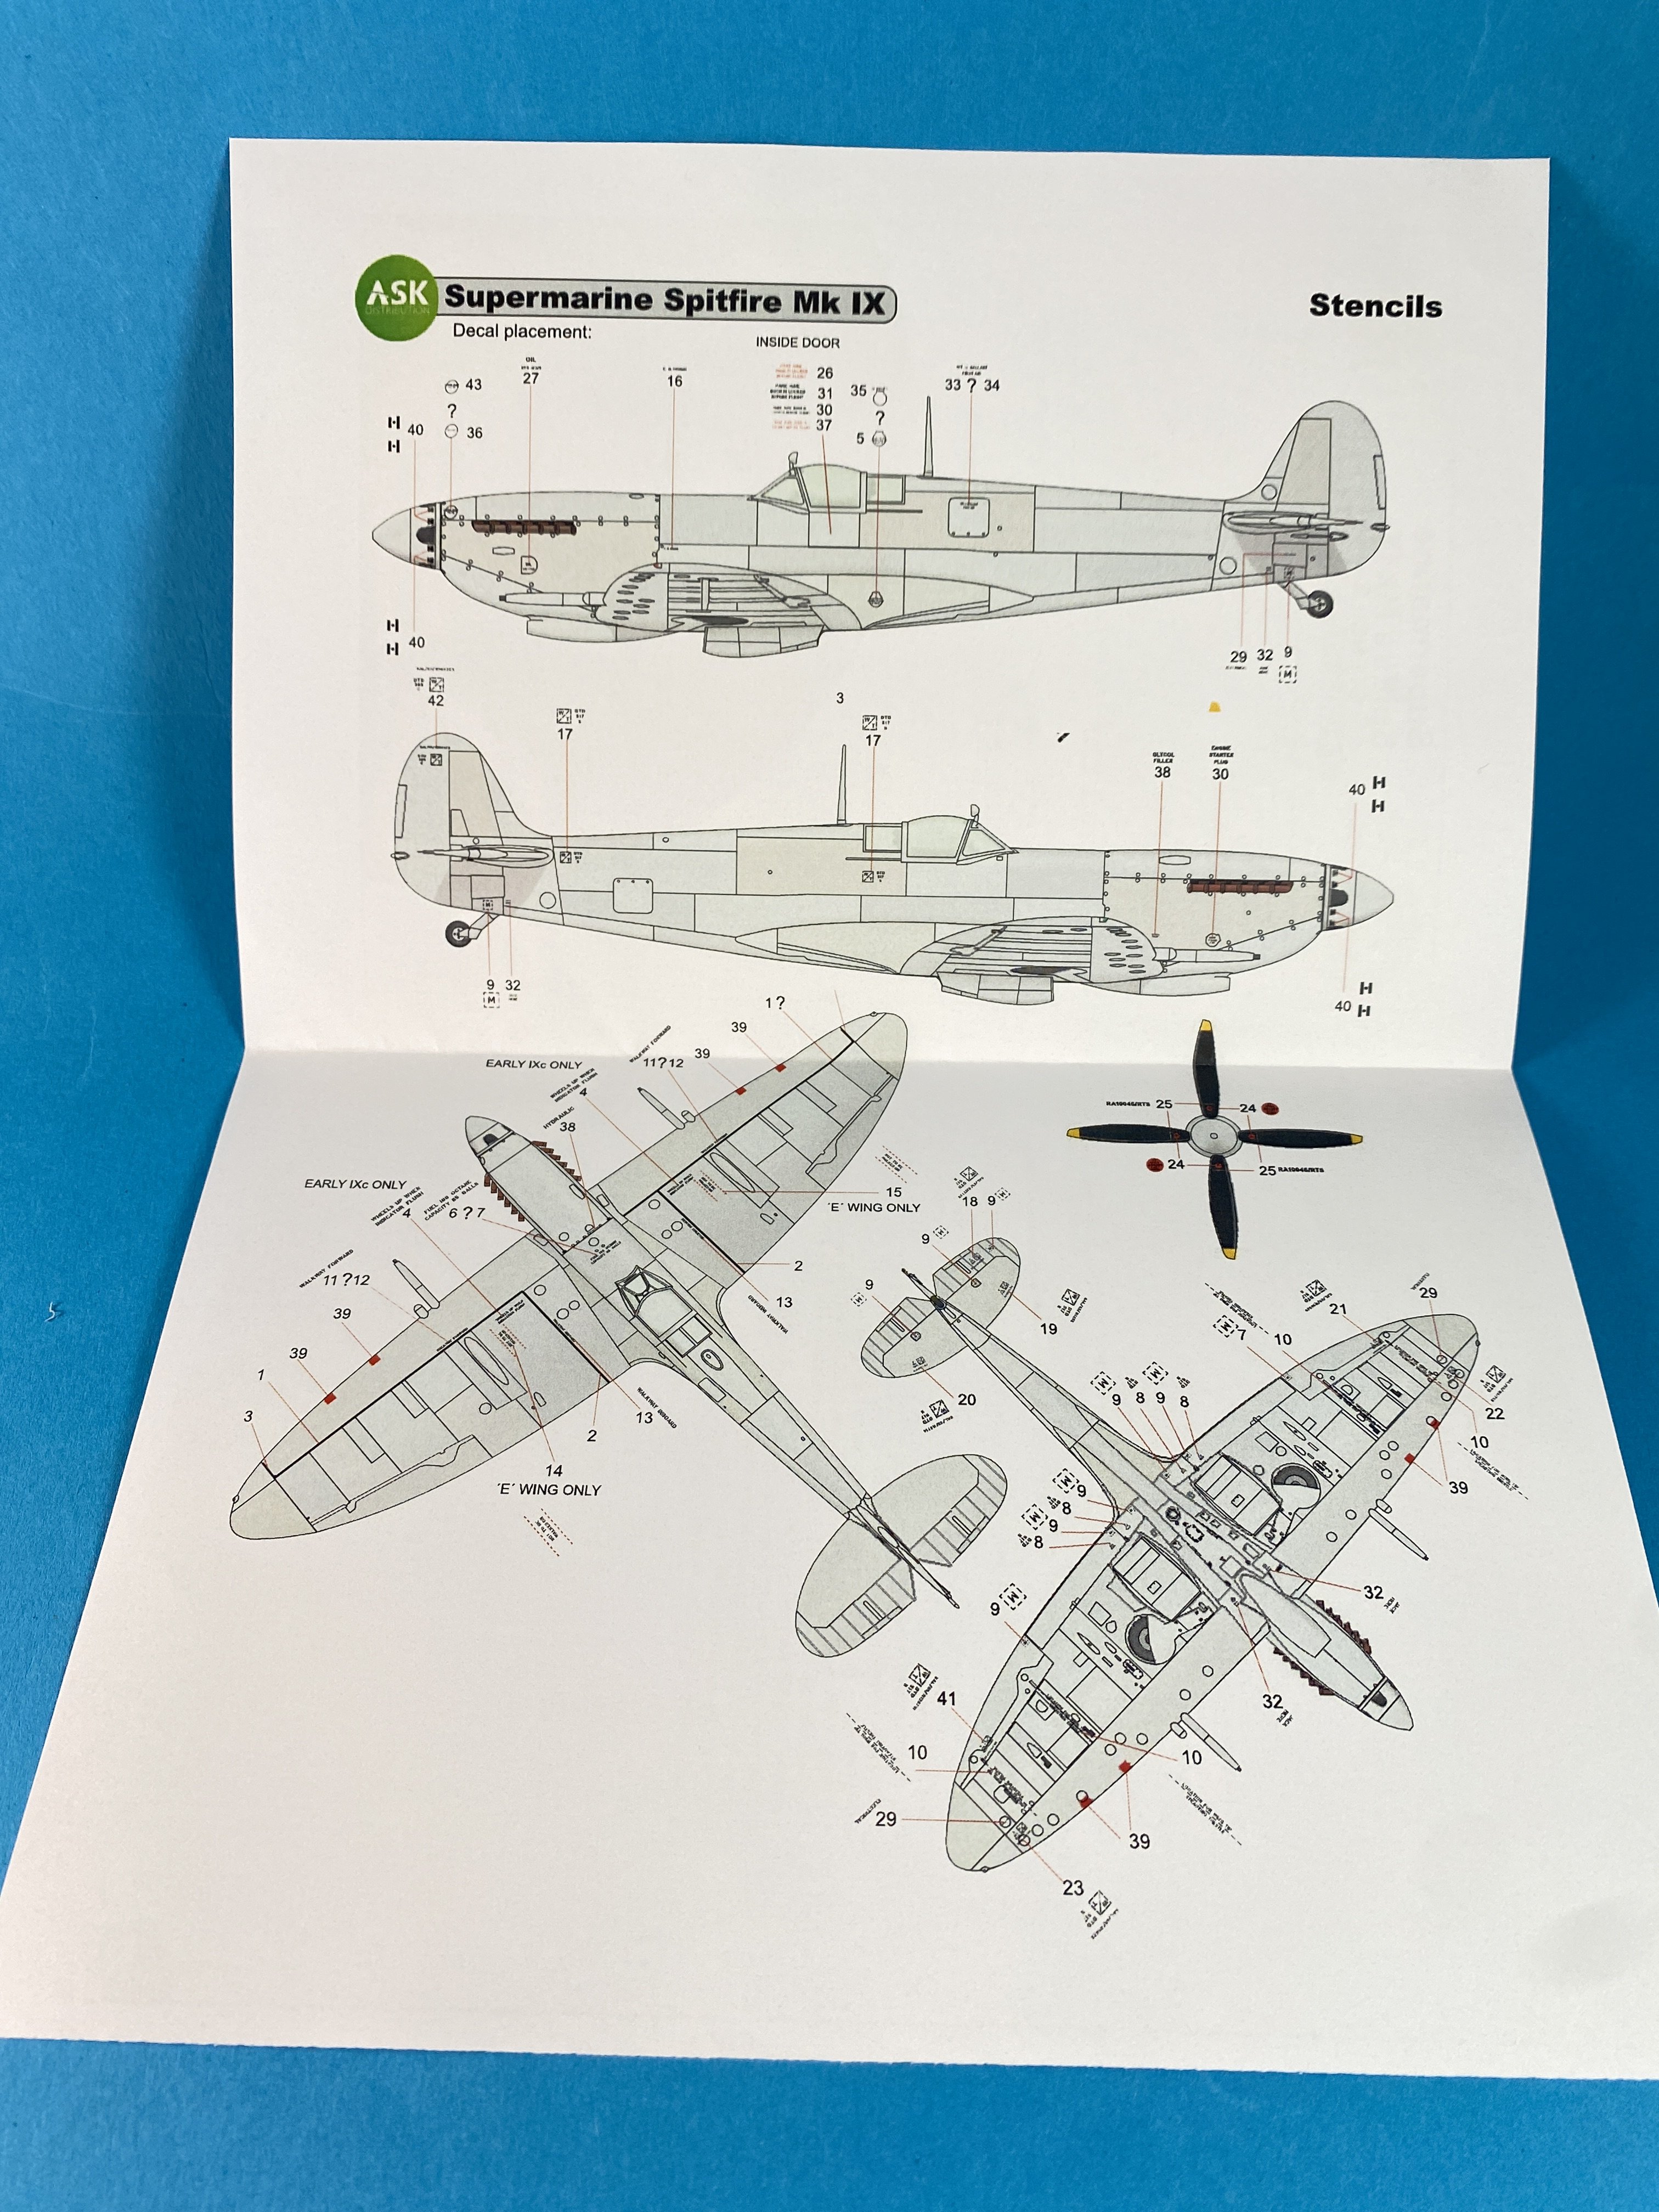
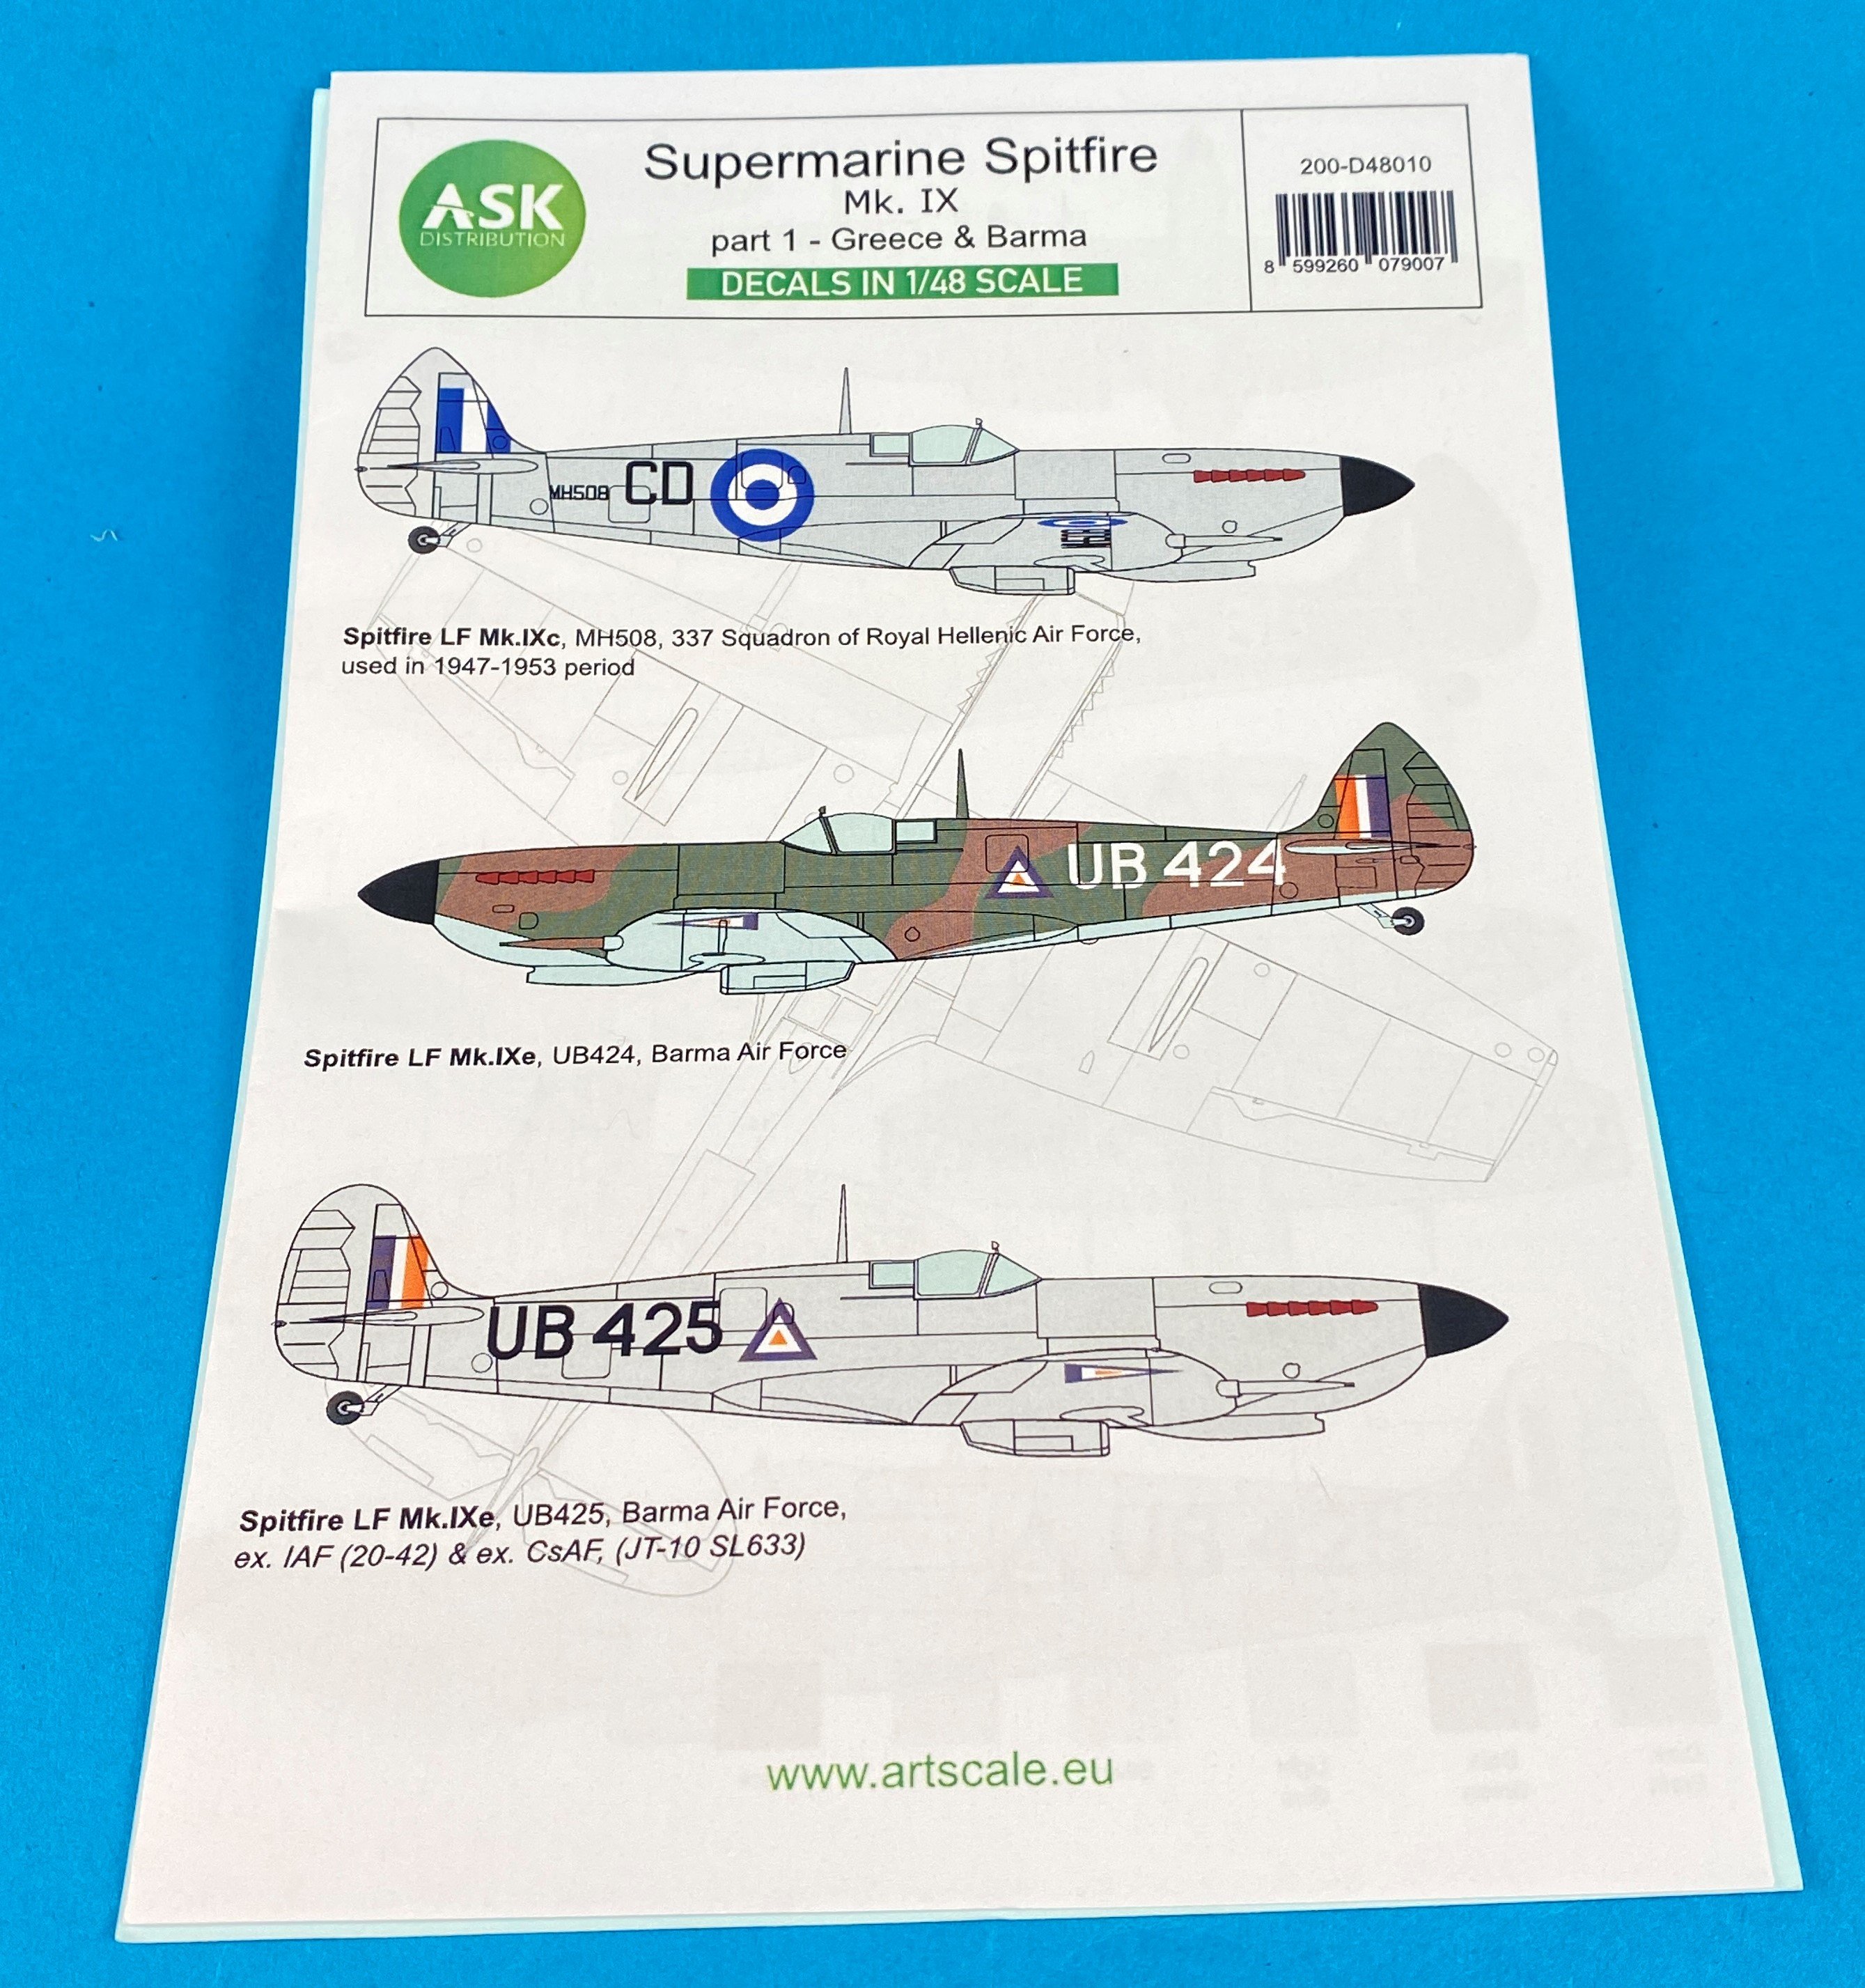
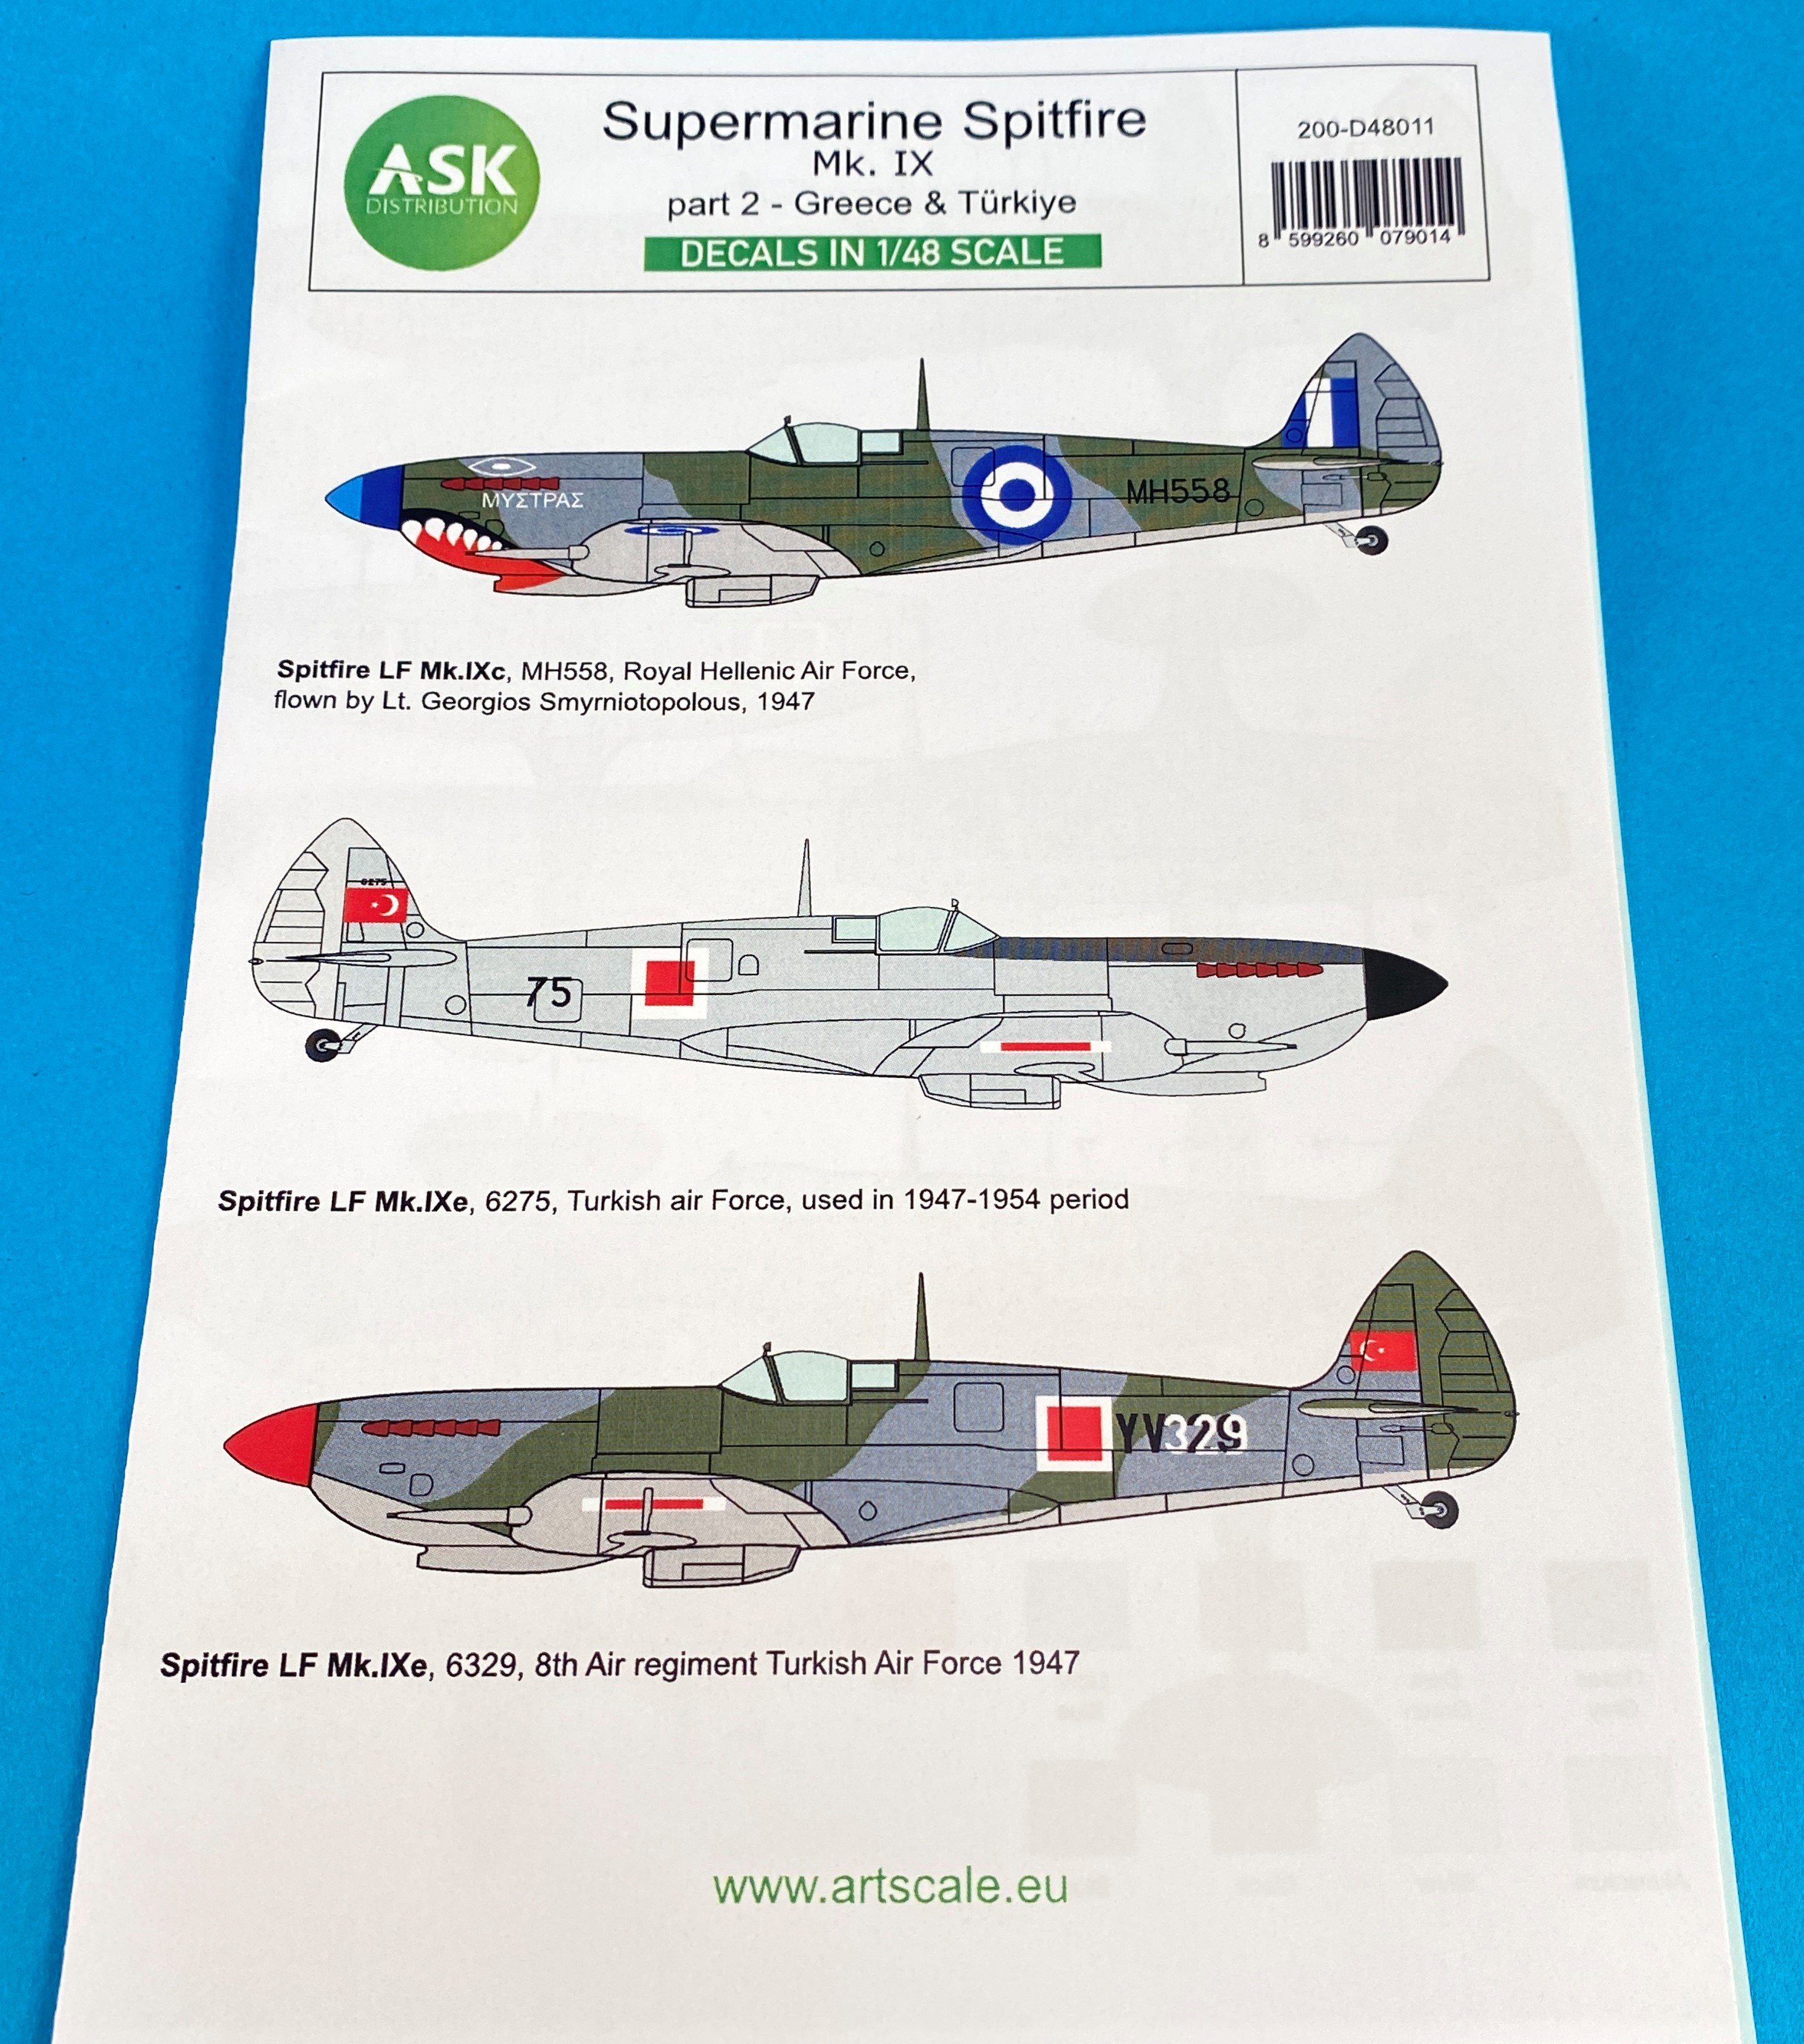
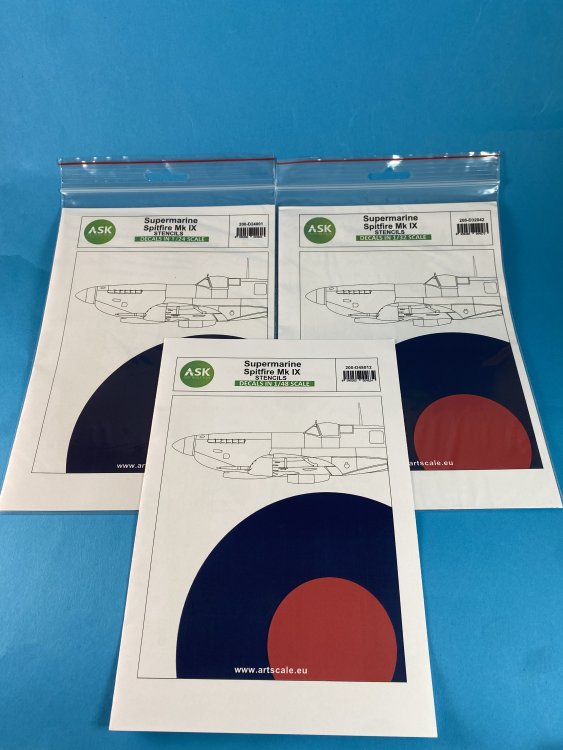
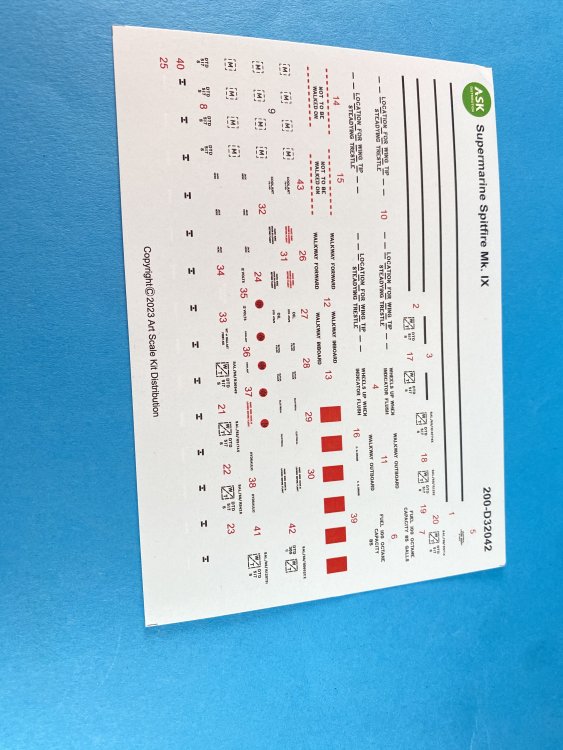
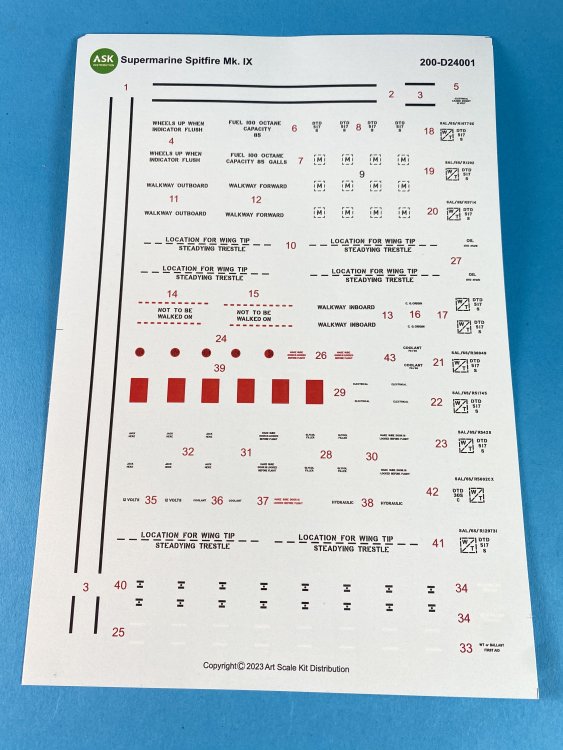
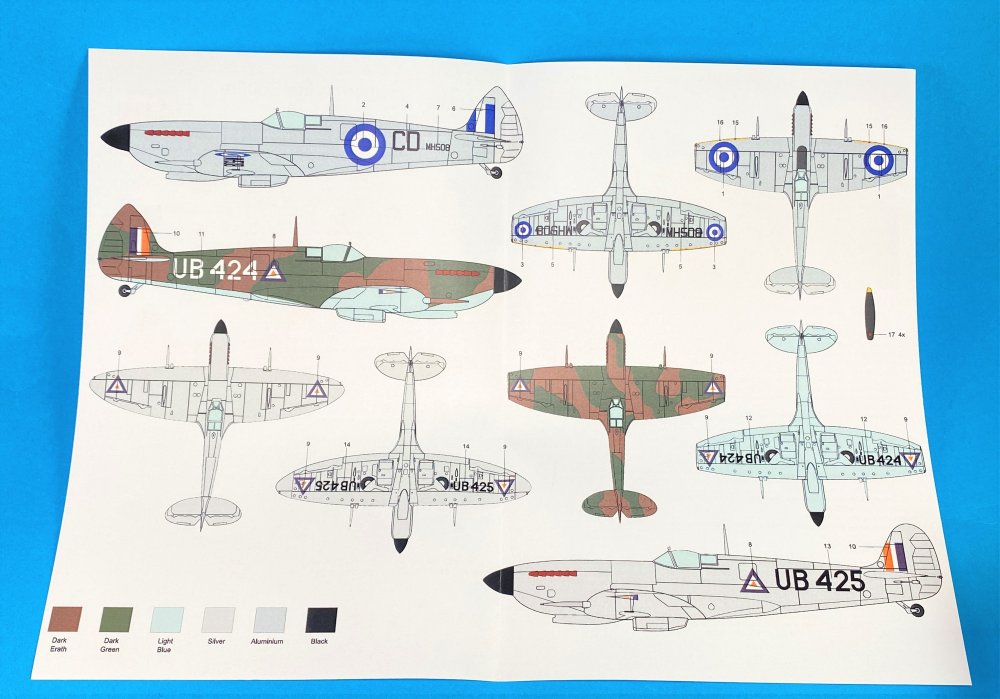
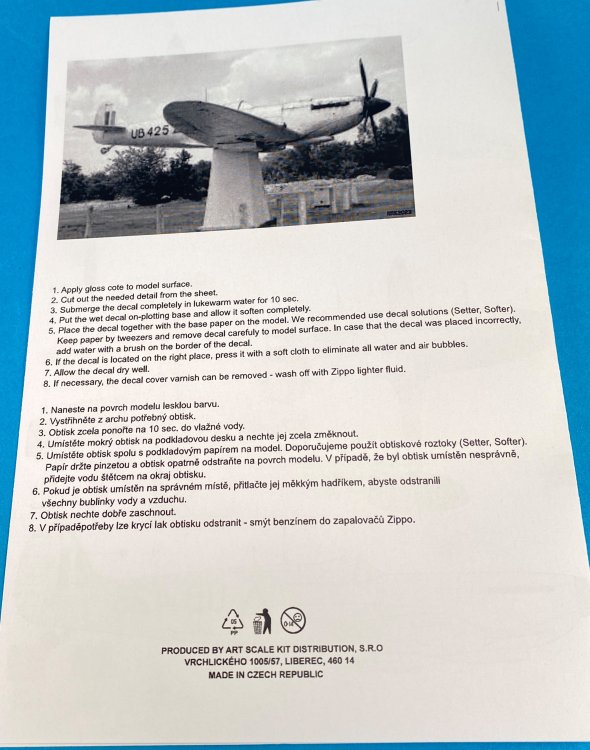
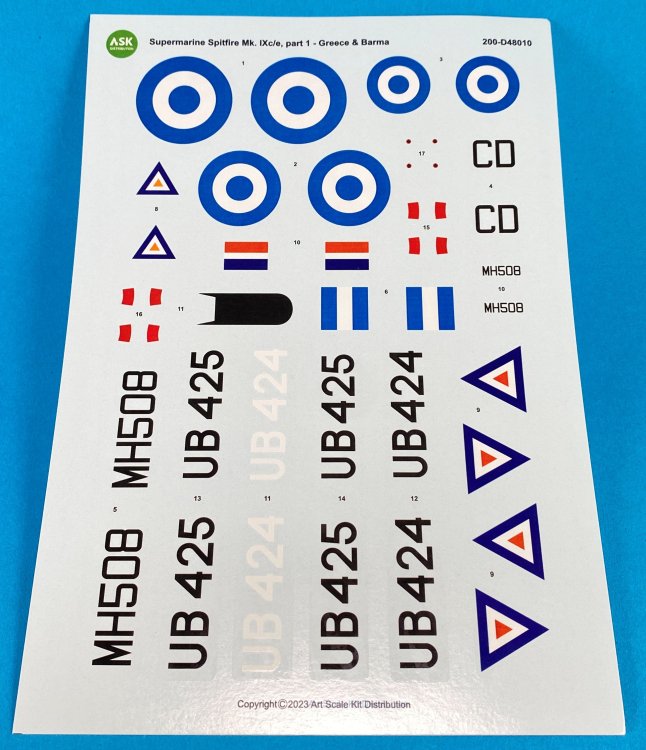
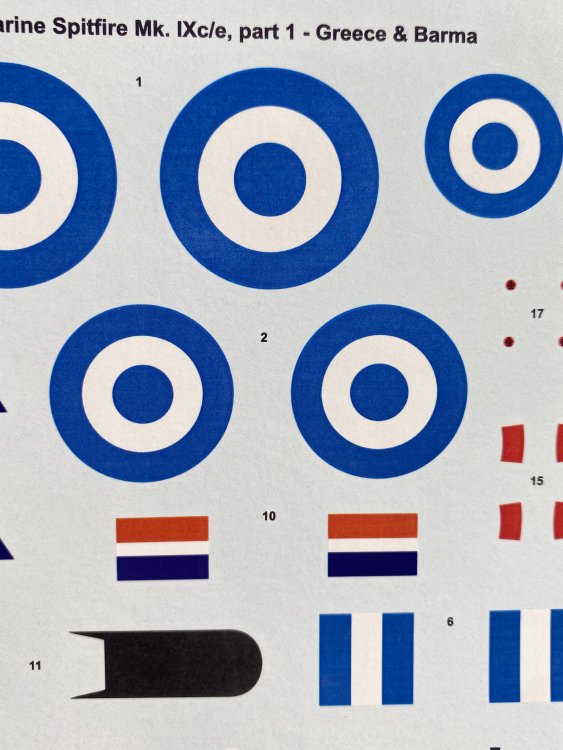
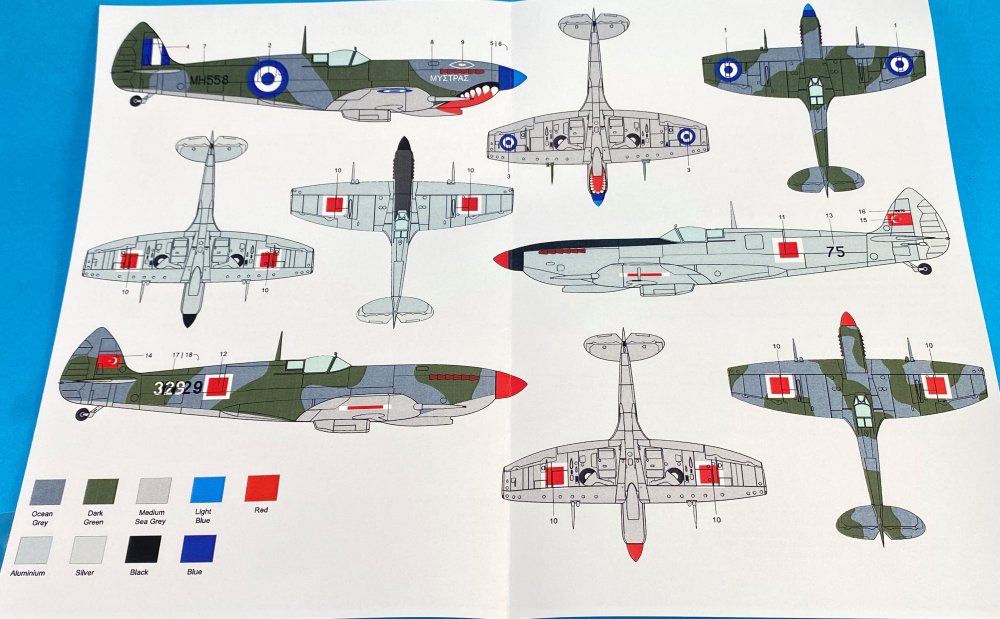
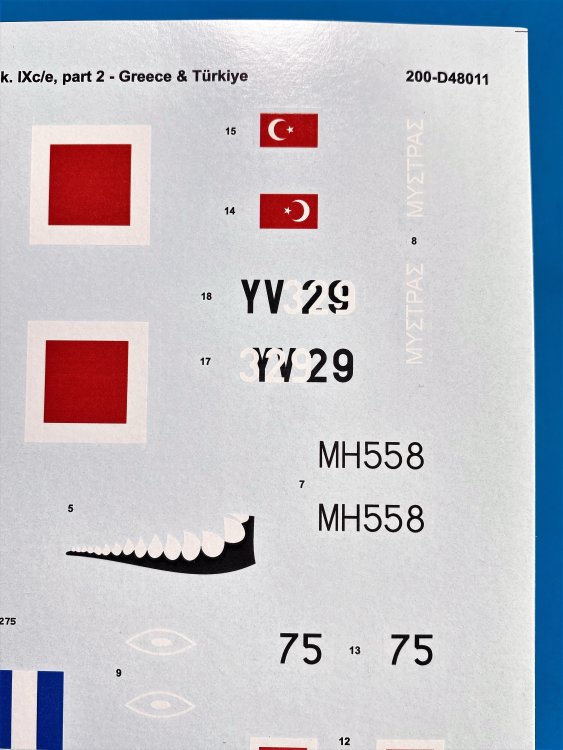
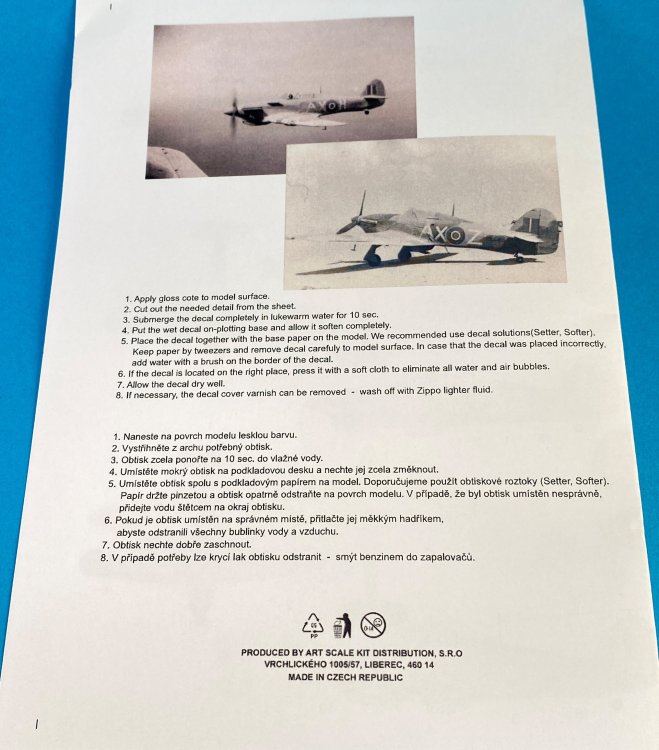
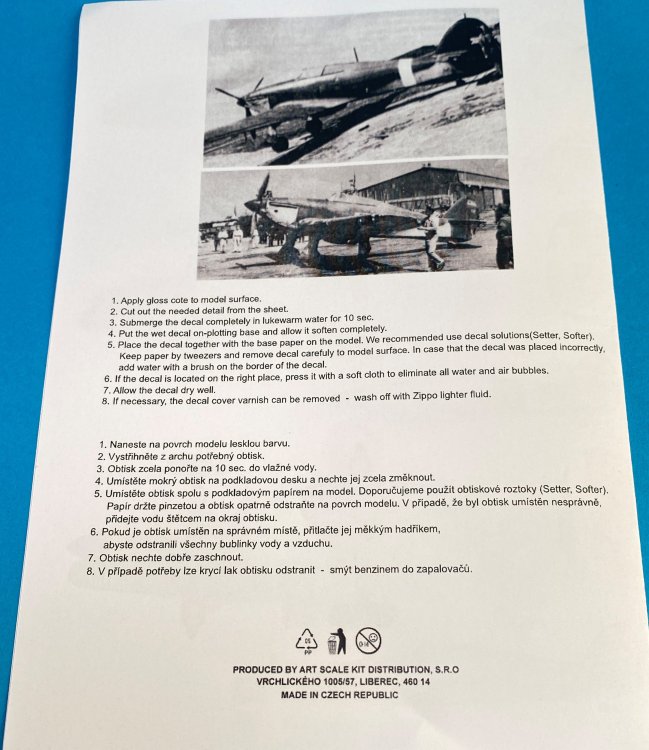
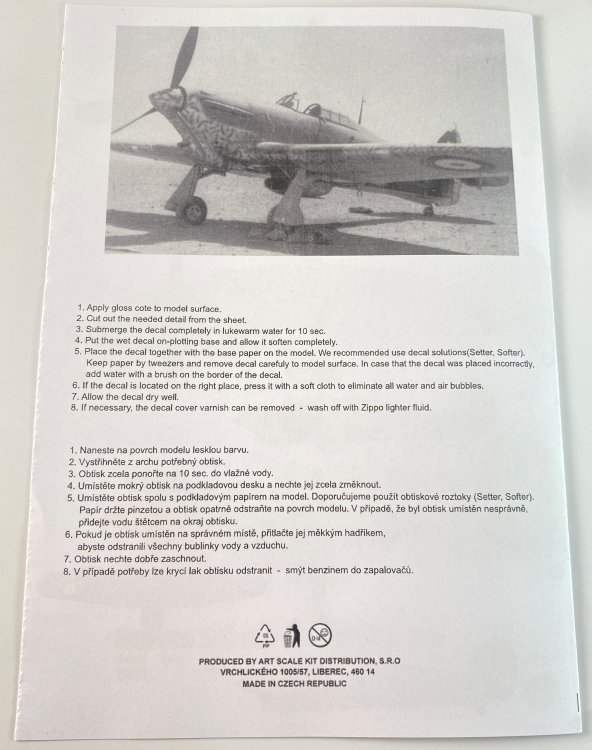
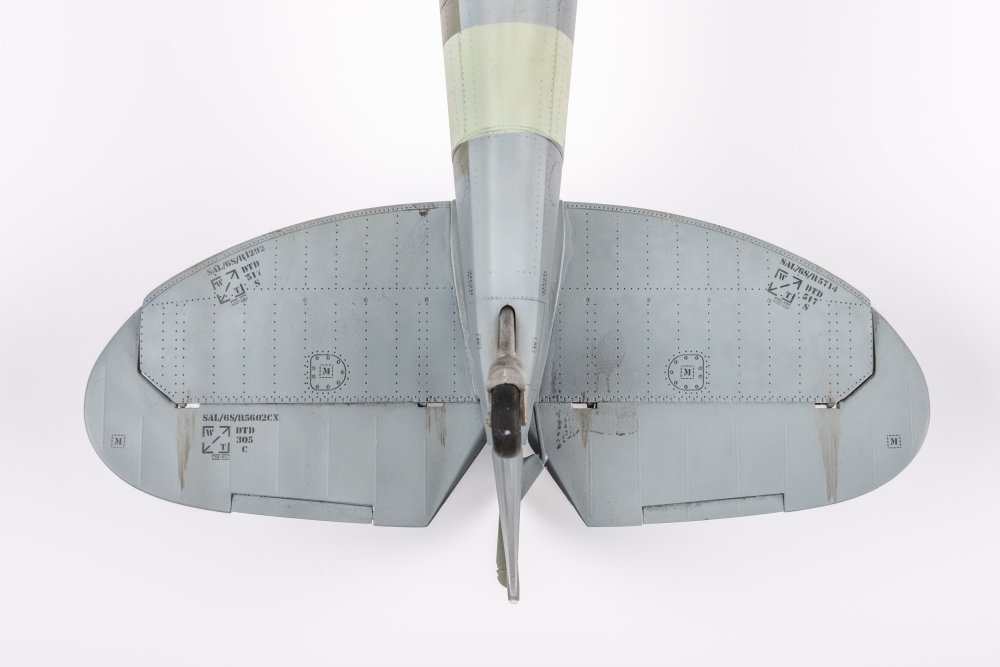
Art Scale Kit Supermarine Spitfire Mk. IX Several Sheets The last but not the least! Today, we get to the end of decal week, offer by Art Scale Model. Today, I´m going to review 2 (two) decal sheet of the Spitfire Mk. IX in 1:48 and 3 (three) stencil decal sheet from ASK. All sets came in a ziplog bag, small A5 size sheet with profiles colors instructions steps how to apply ASK decals. So let’s looks to the option schemes that all decal sheets offer. Also here, in the applying instructions, in all sheets (except the stencils decal sheet), theres`a real photo of one of the airplanes that are represented on the decal sheets. I really love that "bonus" Supermarine Spitfire Mk. IX Part 1 – Greece & Barma Catalogue number200-D48010 Price: 12,30€ To order, click here. - Spitfire LF Mk.IXc, MH508, 337 Squadron of Royal Hellenic Air Force, used in 1947-1953 period - Spitfire LF Mk.IXe, UB425, Barma Air Force, ex. IAF (20-42) & ex. CsAF, (JT-10 SL633) - Spitfire LF Mk.IXe, UB424, Barma Air Force Supermarine Spitfire Mk. IX Part 2 – Greece & Türkiye Catalogue number200-D48011 Price: 12,30€ To order, click here. · Spitfire LF Mk.IXc, MH558, Royal Hellenic Air Force, flown by Lt. Georgios Smyrniotopolous, 1947. · Spitfire LF Mk.IXe, 6275, Turkish AF, used in 1947-1954 period. · Spitfire LF Mk.IXe, 6329, 8th Air regiment Turkish Air Force 1947. The set does have the beautiful shark mouth but only the outline in black and the shark teeth. So the inside mouth, in red must be painted by the modeler. Supermarine Spitfire Mk. IX Stencils Catalogue number200-D24001, D32060, D48012 Price: 12,30€ To order, click here. The stencils are very thin, with small decal film on the edge to prevent to maximum silvering and not blurry, being quite comprehensive. In 1:24 and 1:32 you get one set for one Spitfire. In1:48 the decals sheet give the modeler enough stencils for two aircrafts. ** Analyzing the decal sheets, the color registration is great and a very good definition of the details. The decals have a thin film, in fact looking very thin and delicate. There is no indication where are they printed so I assume that will be in ASK house. The printing quality is quite good, as they are sharp, with outline very well defined. The color look quite good and spot on. I tried already and it work great, with good adhesion to the plane surface without wrinkling or bubbling. No adverse reaction to Micro set or Micro Sol. You do have to work then with care and patience as they are very delicate and therefore, fragile. The instructions are the general ones that are applicable to all decals, it is always important to remember the general principles of decal application. In this case, there is no specific rule for applying these decals. The profiles draws contains lots of information, with side view (both side) and top view with precise decal indication. Conclusion: This week was brought to you by Art Scale Kit. In fact, looking for ASK decal catalogue, we could have several weeks with a new every day! Is a very good product, not expensive and that will give your model a different look on your collection and to the table contest or the club weekly reunion. The location indication of the decals is quite good and very perceptible. The decals as already said, have a very good colour registration, very thin, with minimum decal film, and they work quite nice! My thanks to Art Scale Decals for producing these fantastic decals and the possibility of reviewed them. Francisco Guedes .


-
New airscale Pro range - 1/32 Revell Bf109 G2/4
Fran replied to airscale's topic in Modelling Discussion
a most have, that`s for sure! -
wow!!! Fantastics pictures Martin!!
-
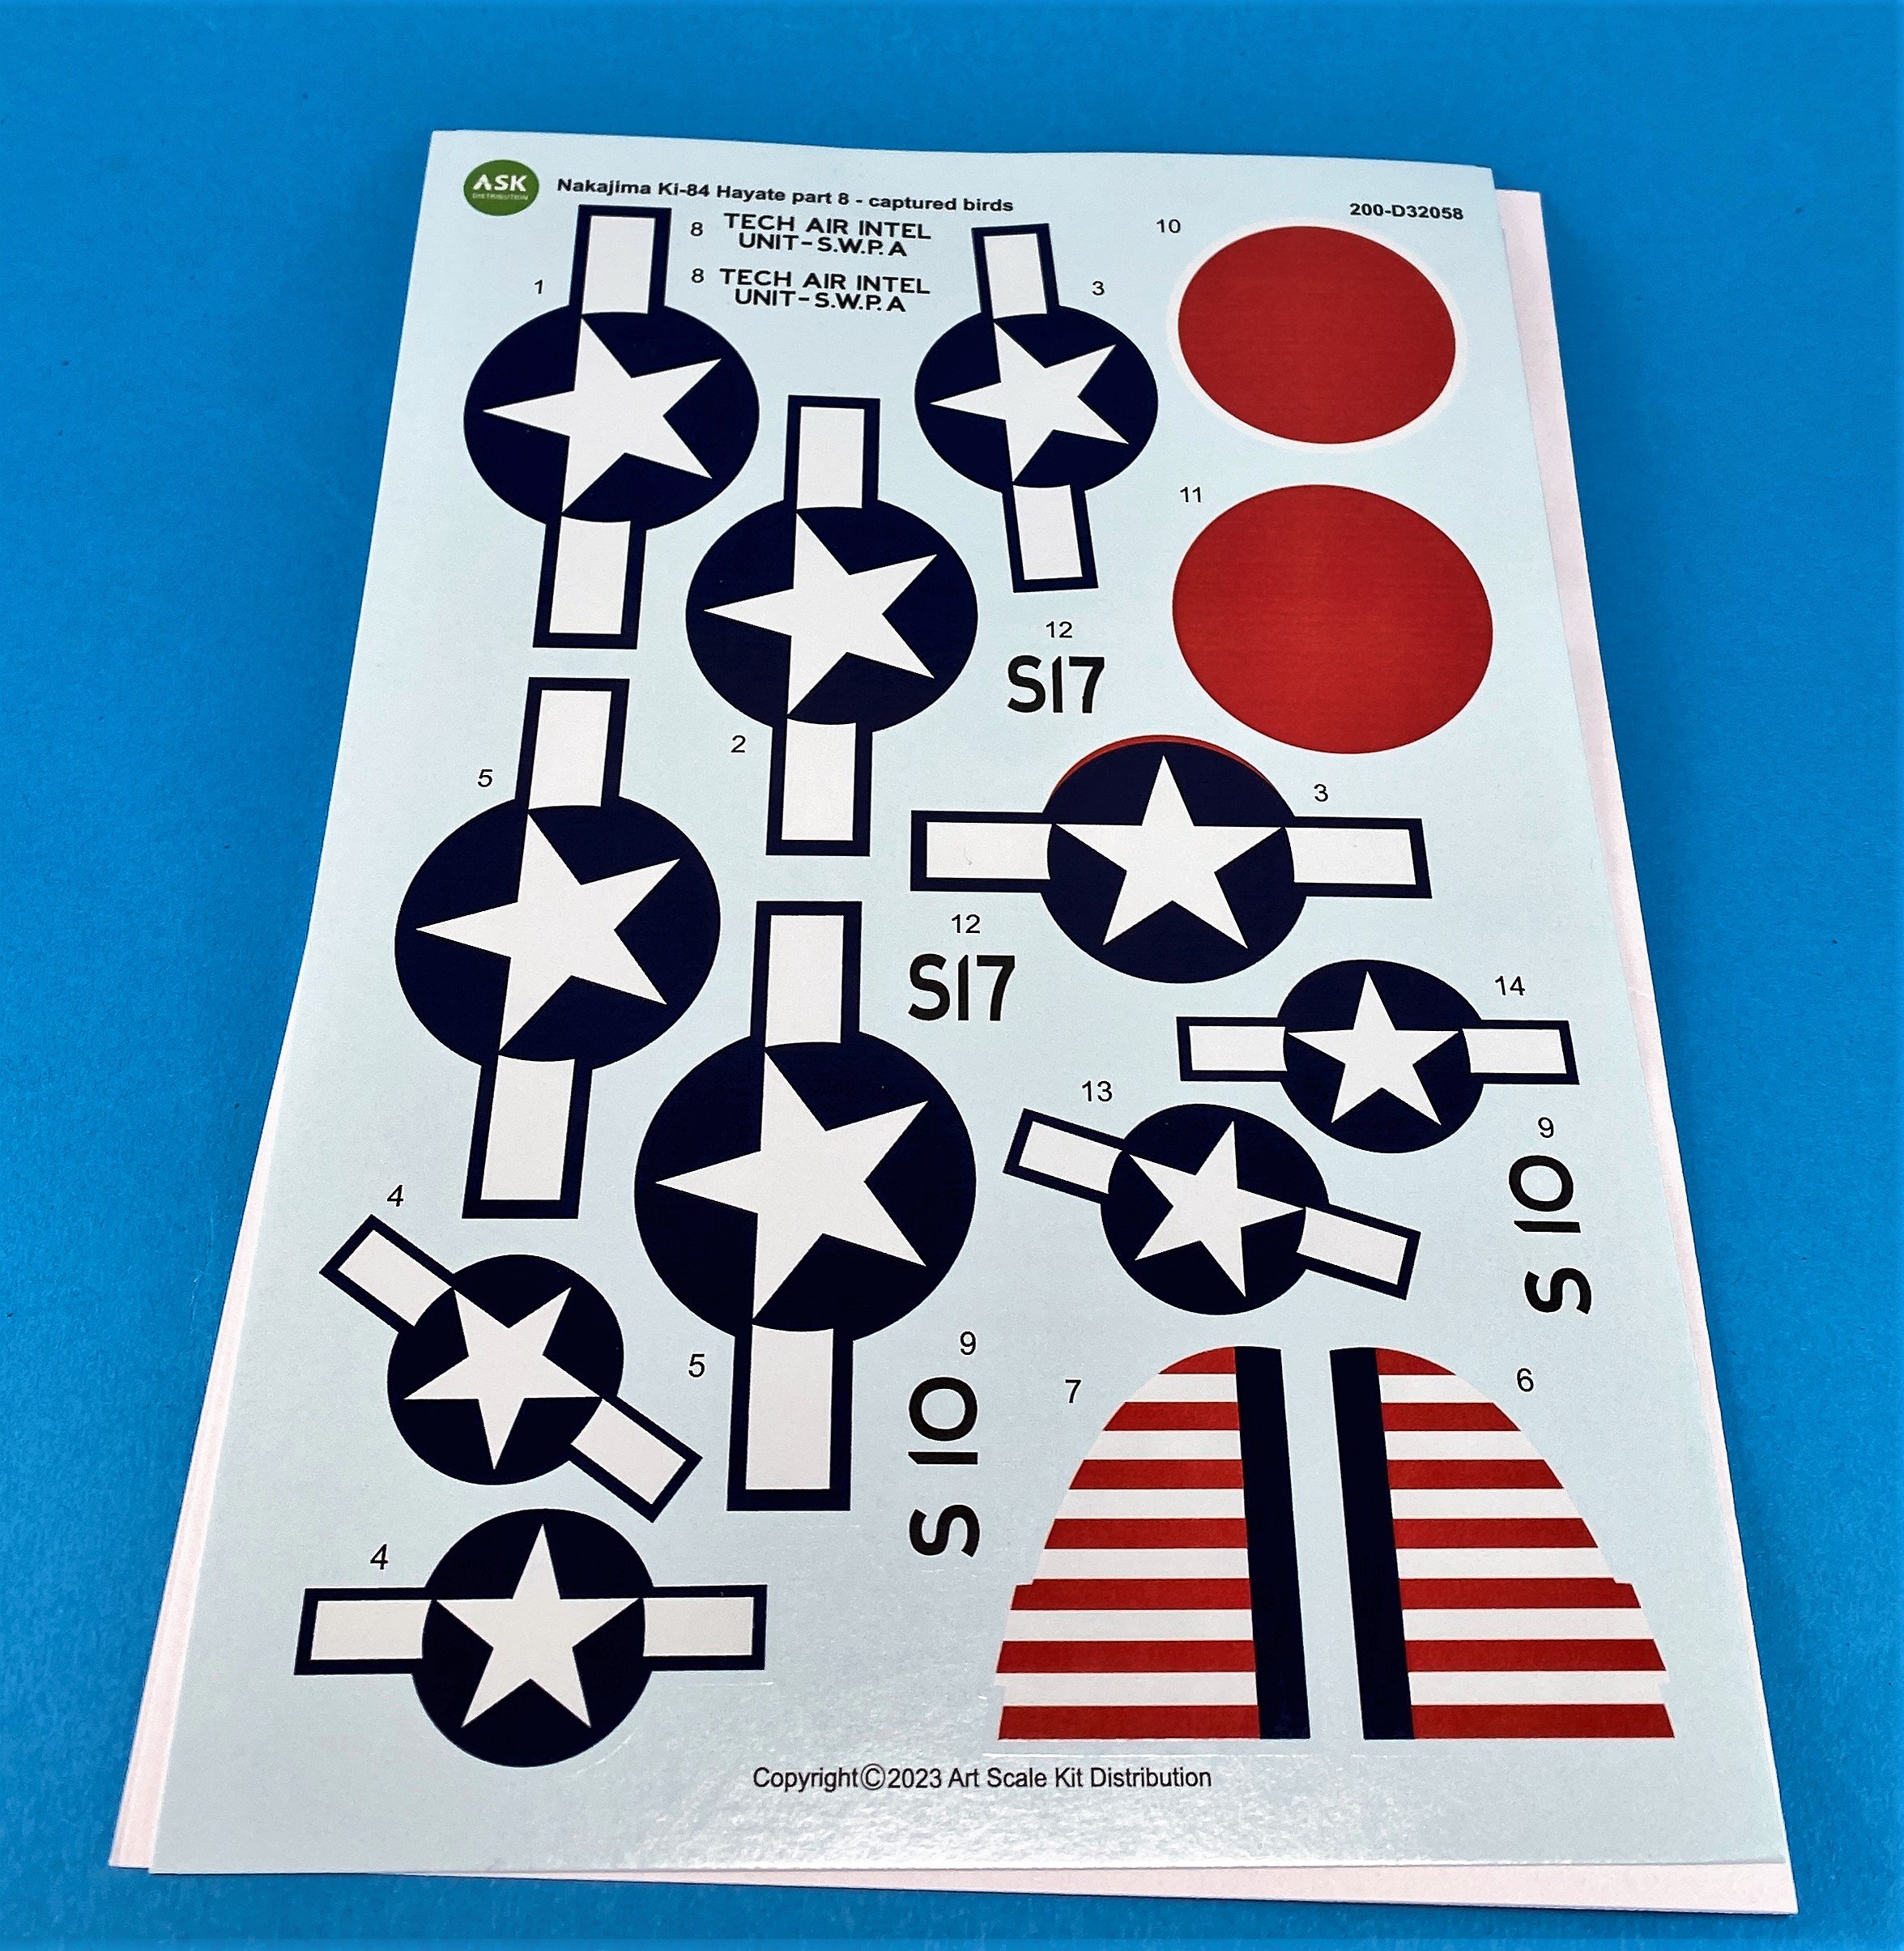
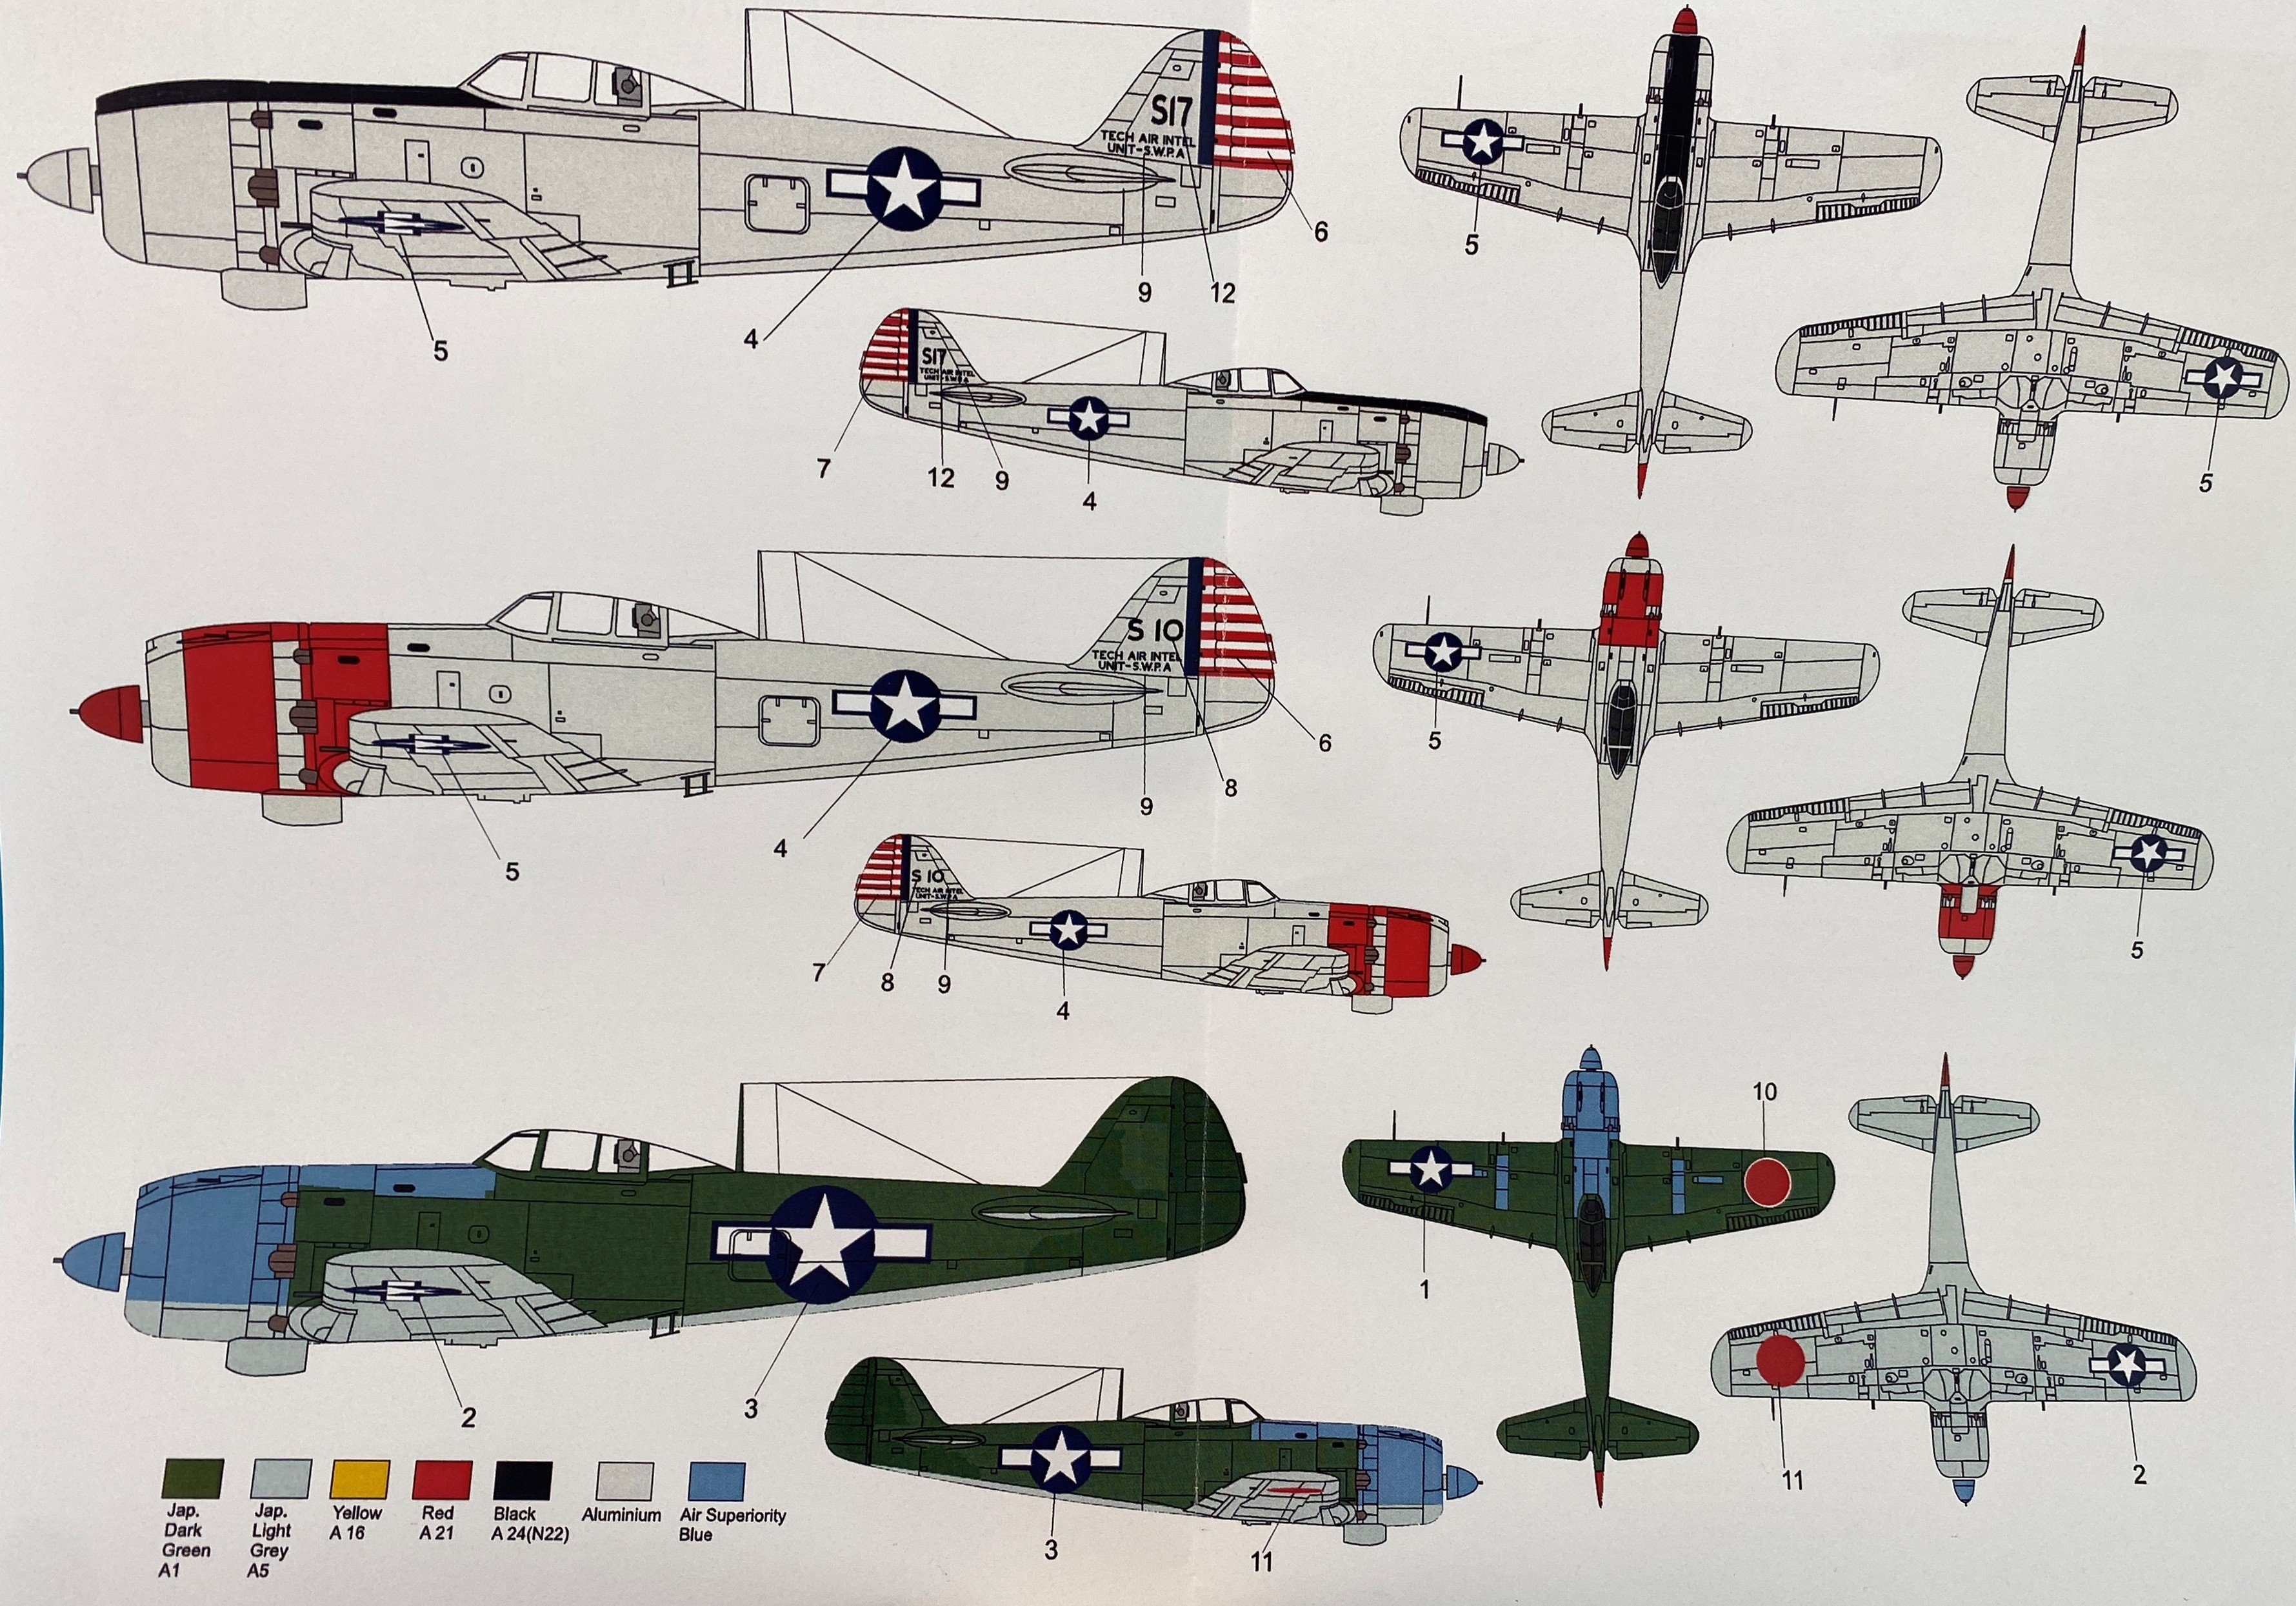
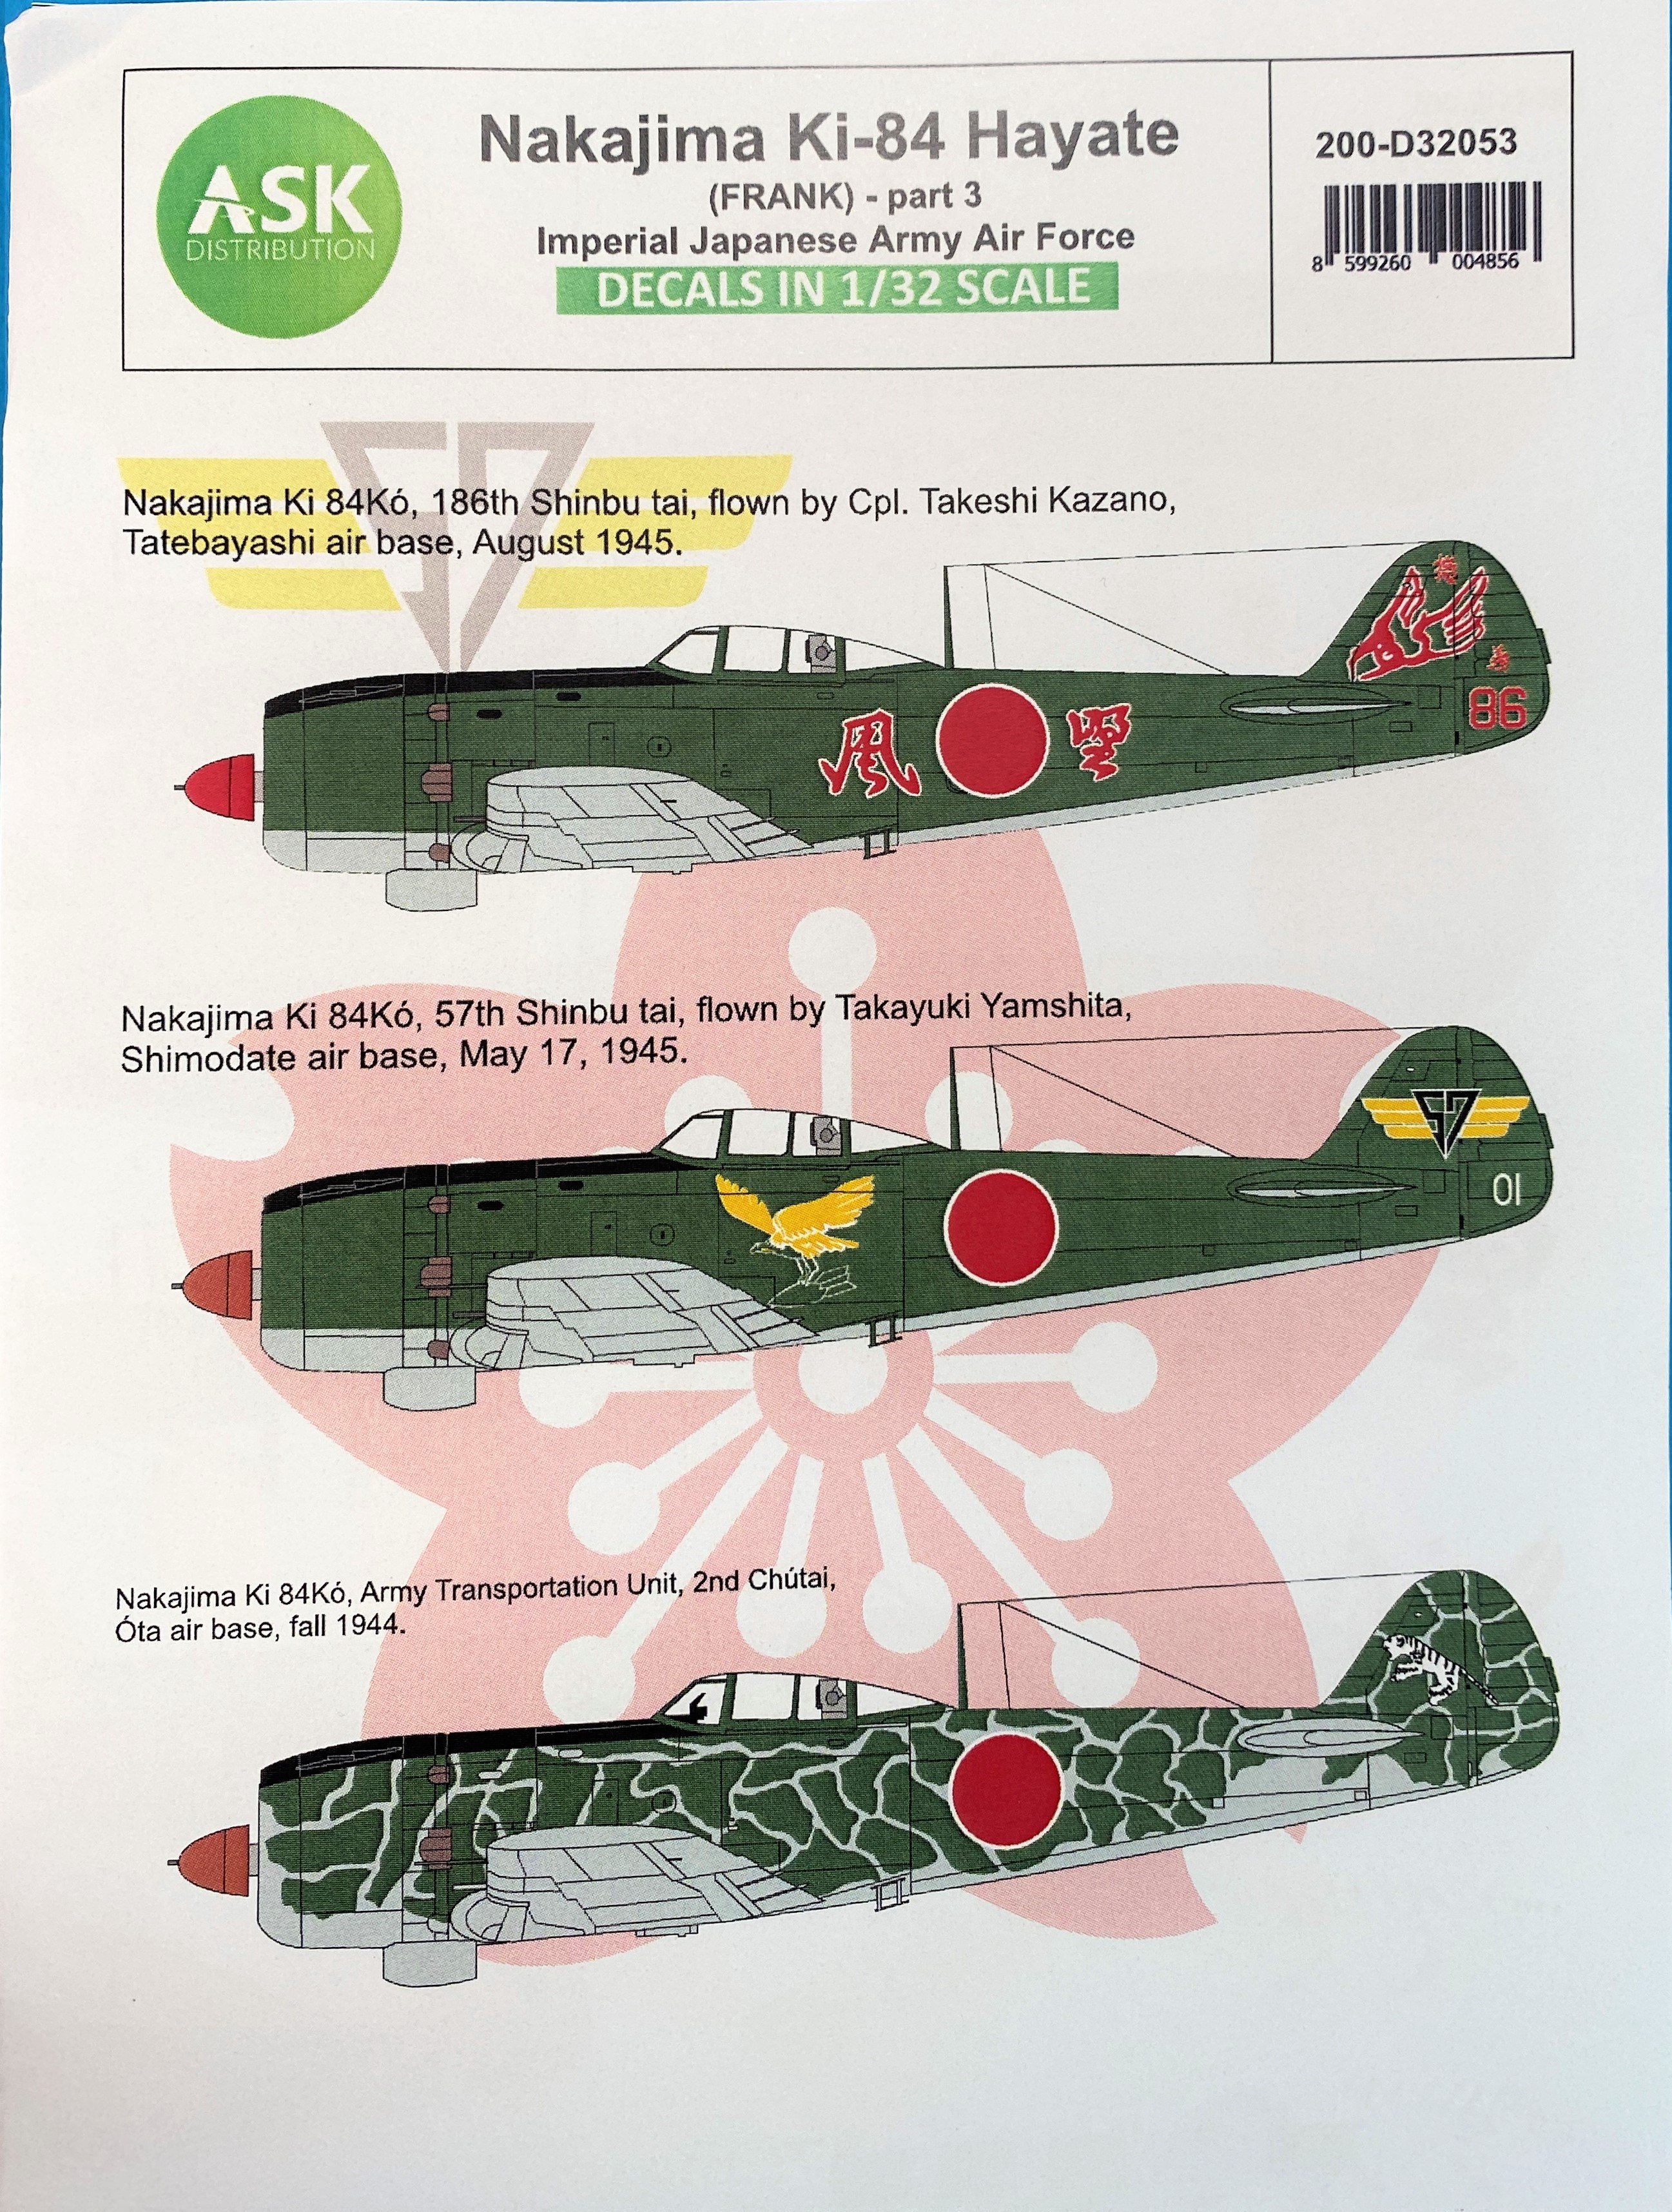
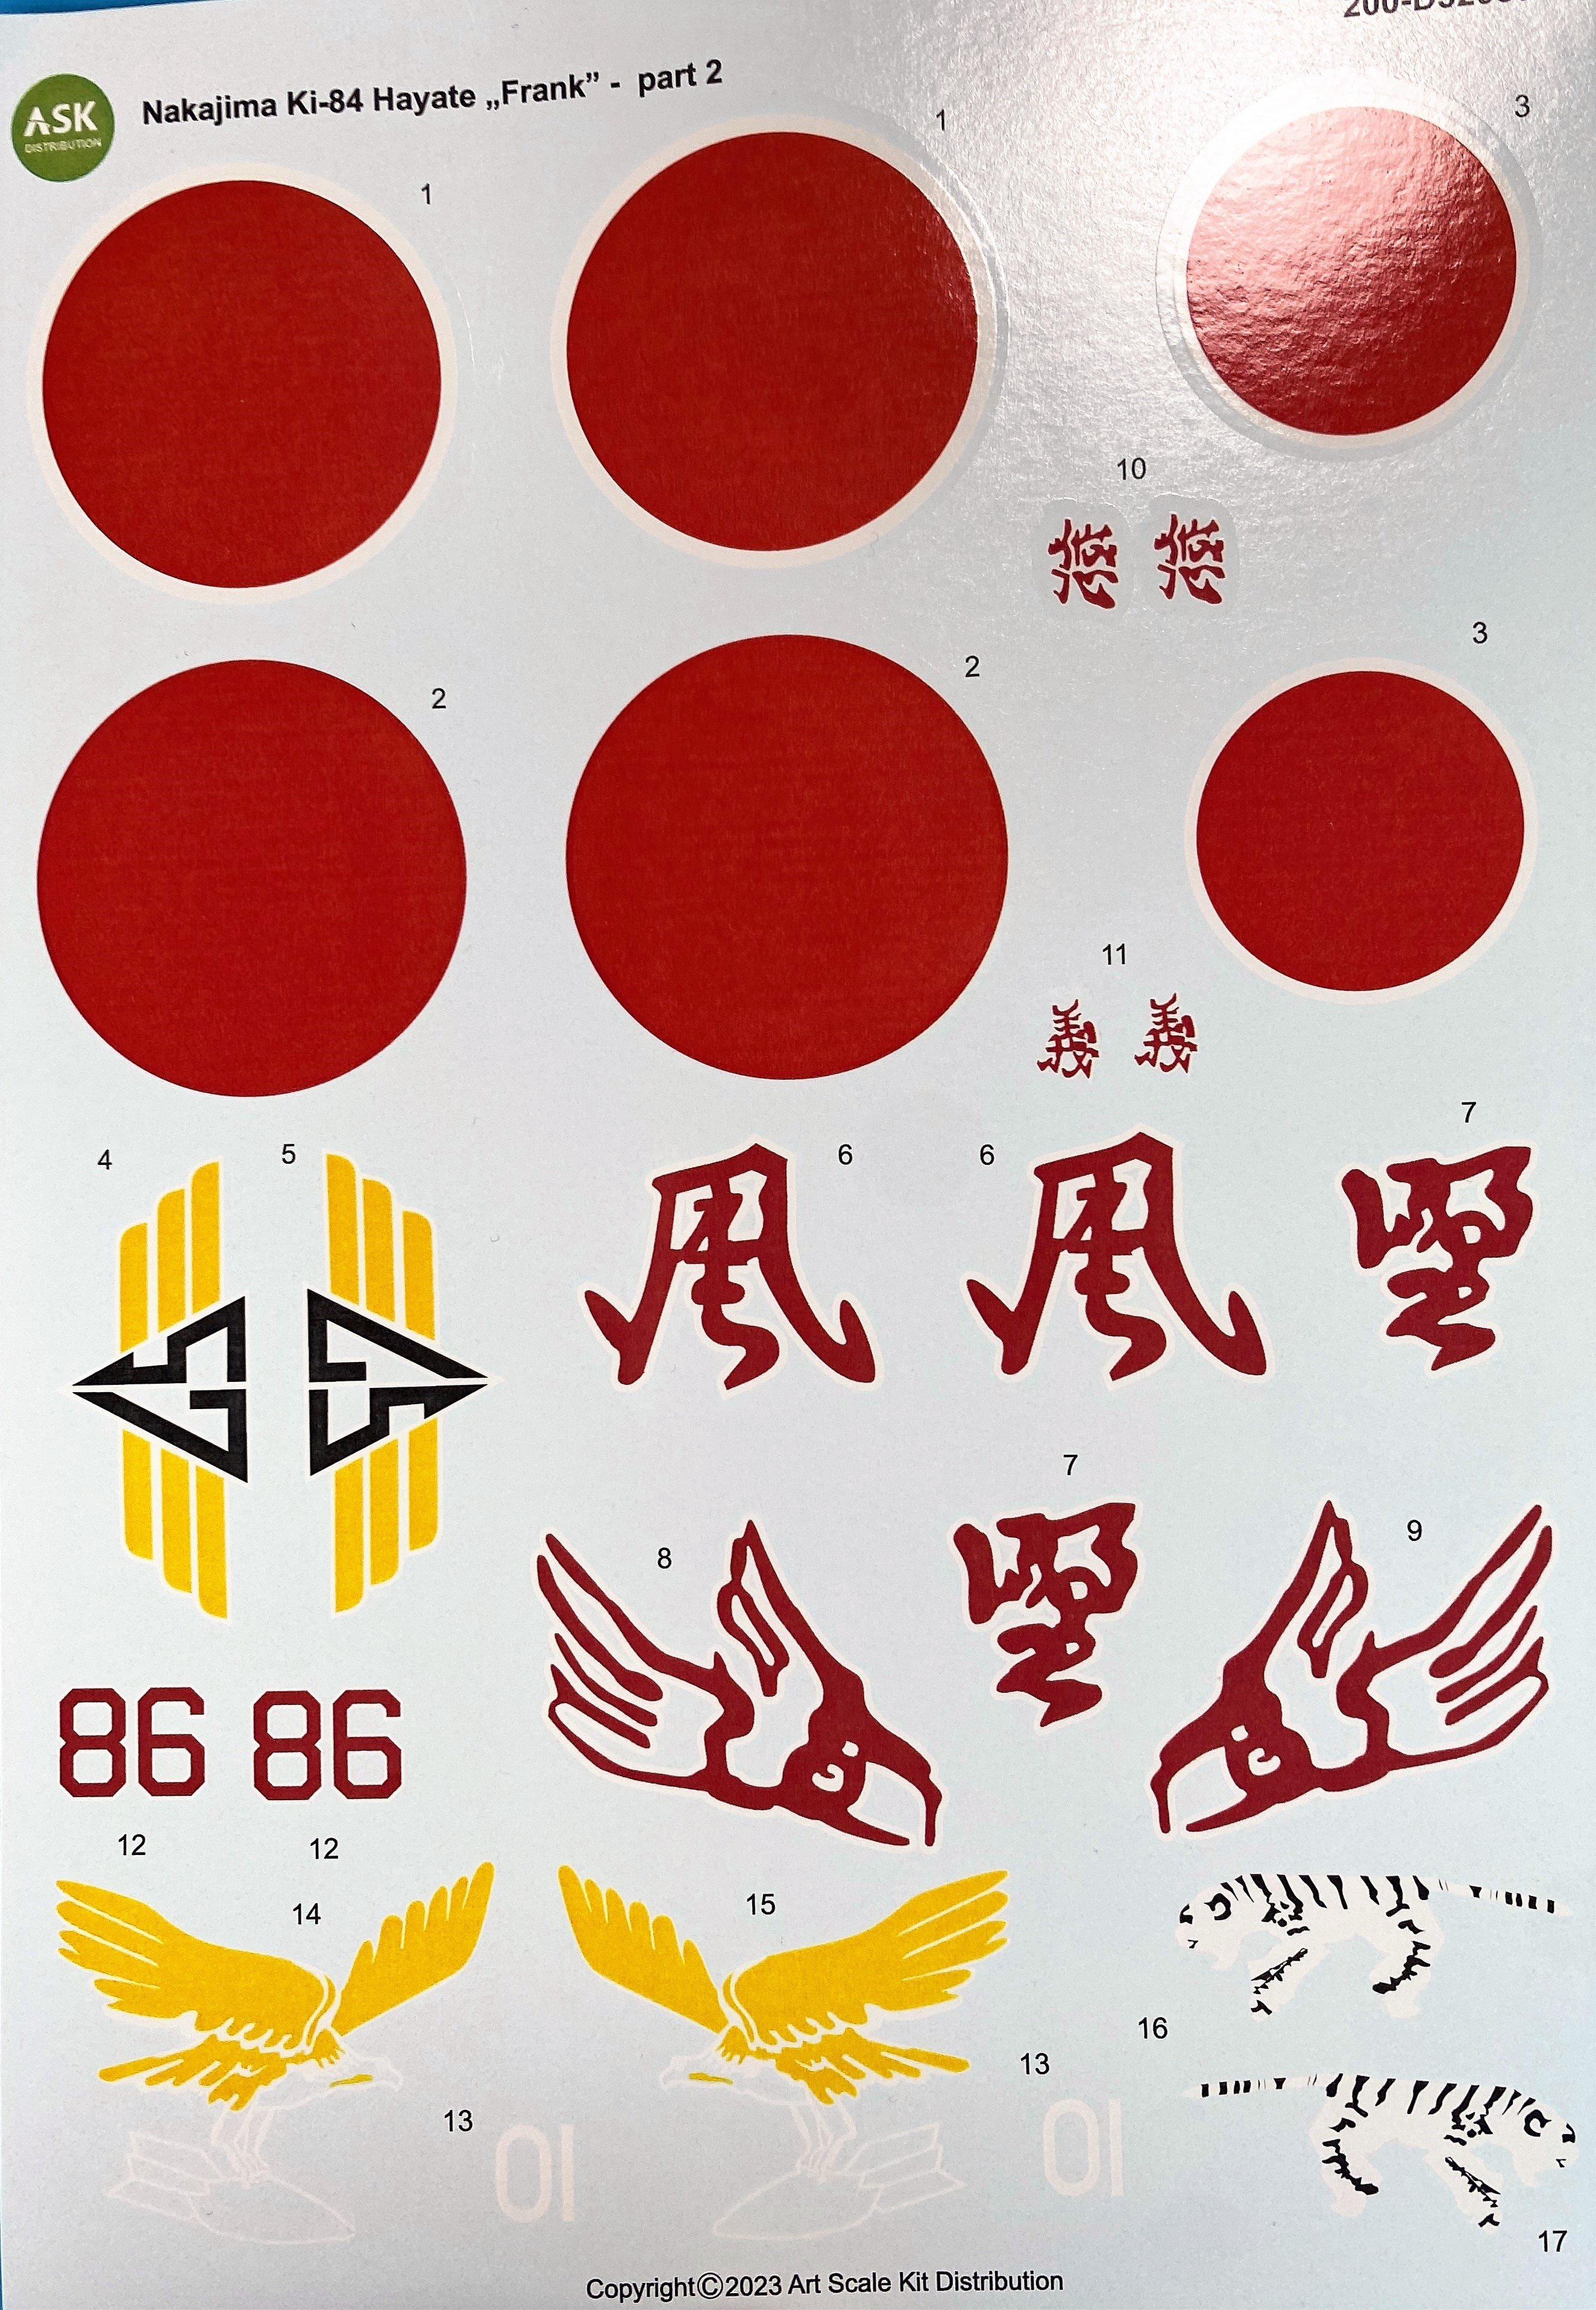
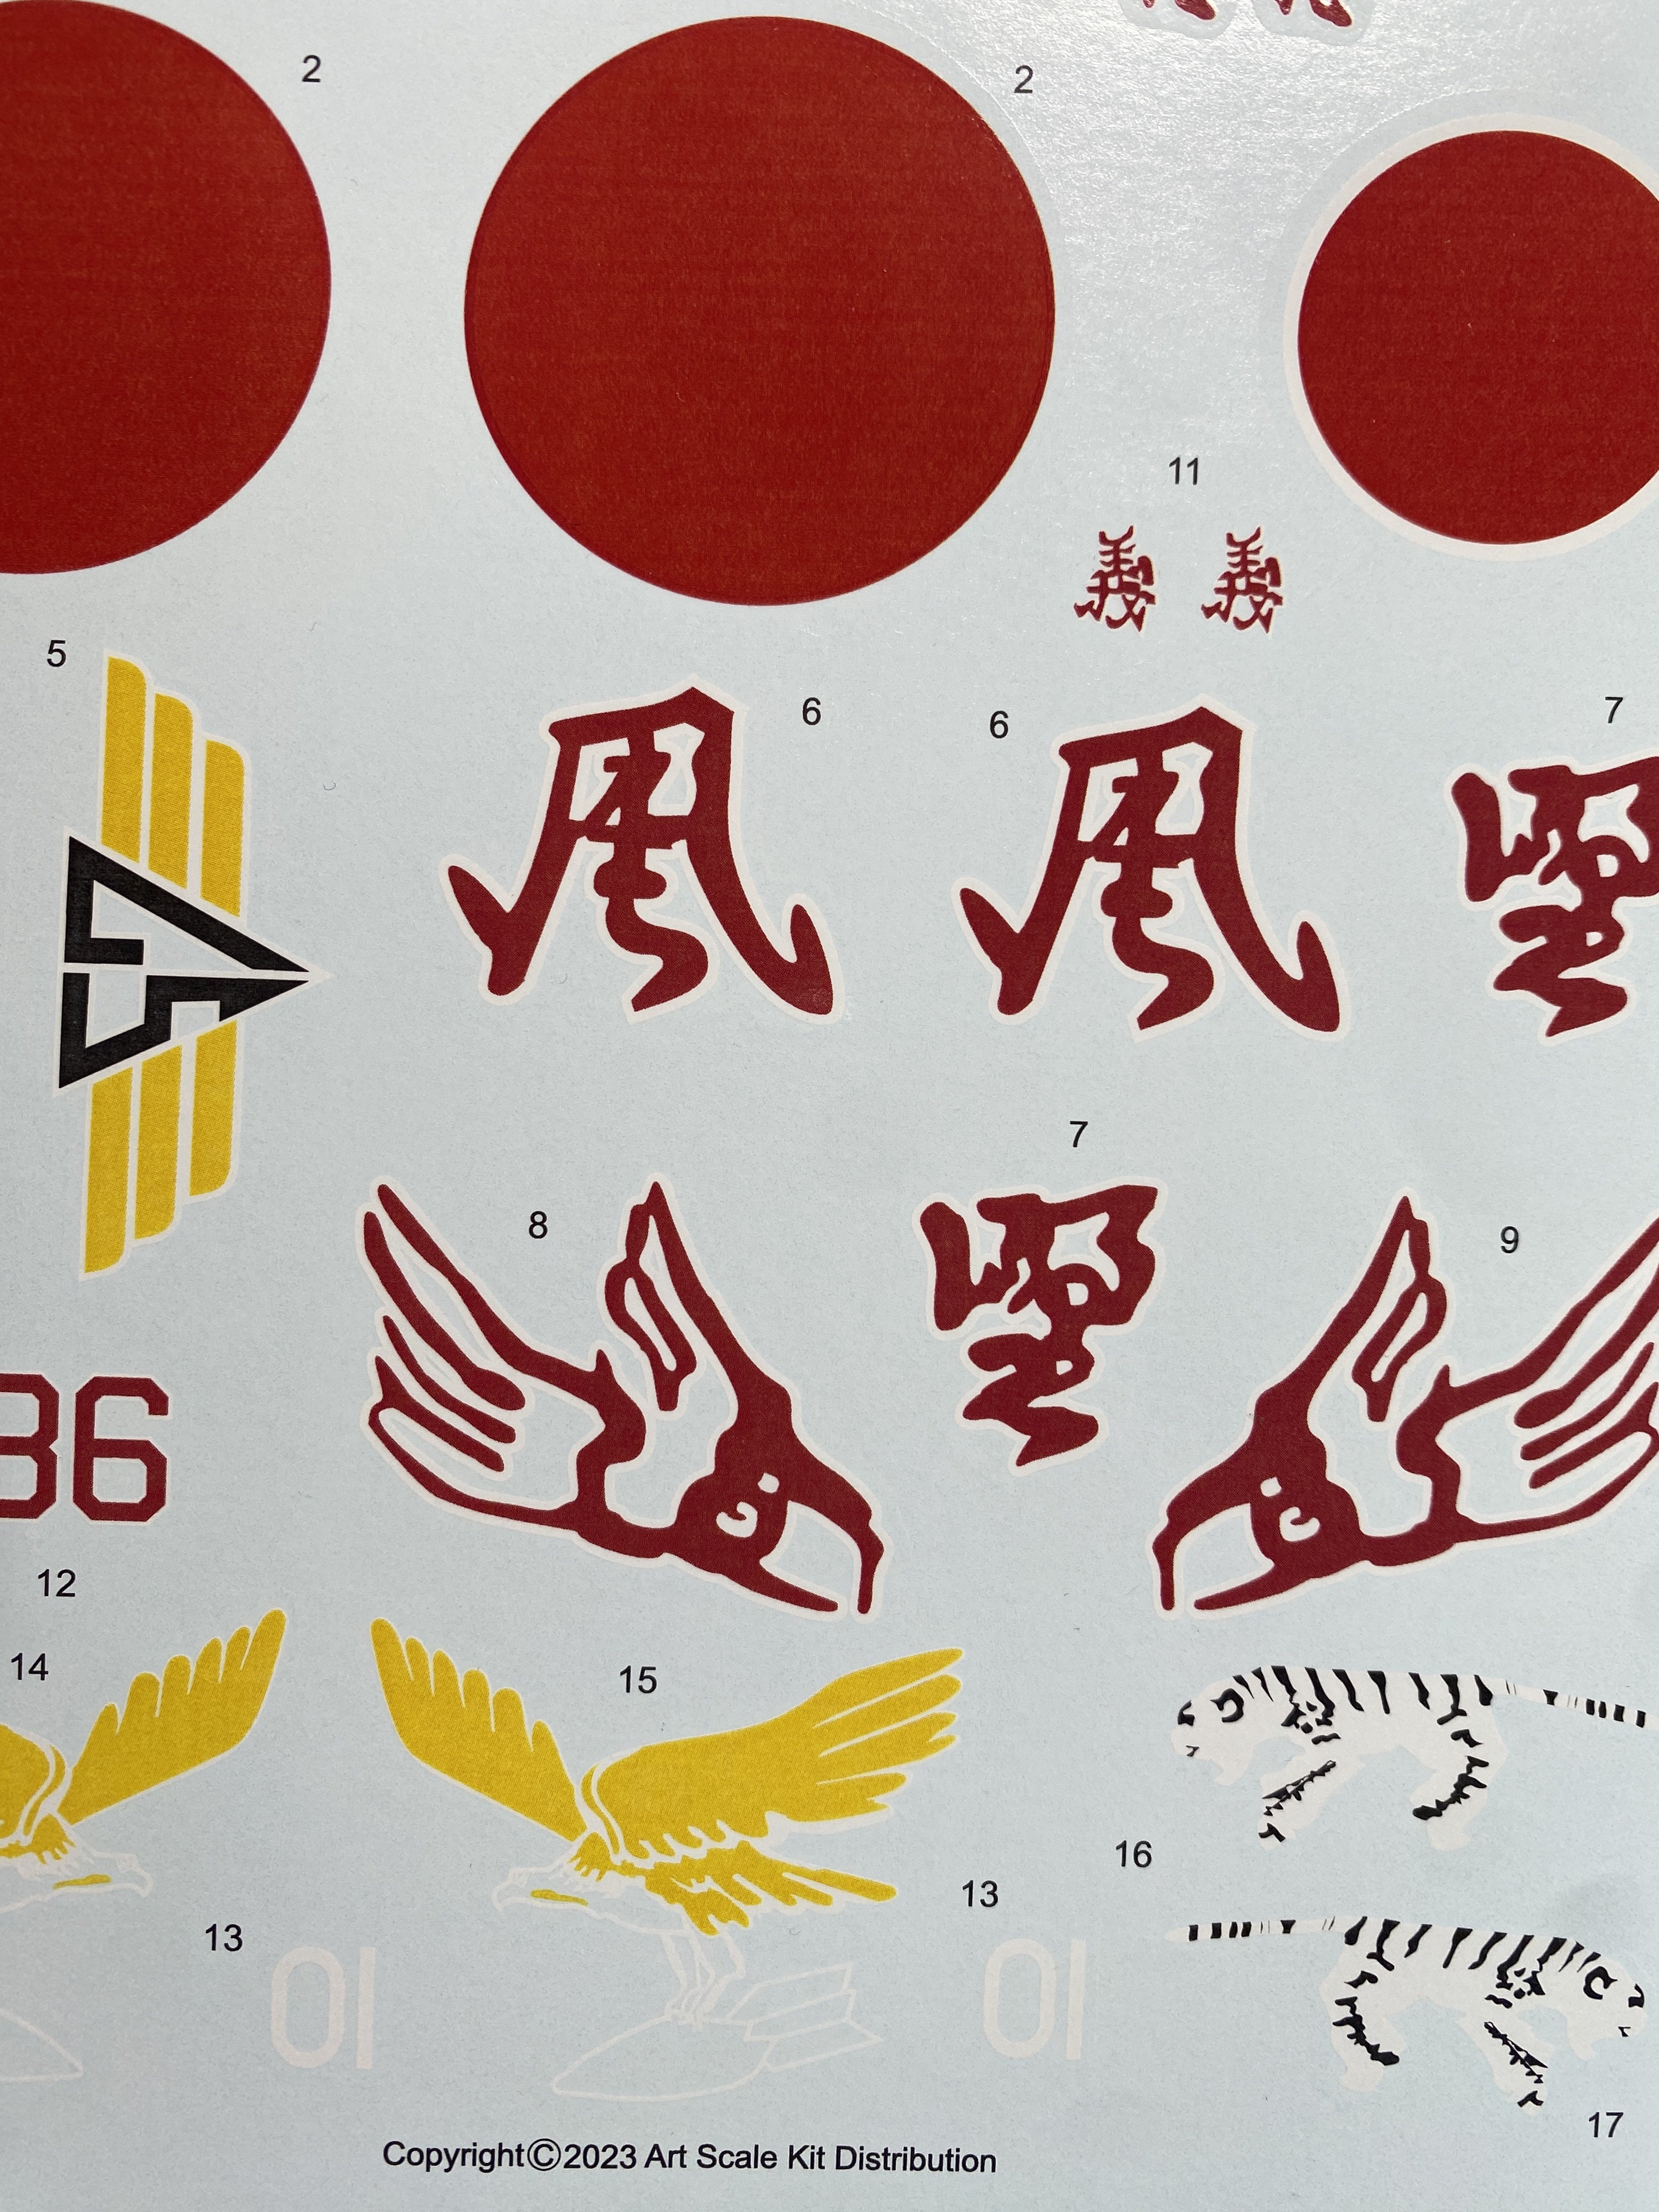
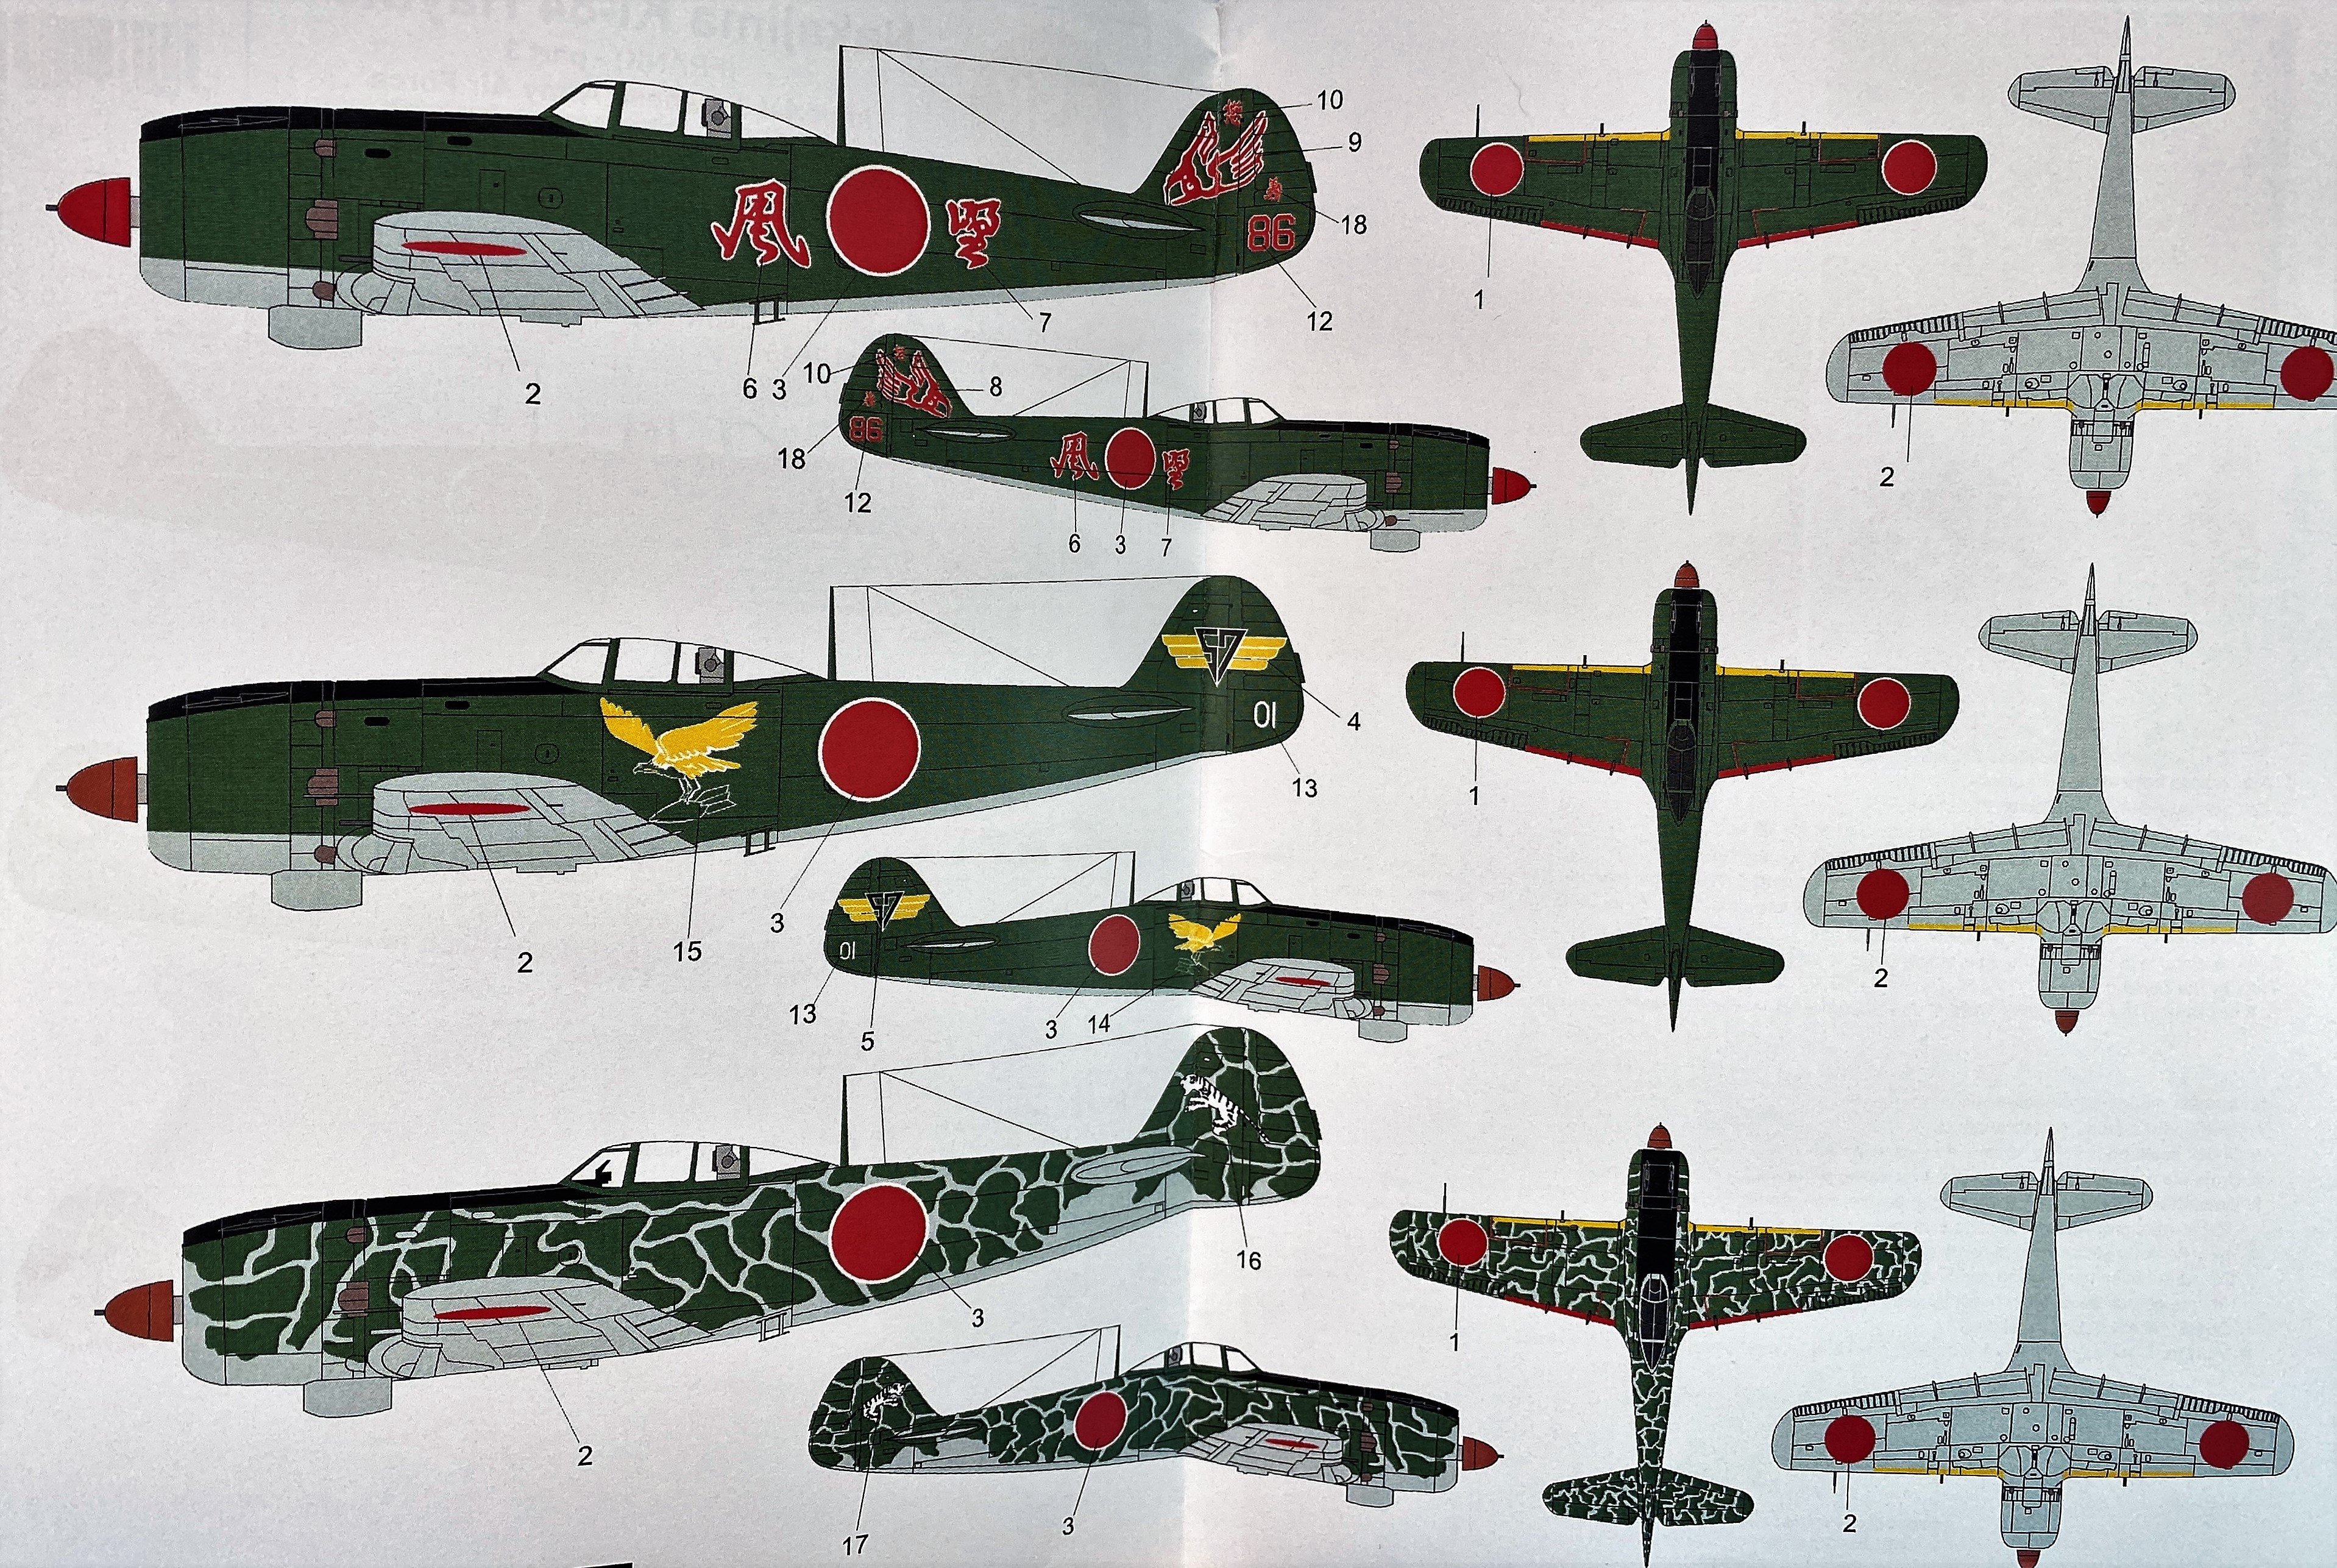
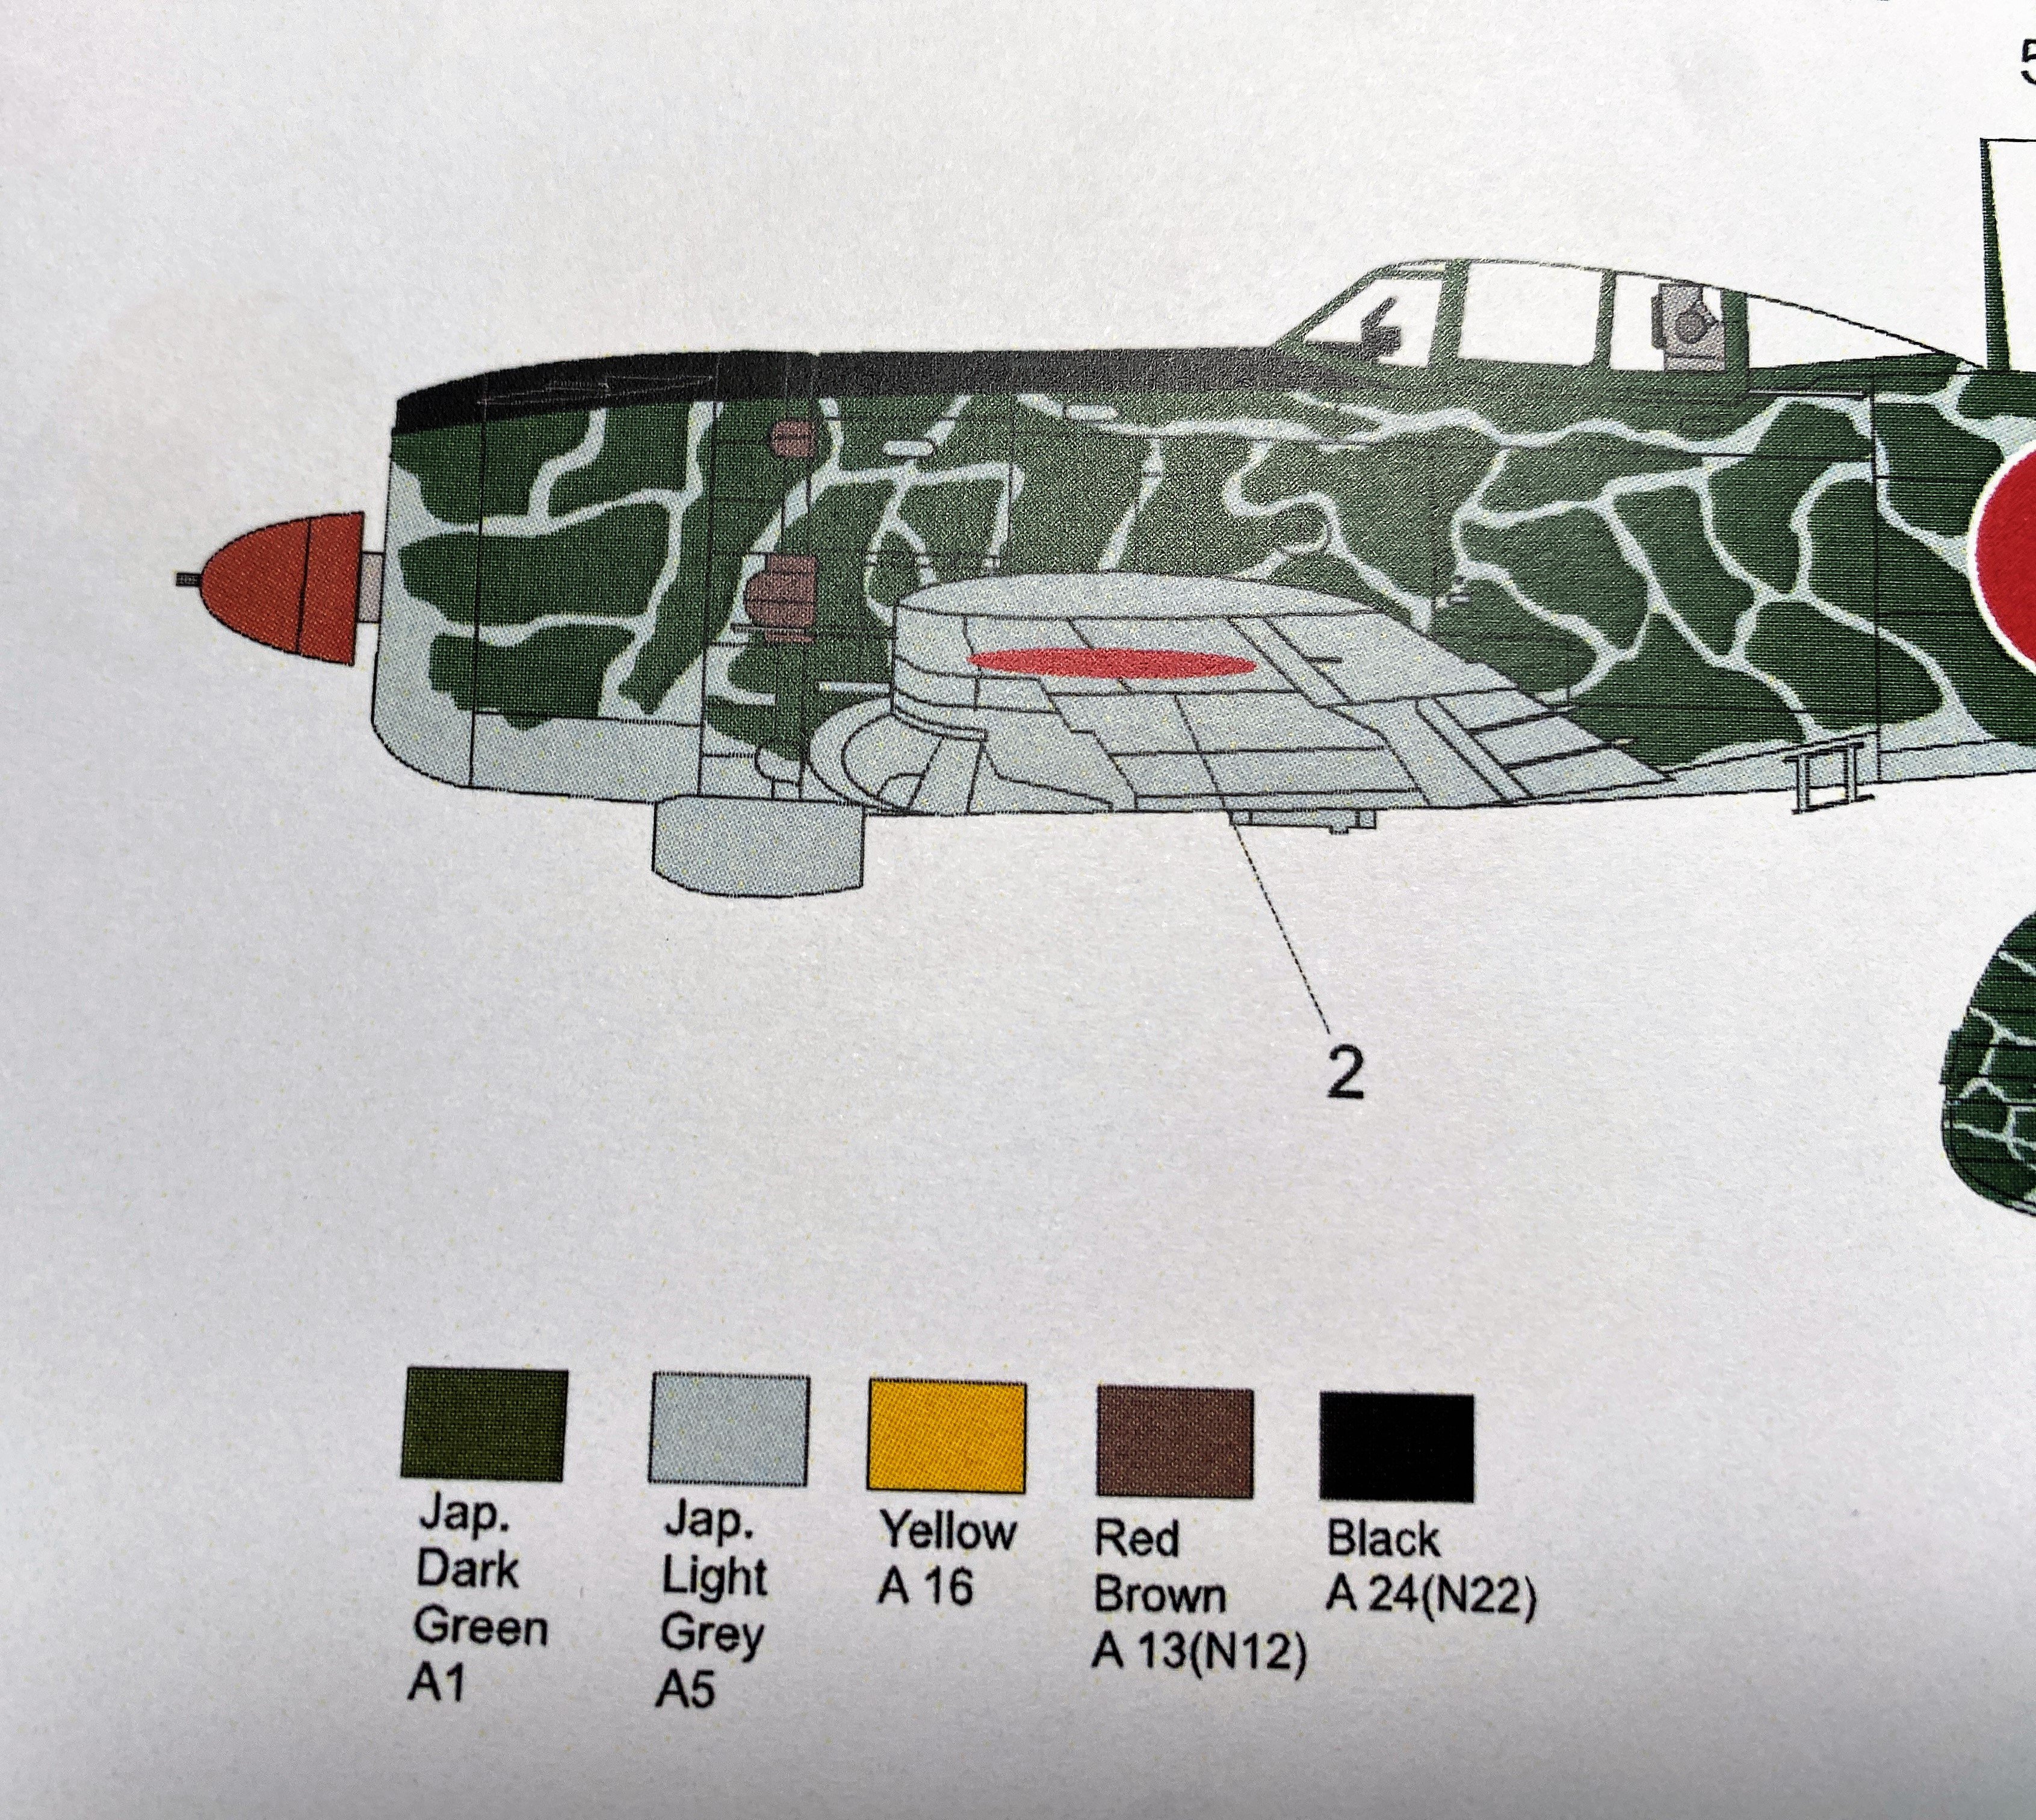
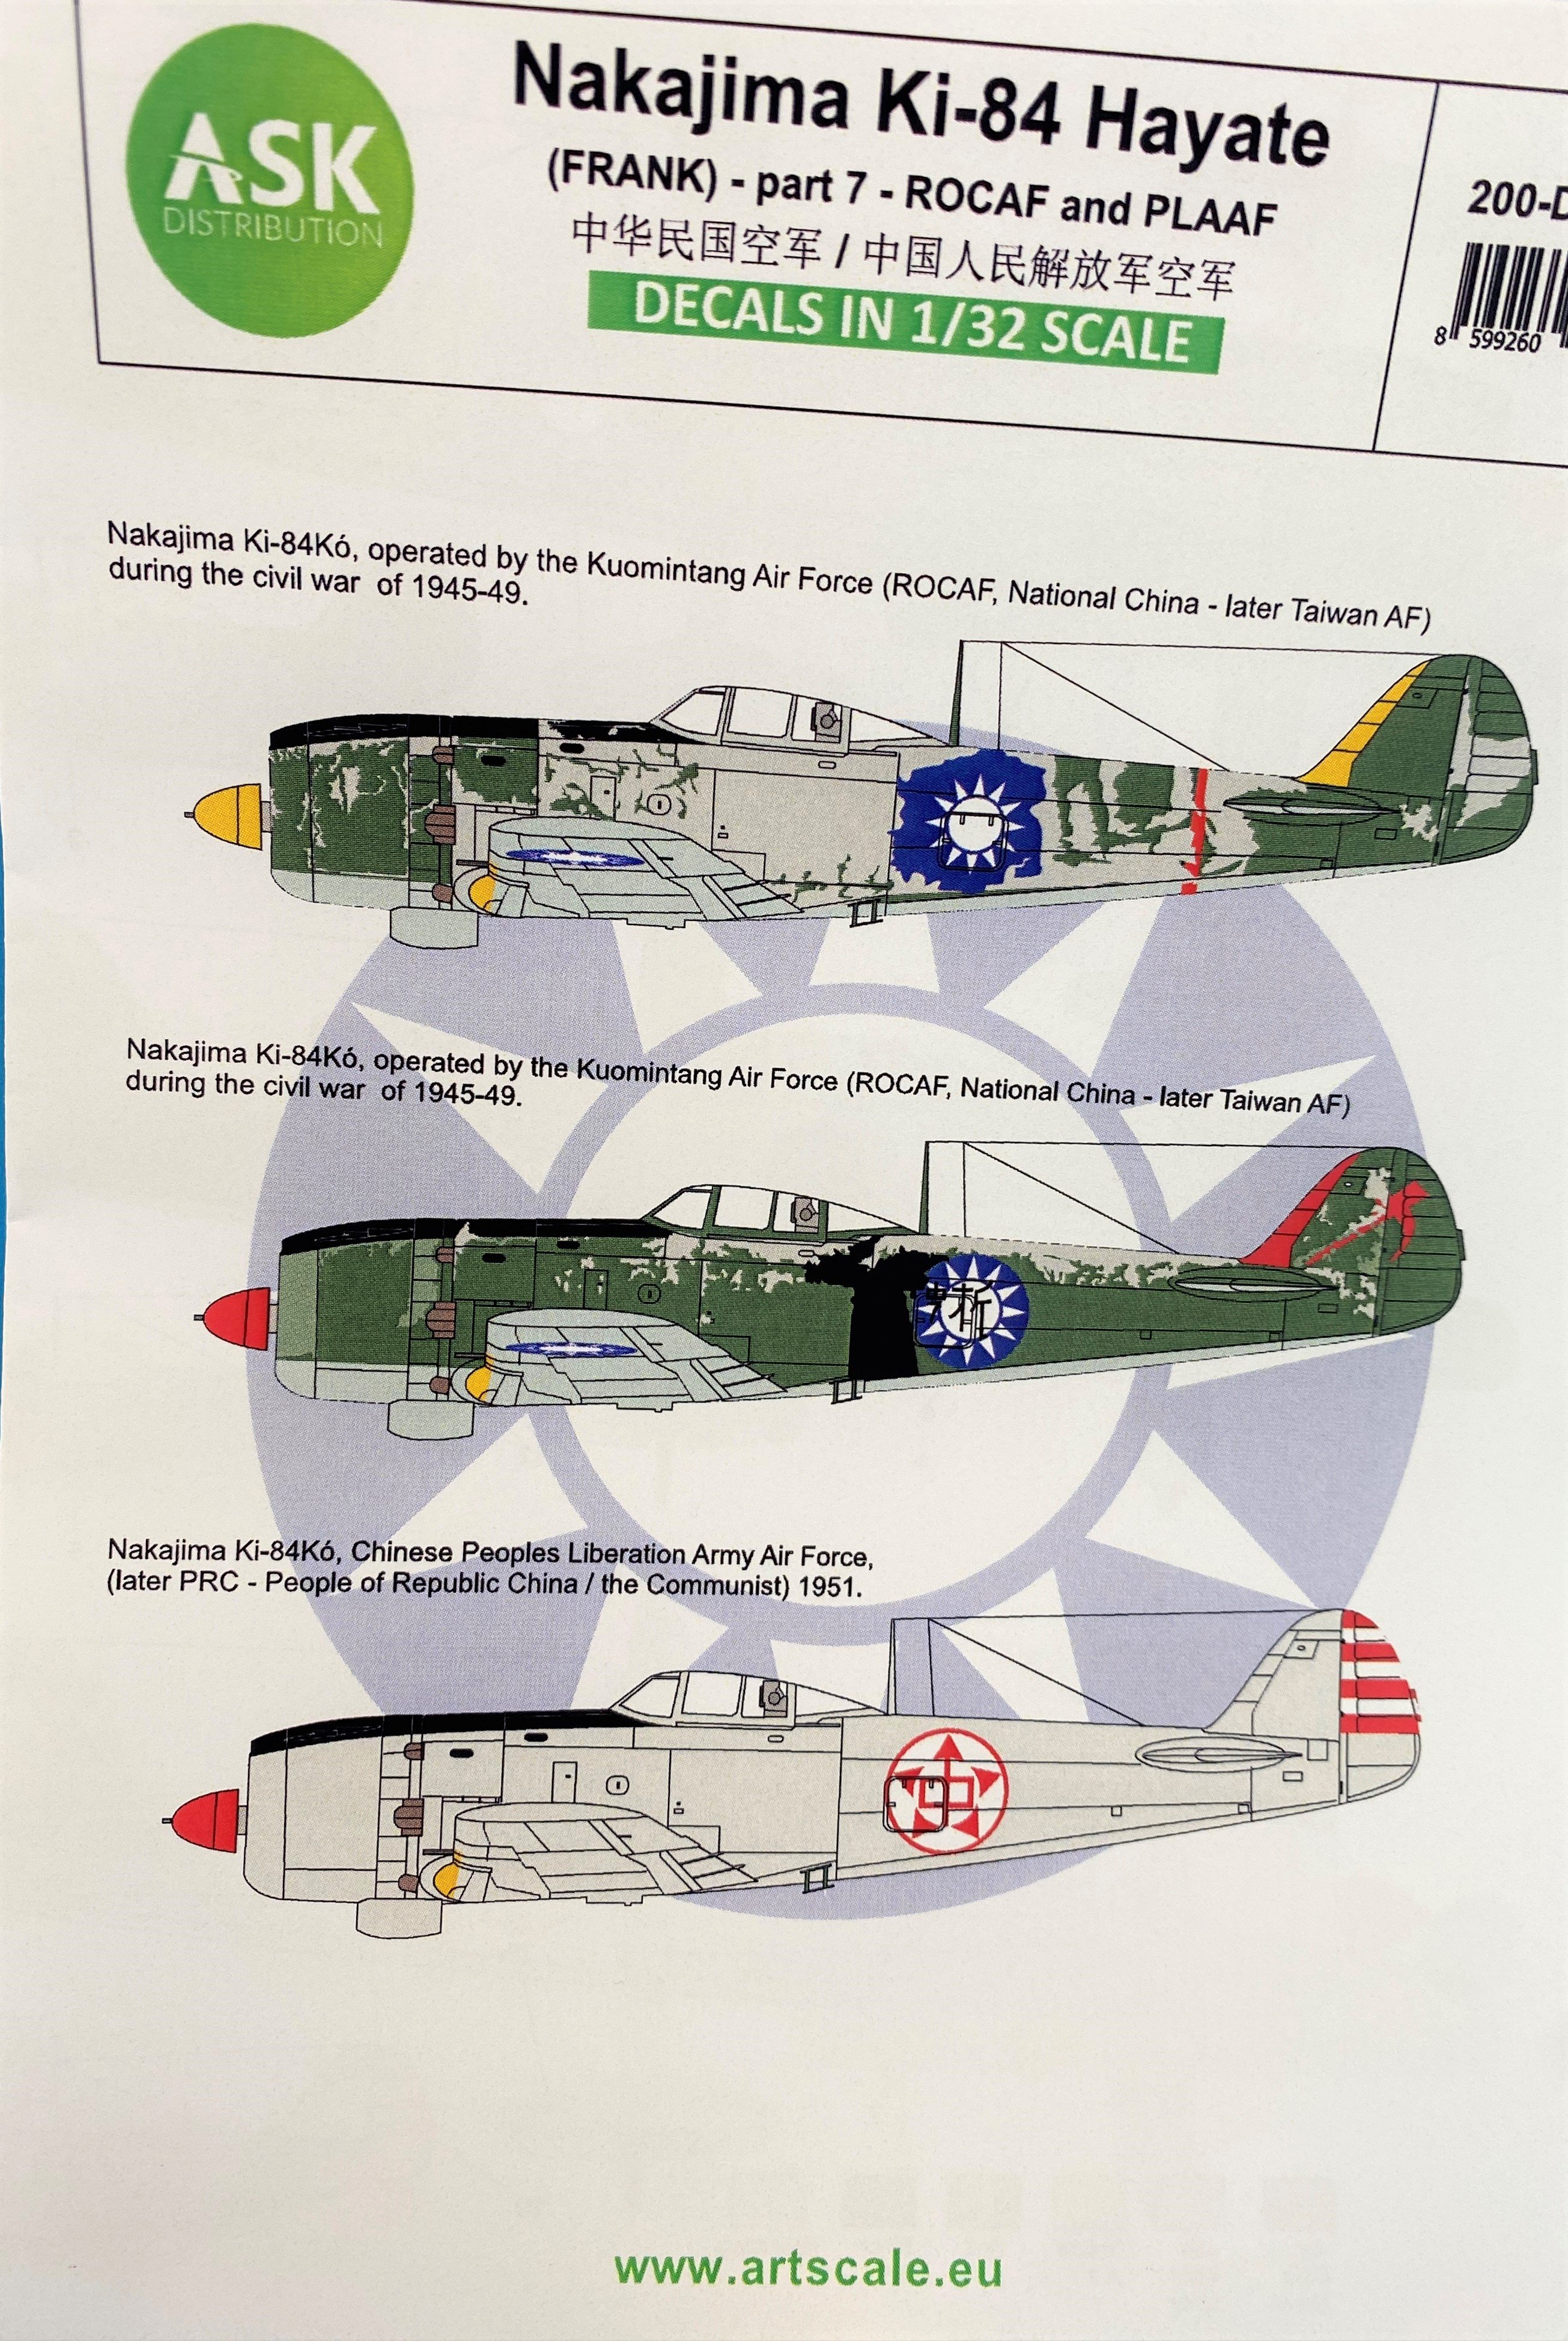
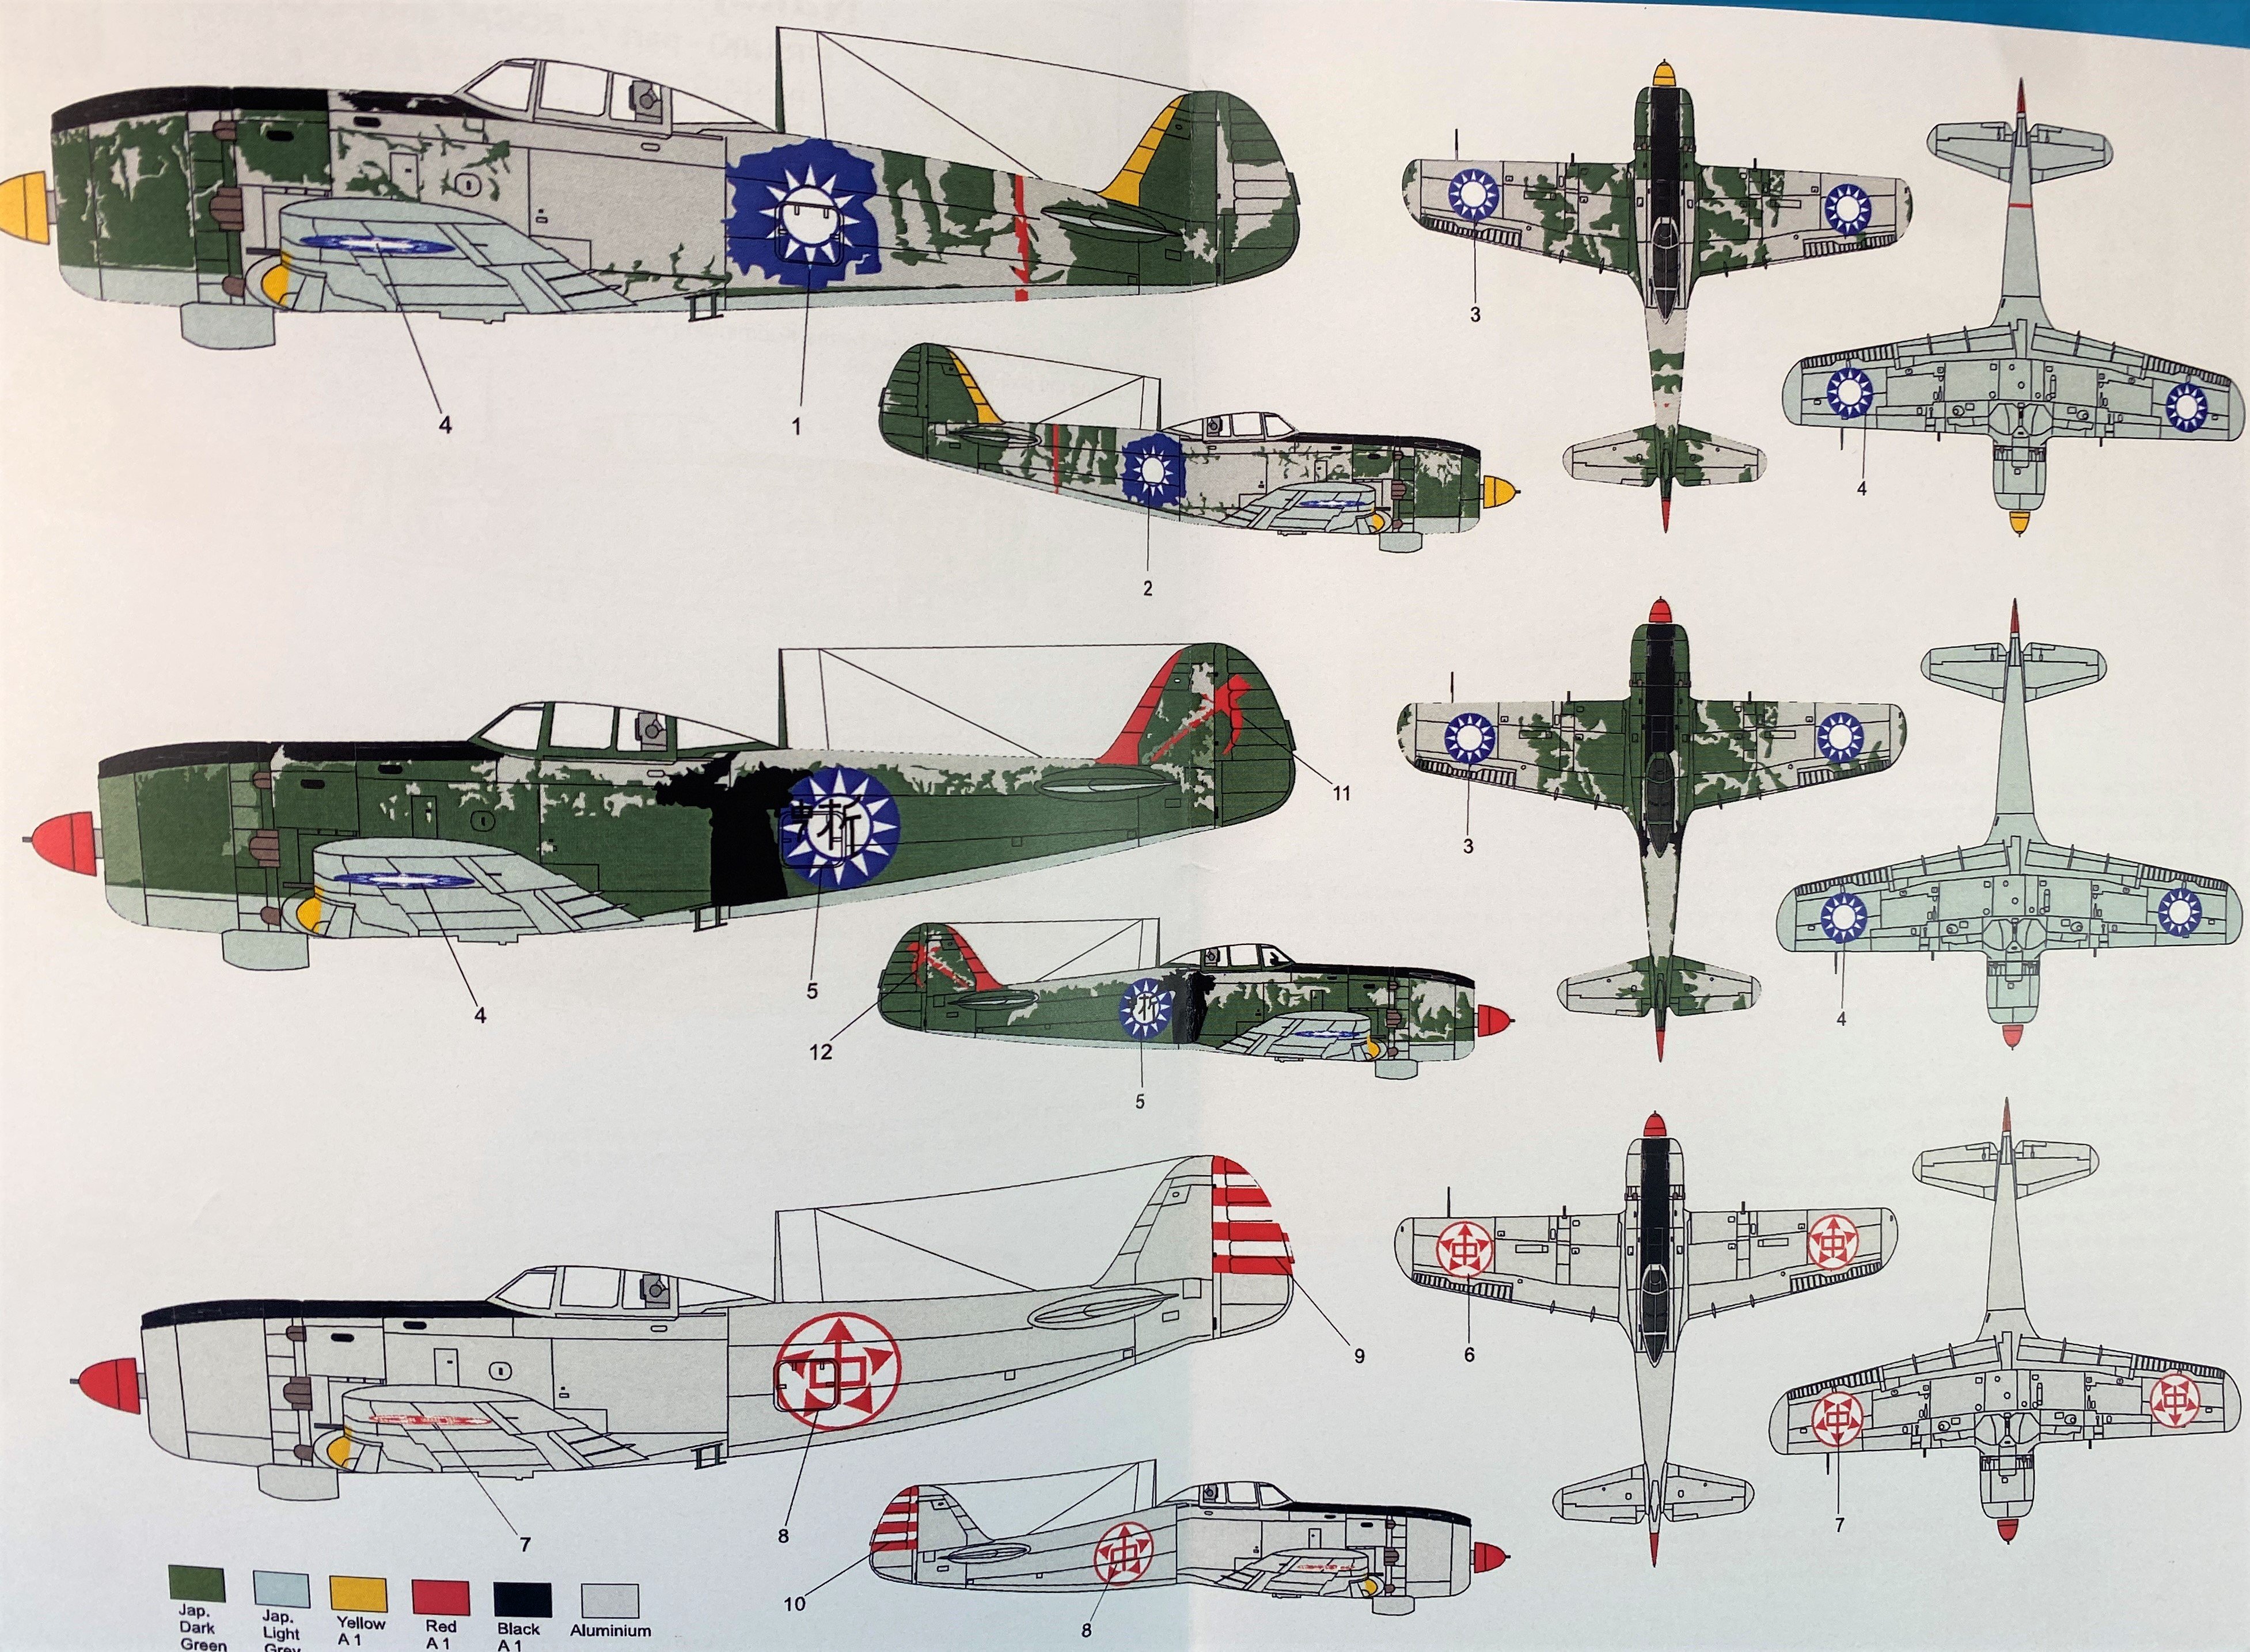
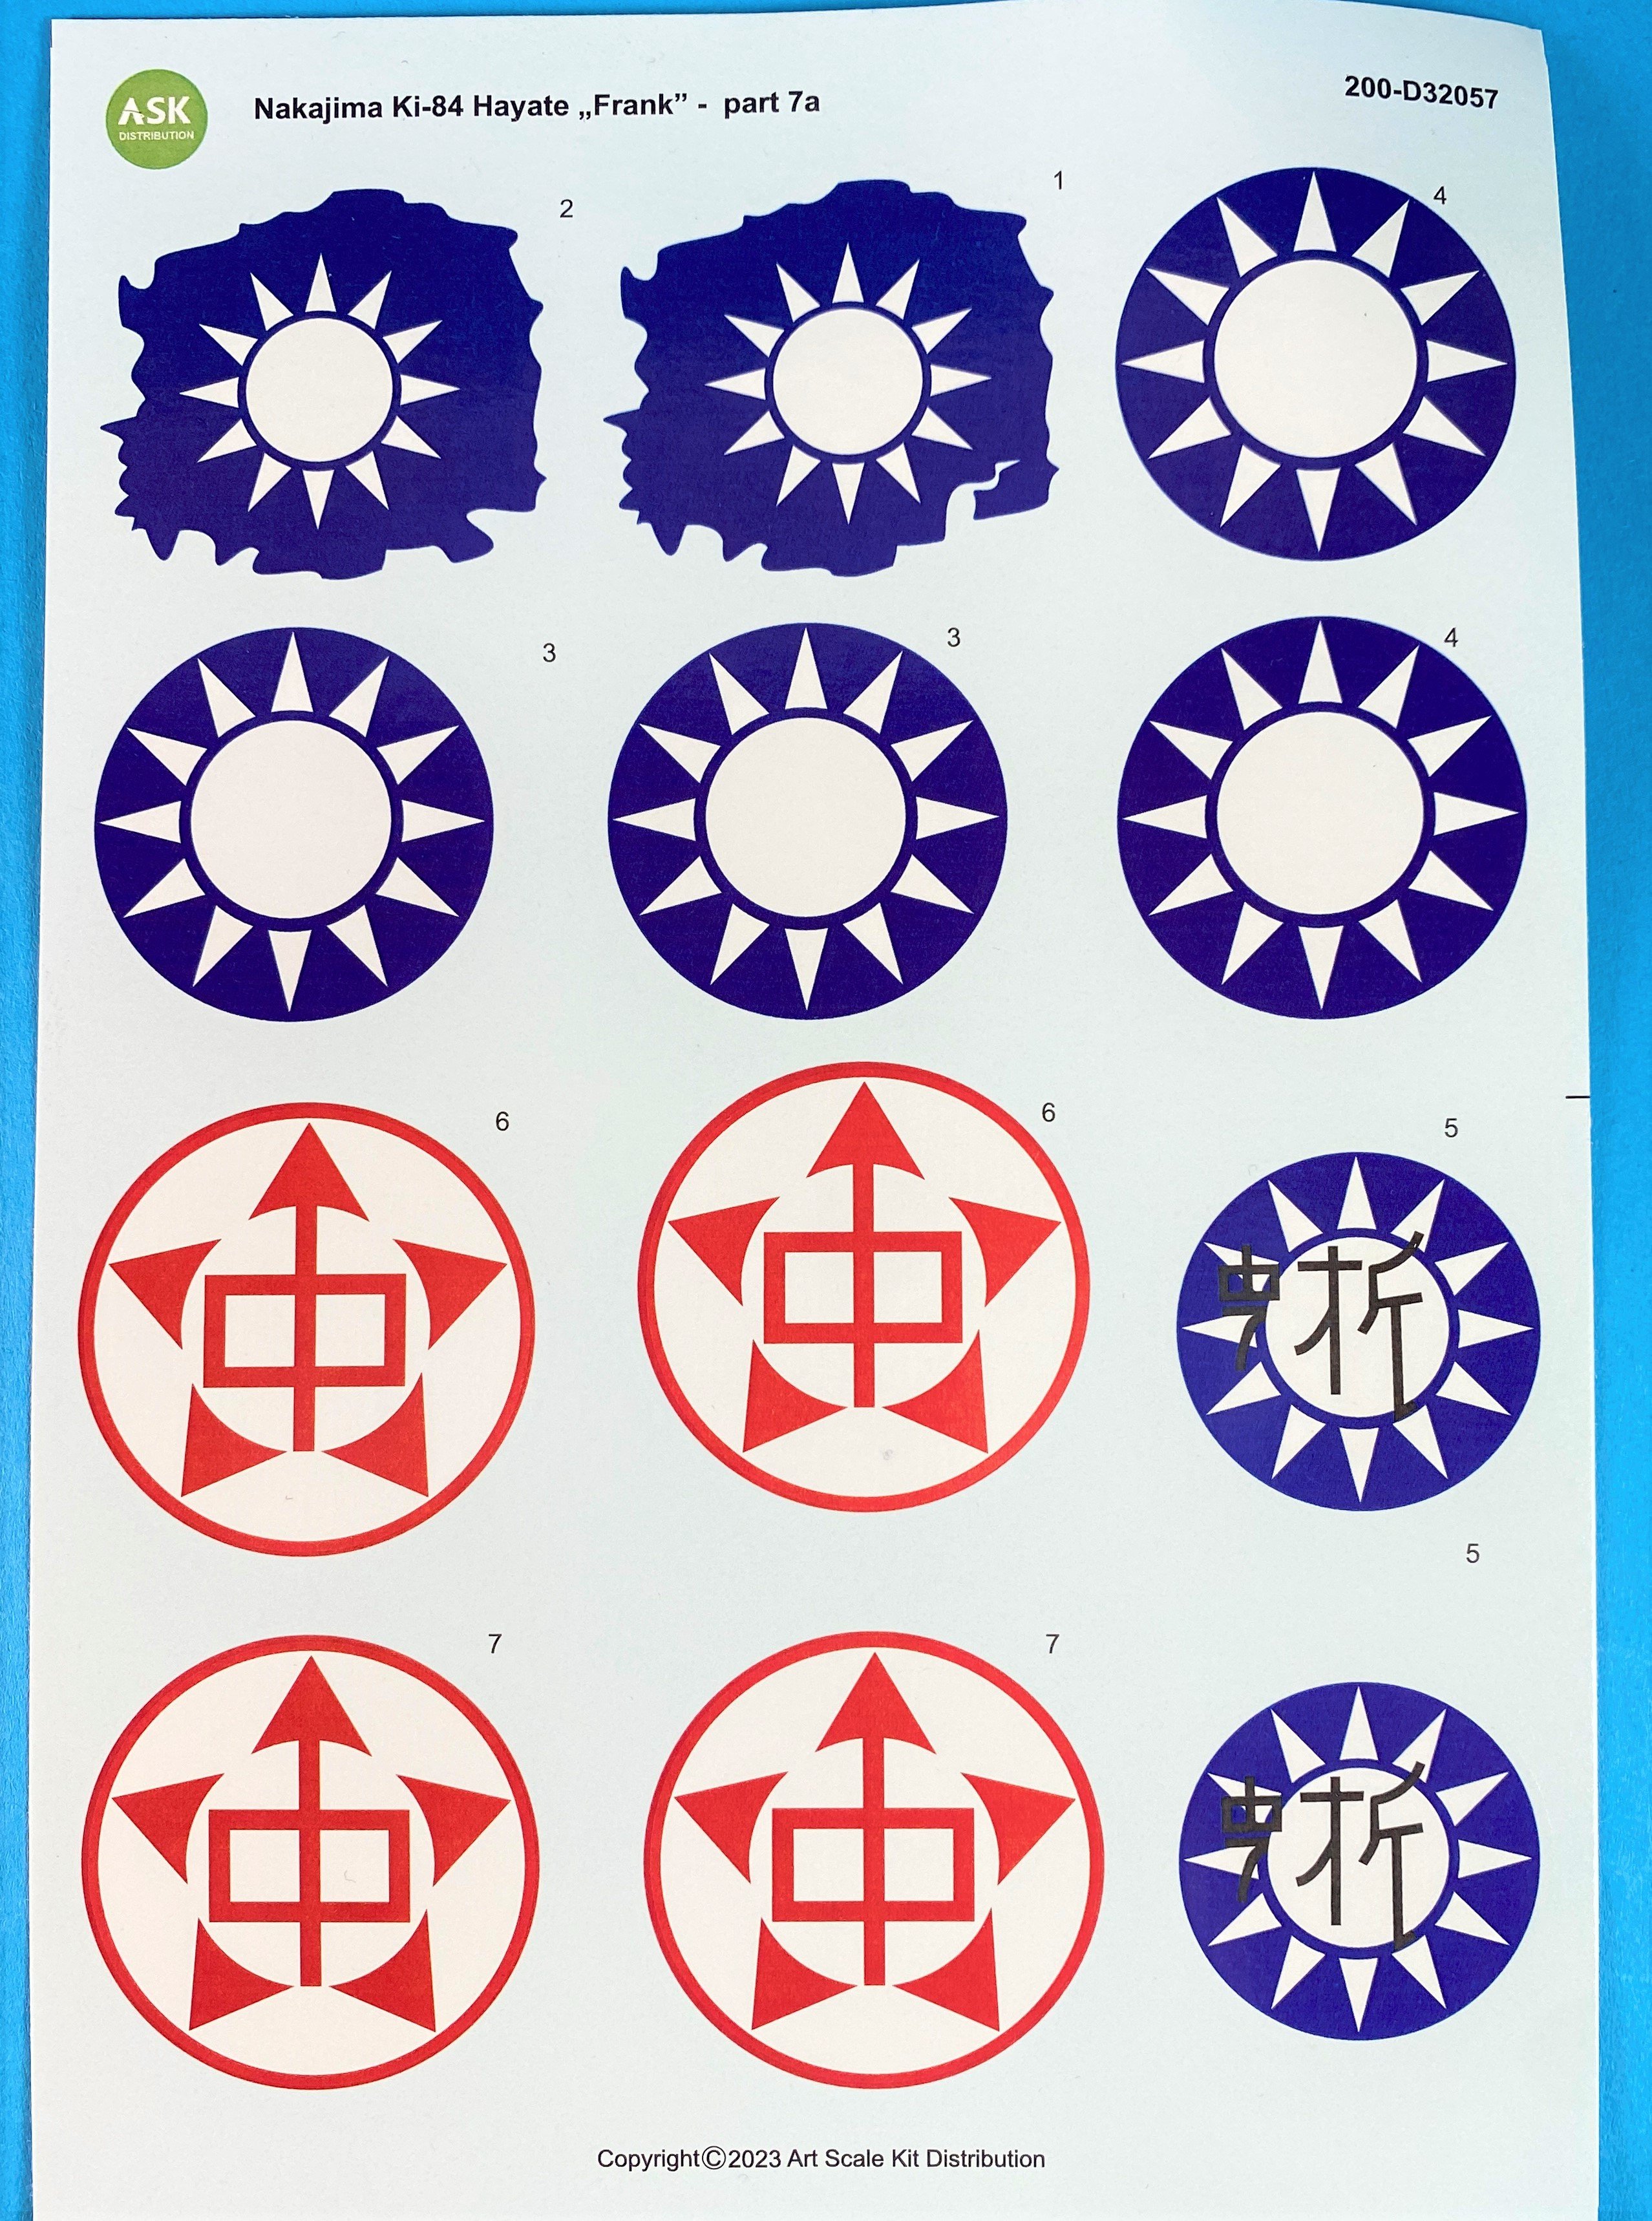
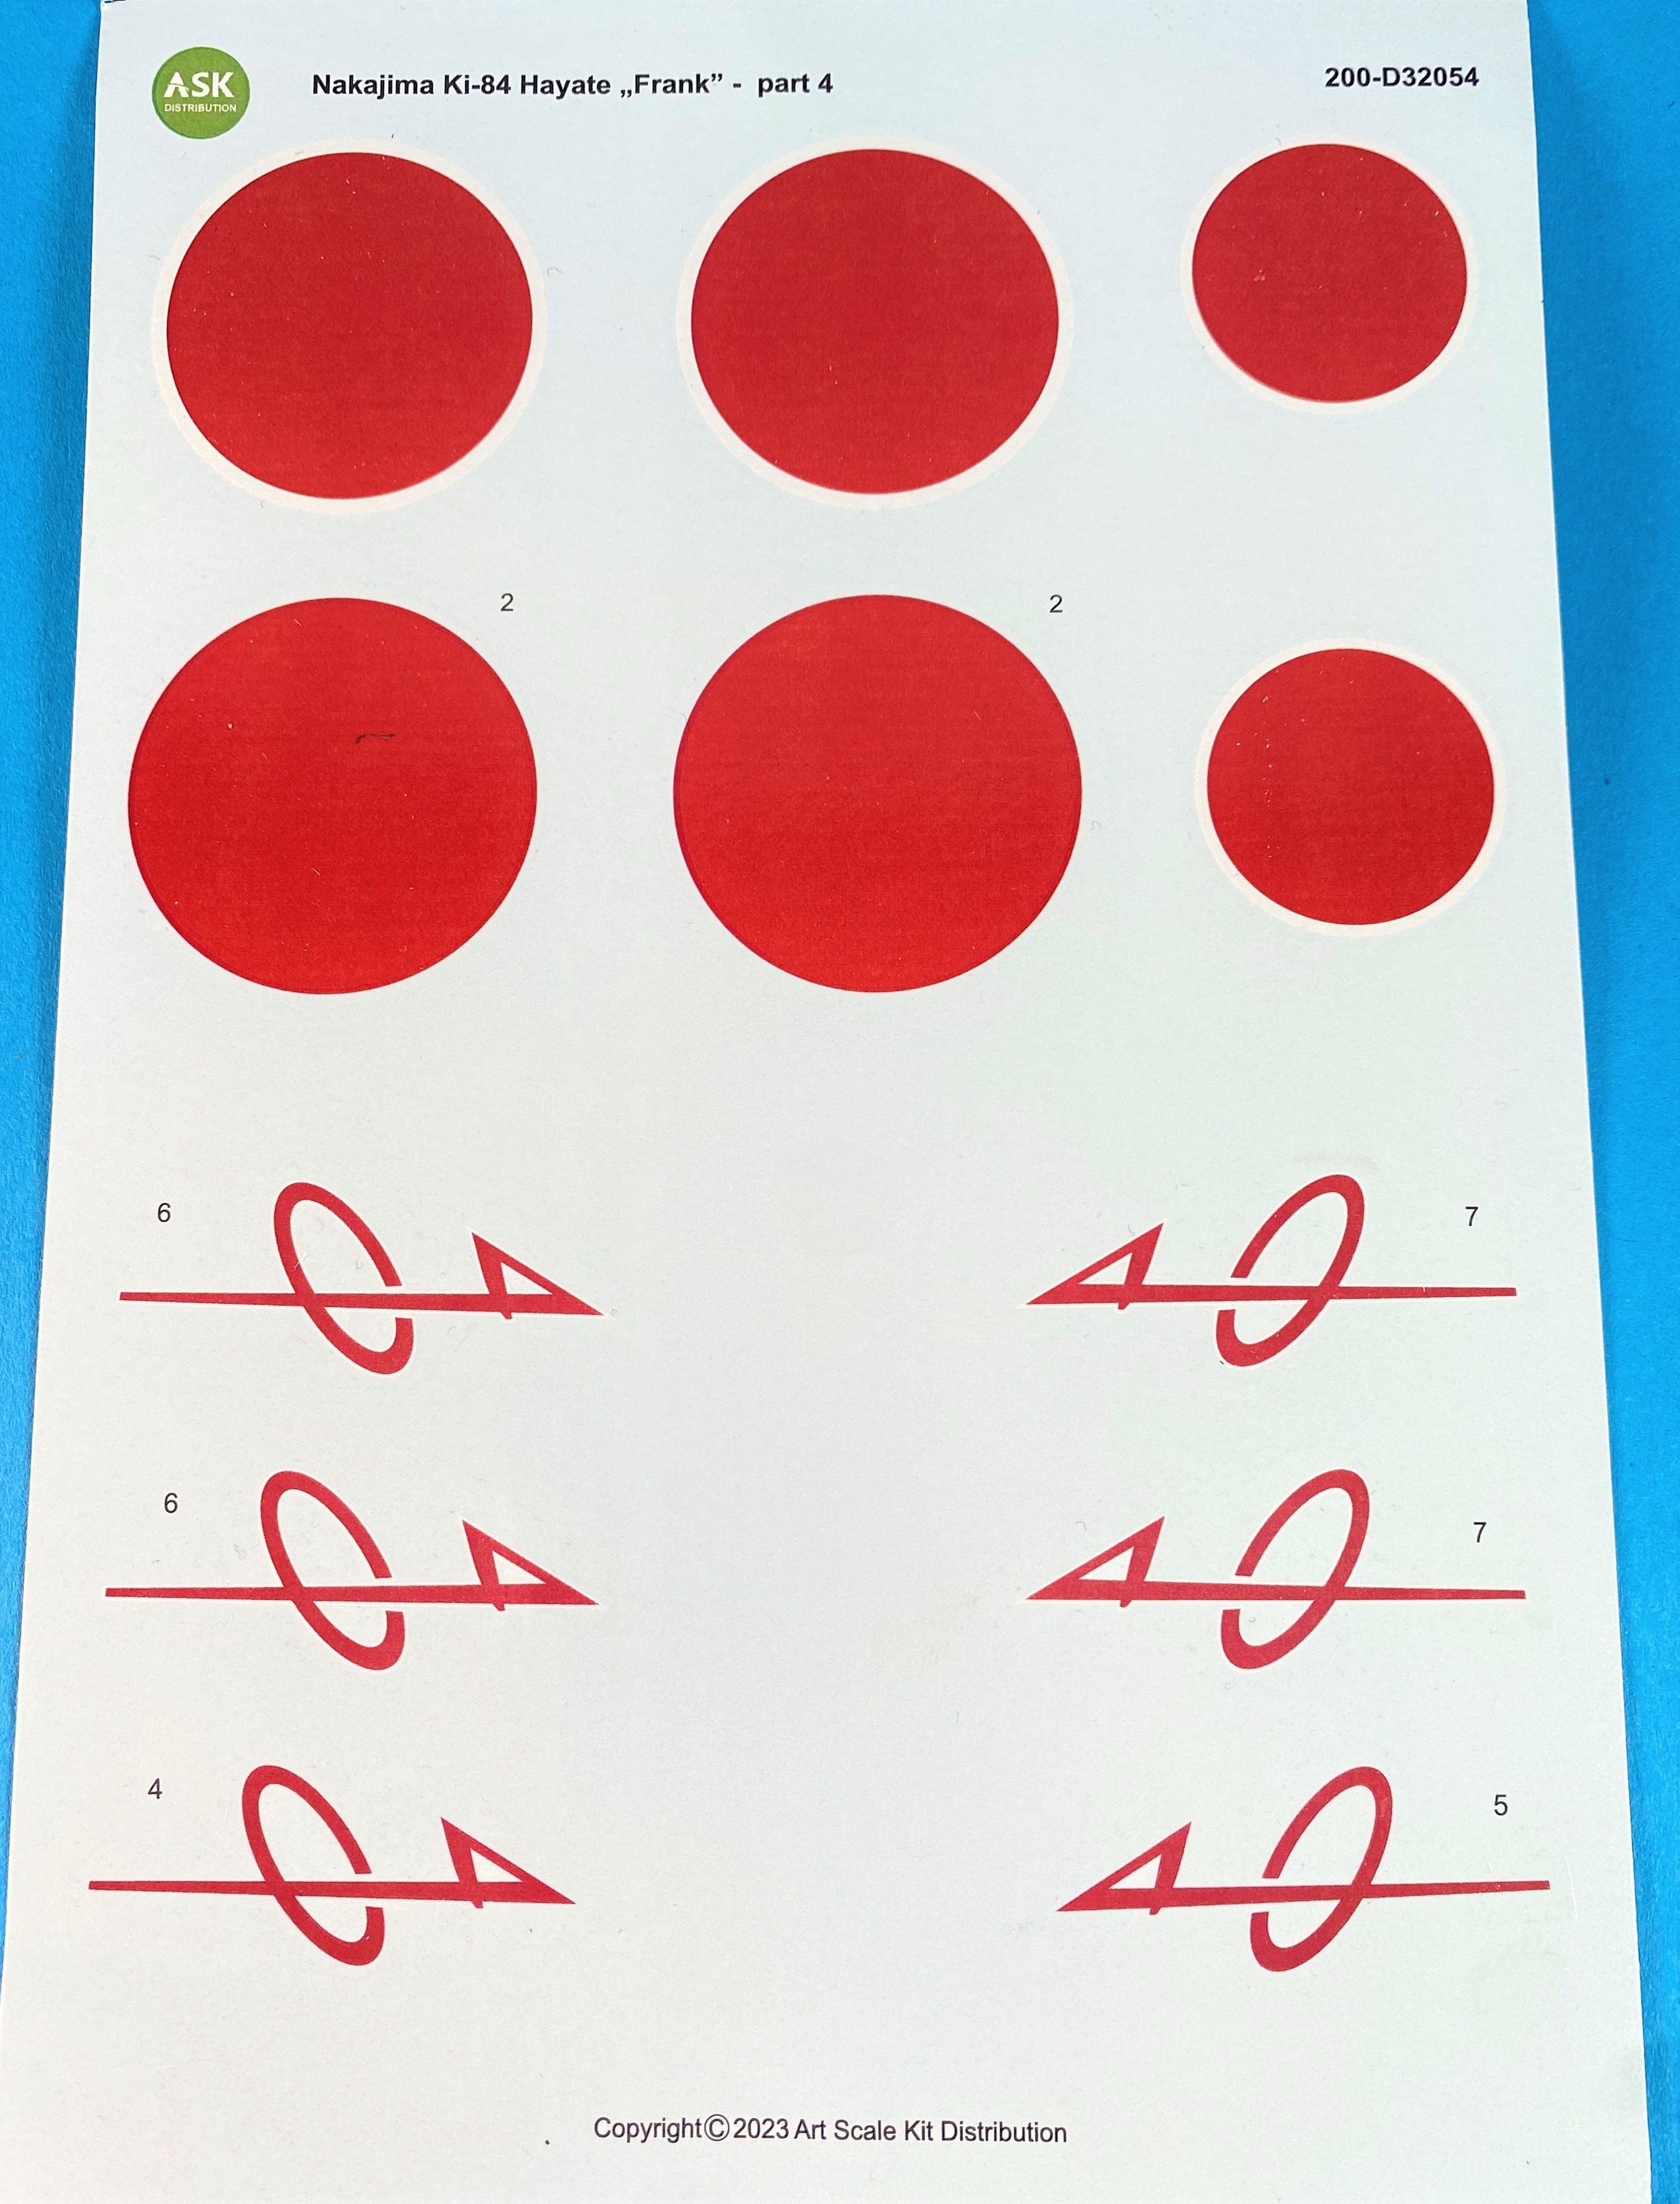
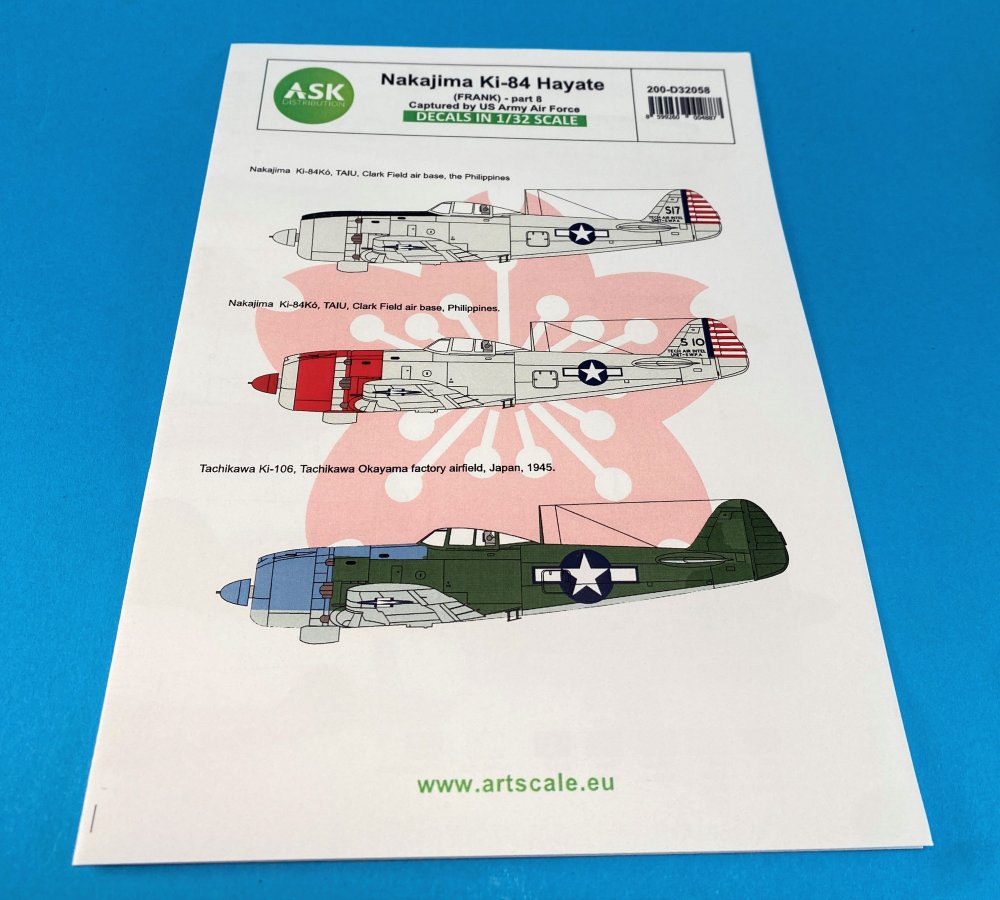
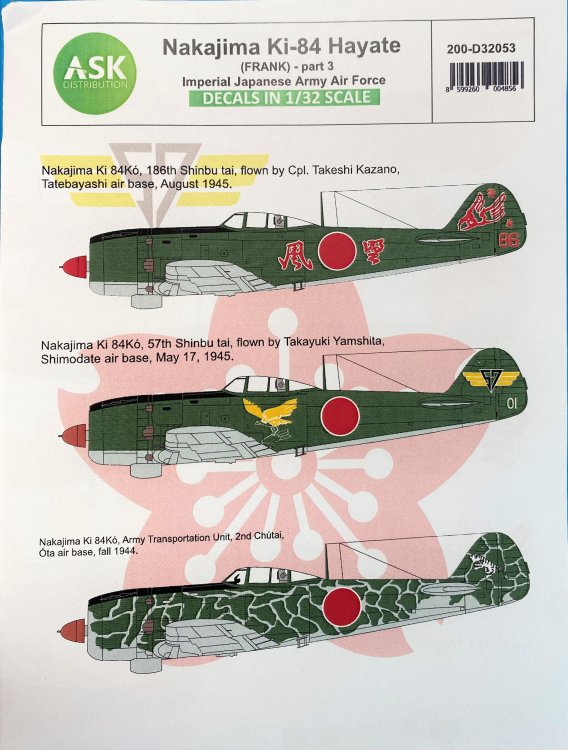
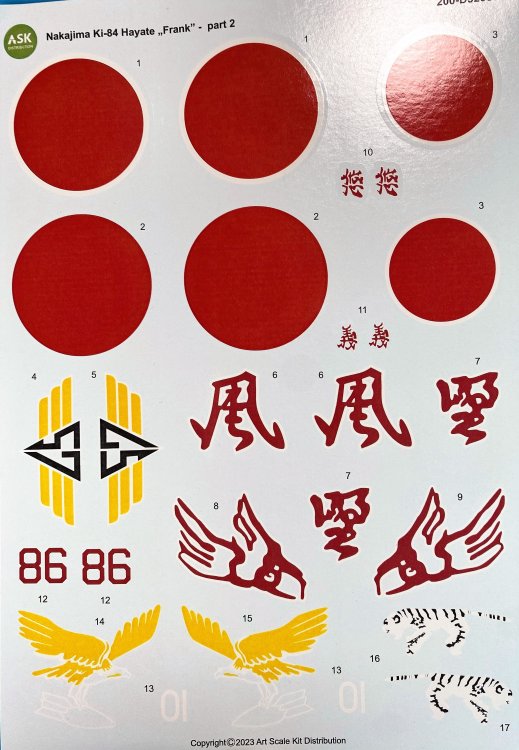
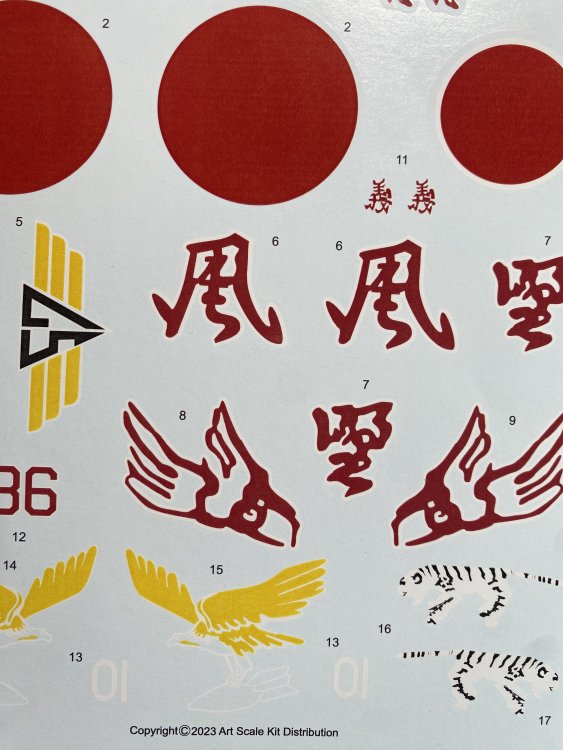
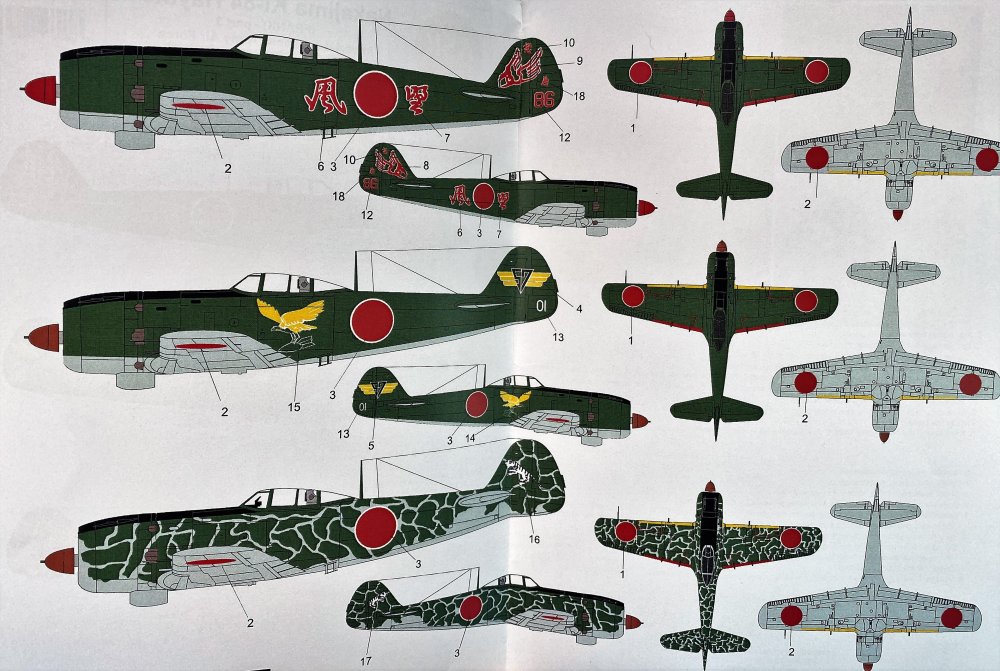
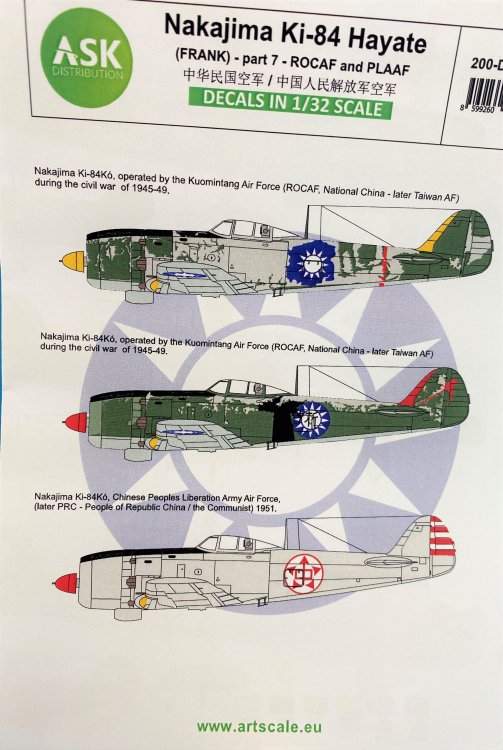
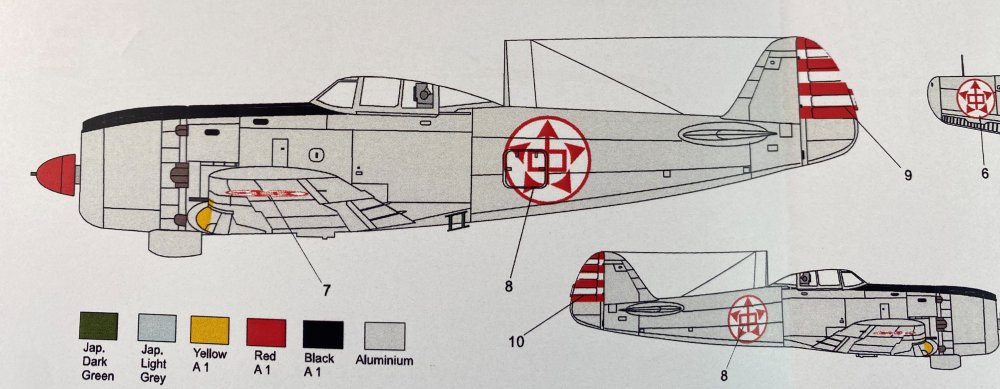
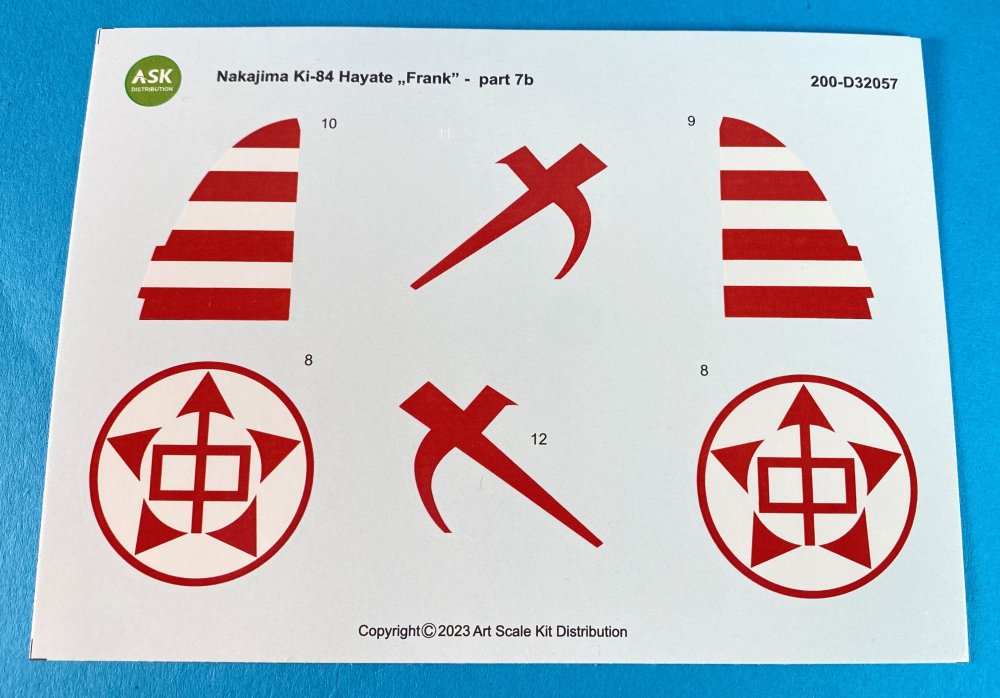
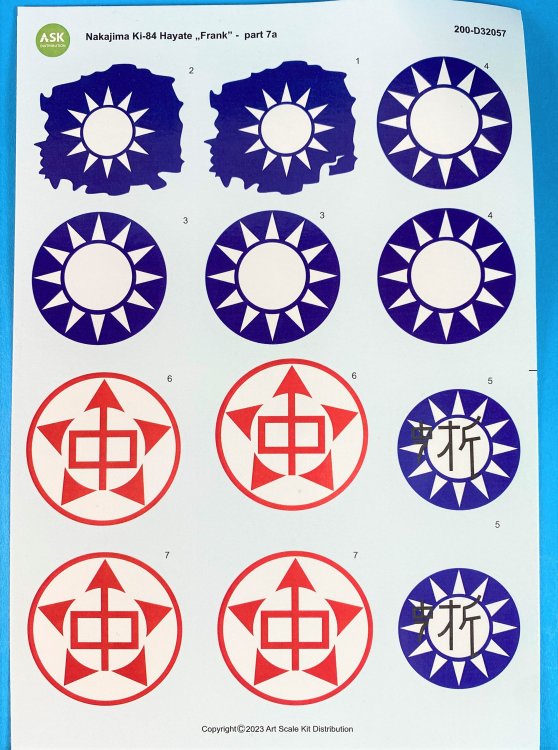
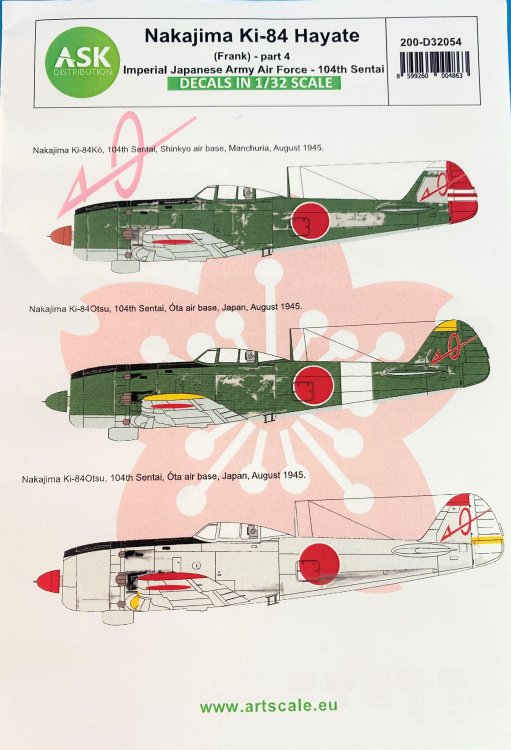
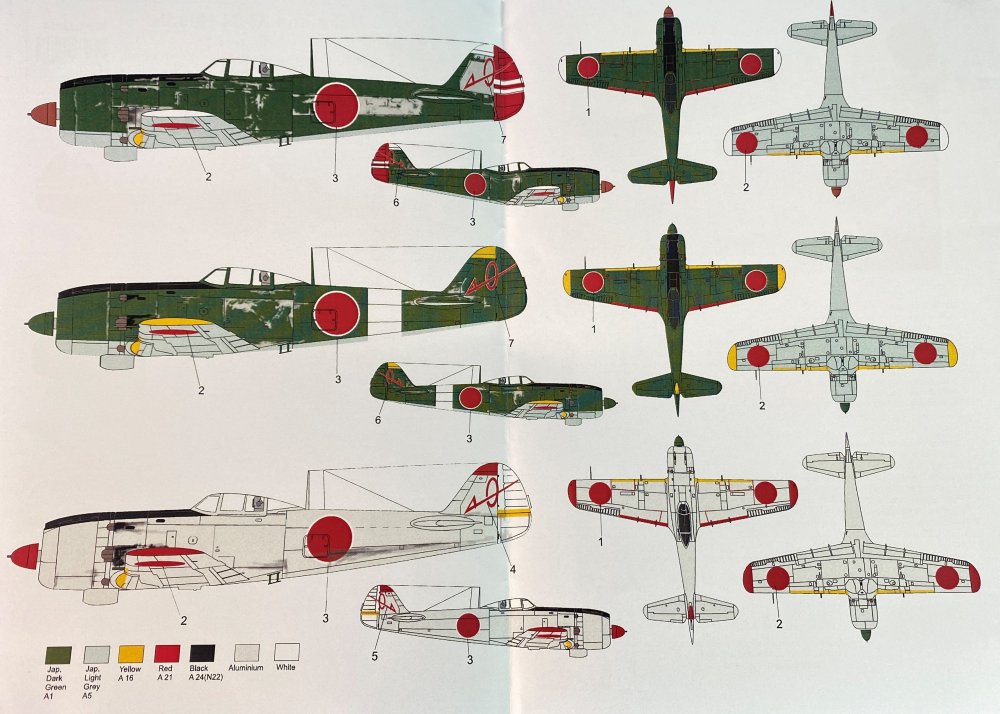
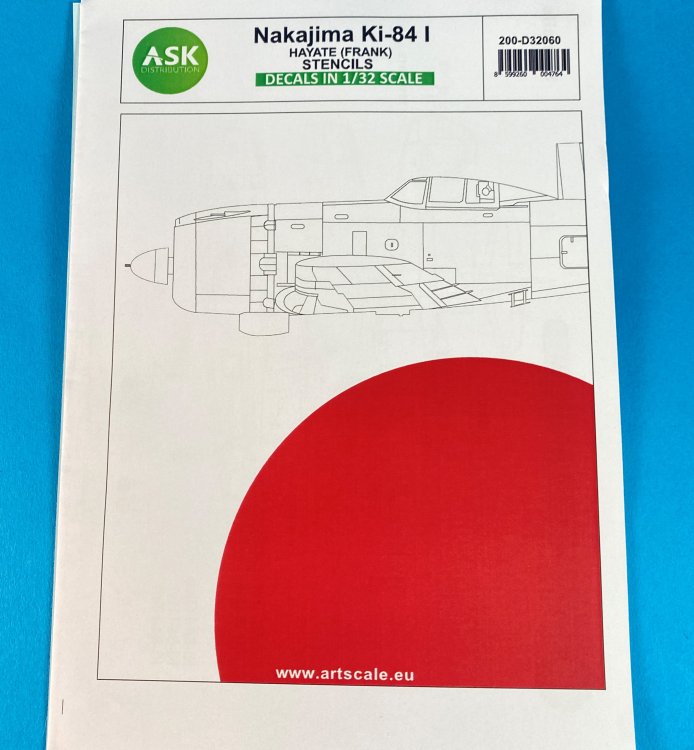
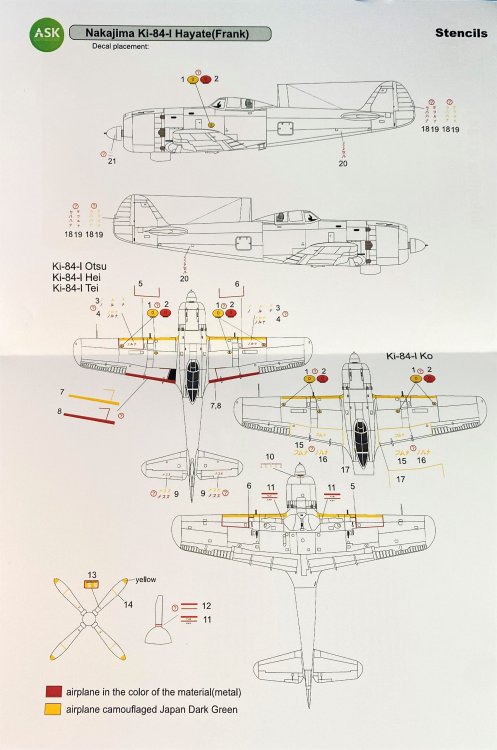
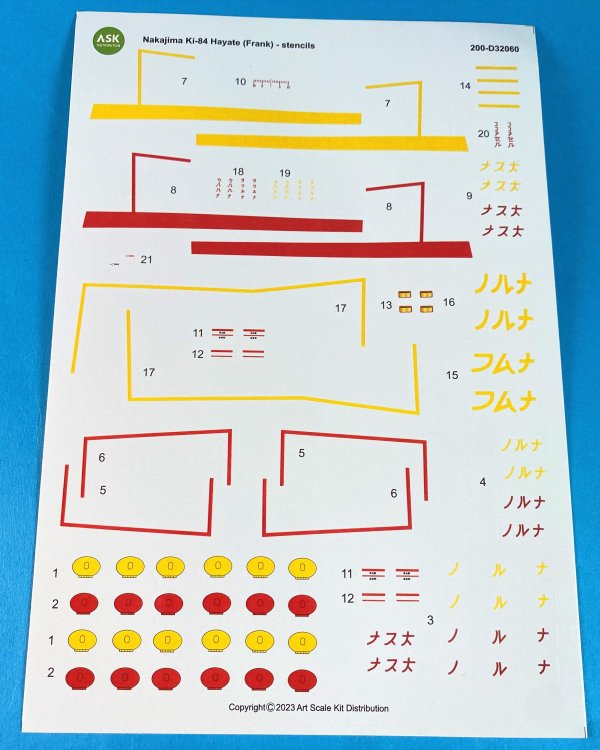
1:32 Art Scale Kit Ki-84 Several Sheets Well, another decal bunch from Art Scale Kit (ASK). Today, I´m going to review 5 (five) decal sheet from ASK. All sets came in a ziplog bag, small A5 size sheet with profiles colors instructions steps how to apply ASK decals. So let’s looks to the option schemes that all decal sheets offer. Also here, in the applying instructions, in all sheets (except the stencils decal sheet, theres`a real photo of one of the airplanes that are represented on the decal sheets. I really love that "bonus" Nakajima Ki-84 Hayate (Frank) – part 3 – Imperial Japanese Army Air Force Catalogue number200-D32053 Price: 12,30€ To order, click here. · Nakajima Ki-84 Kó, 186th Shinbu tai, flown by Cpl. Takeshi Kazano, Tatebayashi Air base, August 1945; · Nakajima Ki-84 Kó, 57th Shinbu tai, flown by Takayuki Yamshita Shimodate Air Base, May 17, 1945 · Nakajima Ki-84 Kó, Army Transportation Unit, 2nd Chutai, Óta air base, fall 1944 This sheet has some lovely art work on the fuiselage and tail fo the 57th Shinbu and 2nd Chutai aircraft. And ASK work capture really good their essences, checking the real photos available on the sheet. Nakajima KI-84 Hayate (Frank) - part 8 – captured by US Army Air Force: Catalogue number200-D32048 Price: 12,30€ To order, click here. · Nakajima Ki-84Ko, TAIJU, Clark Field air base, The Phillippines; · Nakajima Ki-84 Kó, TAIJU, Clark Field Air base, The Phillippines; · Tachikawa Ki-106, Tachikawa Okayama factory airfield, Japan 1945; Nakajima Ki-84 Hayate (Frank) – part 7 – ROCAF and PLAAF Catalogue number200-D32057 Price: 12,30€ To order, click here. · Nakajima Ki-84 Kó, operated by the Kuomintang Air Force (ROCAF, National Chine – Later Taiwan AF) during the civil war of 1945-1949; · Nakajima Ki-84 Kó, operated by the Kuomintang Air Force (ROCAF, National Chine – Later Taiwan AF) · Nakajima Ki-84Kó, Chinese People’s Liberation Army Air Force, (later PRC - People of Republic China / the Communist) 1951. The set, unlike the other has two decal sheets, the second one 7b, is the fuselage insignia of the Chinese People’s Liberation Army Air Force and the marking fo the rudder of this last scheme and the second scheme. Nakajima Ki-84 Hayate (Frank) – part 4 – Imperial Japanese Army Air Force - 104th Sentai Catalogue number200-D32054 Price: 12,30€ To order, click here. · Nakajima Ki-84Kó, 104th Sentai, Shinkyo air base, Manchuria, August 1945. · Nakajima Ki-84Otsu, 104th Sentai, Óta air base, Japan, August 1945. · Nakajima Ki-84Otsu, 104th Sentai, Óta air base, Japan, August 1945. Nakajima Ki-84 Hayate (Frank) Stencils Catalogue number200-D32060 Price: 12,30€ To order, click here. The stencils are very thin, with small decal film on the edge to prevent to maximum silvering and not blurry, being quite comprehensive. this particully case, there`s quite a lots of stencils and big ones. *** Analyzing the decal sheets, the color registration is great and a very good definition of the details. The decals have a thin film, in fact looking very thin and delicate. There is no indication where are they printed so I assume that will be in ASK house. The printing quality is quite good, as they are sharp, with outline very well defined. The color look quite good and spot on. I tried already and it work great, with good adhesion to the plane surface without wrinkling or bubbling. No adverse reaction to Micro set or Micro Sol. You do have to work then with care and patience as they are very delicate and therefore, fragile. The instructions are the general ones that are applicable to all decals, it is always important to remember the general principles of decal application. In this case, there is no specific rule for applying these decals. The profiles draws contains lots of information, with side view (both side) and top view with precise decal indication. Conclusion: As you can see this week, ASK is coming with lots (really, tons) of new decals giving the modeler some great options in 1:32 and 1:48. Is a very good product, not expensive and that will give your model a different look on your collection and to the table contest or the club weekly reunion. The location indication of the decals is quite good and very perceptible. The decals as already said, have a very good colour registration, very thin, with minimum decal film, and they work quite nice! My thanks to Art Scale Decals for producing these fantastic decals and the possibility of reviewed them. Francisco Guedes .


-
- 2
-

-
- art scale kit
- ki-84
- (and 1 more)
-
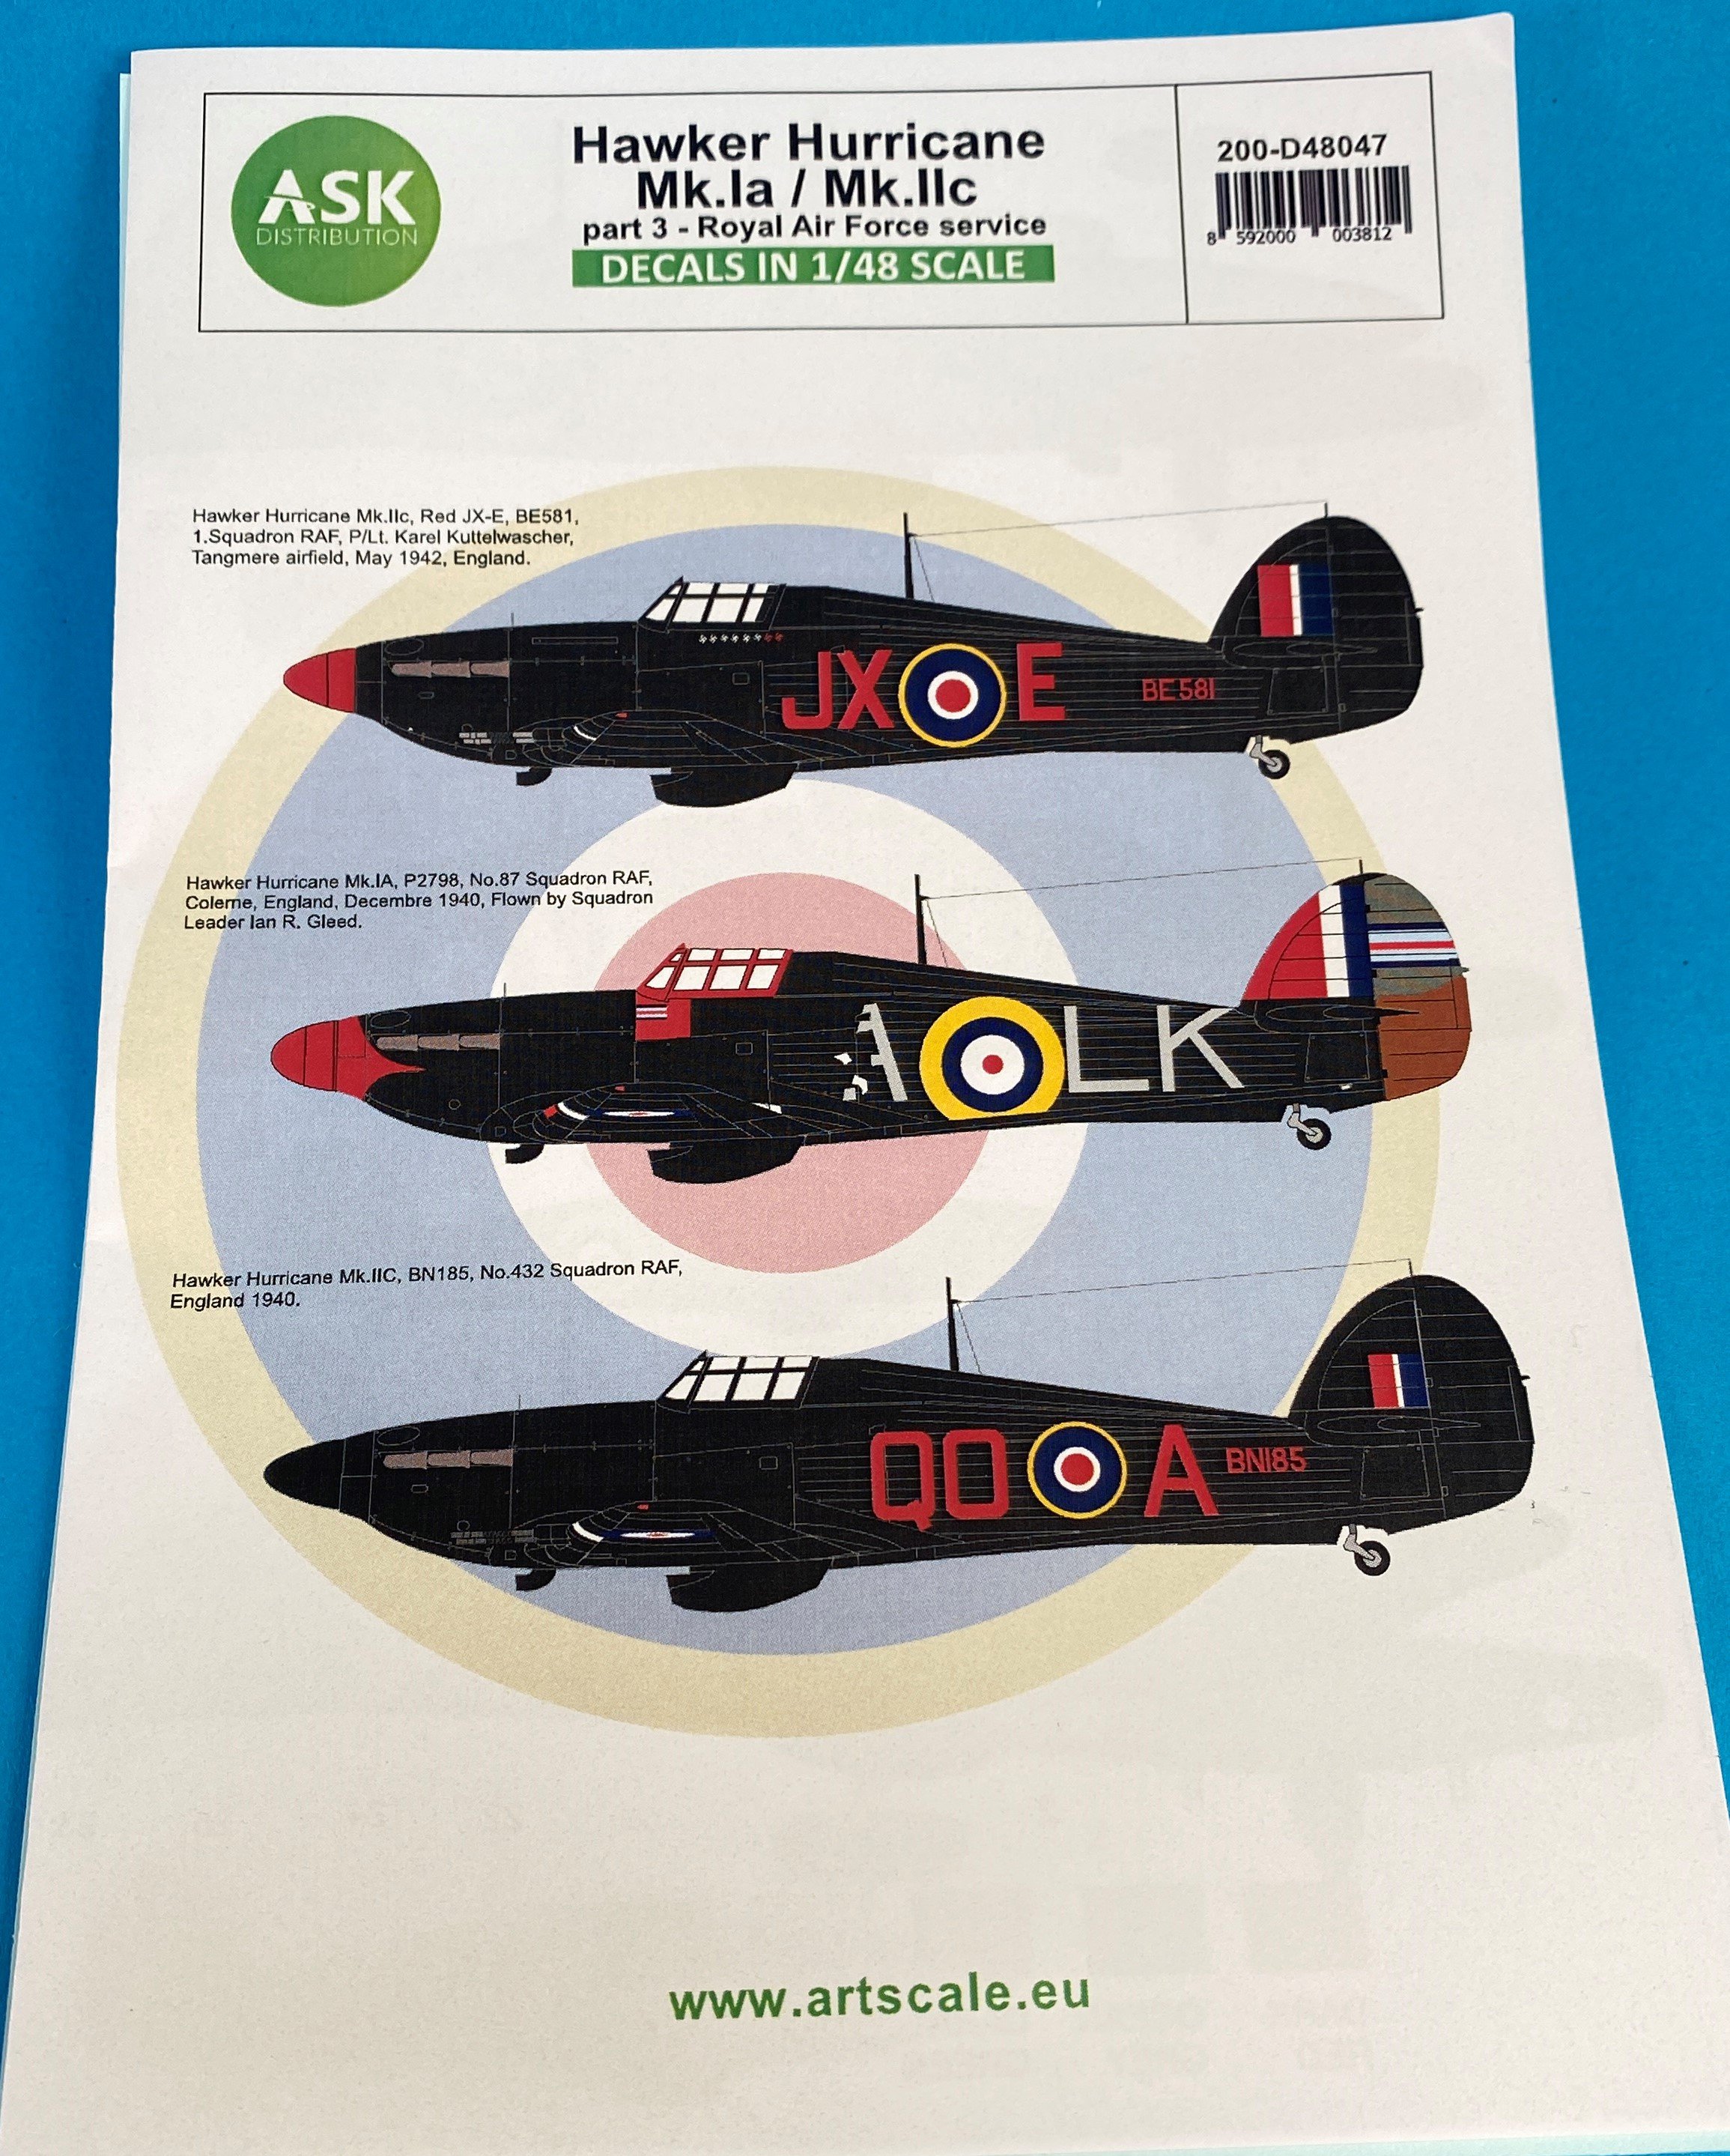
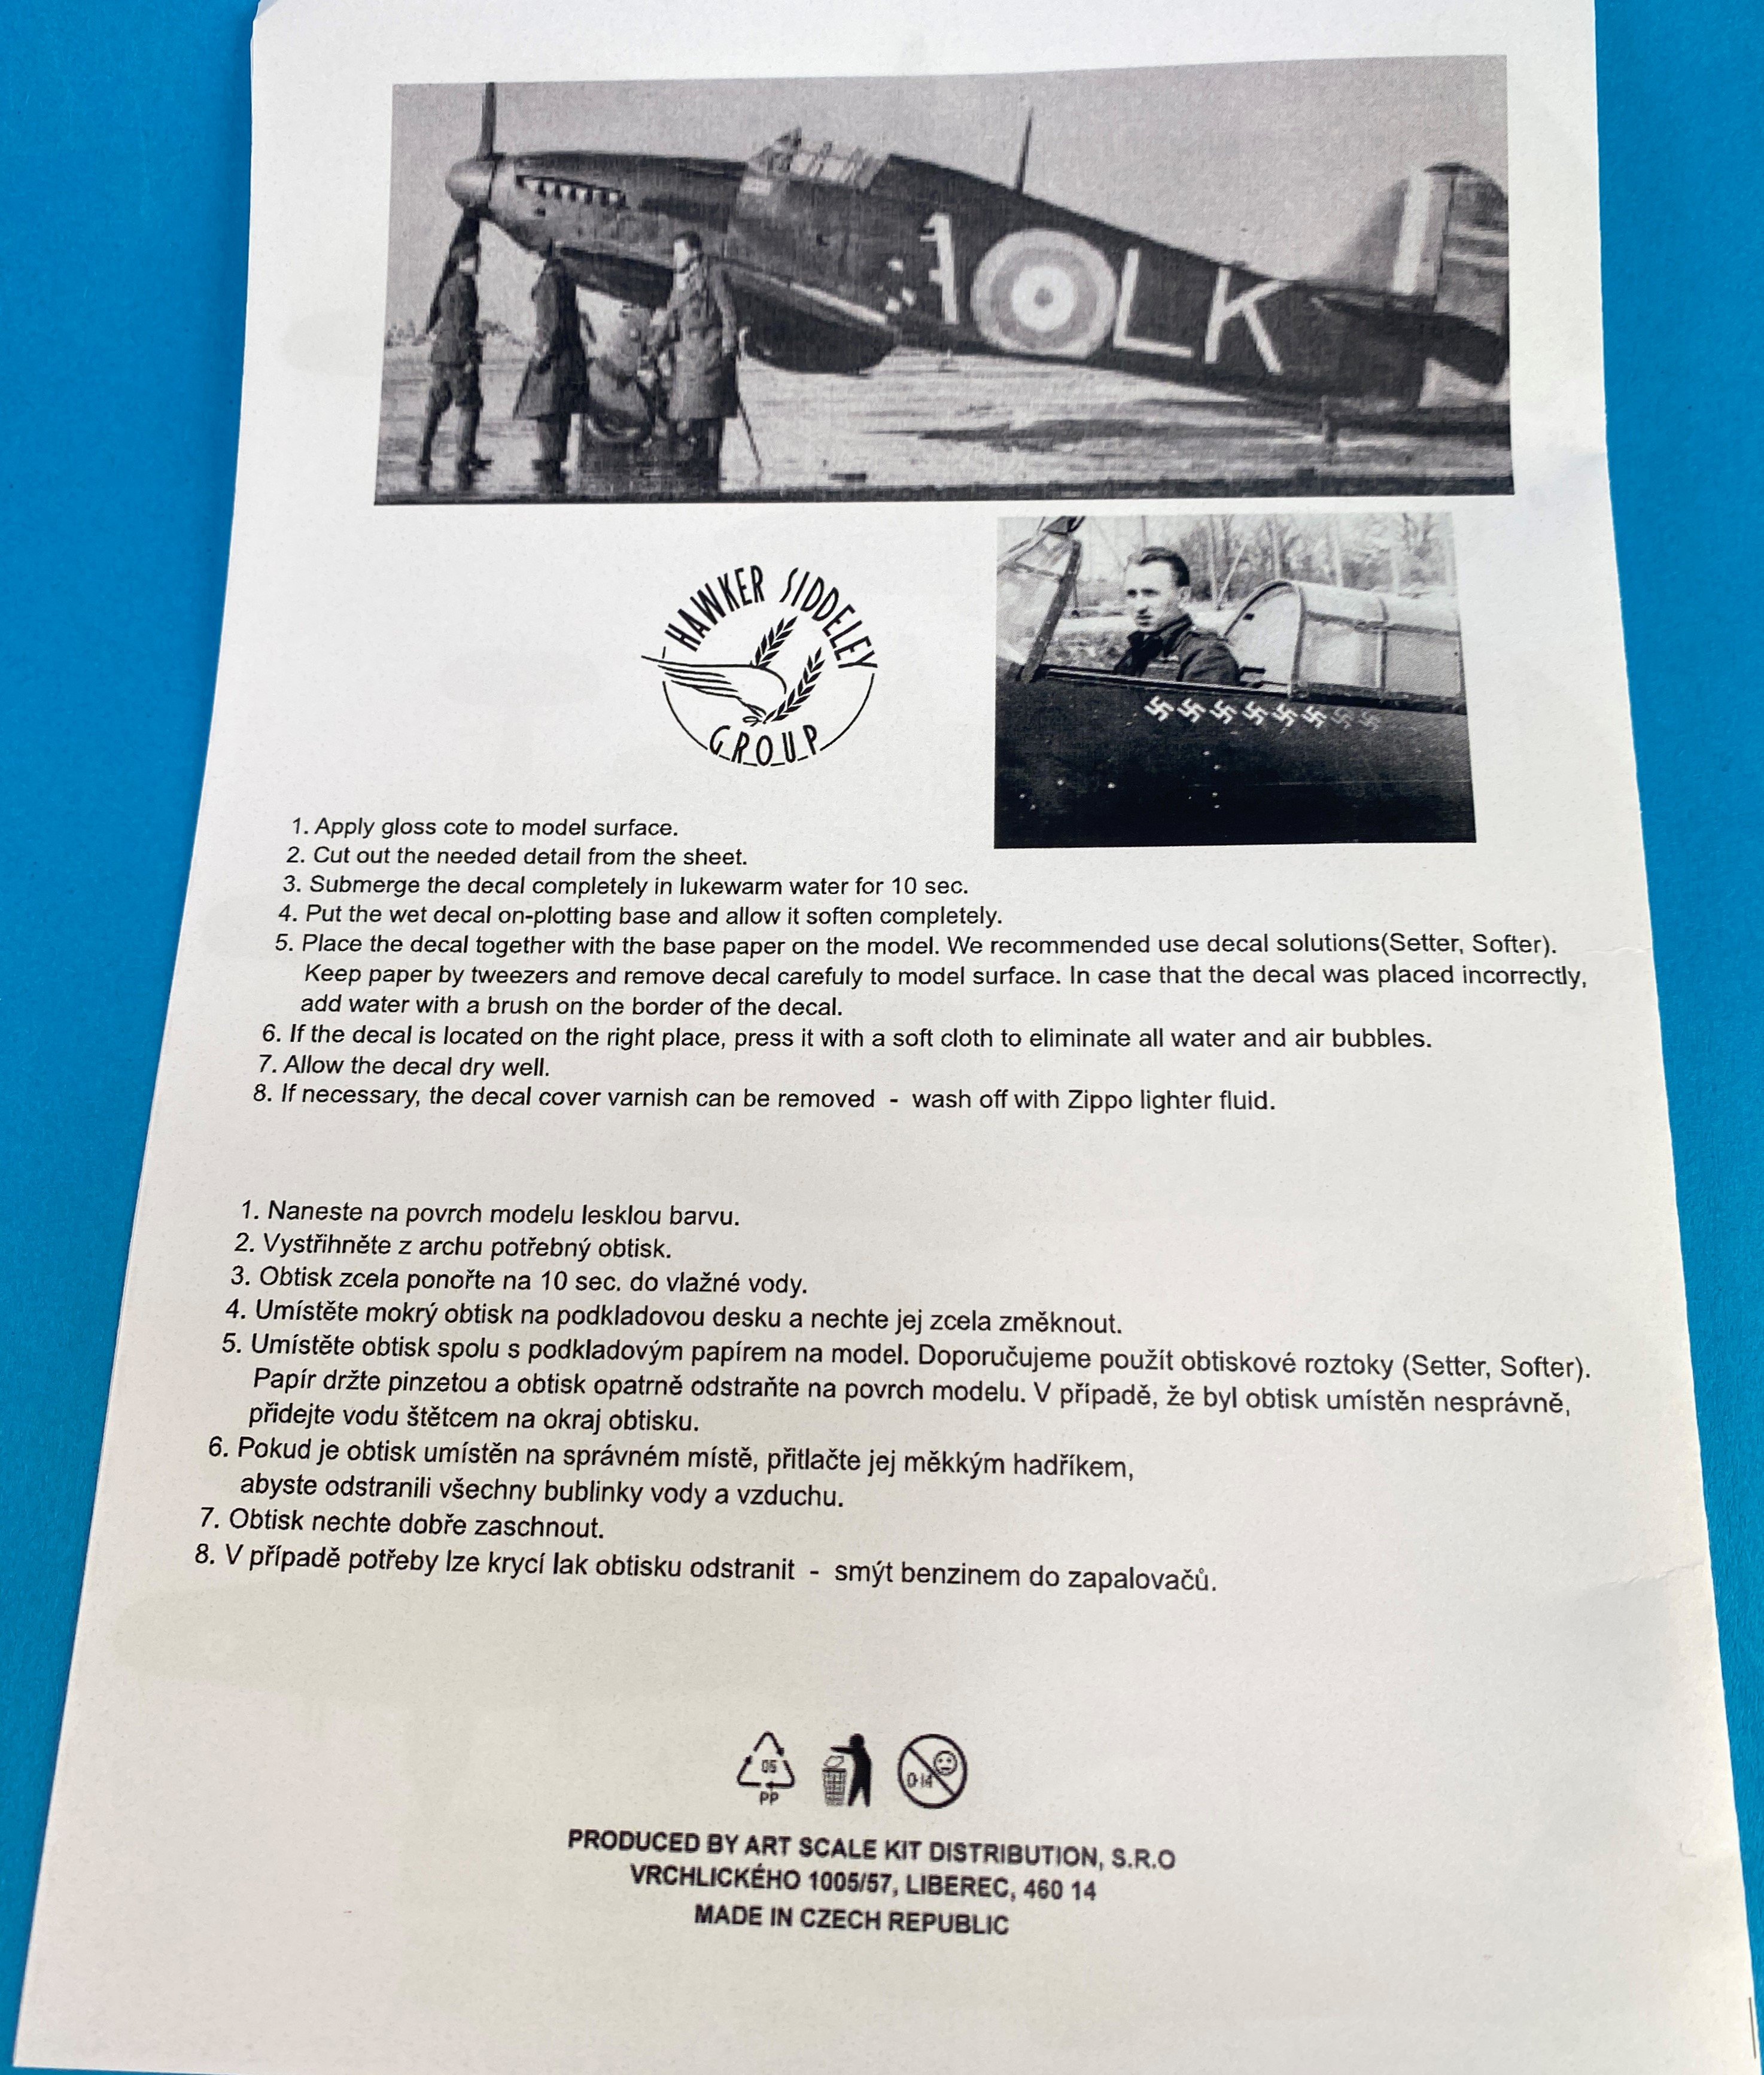
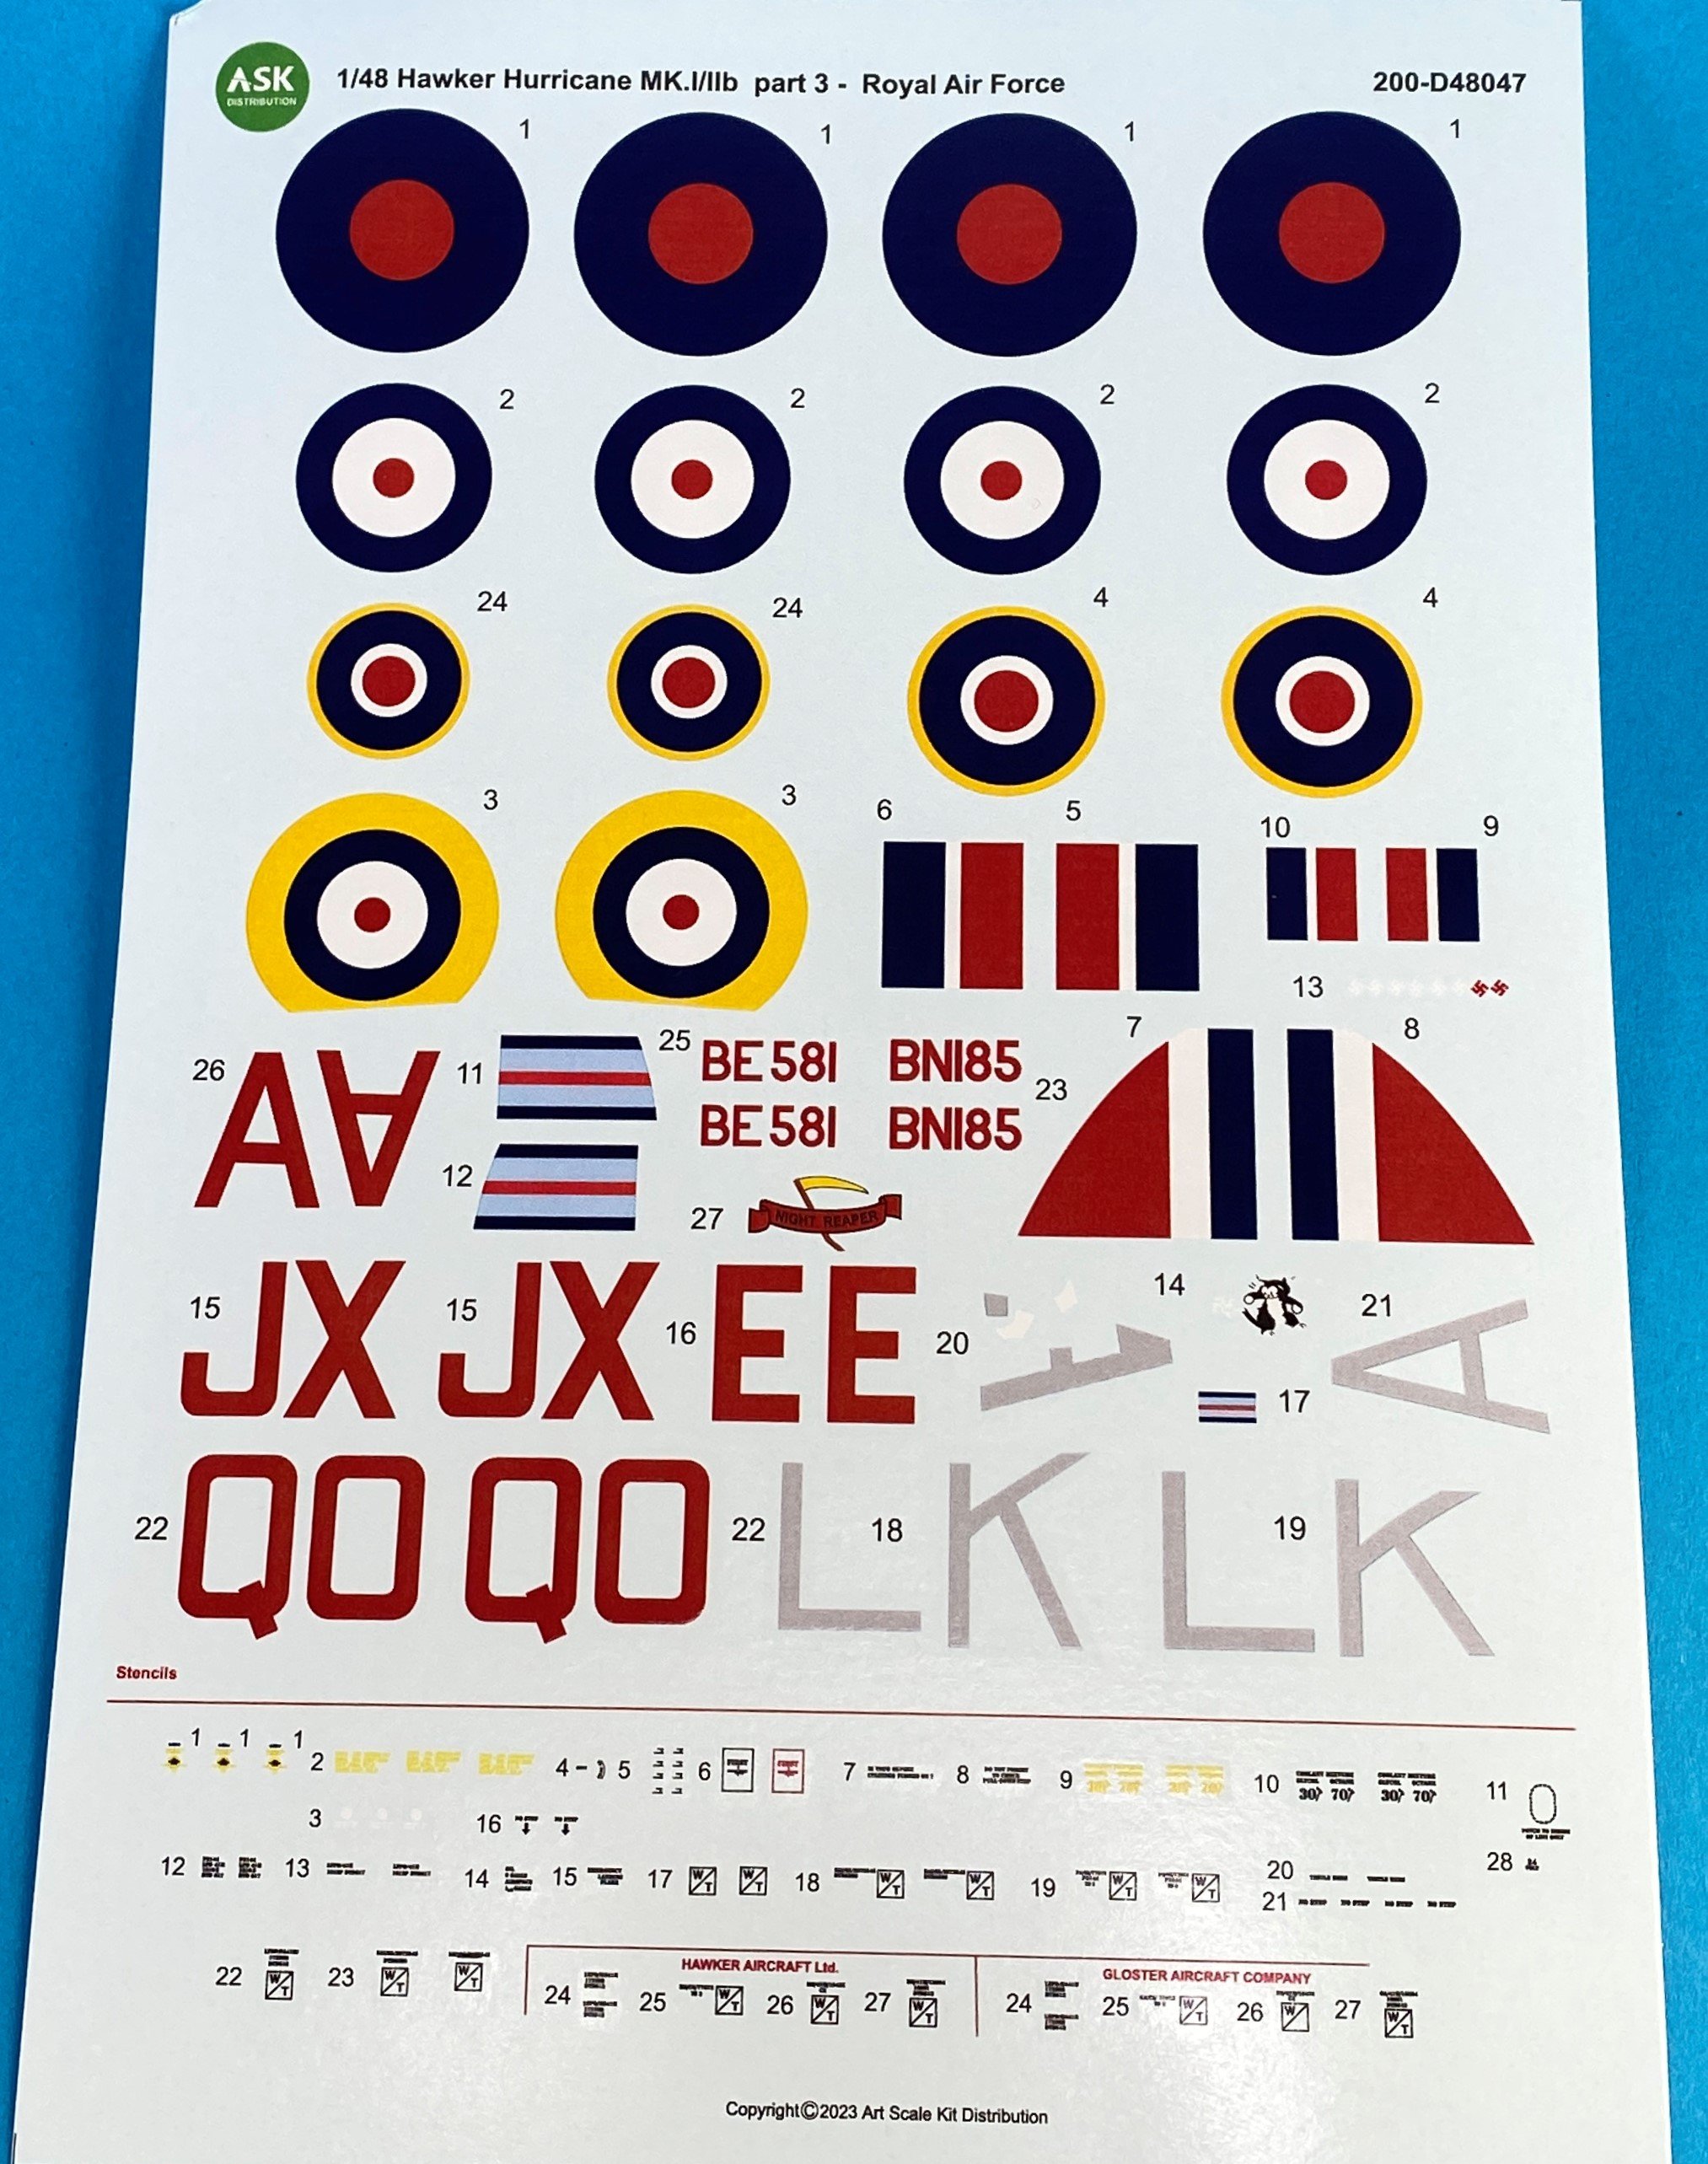
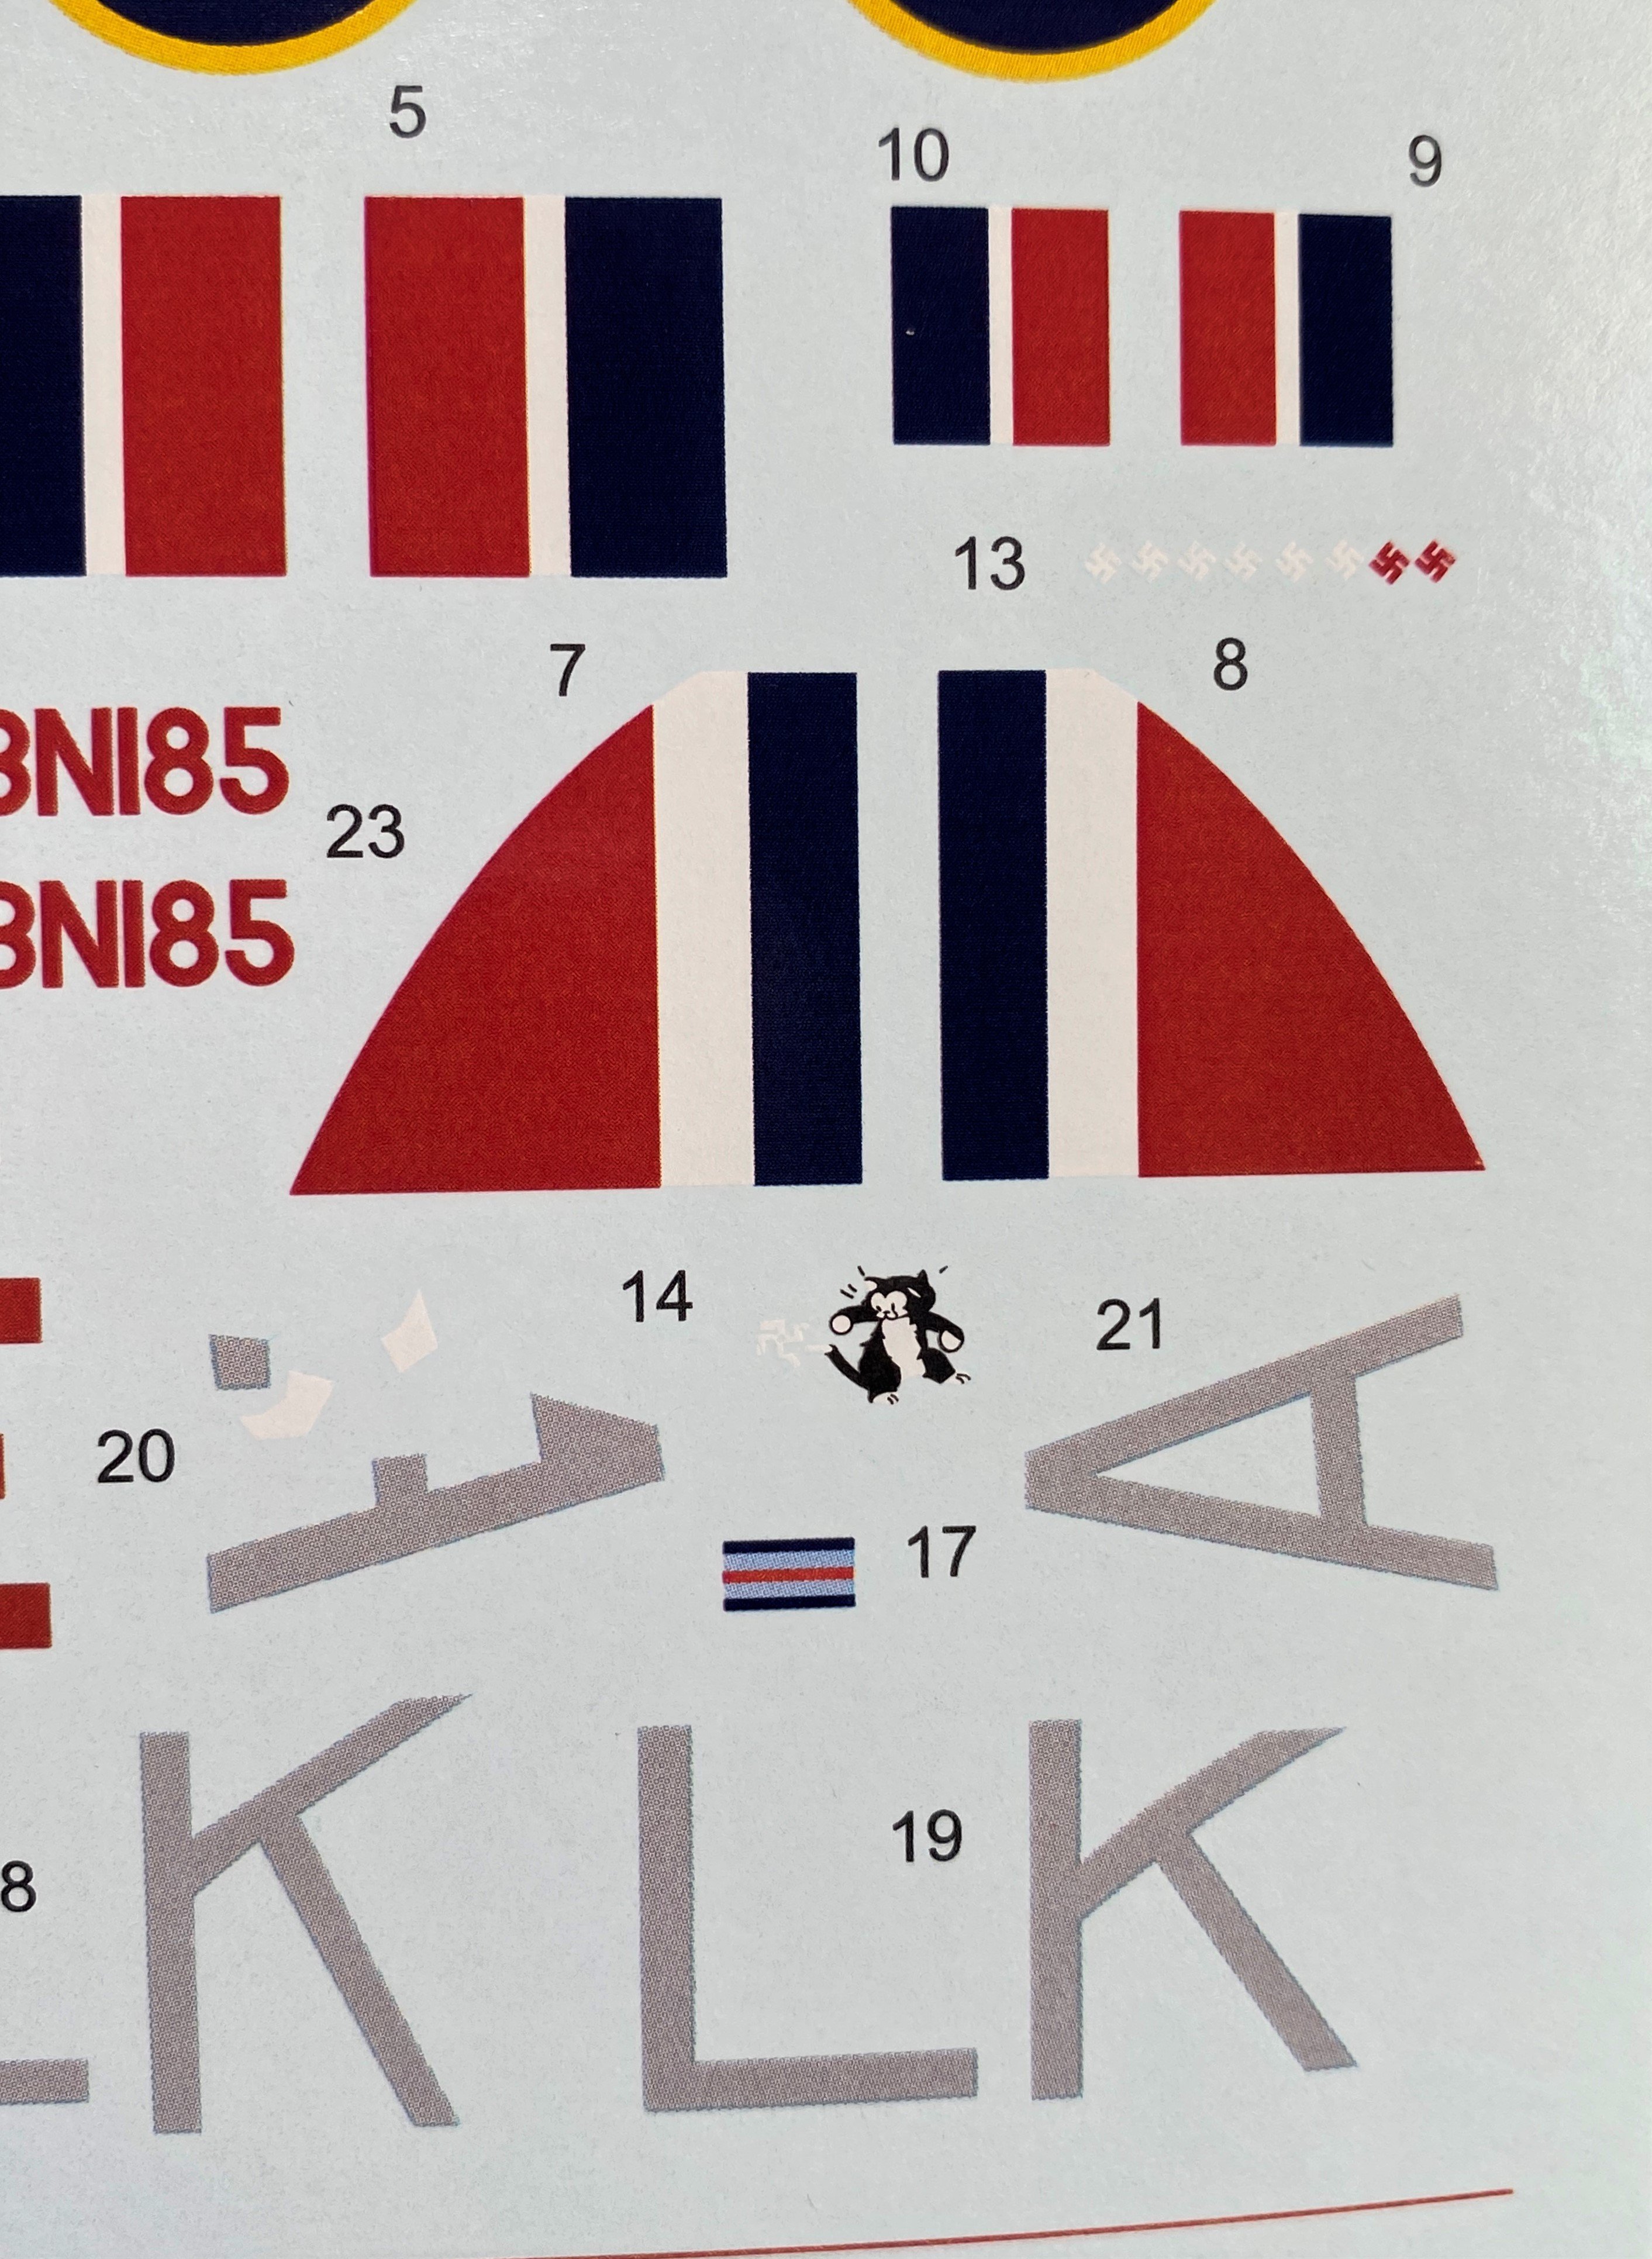
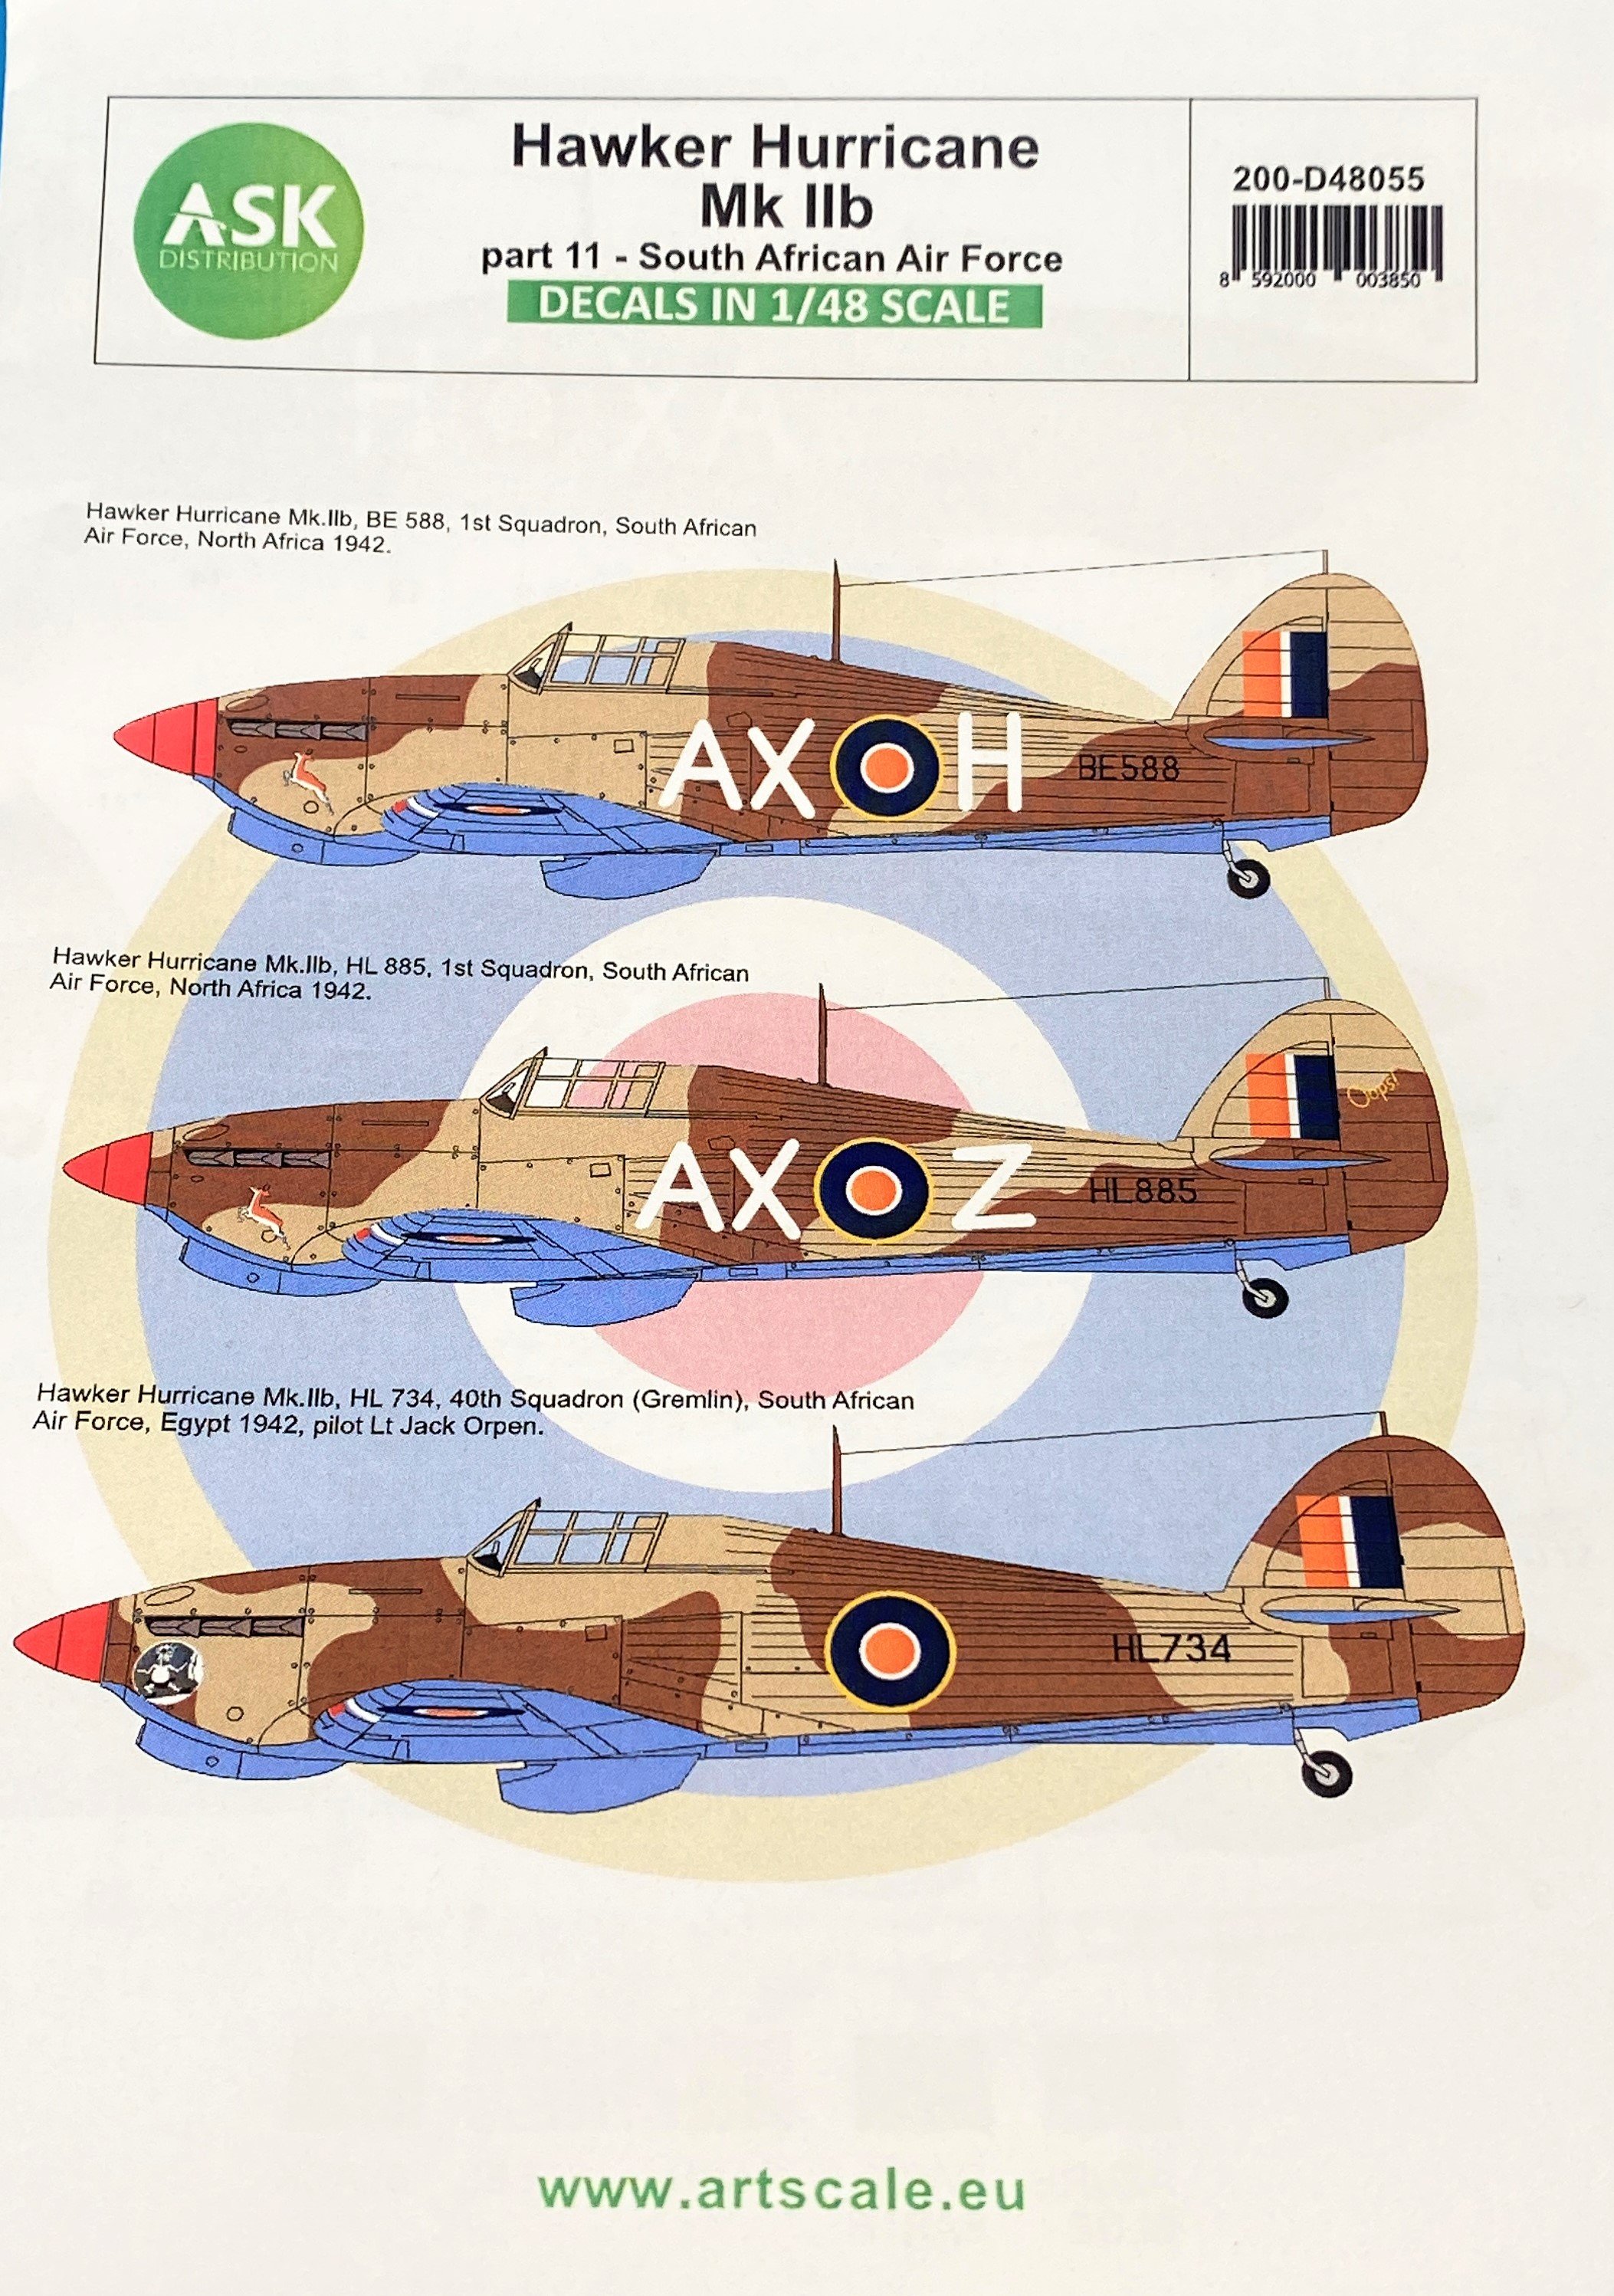
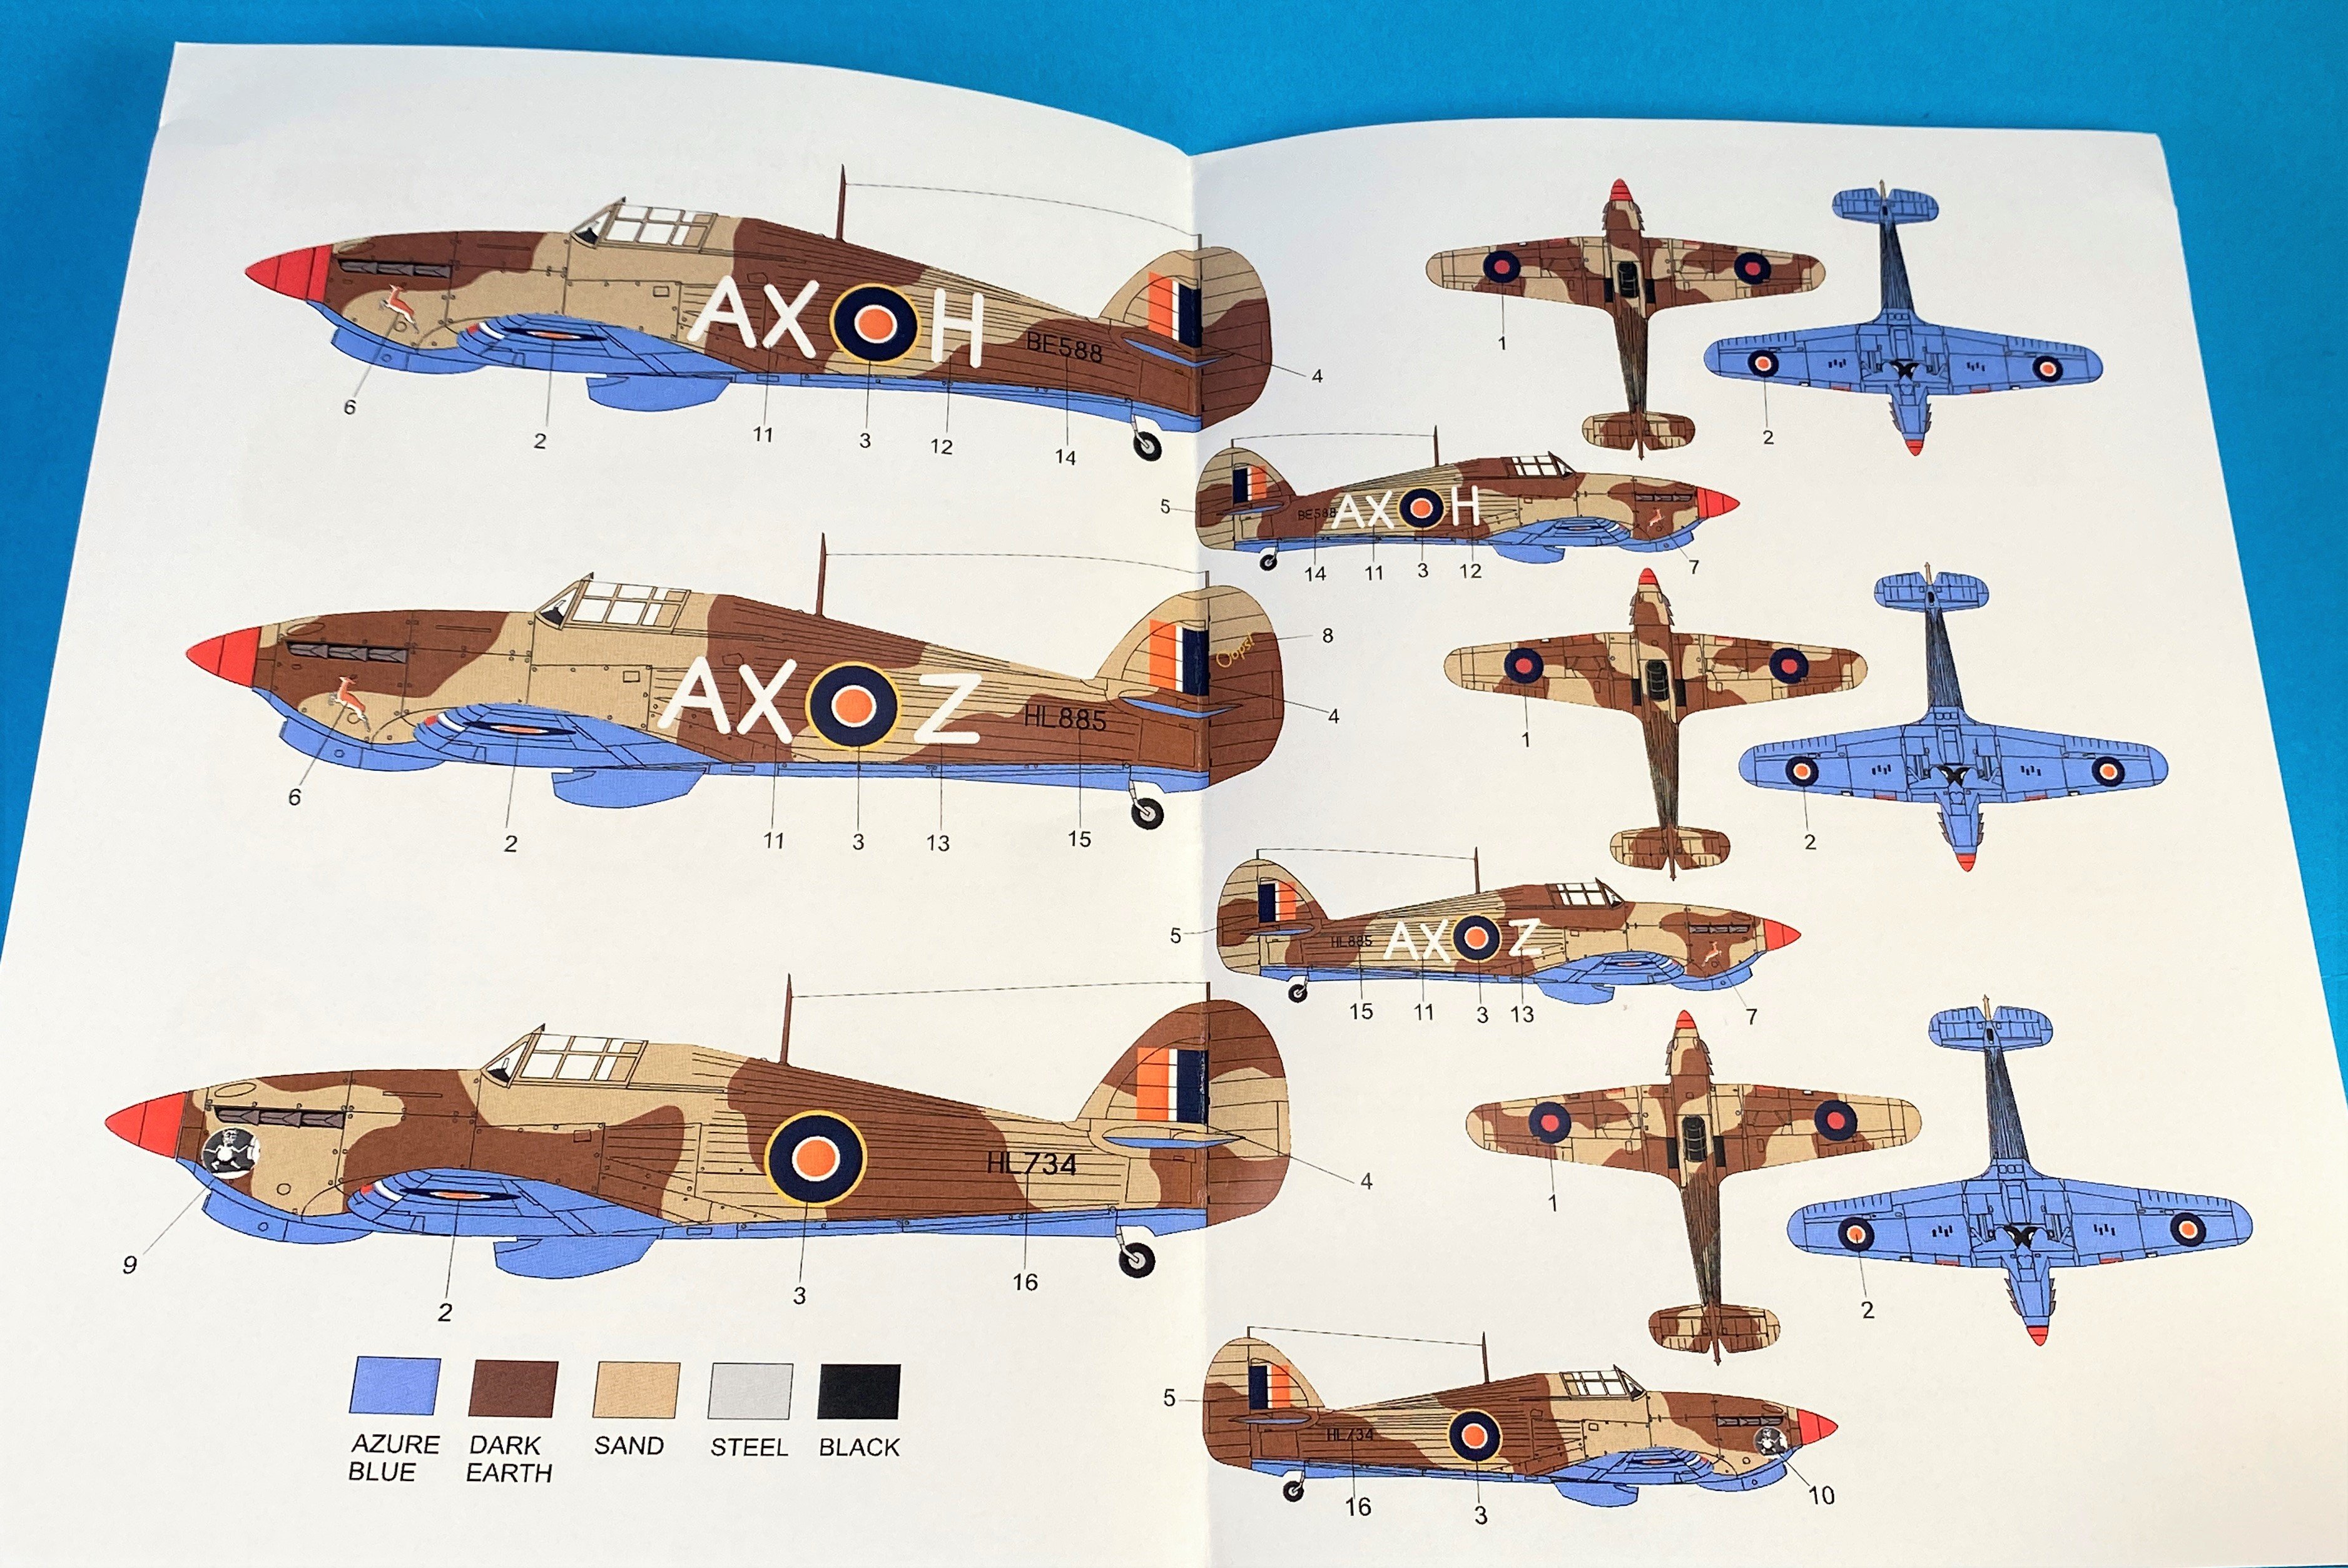
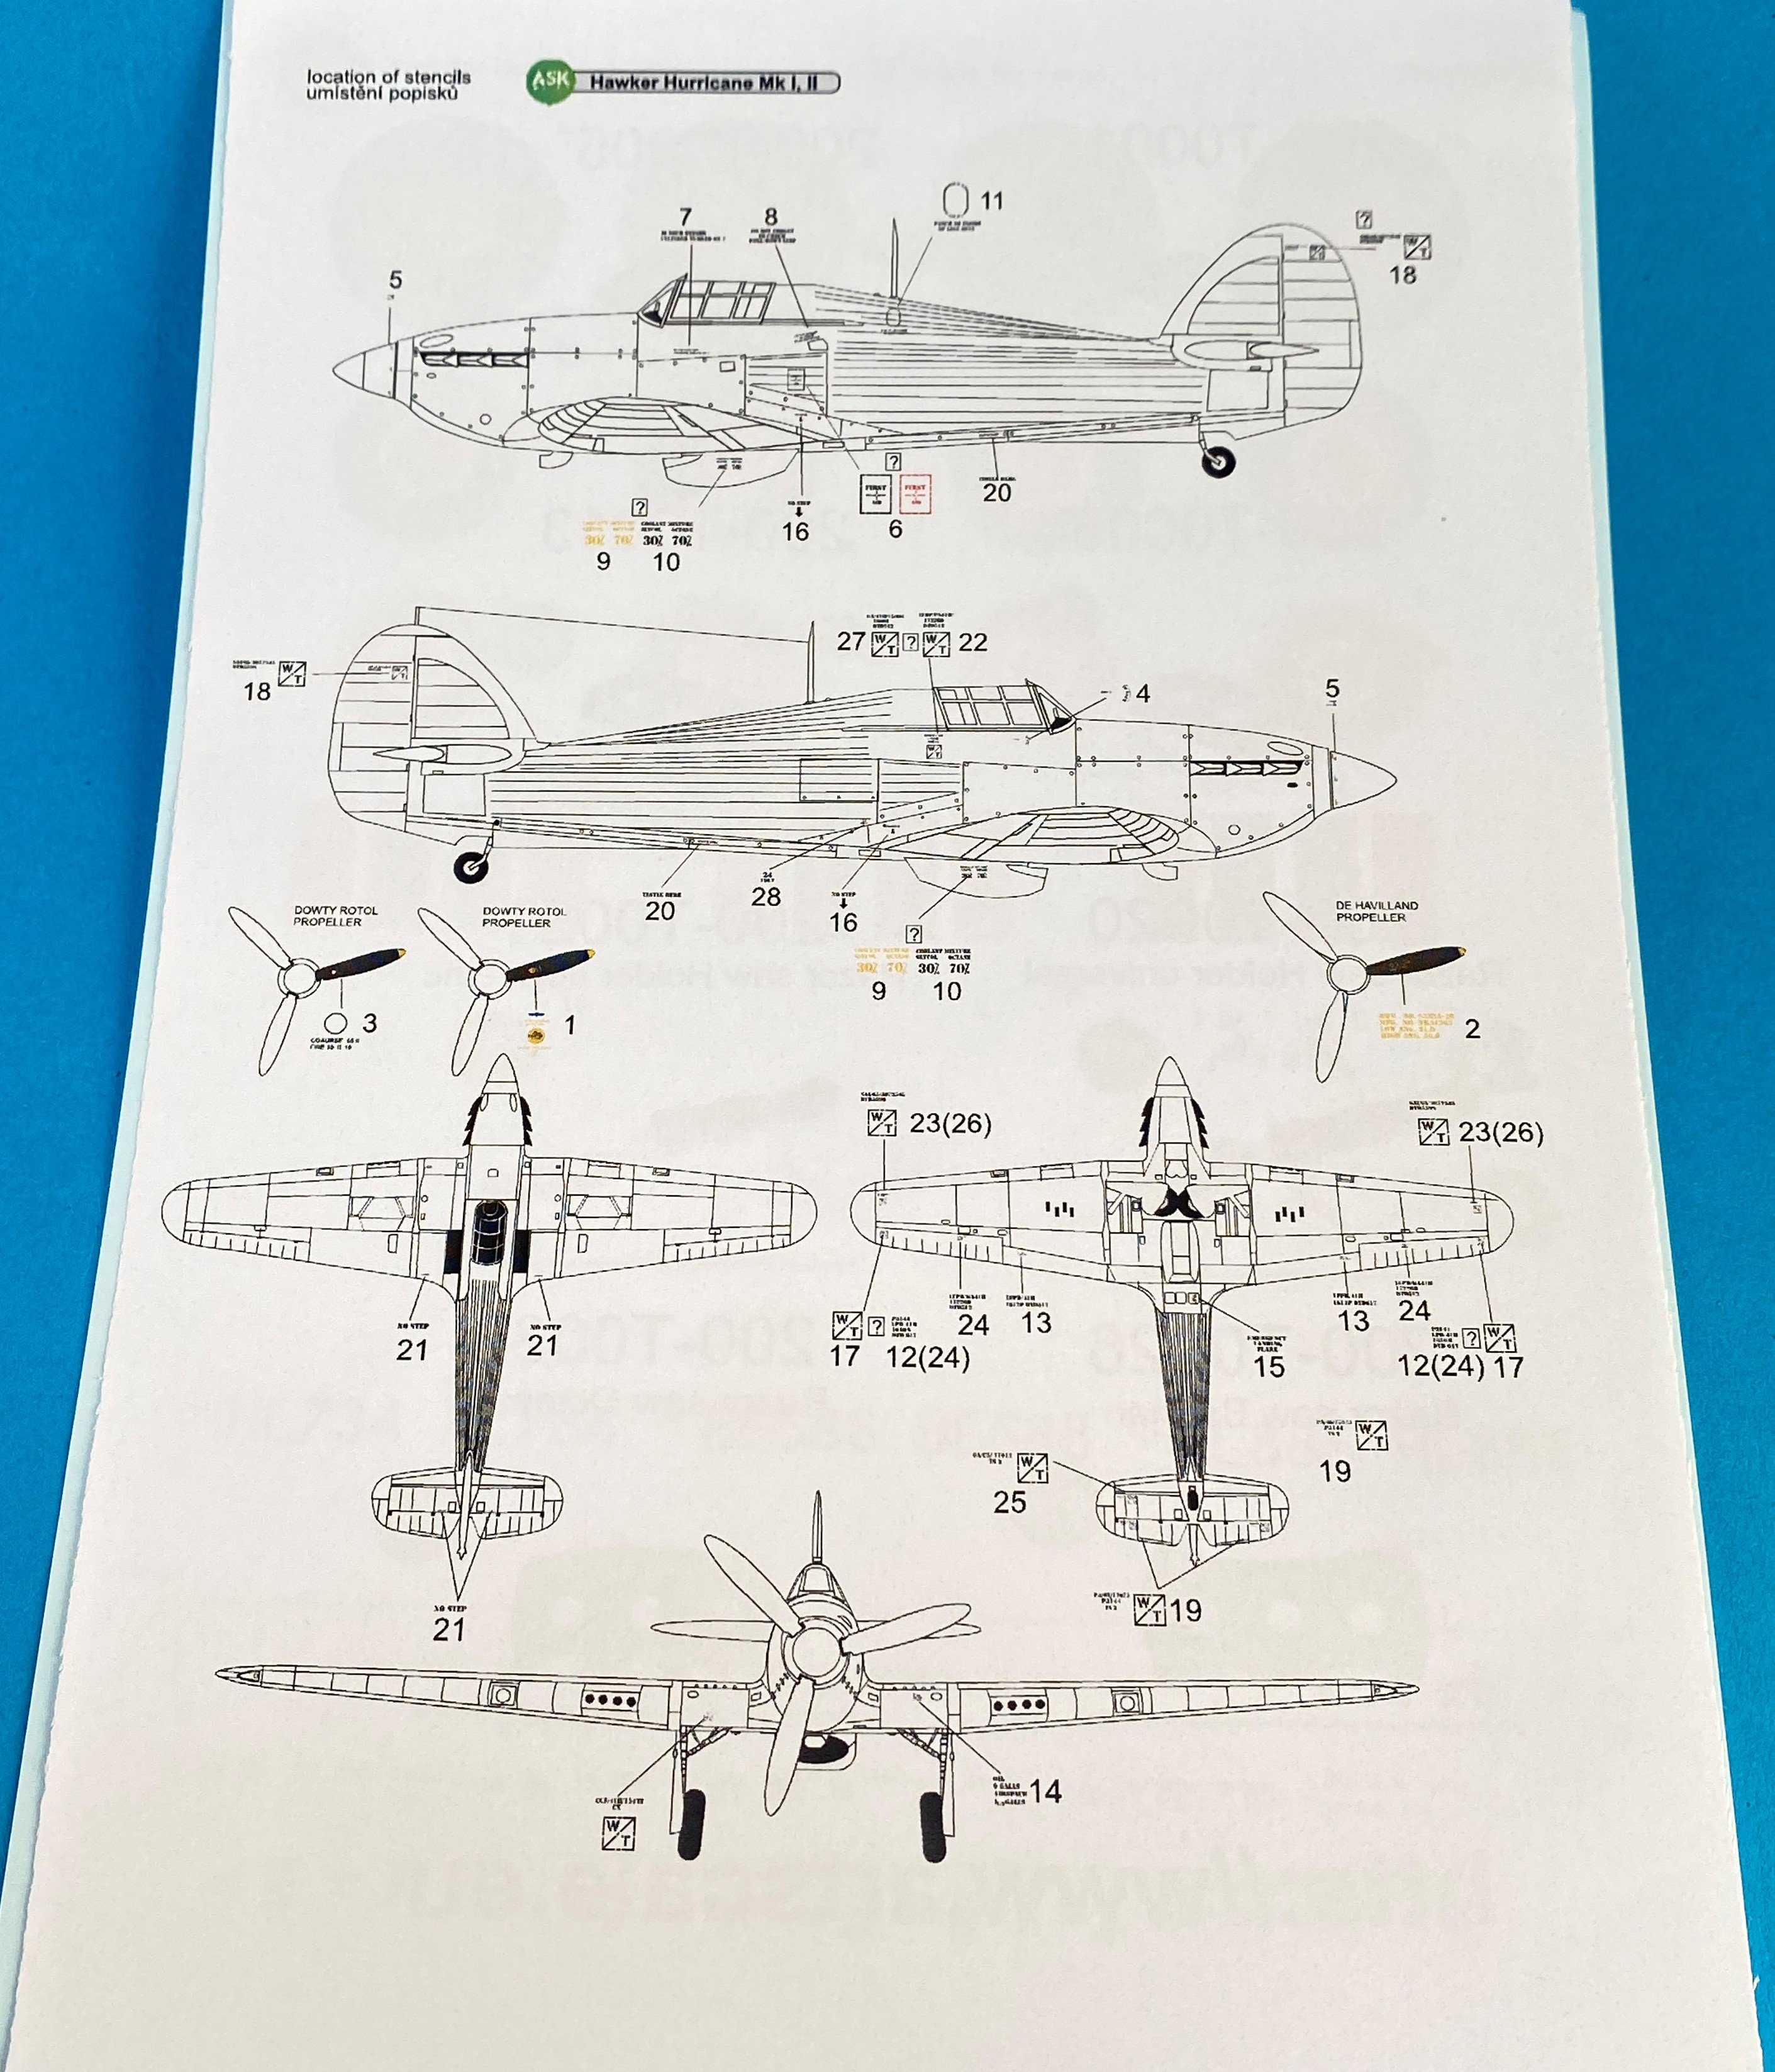
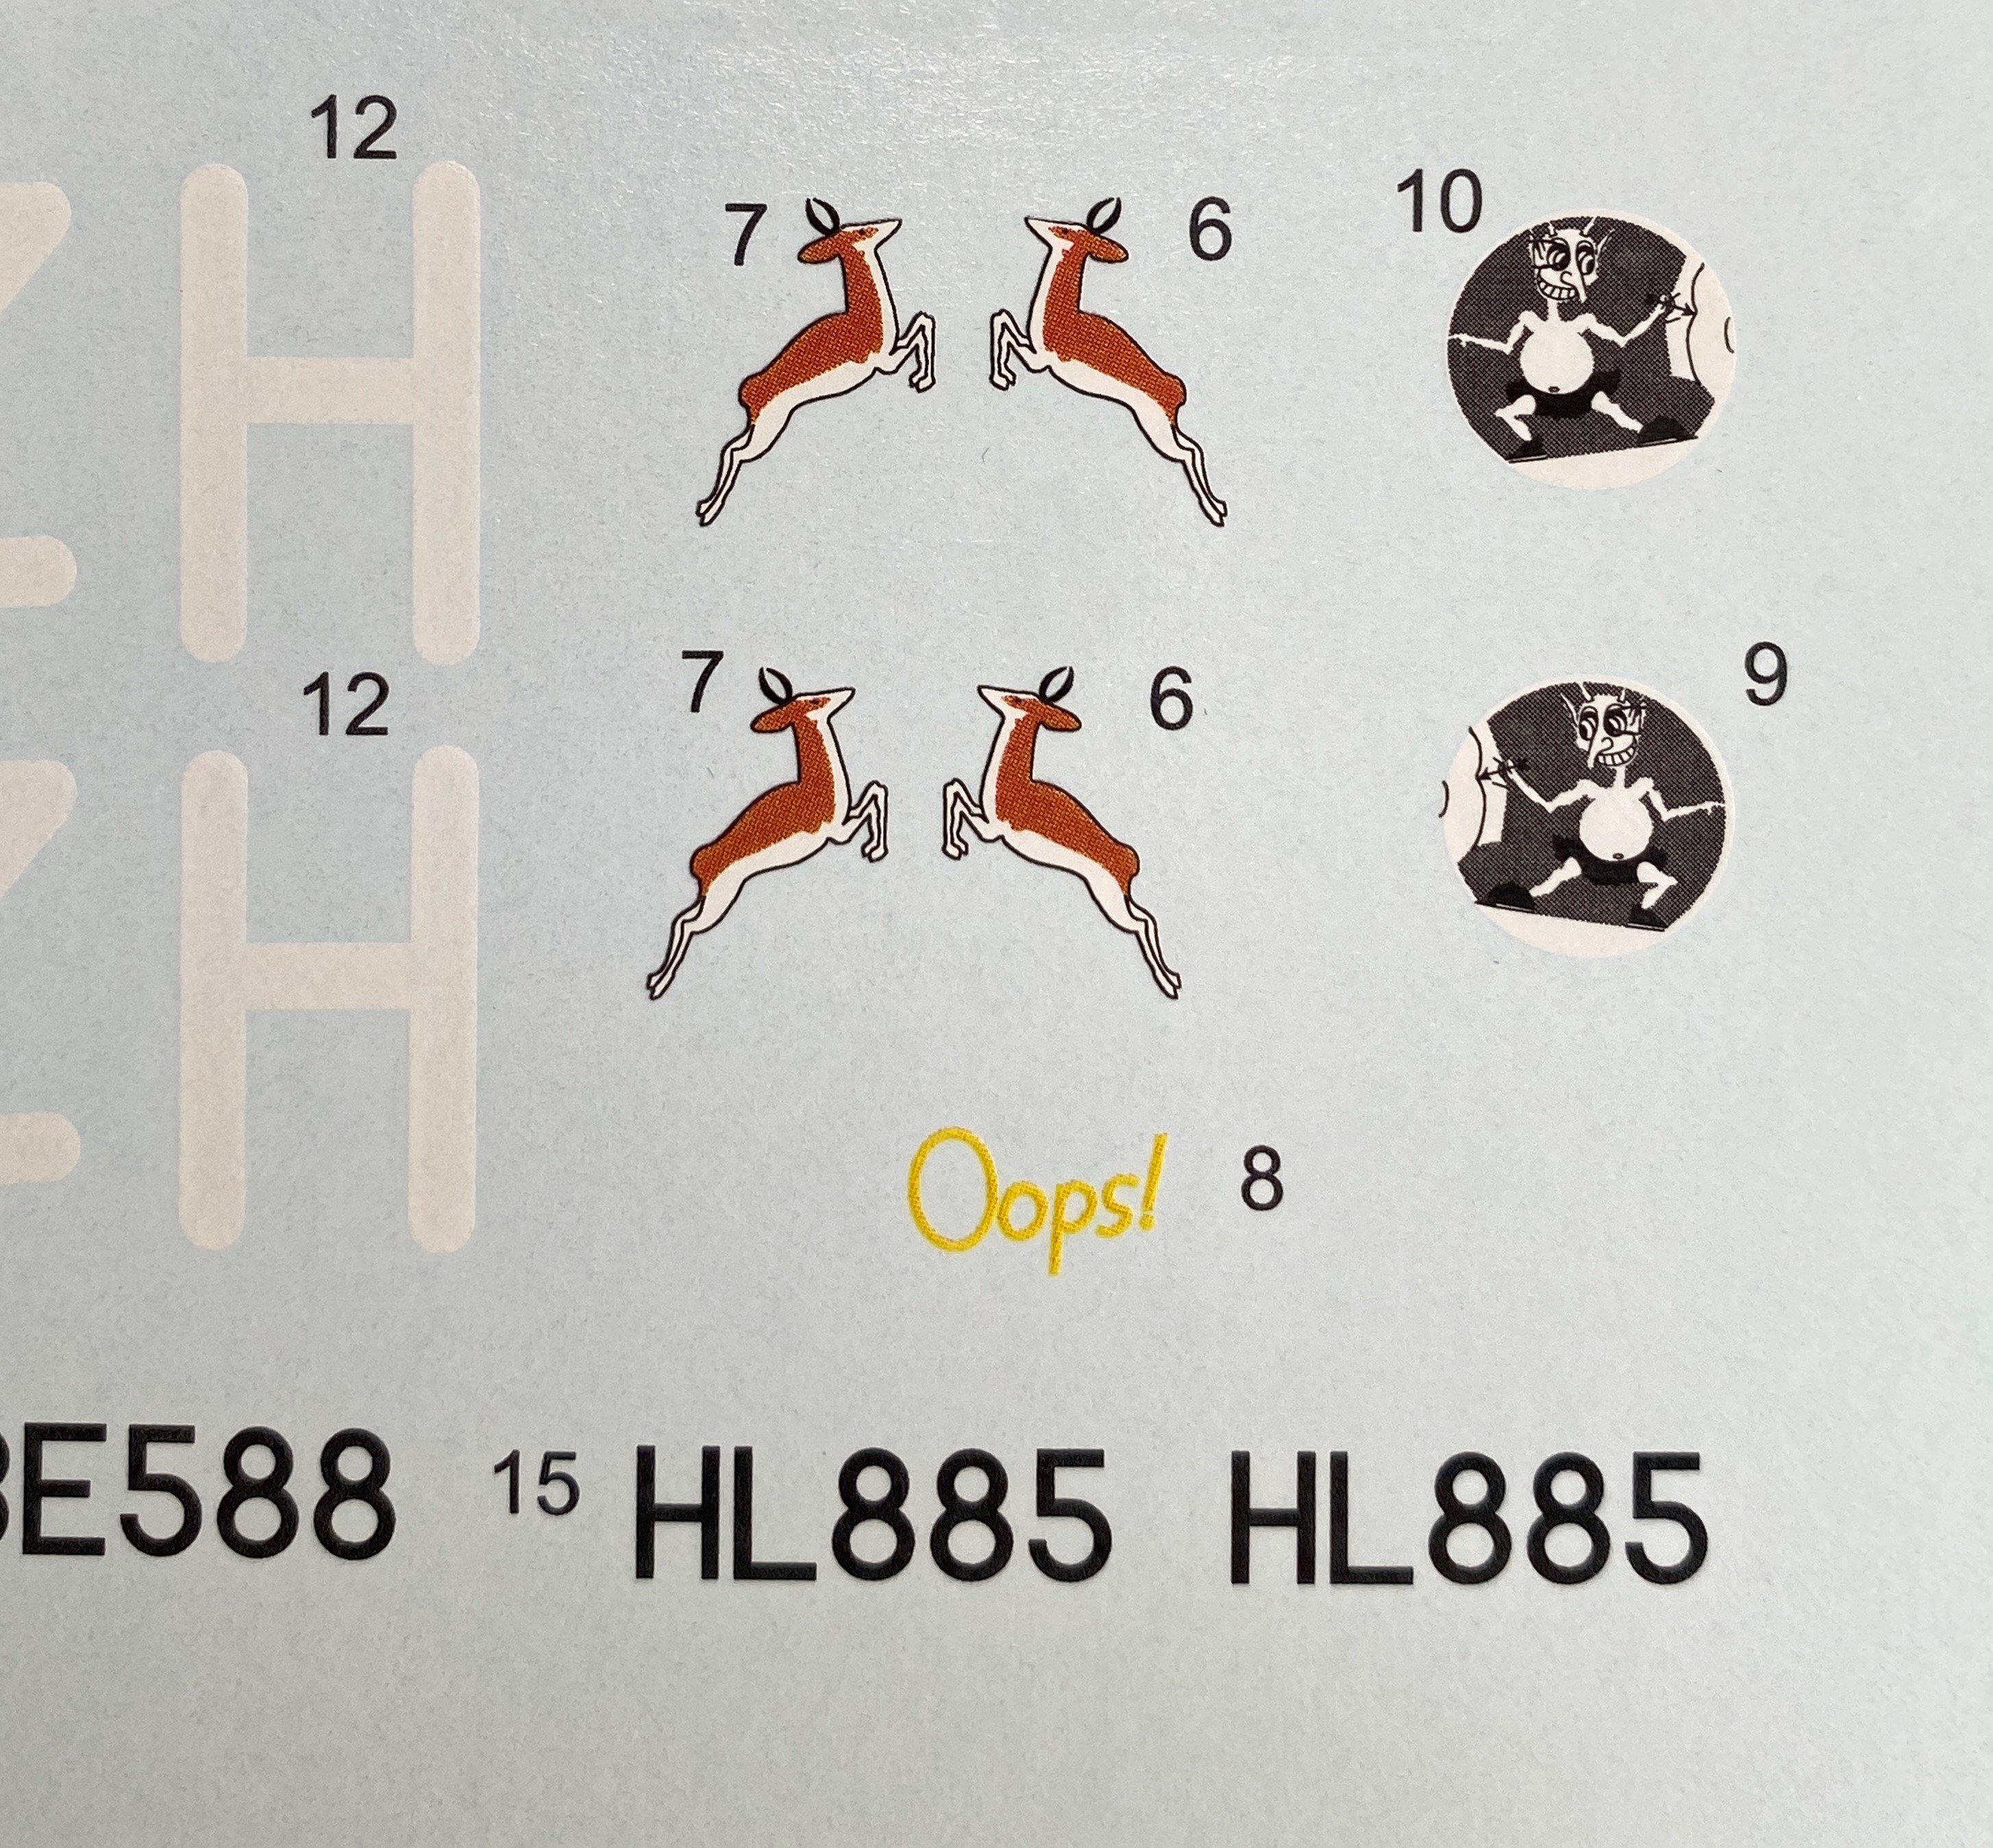
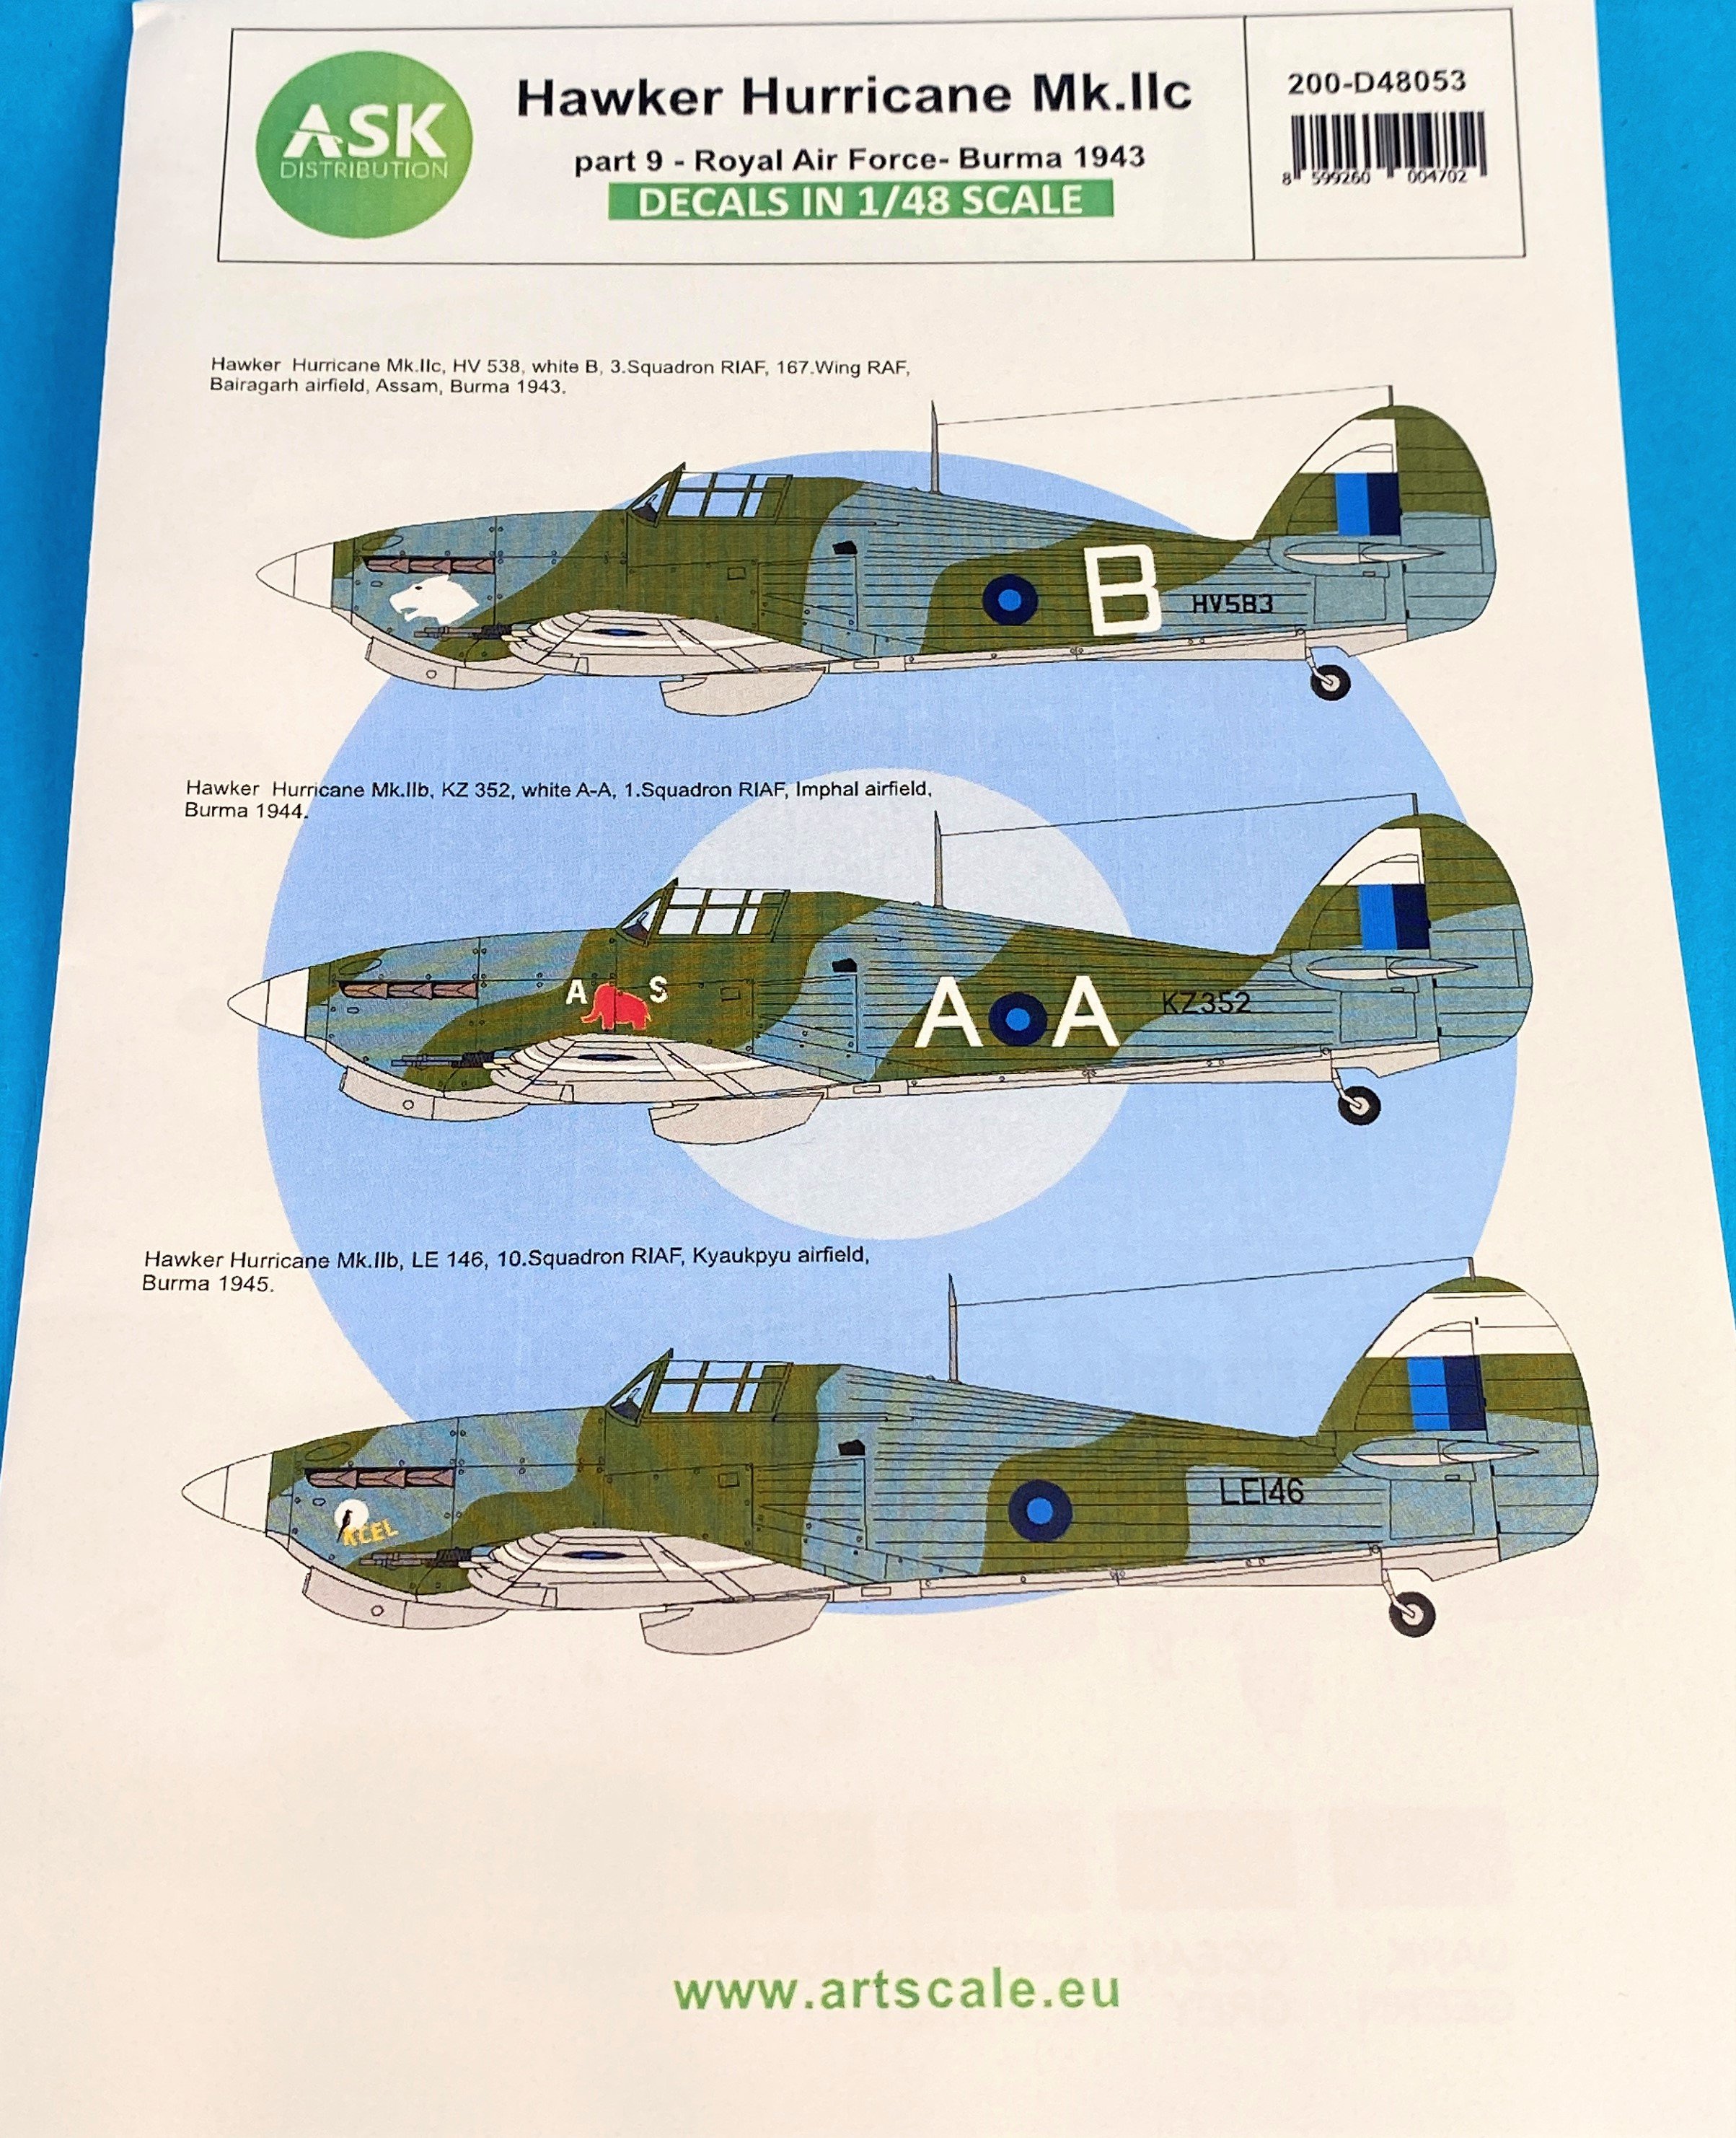
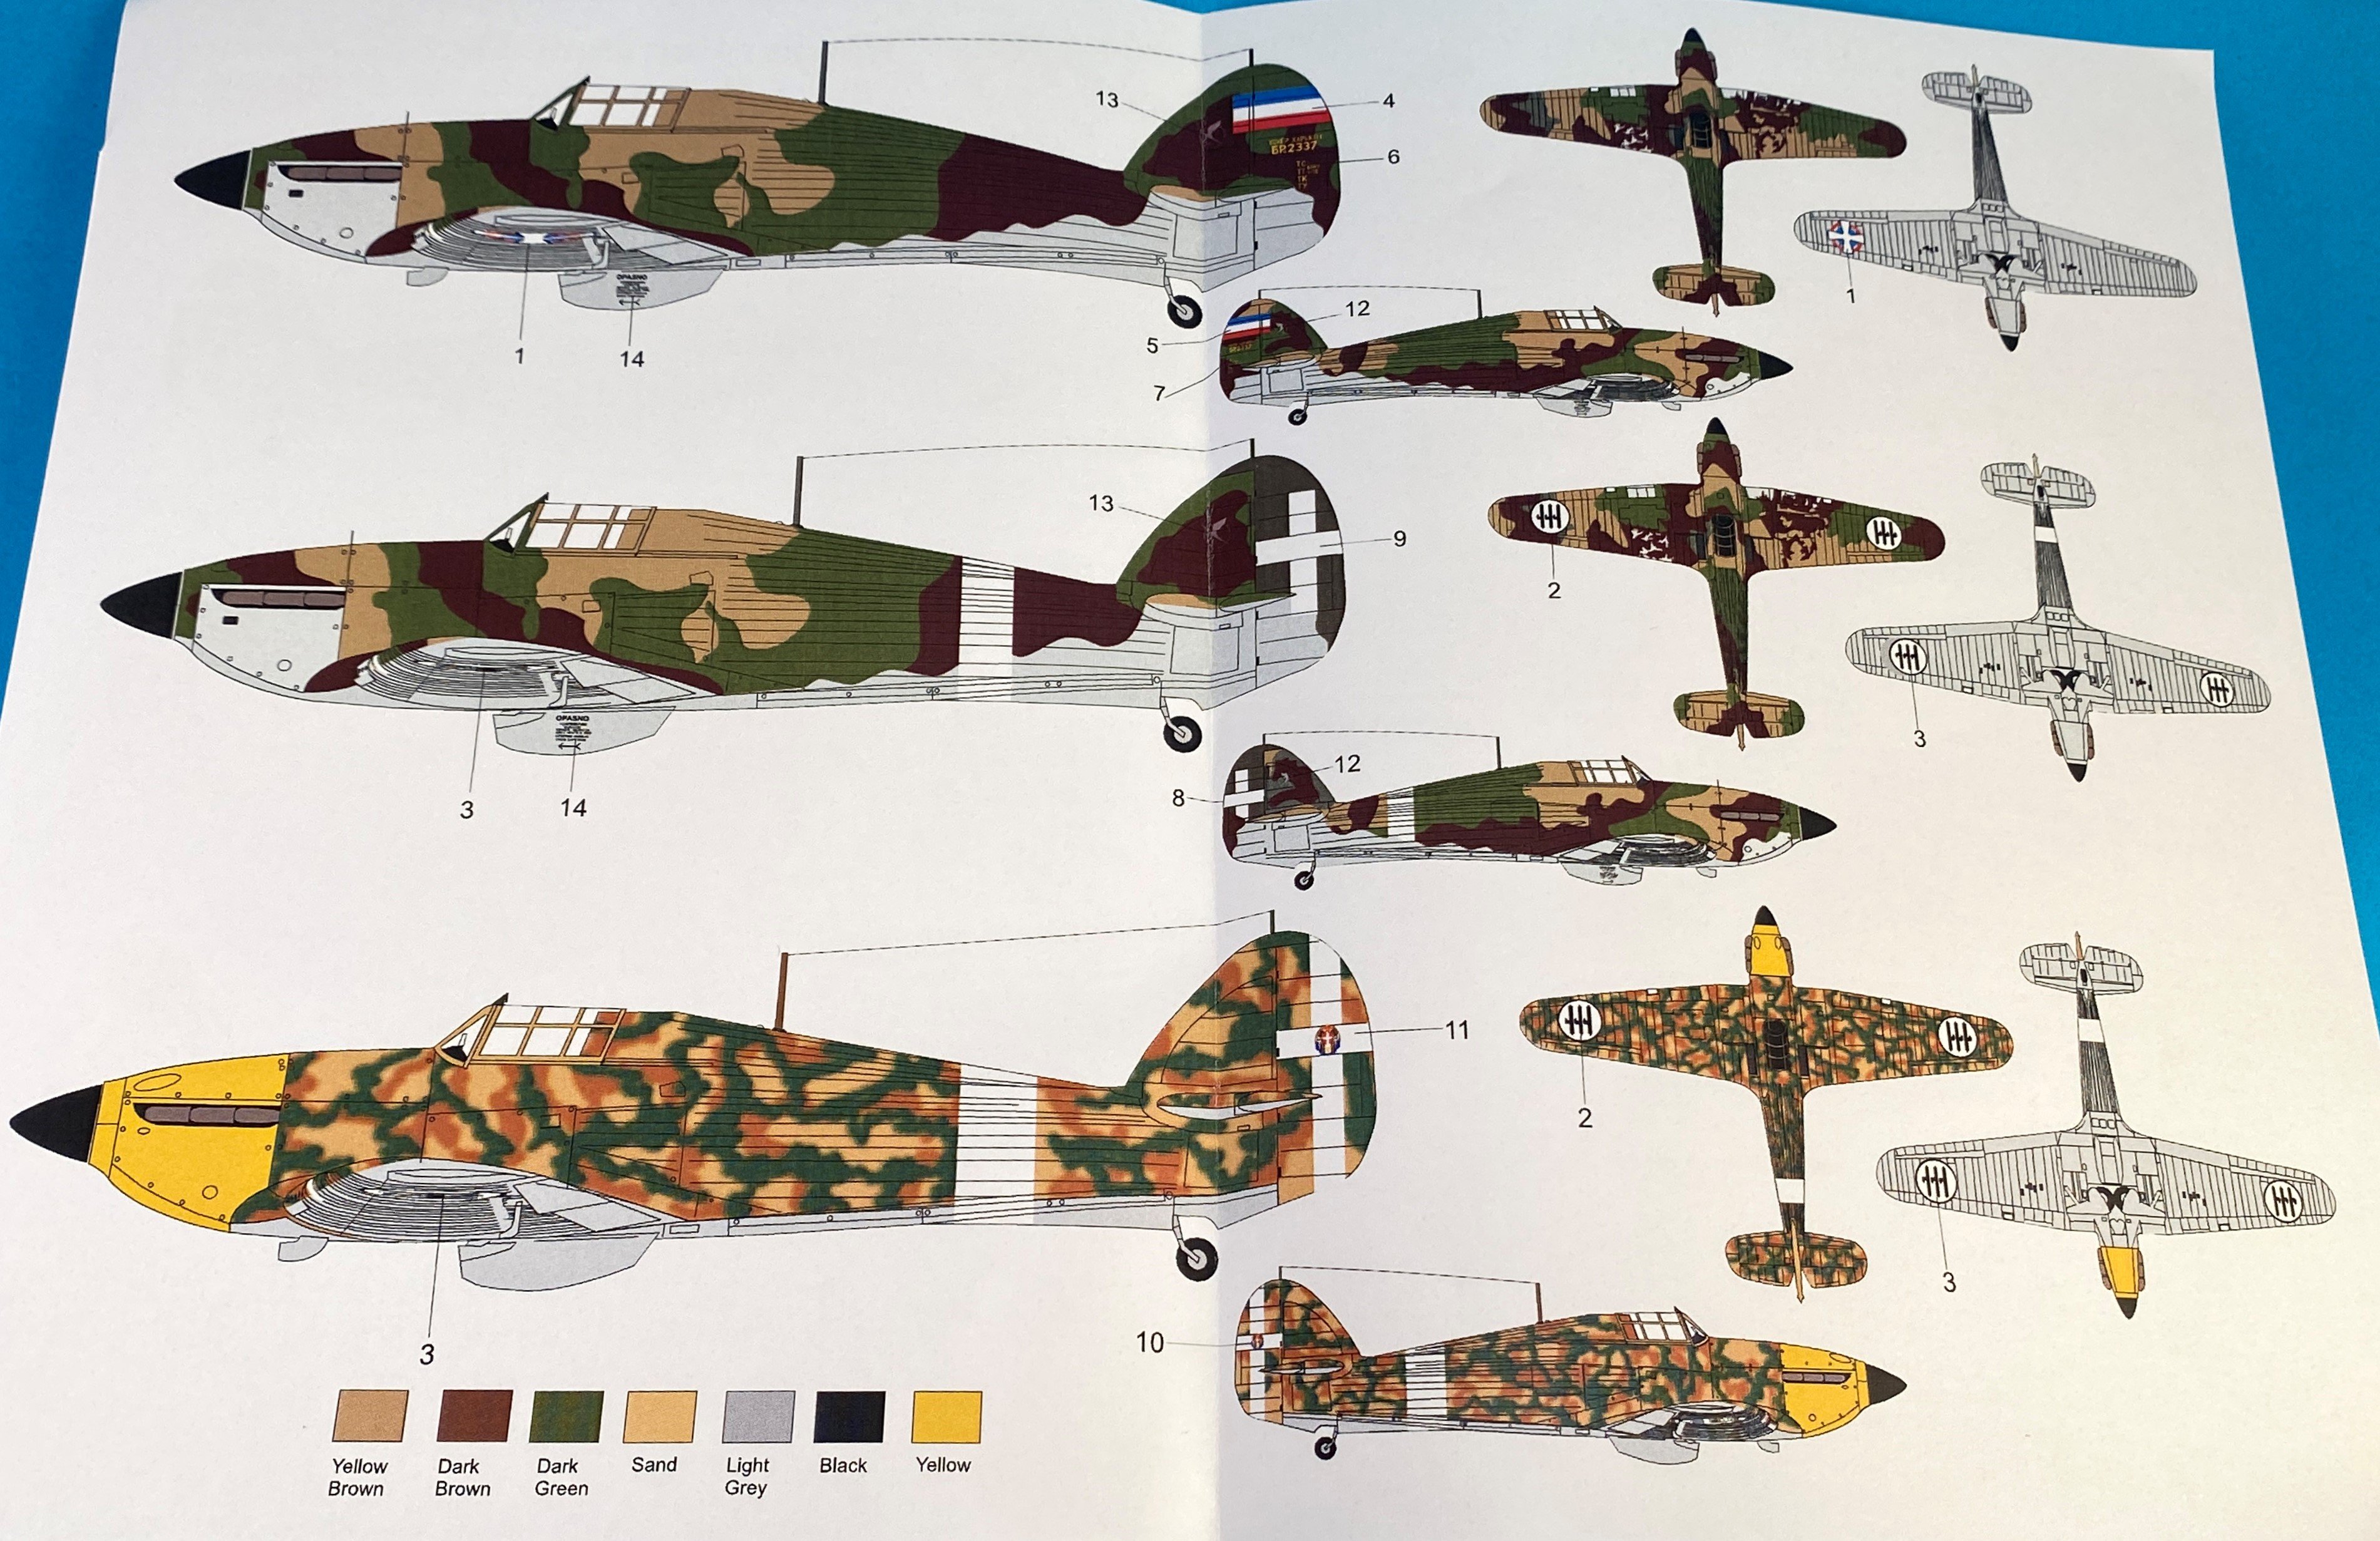
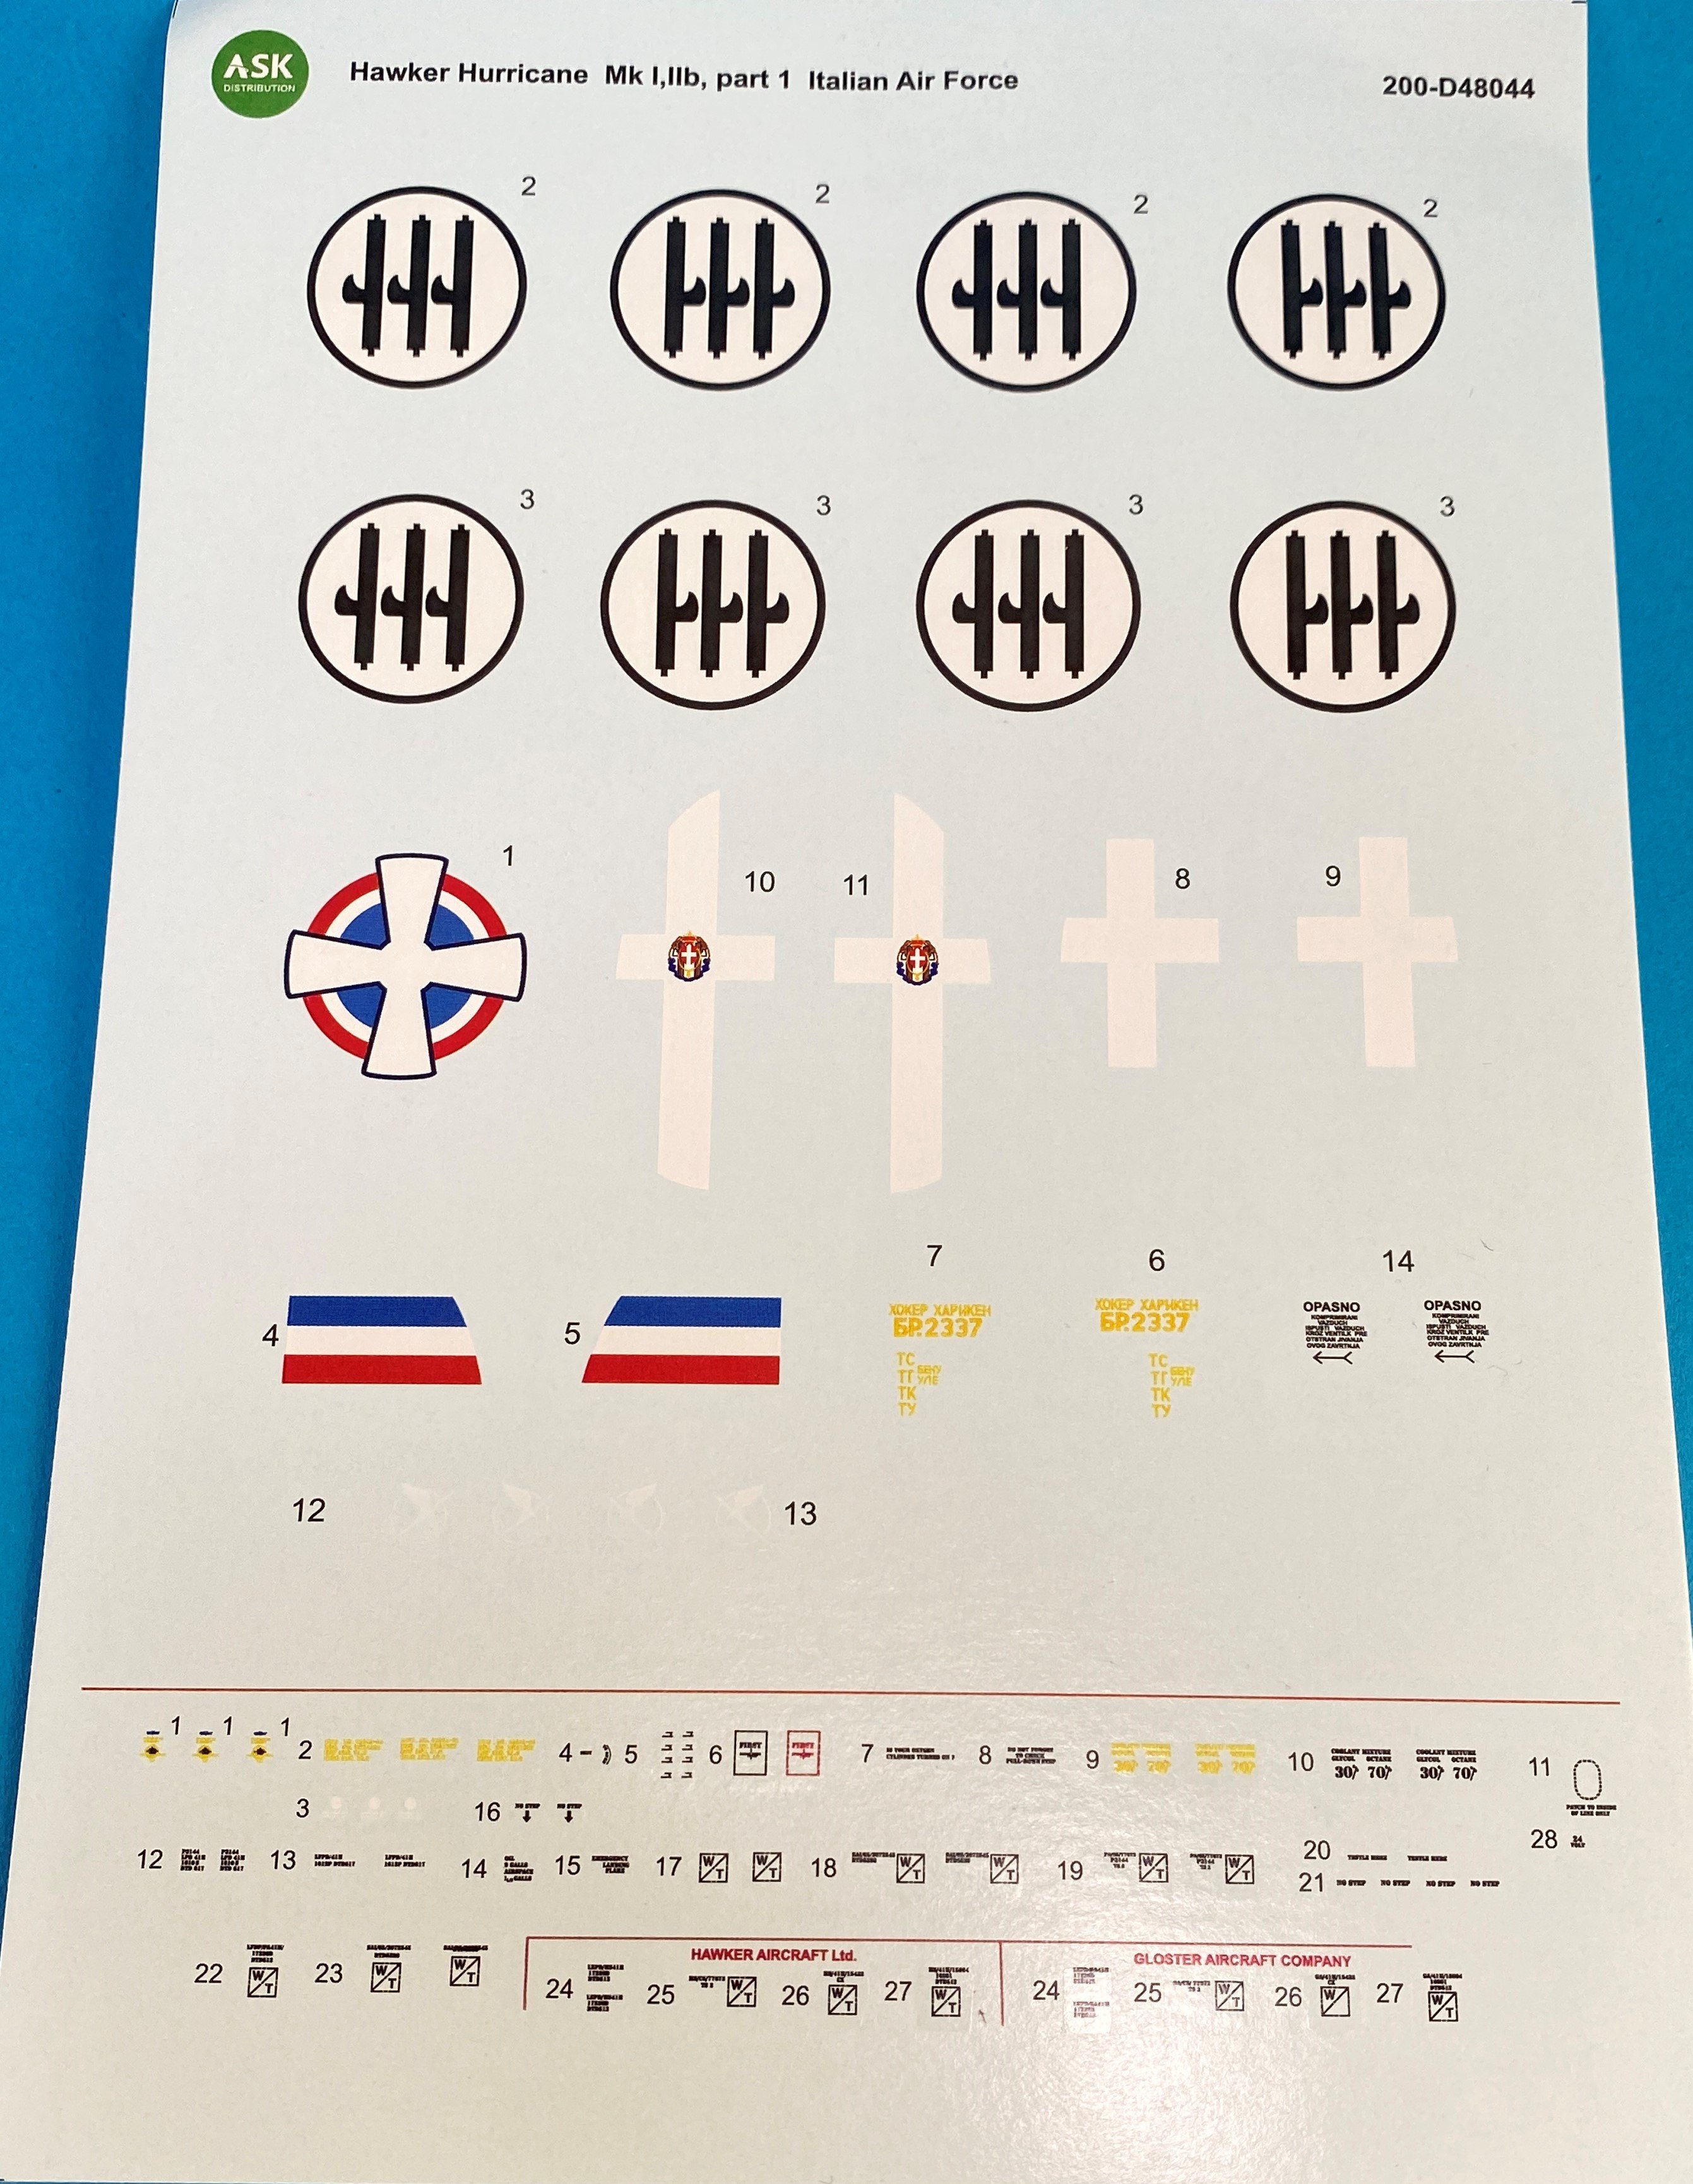
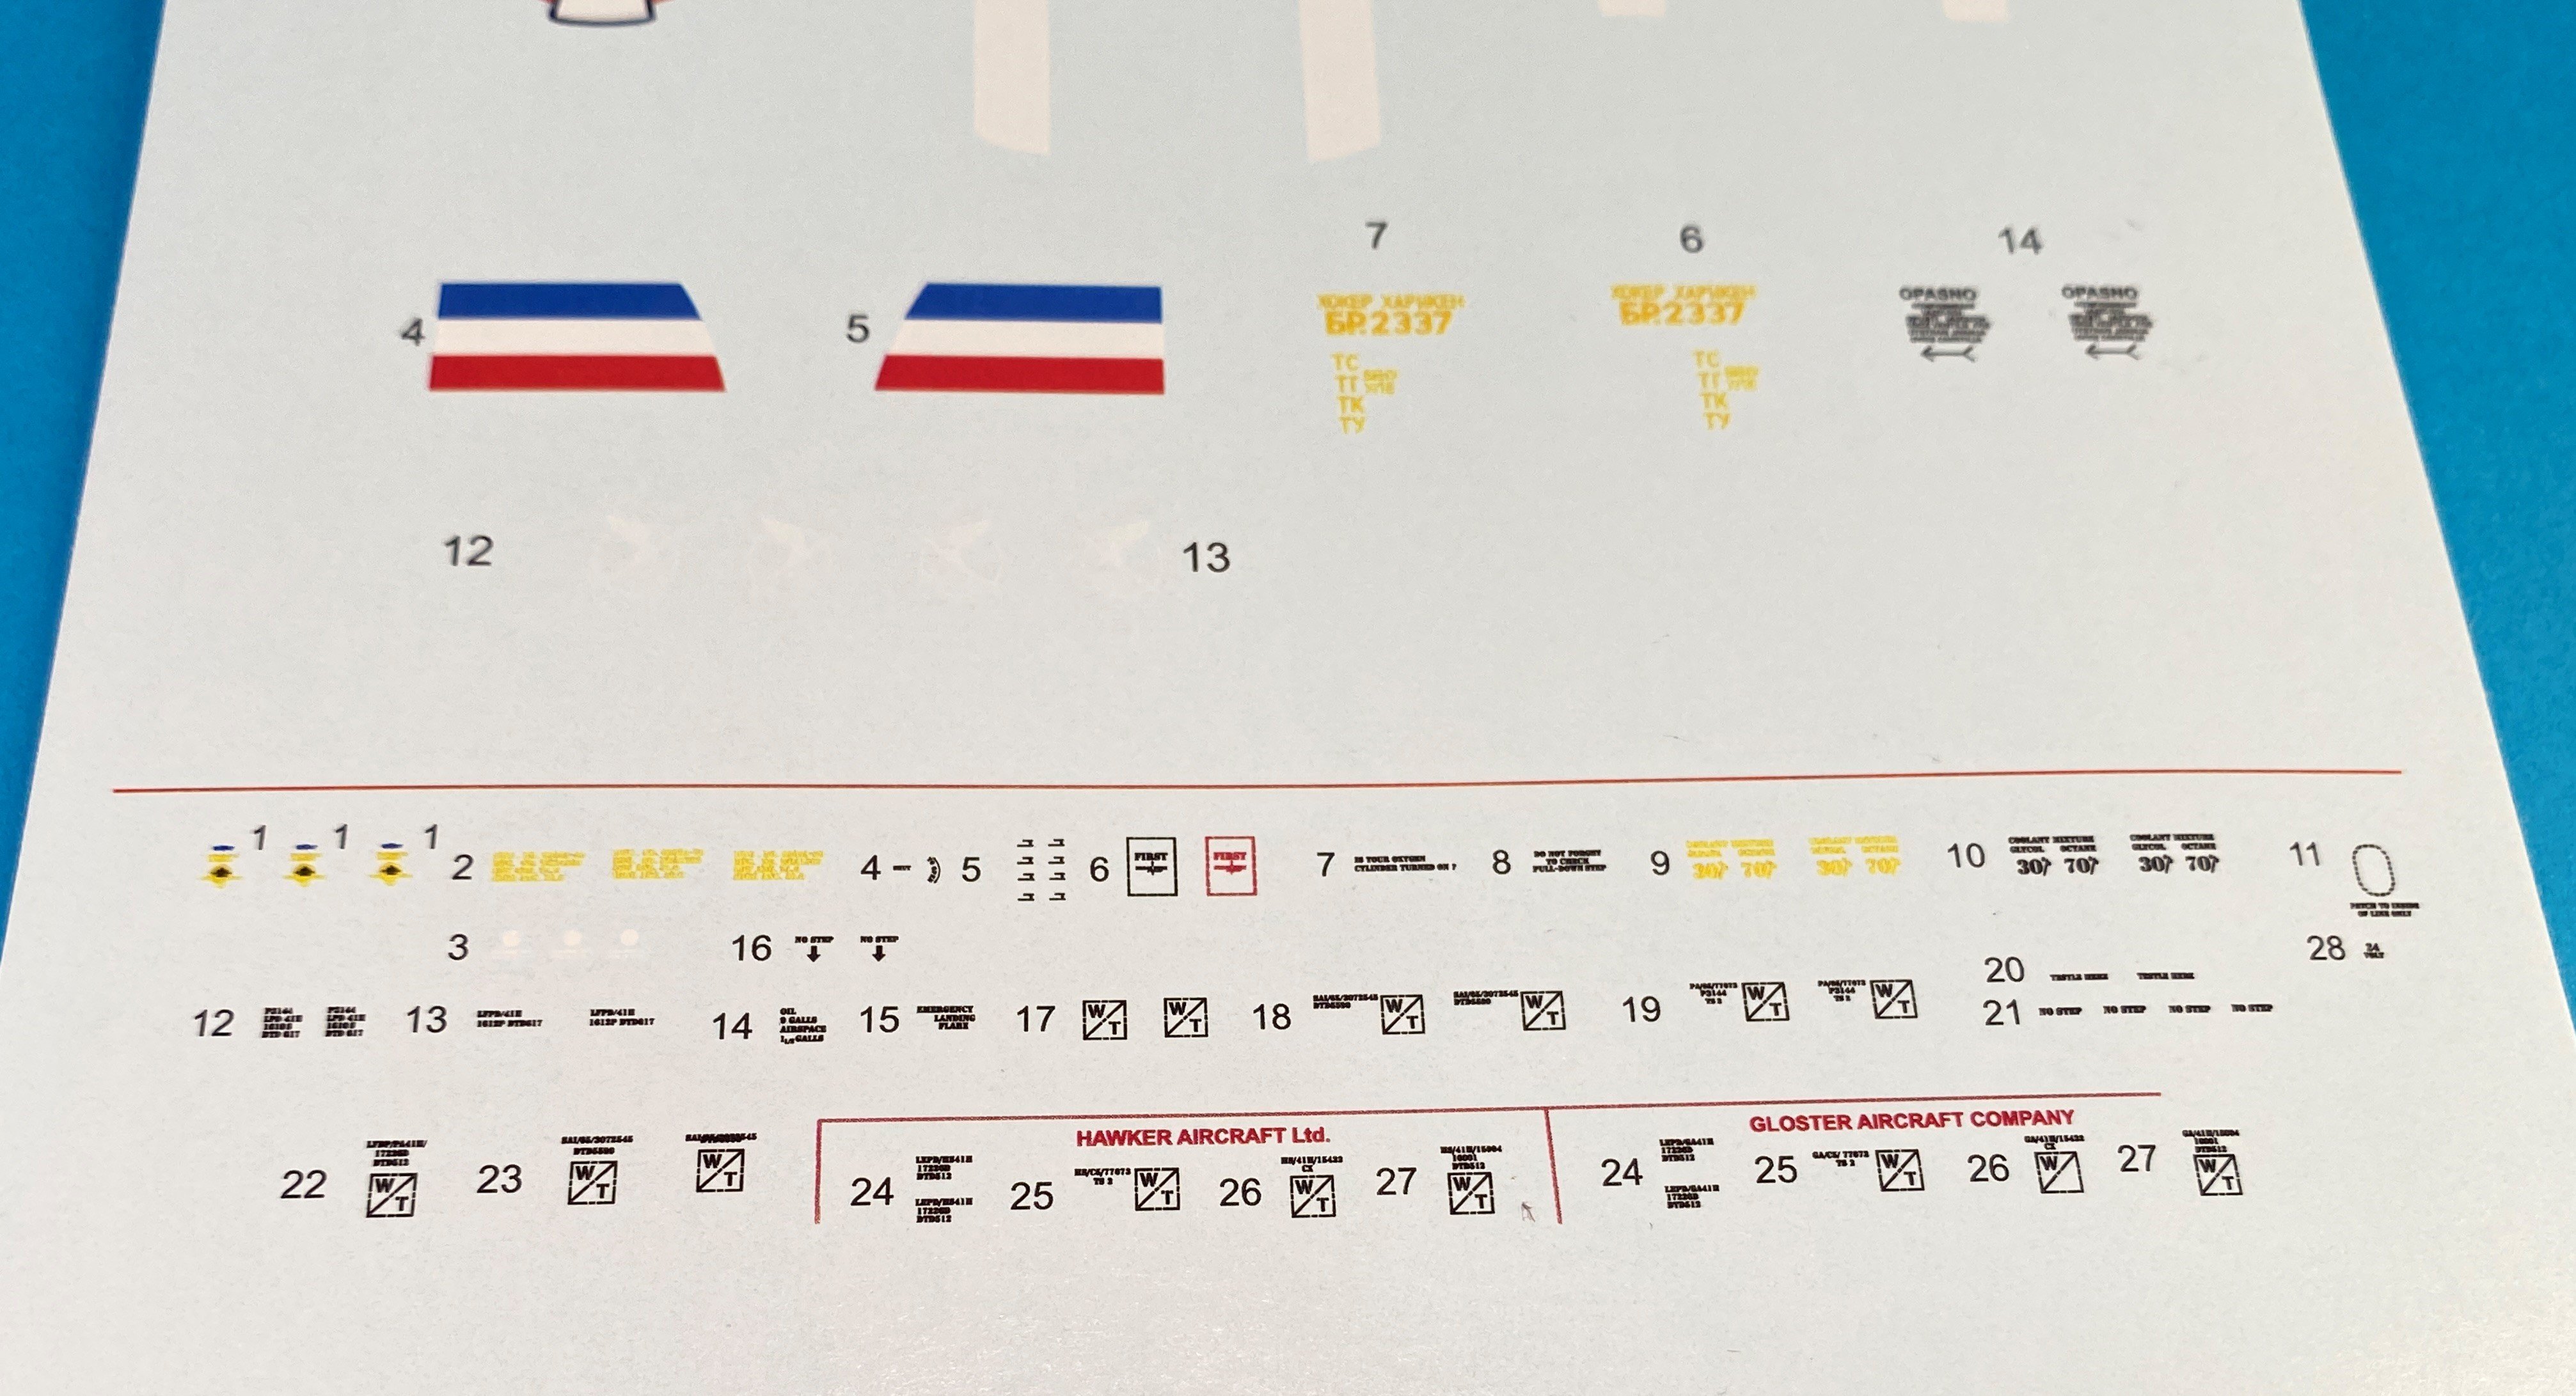
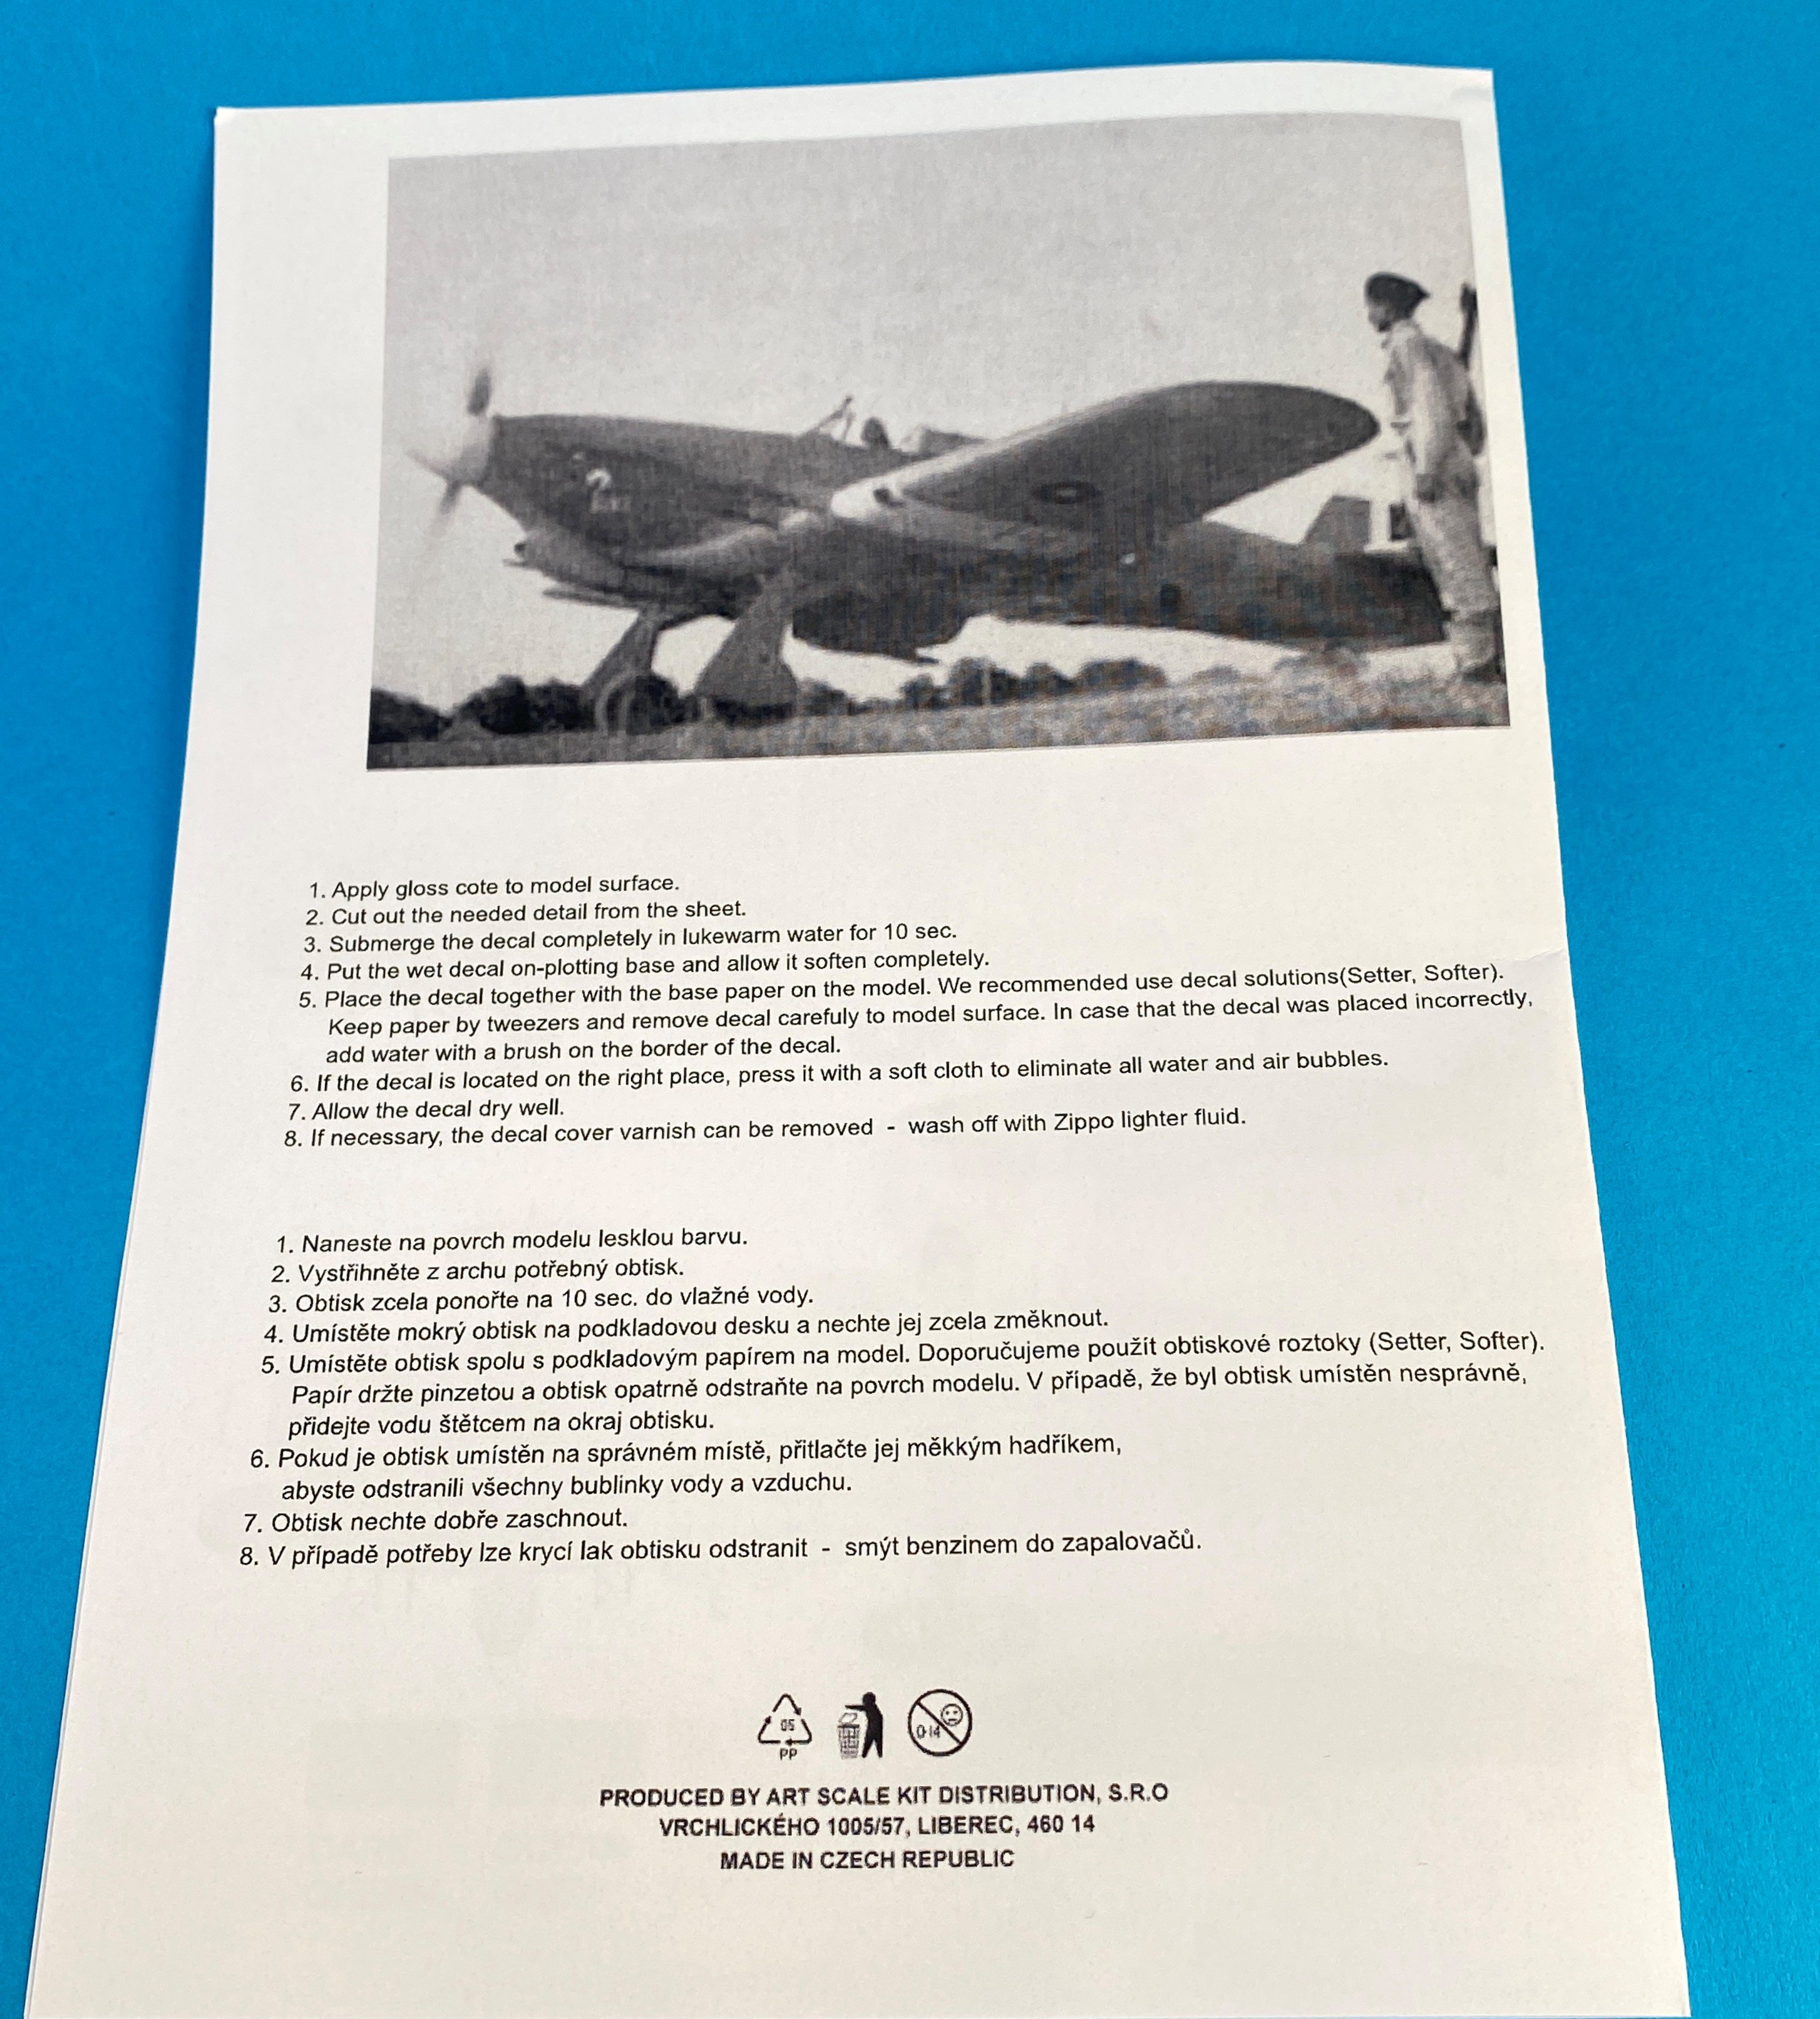
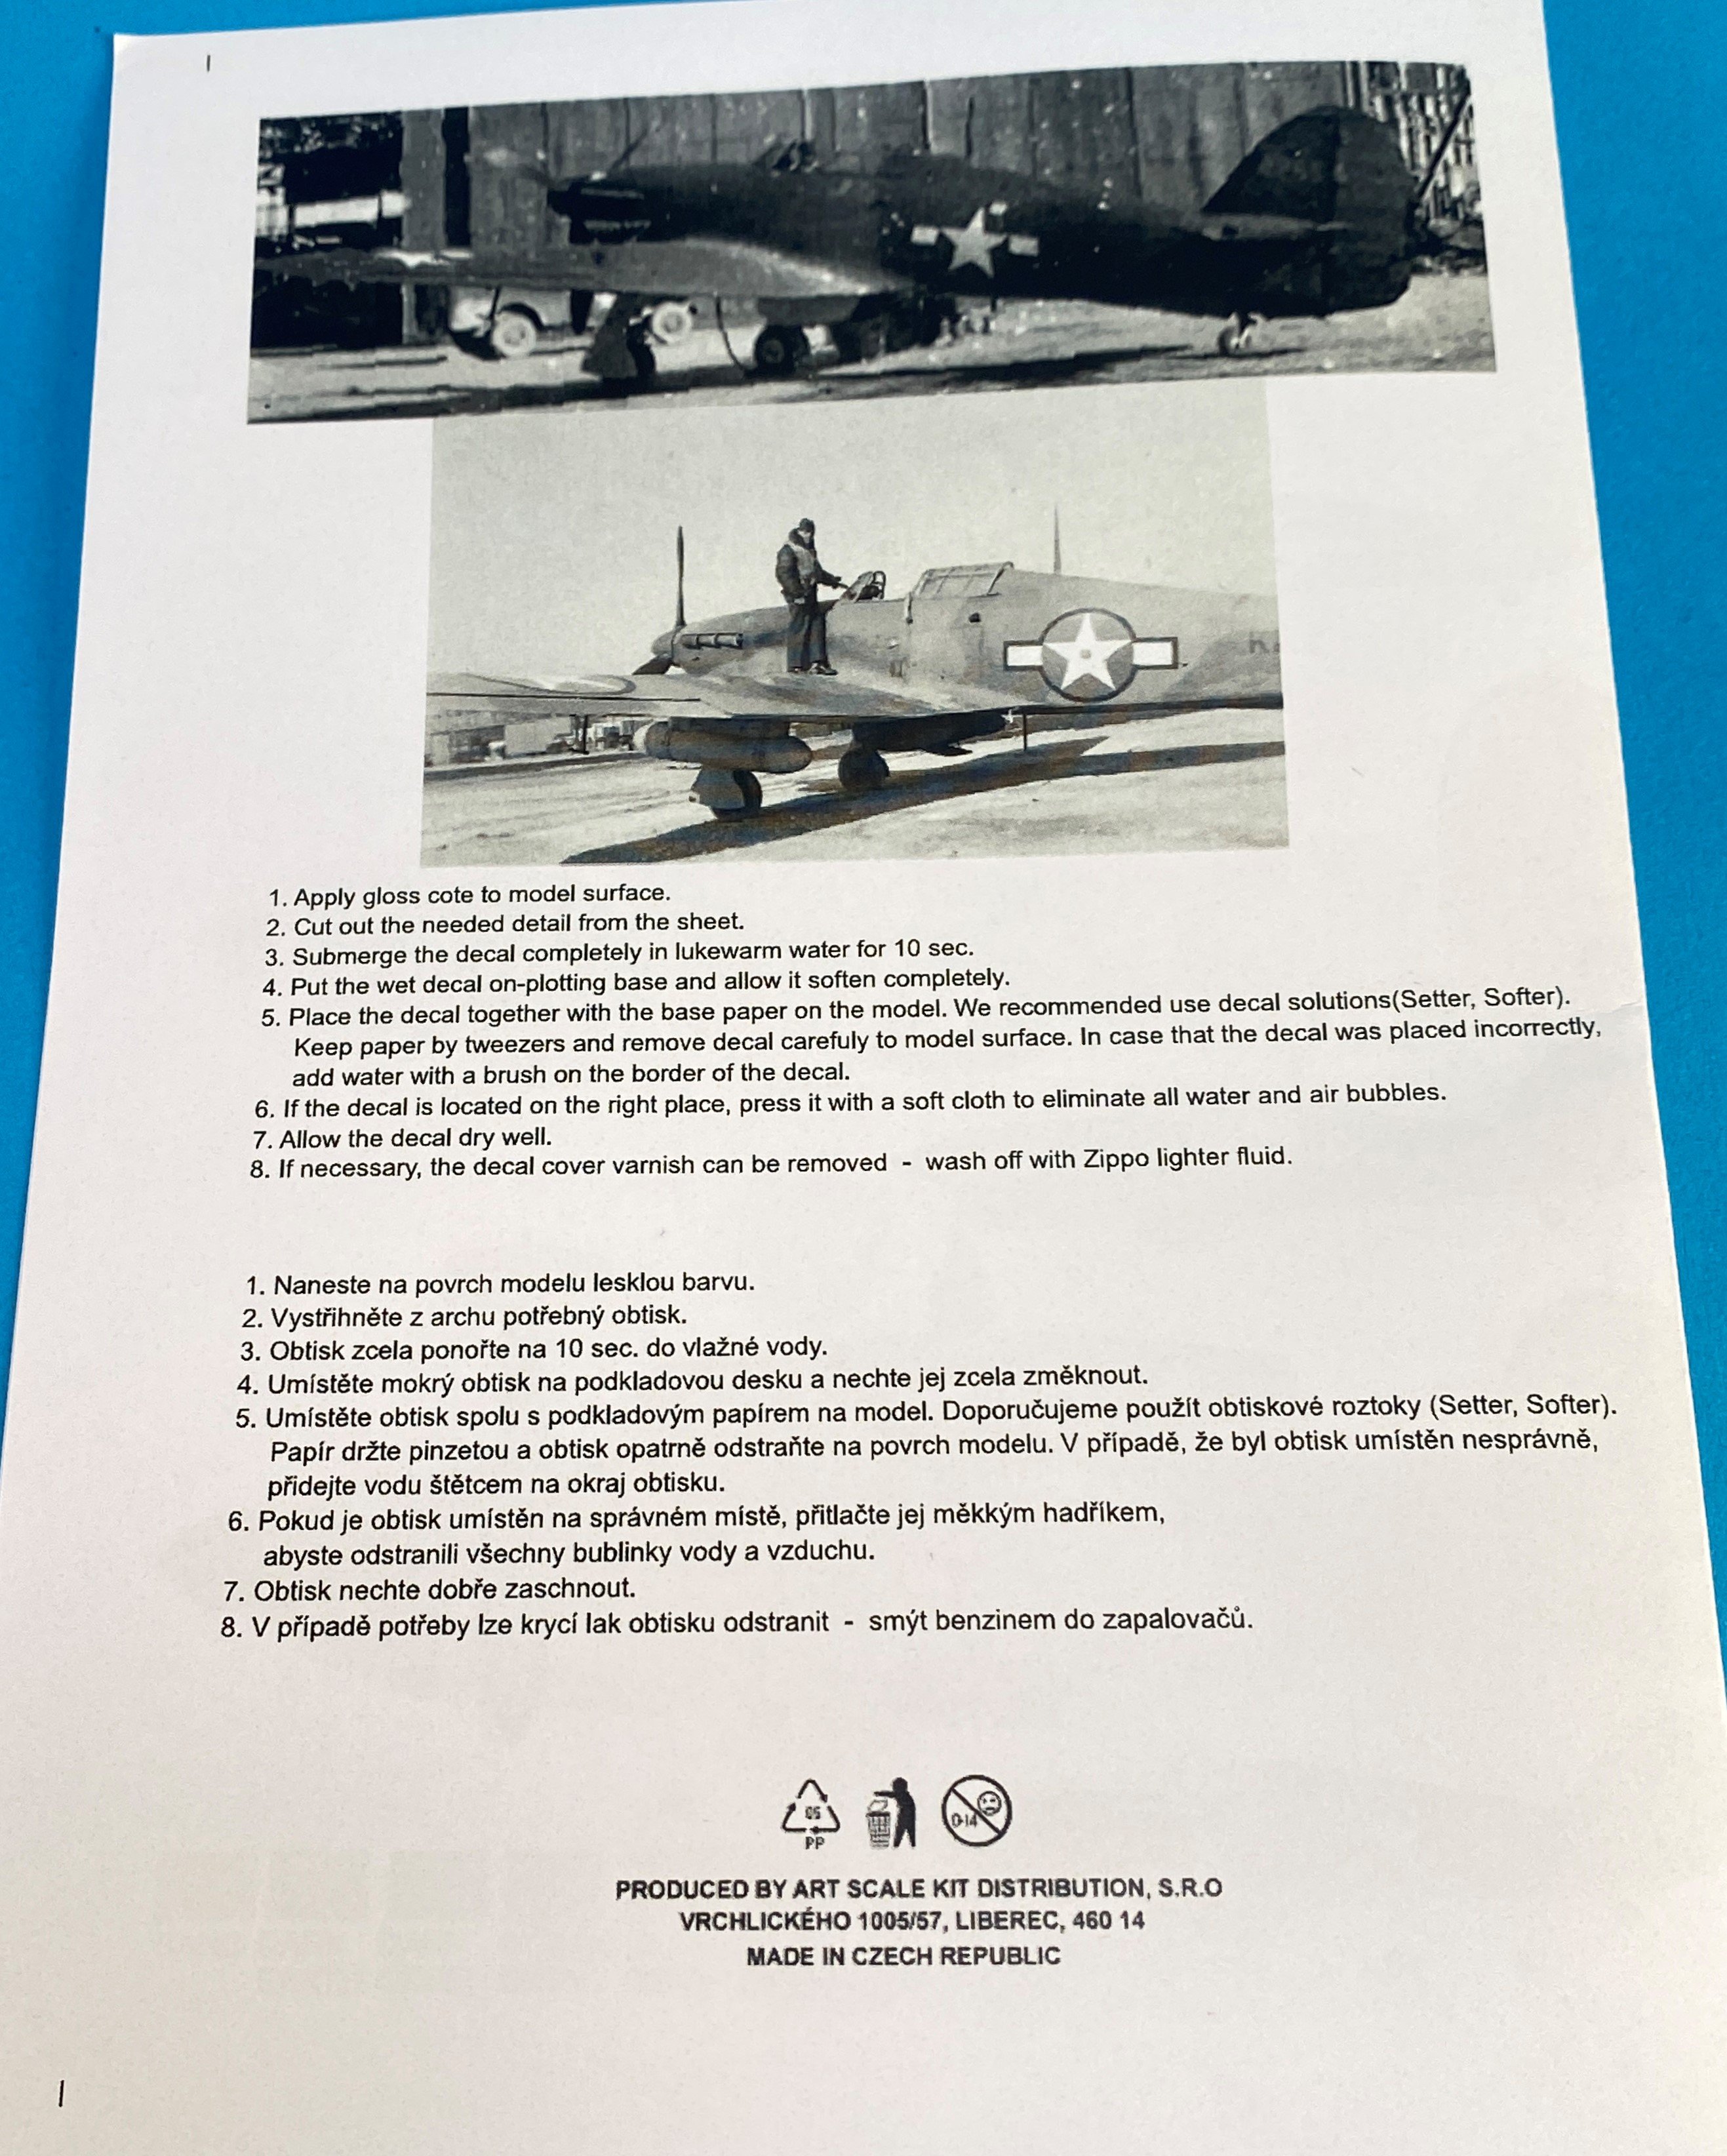
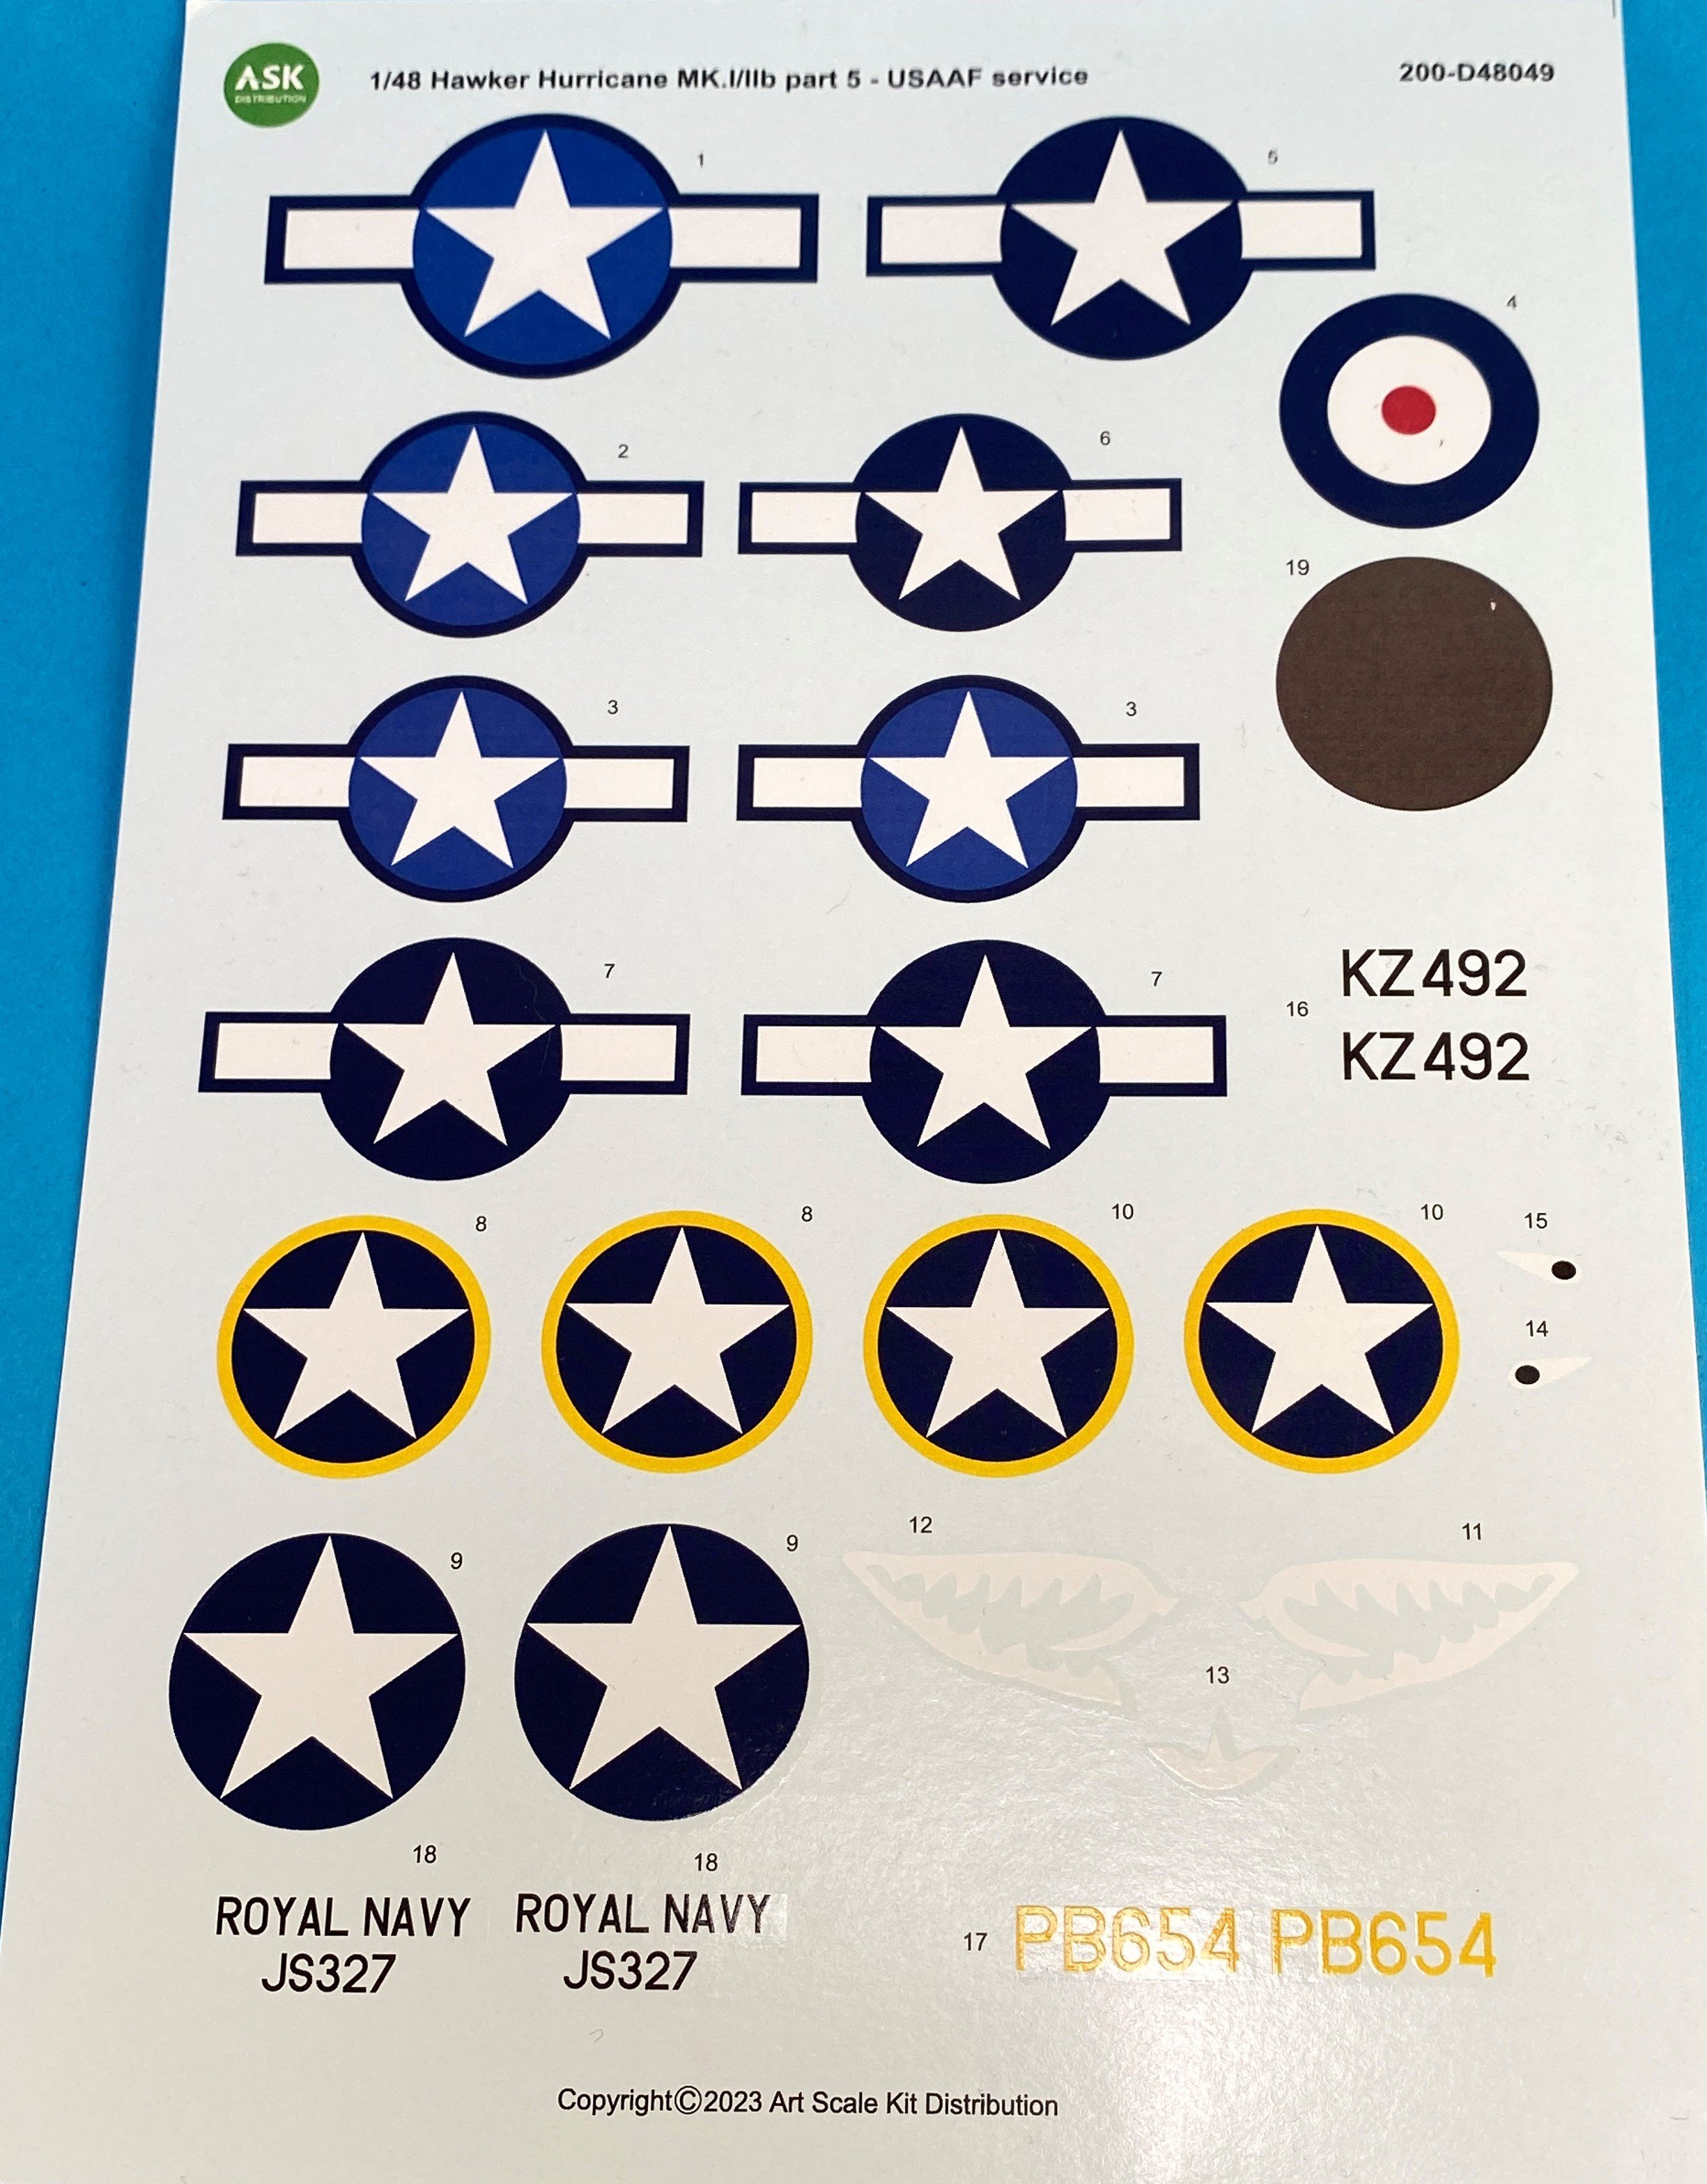
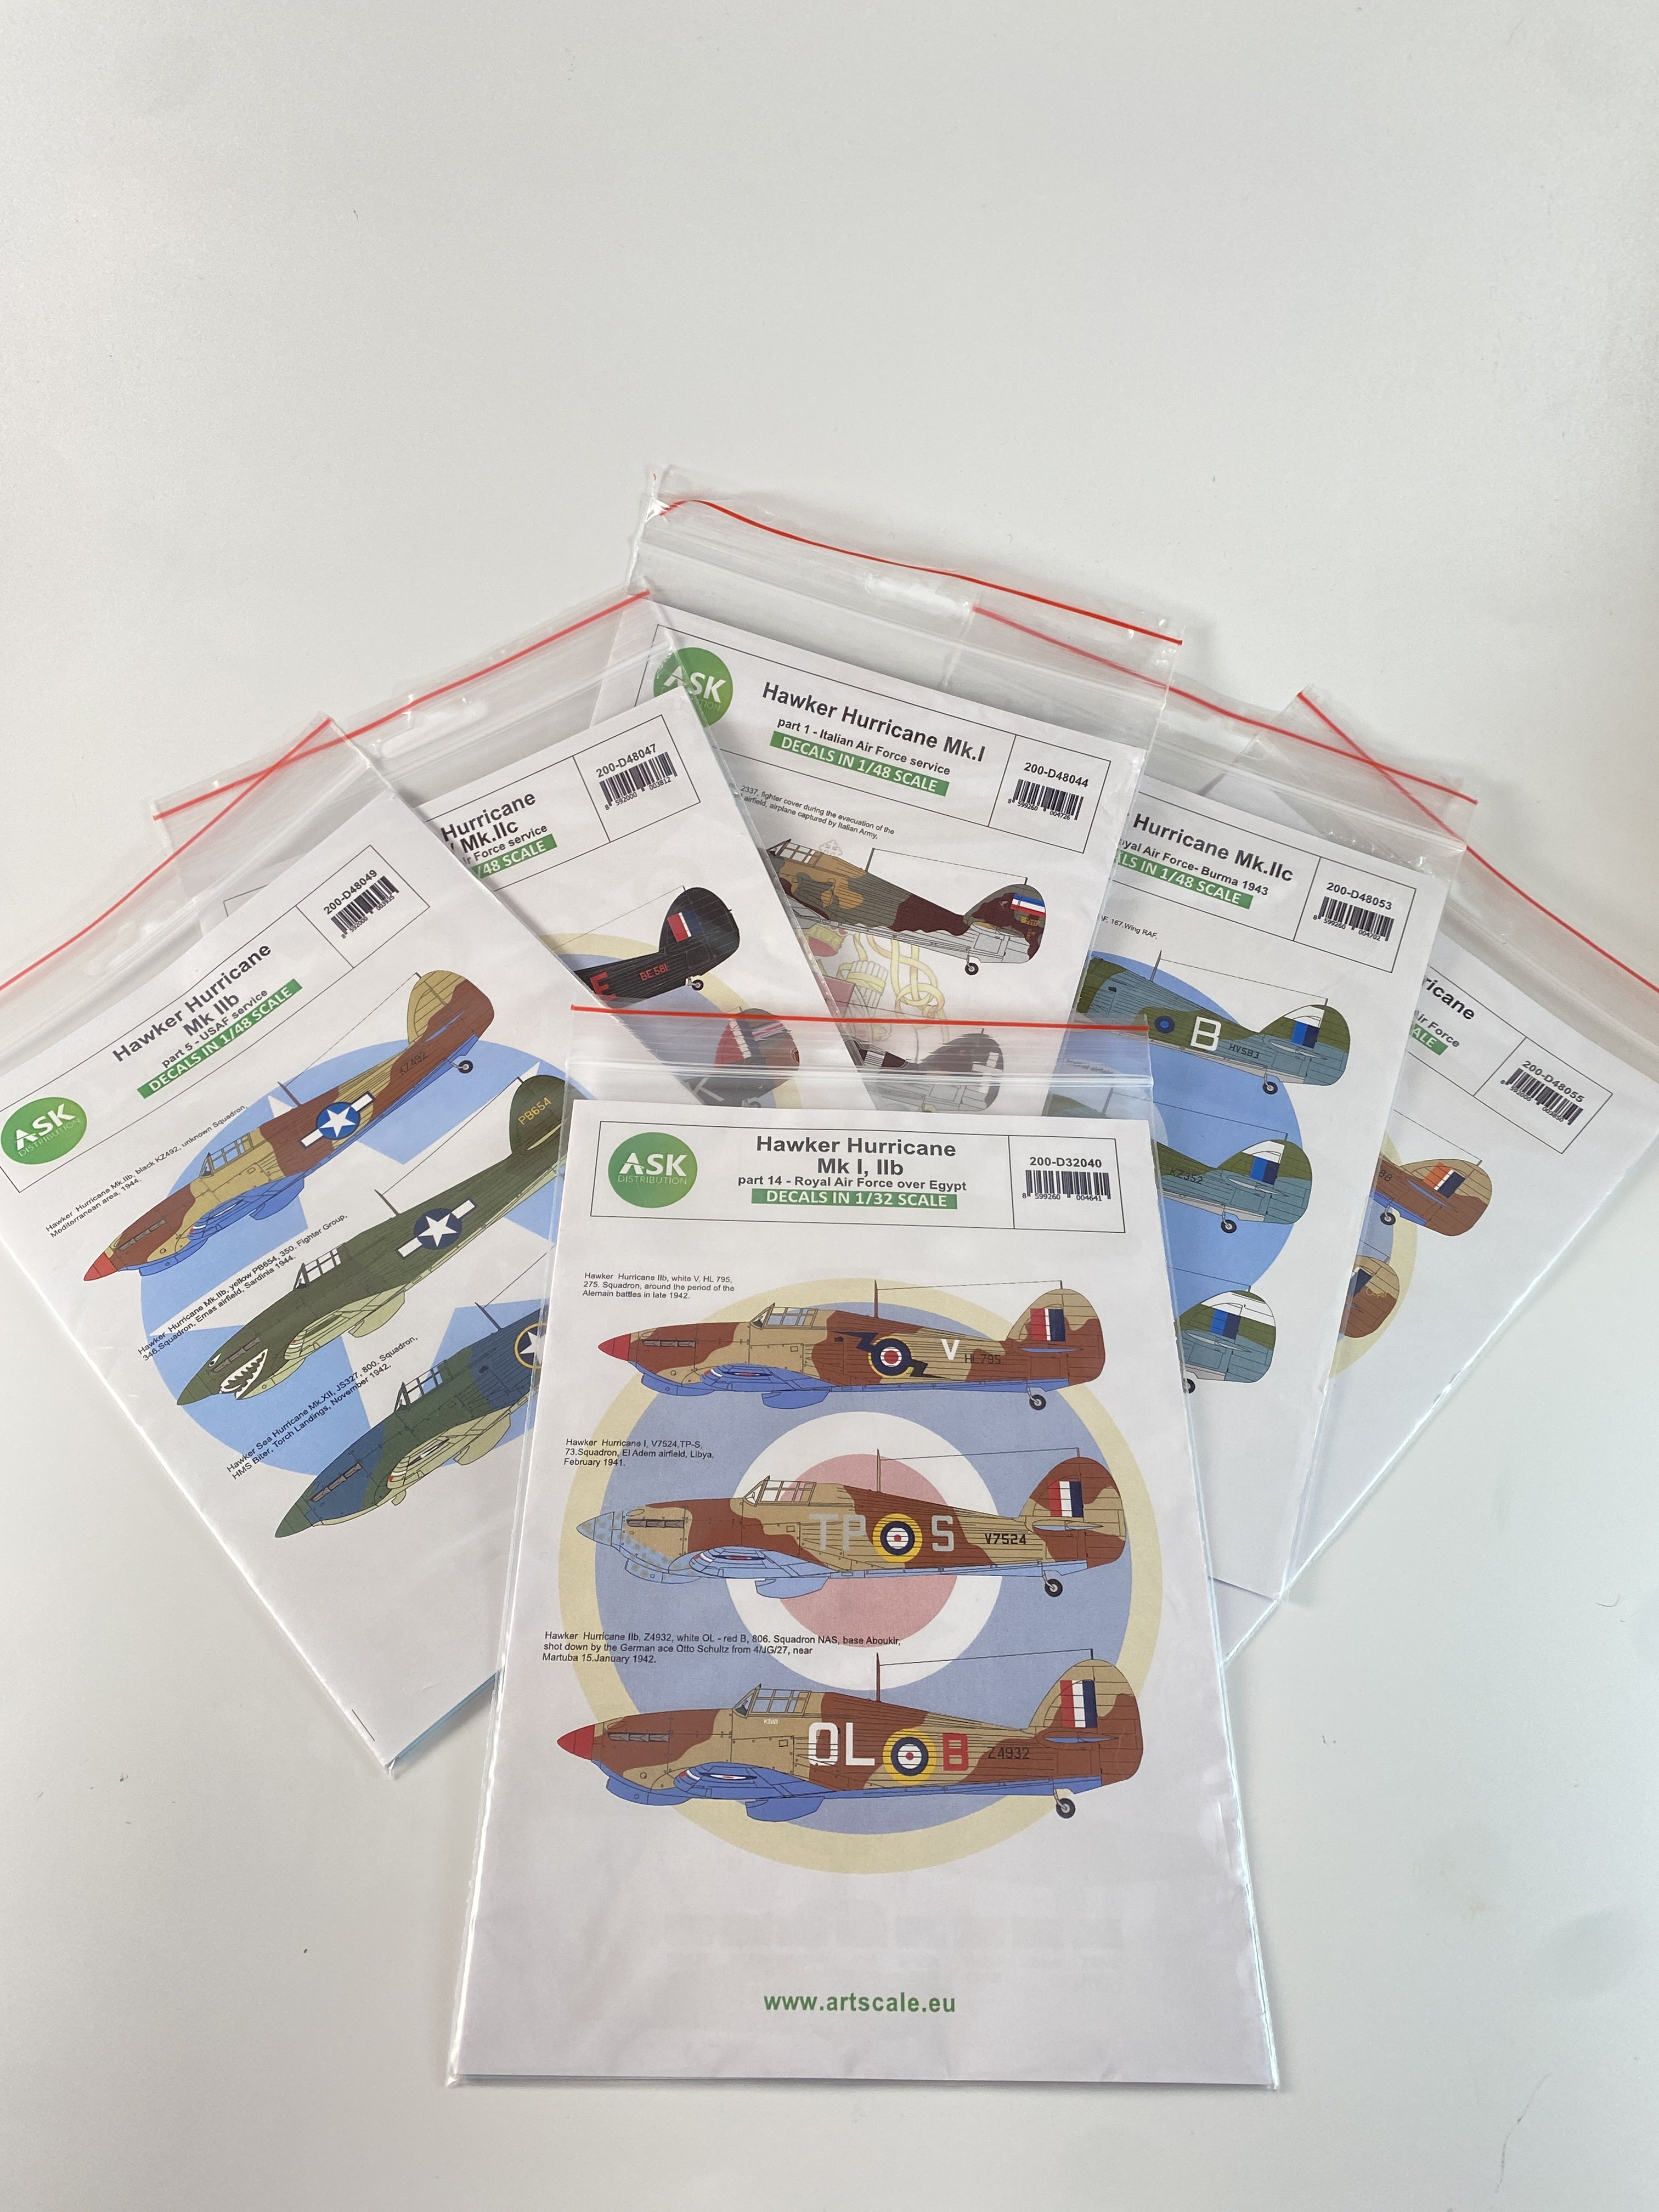
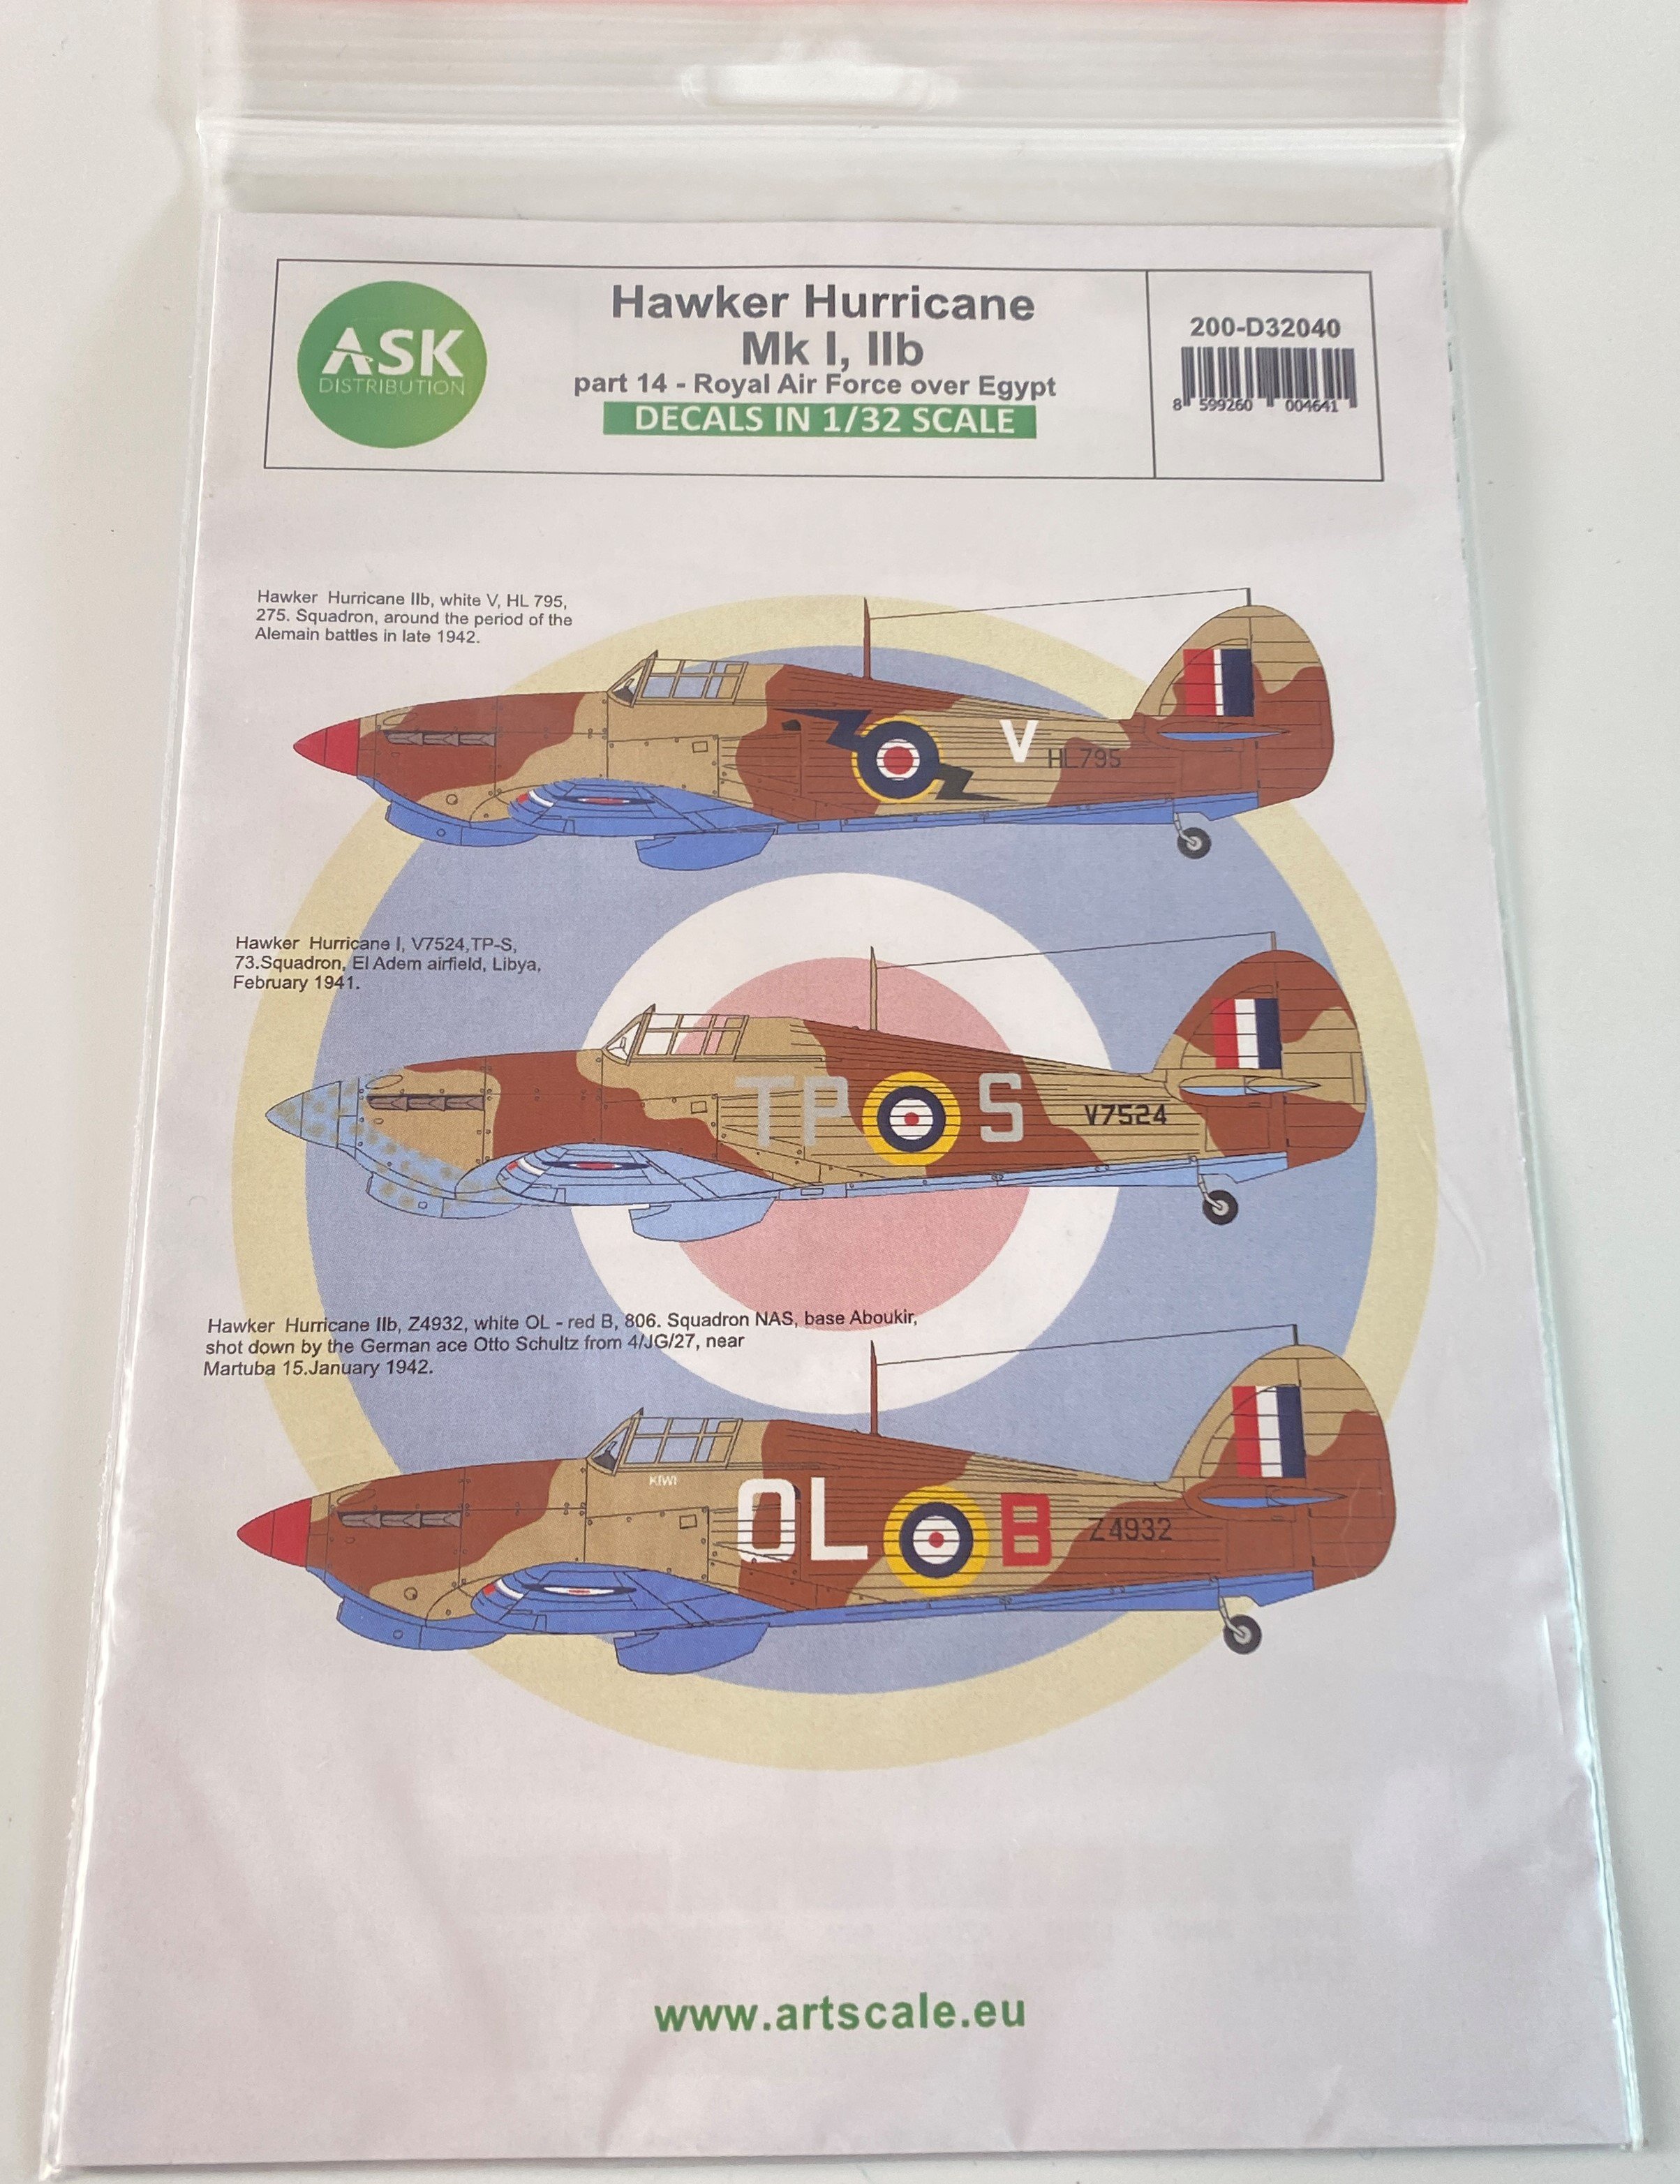
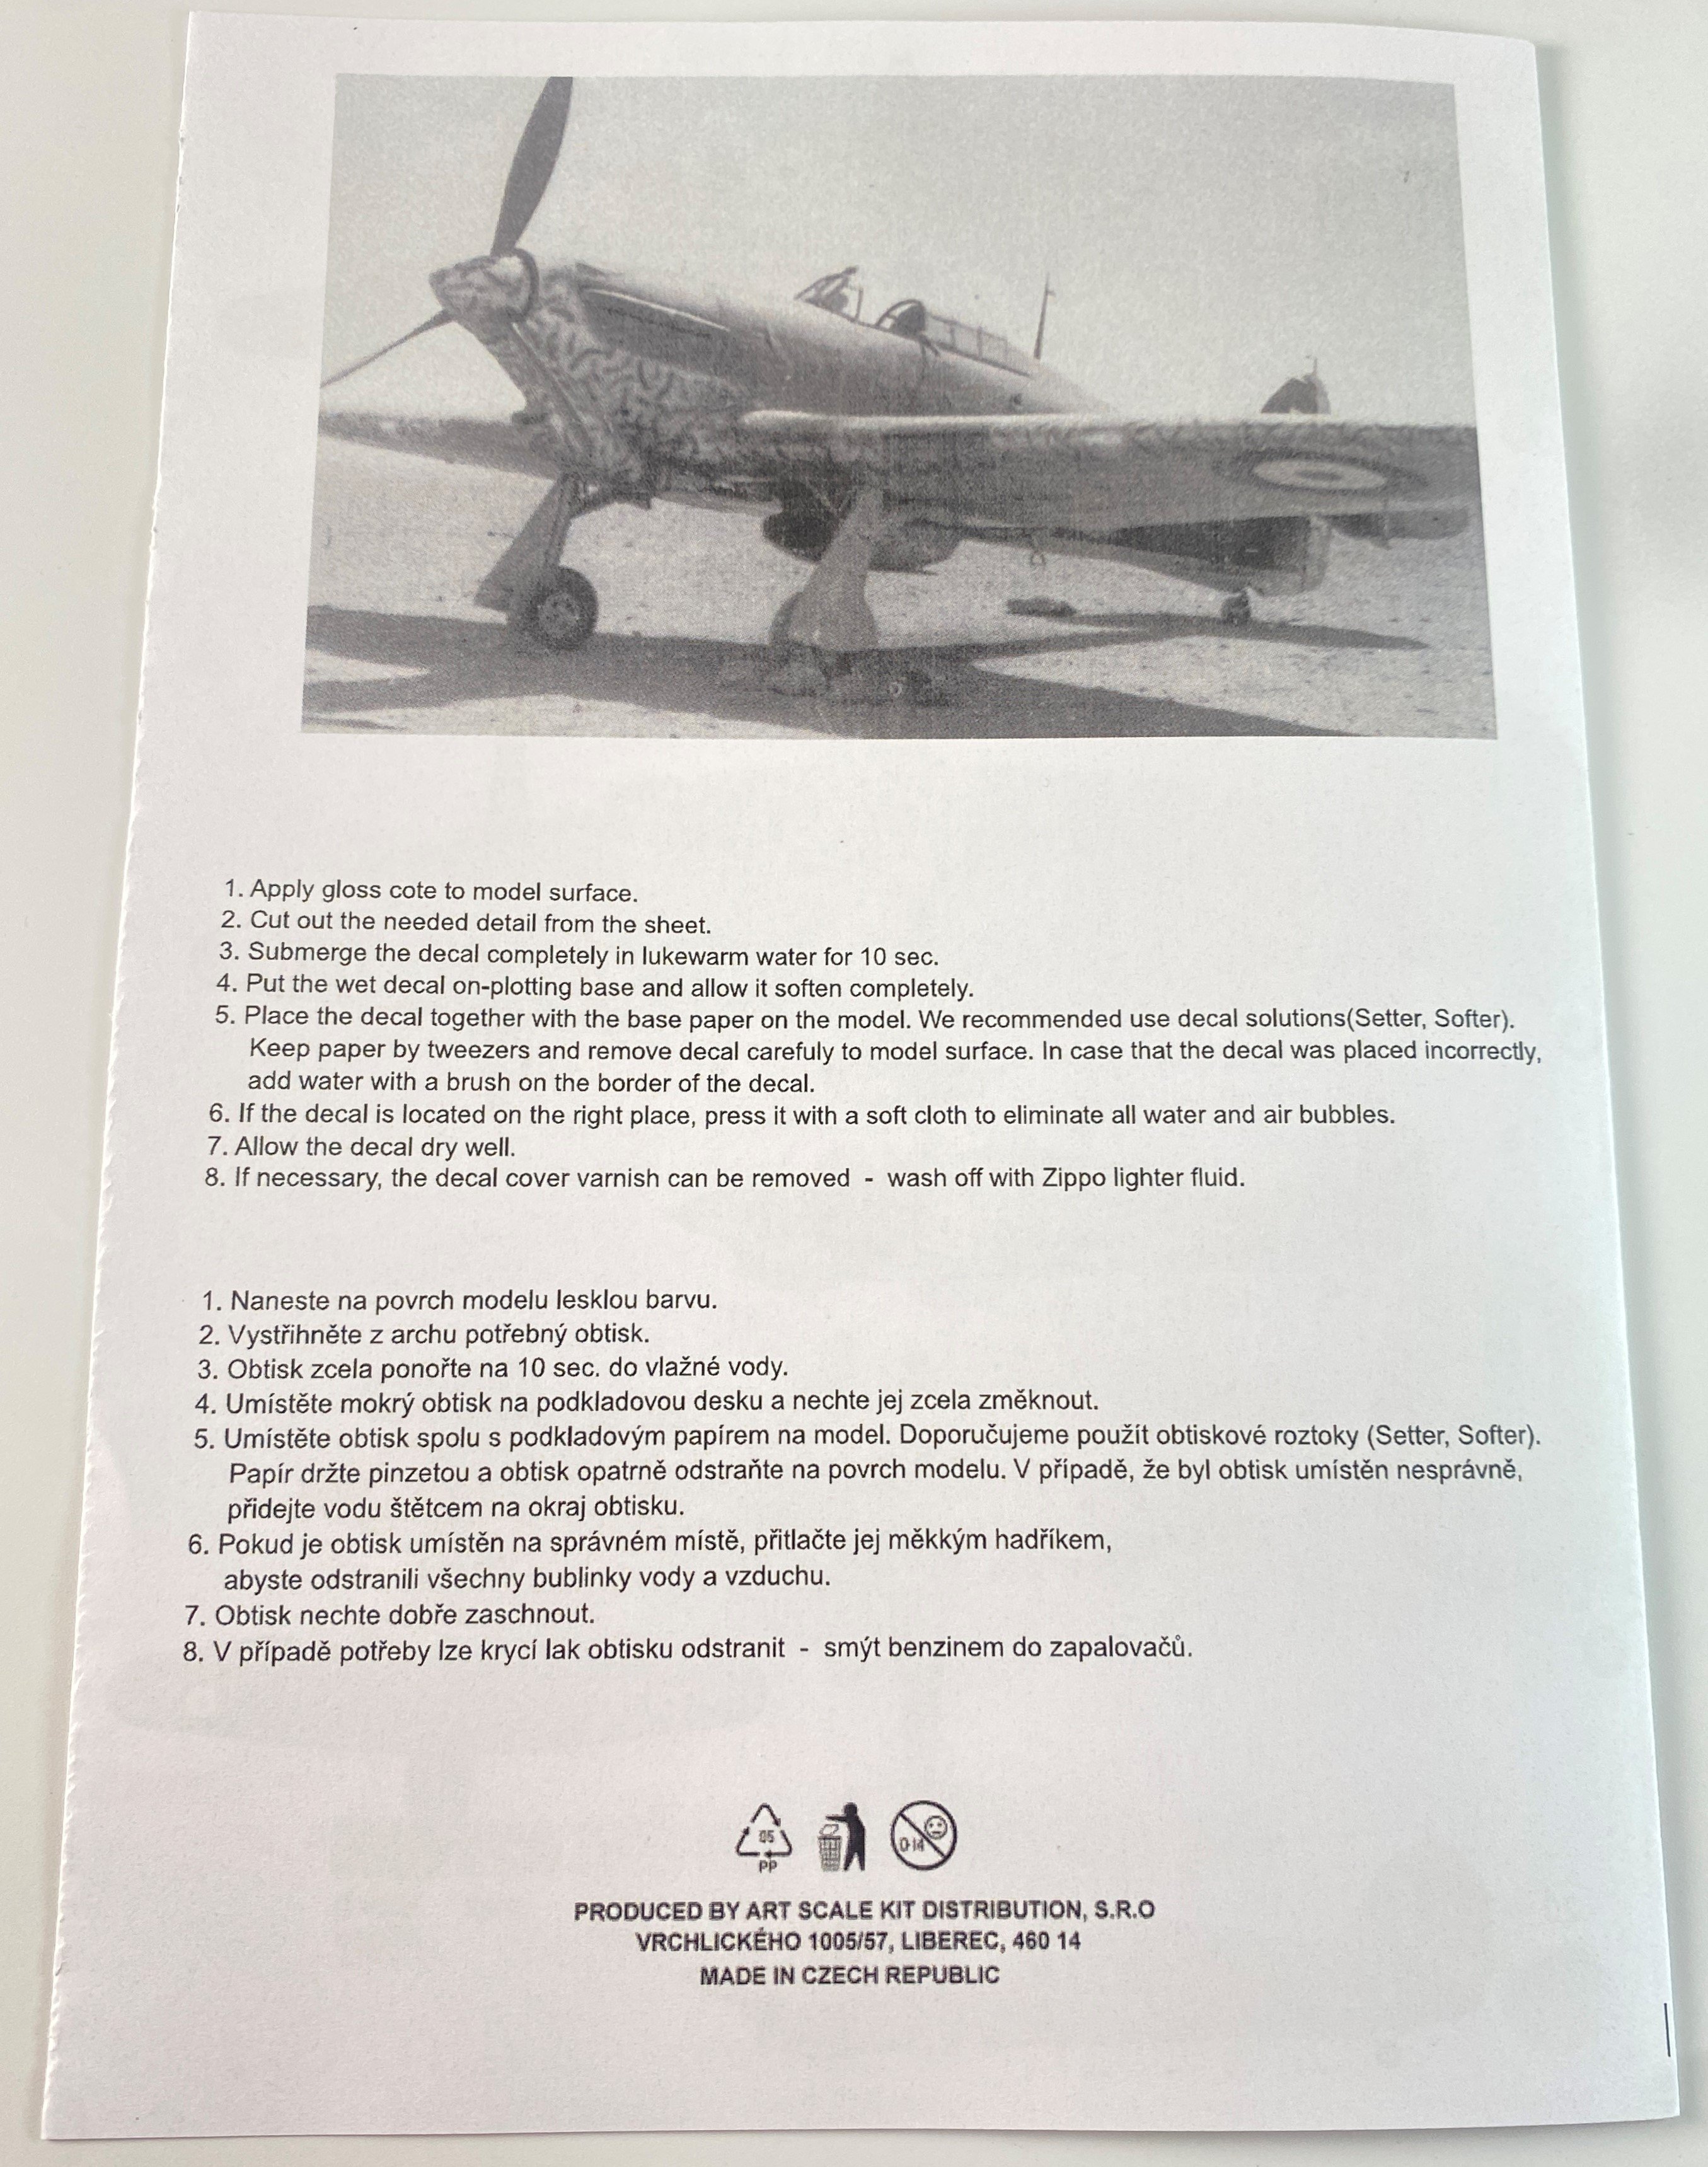
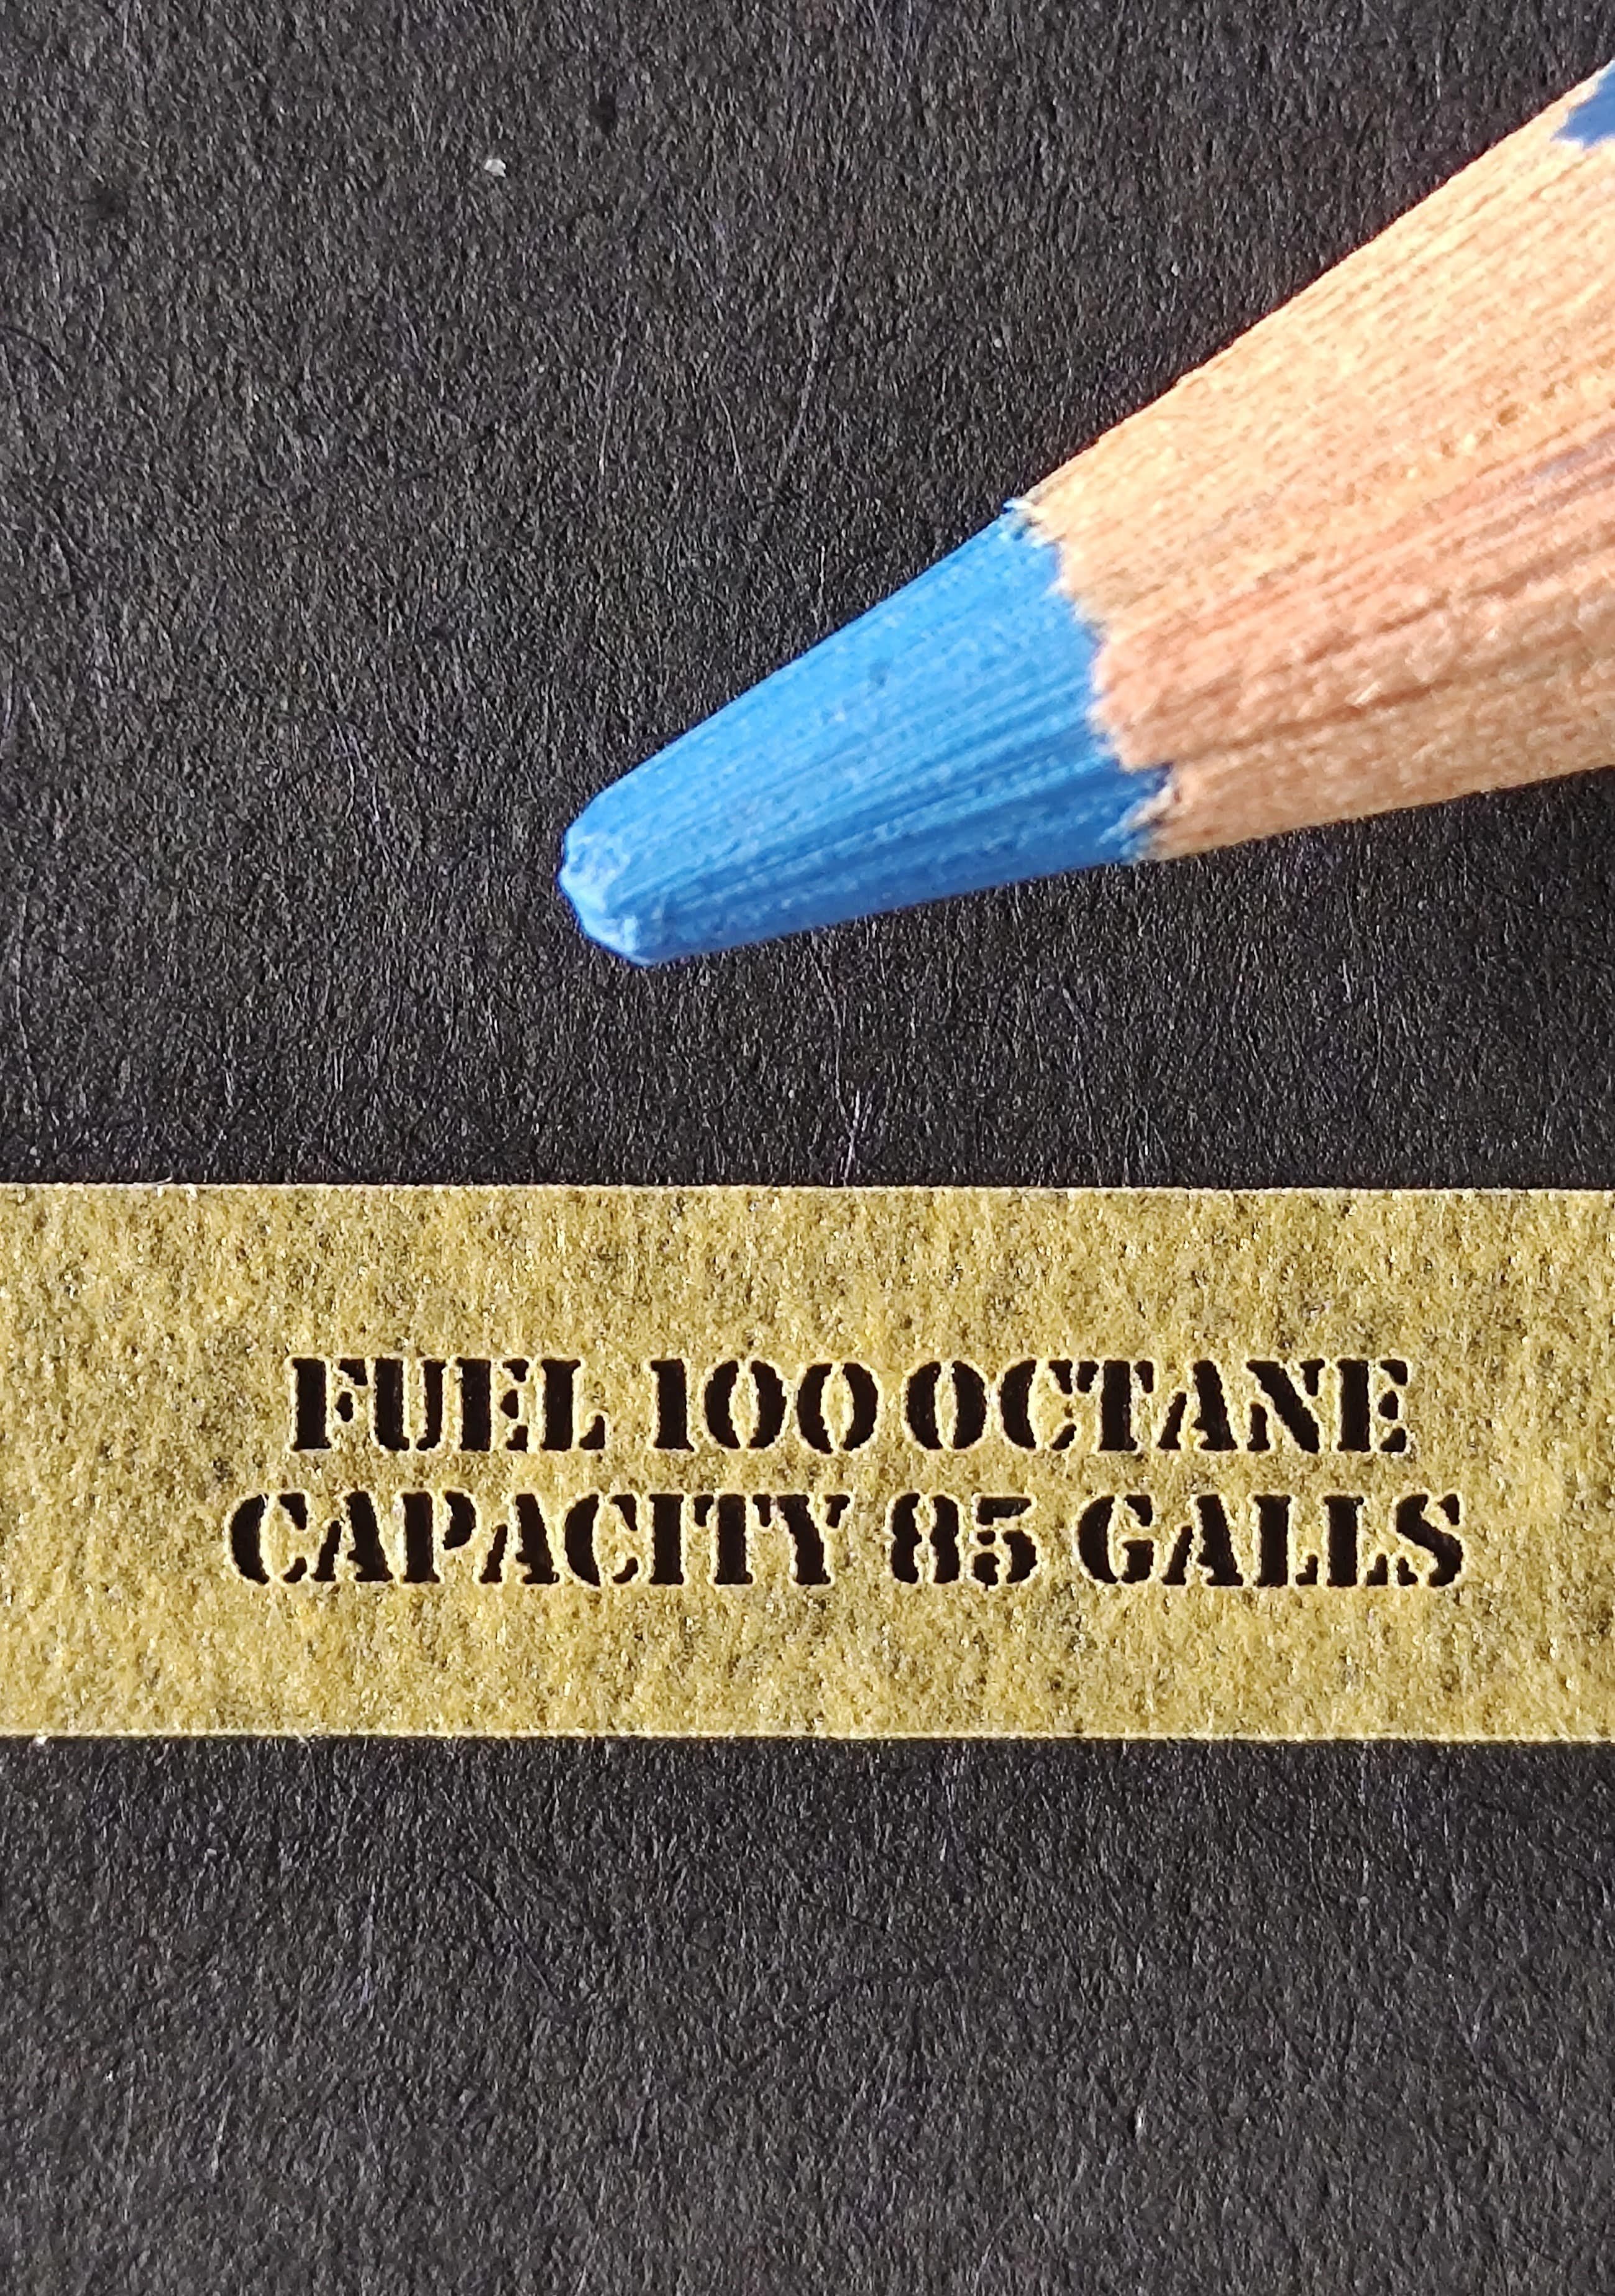
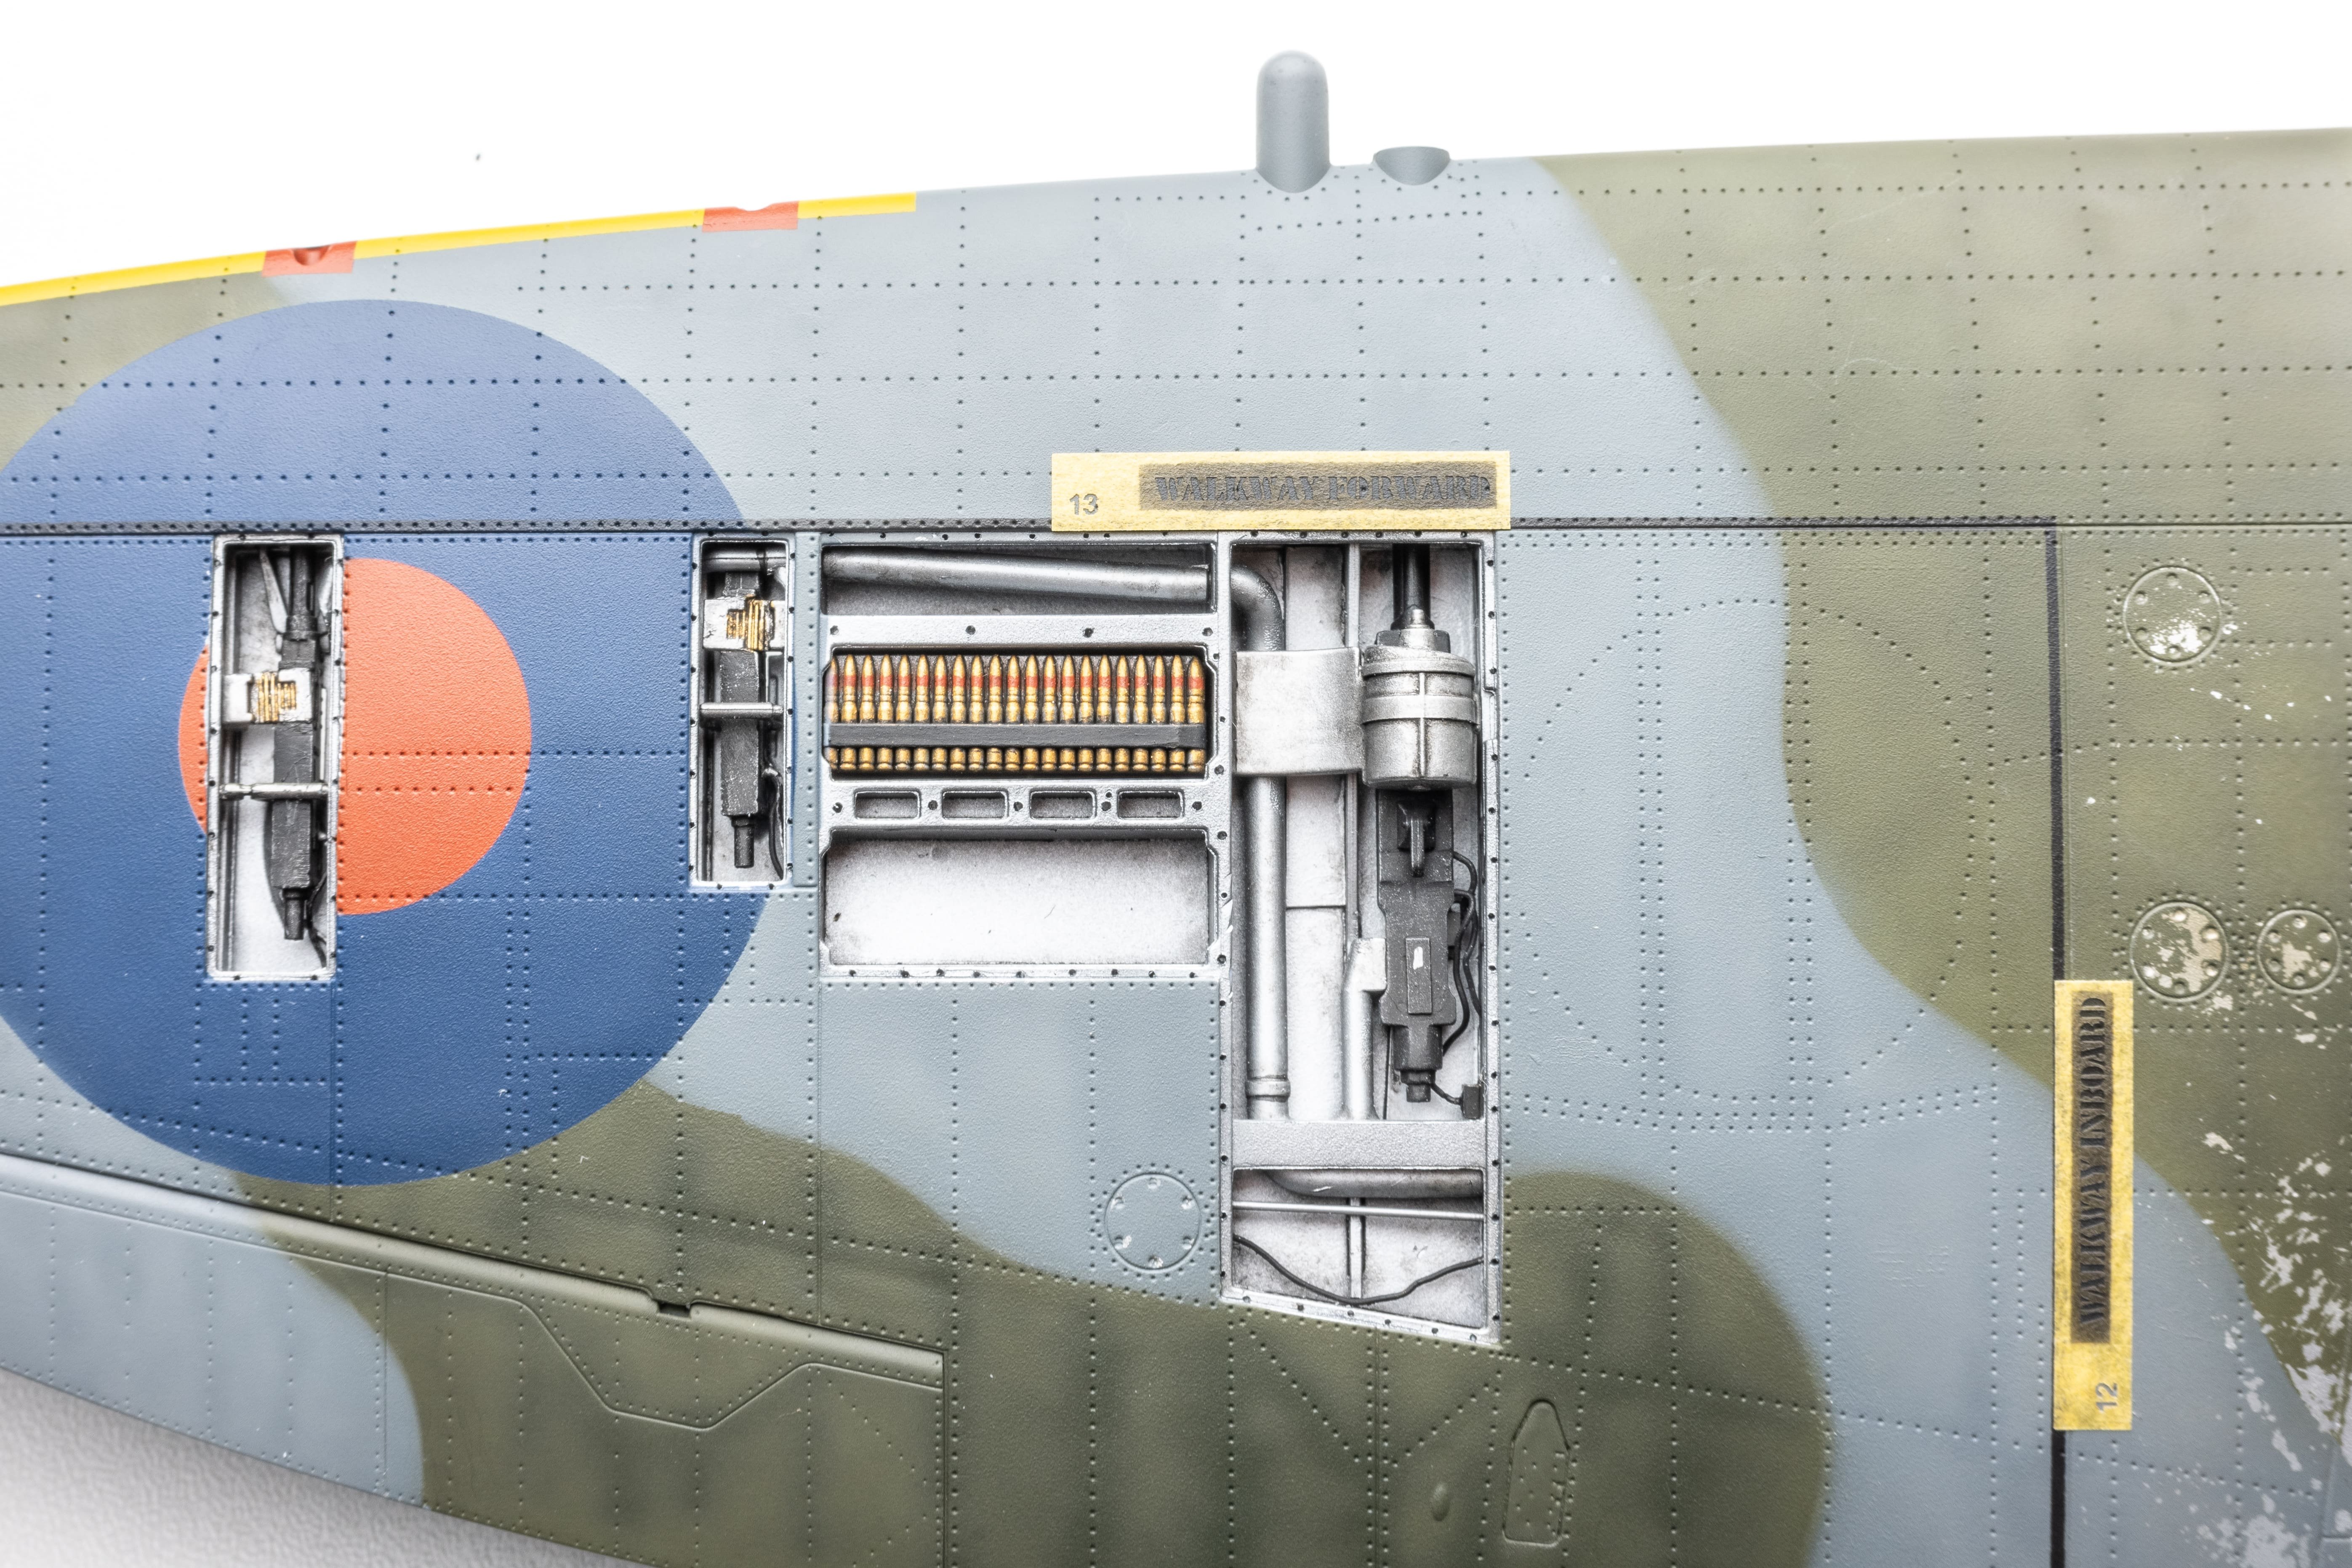
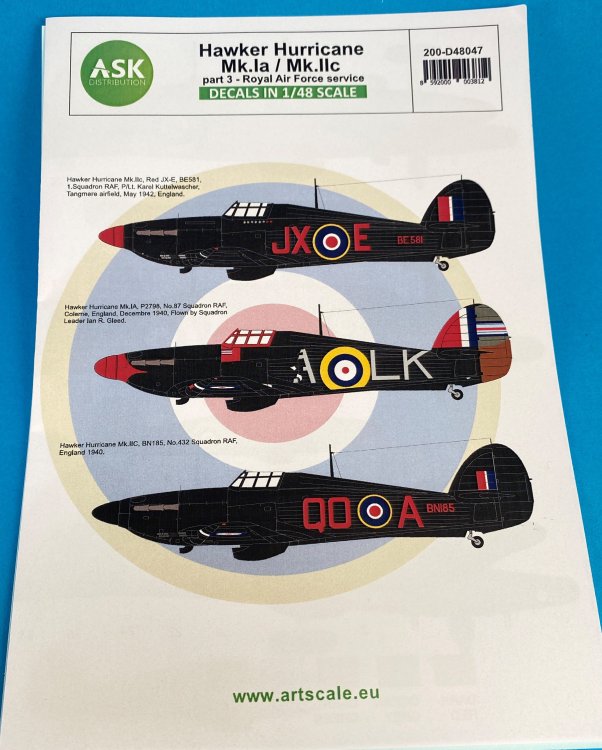
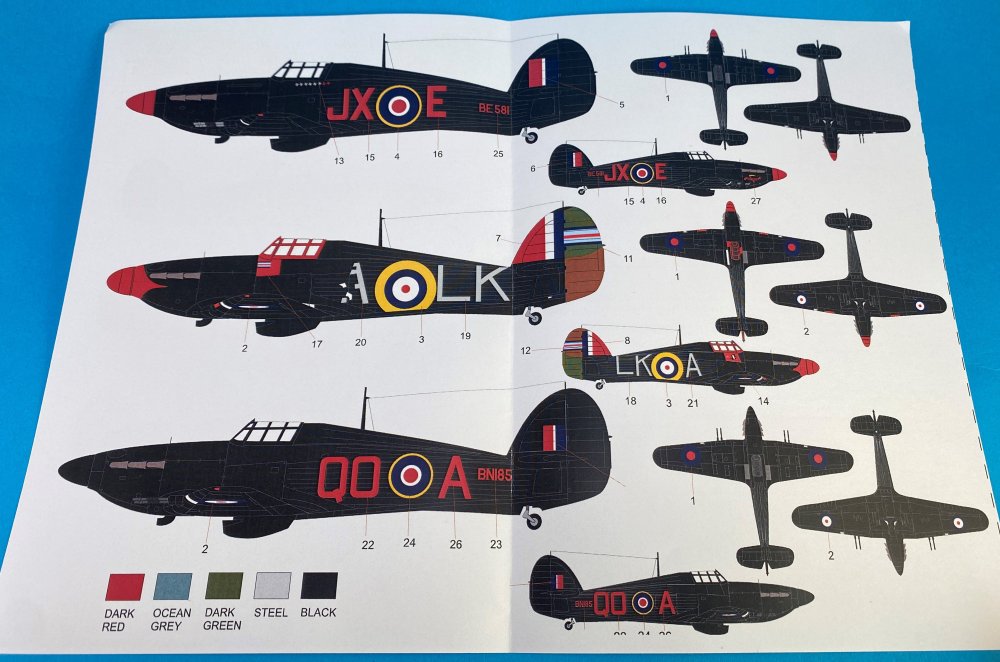
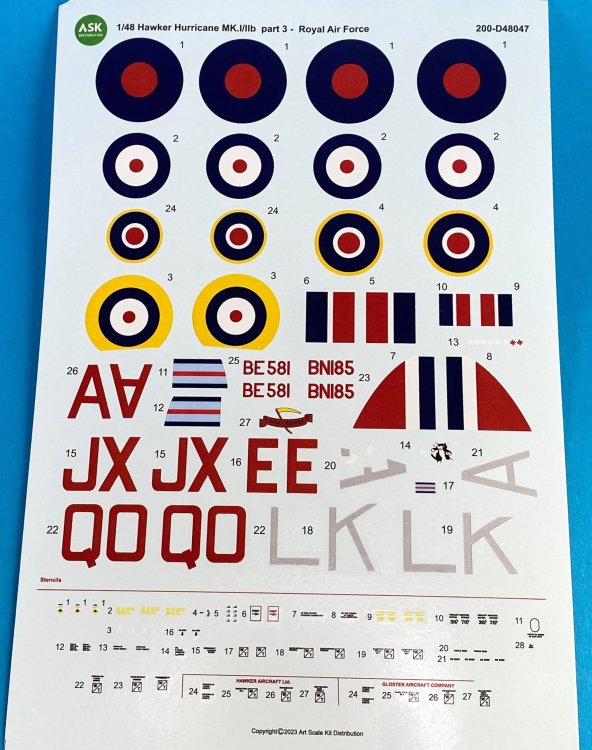
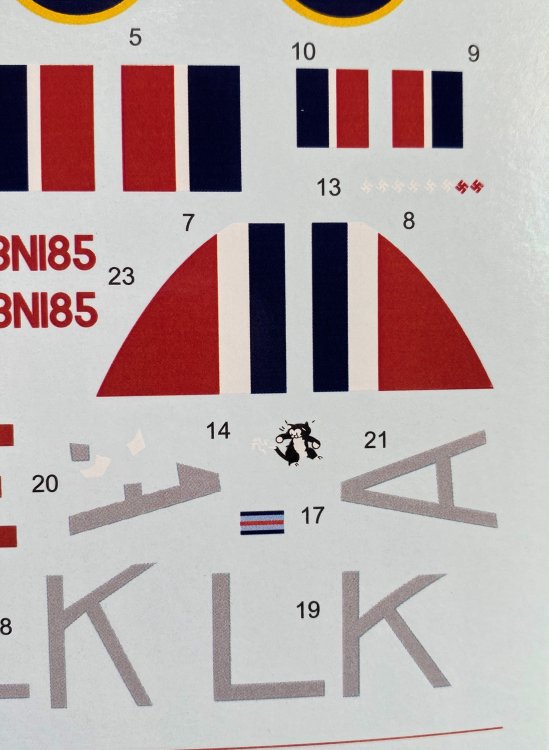
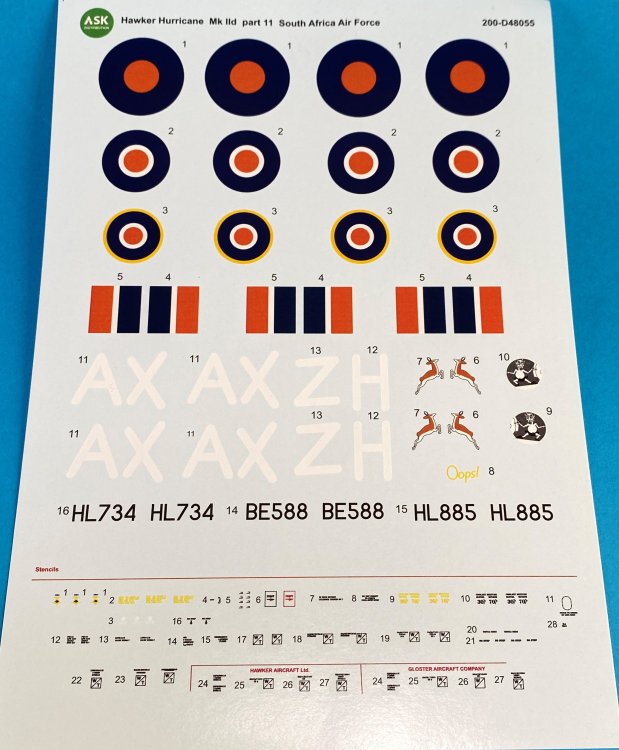
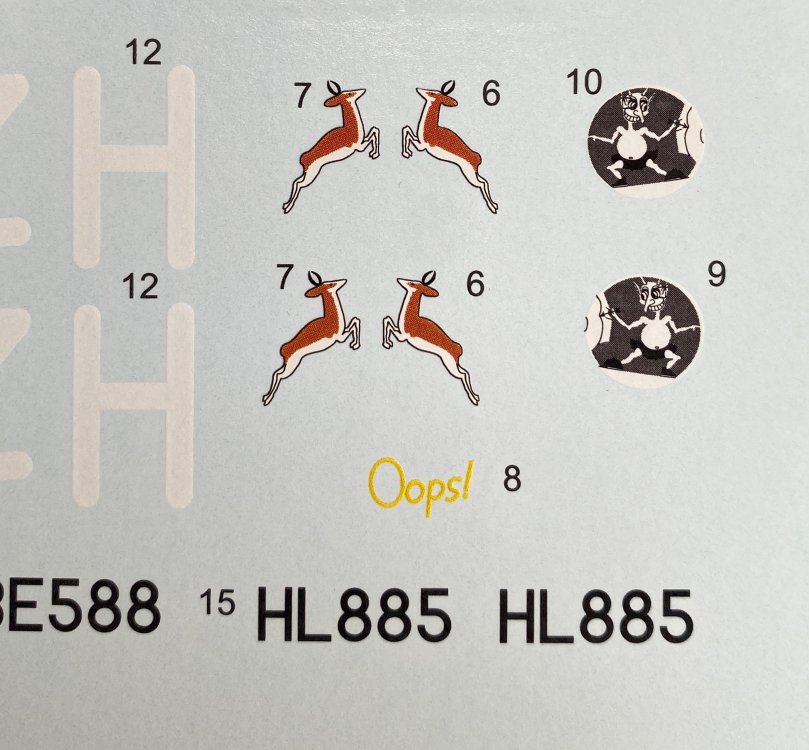
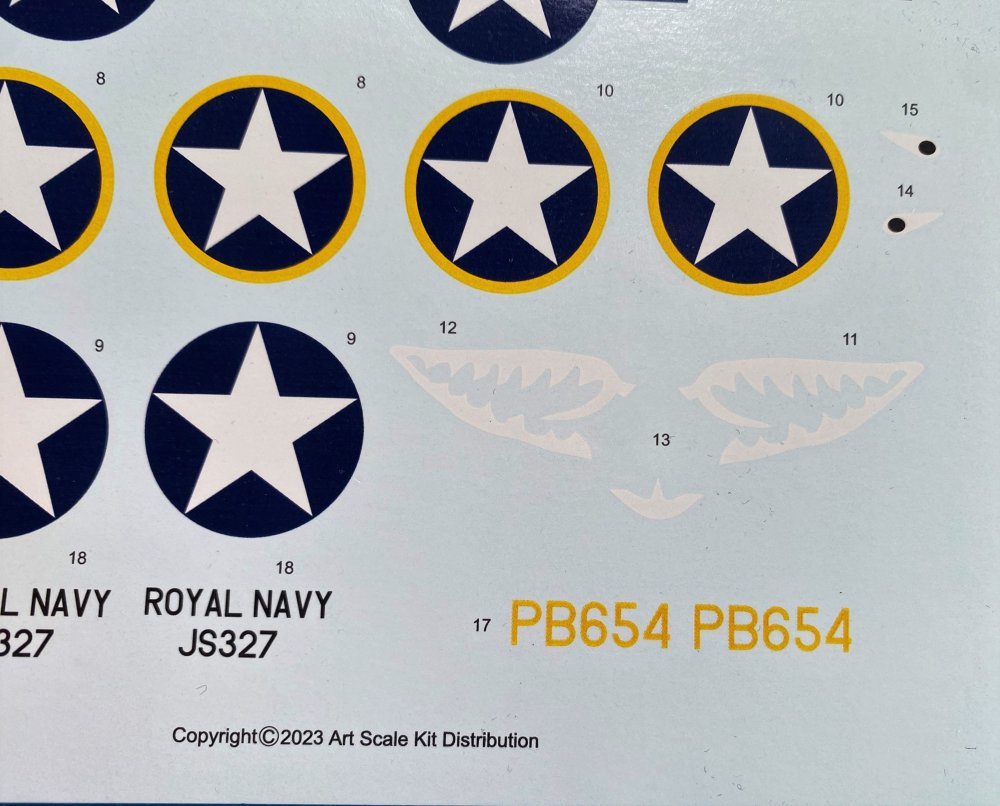
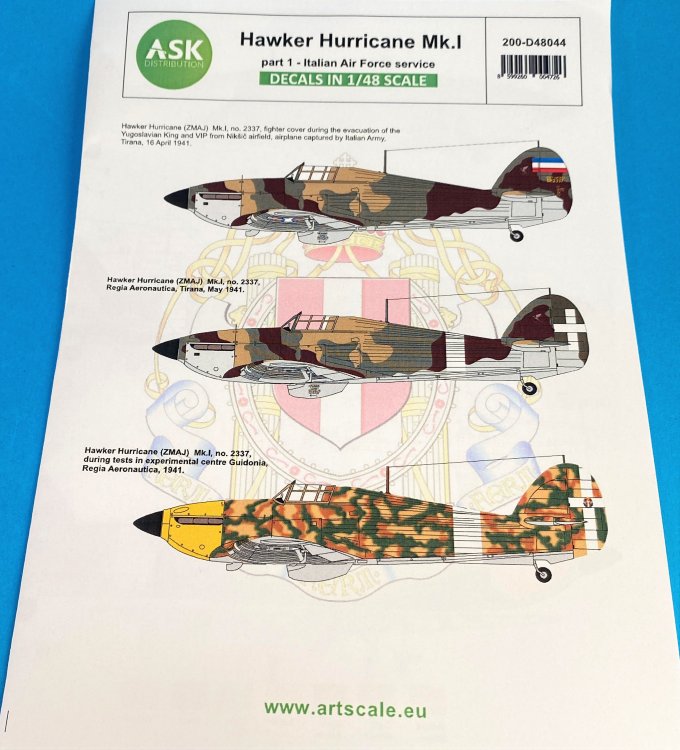
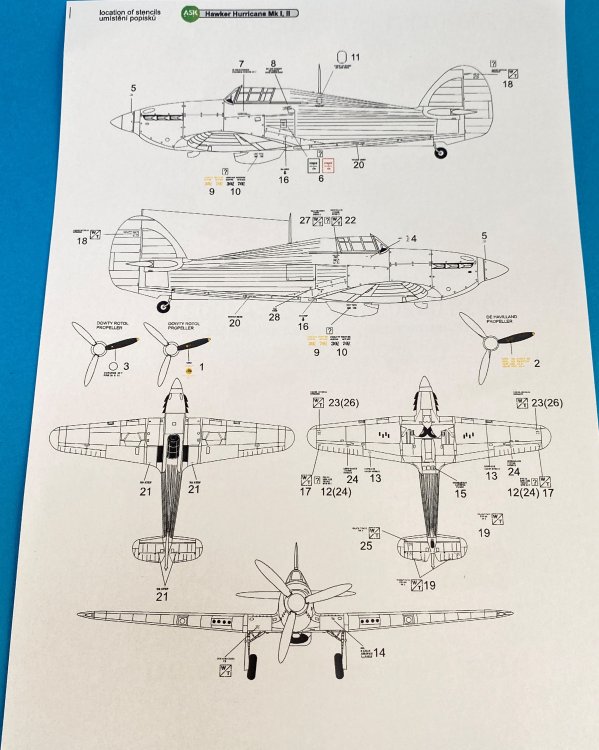
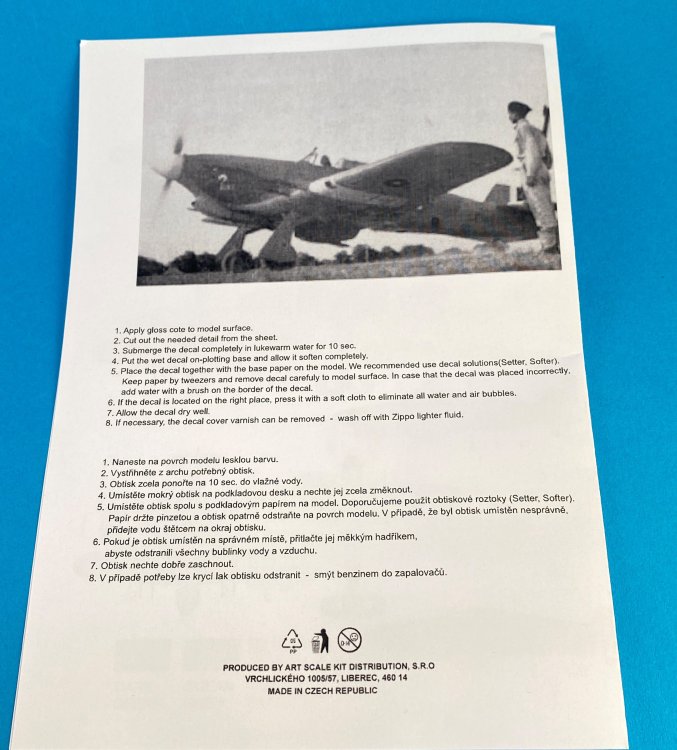
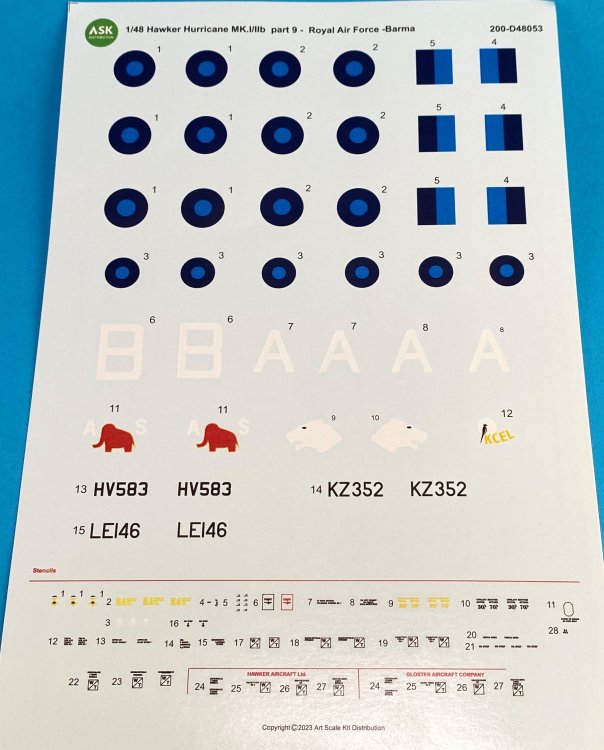
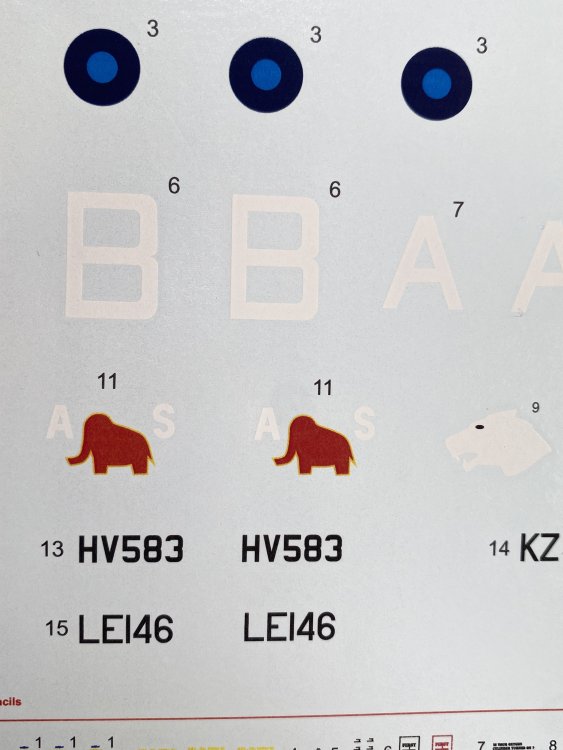
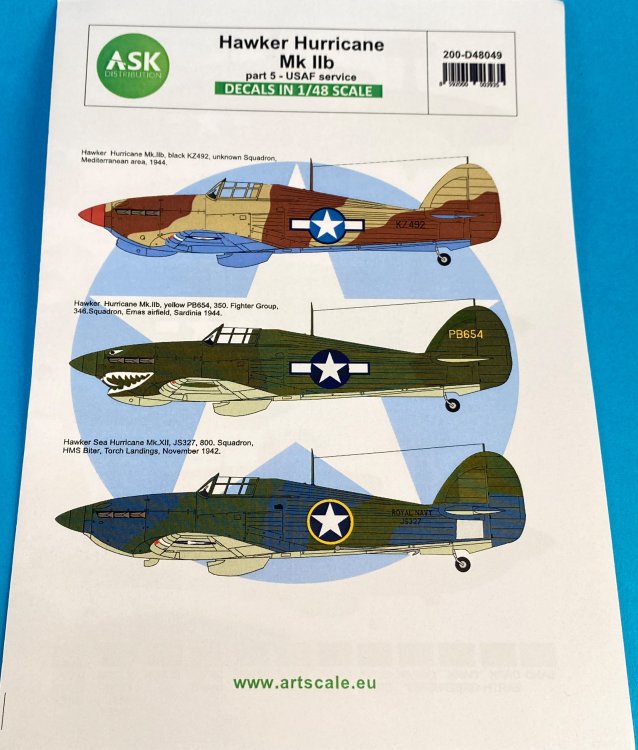
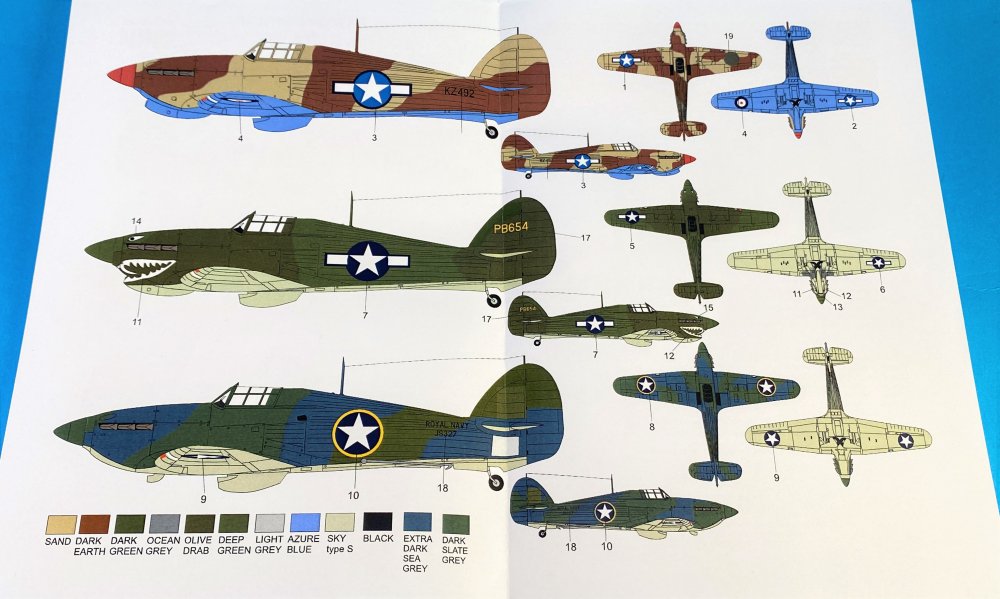
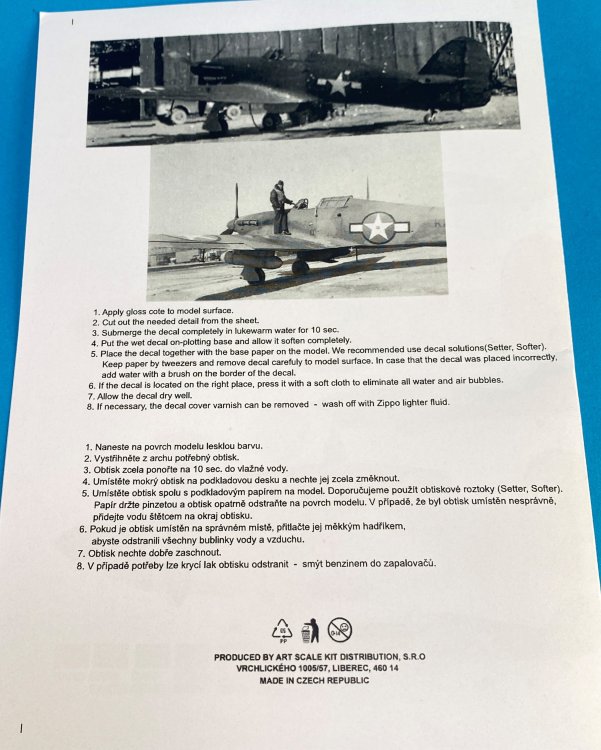
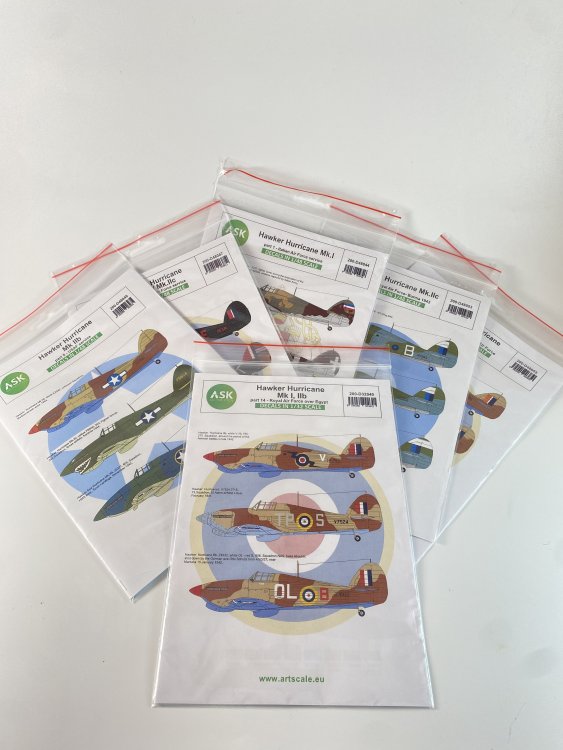
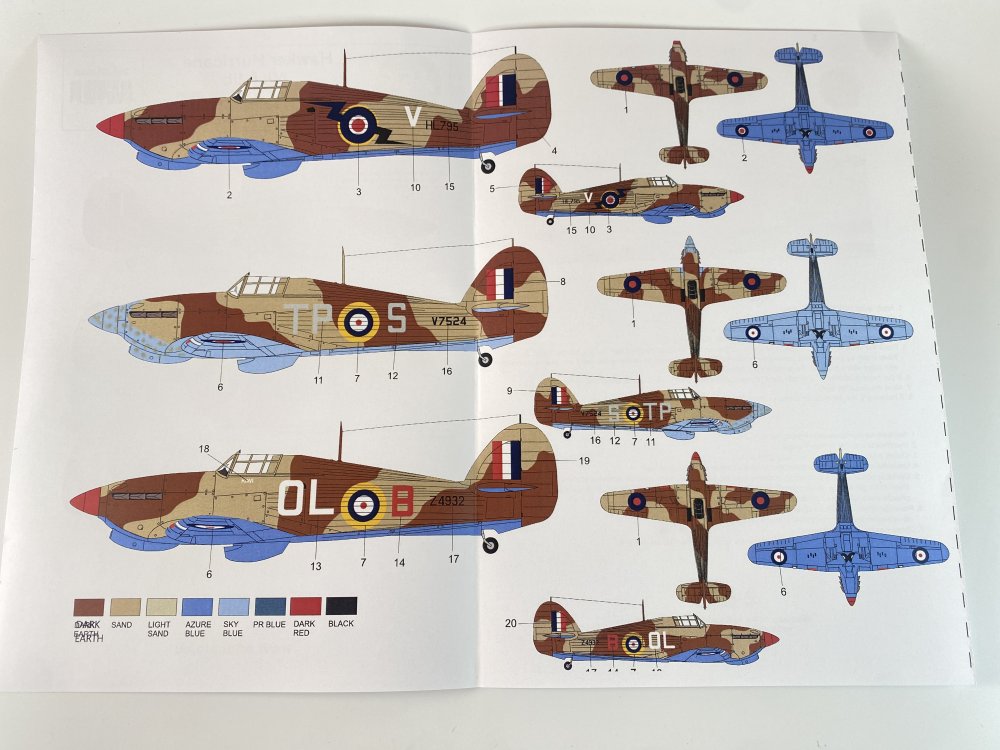
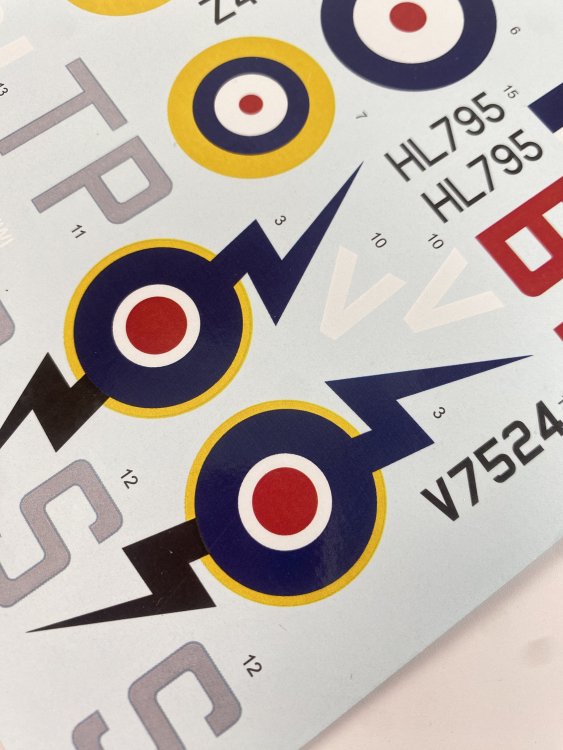
1:32 and 1:48 Art Scale Kit Hawker Hurricane Several Sheets Keeping the pace with Art Scale Kit (ASK) decals. Today, I´m going to review 5 (five) decal sheet from ASK. All sets came in a ziplog bag, small A5 size sheet with profiles colors instructions steps how to apply ASK decals. So let’s looks to the option schemes that all decal sheets offer. But first, one detail that I loved about. In the applying instructions, in all sheets, theres`a real photo of one of the airplanes that are represented on the decal sheets. I really love that "bonus" Hawker Hurricane Mk. I, IIb – part 14 – Royal Air Force over Egypt Catalogue number200-D32040 Price: 12,50€ To order, click here. Hawker Hurricane Mk.IIb, white V, HL 795, 275th Squadron, (around the period of Alemain (??) battle in late 1942) – - Note: I assume that is a typo and it should say: El Alamein battles that took place in North of Africa, late in 1942. Hawker Hurricane Mk. I, V7524, TP-S, 73th Squadron, El Adem Airfield, Libya, February 1941; Hawker Hurricane Mk. IIb, Z4932, White OL – red B, 806, Squadron NAS, base Aboukir, shot down by german ace Otto Schultz from 4/JG/27, near Martuba, 15th January 1942; Two schemes for the Mk IIb and one scheme for the Mk.I. Hawker Hurricane Mk.IIc – part 9 – Royal Air Force – Burma 1943 Catalogue number200-D48053 and 200-D32035 Price: 12,30€ To order, click here. Hawker Hurricane Mk. IIc, HV 538, White B, 3th Squadron Royal Indian Air Force, 167, Wing RAF Bairegarh Airfield, Assam, Burma 1943; Hawker Hurricane Mk. IIb, KZ 352, White A-A, 1th Squadron RIAF, Imphal Airfiel, Burma 1944; Hawker Hurricane Mk. IIb, LE 146, 10th Squadron, RIAF, Kyaukpyu Airfield, Burma 1945 I have always like the Burma schemes and this one is no exception. The sheets says Hurricane Mk.IIc but the second scheme is reference that is a Mk. IIb. Also says Burma 1943 but the second and 3rd schmes are from 1944 and 1945. The 1:48 sheets also brings stencils for one aircraft. Hawker Hurricane Mk.II - part 1 – Italian Air Force Service Catalogue number200-D48044 Price: 12,30€ To order, click here. Hawker Hurricane (ZMAJ) Mk.I, no. 2337, fighter cover during the evacuation of the Yugoslavian King and VIP´s from Nikšič airfield, airplane captured by Italian Army, Tirana, 16 April 1941. Hawker Hurricane (ZMAJ) Mk.I, no. 2337, Regia Aeronautica, Tirana, May 1941. Hawker Hurricane (ZMAJ) Mk.I, no. 2337, during tests in experimental centre Guidonia, Regia Aeronautica, 1941 Hawker Hurricane Mk. Ia /Mk. IIc - part 3 – Royal Air Force Service Catalogue number200-D48044 and 200-D32029 Price: 12,30€ To order, click here. 1 - Hawker Hurricane Mk.IIc, Red JX-E, BE581, 1 Squadron RAF, flying ace P/Lt. Karel Kuttelwascher, Tangmere airfield, May 1942, England. o Karel Miloslav Kuttelwascher, DFC and Bar (23 September 1916 – 17 August 1959) was a Czech fighter pilot, and a flying ace of the UK's Royal Air Force (RAF) in the Second World War. § ASK has put on their website a brief history about this Ace. · He was in combat service from May 1940 to October 1942, first with the French Air Force and then with the RAF. Kuttelwascher, nicknamed "Kut", was the RAF's most successful Czechoslovak pilot, and one of the RAF's highest-scoring flying aces overall. In RAF service he shot down 18 enemy aircraft. He may also have scored numerous victories in French Air Force service, but these are unconfirmed as many French records were lost. In 1945 Kuttelwascher returned to Czechoslovakia but in 1946 he returned to Britain, where he made a civilian flying career with British European Airways. He died of a heart attack in 1959, aged 42. But there`s a lot to read about Kuttelwascher on the web, so here are two links that are very worth of reading: http://www.rogerdarlington.me.uk/nighthawk.html https://fcafa.com/2011/01/01/karel-kuttelwascher/ 2 - Hawker Hurricane Mk.Ia, P2798, No.87 Squadron RAF, Colrene, England, Decembre 1940, Flown by Squadron Leader Ian R. Gleed ASK has put on their website a brief history about this Ace: Wing Commander Ian Richard Gleed DSO, DFC (3 July 1916 – 16 April 1943), nicknamed "Widge," was a Royal Air Force (RAF) pilot and flying ace credited with the destruction of 13 enemy aircraft during the Second World War. He served in the Battle of France and BAttle of Britain before being shot down and killed over Tunisia. Gleed published a fictionalized memoir - Arise to Conquer in 1942. Gleed Avenue in Bushey is named in his honour, one of a number of streets in the area named after Battle of Britain pilots. But there`s a lot to read about Gleed on the web, so here are two links that are very worth of reading: https://www.bbm.org.uk/airmen/Gleed.htm § http://www.hatfield-herts.co.uk/aviation/gleed.html 3 - Hawker Hurricane Mk.IIc, BN185, No.432 Squadron RAF, England 1940. While the decal sheet says that is for the Hurricane Mk IIC, in fact the second scheme, Ian R.Gleed aircraft is a Mk.Ia. Hawker Hurricane Mk. IIb – part 5 – USAF service Catalogue number200-D48049 Price: 12,30€ To order, click here. Hawker Hurricane Mk.IIb, black KZ492, unknow Squadron, Mediterranean area, 1944. Hawker Hurricane Mk.IIb, yellow PB654, 350. Fighter Group, 346. Squadron, Emas airfield, Sardinia 1944. Hawker Sea Hurricane Mk.XII, JS327, 800. Squadron, HMS Biter, Toch Landings, November 1942. Hawker Hurricane Mk. IIb – part 11 – South African Air Force Catalogue number200-D48055 Price: 12,30€ To order, click here. Hawker Hurricane Mk.IIb, BE 588, 1st Squadron, South African Air Force, North Africa 1942. Hawker Hurricane Mk.IIb, HL 885, 1st Squadron, South African Air Force, North Africa 1942. Hawker Hurricane Mk.IIb, HL 734, 40th Squadron (Gremlin), South African Air Force, Egypt 1942, pilot Lt. Jack Orpen. - To learn a little more: https://saafww2pilots.yolasite.com/jack-orpen.php The stencils are very thin, with small decal film on the edge to prevent to maximum silvering and not blurry, being quite comprehensive. In 1:32 you have to get the stencil sheet that gives you two complete sets for two aircrafts. ** Analyzing the decal sheets, the color registration is great and a very good definition of the details. The decals have a thin film, in fact looking very thin and delicate. There is no indication where are they printed so I assume that will be in ASK house. The printing quality is quite good, as they are sharp, with outline very well defined. The color look quite good and spot on. I tried already and it work great, with good adhesion to the plane surface without wrinkling or bubbling. No adverse reaction to Micro set or Micro Sol. You do have to work then with care and patience as they are very delicate and therefore, fragile. The instructions are the general ones that are applicable to all decals, it is always important to remember the general principles of decal application. In this case, there is no specific rule for applying these decals. The profiles draws contains lots of information, with side view (both side) and top view with precise decal indication. Conclusion: ASK is coming with lots (really, tons) of new decals giving the modeler some great options in 1:32 and 1:48. The location indication of the decals is quite good and very perceptible. The 1:48 decals schmes as a bonus of a full stencil set for one aircraft ( for 1:32, you will need to get it for another decals sheet). The decals as already said, have a very good colour registration, very thin, with minimum decal film, and they work quite nice! My thanks to Art Scale Decals for producing these fantastic decals and the possibility of reviewed them. Francisco Guedes


-
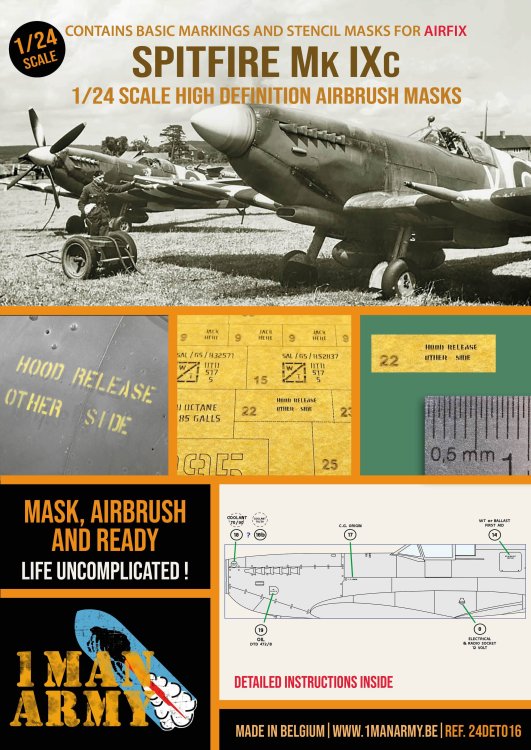
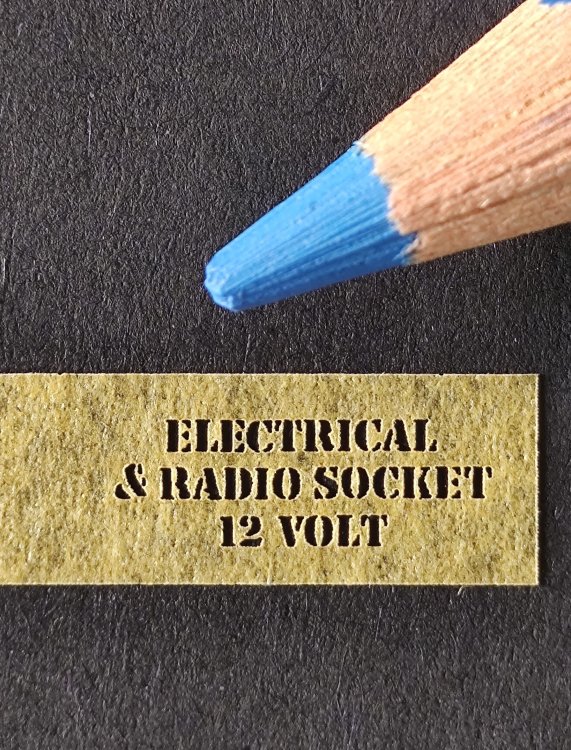
Pictures of the Airfix Spitfire Mk IXc 1/24 built and photographed by the Belgian modeller Dirk Devijver. Not using 1 decal and using the 1ManArmy masking set. I do like the decals stage of a build... but painted markings are the best result... and how about painted stencils? In 1:32, that stencils are bigger and the risk of silvering is a reality, I wonder, with 1ManArmy masks, if the 1:24 and 1:32 decals stencils will be in the way of extinction? I can`t, for some reason, upload all the pictures of the beautiful Spitfire so I leave here the facebook link: https://www.facebook.com/photo?fbid=698398562327098&set=pcb.698399342327020


-
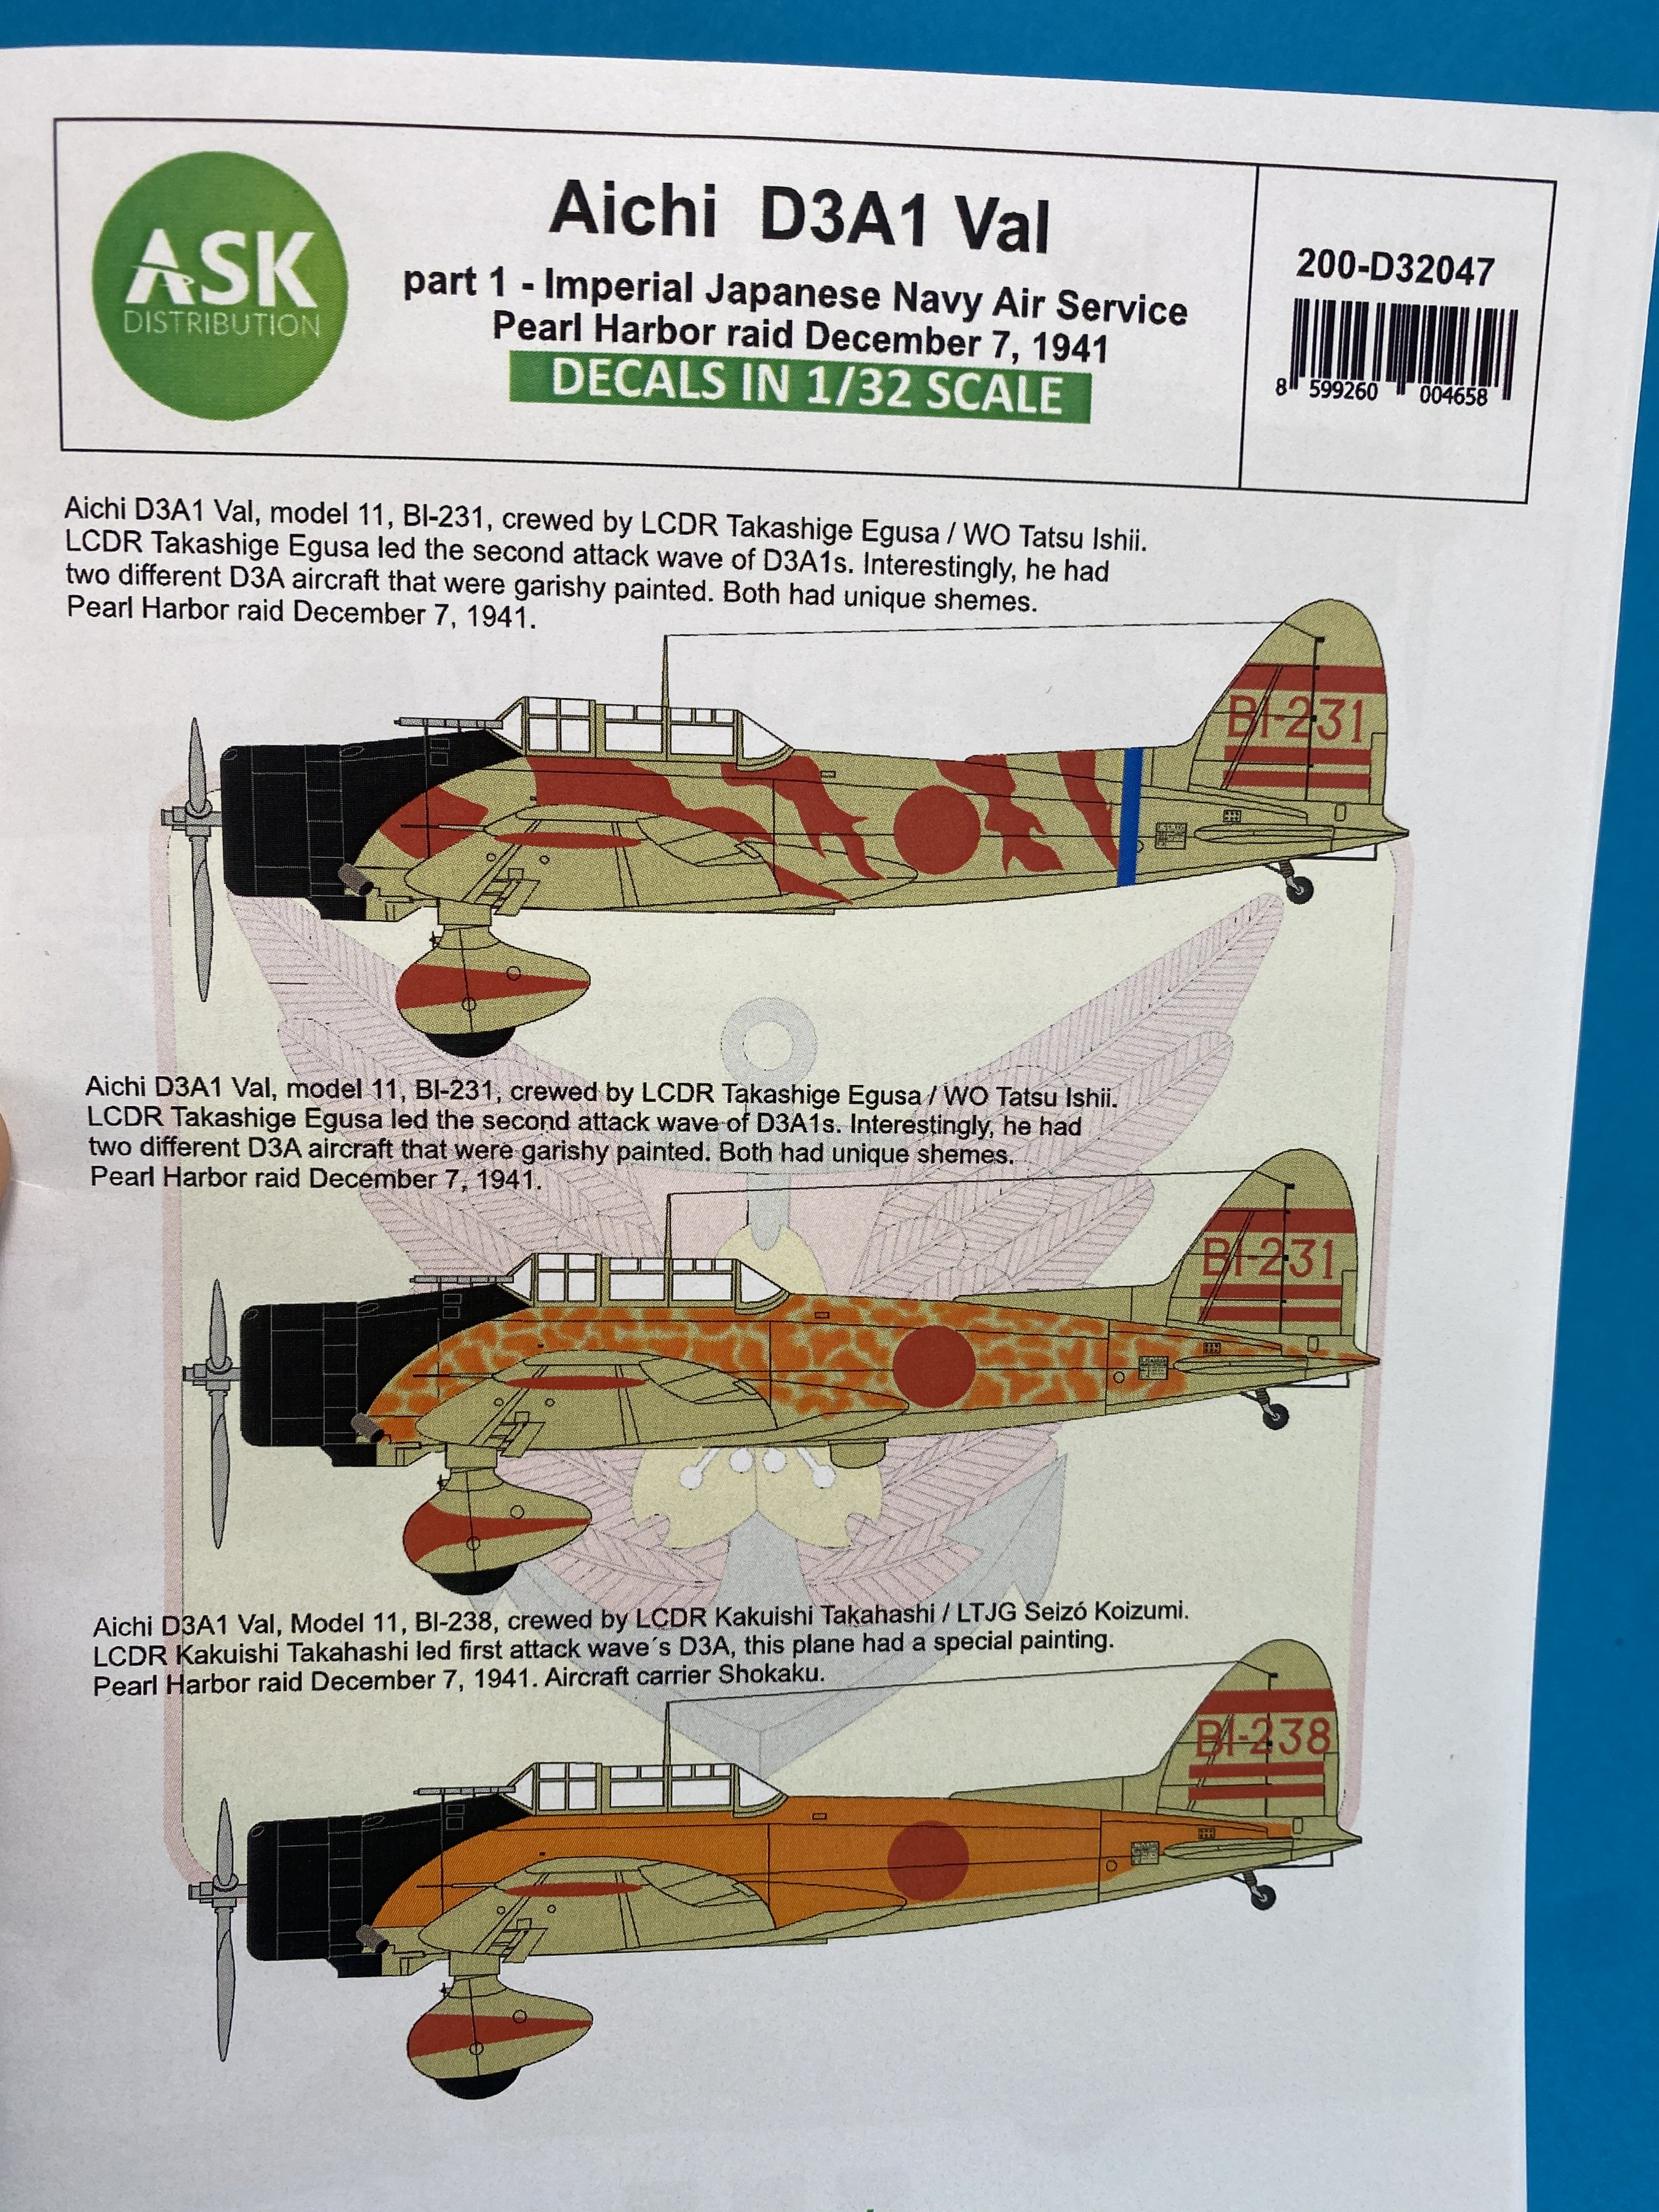
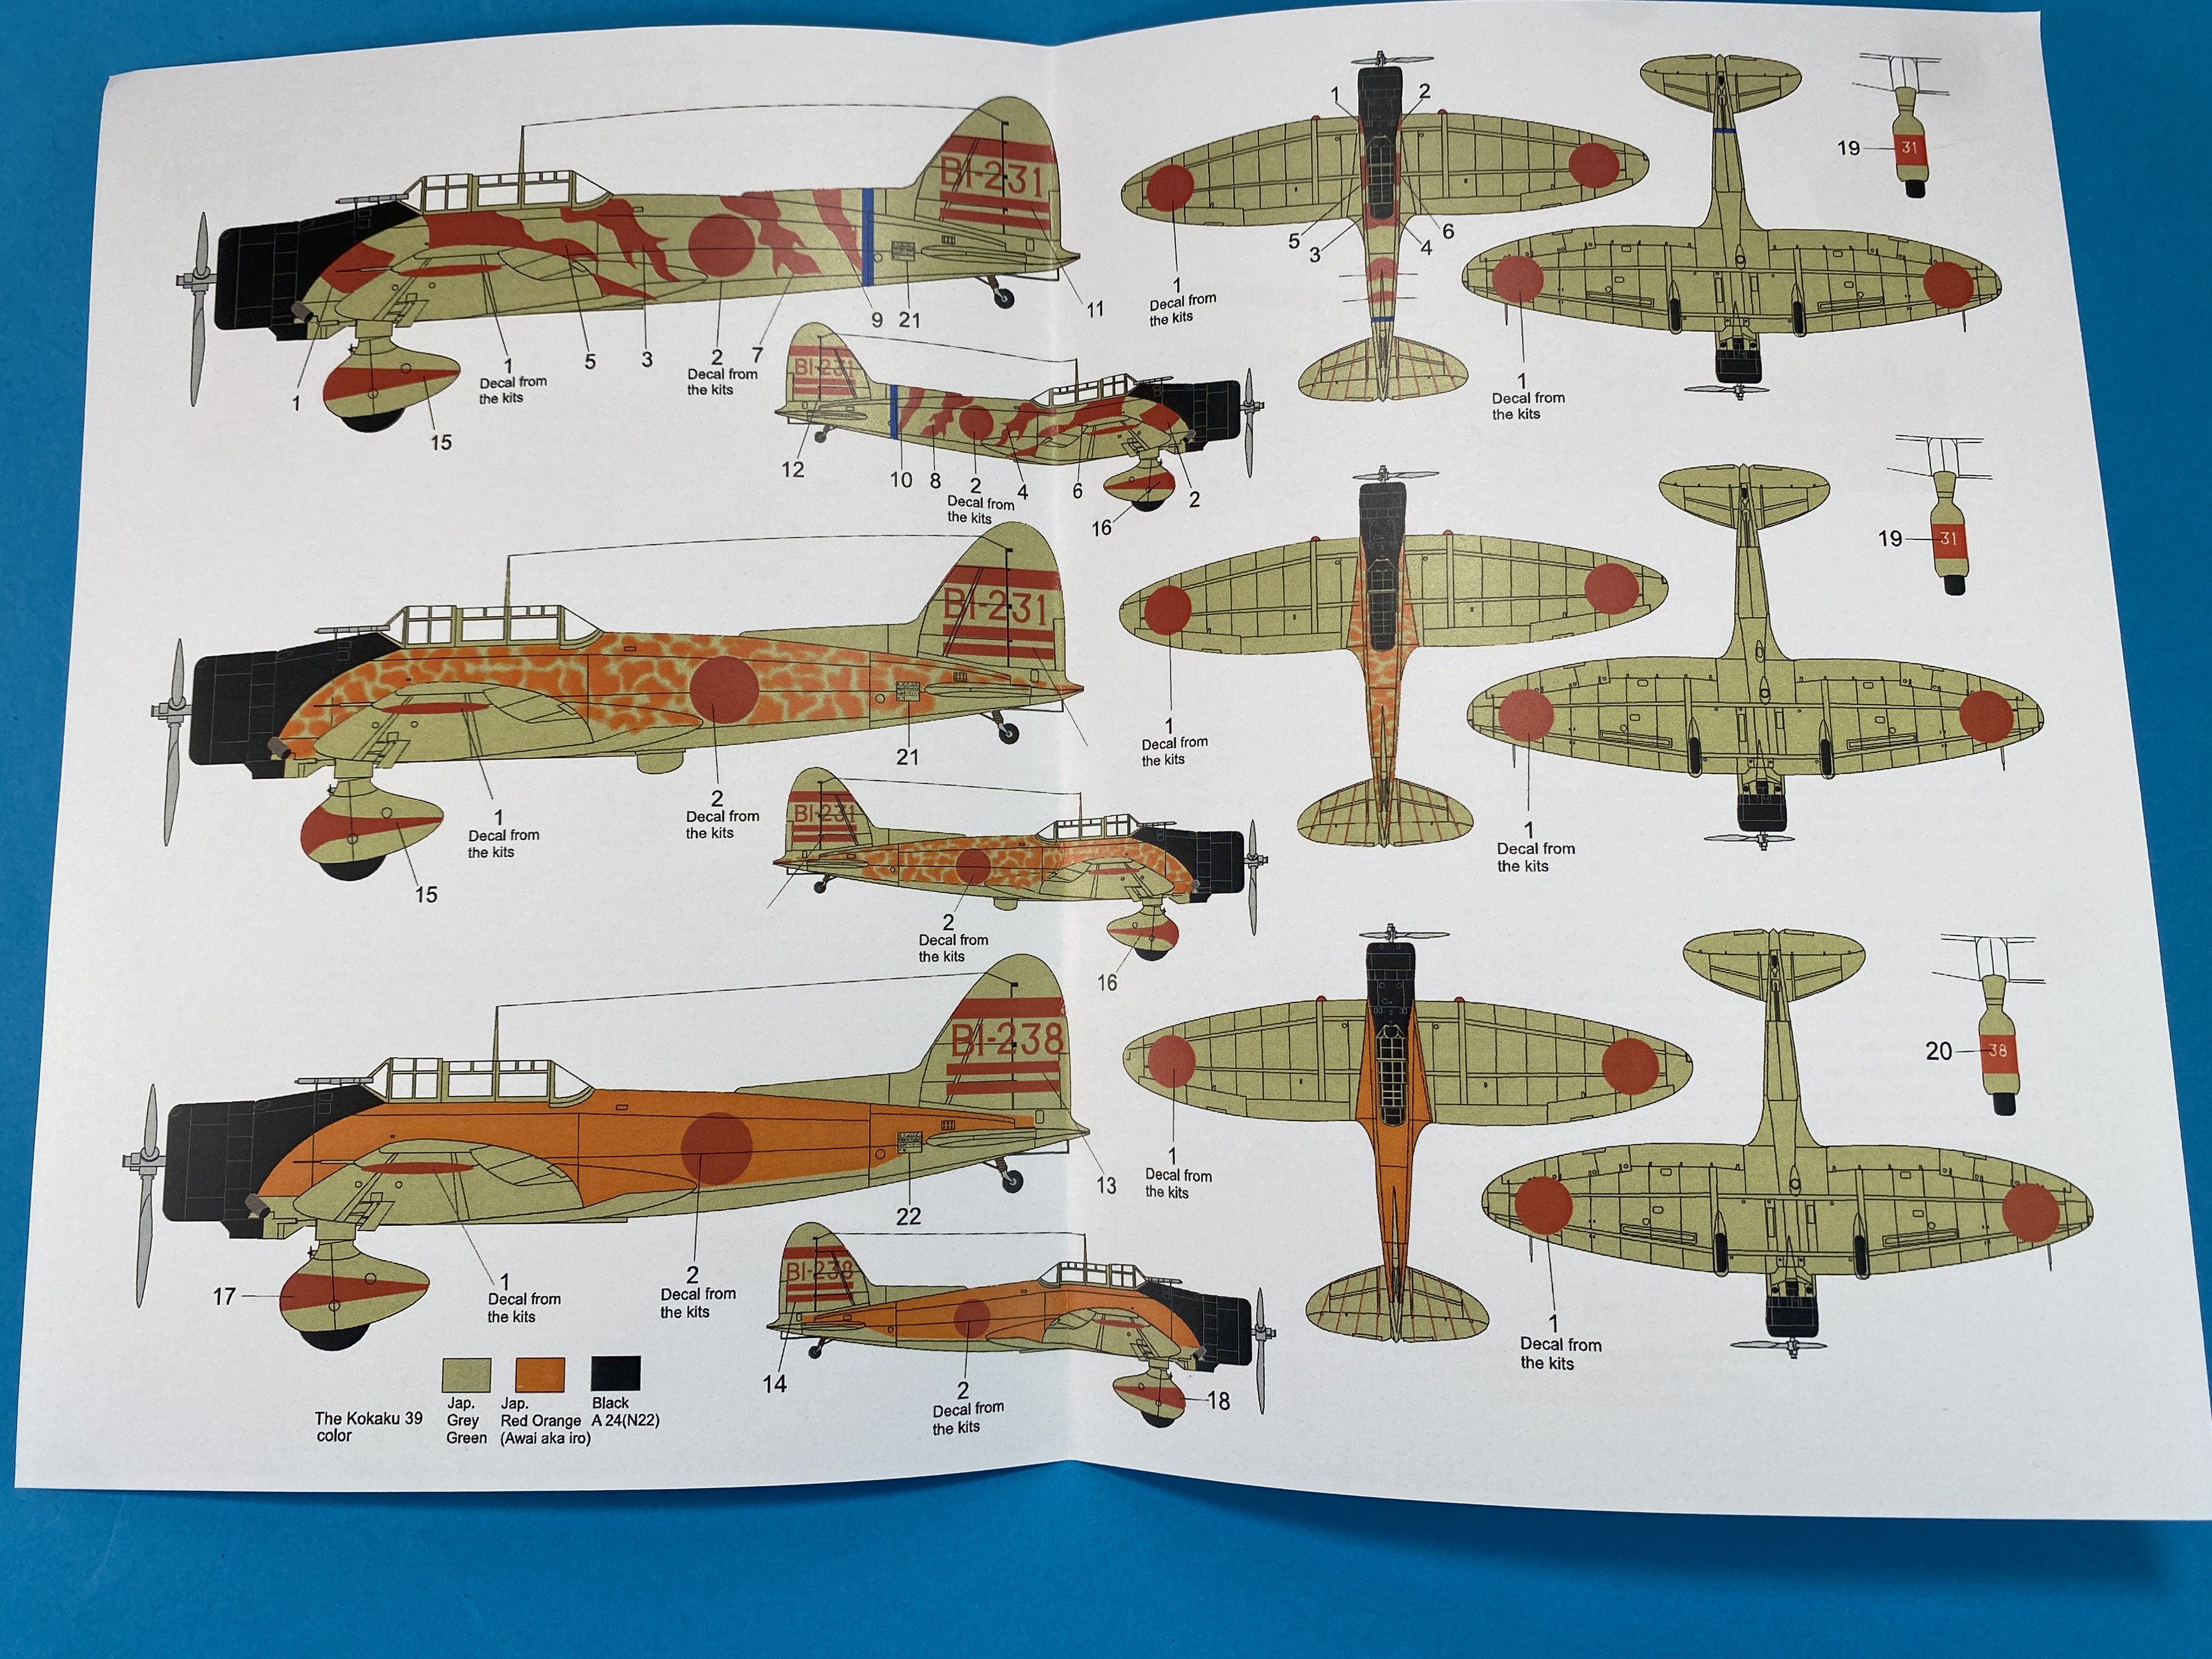
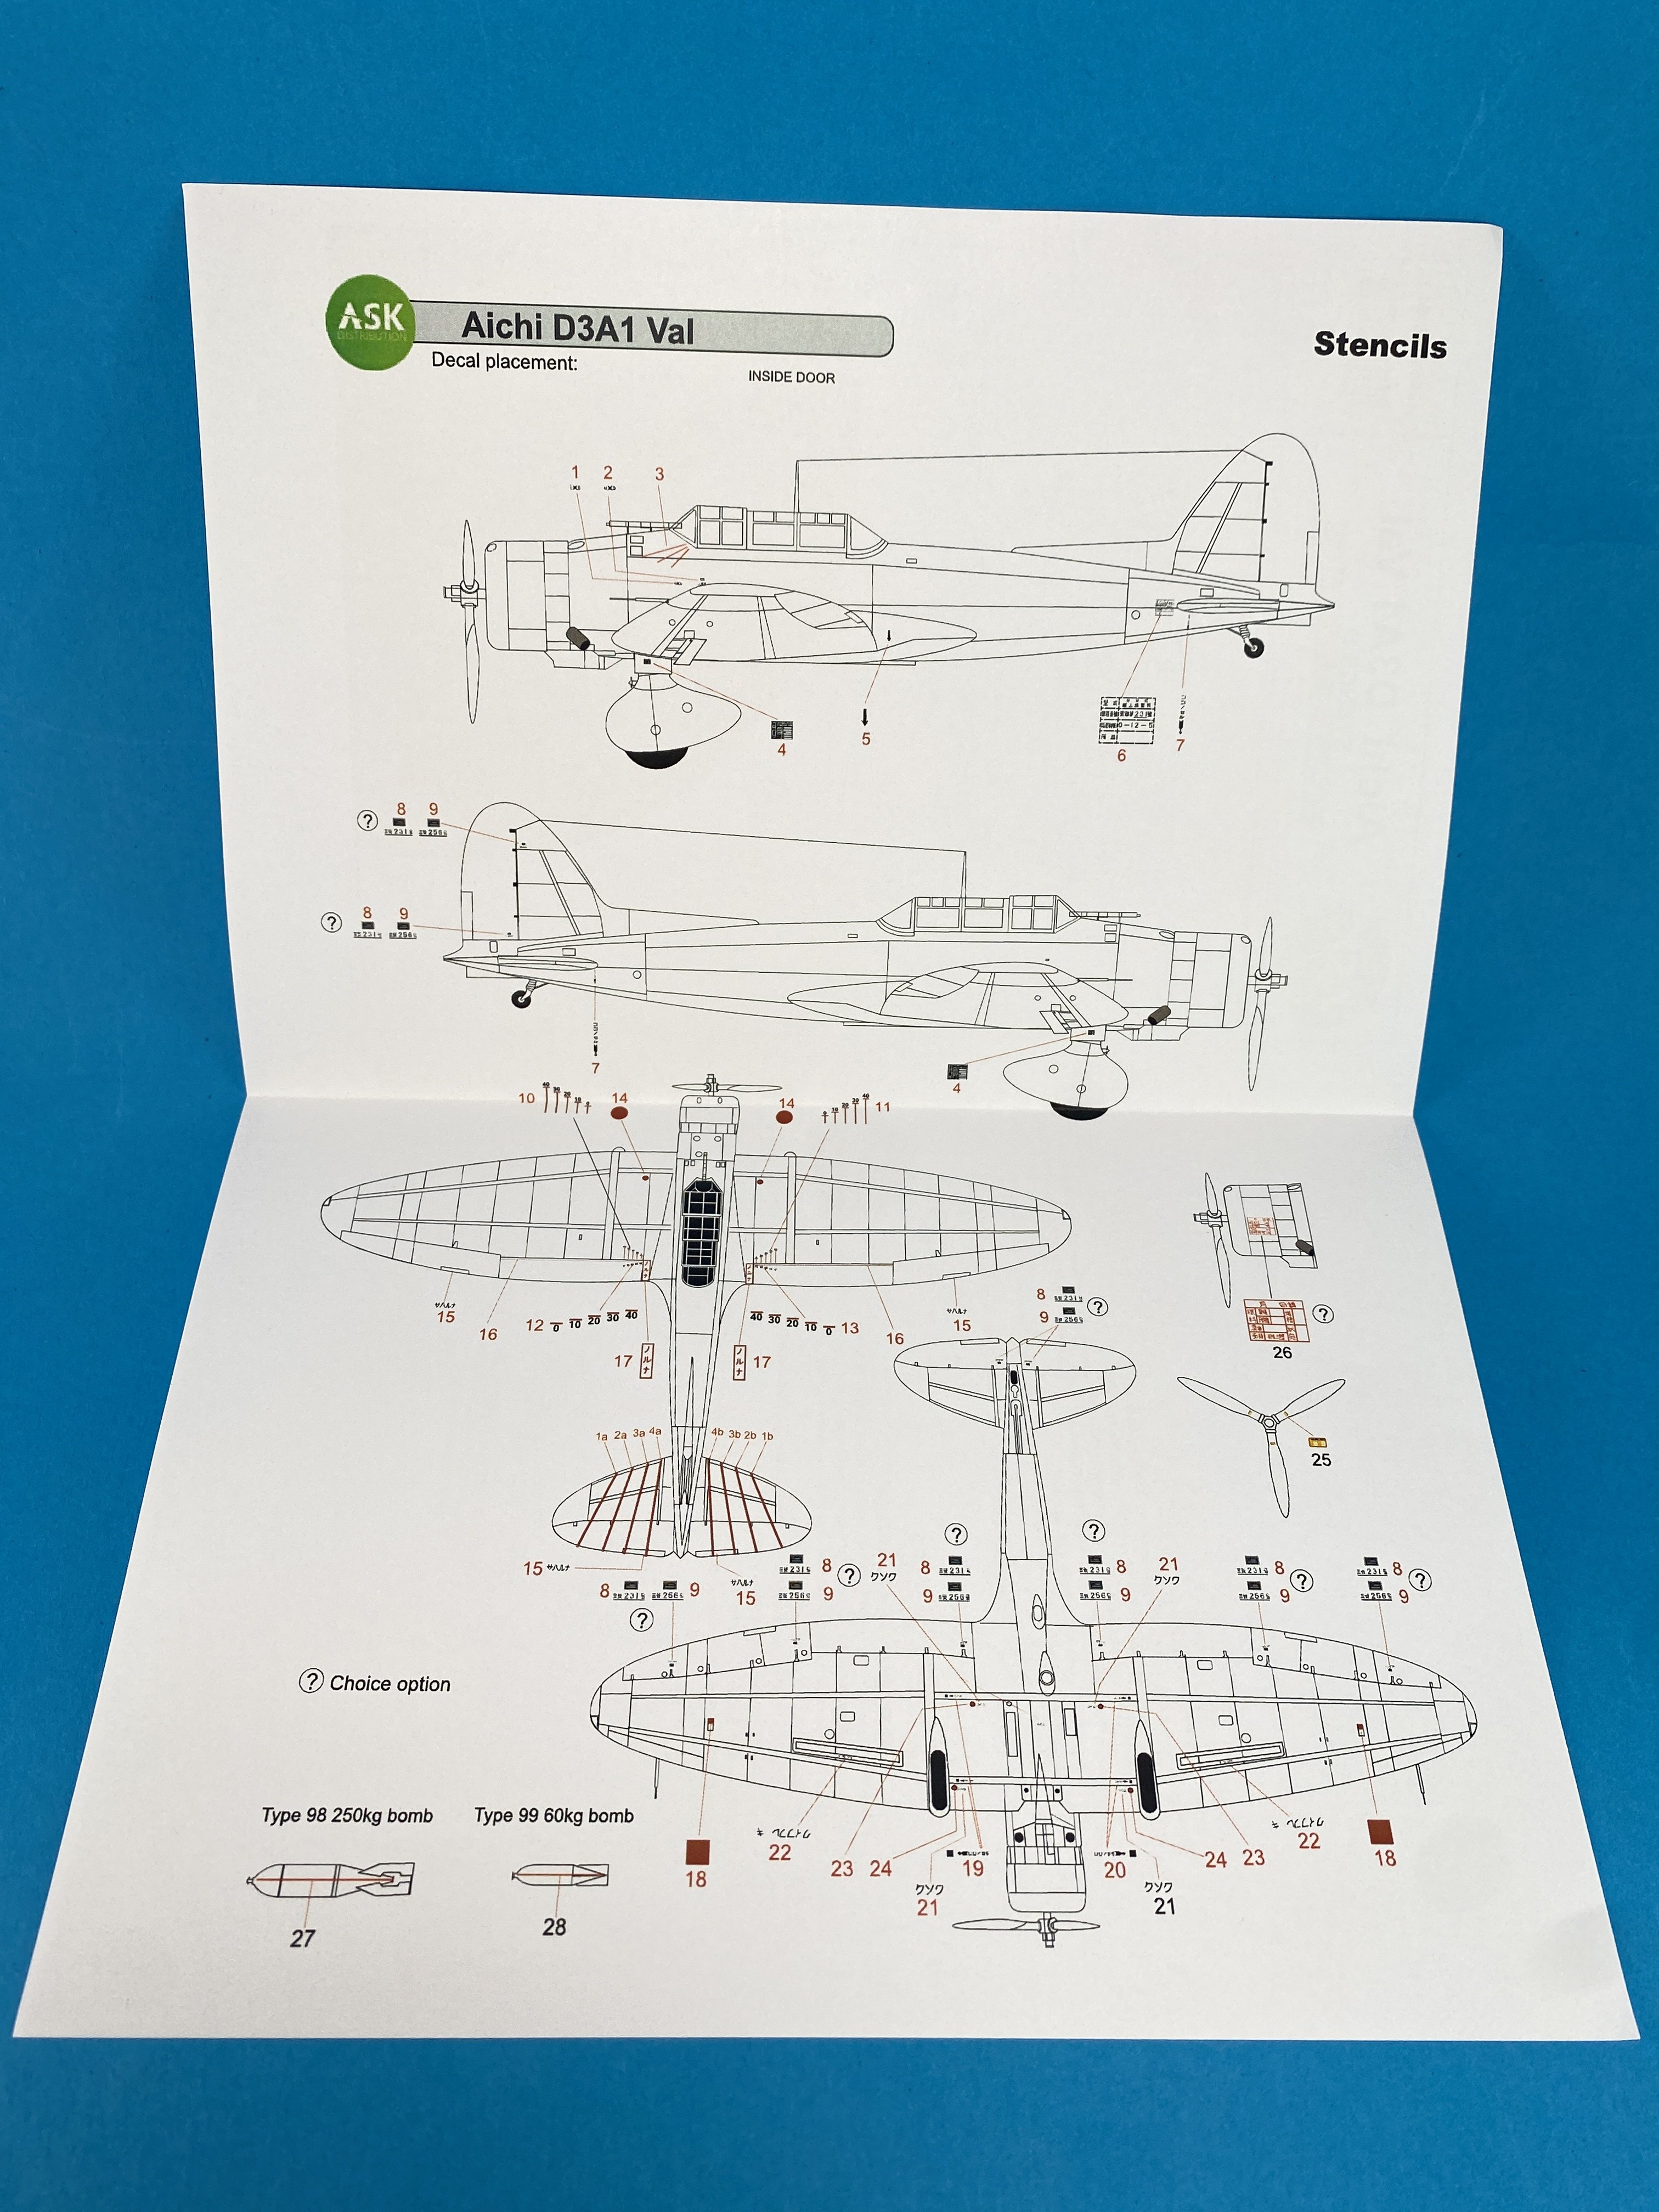
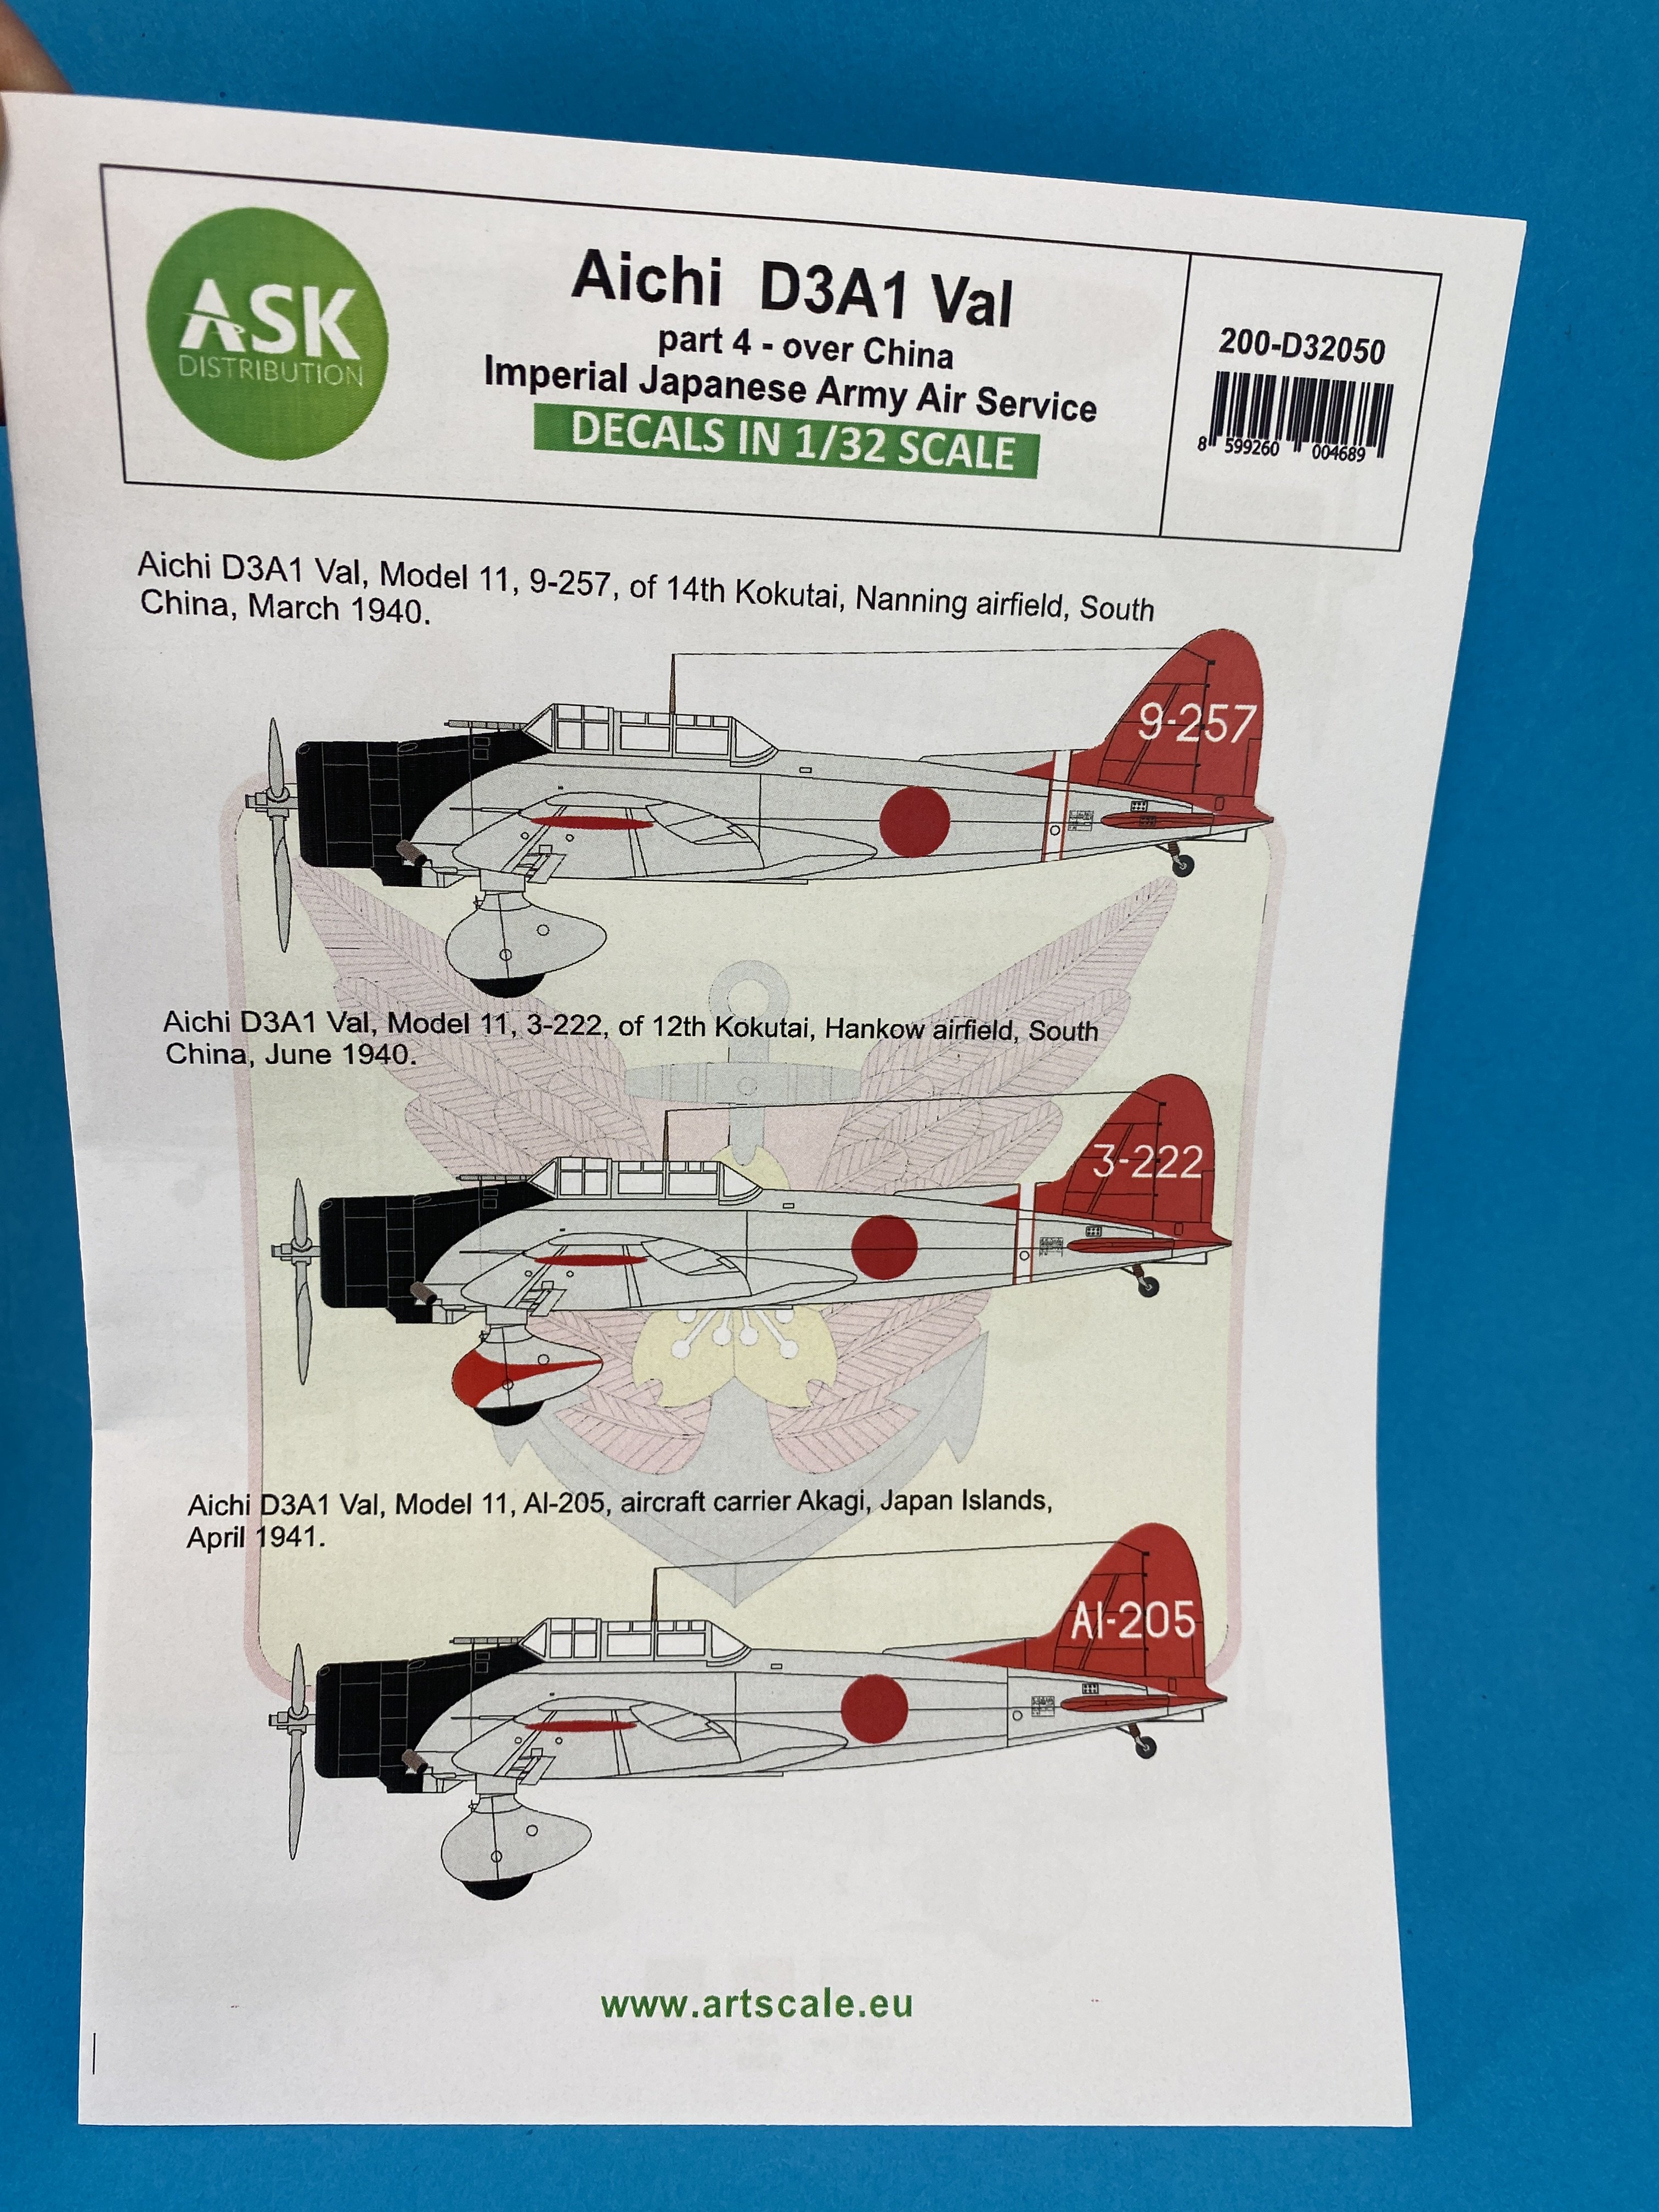
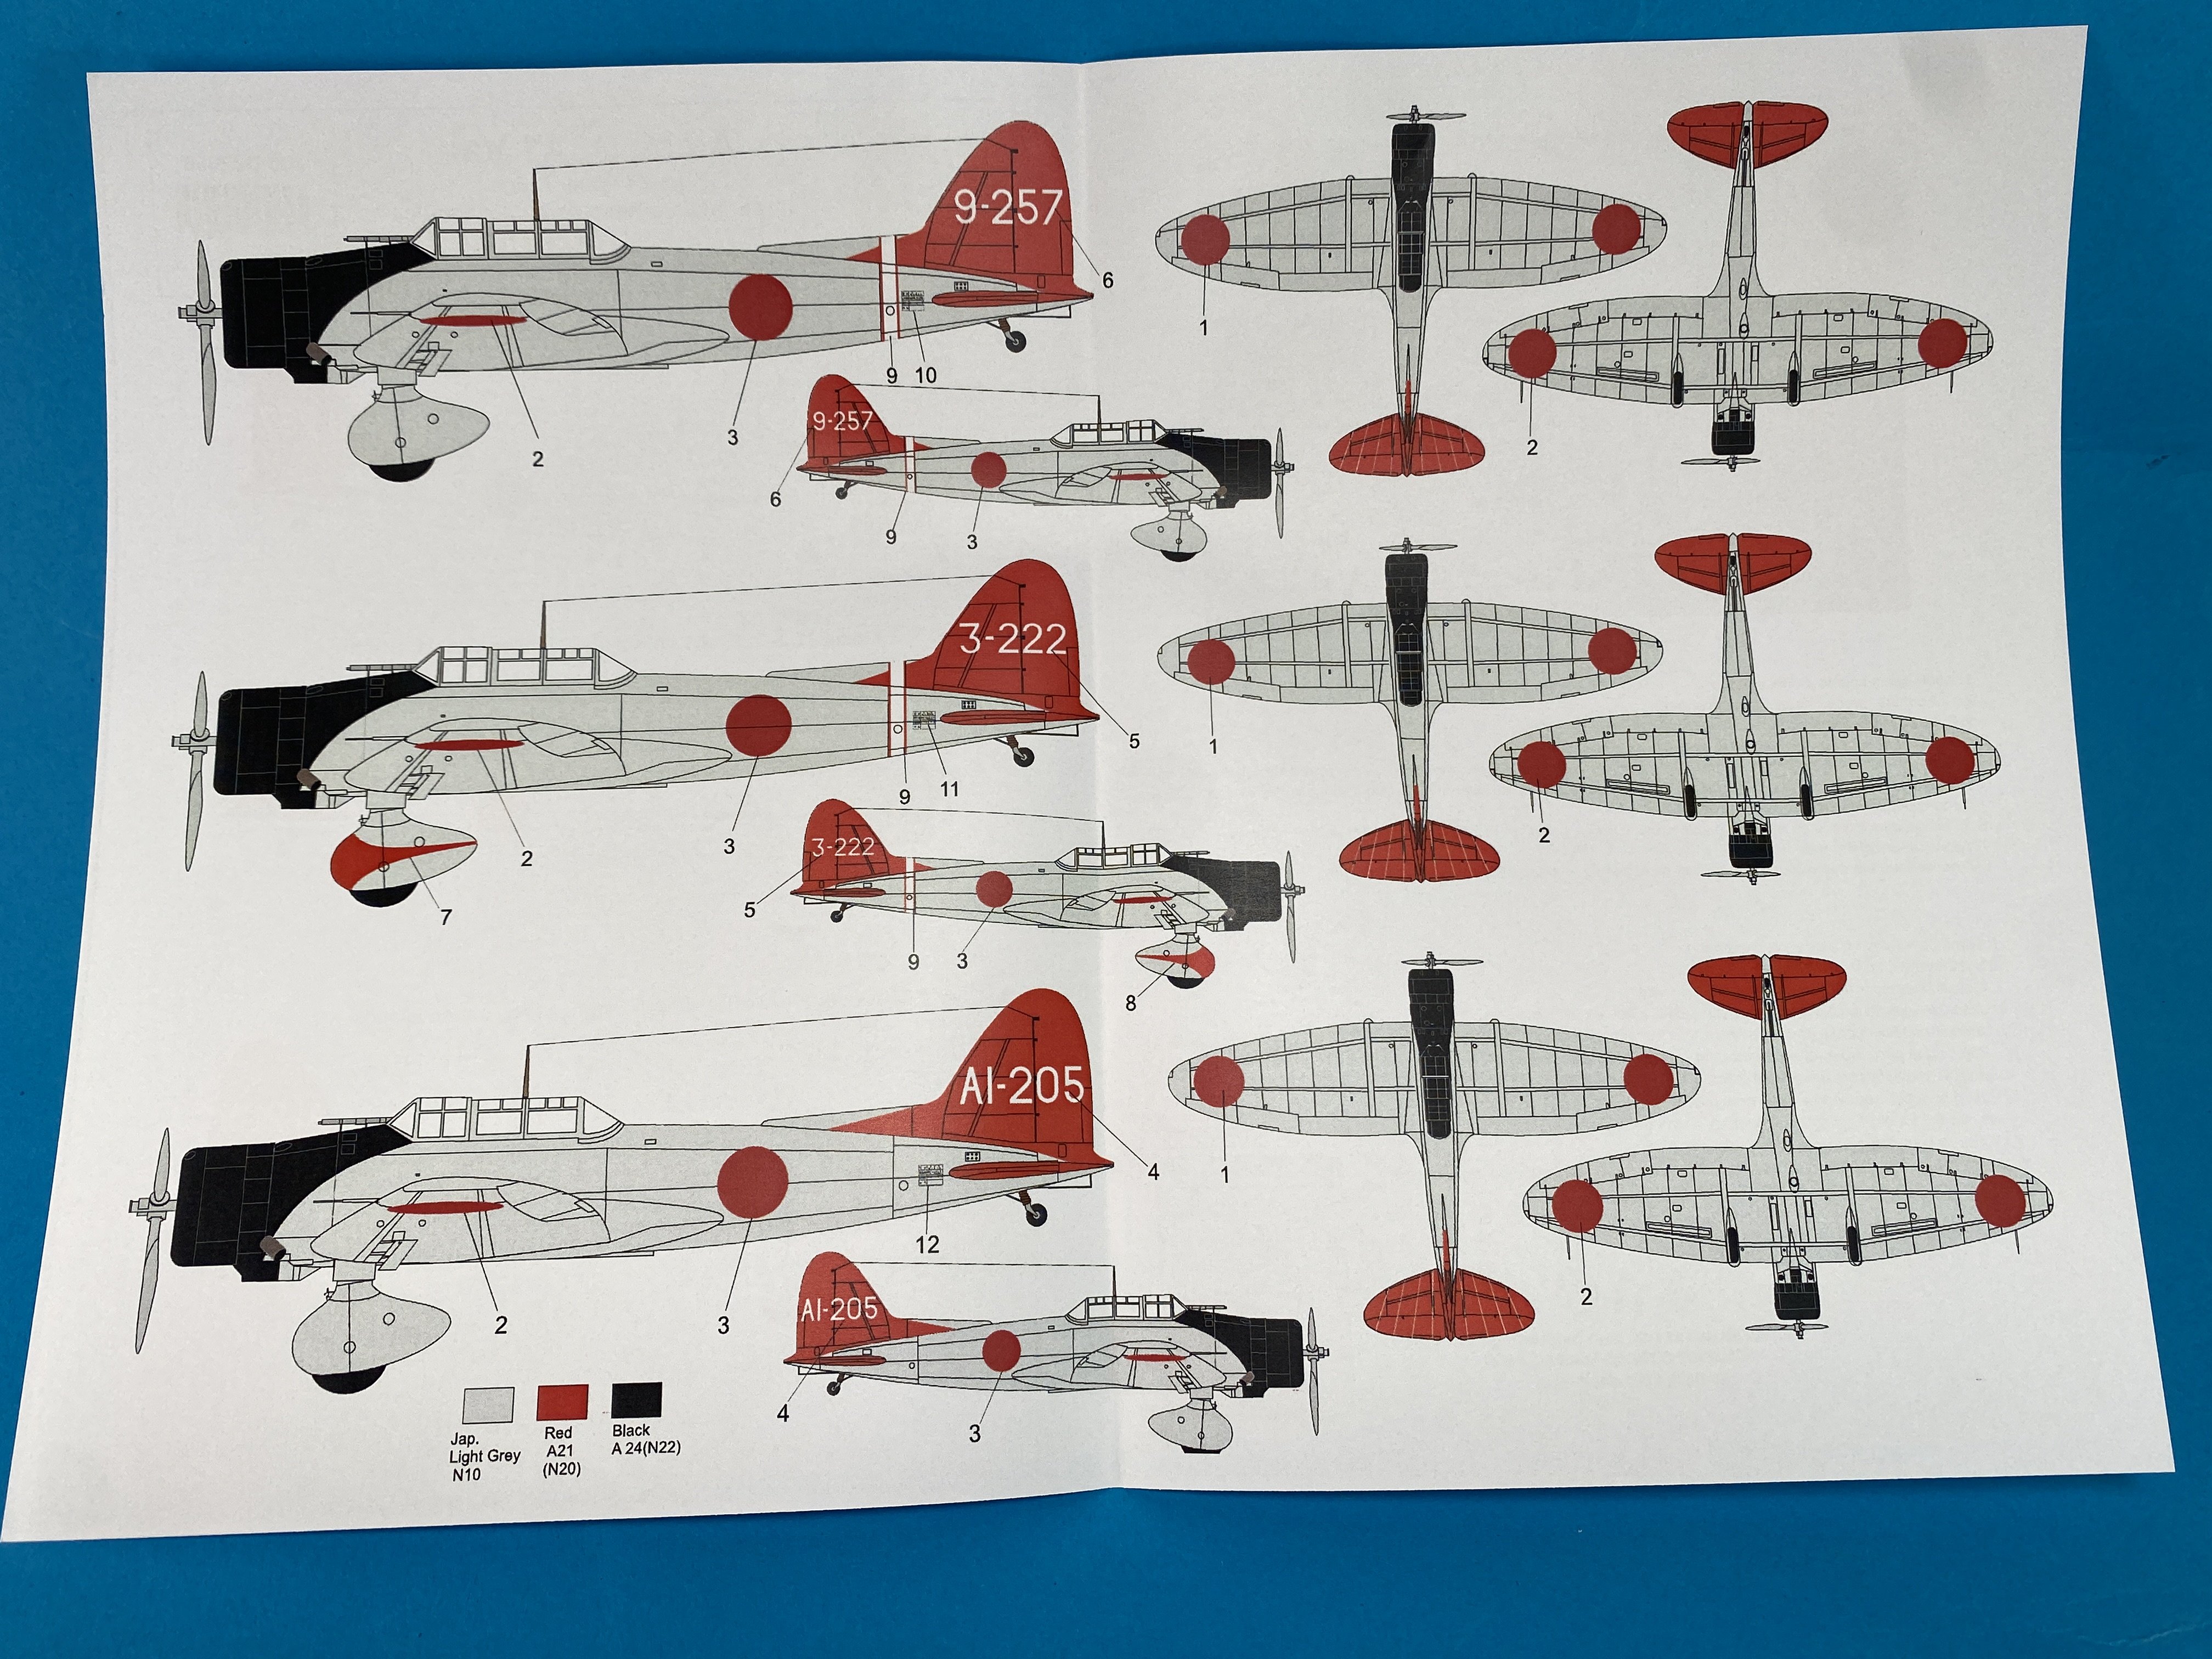
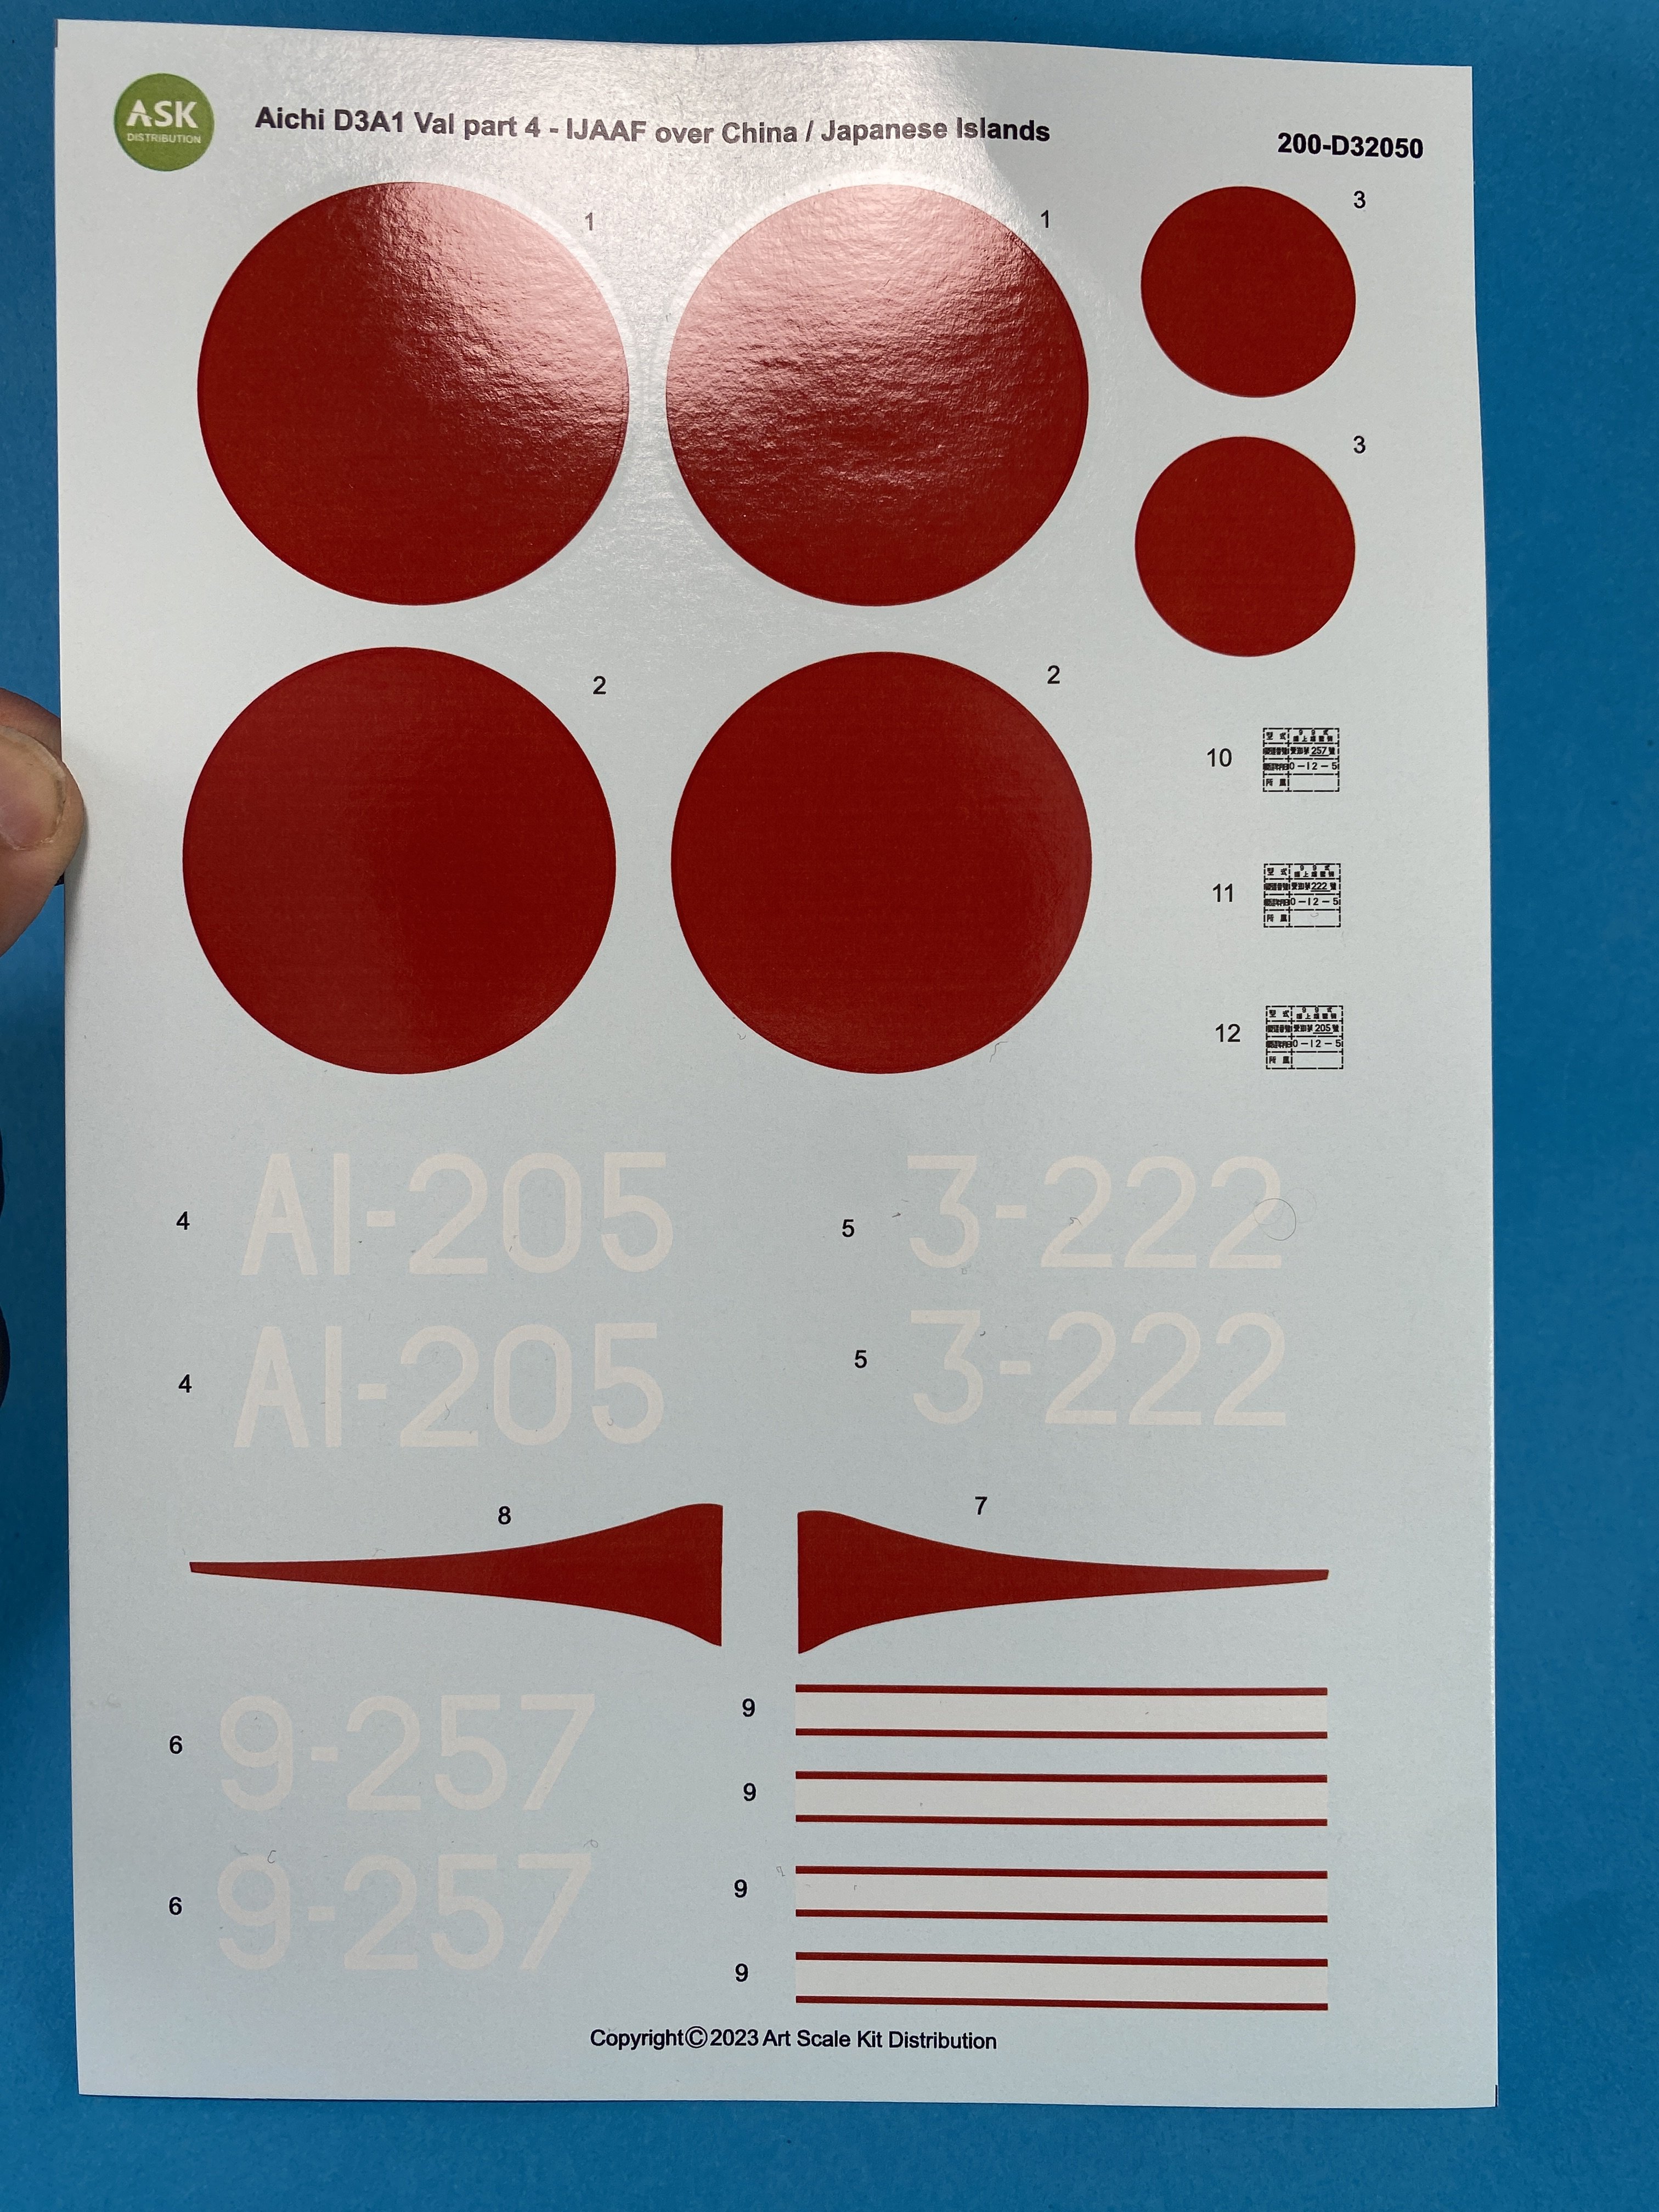
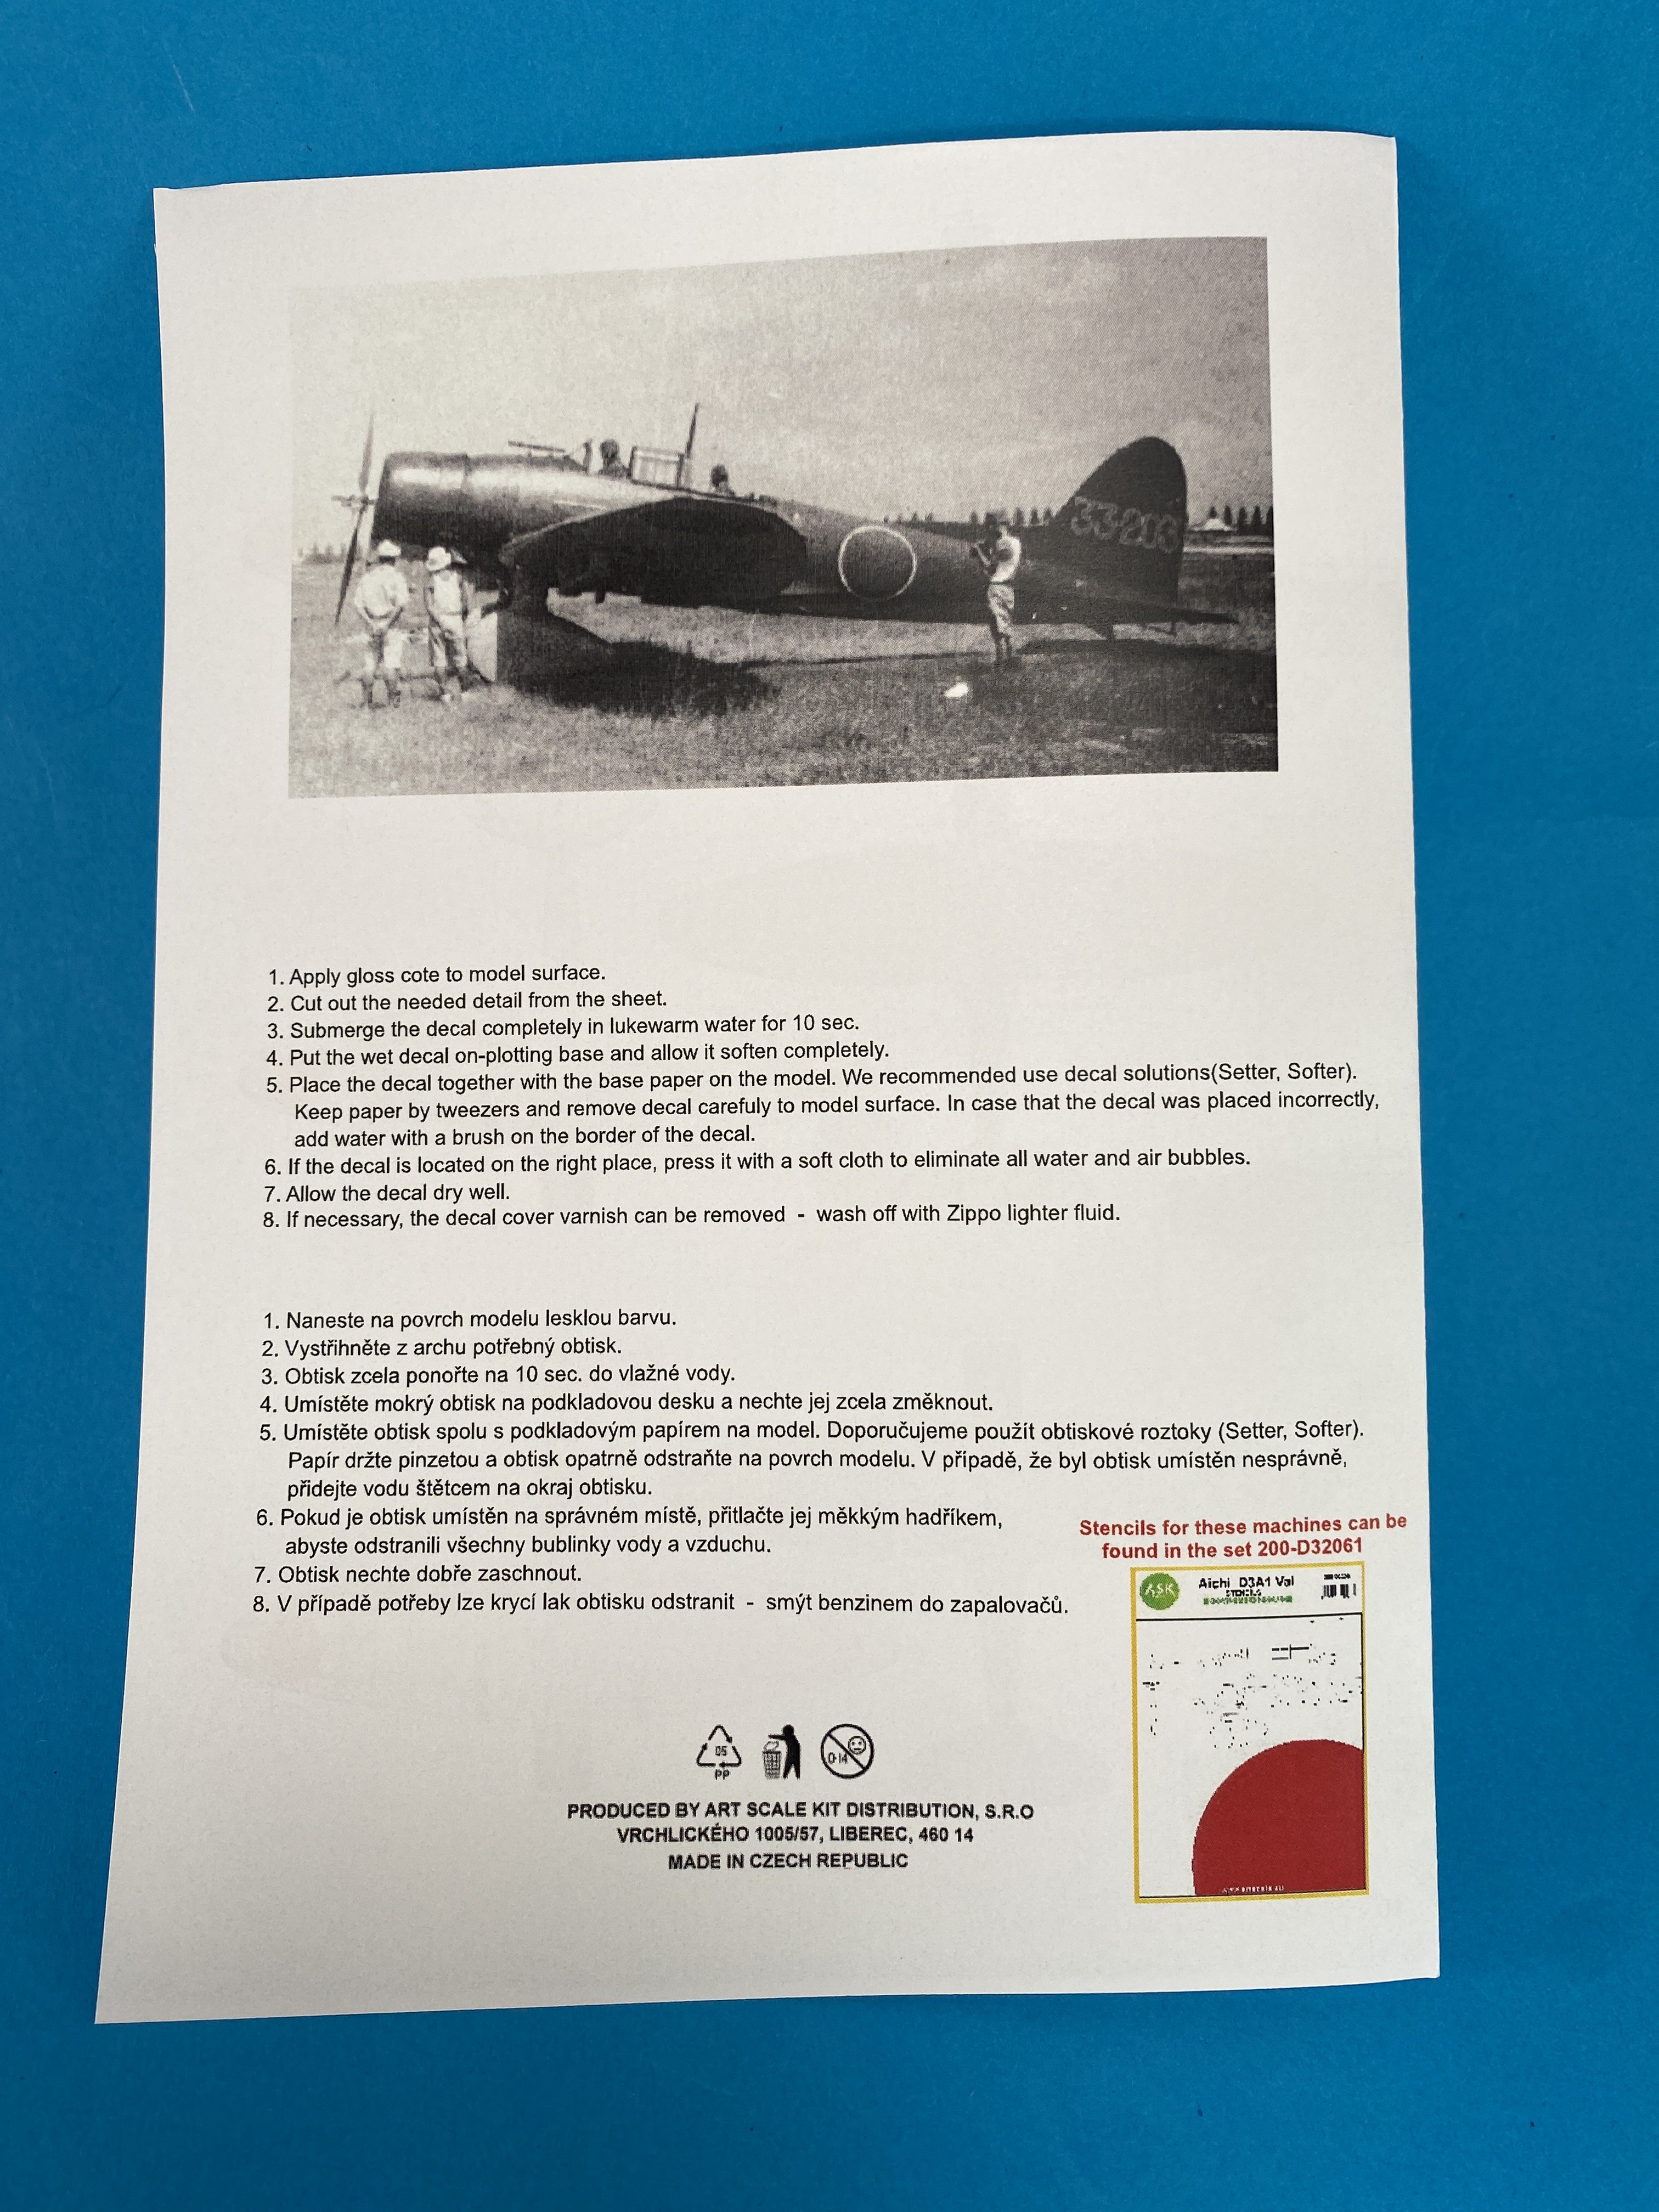
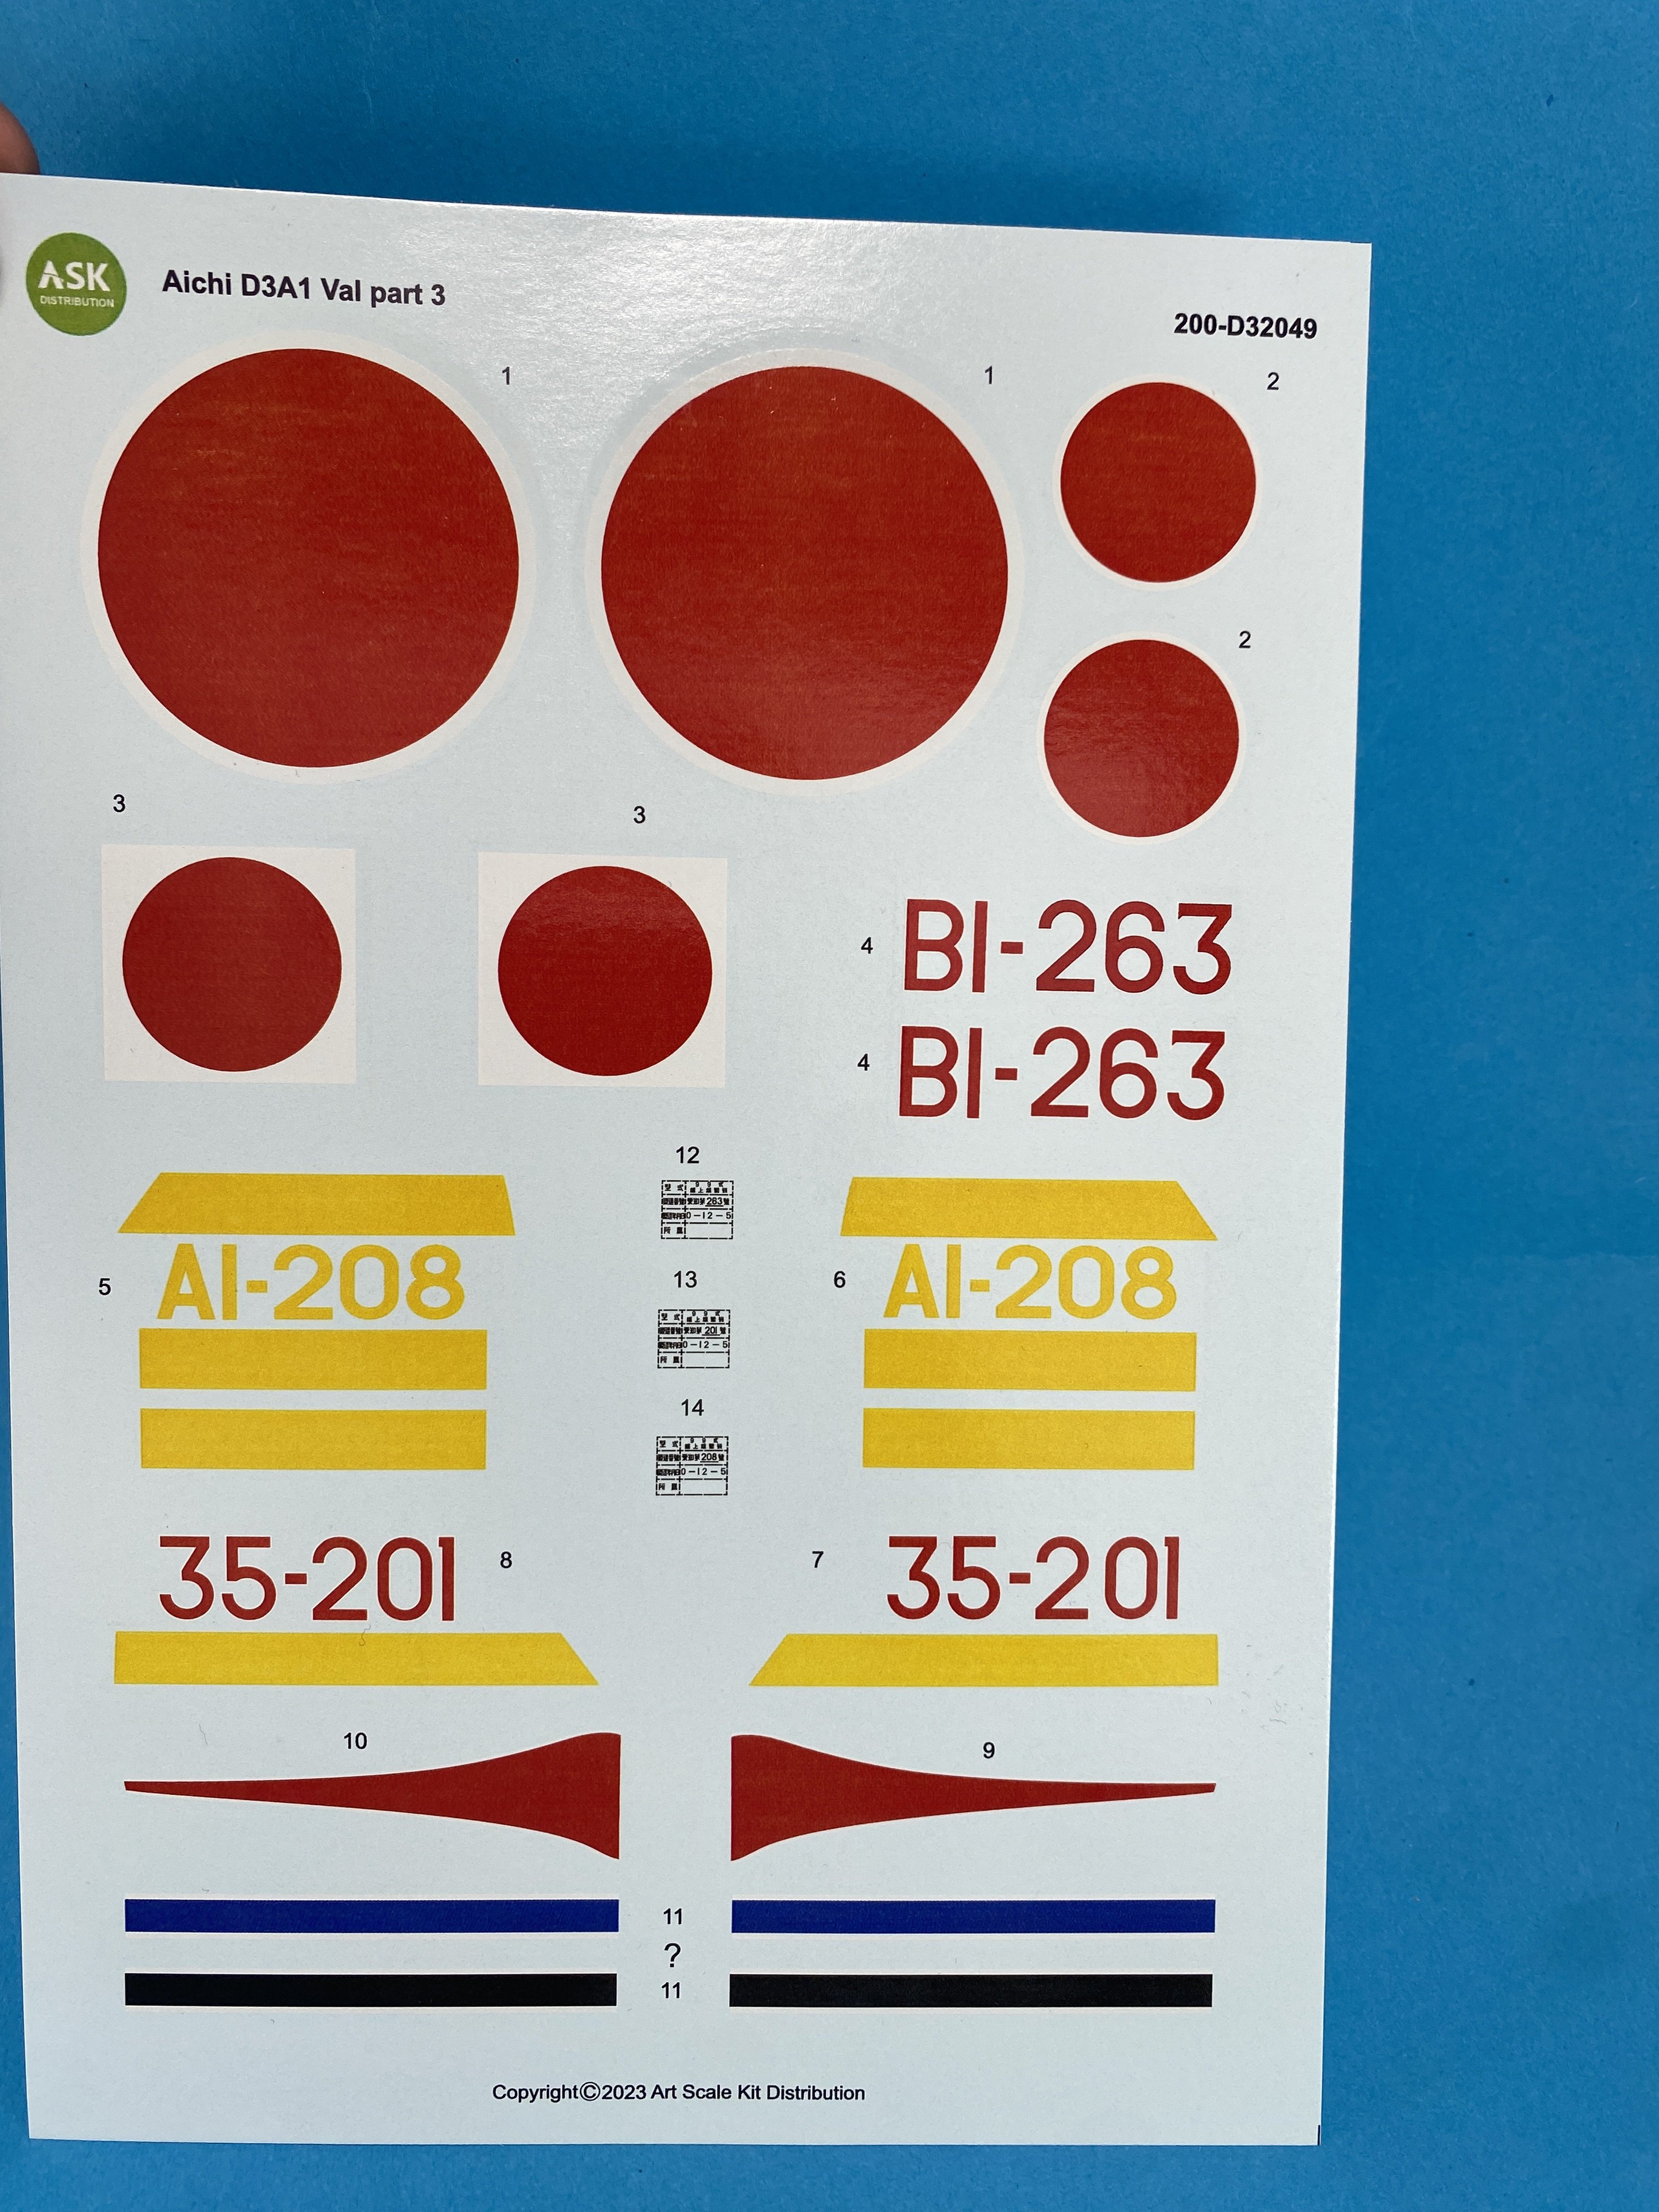
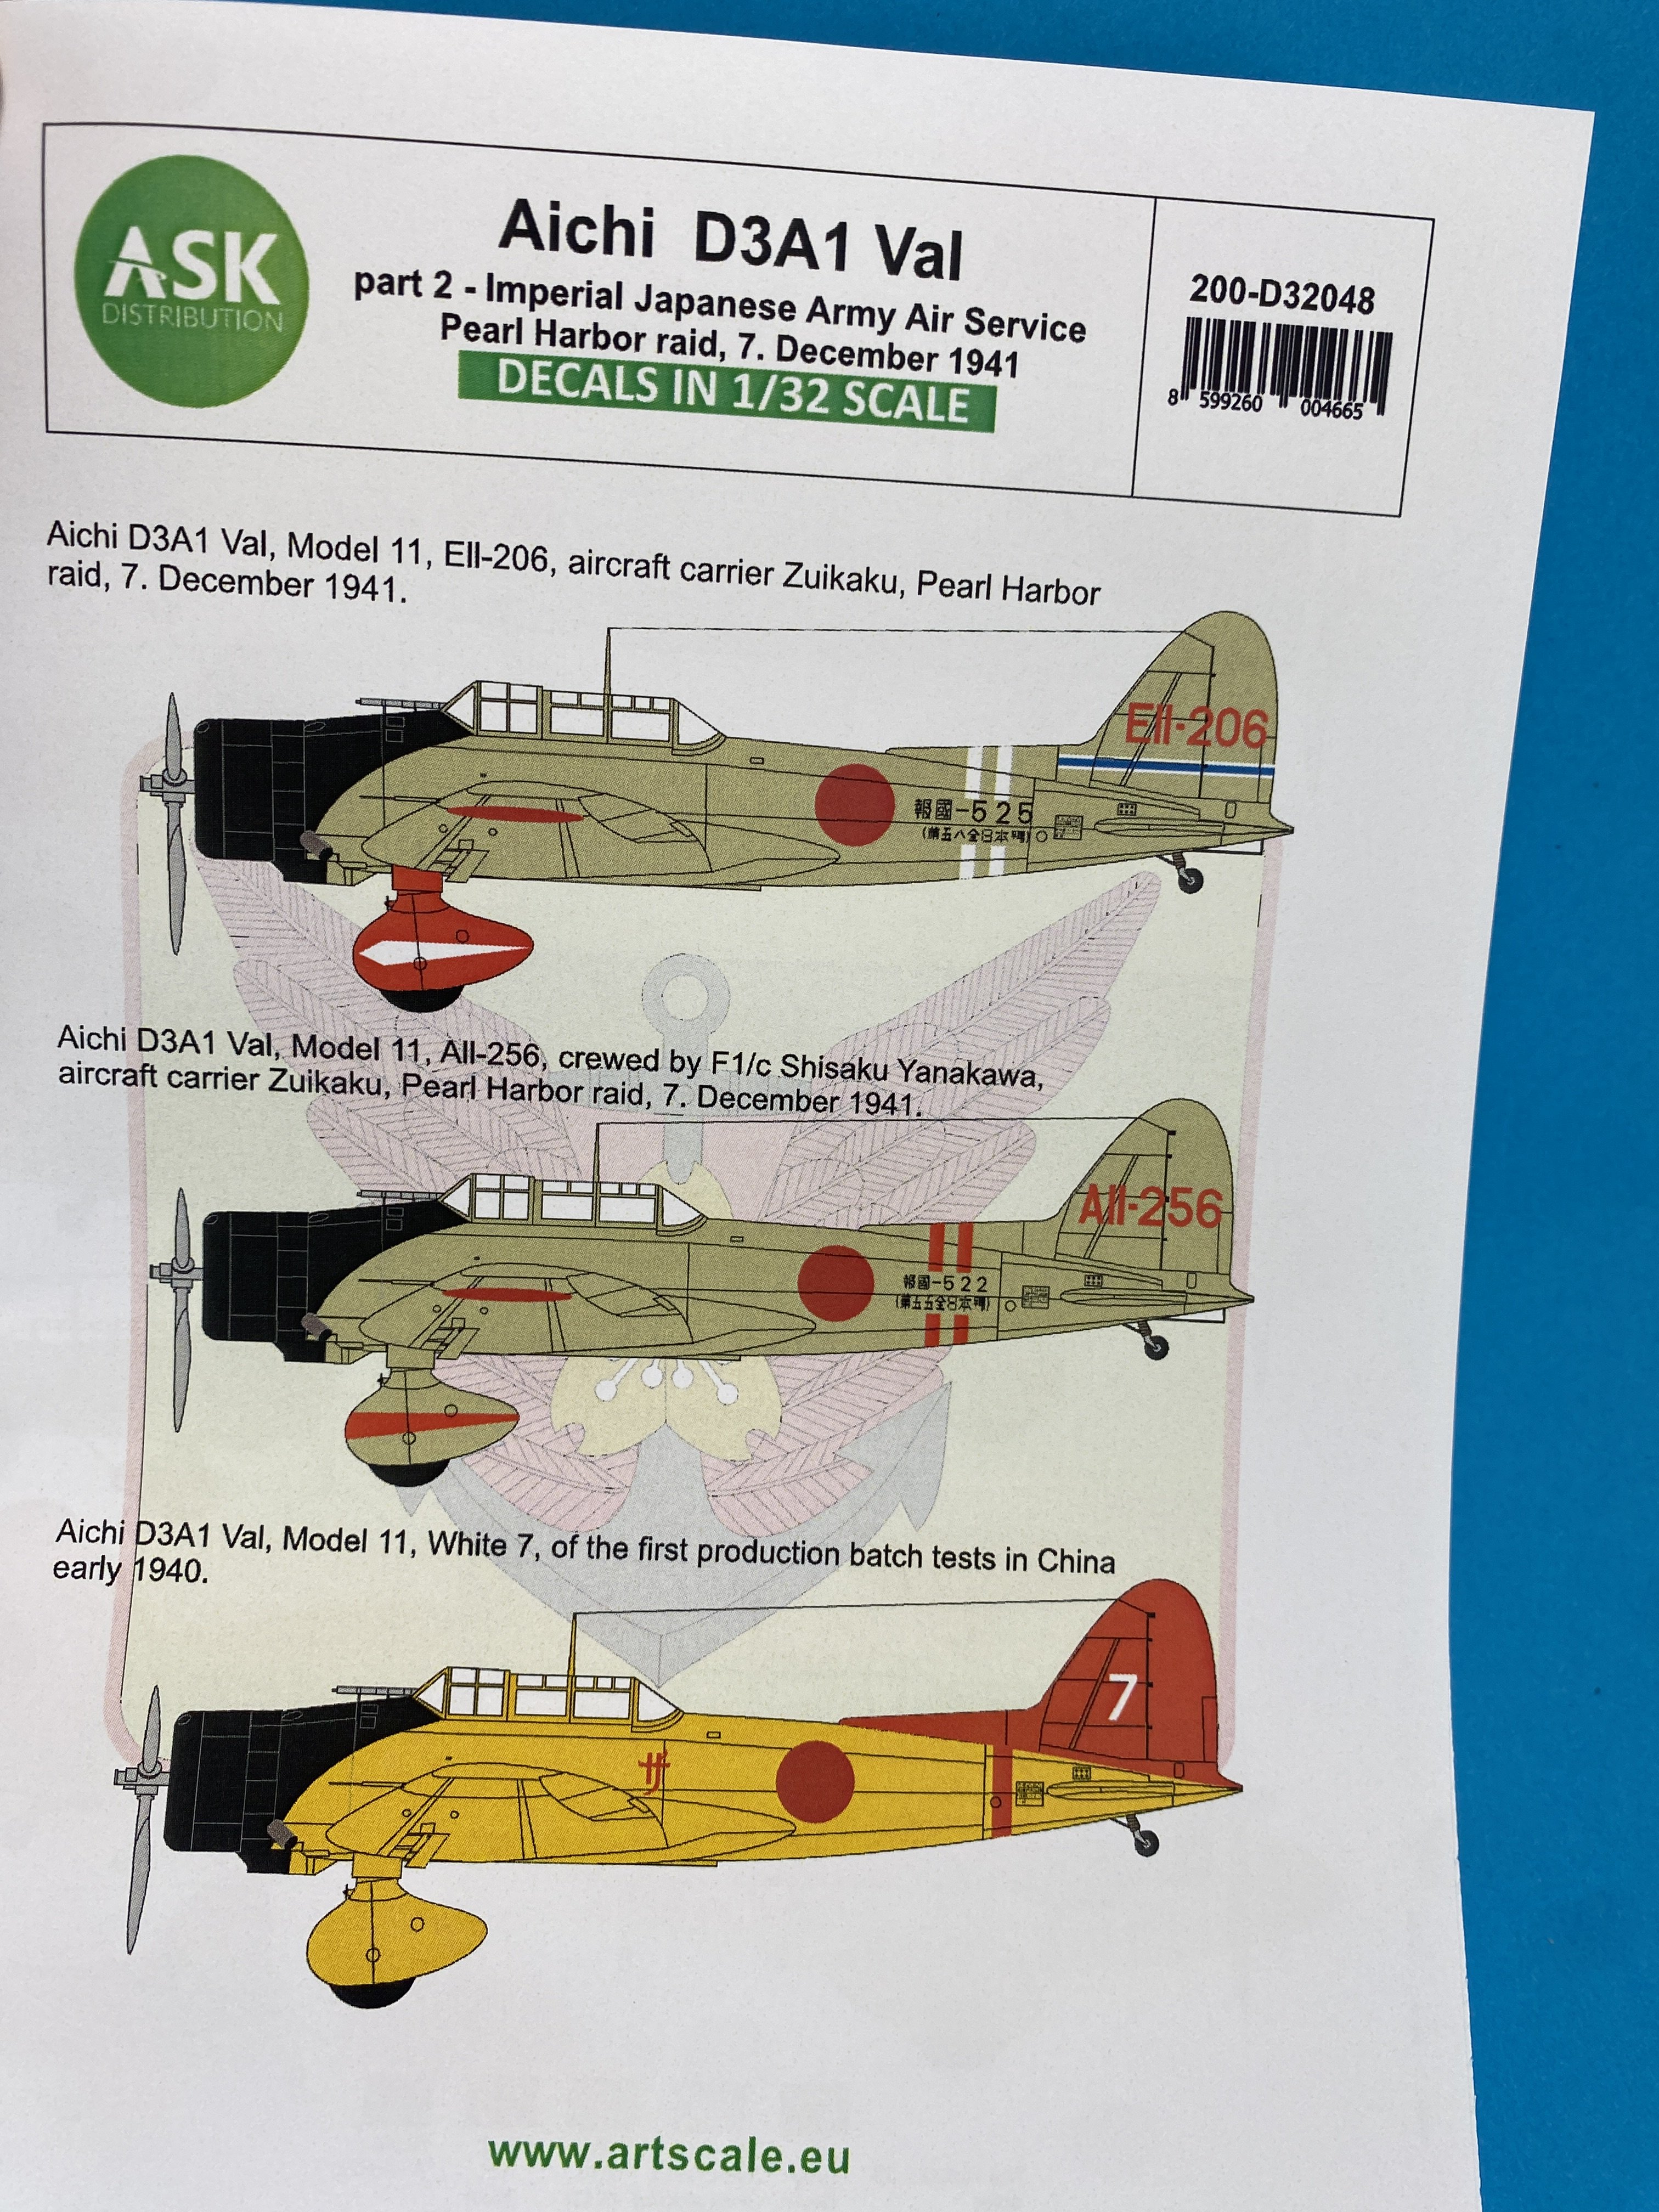
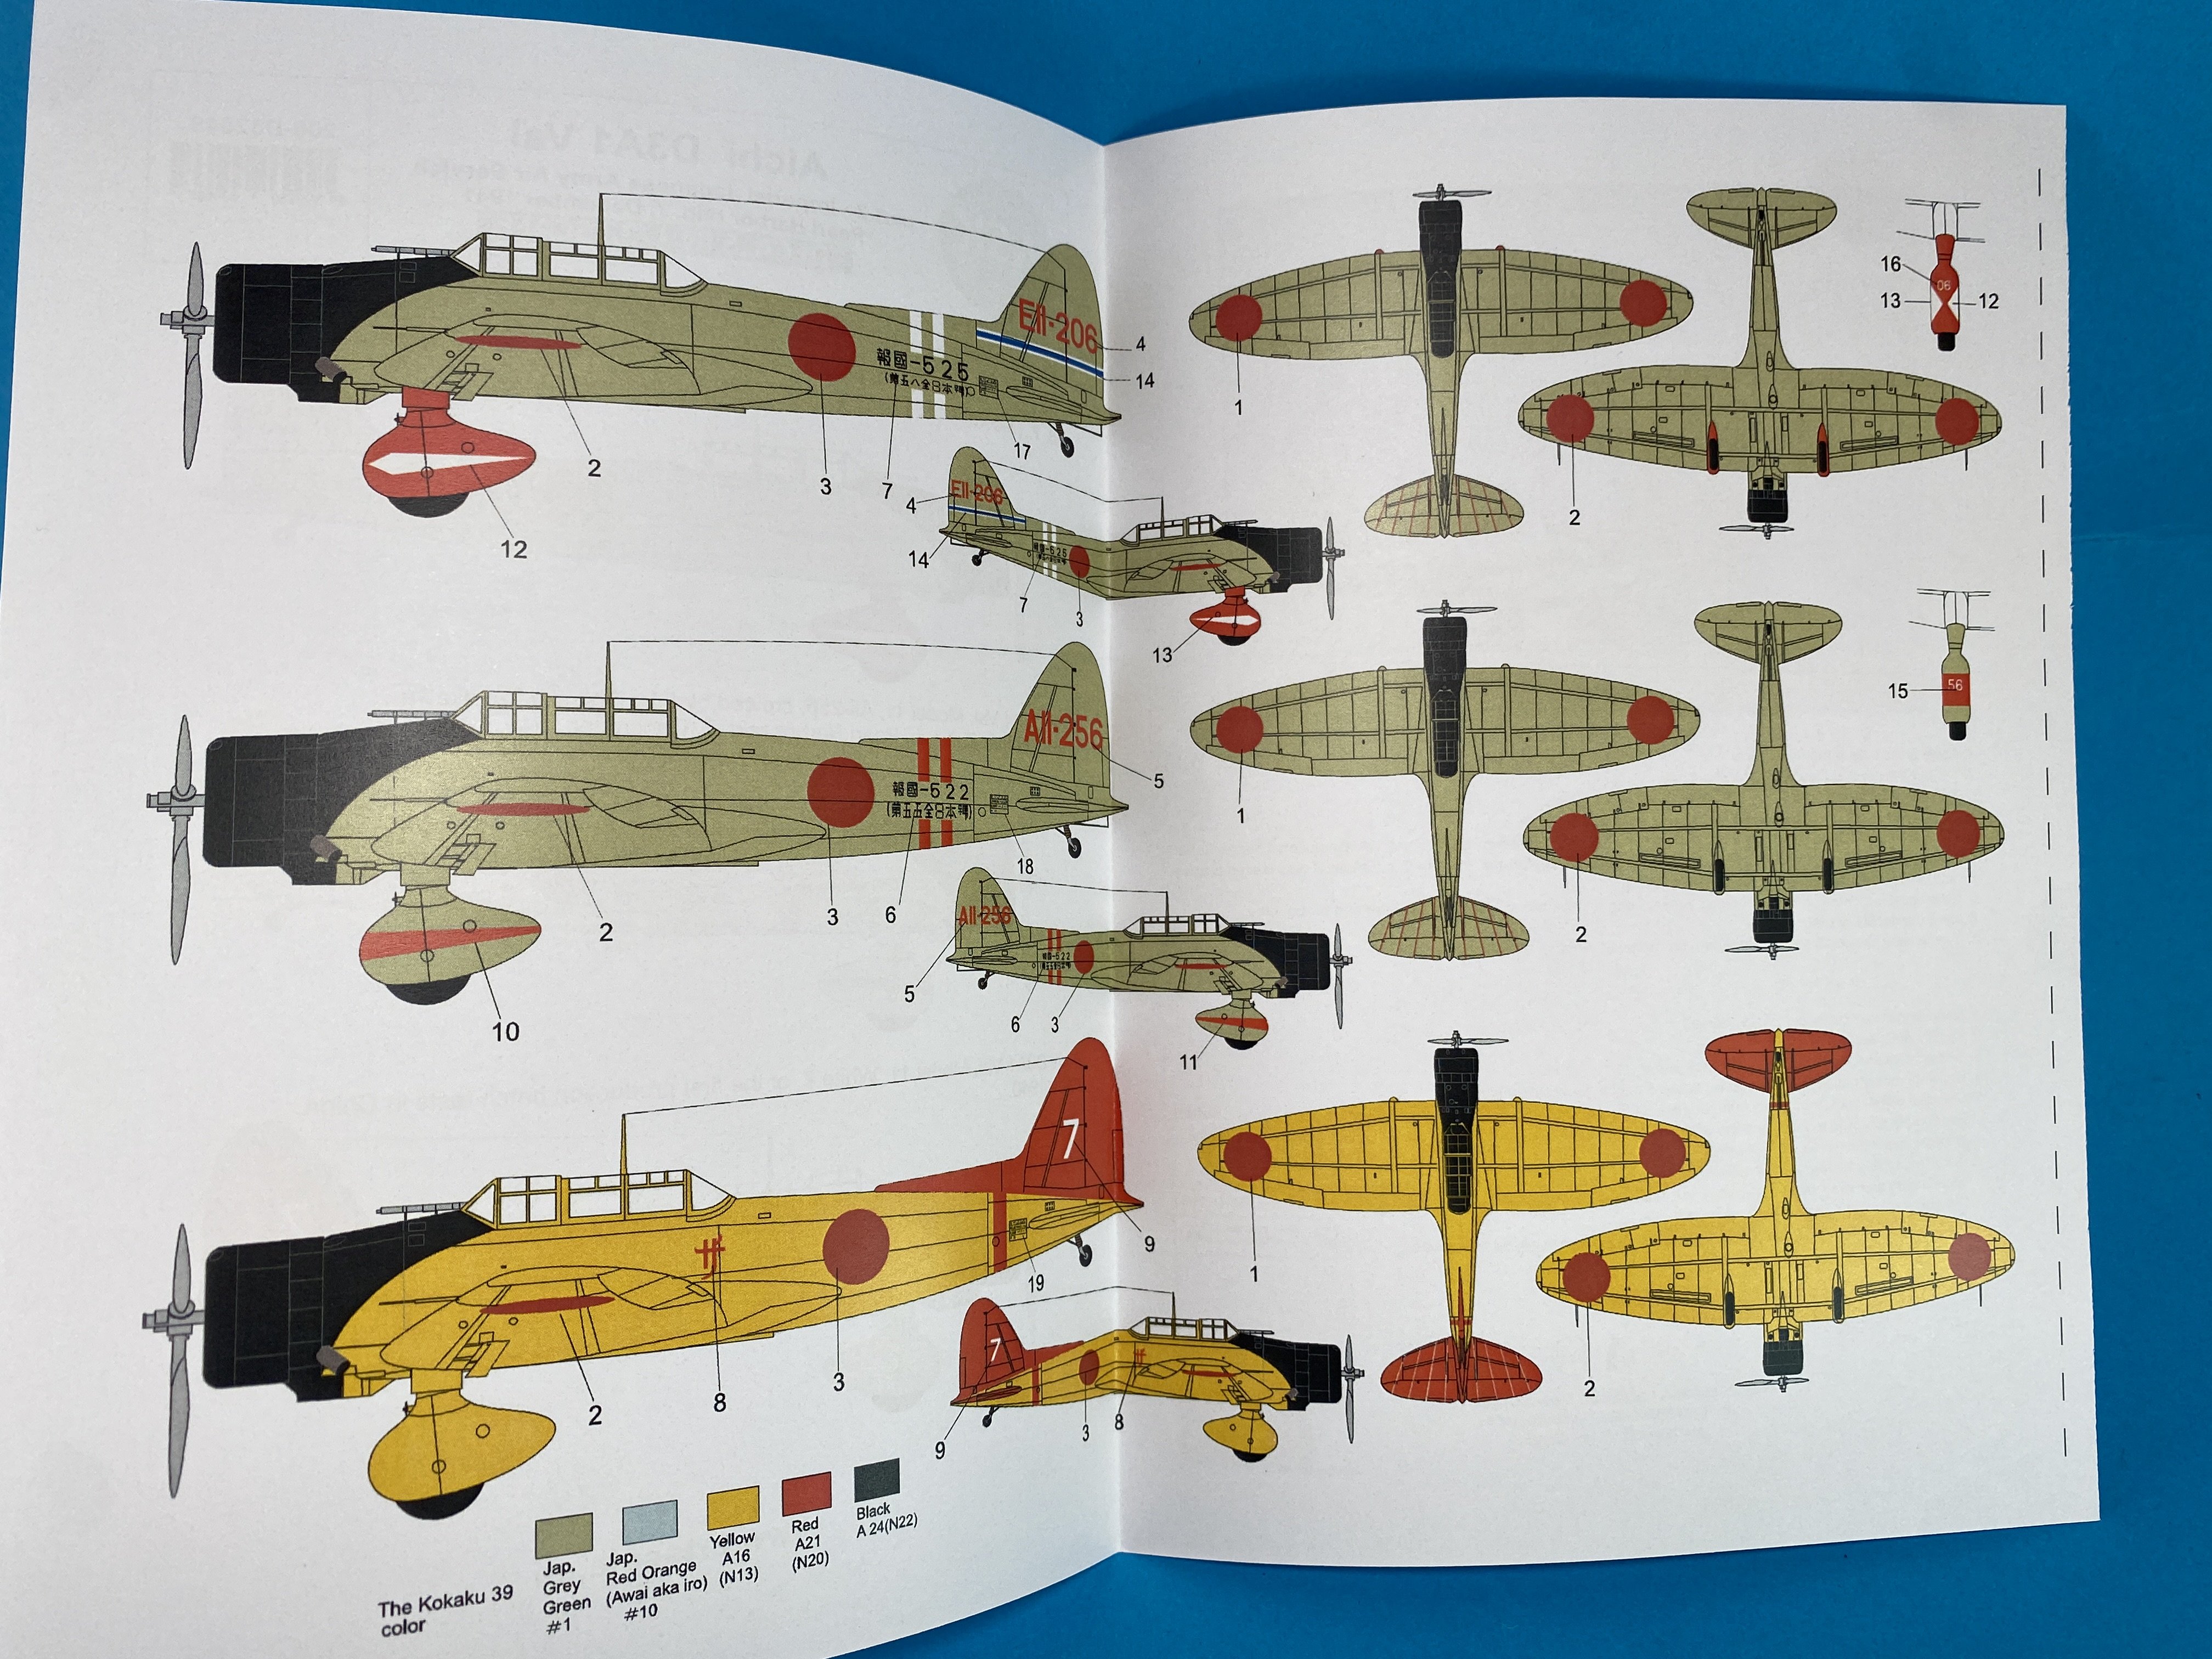
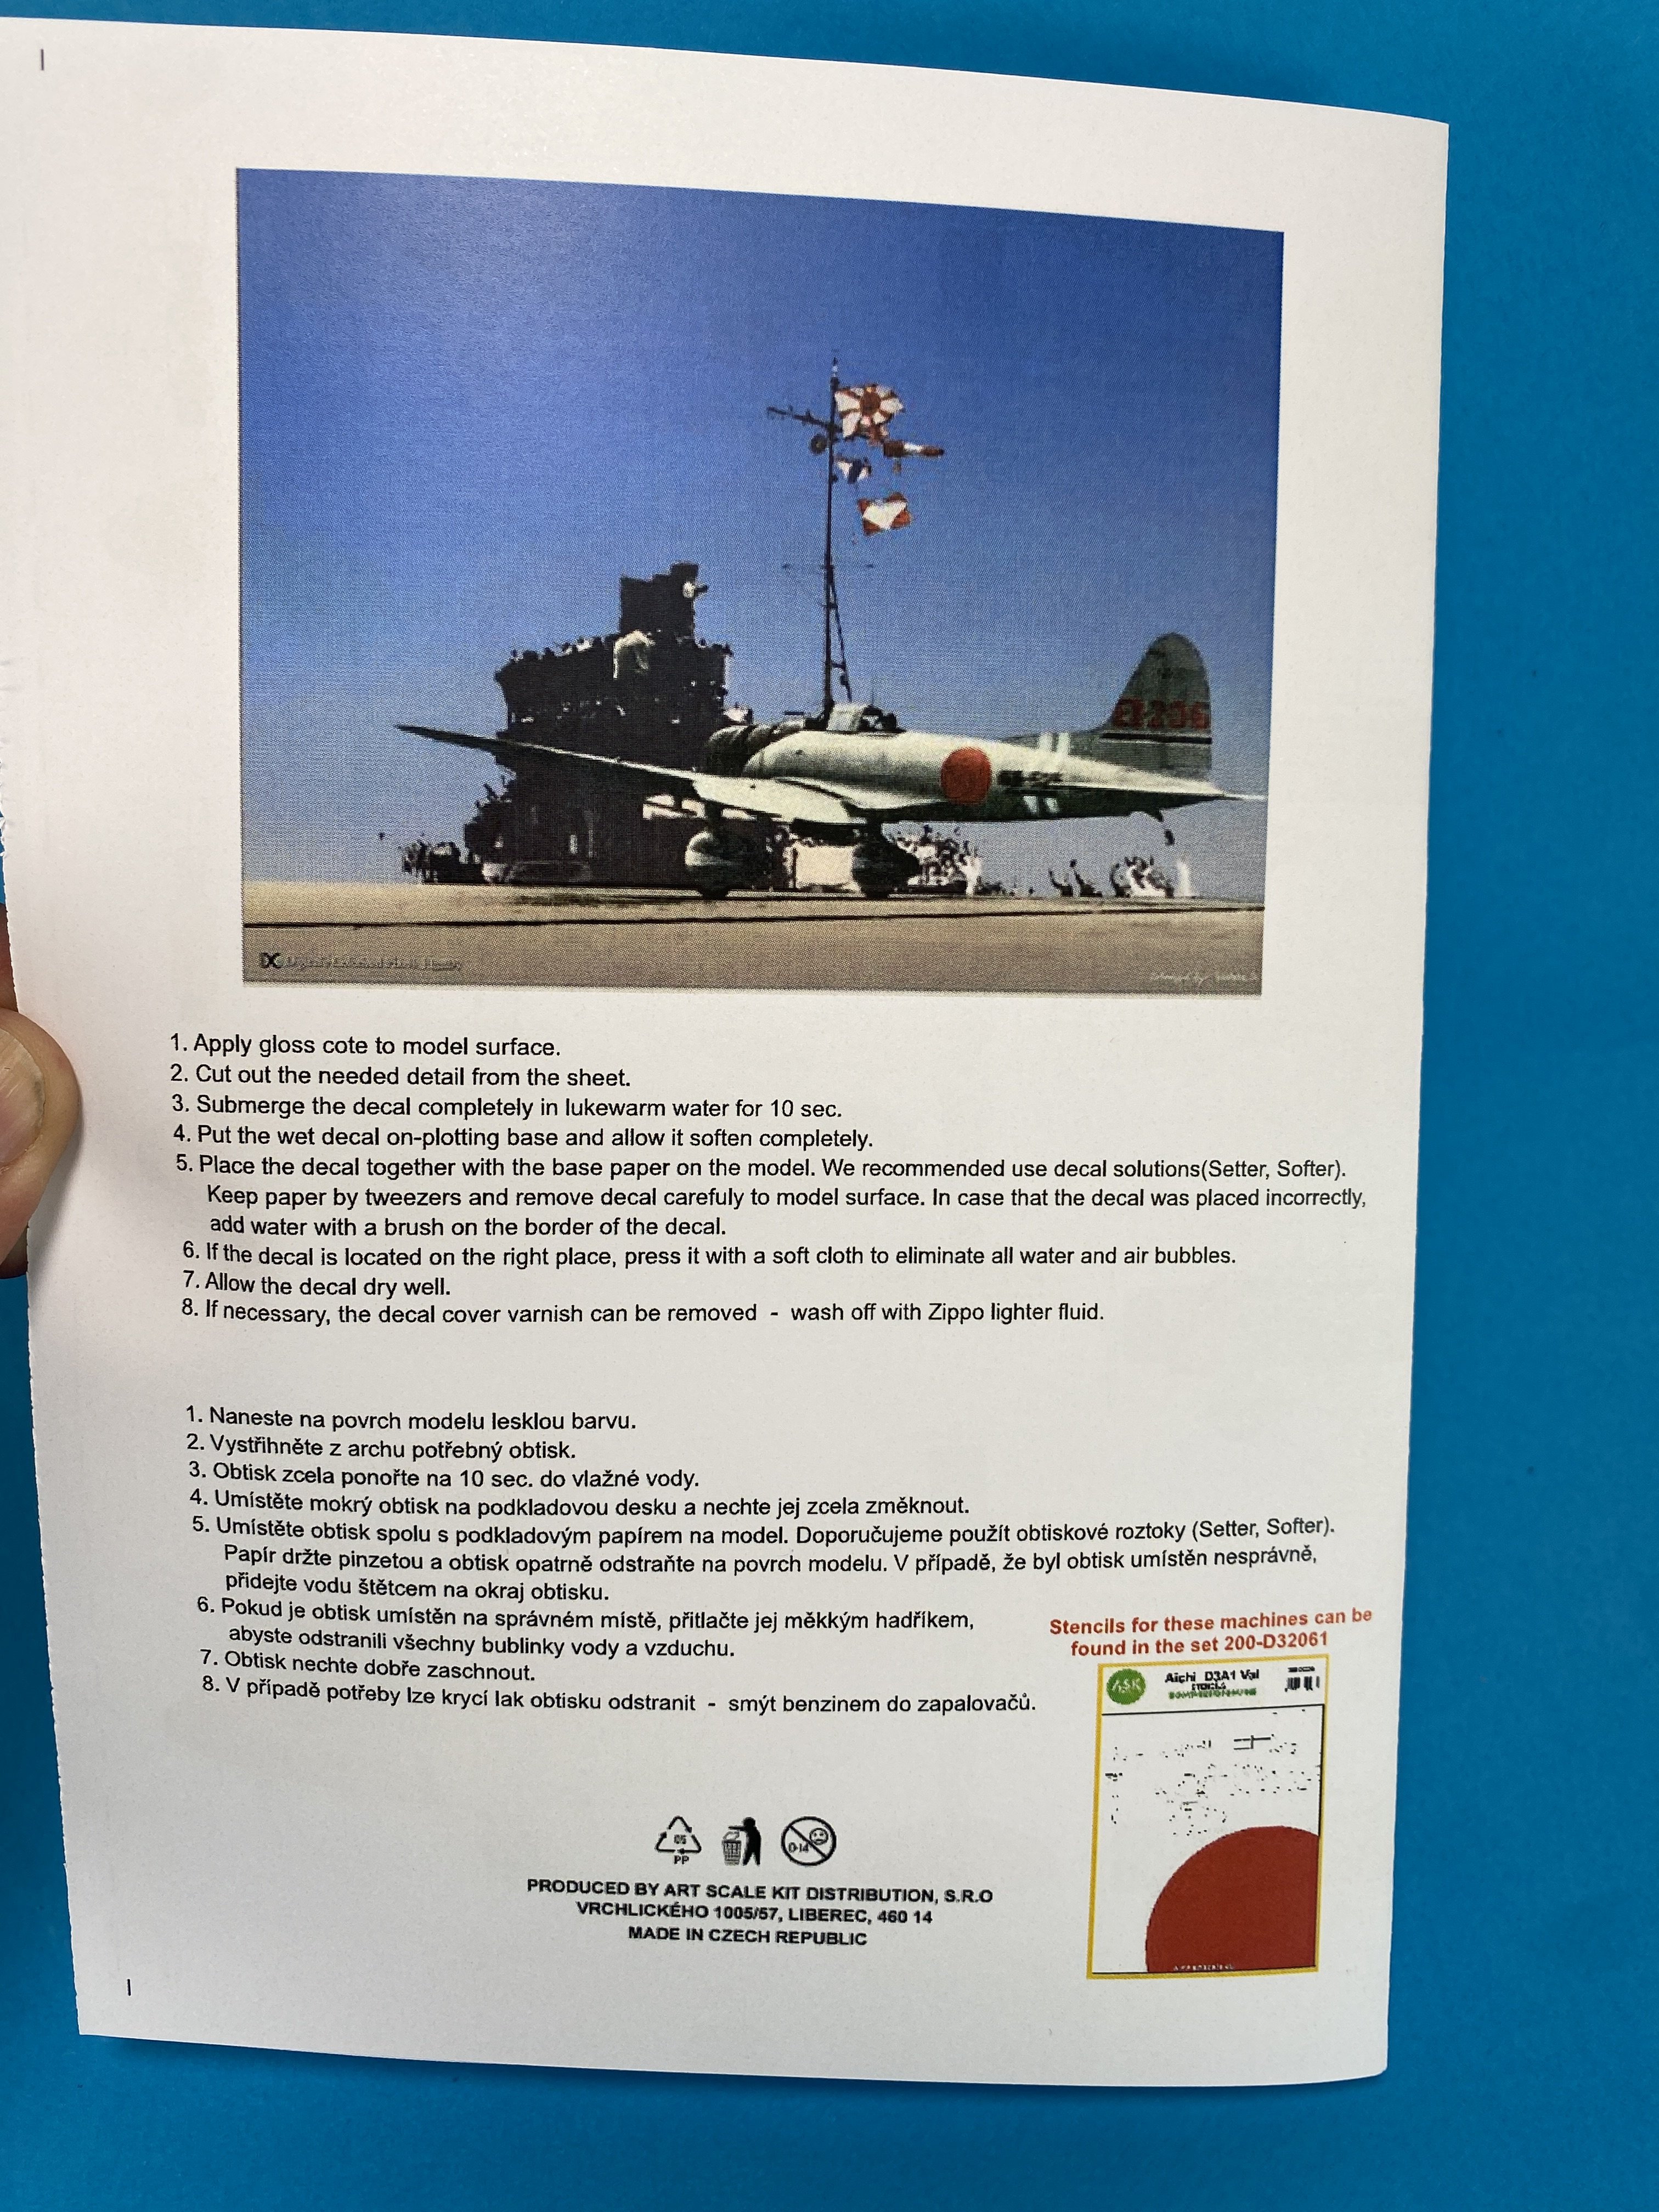
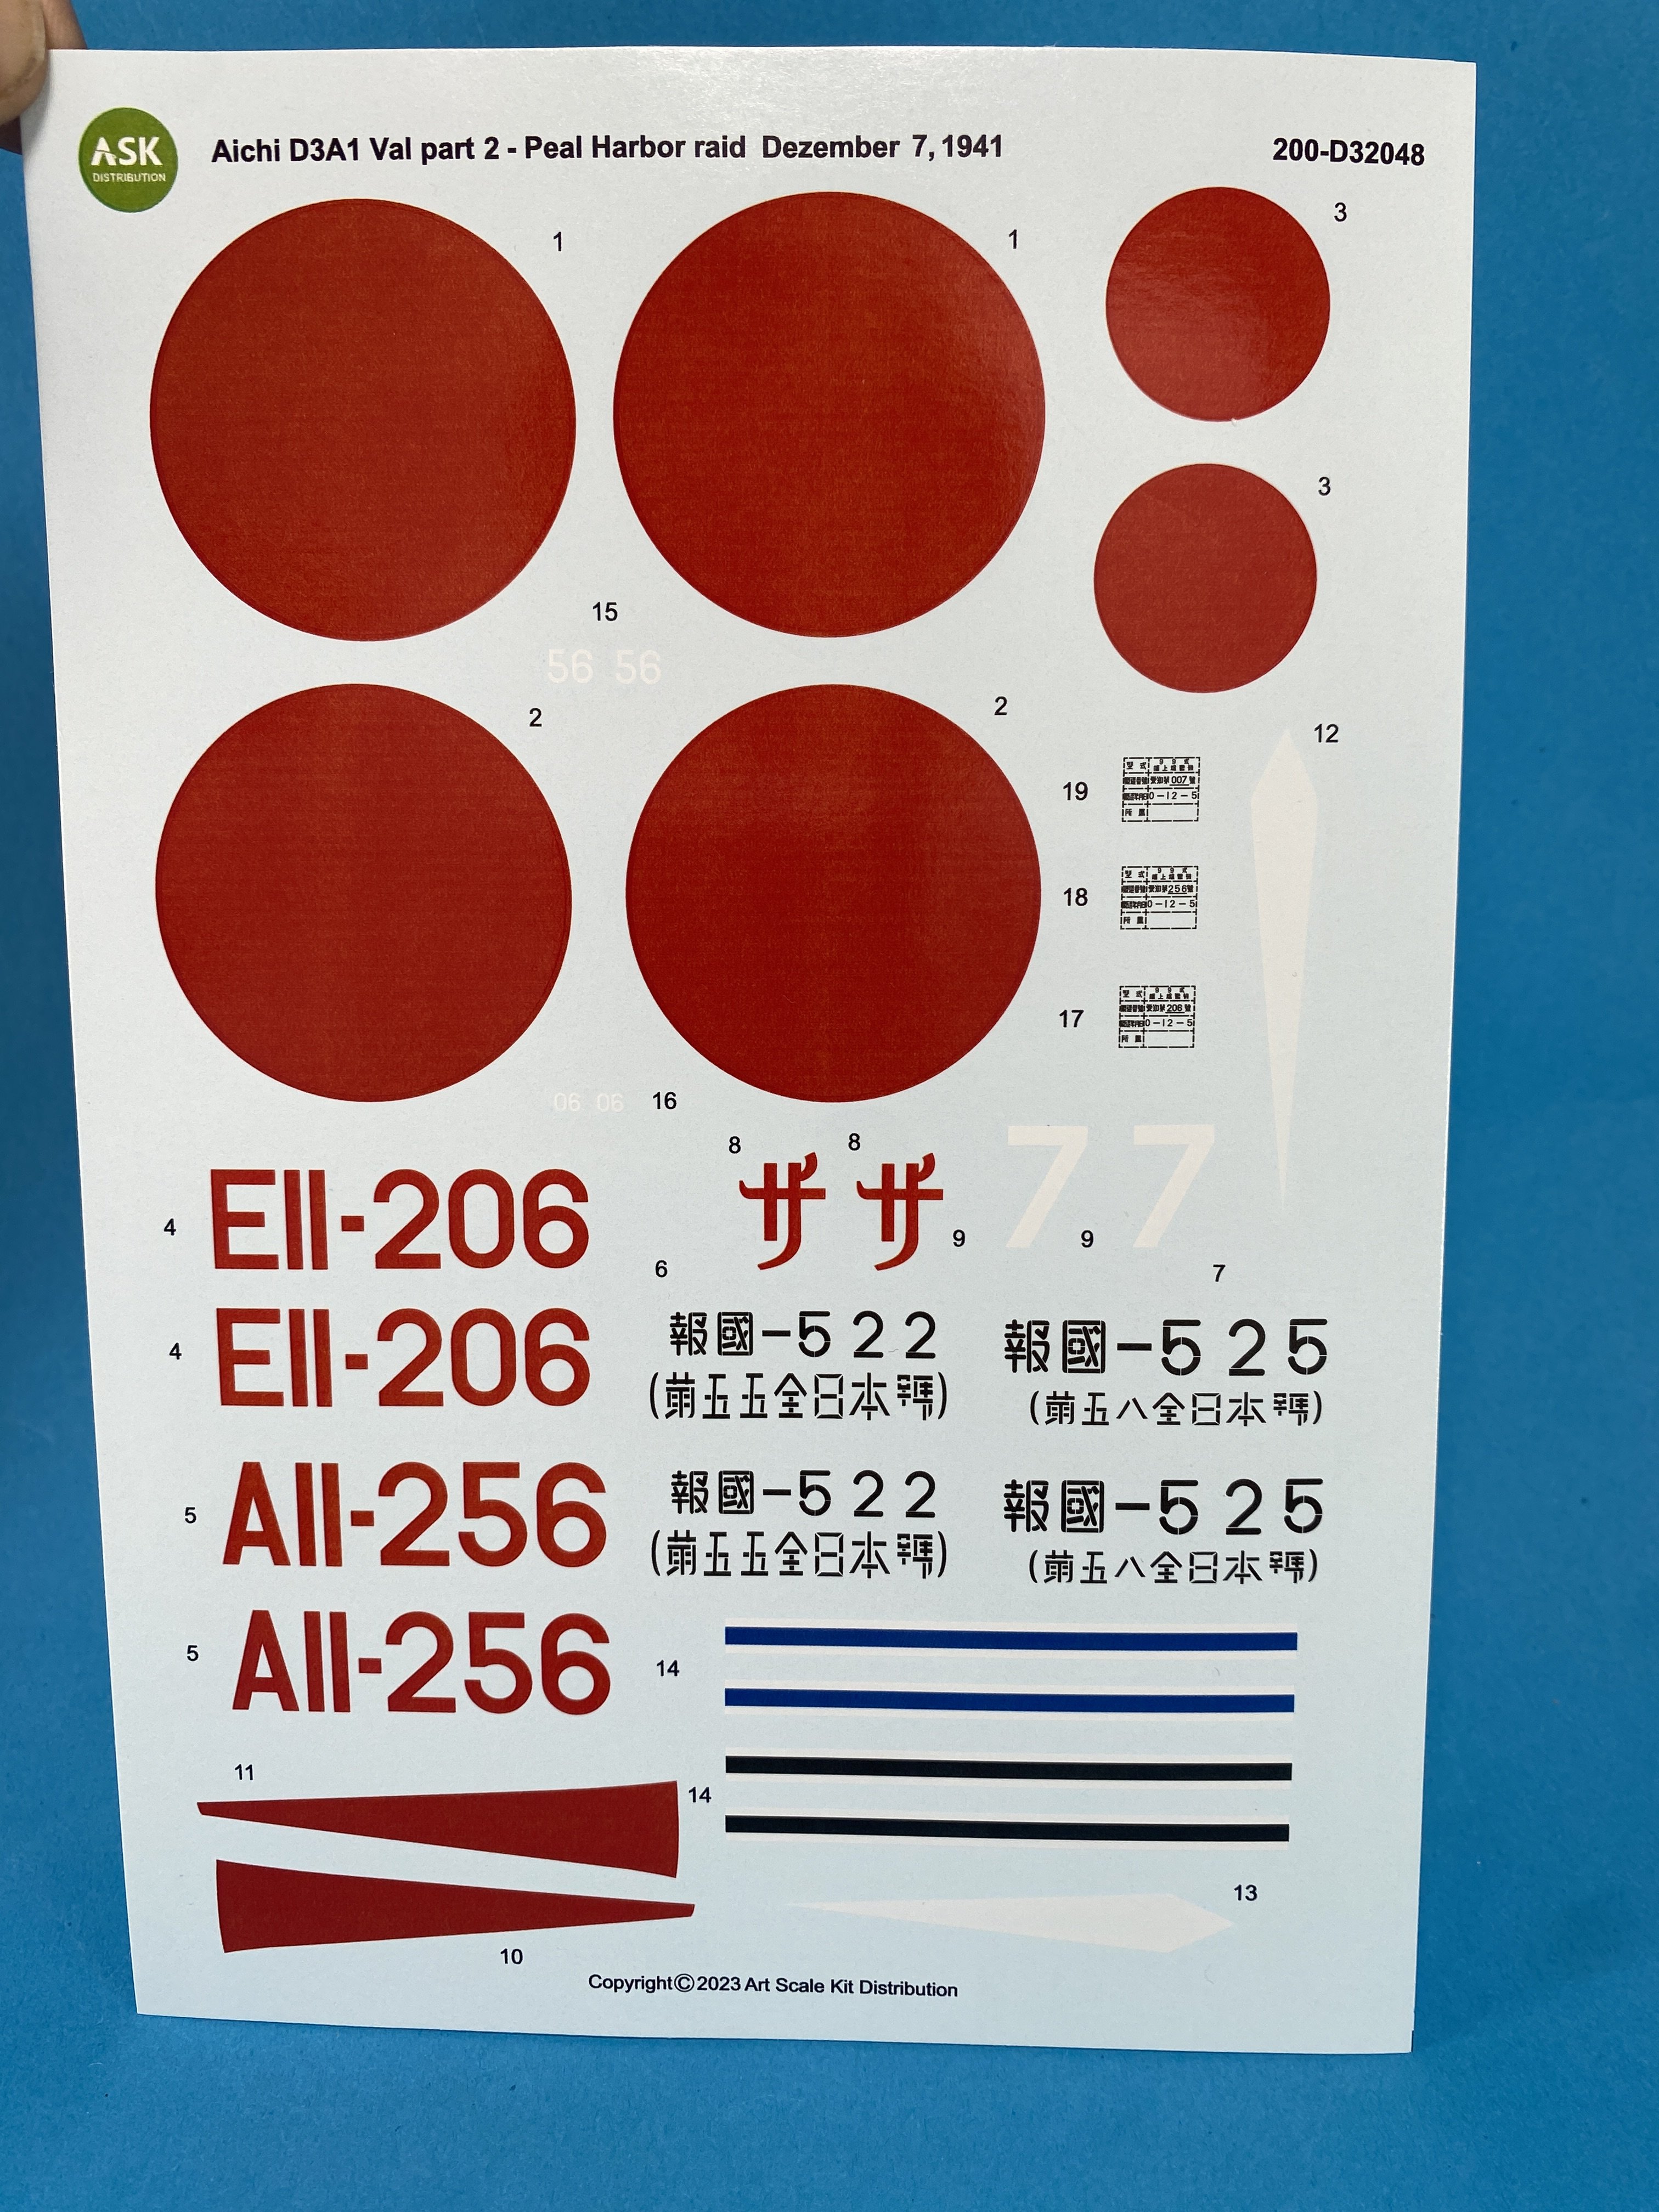
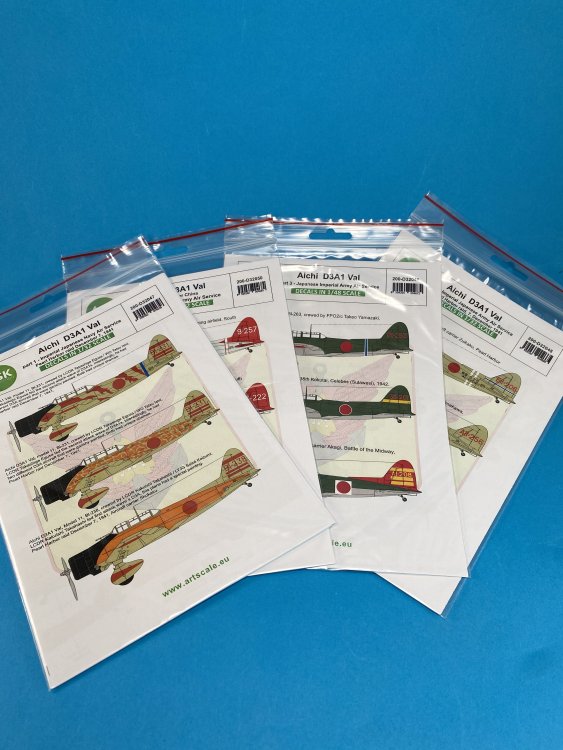
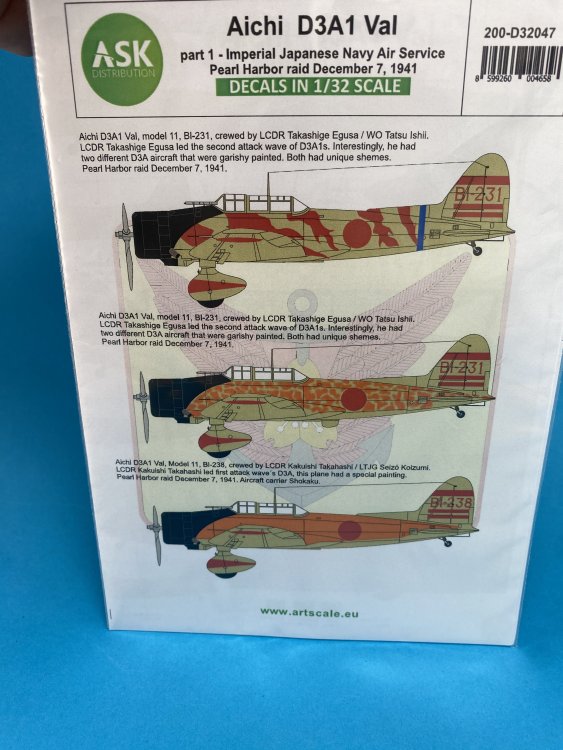
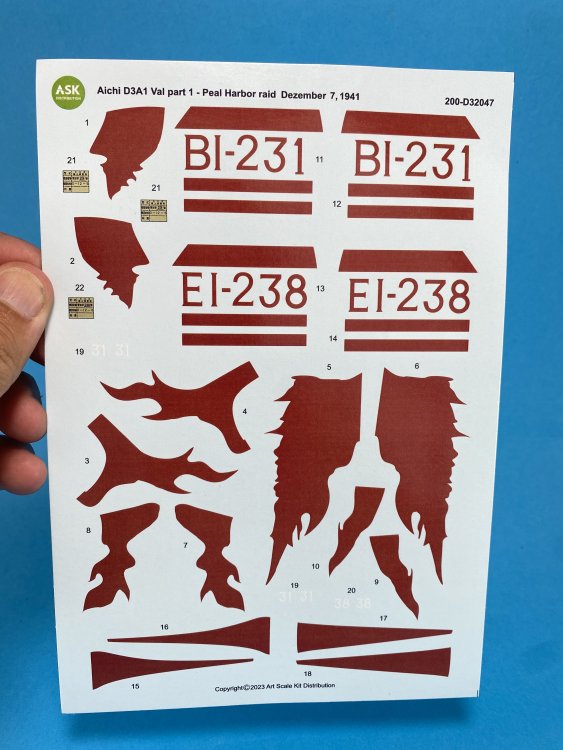
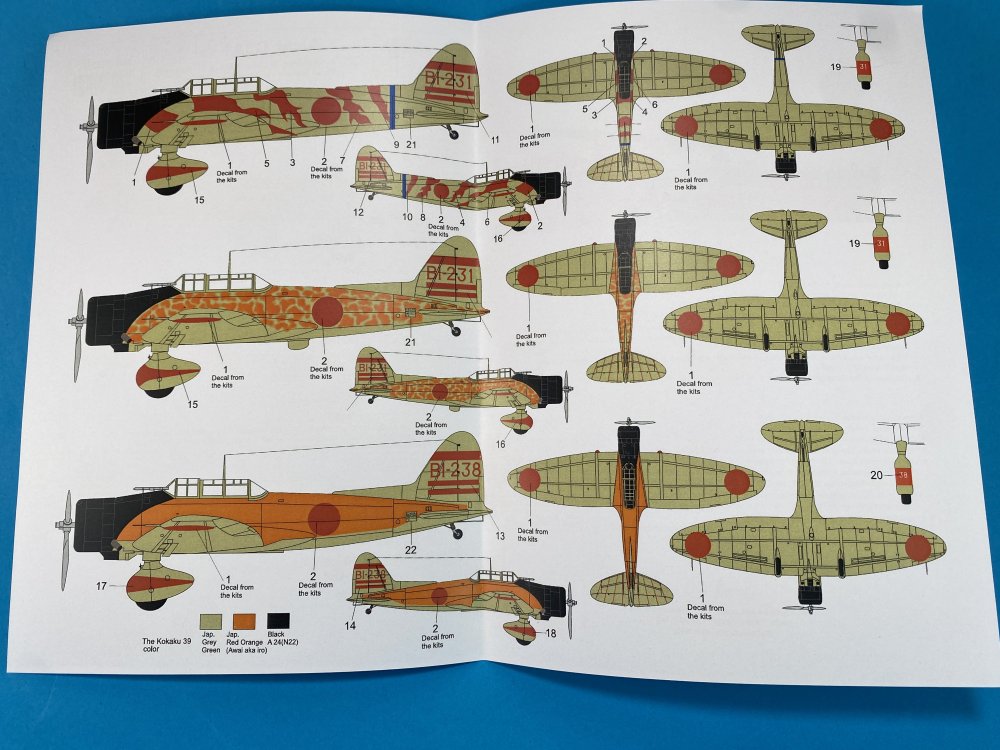
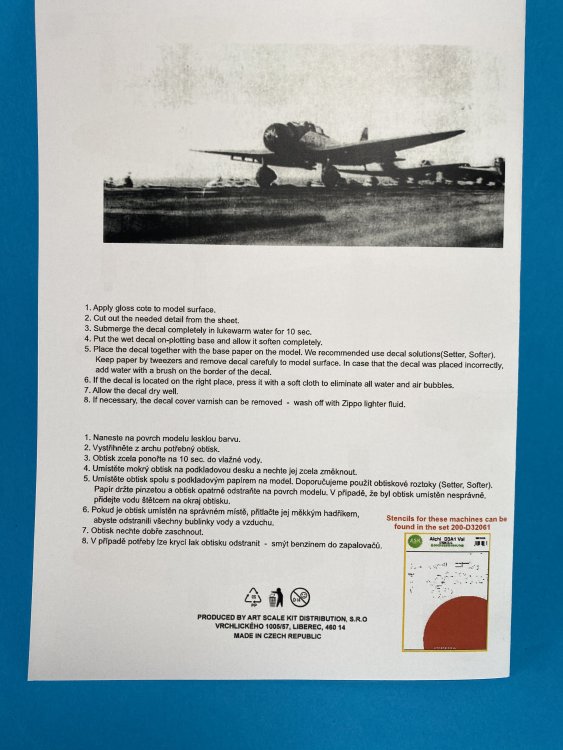
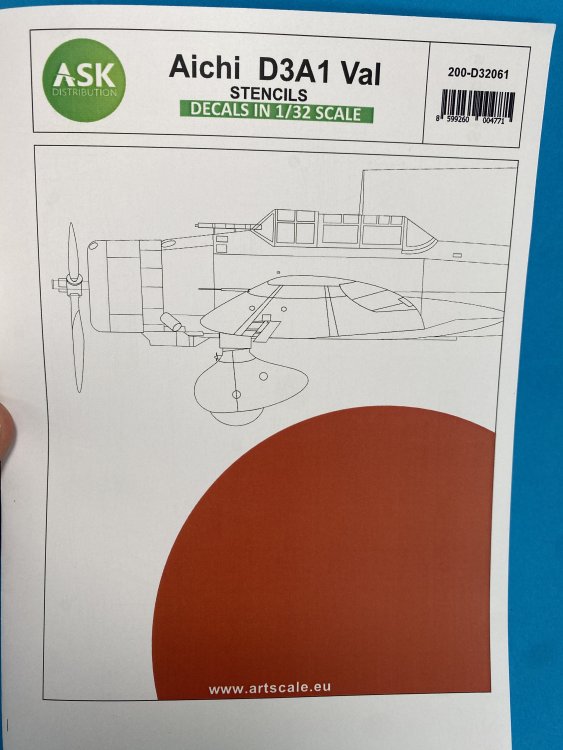
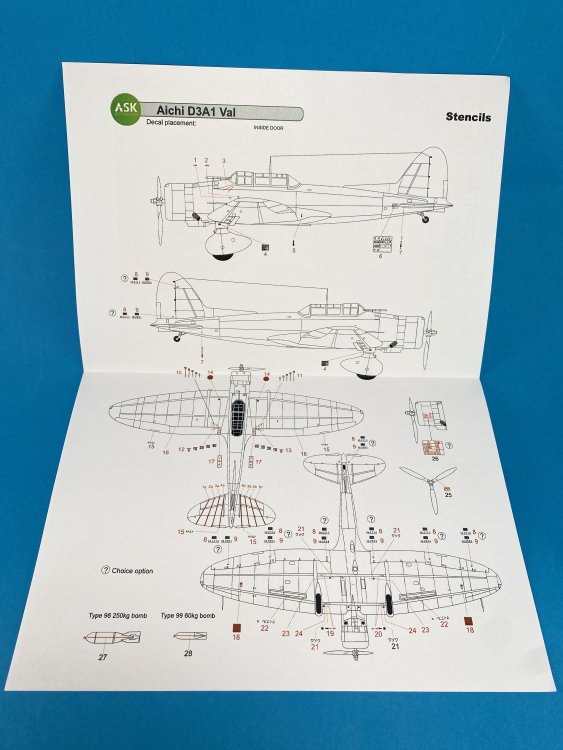
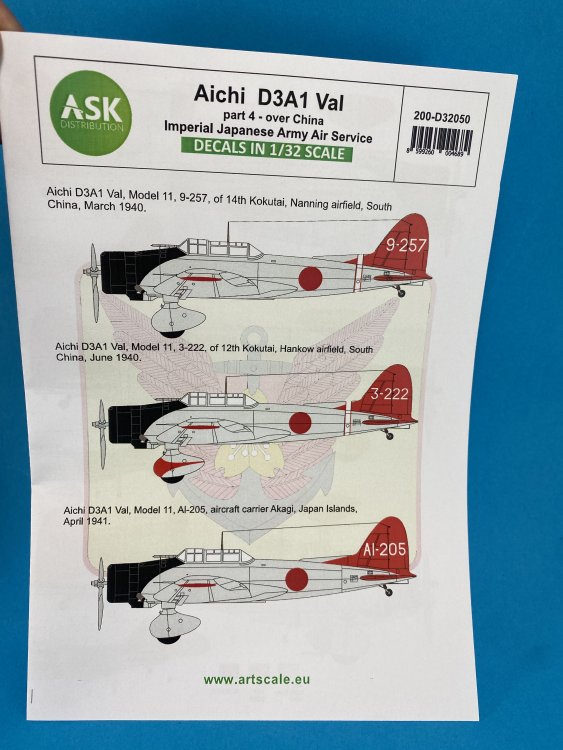
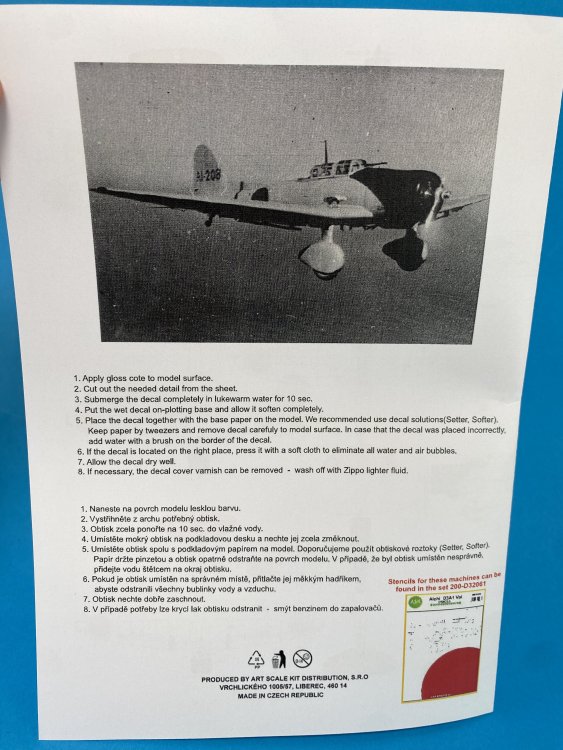
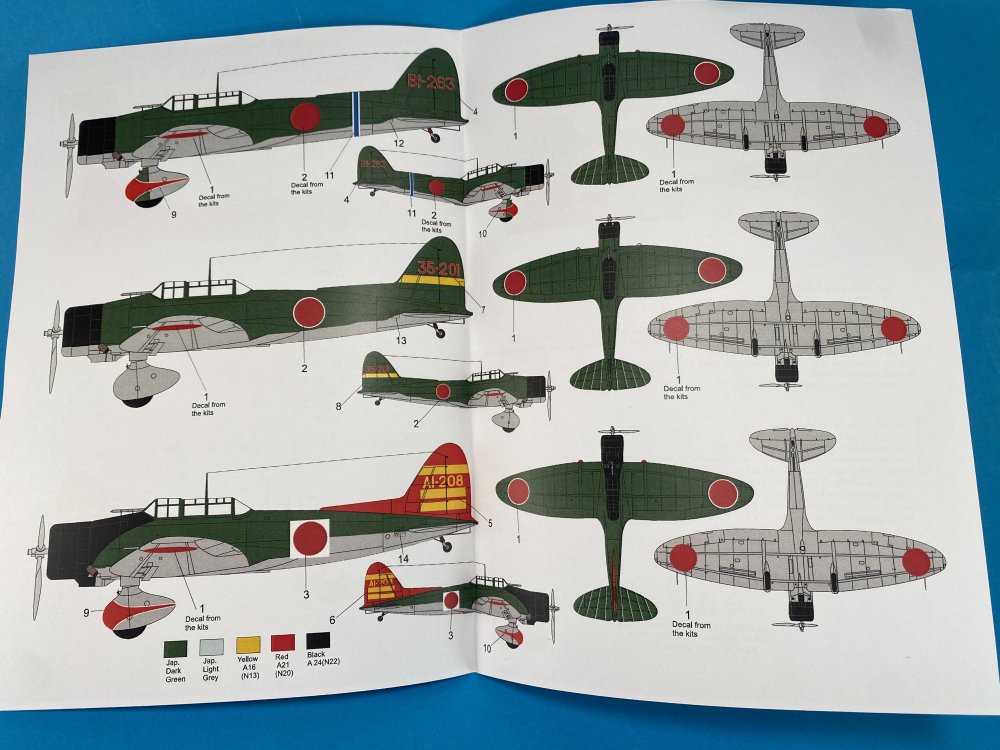
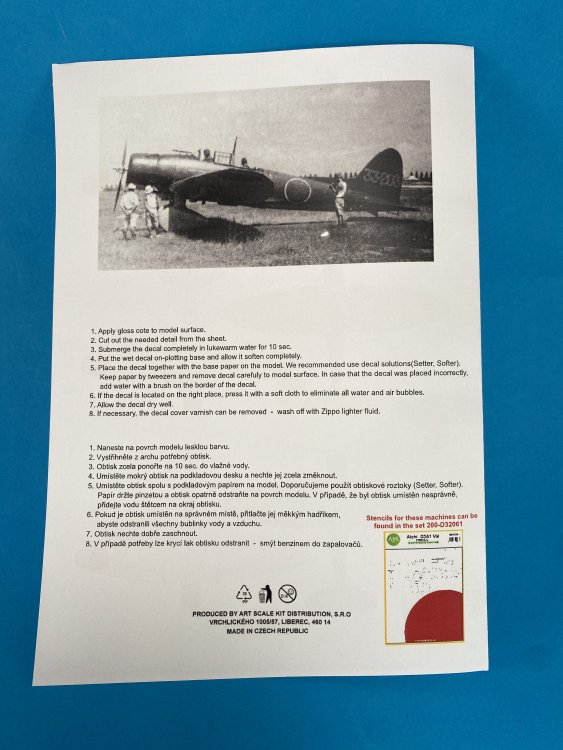
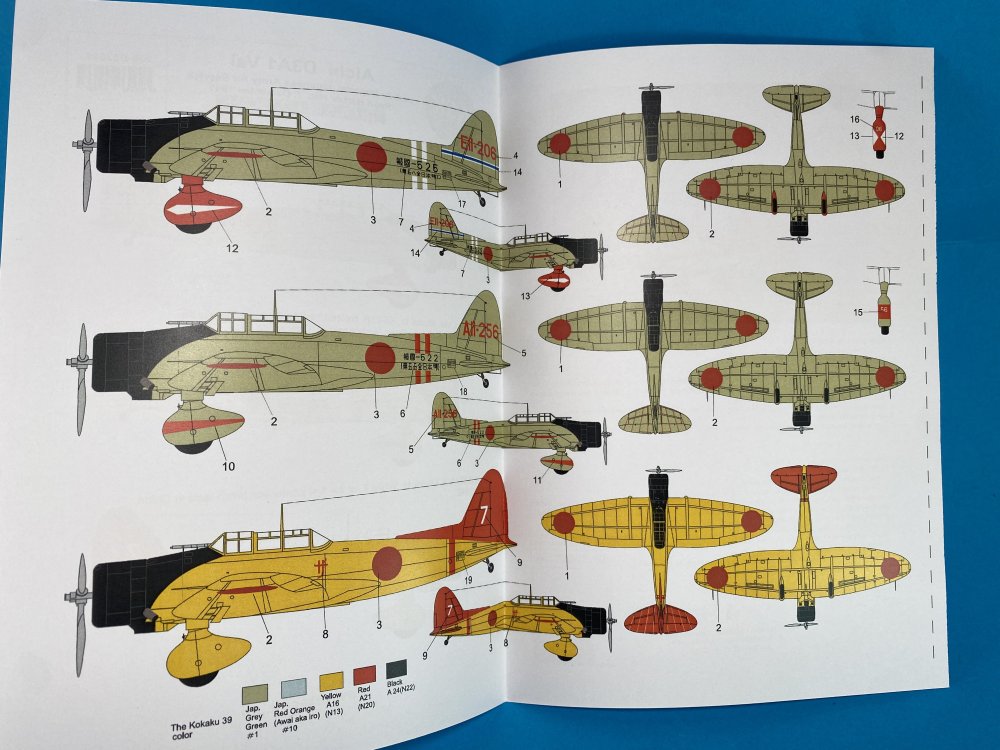
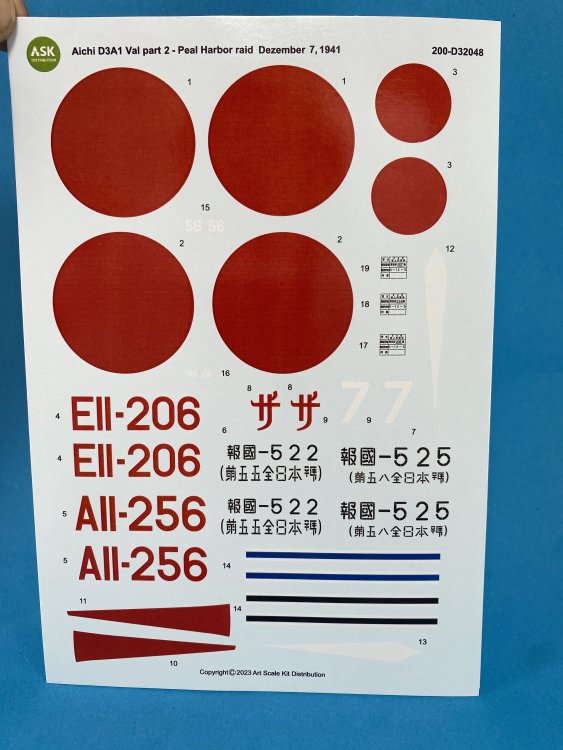
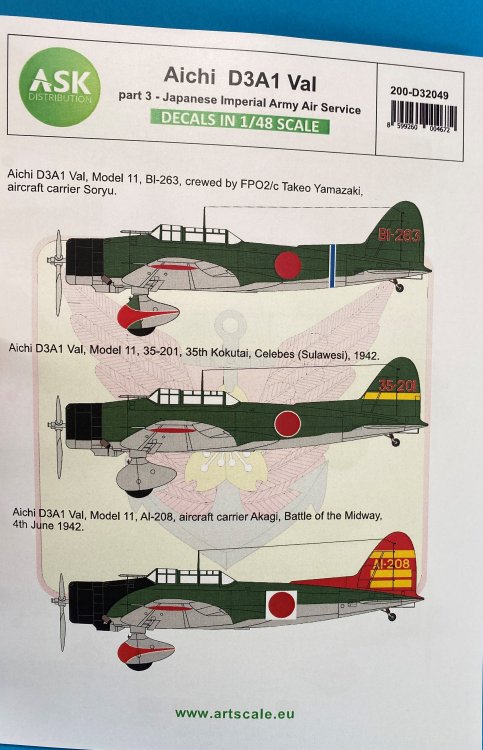
1:32 Art Scale Kit Aichi D3A1 Val Several Sheets Art Scale Kit (also known as ASK) is a model hobby shop but also a modelling tools producer, a resin 3D producer and also a Decal producer… So It`s a name that is getting really quickly on the top of the modelling world. Today, I´m going to review 5 (five) decal sheet from ASK. All sets came in a ziplog bag, small A5 size sheet with profiles colors instructions steps how to apply ASK decals. So let’s looks to the option schemes that all decal sheets offer. But first, one detail that I loved about. In the applying instructions, in all sheets, there is a real photo of one of the airplanes that are represented on the decal sheets. I really love that "bonus" Aichi D3A1 Val – parte 1 – Imperial Japanese Army Air Service, Pearl Harbour raid, December, 7th, 1941 Catalogue number200-D32047 Price: 18,30€ To order, click here. Aichi D3A1 Val , Model 11, BI-231, crewed by LCDR Takashige Egusa/ WO Tatsu Ishii Aichi D3A1 Val , Model 11, BI-231, crewed by LCDR Takashige Egusa/ WO Tatsu Ishii Aichi D3A1 Val , Model 11, BI-238, crewed by LCDR Kakuishi Takahashi/LTJG Seizó Koizumi. This is my favorite decal sheet of all 4. It has some really nice striking schemes for the Val. However, there is no hinomaru on it, so you have to get some extra or rely on the one that is in the model kit. Aichi D3A1 Val – parte 2 – Imperial Japanese Army Air service, Pearl harbour raid, December, 7th, 1941 Catalogue number200-D32047 Price: 12,30€ To order, click here. Aichi D3A1 Val , Model 11, EII-206, aircraft carrier Zuikaku, Pearl Harbour raid, December, 7th, 1941; Aichi D3A1 Val , Model 11, AII-206, crewed by F1/c Shisaku Yanakawa, aircraft carrier Zuikaku, Pearl Harbour raid, December, 7th, 1941; Aichi D3A1 Val , Model 11, White 7, of the first production batch tests in China, early 1940 Aichi D3A1 Val - Part 3 – Japanese Imperial Army Air service Catalogue number200-D32049 Price: 12,30€ To order, click here. Aichi D3A1 Val, Model 11, BI-263, crewed by FPO2/c Takeo Yamazaki, aircraft carrier Soryu. Aichi D3A1 Val, Model 11, 35-201, 35th Kokutai, celebes (Sulawesi), 1942; Aichi D3A1 Val, Model 11, AI-208, aircraft carrier Akagi, Battle of Midway, 4th June 1942; Aichi D3A1 Val - Part 4 – Japanese Imperial Army Air service Catalogue number200-D32047 Price: 12,30€ To order, click here. Aichi D3A1 Val, Model 11, 9-257, of 14th Kotukai, Nanning Airfield, South China, March 1940; Aichi D3A1 Val, Model 11, 3-222, of 12th Kotukai, Hankow Airfield, South China, June1940; Aichi D3A1 Val, Model 11, AI-205, aircraft carrier Akagi, Japan Islands, April 1941; Aichi D3A1 Val Stencils Catalogue number200-D32049 Price: 12,30€ To order, click here. The stencils are very thin, with small decal film on the edge to prevent to maximum silvering and not blurry, being quite comprehensive. ** Analyzing the decal sheets, the color registration is great and a very good definition of the details. The decals have a thin film, in fact looking very thin and delicate. There is no indication where are they printed so I assume that will be in ASK house. The printing quality is quite good, as they are sharp, with outline very well defined. The color look quite good and spot on. I tried one of the Hinomaru (that curious is not available in part 1 decal as I already said), and it work great, with good adhesion to the plane surface without wrinkling or bubbling. No adverse reaction to Micro set or Micro Sol. You do have to work then with care and patience as they are very delicate and therefore, fragile. The instructions are the general ones that are applicable to all decals, it is always important to remember the general principles of decal application. In this case, there is no specific rule for applying these decals. The profiles draws contains lots of information, with side view (both side) and top view with precise decal indication. Conclusion: ASK is coming with lots (really, tons) of new decals giving the modeler some great options in 1:32 and 1:48. The location indication of the decals is quite good and very perceptible. The decals as already said, have a very good colour registration, very thin, with minimum decal film, and they work quite nice! My thanks to Art Scale Decals for producing these fantastic decals and the possibility of reviewed them. Francisco Guedes .


-
- 1
-
-
- art scale kit
- aichi
- (and 2 more)
-
P-40M to a P-40L conversion completed
Fran replied to JohnB's topic in LSM 1/32 and Larger Aircraft Ready for Inspection
Great Work!!! Congrats -
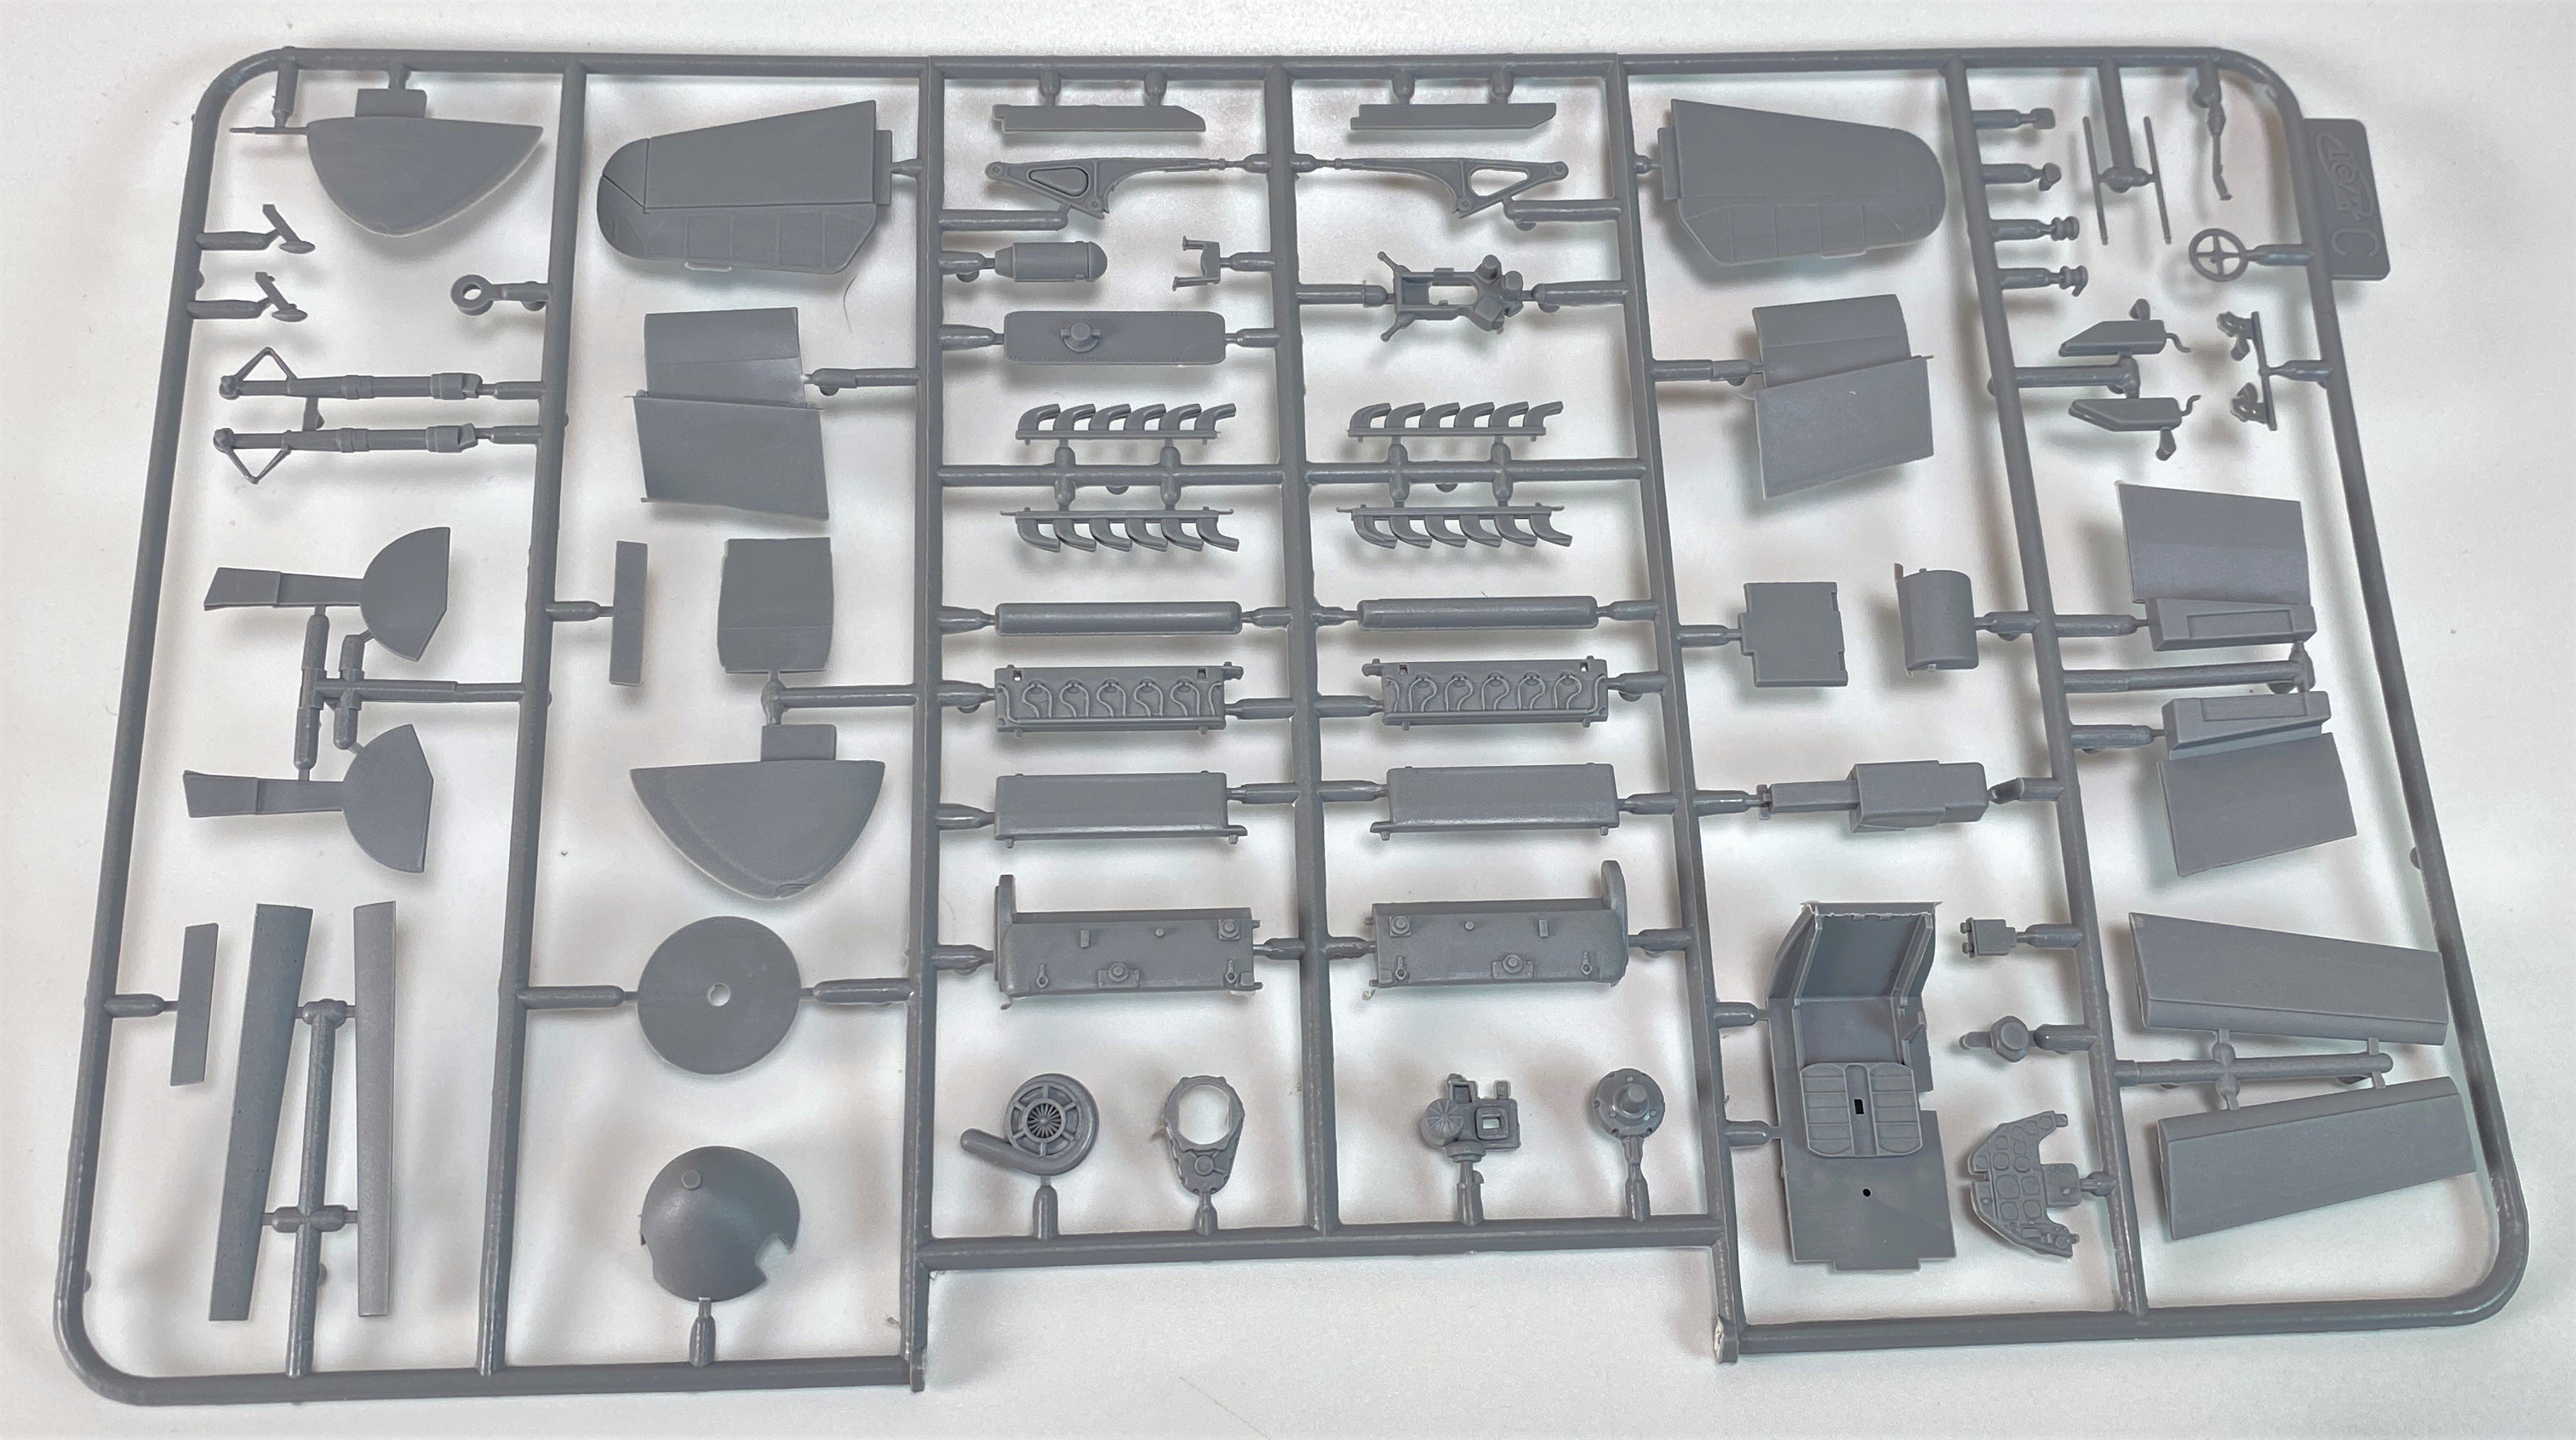
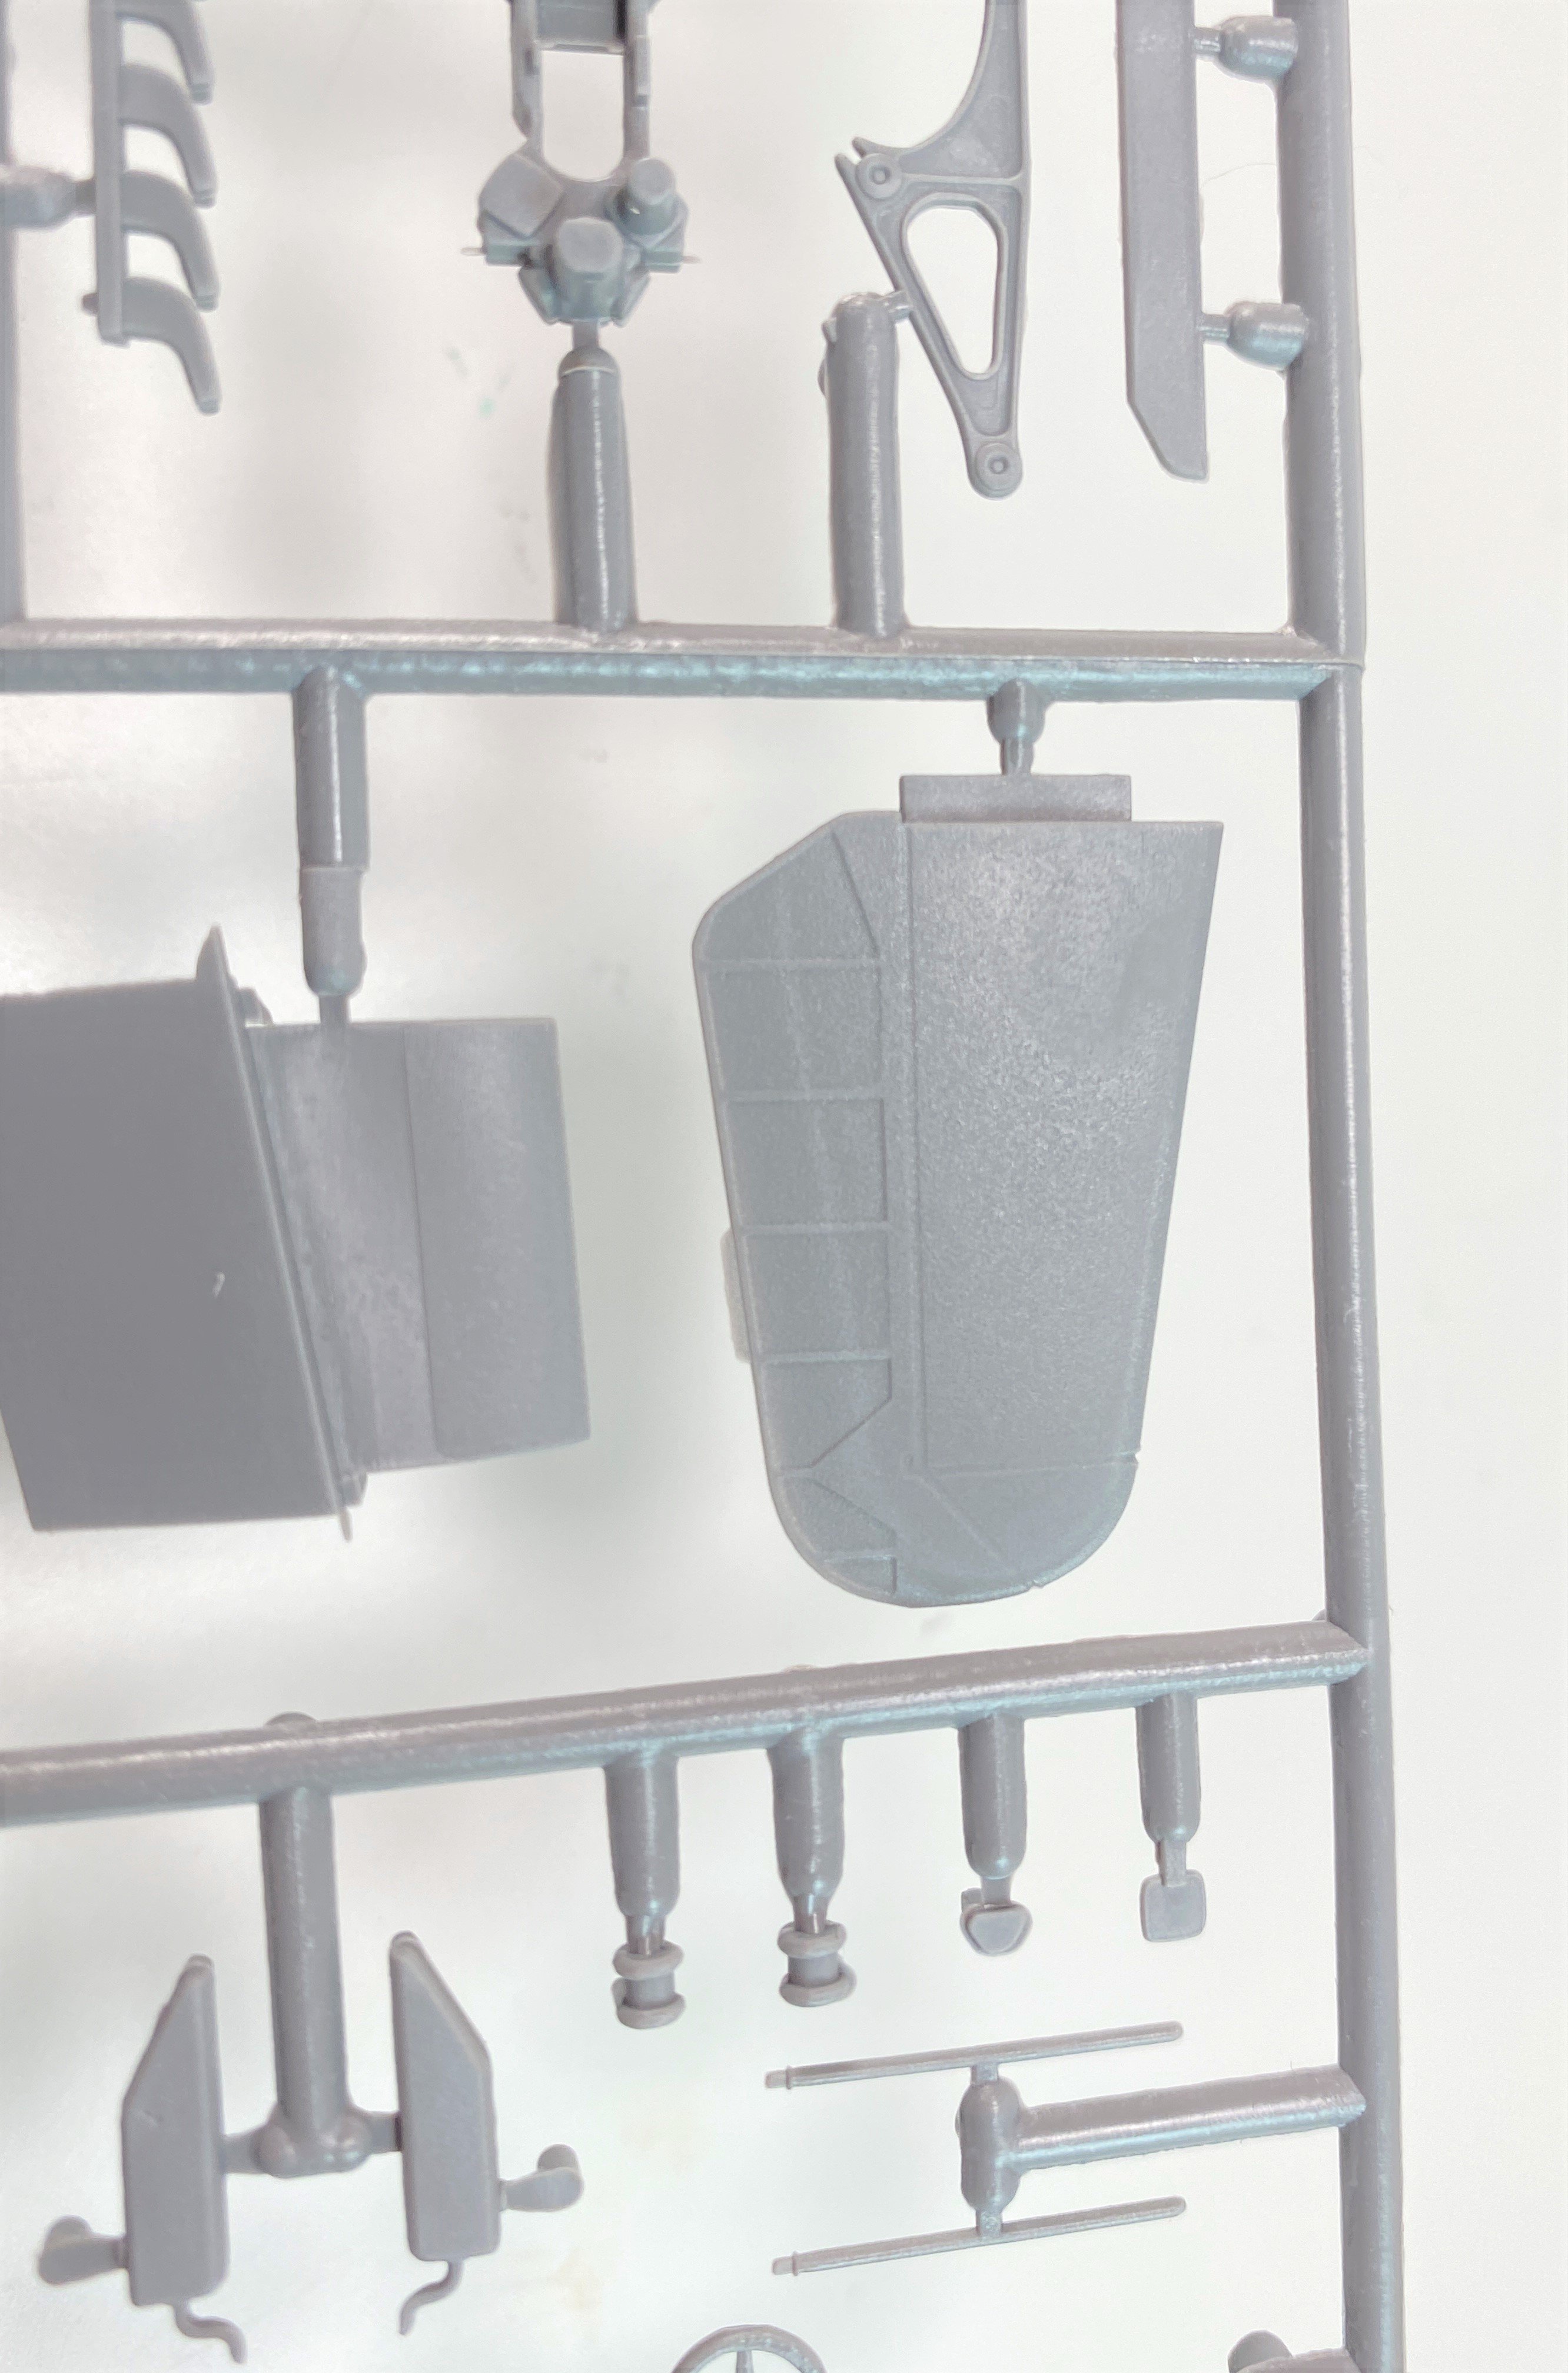
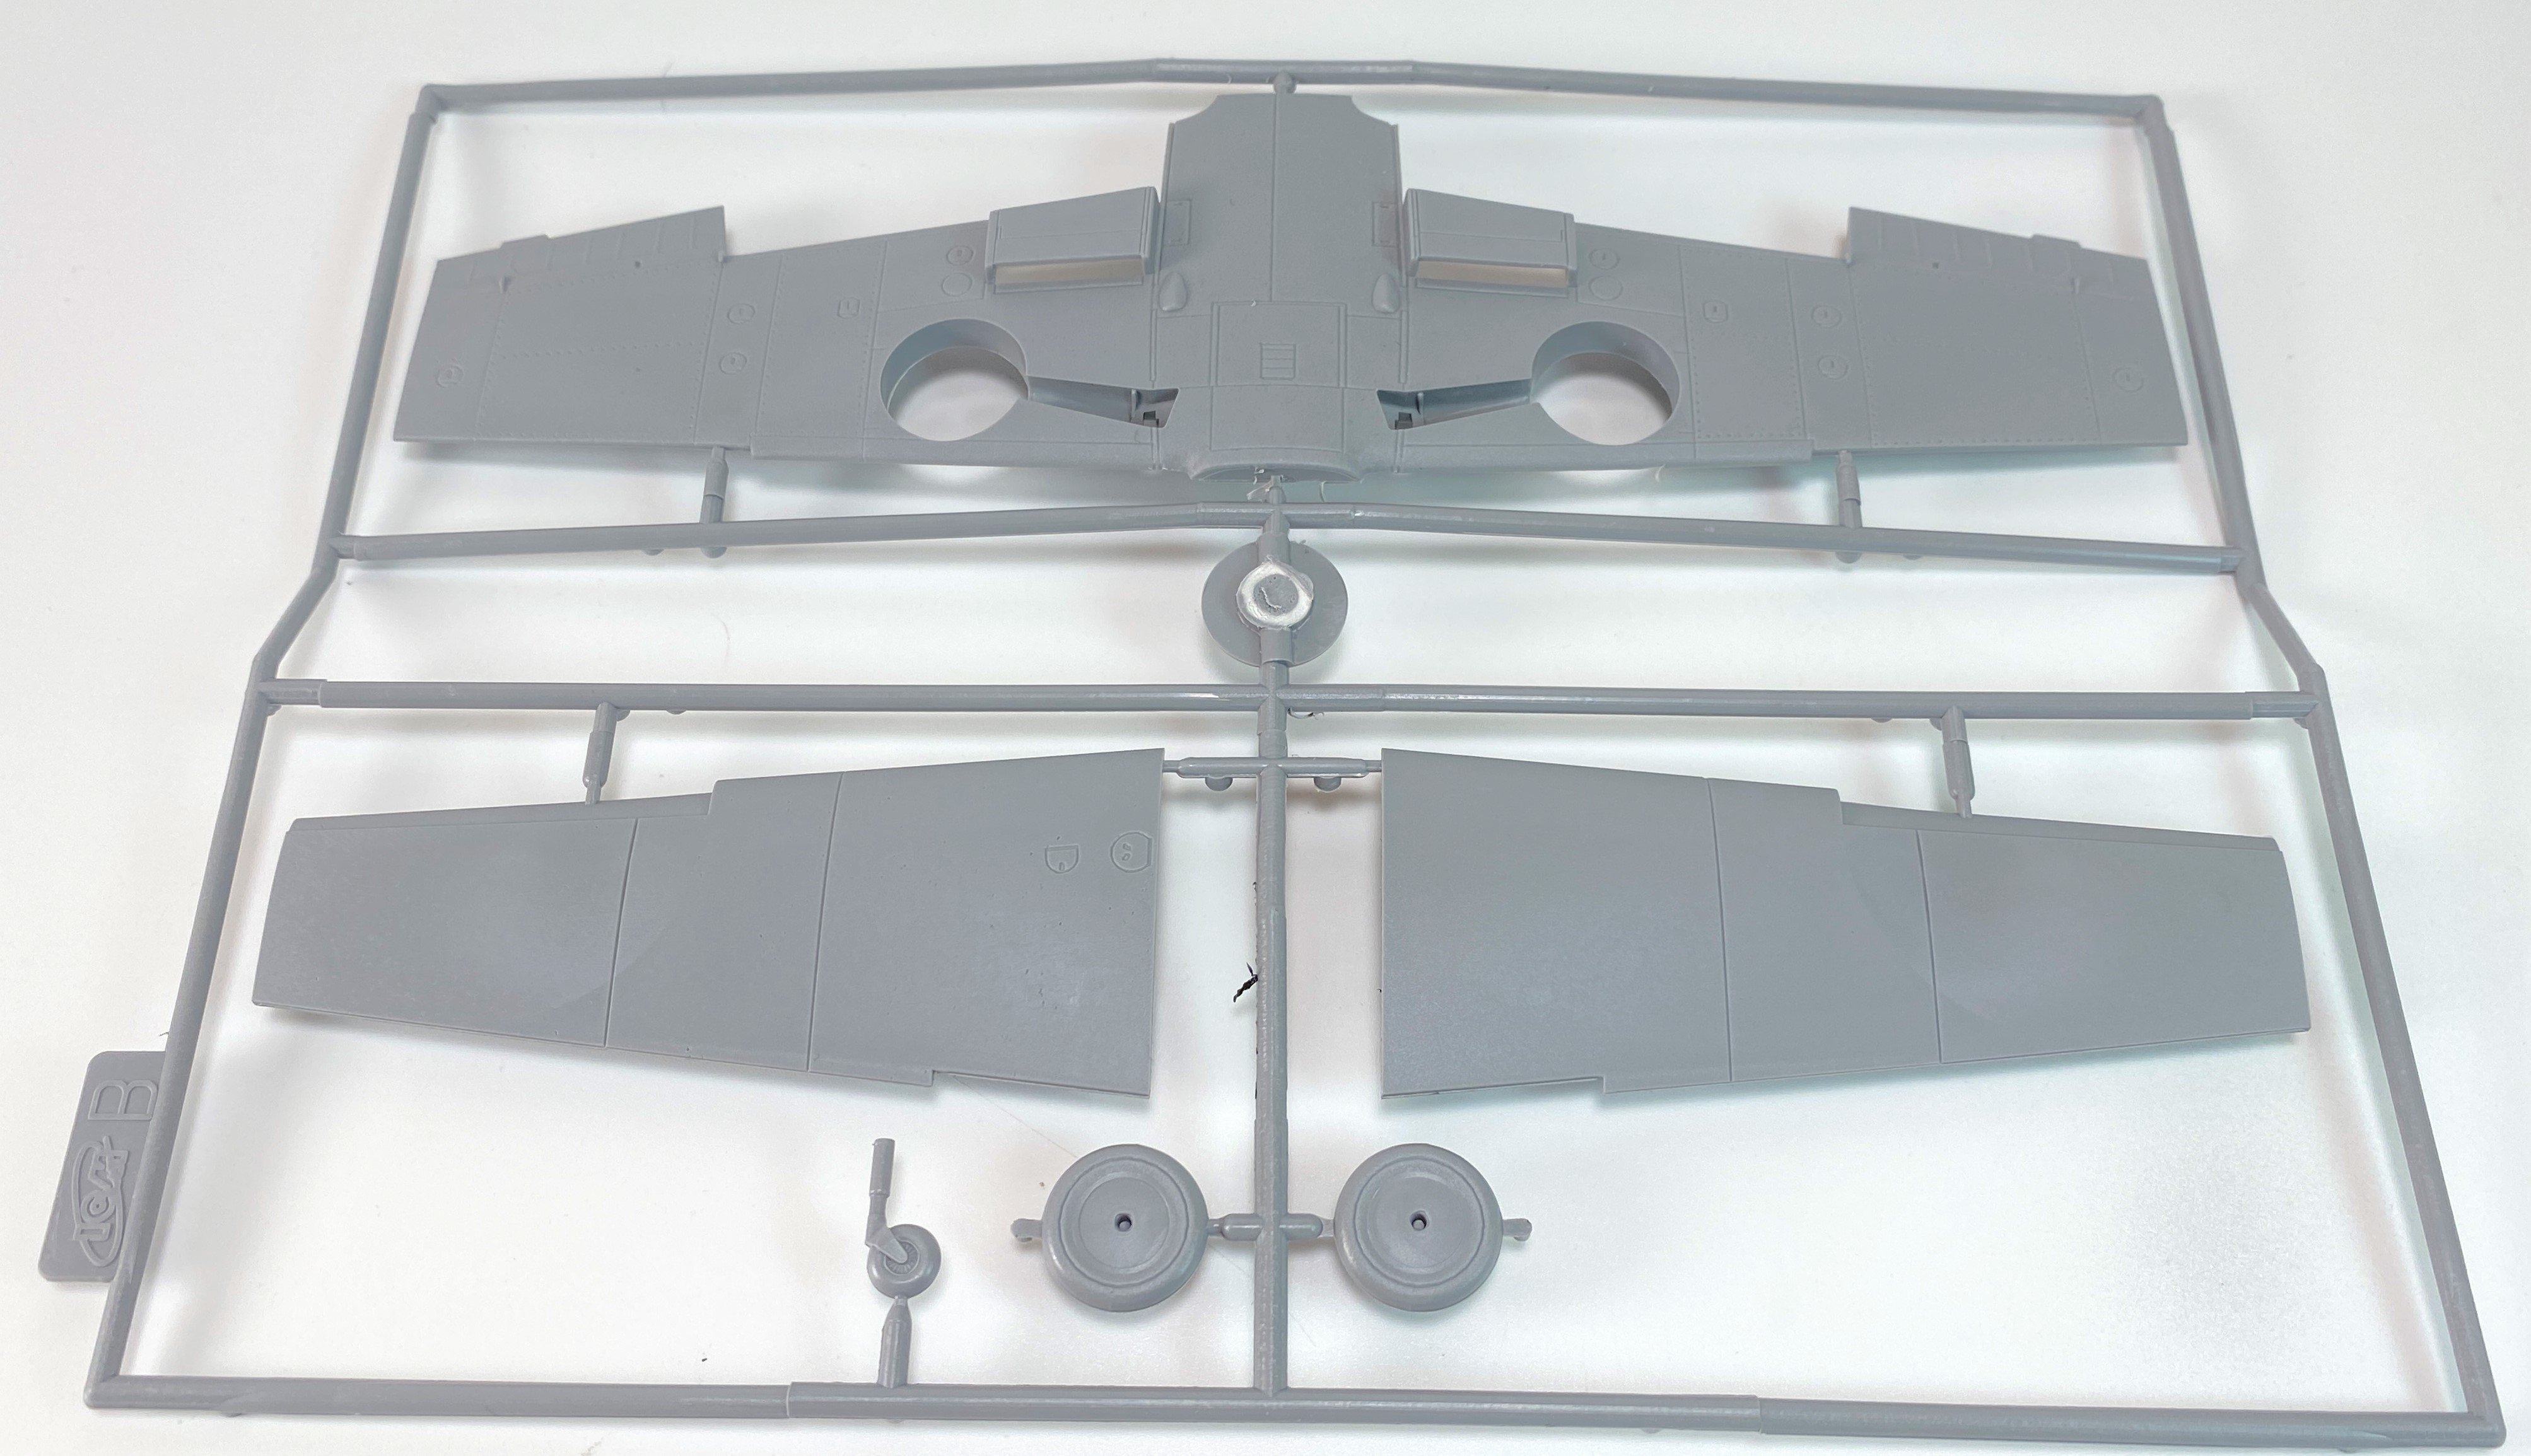
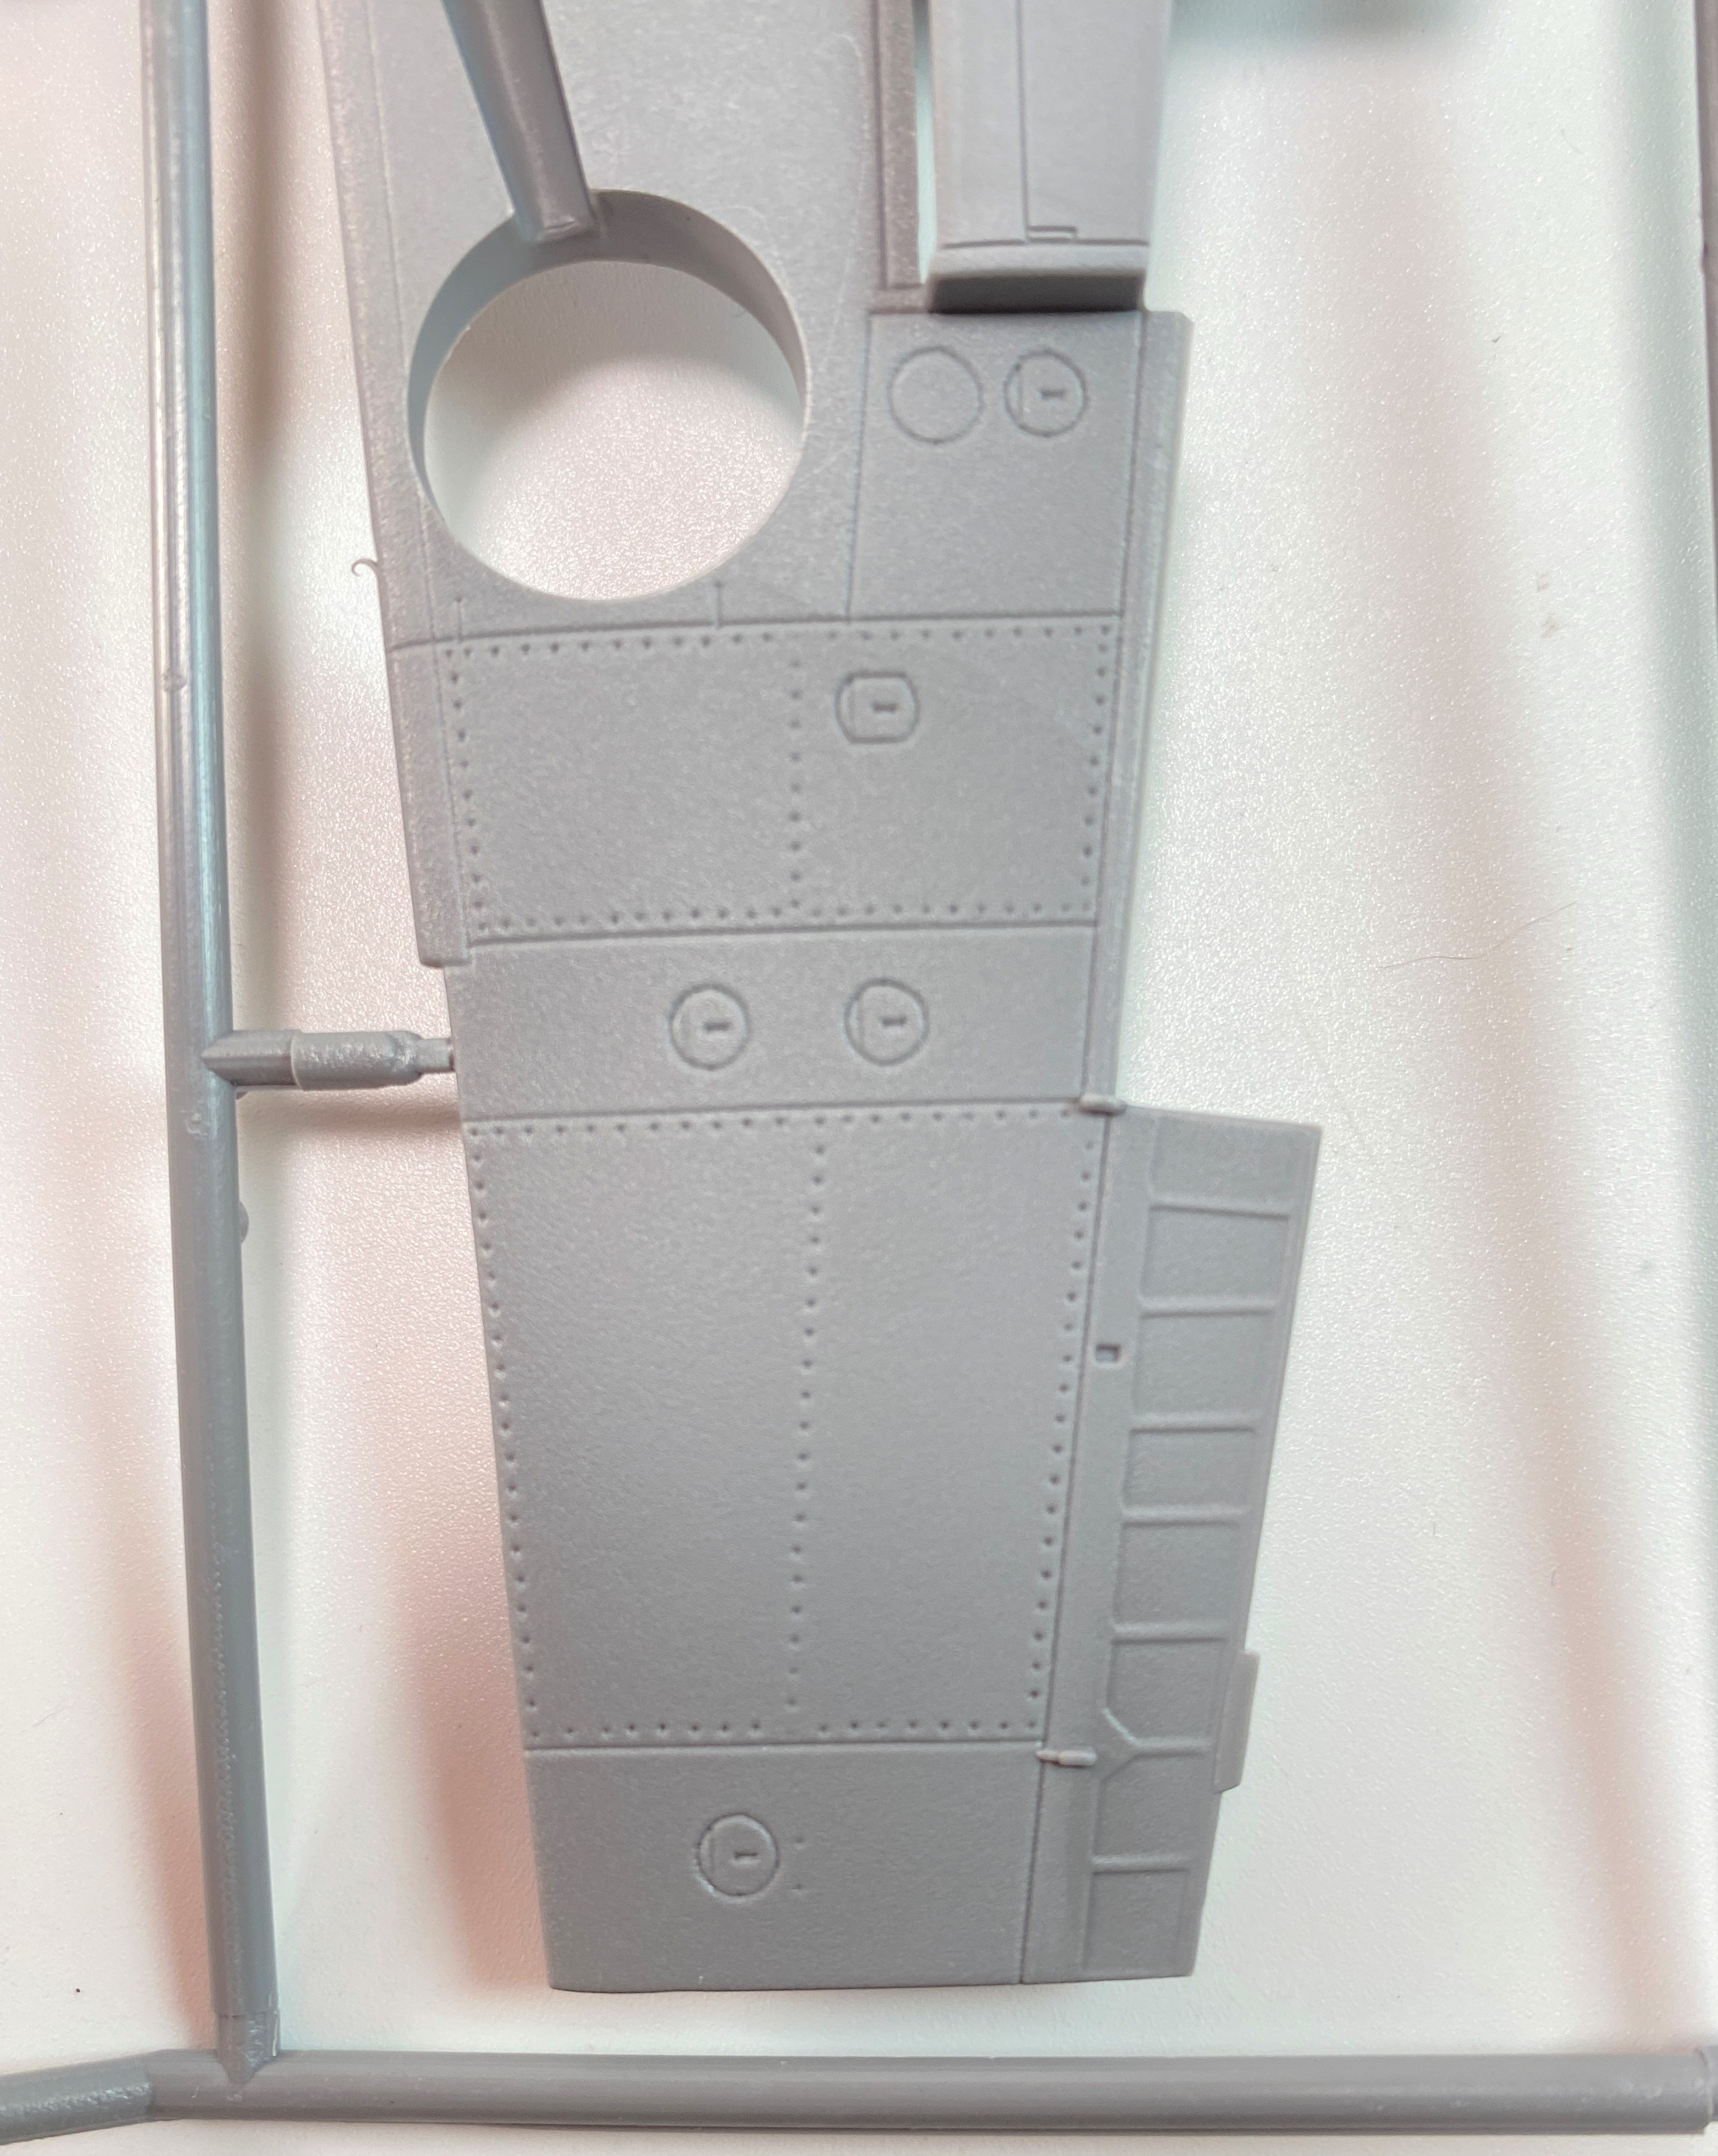
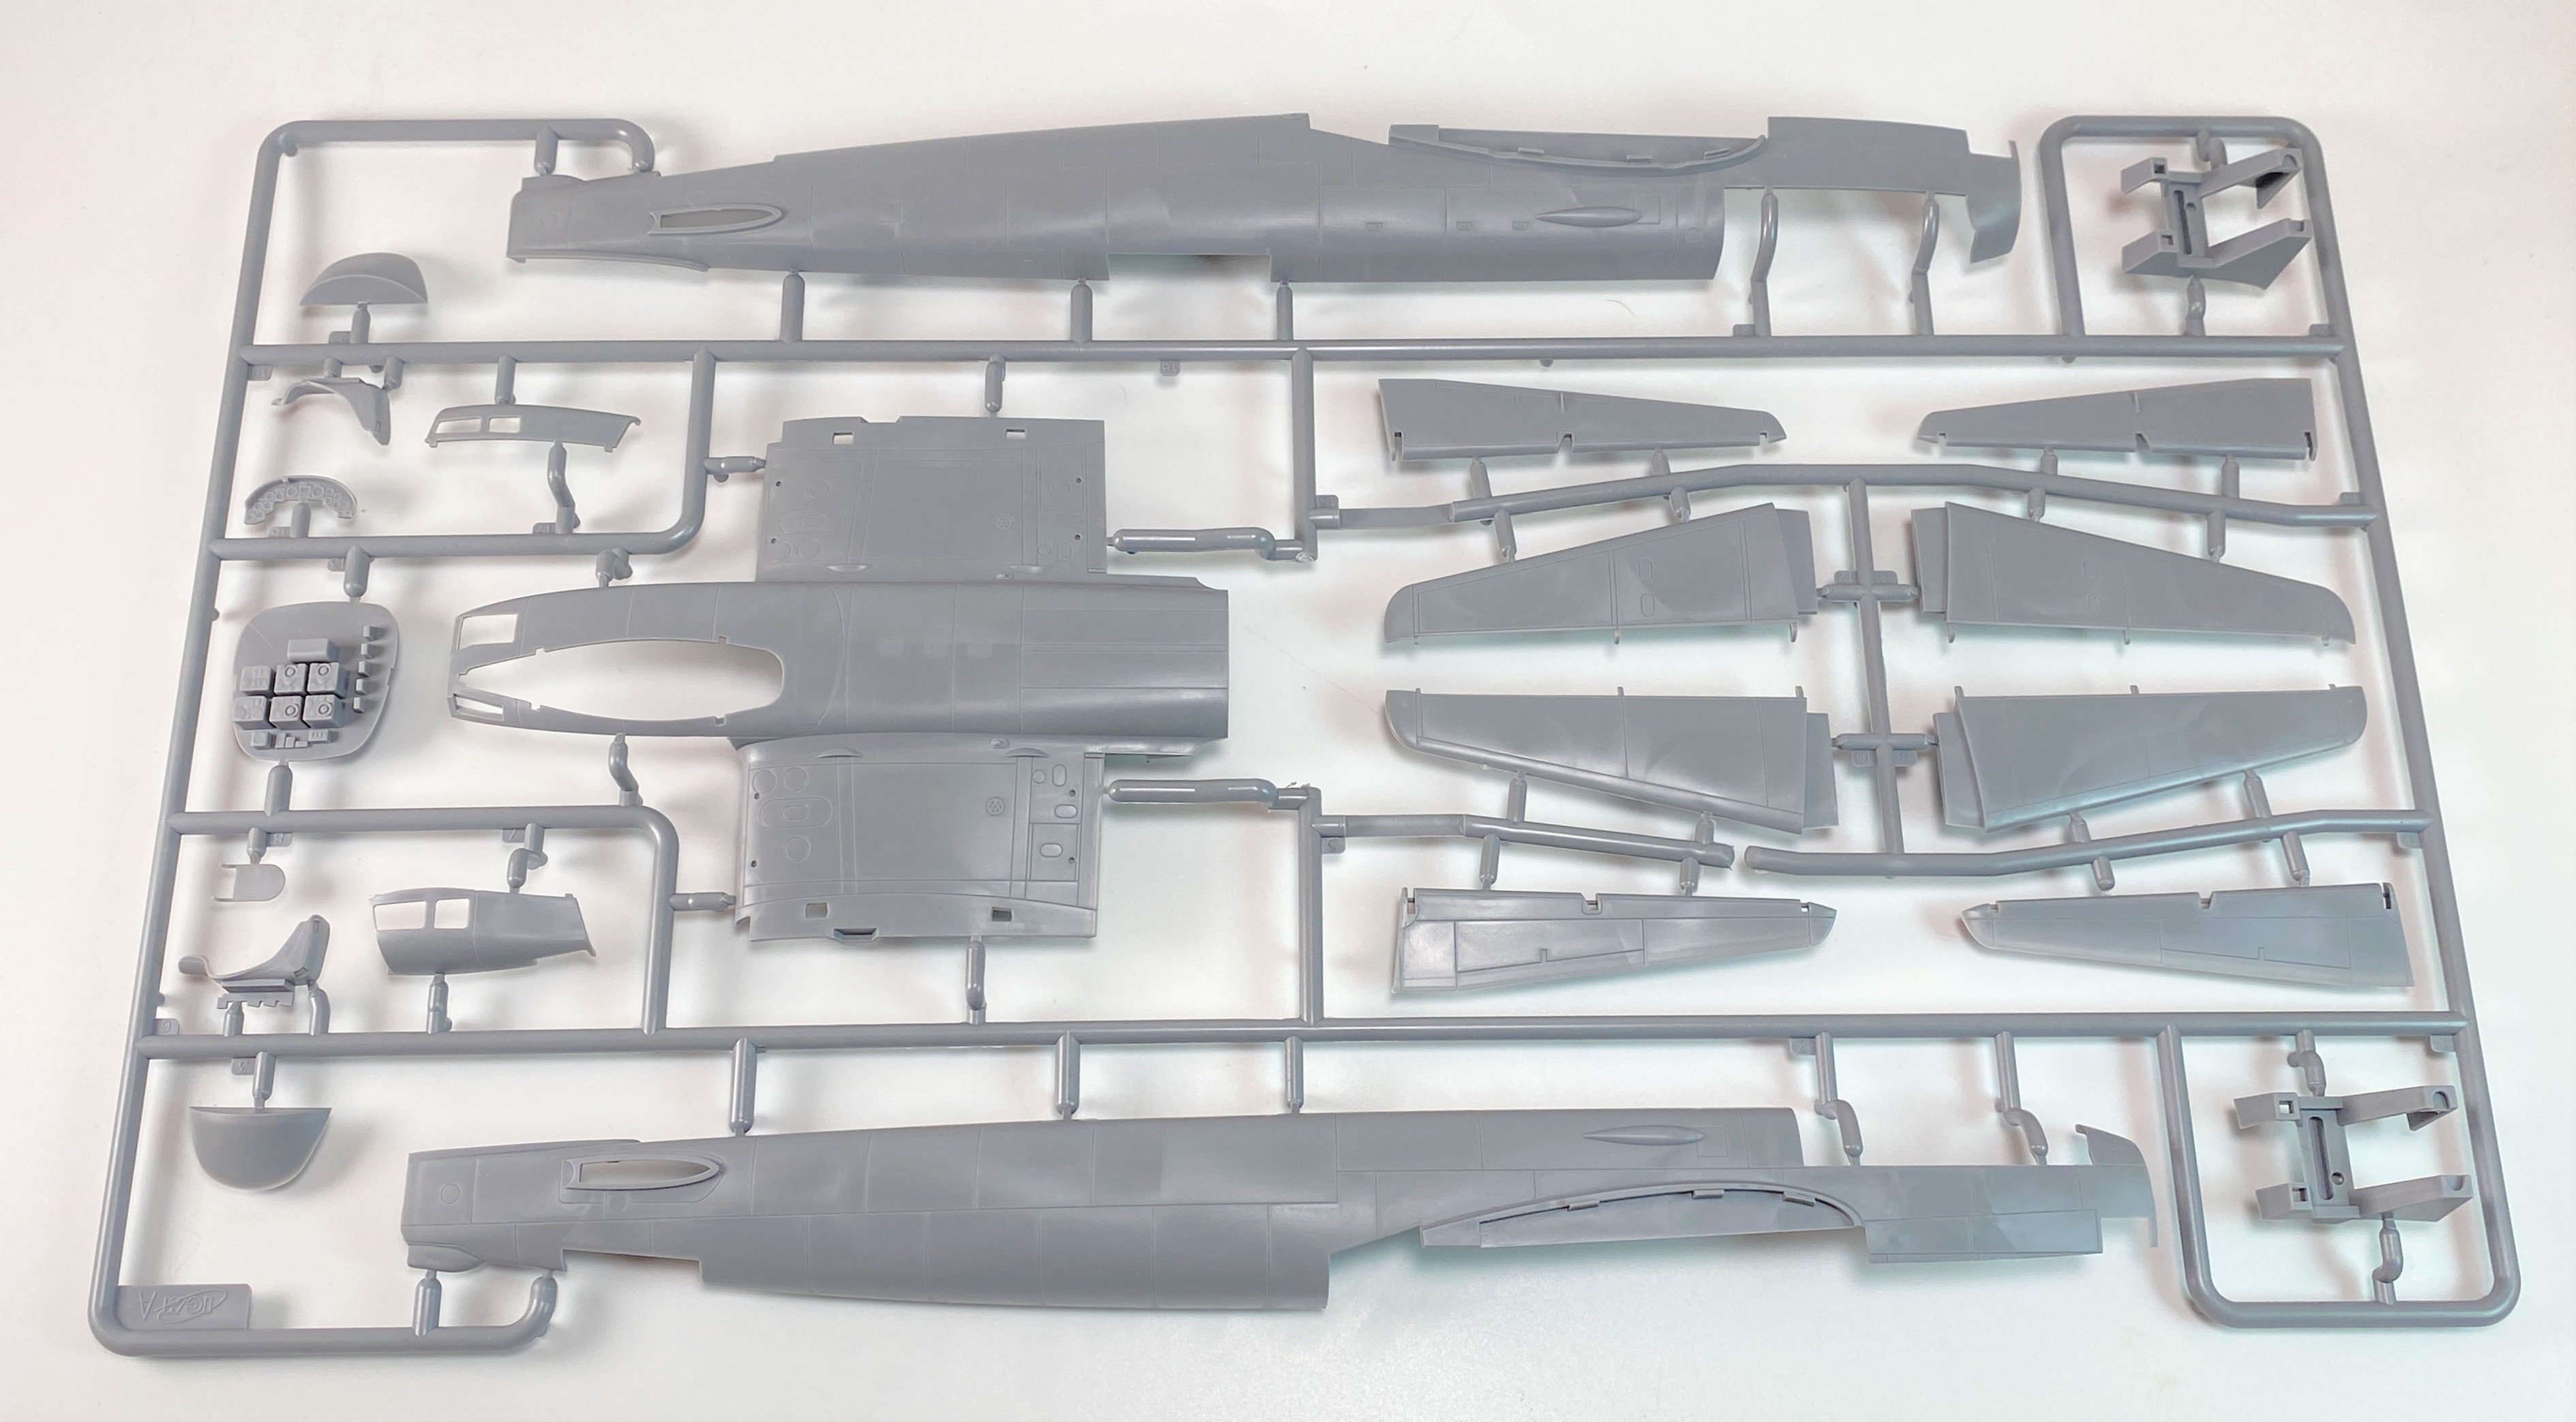
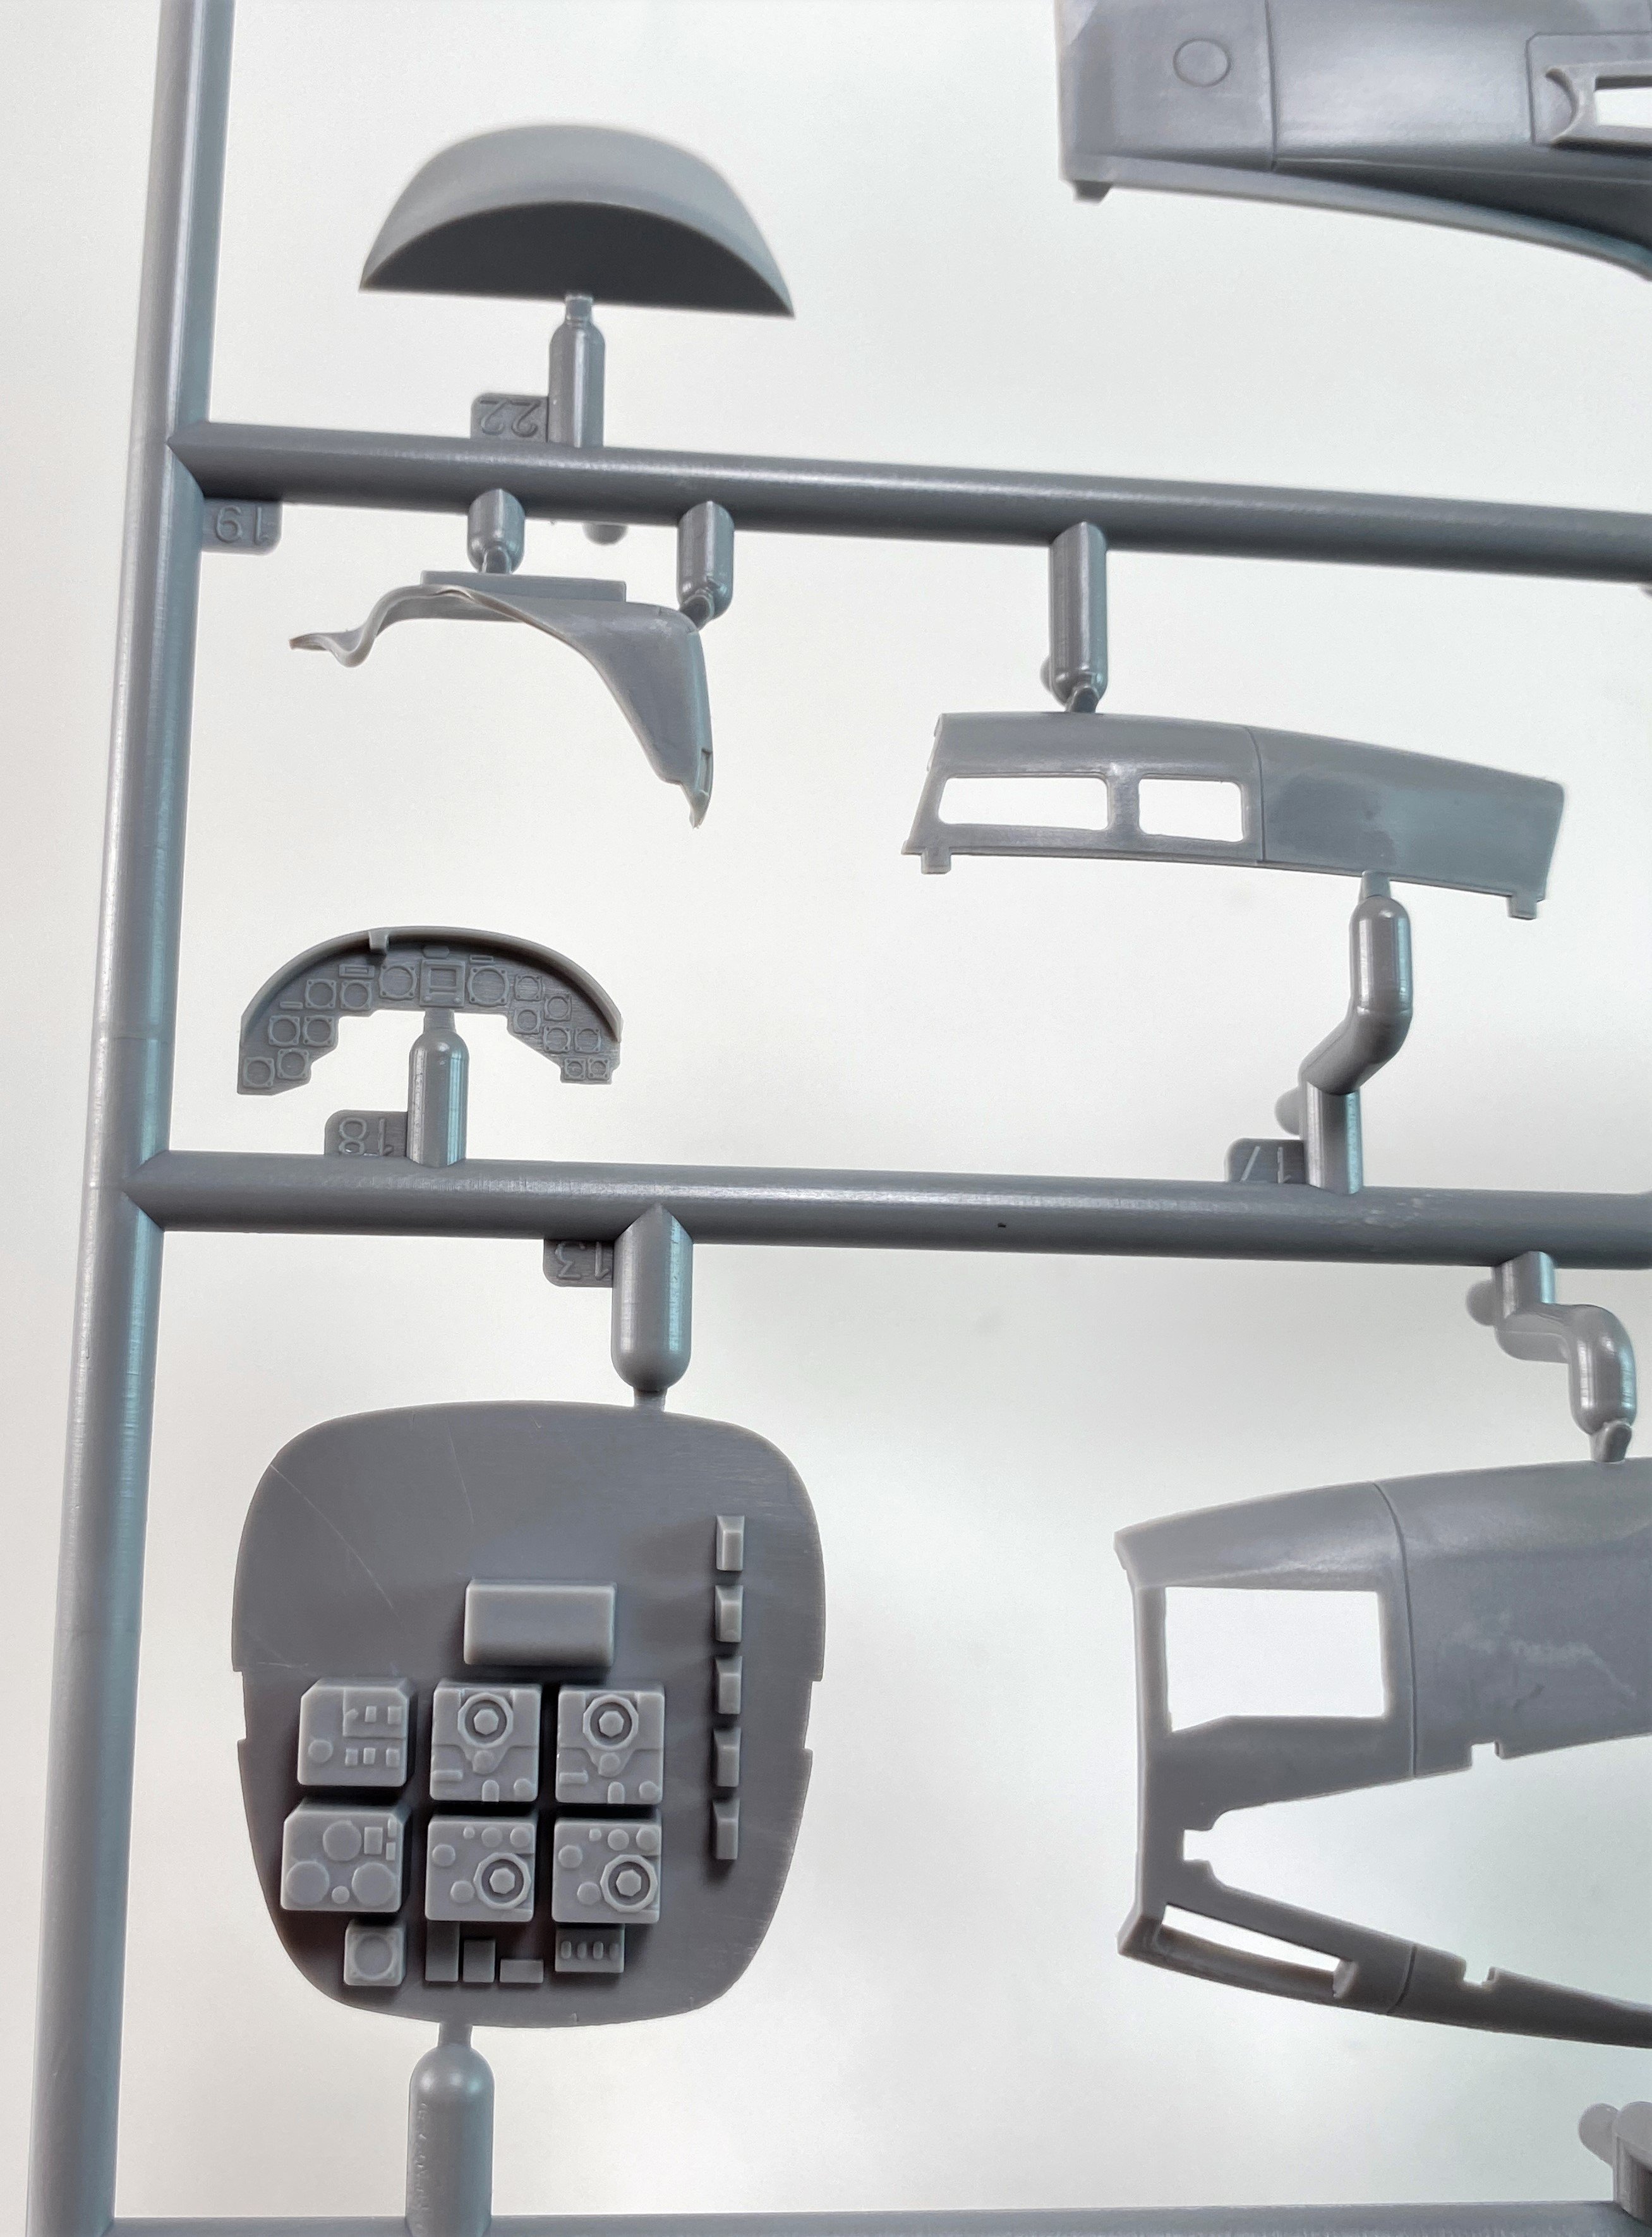
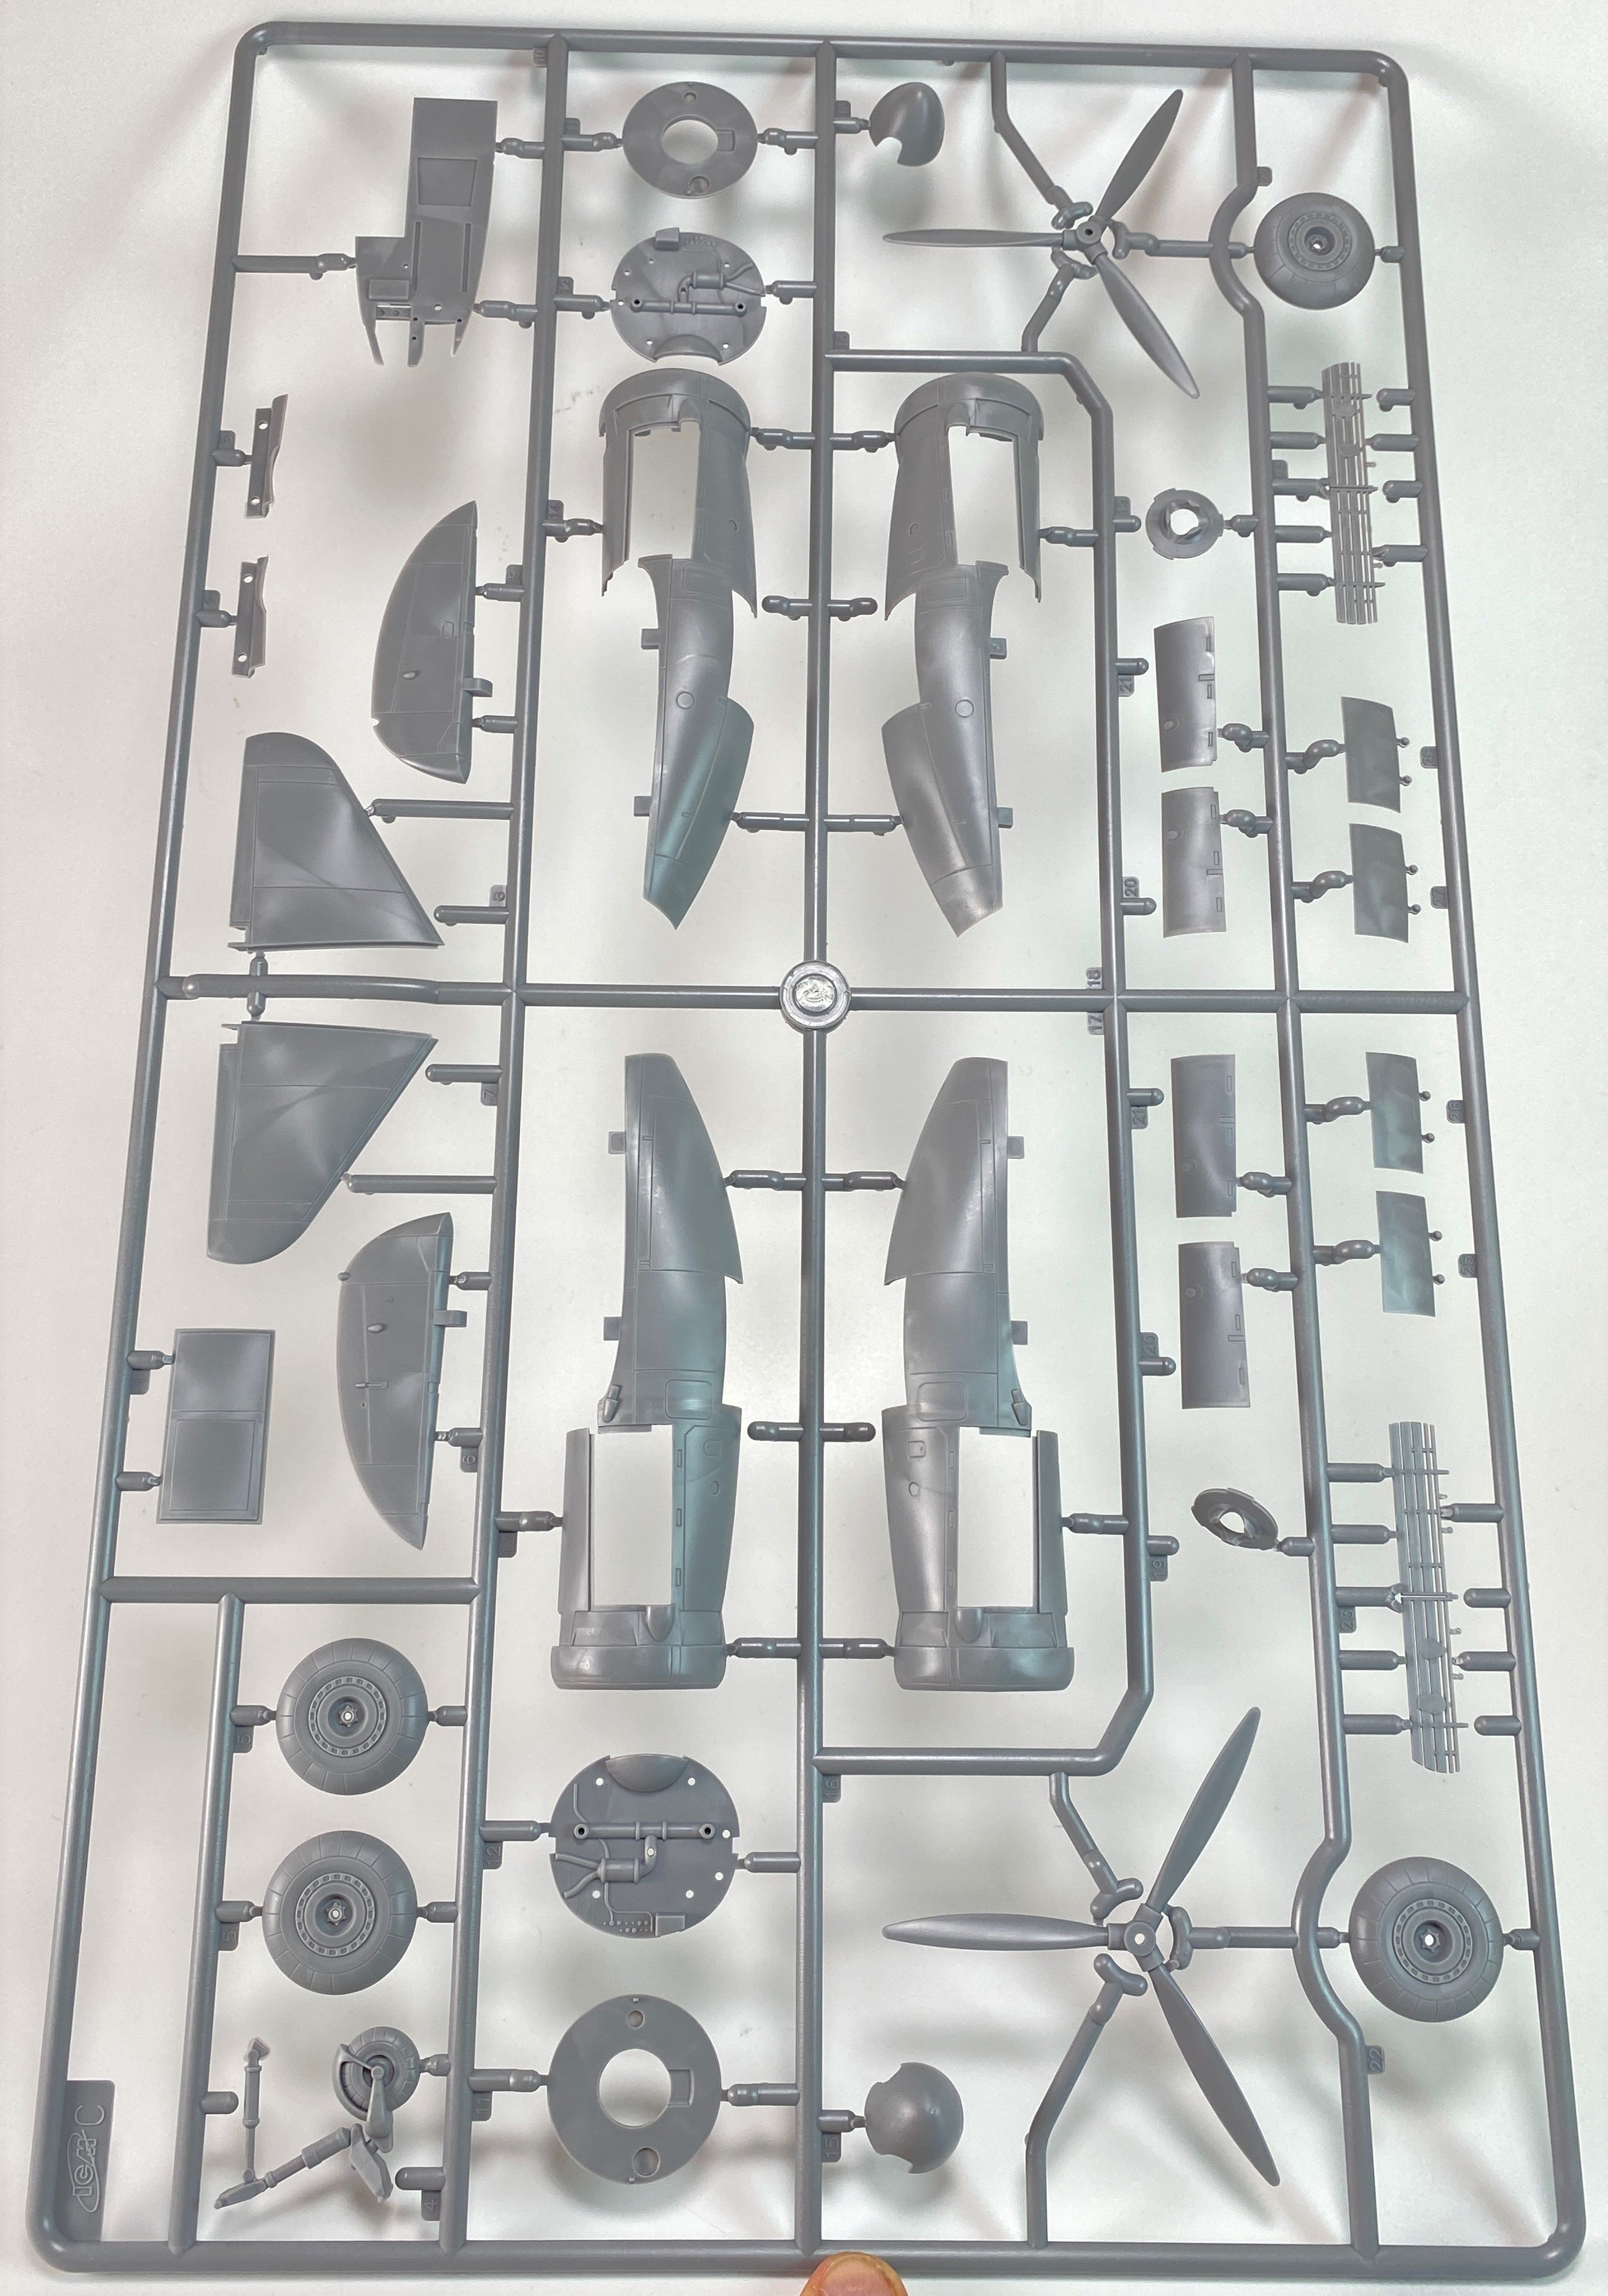
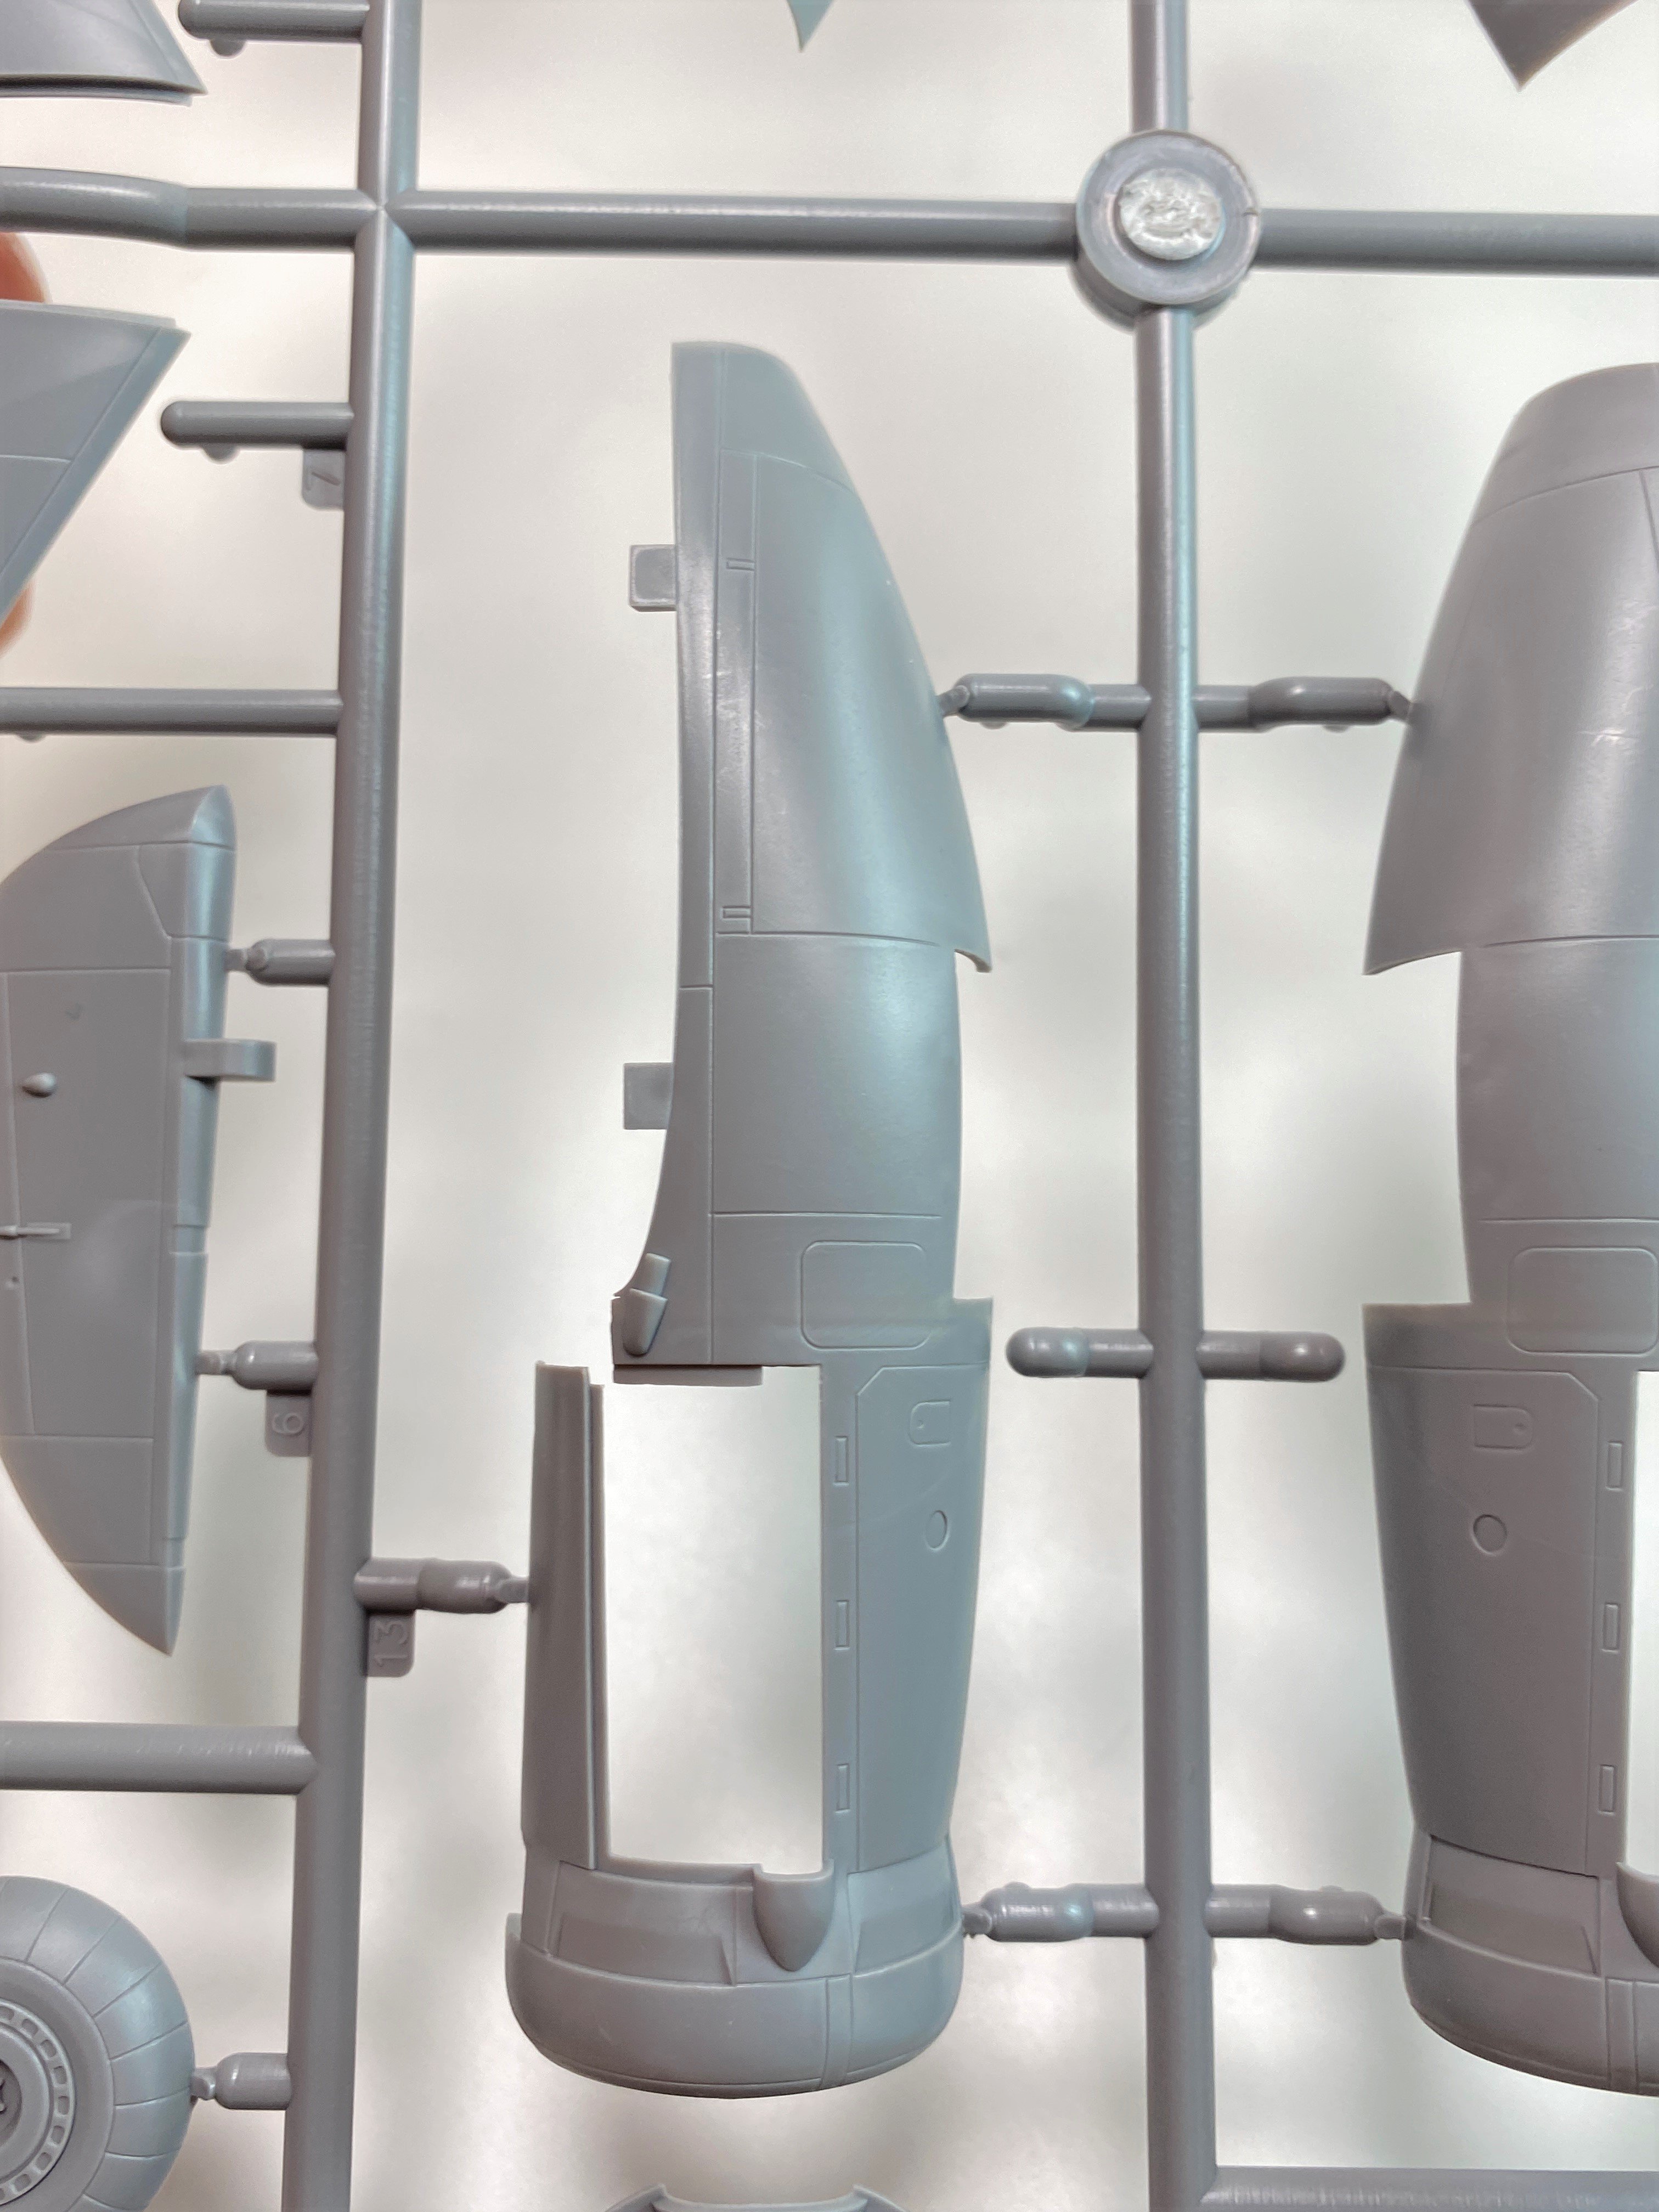
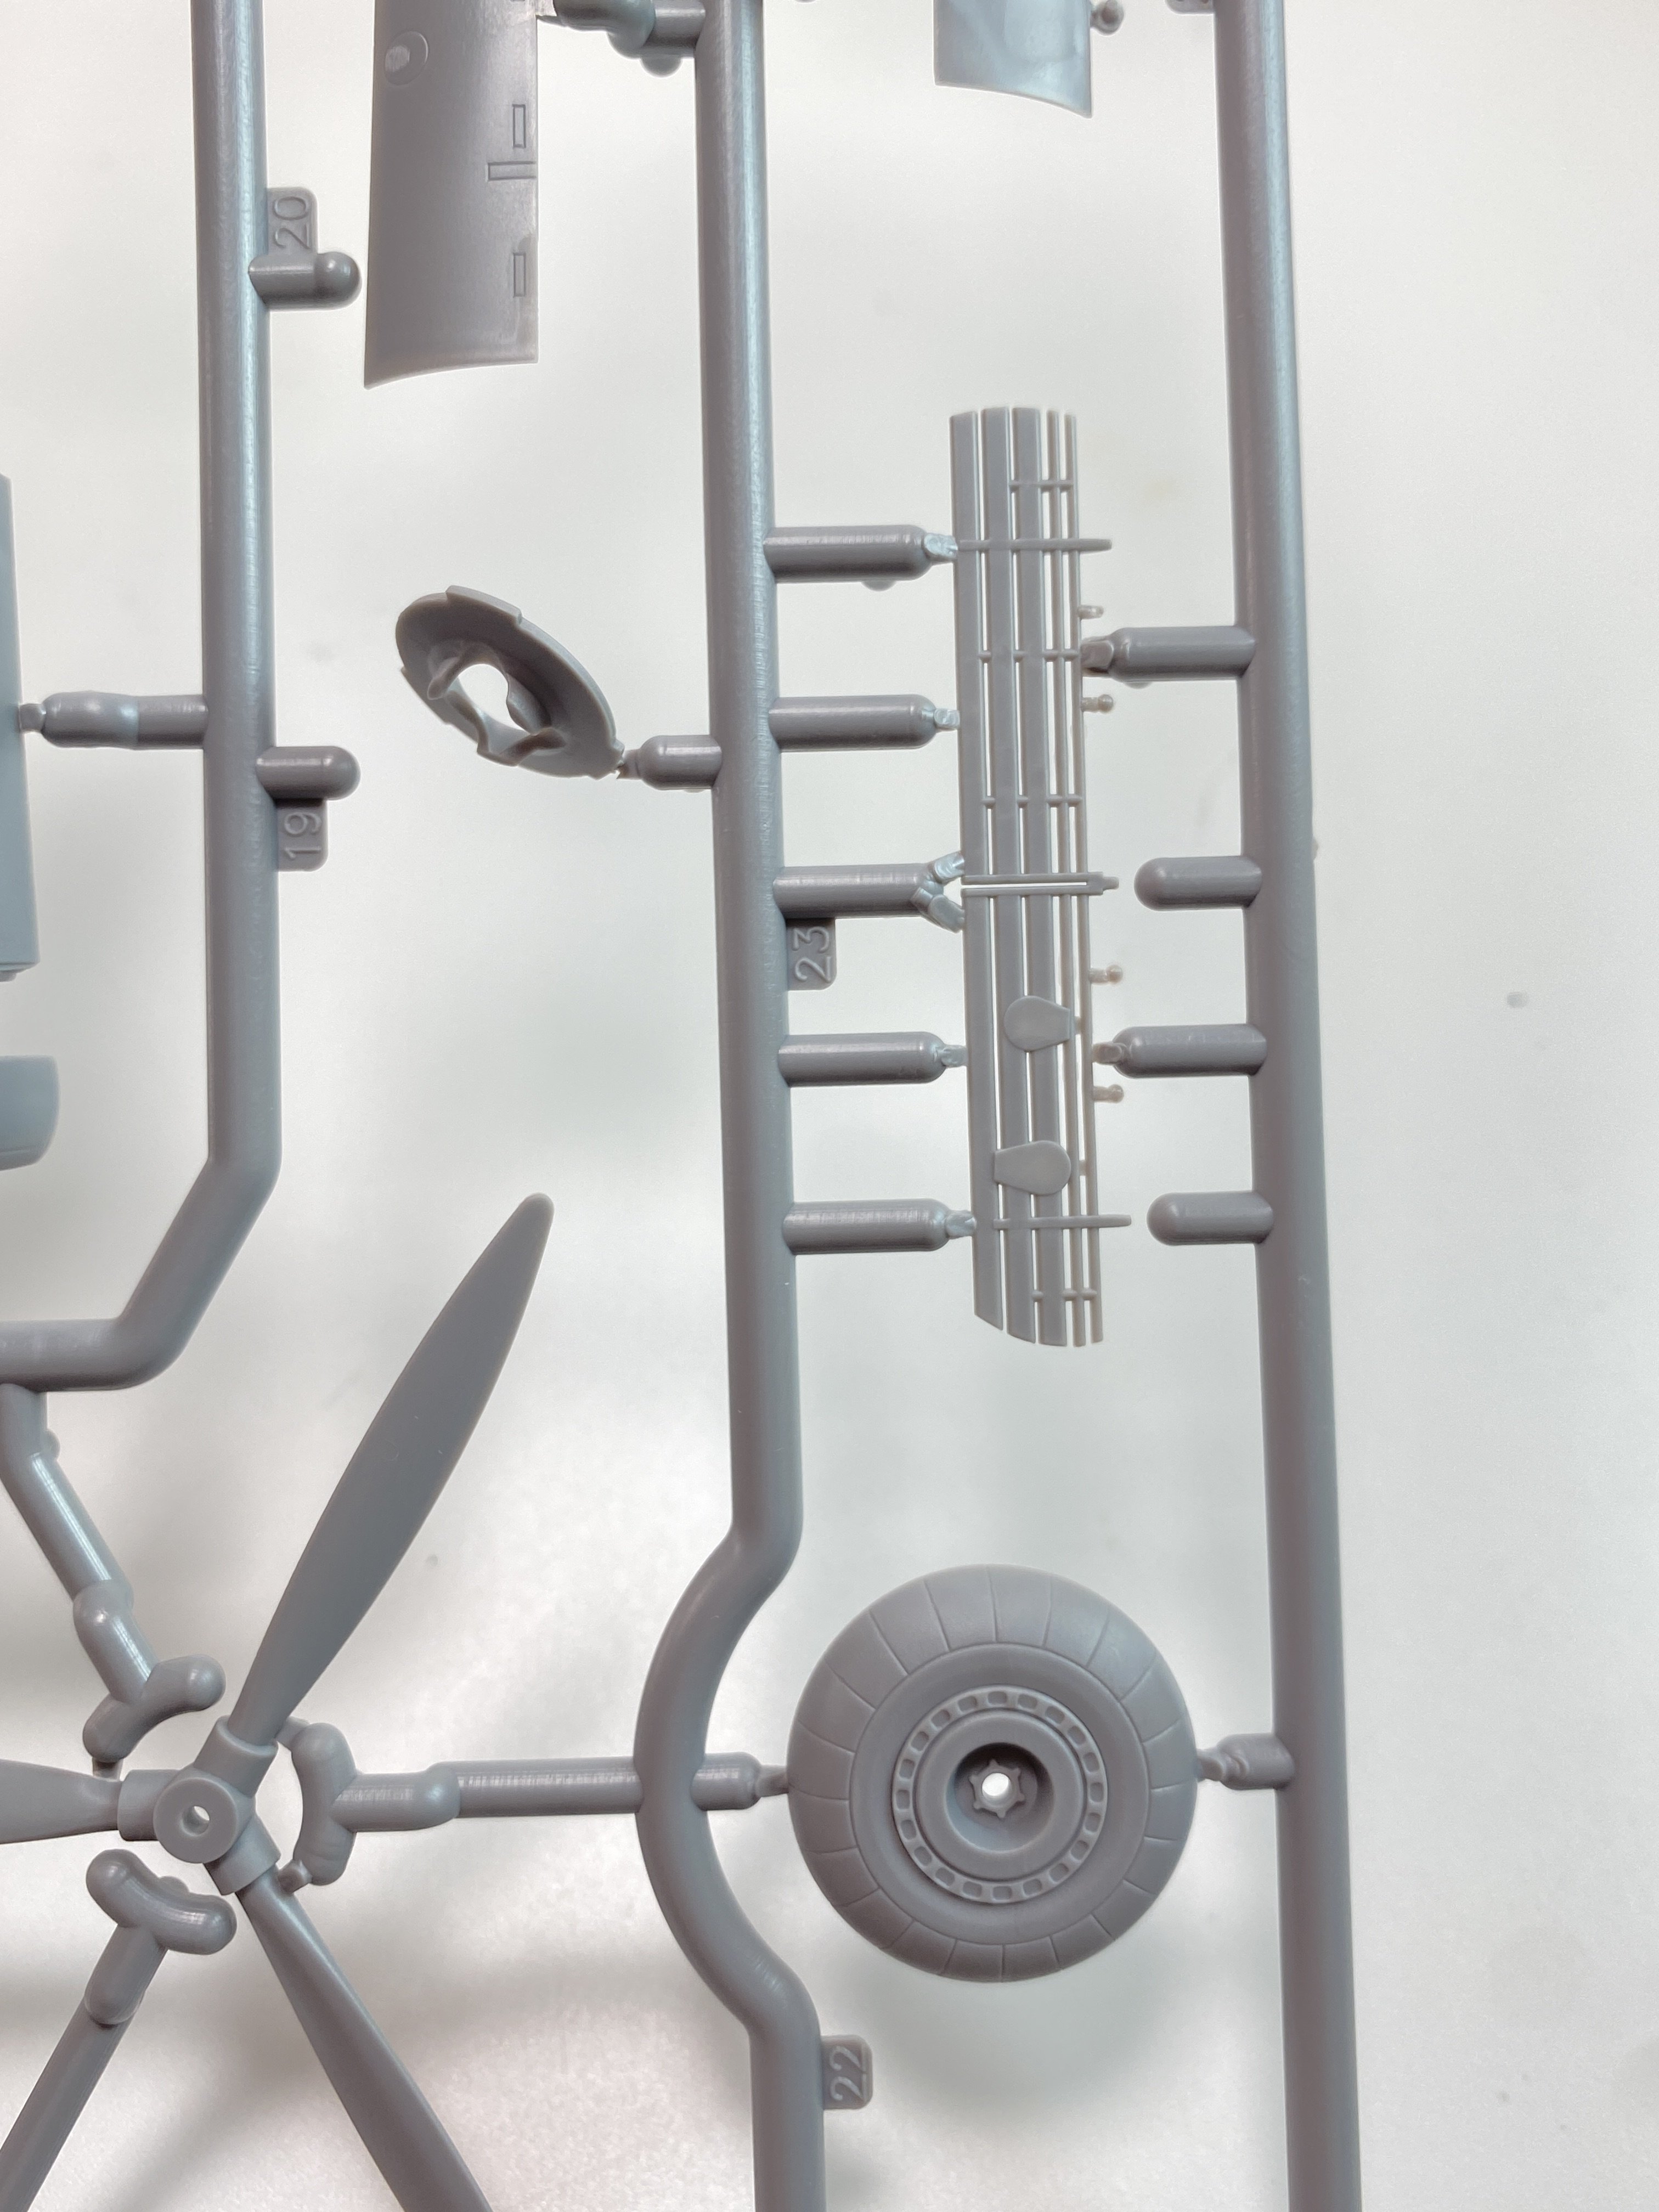
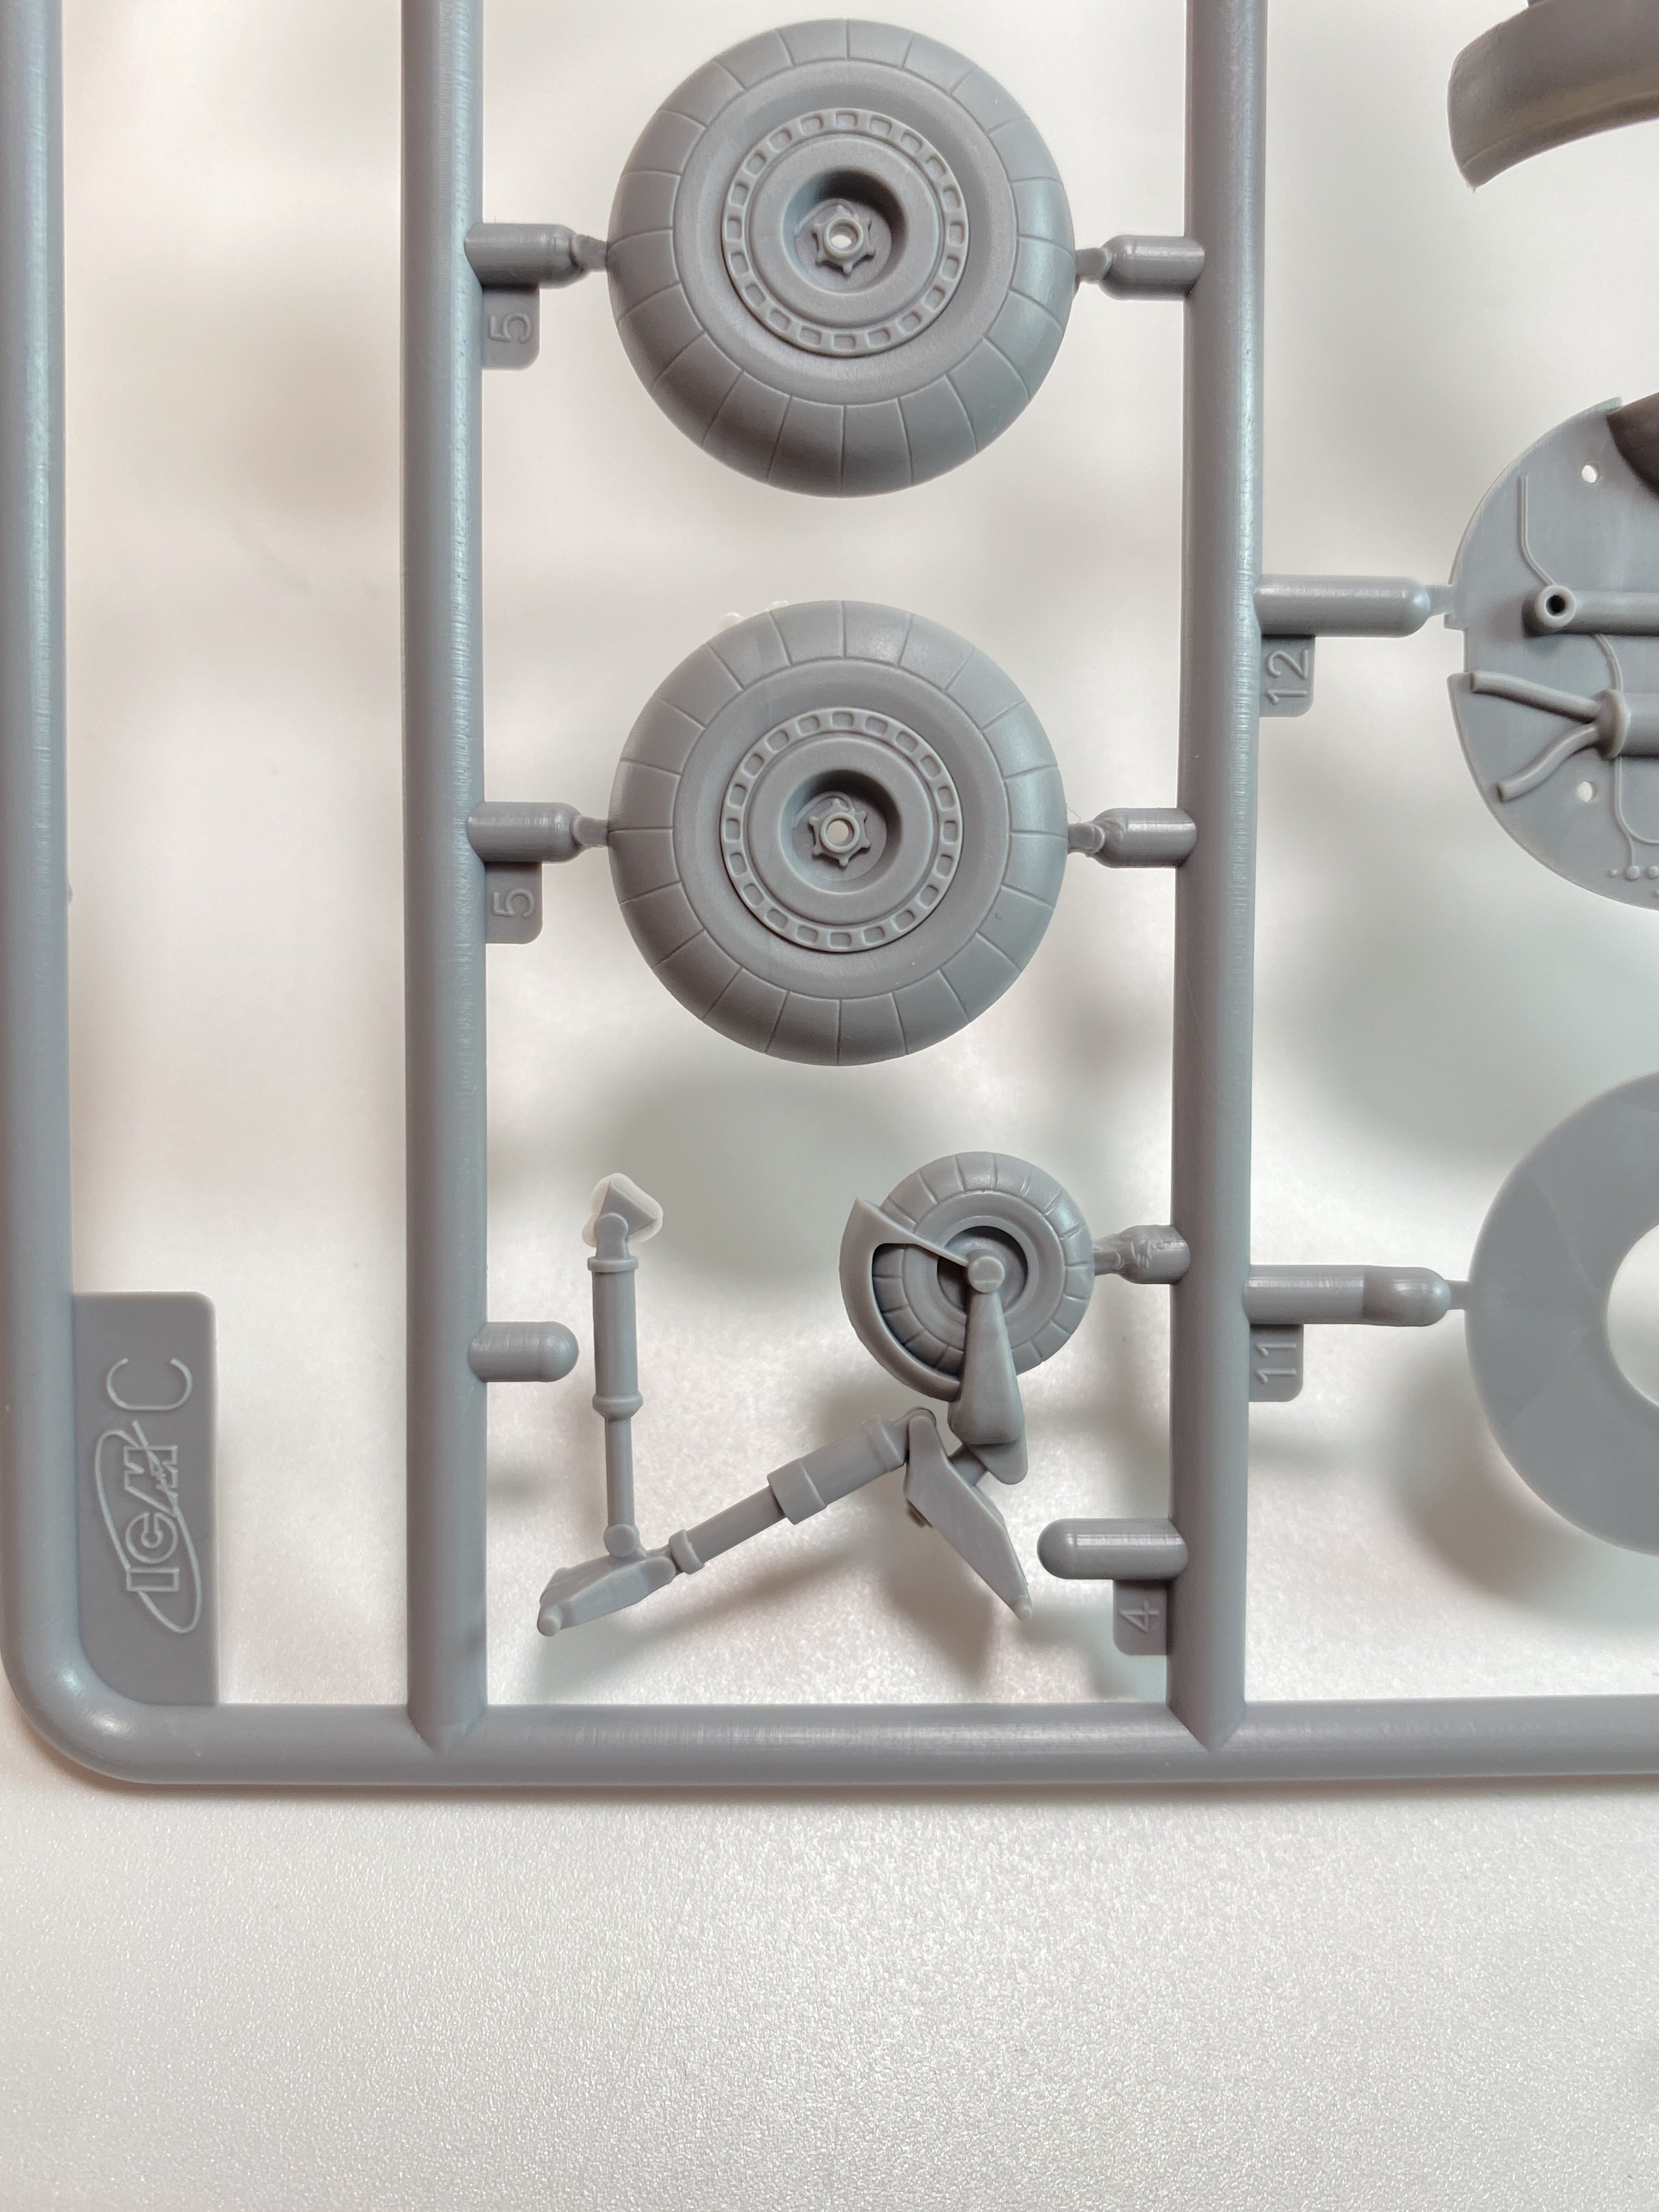
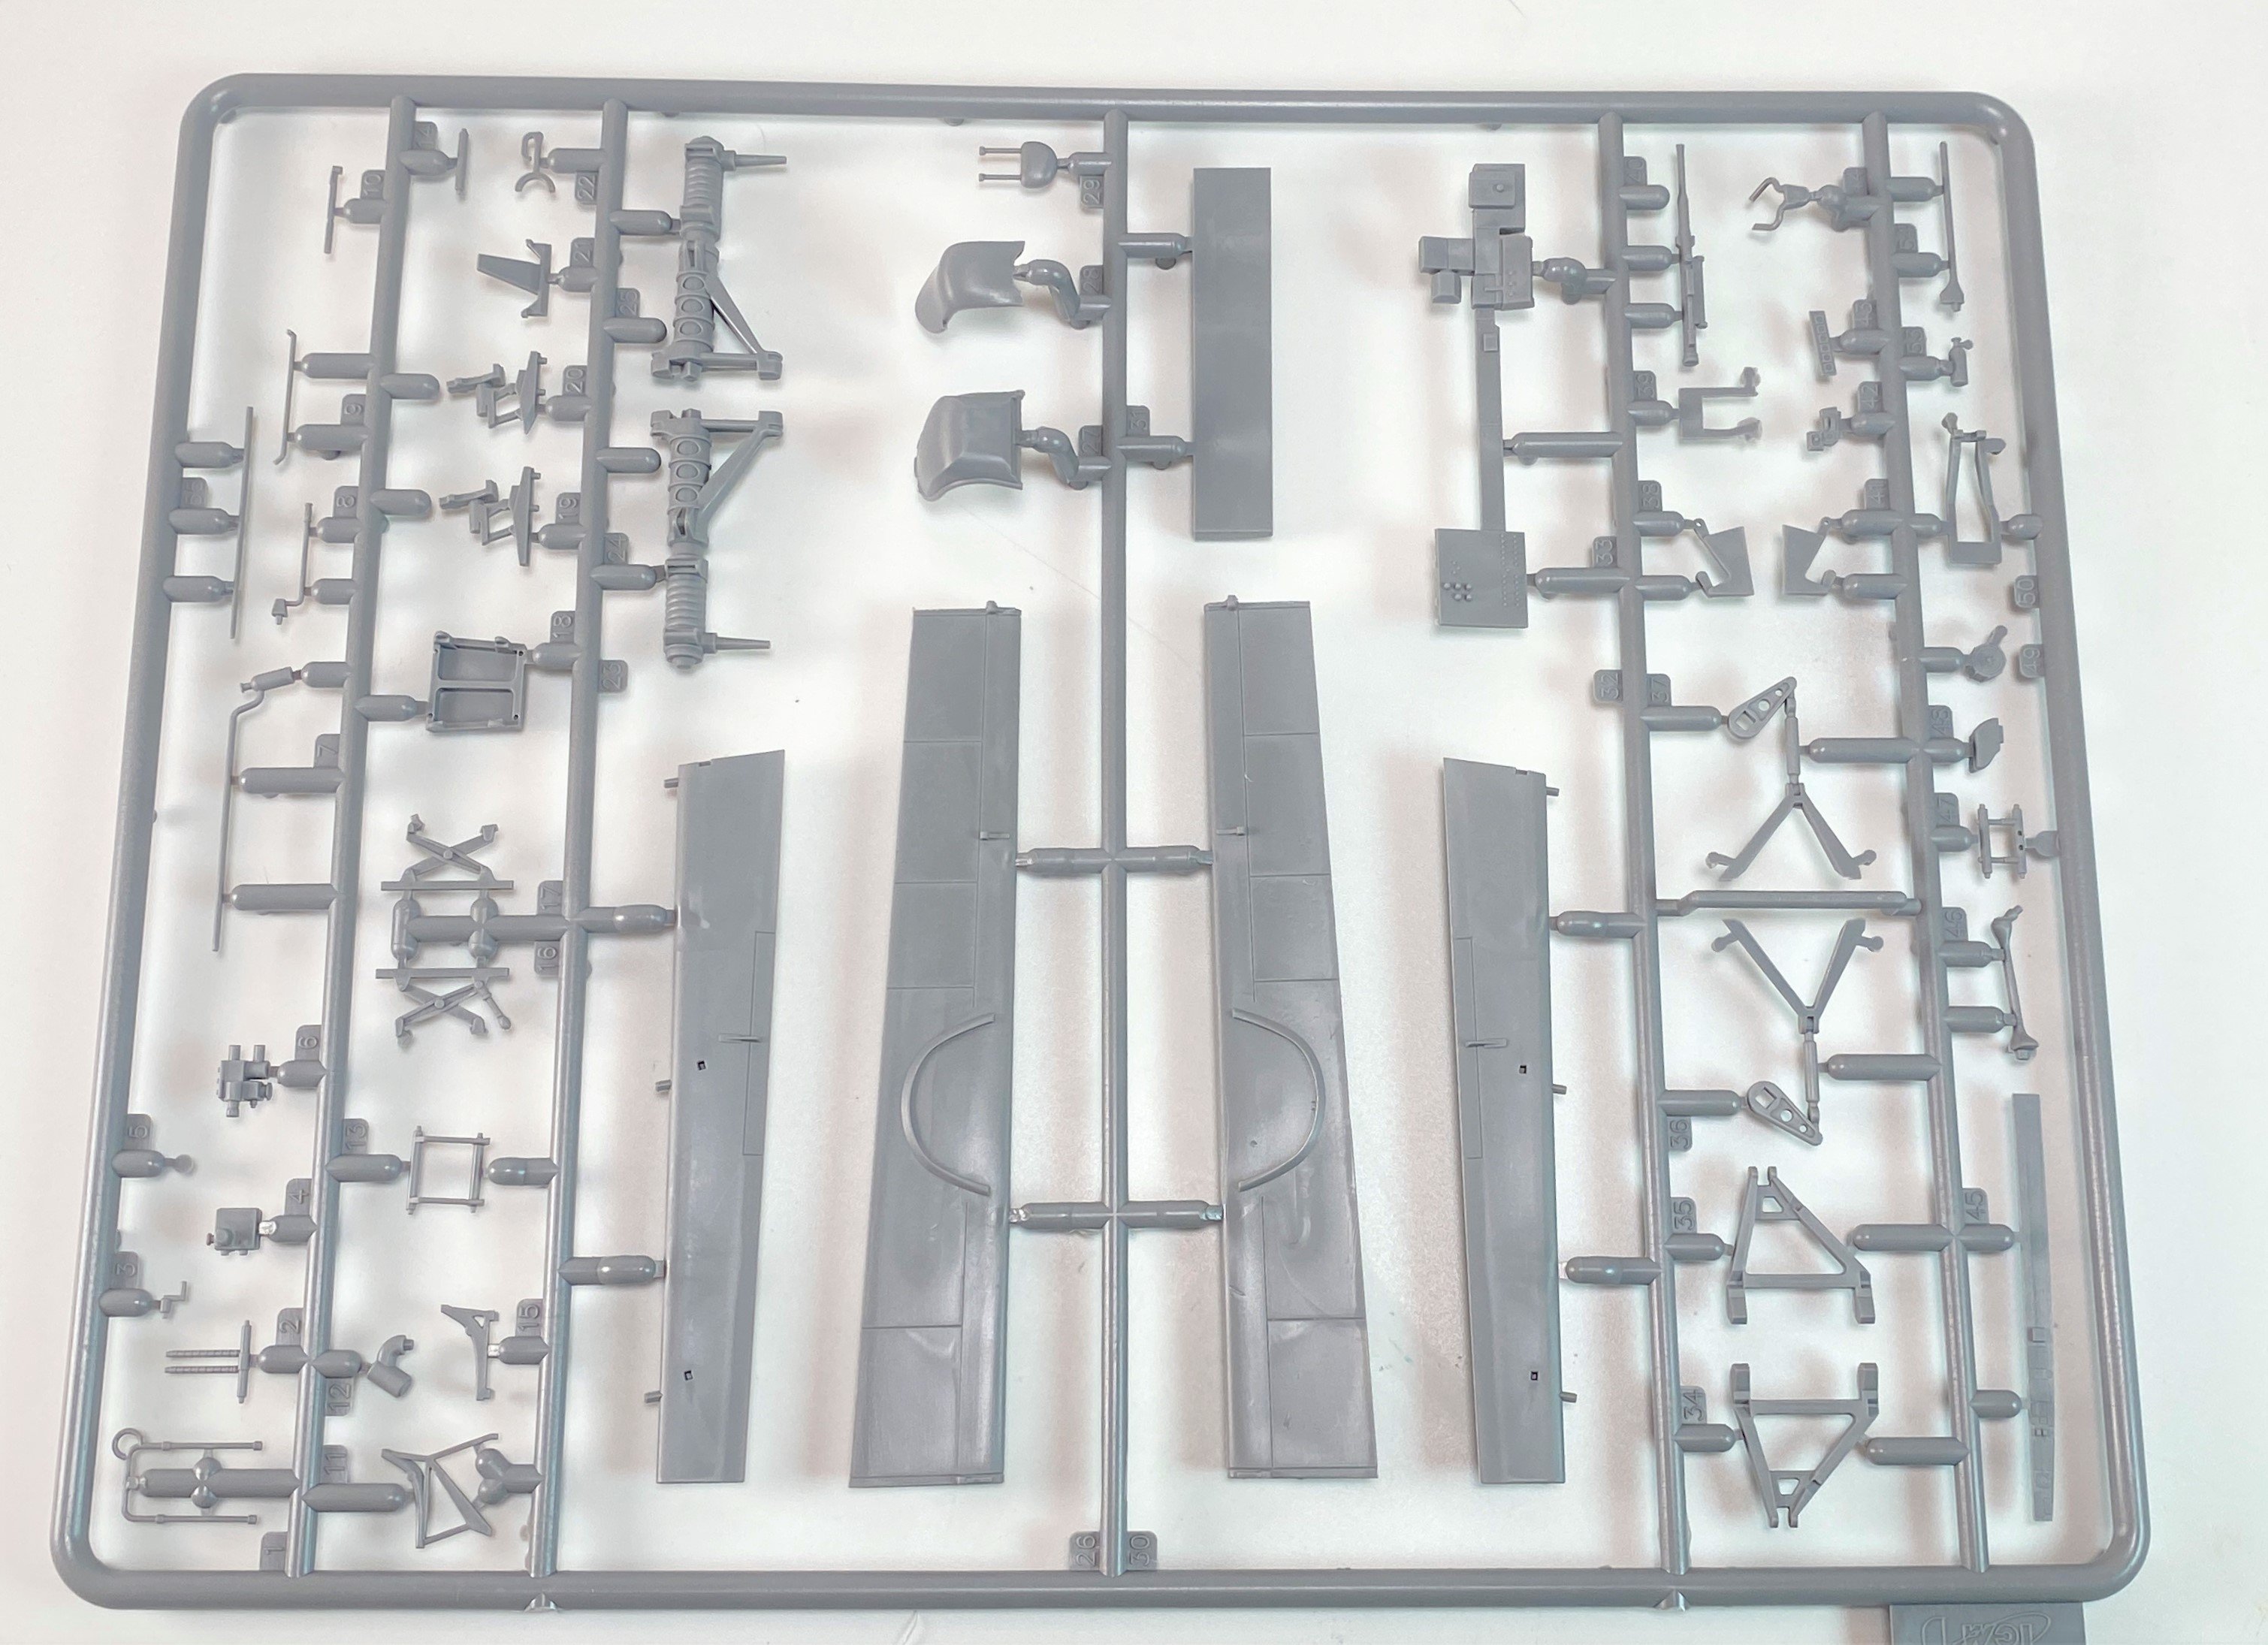
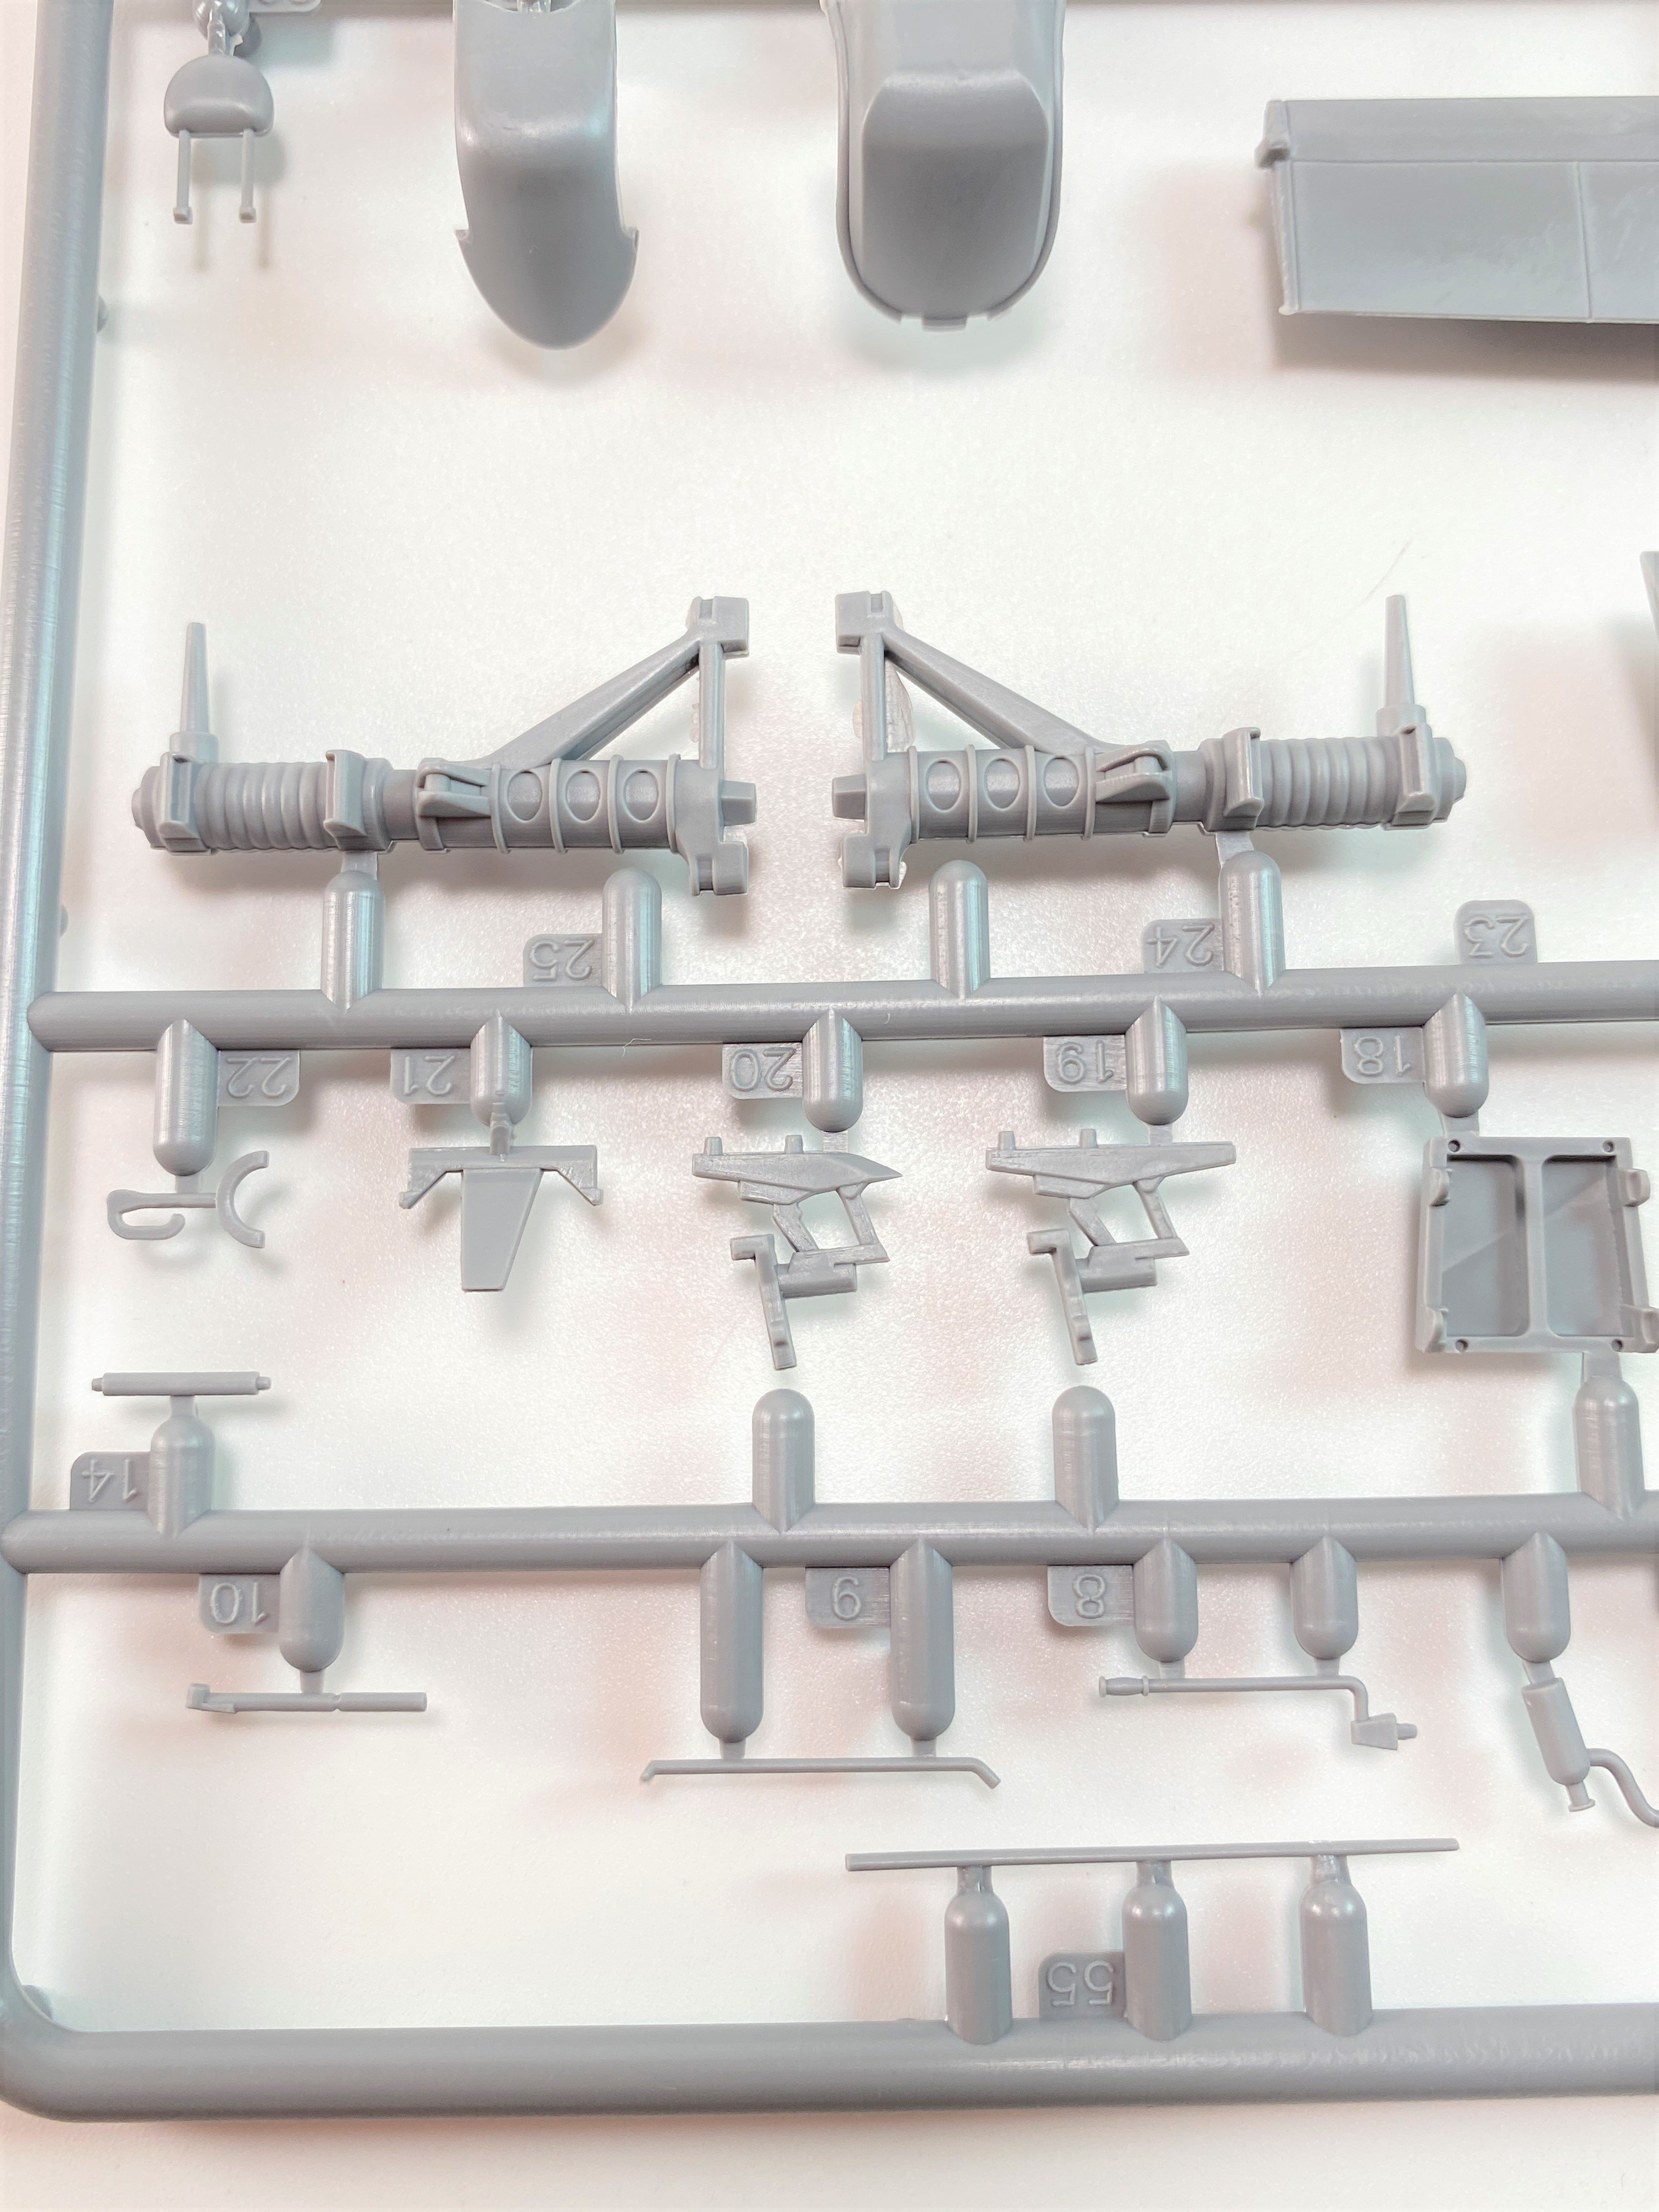
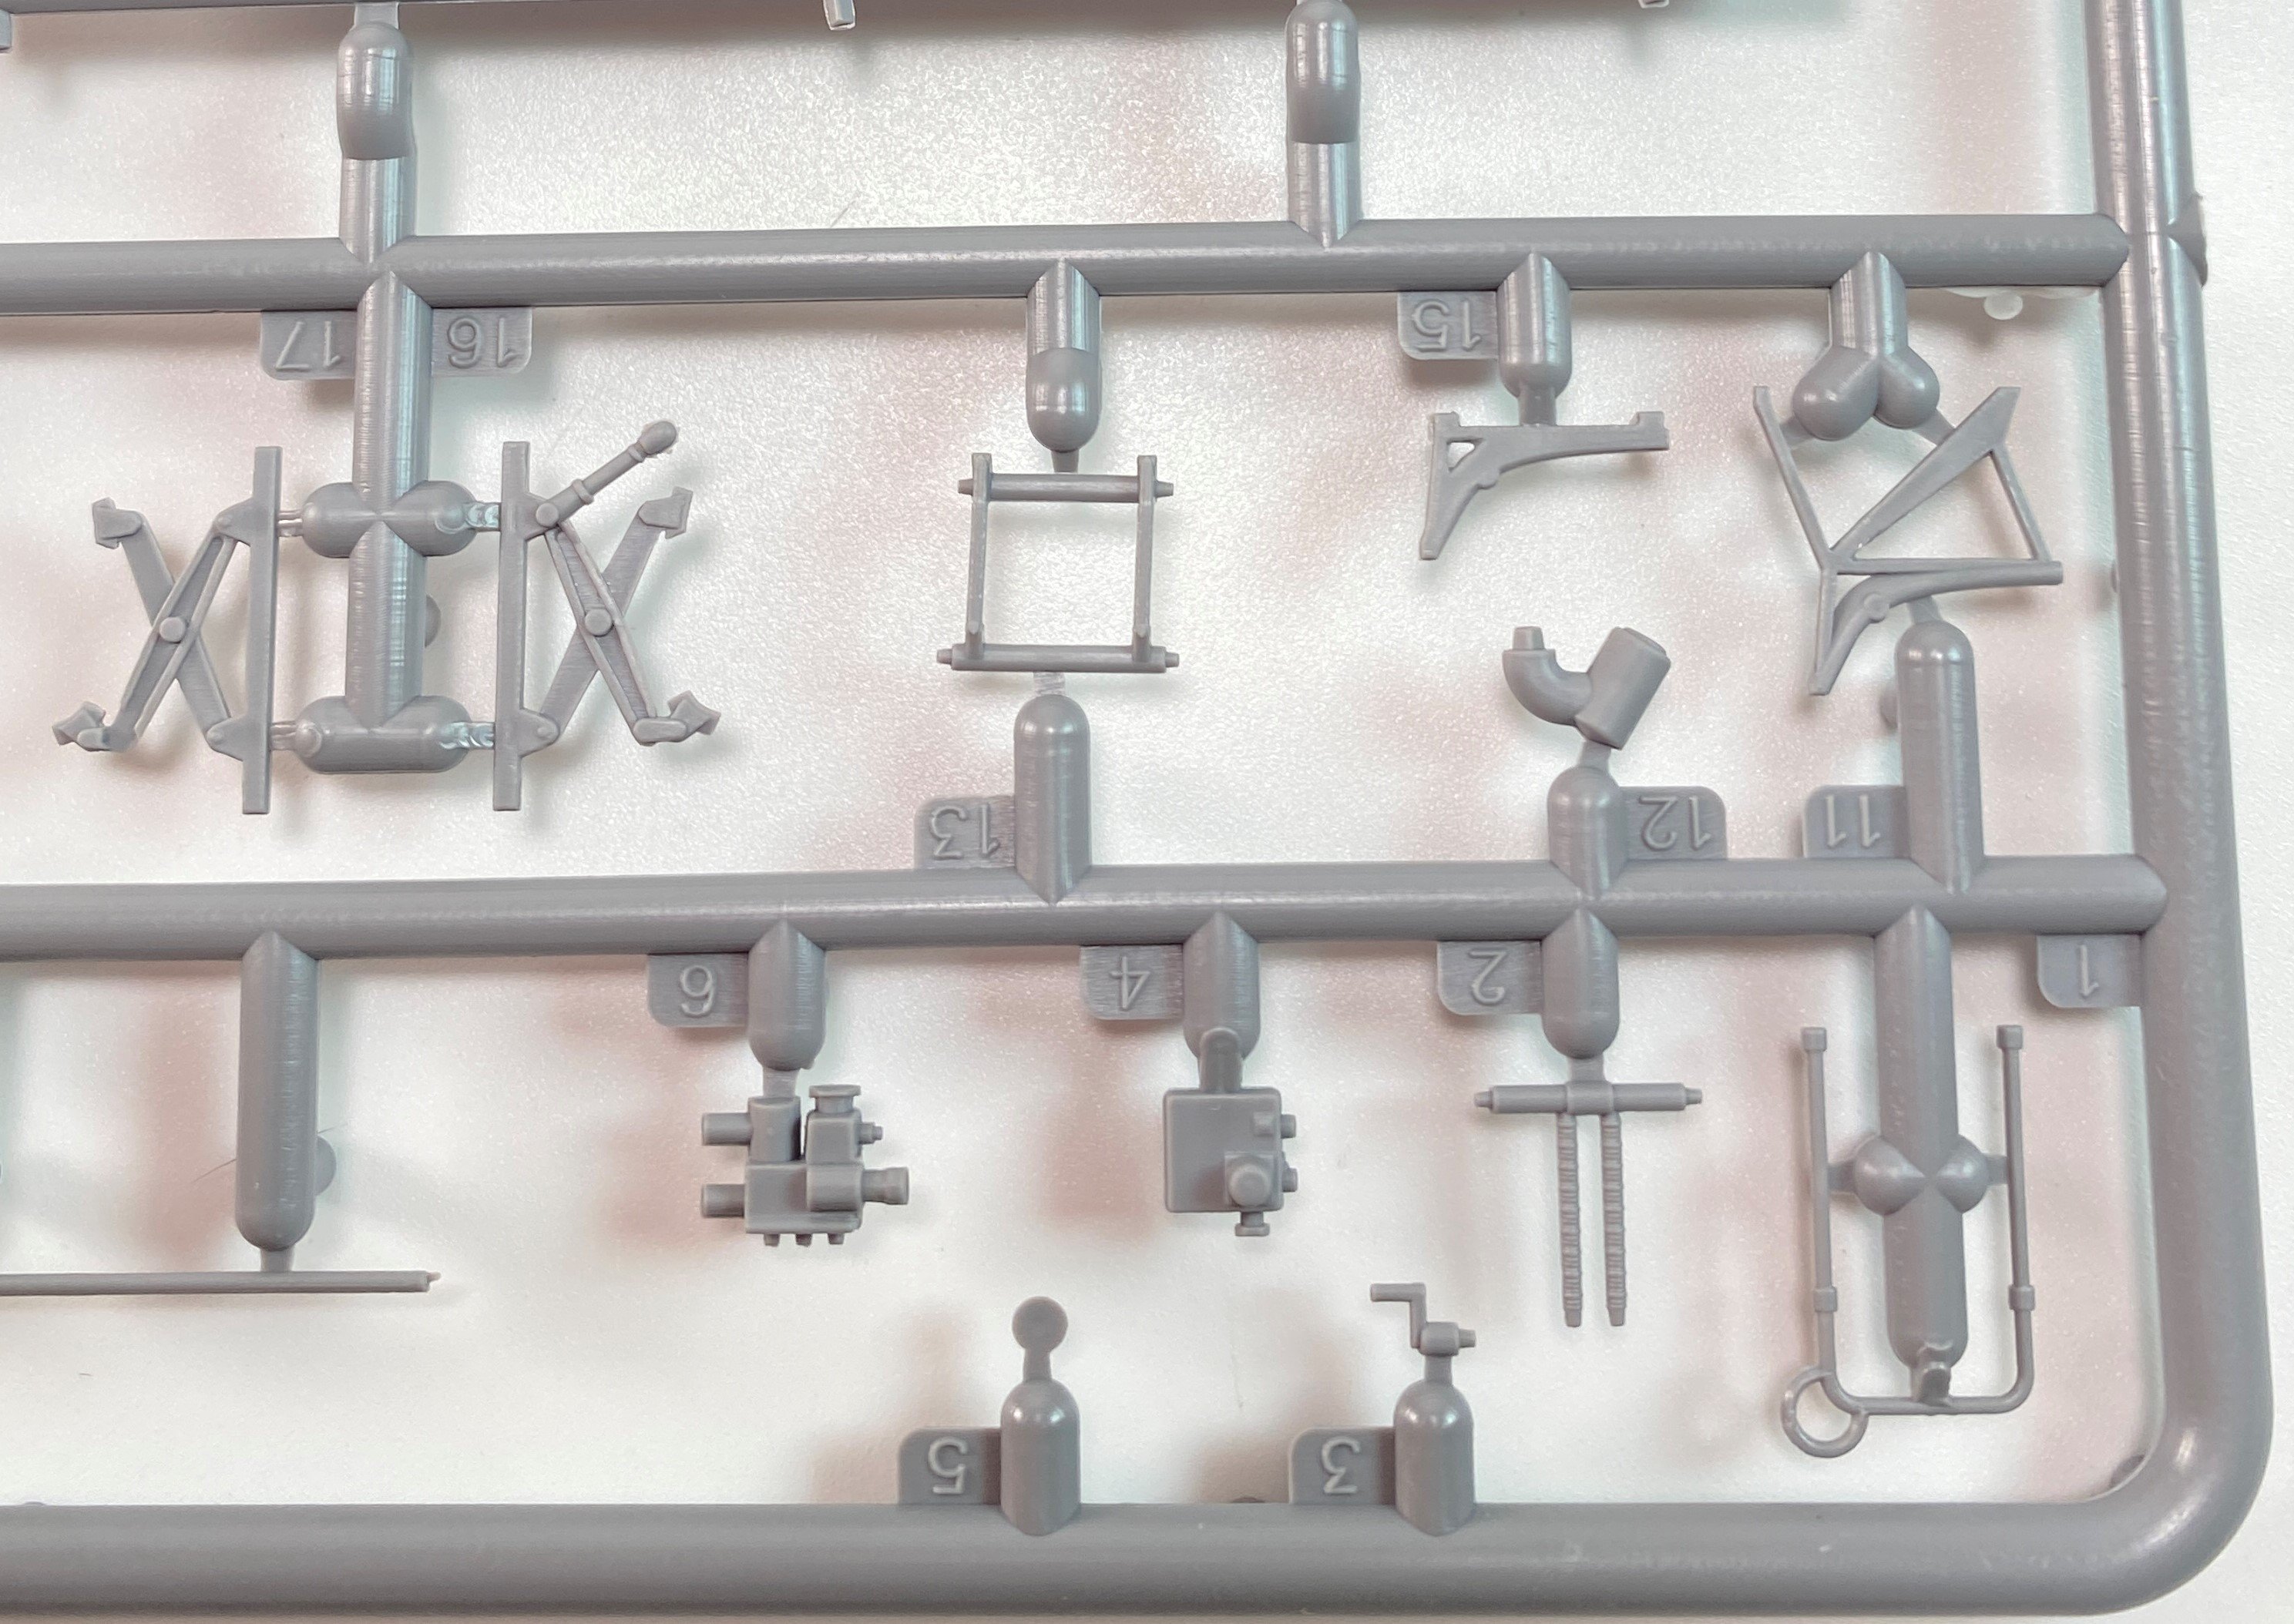
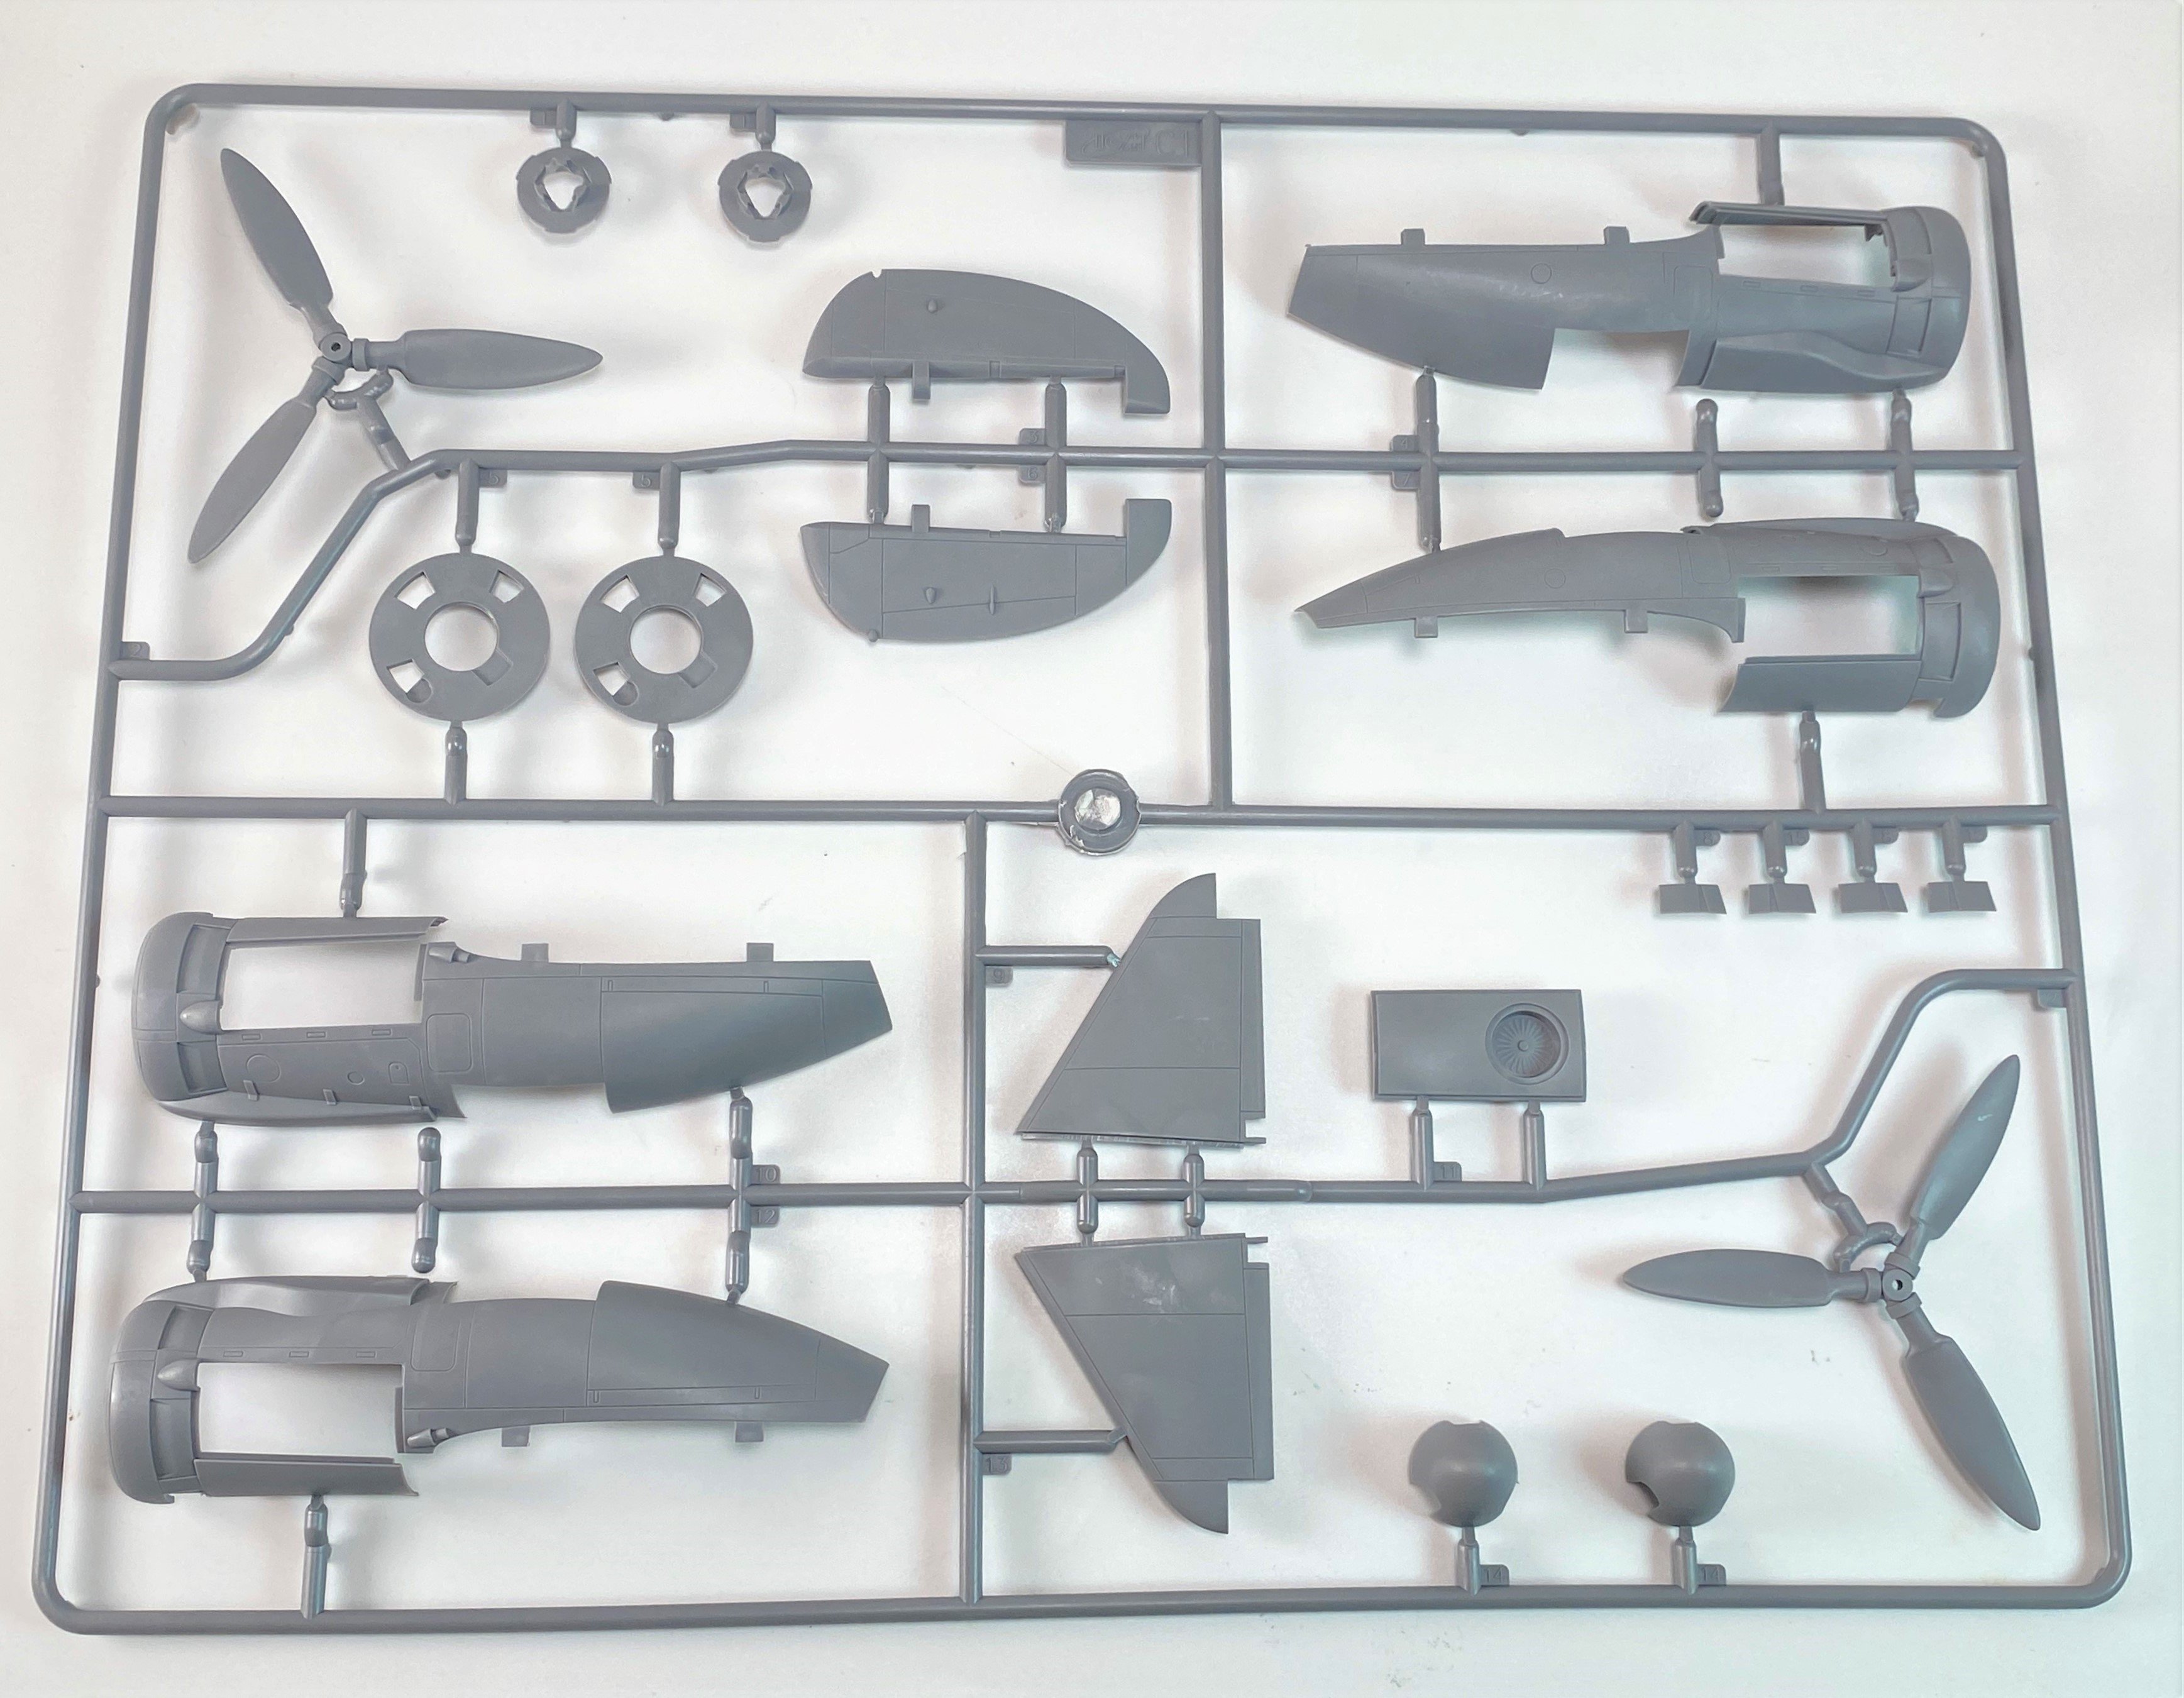
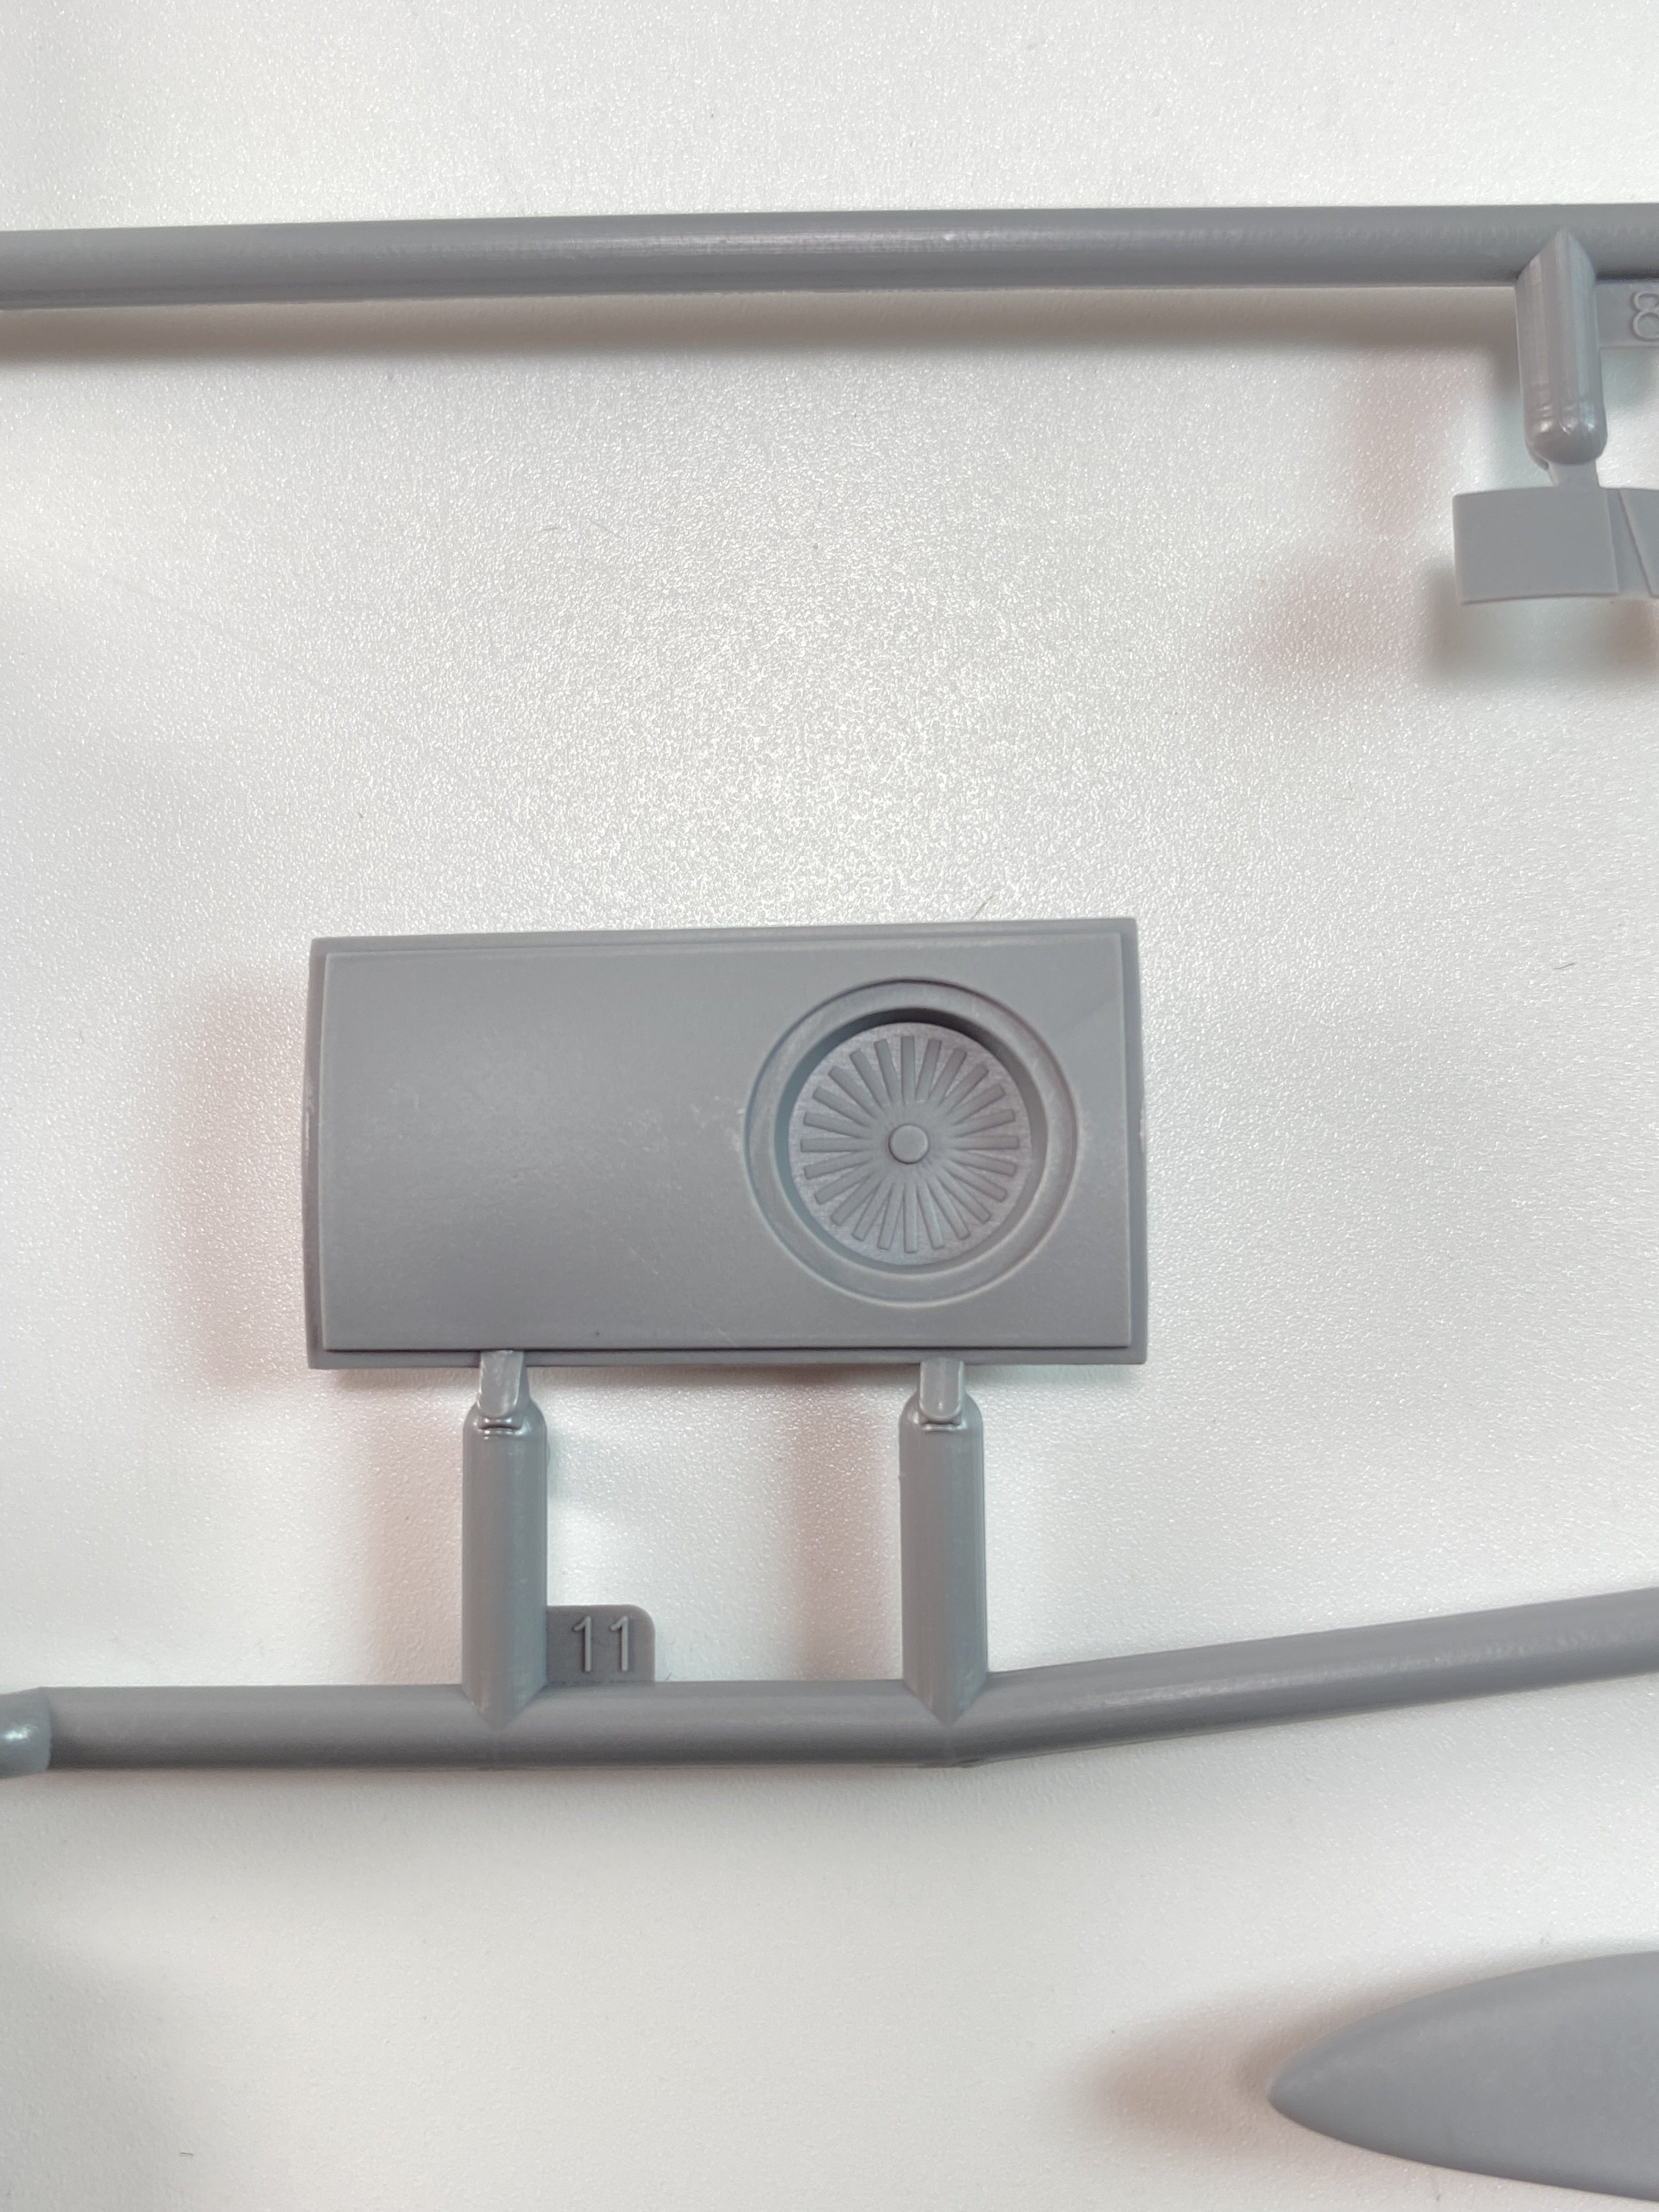
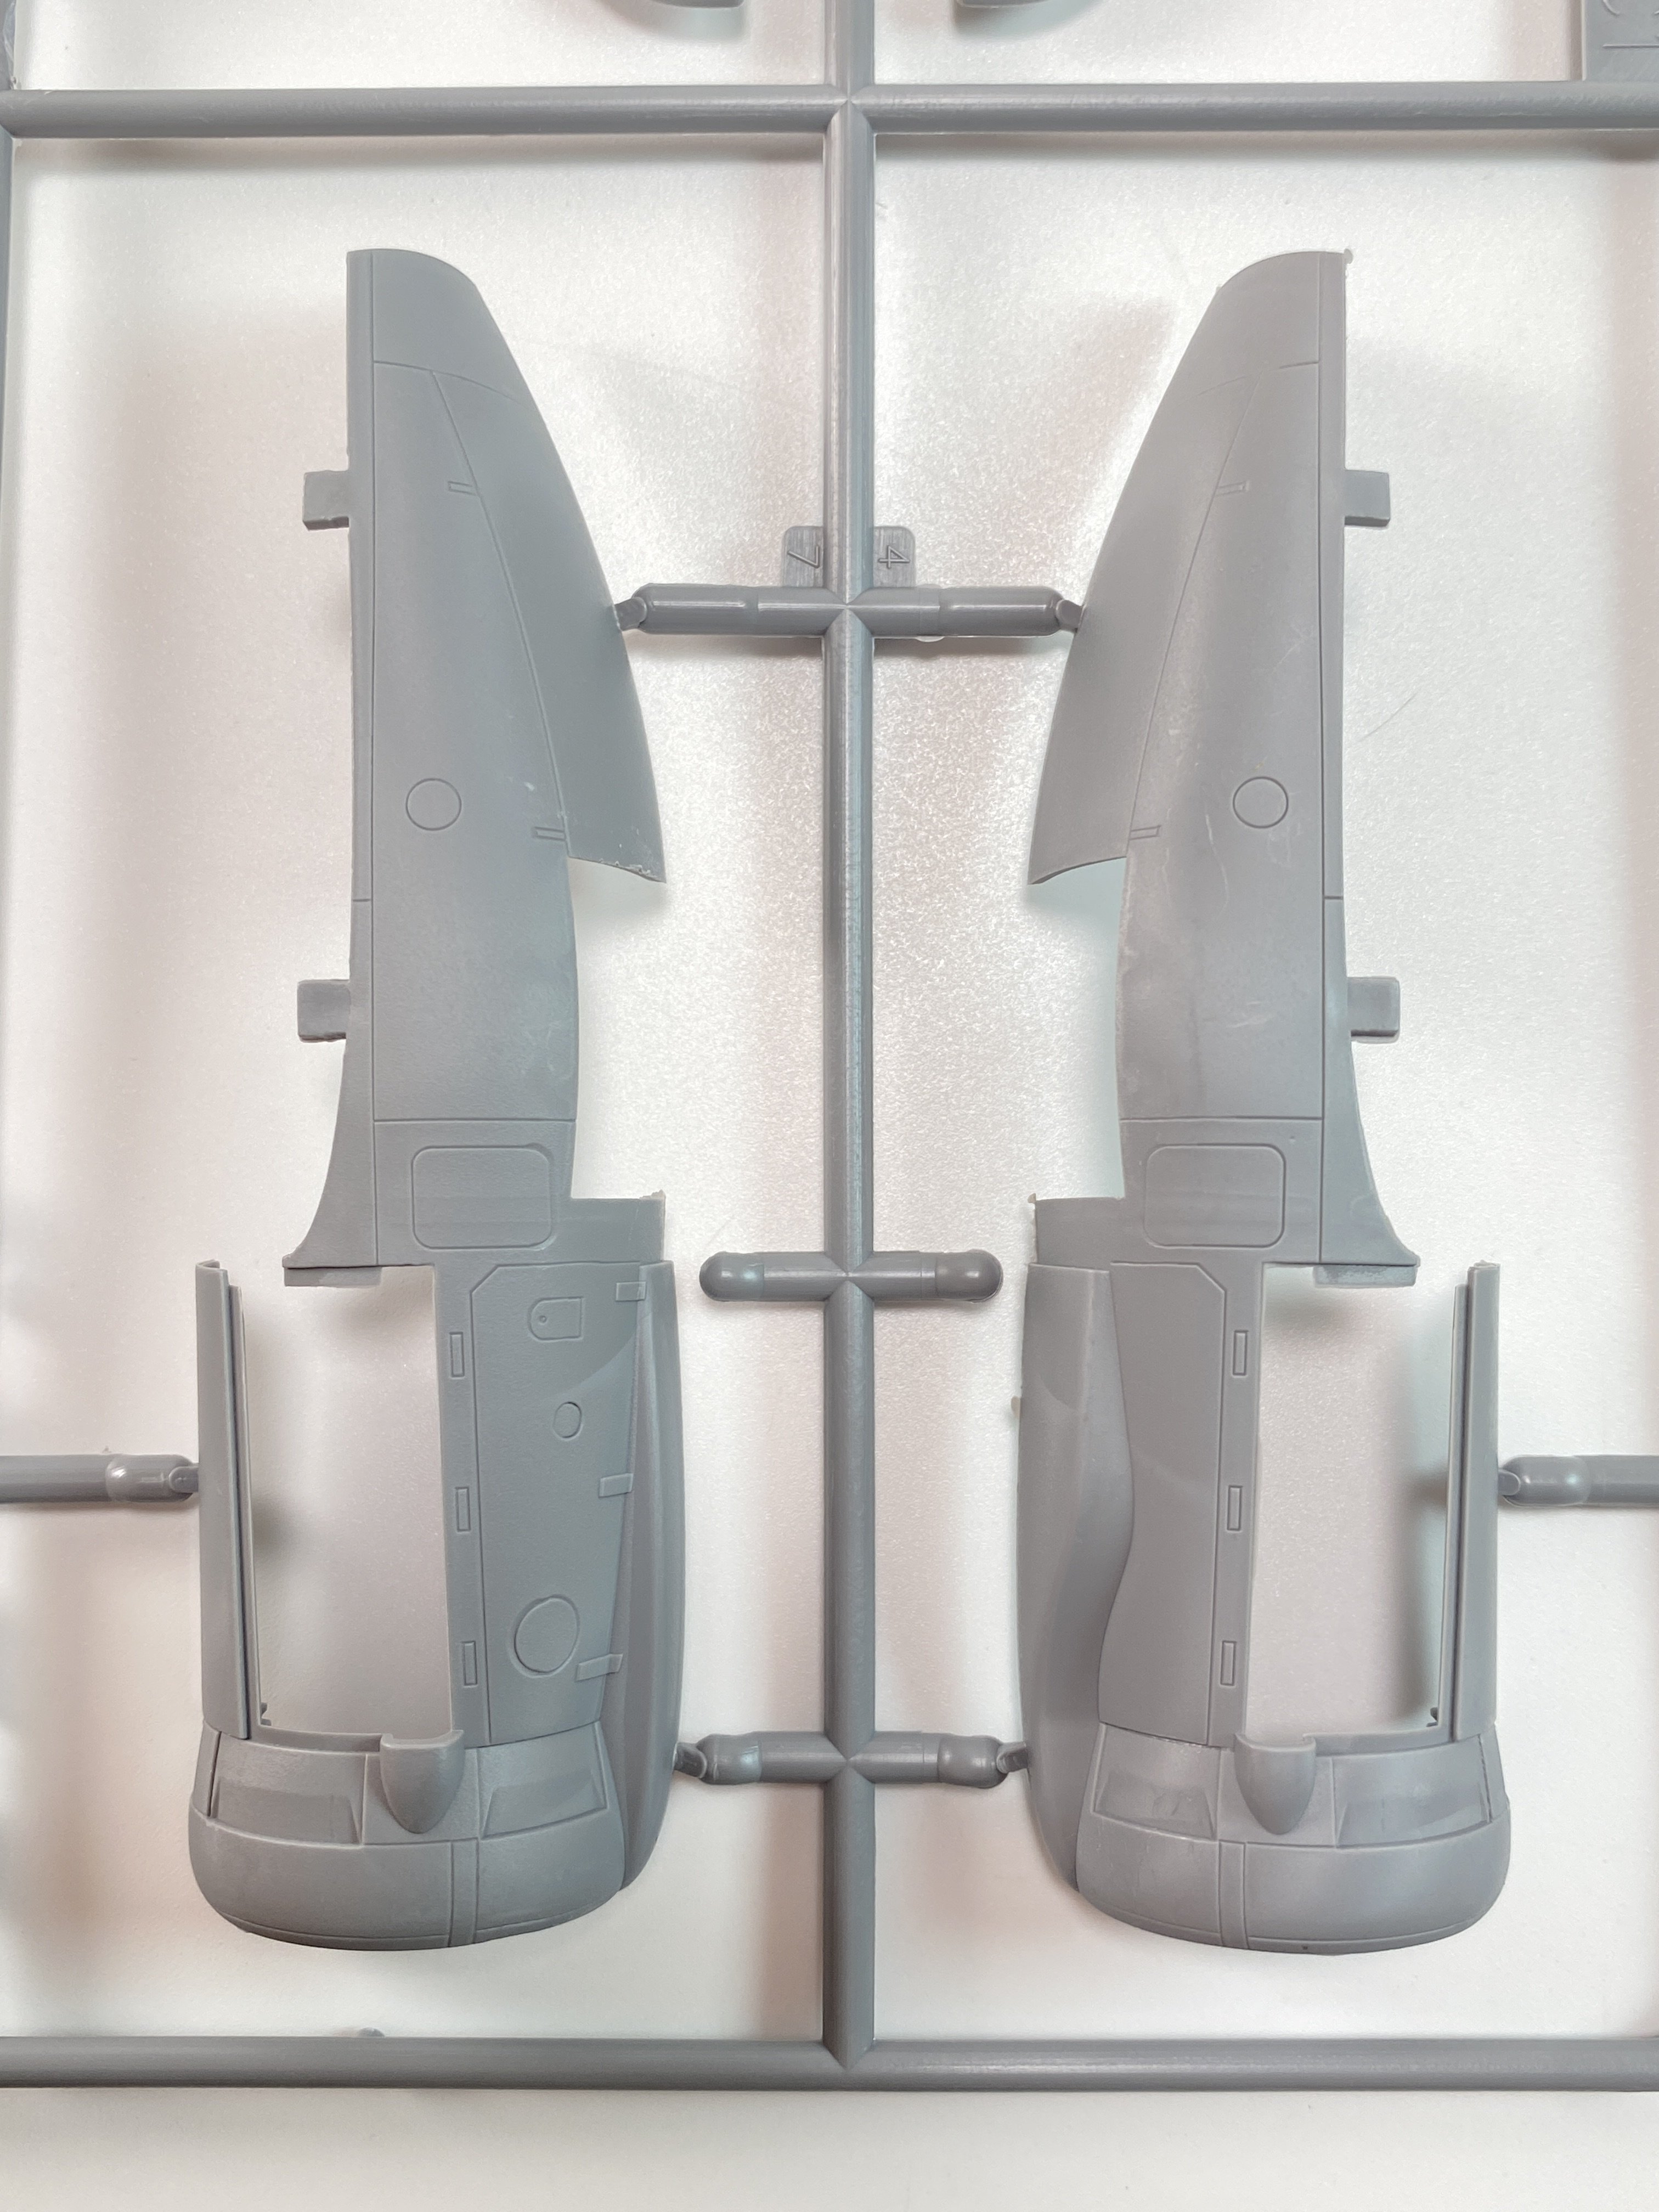
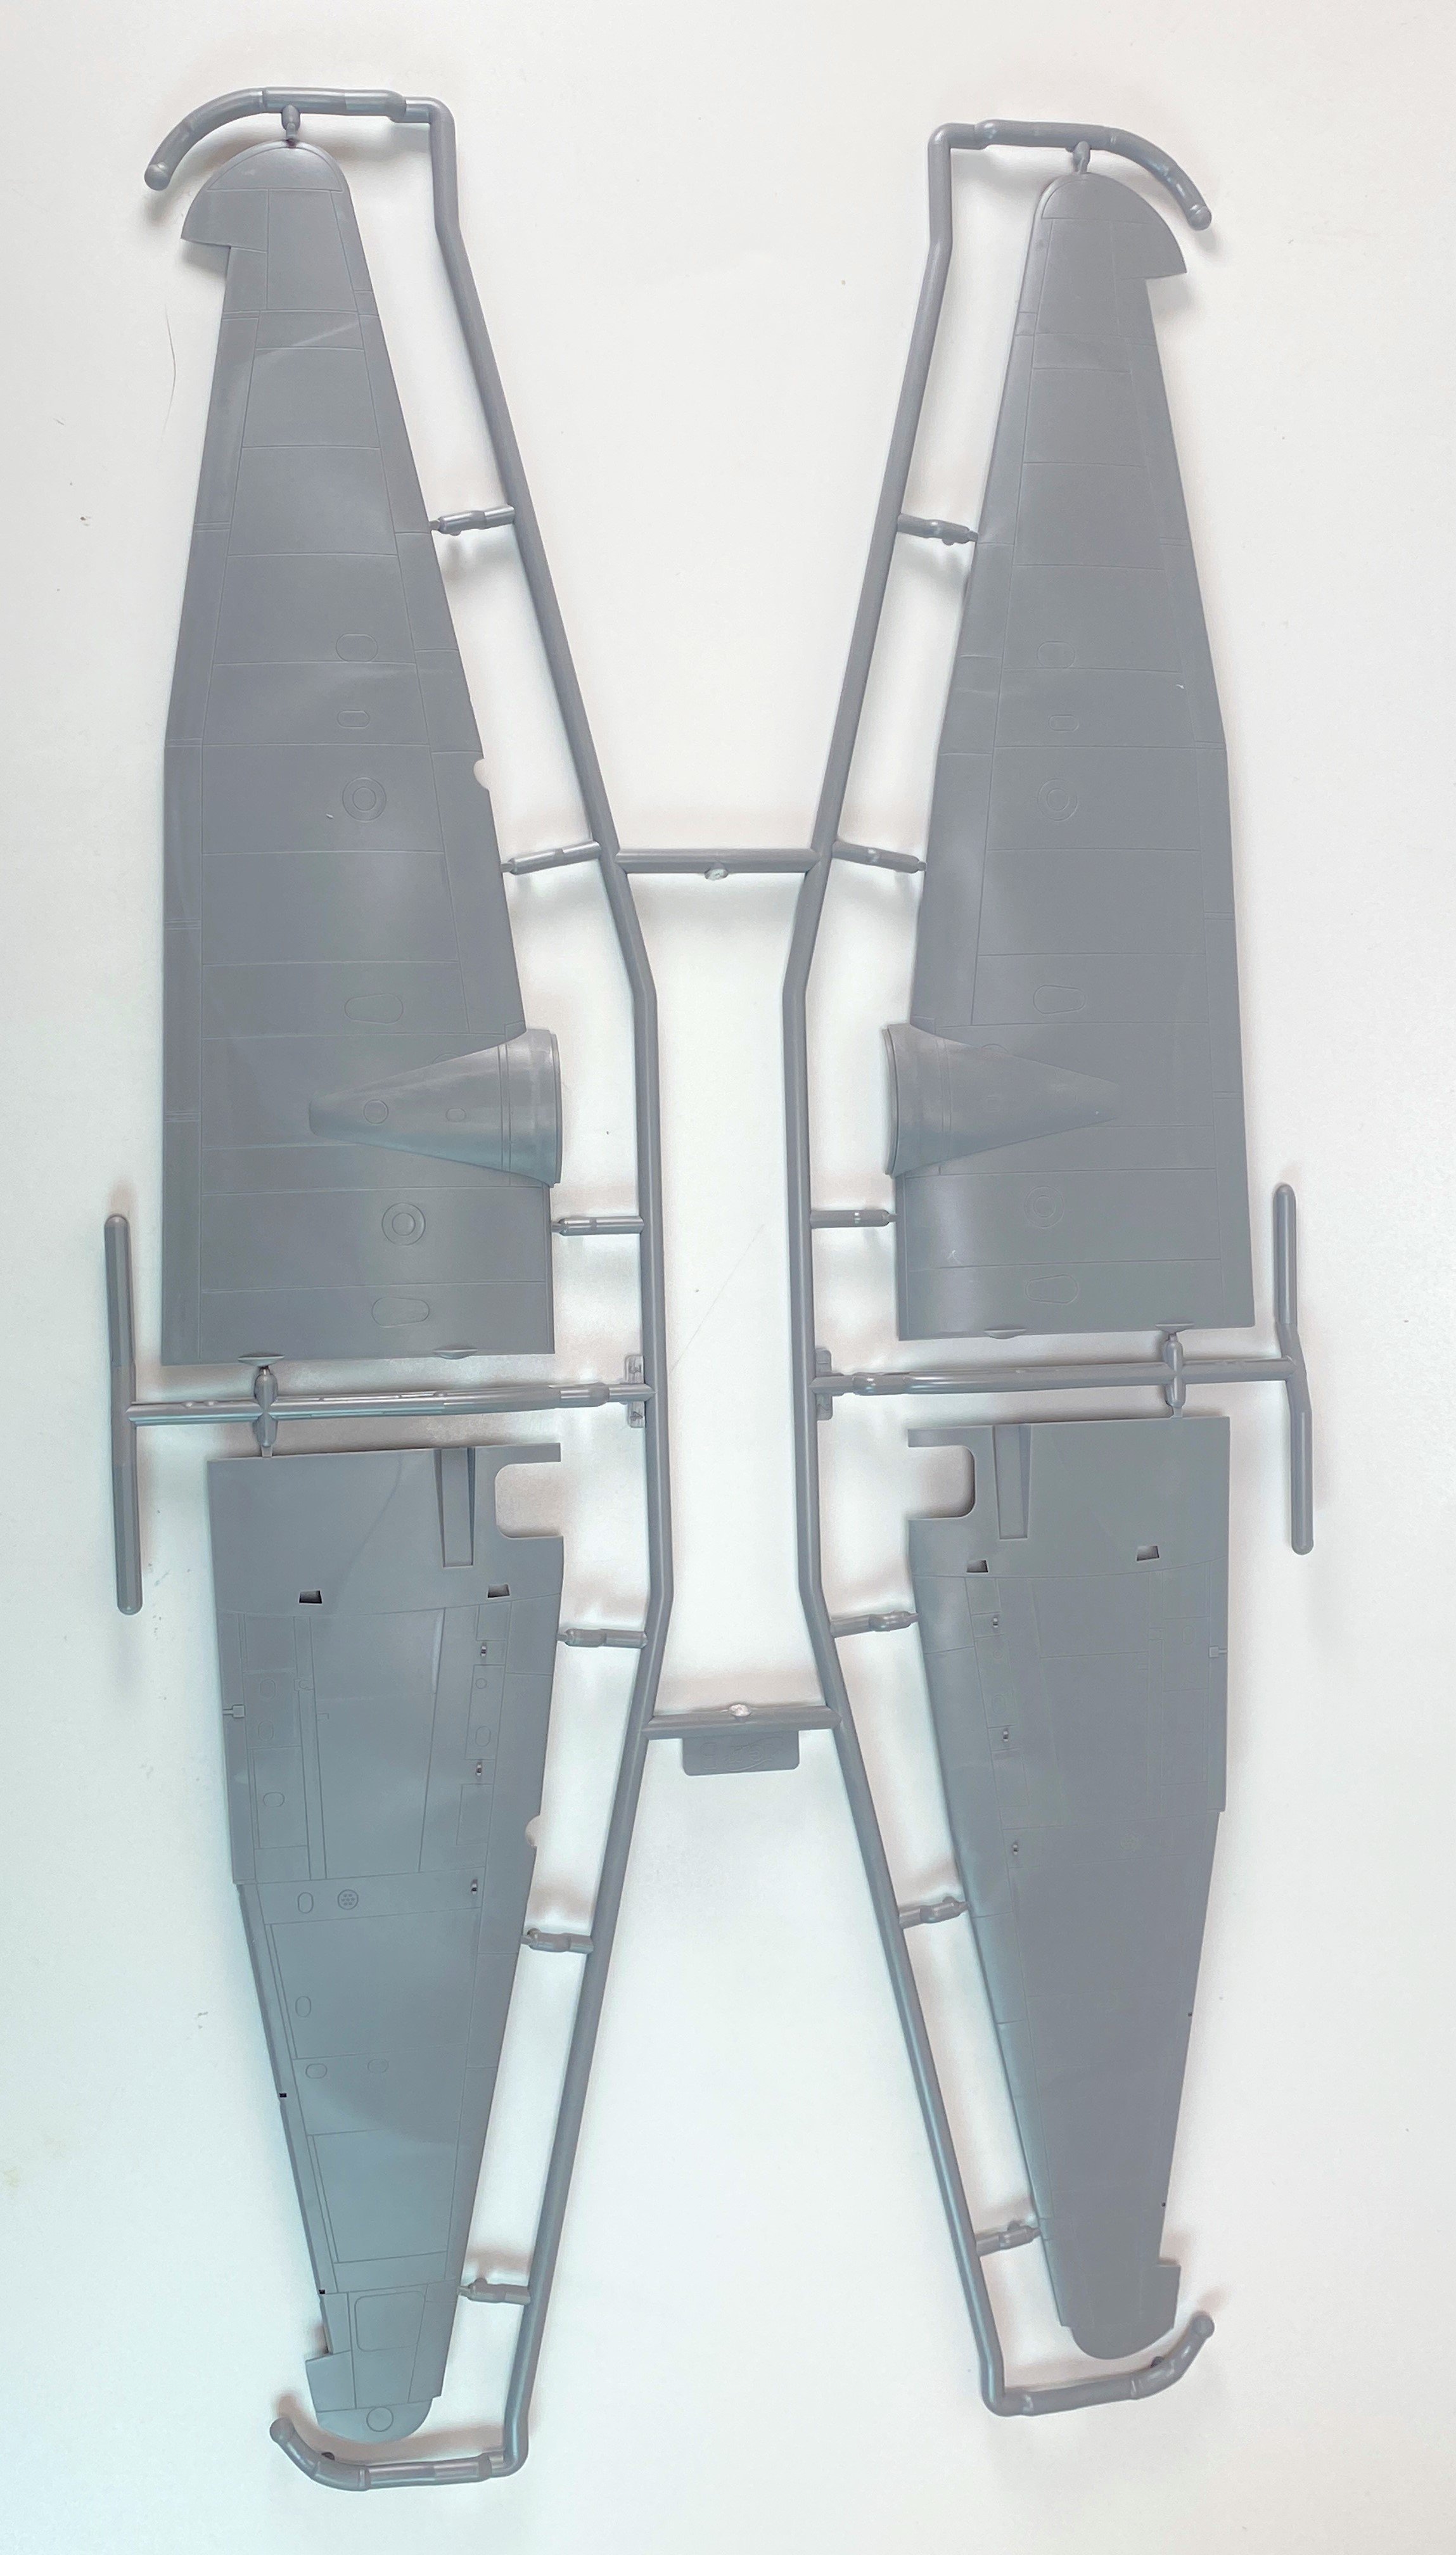
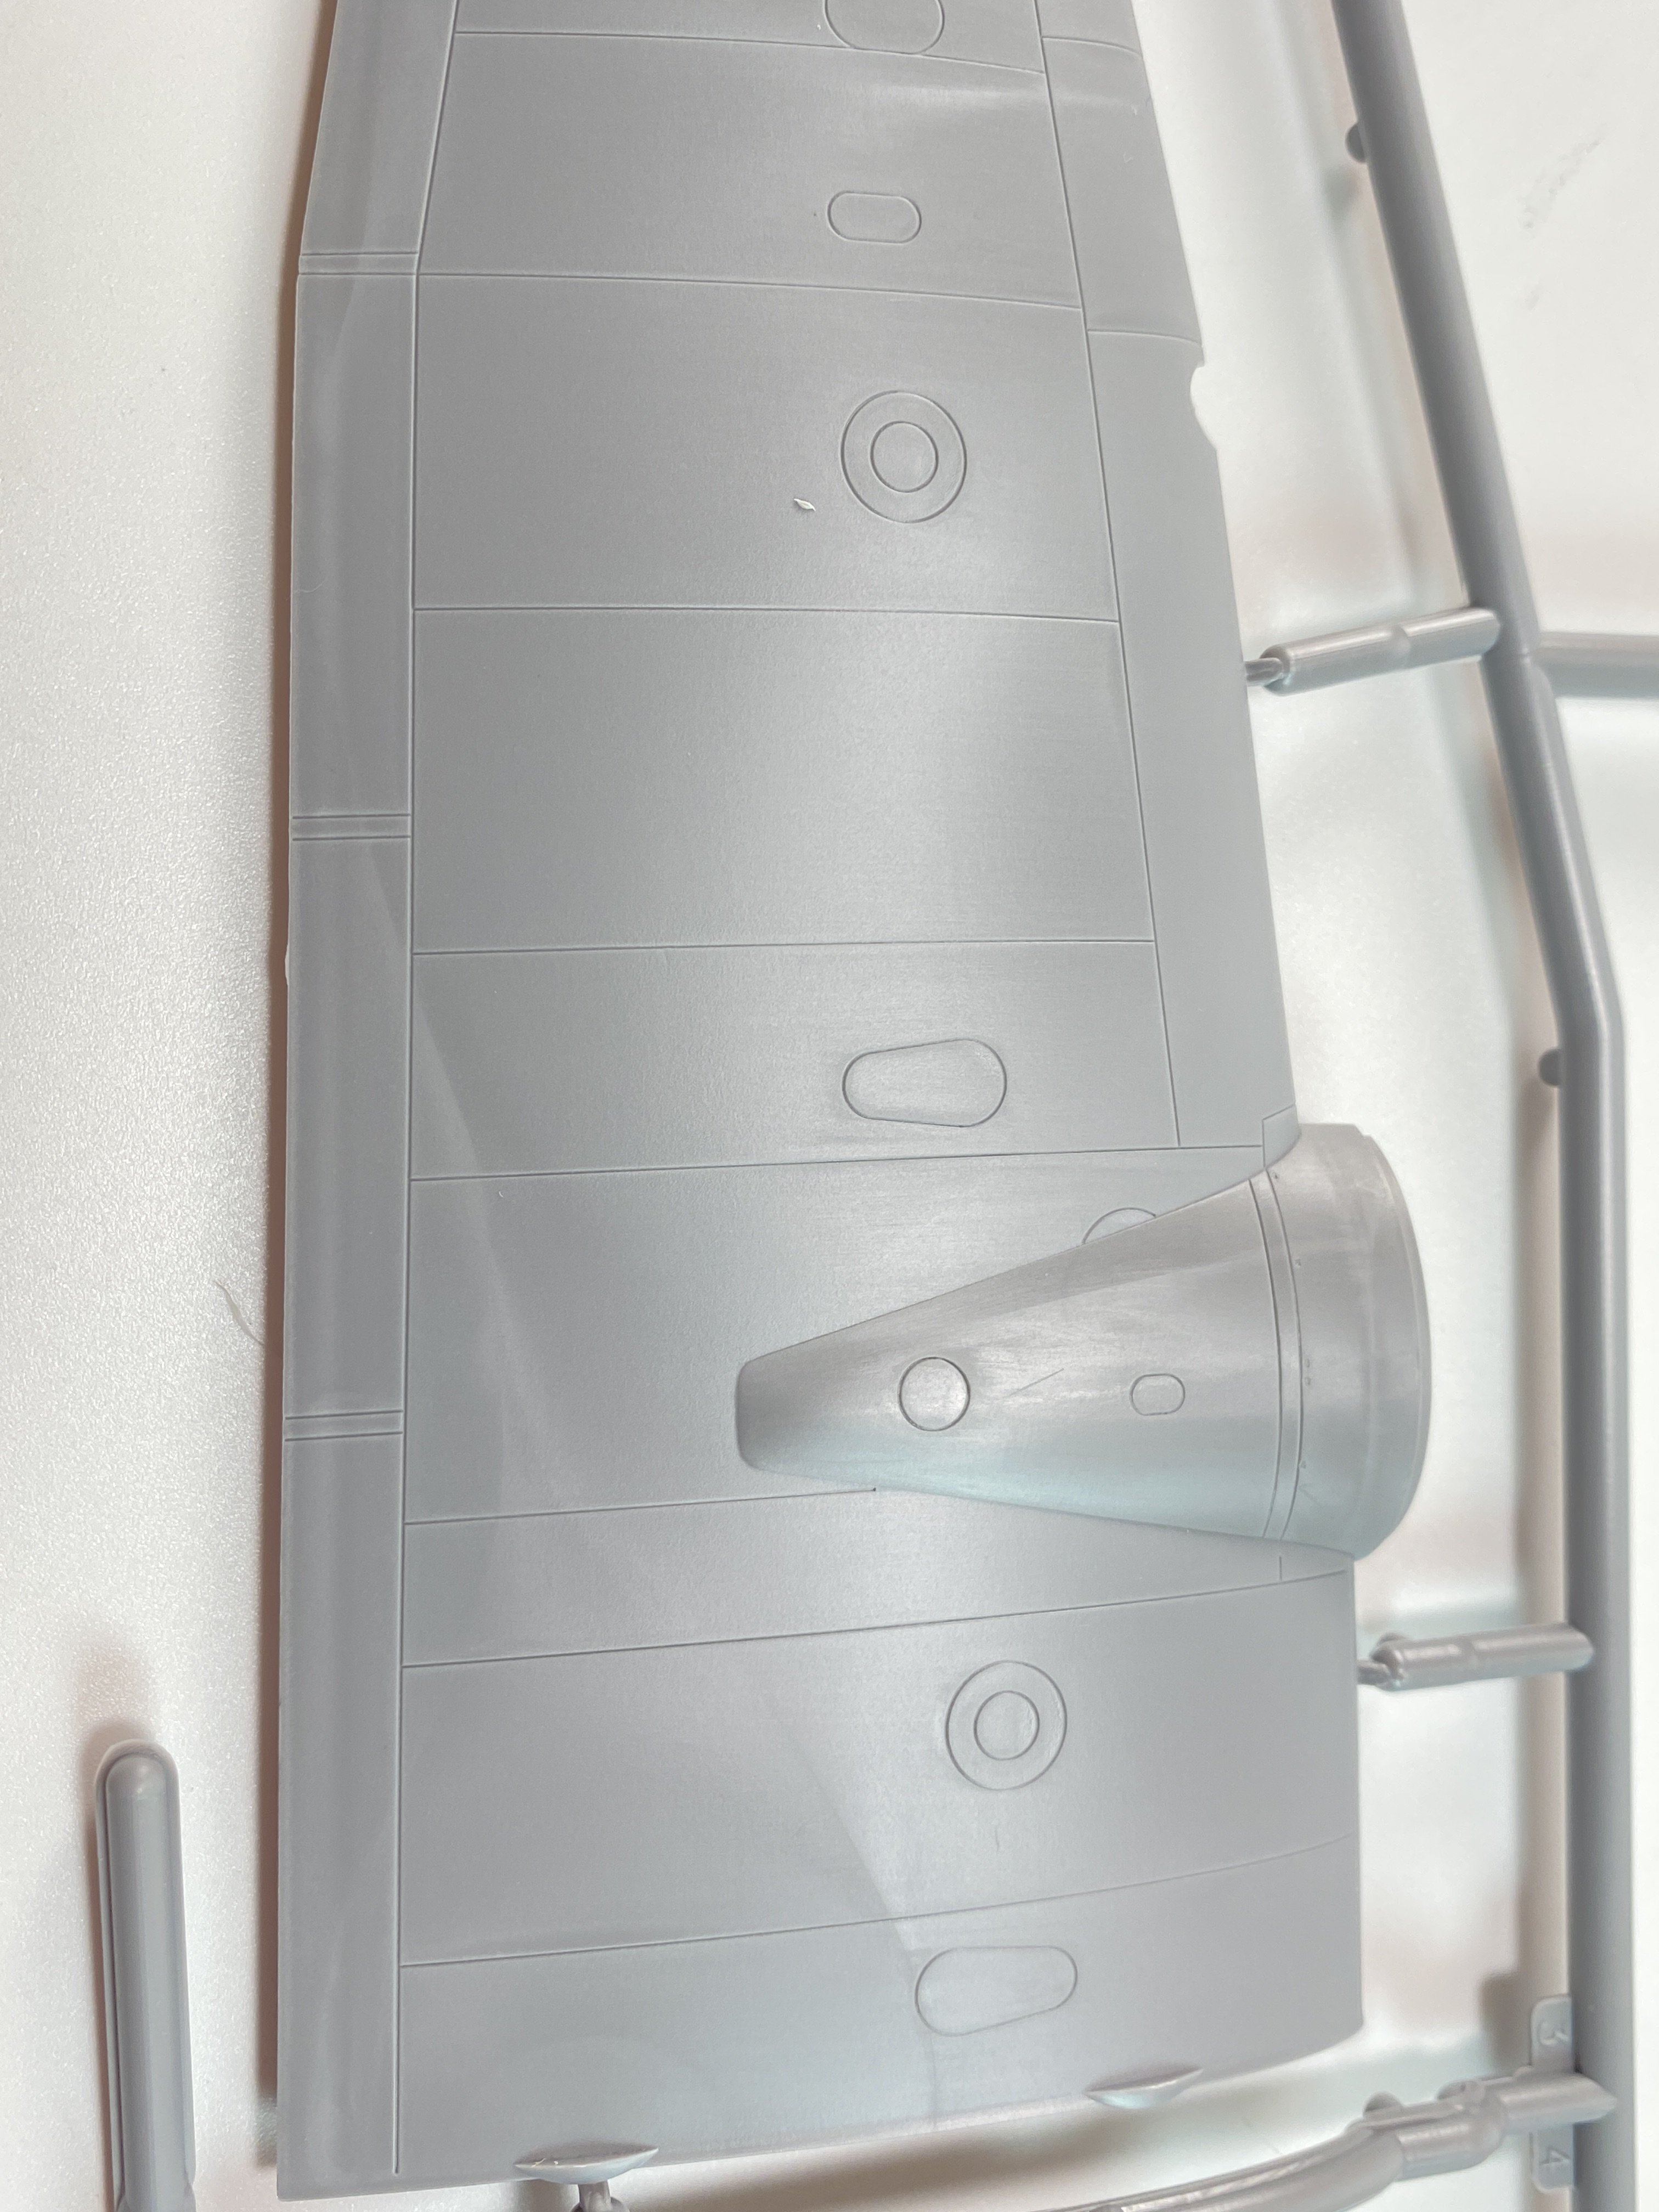
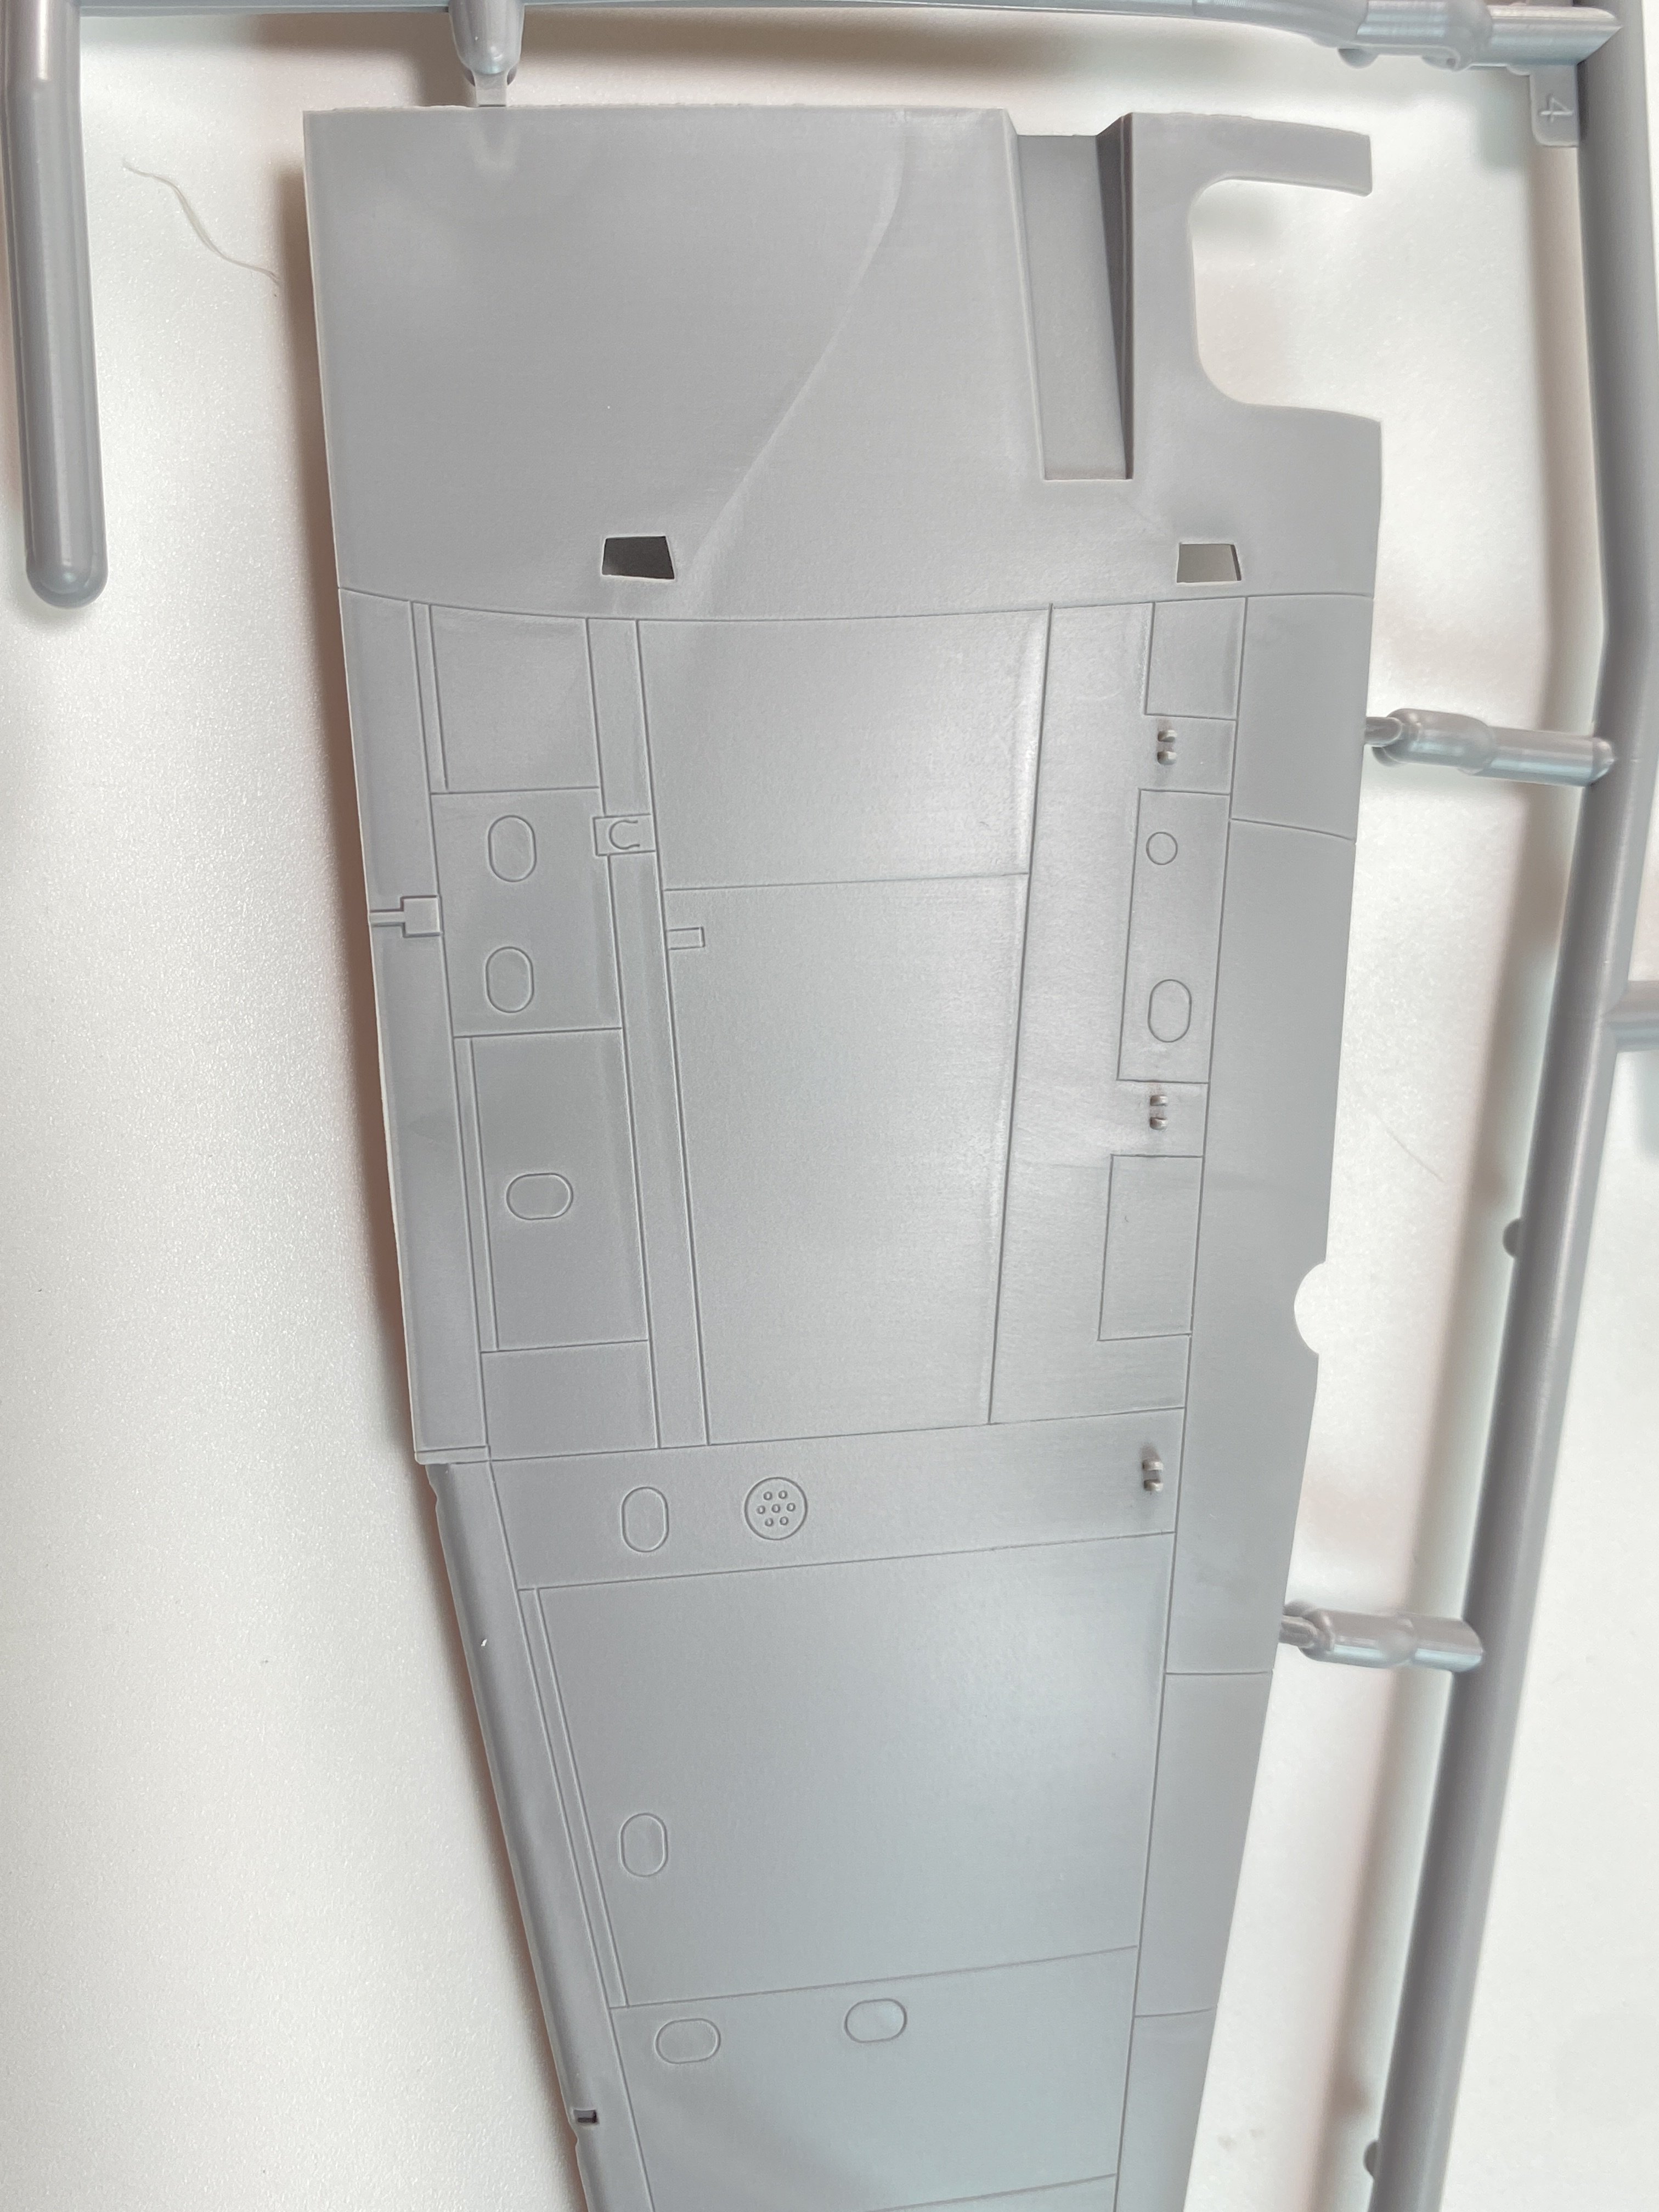
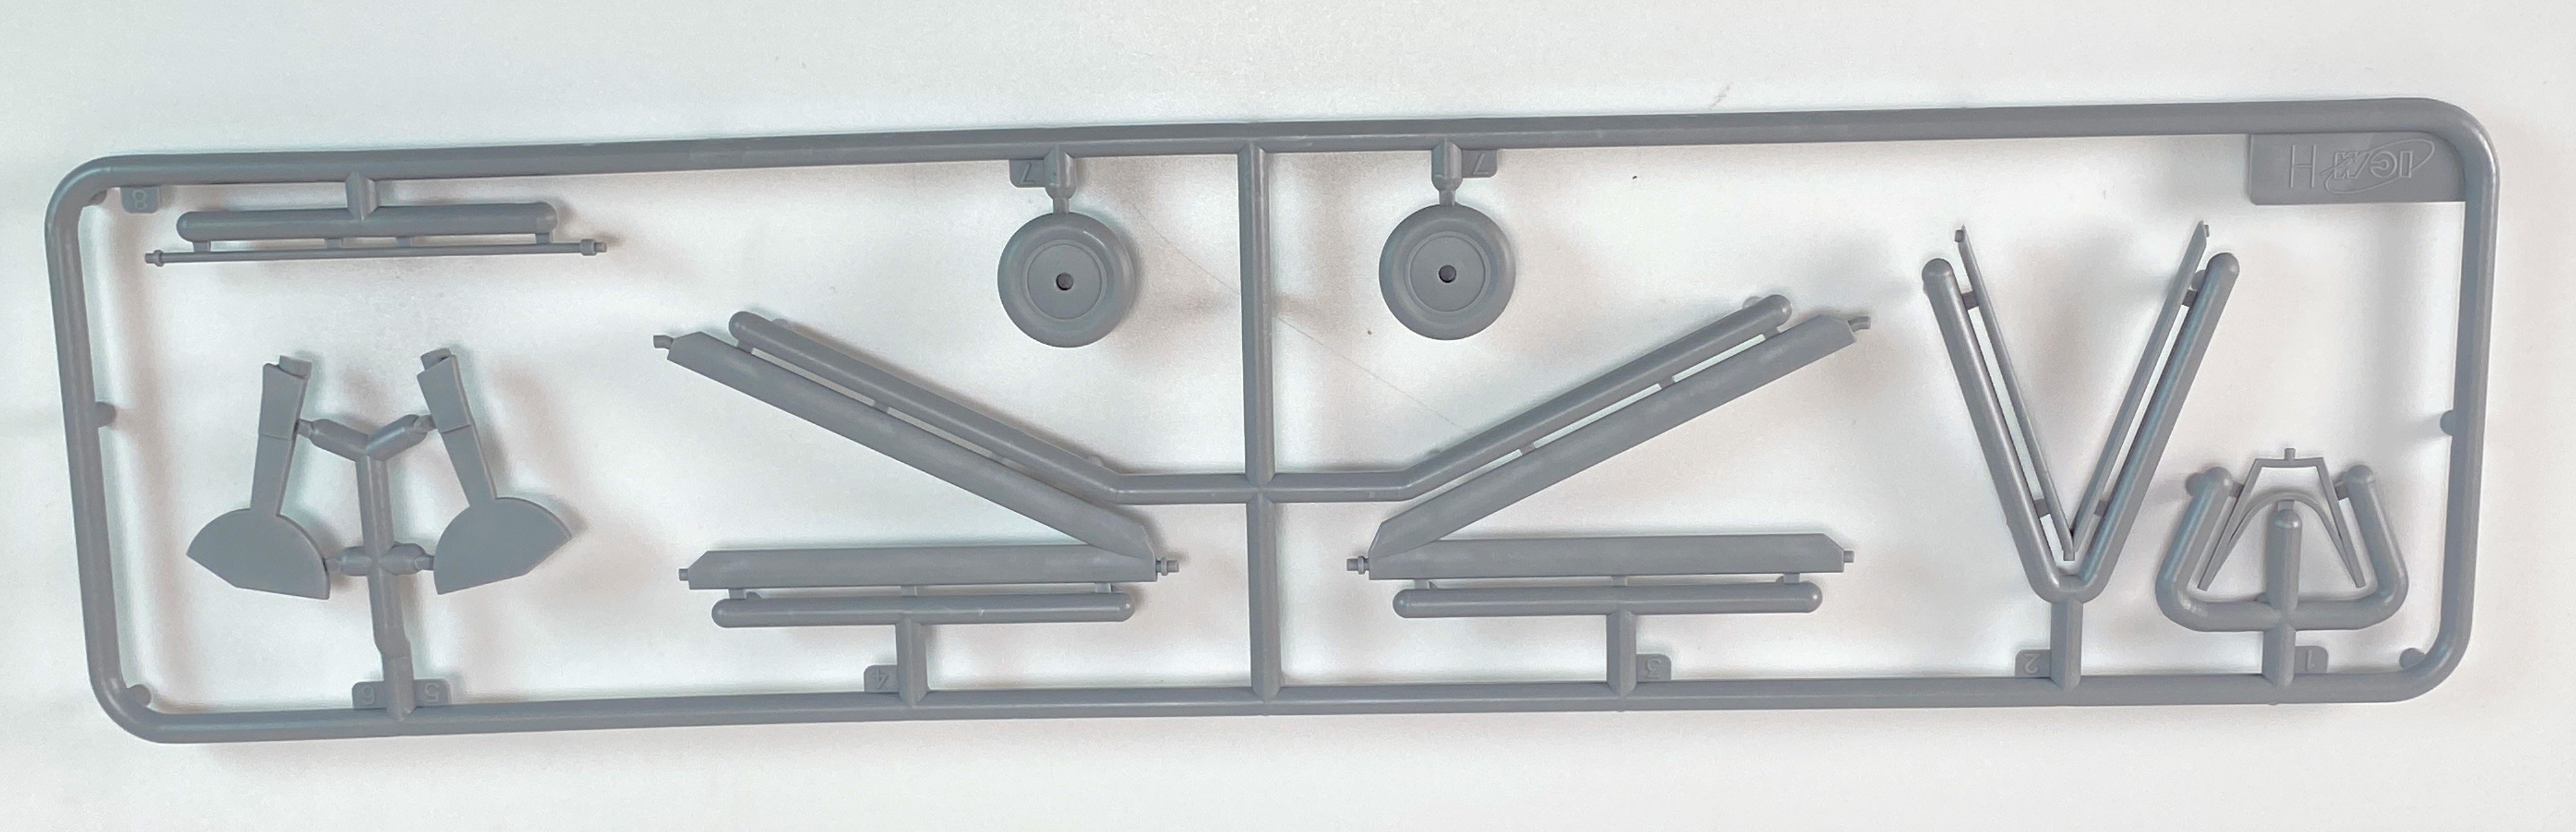
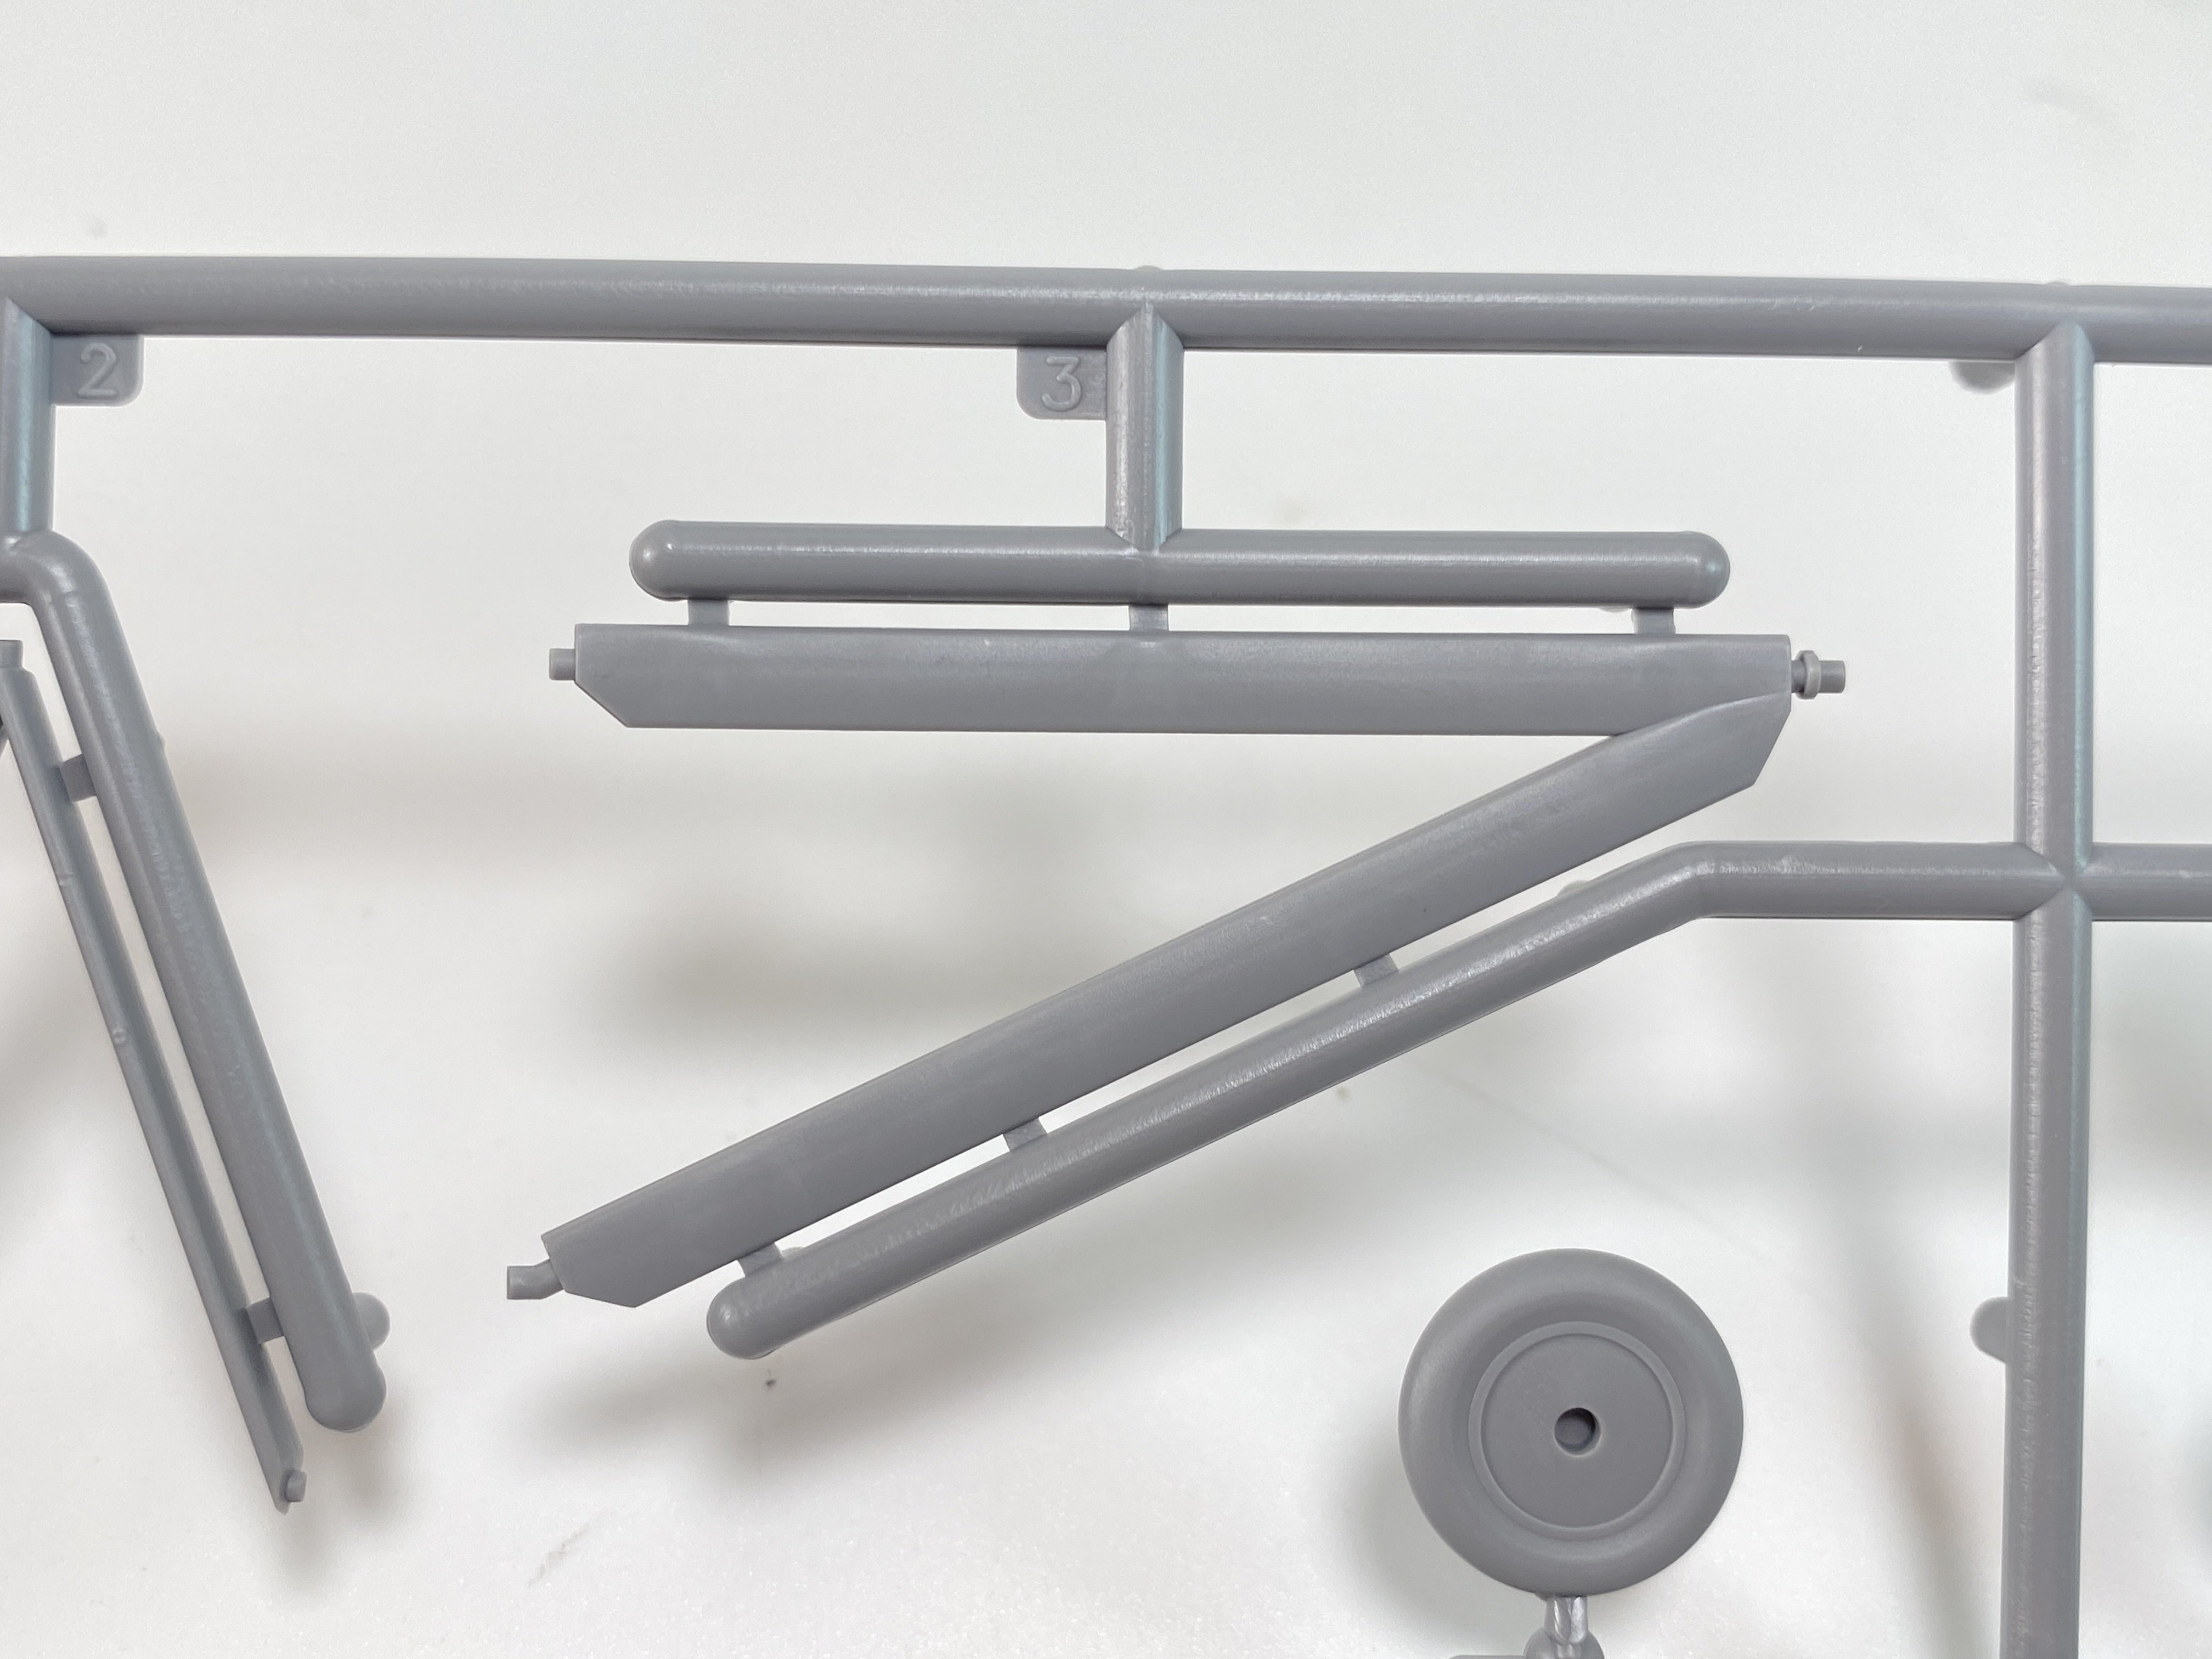
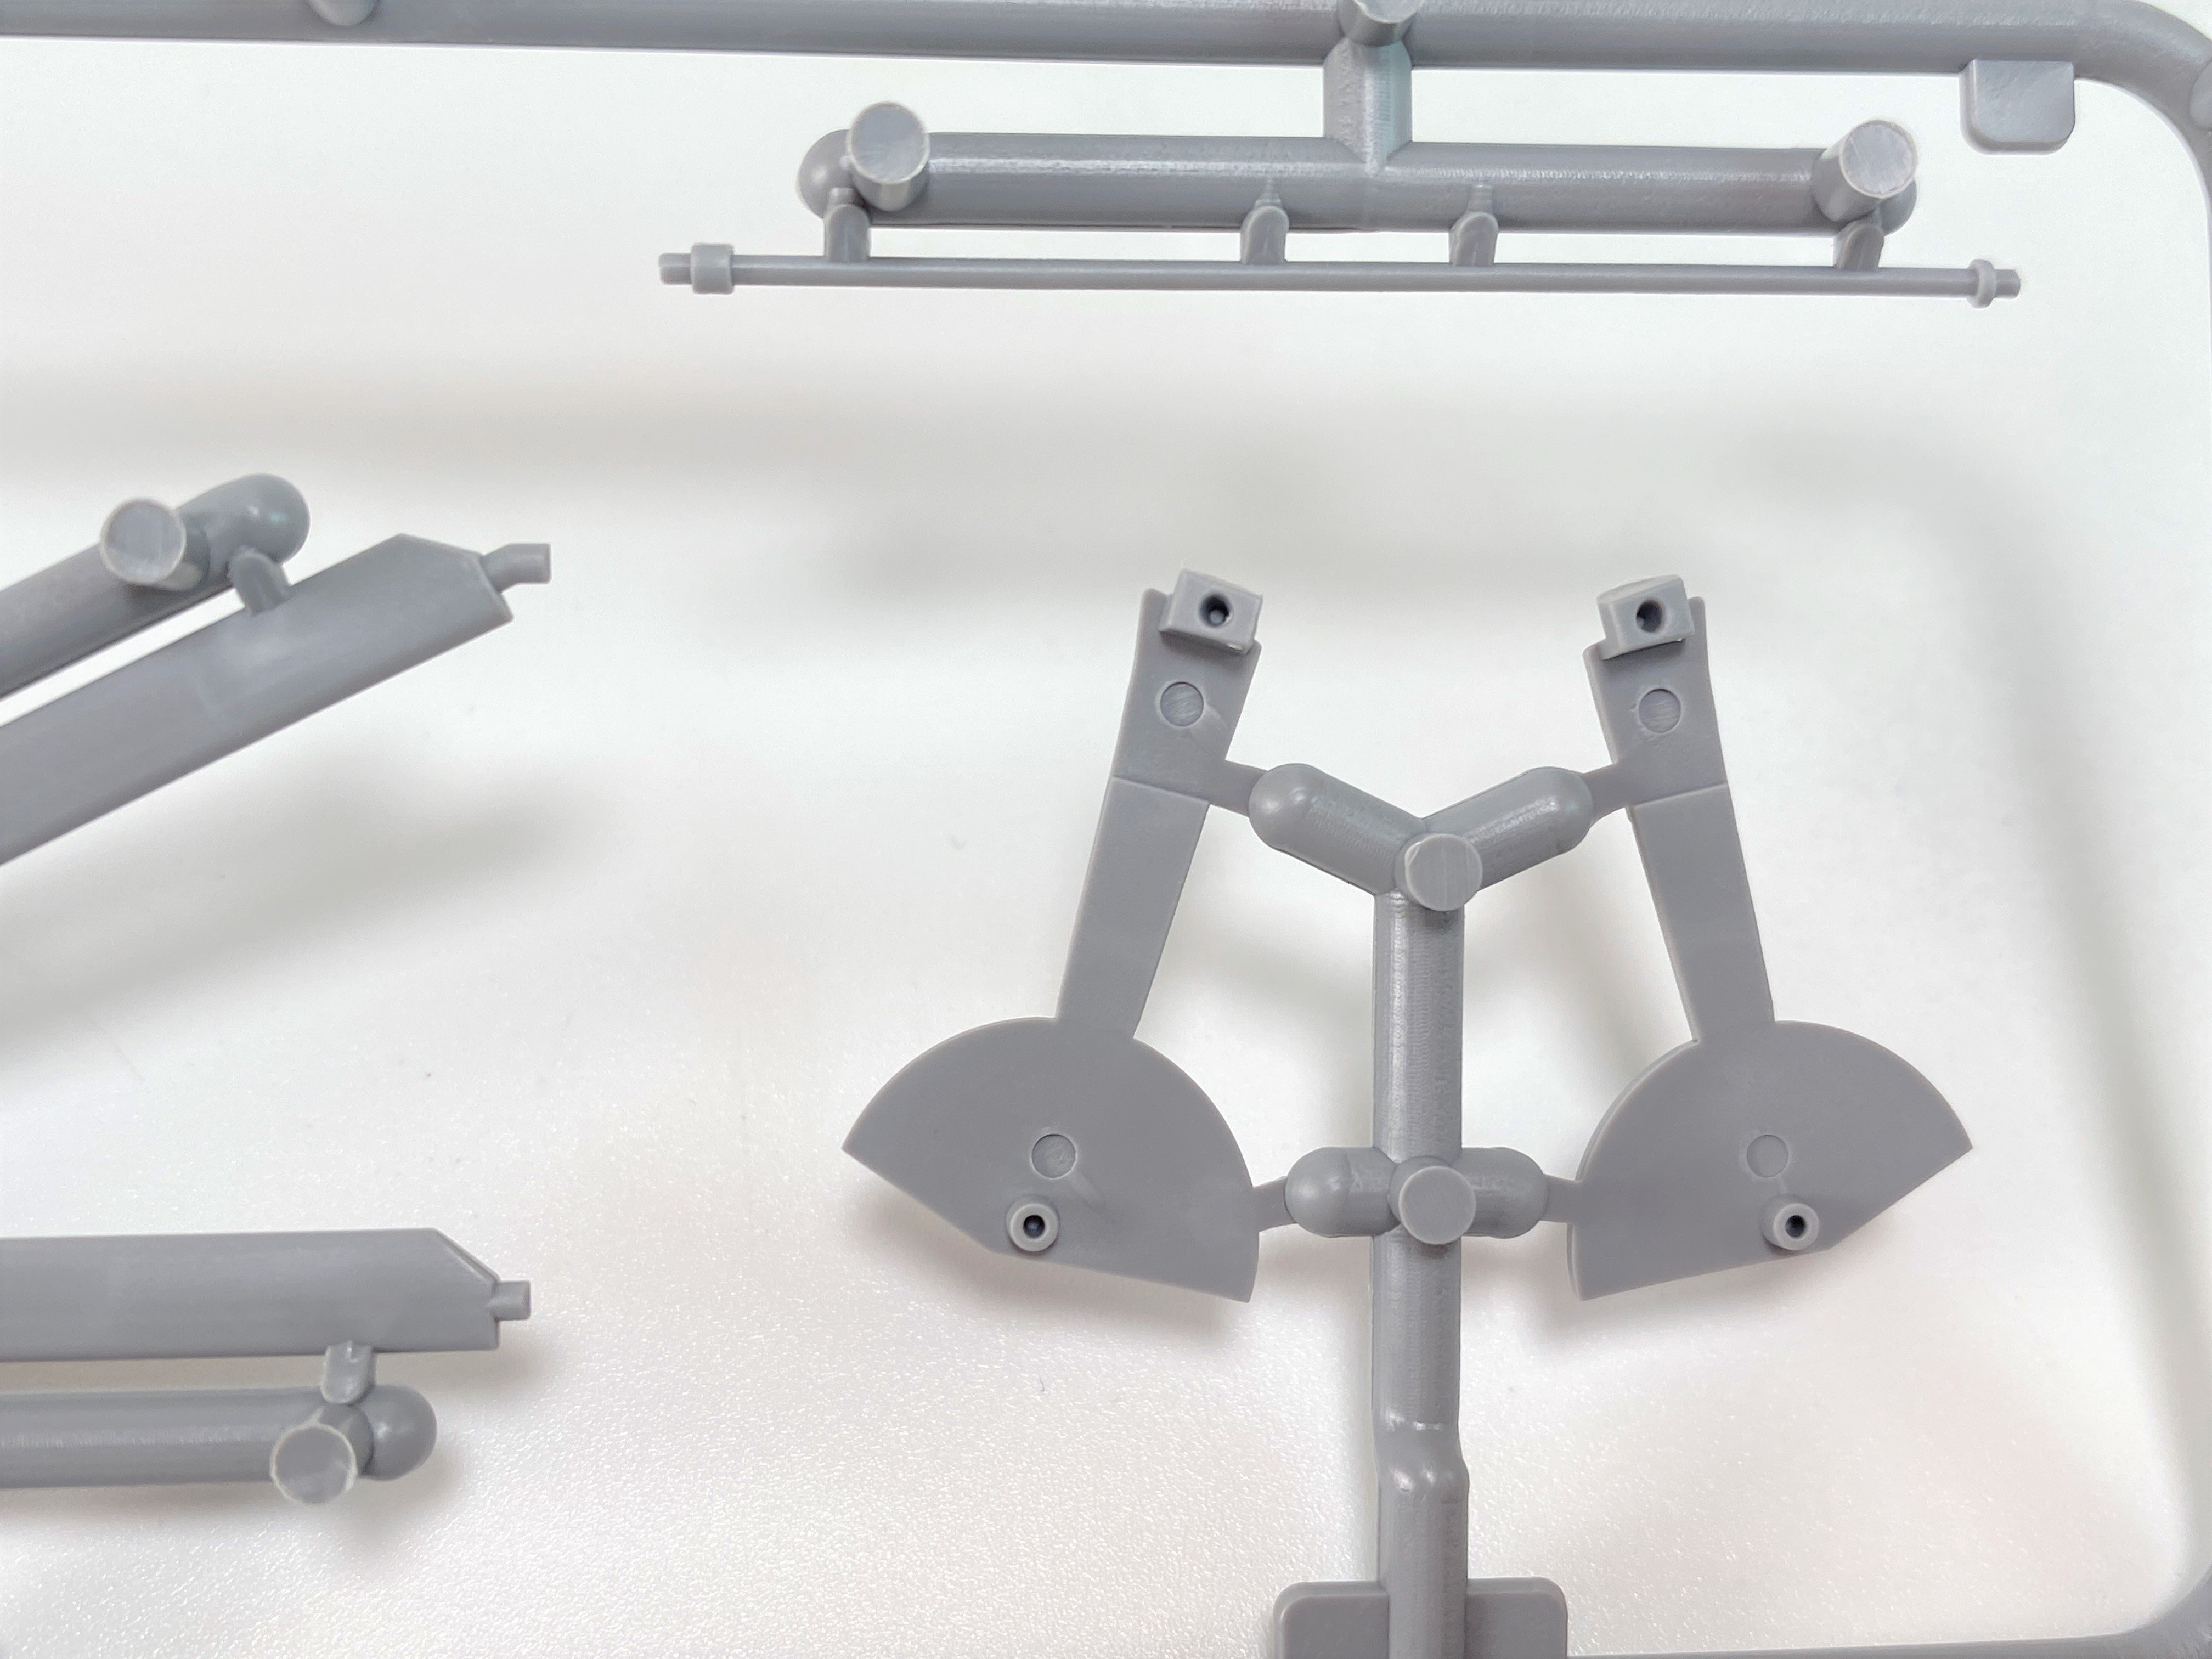
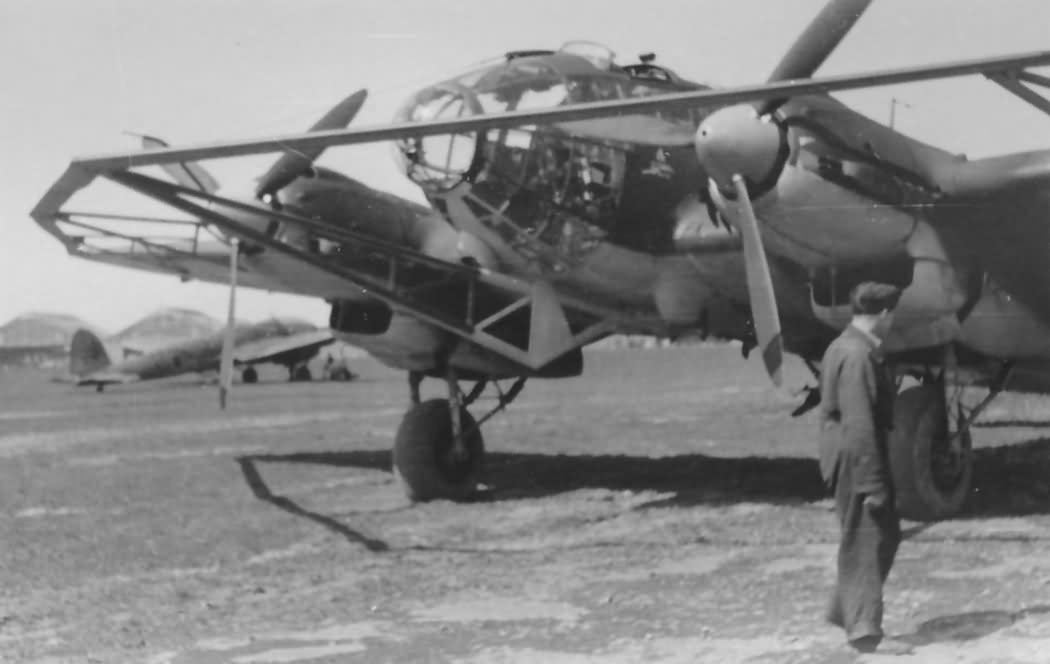
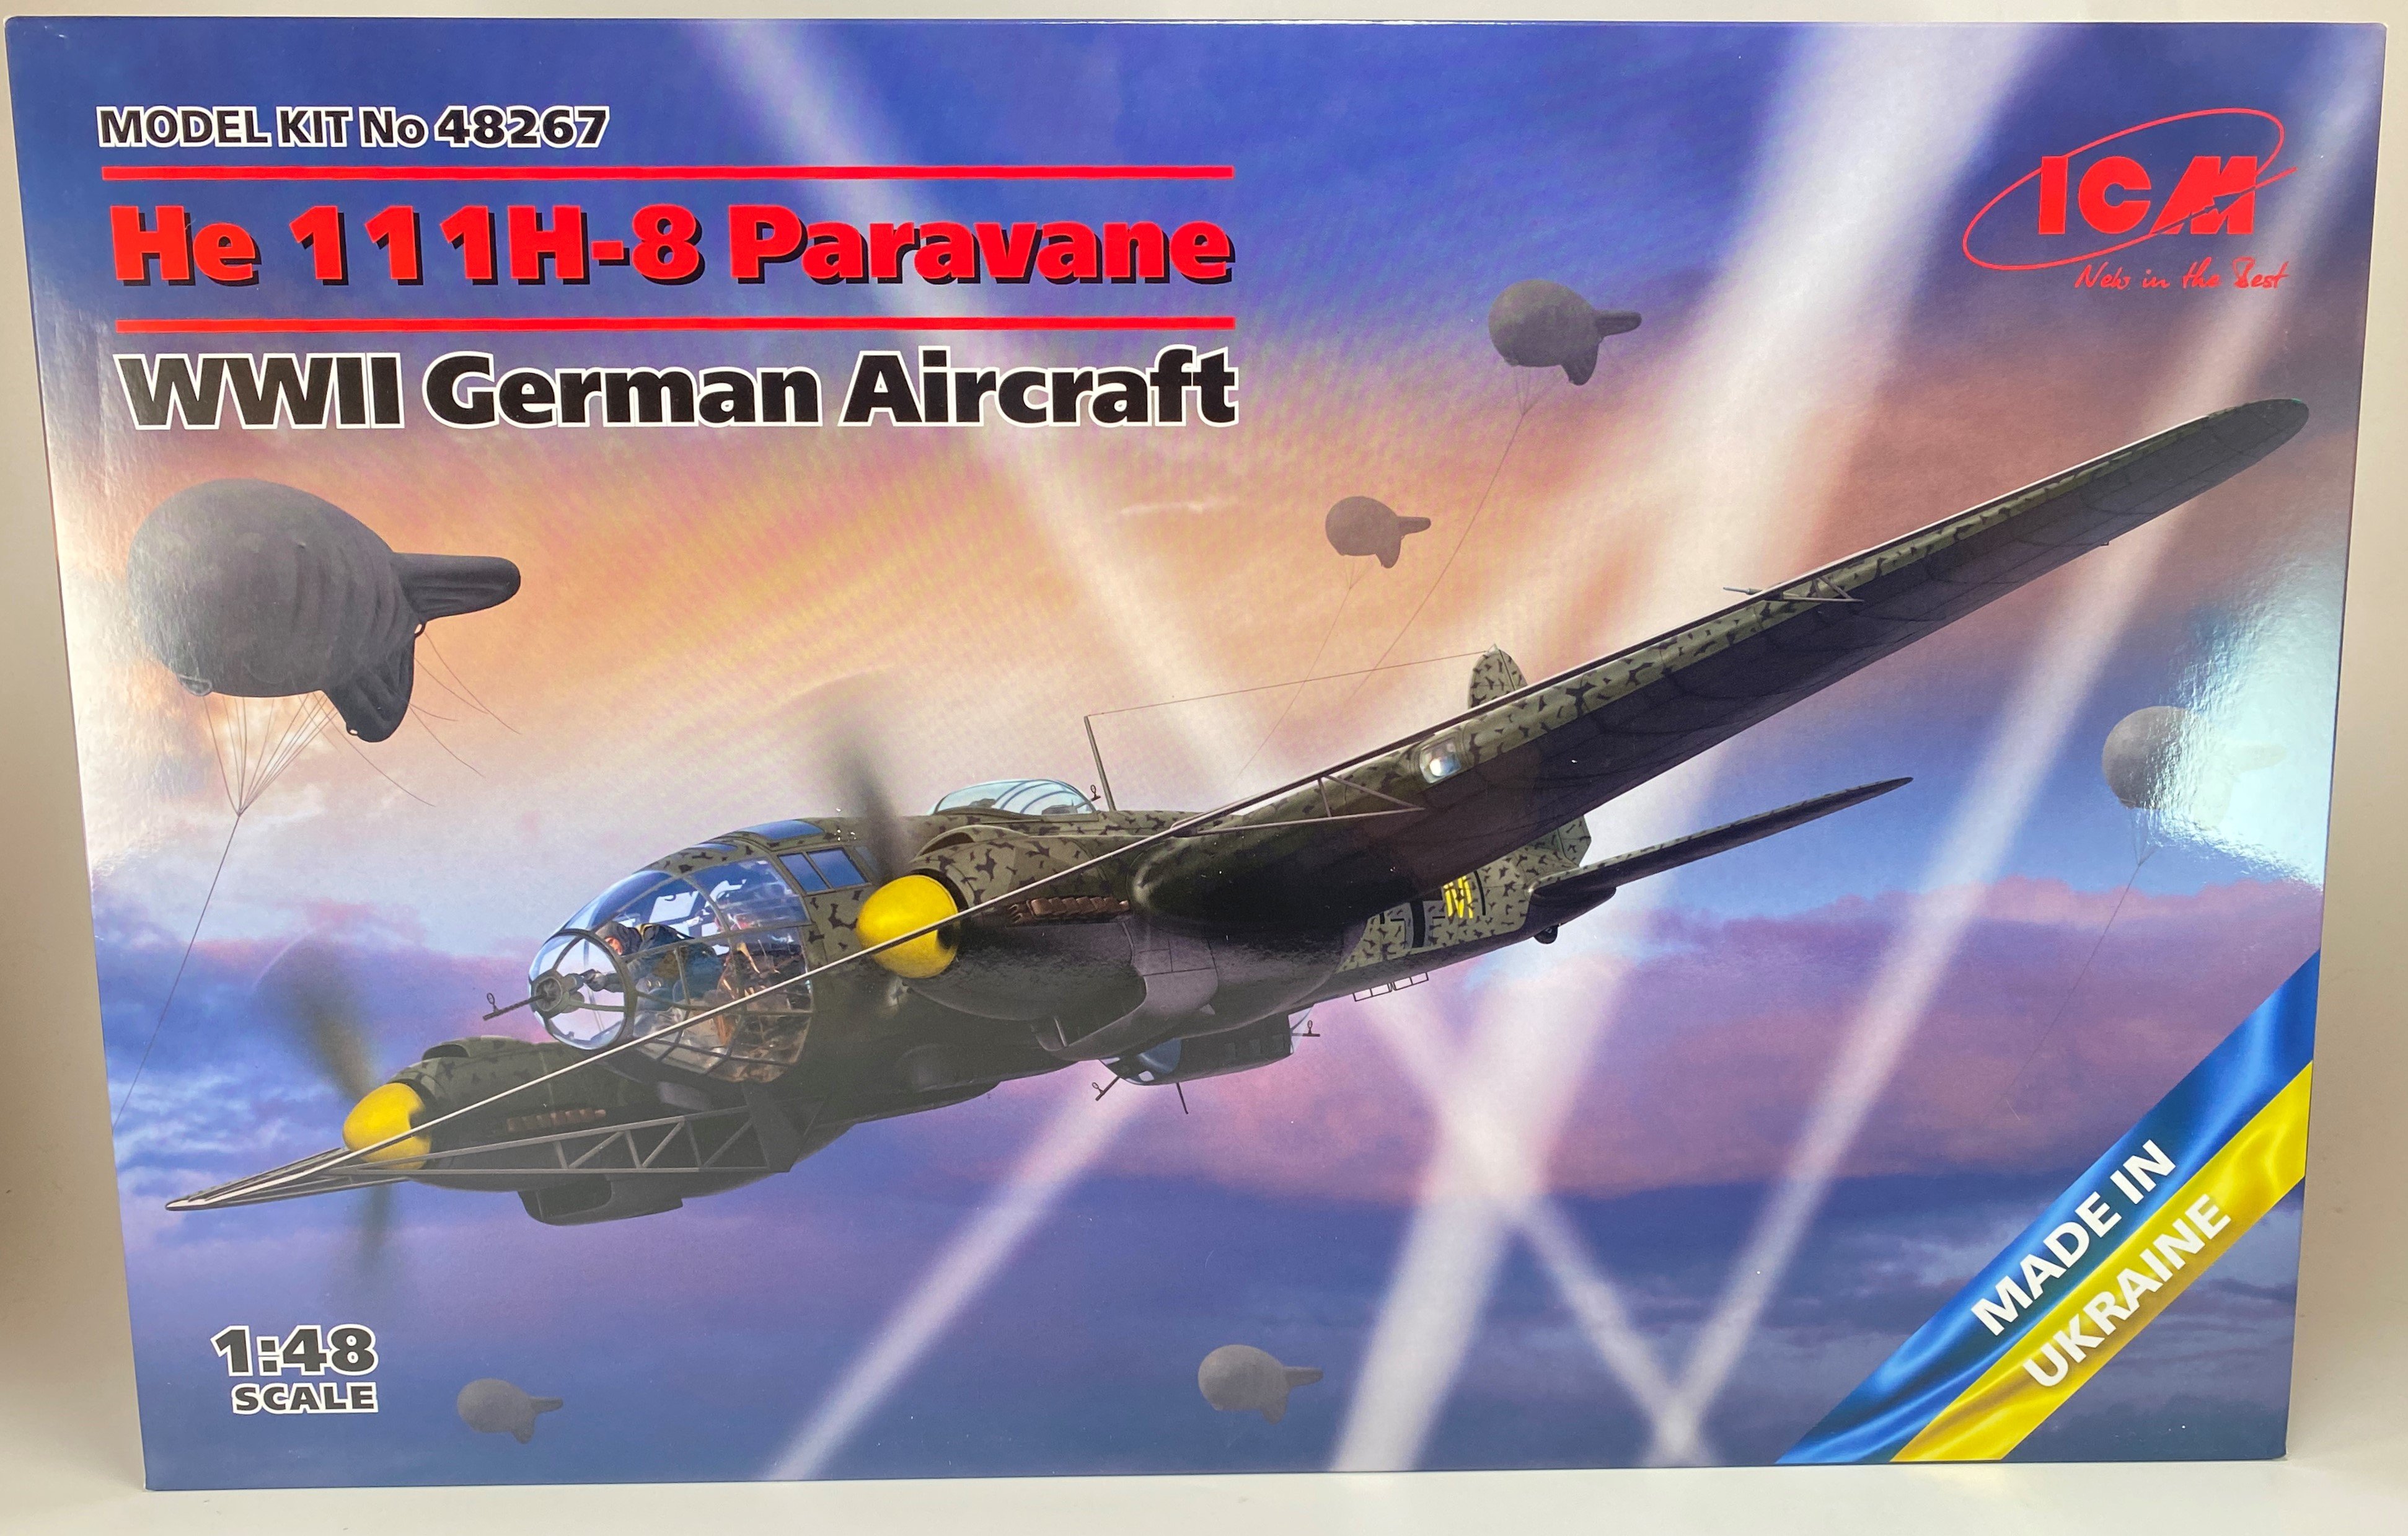
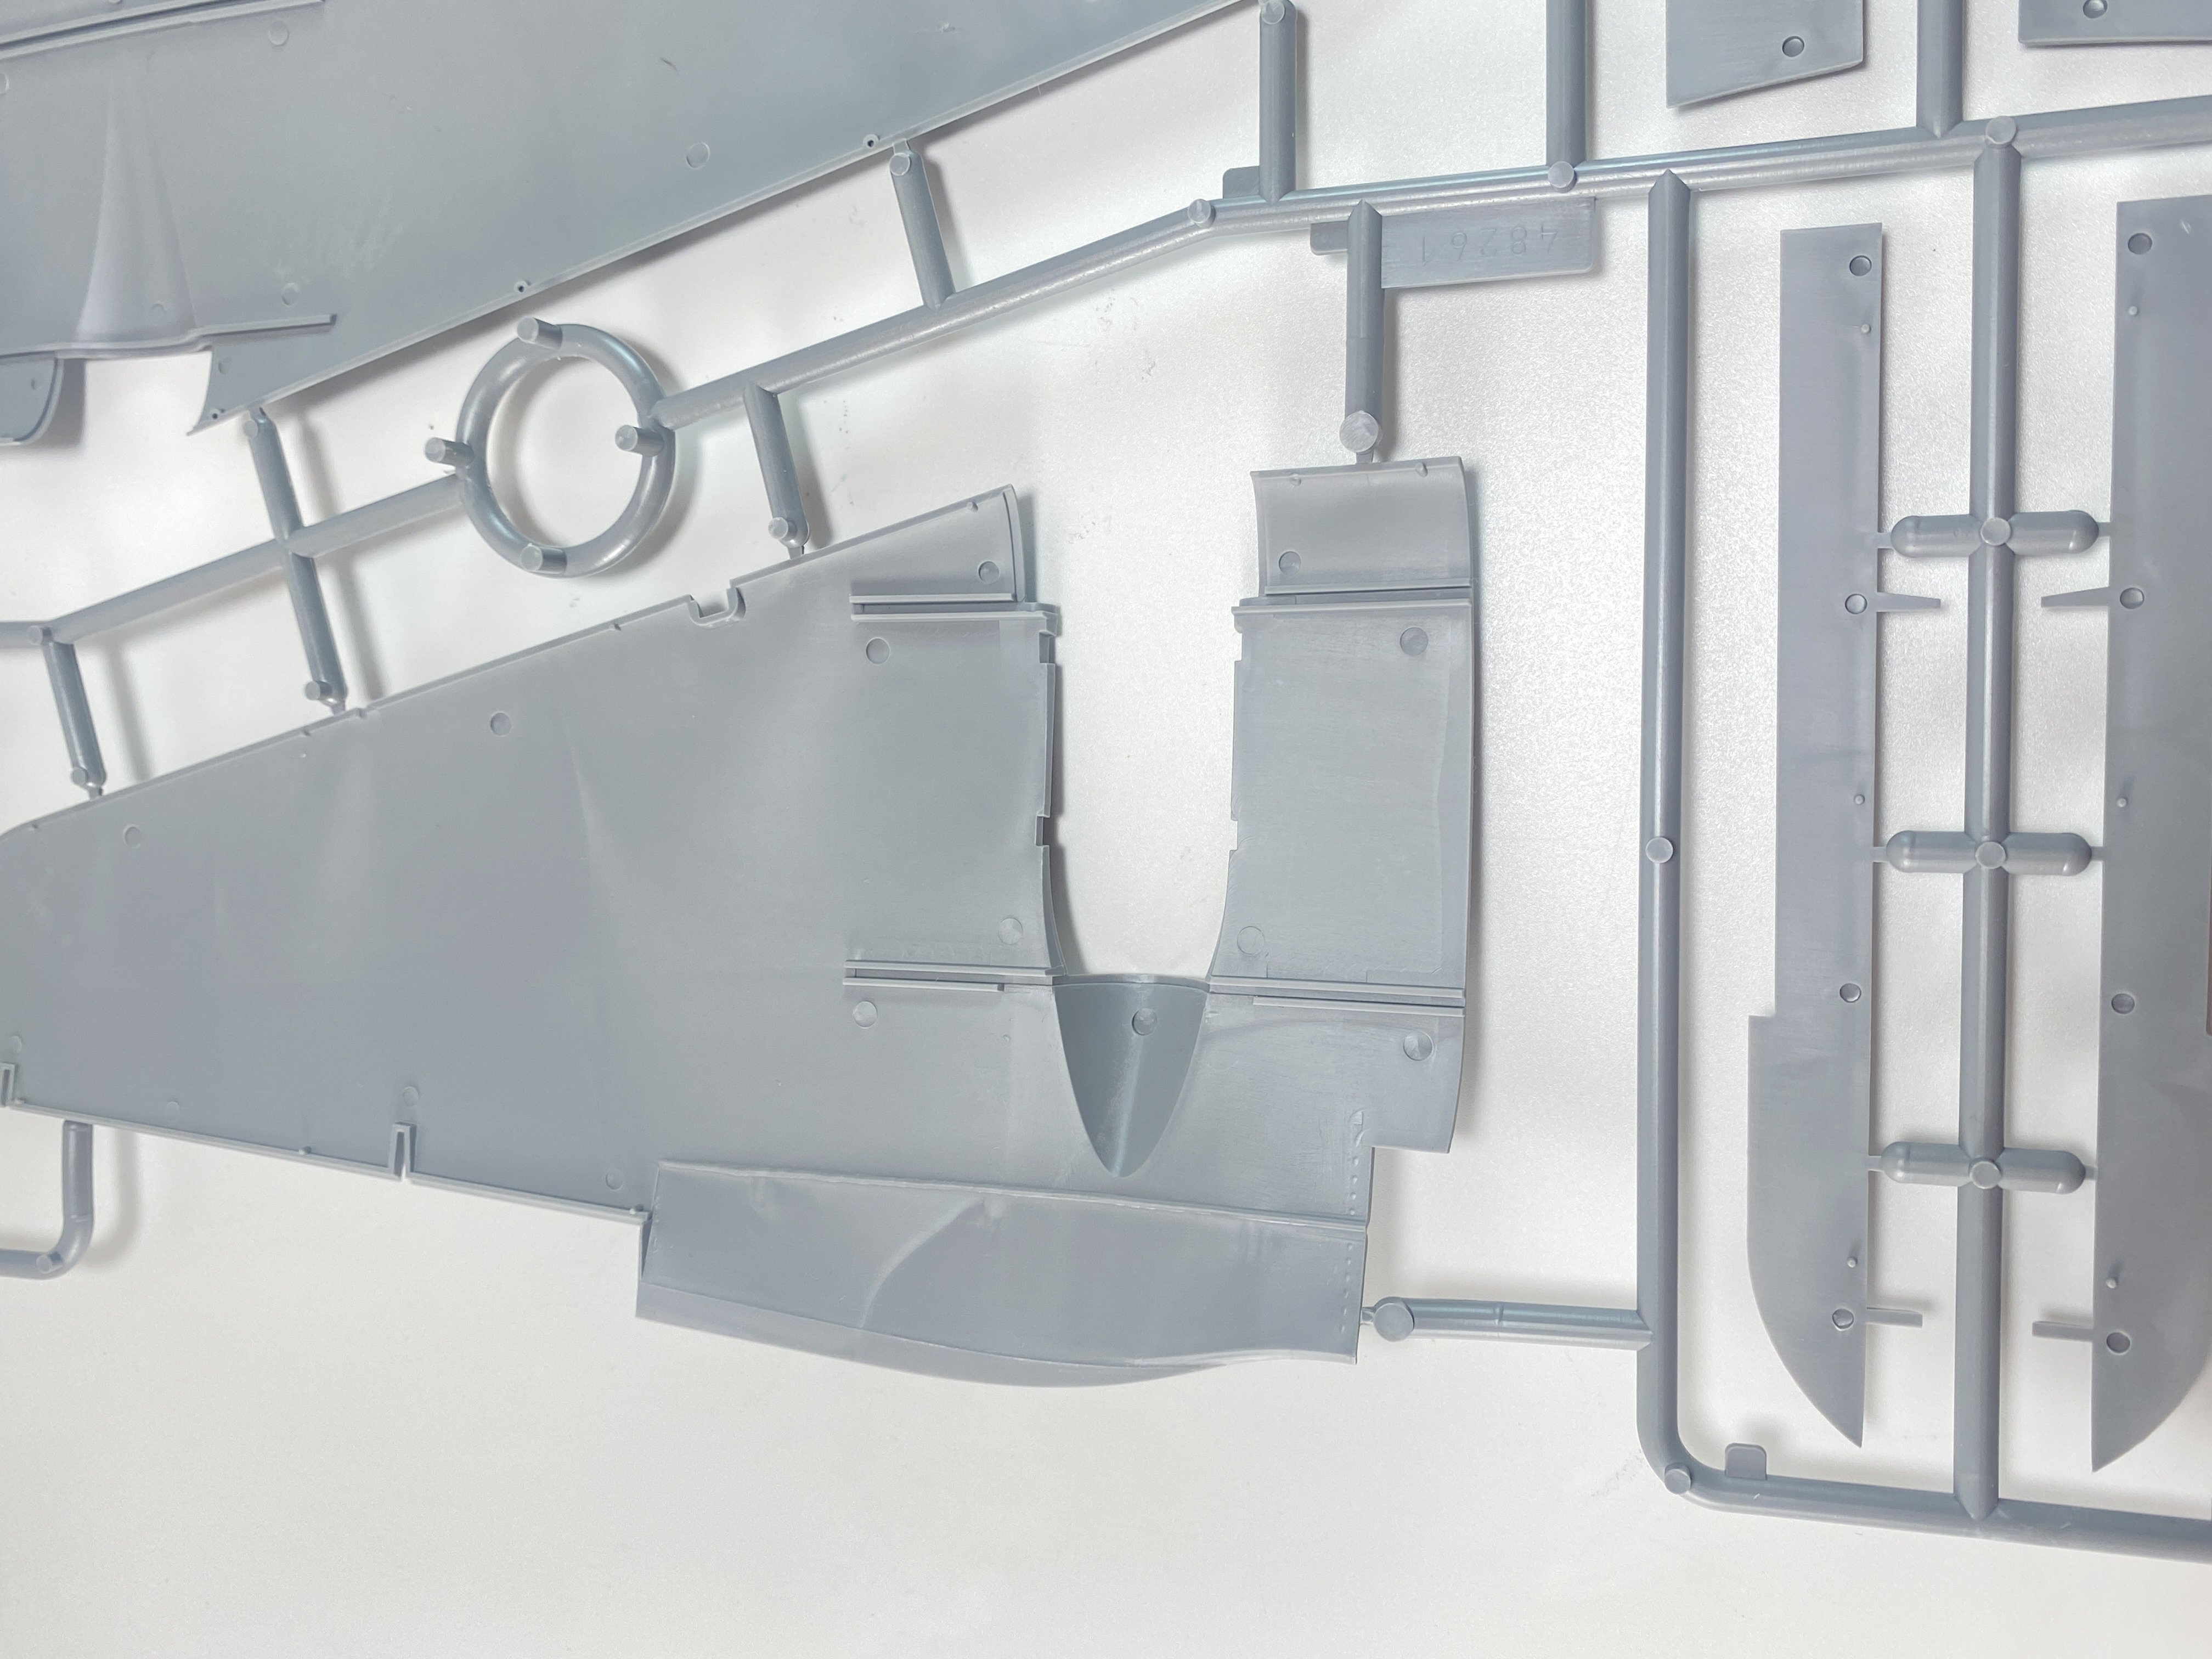
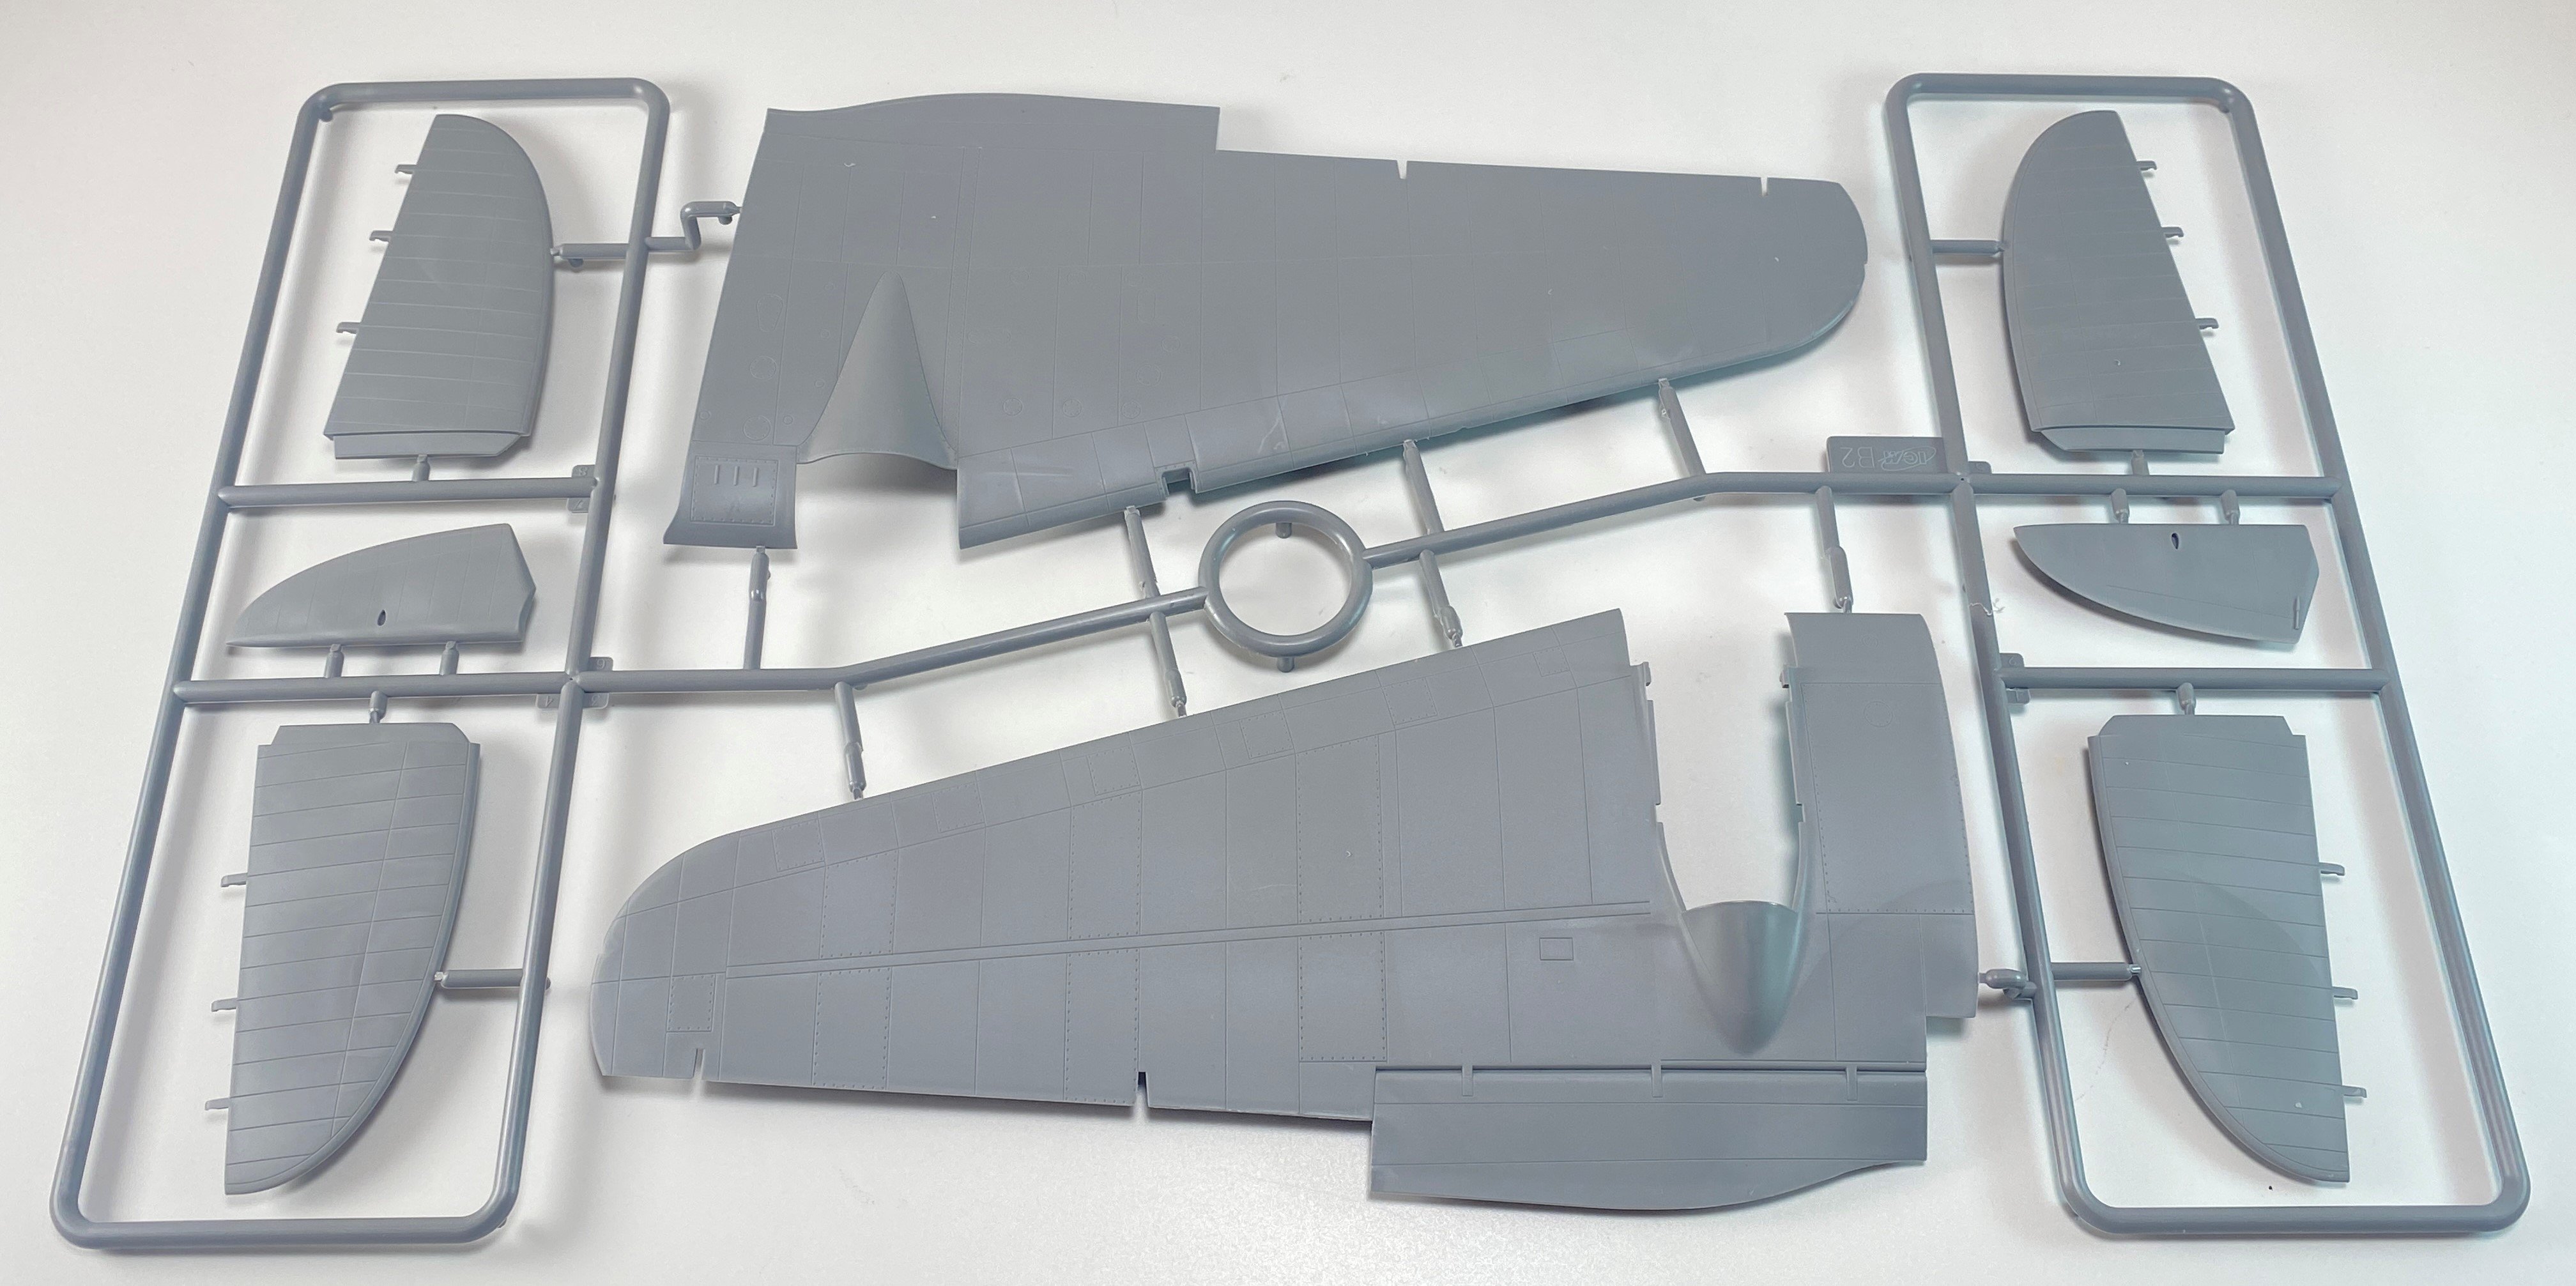
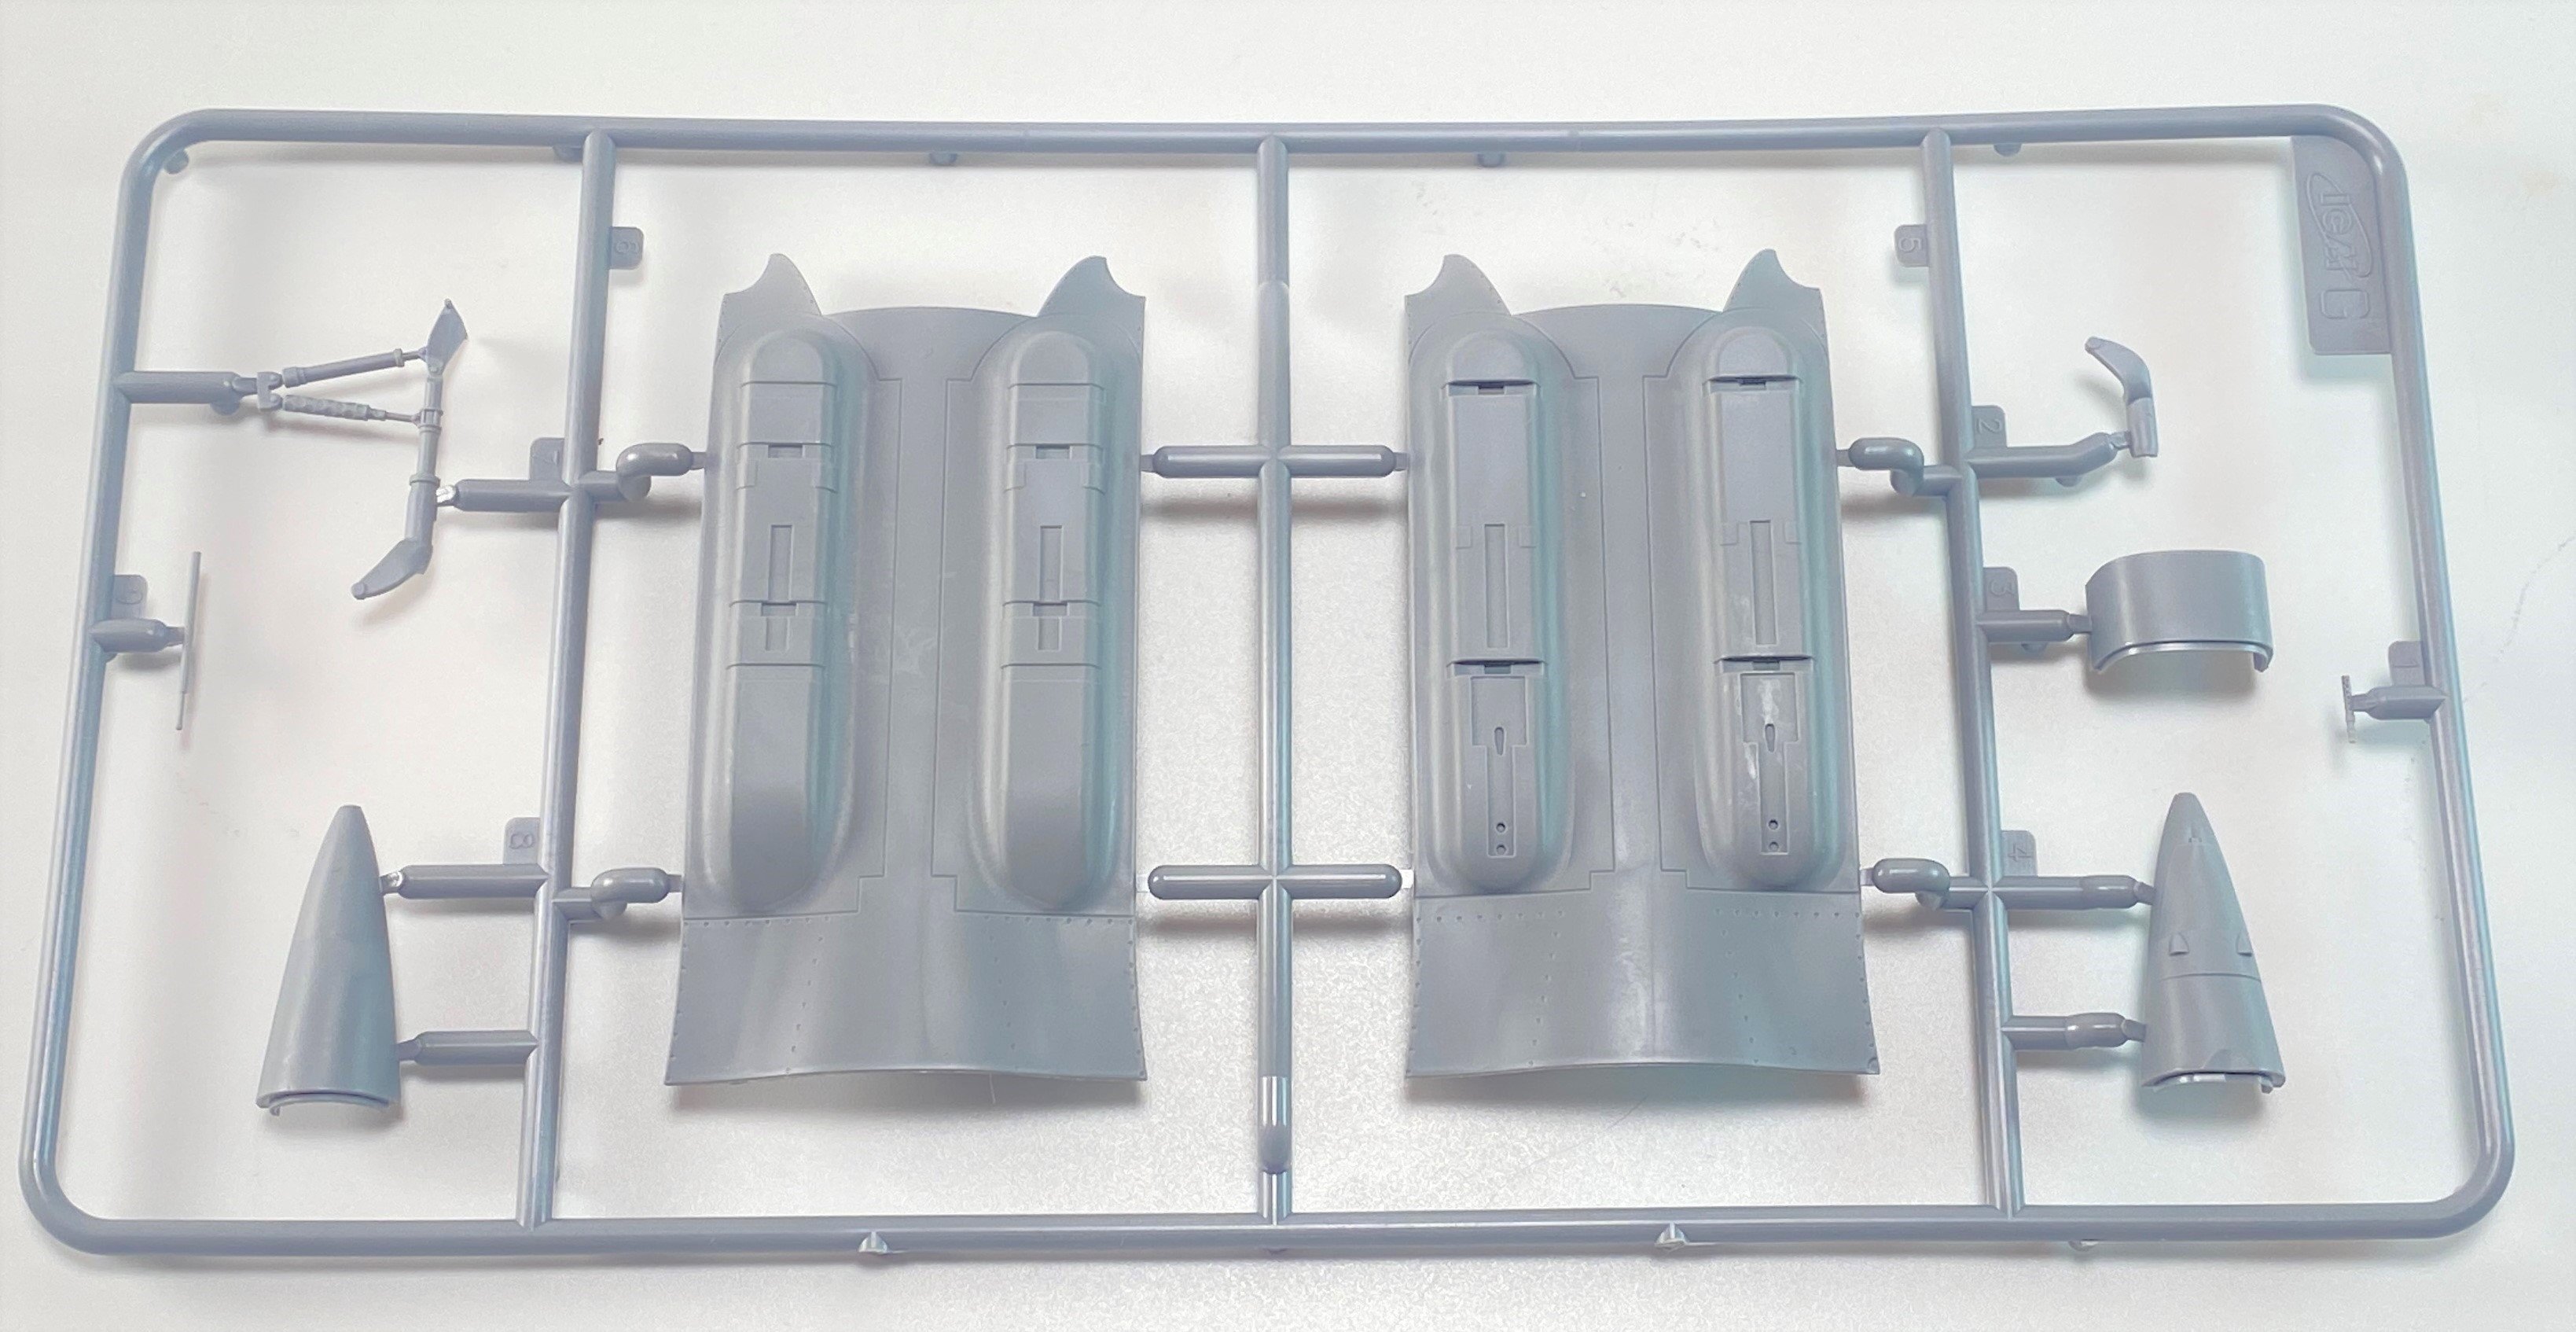
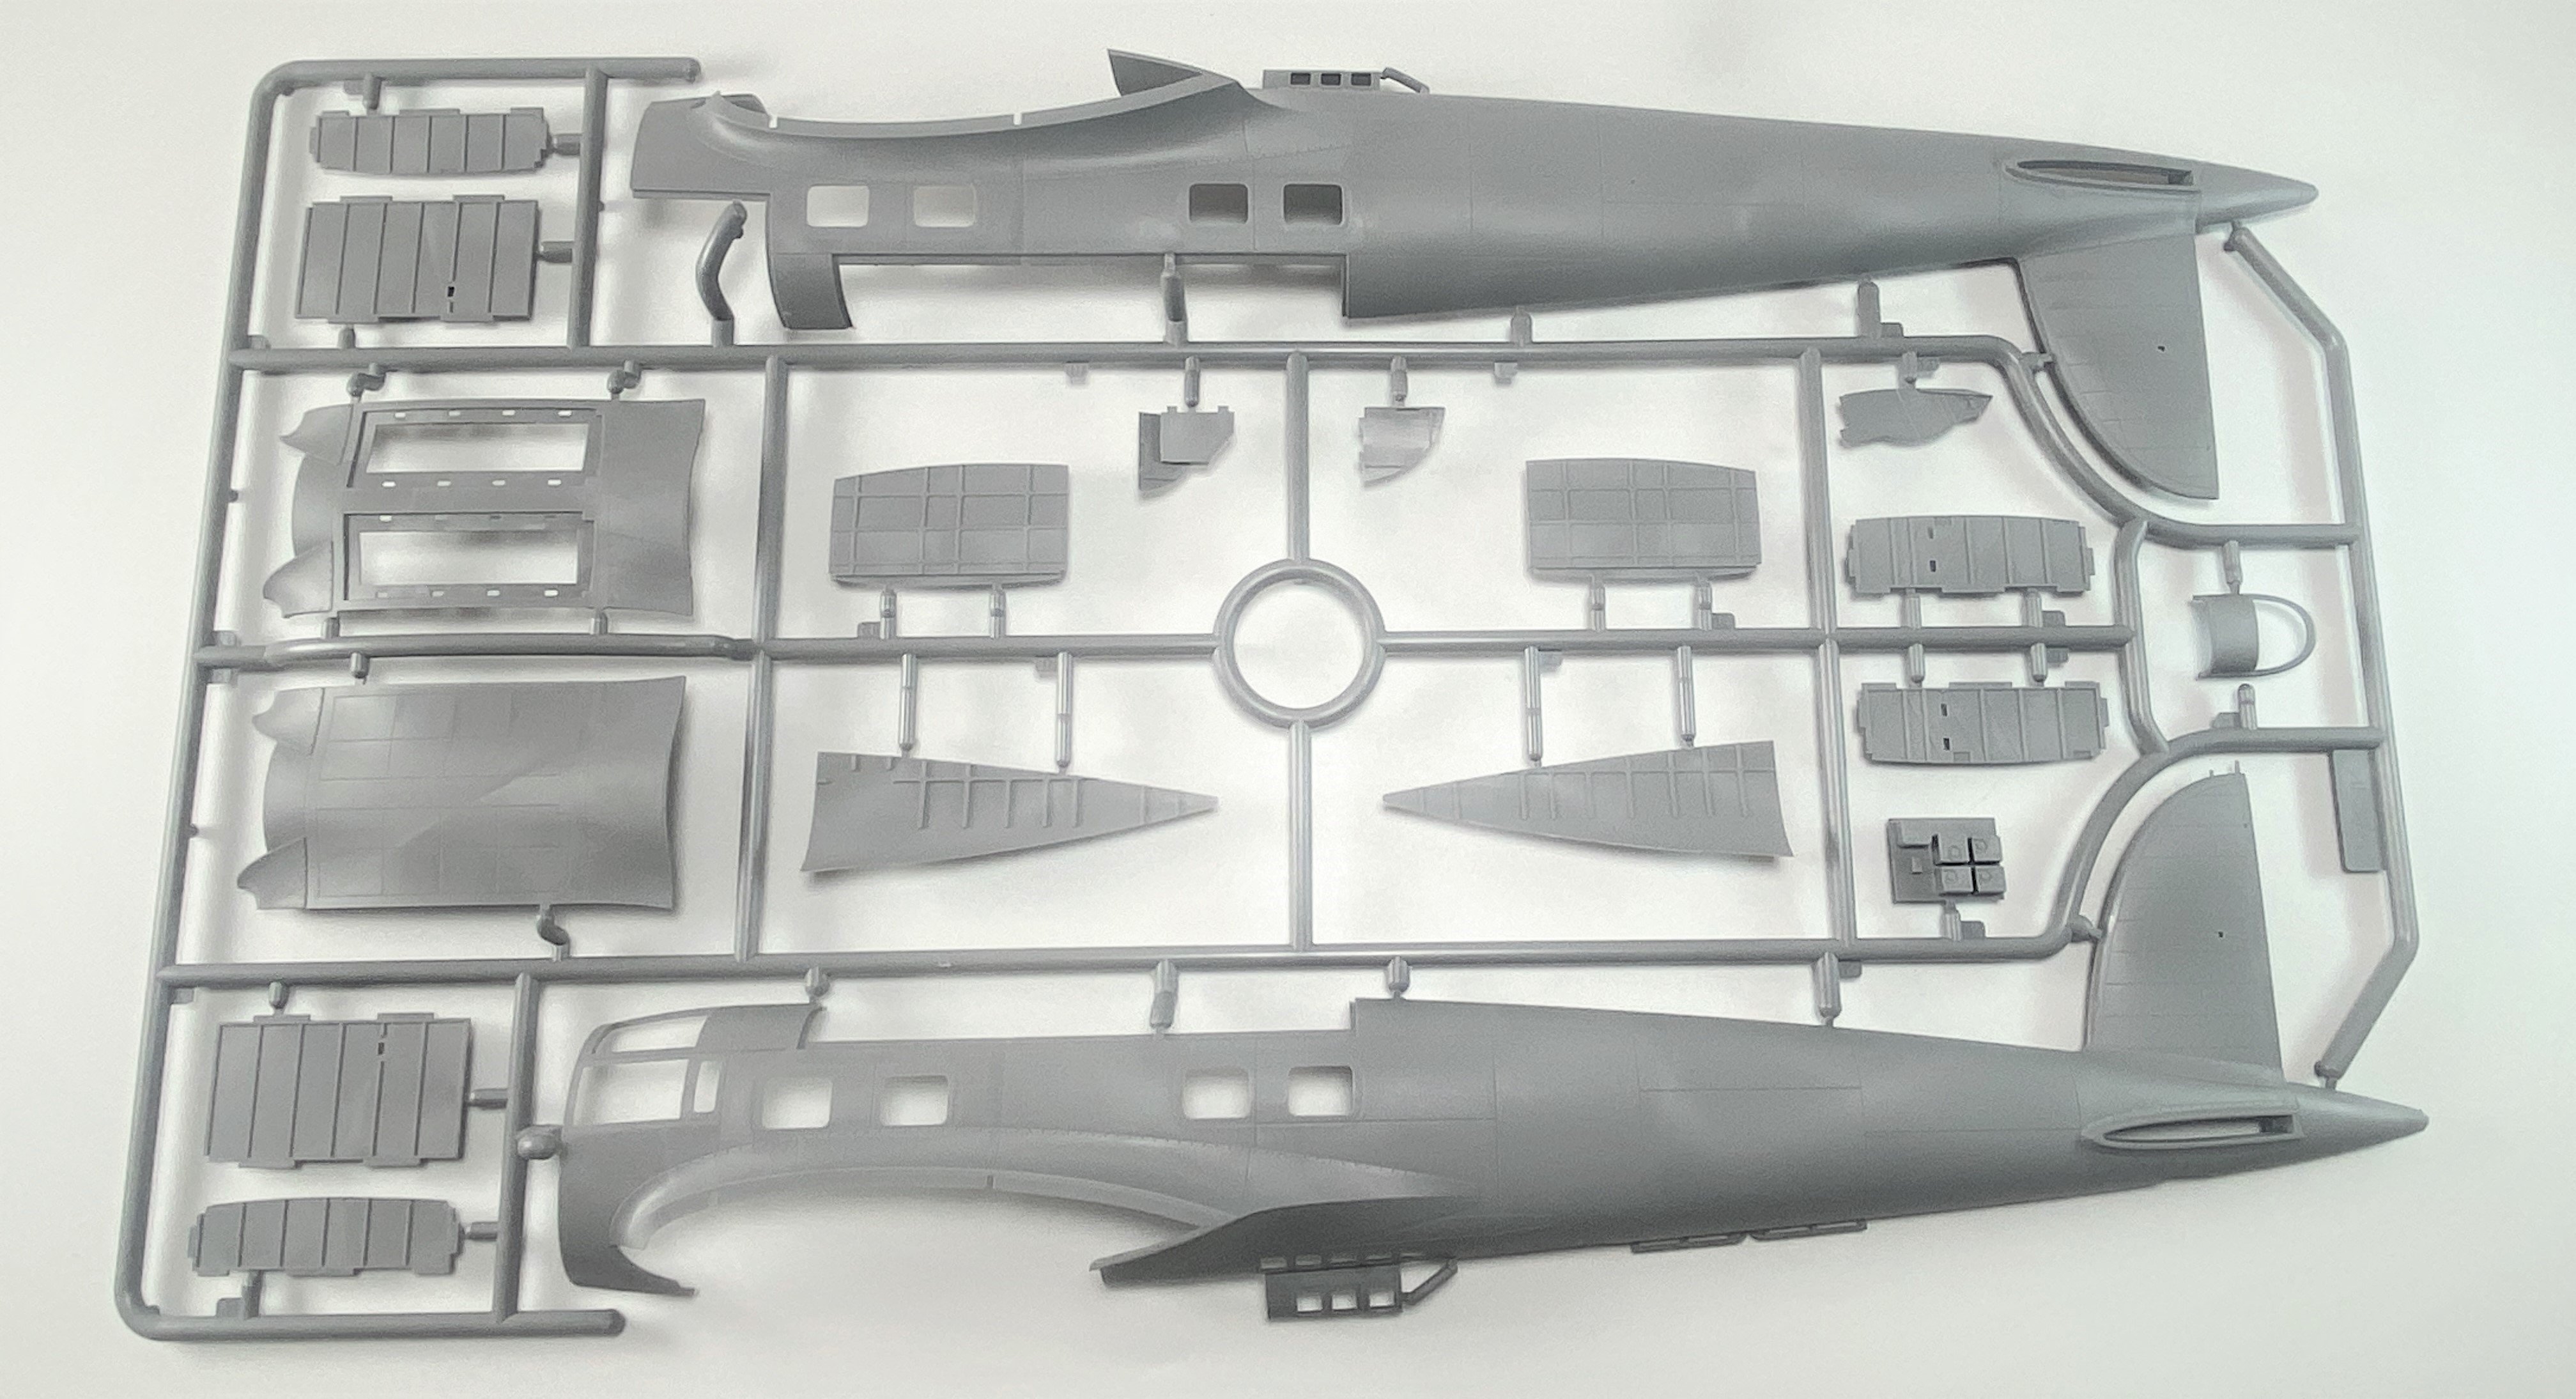
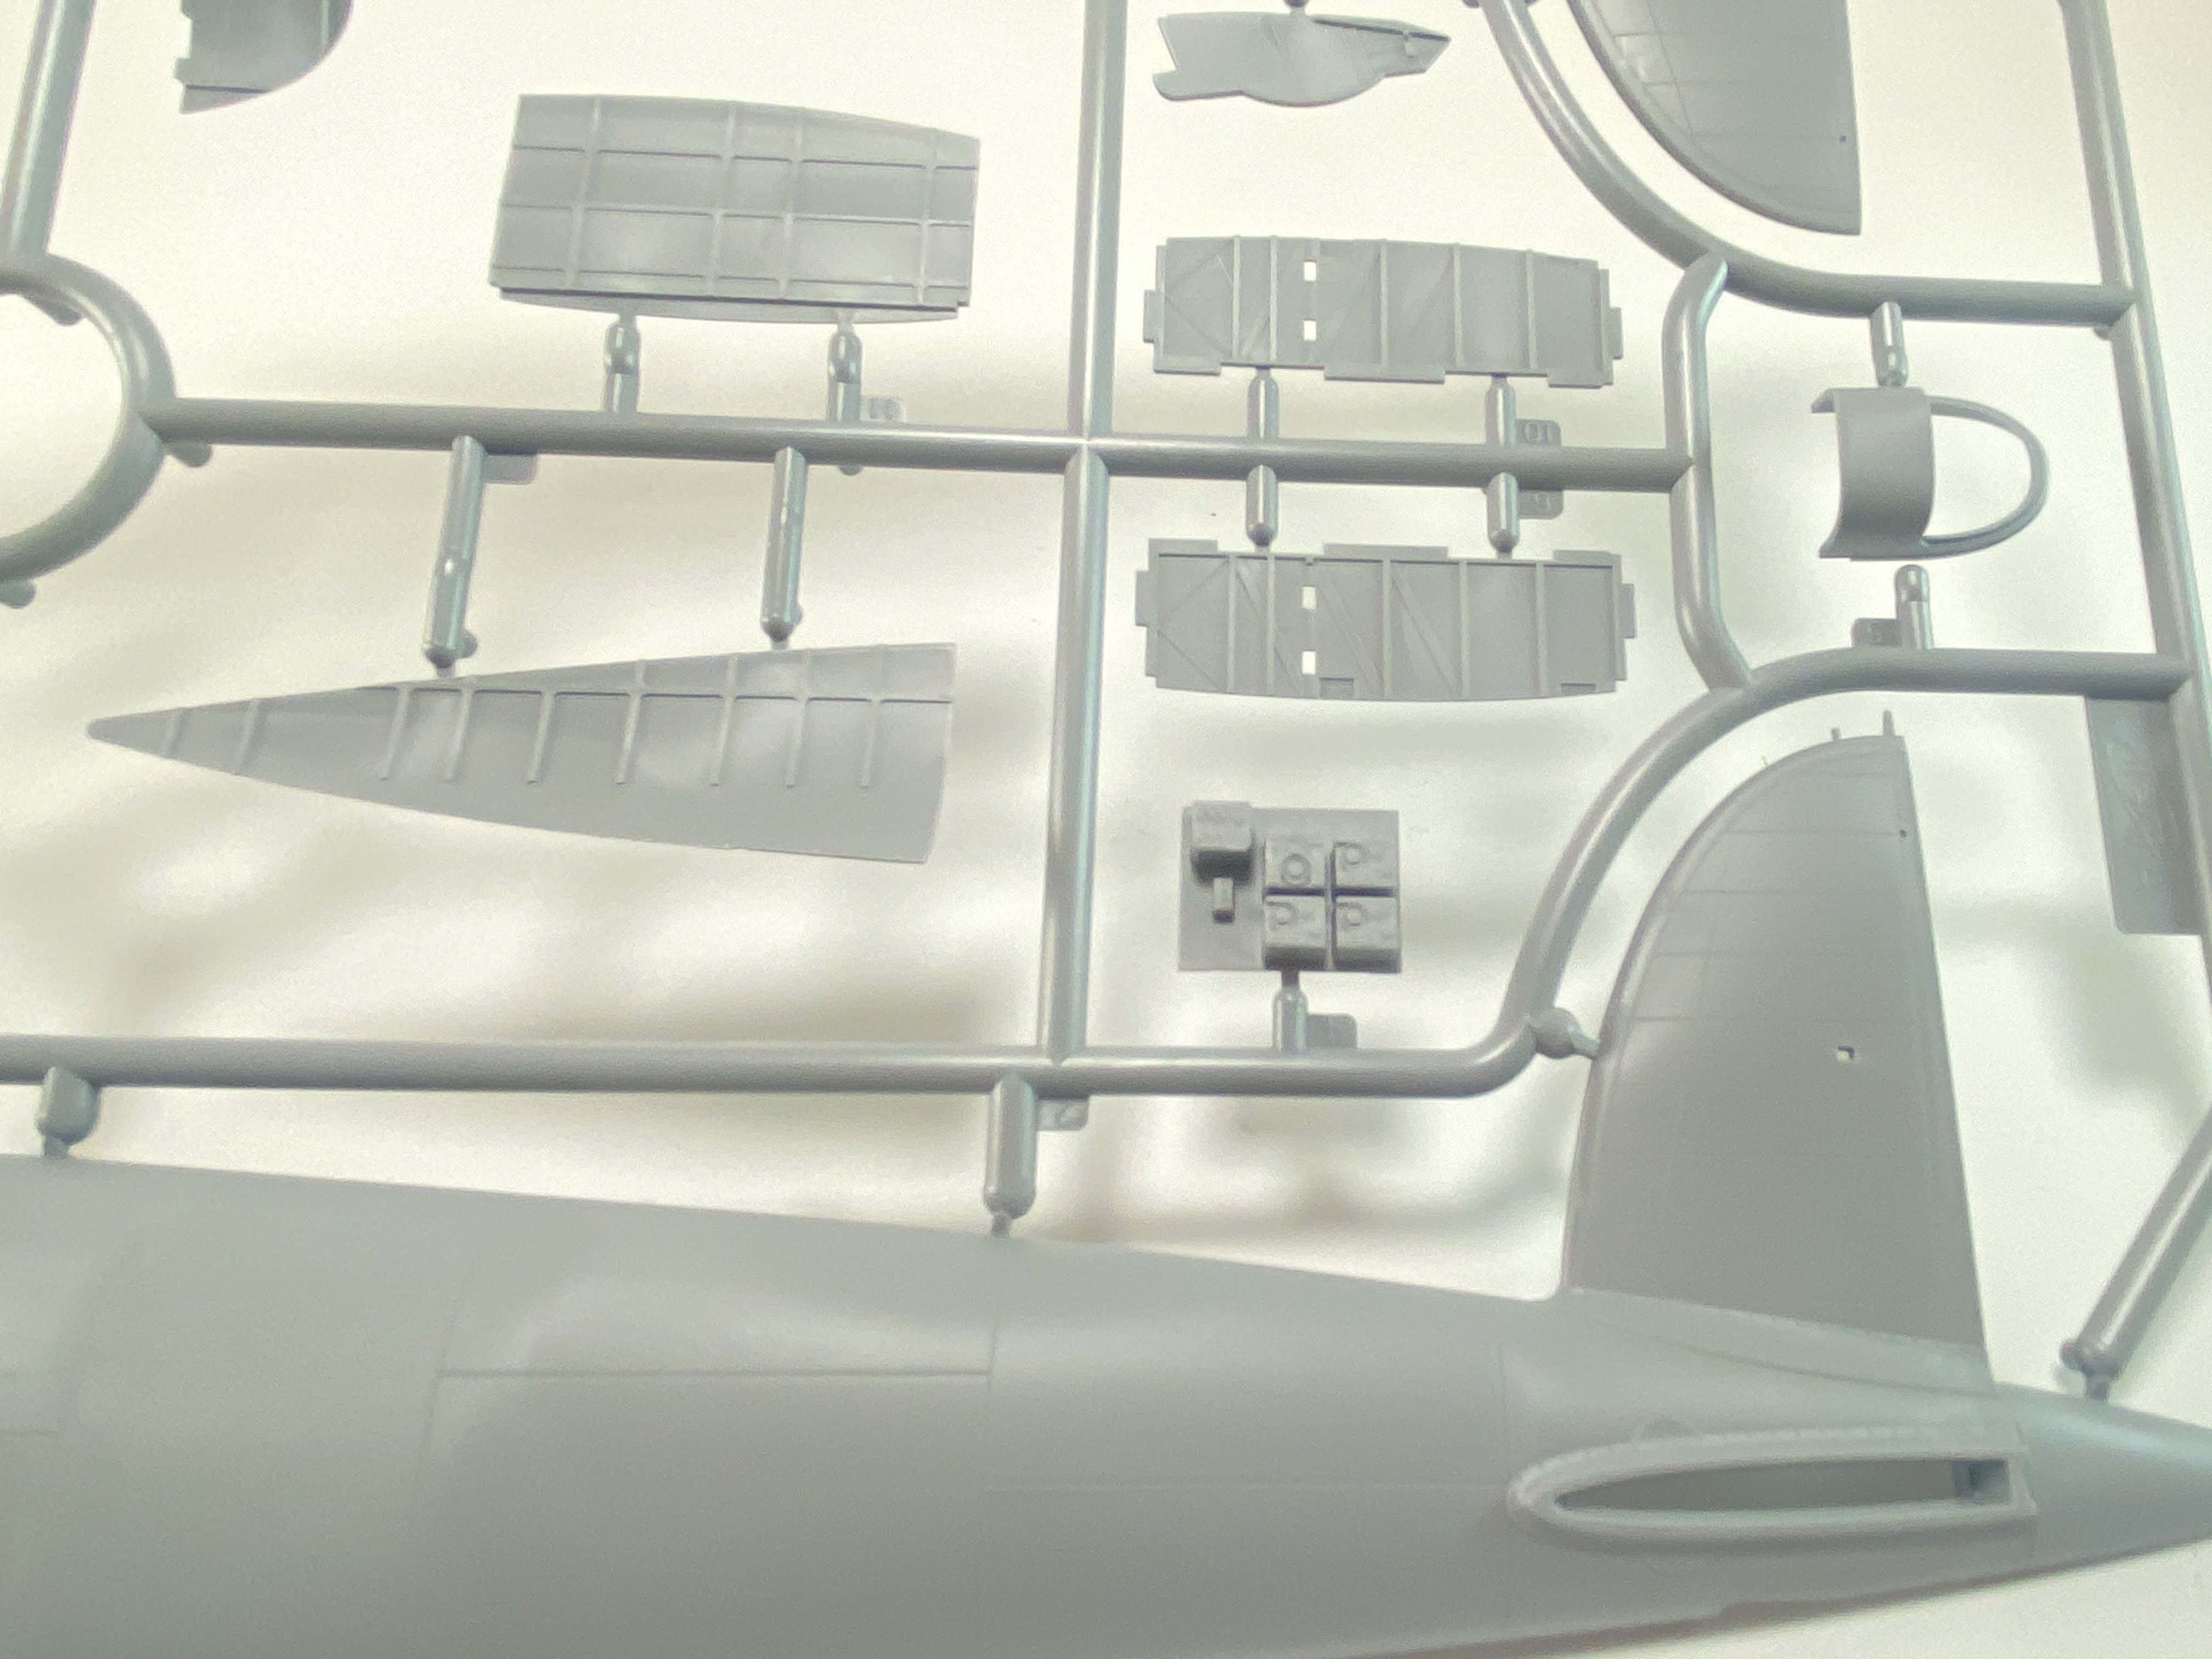
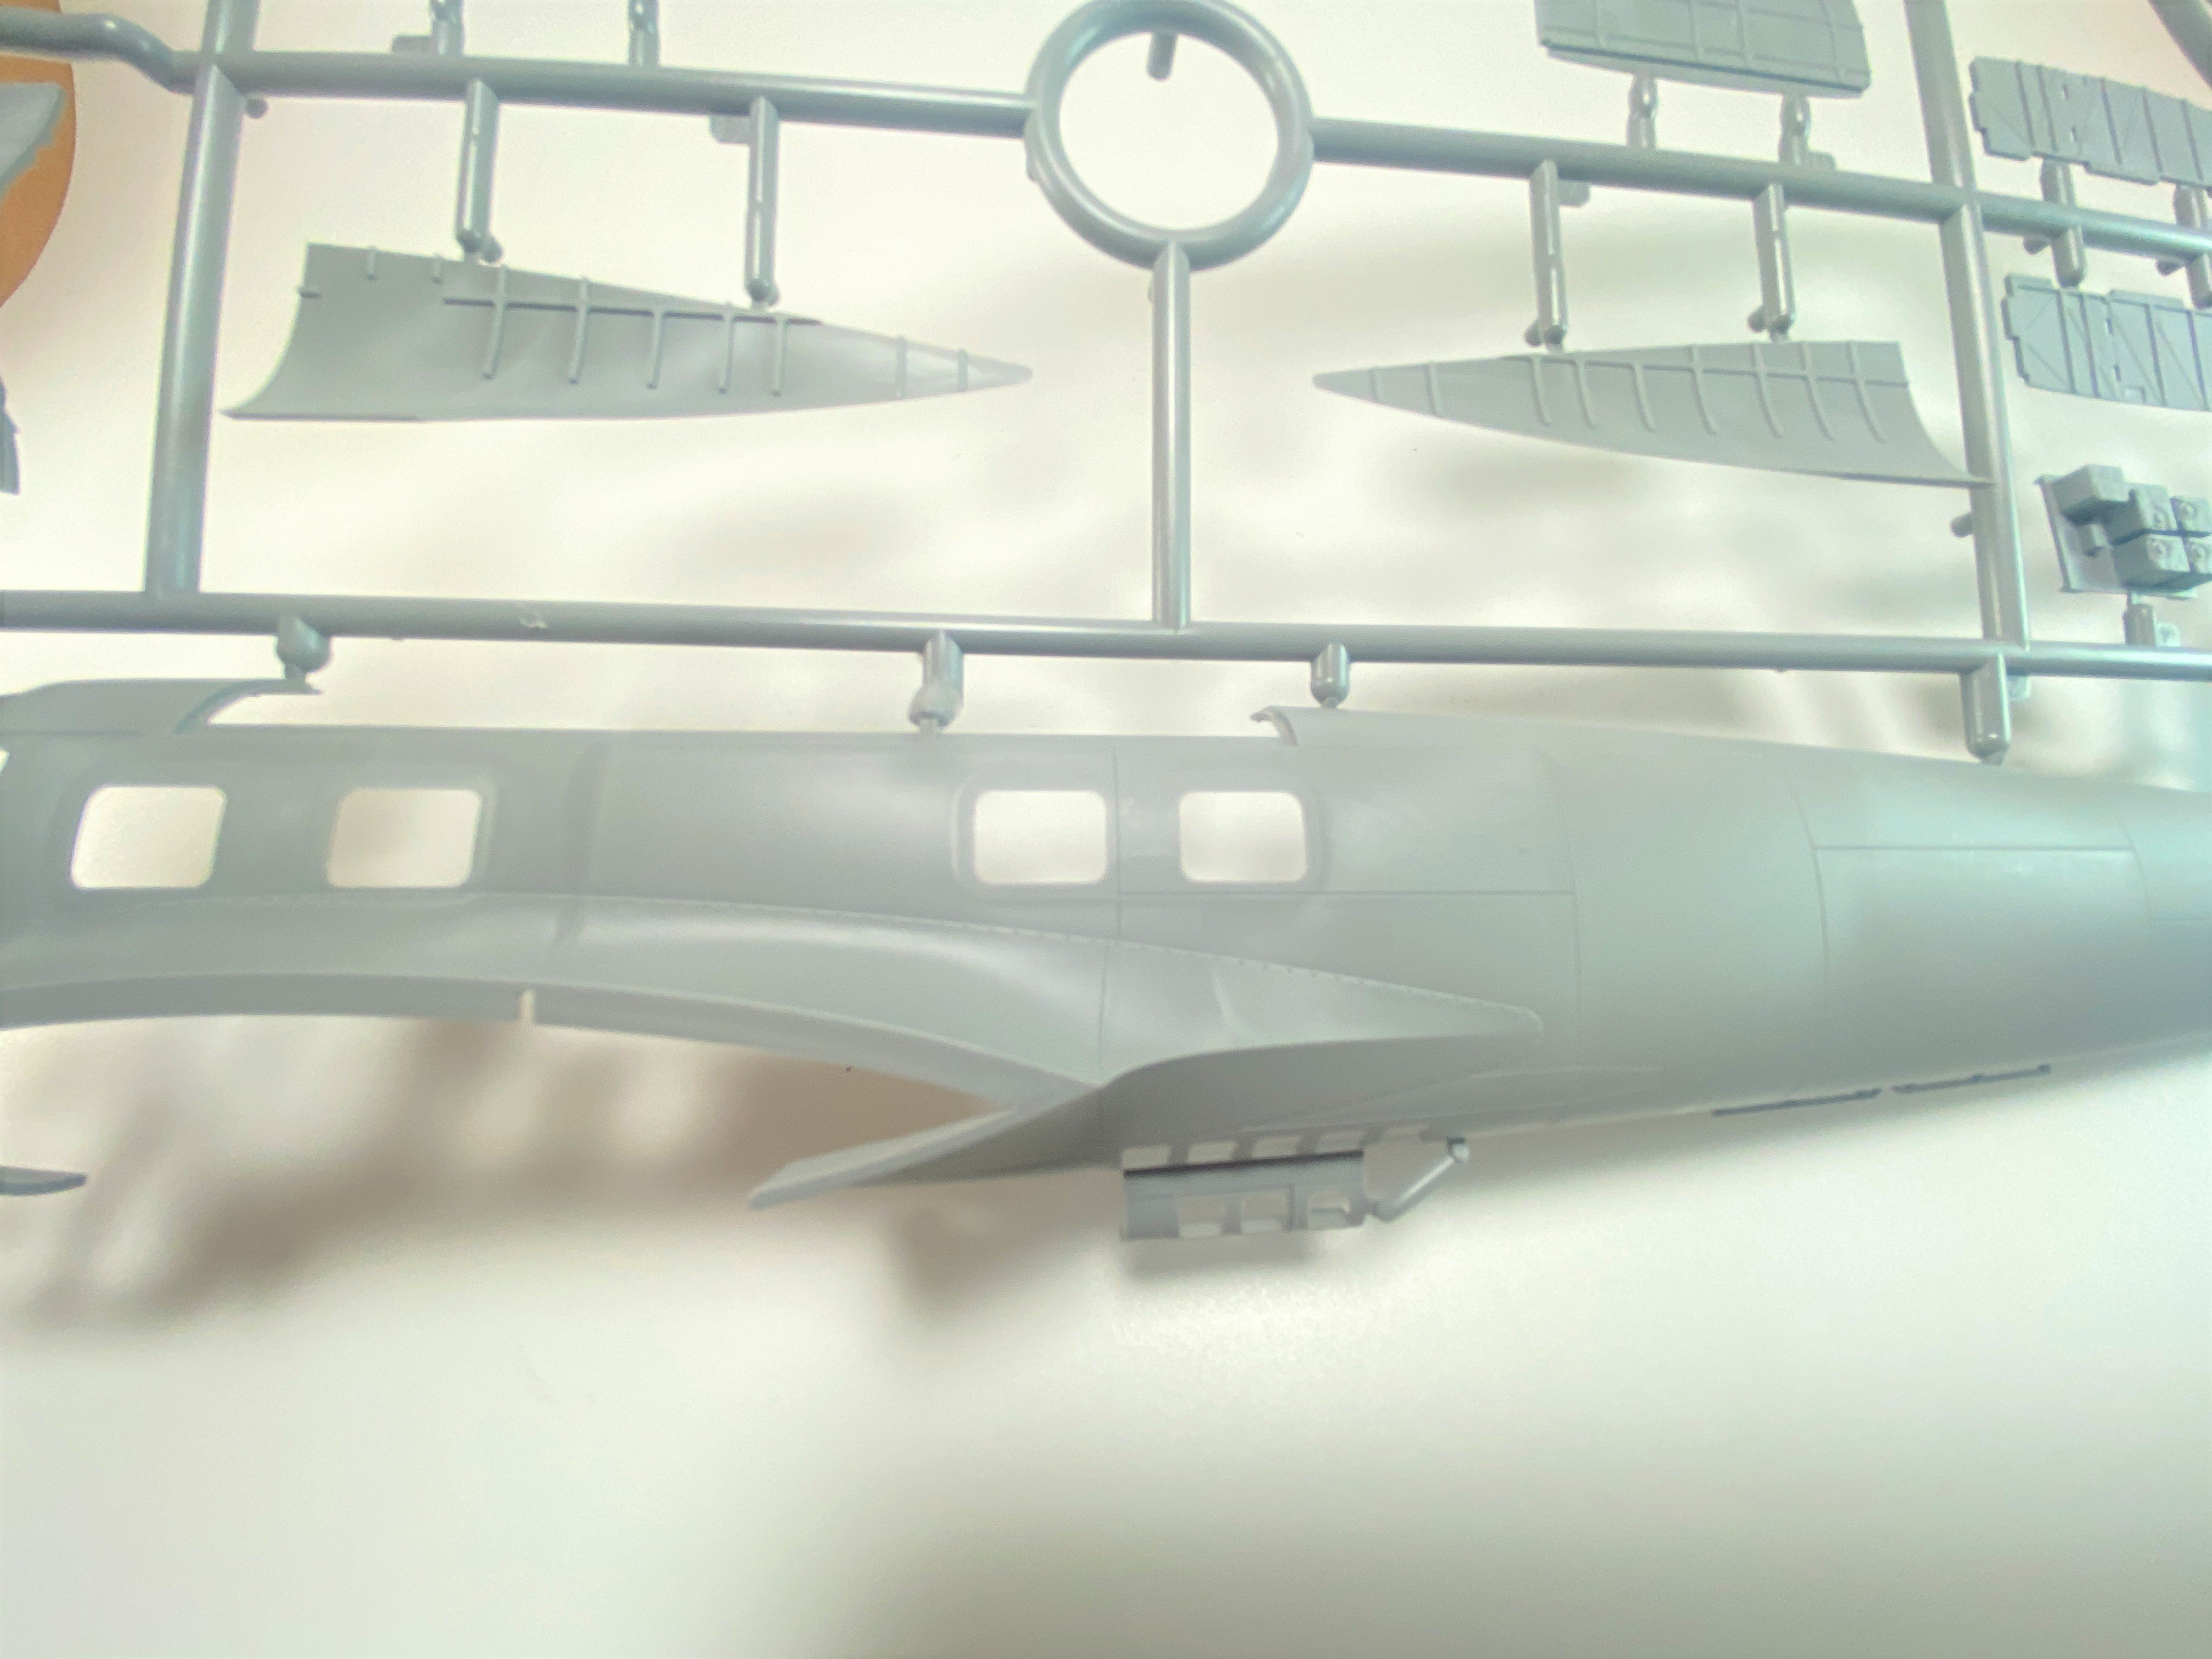
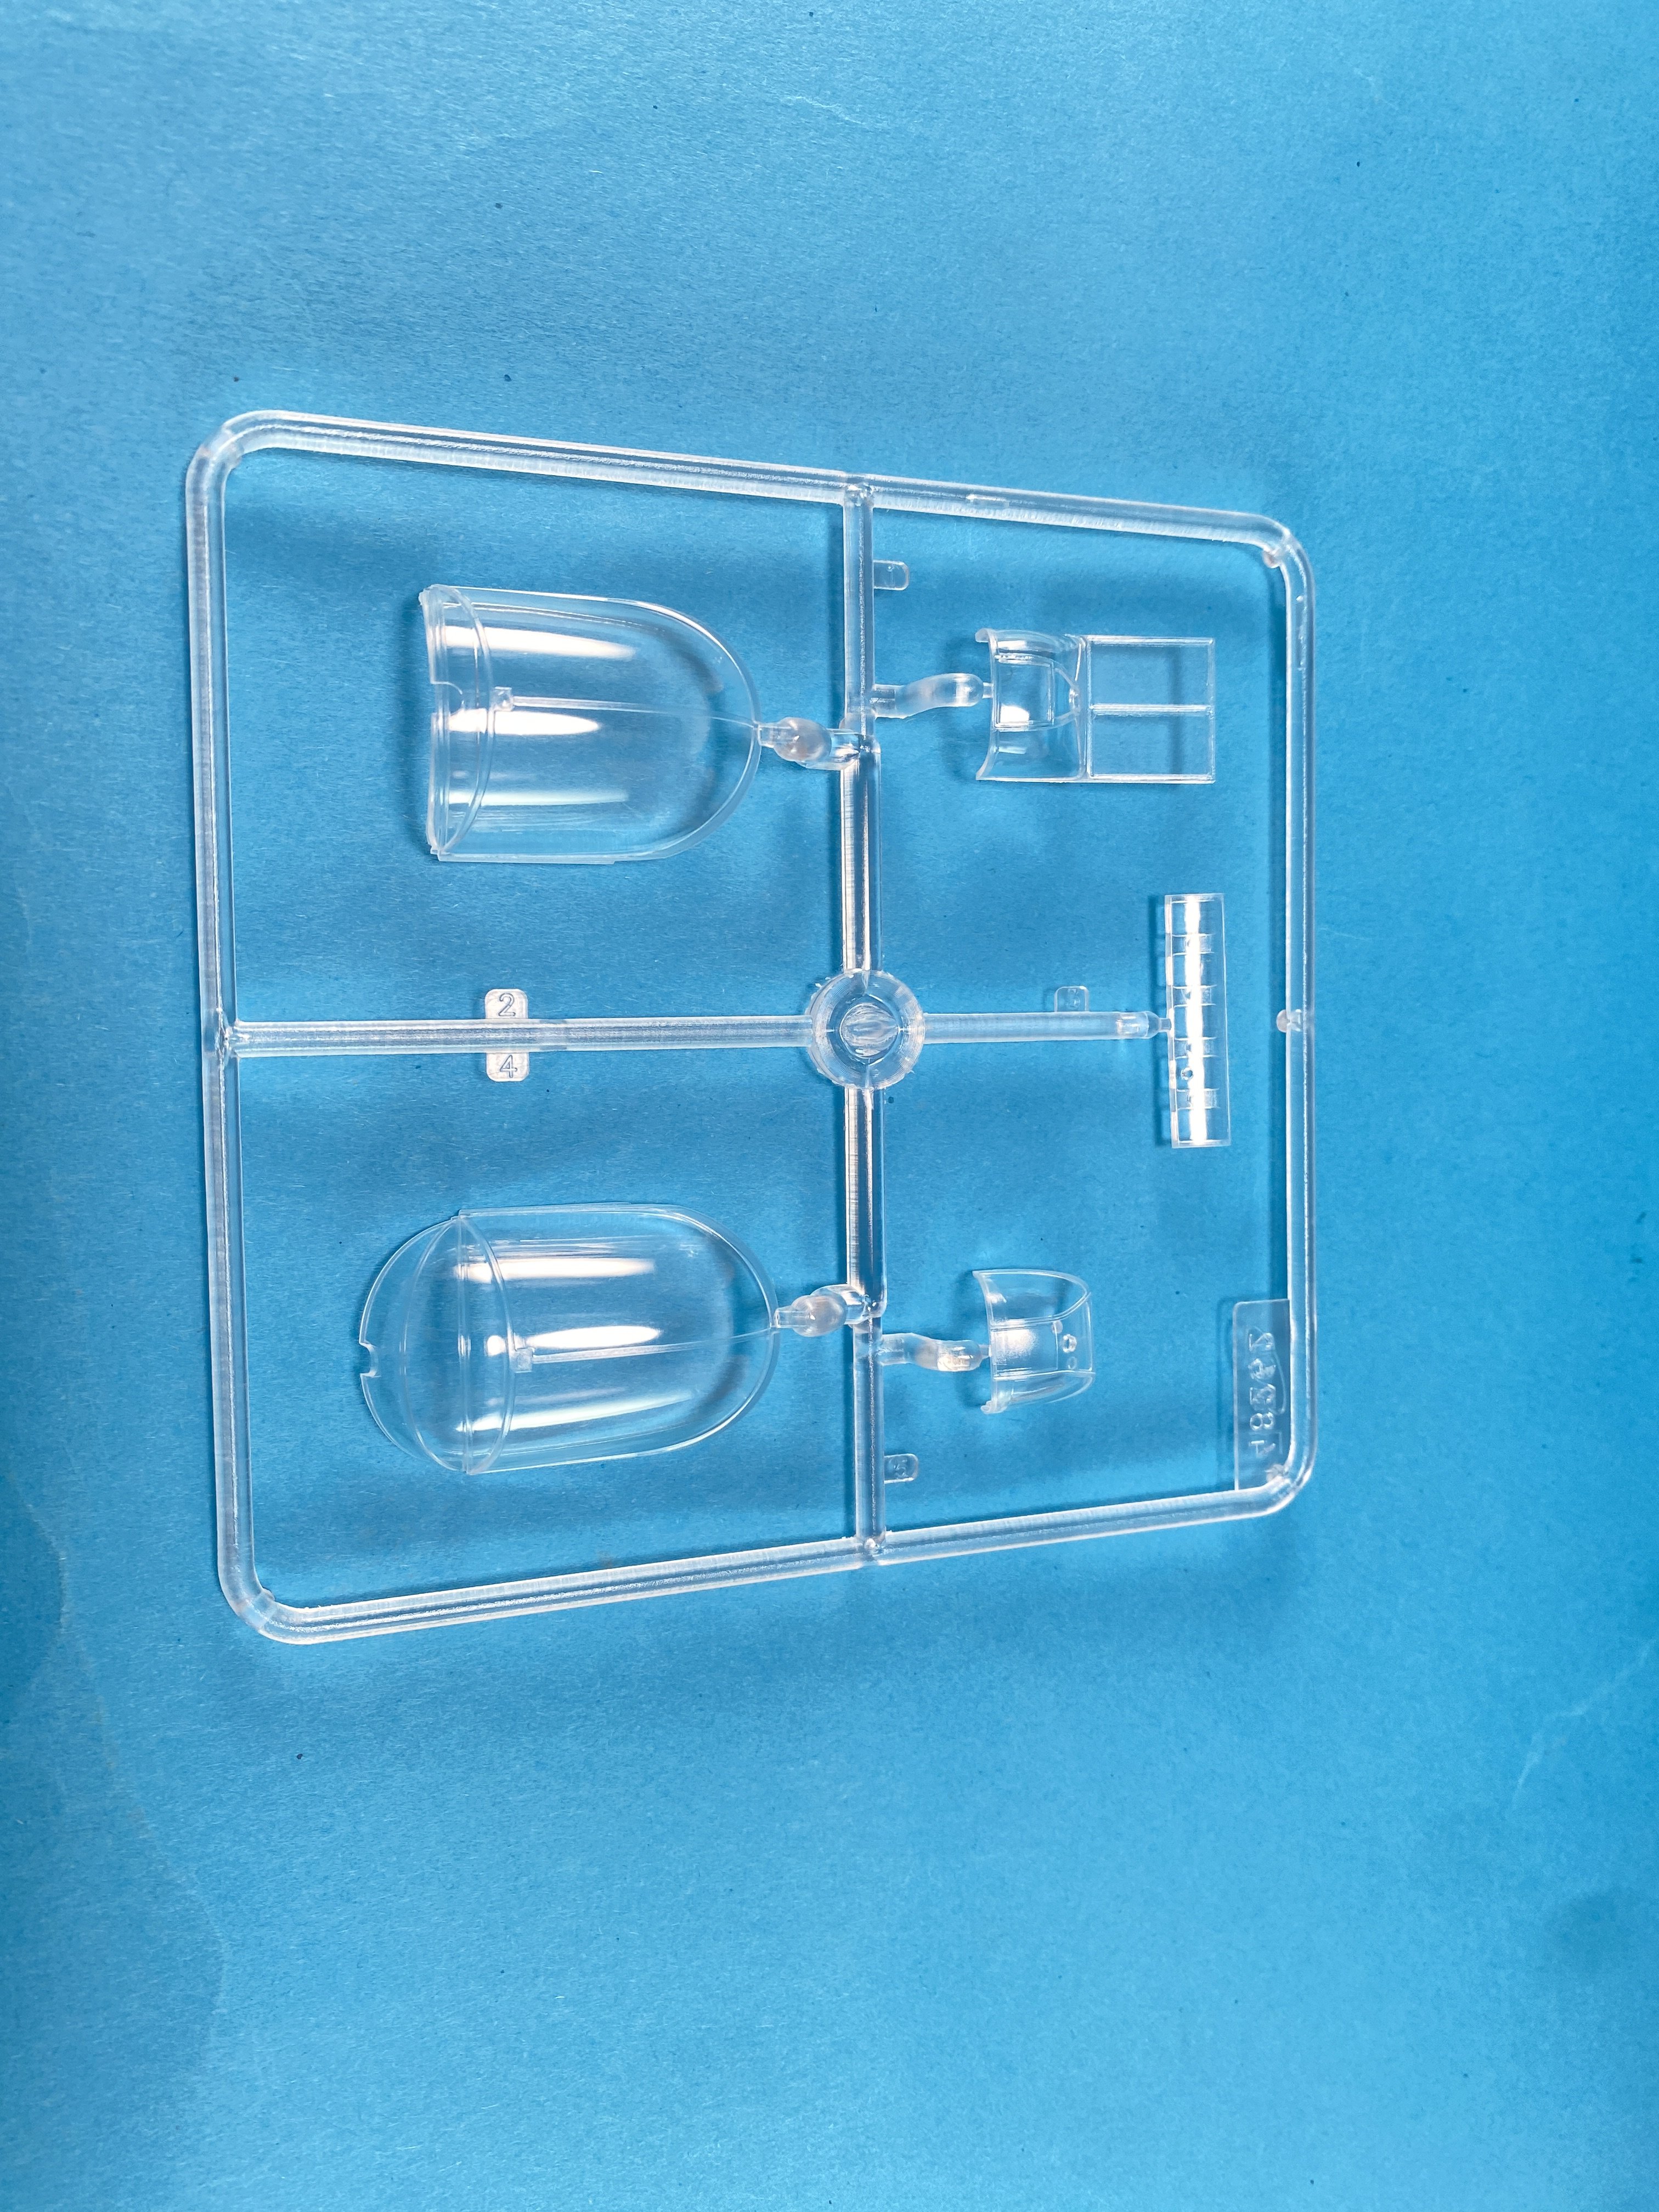
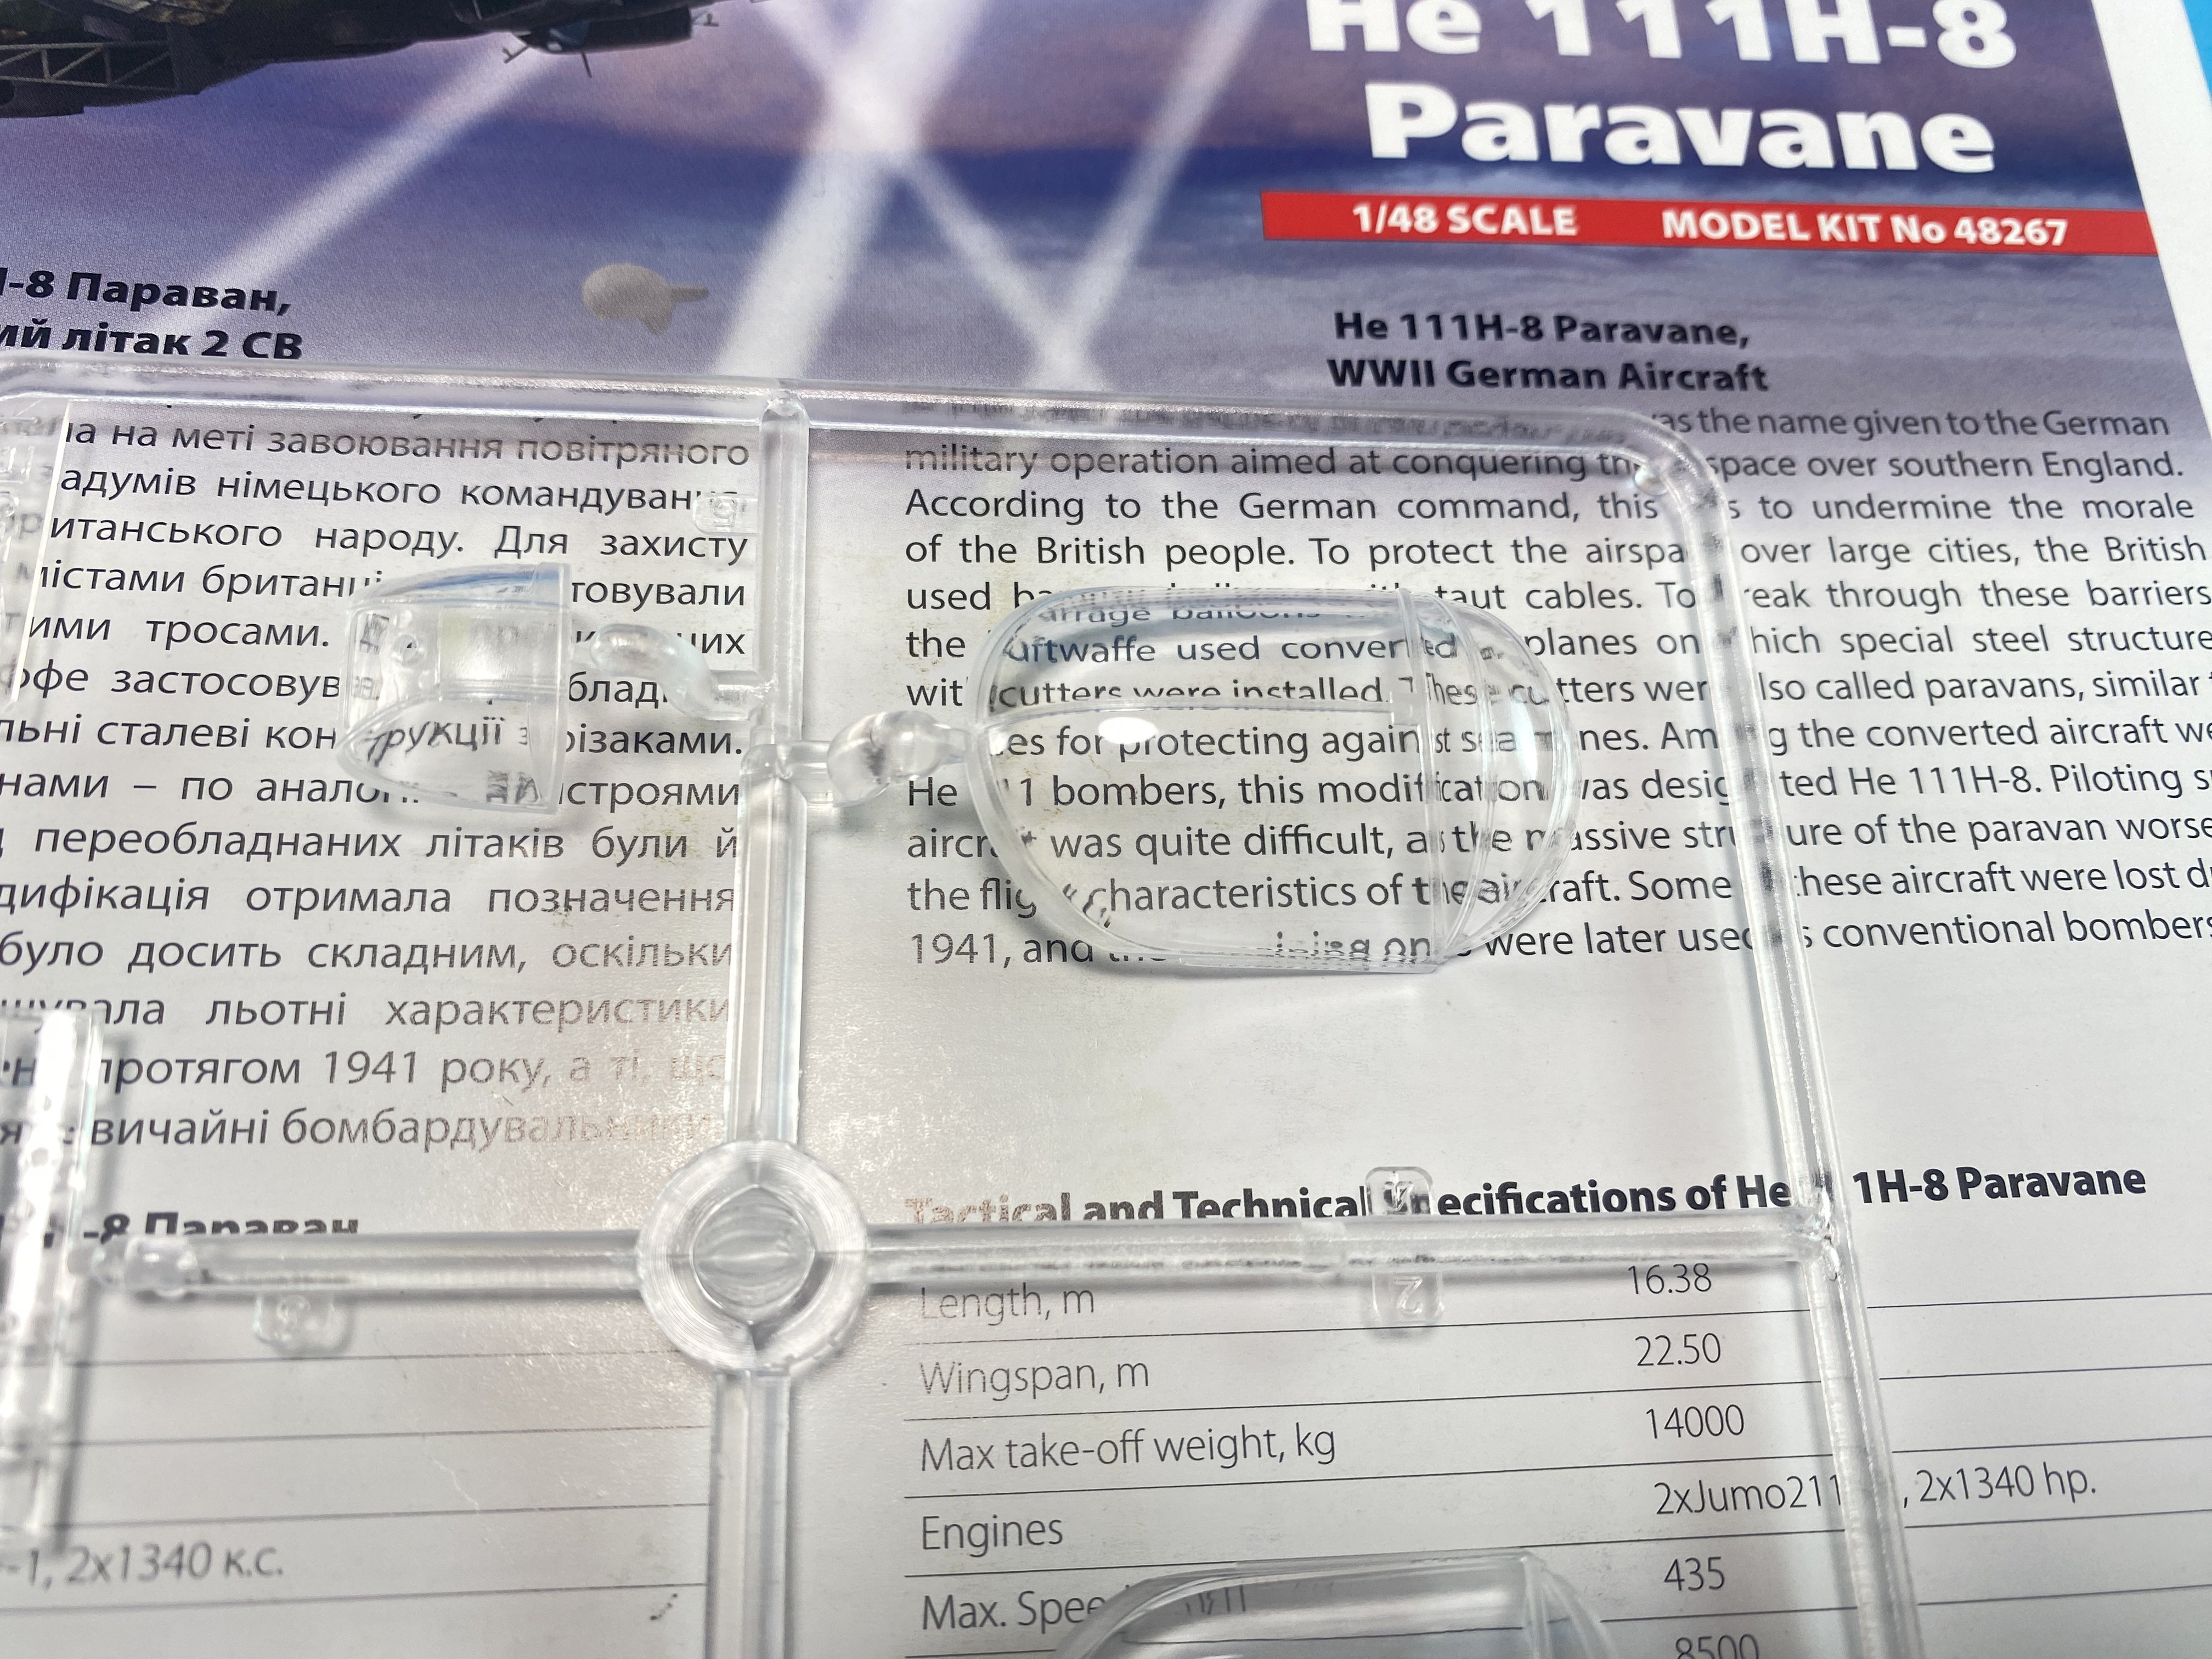
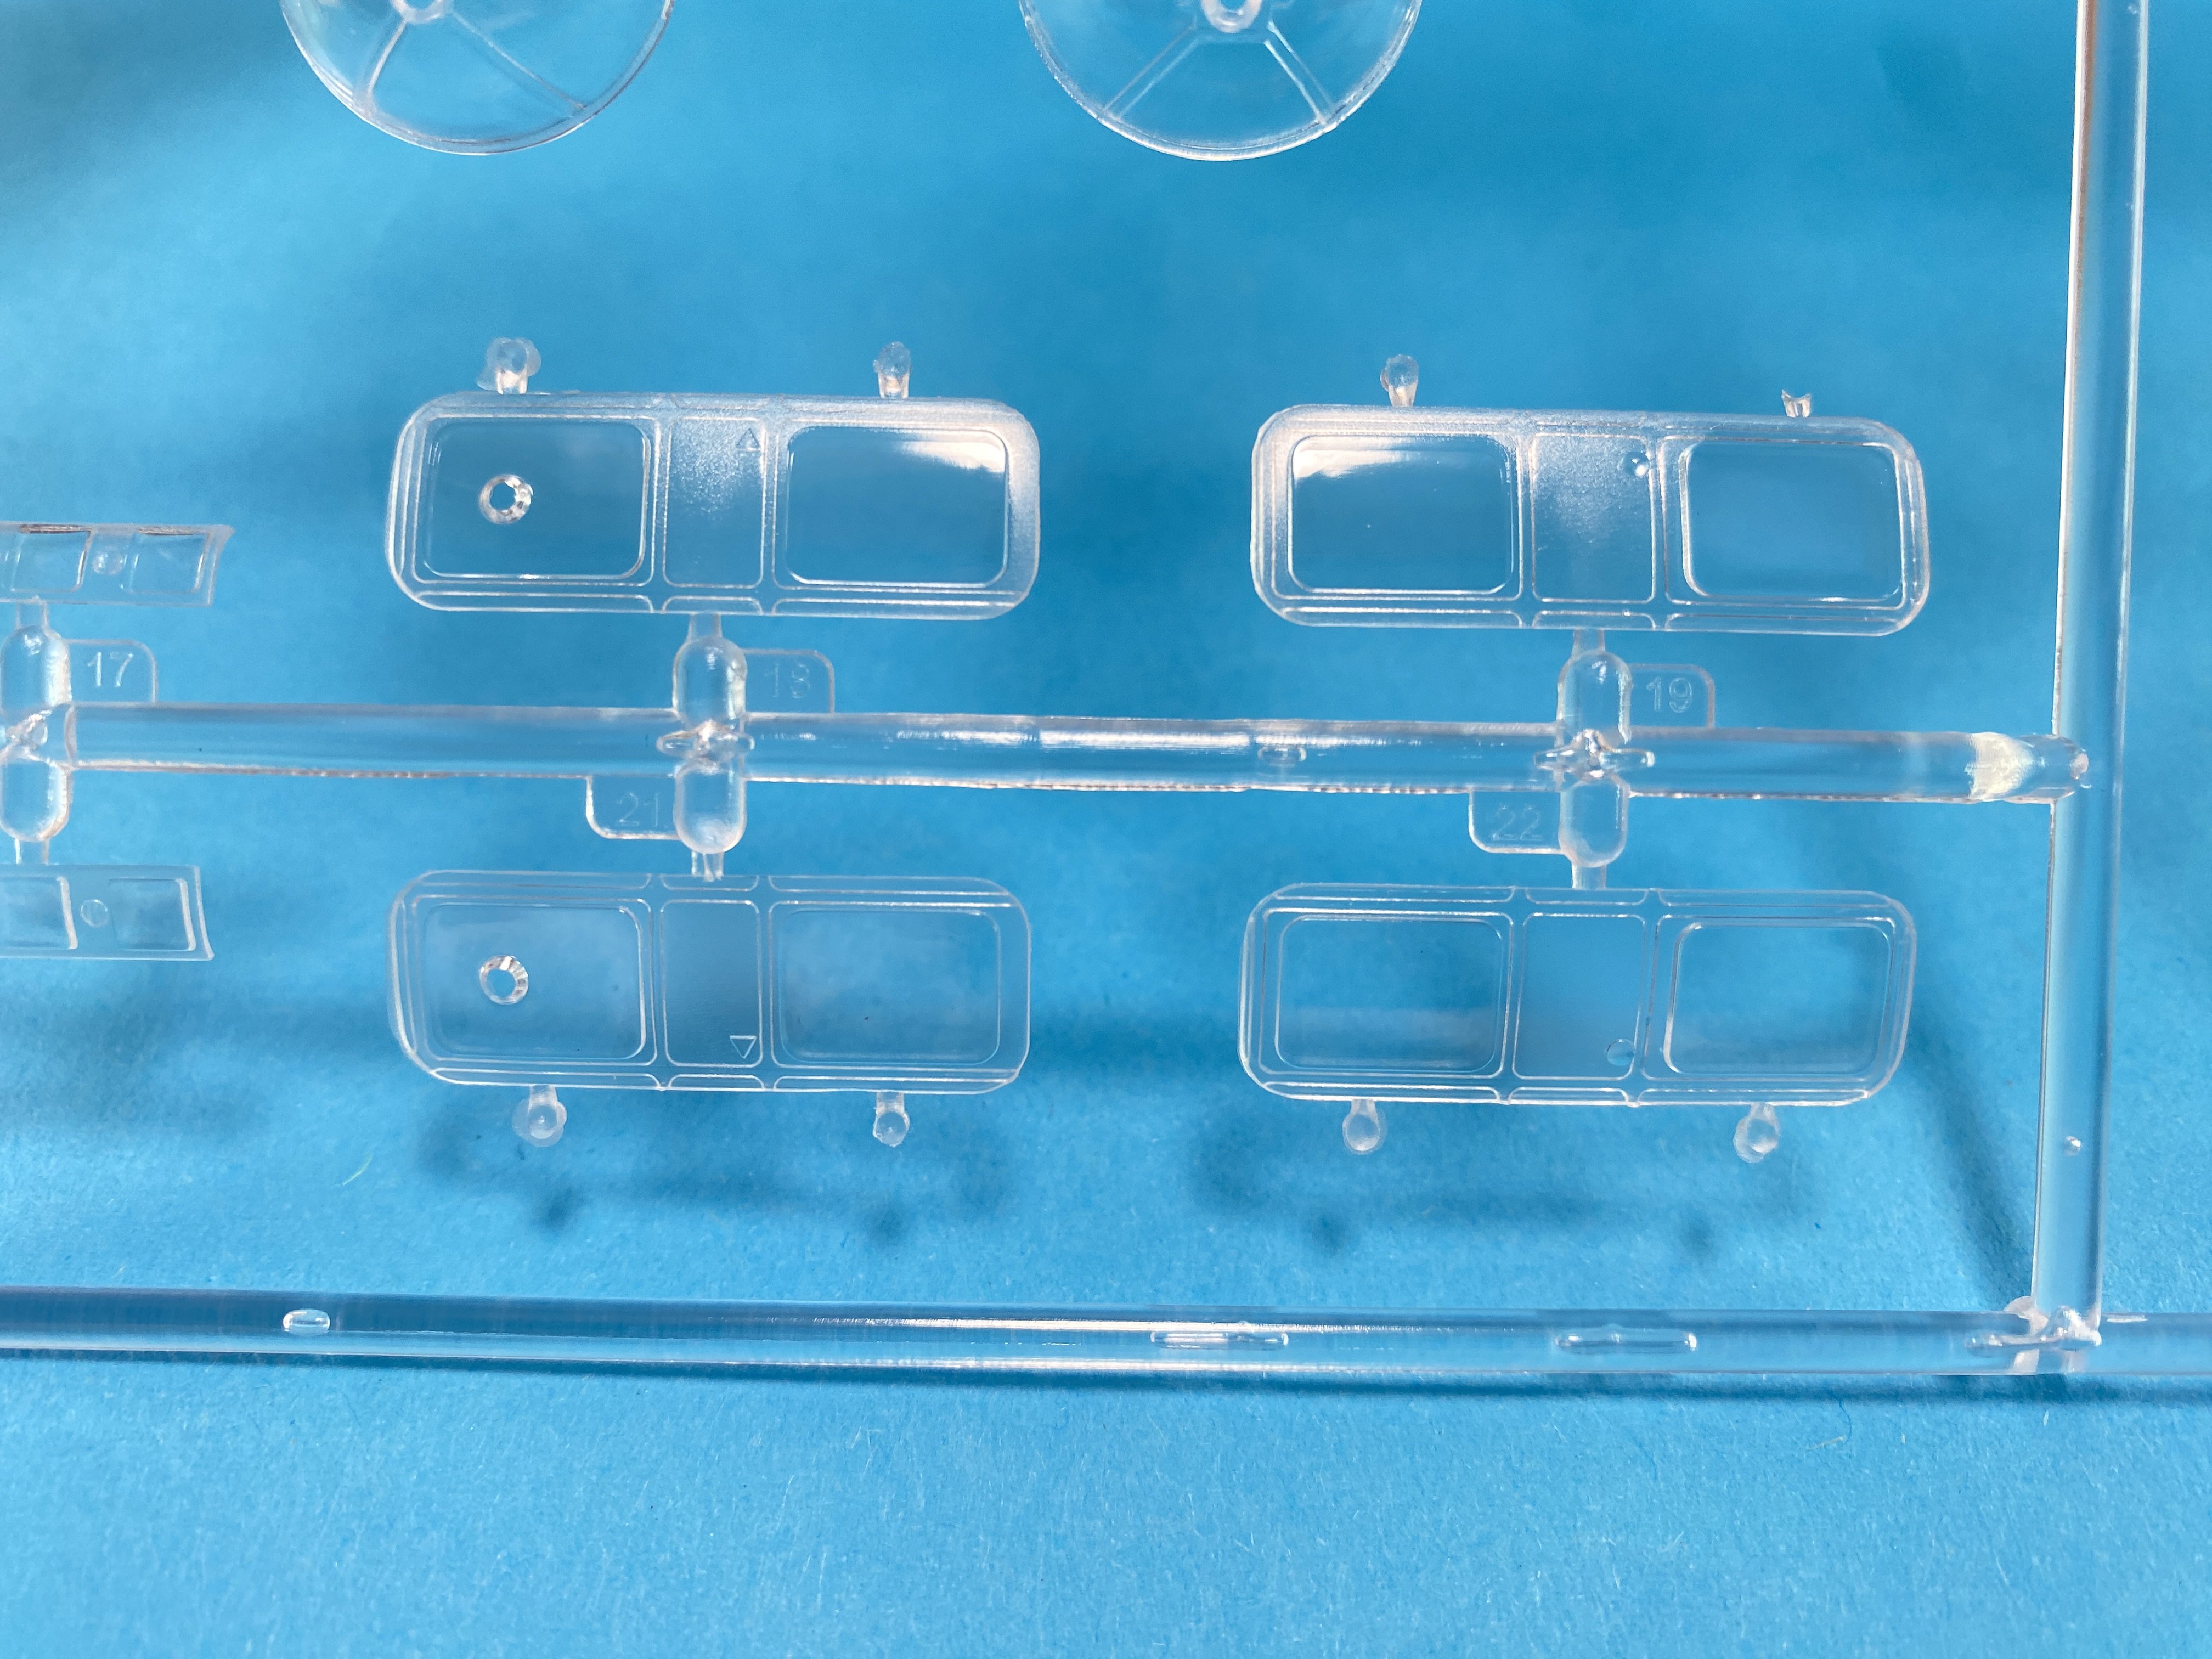
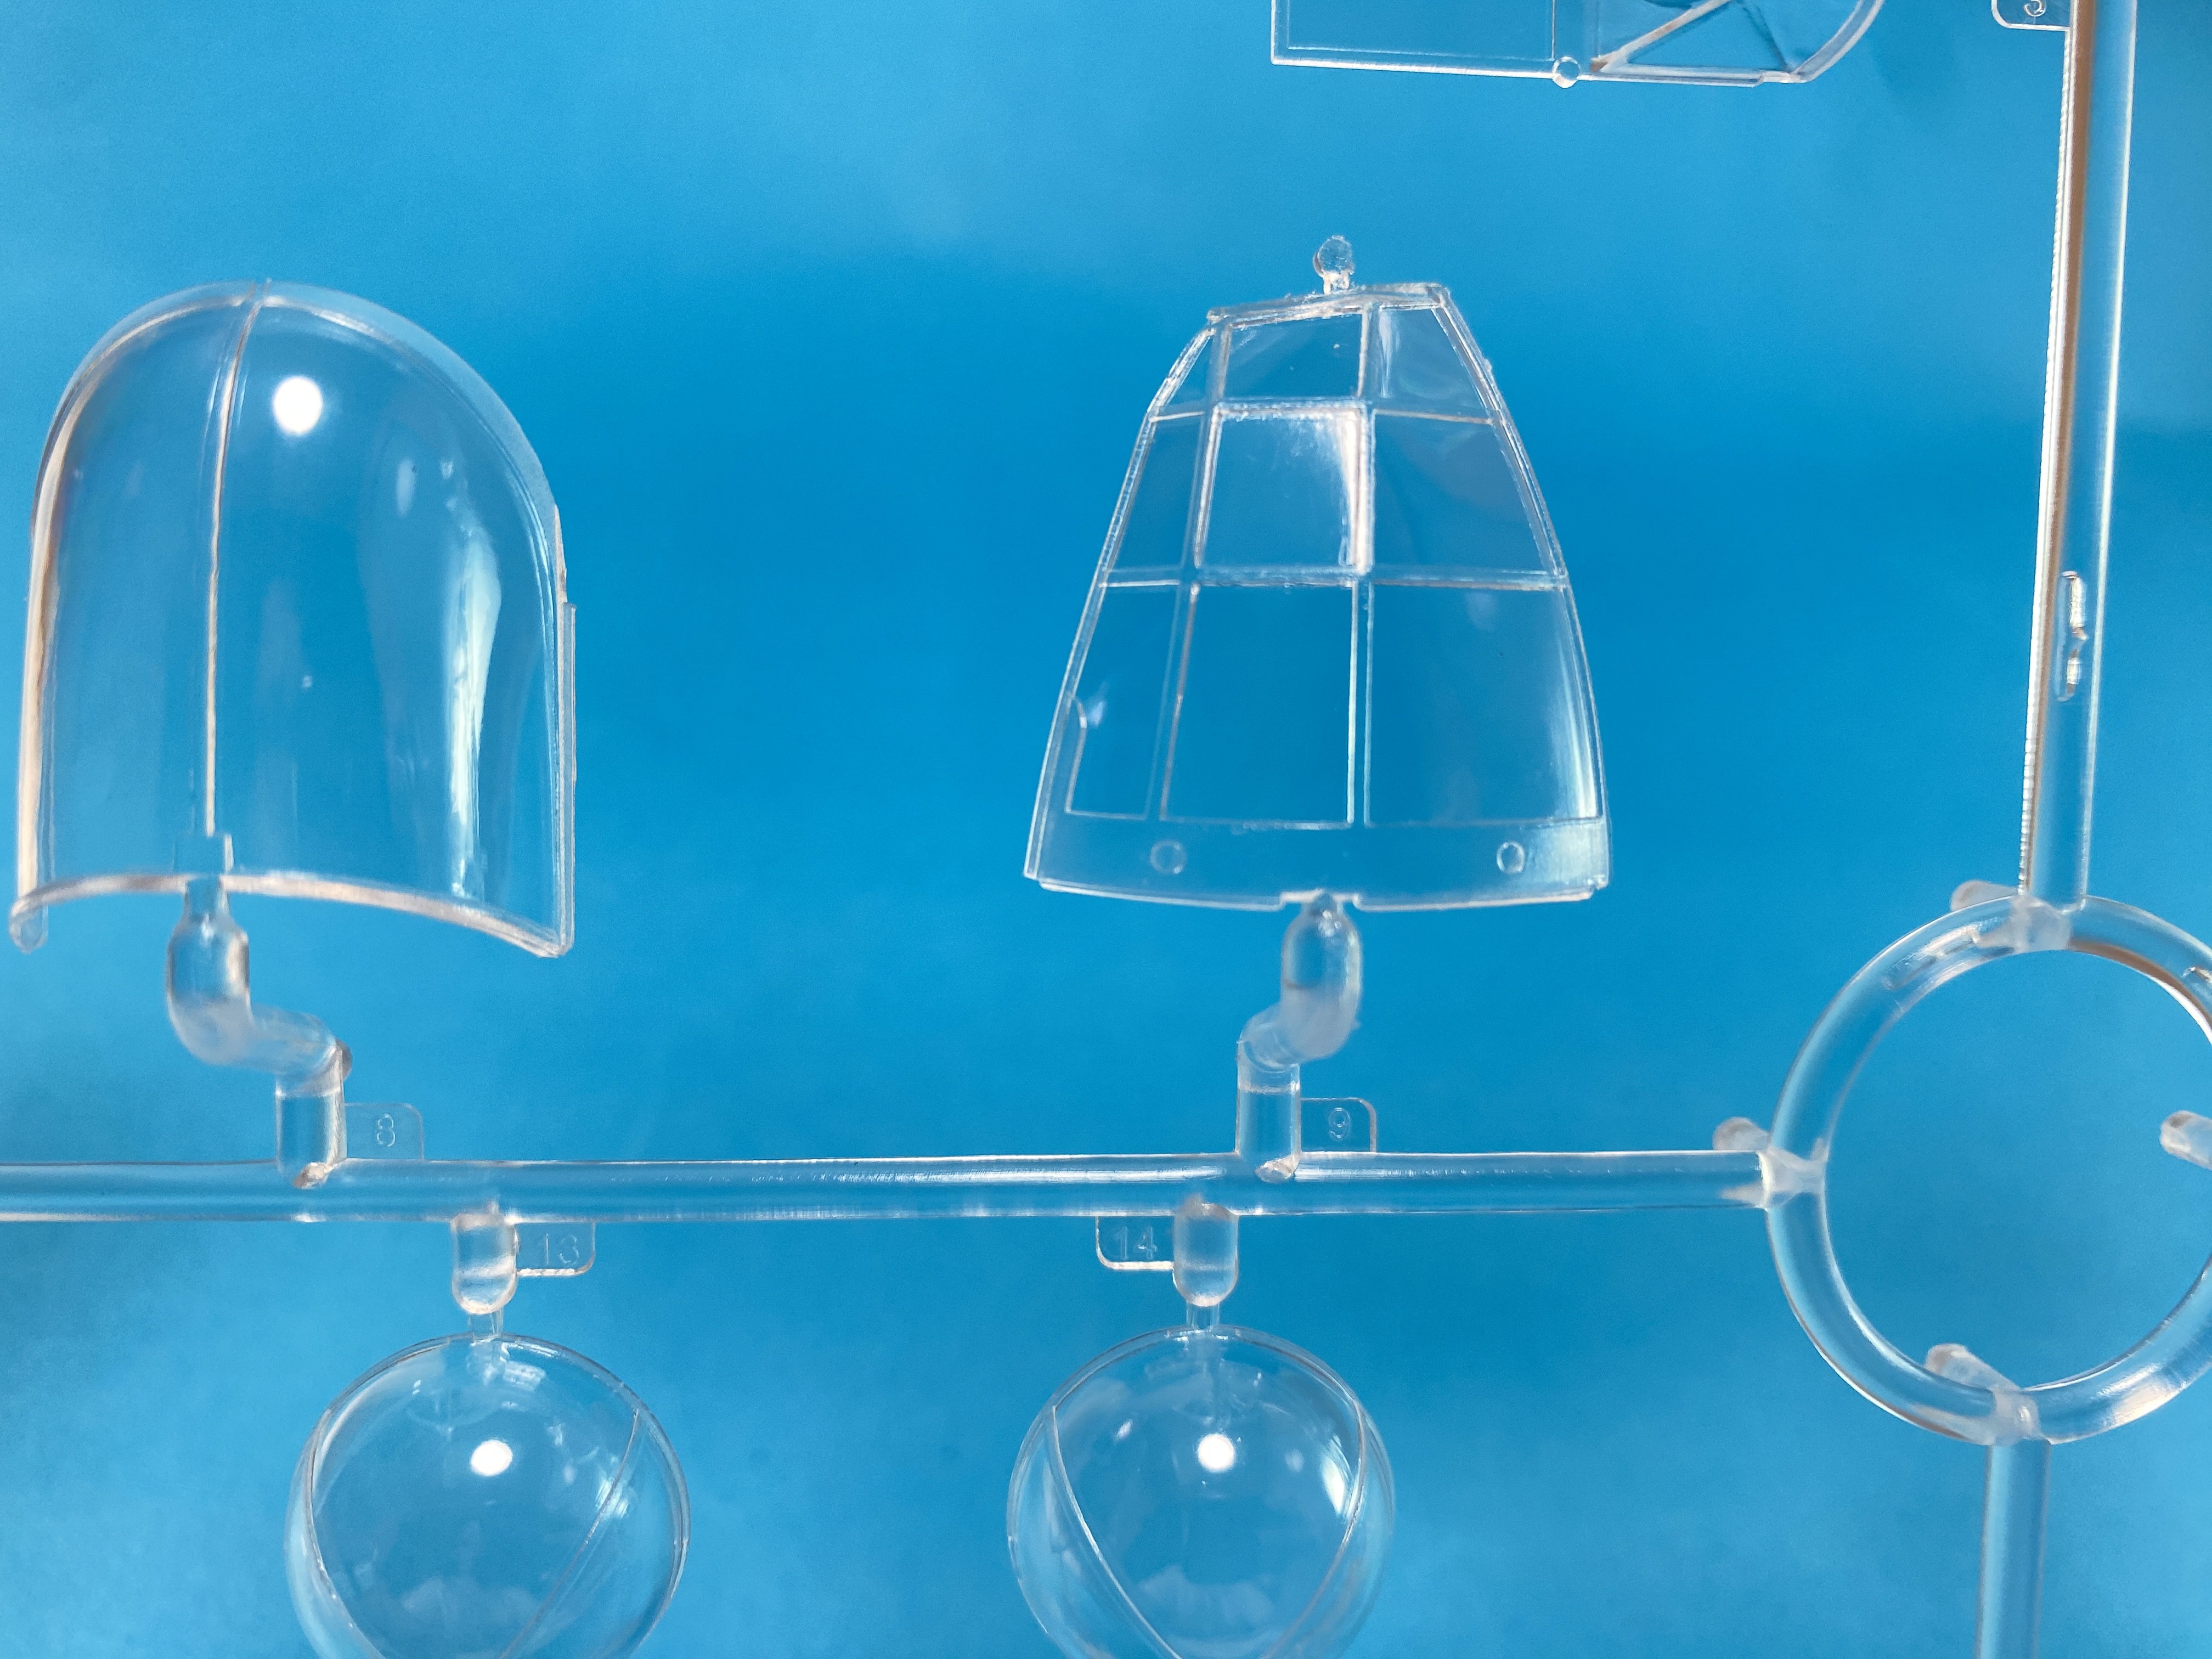
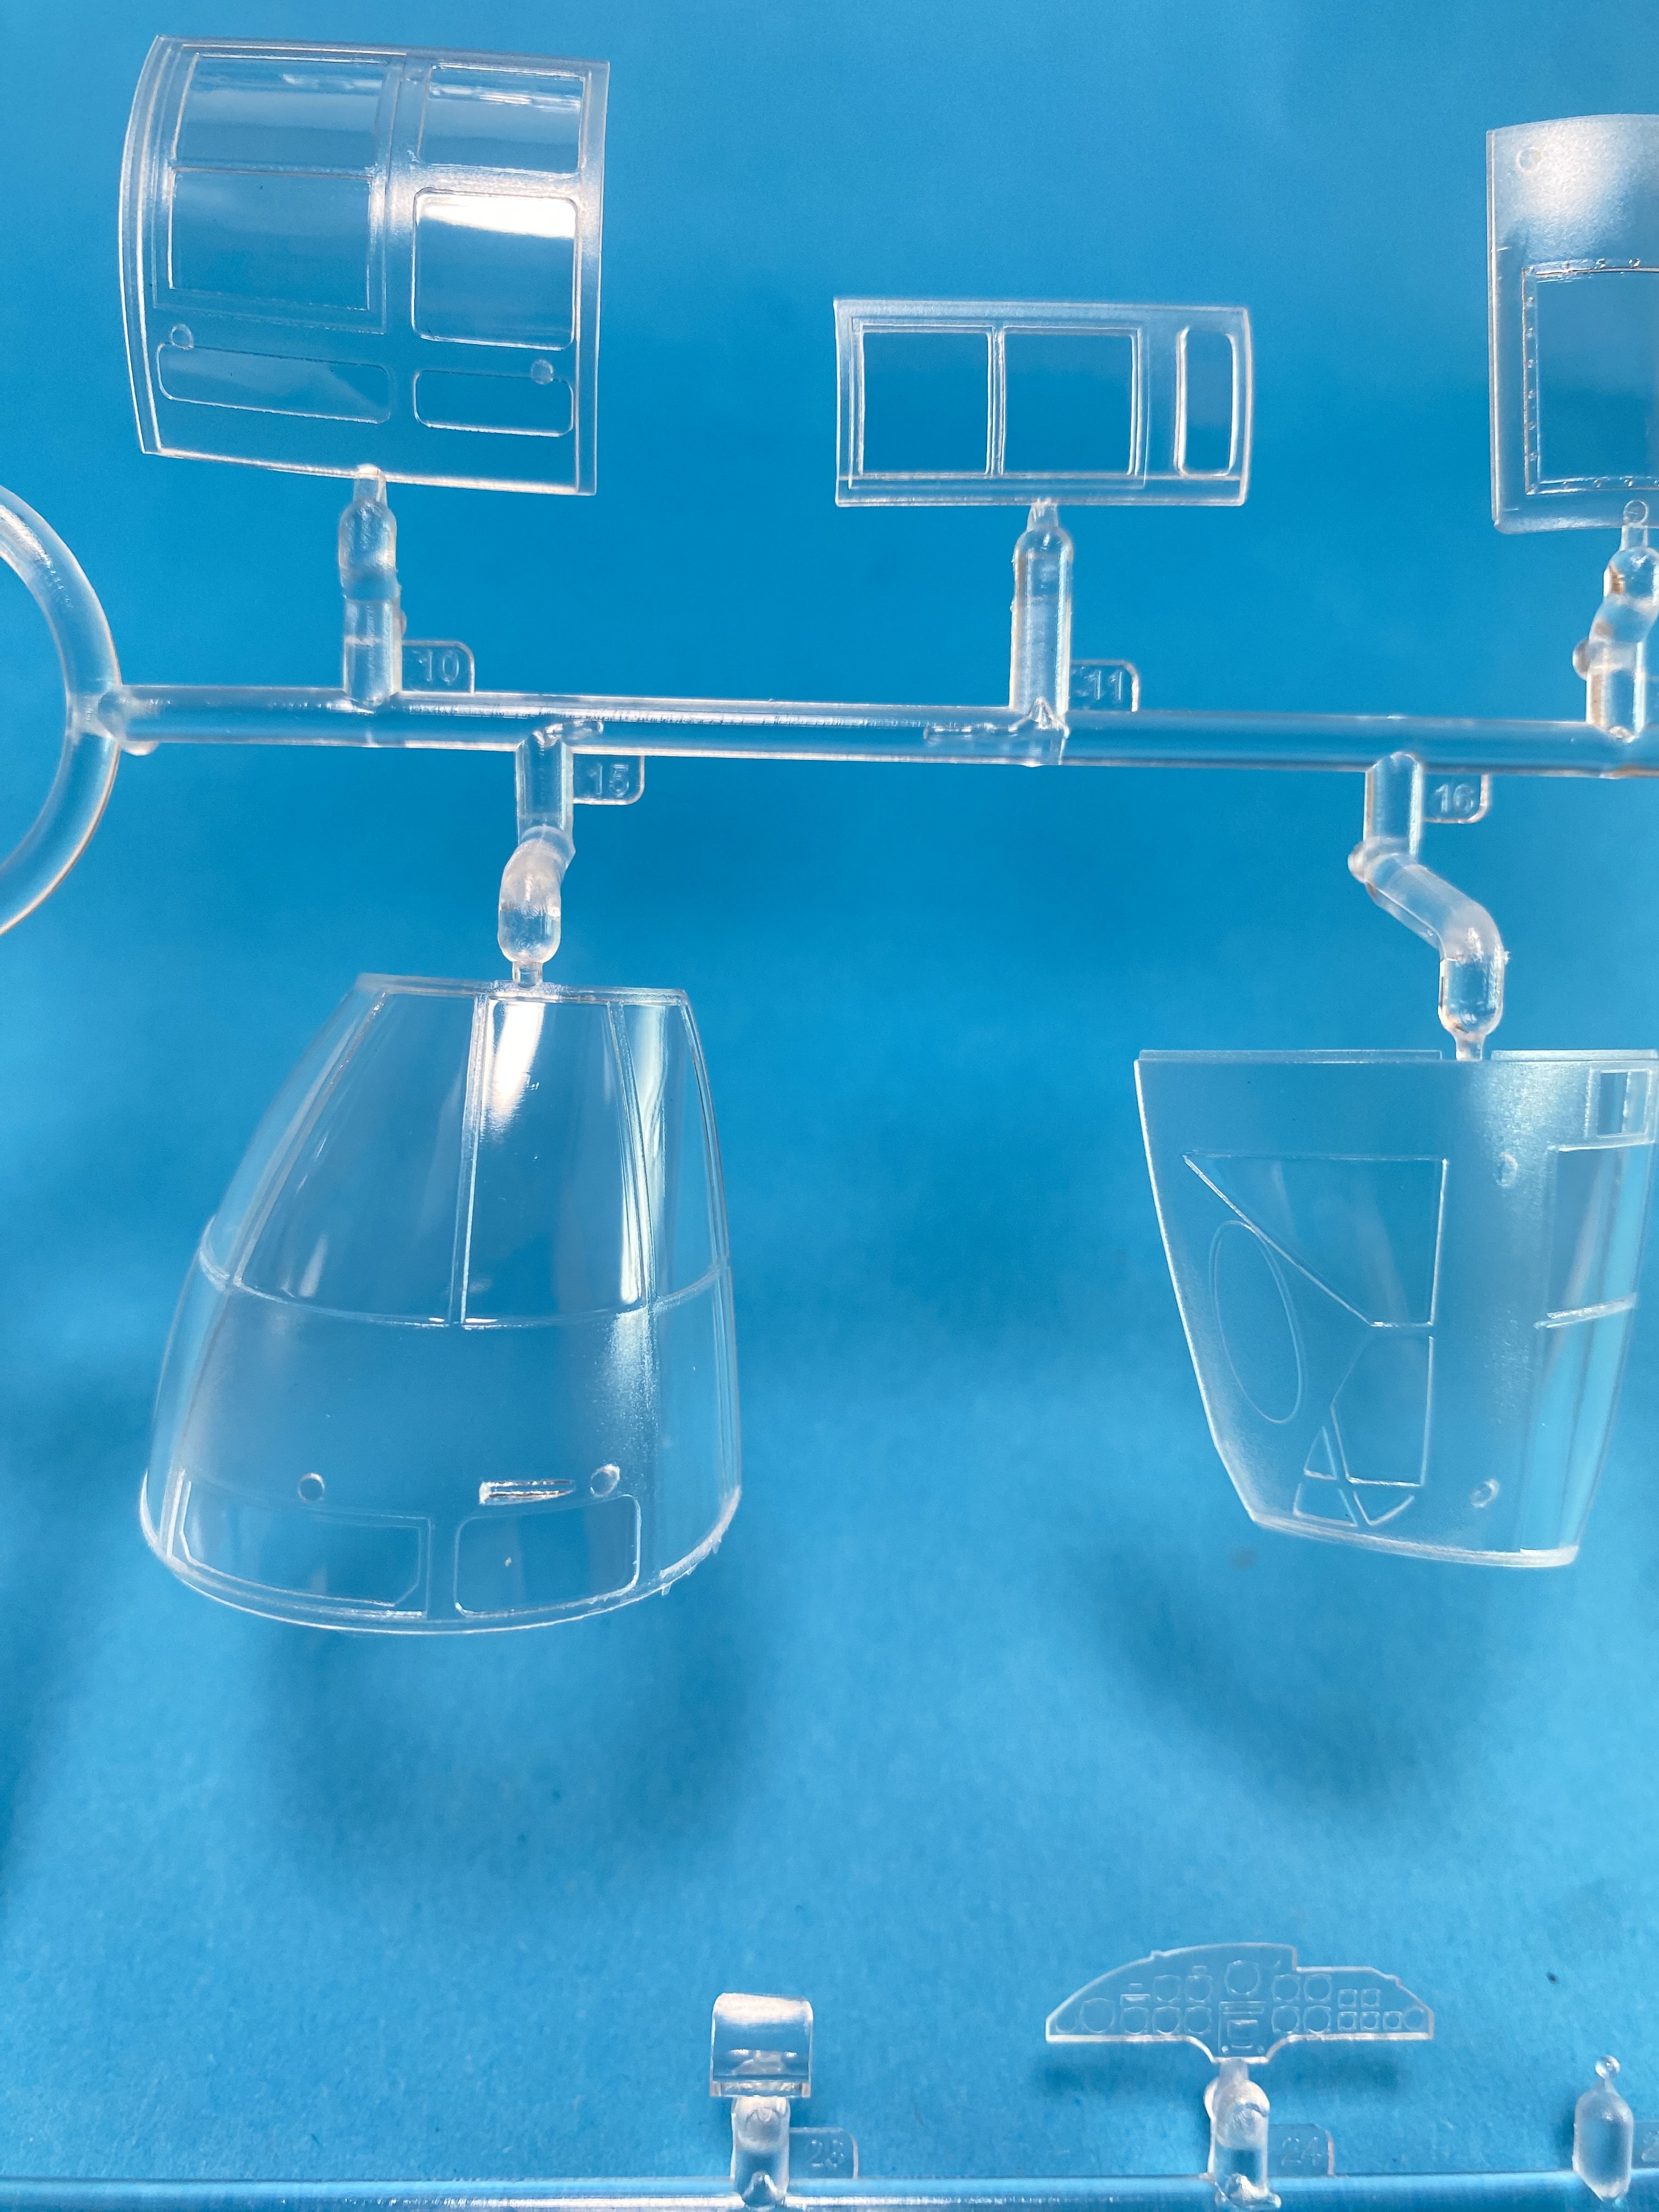
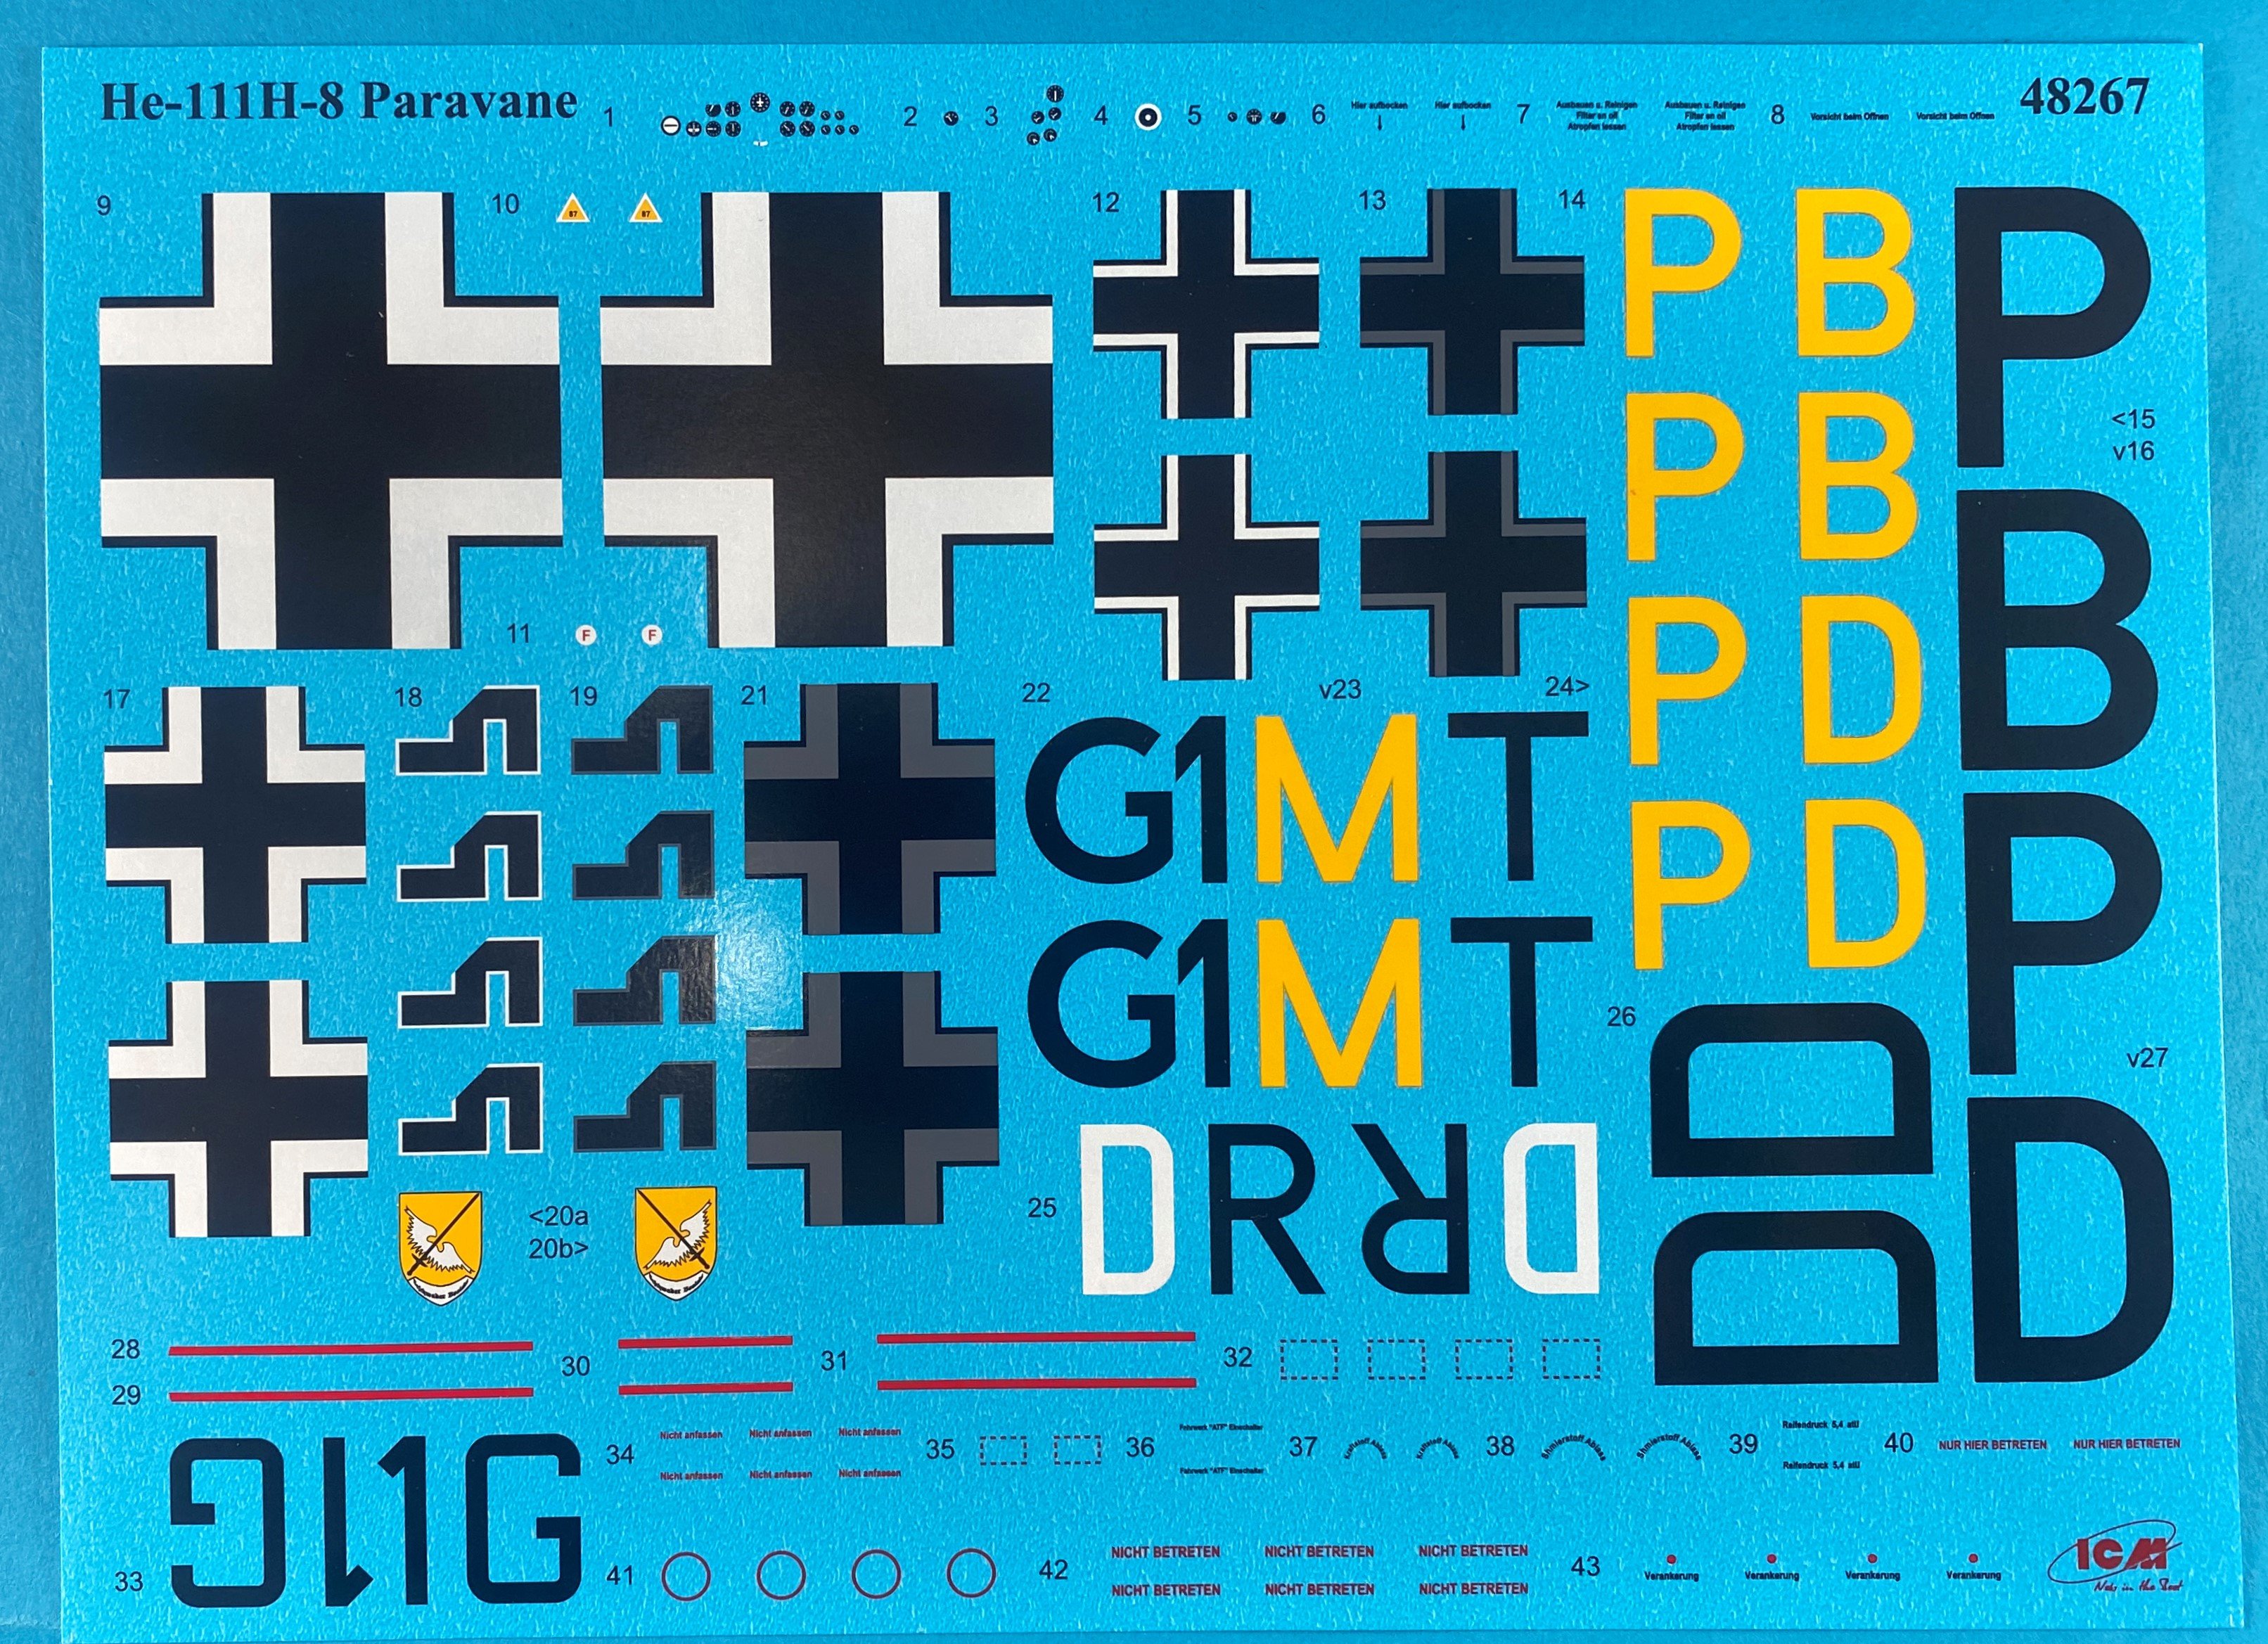
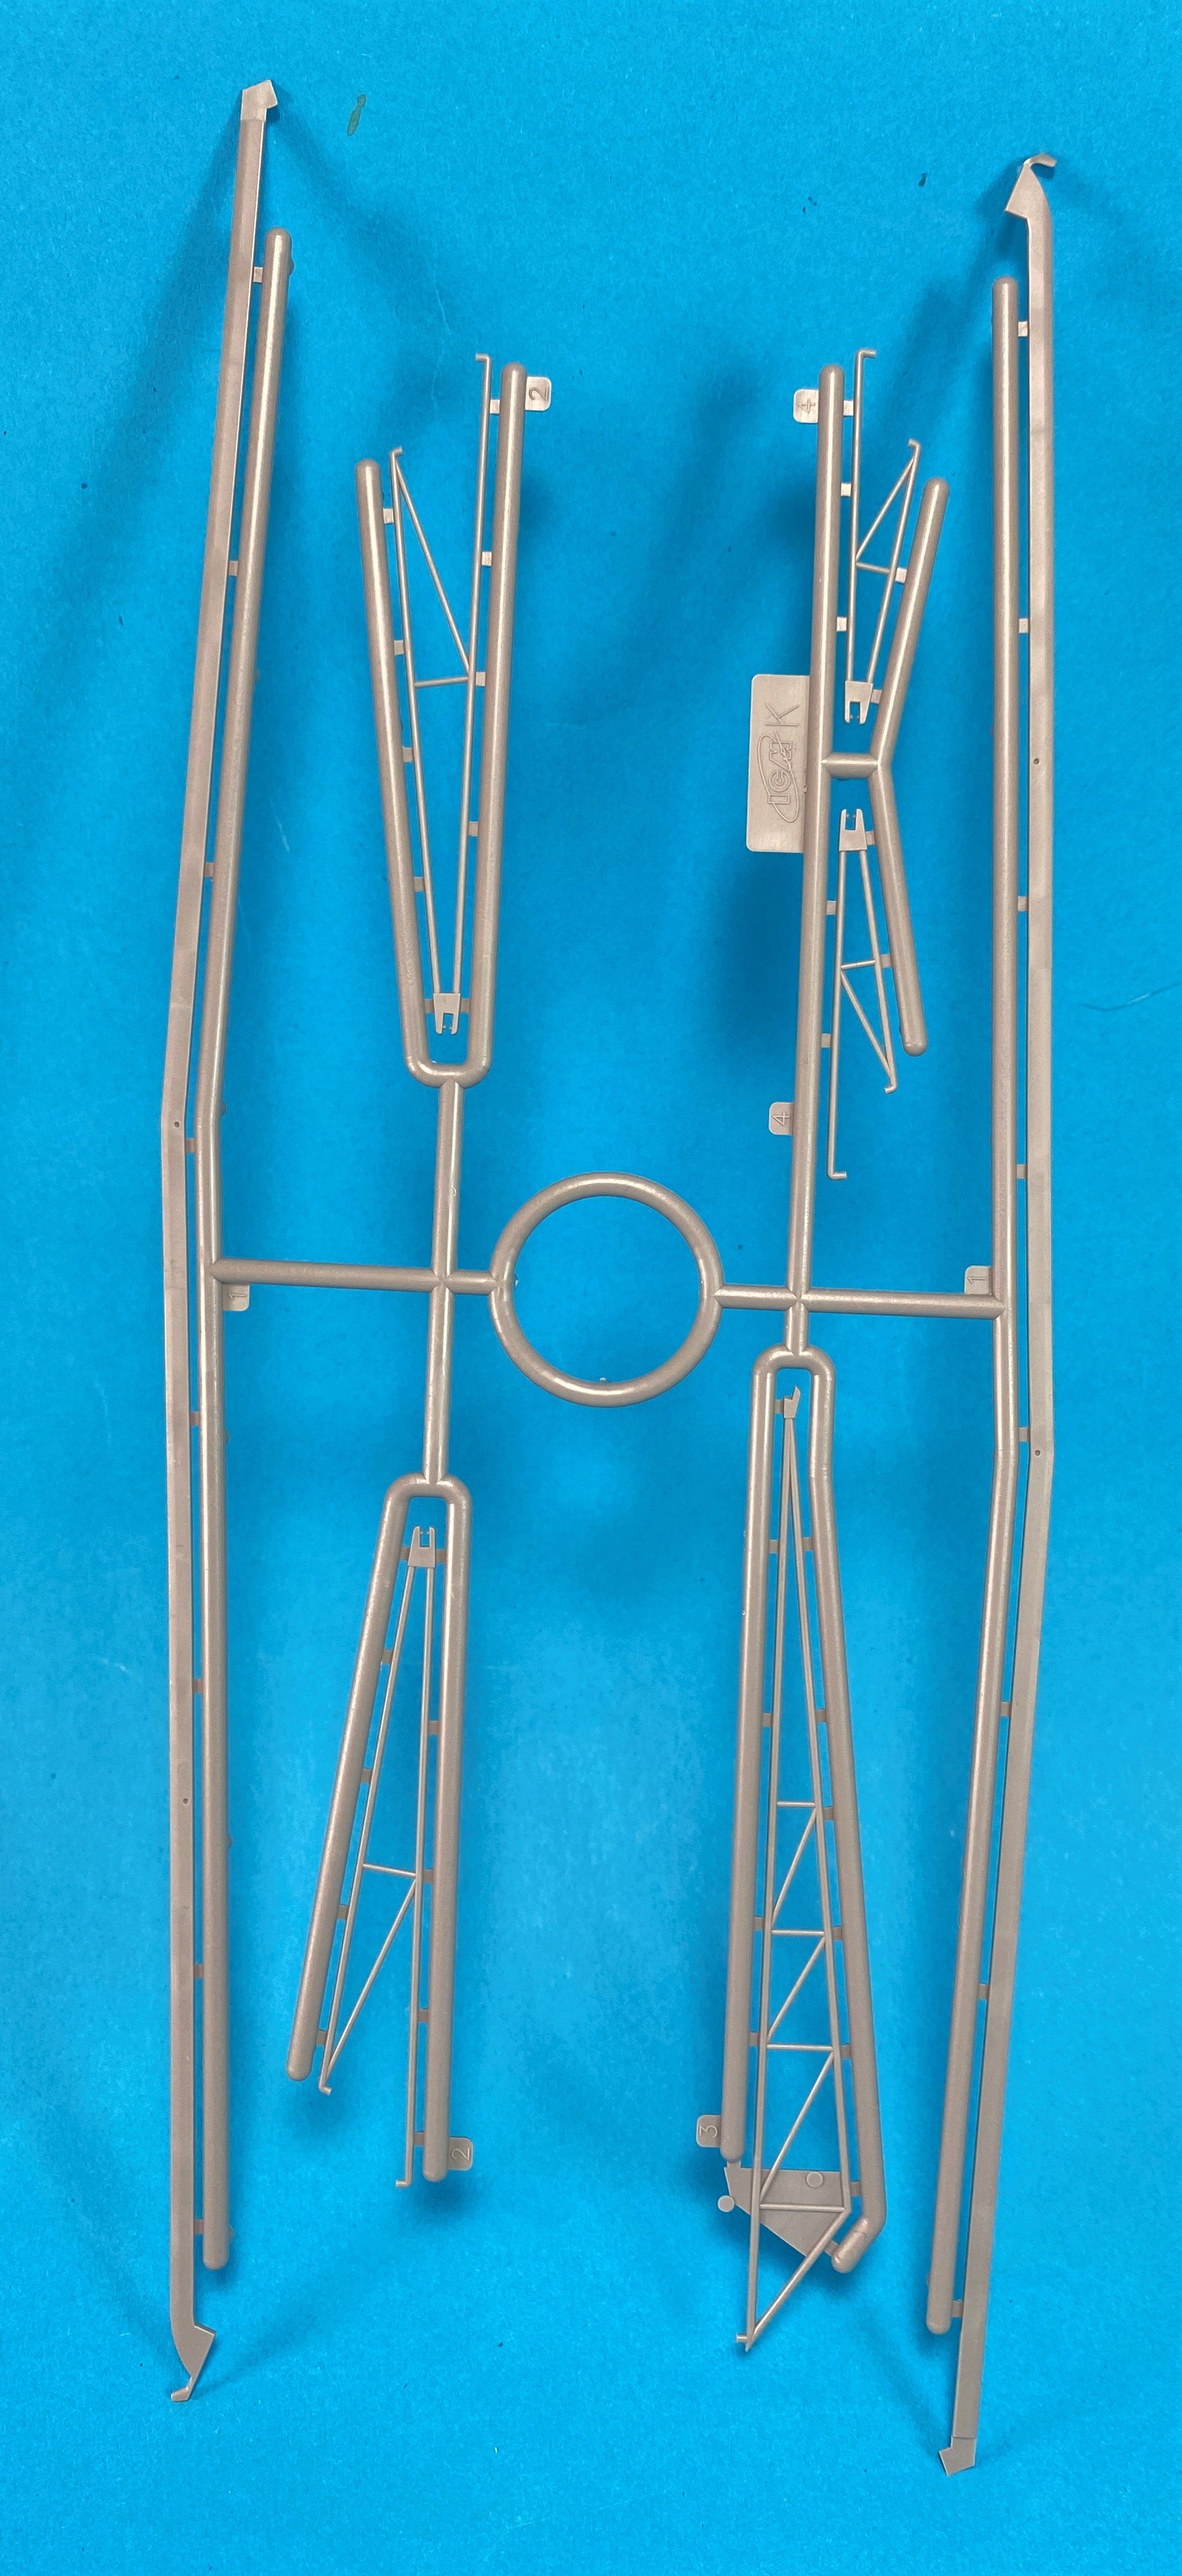
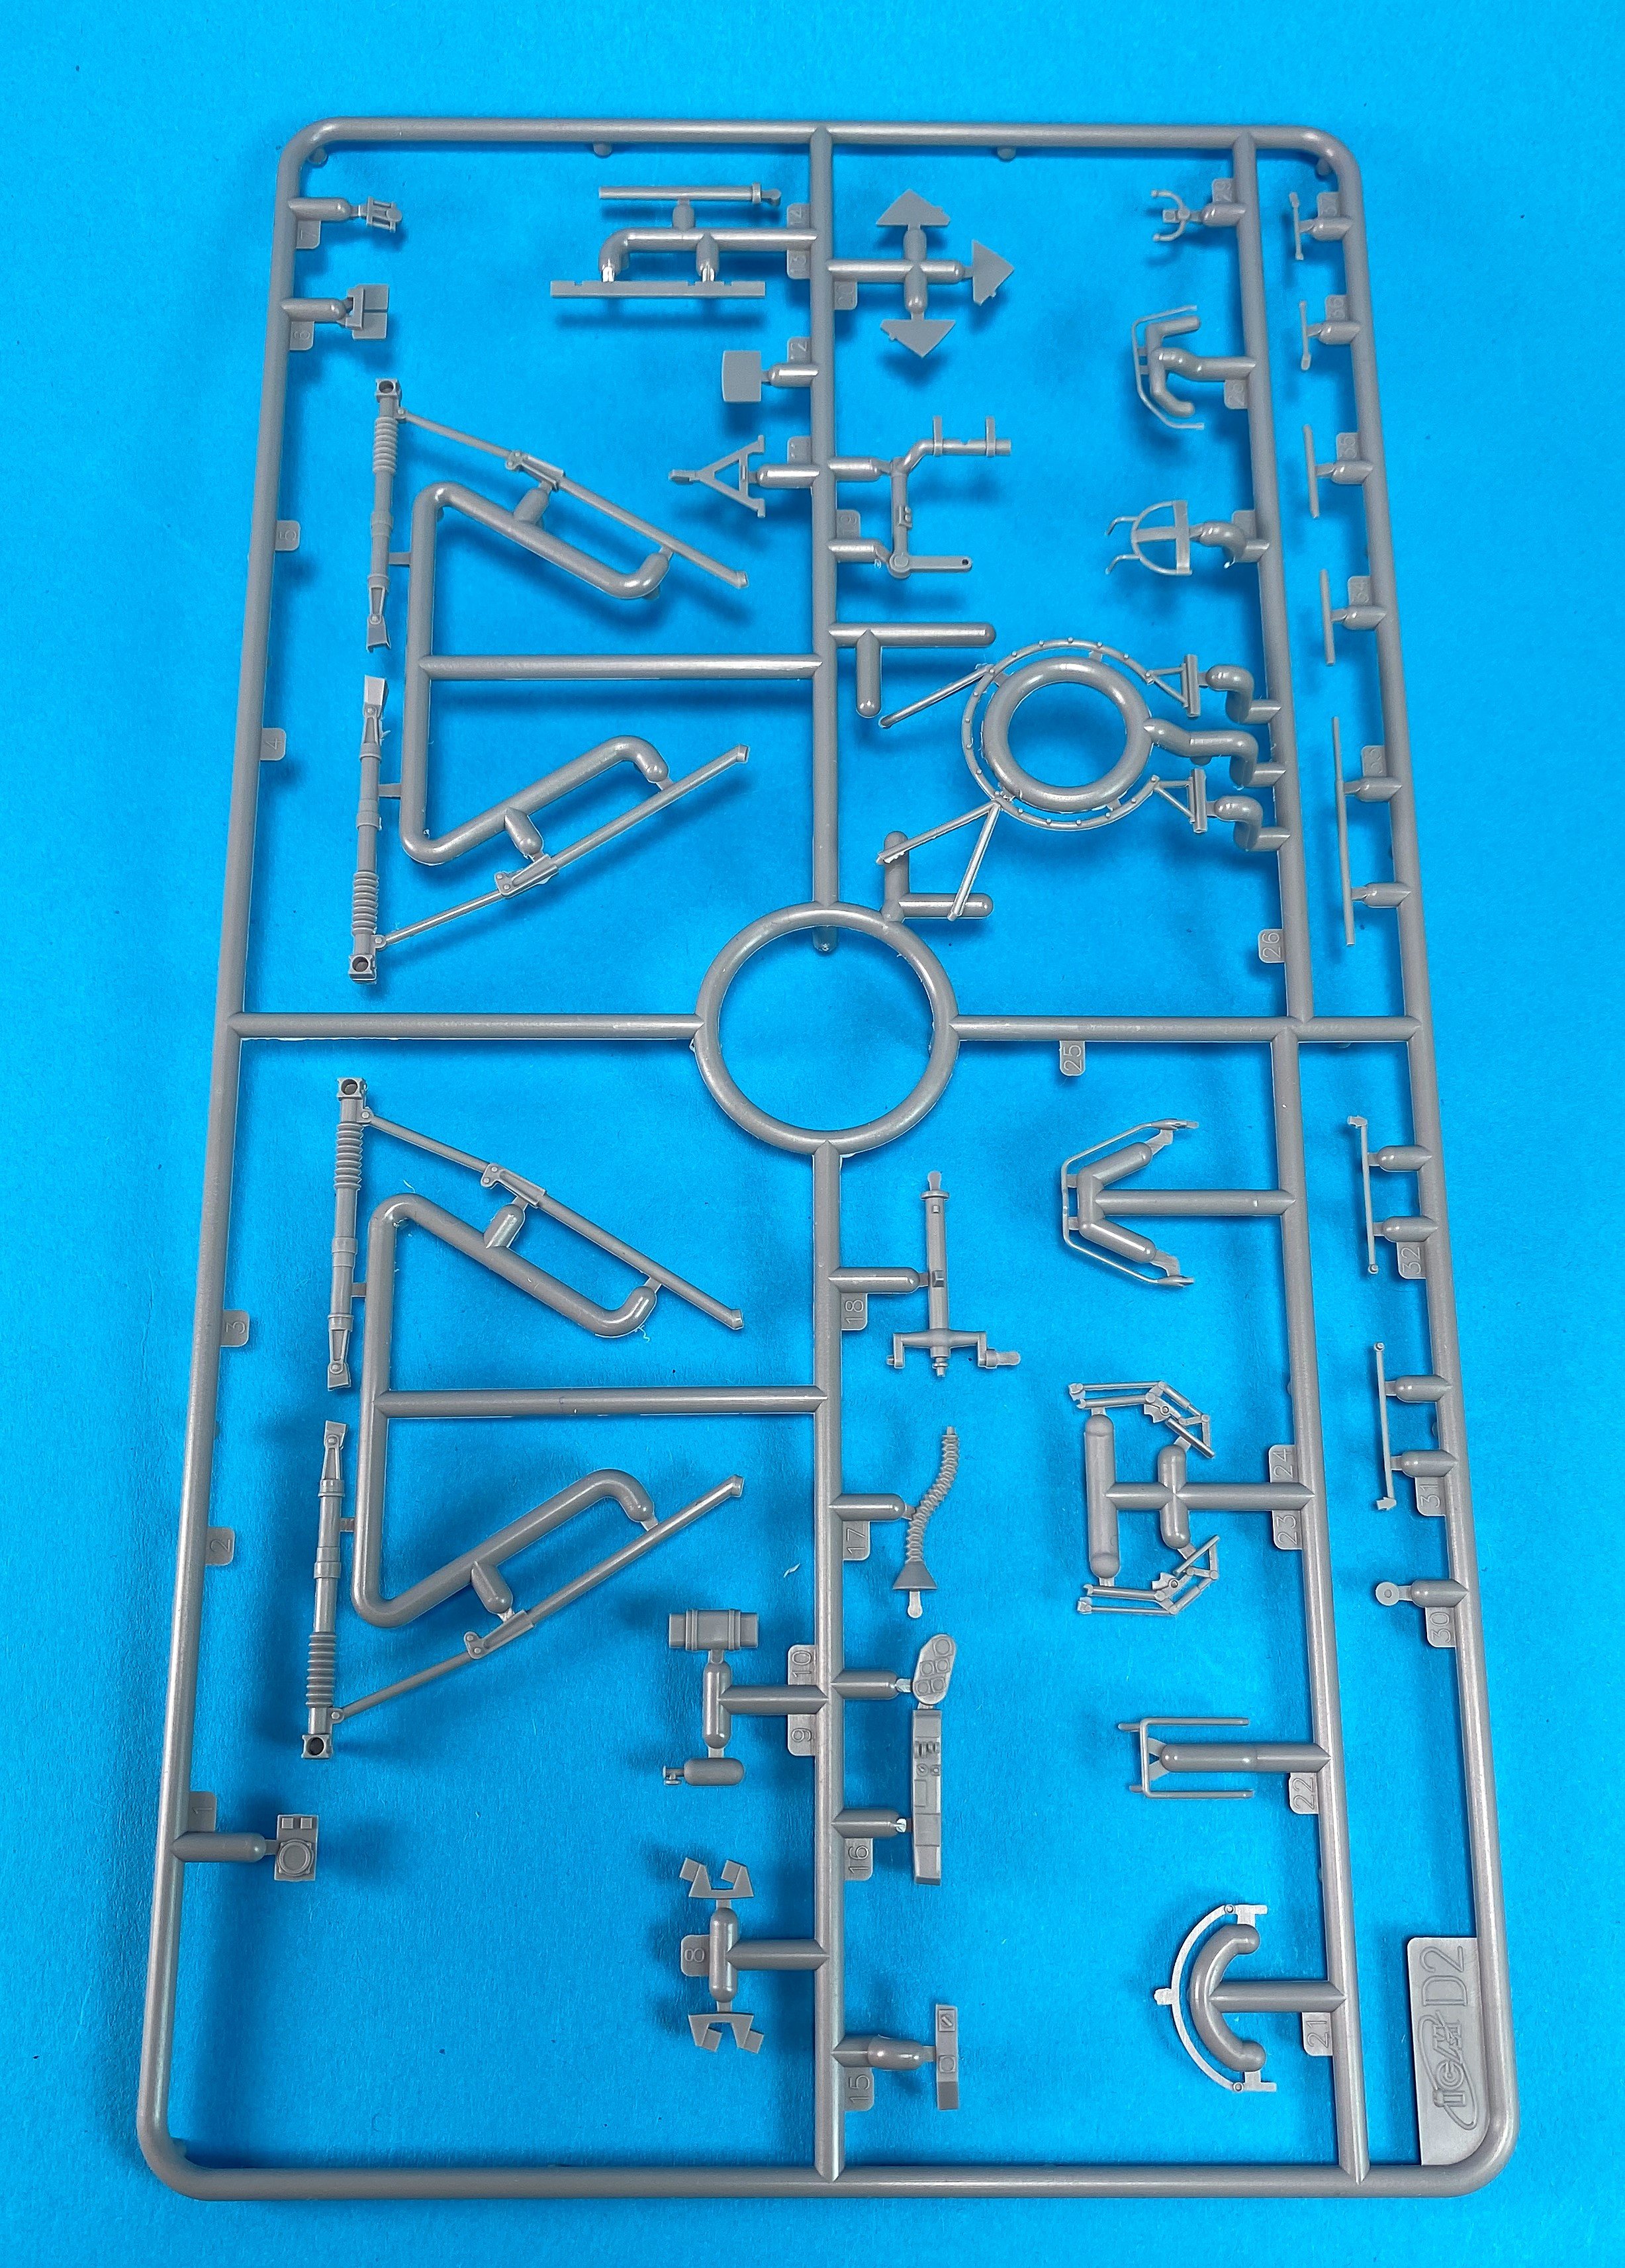
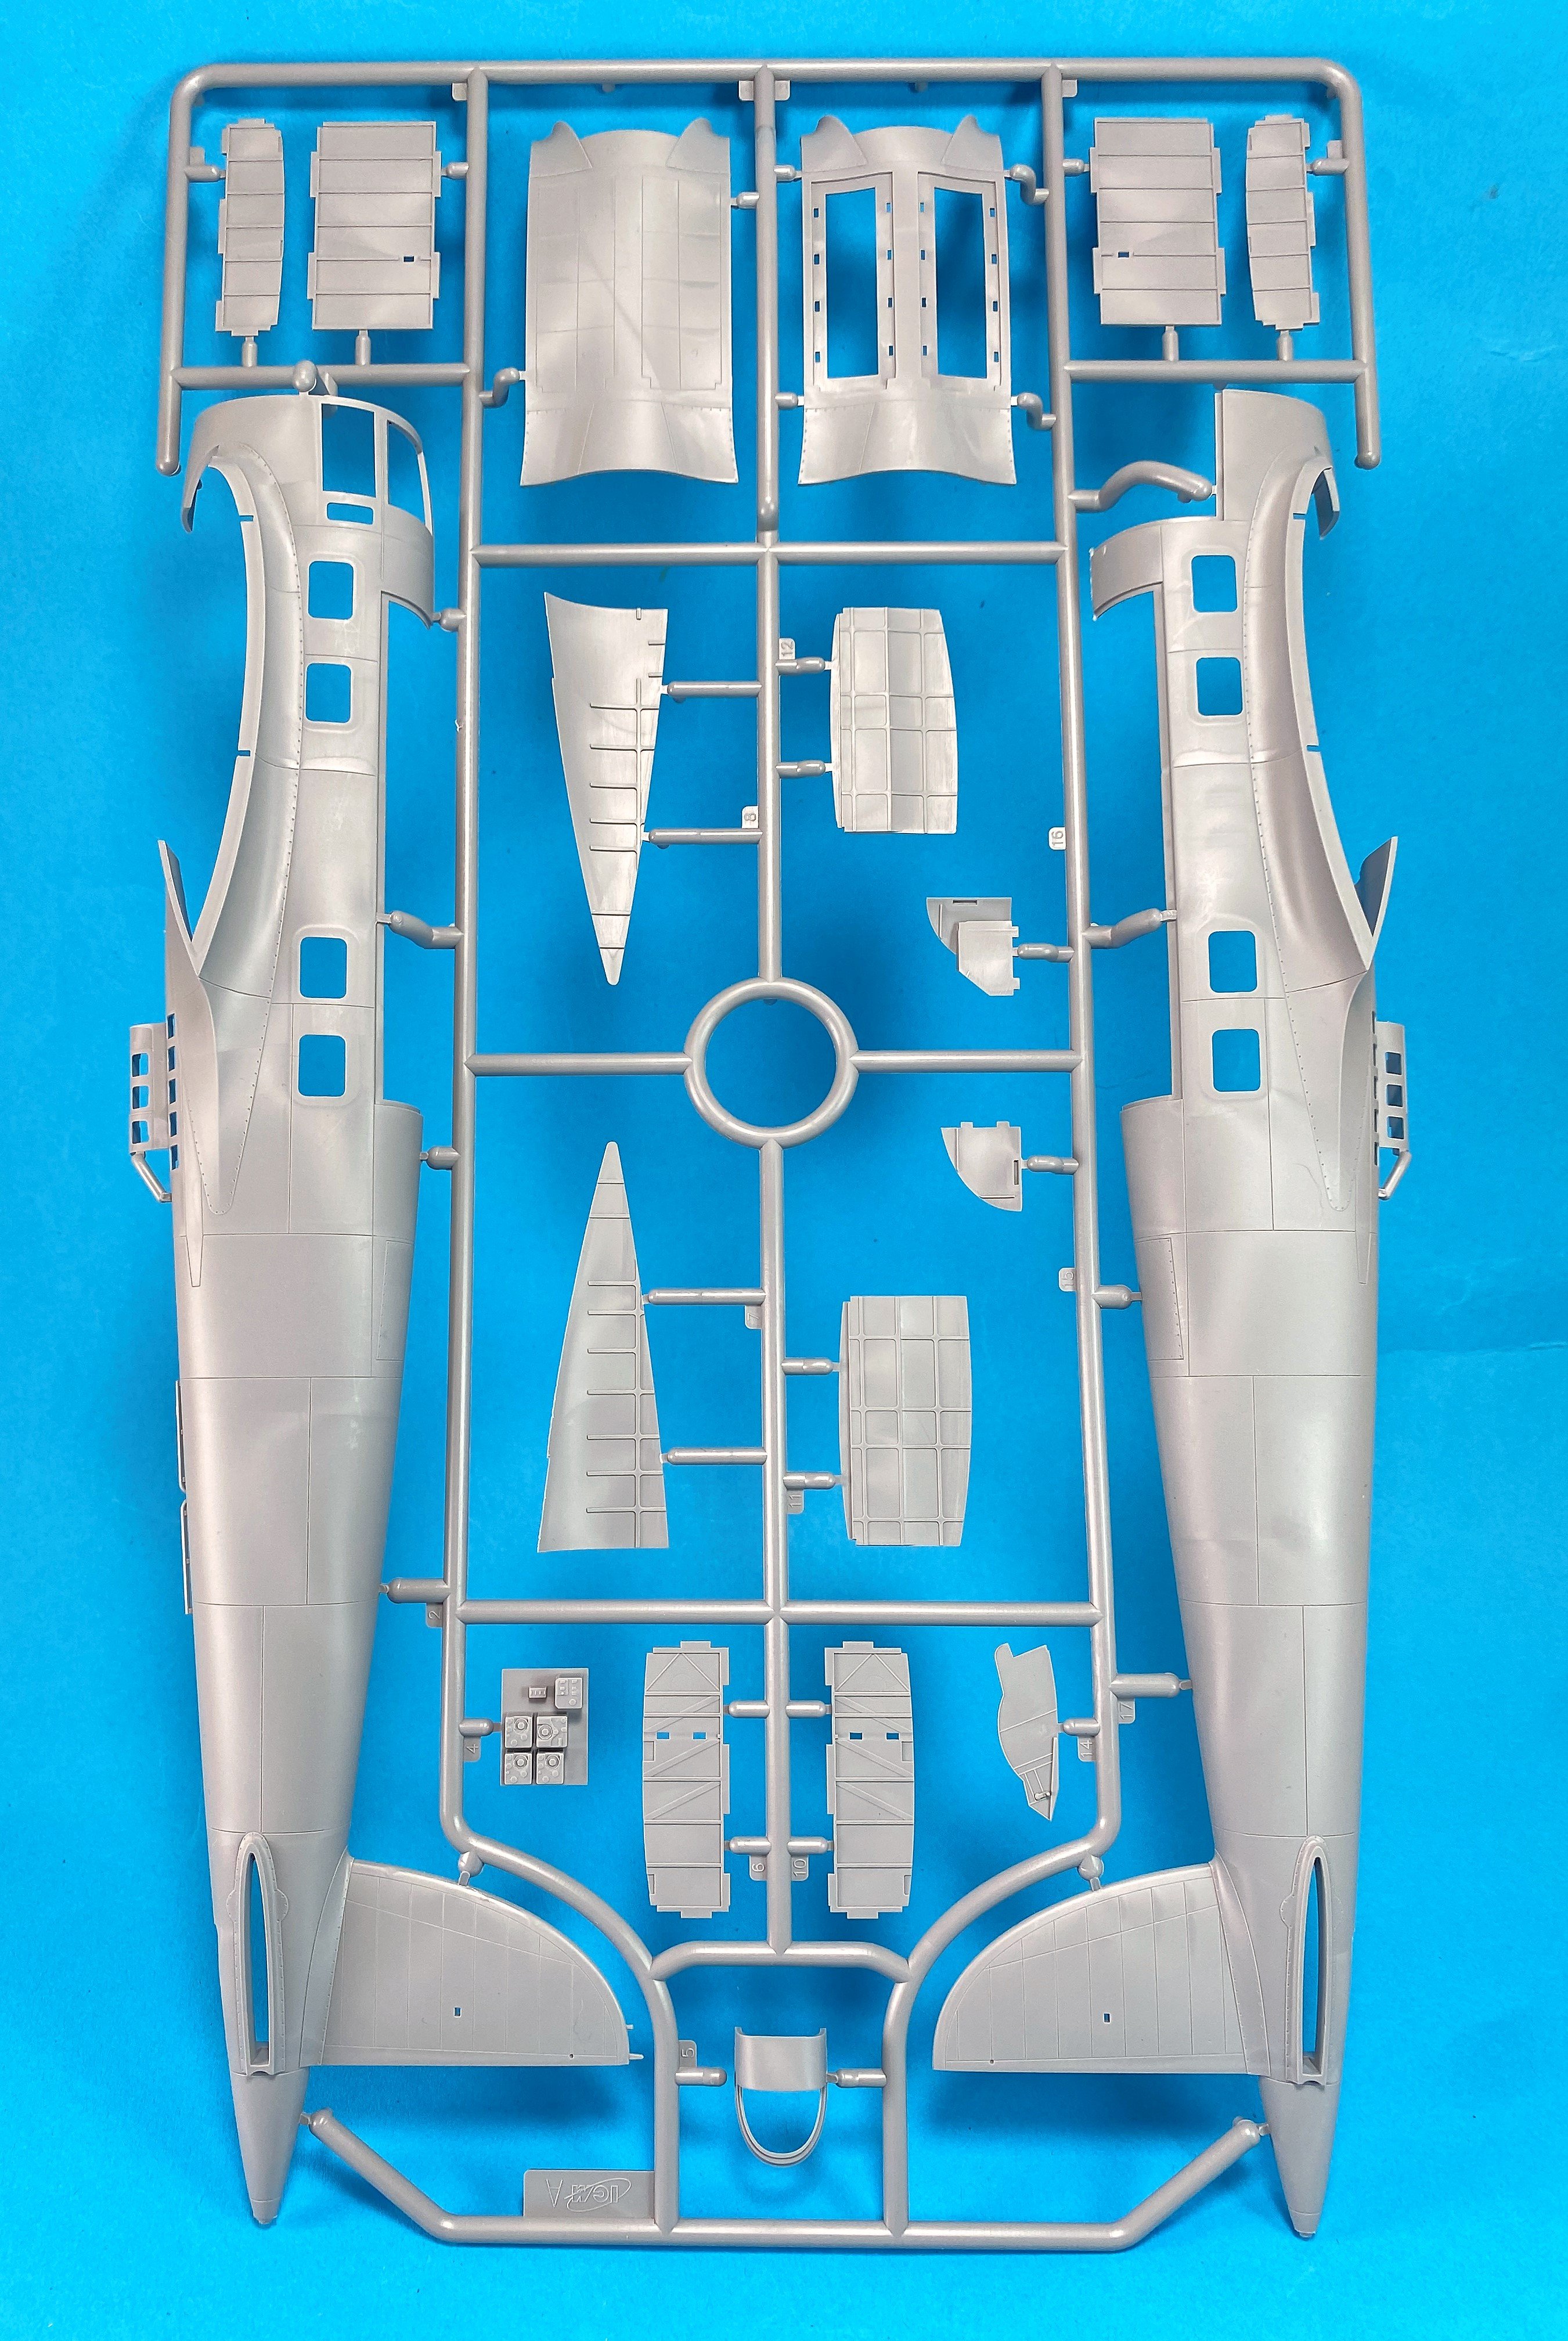
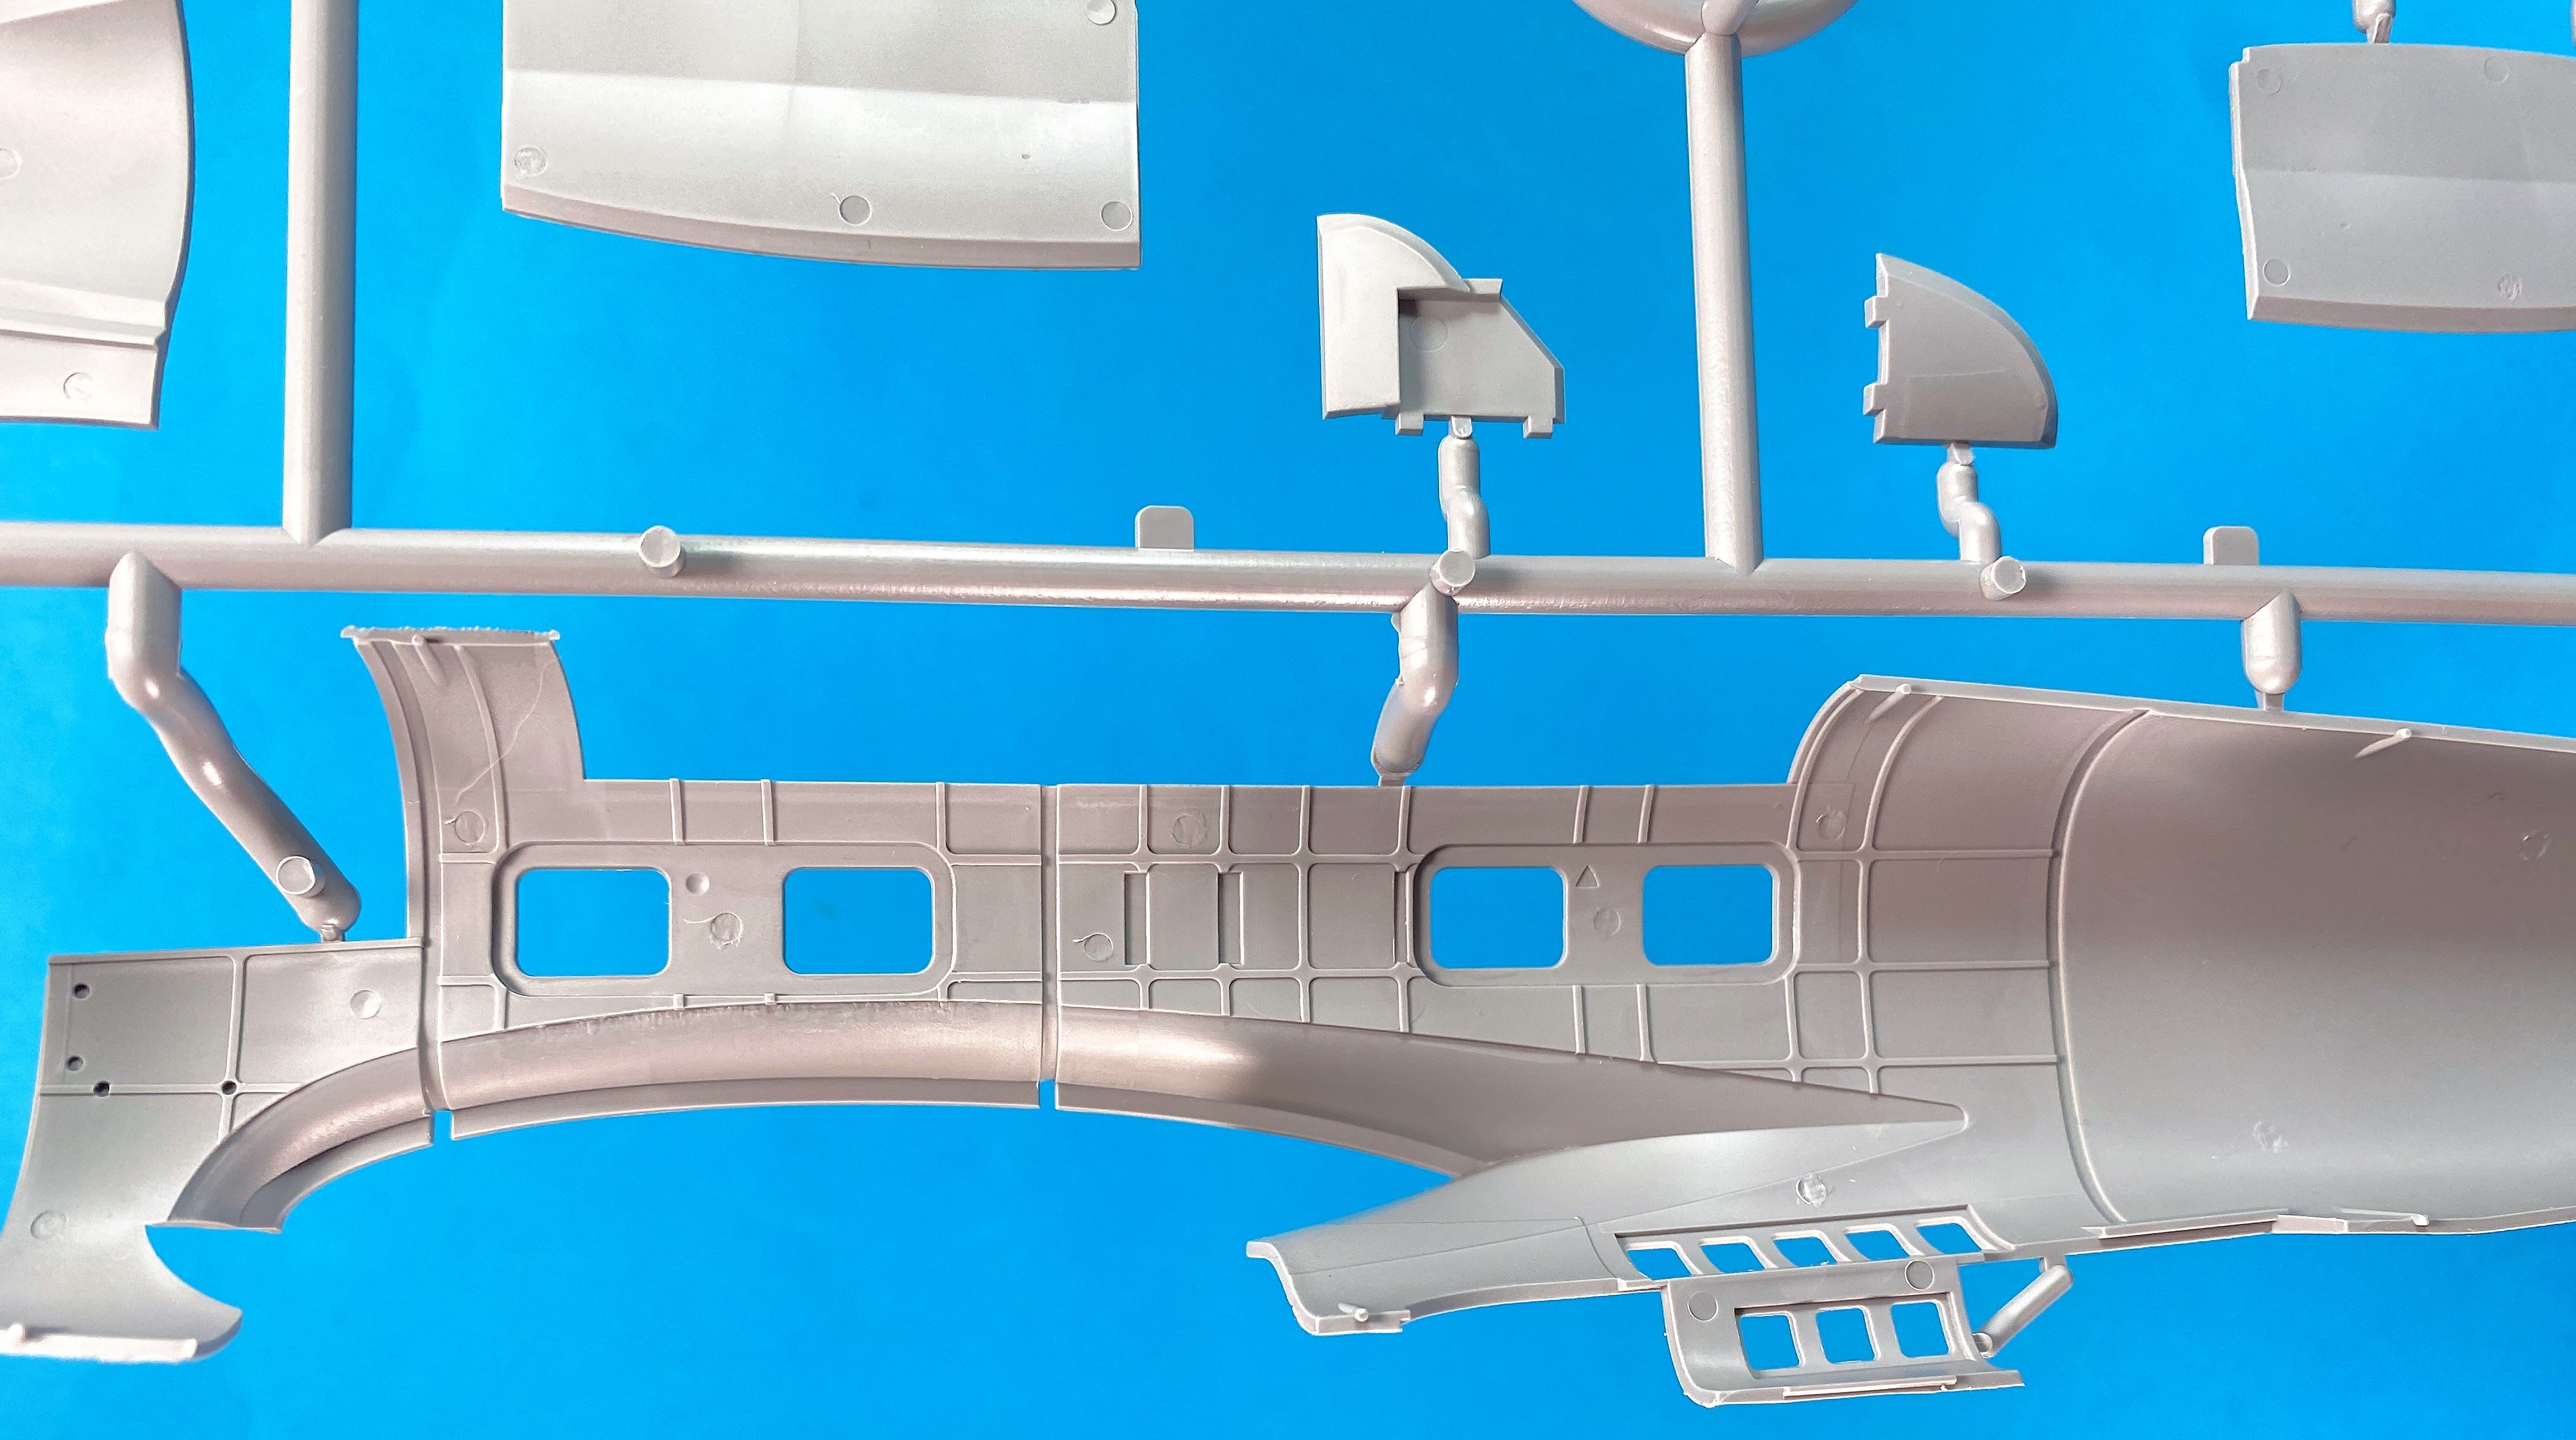
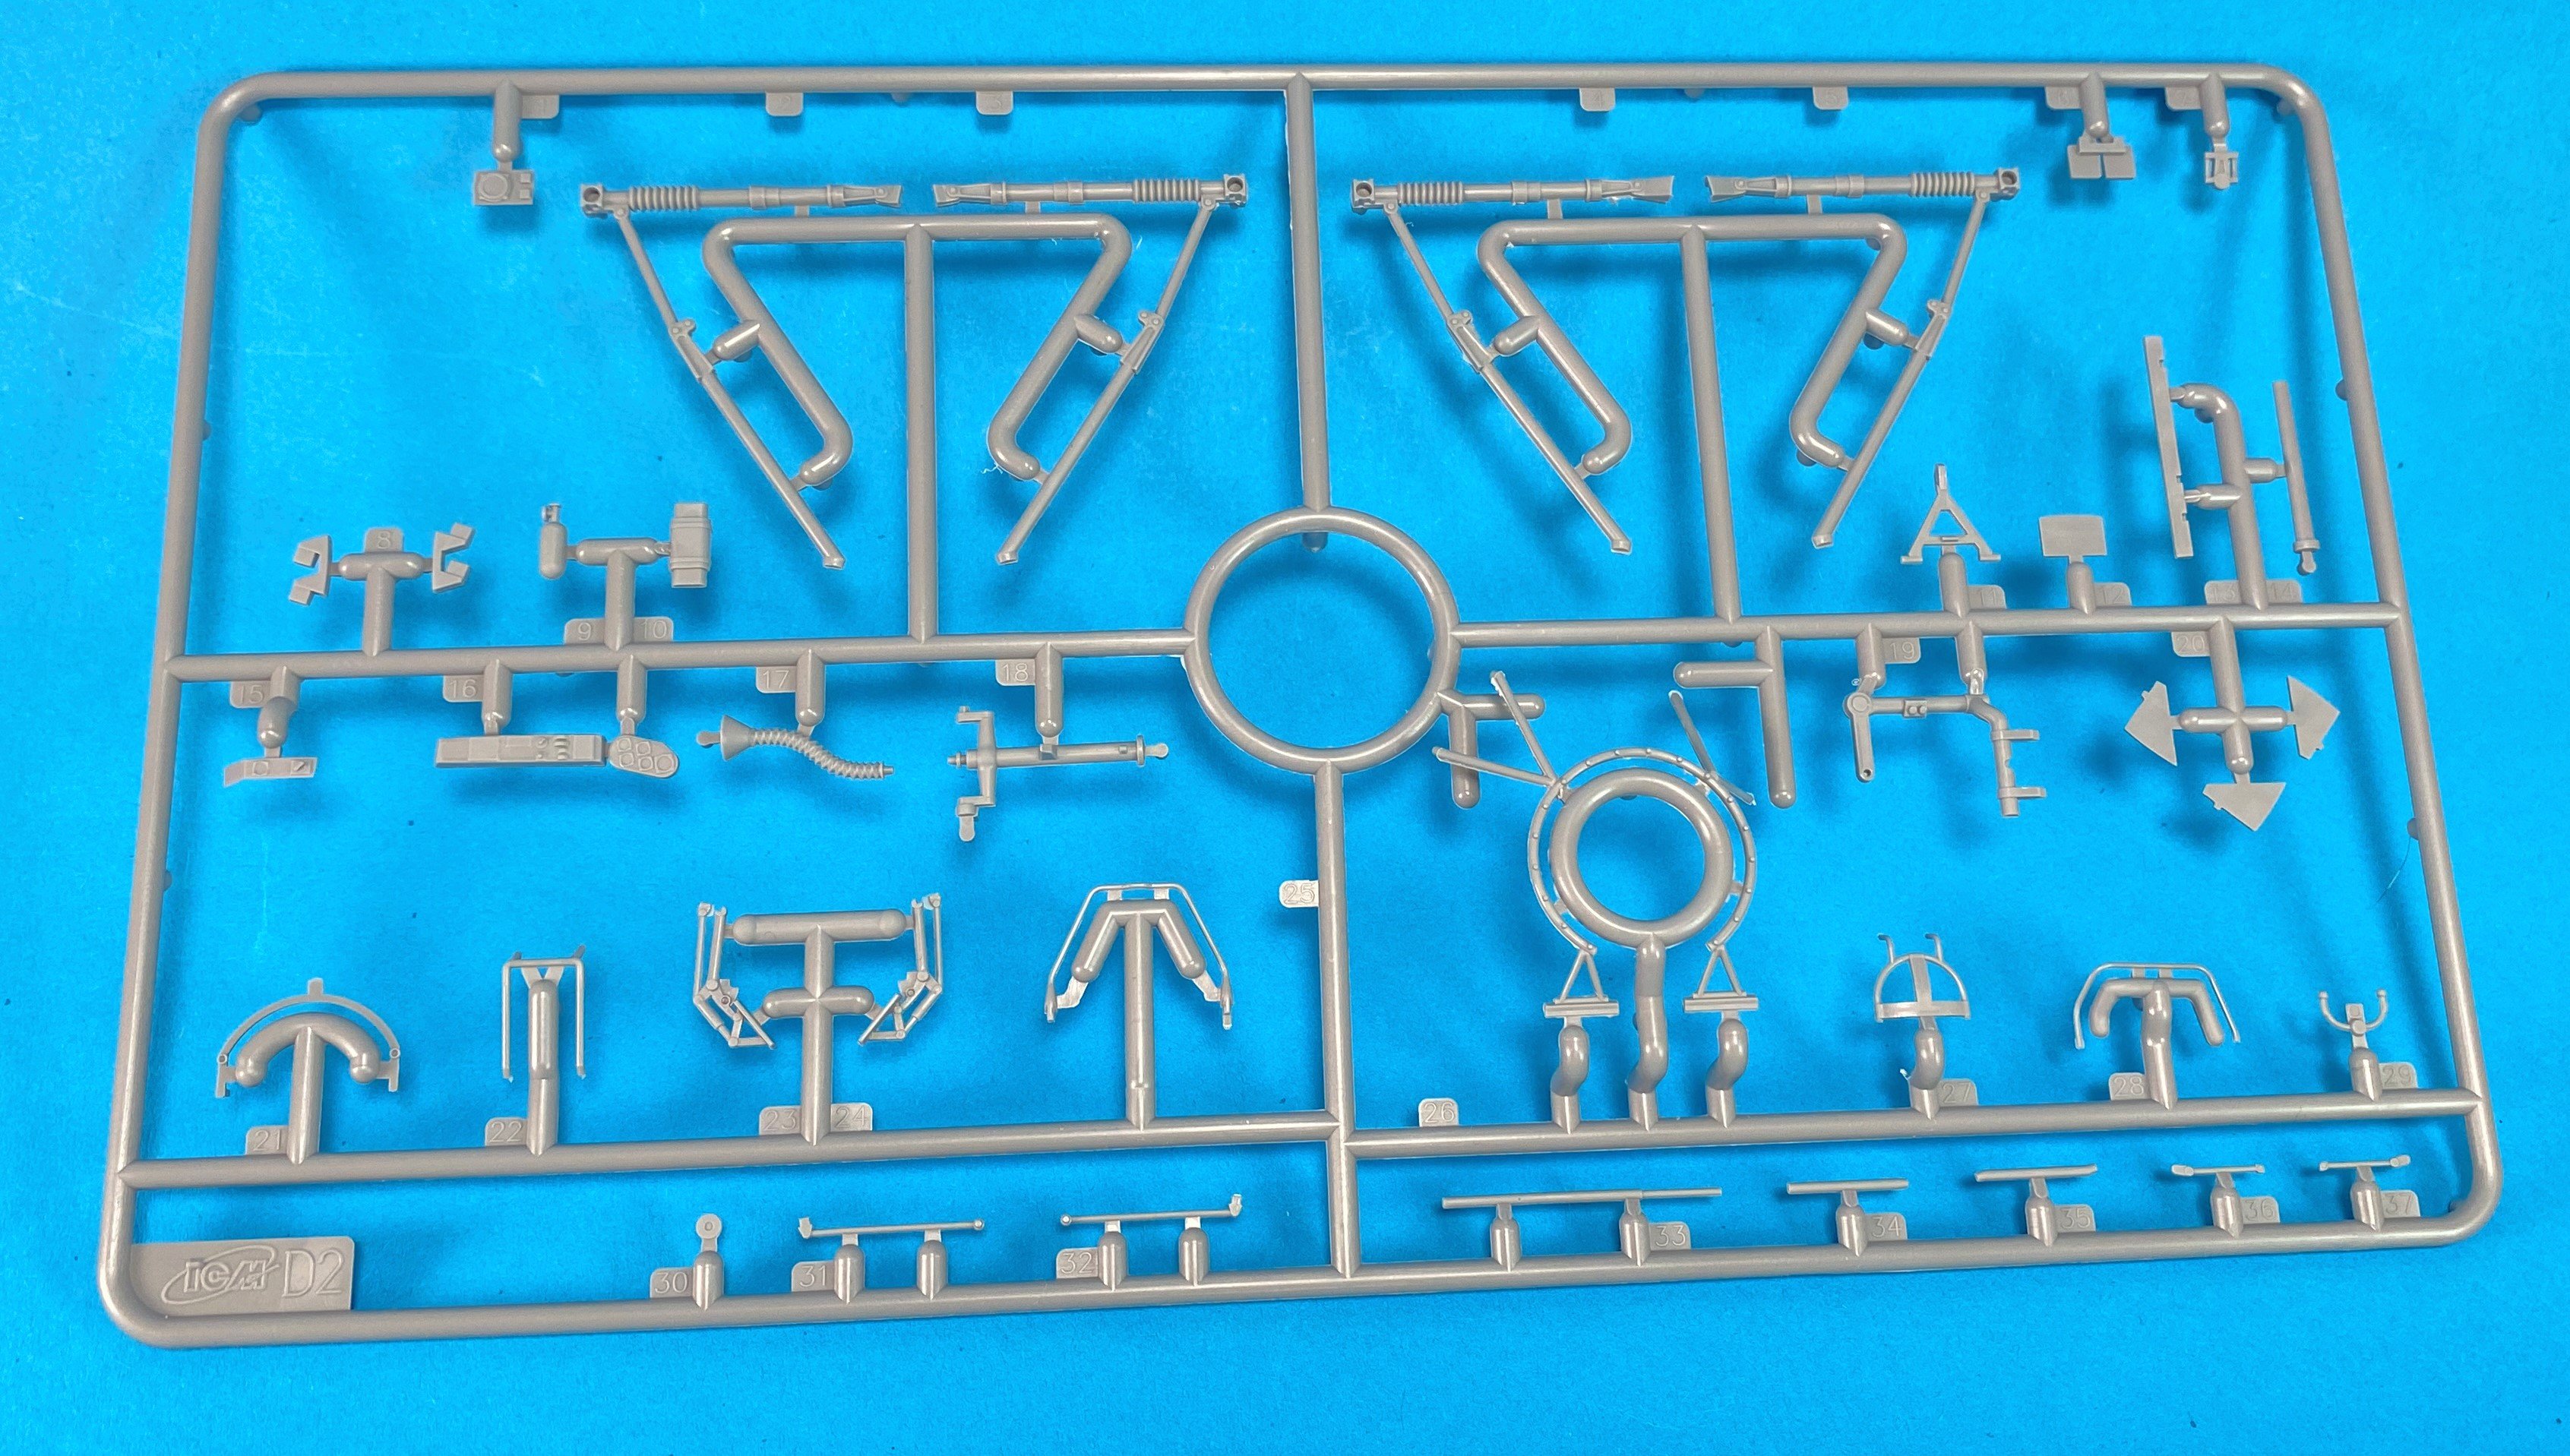
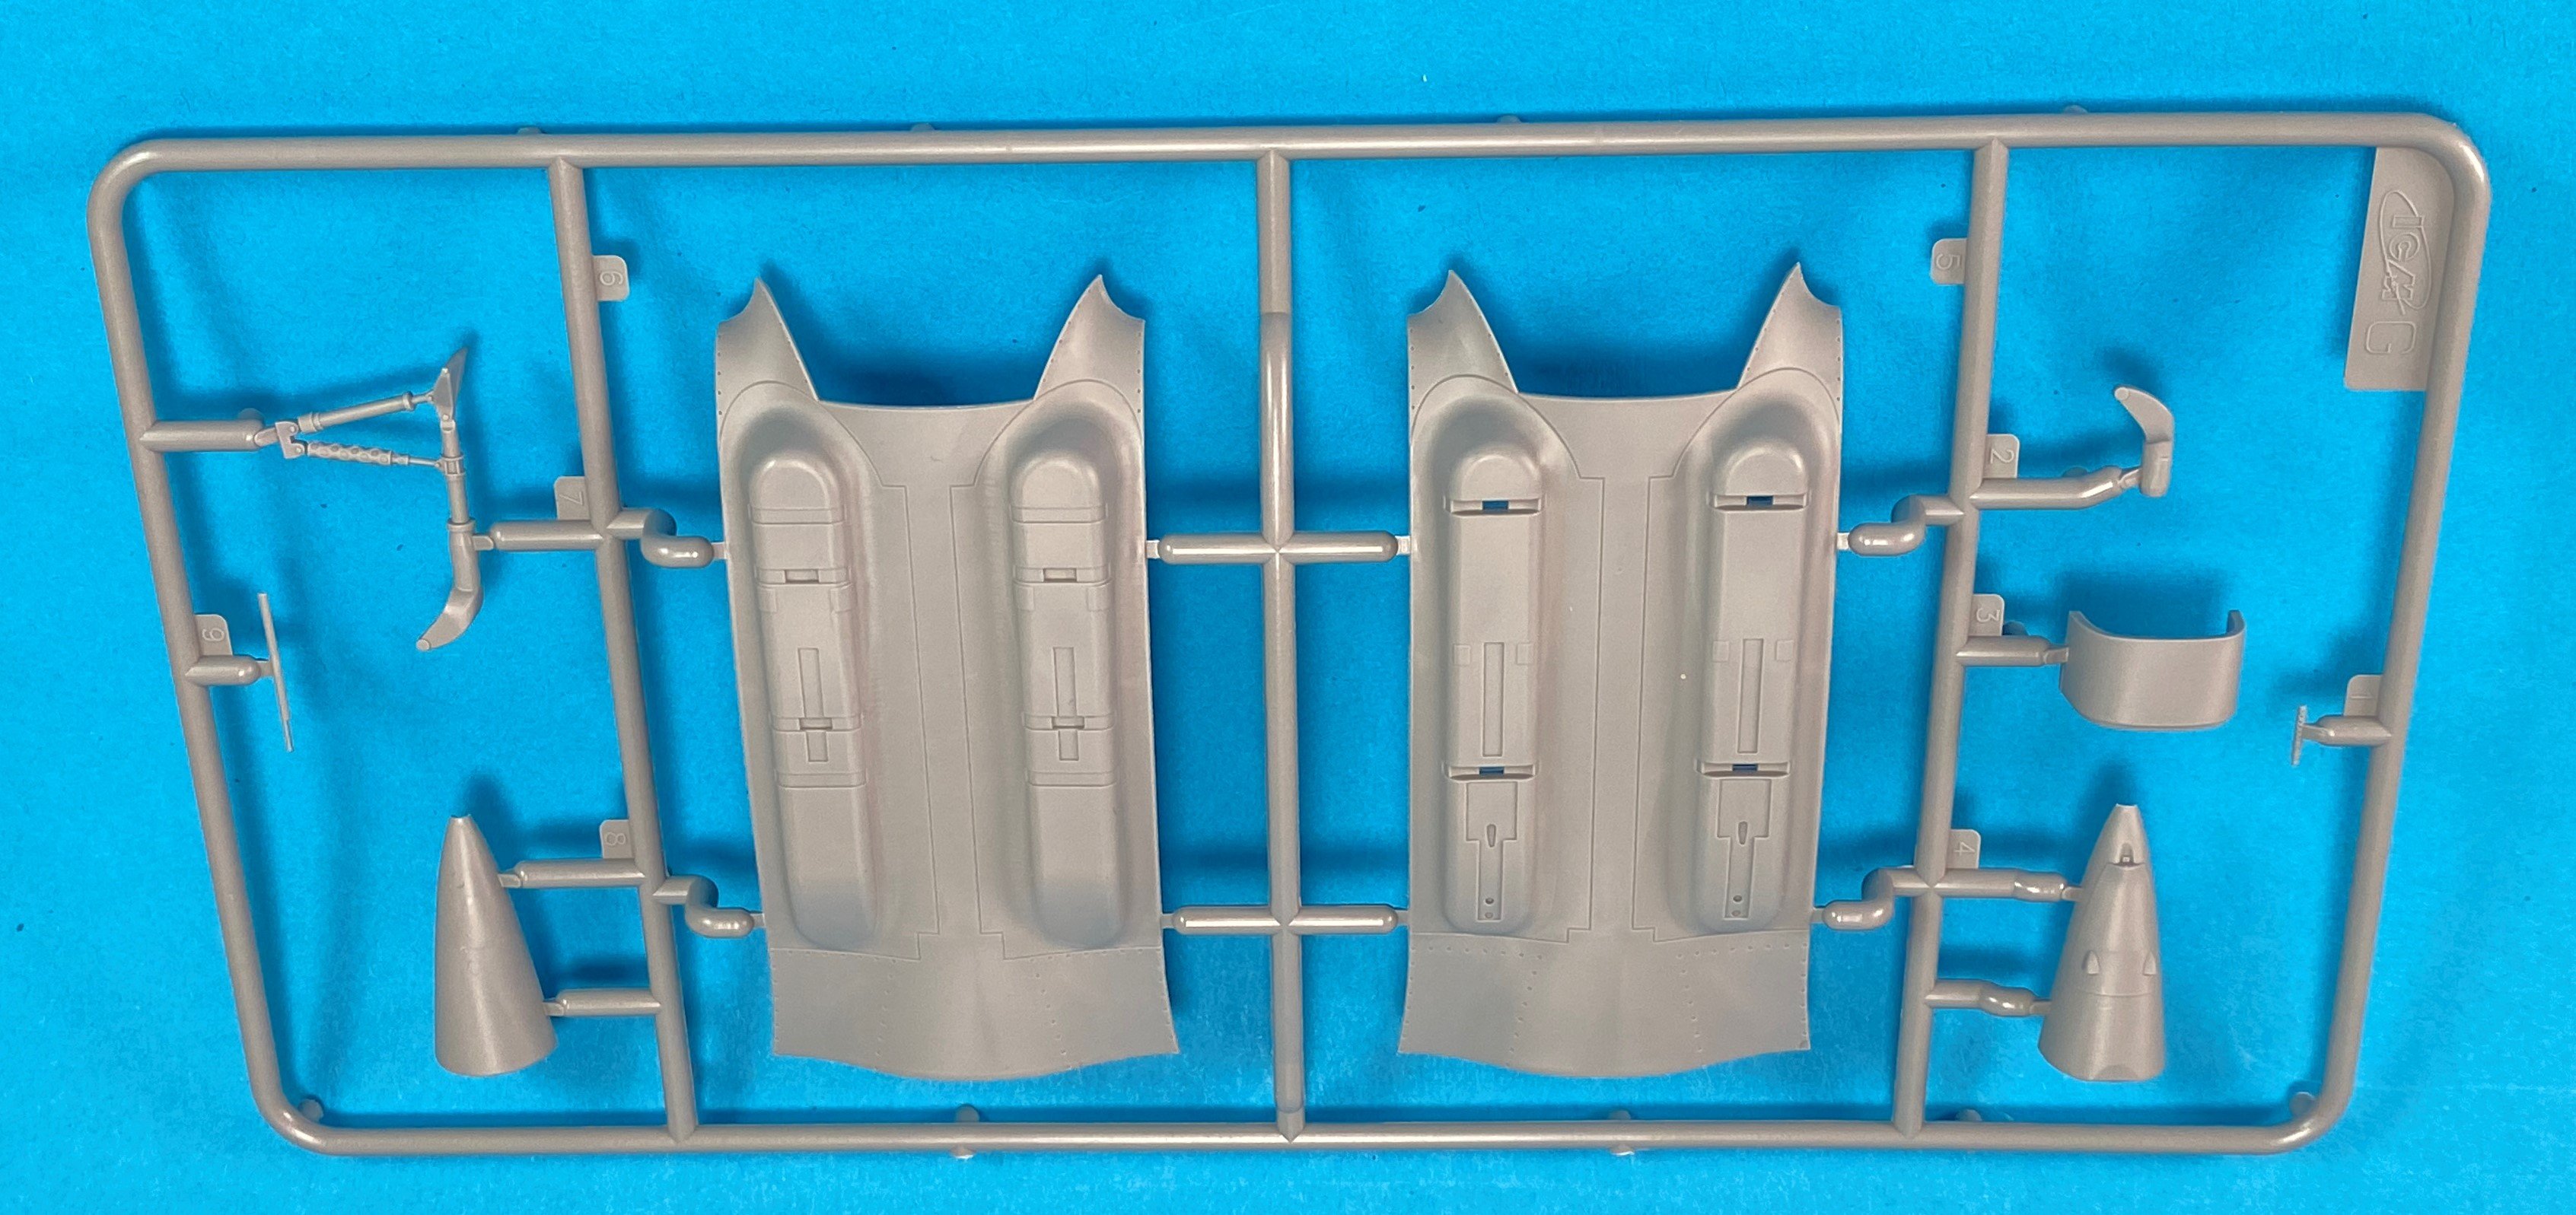
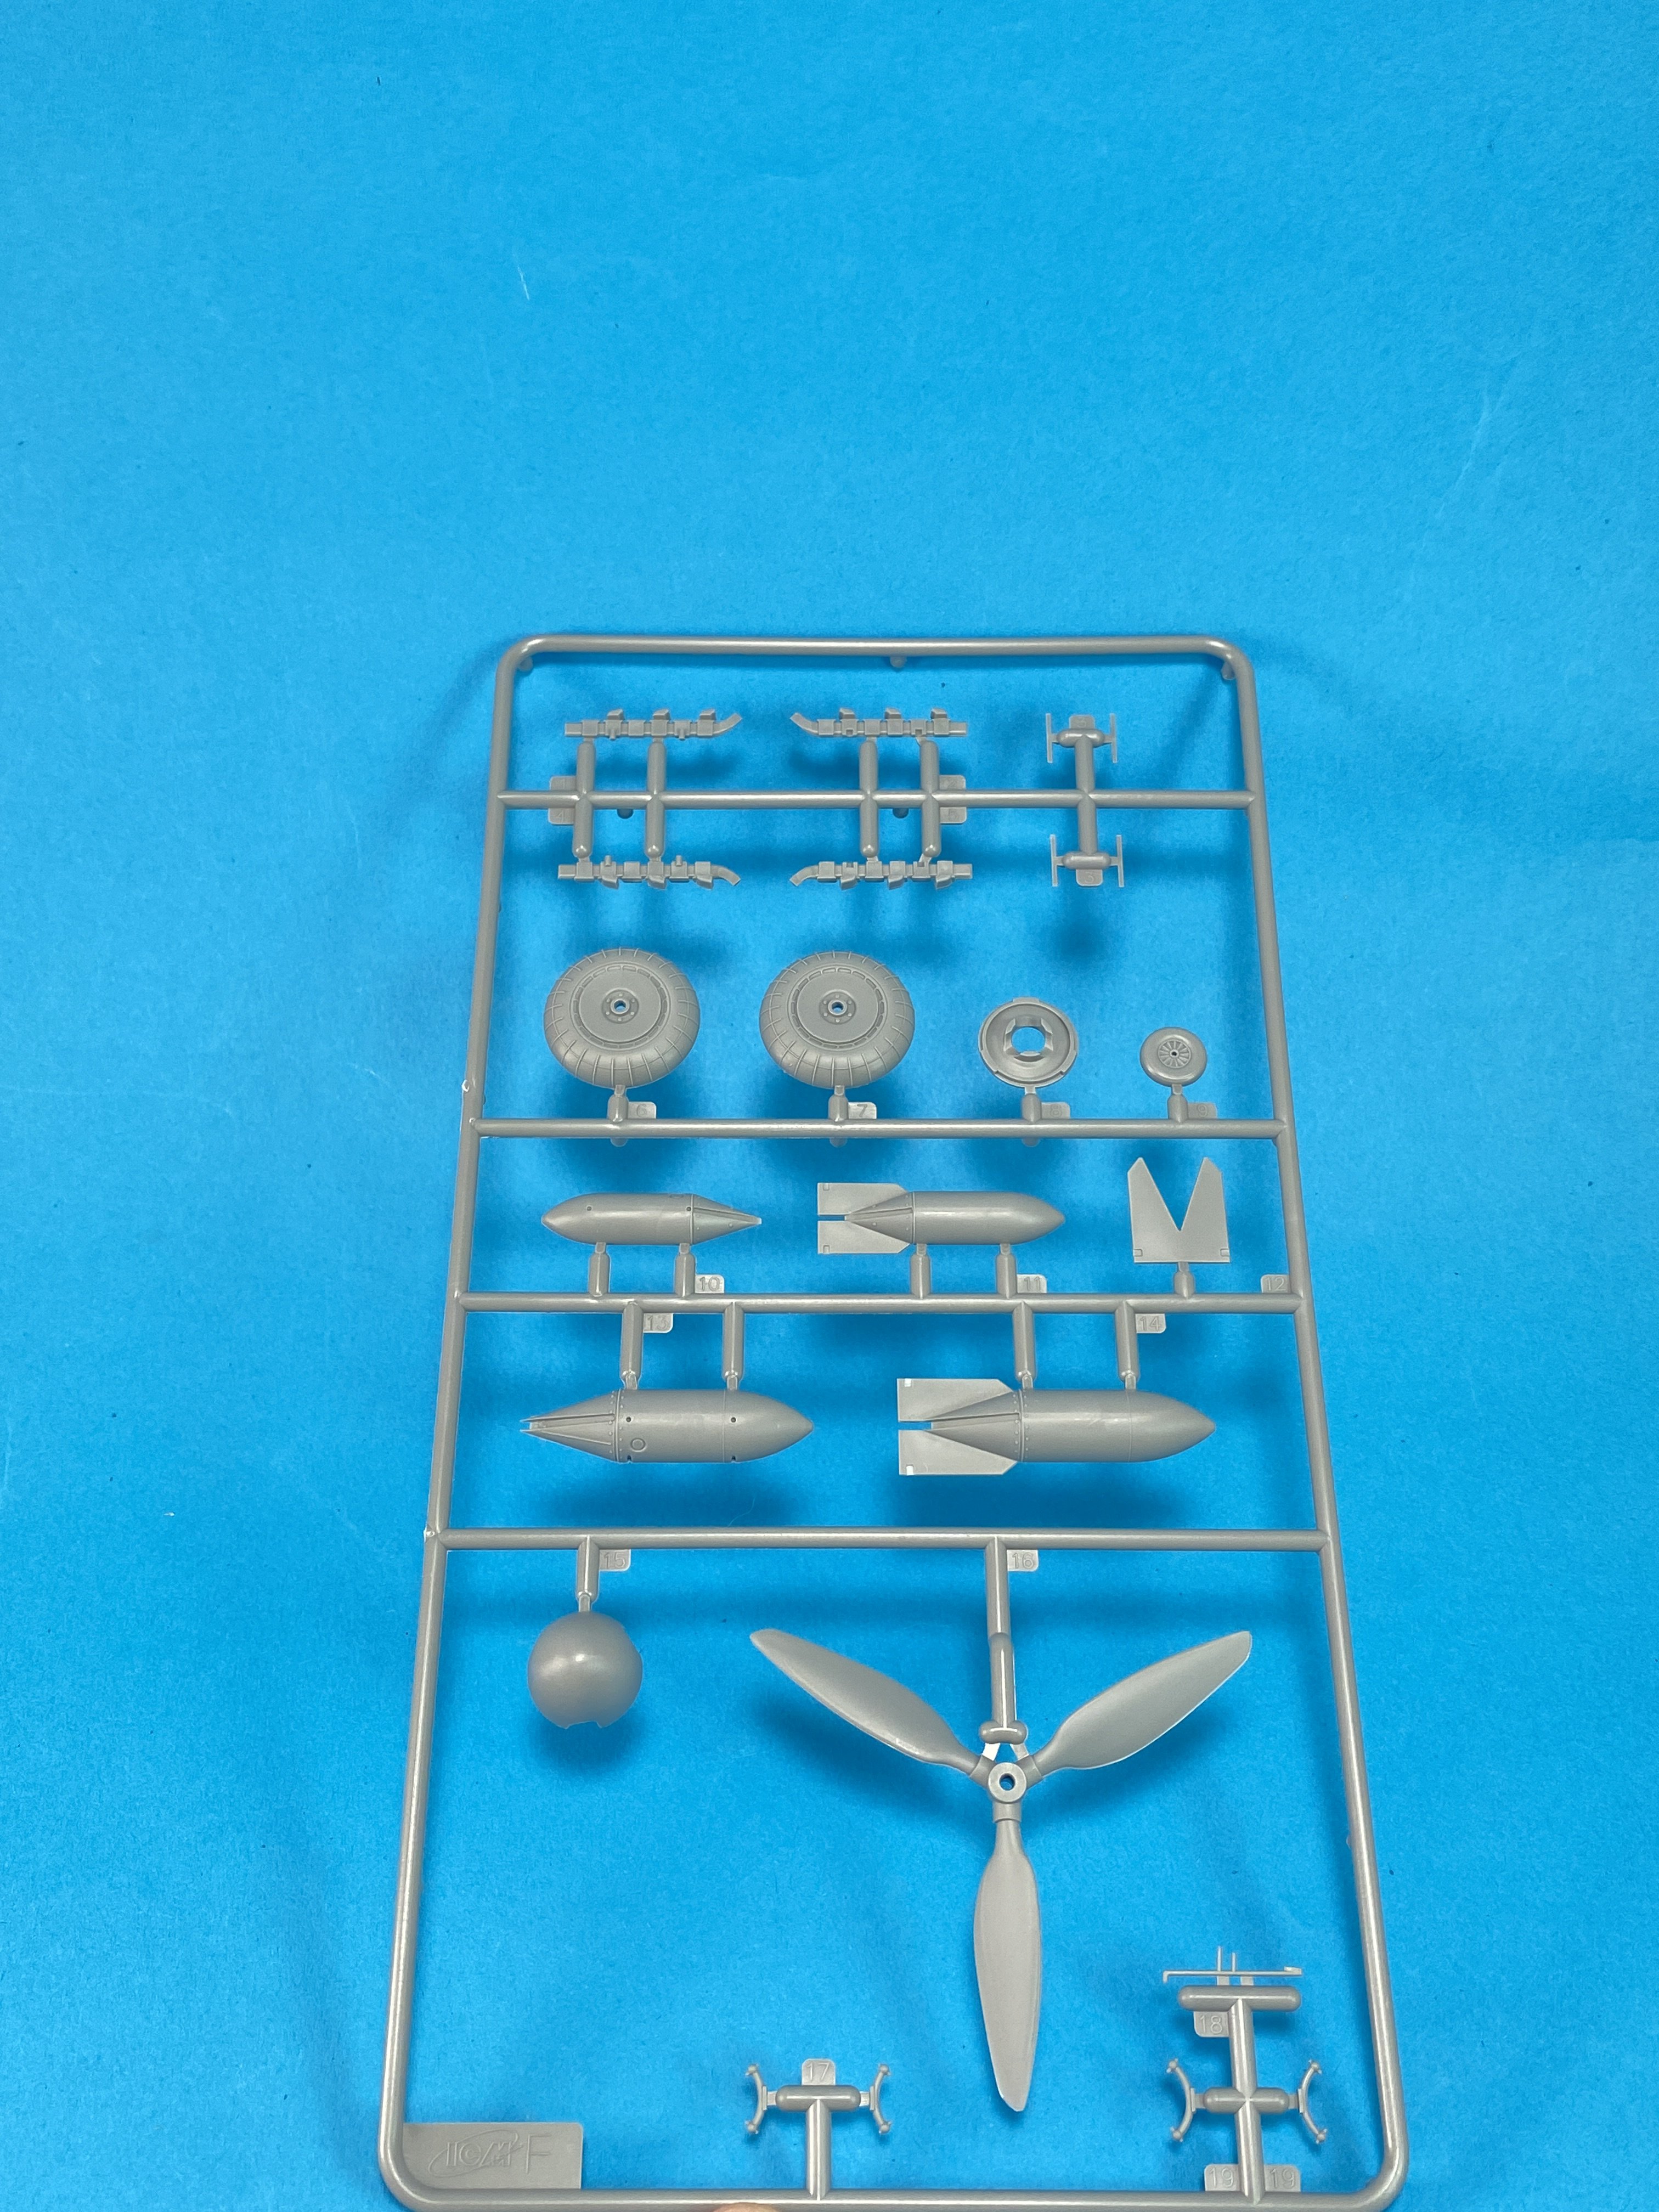
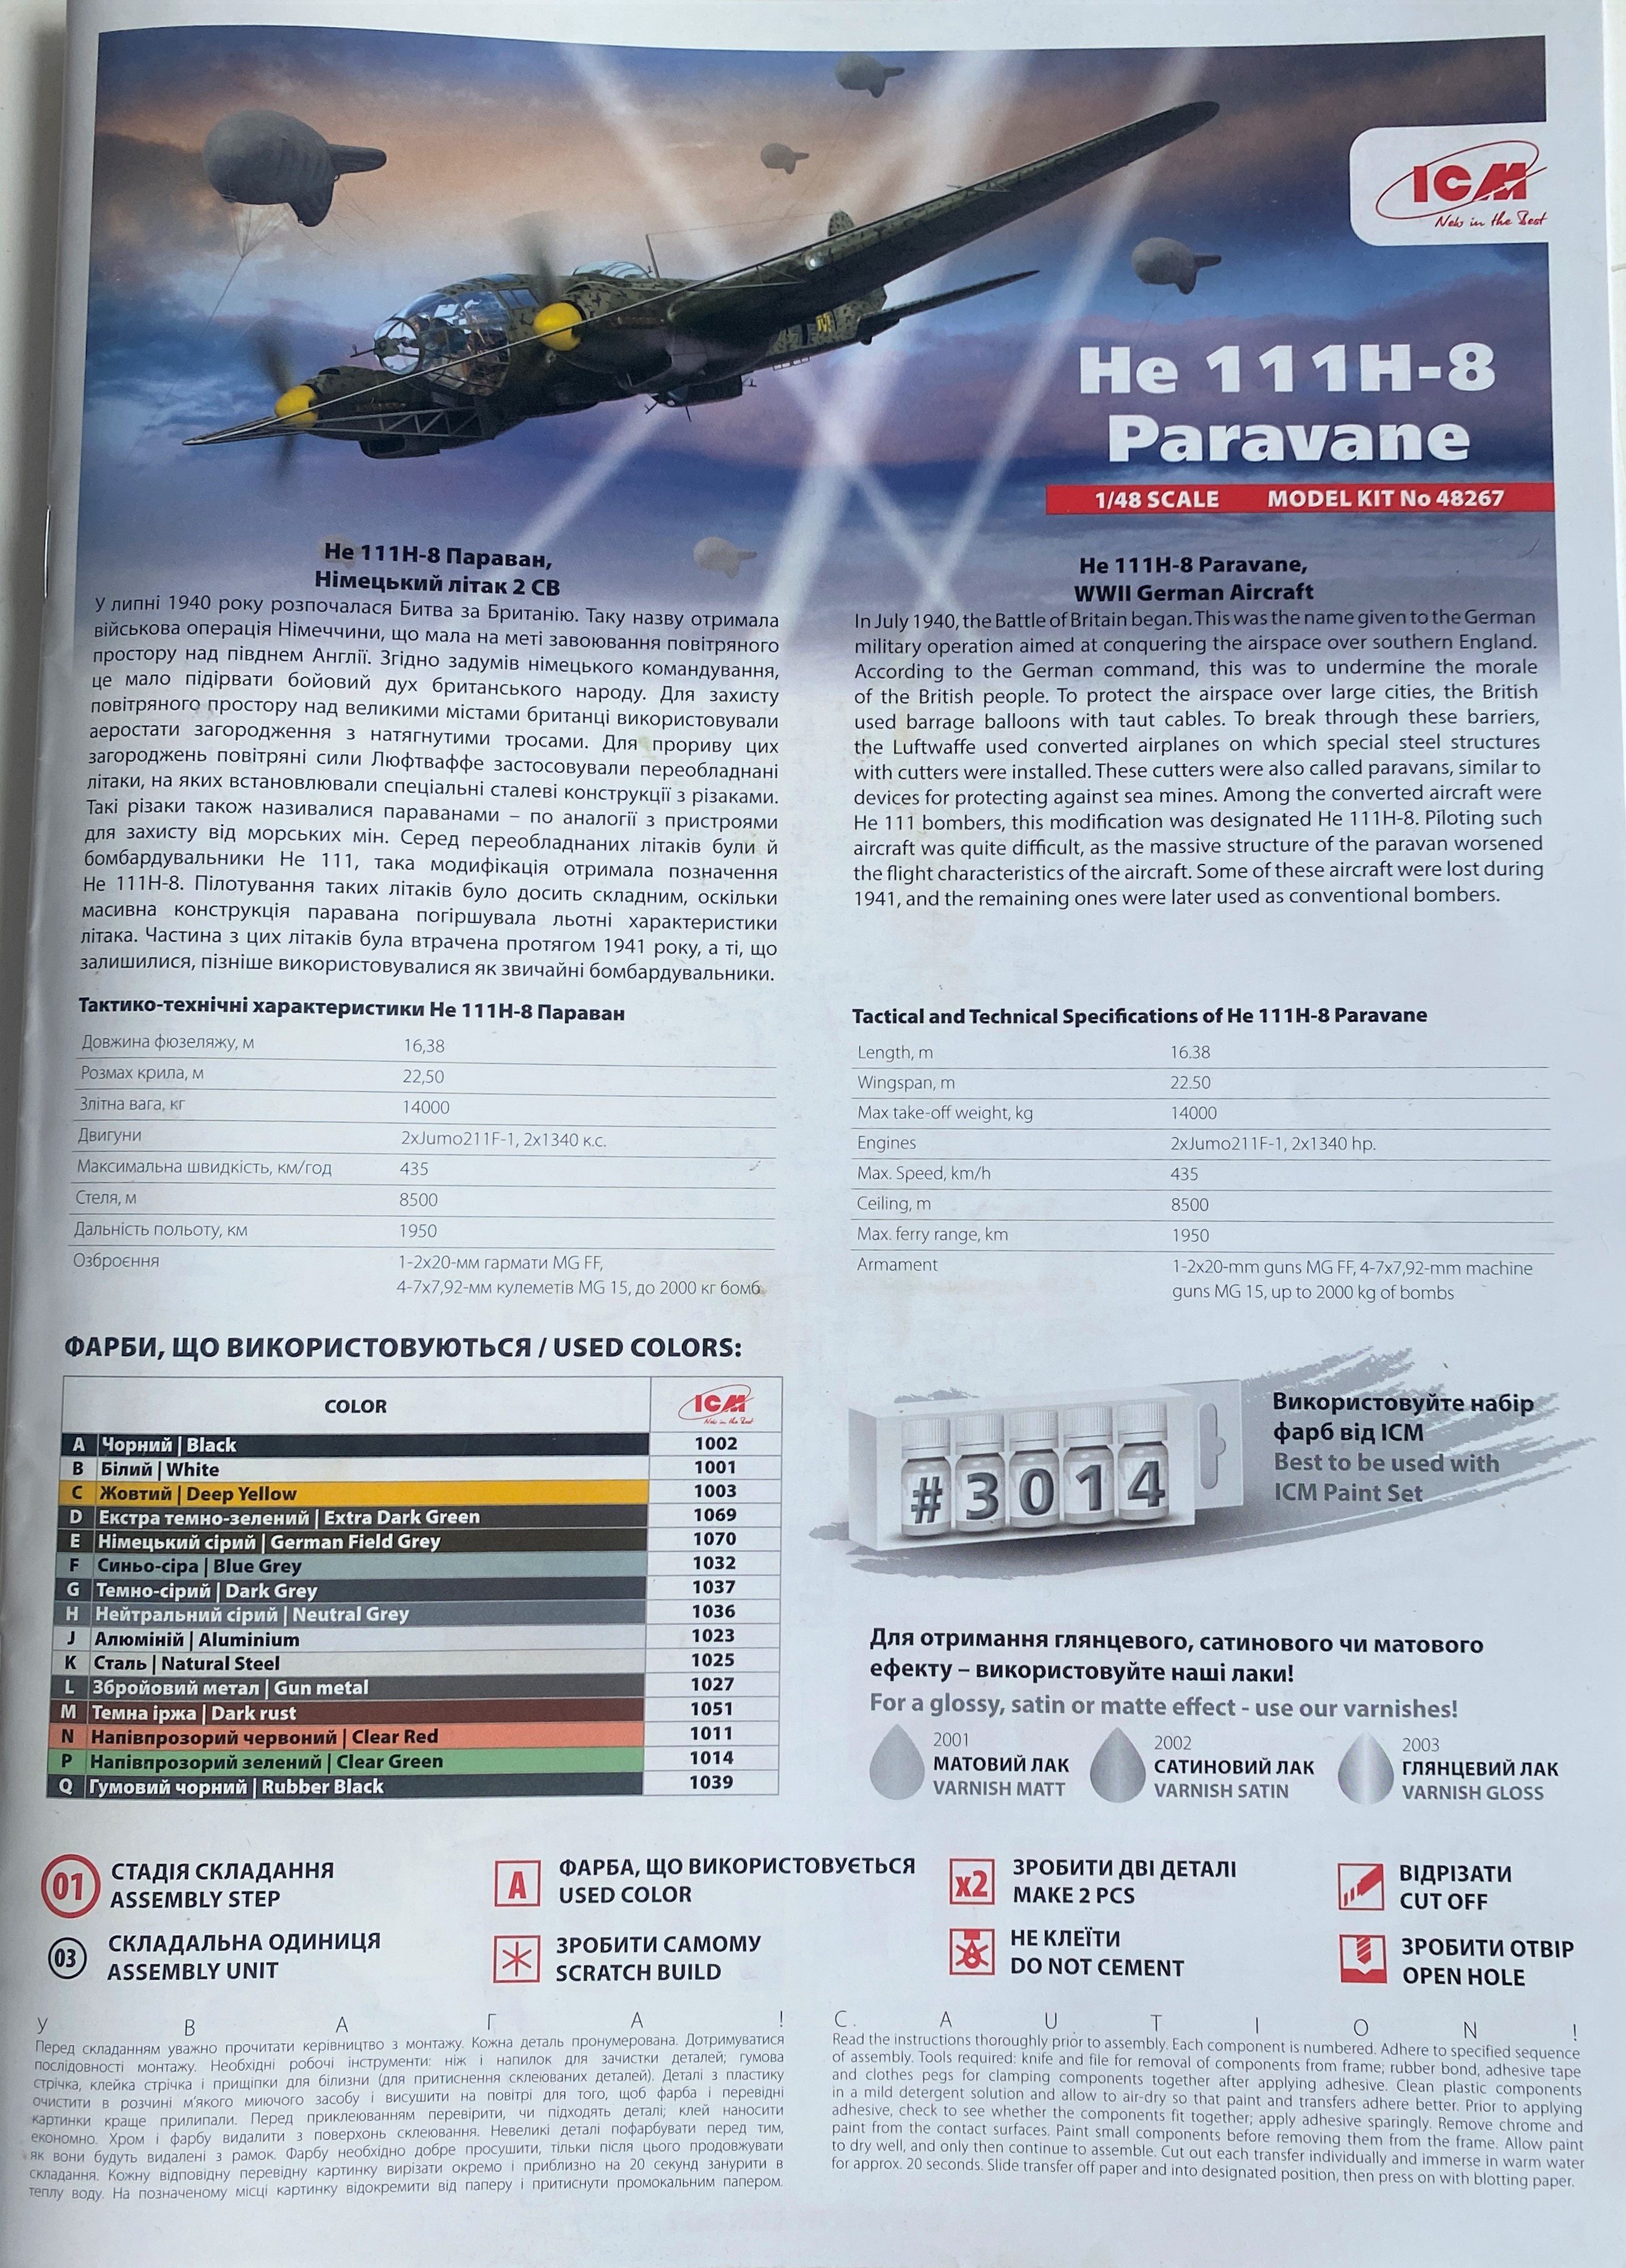
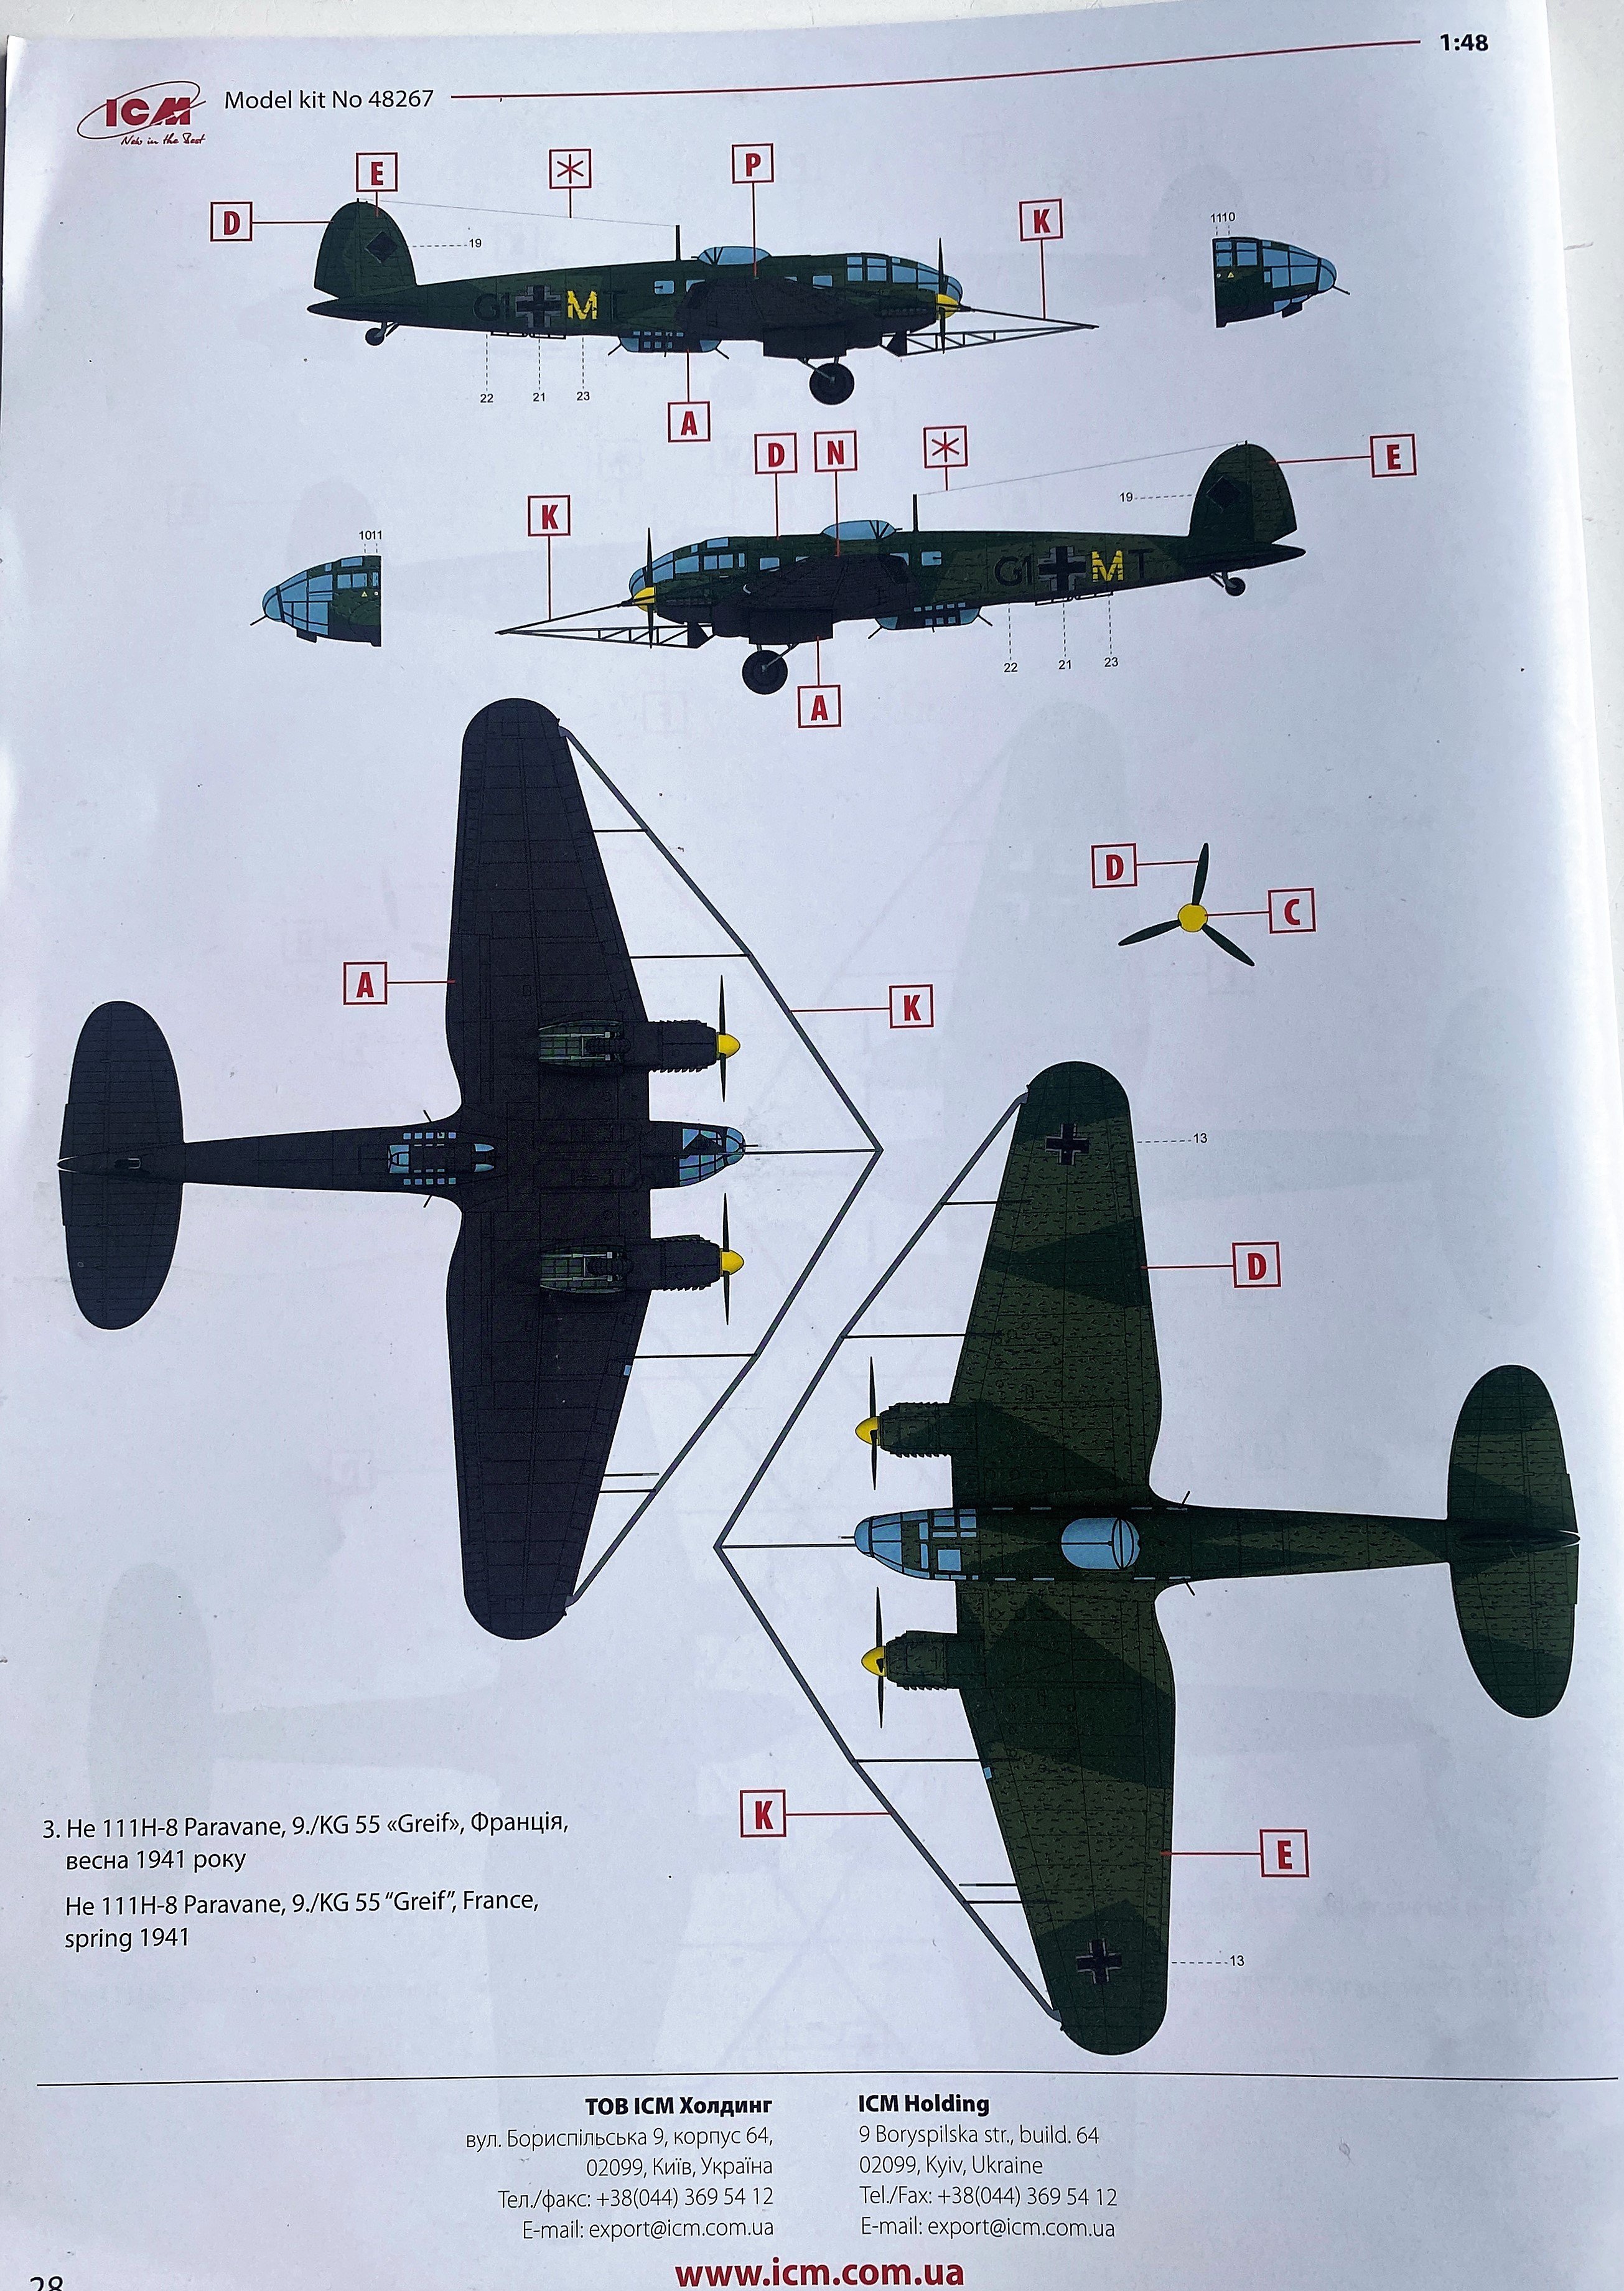
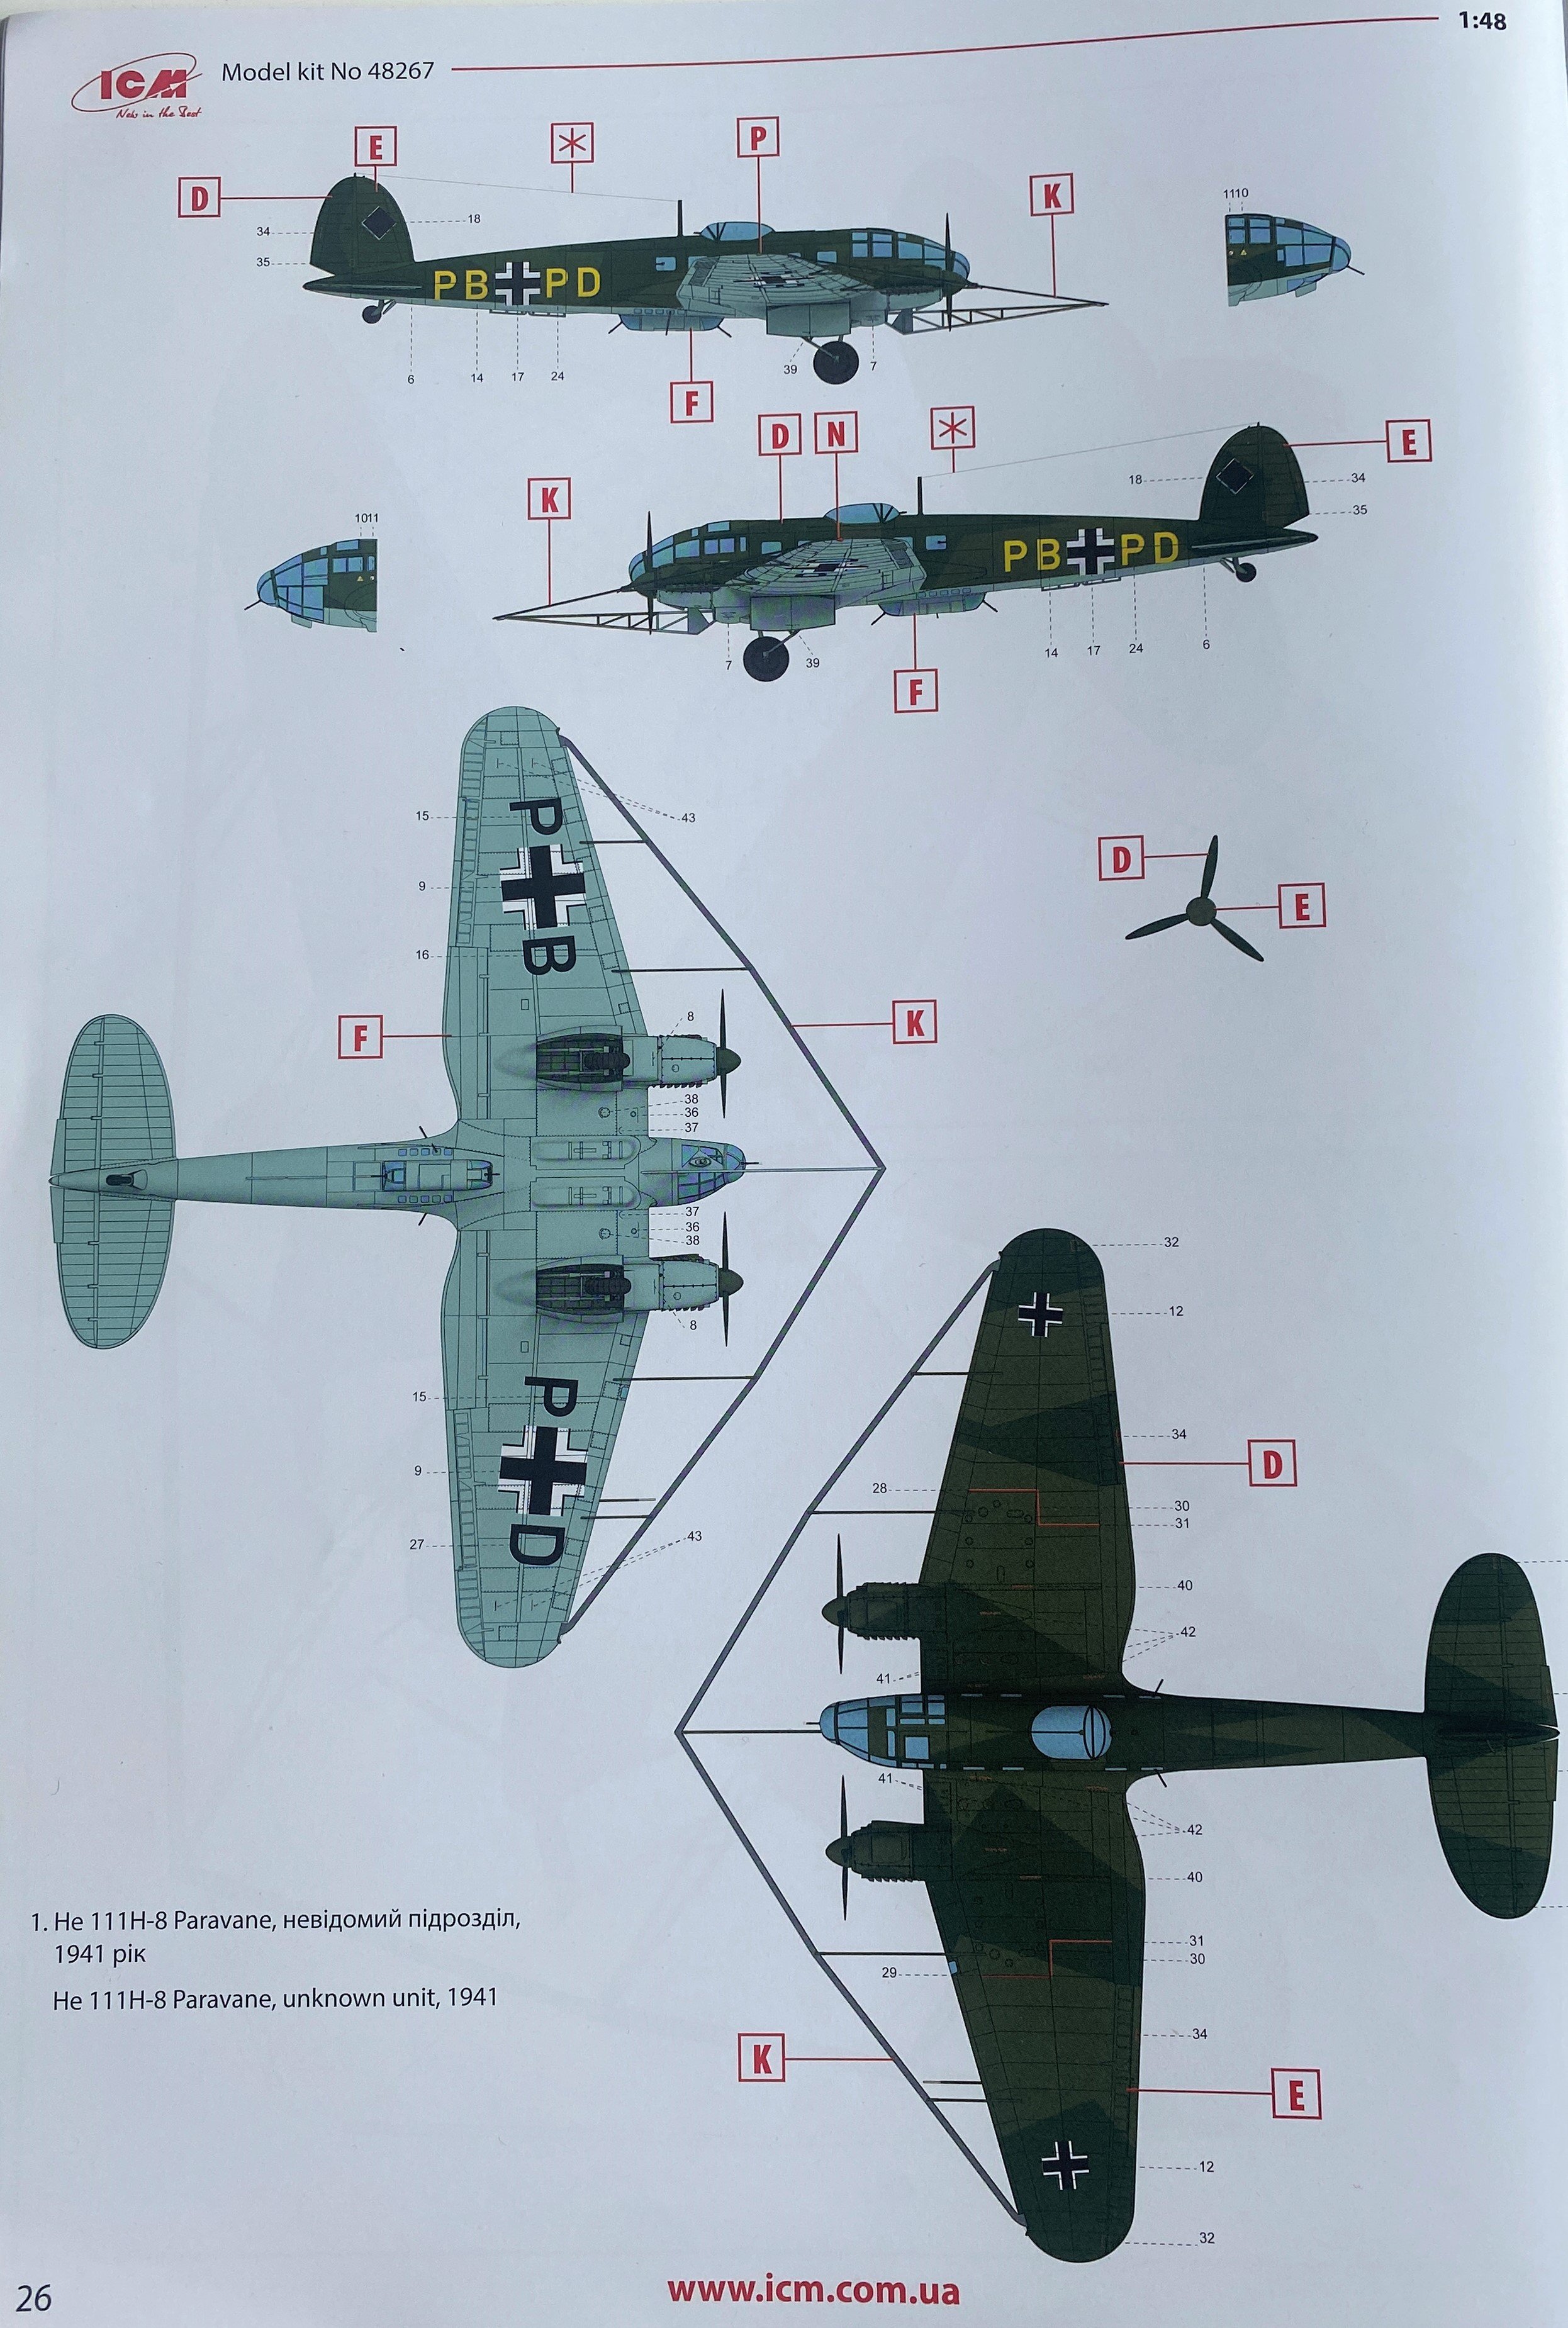
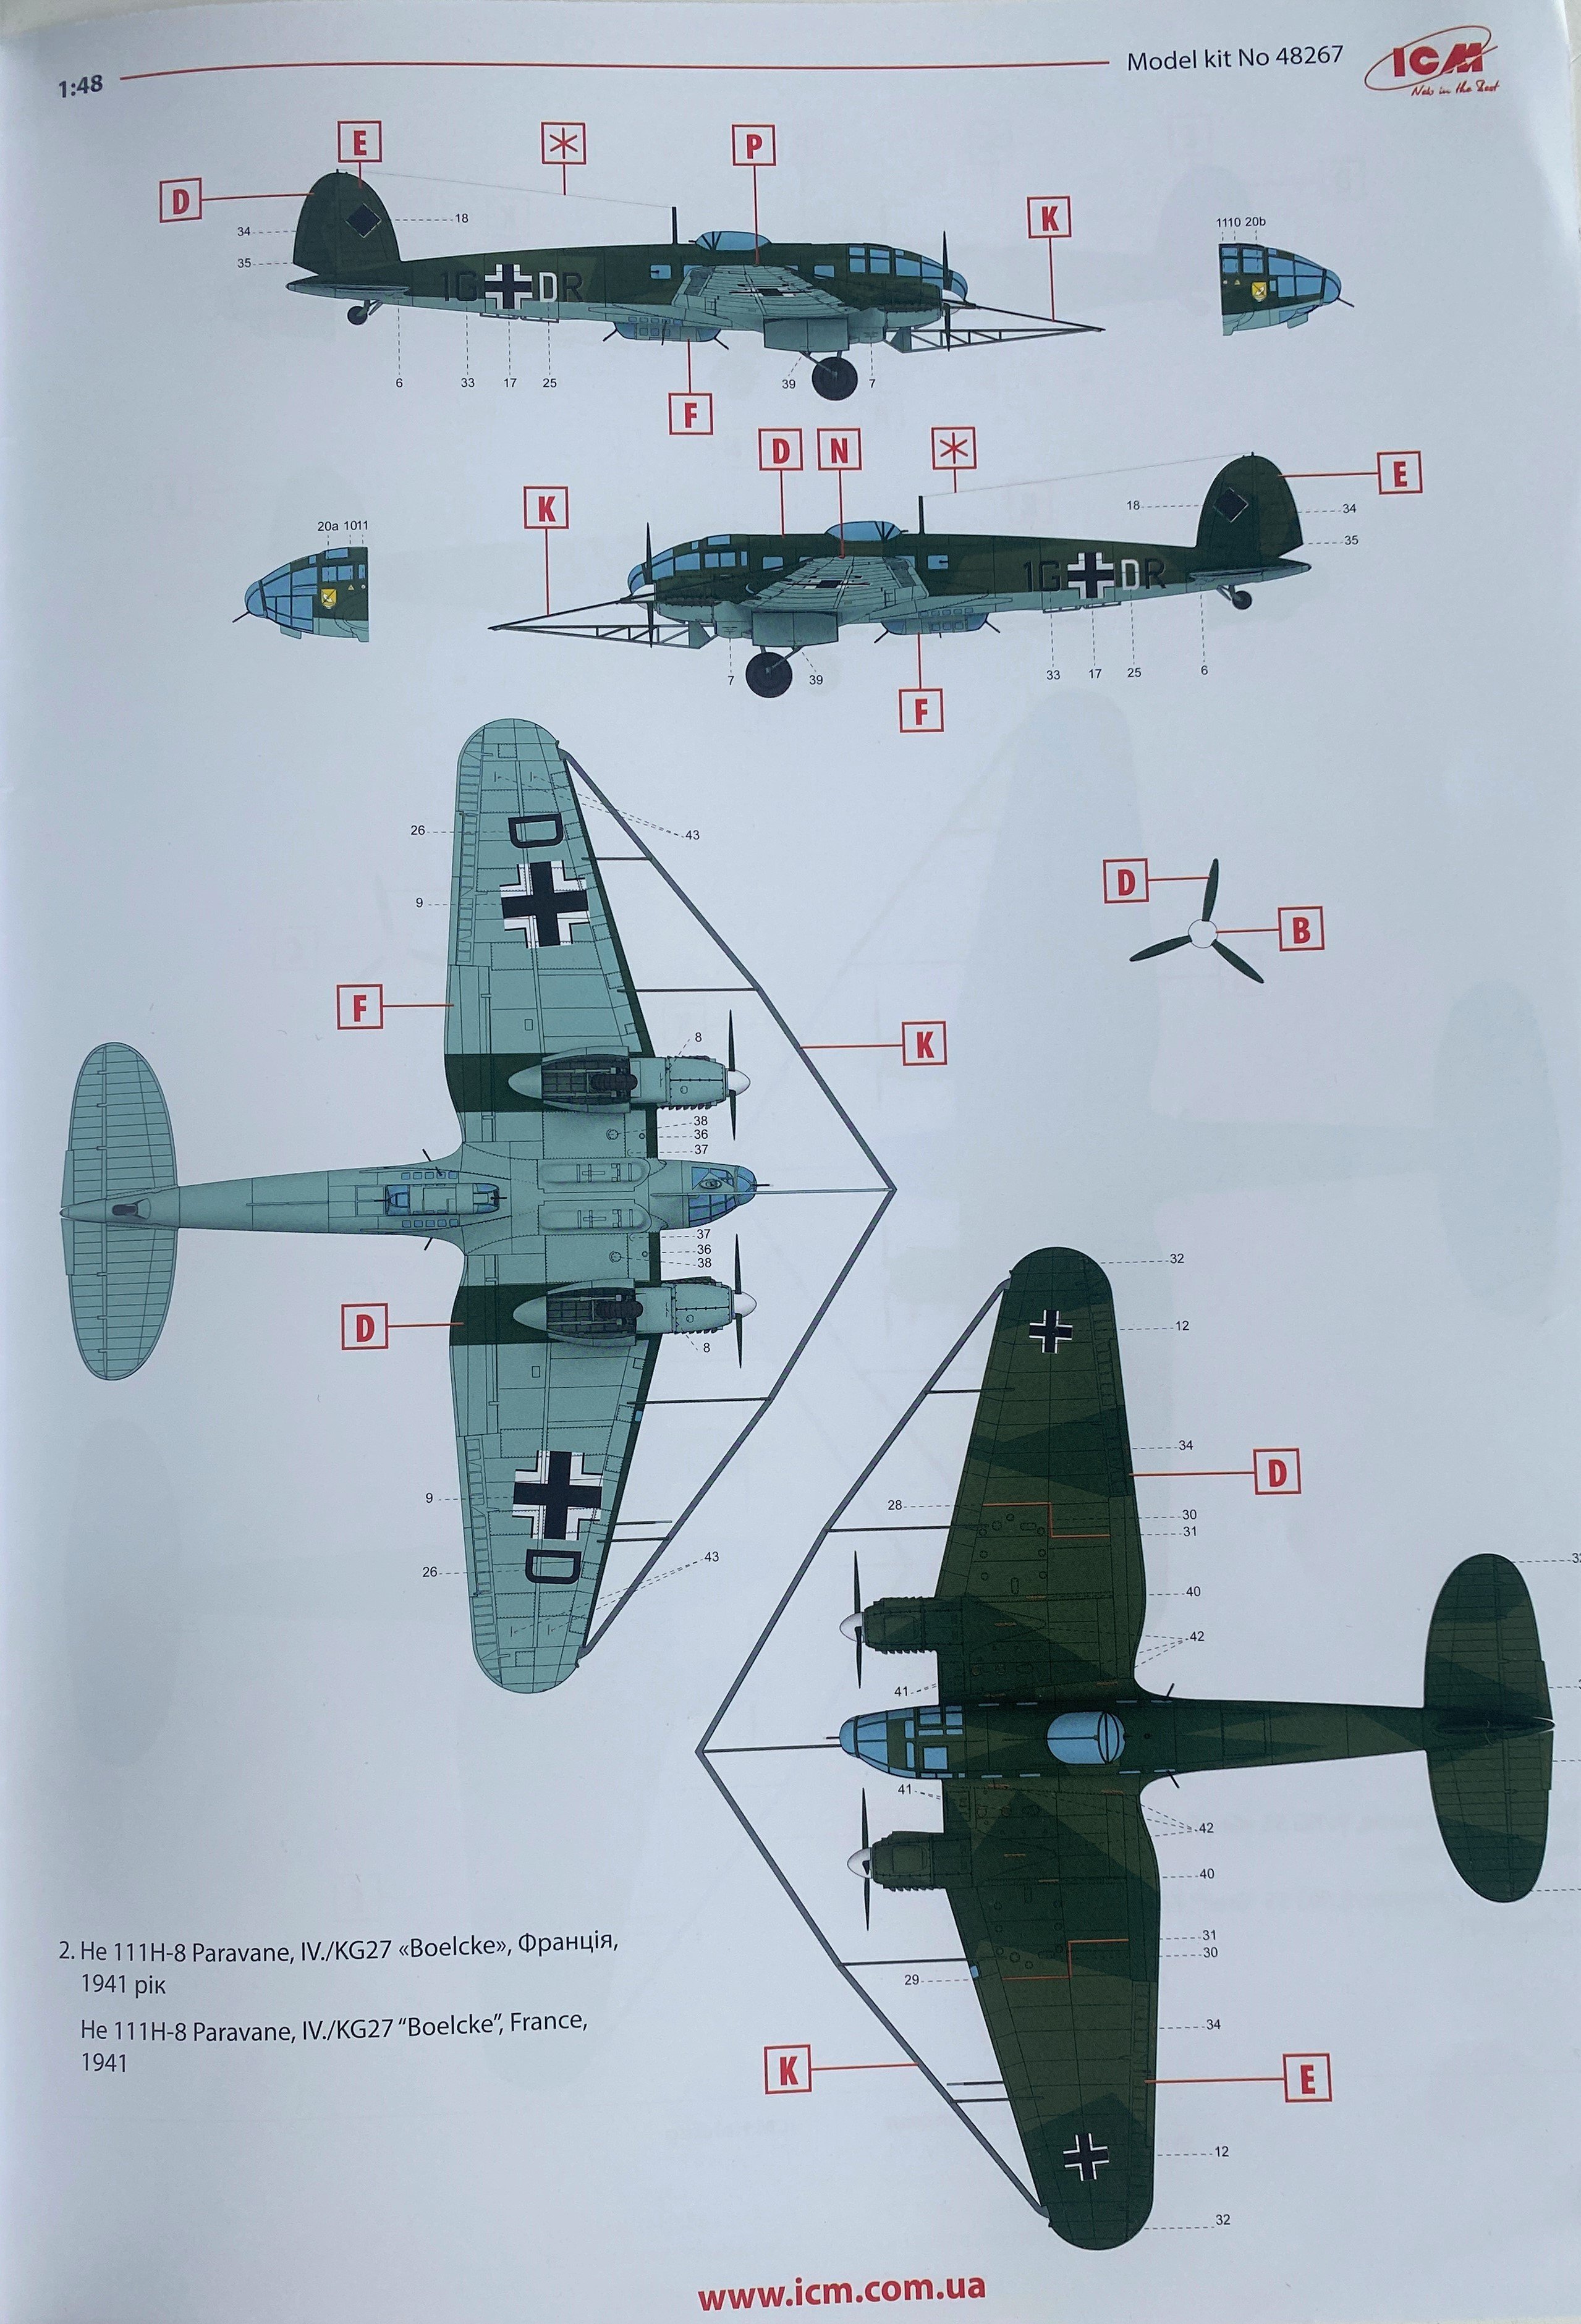
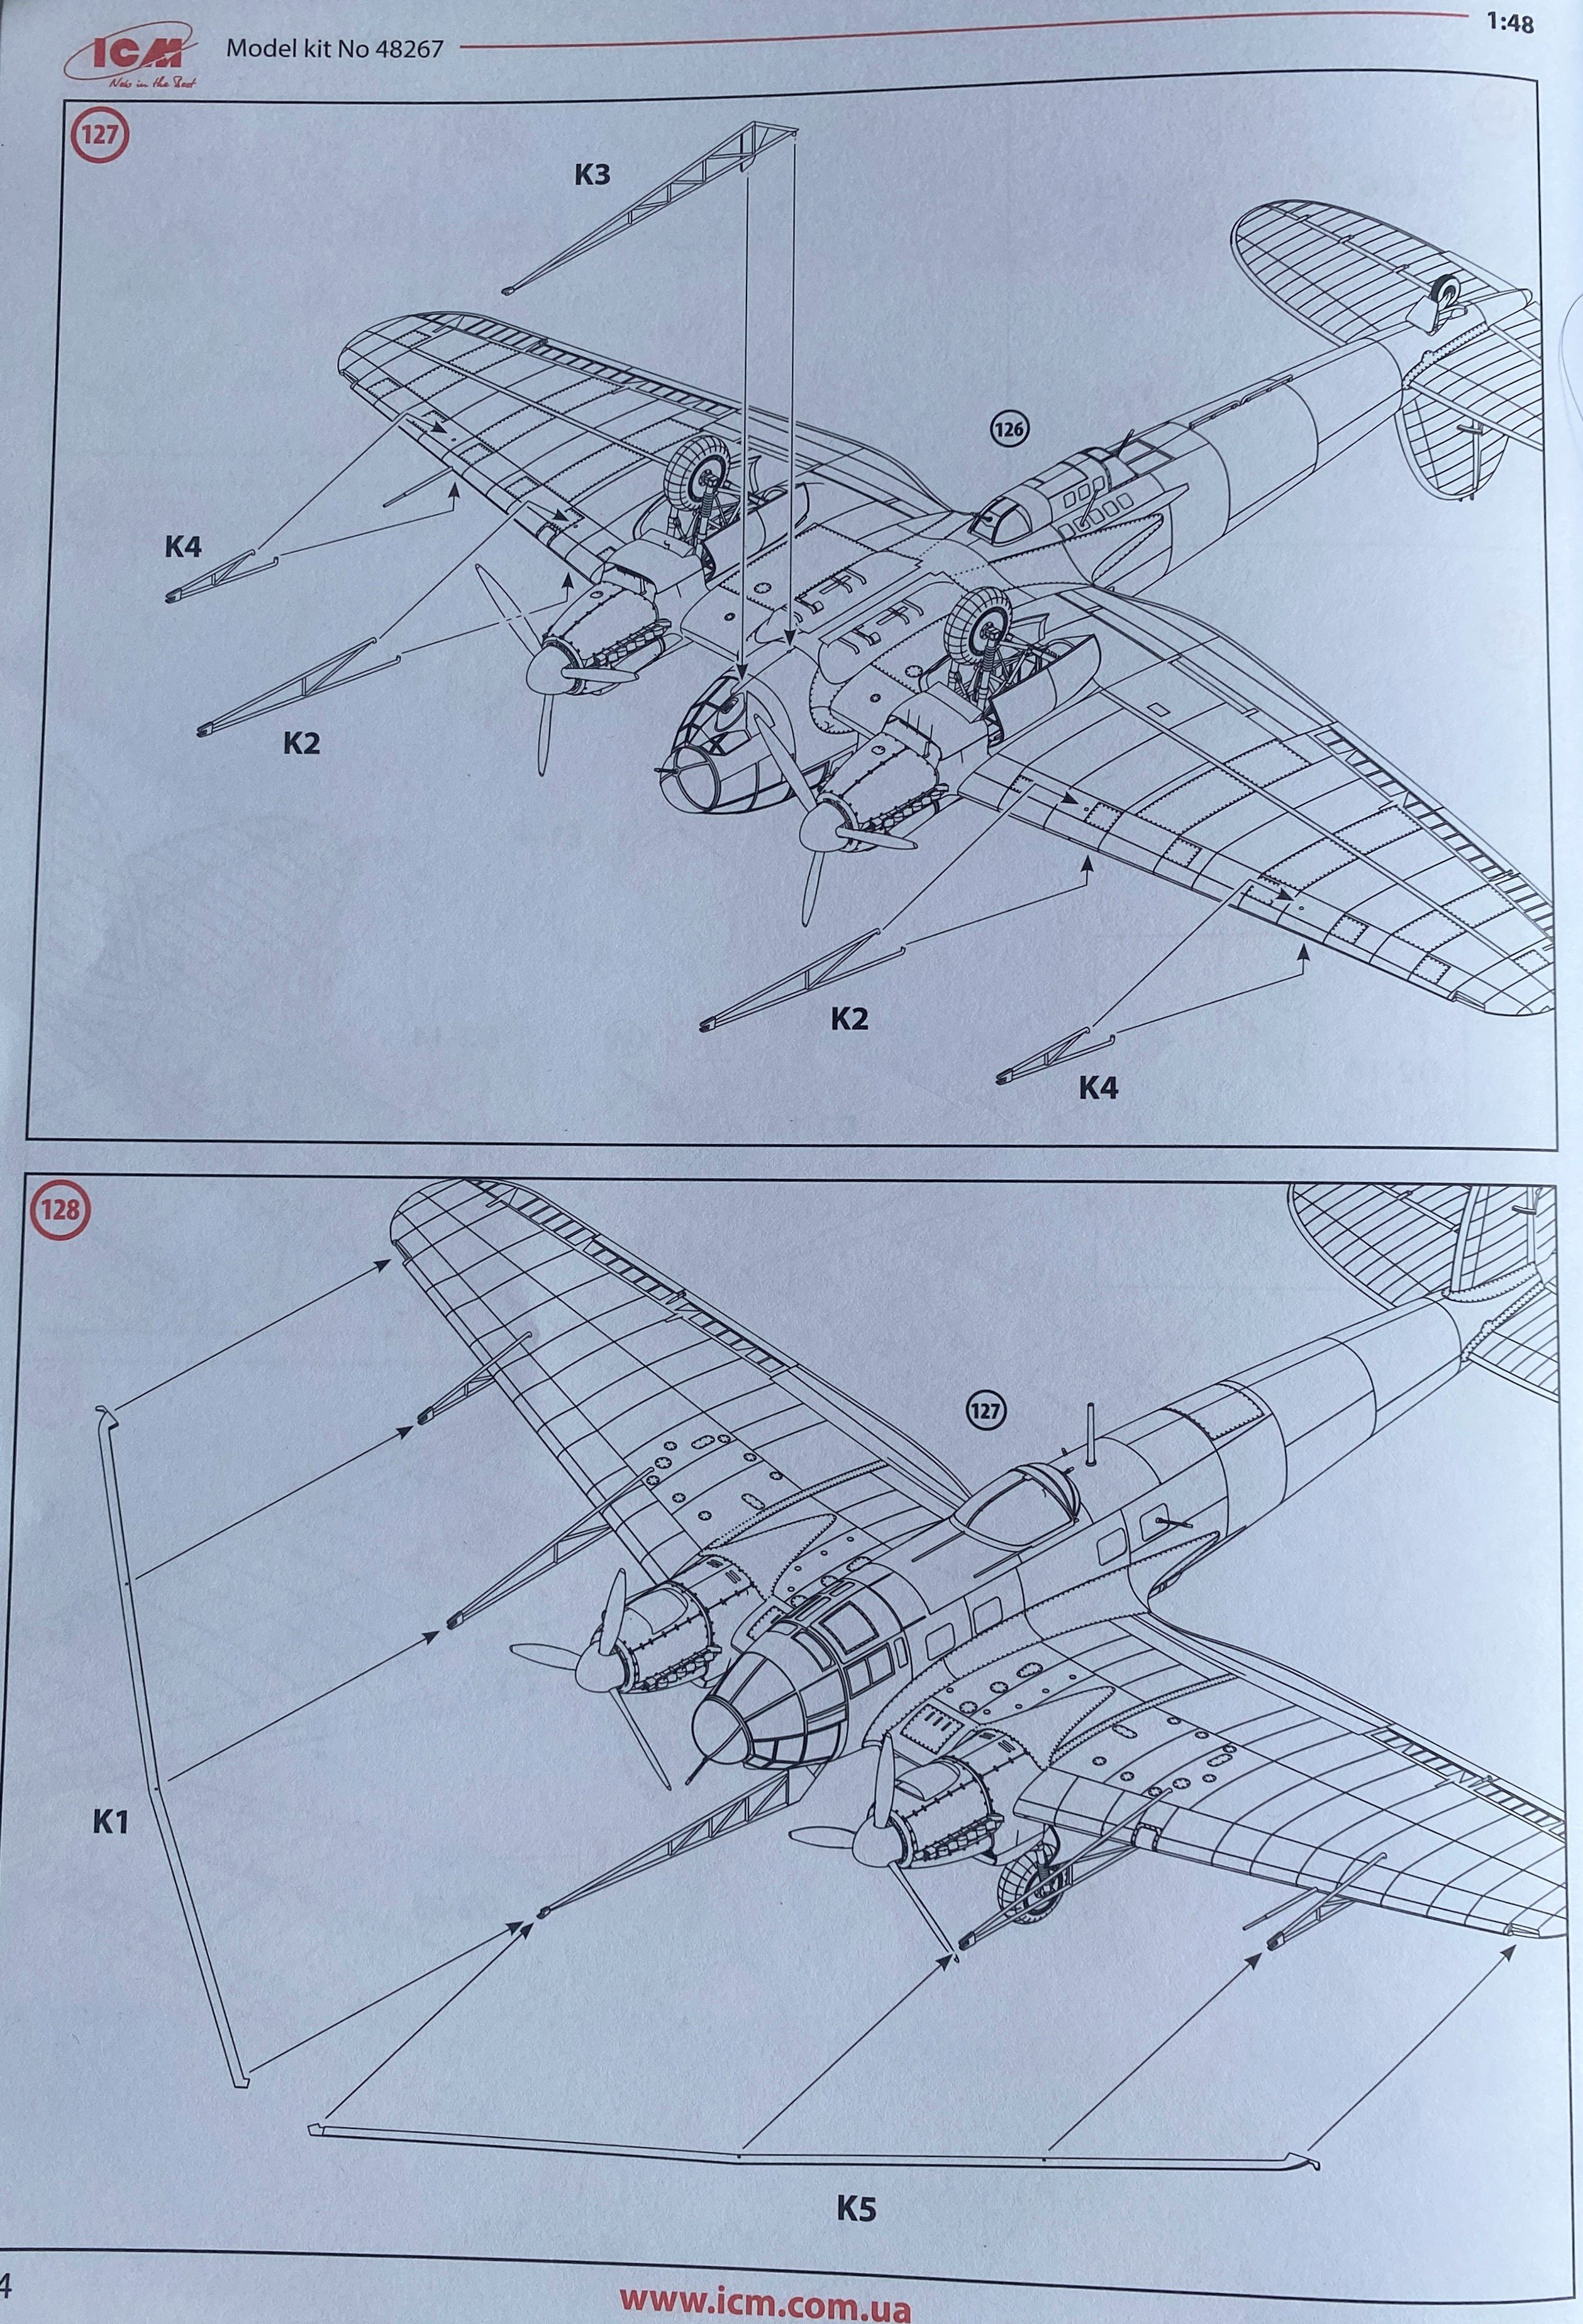
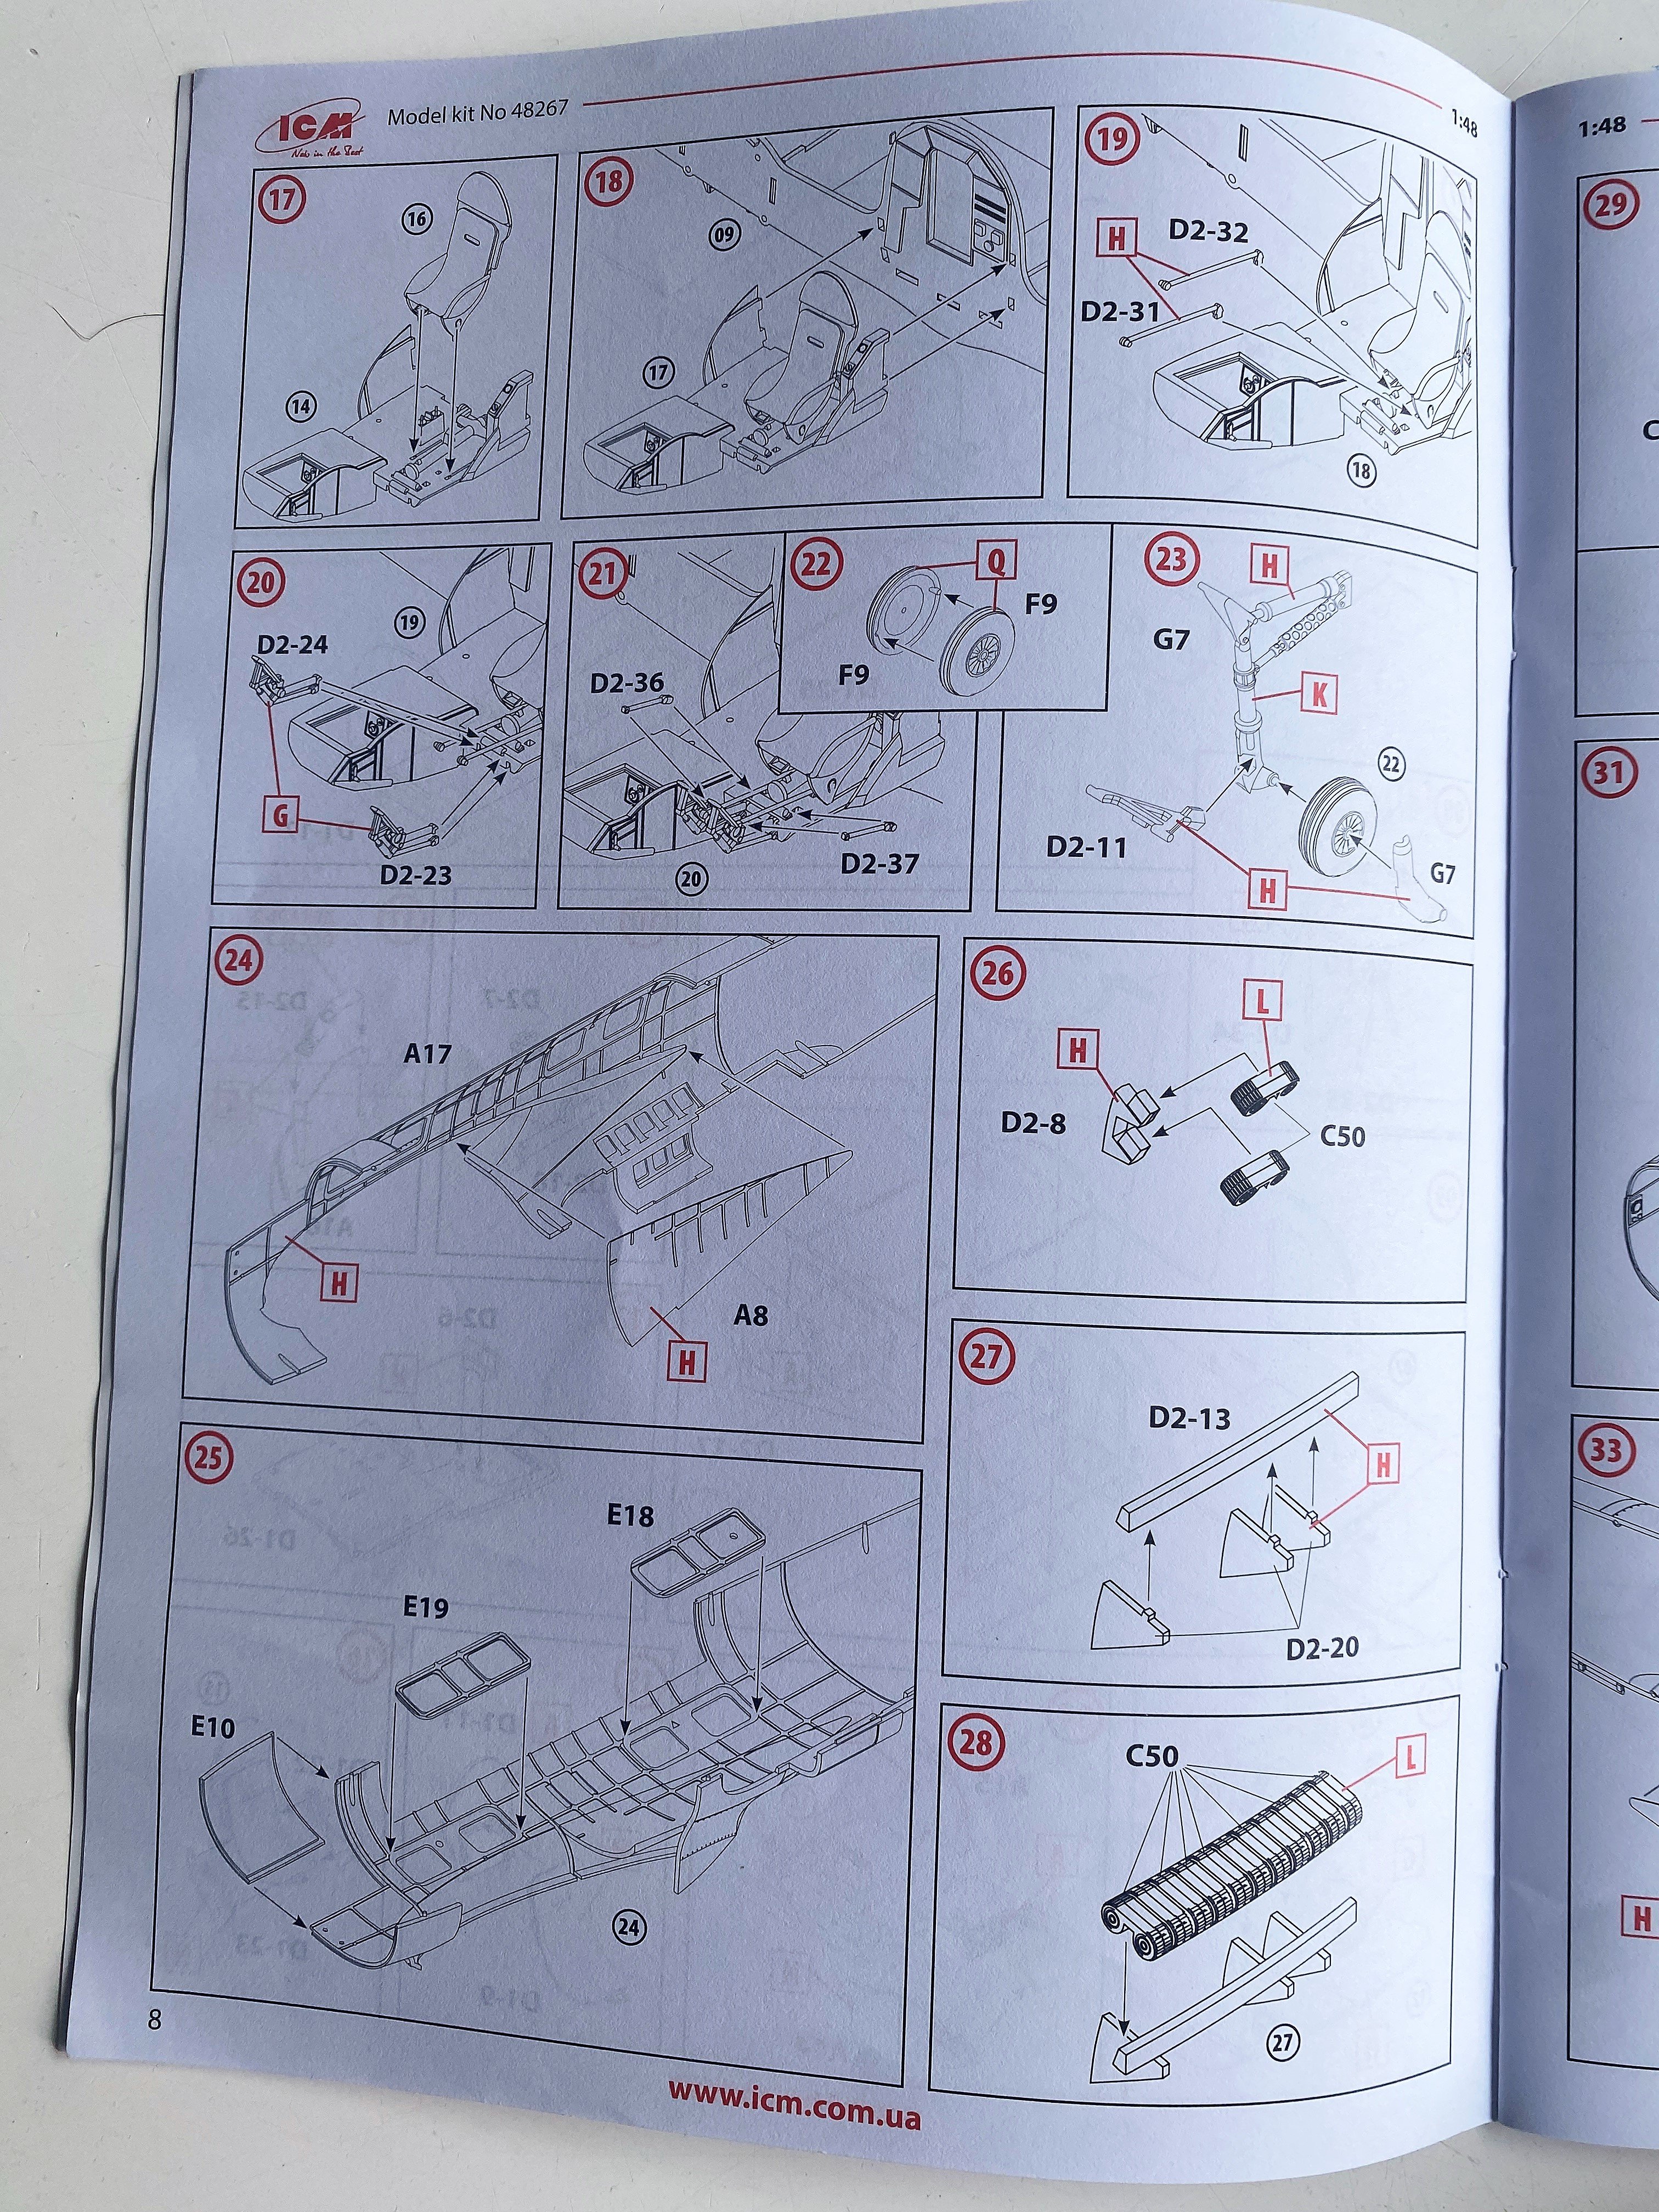
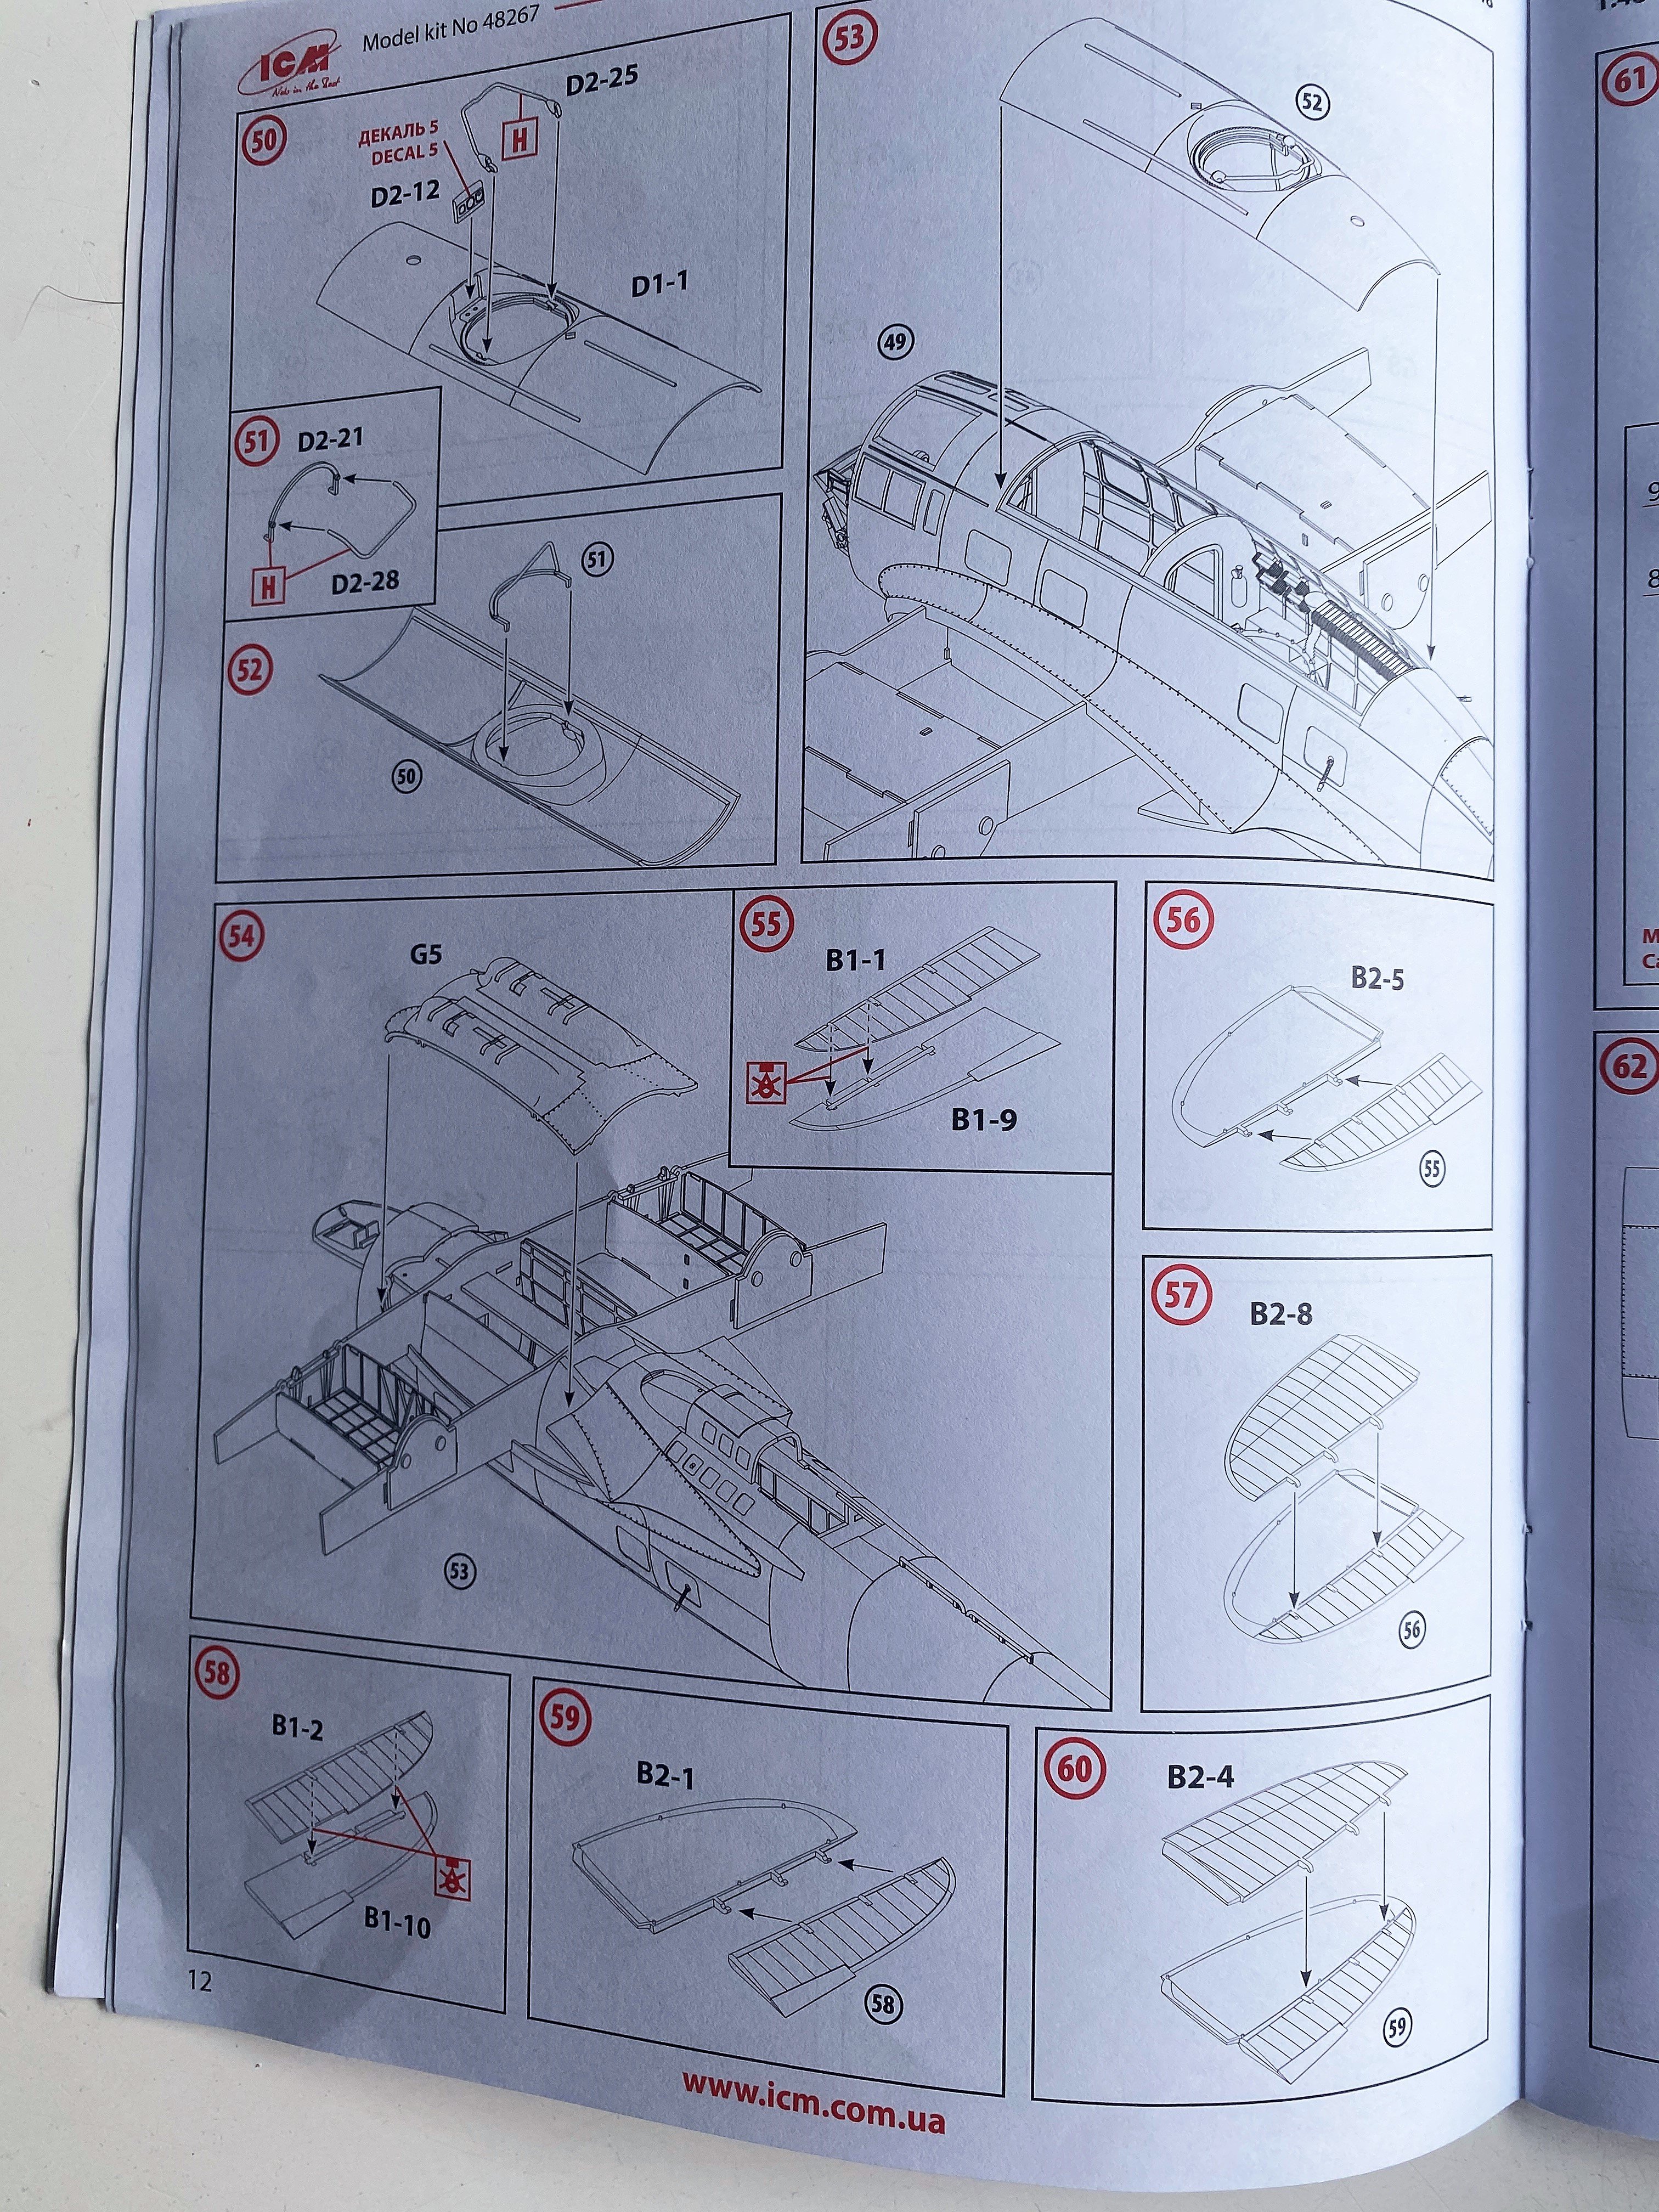
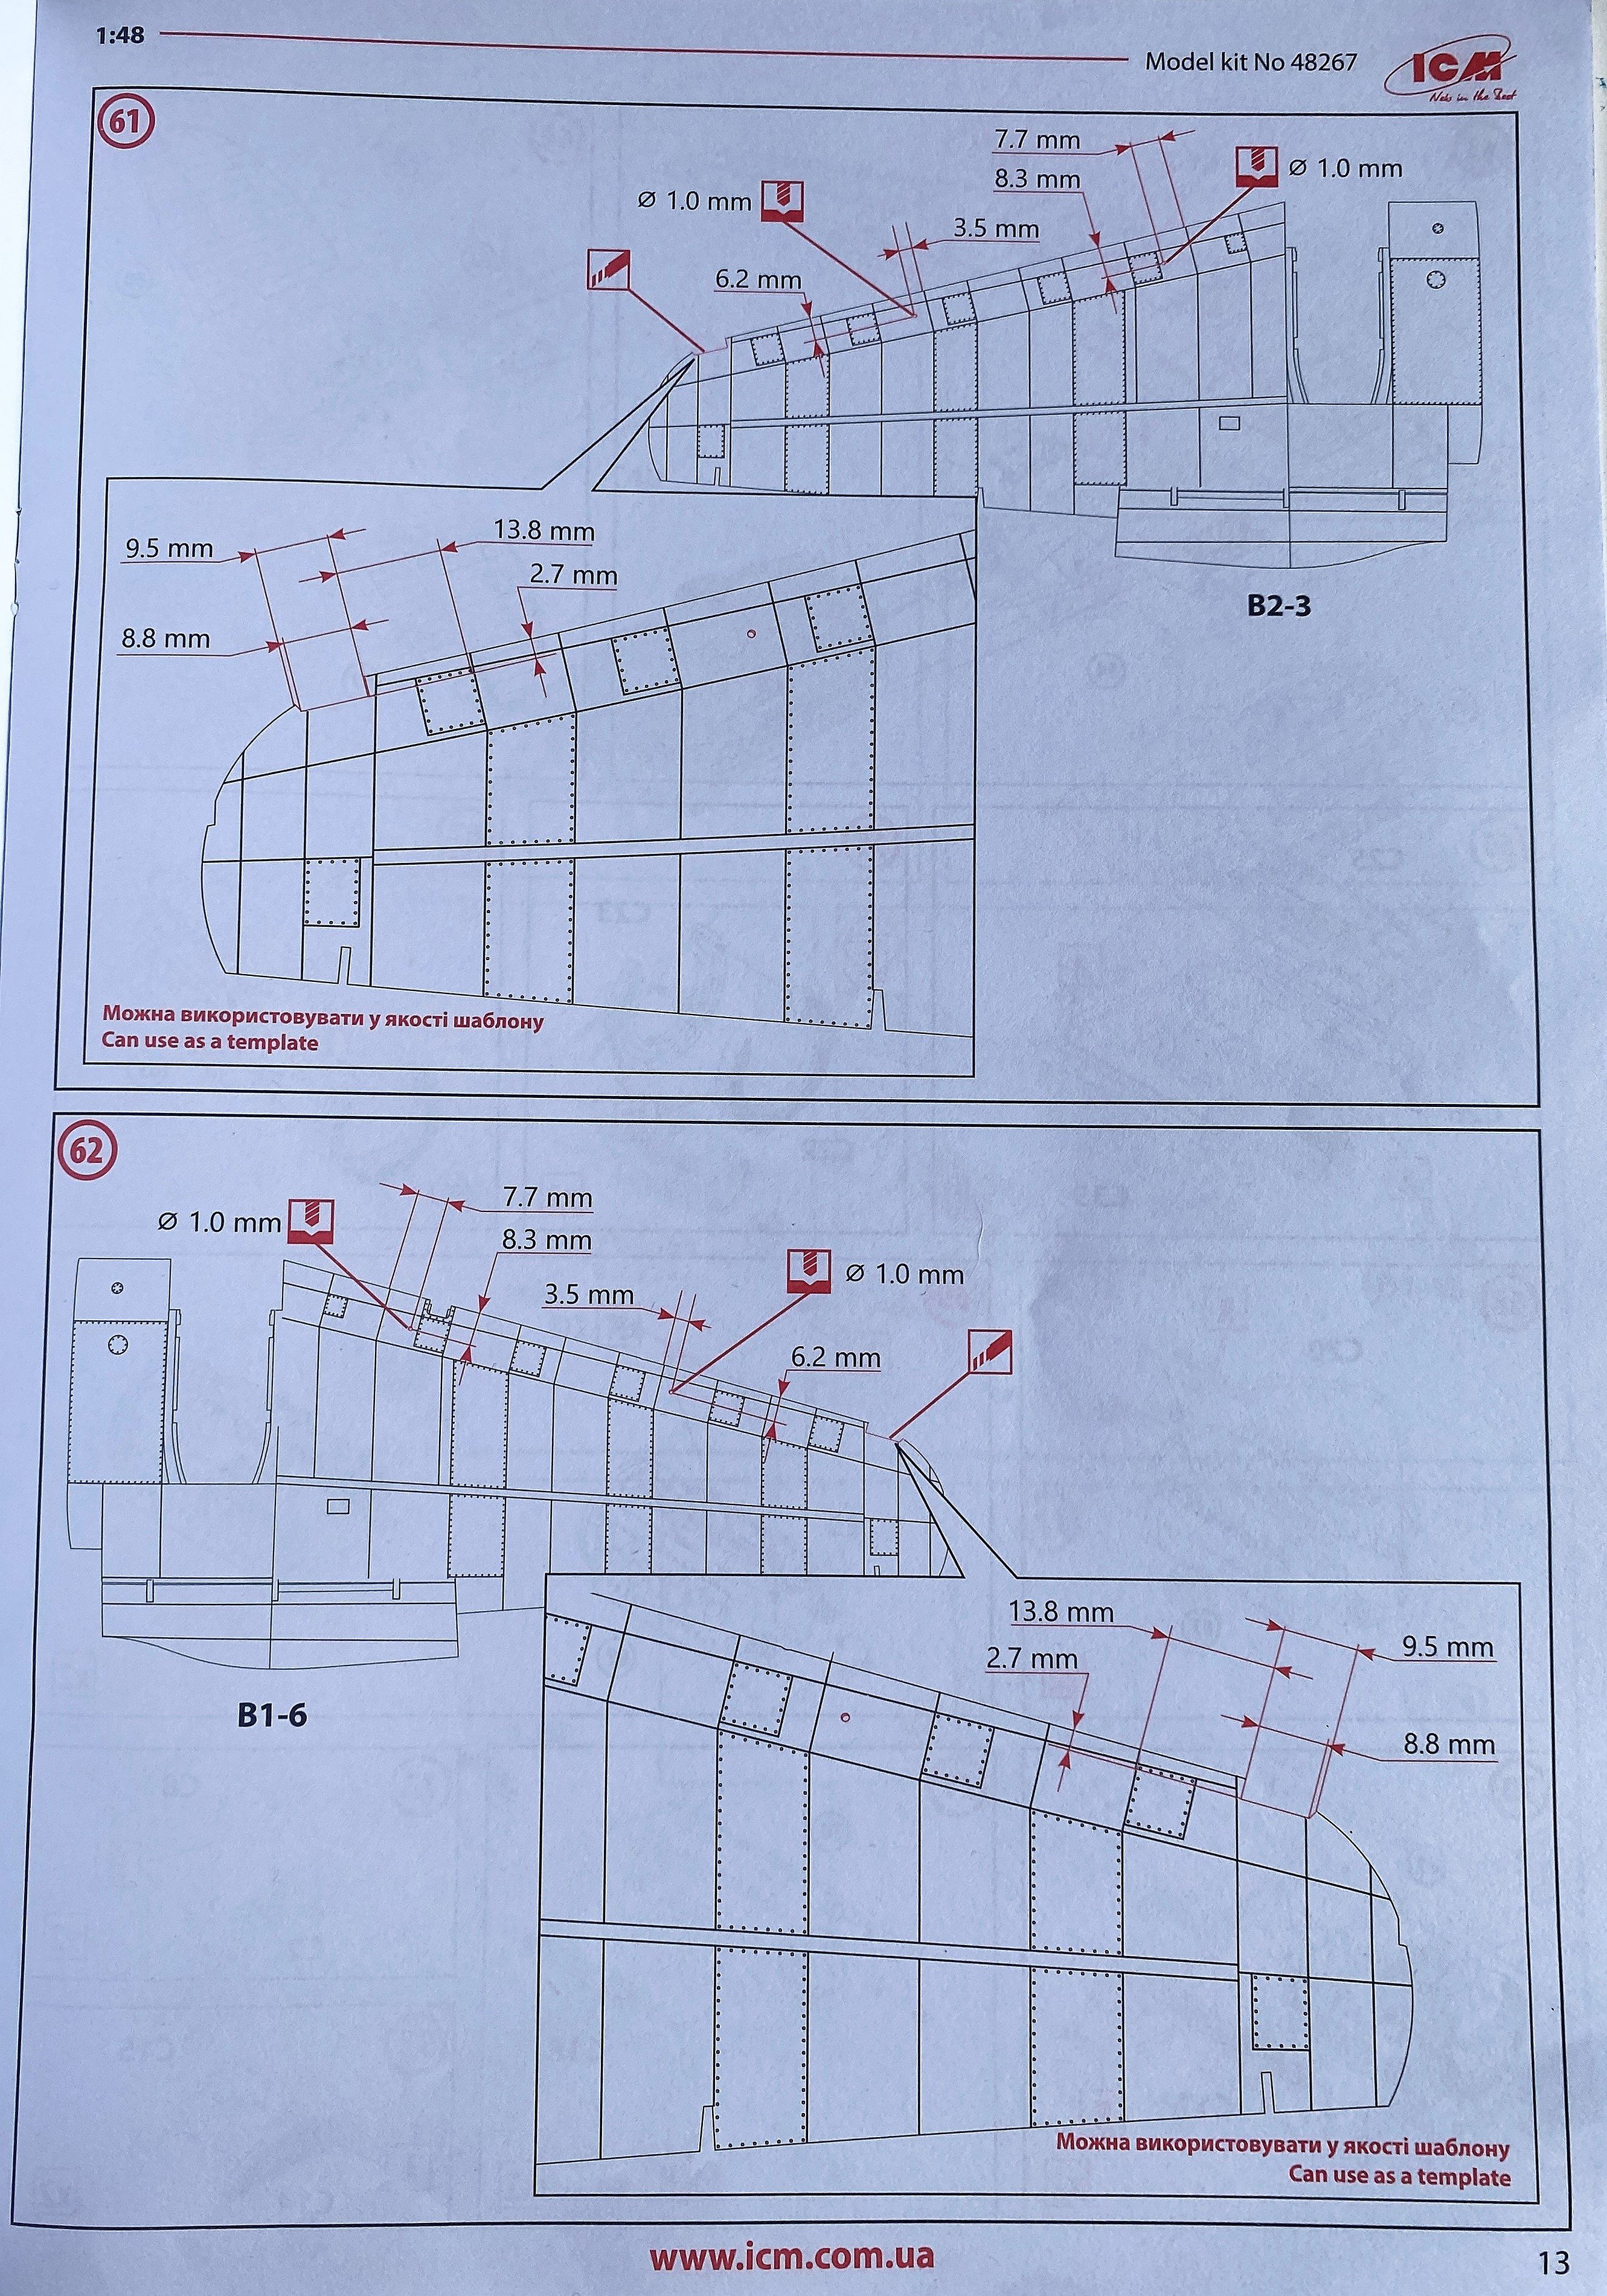
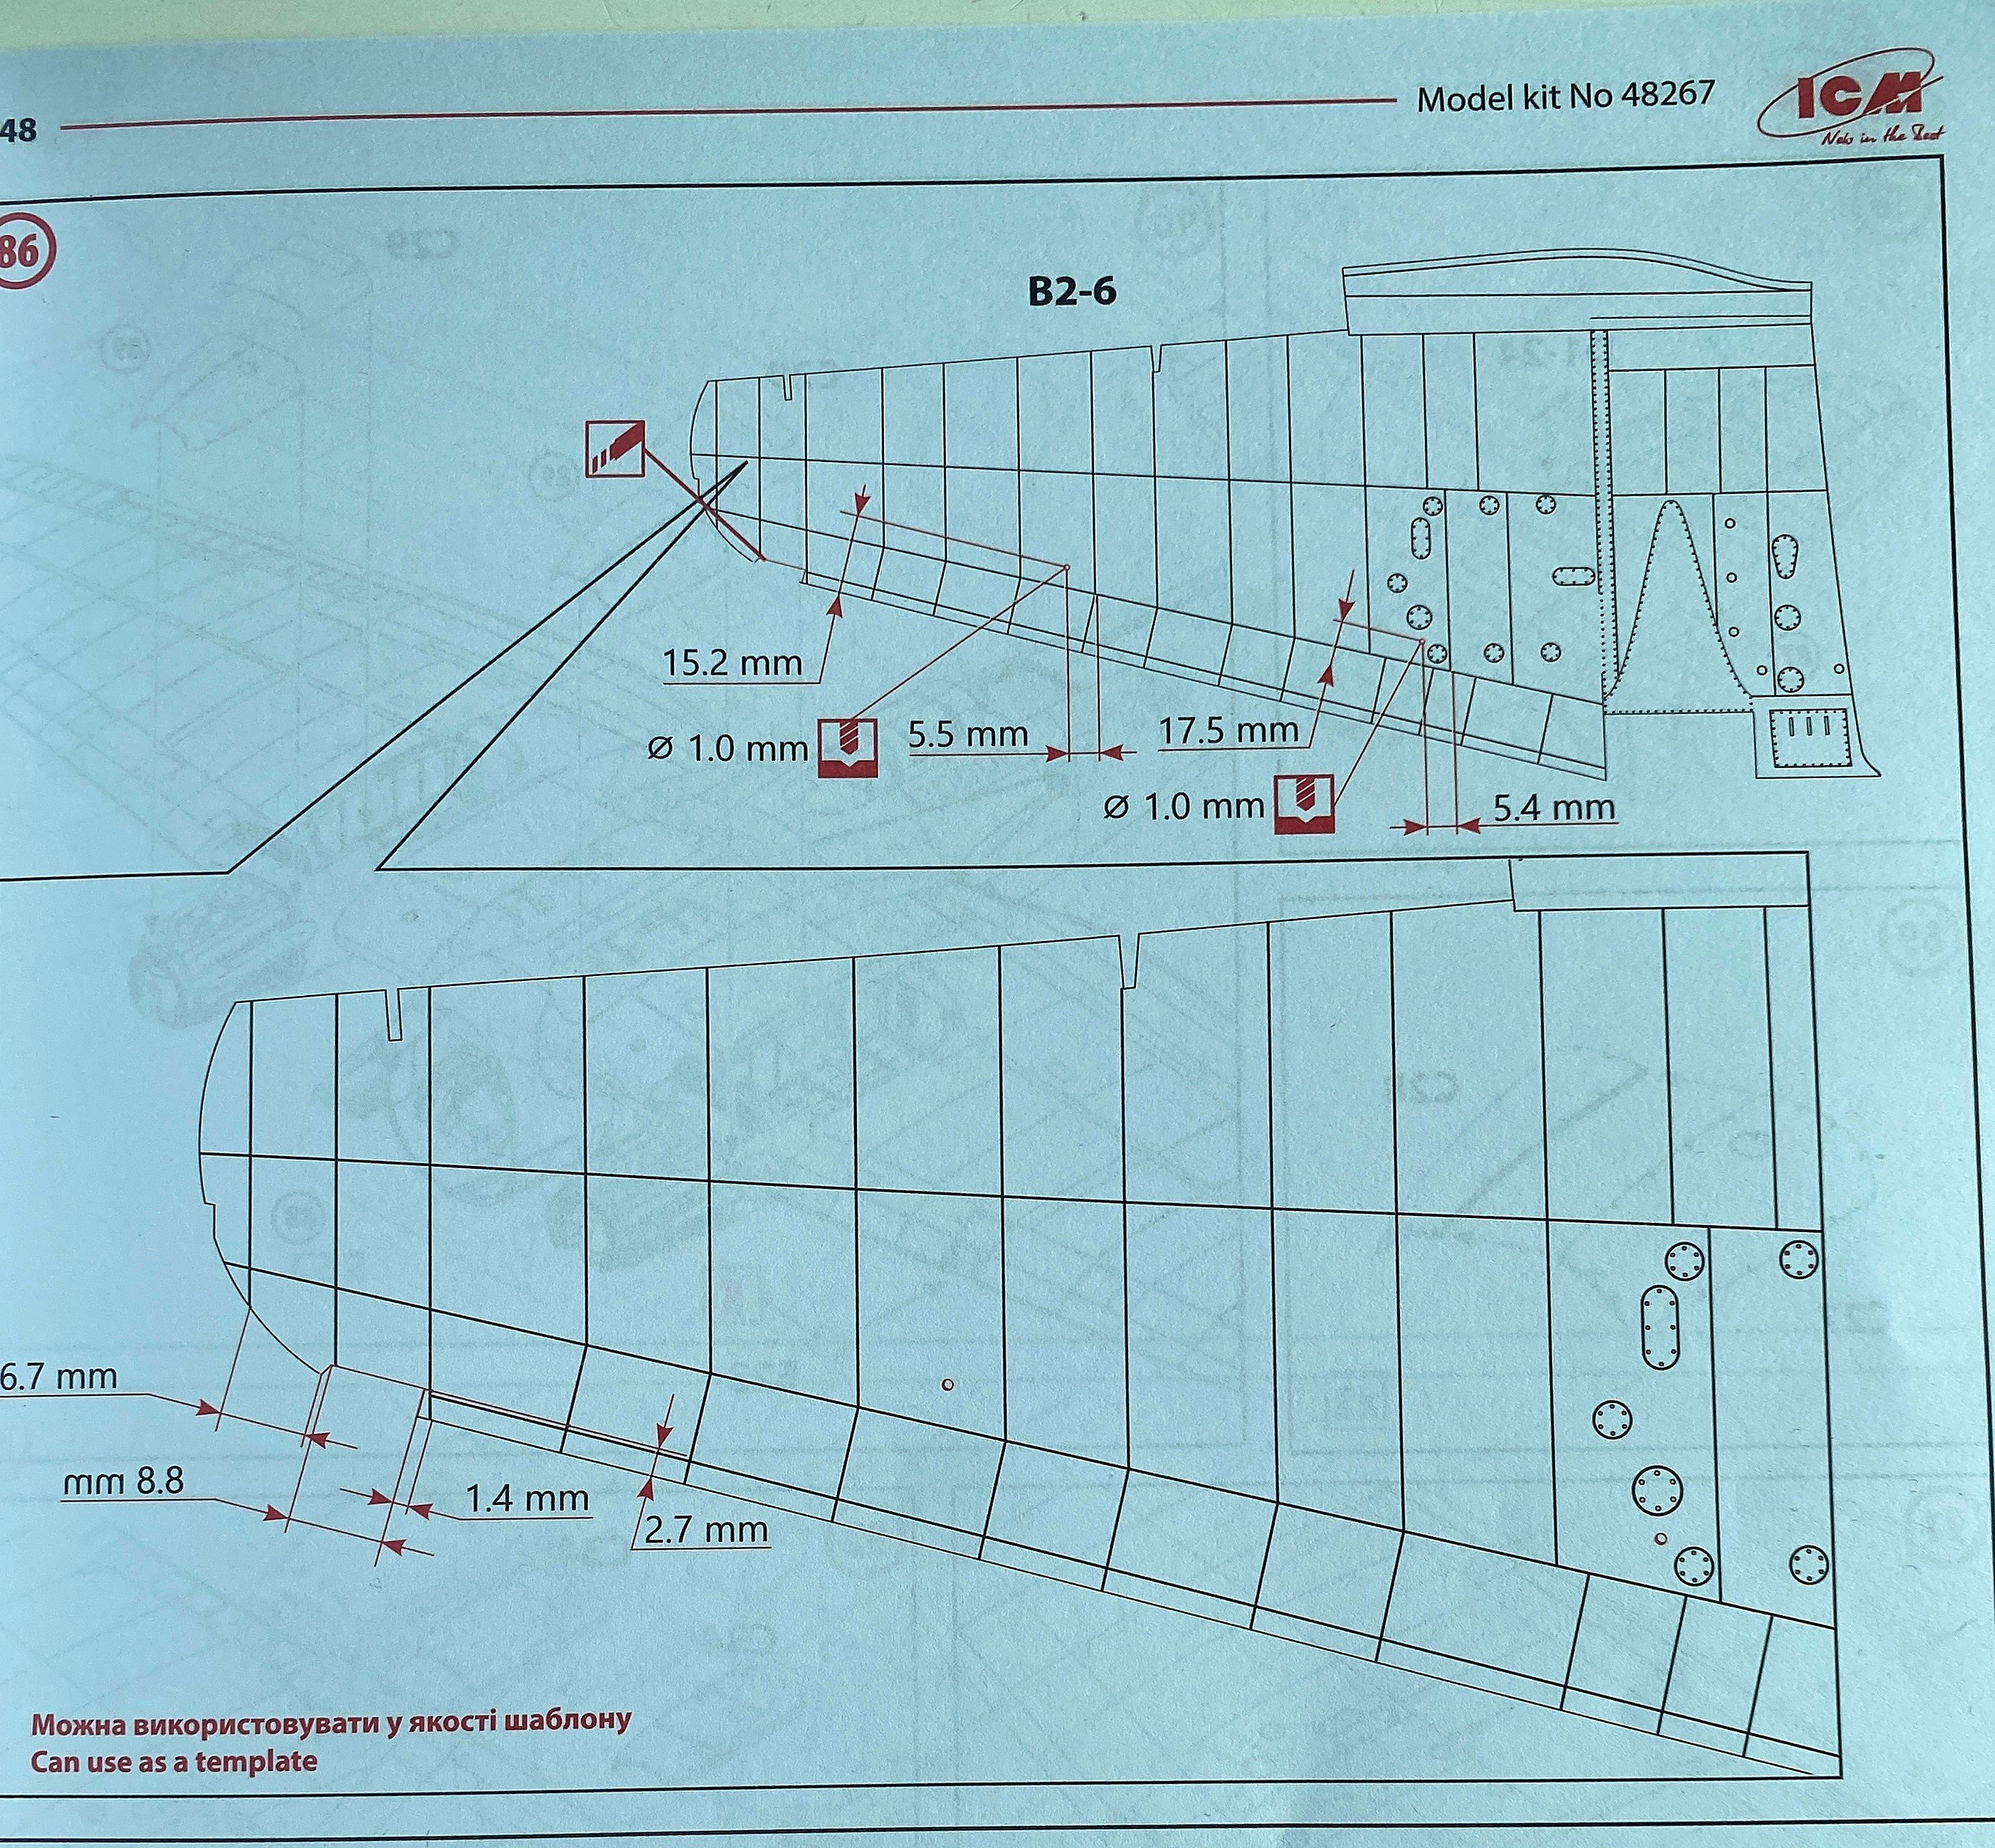
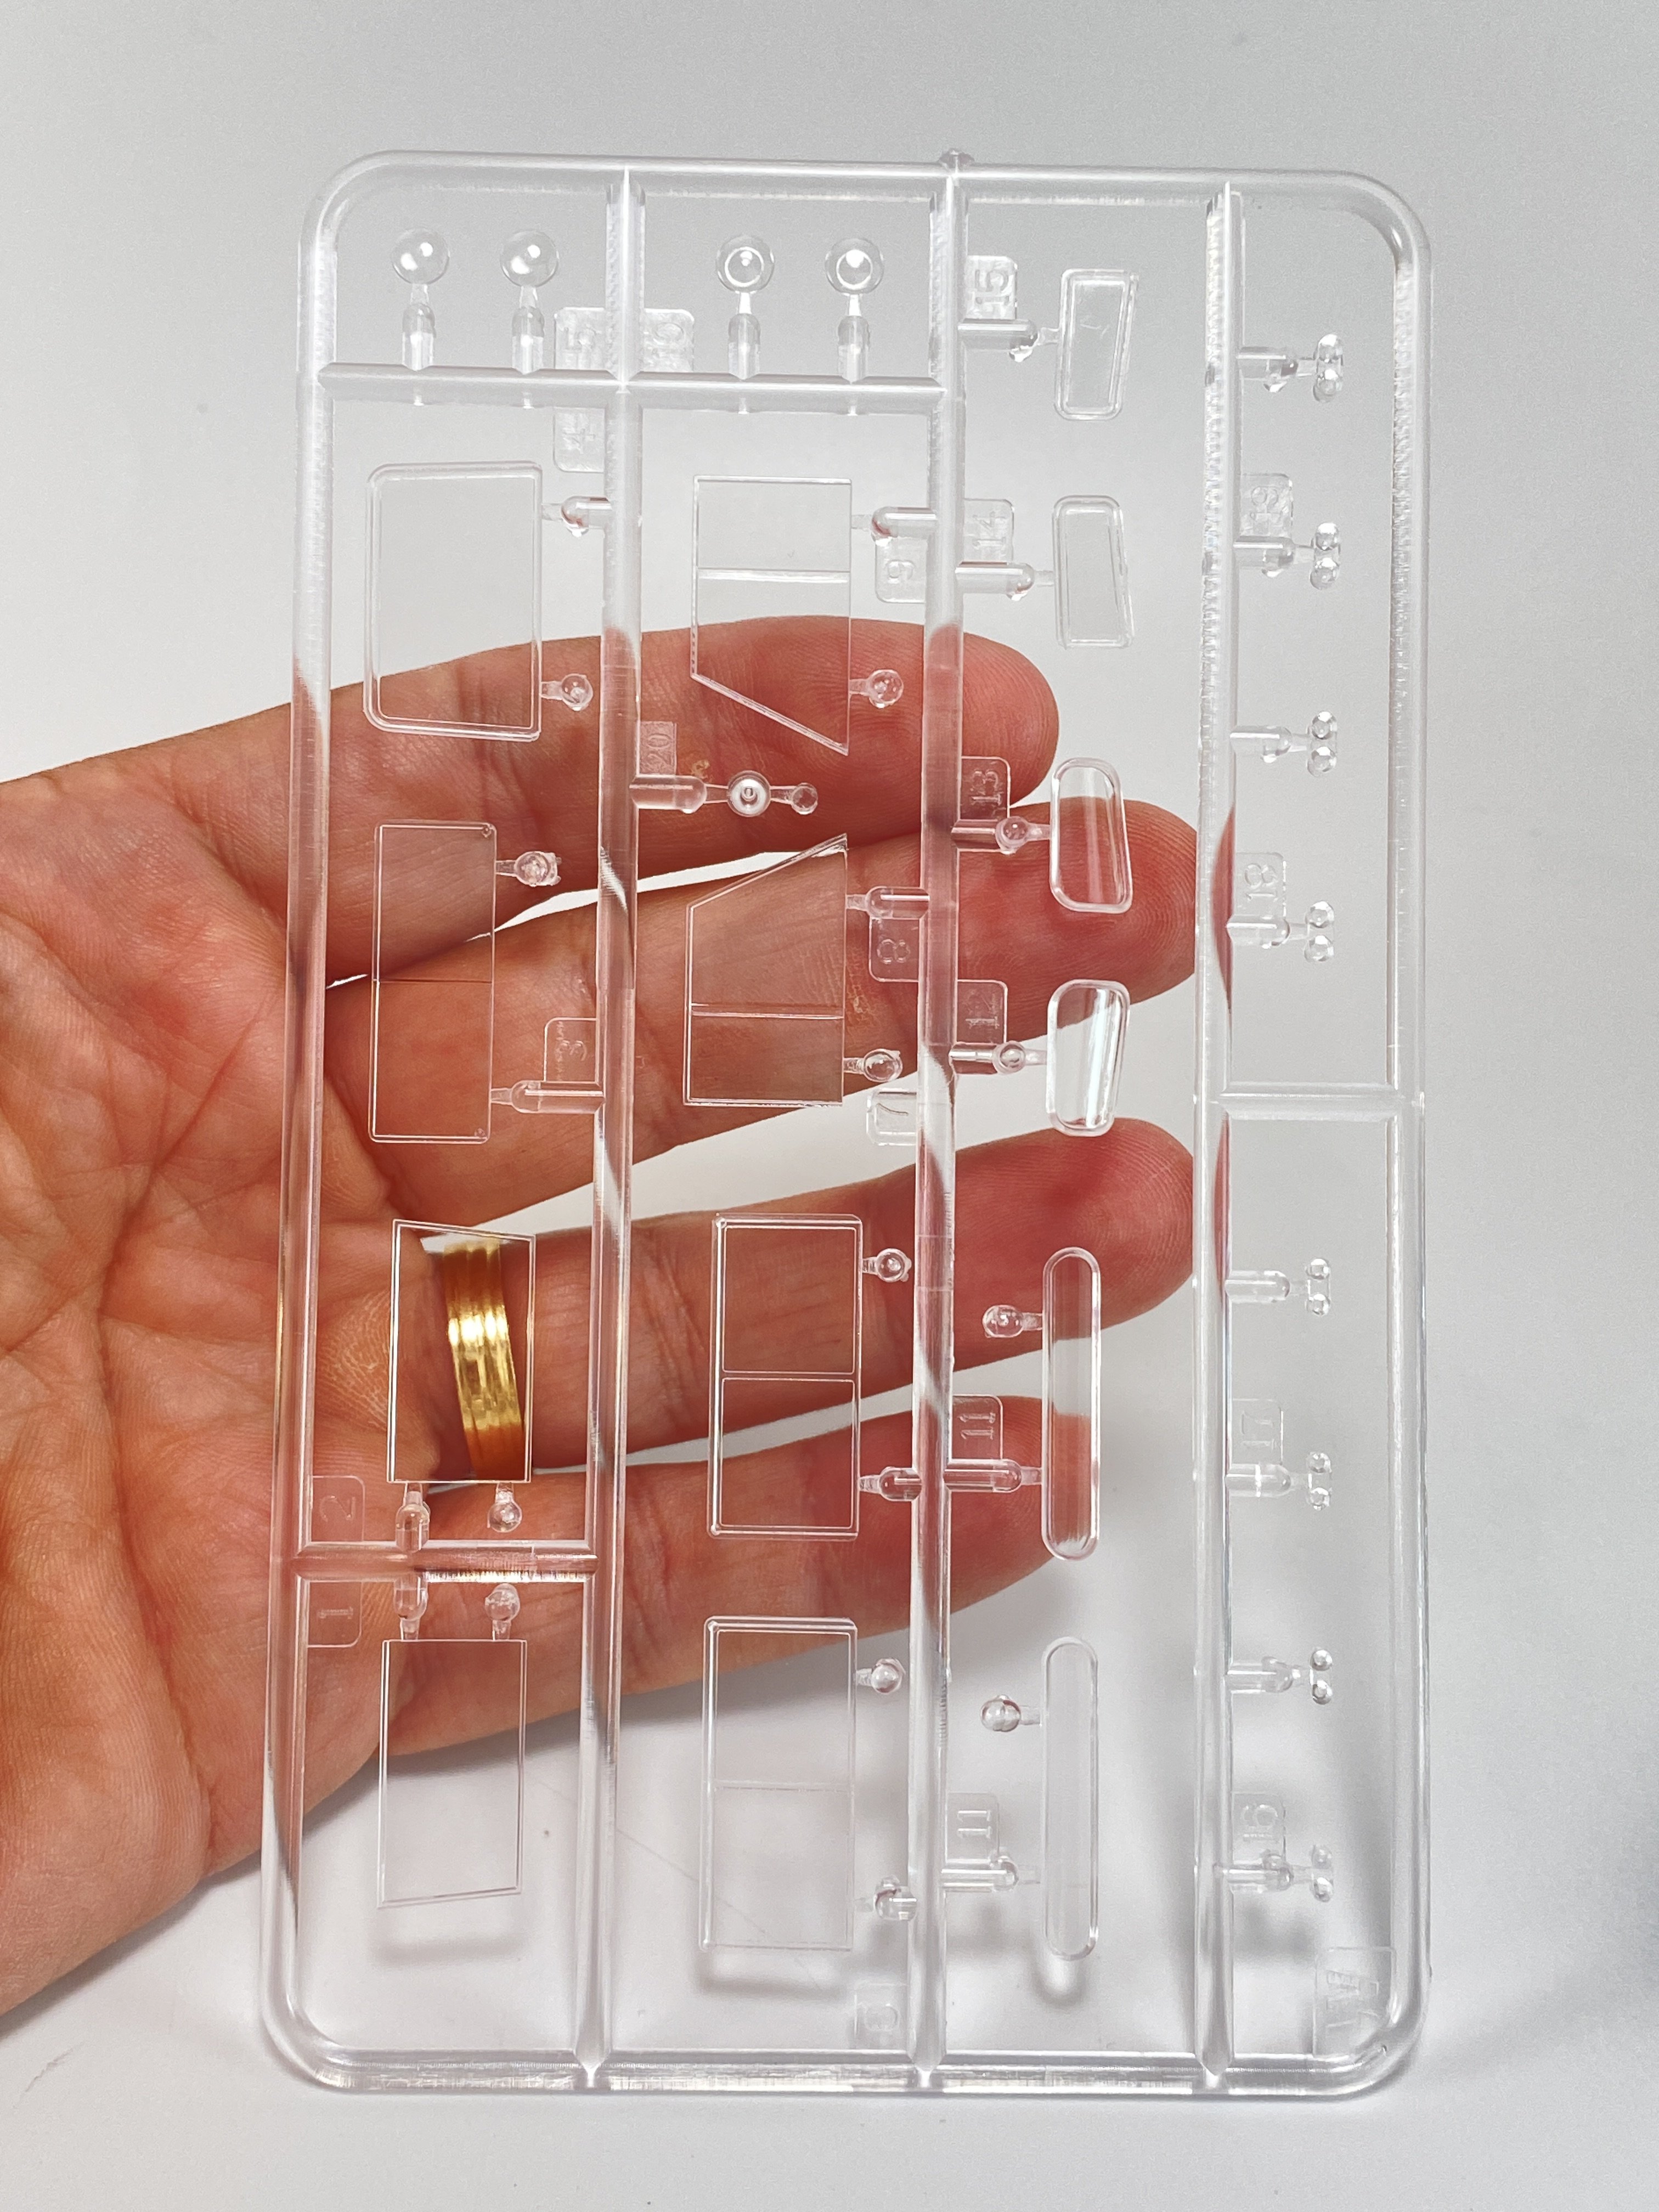
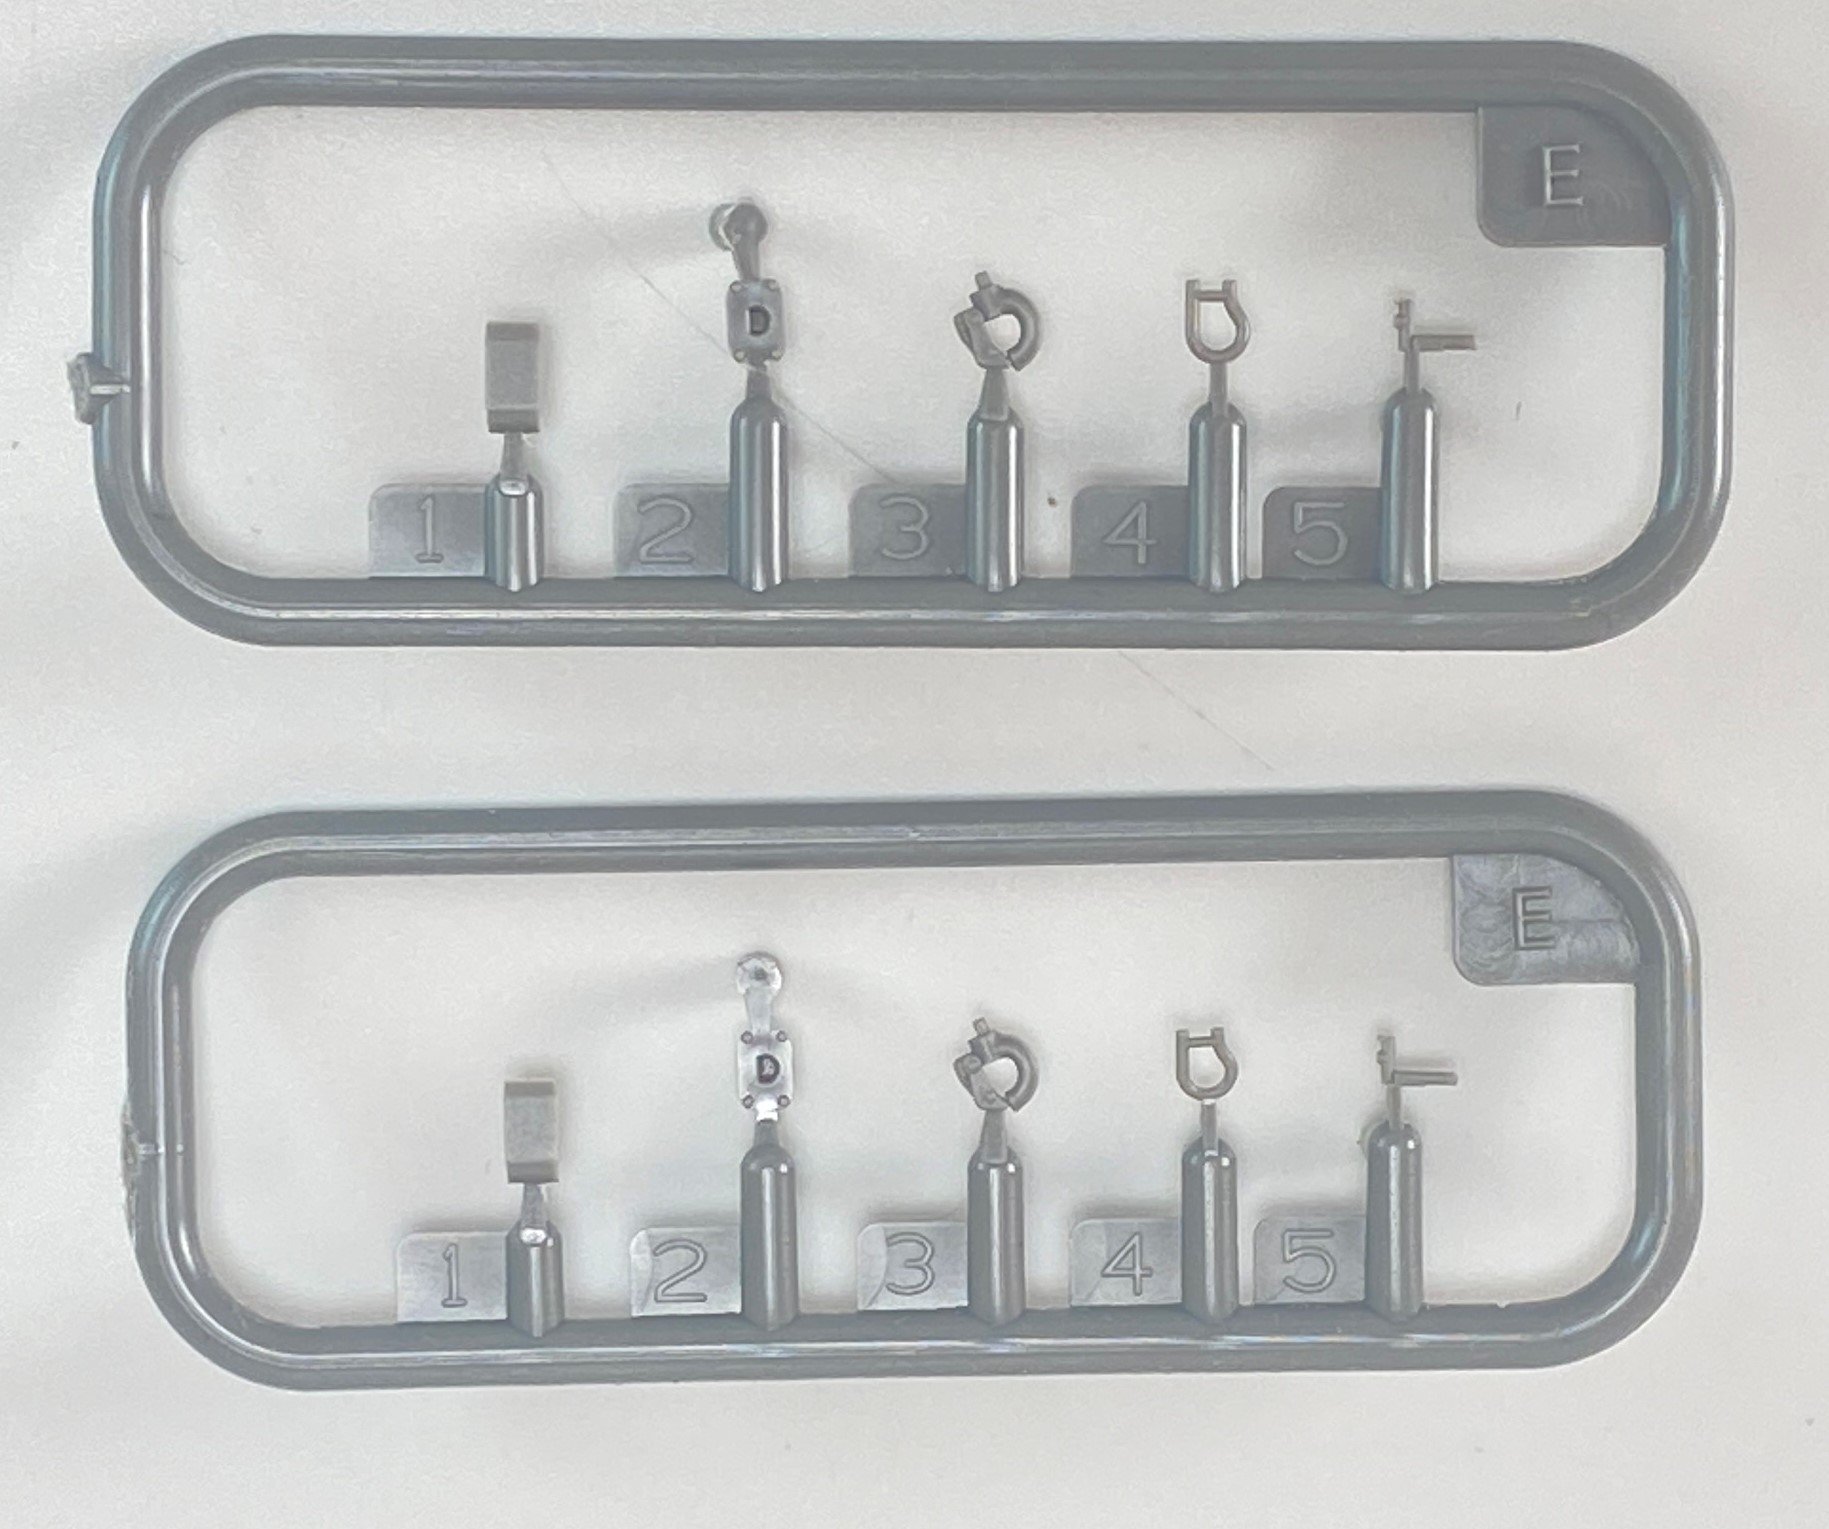
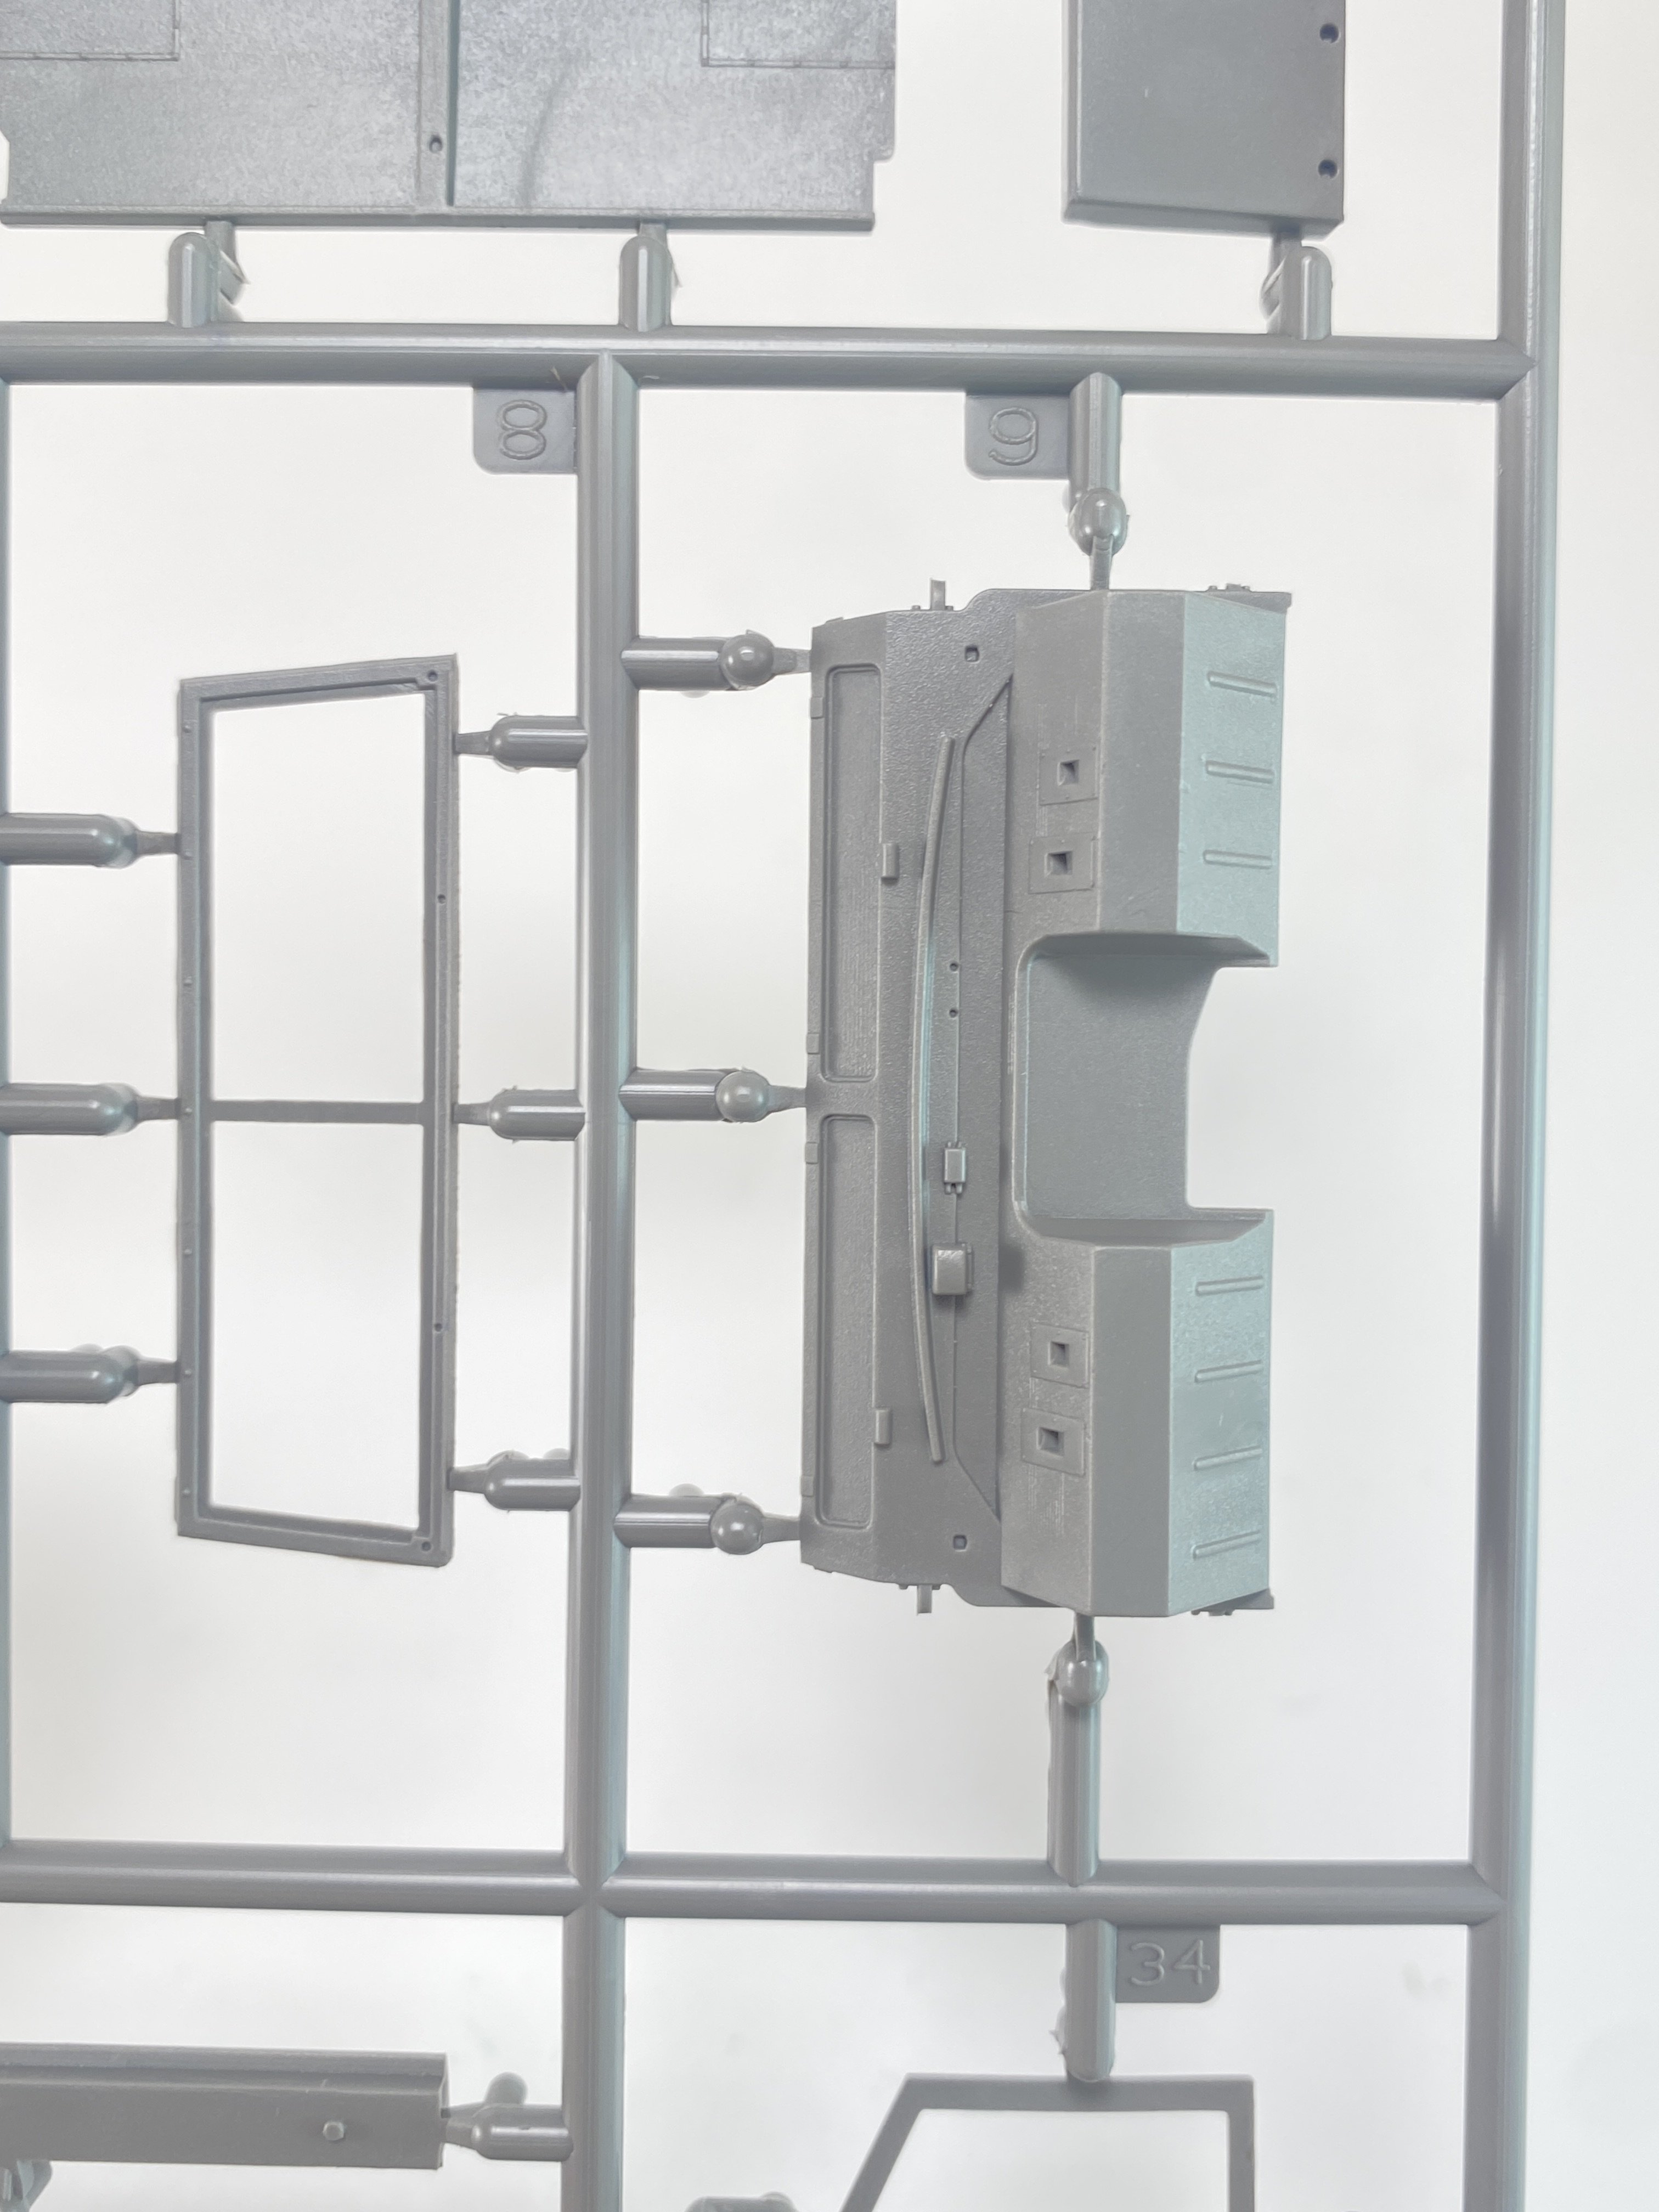
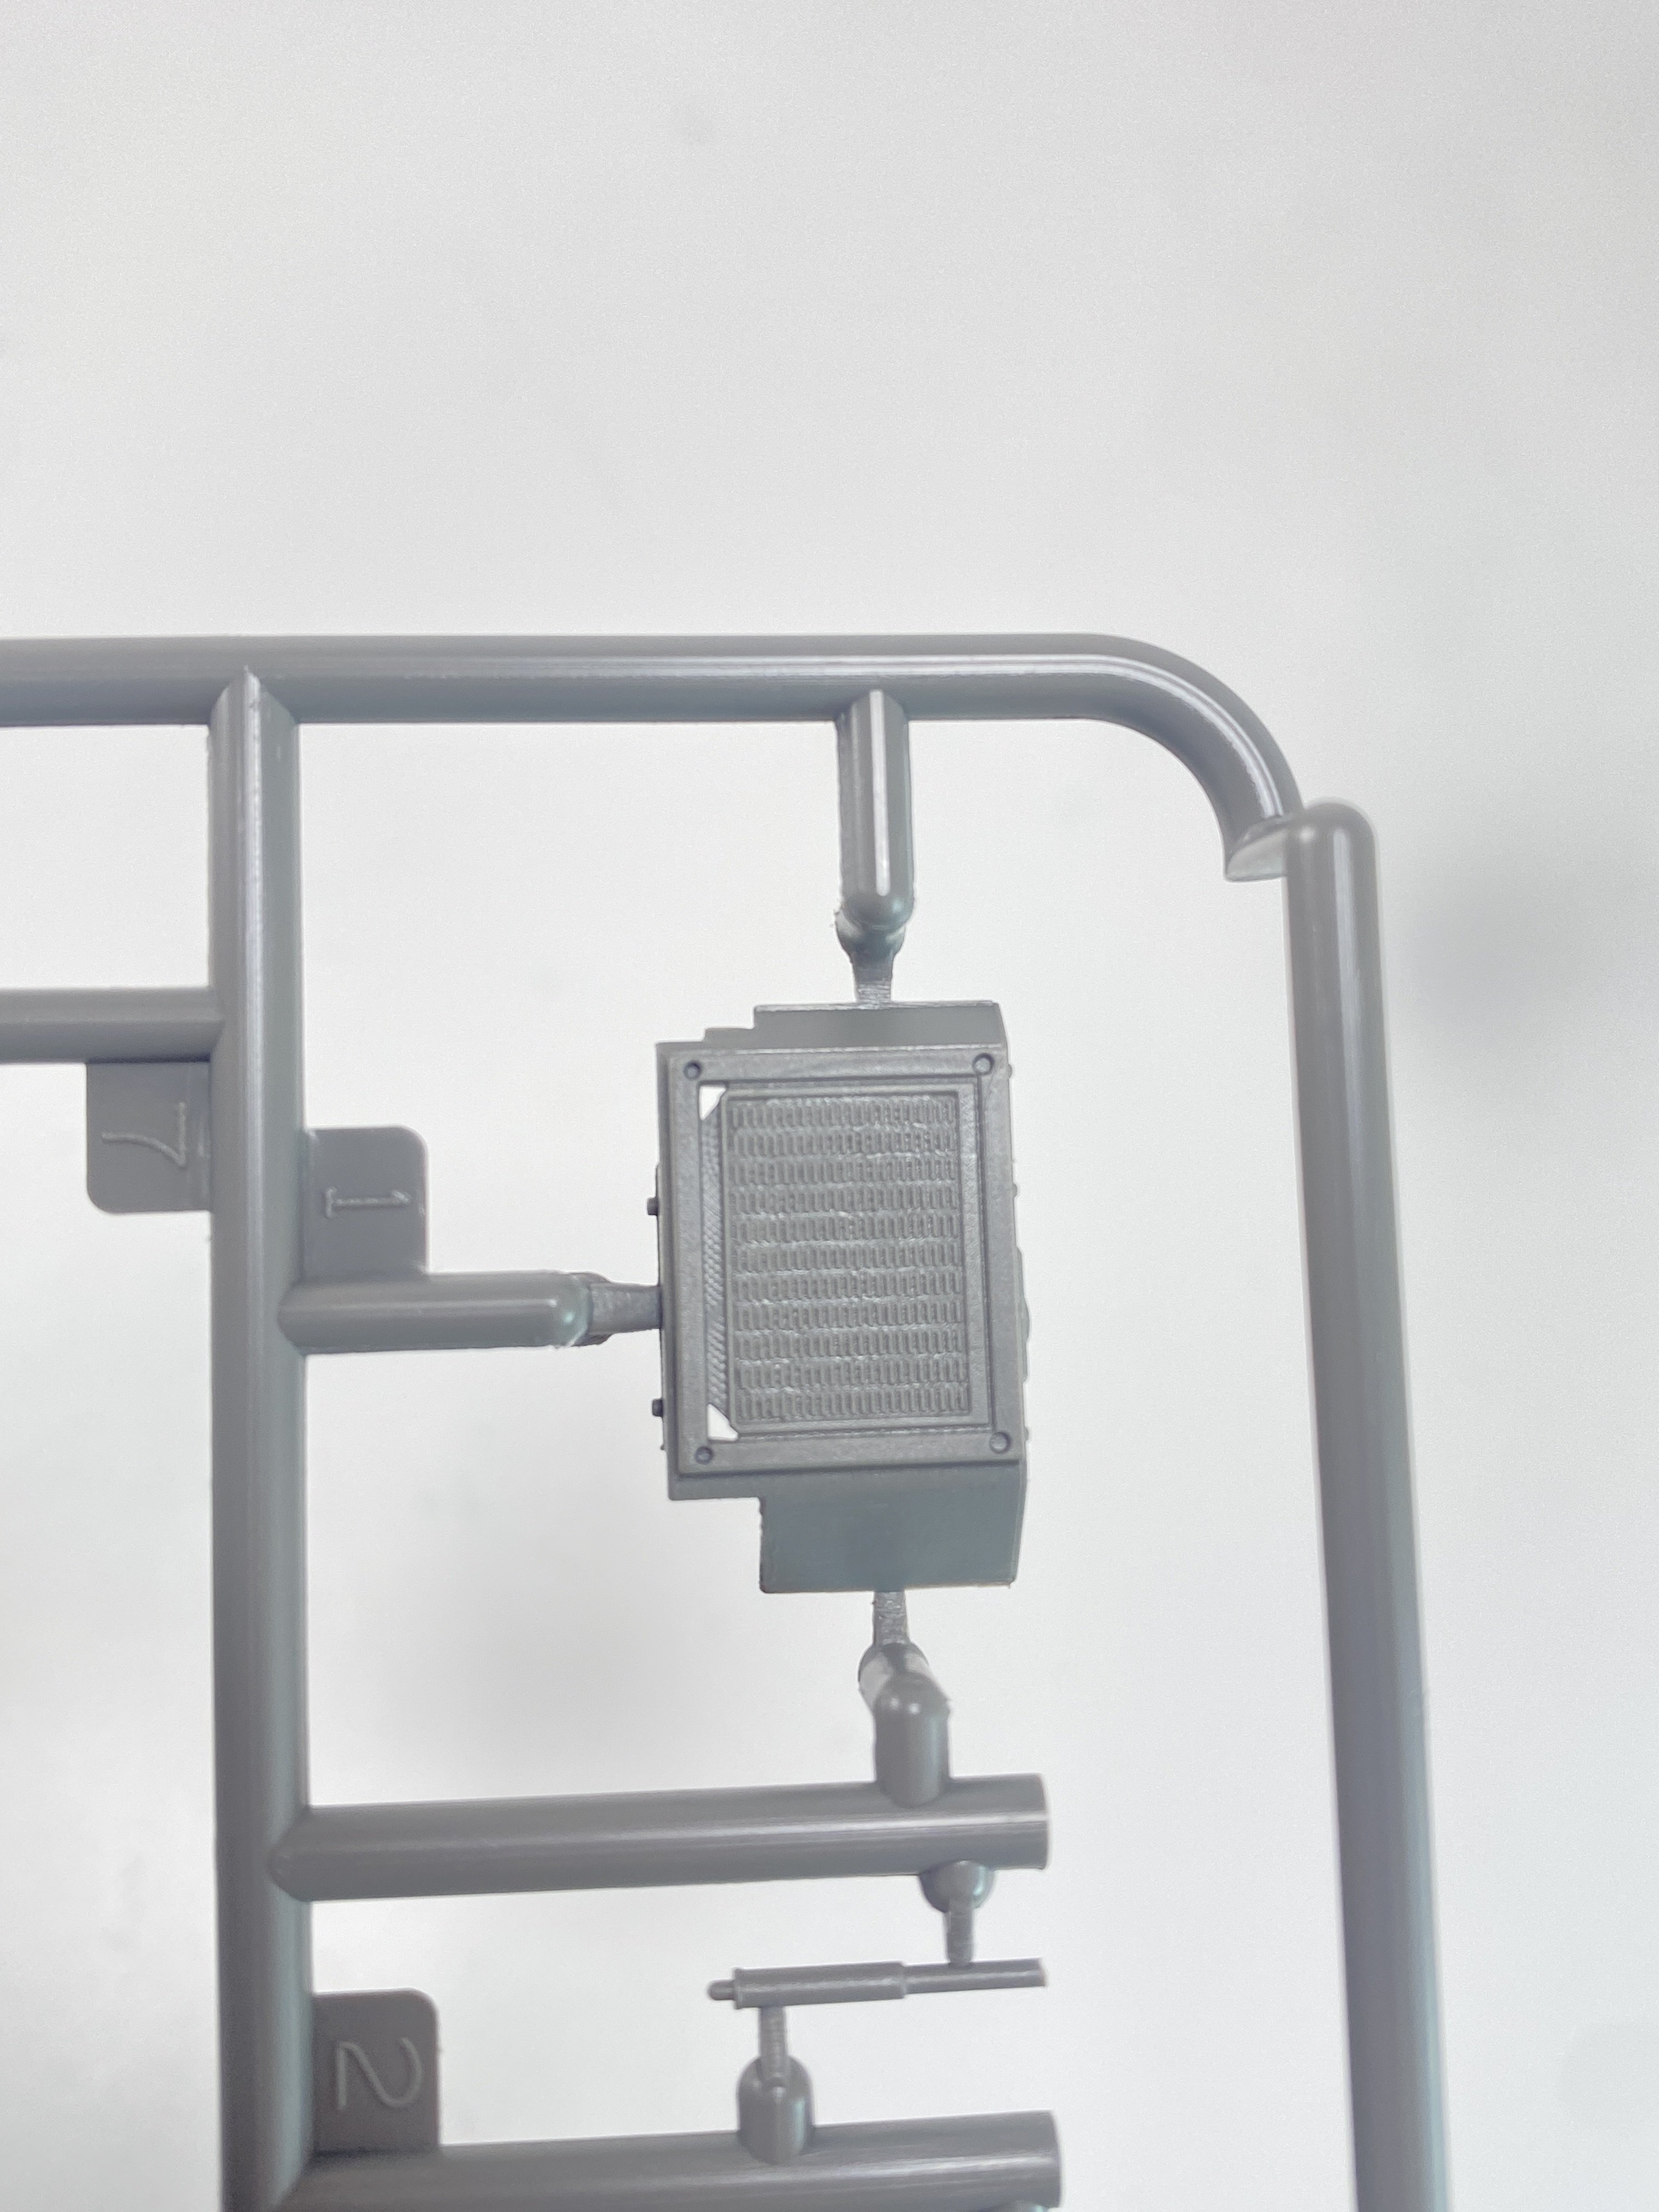
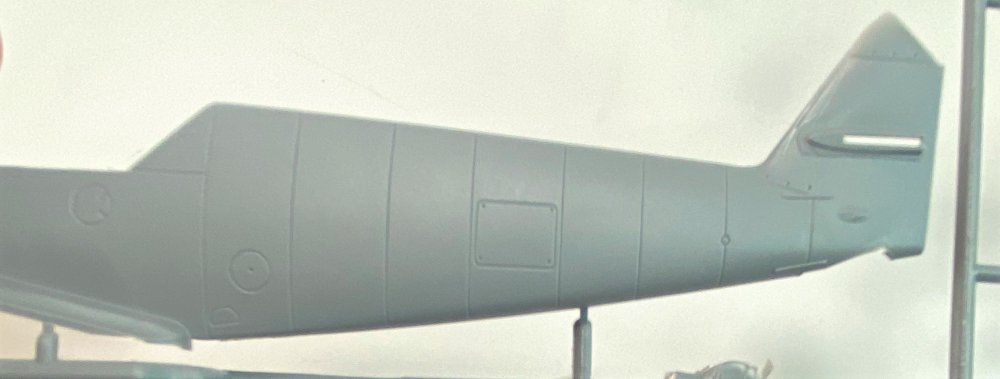
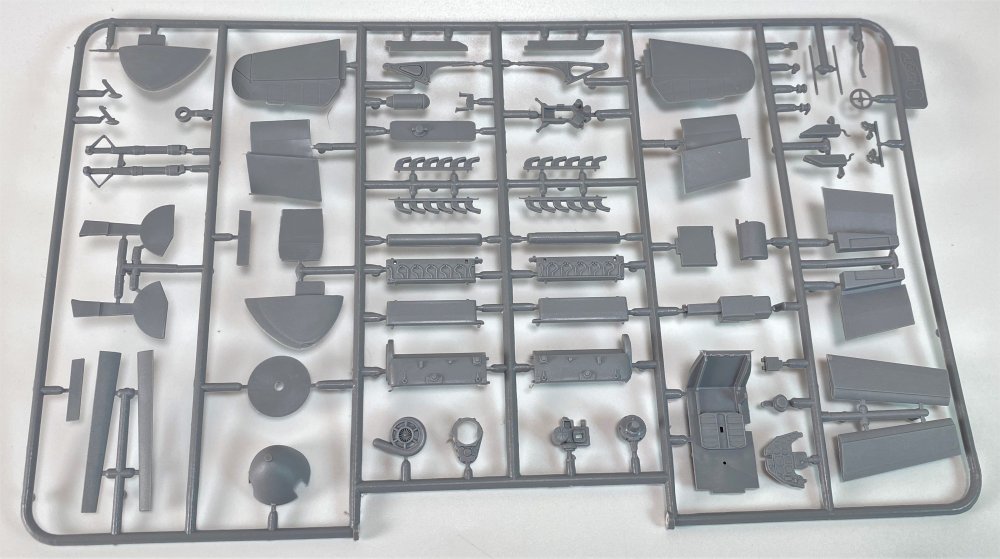
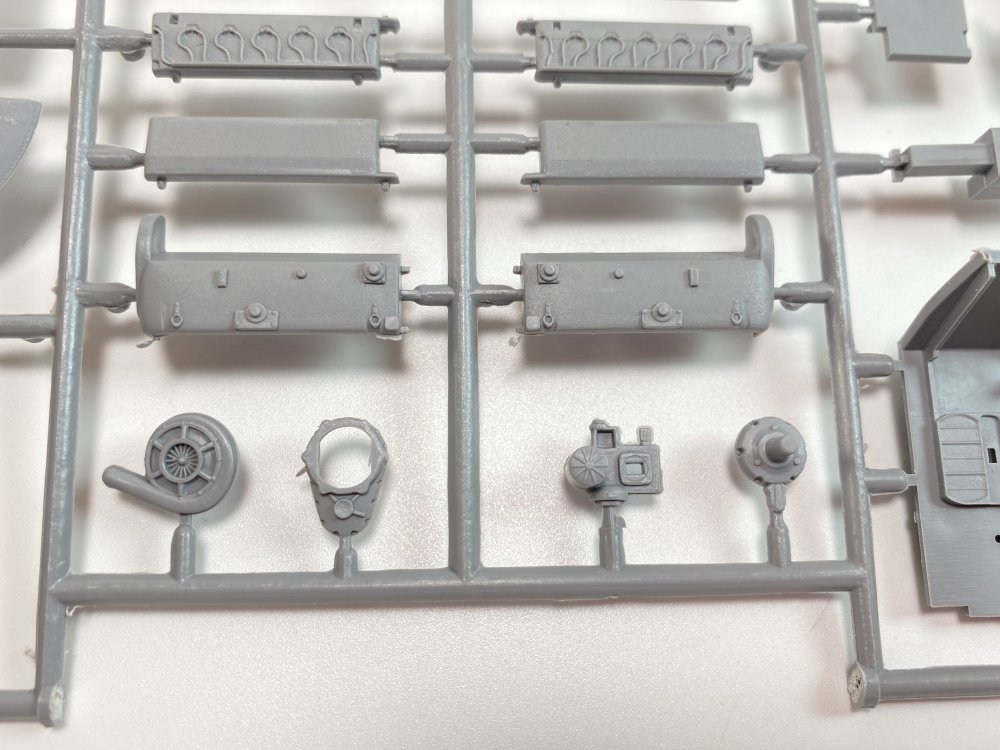
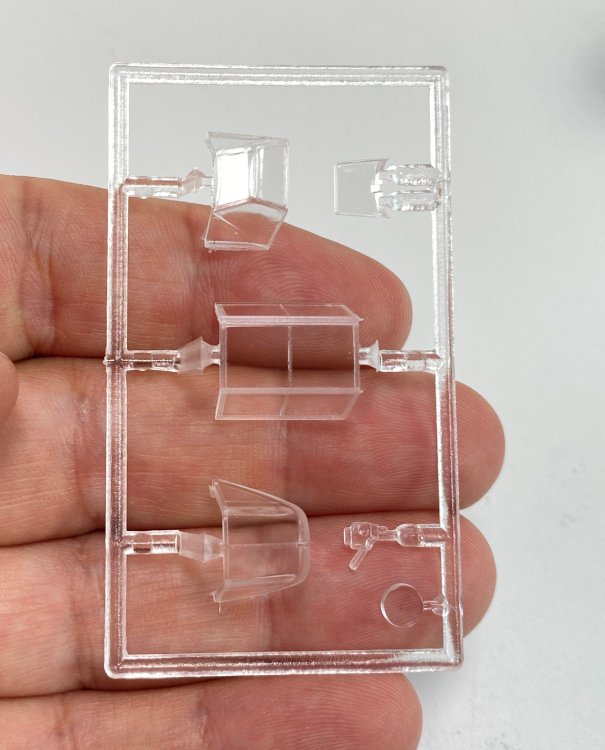
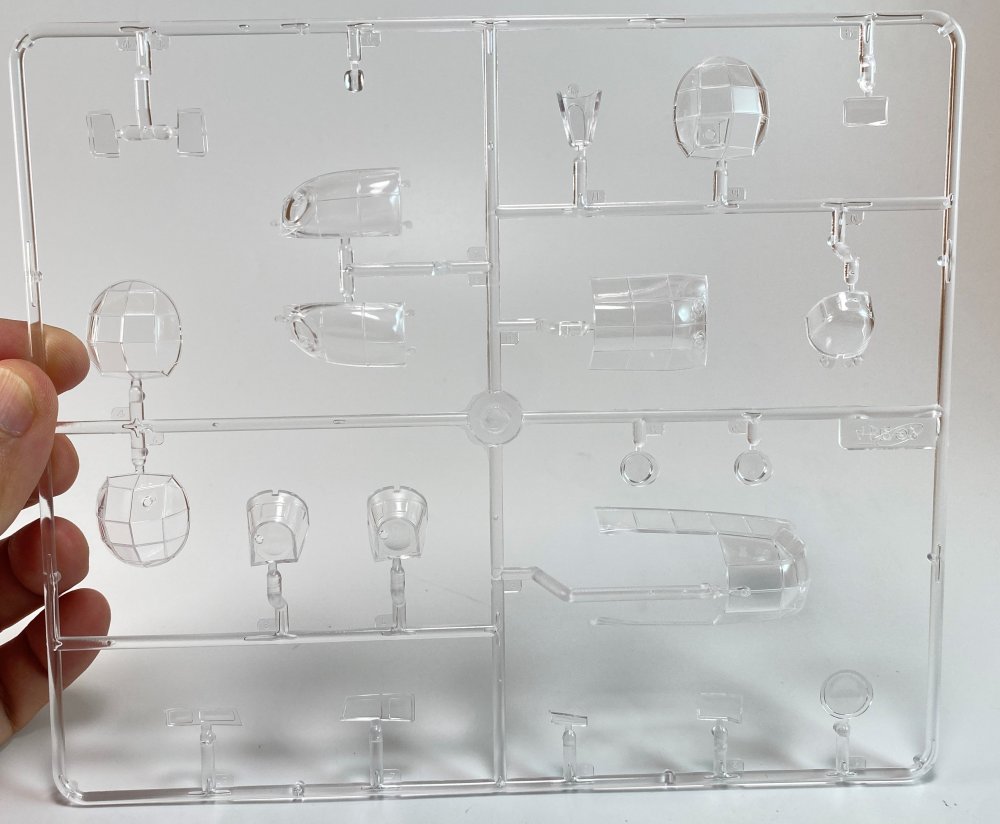
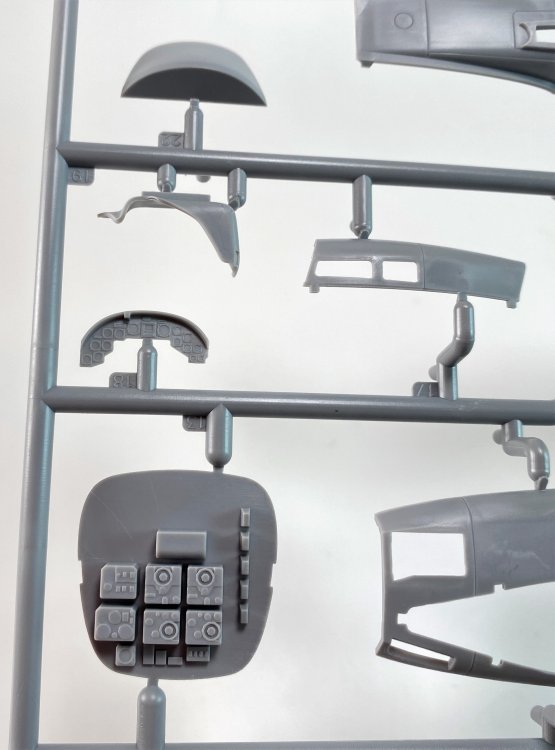
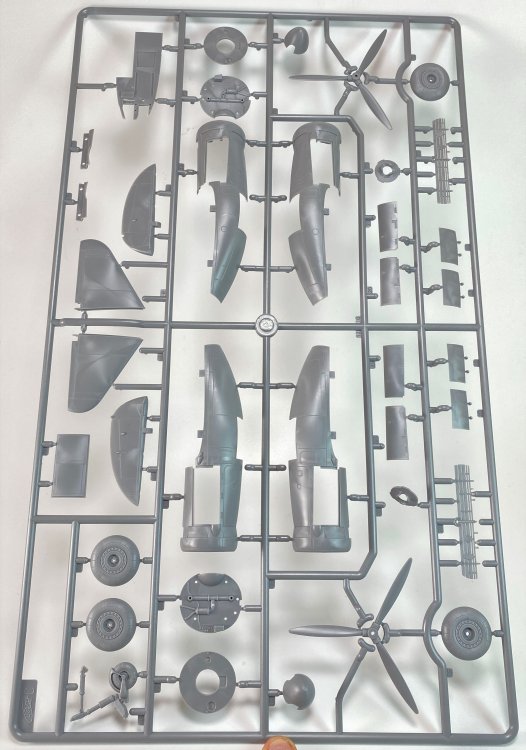
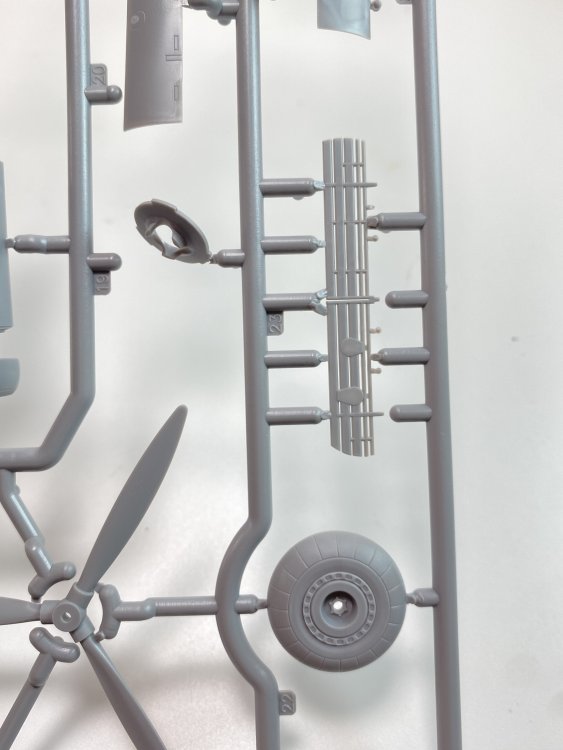
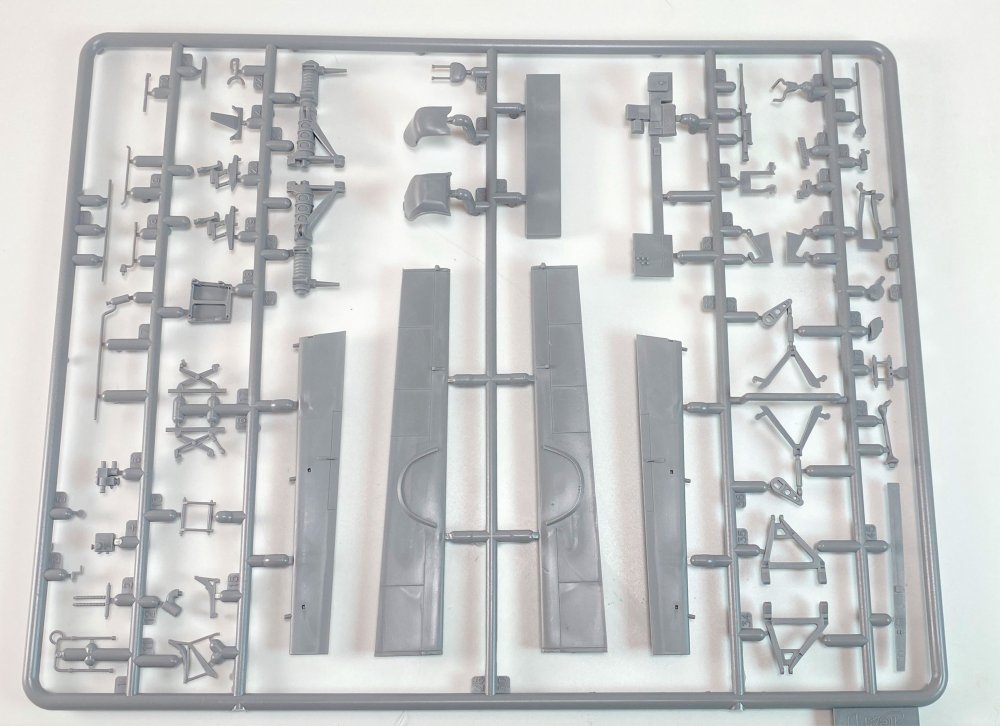
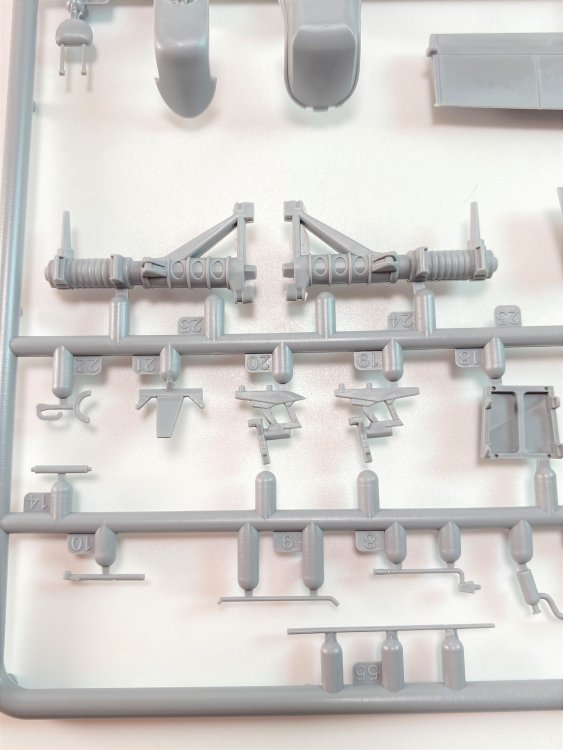
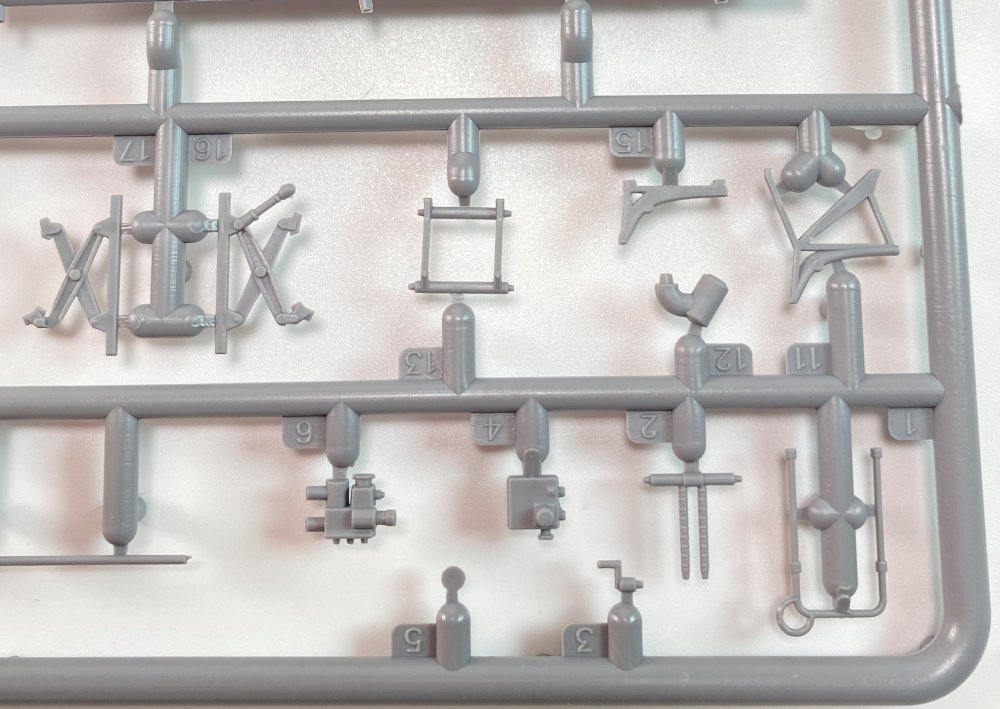
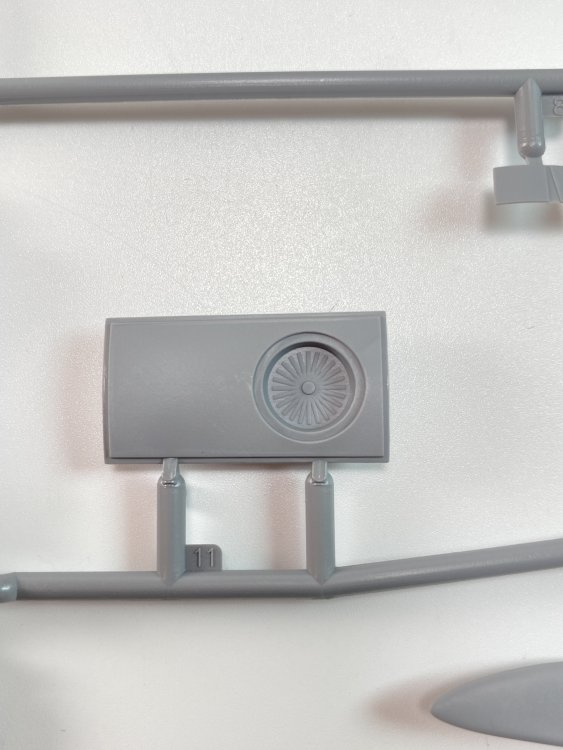
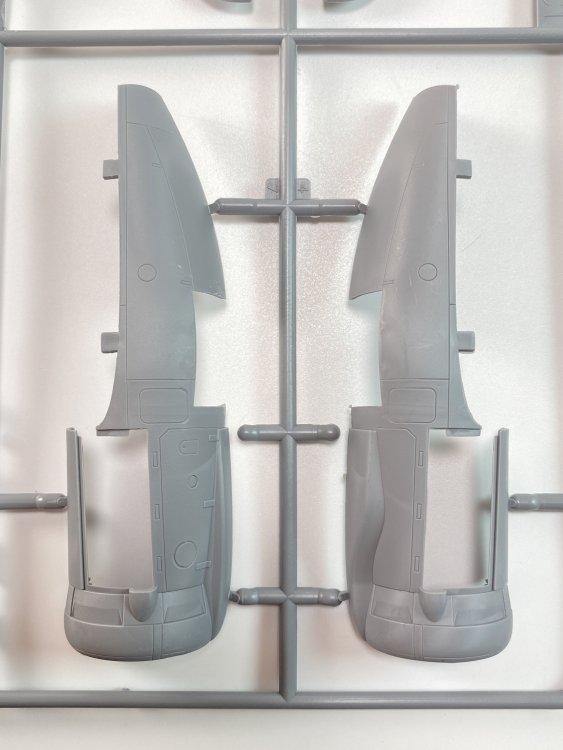
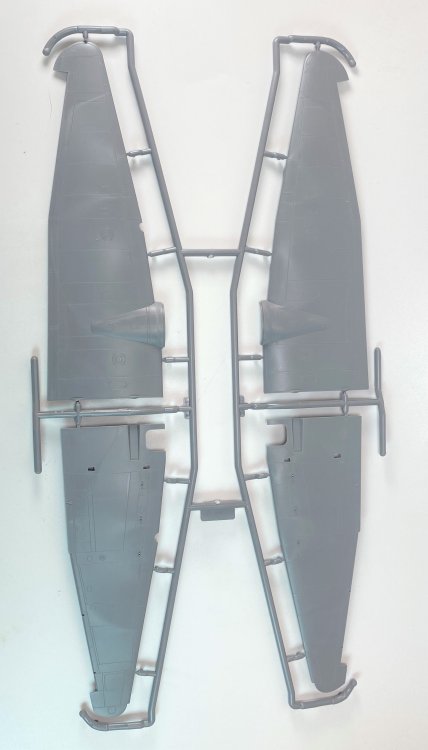
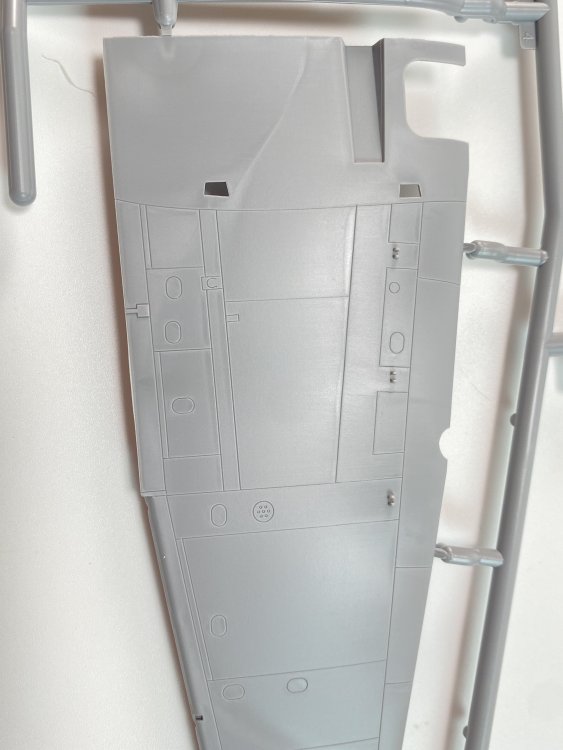
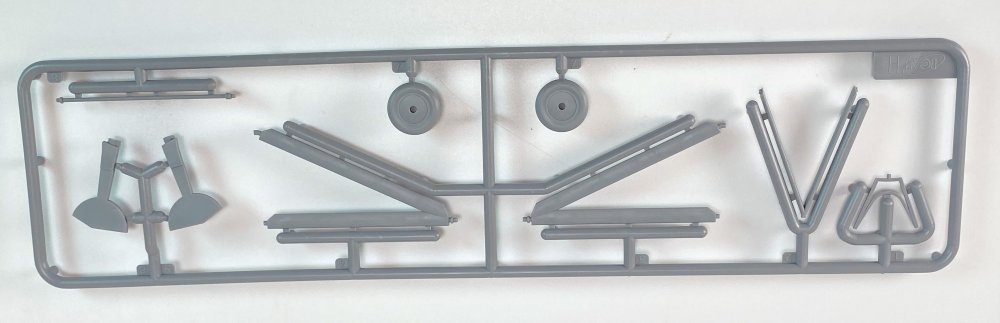
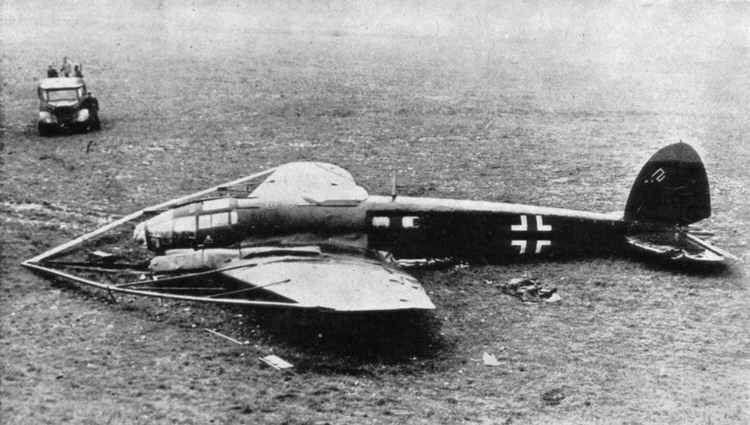
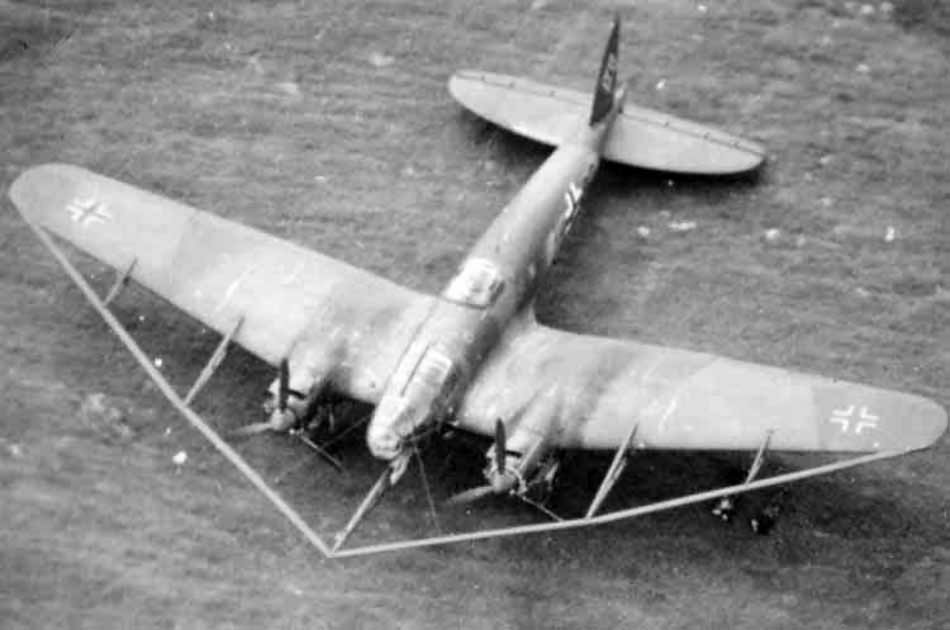
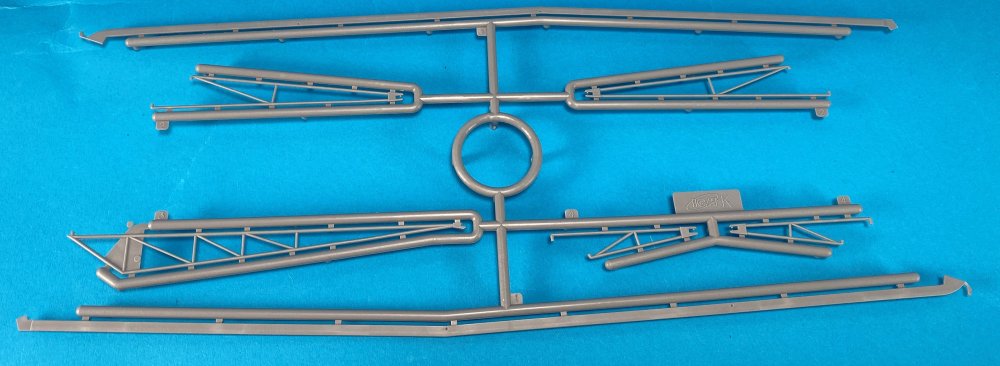
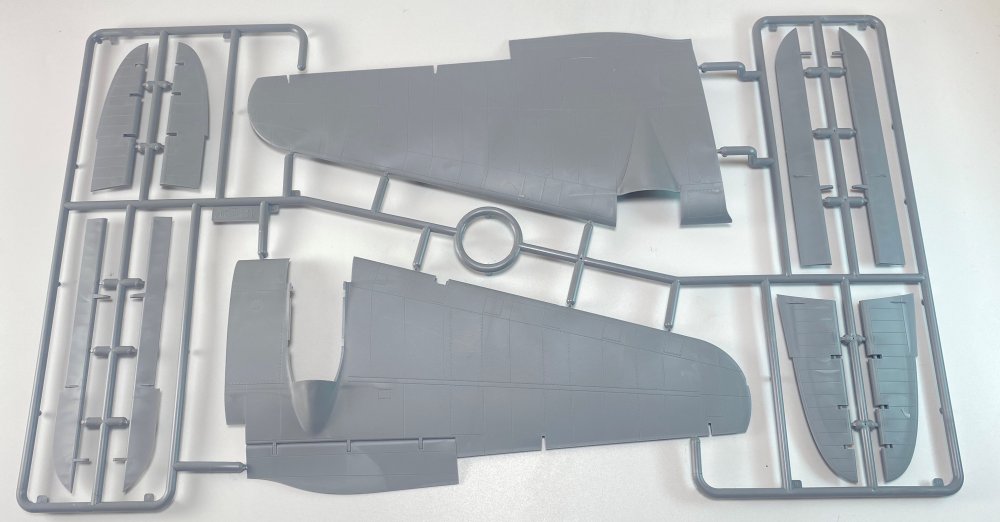
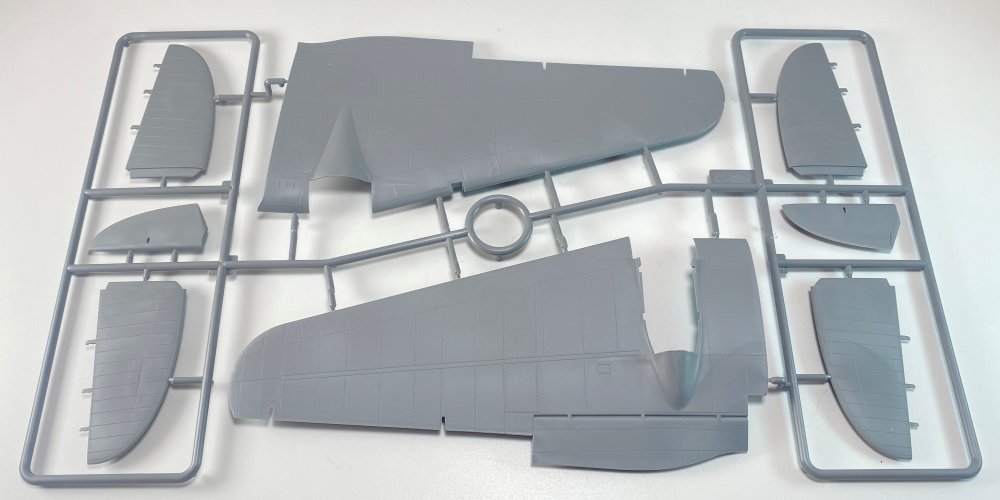
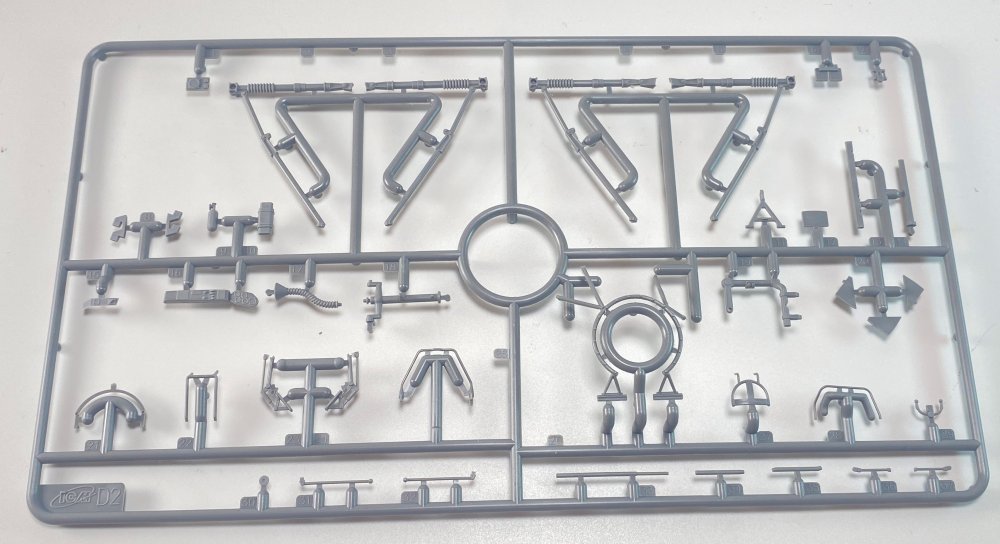
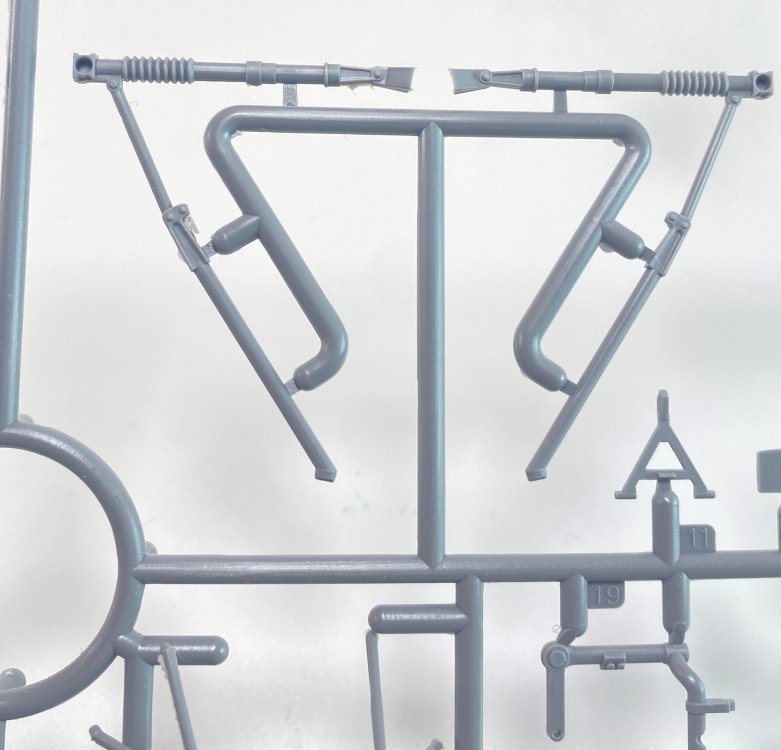
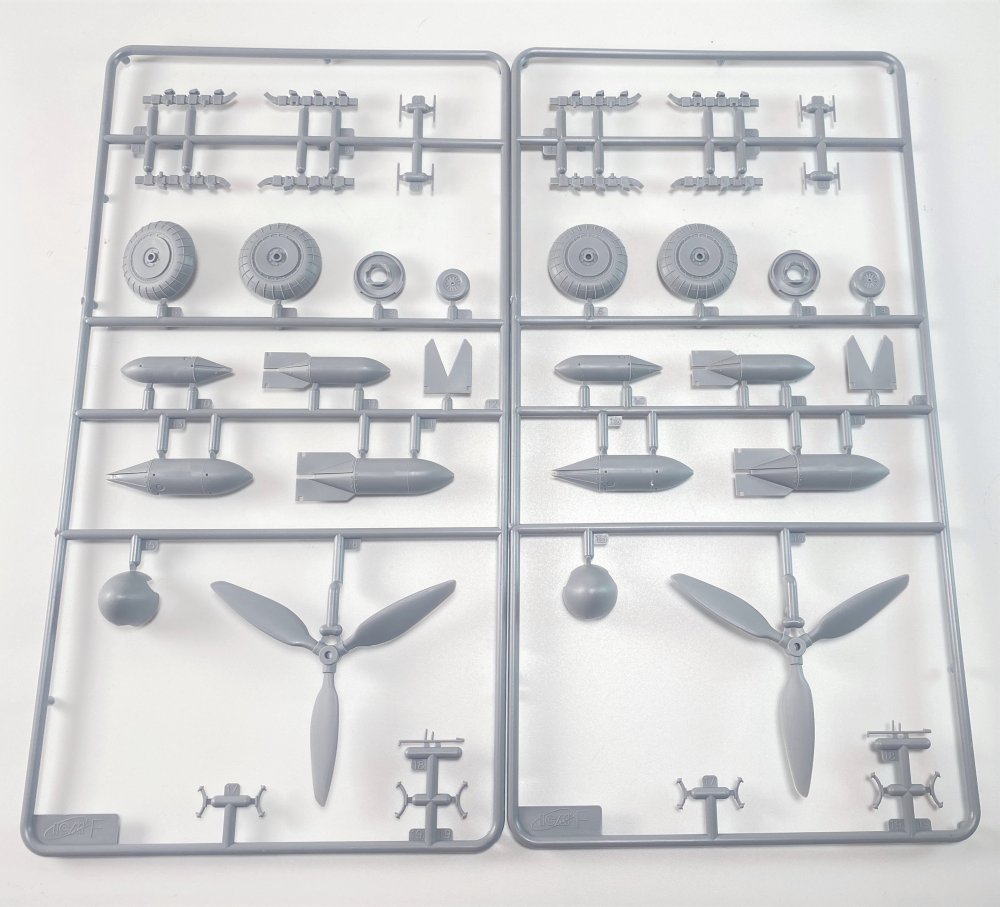
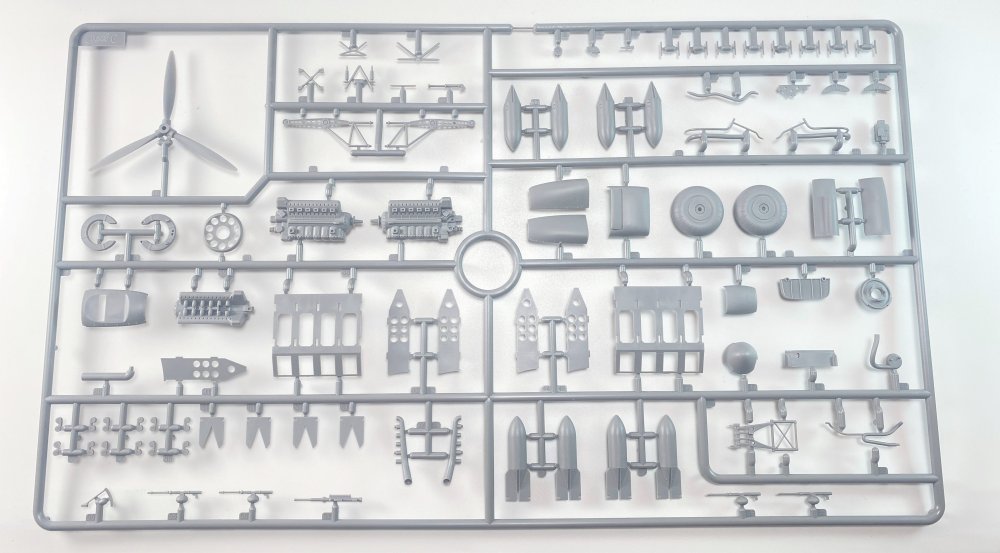
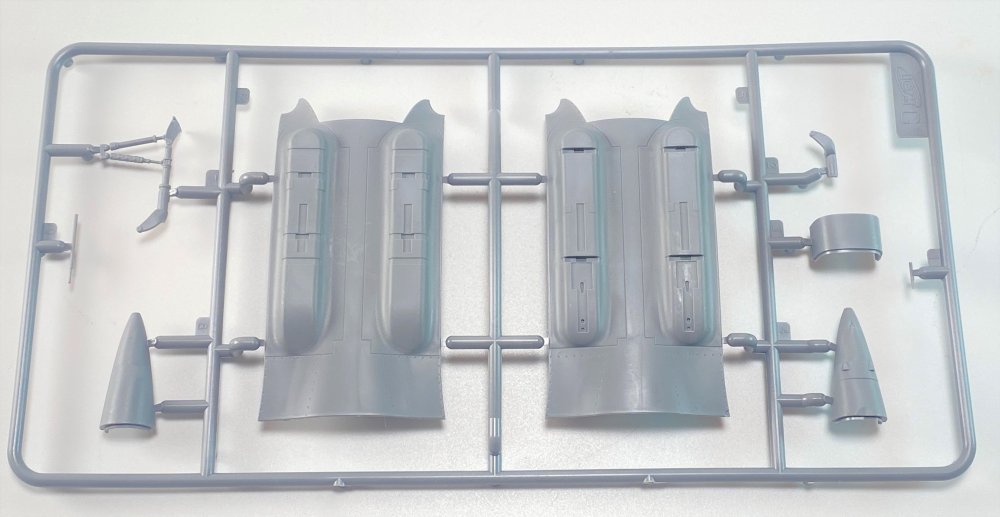
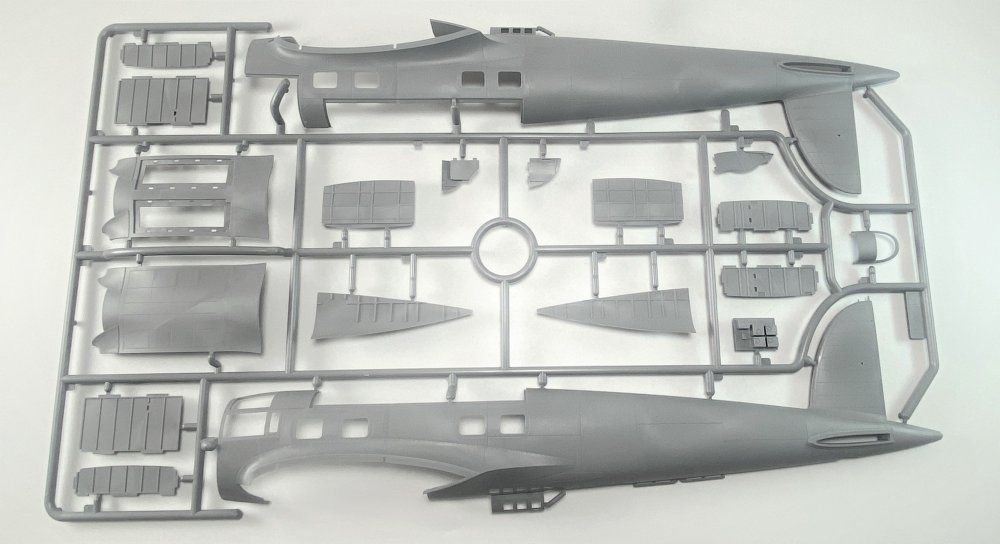
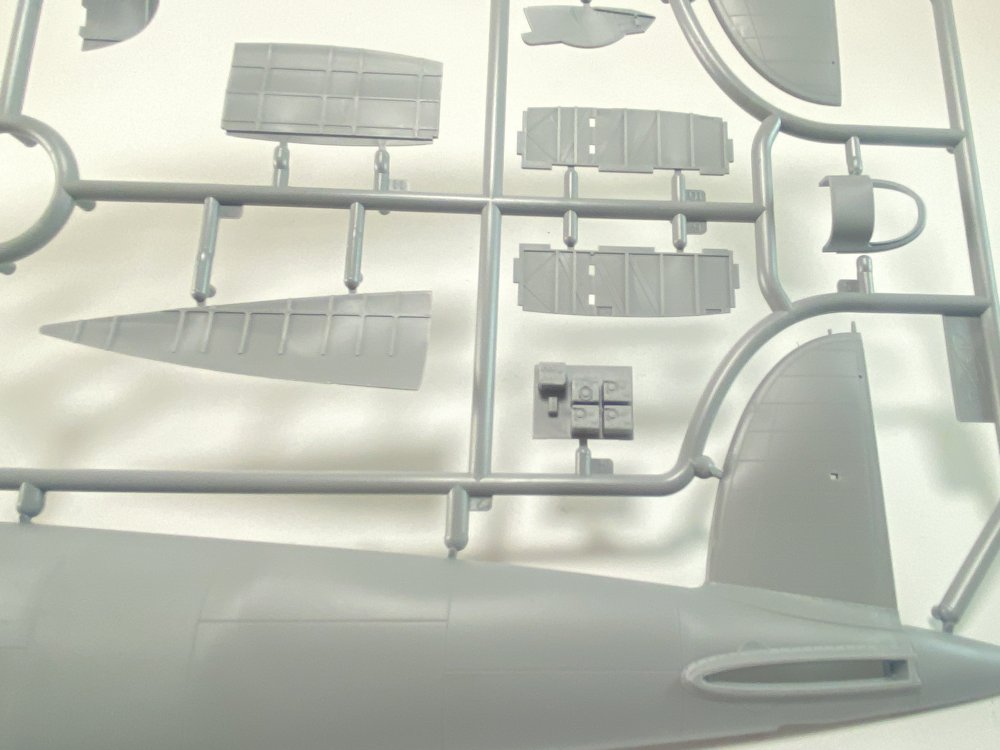
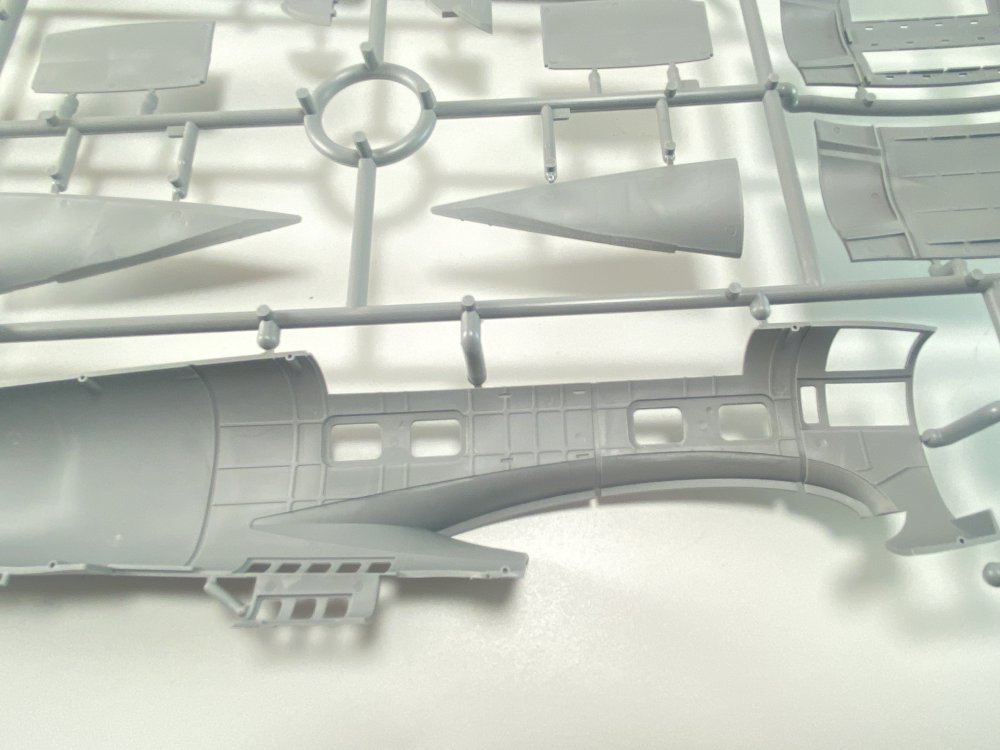
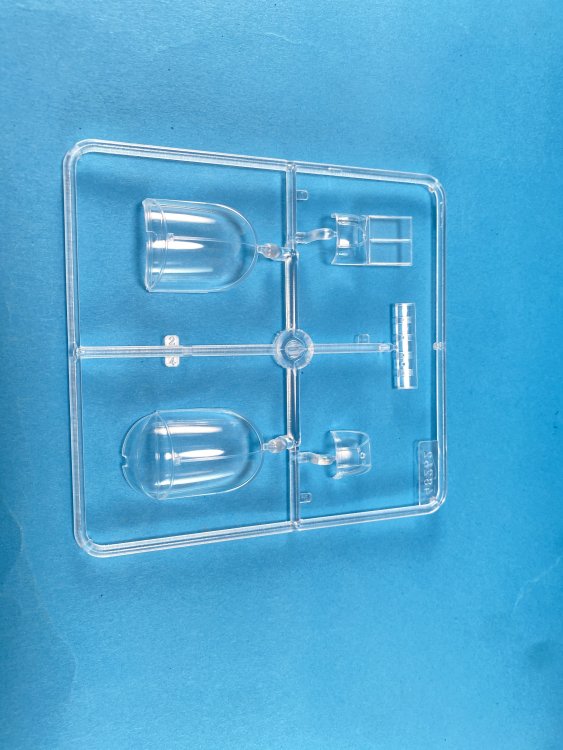
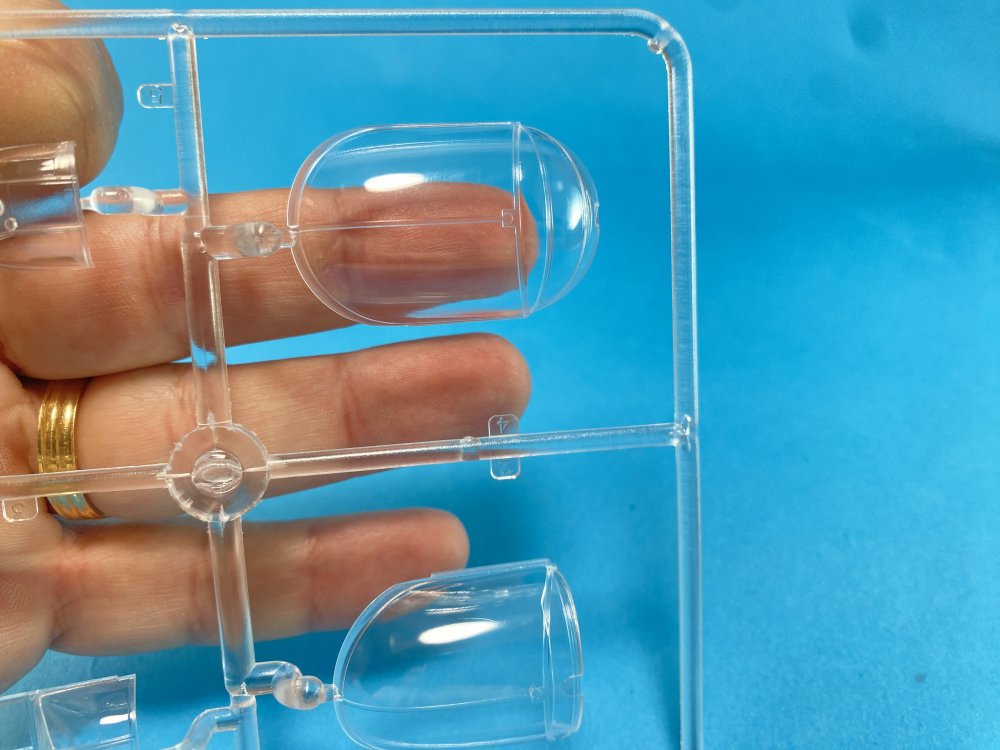
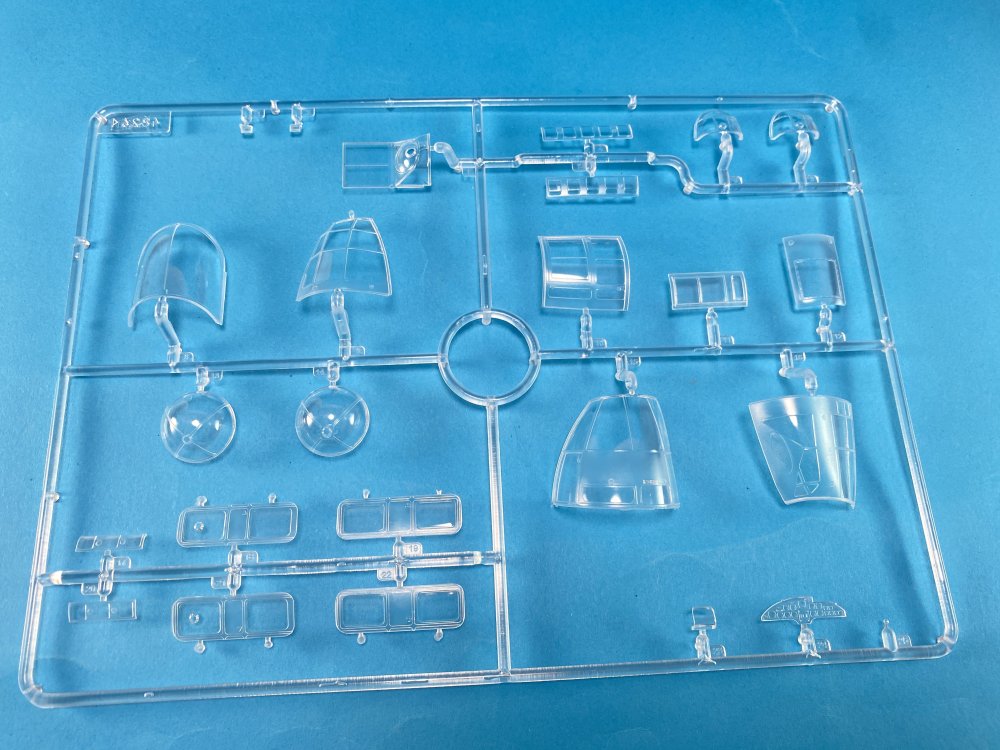
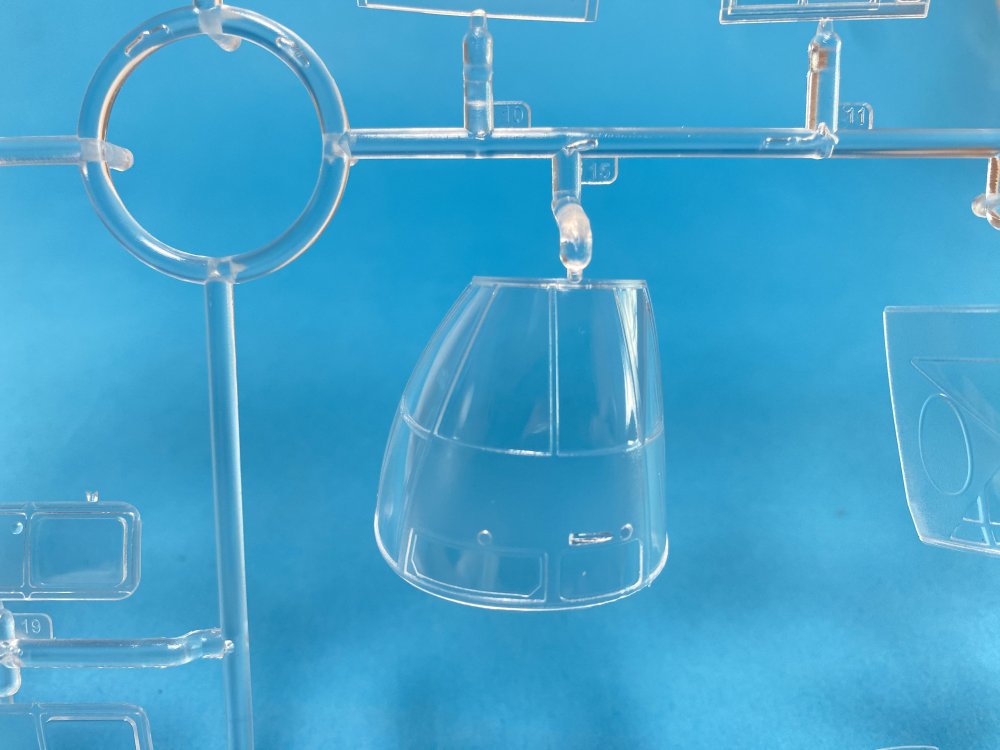
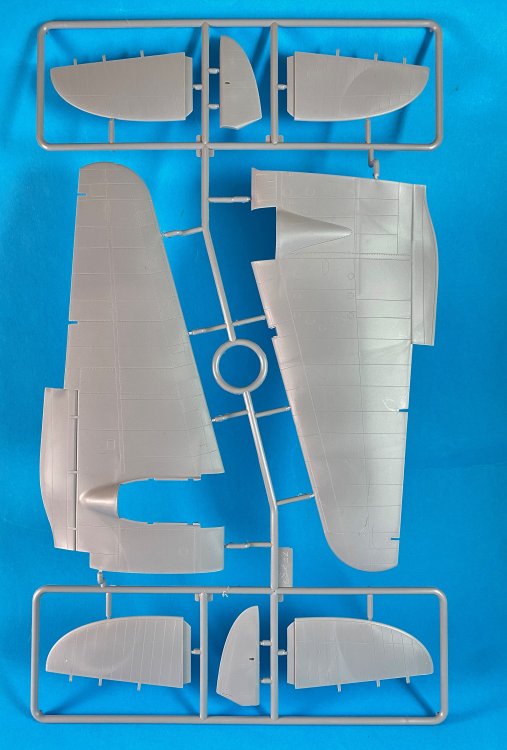
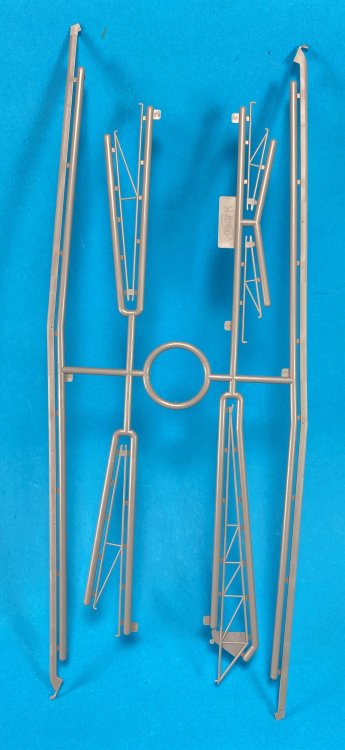
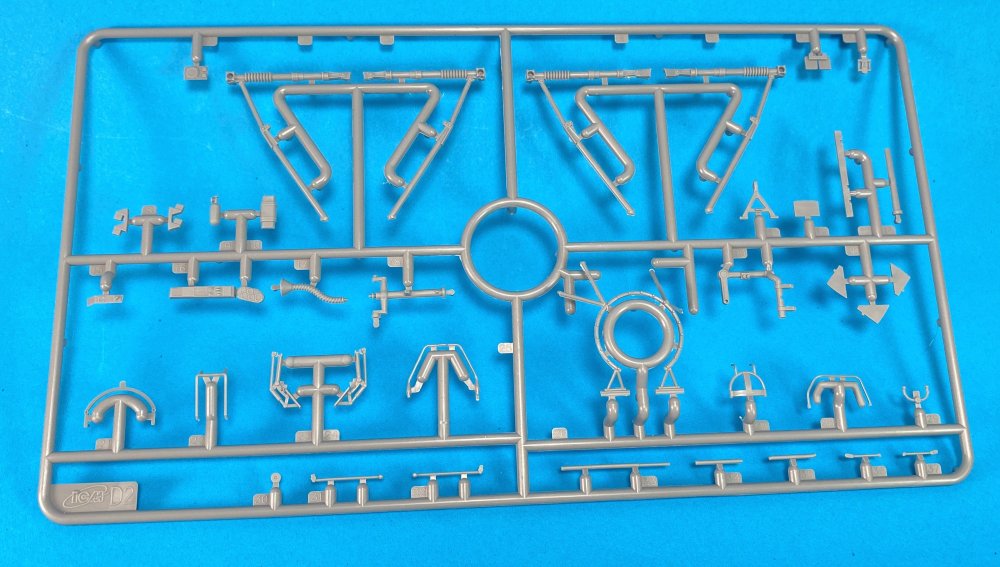
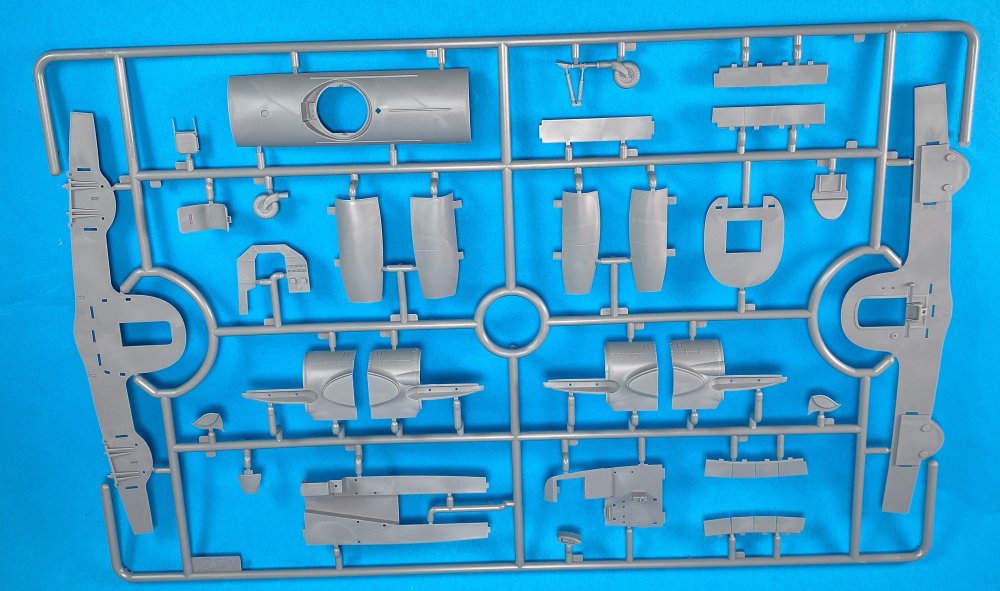
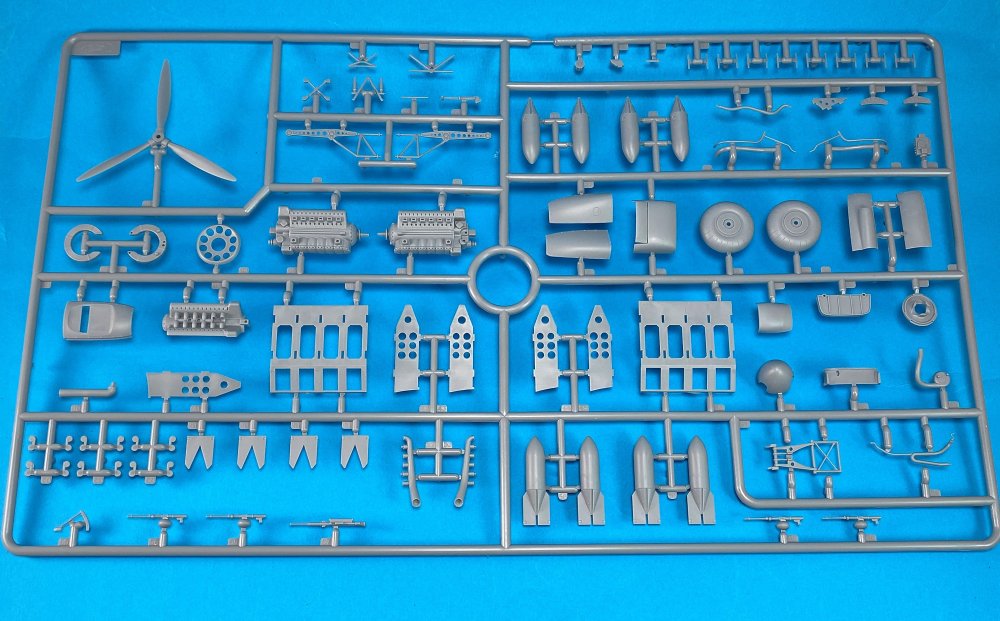
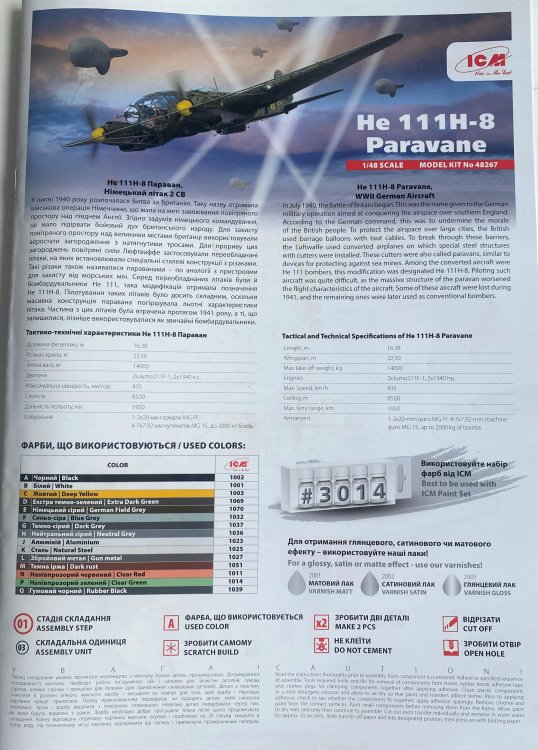
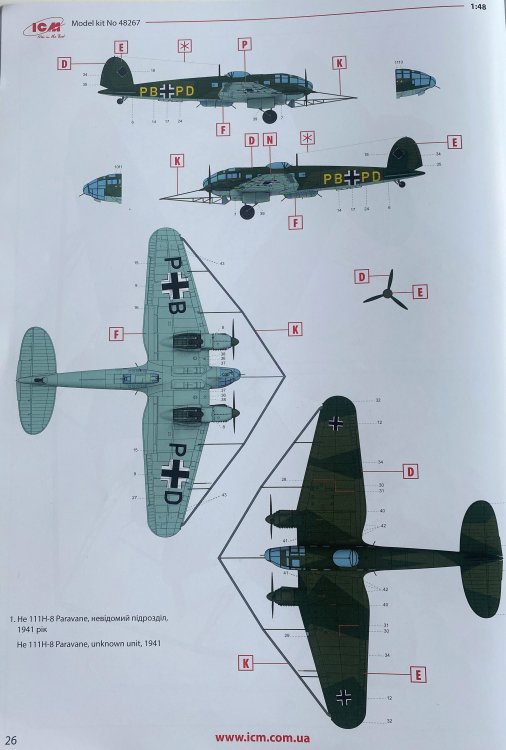
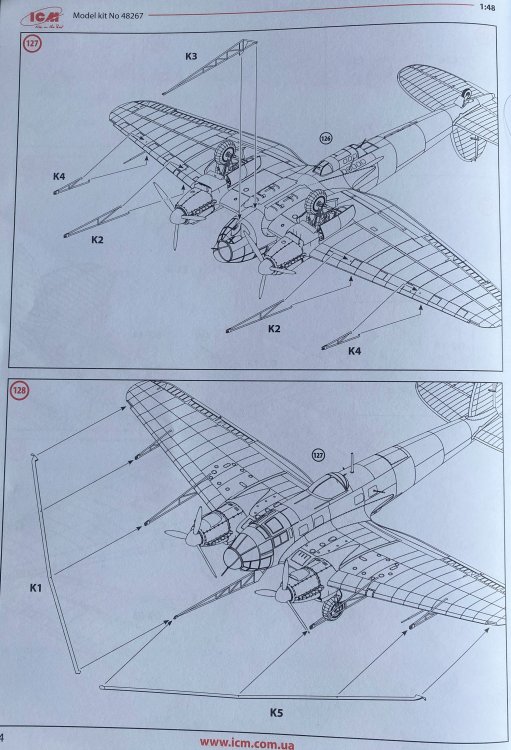
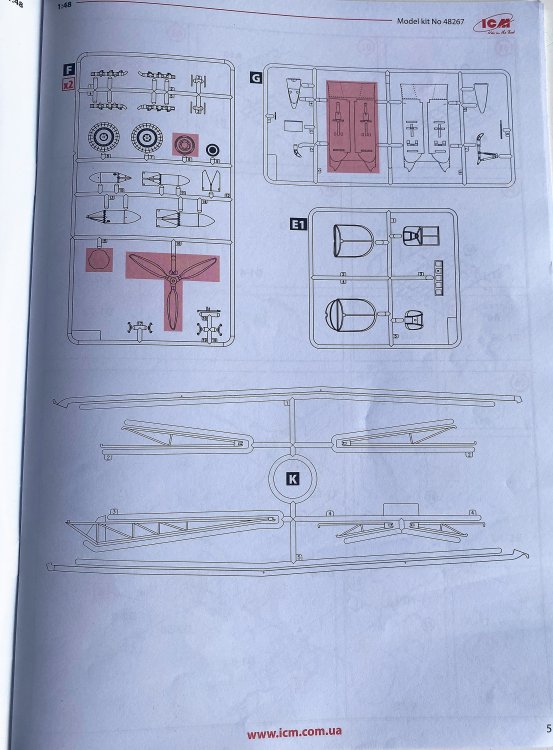
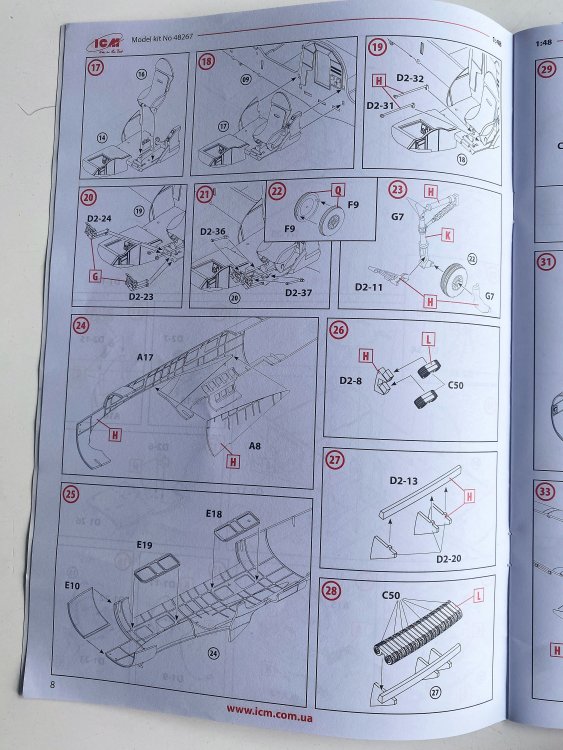
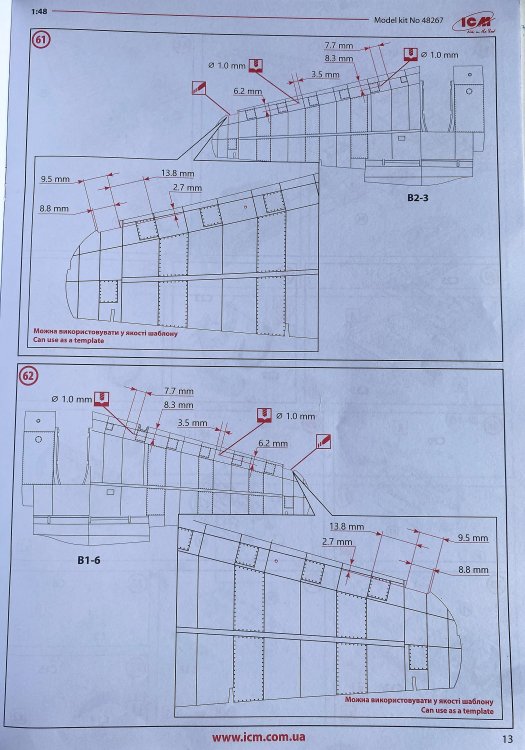
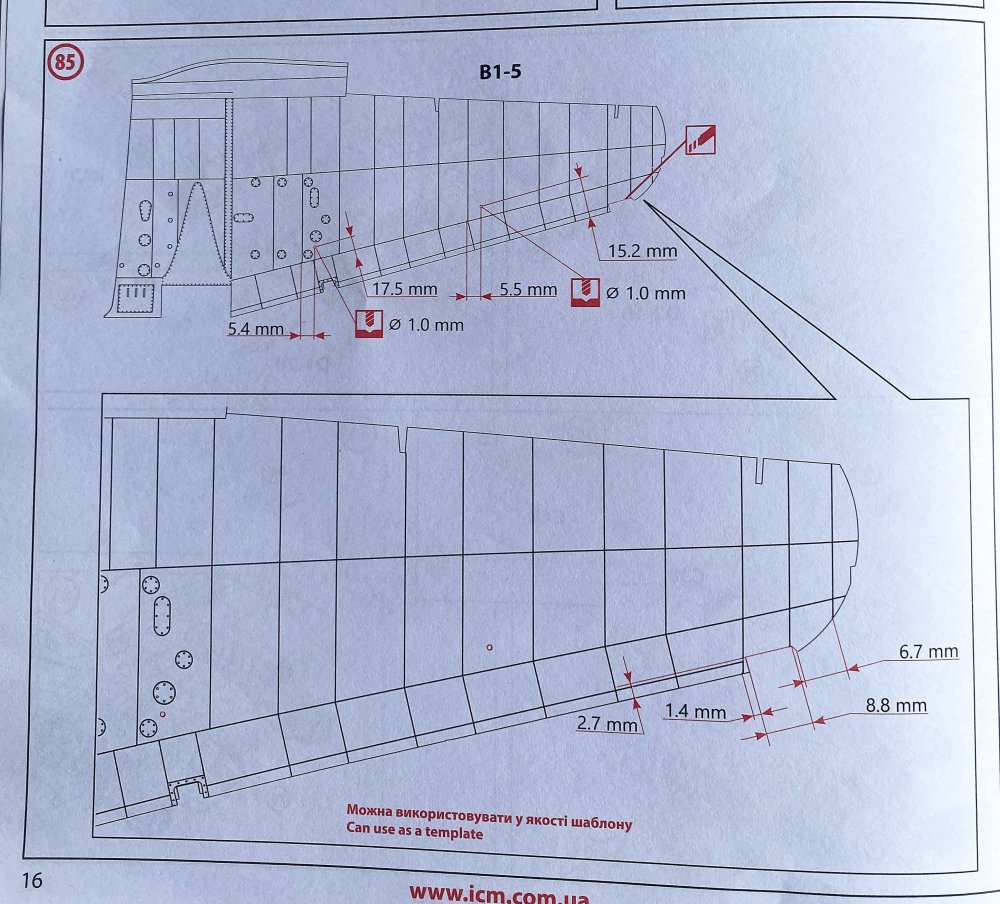
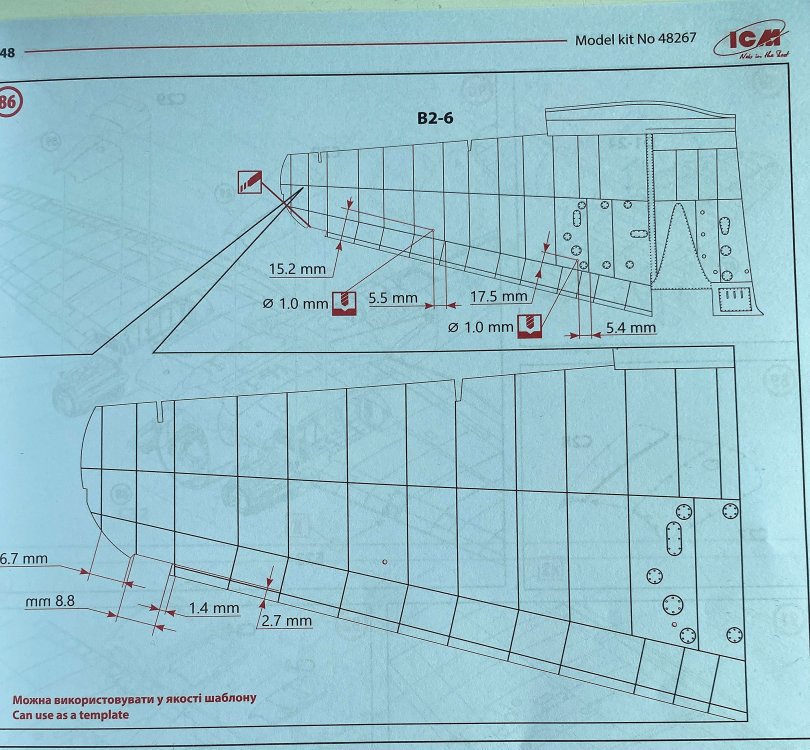
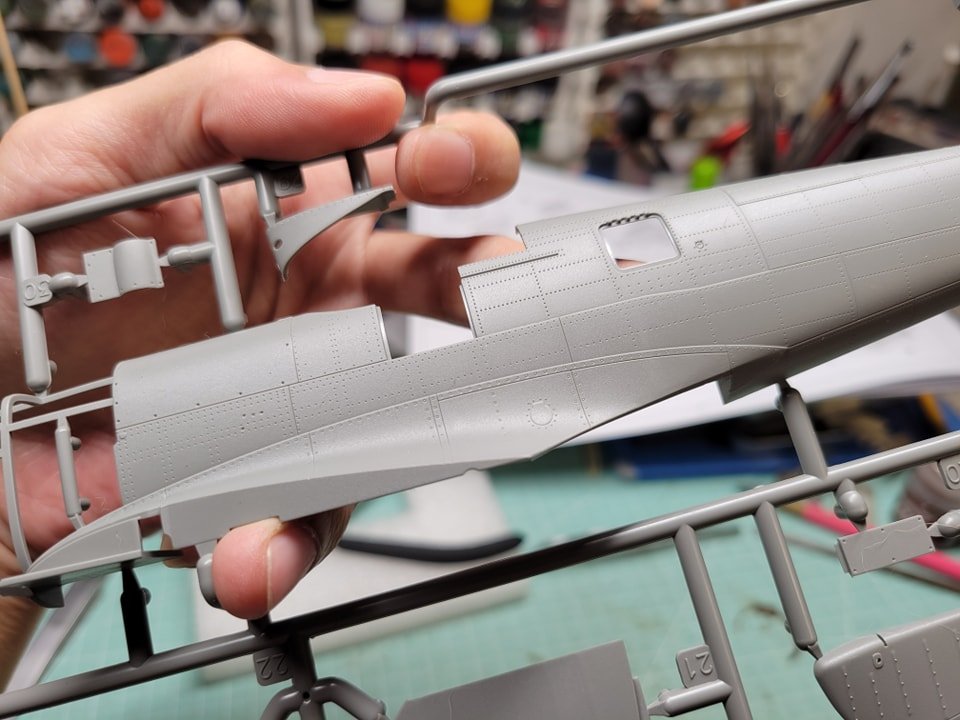
1:48 Heinkel He-111 H-8 Paravane ICM Catalogue number 48267 Price: around 47€ “The Heinkel He 111 is a German airliner and bomber designed by Siegfried and Walter Günter at Heinkel Flugzeugwerke in 1934. Through development, it was described as a "wolf in sheep's clothing". Due to restrictions placed on Germany after the First World War prohibiting bombers, it was presented solely as a civil airliner, although from conception the design was intended to provide the nascent Luftwaffe with a heavy bomber. Perhaps the best-recognised German bomber of World War II due to the distinctive, extensively glazed "greenhouse" nose of the later versions, the Heinkel He 111 was the most numerous Luftwaffe bomber during the early stages of the war. It fared well until it met serious fighter opposition during the Battle of Britain, when its defensive armament was found to be inadequate. As the war progressed, the He 111 was used in a wide variety of roles on every front in the European theatre. It was used as a strategic bomber during the Battle of Britain, a torpedo bomber in the Atlantic and Arctic, and a medium bomber and a transport aircraft on the Western, Eastern, Mediterranean, Middle Eastern, and North African Front theatres. The He 111 was constantly upgraded and modified, but had nonetheless become obsolete by the latter part of the war. The failure of the German Bomber B project forced the Luftwaffe to continue operating the He 111 in combat roles until the end of the war. Manufacture of the He 111 ceased in September 1944, at which point piston-engine bomber production was largely halted in favour of fighter aircraft. With the German bomber force virtually defunct, the He 111 was used for logistics. Production of the Heinkel continued after the war as the Spanish-built CASA 2.111. Spain received a batch of He 111H-16s in 1943 along with an agreement to licence-build Spanish versions. Its airframe was produced in Spain under licence by Construcciones Aeronáuticas SA. The design differed significantly only in the powerplant used, eventually being equipped with Rolls-Royce Merlin engines. These remained in service until 1973.he H variant of the He 111 series was more widely produced and saw more action during World War II than any other Heinkel variant. Owing to the uncertainty surrounding the delivery and availability of the DB 601 engines, Heinkel switched to 820 kW (1,100 hp) Junkers Jumo 211 powerplants, whose somewhat greater size and weight were regarded as unimportant considerations in a twin-engine design. When the Jumo was fitted to the P model it became the He 111 H. The He 111 H-1 was fitted with a standard set of three 7.92 mm (0.312 in) MG 15 machine guns and eight SC 250 250 kg (550 lb) or 32 SC 50 50 kg (110 lb) bombs. The same armament was used in the H-2 which started production in August 1939. The P-series was gradually replaced on the eve of war with the new H-2, powered by improved Jumo 211 A-3 engines of 820 kW (1,100 hp). A count on 2 September 1939 revealed that the Luftwaffe had a total of 787 He 111s in service, with 705 combat ready, including 400 H-1 and H-2s that had been produced in a mere four months. Production of the H-3, powered by the 895 kW (1,200 hp) Jumo 211 D-1, began in October 1939. Experiences during the Polish Campaign led to an increase in defensive armament. MG 15s were fitted whenever possible and the number of machine guns was sometimes increased to seven. The two waist positions received an additional MG 15, and on some variants a belt-fed MG 17 was even installed in the tail. A 20 mm (0.79 in) MG FF autocannon would sometimes be installed in the nose or forward gondola. After the Battle of Britain, smaller scale production of the H-4s began. The H-4 was virtually identical to the He 111 P-4 with the DB 600s swapped for the Jumo 211D-1s. Some also used the Jumo 211H-1. This variant also differed from the H-3 in that it could either carry 2,000 kg (4,400 lb) of bombs internally or mount one or two external racks to carry one 1,800 kg (4,000 lb) or two 1,000 kg (2,200 lb) bombs. As these external racks blocked the internal bomb bay doors, a combination of internal and external storage was not possible. A PVR 1006L bomb rack was fitted externally and an 835 L (184 imp gal; 221 US gal) tank added to the interior spaces left vacant by the removal of the internal bomb-bay. The PVR 1006L was capable of carrying a SC 1000 1,000 kg (2,200 lb) bomb. Some H-4s had their PVC racks modified to drop torpedoes. Later modifications enabled the PVC 1006 to carry a 2,500 kg (5,500 lb) "Max" bomb. However 1,000 kg (2,200 lb) "Hermann" or 1,800 kg (4,000 lb) "Satans" were used more widely. The H-5 series followed in February 1941, with heavier defensive armament. Like the H-4, it retained a PVC 1006 L bomb rack to enable it to carry heavy bombs under the fuselage. The first ten He 111 H-5s were pathfinders, and selected for special missions. The aircraft sometimes carried 25 kg (55 lb) flashlight bombs which acted as flares. The H-5 could also carry heavy fire bombs, either heavy containers or smaller incendiary devices attached to parachutes. The H-5 also carried LM A and LM B aerial mines for anti-shipping operations. After the 80th production aircraft, the PVC 1006 L bomb rack was removed and replaced with a heavy-duty ETC 2000 rack, enabling the H-5 to carry the SC 2500 "Max" bomb, on the external ETC 2000 rack, which enabled it to support the 2,500 kg (5,500 lb) bomb. Some H-3 and H-4s were equipped with barrage balloon cable-cutting equipment in the shape of cutter installations forward of the engines and cockpit. They were designated H-8, but later named H8/R2. These aircraft were difficult to fly and production stopped. The H-6 initiated some overall improvements in design. The Jumo 211 F-1 engine of 1,007 kW (1,350 hp) increased its speed while the defensive armament was upgraded at the factory with one 20 mm (0.79 in) MG FF cannon in the nose and/or gondola positions (optional), two MG 15 in the ventral gondola, and one each of the fuselage side windows. Some H-6 variants carried tail-mounted MG 17 defensive armament.[54] The performance of the H-6 was much improved. The climb rate was higher and the bomber could reach a slightly higher ceiling of 8,500 m (27,900 ft). When heavy bomb loads were added, this ceiling was reduced to 6,500 m (21,300 ft). The weight of the H-6 increased to 14,000 kg (31,000 lb). Some H-6s received Jumo 211F-2s which improved a low-level speed of 365 km/h (227 mph). At an altitude of 6,000 m (20,000 ft) the maximum speed was 435 km/h (270 mph). If heavy external loads were added, the speed was reduced by 35 km/h (22 mph). Other designs of the mid-H series included the He 111 H-7 and H-8. The airframes were to be rebuilds of the H-3/H-5 variant. Both were designed as night bombers and were to have two Jumo 211F-1s installed. The intention was for the H-8 to be fitted with cable-cutting equipment and barrage ballon deflectors on the leading edge of the wings. The H-7 was never built.” The H-9 was intended as a trainer with dual control columns. The airframe was a H-1 variant rebuild. The powerplants consisted of two JumoA-1s or D-1s.[56] The H-10 was also designated to trainer duties. Rebuilt from an H-2 or H-3 airframe, it was installed with full defensive armament including 13 mm (0.51 in) MG 131 and 7.92 mm (0.312 in) MG 81Z machine guns. It was to be powered by two Jumo 211A-1s, D-1s or F-2s.”* *History from Wikipedia. Now, let´s go to the model kit. He-111 ICM has being around for quite some time now, but unbelieve I never have seen one in flesh. So I`m really excited to get my hands on the ICM release. Checking the box, is the usual ICM flip top cardboard with a separate card lid showing the artwork. Speaking of artwork, I really love these ICM artworks. No idea who is the author but kudos to his work. All the plastic sprue are in two plastic bags with the clear parts in other plastic bag inside. Checking the plastic parts, the injection markings are very sutble and mainly in places that will be hard to see when build. Its evident that ICM made the home work to make modeler live easier. I`m very pleased to see all the internal structure present in the fuselage halves and the internal detai. In the same way, I saw in the Martim Baltimore kit (here), ICM also make the join internal of the wing spars that extend beyond the engines. This help a lot the construction phase as it give wing support and correct alignment with the fuselage. Before going to the plastic parts, I wanted to checked the clear parts as the He-111 as a huge front glass gondola. 1. The transparent parts are provided for the cockpit canopy, gun turrets, and windows. They are clear and free from distortion, allowing for excellent visibility of interior details. The new sprue of the variation is the the K sprue that give us the ballon cutter (paravane) structure. Checking the wings, they are just the same as other variations, as such no location holes from cutting structure (paravane structure). It`s complex as that would involve a mold modification that would be quite expensive. If the referent pinhole were on the inside, that could have been done since the beginning of the first release… Instead, the ICM in steps 61/62 and 85/86, gives the measures in millimeters (worse, 3.5mm or 7.7mm) You will need a digital caliper) so you can drill the locations points. Are quite some complex measures directly on the mode surface and also a surgery in the wing edge cutting a little part of it to be the main external location of the paravane structure. This will not be an easy work at all. It will demand quite some measuring and pre-study to get it right but an intermediate/expert modeler should pull this off. And the G sprue is not totally equal to the H-16 for example. The H-16 version has several bombs, bombs racks, machine guns and upper fuselage parte that this G sprue don’t have. It`s much smaller and only with tailskid, central belly and fuselage end cone (This implies a little surgery as the fuselage is complete with another end cone). So, in step 43, it shows that you have to cut the end cone of the fuselage and replace it by the new one. As I said before, it’s the first time I really check a ICM He-111. That said again, I was quite impressed to have two full detail engines straight from the box that you can used like that and left it open or hyperdetailed it with some plugs and wires and simple close all up. It`s really up to the modeler. The flight control surfaces are all separated parts so it’s a cool touch from ICM that allows modeler to put the flying surface at their desired. The decal sheet has a good color registration and supply 3 finishing options: Ø He-111 H-8 Paravane, Unknown Unit 1941 Ø He-111 H-8 Paravane, IV./KG27 “BOELCKE”, France 1941 Ø He-111 H-8 Paravane, 9./KG55 “GREIF”, France Spring 1941 The instruction manual is detailed and easy to follow. It includes step-by-step assembly diagrams, color callouts, and decal placement guides. Conclusion The ICM 1:48 Heinkel He-111 H-8 is shaping up to be a standout model kit because its unique look with that Paravane structure. This structre will not be easy to install but an expert modeler (even an intermediate) will handle it with no big issues. The detail out of the box is very good and it will make a very good replica. For the expert and keen modeler some AM will make some extra detail to make this beauty into a masterpiece. Highly recommend this to intermediate/expert modeler My truly thanks to ICM for the review sample. Some extra pictures from the plastic parts:


-
Only saw this post today!!! What some terrible moments there Harvey!! Sorry to hear that!! See that you are getting better. Rest up, get well!!
-
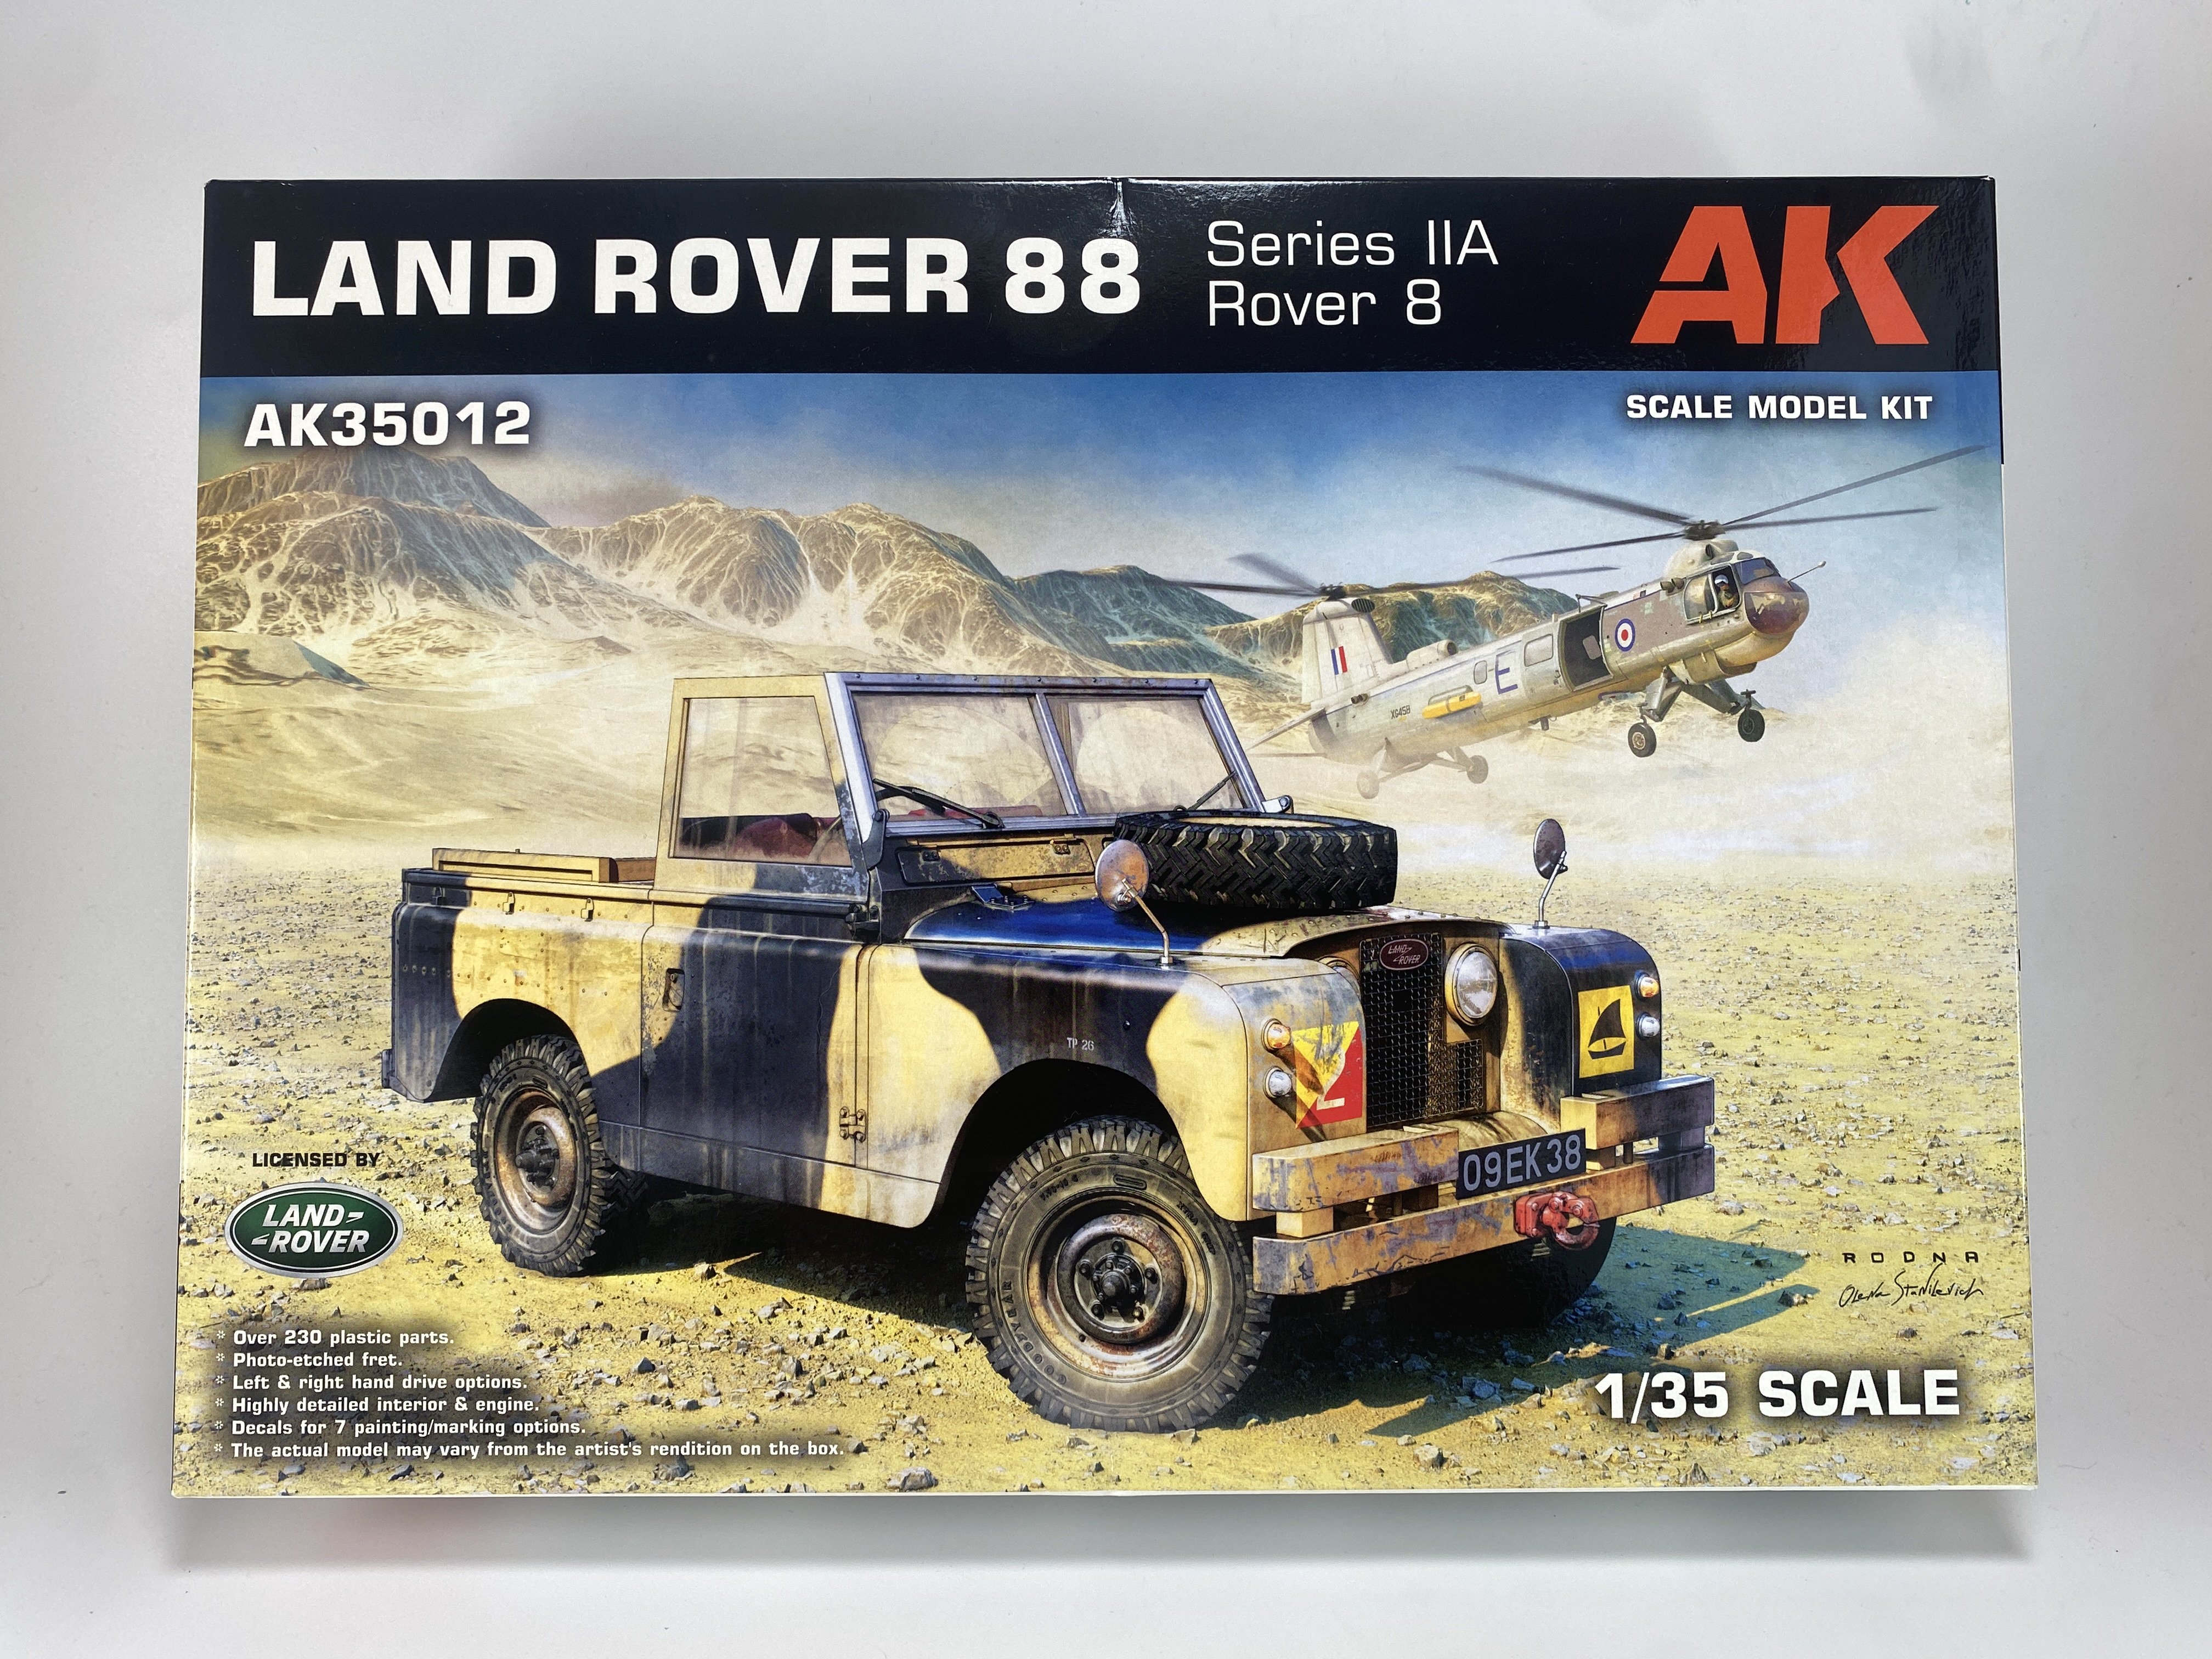
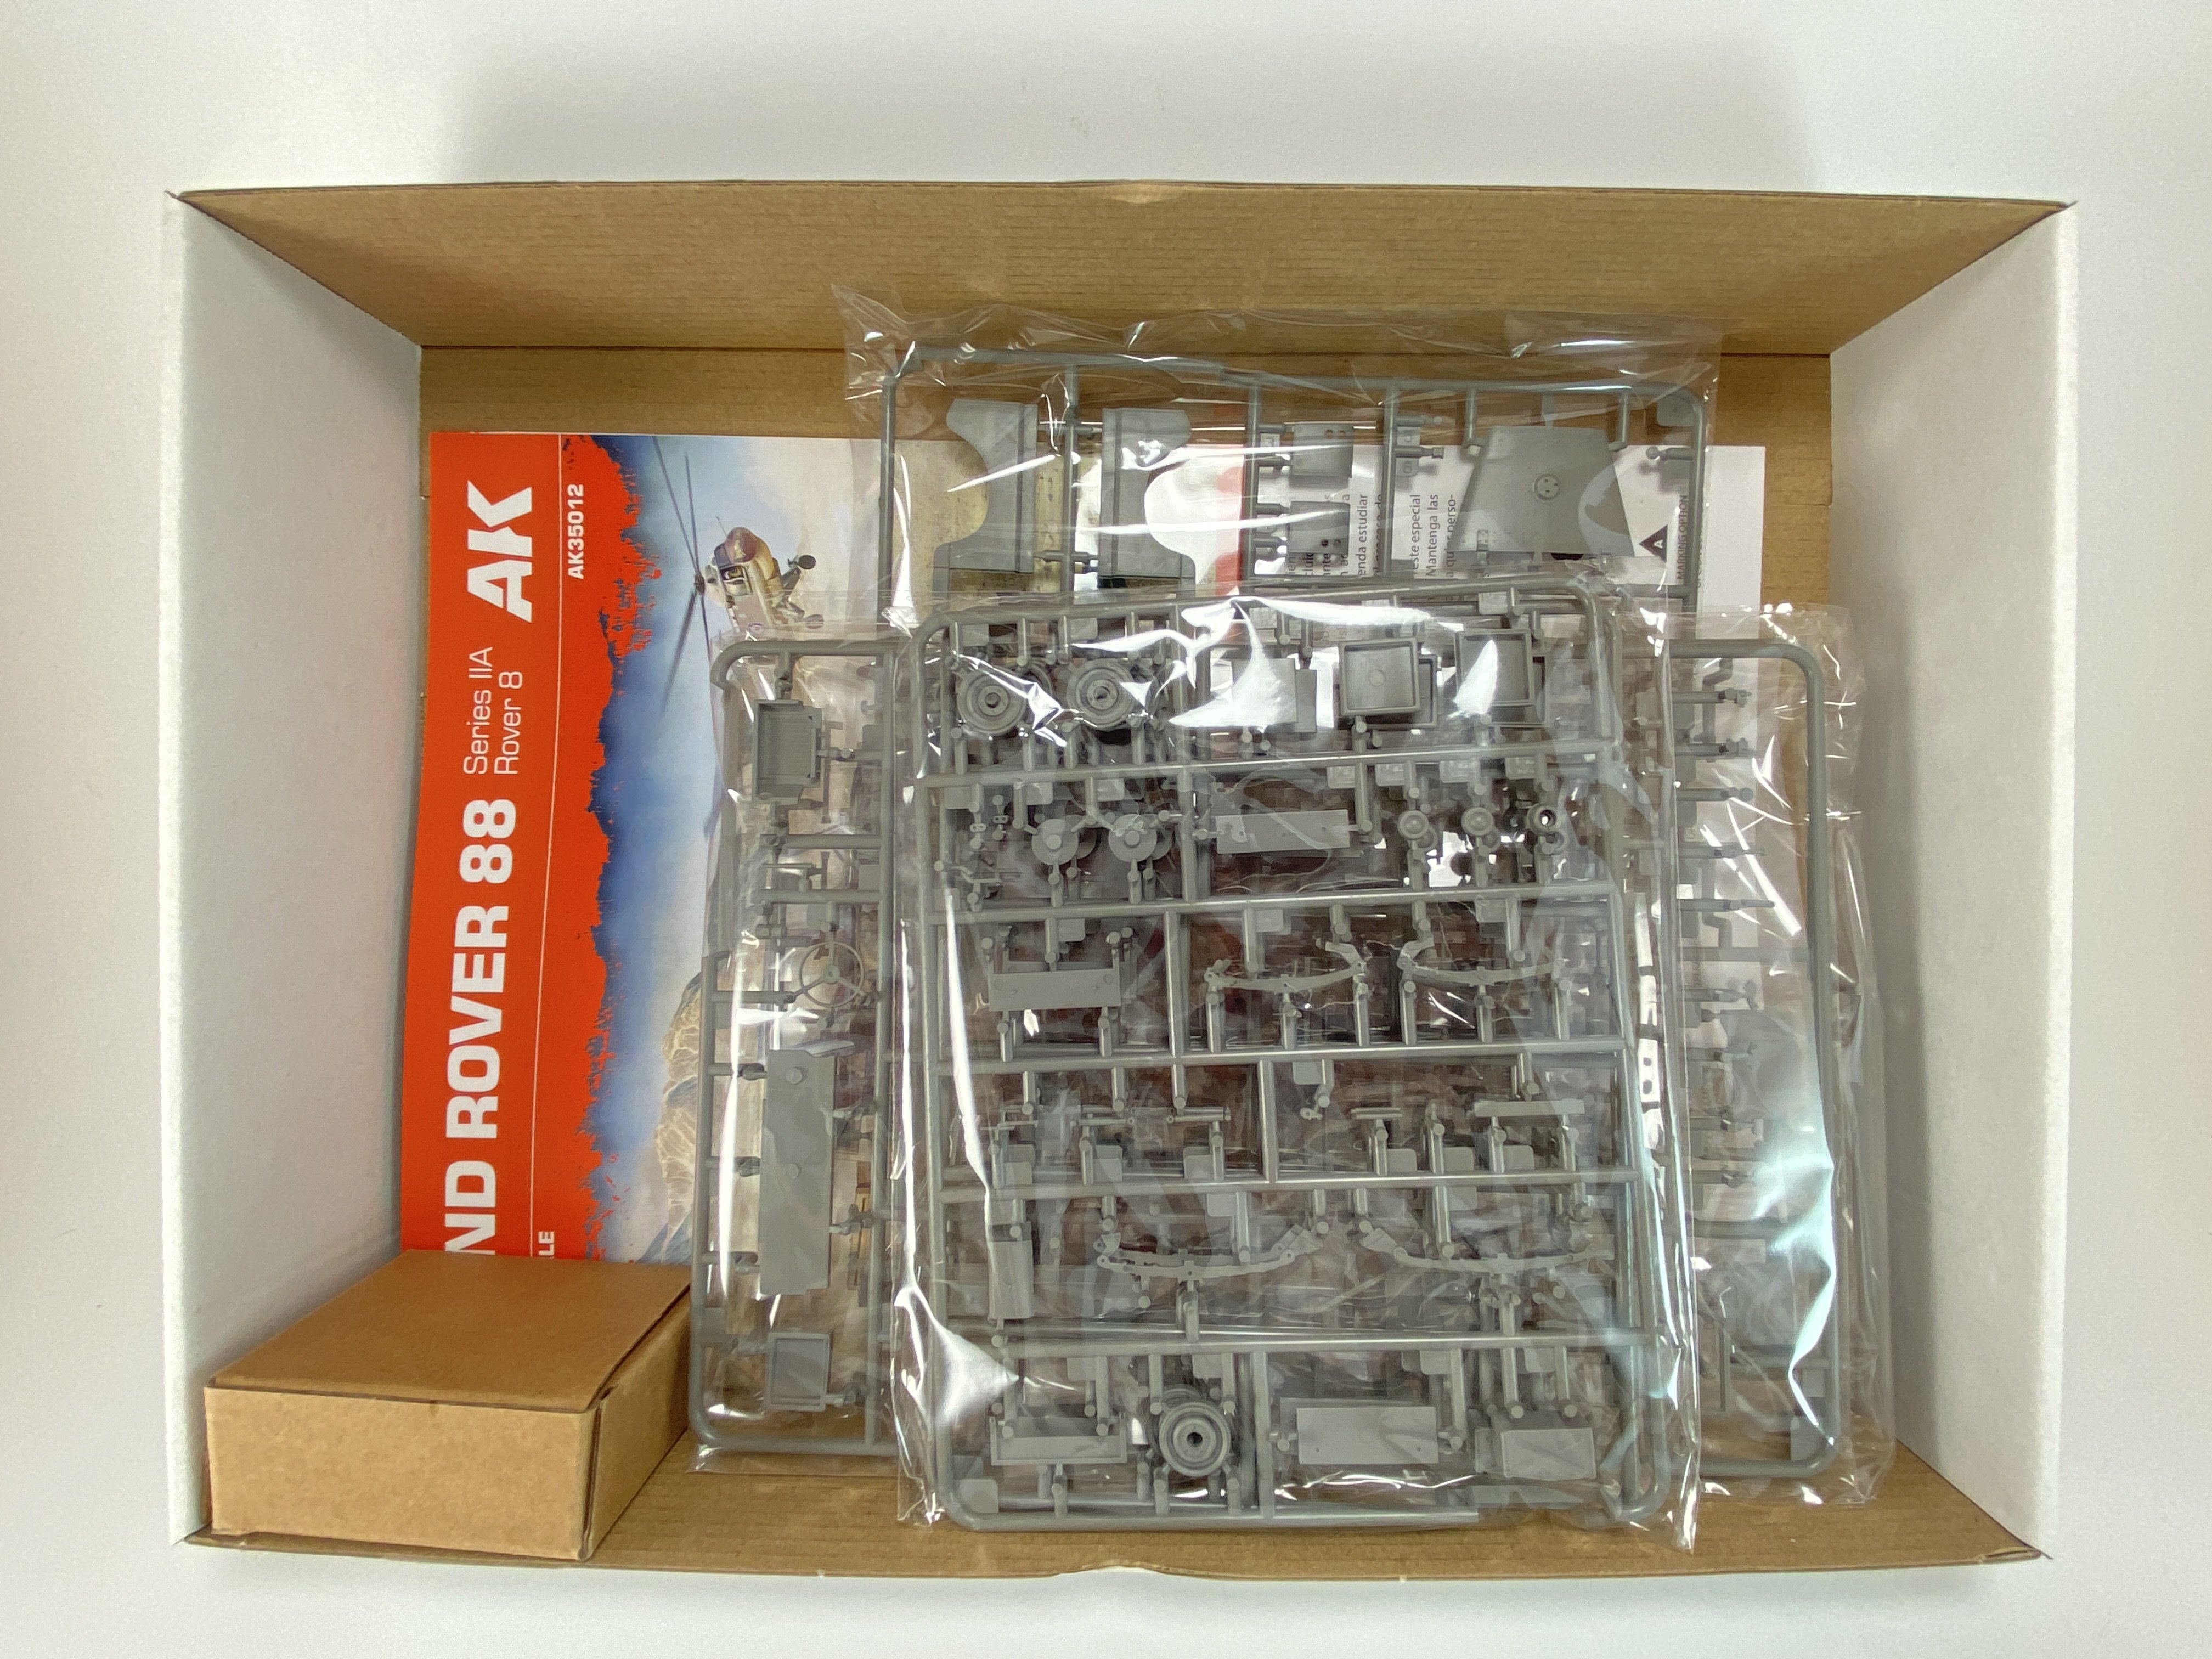
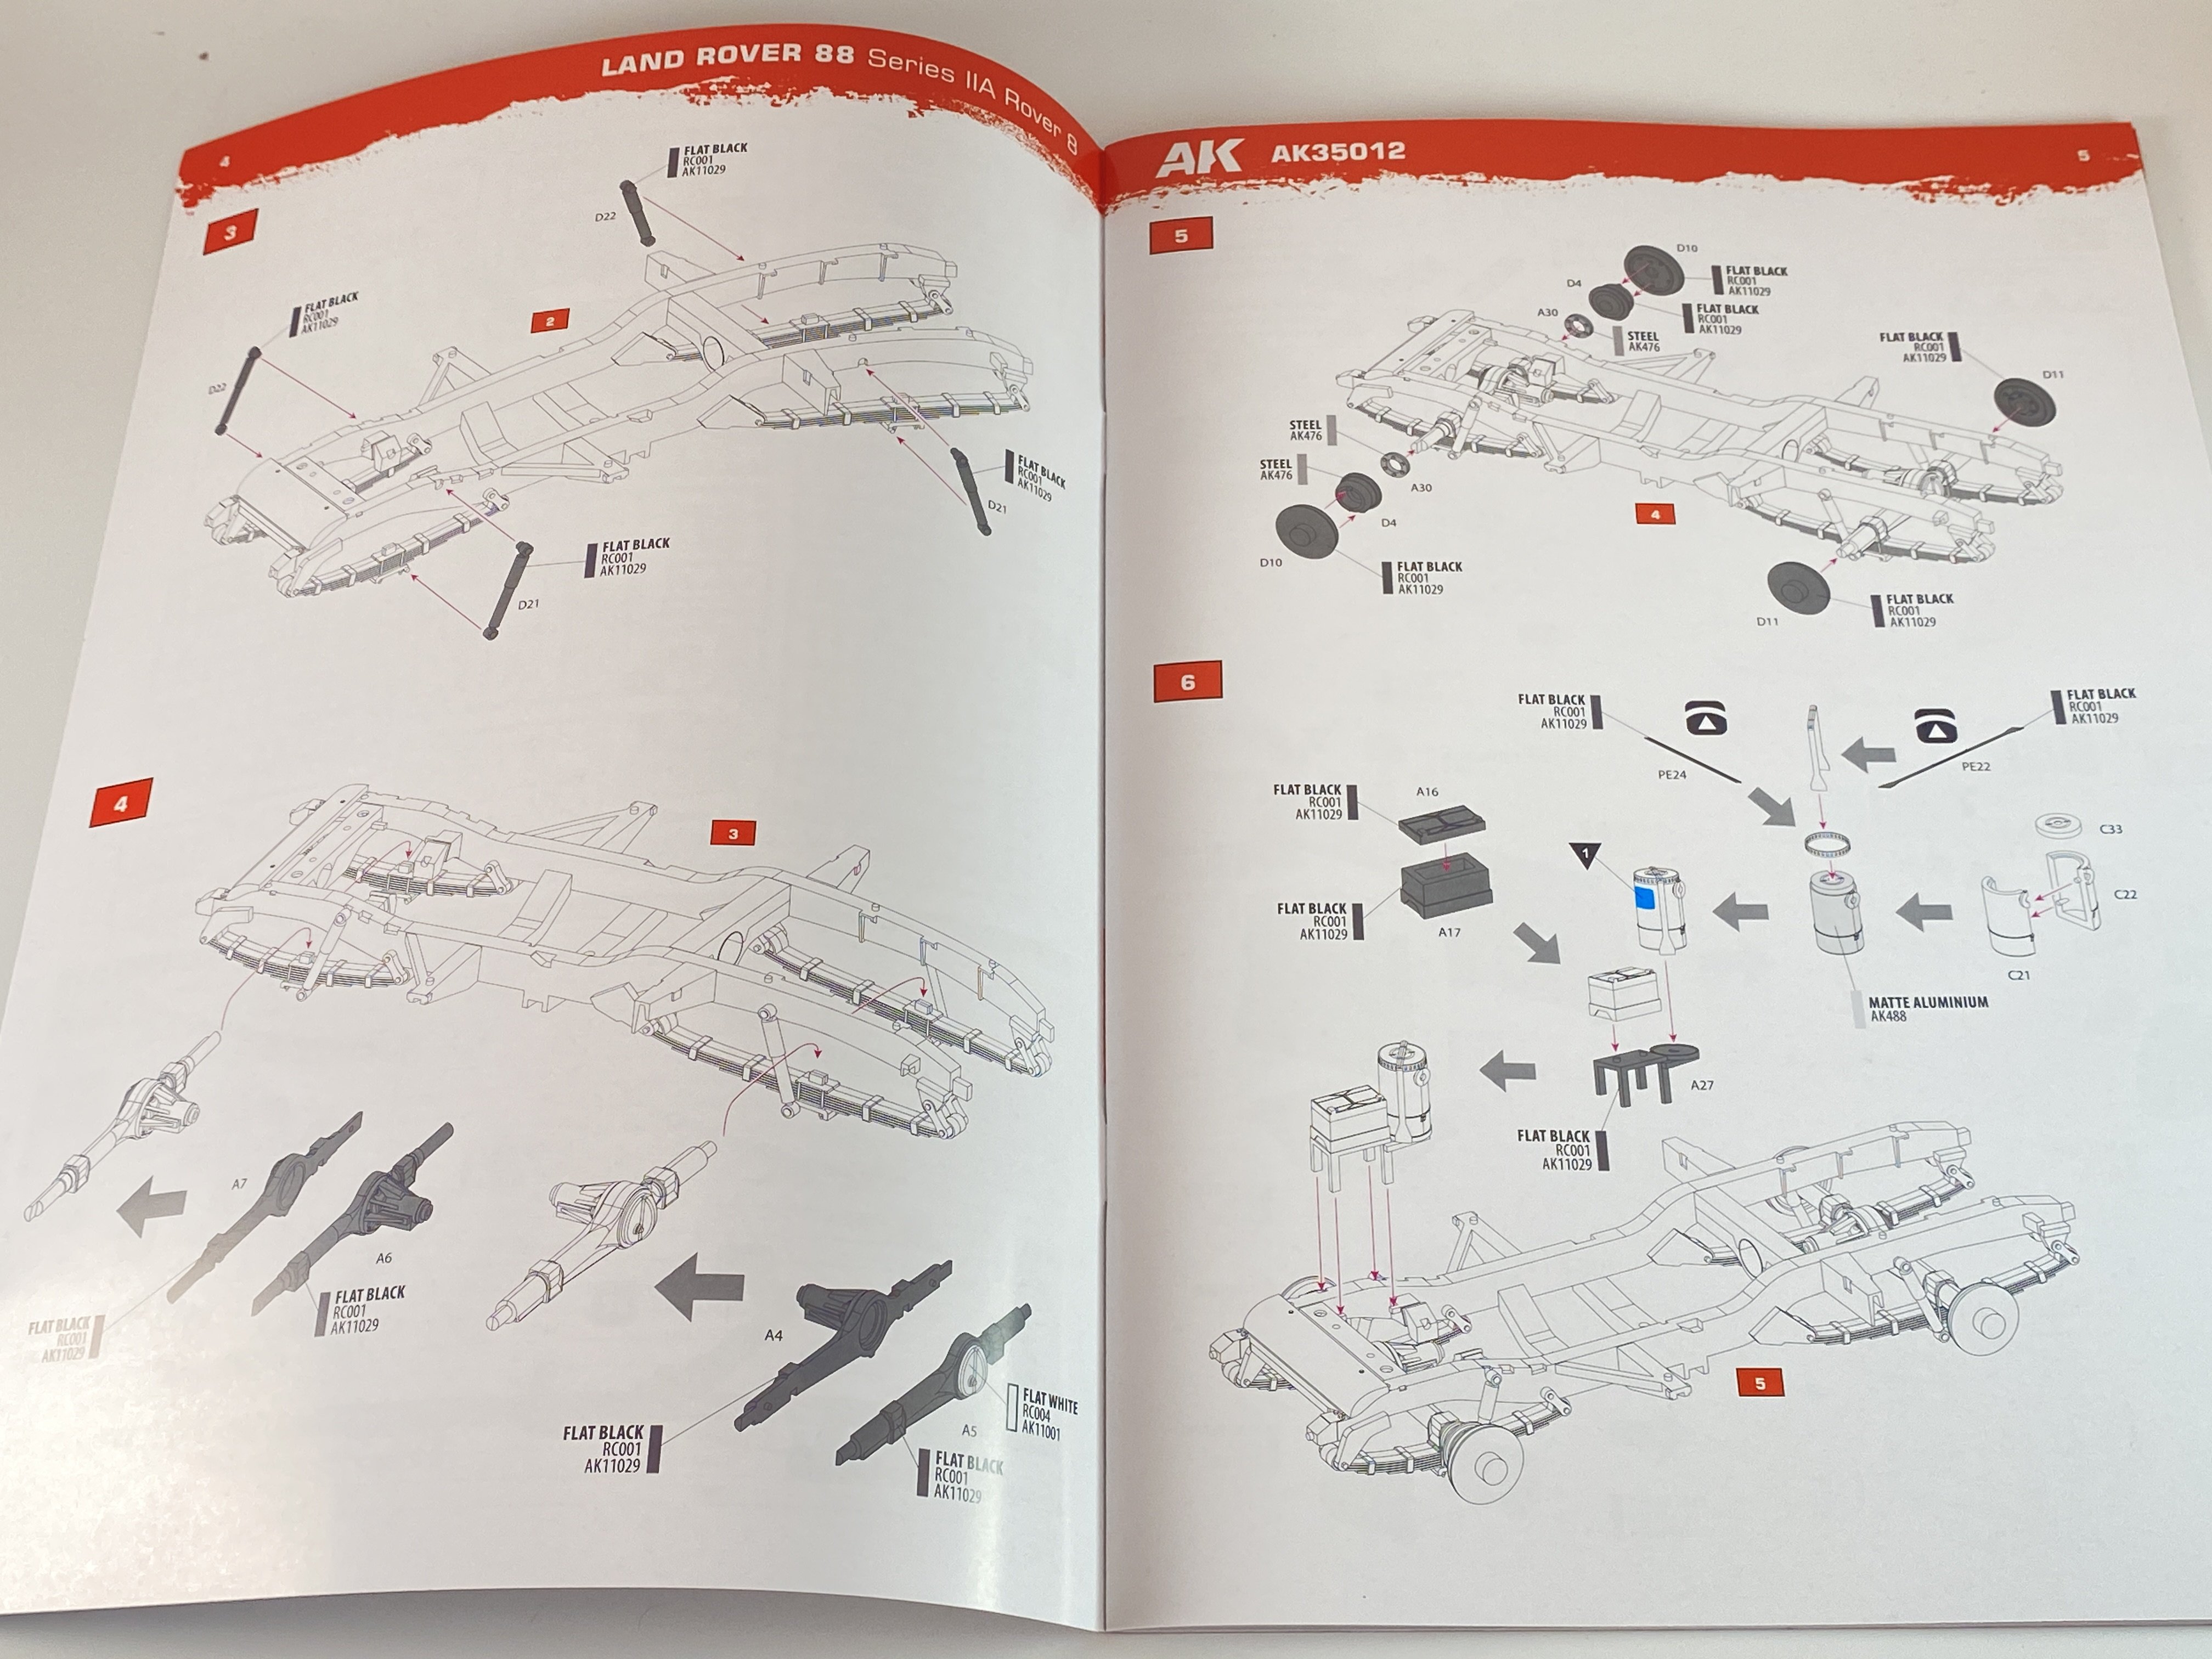
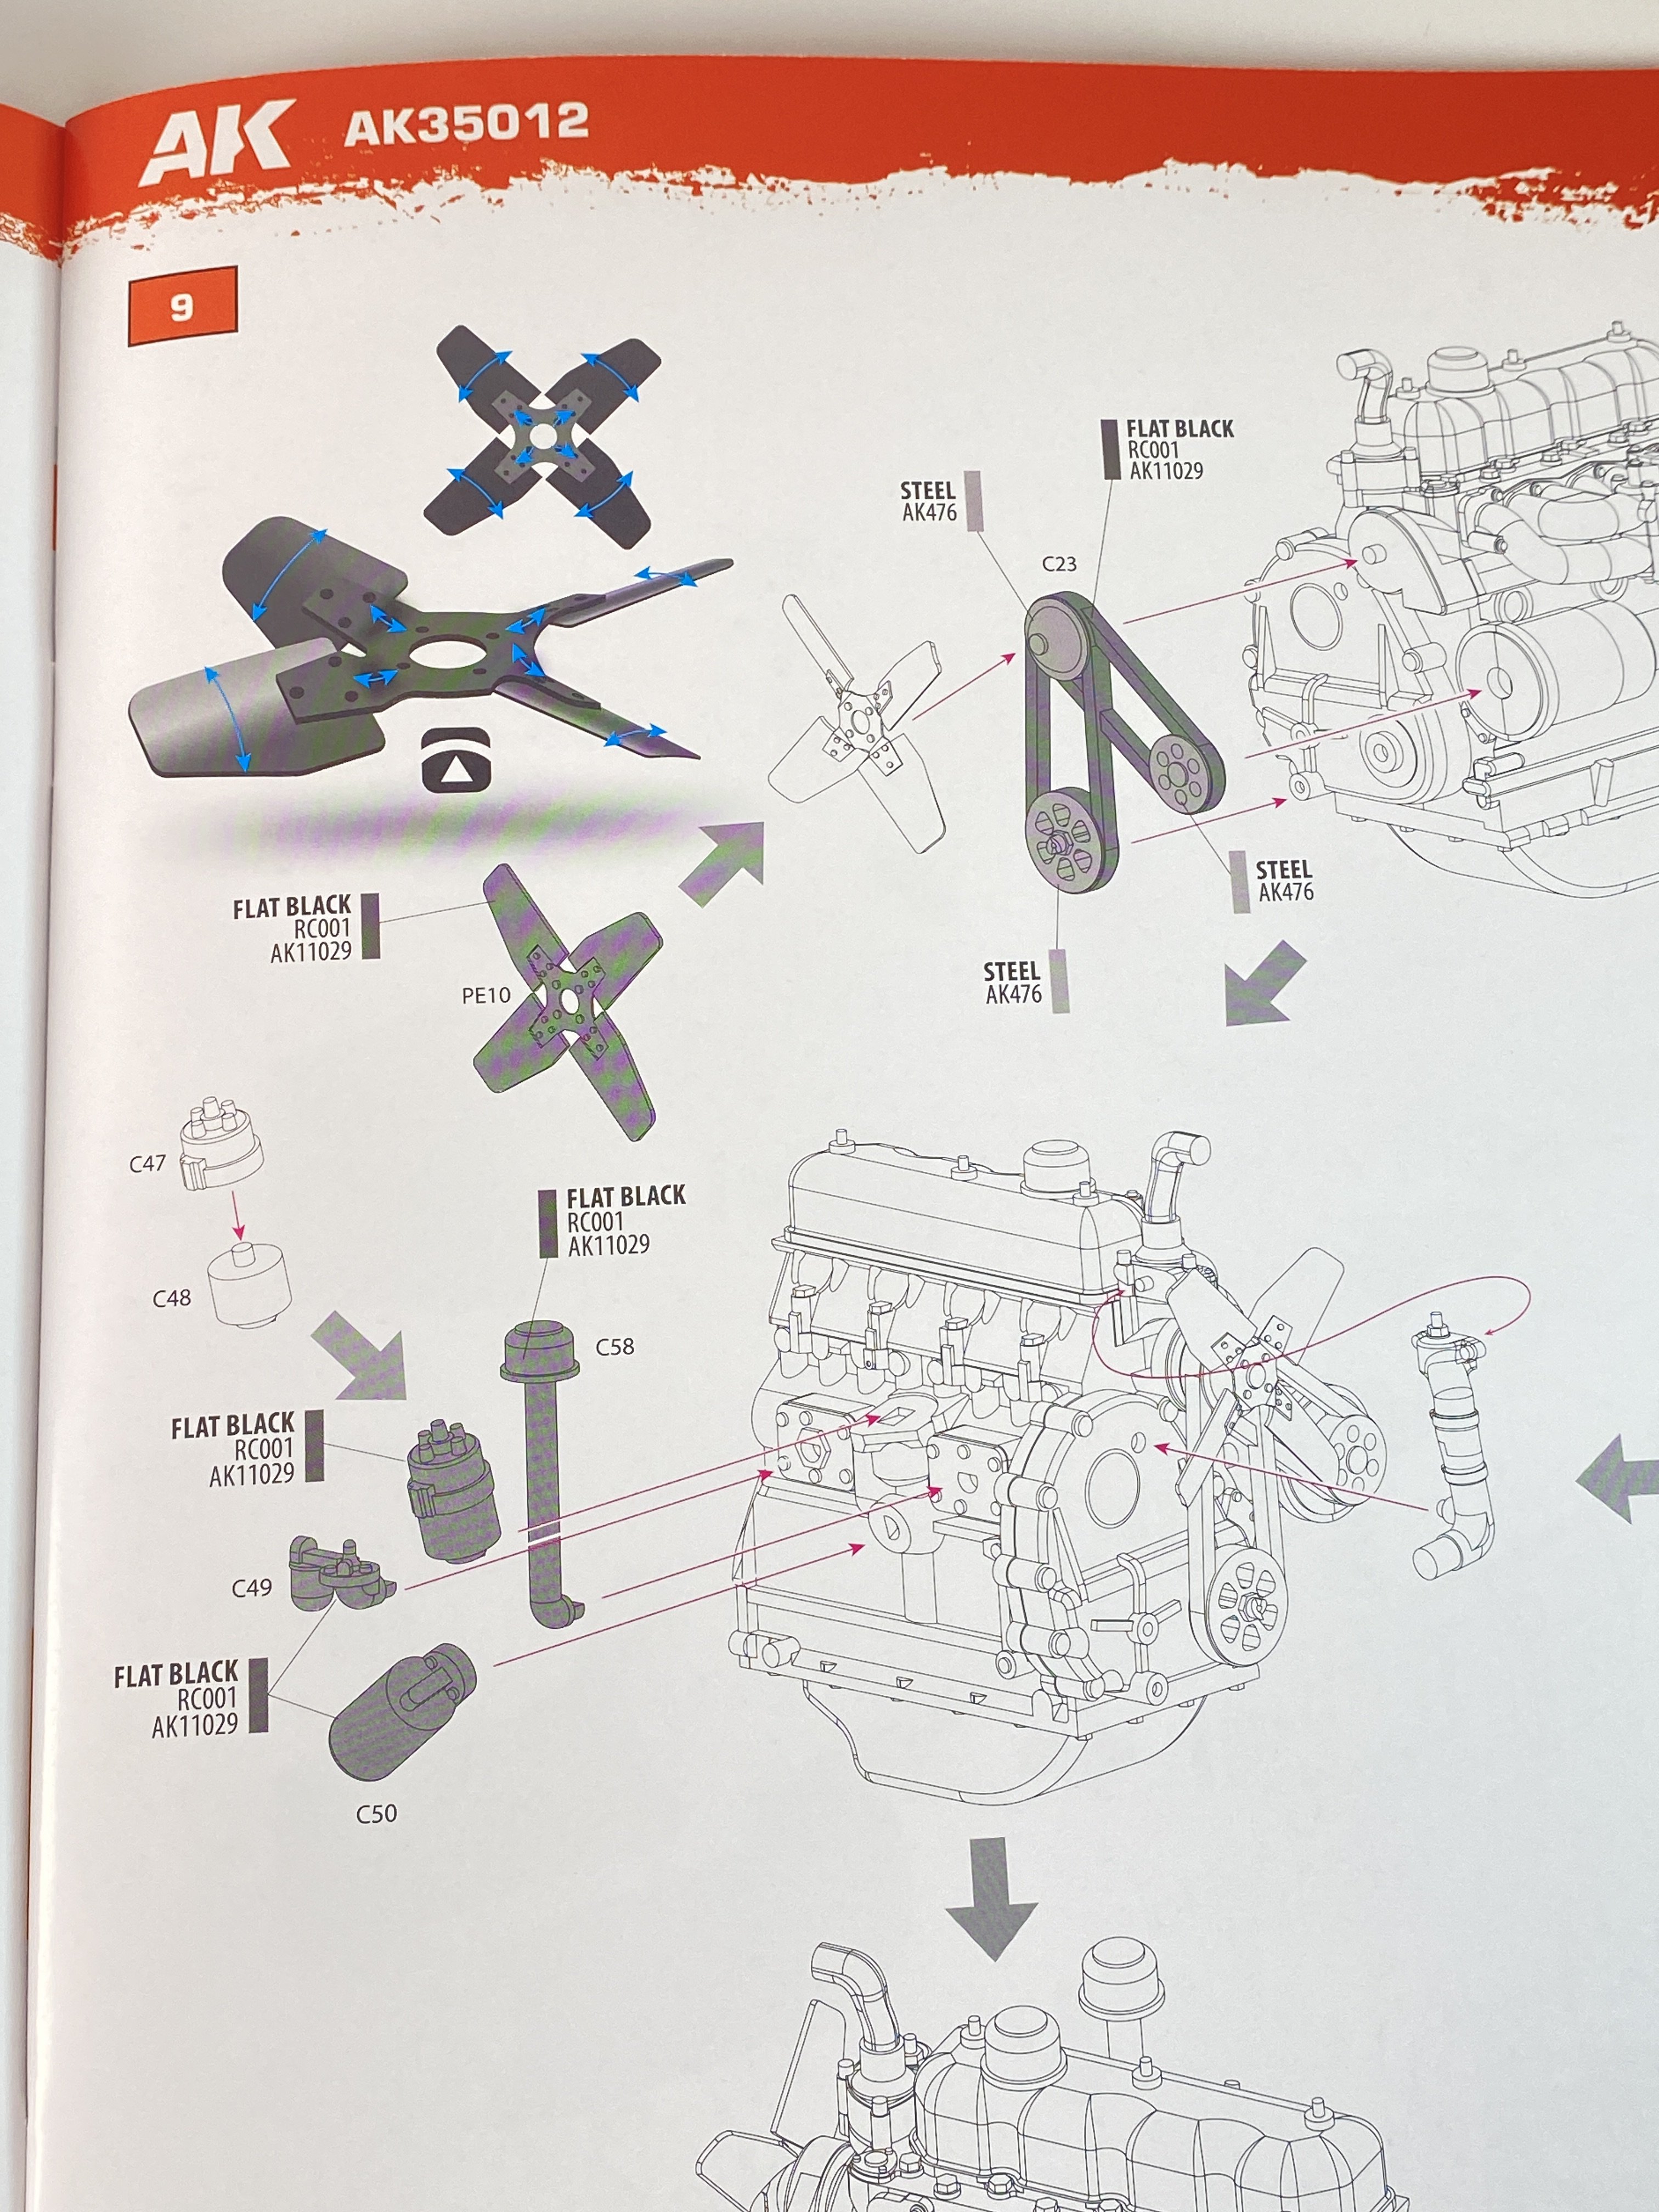
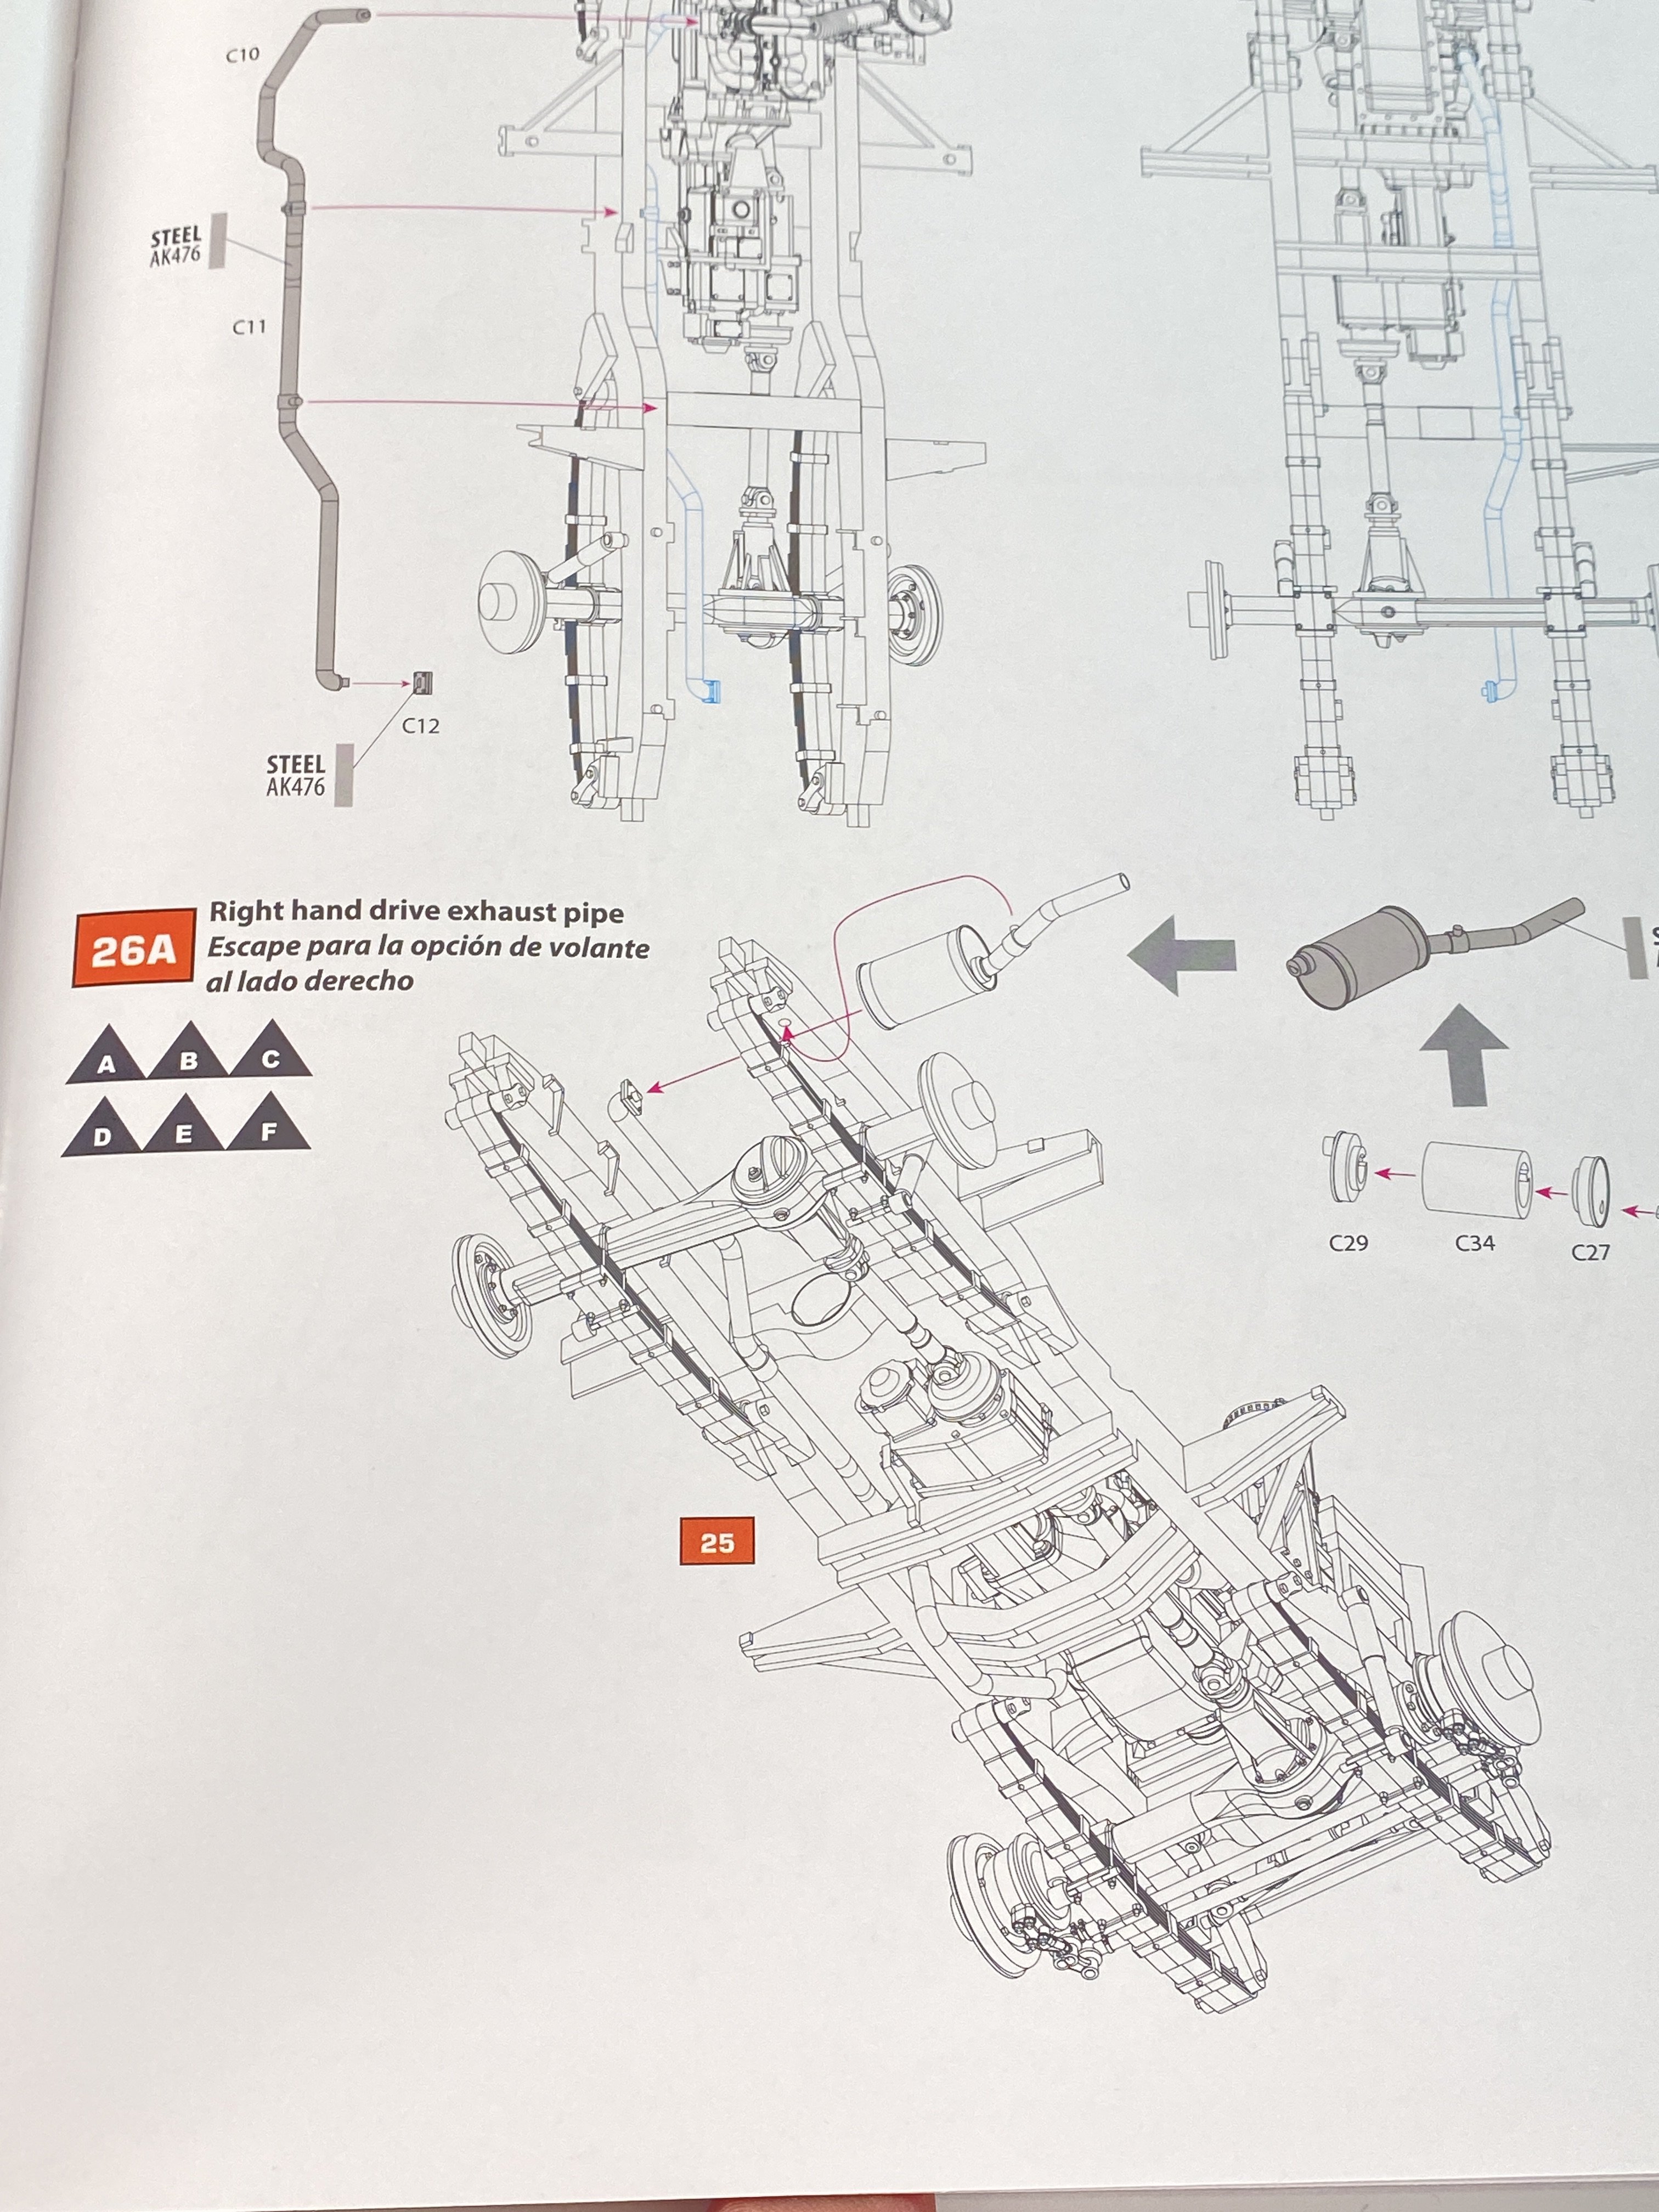
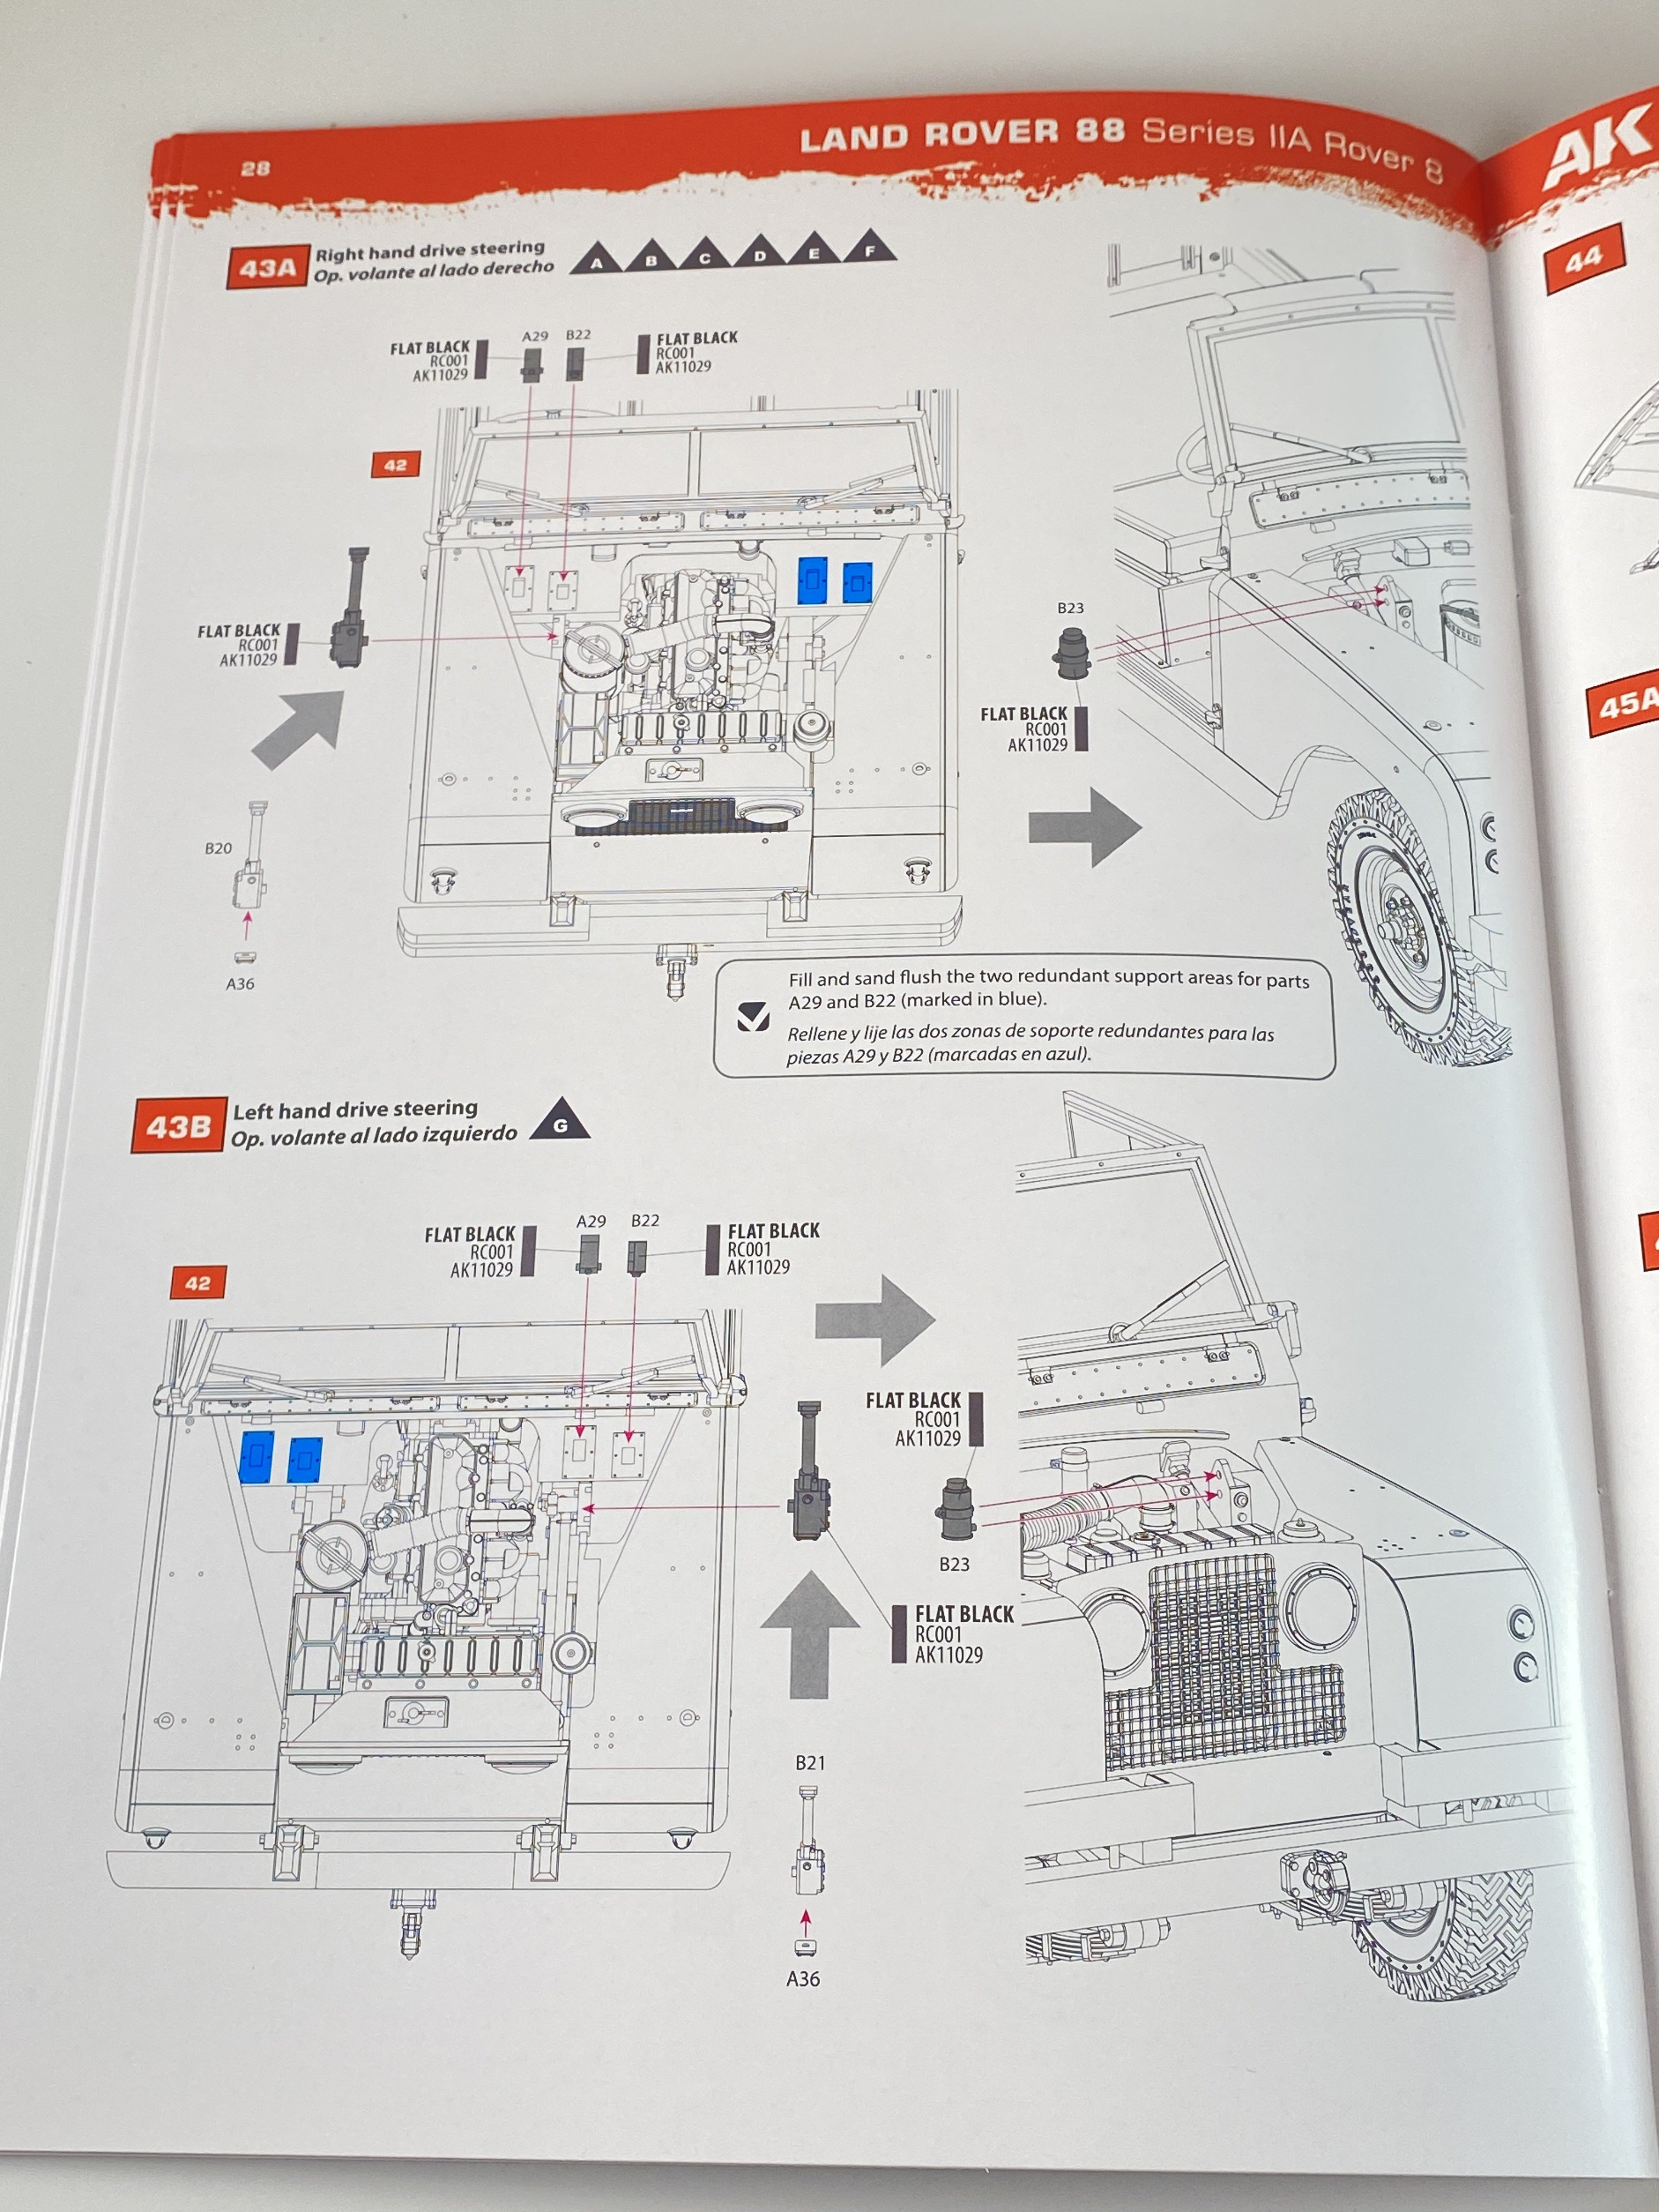
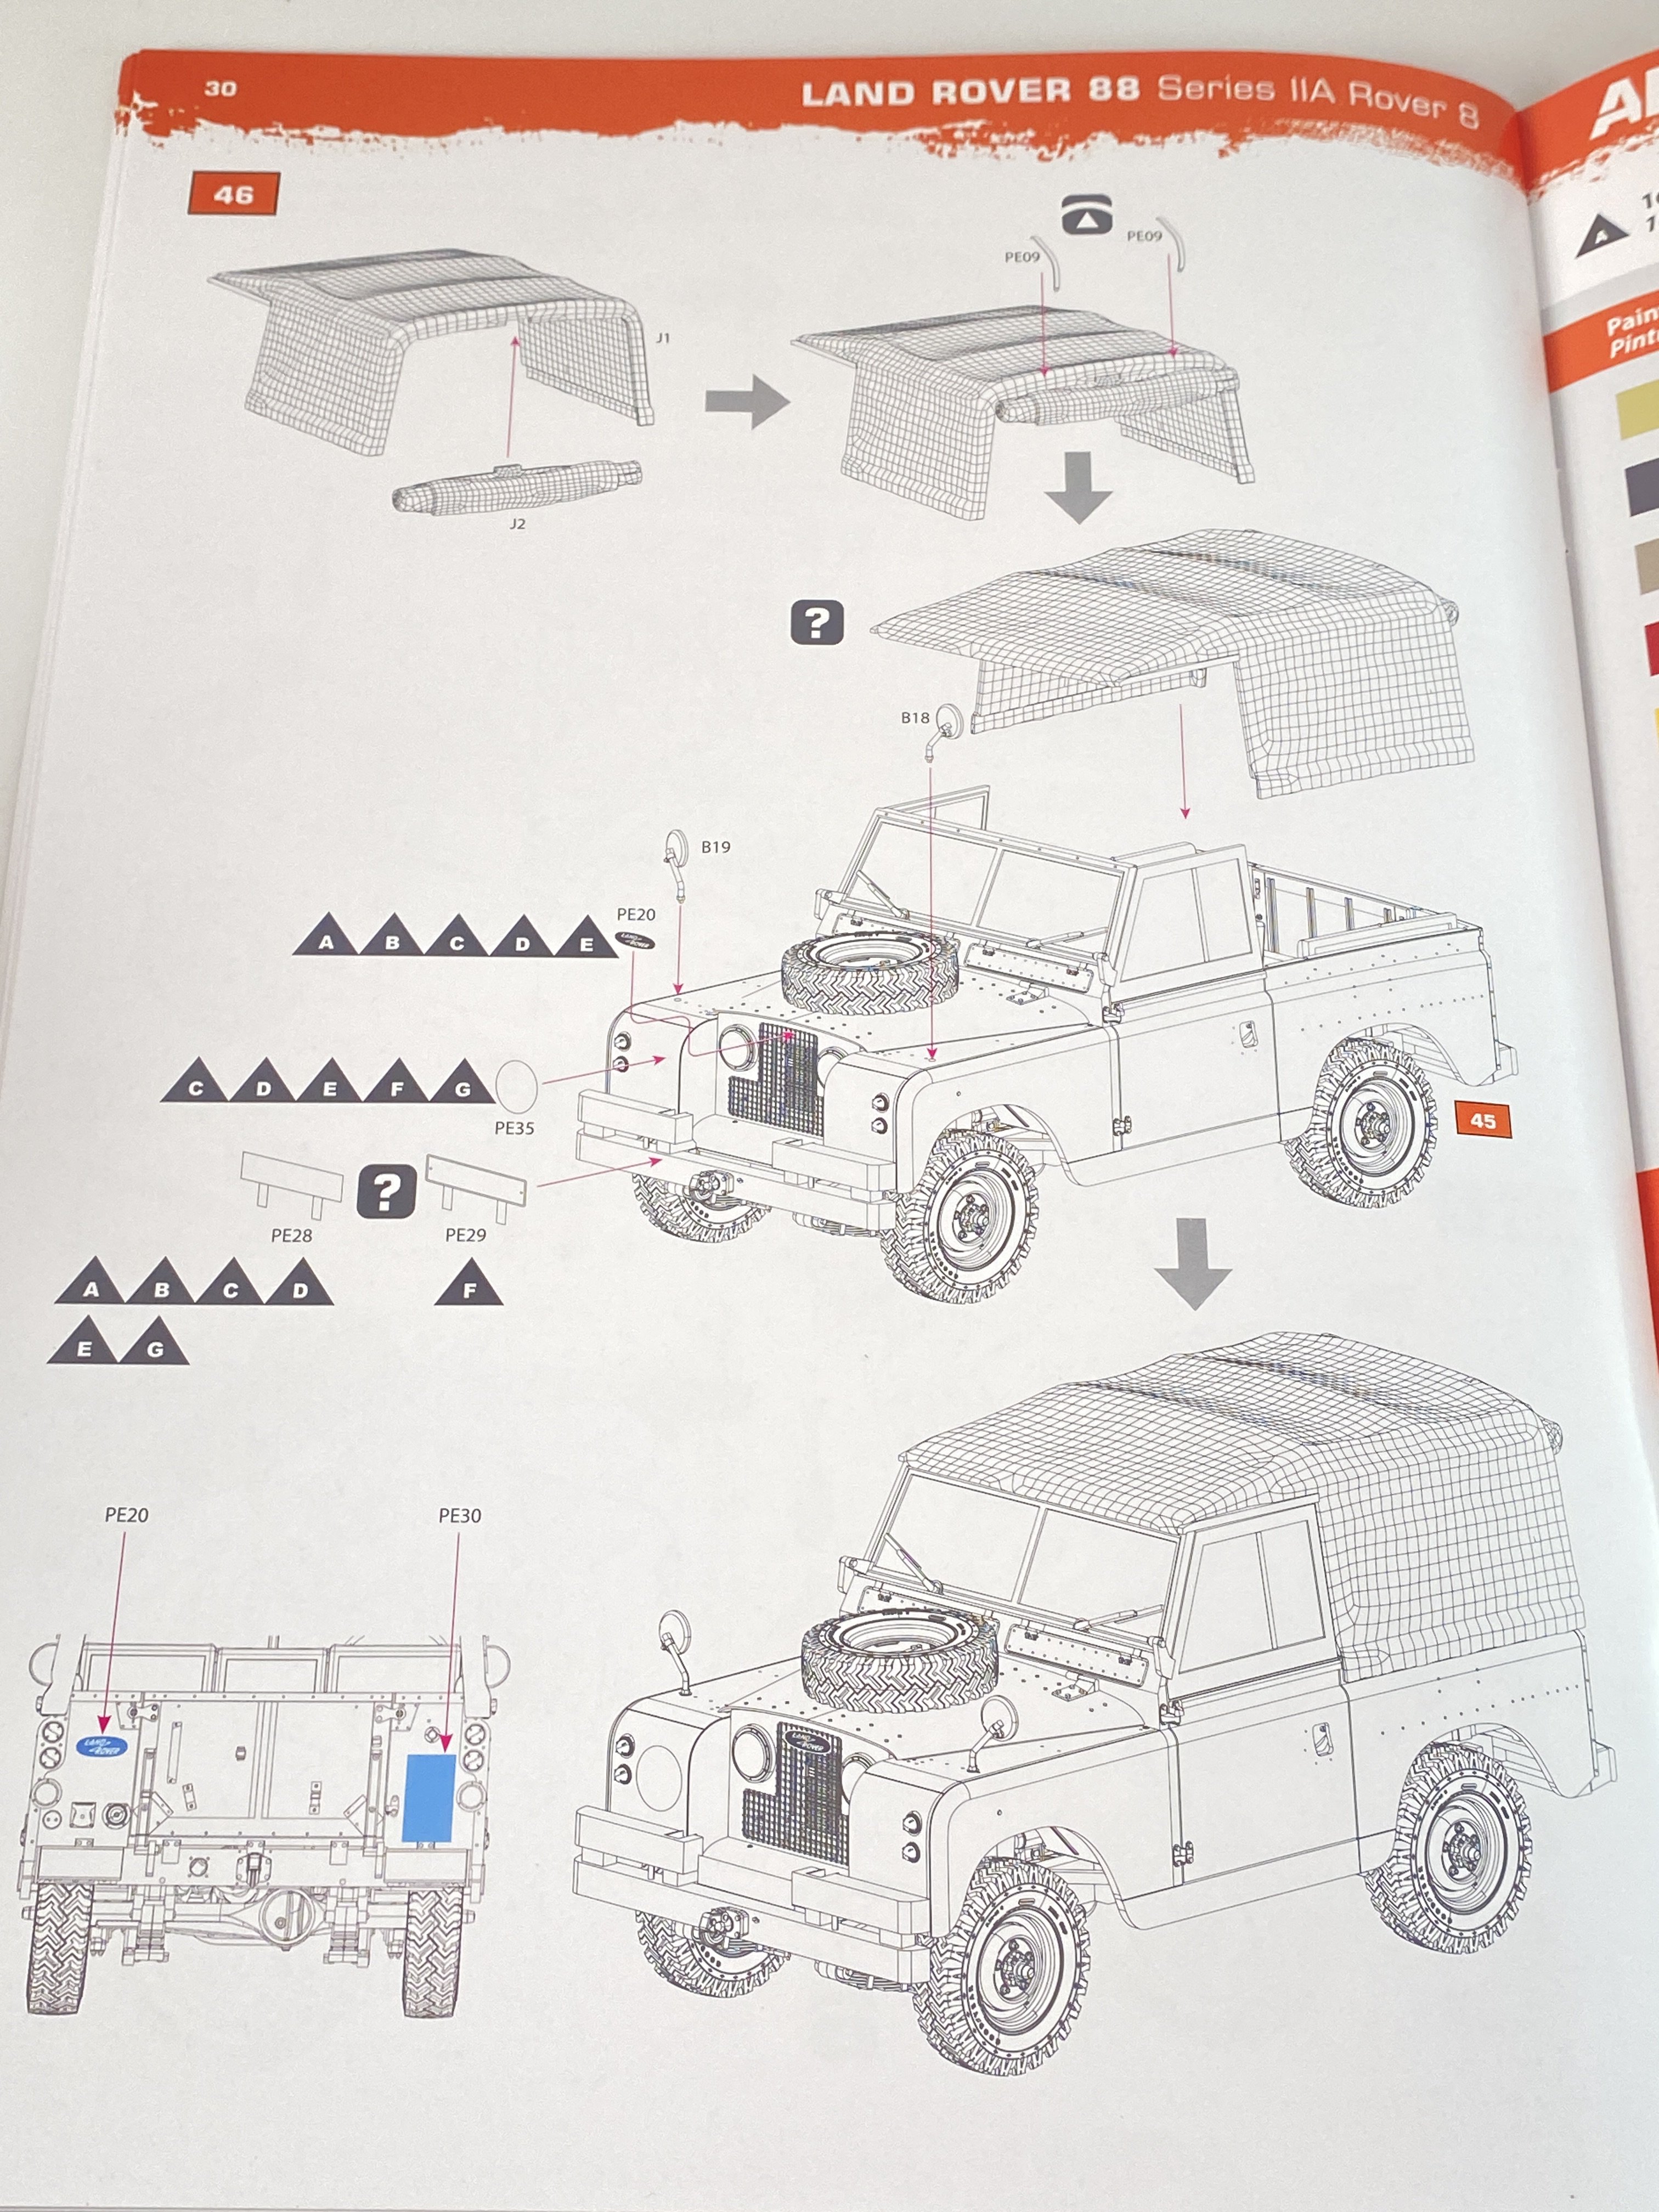
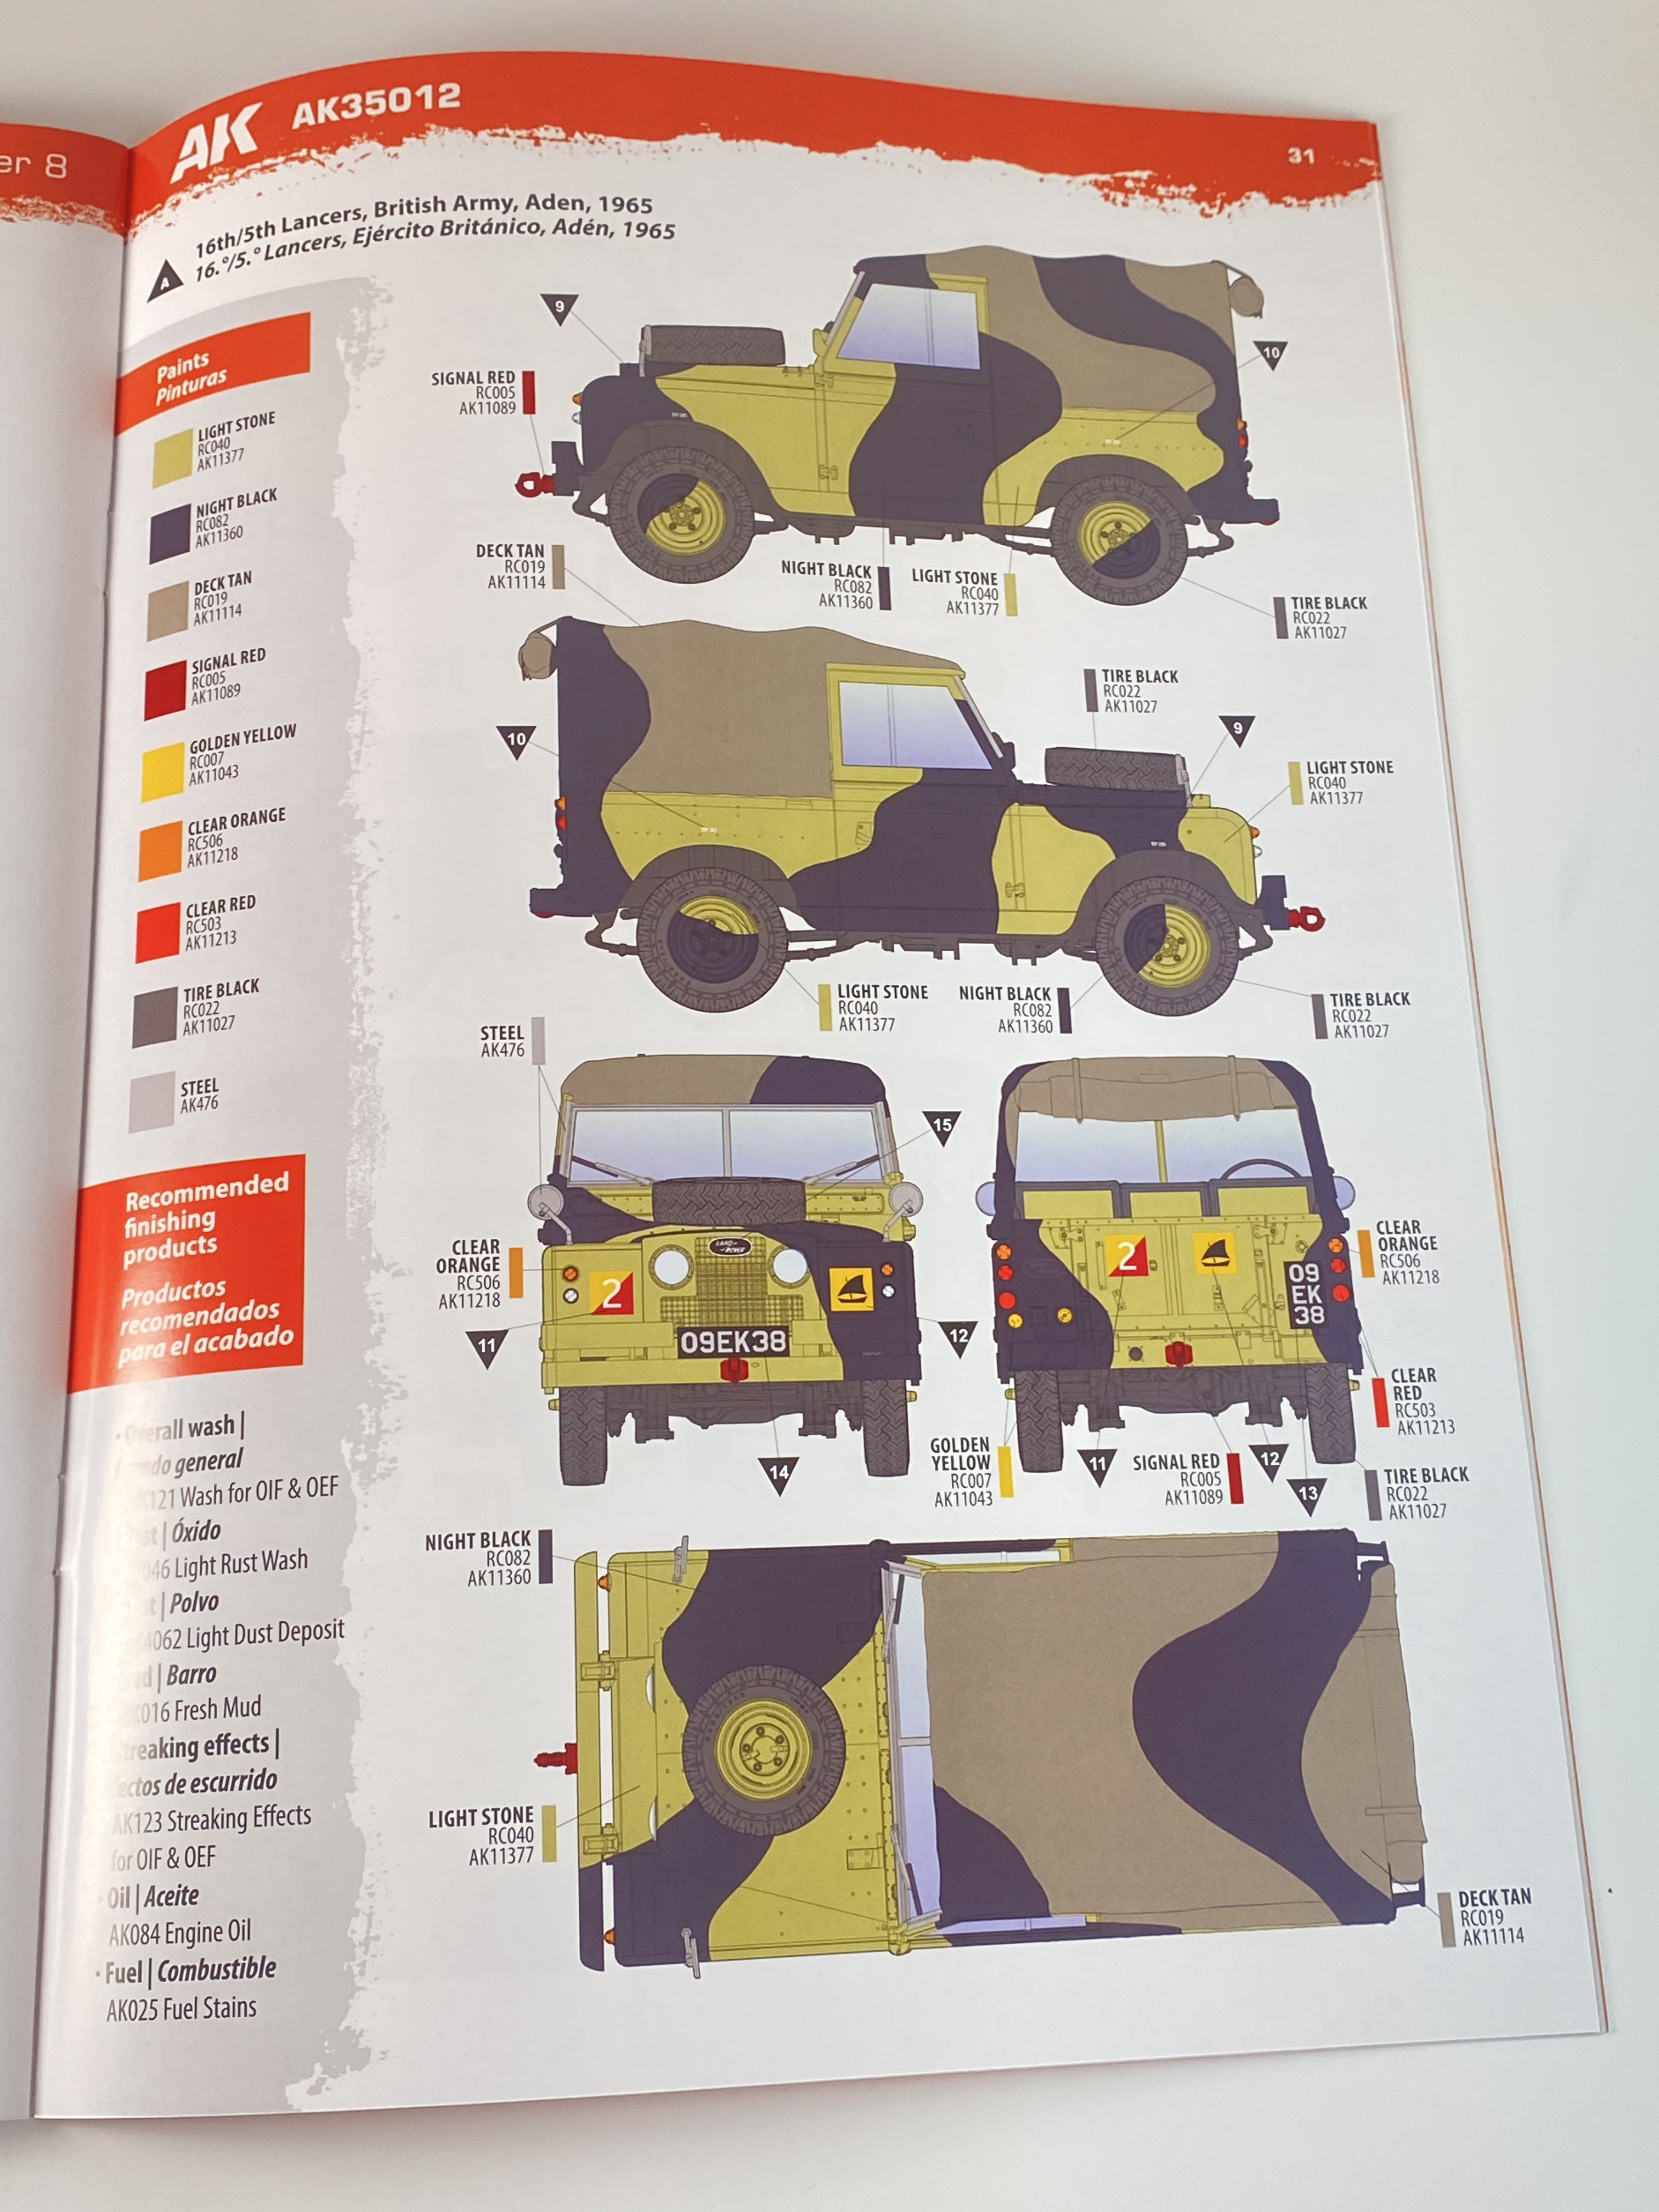
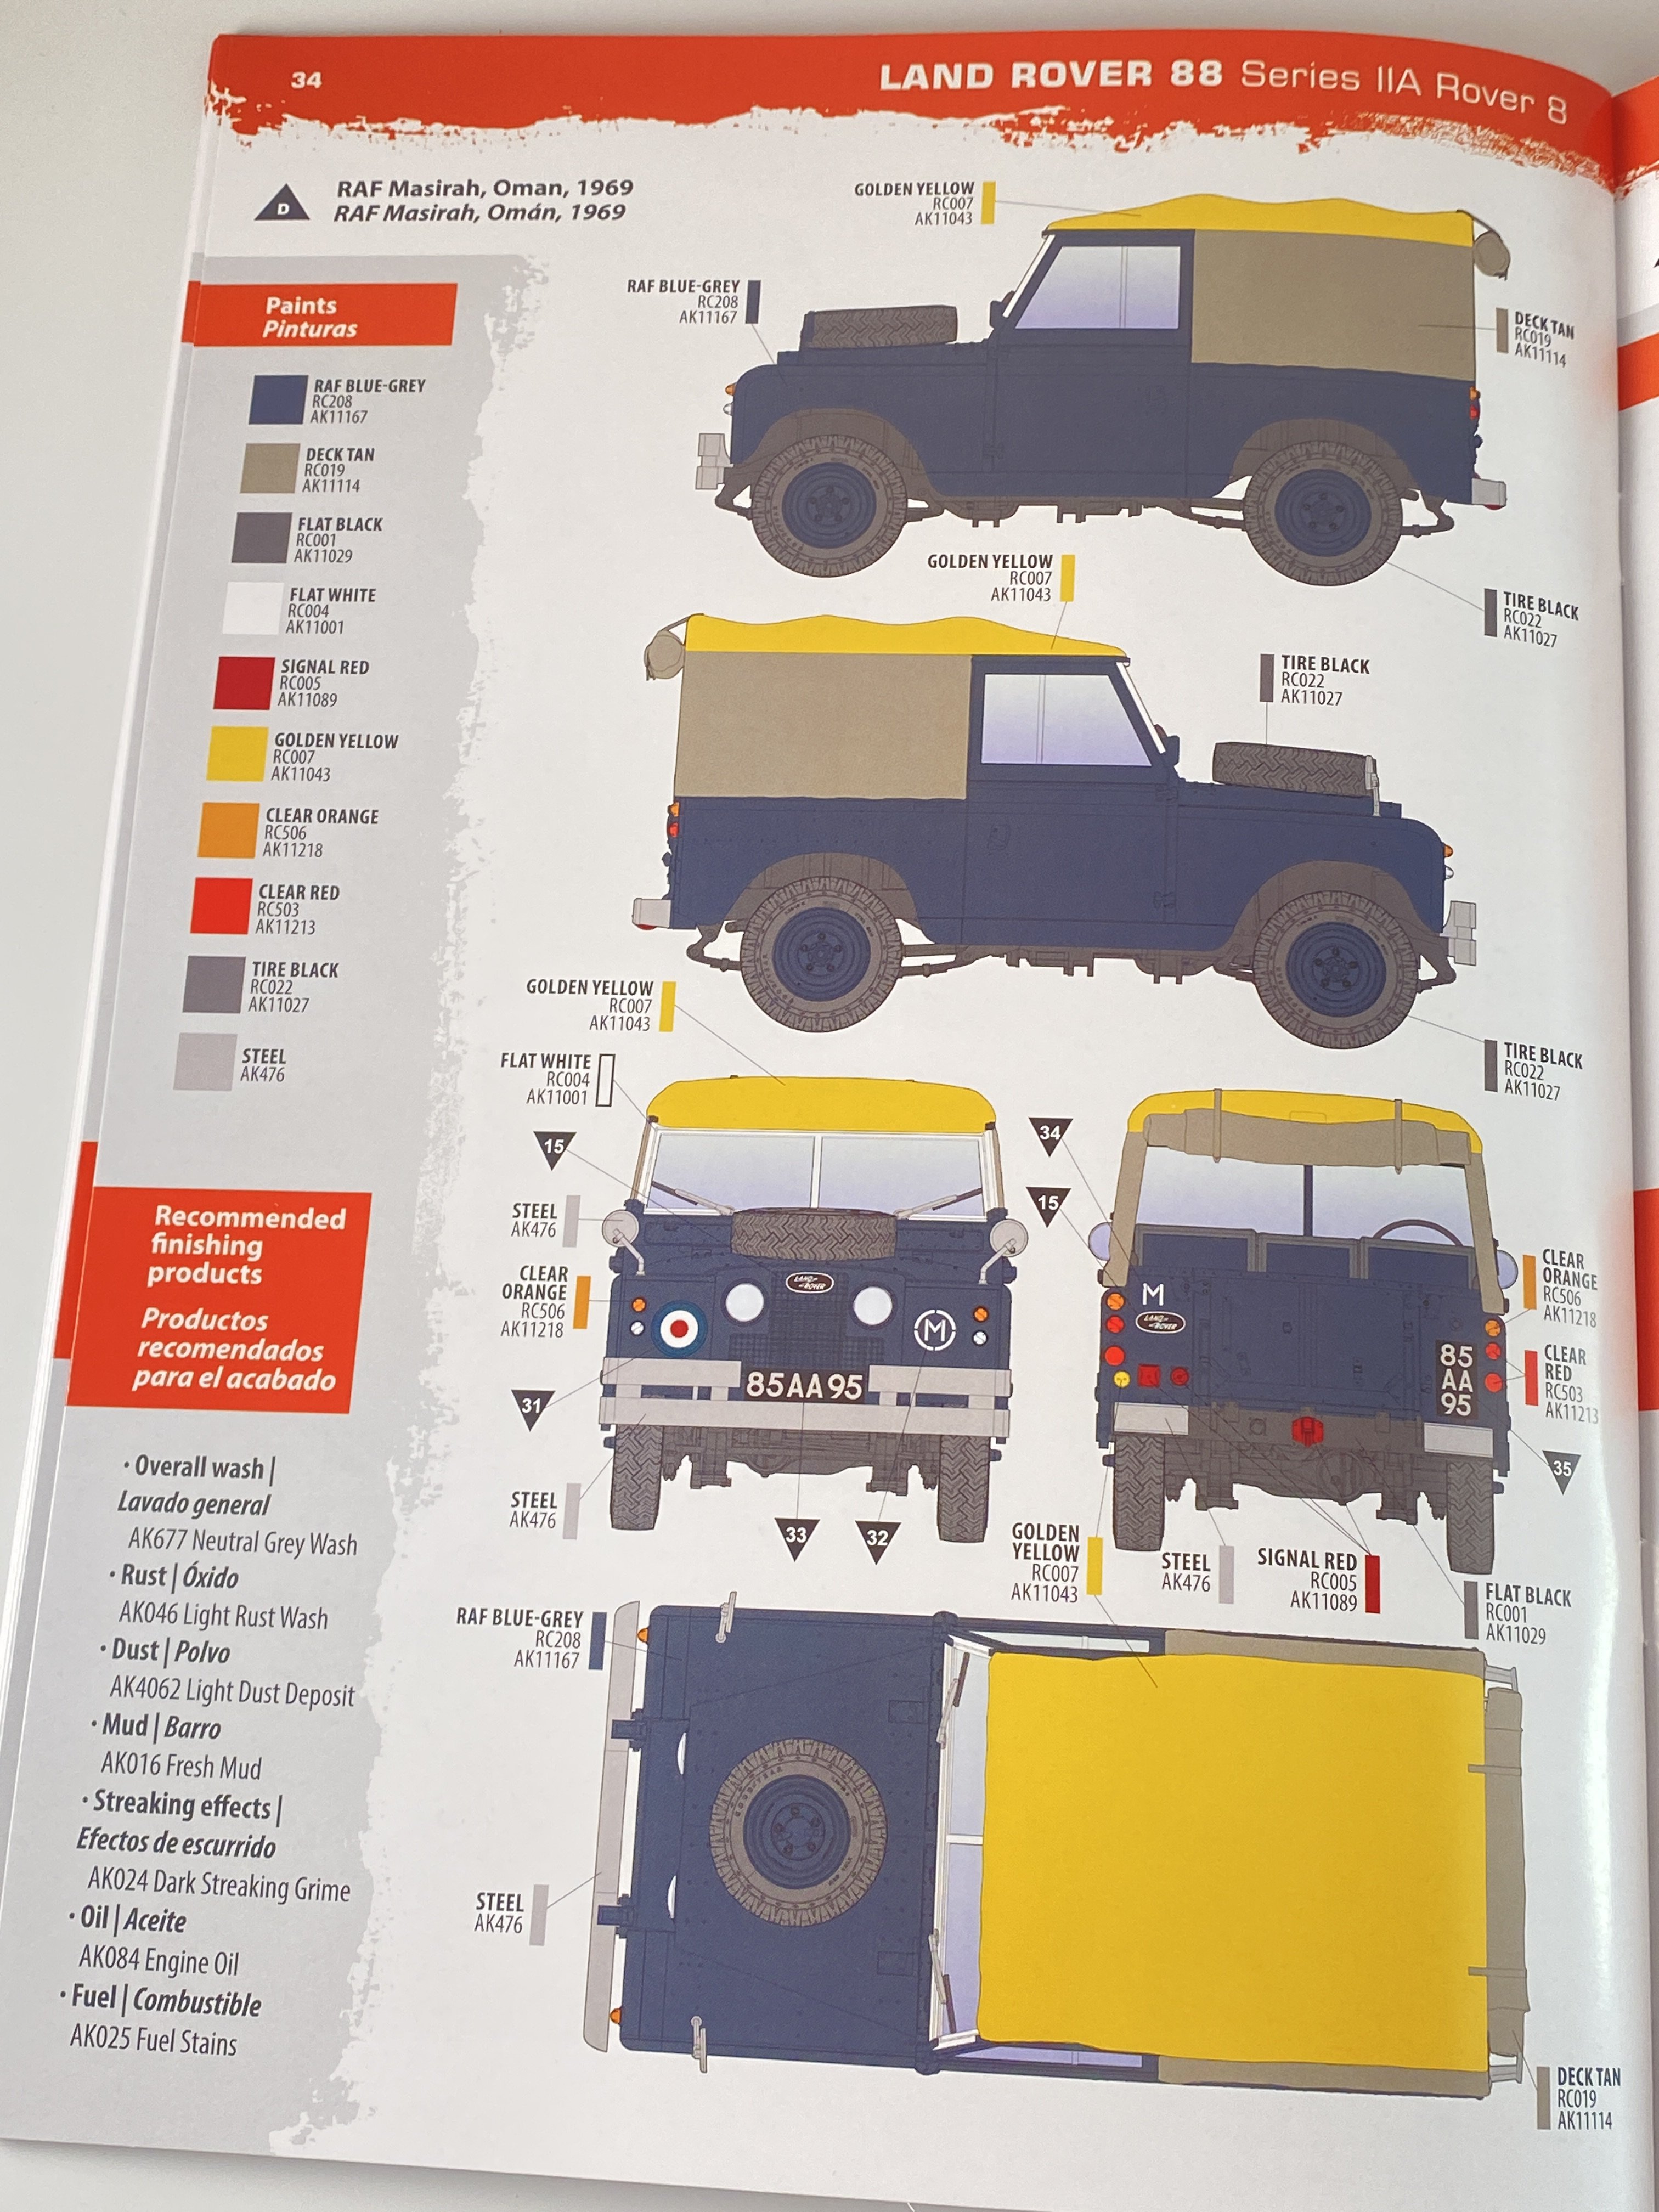
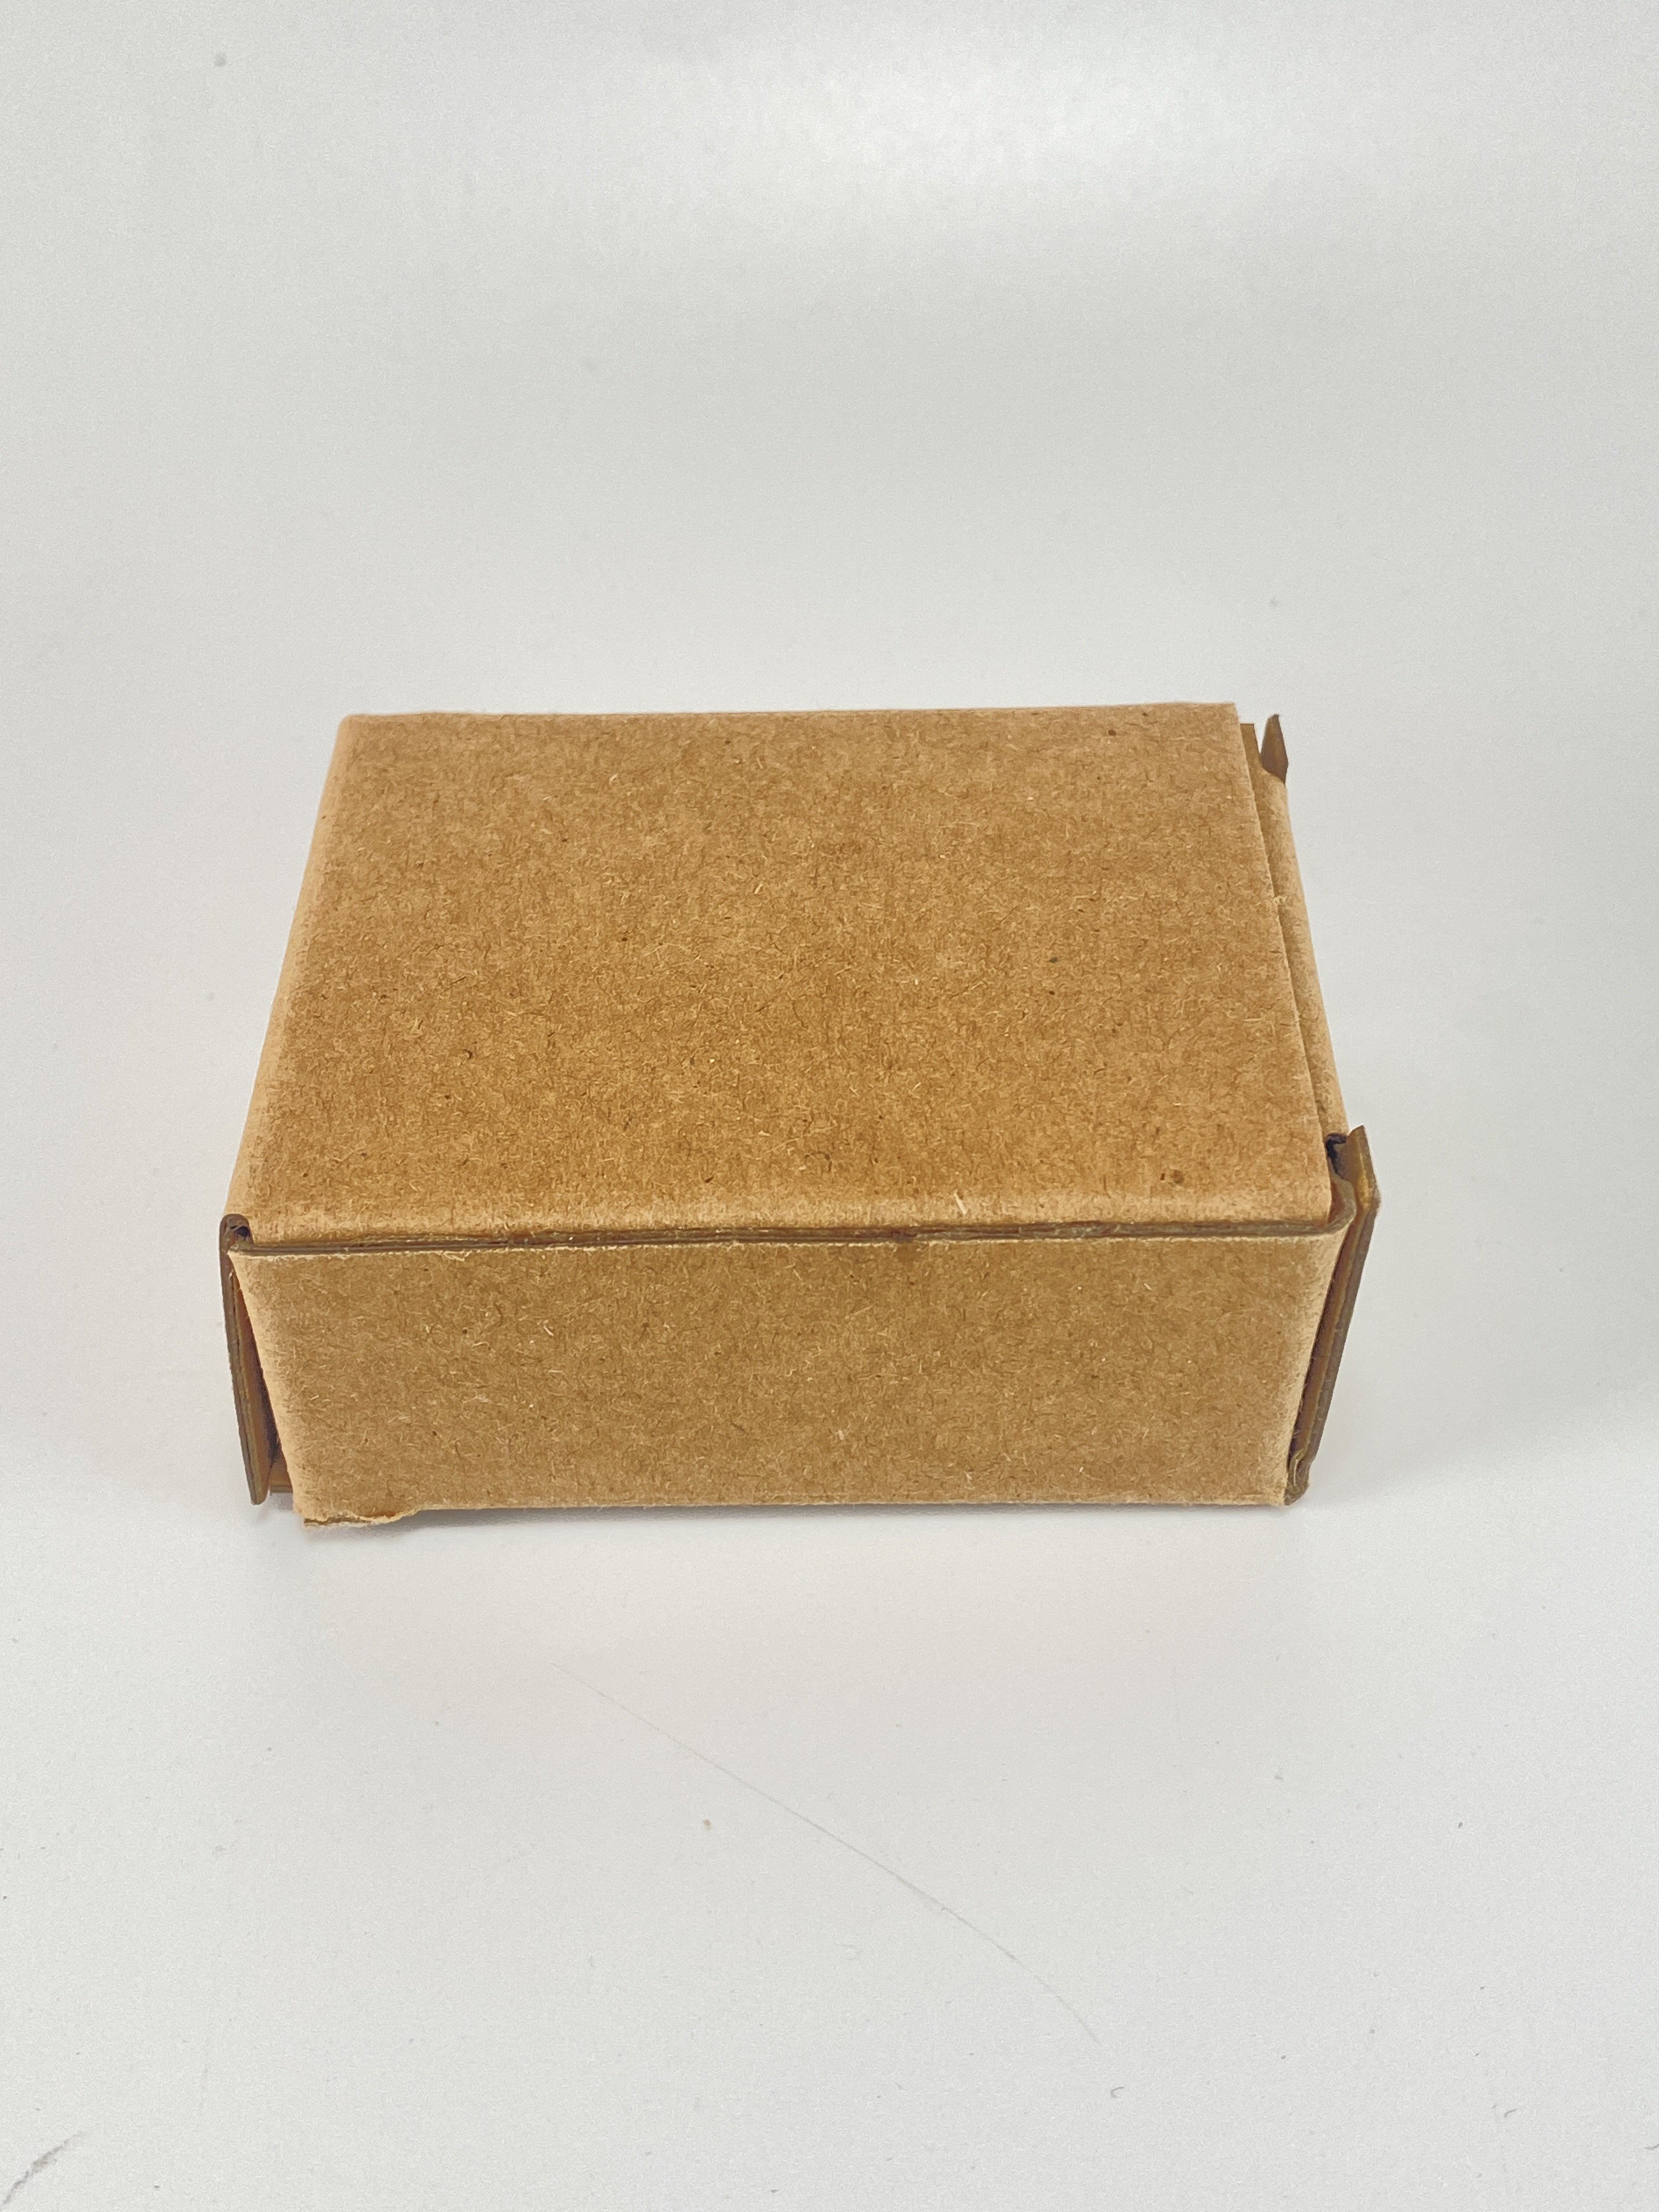
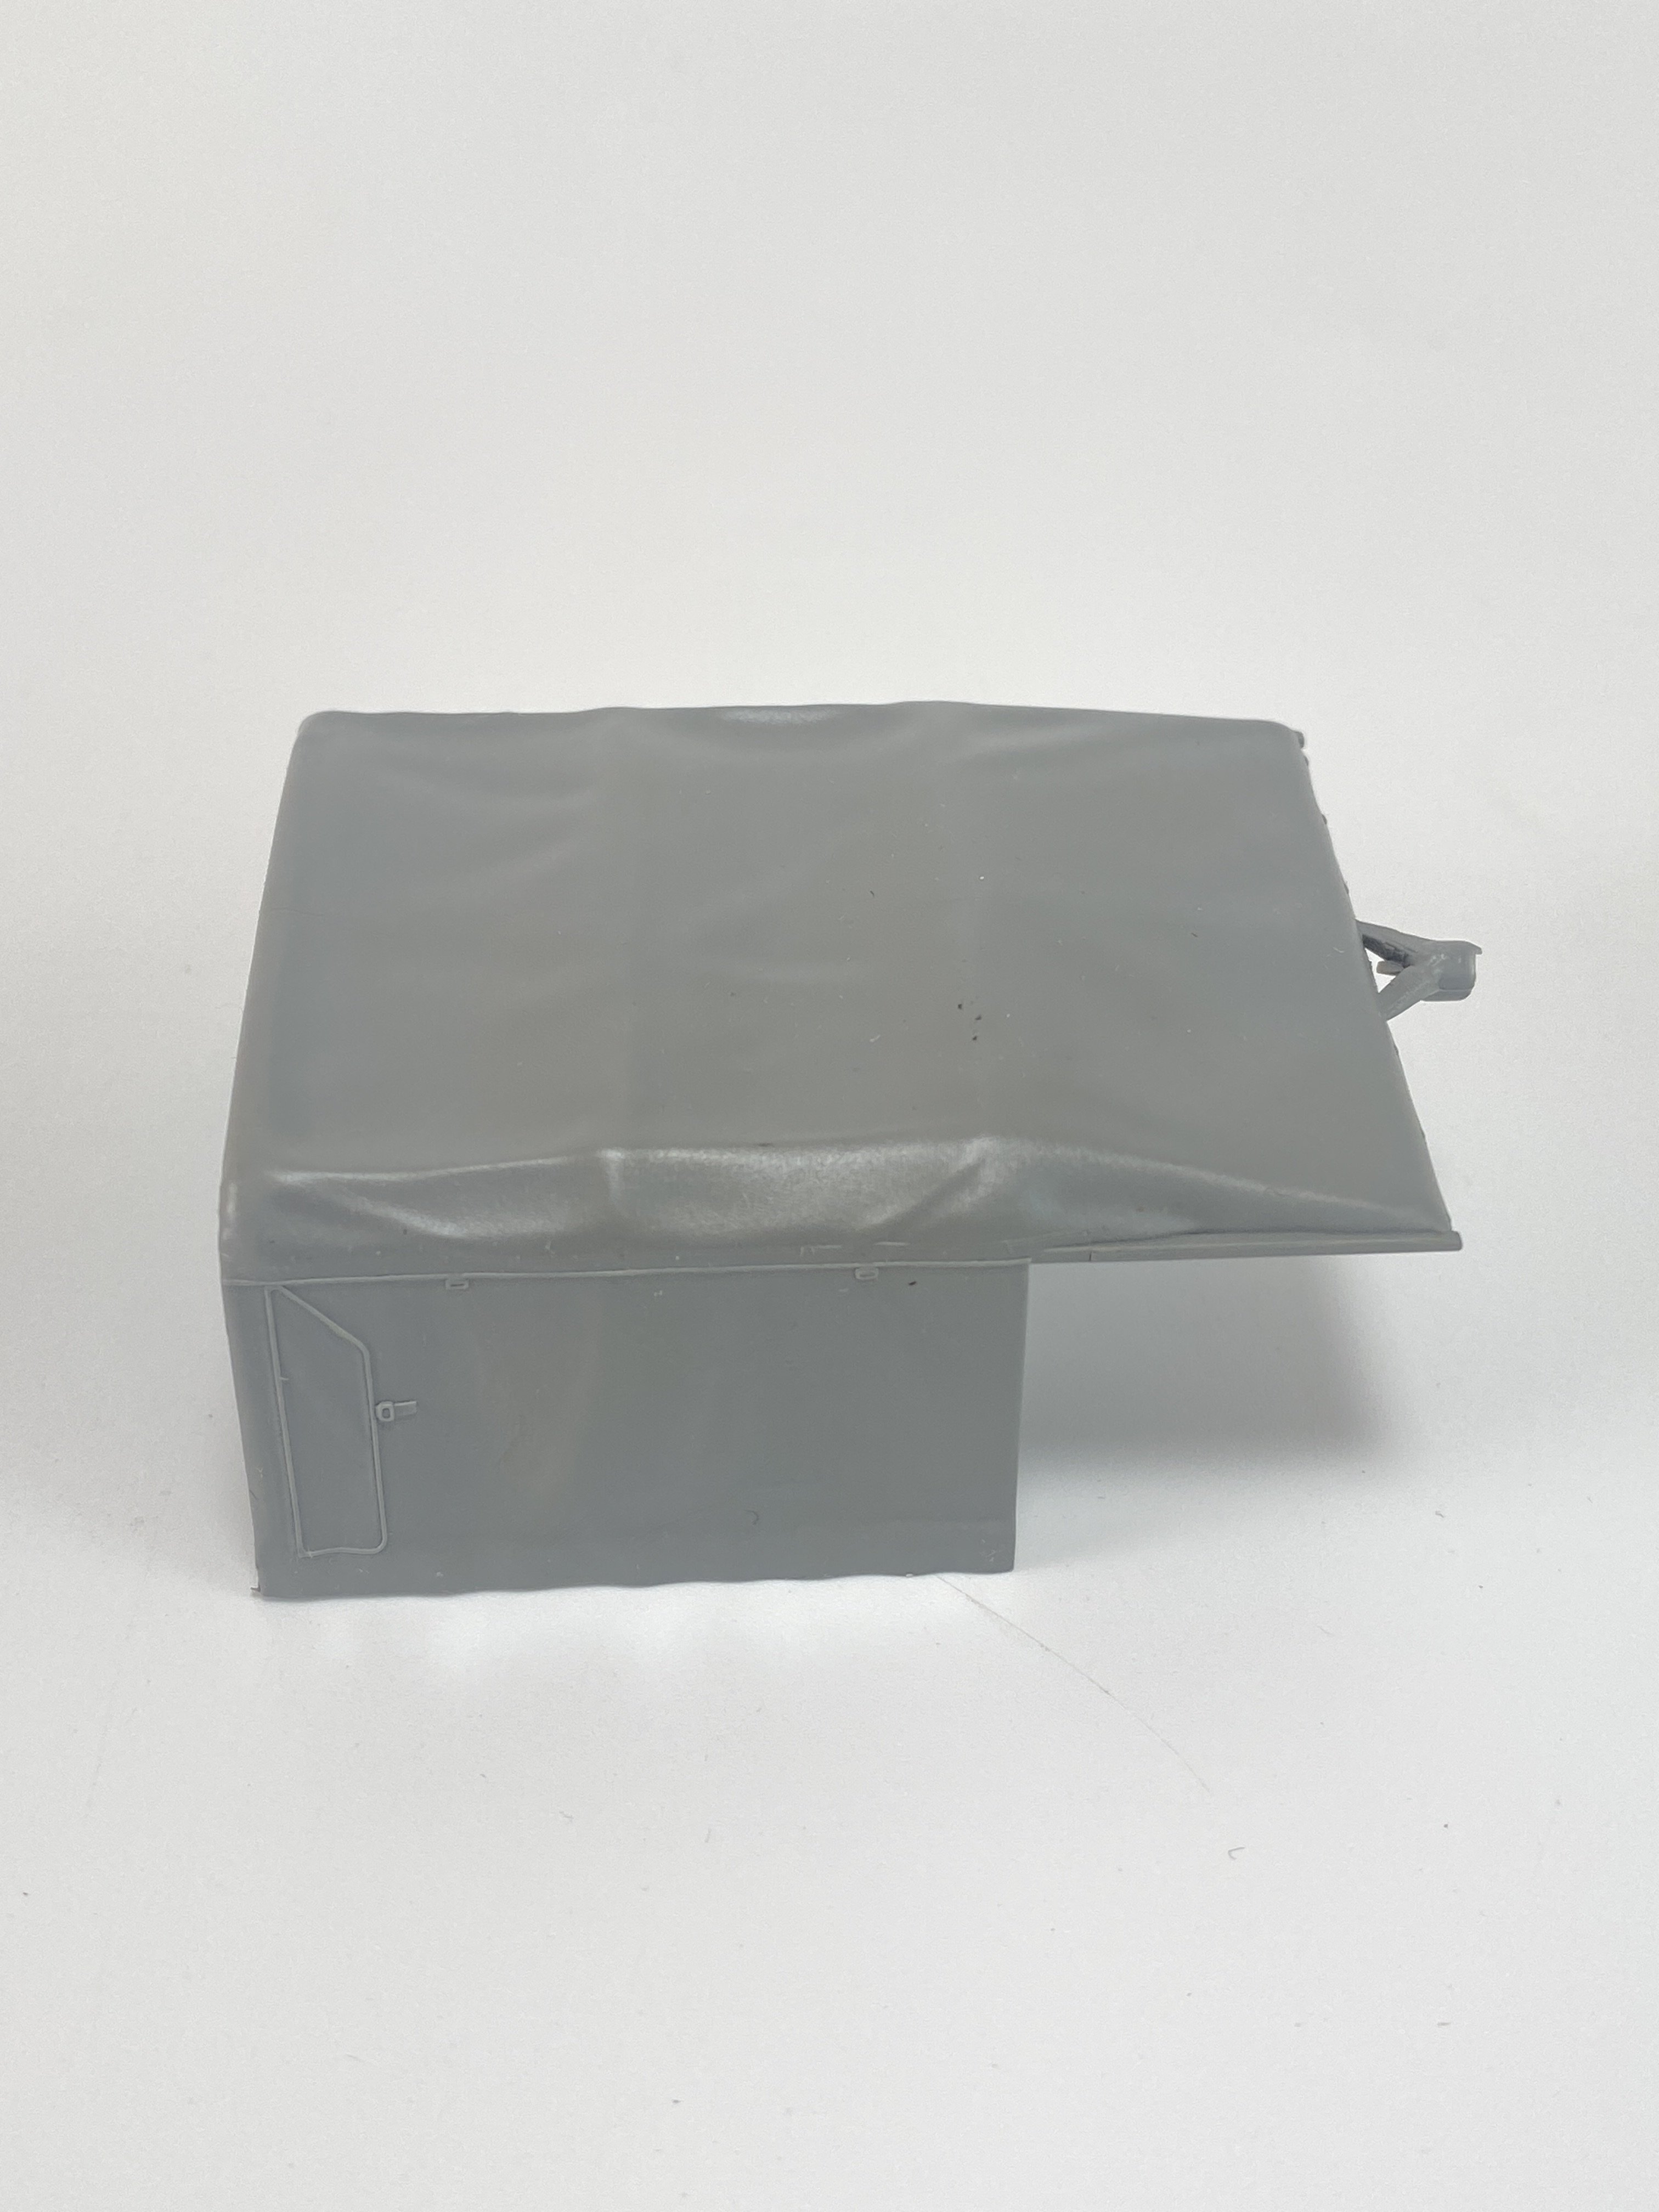
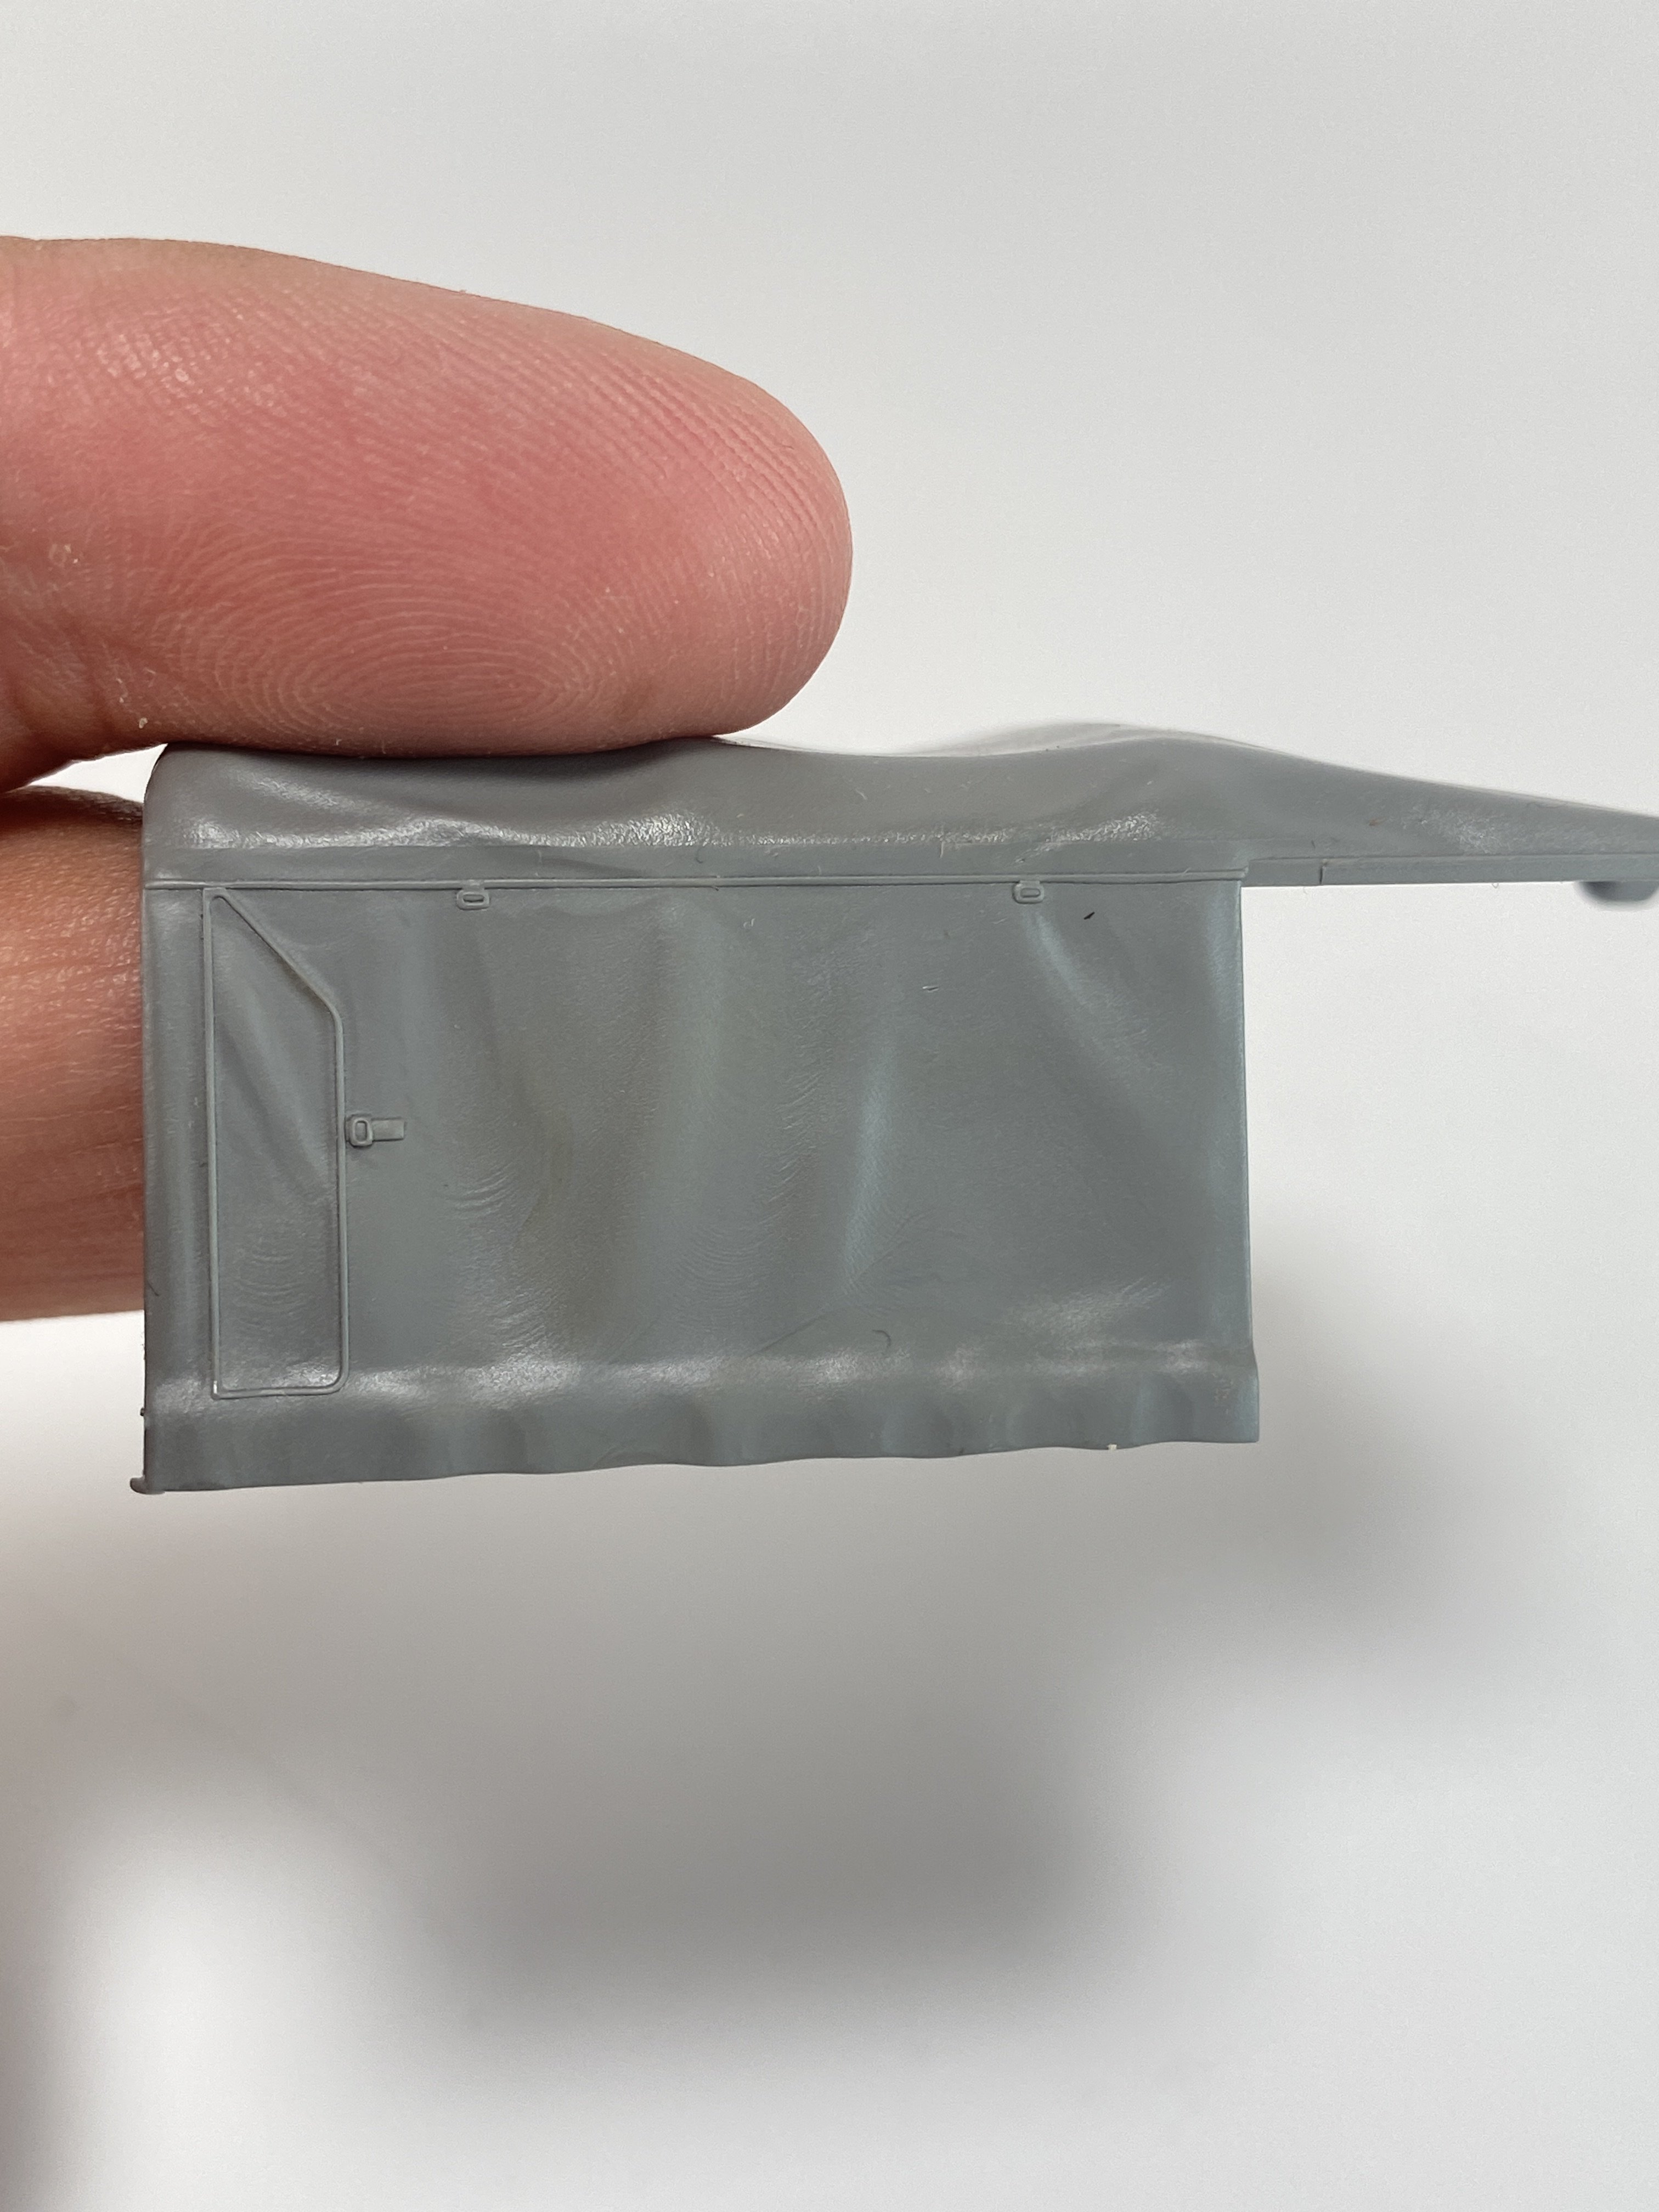
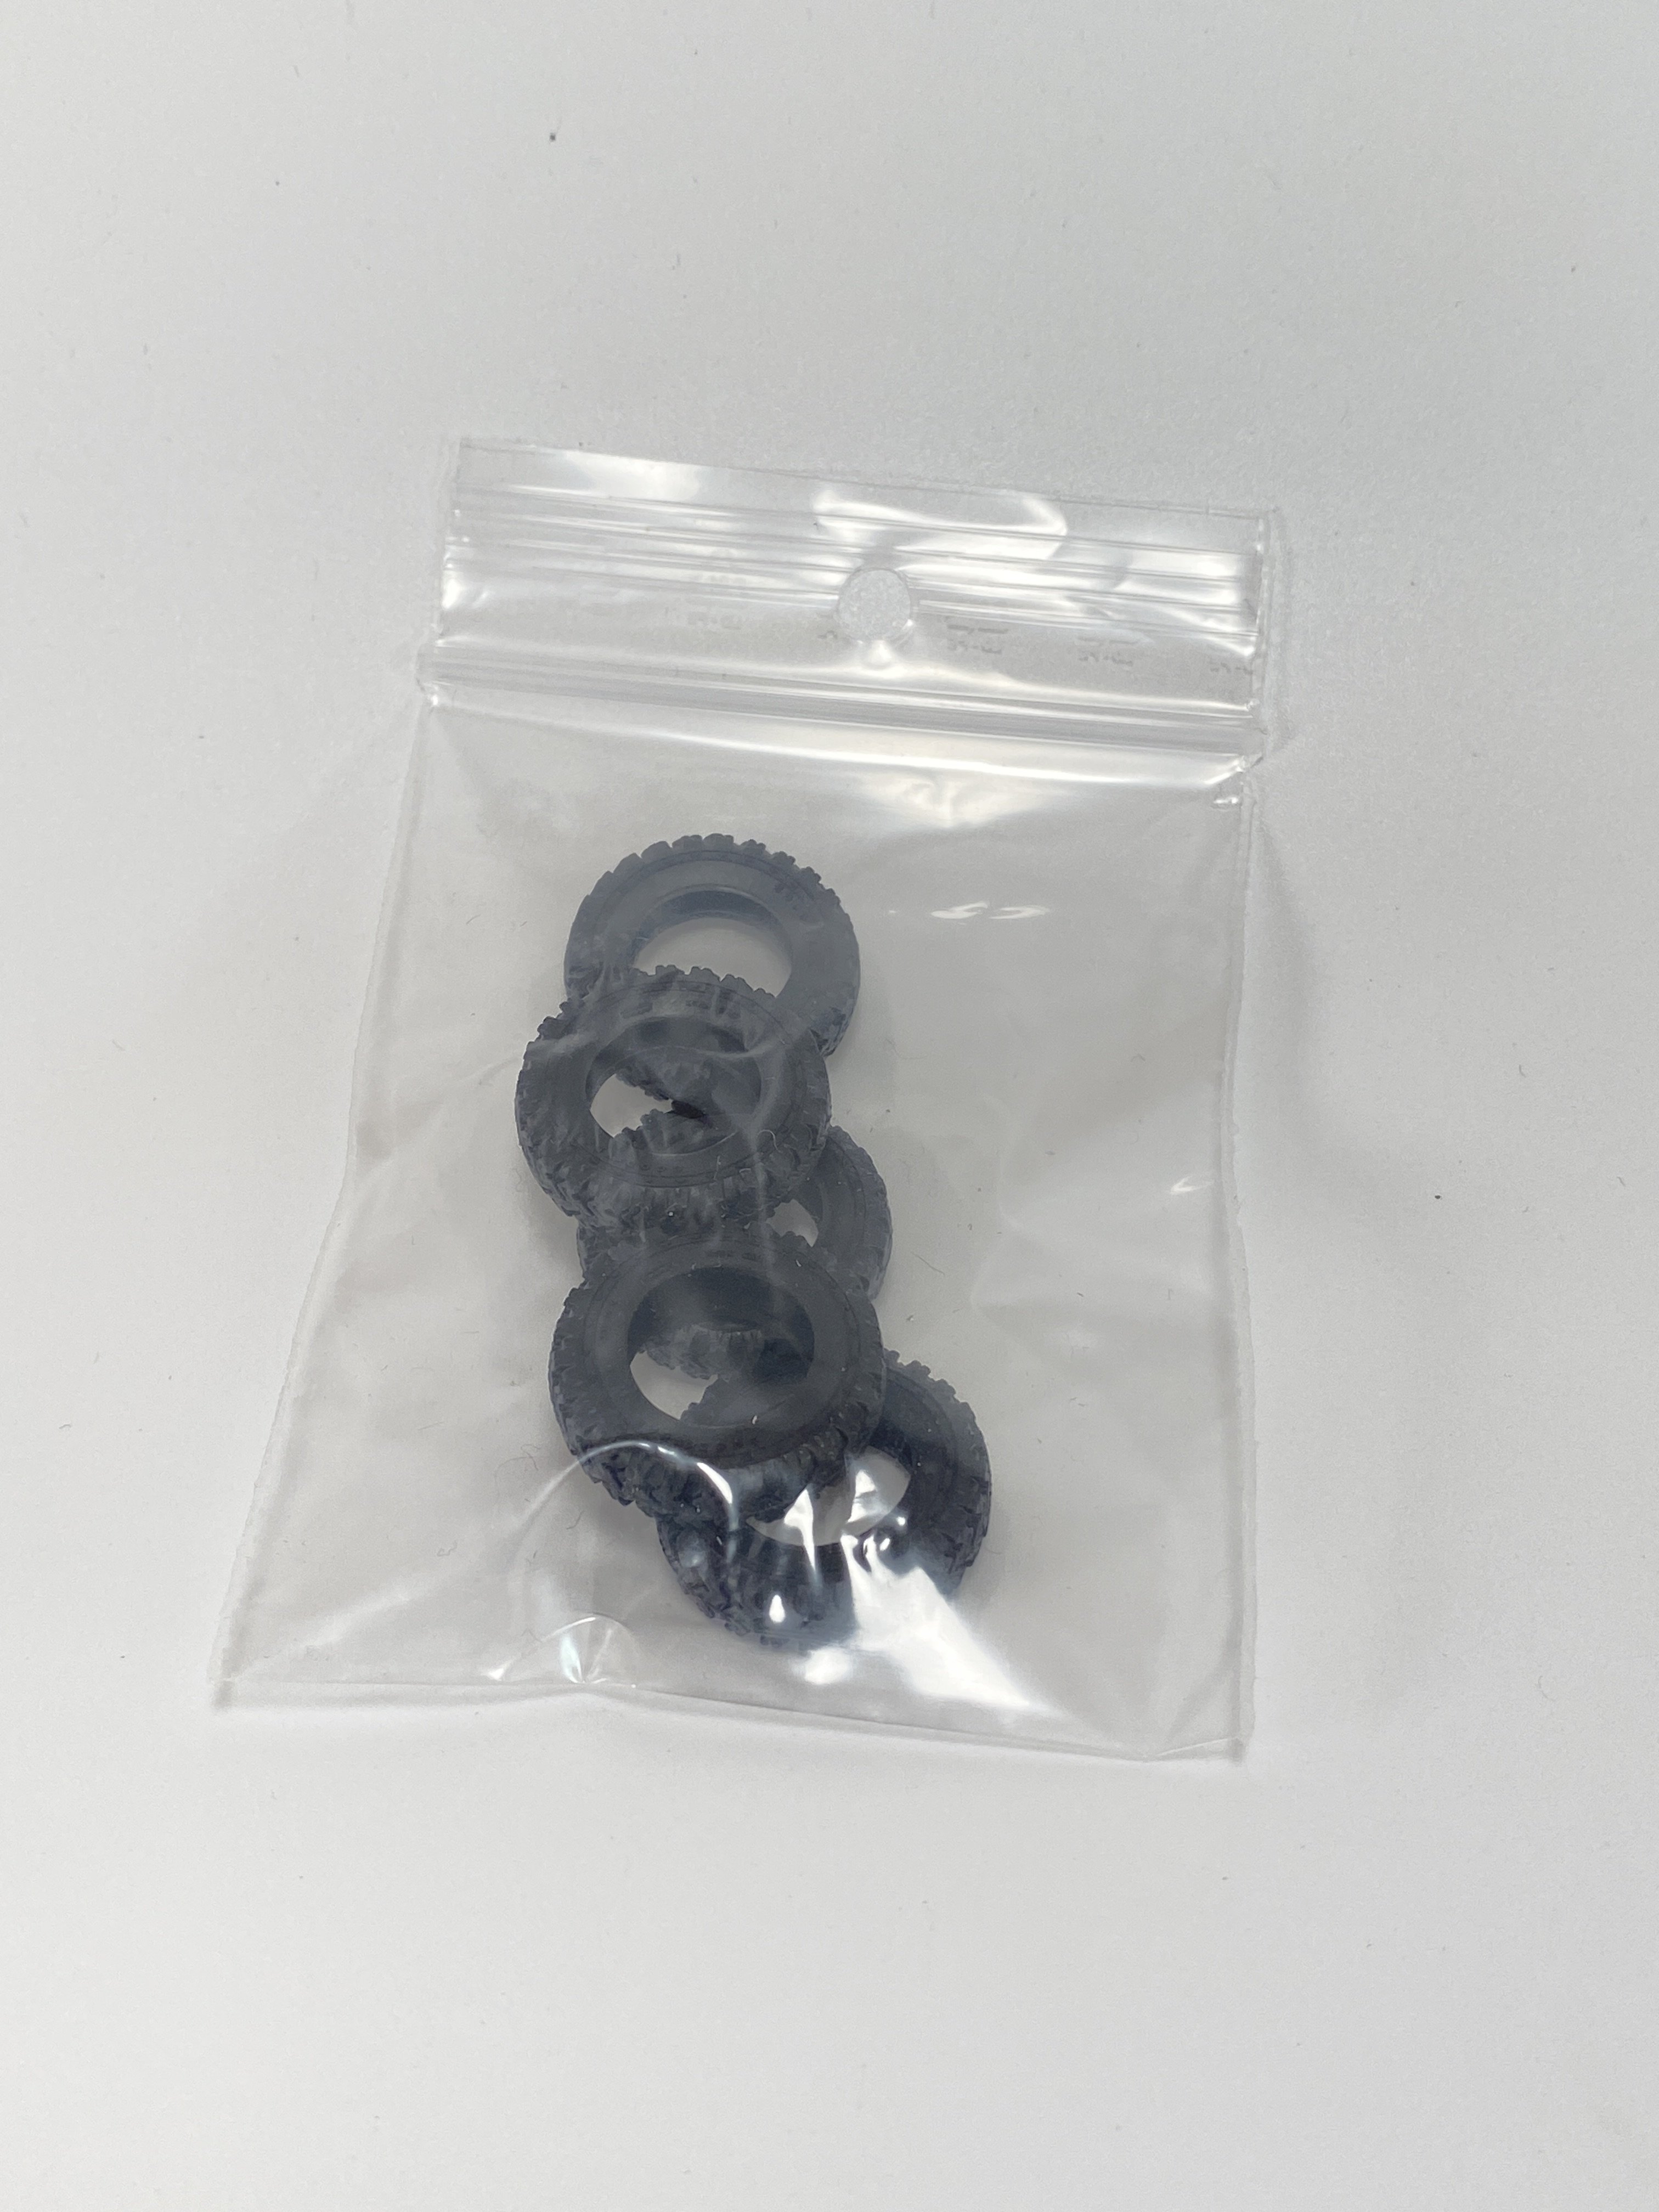
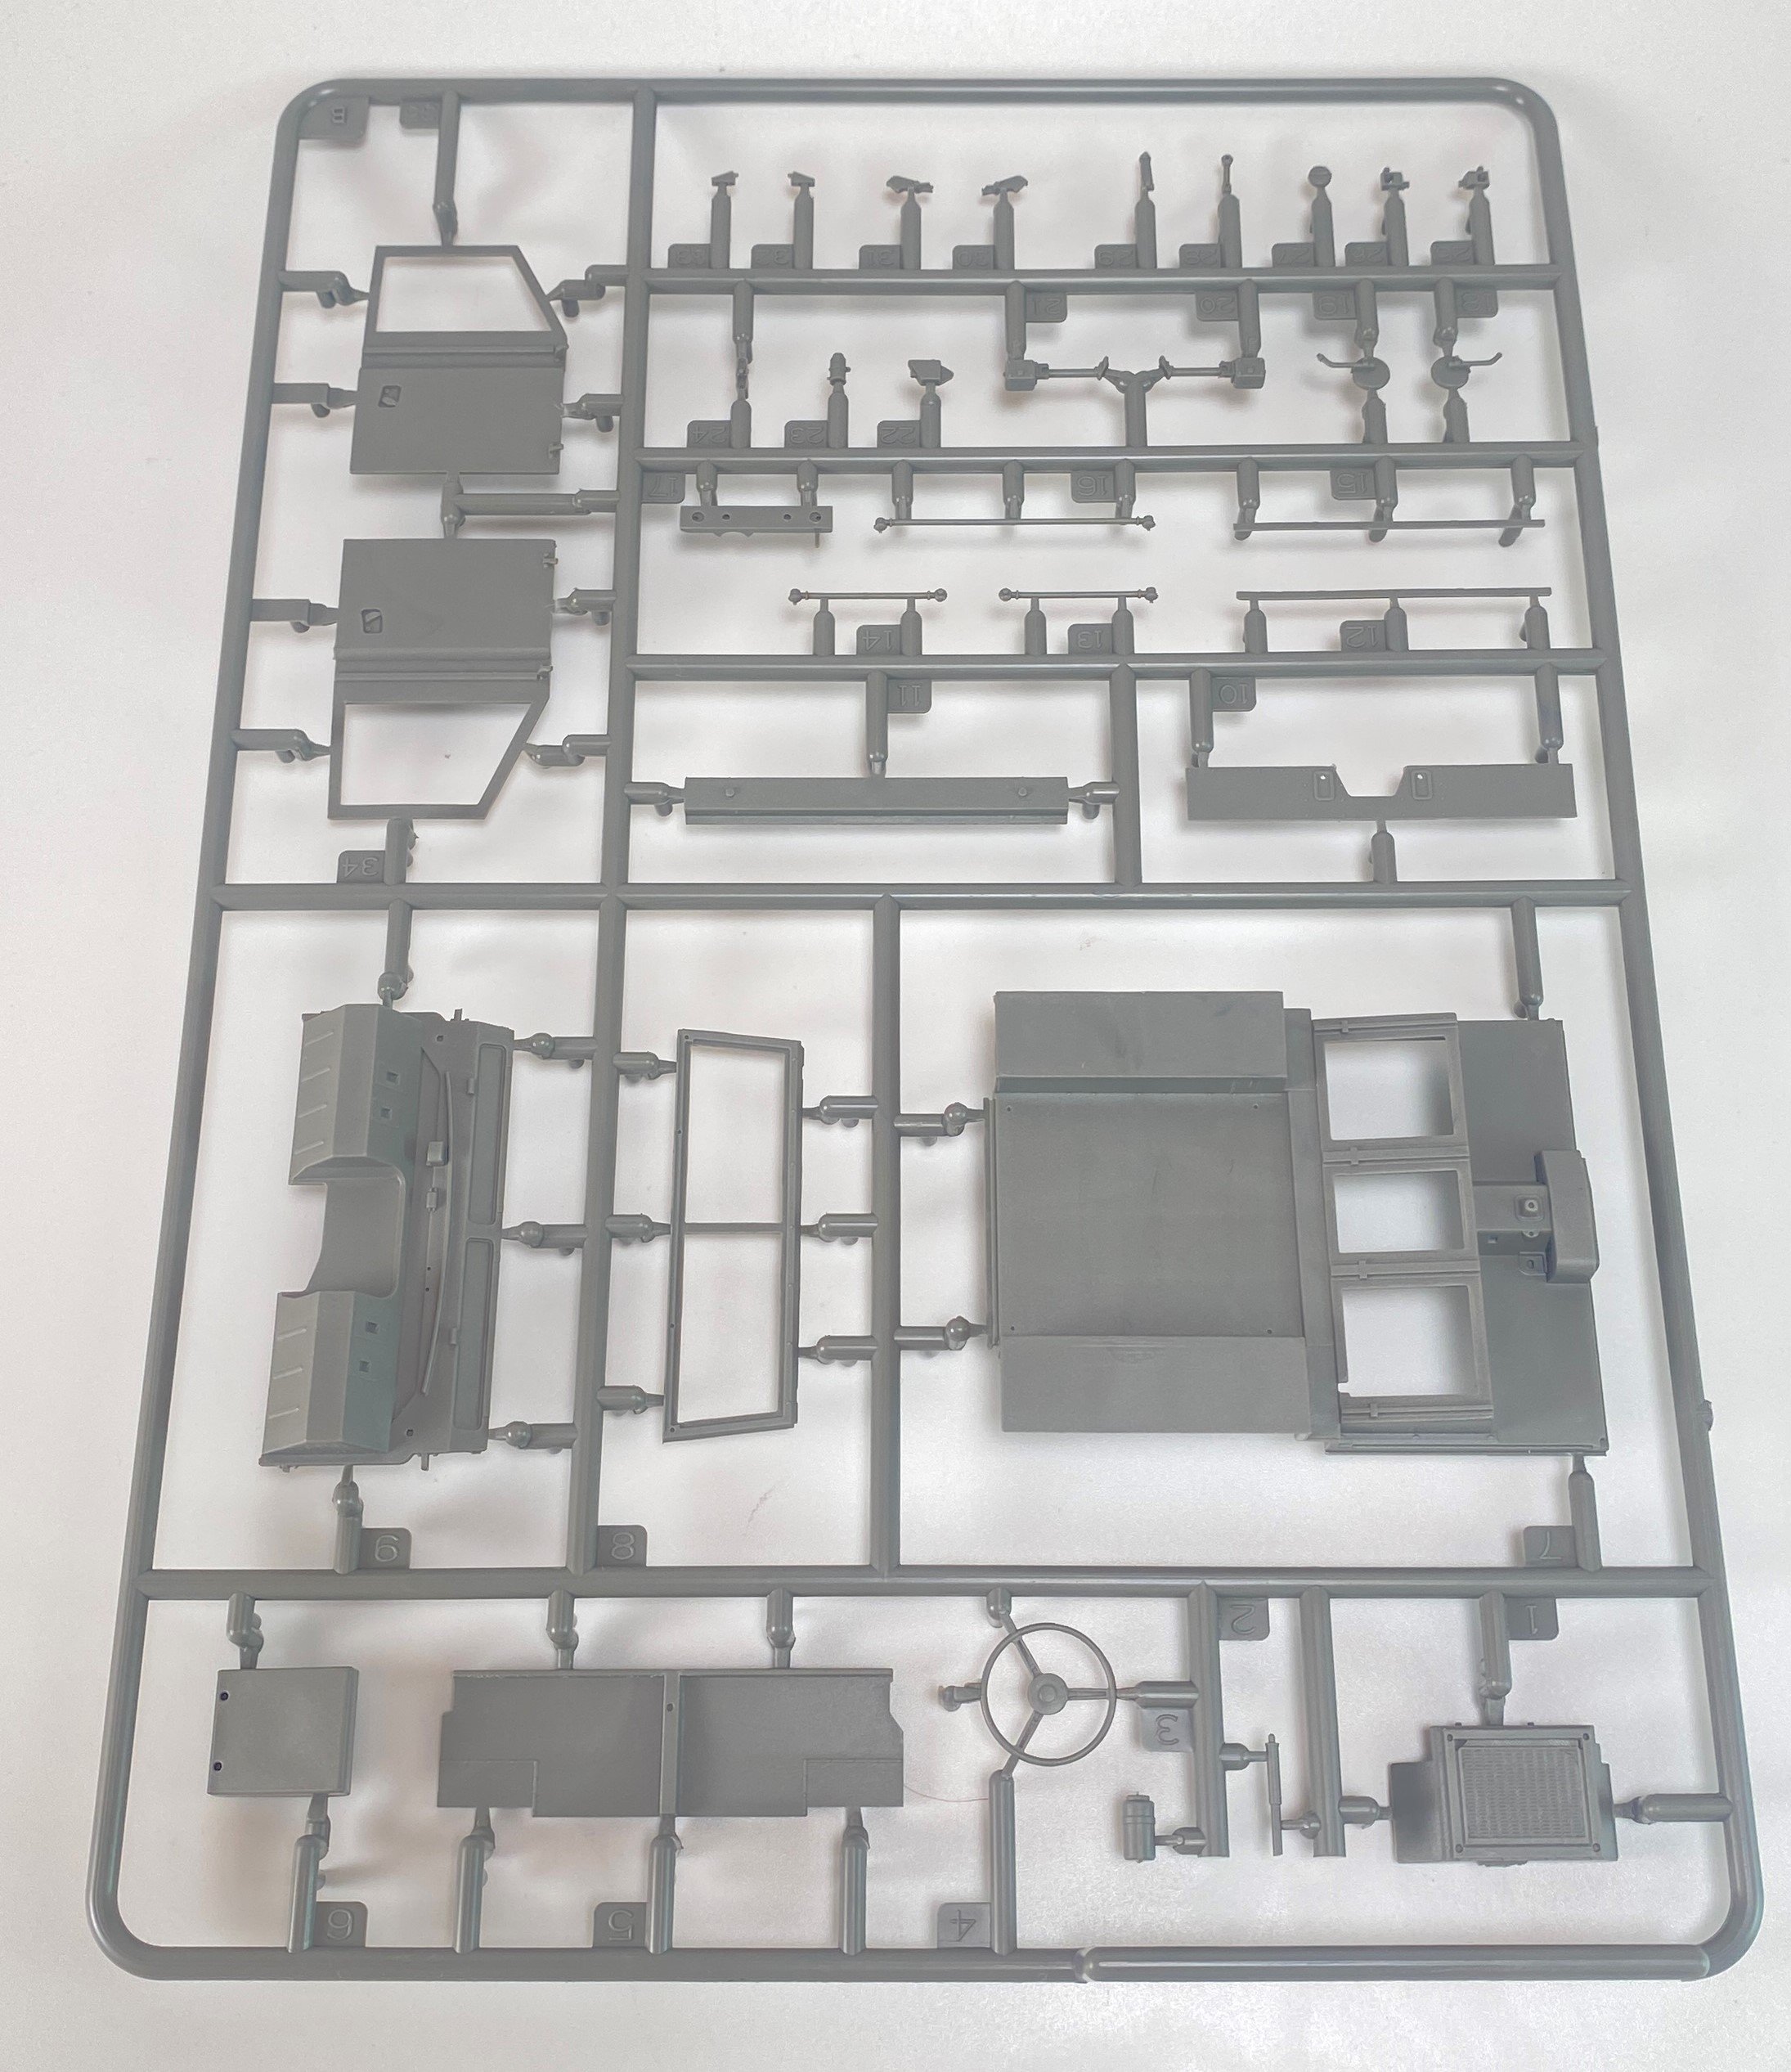
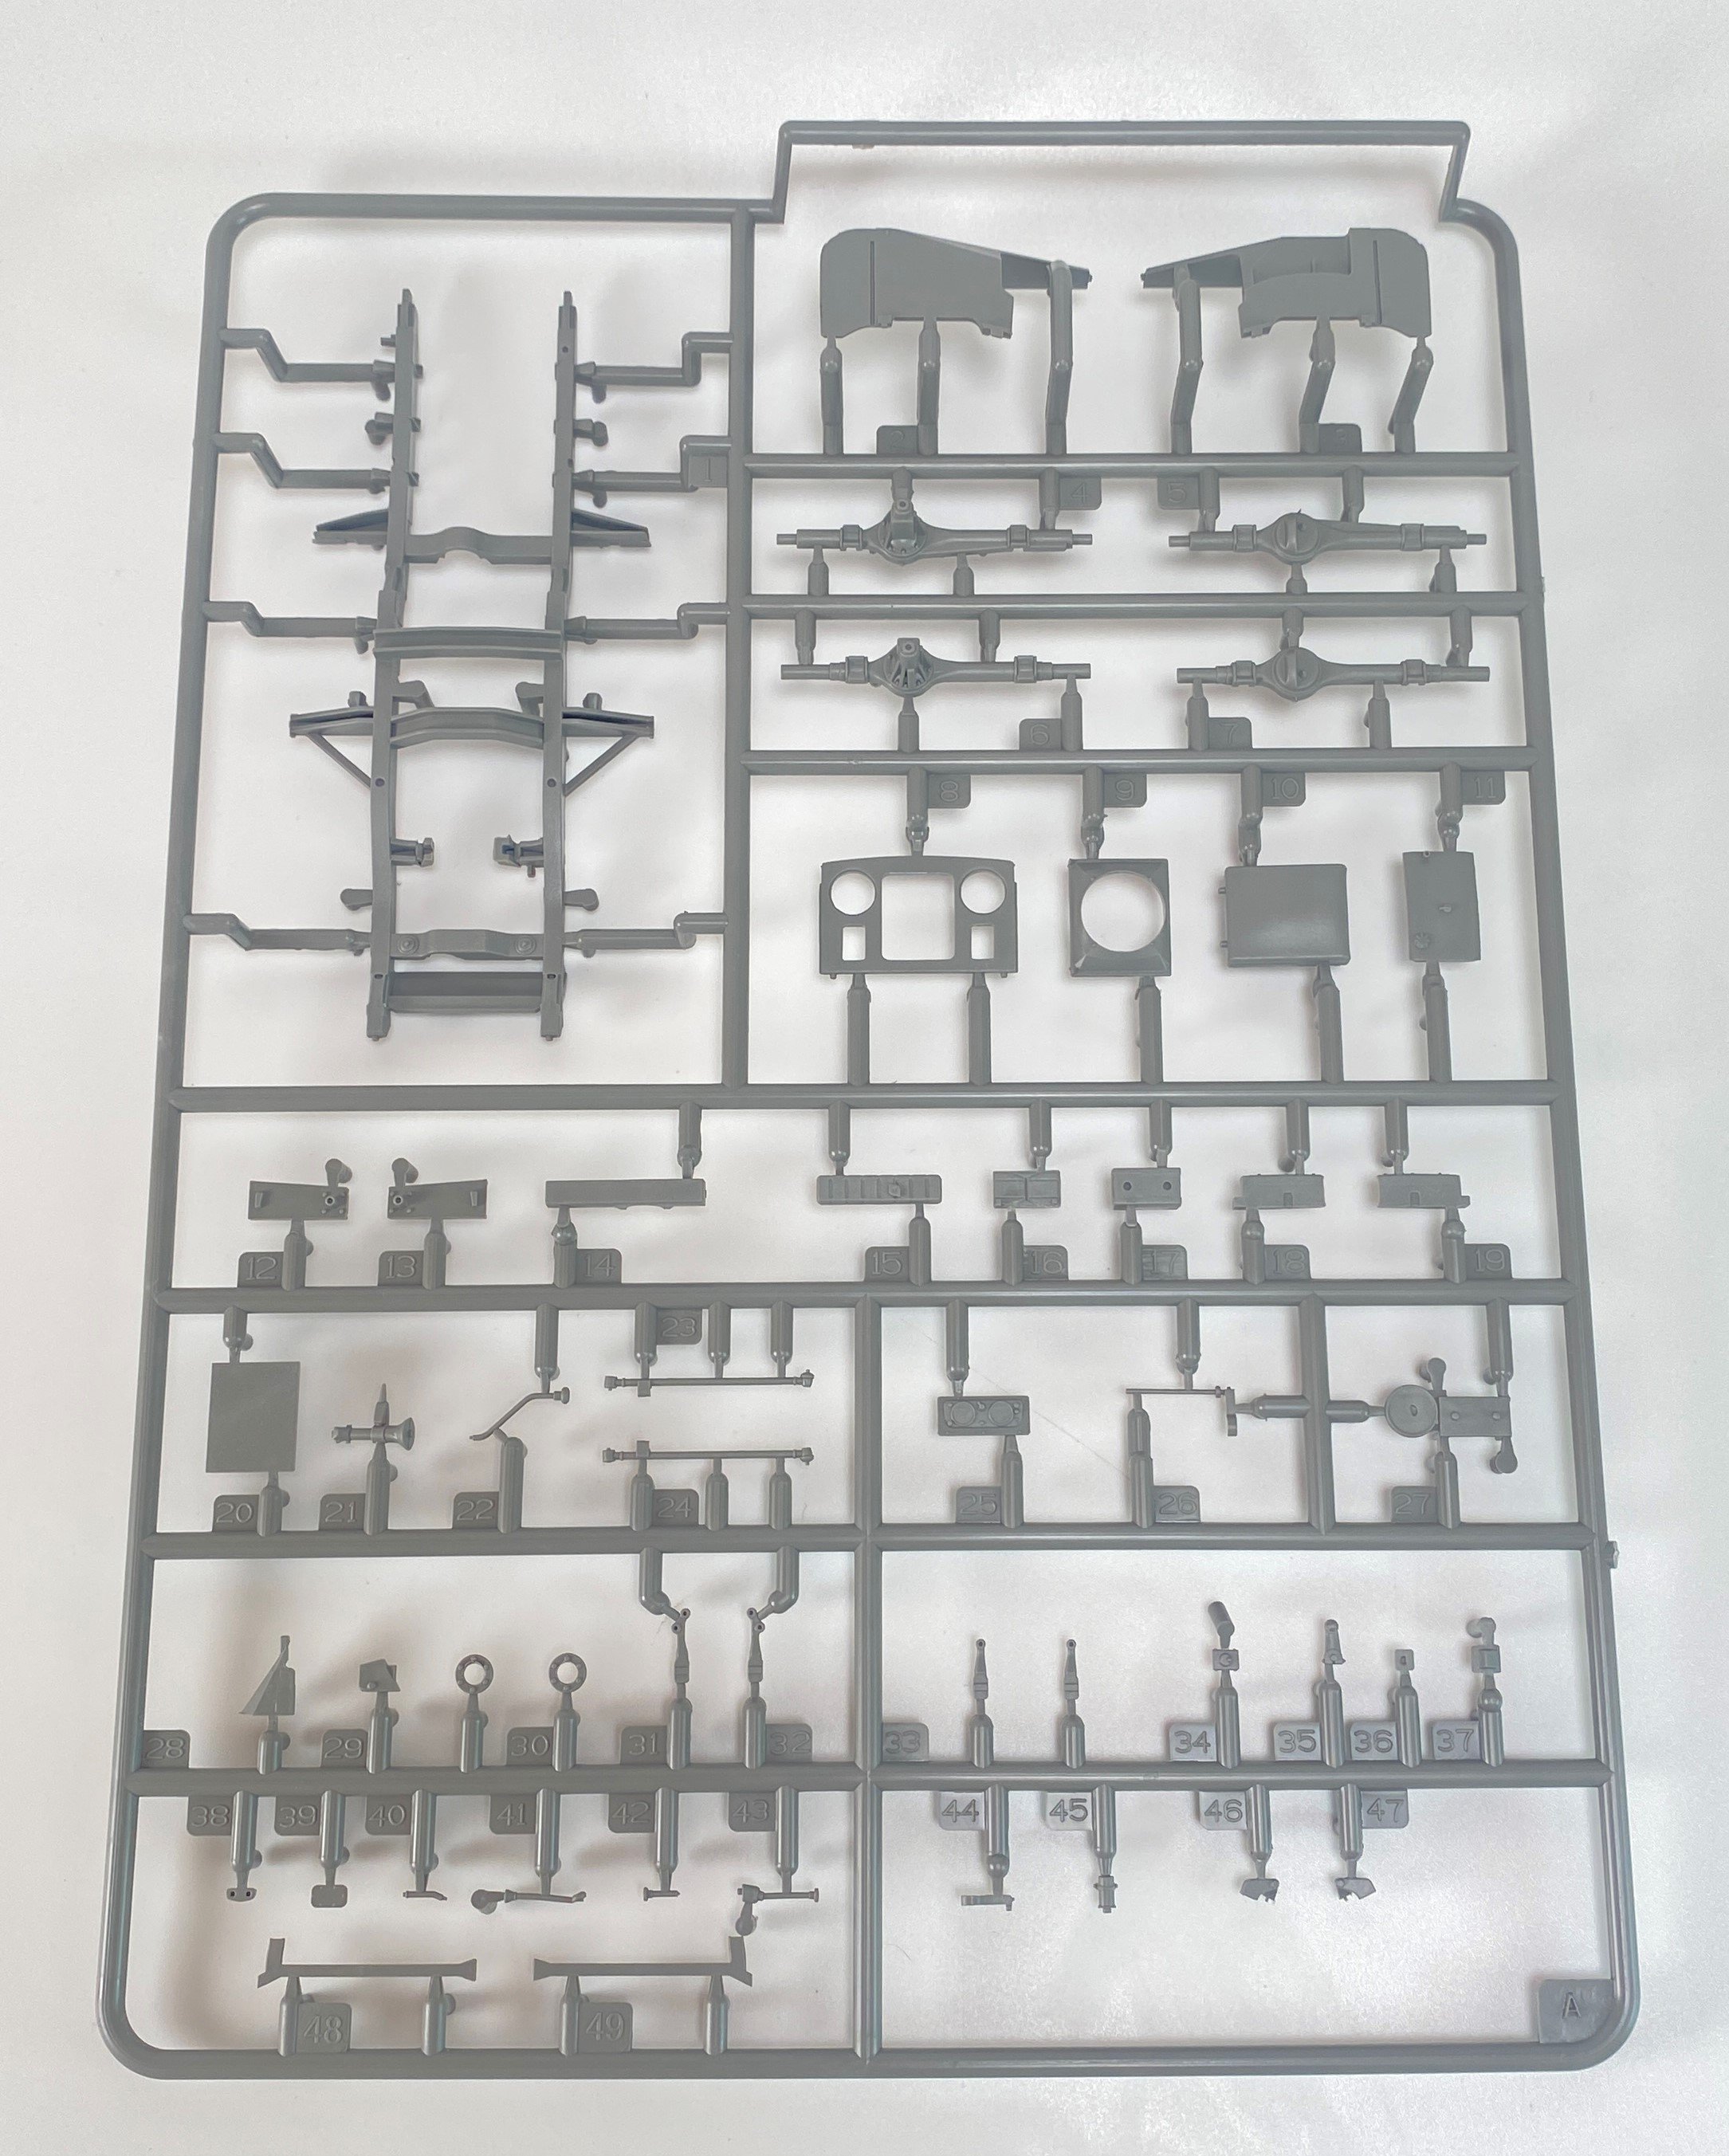
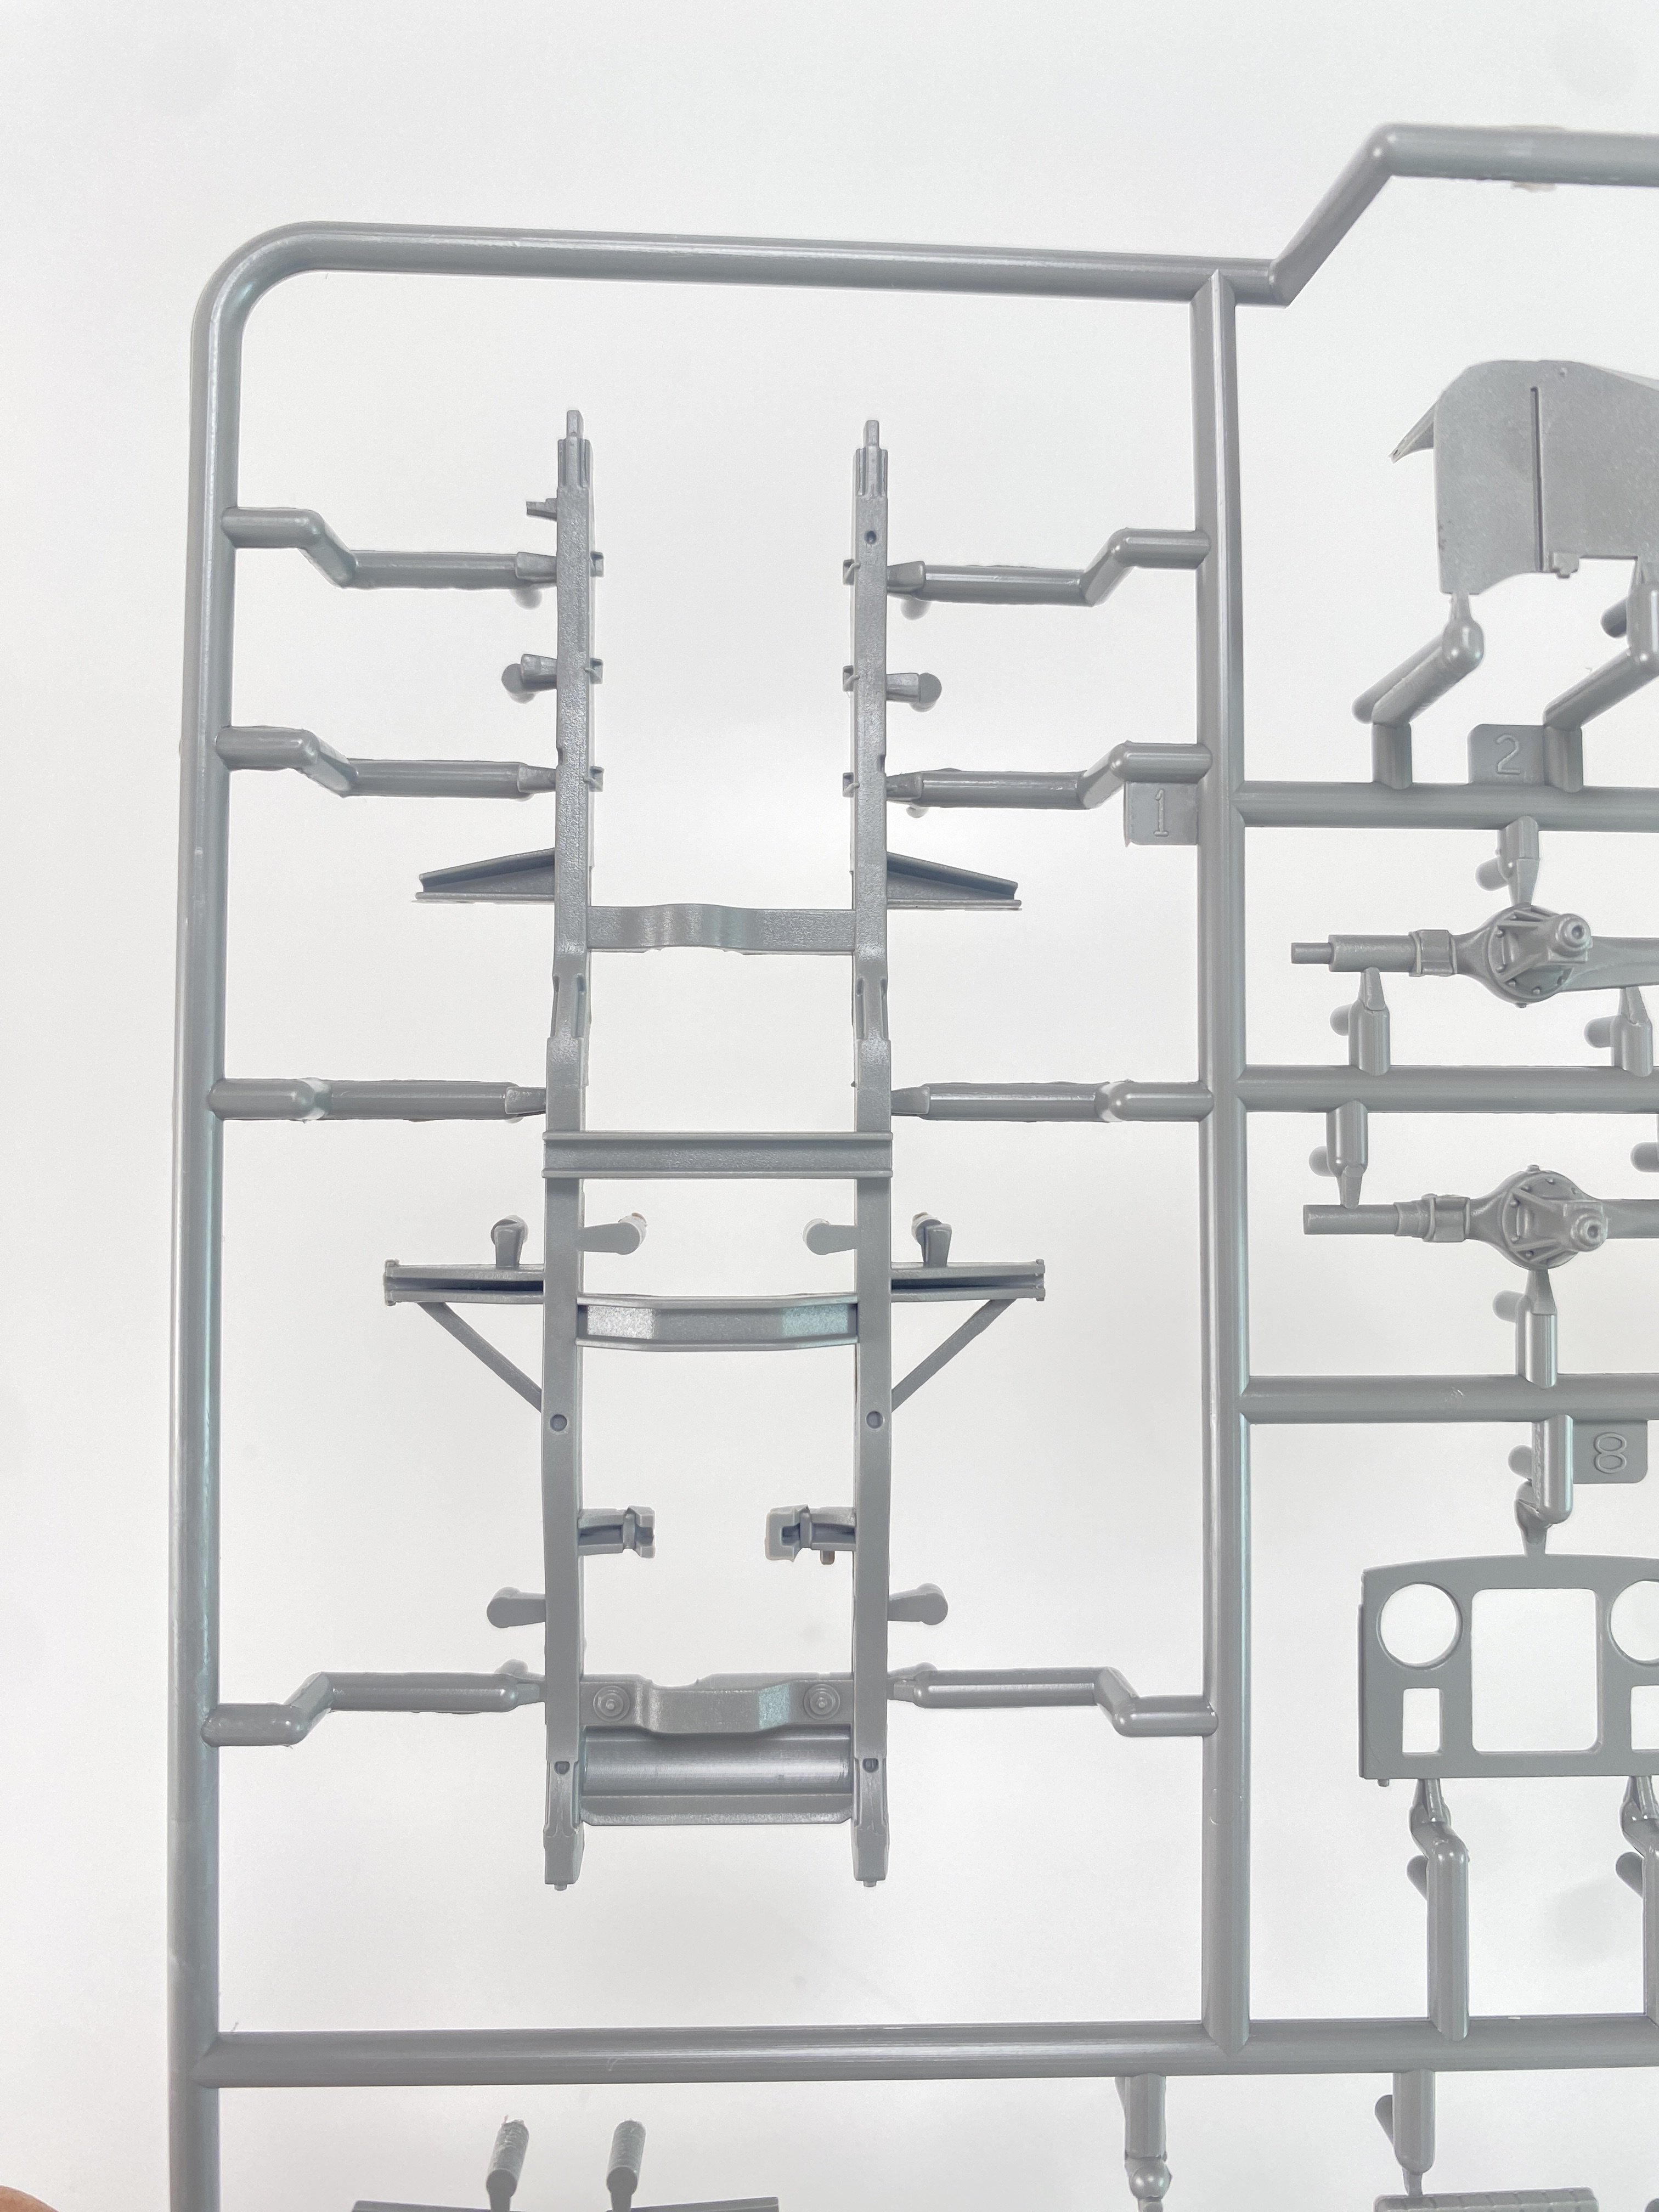
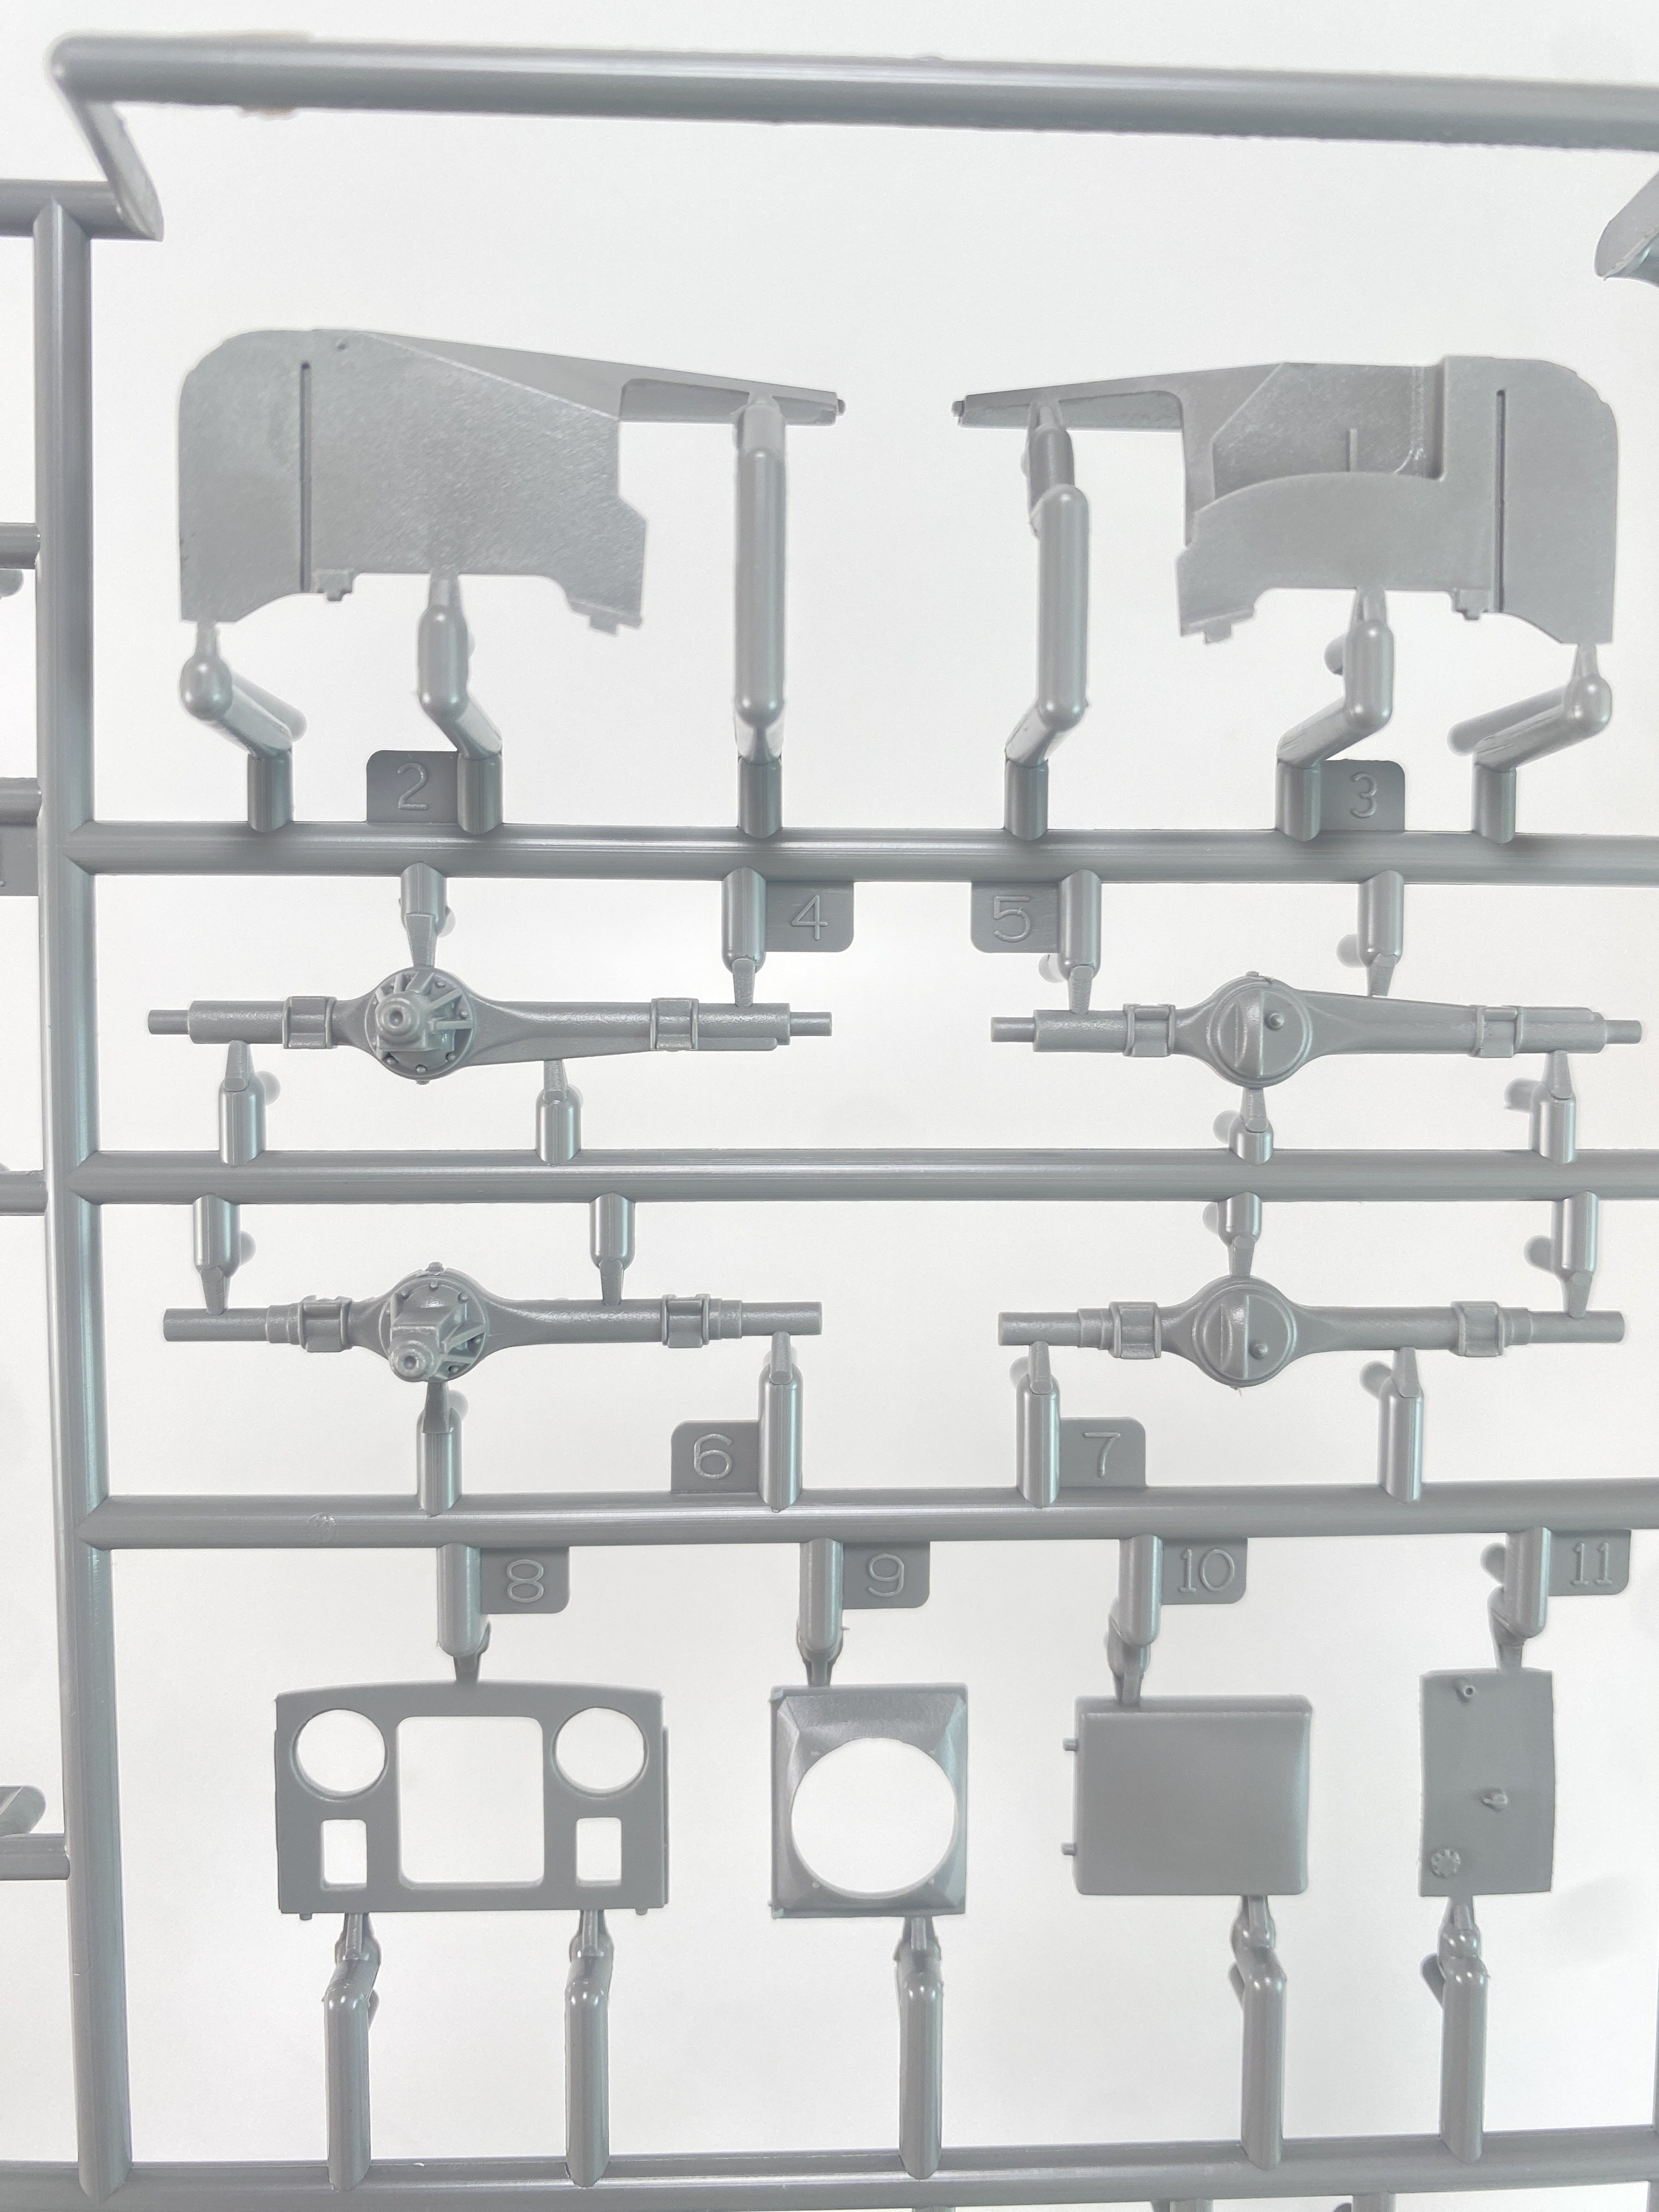
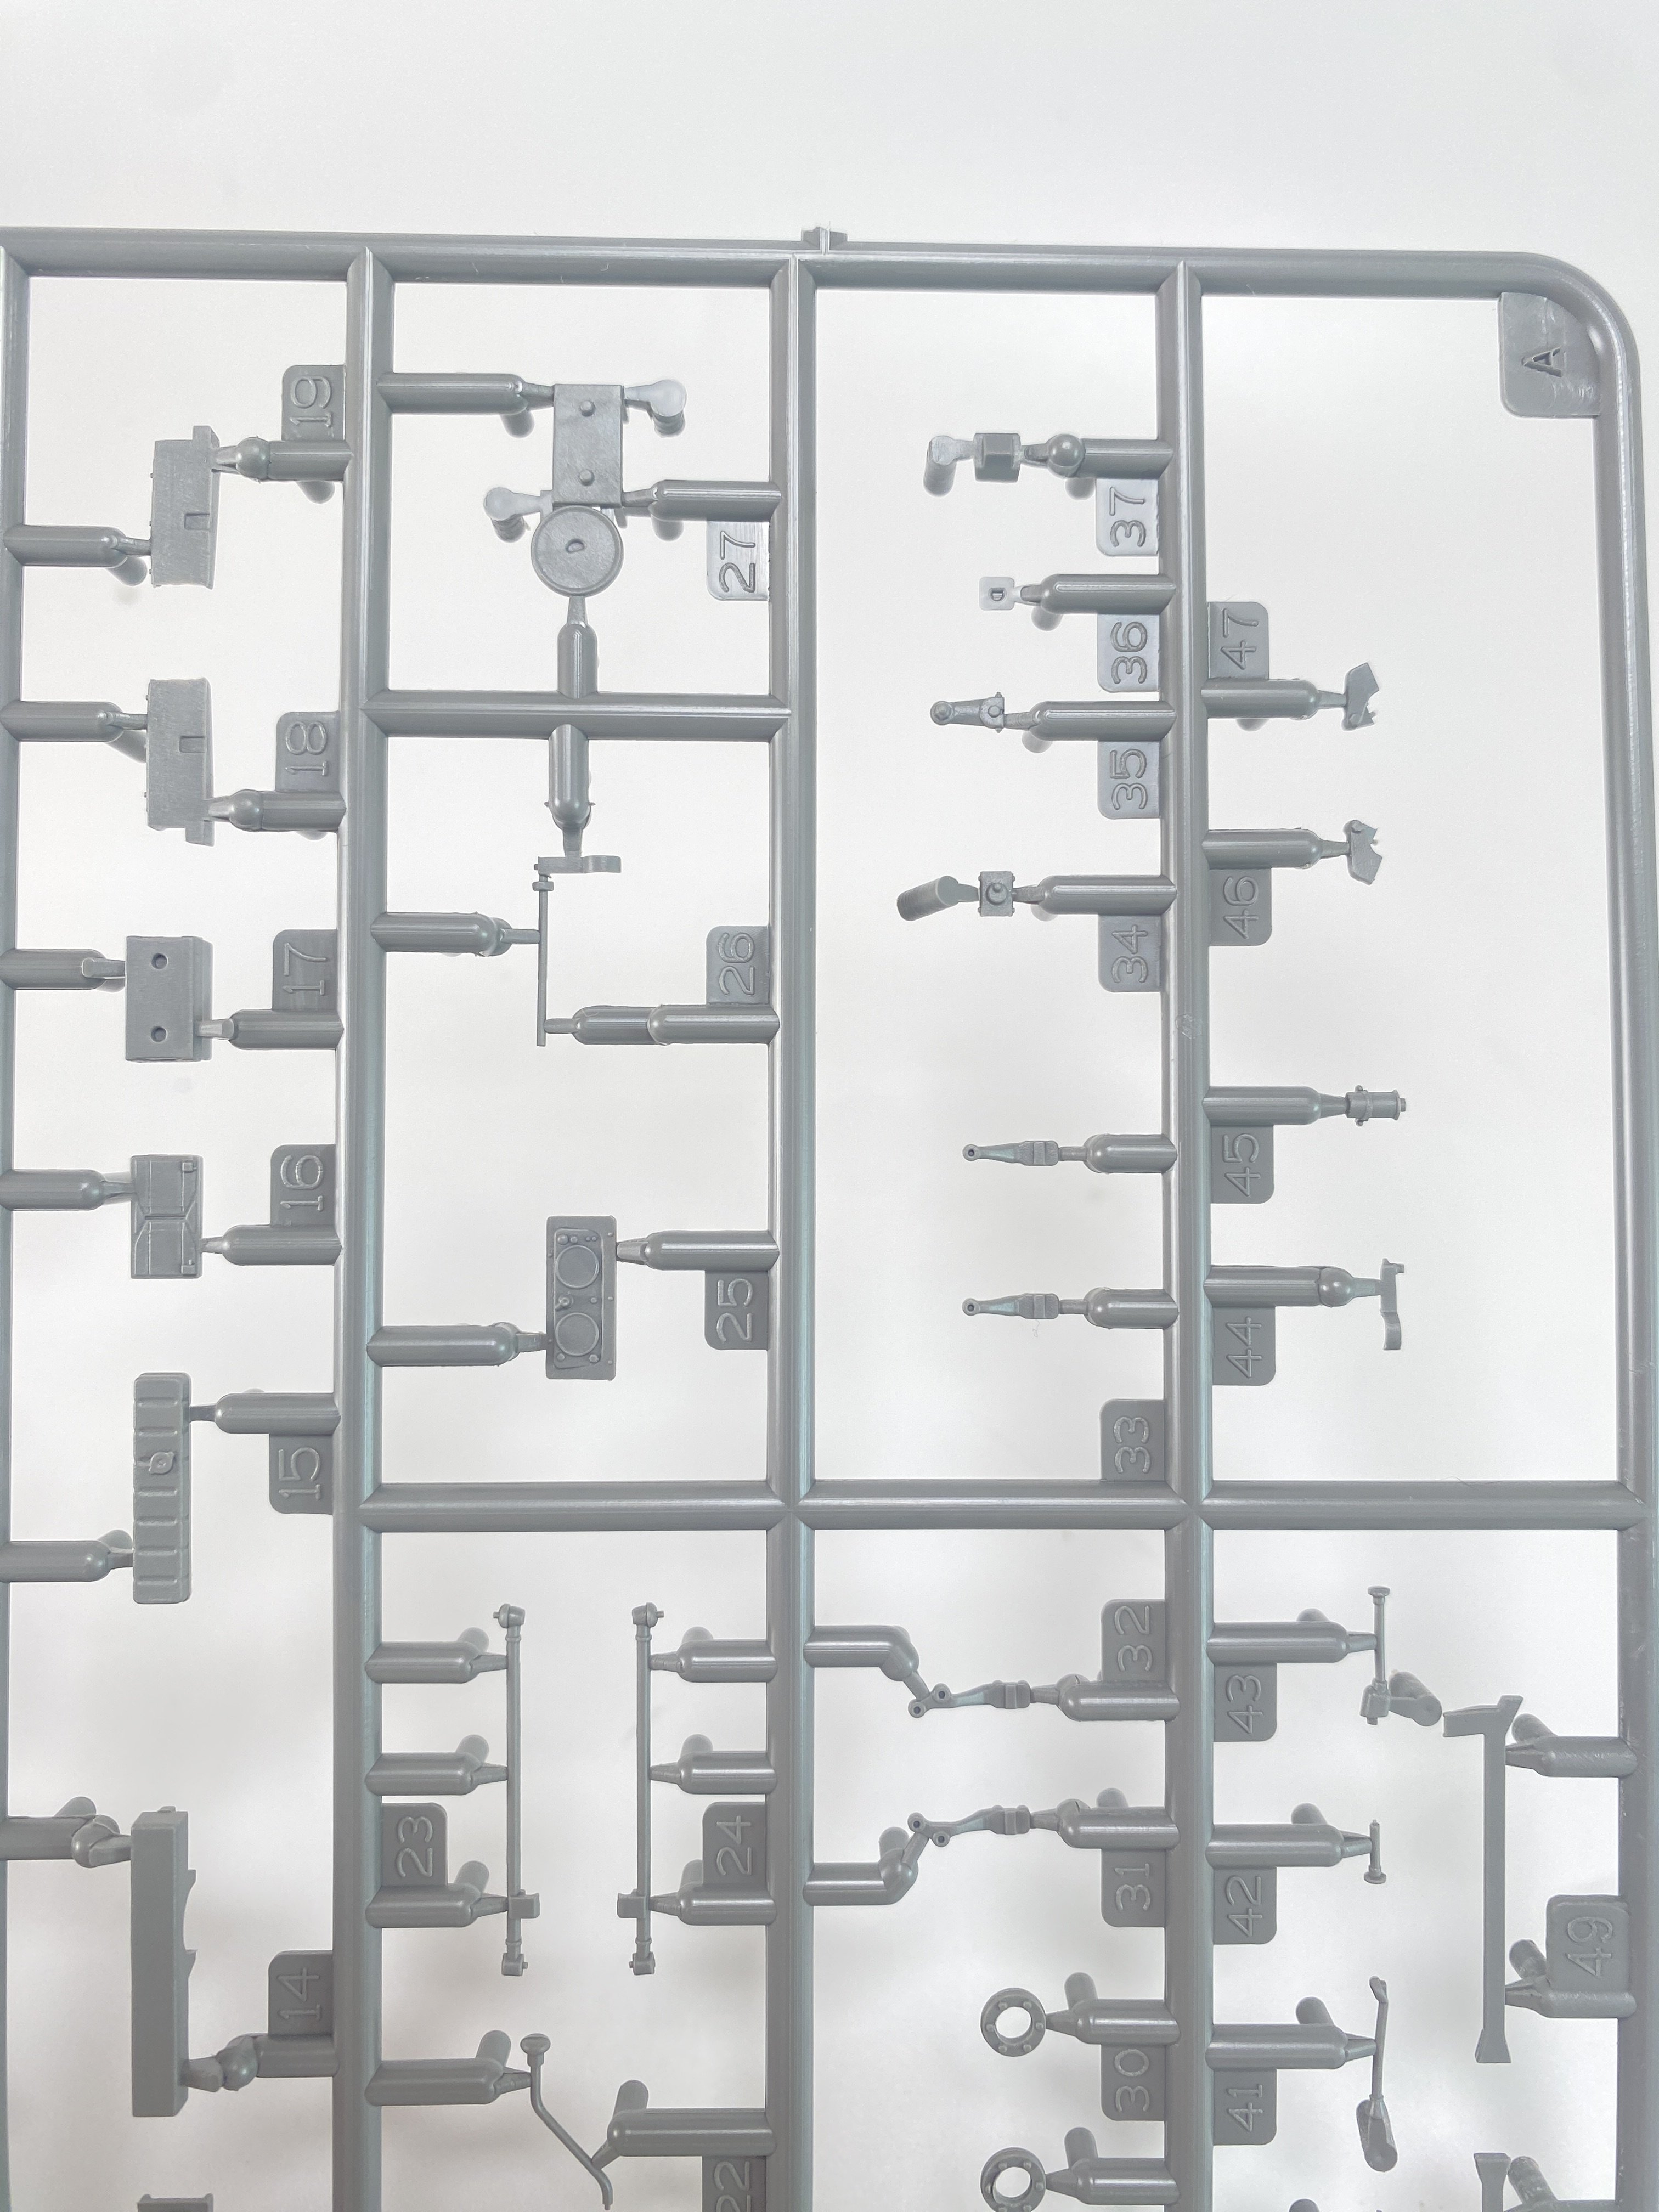
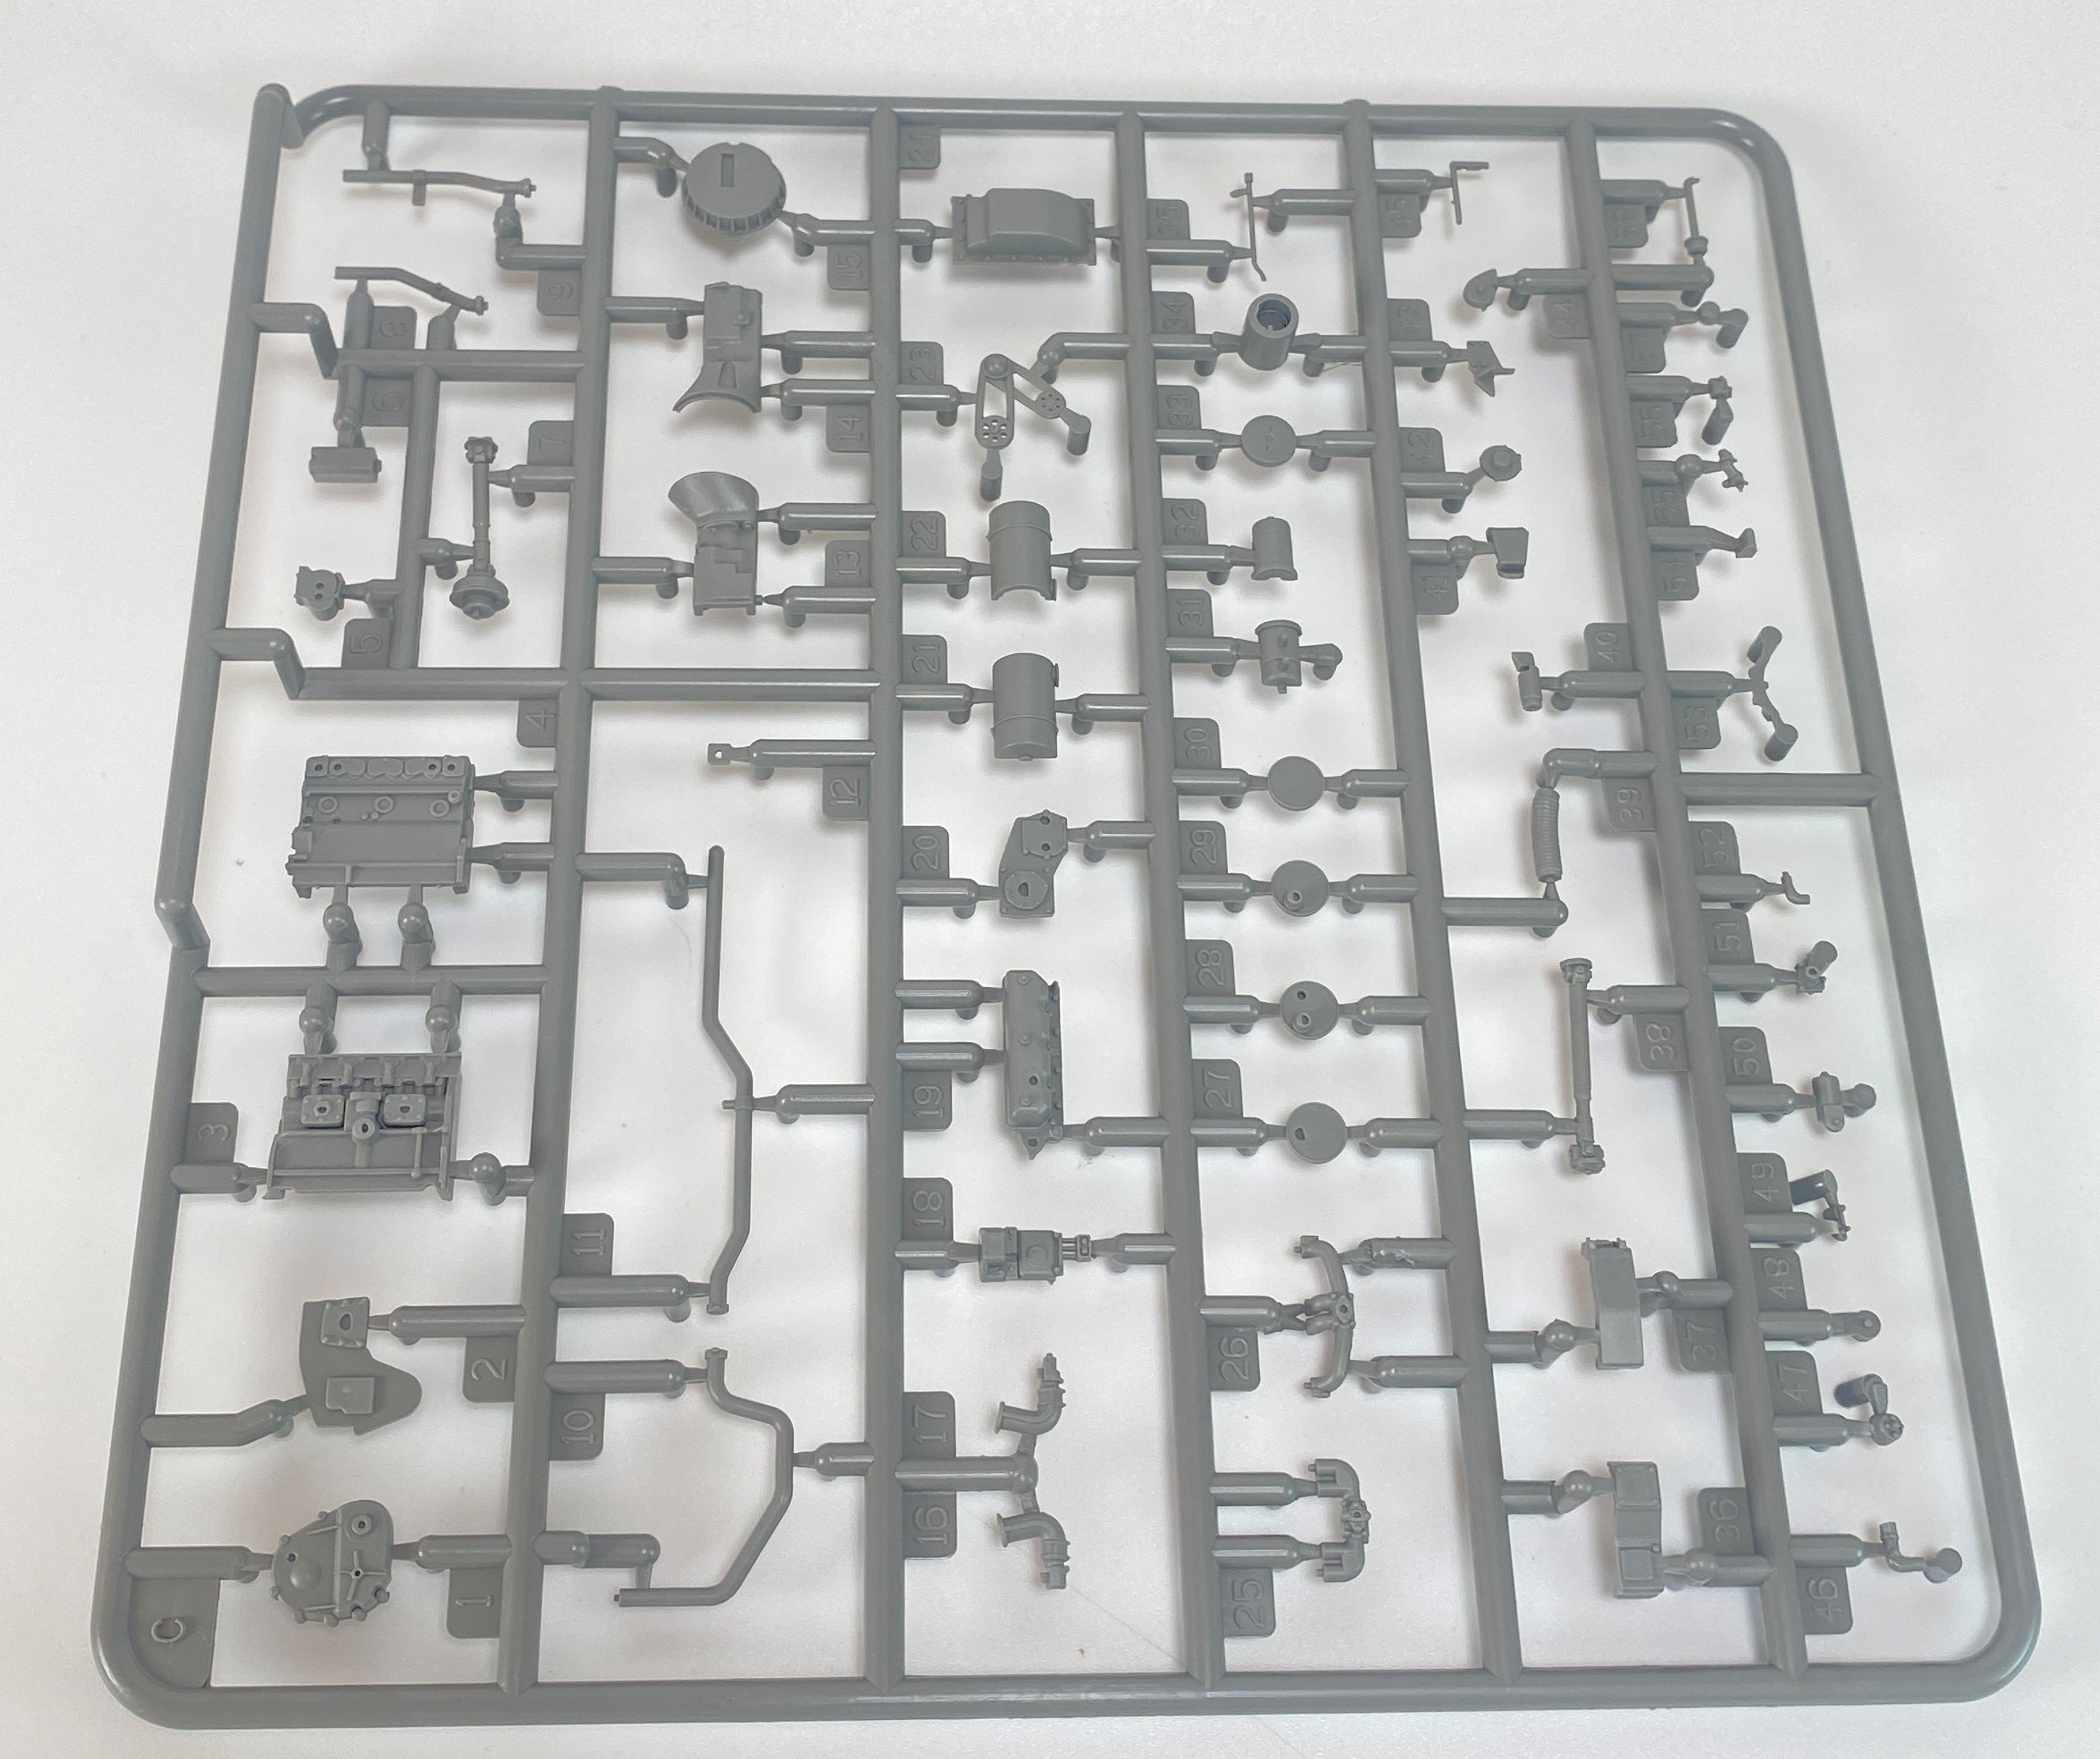
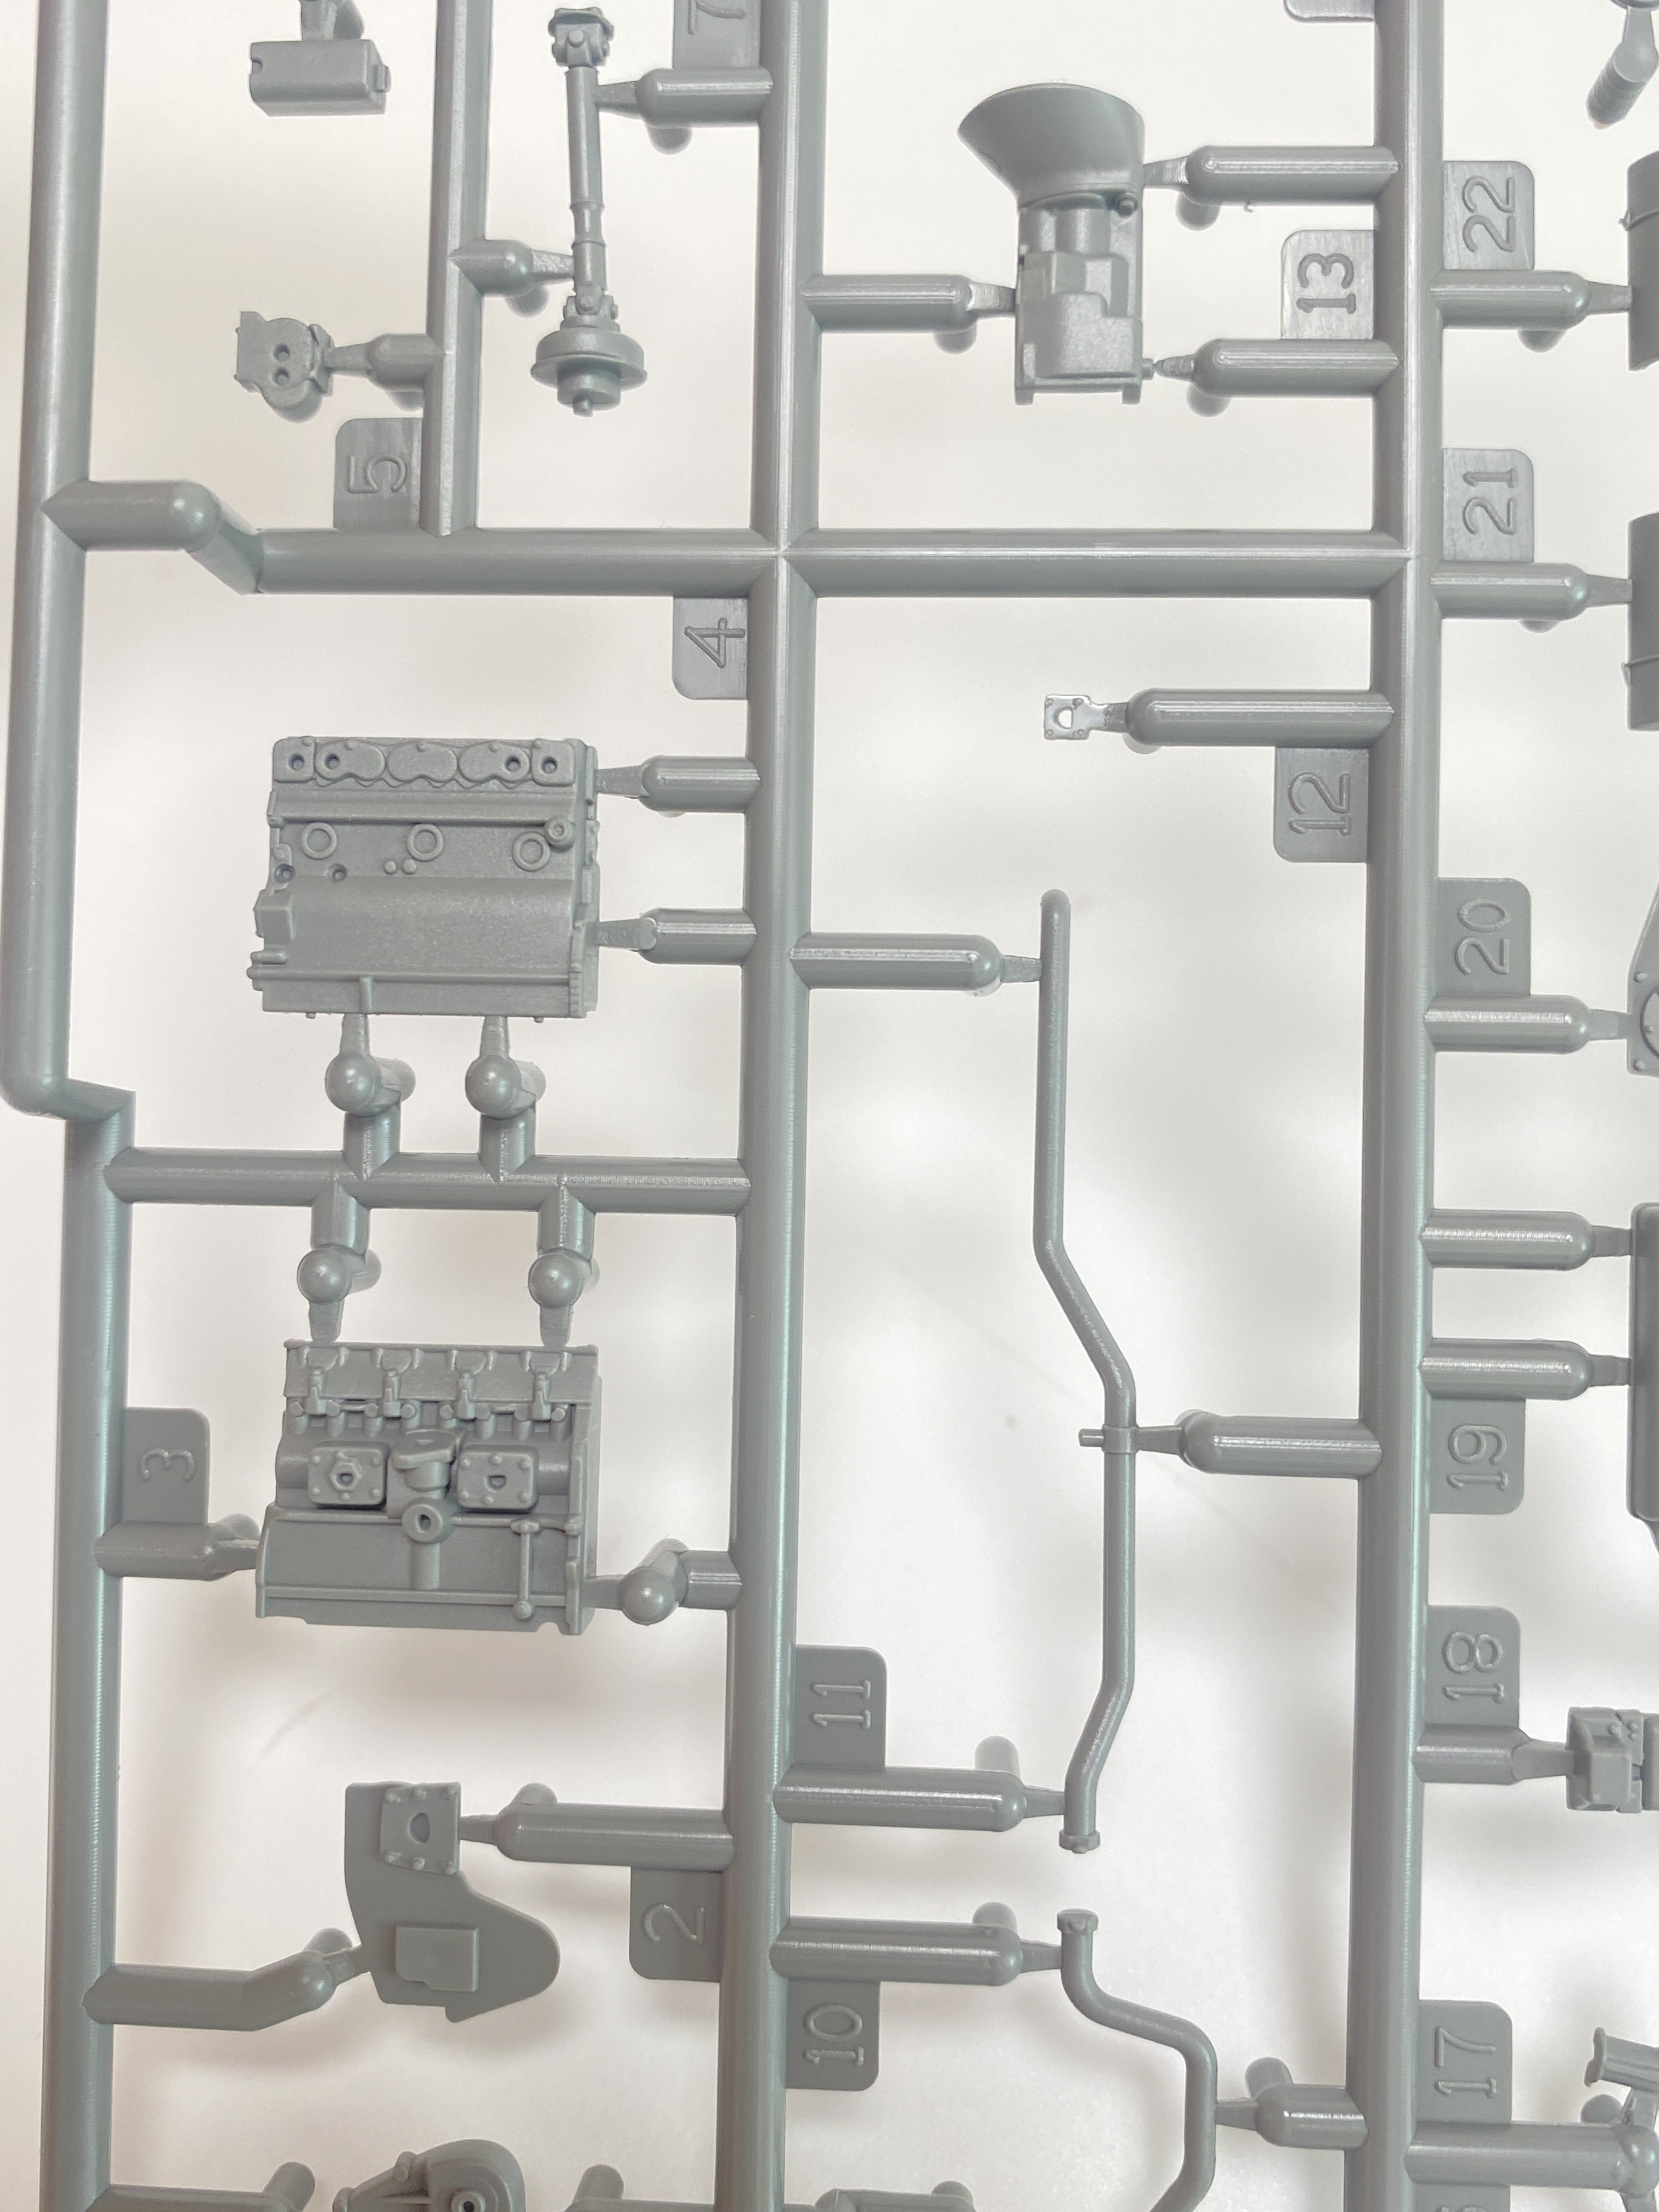
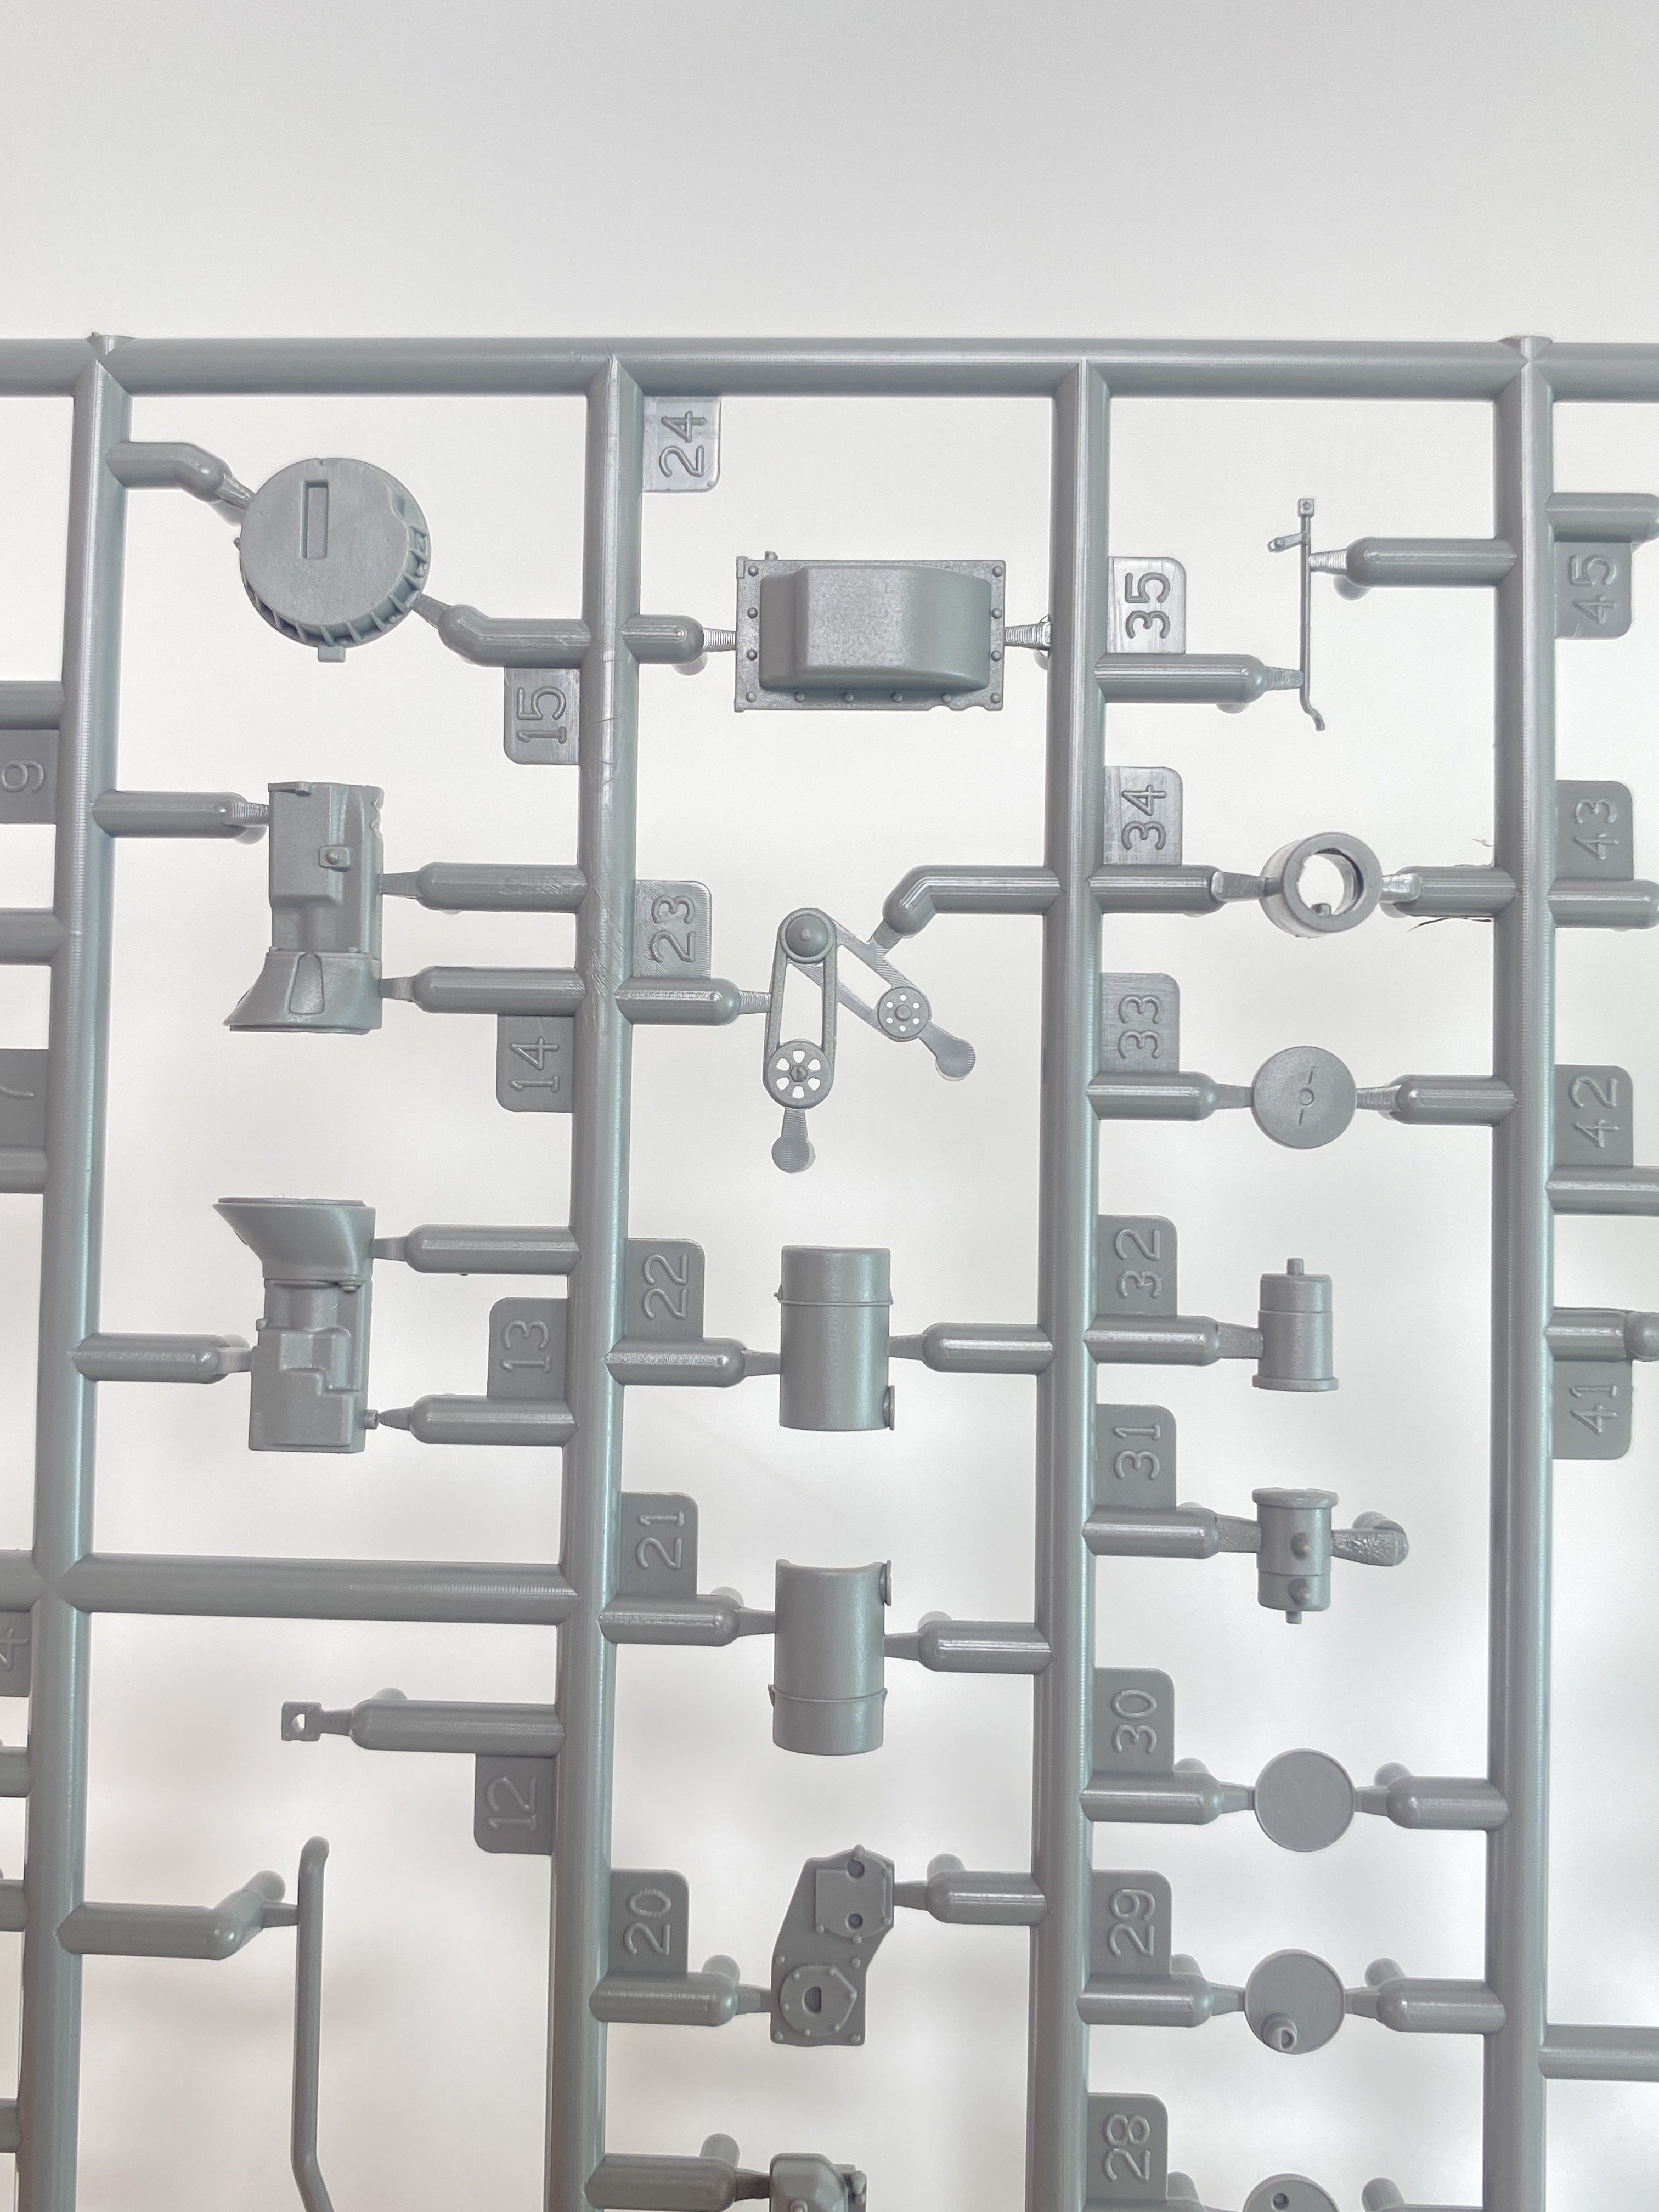
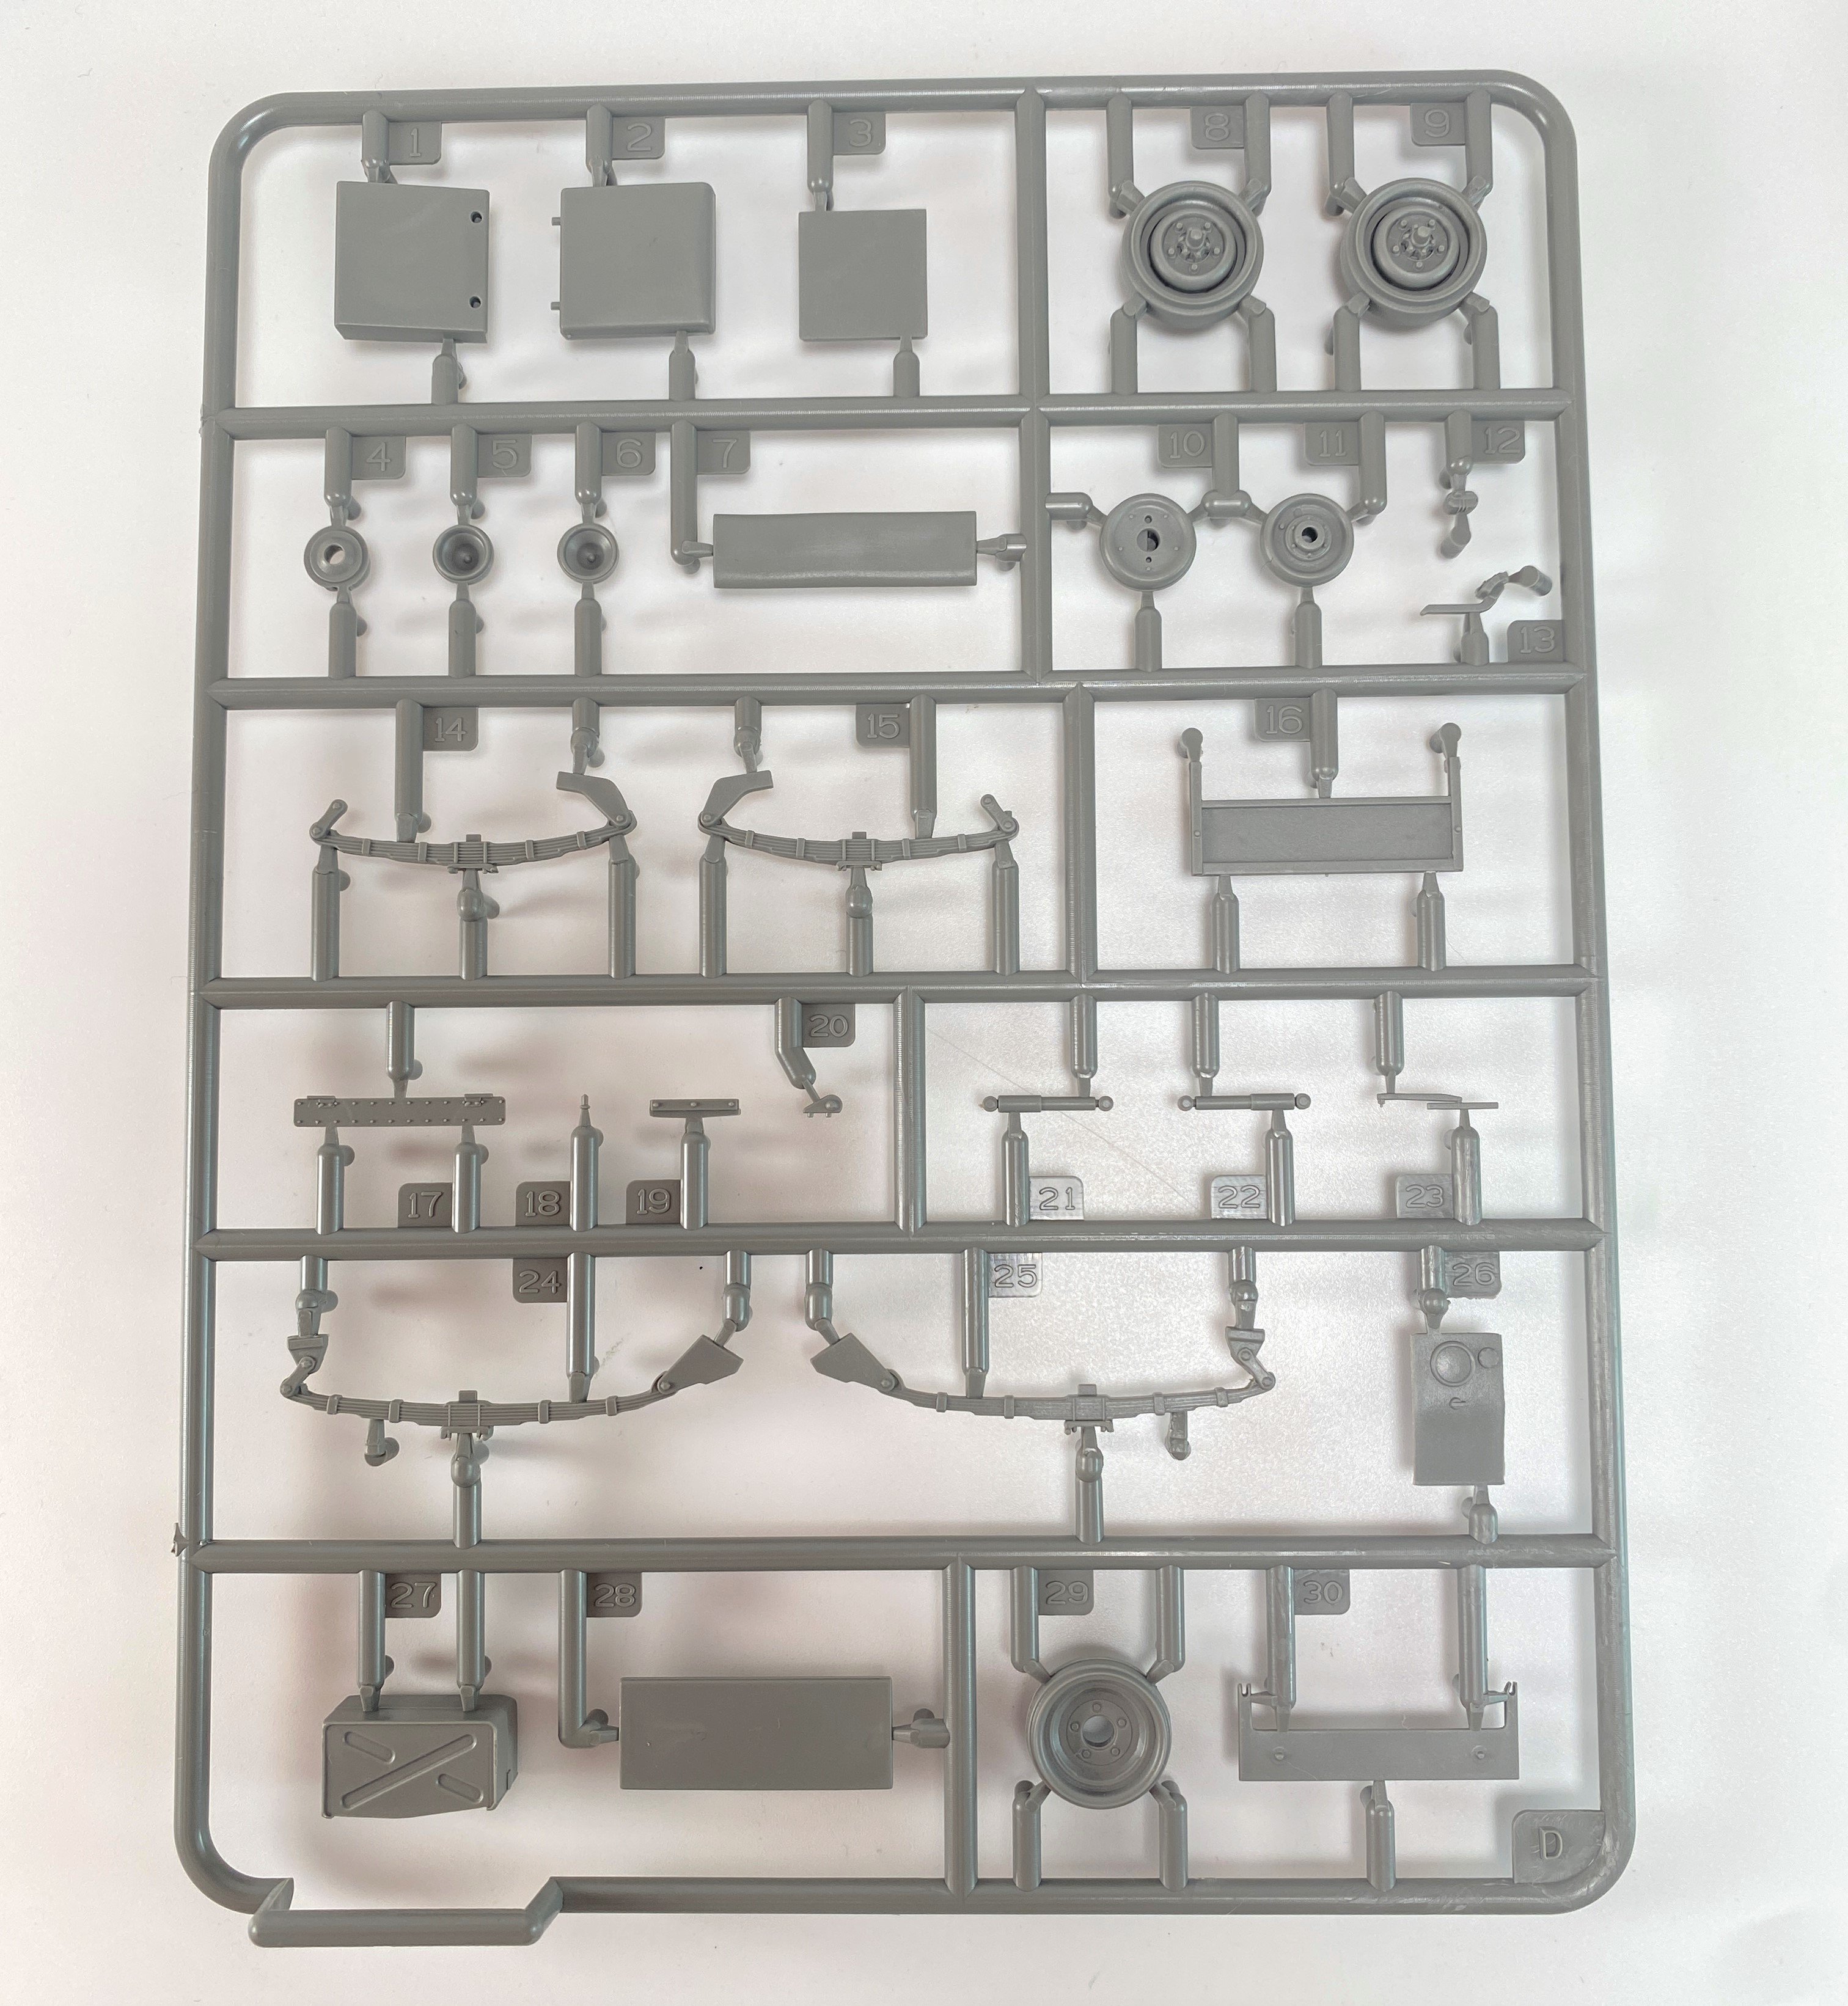
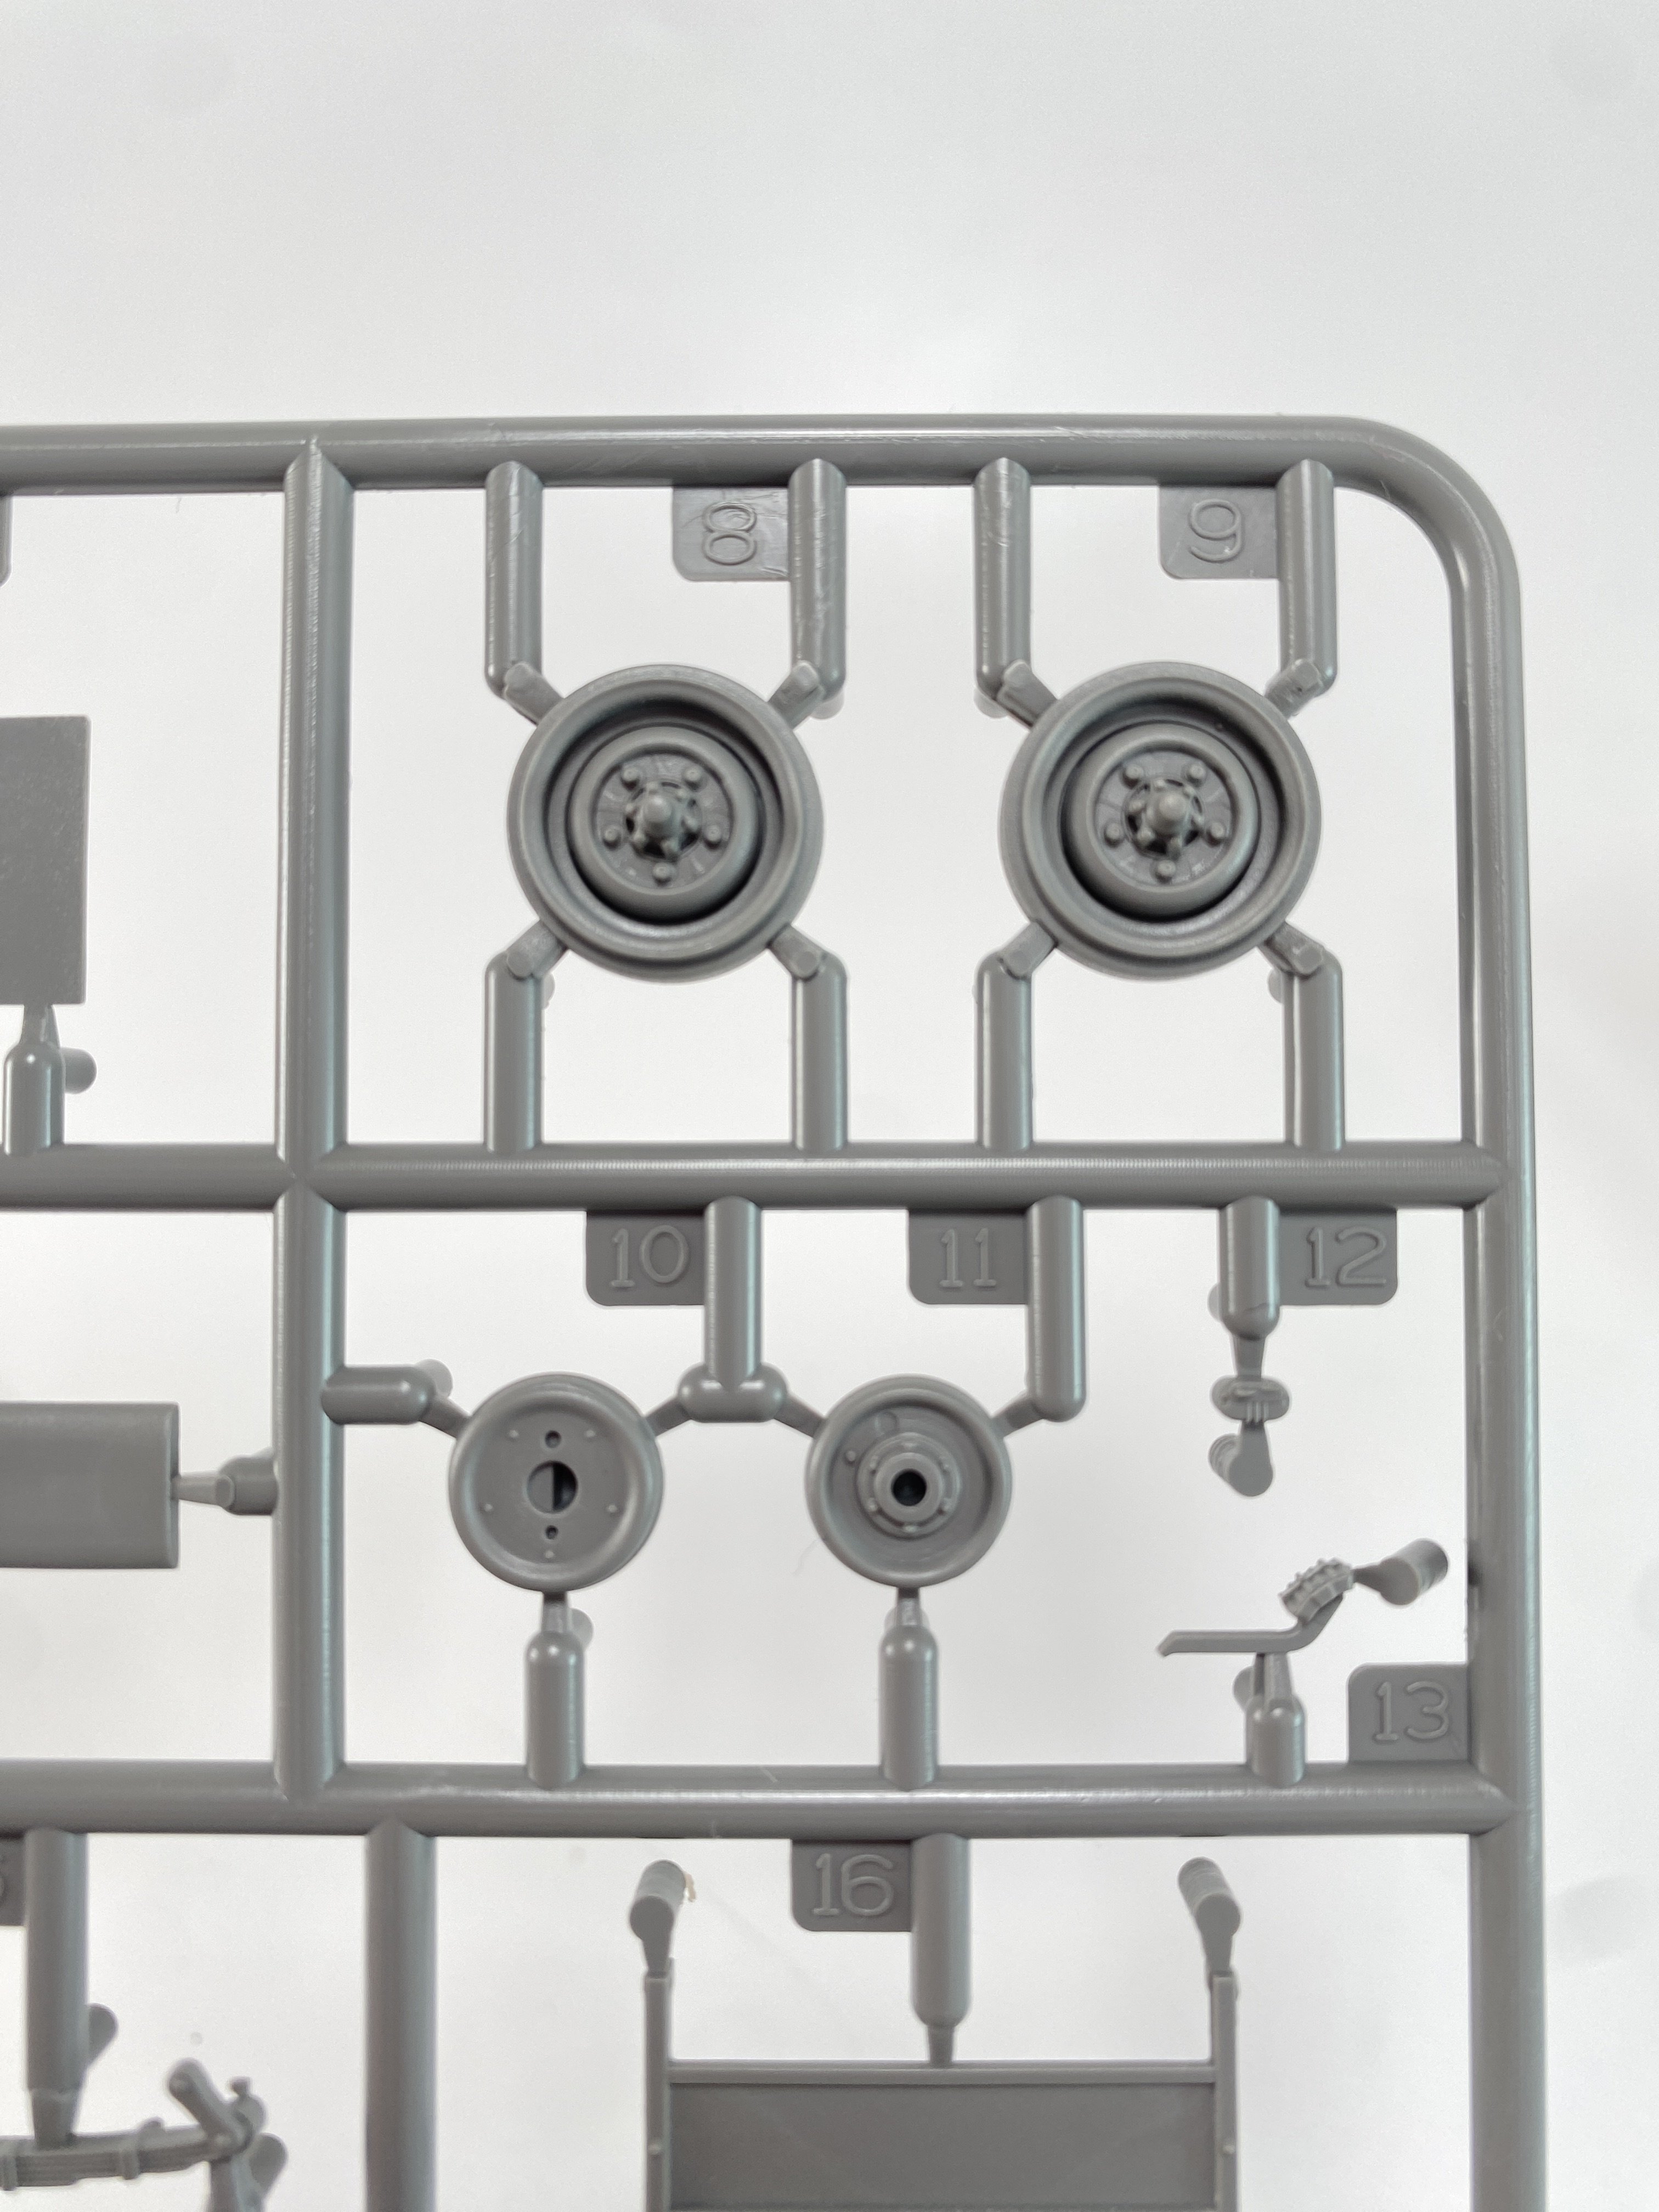
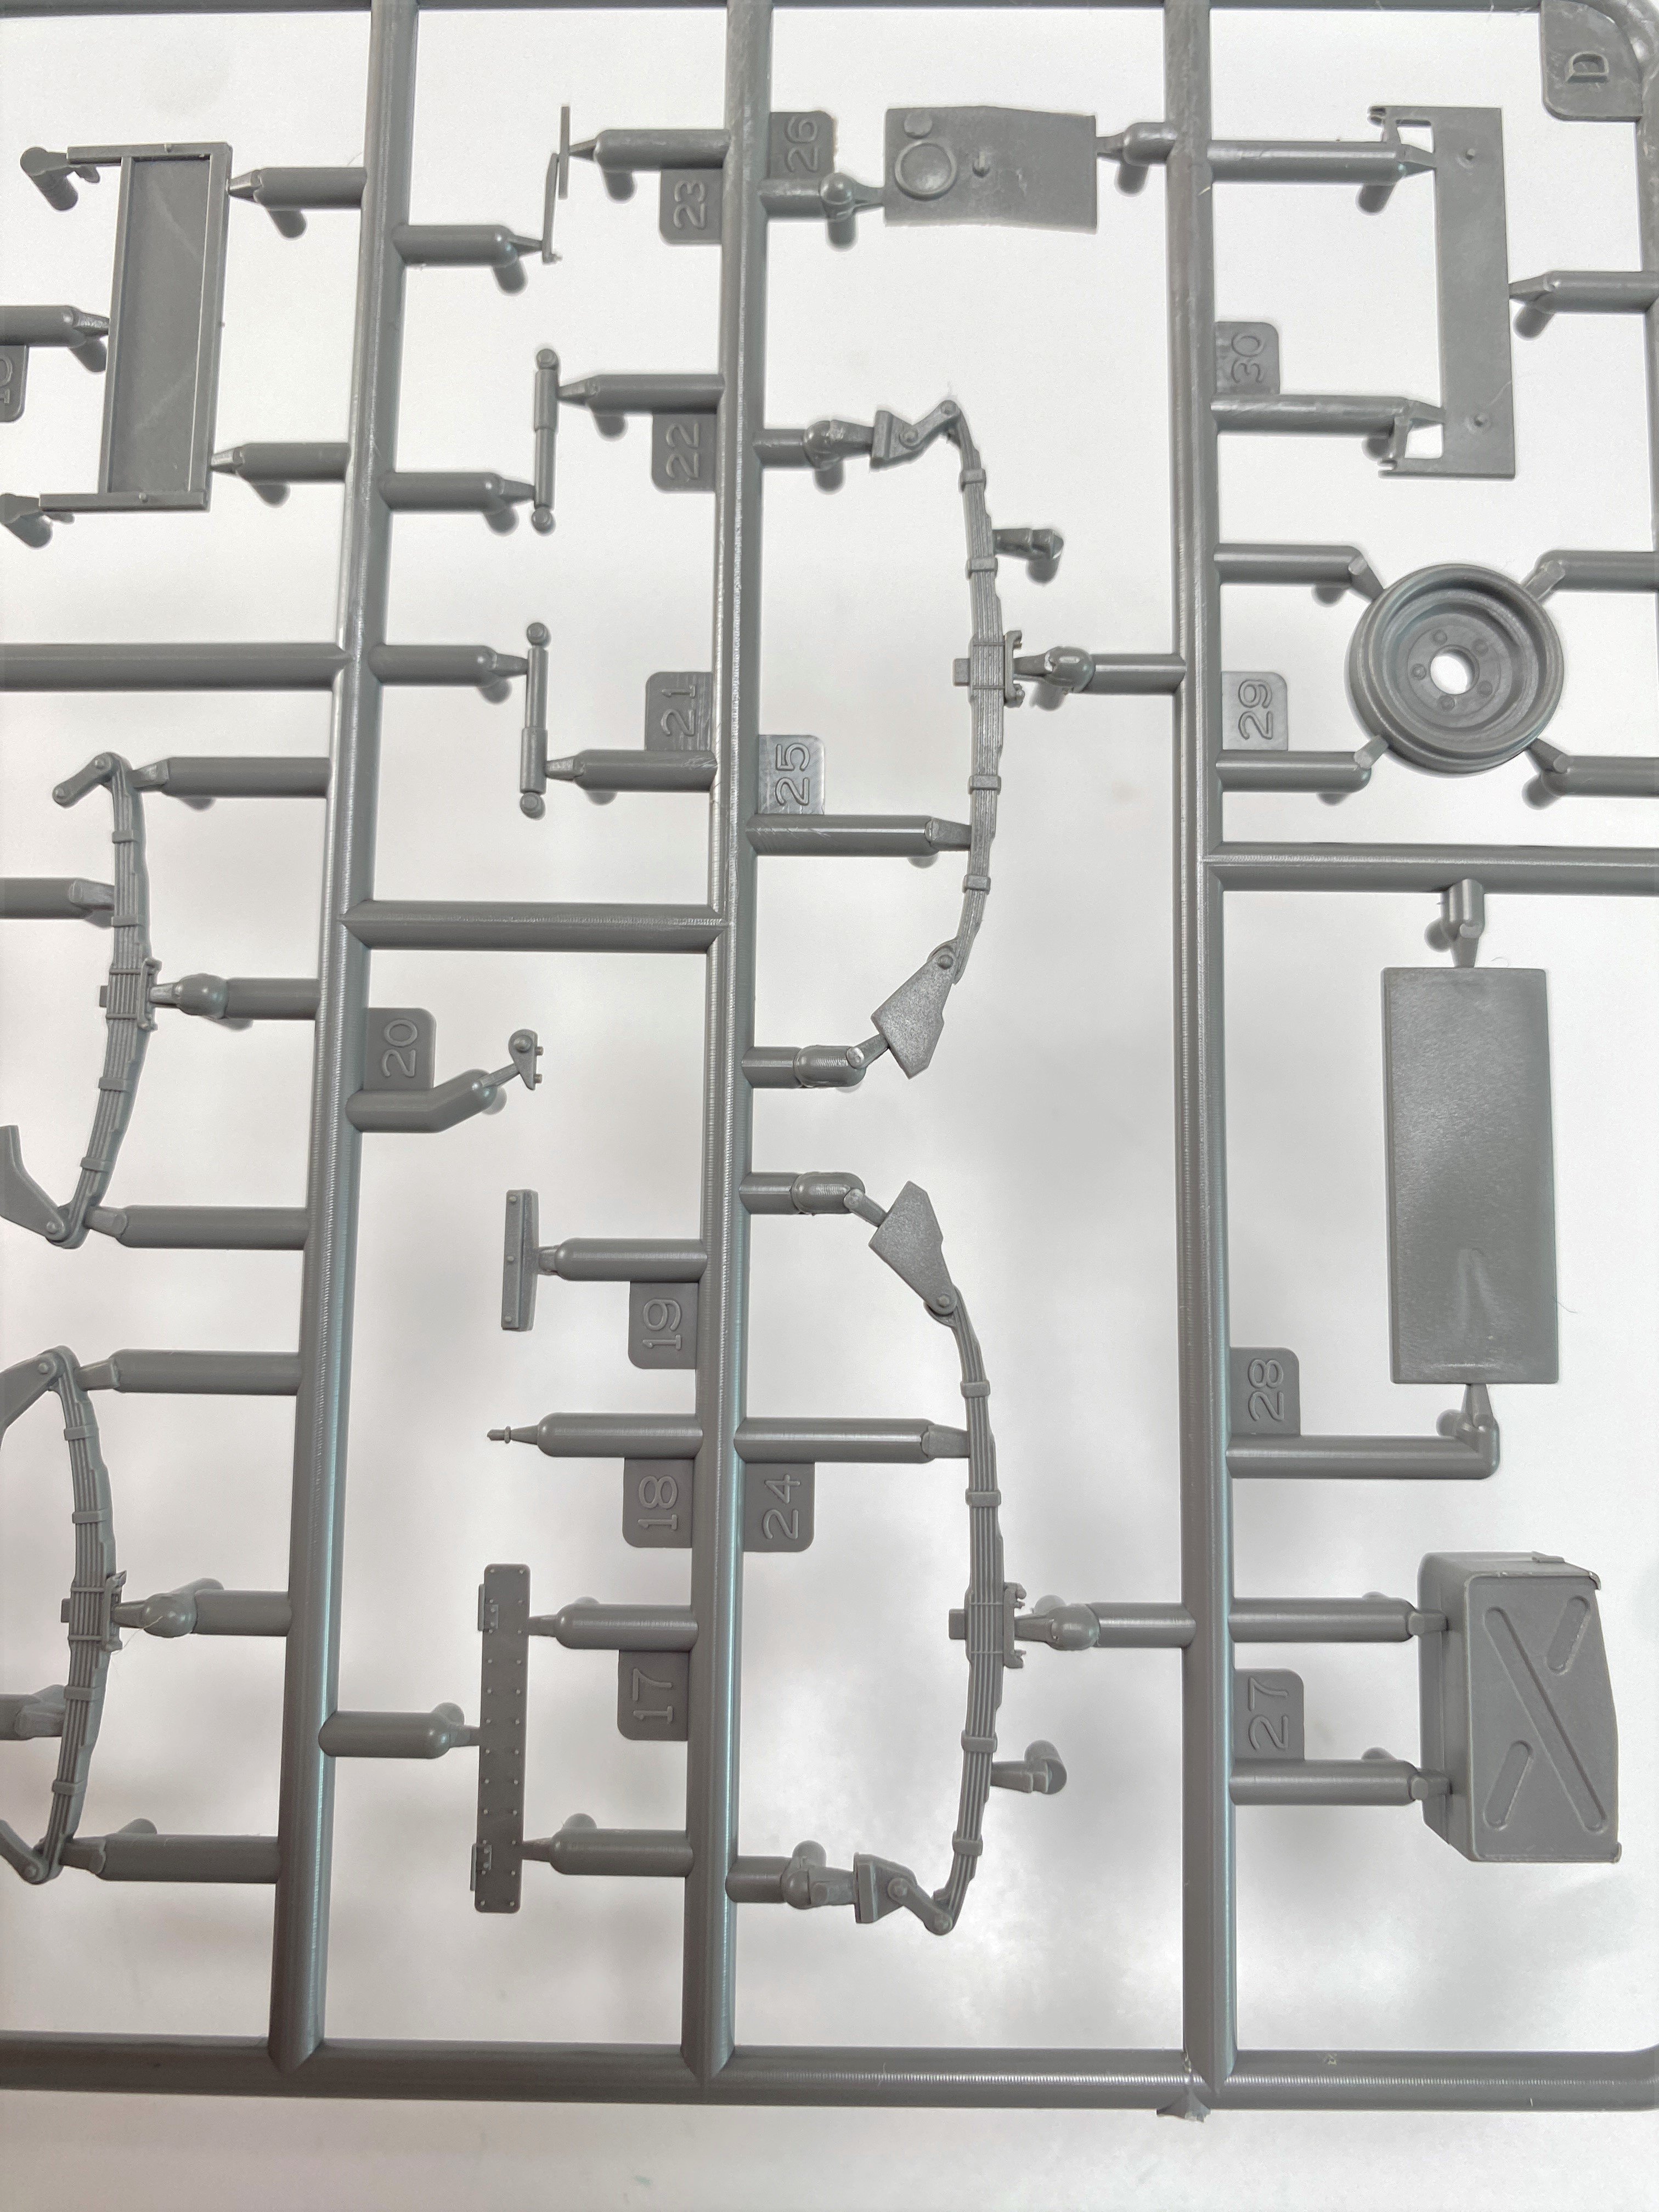
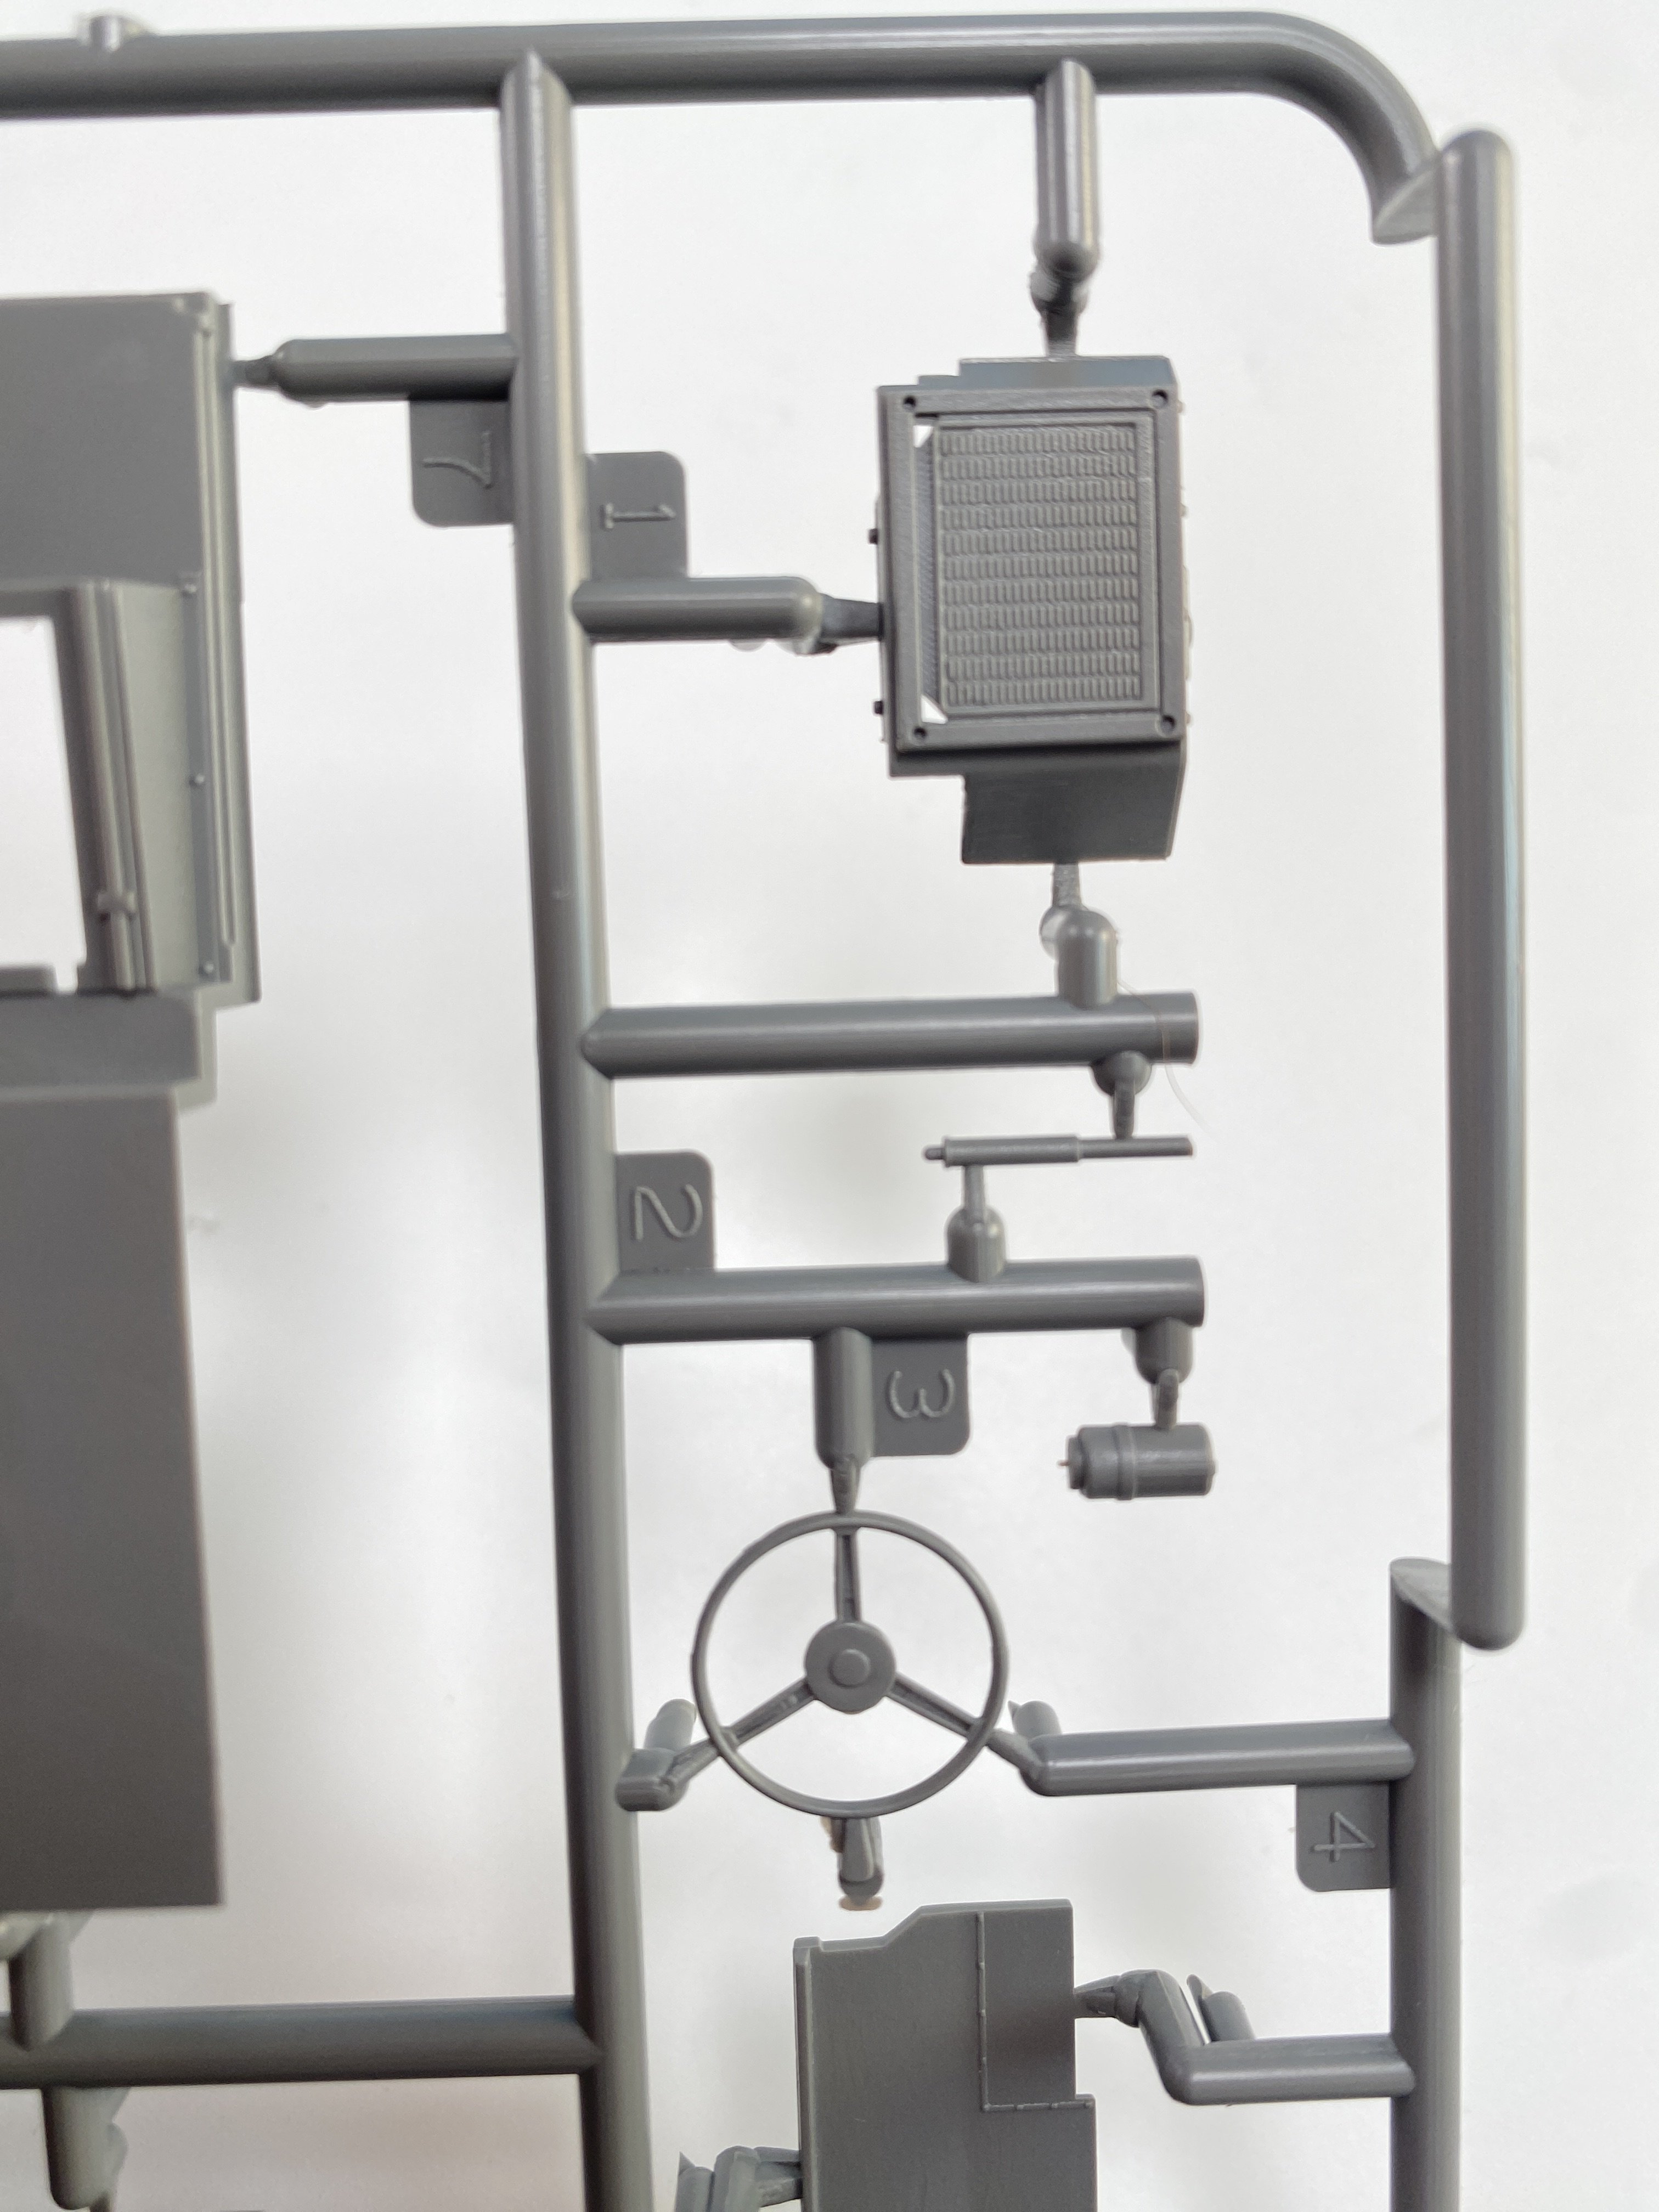
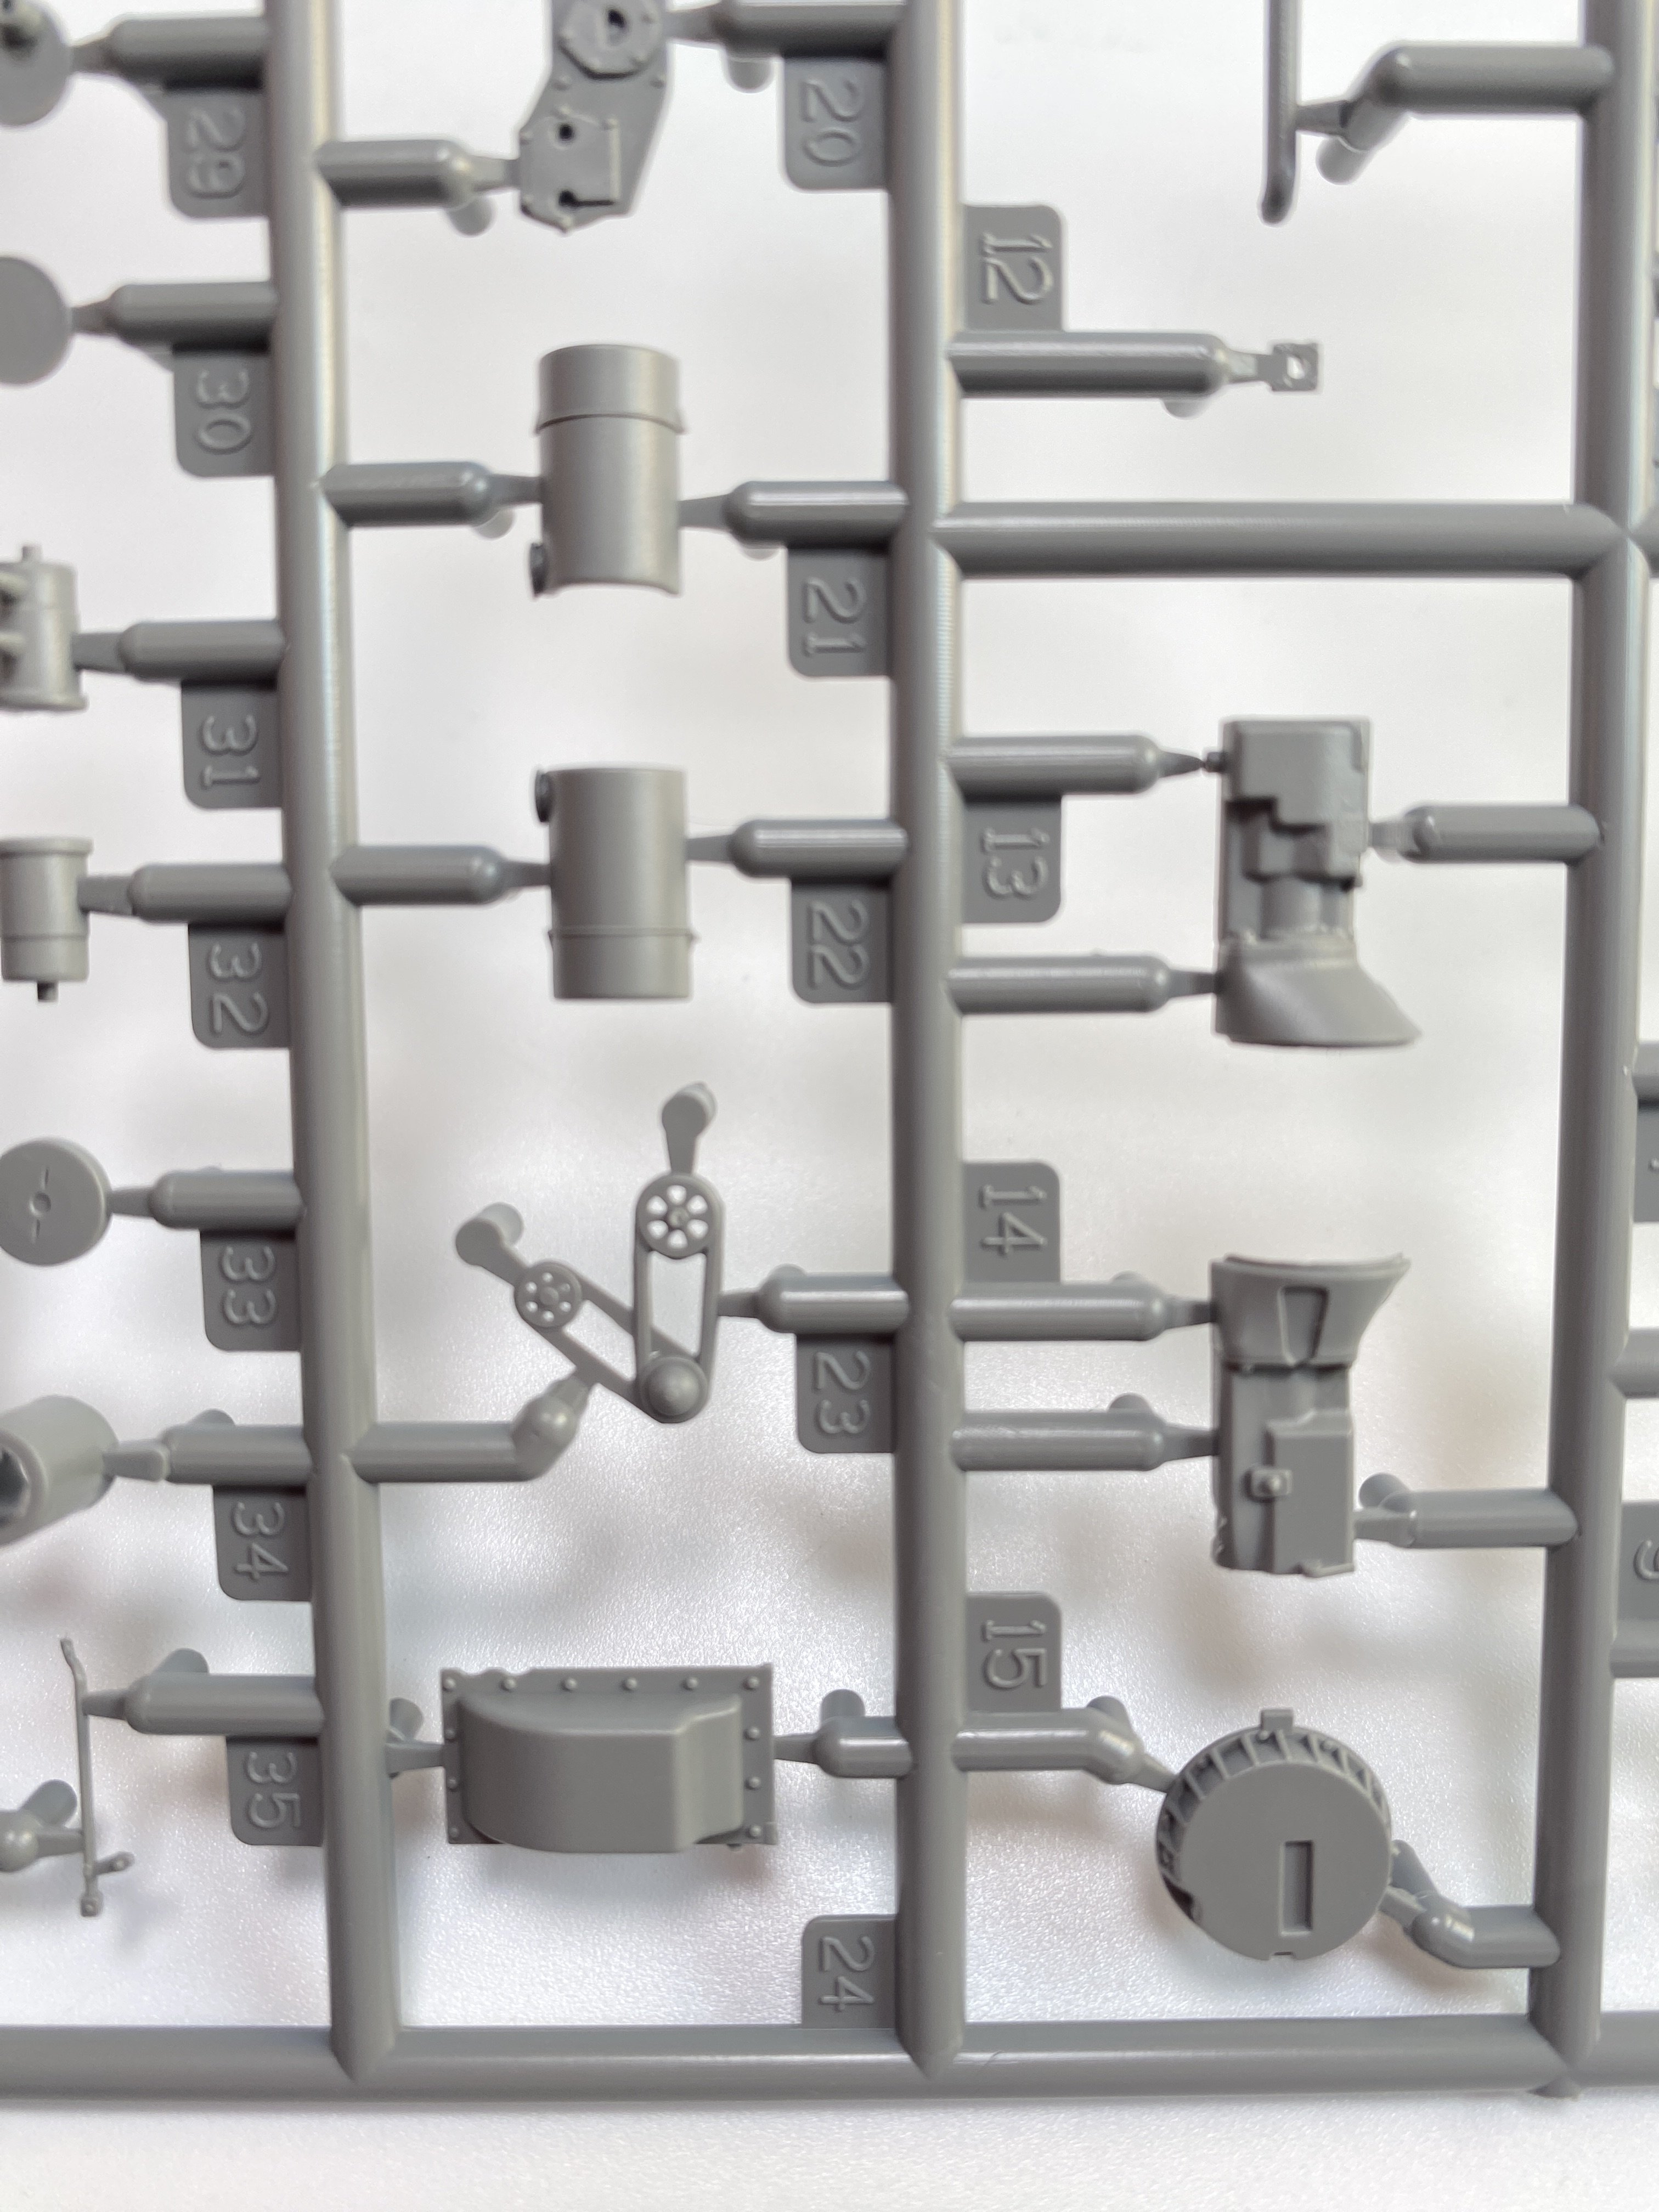
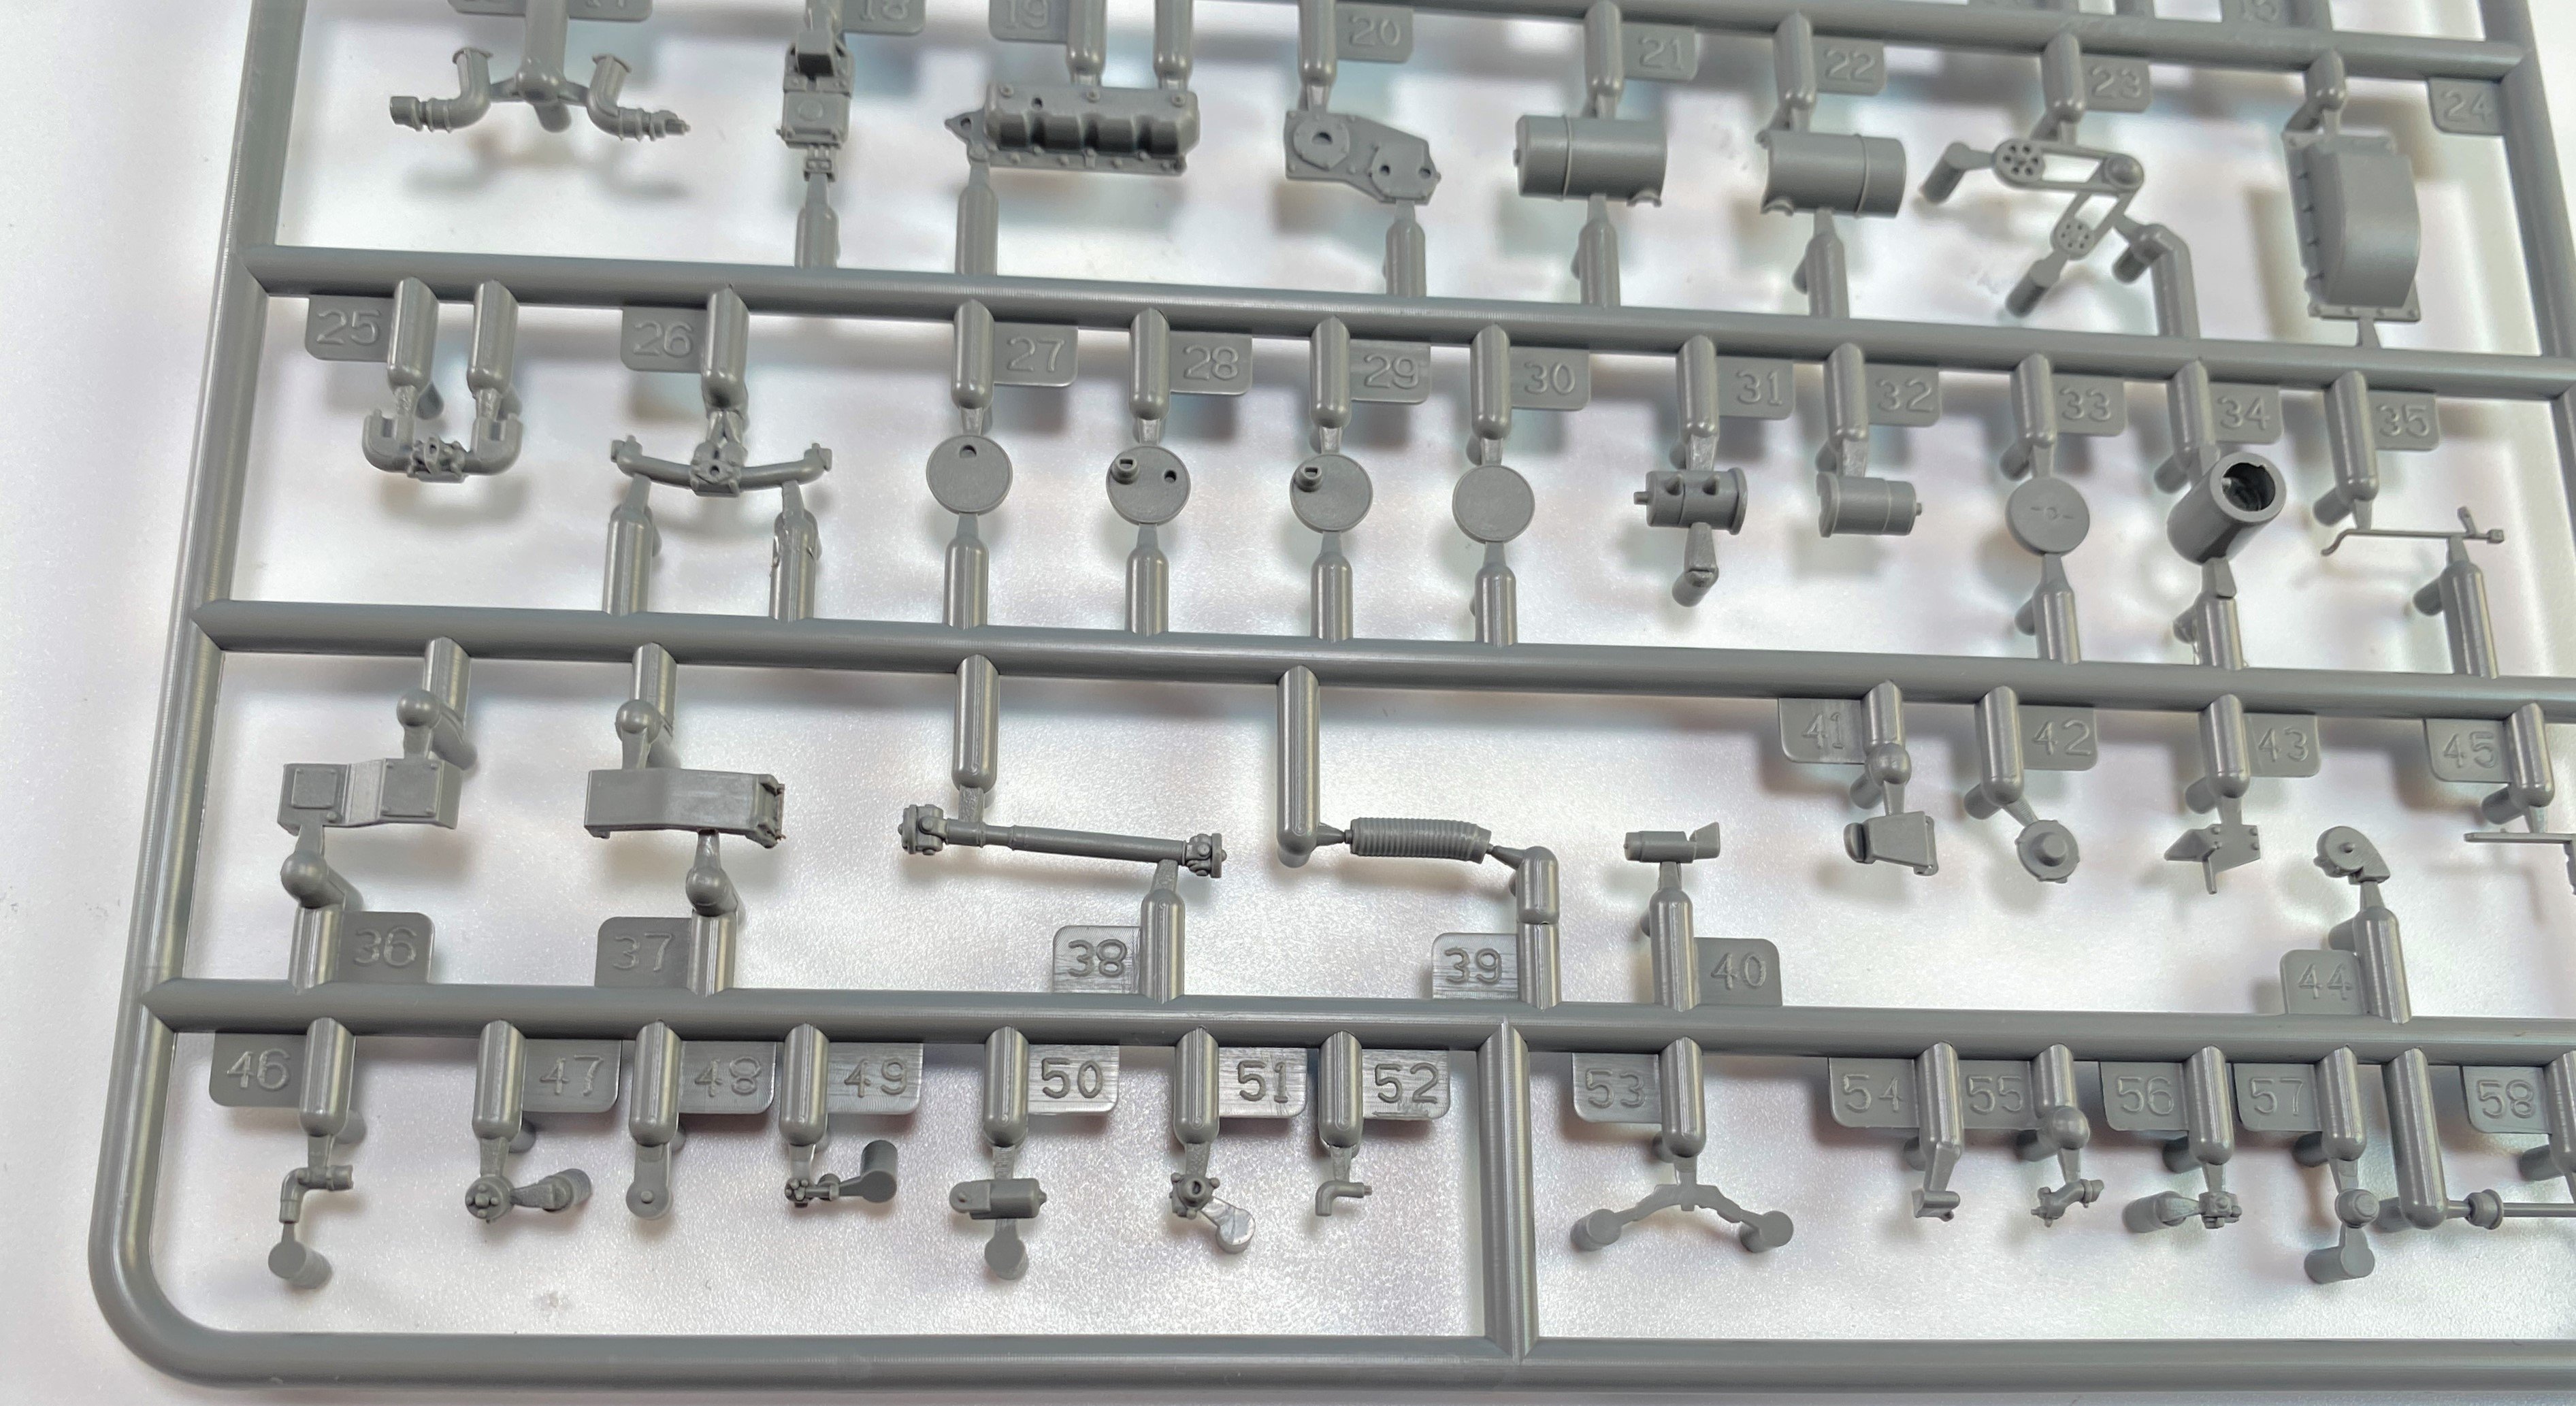
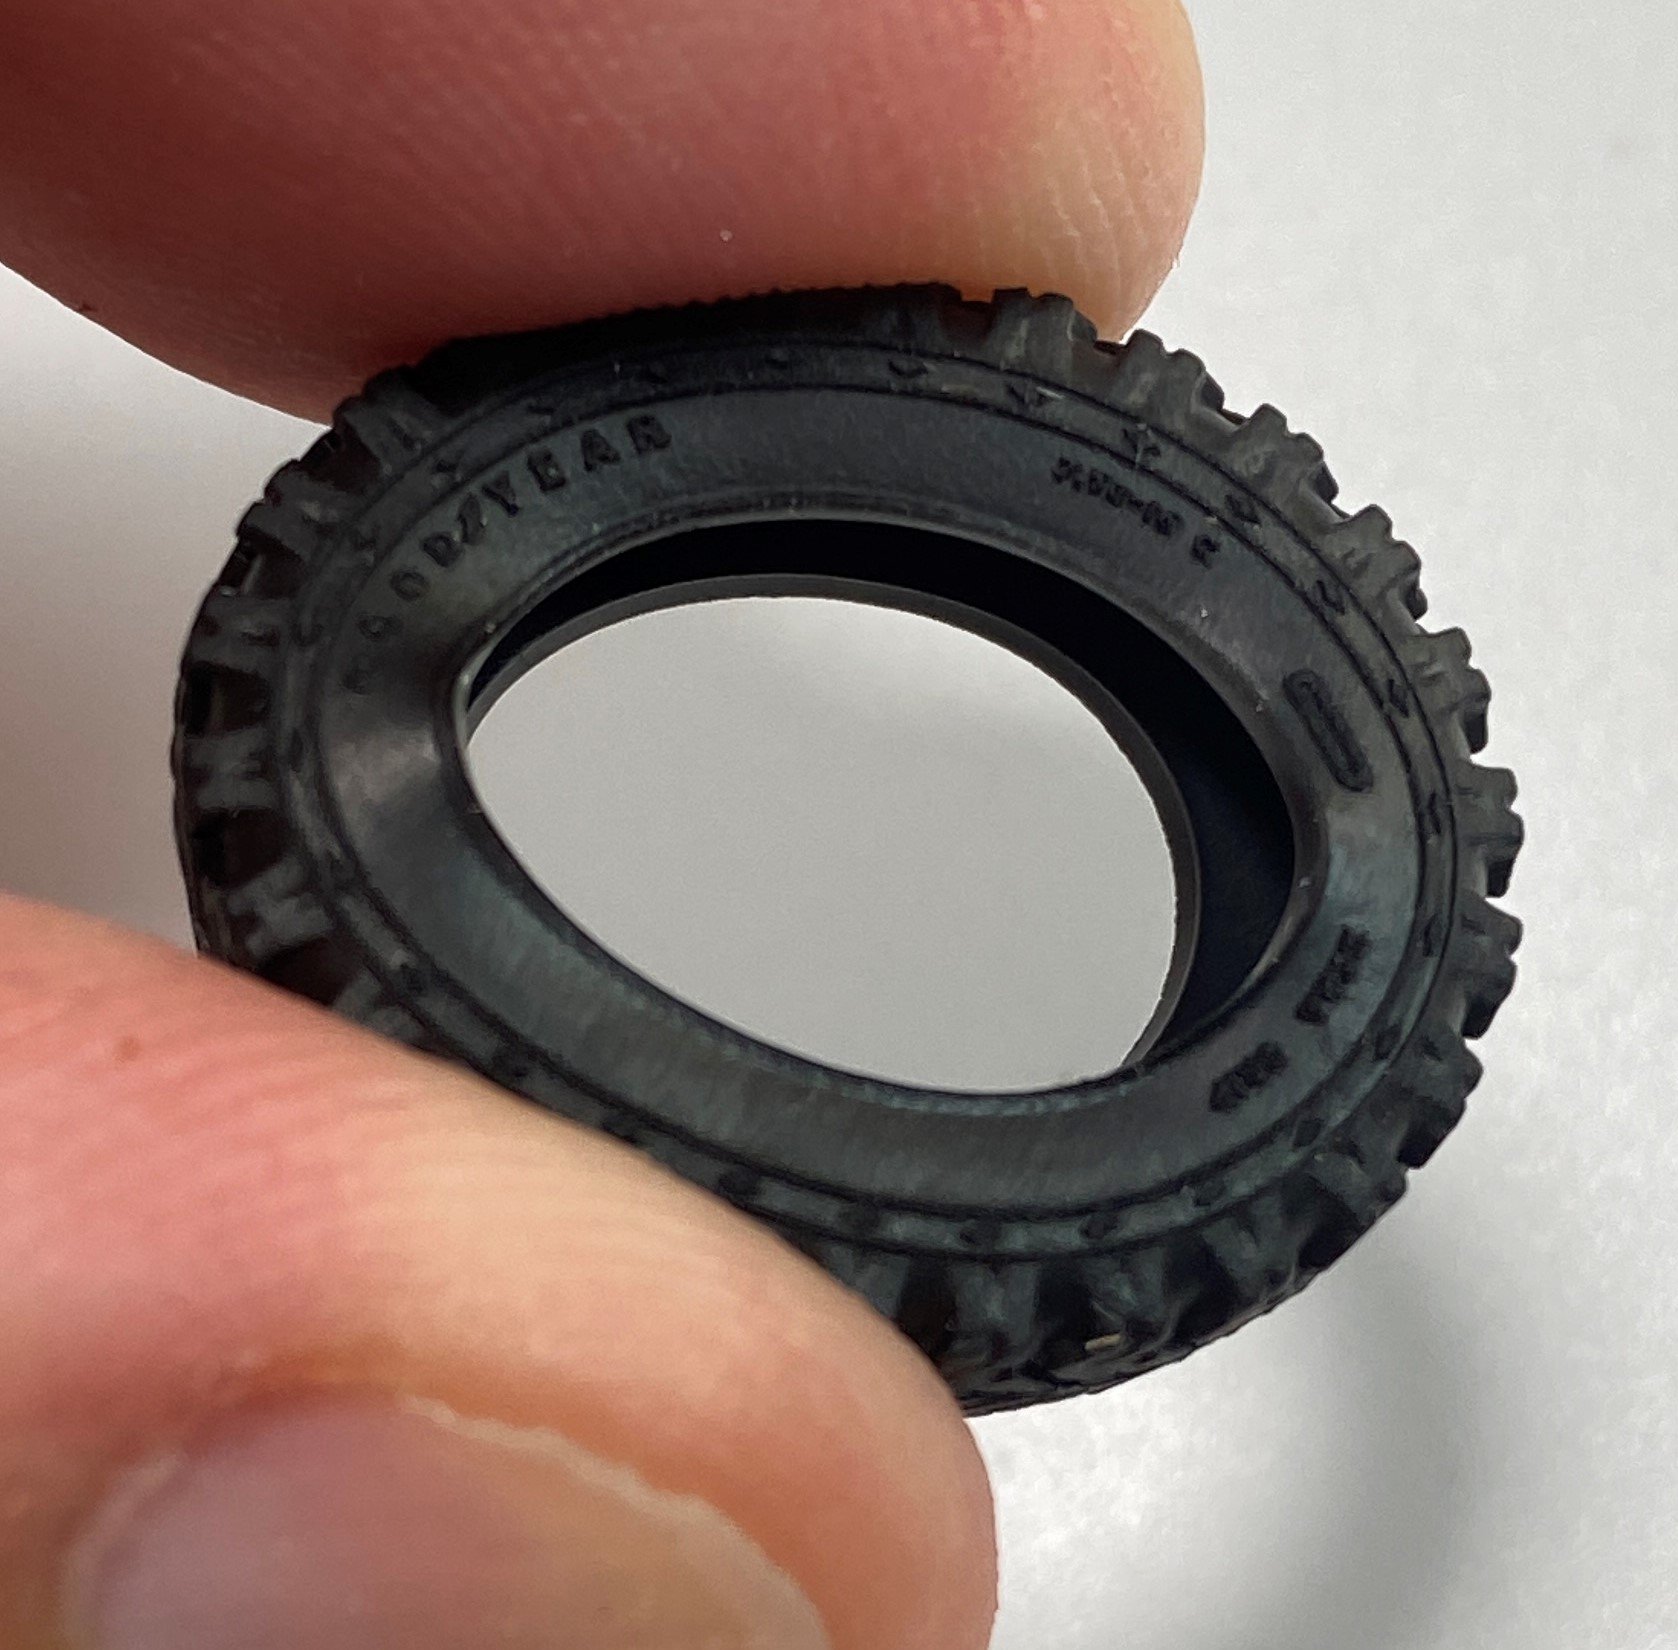
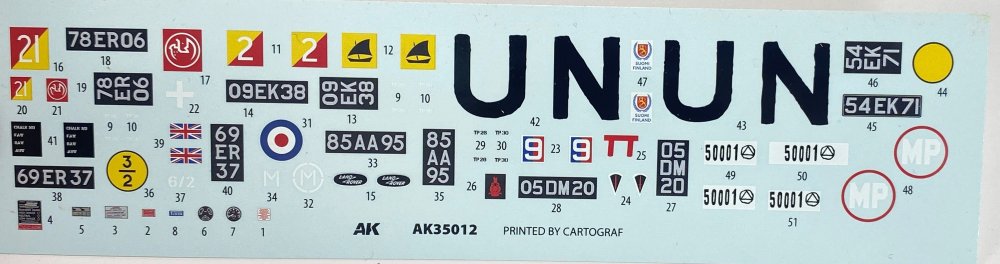
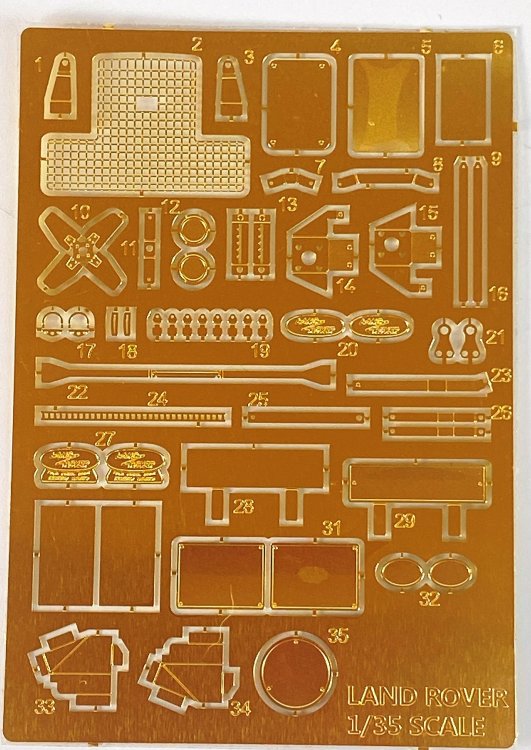
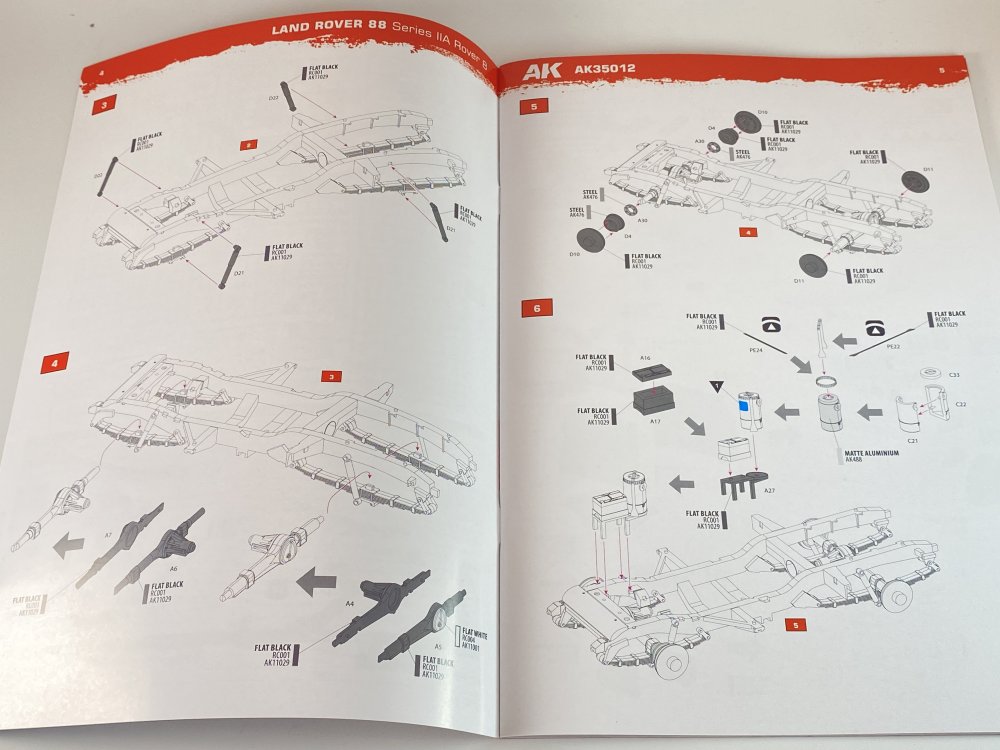
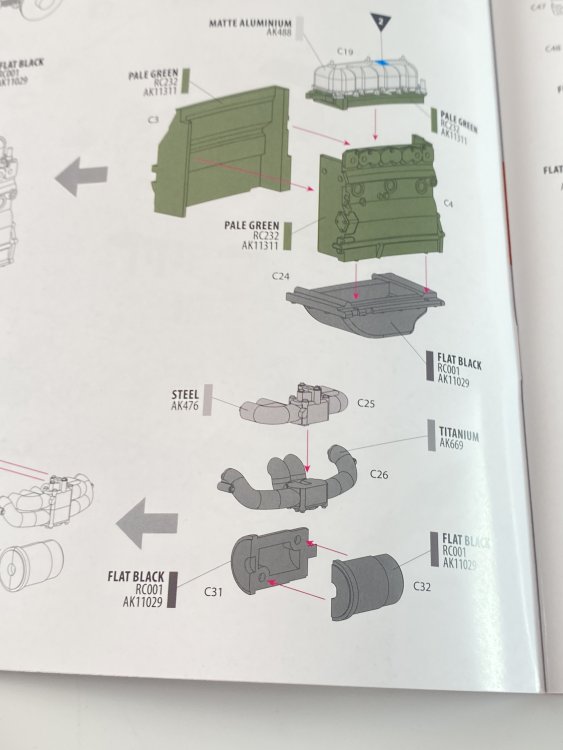
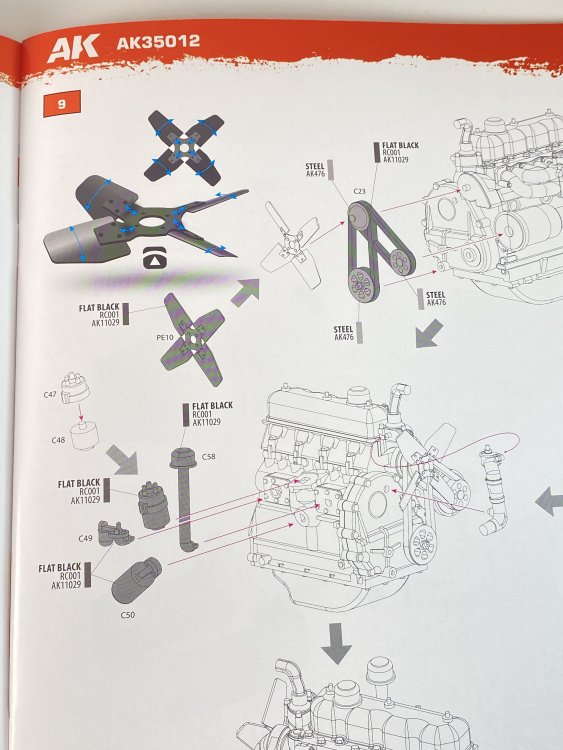
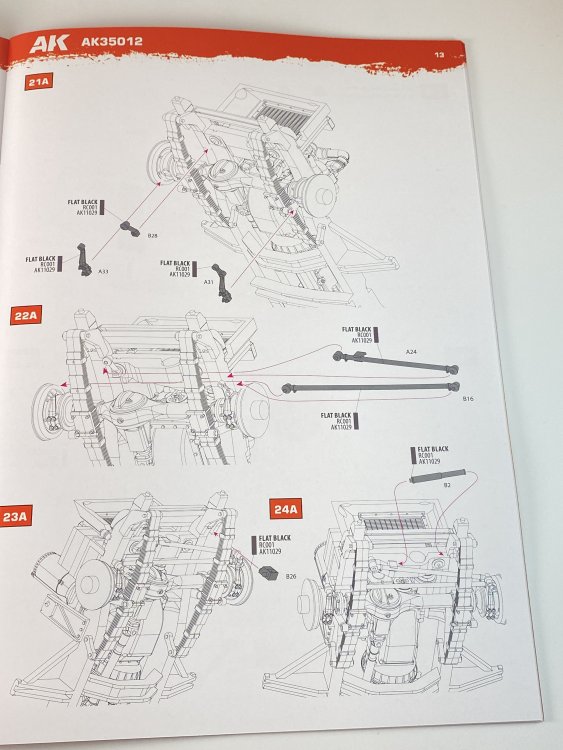
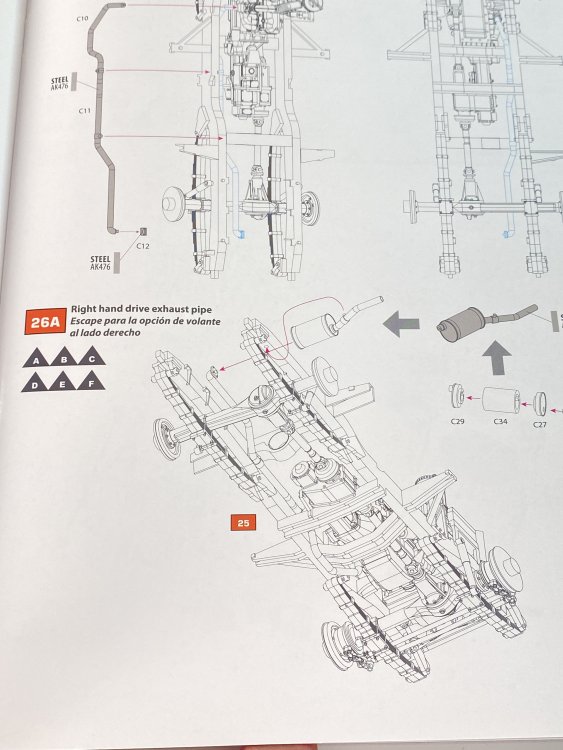
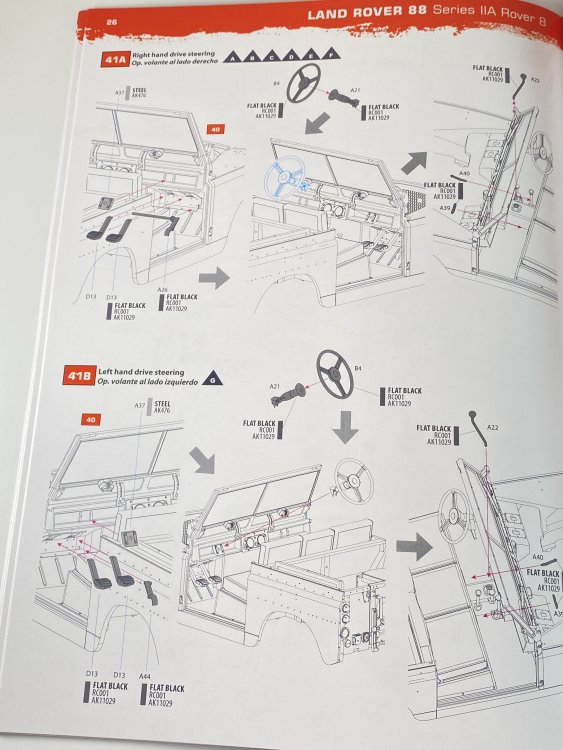
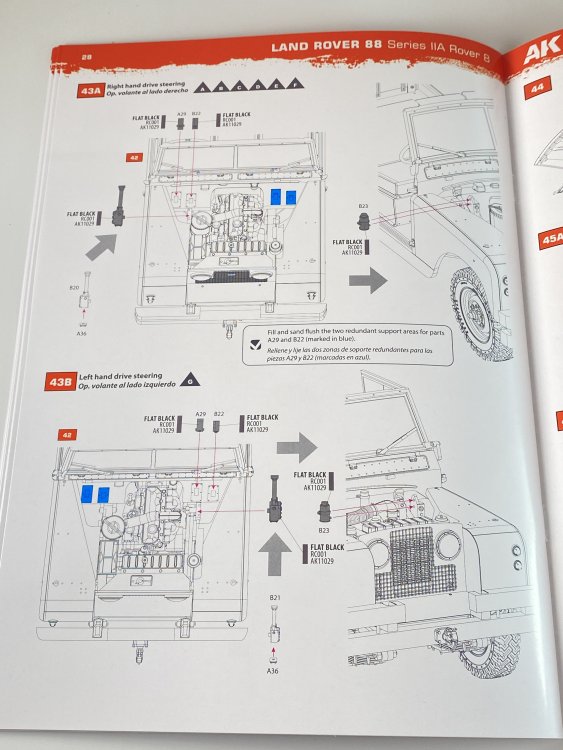
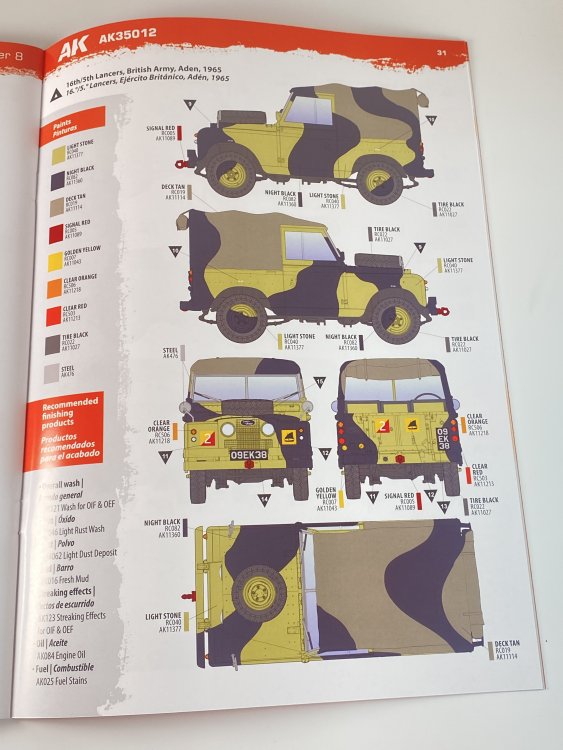
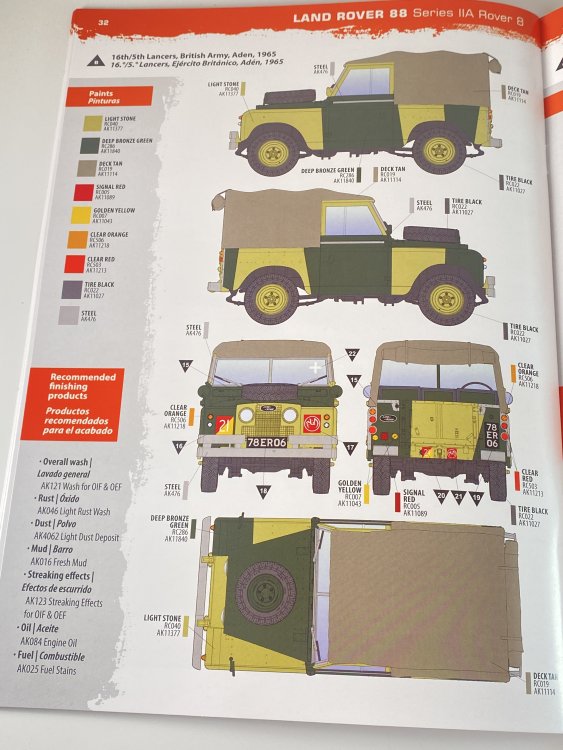
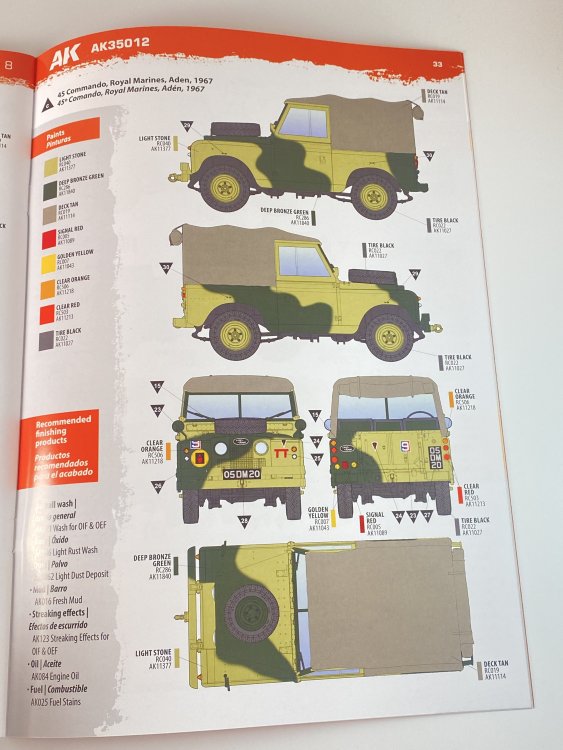
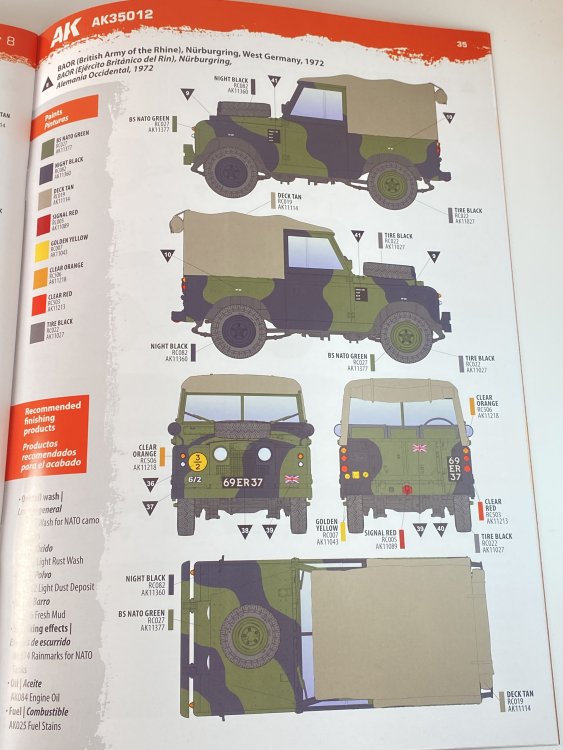
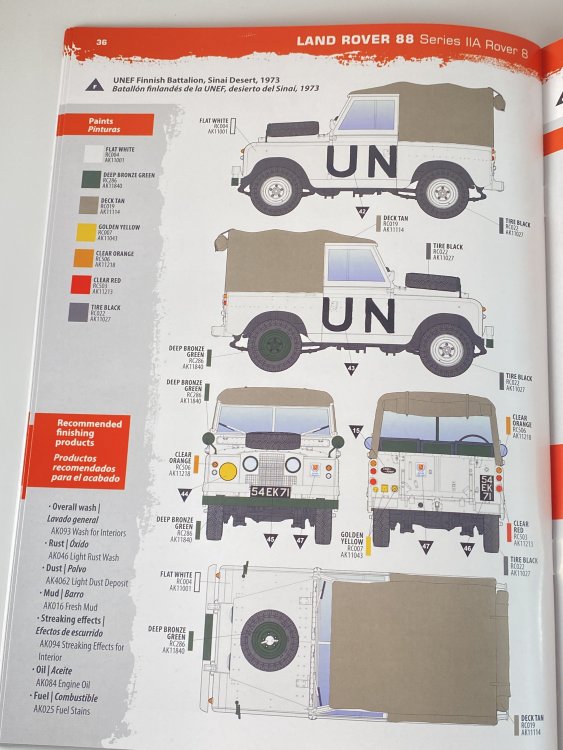
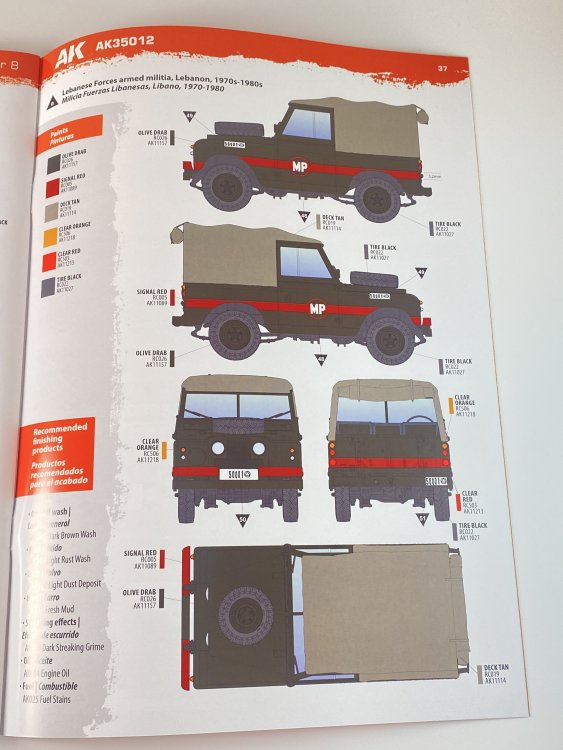
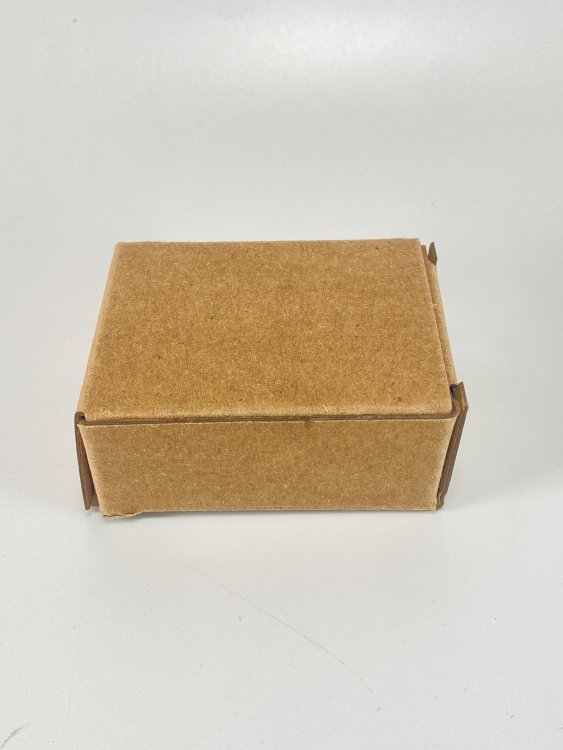
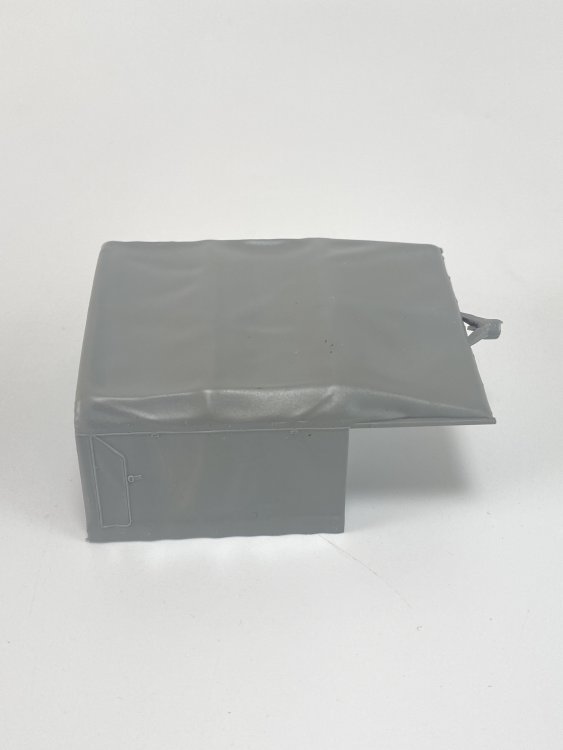
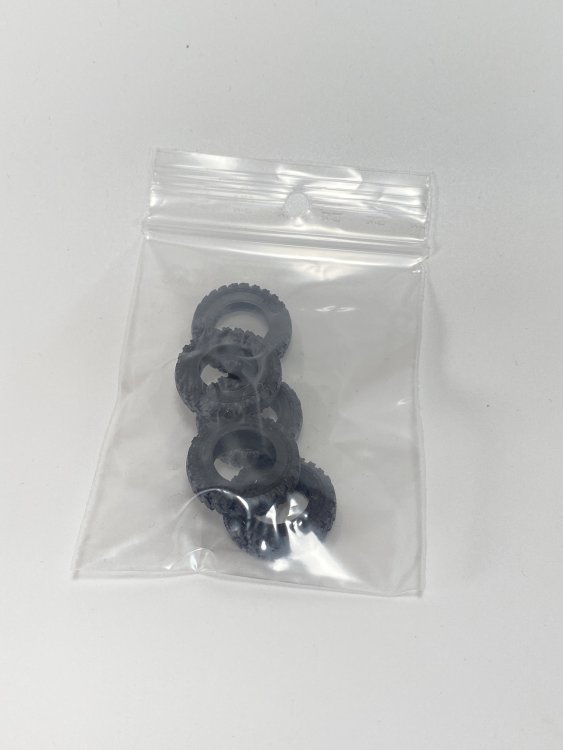
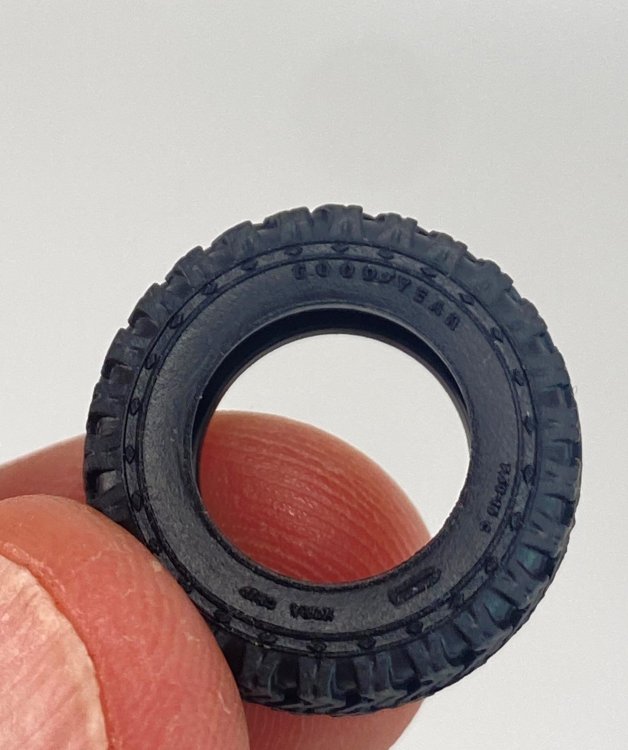
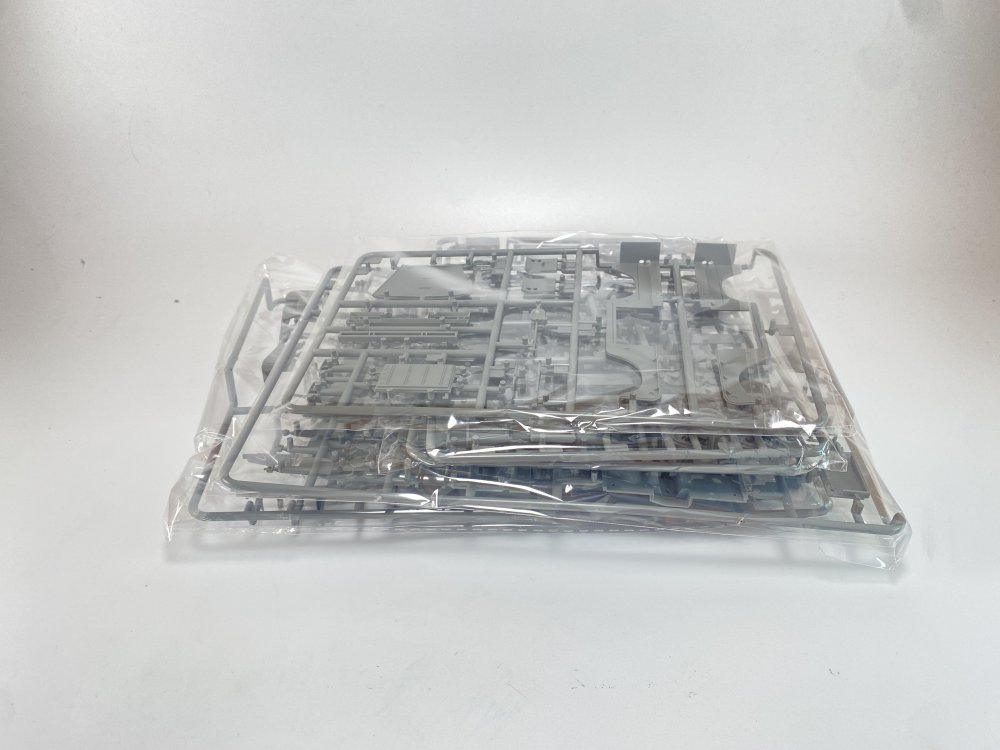
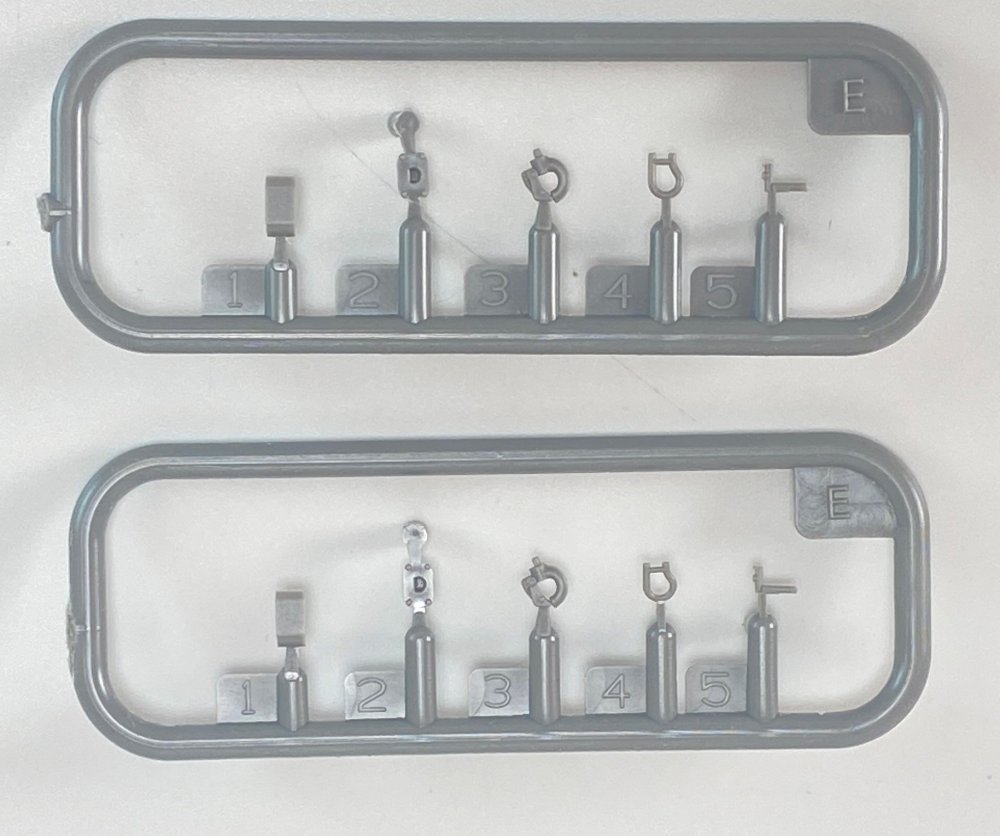
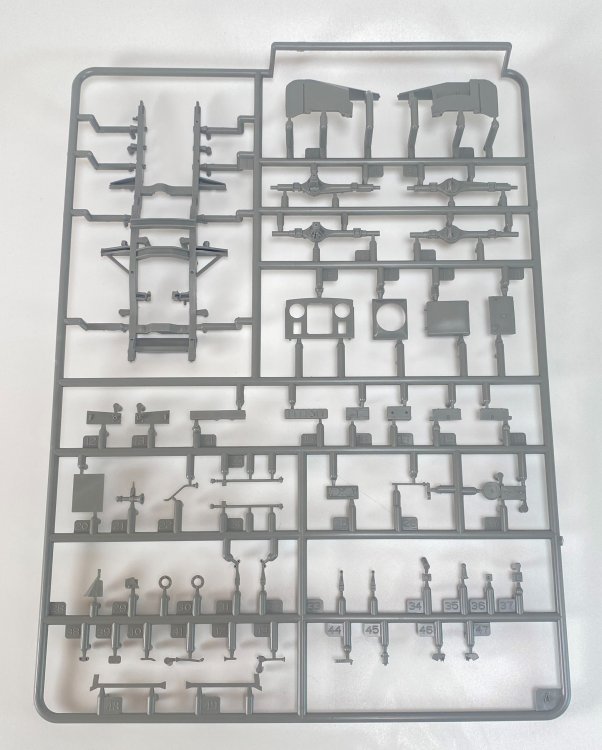
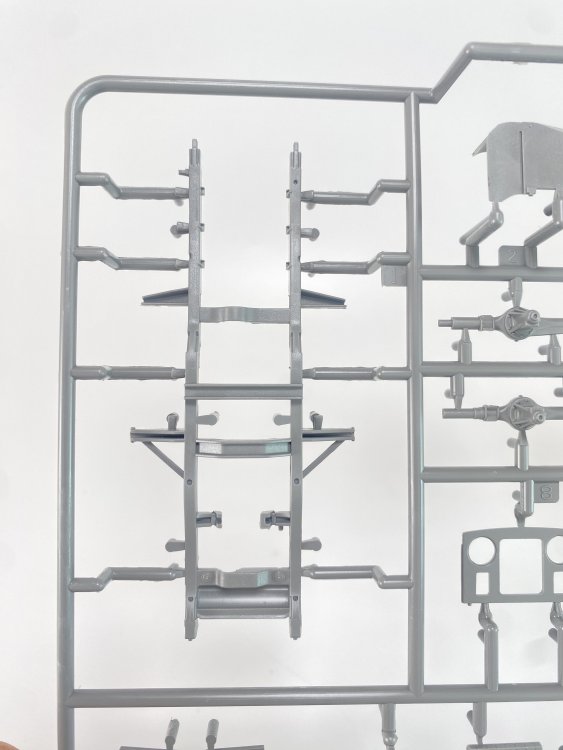
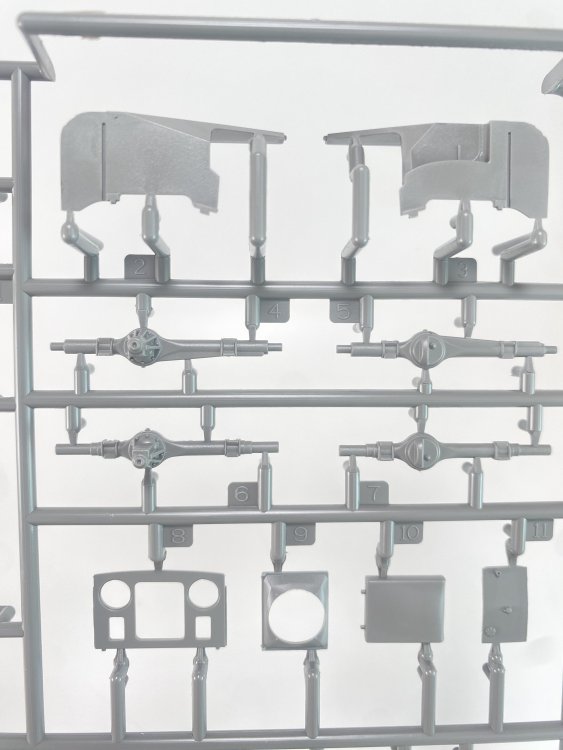
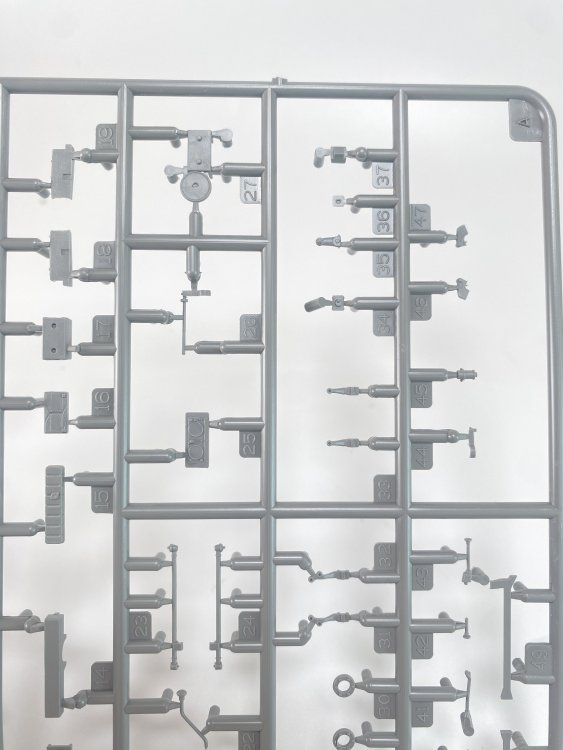
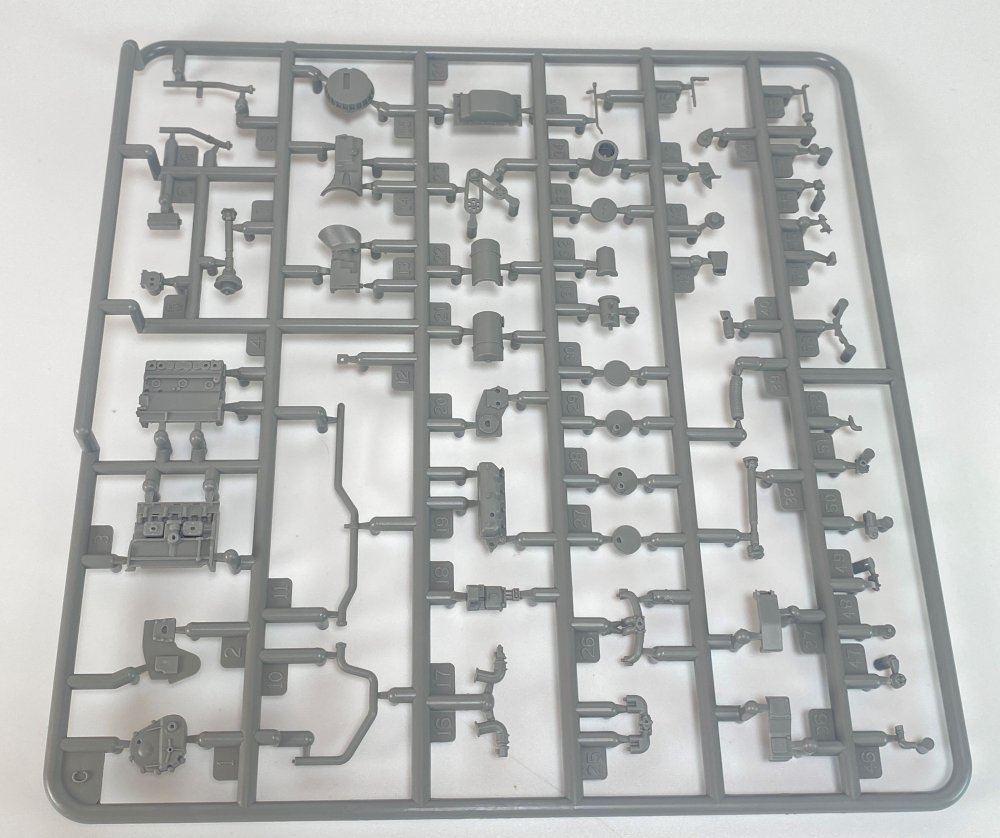
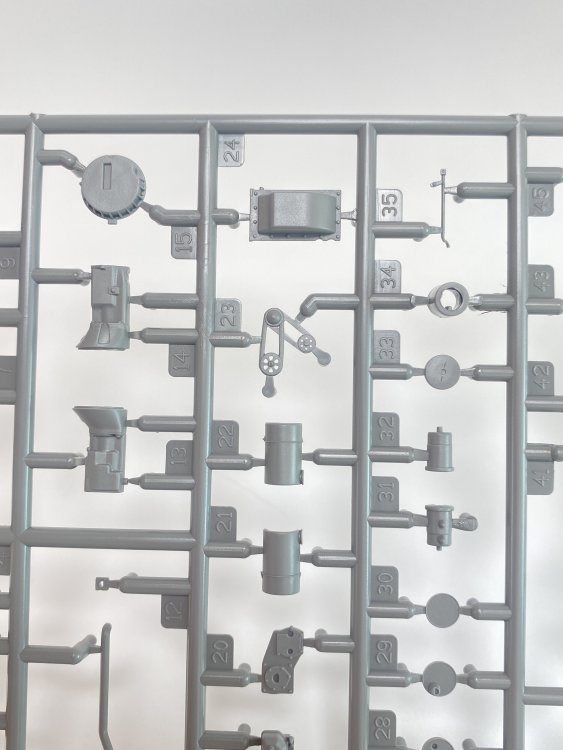
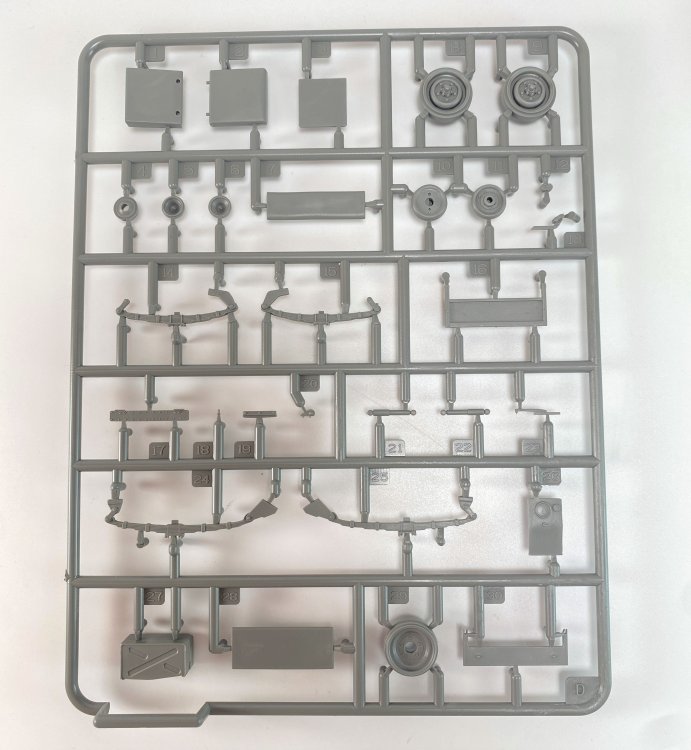
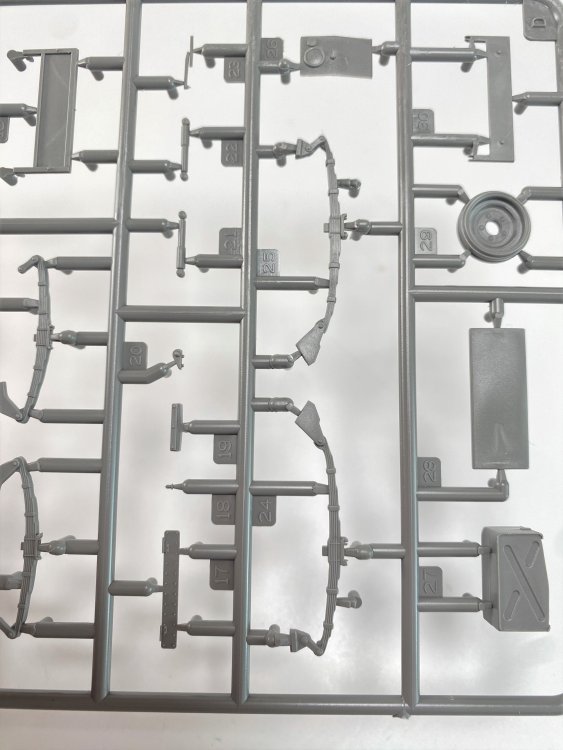
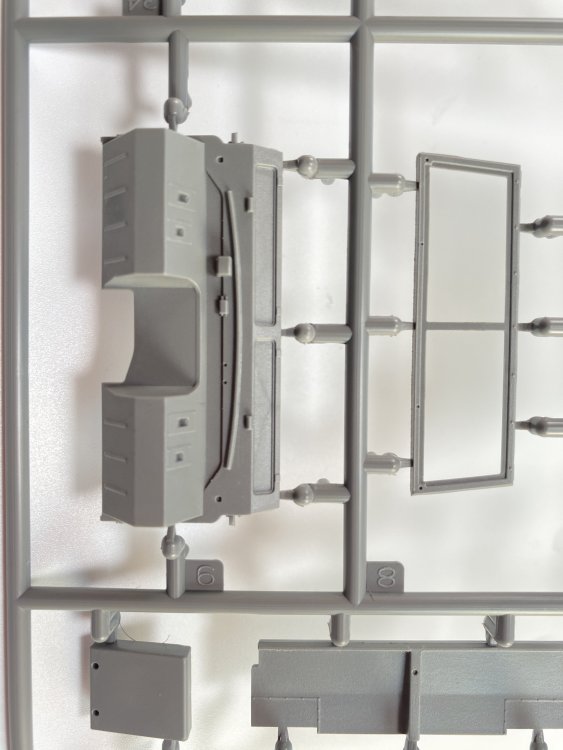
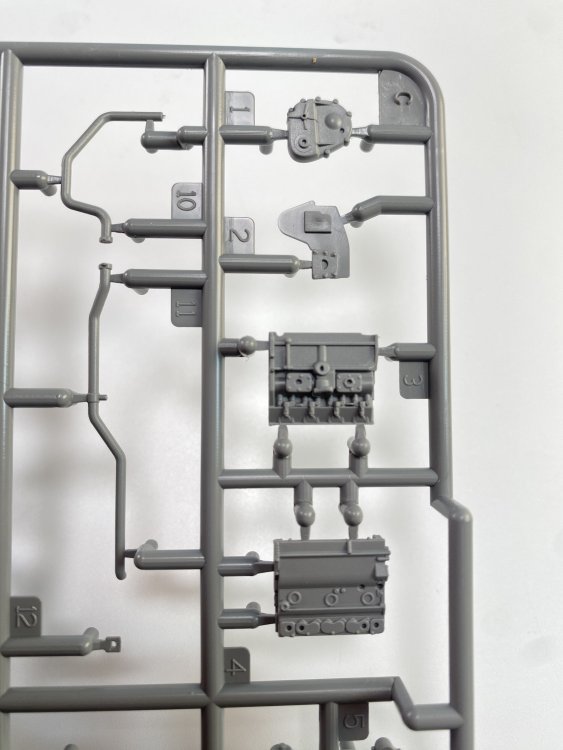
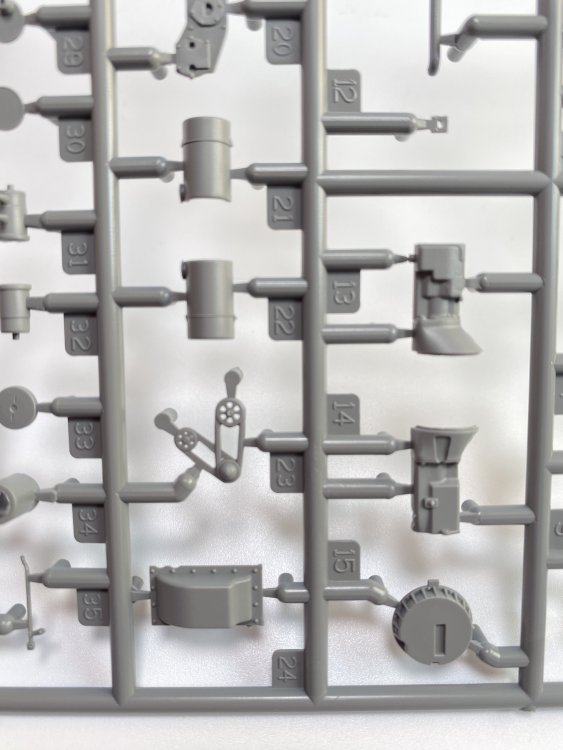
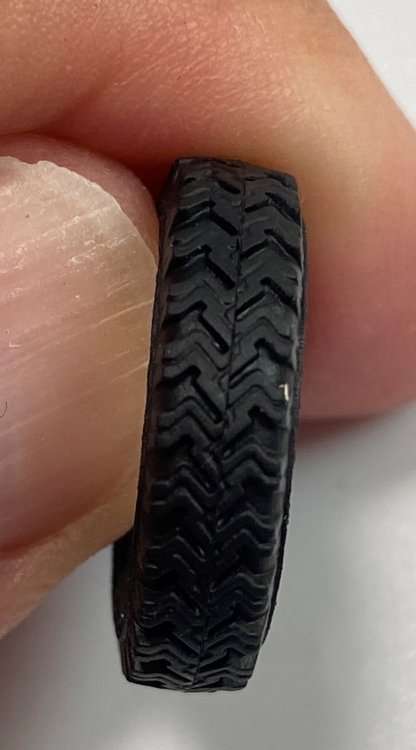
Land Rover 88 Series IIA Rover 8 Catalogue Number AK35012 Price Tag: 37,95€ AK Interactive started to release their own brand of models, starting with some rebox. After that, they enter the injection mold world with the Toyota FJ43 that we build free paint here. Now we have the pleasure to review the new AK release: the Land Rover 88. The box art is a very attractive with a 16th/5th Lancers, from the British army. One thing that is curious and we didn’t saw in the Toyota release is that AK gave the “real name” to it: Land Rover. And you can see the Land Rover logo on the left bottom corner showing that AK got the Land Rover permission (licensed by). Opening the box, all the sprues are individually wrapped, the decals sheets are lose as the PE fret. It’s a small decal sheet and PE, so there`s no problem with that. Four tyres (rubber ones) are in a single little bag and a small cardbox inside. Opening that, a fragile piece is inside – a boxed optional canvas. The care of packing is a real plus. Nice AK. The injection looks very good with the injection pins well placed to avoid some extra work (at least it seems). Checking the sprues, the amount of parts and the details of the injection parts is really eye-catching because they are in fact really good. One of the best I have seen in 1:35. A few injection marks could be a little trouble as they probably show up after build. While the suspension is not movable, the detail is outstanding, so you get a full detail engine and full detail gearbox, alongside with radiator, battery, and the entire mechanic associated. Only you have to do is adding wires. Another thing that AK made possible: option of left or right drive vehicle. And they do not only chance the steering wheel from left to right (with a new tablier design) but they also chance all the wheel drive mechanism. Fantastic!!! The PE fret gives some extra details like the front radiator grill, engine fan and some extra engine details, clamps, windshield up and down, Land rover logo, and license plate. The external detail is also very complete and very well replicated. The final look will be a Land Rover 88 for sure. The instruction booklet is a glossy paper with 38 pages. The assembly instructions are clear, with step-by-step illustrations that guide you through the building process. The sequence of construction is logical, making it relatively easy for both beginners and experienced modelers to follow along. No kit is perfect and this have one thing that I don’t like: vinyl rubber tyres. I always get these substitute by resin ones Another thing. All the mechanical details, the interior detail (with the option for left or right side drive), the hood can be display wide open, and you simply don’t have the option of opening the doors? Probably the open mechanism is hard to achieved… The decals come in a small rectangular sheet, with very good color registration and pigmentation… Nothing to say as they are made by Cartograf. AK has provided 7 schemes for this release, which are: 1. 16th/5th Lancers, British Army, Aden, 1965 2. 16th/5th Lancers, British Army, Aden, 1965 3. 45 Commando, Royal Marines, Aden, 1967 4. RAF Masirah, Oman, 1969 5. BAOR (British Army of the Rhine), Nürburgring, West Germany, 1972 6. UNEF Finnish Battalion, Sinai Dessert, 1973 7. Lebanese Forces Armed Militia, Lebanon, 1970 - 80 Conclusion The AK Interactive 1:35 Land Rover 88 model kit offers an impressive level of detail. This release is a upgrade work of the FJ43 previous release by AK, as it has more refined details going even further in the detail… All the details are there… you can choose to put them or not, but it almost sacrilege not to show those details. In the end, you get a very well detailed model that is an attractive choice for scale model enthusiasts, especially those with a penchant for military vehicles and the end result is a visually stunning and historically accurate representation of the Land Rover 88. Overall, I would highly recommend this model kit to intermediate and advanced modelers who appreciate a challenge and are willing to invest the time and effort to create a remarkable finished product. While it might require a bit more patience and skill, the AK Interactive Land Rover 88 is a rewarding build that showcases the beauty and intricacies of this iconic vehicle. Very Highly Recommend. Our thanks to AK-Interactive for the review samples and all the support given. To purchase this directly, click THIS link.


-
LSM Modelling News 2023 merged Fran and Artful69’s threads
Fran replied to Fran's topic in Modelling Discussion
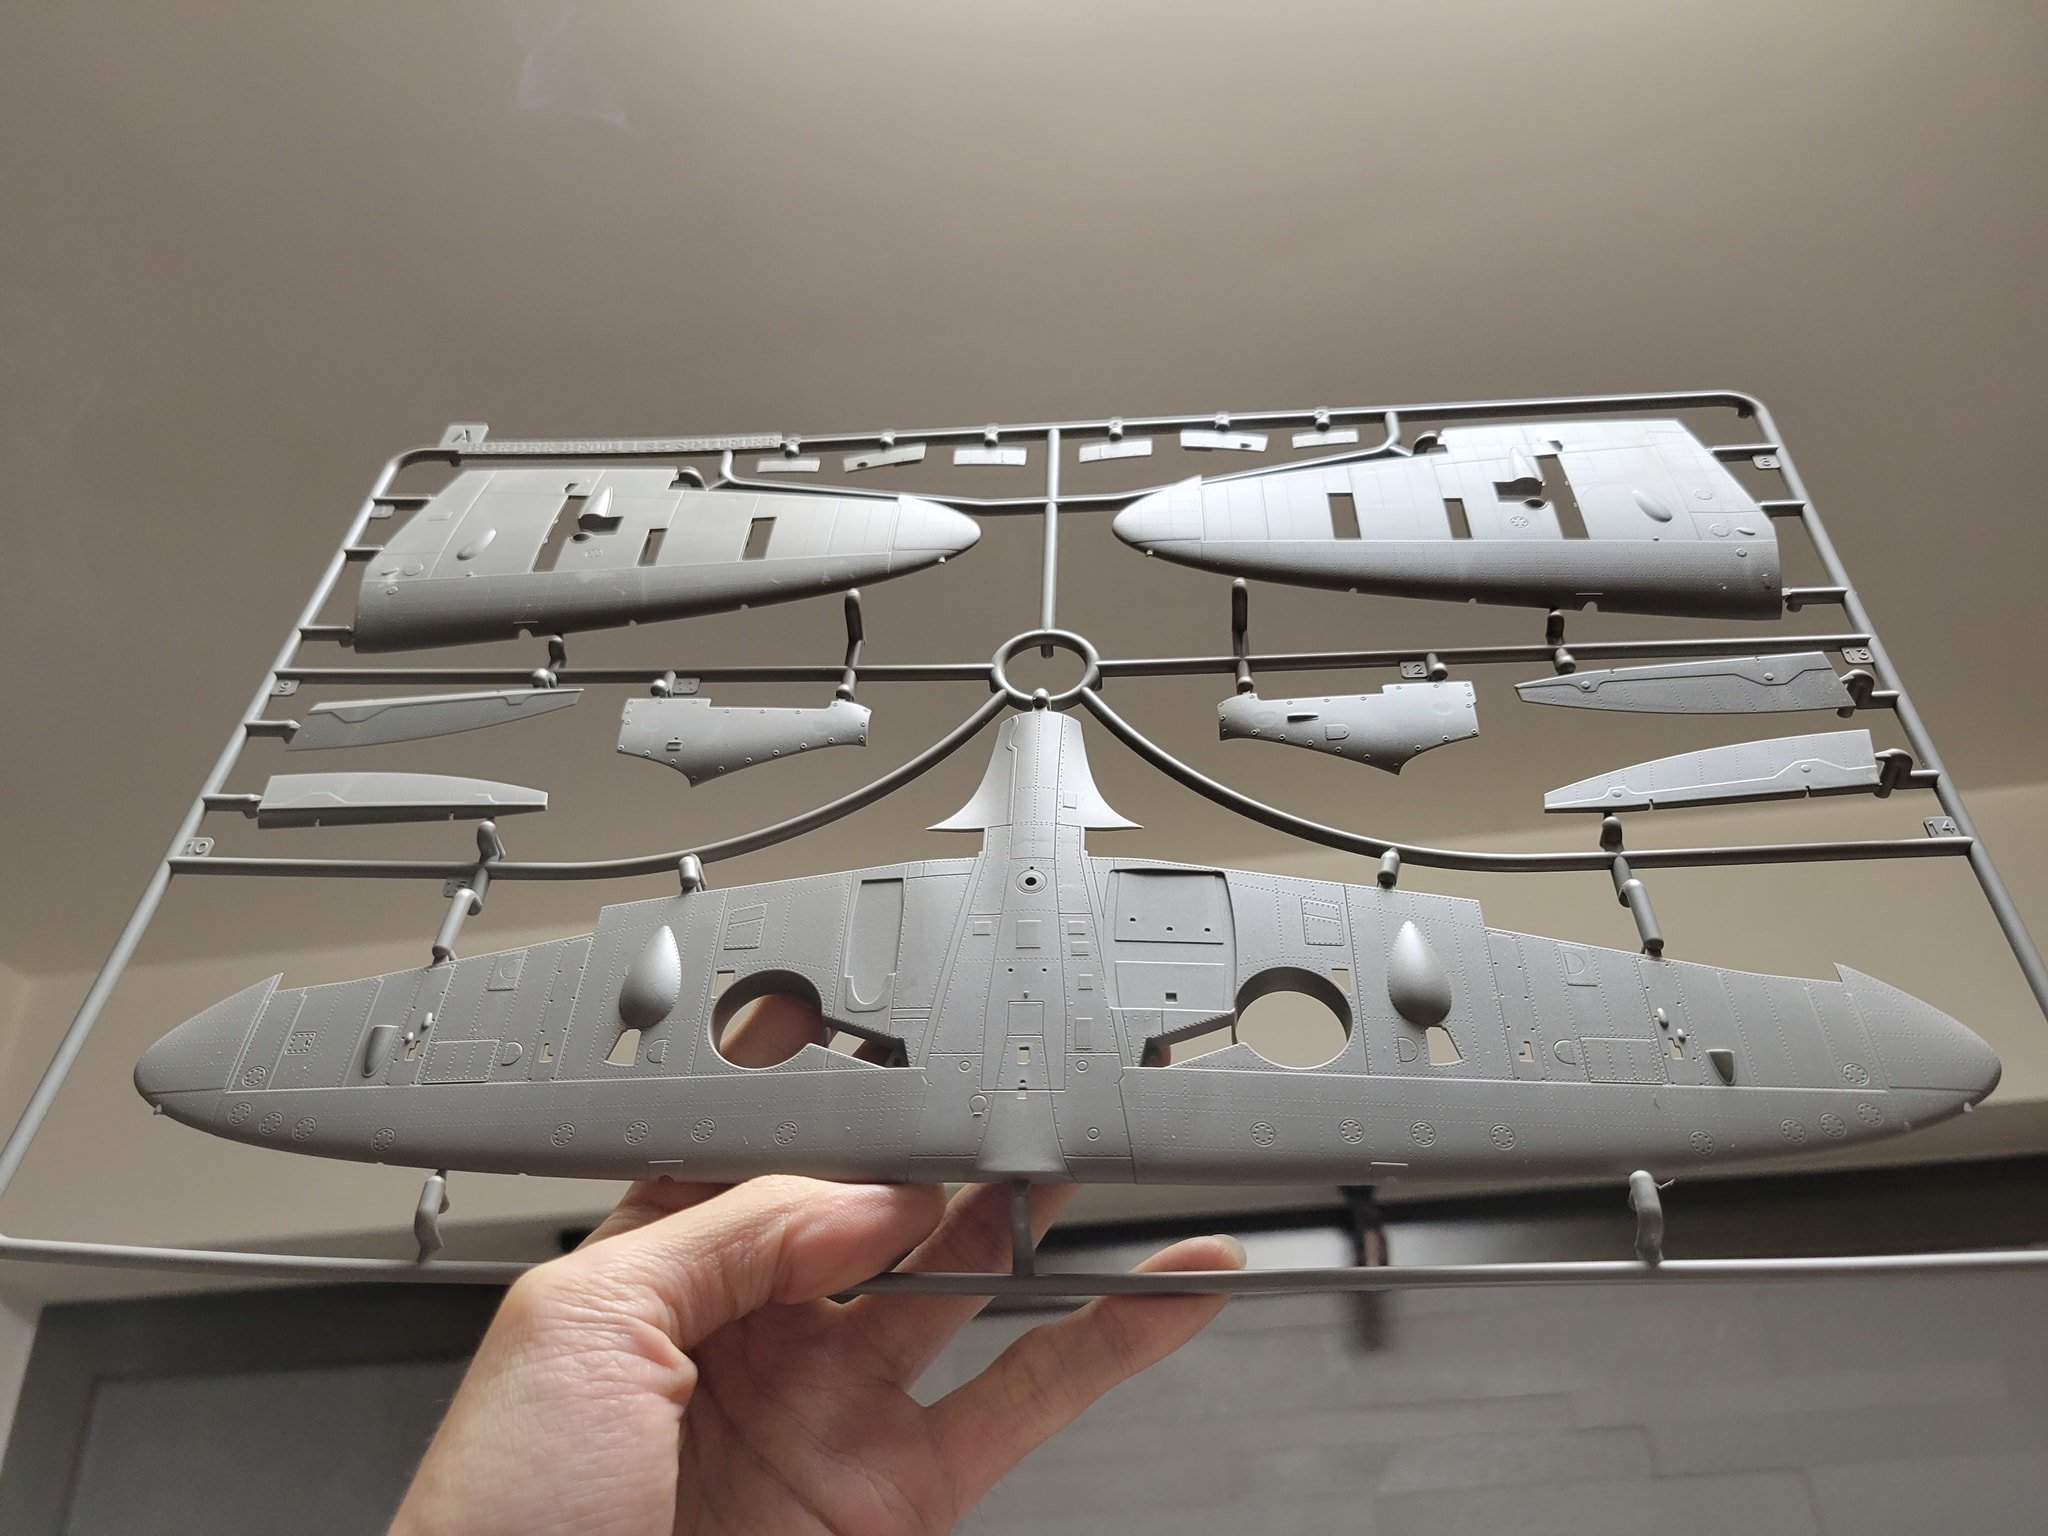
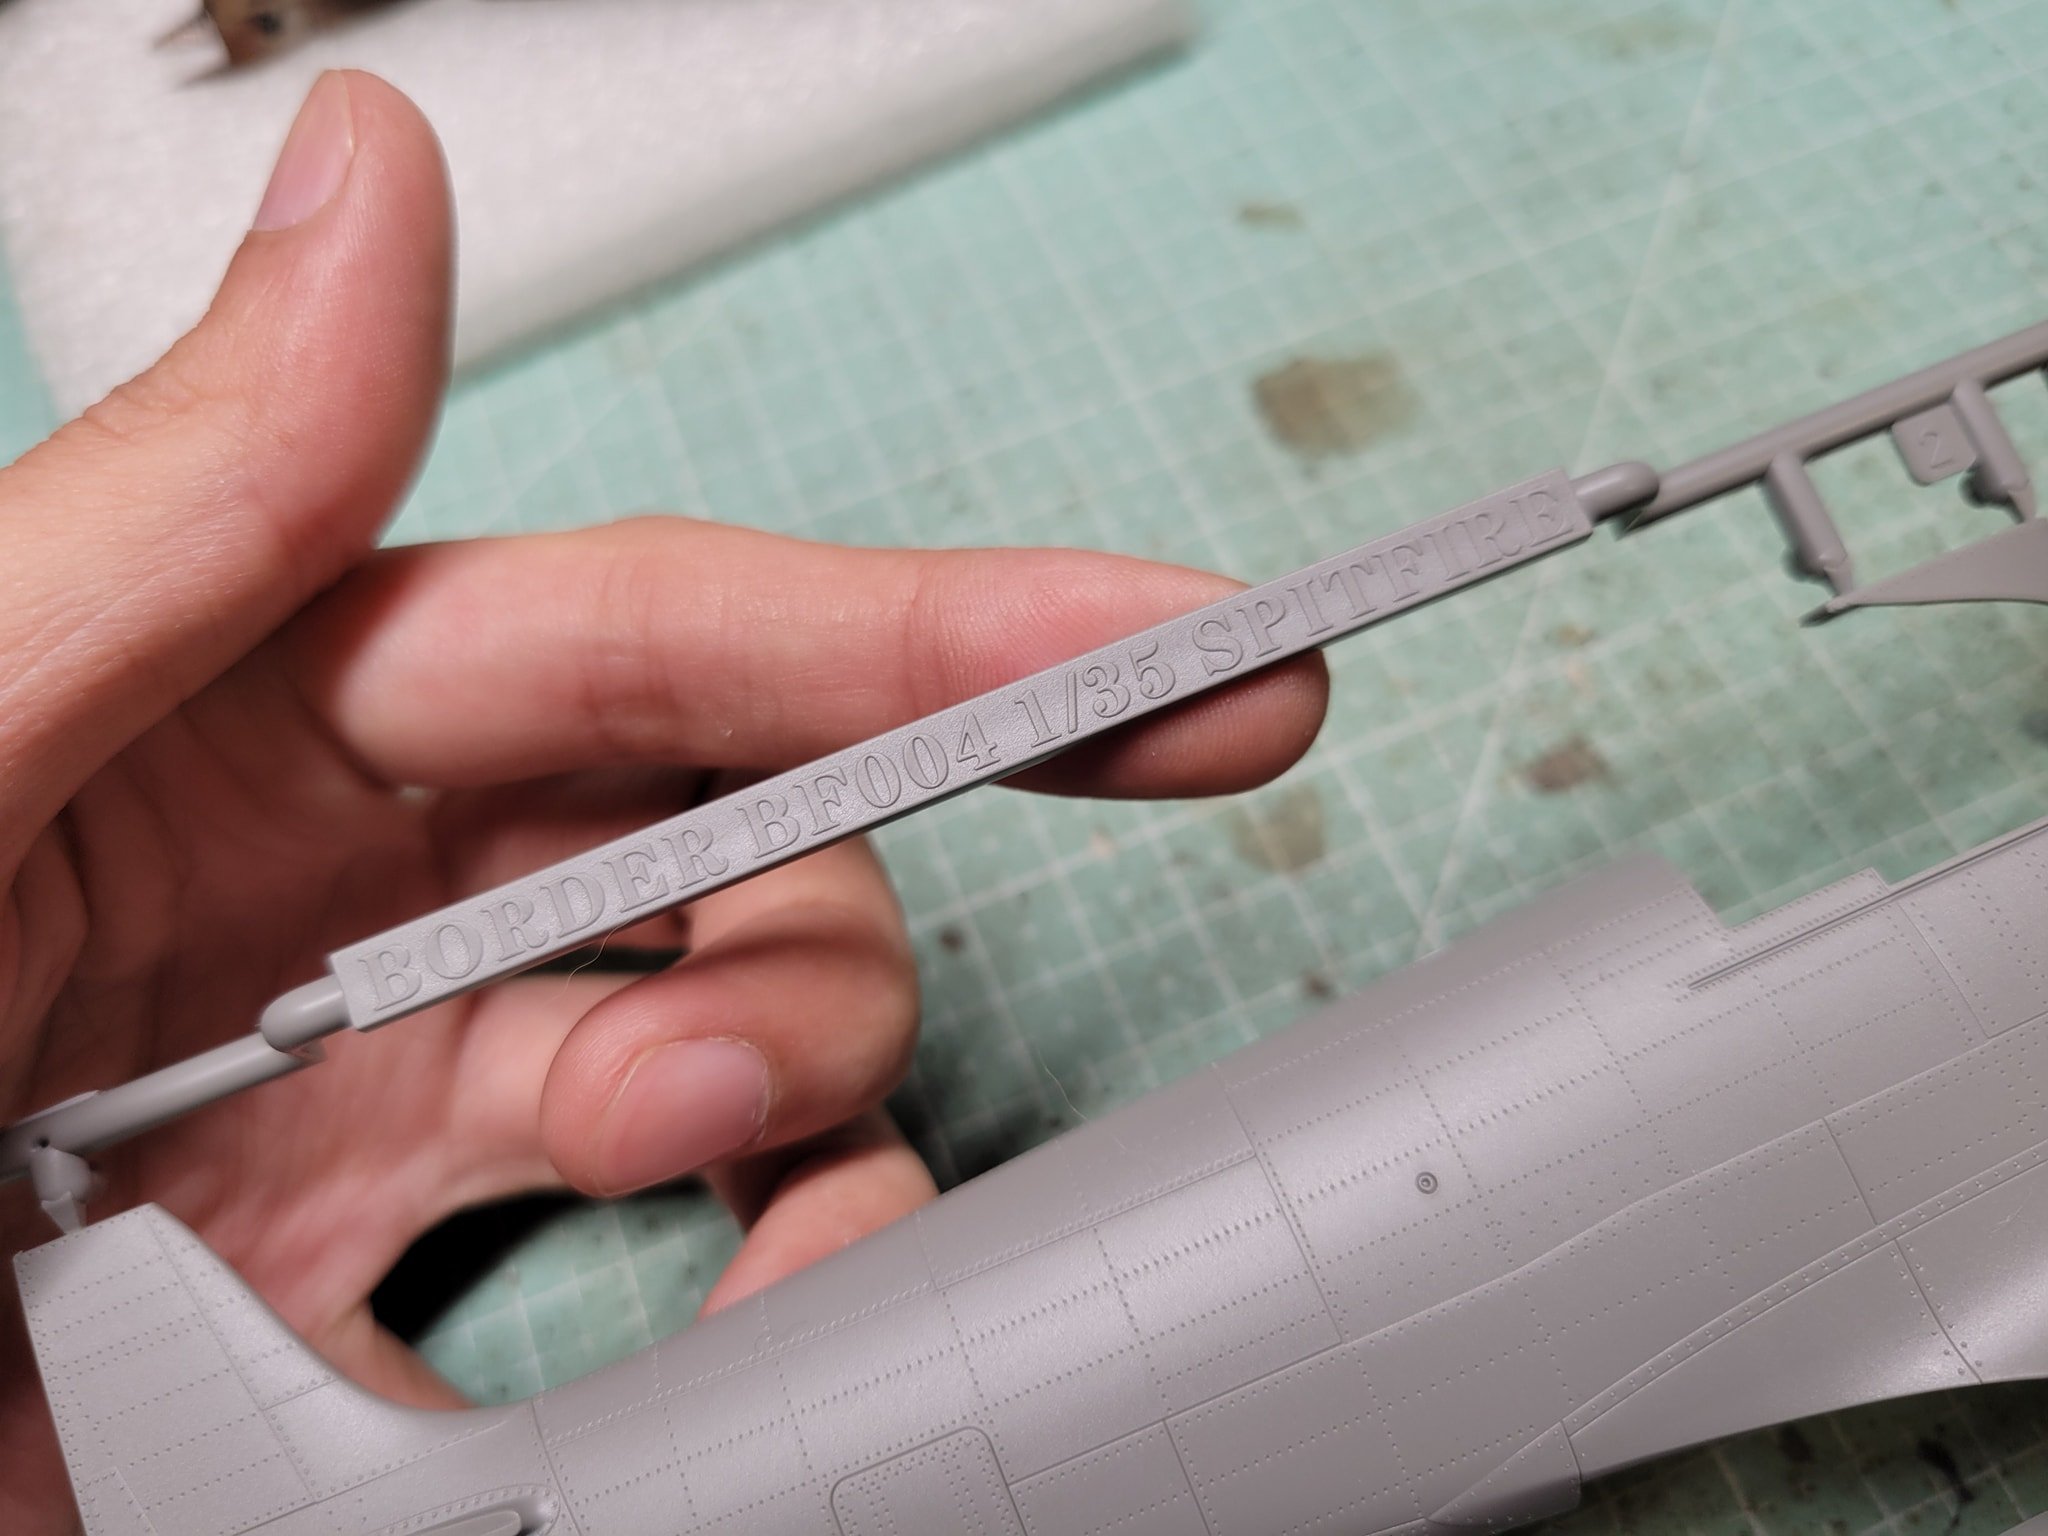
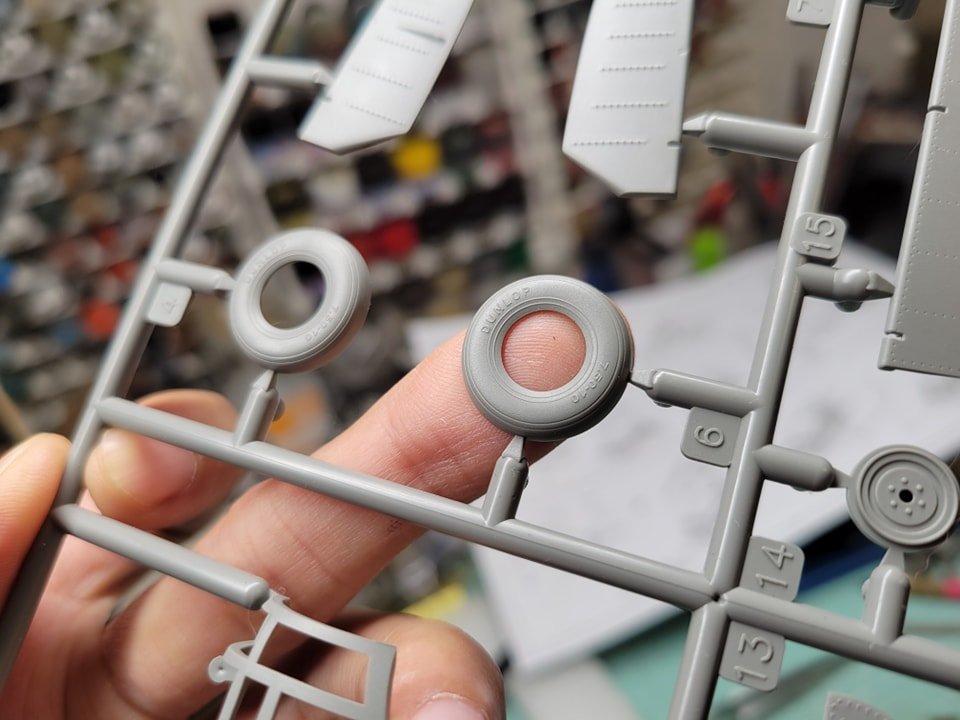
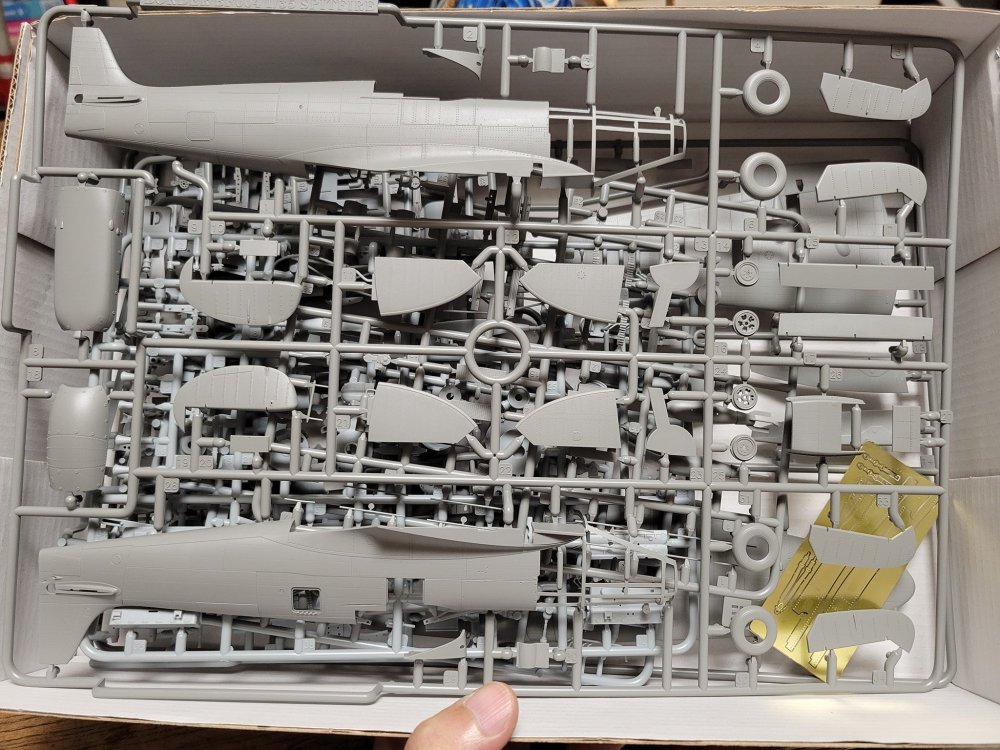
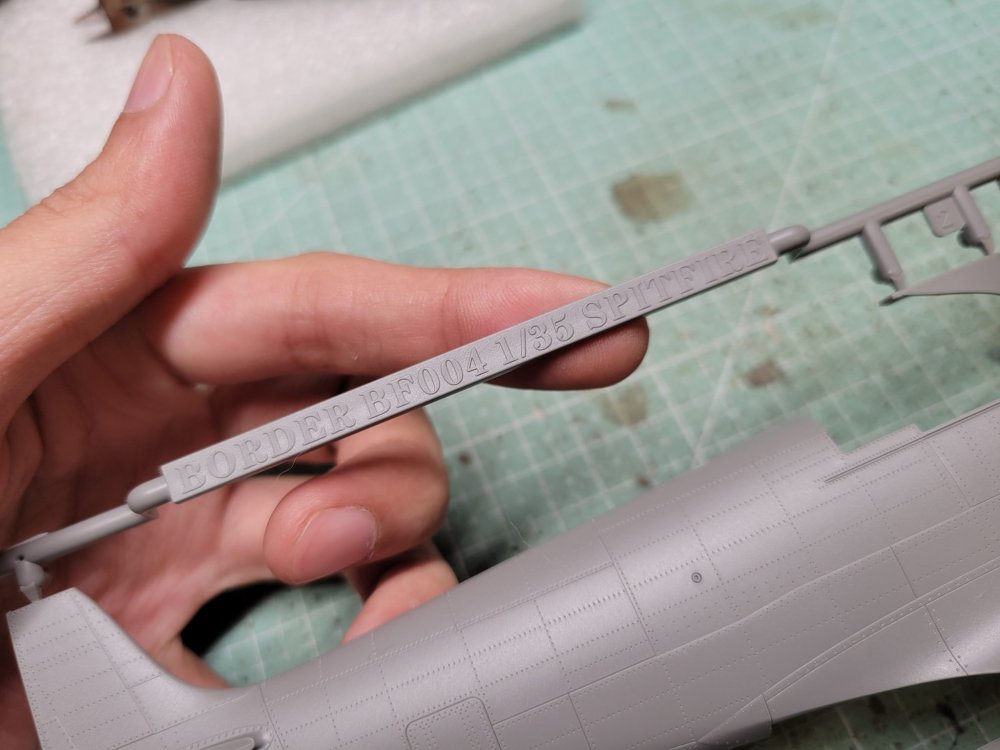
Well, I saw this other day, and forgot to share here... Upcoming 1:35 Border Spitfire... I think that might be Mk. V...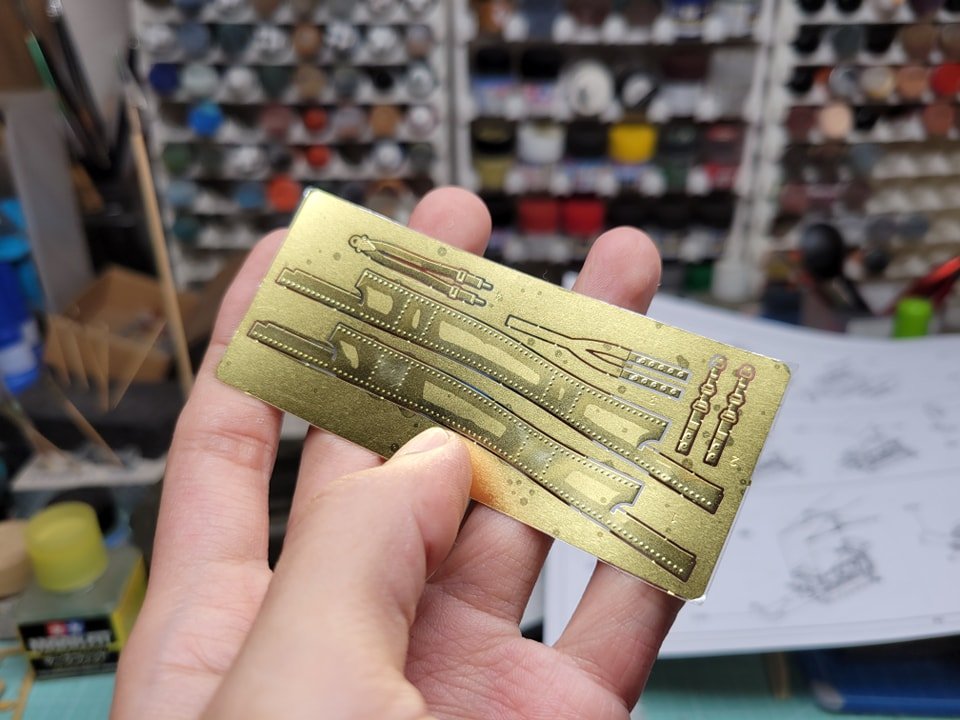

-
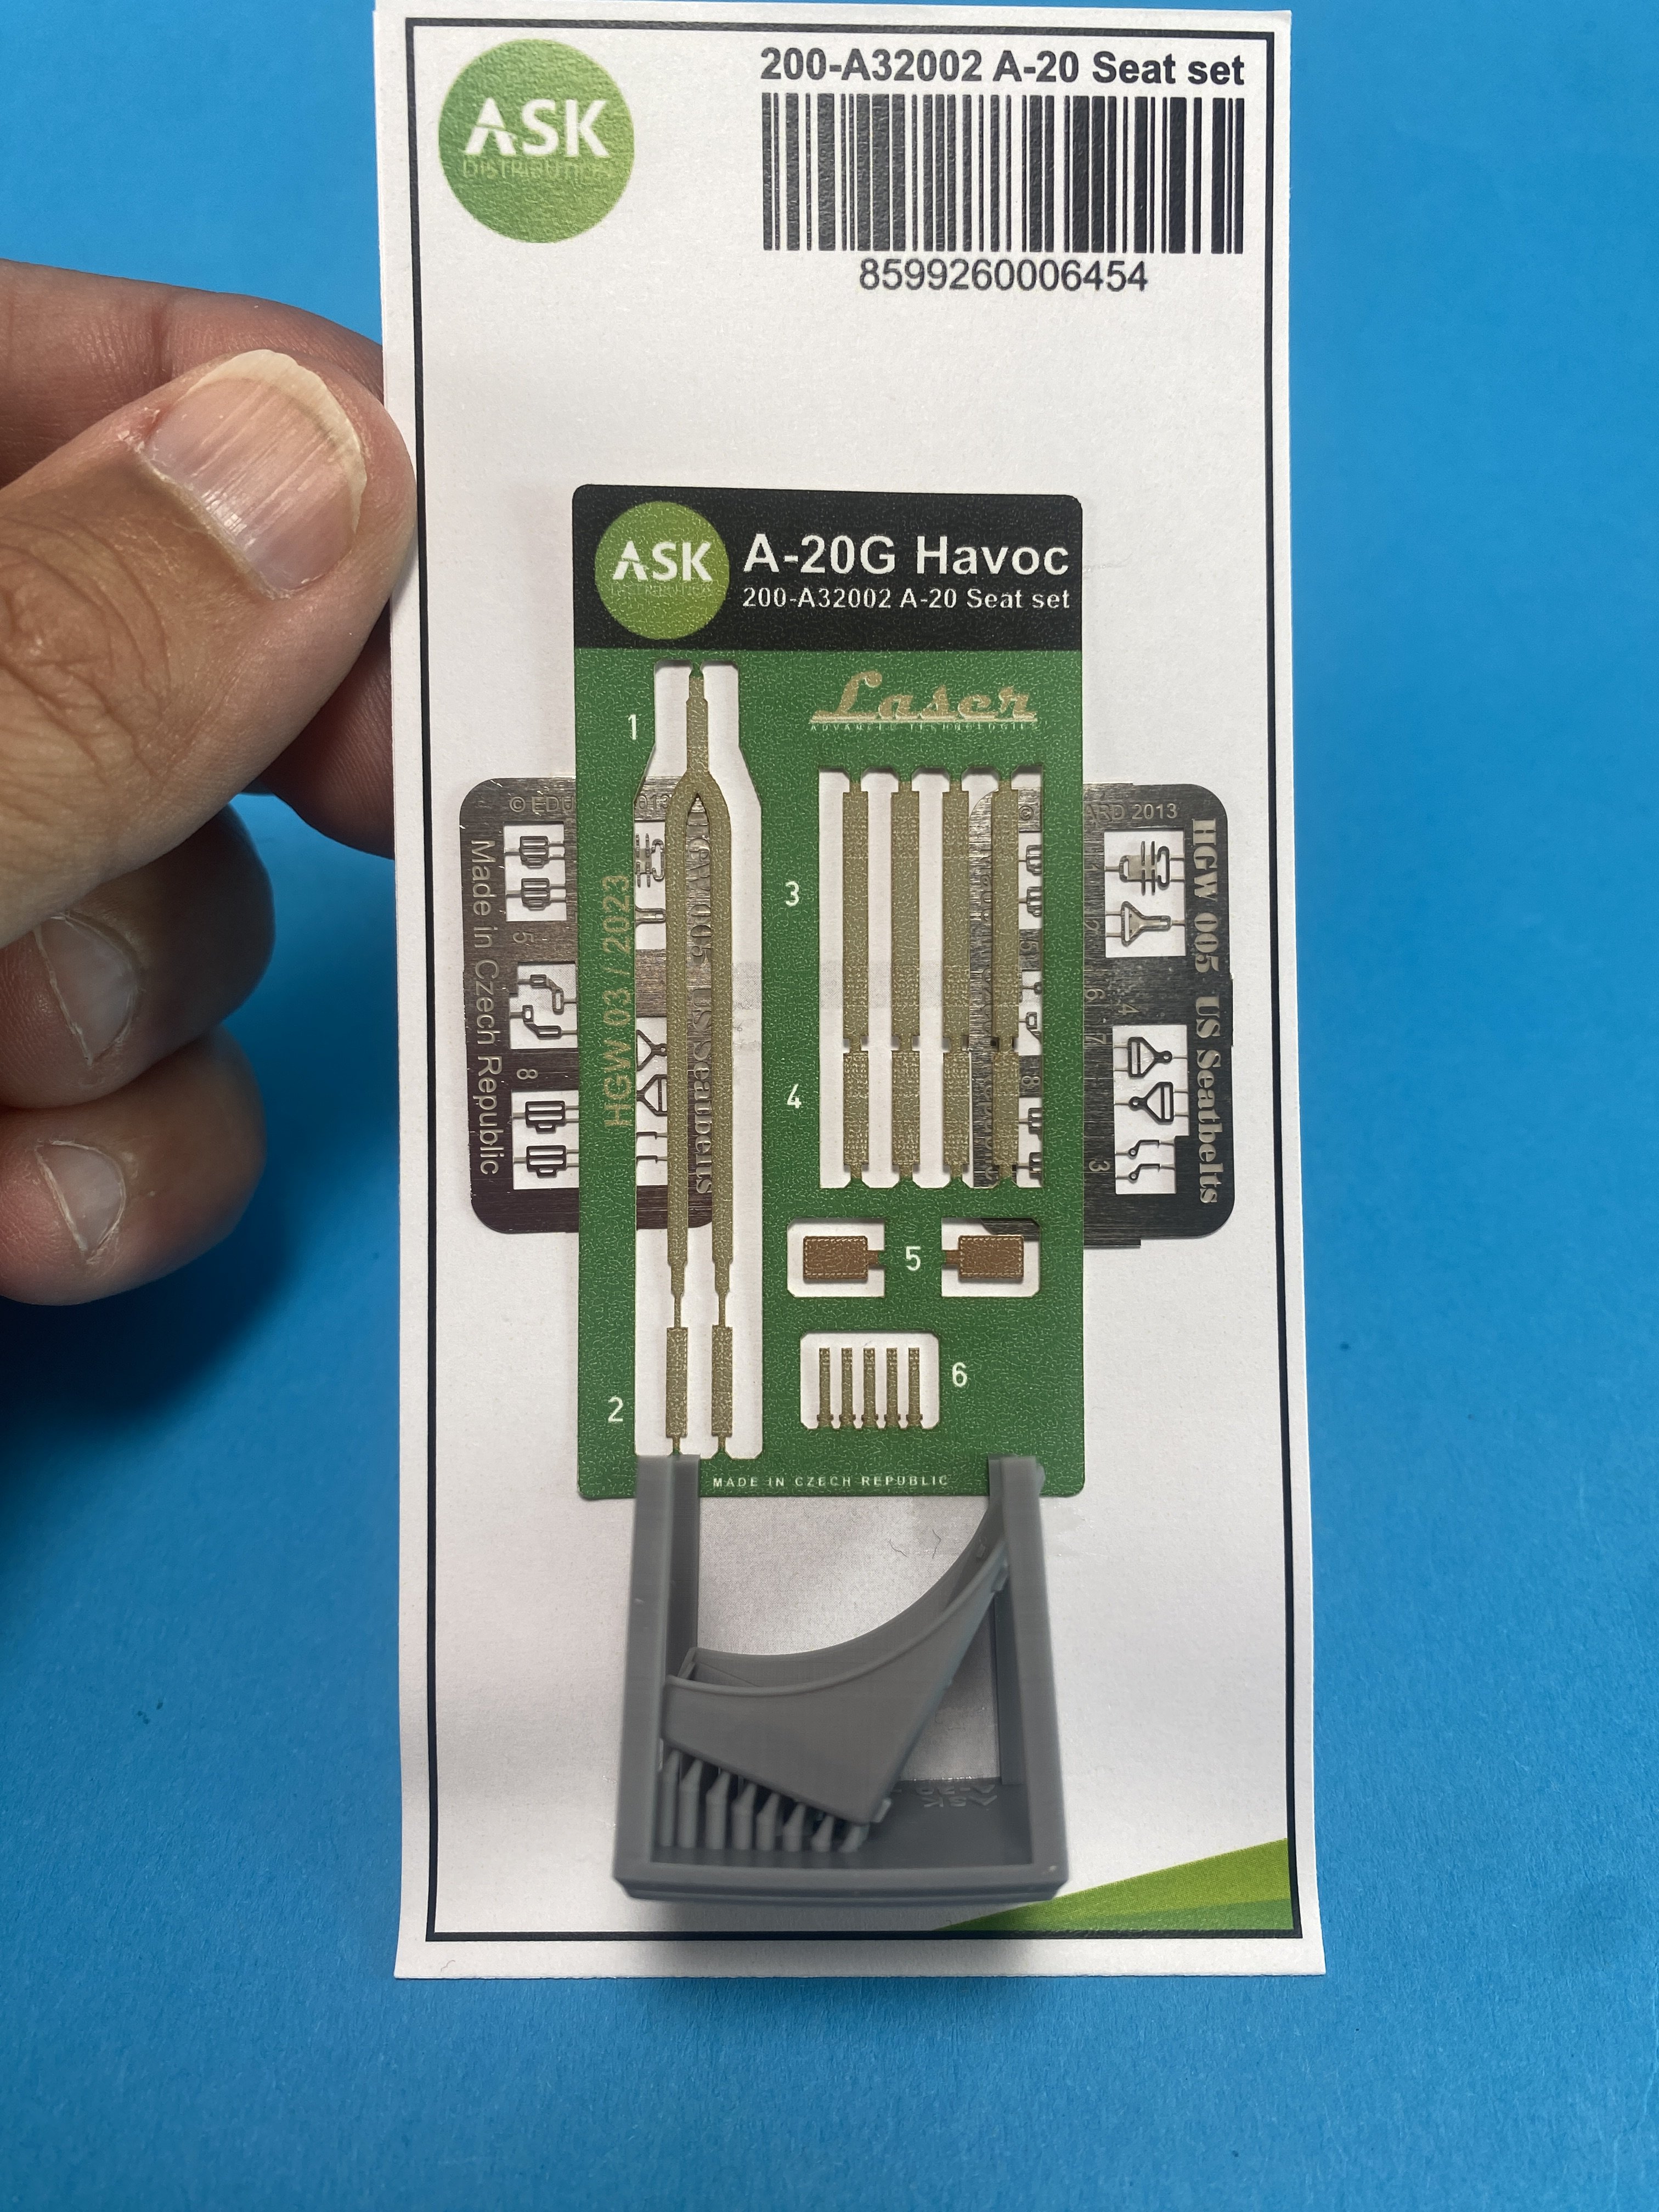
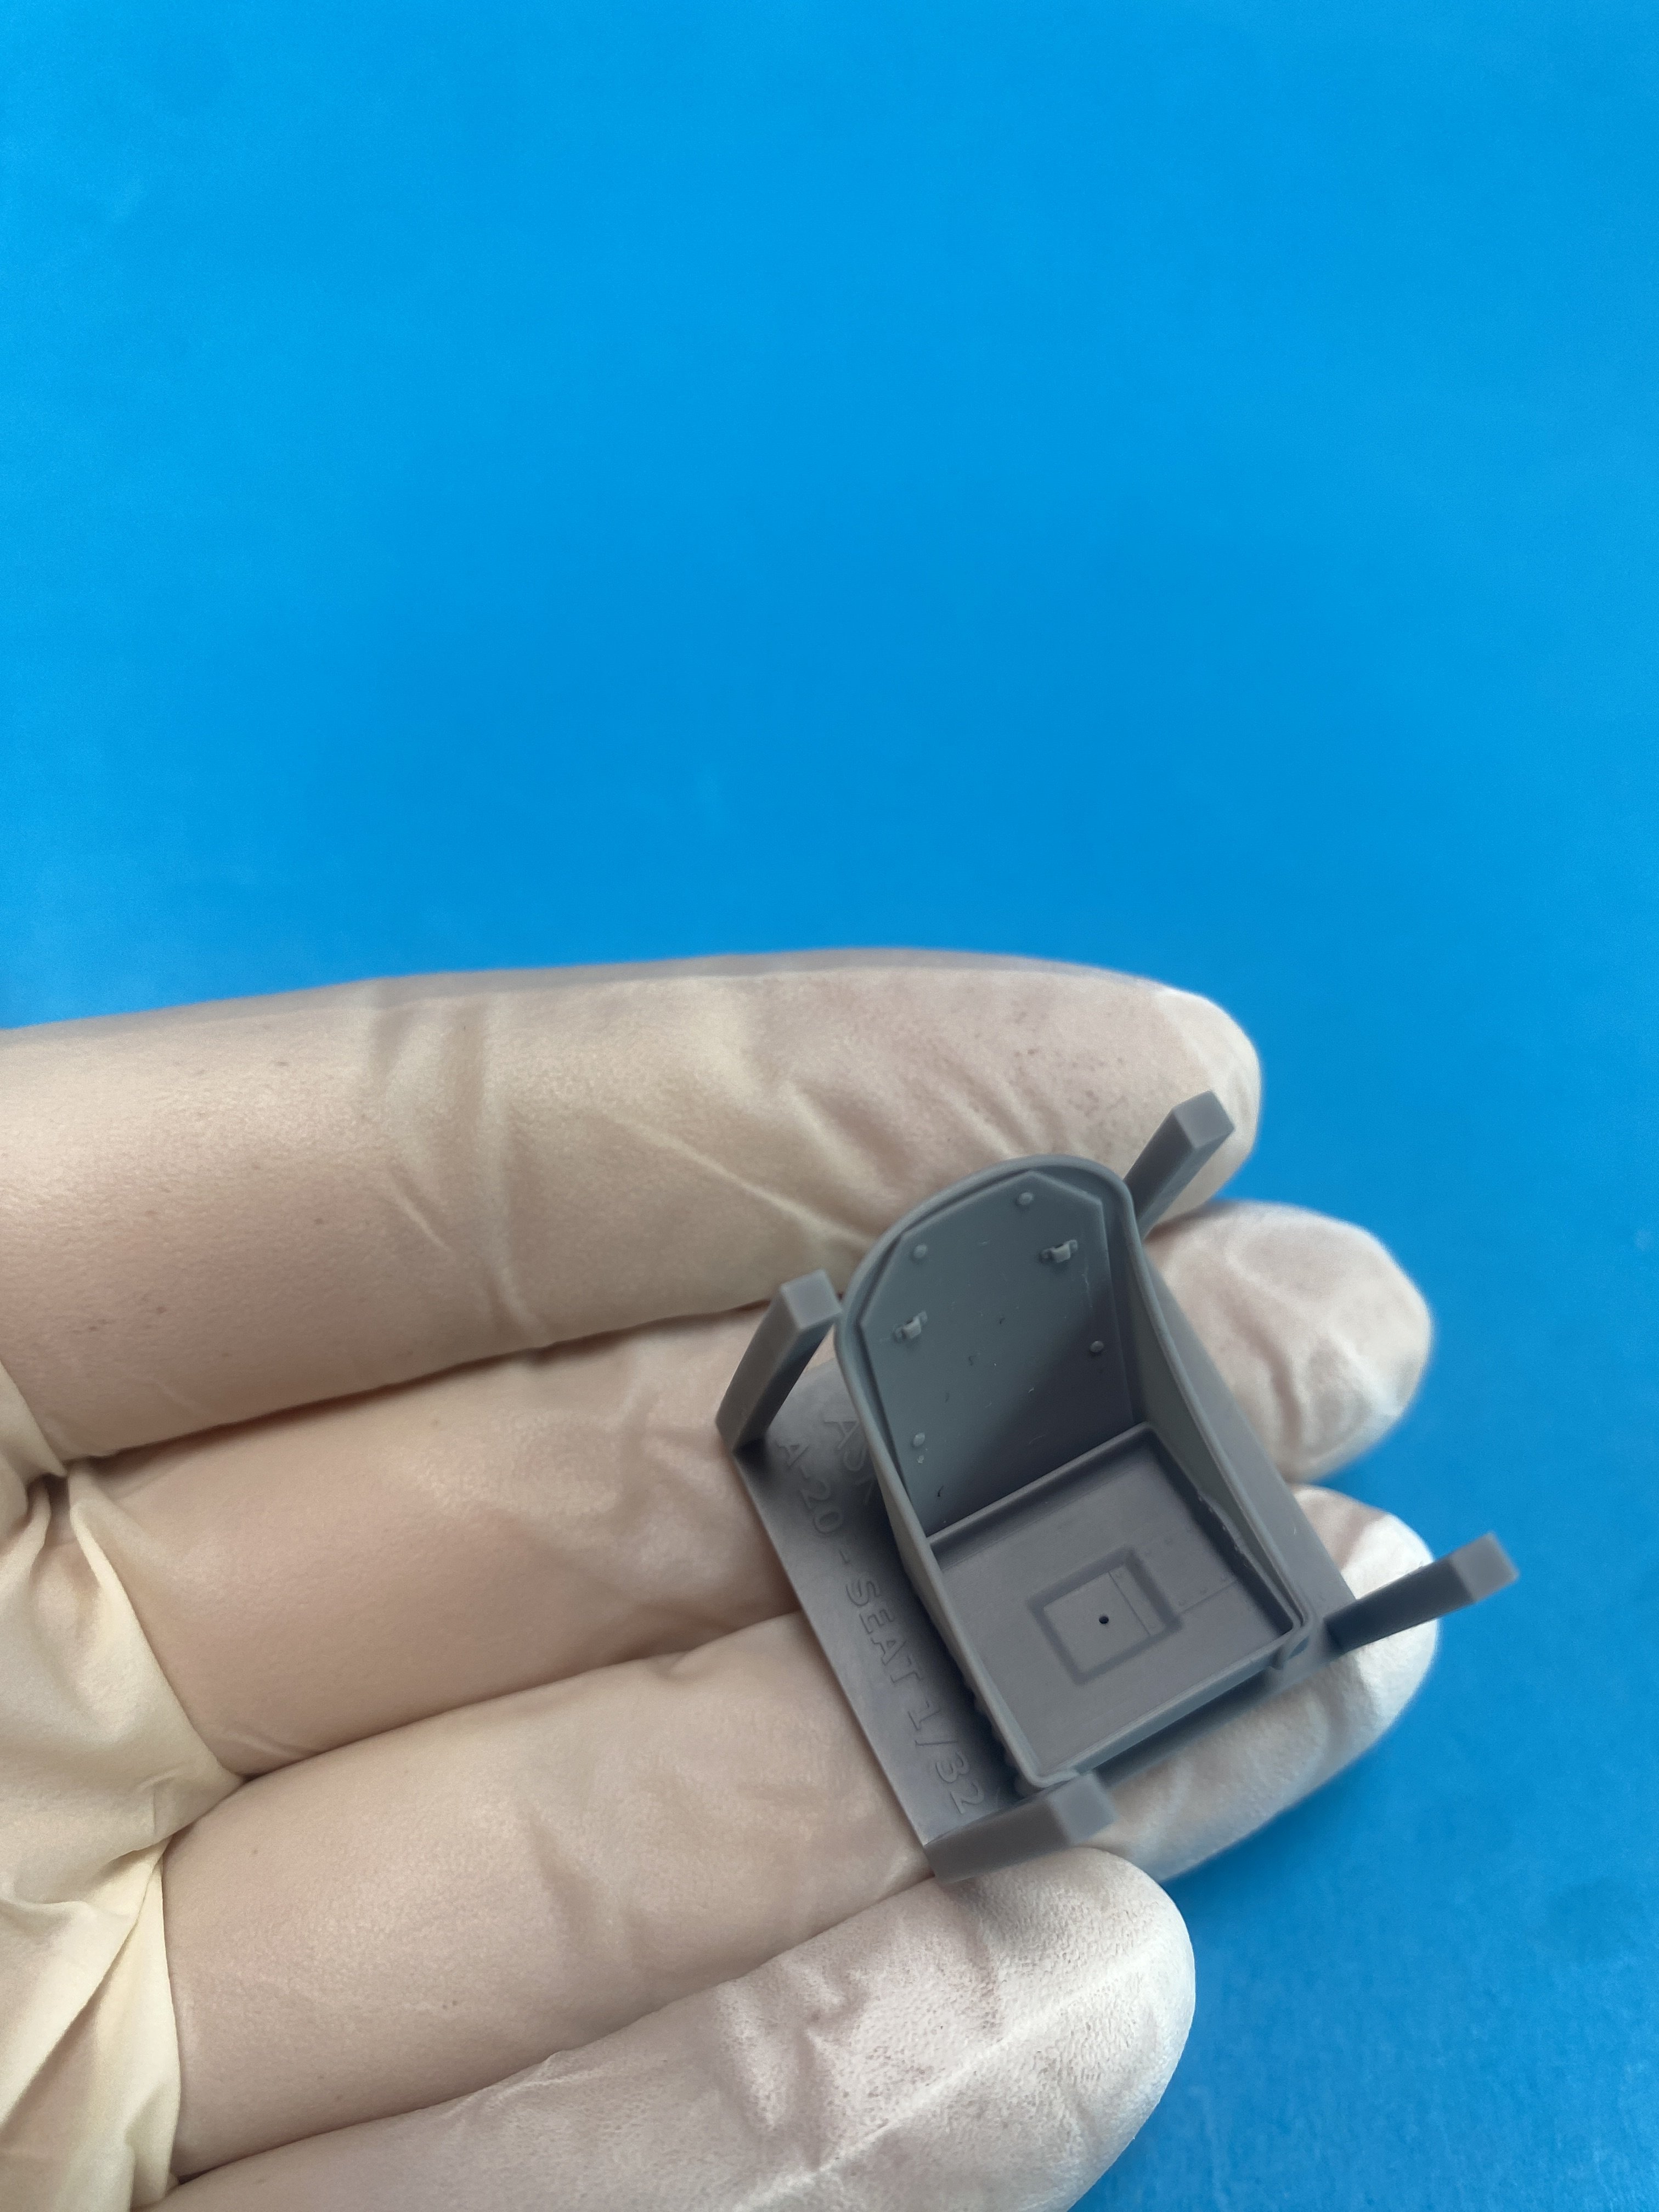
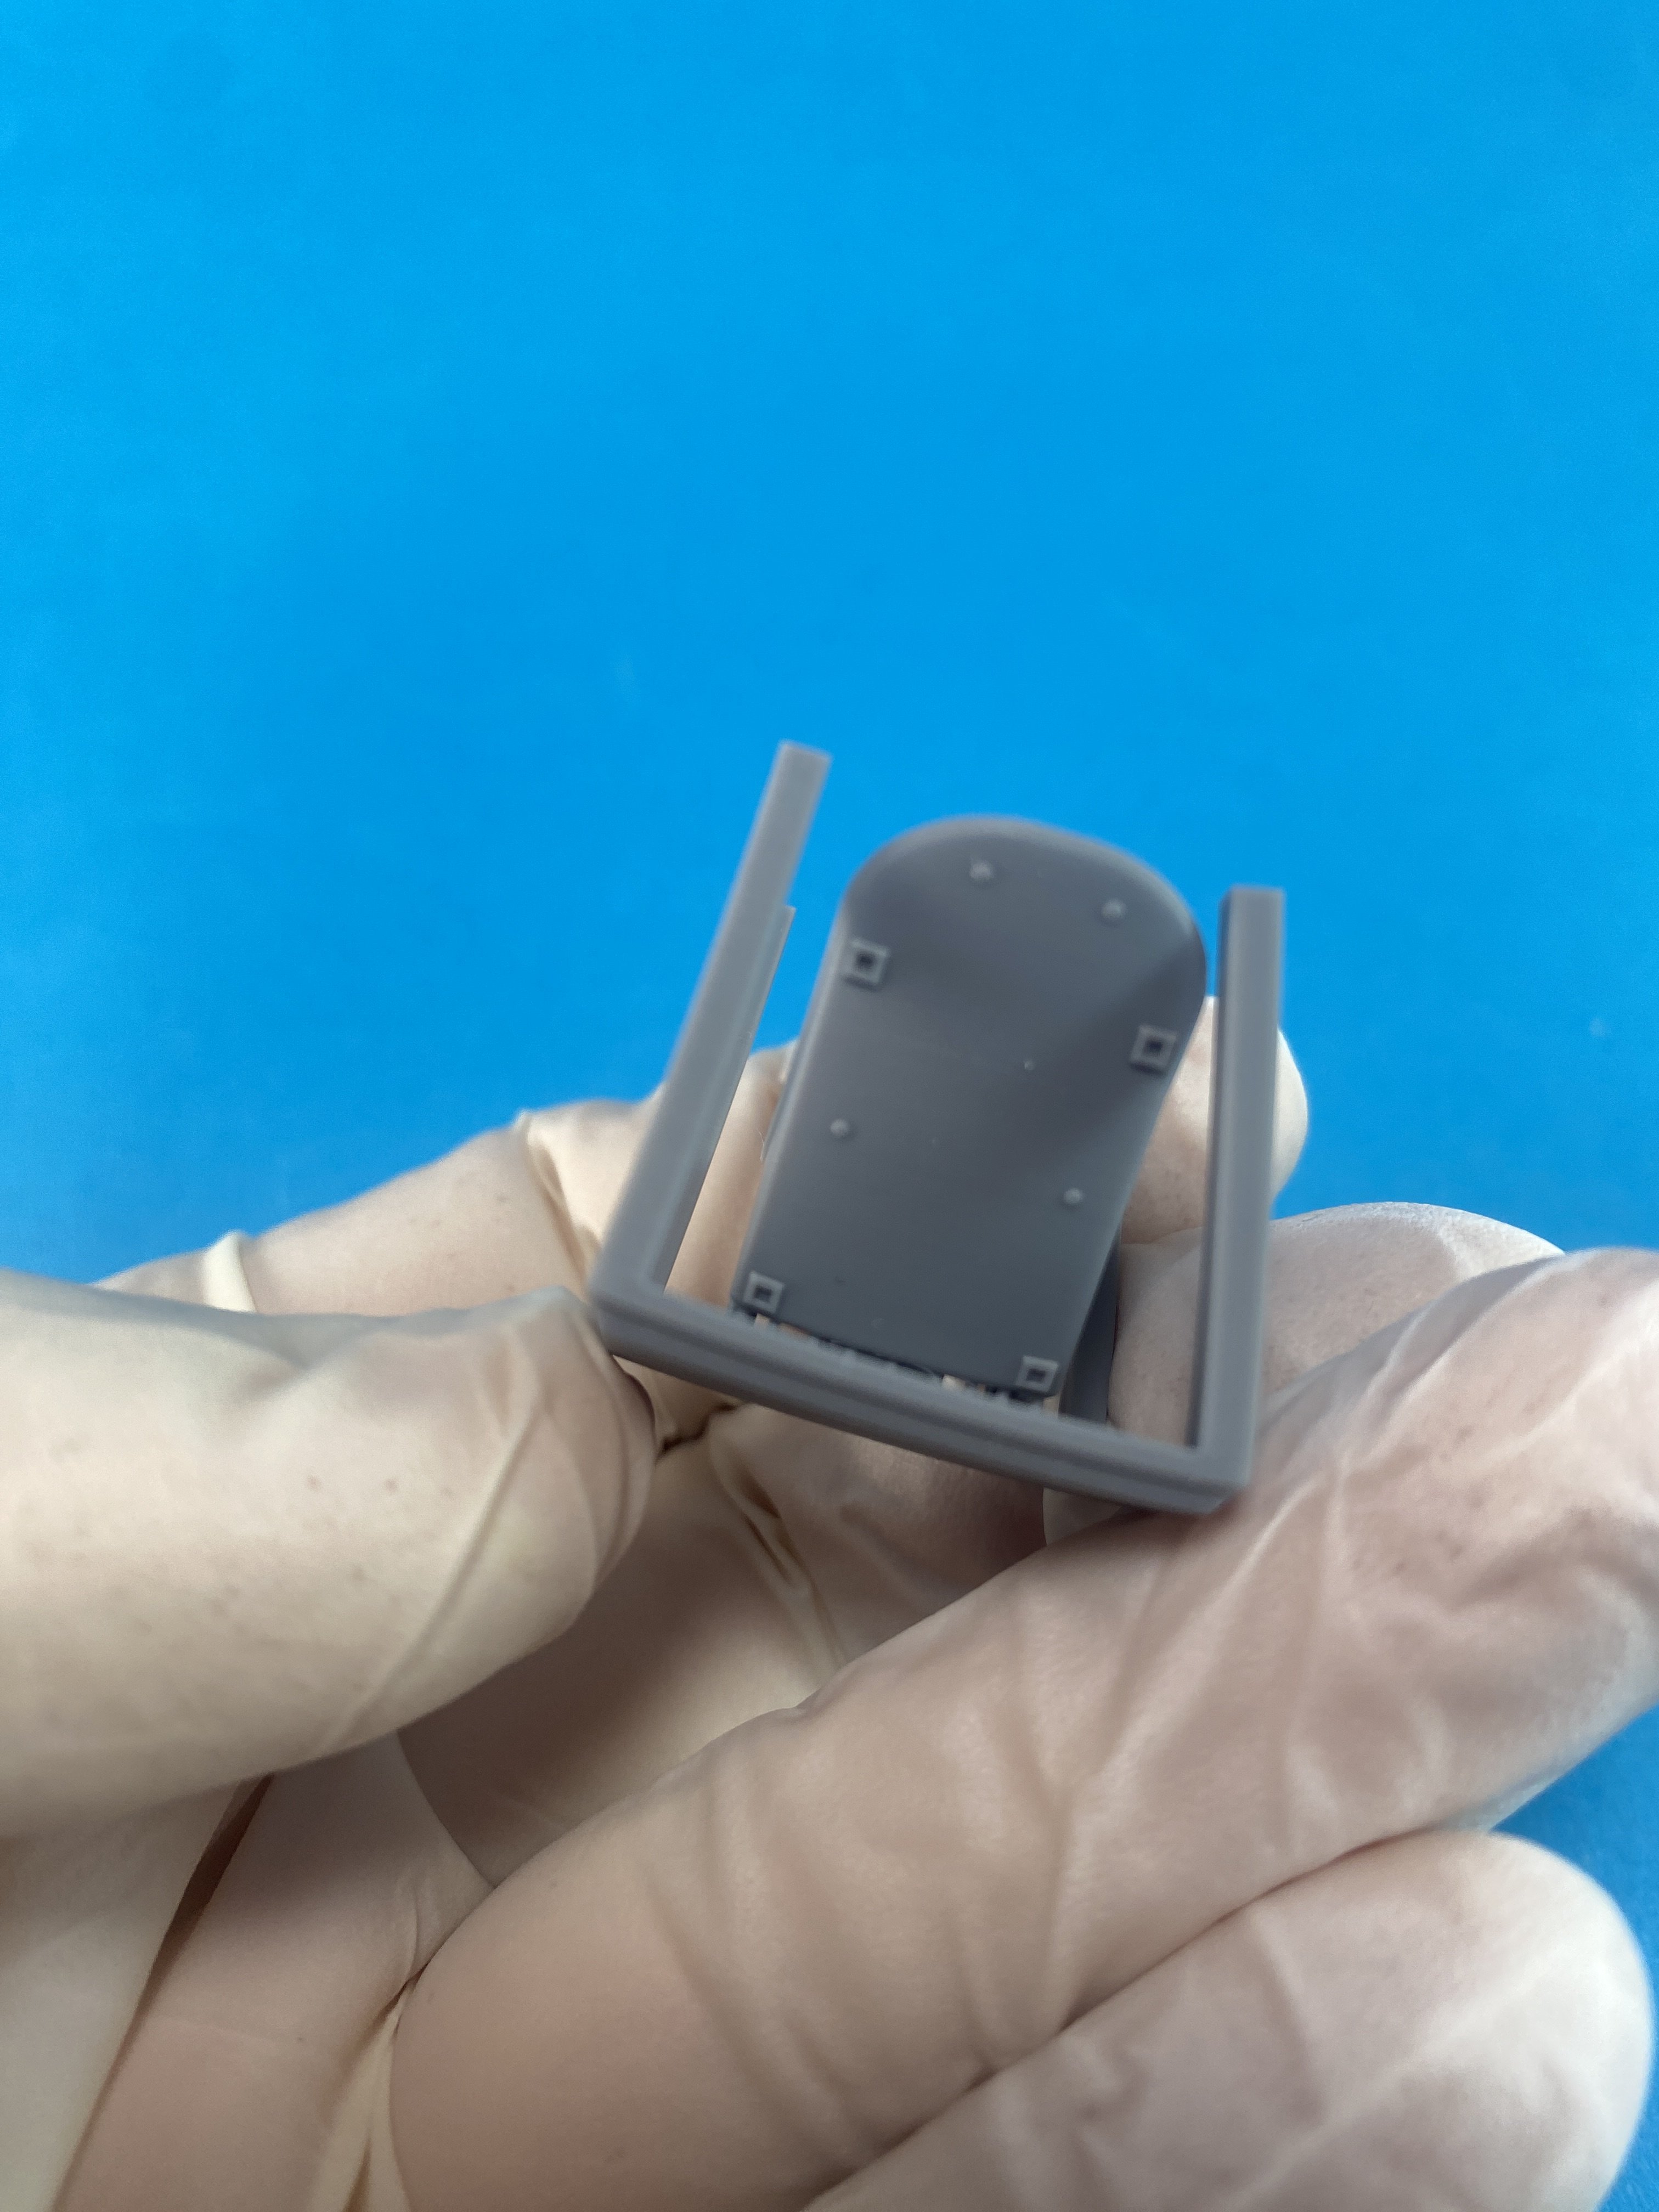
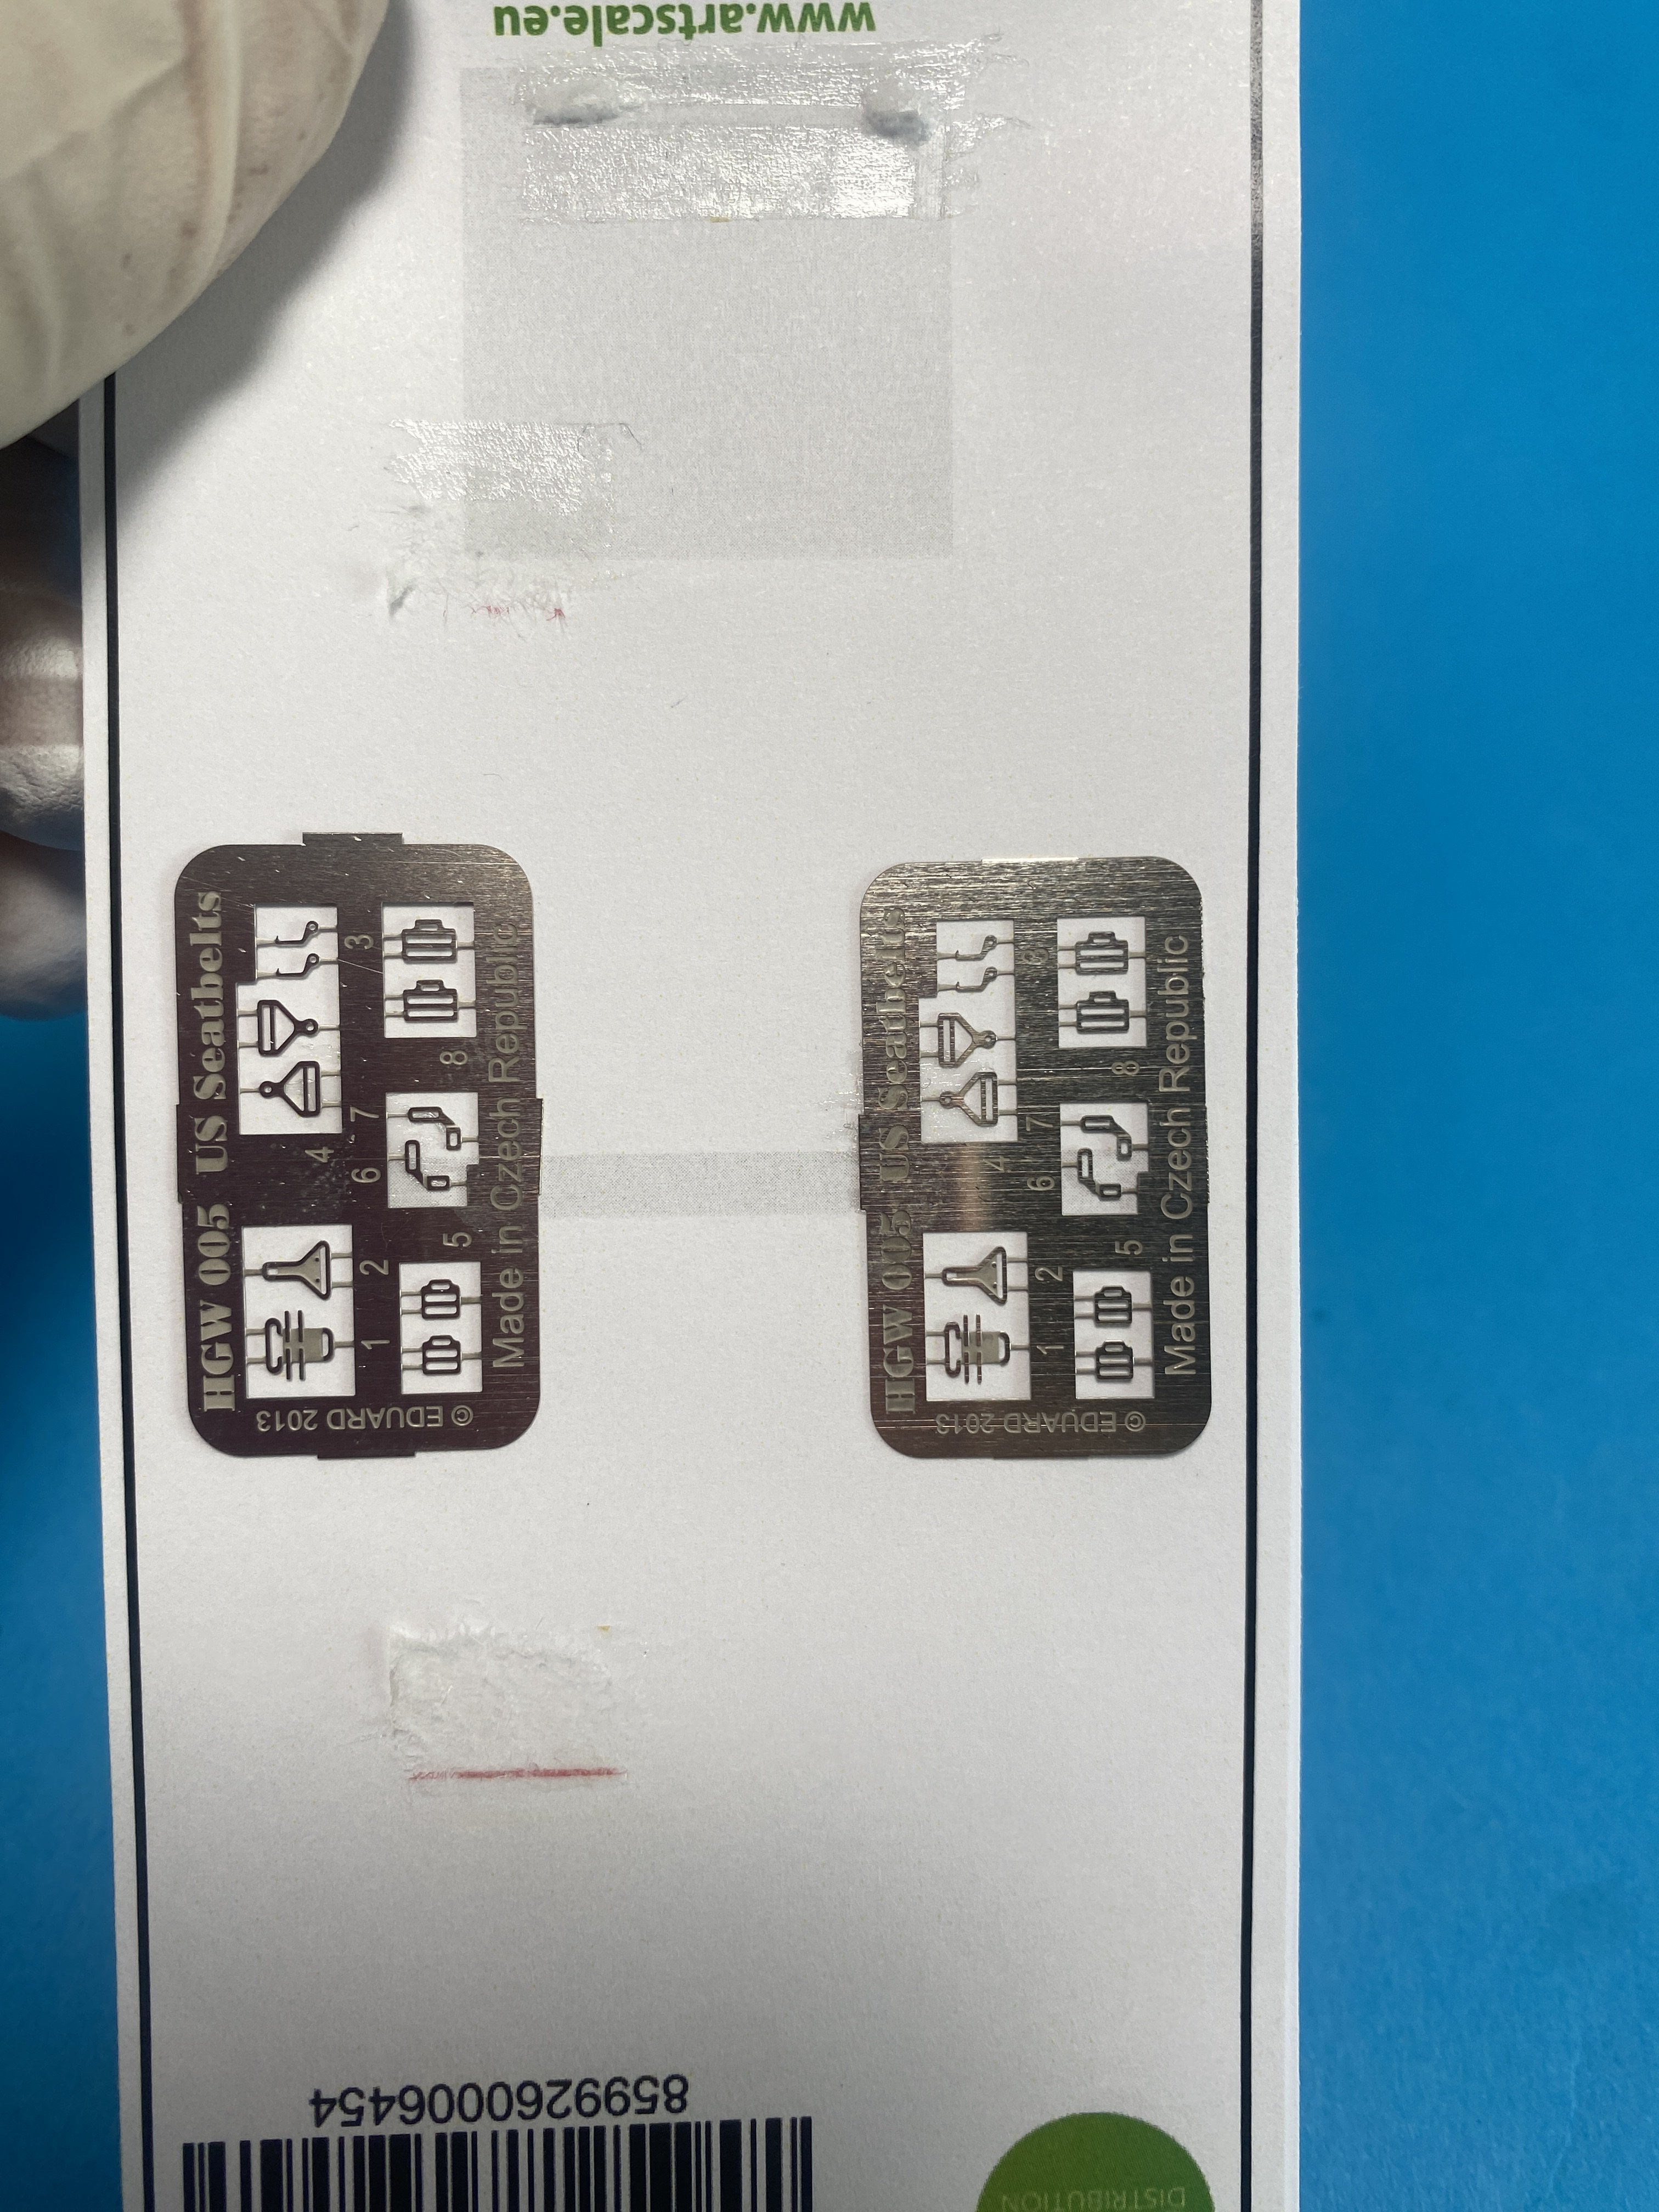
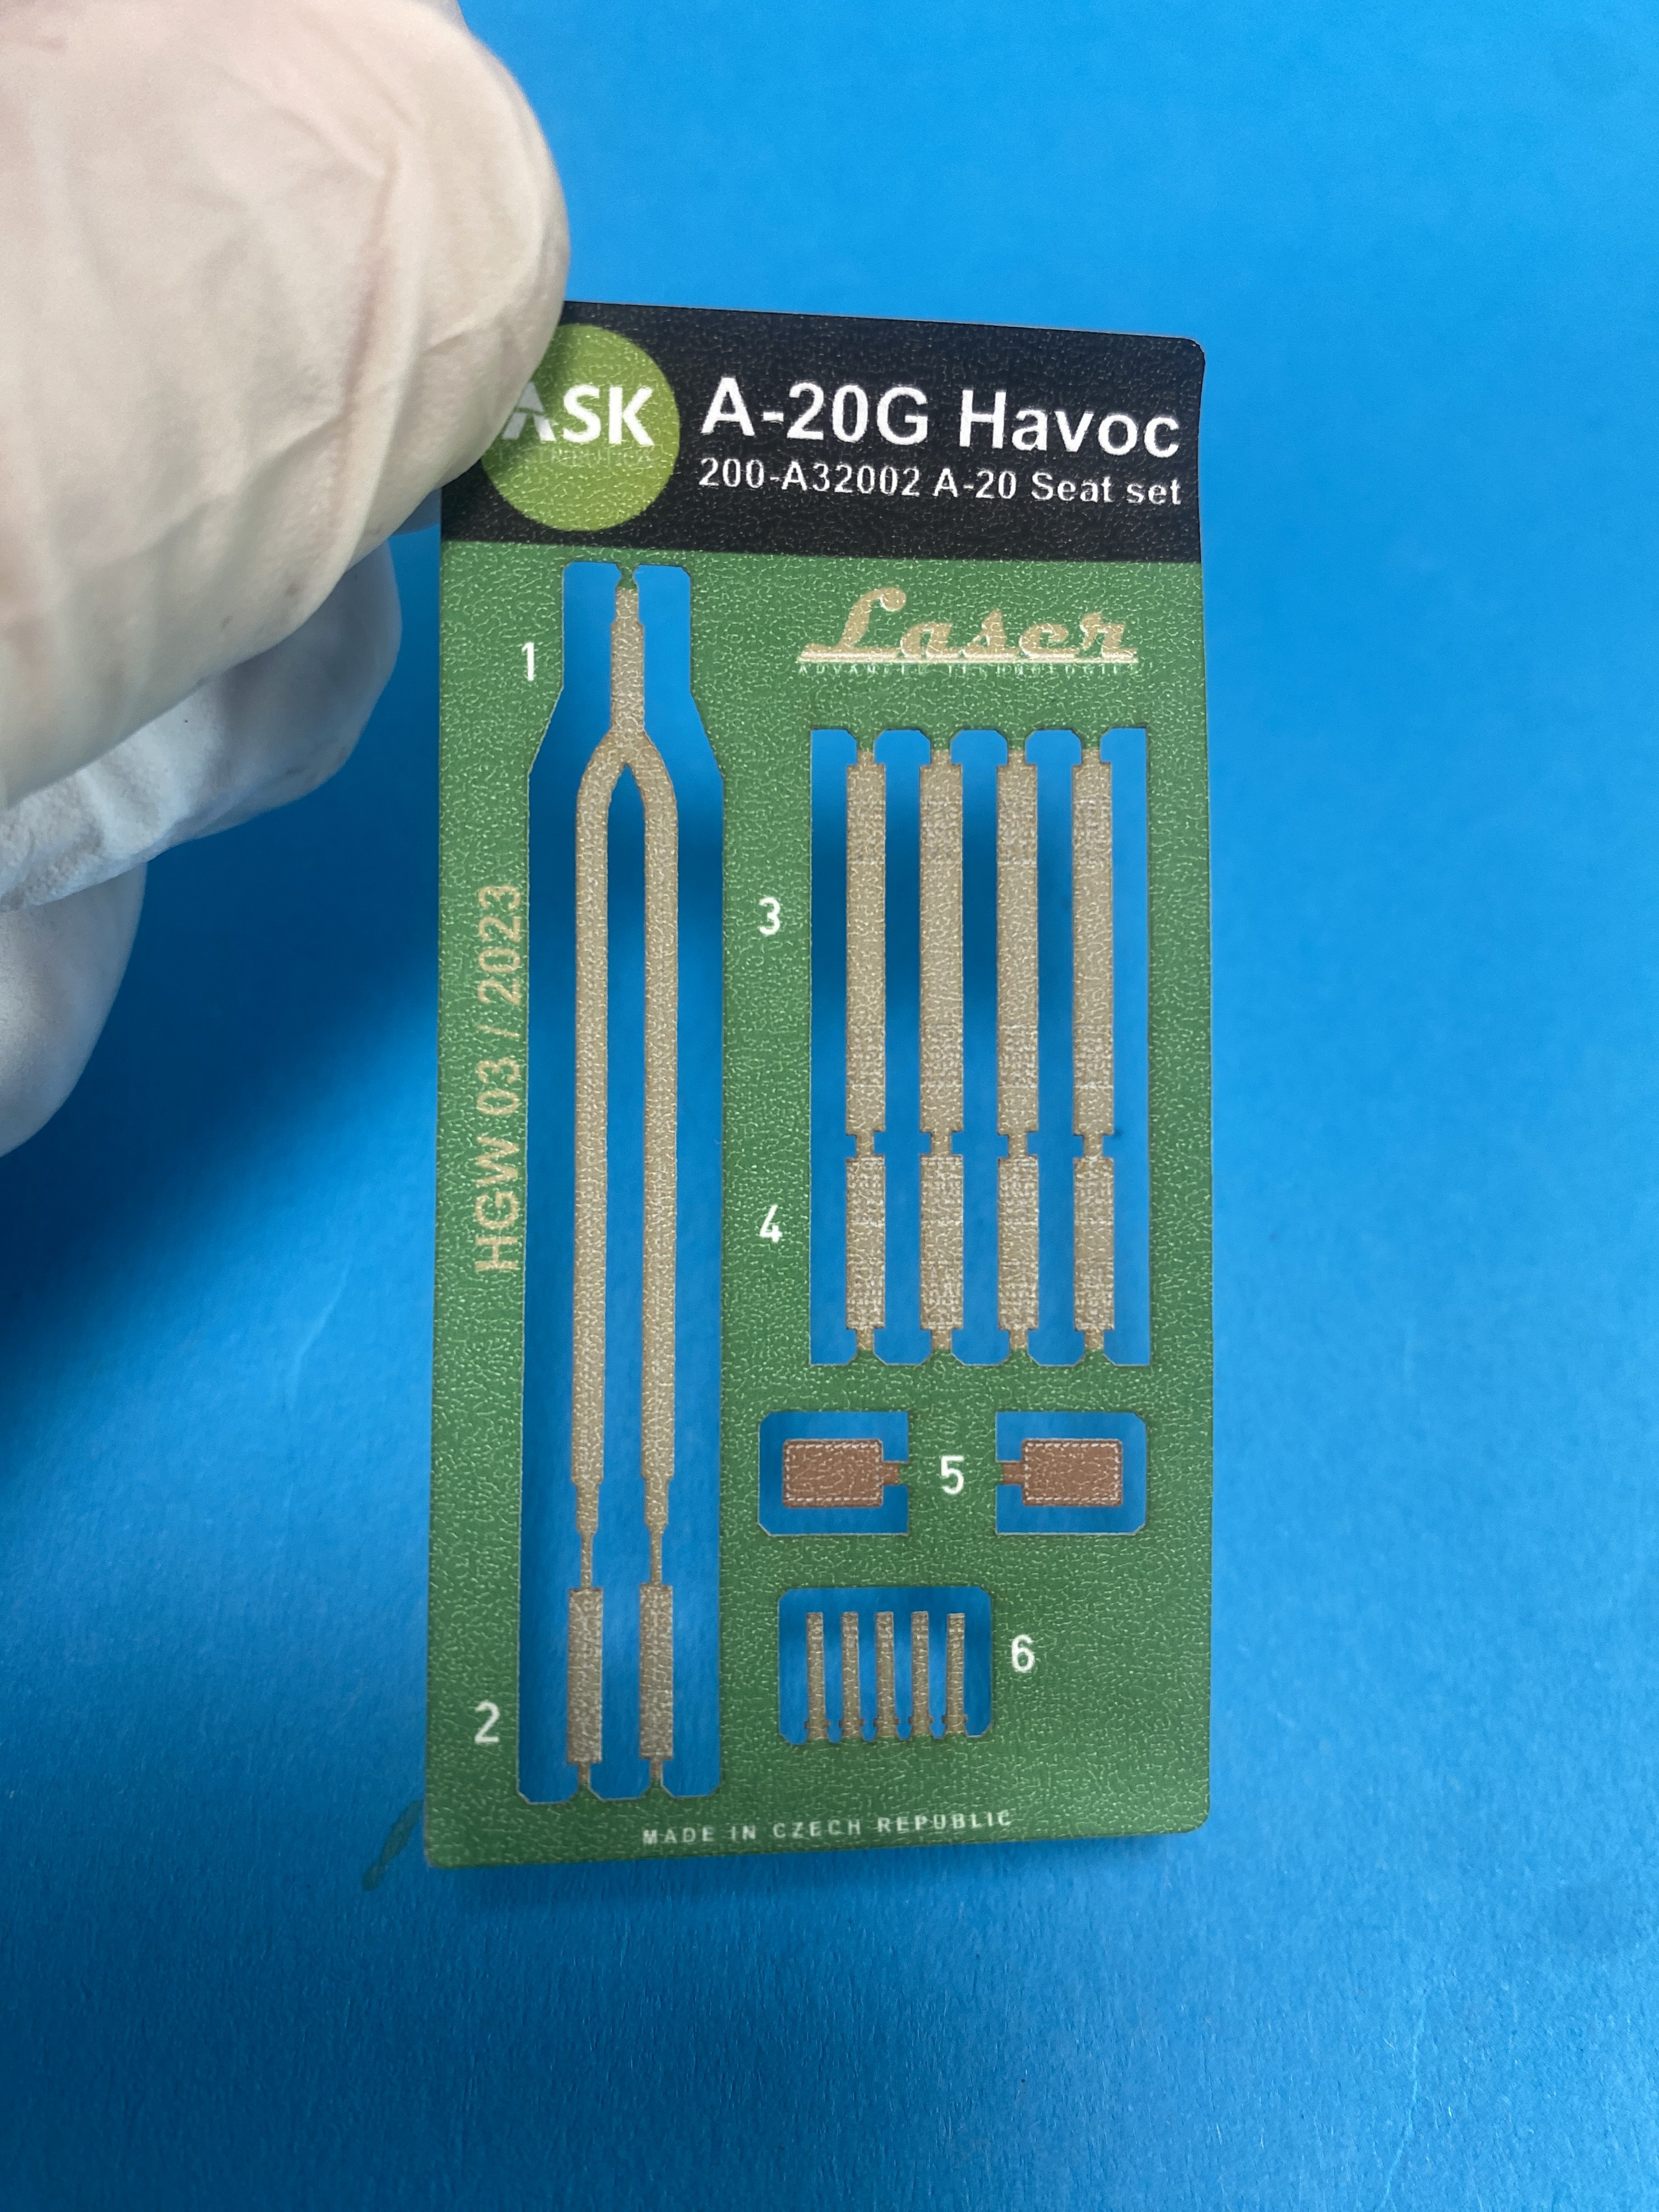
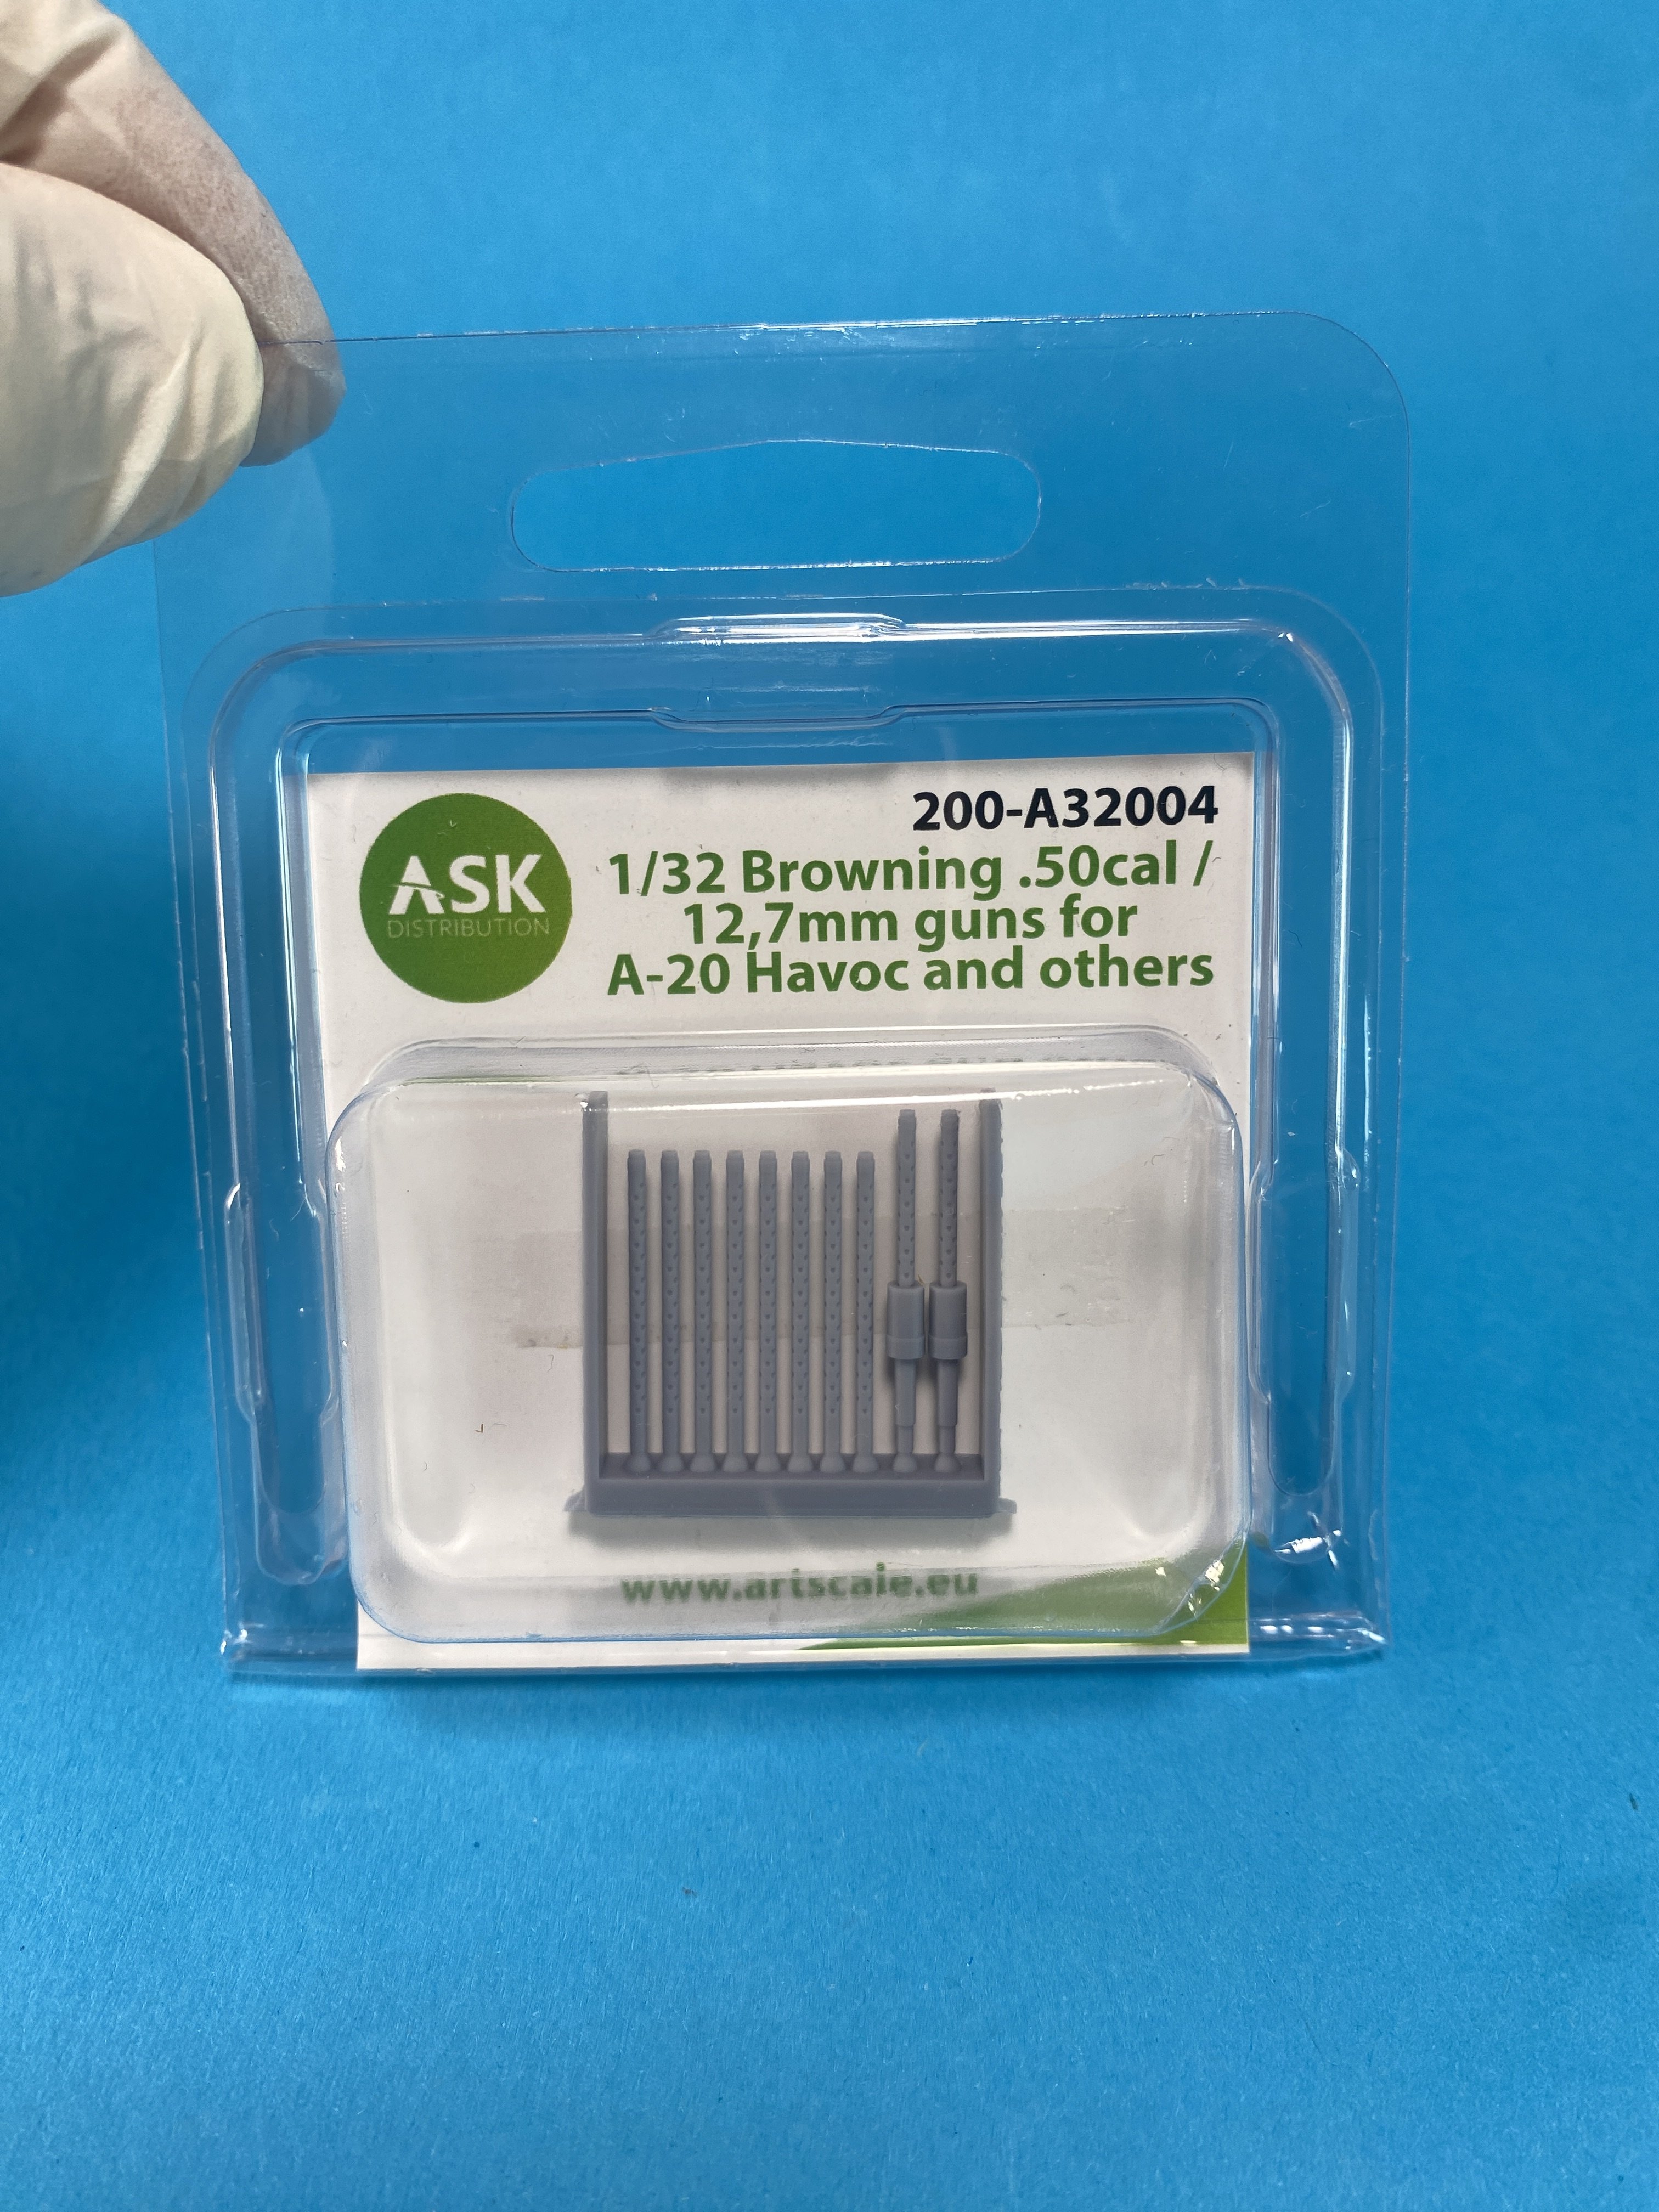
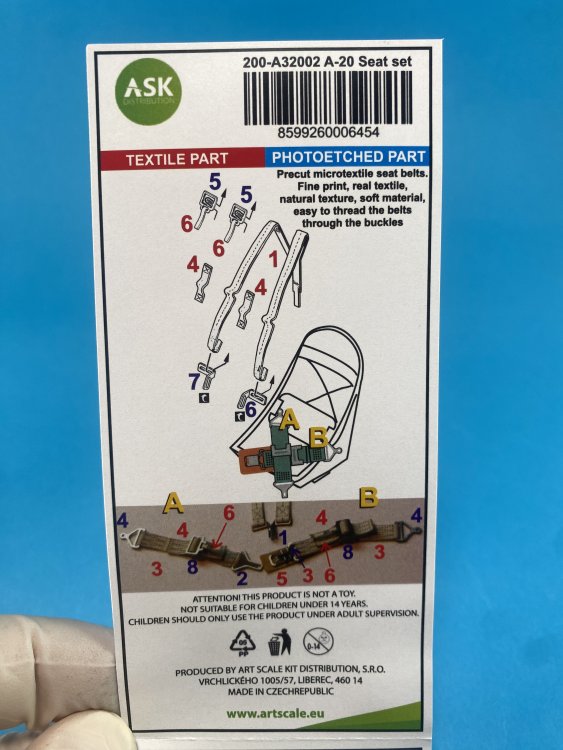
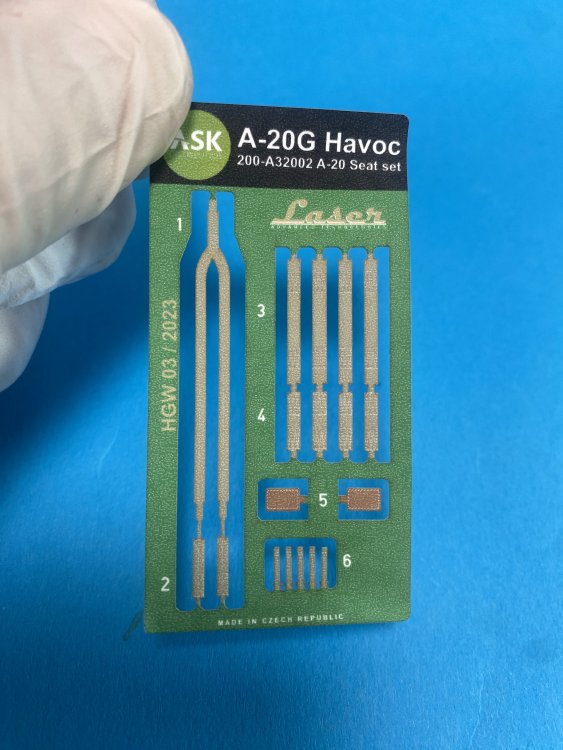
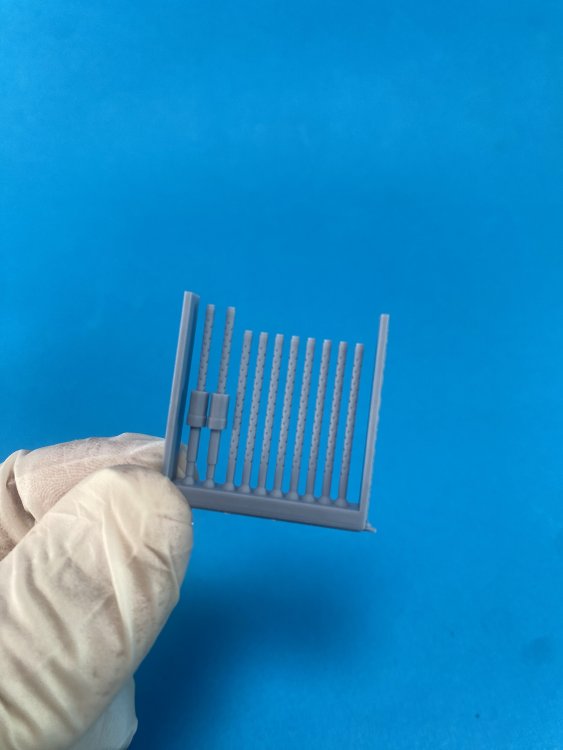
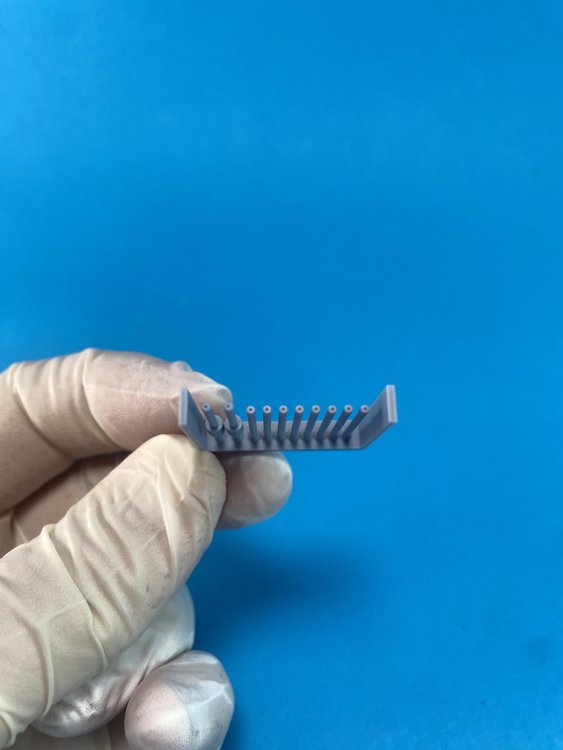
ART SCALE KIT 1:32 A-20G Details sets. * A-20 Seat set Cataloque number 200-A32002 Available at ASK store, here ASK is releasing now only several new decals sheets and a lots of masking sets… Now they enter the detail sets worlds. The first one the we will be looking is the brand new A-20 seat set. On this set, you get a seat for A-20 early type. This seat is suitable for the A-20 A, B, C up to approx. G.5 The seat is in 3D resin Print, very well printed with no printing lines at all, resulting in beautiful surface detail. Being a early seat, there`s no direct match between both seat, but een so I put here pictures of the seat that comes in the box. To be along this fantastic seat, you got textile seat belts with photoetched buckles. The seat belts are printed at laser and HGW logo is on it… so if is made by HGW so the quality is granted. The seatbelts are extremely detail, having 8 PE parts in each belt. Having working wit HGW seatbelts before, they are fabulous and in the edn they really look like the real seatbelt. They are not easy to make, at all, and I only recommend to an intermediate modeler or up. Browning .50cal/12,7mm guns for Havoc and other Catalogue number 200-A32004 Available at ASK store, here The second detail set are the front guns These come in resin 3D Print and as the other set, the printing is done with high definition on the printers, so no printing lines whatsoever. These are hollow in the barrel and the surface detail are really accentuate to represent the refrigerating gun system. These guns can be used on Havoc or any other 1:32 model that use Browning .50cal. These are a major update to the ones that are in HK Model box. CONCLUSION: Both sets are must have to all of those that have bought the new Hong Kong 1:32 A-20G as it brings the detail on those specific area to an all-new level. So treat yourself and get the 1:32 Hong Kong A-20G alongside with these two sets! Very VERY Highly recommended Fran Our thanks to ASK – Art Scale Kit for the review samples. You can get this set and all mask set at Art Scale Kit webshop


-
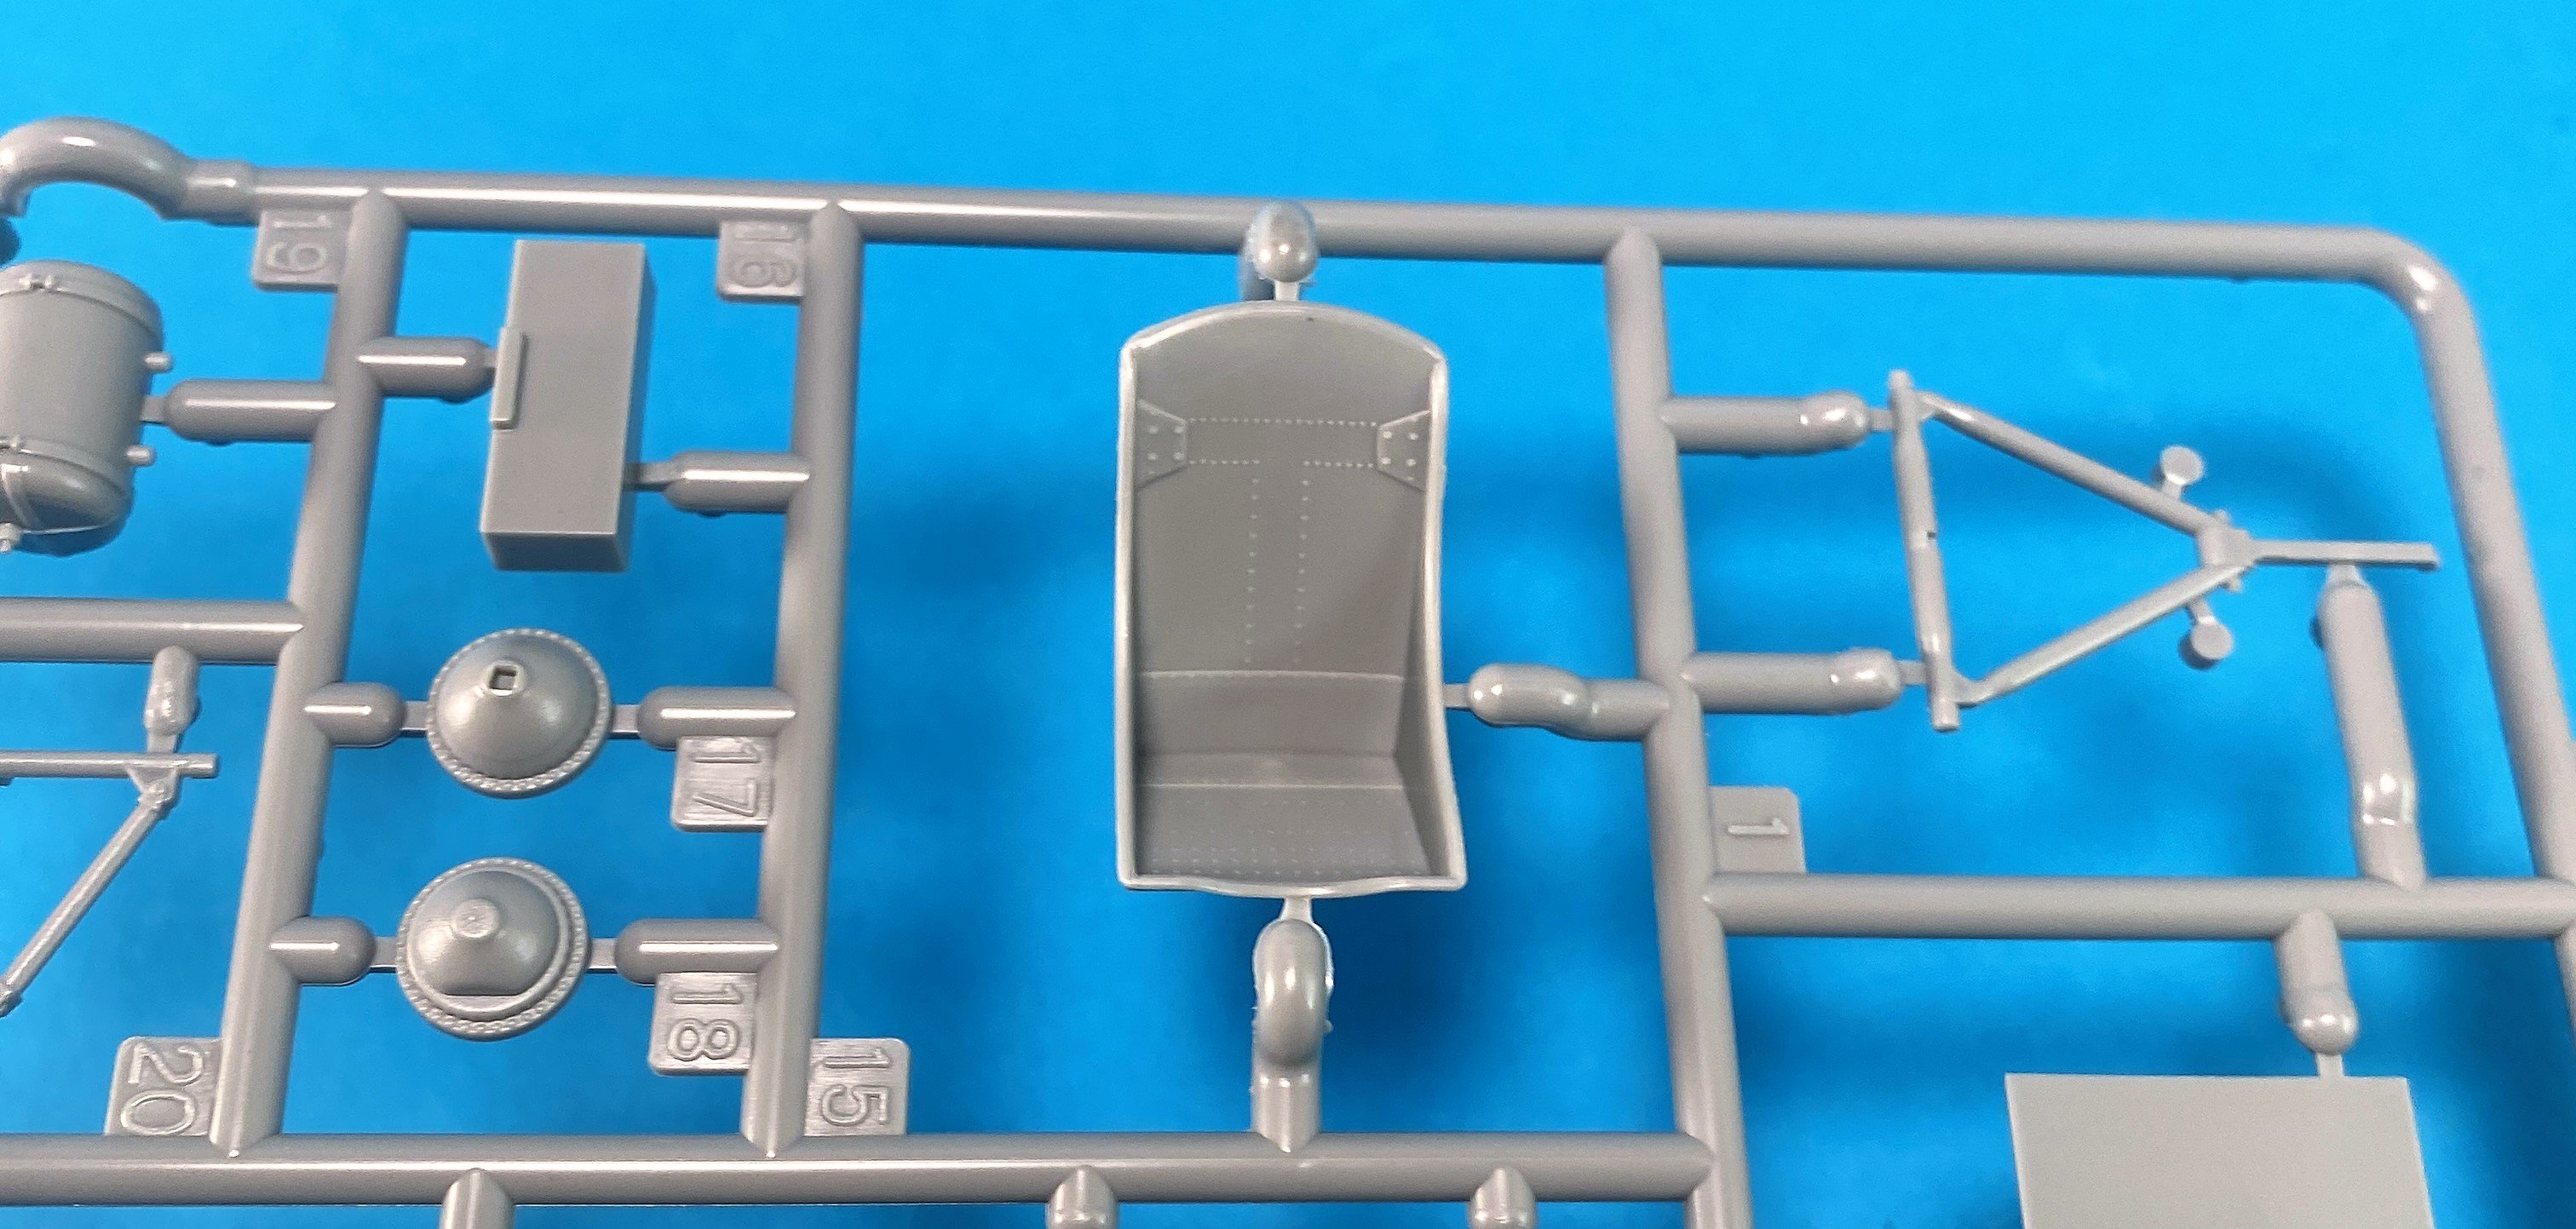
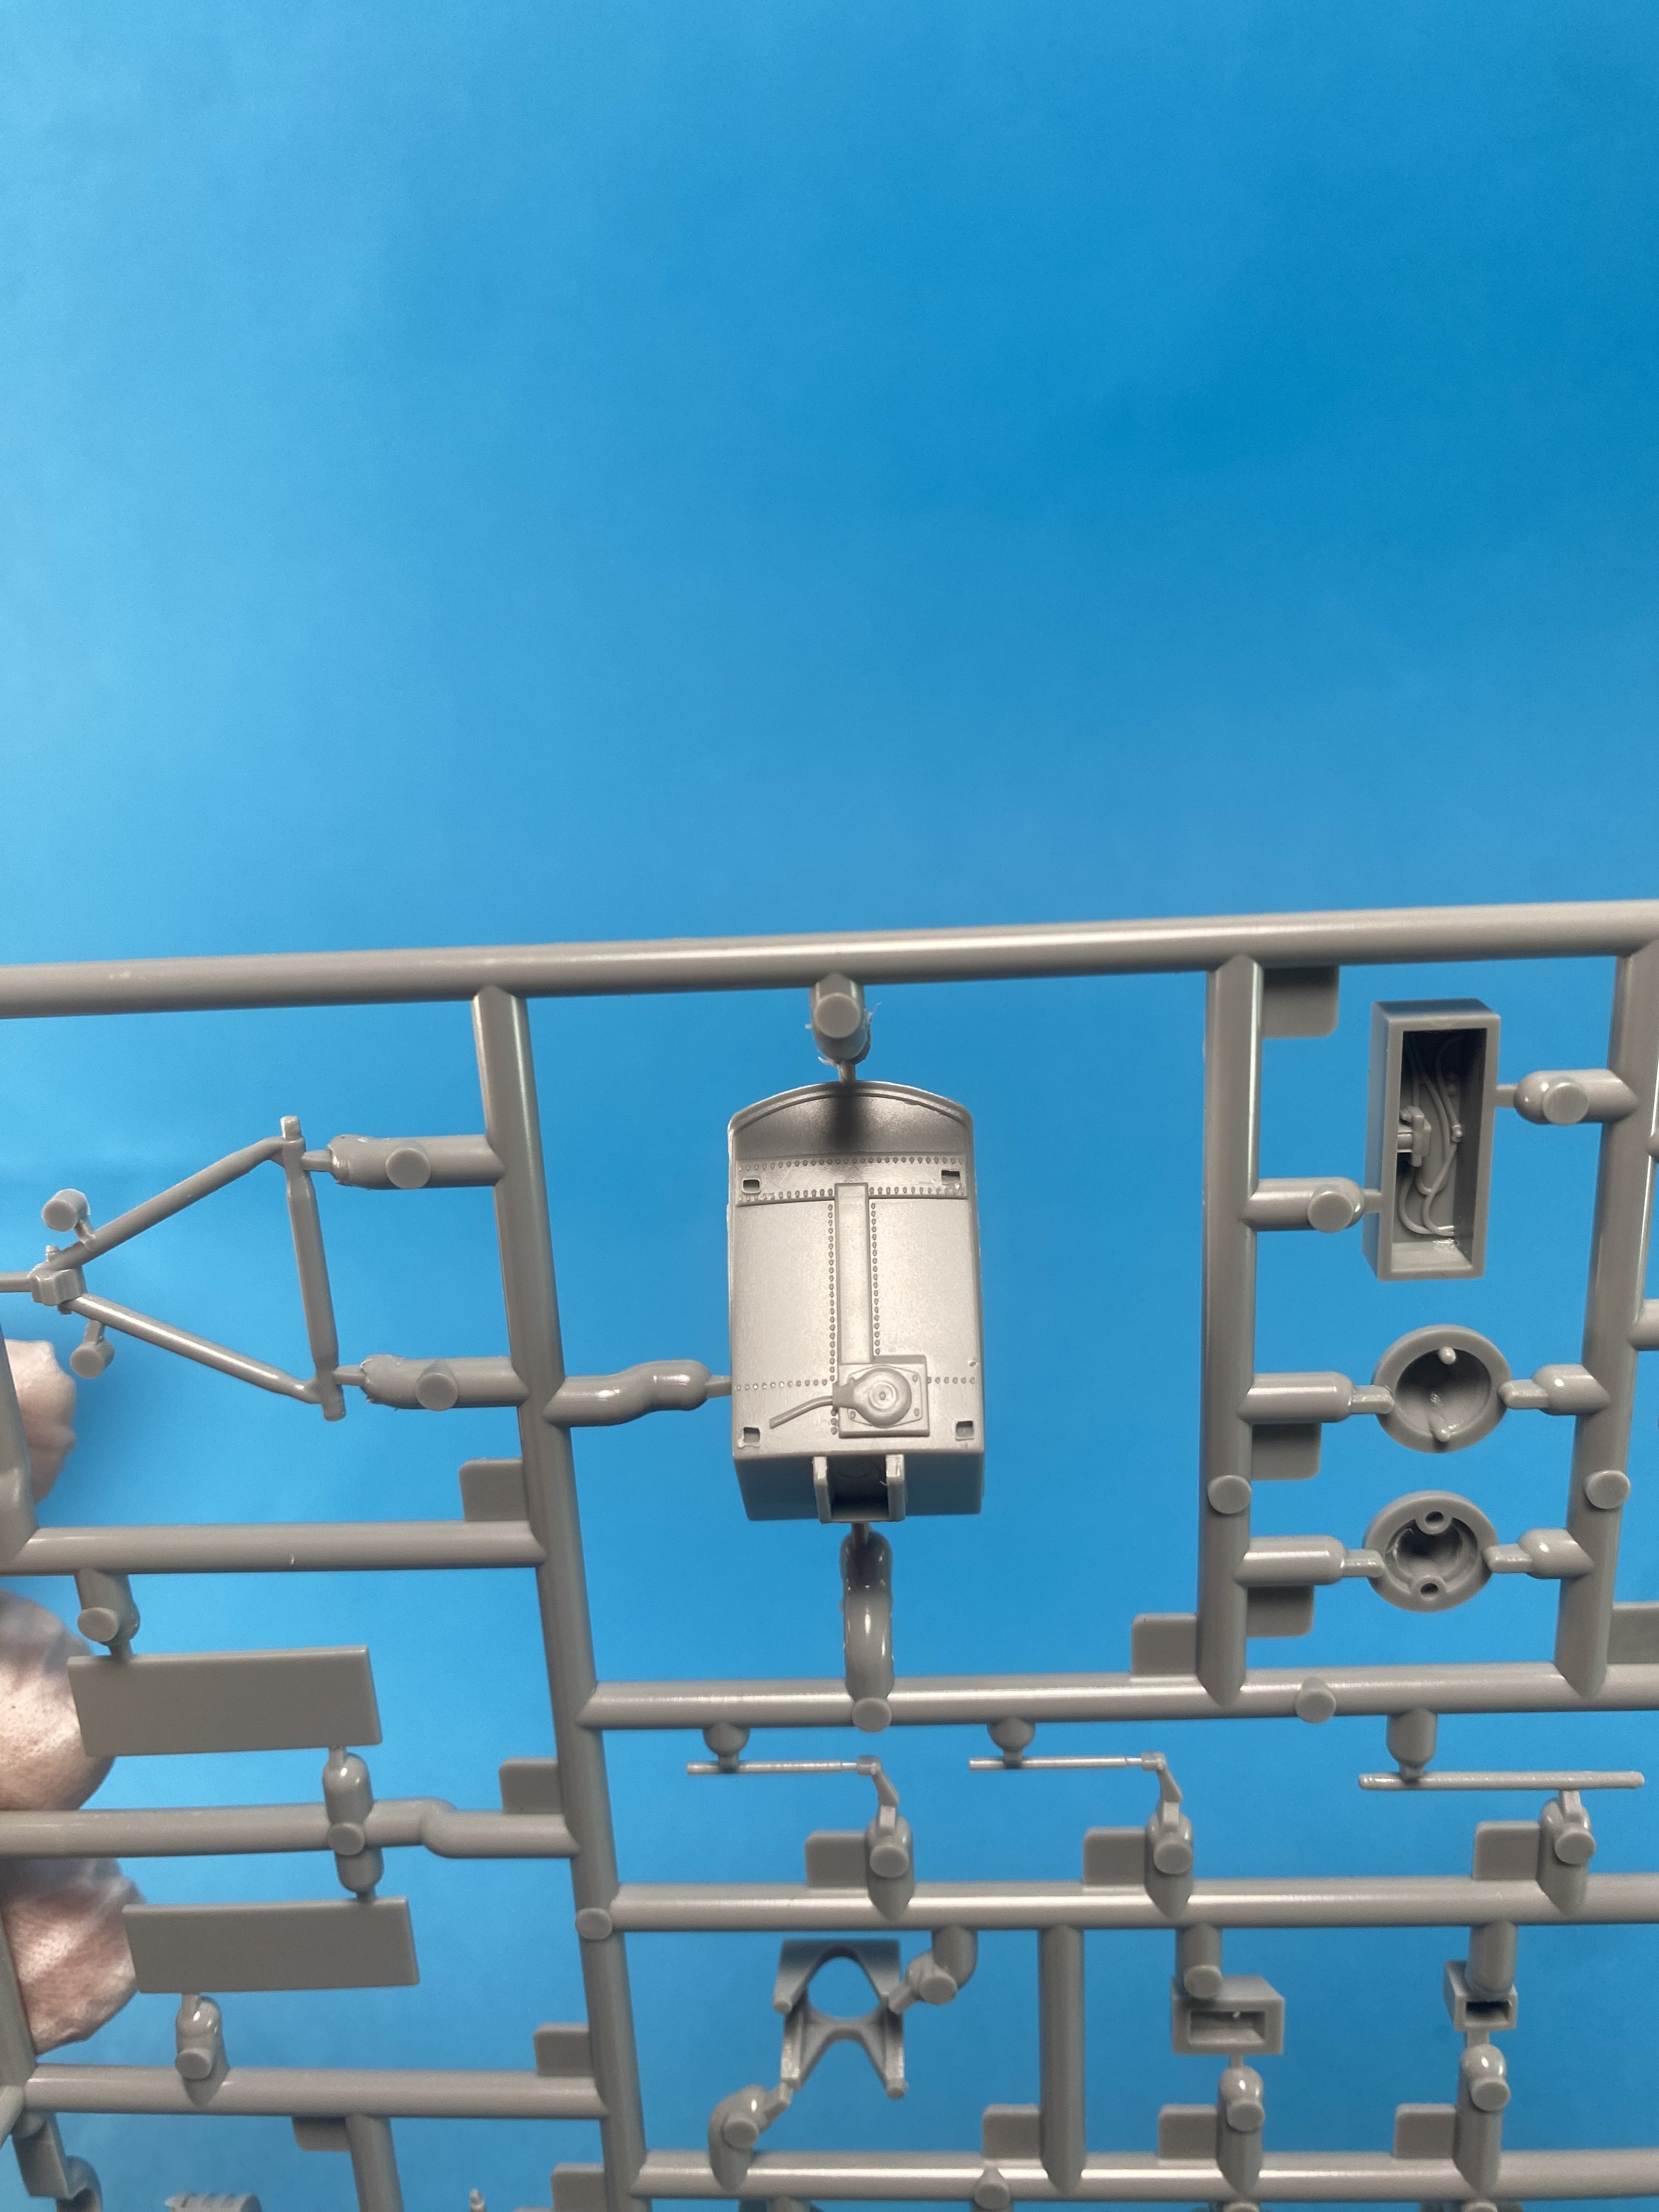
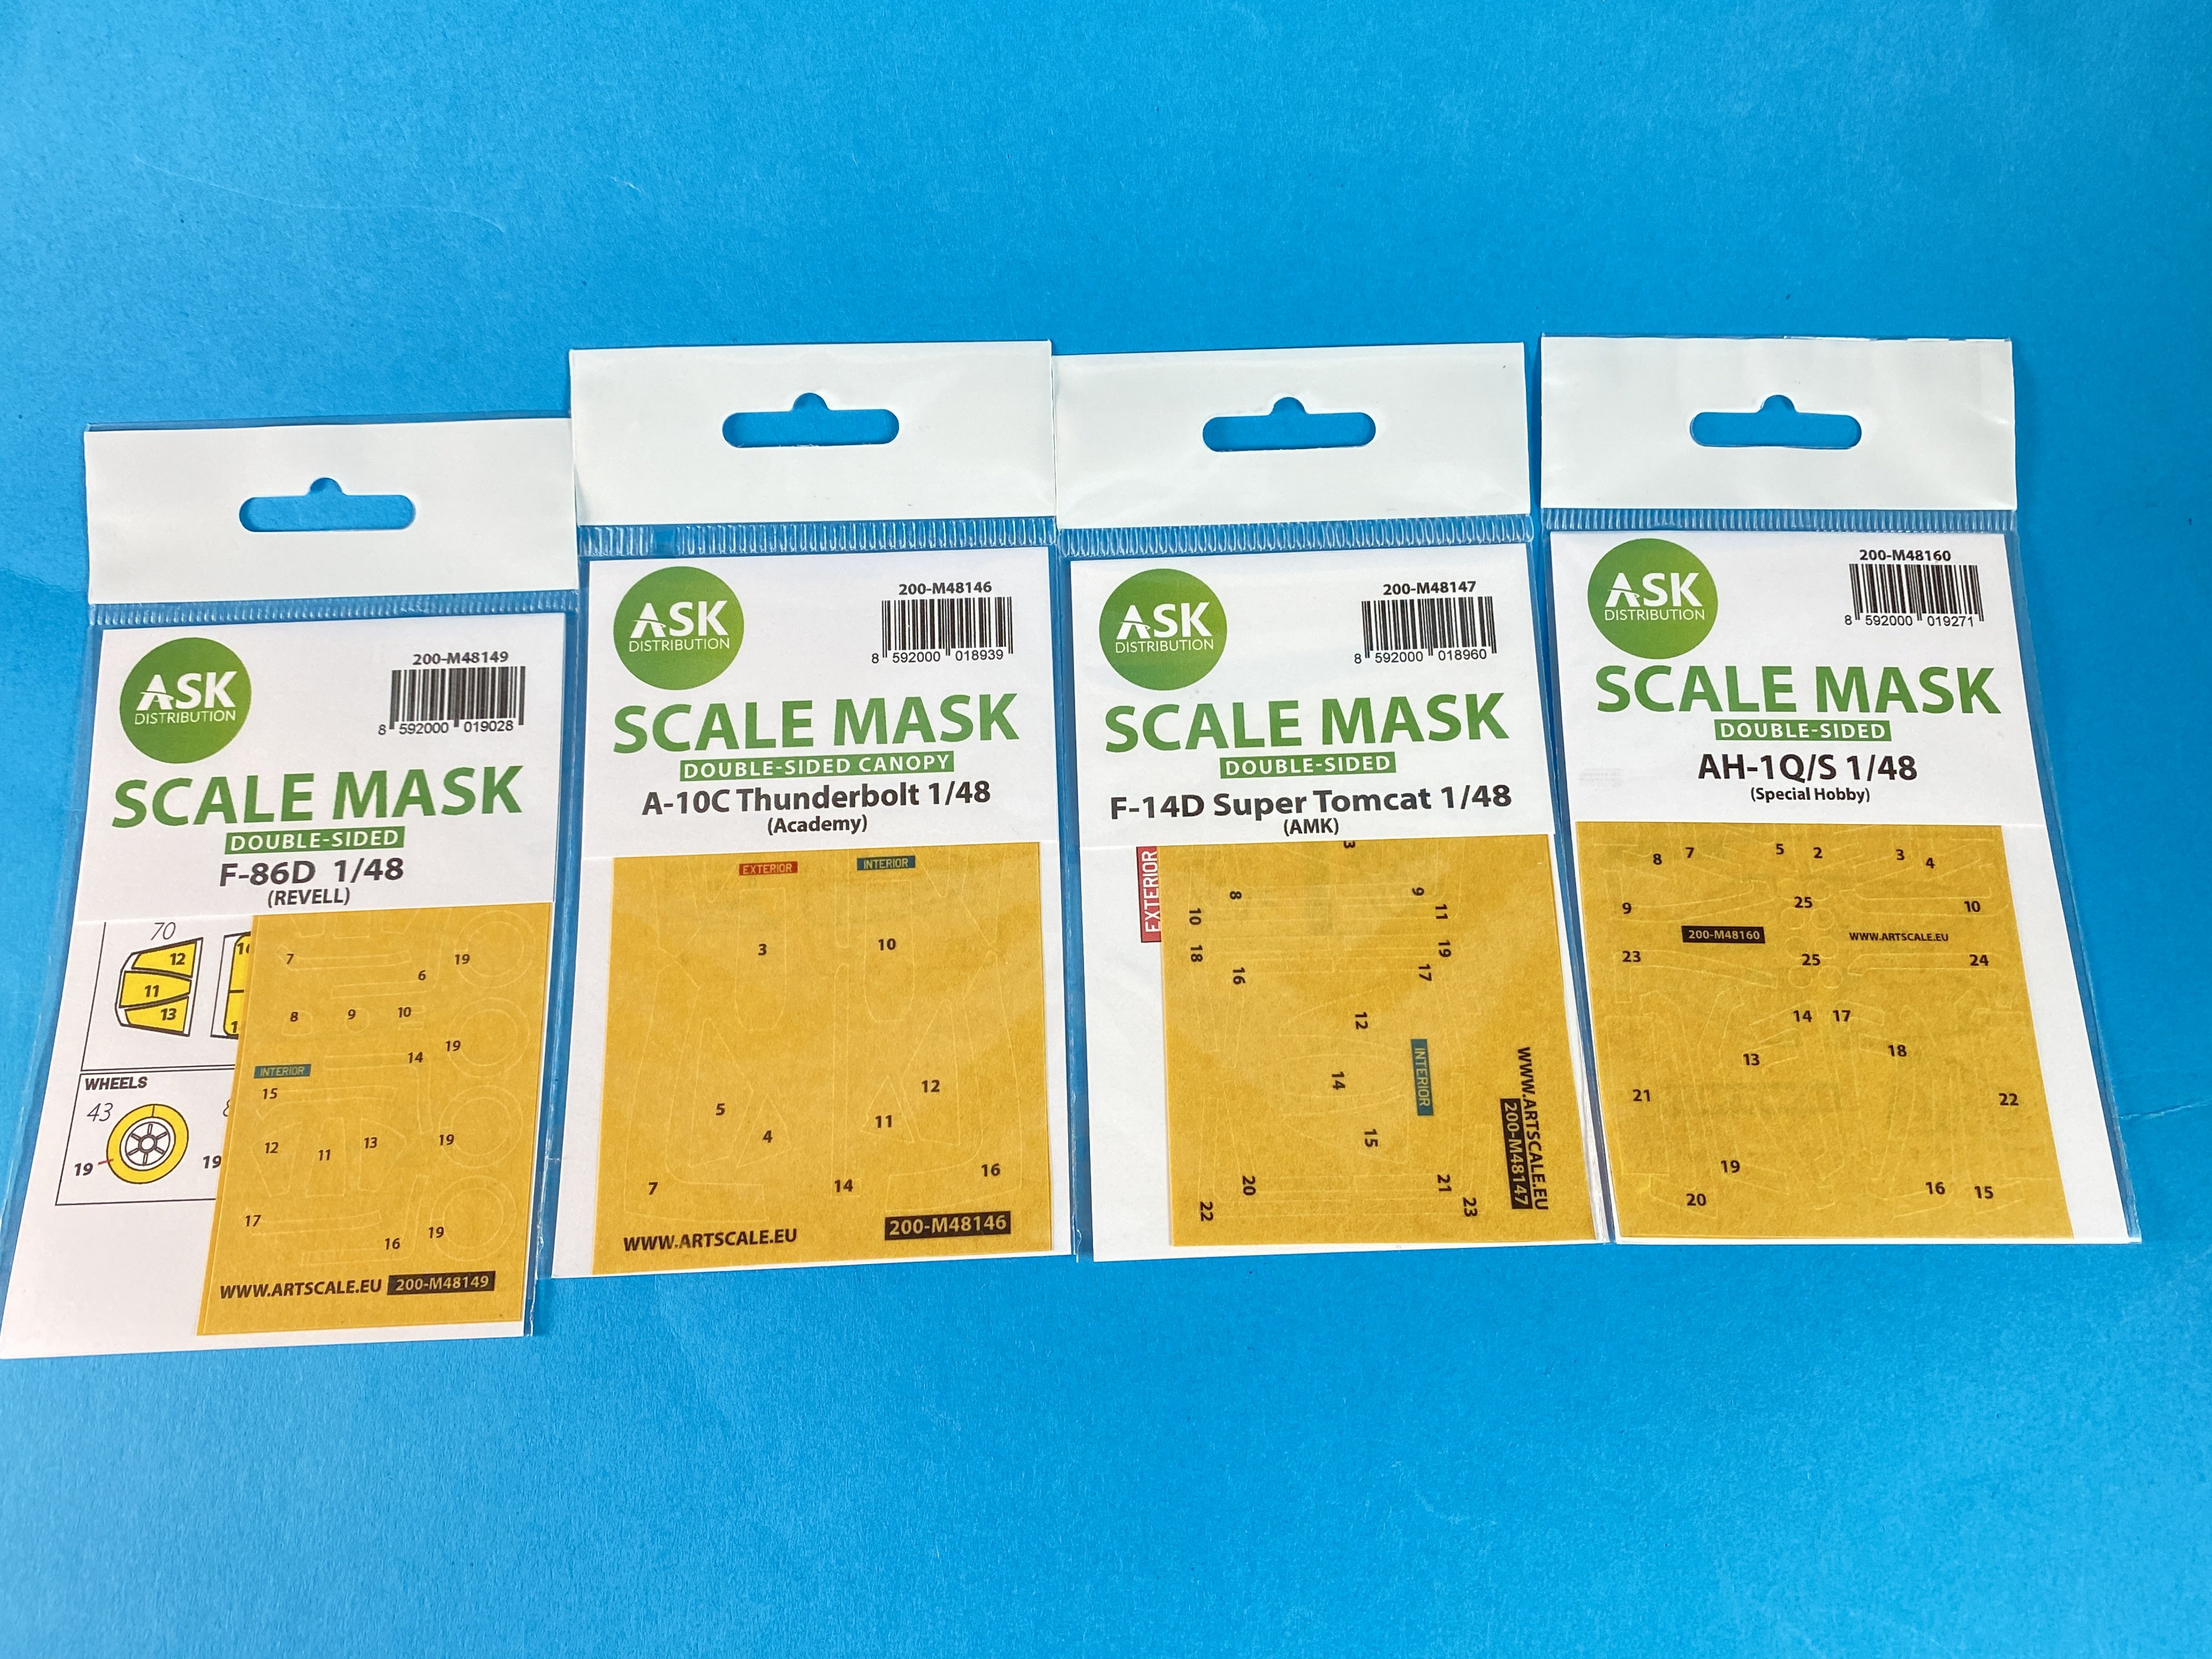
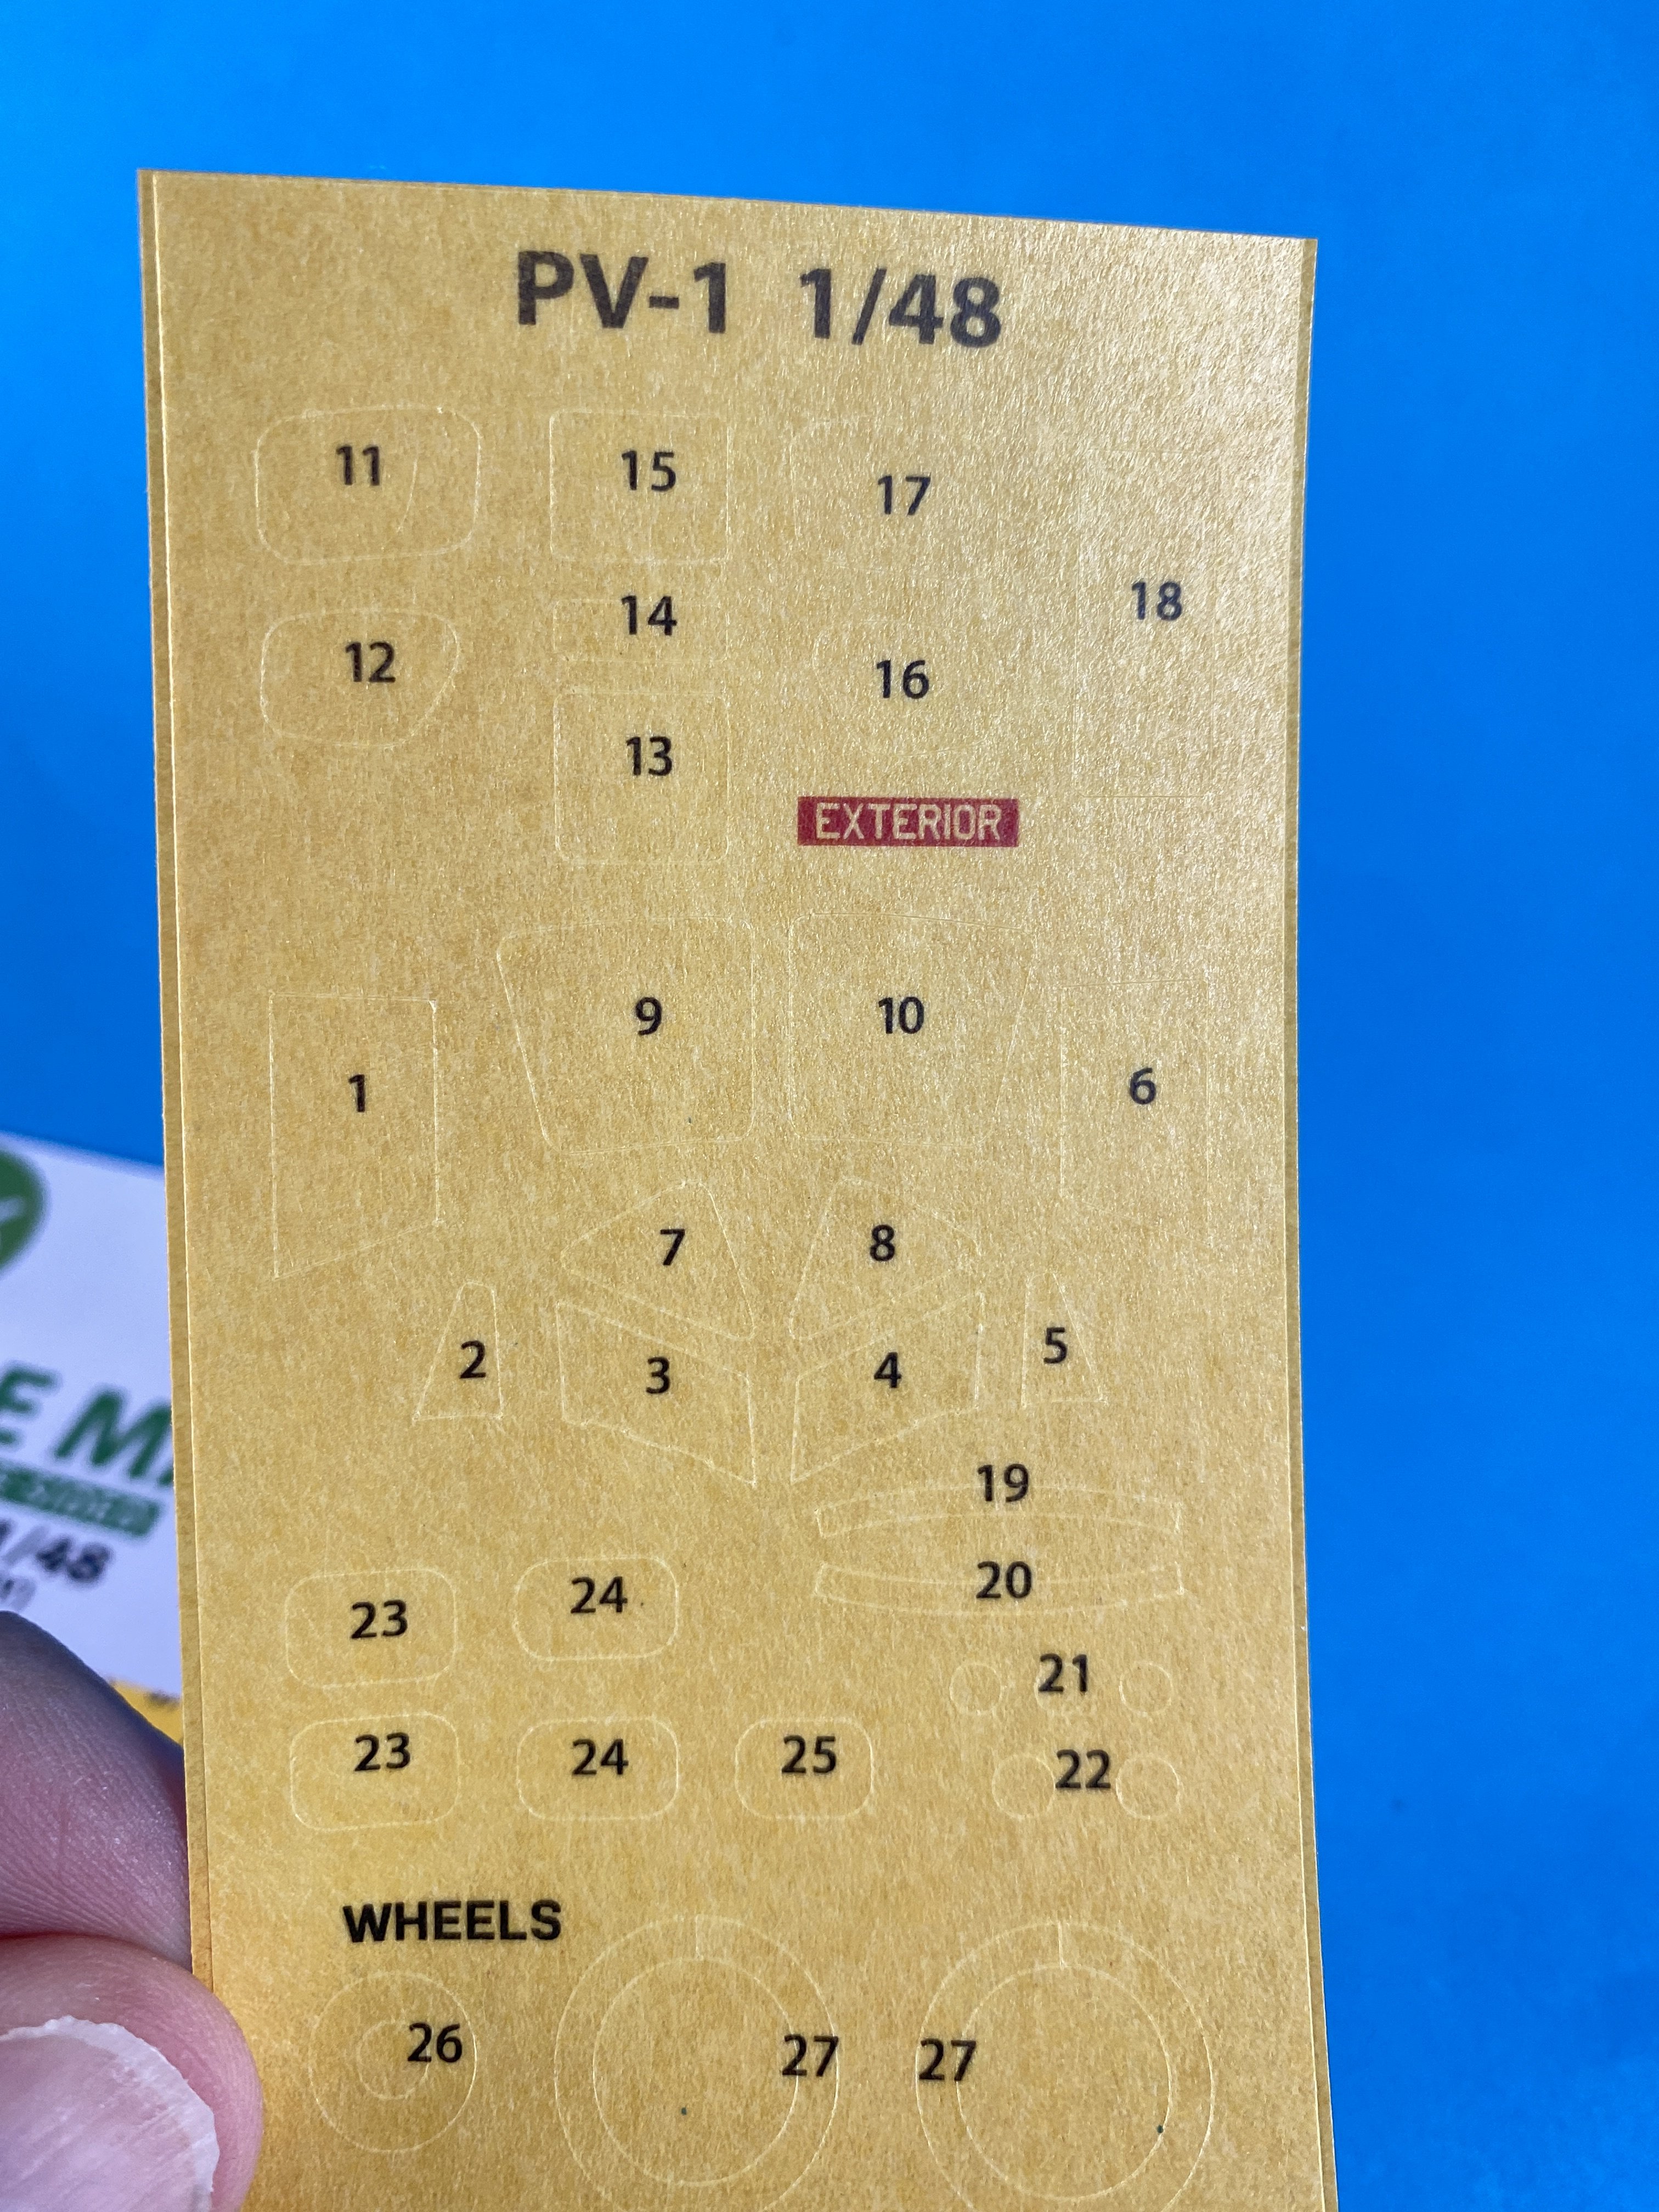
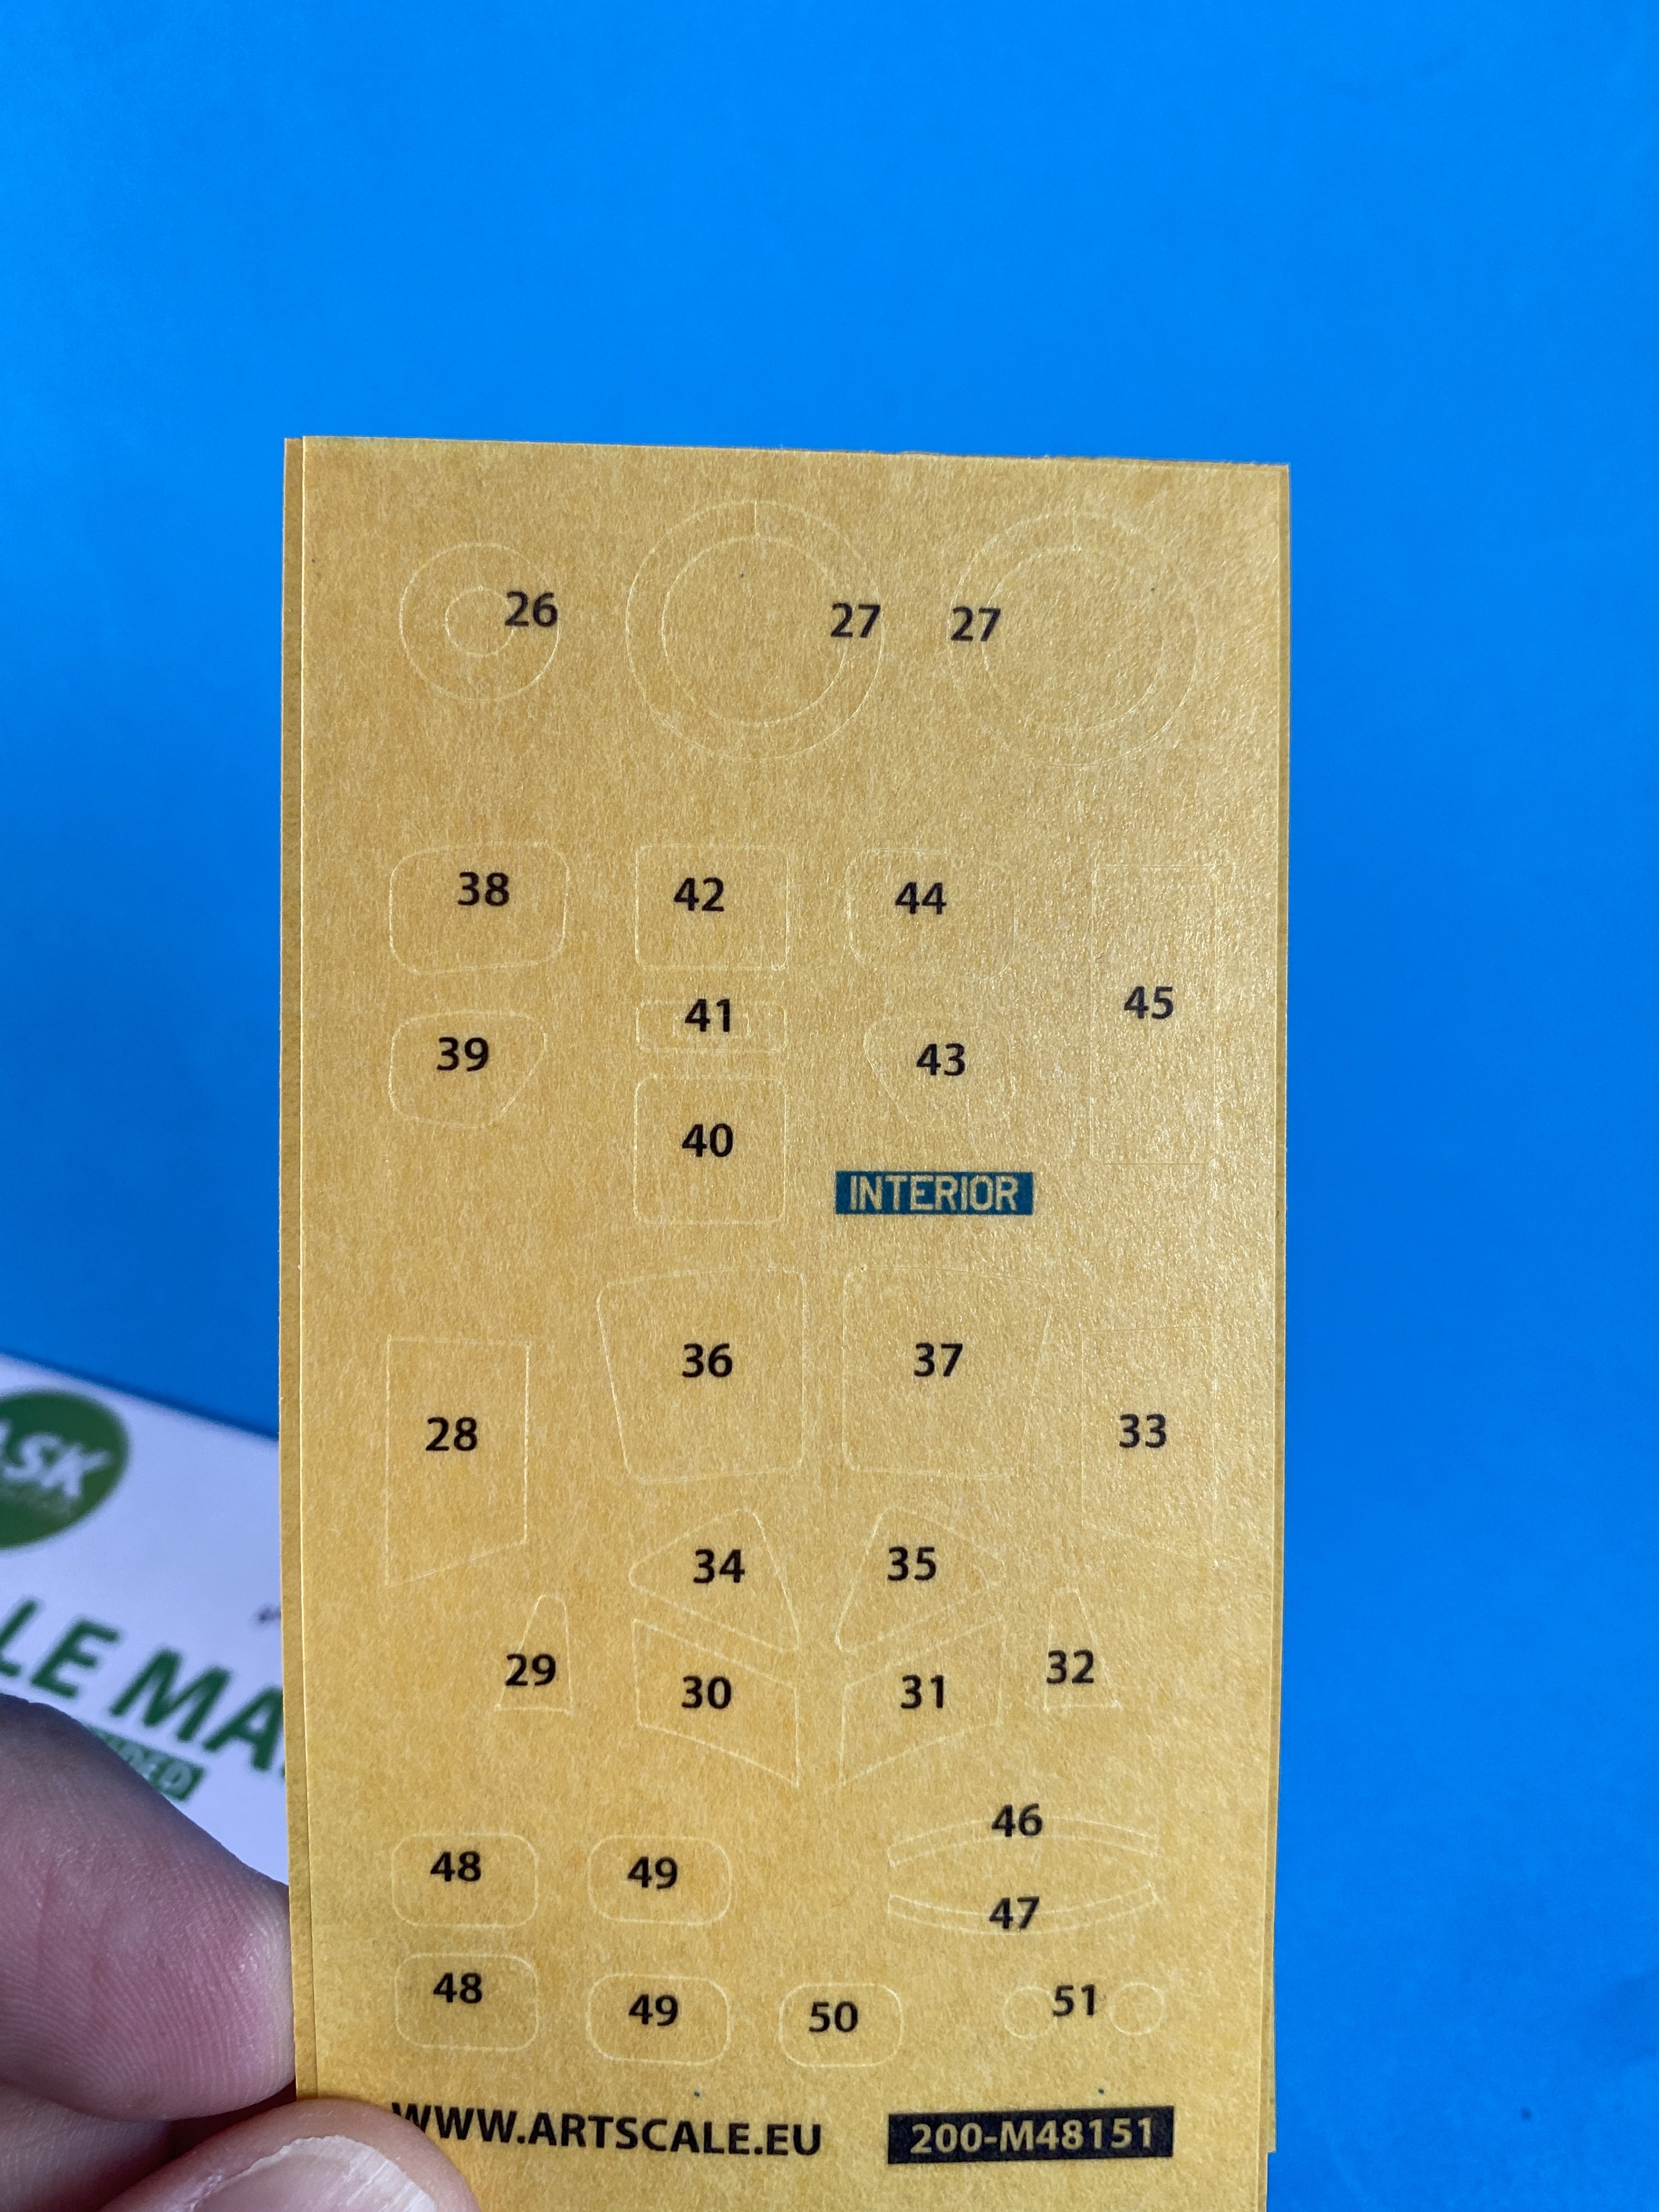
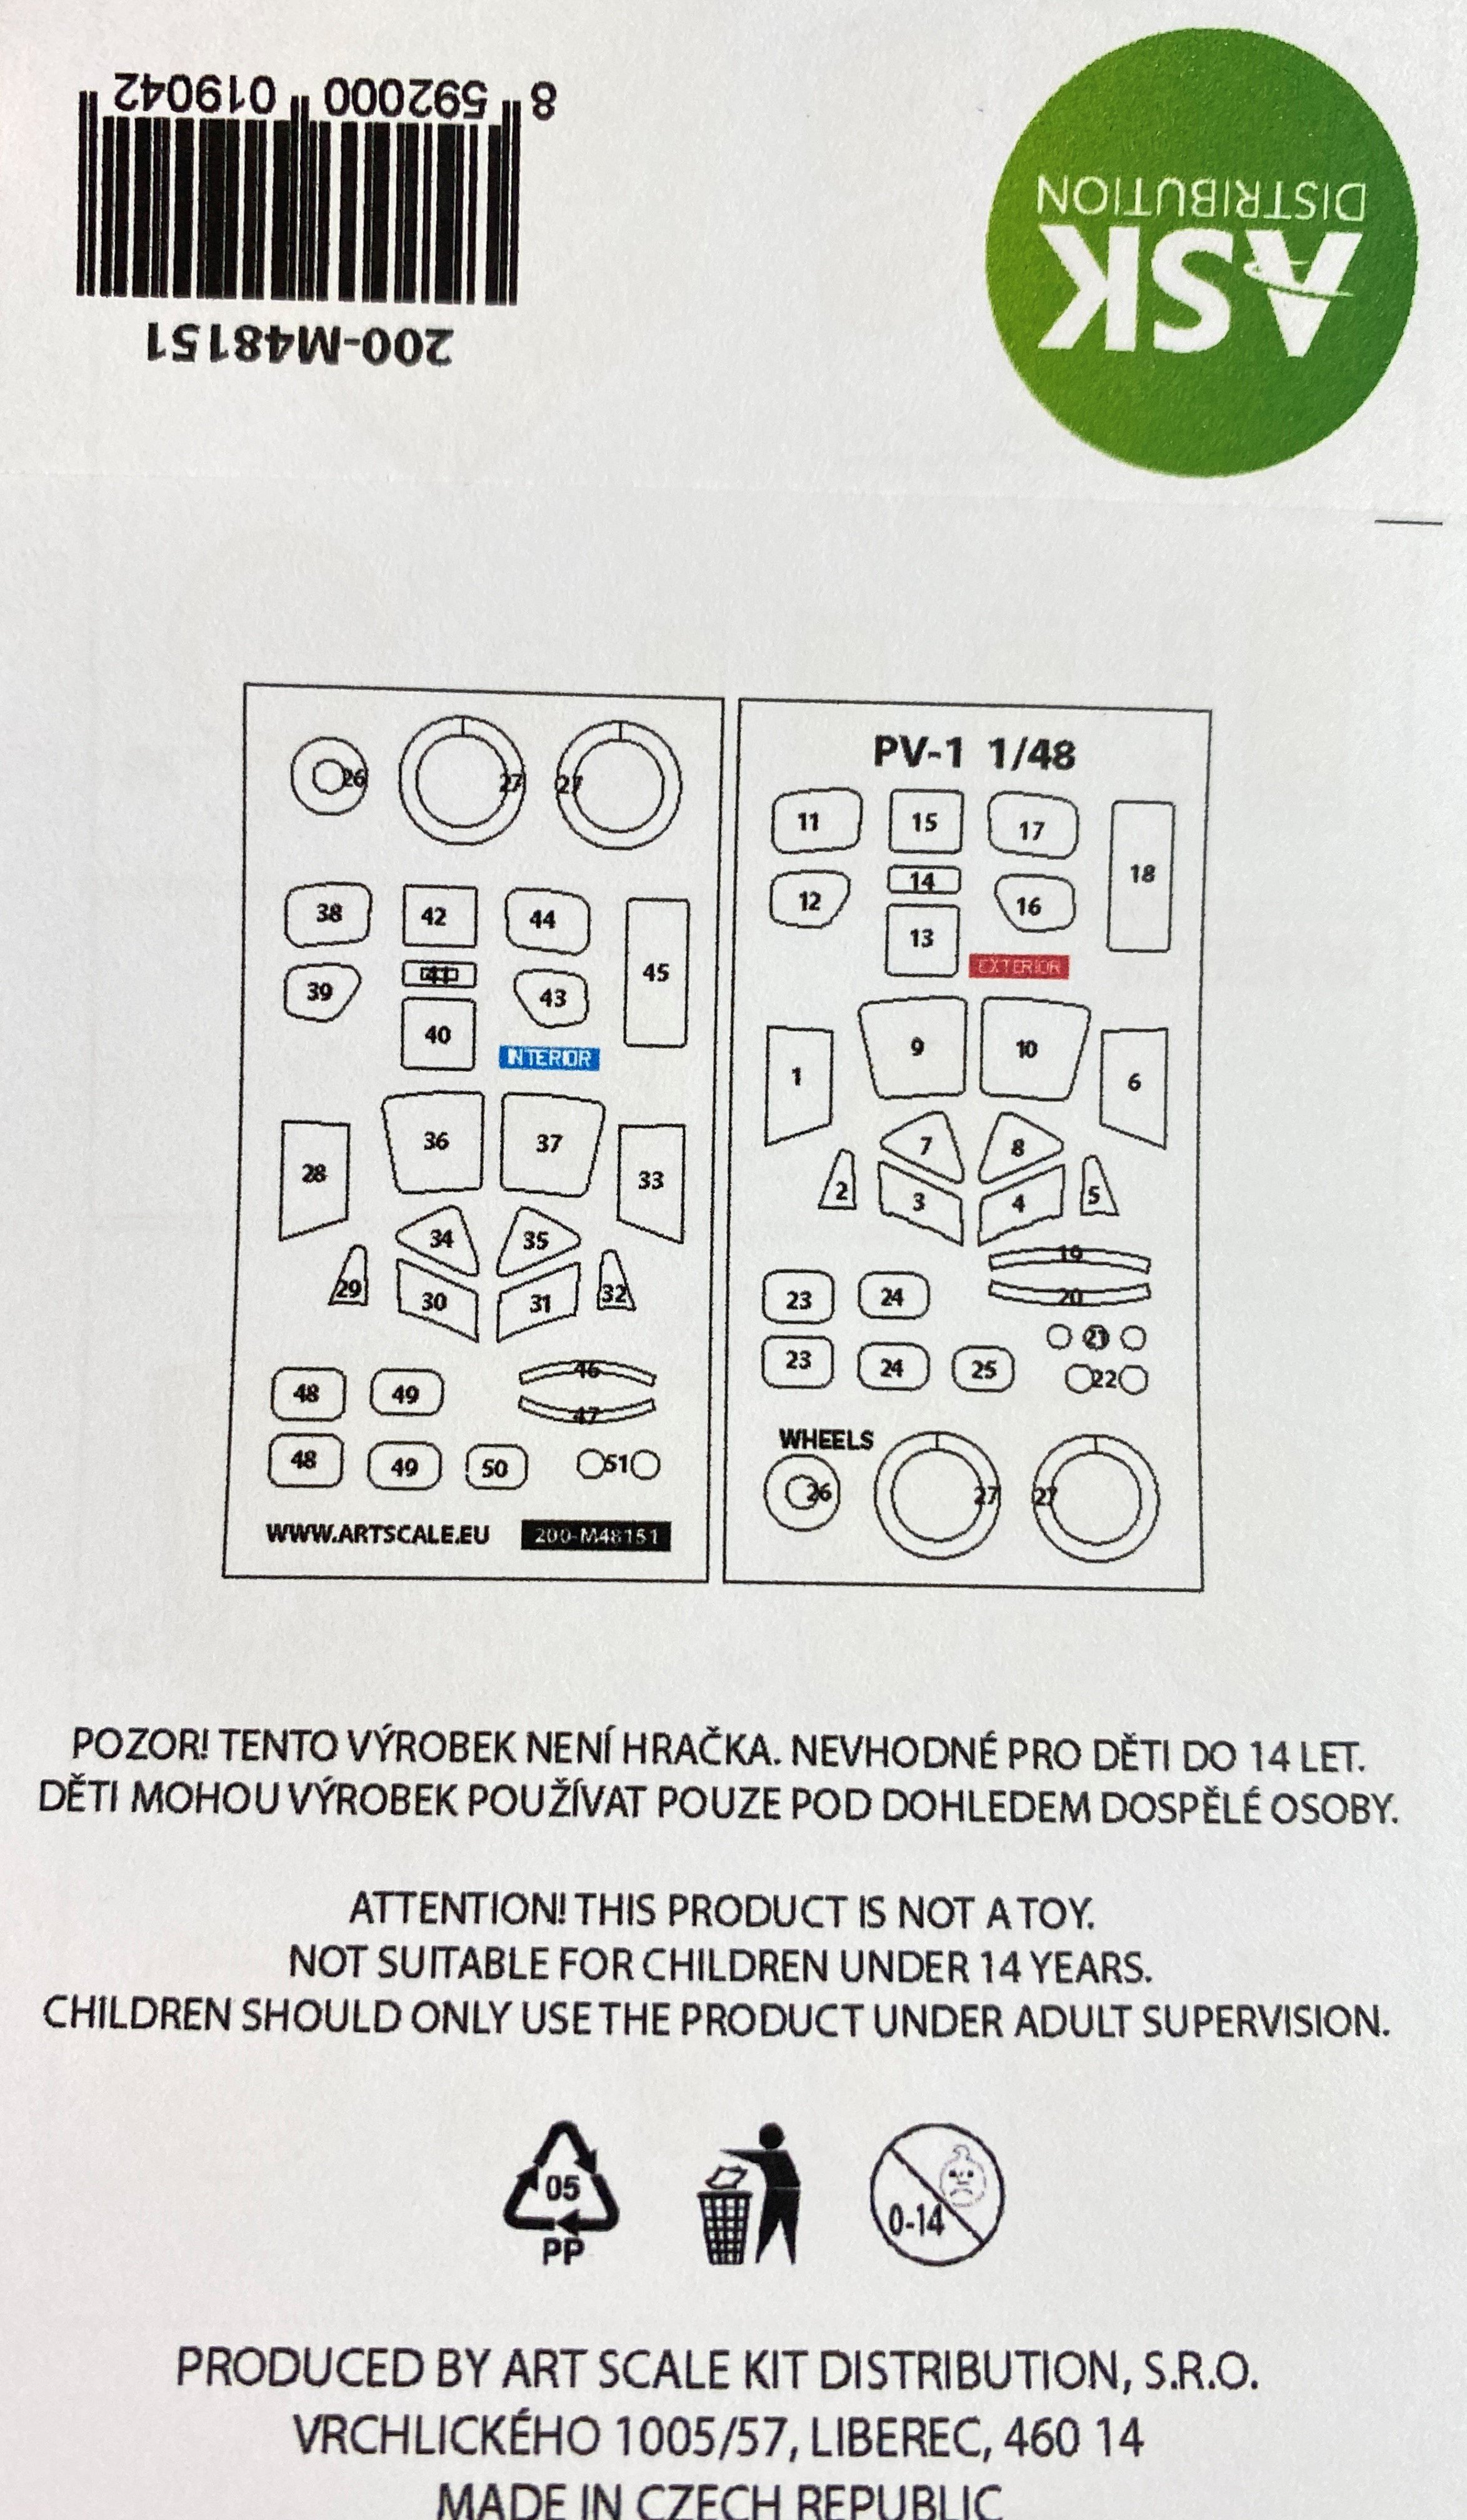
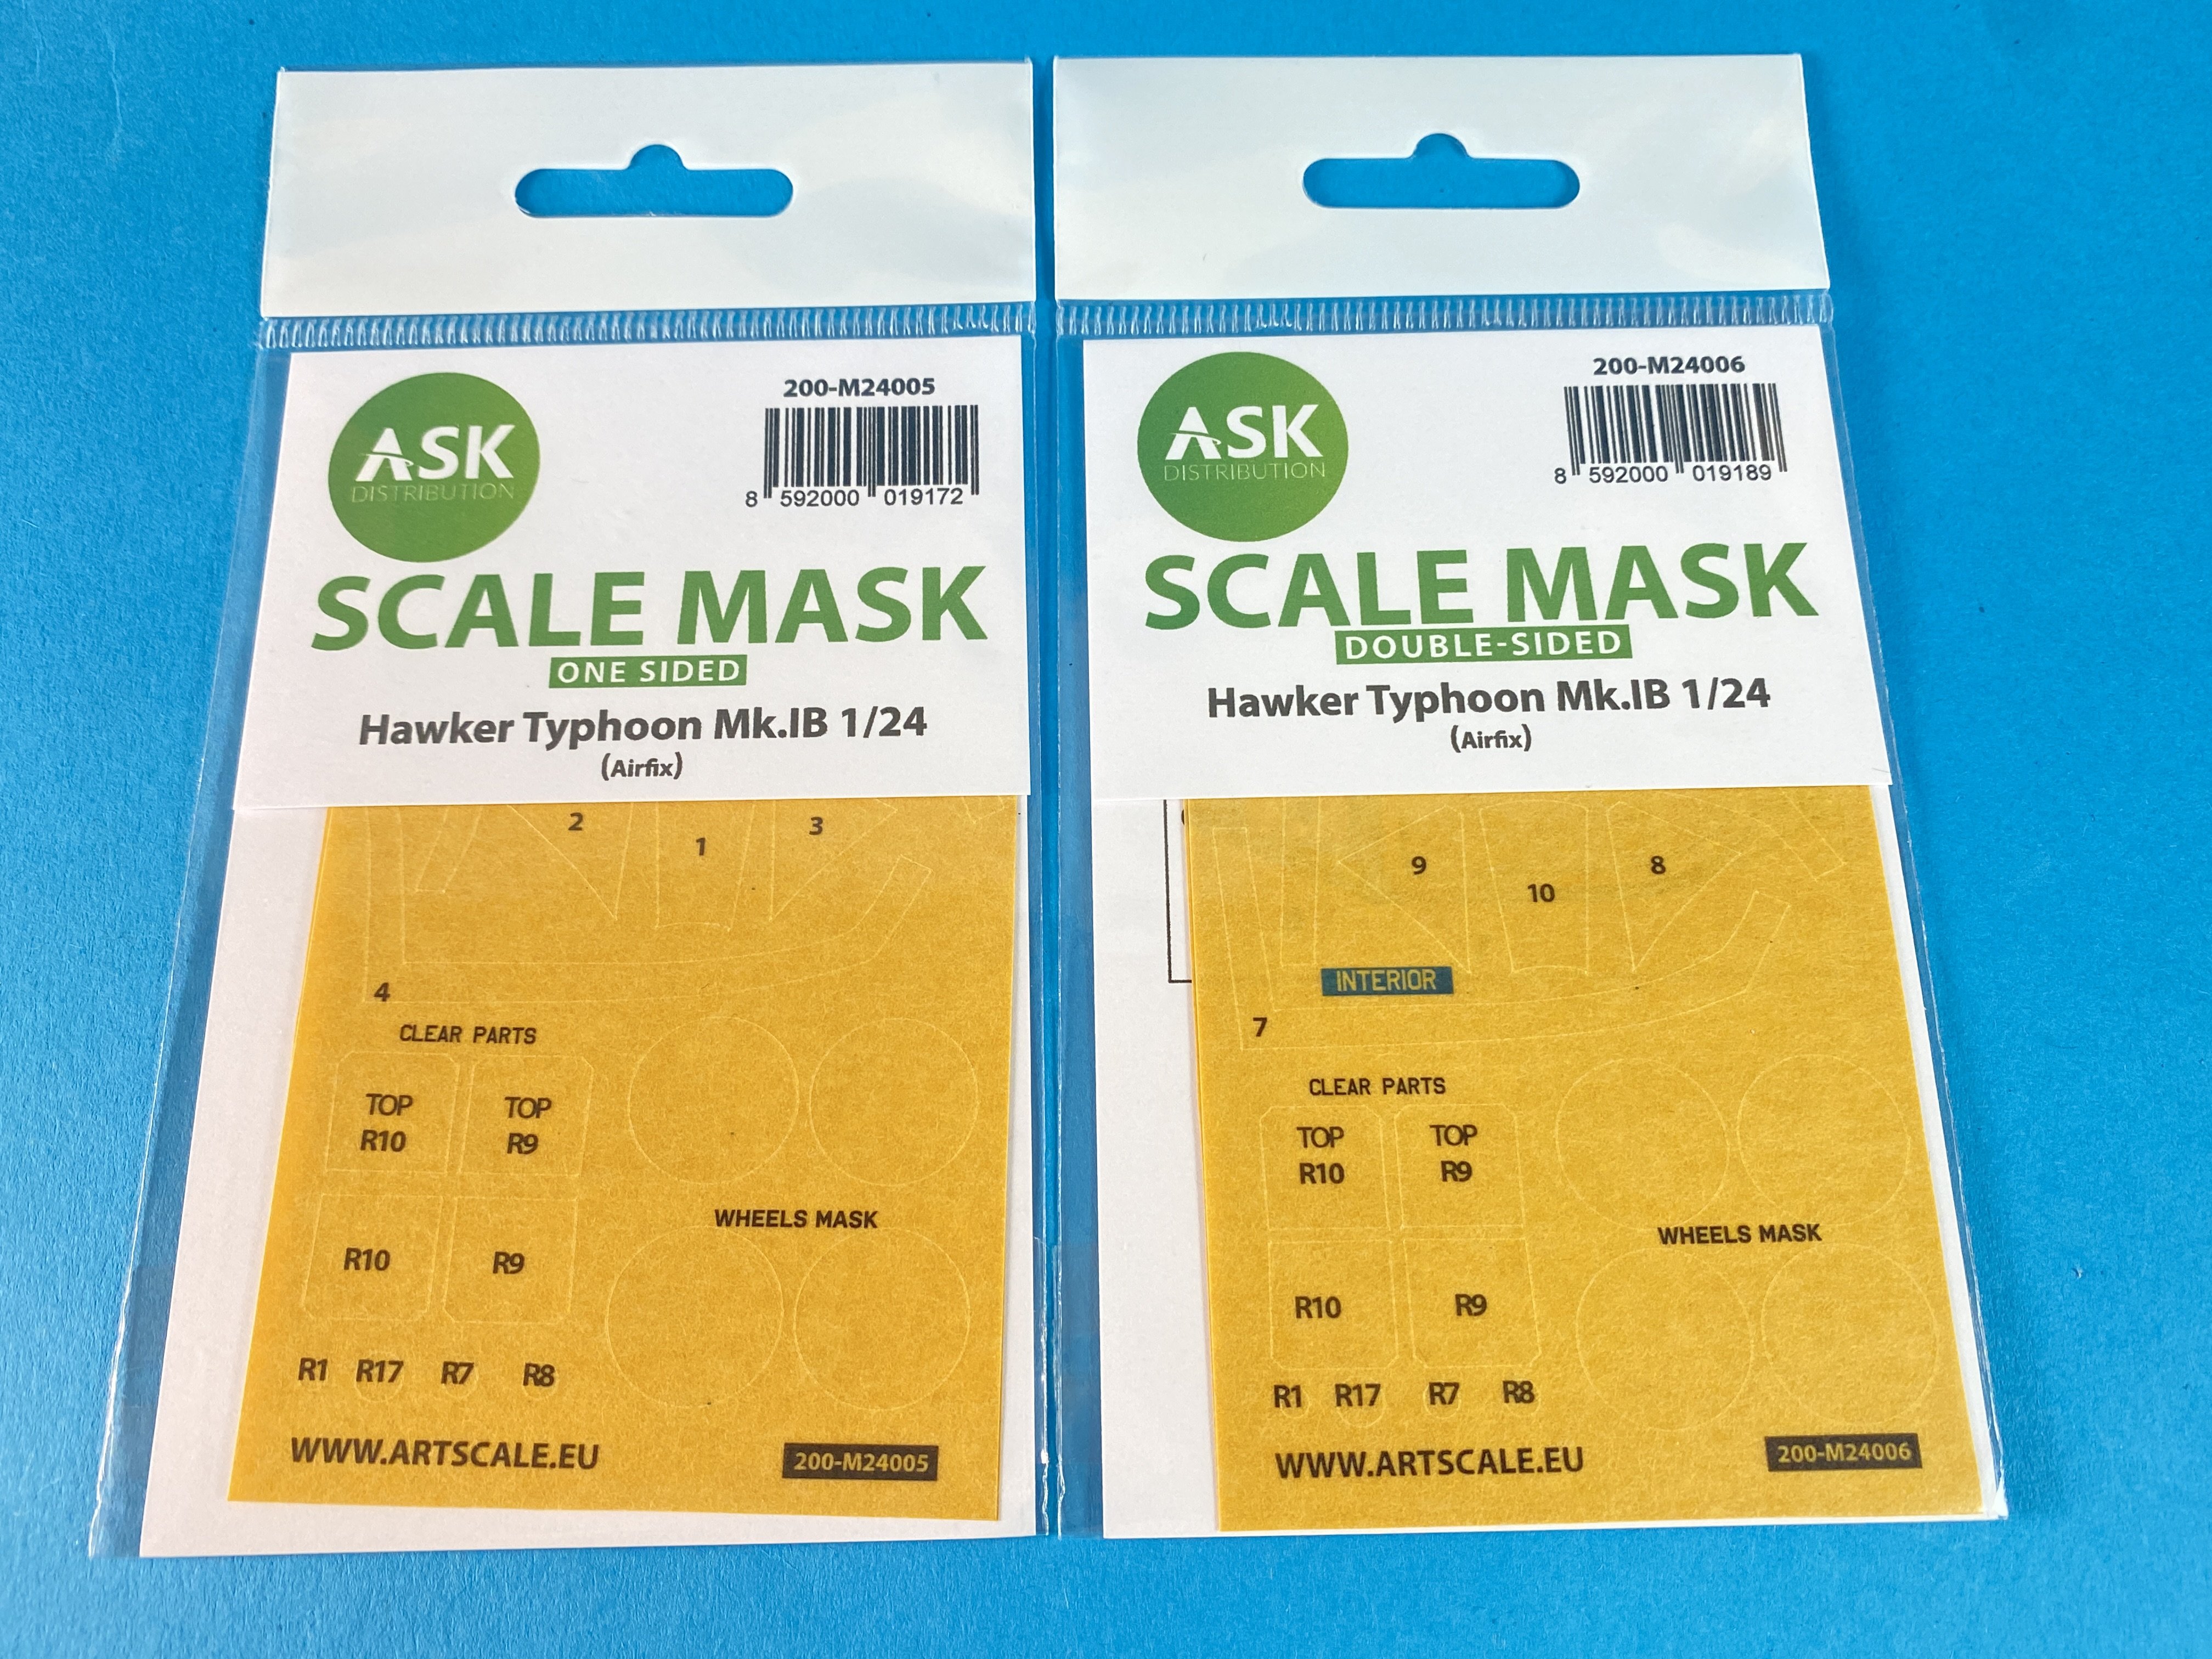
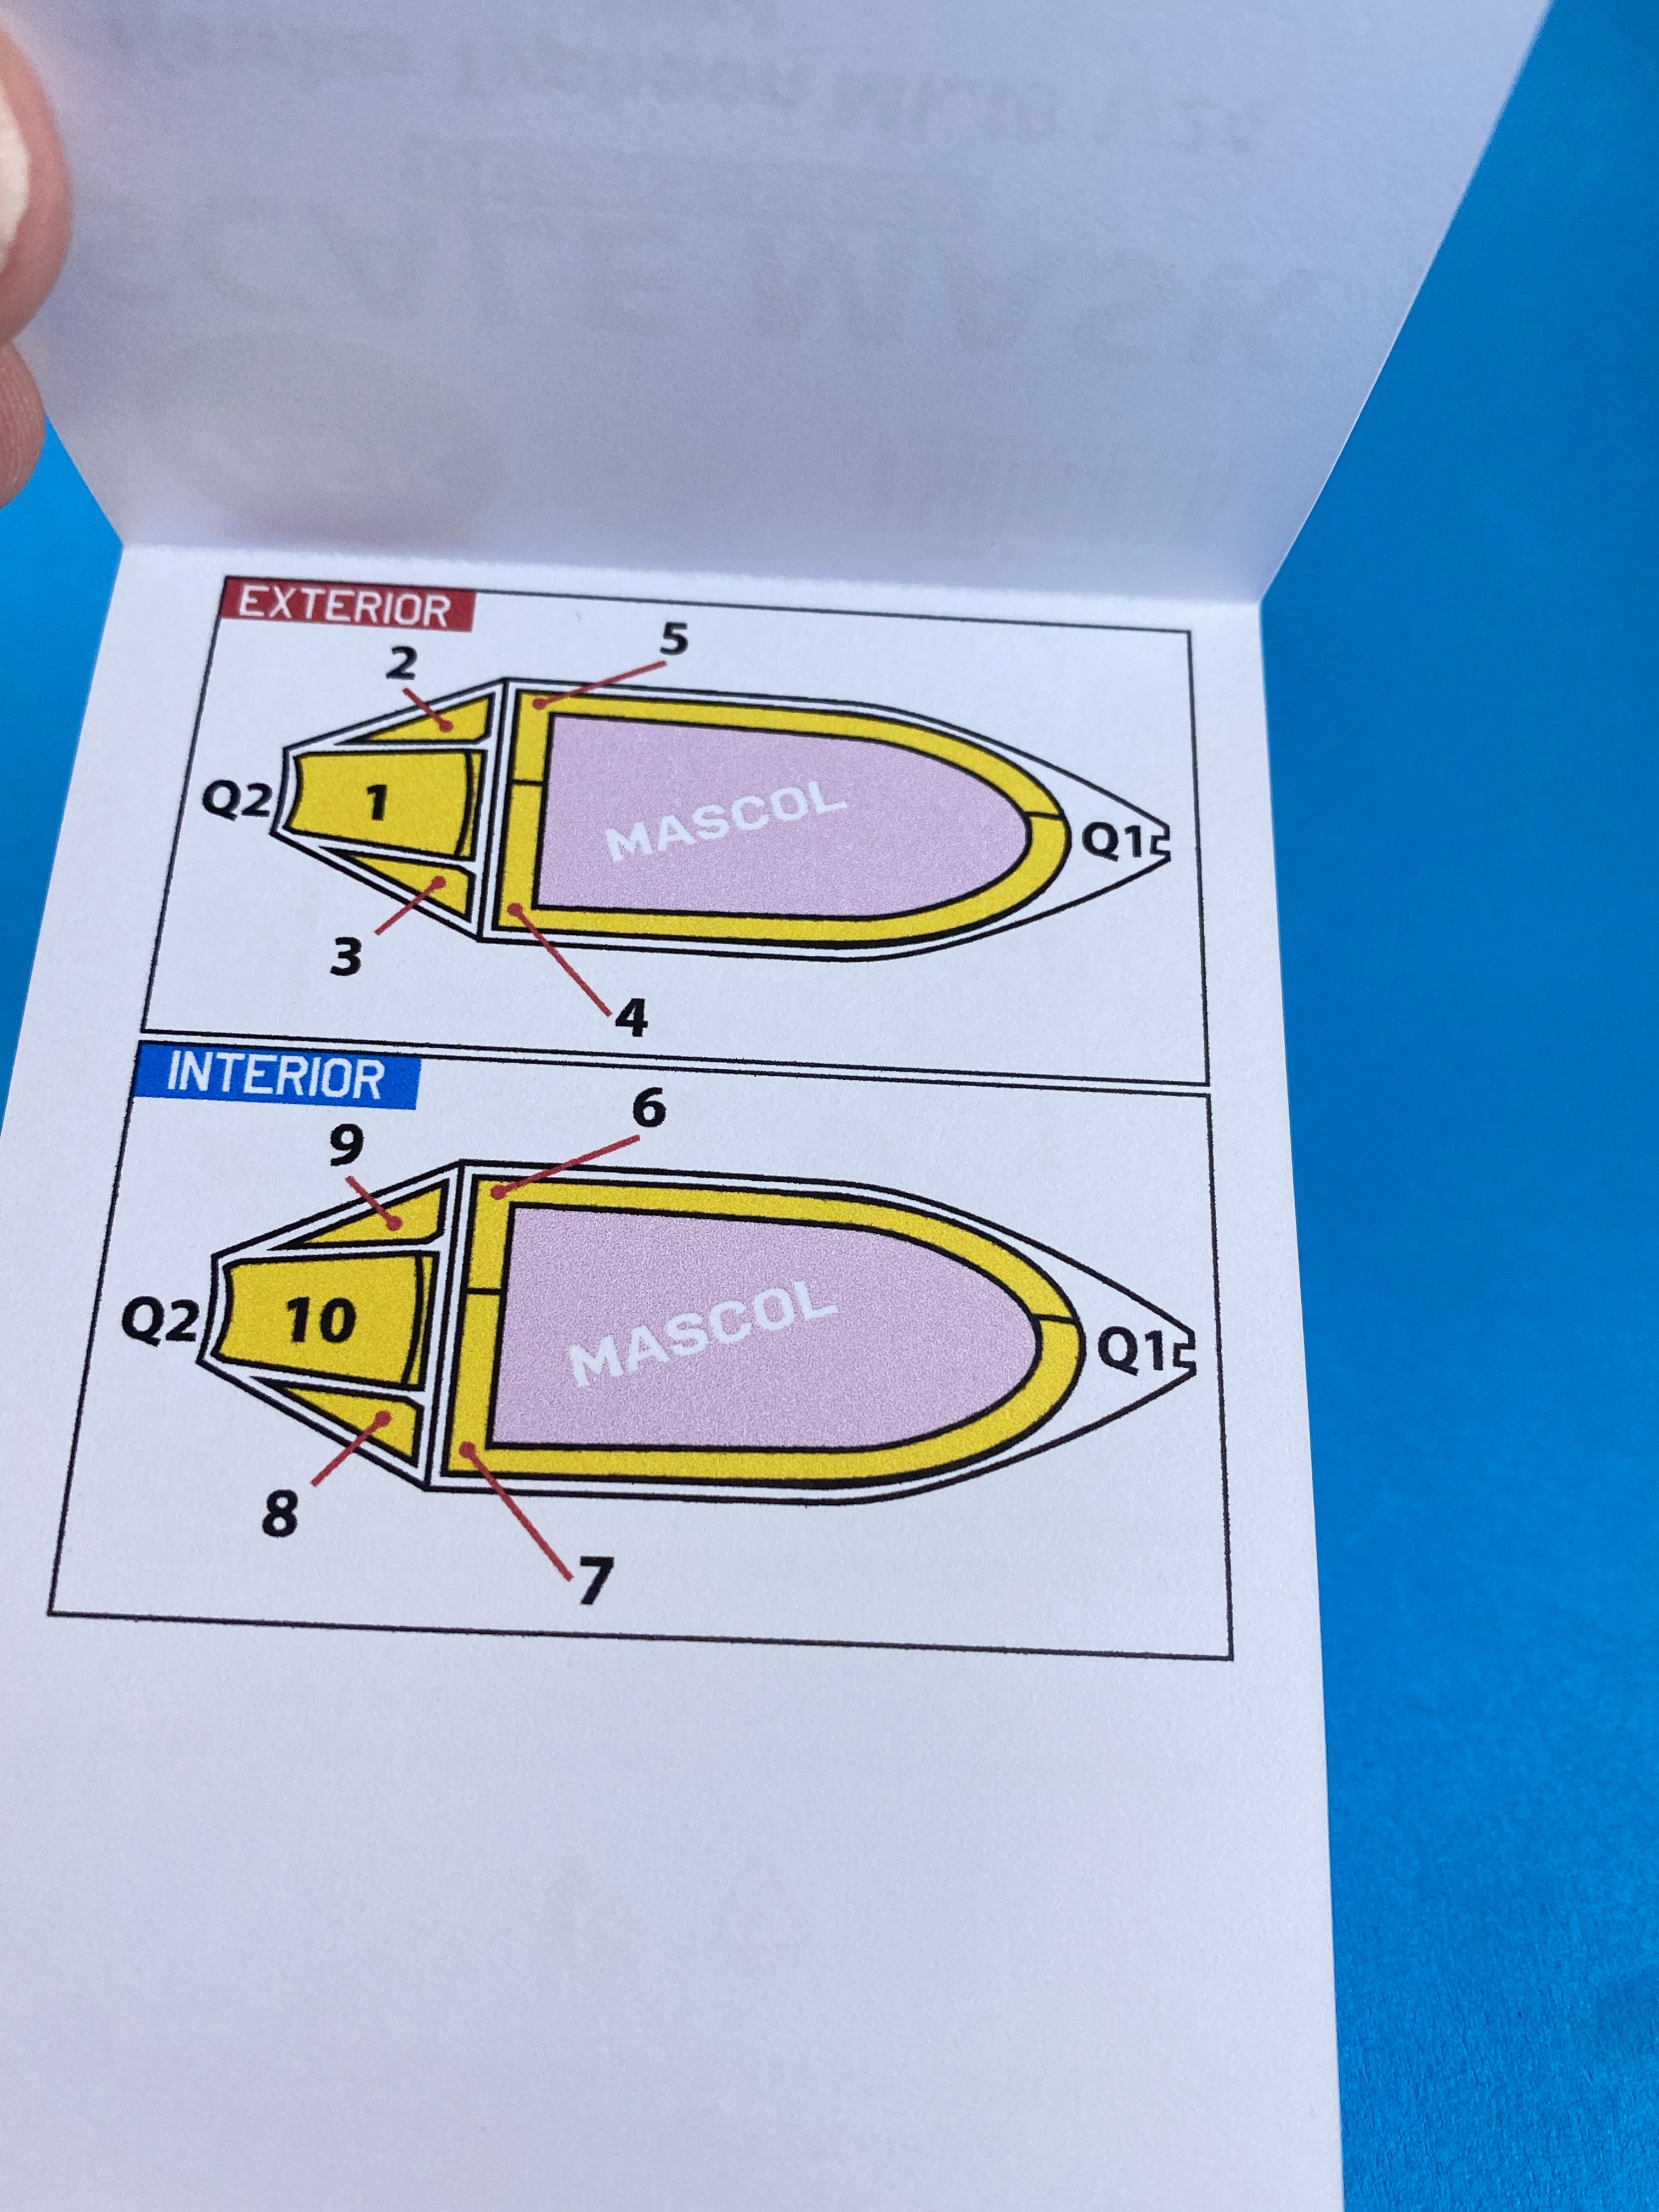
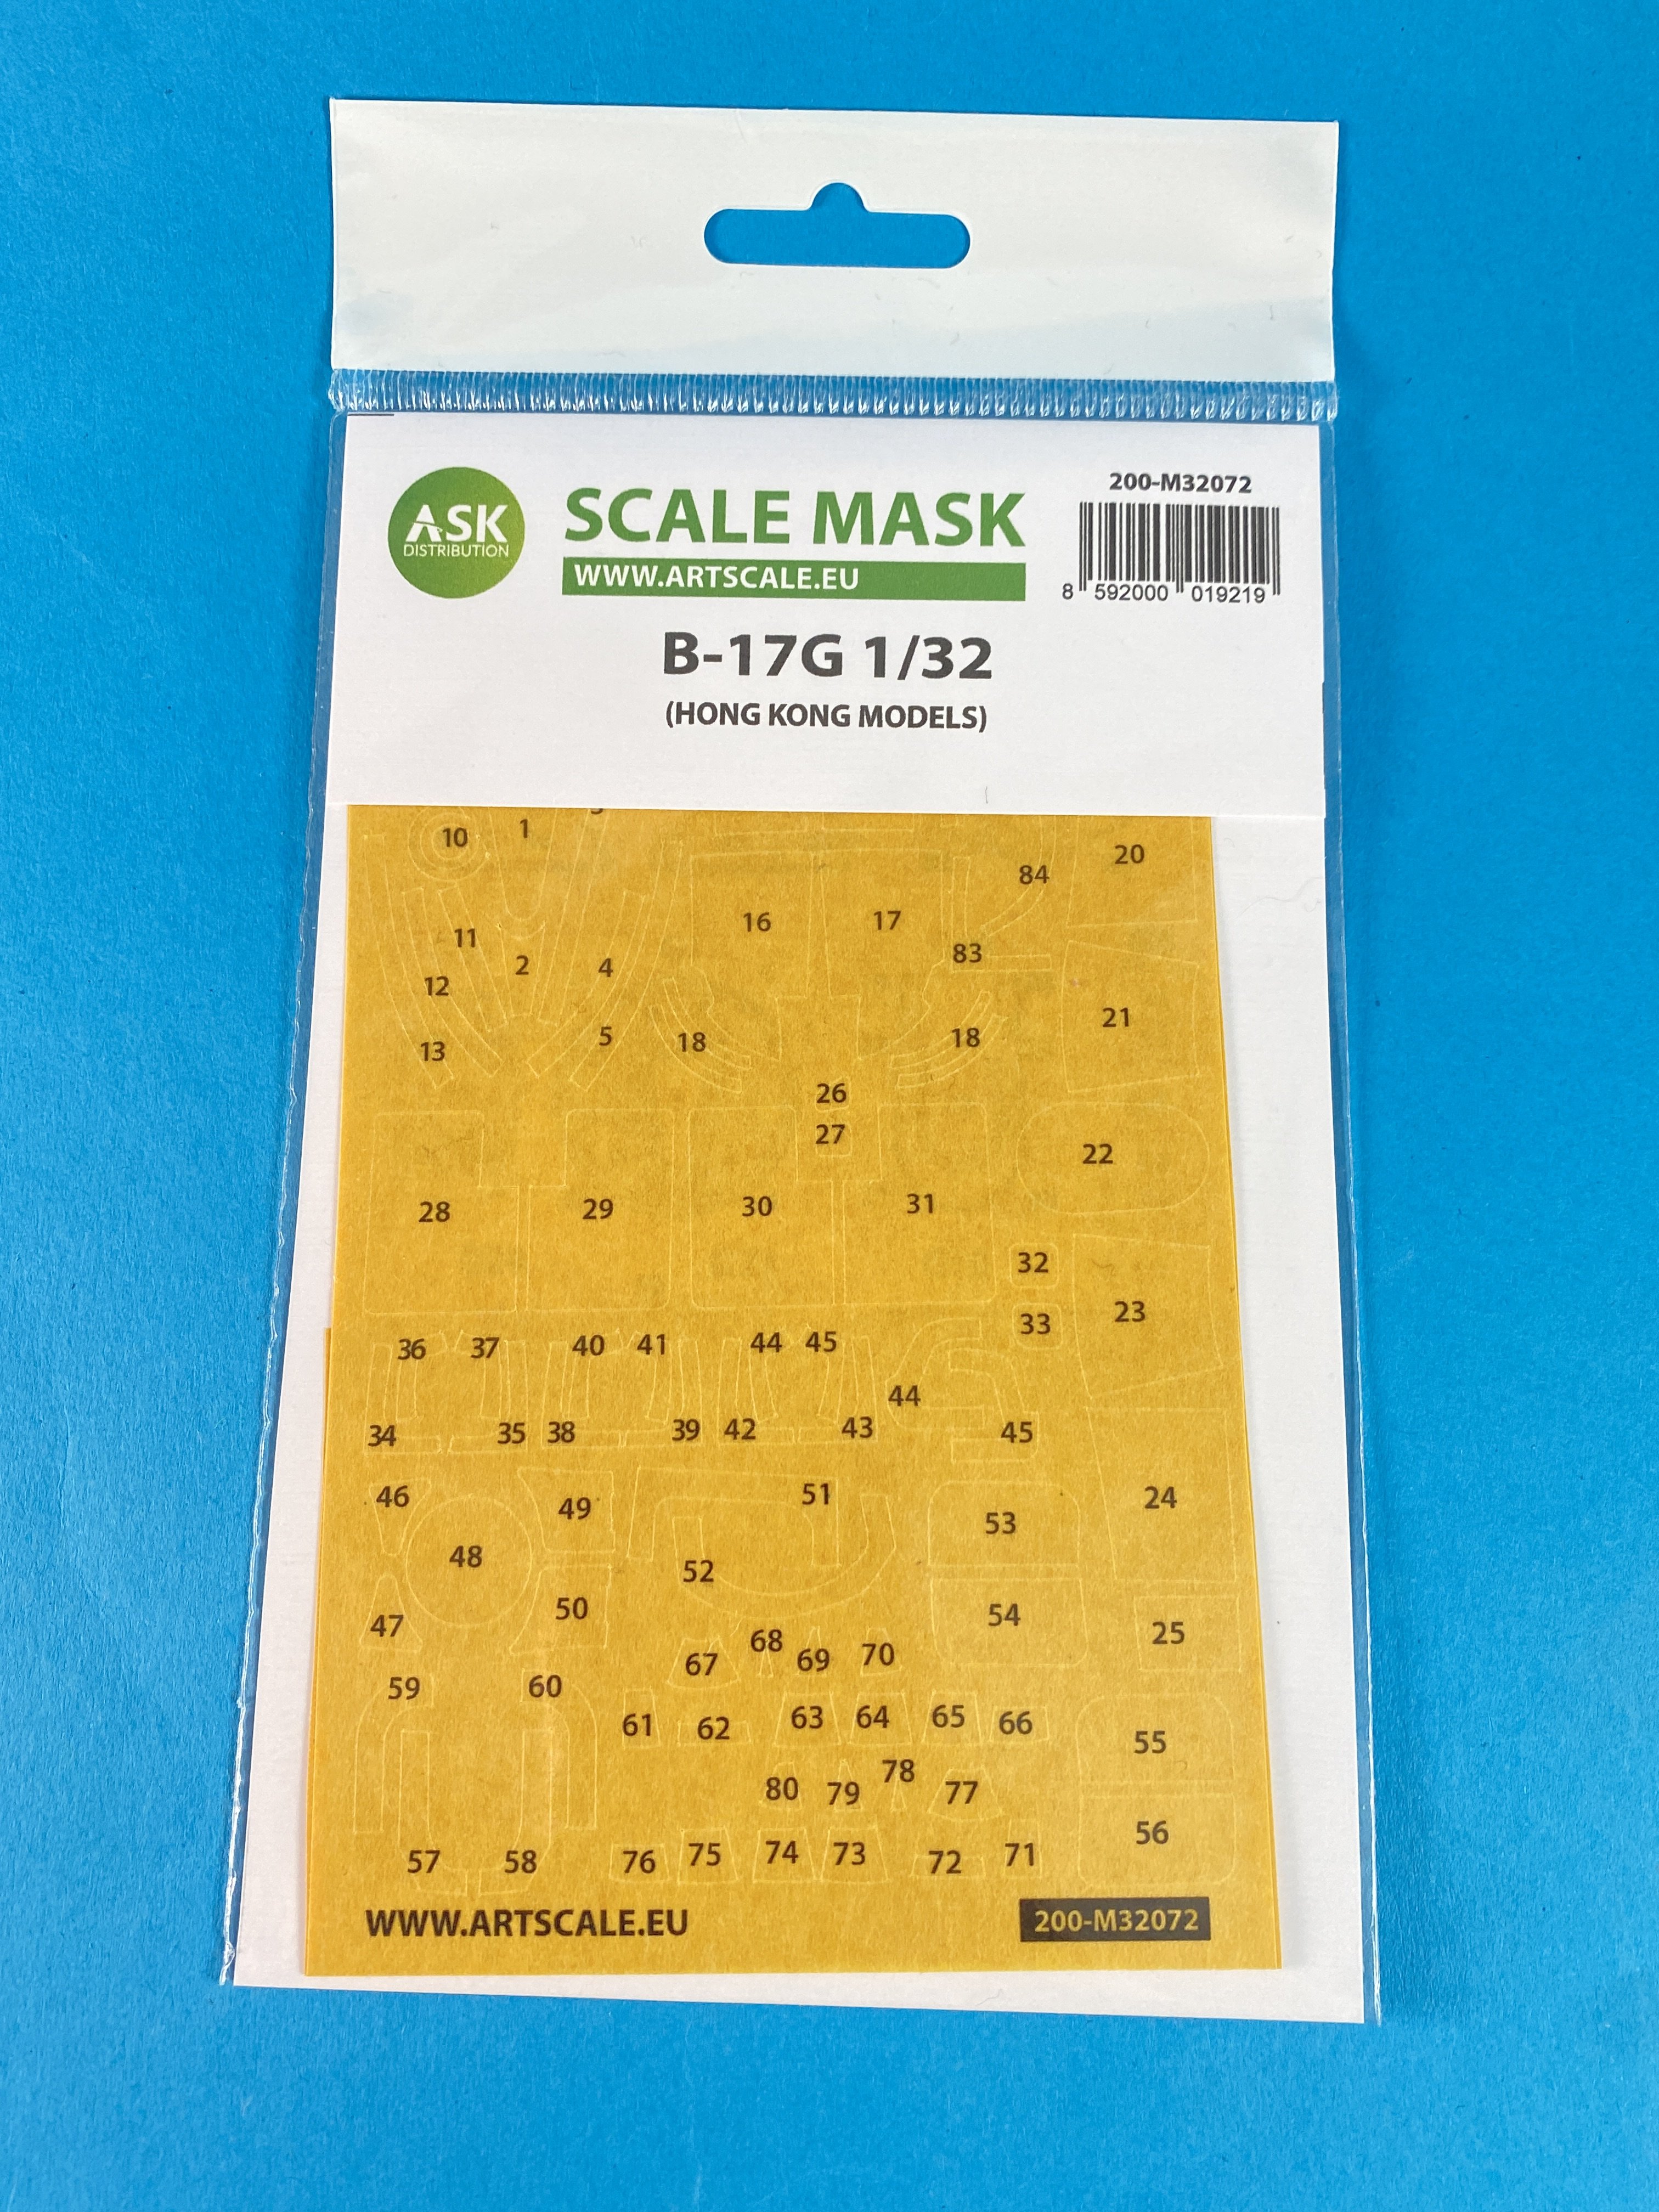
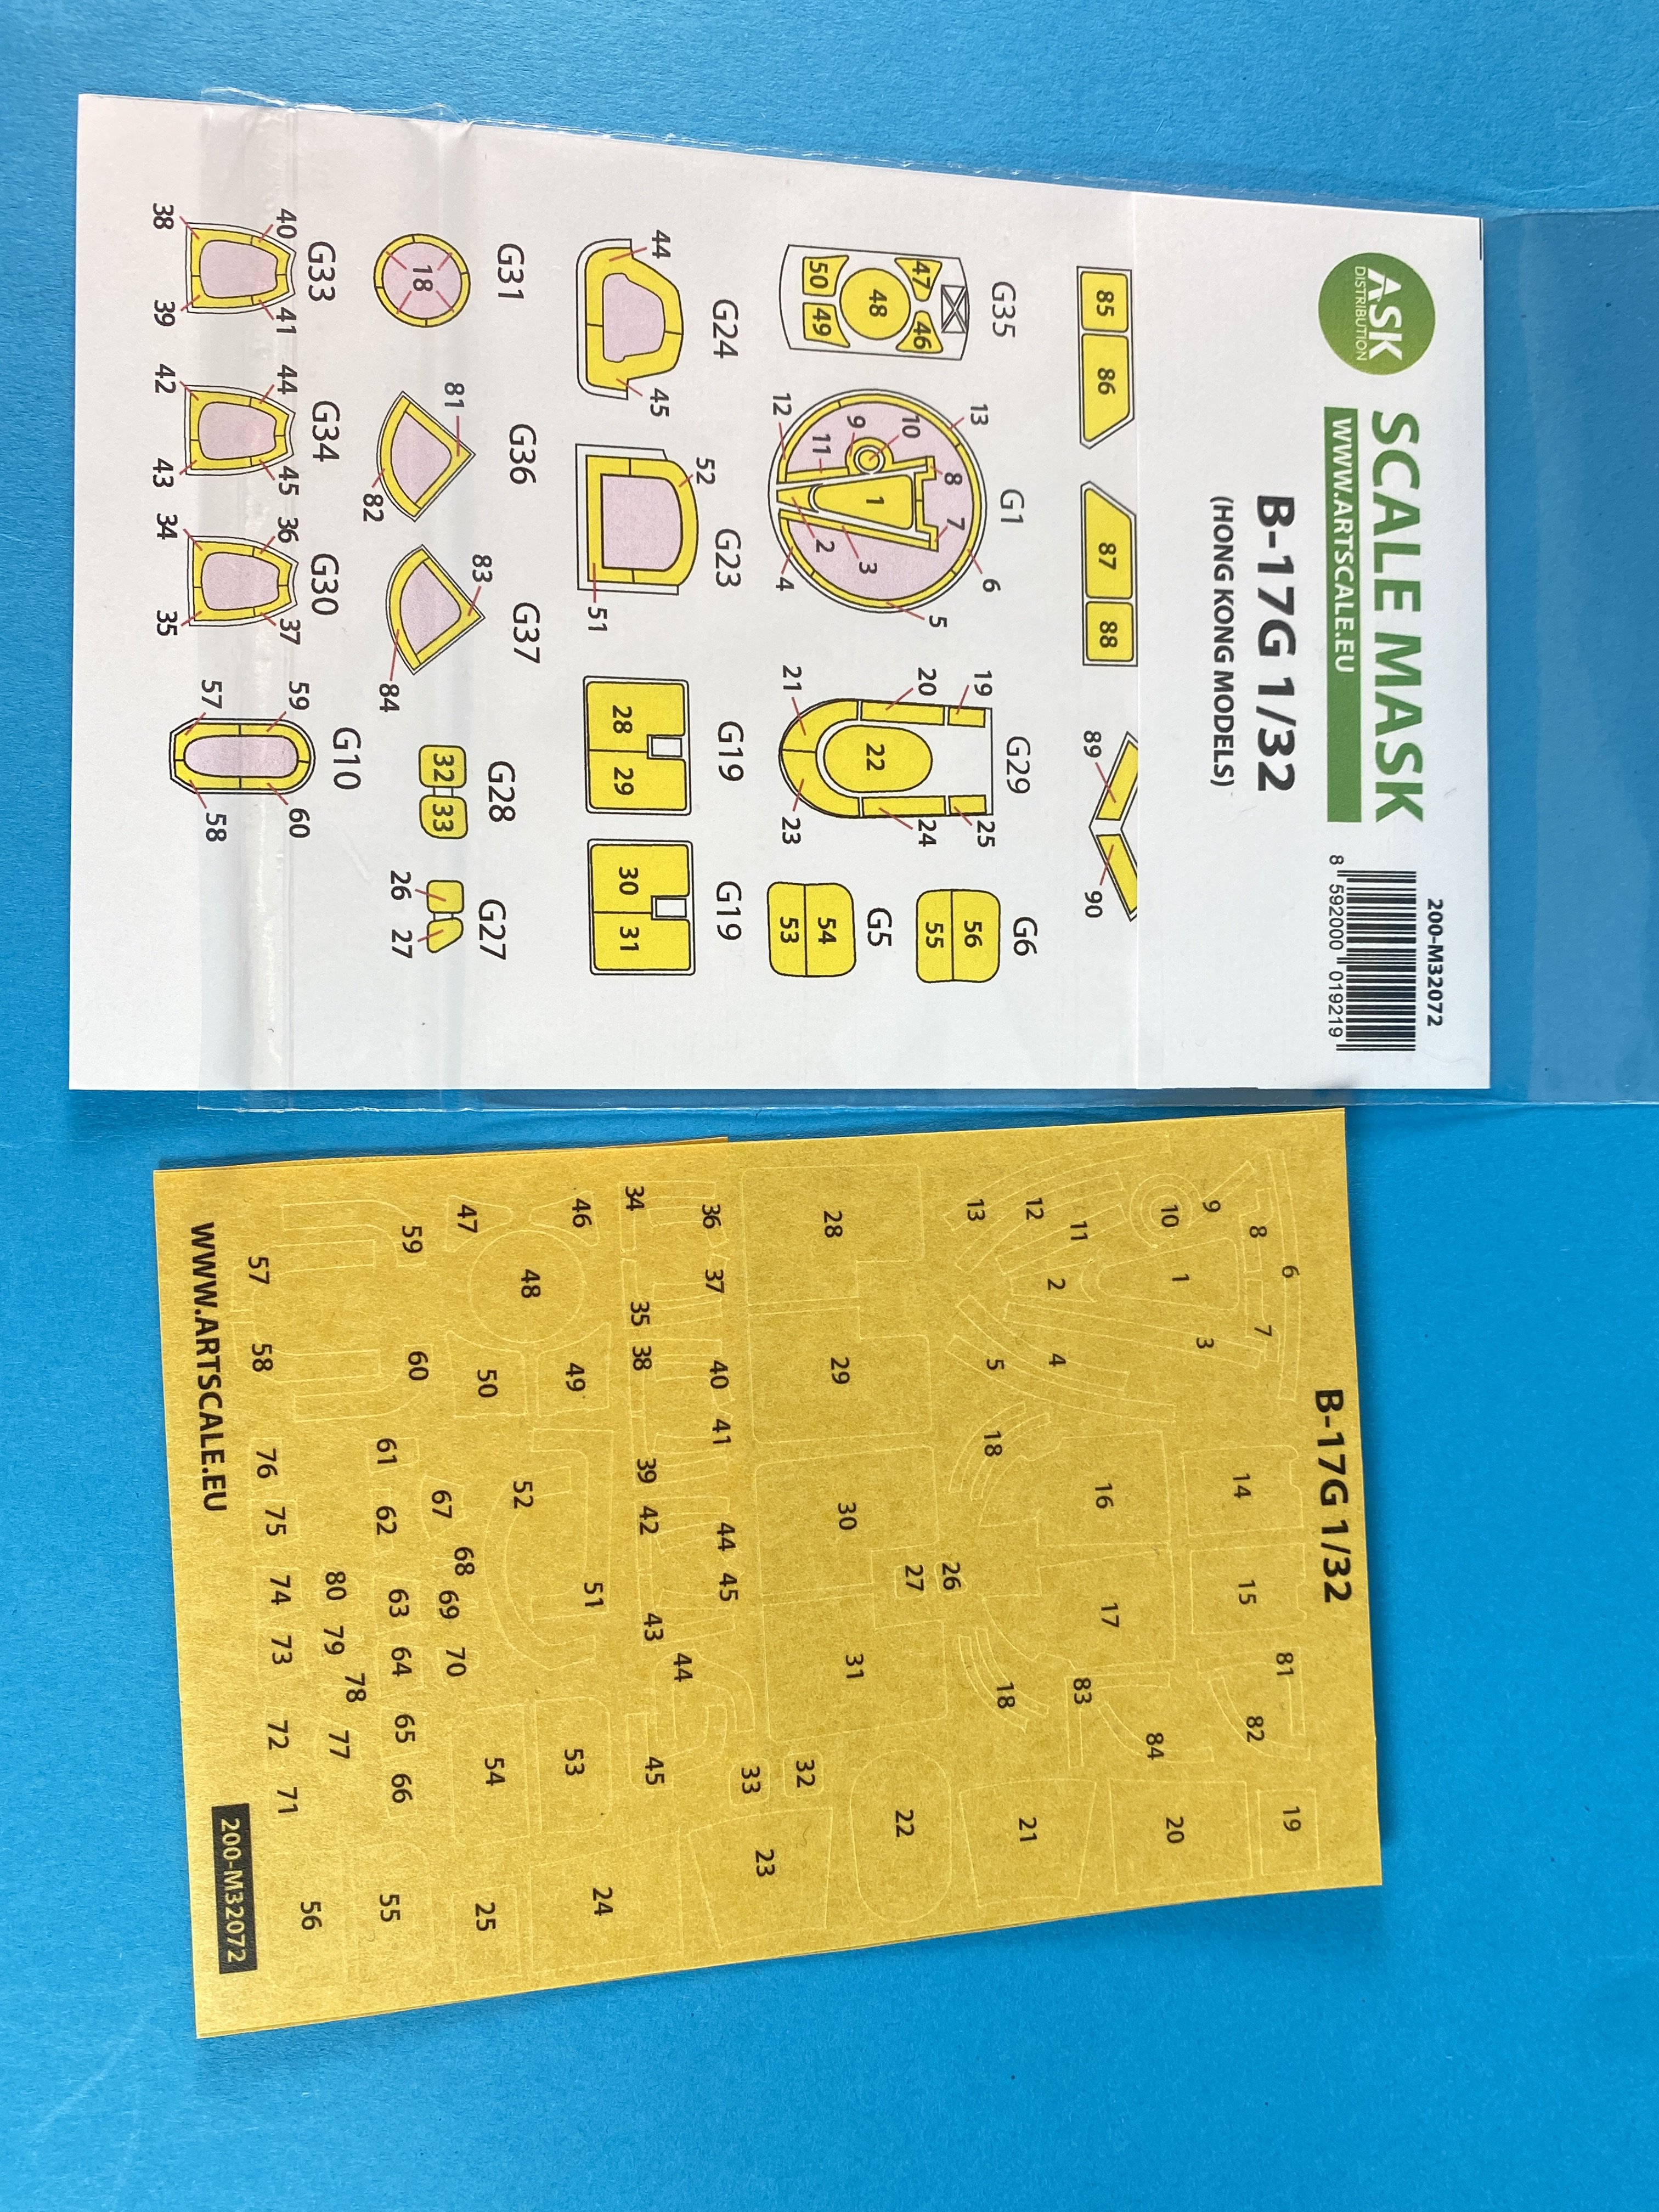
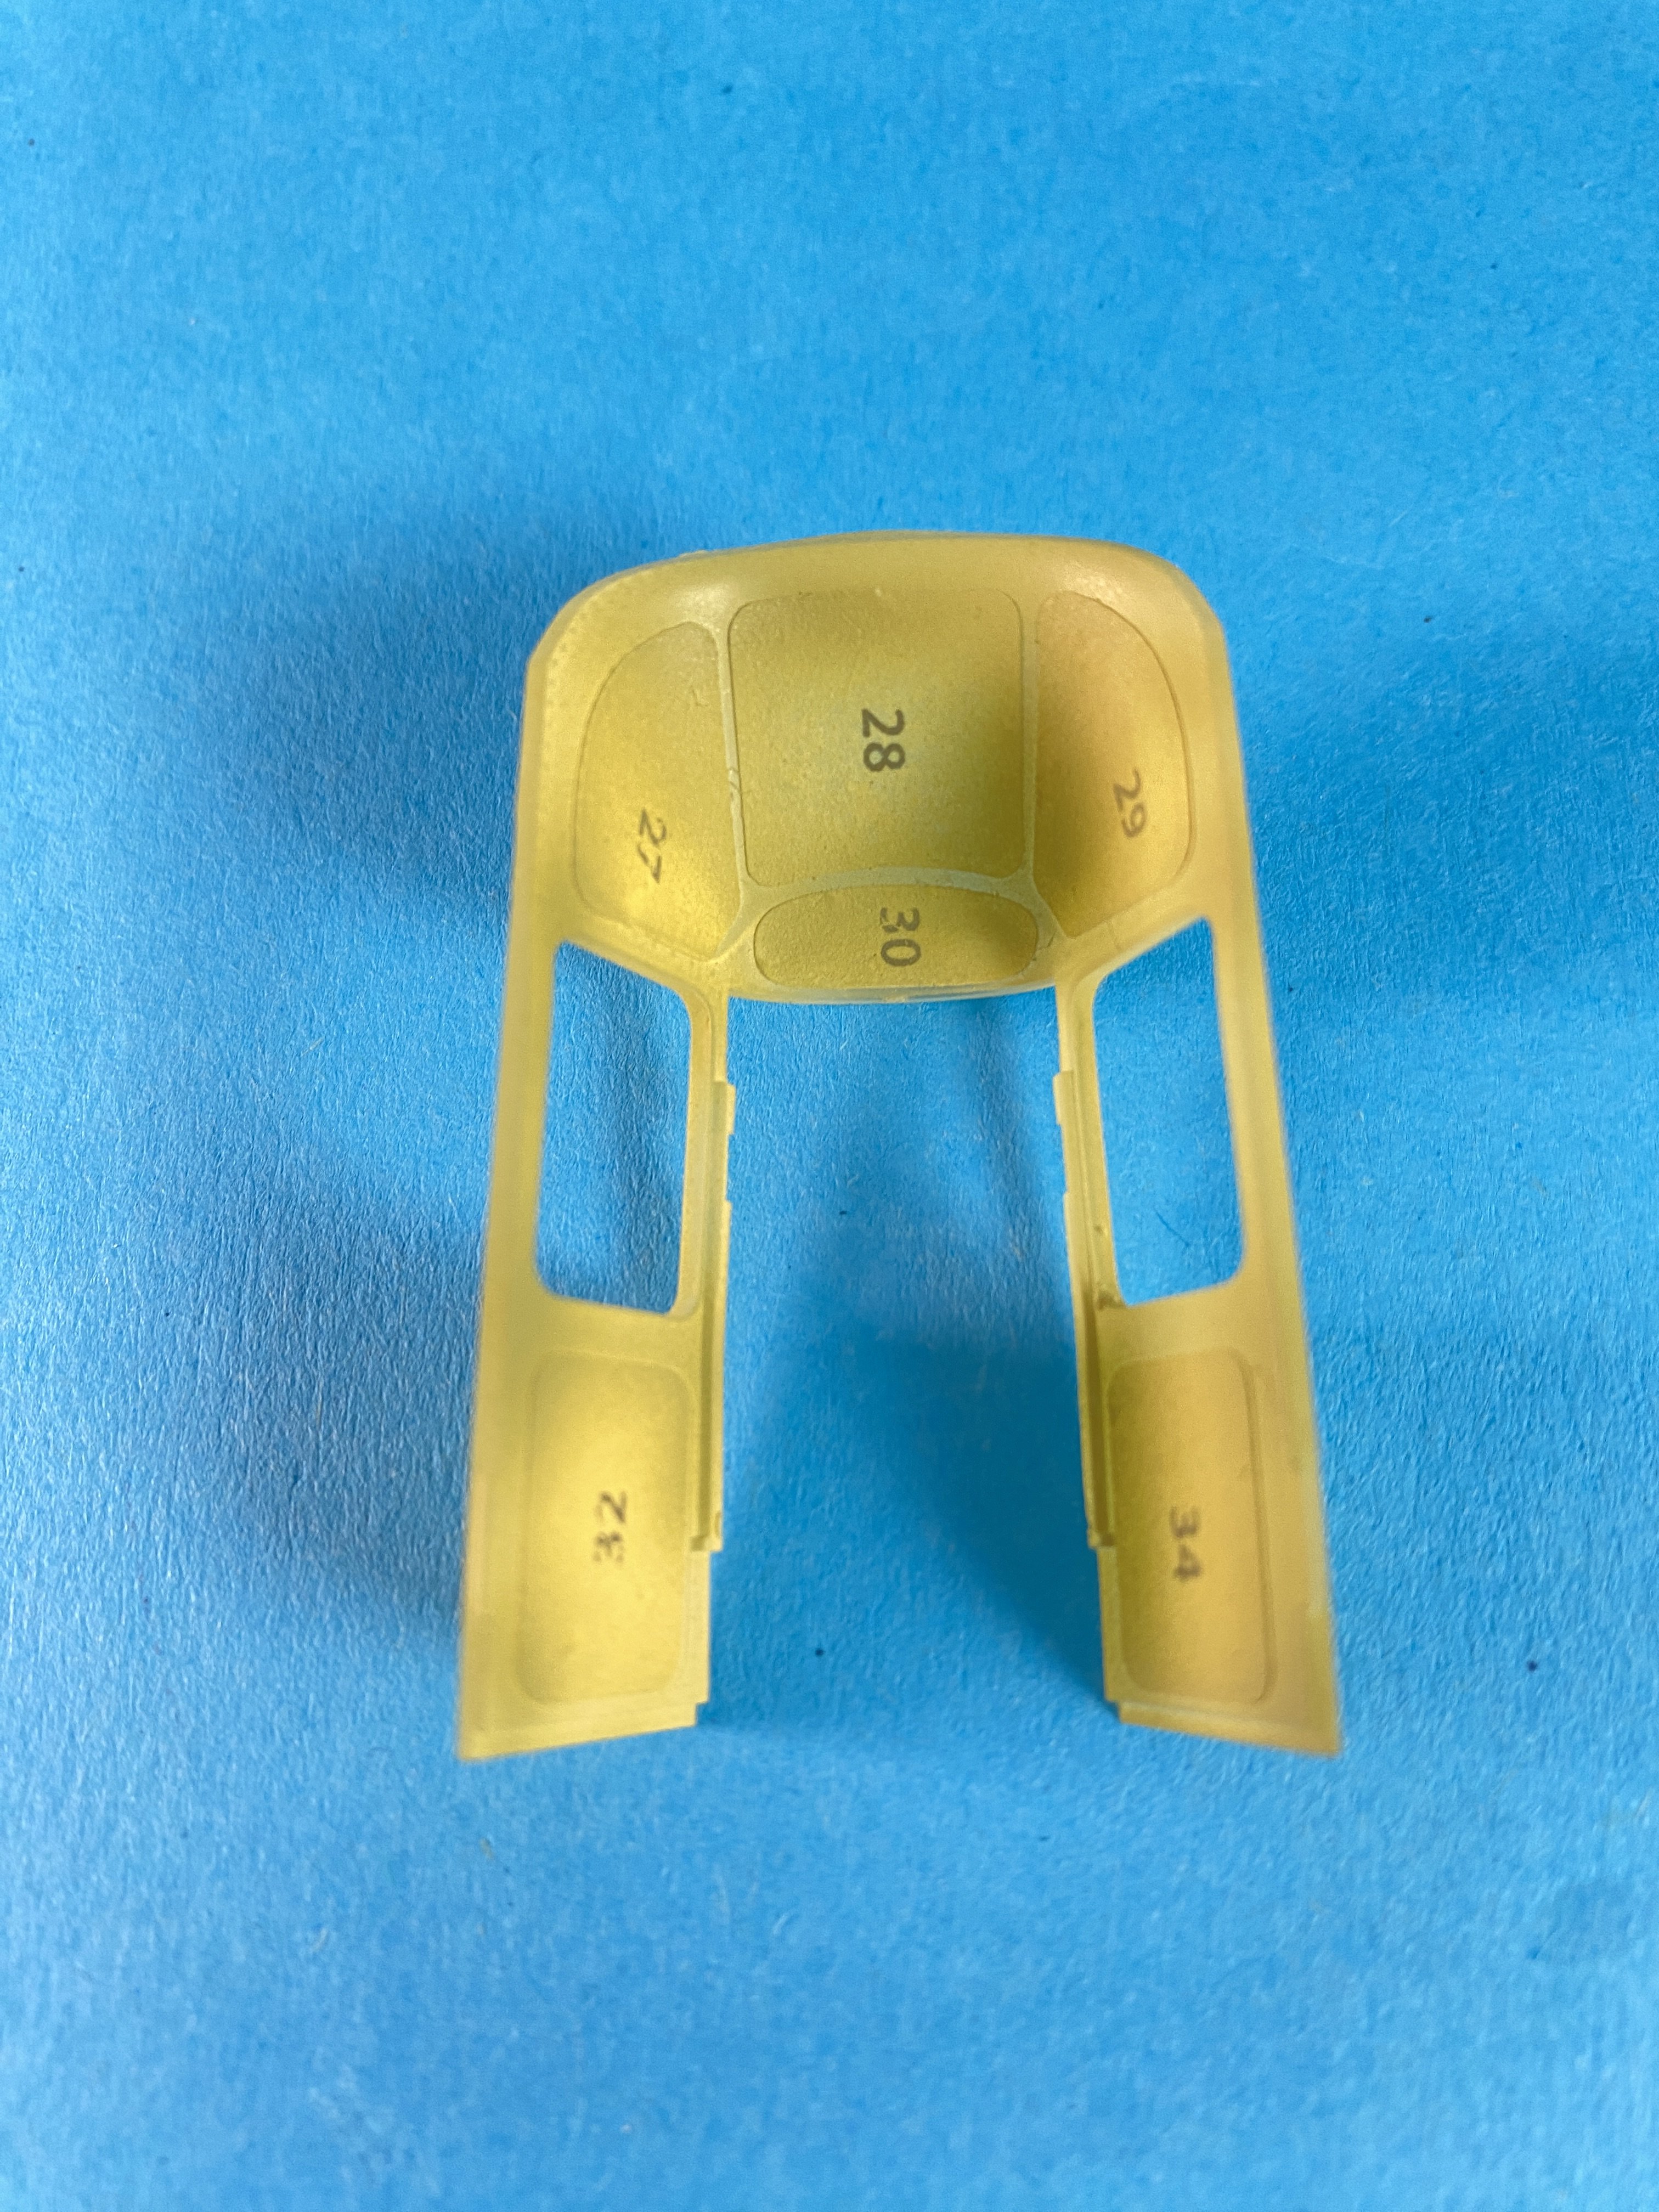
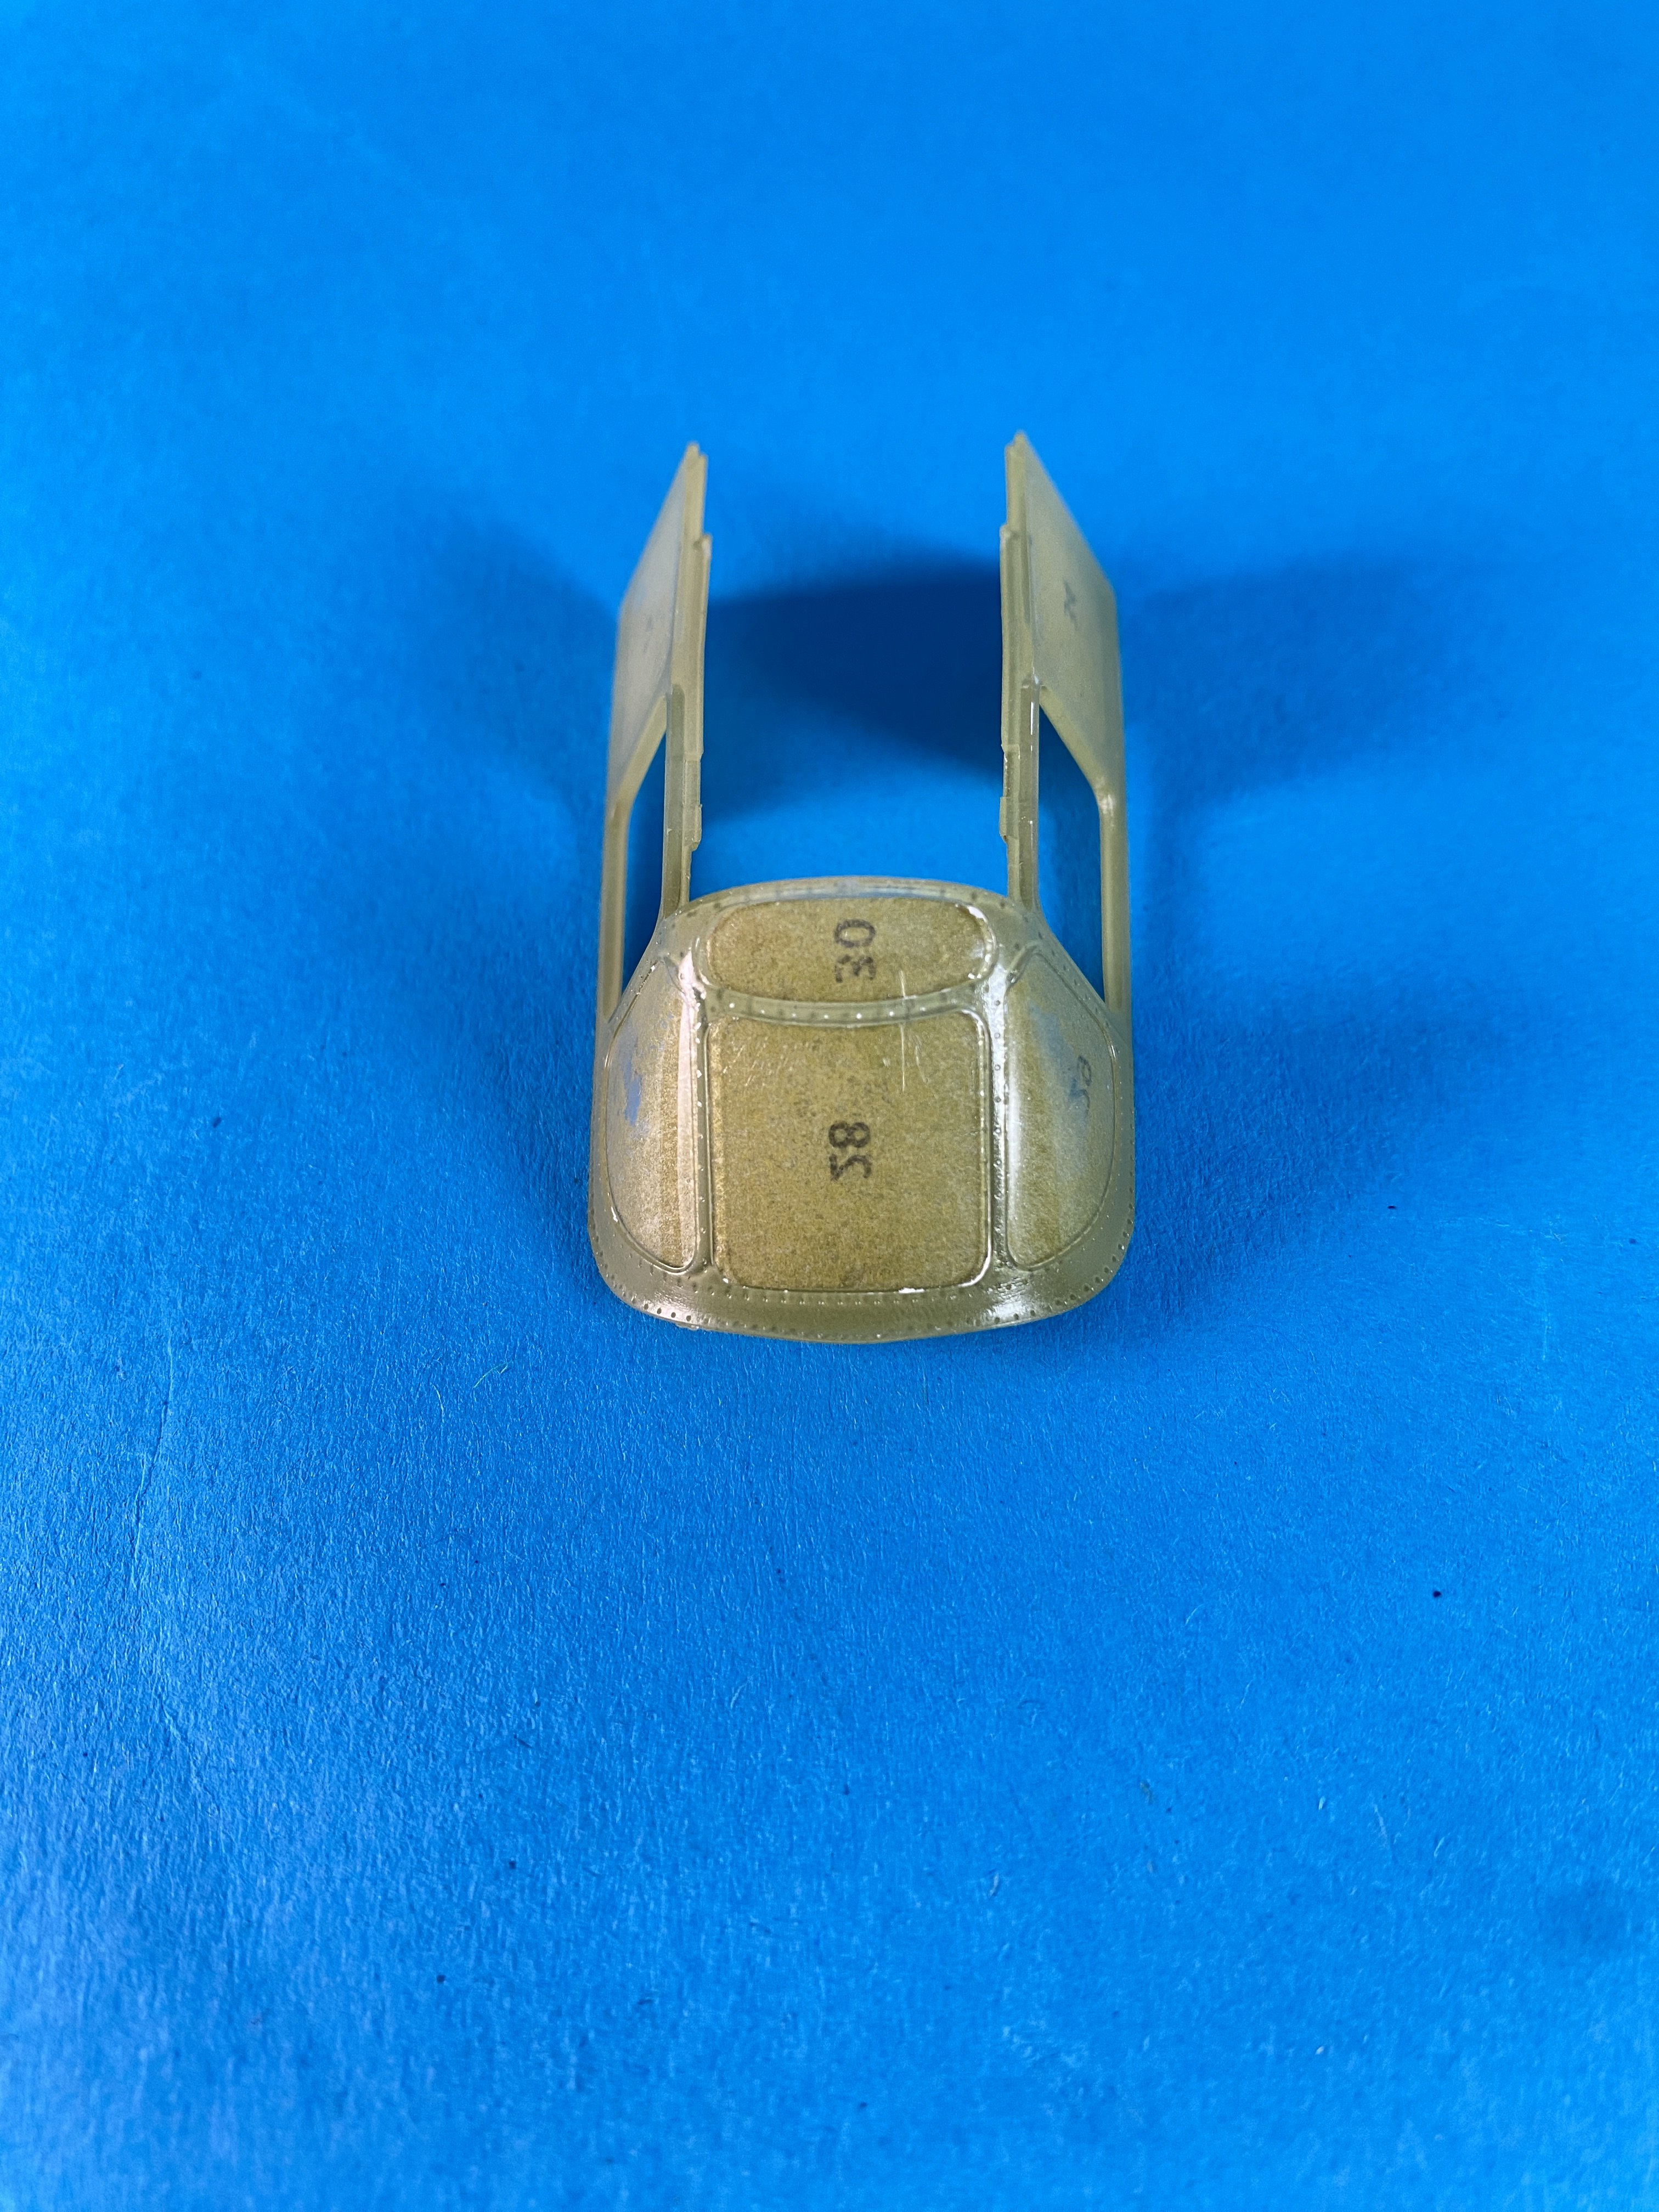
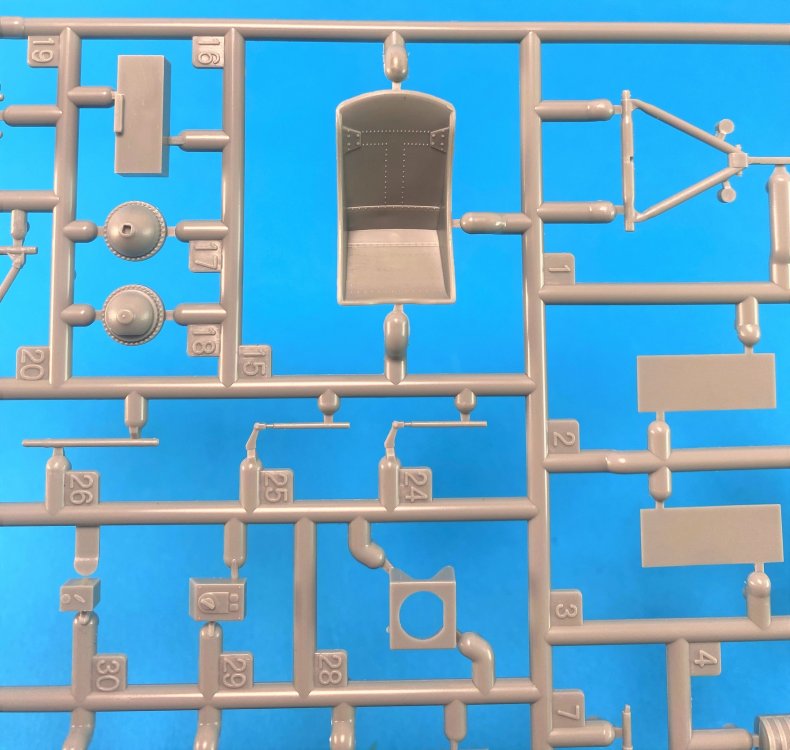
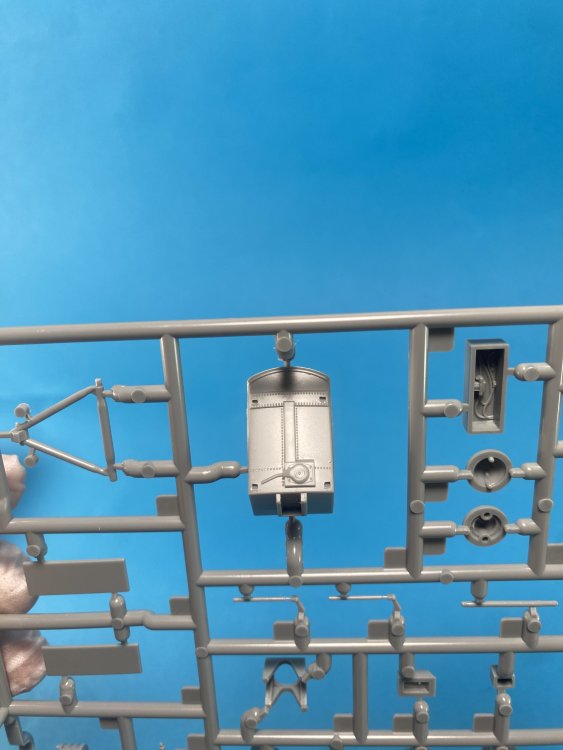
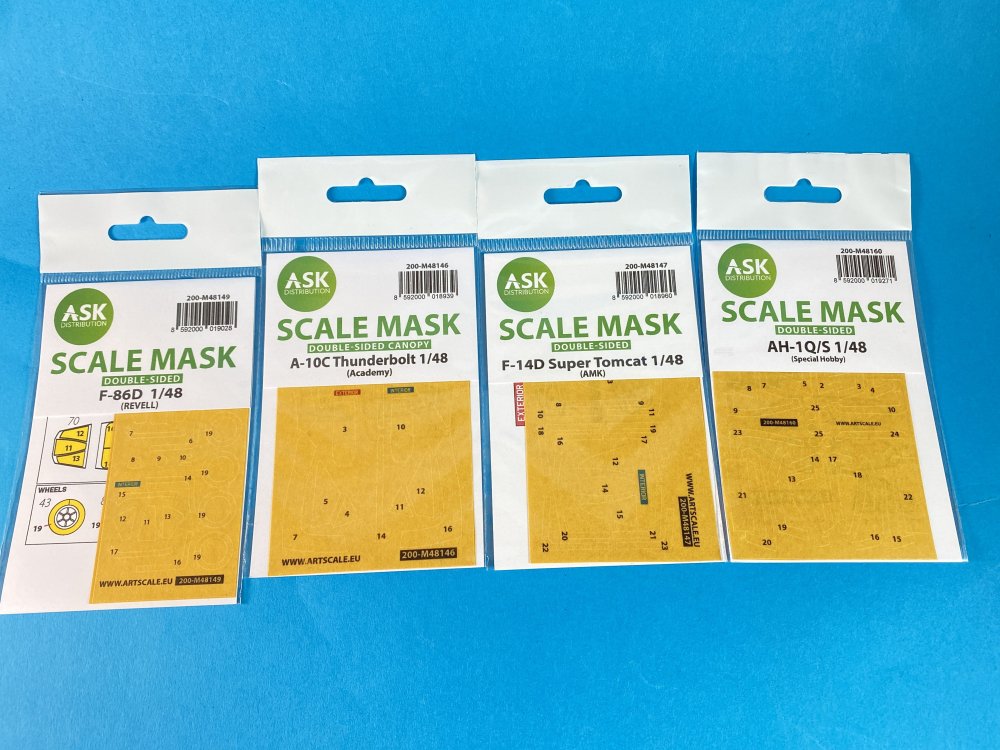
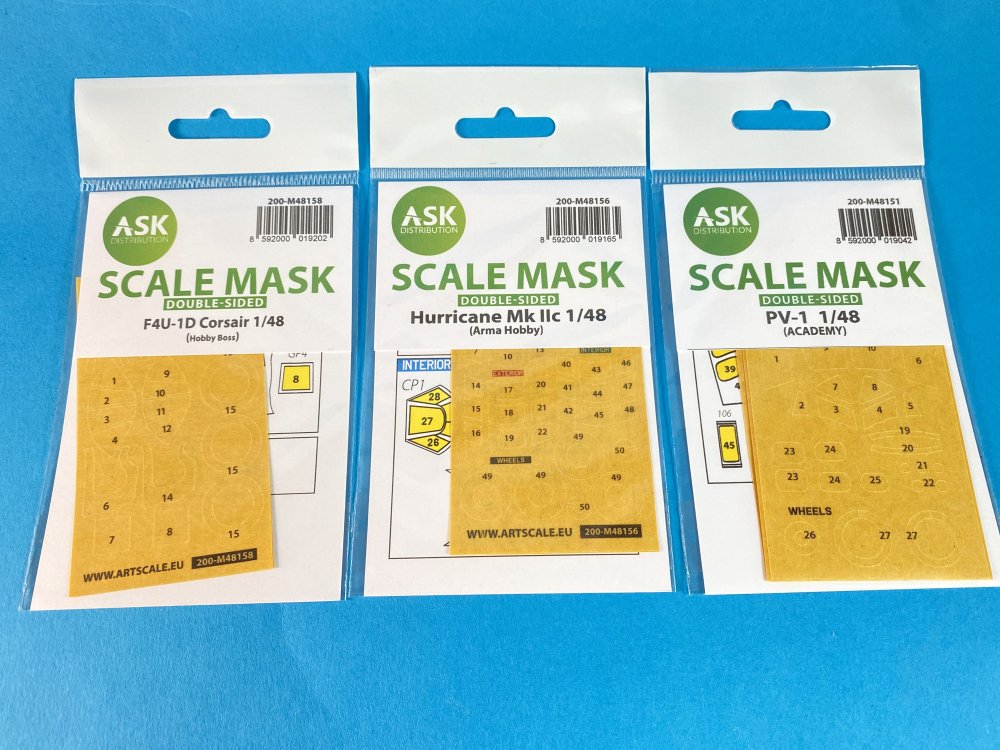
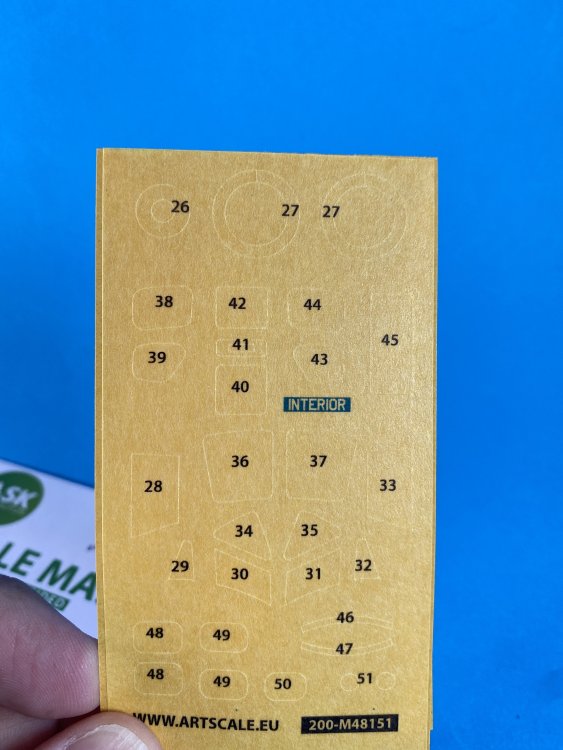
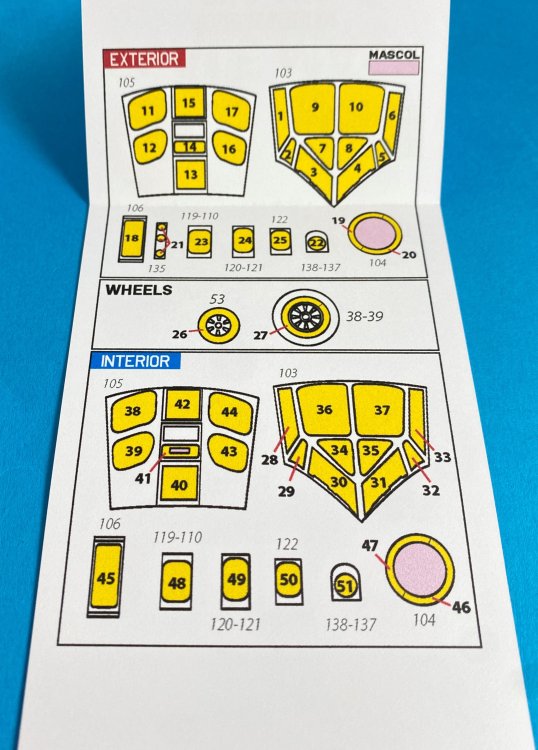
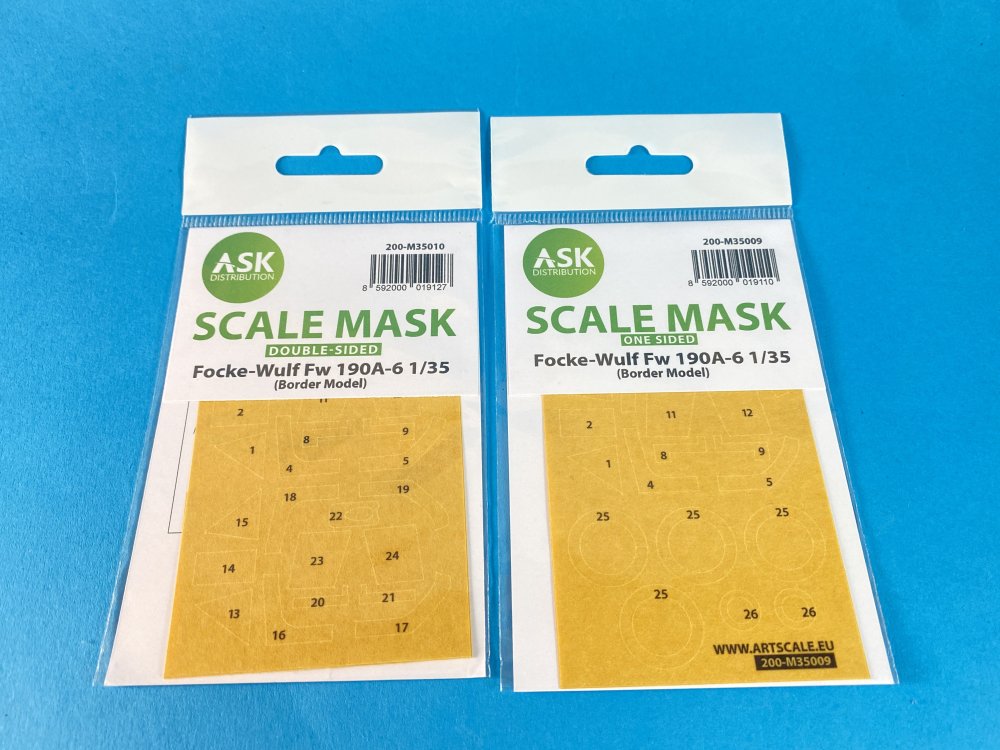
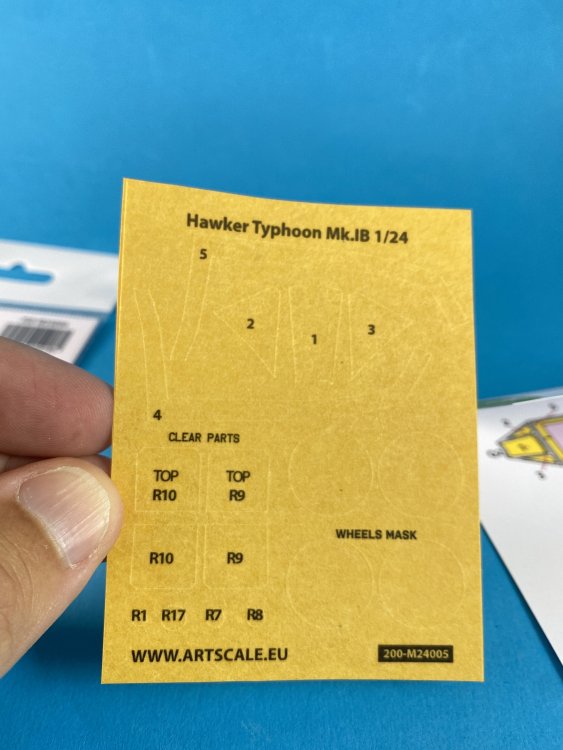
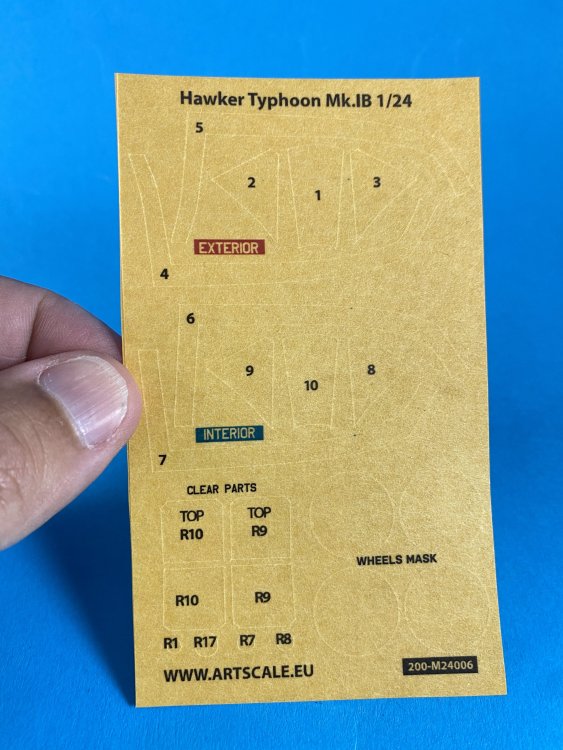
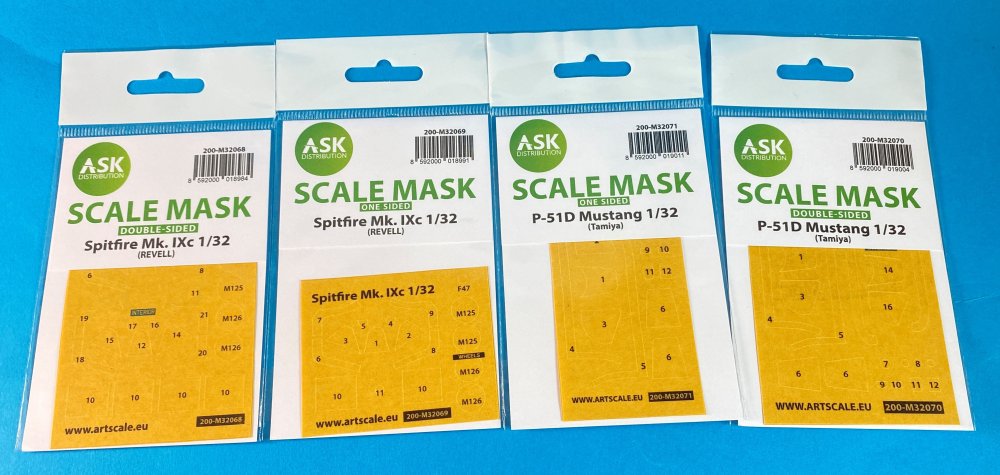
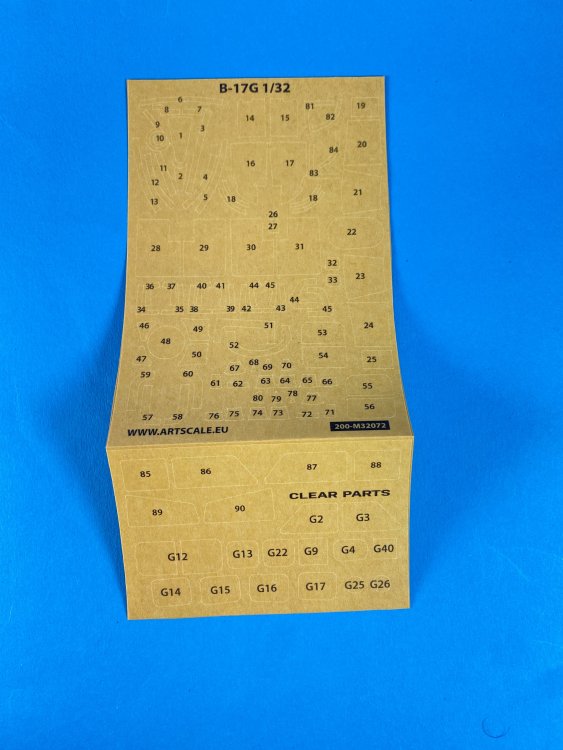
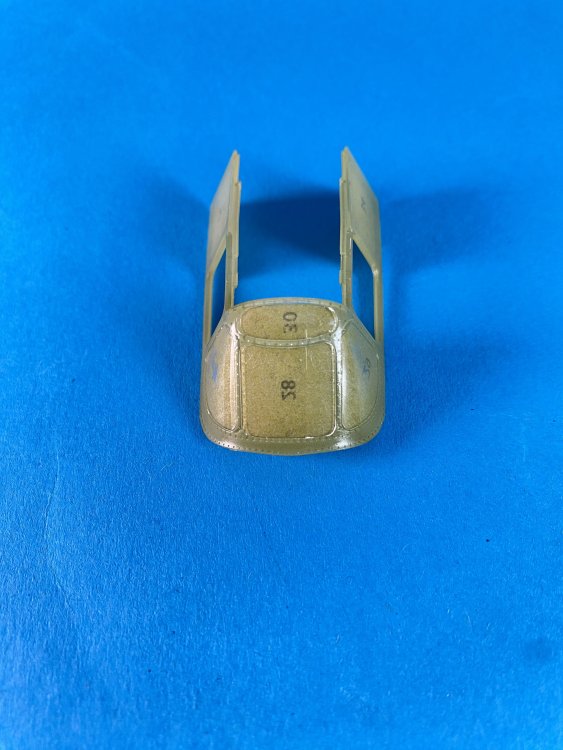
ART SCALE KIT Art Scale Kit Masks Several Masks 1:24 Hawker Typhoon Mk IB (Airfix) 1:32 Spitfire Mk. IXc (Revell) P-51 D Mustang (Tamiya) 1:35 Focke Wulf Fw-190 A6 (Border Model) 1:48 F-86 (Revell PV-1 Ventura (Revell) Hawker Hurricane Mk.II (Arma Hobby) F4U-1D Corsair (Academy) A-10C (Academy) F-14D Tomcat (AMK) AH-1QS (Special Hobby) (HK MODELS kit) Available at ASK store, here The aftermarket that I never, ever, miss in all my work: canopy mask. For one main reason: time (and personally, I hate masking canopies) With a much less amount of time you get a very good result that you also can get in the tradicional way, but with lots of time “wasted”… And there`s is a new player in town… and climb right on the top of the masking canopies world: ASK Productions canopy mask. I already use these masks in the 1:48 B-25J and the 1:32 A-20G. So all the masks come in a plastic bag like all other mask set from other brands. The mask itself is made from a tape very similar to kabuki tape, only a bit darker. The inside instructions are very clear and every mask it has it`s on number. Great touch to make your live even easier. You can get two types: one side mask and double-face mask. This so you can mask inside to make more realistic your build. It`s practically impossible to paint inside without this. The mask is easy remove from the sheet with a fine tweezer The glue on the tape is very good and it is resistant so you can glue and unglue form the clear part to get the perfect alignment without worries of losing the tape glue. The numbers are simply perfect! A great add to find that small mask in the full yellow sheet. Having already worked with these masks, you can get all the masking ray in a few minutes. It`s perfect. CONCLUSION: I love these masks set. It`s a must have in all my builds. It’s not a laser cut as ASK use a very high quality cutter that use different cutting speed and a daily changing knifes. It’s a perfect product with perfect tape glue, perfect tape, with super clear instructions with the numbers of the mask that makes the job super easy and super fast. Very VERY Highly recommended Fran Our thanks to ASK – Art Scale Kit for the review samples. You can get this set and all mask set at Art Scale Kit webshop


-
- 1
-
-
- art scale kit
- ask
- (and 5 more)
-
ok! So US and UK? Nothing in EU (like Aviation Megastore, Modelbau or ASK)?
-
Thanks Eli!!! When and where we can order it?
-
My first jet model related thing was 1:48 Zotz decals Saab J35F J Draken... Love it and i still have it... need to get it on a model! I have several Zotz decals... In fact, never used any... they are just to gourgeous to be use actually. But i need to sort that out and i will start with this new !-20 decal sheet for sure!
-
Wow!! cant wait for it!!
-
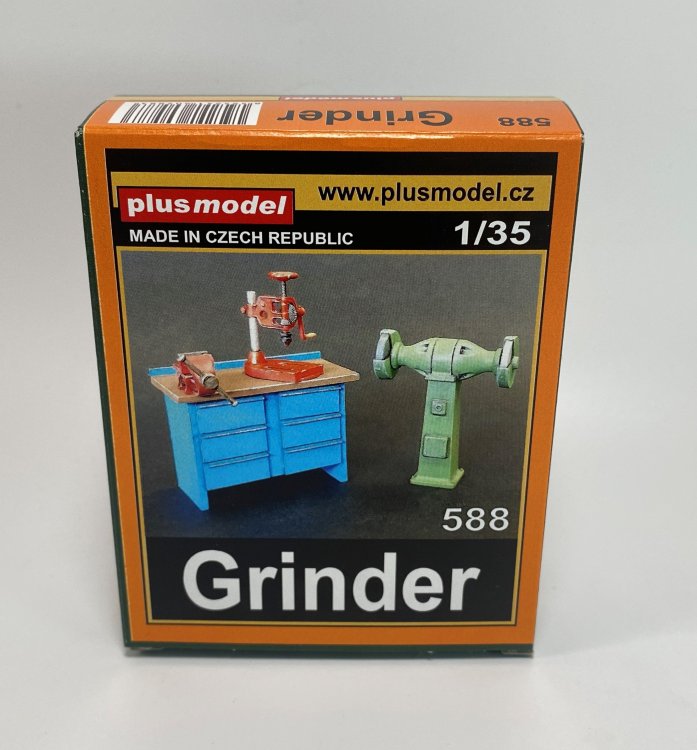
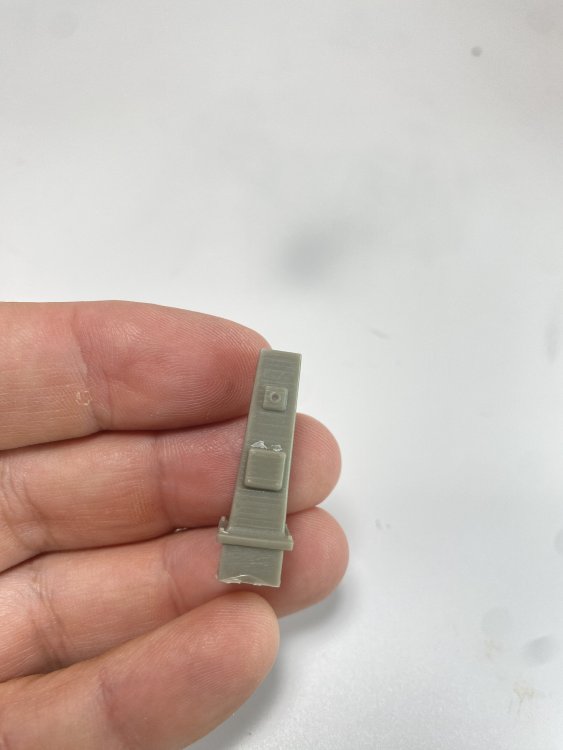
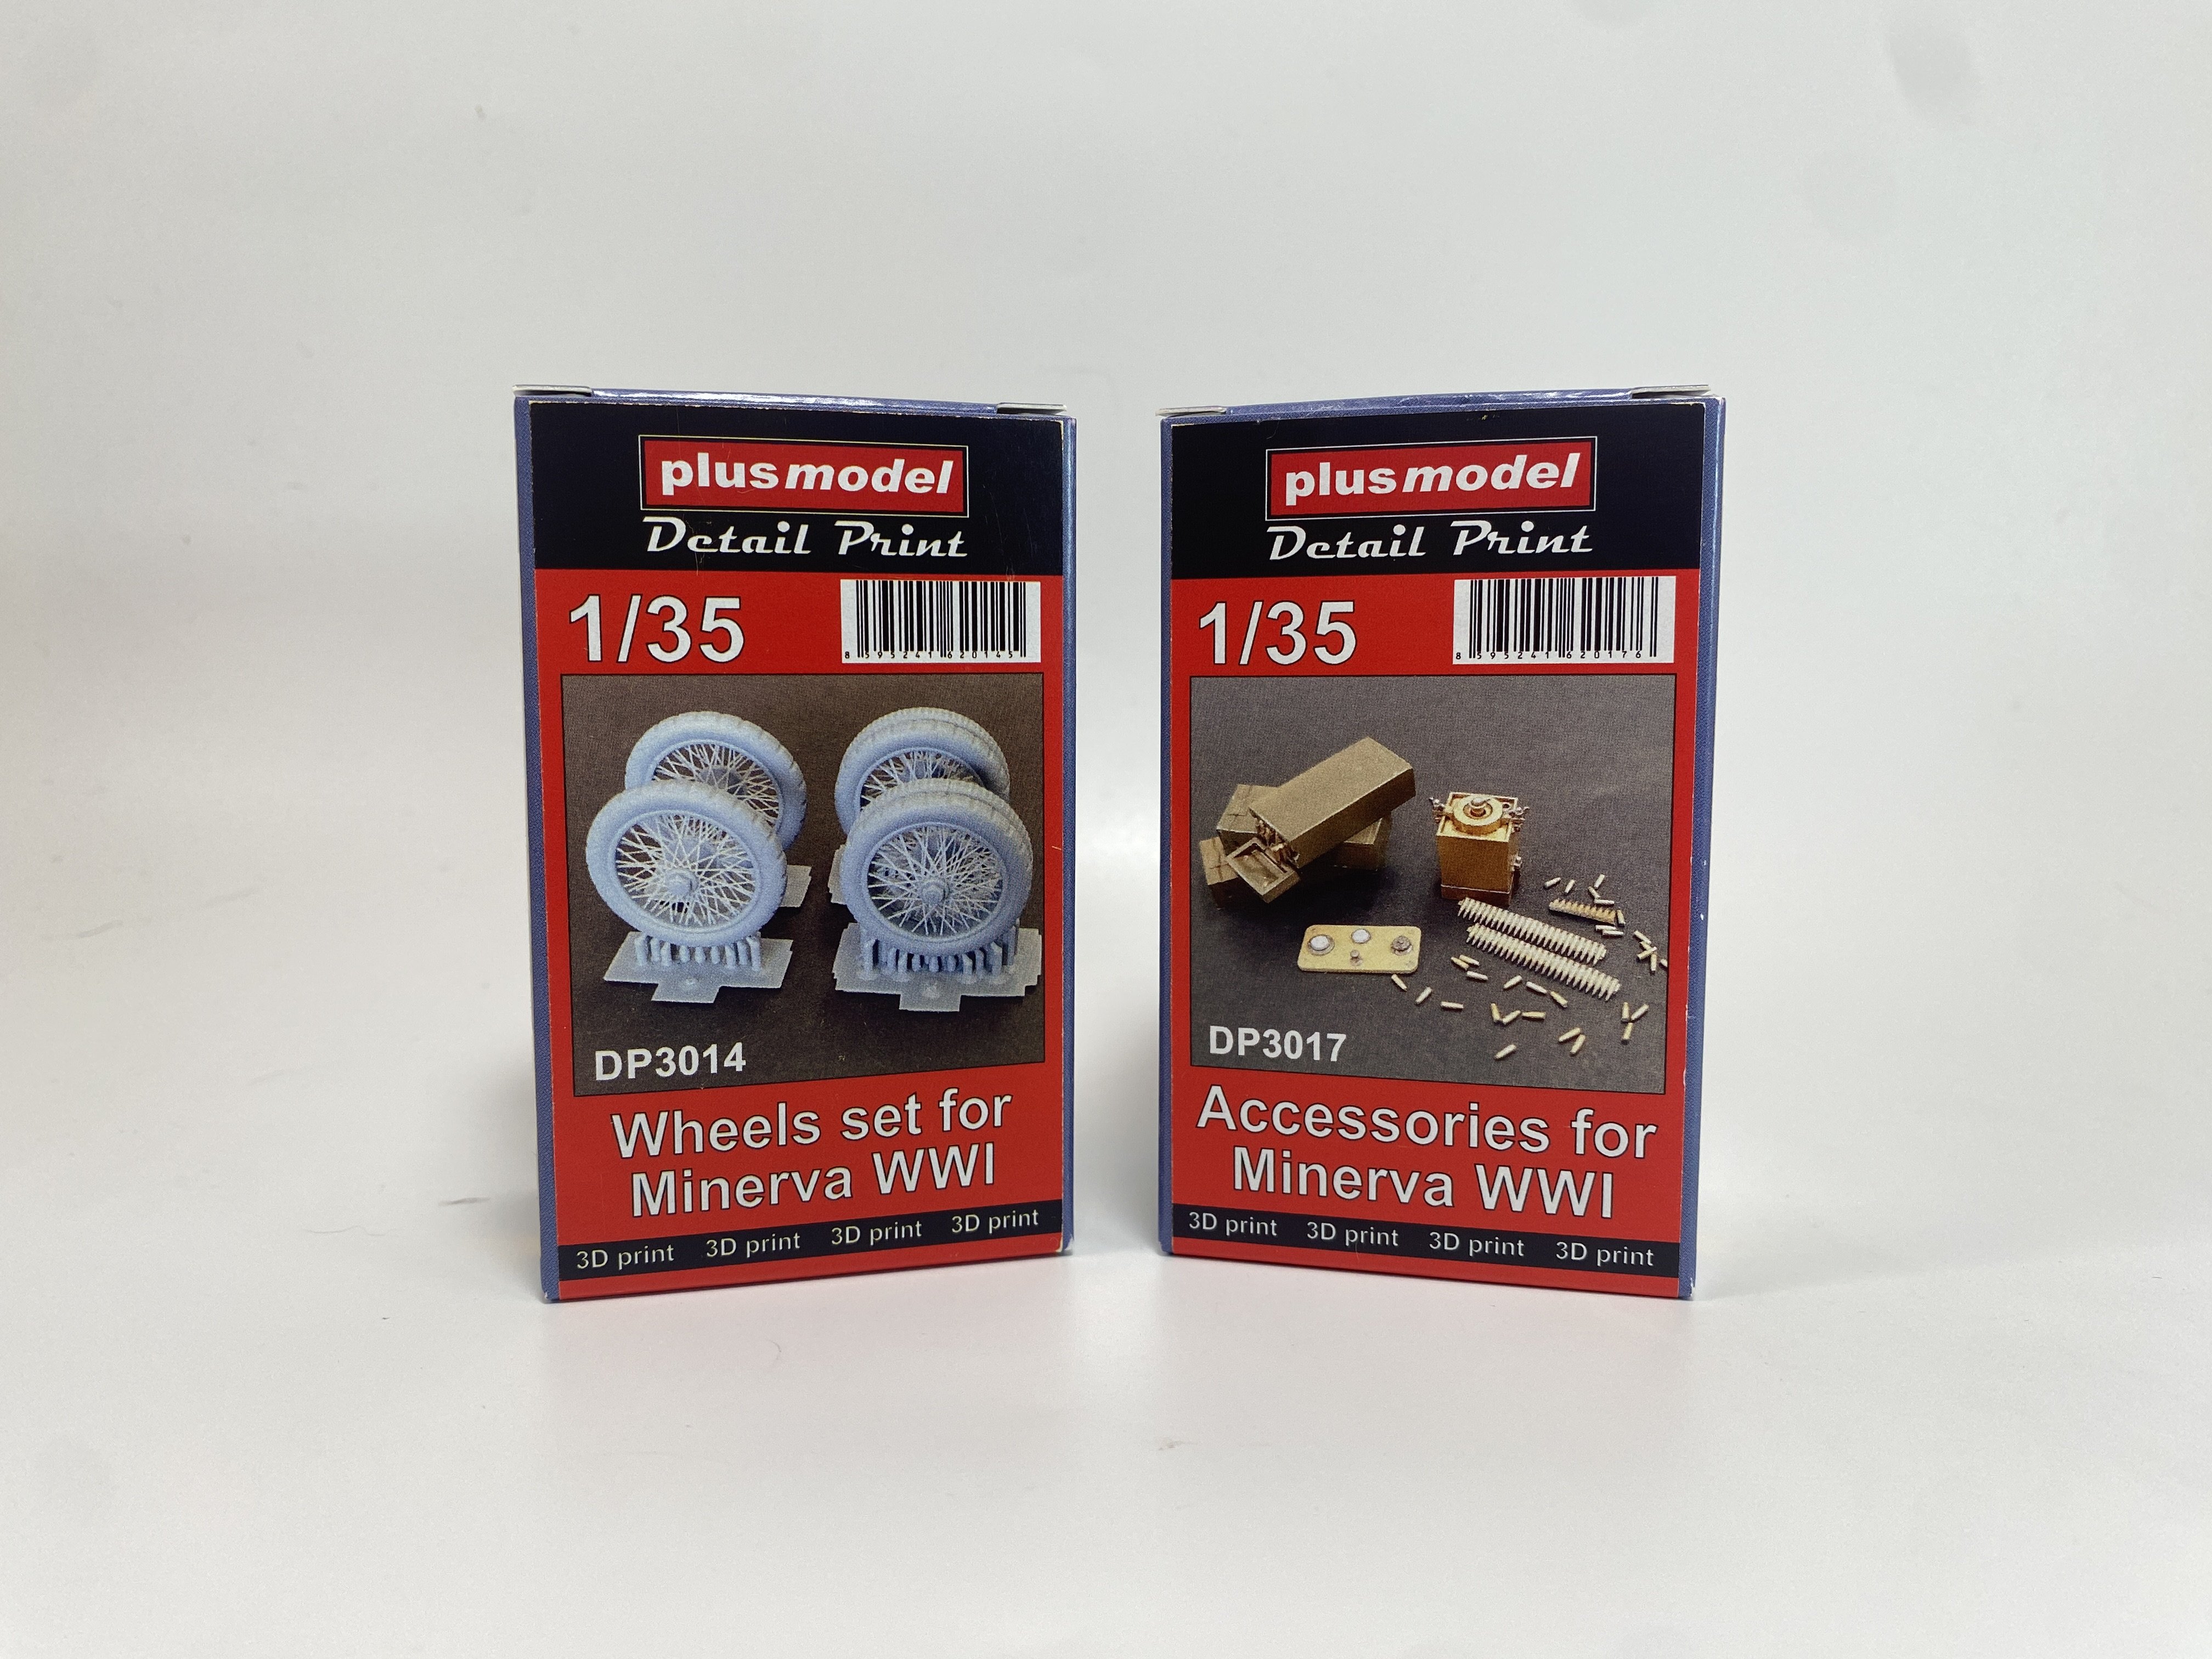
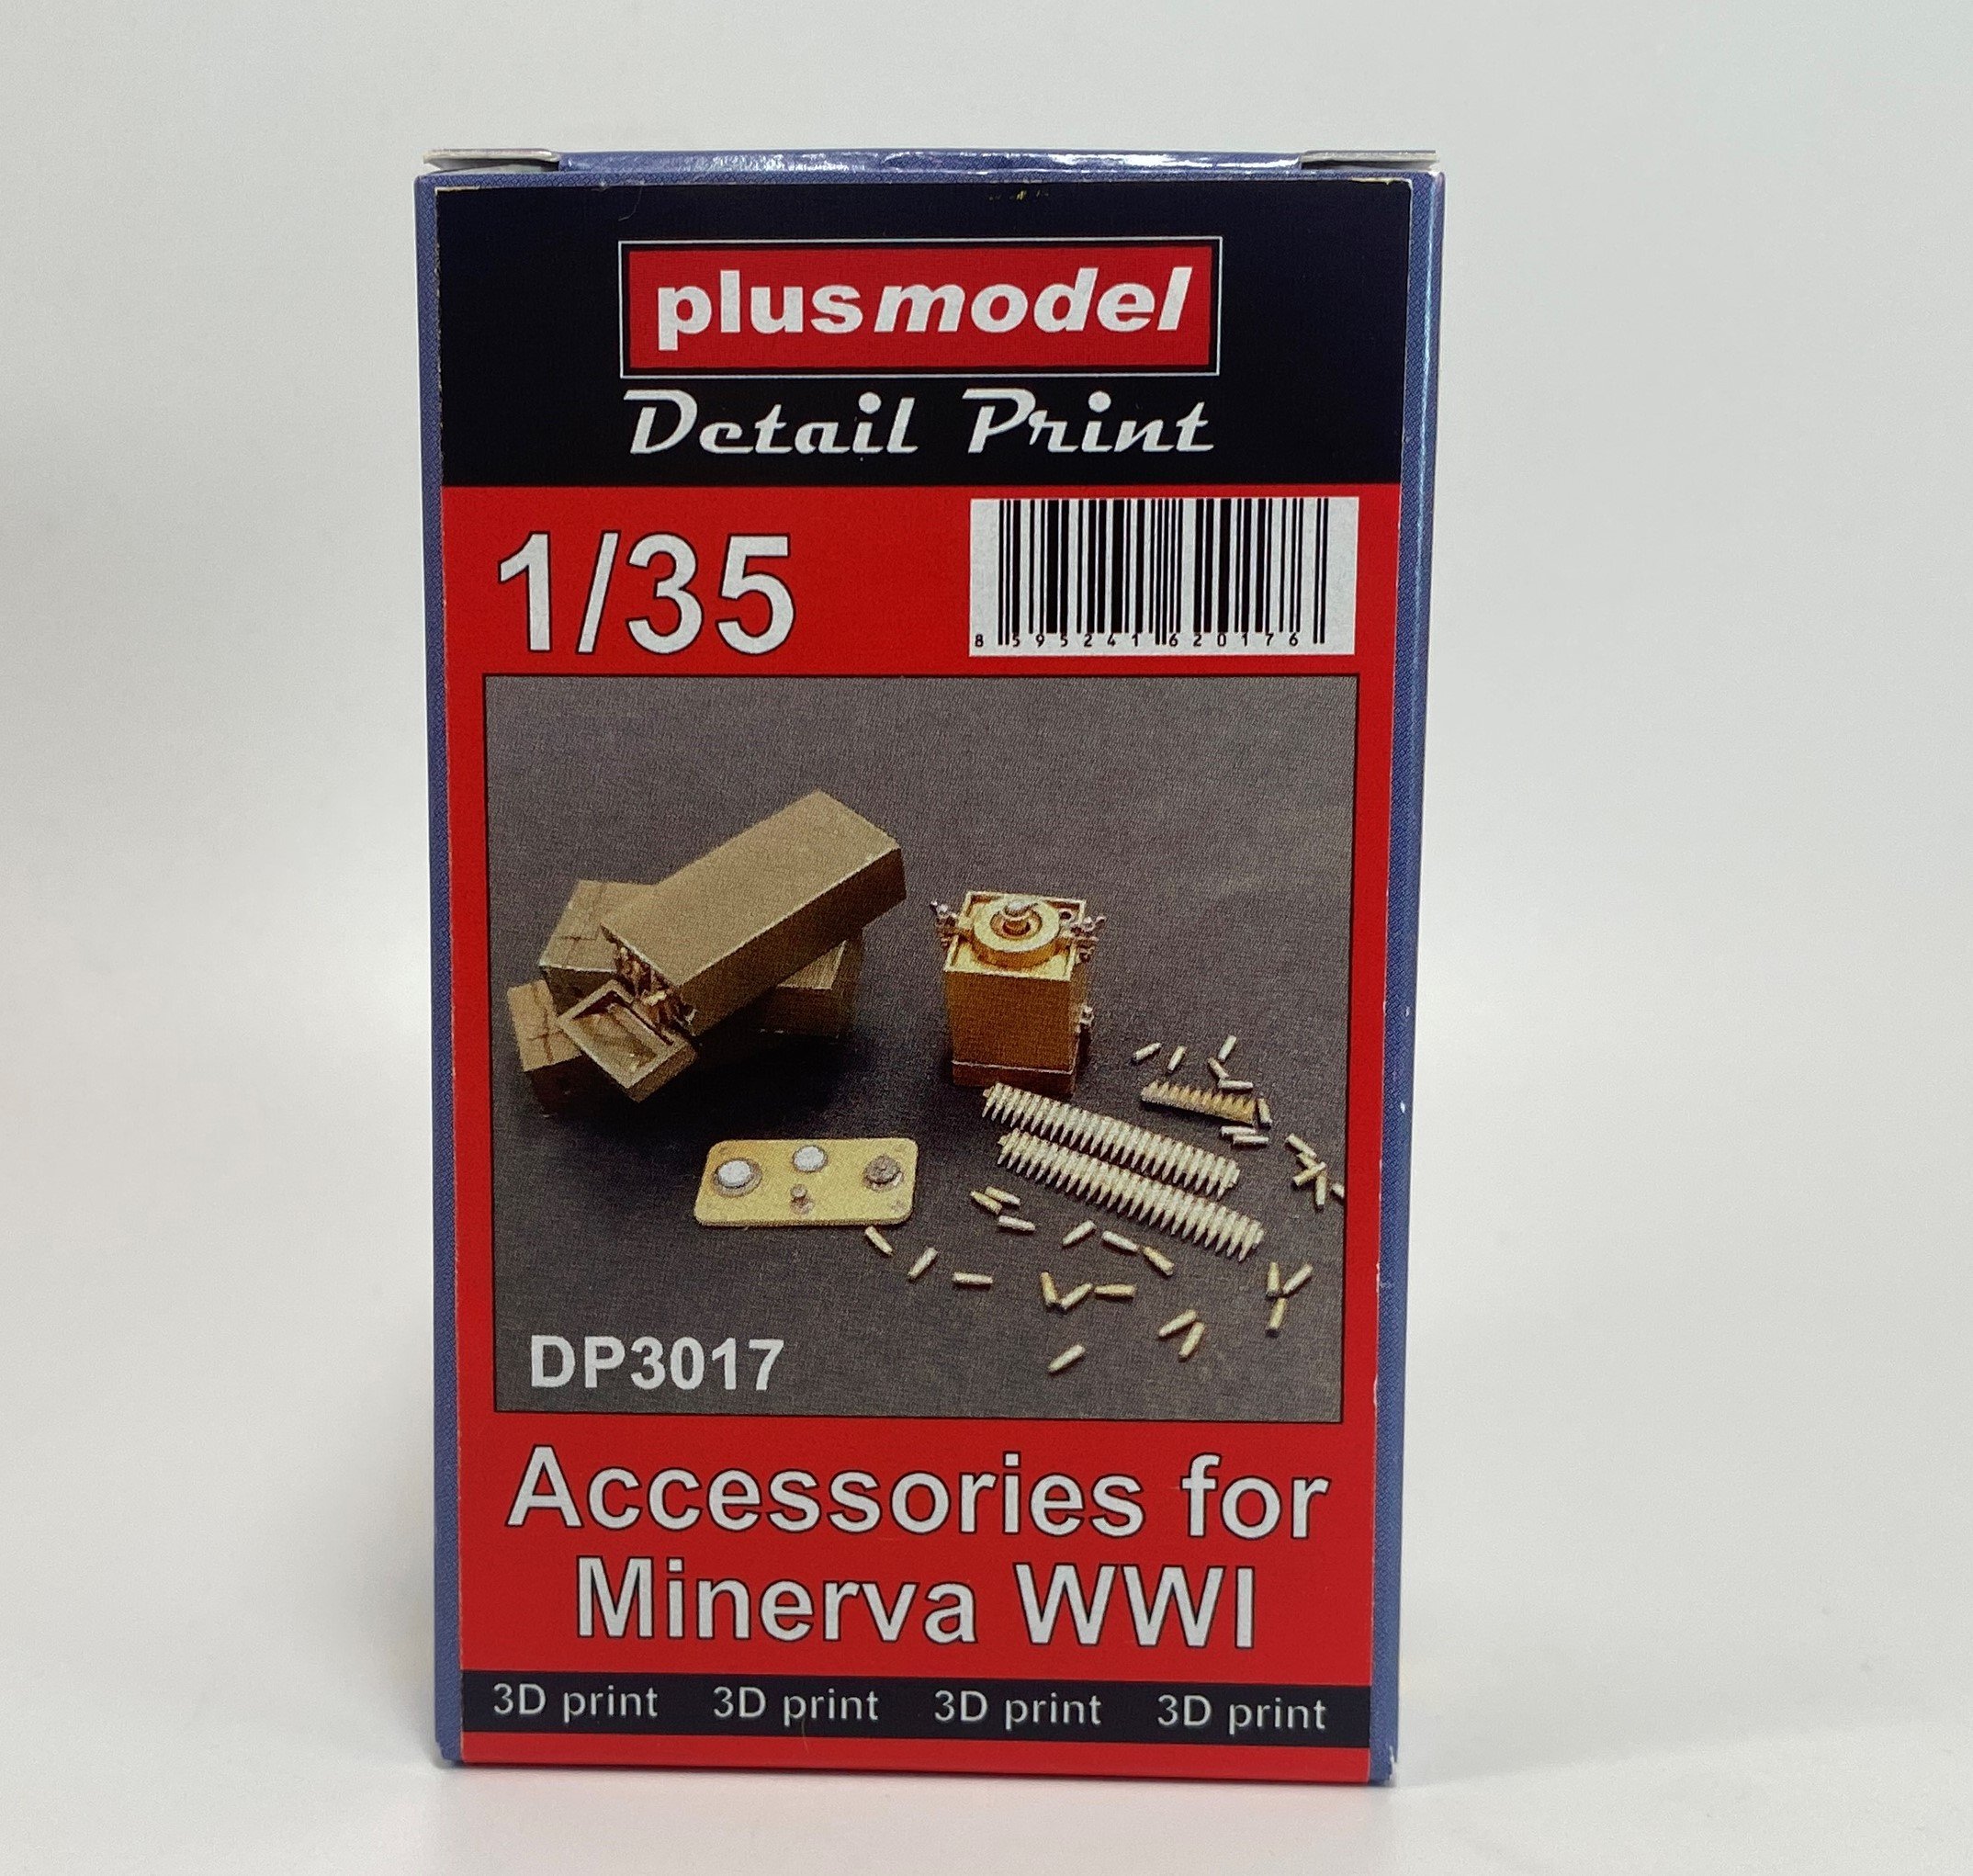
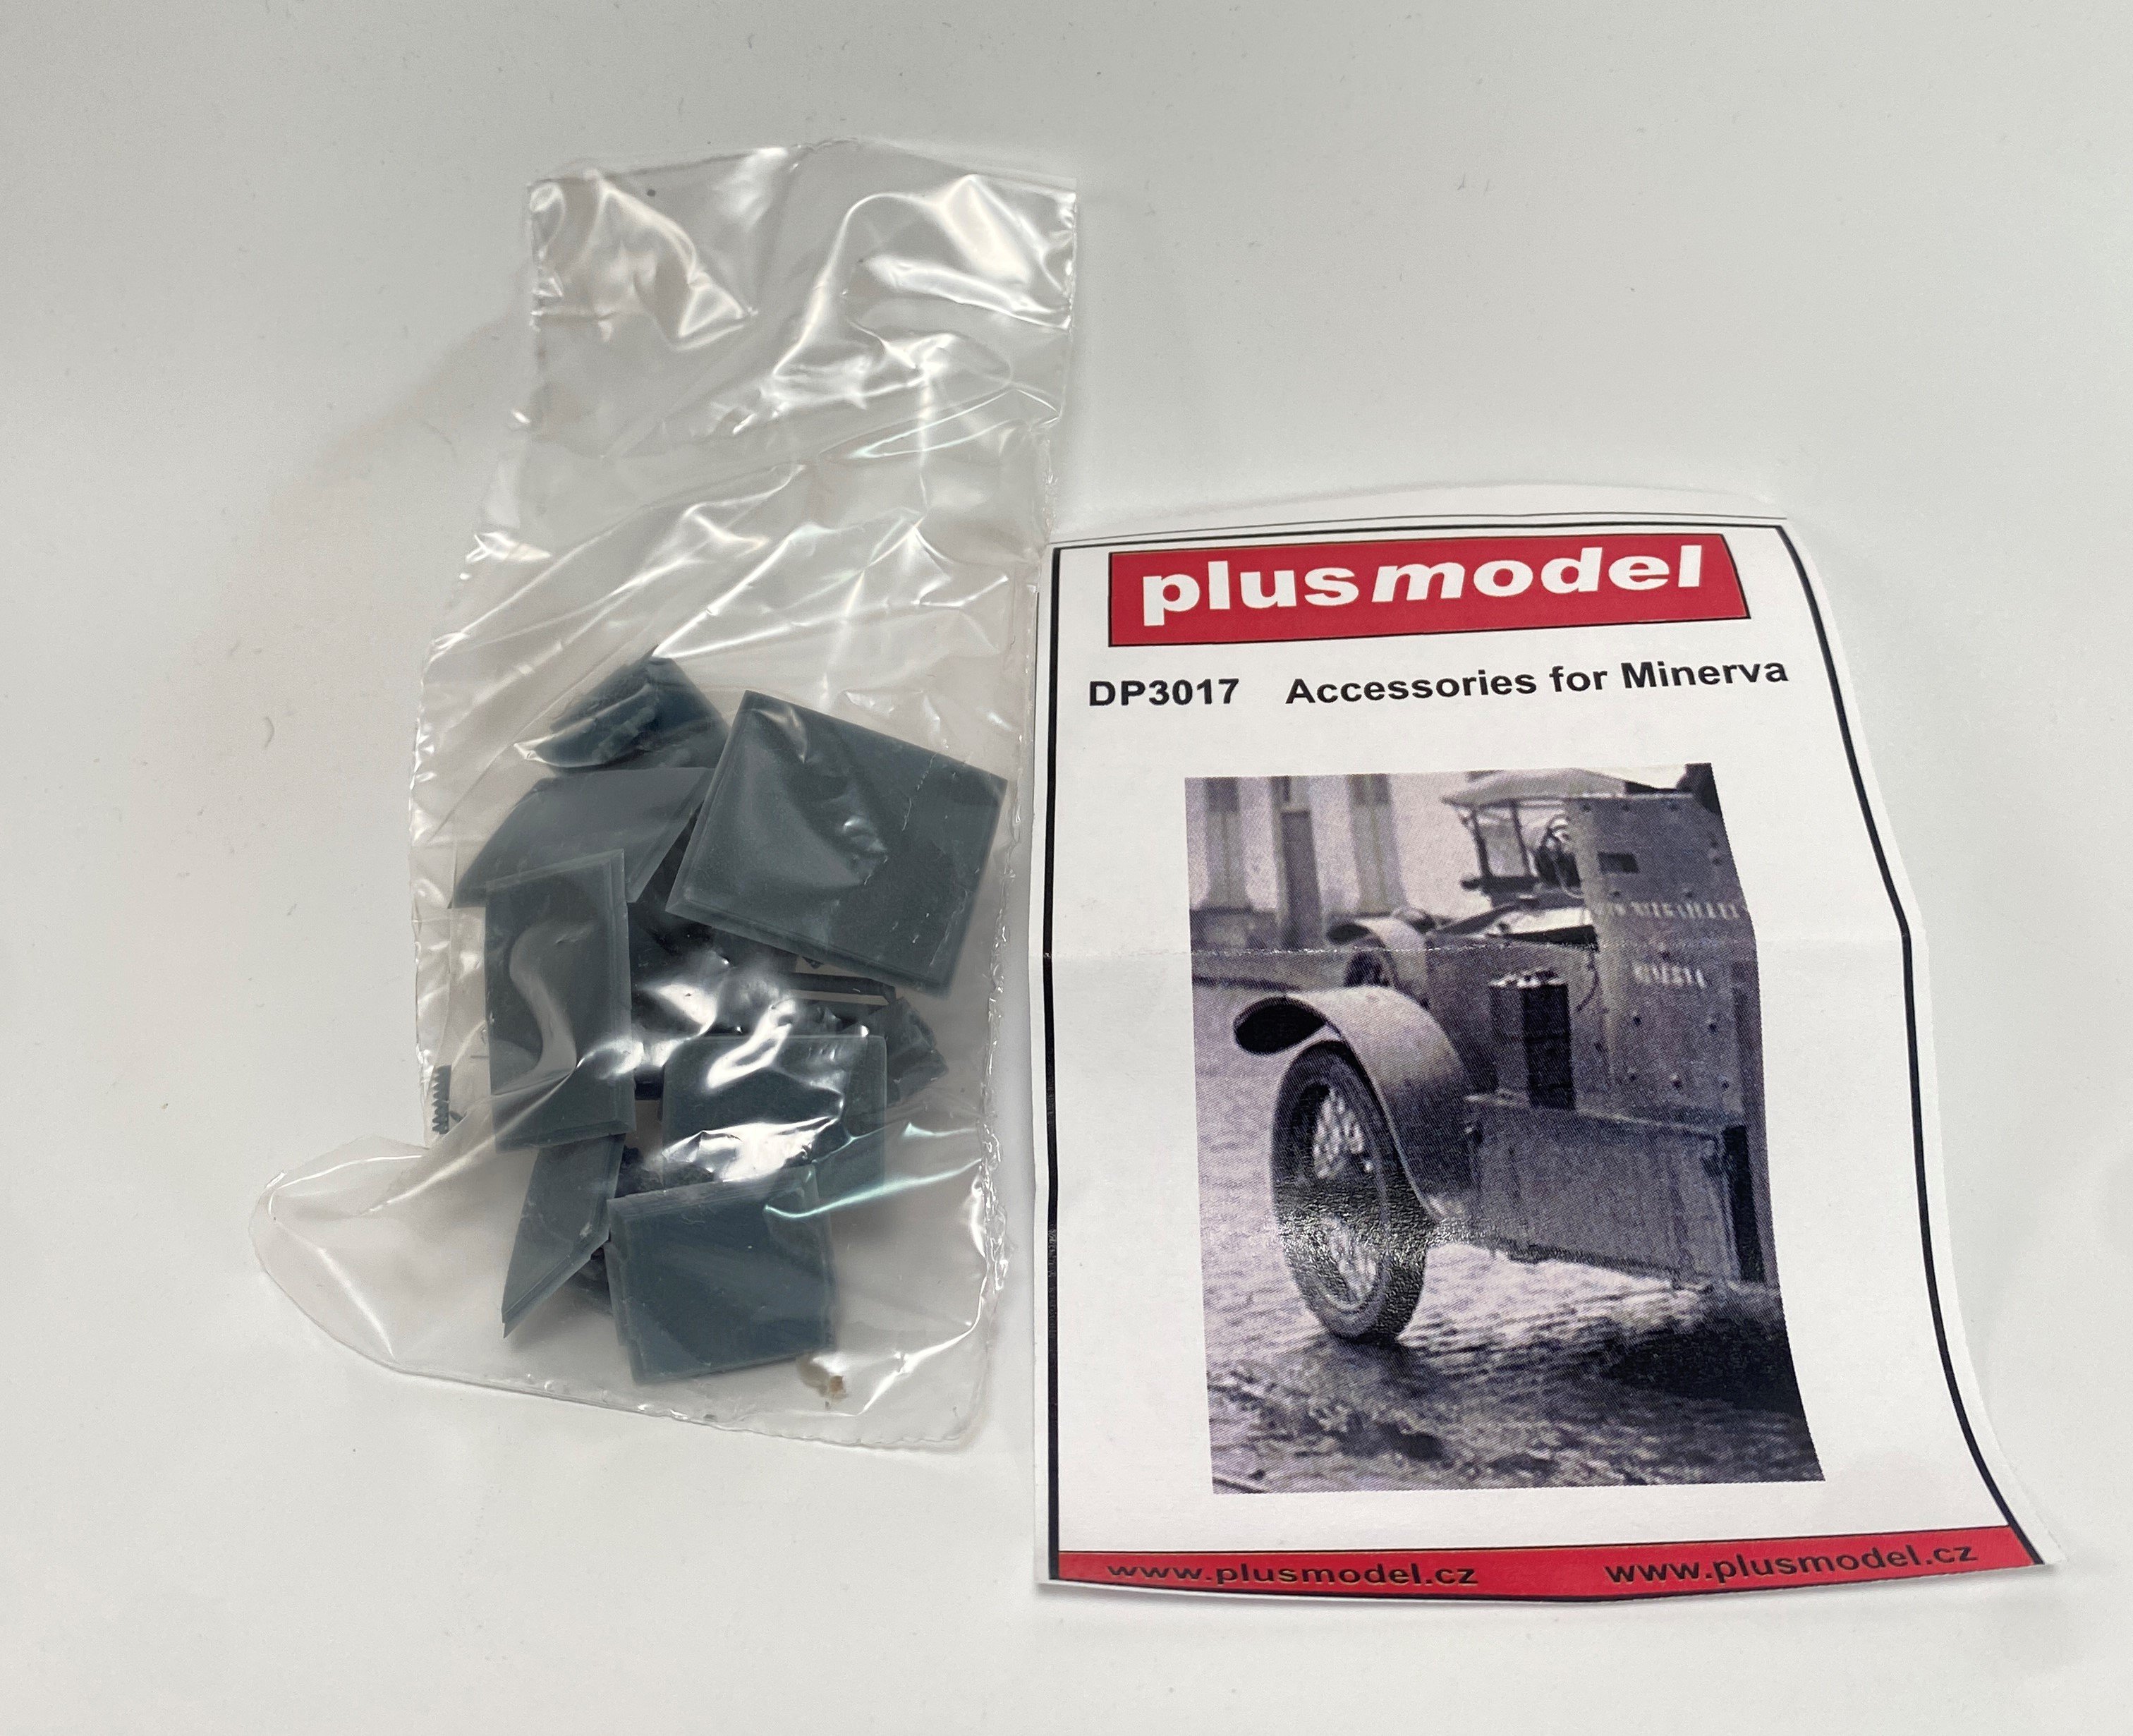
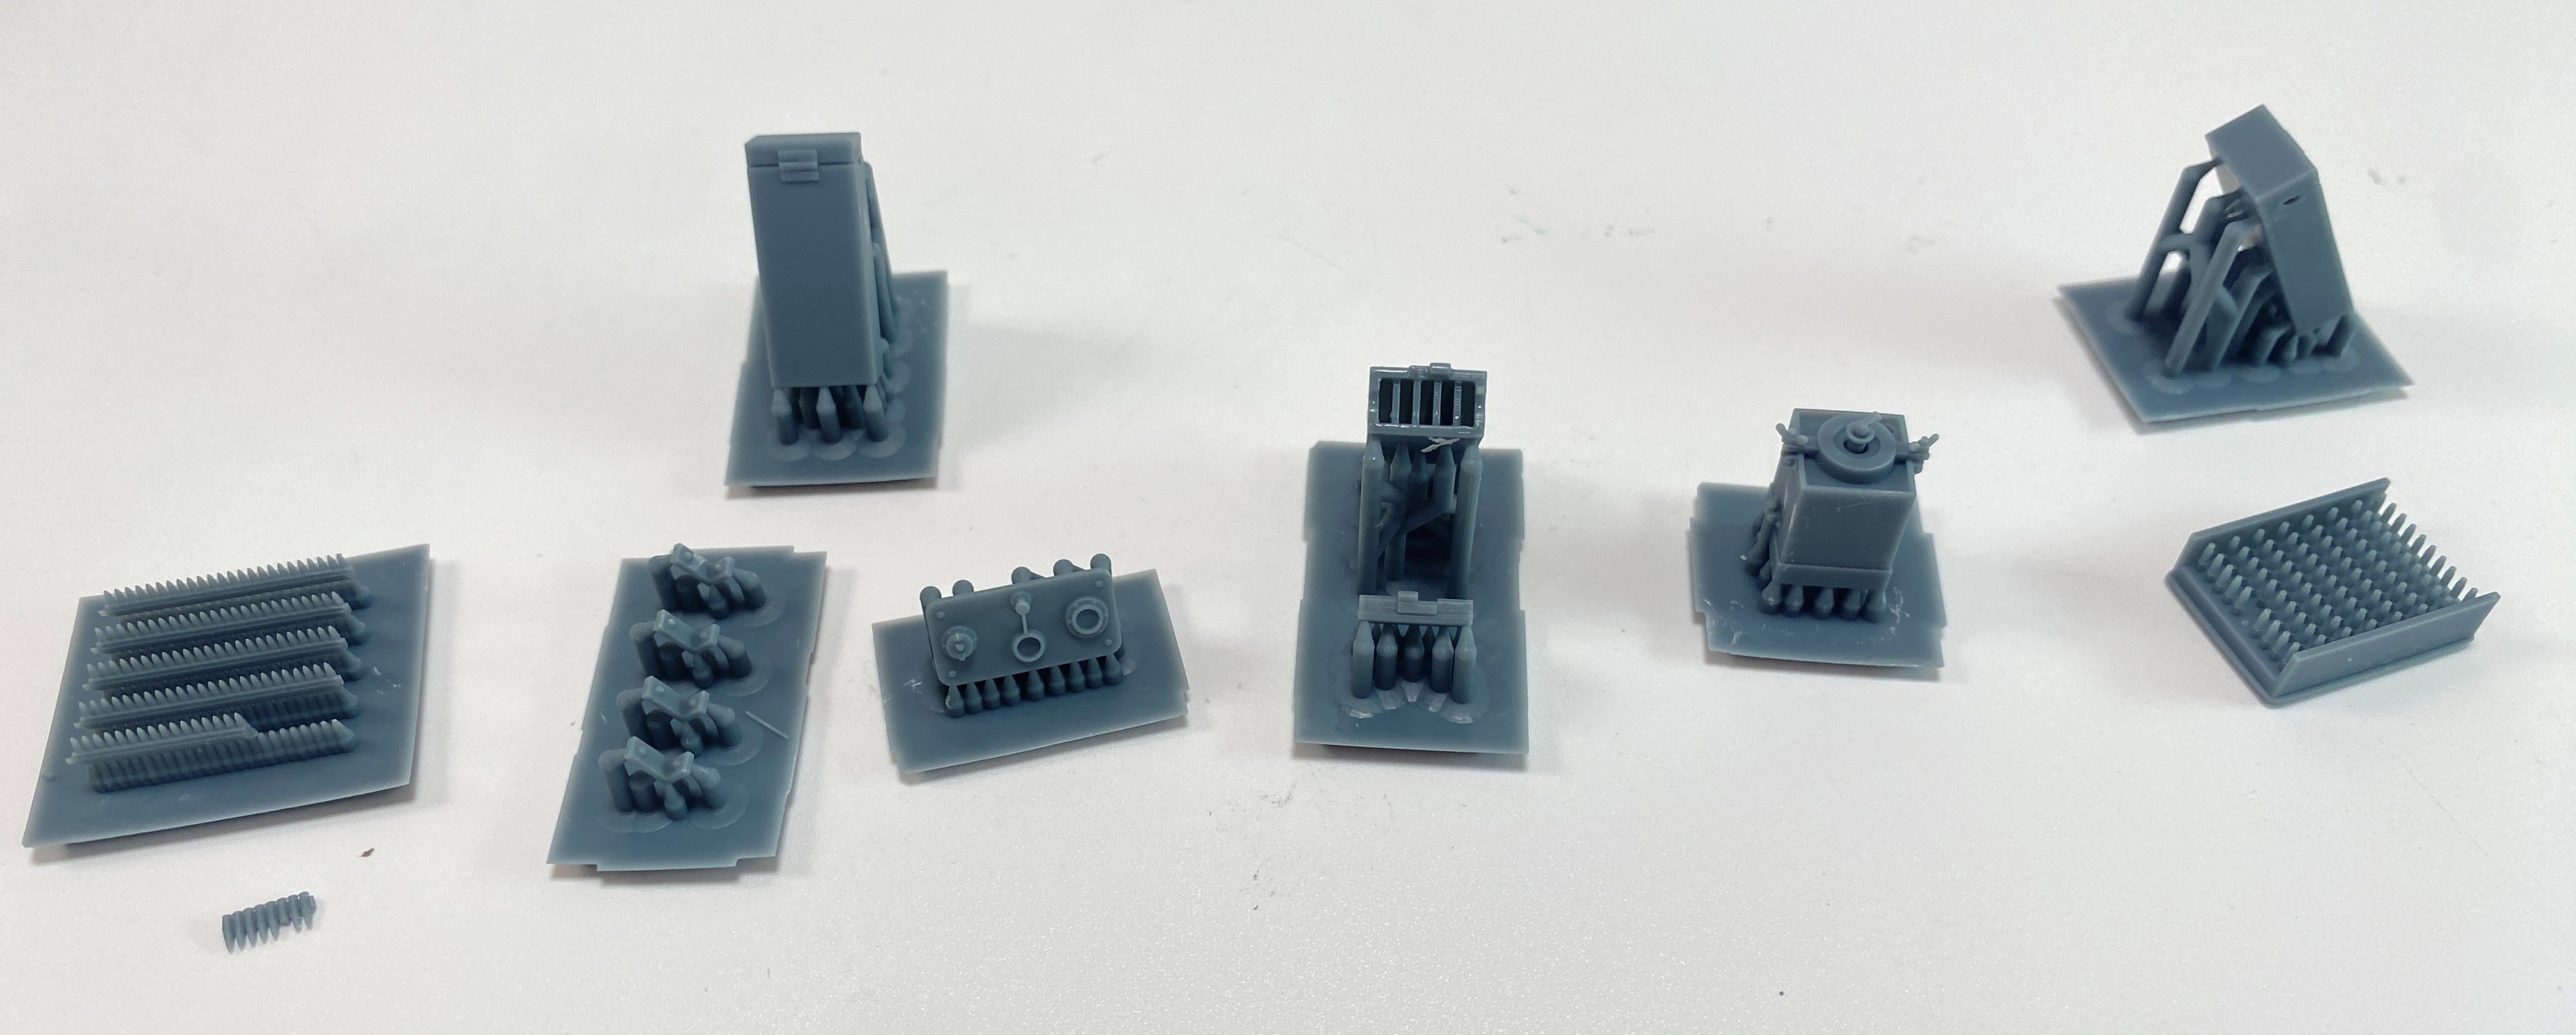
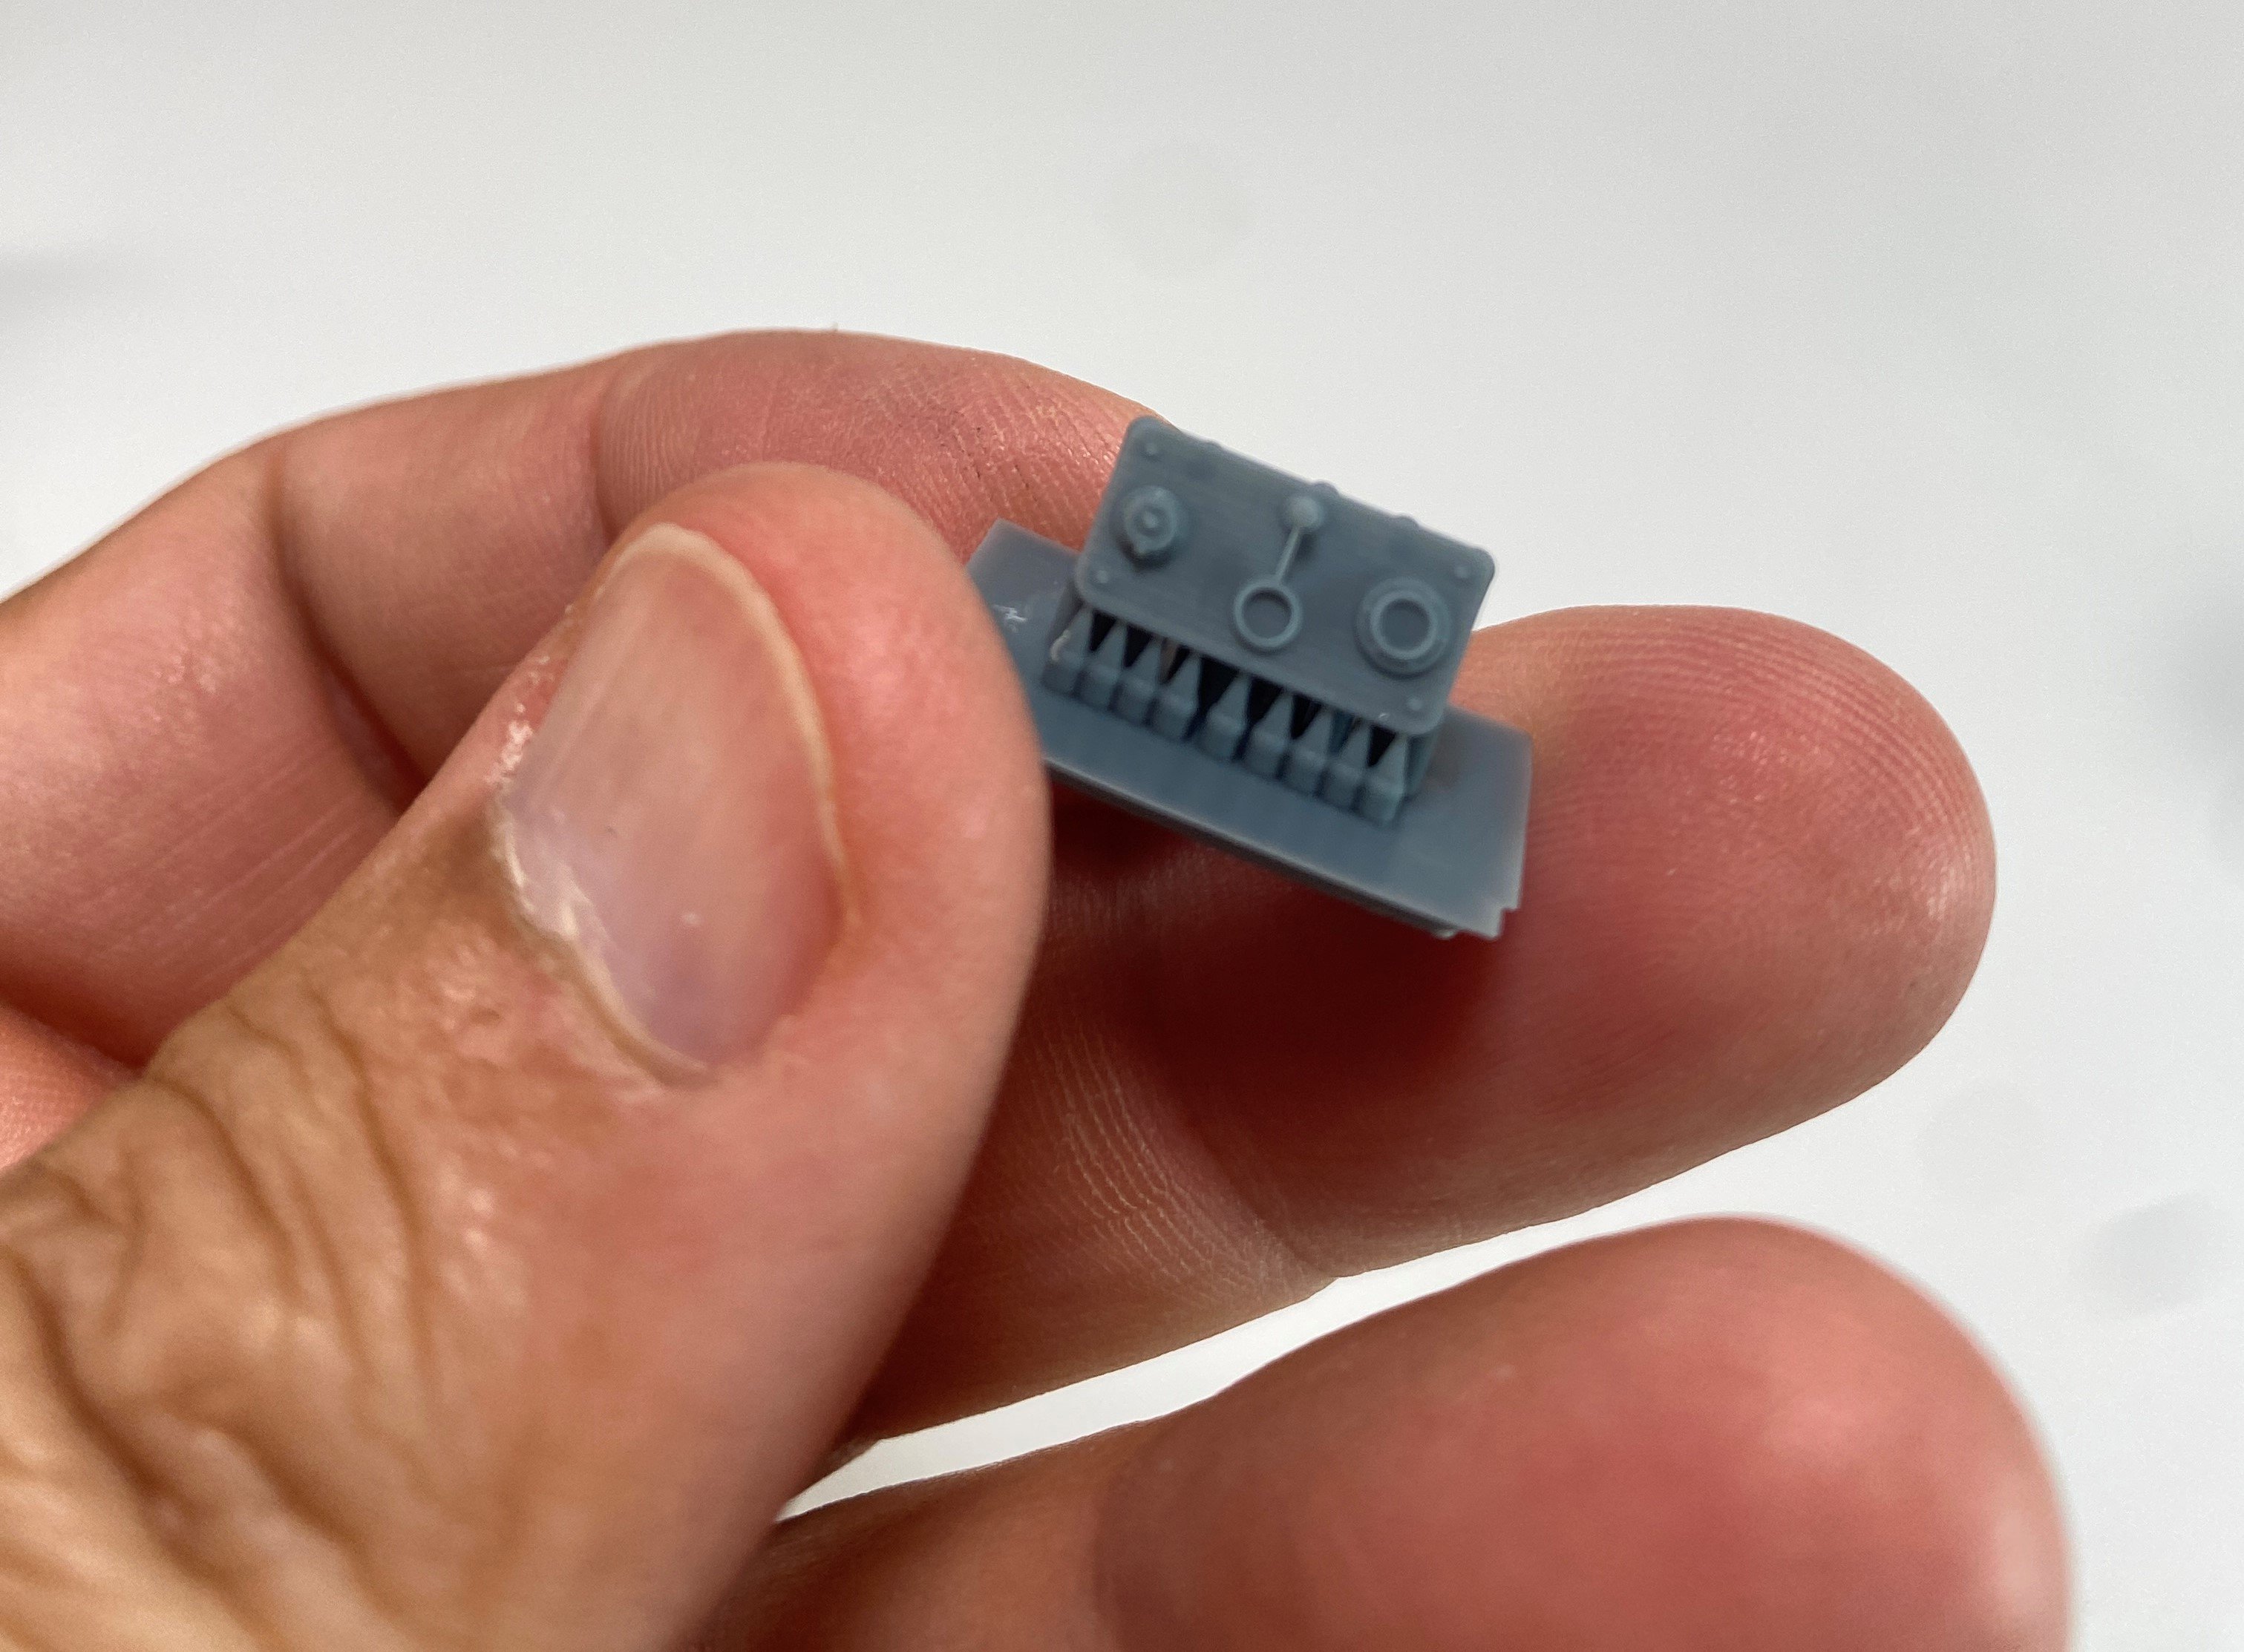
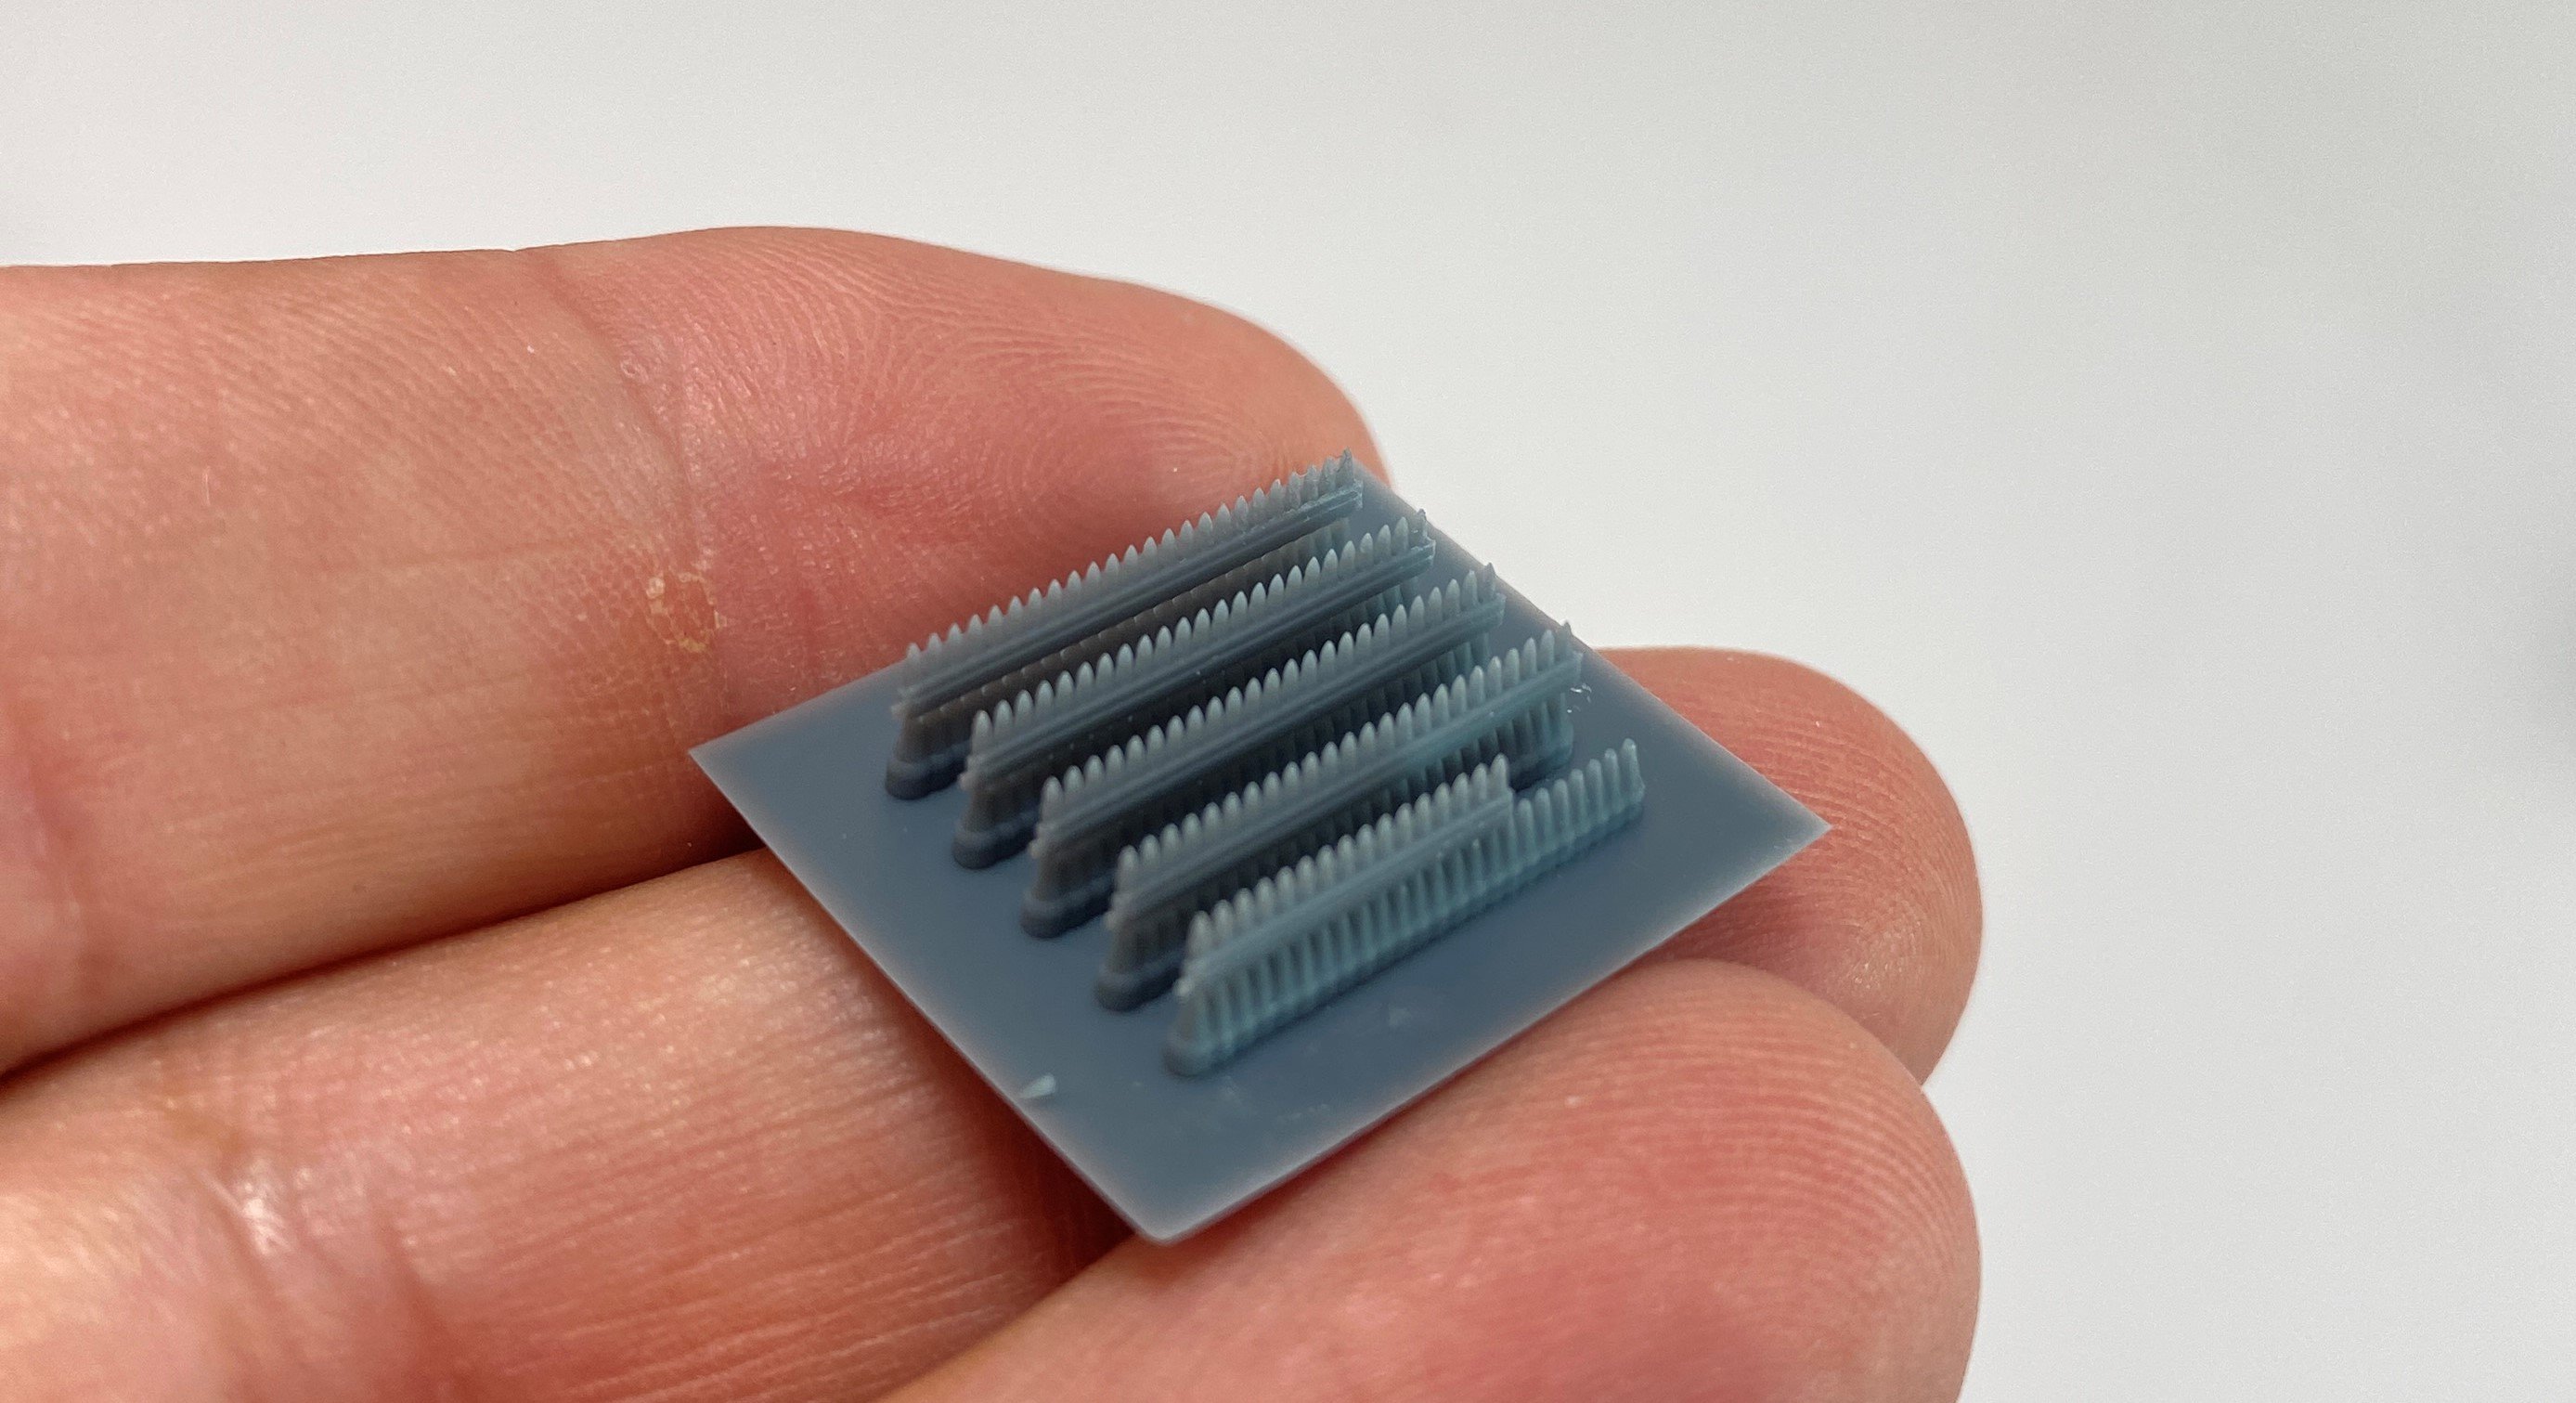
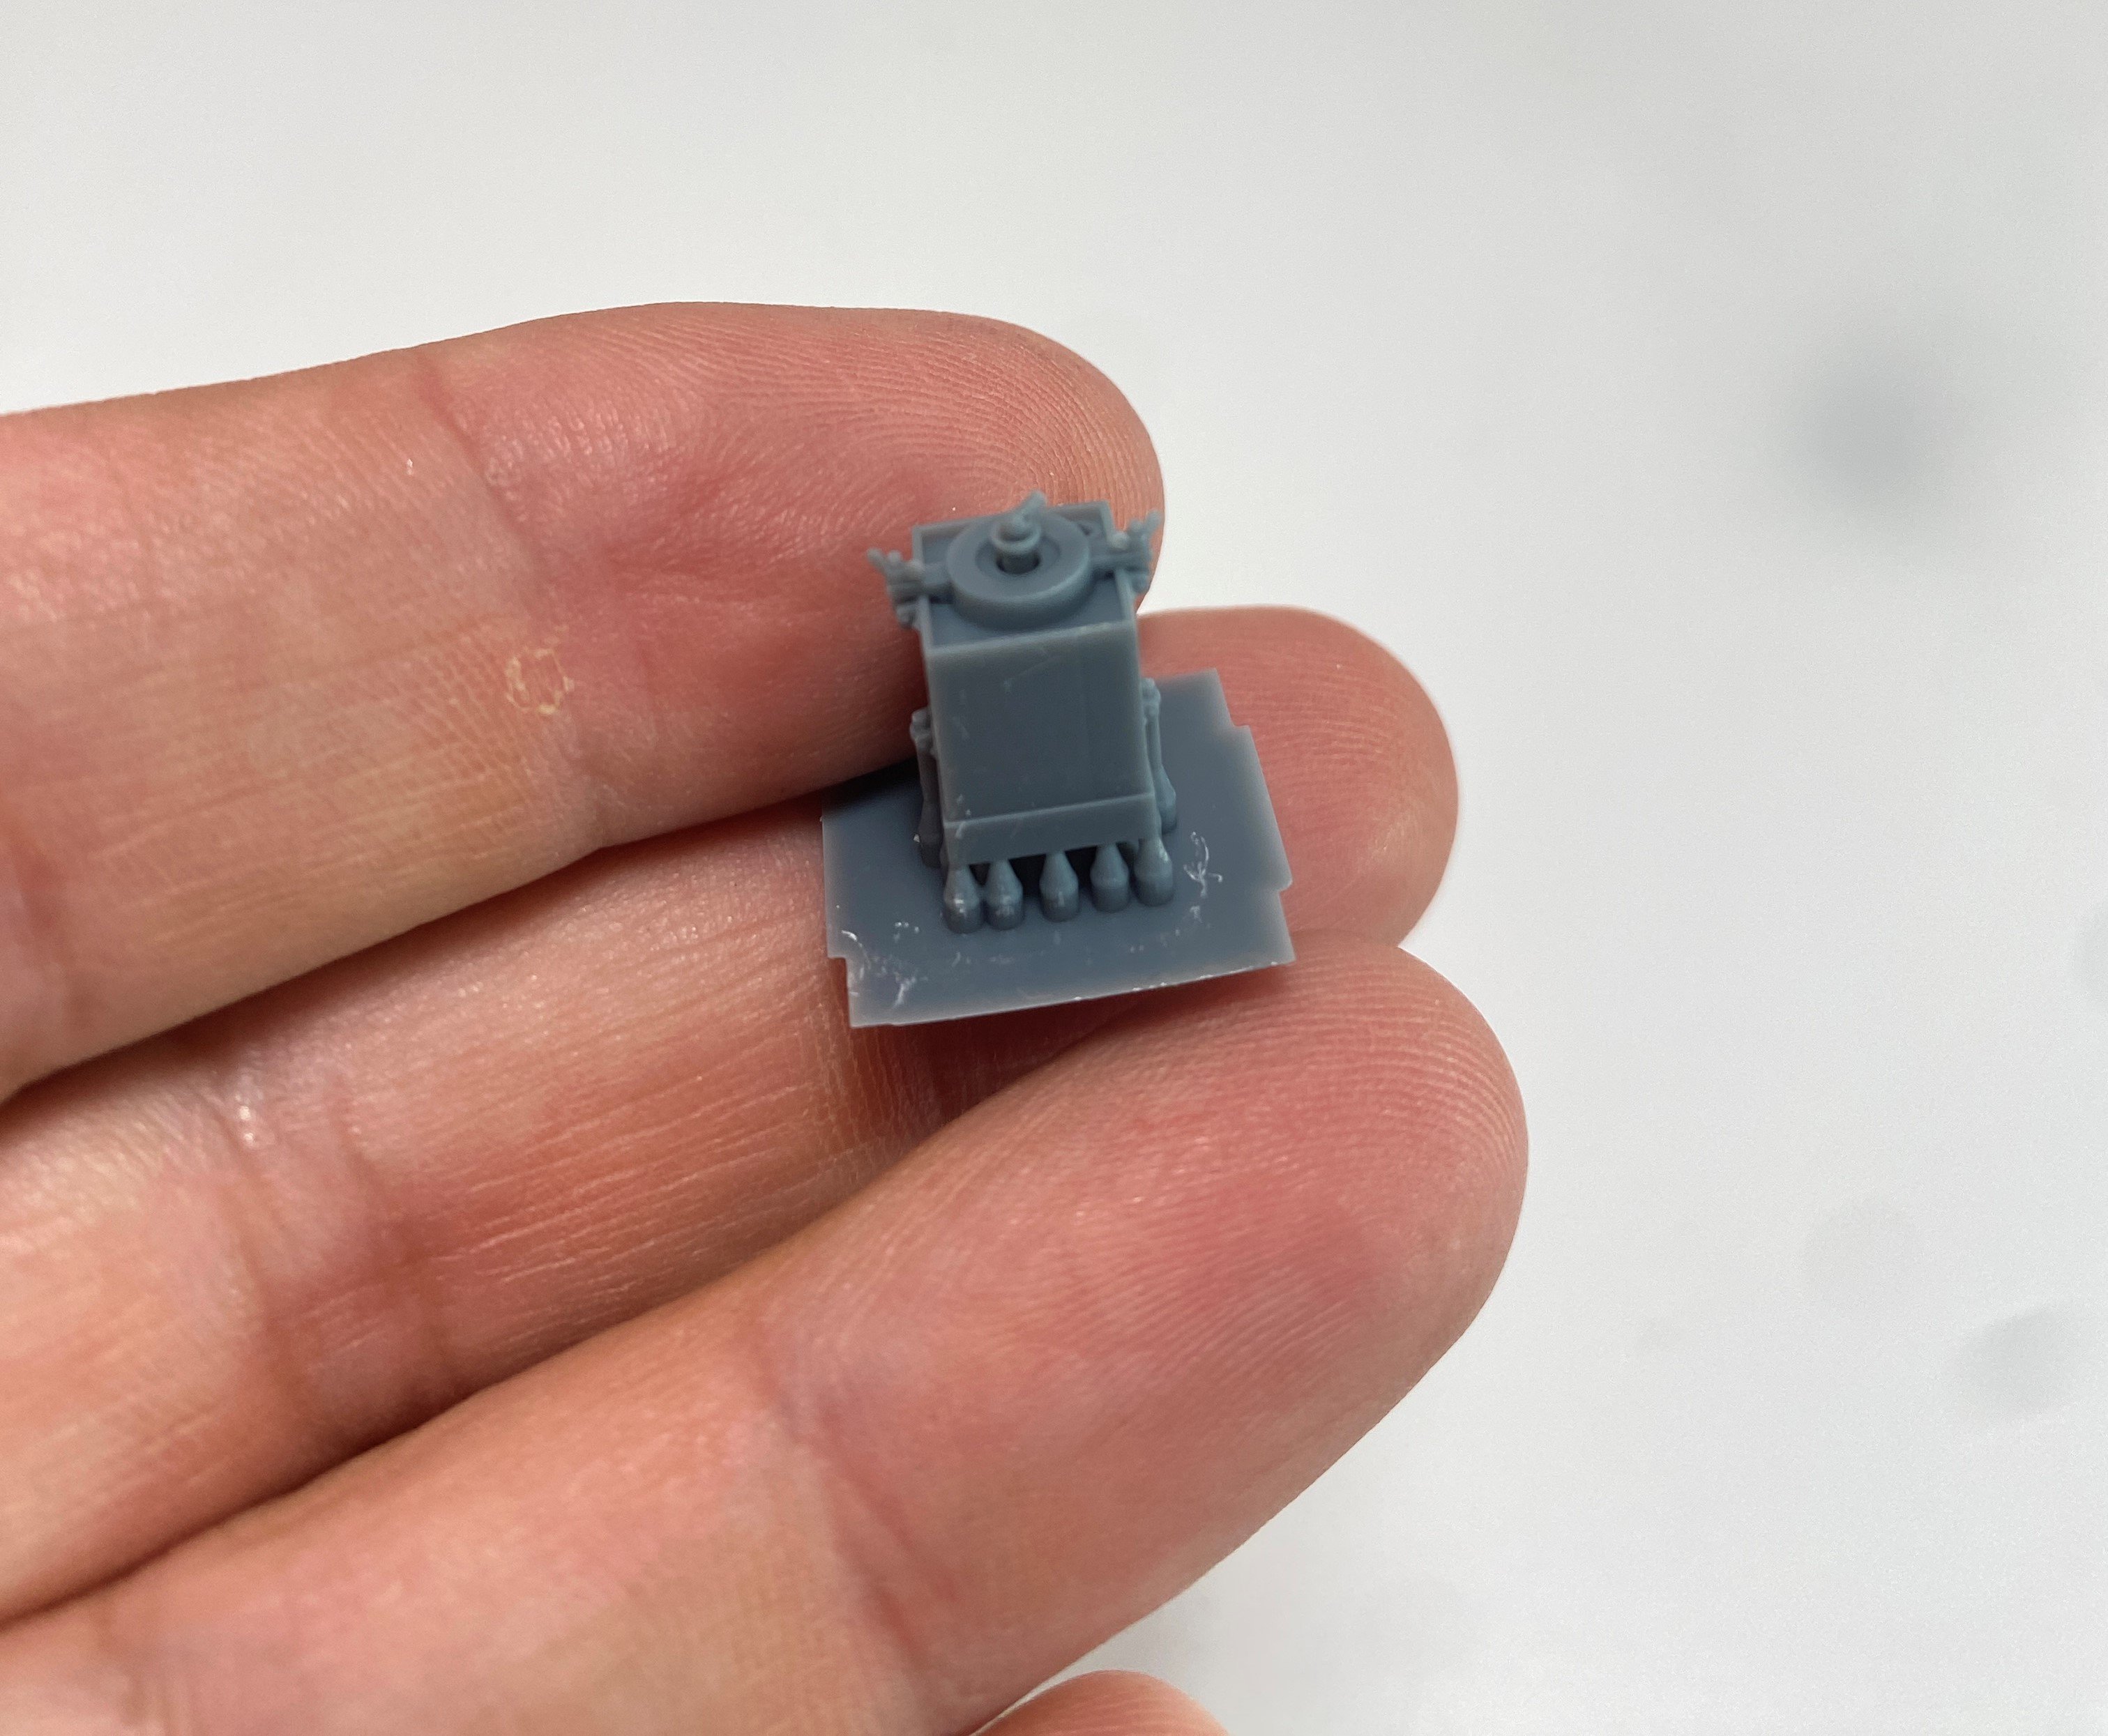
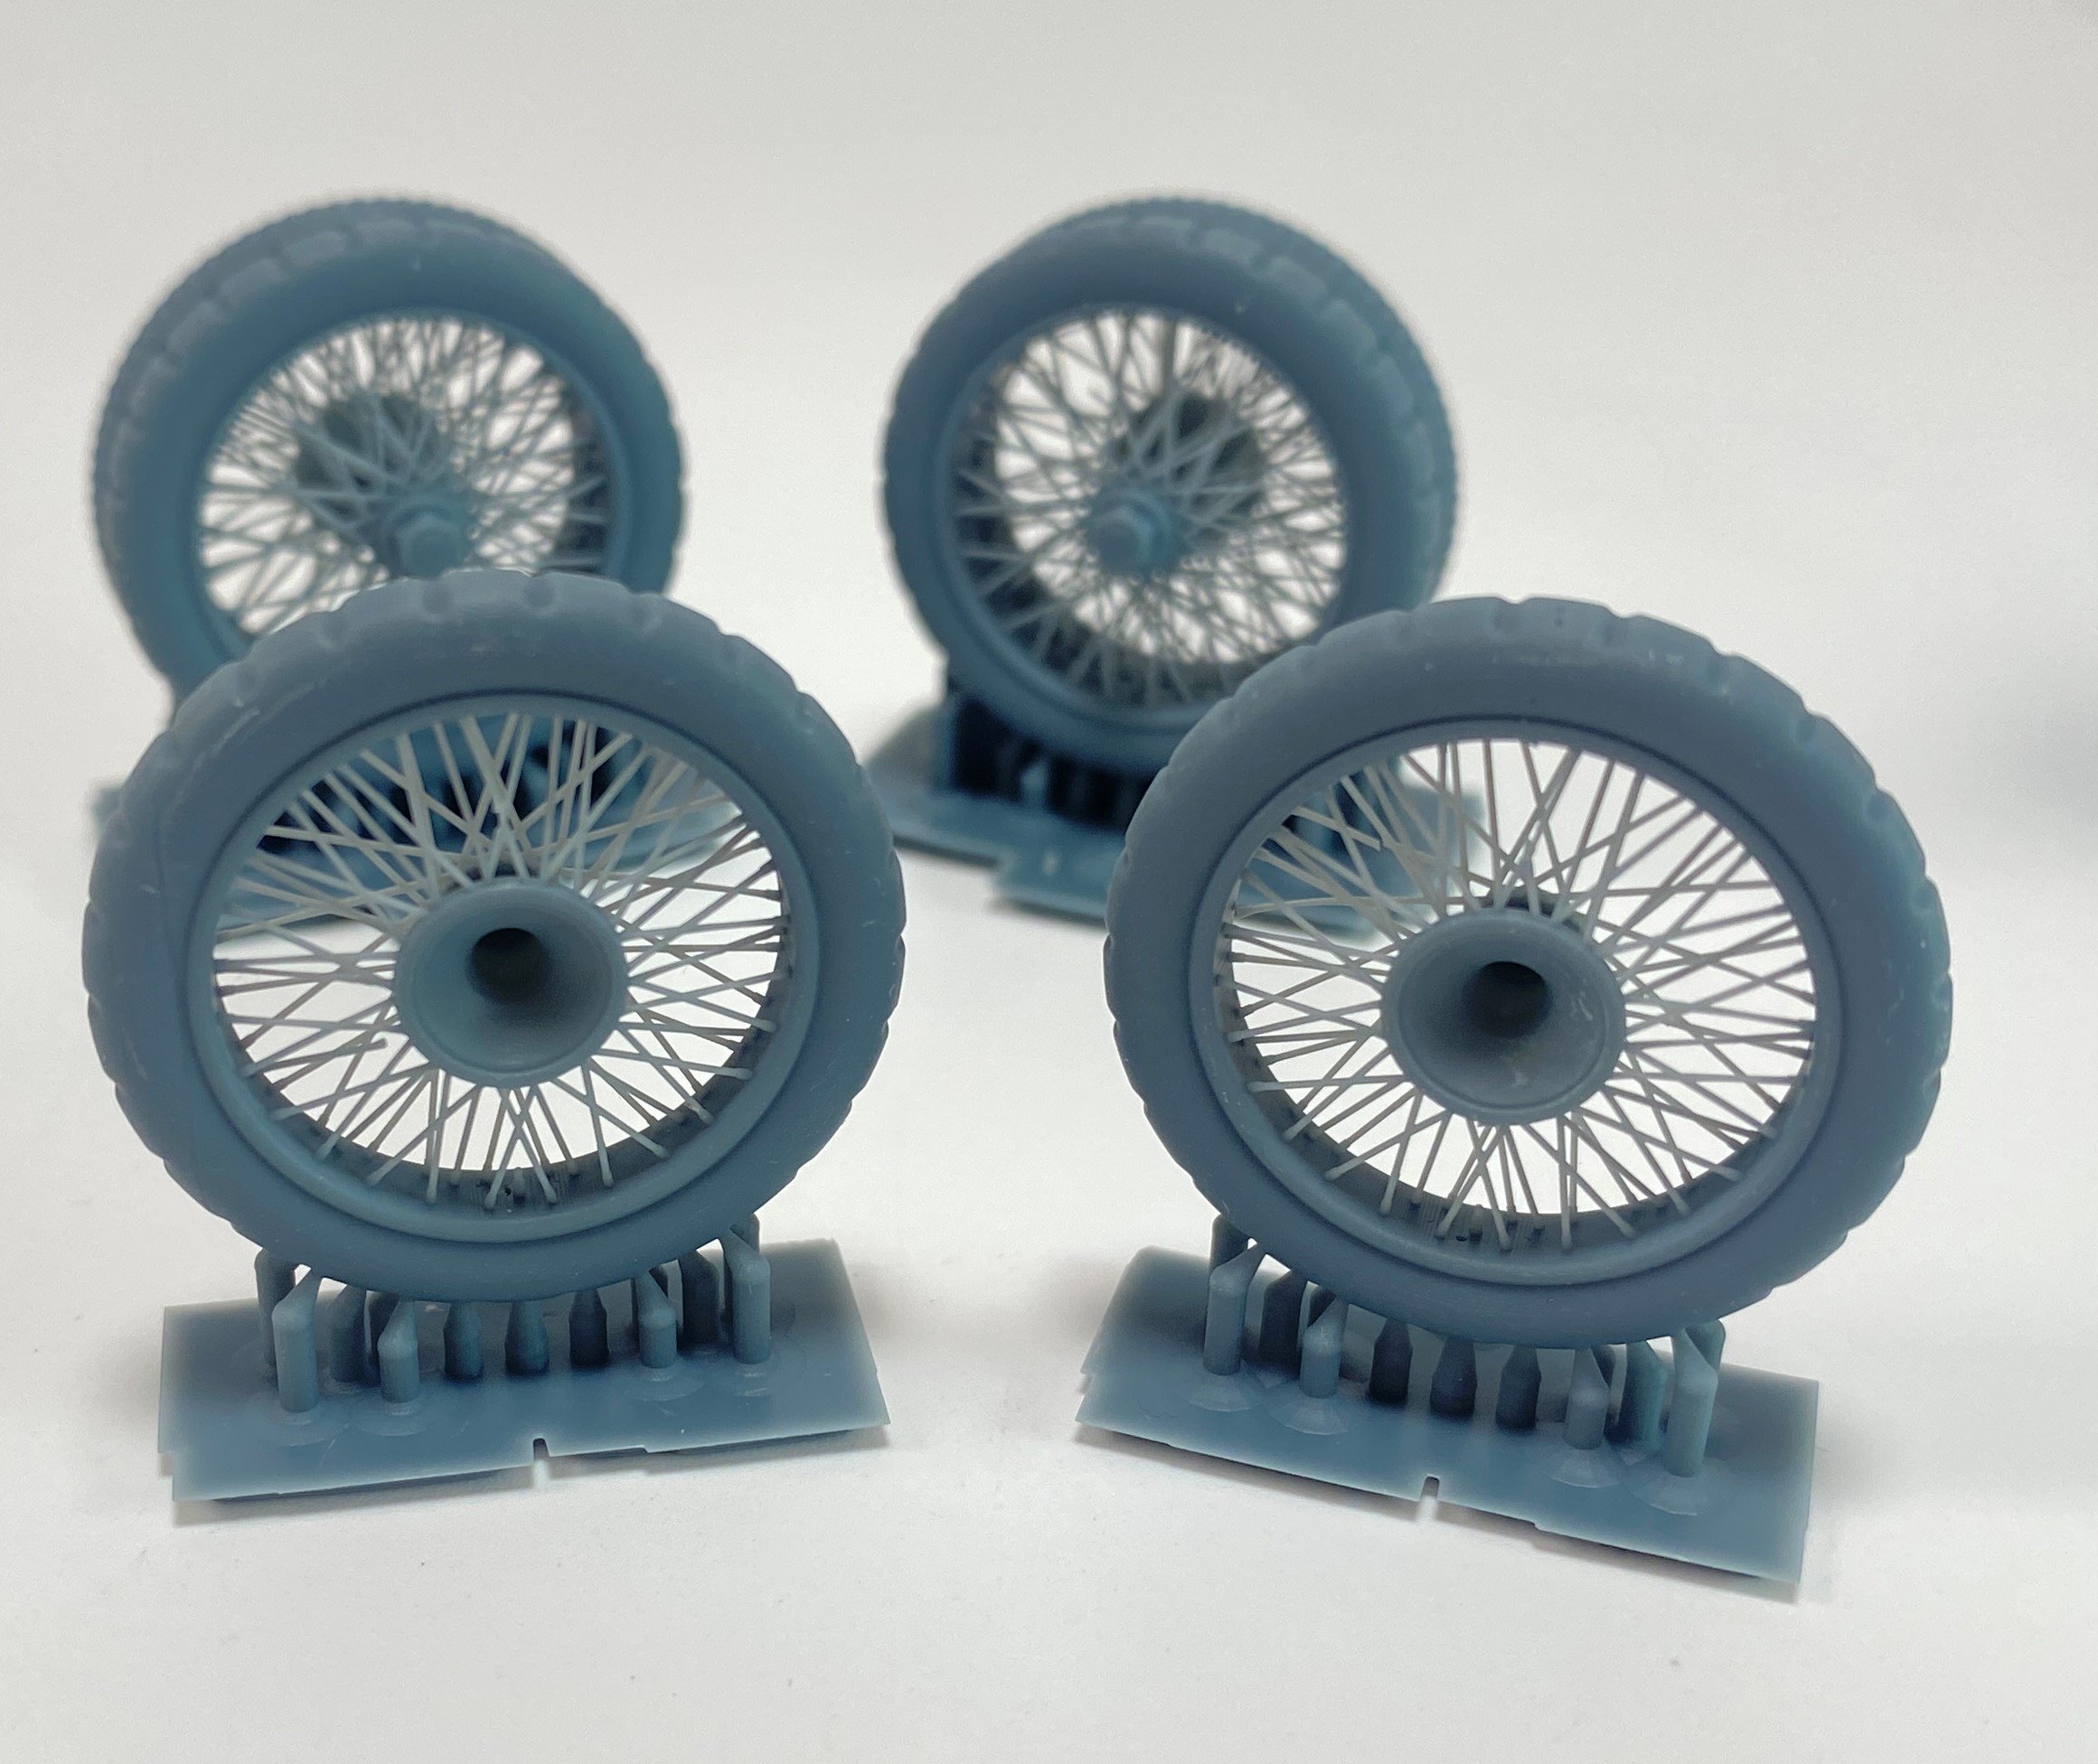
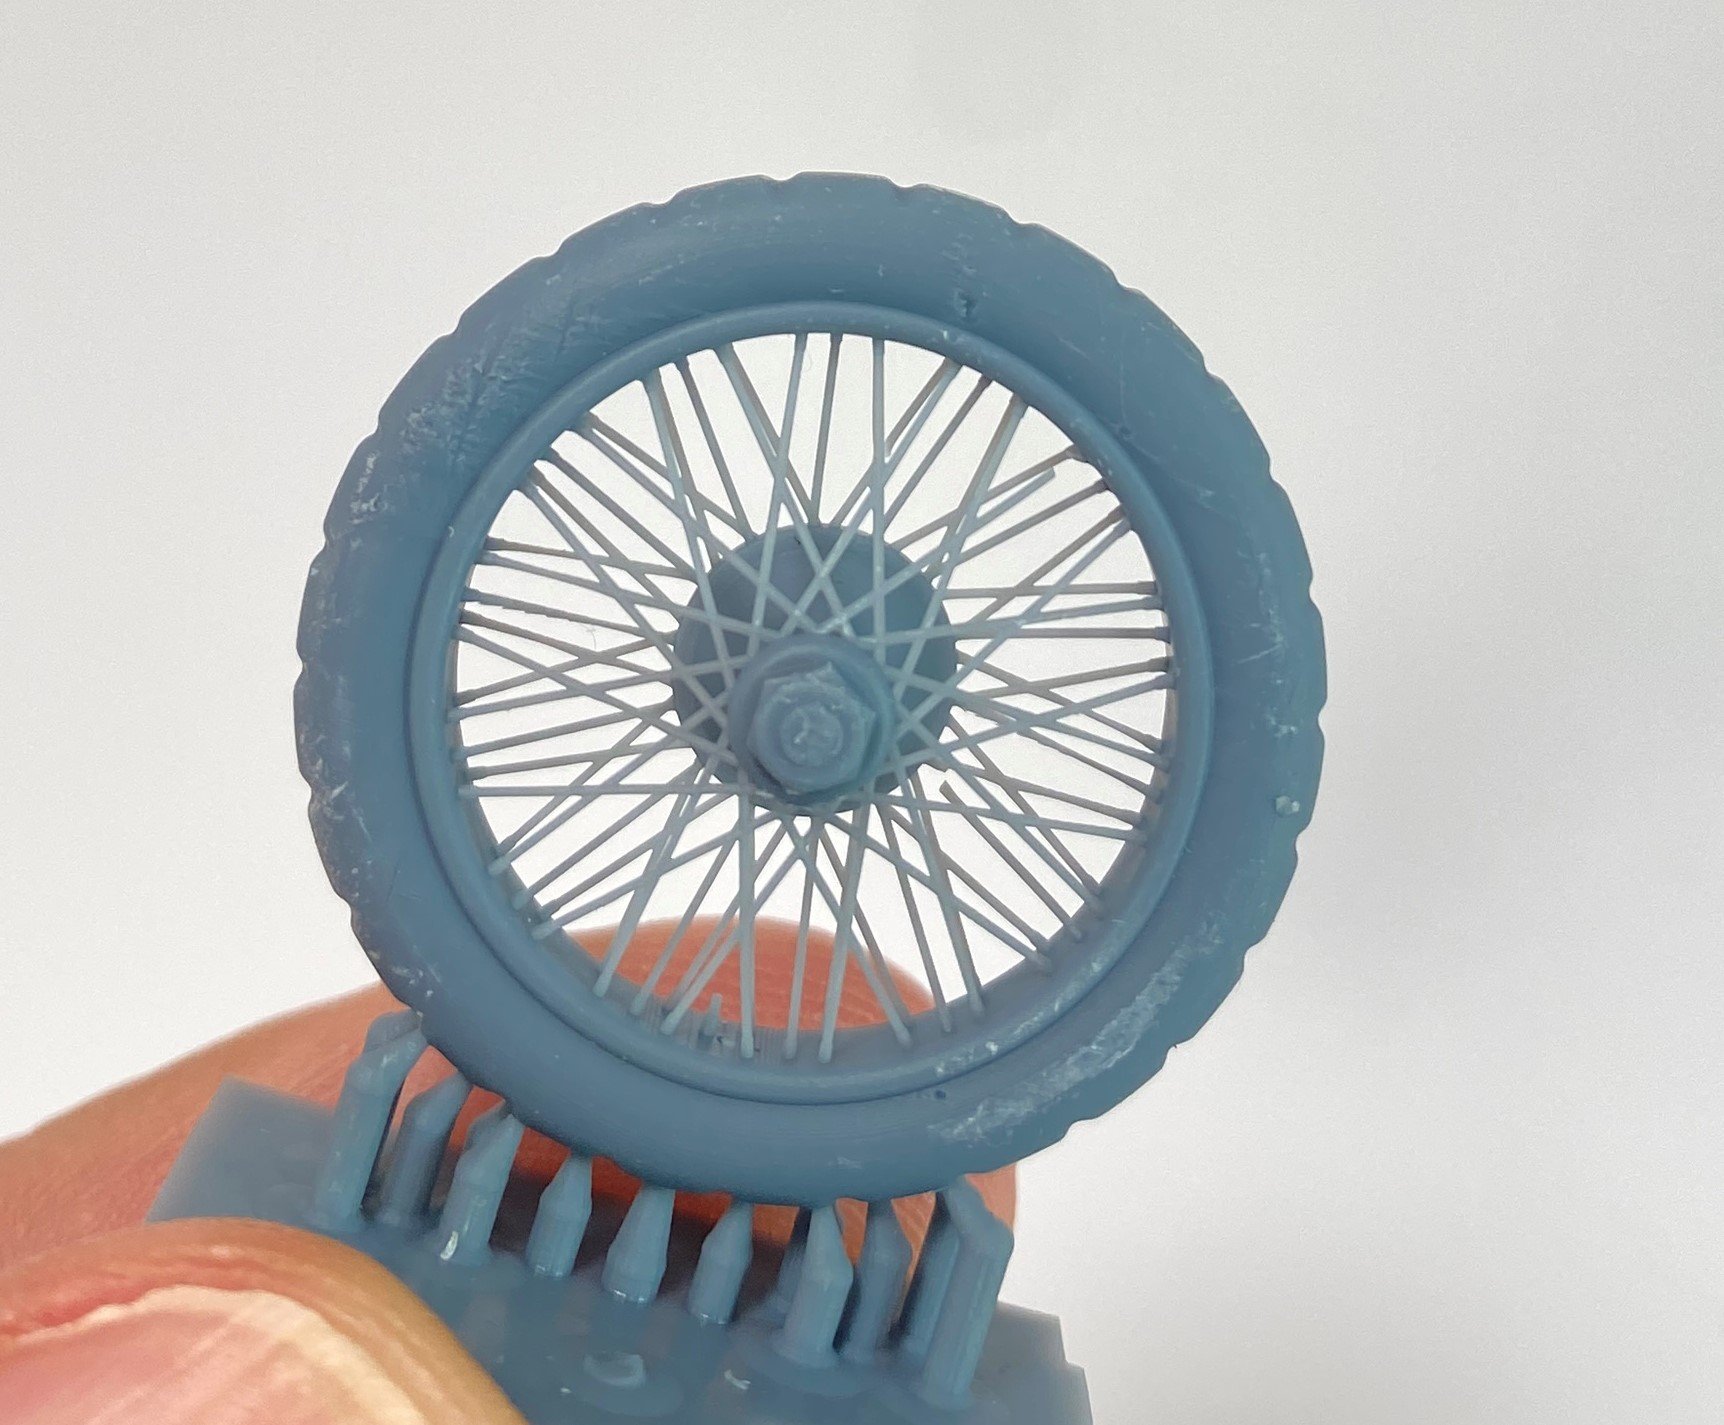
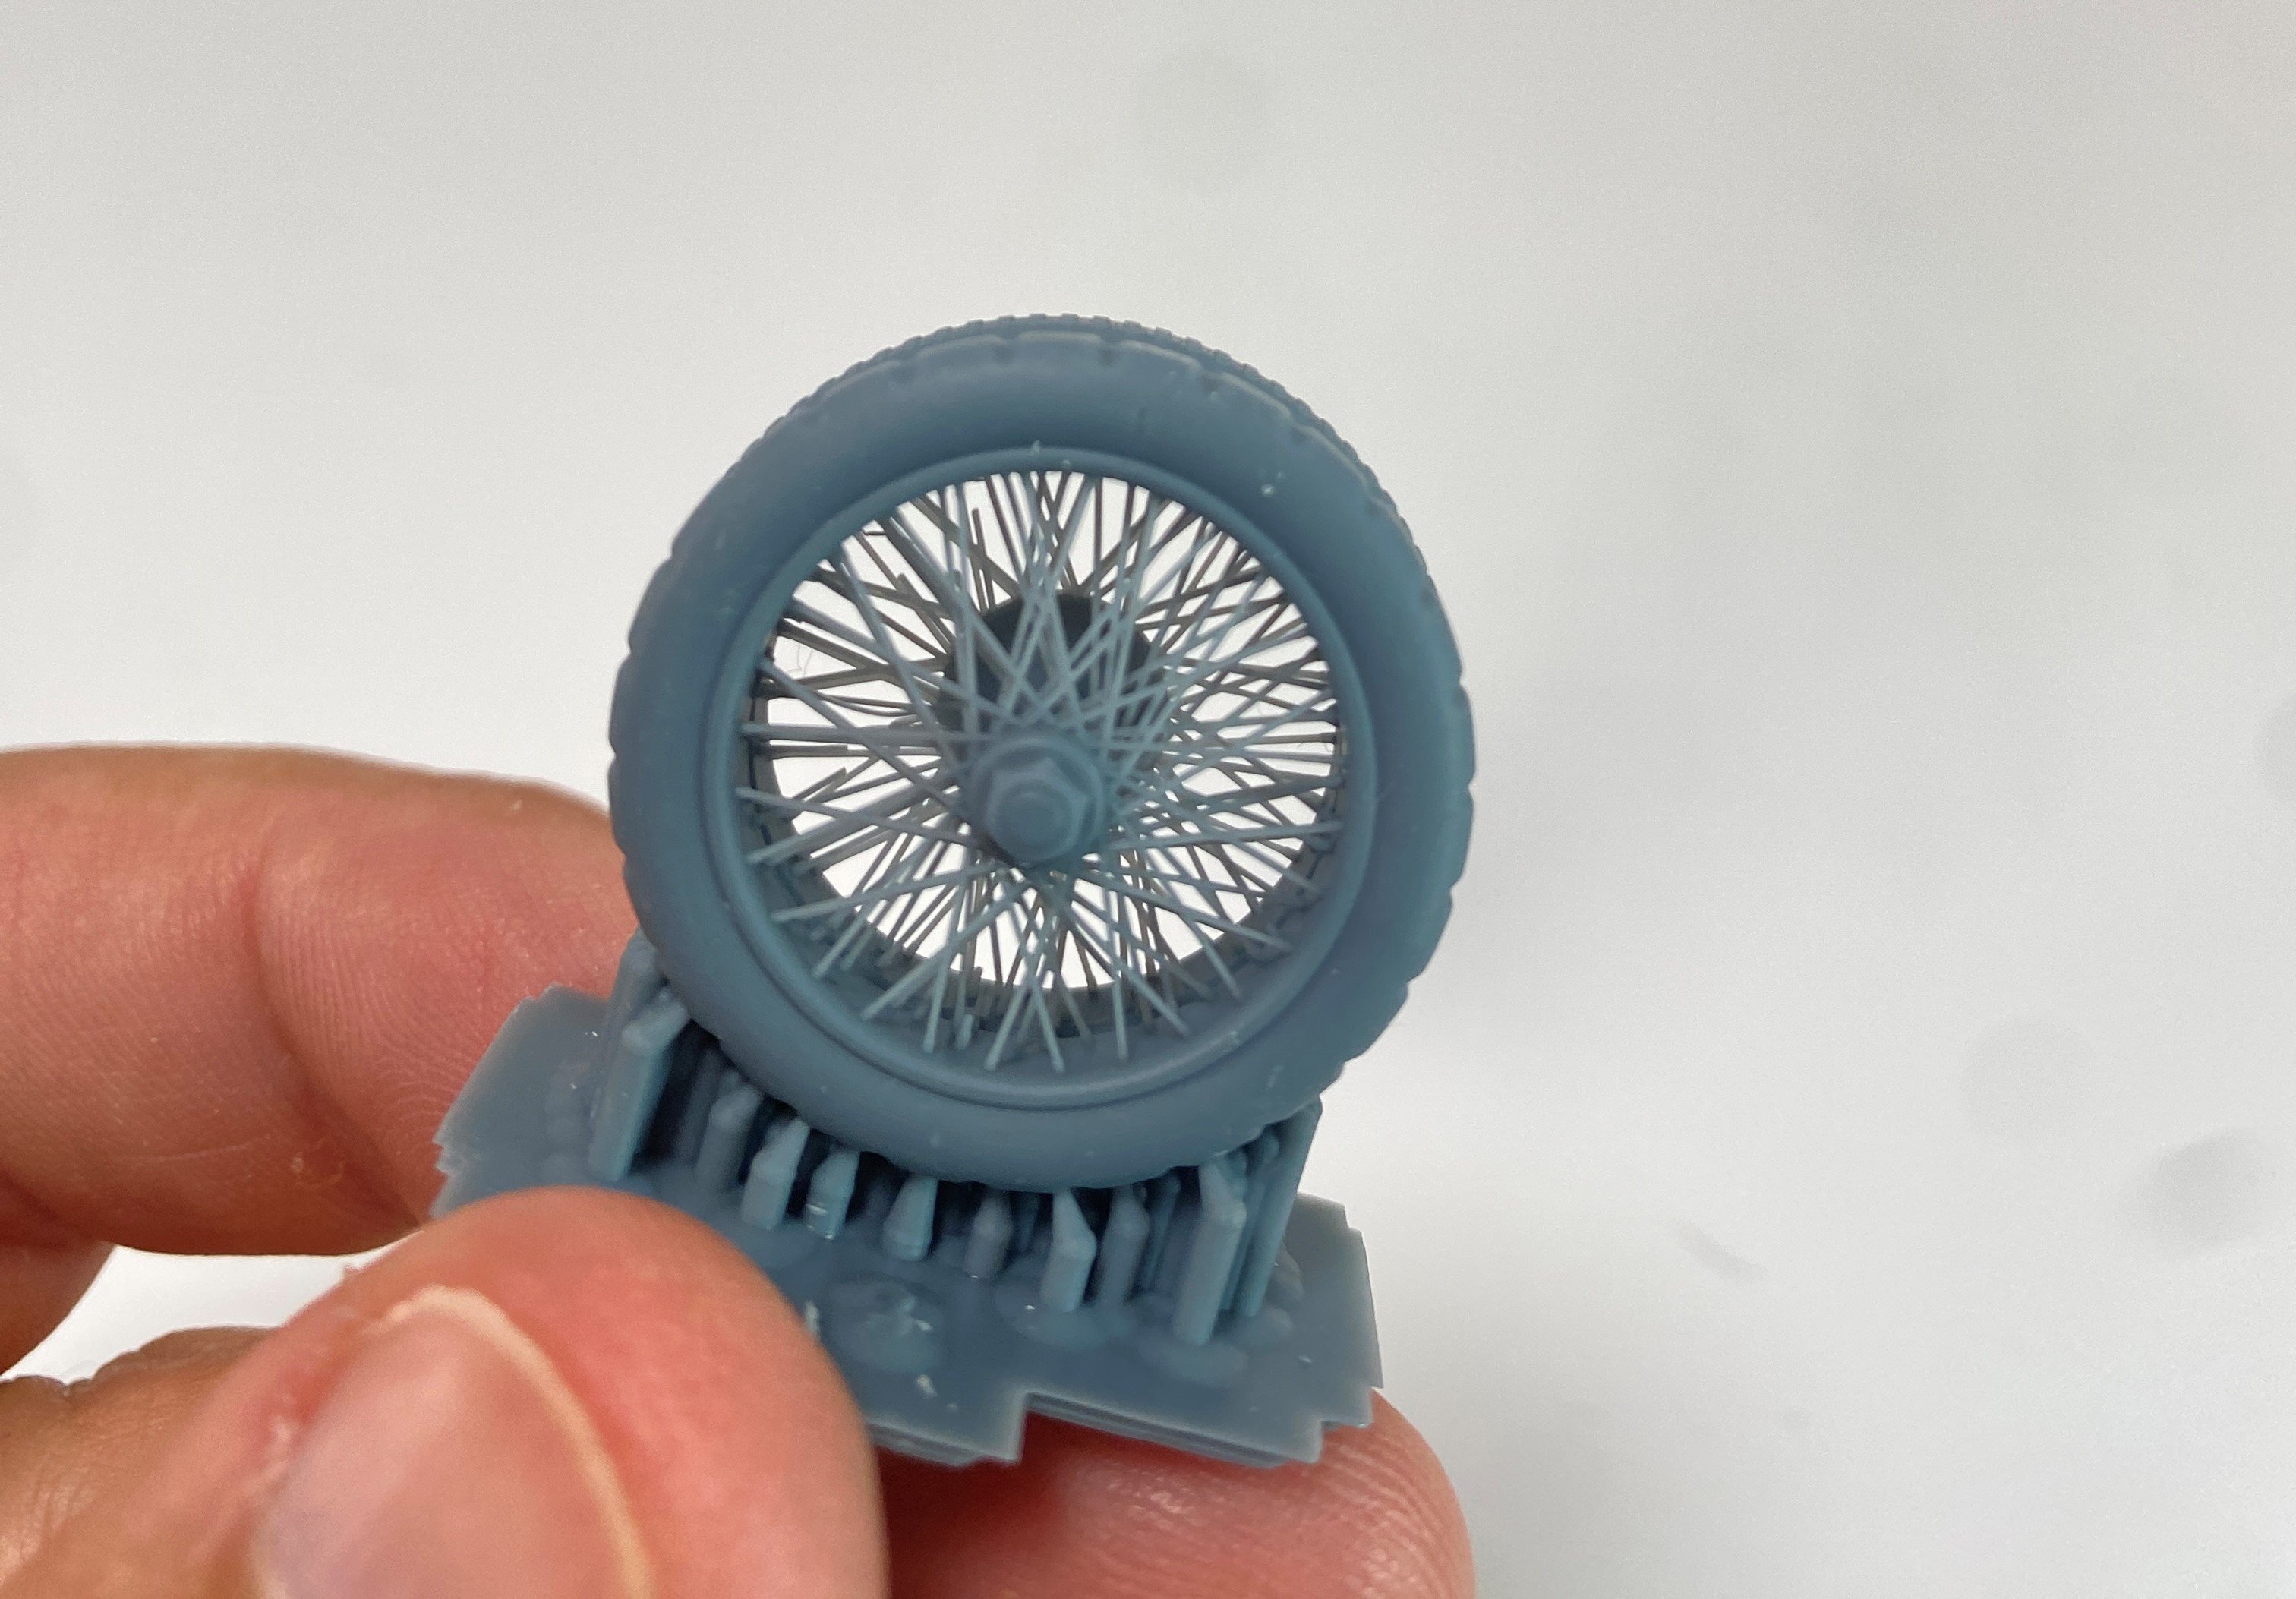
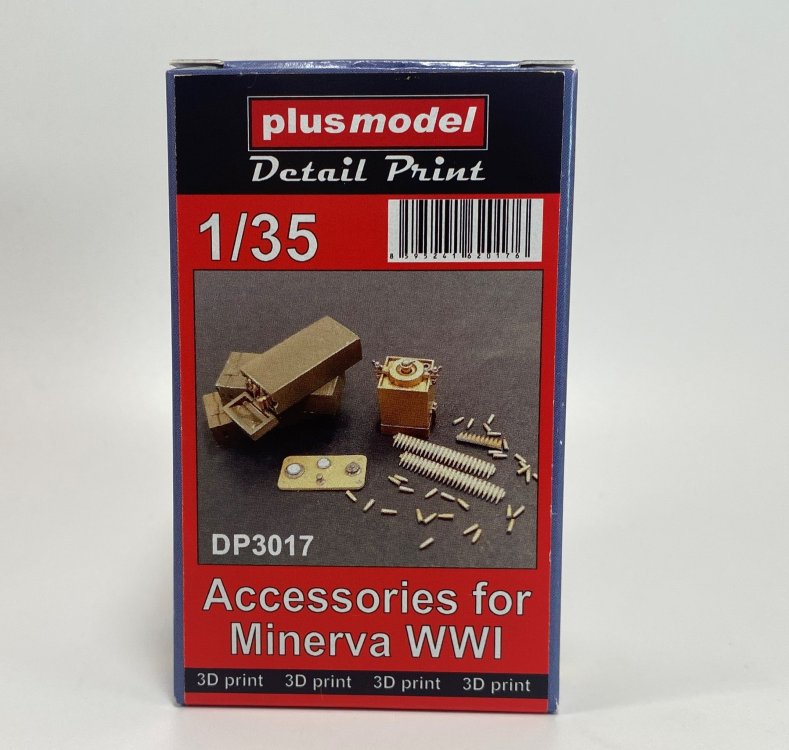
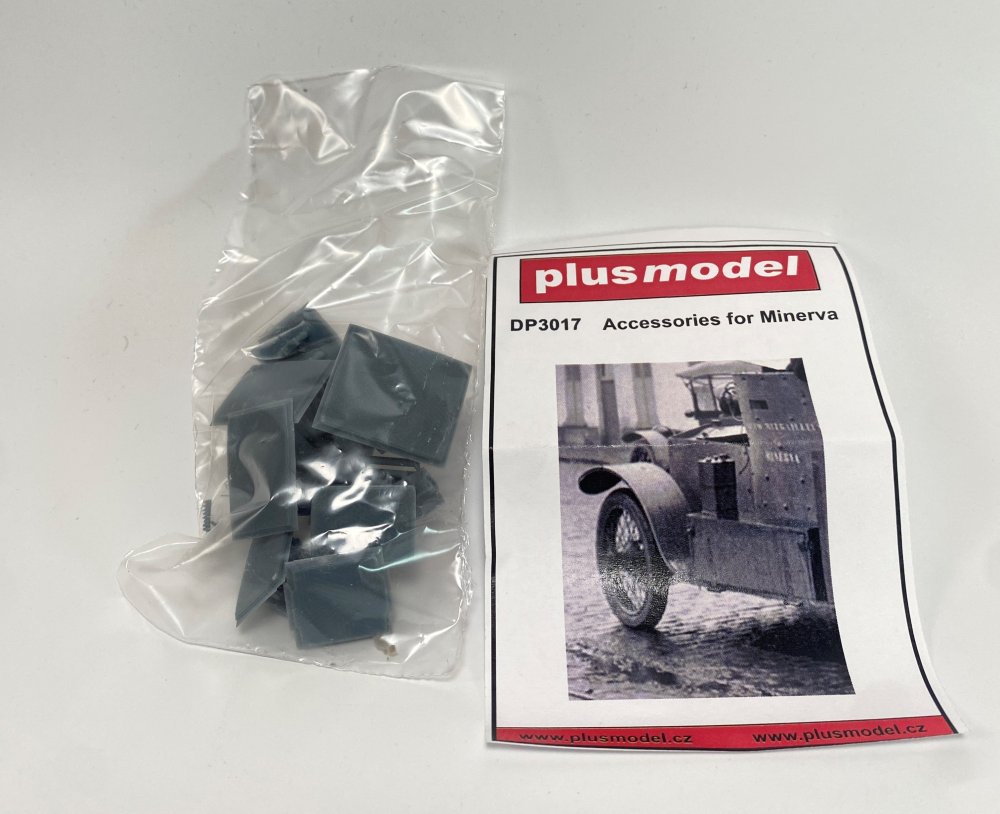
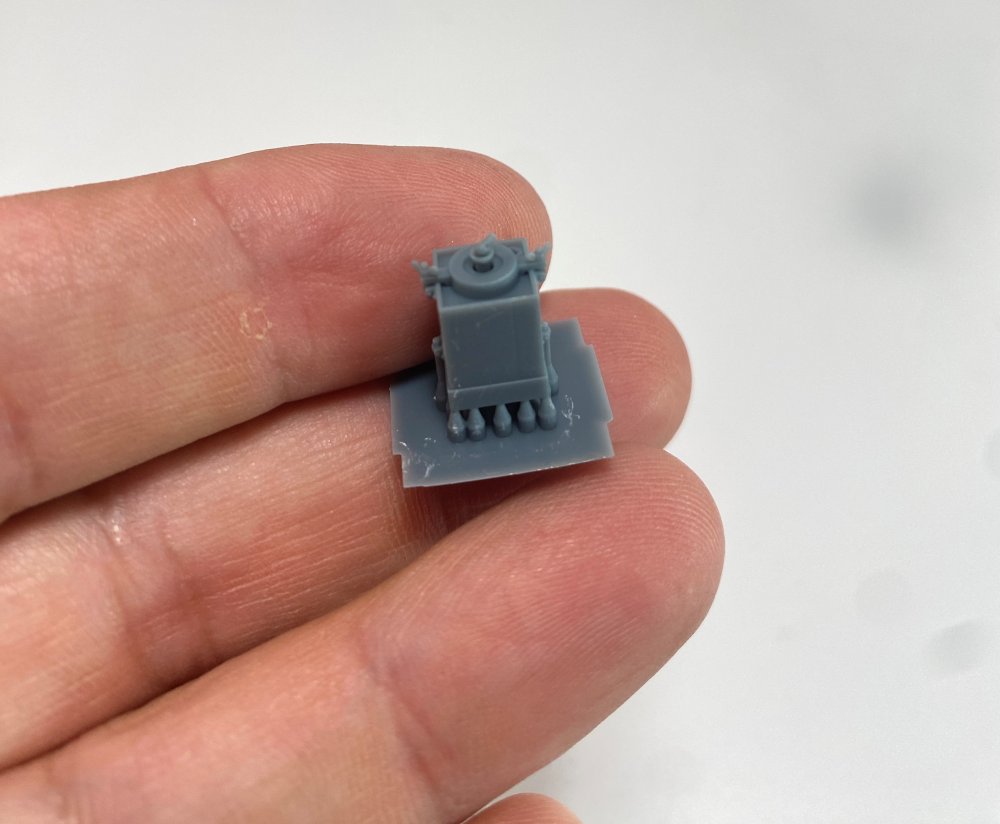
PLUSMODEL Details Sets for 1:35 Minerva Armoured Car Available from Plusmodel for the prices indicated below on the text These kid of sets from Plusmodel are new for me but a perfect logical step from Plusmodel. So, today we have two detail sets for the Copper State Model 1:35 Minerva Armoured car. Theses sets are both 3D print technology, all of the items very well packaged, with the all the parts coming inside of a bubble bag. The first one is Wheels Set (4 resin 3d pieces) Catalogue n.º DP3014 Price tag: 16,40€ – directly from Plusmodel. Minerva wheels are spoked wheels, and in the kit it is possible to see the limitation of plastic injection, as the spokes of the wheels are clearly out of scale. Before 3D printing, this type of spoke wheels was only possible to improve through real wire and some of the wheels that were handmade reached quite high values. Now with 3D printing, it is possible, with a print with great precision, to obtain these wheels, which are a masterpiece of detail and precision with the spokes of the wheels with thickness to scale (I dare to say that they must have 1mm in diameter or even less). The tires have the rubber detail perfectly defined and clear. A very simple addition (change the kit wheels) at a very reasonable cost and with clearly superior detail. * Accessories (10 resin 3D prints pieces) Catalogue n.º DP3017 Price tag: 11,13€ directly from Plusmodel. The second set gives a range of options that not all are specifically for detailing the vehicle in replacement of original parts, but new parts. So you get 22 individual parts and 80 empty cartridges. Of these 22 pieces, 12 are cartridge belts, an acetylene generator, 3 ammunition boxes (two close, one open), dashboard, acetylene generator and 80 empty cartridges. Zero instructions, only a small picture.… I was expecting more but I believe that the Minerva Instructions will help were to put part of this detail set, namely the acetylene generator because the dashboard will be easy to get it in the right place. Conclusion These two set will force me to buy the CSM Minerva because these pieces really deserved to be build and be include in the 1:35 Minerva. Despite the absence of instruction on the second set (I believe that the small picture show the generator, on the left side of the armour car, and the dashboard is easy to know where), the quality of both sets is of the highest level. The wheels are one of the best things I saw in 3D. Top noch Plusmodel, WELL DONE! Very Highly recommended With my sincere thanks to Plusmodel. To purchase directly, click this link. Francisco Guedes


-
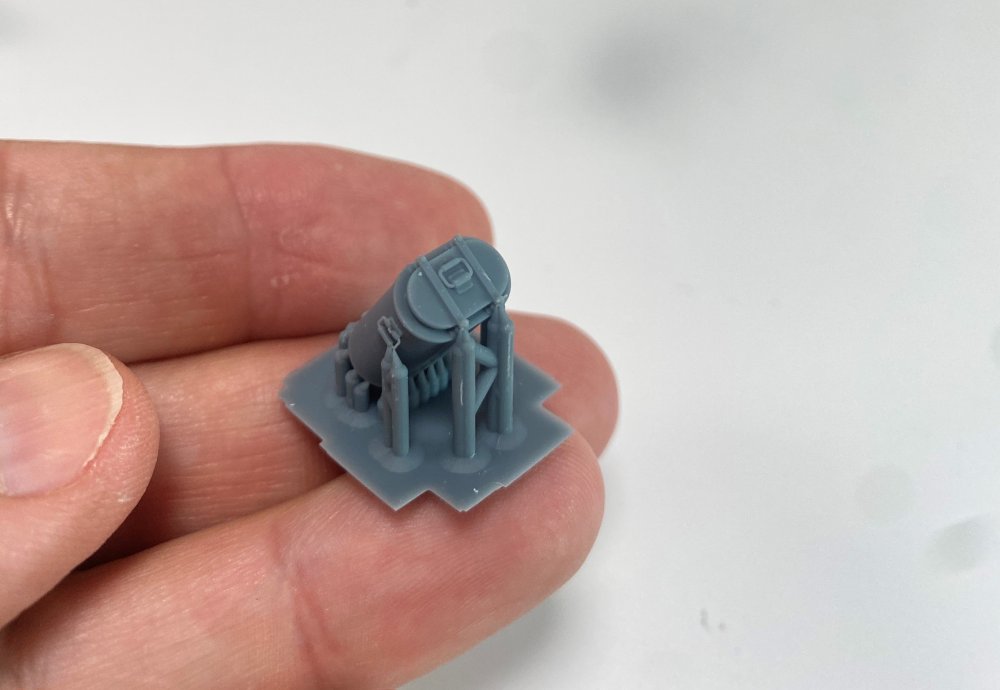
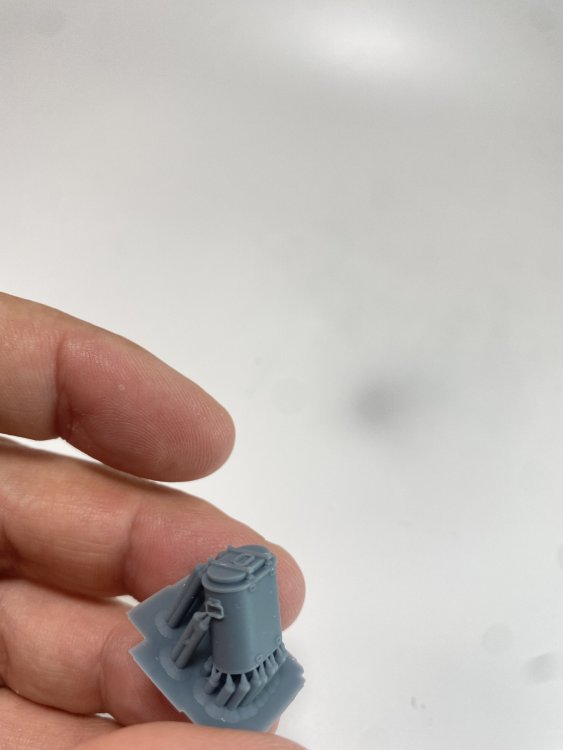
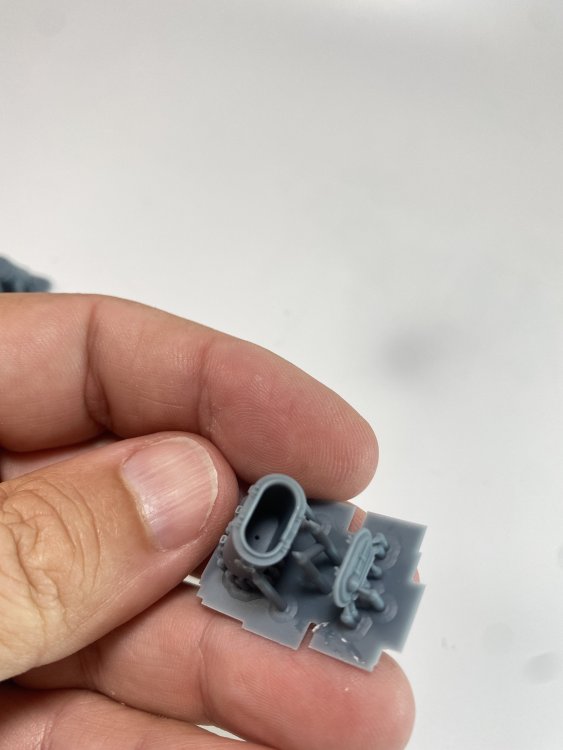
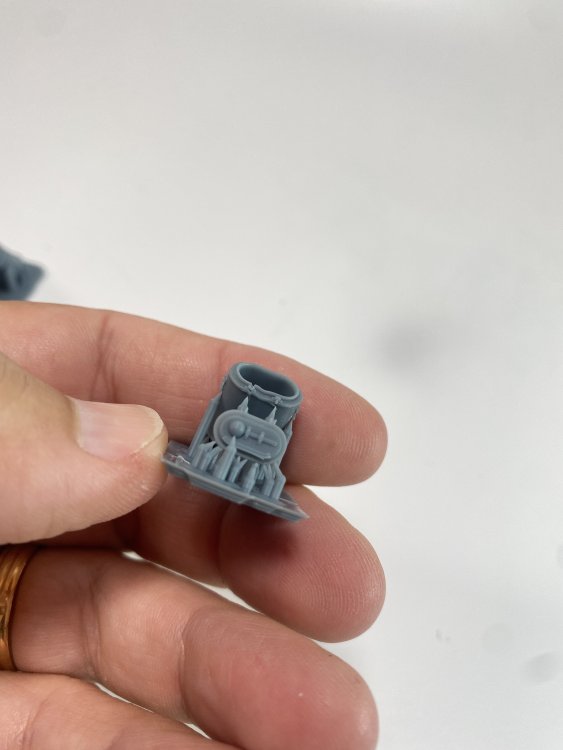
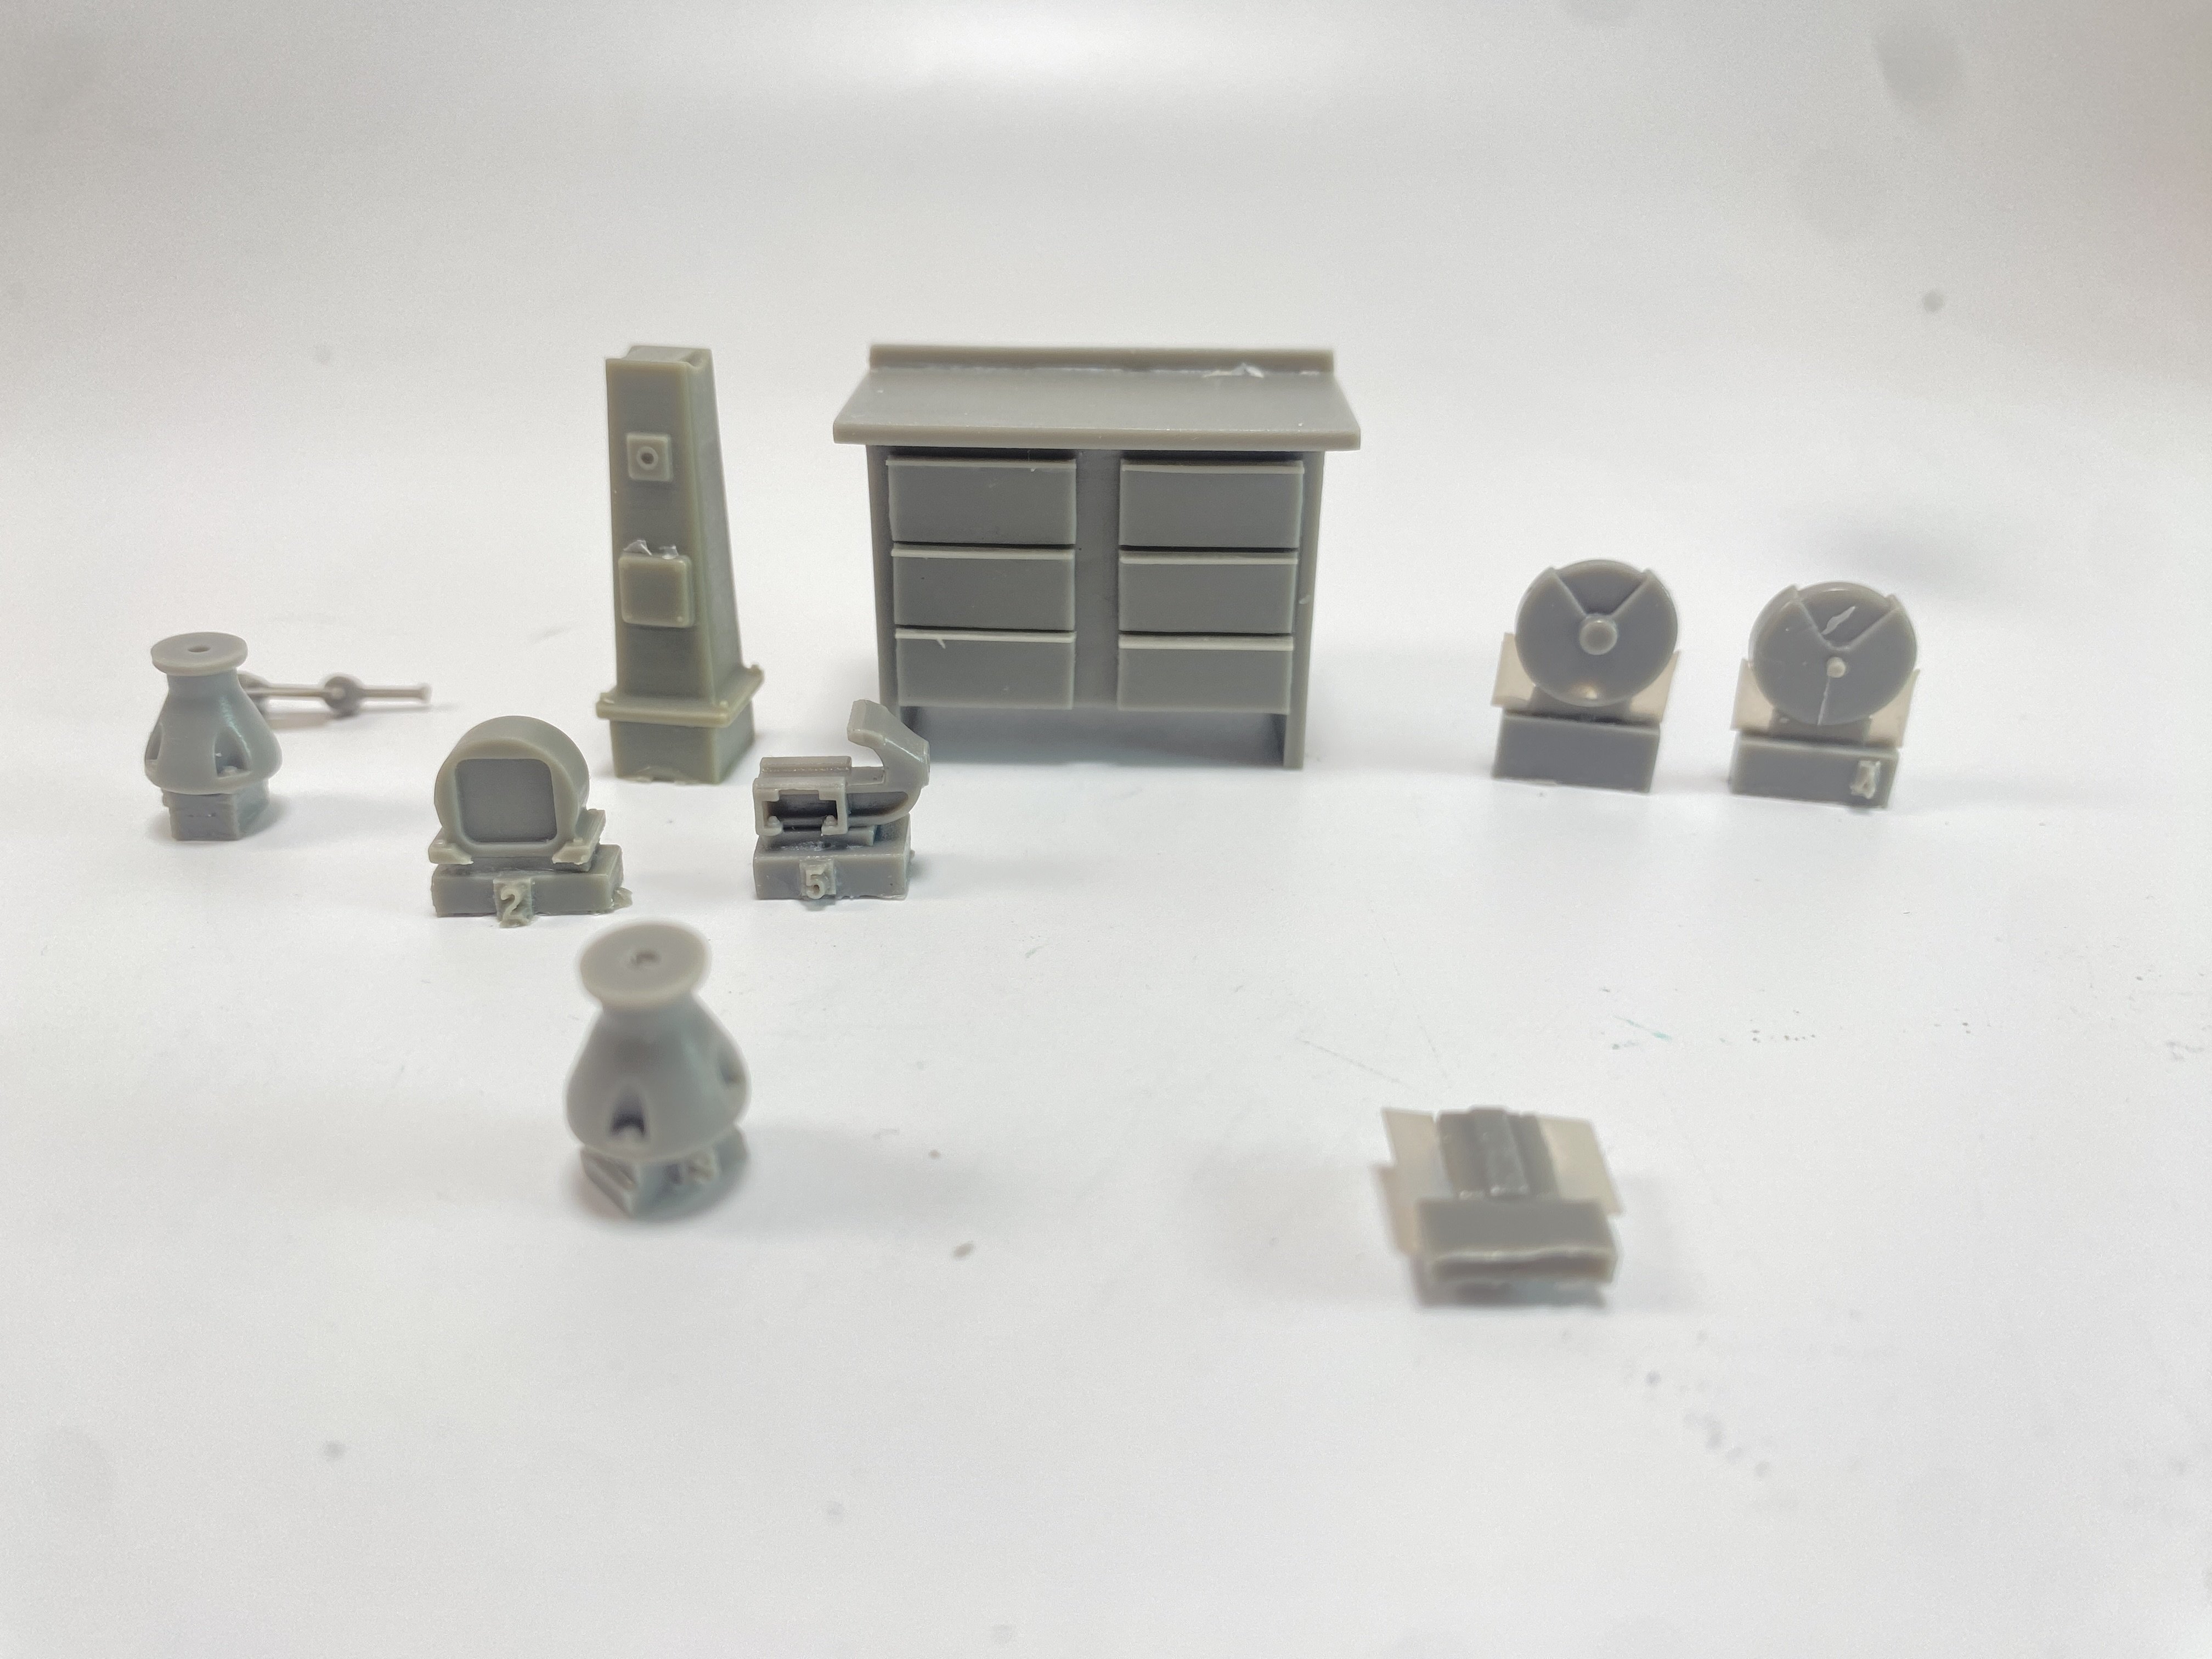
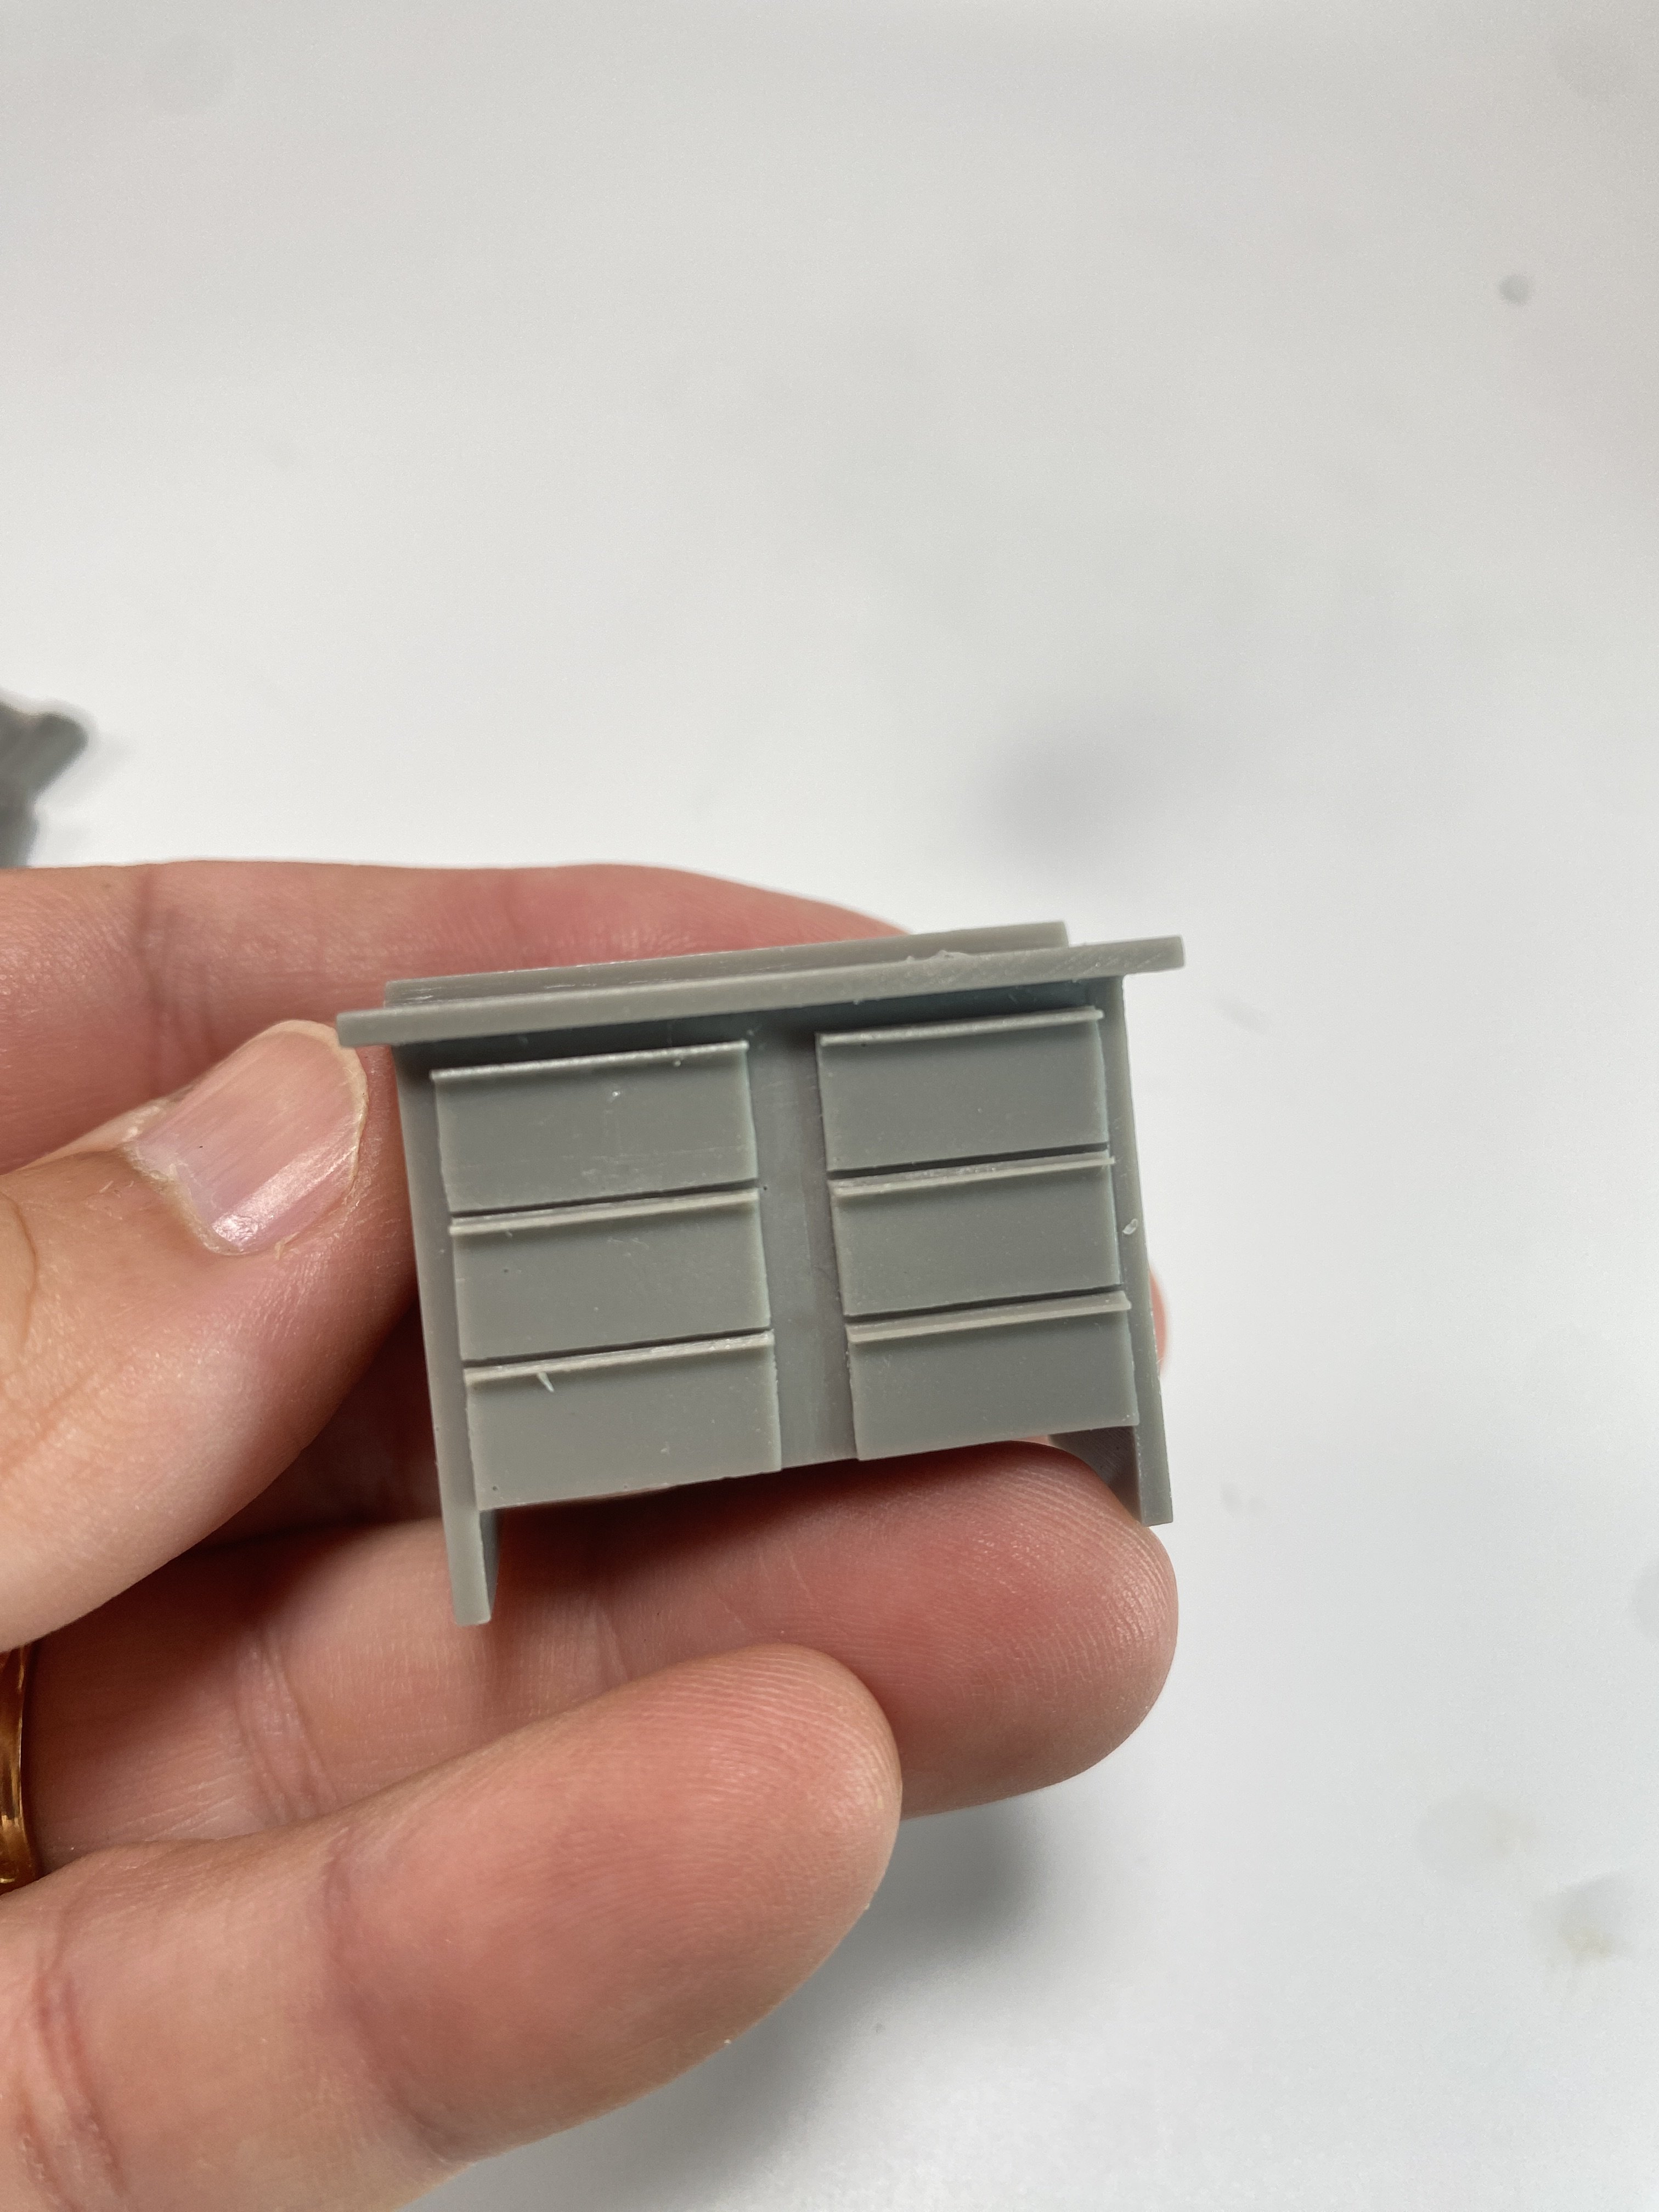
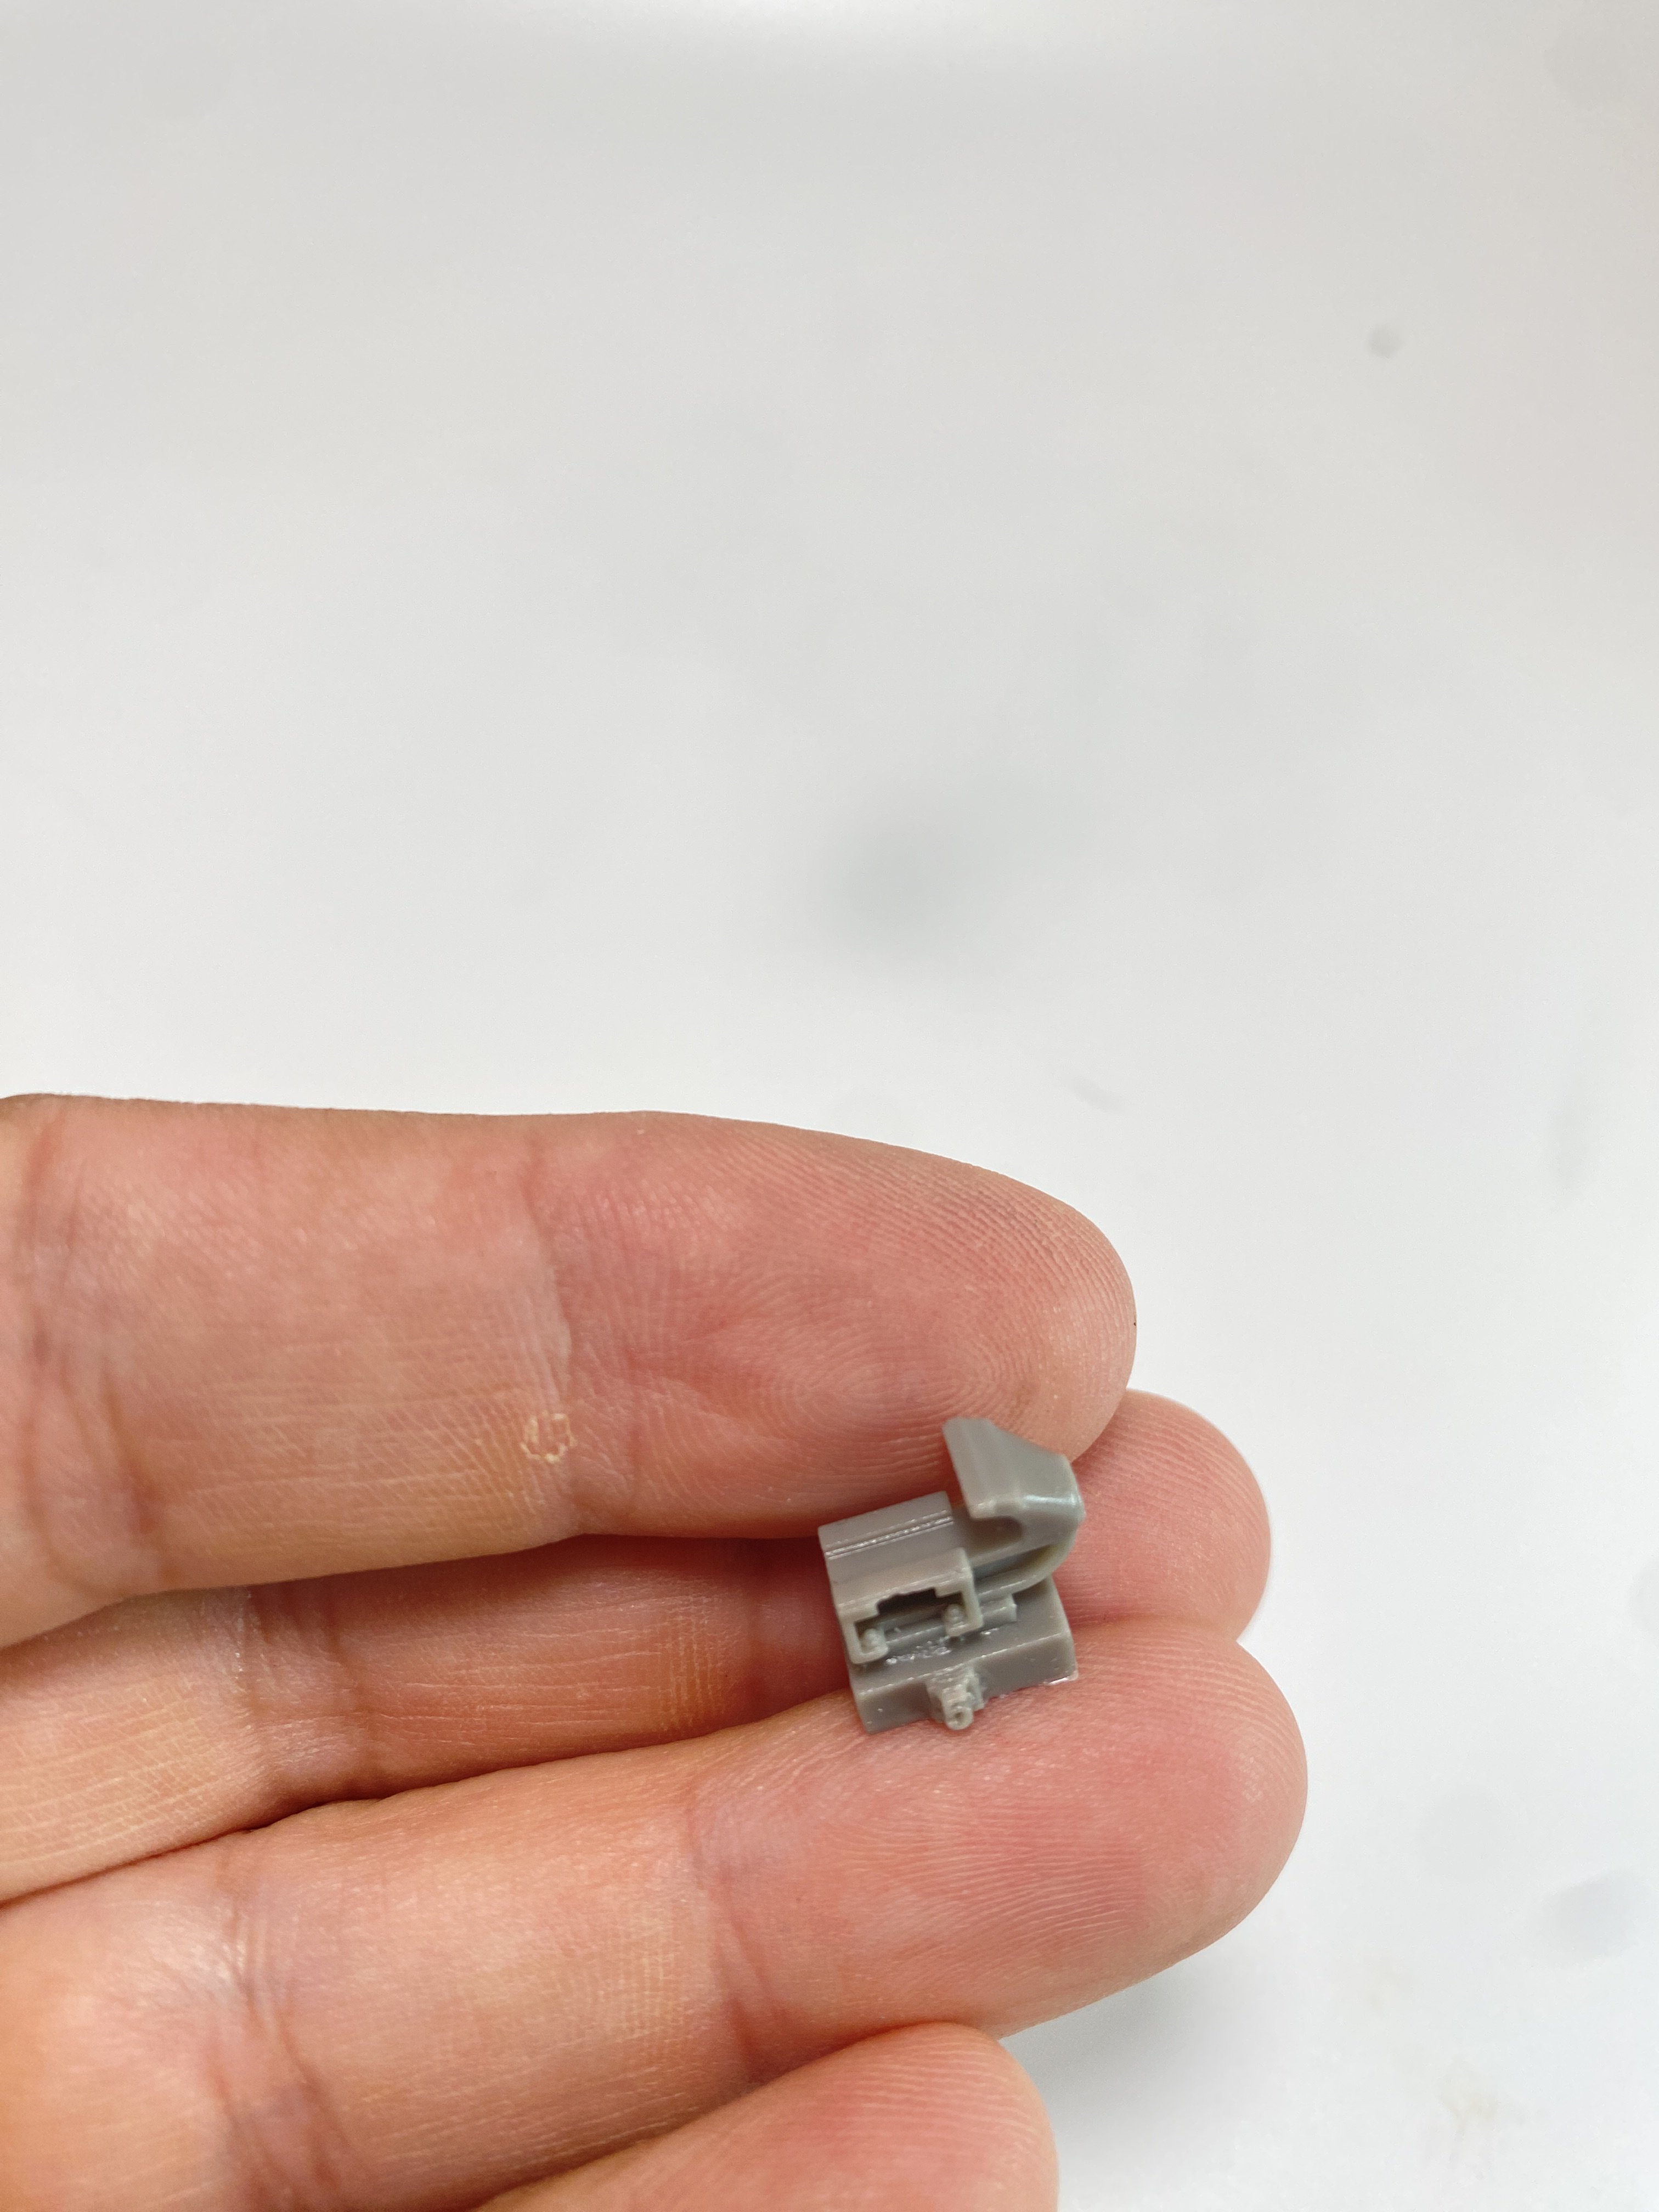
Plusmodel 1:35 Diorama Accessories
Fran posted a topic in LSM-Related Reviews (military figures etc)
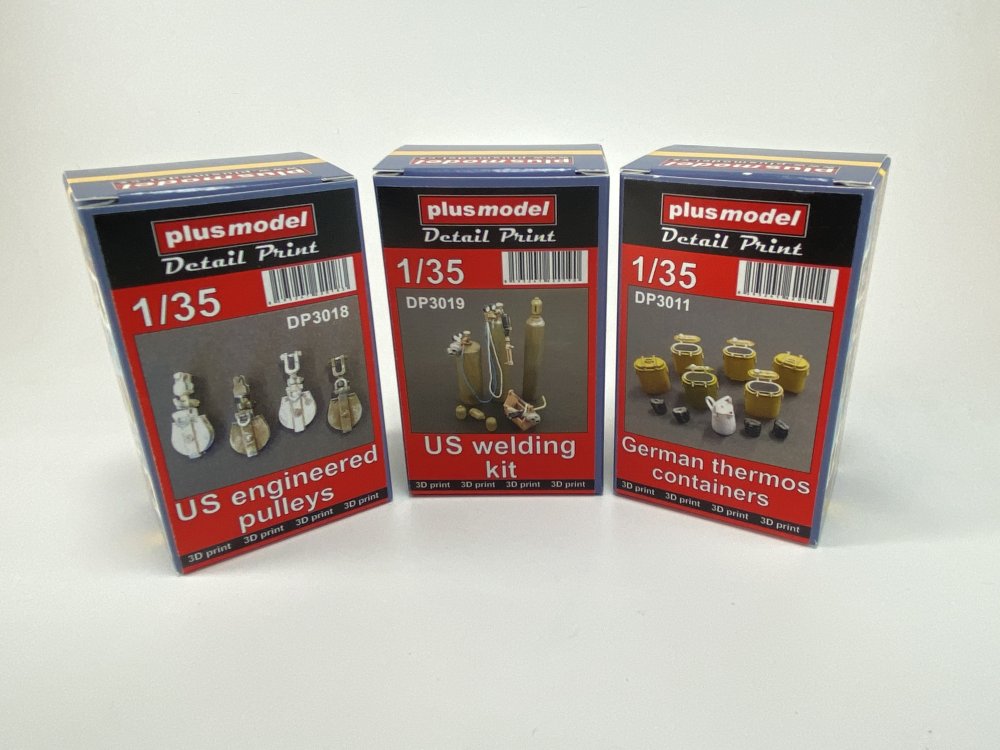
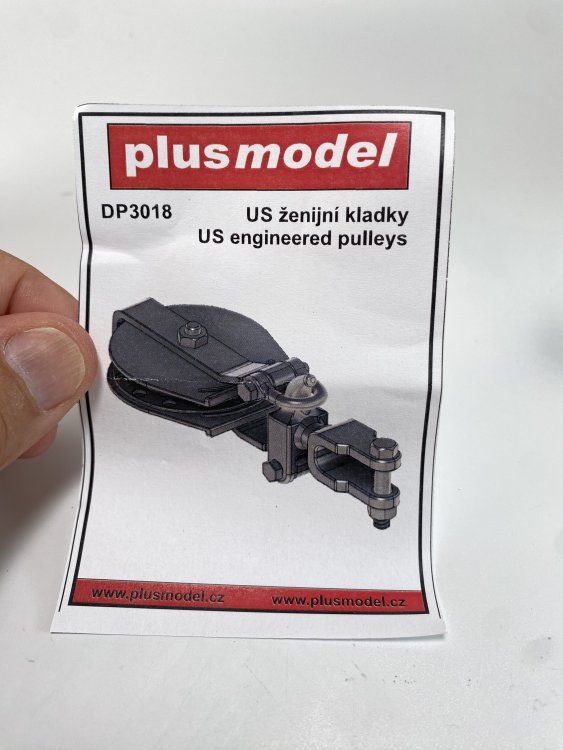
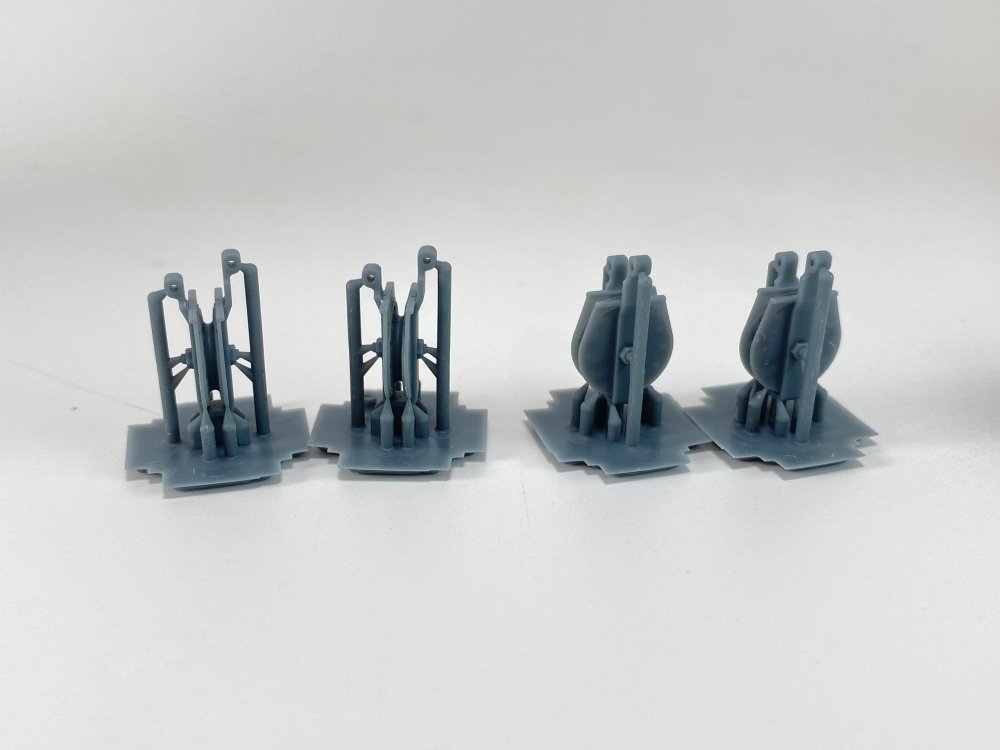
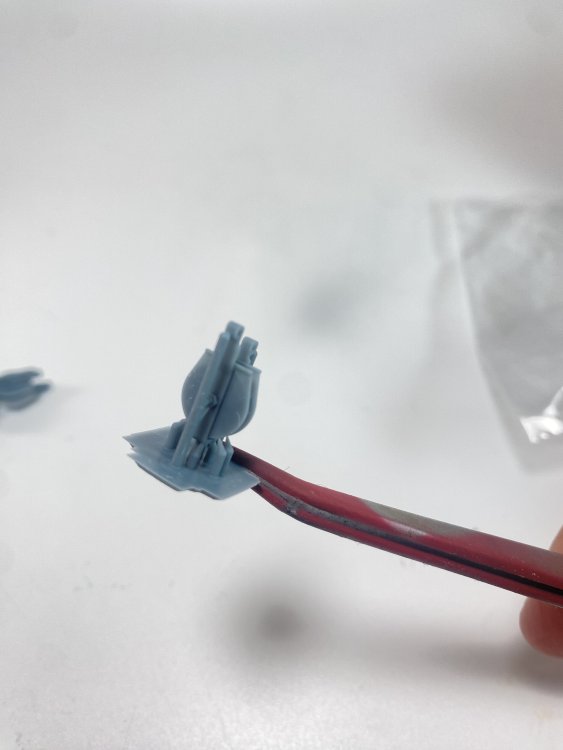
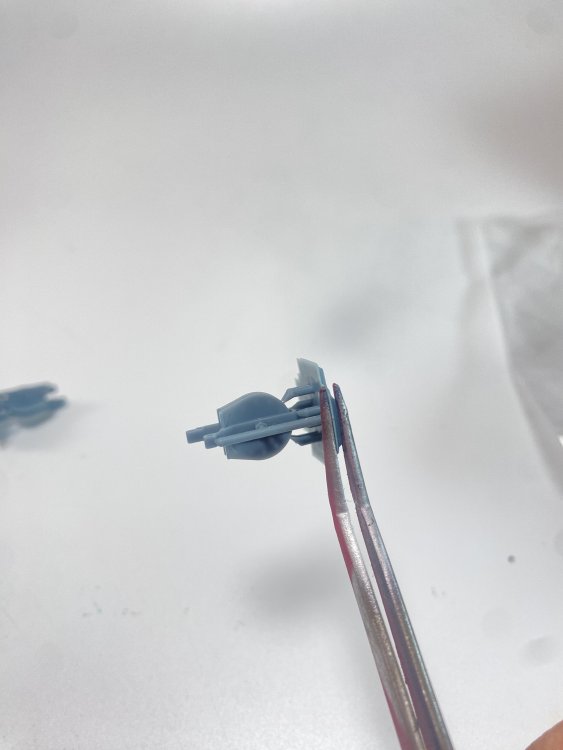
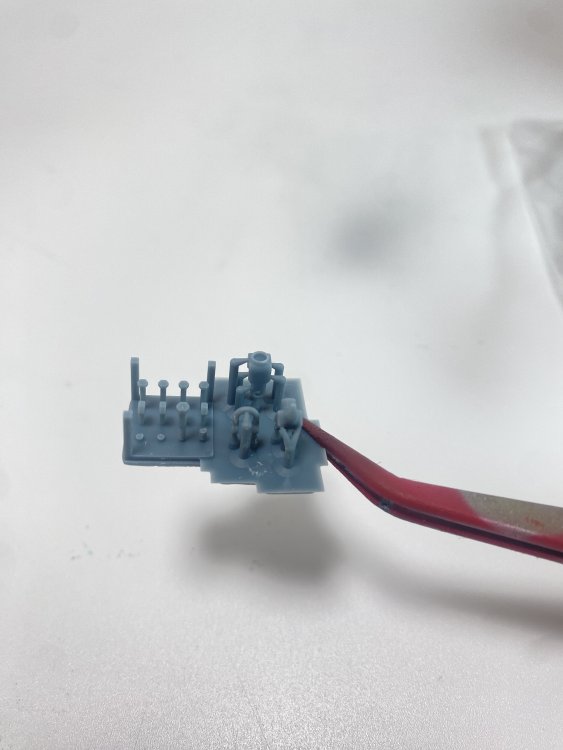
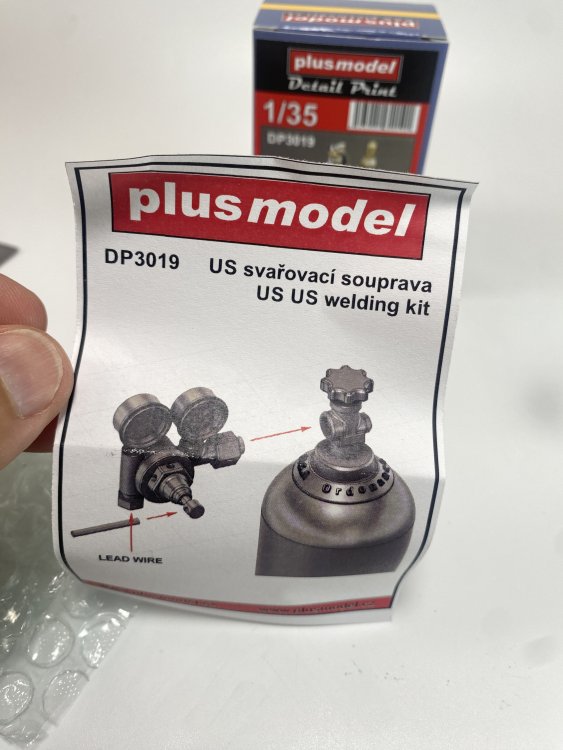
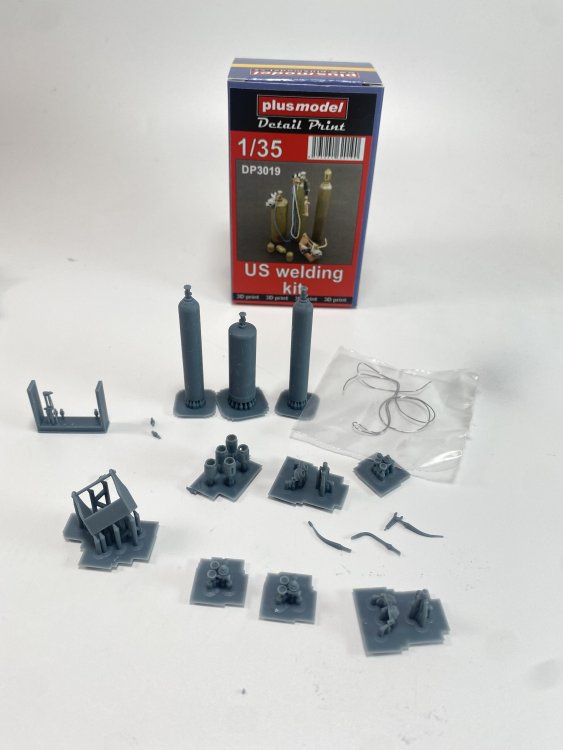
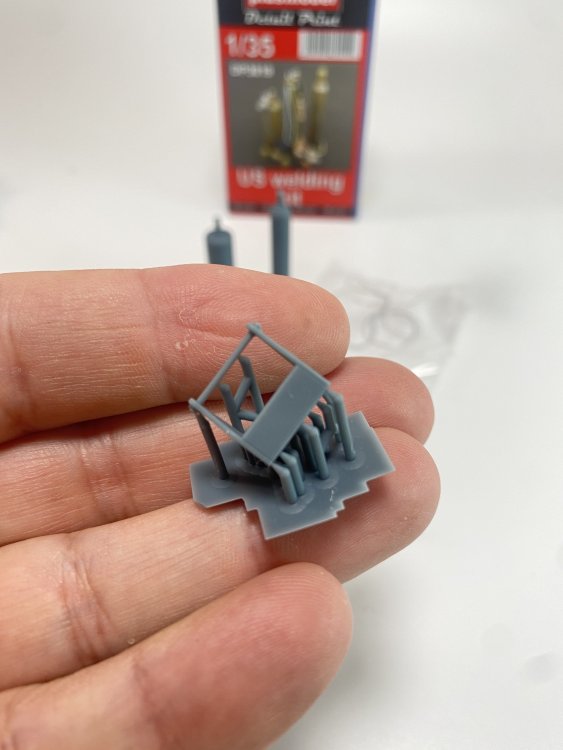
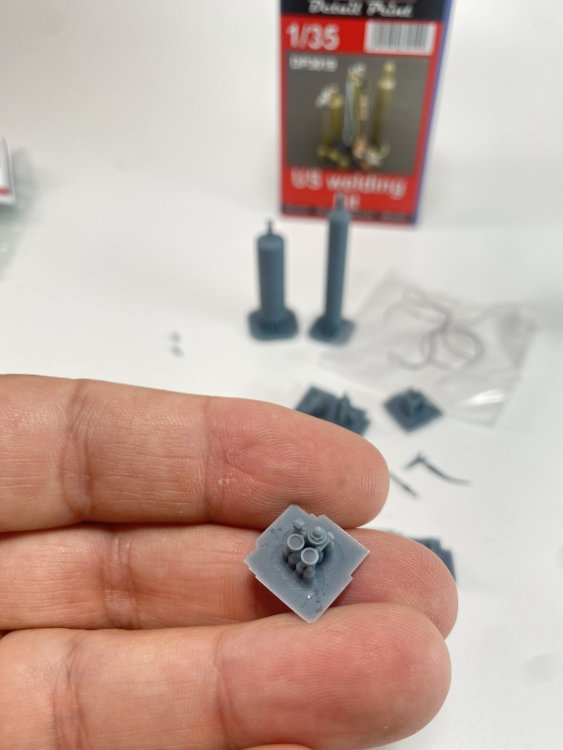
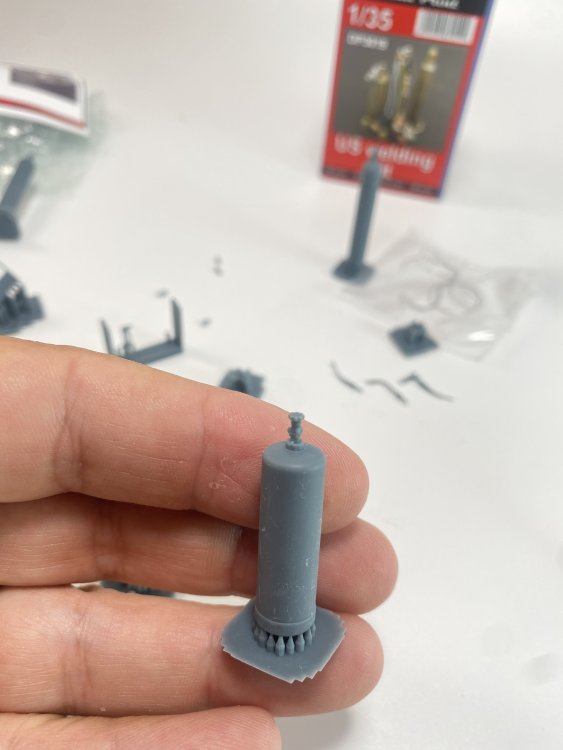
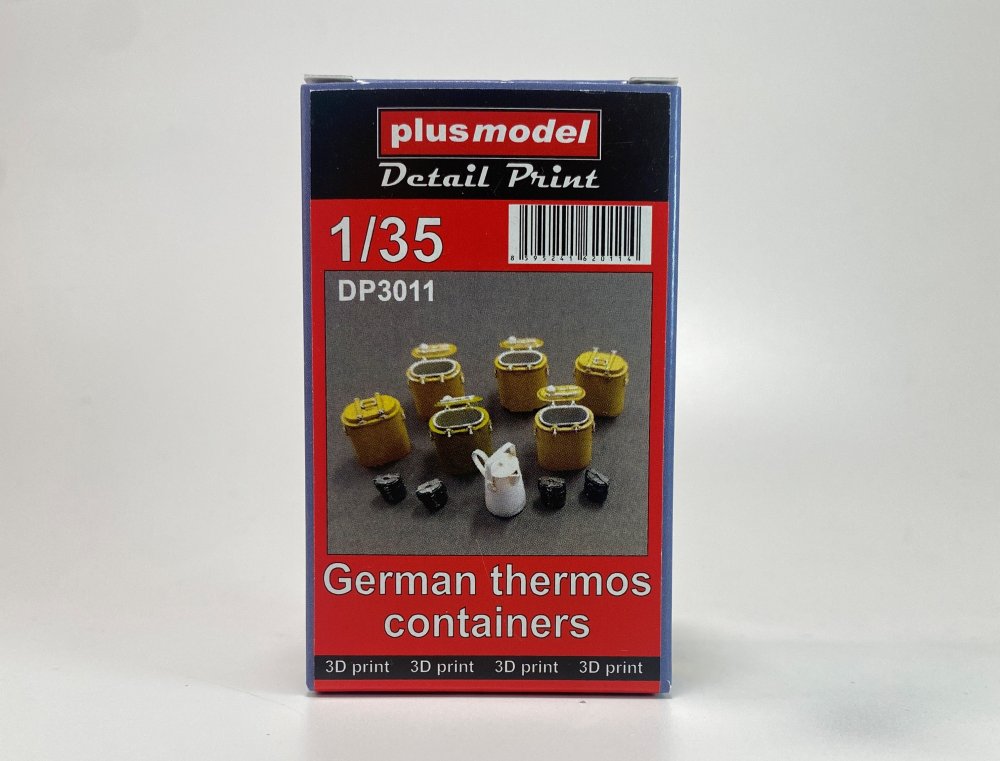
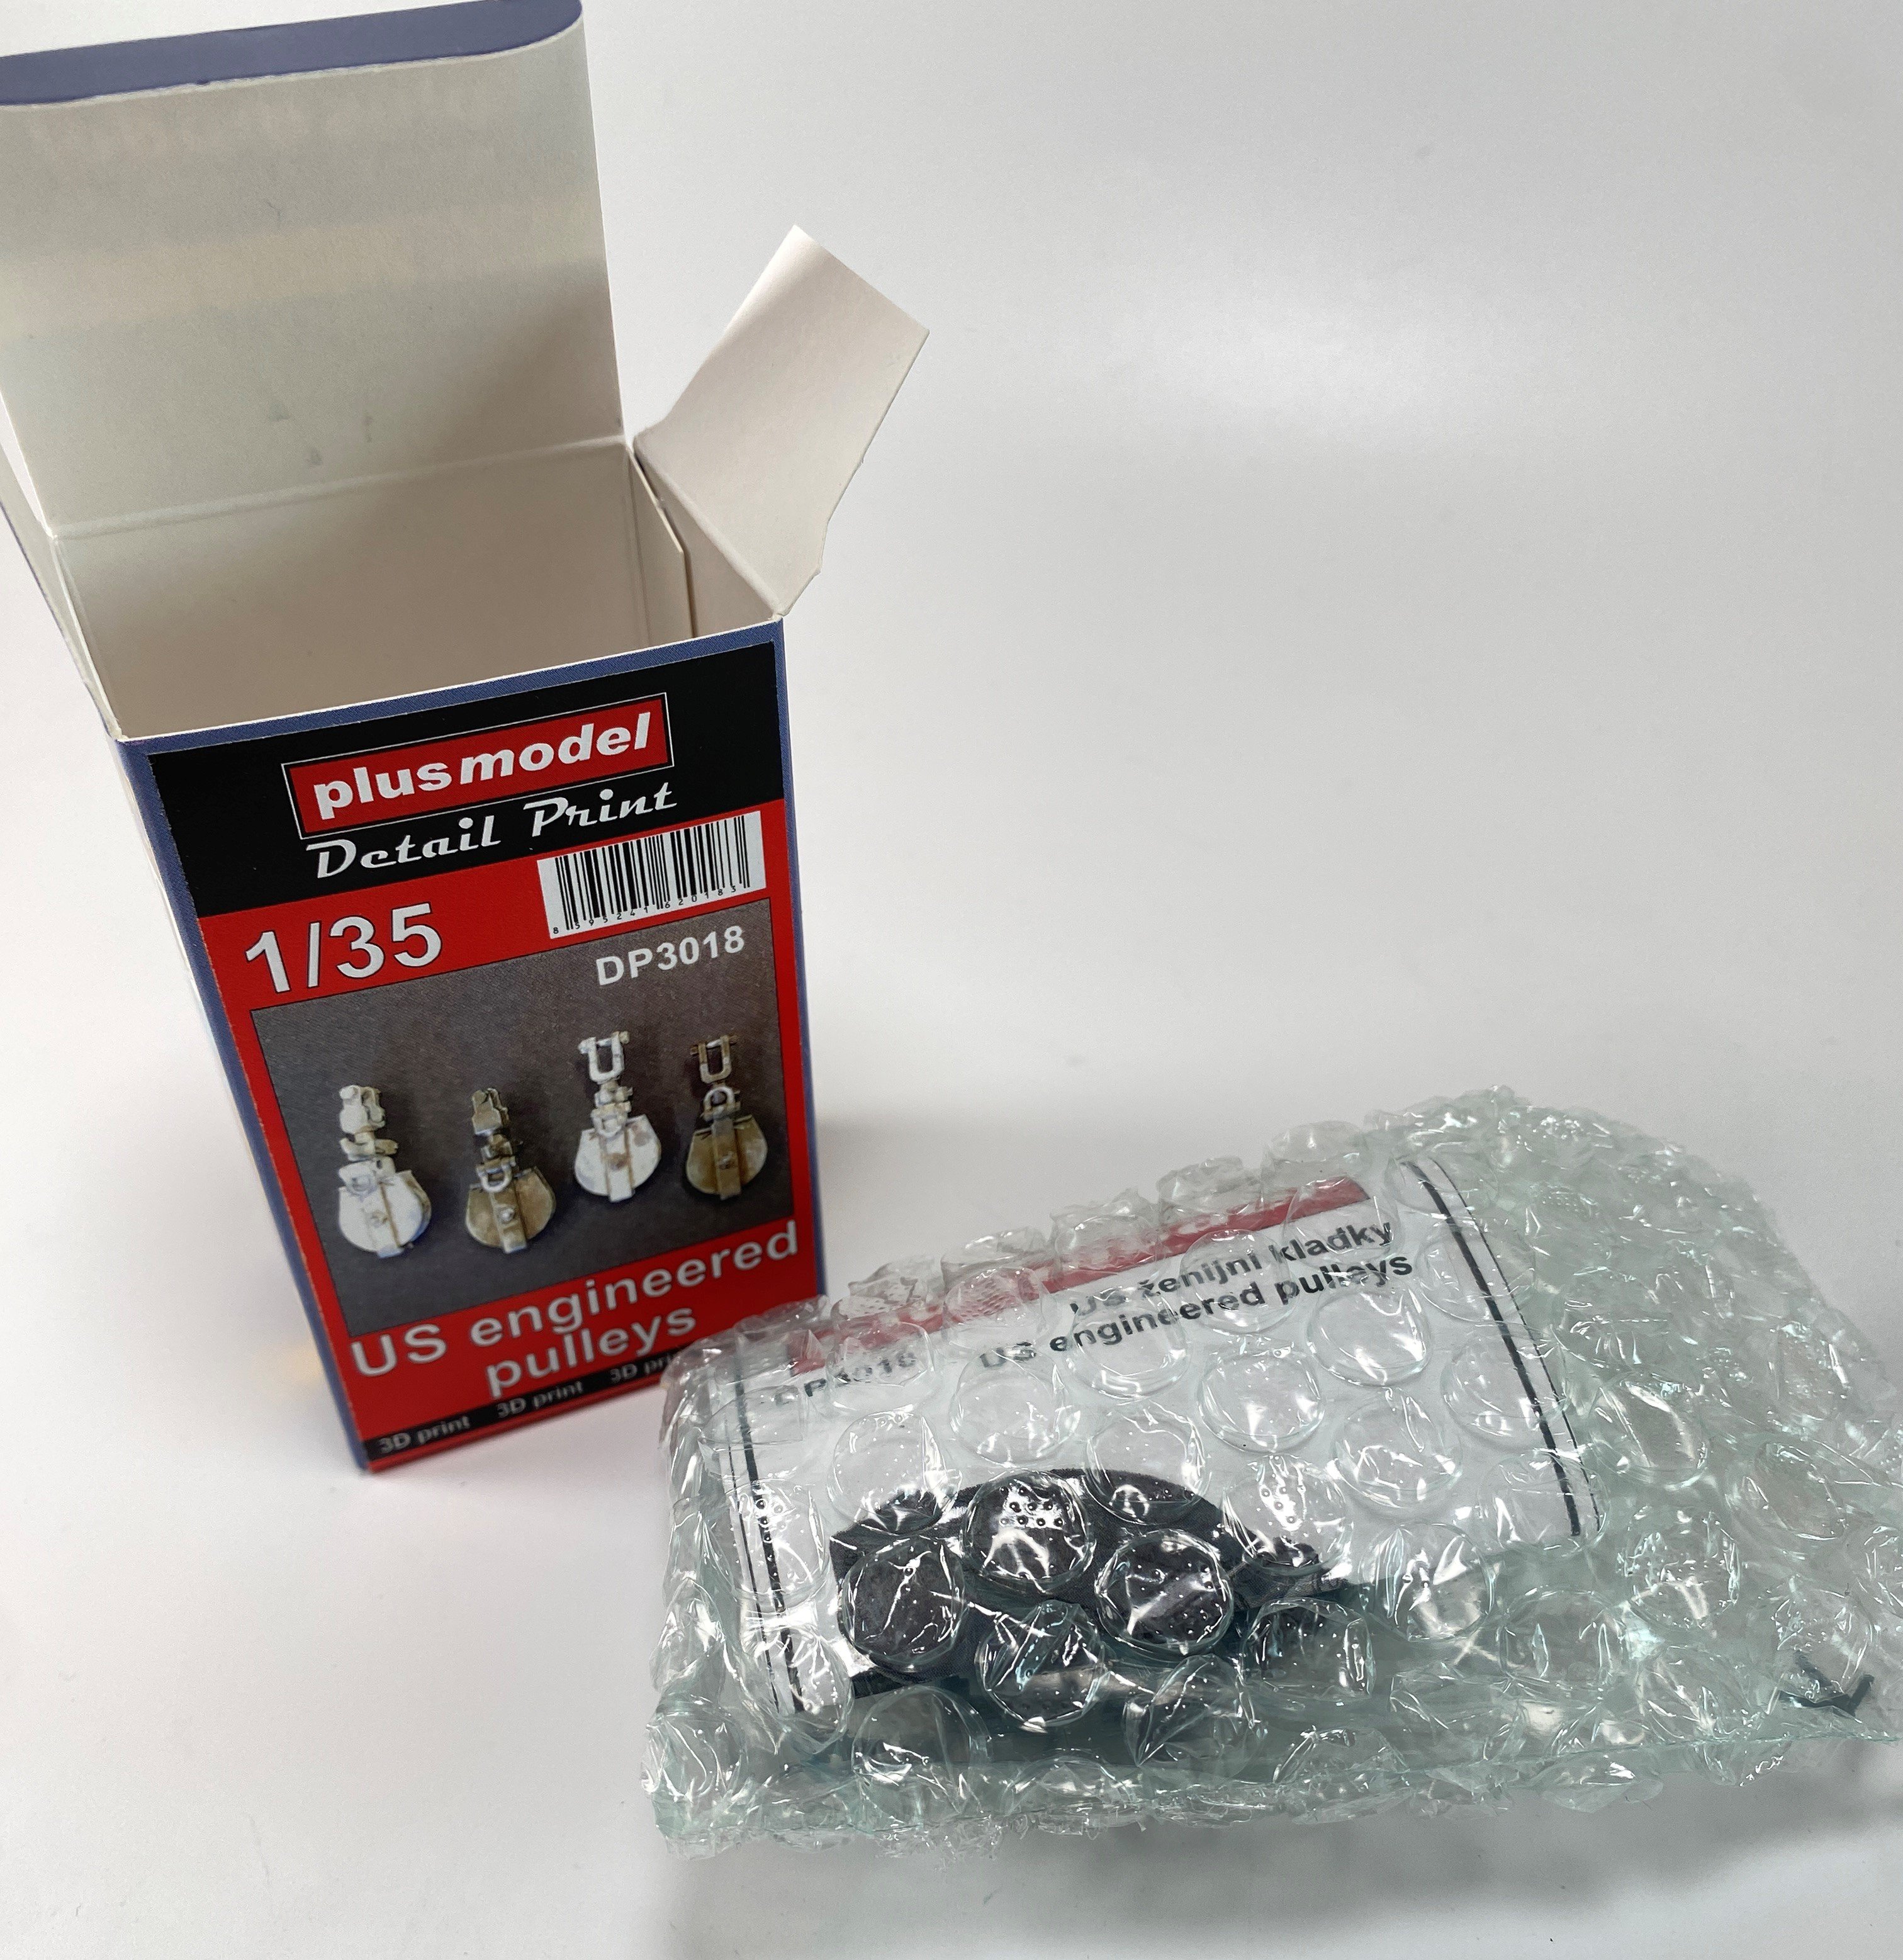
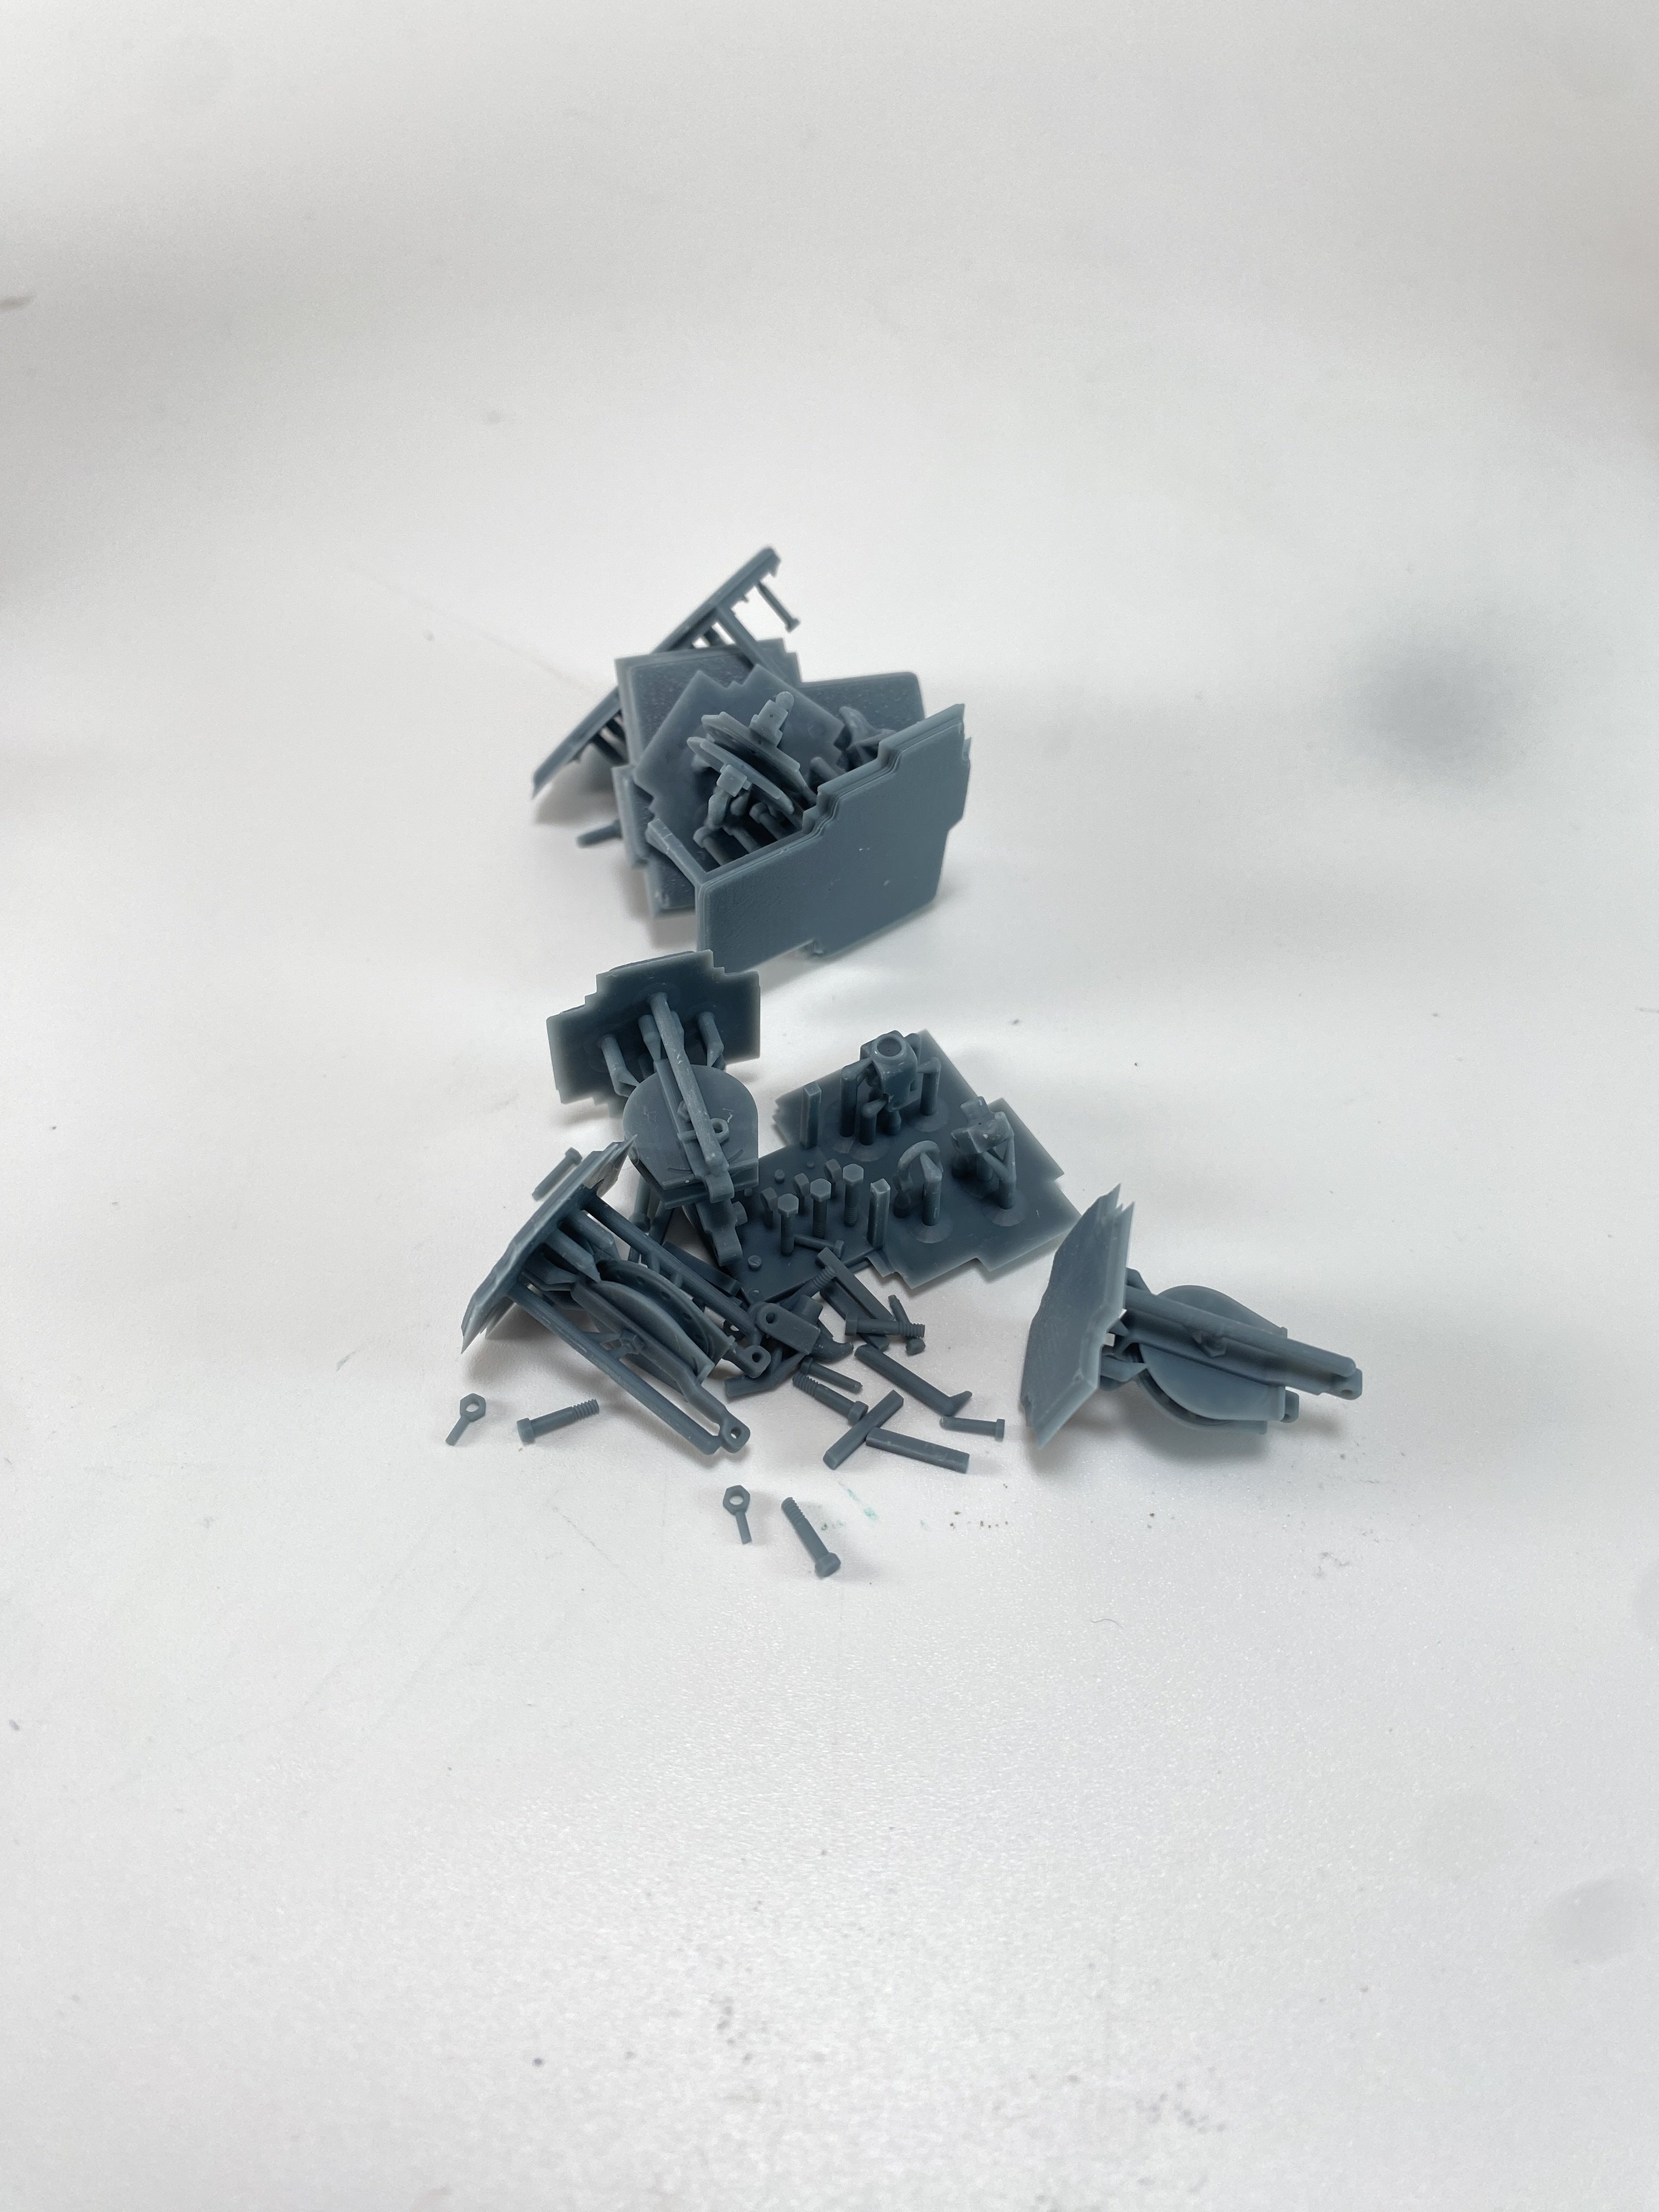
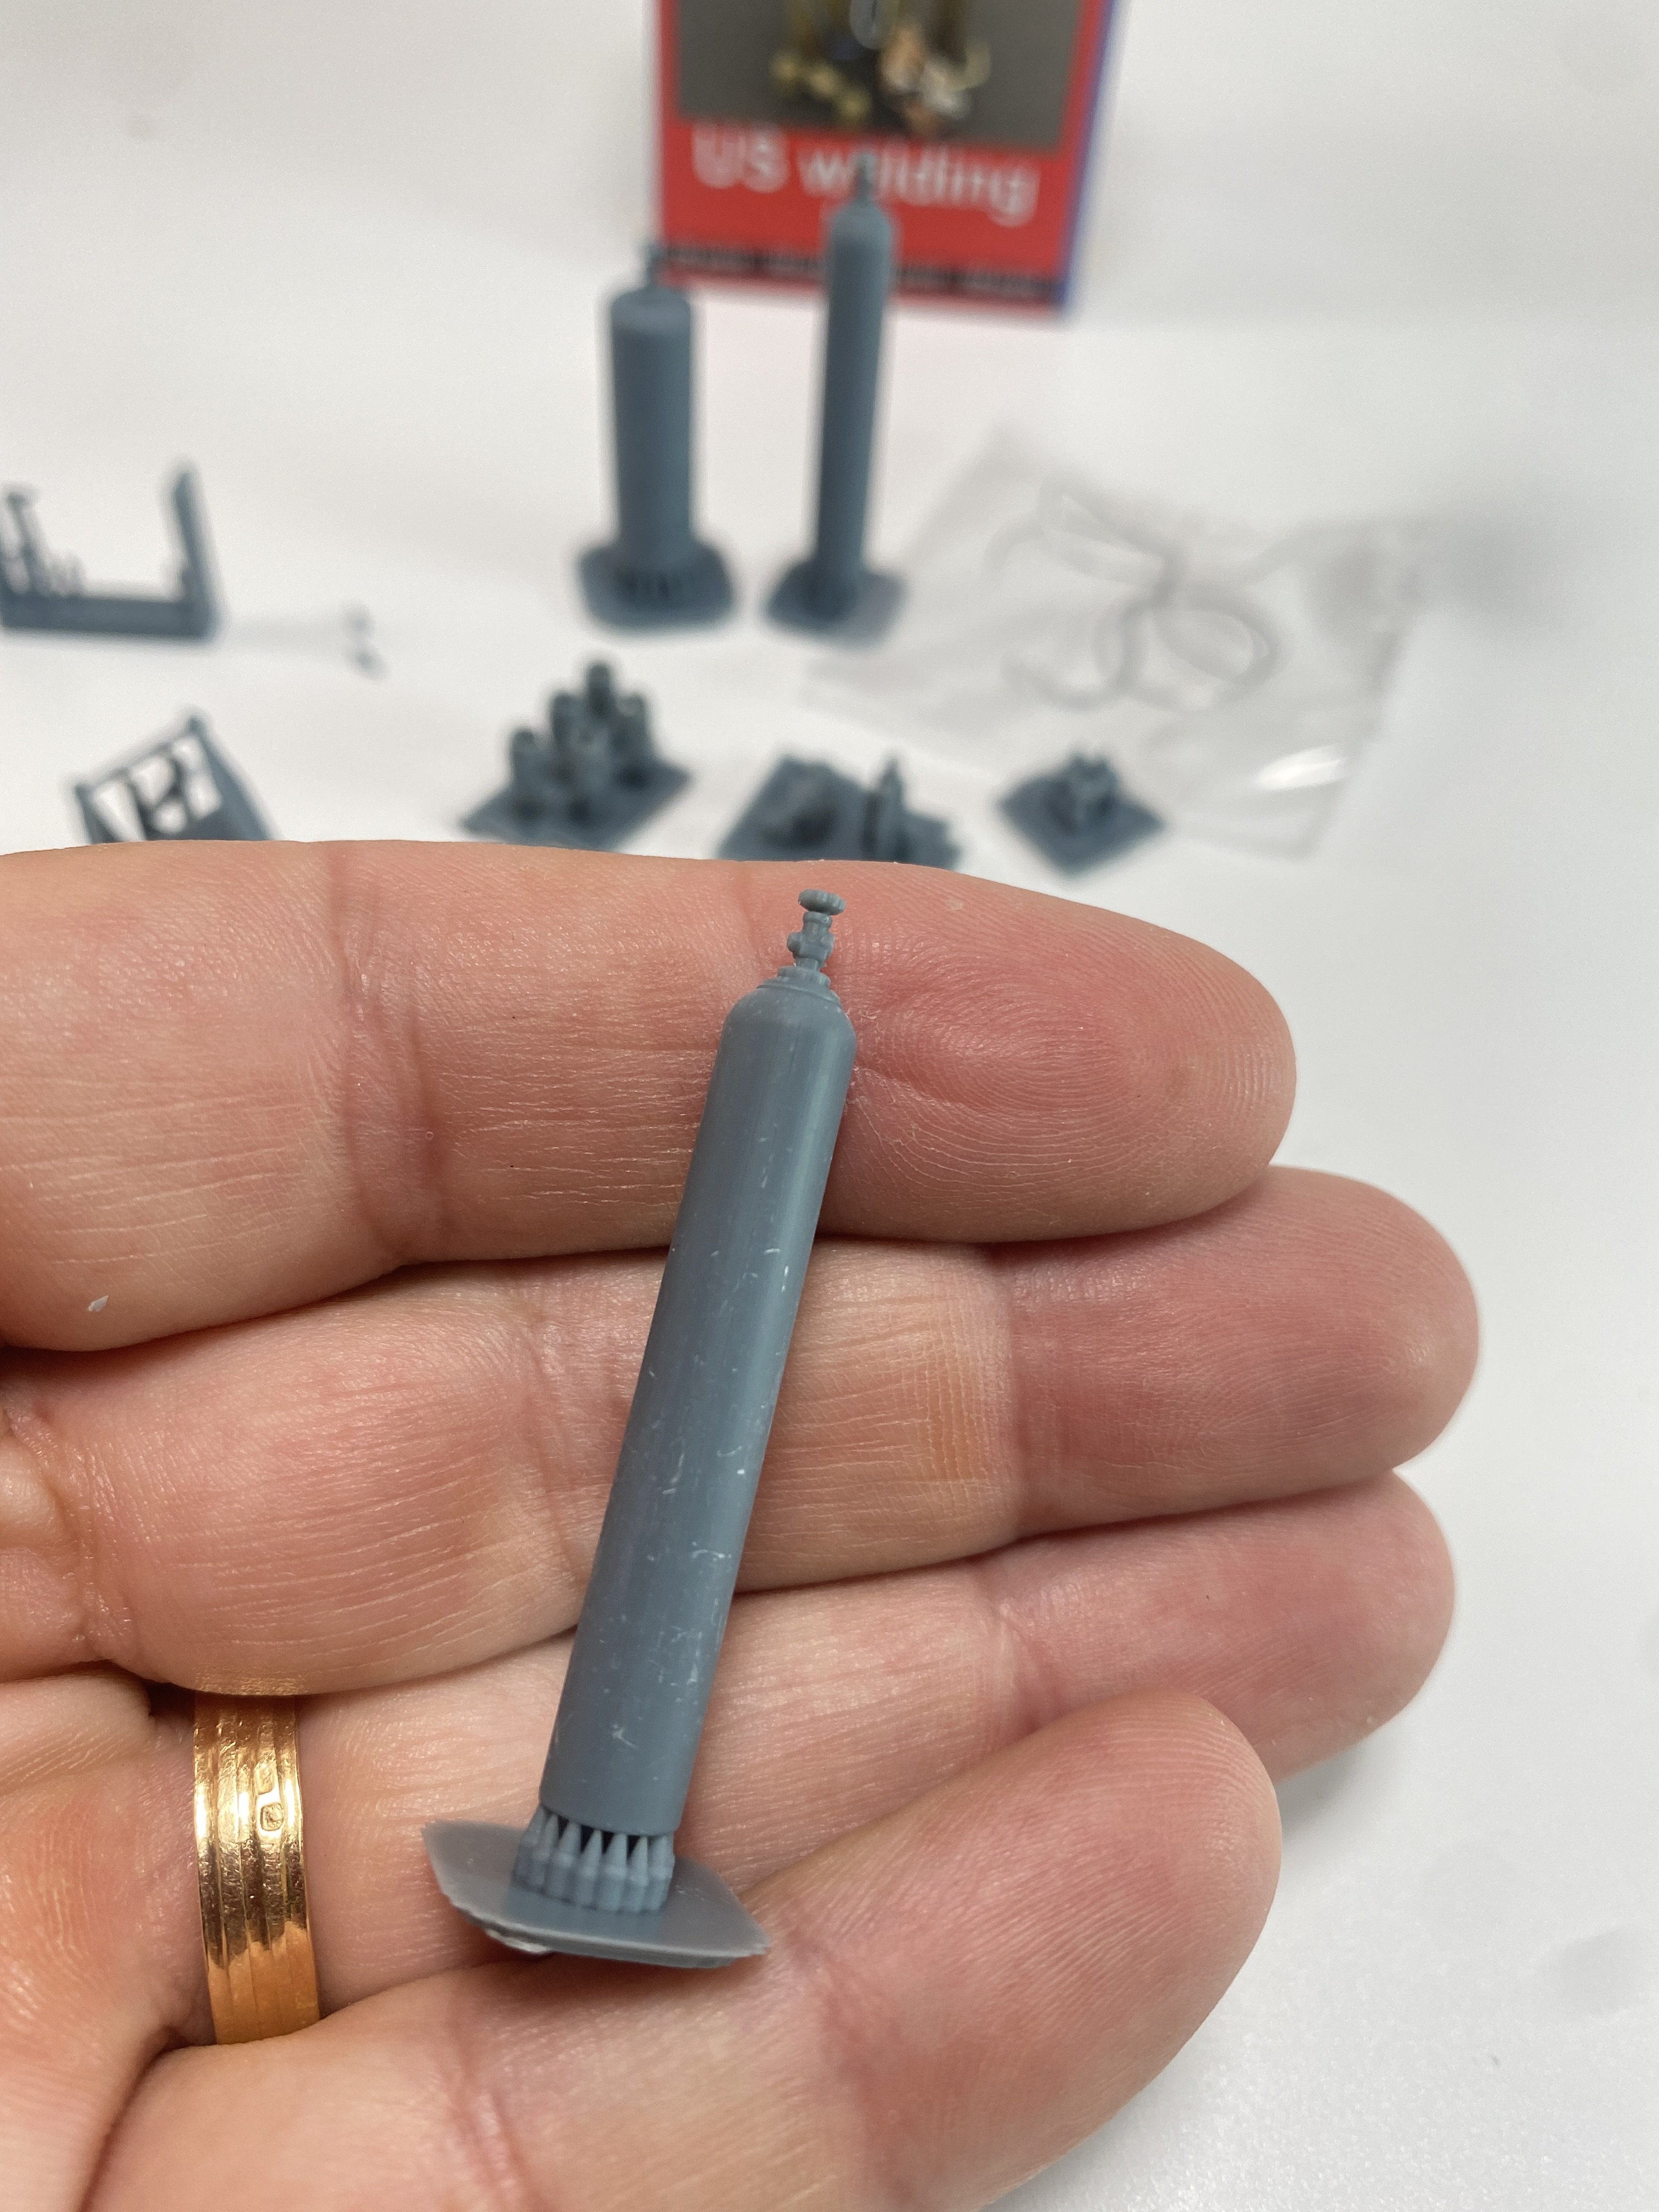
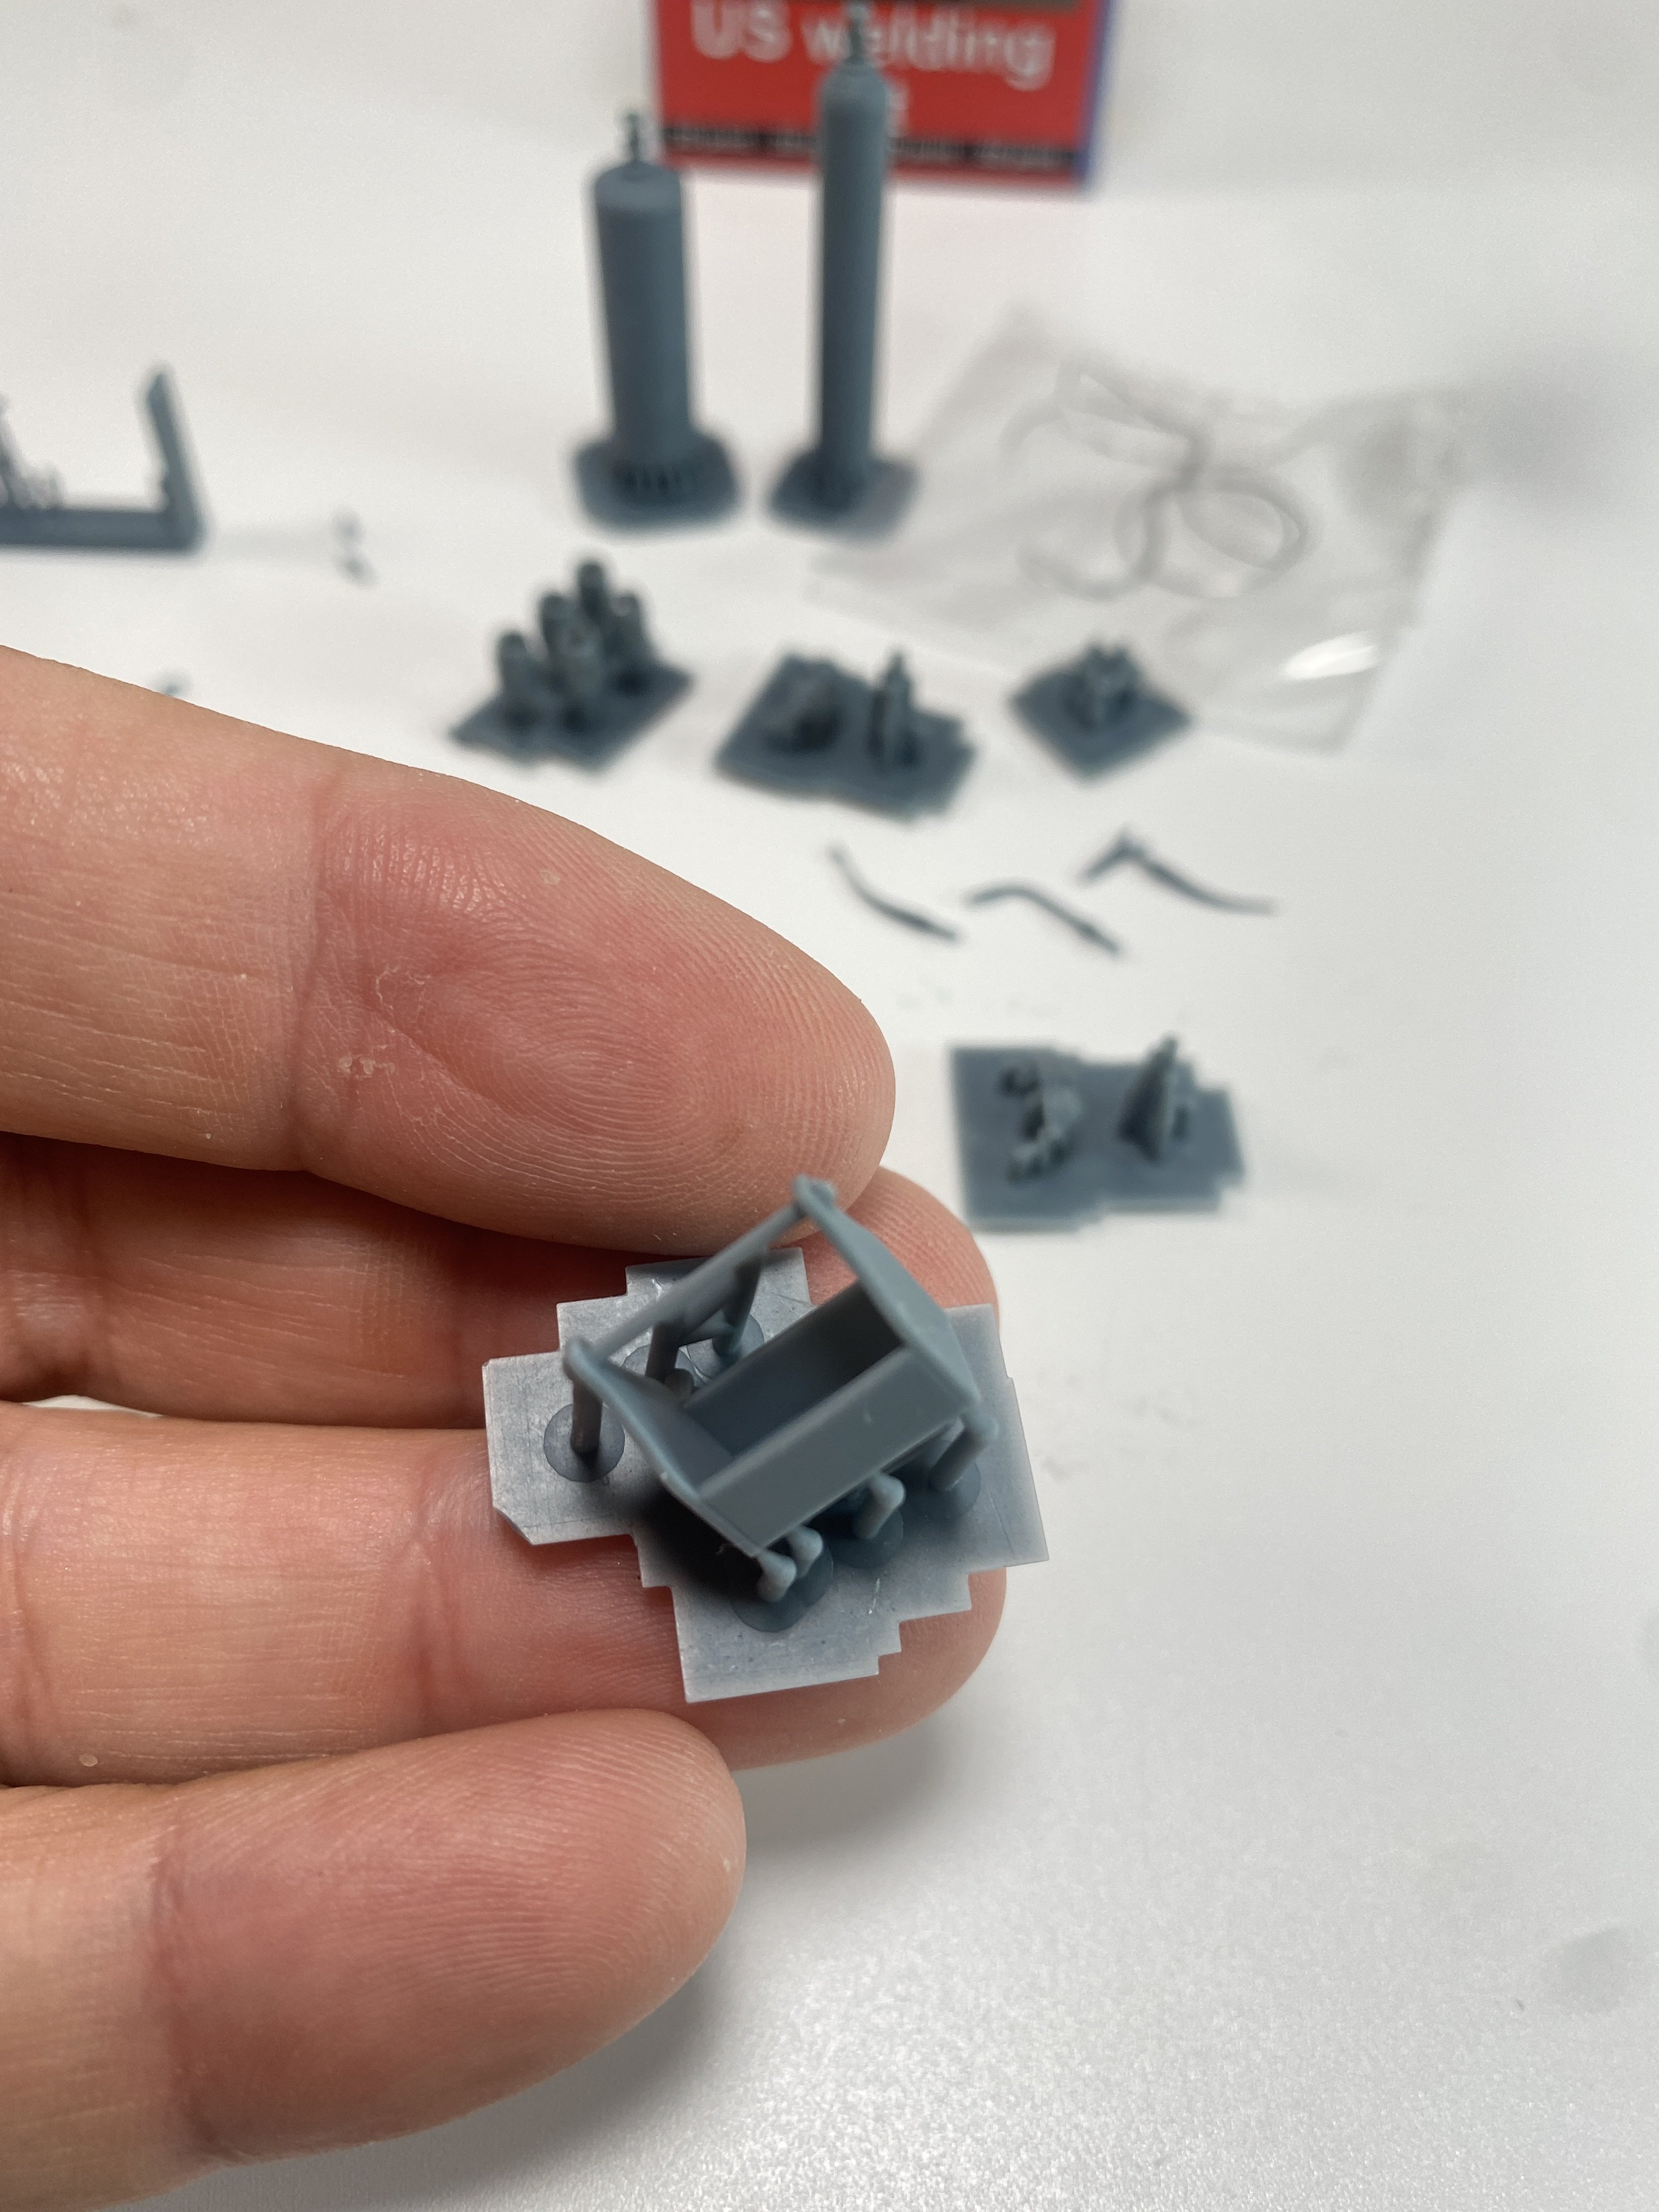
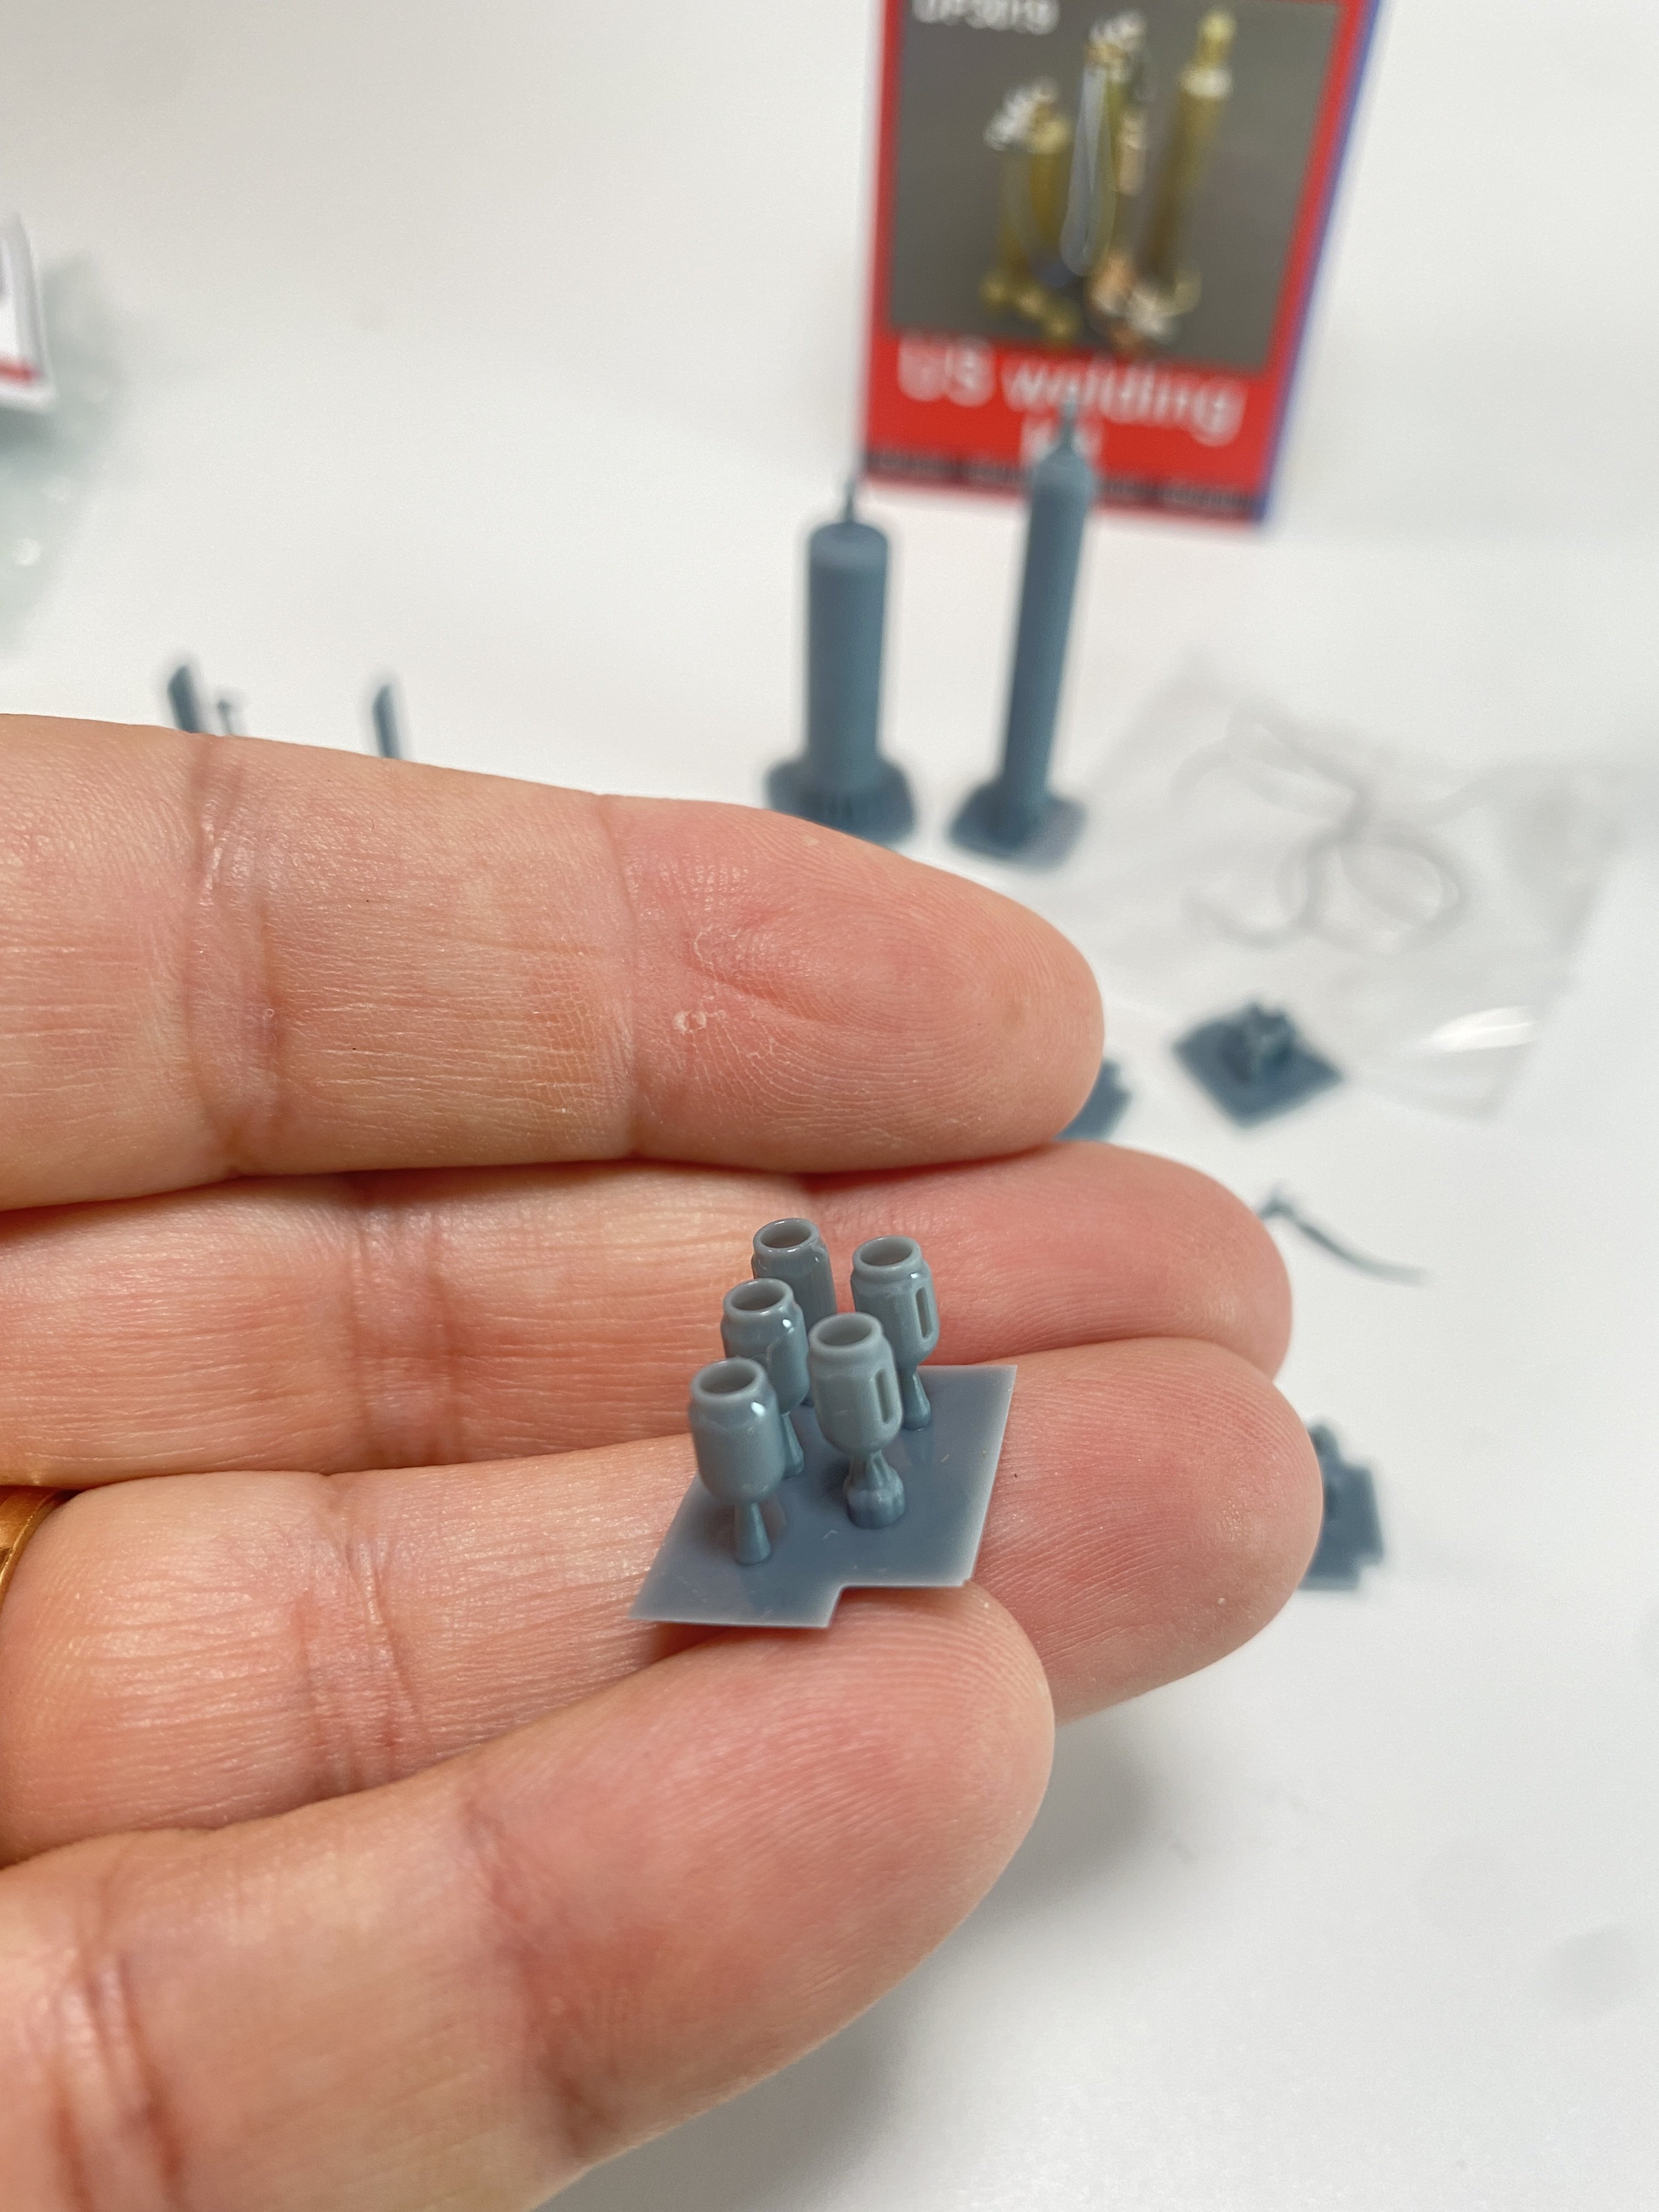
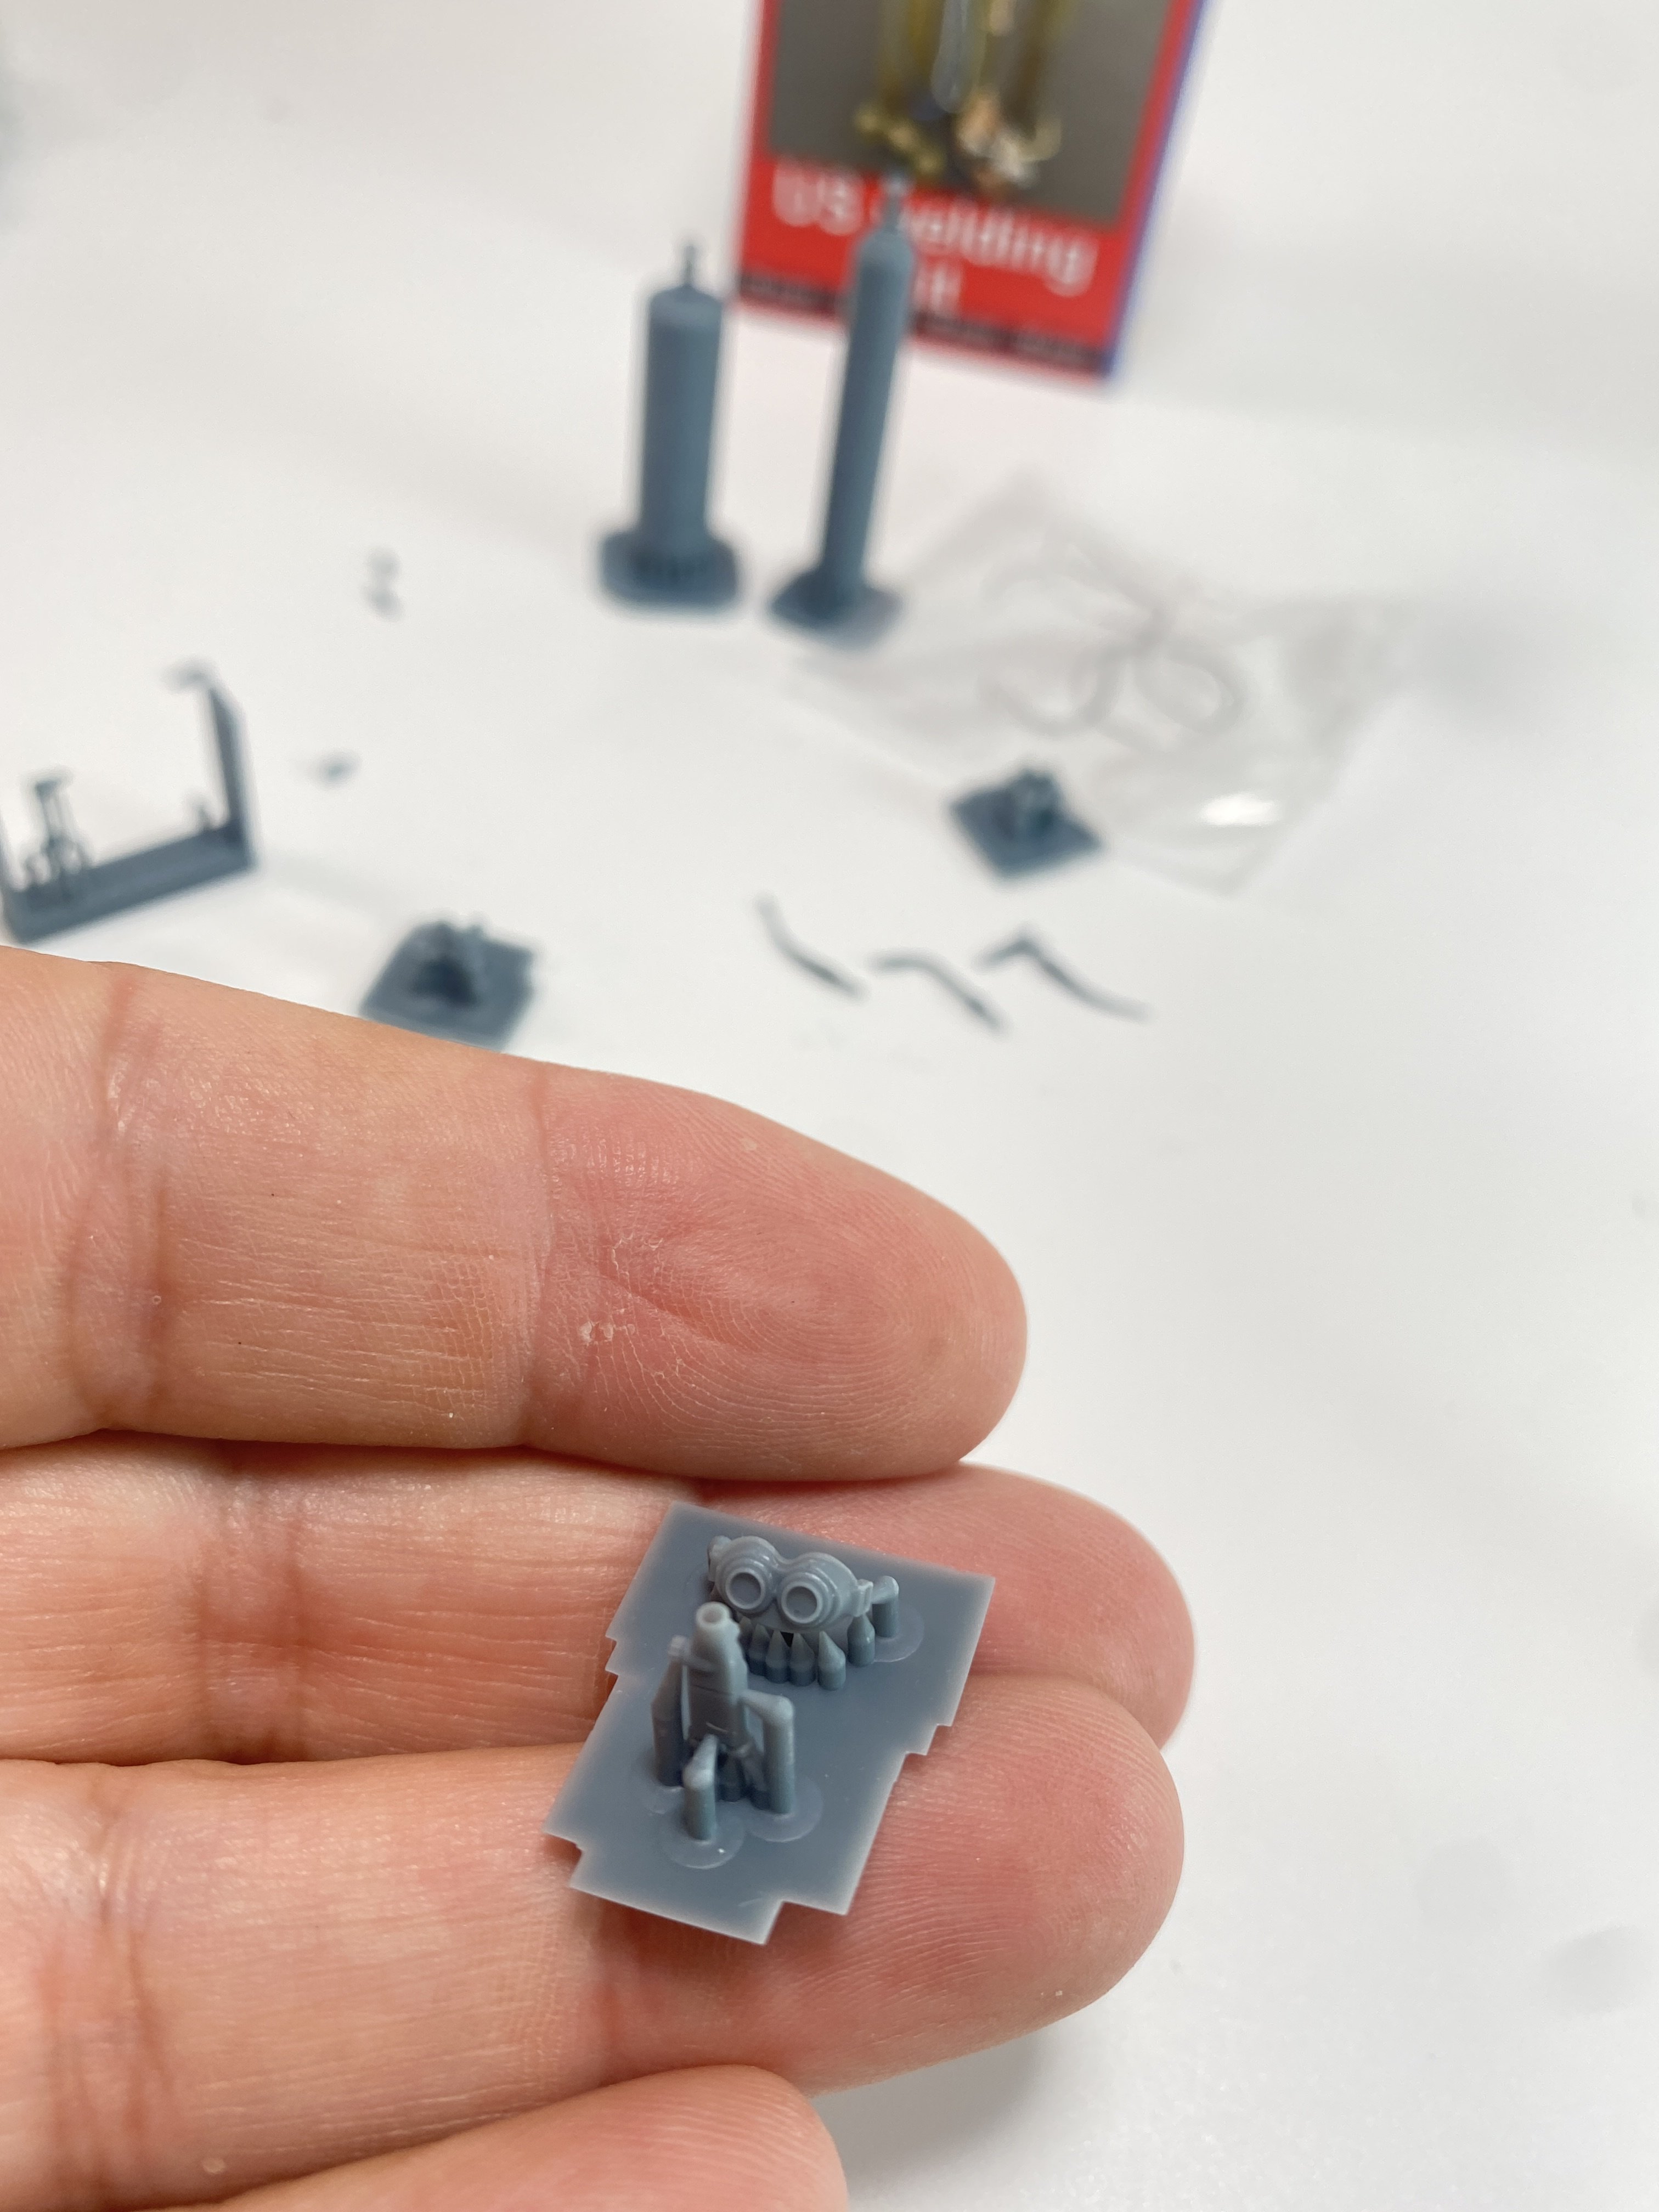
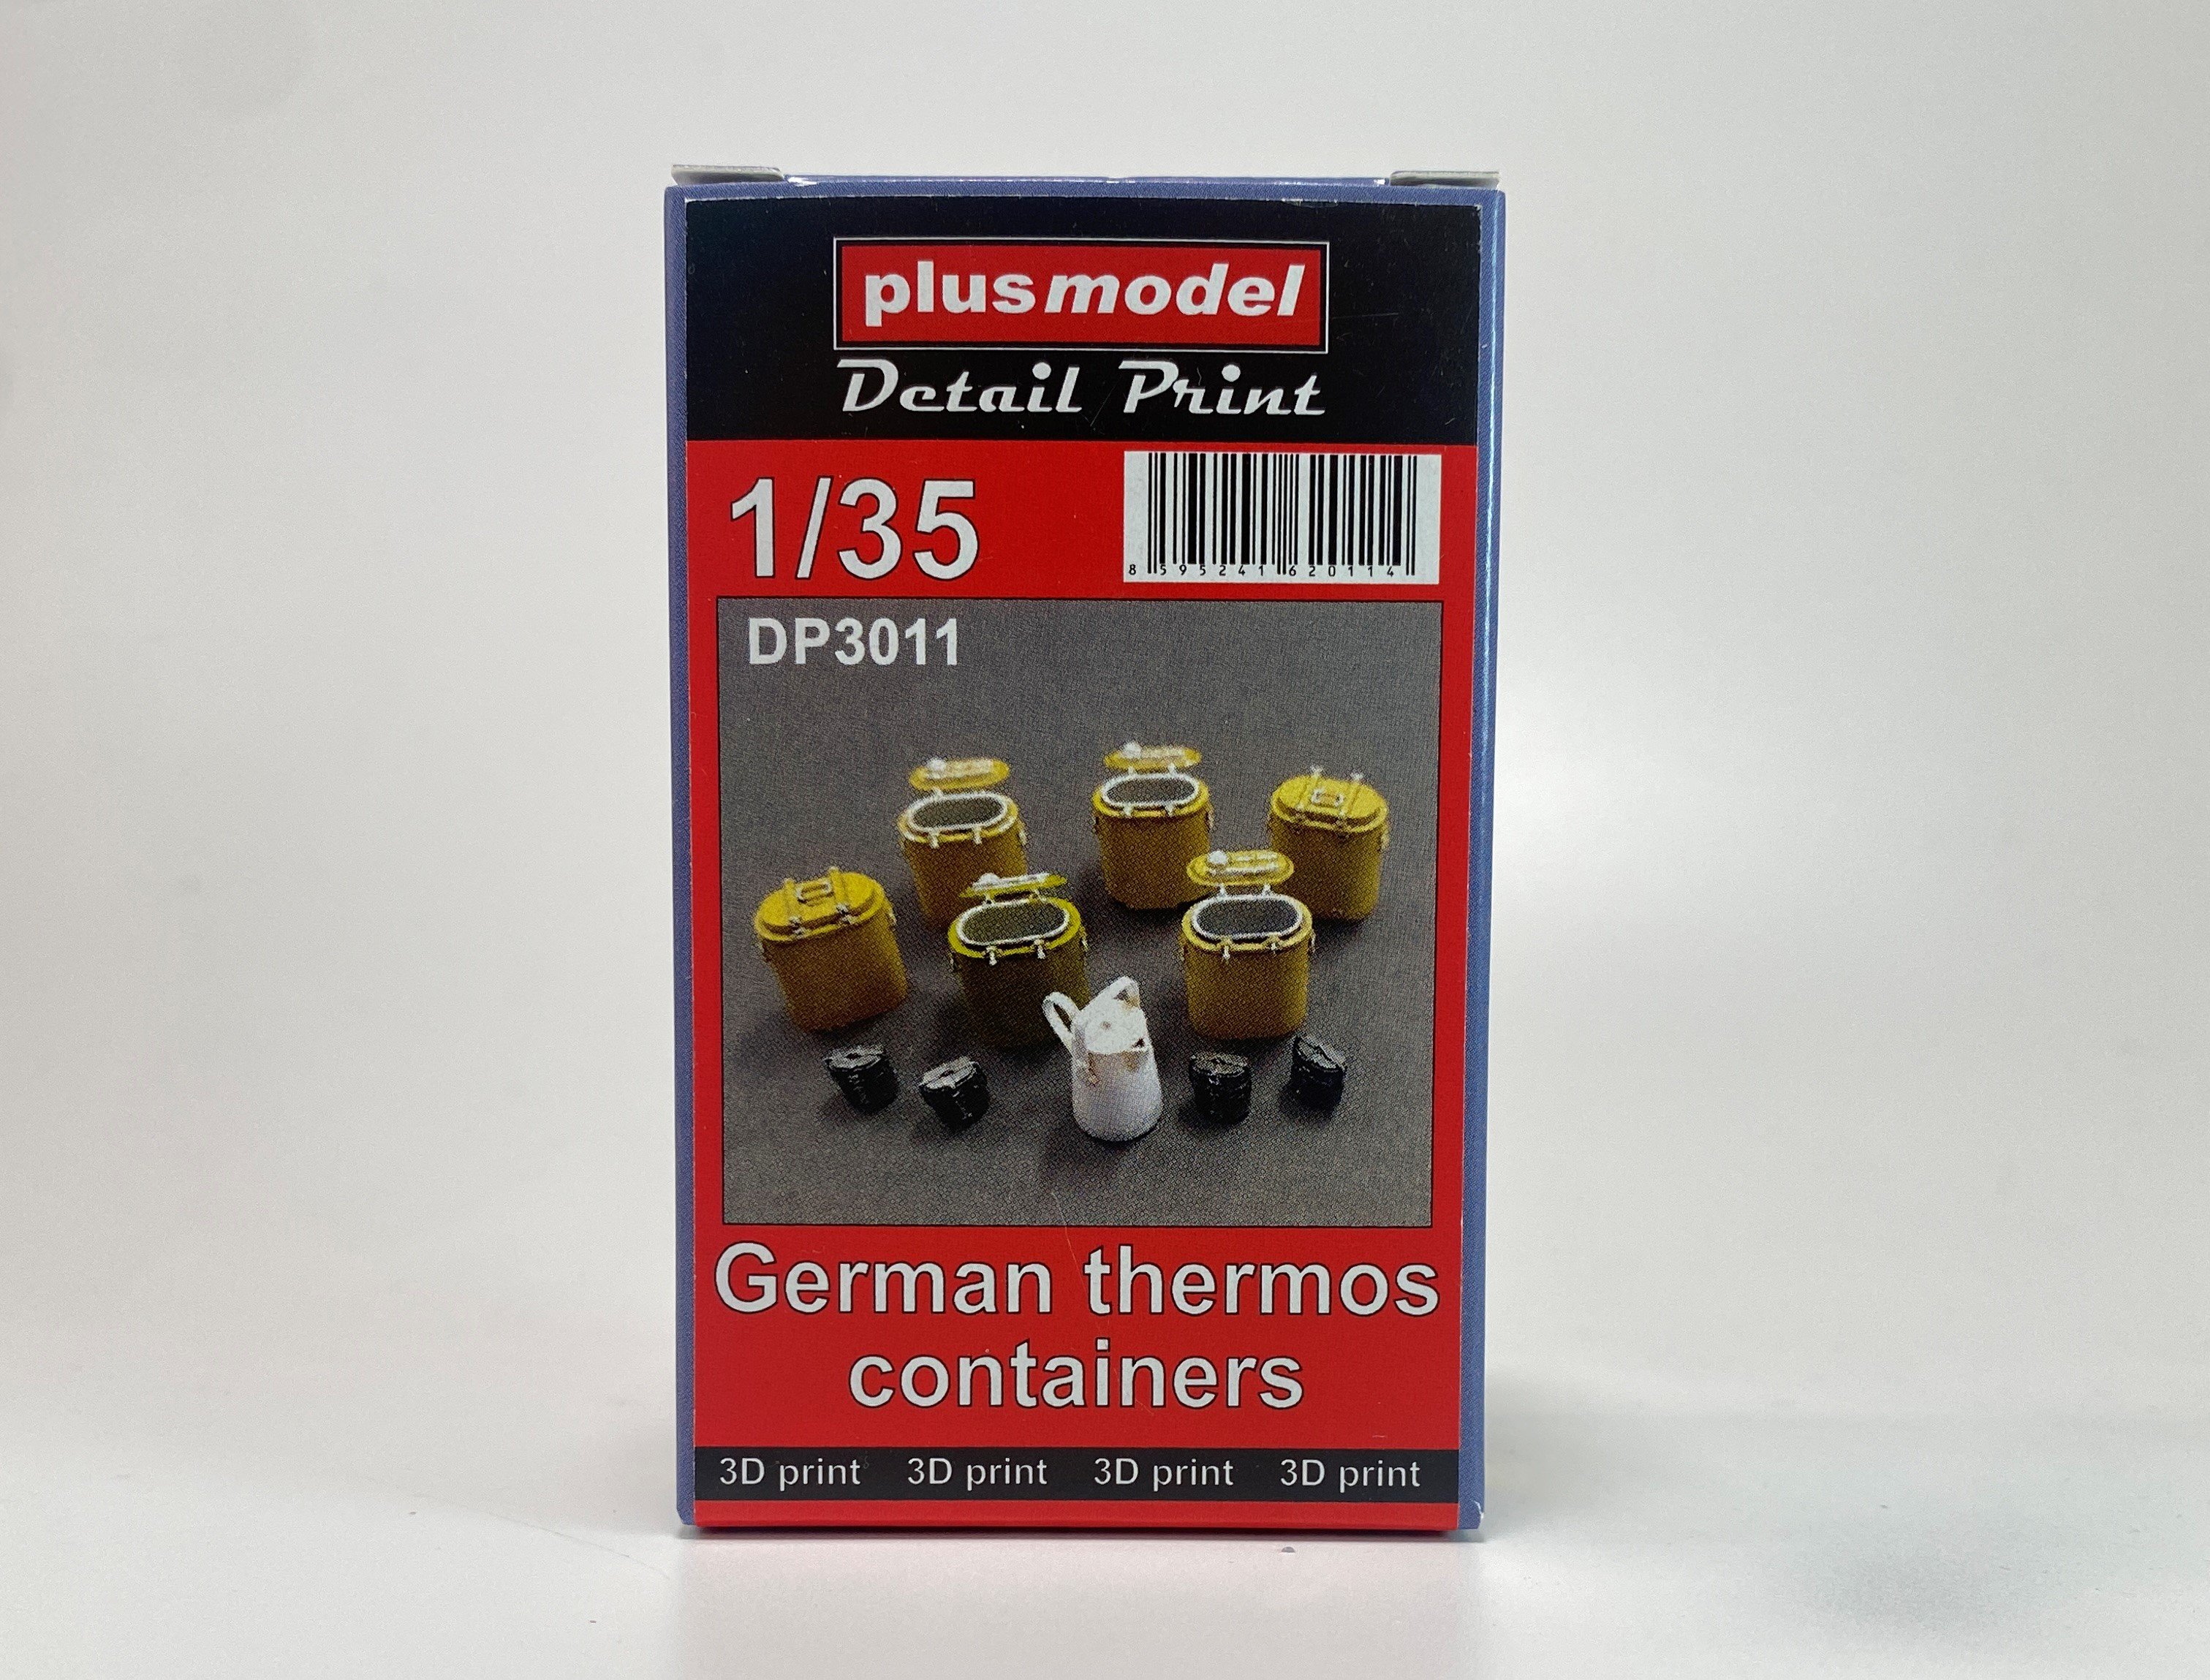
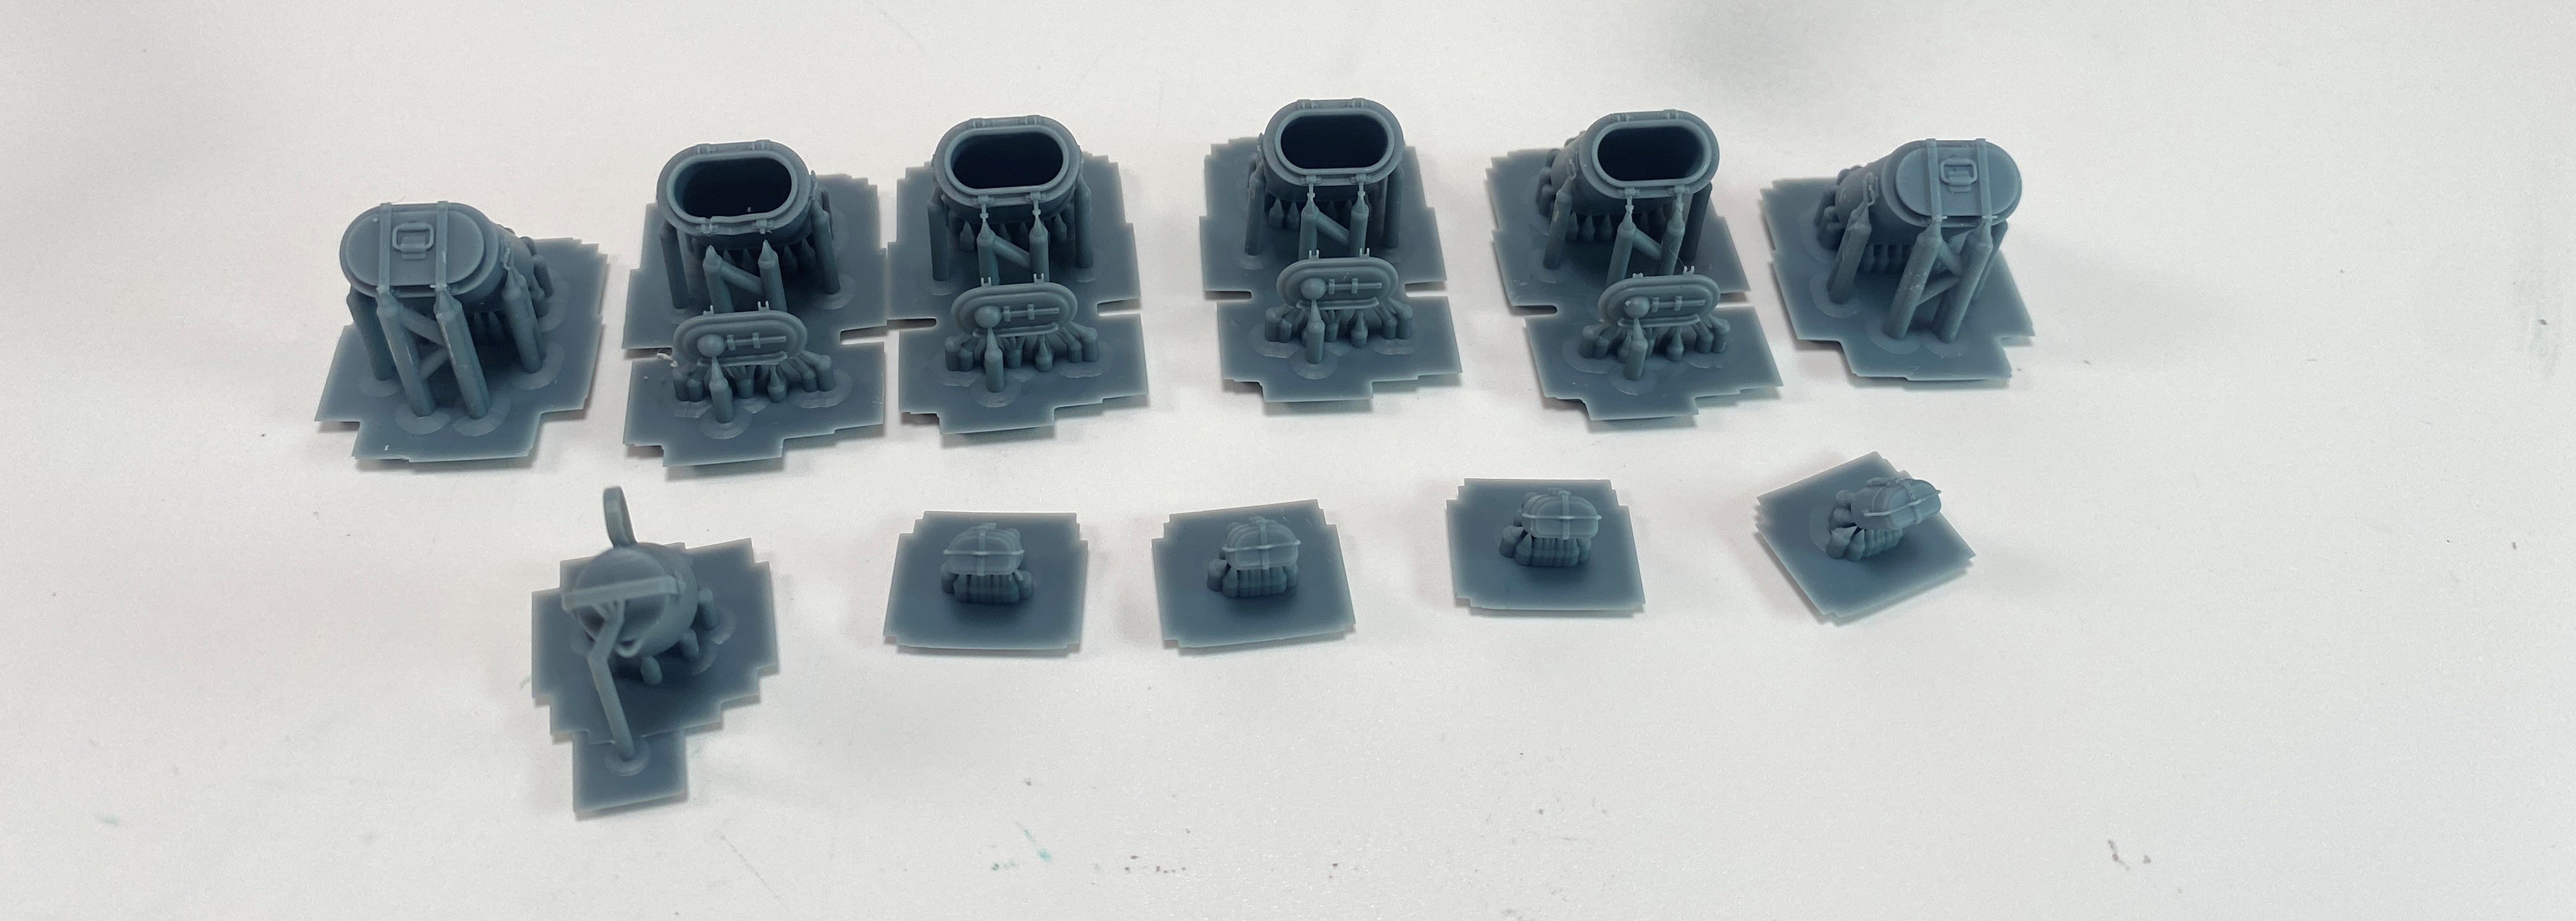
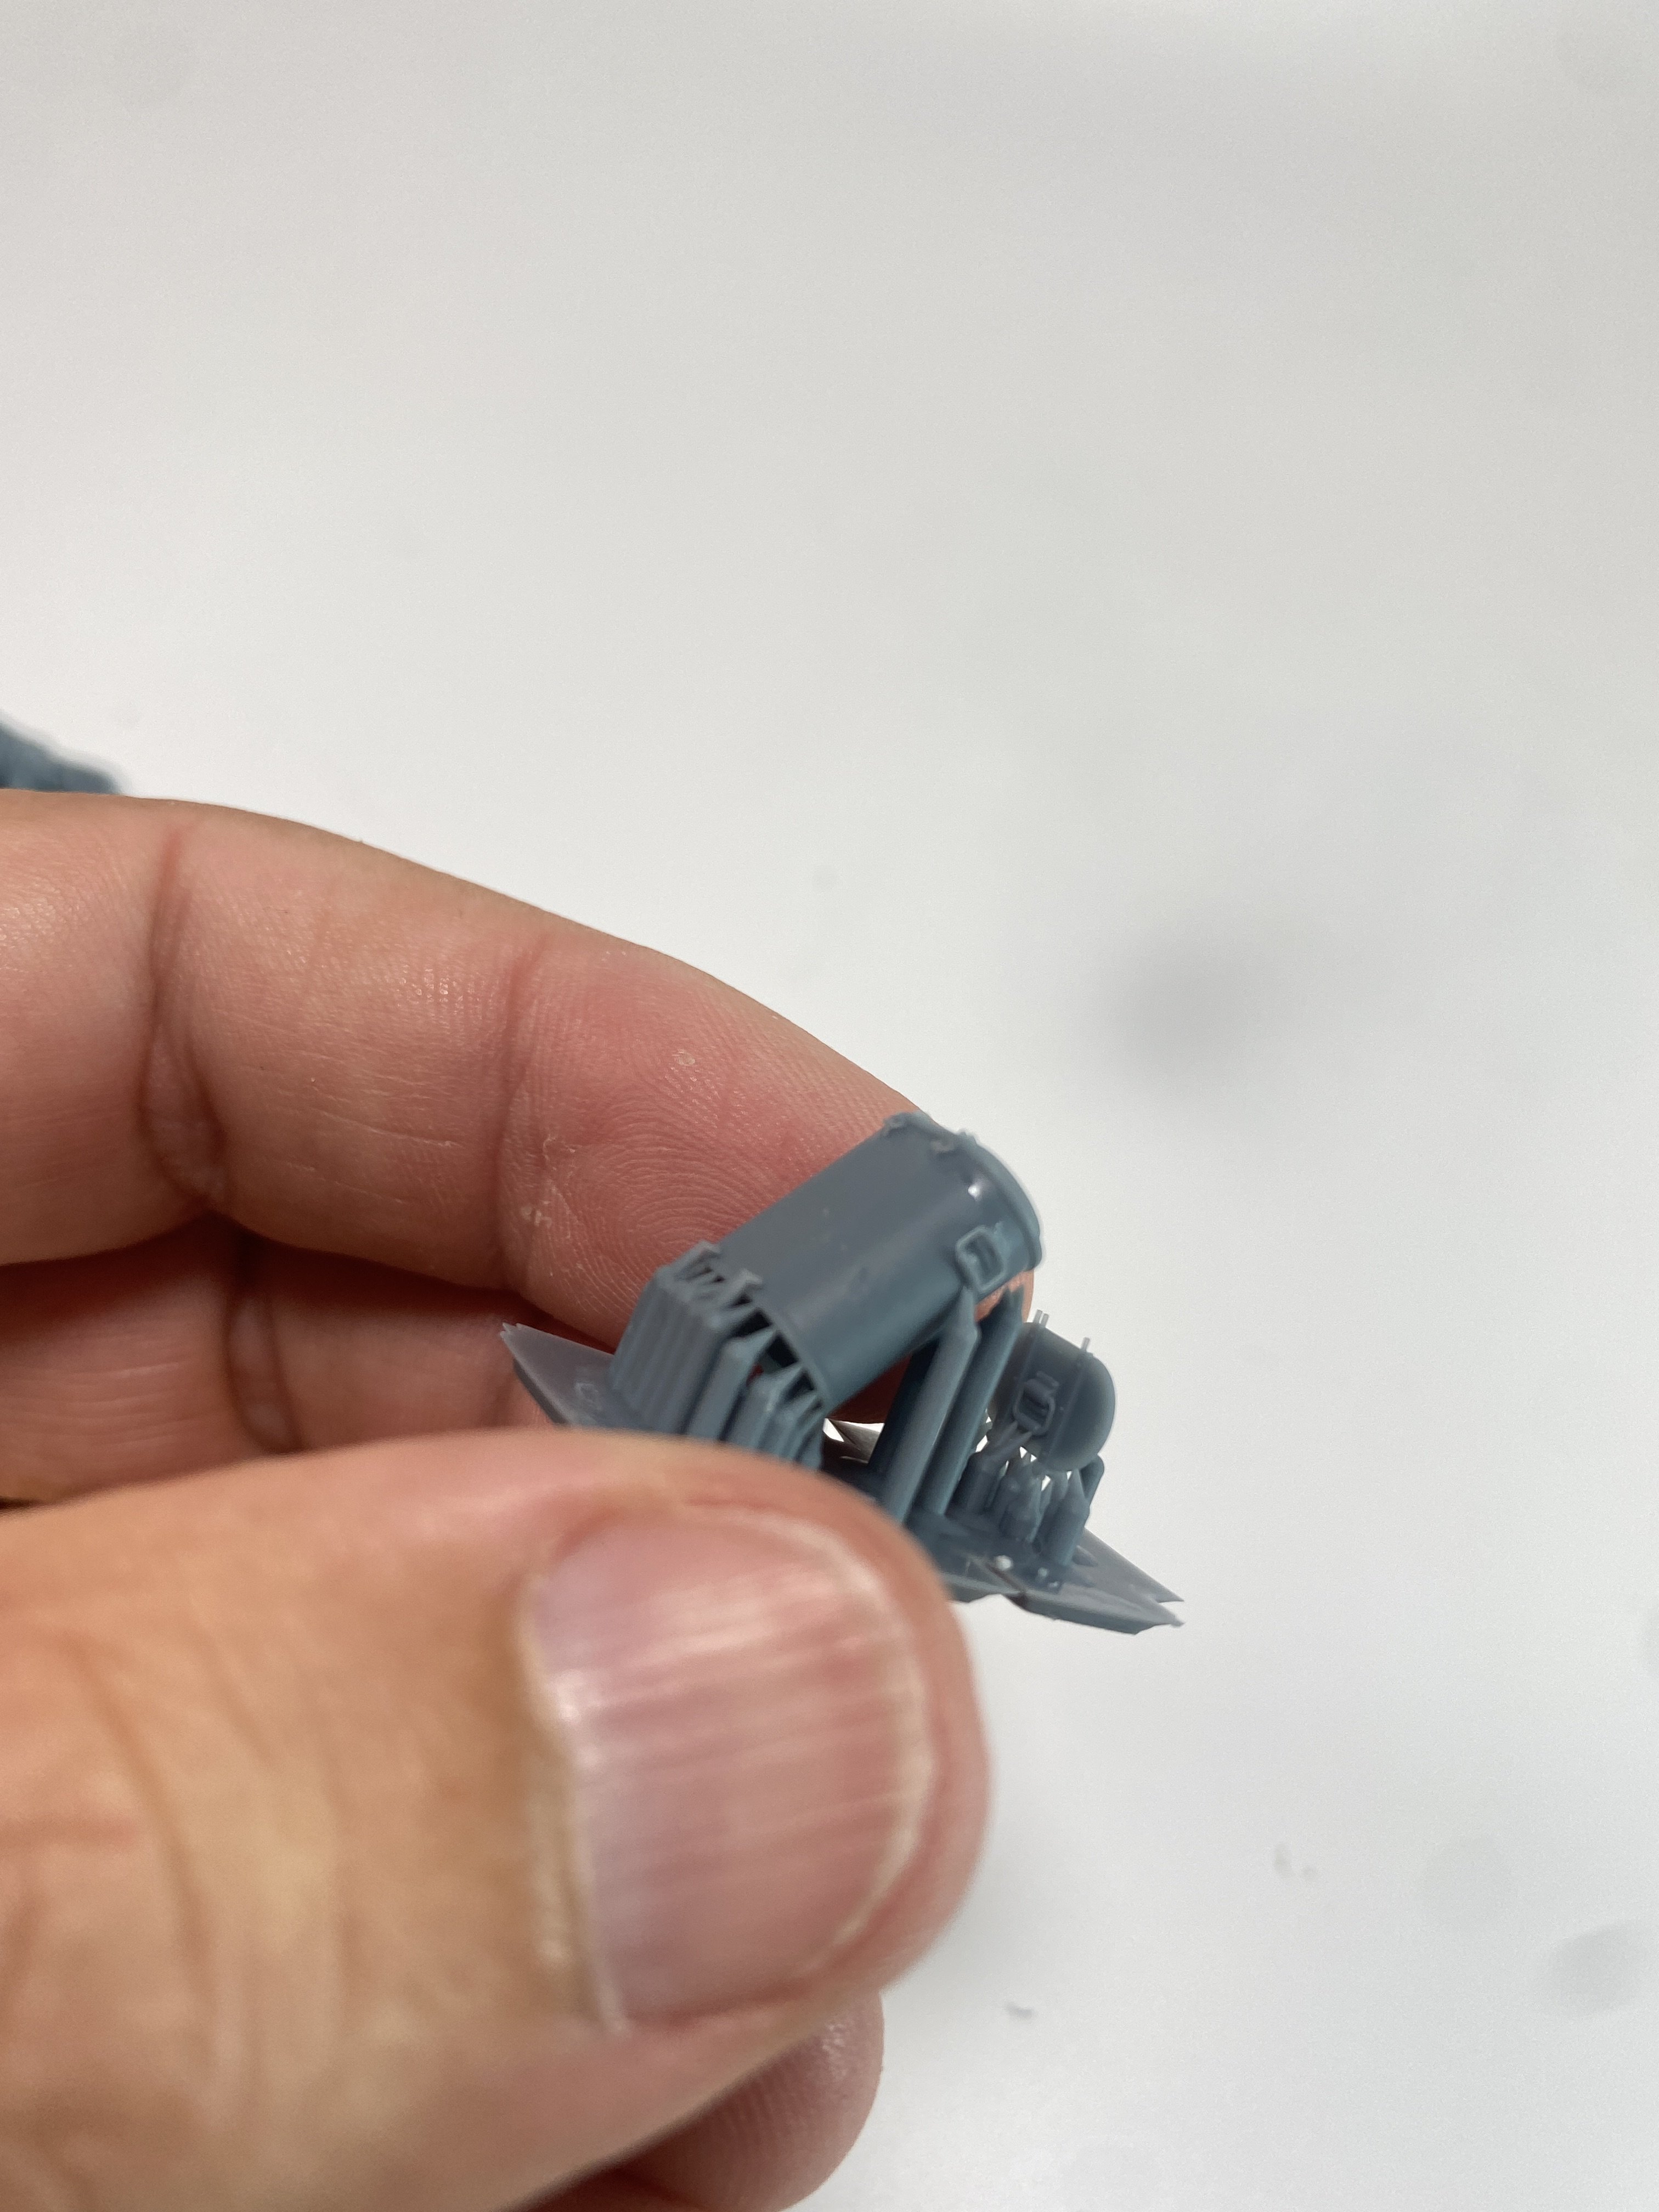
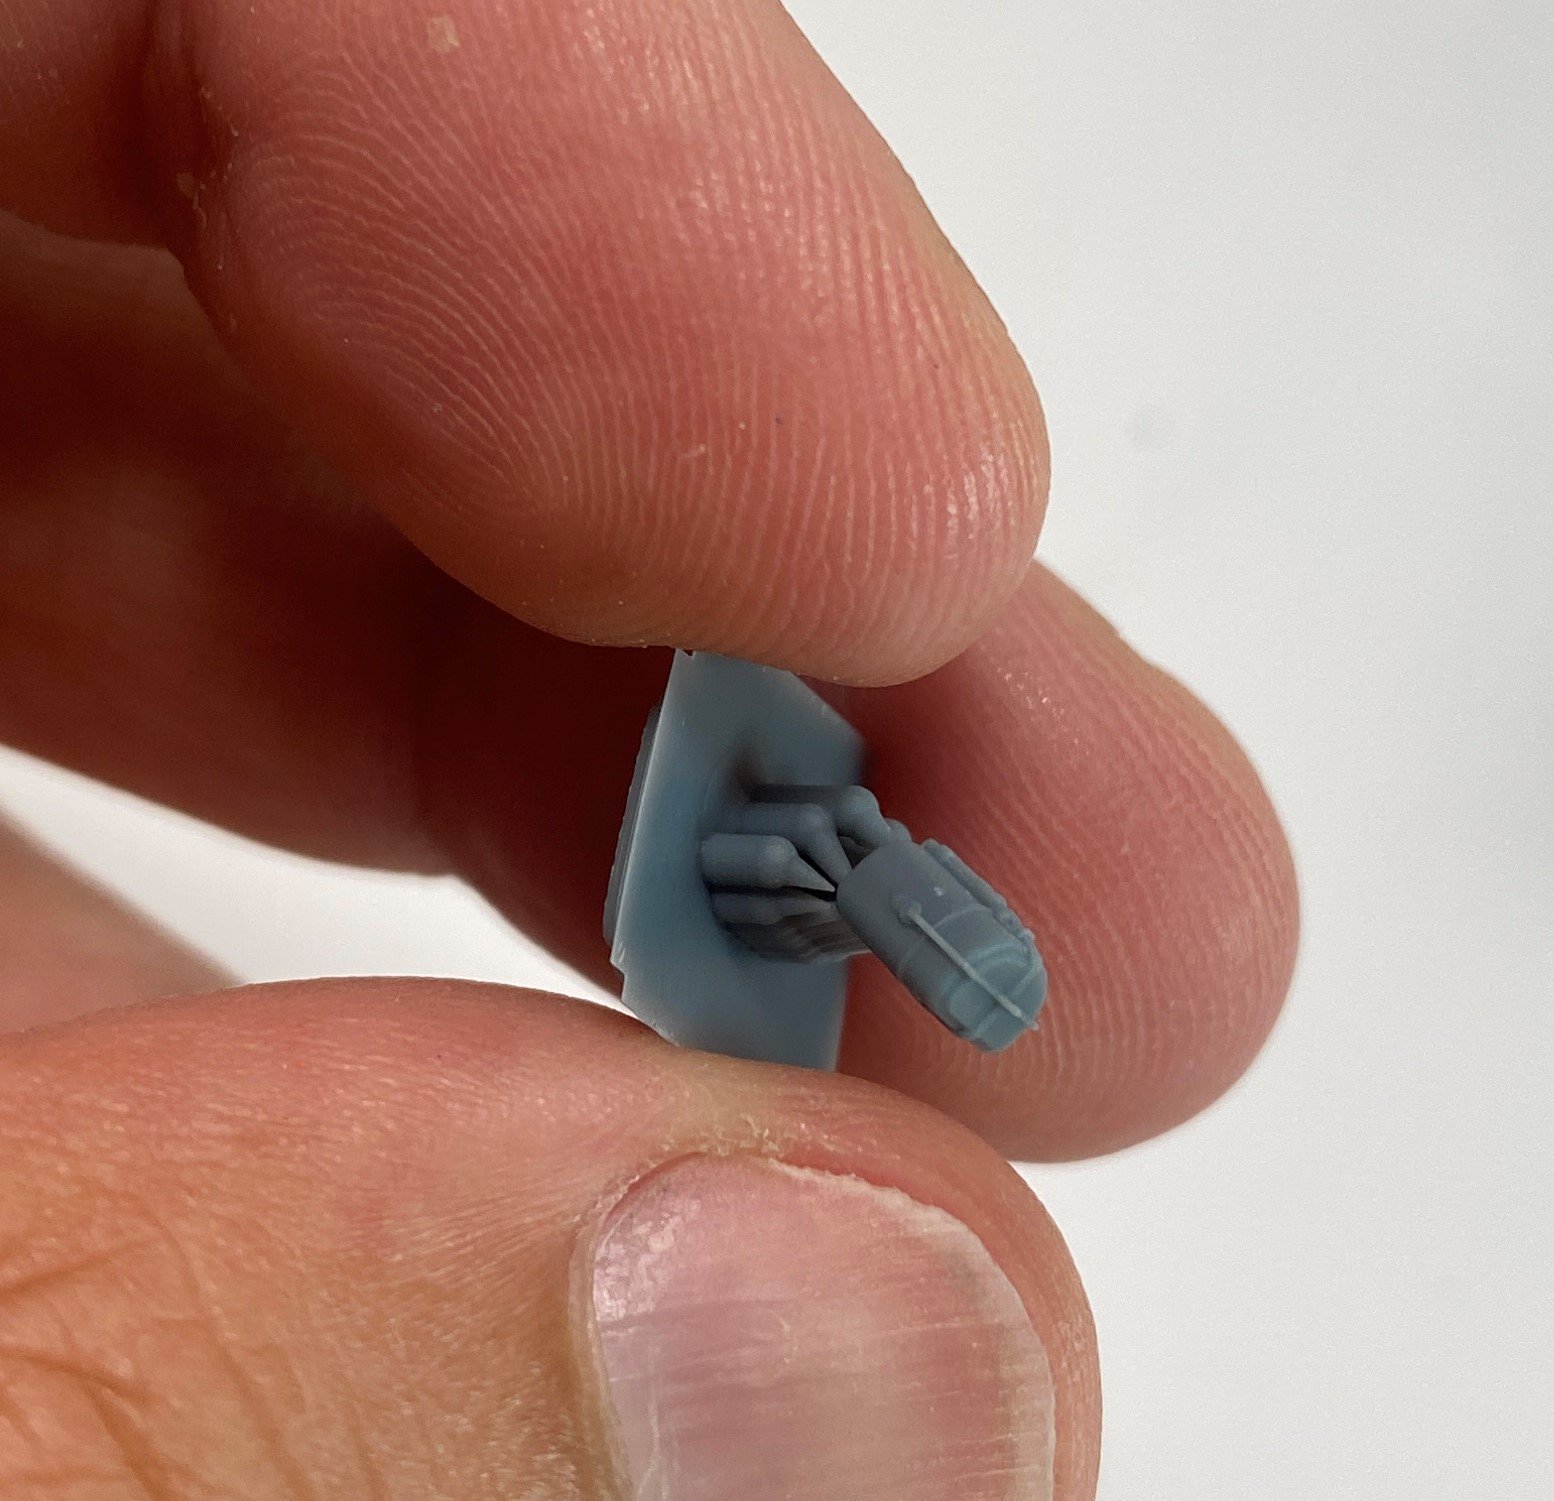
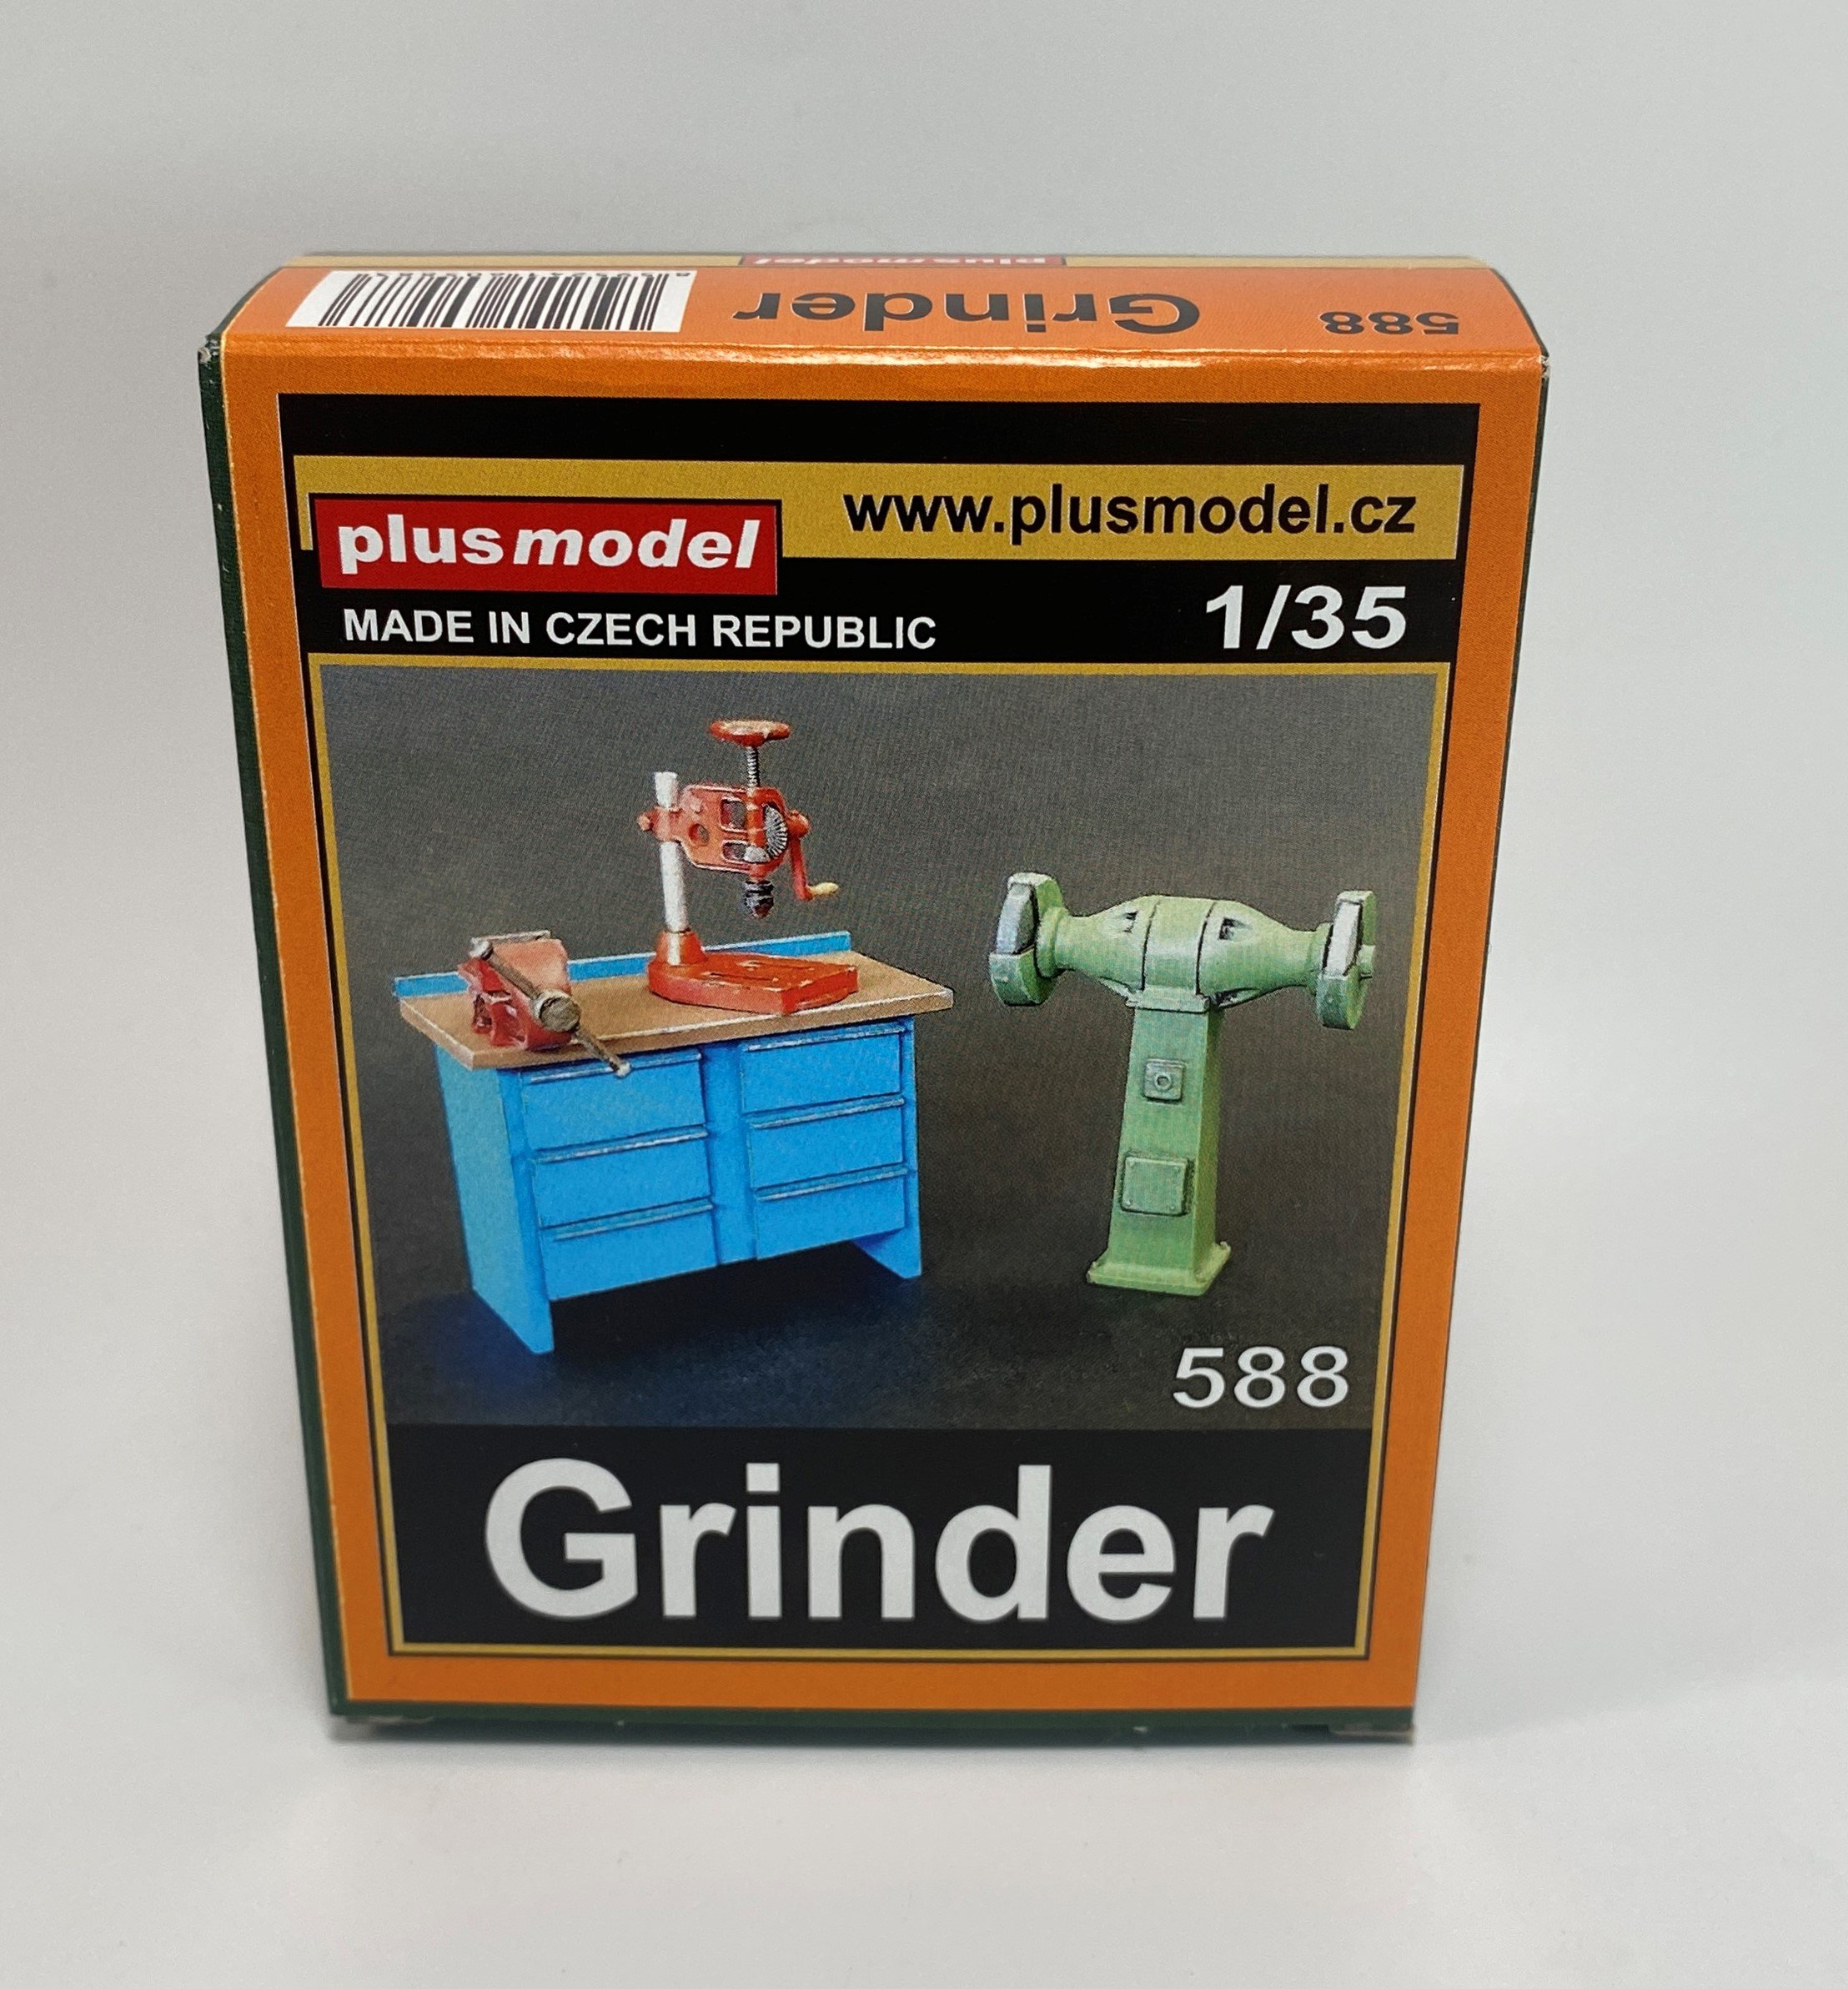
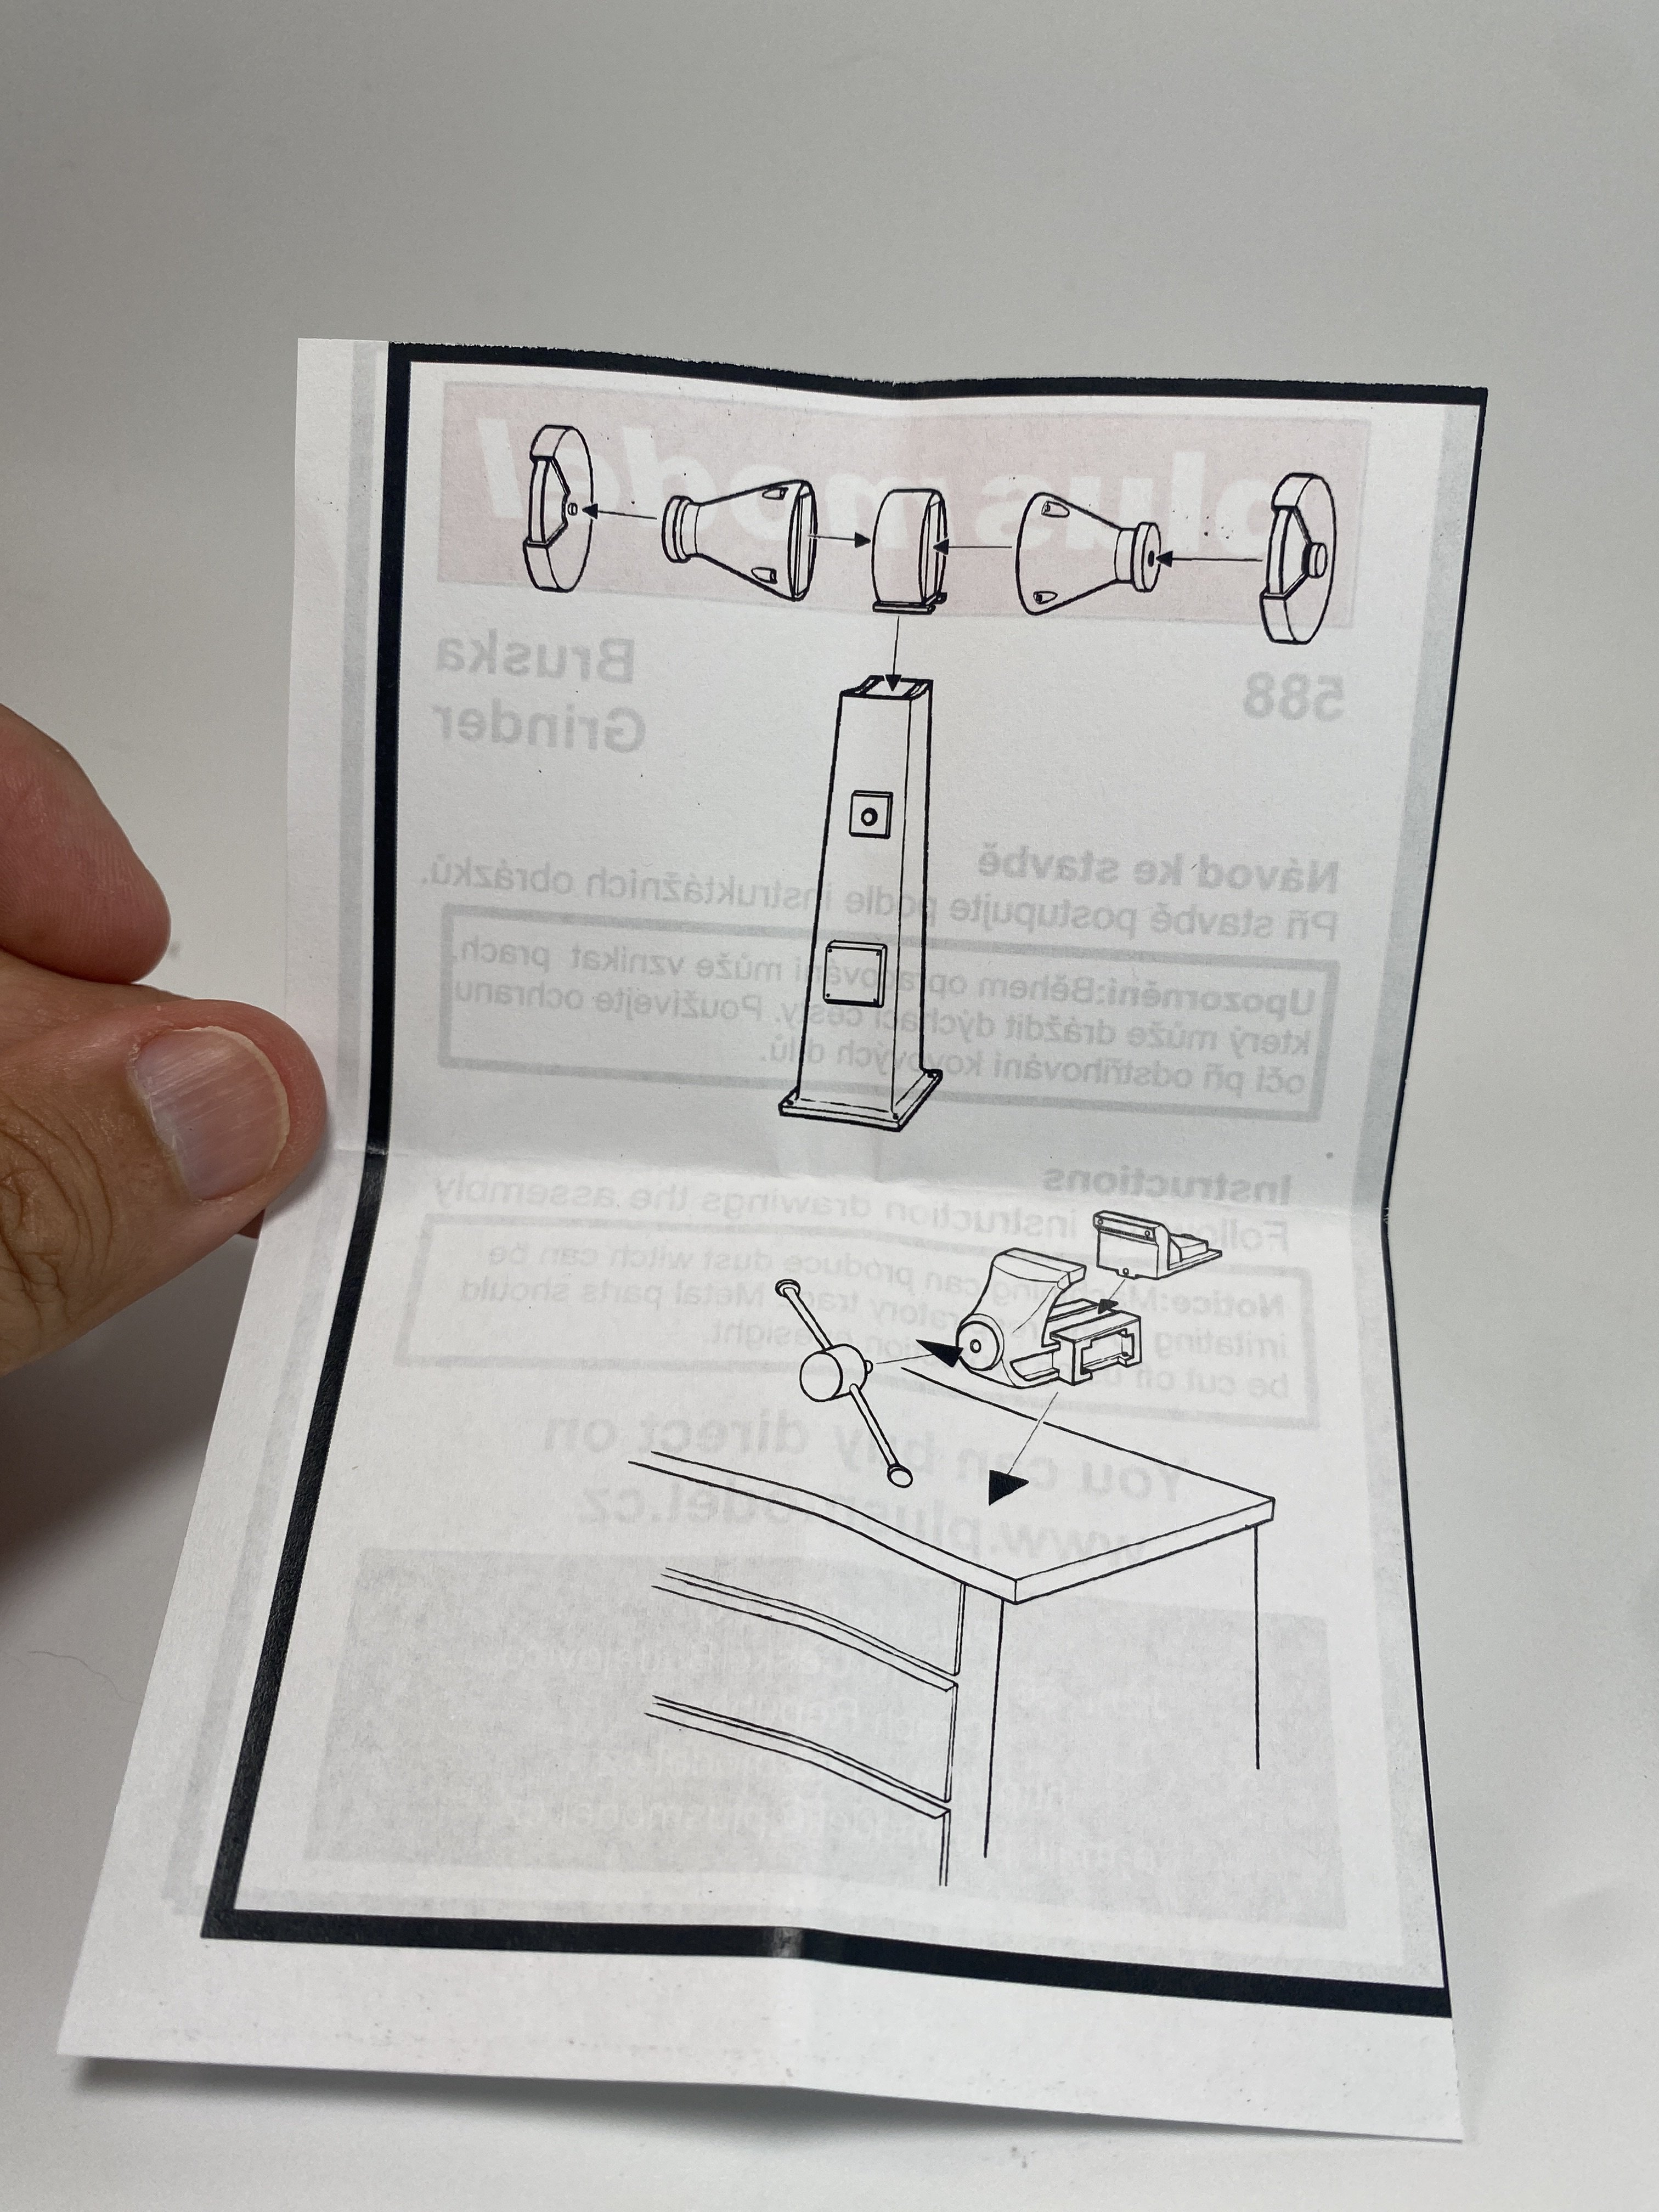
PLUSMODEL Diorama Accessories Sets Available from Plusmodel for the prices indicated below on the text Continuing in reviewing Plusmodel new item, this time we got two details sets from the new line, Detail Print series and one accessories detail set in resin. Plus Model always set a originality way in their sets and these ones are no exception. All sets are in 1:35. The new line comes in a small and modern look box. The box art still have the full build set as box art. The “Grinder” comes in the traditional box way. All of the items very well packaged, with the all the parts coming inside of a bubble bag. Starting with the resin accessories detail set we get the “grinder” Grinder (10 resin parts and 3 resin 3d pieces) Catalogue n.º 588 Price tag: 16,82€ – directly from Plusmodel. This is a very welcome addition in 1:35 to ll of those who want to make a diorama with a workshop or something similar. The box brings everything you saw on the boxart. So a full workbench in a single piece is there. The drill and respectic arm is very well detailed and is in full 3D. The workbench vise is separate so it can be placed on the table anywhere or used separately. The double-ended file machine is made of 6 pieces in resin. All the pieces have enormous detail, being quite delicate, namely the 3D pieces. The resin blocks look quite easy to remove, only patience will be needed. * US Welding kit (10 resin 3D prints pieces) Catalogue n.º DP3019 Price tag: 13,07€ directly from Plusmodel. These 10 pieces in 3D are very well printed, with no distortion and nice detail. Its gives two weldings kits and extra large botlle. A wire is also in the box to be the hose. They are printed is in dark grey with no flash or printing lines. All parts are beautiful printed with fantastic detail. And the surface detail is fantastic. The resin 3D block are very easy to remove (some can be remove by hand) and are in perfect place to be removed without damage ant detail. ** German thermos Containers (10 resin 3D prints pieces) Catalogue n.º DP3011 Price tag: 10,41€ – directly from Plusmodel. The quality printing here stand also with very high quality. So there is 4 open container and 2 close ones. The ones that have a cap in open position, are totally hollow , so you can had “water” on it… Would be a good an extra realism on it. The resin blocks are not so easy to remove that the welding kit set, ans part of them are in the container body, so care and lots of patience should be necessary to reduce the work of removing the connections marks and keep the surface detail. Four small containers are also in the set and an old kettle. This old kettle is very delicated but is a beauty and it will add extra detail to your work, US Engineered Pulleys WWII (Resin 3D prints pieces) Catalogue n.º DP3018 Price tag: 9,92€ – directly from Plusmodel. Finally, a set with four engineer pulleys of the US Army. Well, are only four but it is a quite complex building with lots of parts, namely many screws and nuts. It’s not an easy build because you don’t get any instructions but a full image of it. So this set can`t be for a novice modeler at all but expert modeler (or a high intermediate modeler) The detail, once again is impressing and everything and these can by use almost in every diorama with US recovery vehicle or in a workshop. Conclusion These four sets of accessories for dioramas translate once again well Plusmodel philosophy: originality, quality and versatility. The quality is of the highest level, now with their new line using 3D Printing technology. Some of these set are not for novice modeler (and the Engineered Pulleys for experience modeler) and an intermediate modeler can make something very good out of these sets. And the detail that will be add to the diorama will be well worth. Very Highly recommended With my sincere thanks to Plusmodel for these review sample. To purchase directly, click this link. Francisco Guedes