
Fran
-
Posts
2,286 -
Joined
-
Last visited
Content Type
Profiles
Forums
Events
Gallery
Everything posted by Fran
-
This year, around the end of March, we will have a 1:32 PZL-23 Karas! Lets hope for high printing quality (I really hope that it would be better that Jetmad) According with Crazy Cat 3D (brand name of the manuacture) it will cost 150€ (with shipping)


-
I also heard that Titan Models is releasing this year, a 1:48 Tu-95 Bear!
-
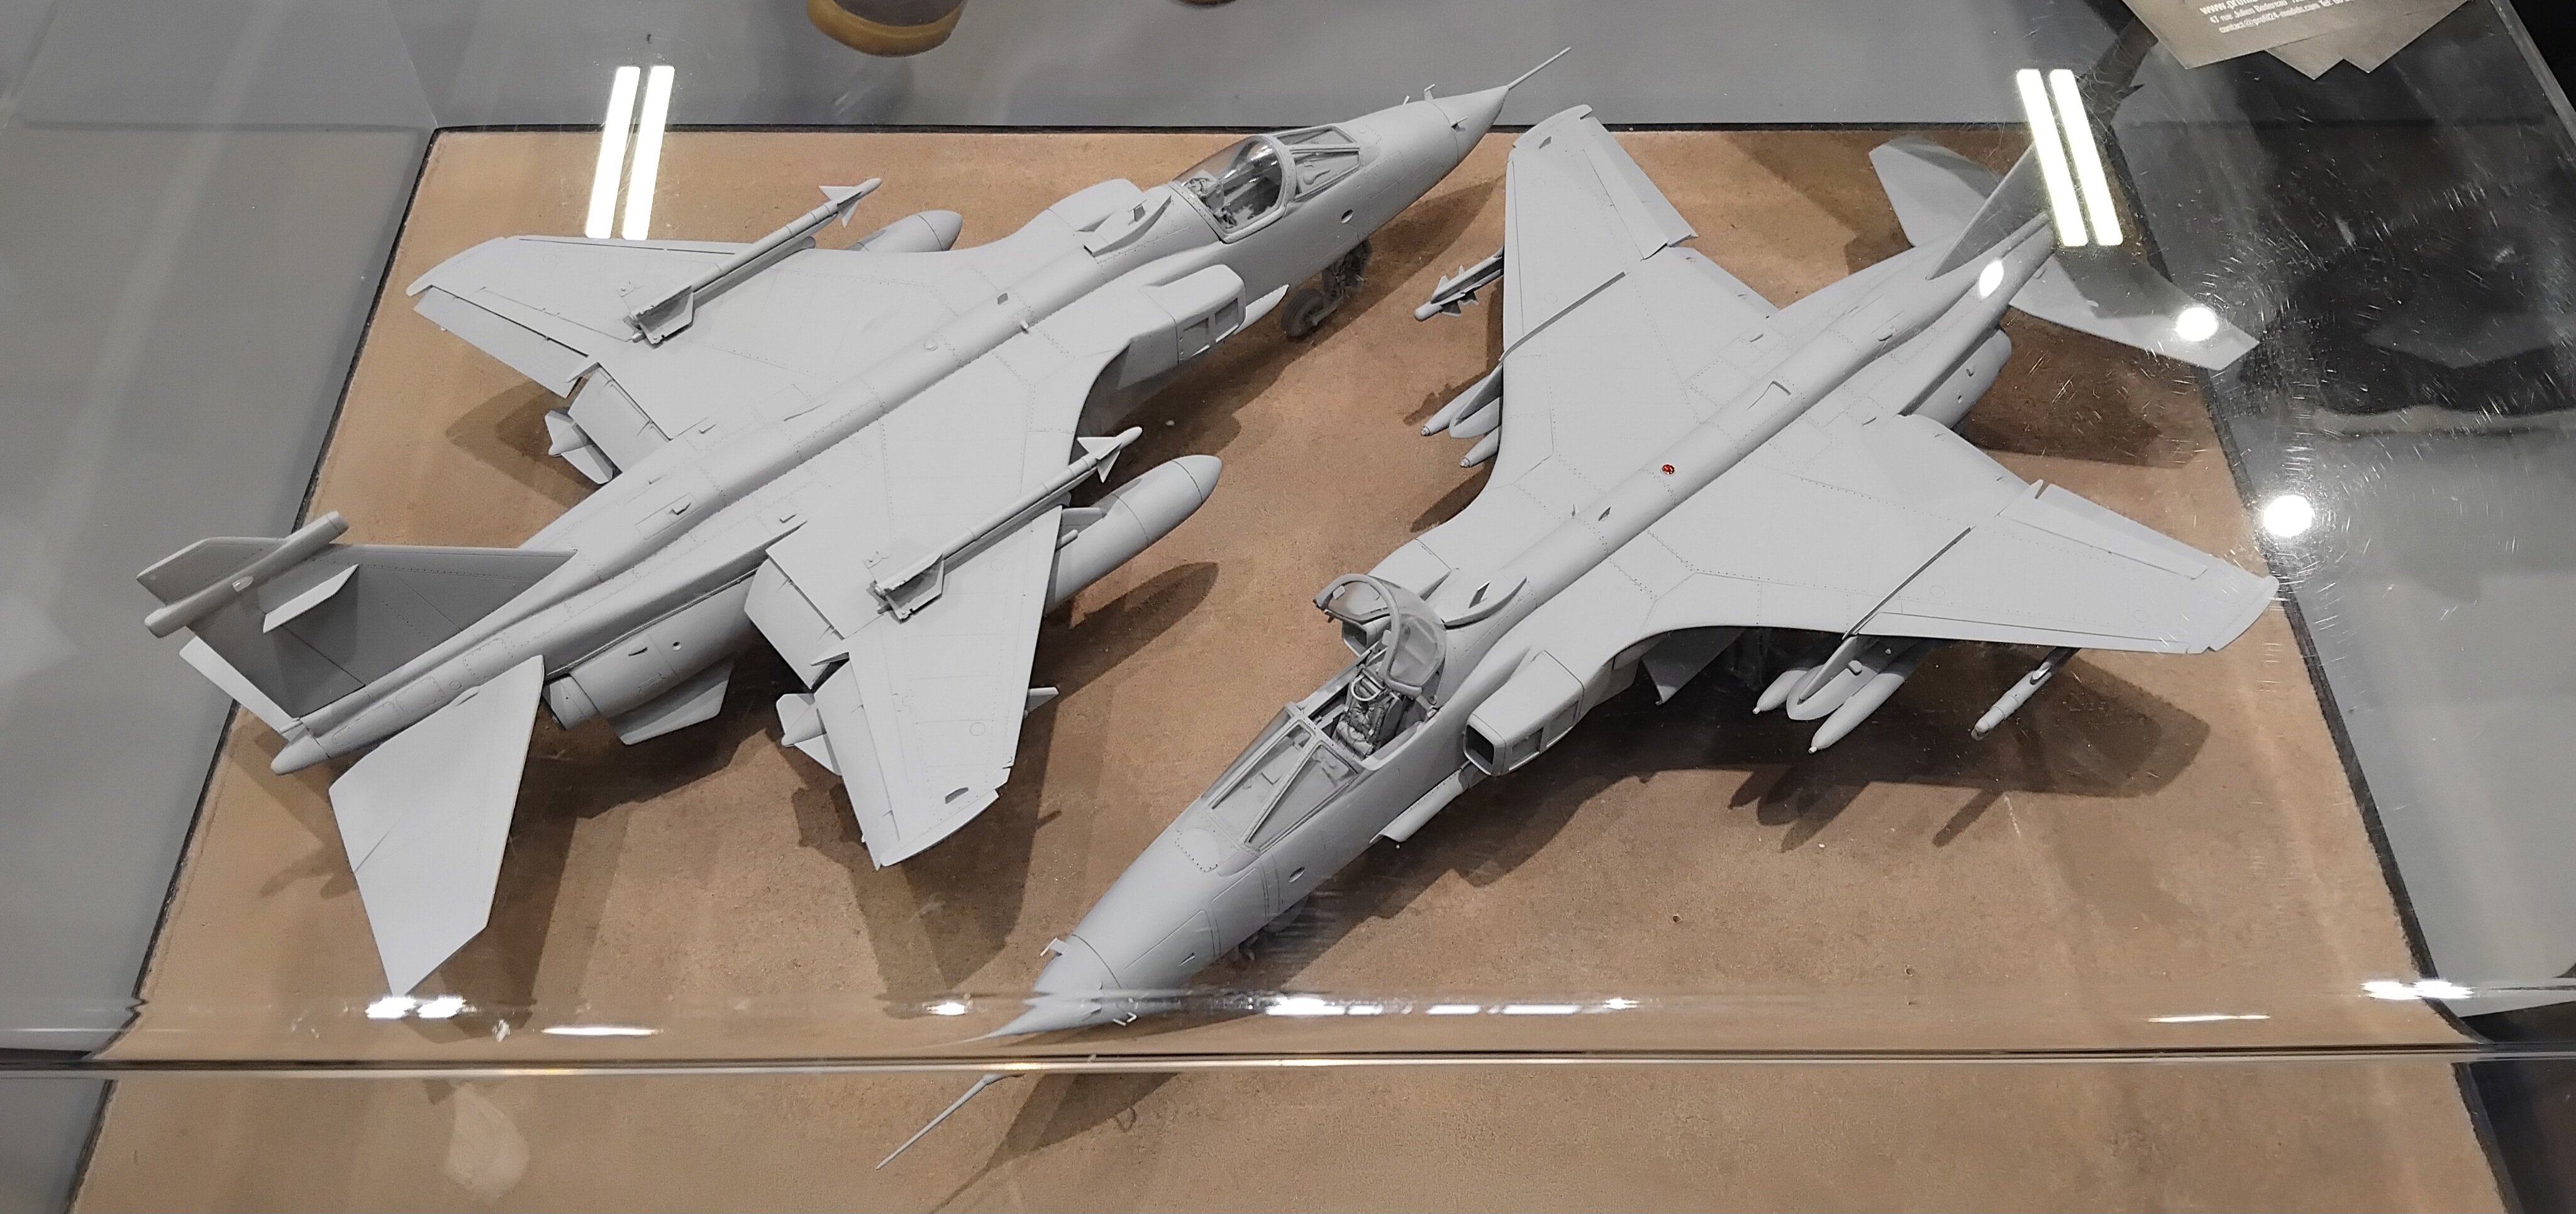
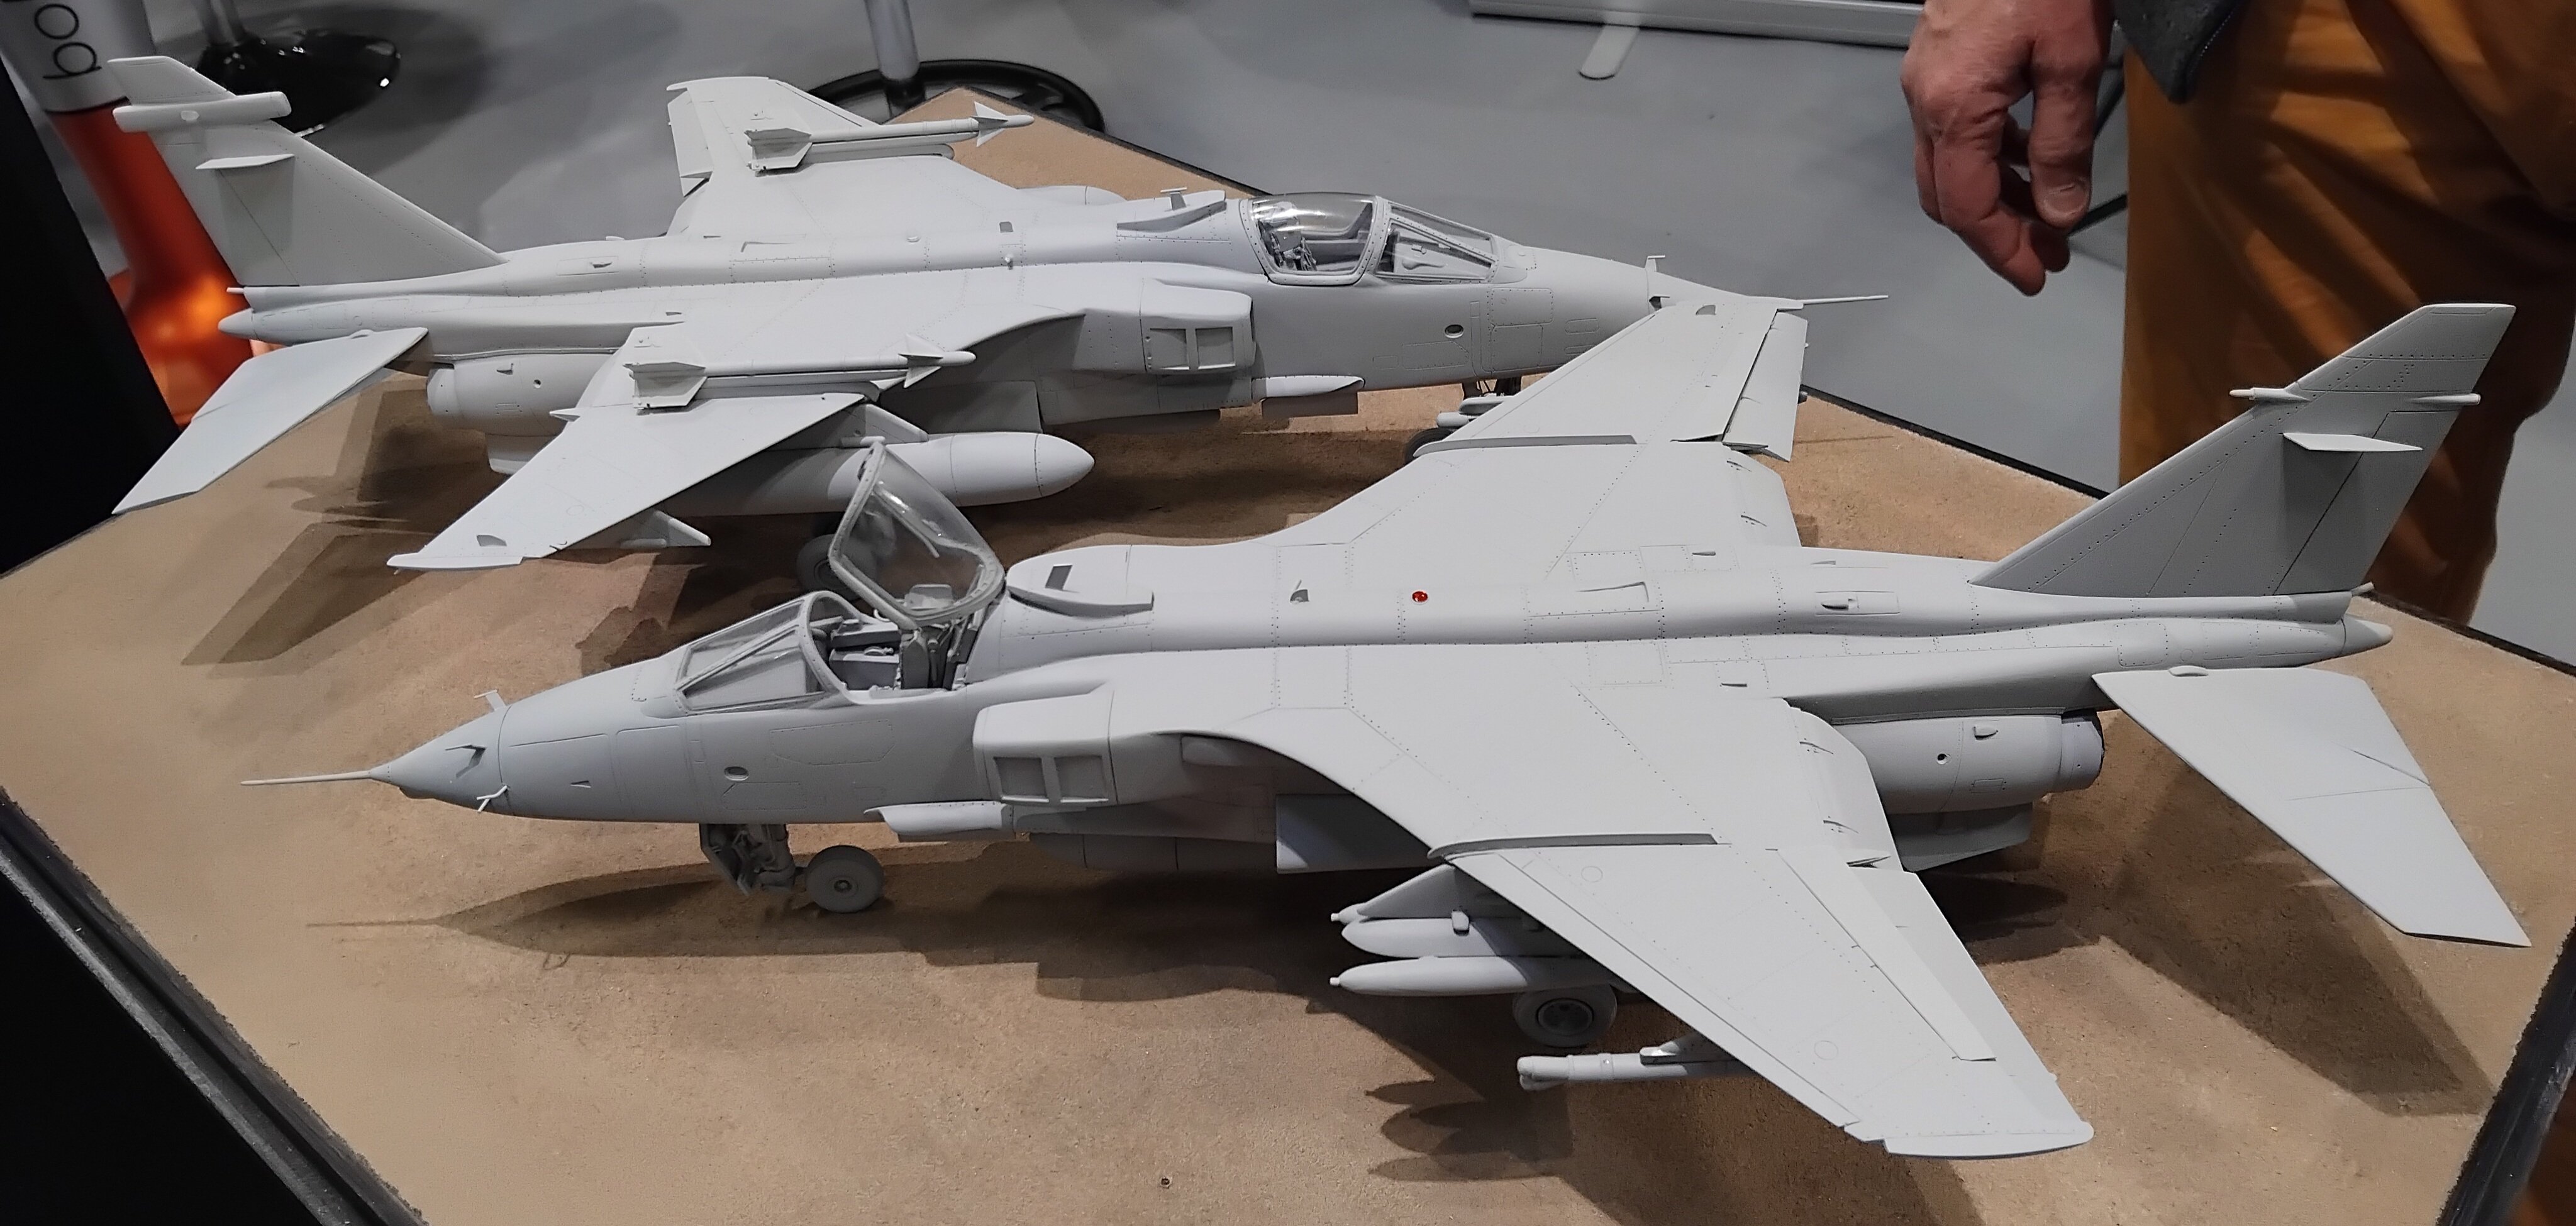
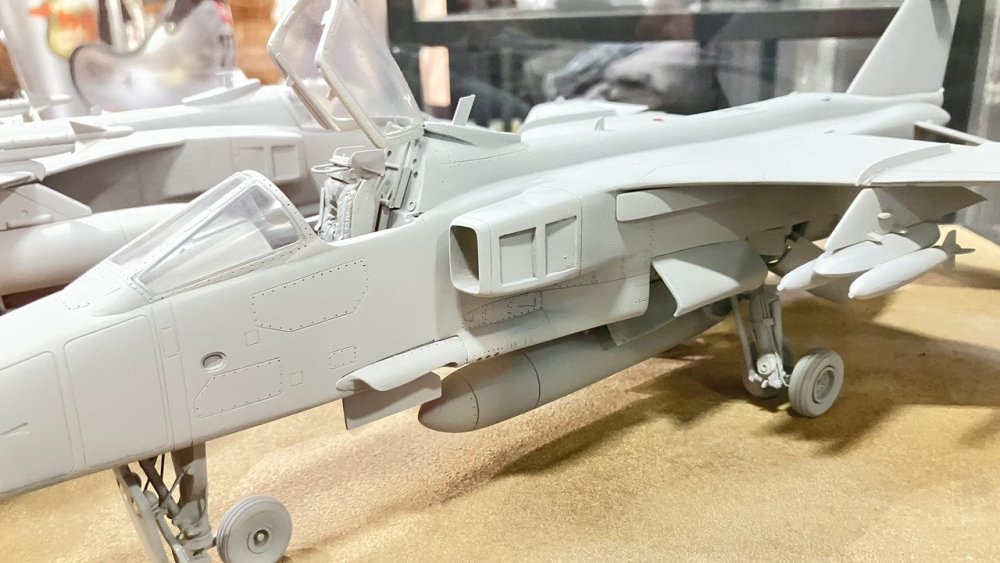
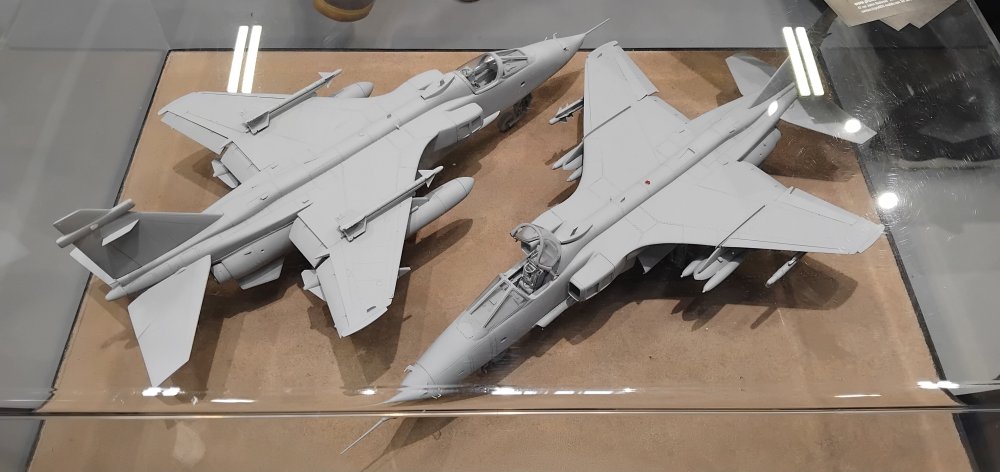
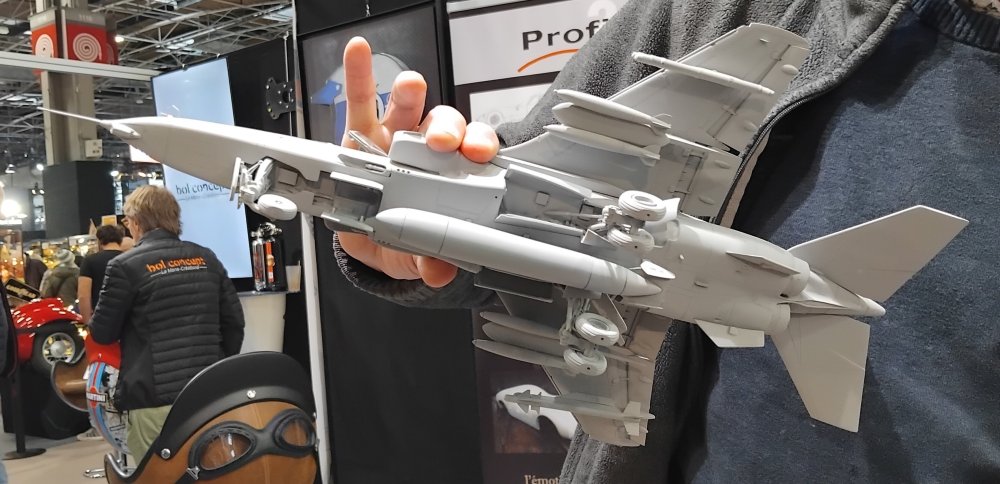
French company Profil24-Models ( https://www.profil24-models.com/model-kits-modeles-reduits/en/) - is to release 1/32nd SEPECAT Jaguar resin kits (French and British variants) I read that the price tag will be 350€ Just saw! https://master194.com/forum/viewtopic.php?t=129121 https://www.facebook.com/groups/master194/posts/3889627221300504/

-
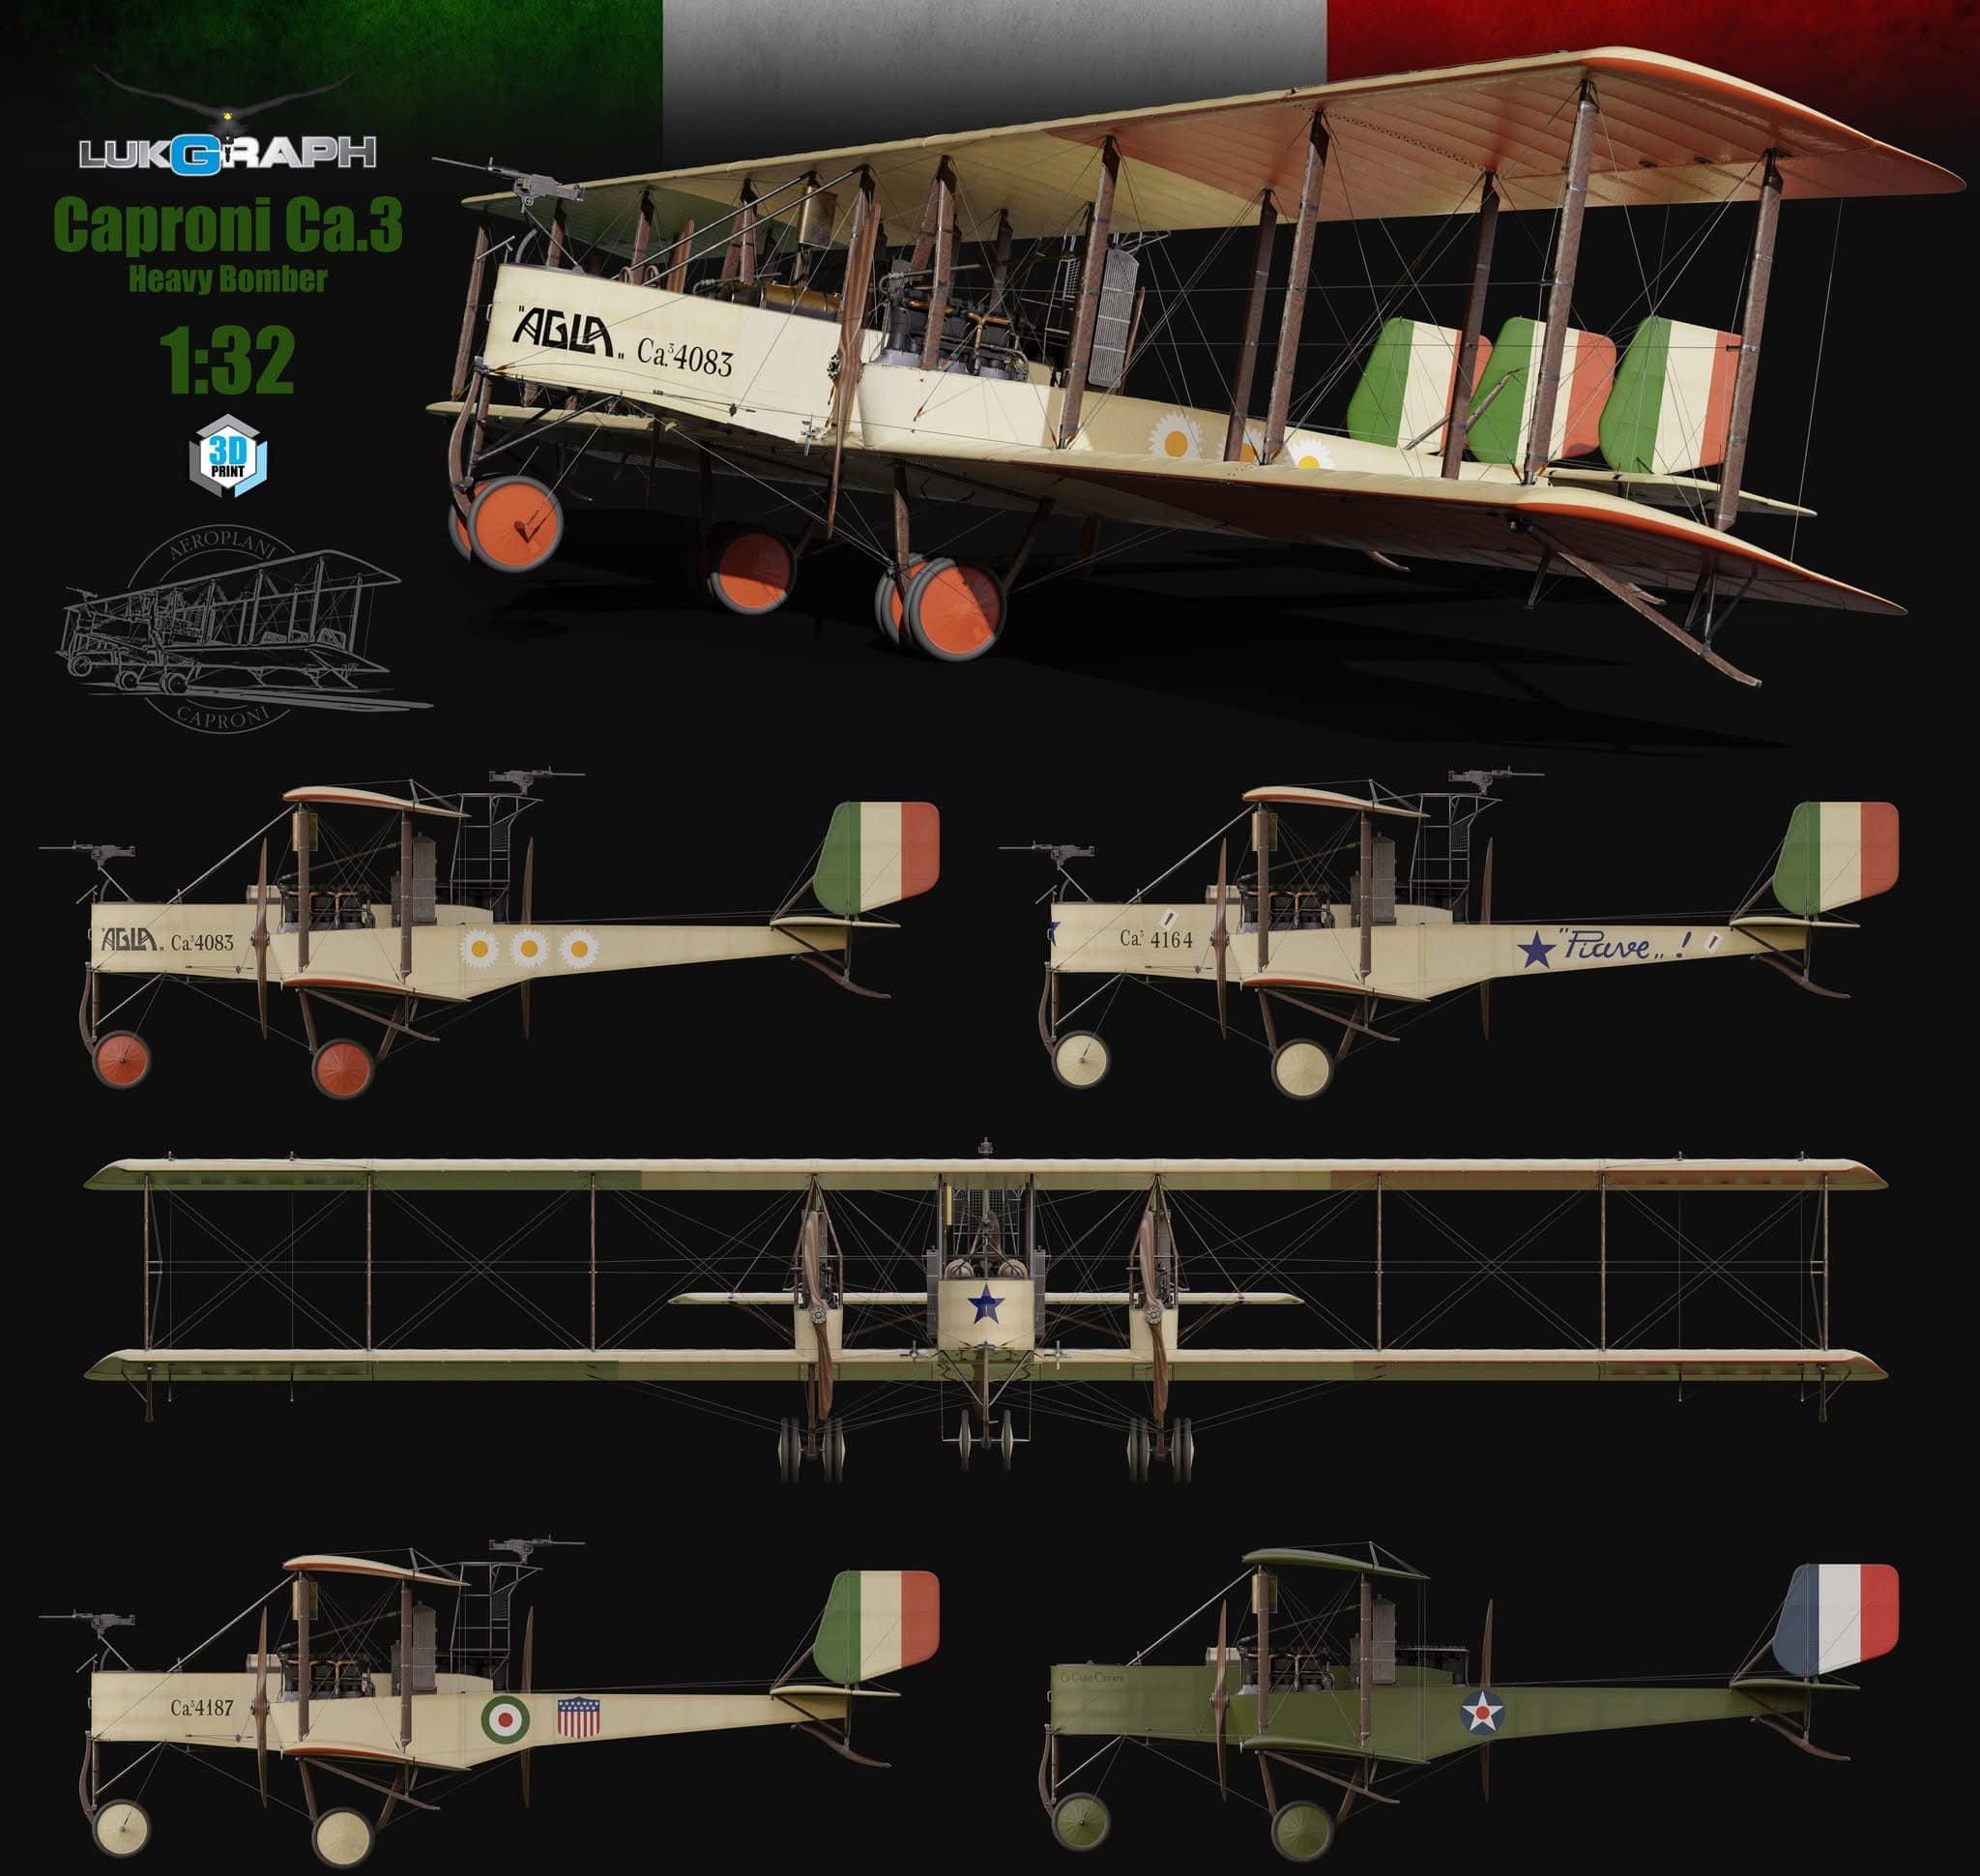
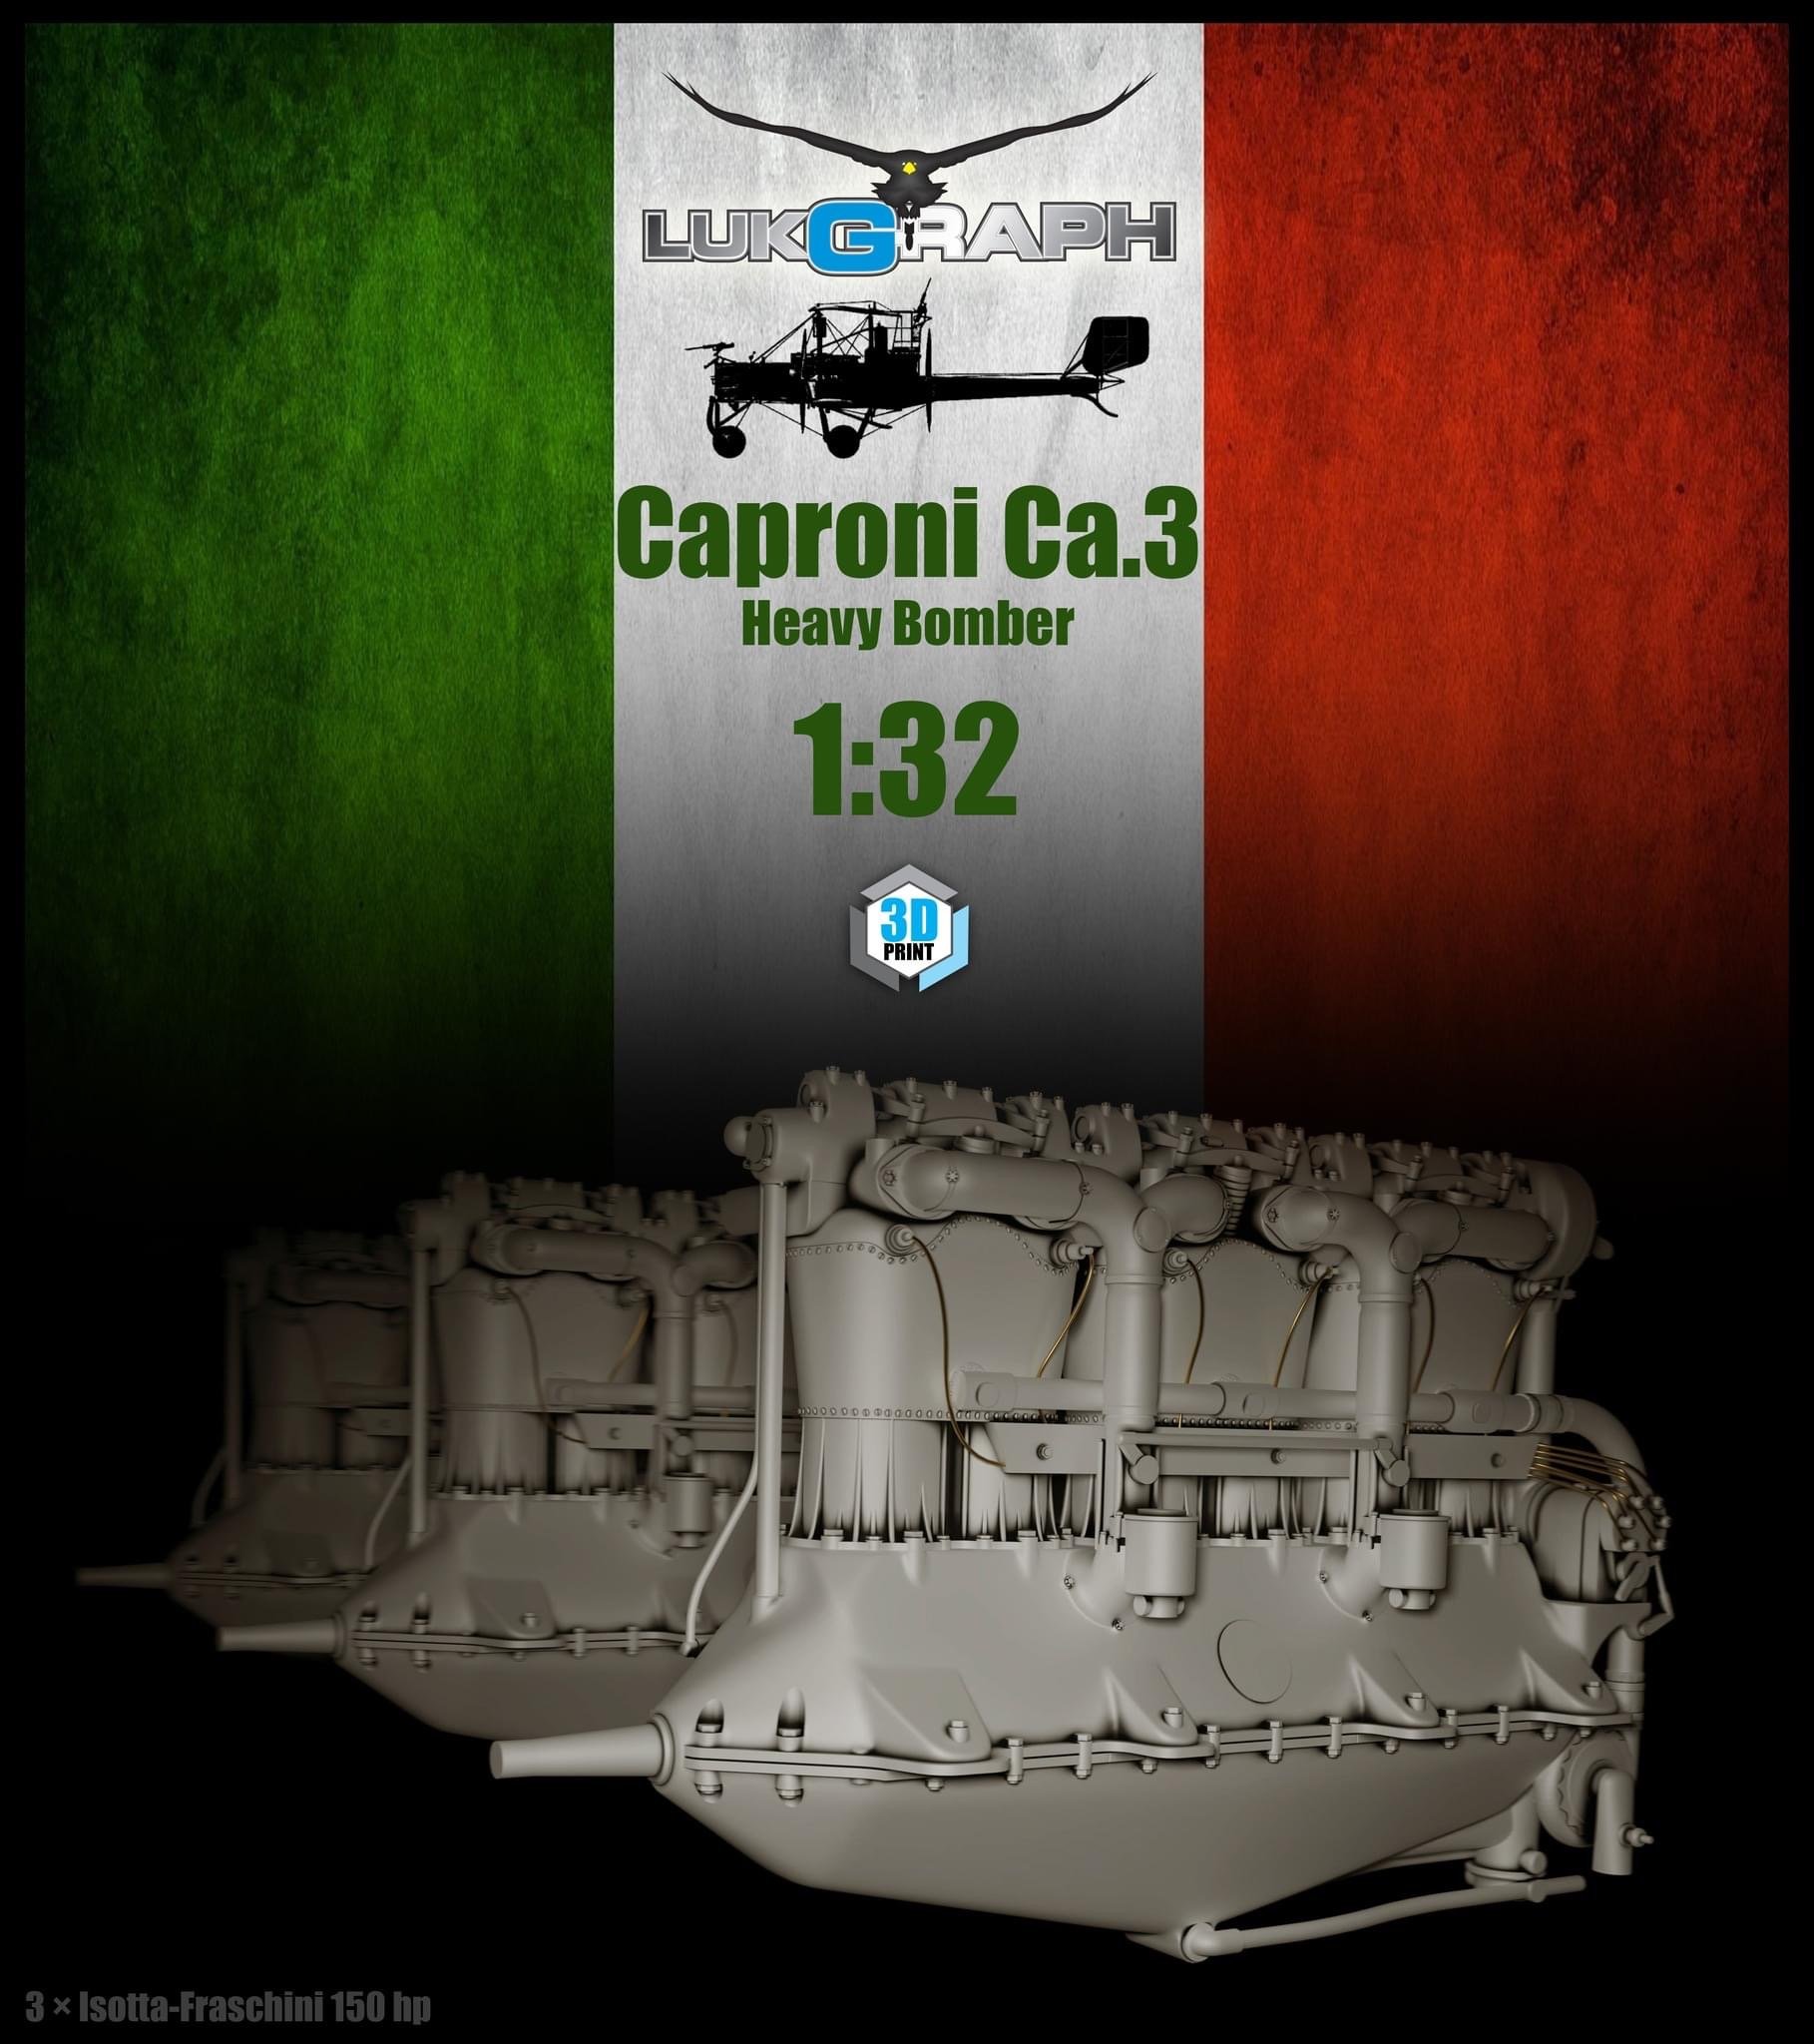
Probably but then it would be a Caproni in 1:48 for 250€ or more… but not a 1:32.
-
Looks terrific but the price tag is an issue, for sure... I would love to have one copy but not at 499€ plus shipping... But I would pay 200€/250€ for it even if it, for that, it had to come without the wooden box and figures... beautifull box but for me, useless...
-

1:32nd scale Caproni-Pensuti
Fran replied to sandbagger's topic in LSM 1/35 and Larger Work In Progress
Great start!! I had no idea that MicroMir had this model in their catalogue. -
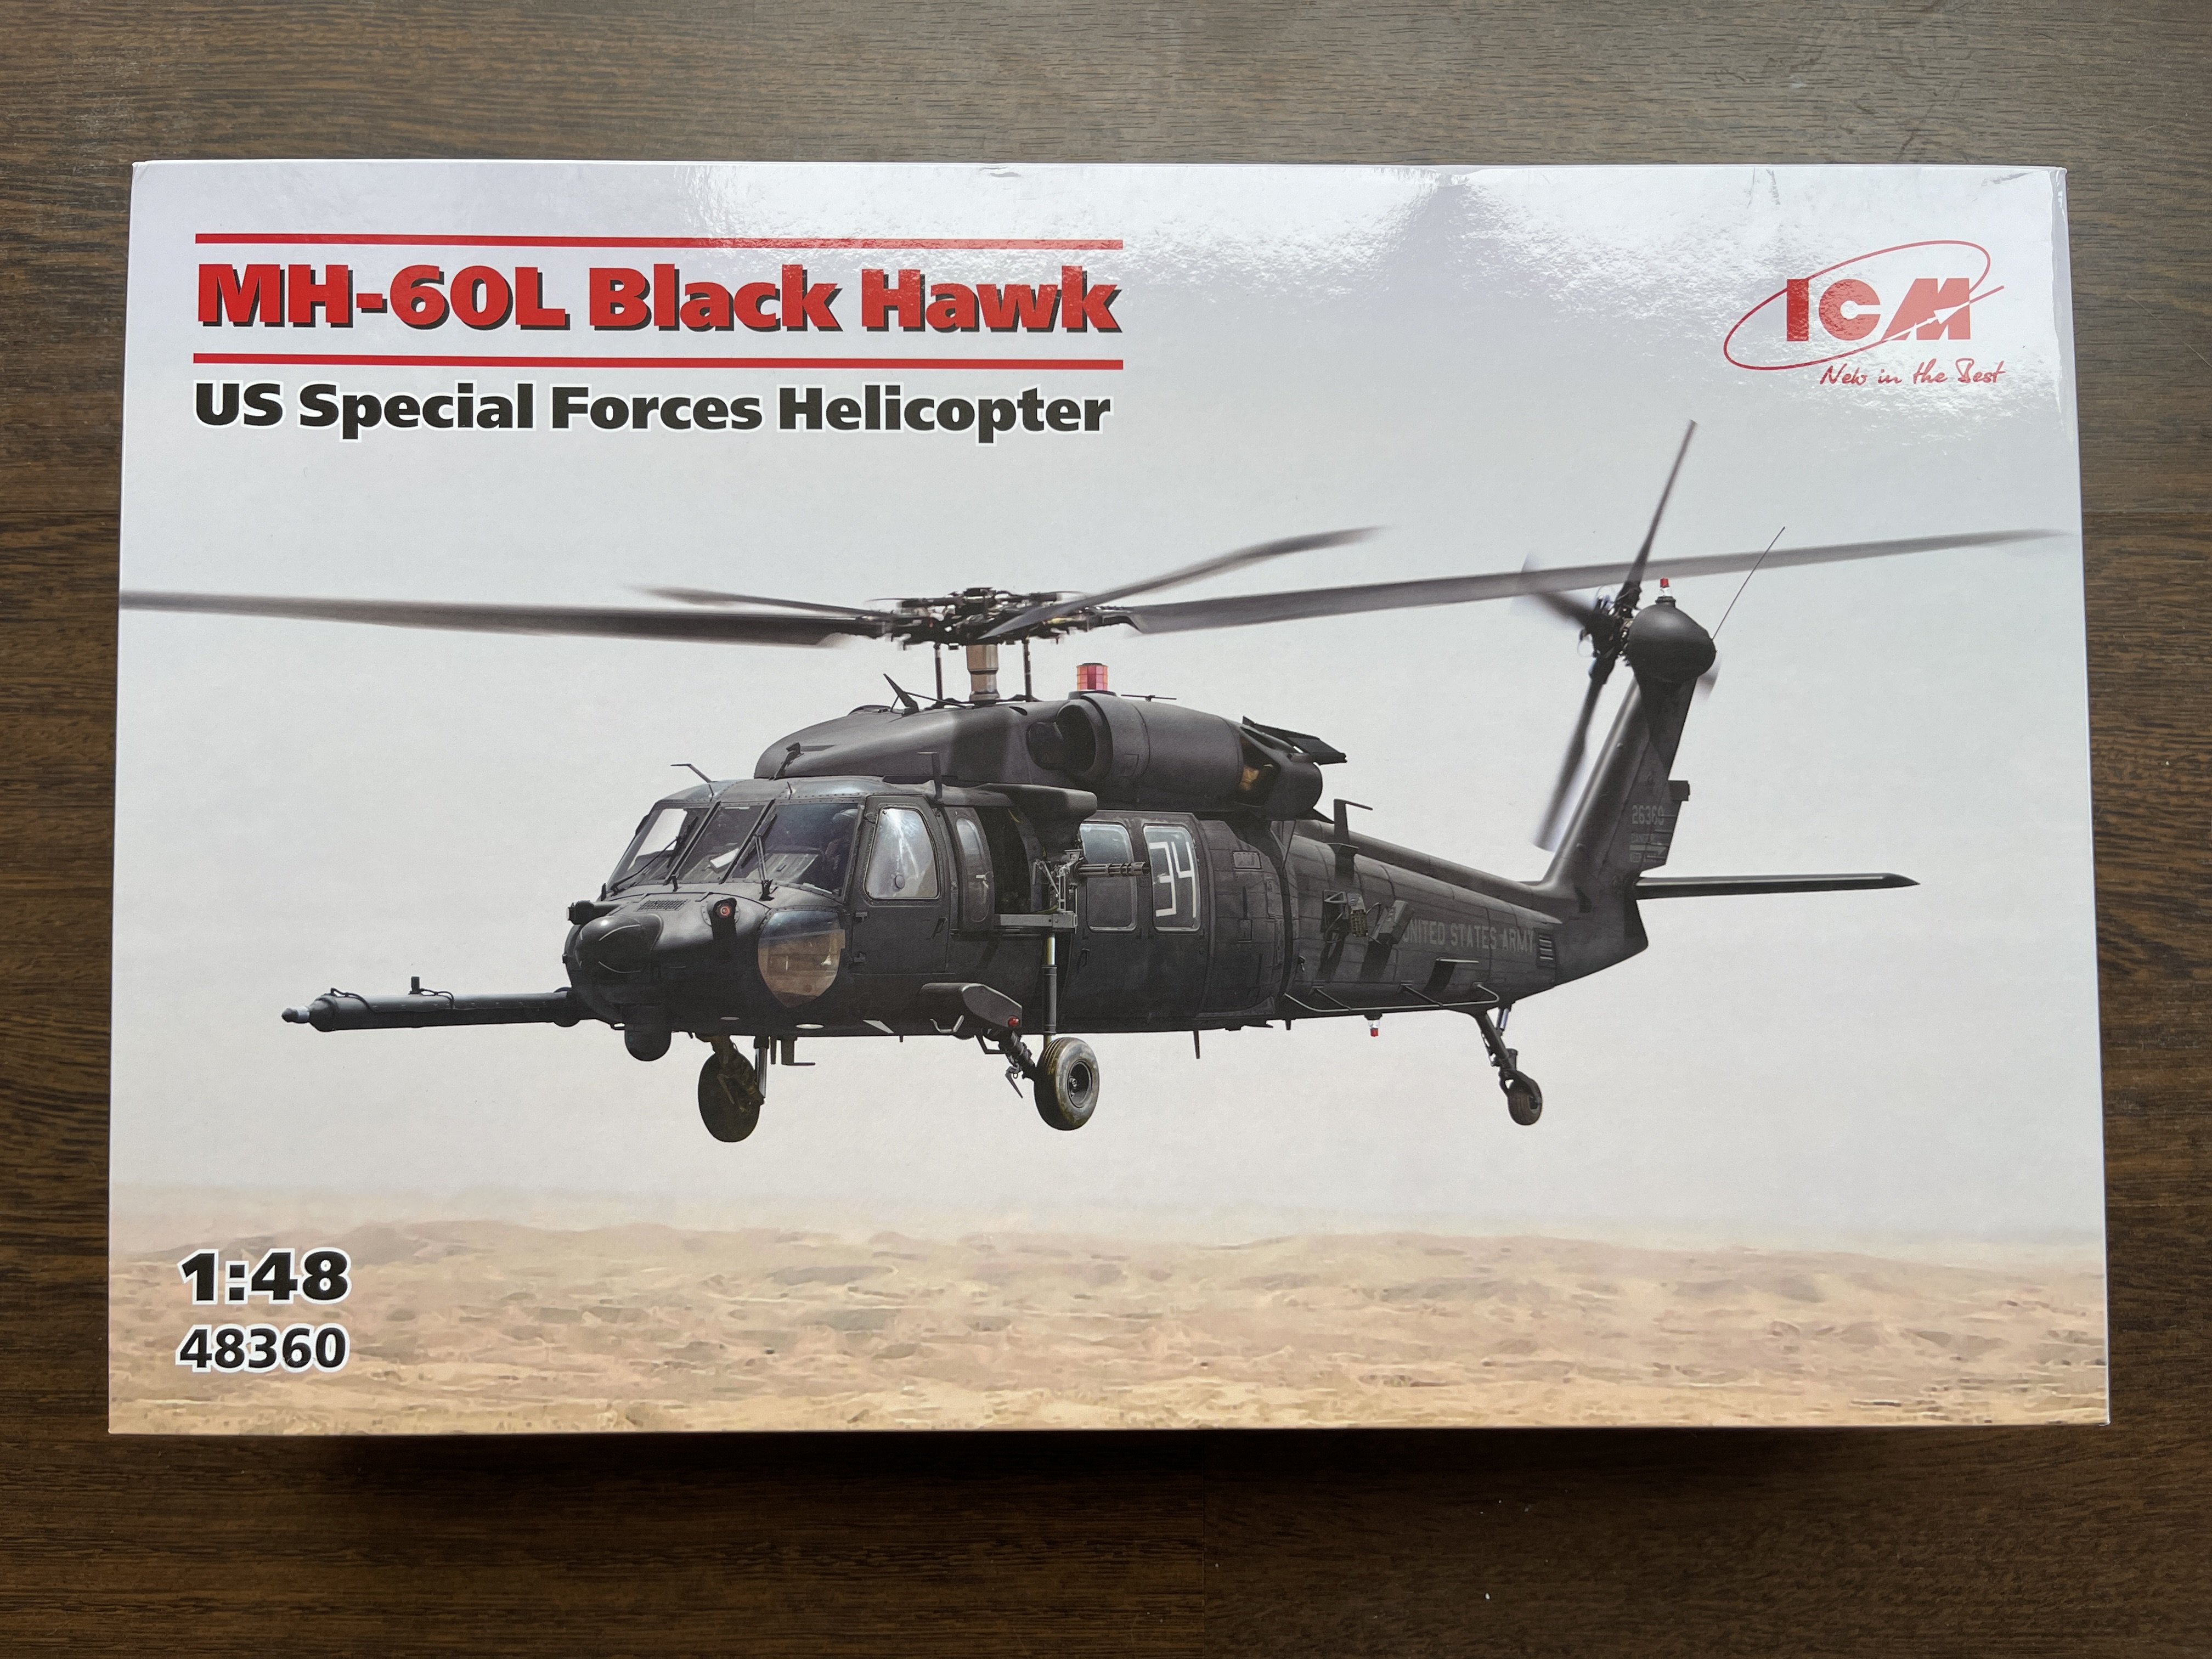
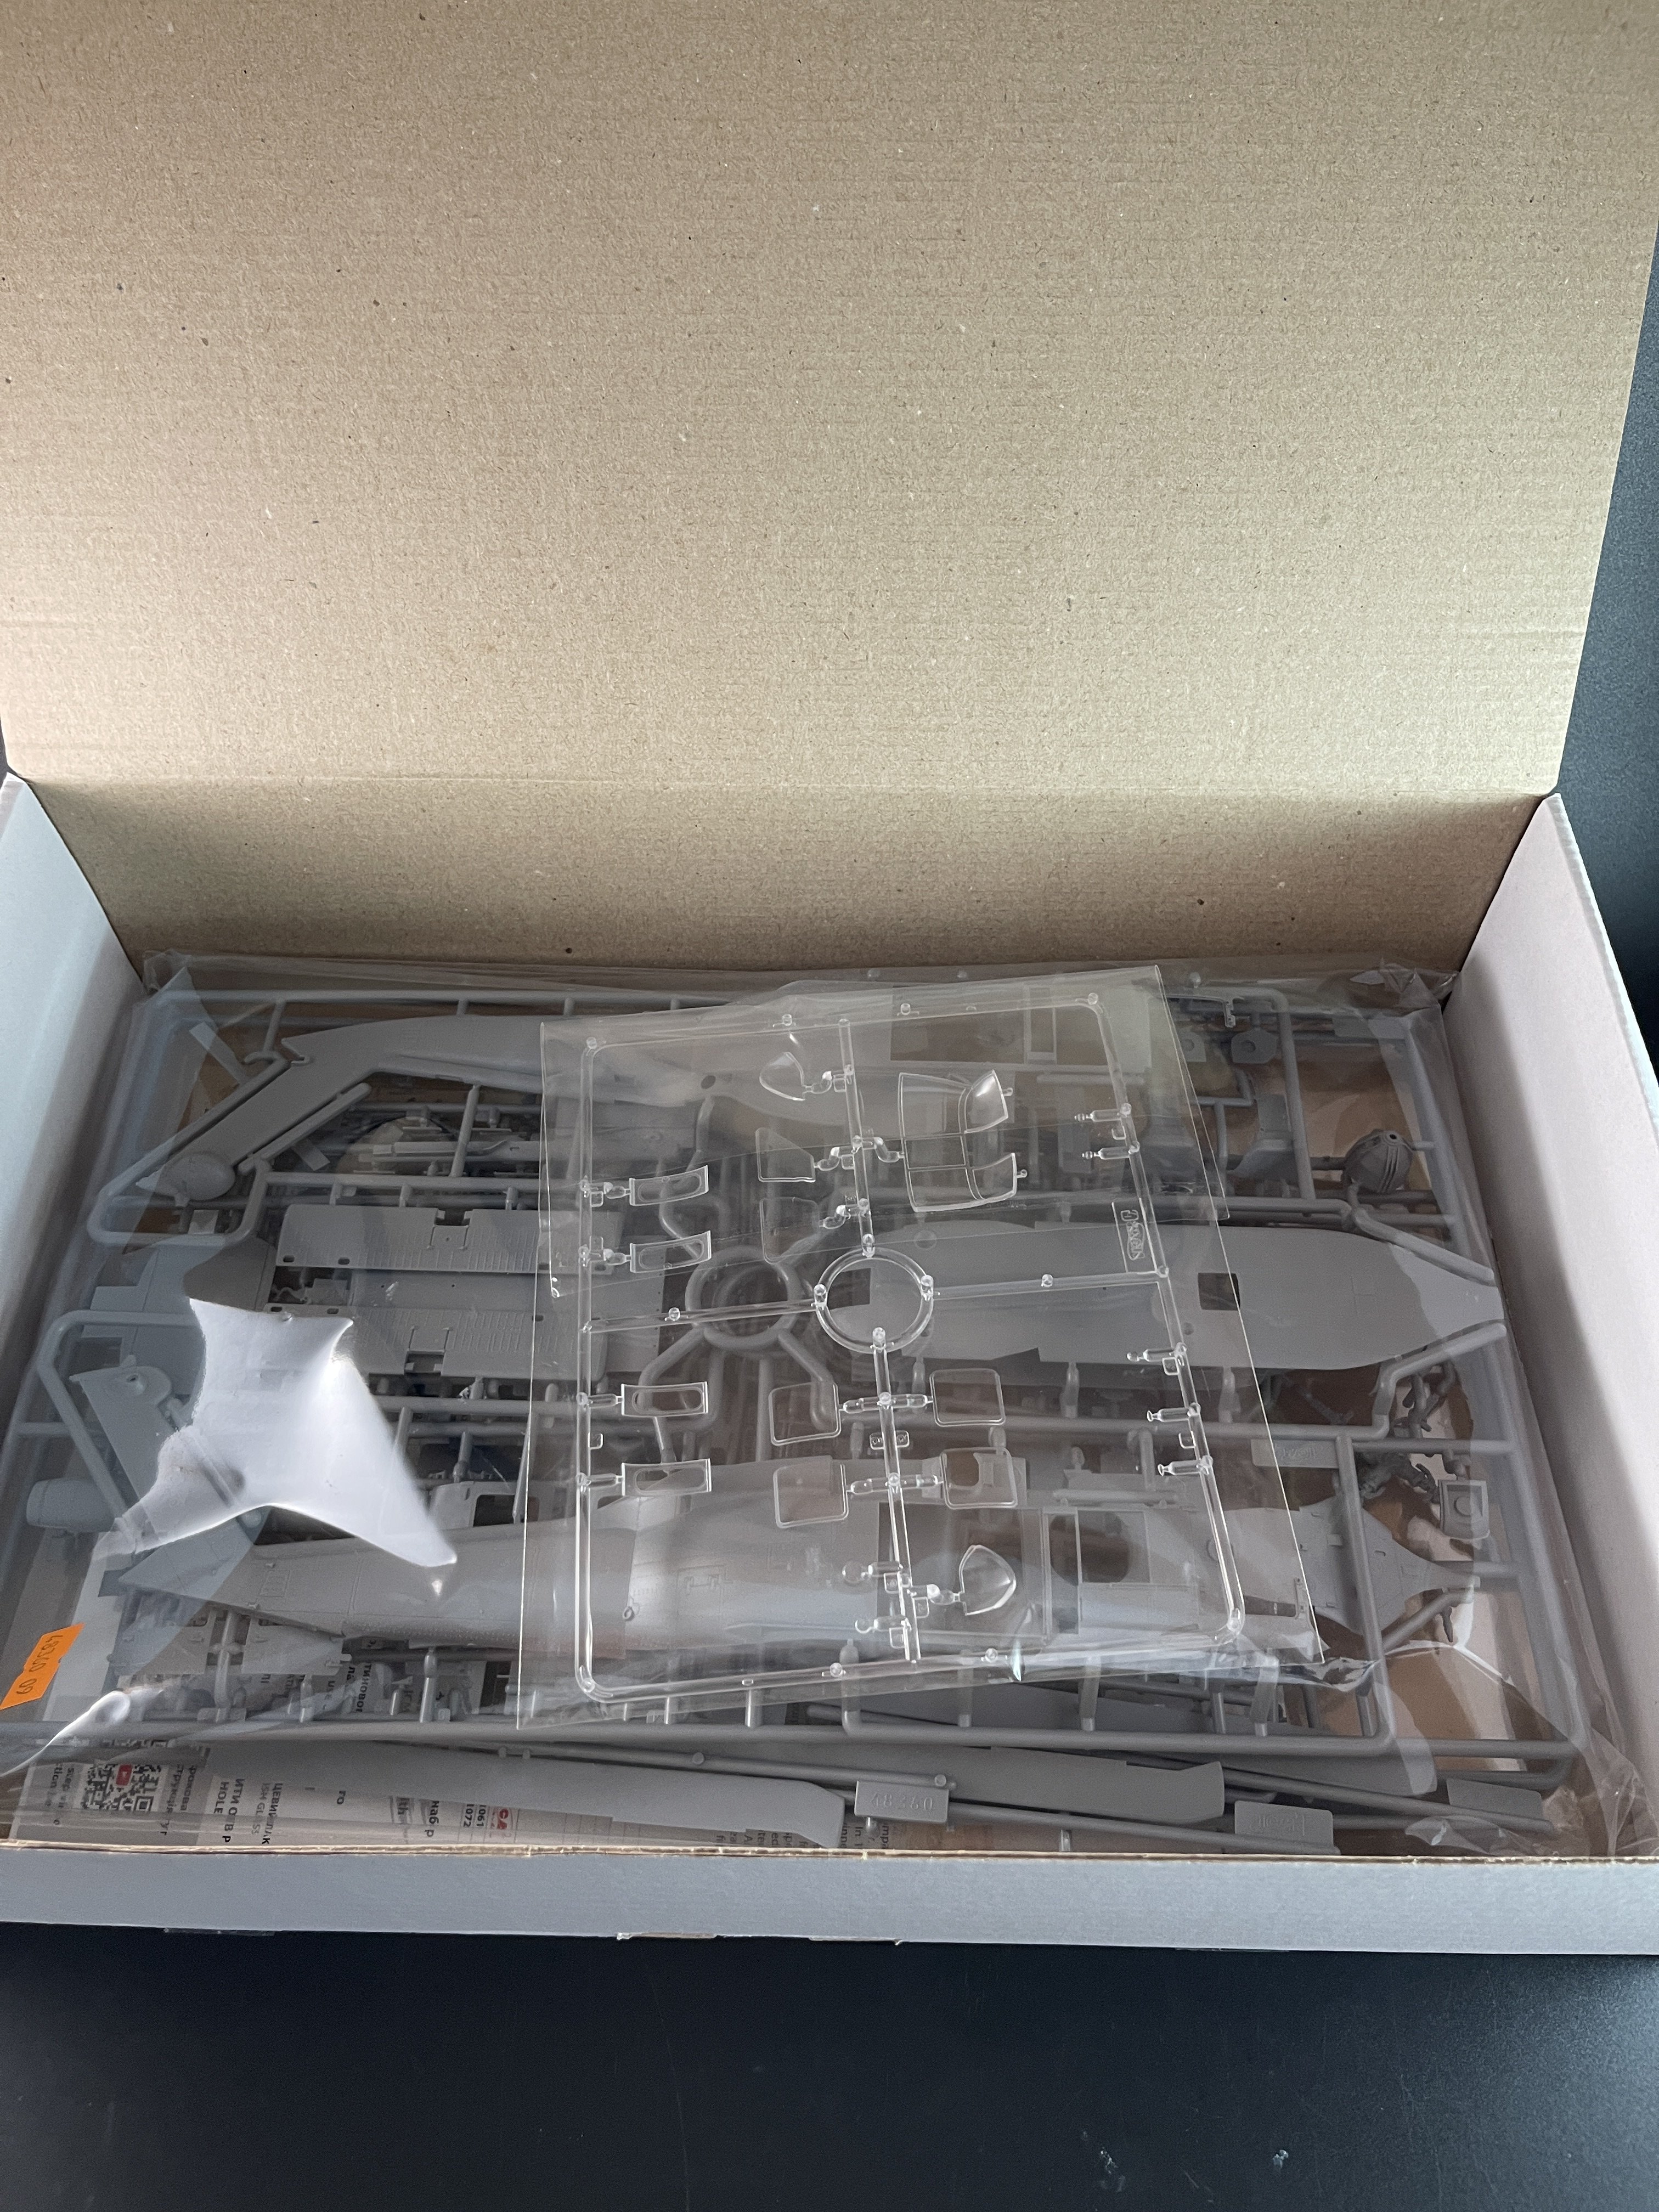
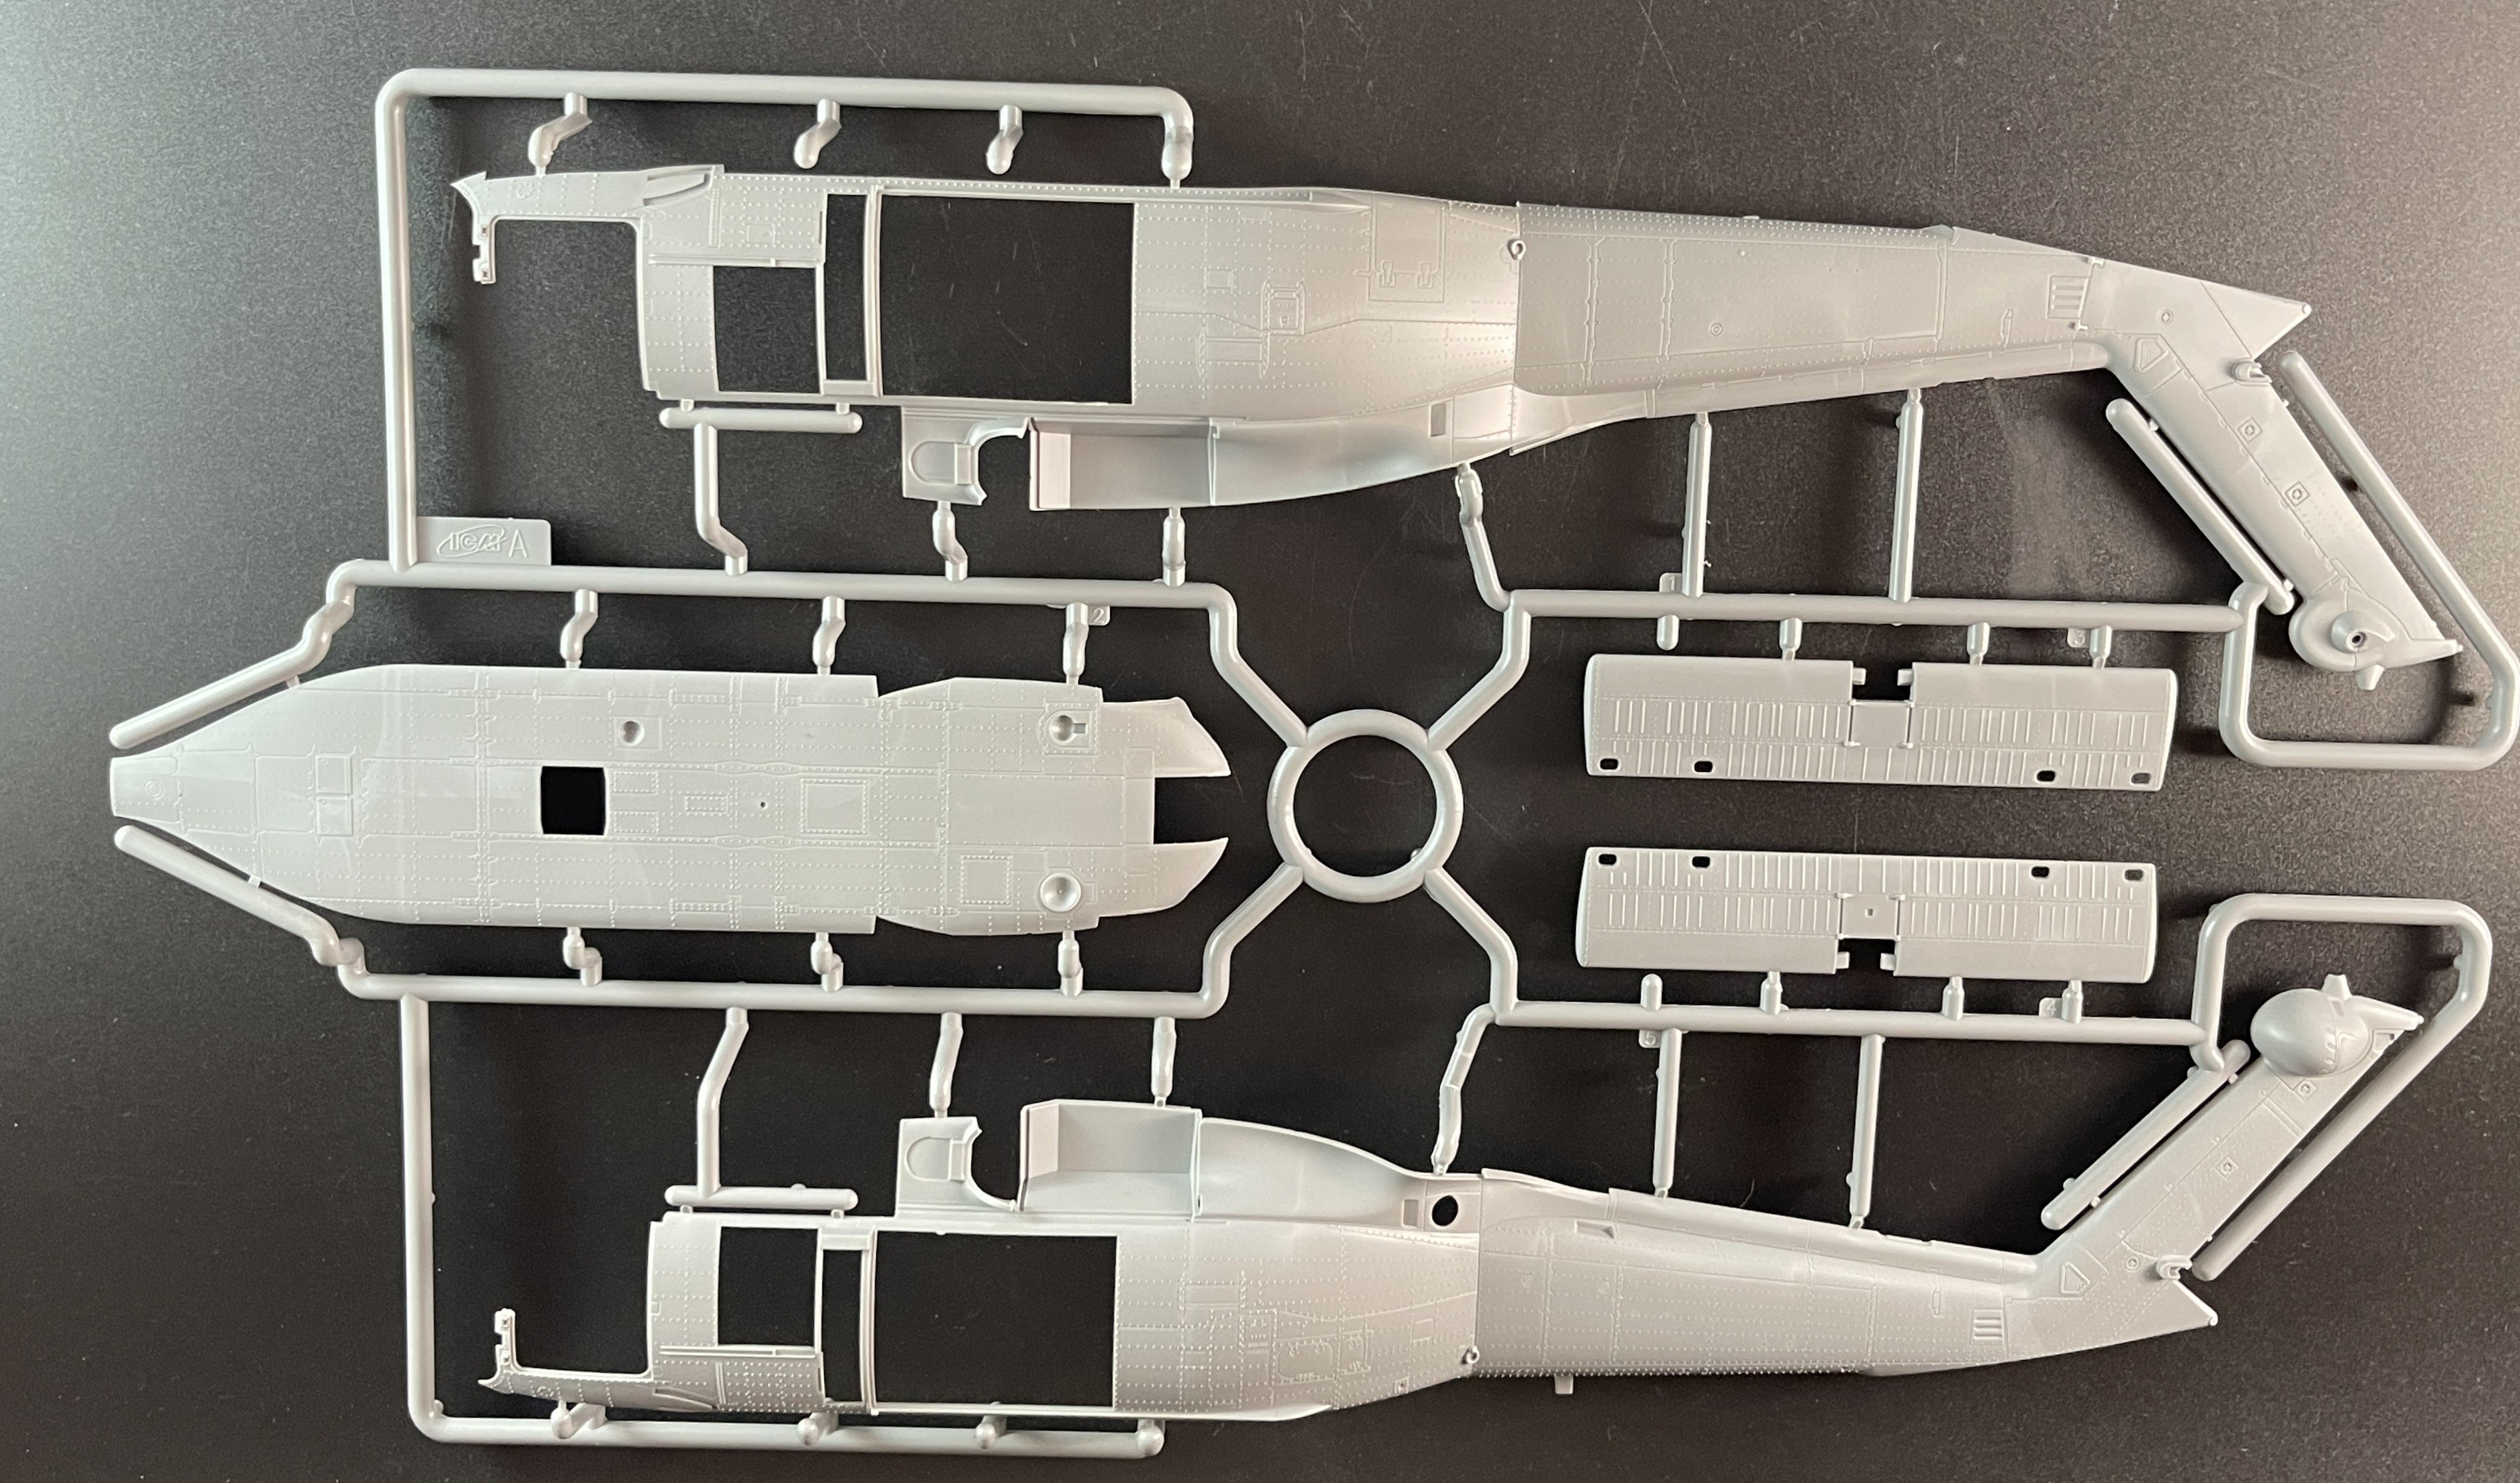
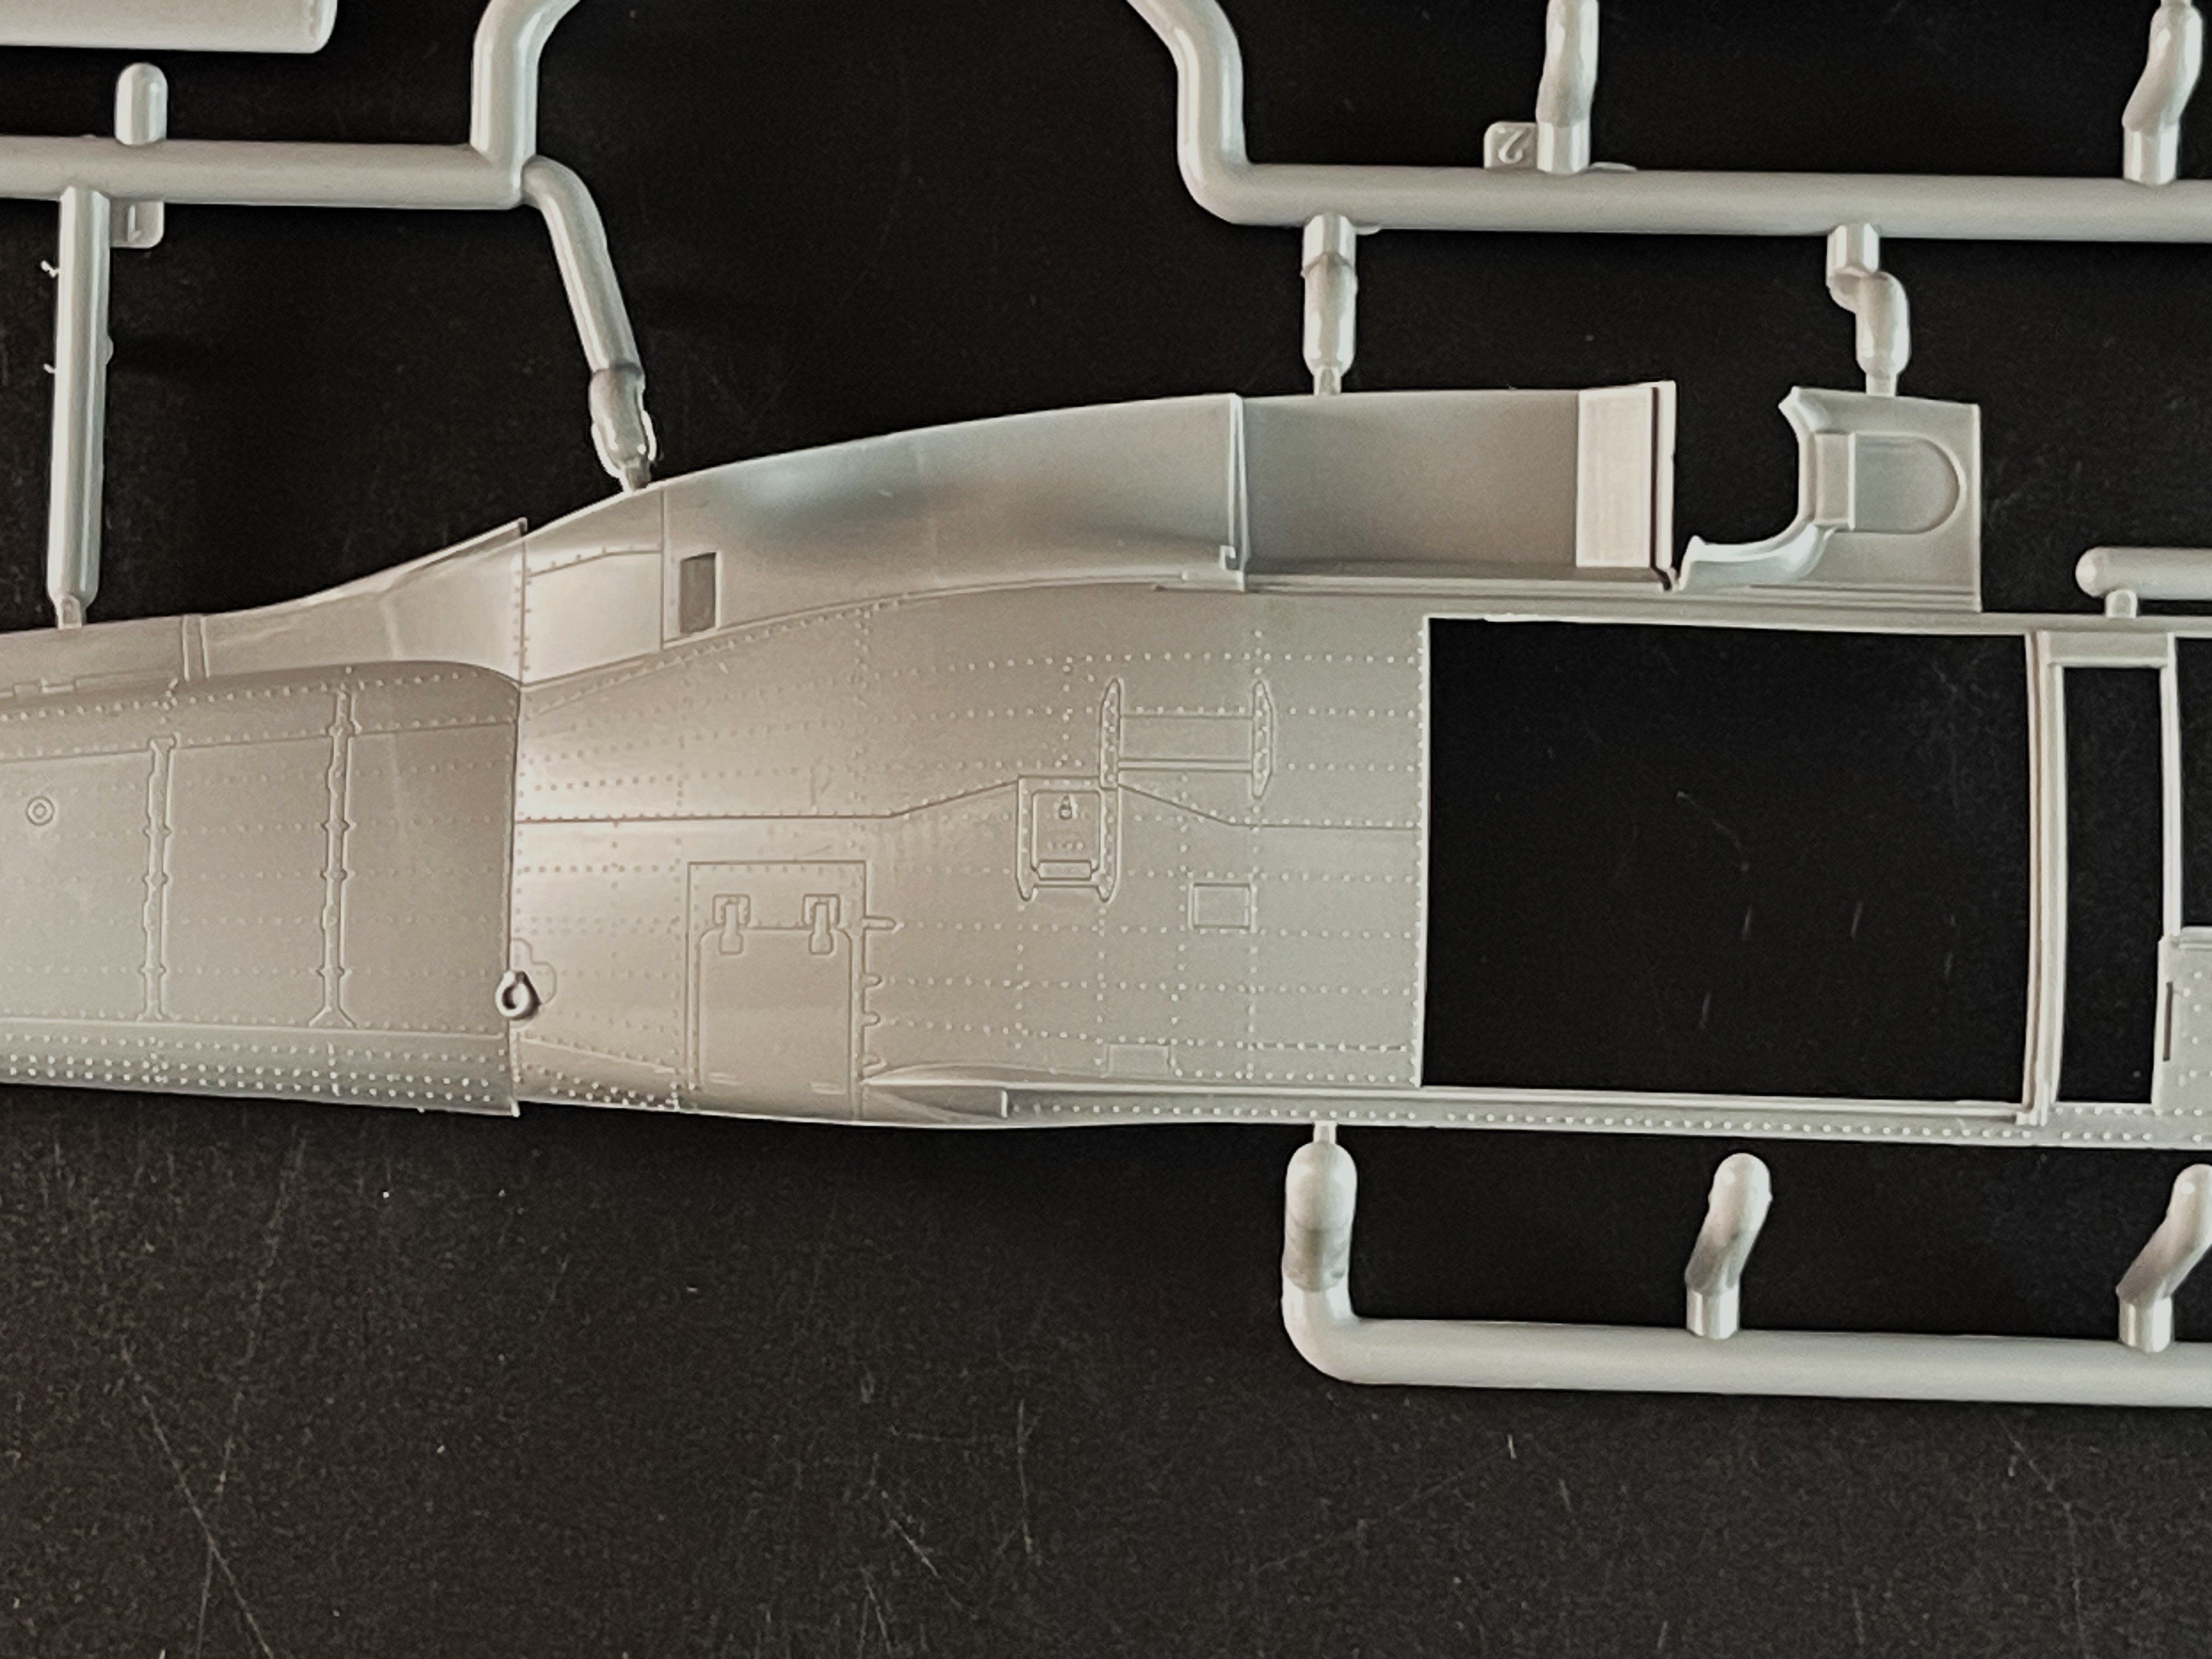
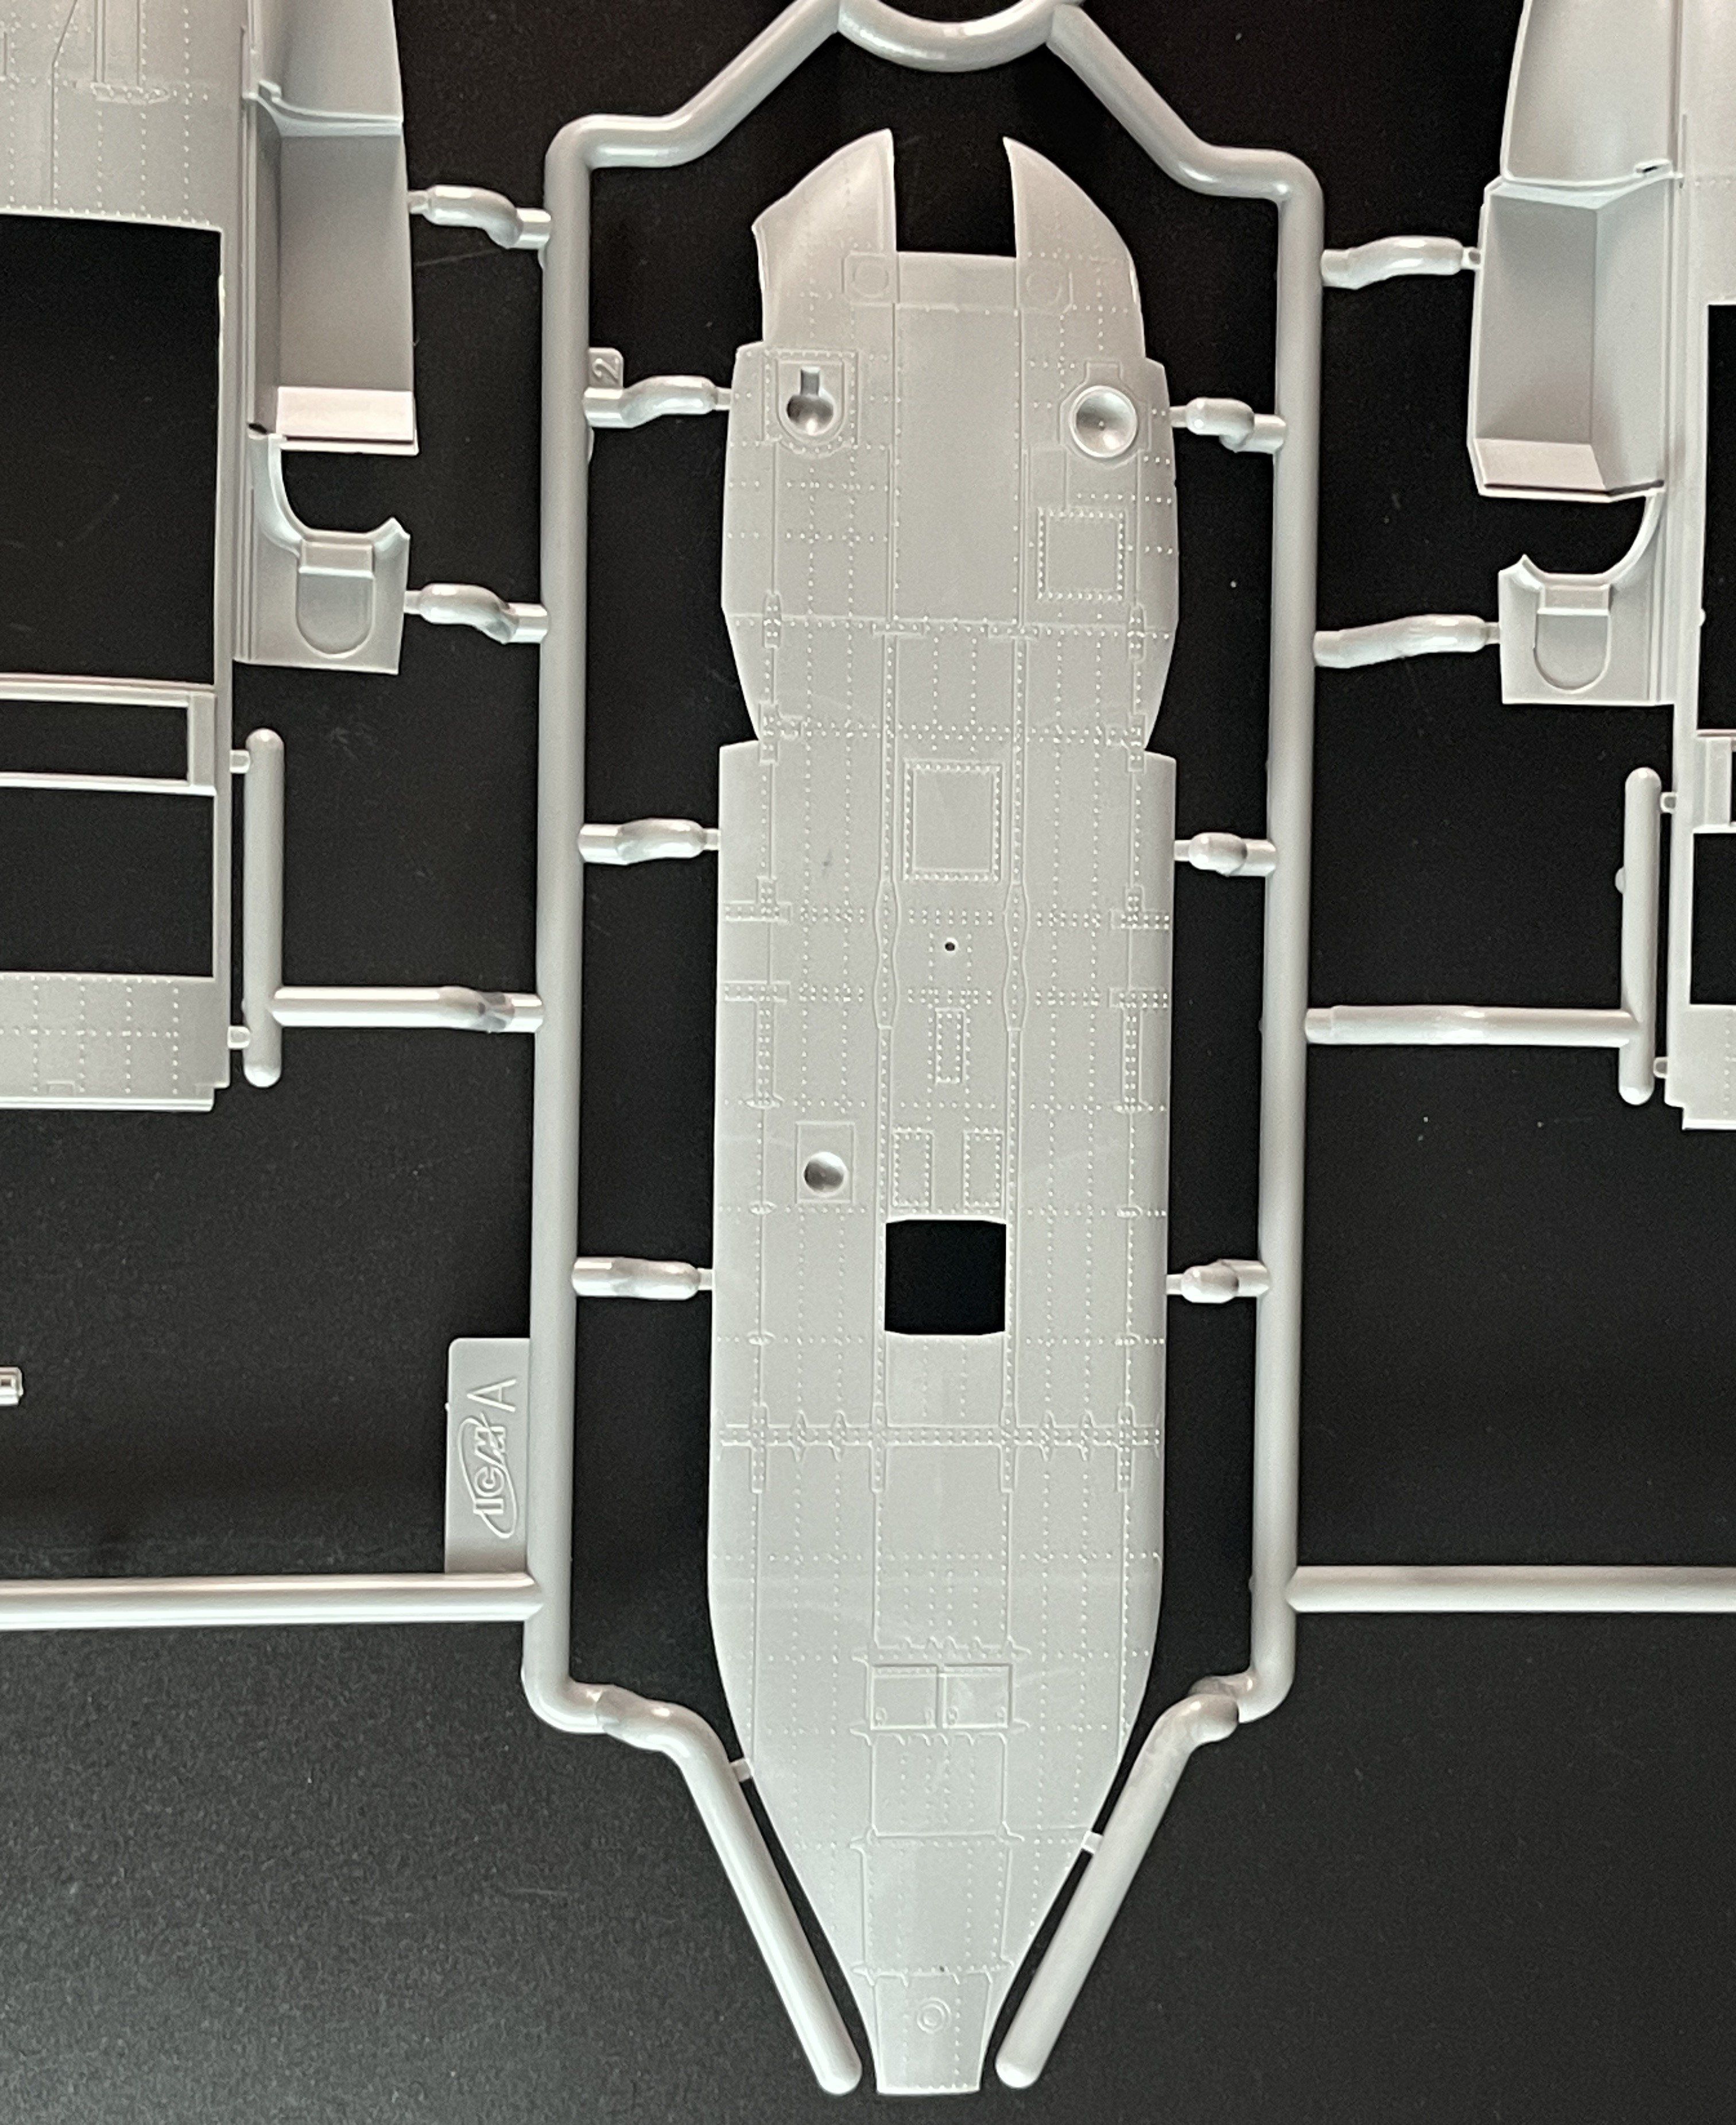
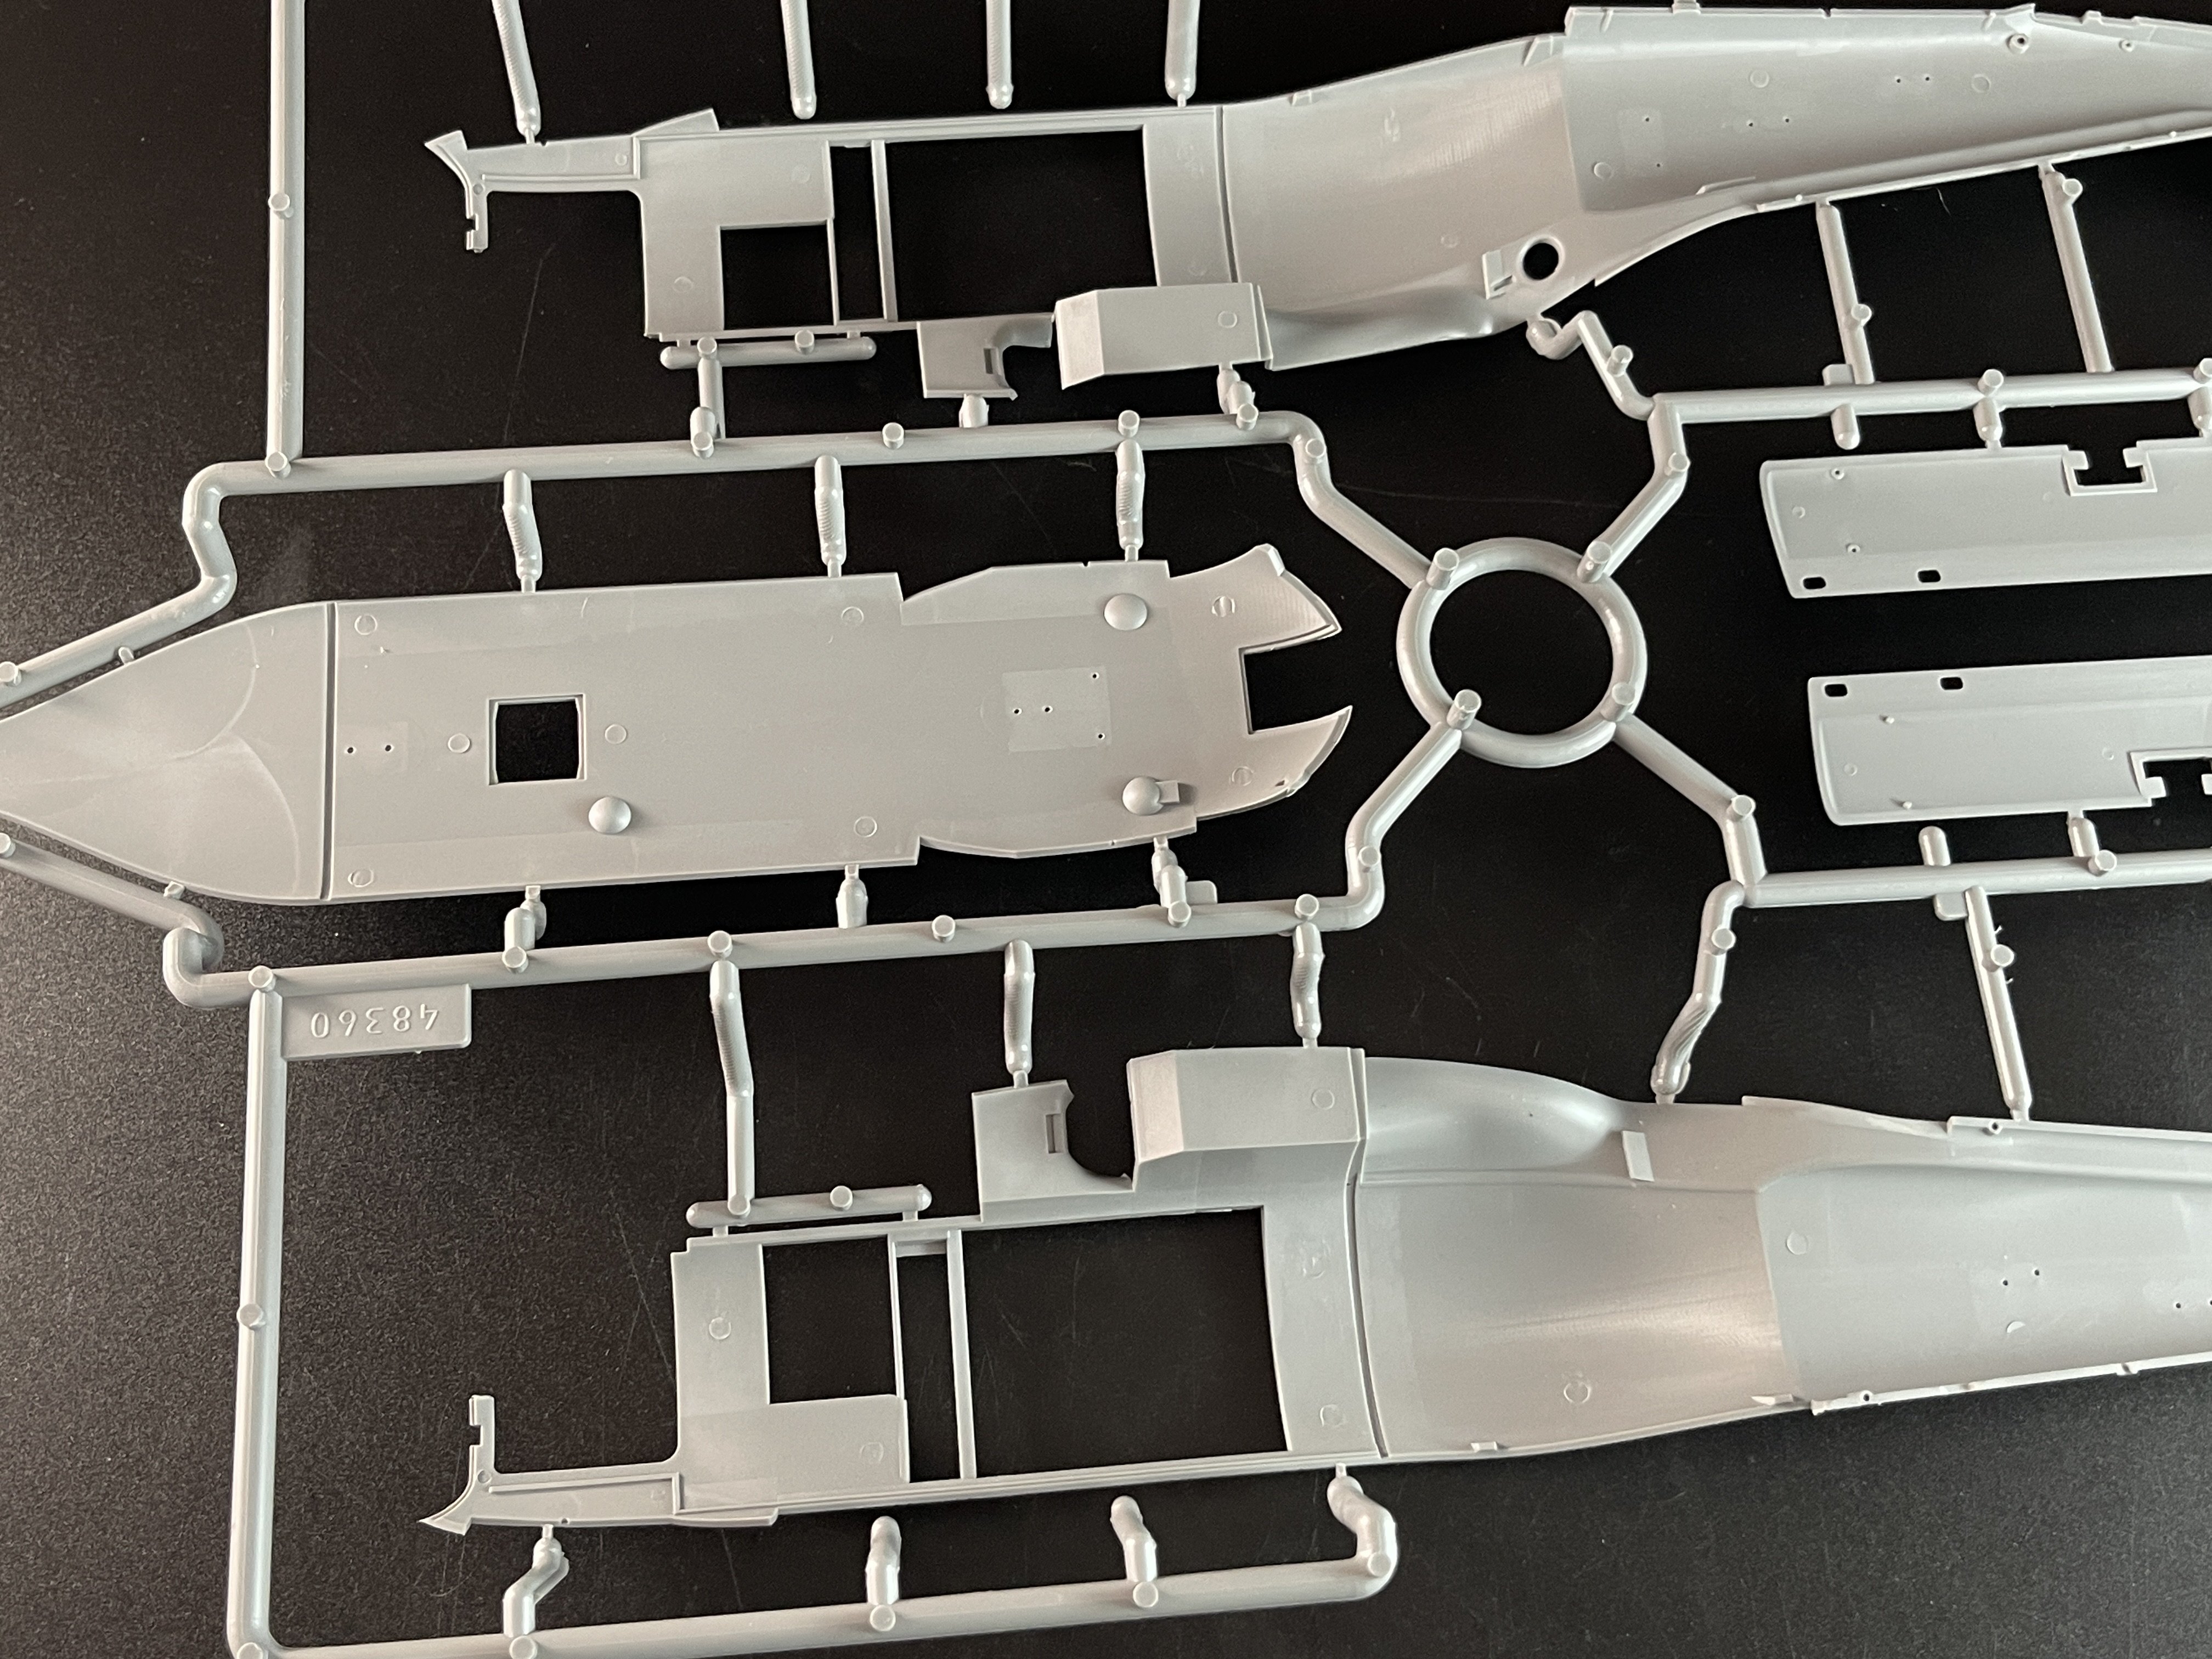
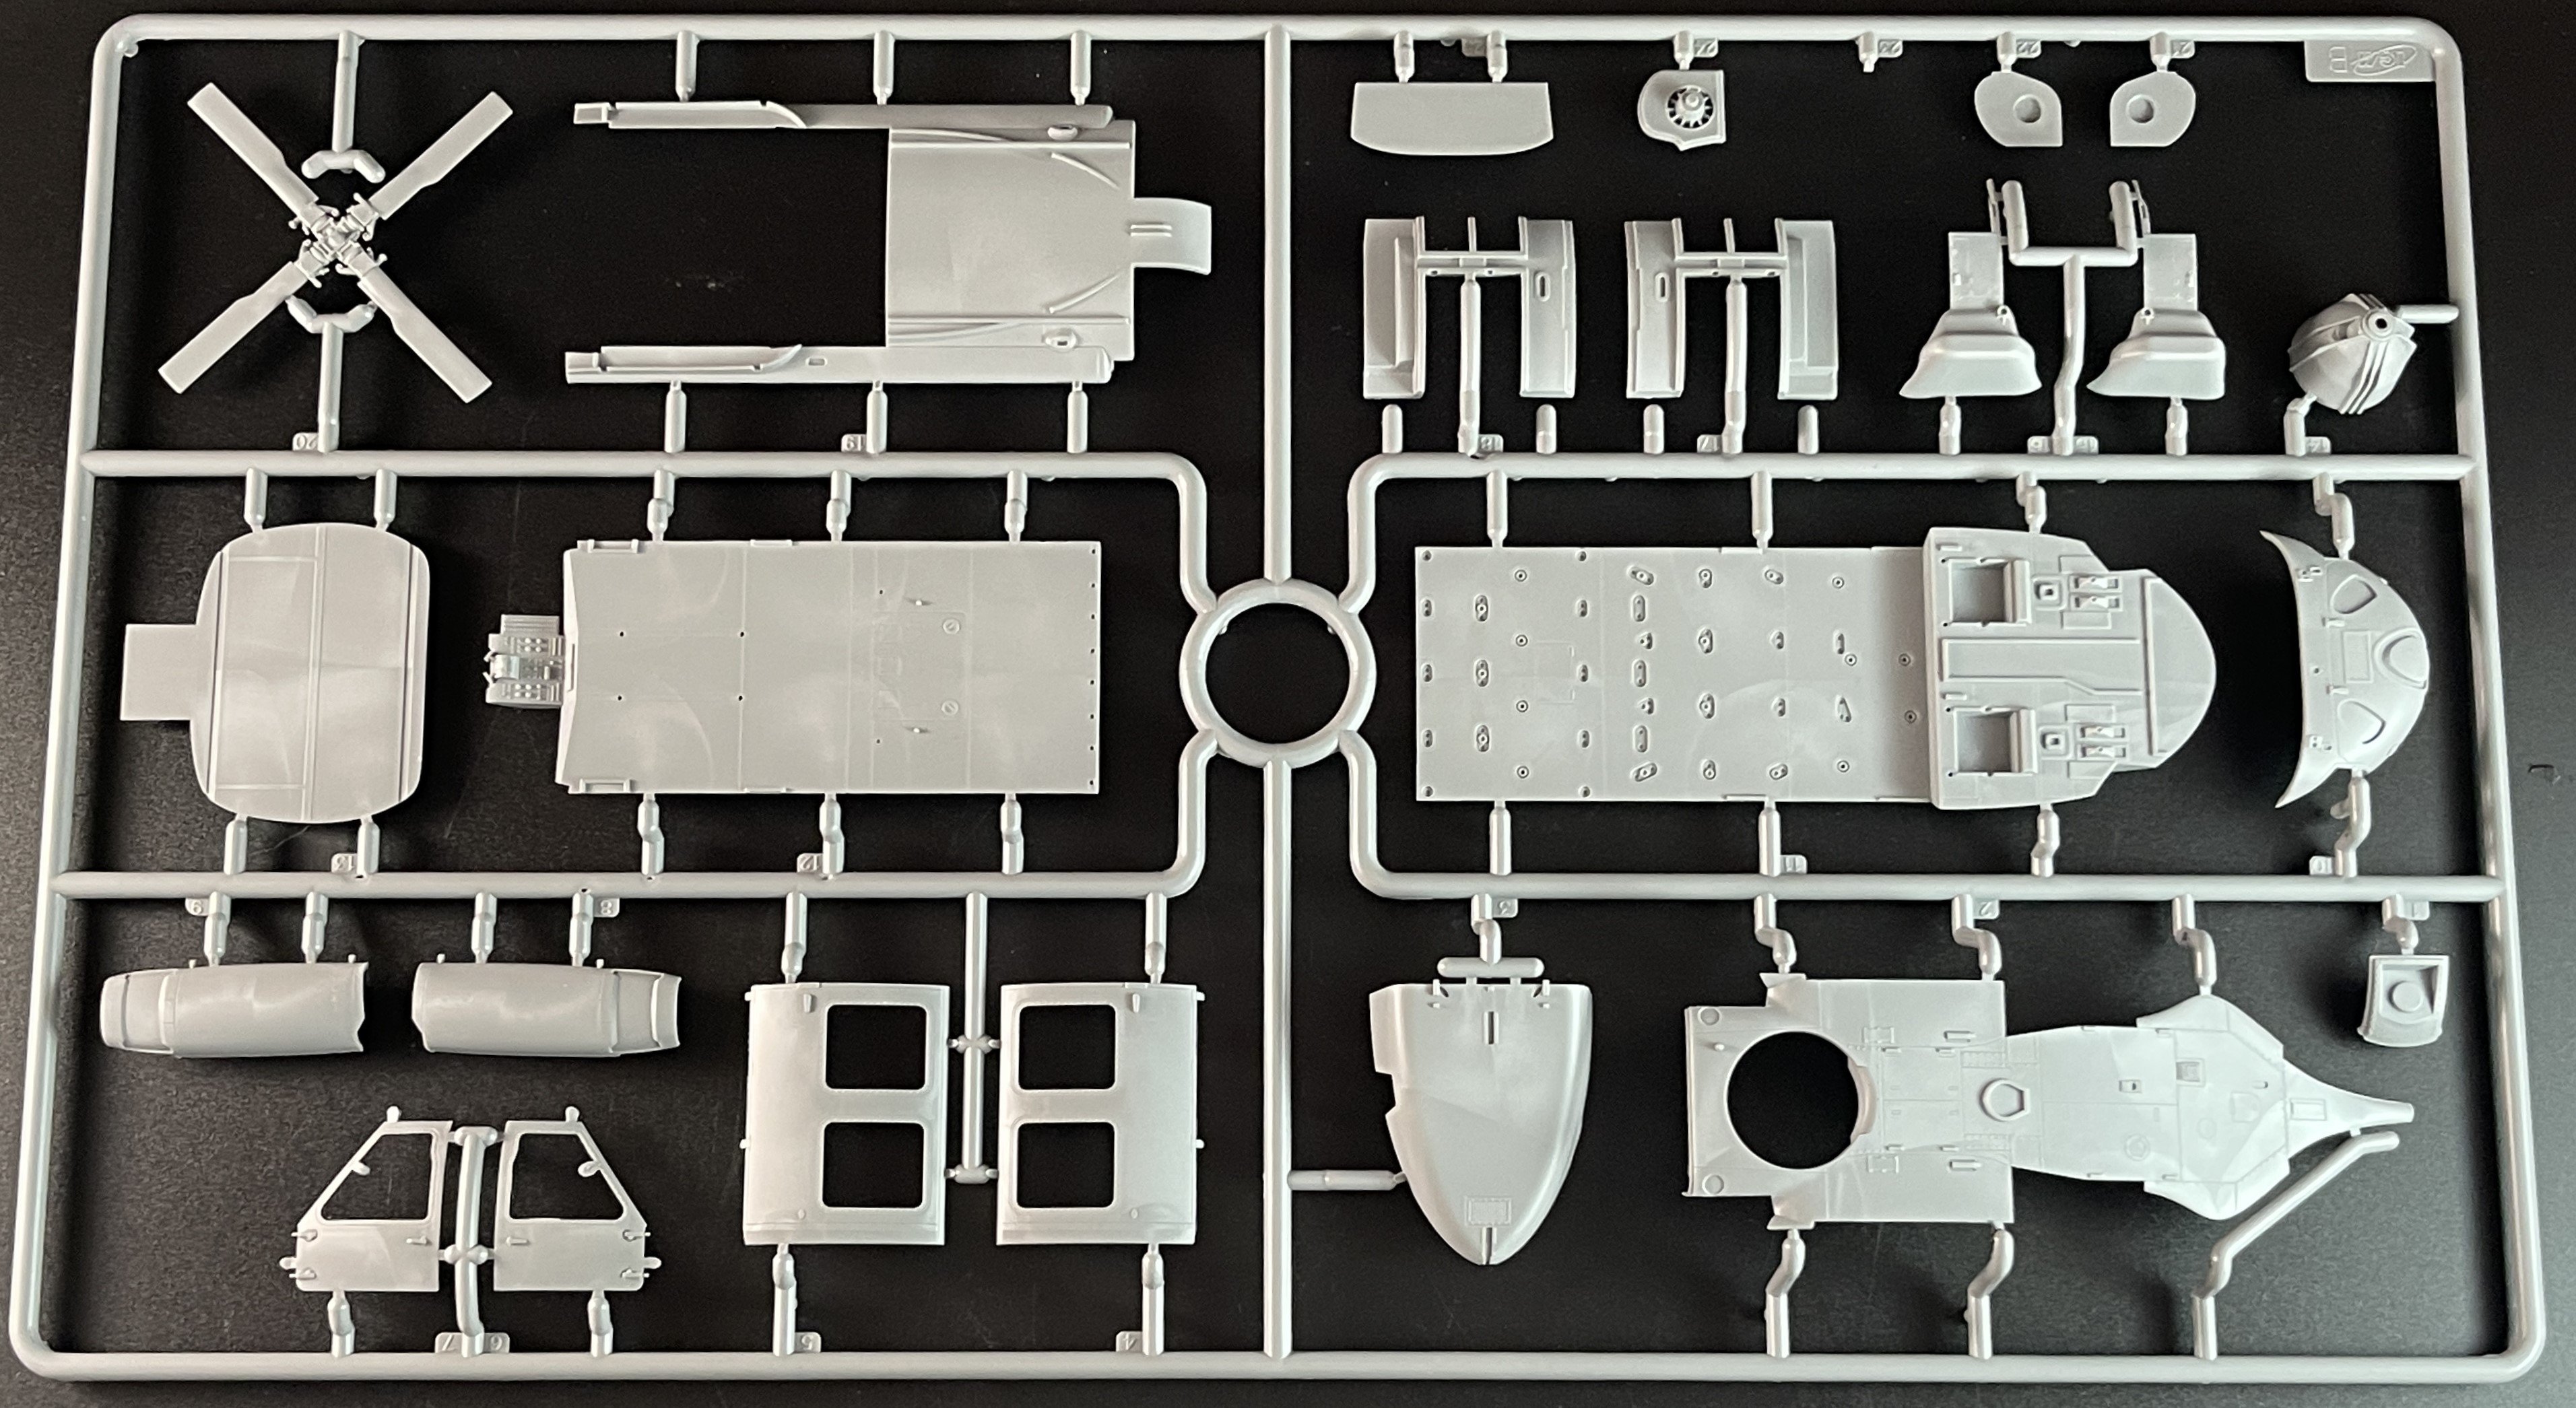
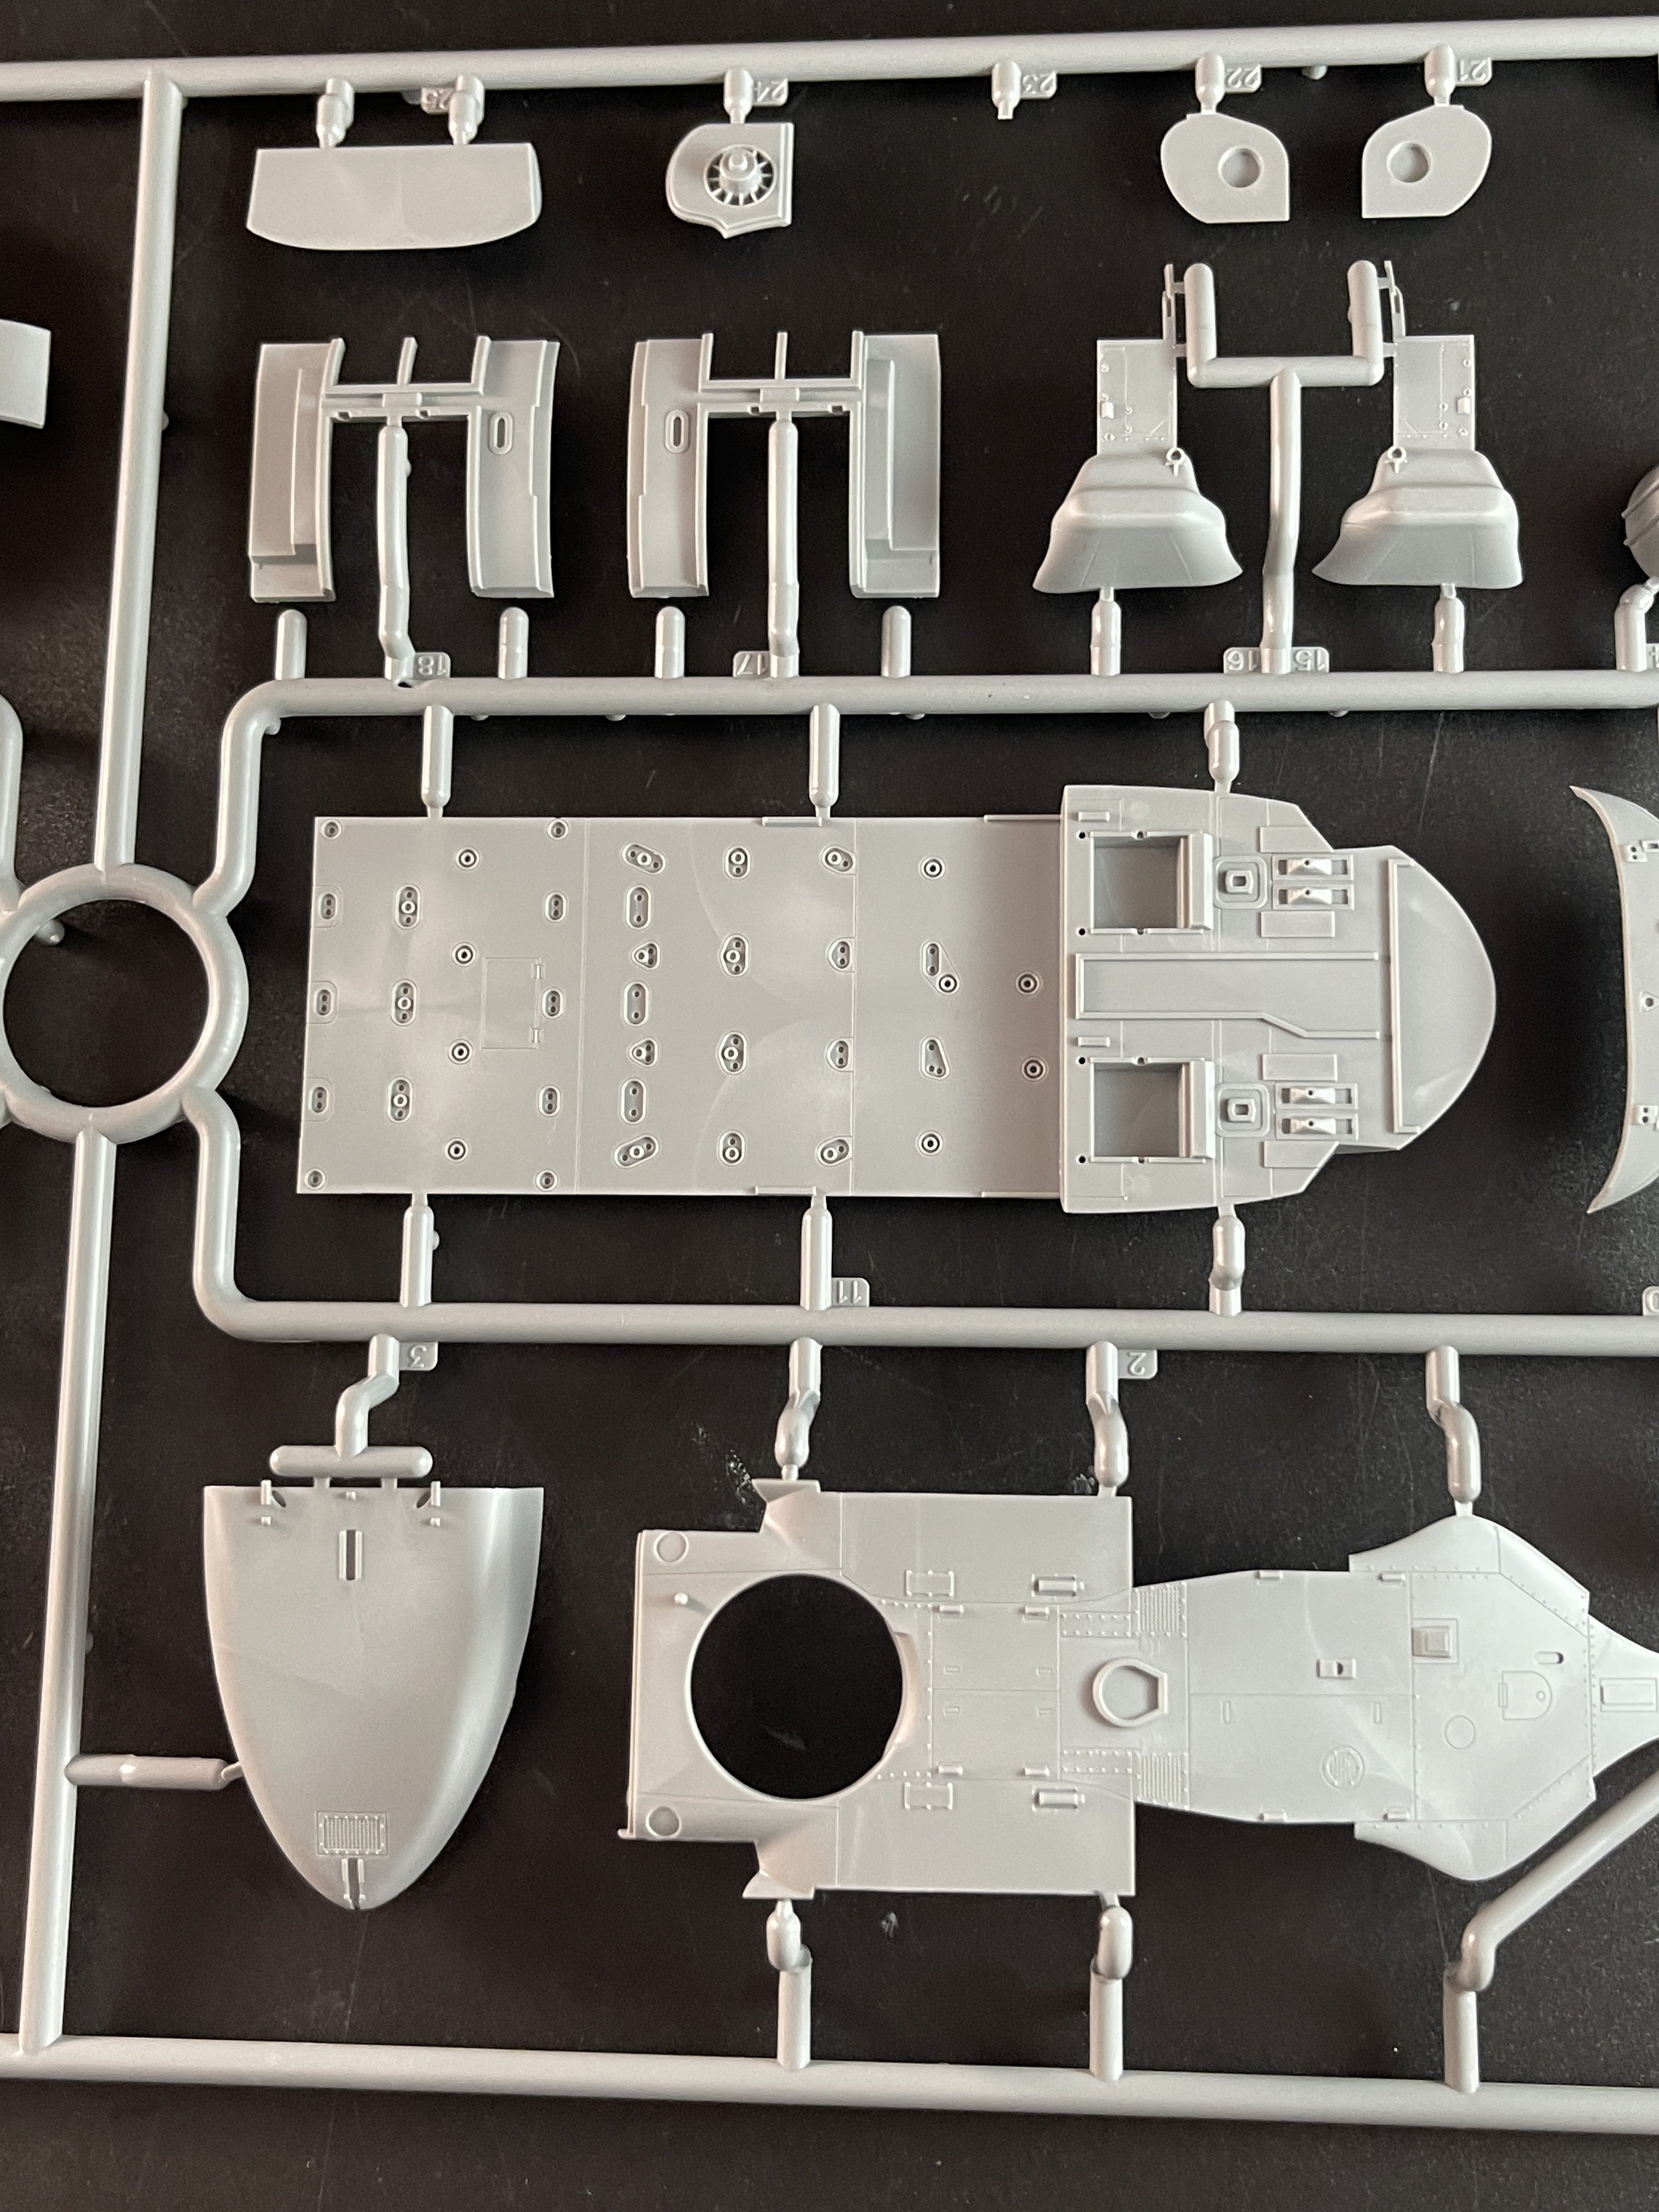
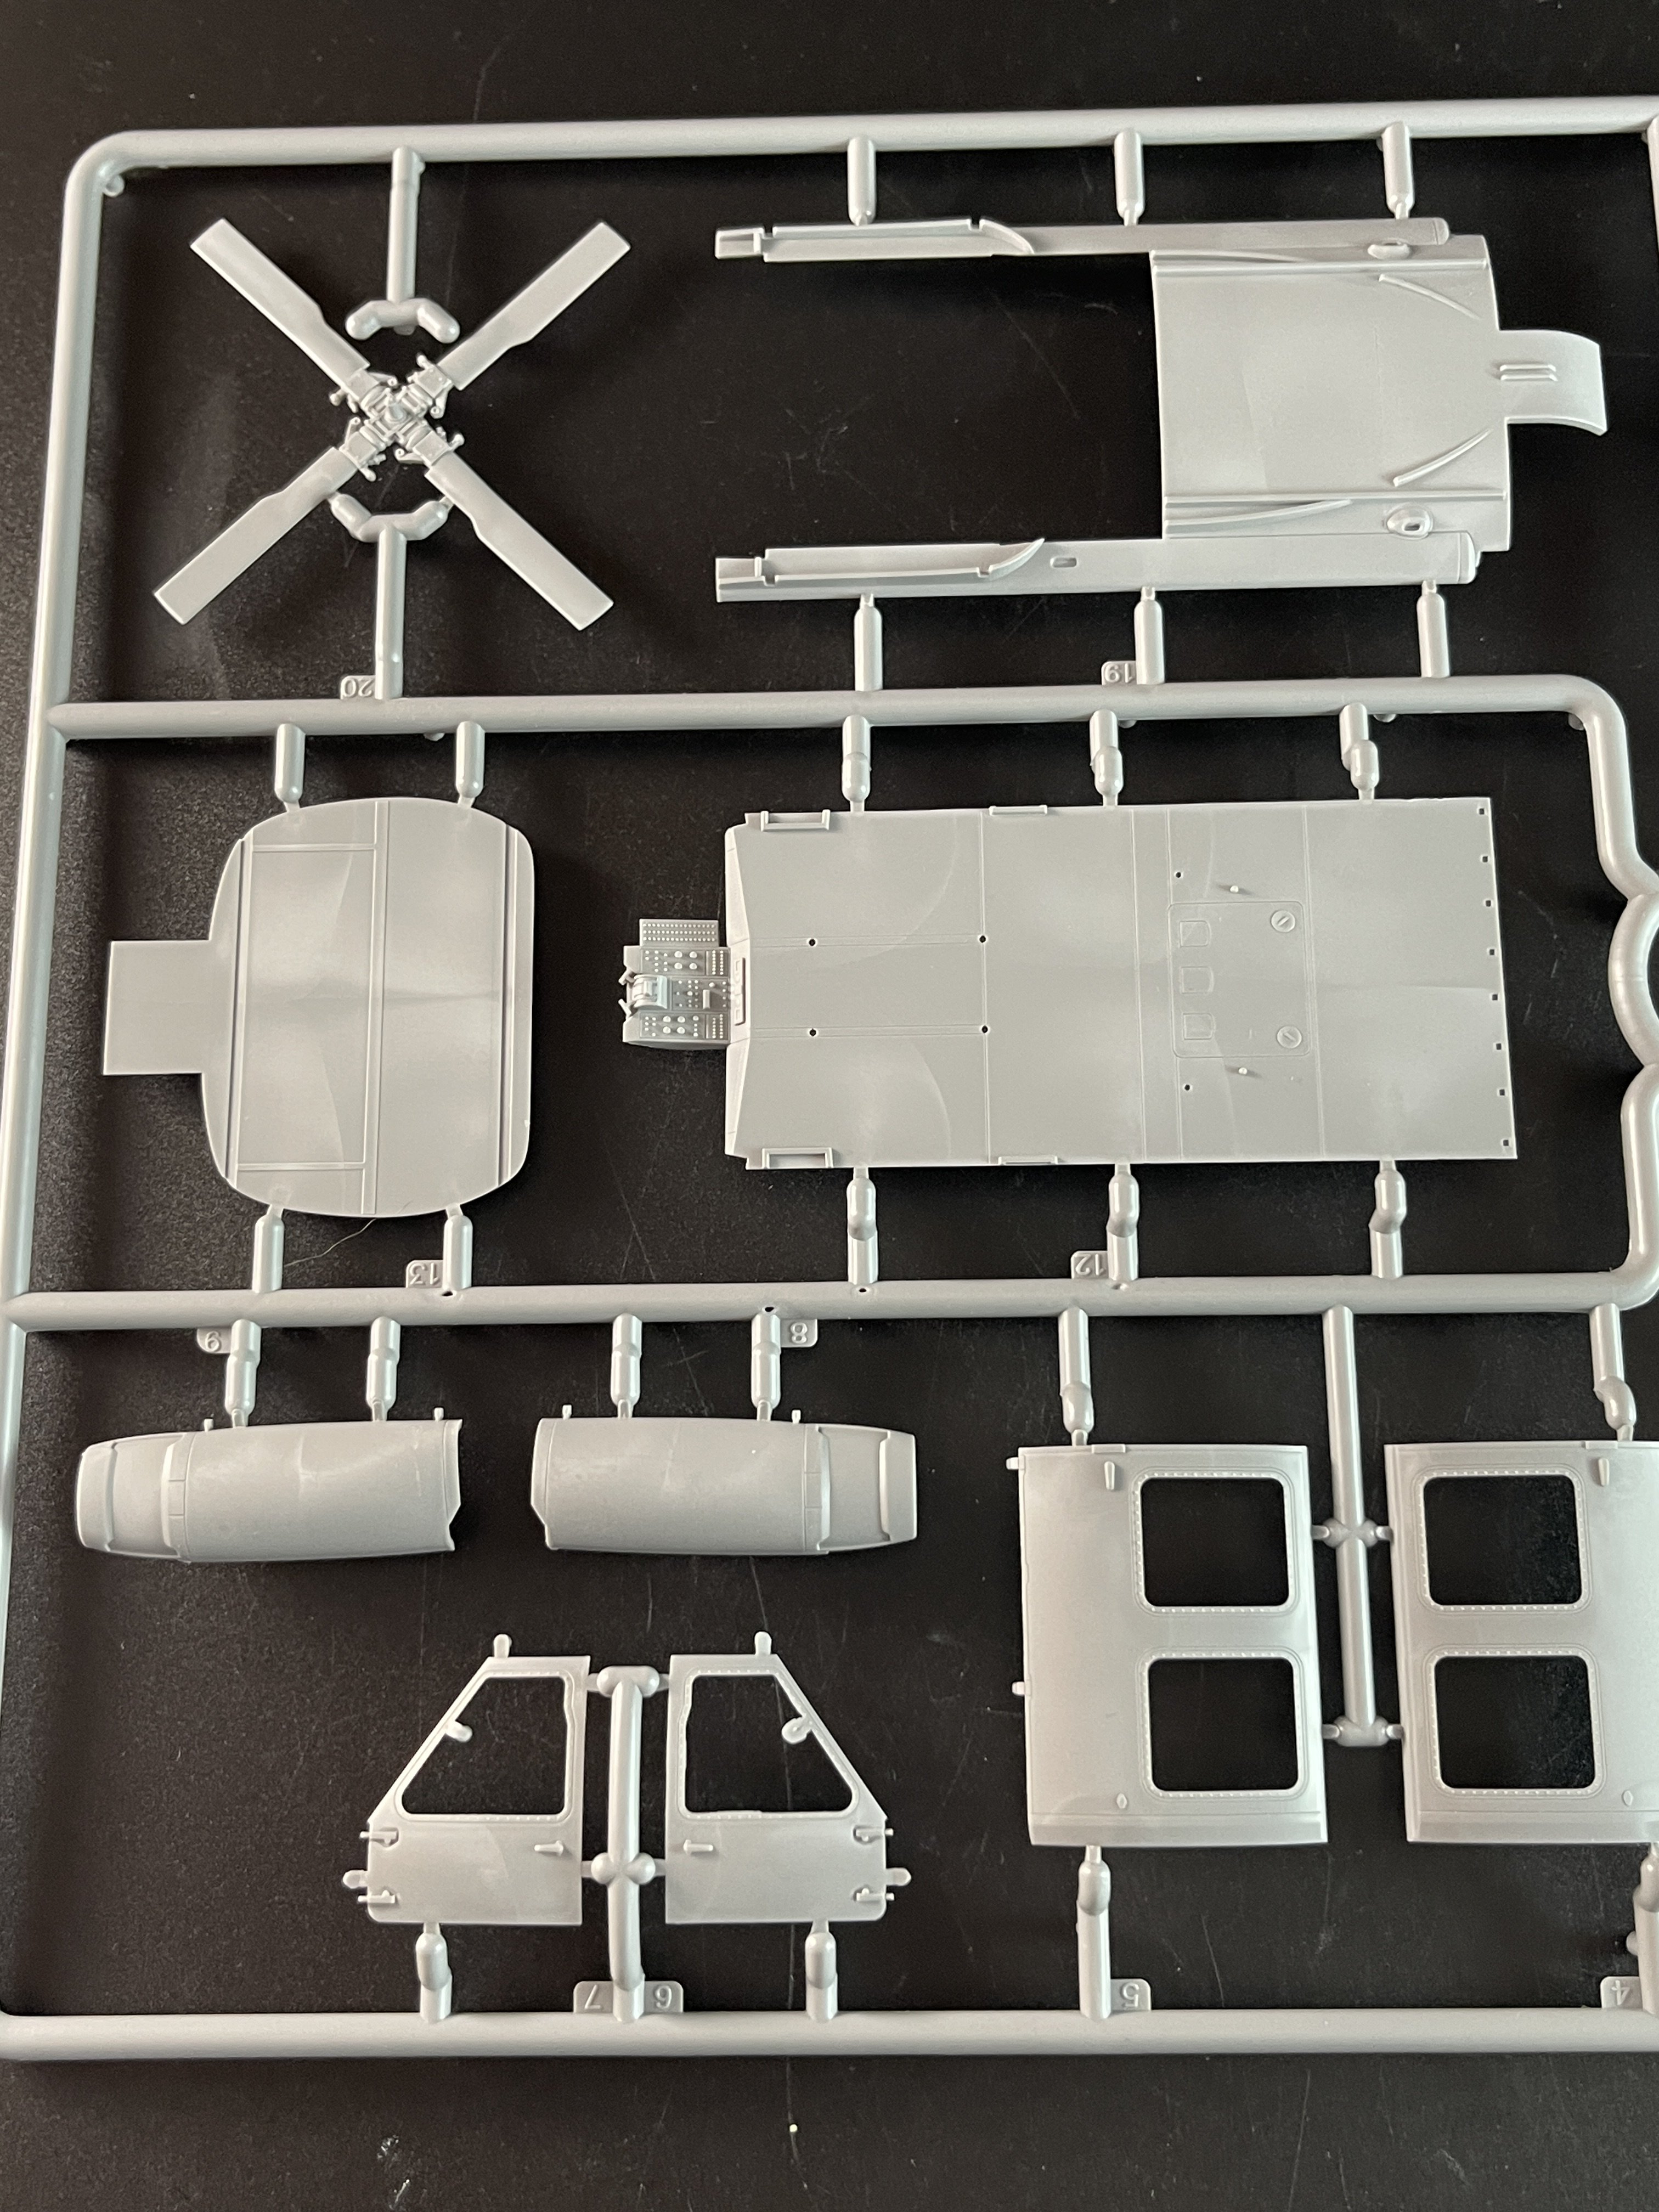
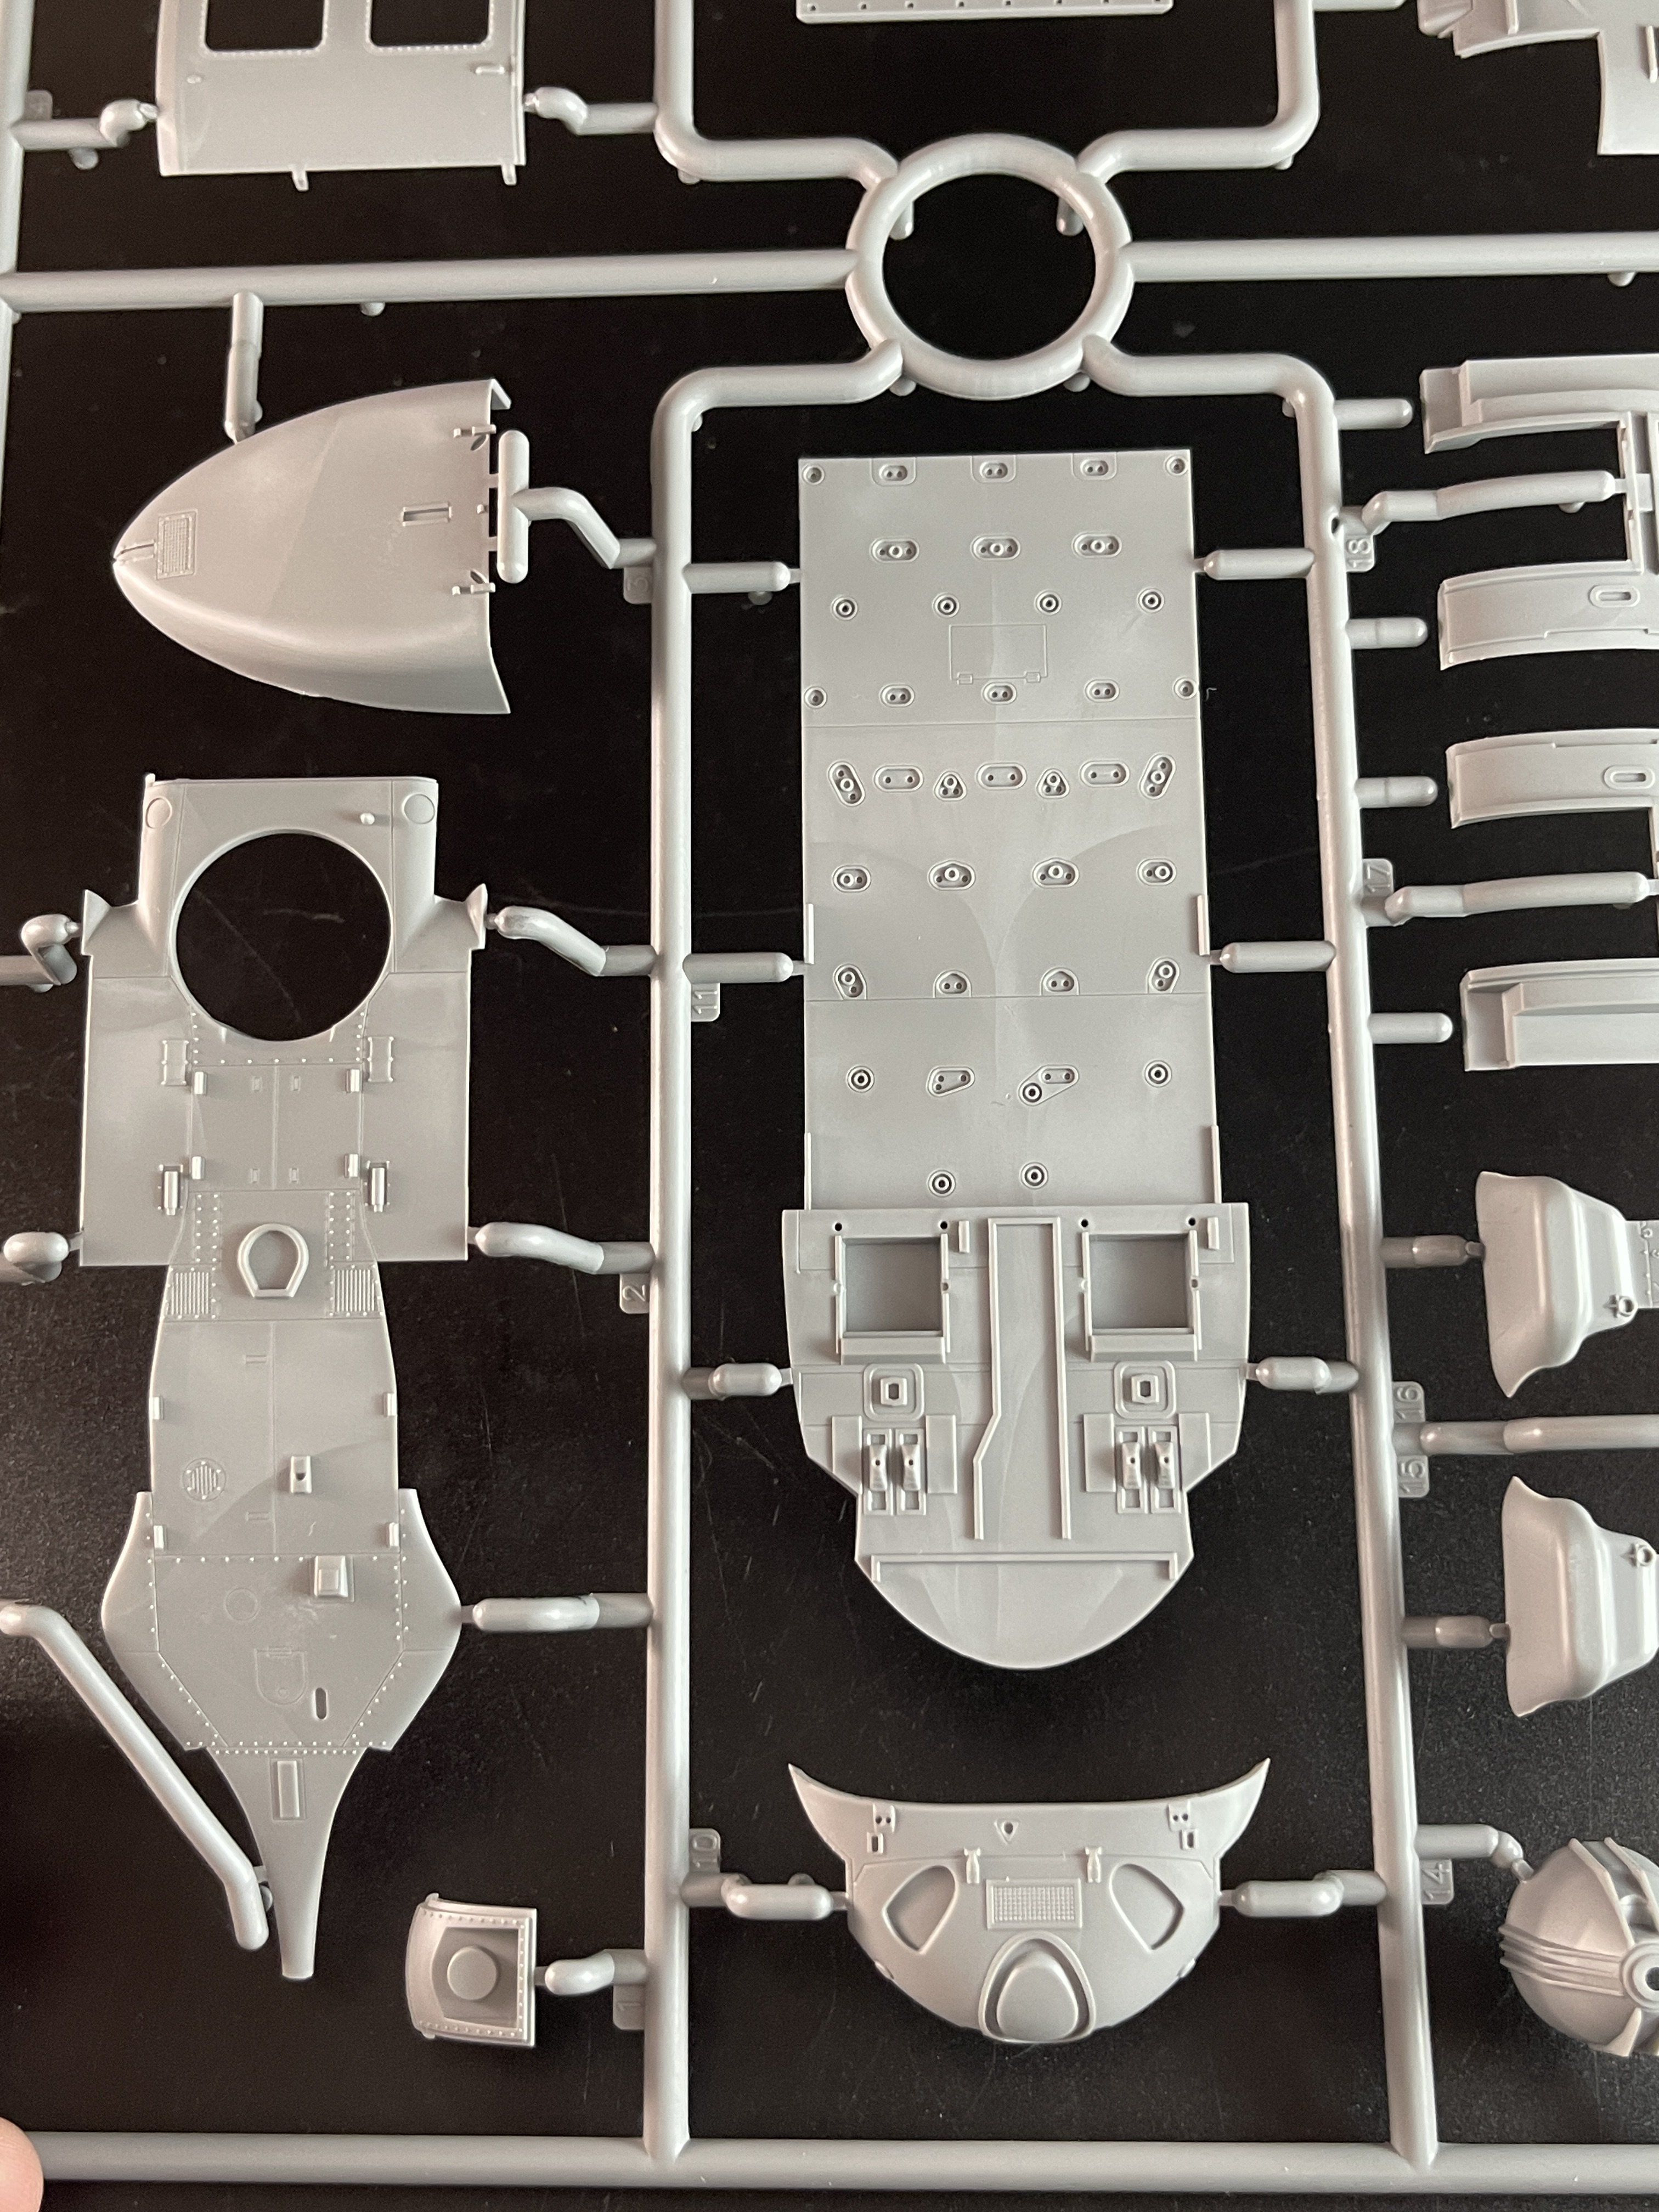
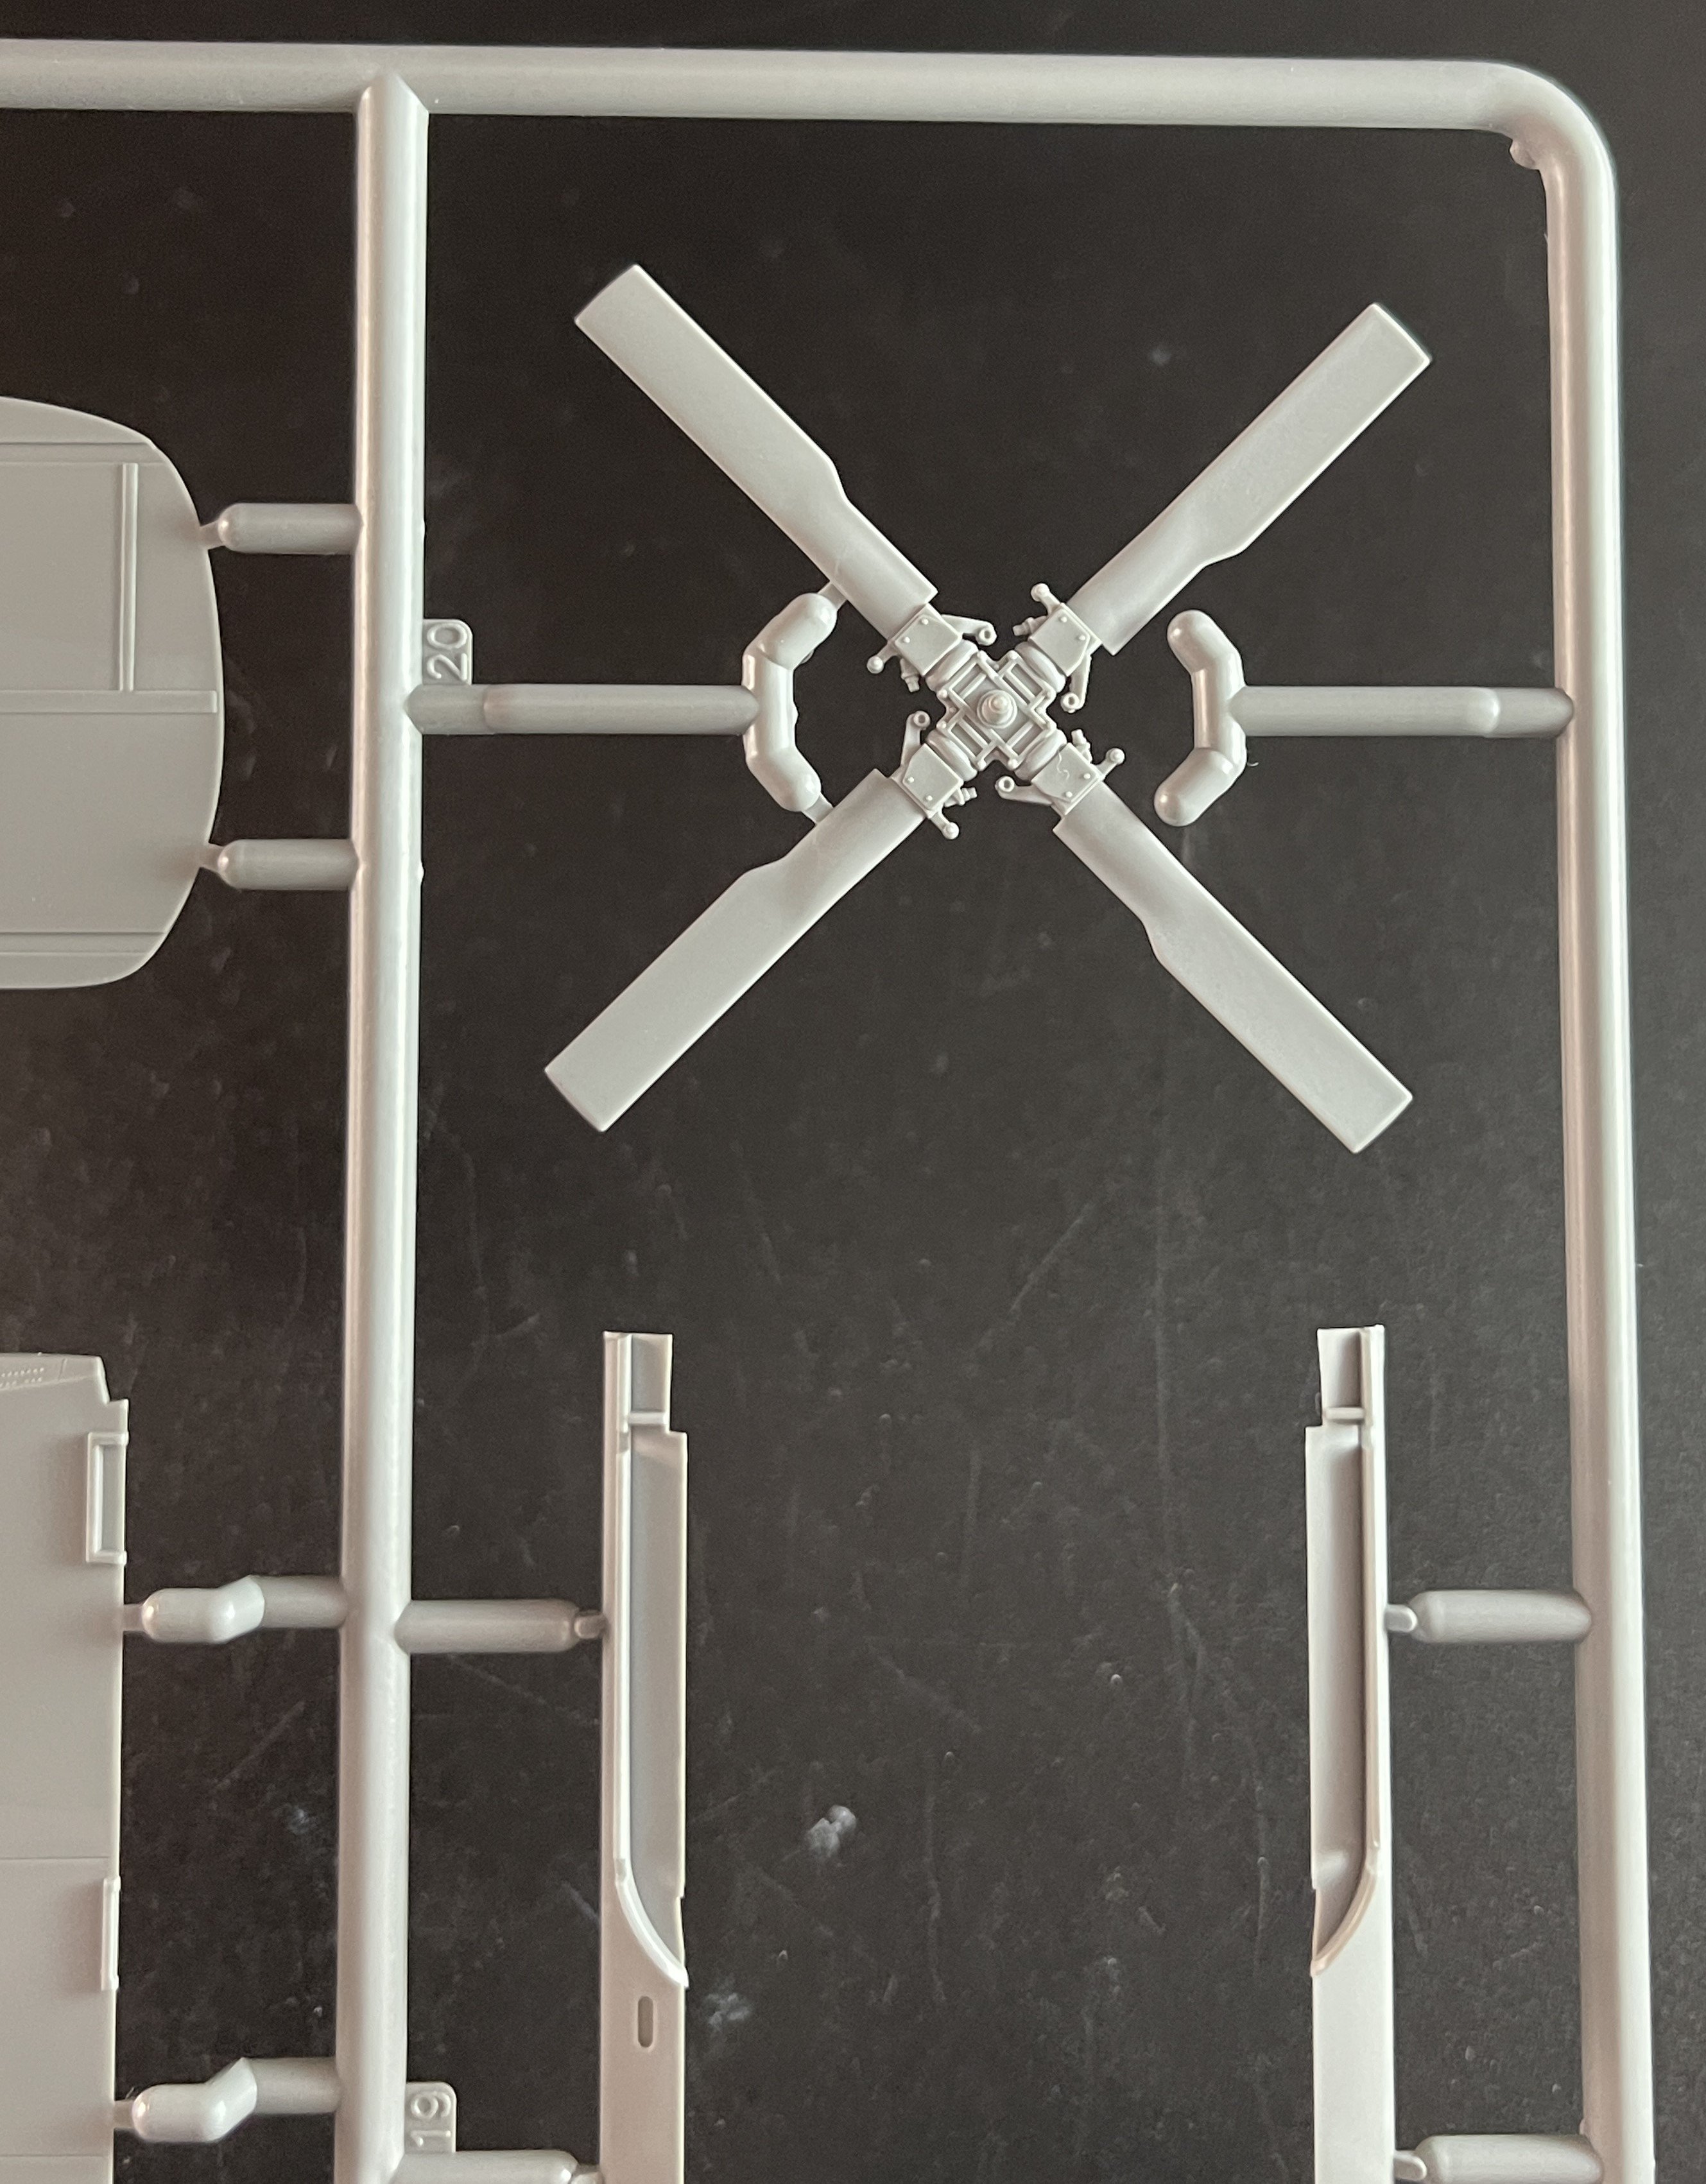
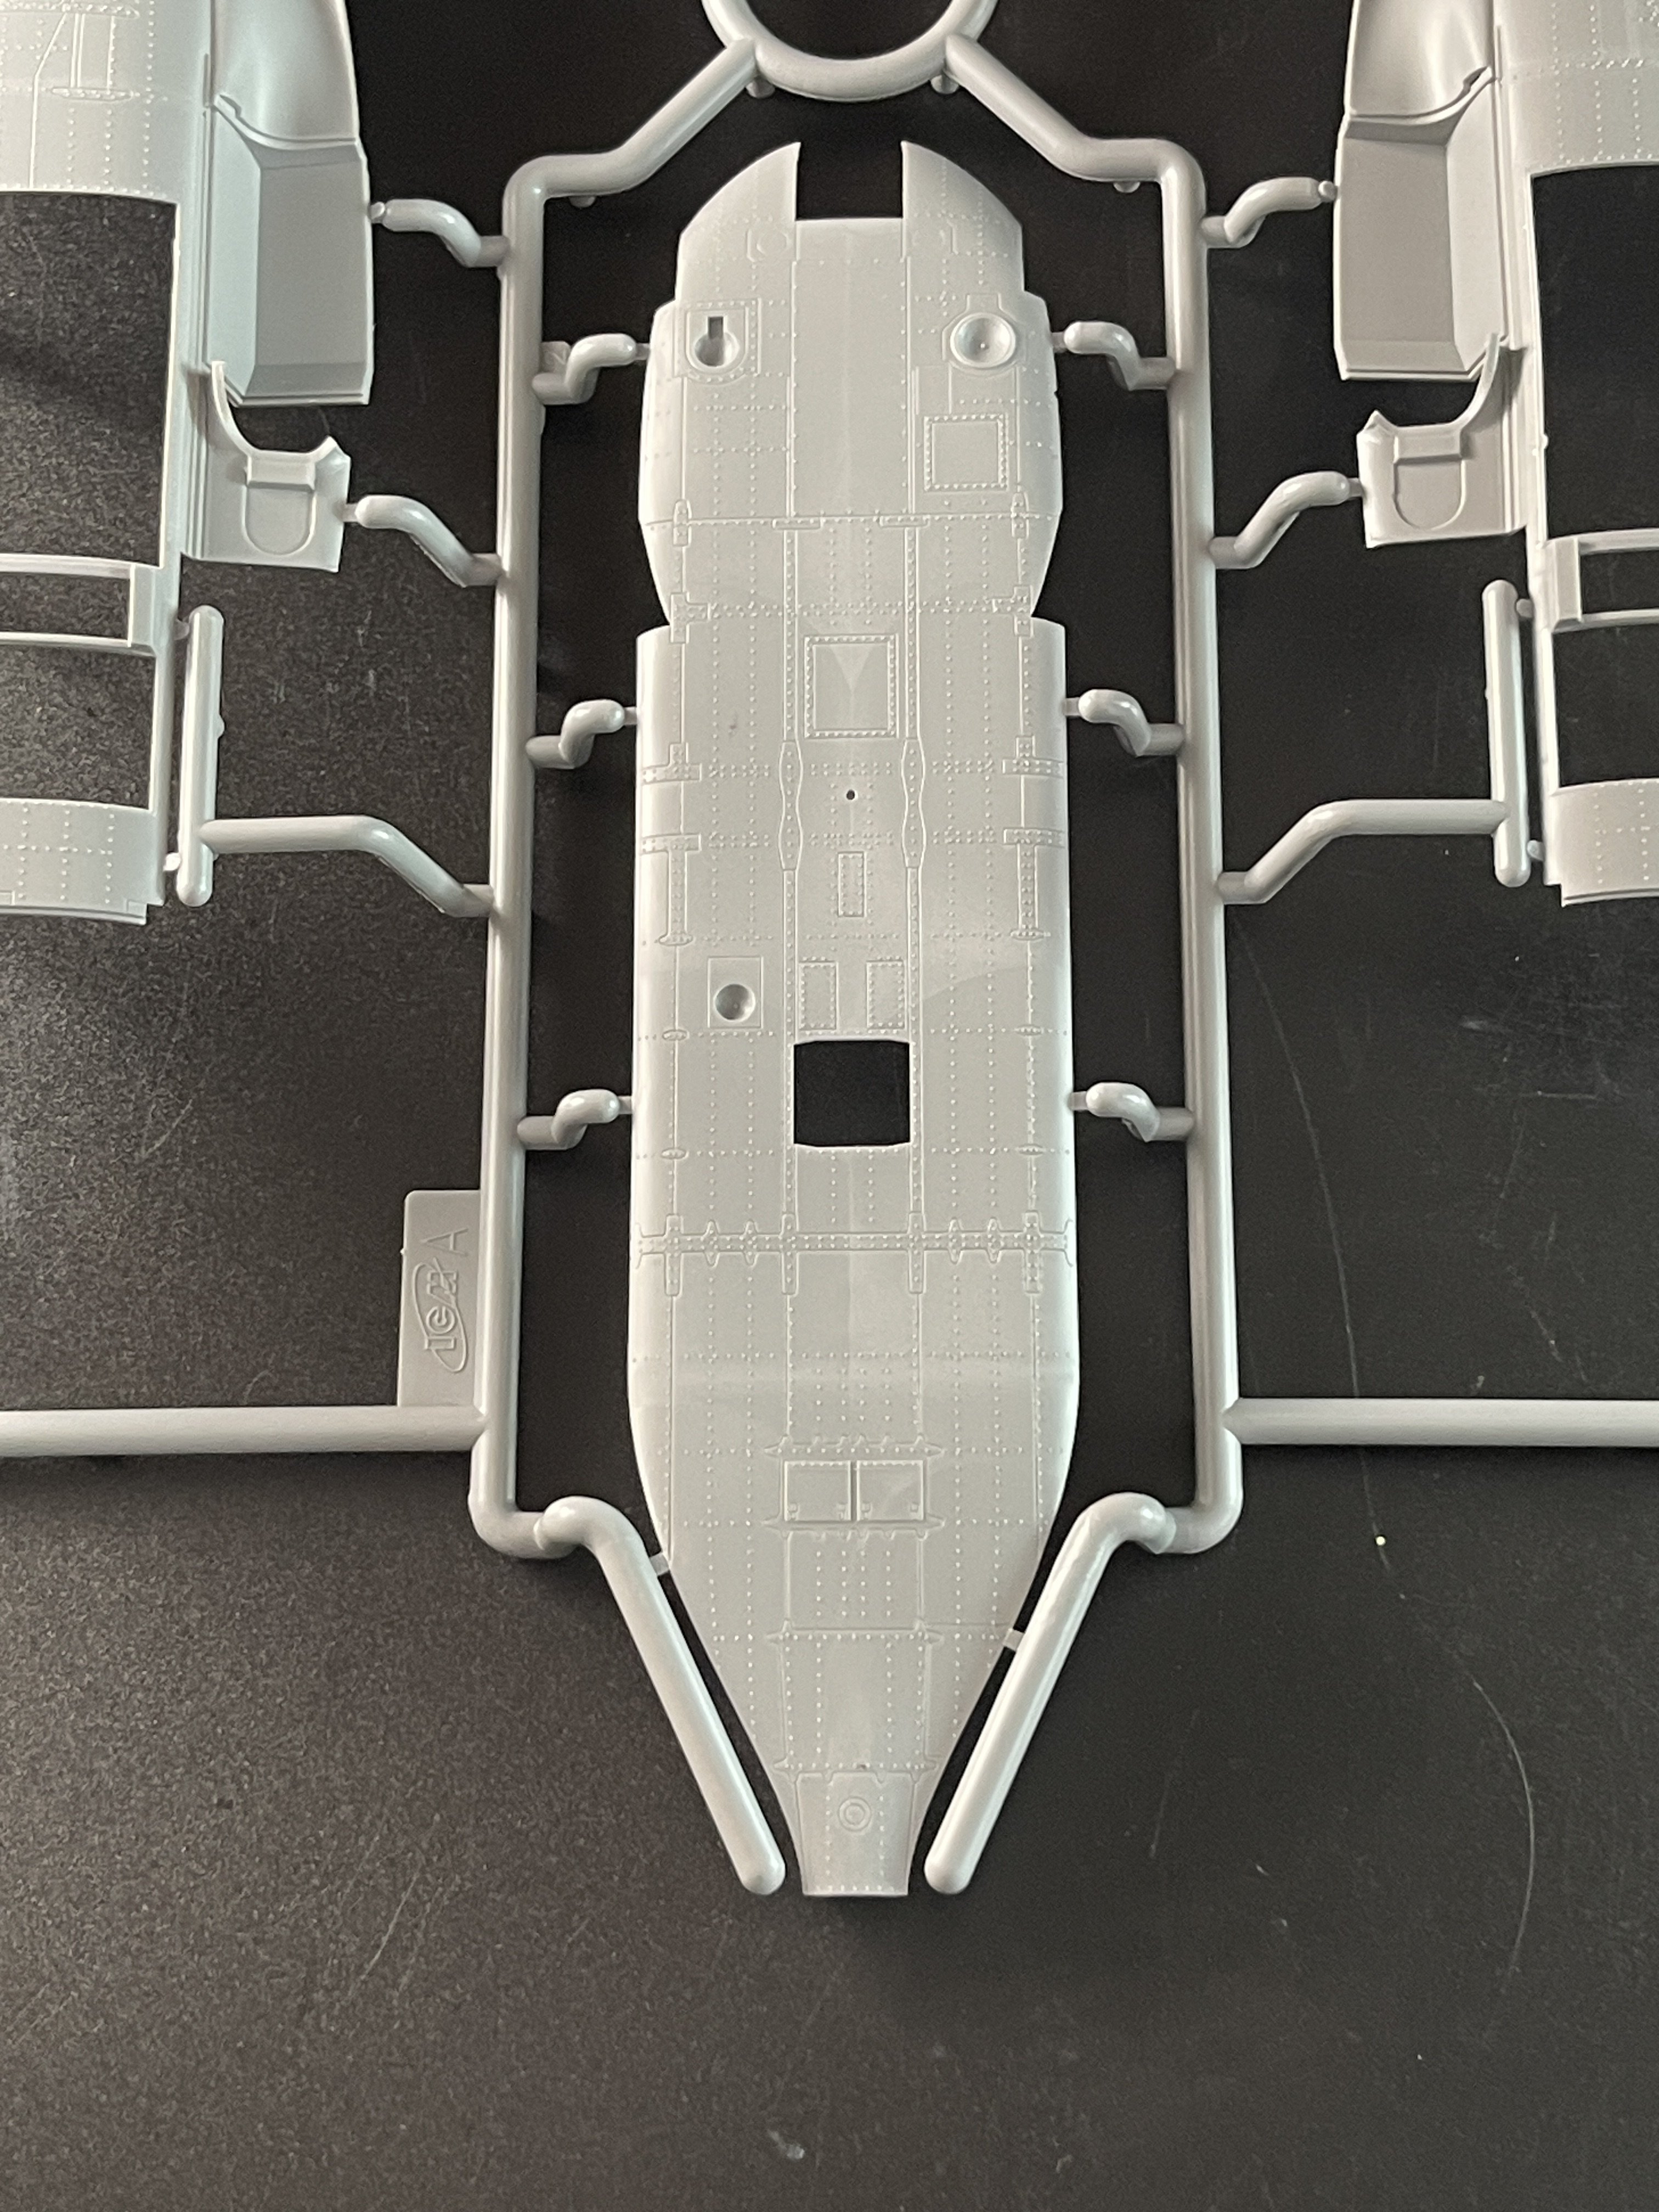
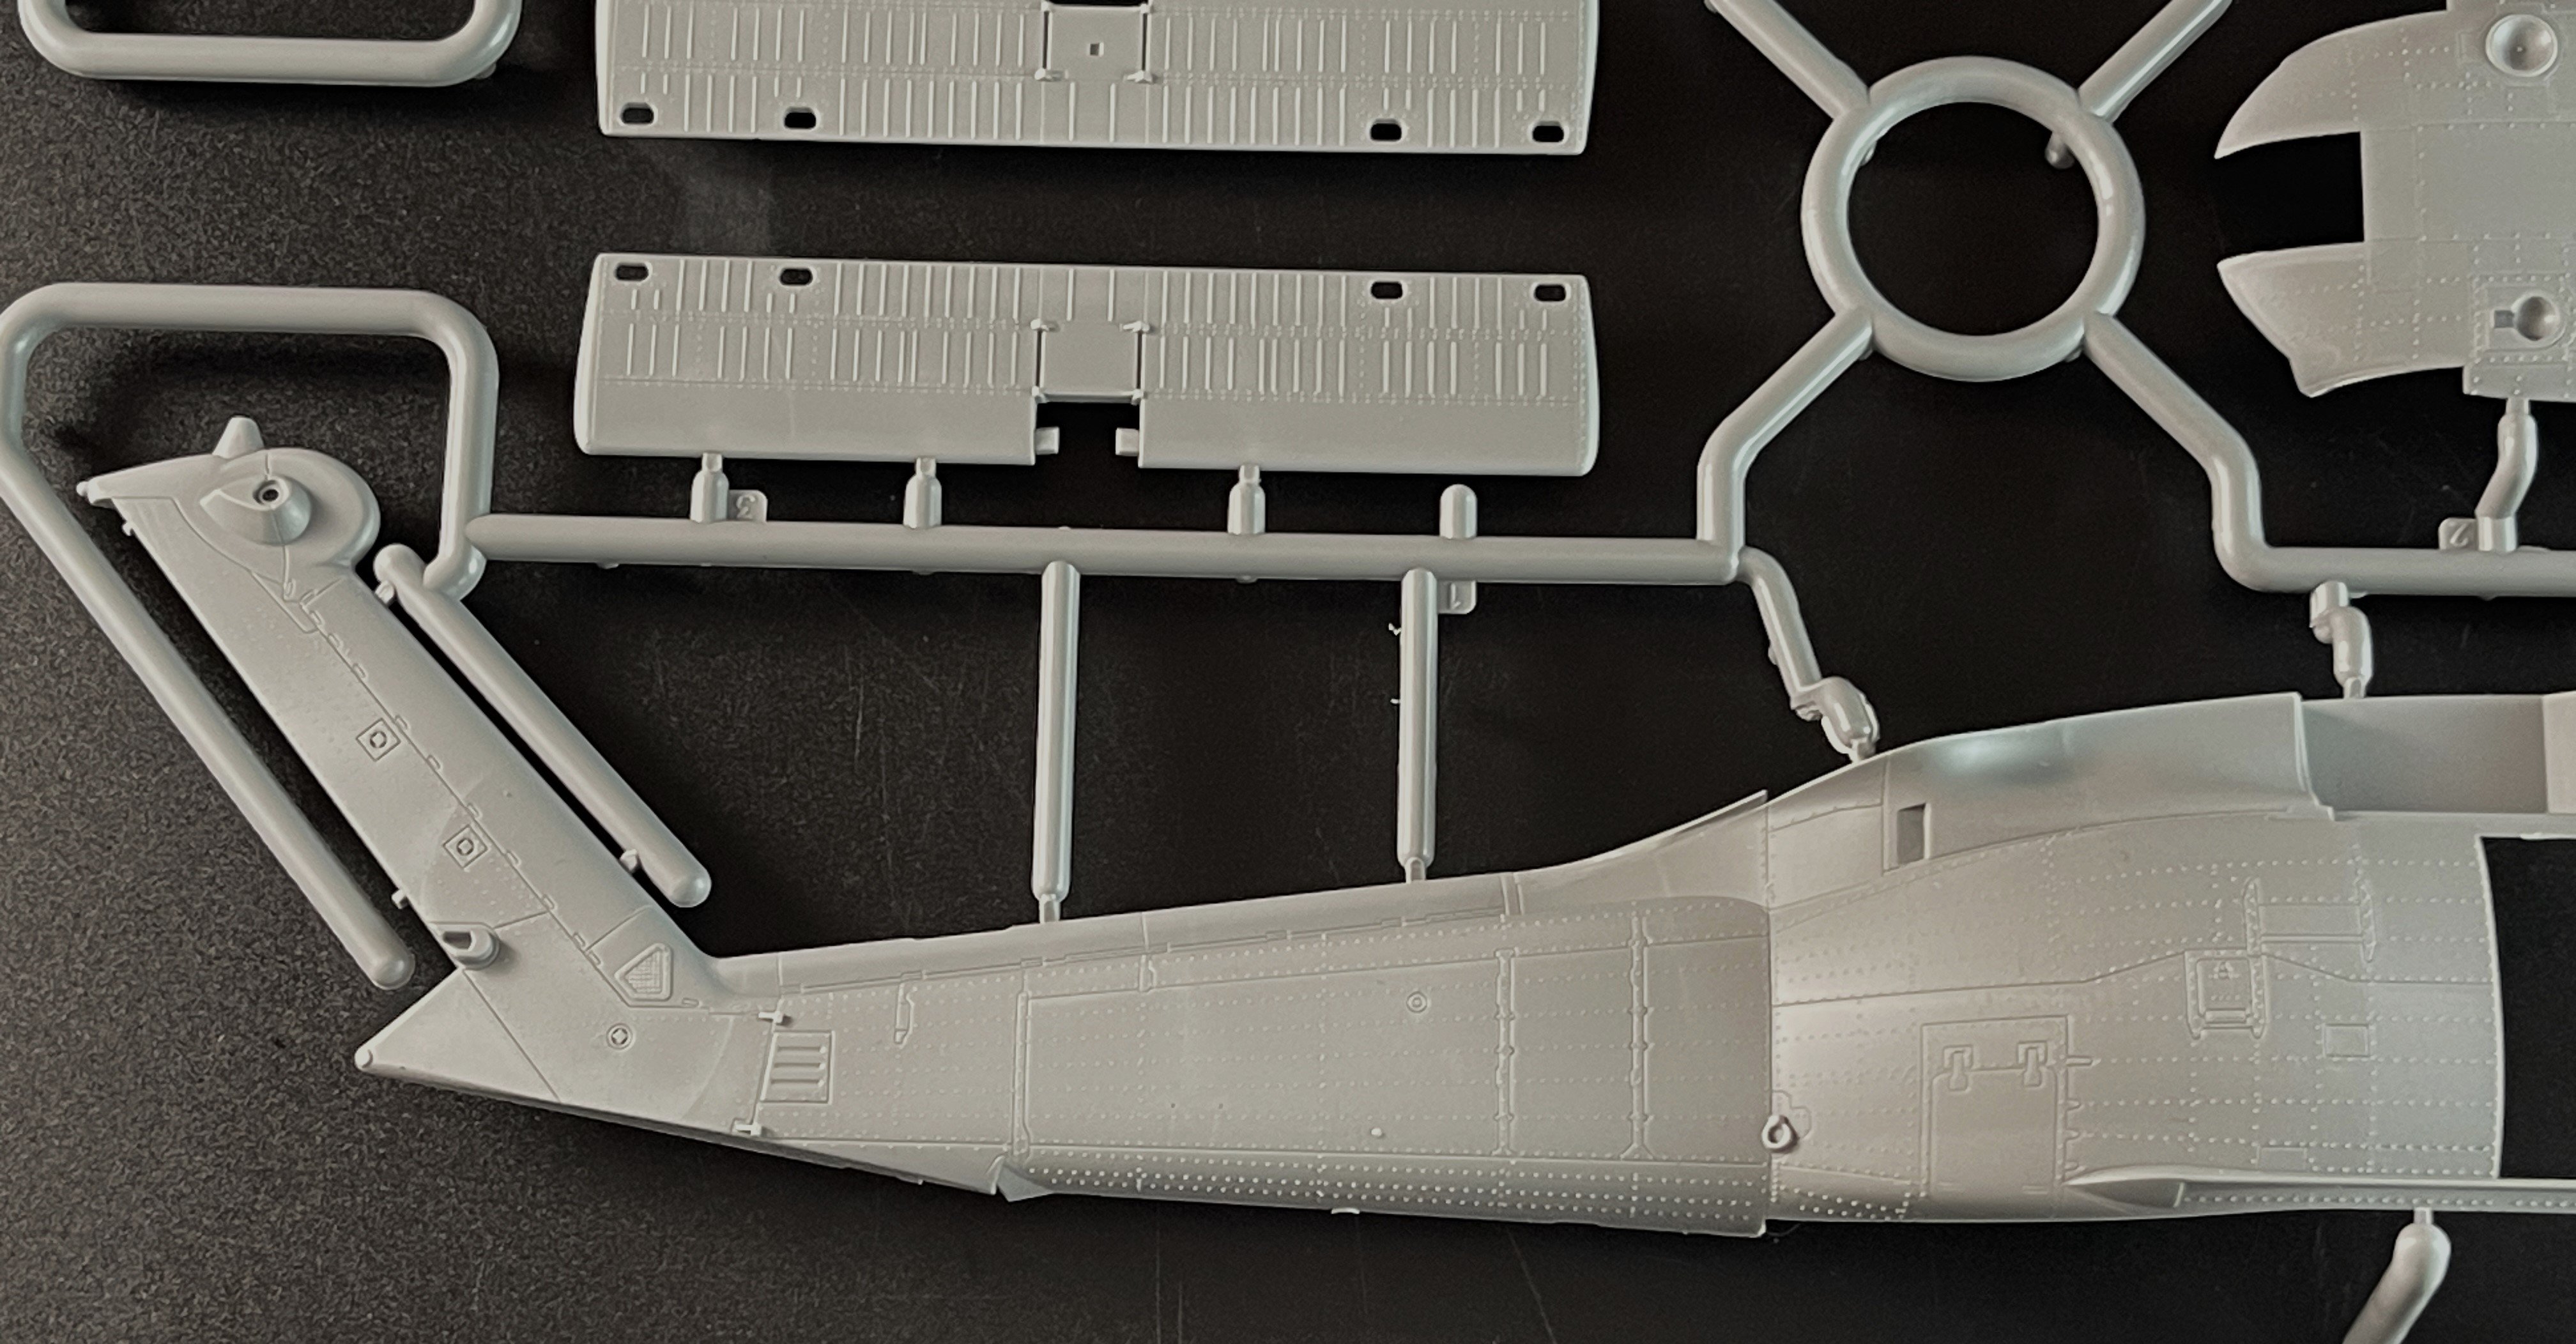
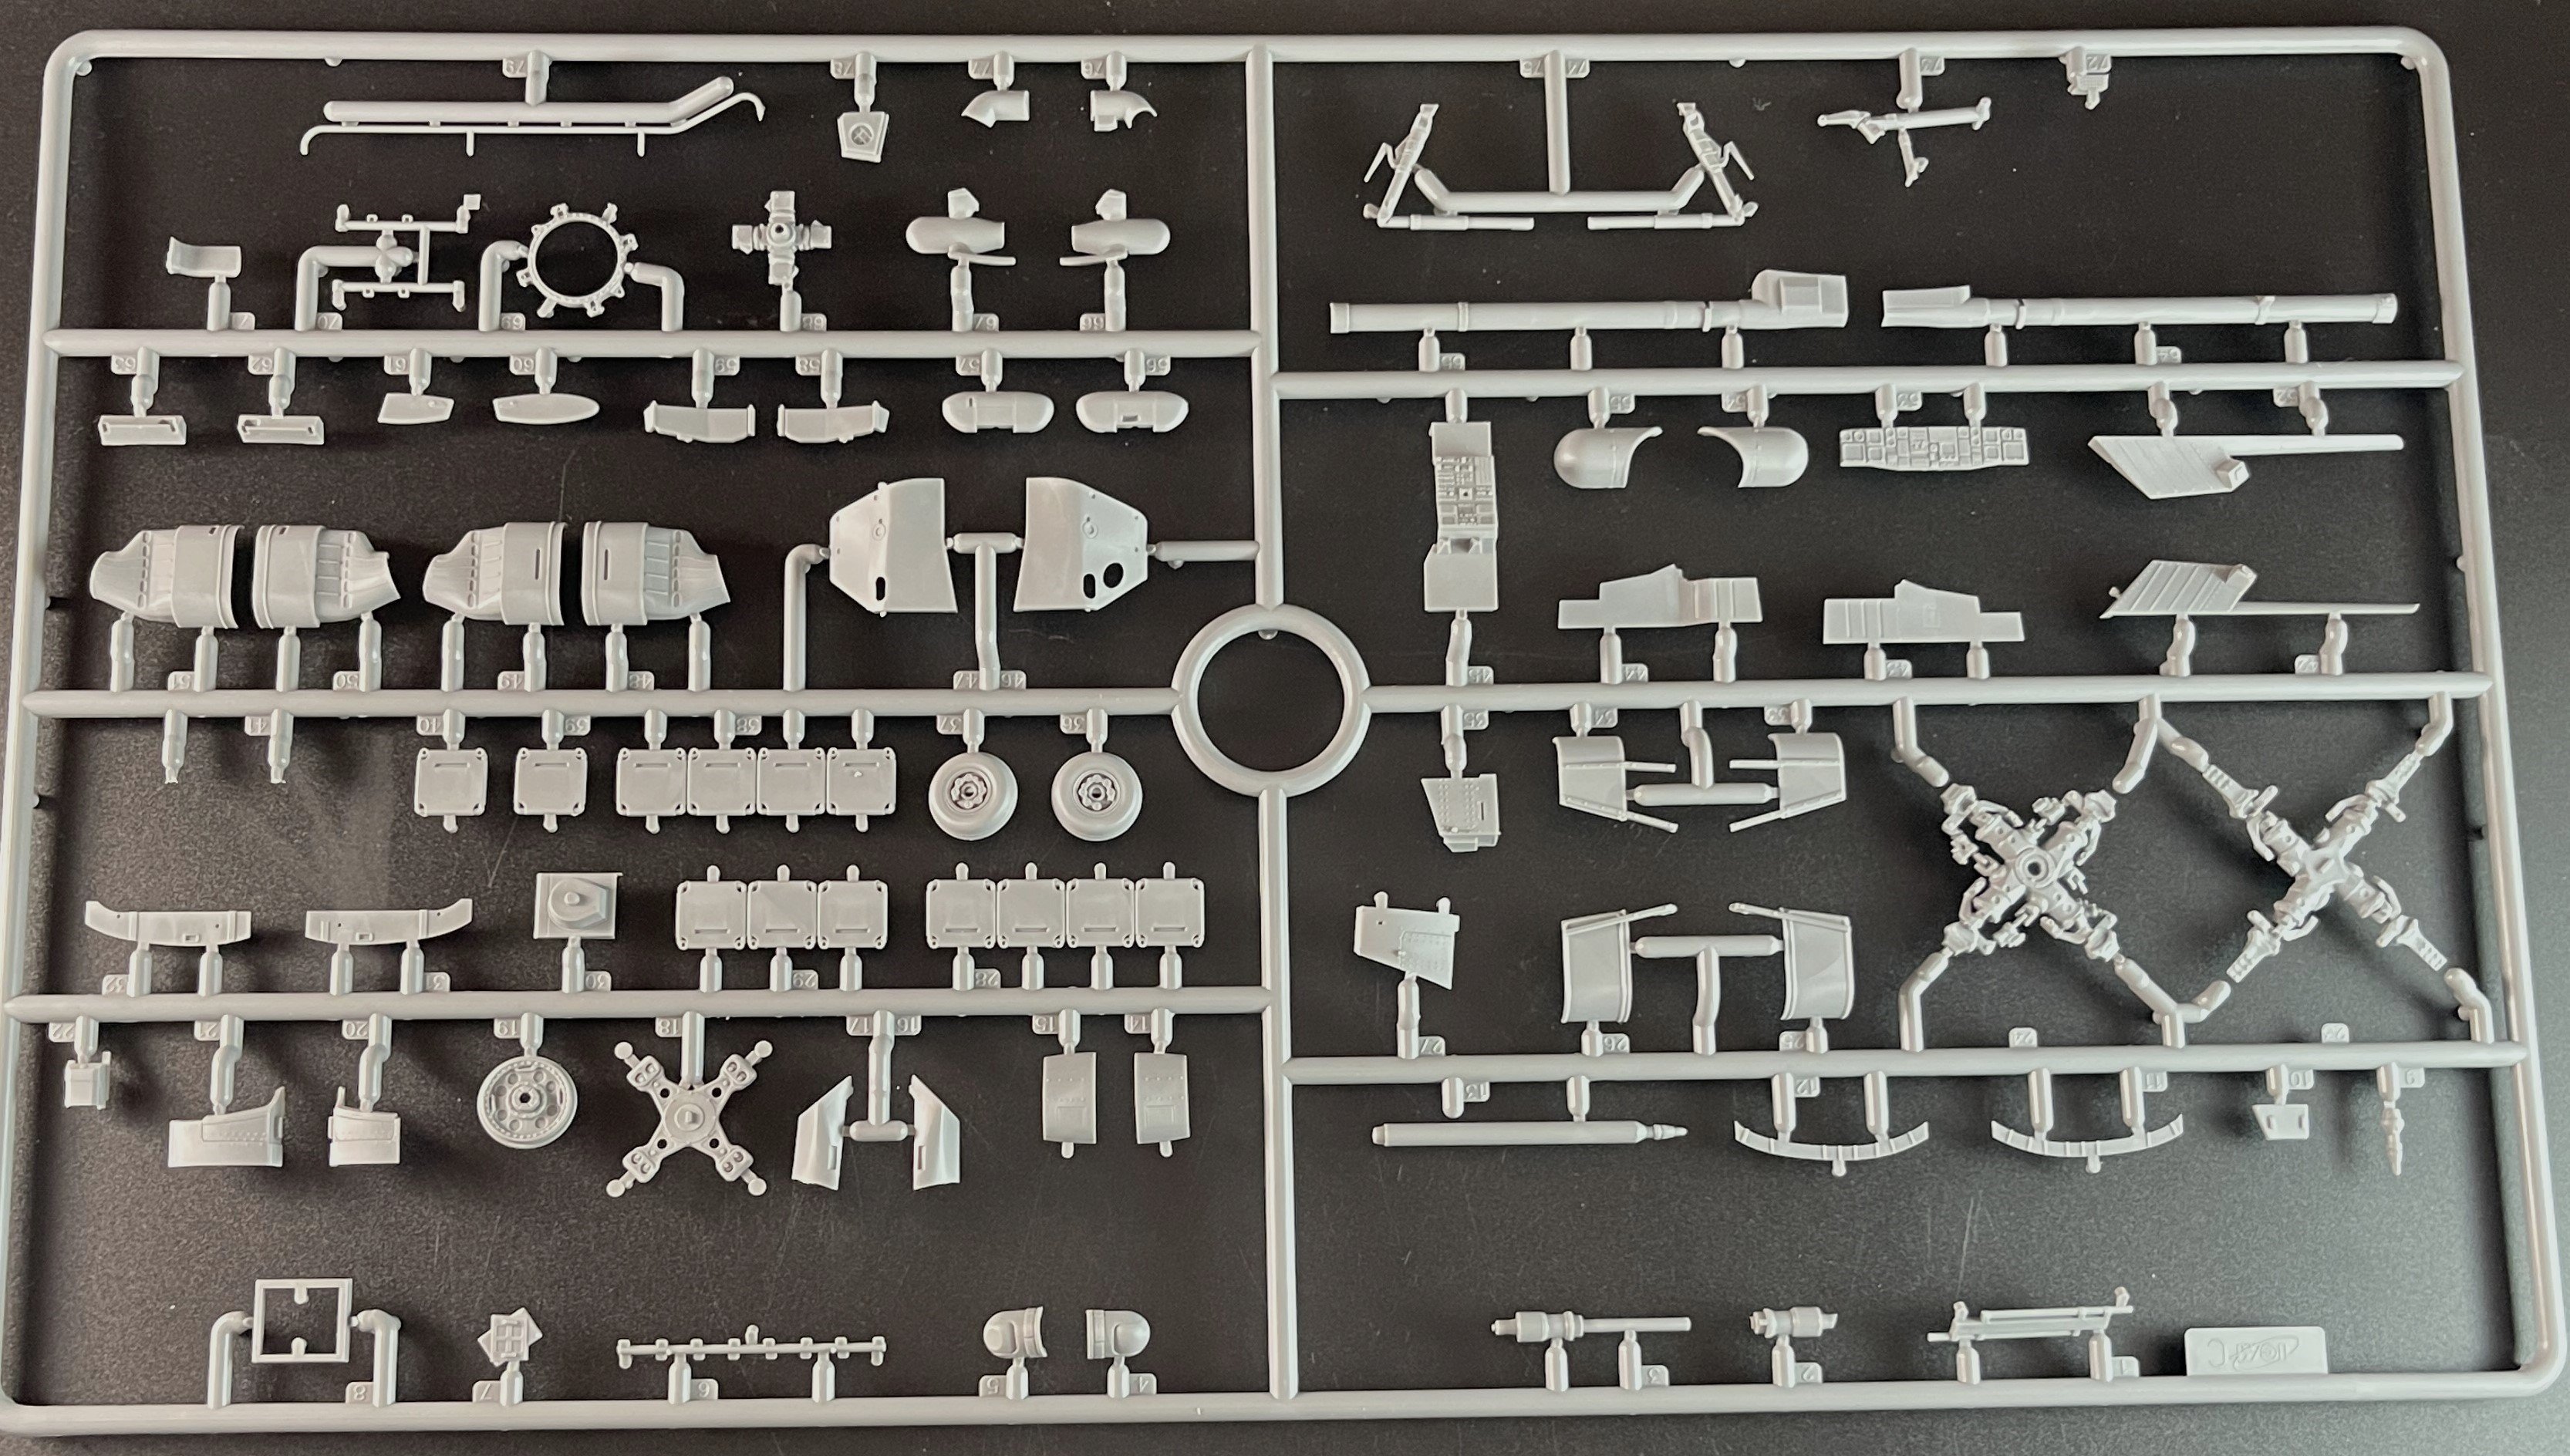
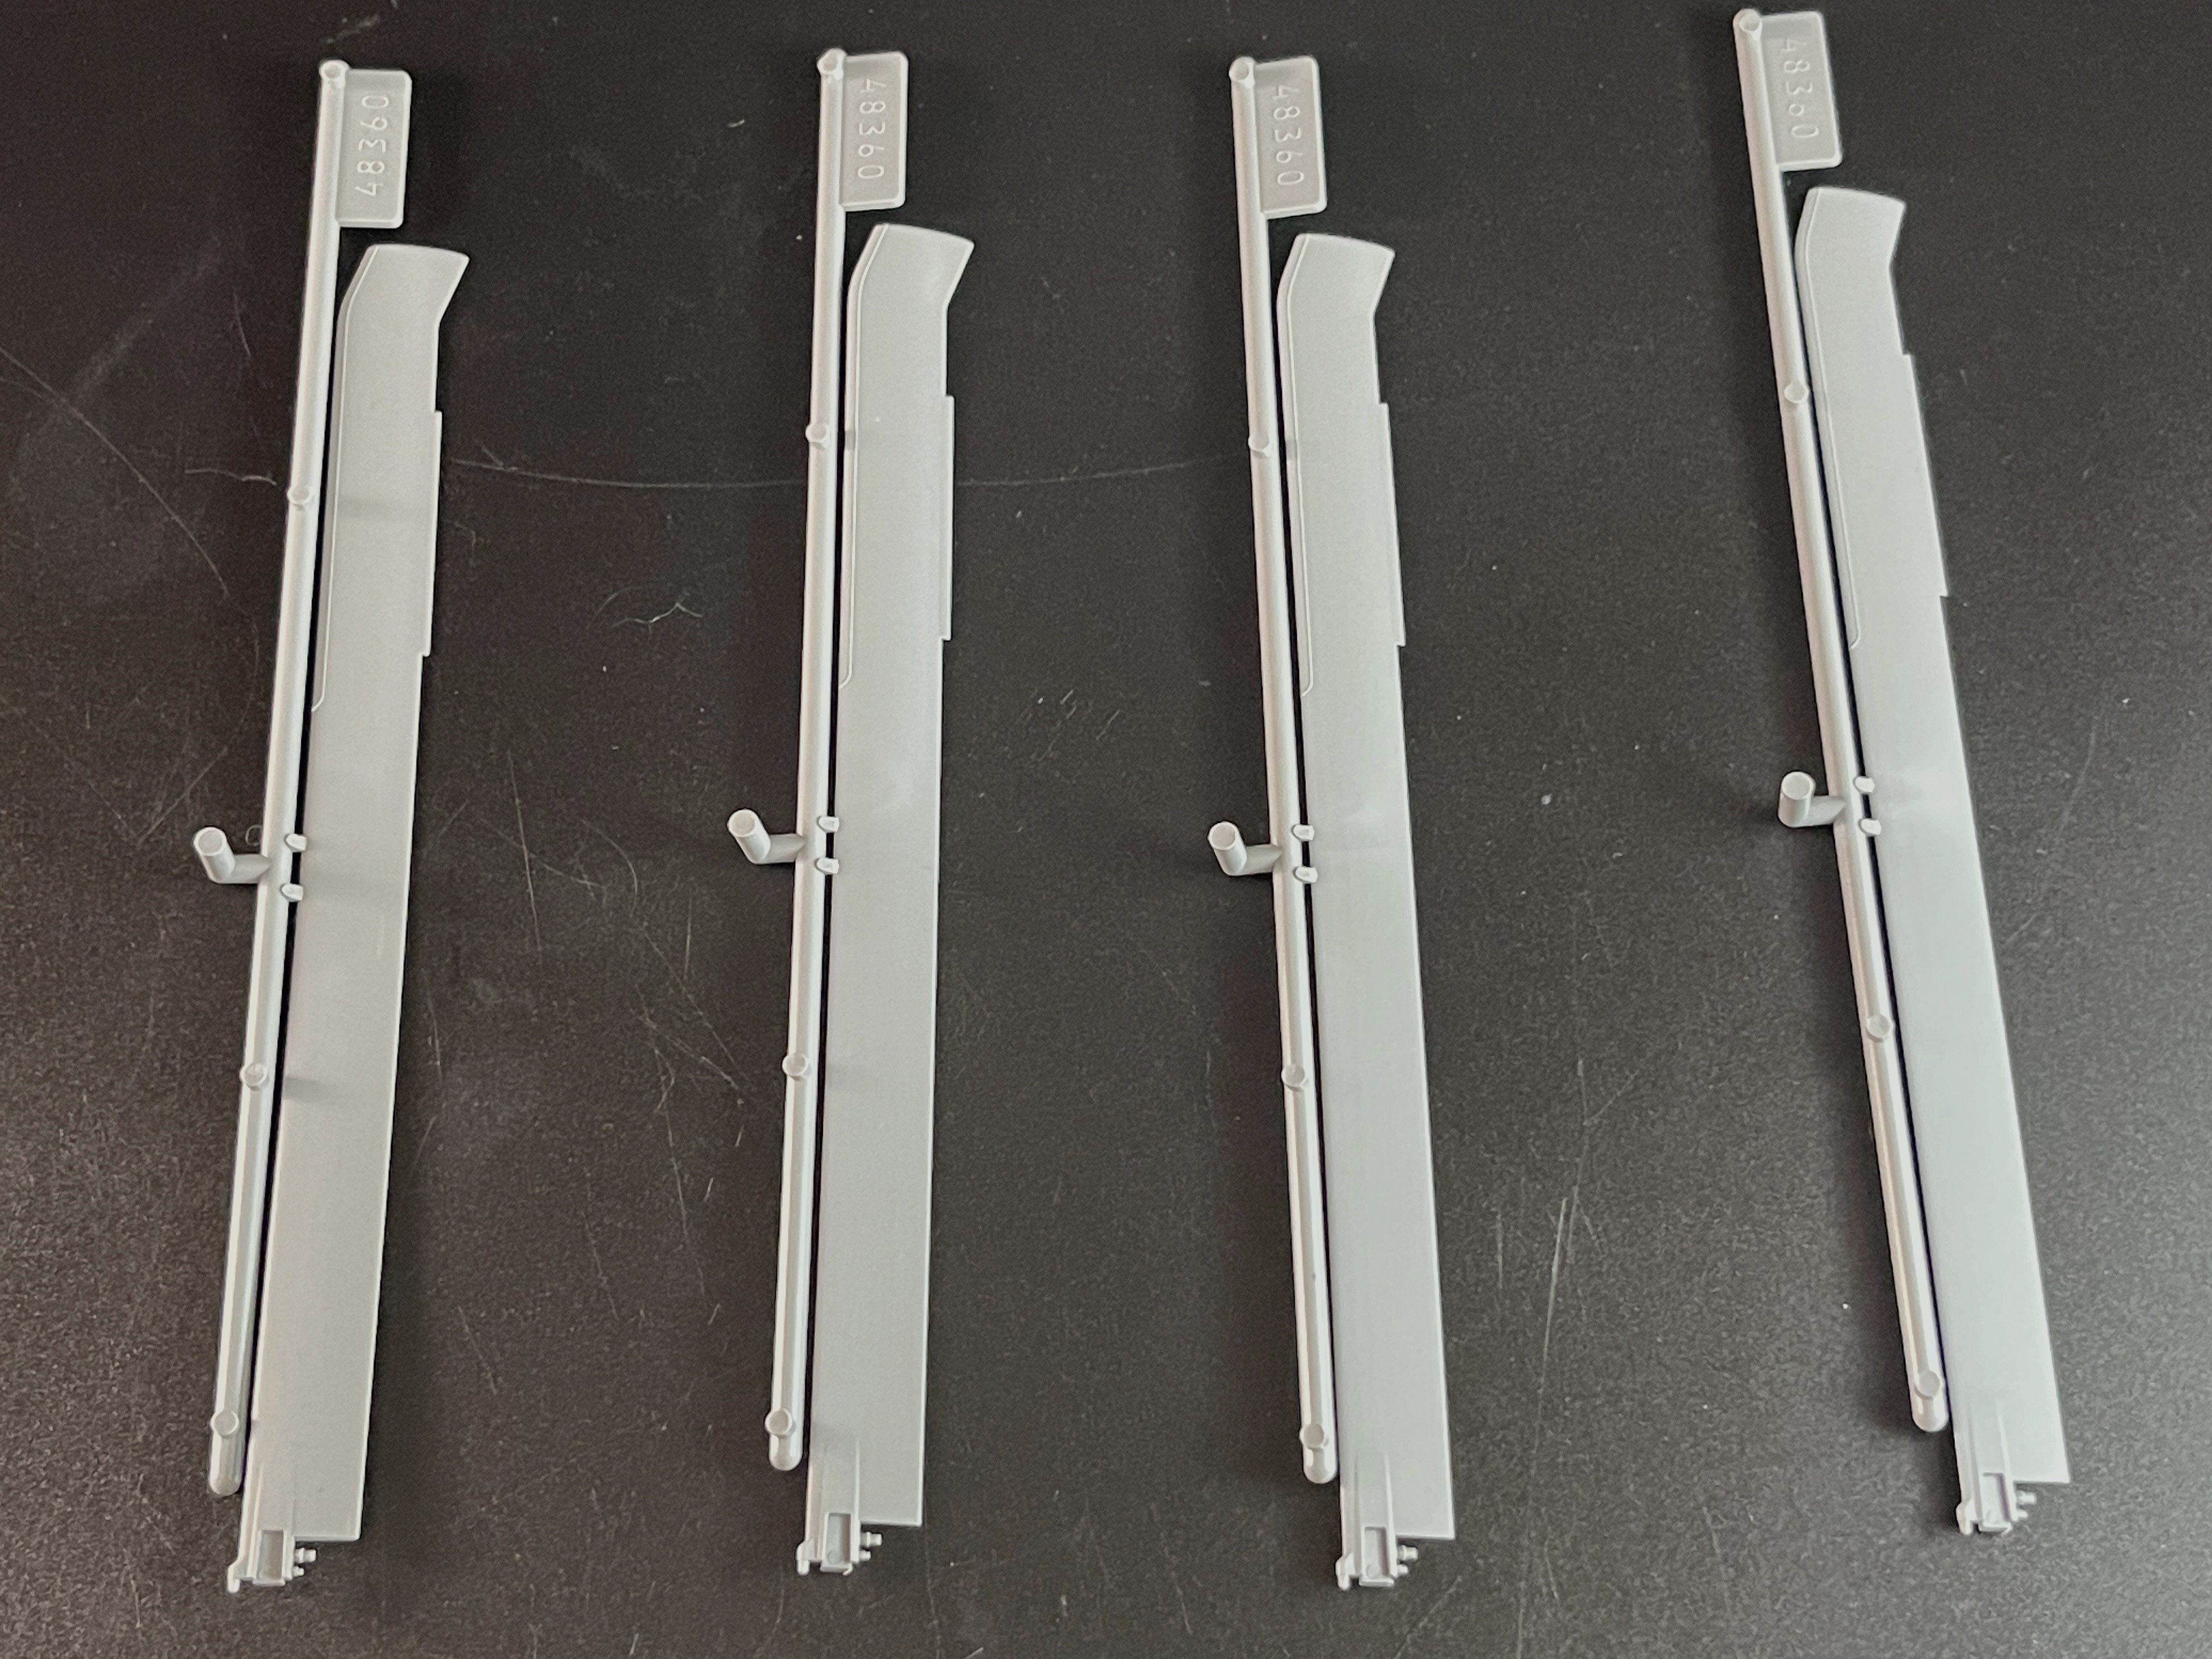
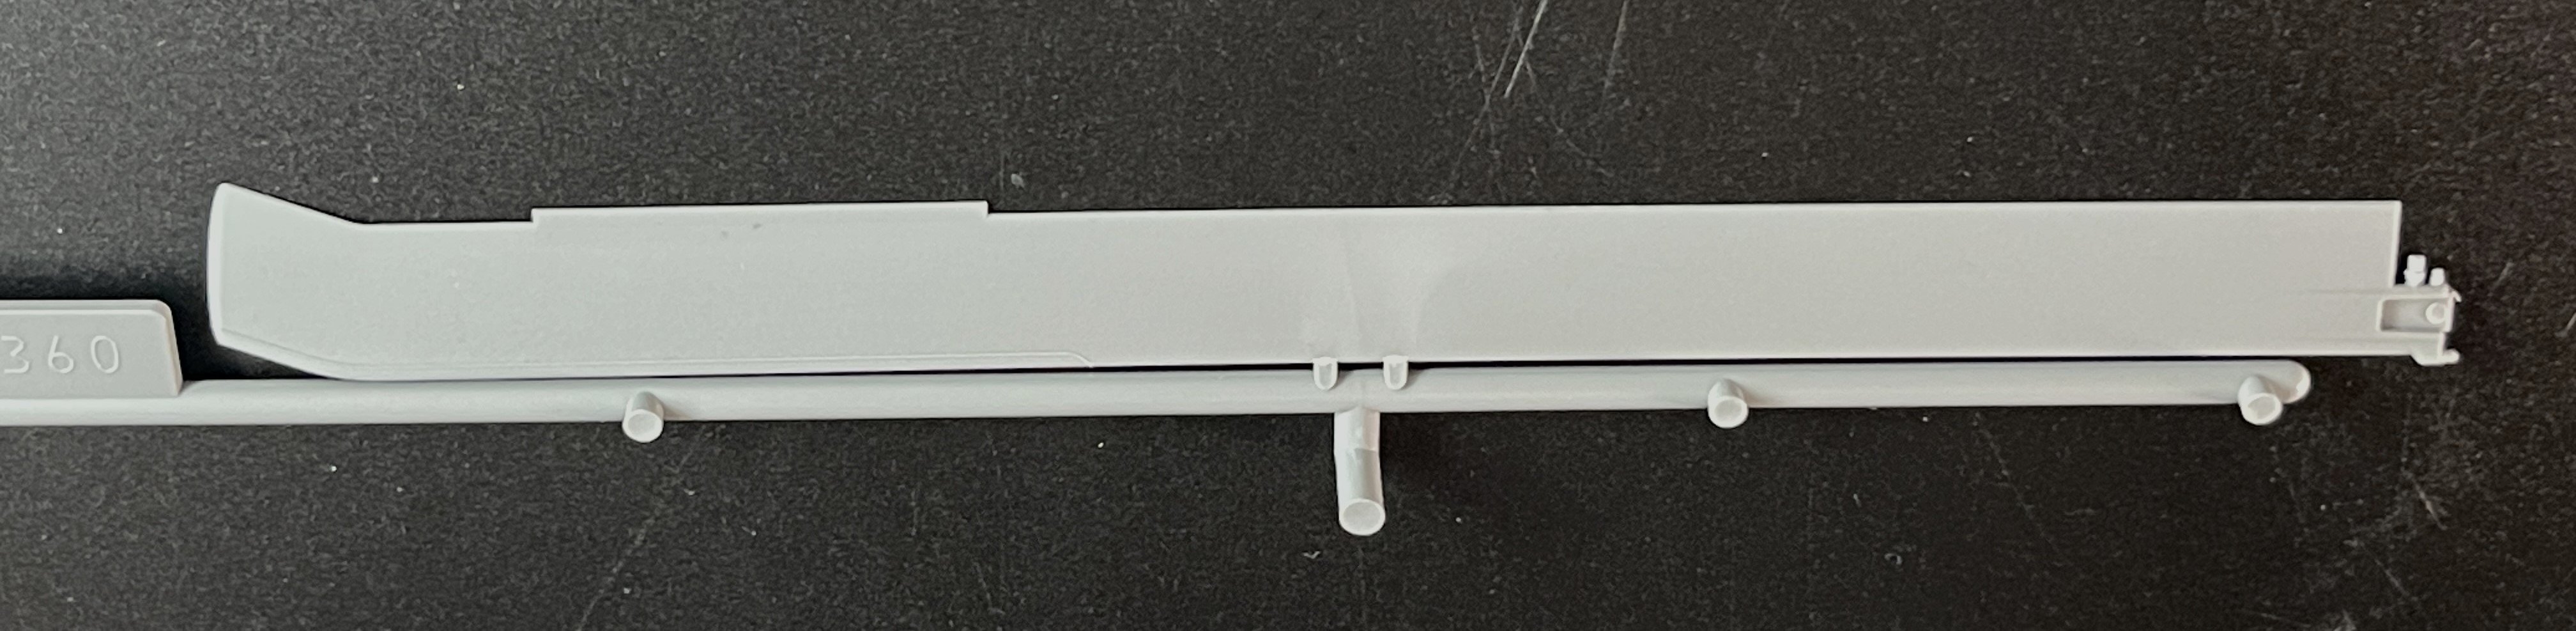
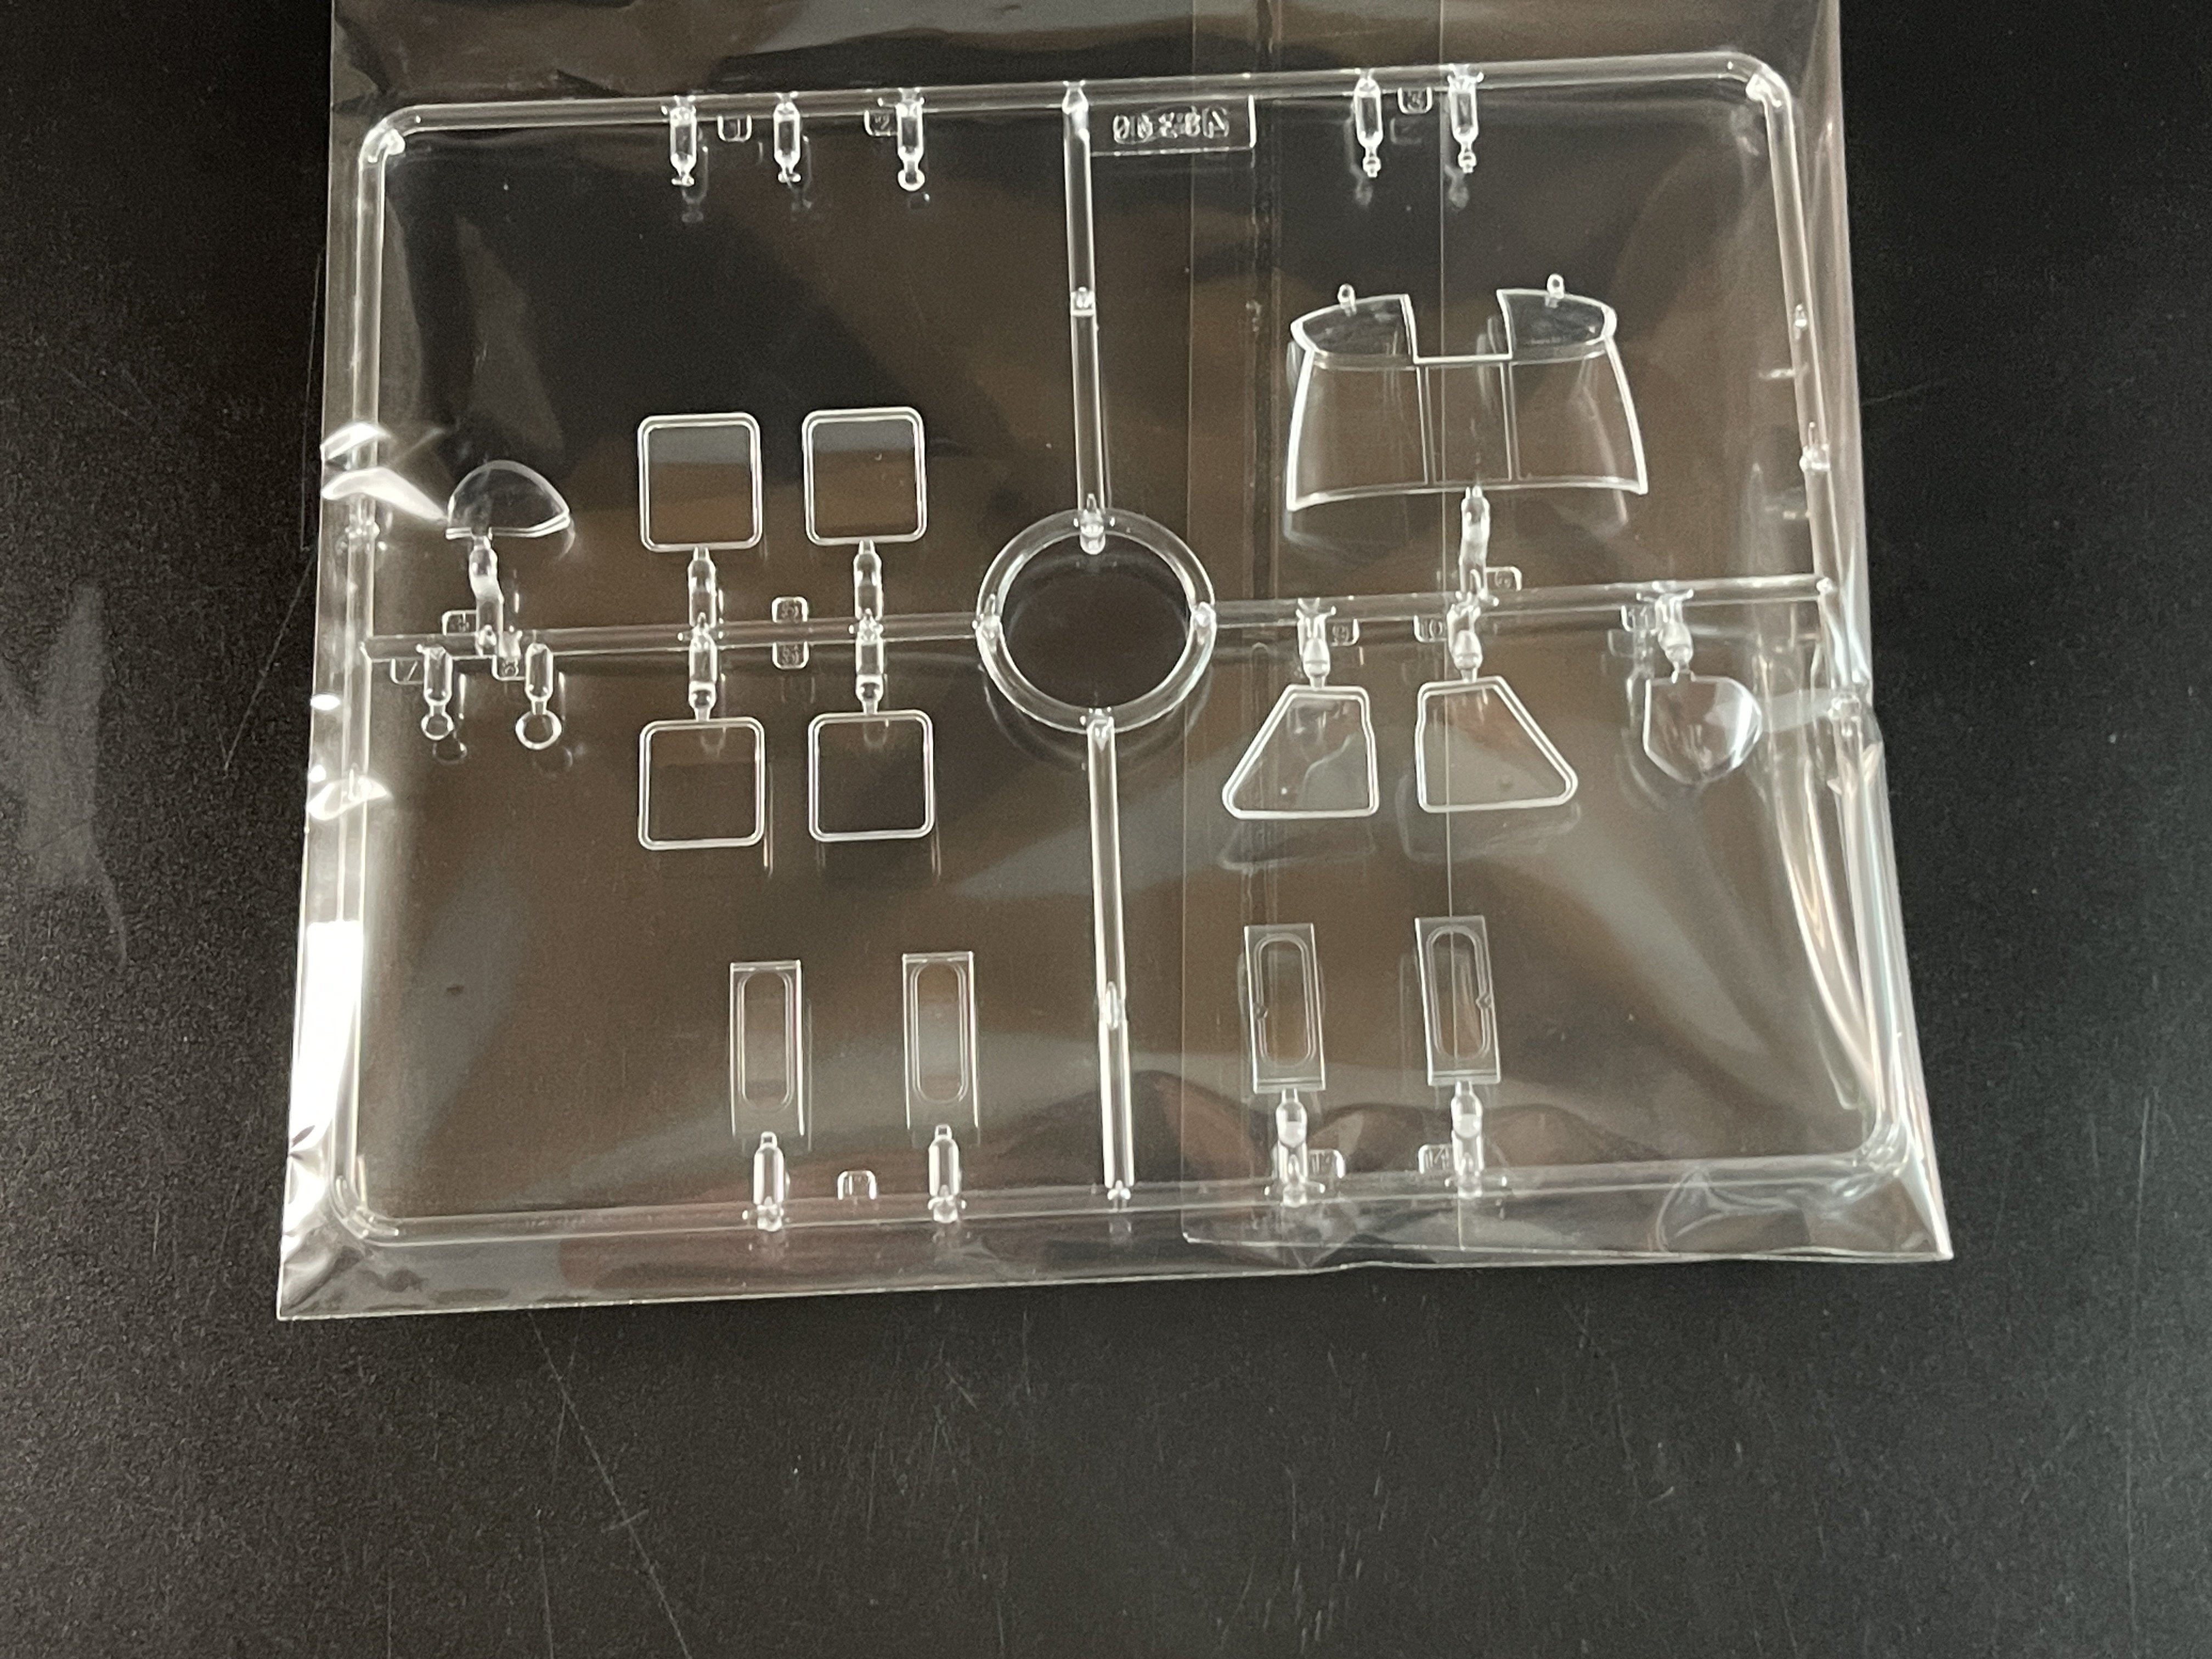
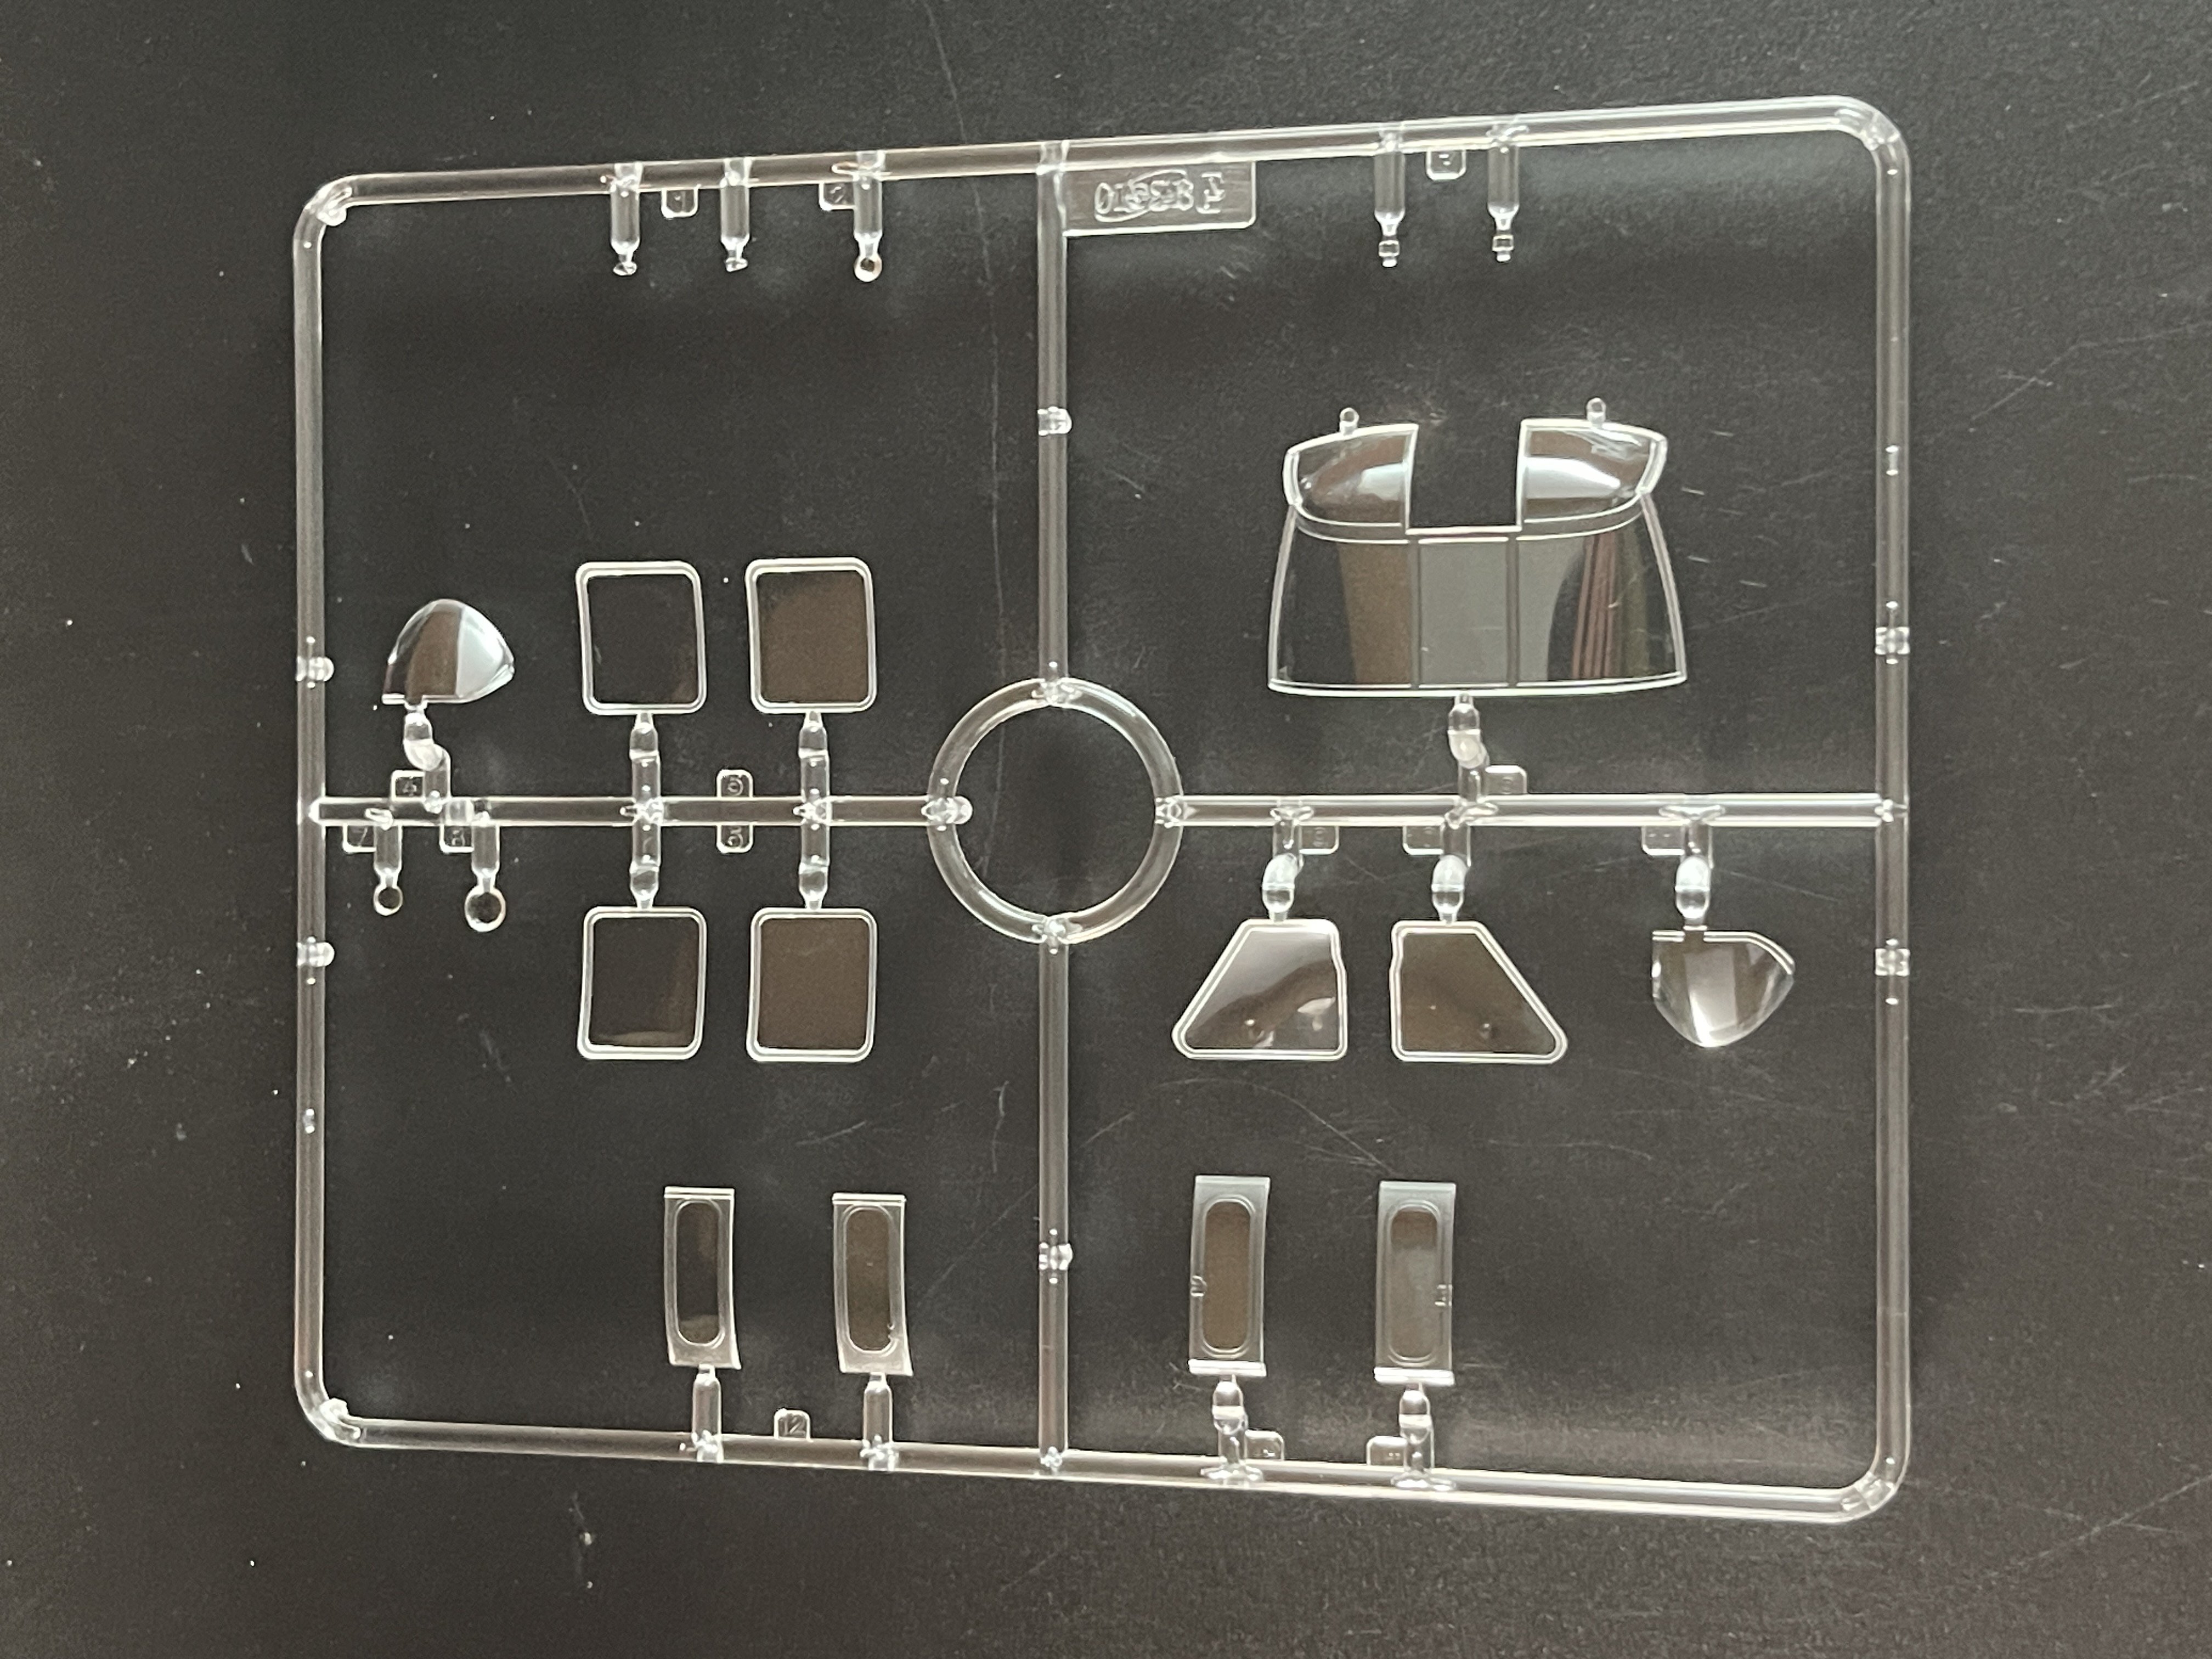
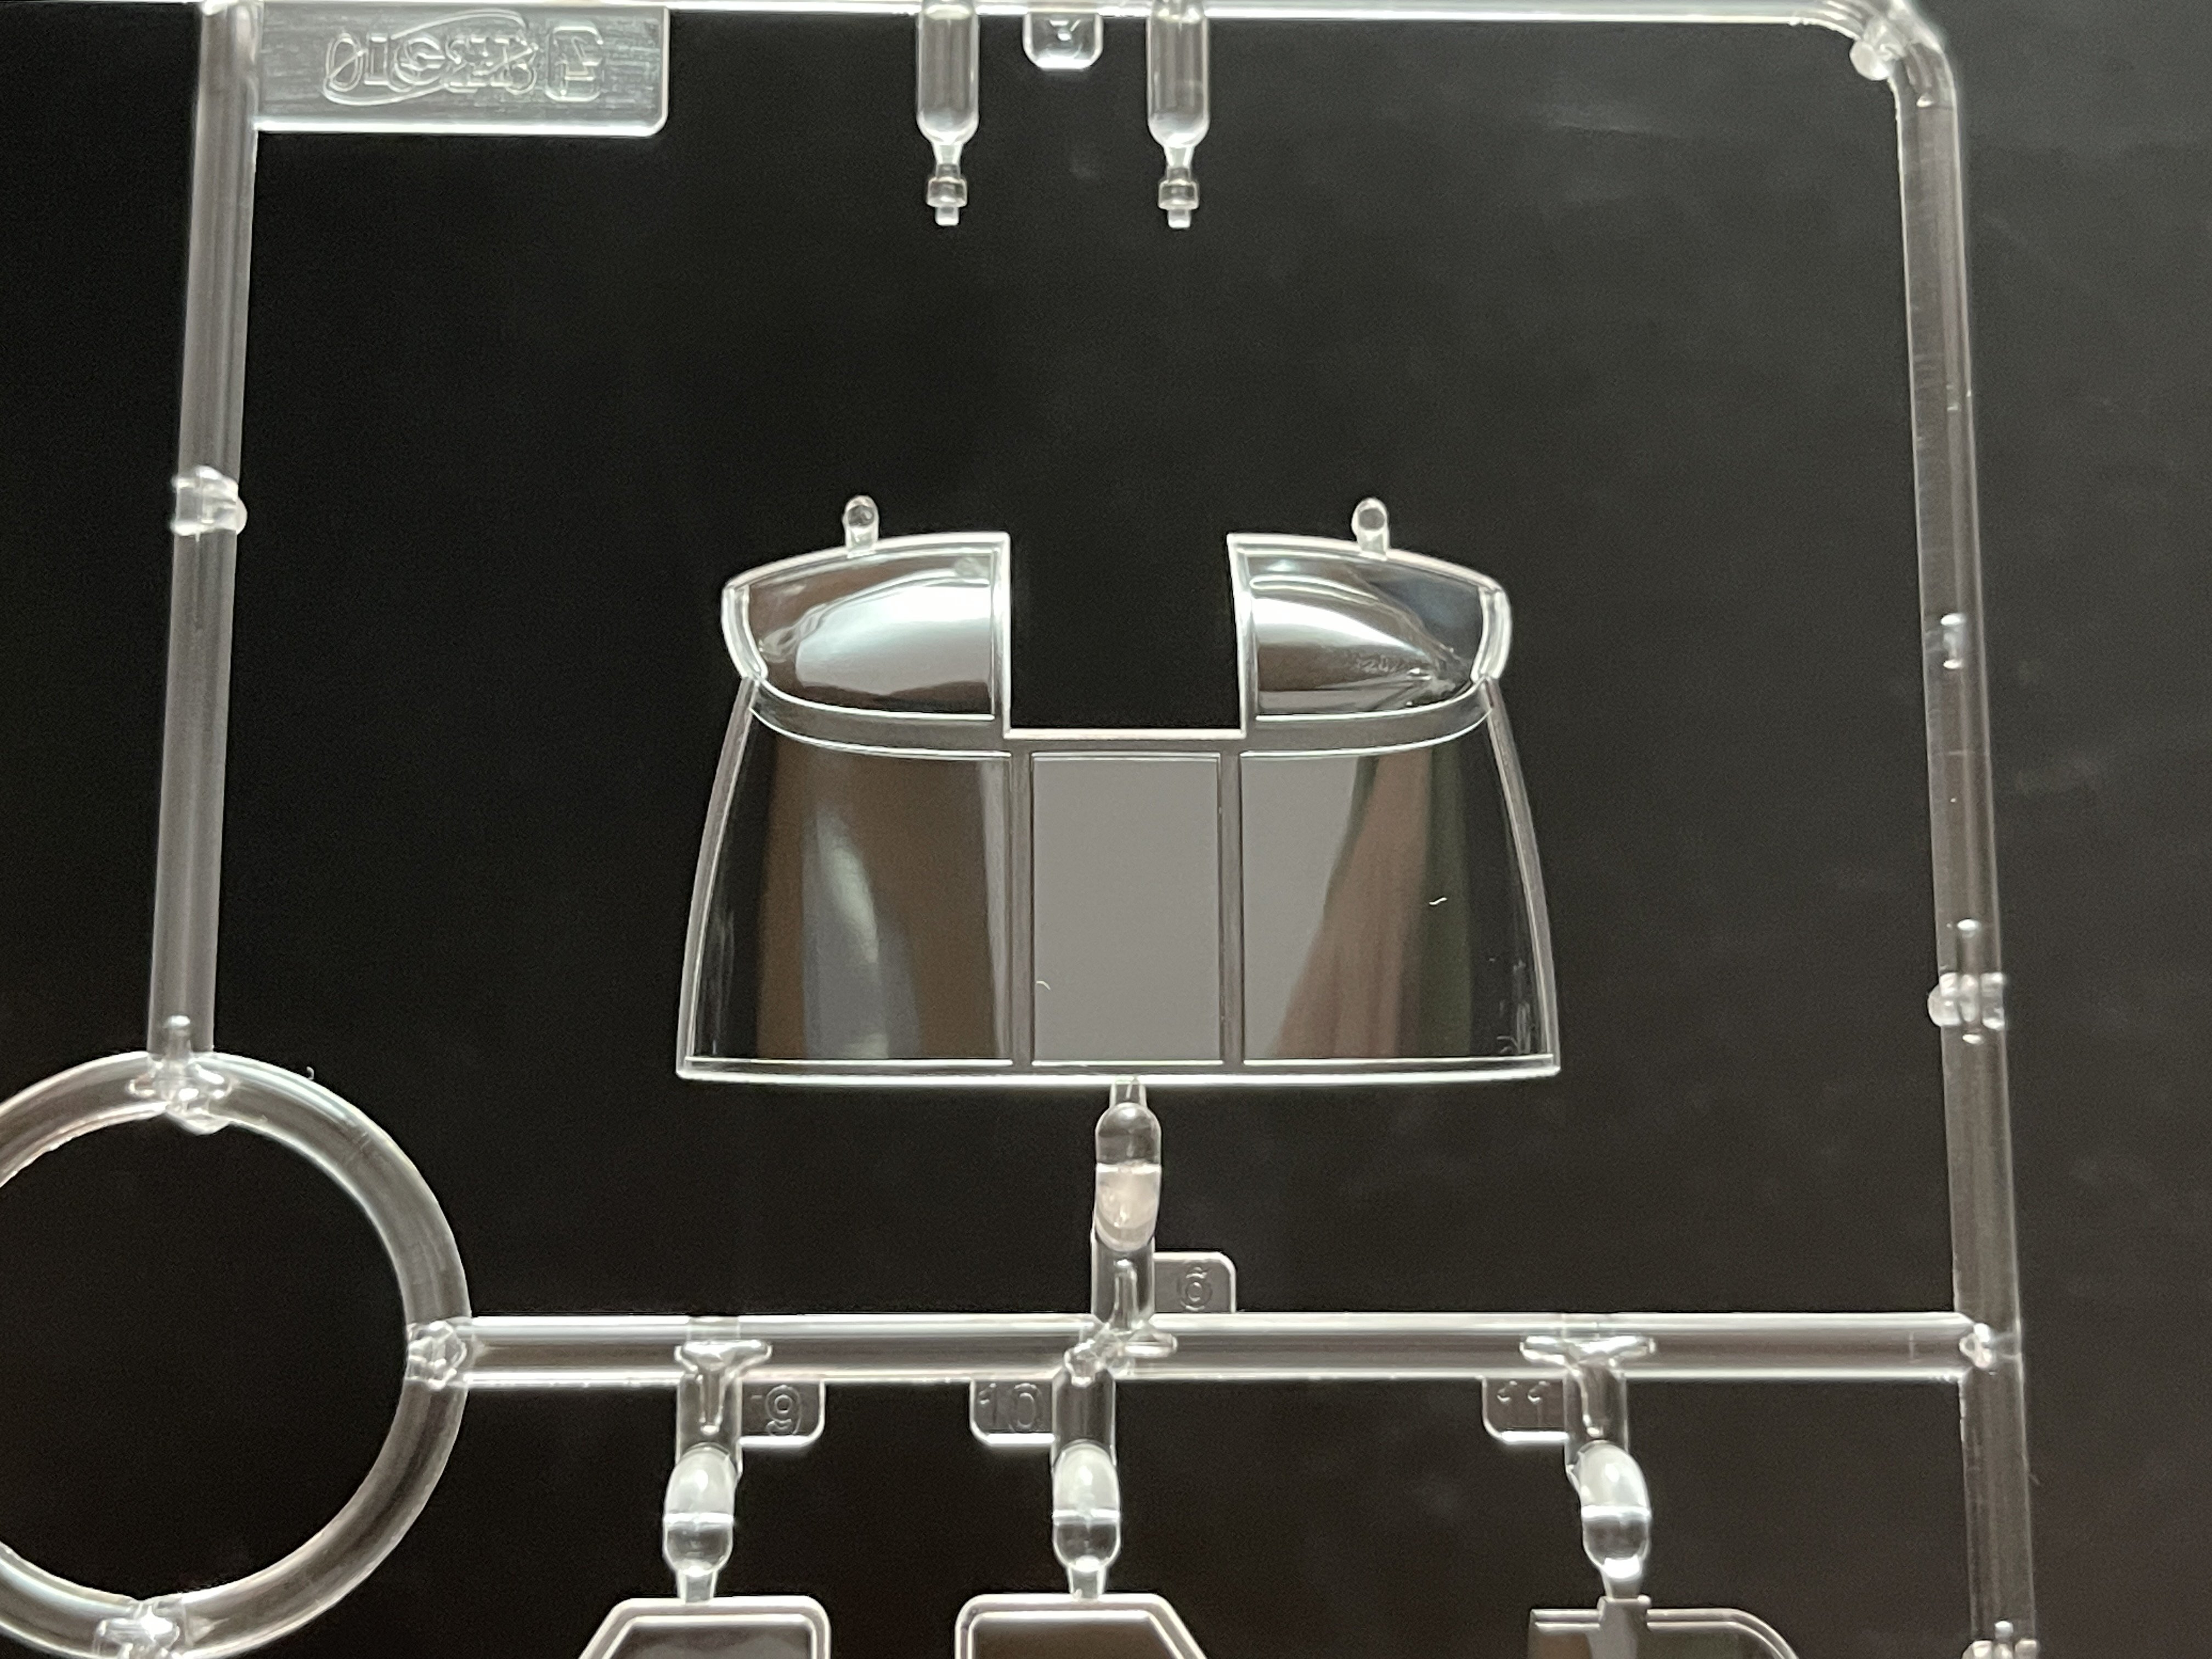
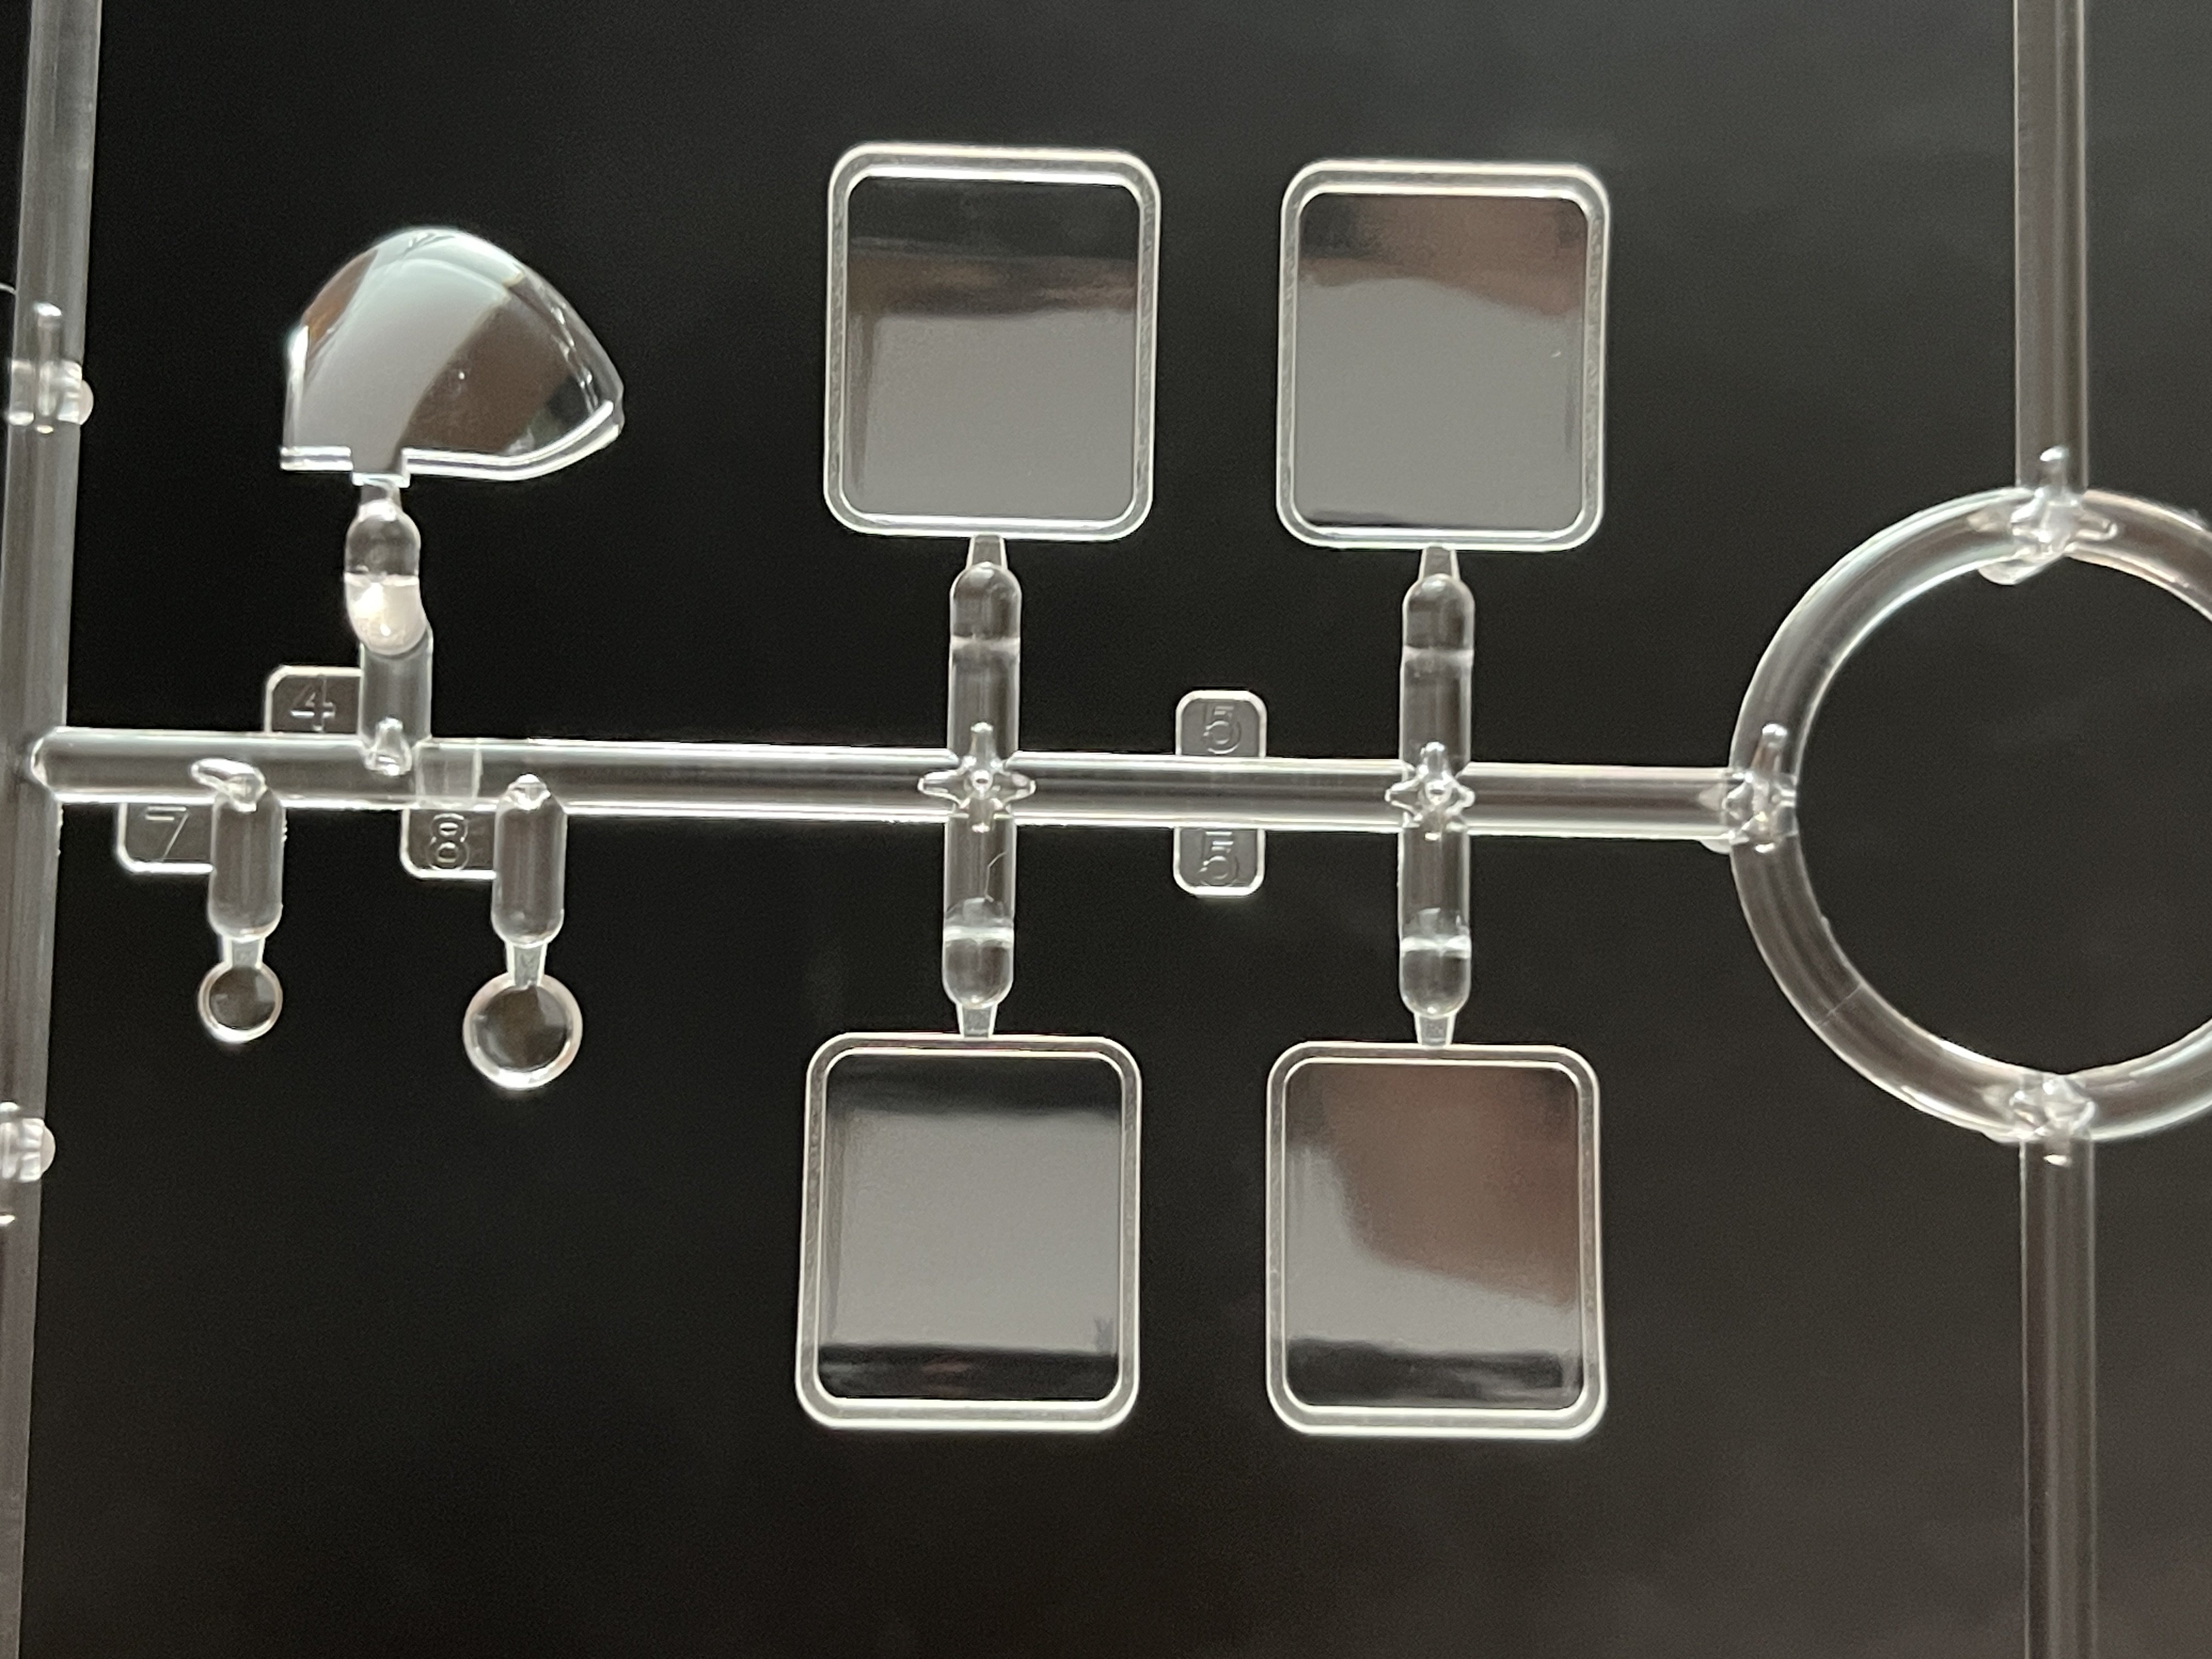
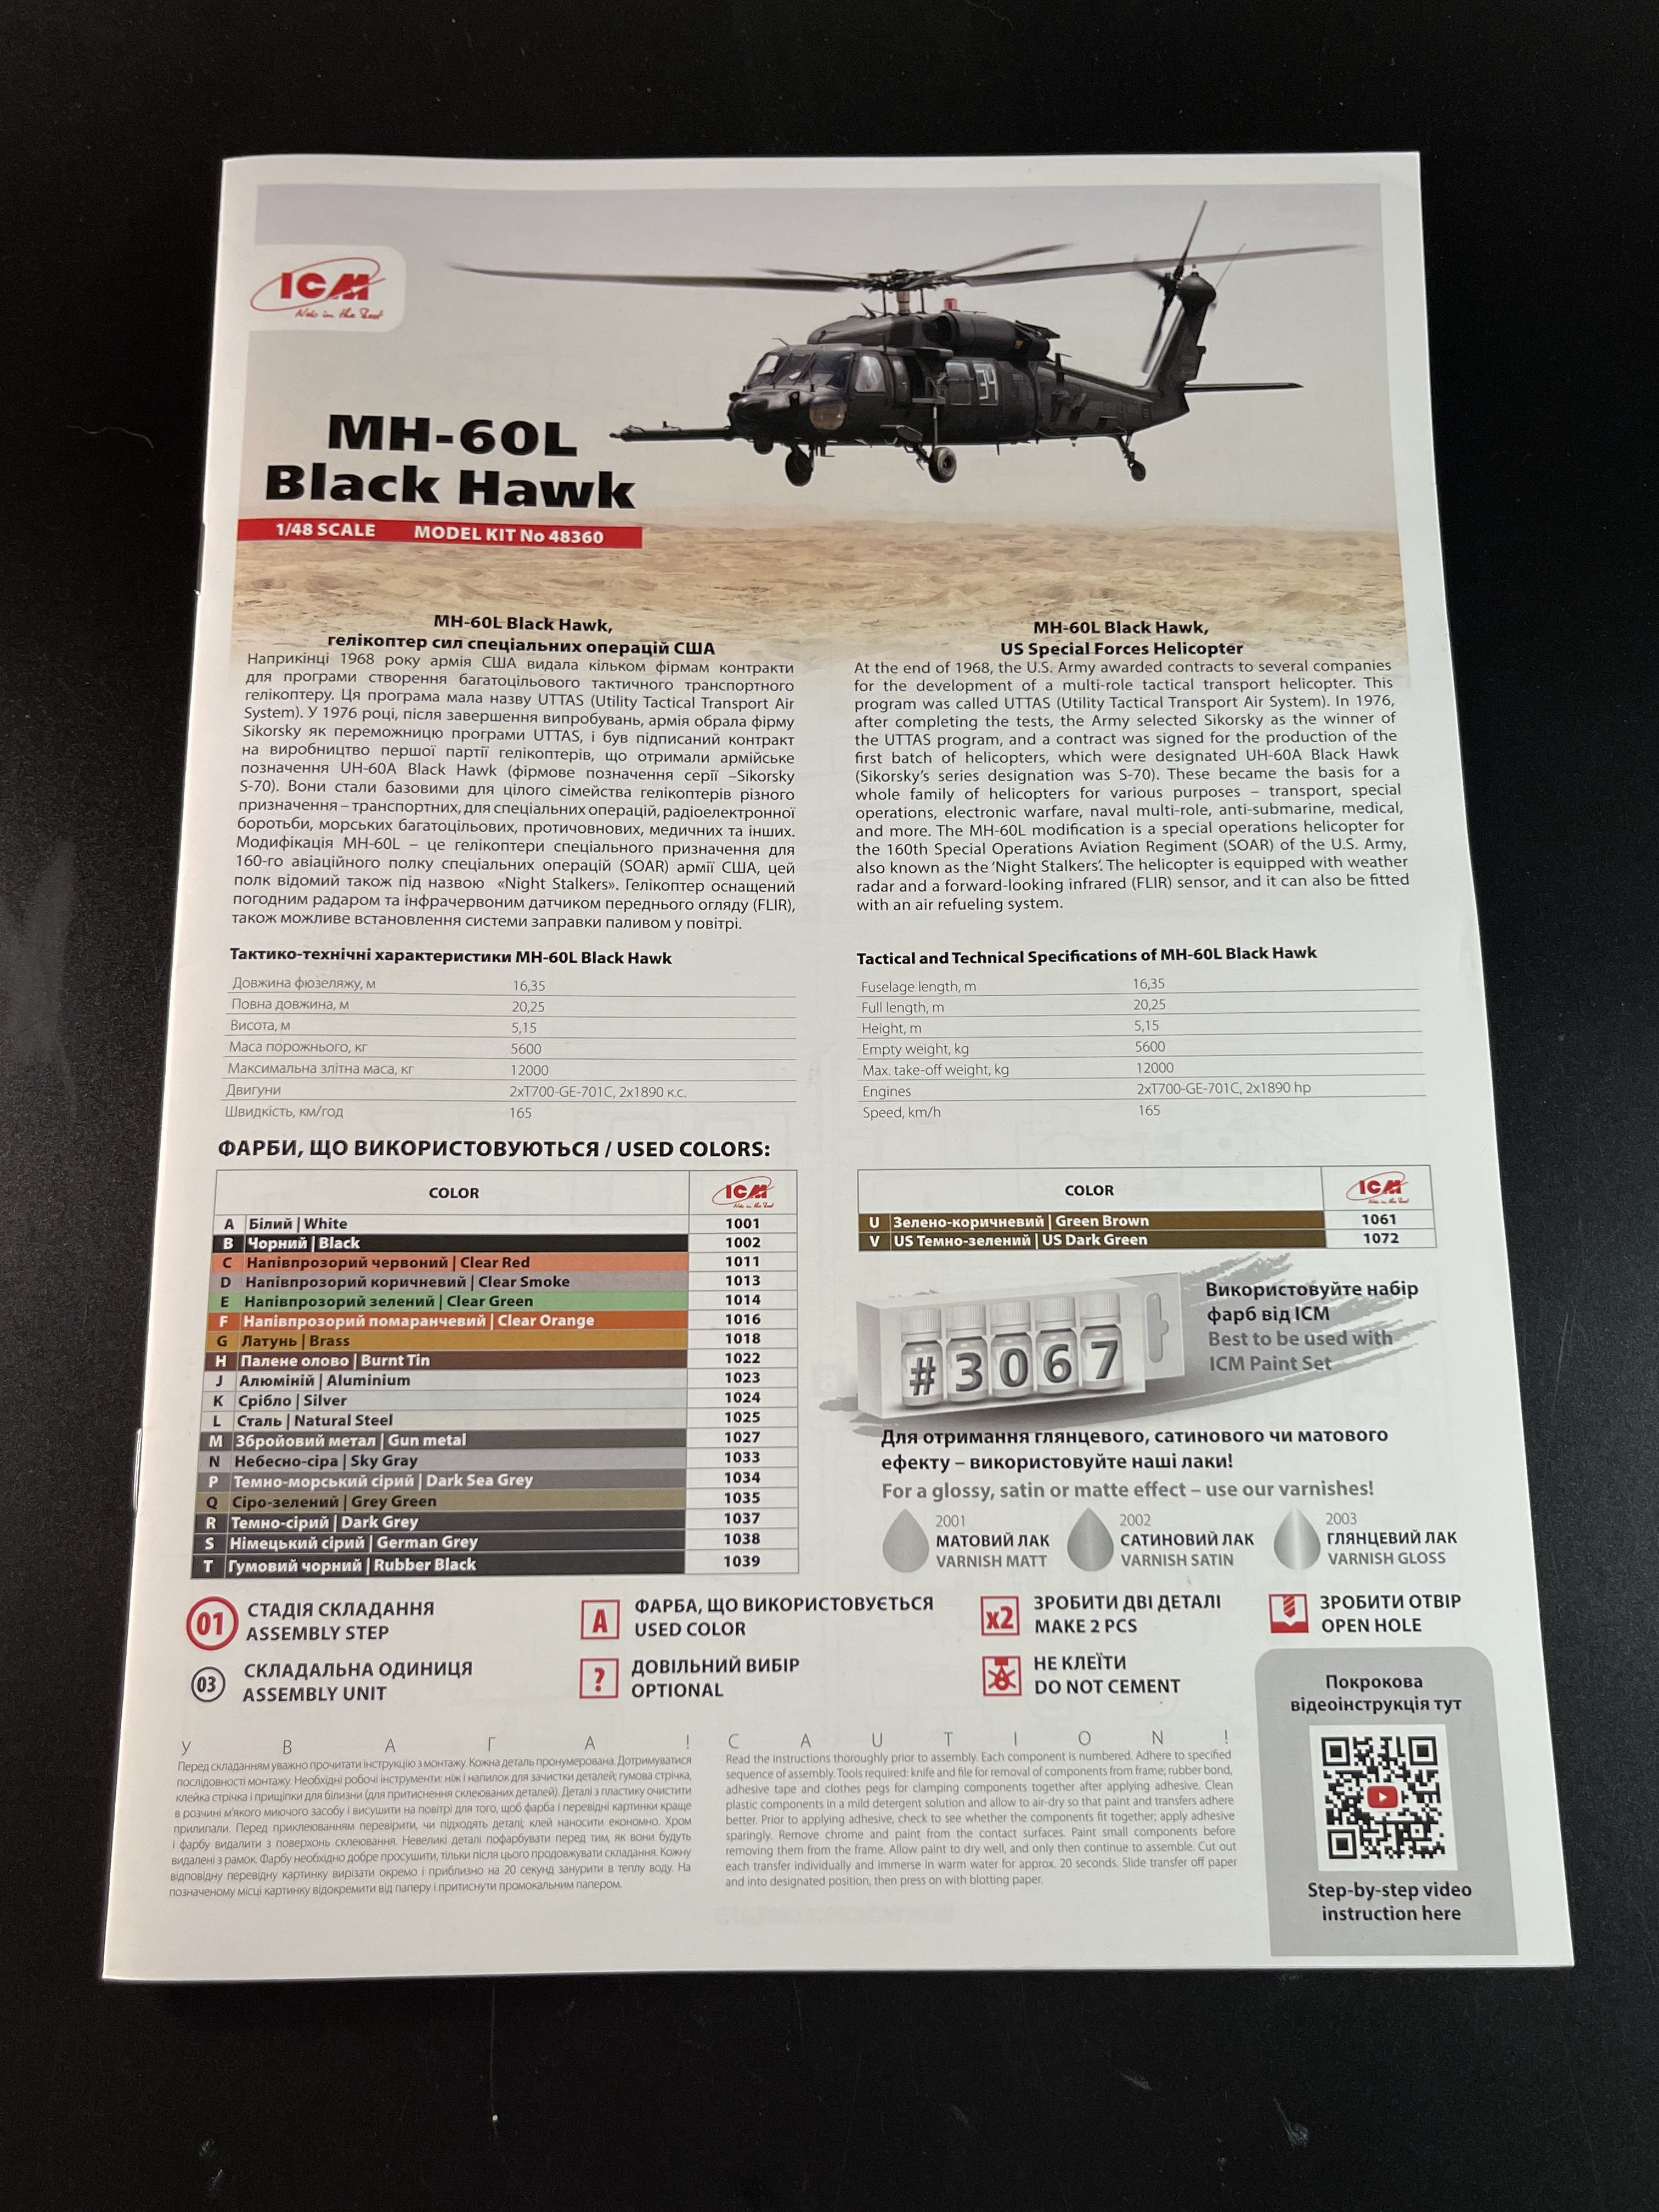
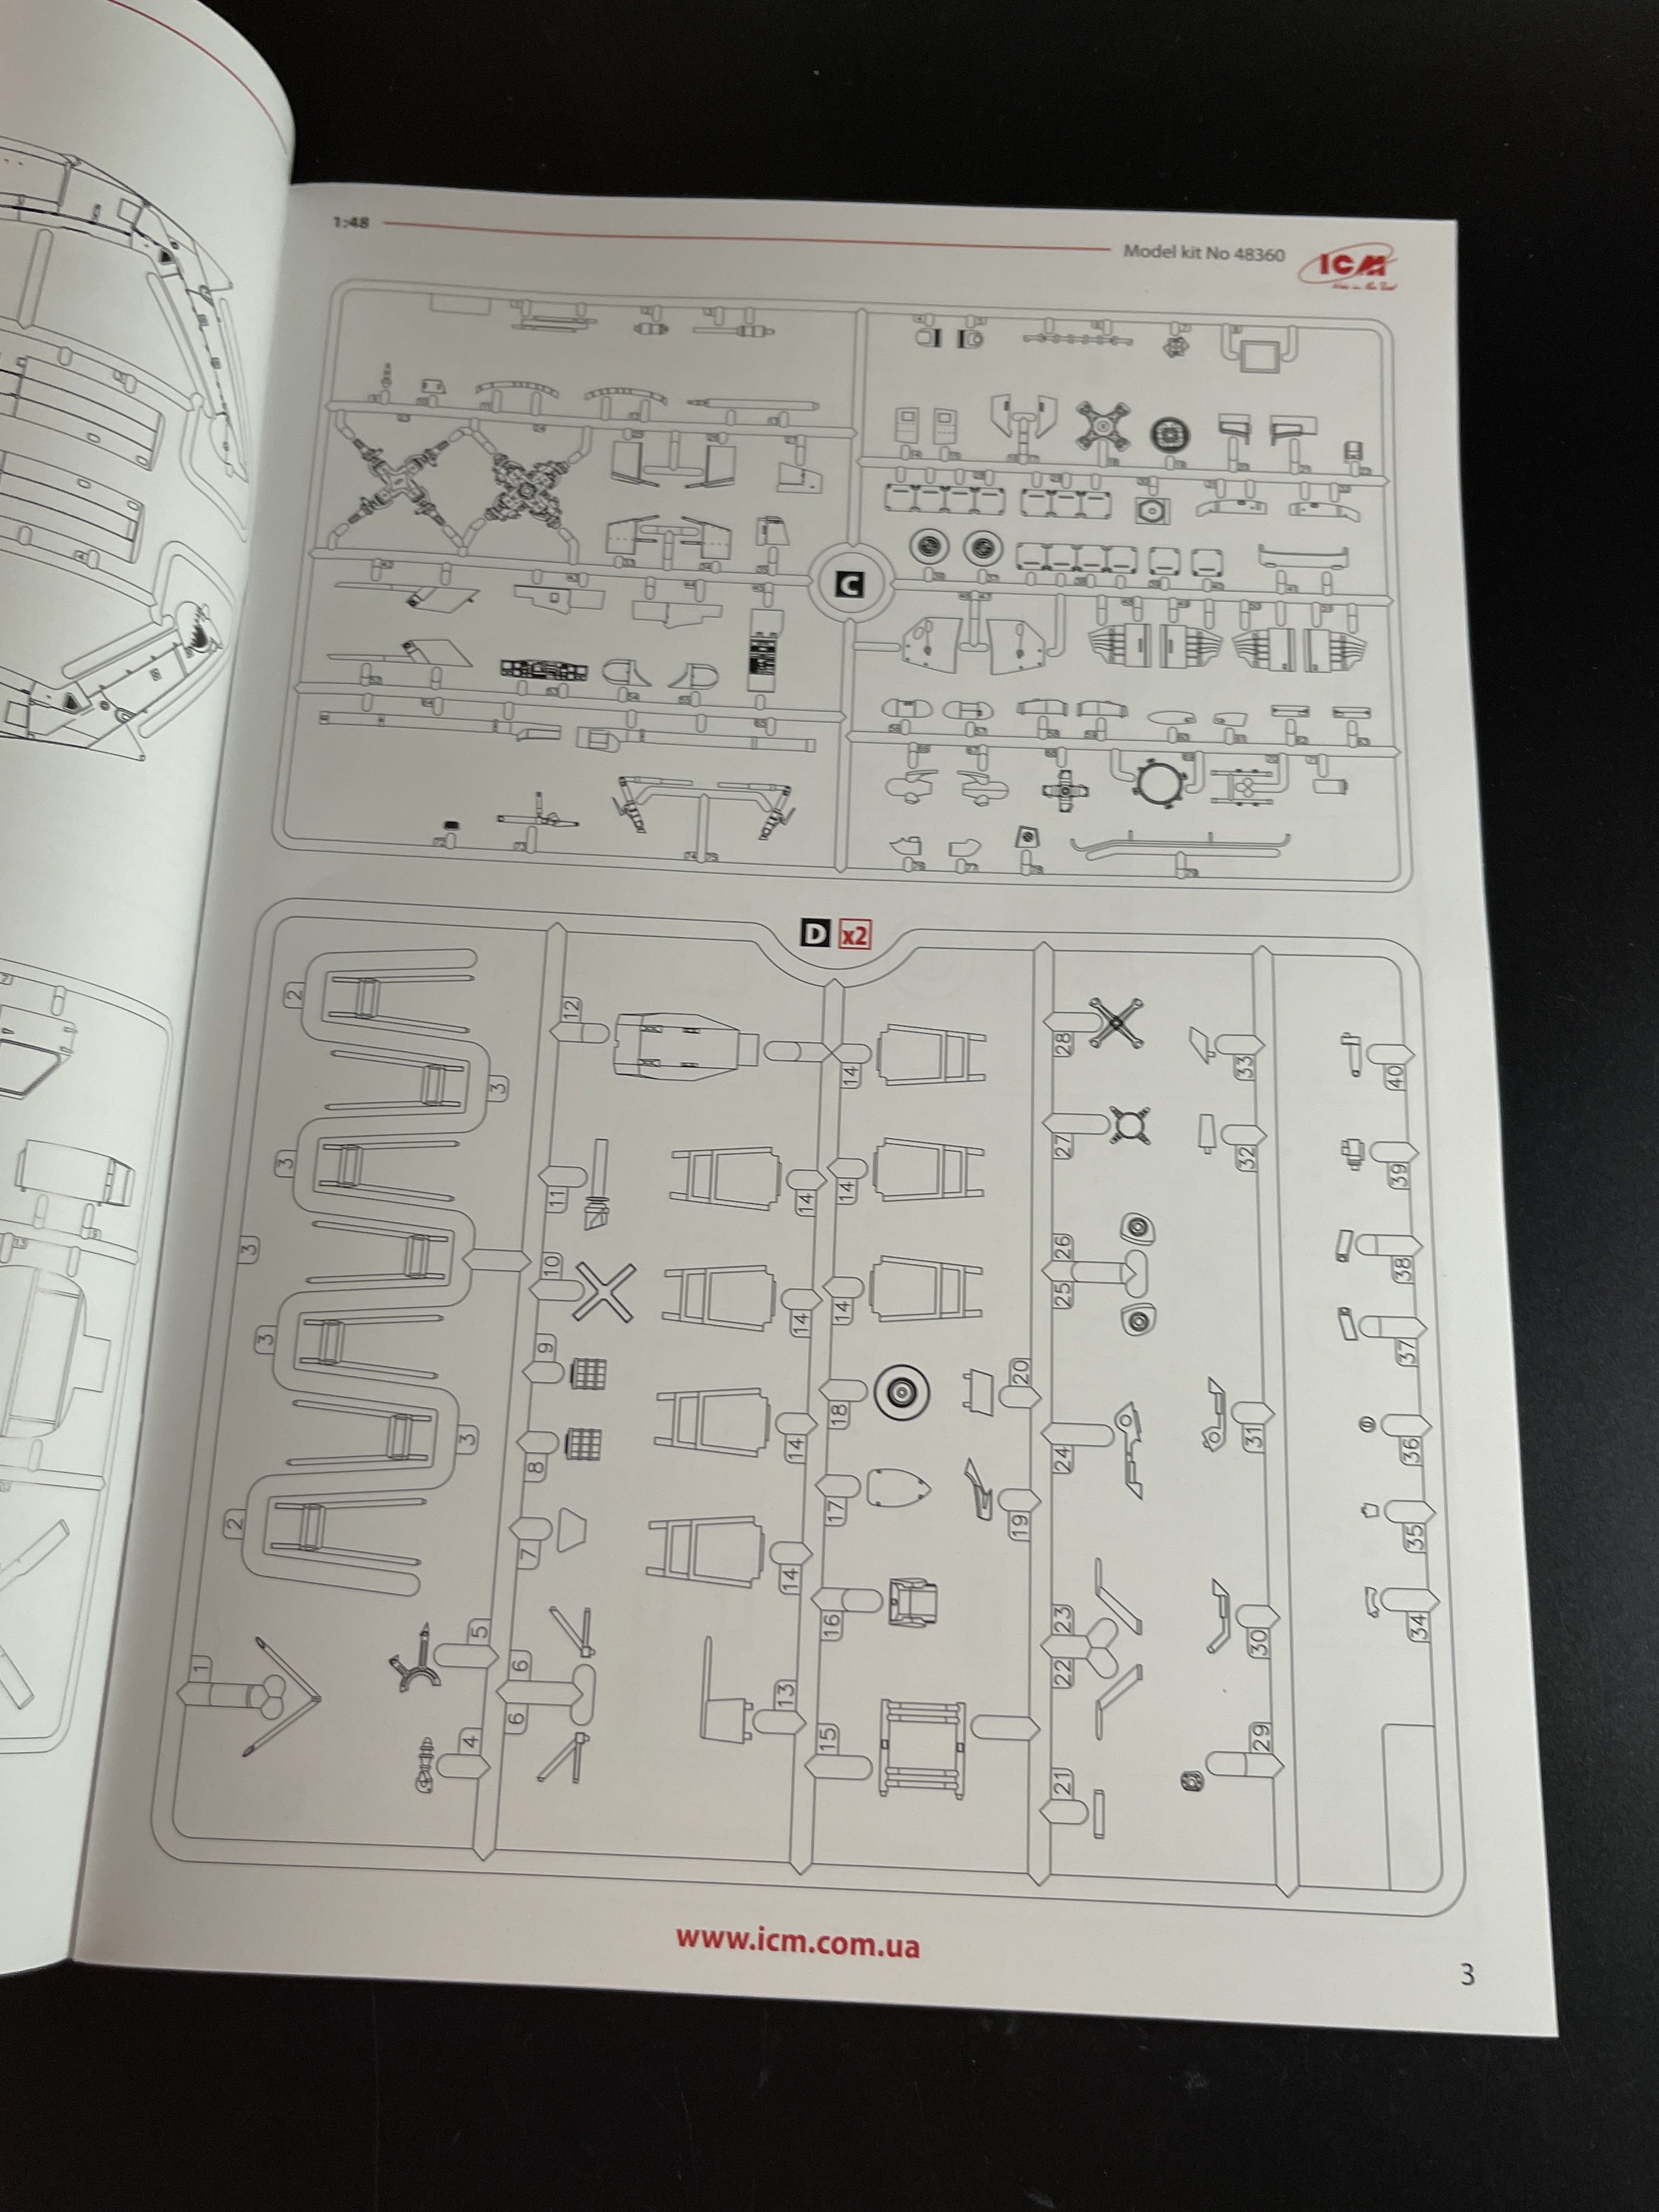
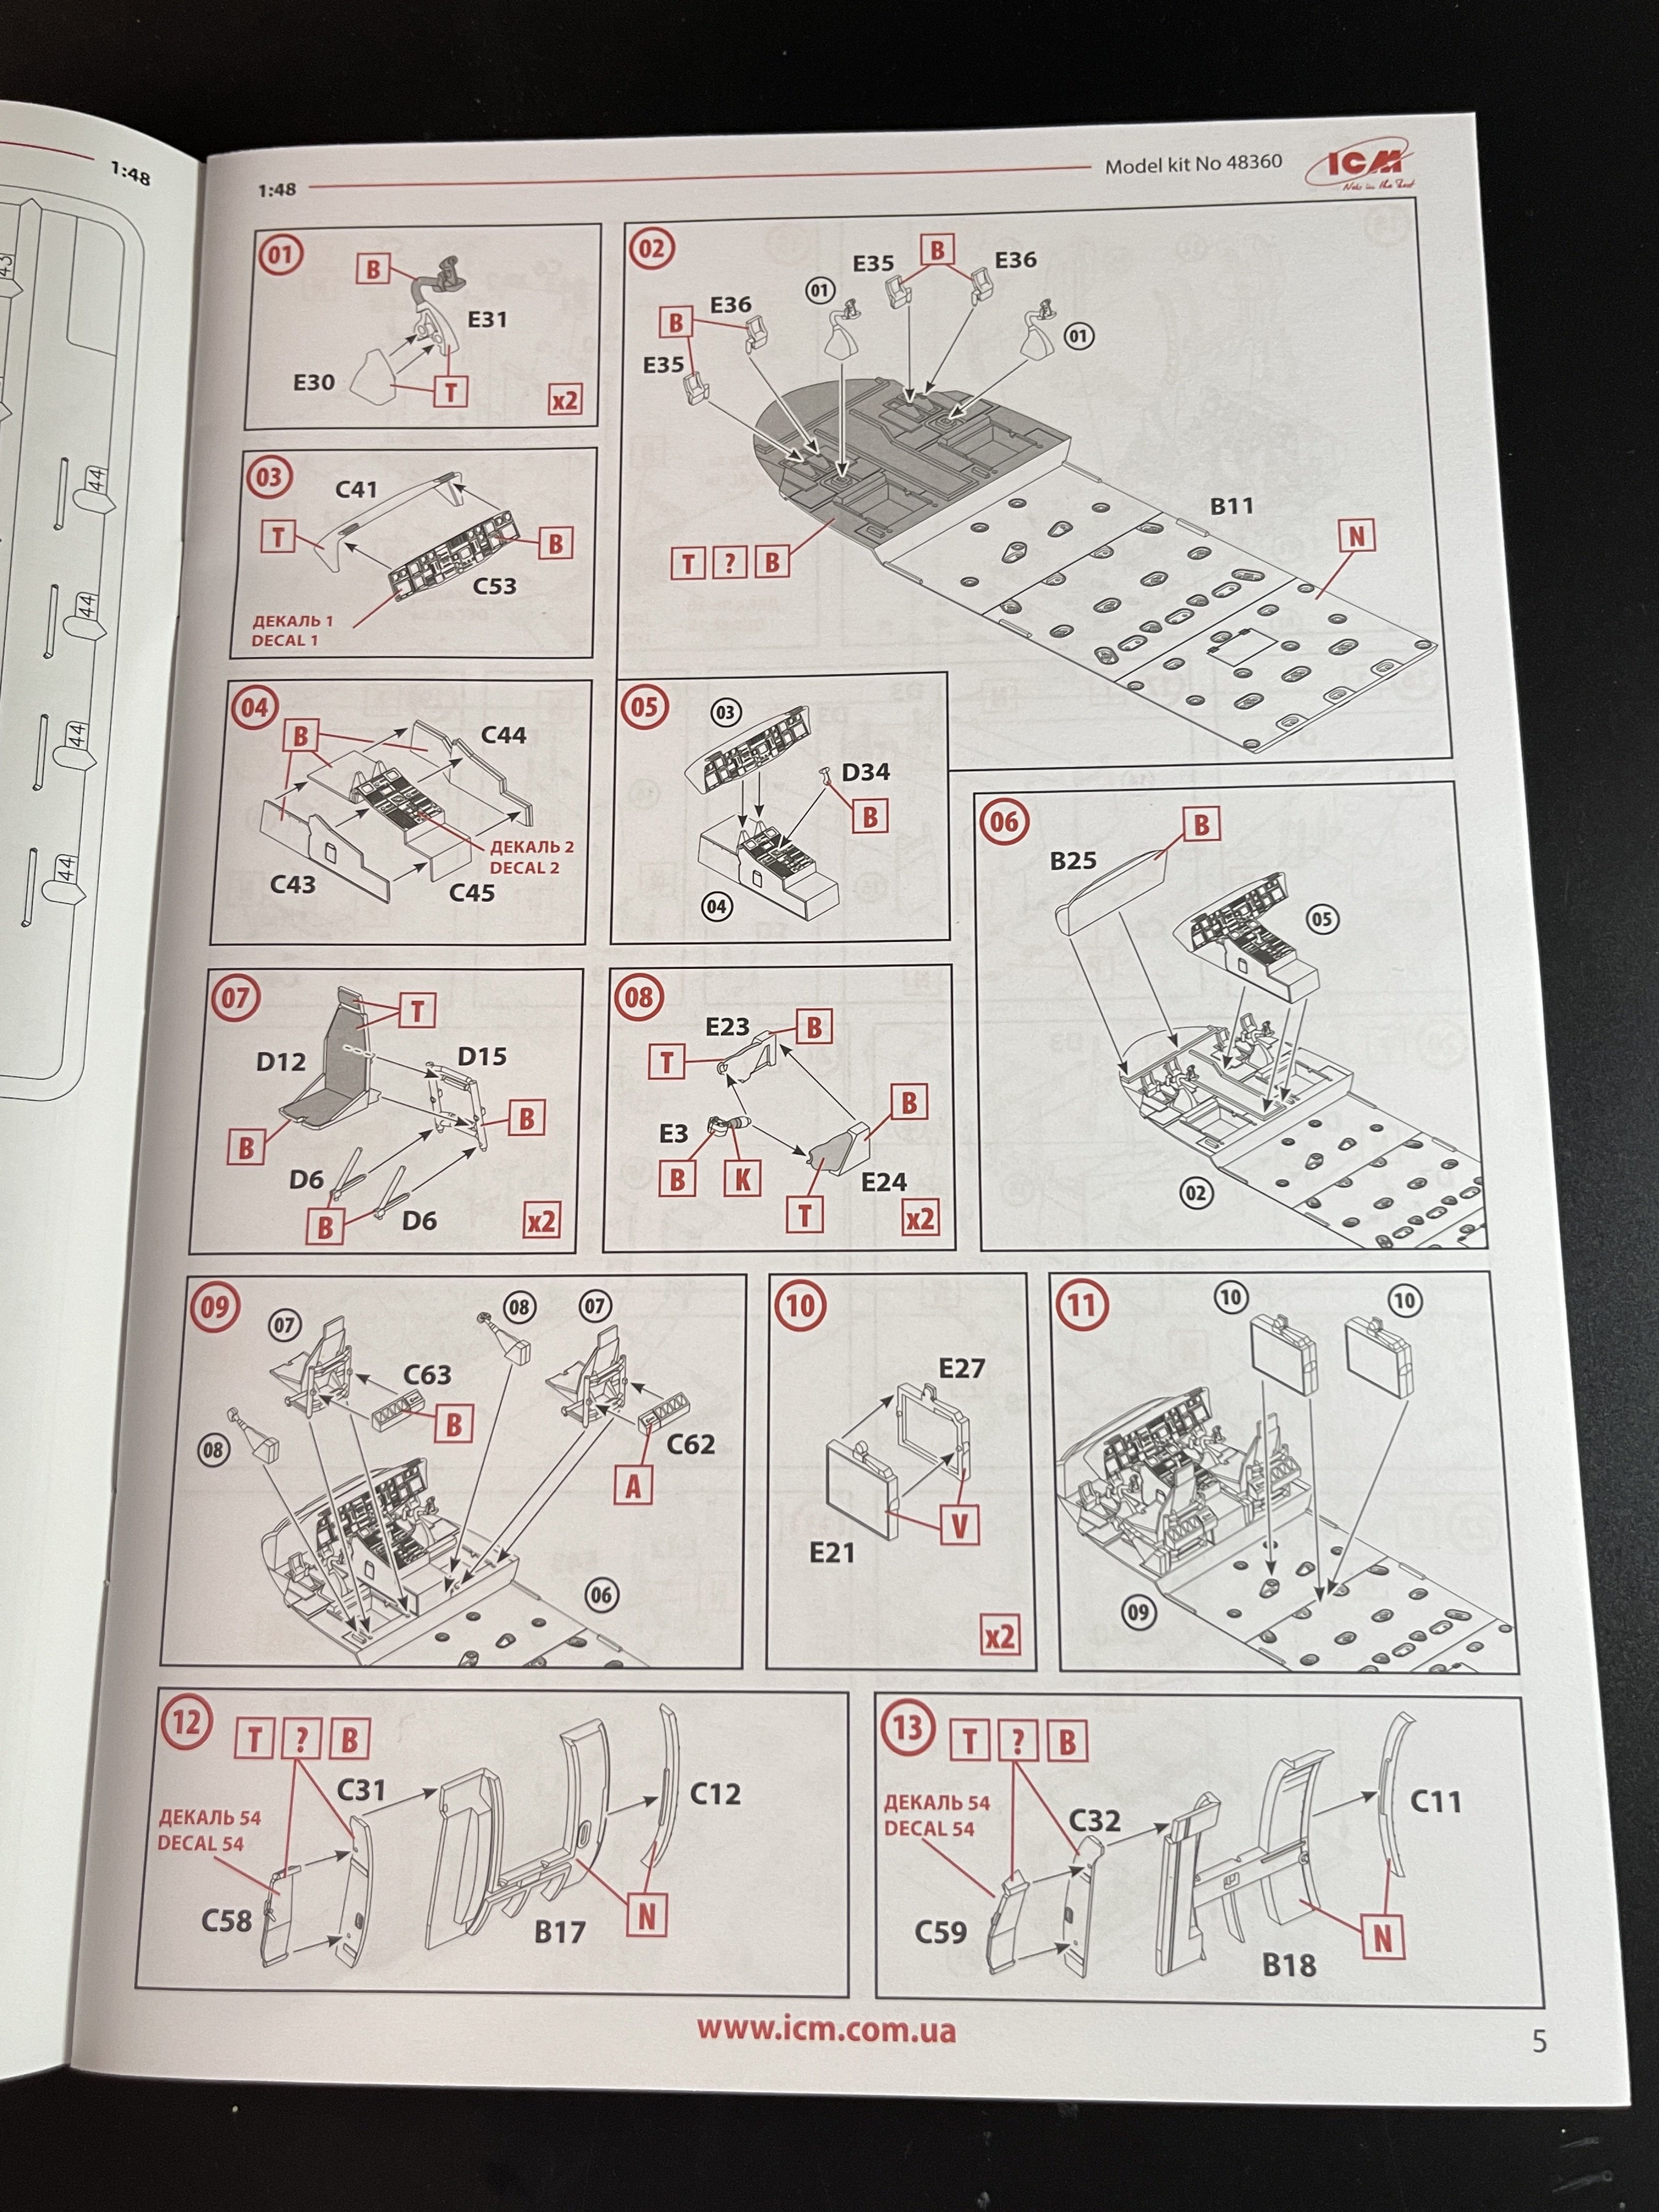
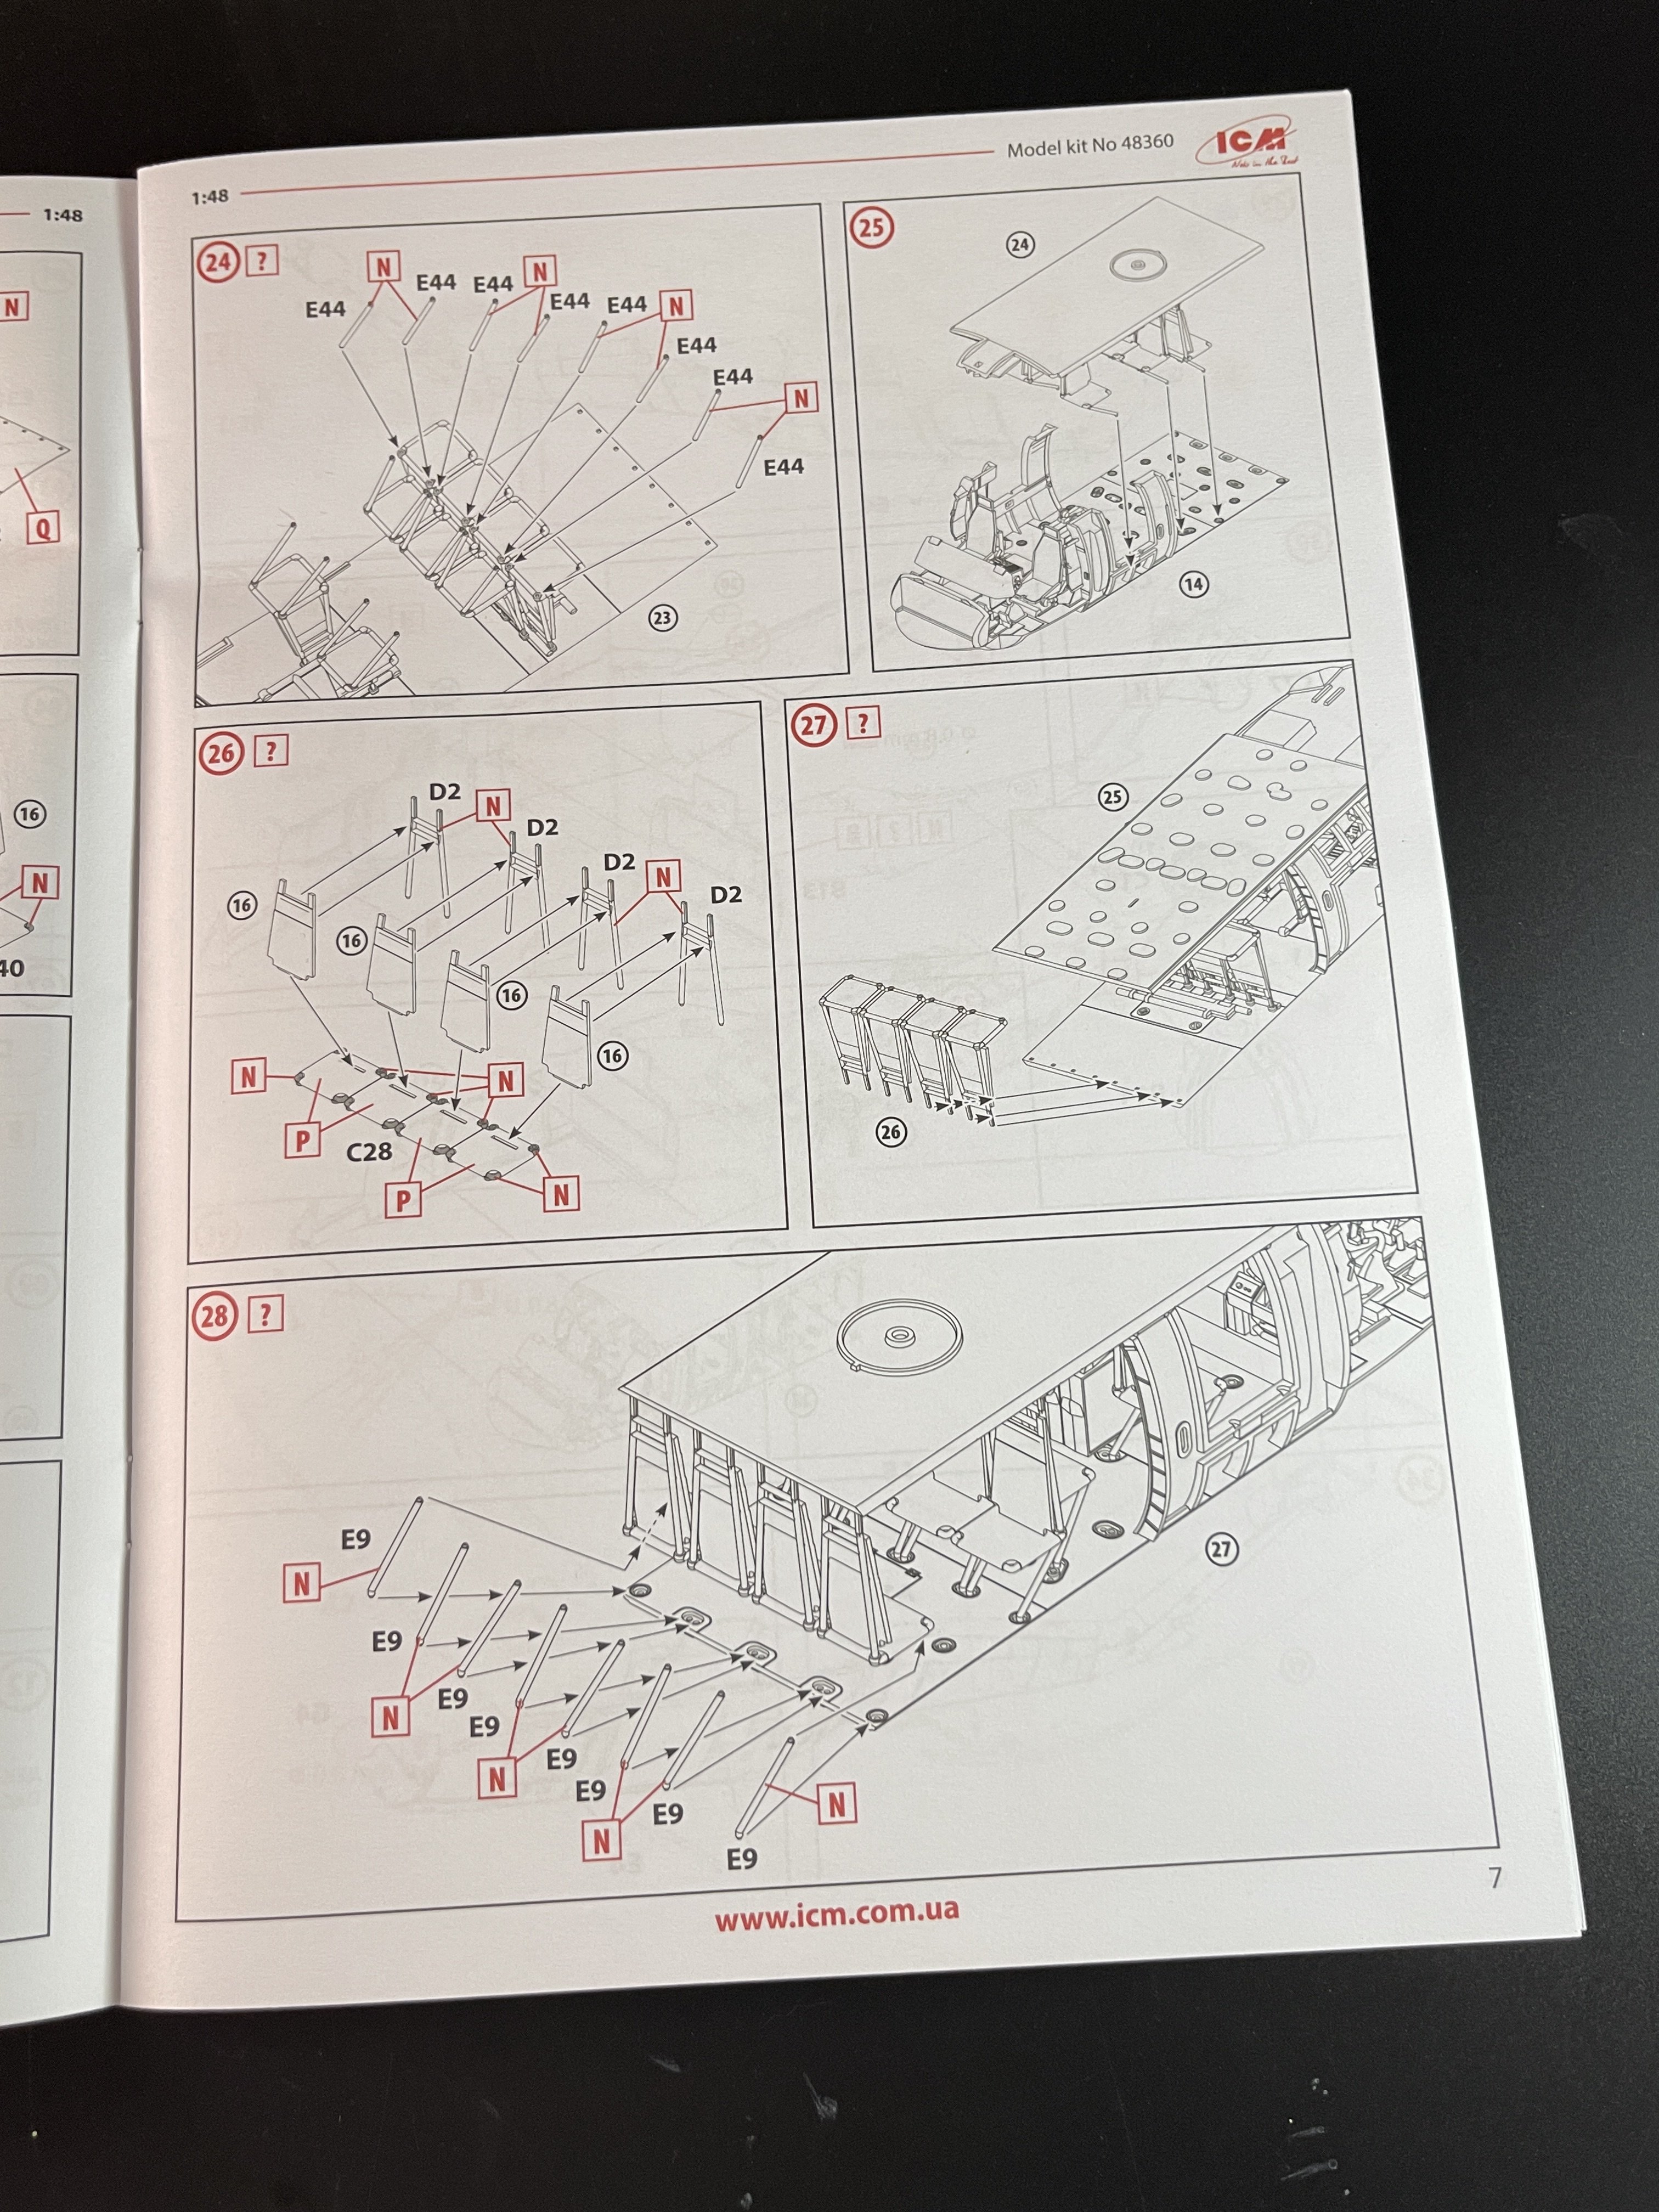
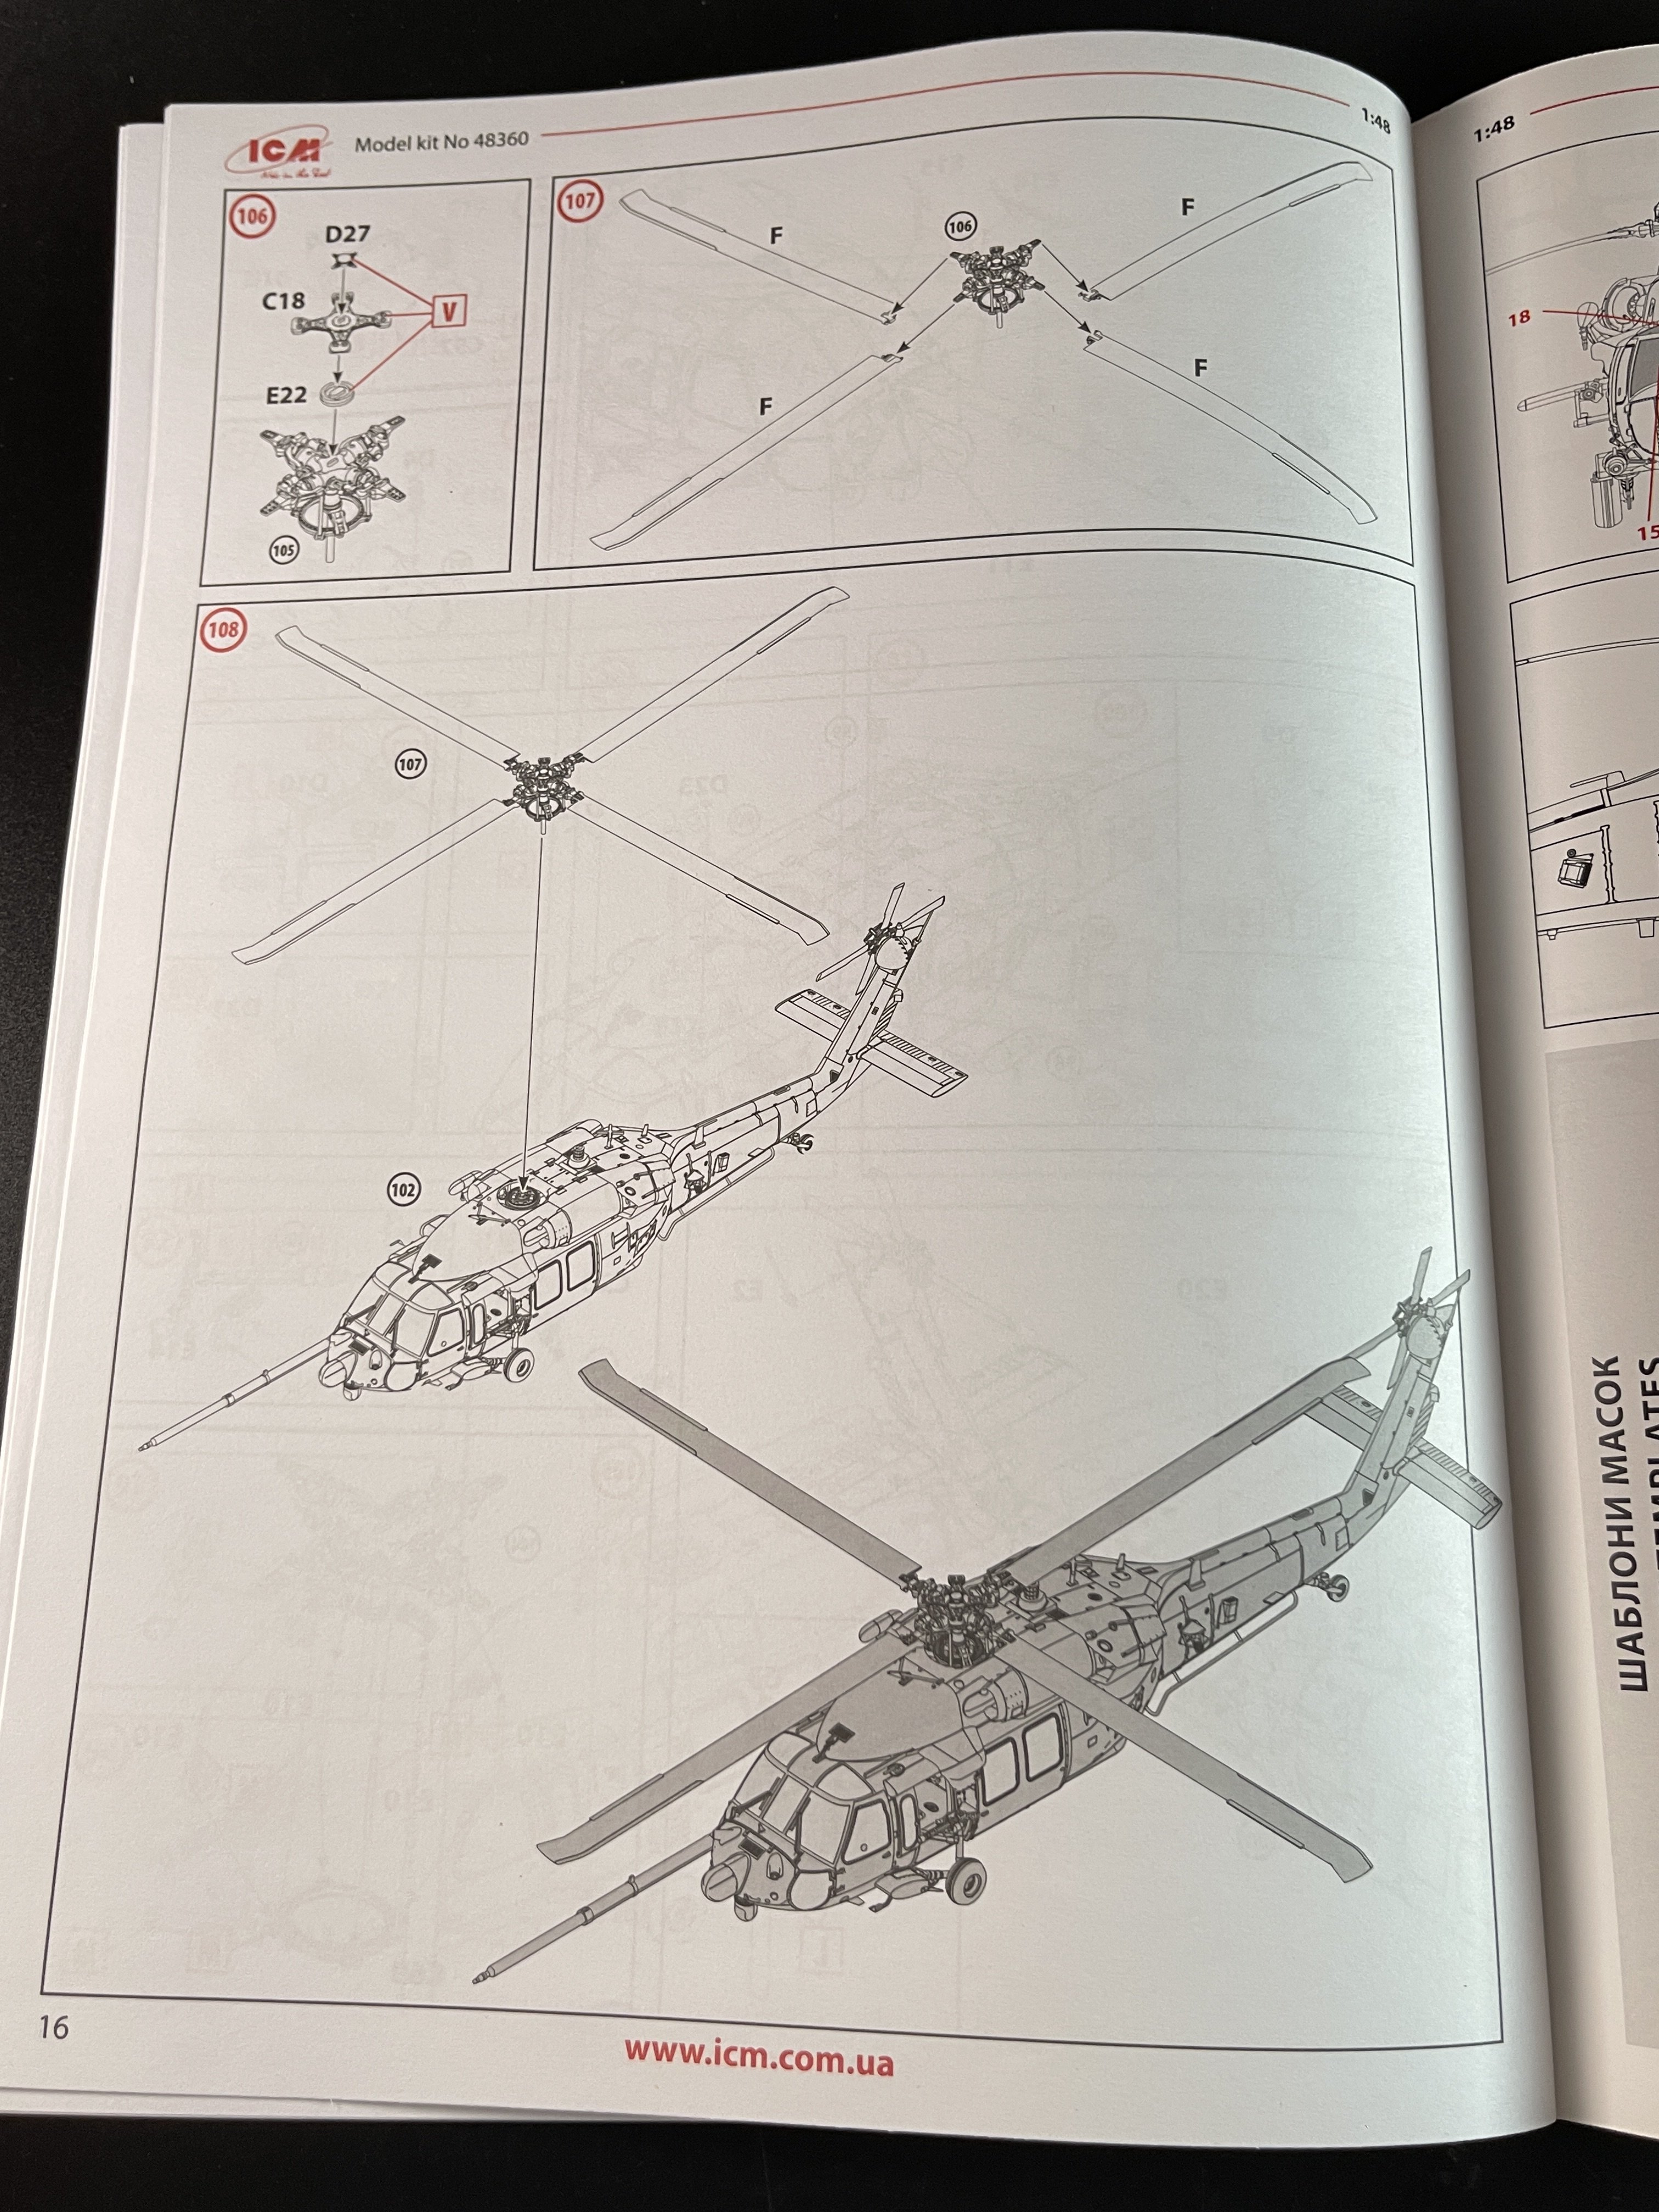
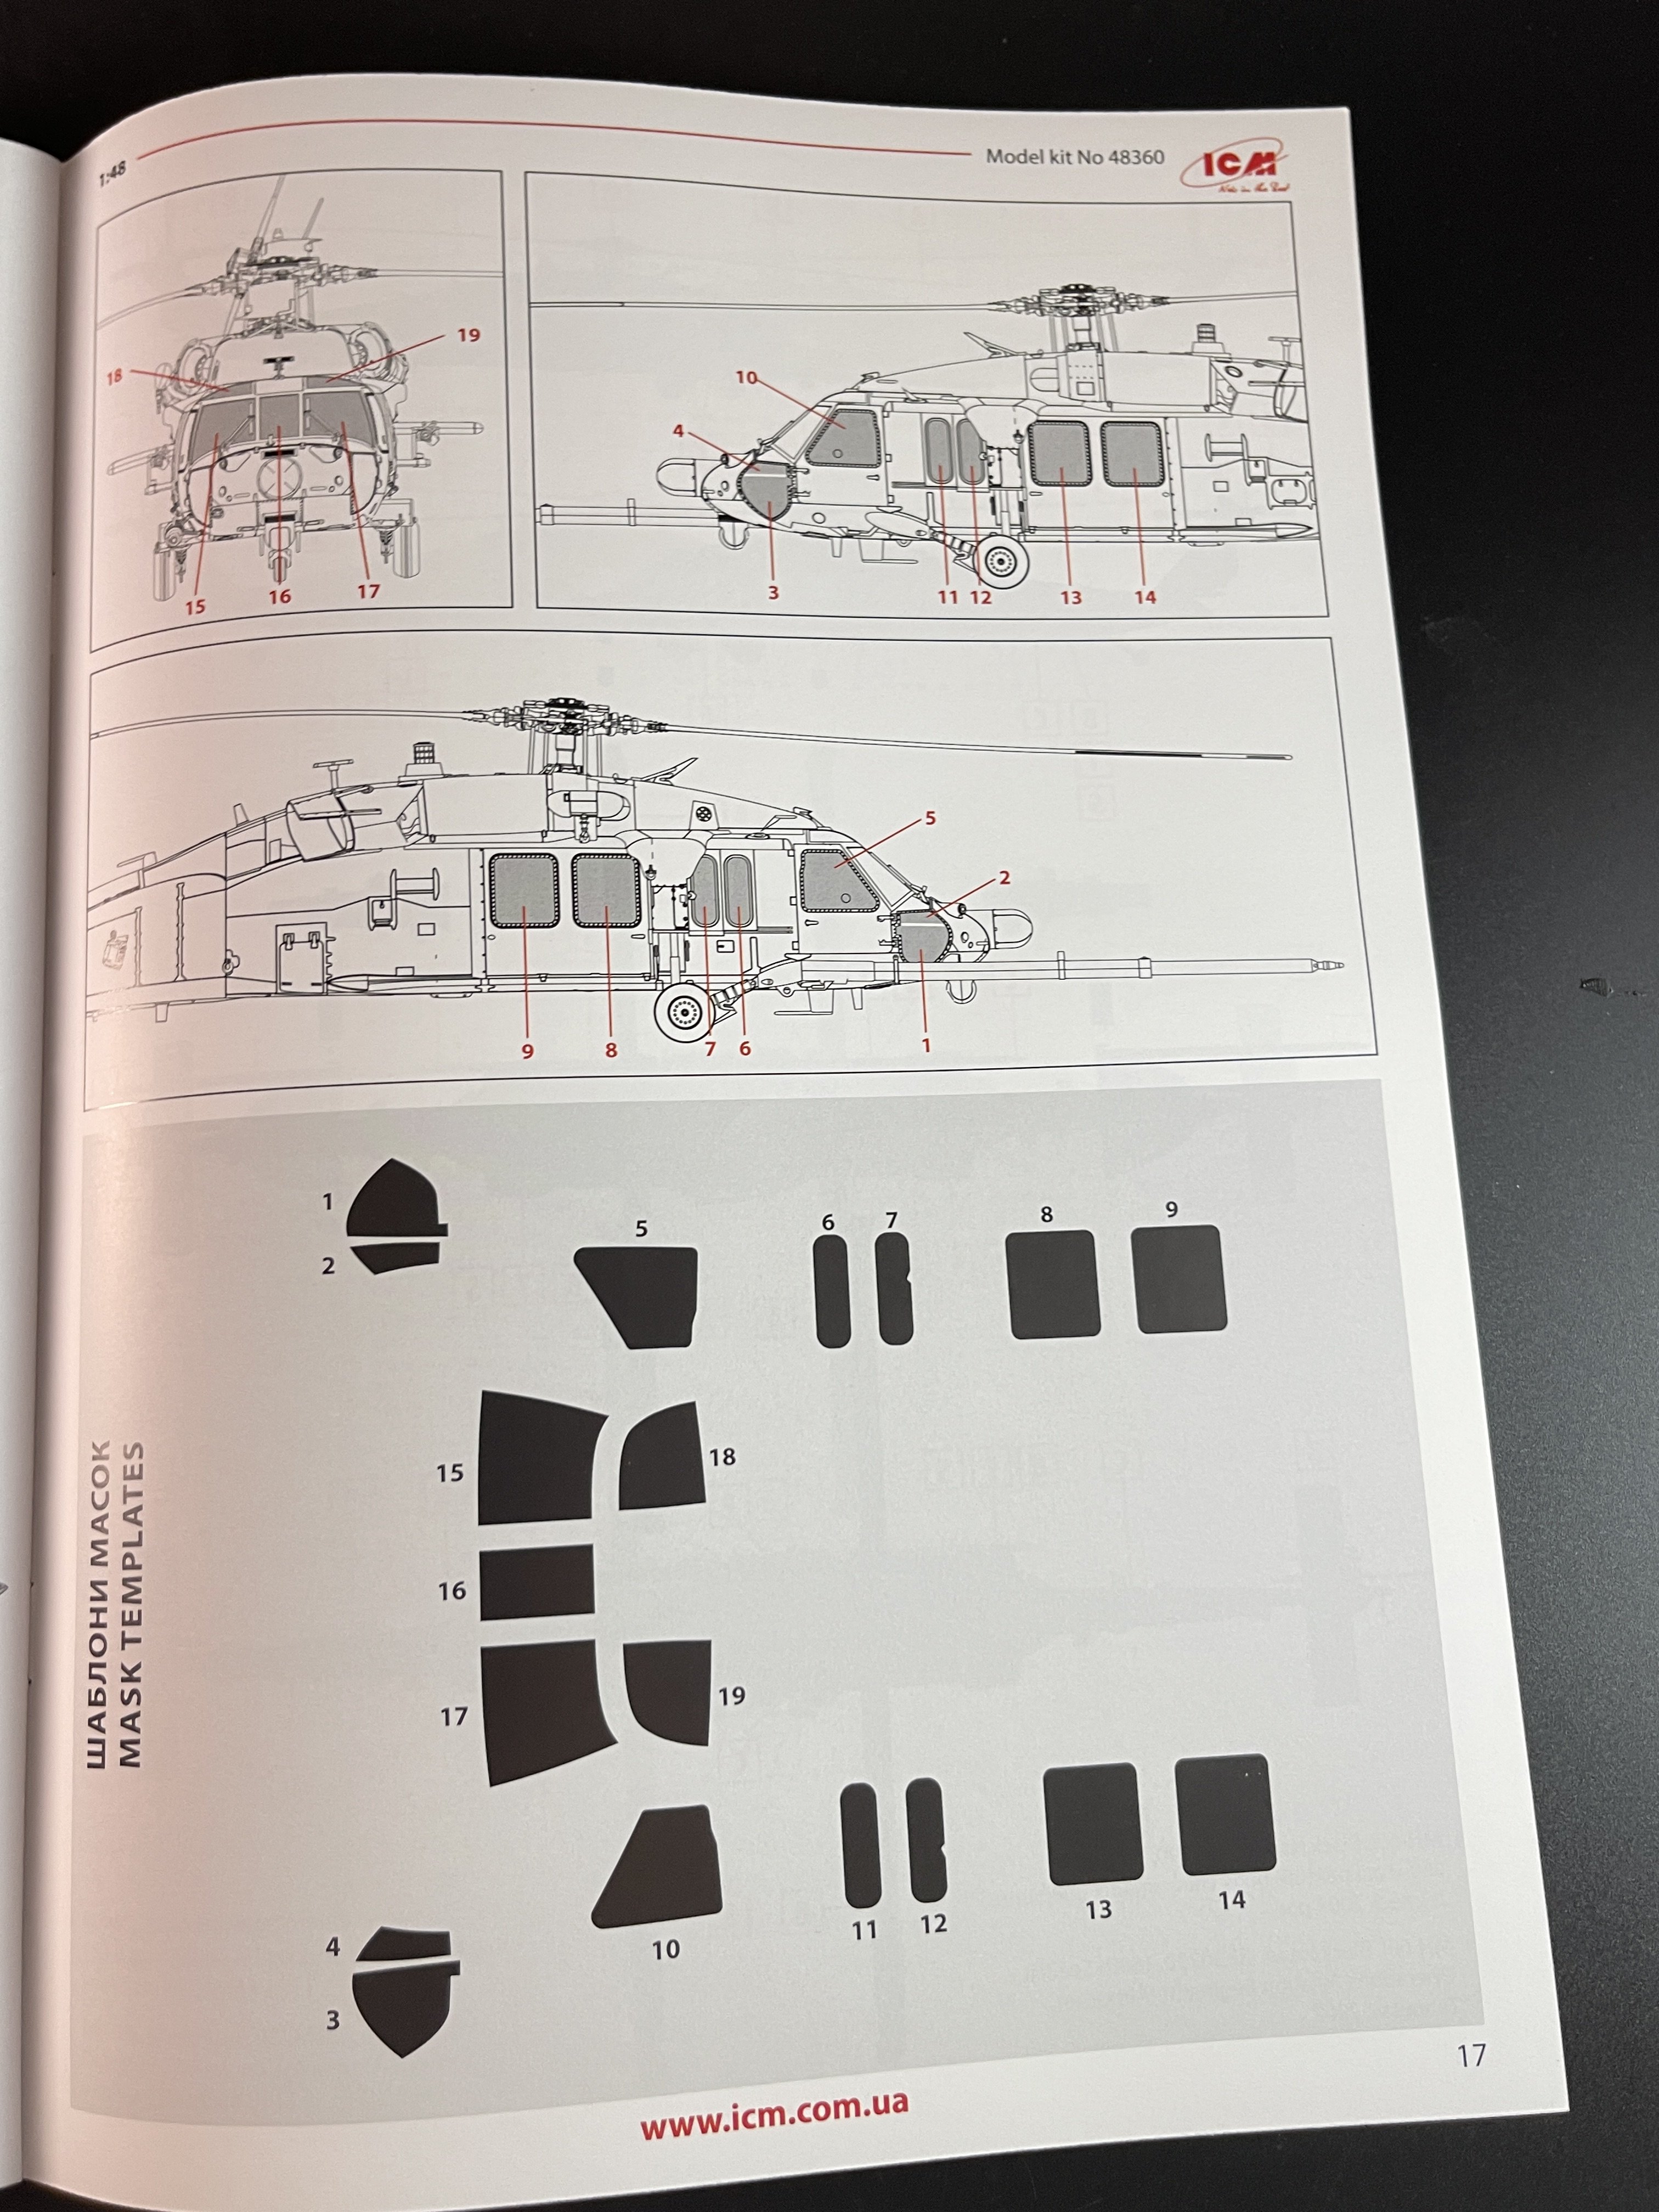
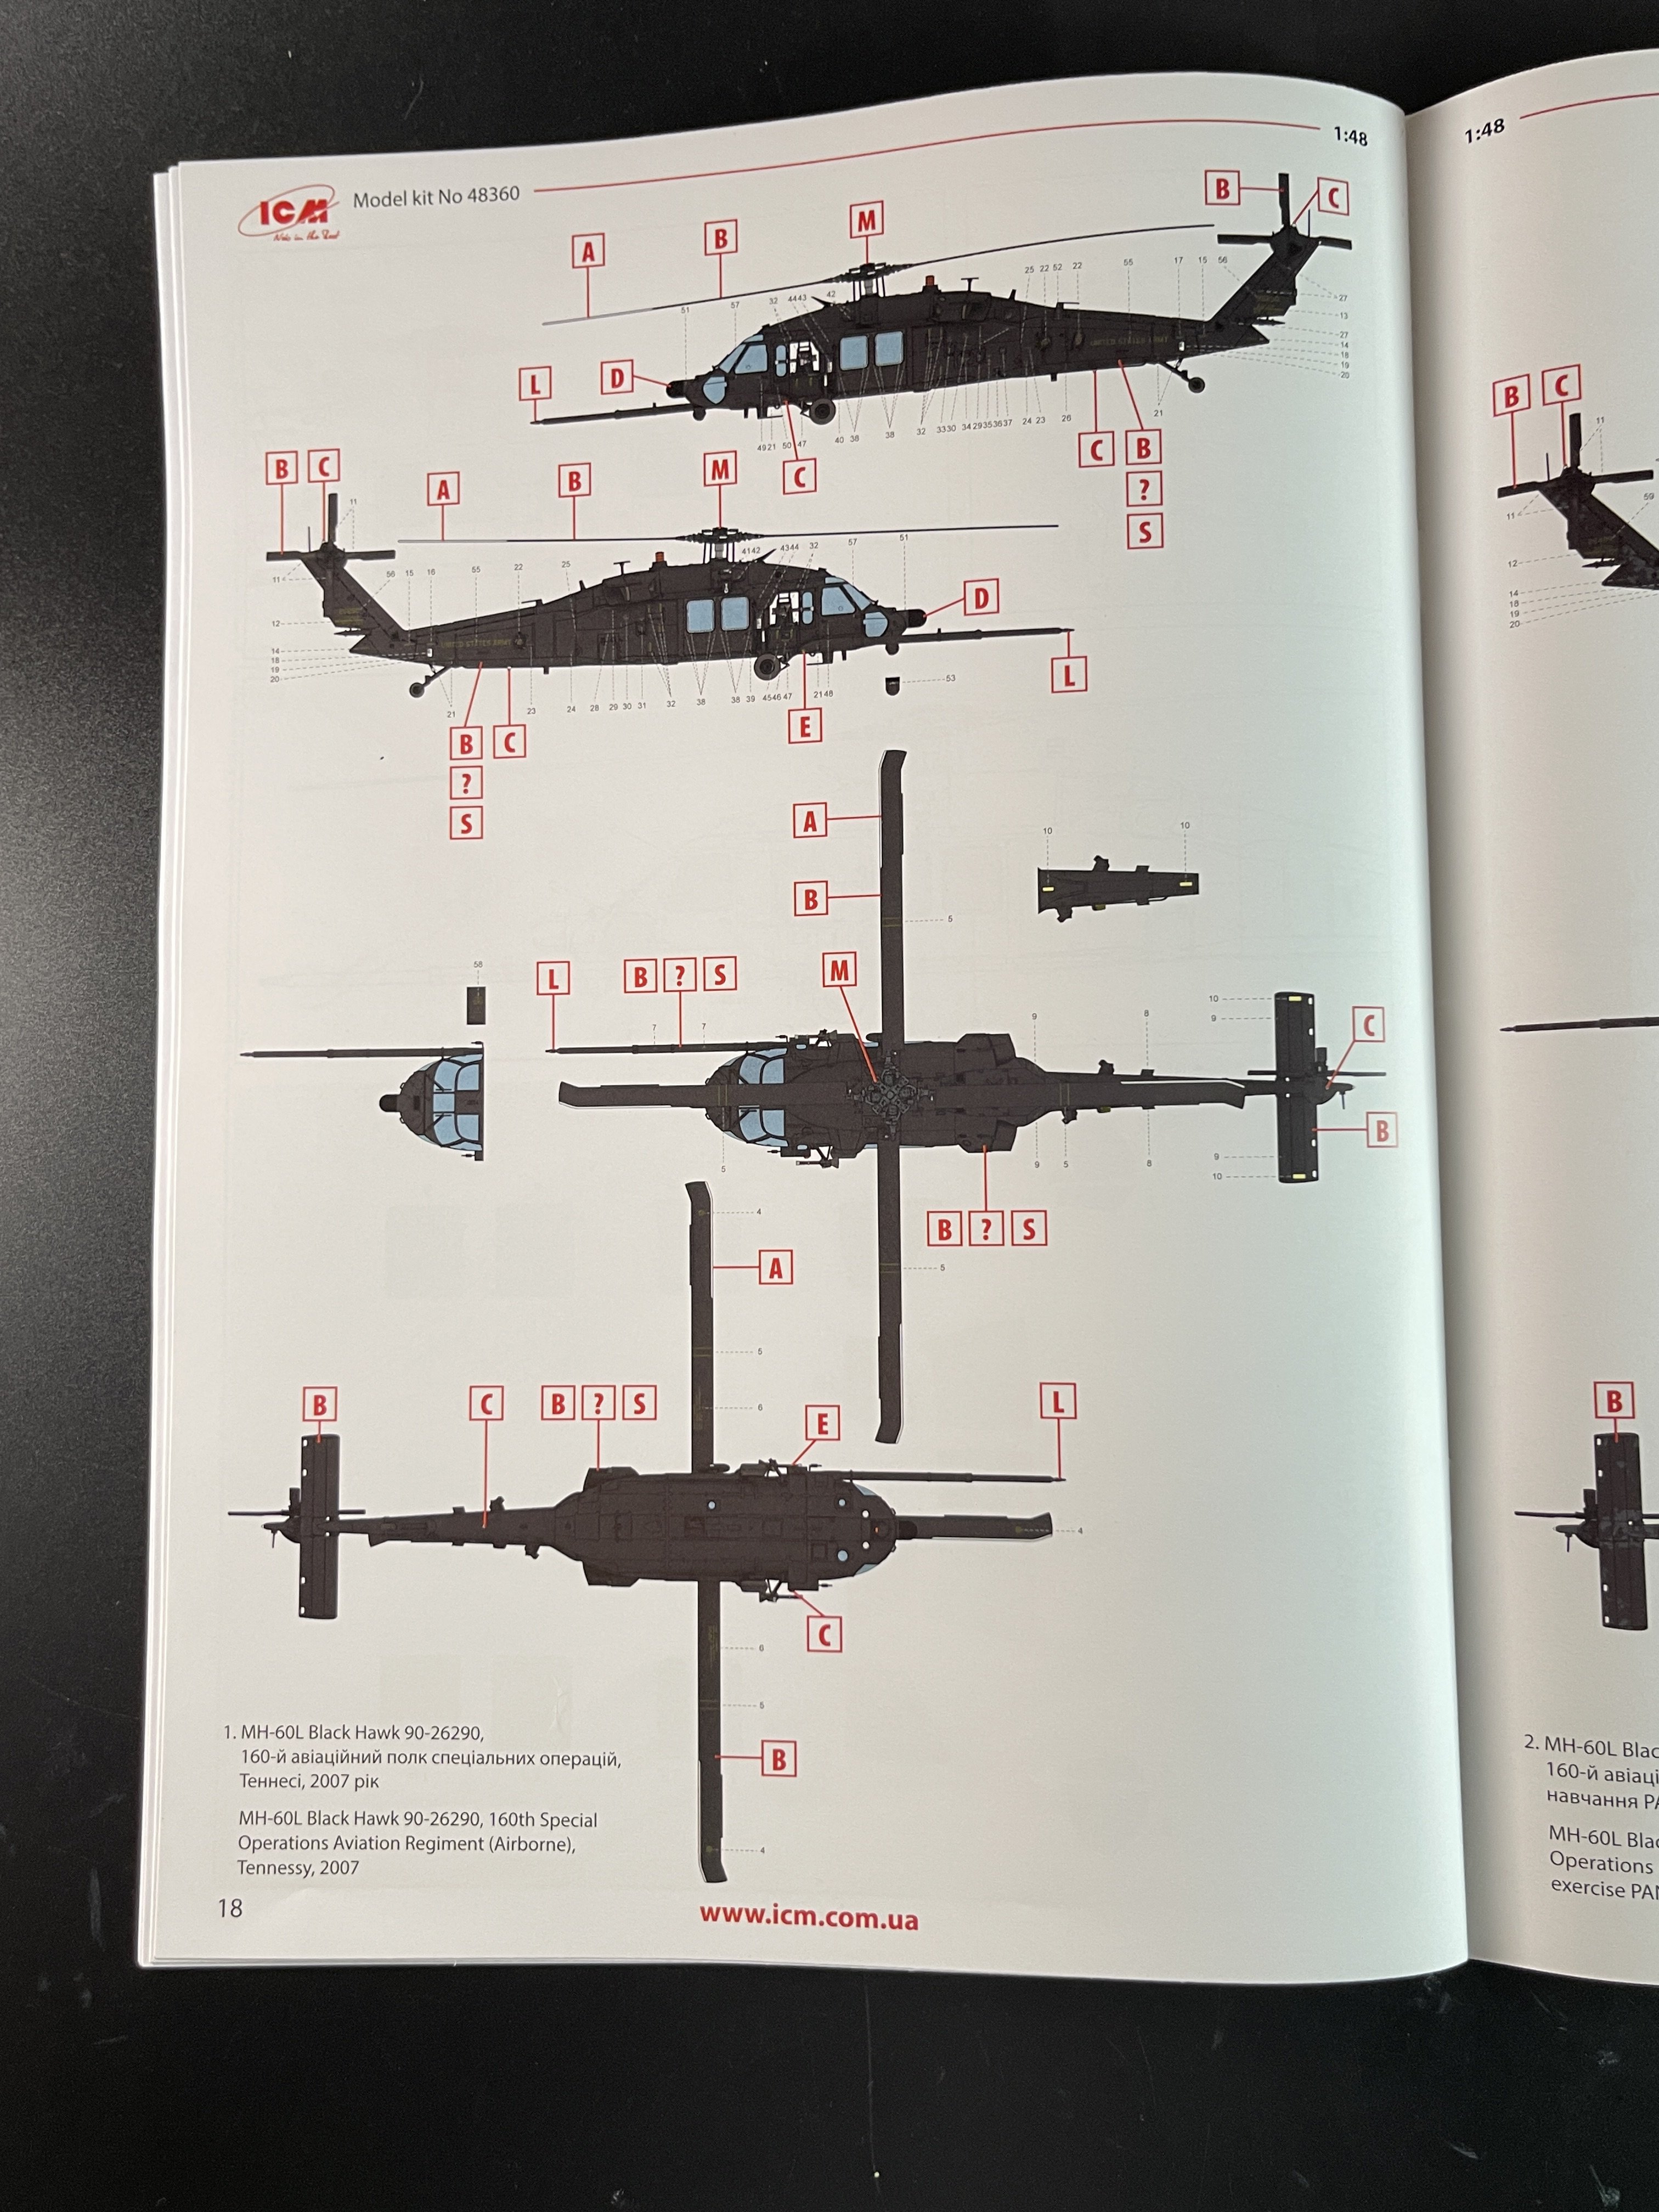
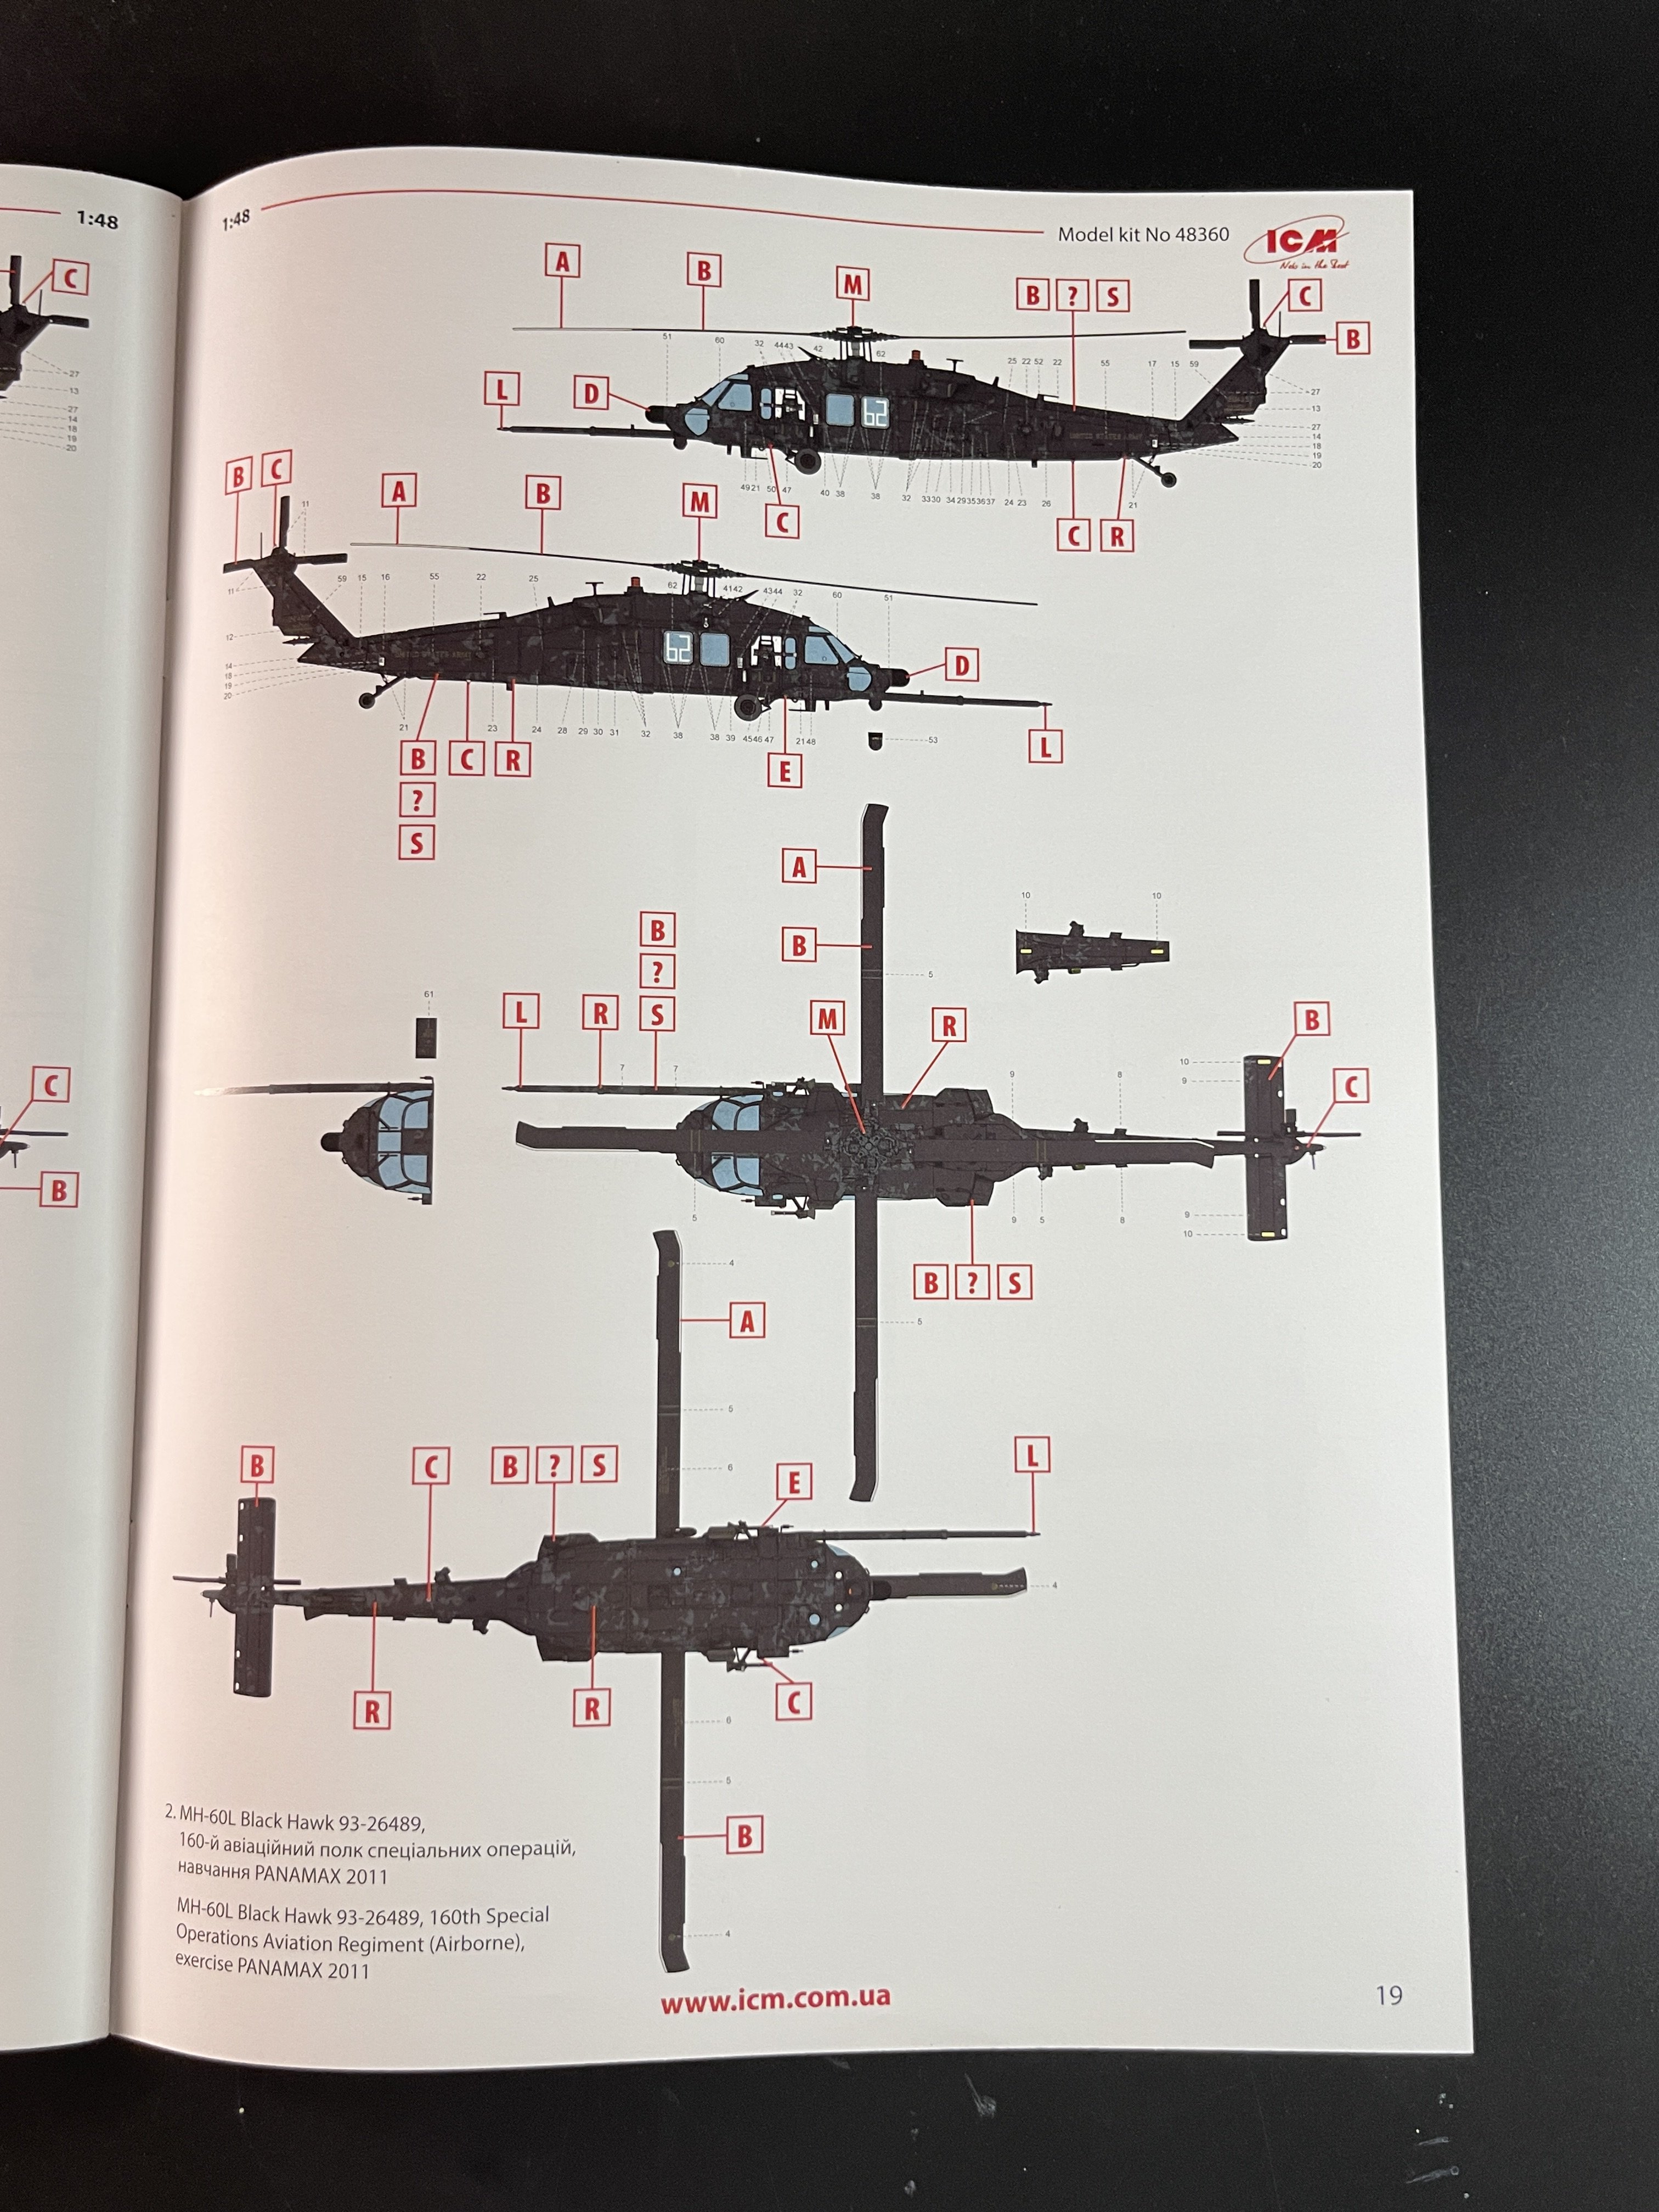
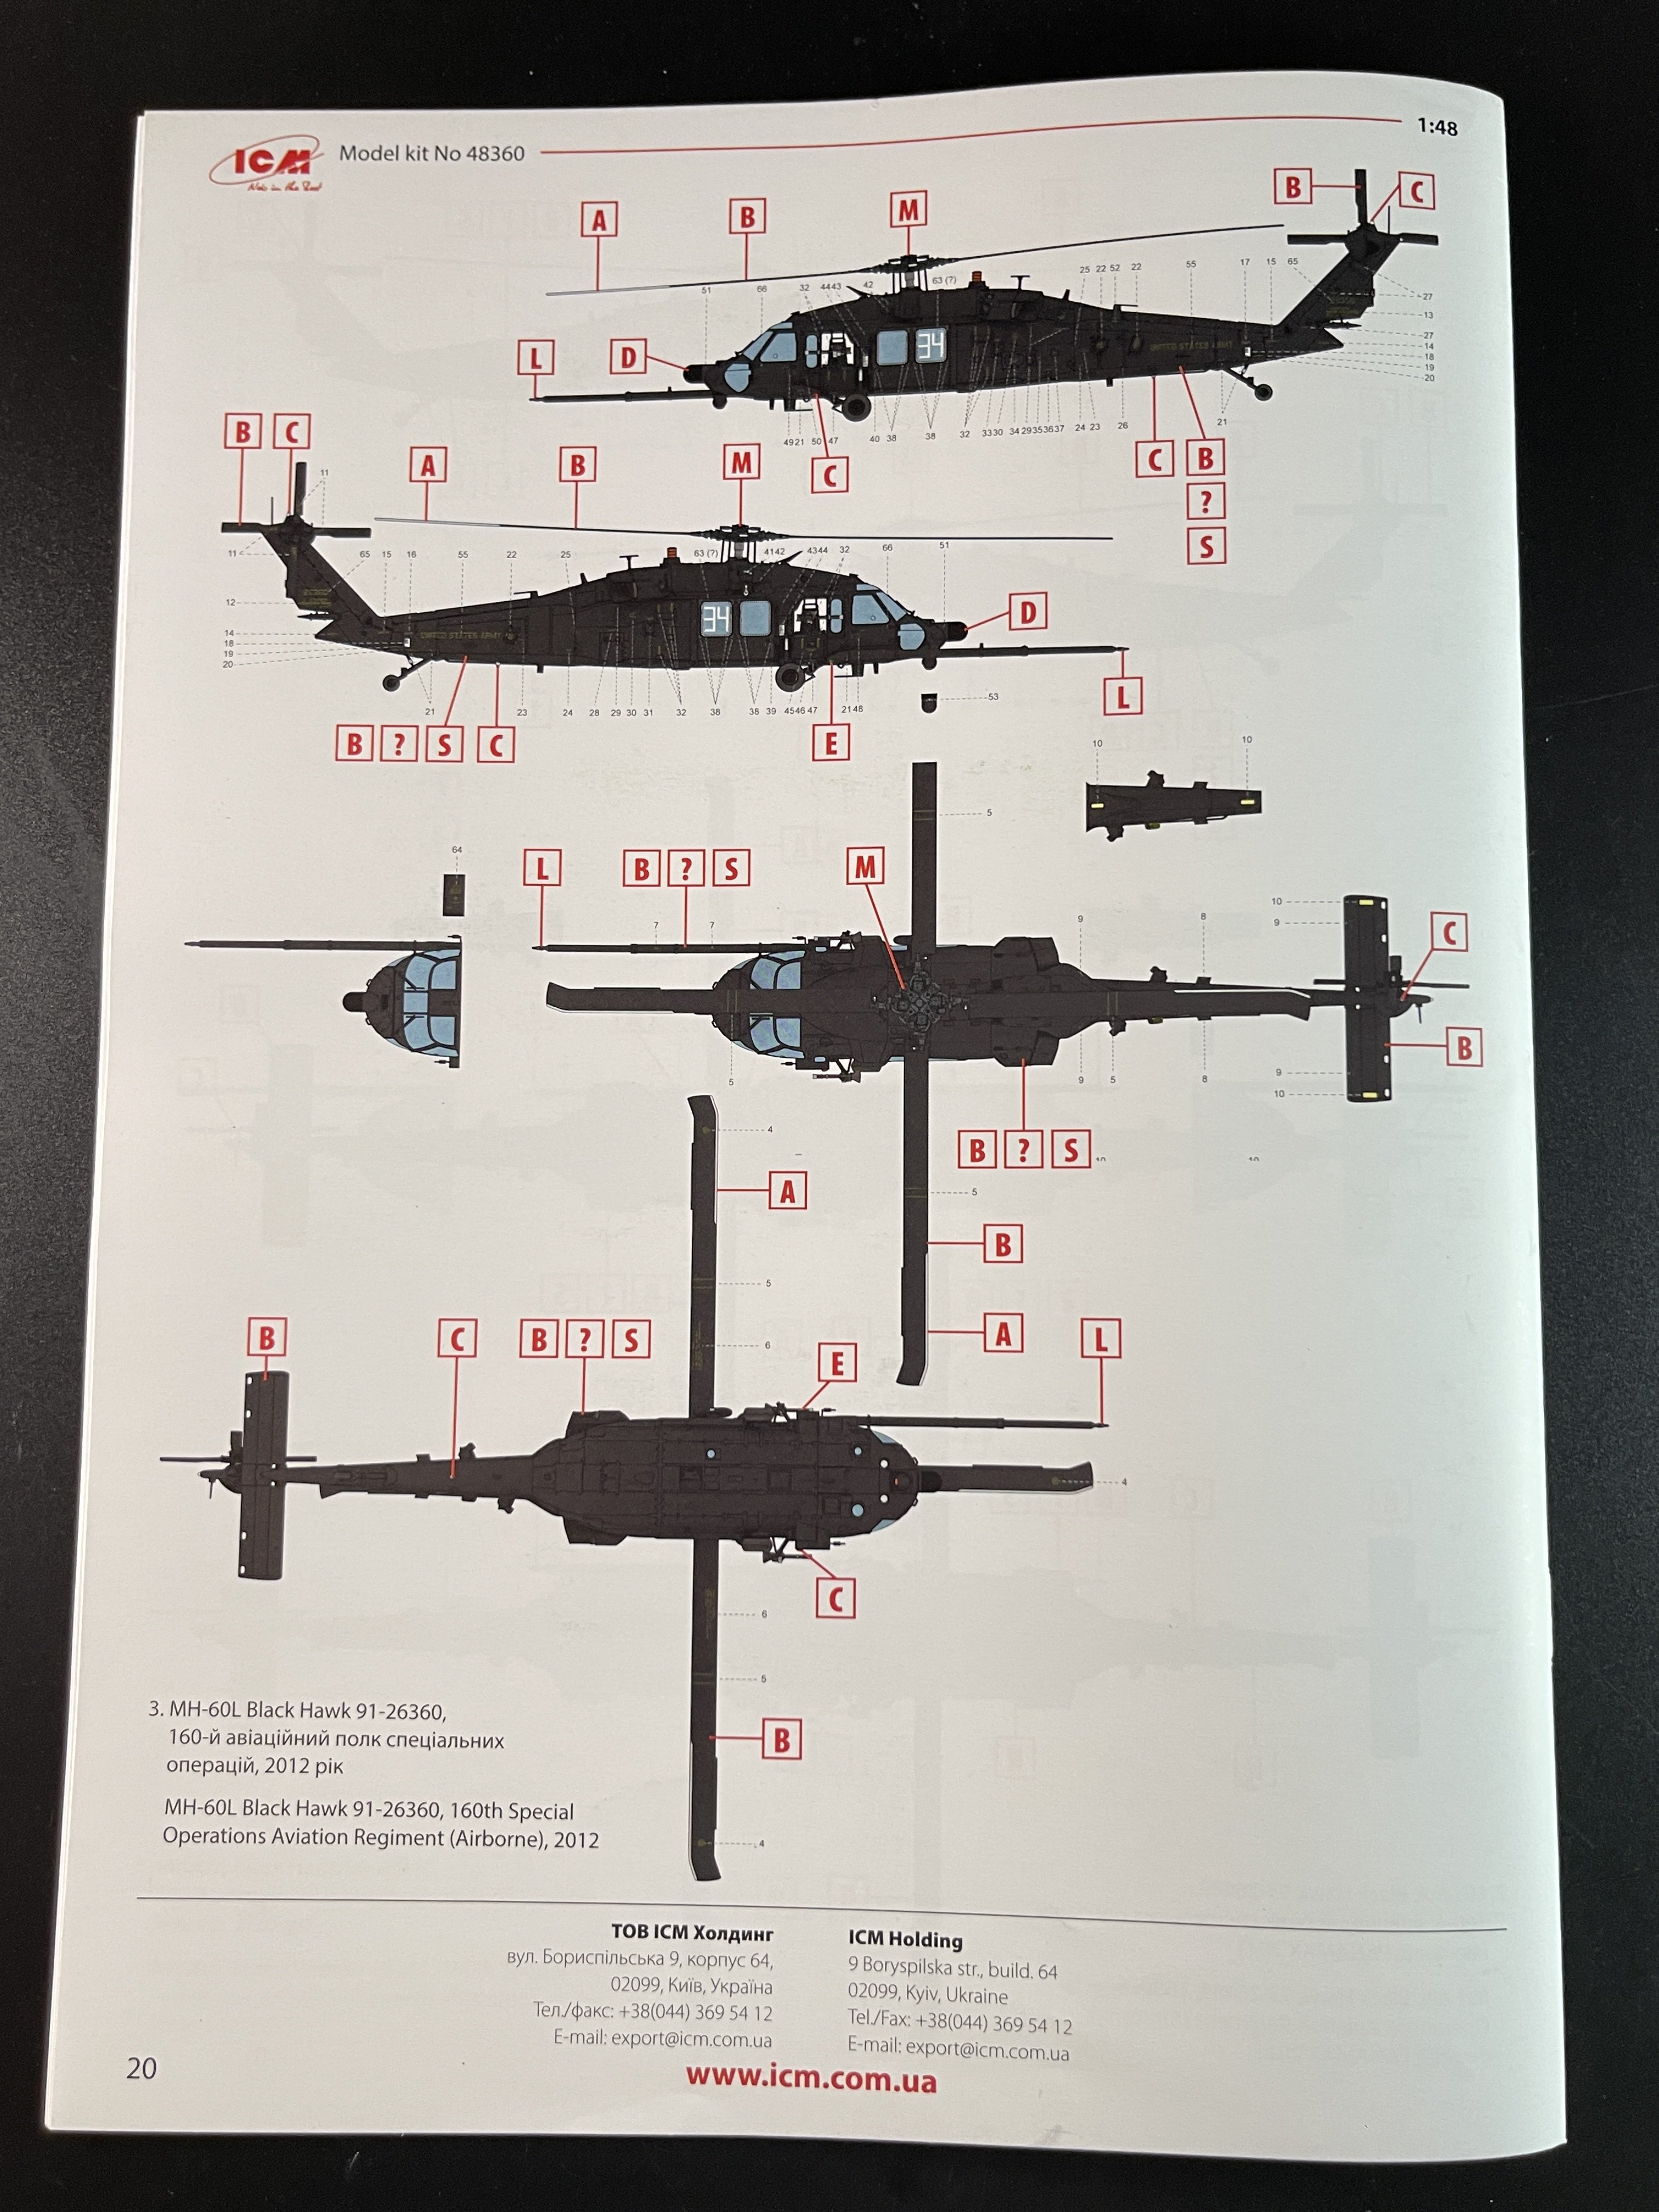
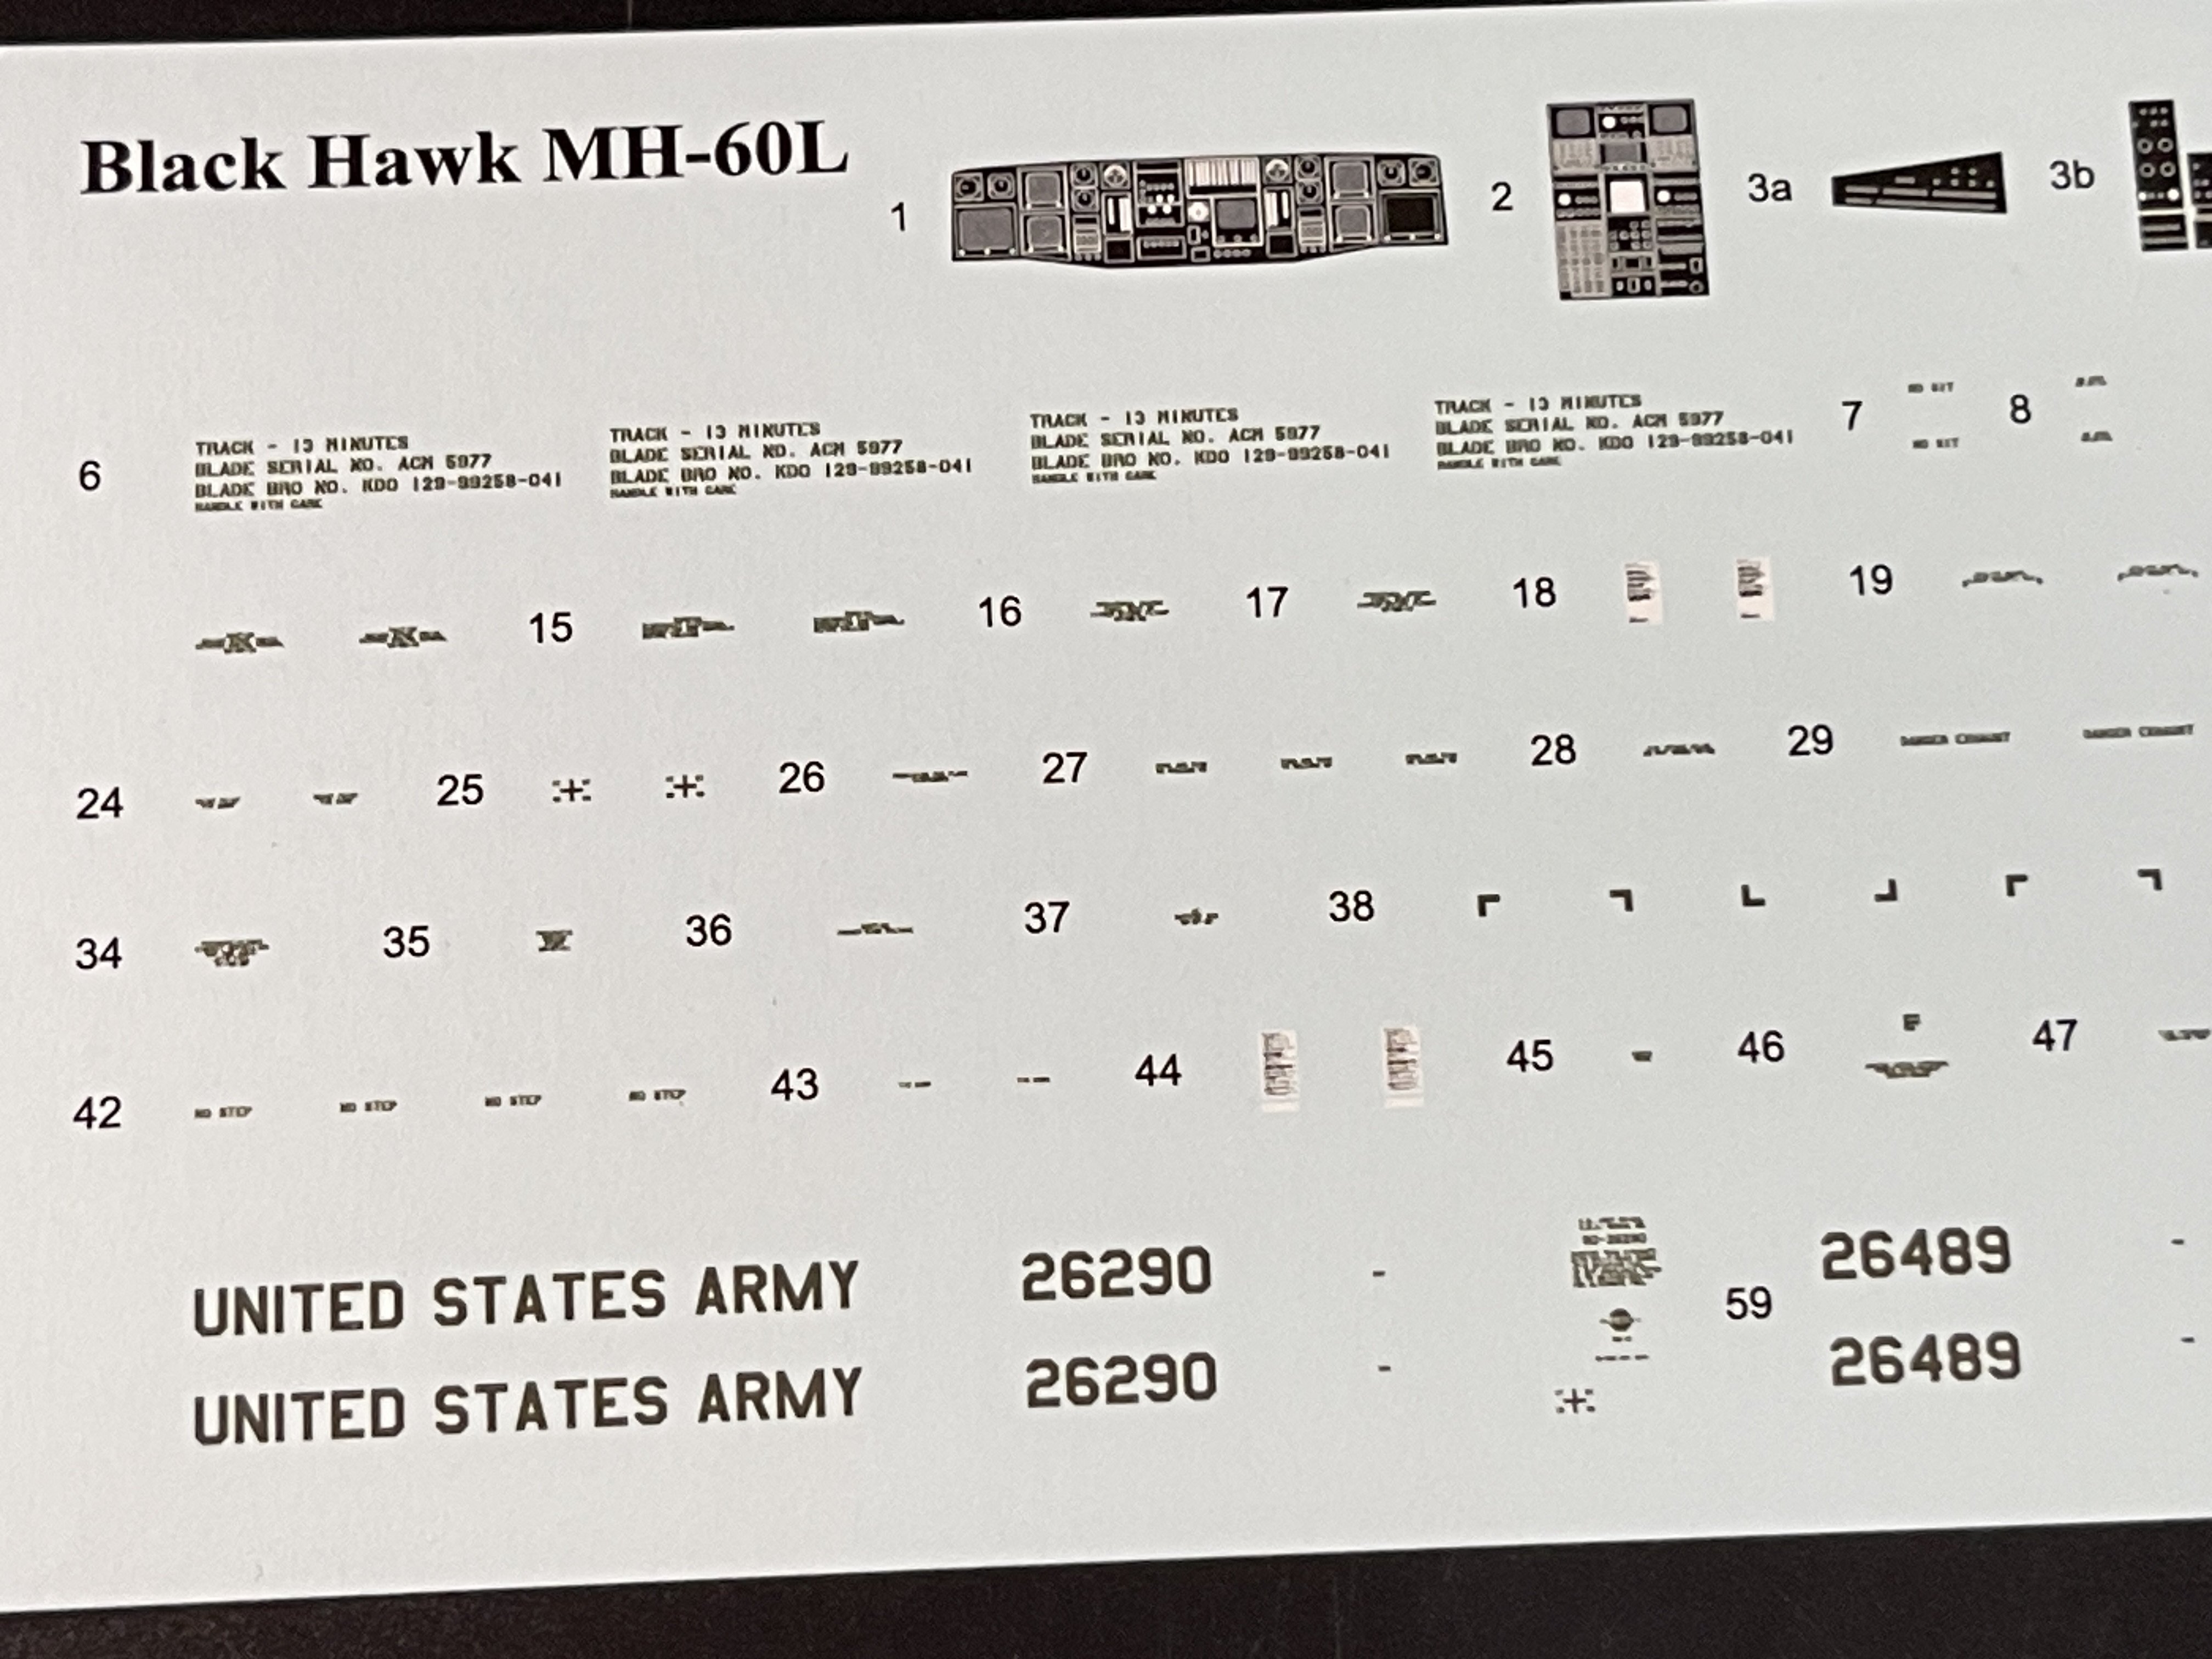
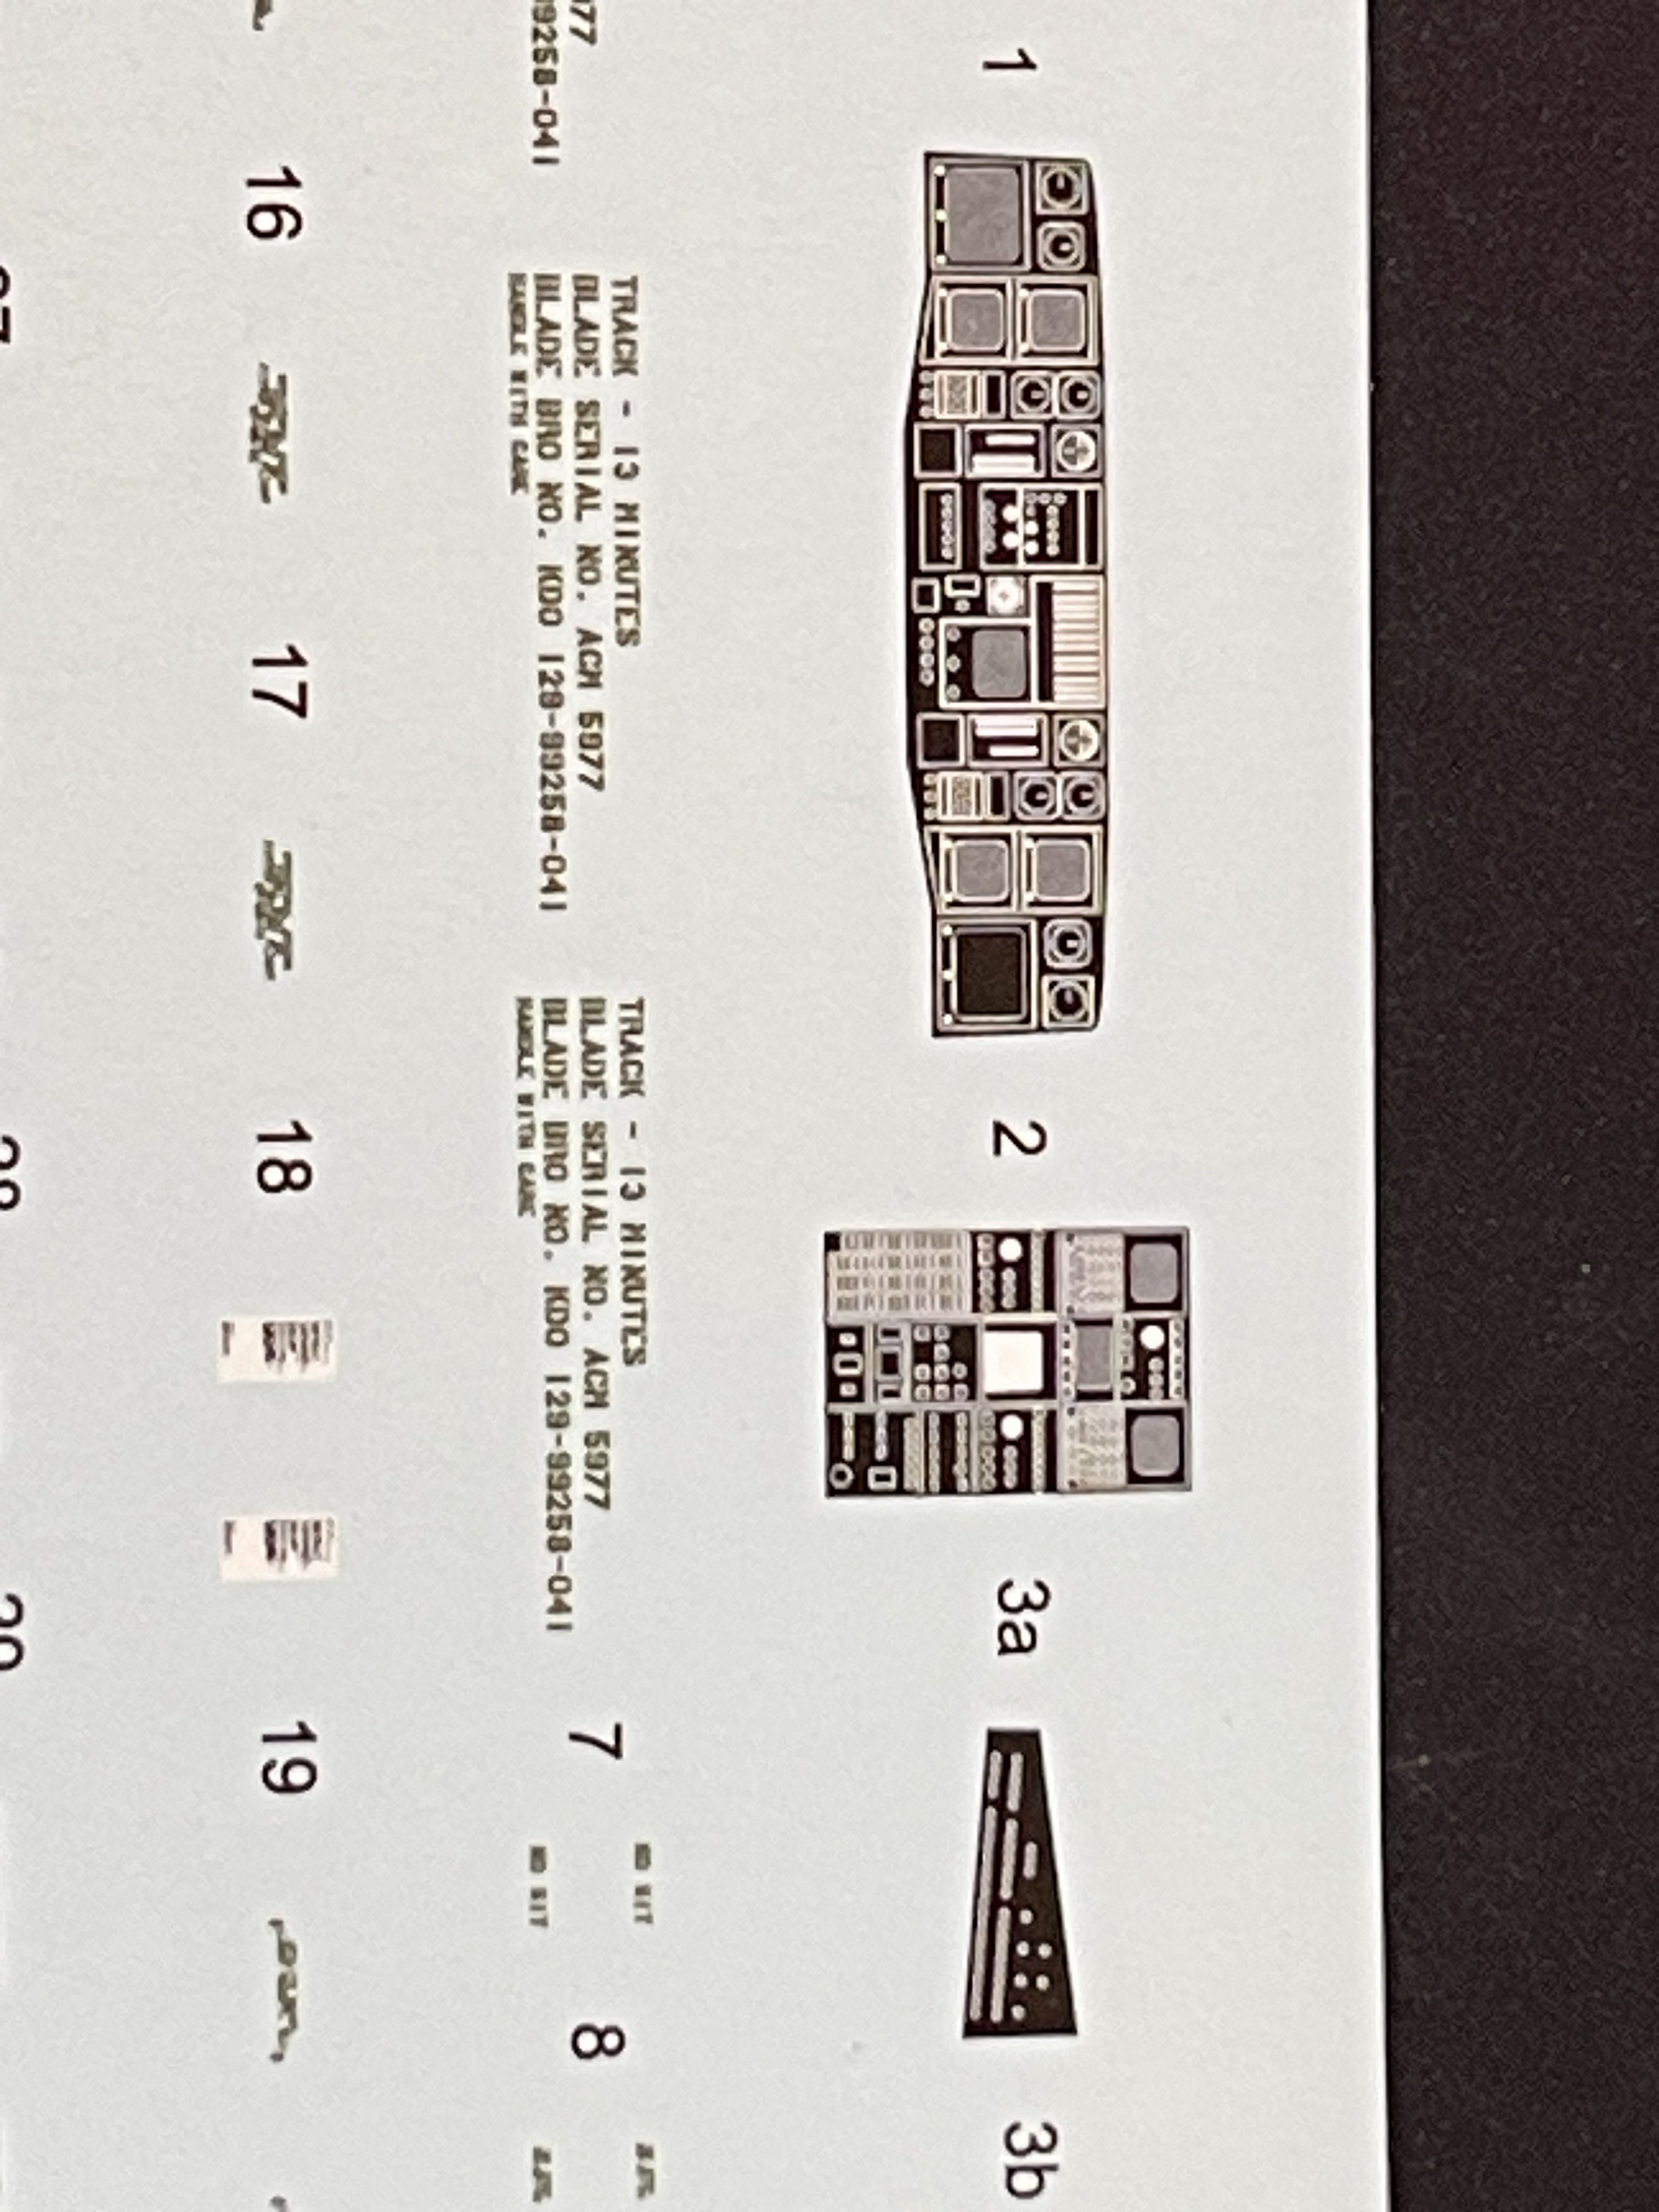
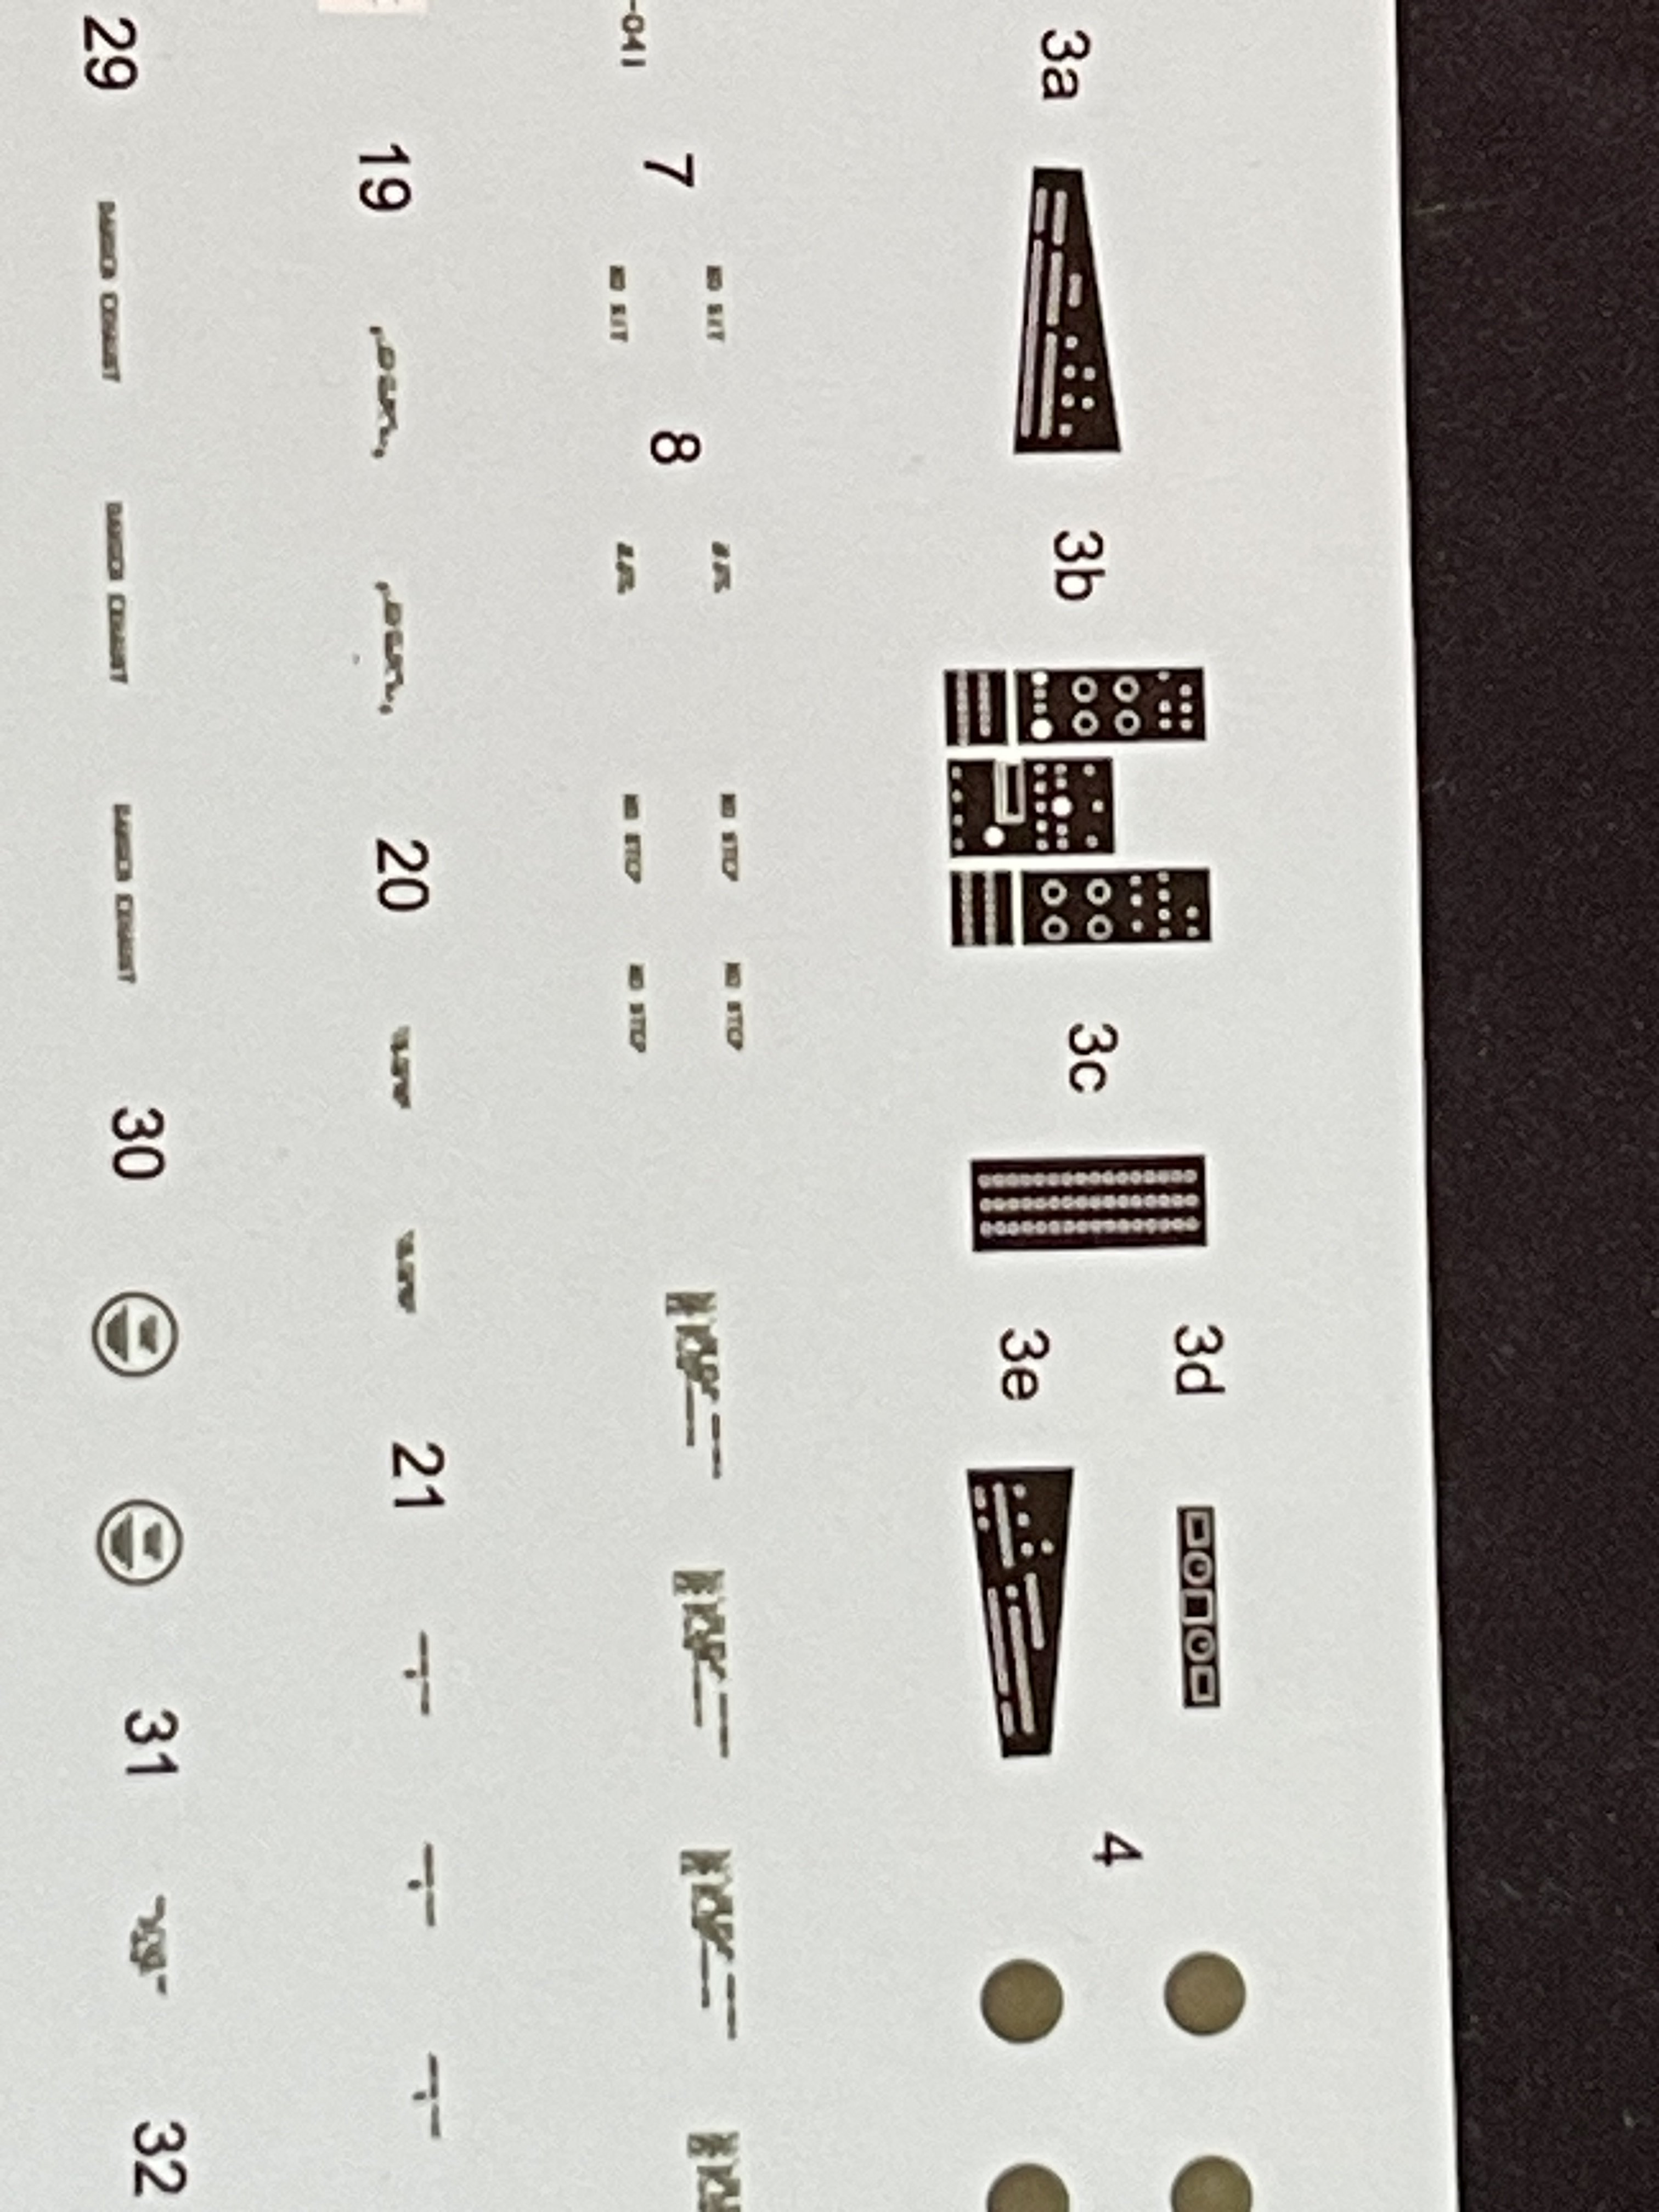
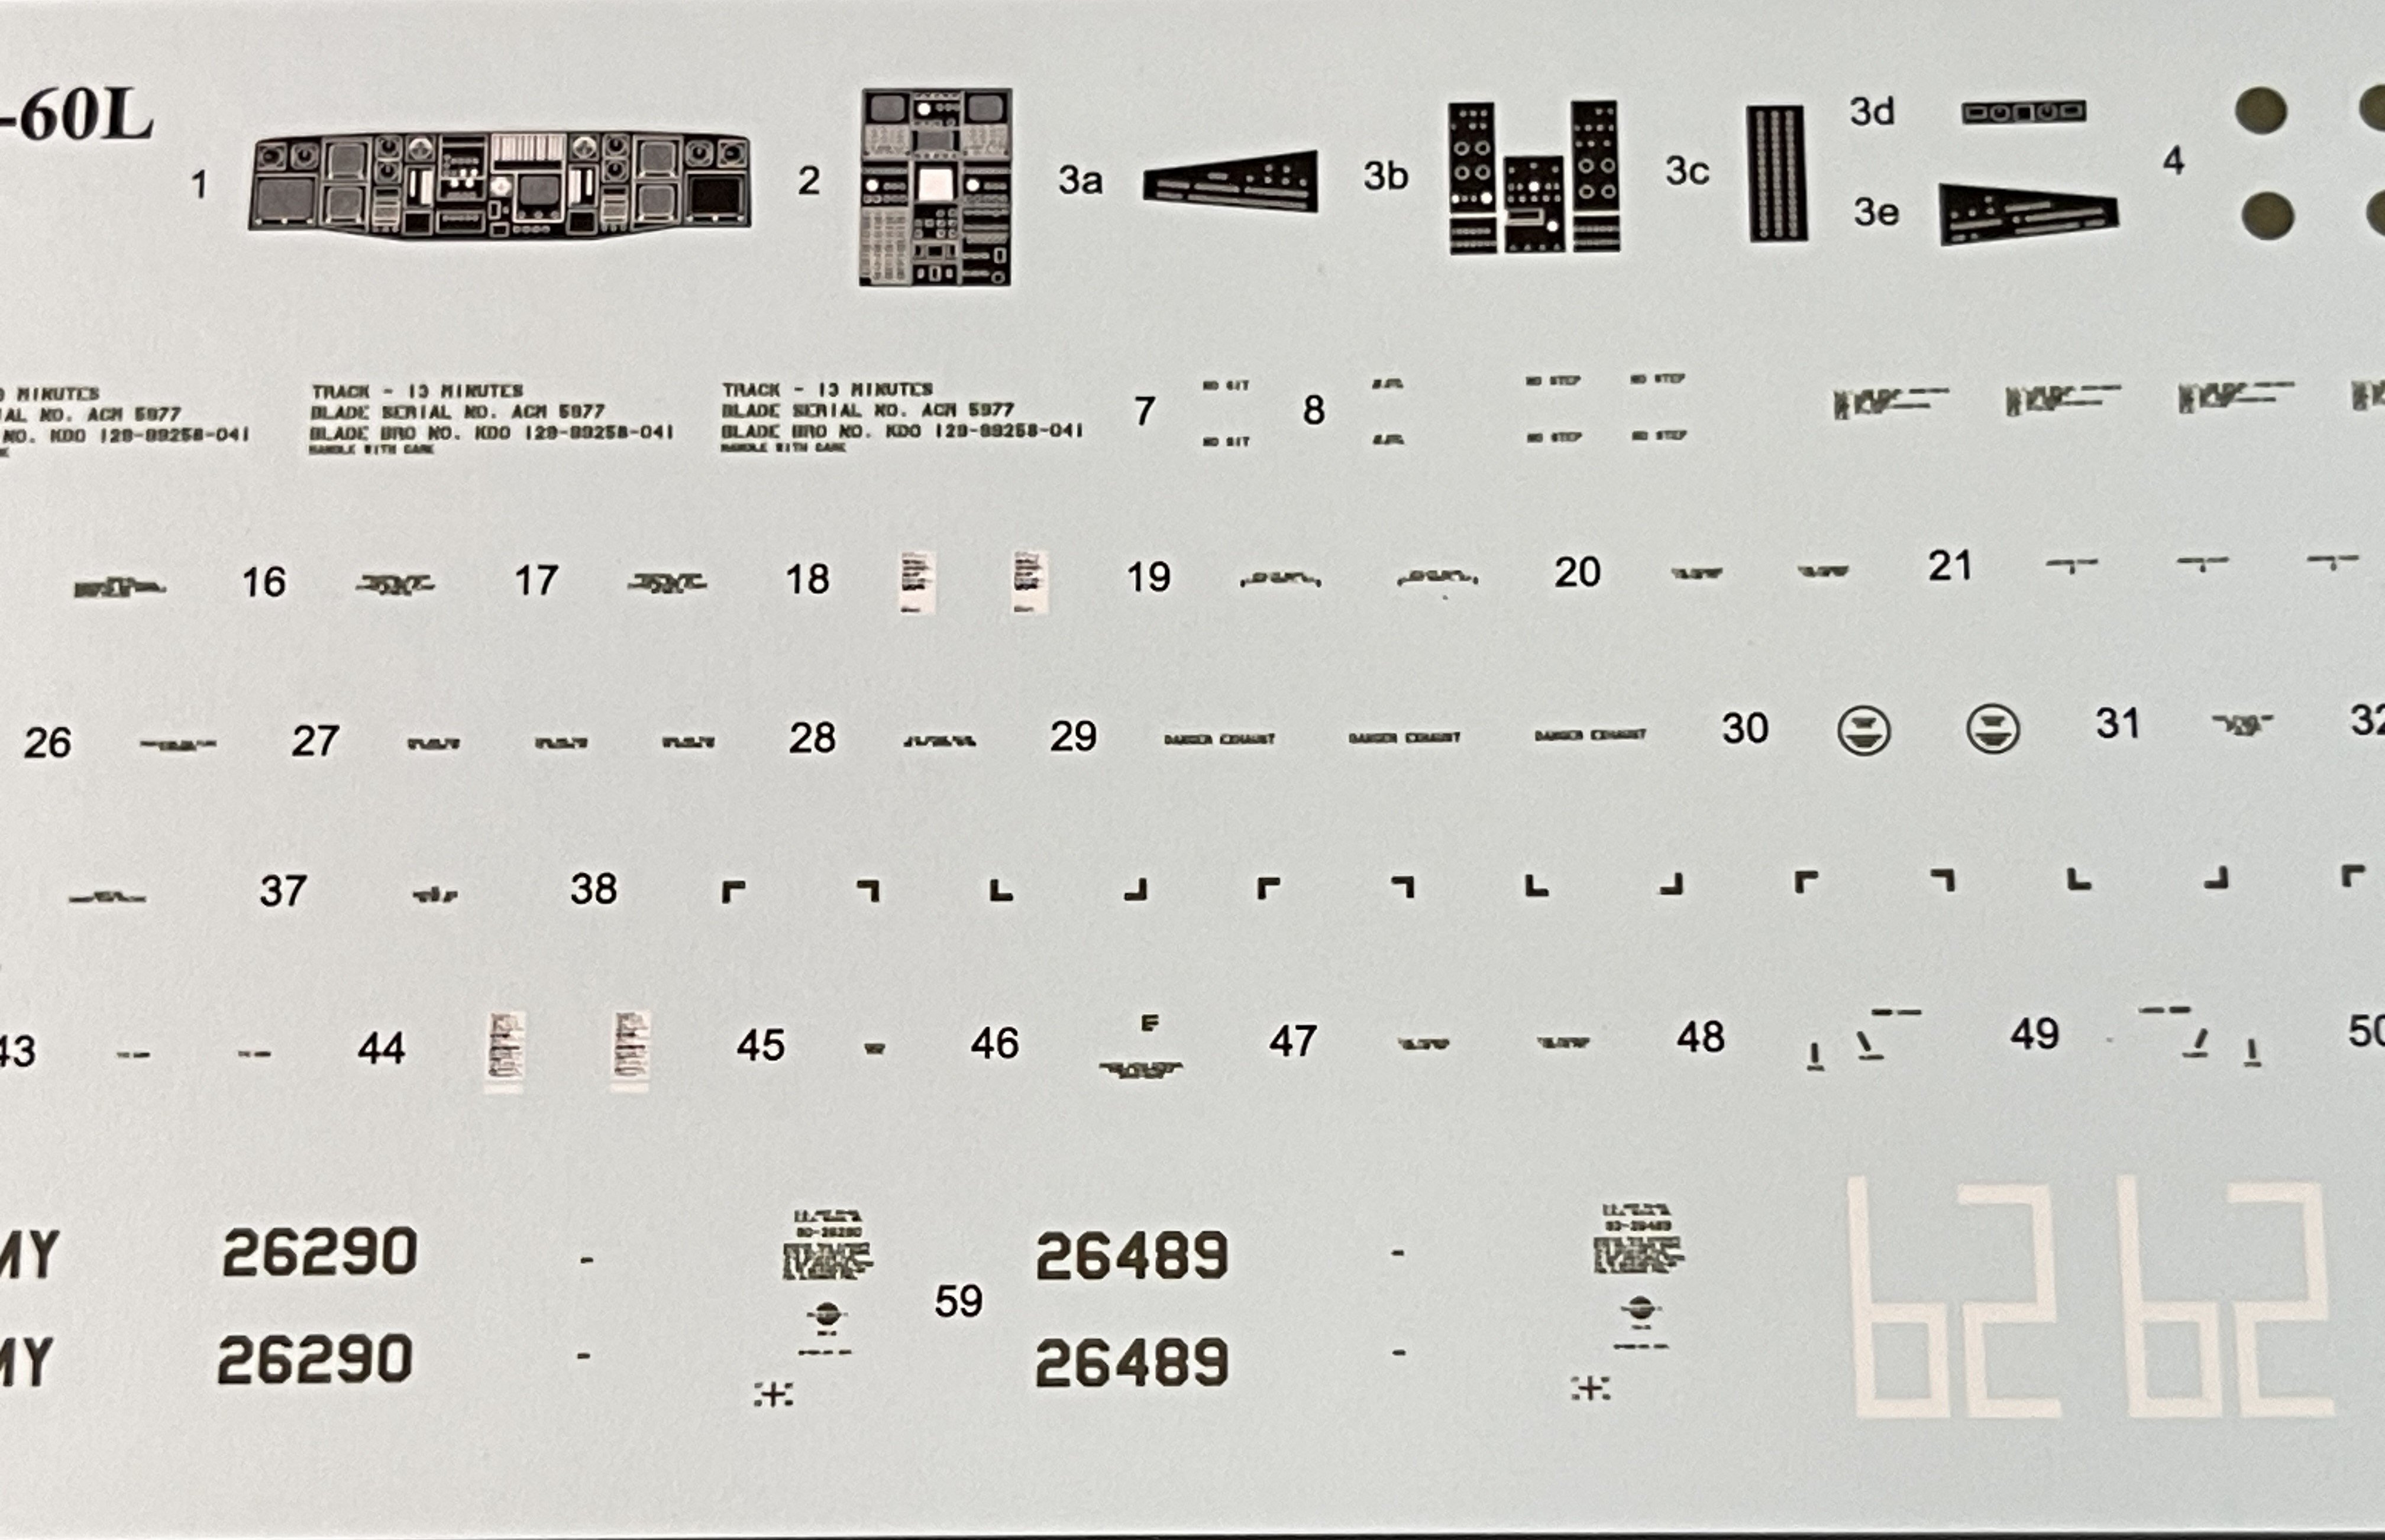
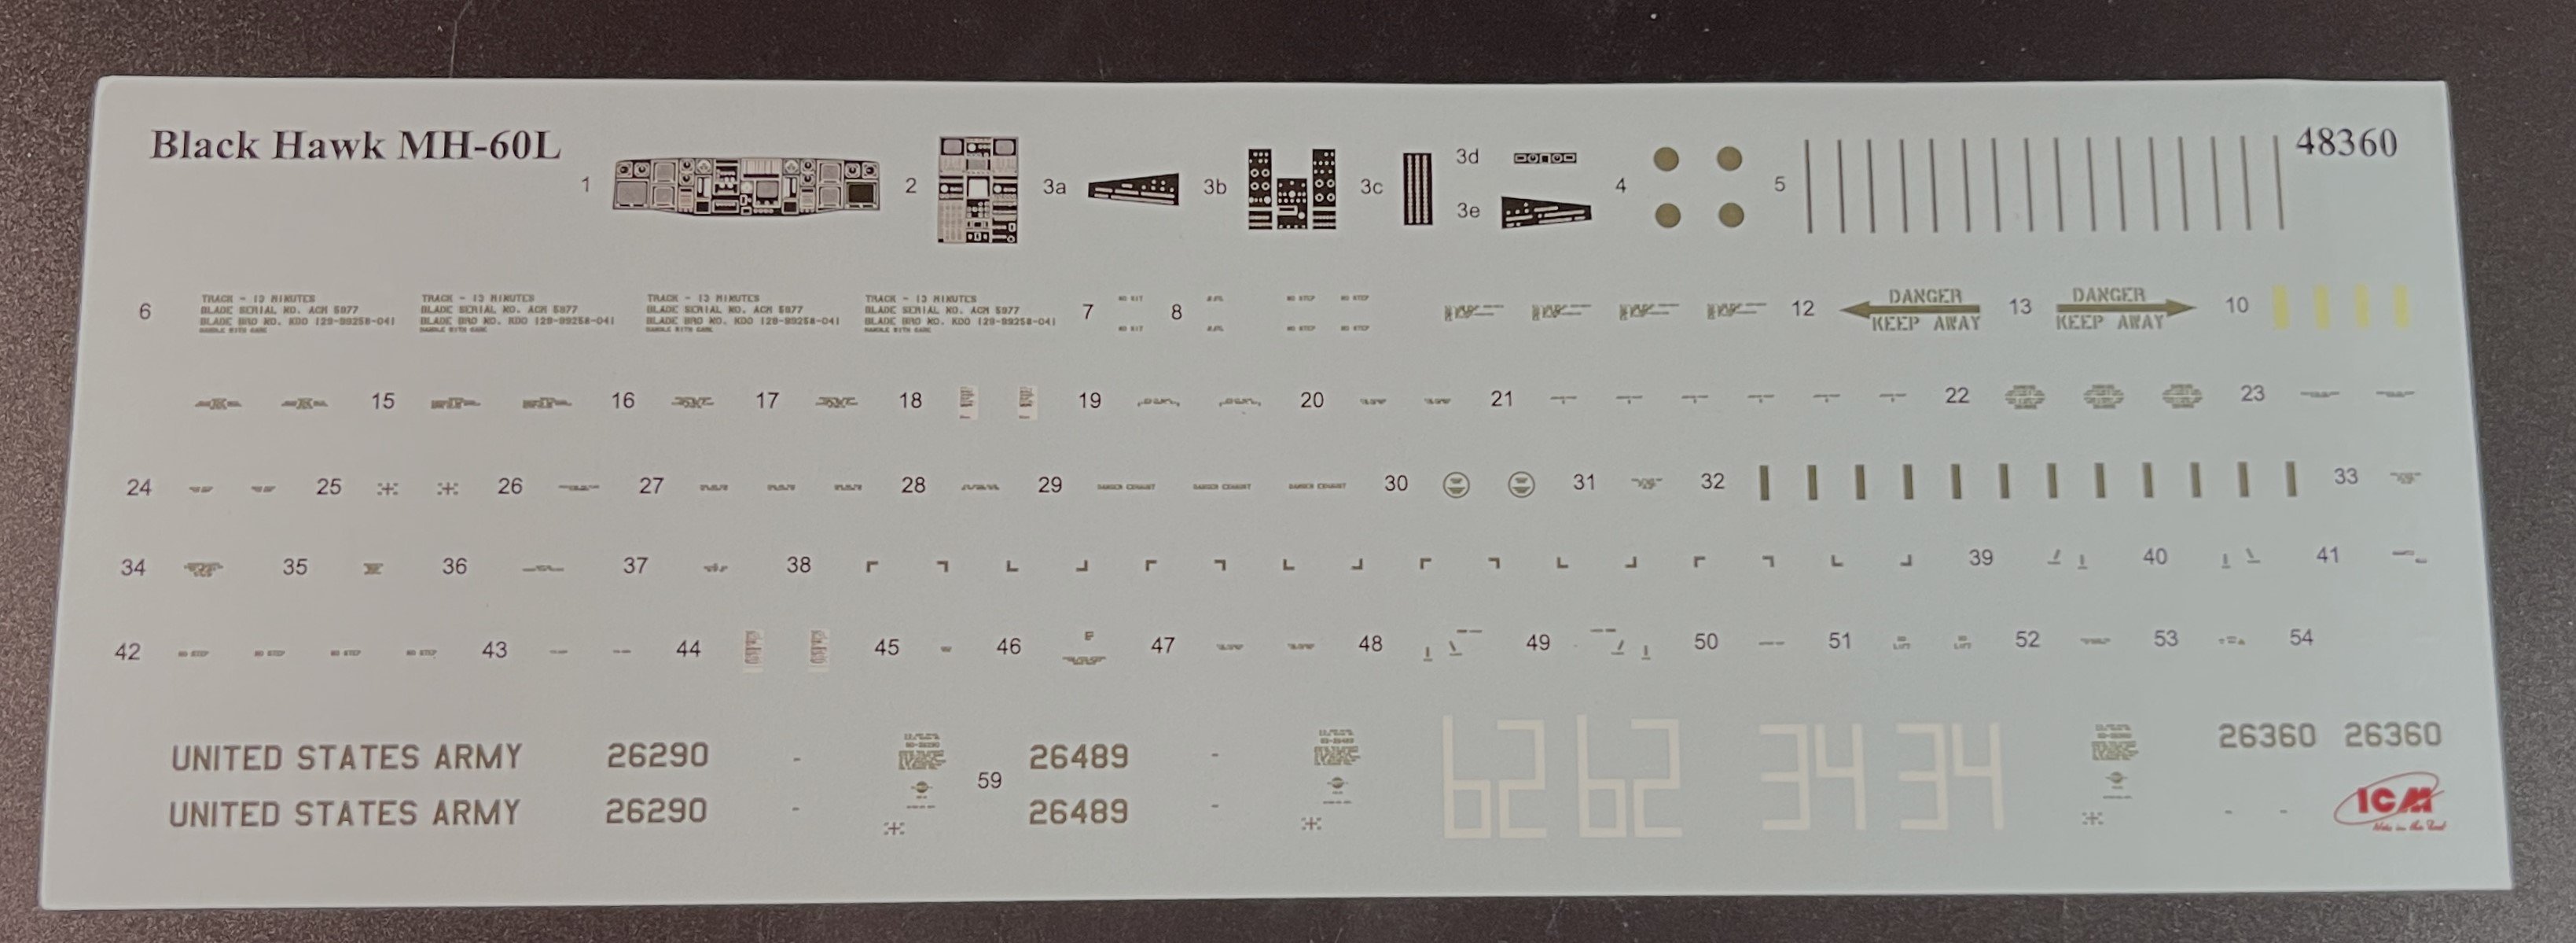
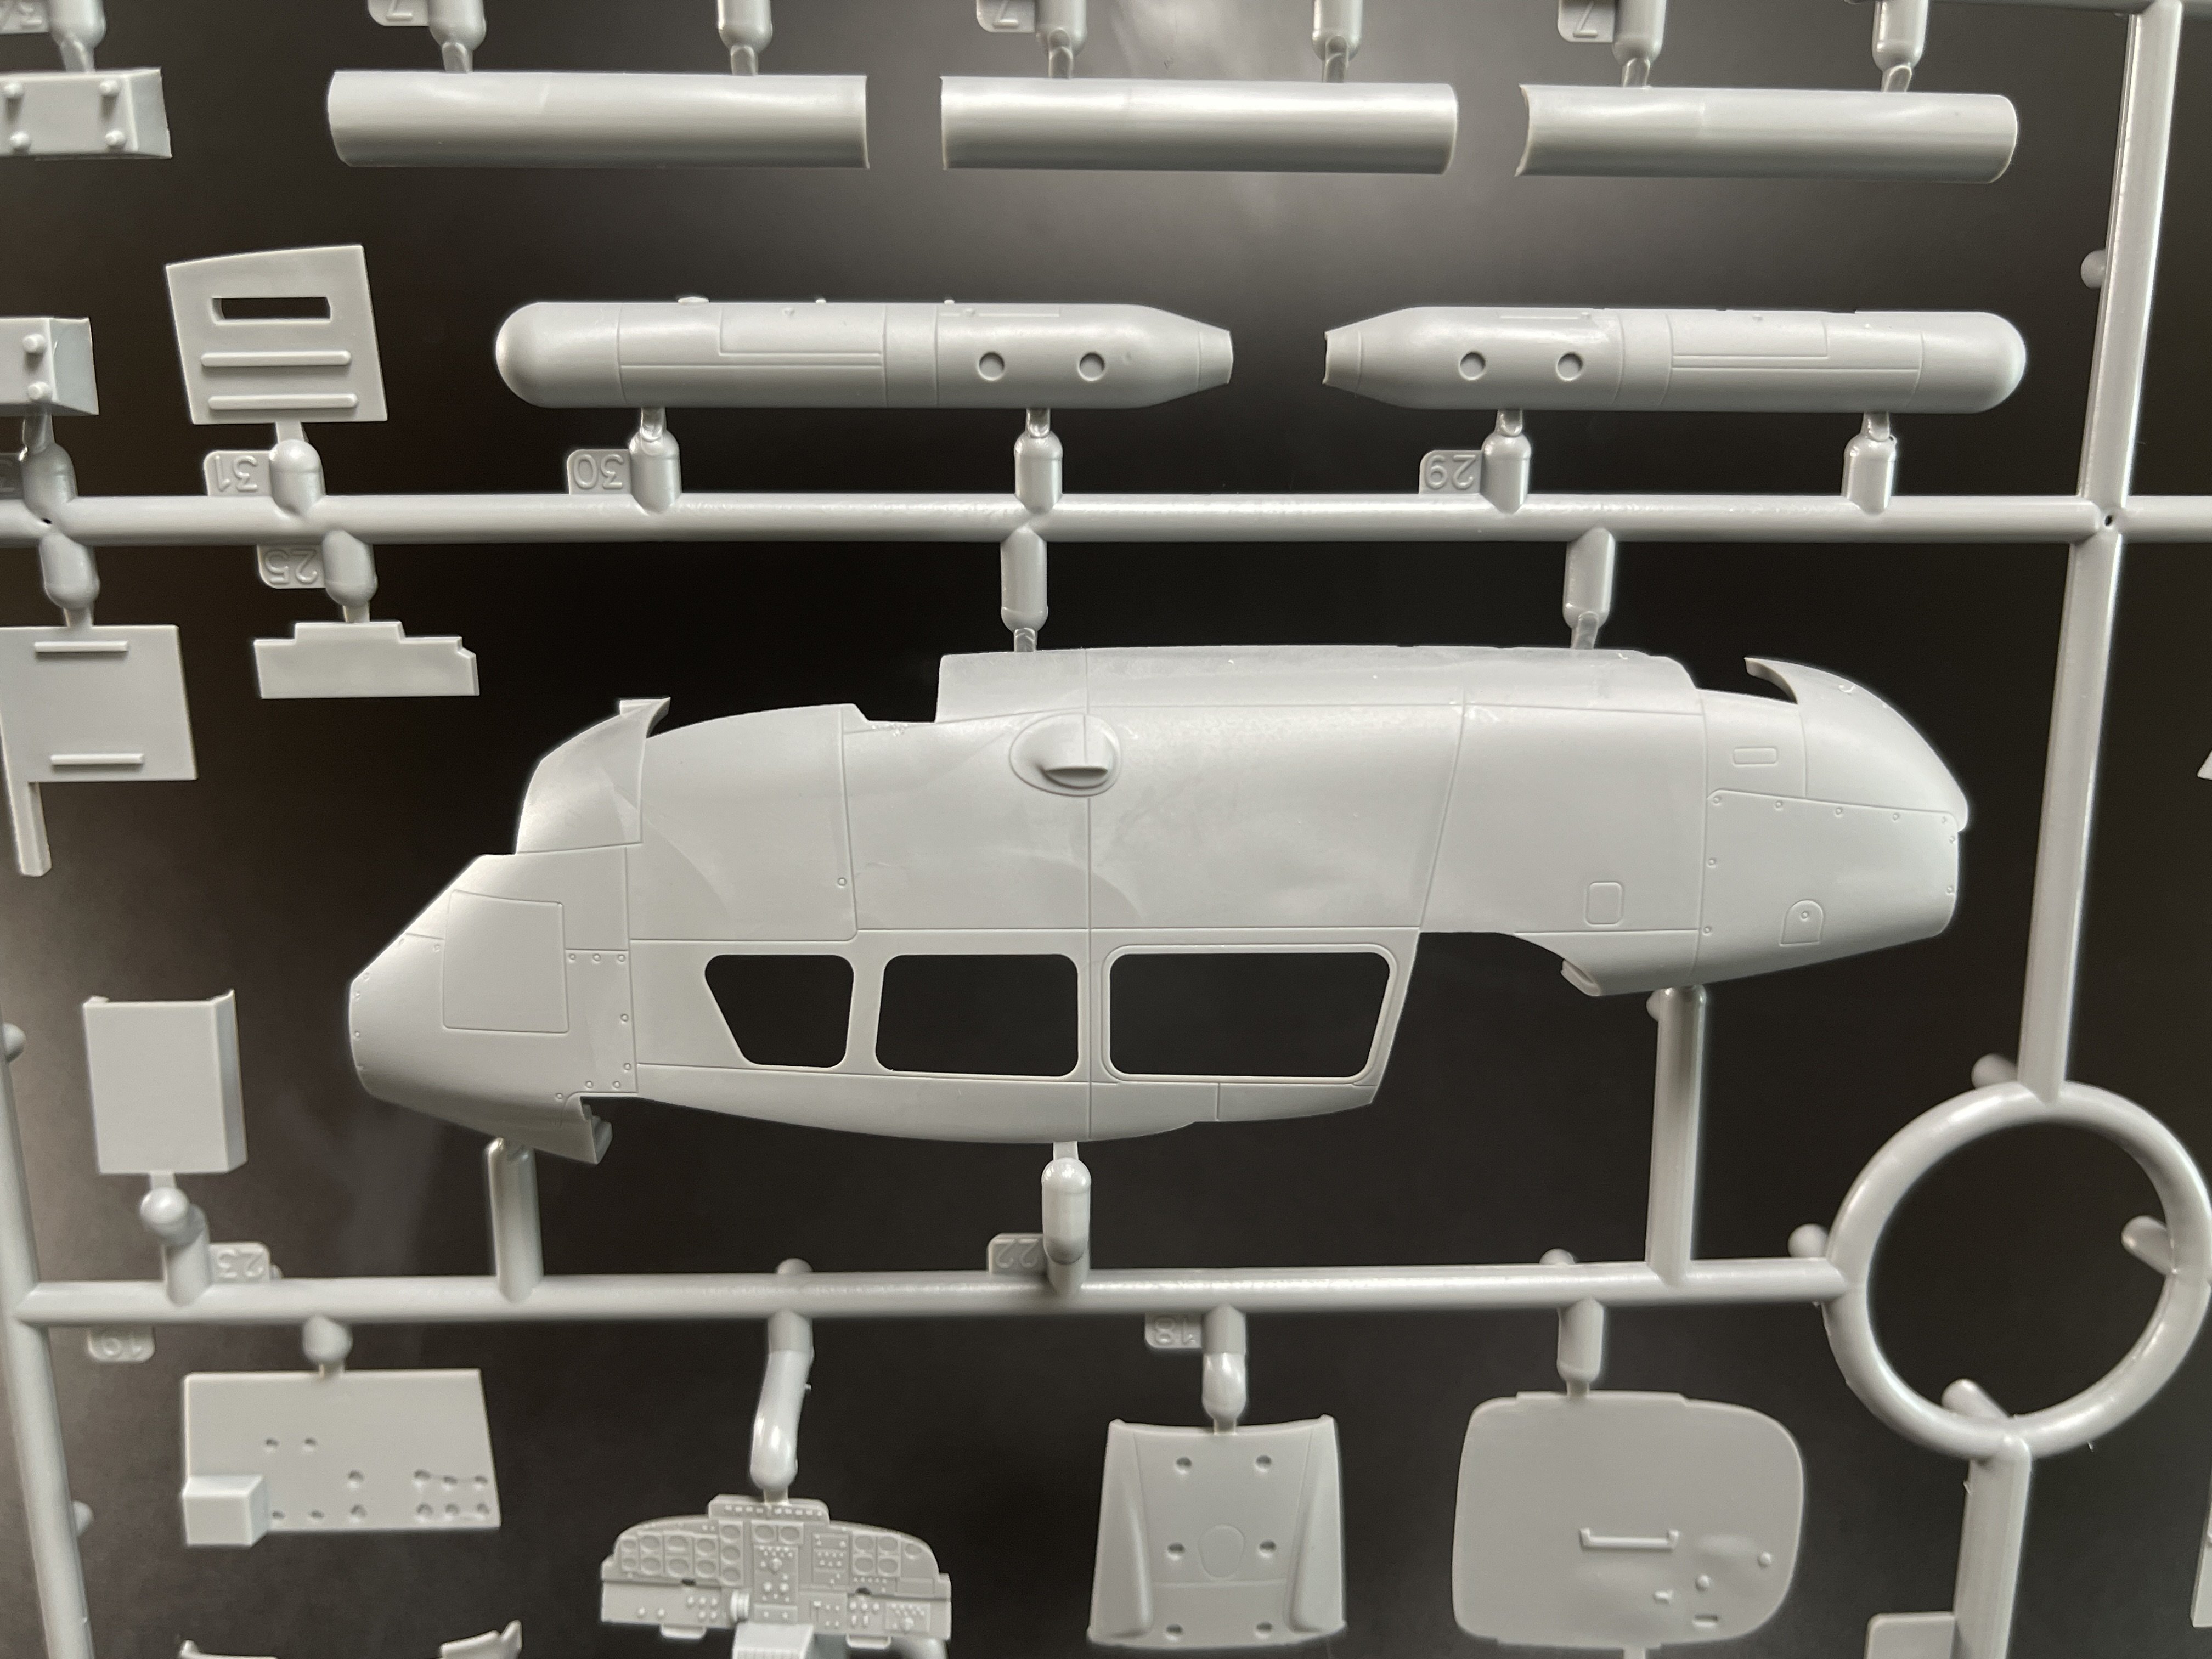
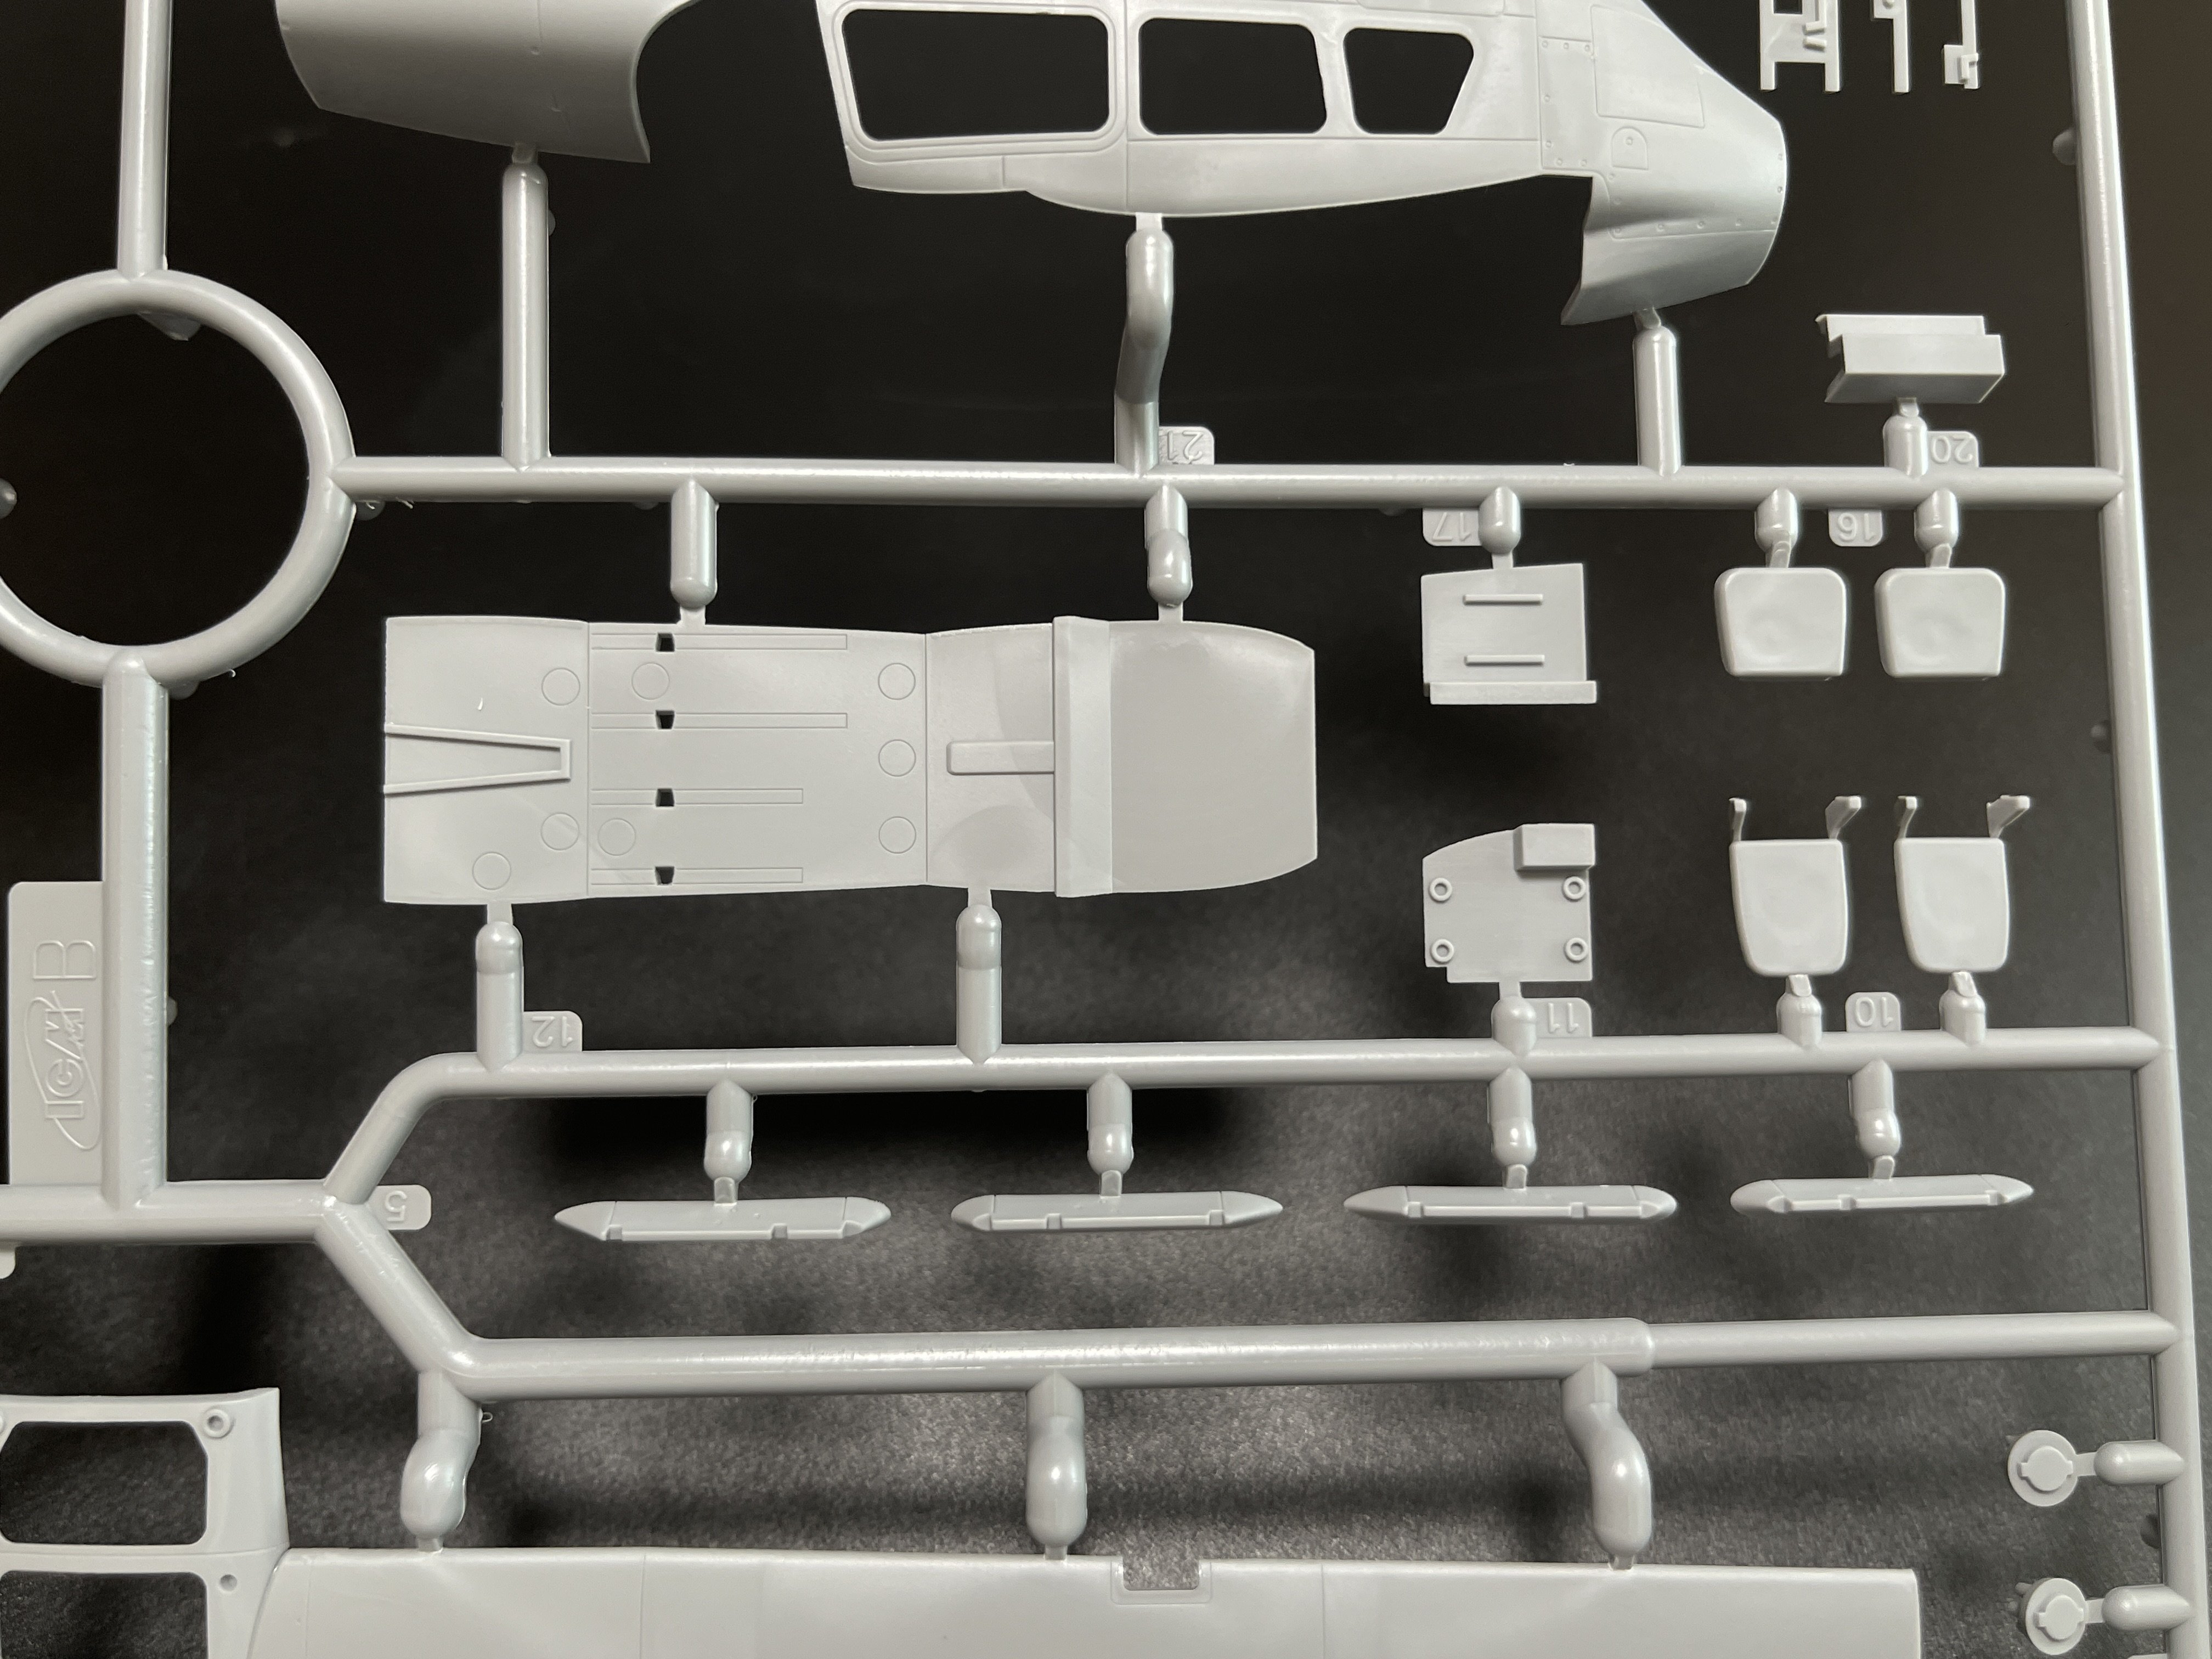
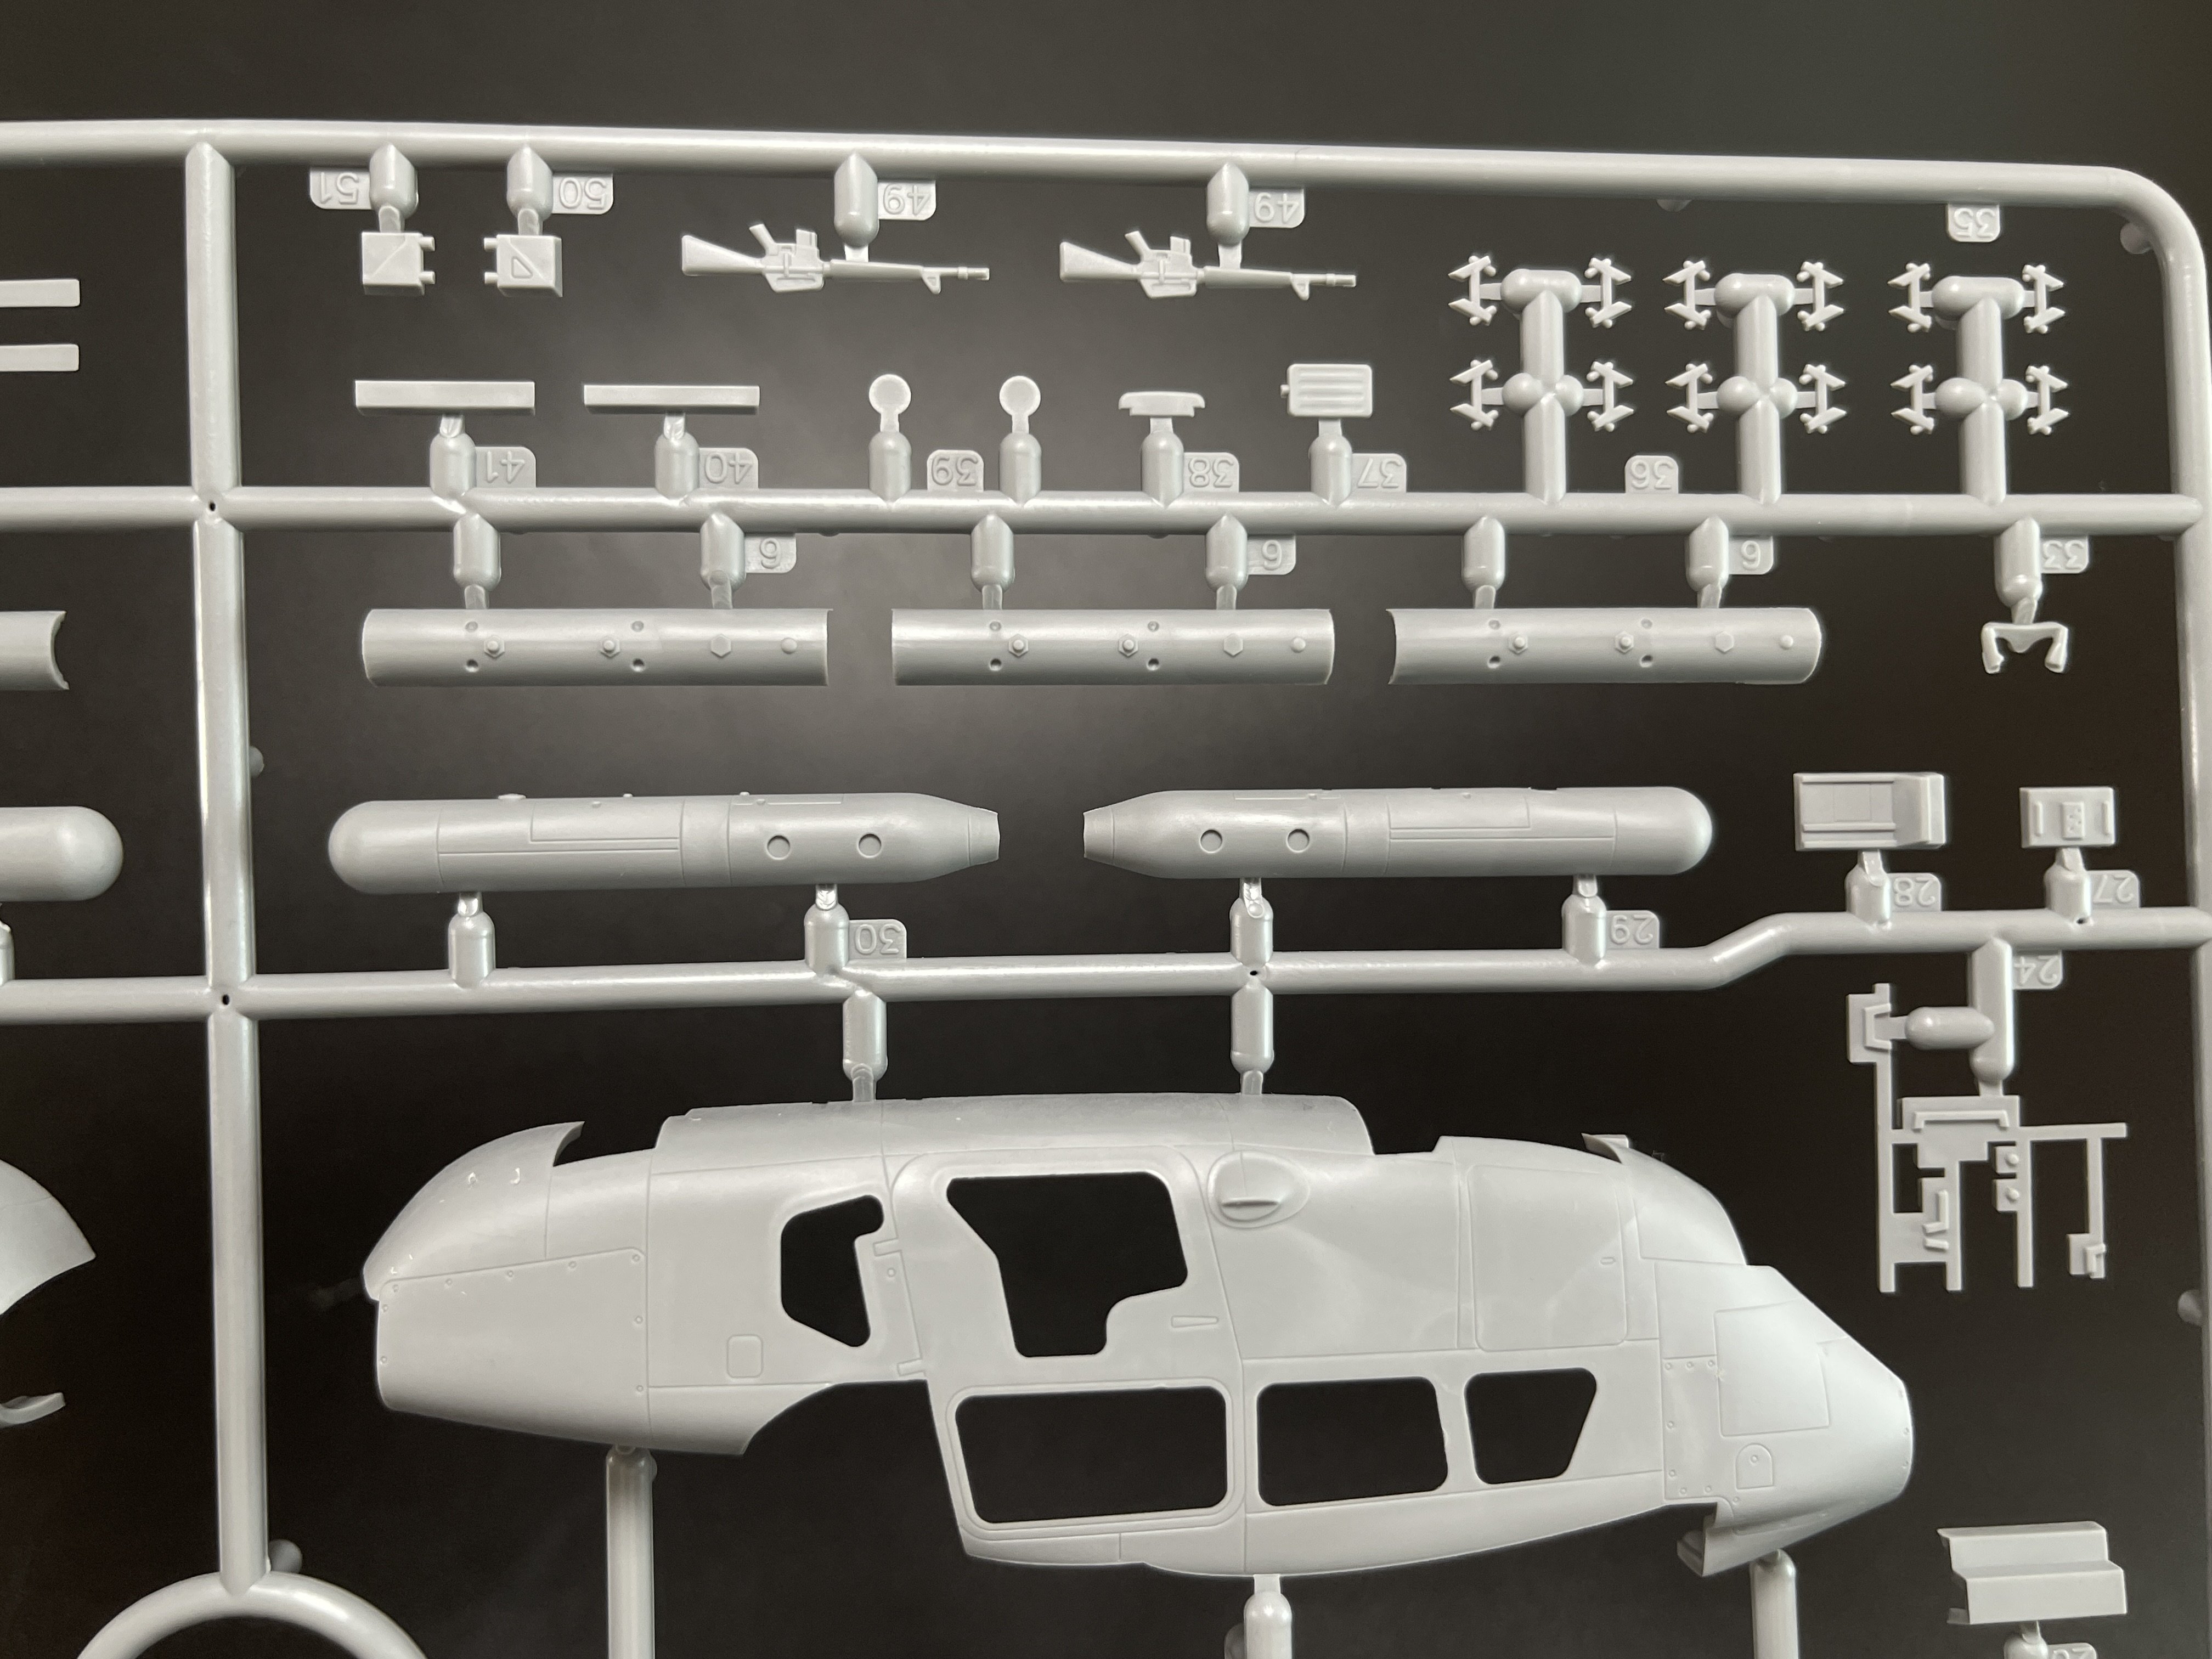
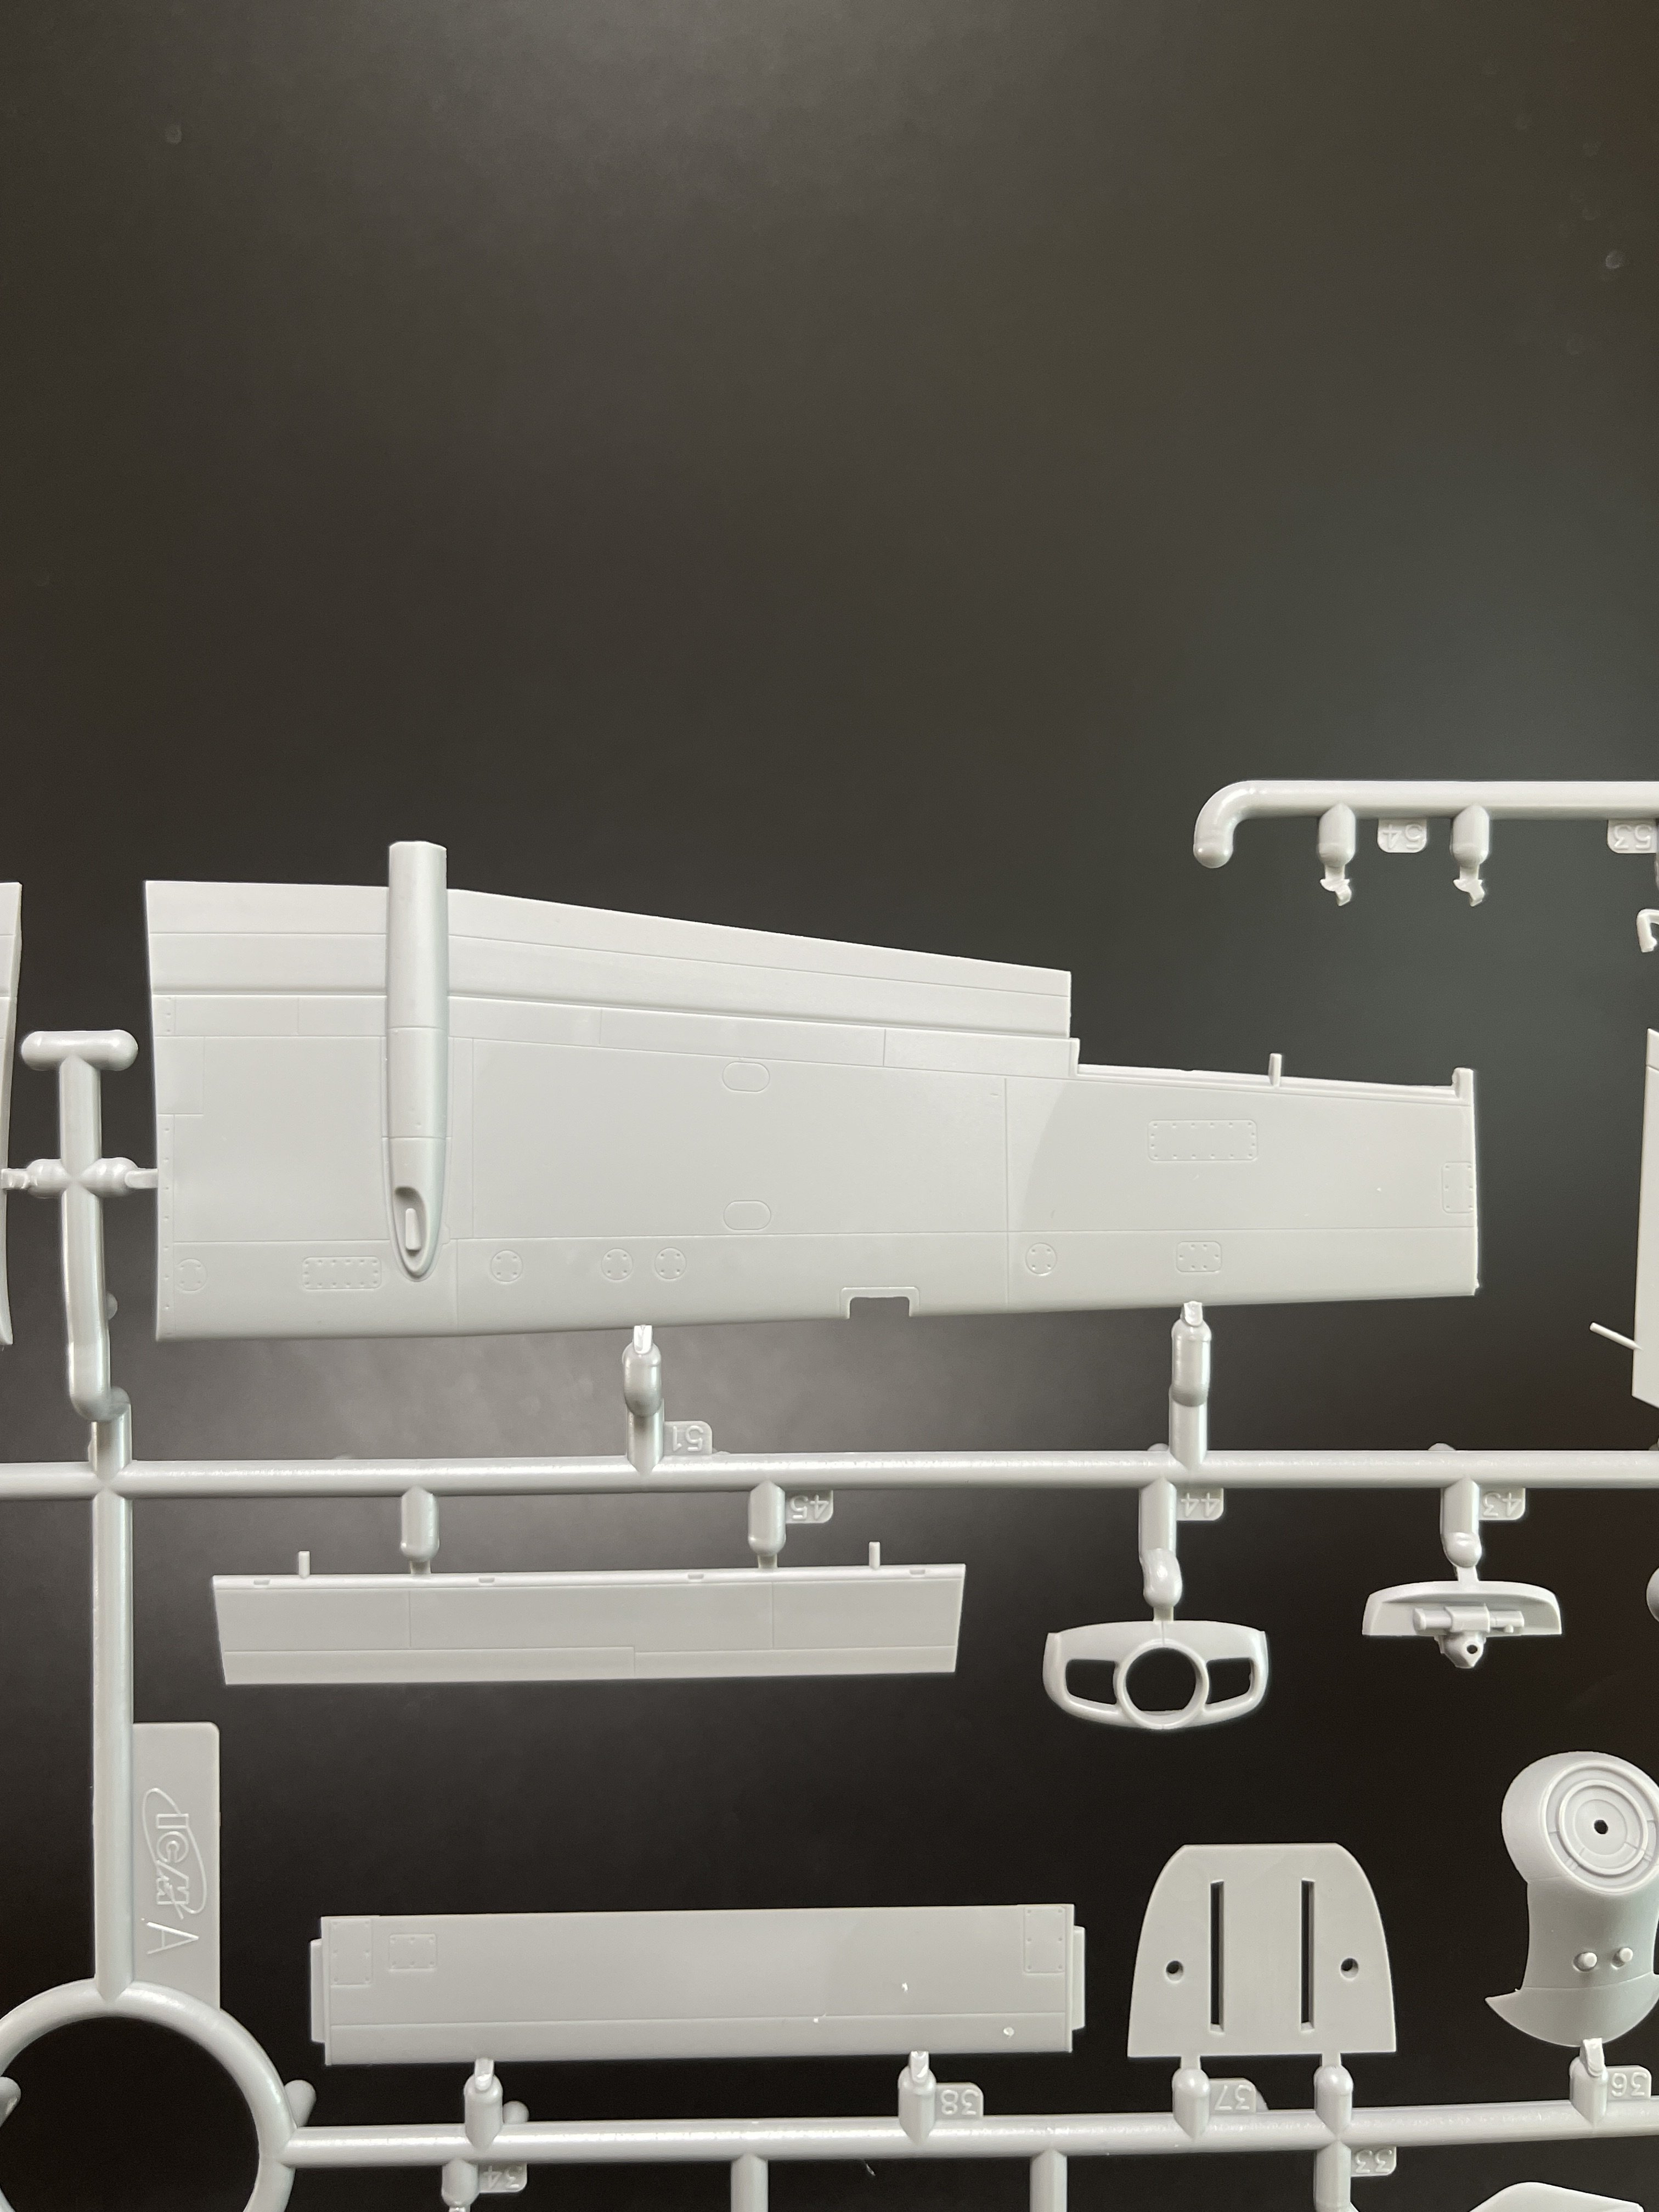
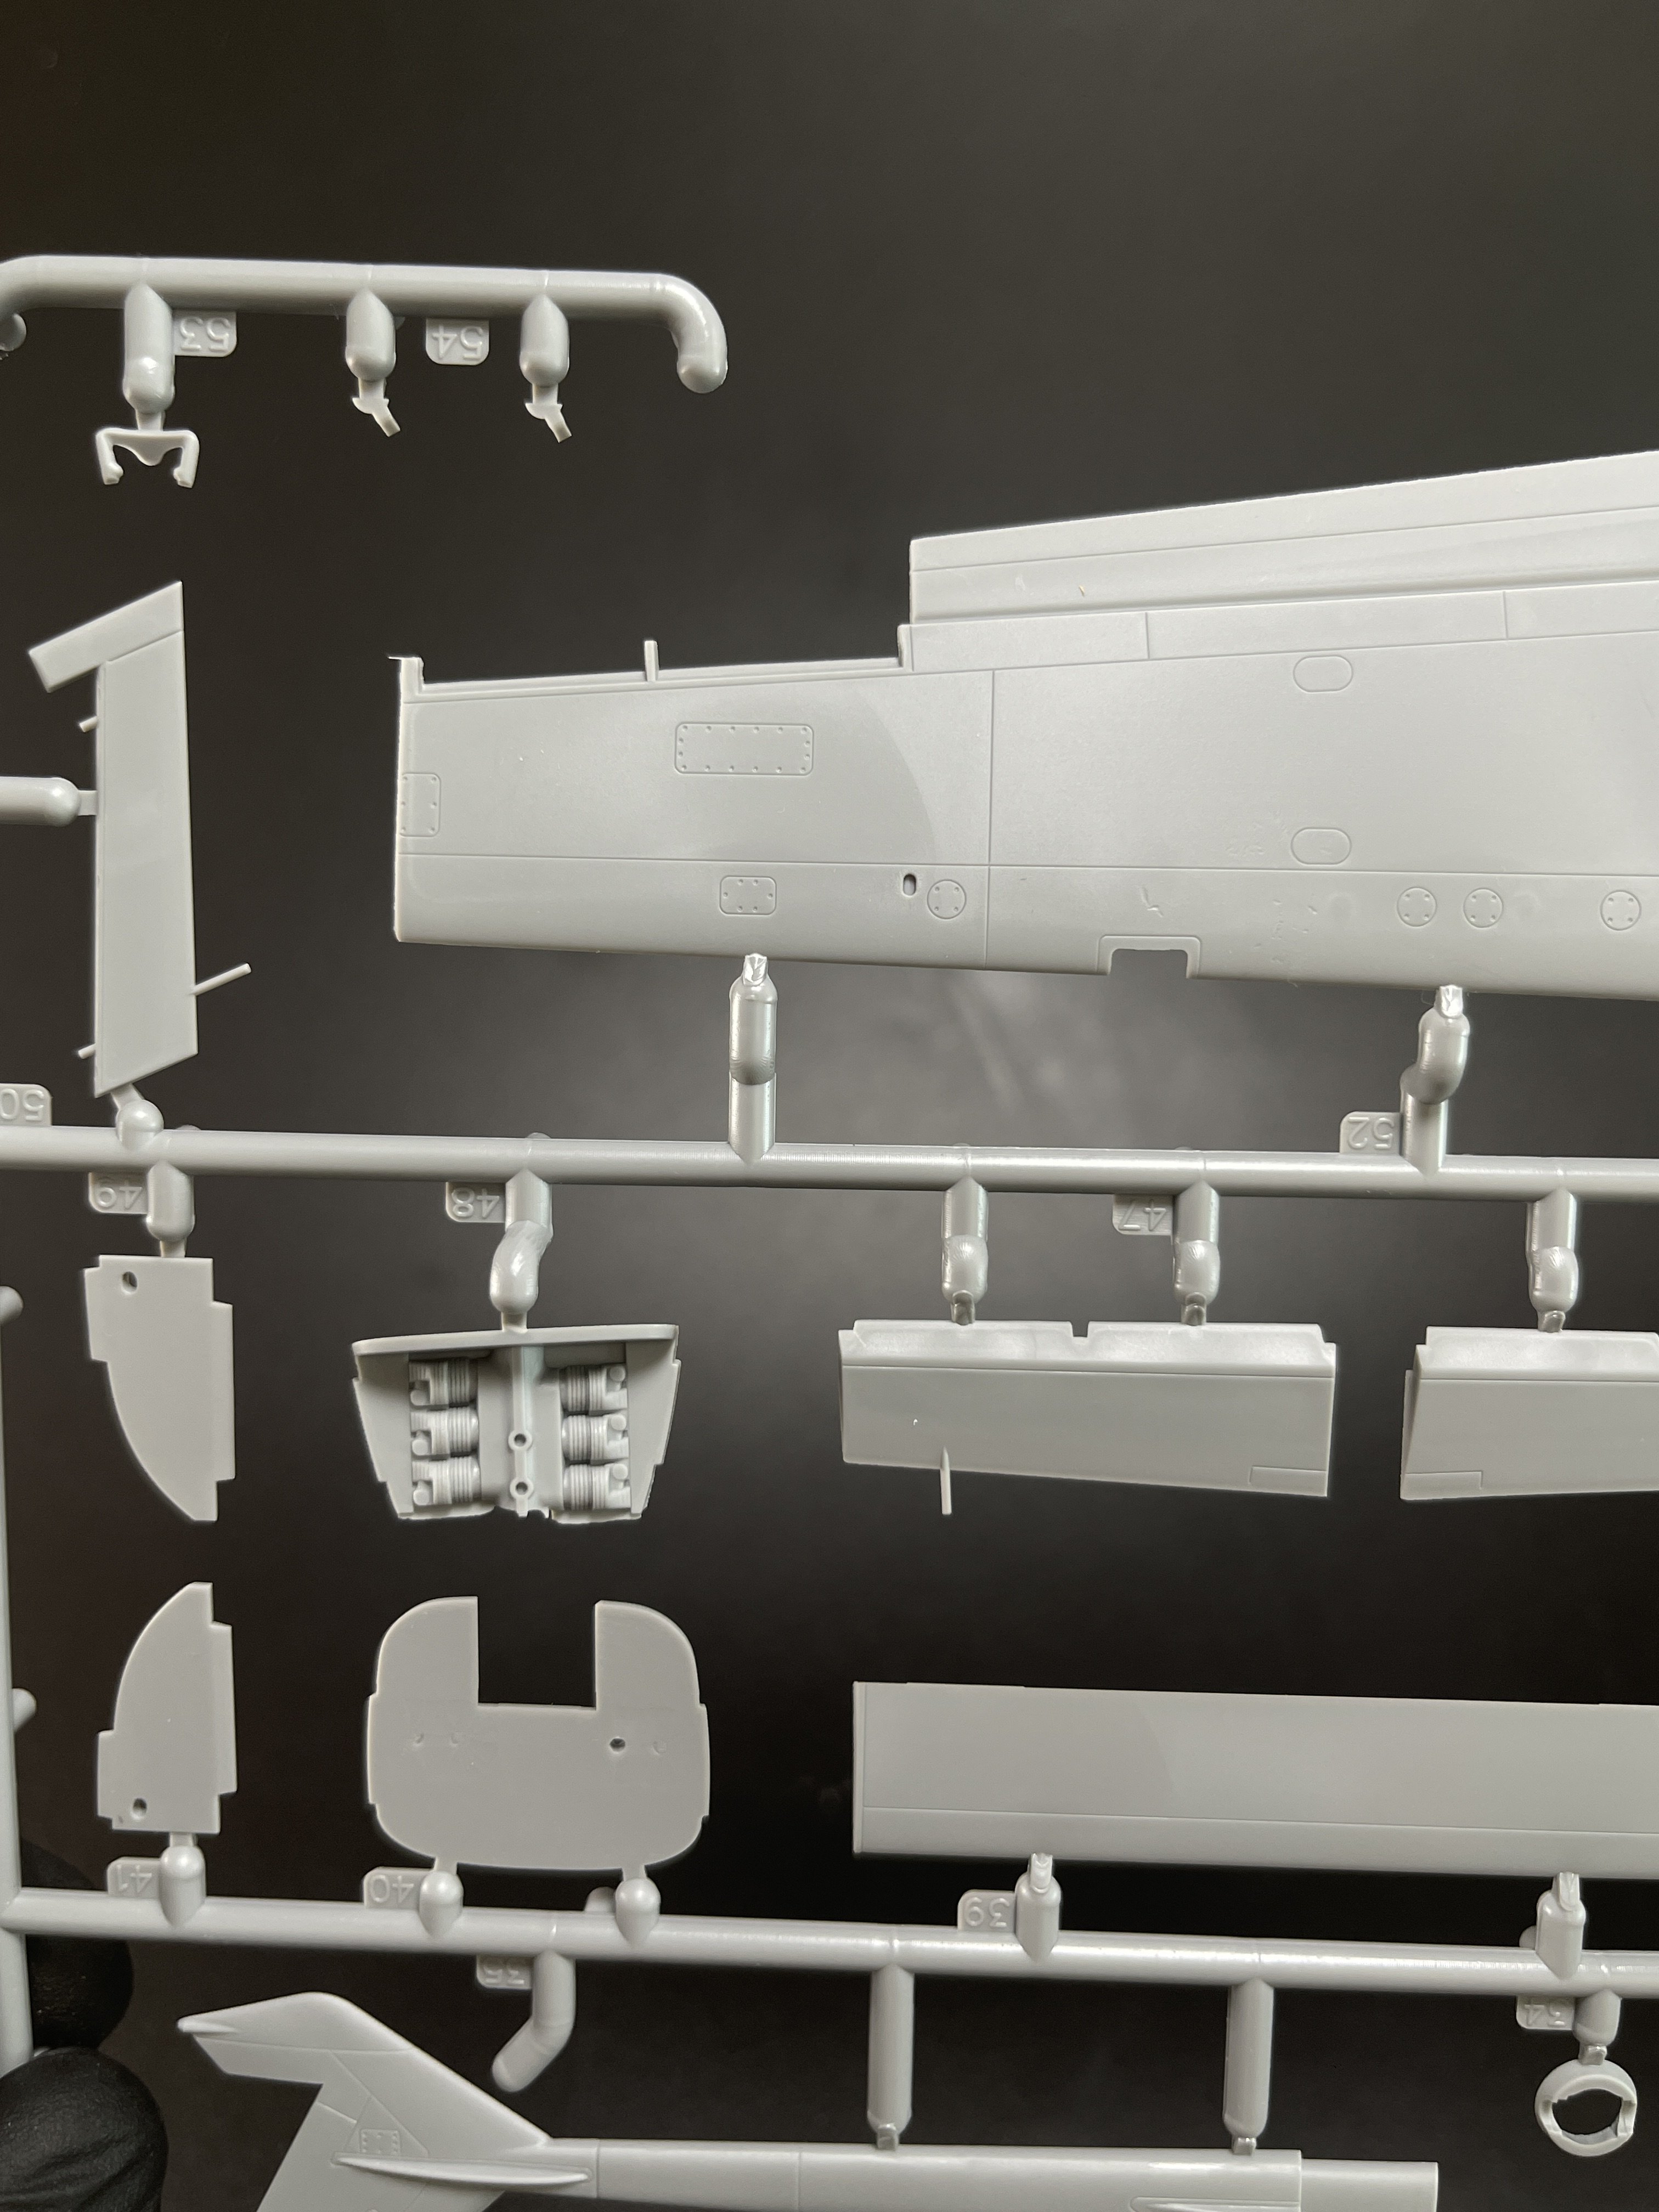
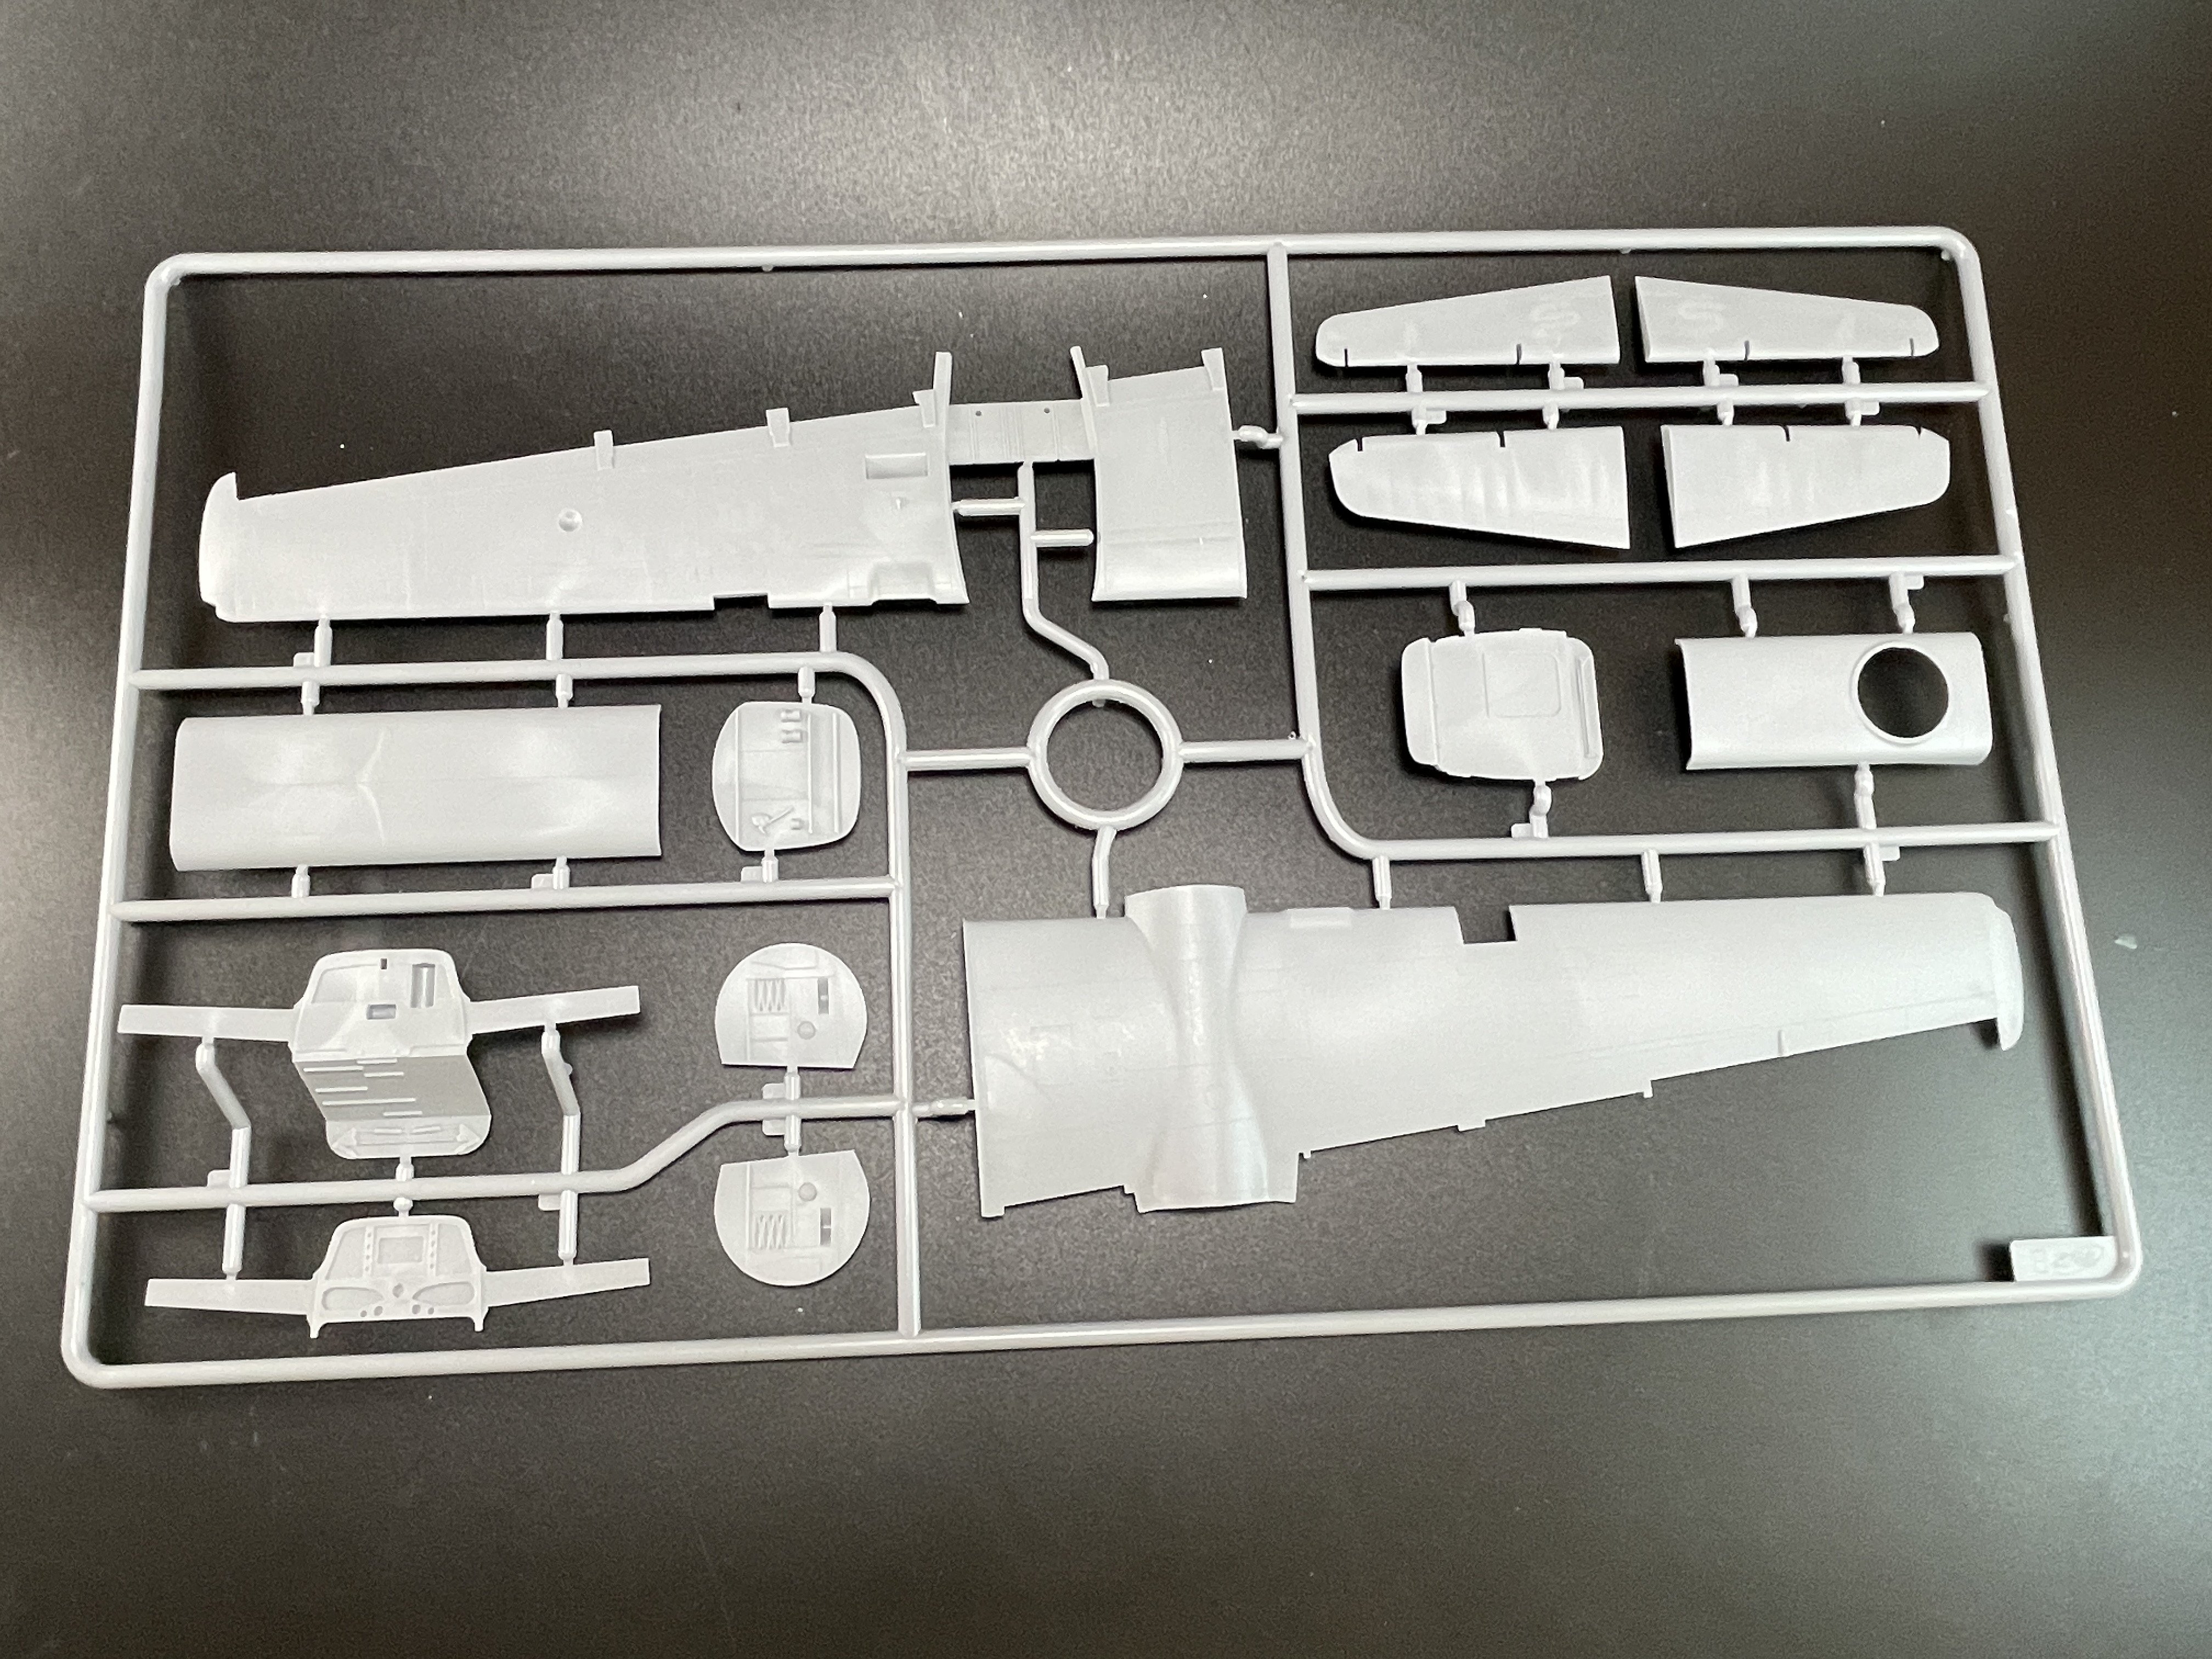
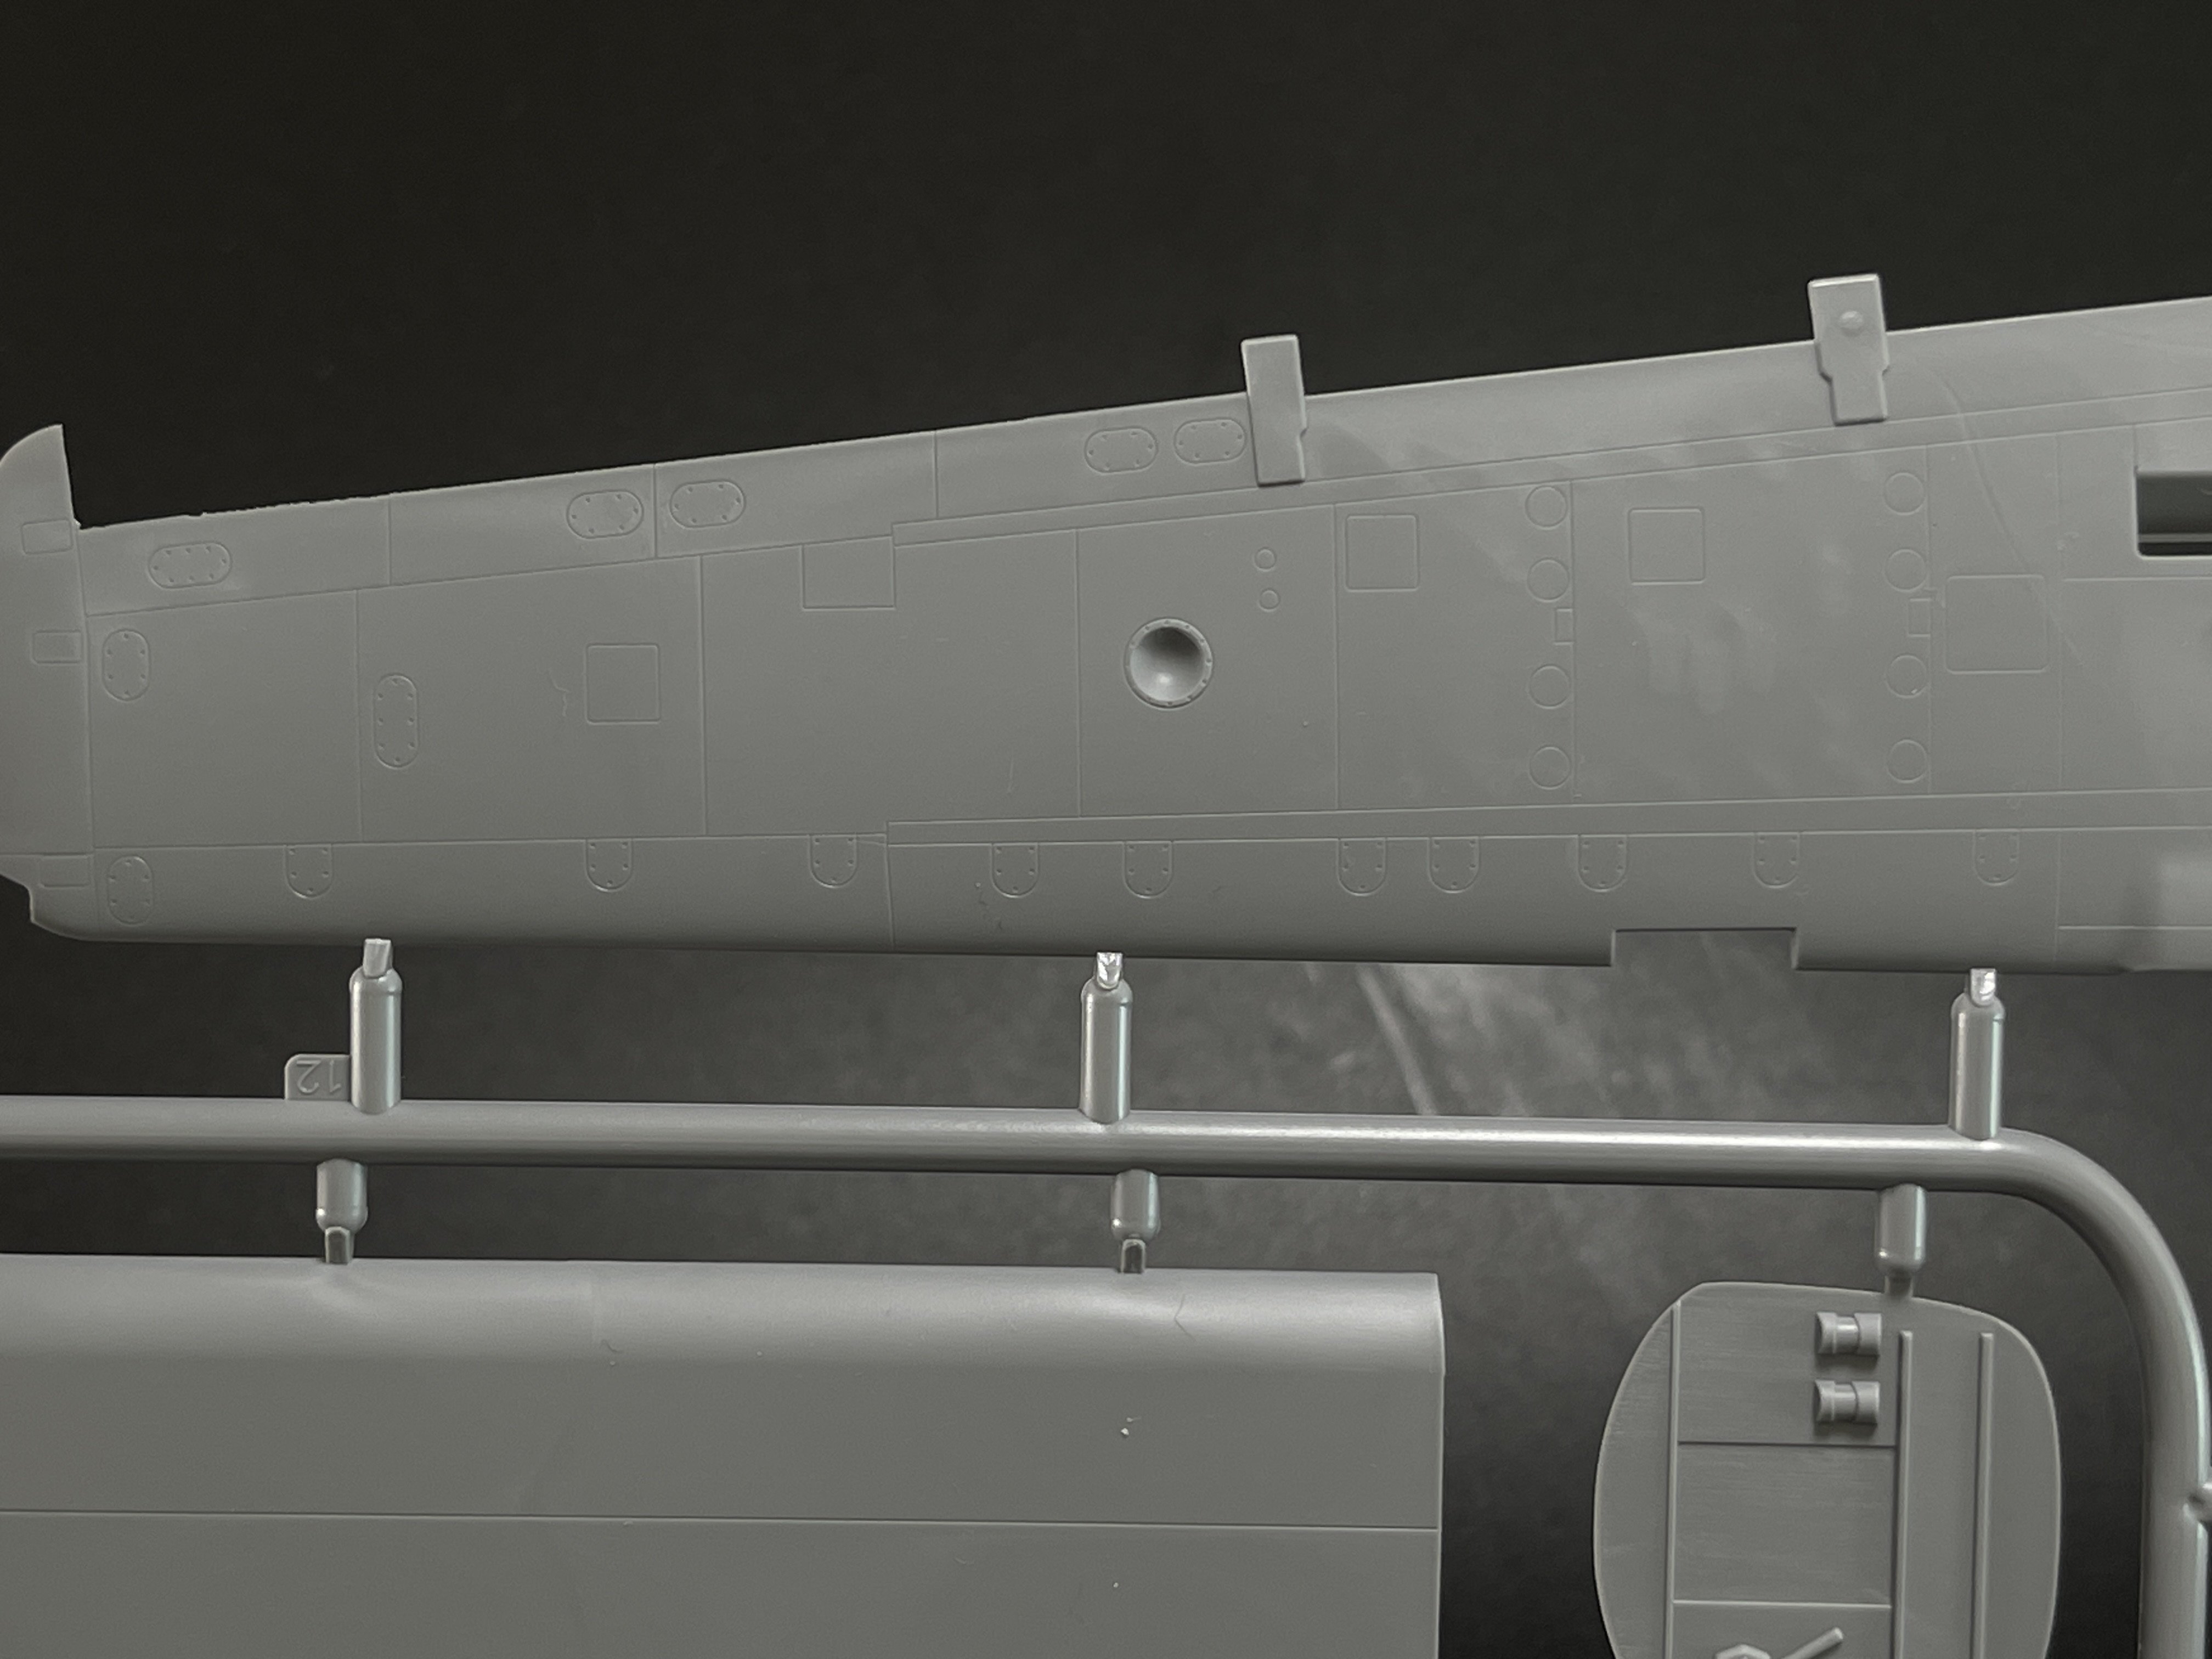
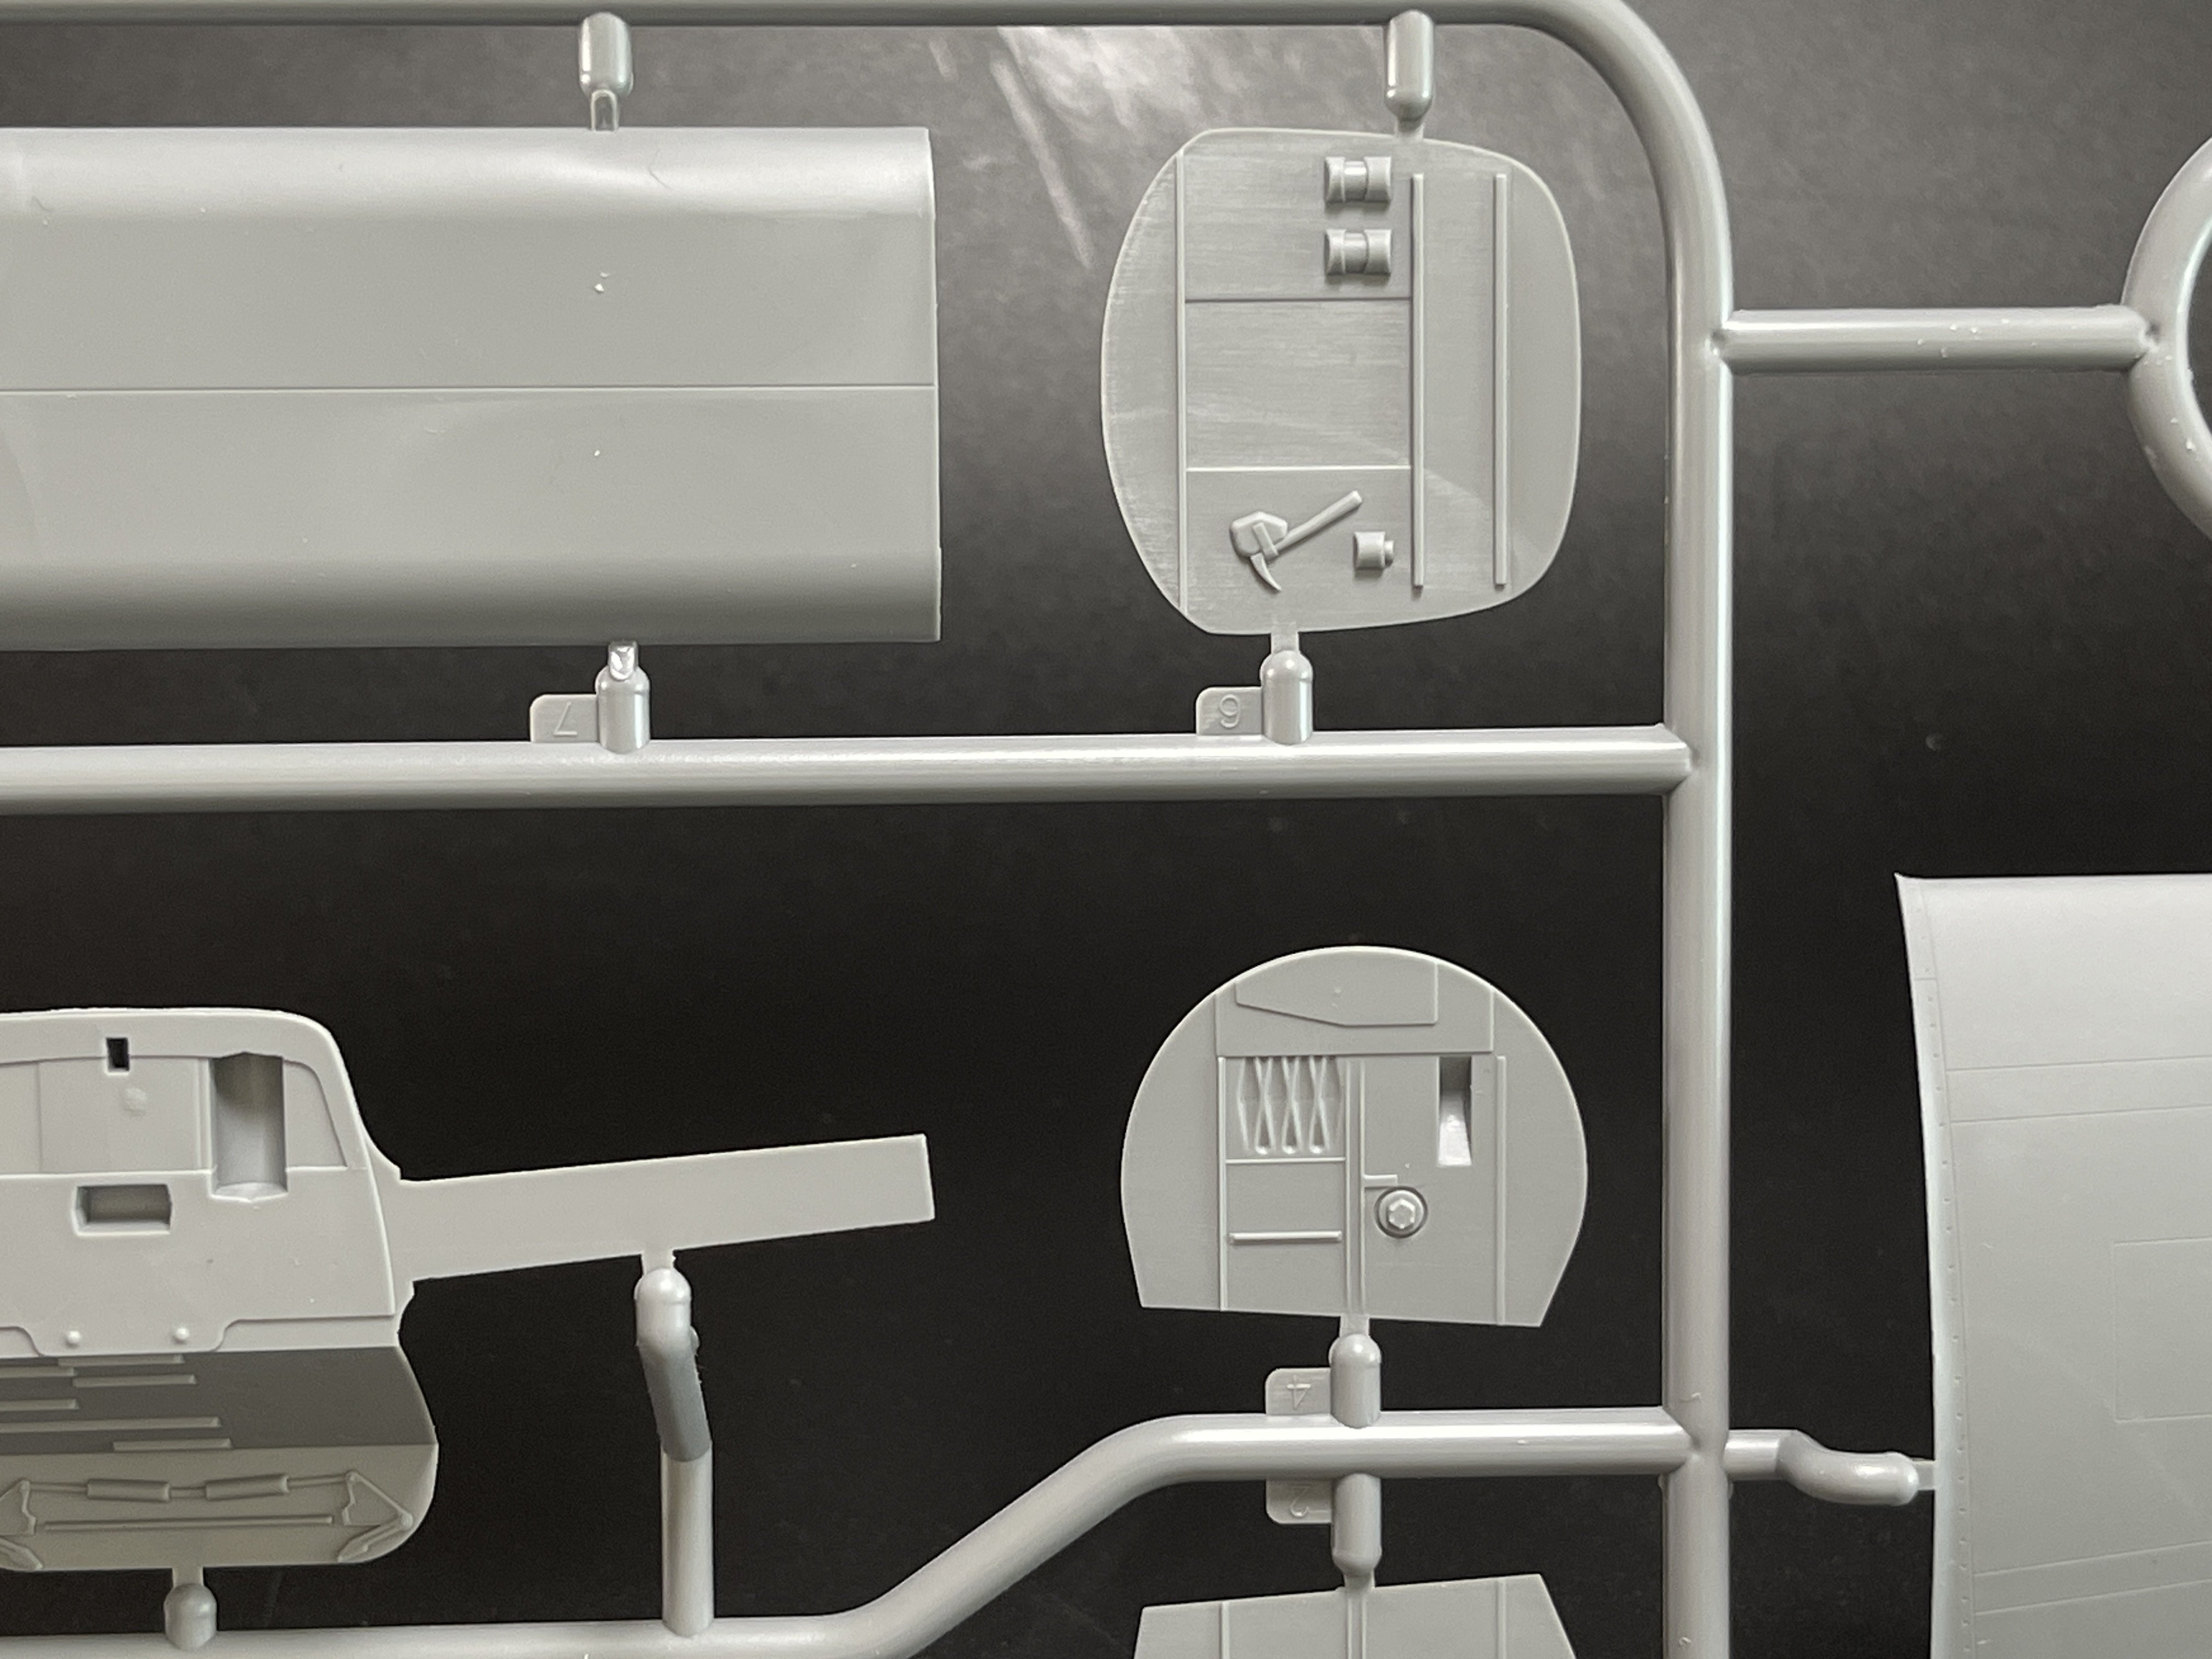
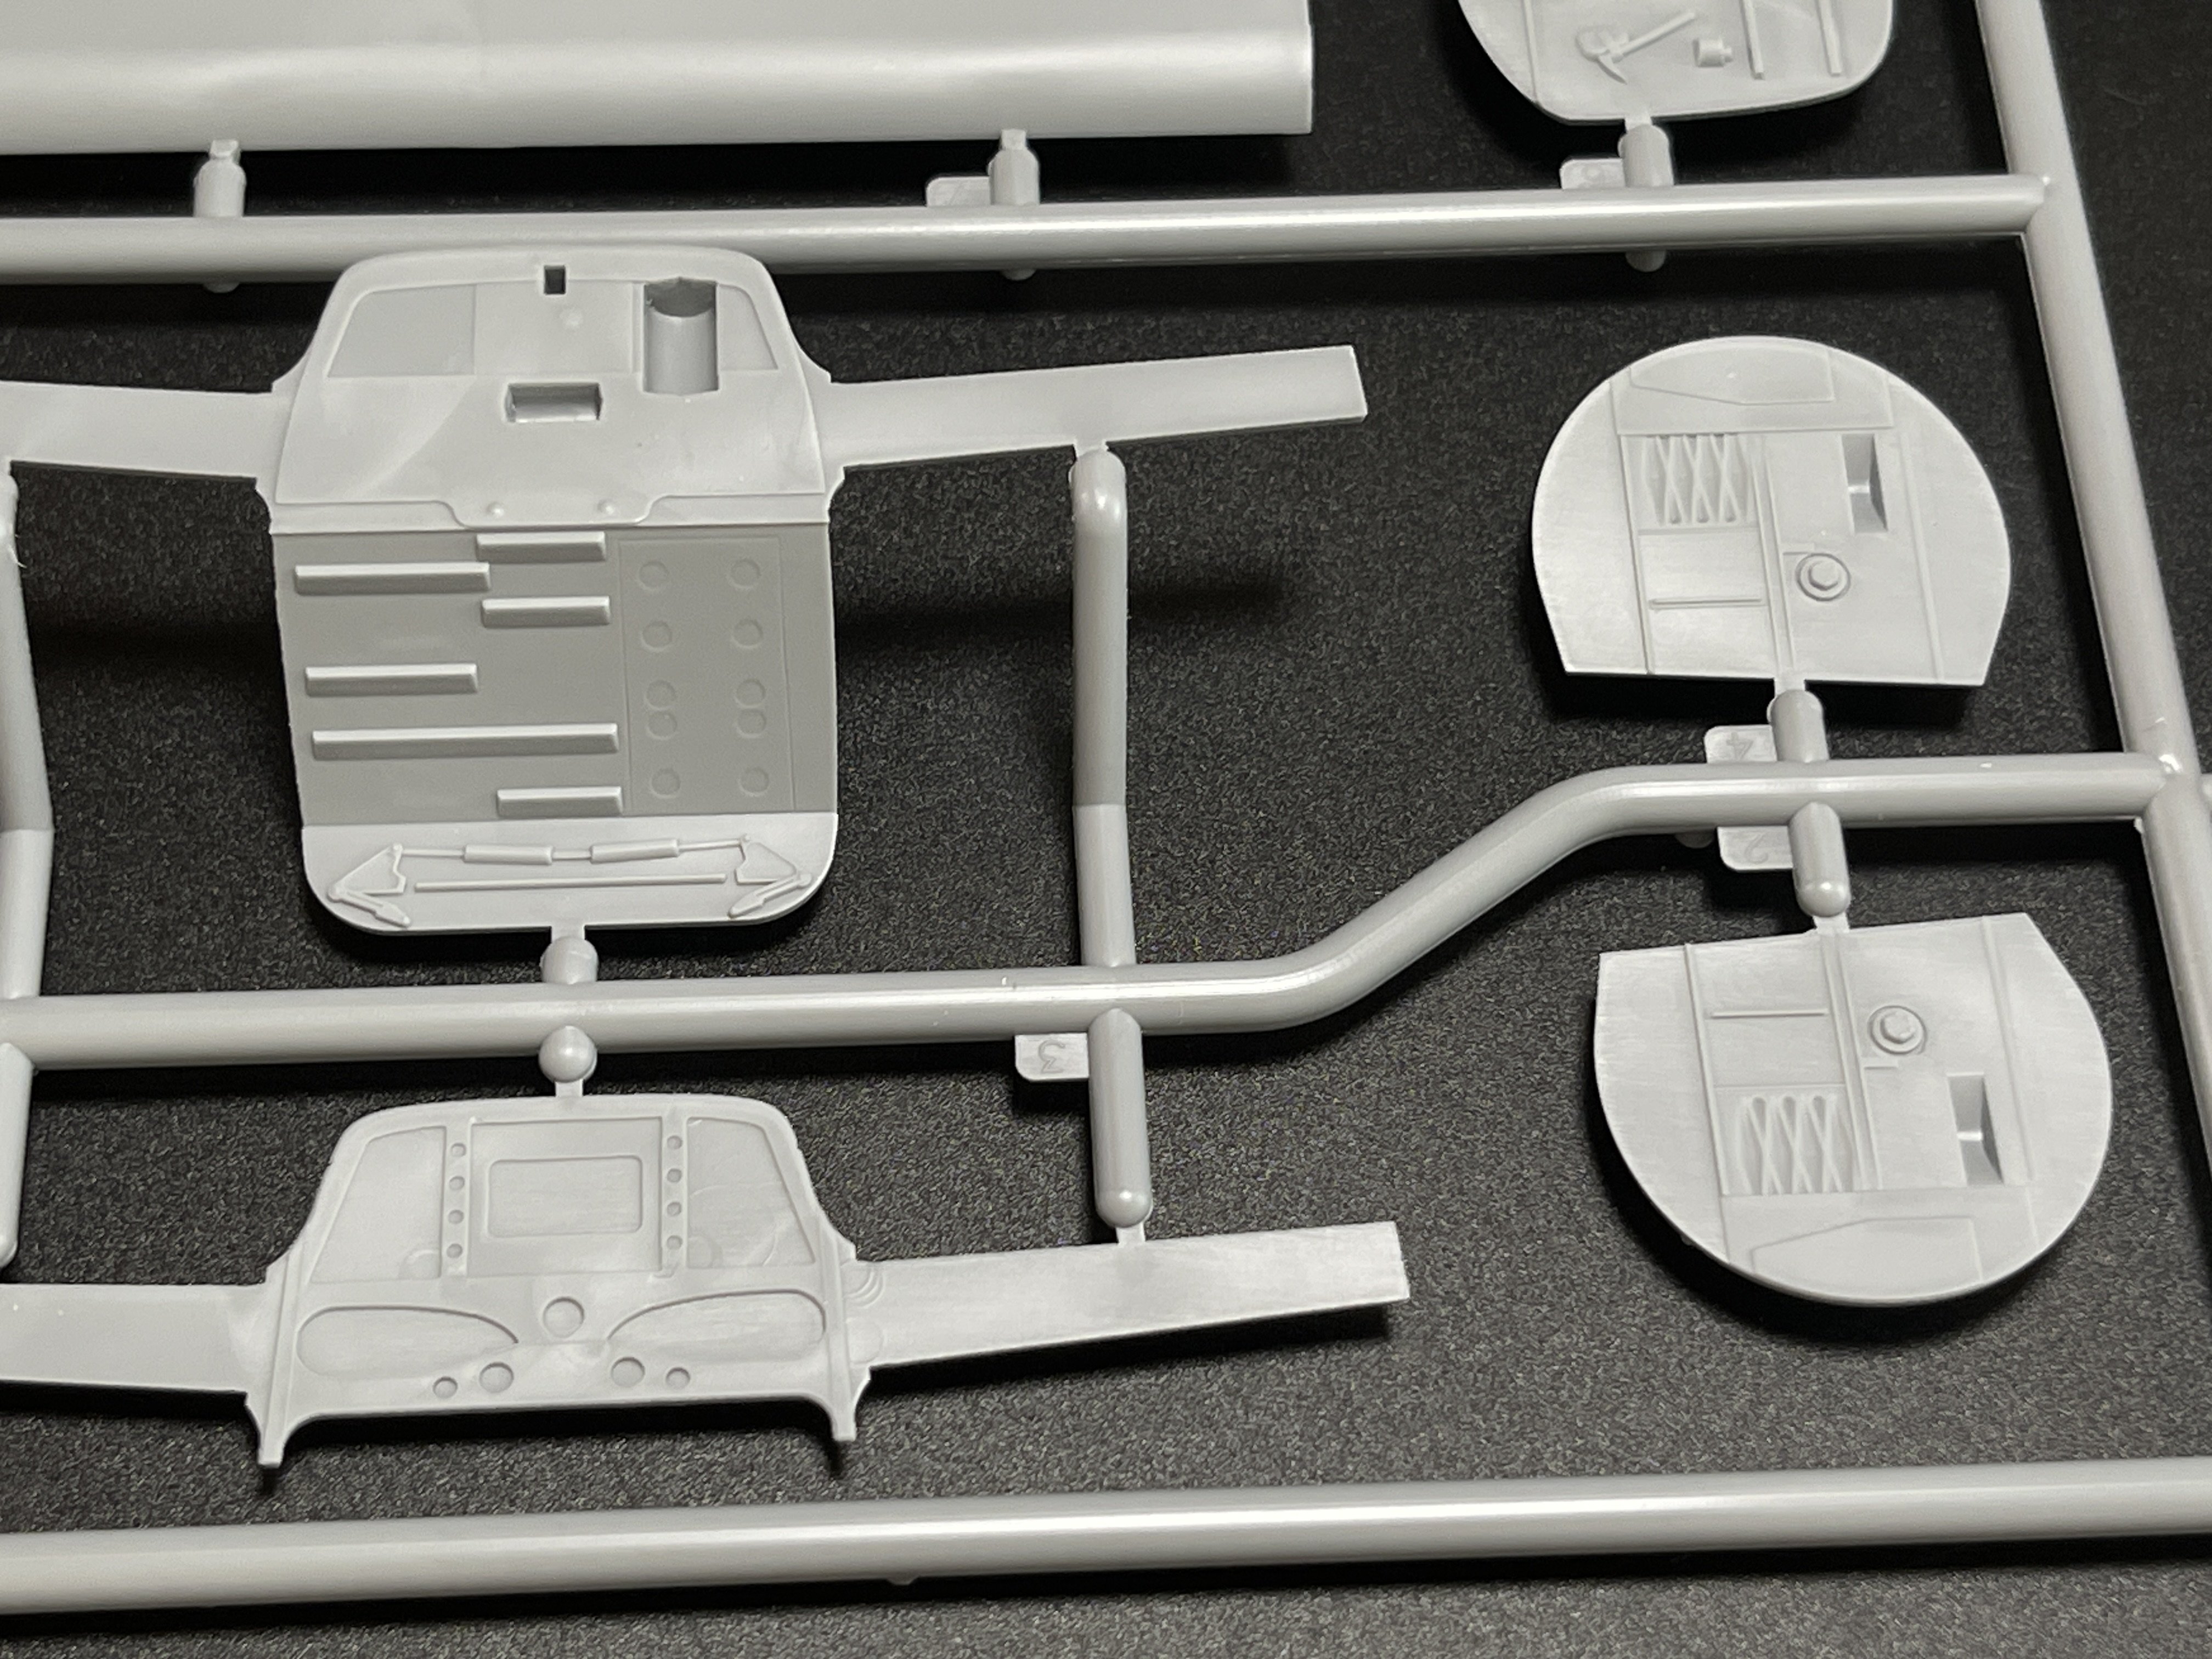
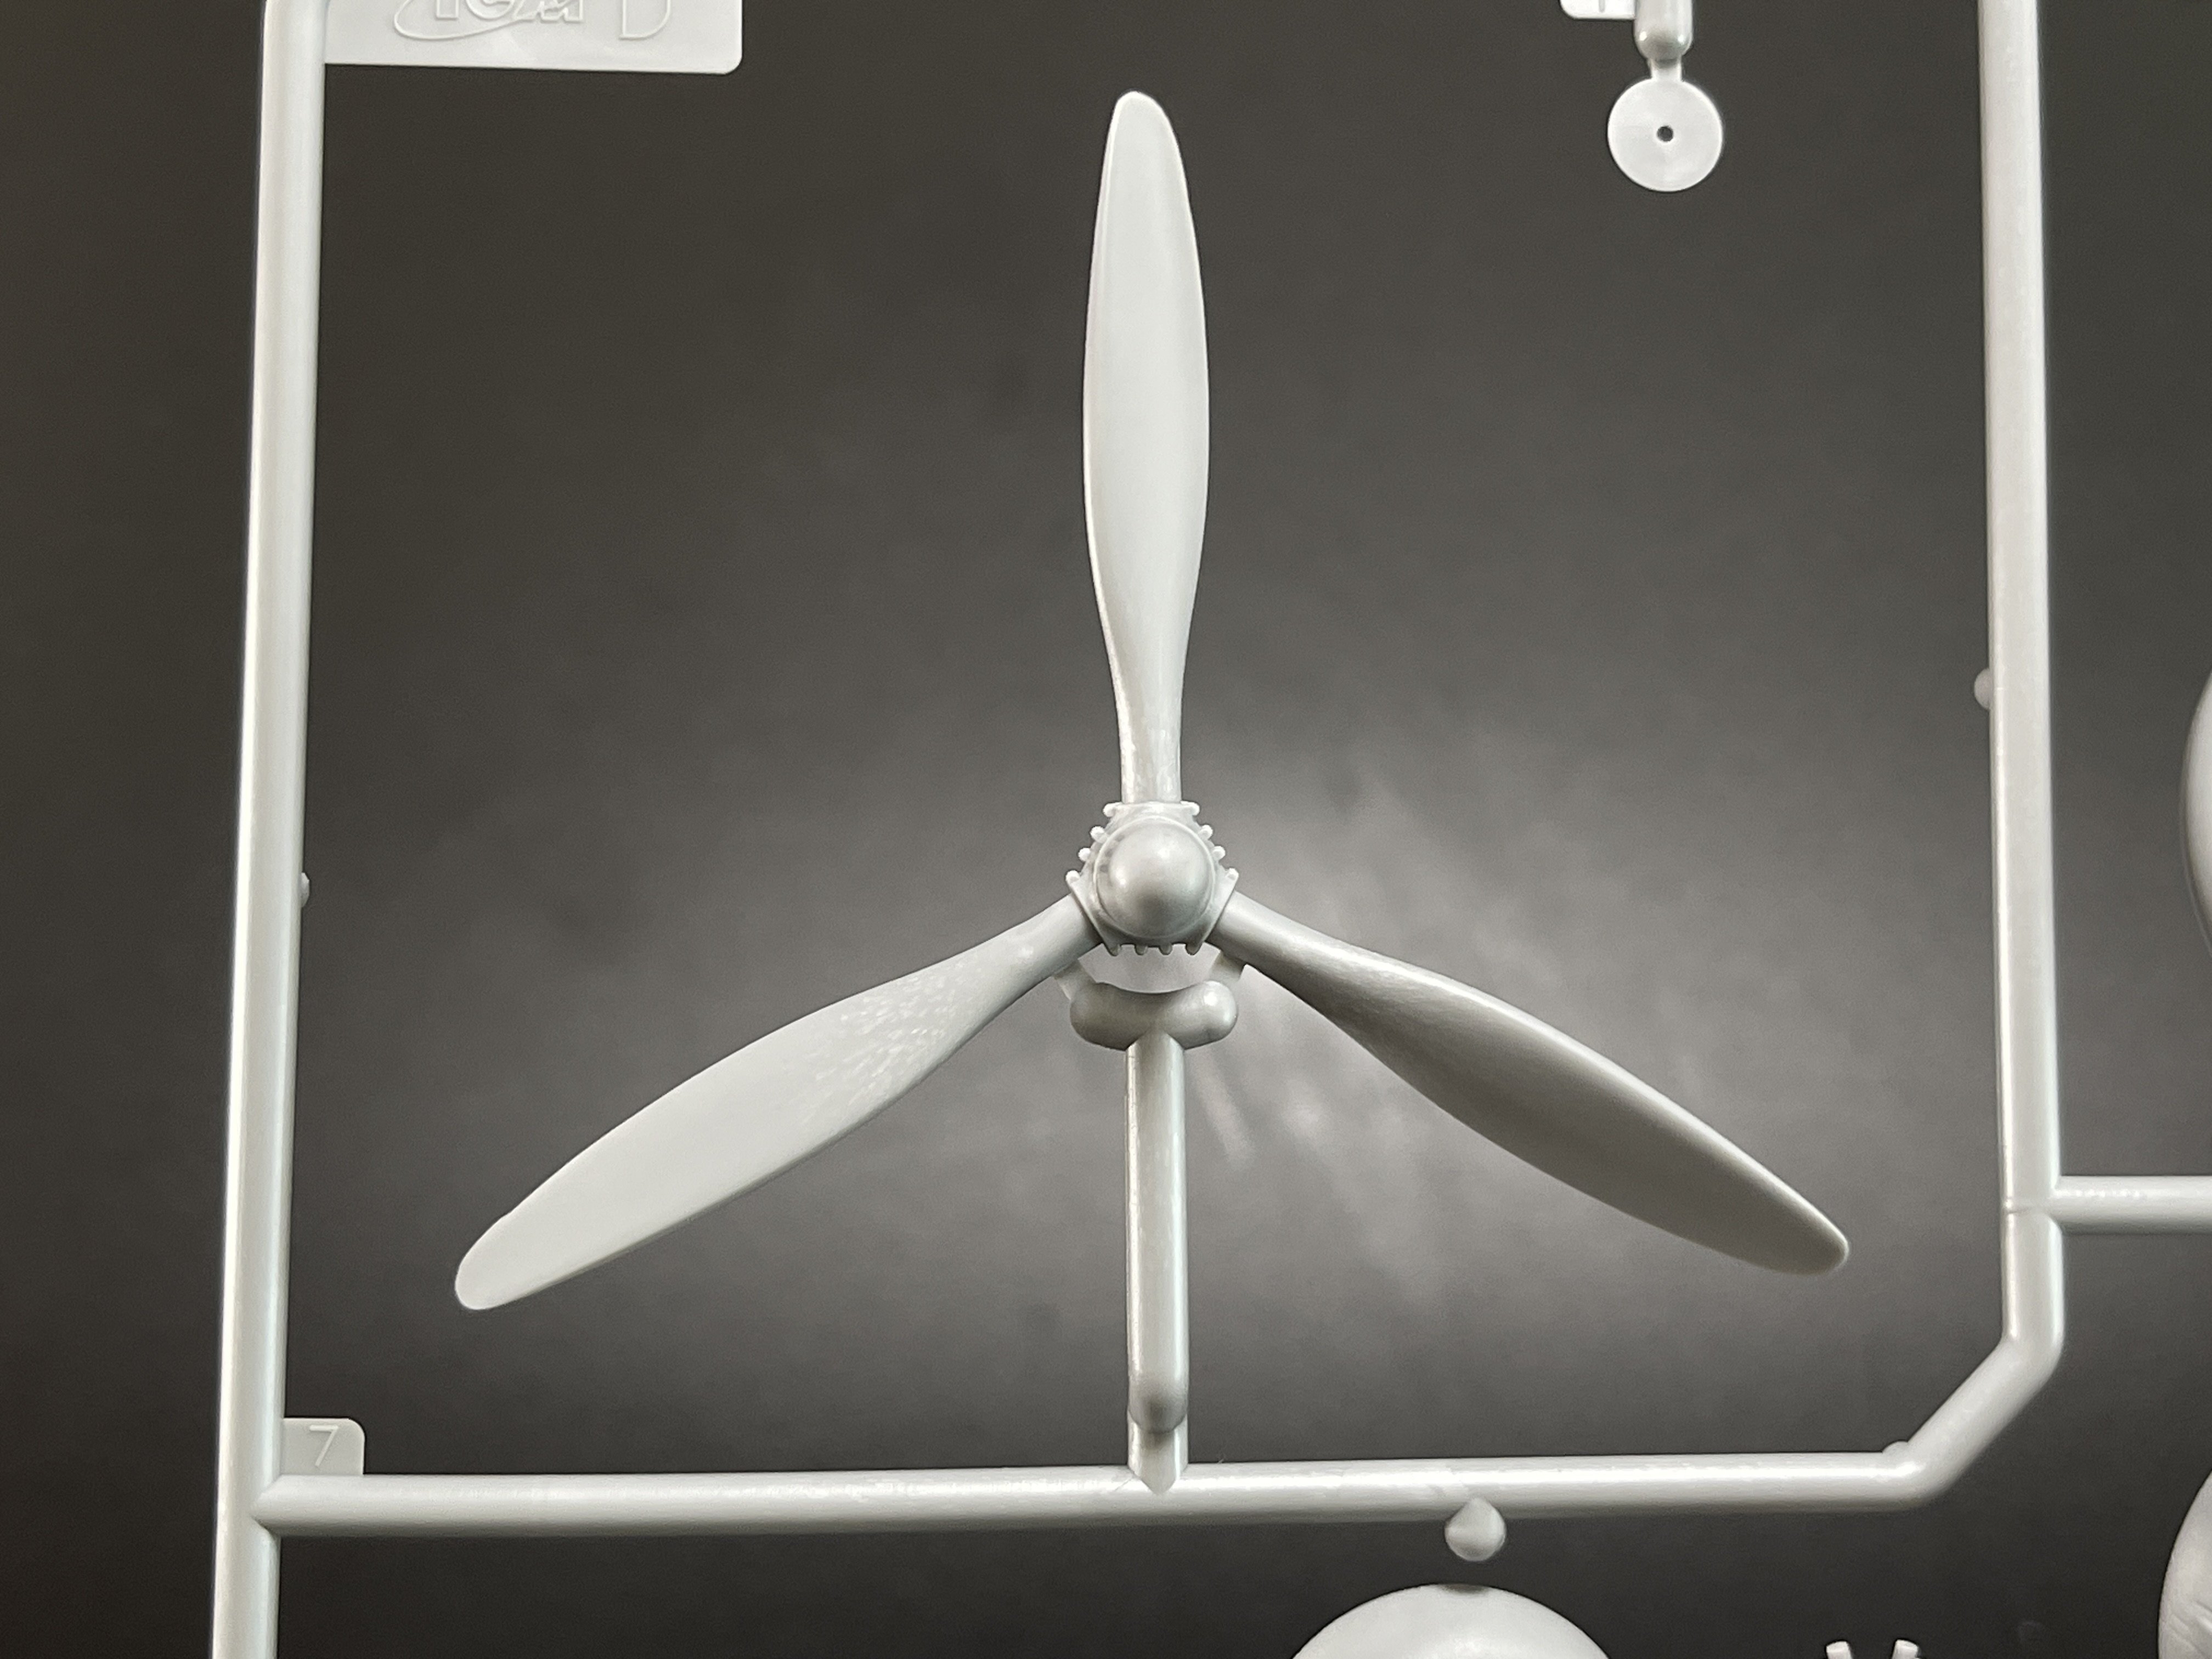
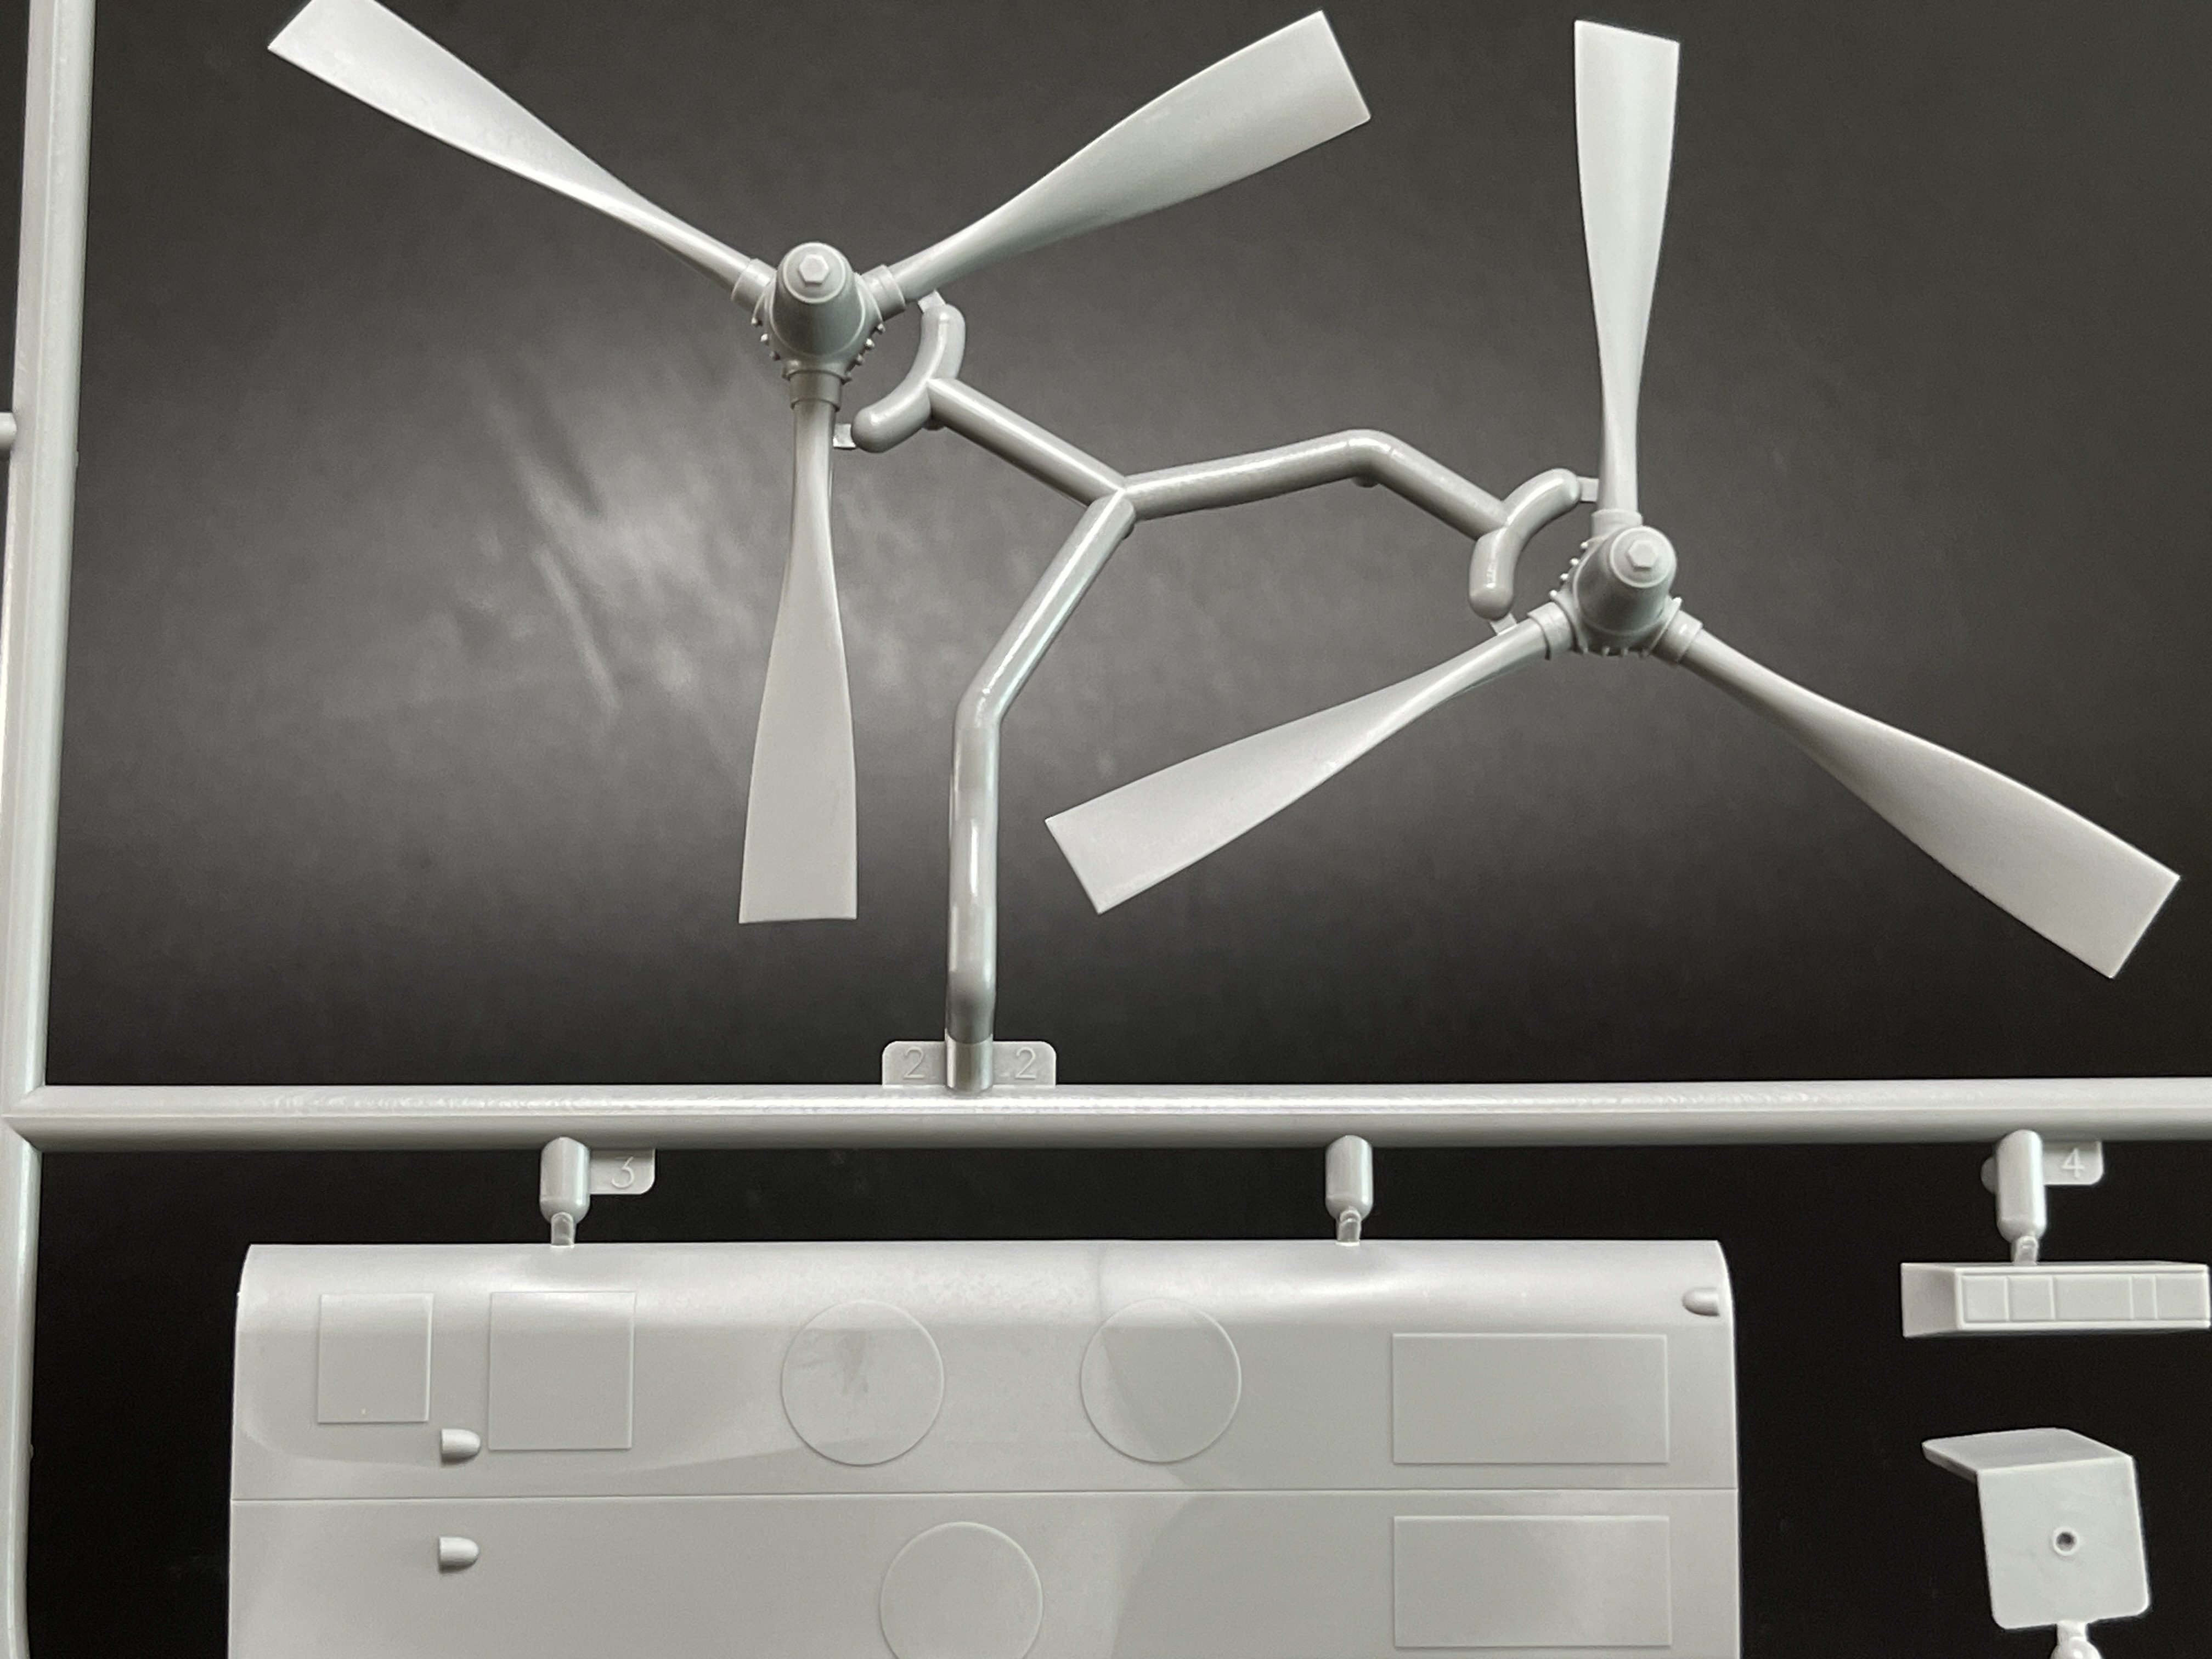
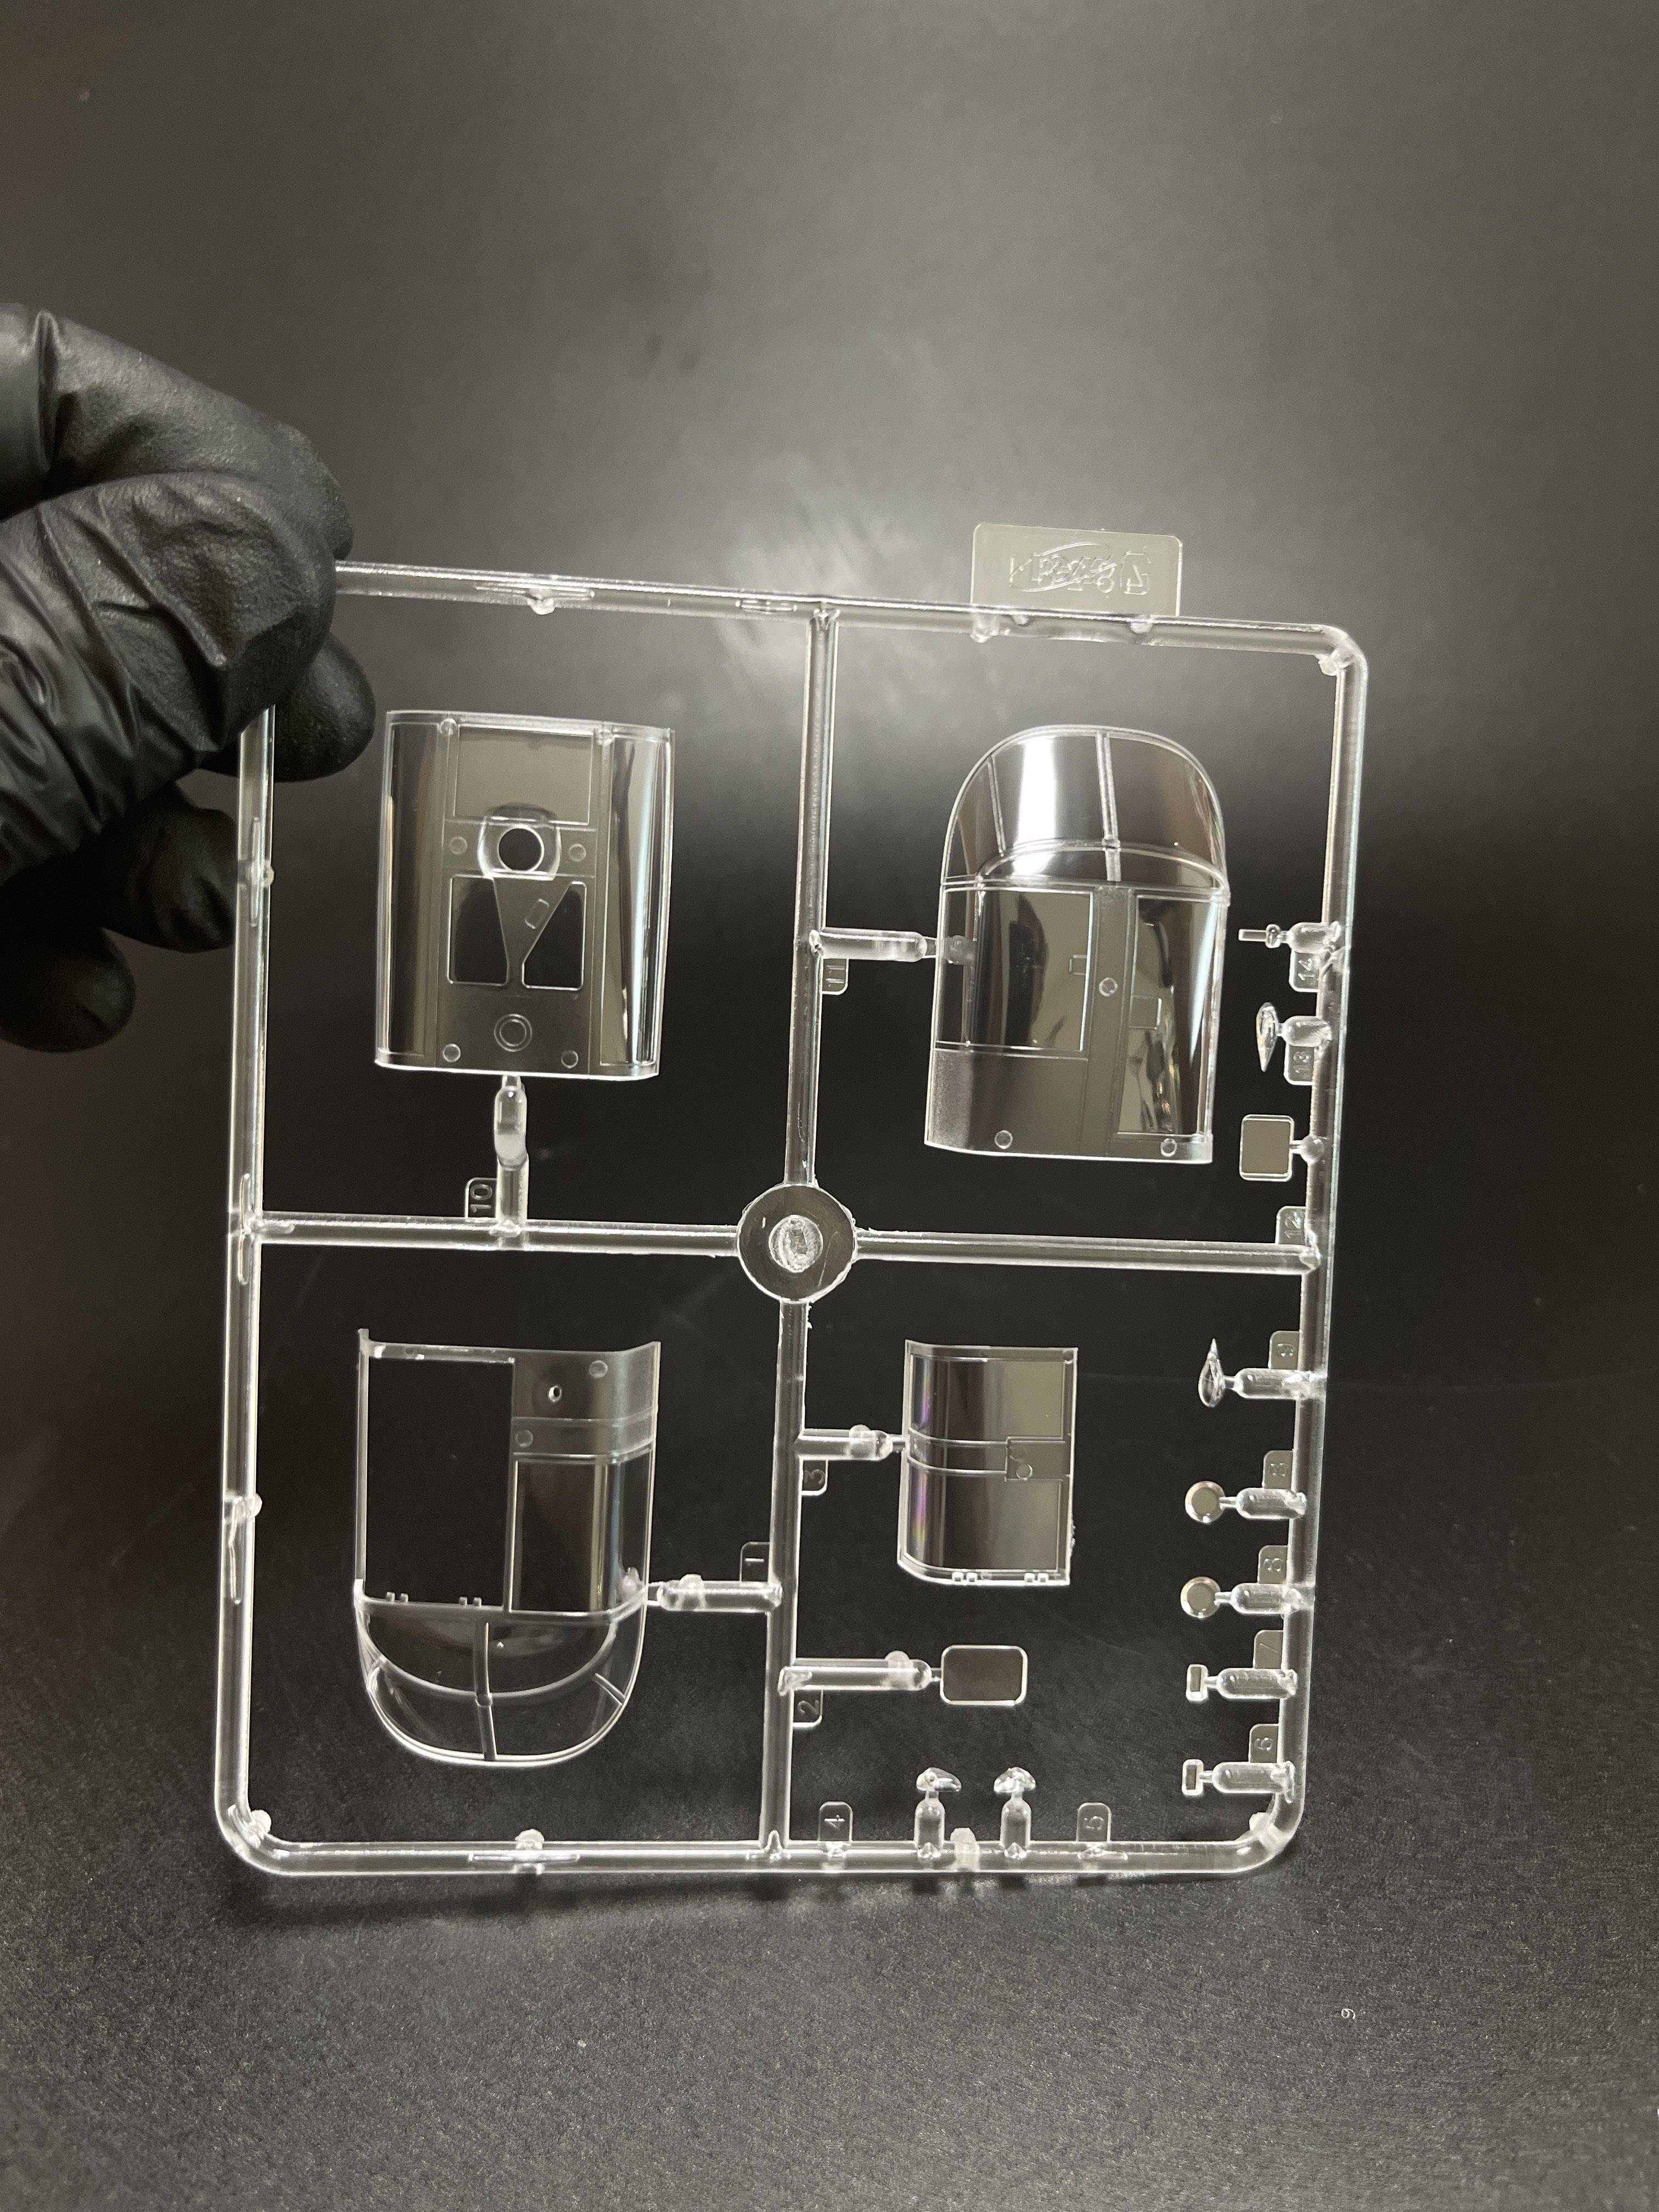
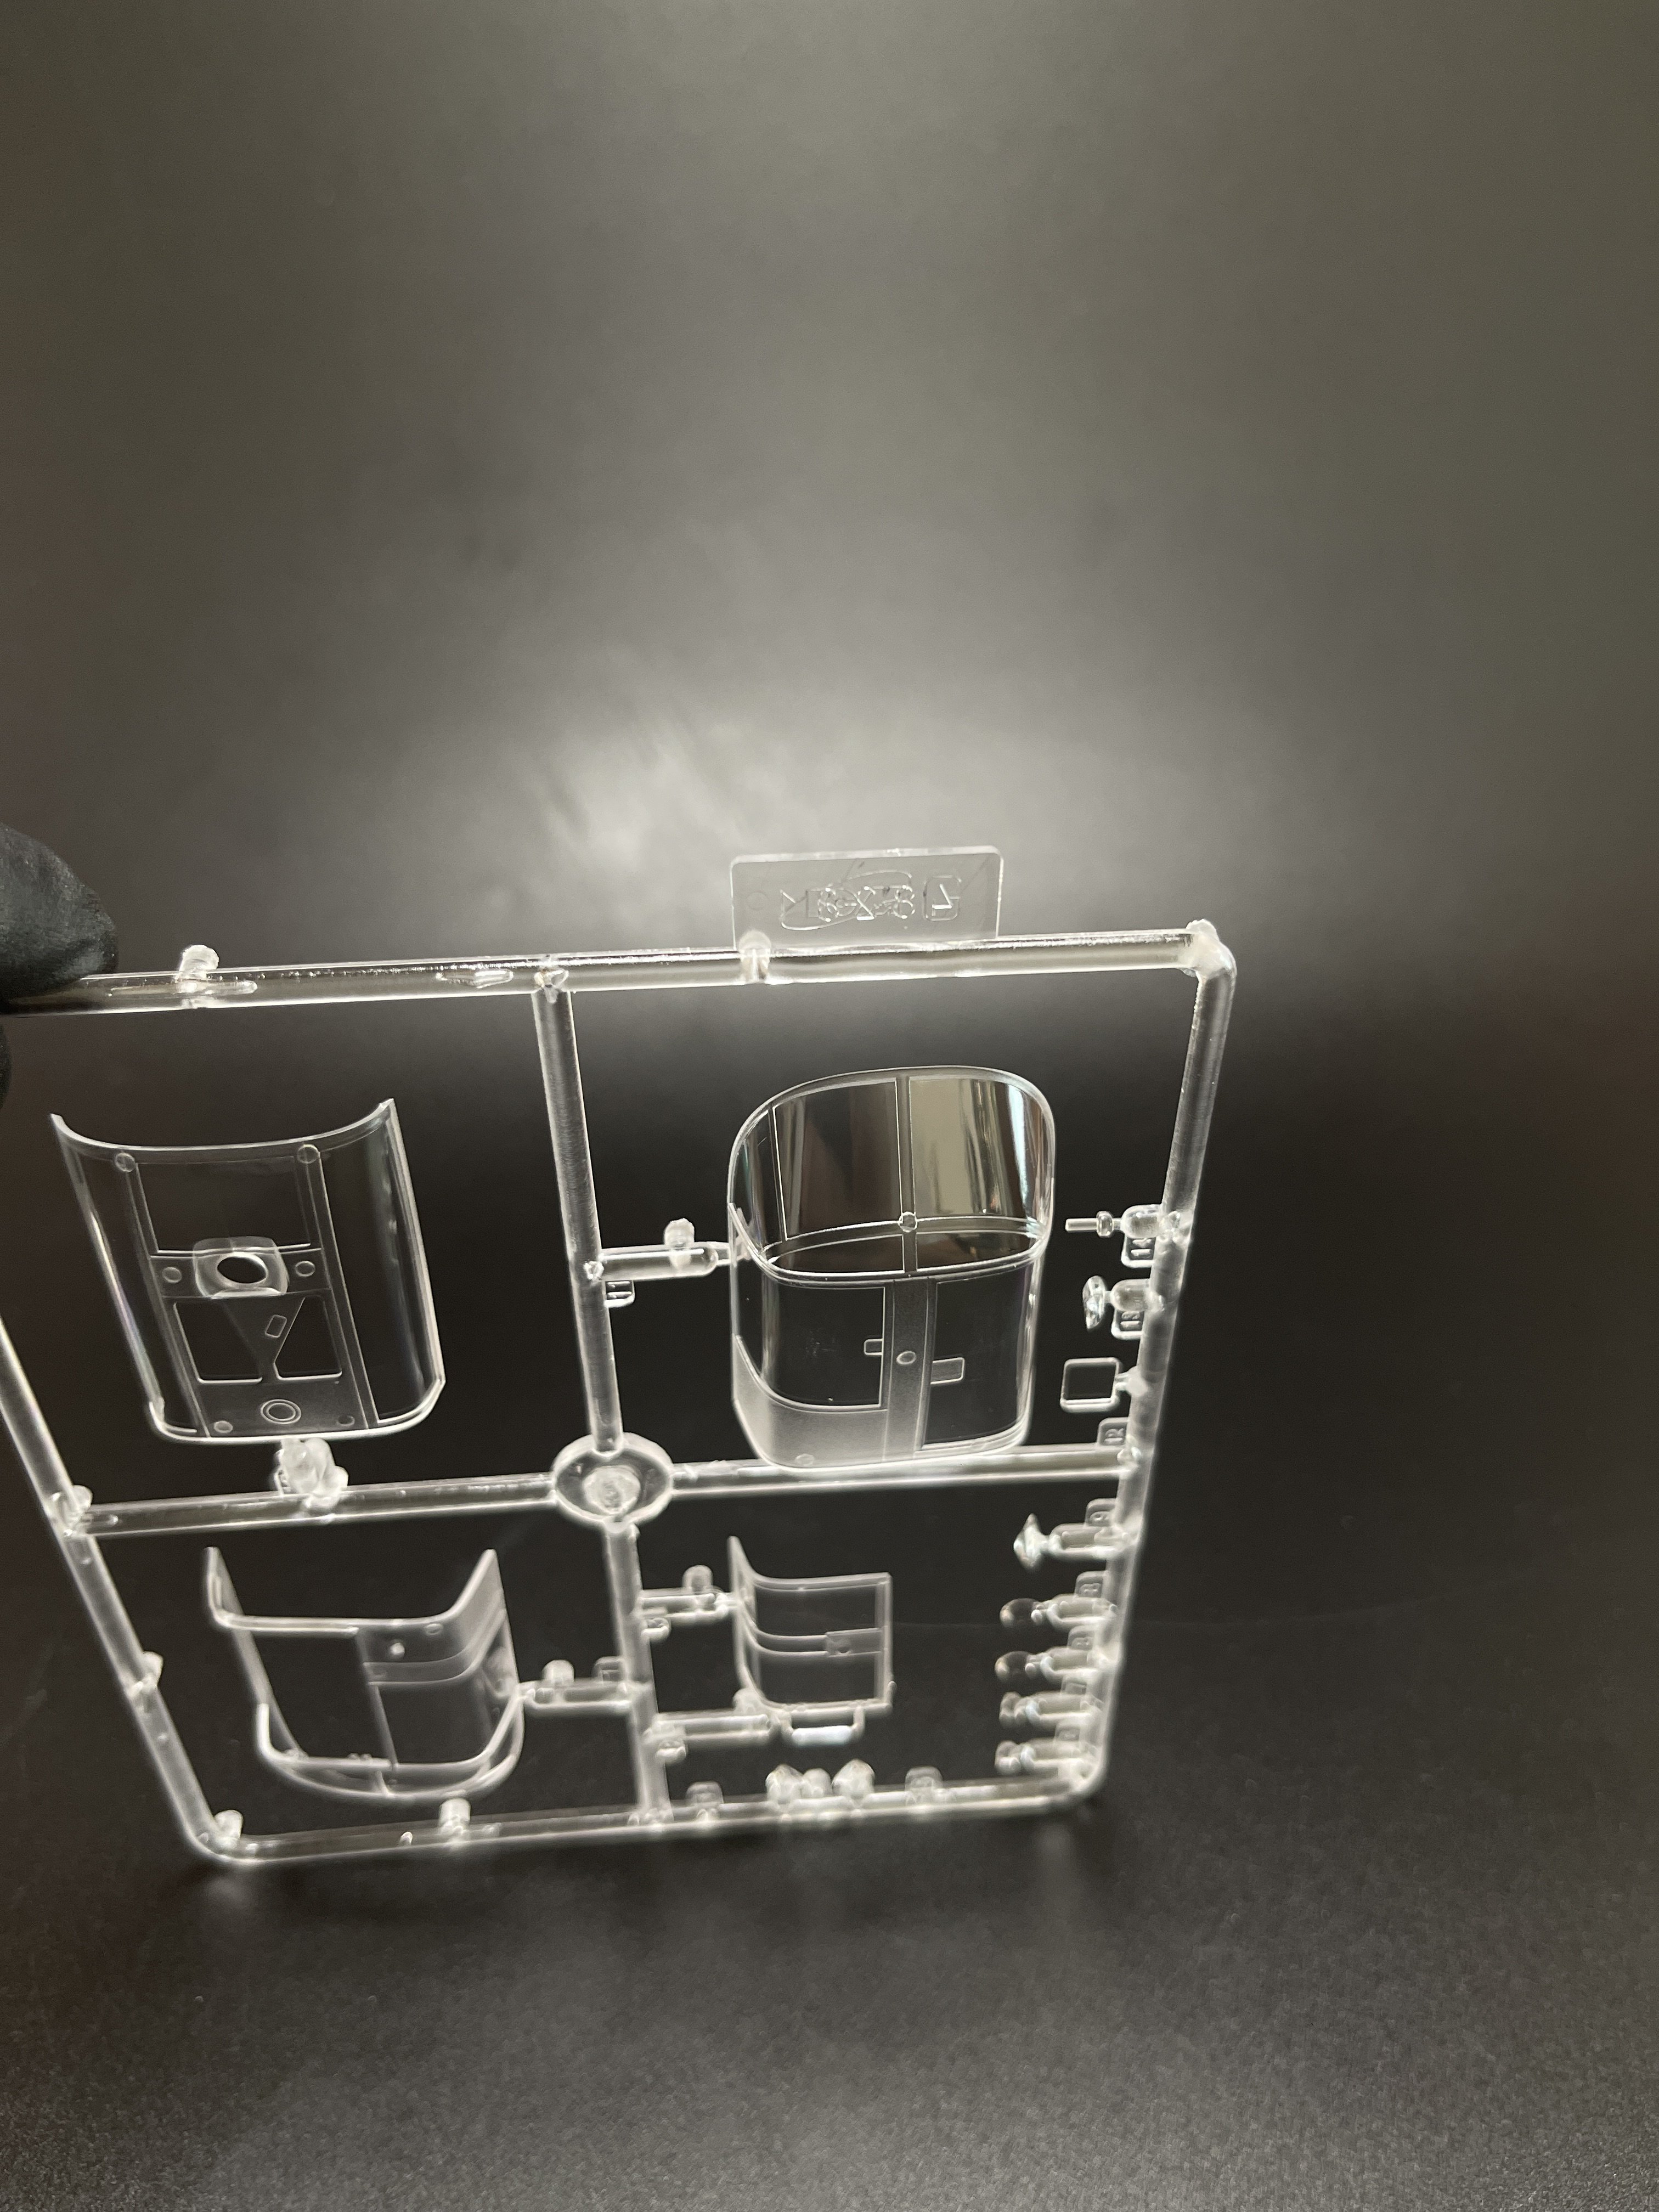
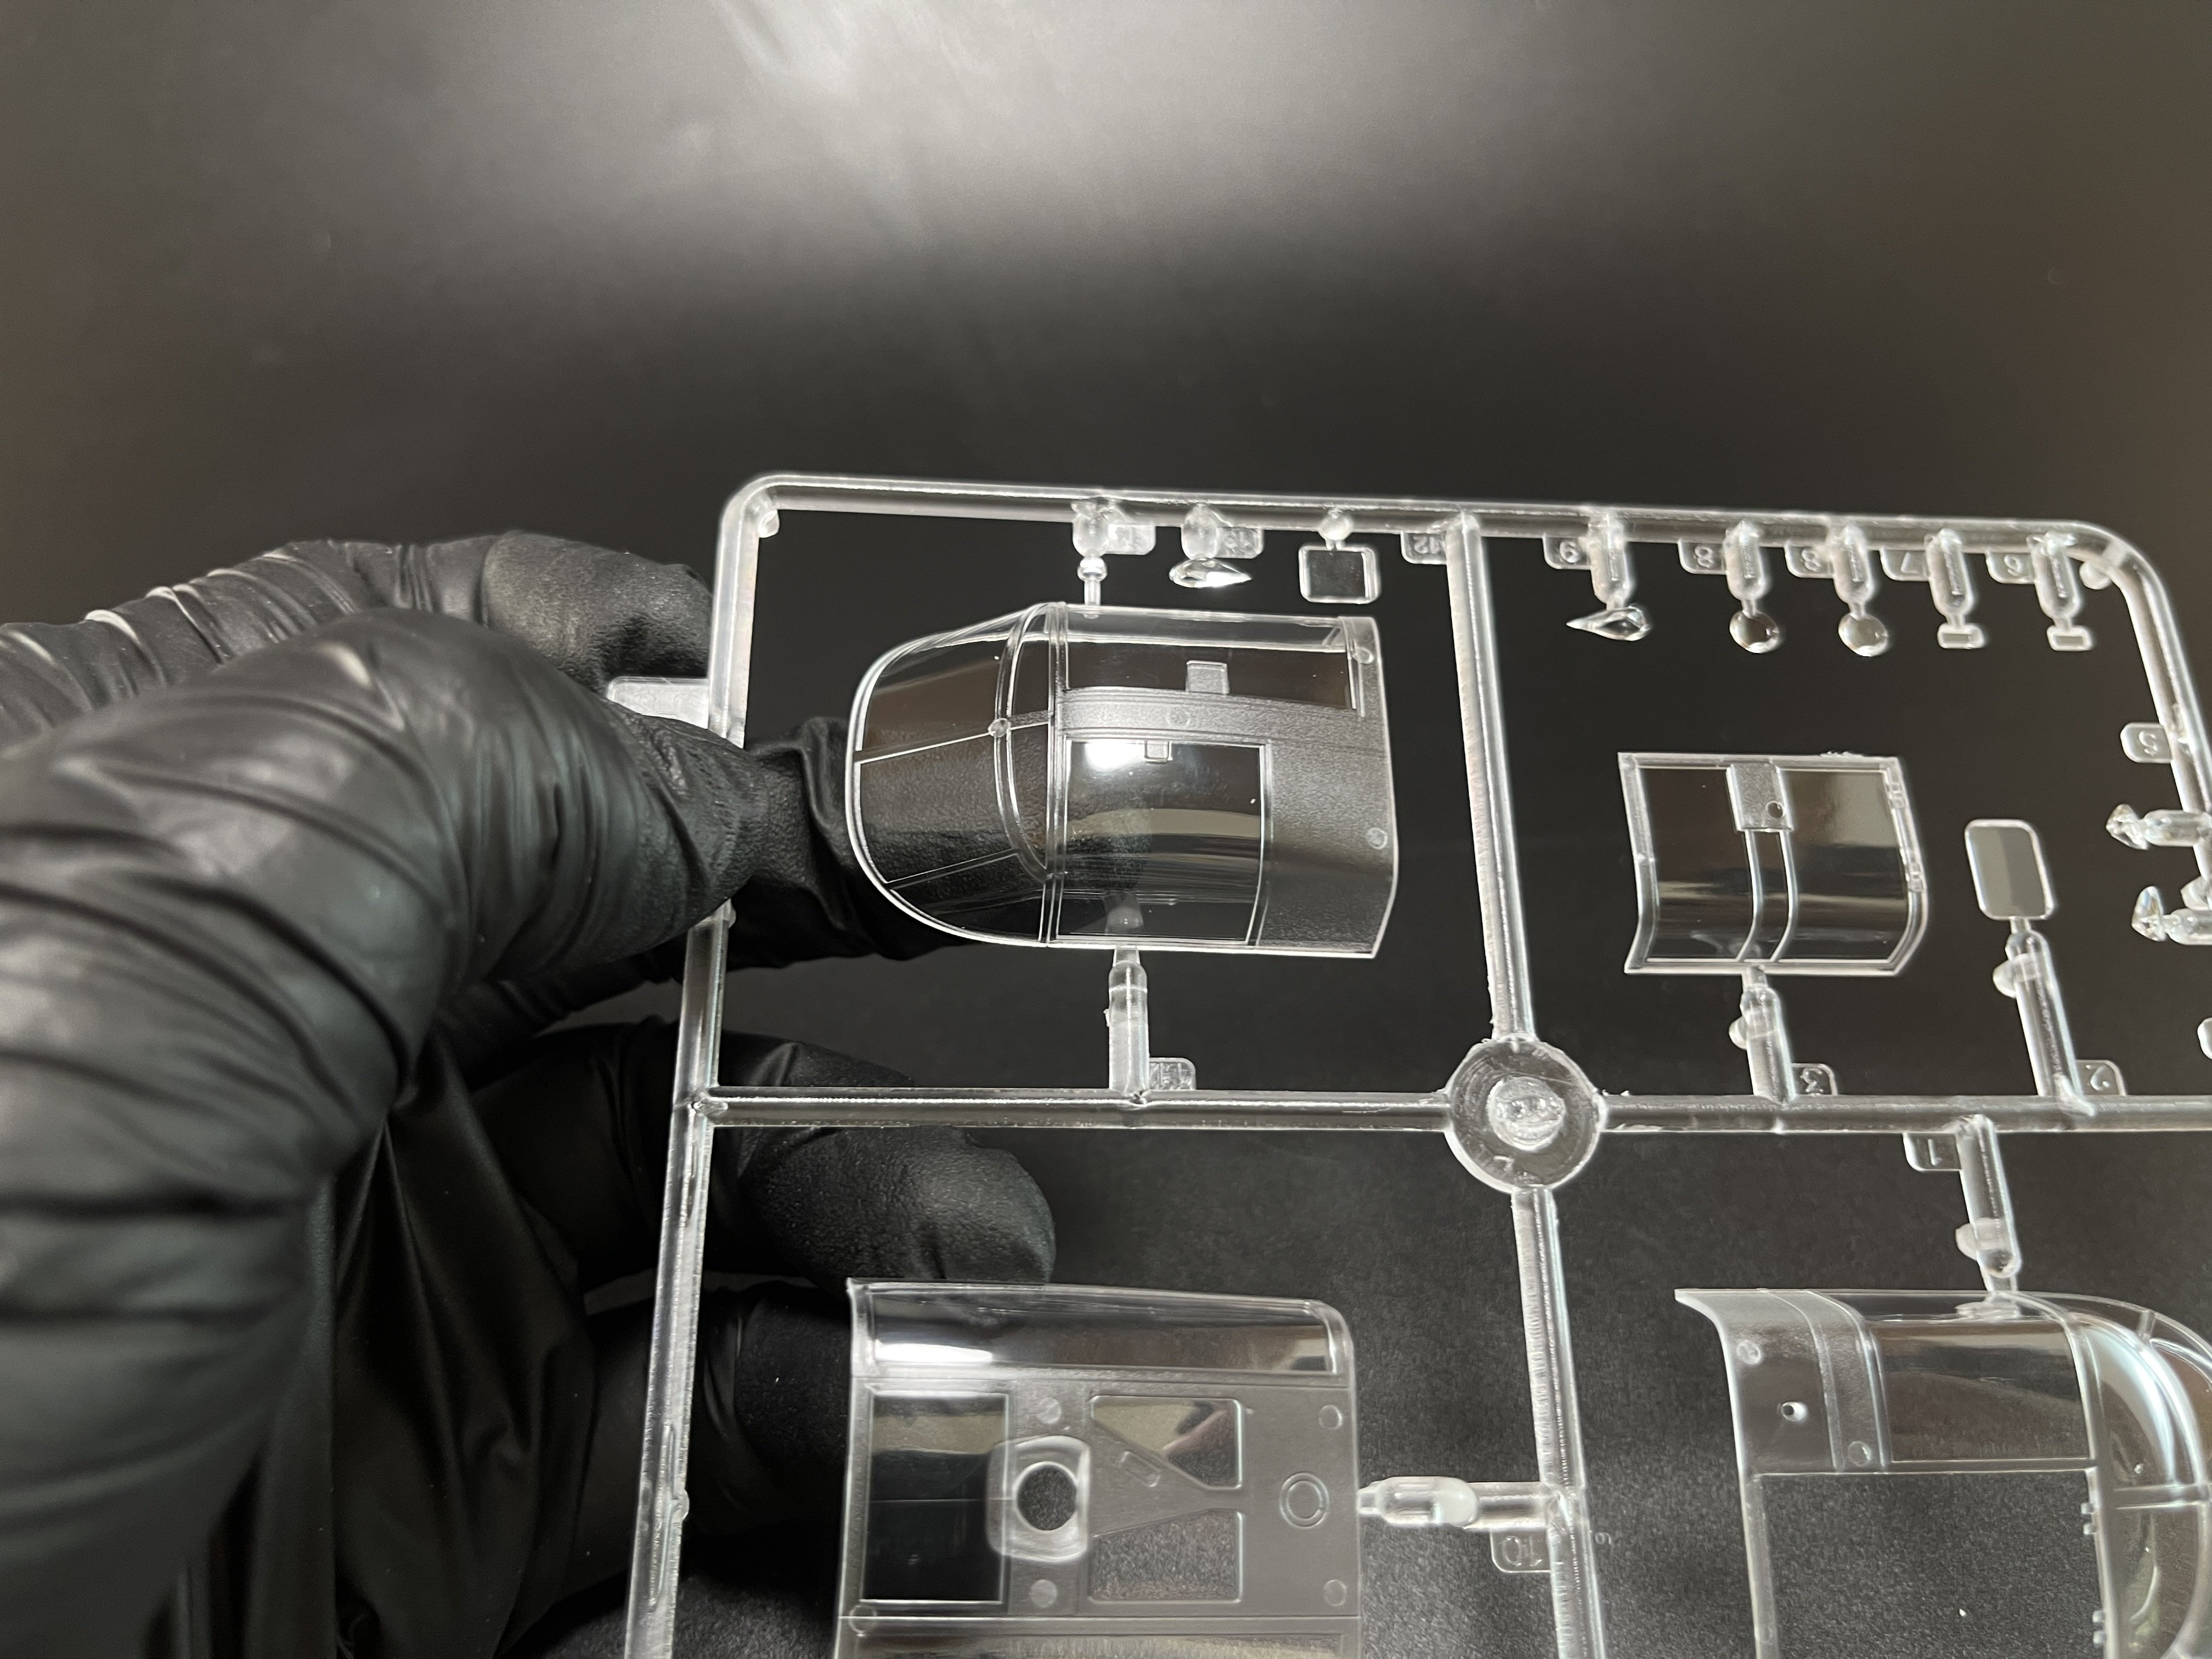
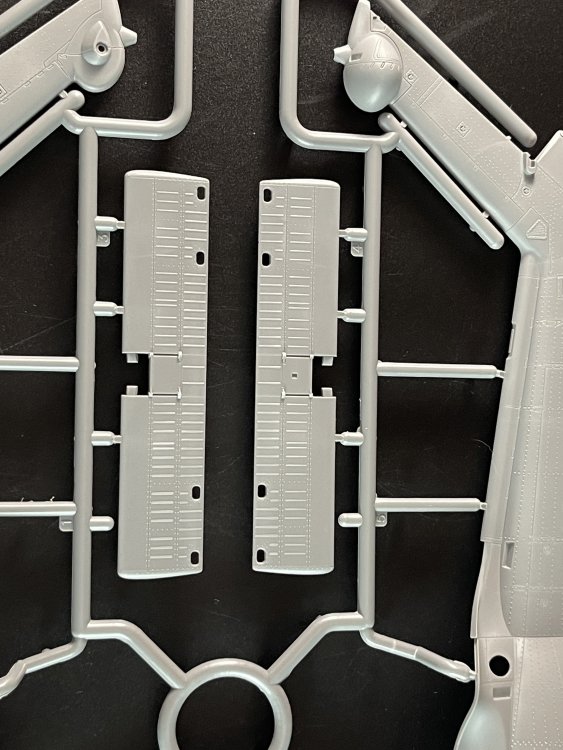
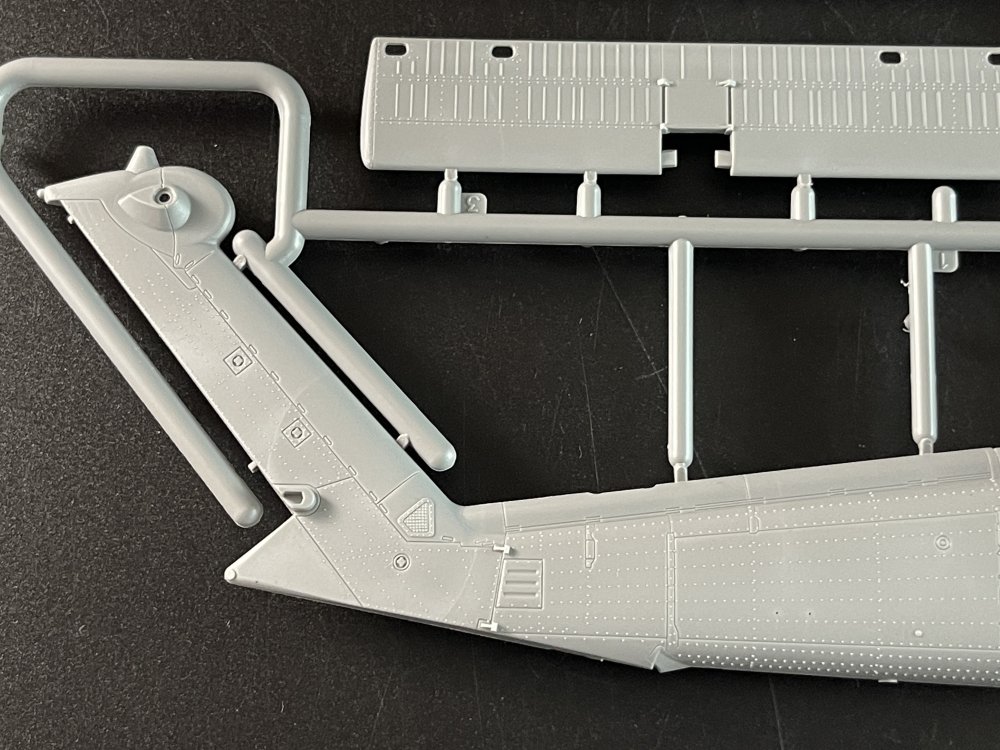
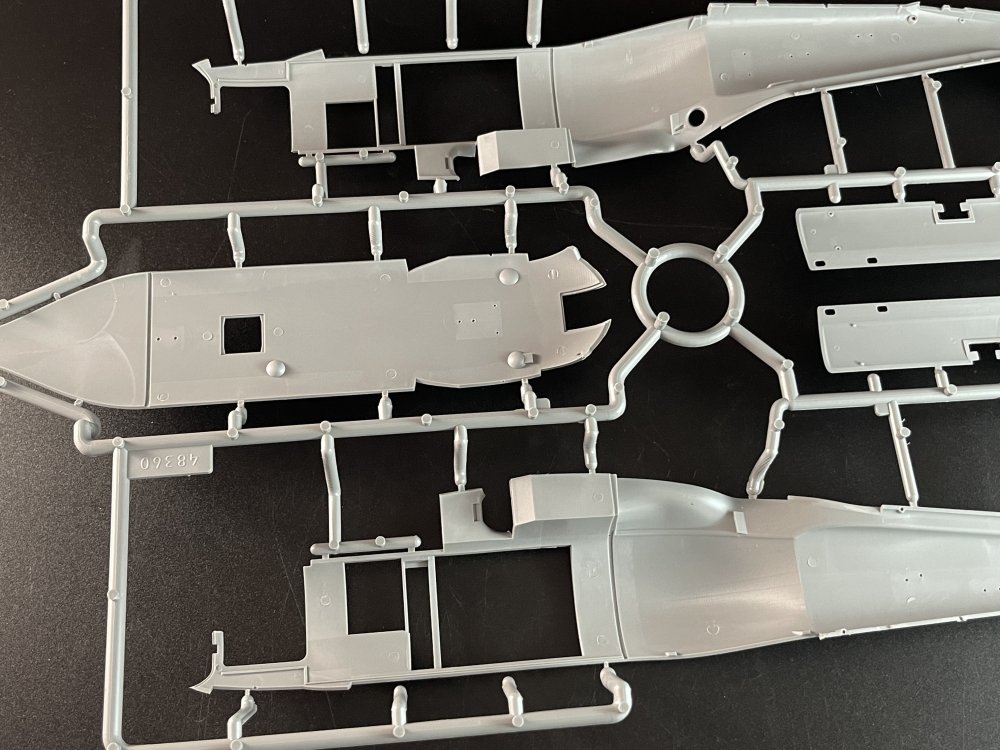
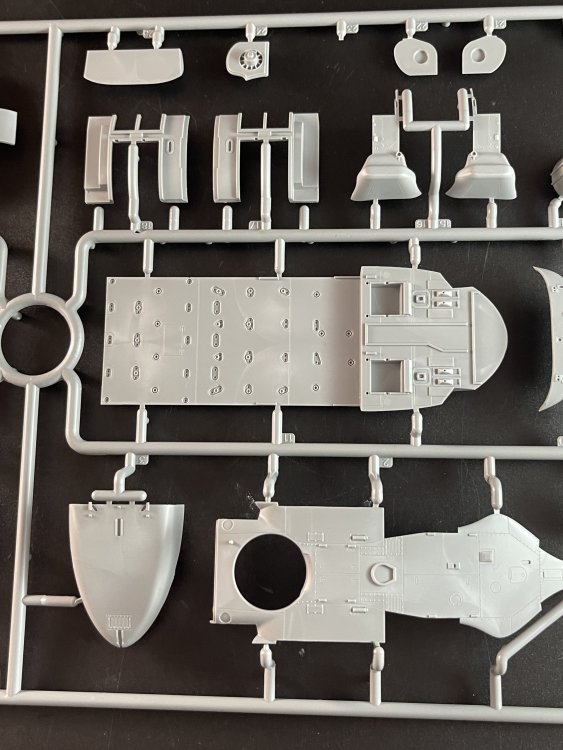
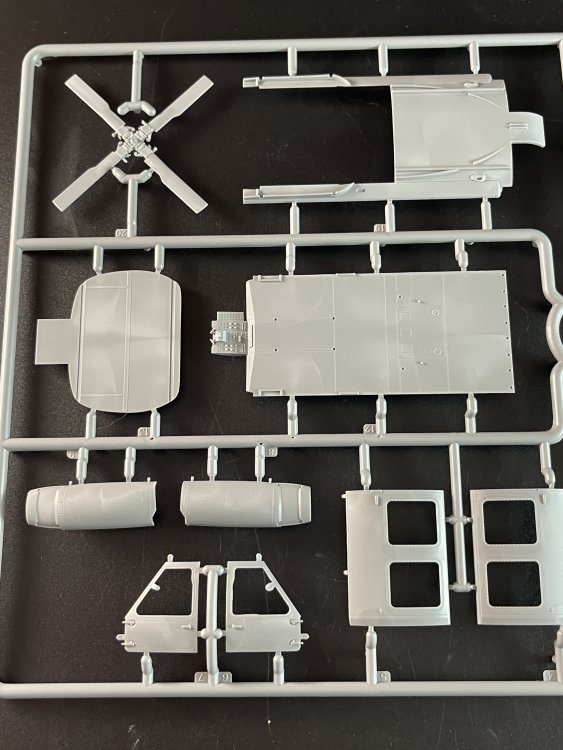
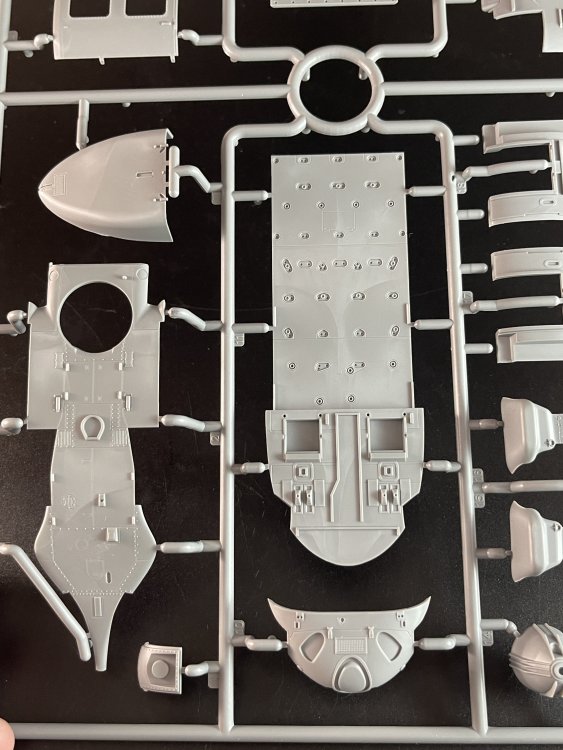
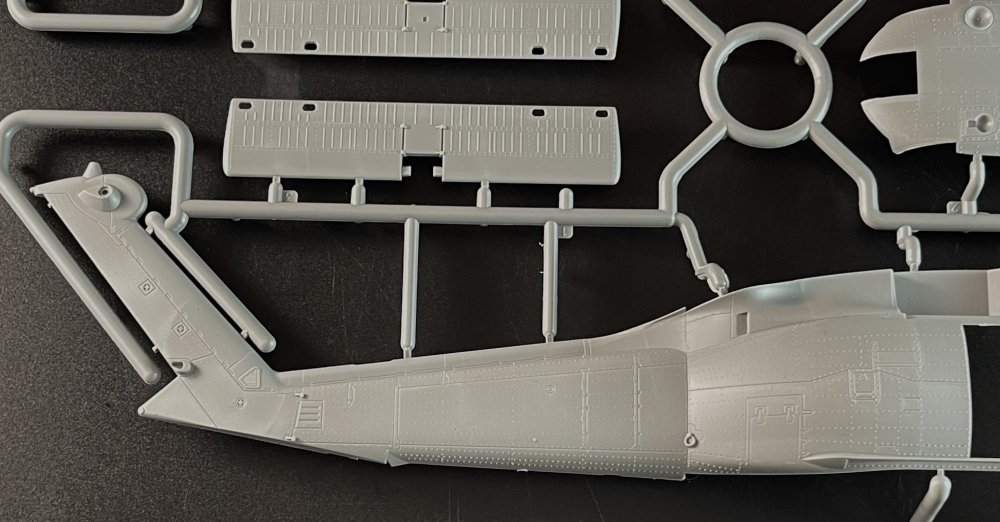
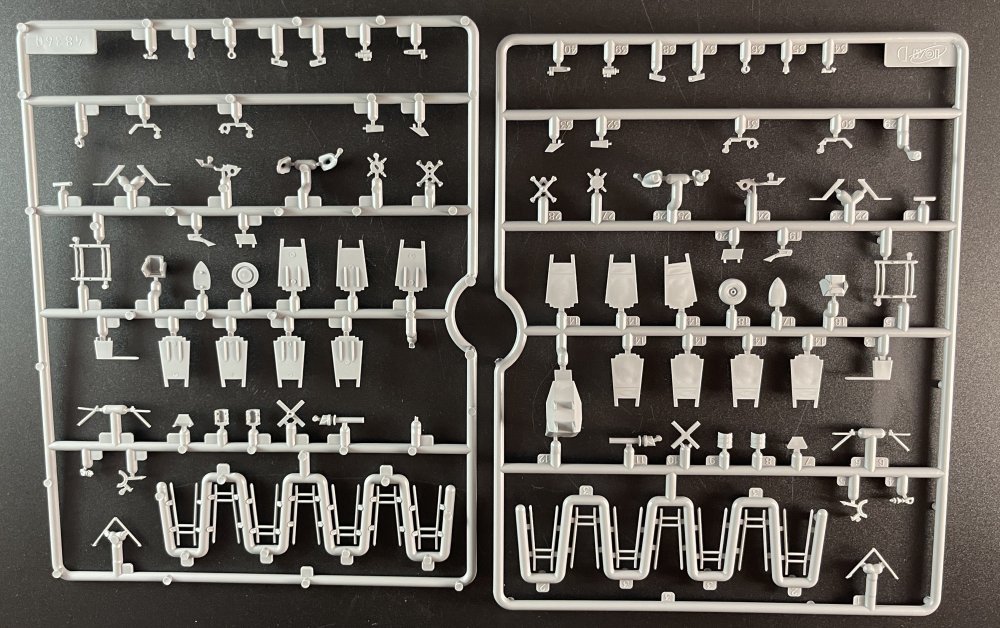
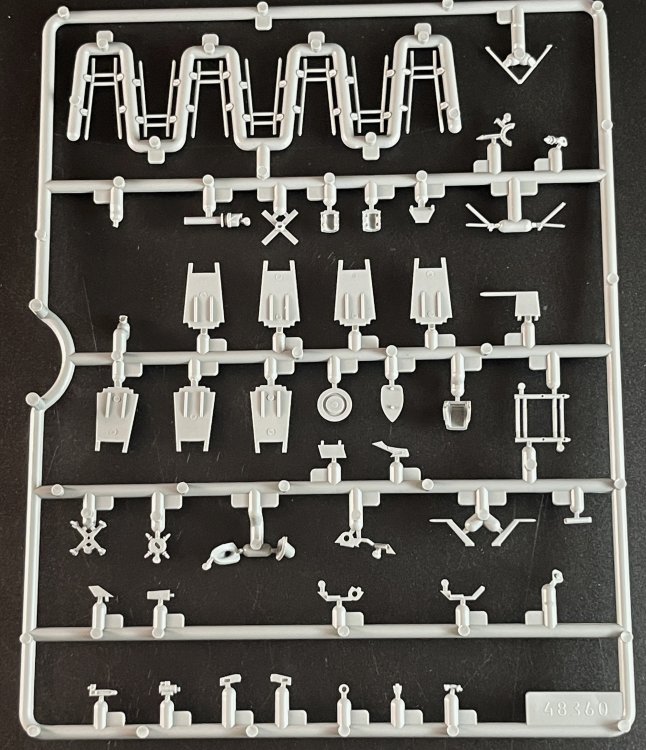
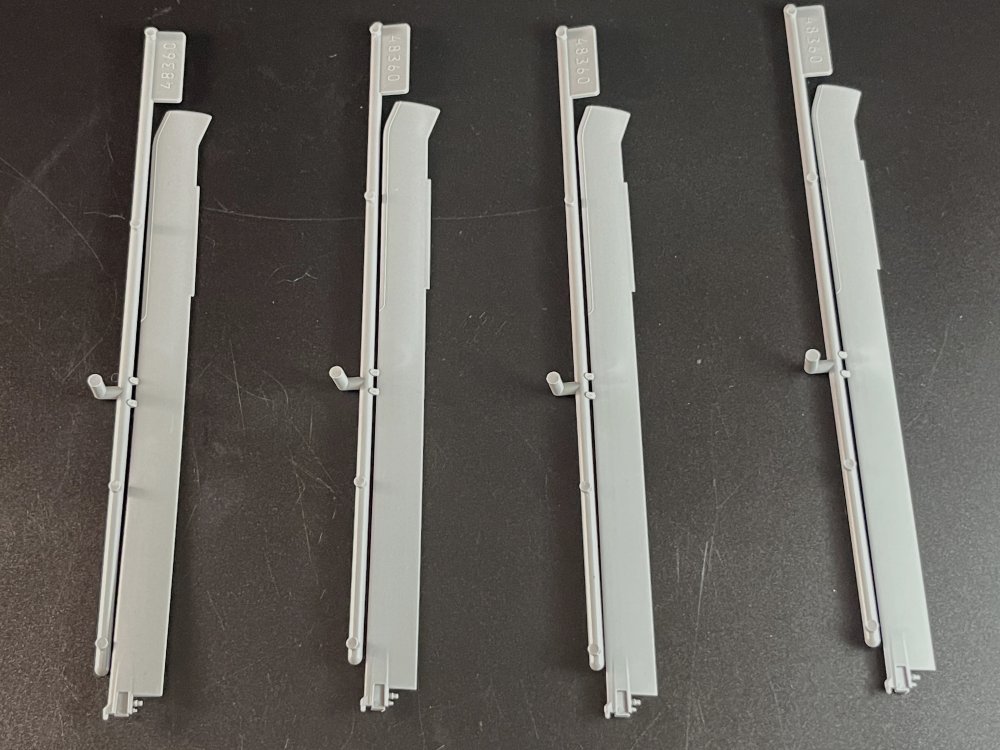
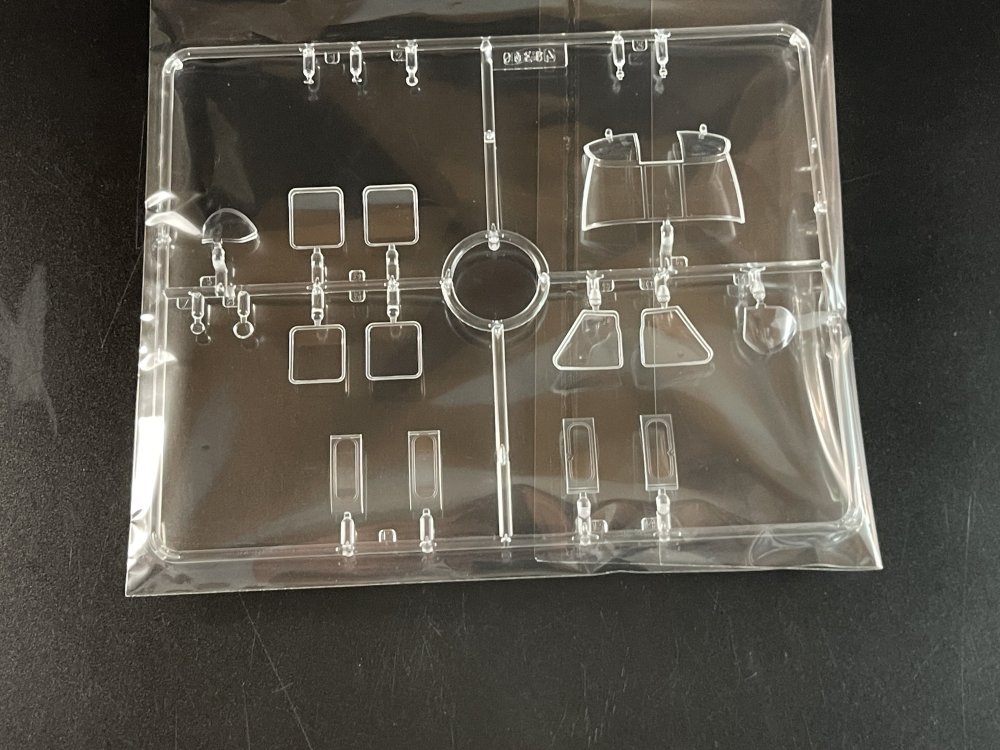
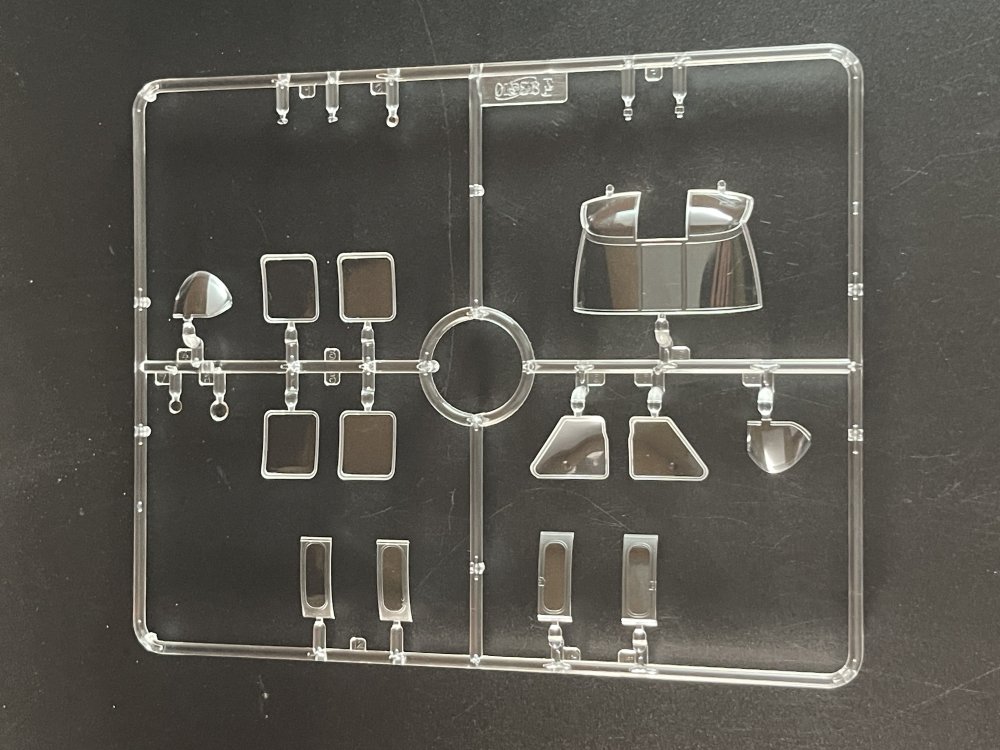
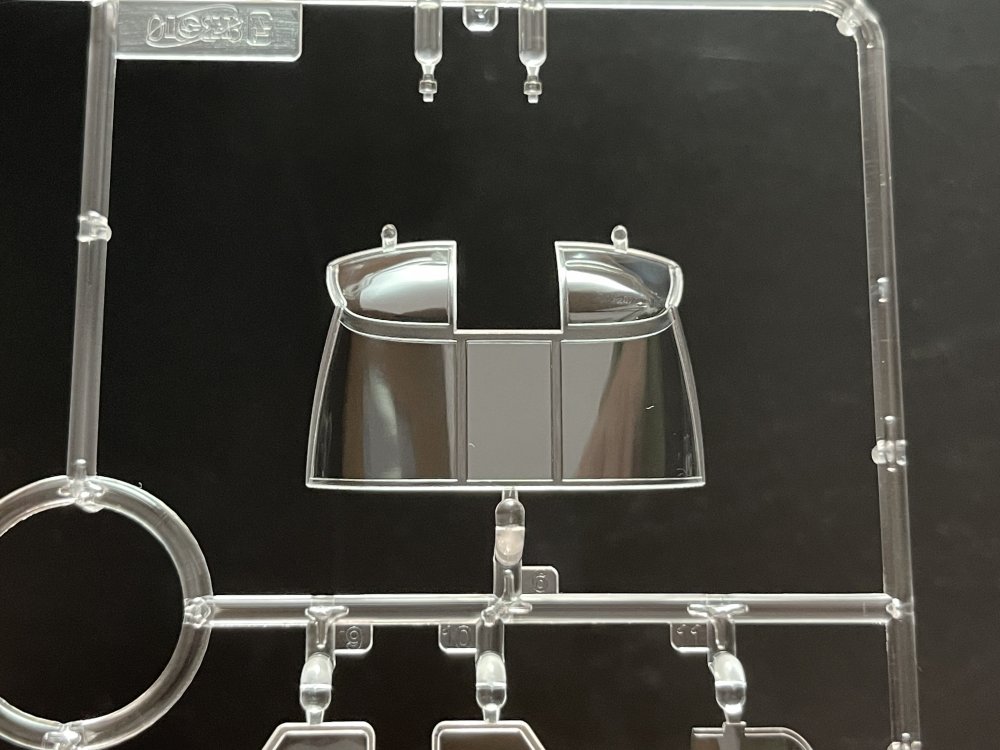
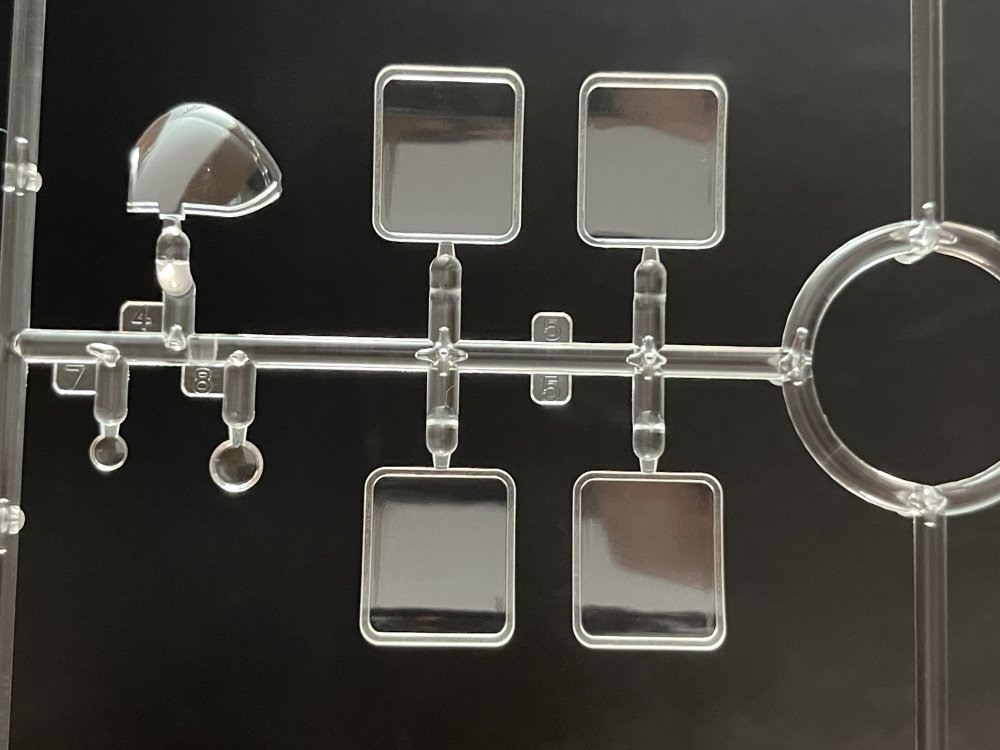
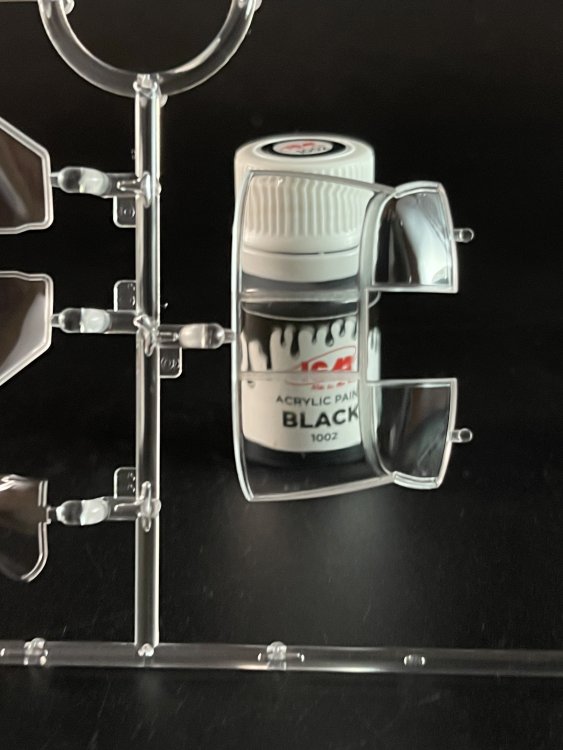
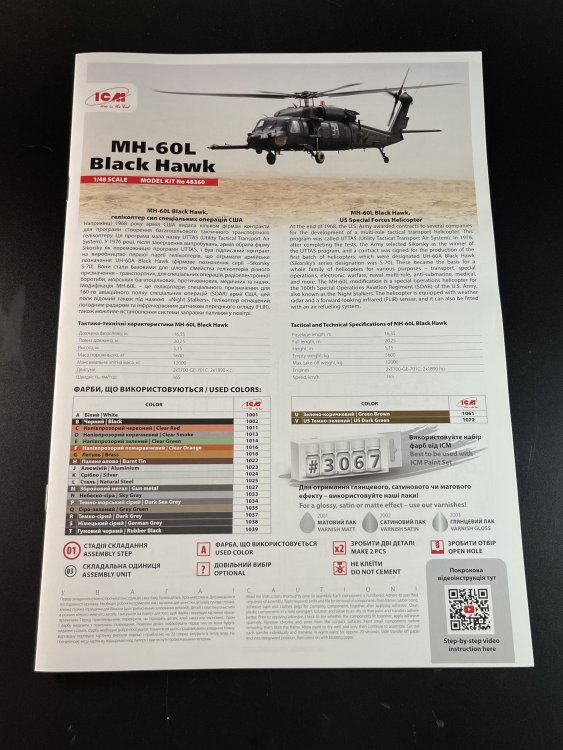
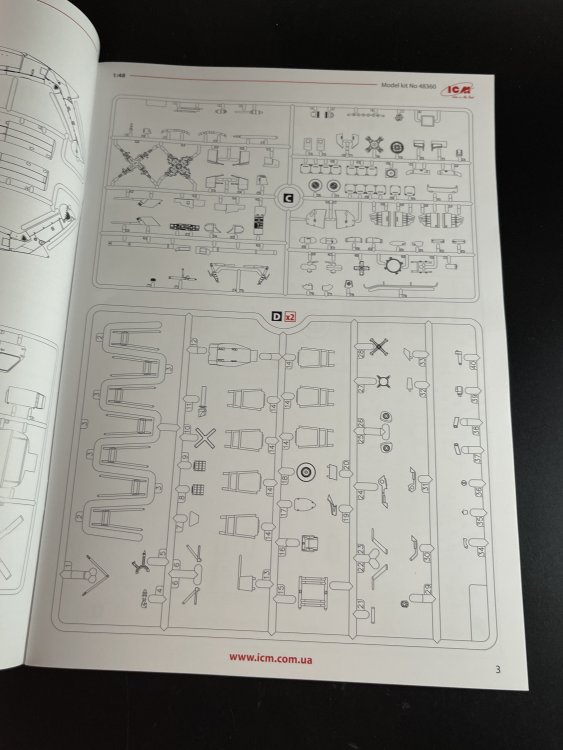
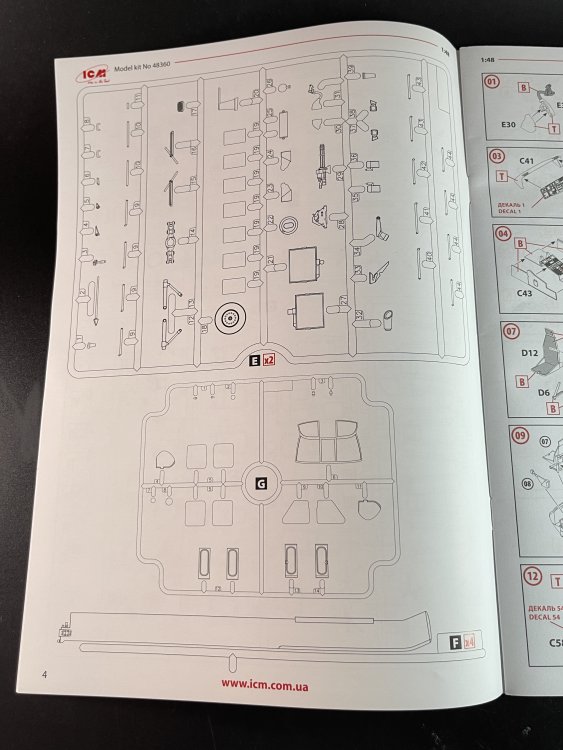
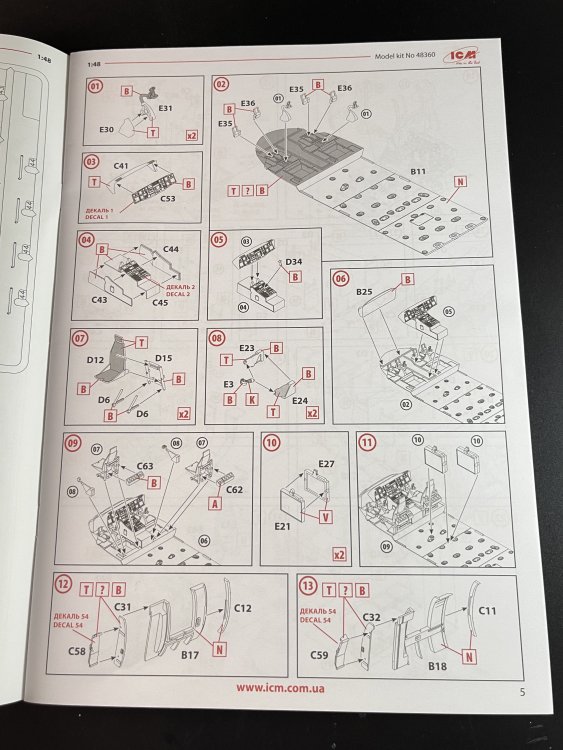
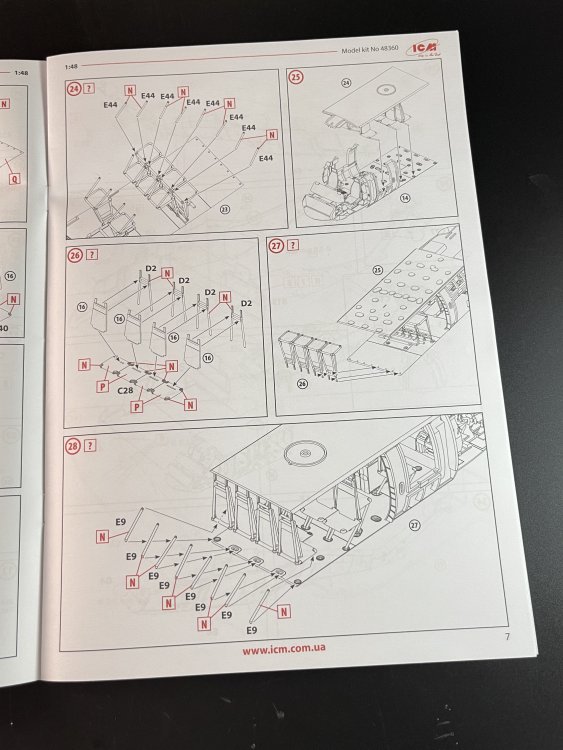
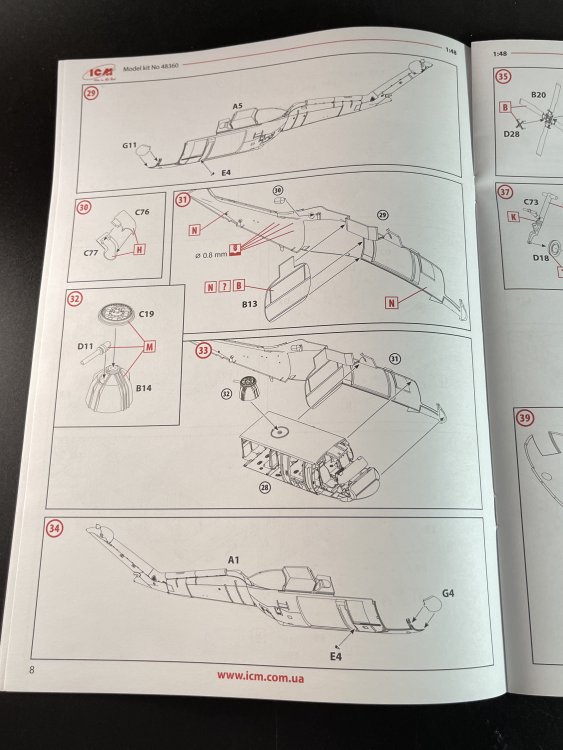
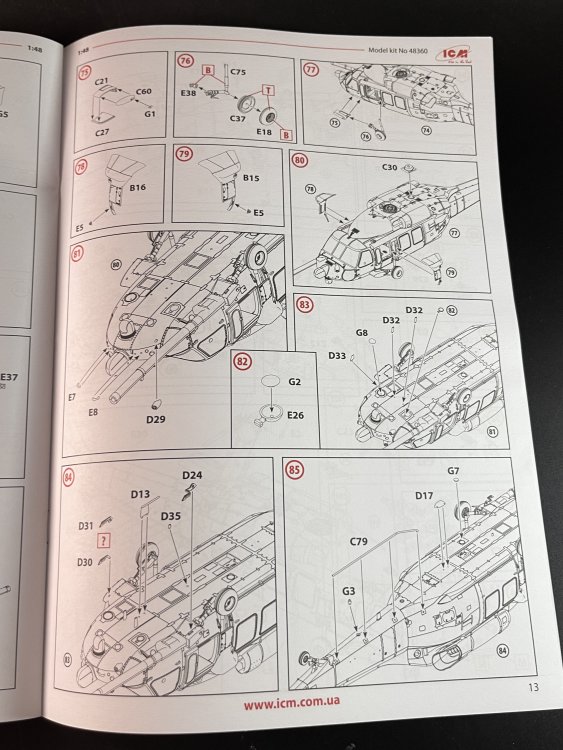
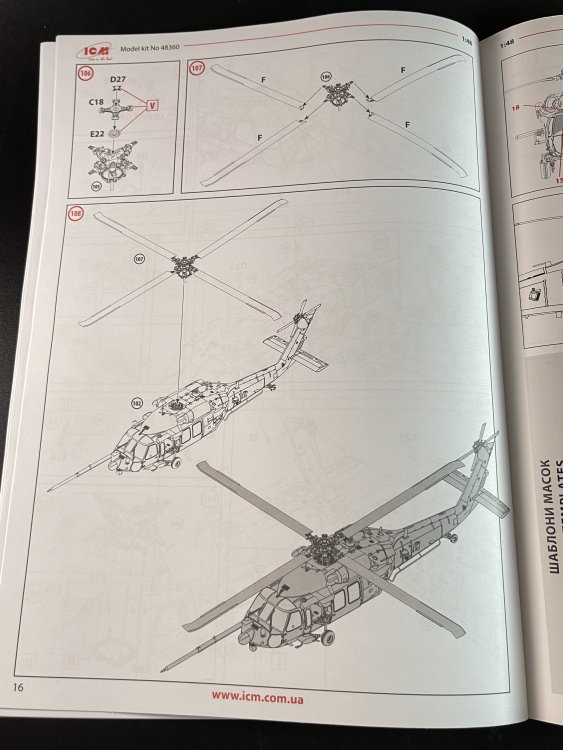
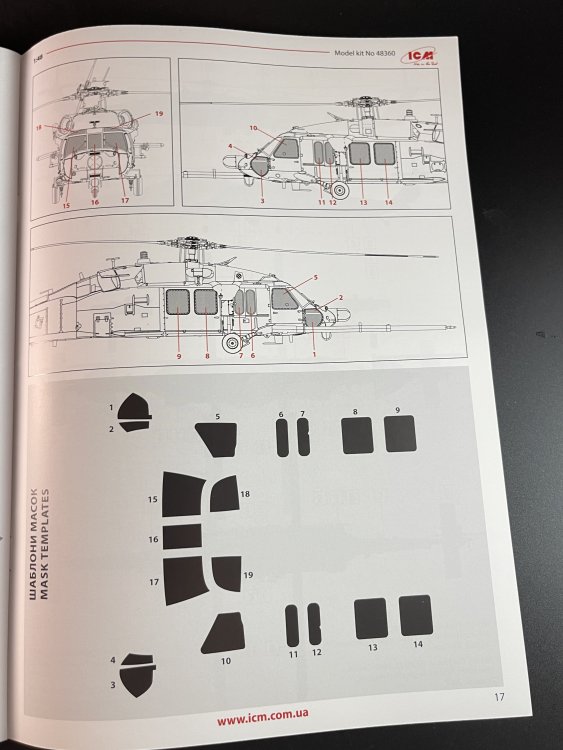
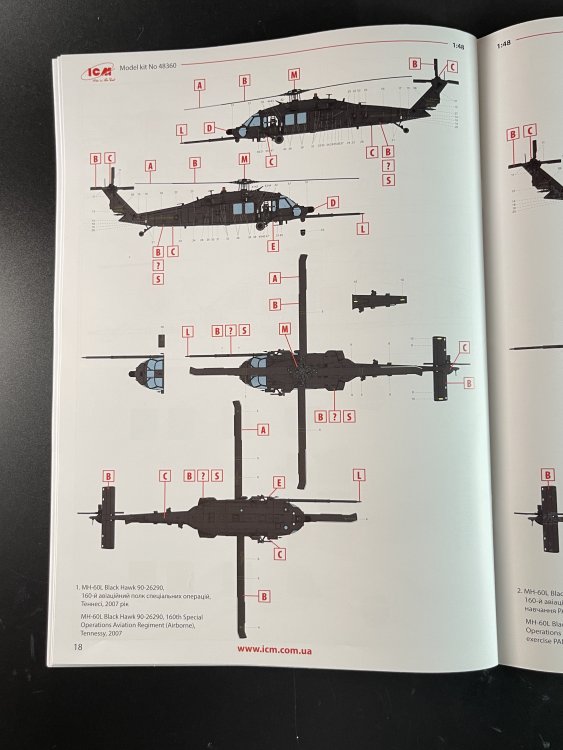
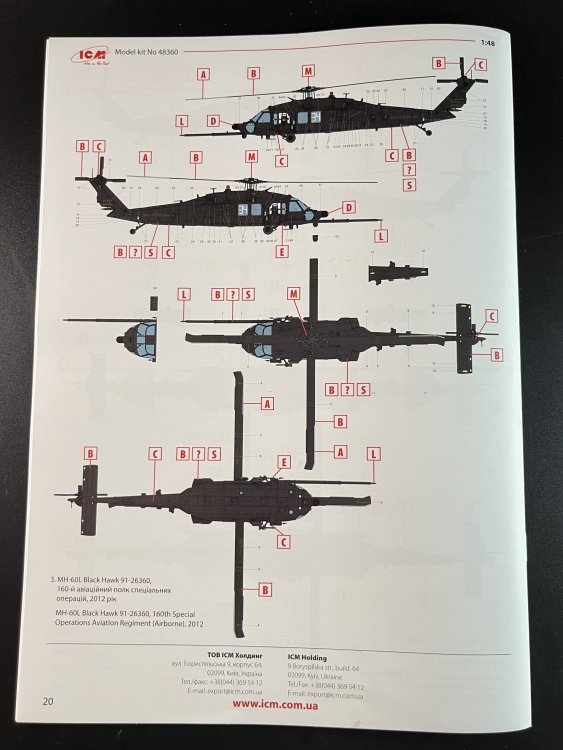
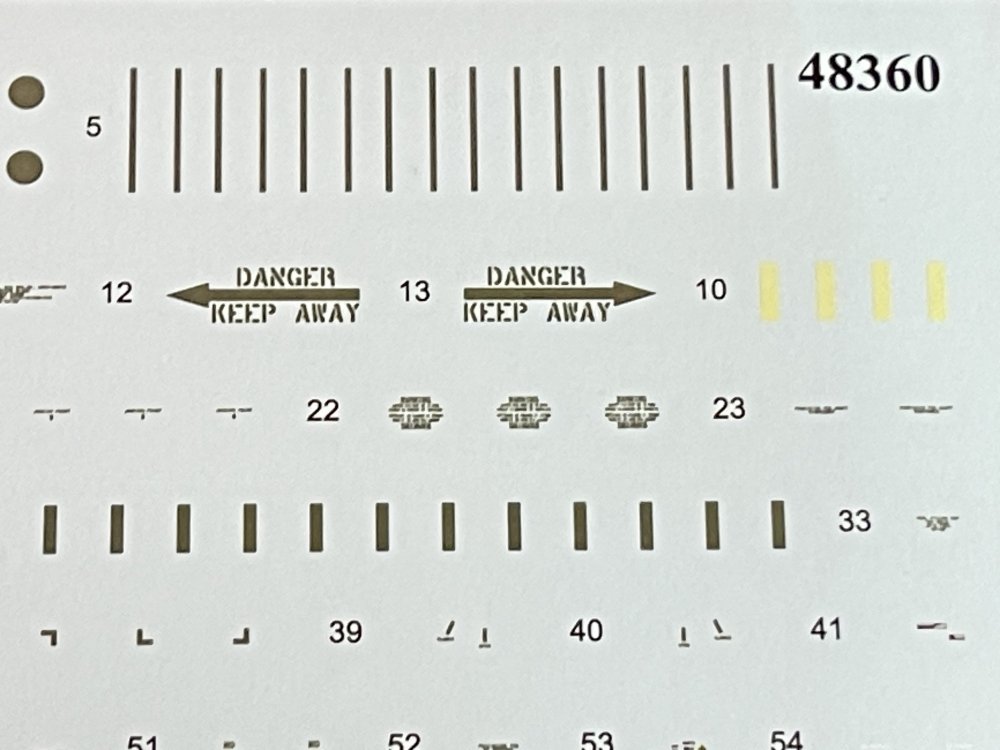
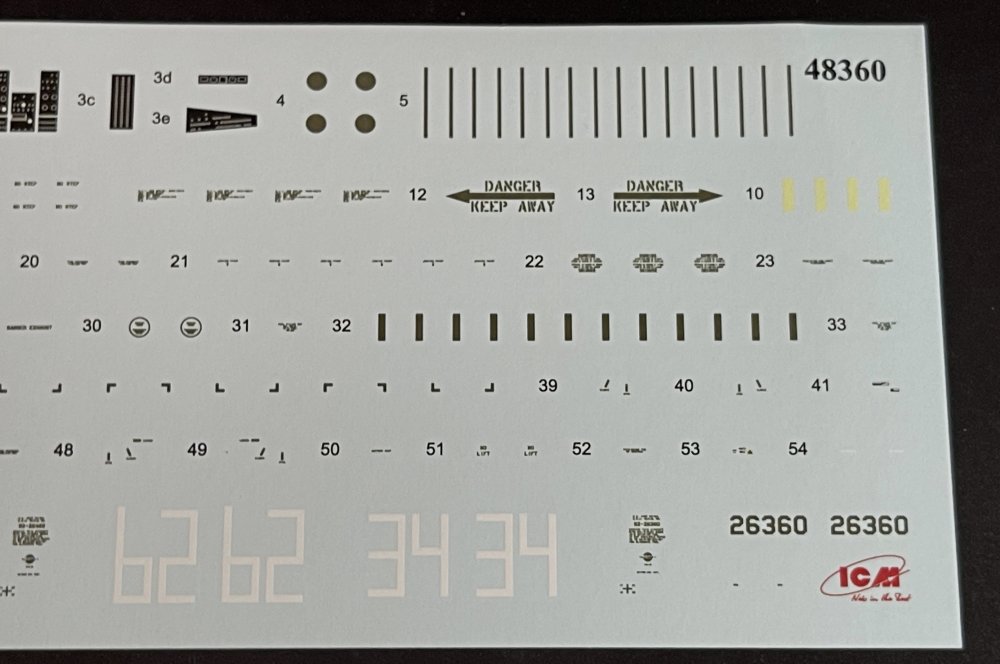
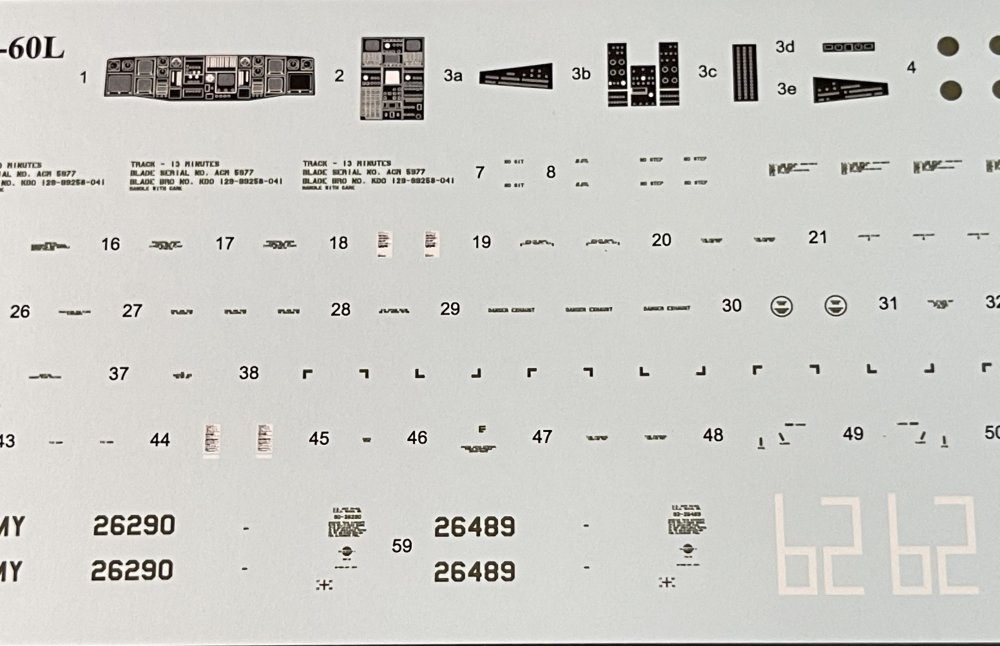
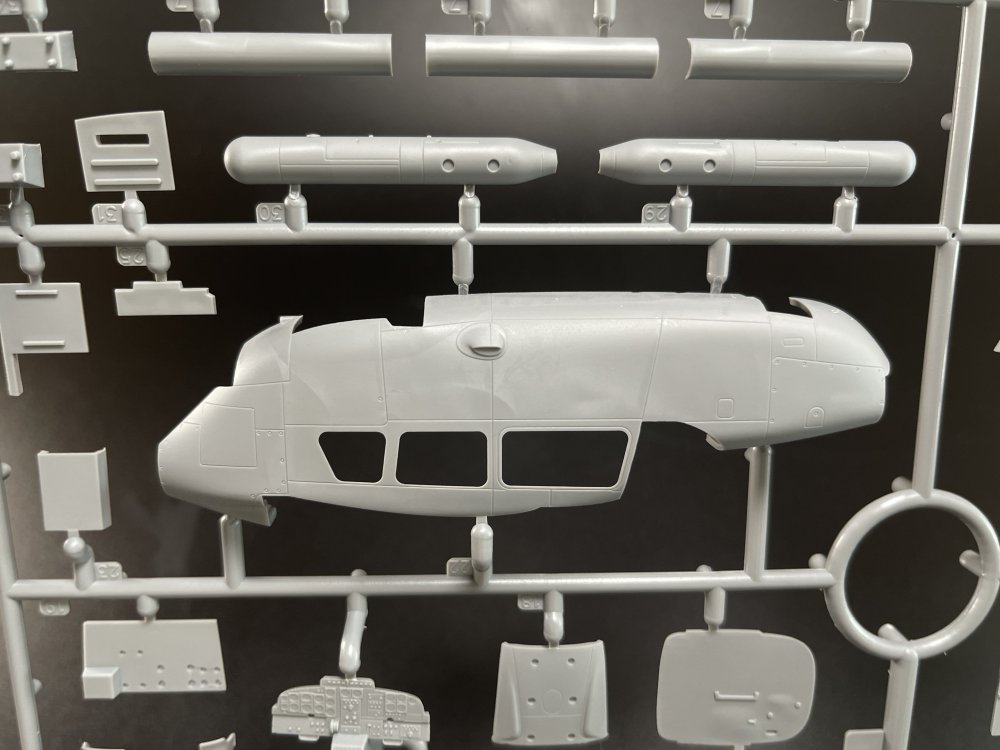
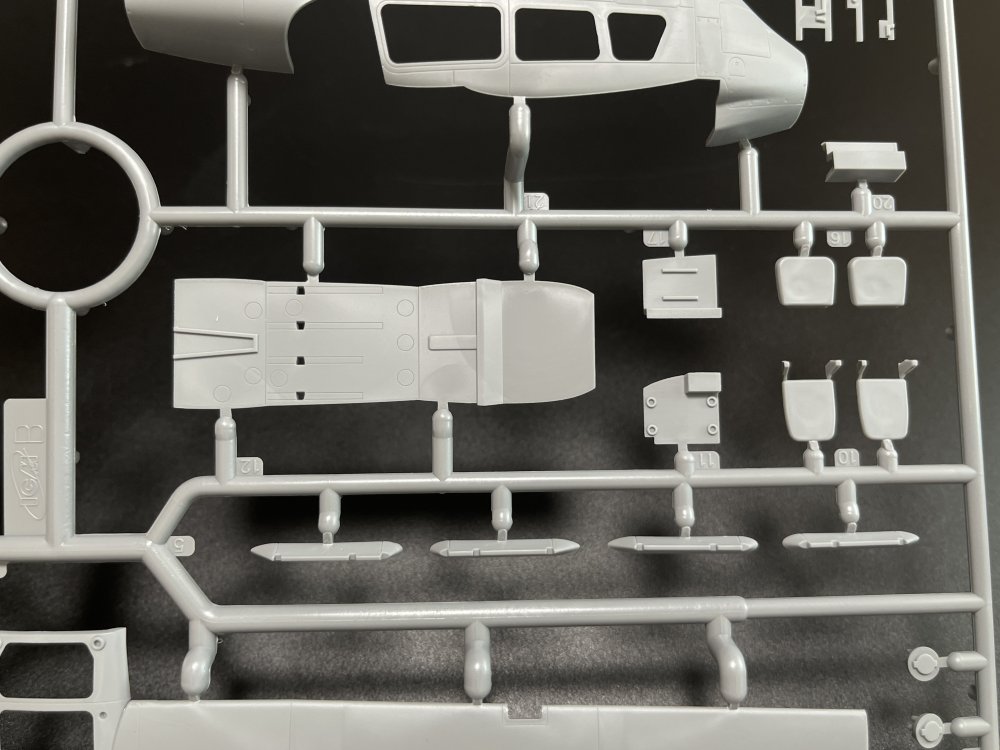
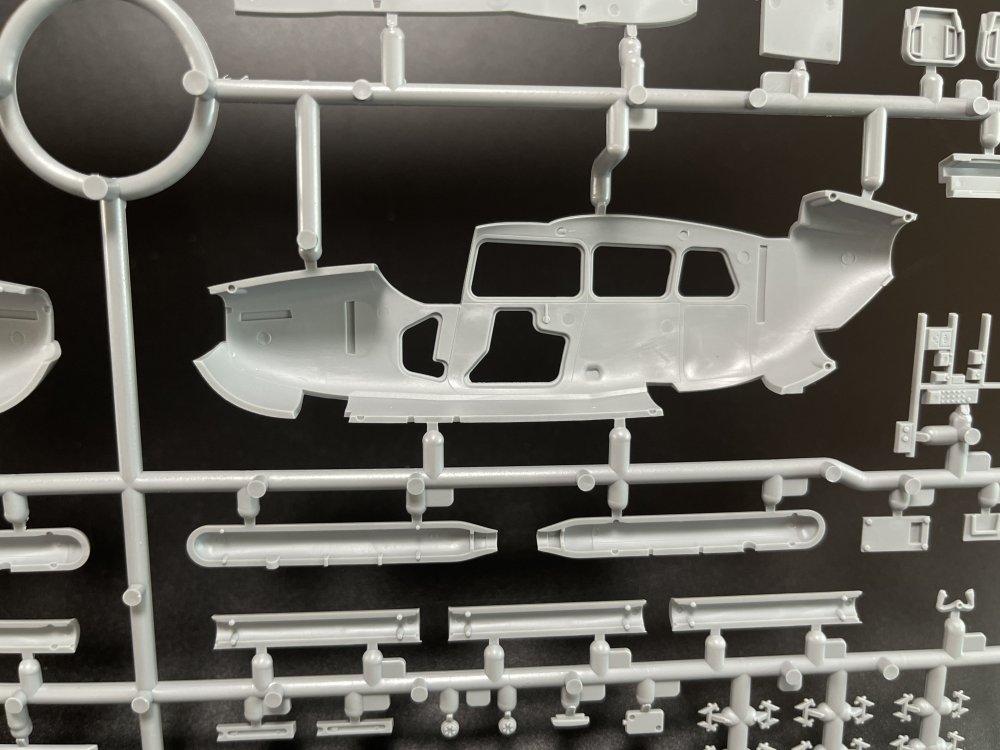
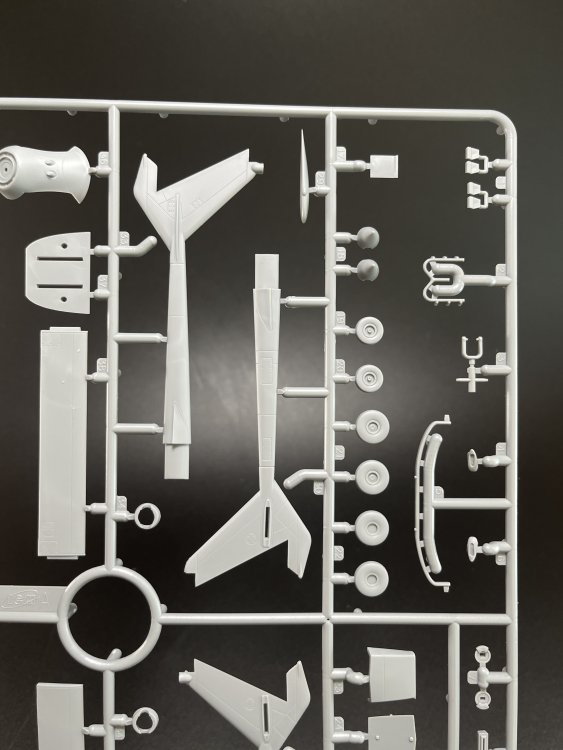
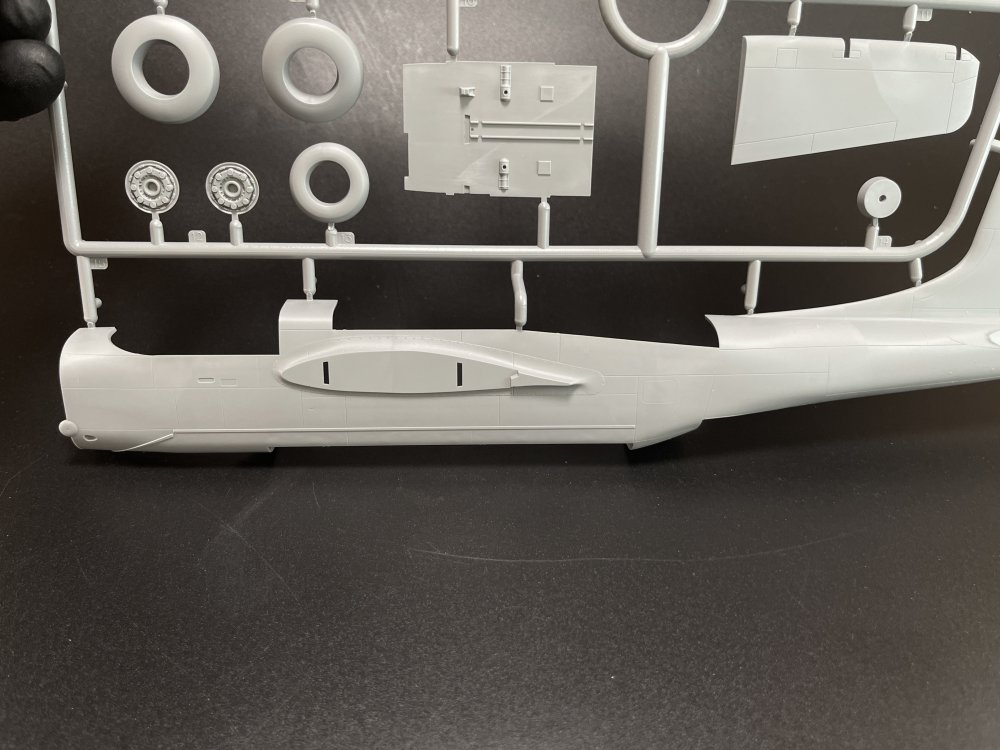
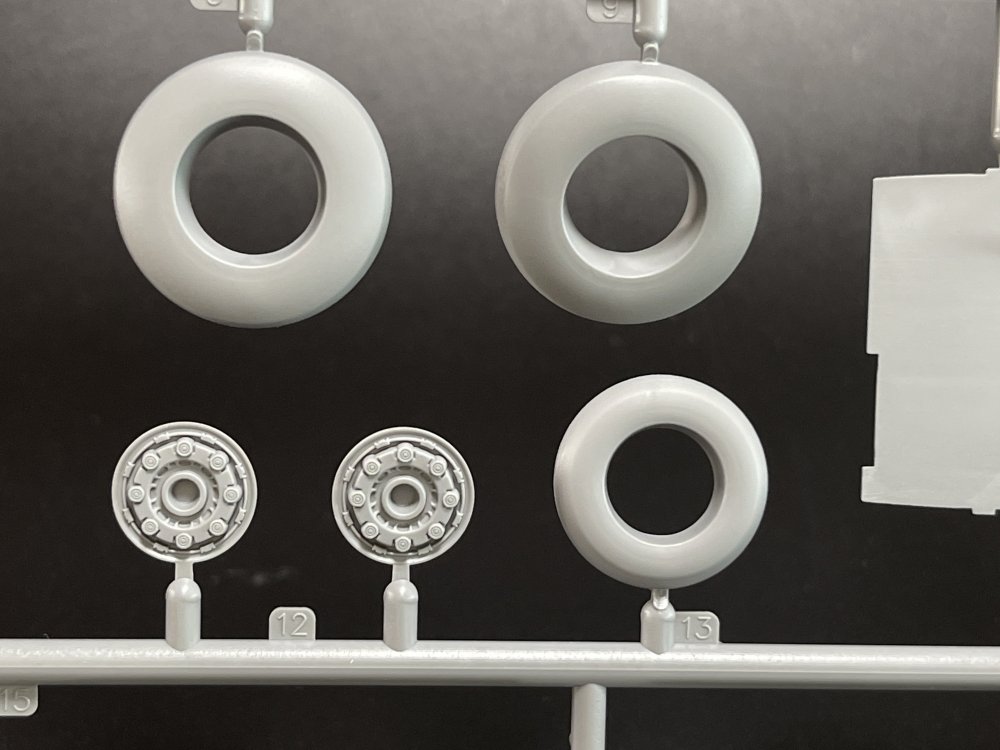
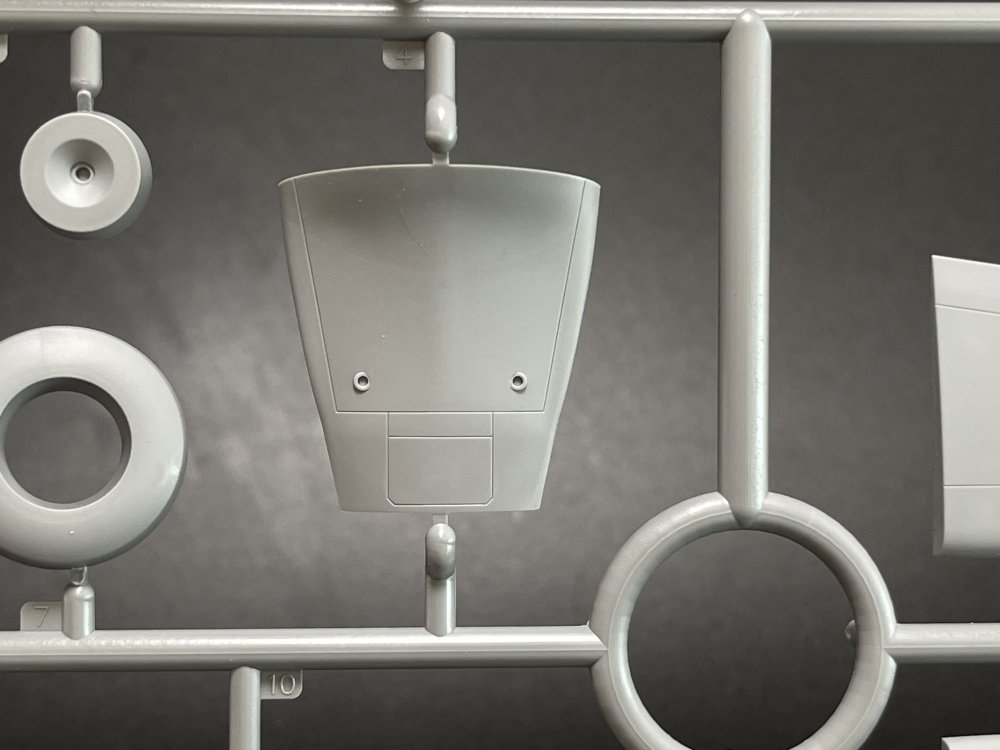
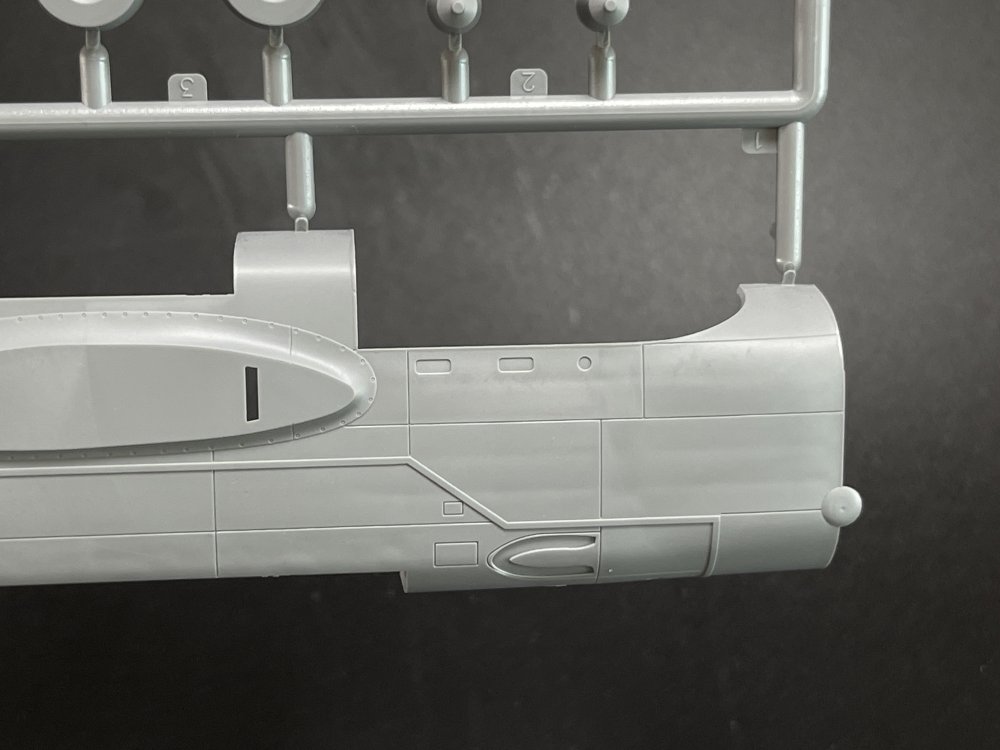
1:48 MH-60L Black Hawk US Special Forces Helicopter ICM Catalogue number 48360 Price: €50,60 To get one, just click here - Art Scale Kit (ASK website) ICM is unstoppable!! A brand new mould of the mythic Black Hawk in 1:48!! And once again an extraordinary work in the modelling world. ICM is leaving their legacy in the modelling world, that’s for sure. This Black Hawk is a highly anticipated release, to almost all military modellers. First a bit of history. “The primary mission of the MH-60 Black Hawk helicopter is to conduct overt or covert infiltration, exfiltration, and resupply of special operations forces across a wide range of environmental conditions. An armed version, the Direct Action Penetrator, has the primary mission of armed escort and fire support. Secondary missions of the MH-60 include external load, combat search and rescue and medical evacuation operations. The MH-60 is capable of operating from fixed-base facilities, remote sites, or ocean-going vessels. The 160th Special Operations Aviation Regiment (Airborne) operates three versions of the Black Hawk helicopter: The MH-60K (Black Hawk) is a highly modified twin-engine utility helicopter based on the basic UH-60 Black Hawk airframe but developed specifically for the special operations mission. Improvements include an aerial refueling capability, an advanced suite of aircraft survivability equipment and improved navigation systems, including multi-mode radar to further improve pinpoint navigation in all environments and under the harshest conditions. The MH-60L is also a highly modified version of the standard U.S. Army Black Hawk configured for special operations use. It has many, but not all, of the modifications found on the “K” model. The MH-60L Direct Action Penetrator (DAP), or DAP, is an MH-60L modified to mount a variety of offensive weapons systems. Its mission is to conduct attack helicopter operations utilizing area fire or precision guided munitions and armed infiltration or exfiltration of small units. It is capable of conducting direct action missions as an attack helicopter or reconfiguring for troop assault operations. In the direct action role, the DAP would not normally be used as a primary transport for troops or supplies because of high gross-weight limits. The DAP is capable of conducting any mission during day, night or adverse weather conditions. MH-60L and MH-60K Performance Characteristics: Normal cruise airspeed 120 knots Maximum dash airspeed 178 knots Normal mission range (no A/R) 450 NM Normal mission endurance (no A/R) 4 hrs, 20 min https://www.soc.mil/USASOAC/AirFrames.html Now let´s crack the box and check what is inside. First, typical ICM grey plastic with very good surface detail with crisp panel lines and rivet details that are characteristic of ICM's recent releases. In total you will get seven plastic grey sprues, four sprues only with the rotor blade and a clear sprue. The surface detail is excellent with finely engraved panel lines, recessed and raised rivets. This ICM release has a very well detail cockpit and the after compartment is also very full with tubular framed seats giving a busy look to all… So direct from the box, you will get a quite good detail kit. Just missing the seatbelts for a decent cockpit. However there is still lot of room to the aftermarket boys. The same goes to the engine and undercarriage. The deails are ther and they are quite good straight from the box, but AM brands can go futher on the detail . ICM did have a clever design on the nose to adapt the version-specific extensions and variations However, the two halves don’t have the floor and the top of the cabin. I only hope that the fitting will be great because if you have to use filler in any part, with the raised rivets, the damage on this detail is 100% for sure, and very hard to replicate again… These constructions options are because of the future versions already announced. So, dry fitting/test fitting over and over again will be a good step to put all together. There is a lot of plastic as ICM gives the modeler the possibility of several equipament, rotor blades positions and open or close doors. The clear parts, once again is one of the best. Totally clear and no distortions. The decal sheet, ICM design and made by anonymous are quite good with very thin film and great color pigmentation. I like the instruments panels decals. The look quite good. There are three decal options, all black or black with dark grey camouflage scheme. The profiles are quite small… I understand that to make them bigger, ICM would spend more at least 2 in color pages in each profile and that could make the price go higher, but like this is almost impossible to see the color (black and dark grey demarcation and hard to see the decals numbers, though due to the size of the profiles in print, it’s quite hard to discern the details, and the decal numbers are also quite small. From the box you get these: 90-26290, 160th Special Operations Aviation Regiment (Airborne), Tennessee, 2007 93-26489, 160th Special Operations Aviation Regiment (Airborne), Exercise PANAMAX 2011 91-26360, 160th Special Operations Aviation Regiment (Airborne), 2012 As for the instruction booklet, the first two and the last two pages are in glossy paper with color profiles in the back pages and a mask template (nice touch as usually) The color indication are good but as I said in the past, only with ICM color. ICM color are easier to find and they do sell all them (60 of hem I think) in a full pack. I have had the opportunity to try some and I confess that I liked (either brush and airbrush) but I need to test a little more with proper ICM thinner specially on airbrush. Th one that I didn’t liked at all was the aluminum. That said, and even thought I think that some color references for Tamiya, Gunze or AK would be most welcome. Conclusion: ICM did again, delivering a brand new mold Black Hawk, and it´s is the best Black Hawk in 1:48. It`s, without a doubt a great addition to any modeler's collection, especially for those interested in modern military helicopters. However I only would recommend to intermediate modeler, as the cabin could be a bit tricky to get it. If you want a Black Hawk, this is the model you should get. Just get one!!!! Thanks ICM to make this model available. VERY HIGHLY RECOMMEND


-
- 4
-

-

-
- icm
- black hawk
- (and 1 more)
-
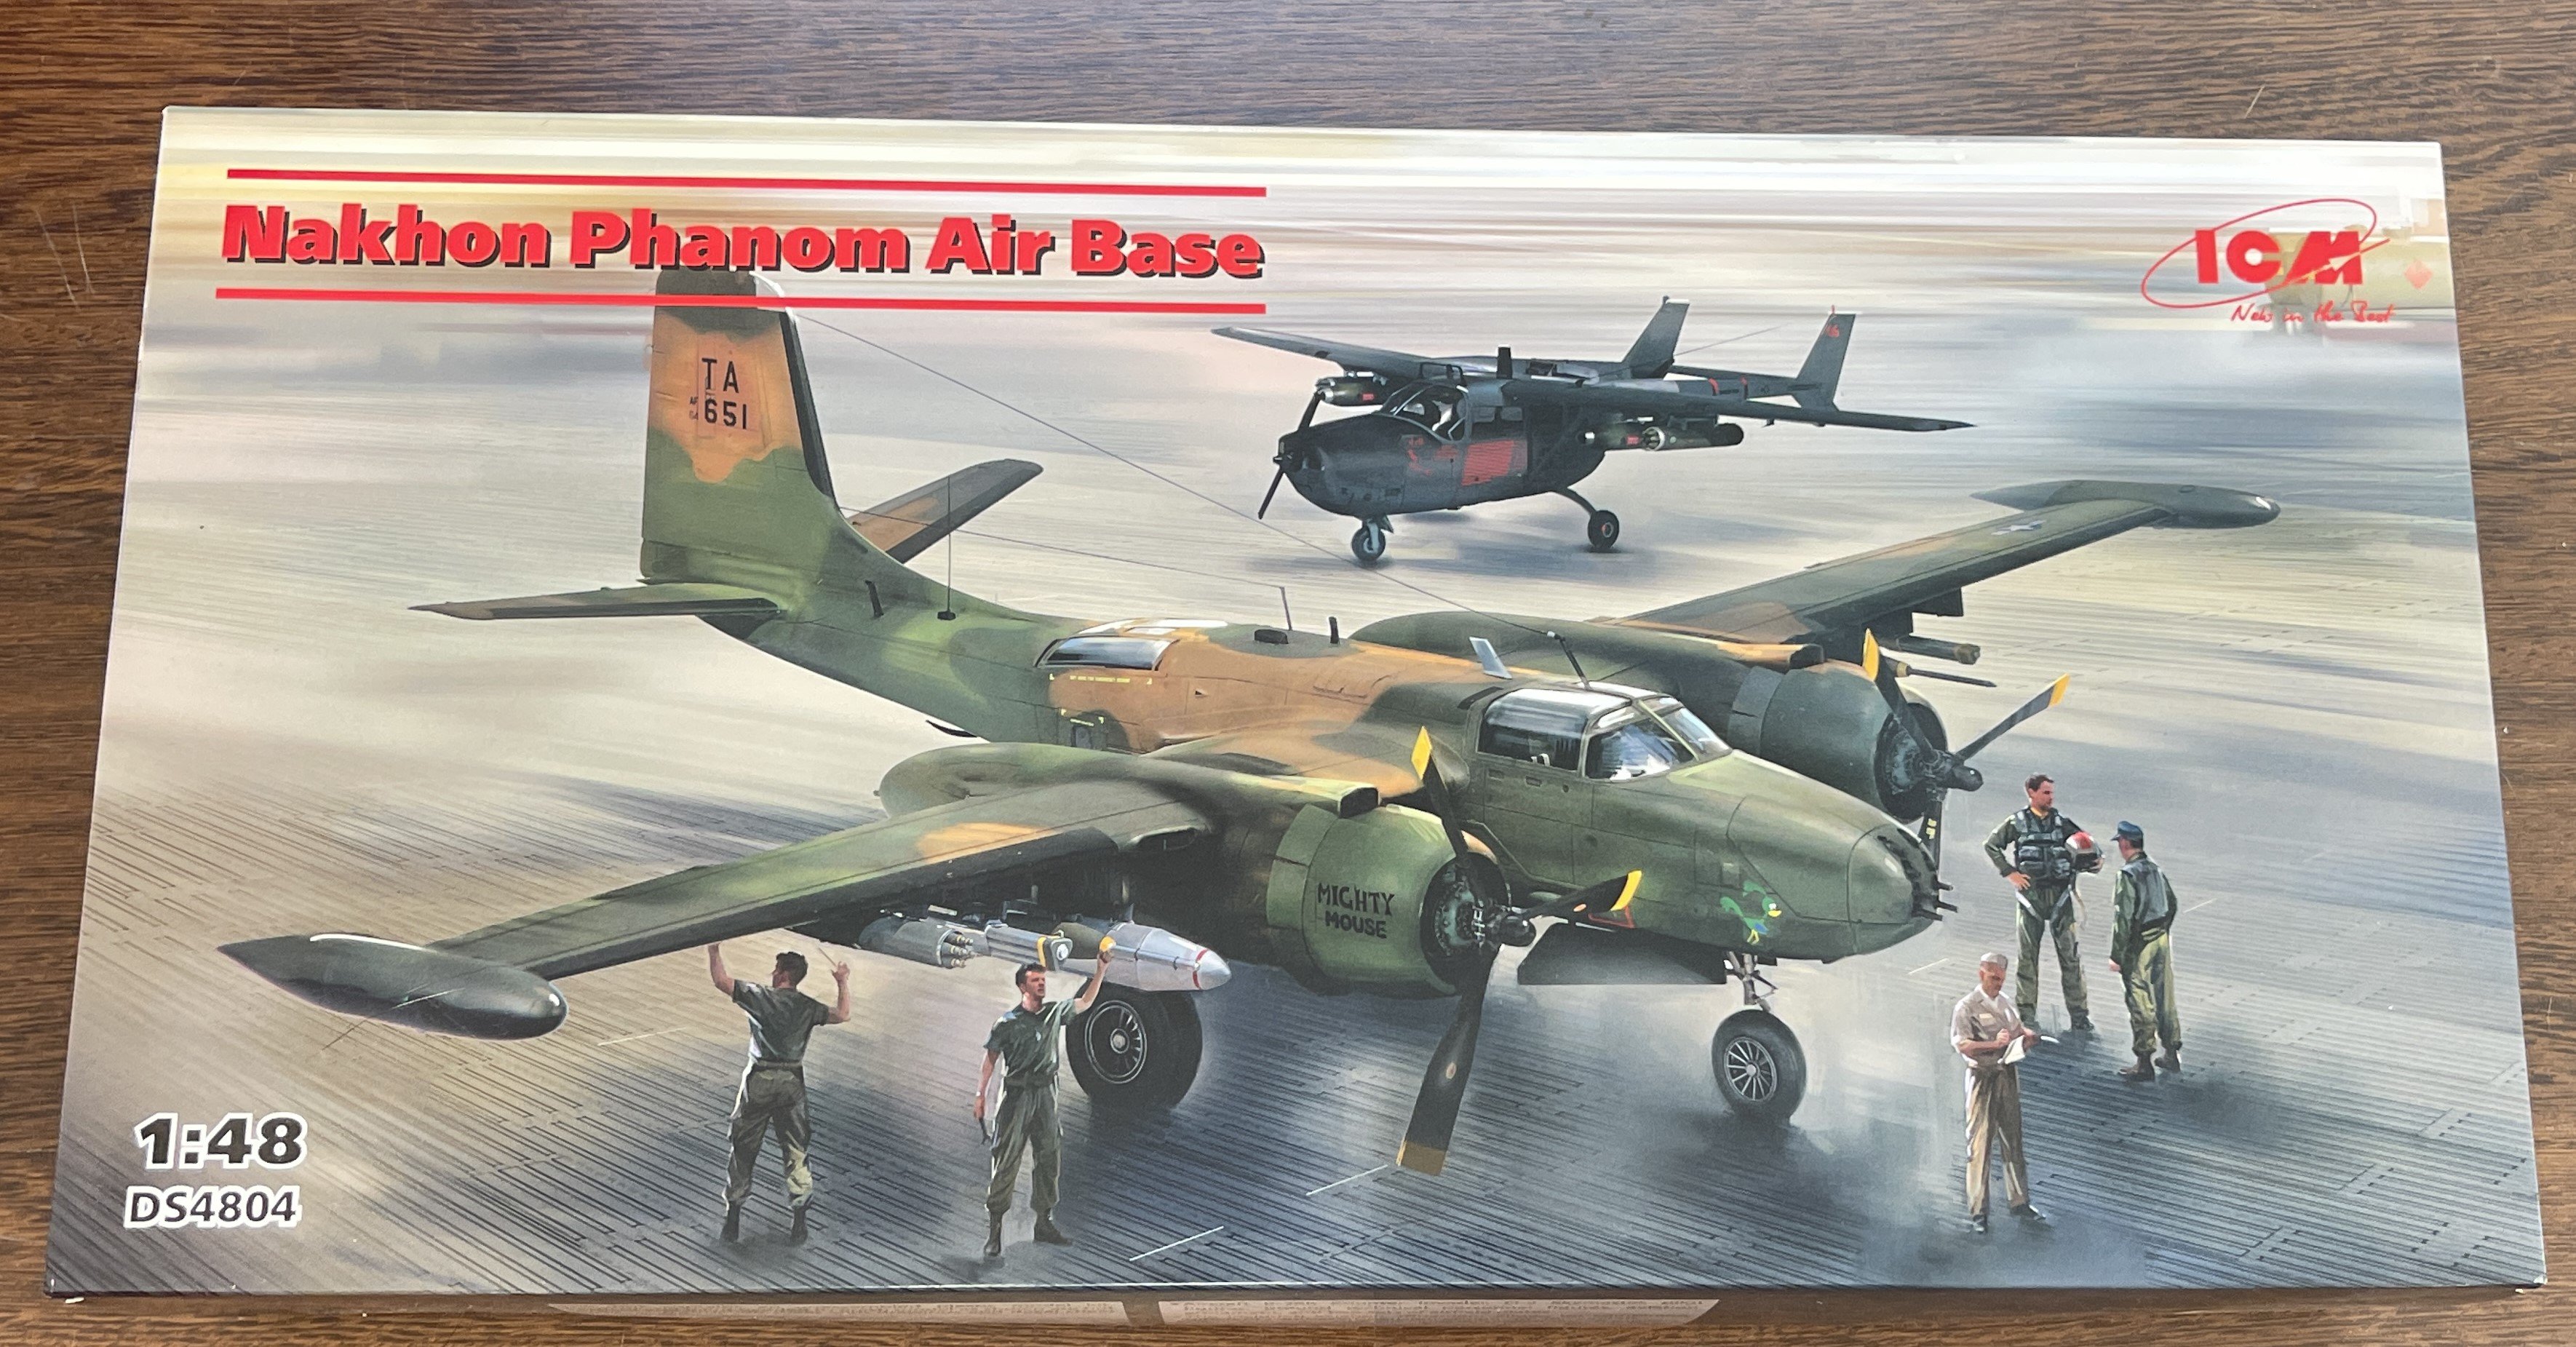
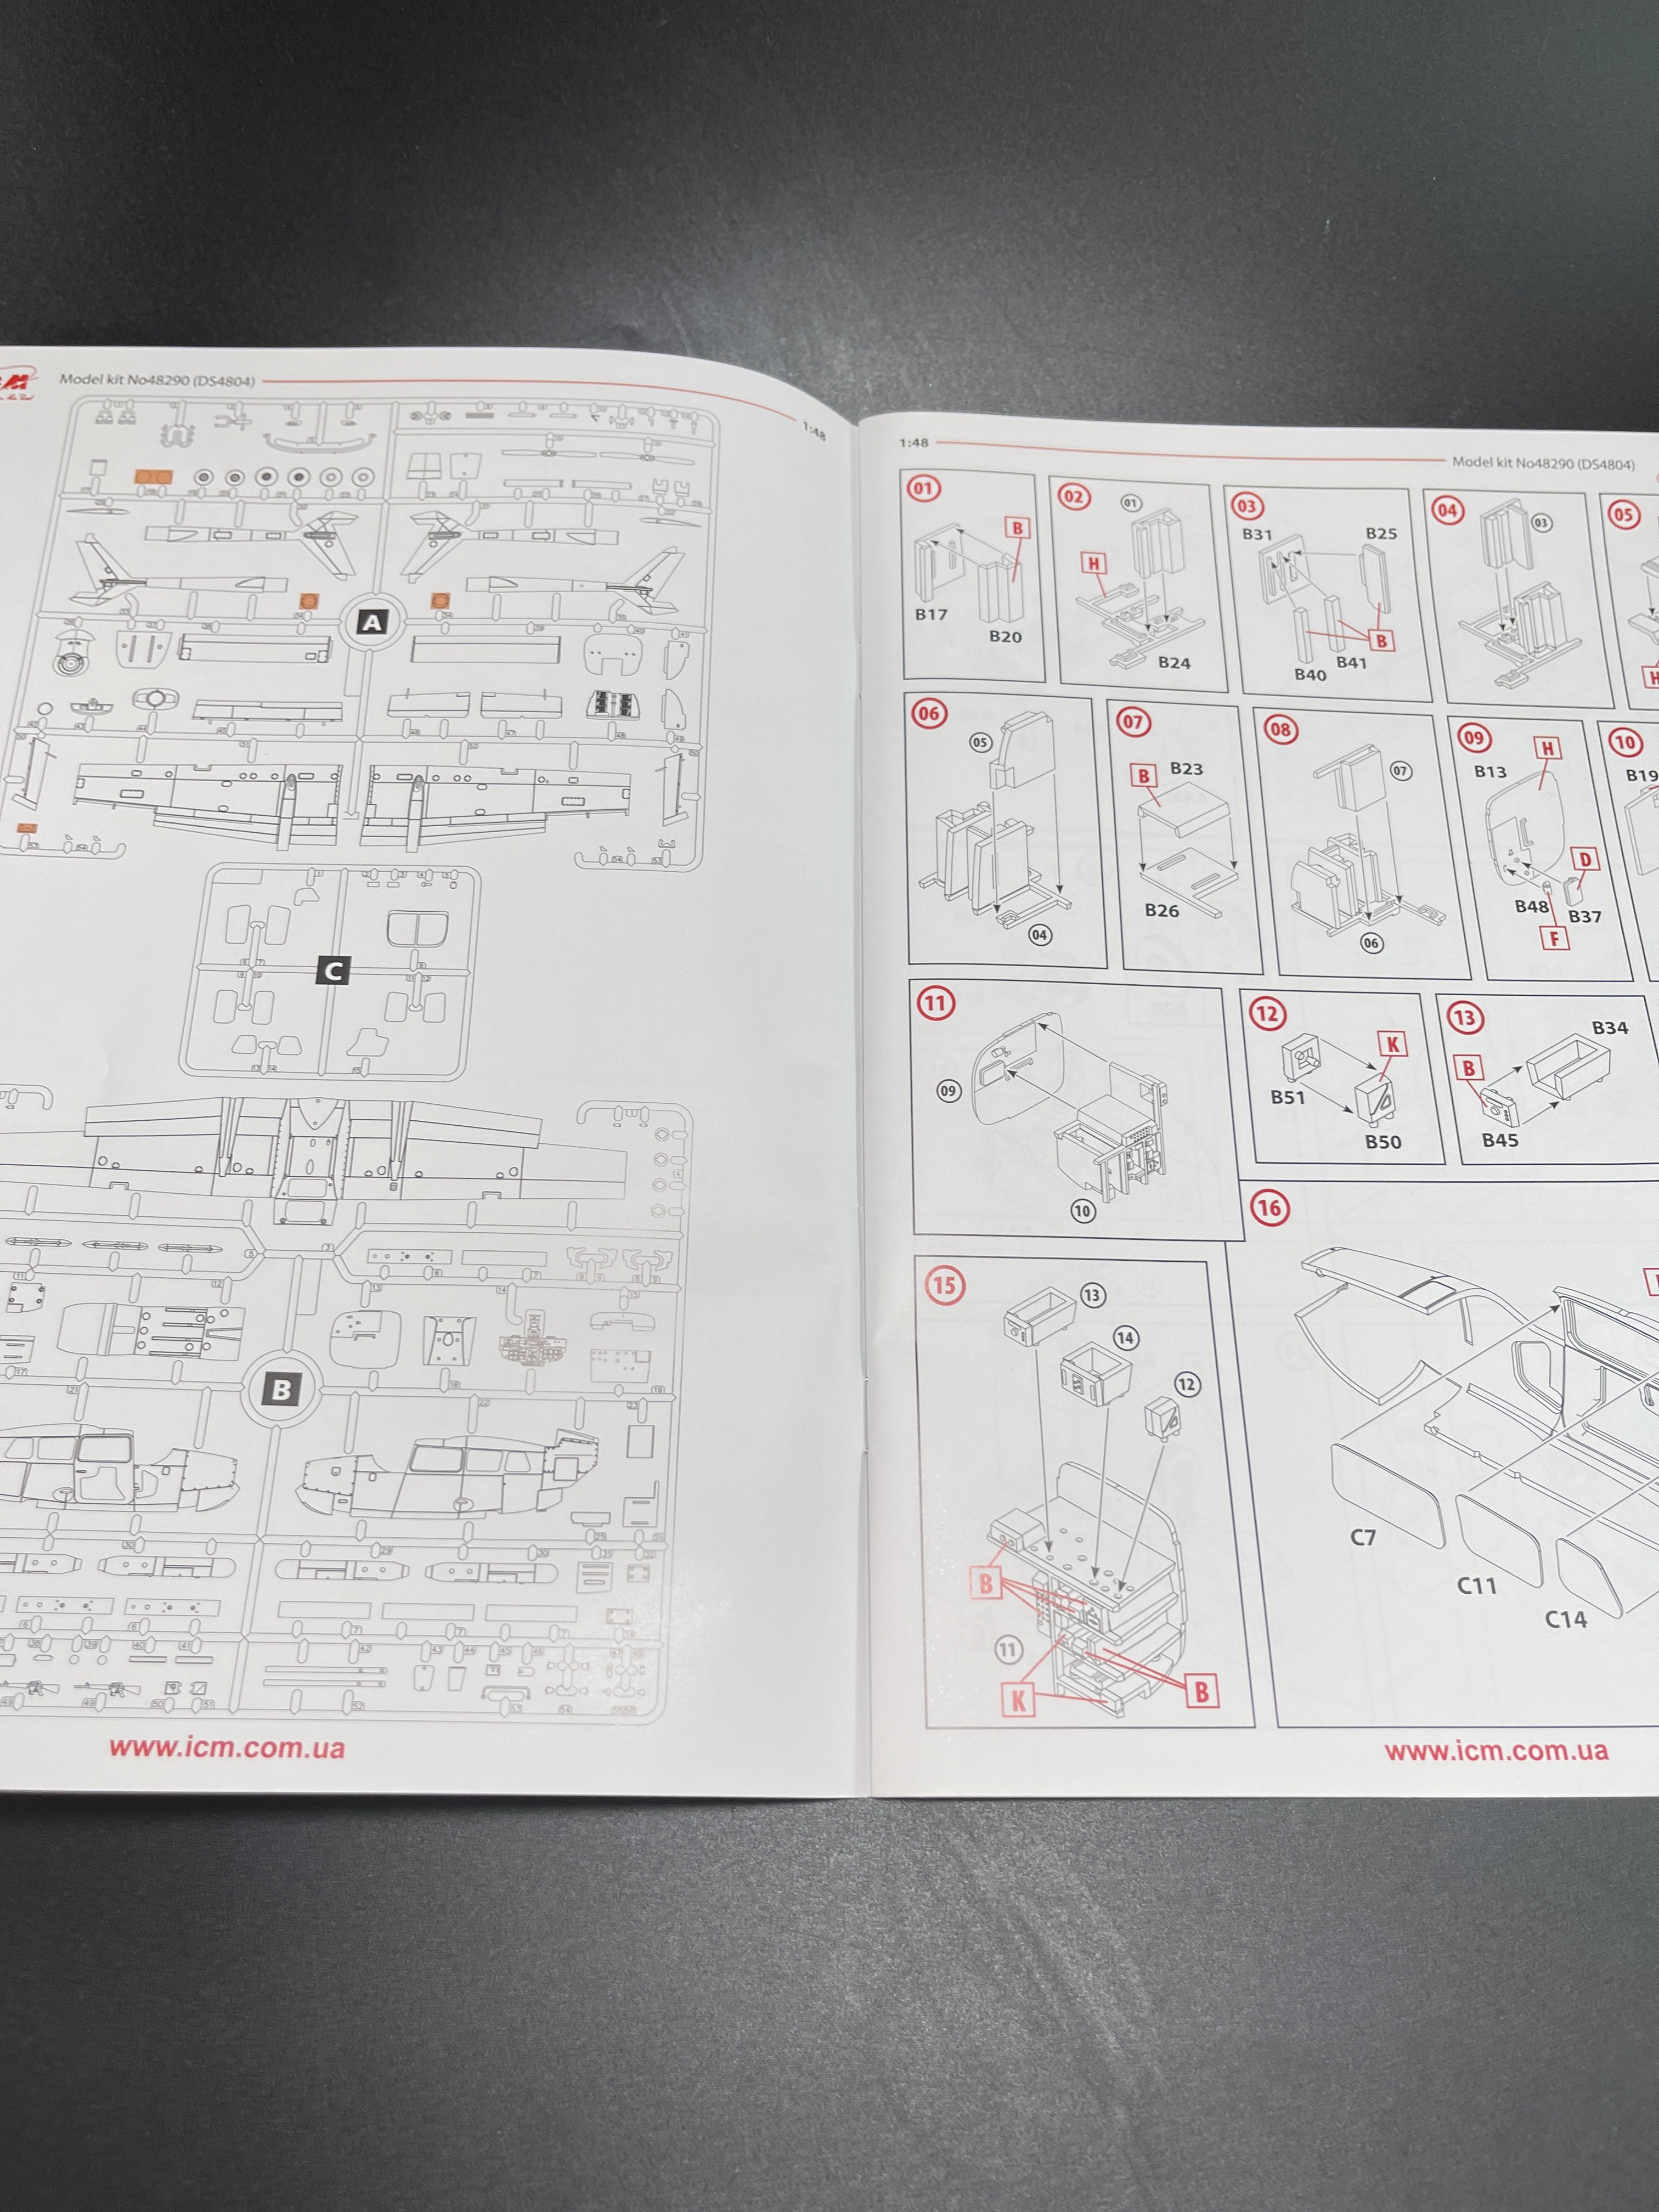
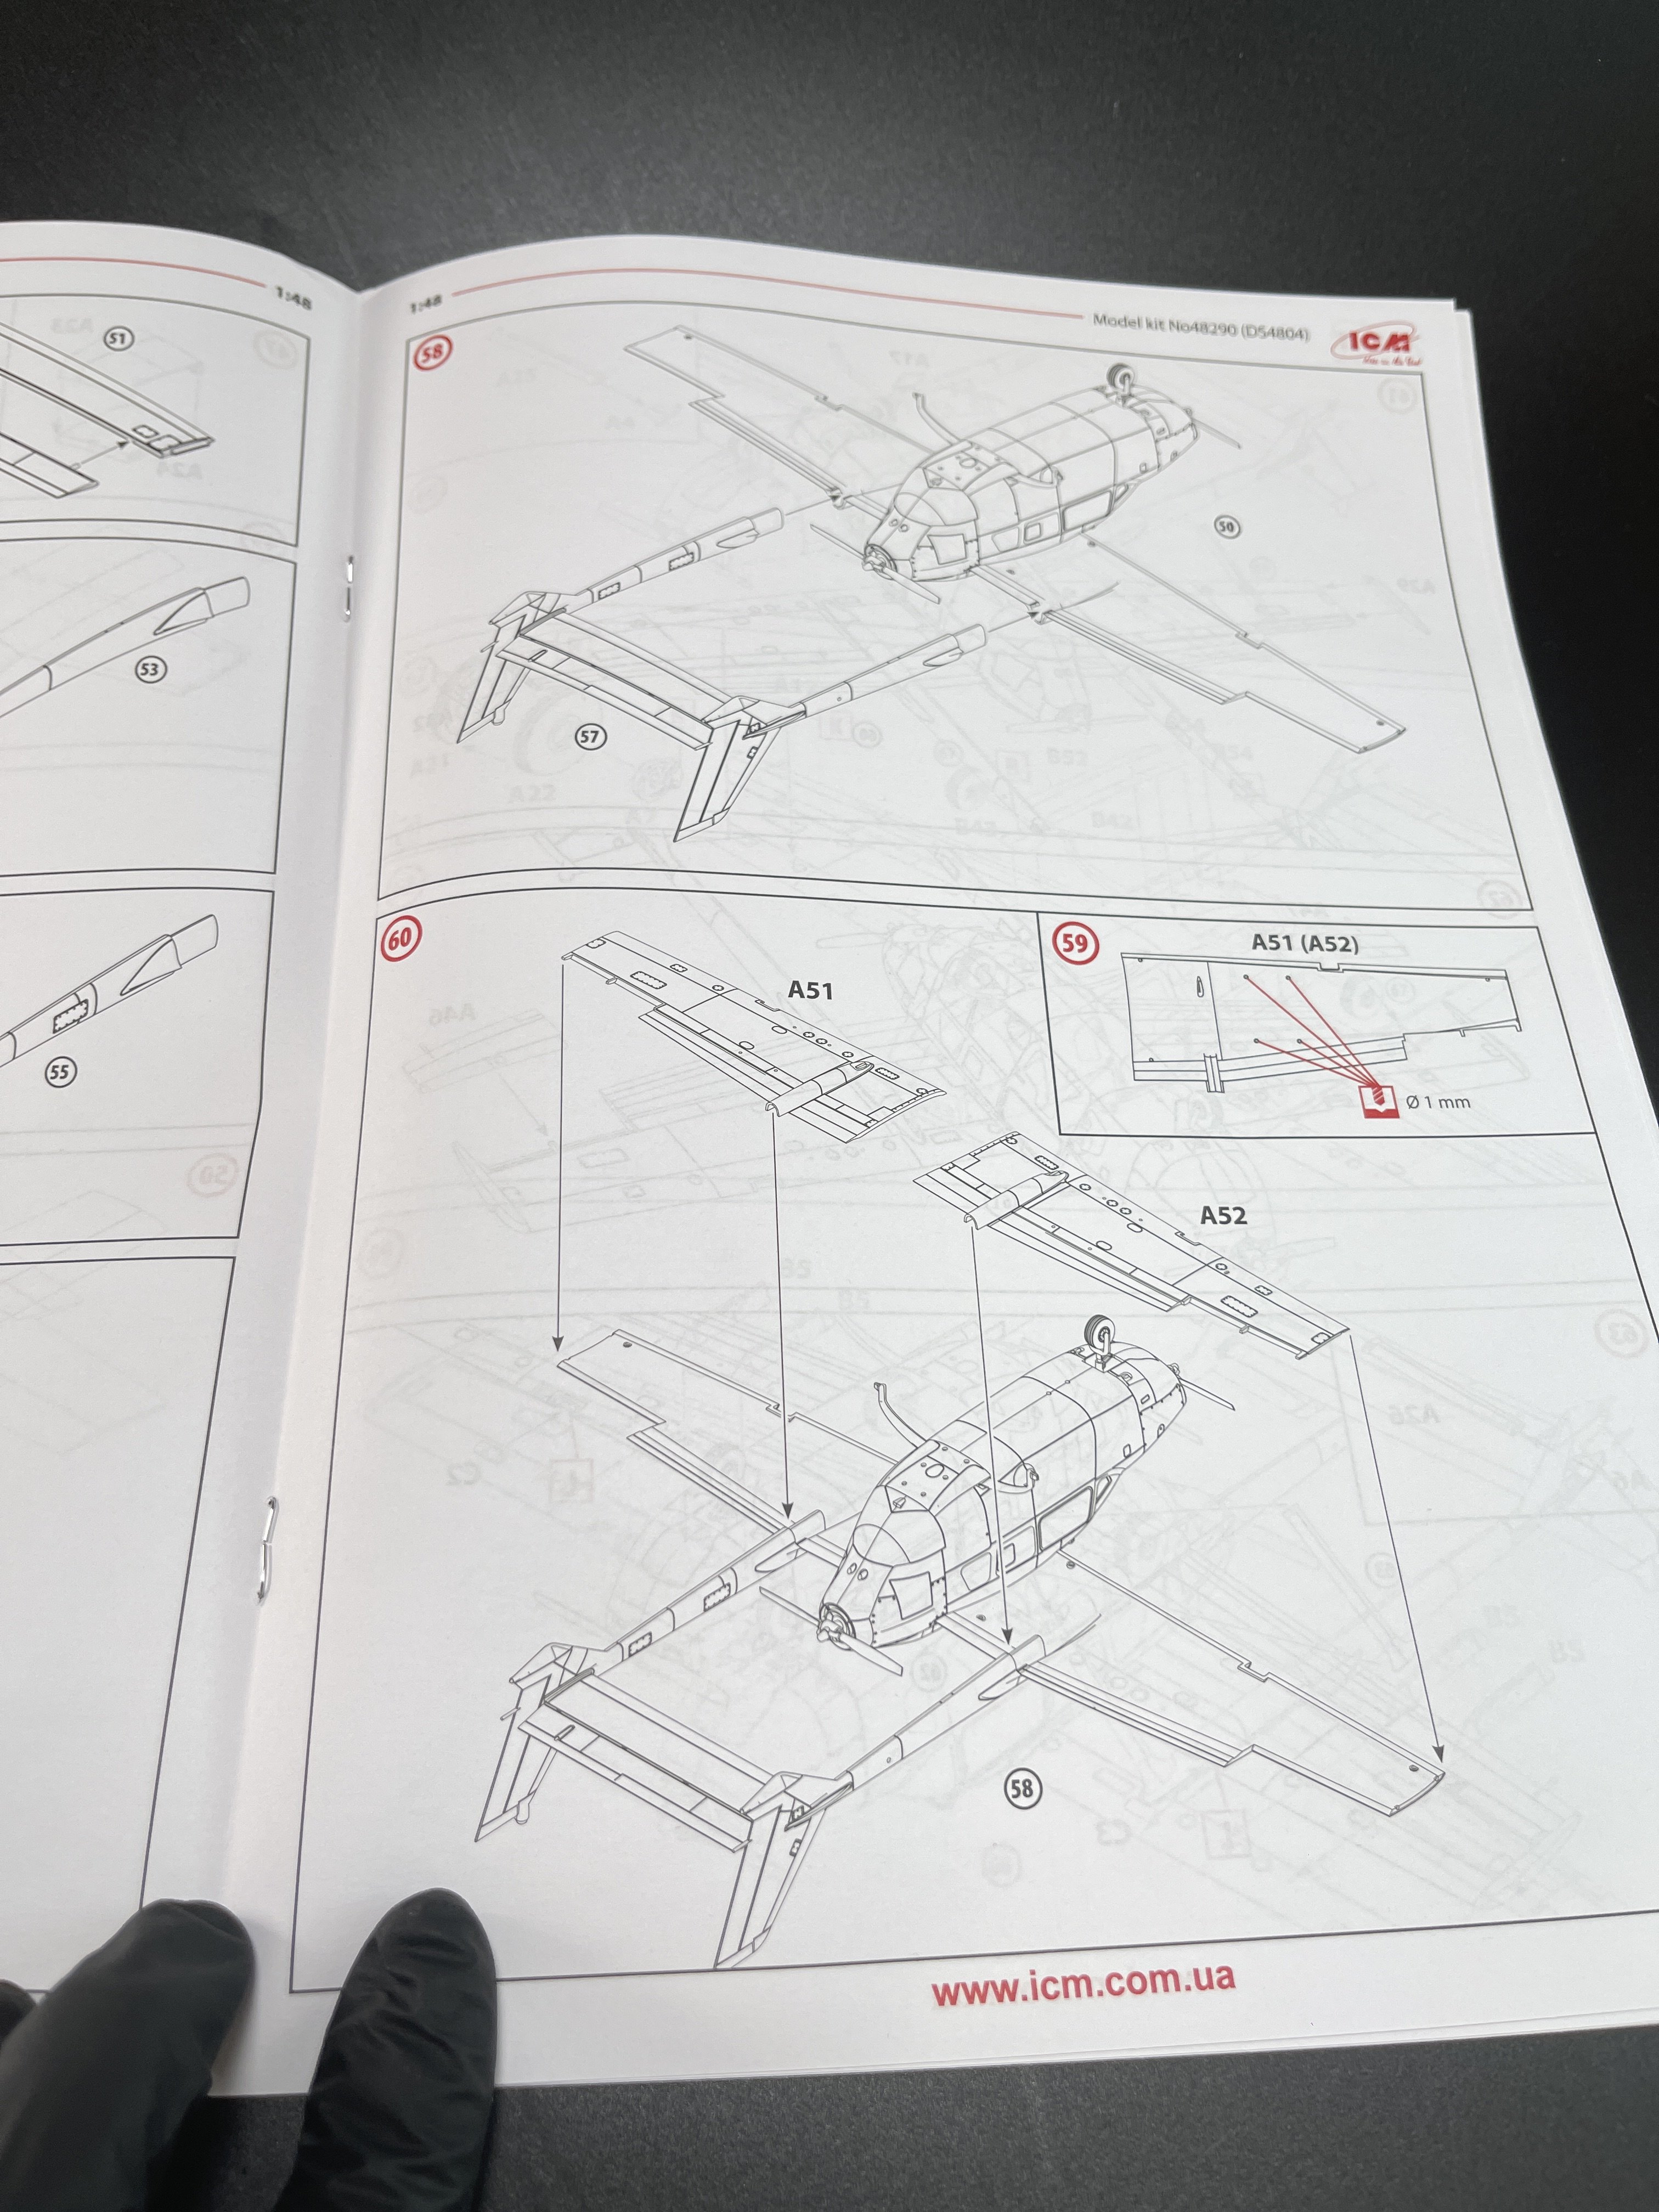
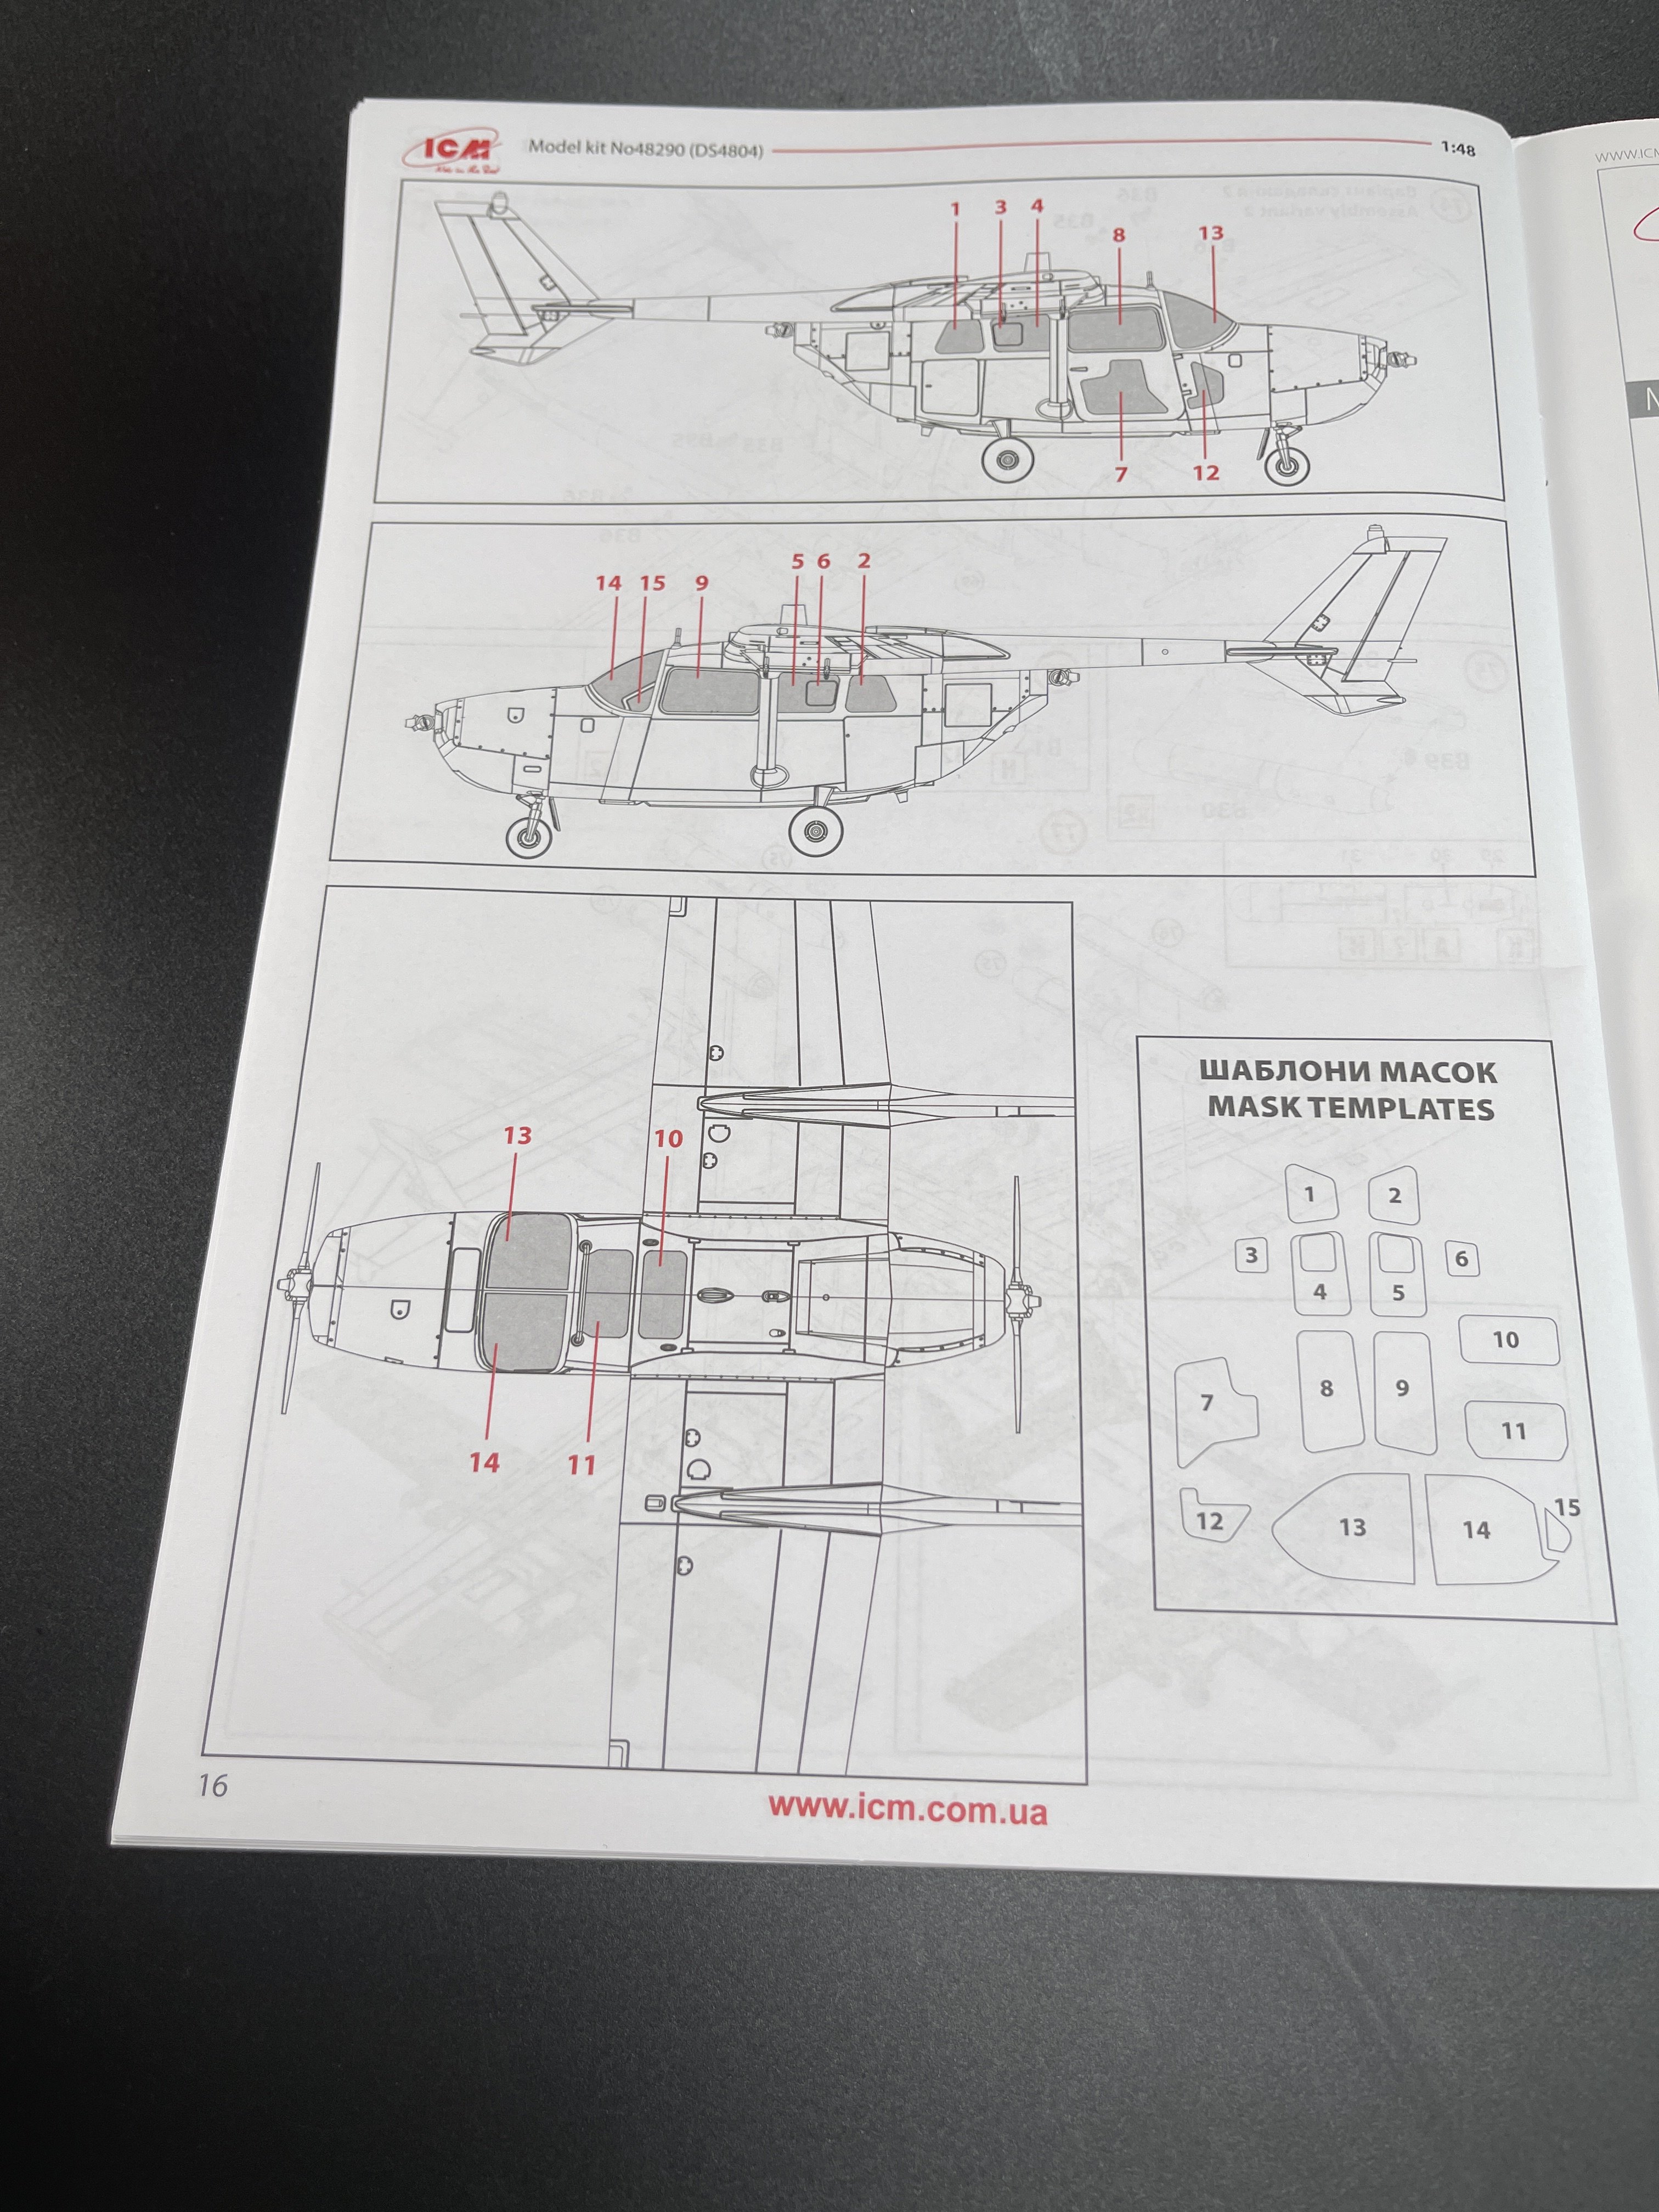
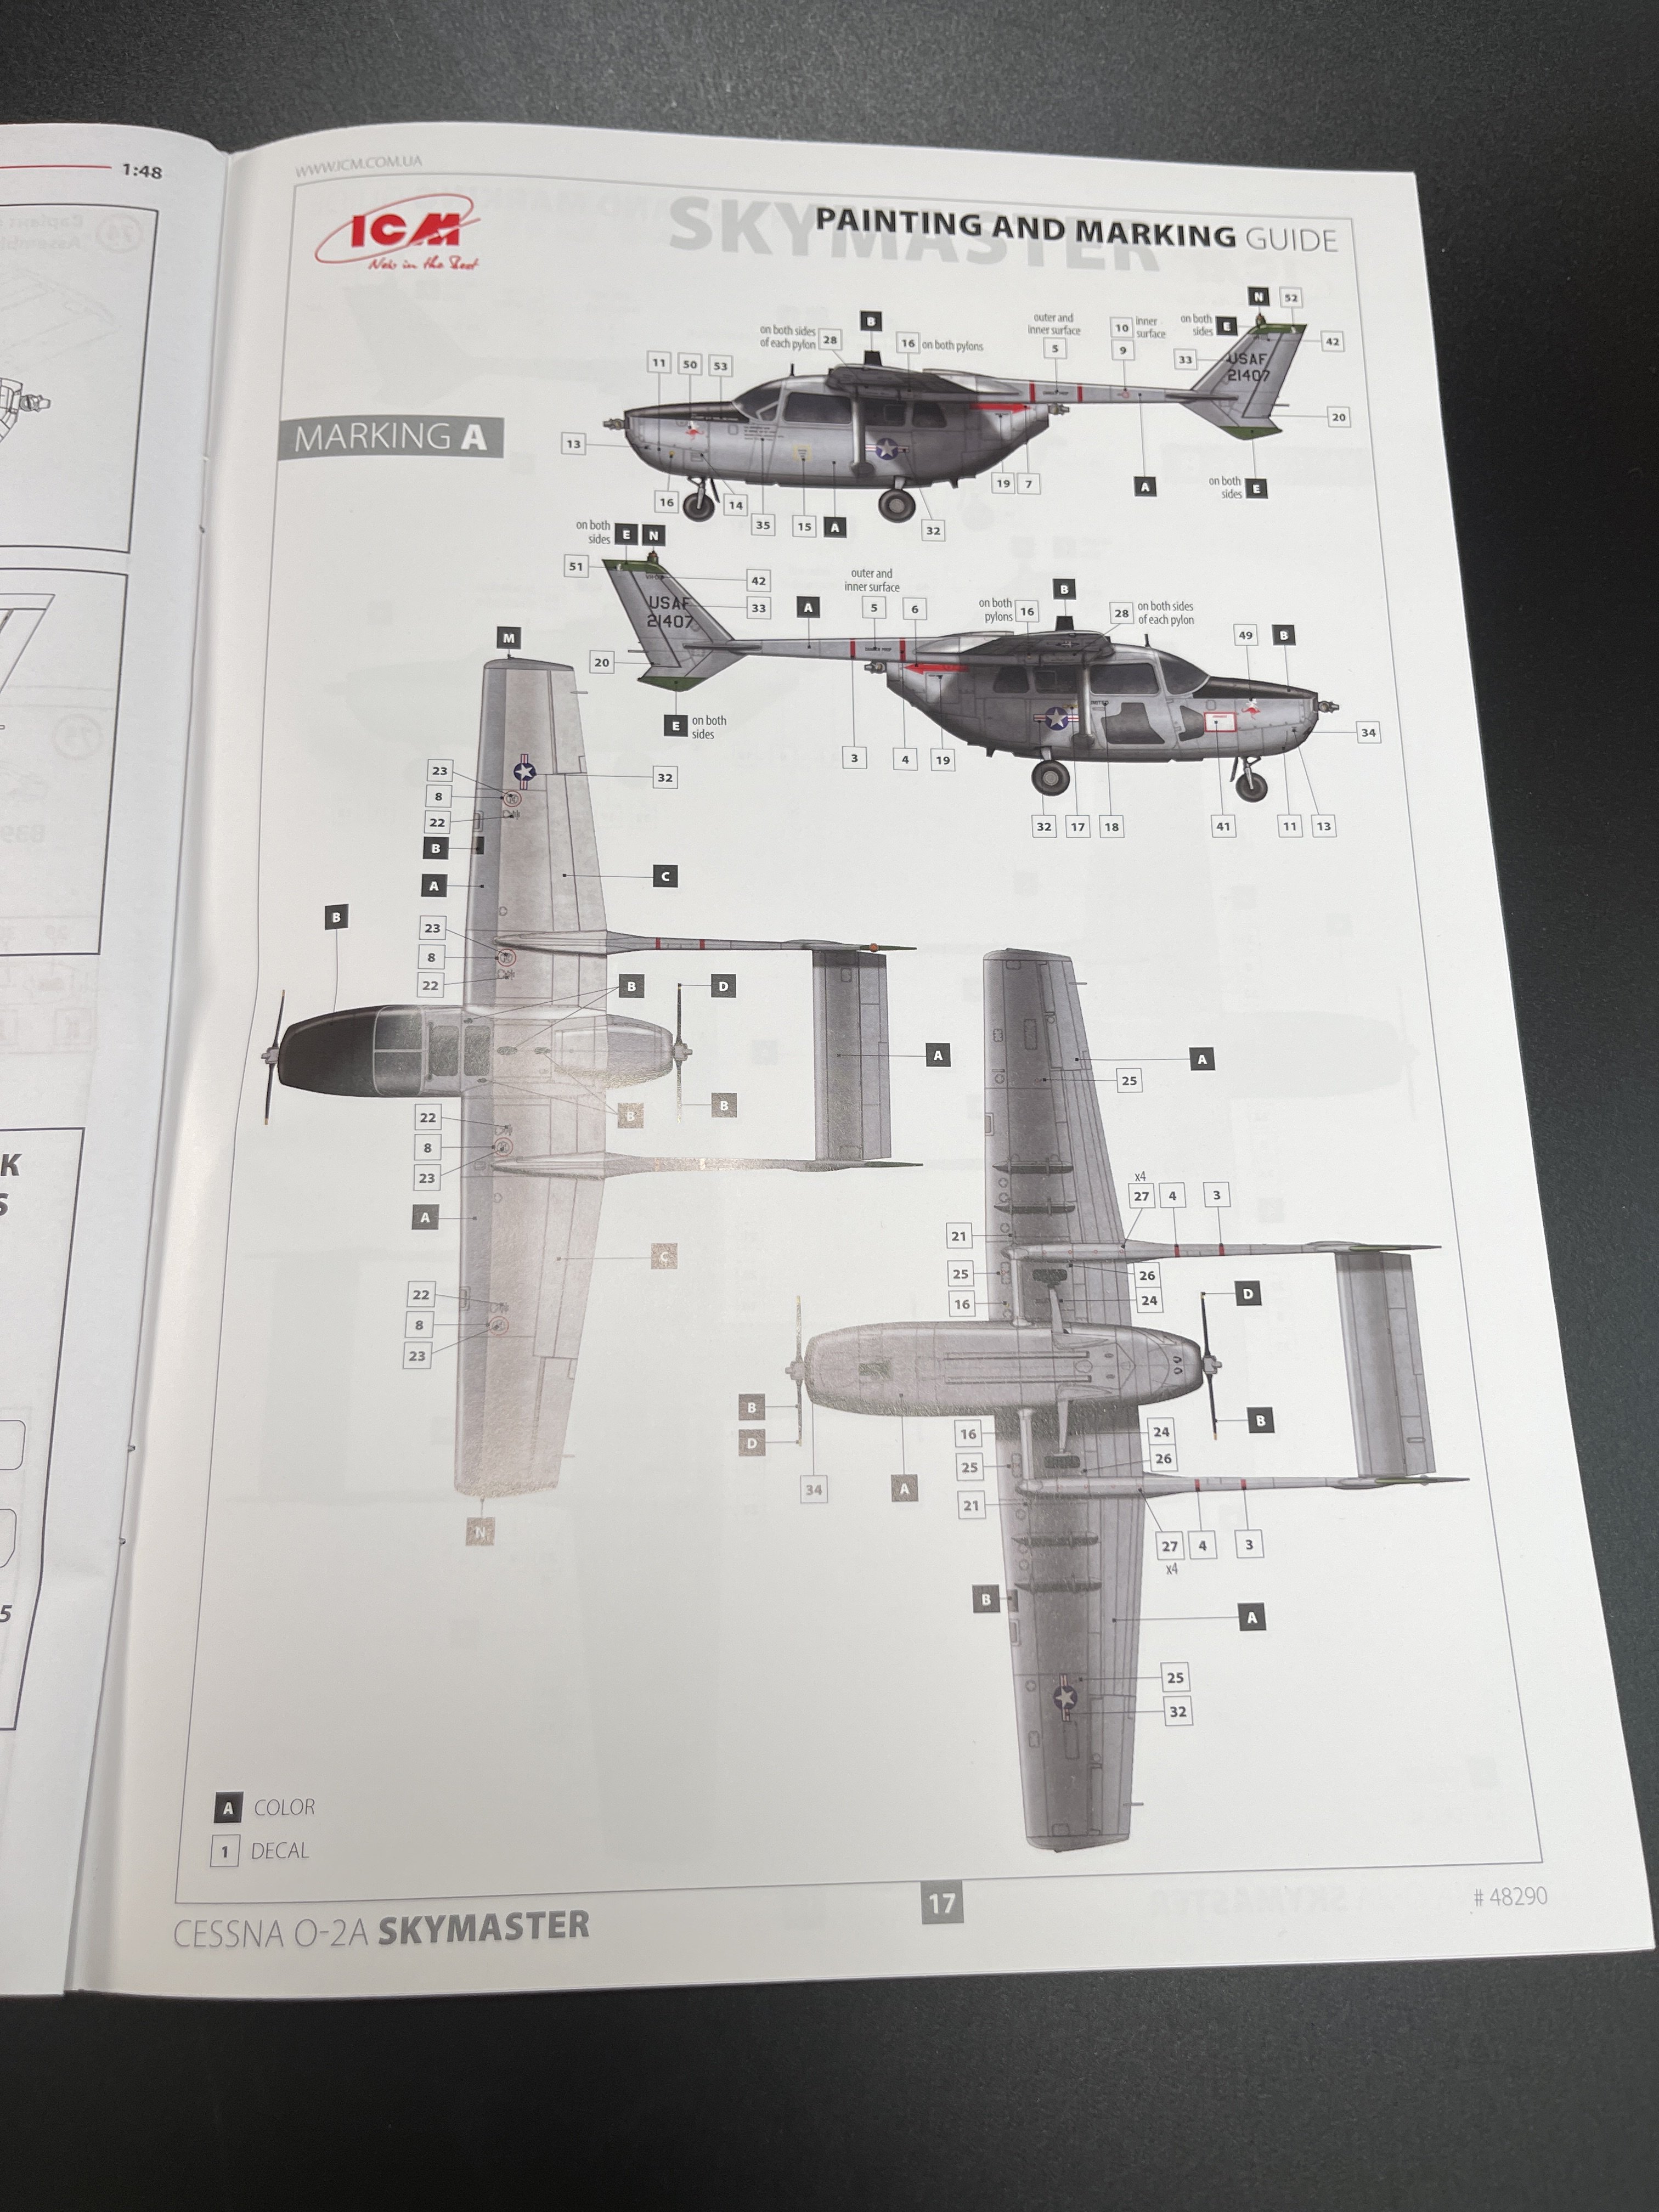
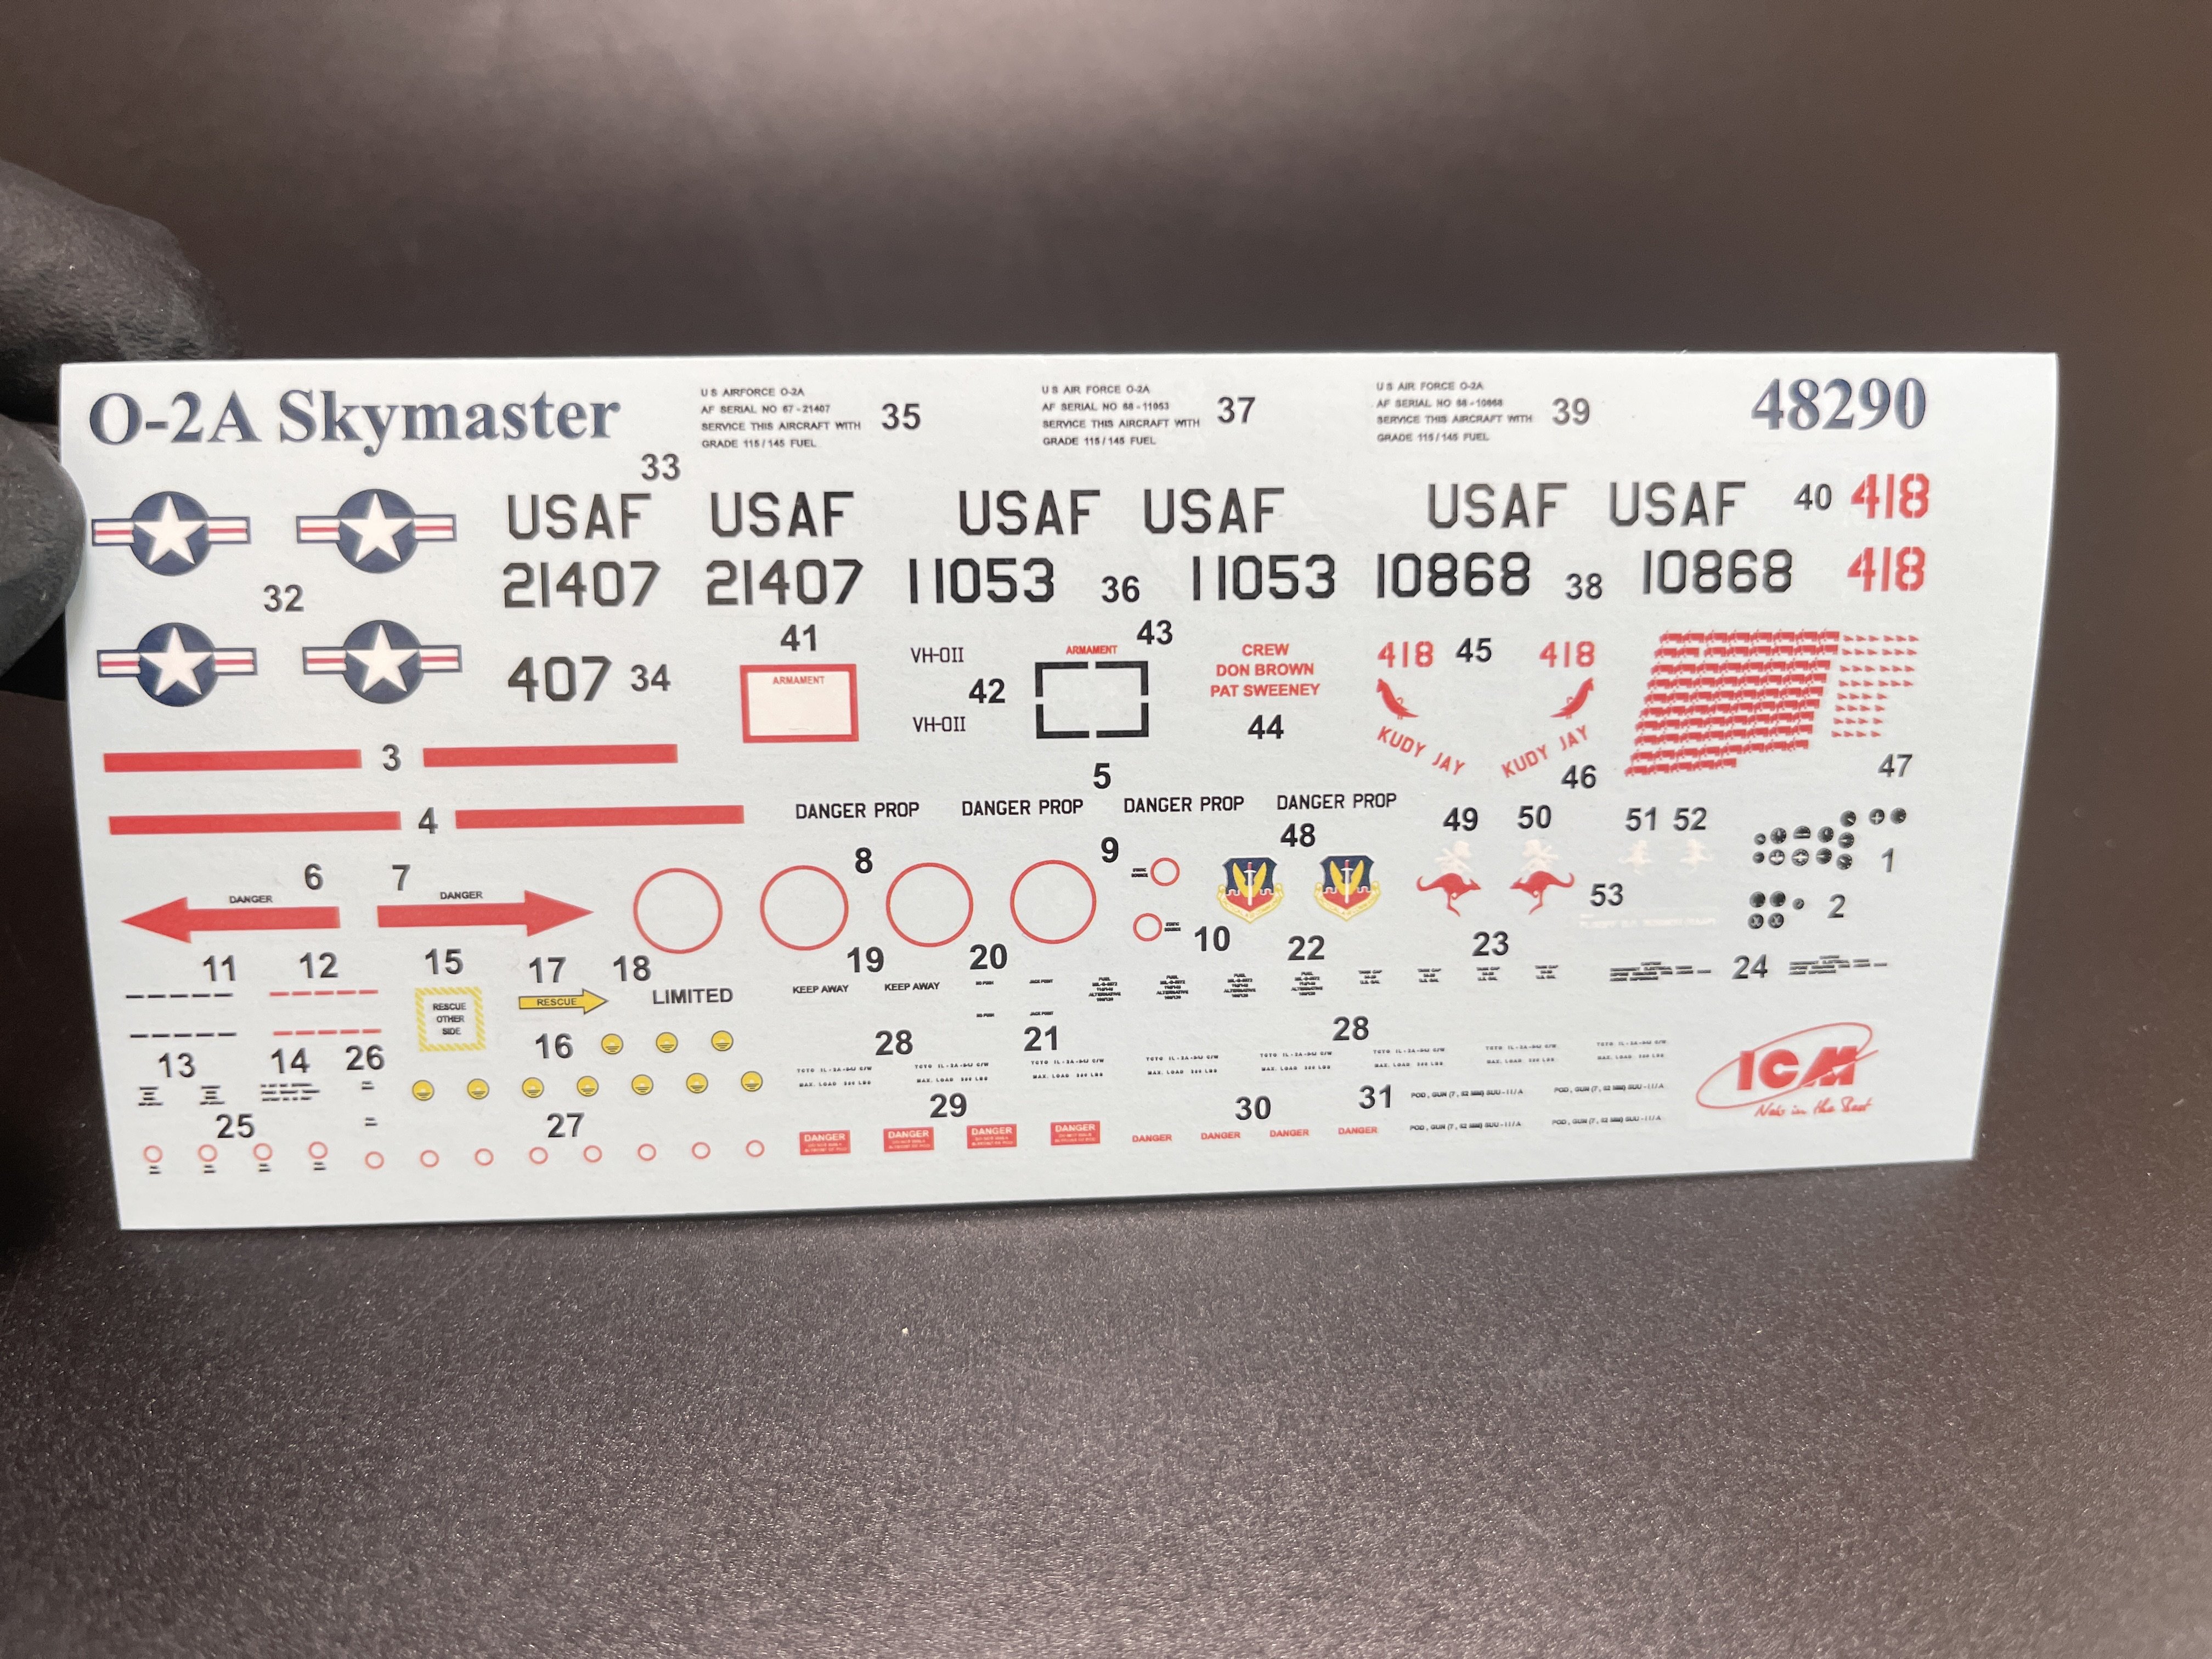
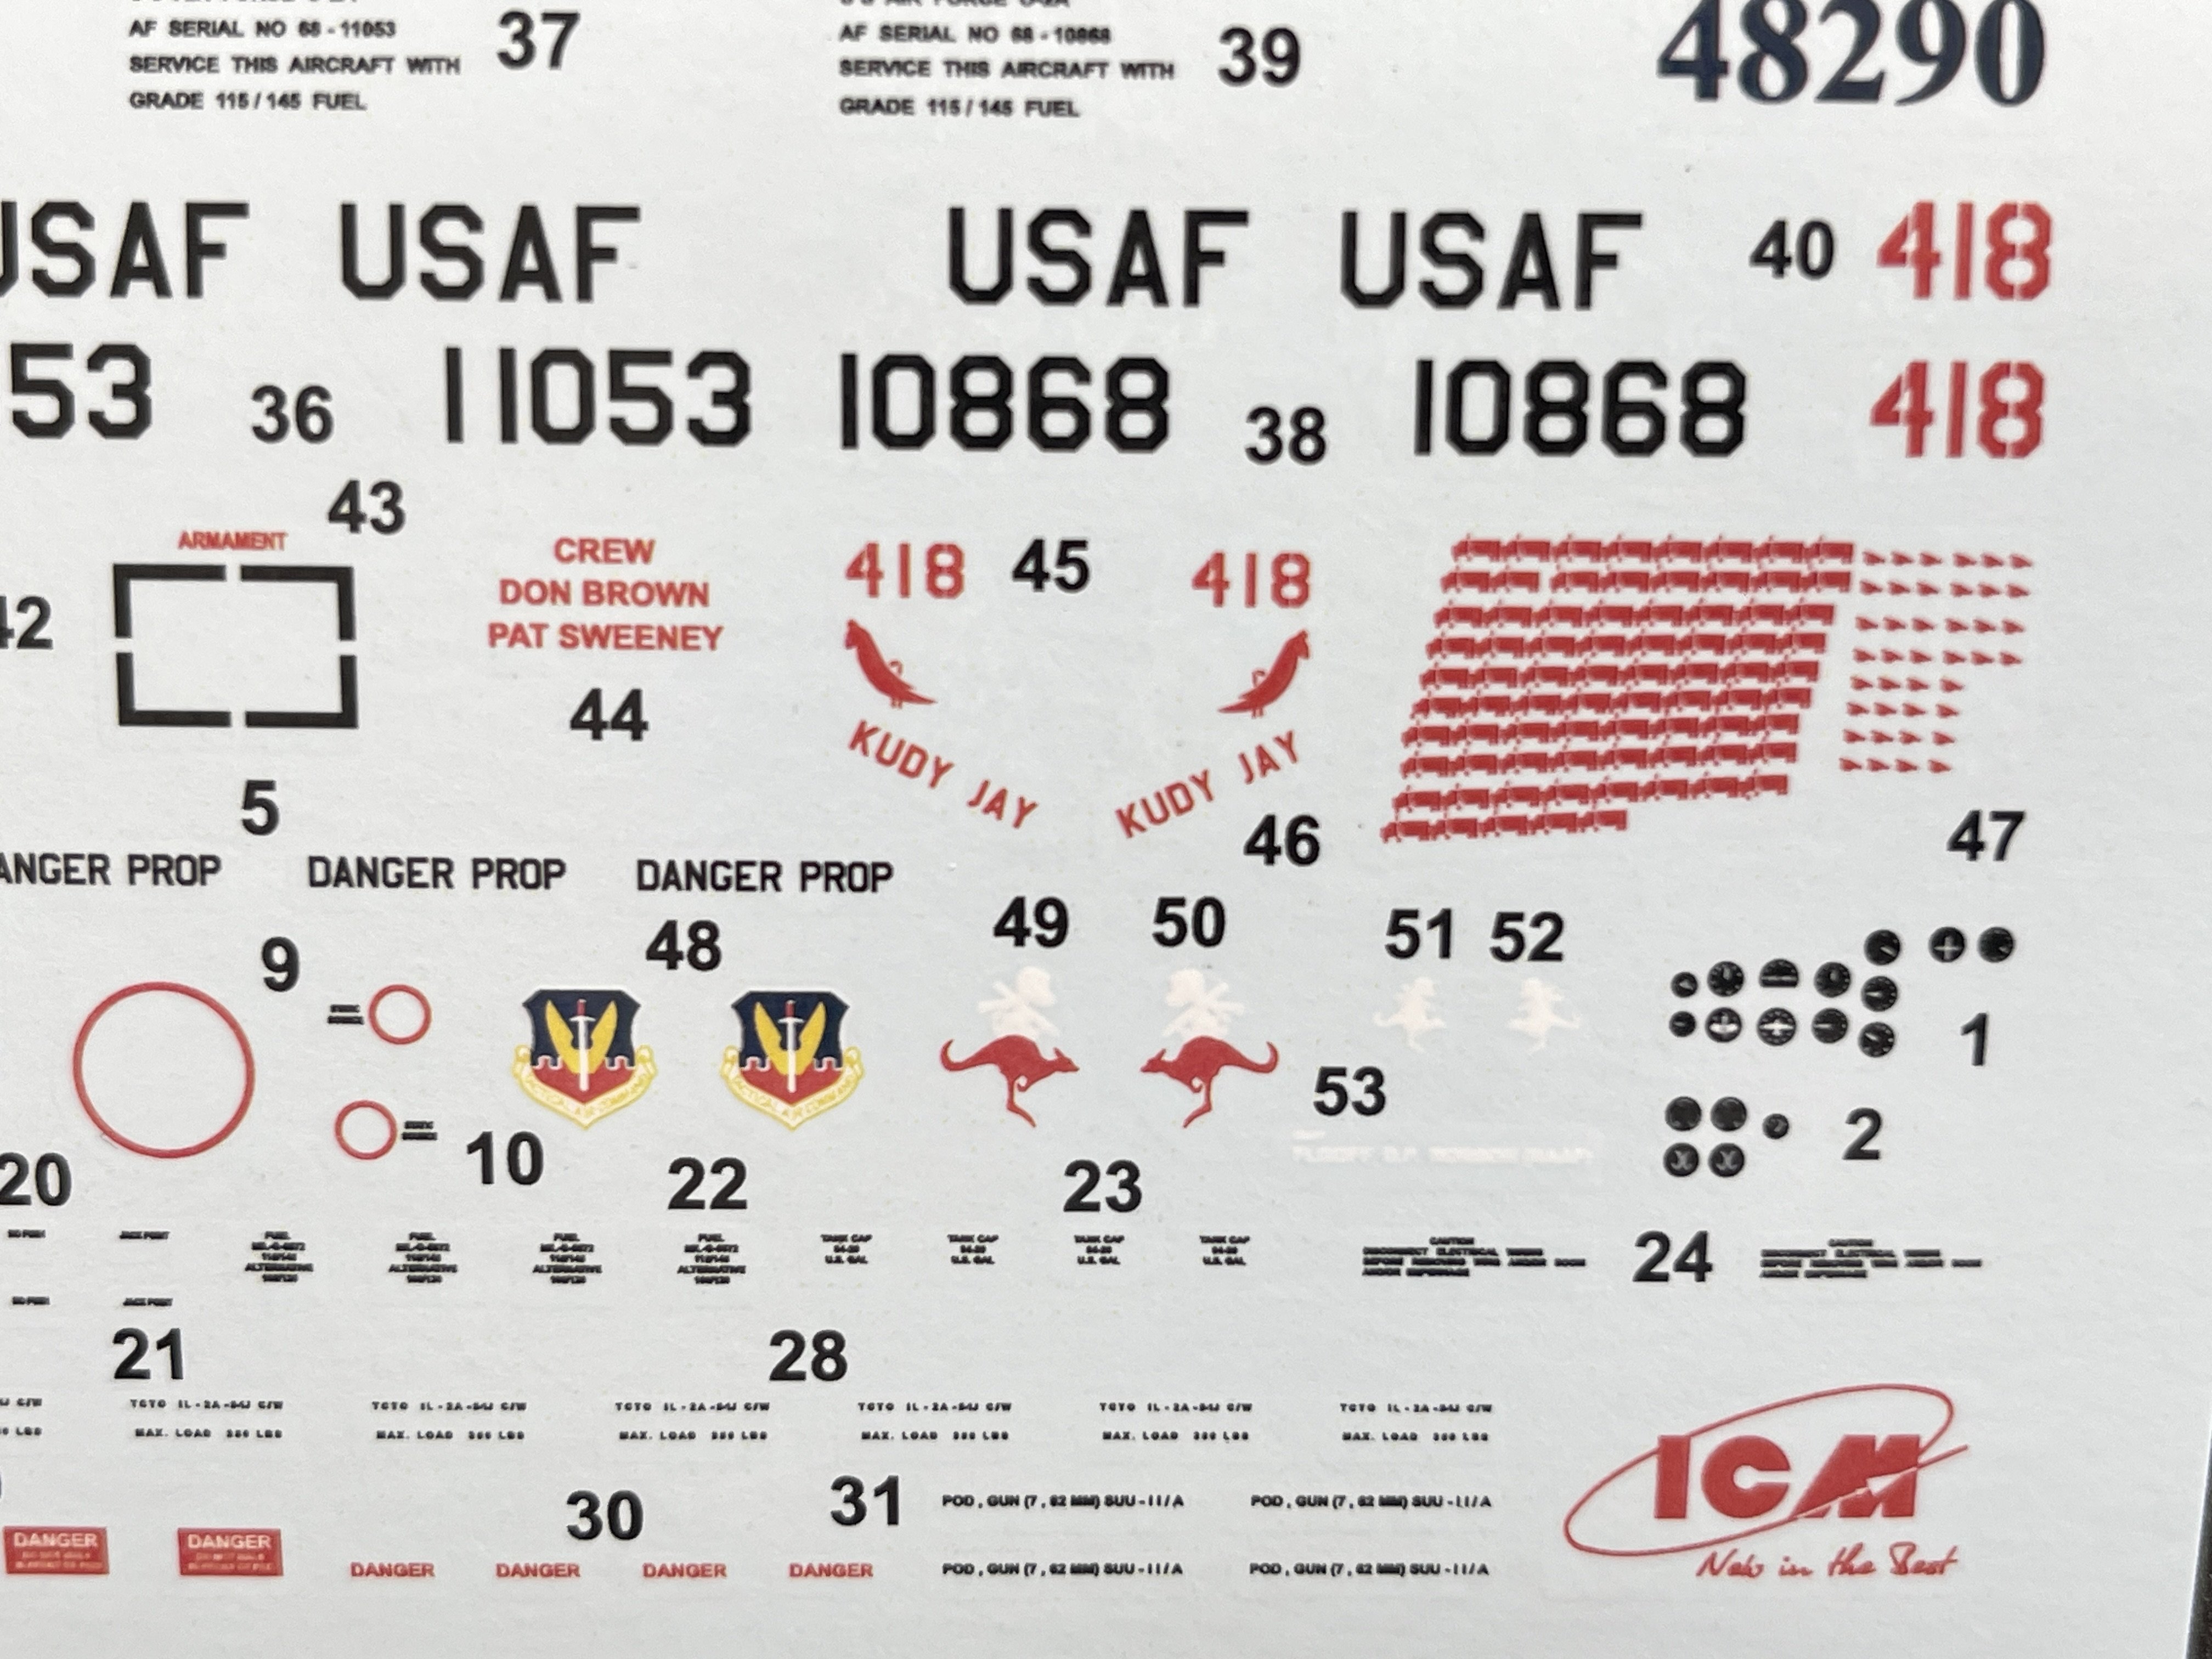
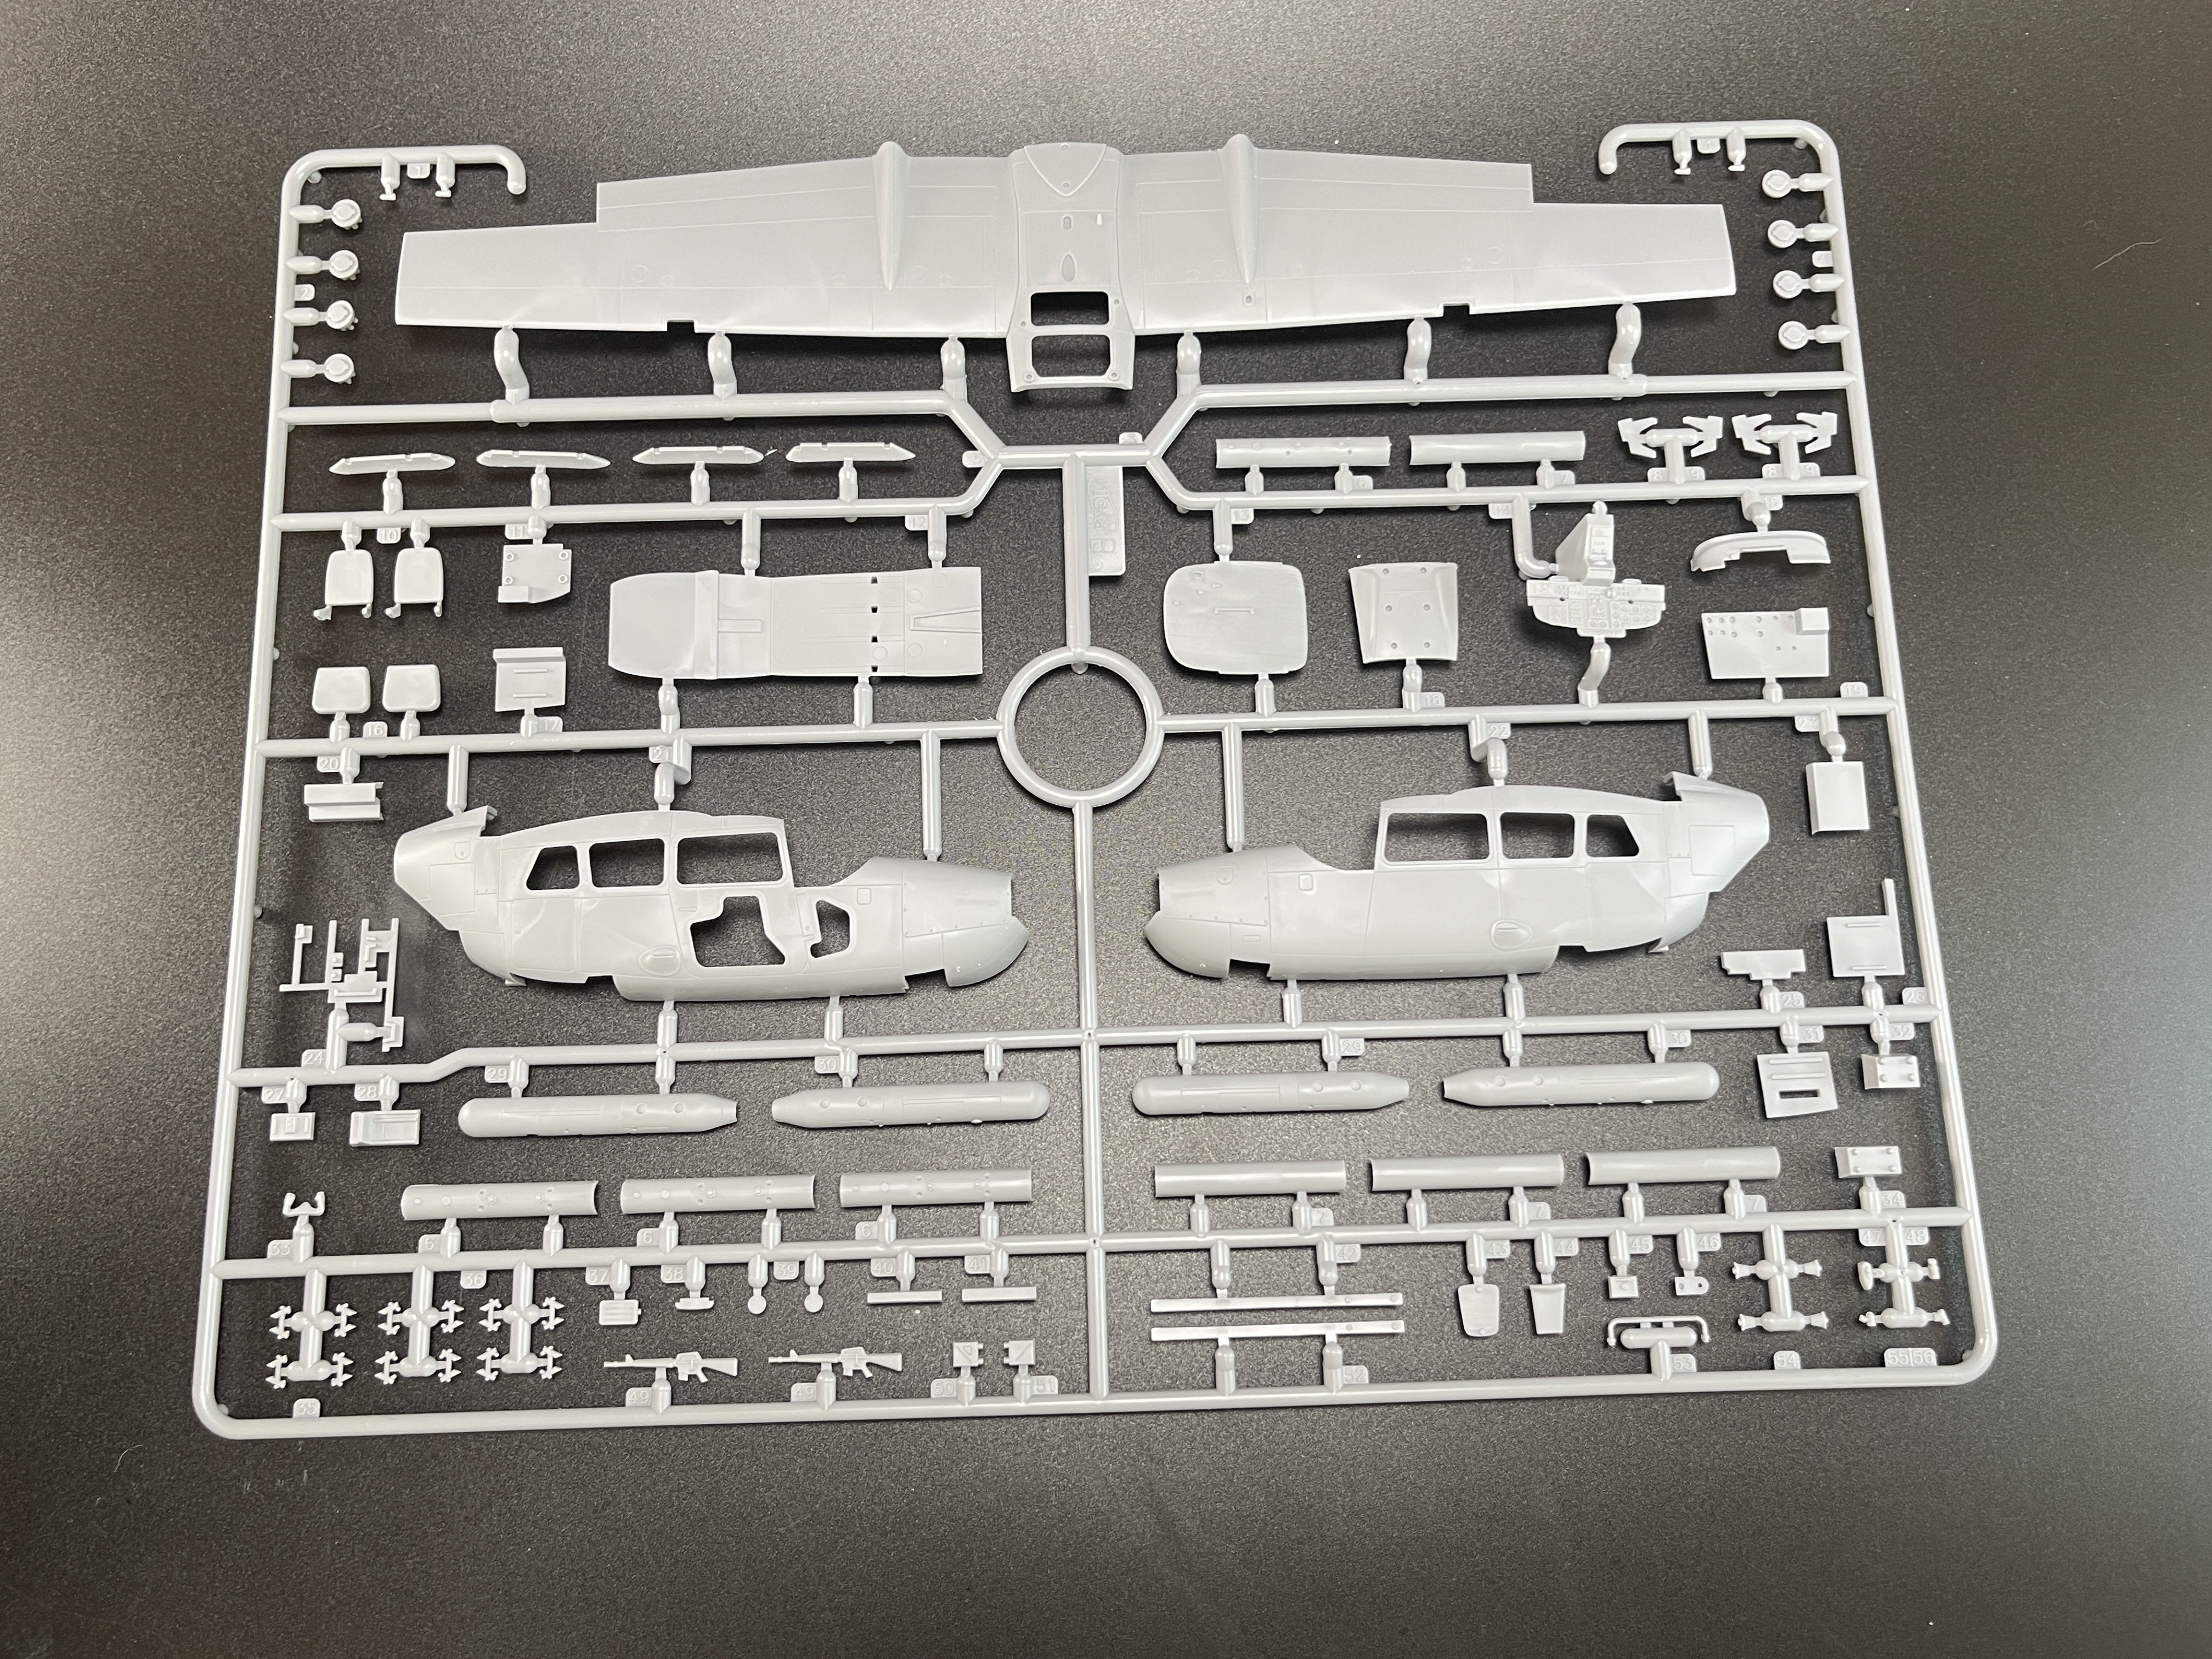
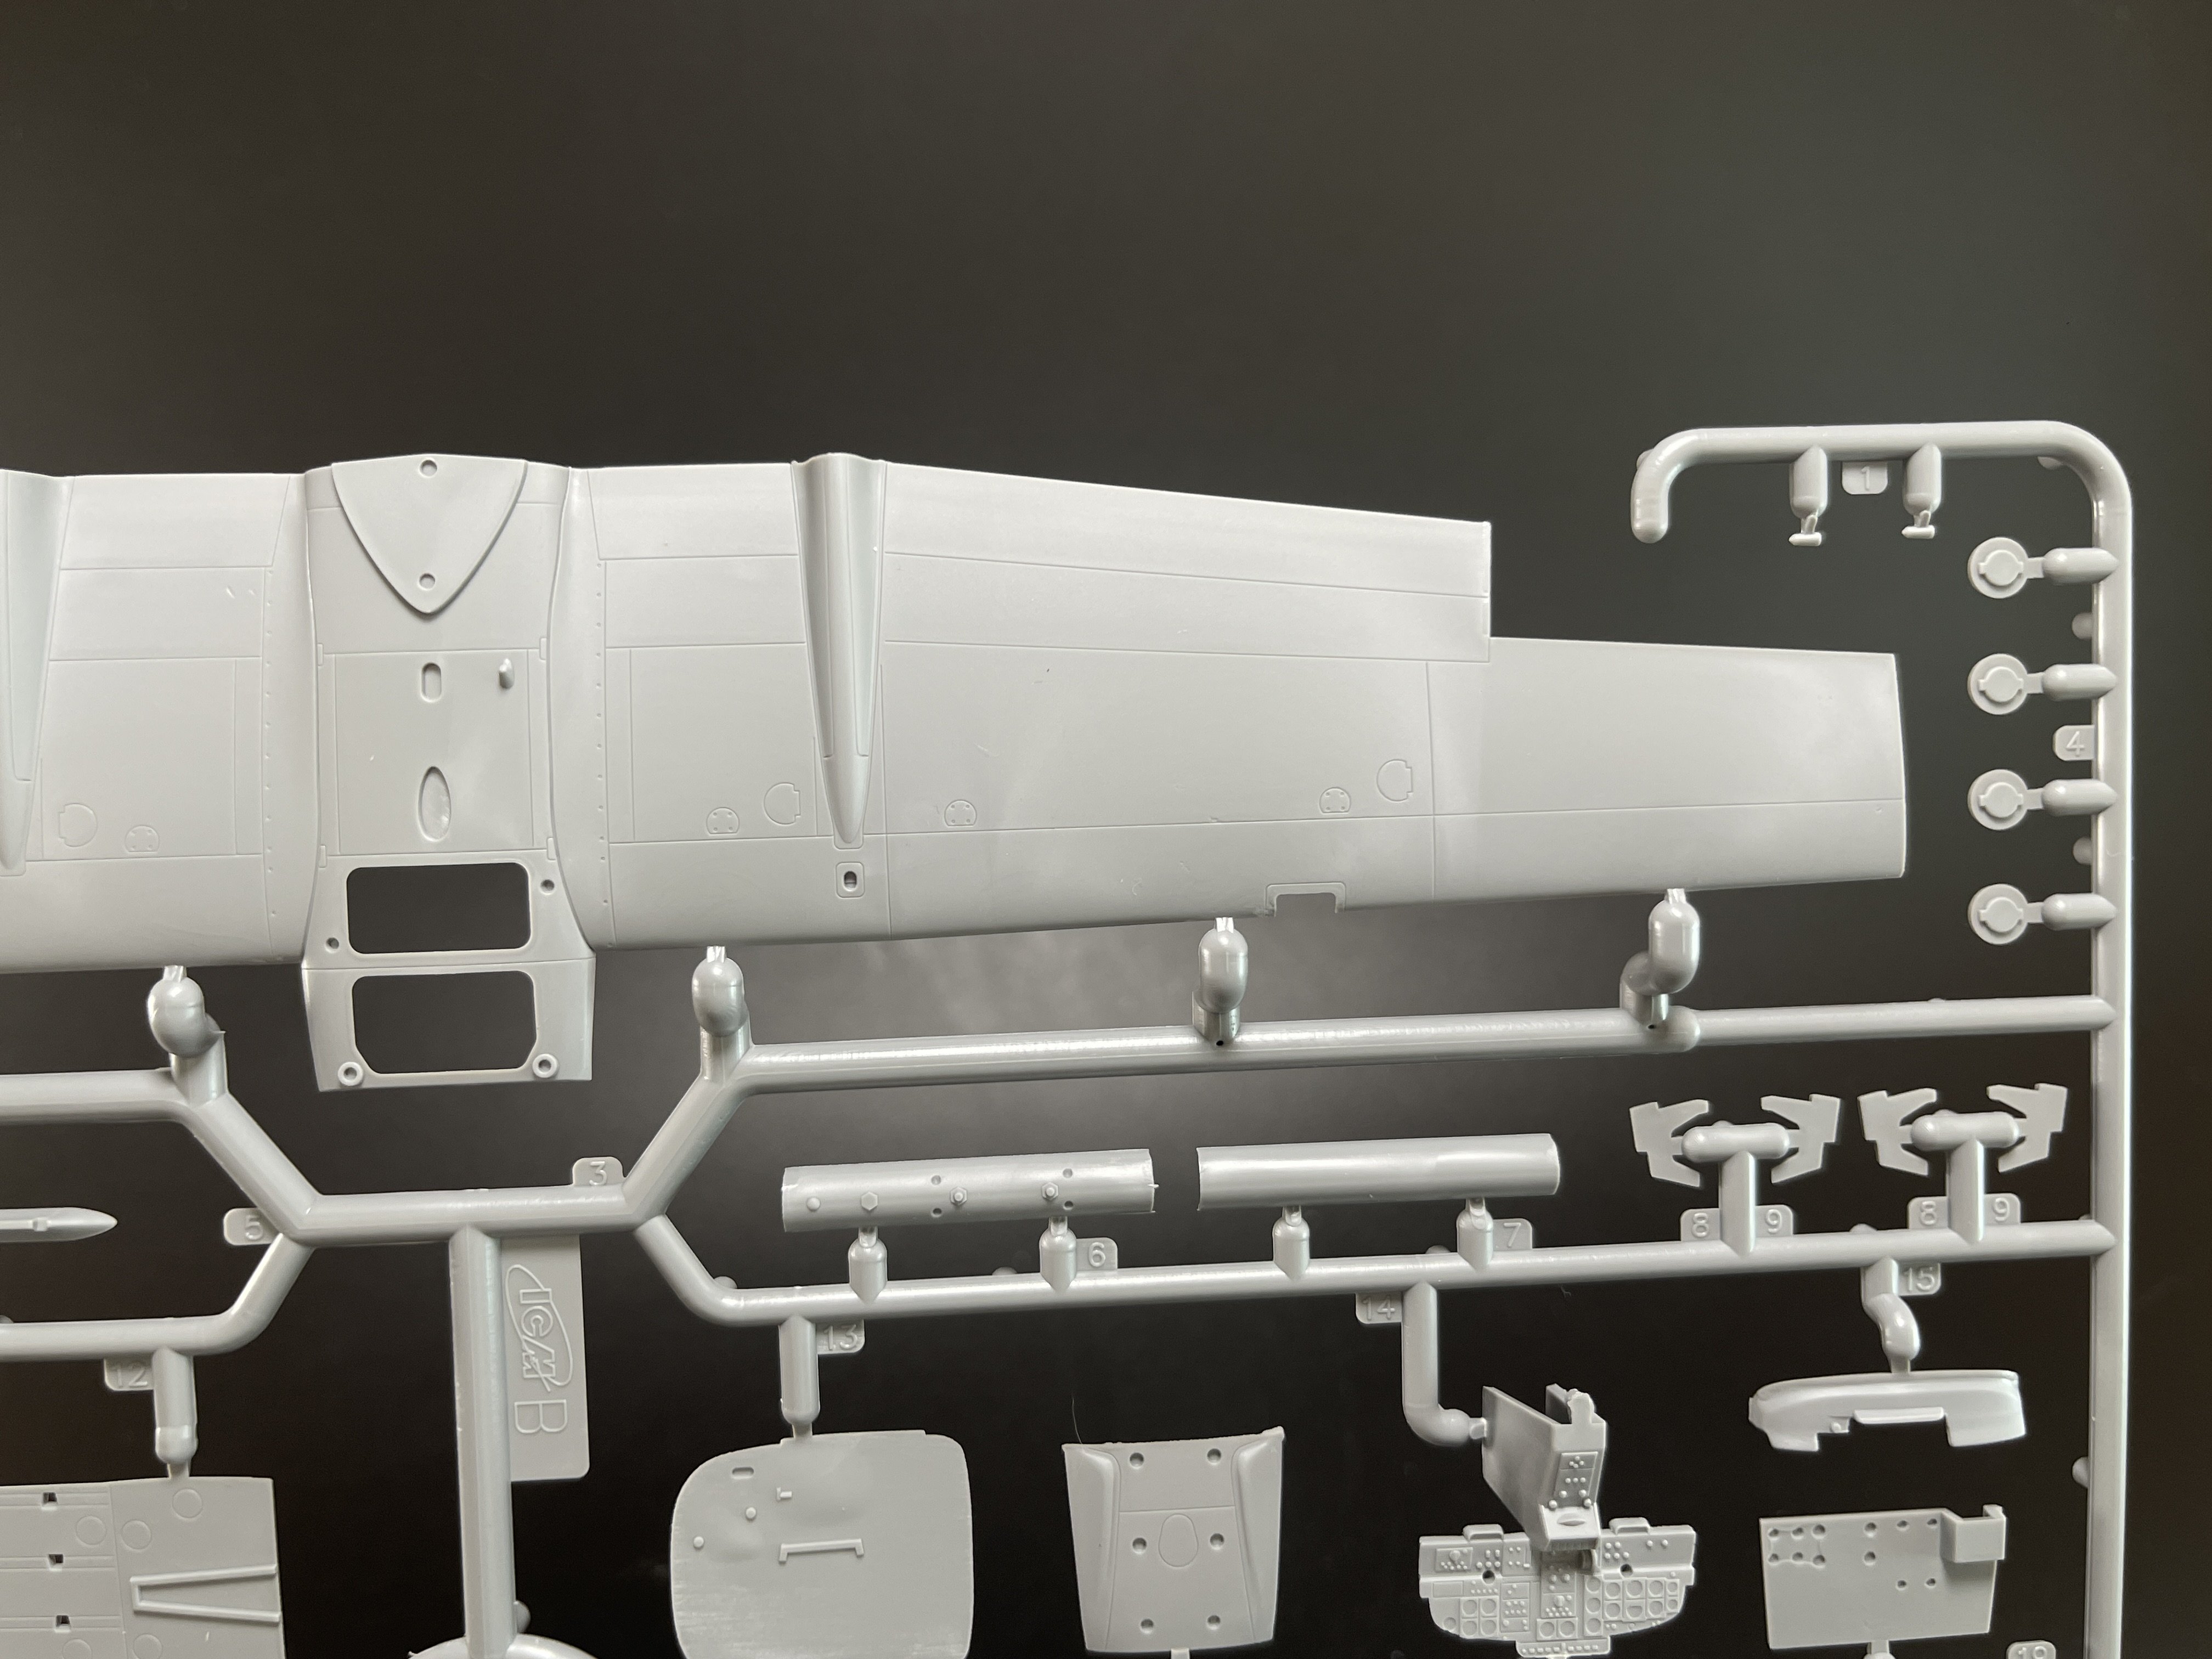
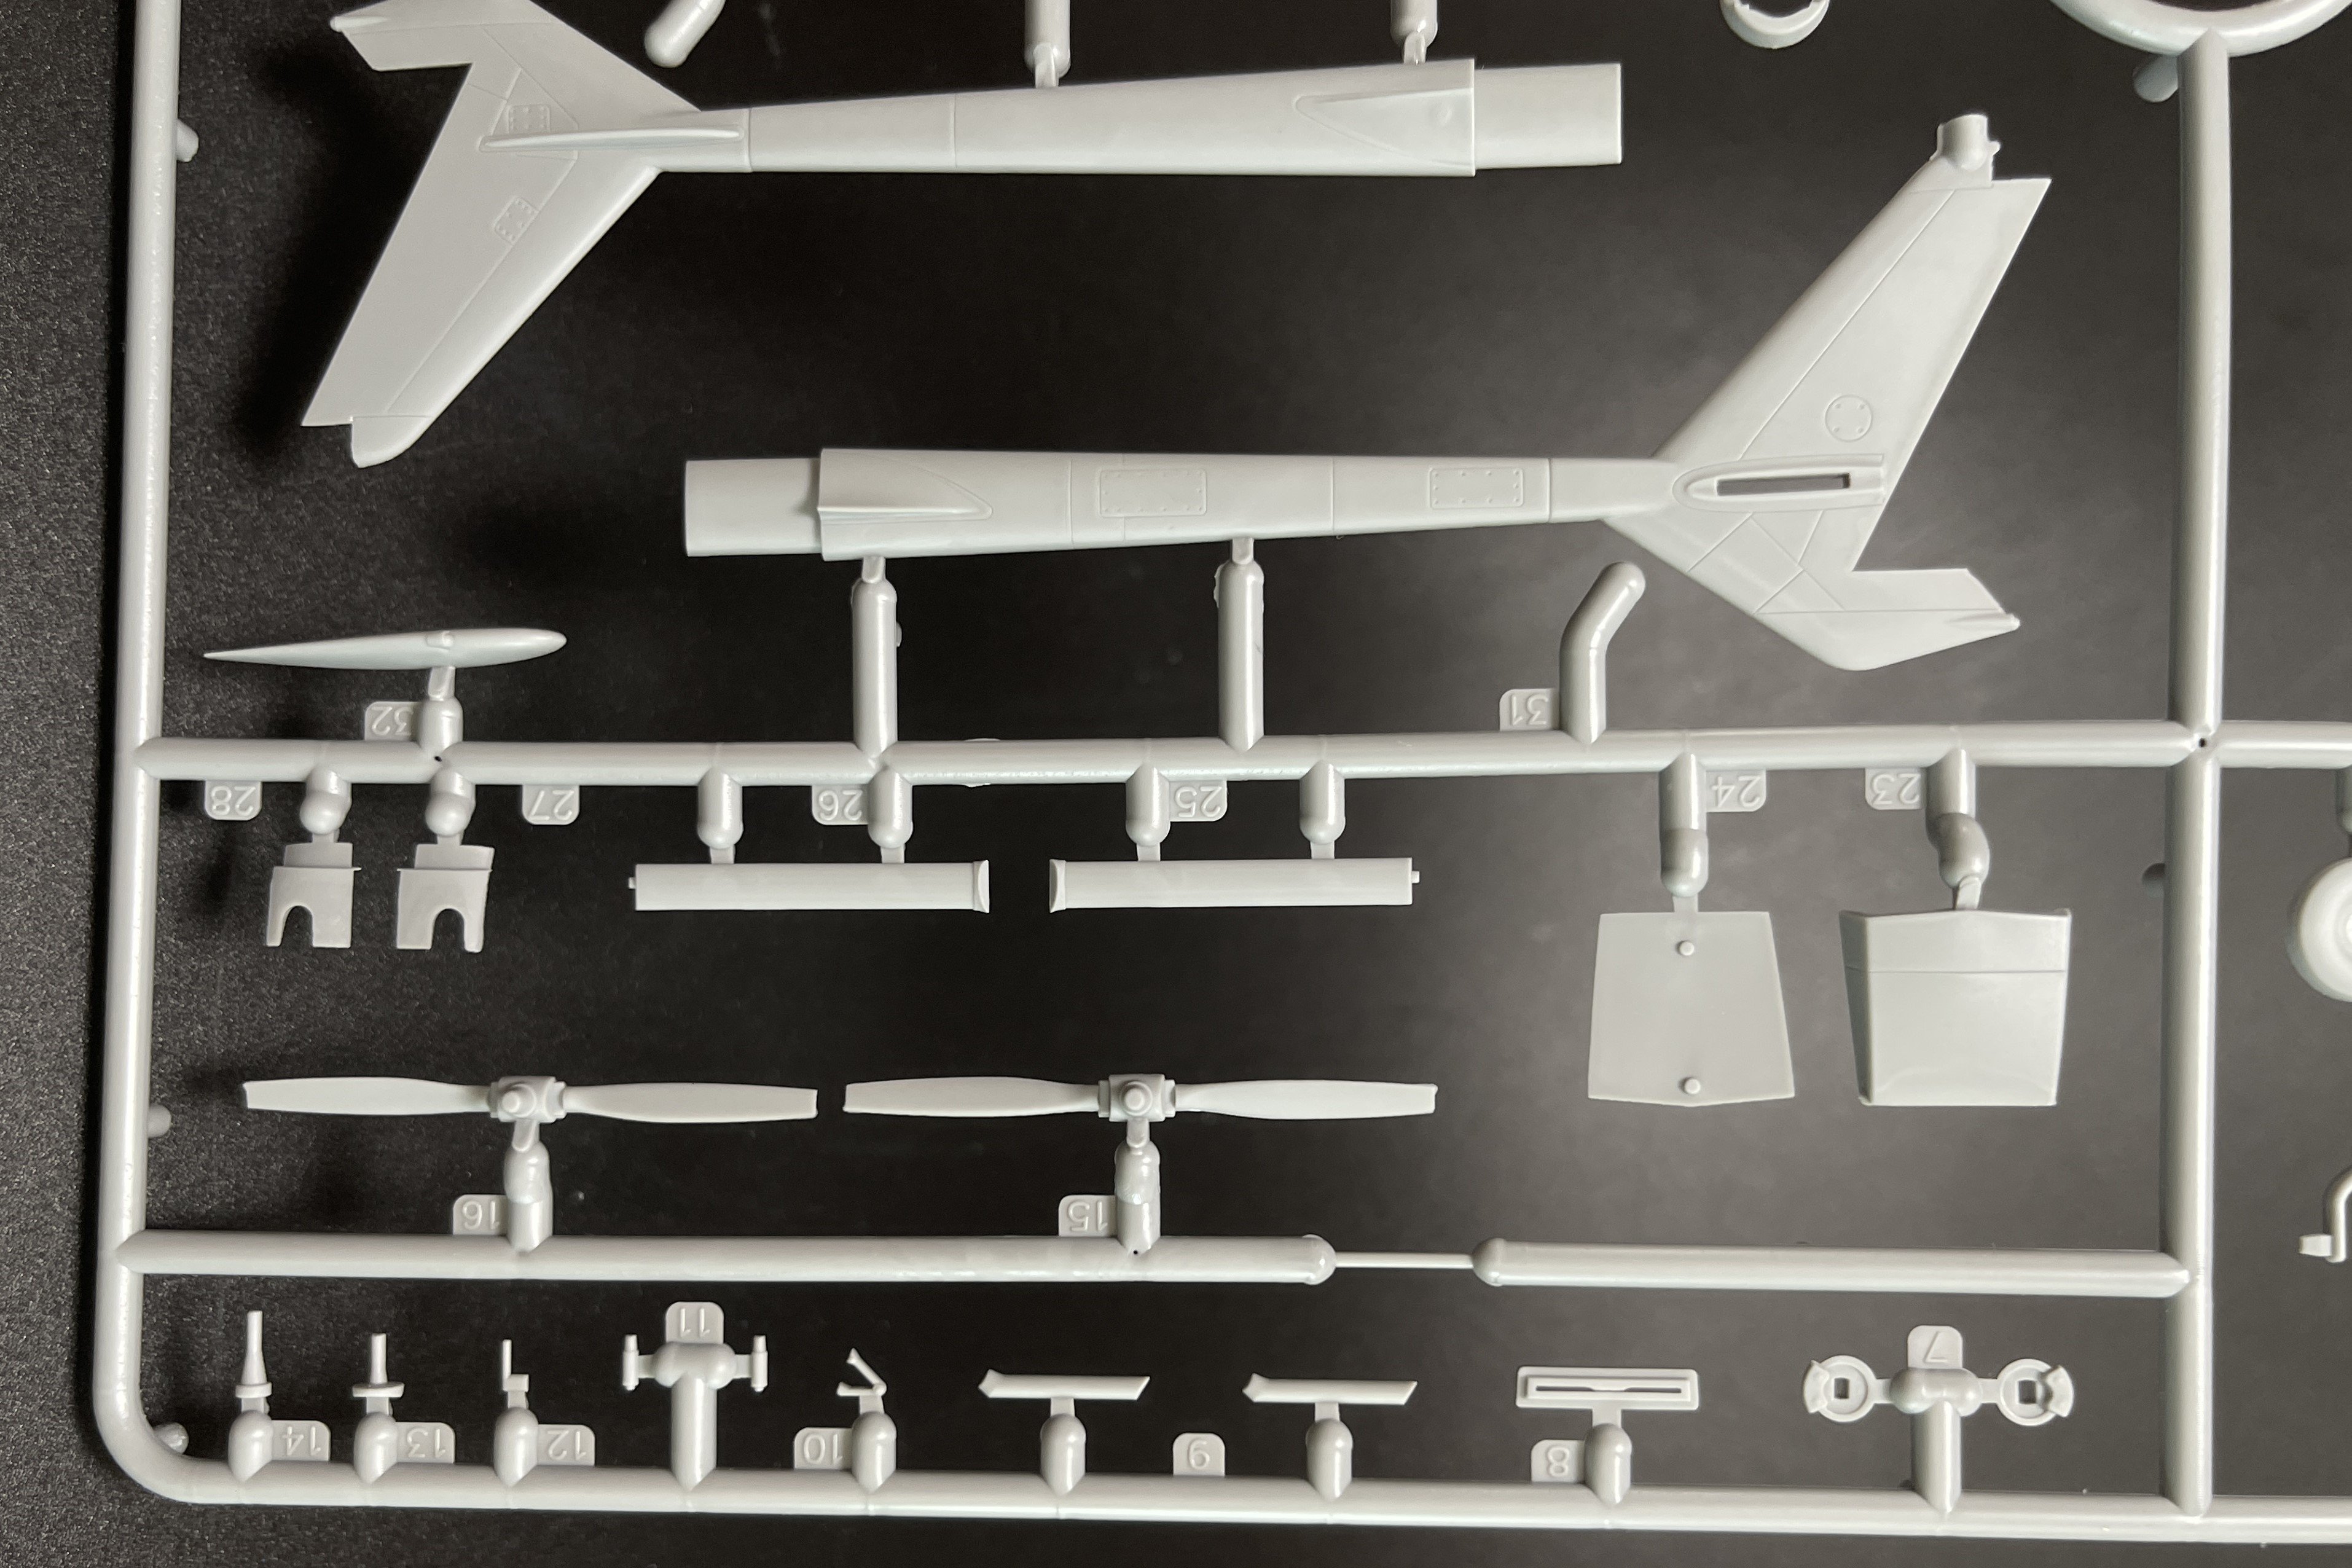
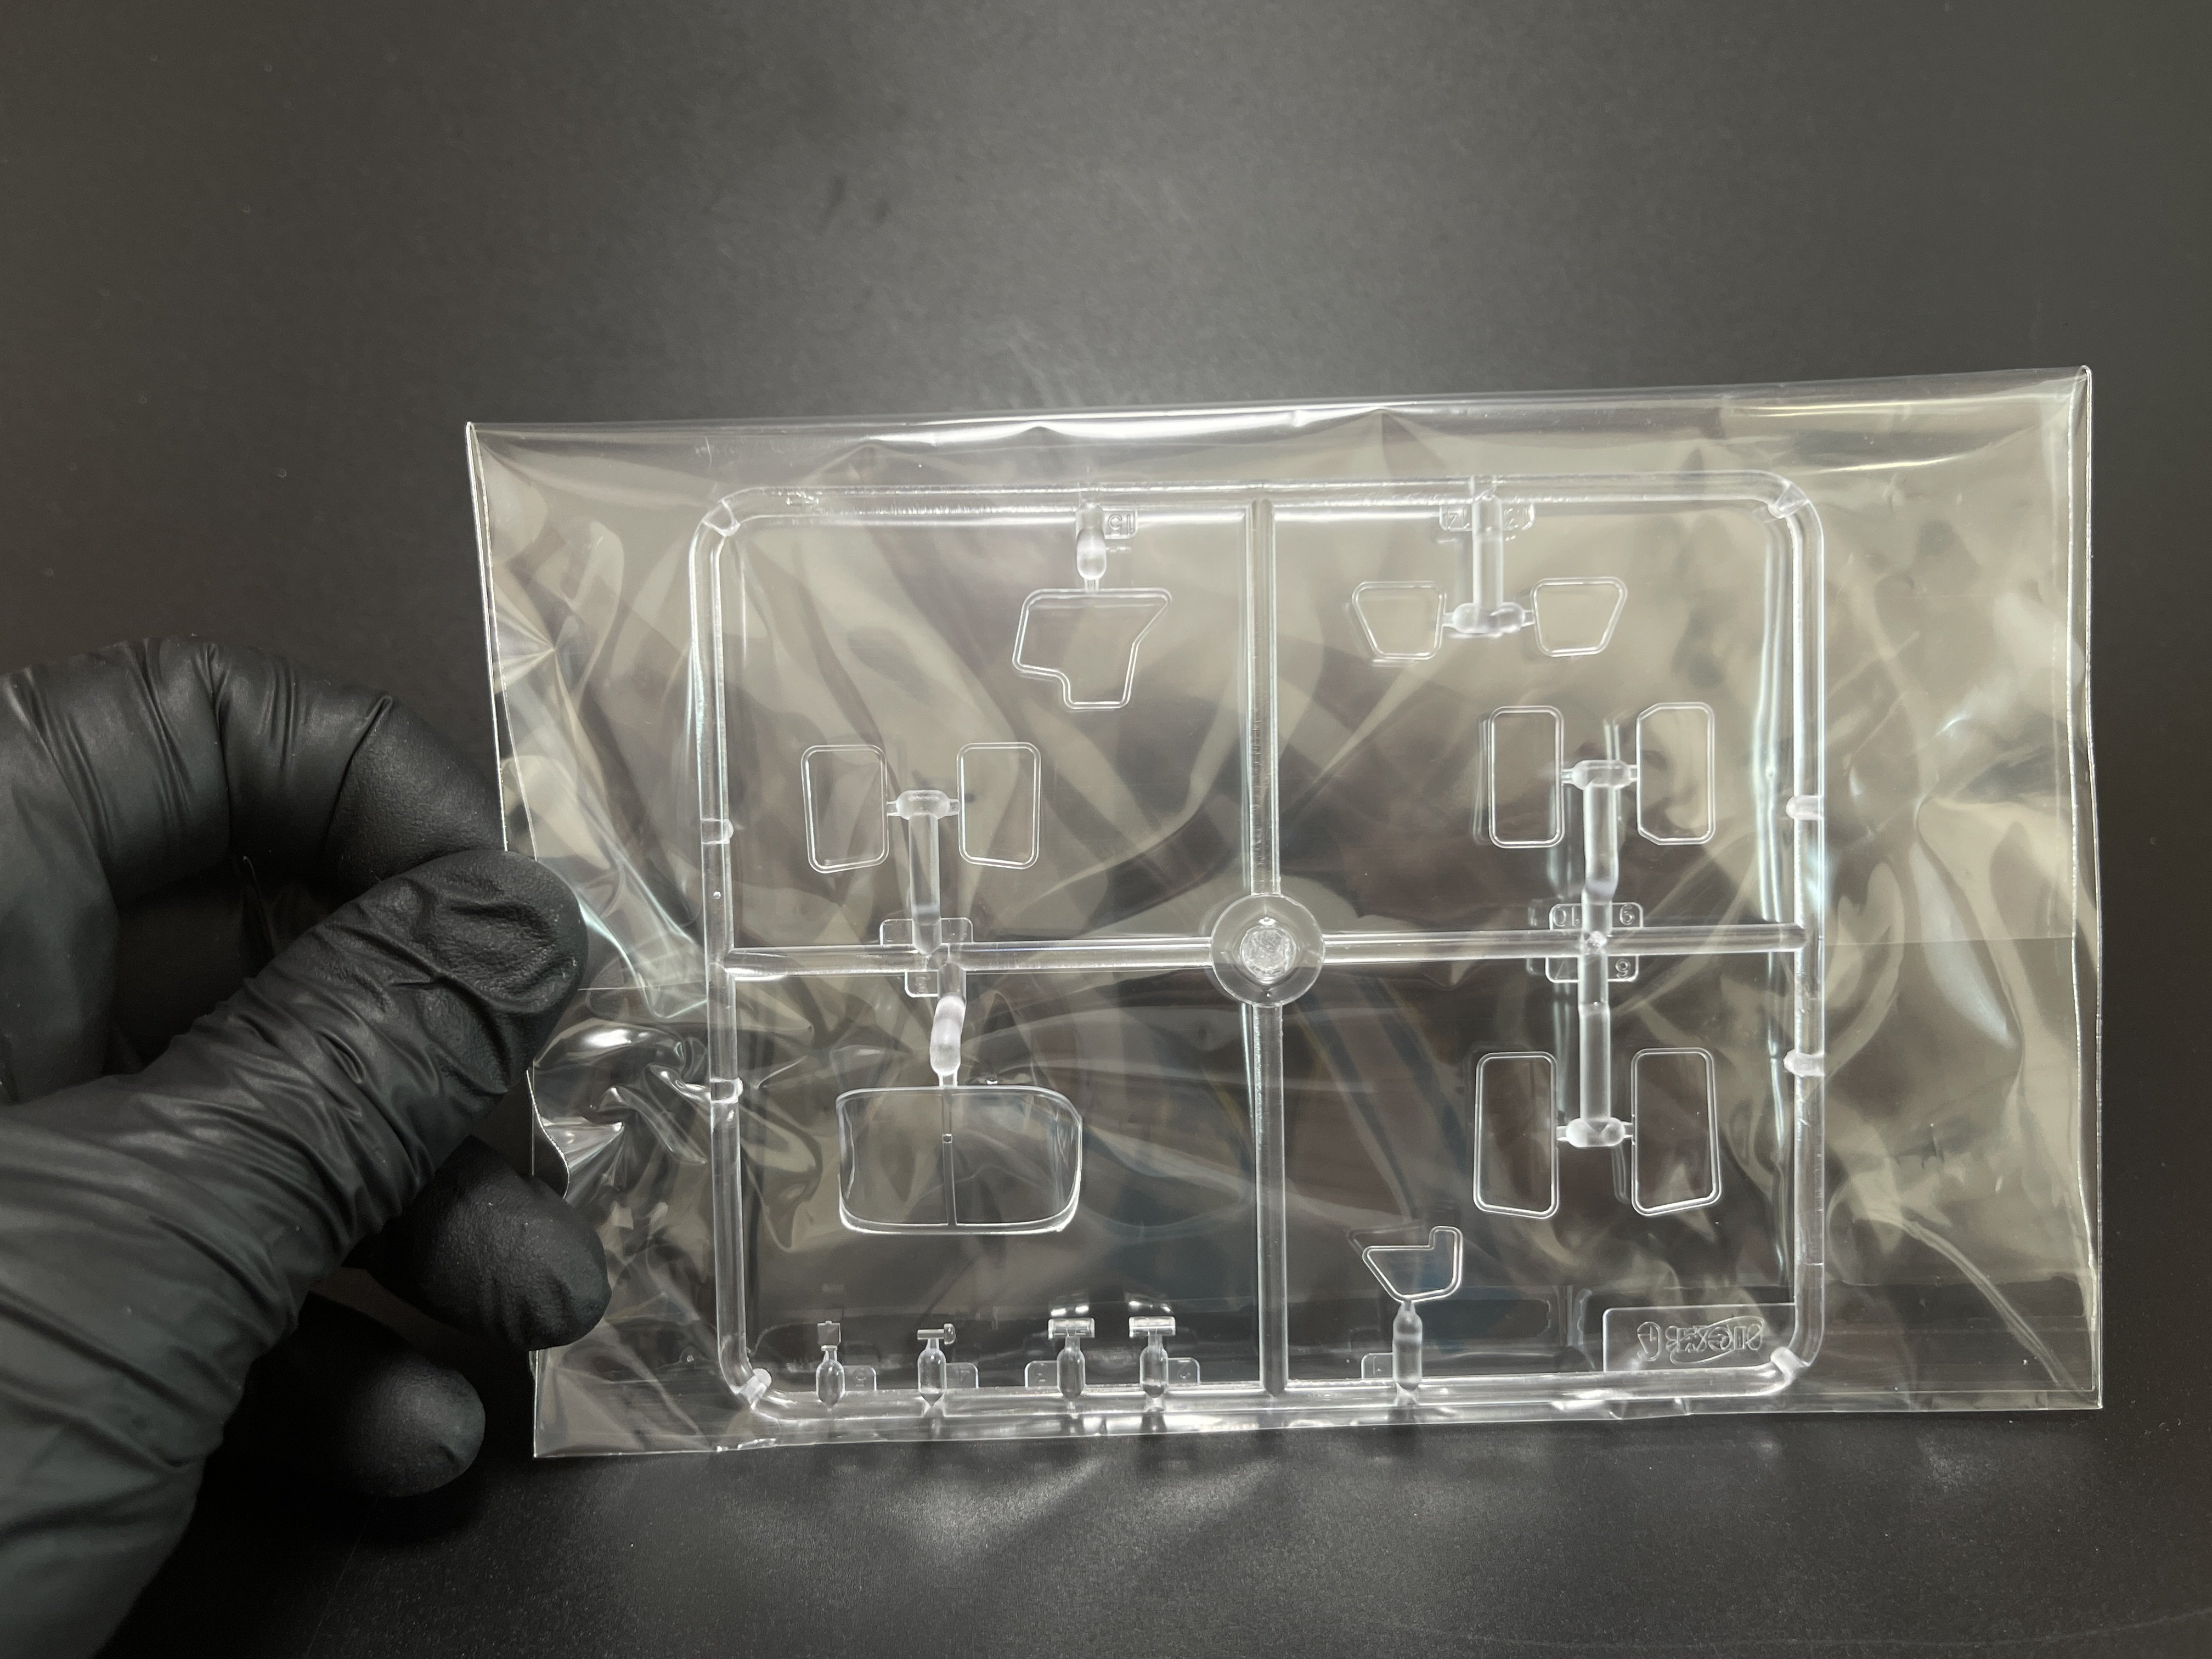
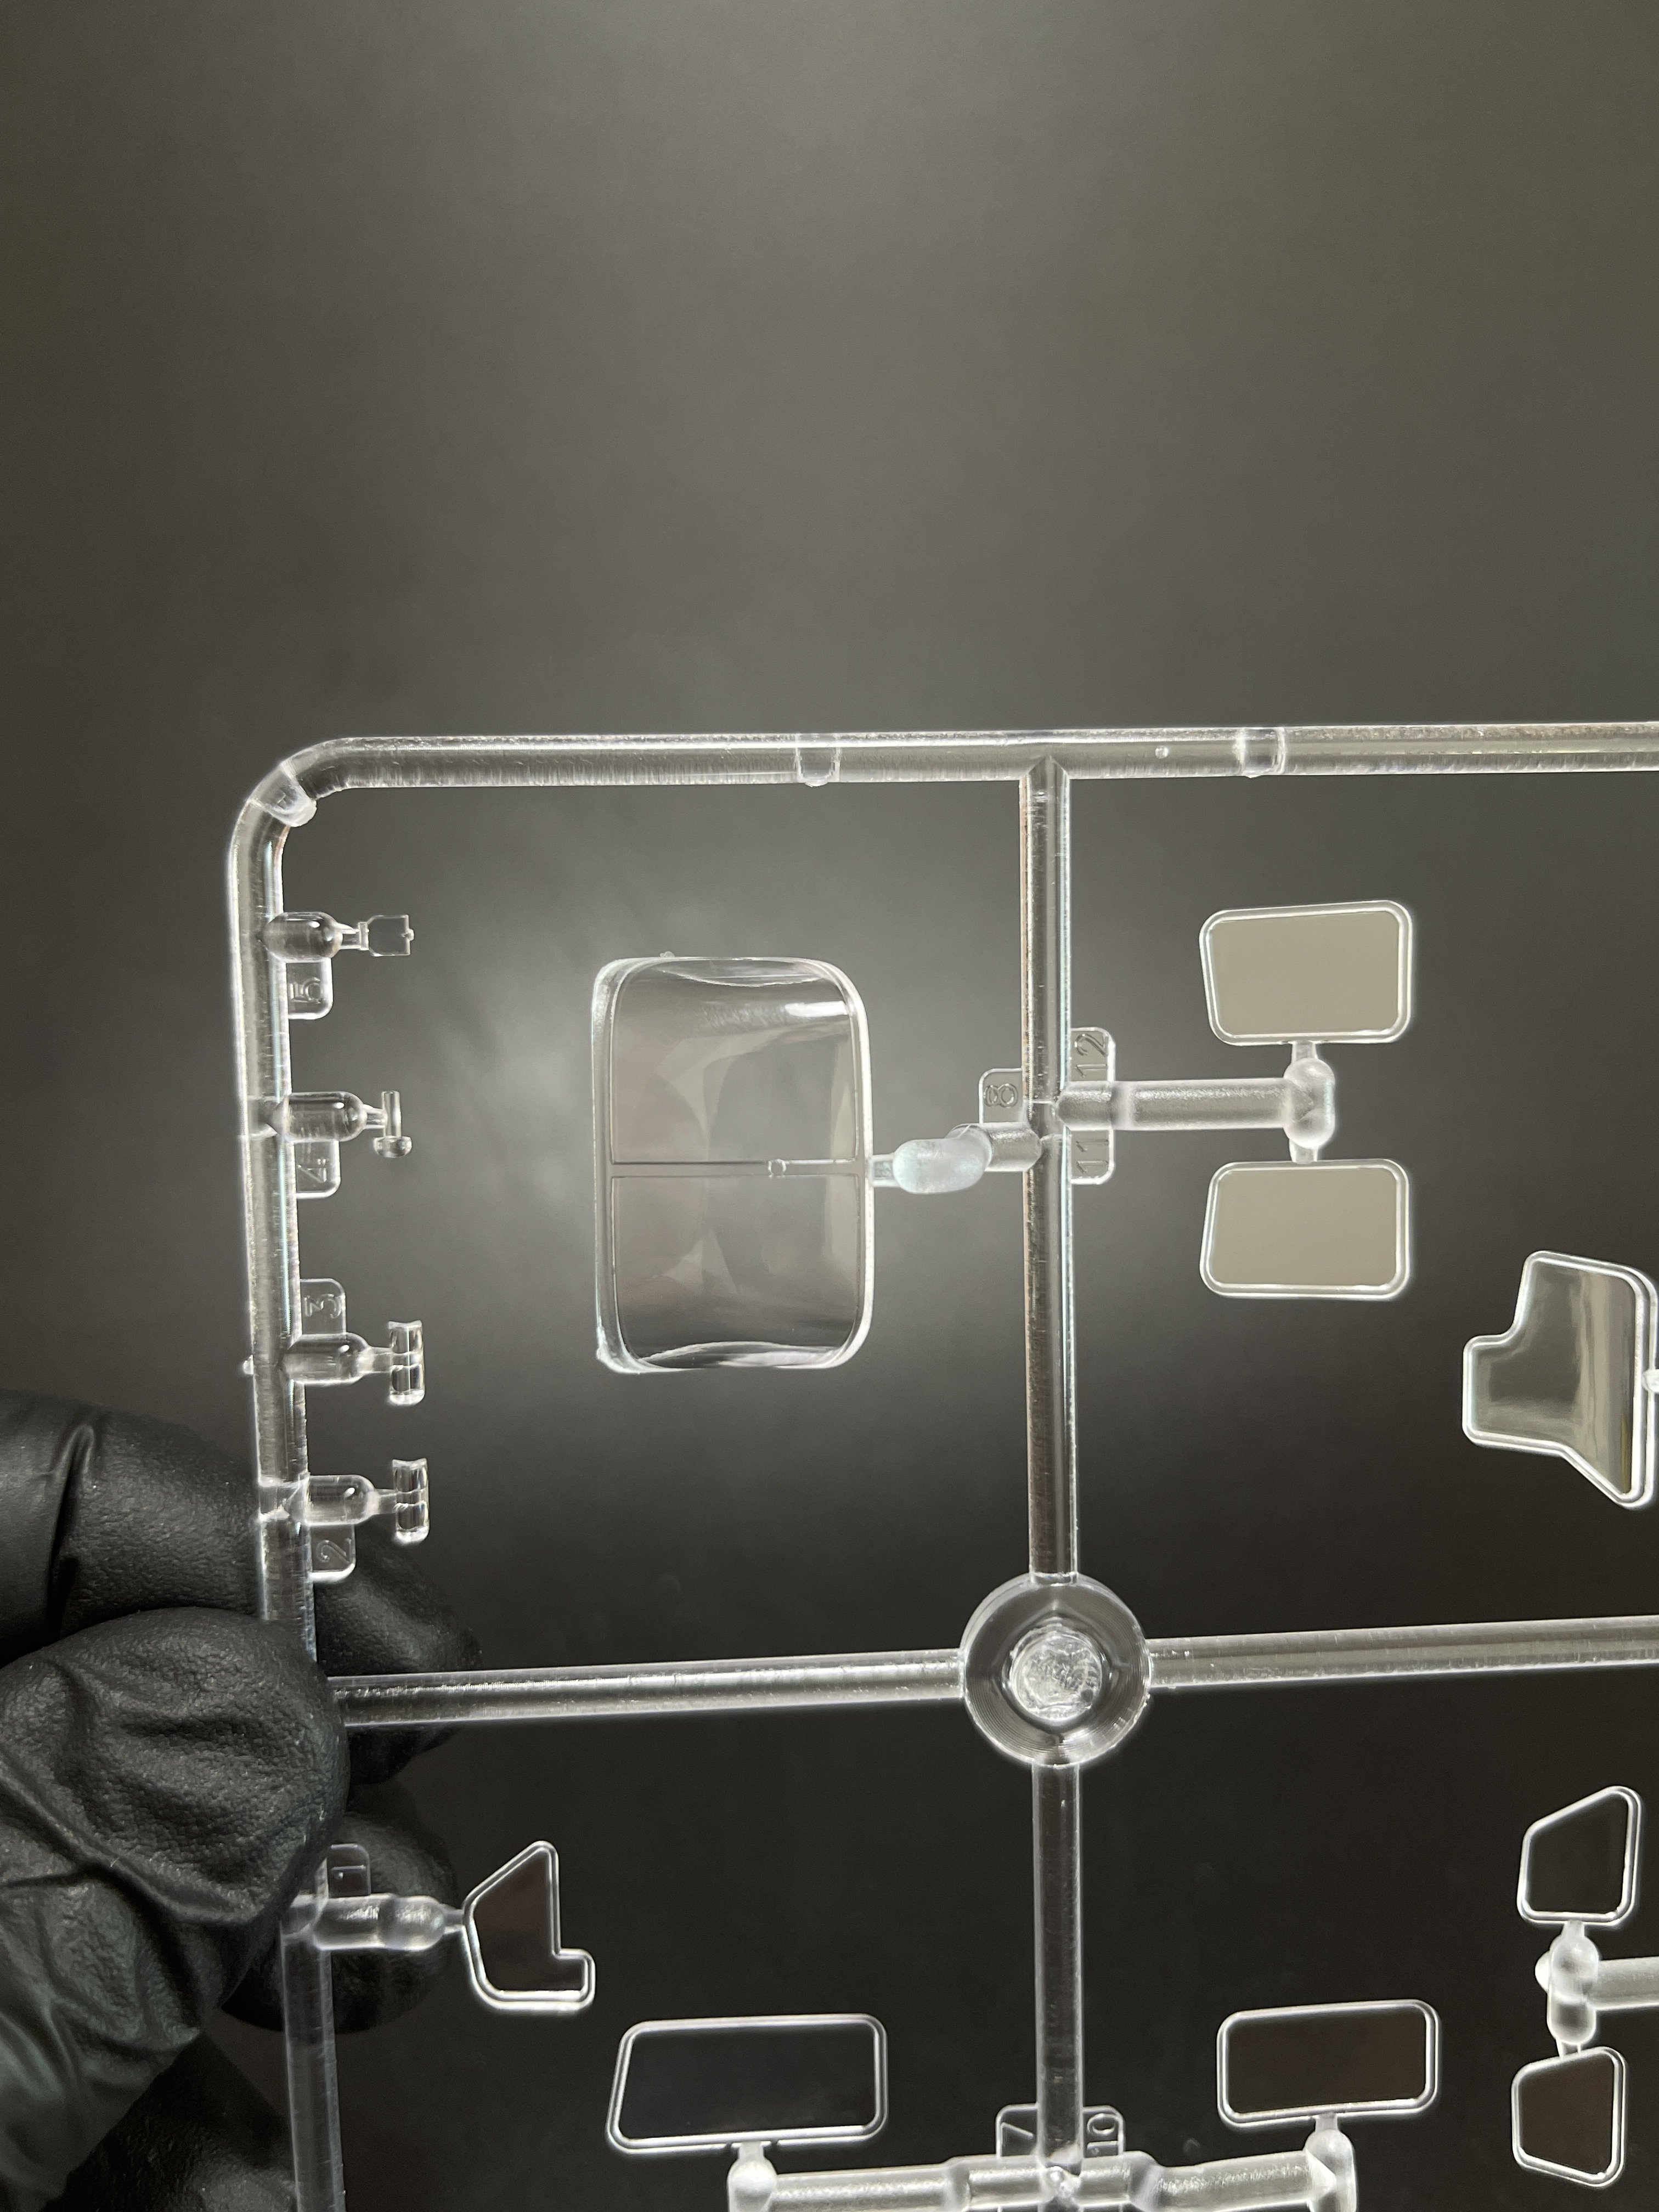
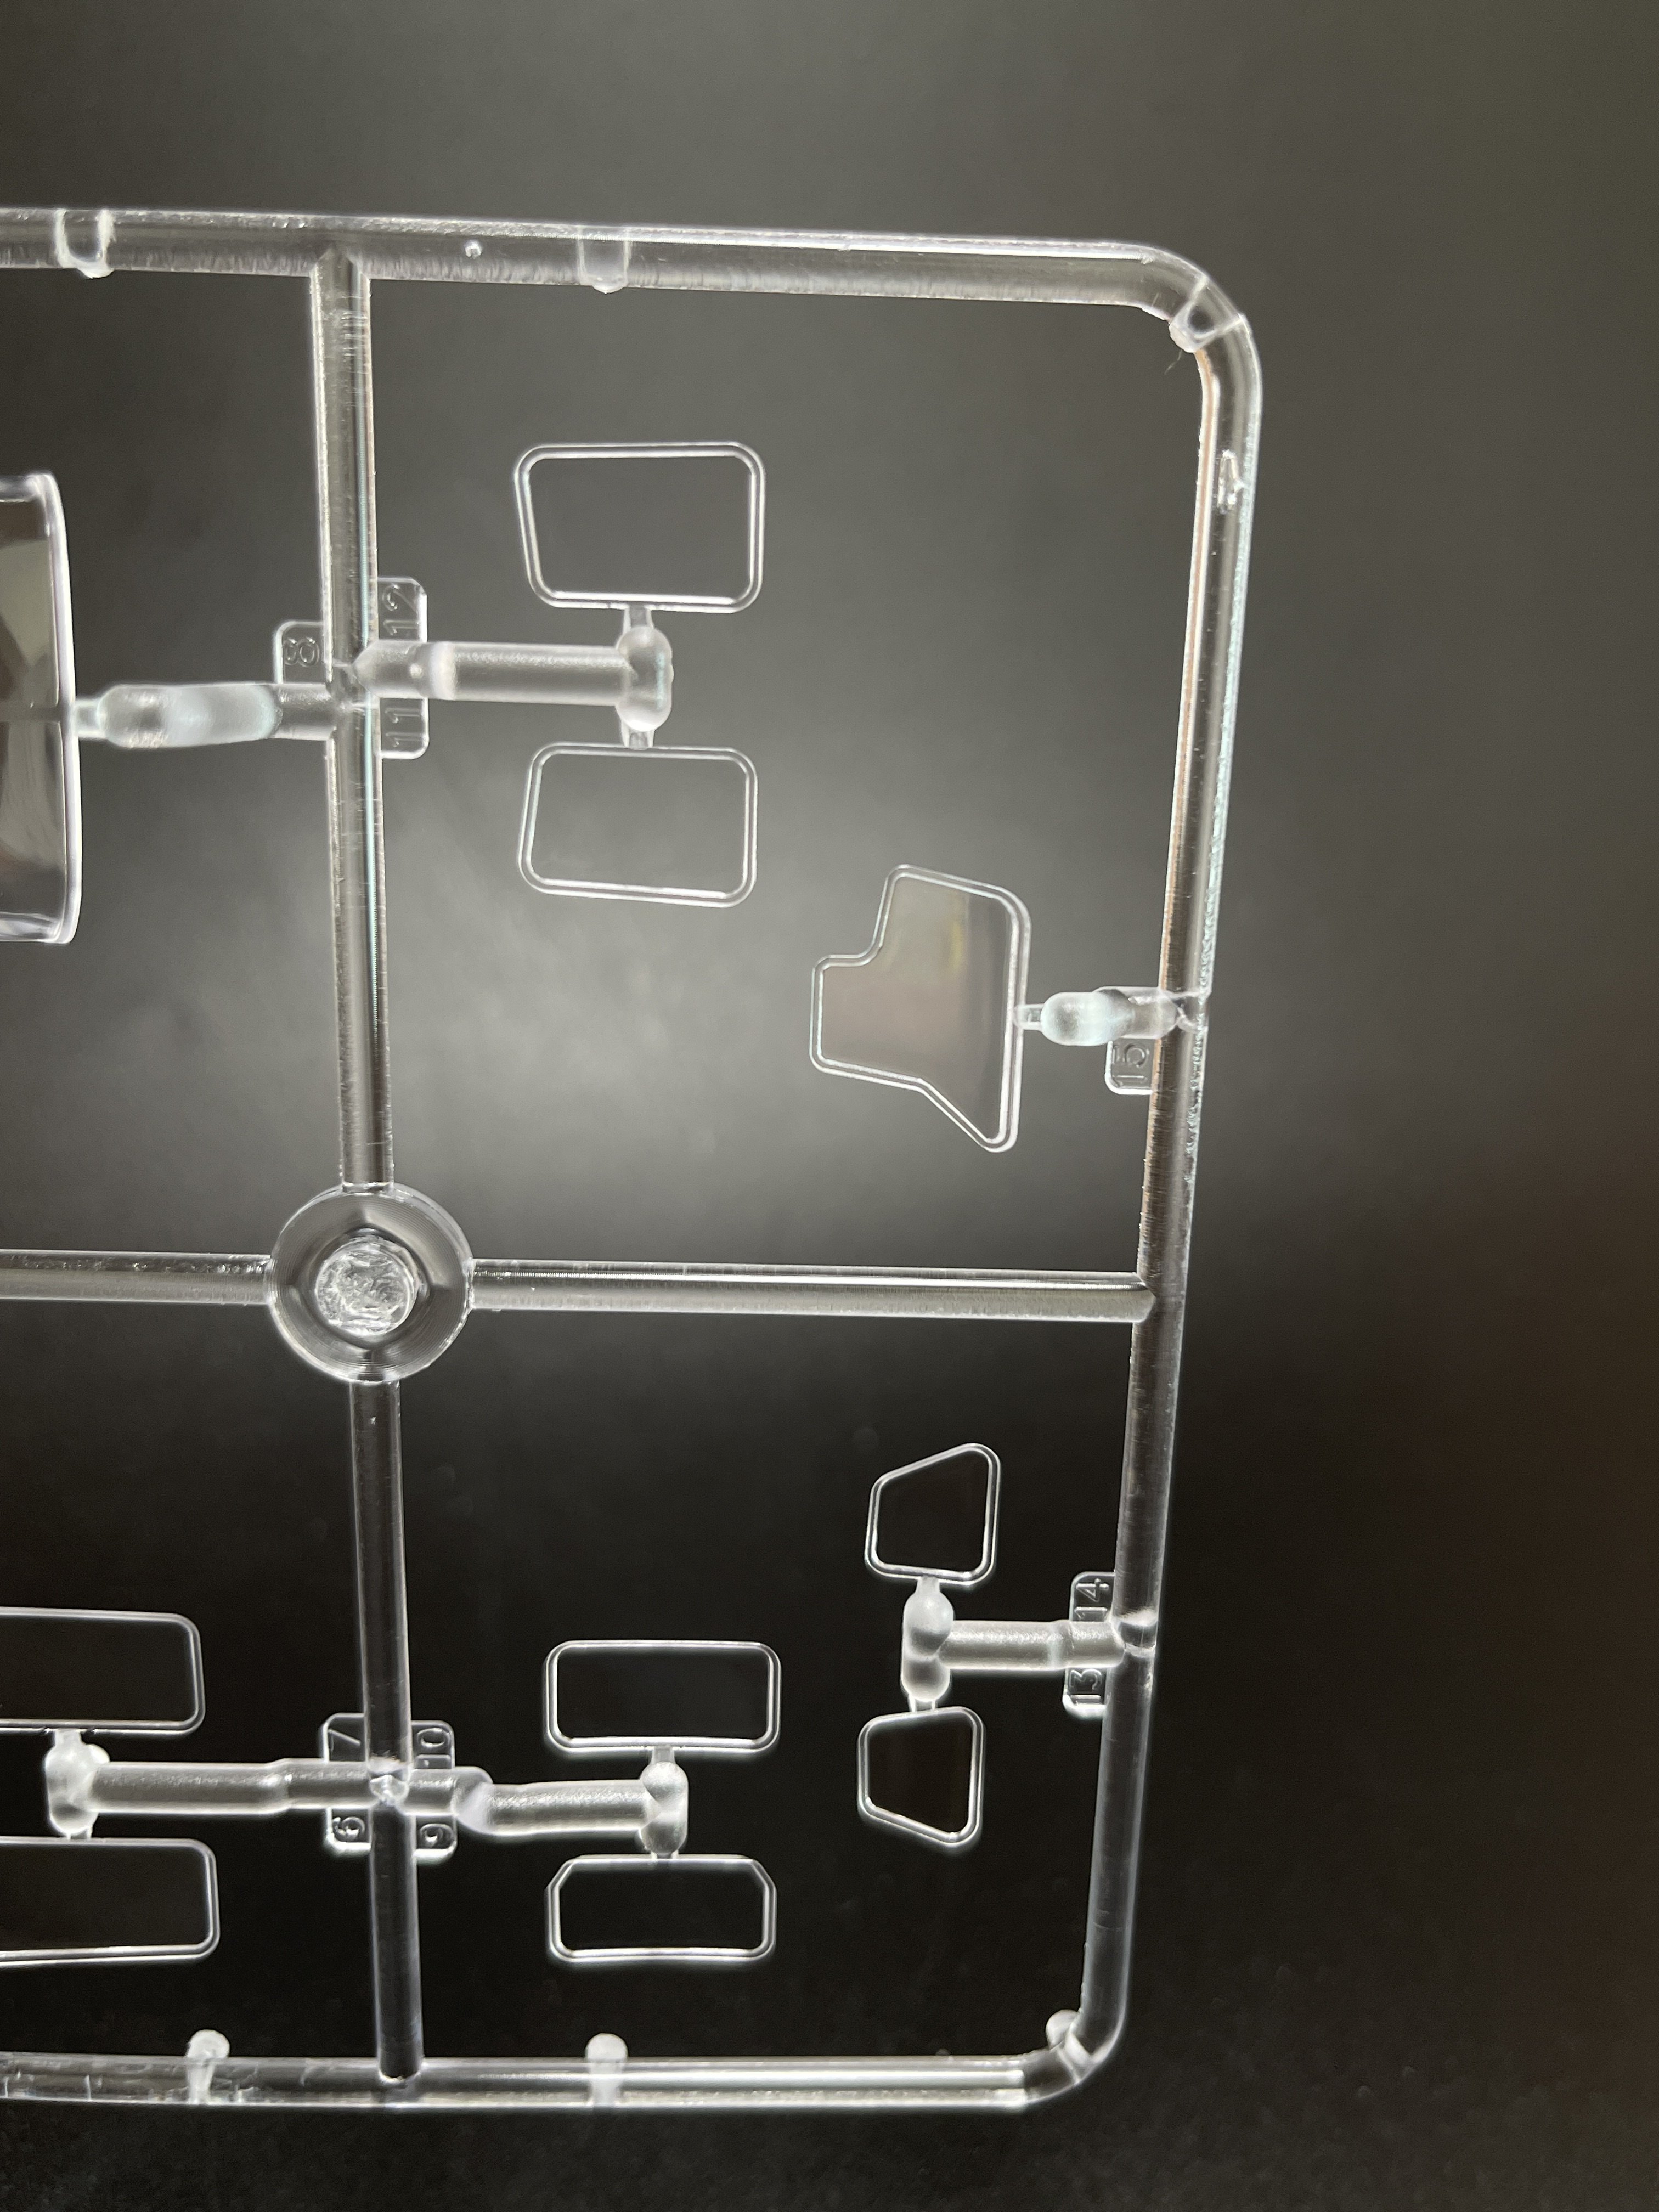
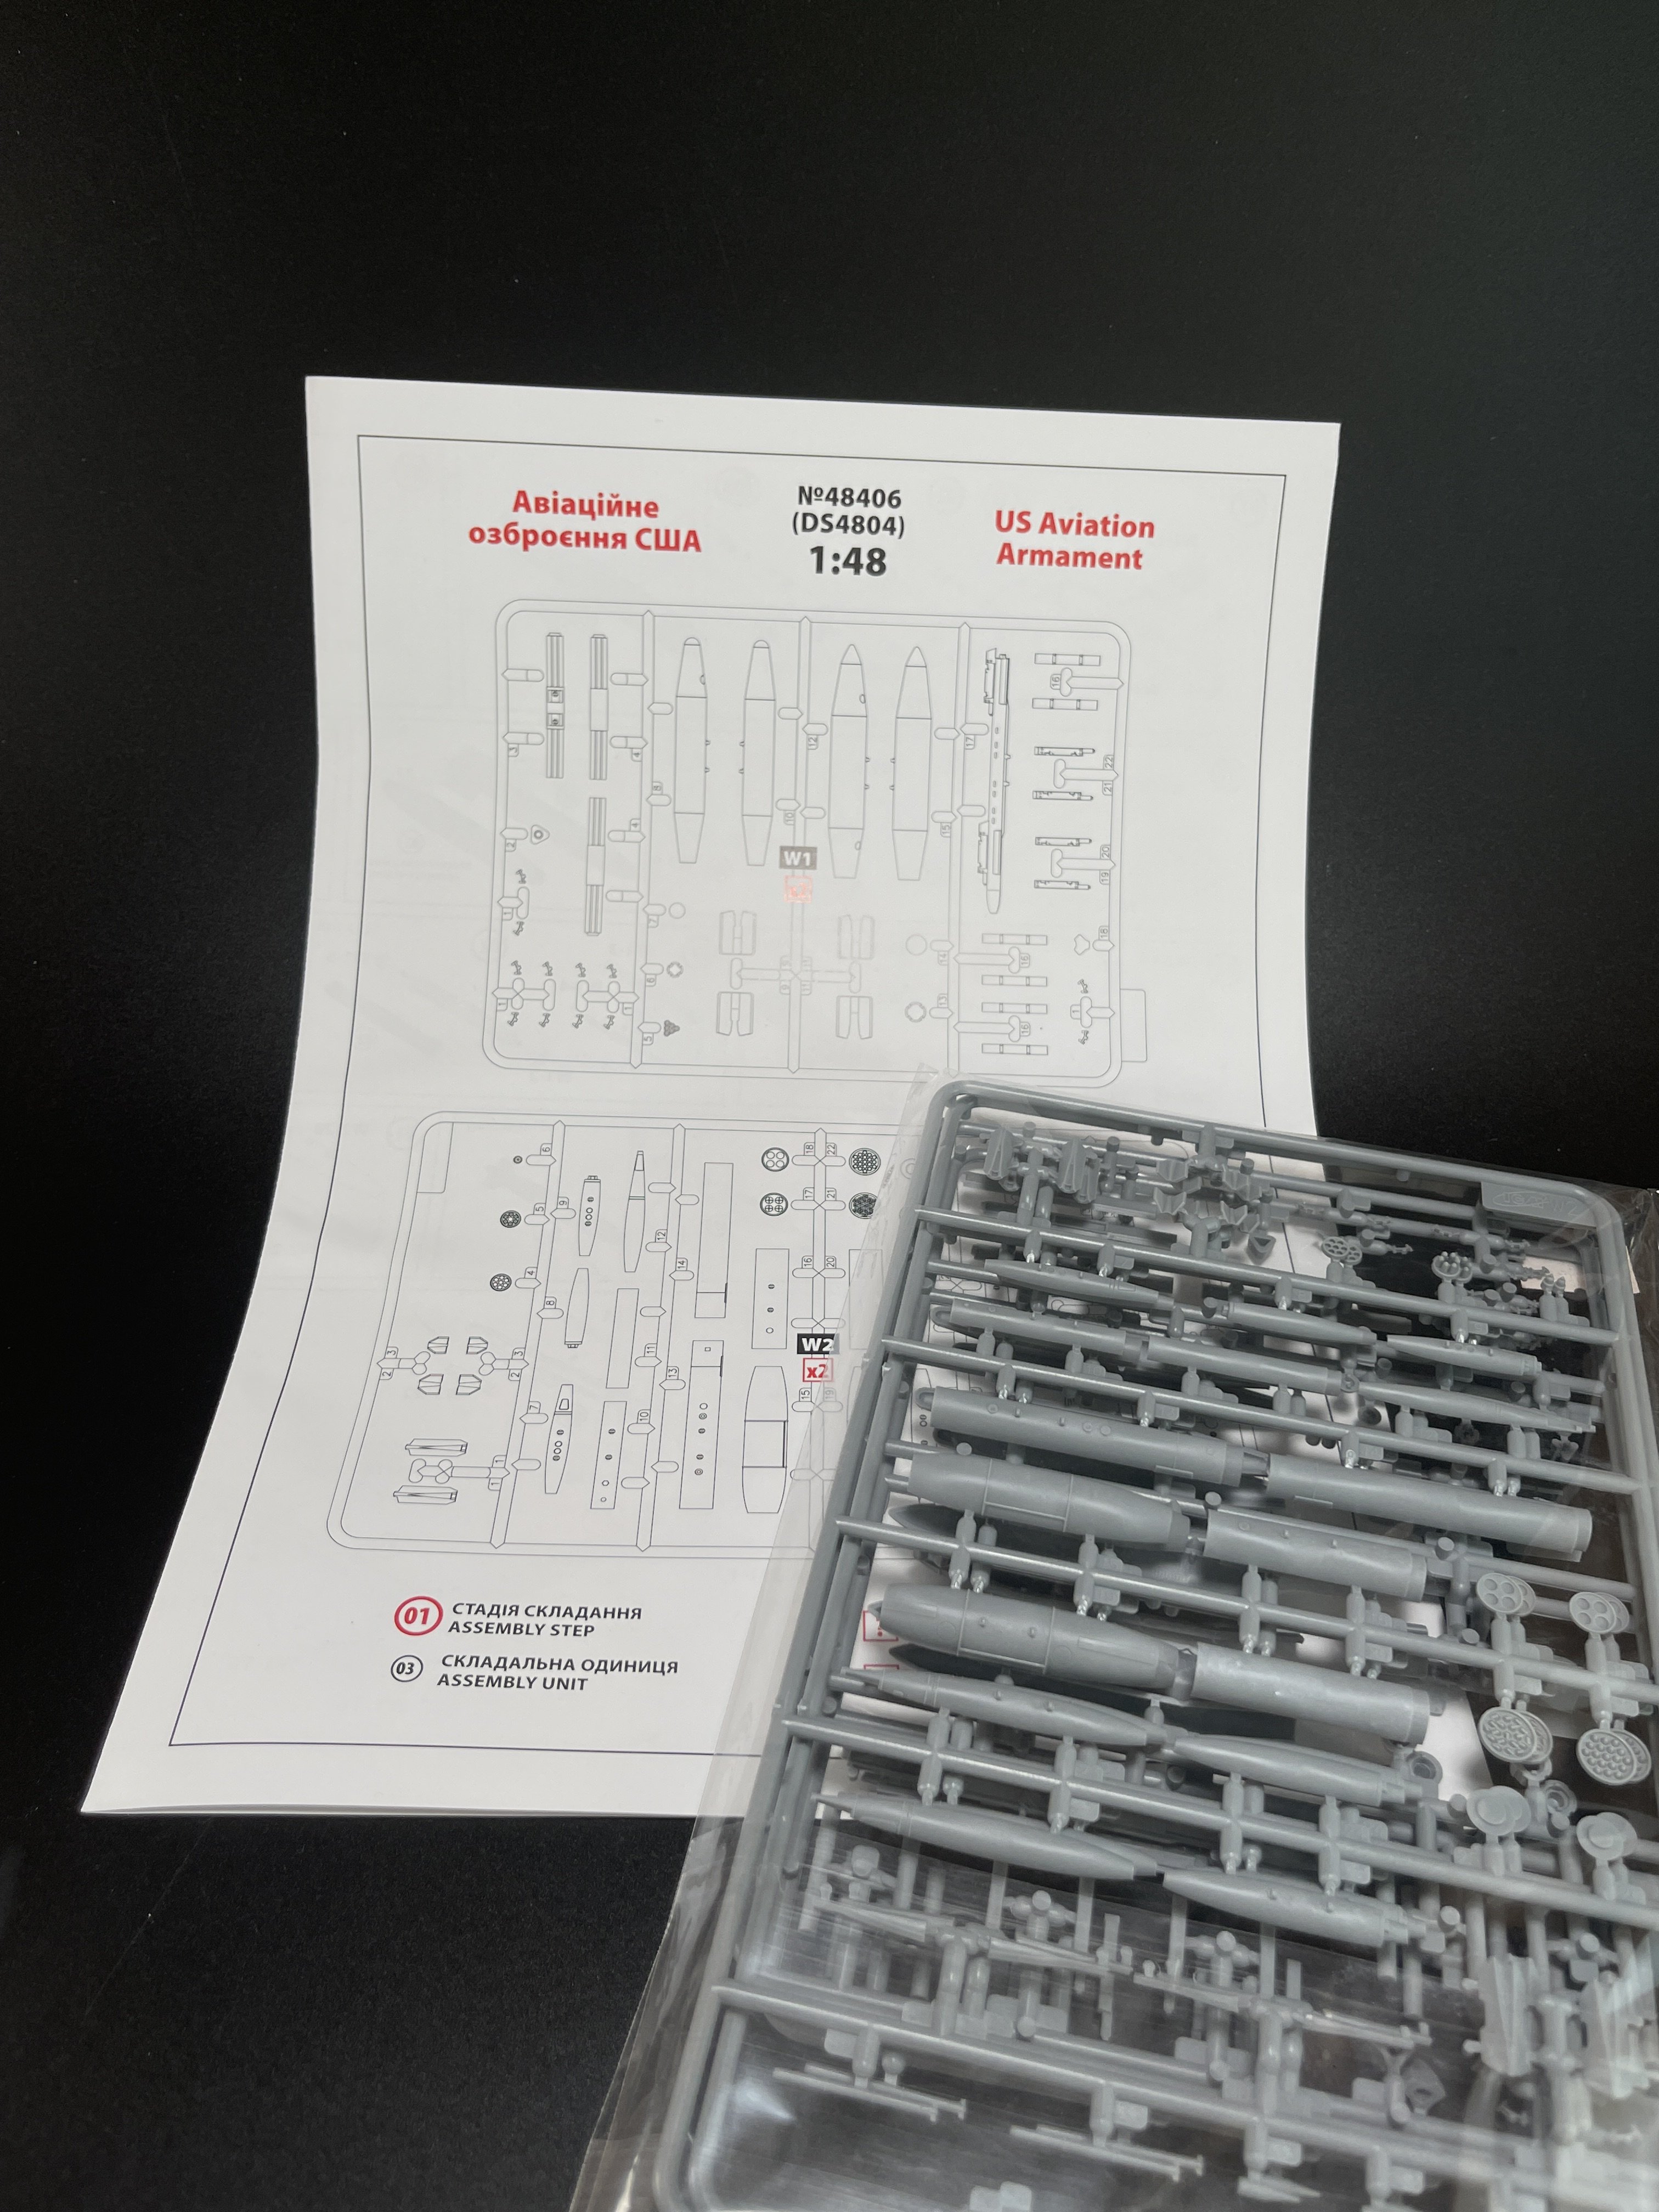
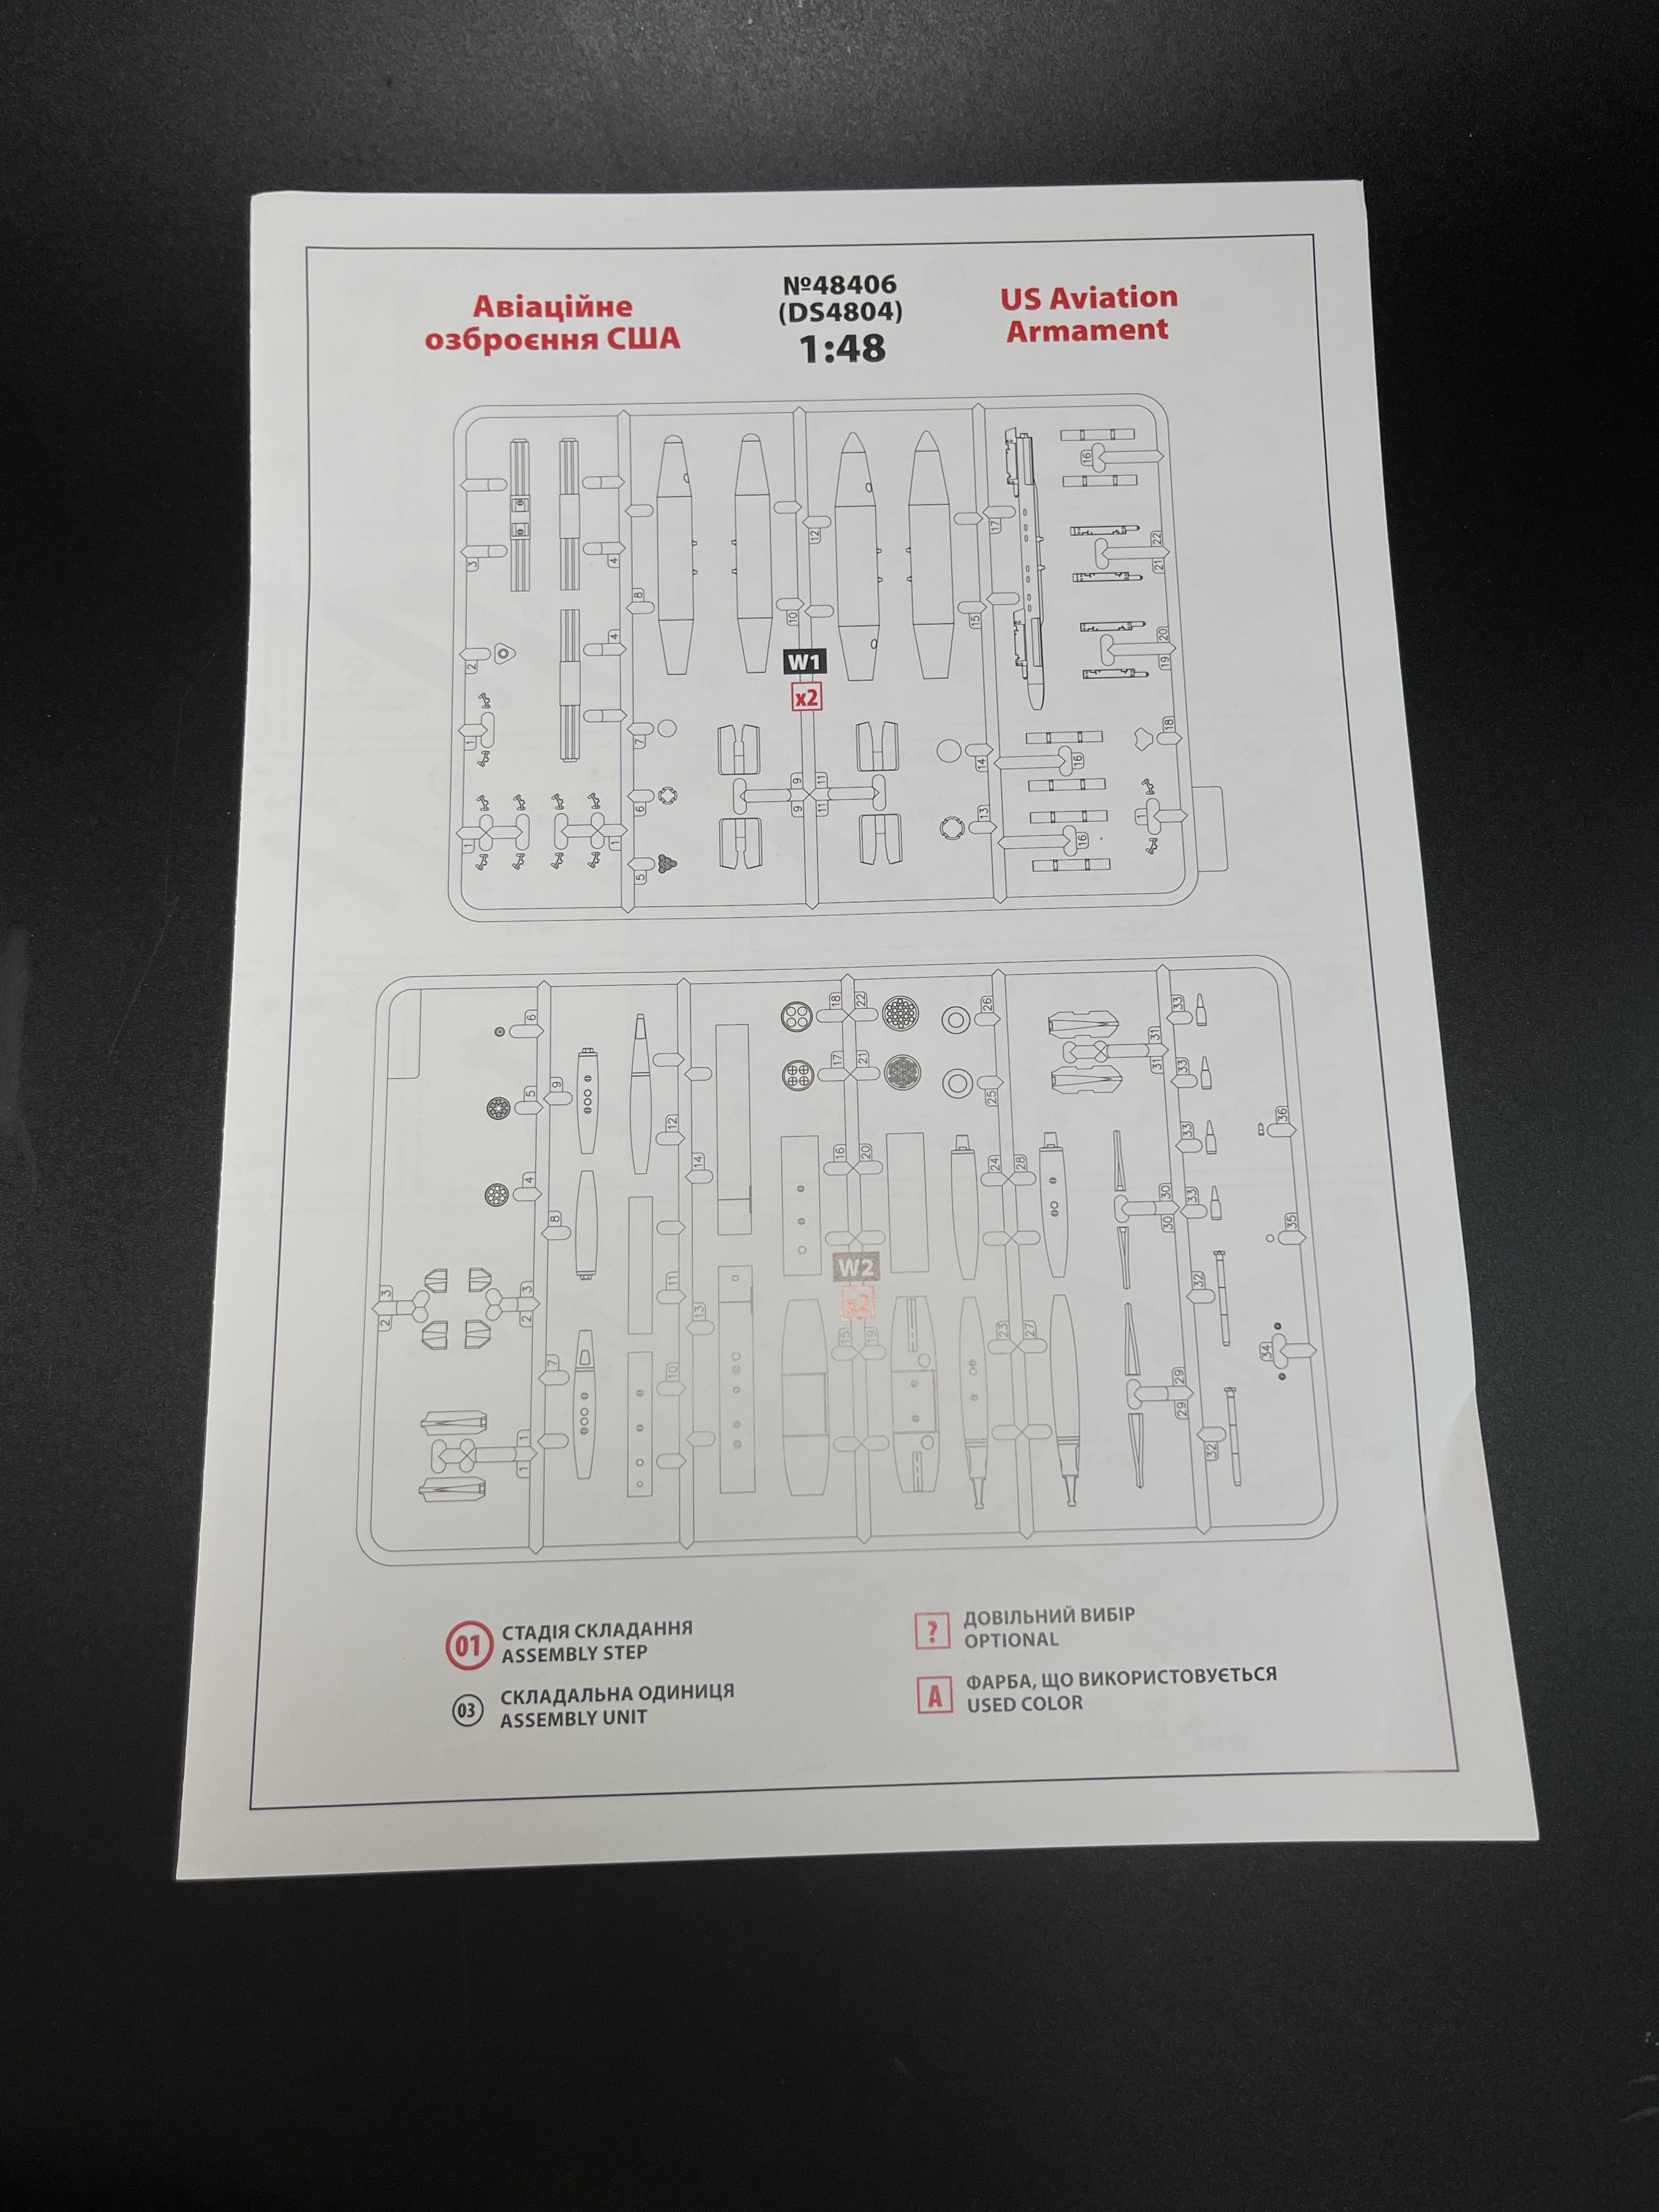
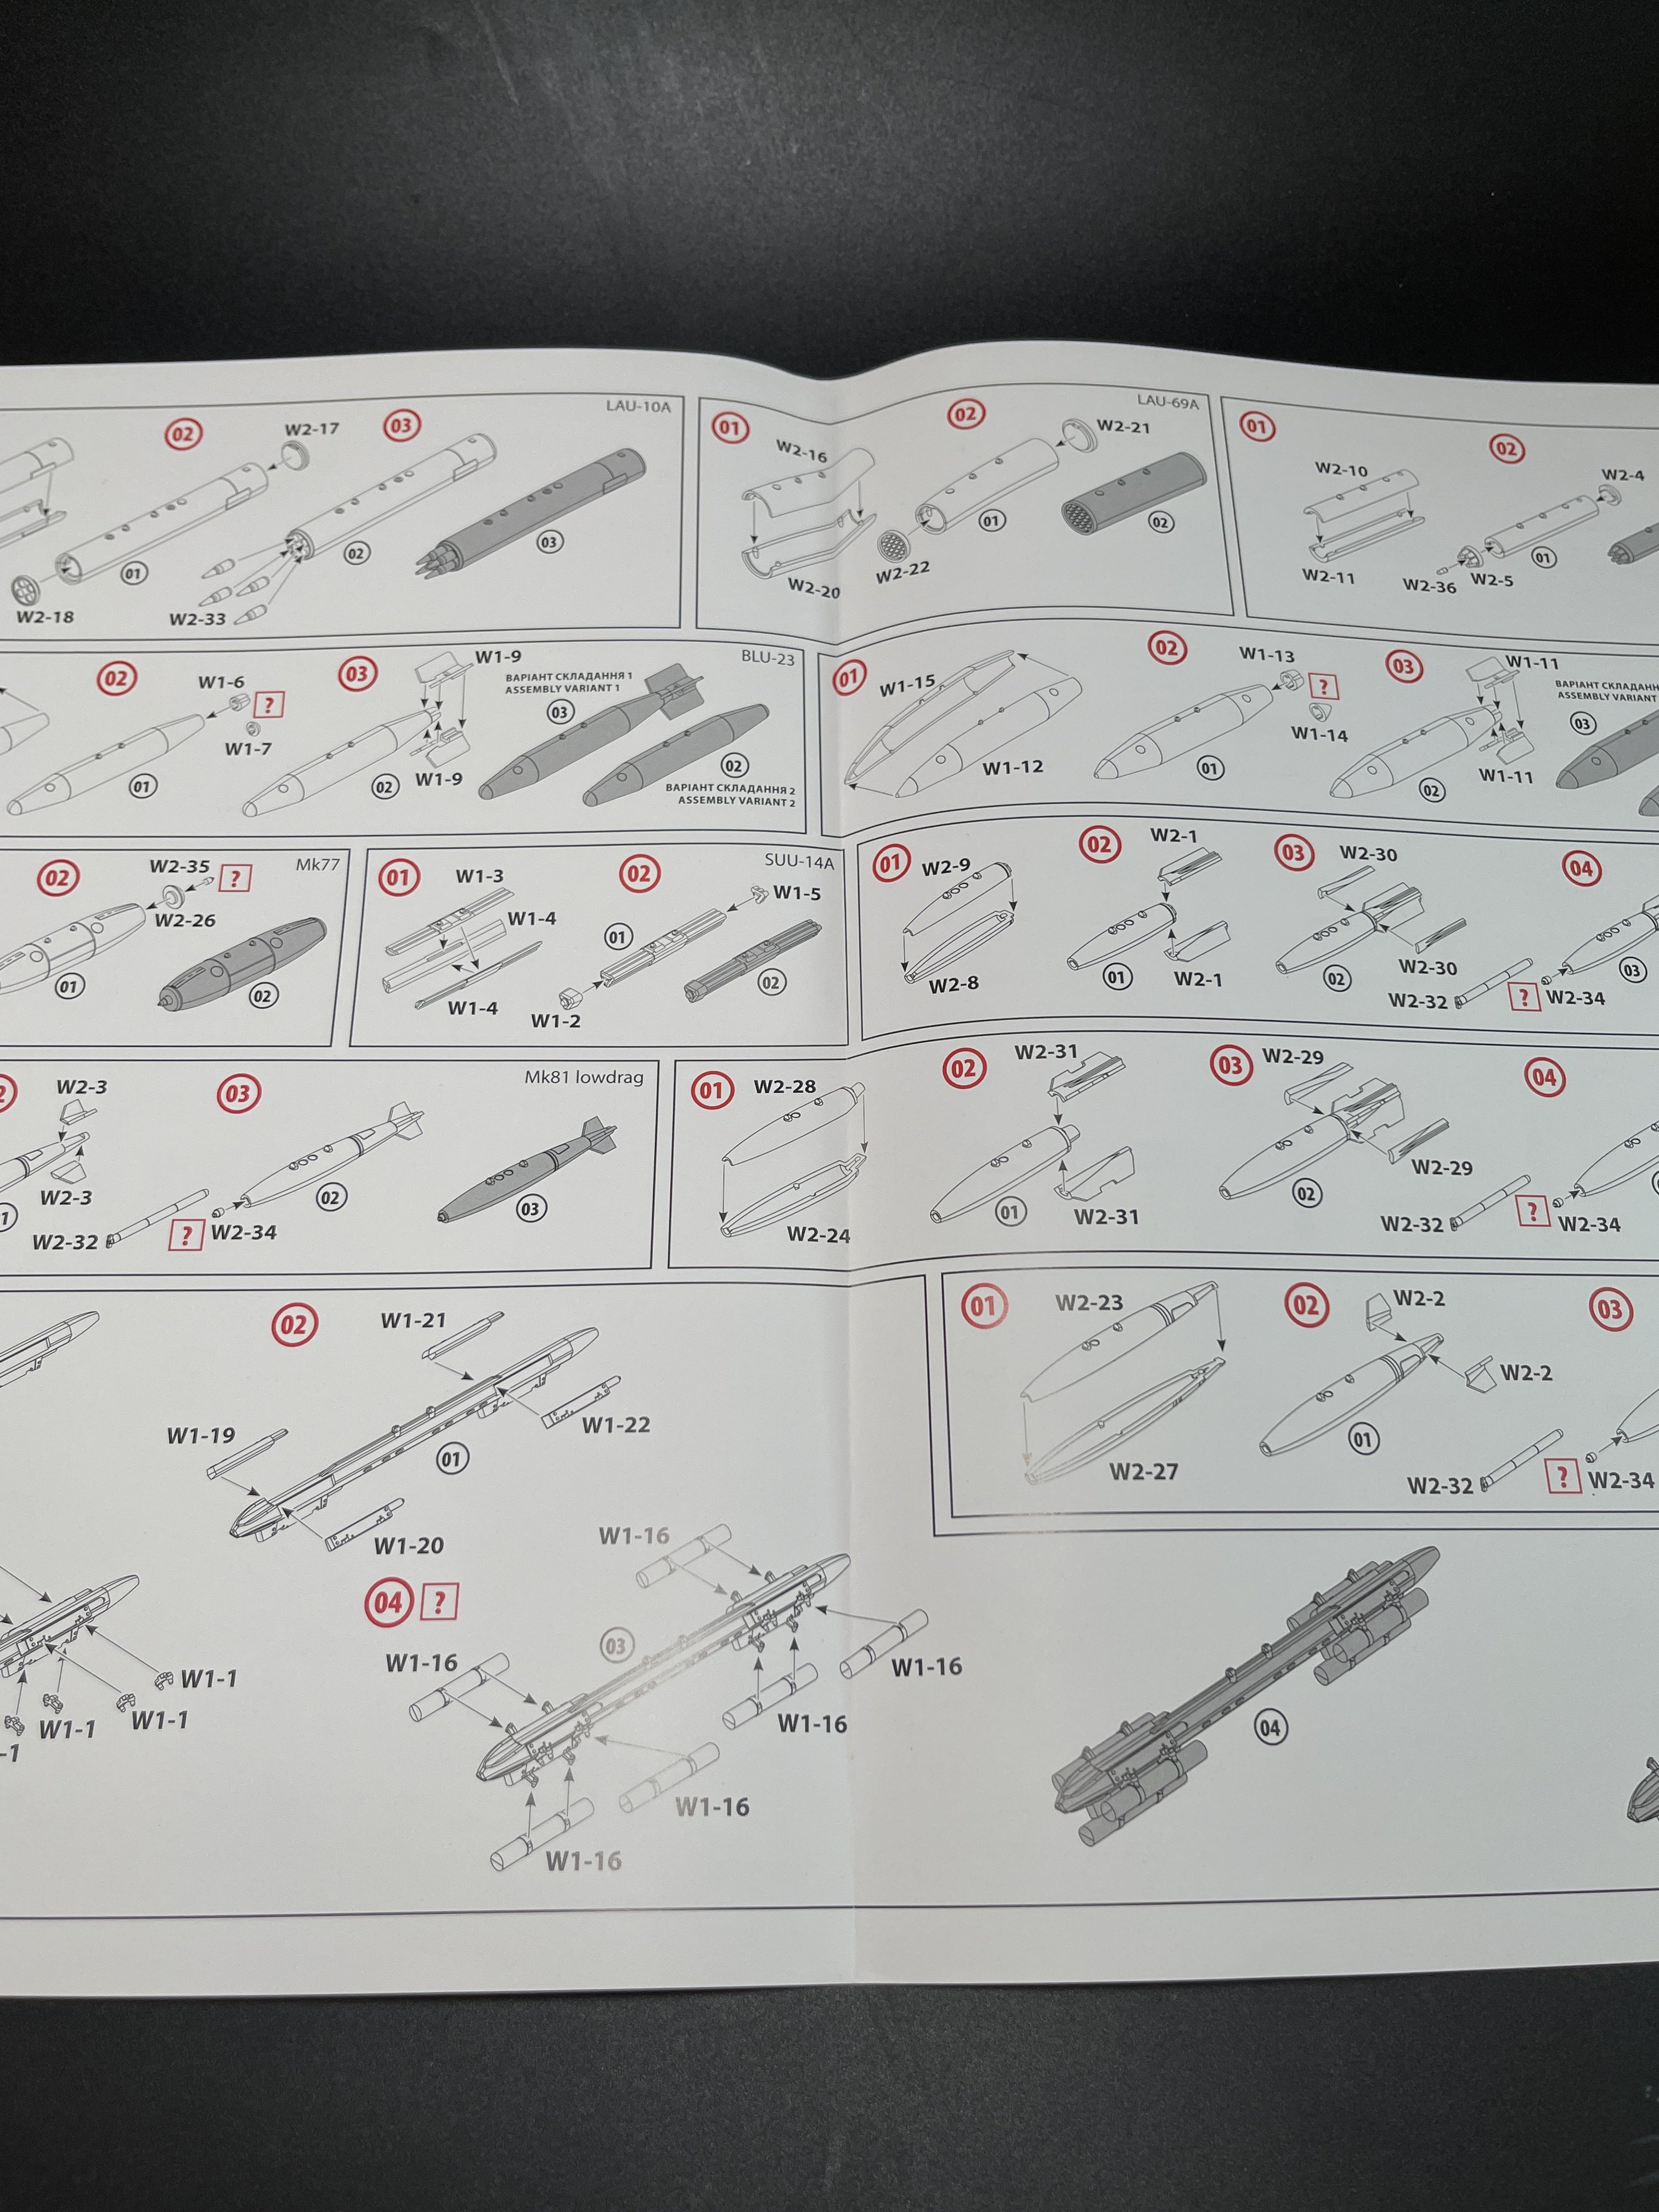
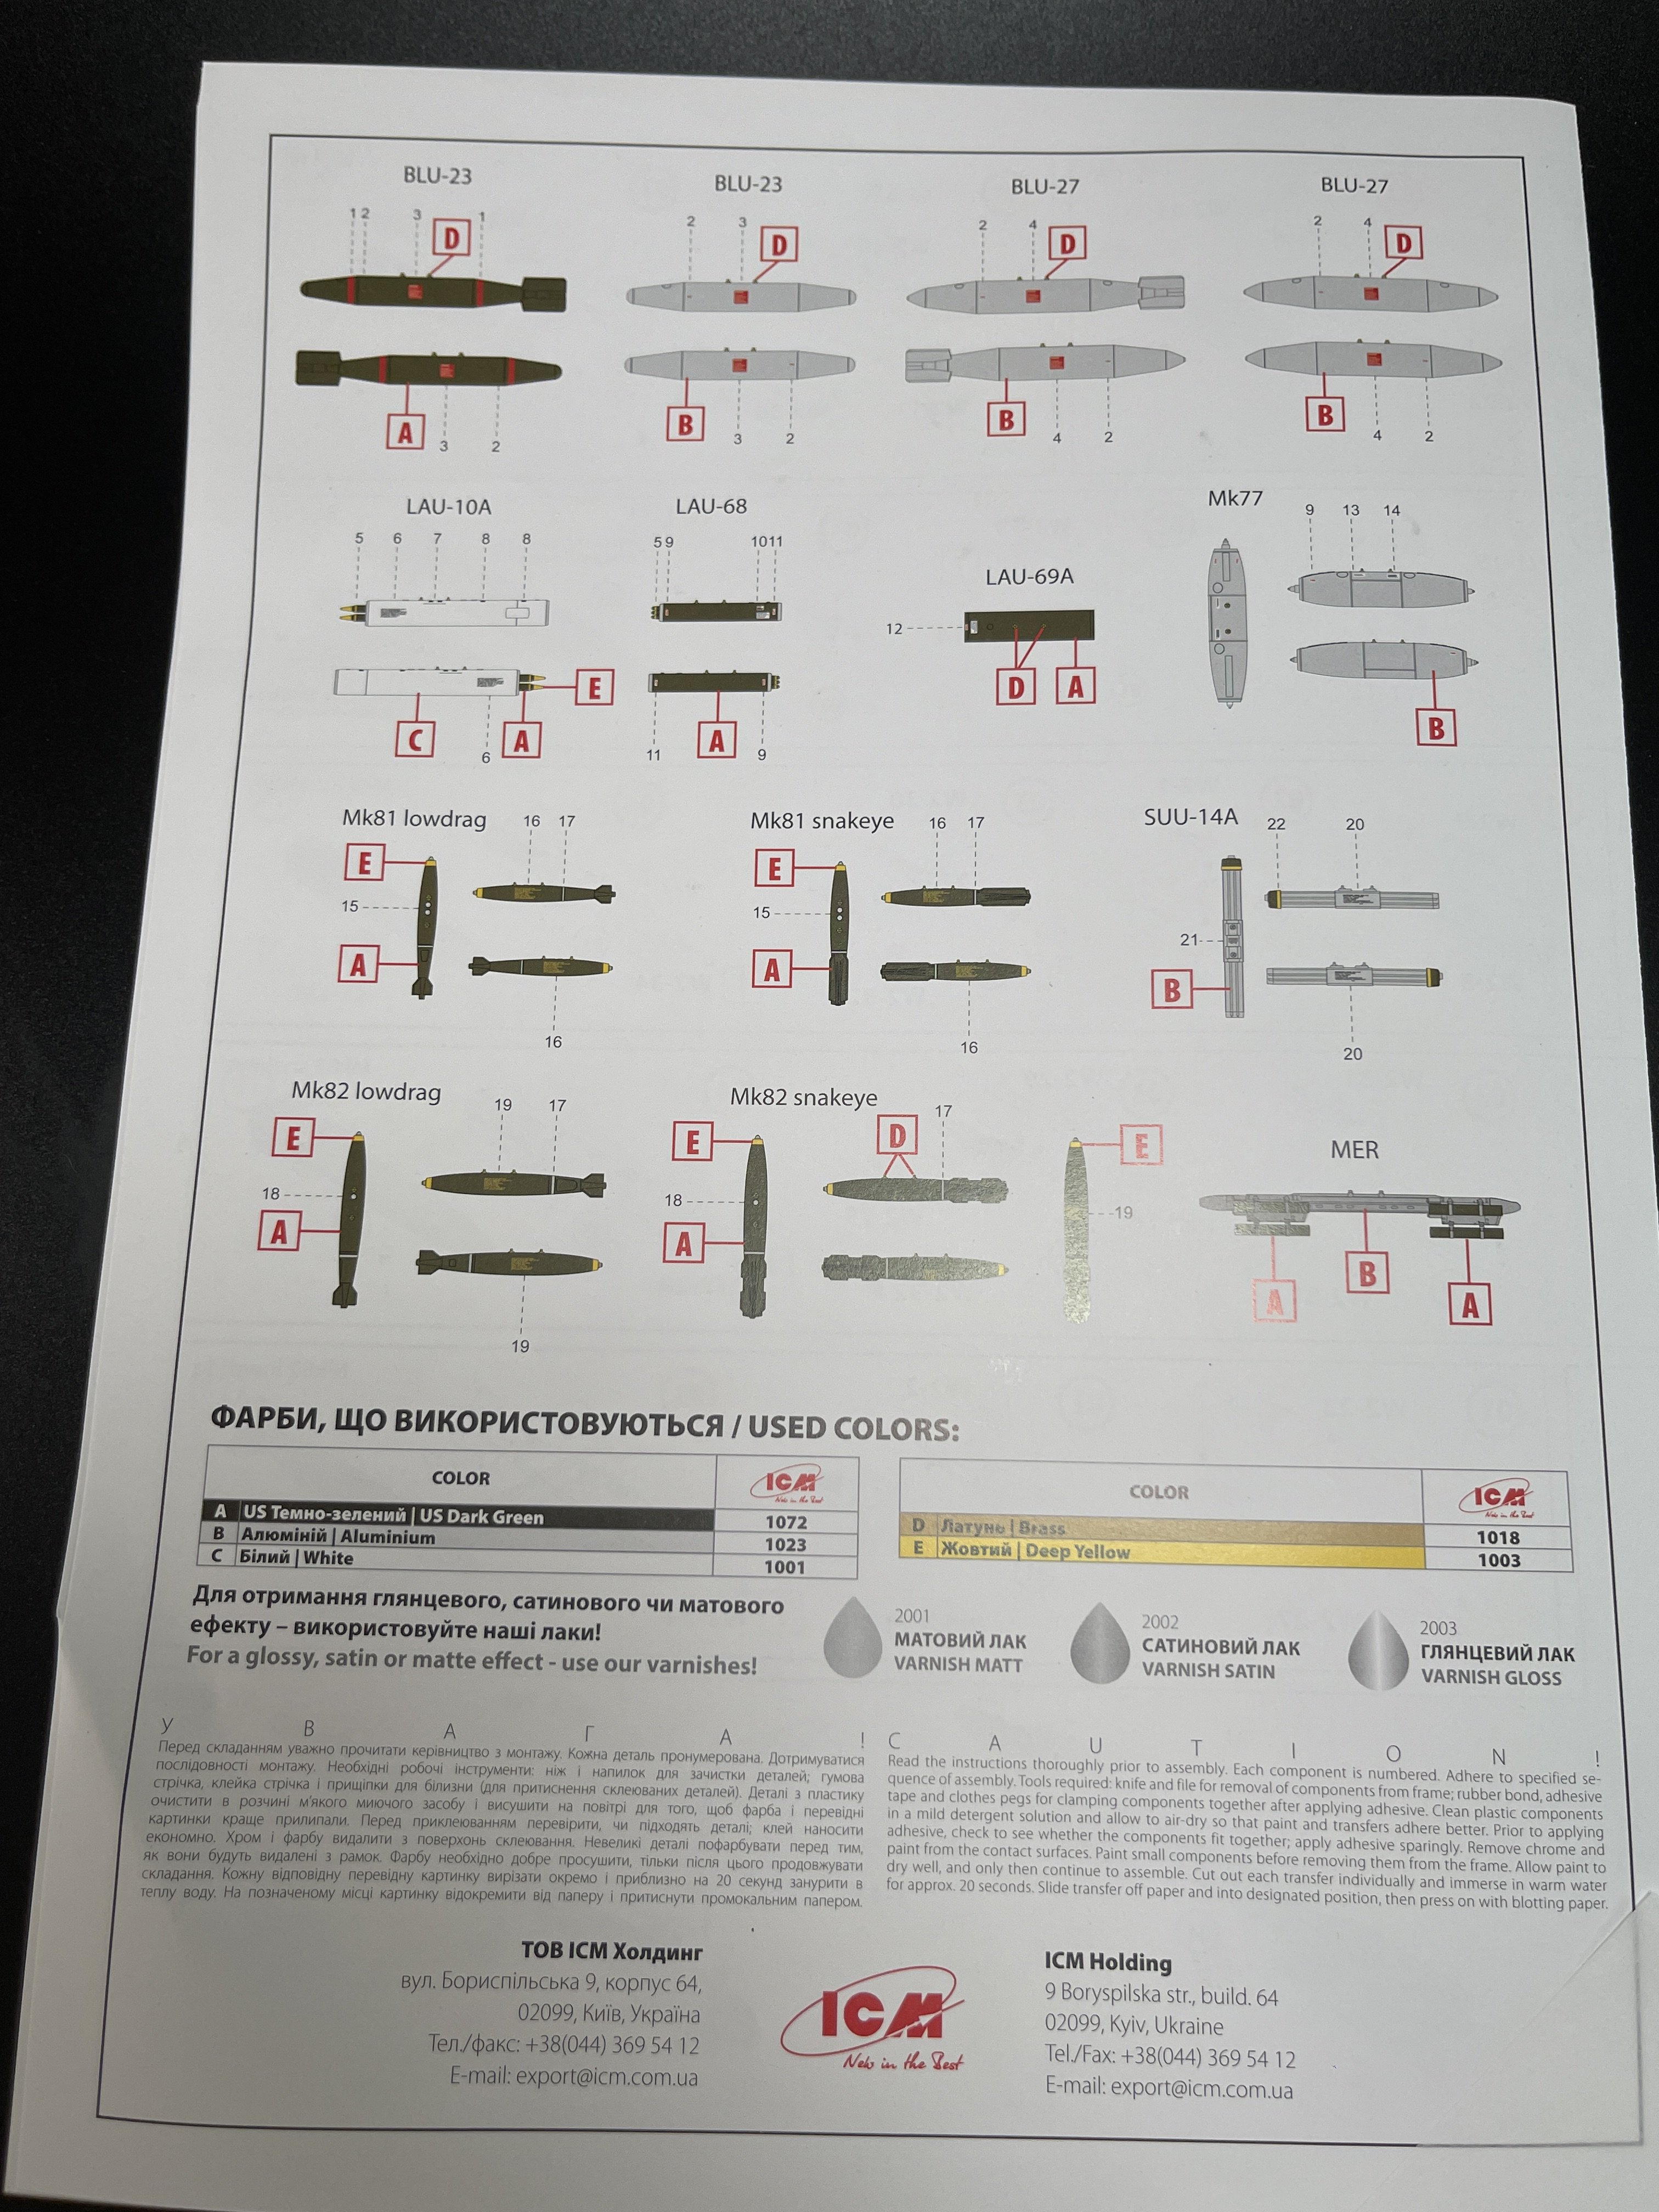
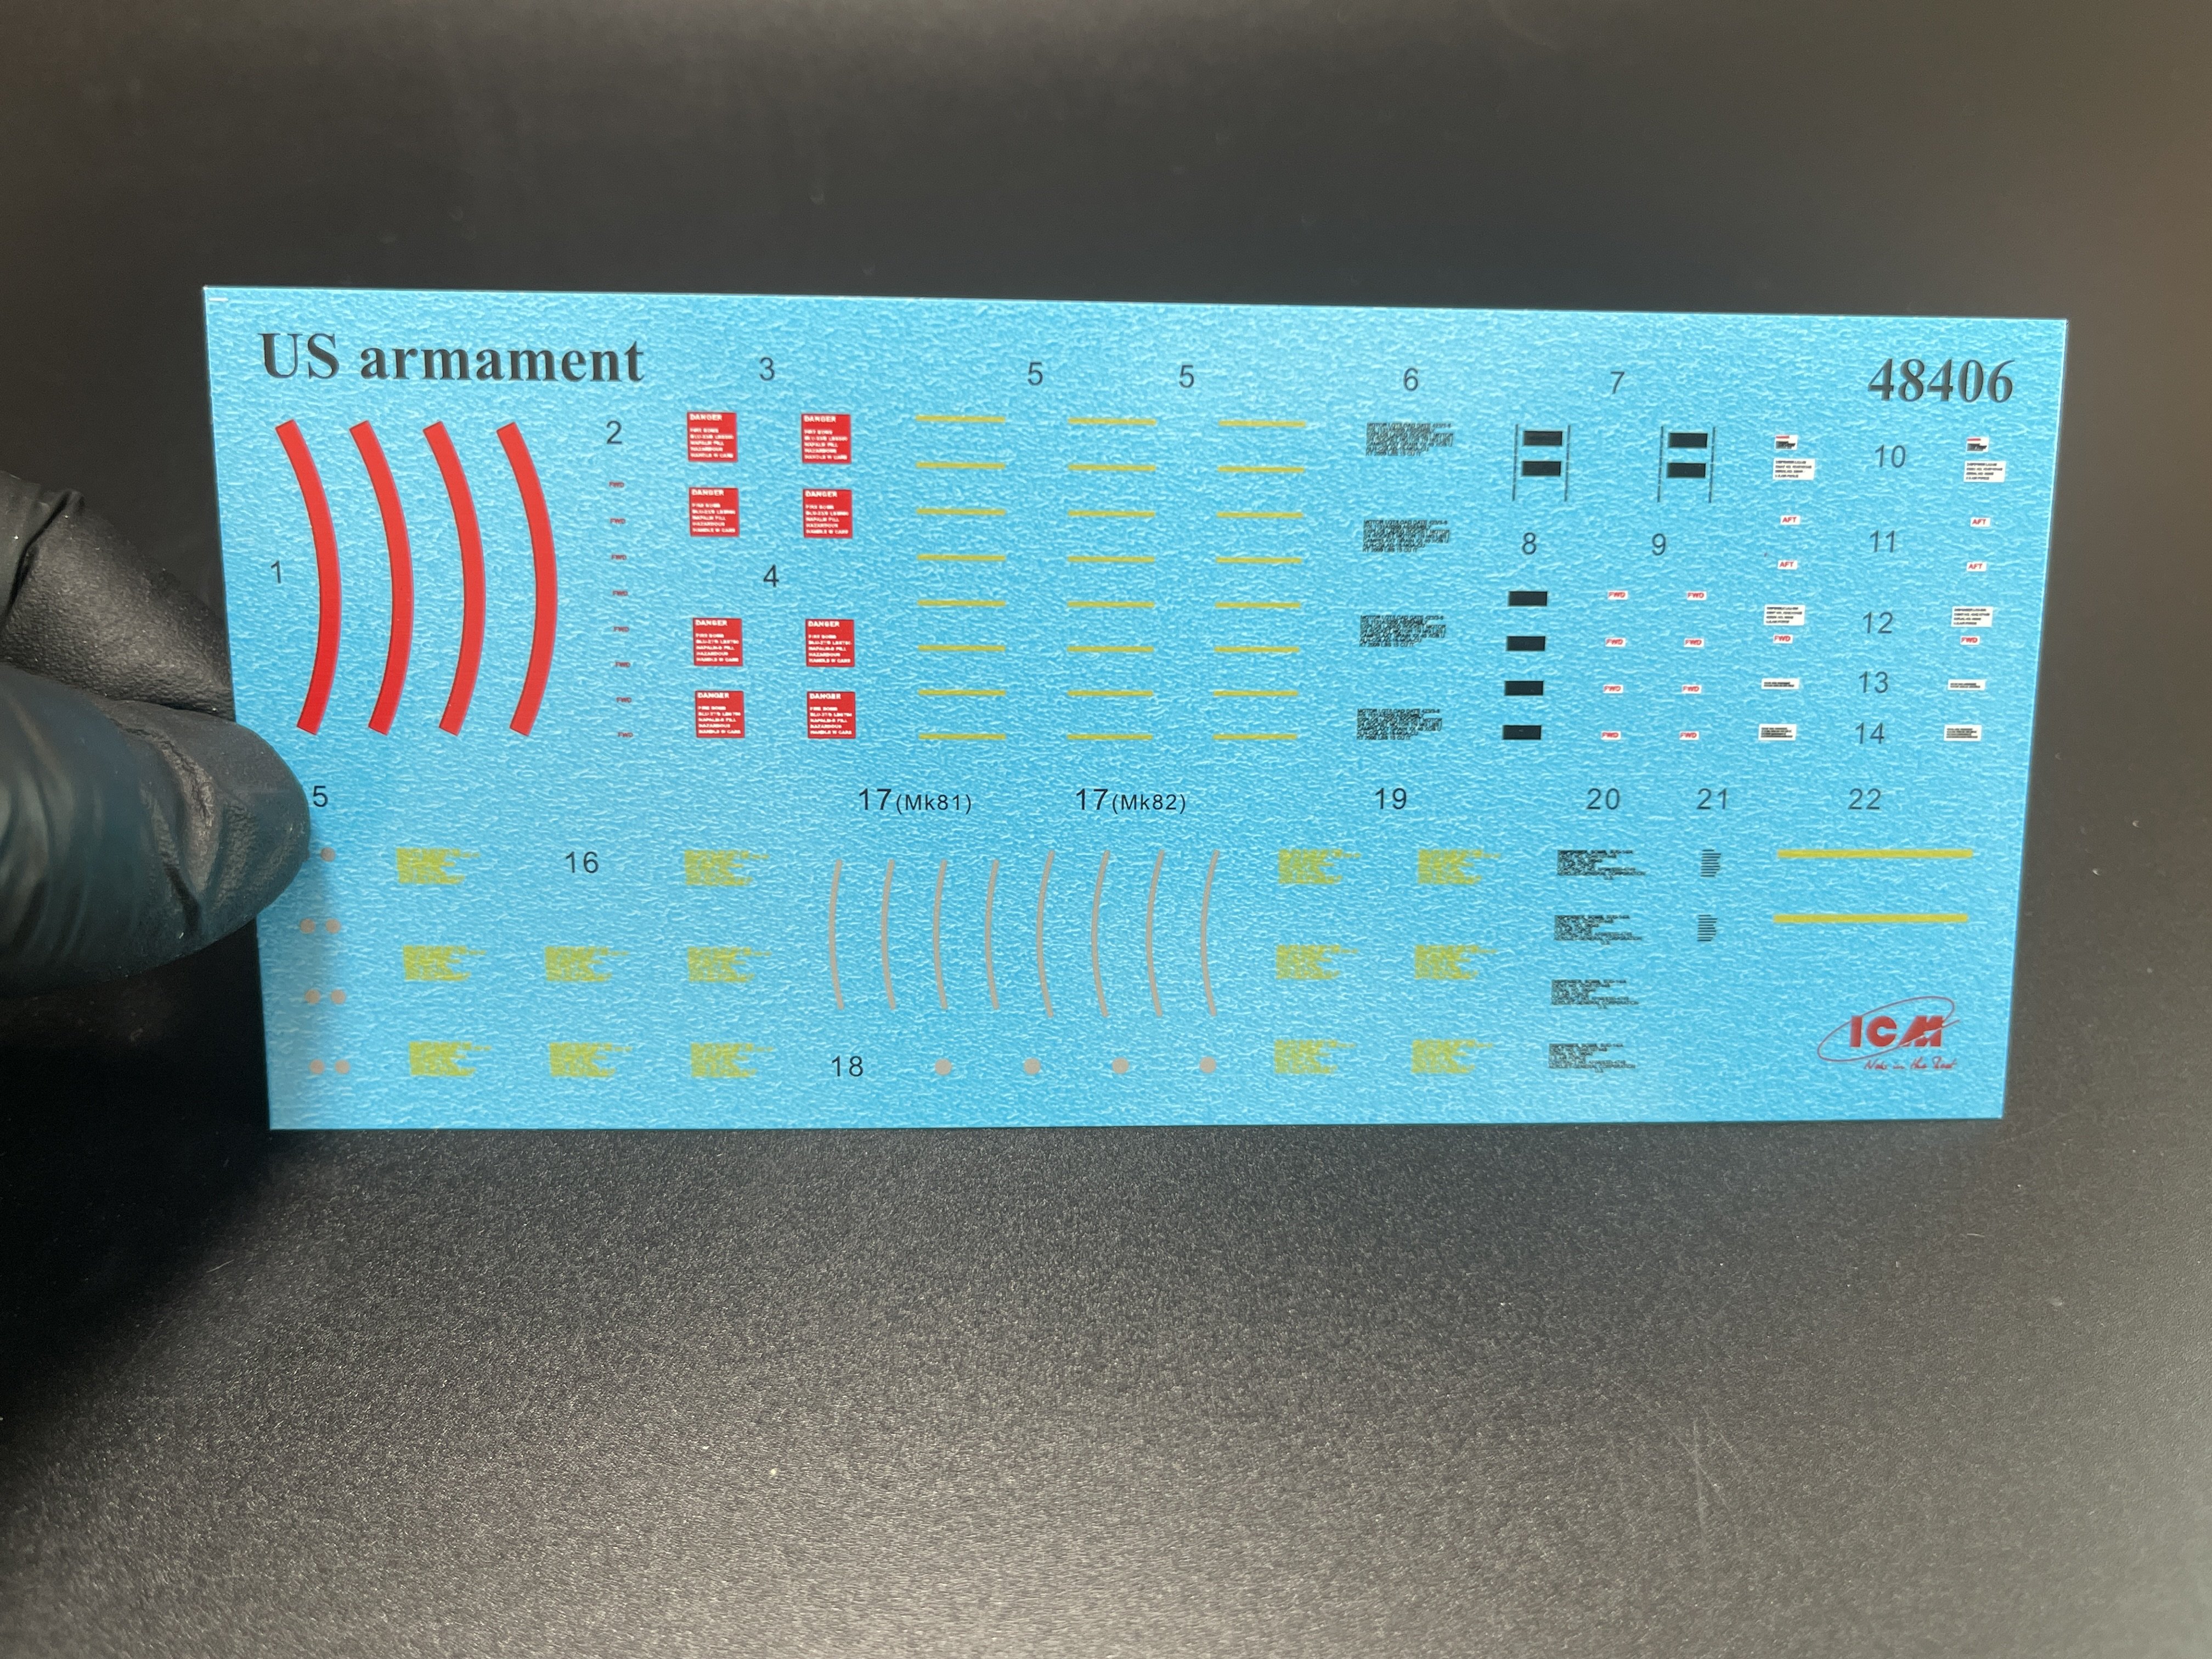
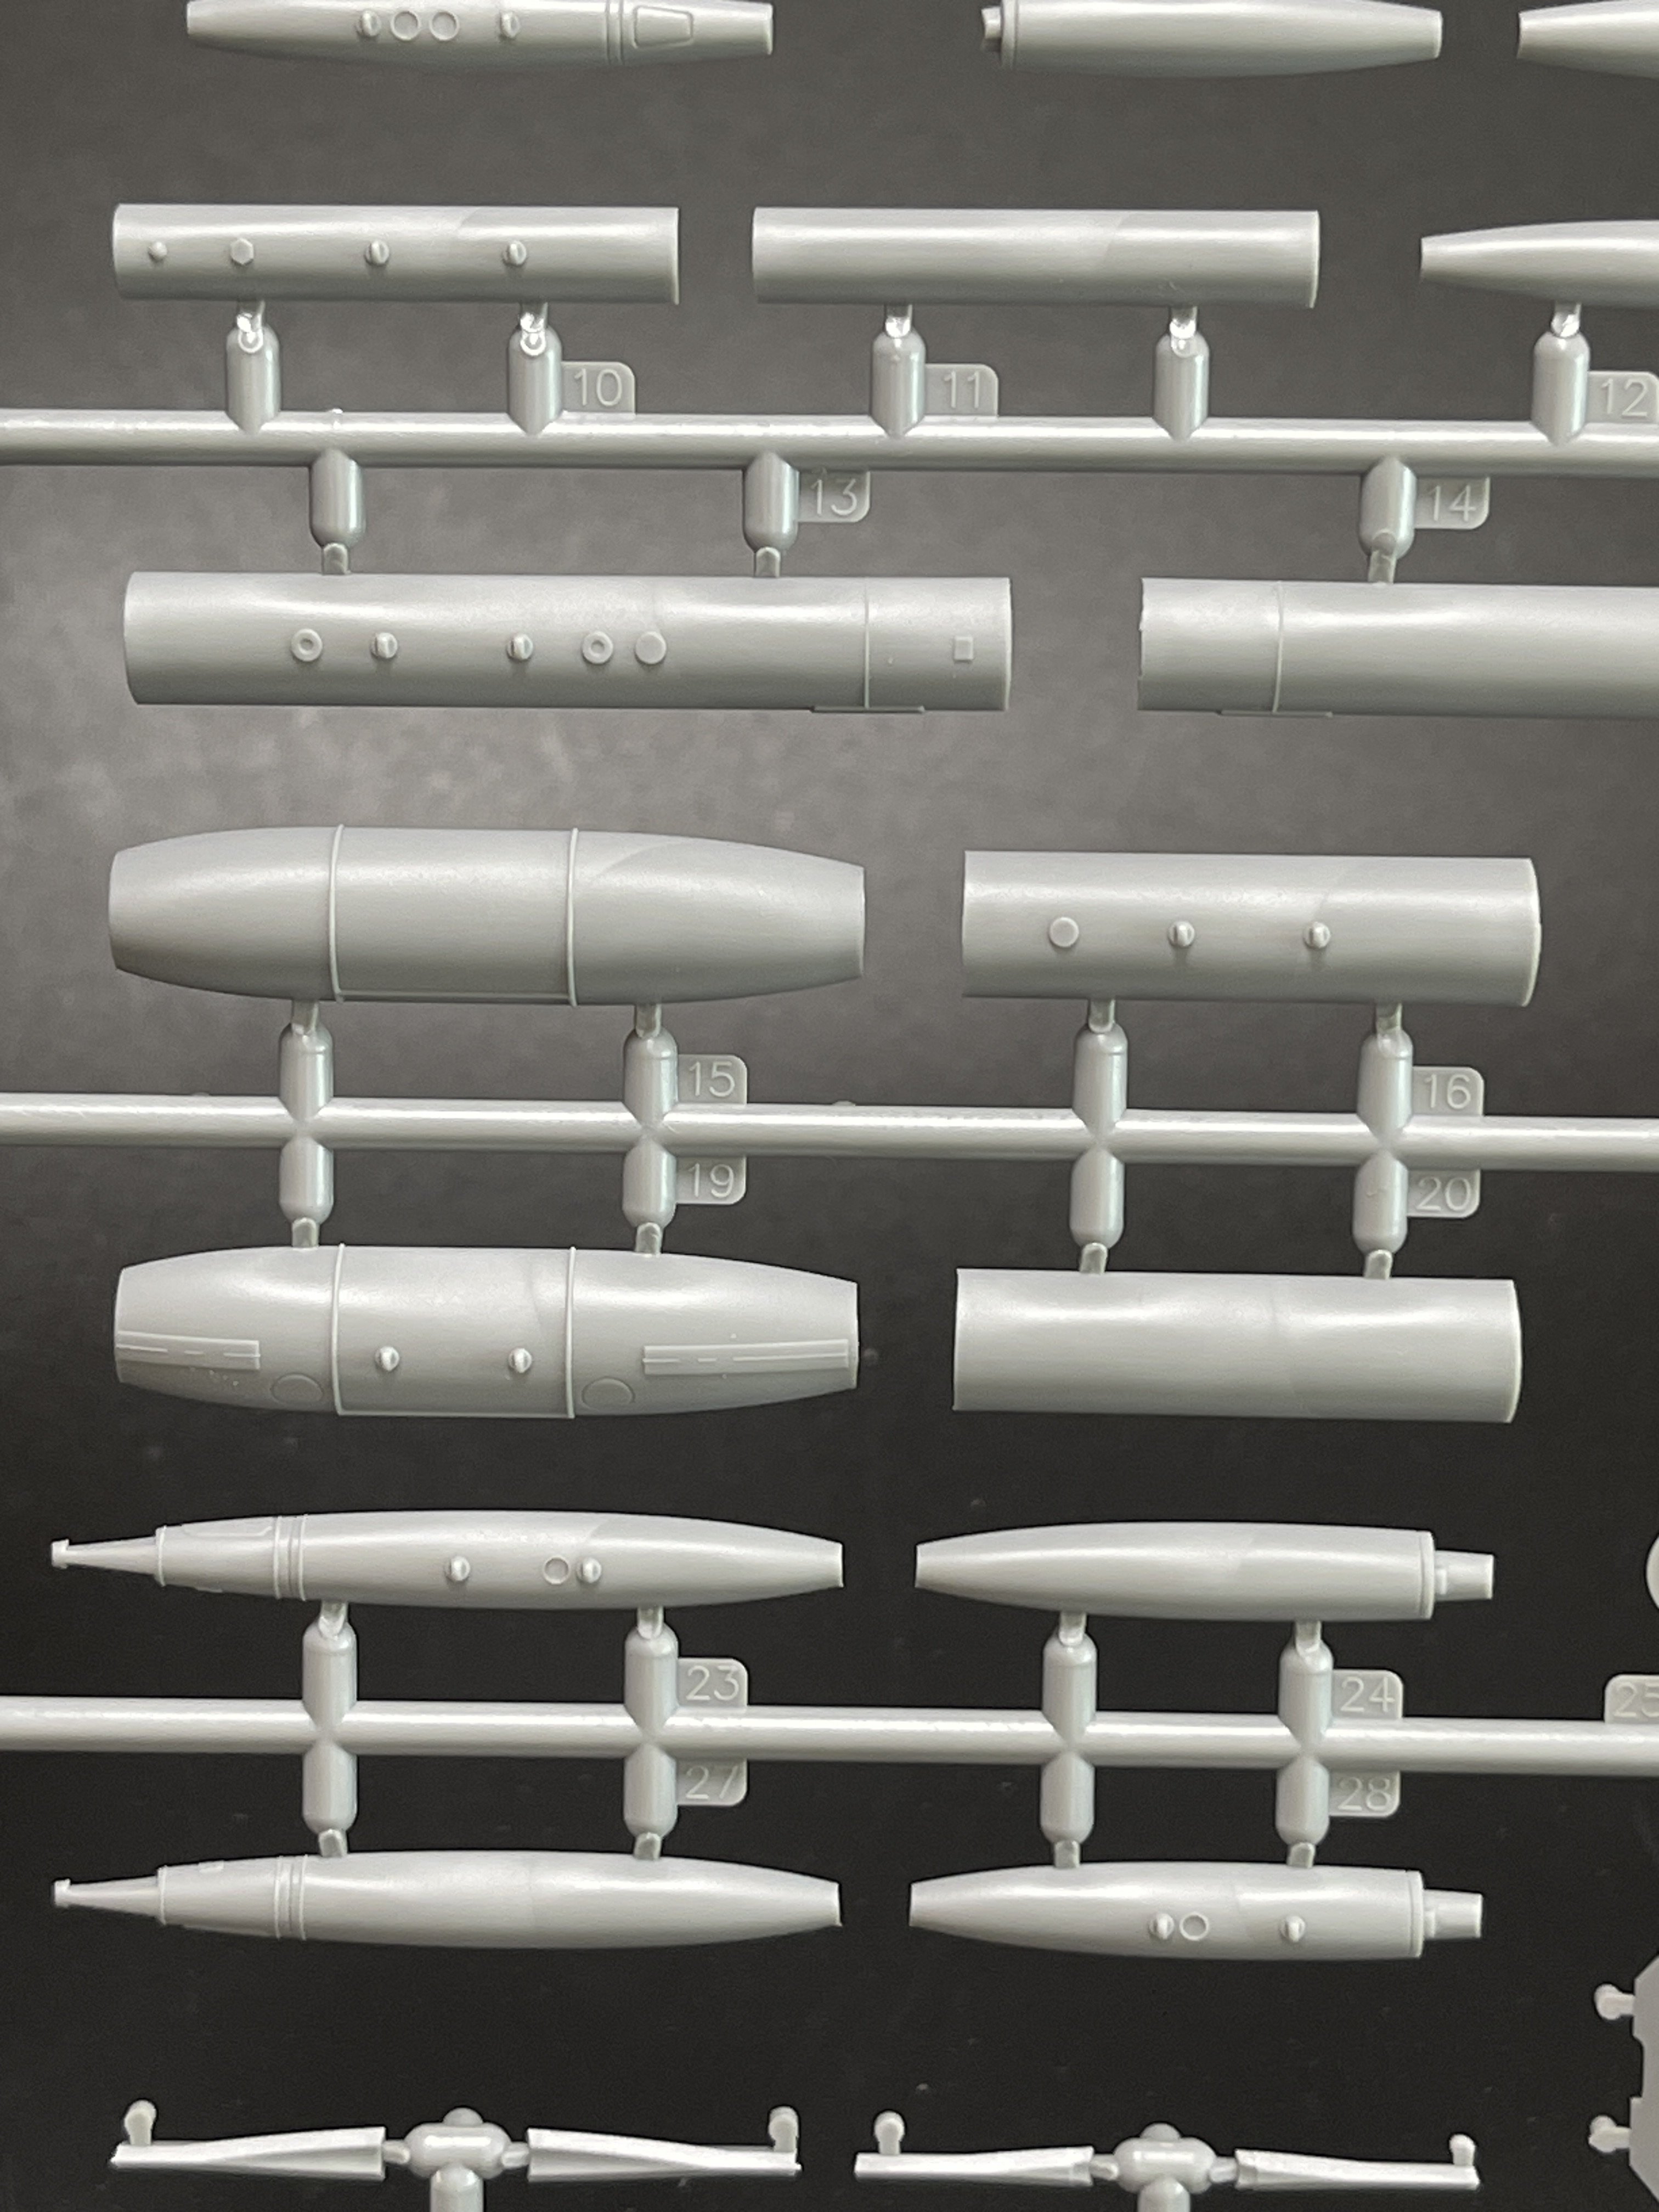
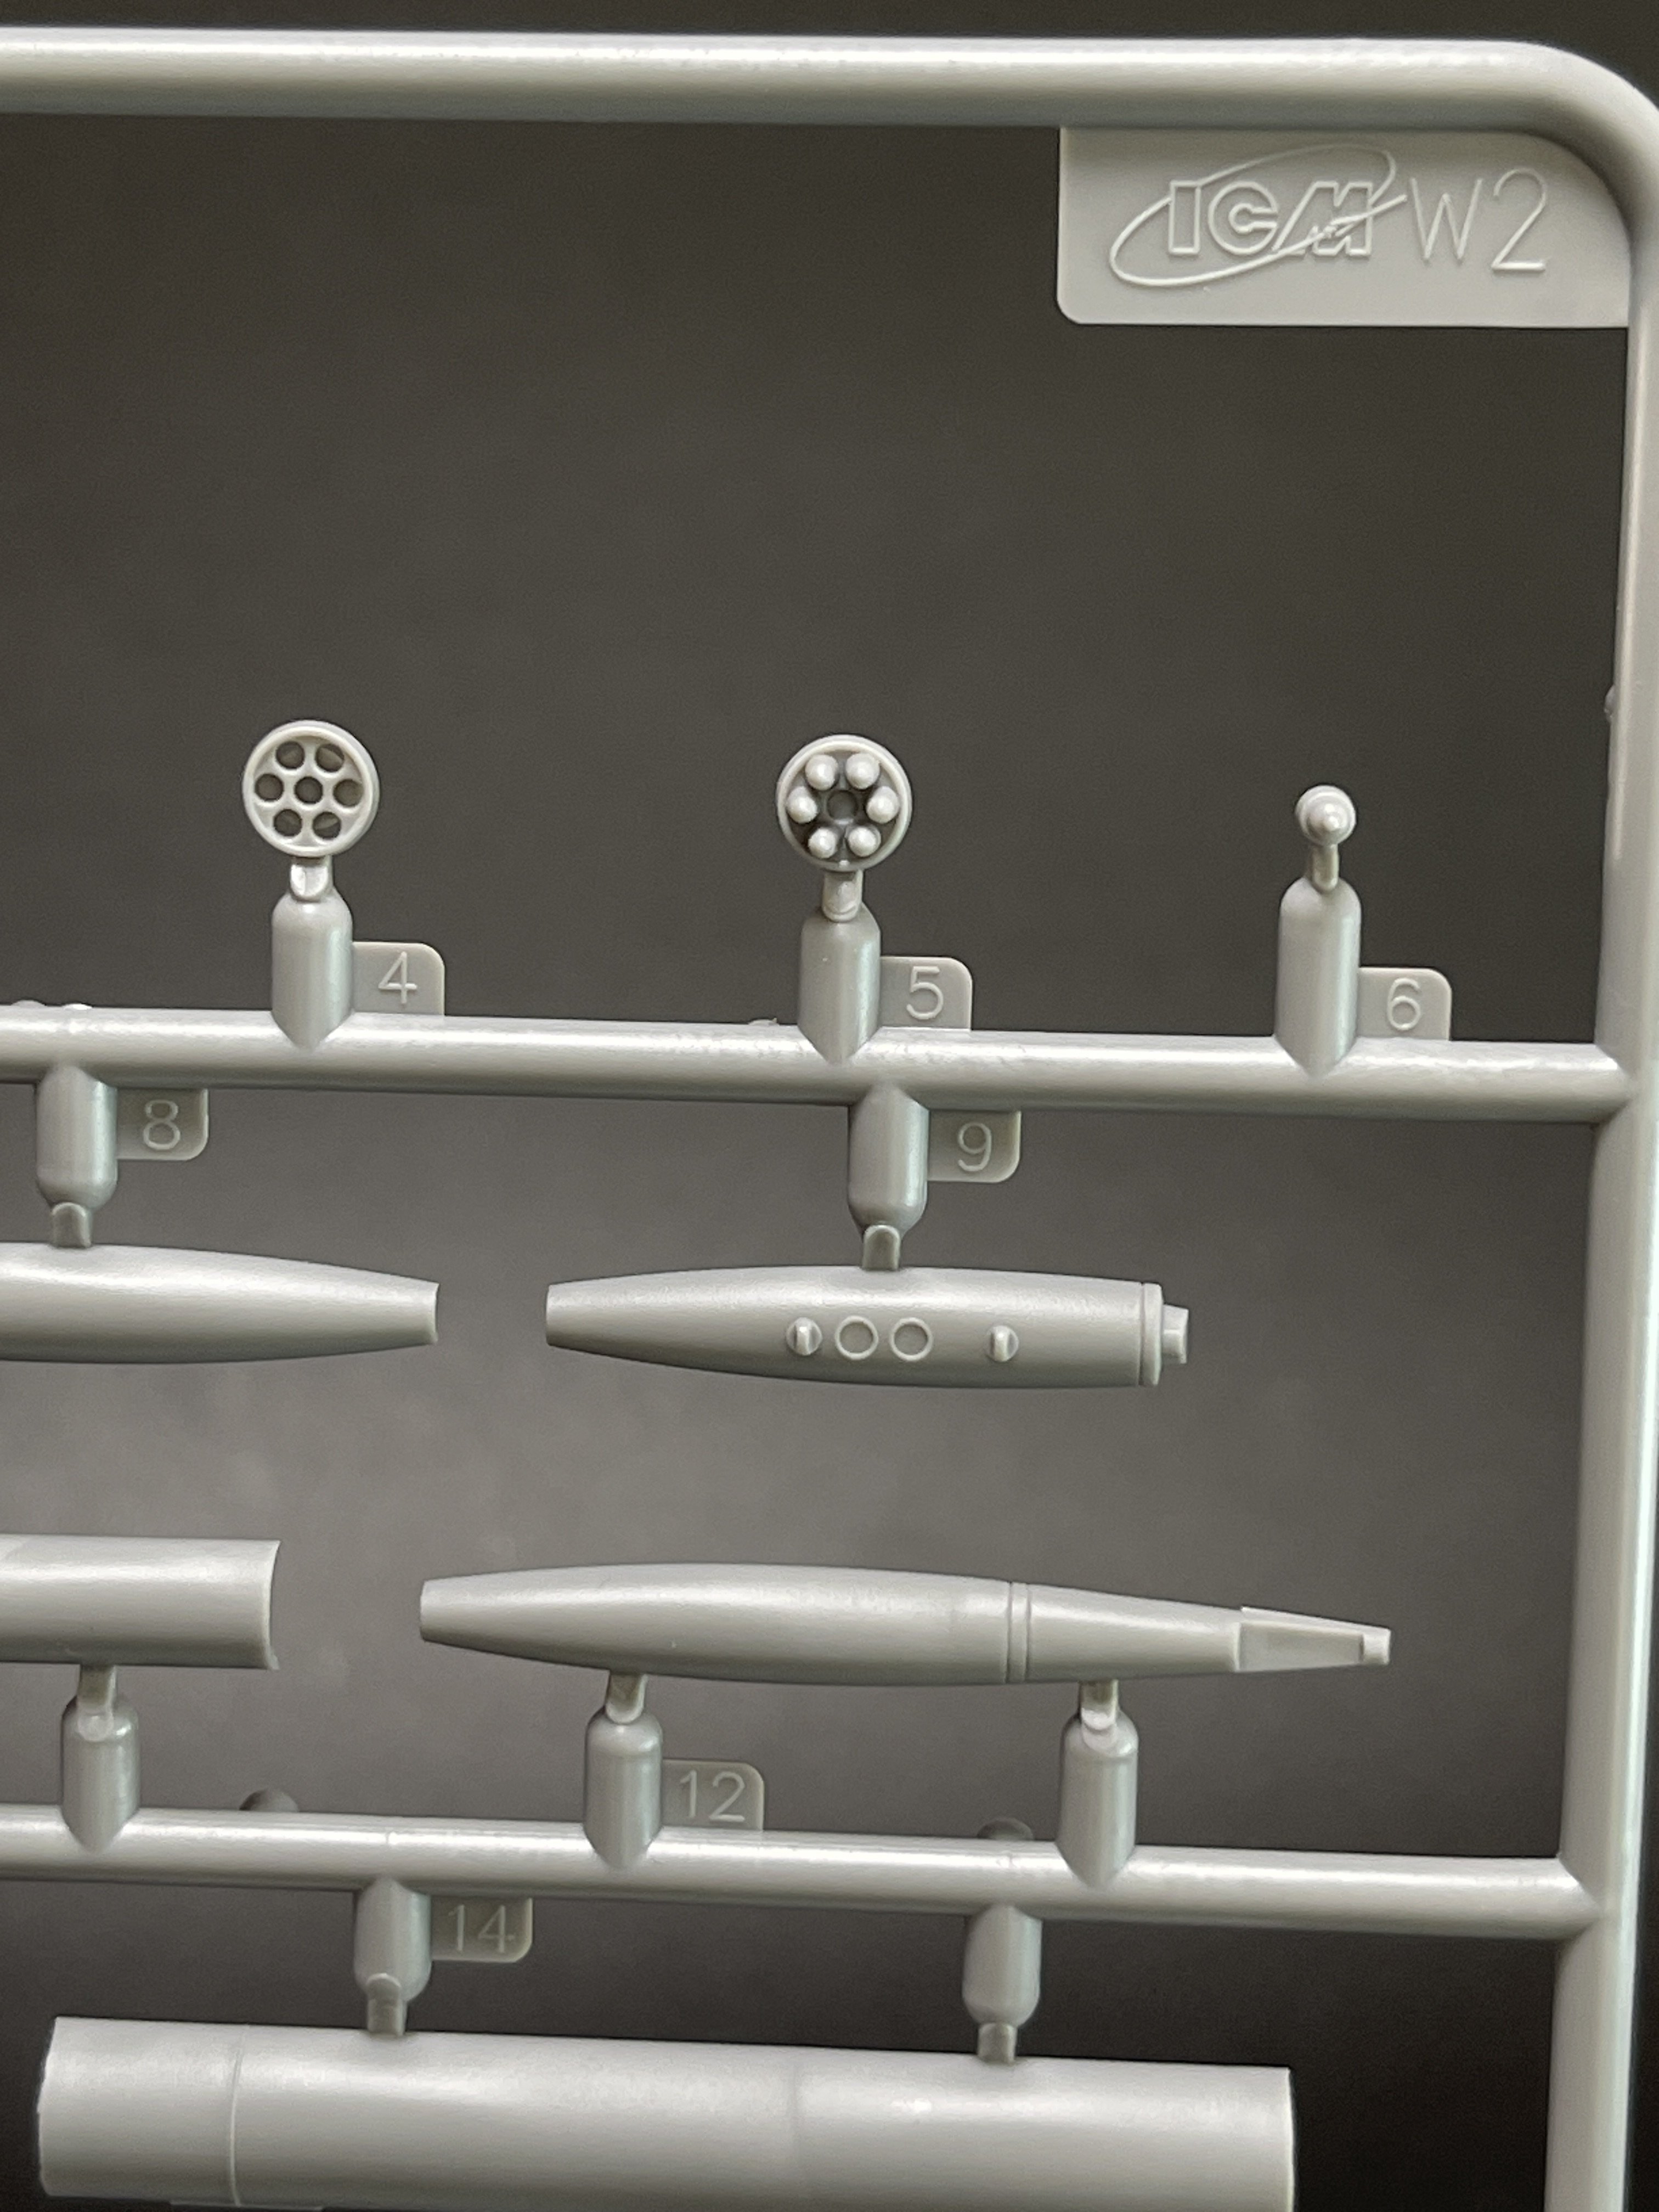
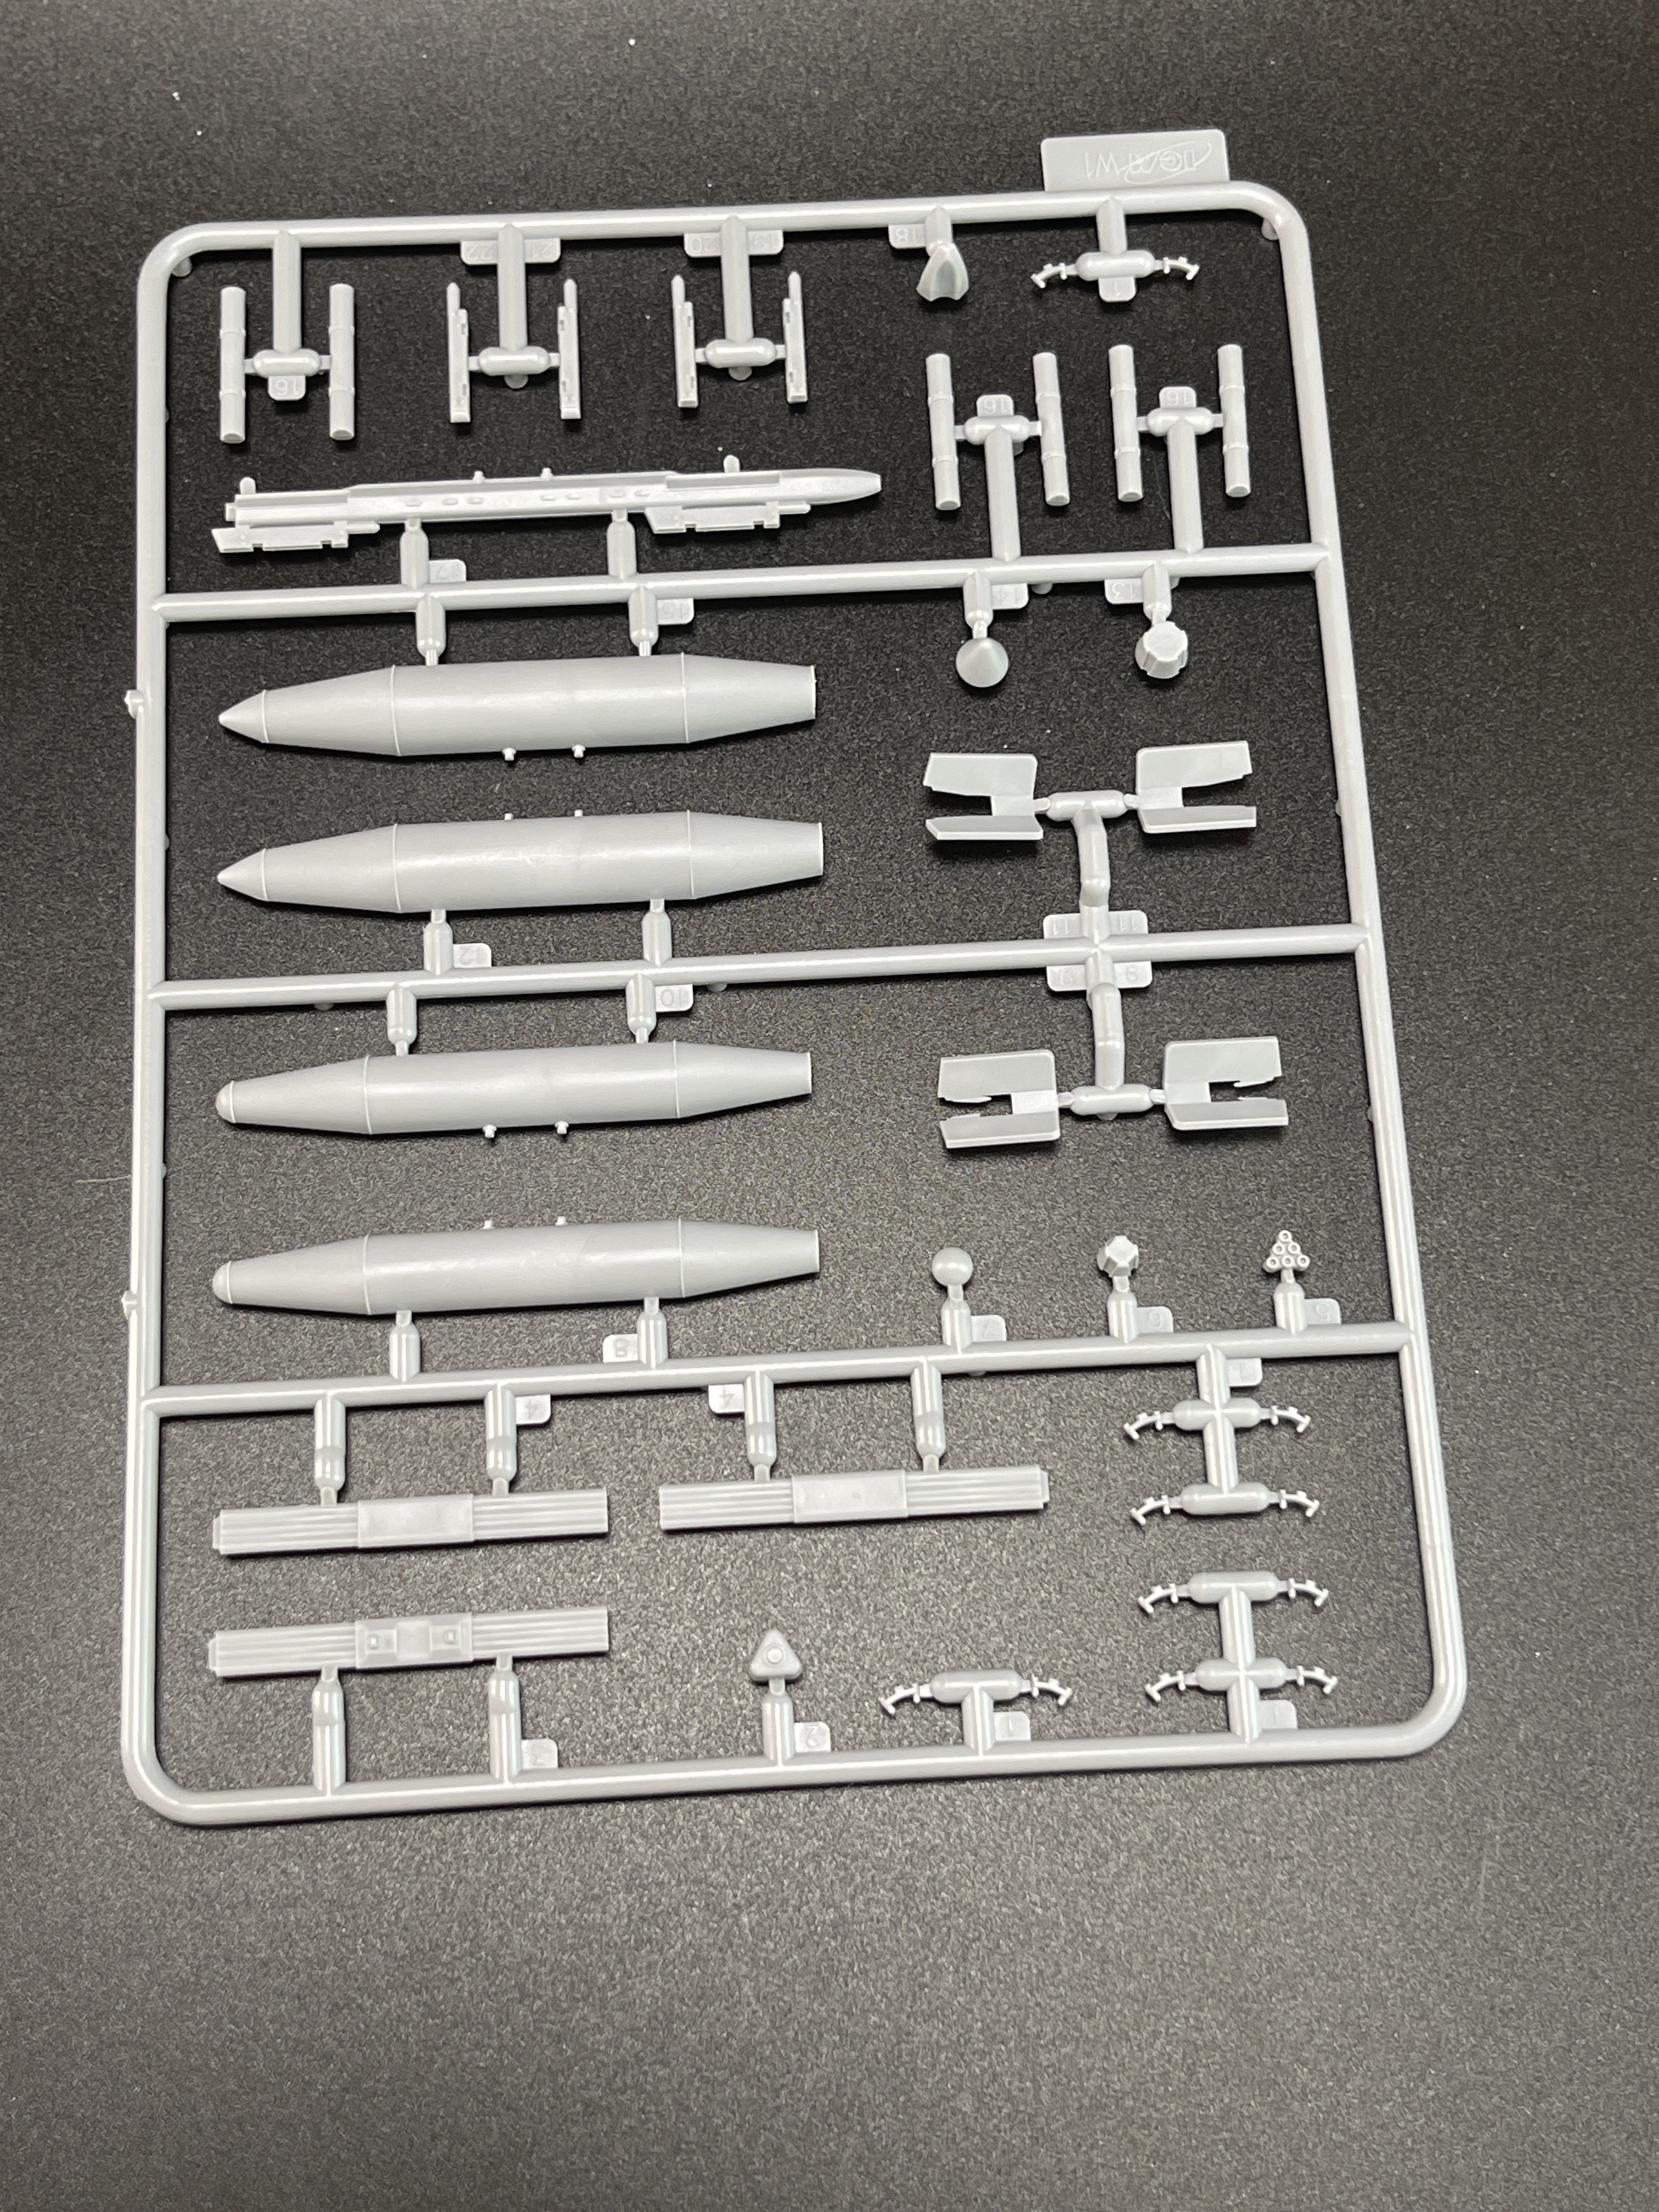
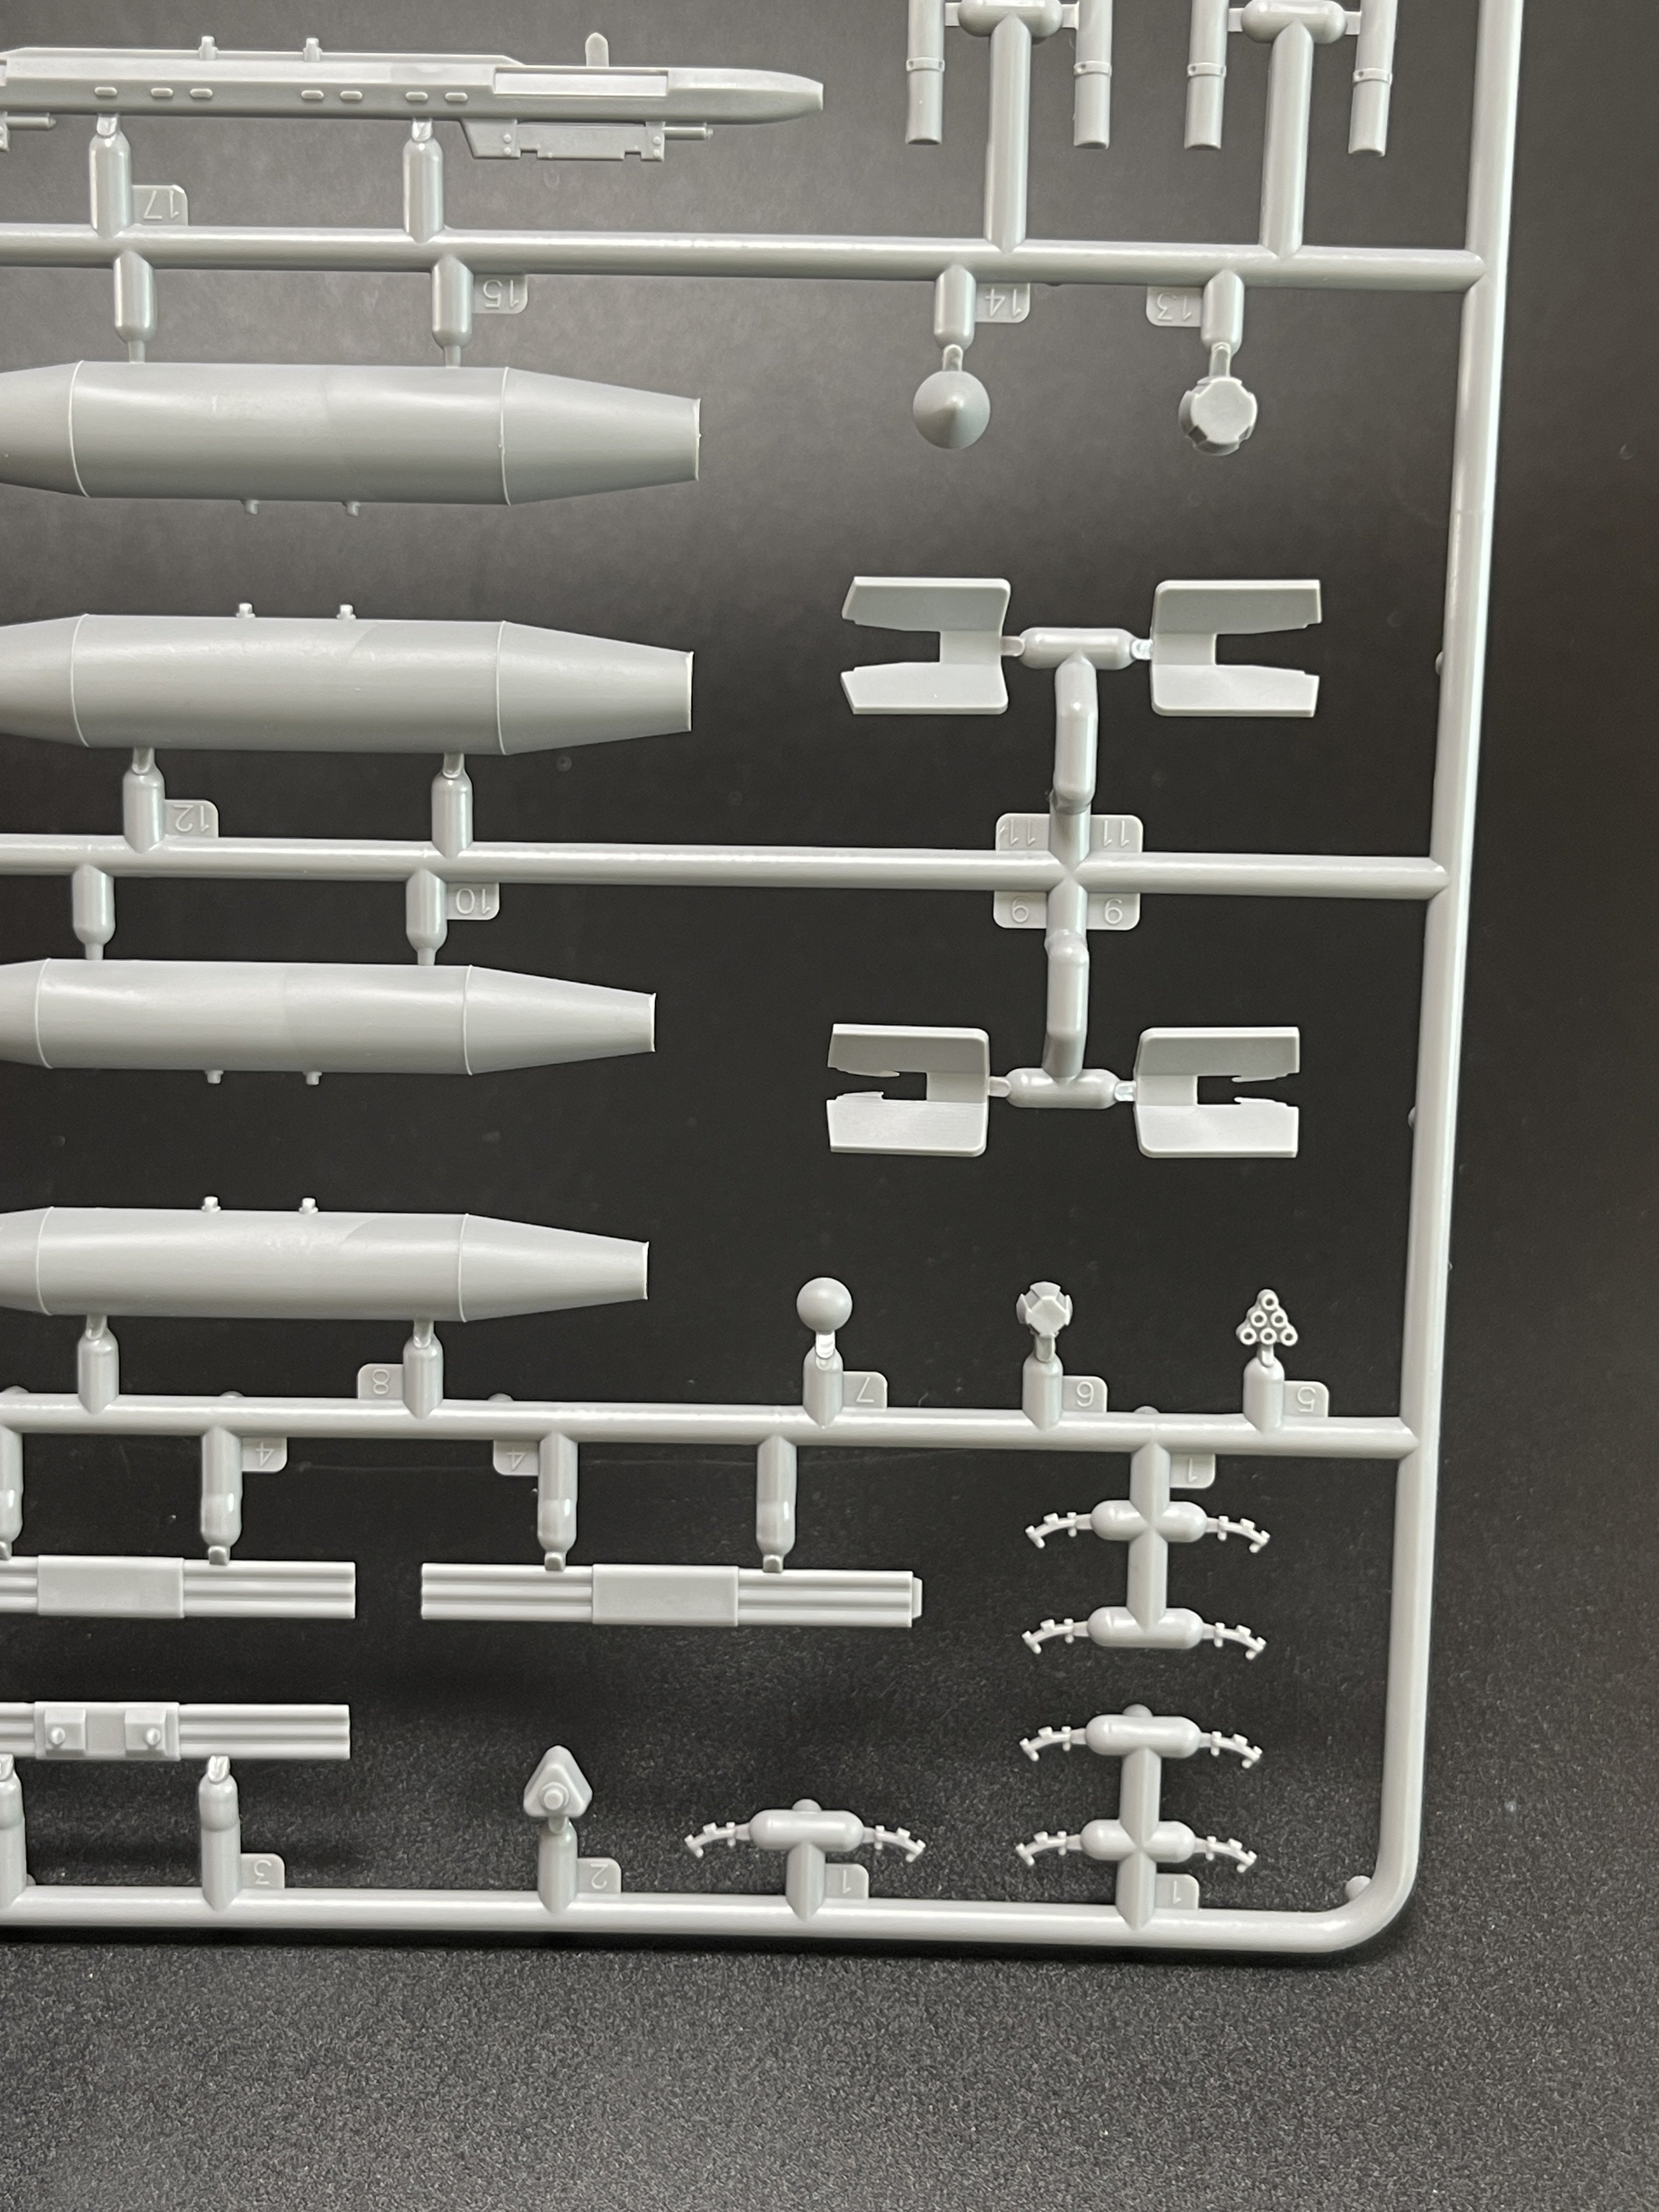
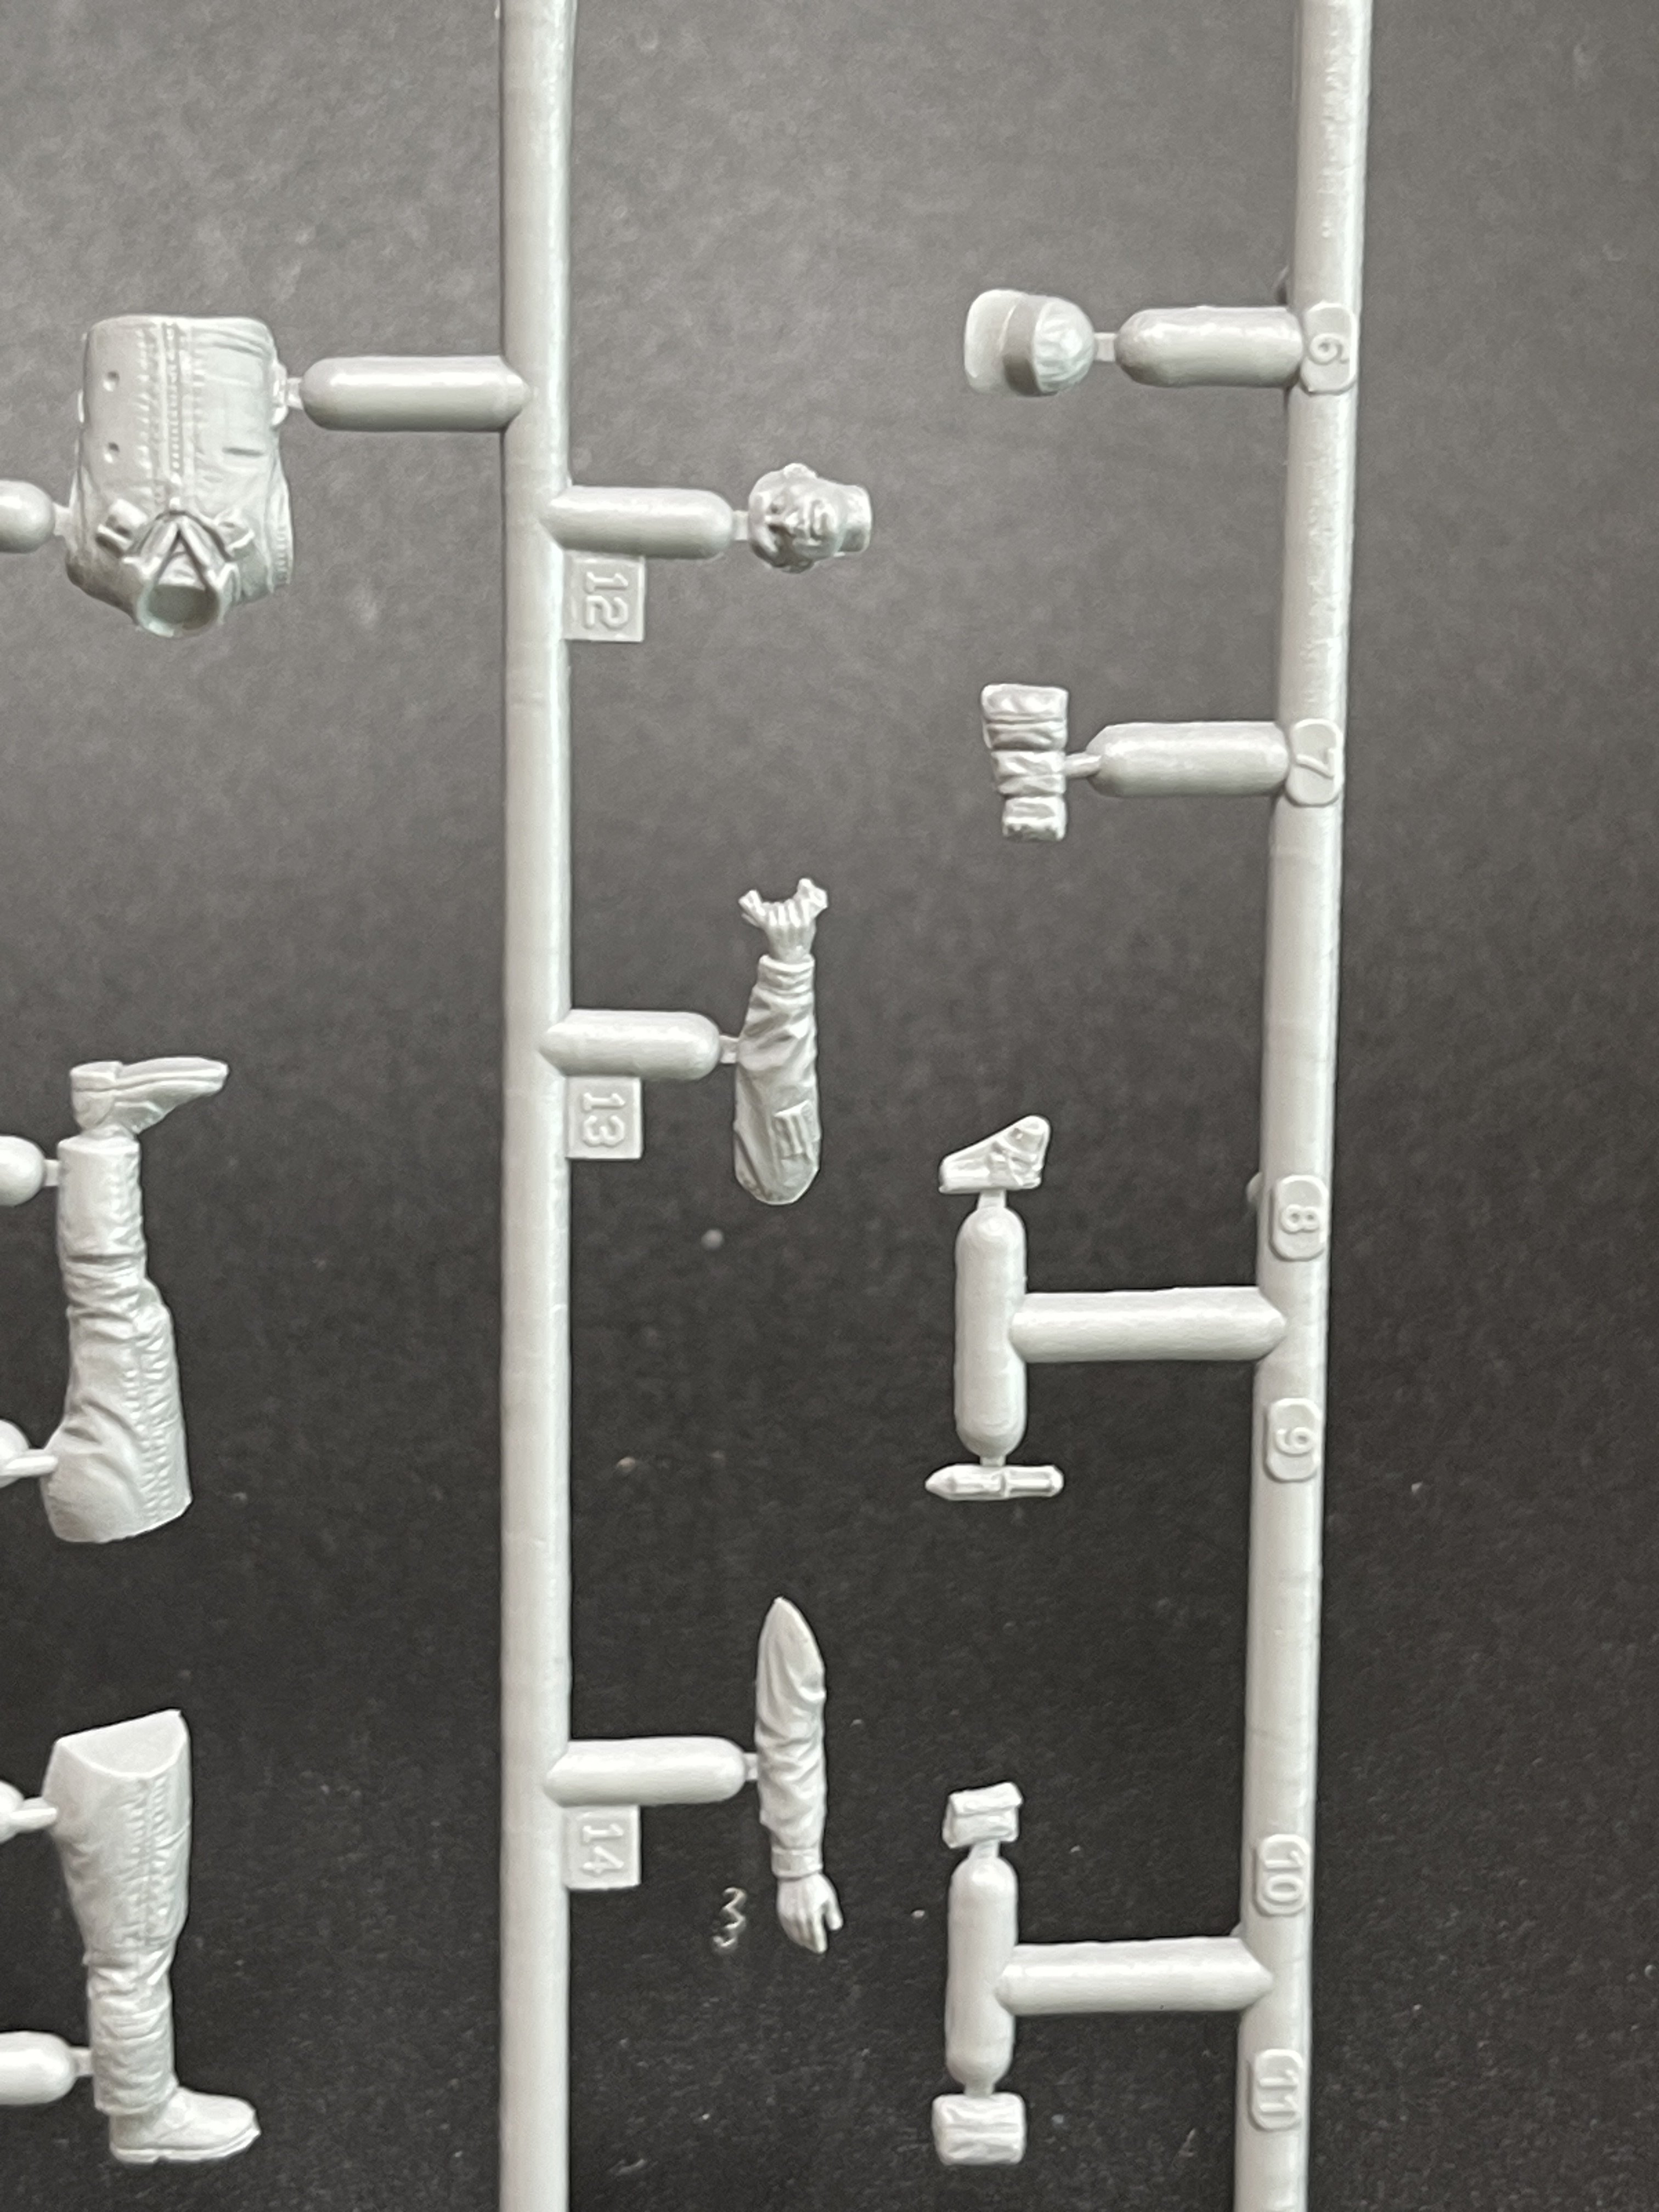
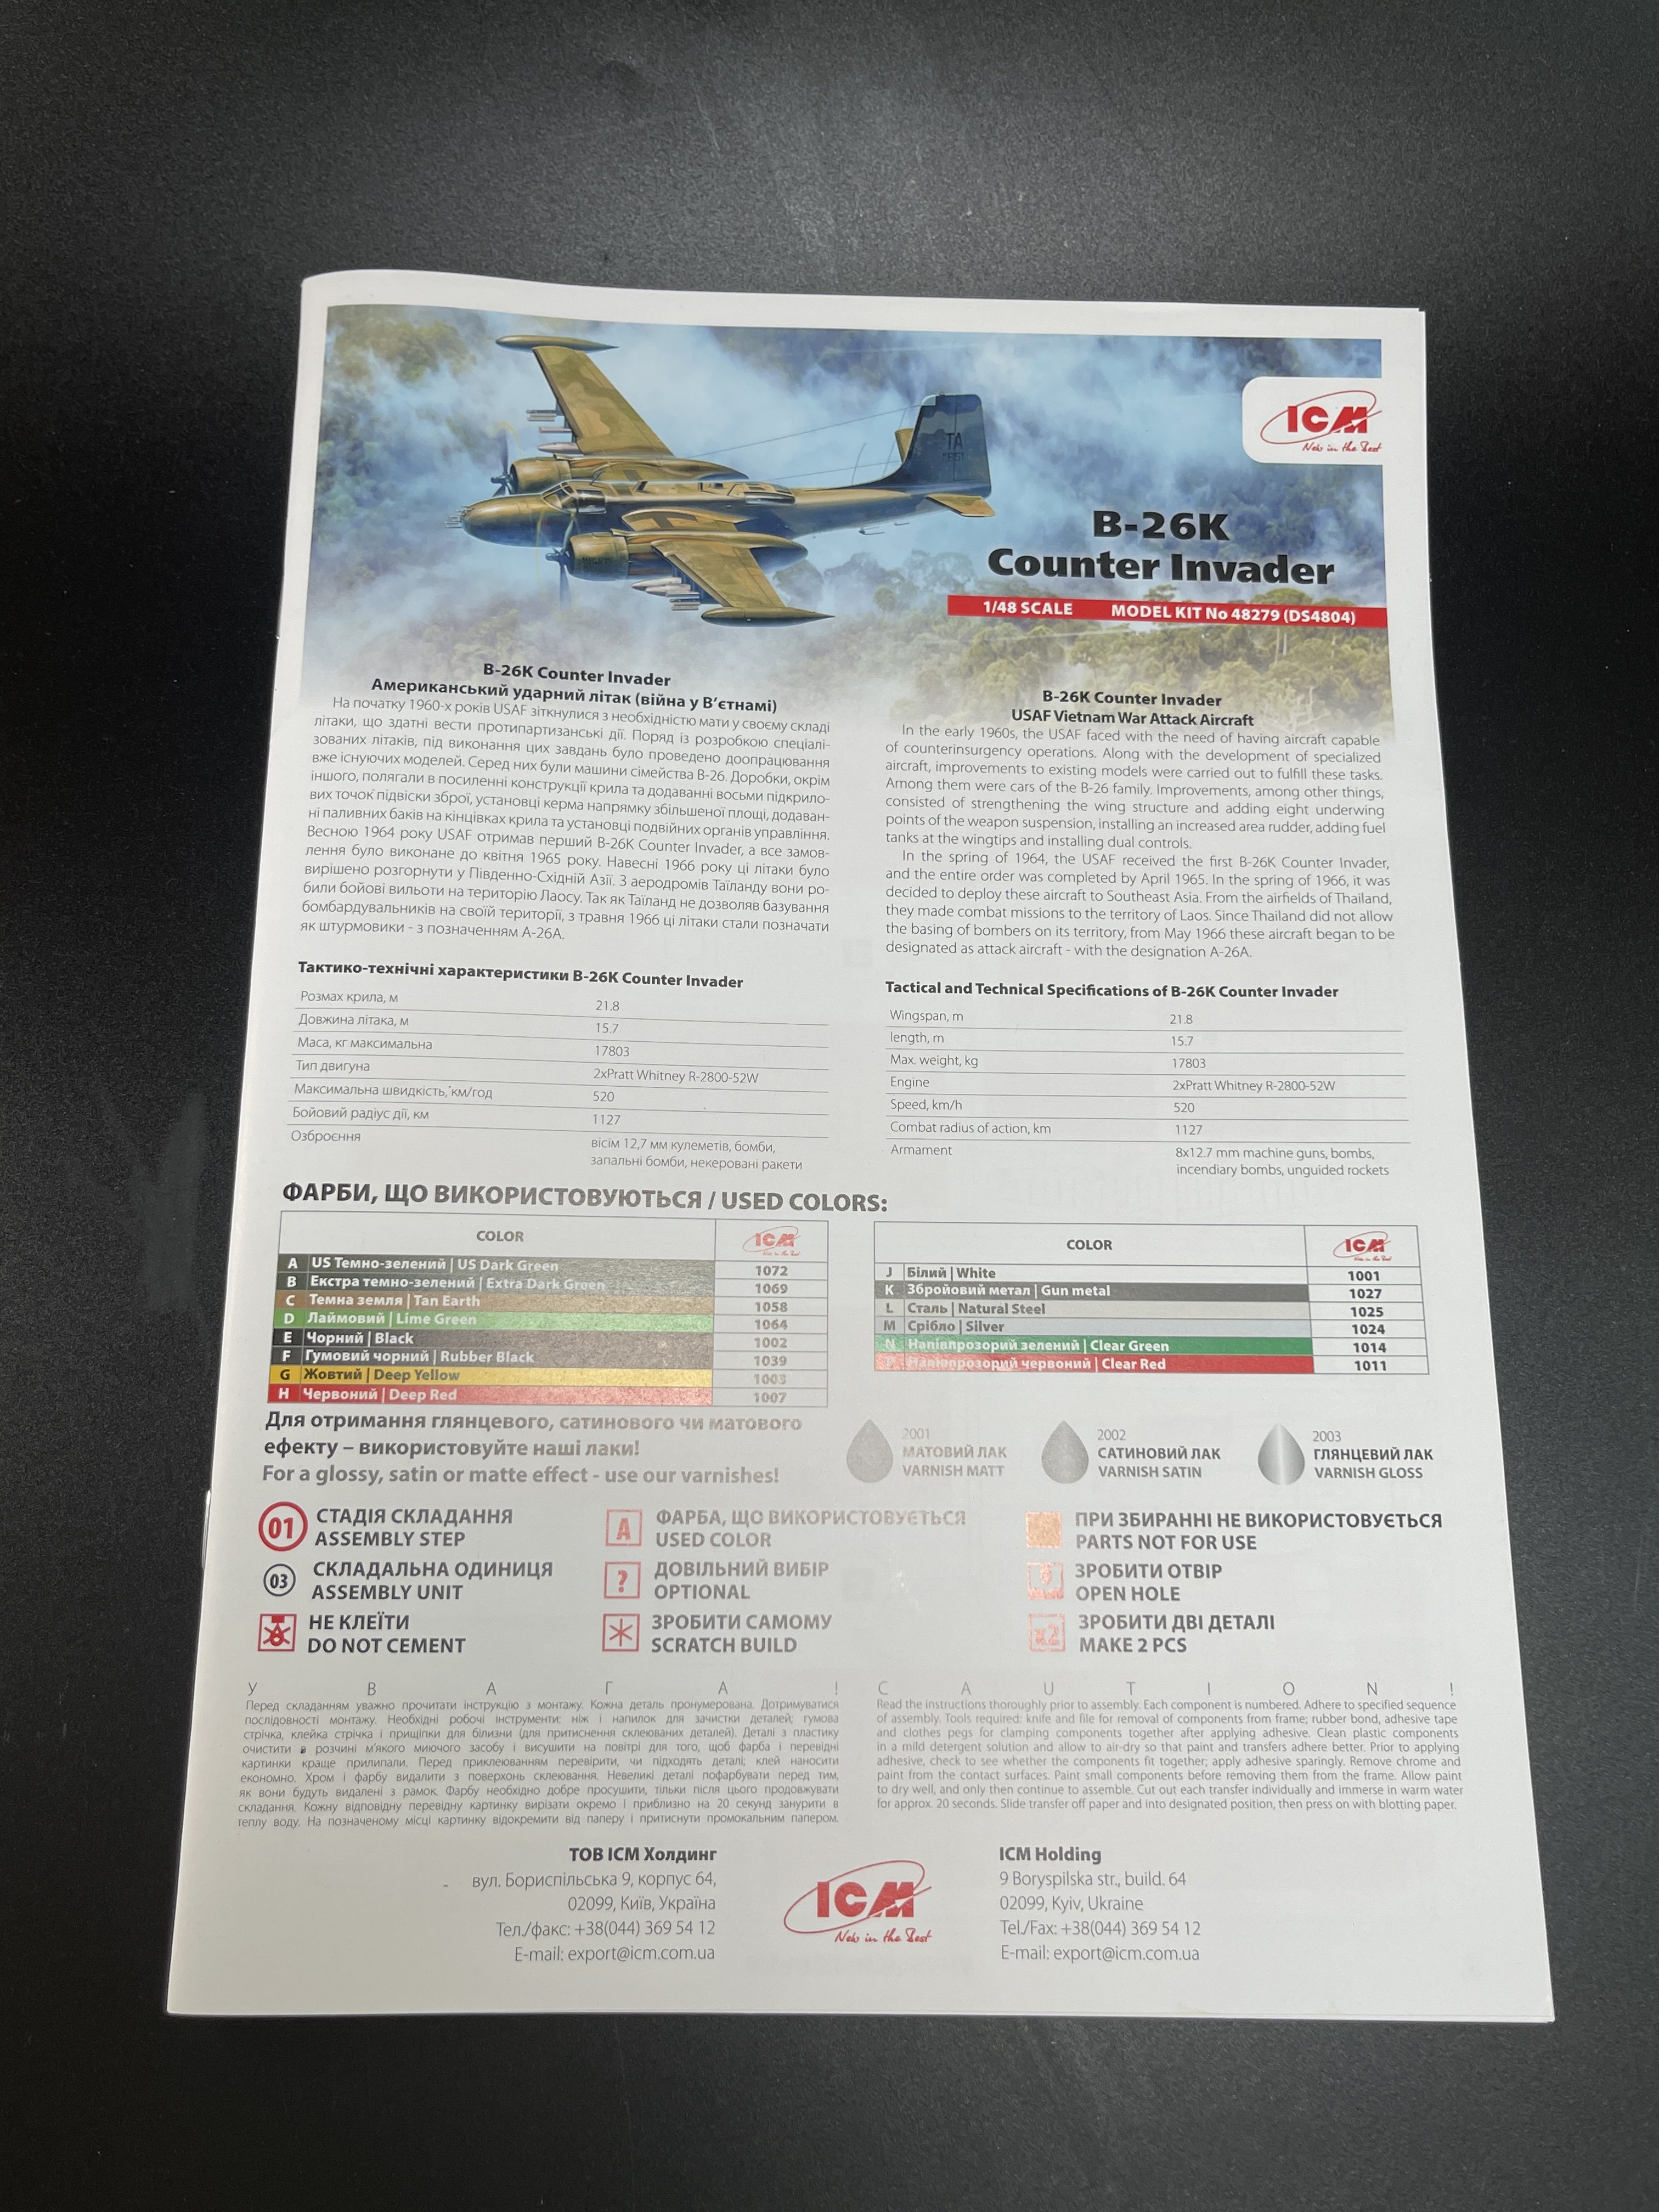
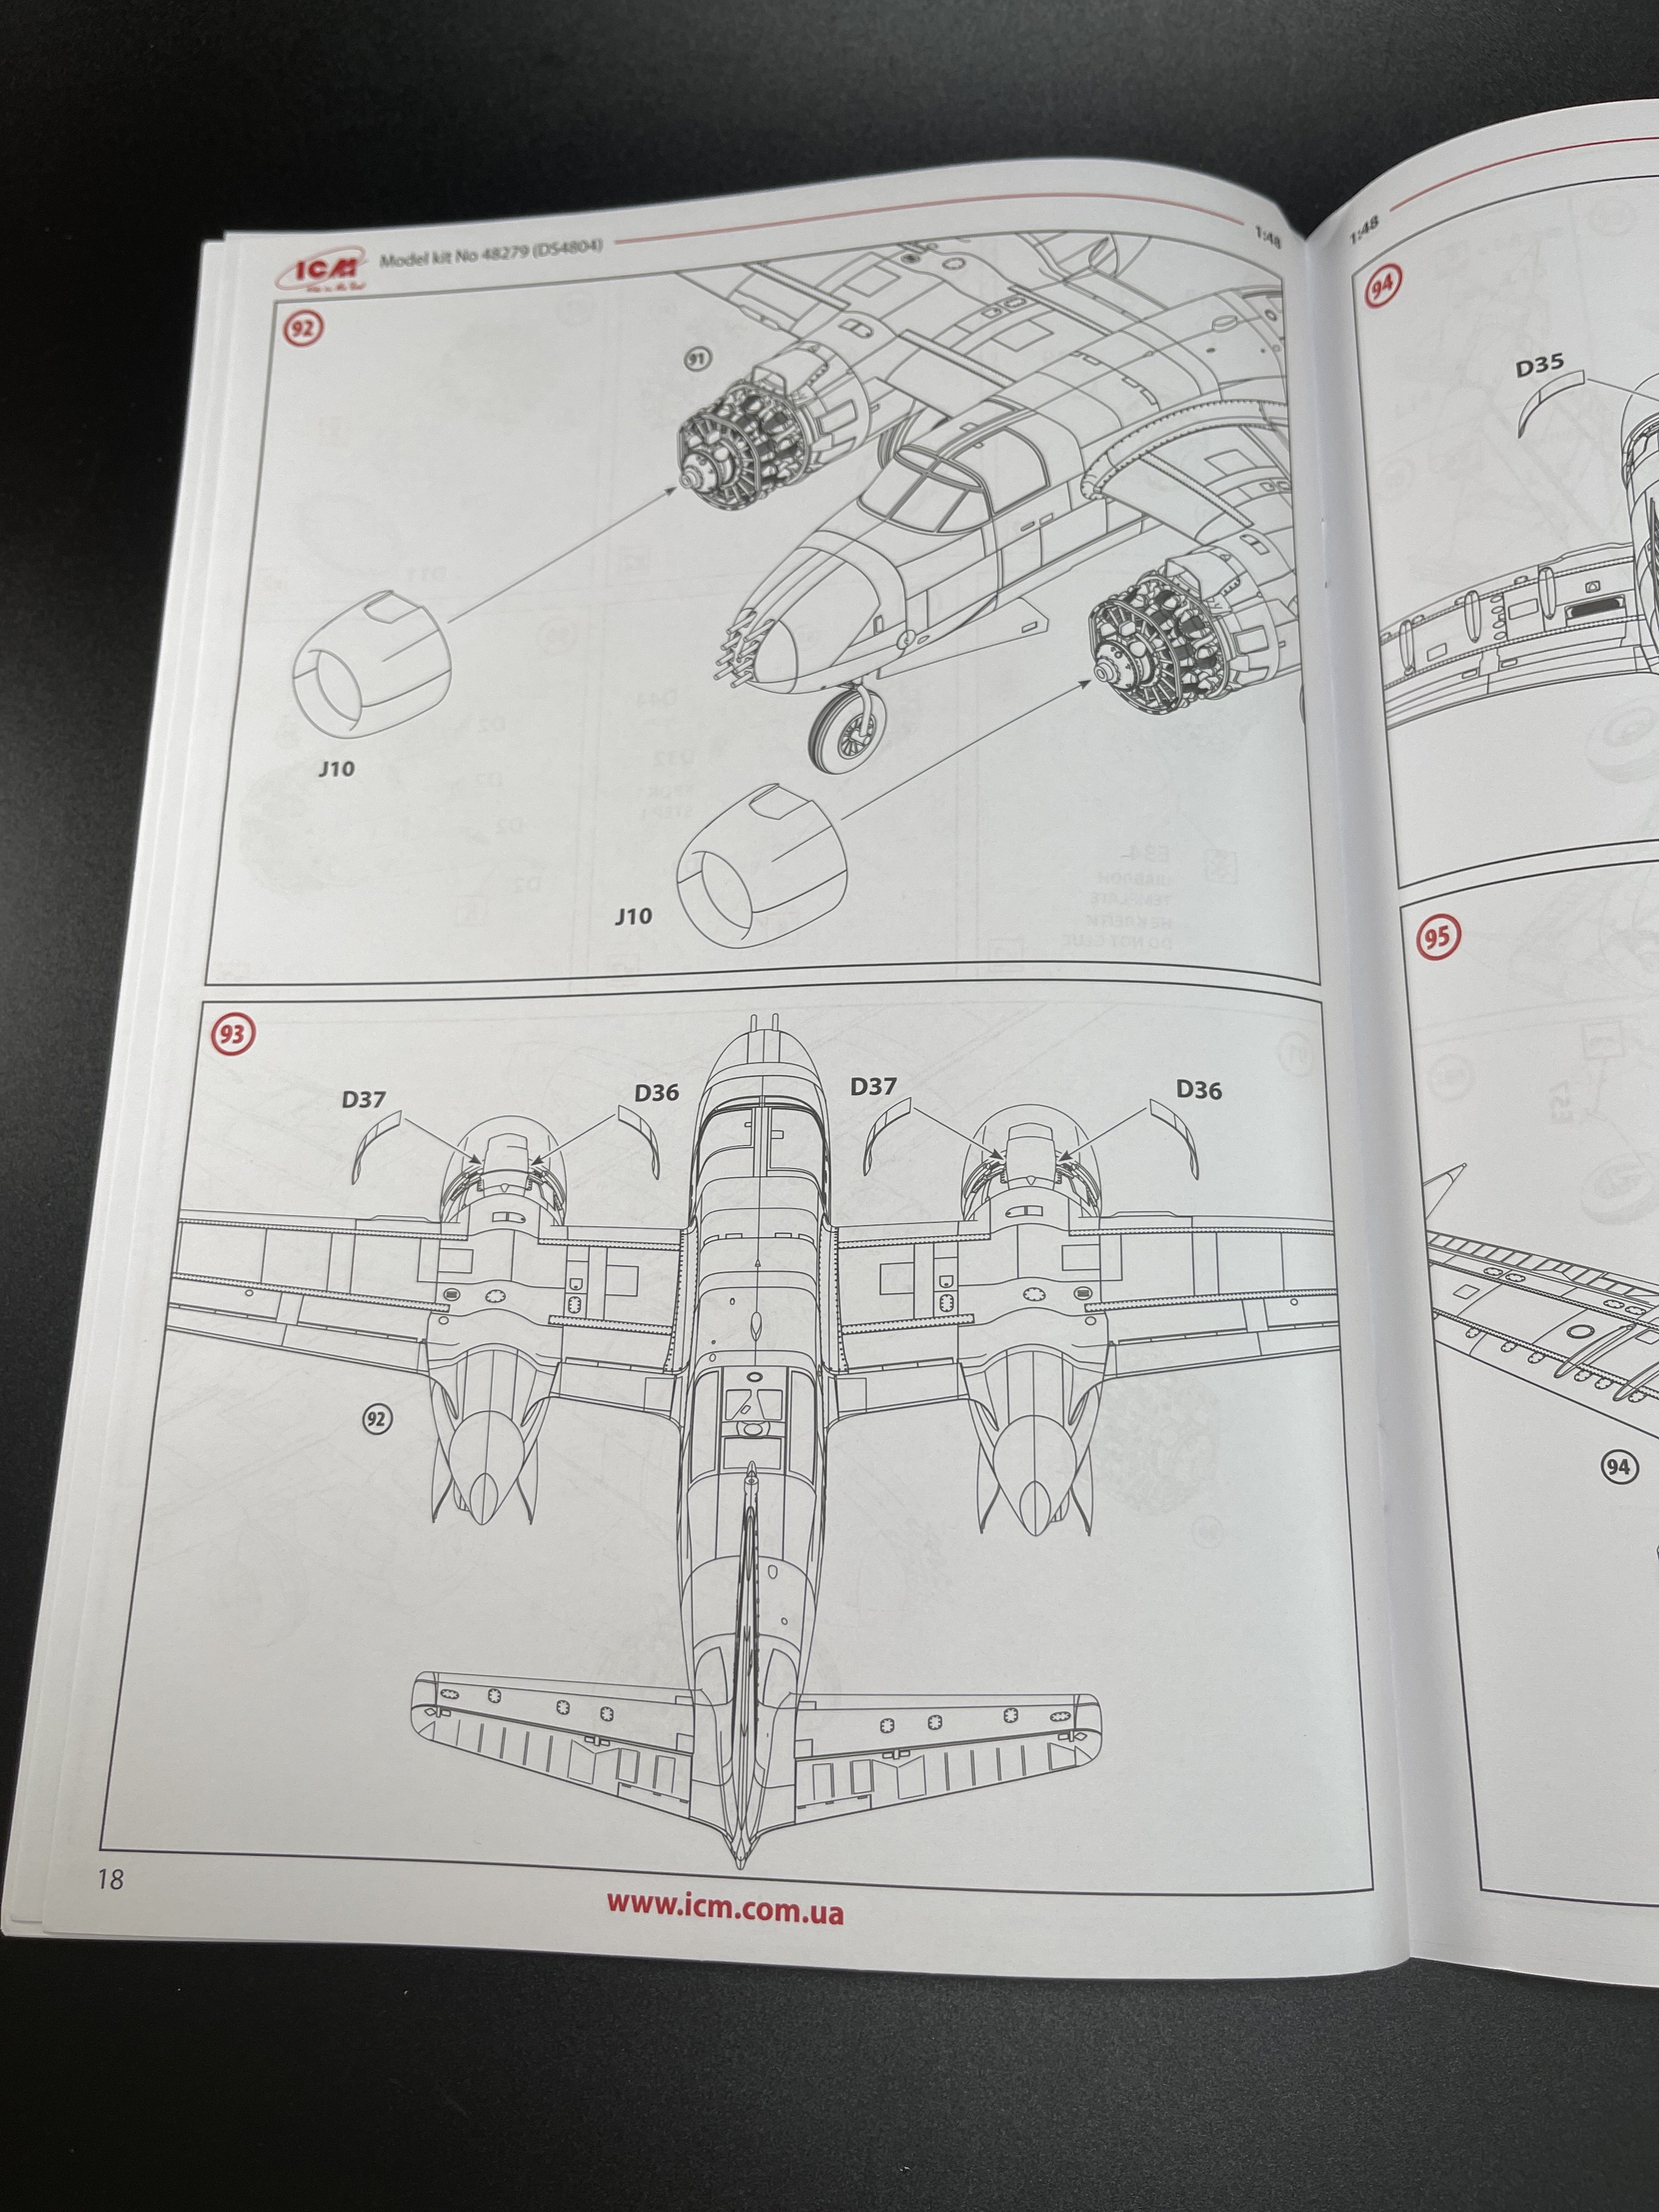
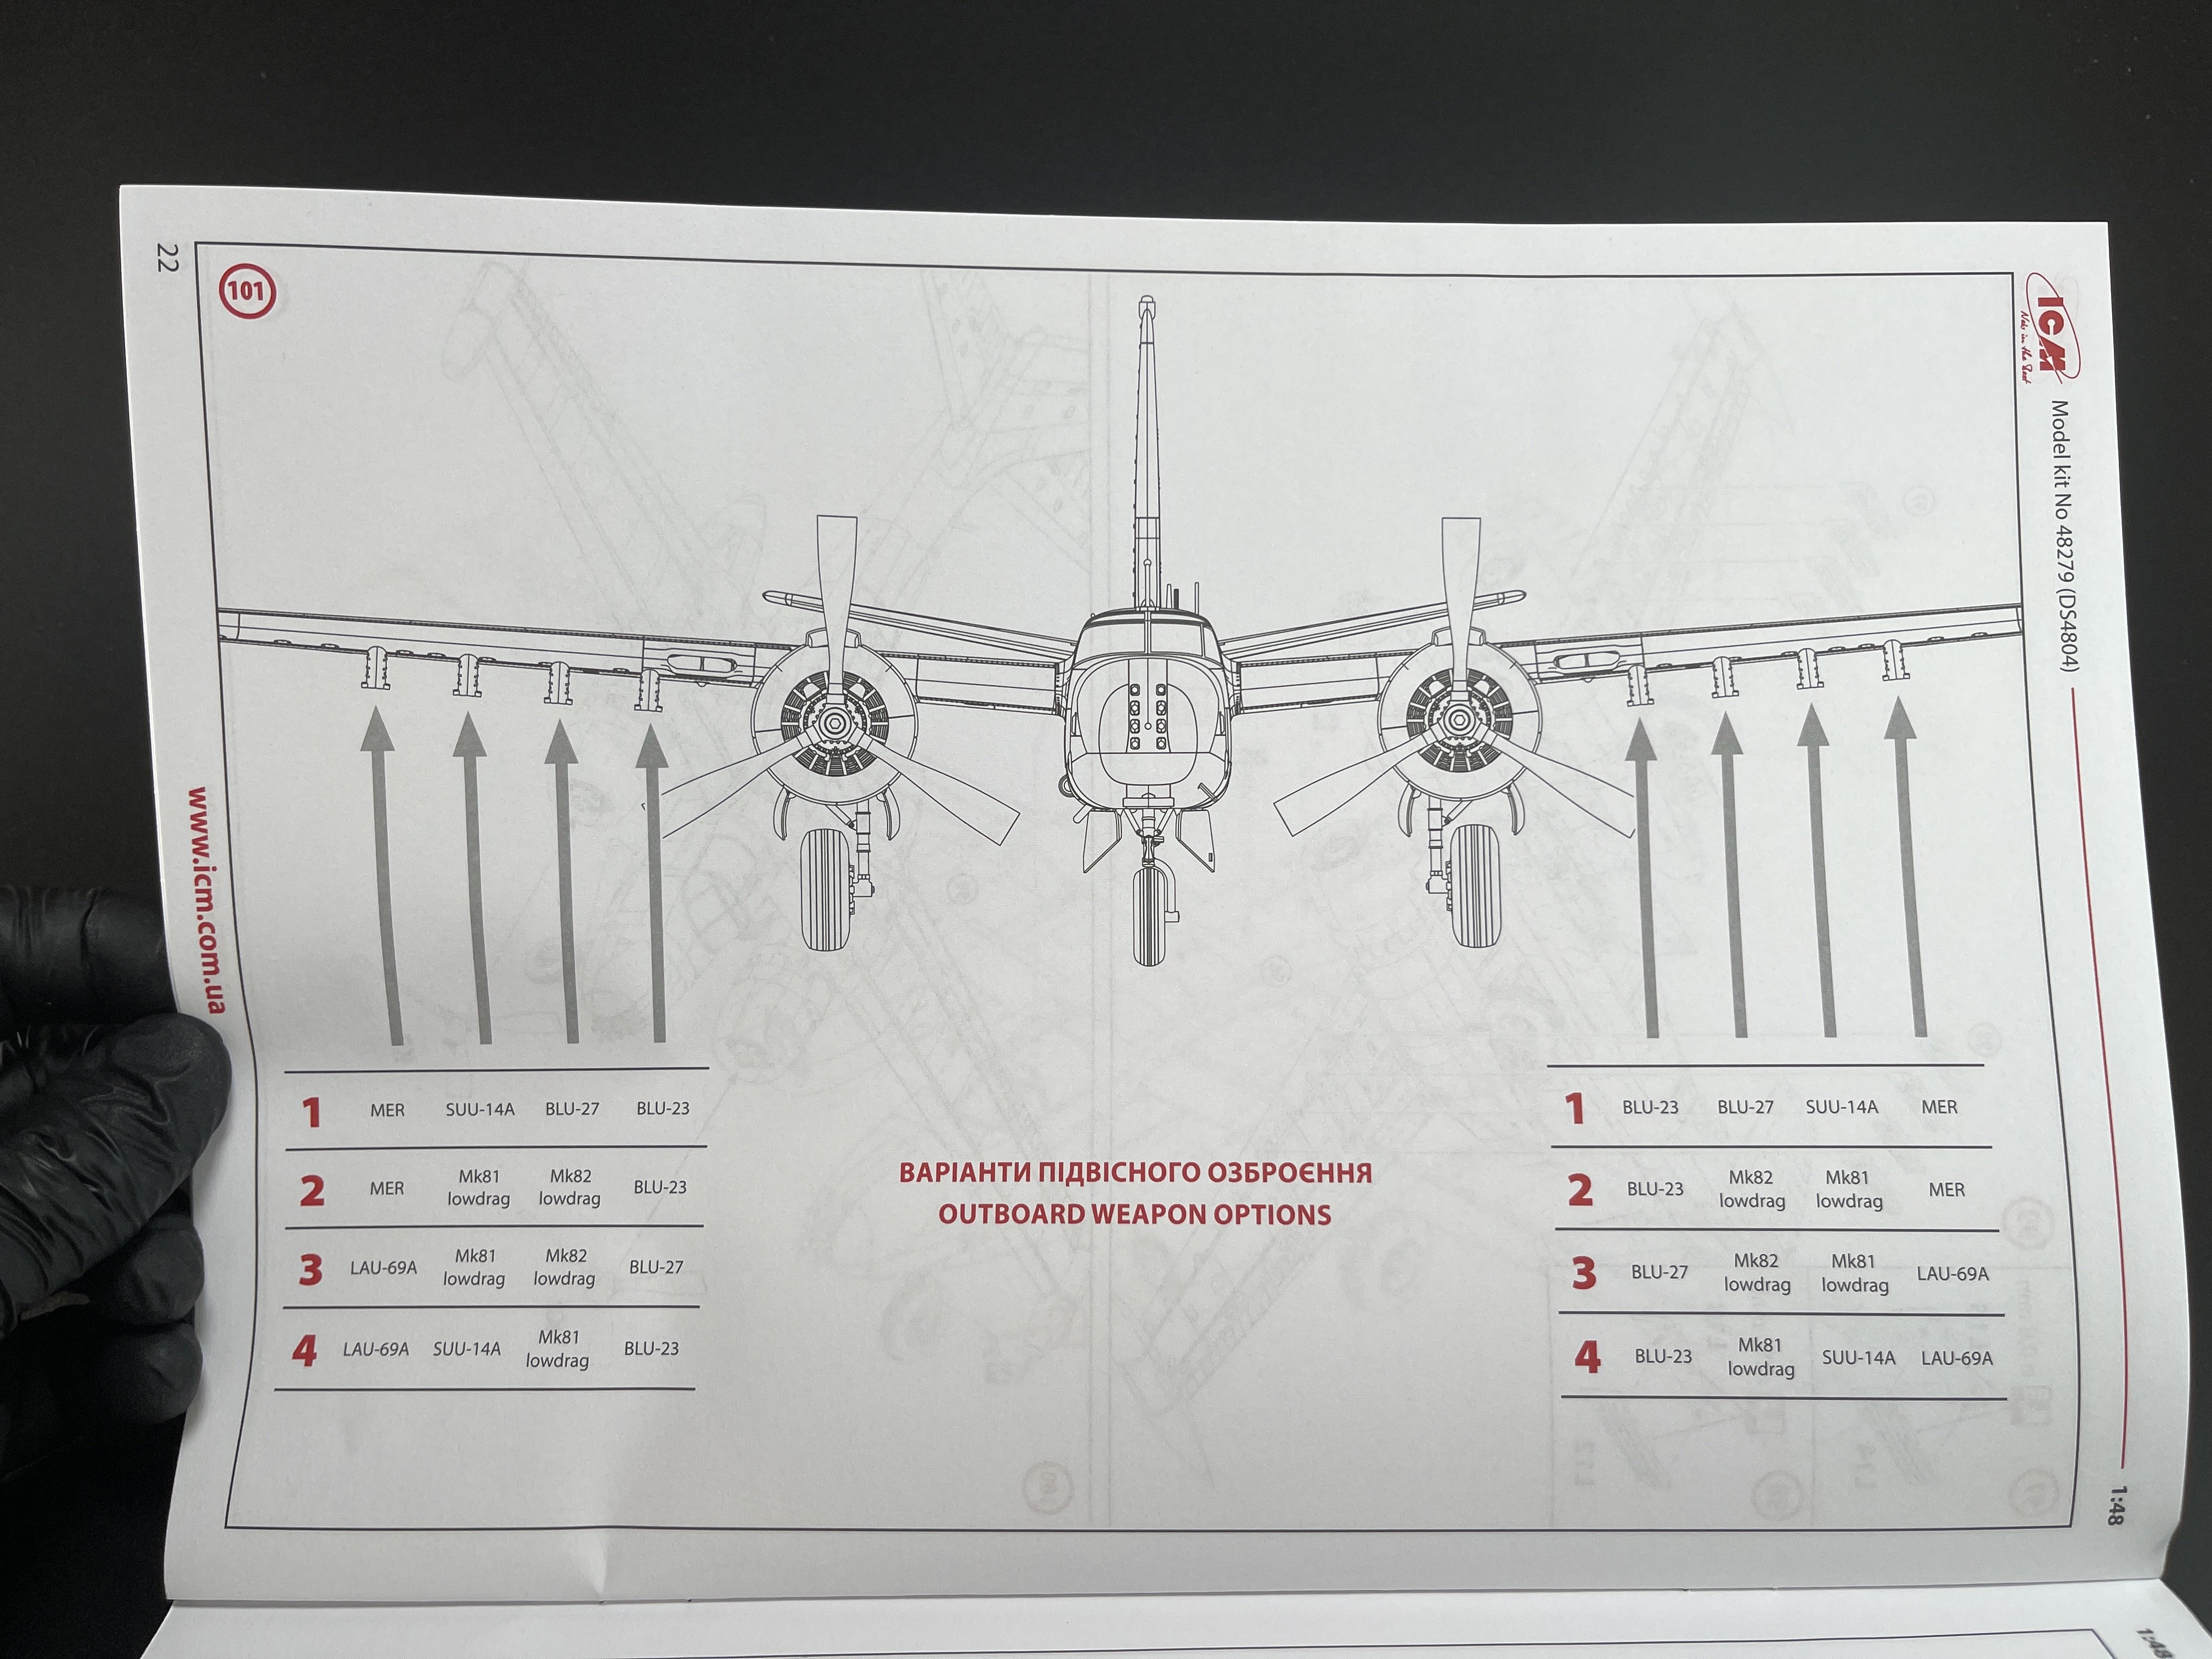
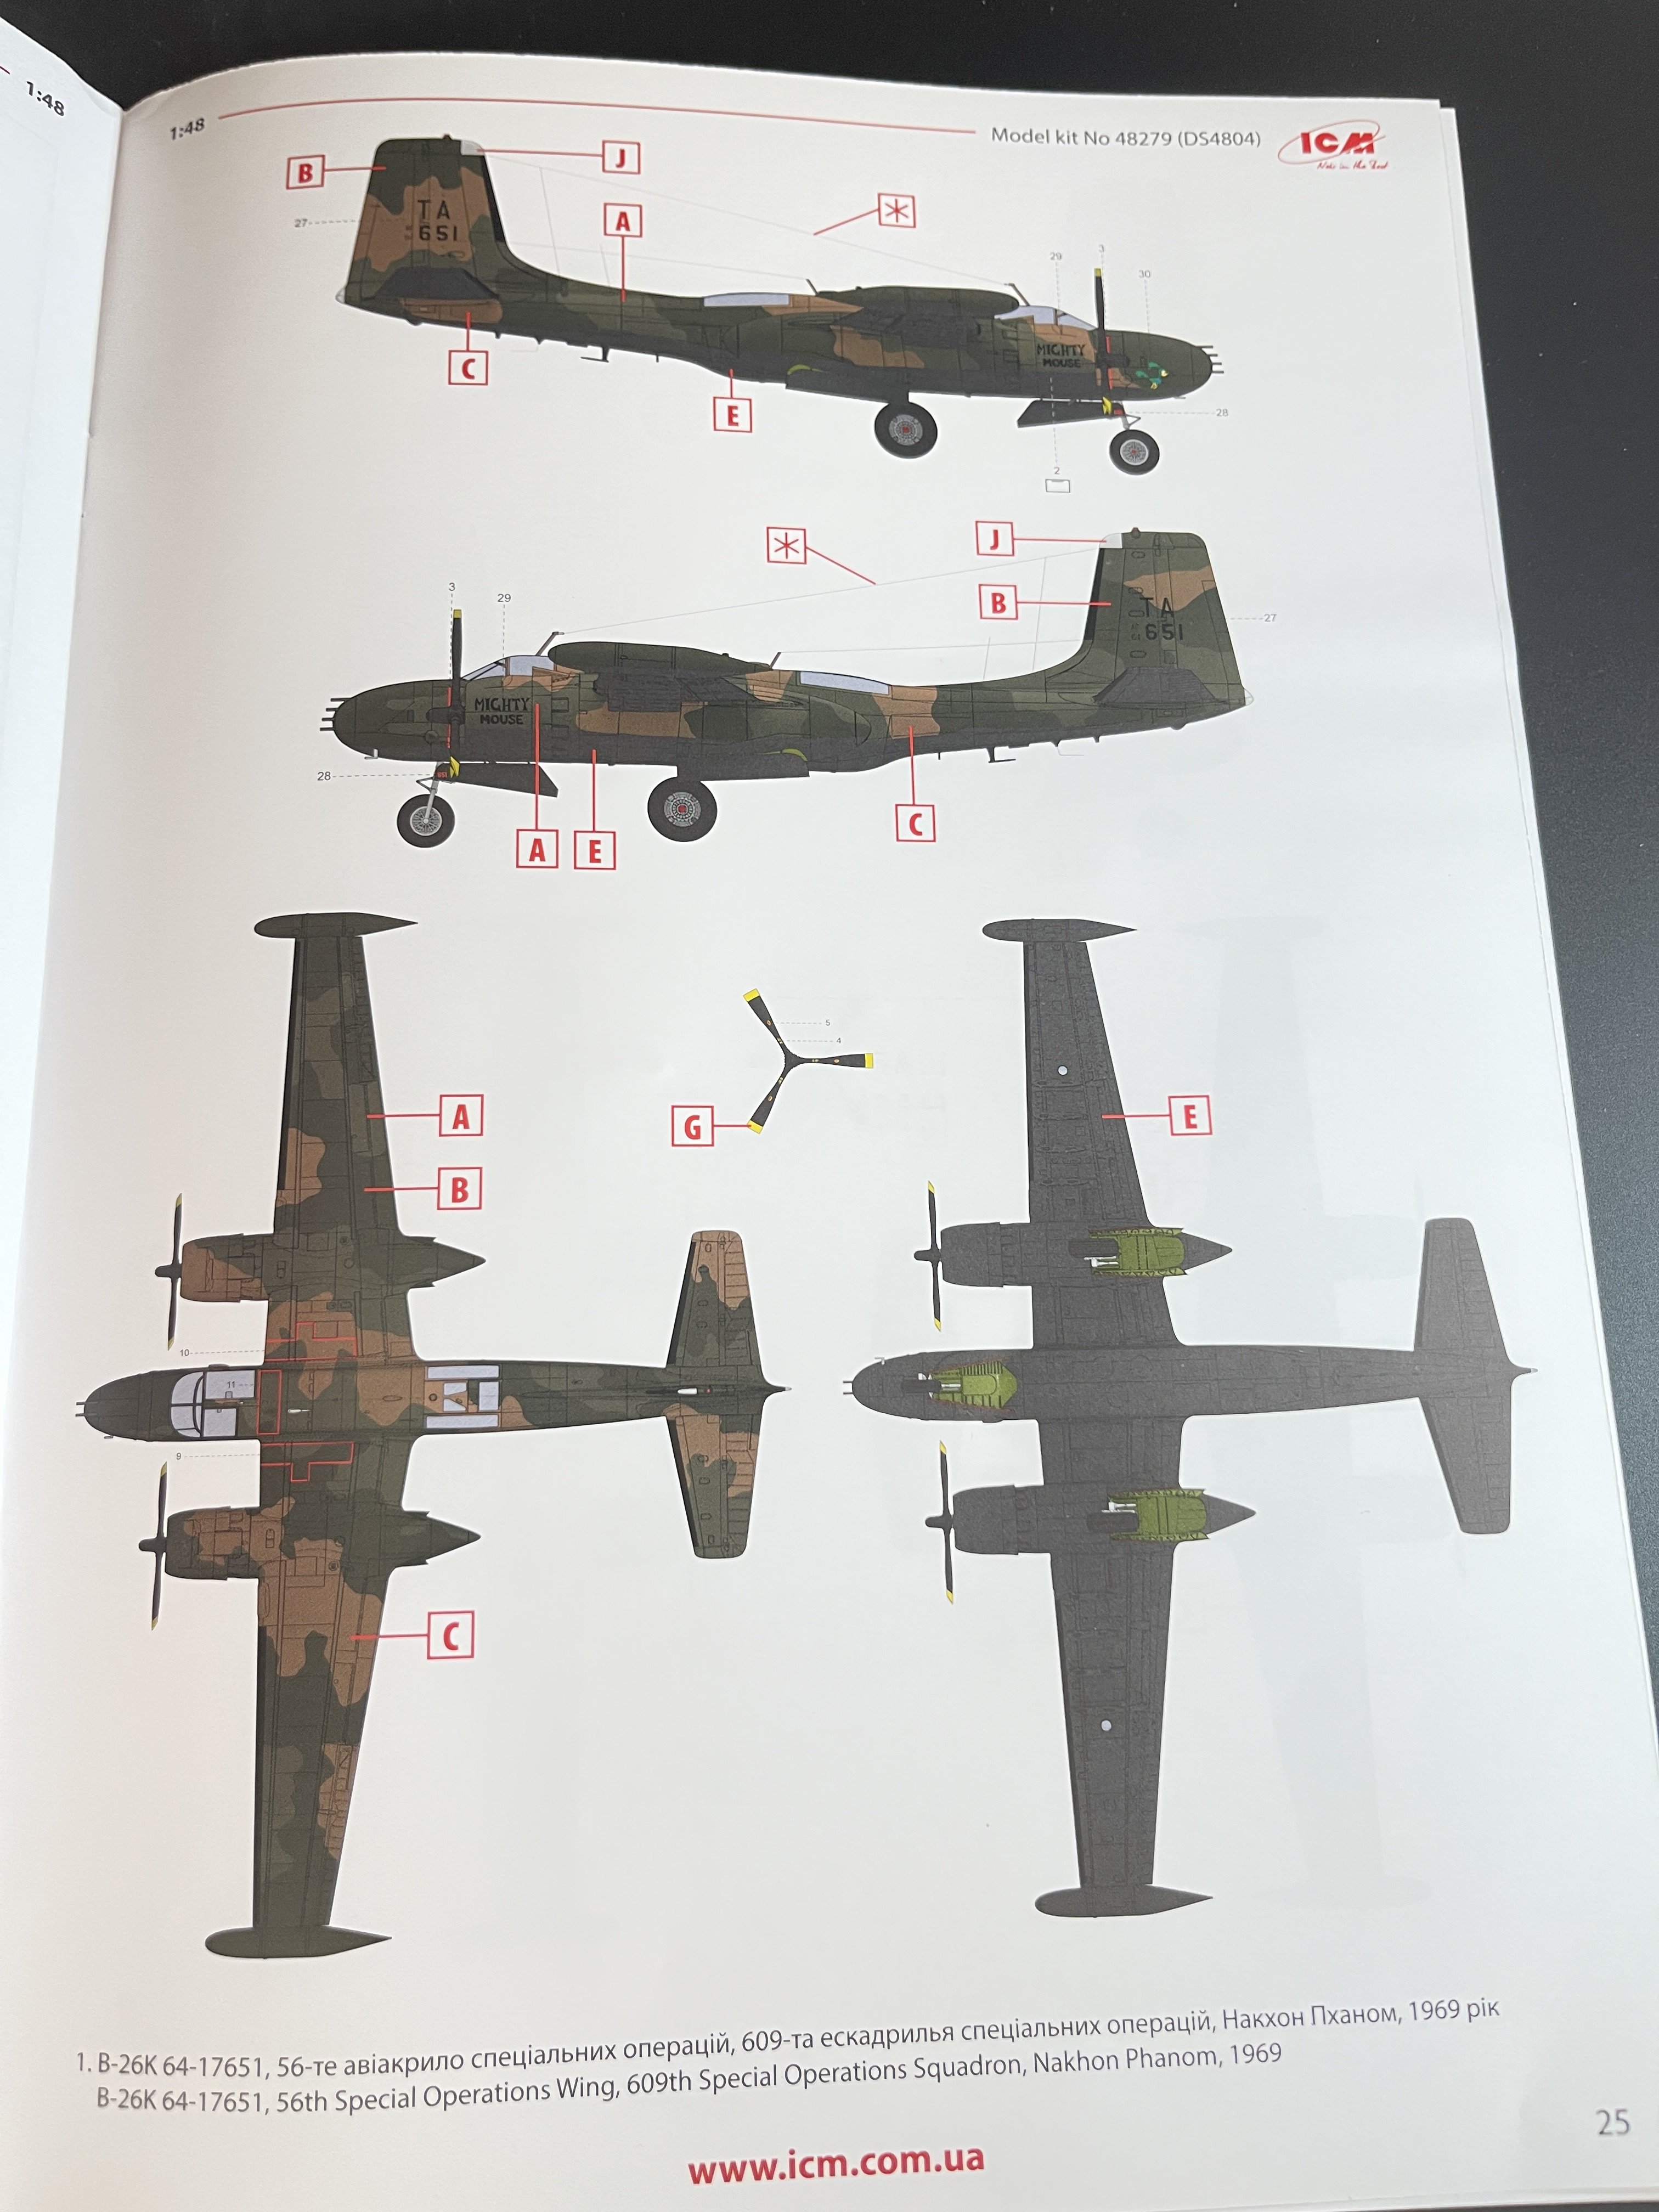
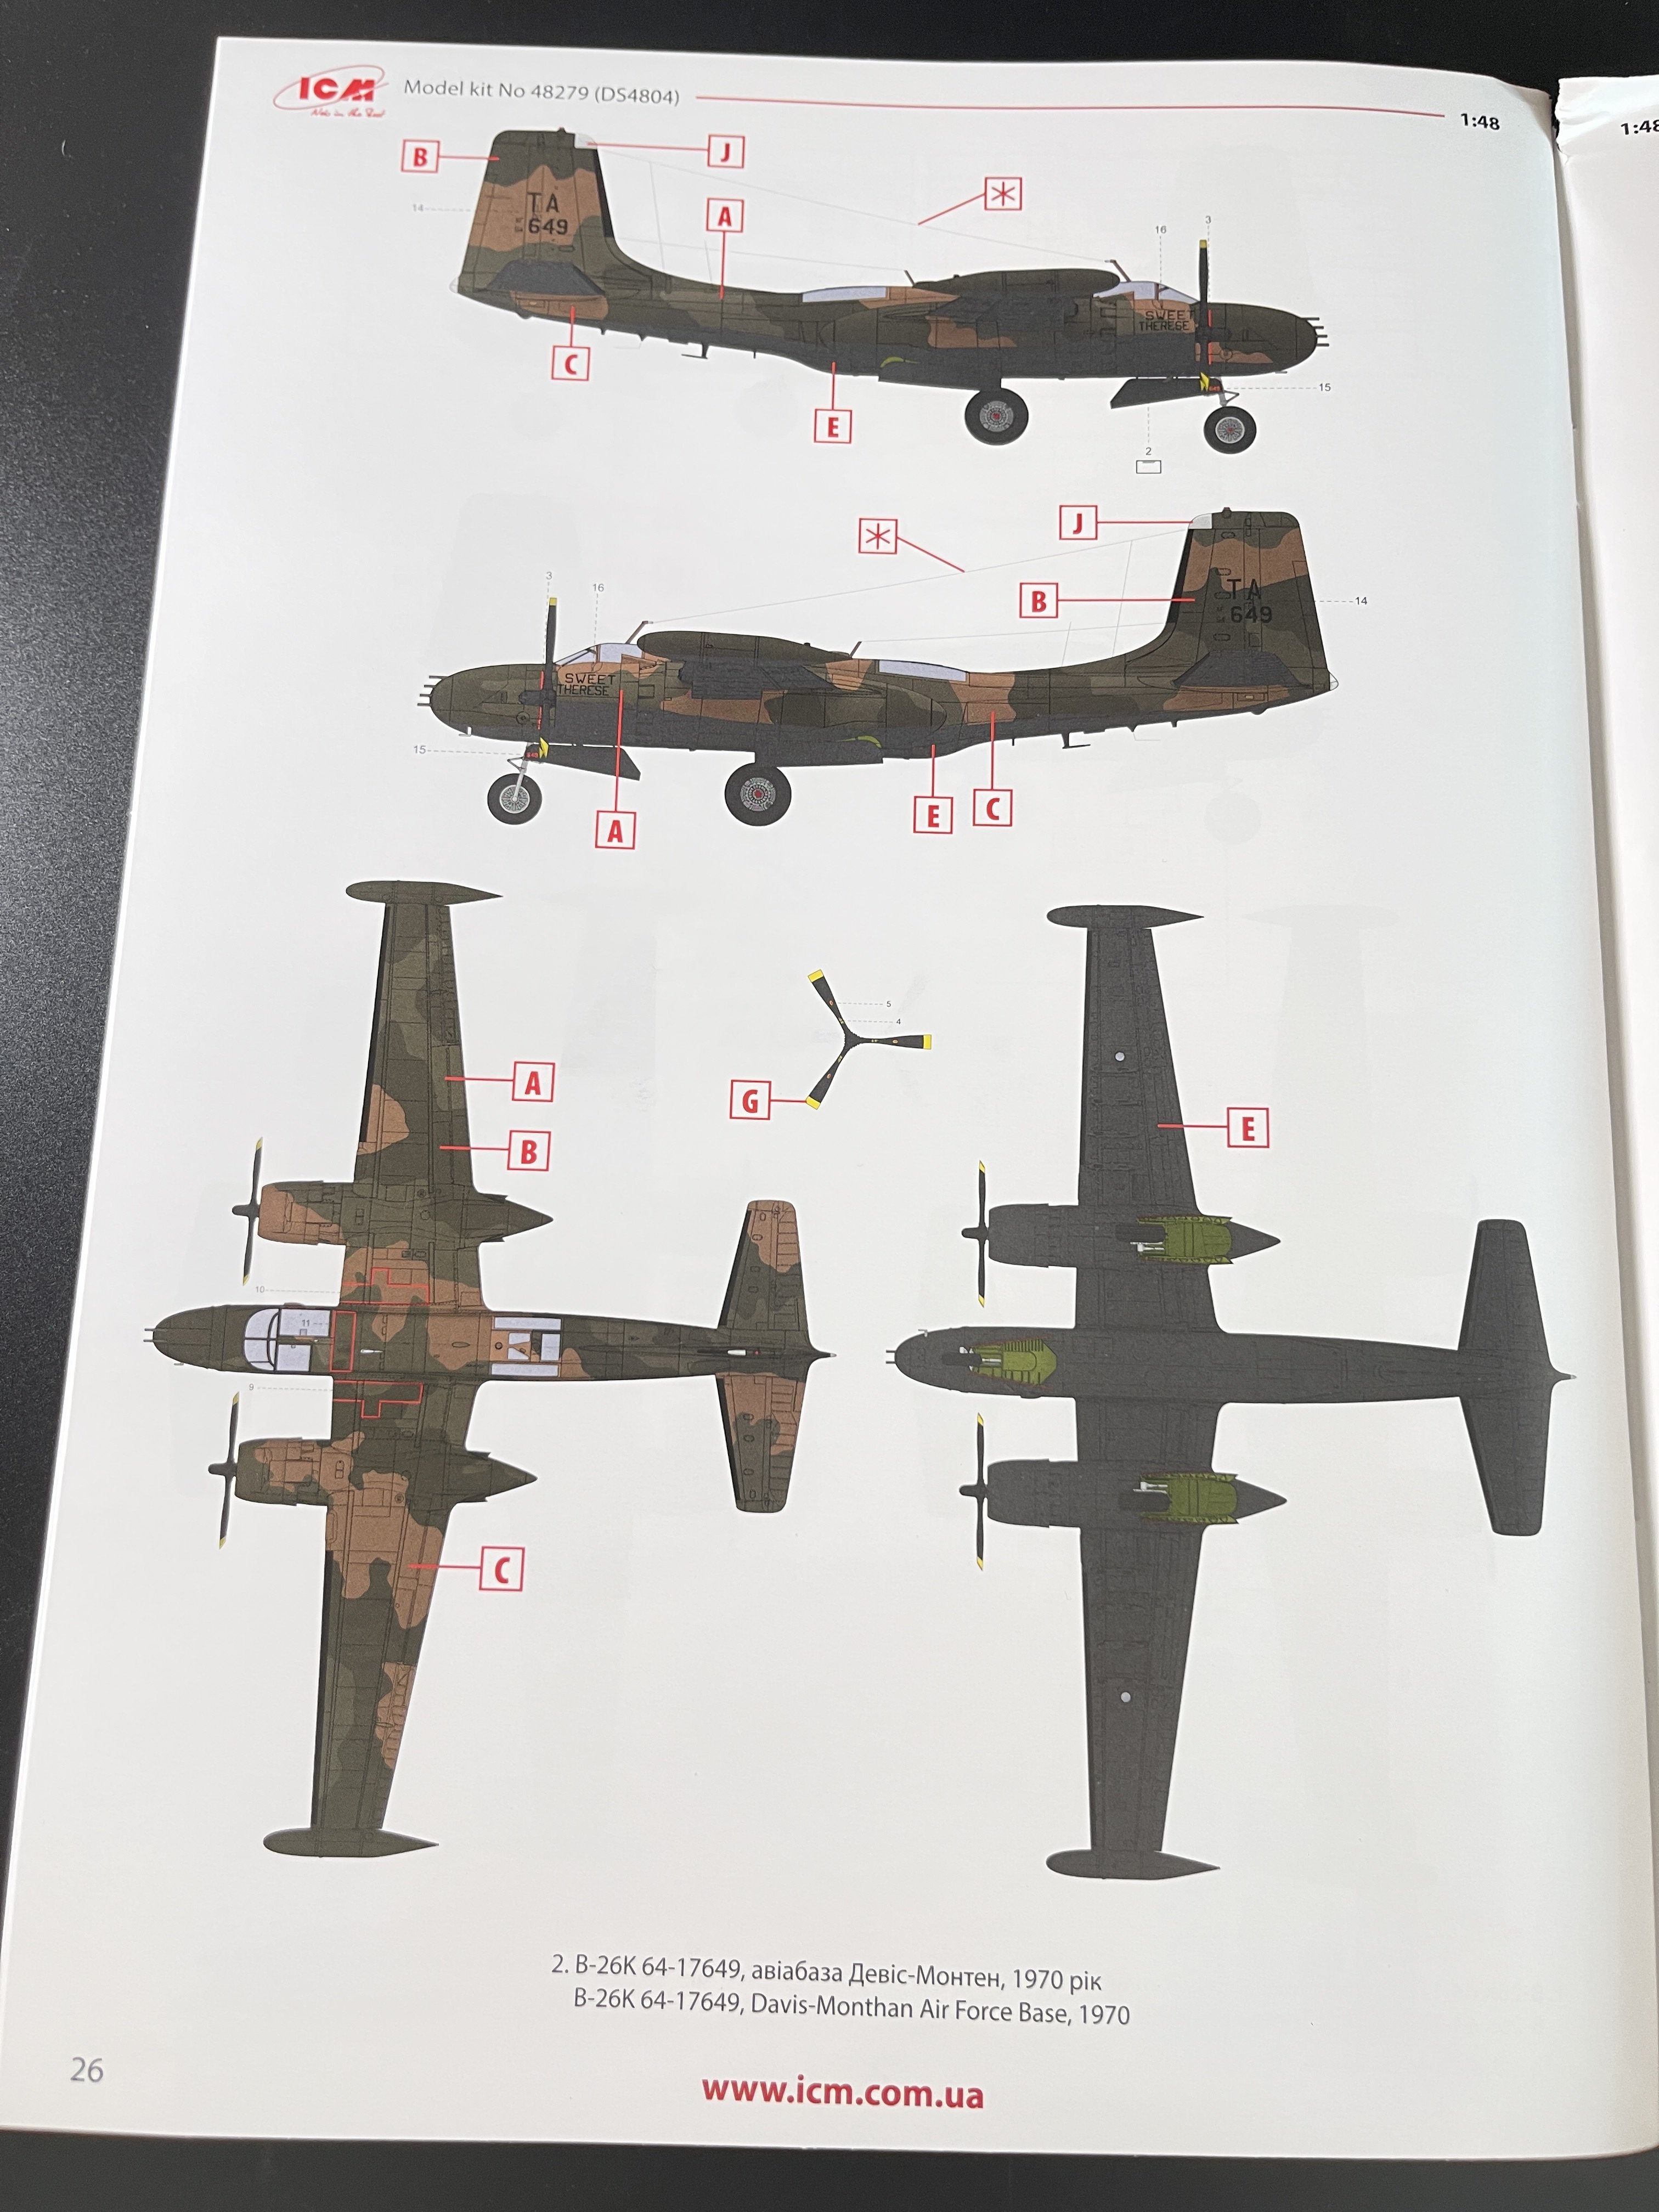
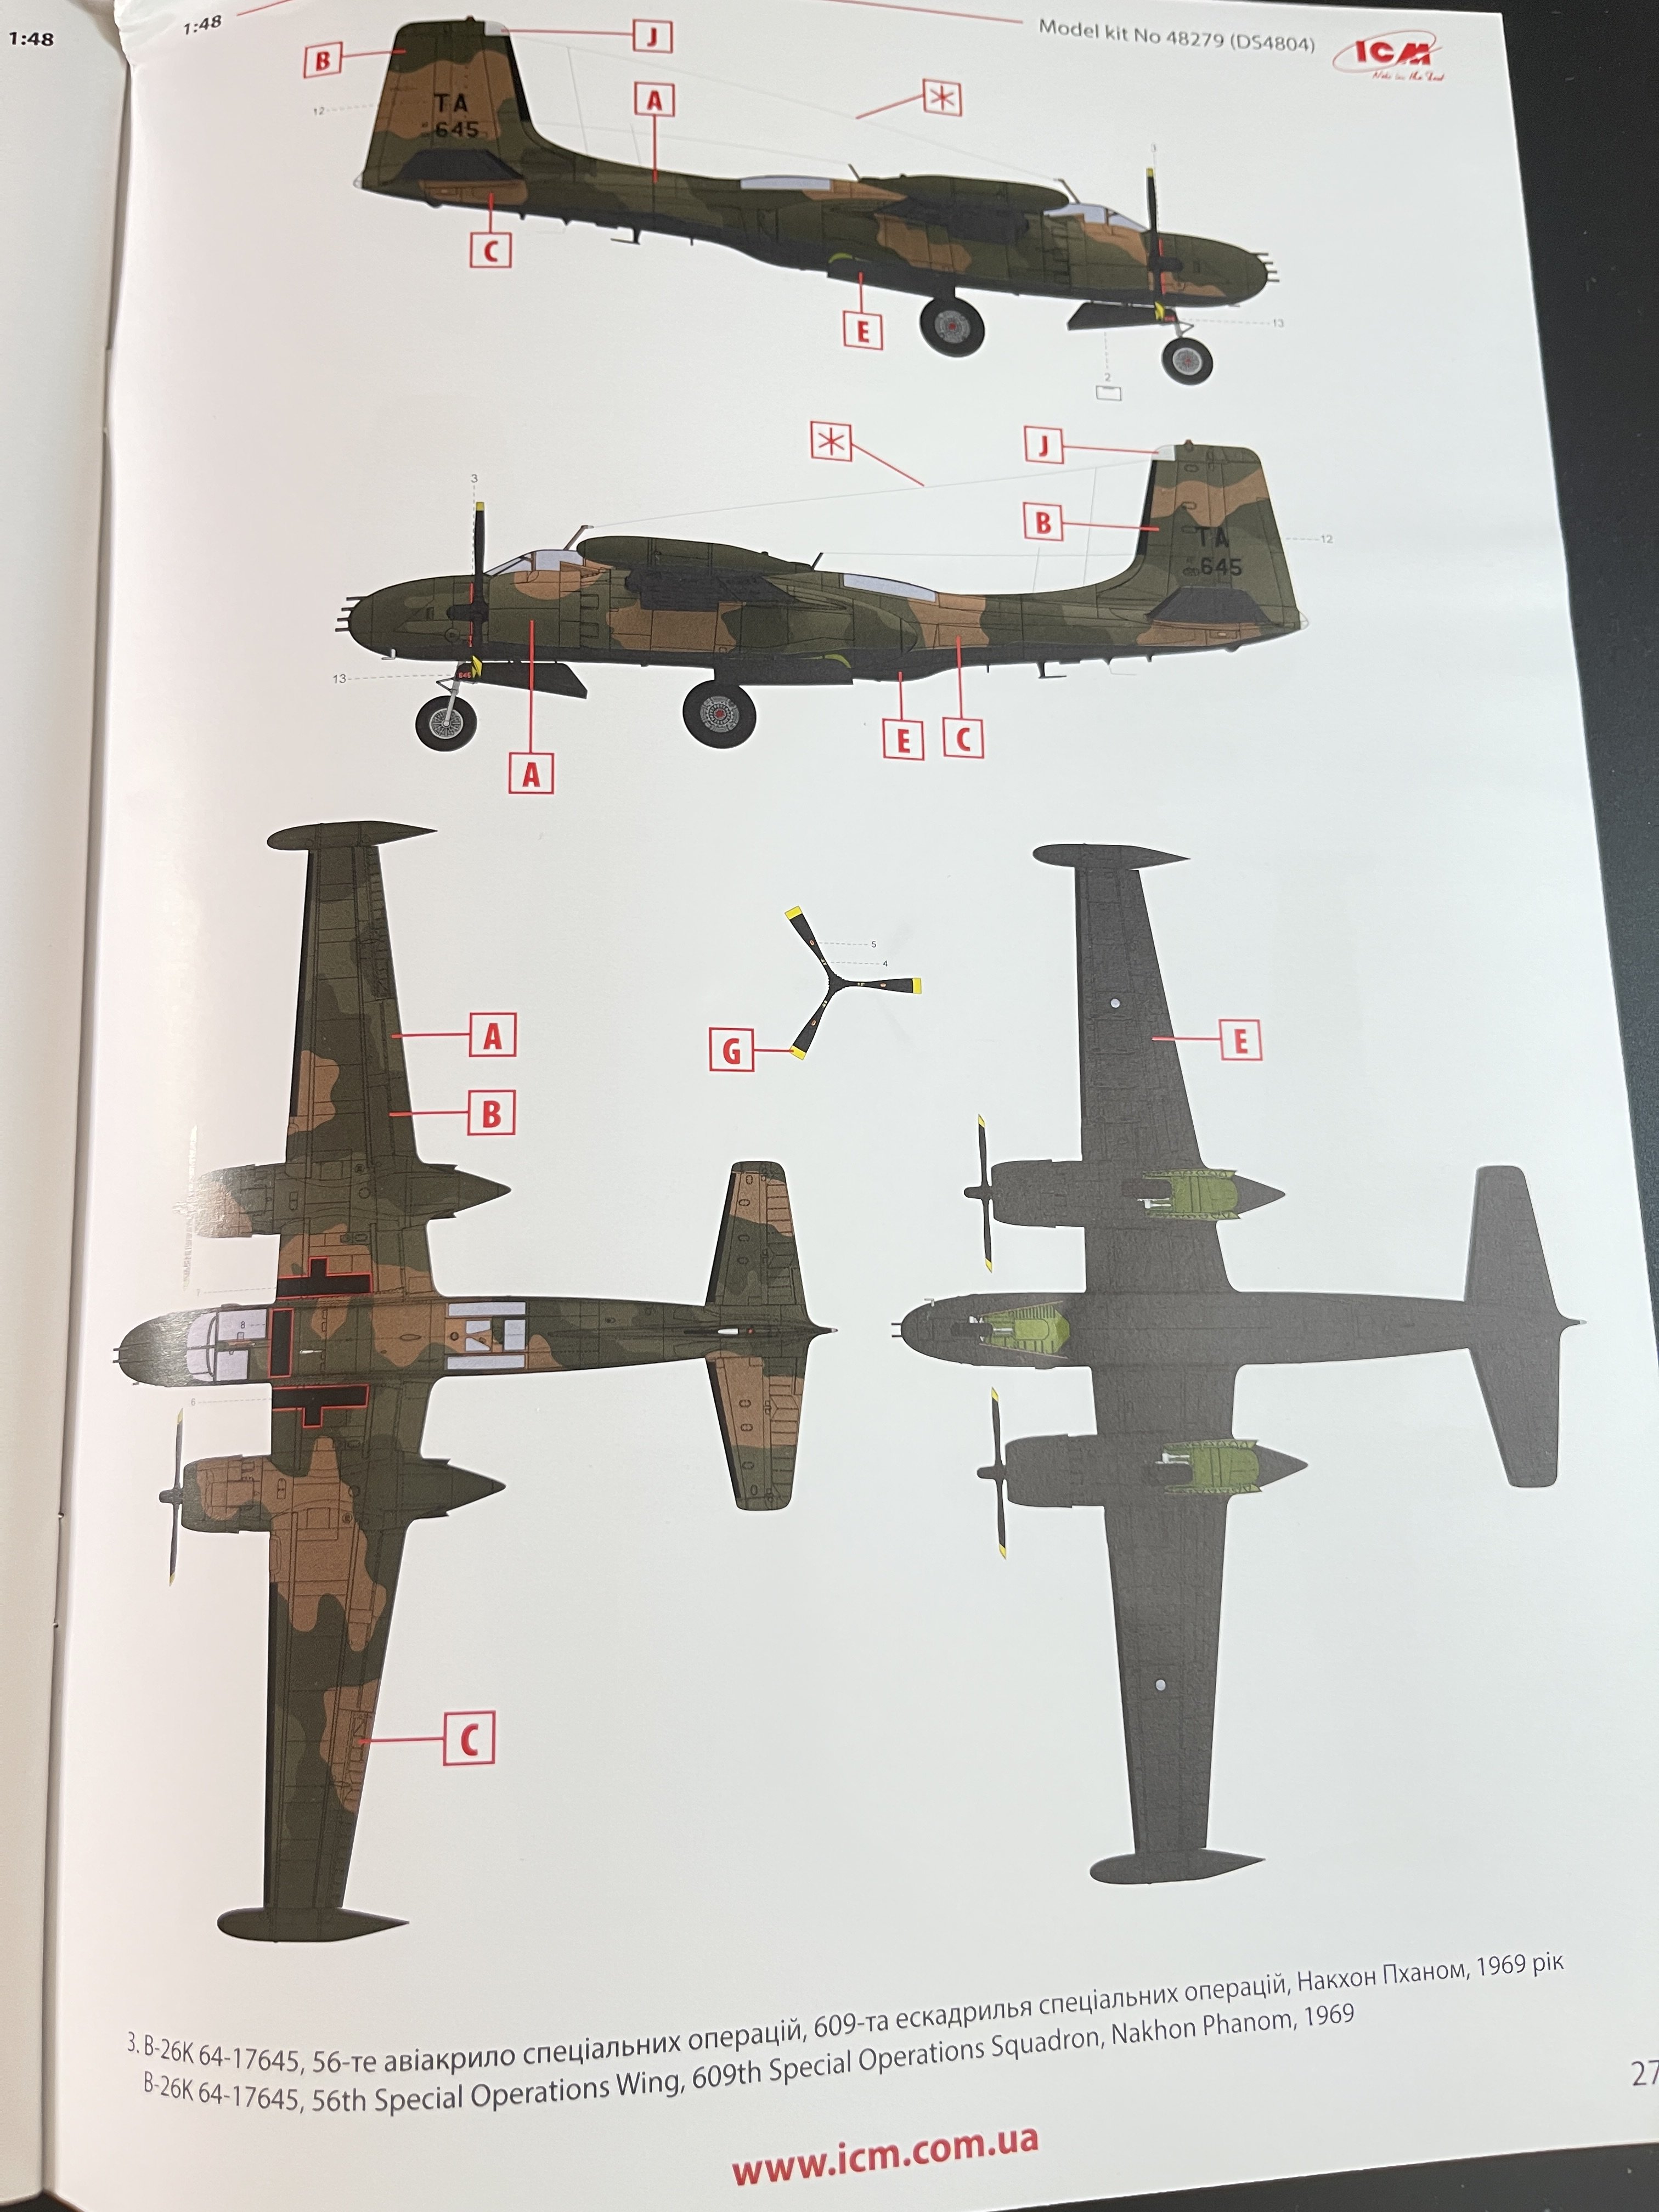
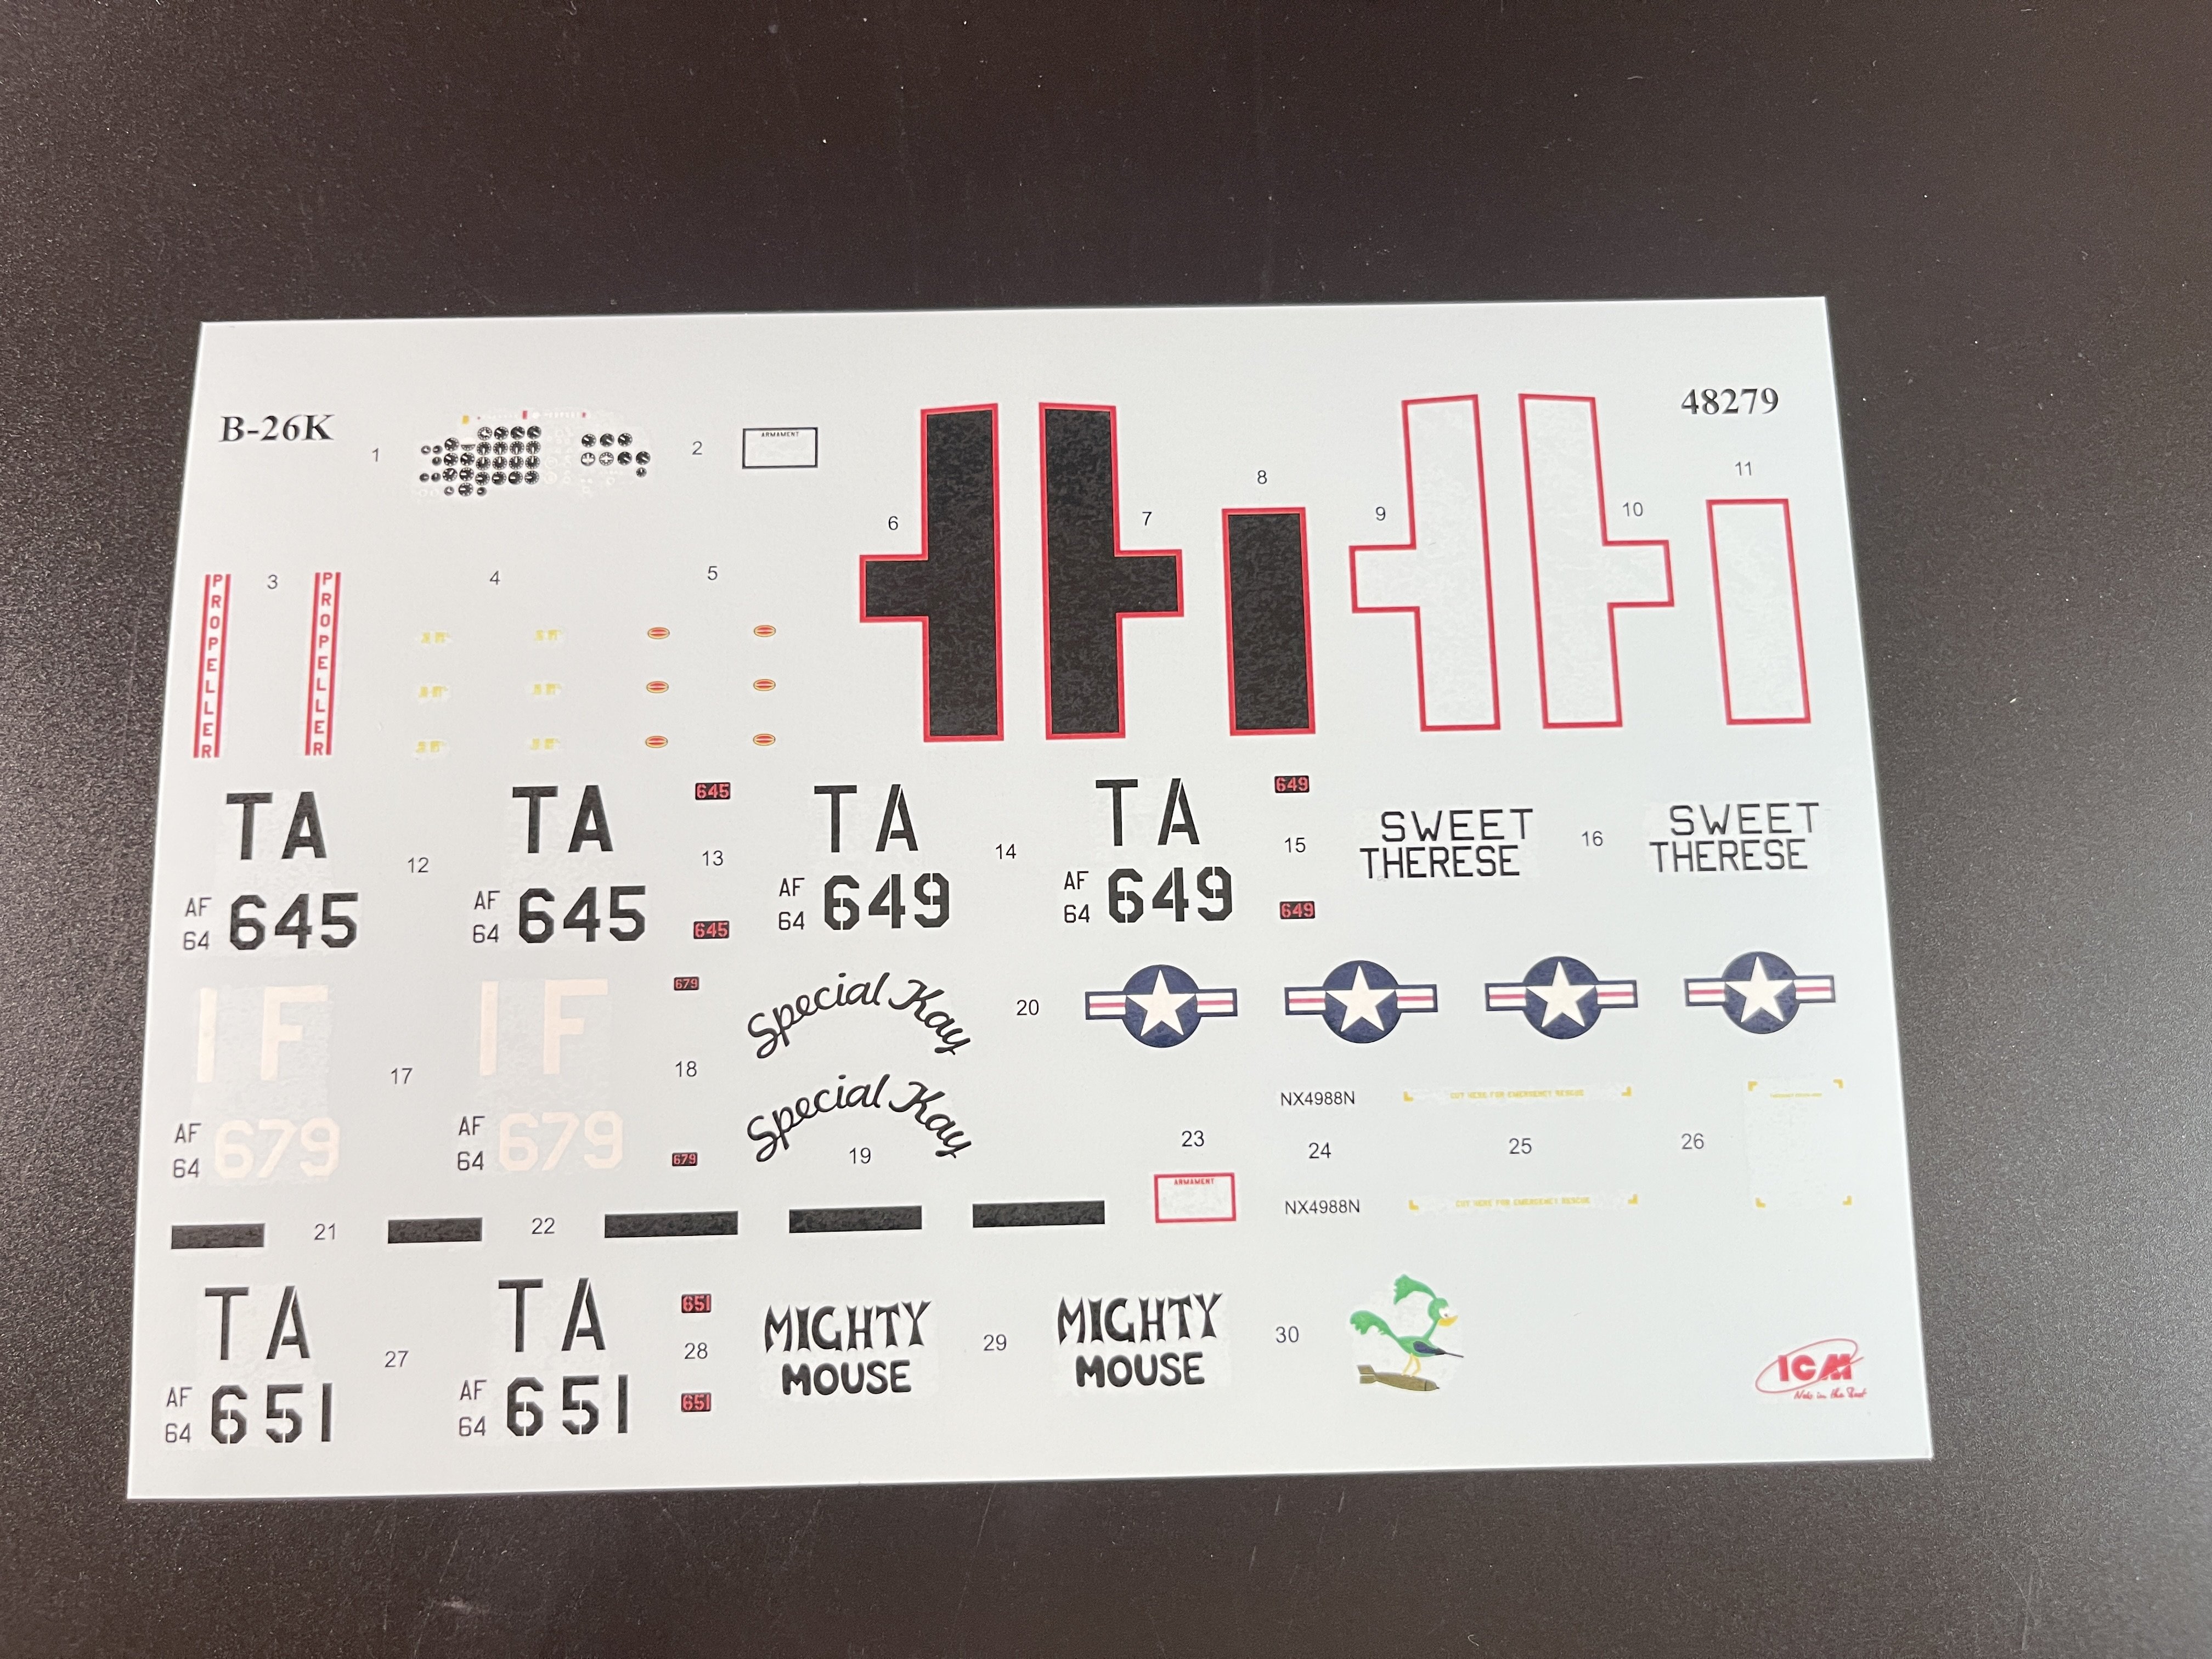
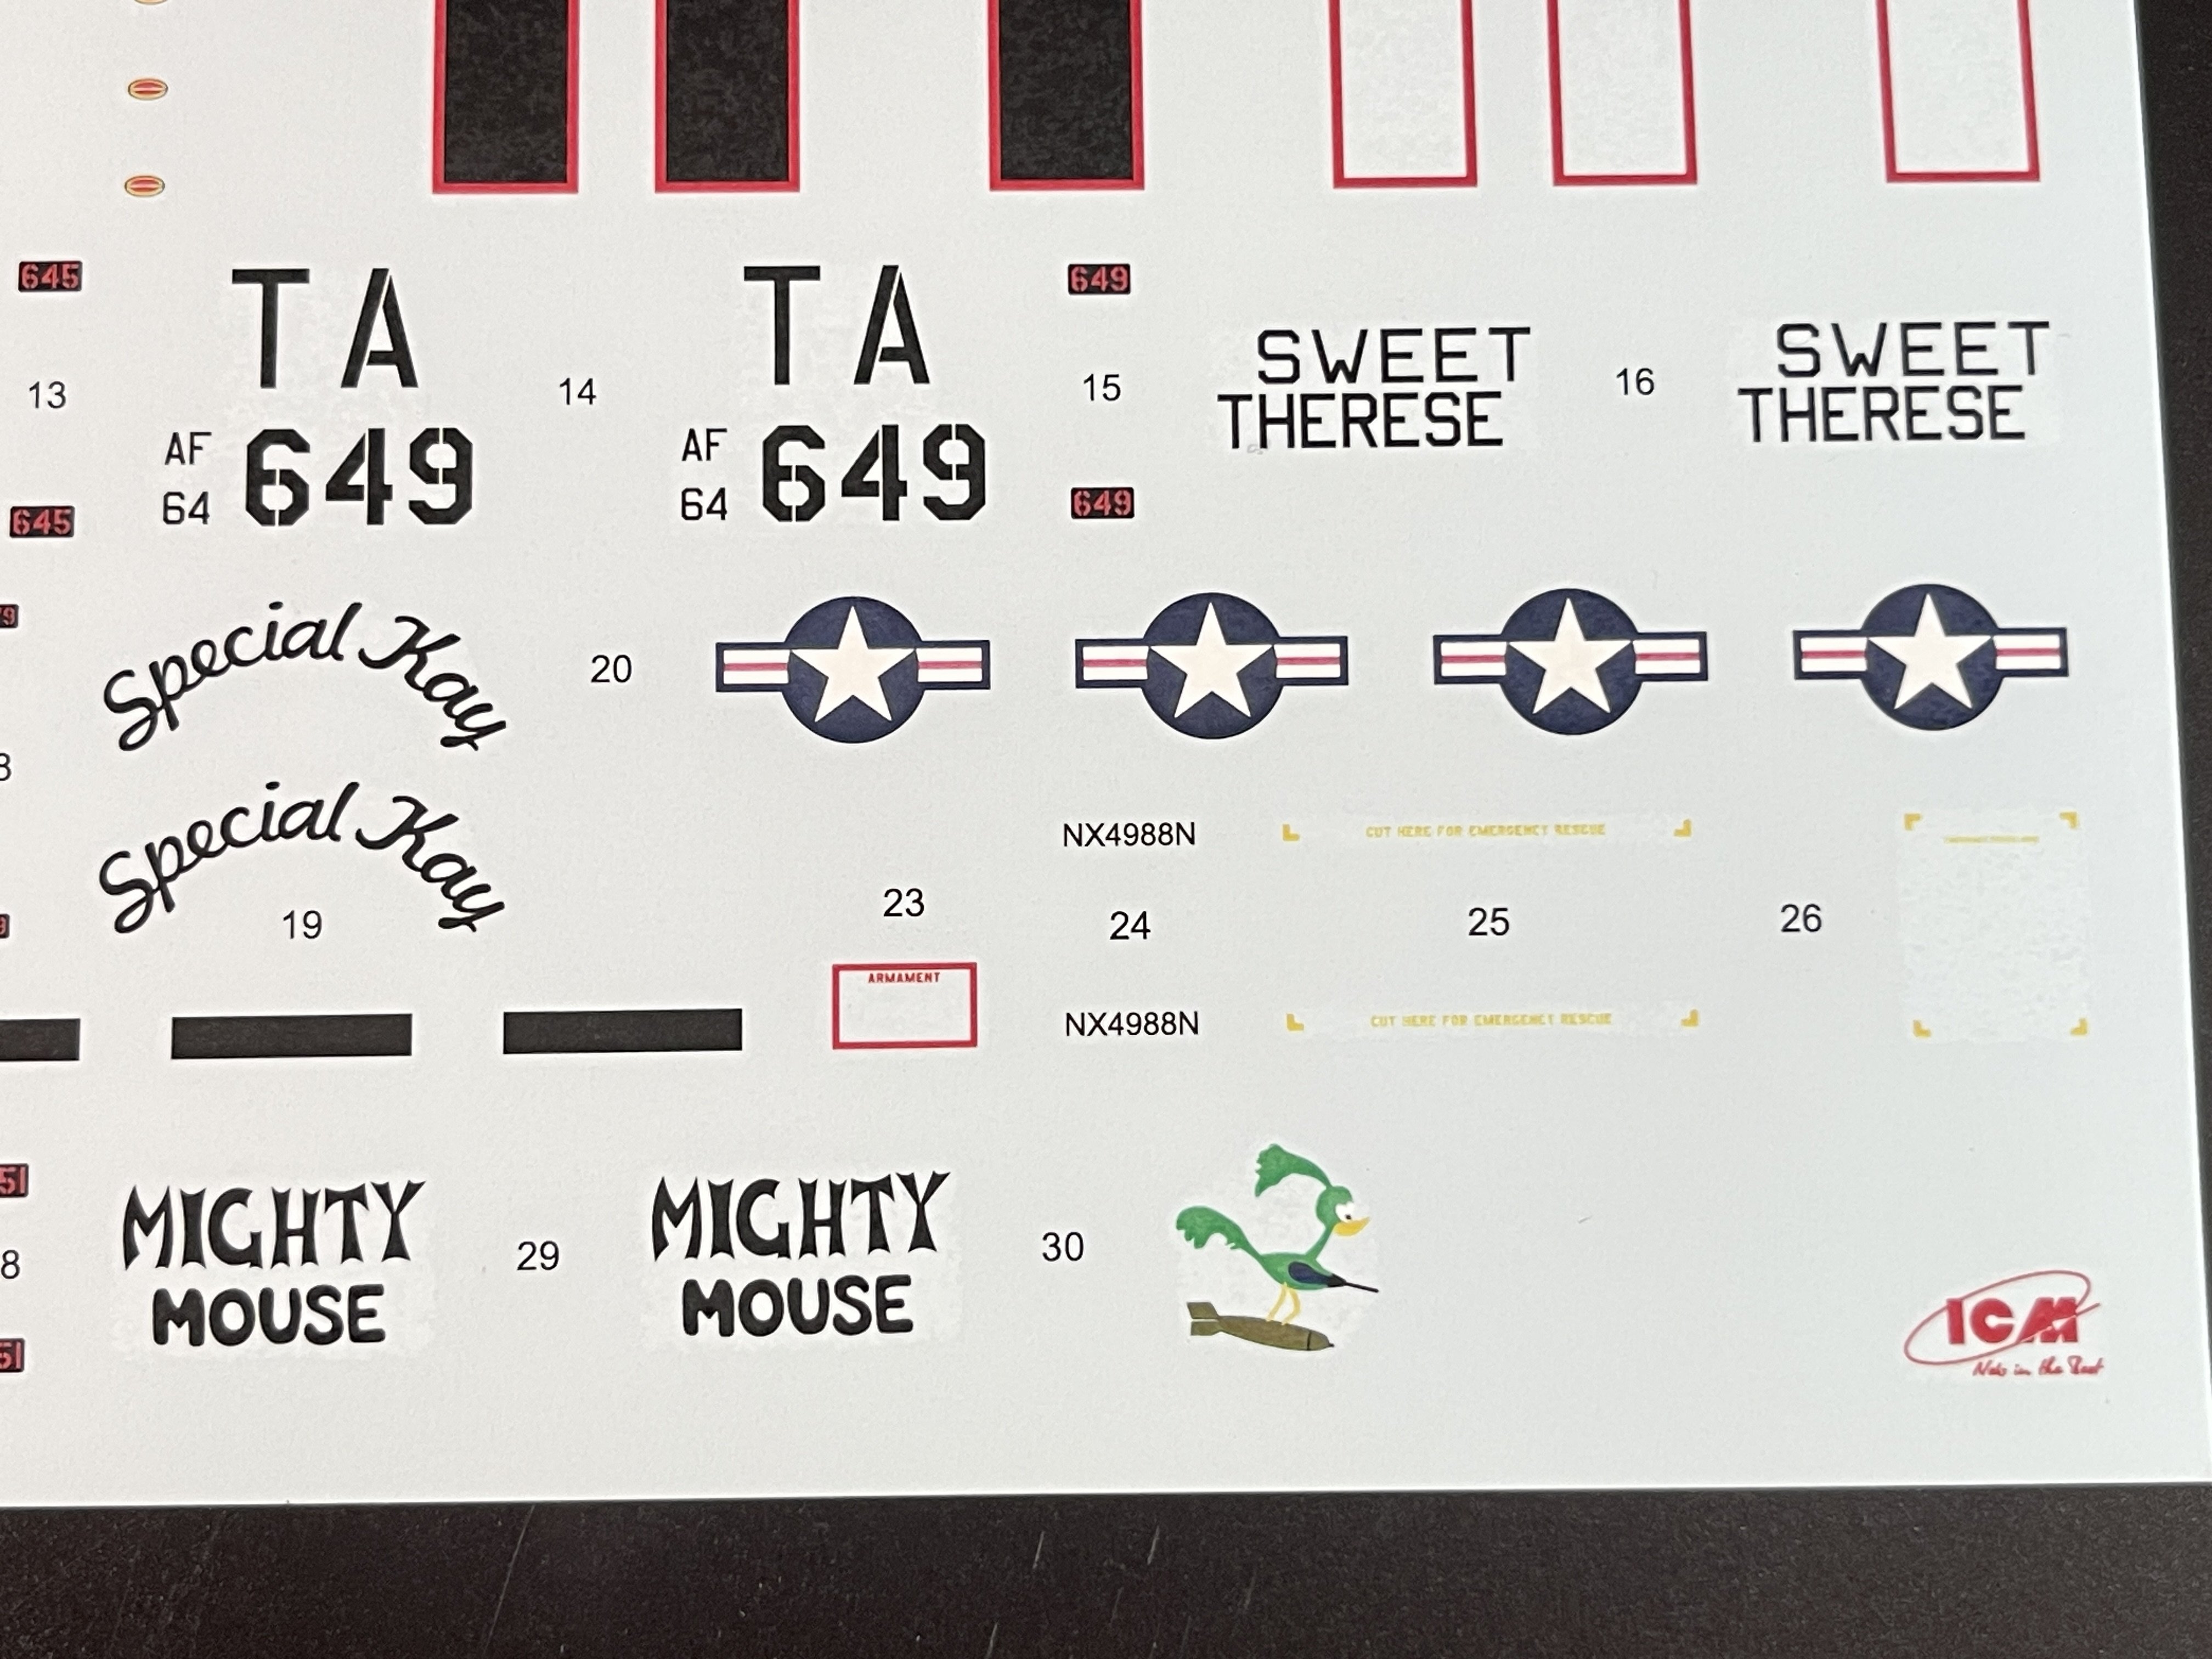
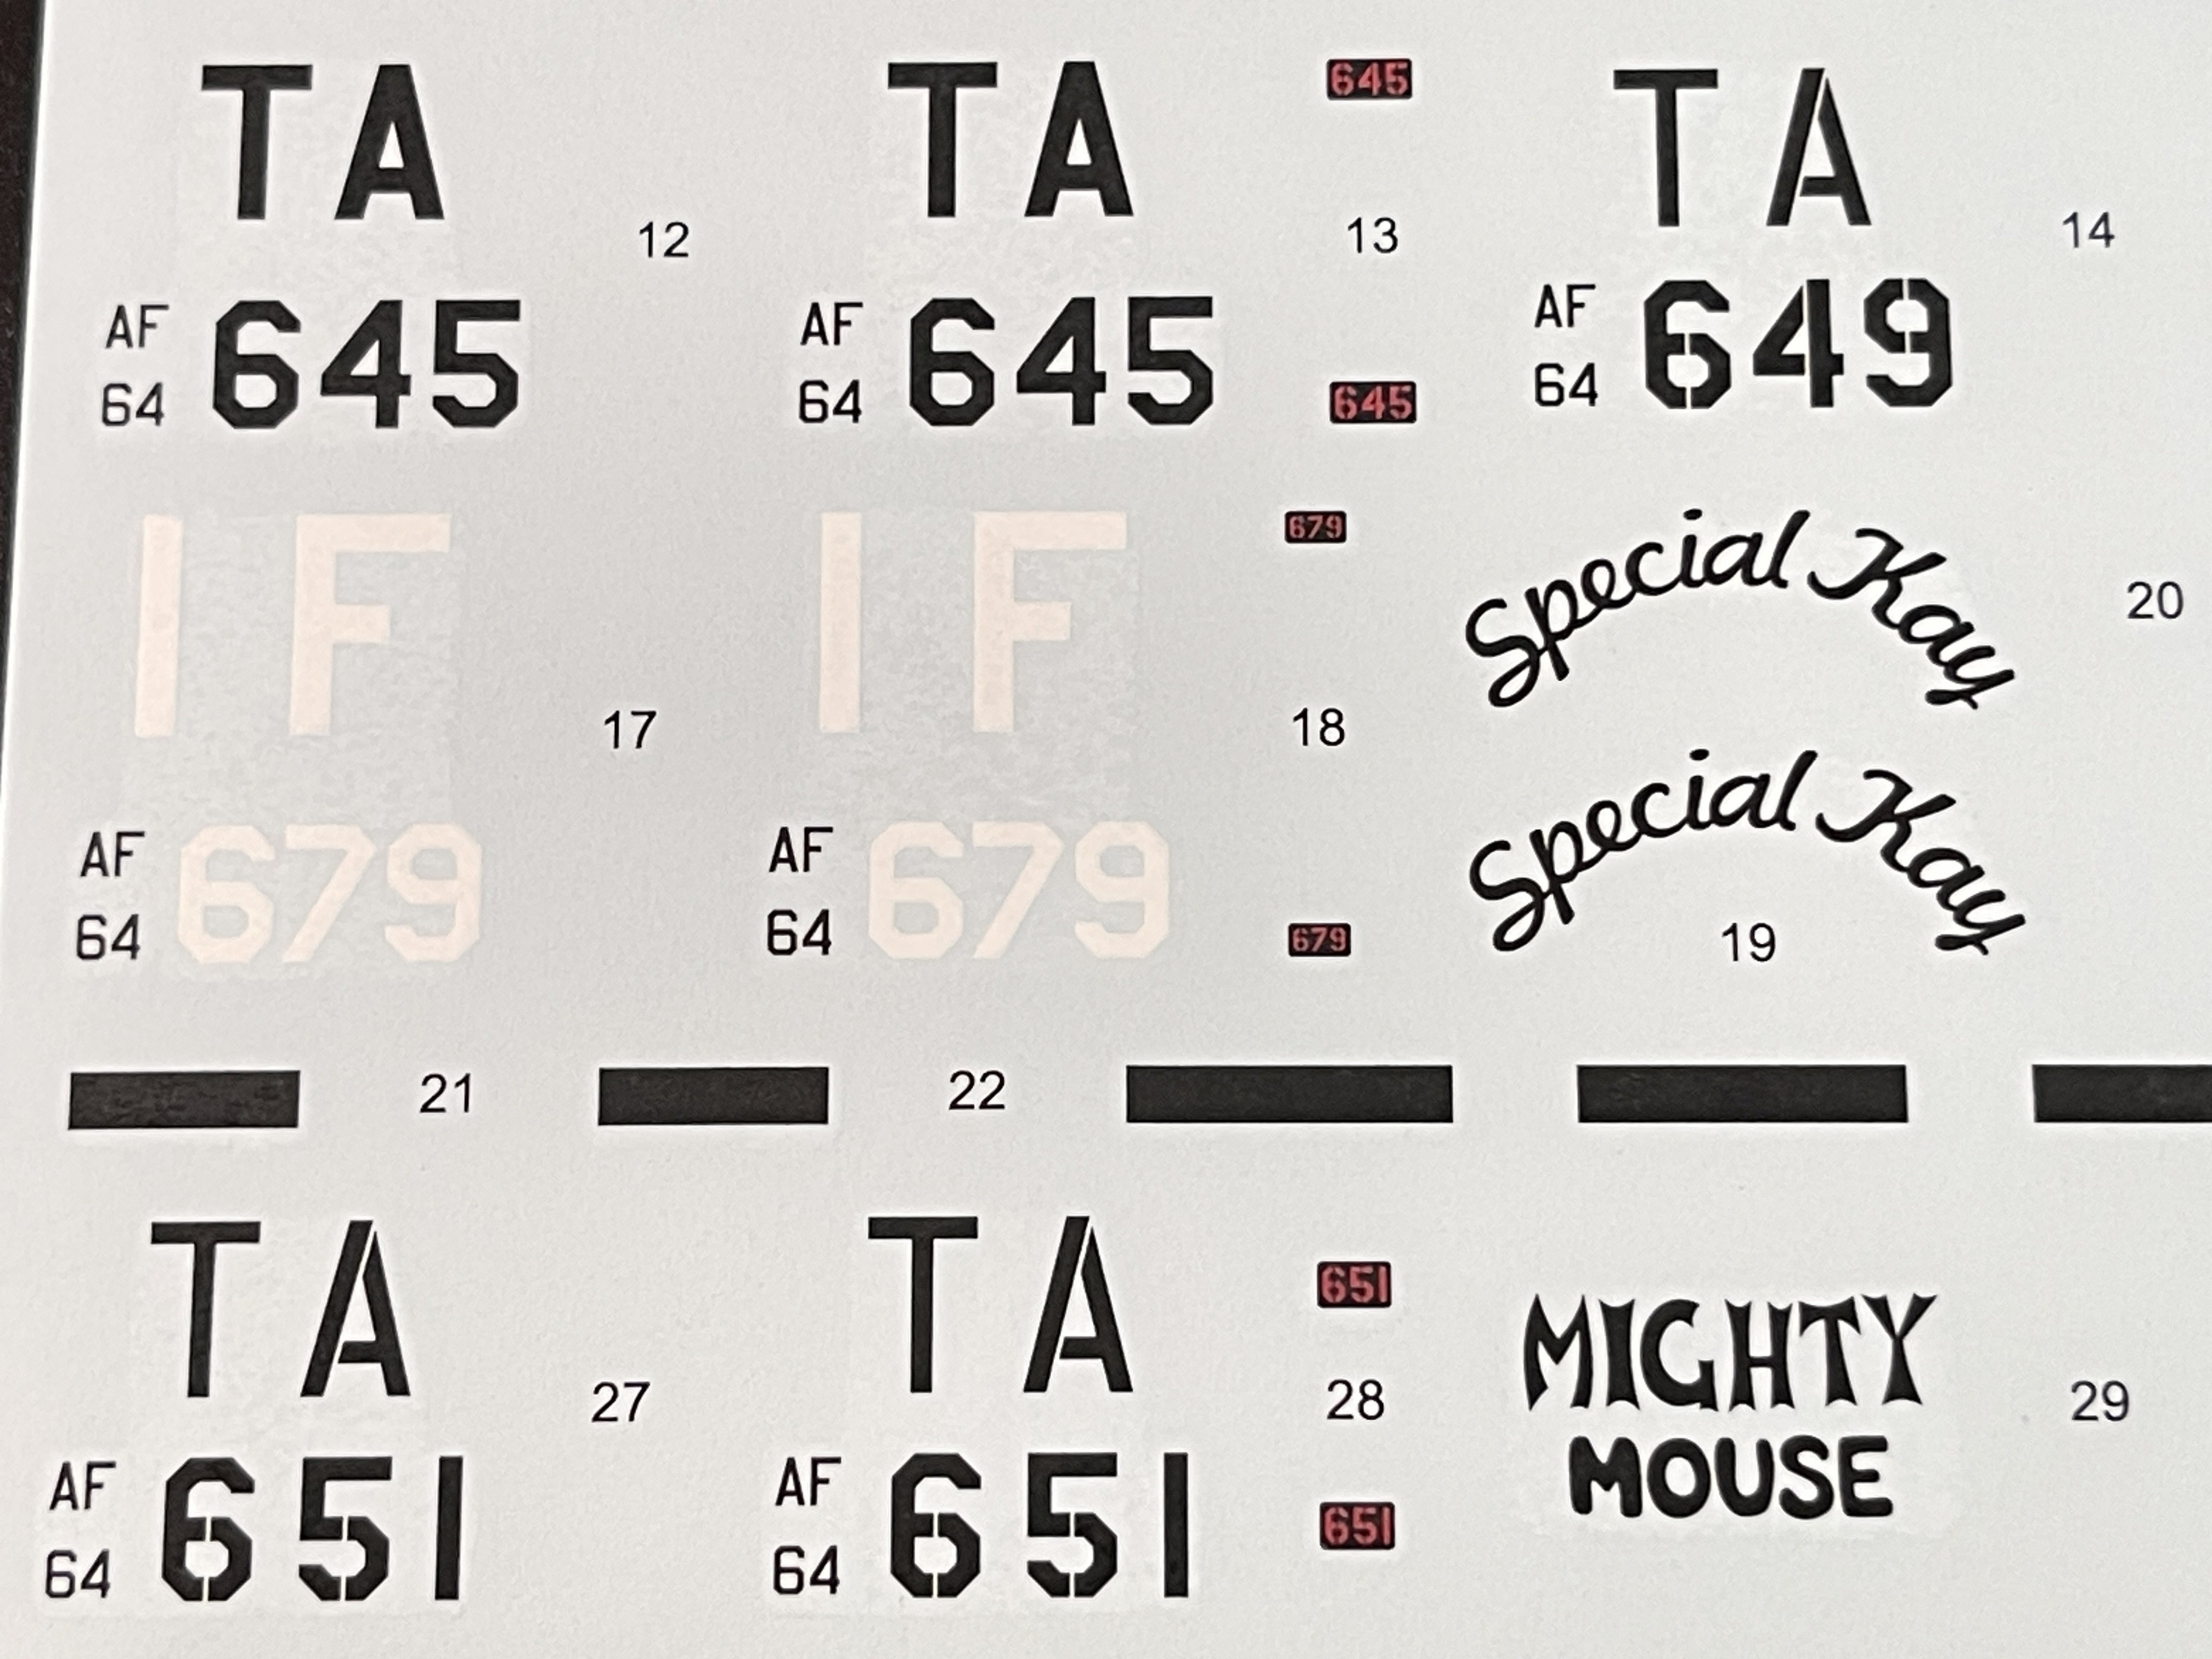
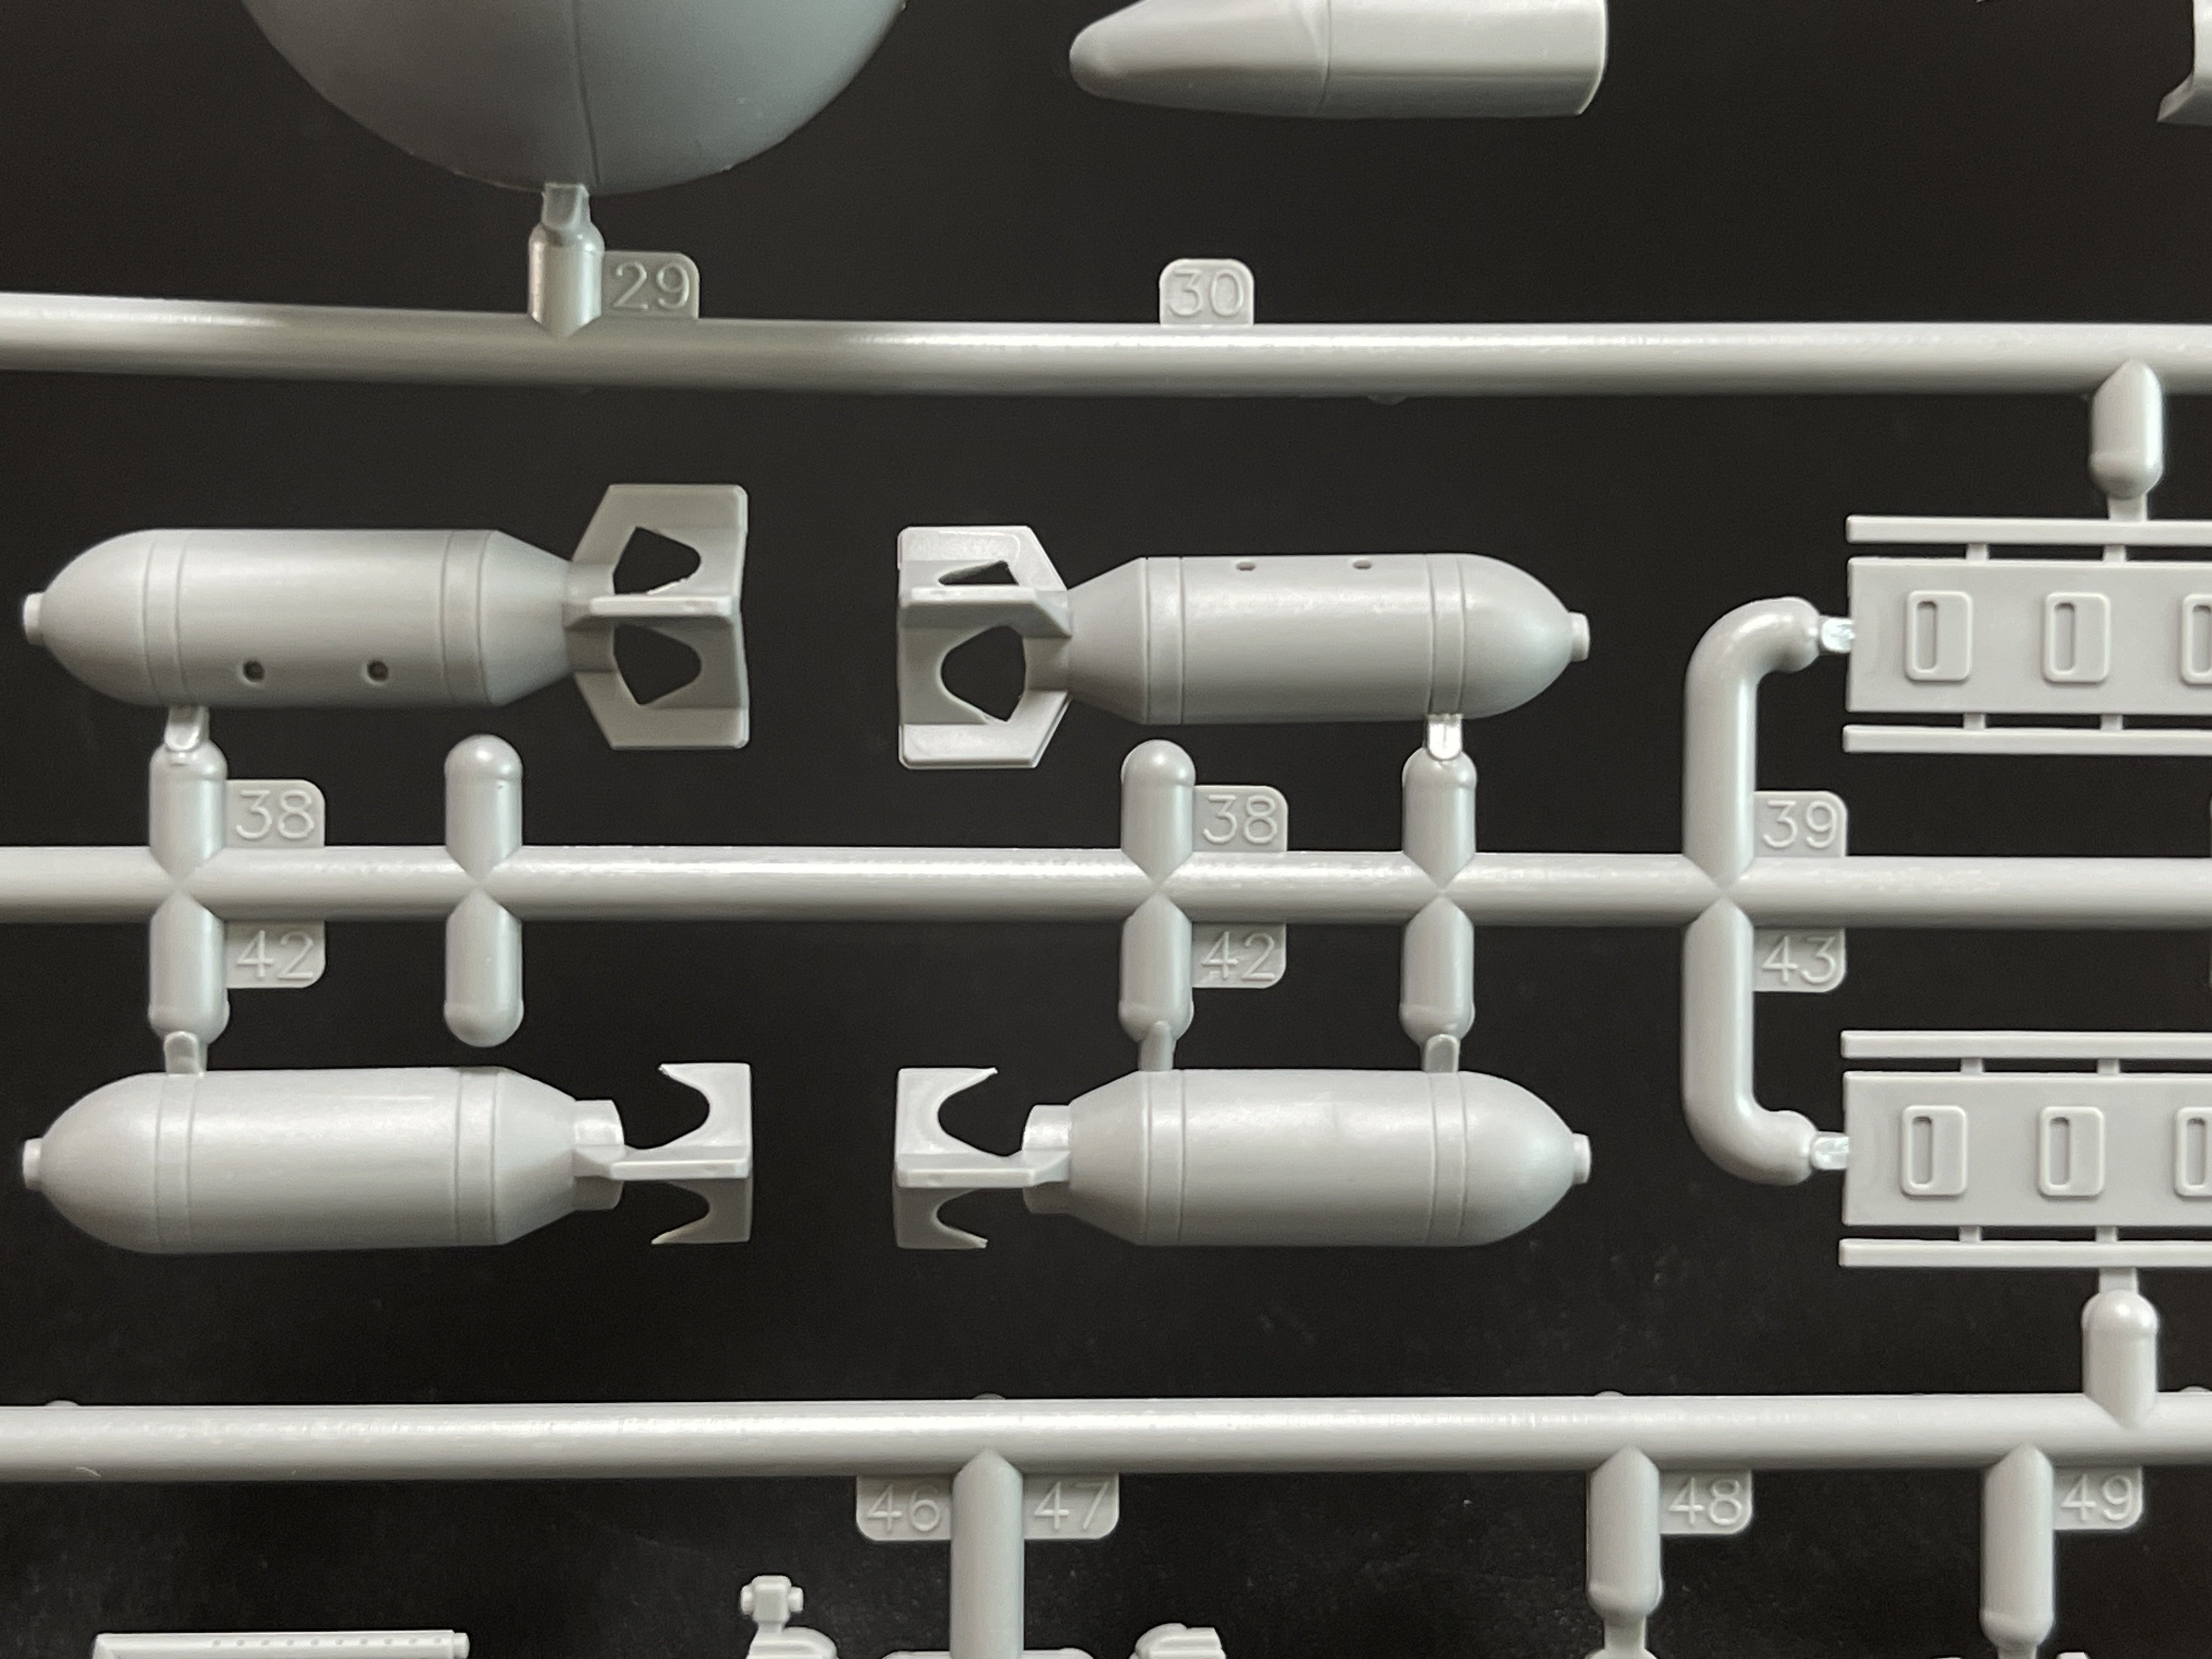
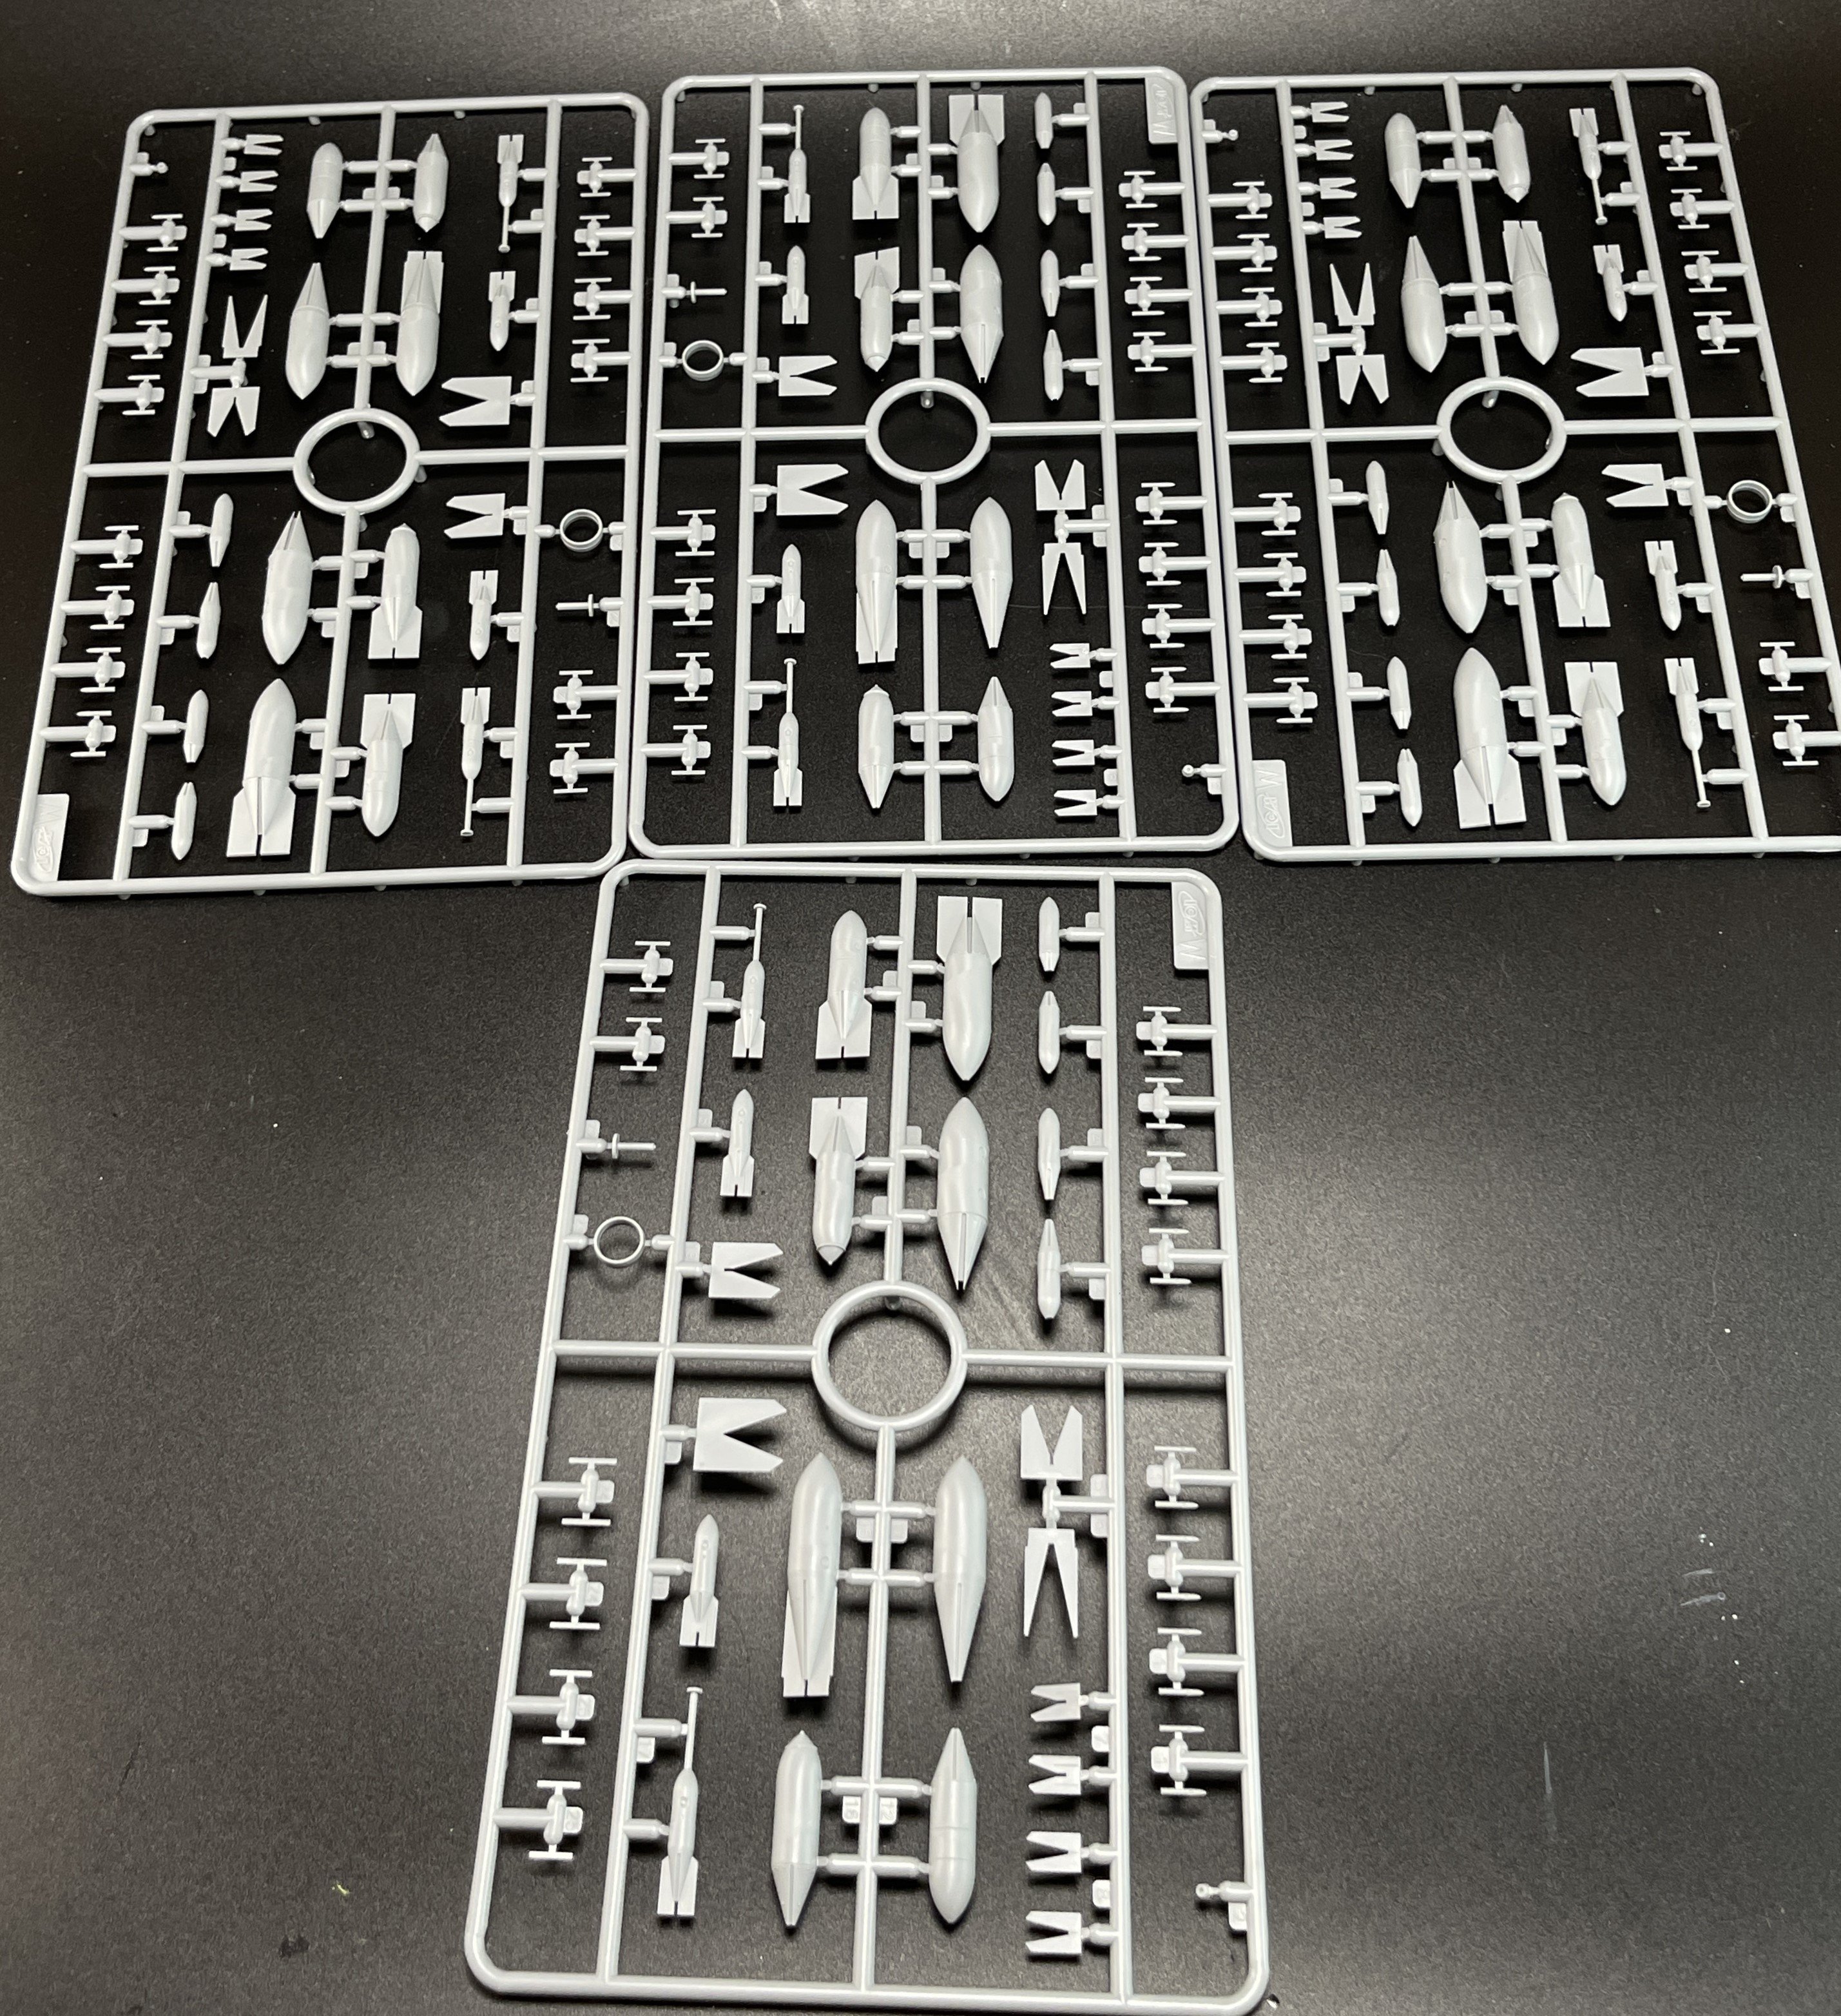
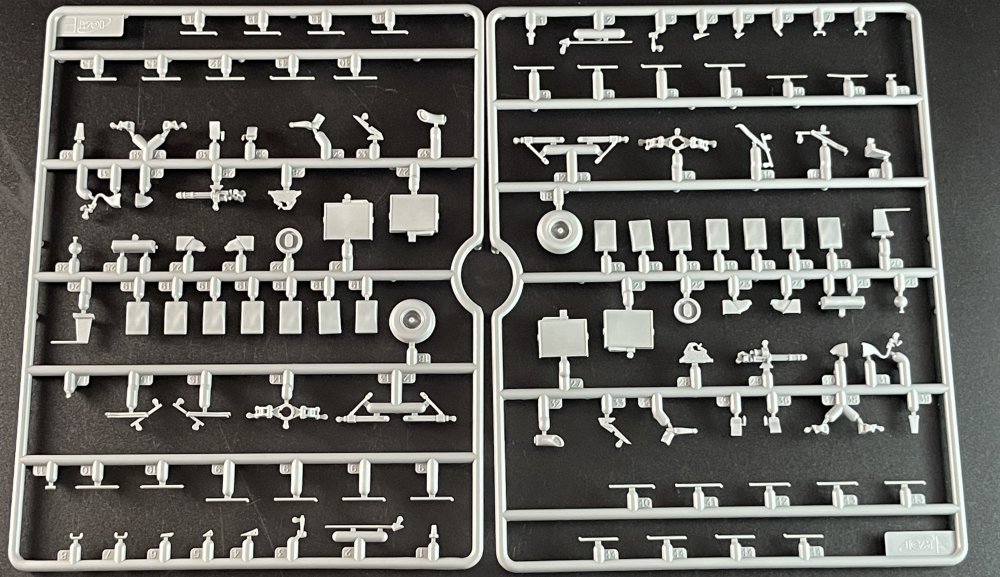
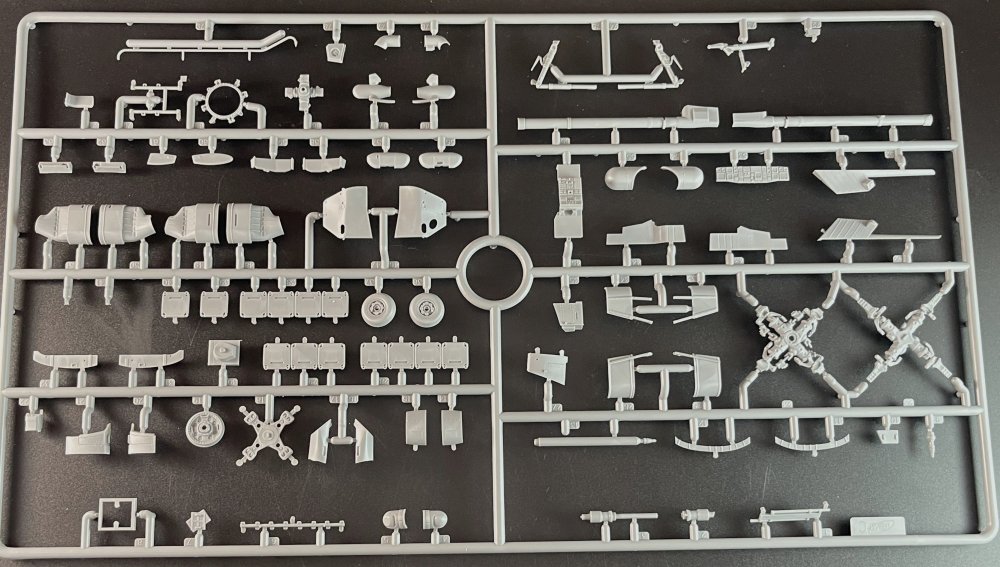
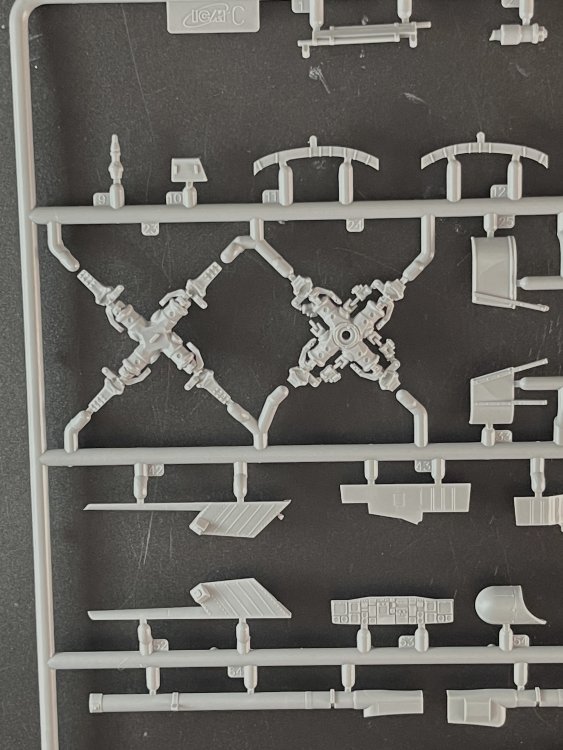
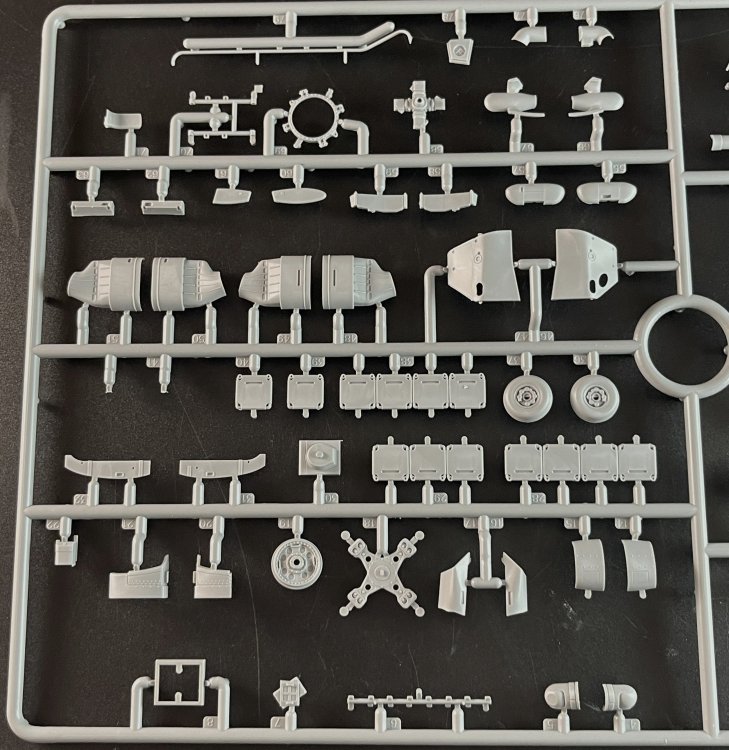
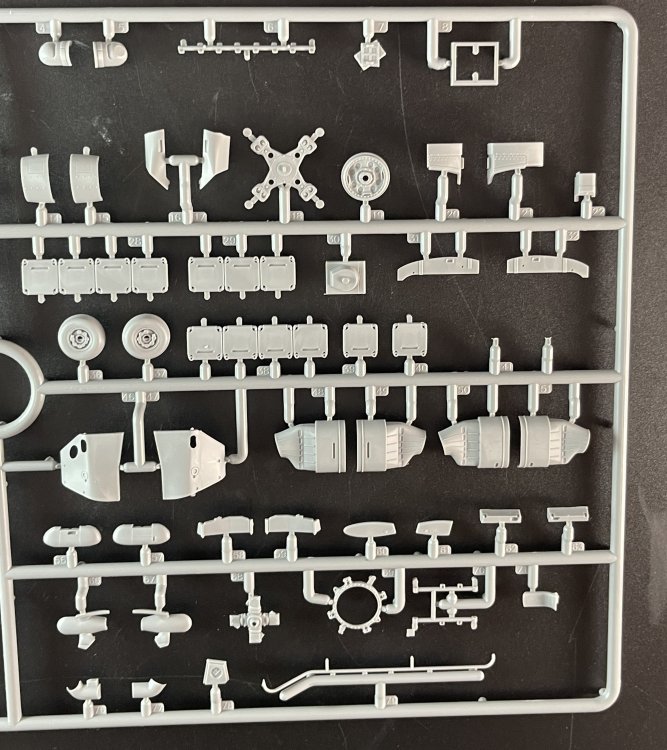
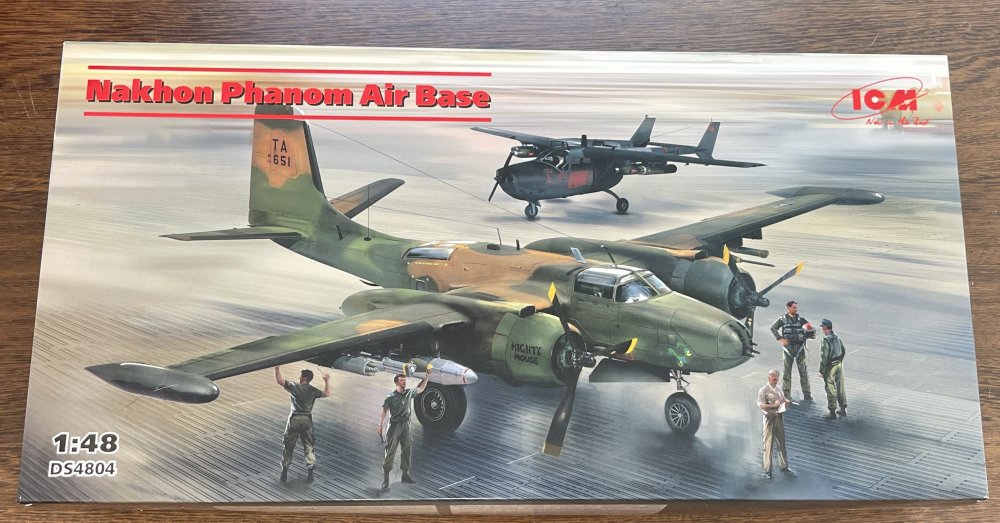
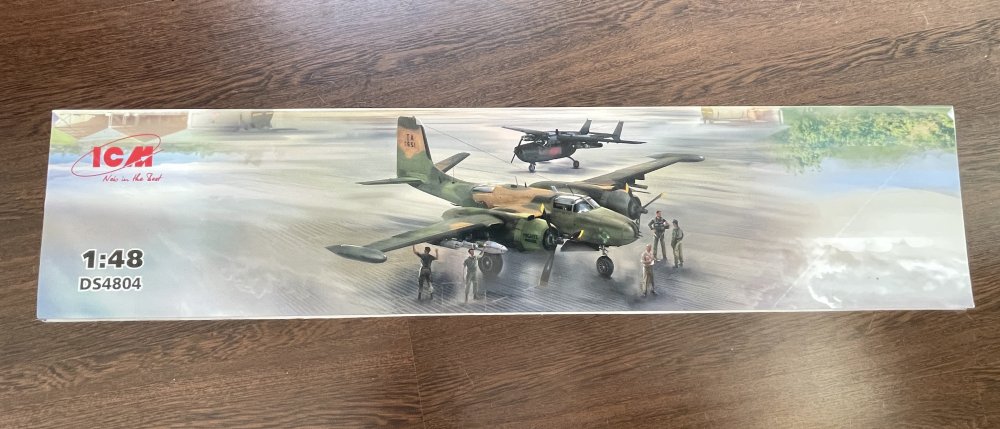
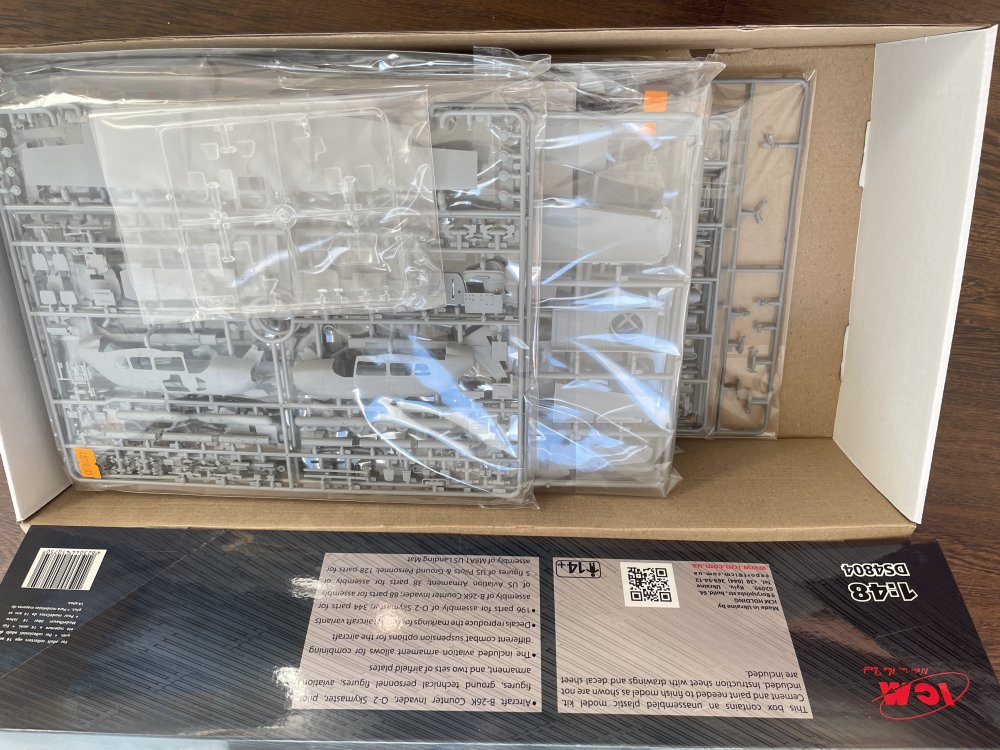
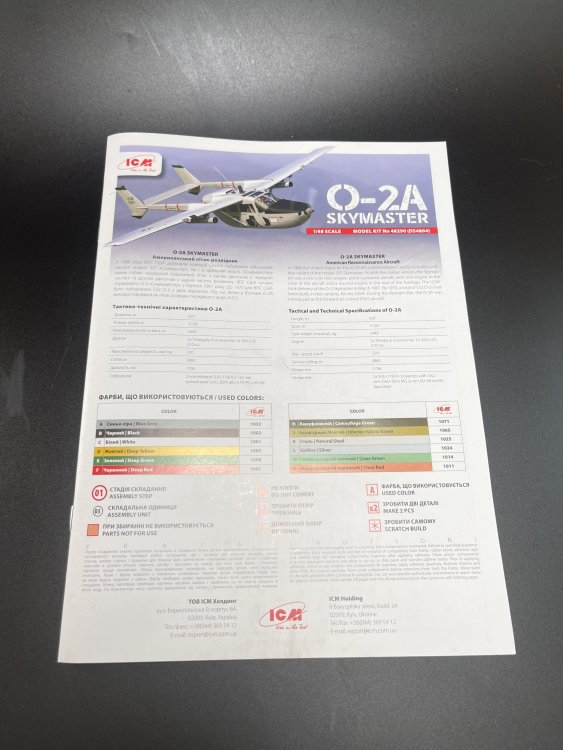
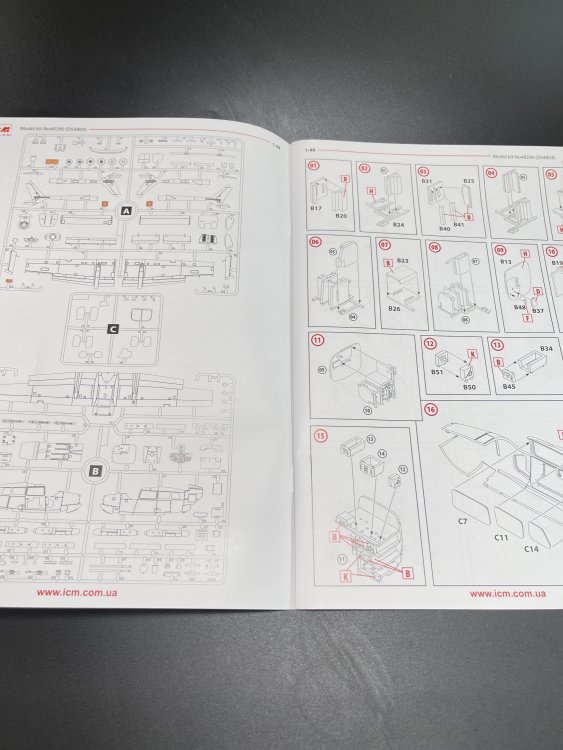
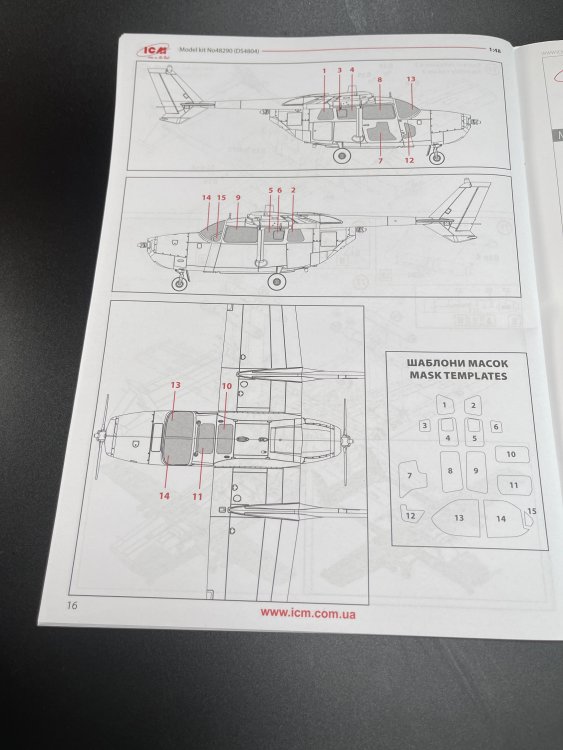
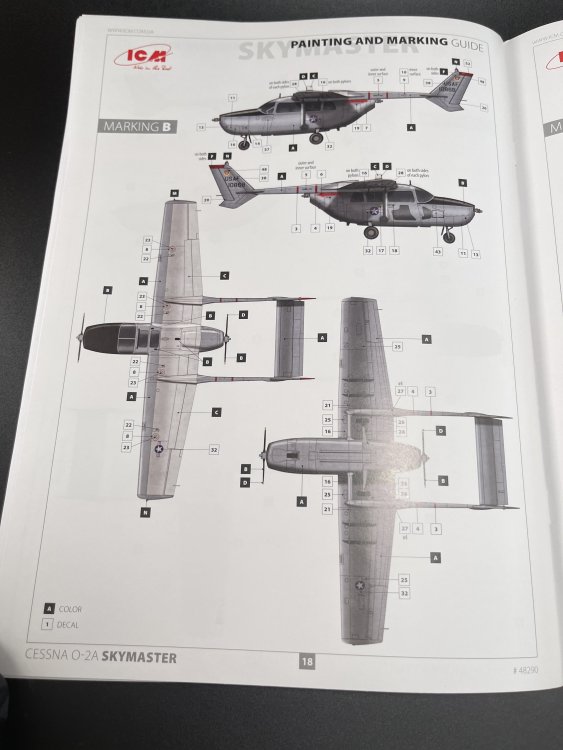
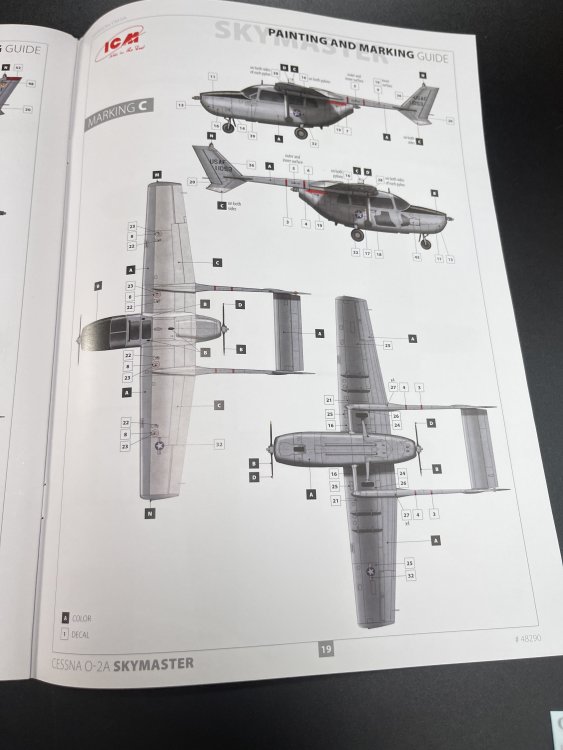
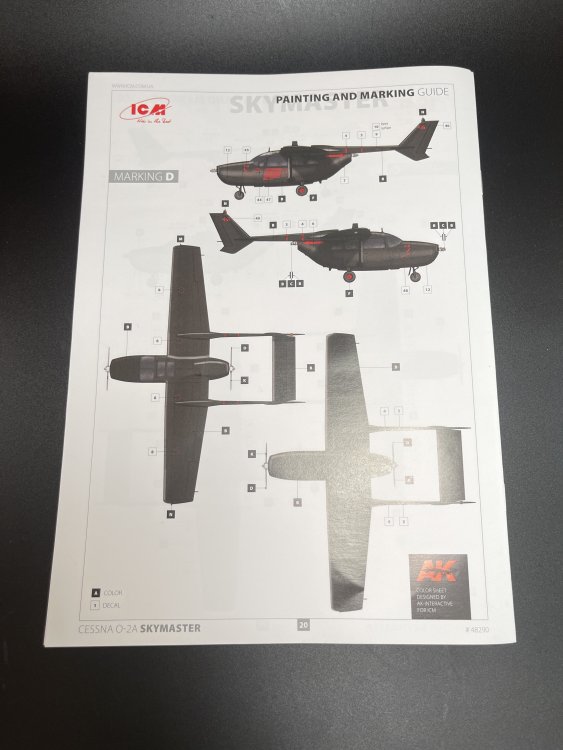
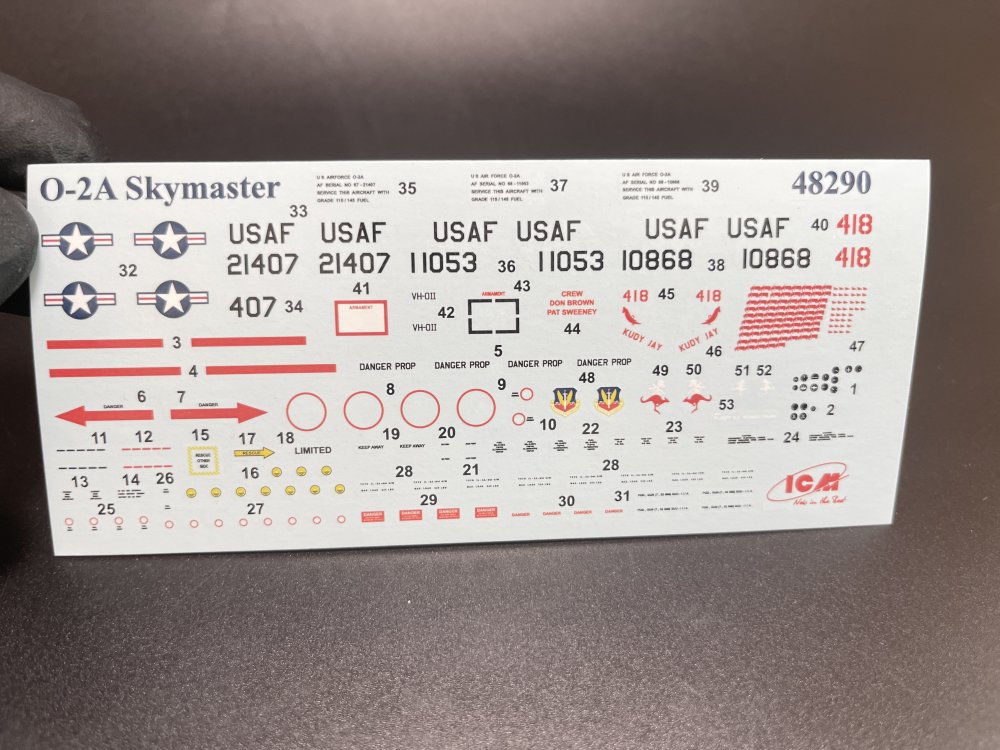
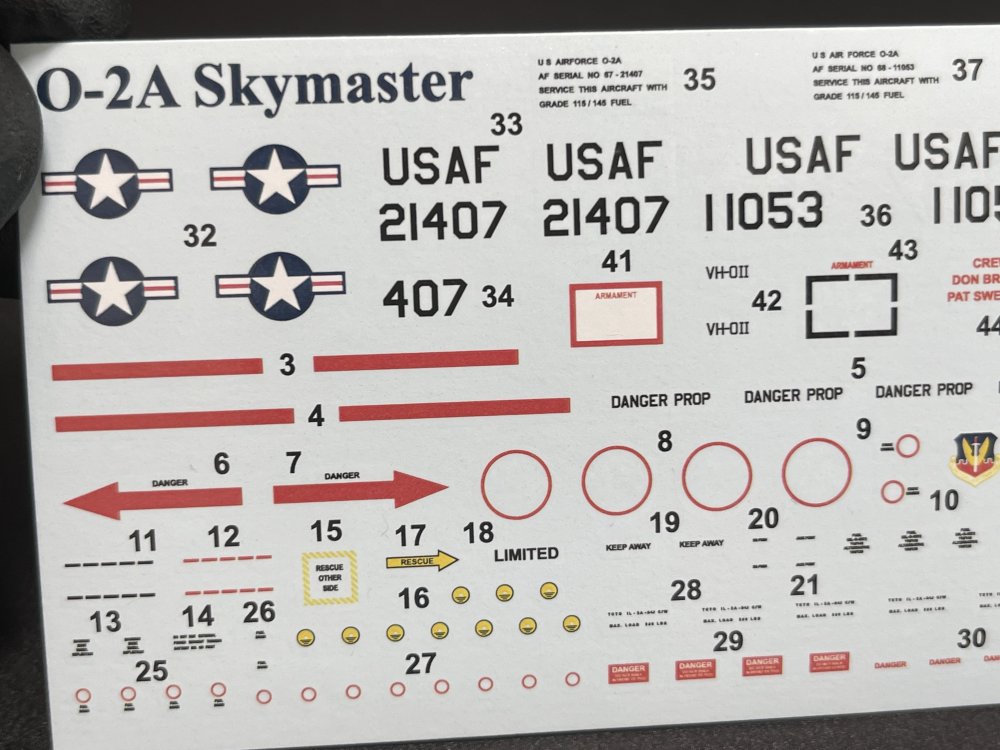
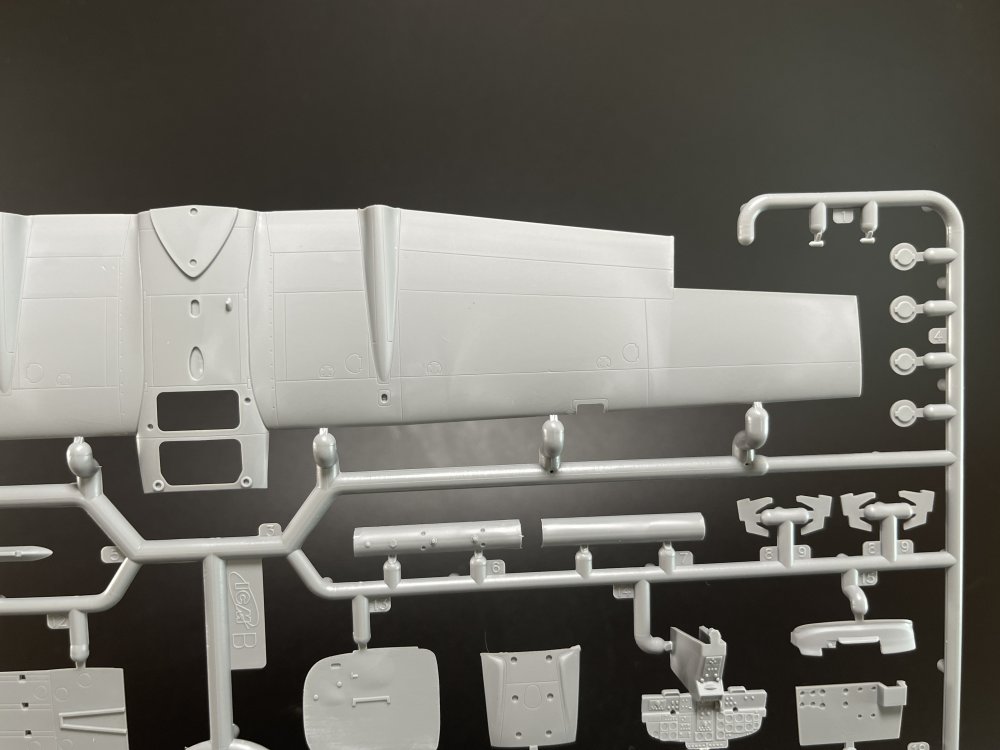
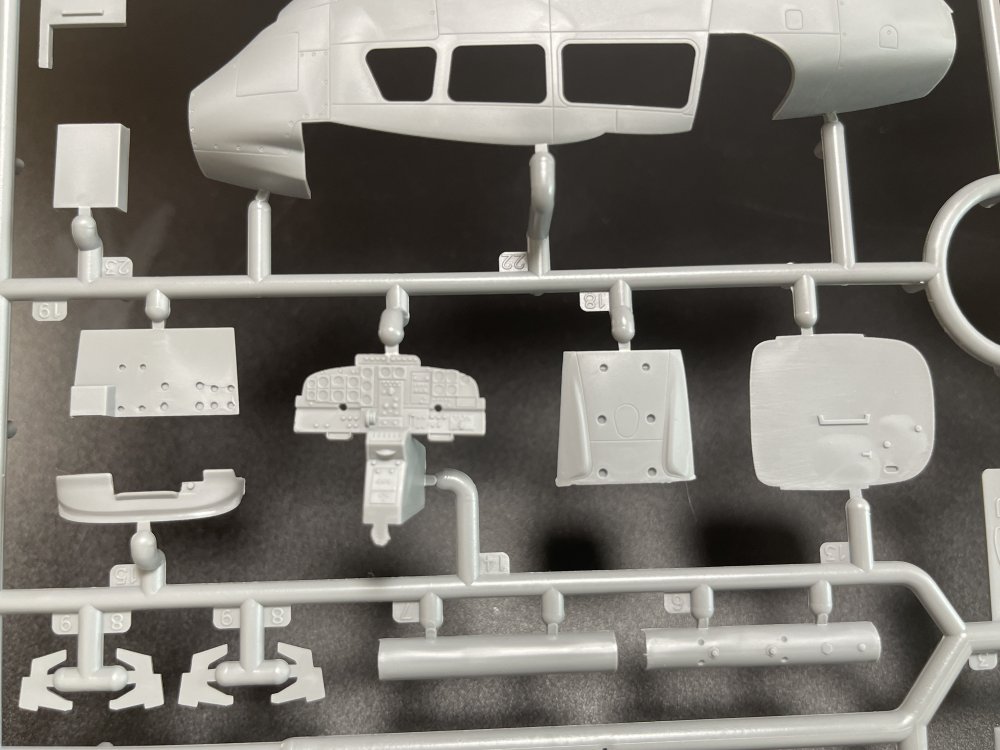
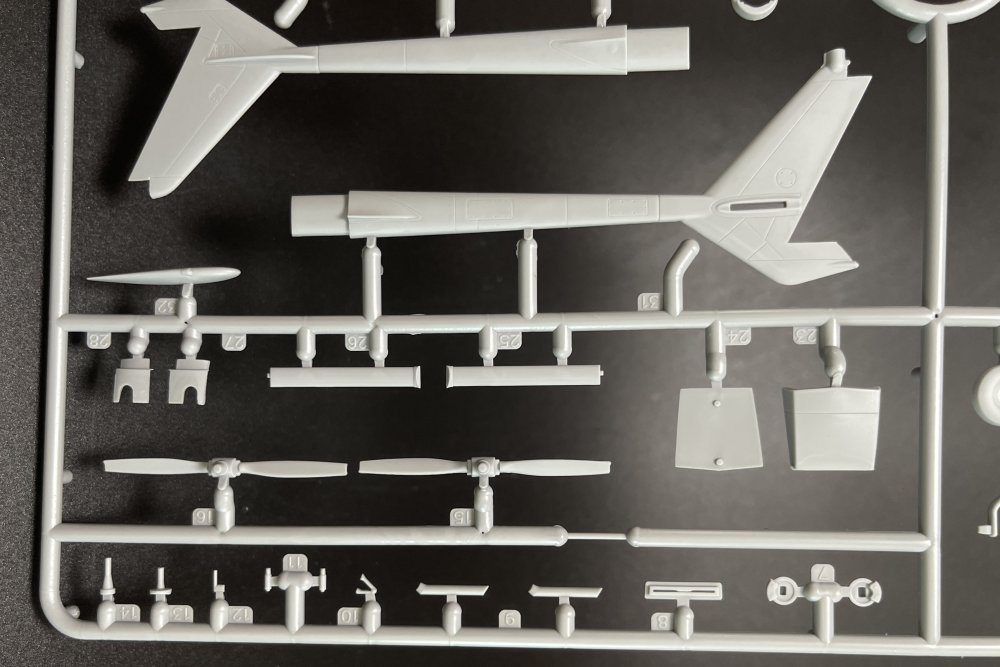
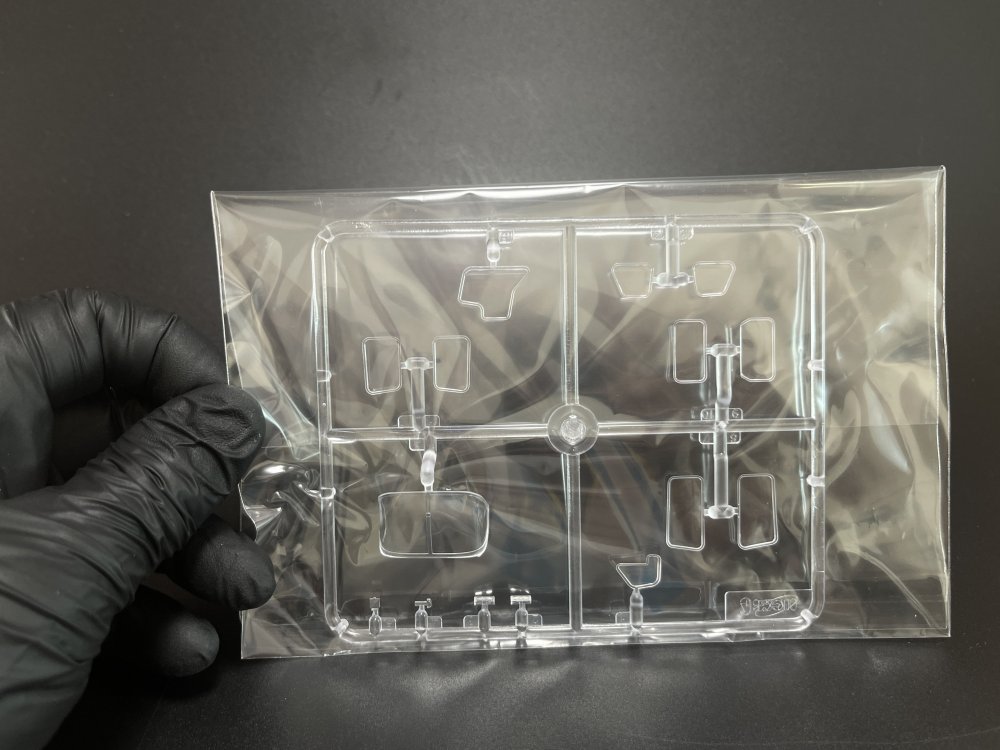
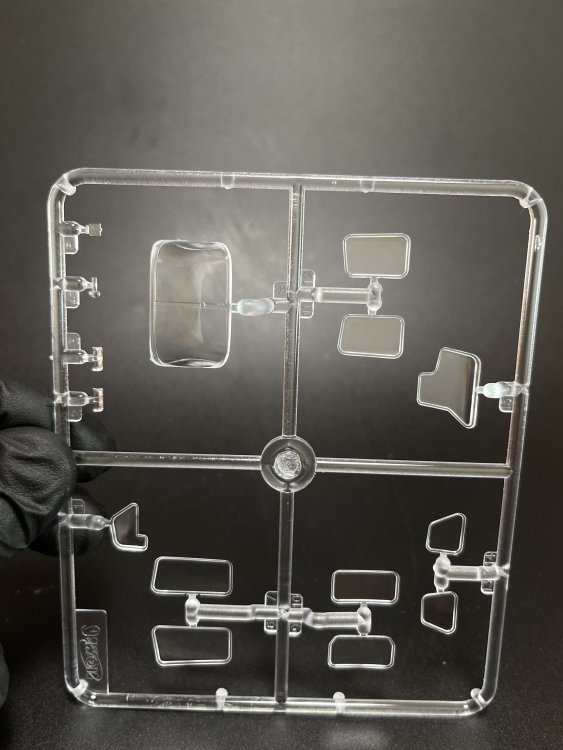
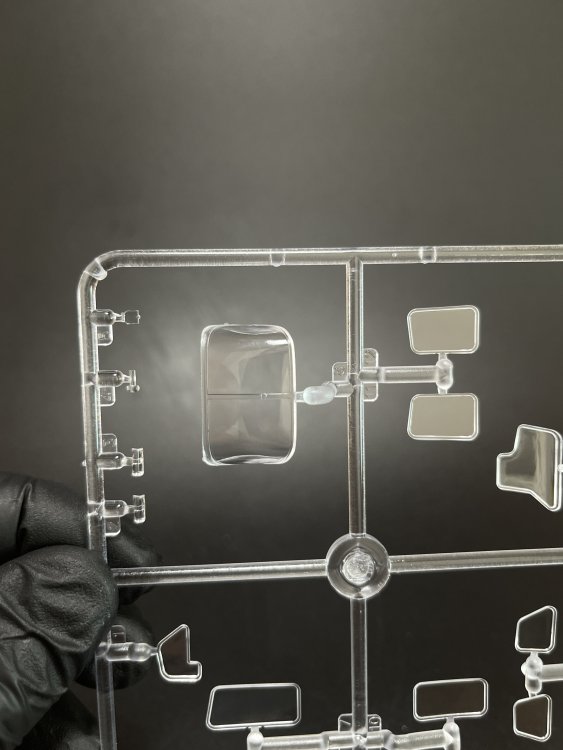
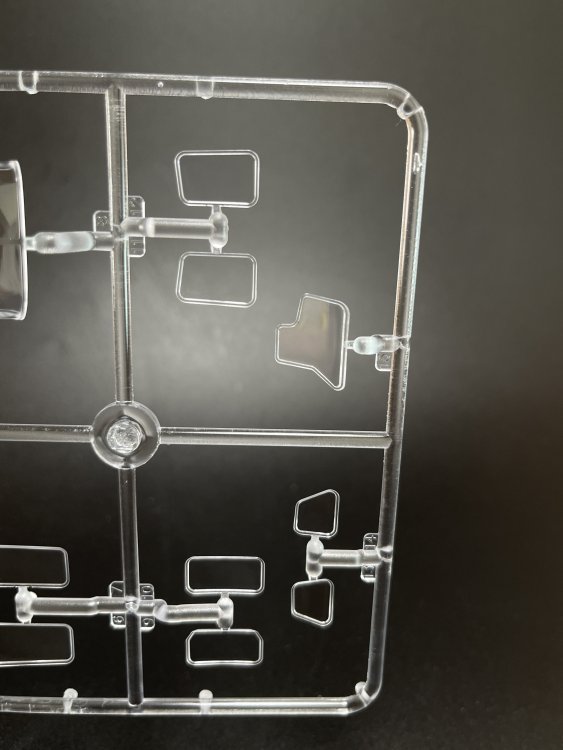
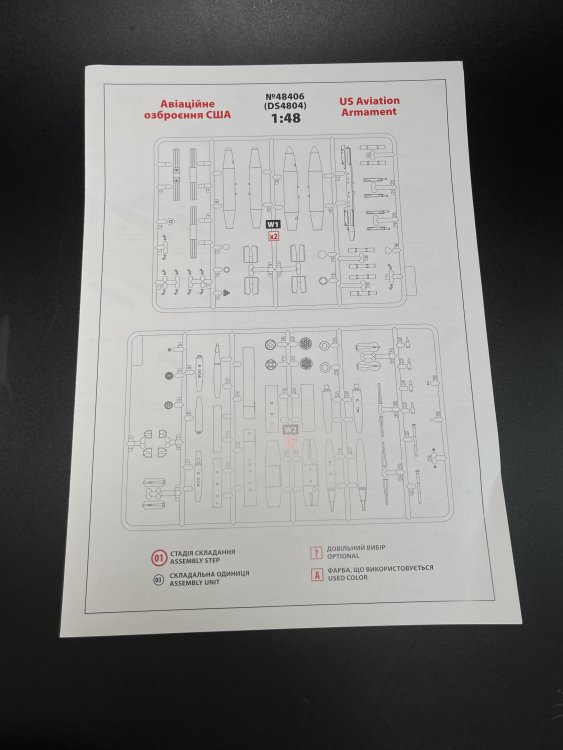
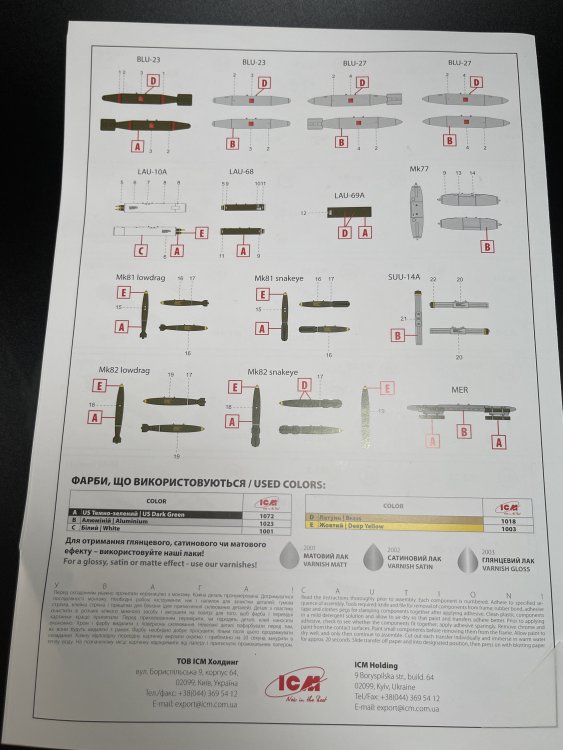
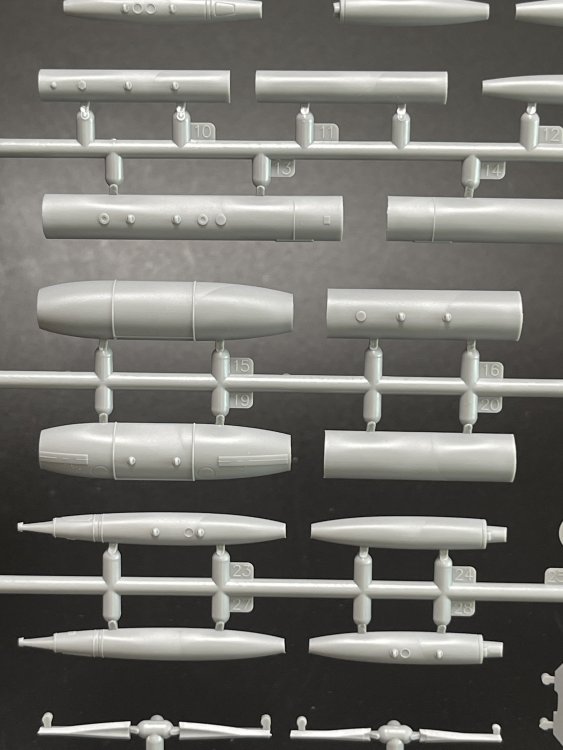
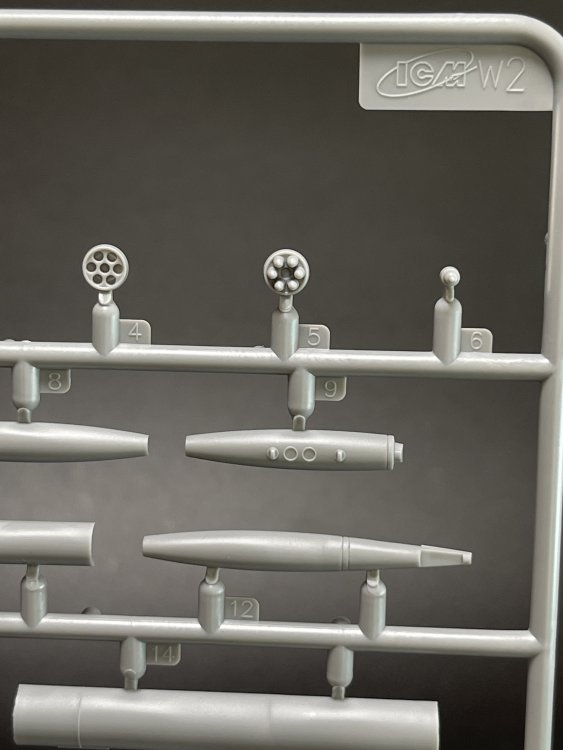
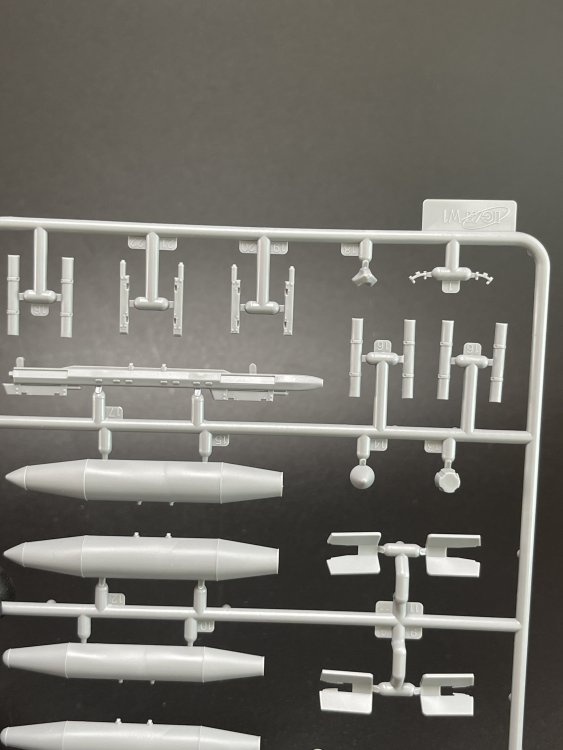
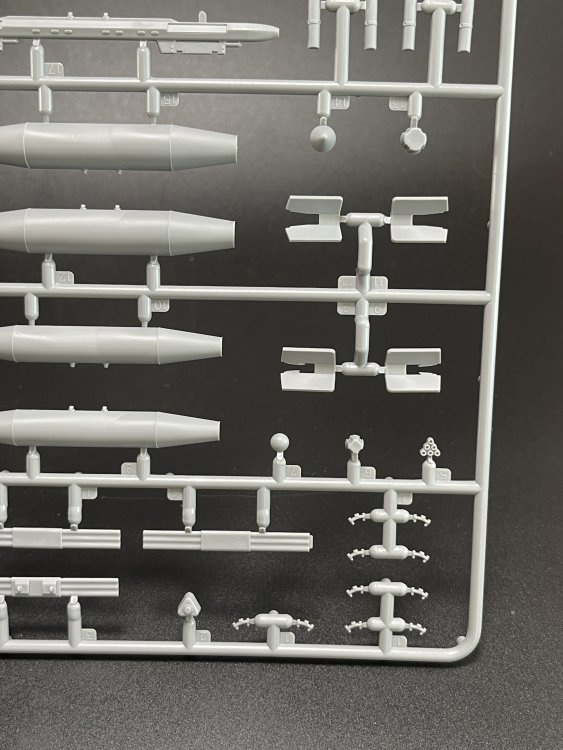
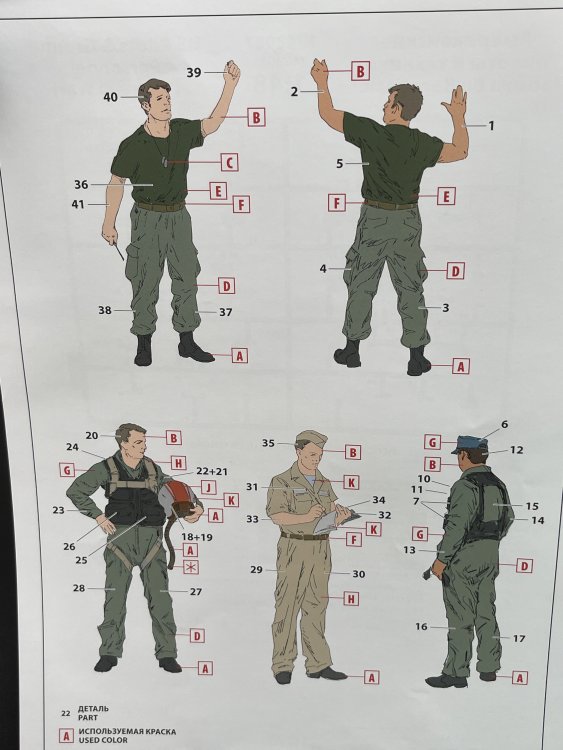
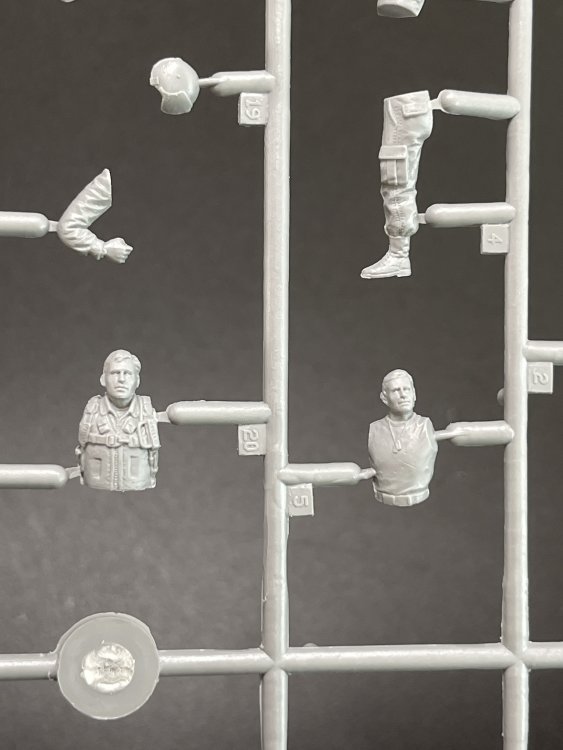
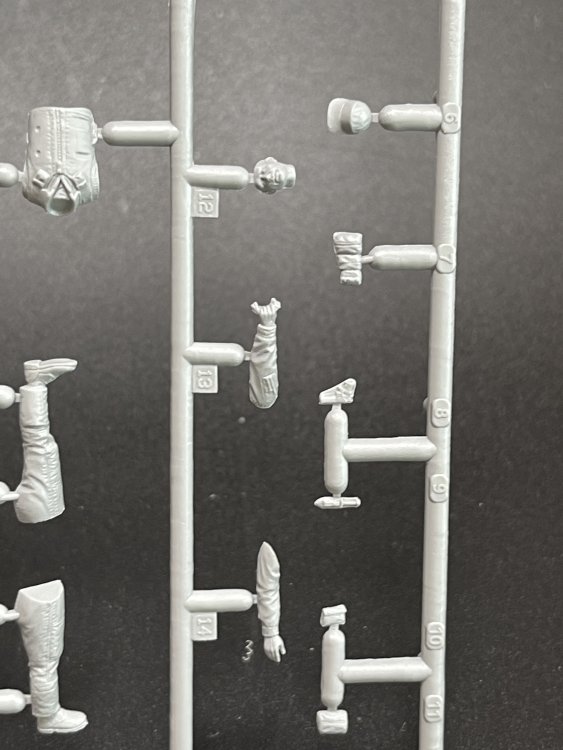
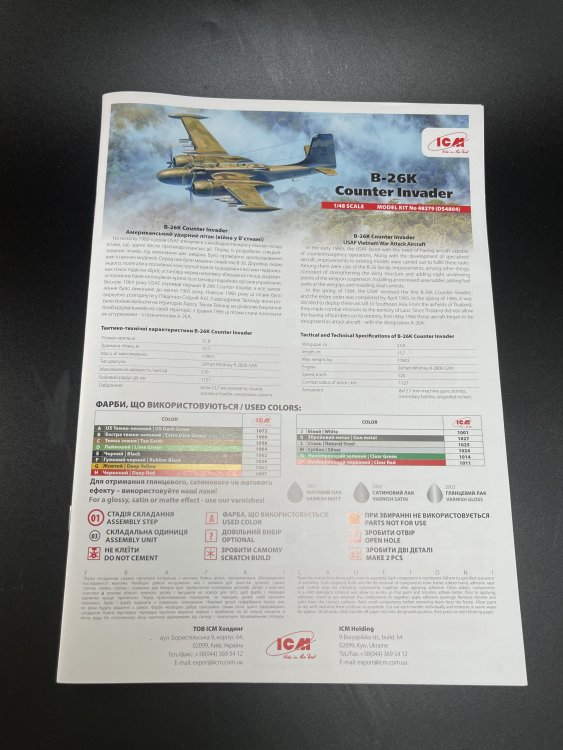
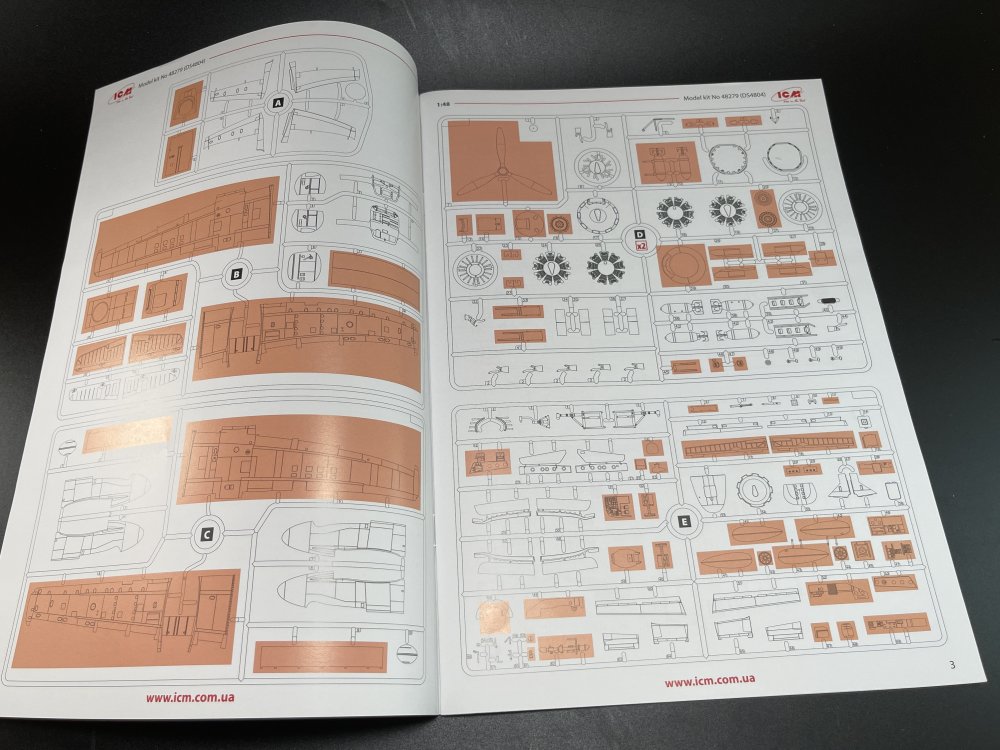
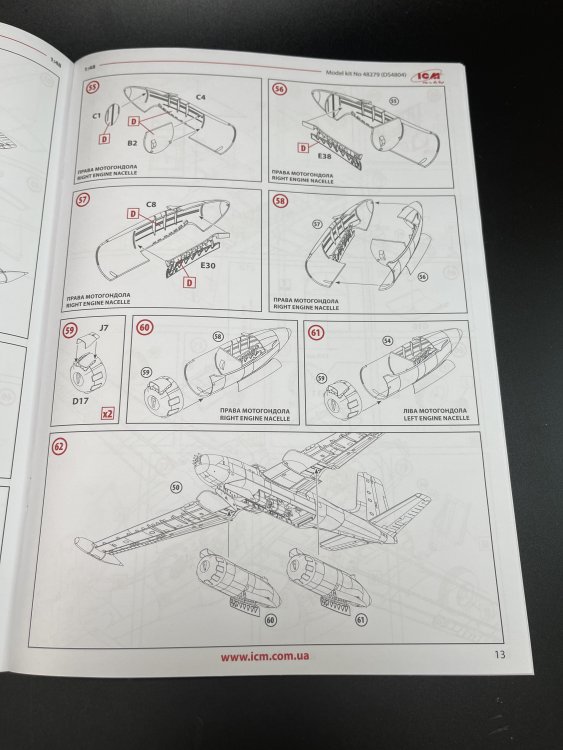
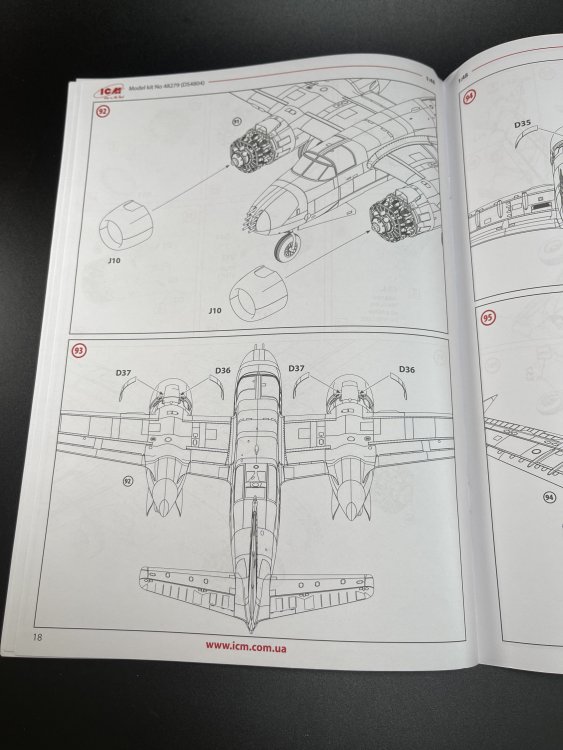
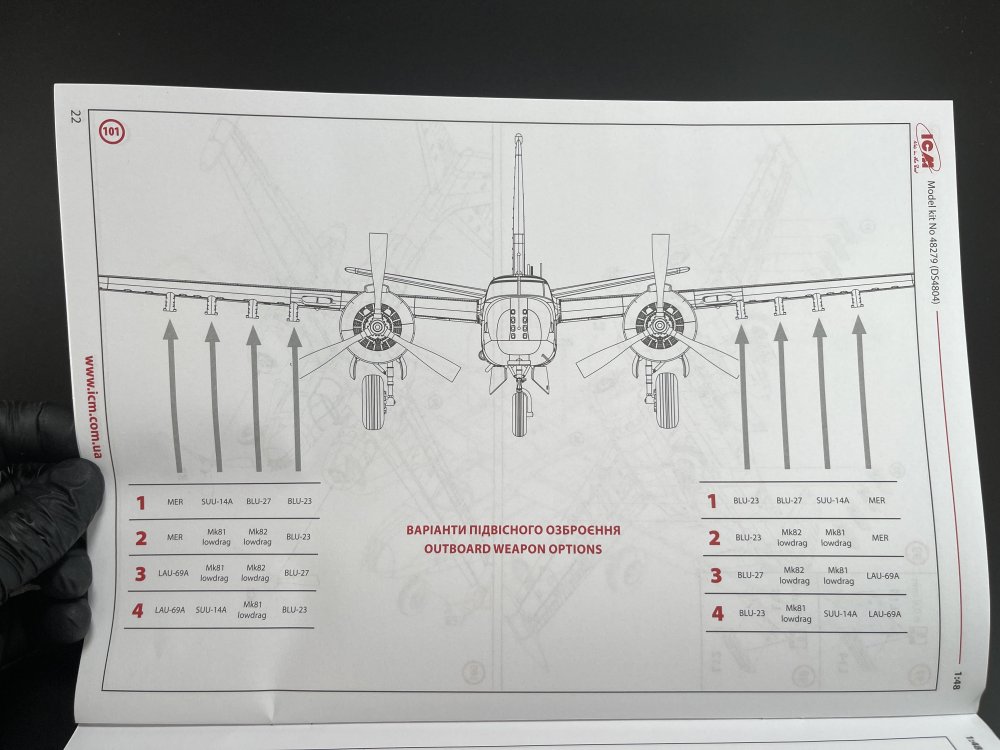
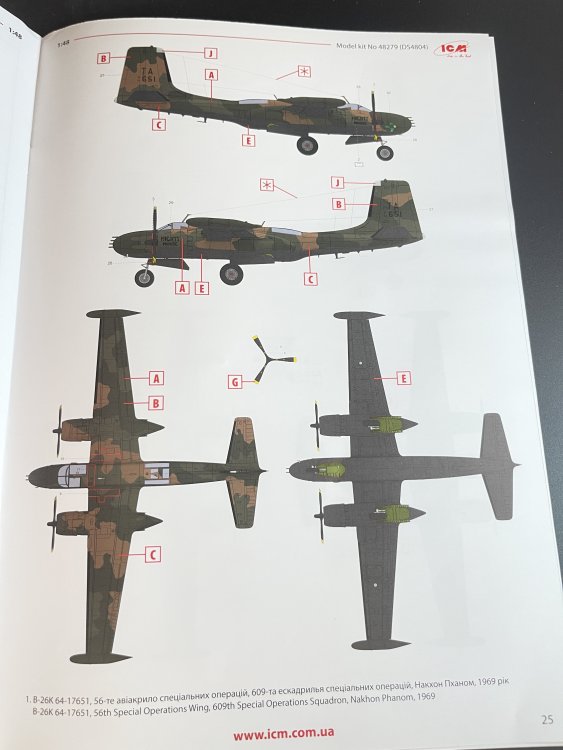
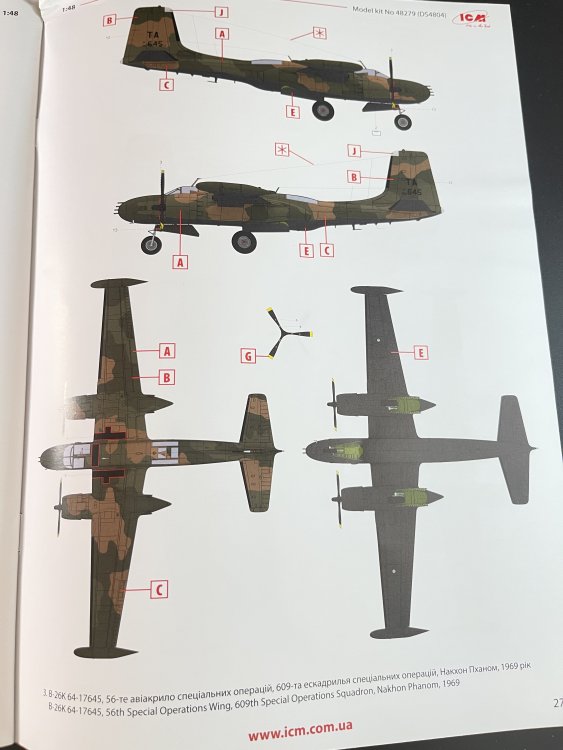
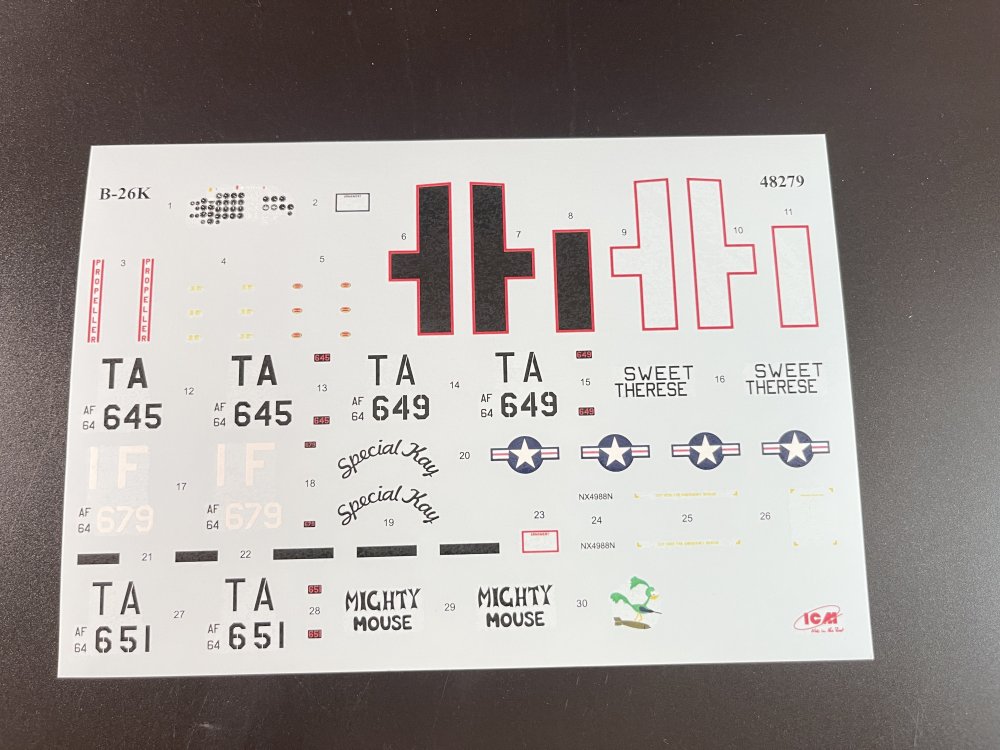
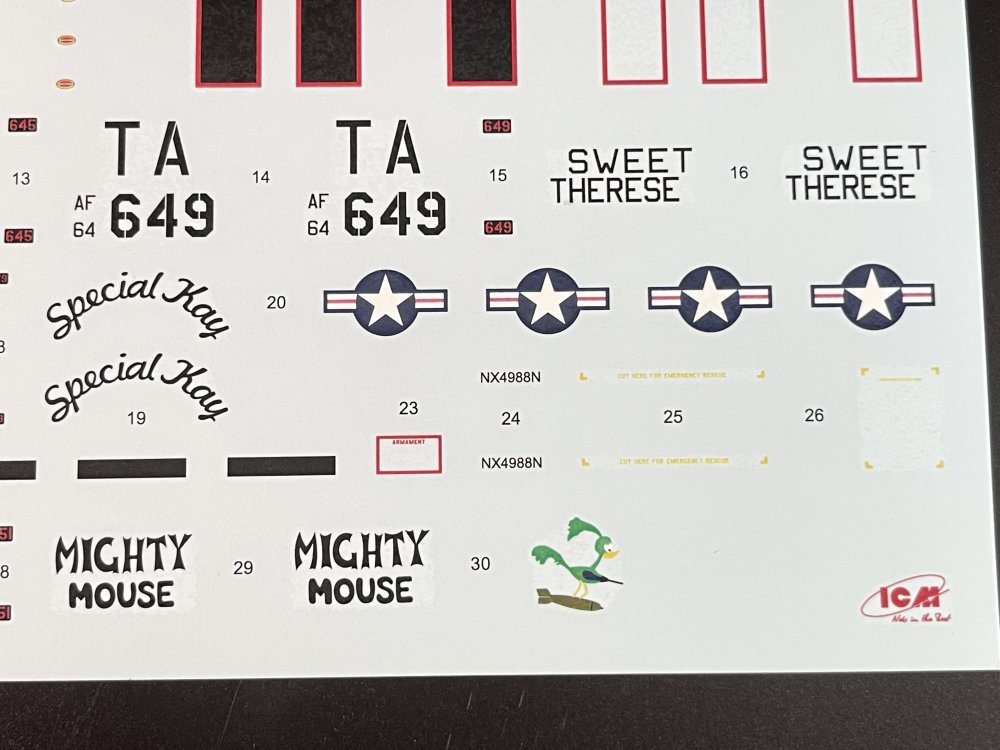
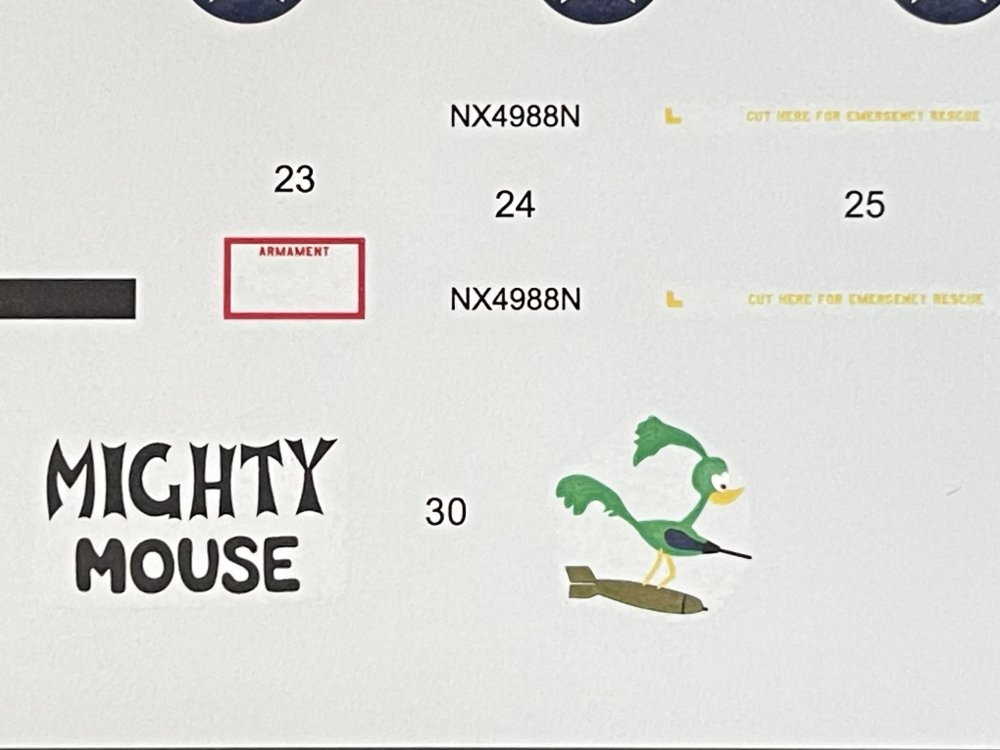
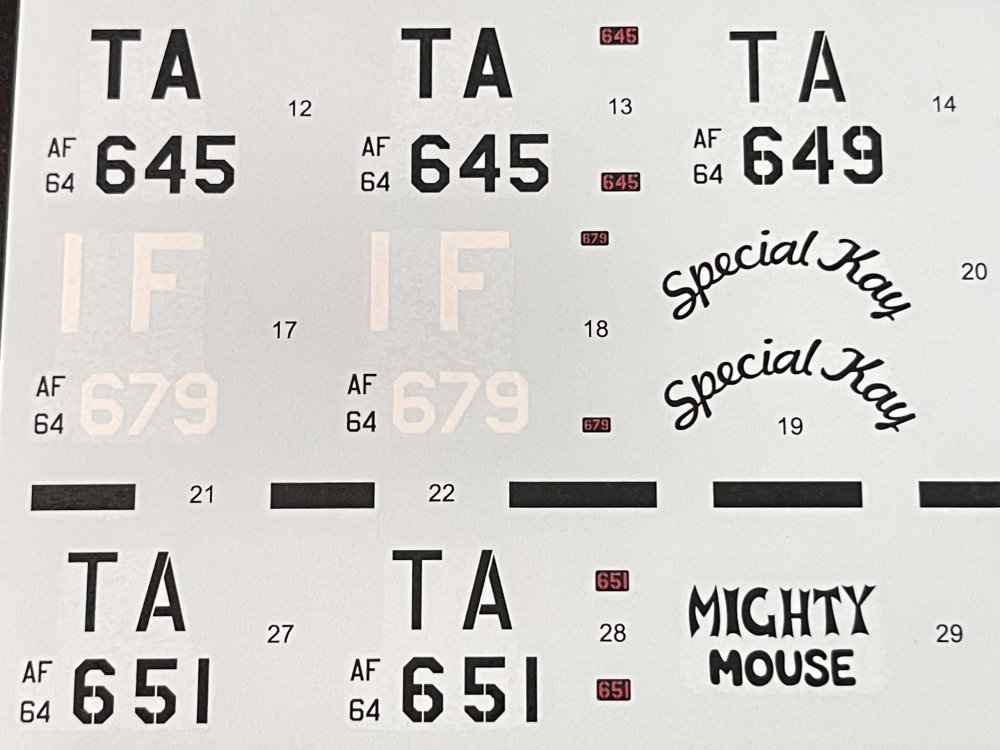
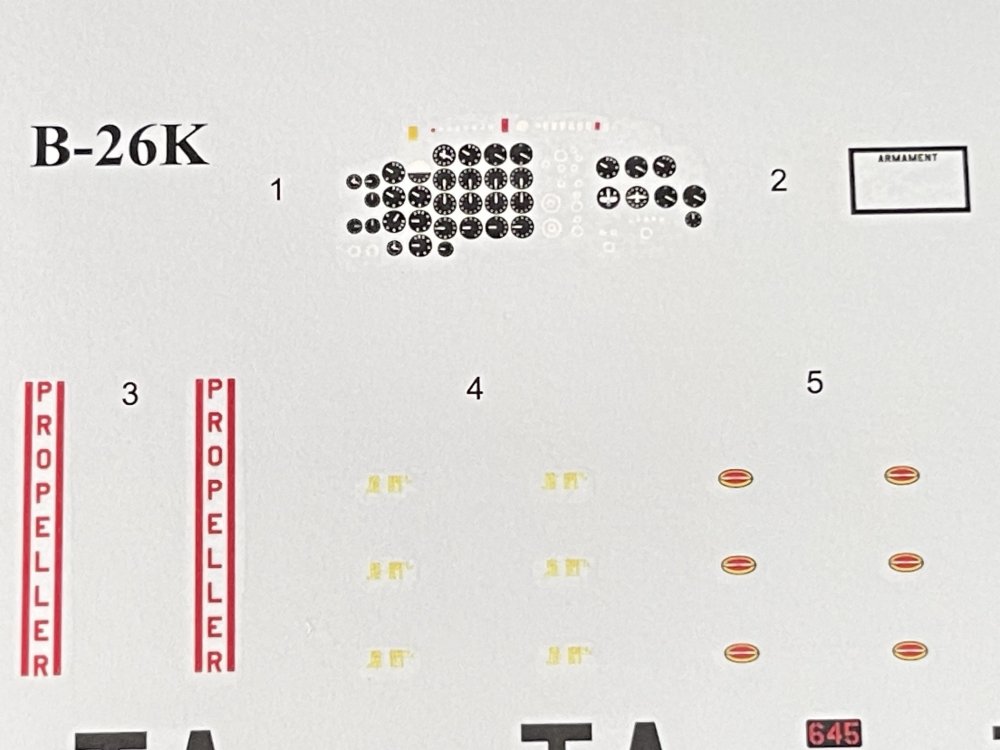
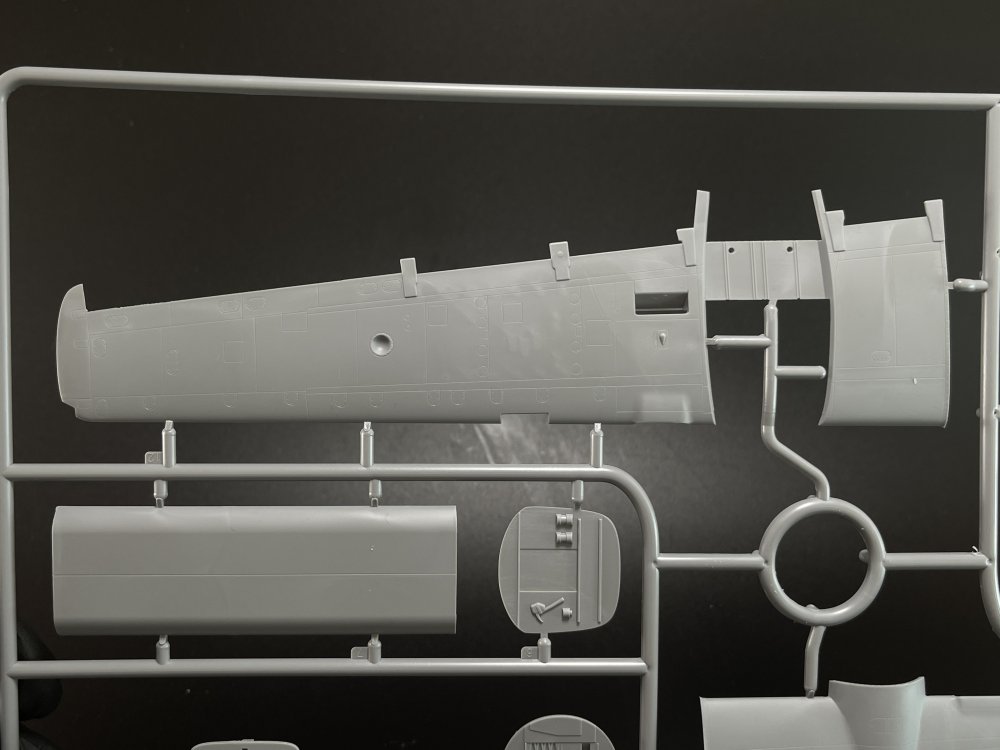
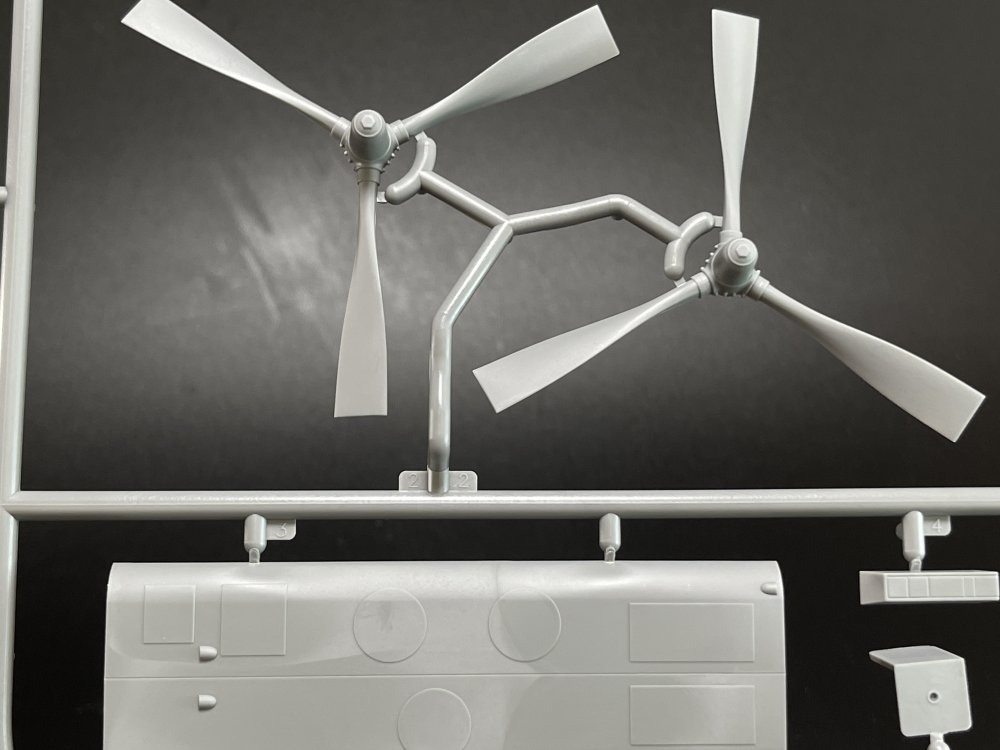
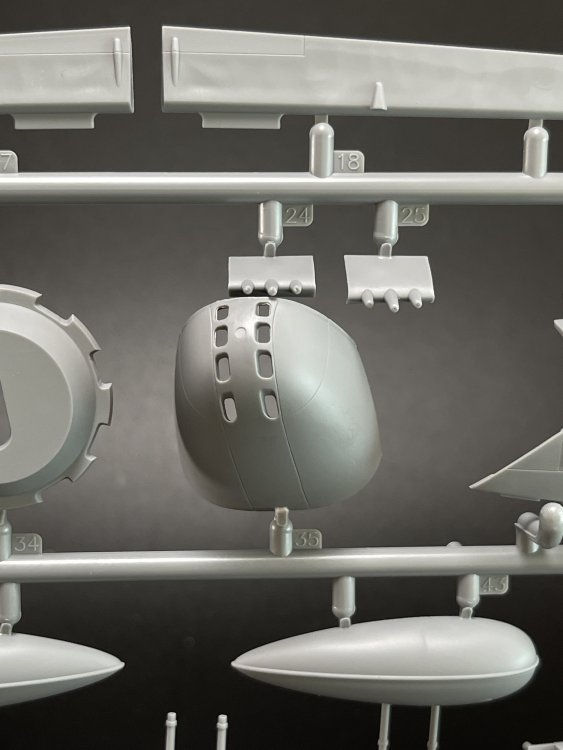
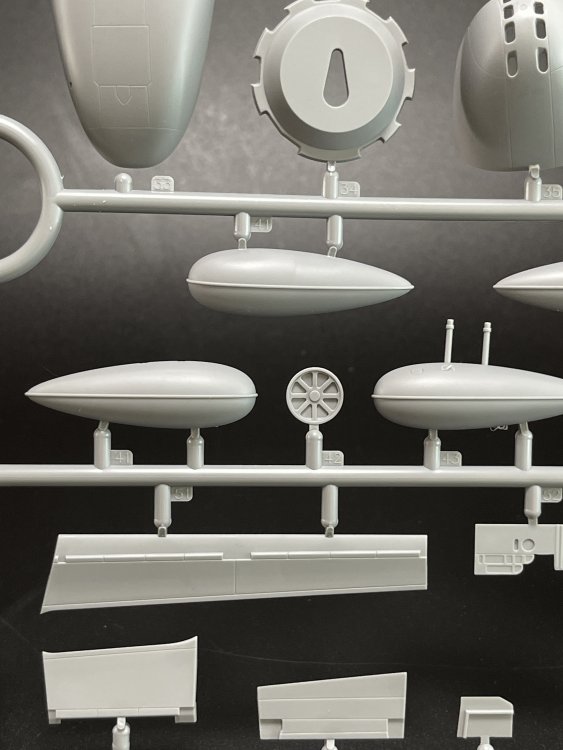
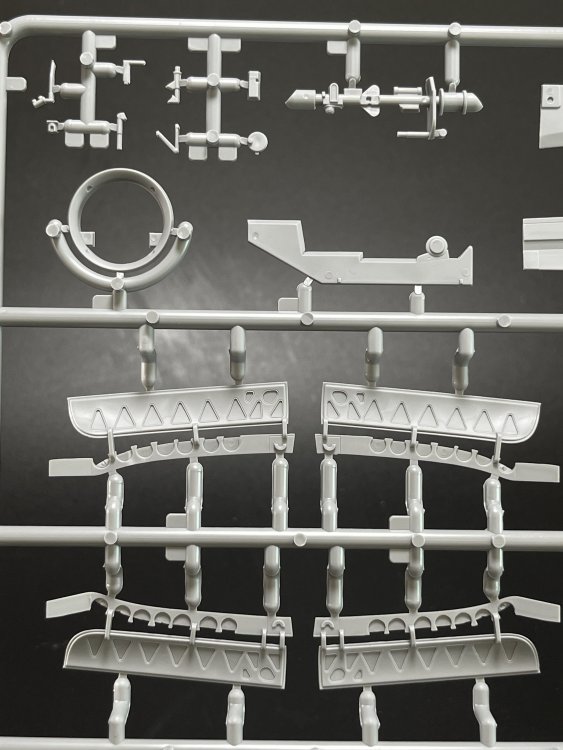
1:48 Nahkon Phanon Air Base Set ICM Catalogue number DS4804 Price: around 69,40€ (at ArtScale Kit) Nahkon Phanon Air Base, a U.S. Military base in Thailand. At Nakhon Phanom the mighty Mekong River slices through the heart of the unified tribal cultures of the Mekong River Valley People forming today the current modern border between the countries of Thailand and Laos. Situated in extreme Northeast Thailand, known as Isan, Nakhon Phanom is adjacent to the central Laotion town of Thakhet which means “foreigner crossing” in Lao. Nakhon Phanom “The City of Hills” was affectionately known as “Naked Fanny” or NKP by the Americans and refered to as the “End of the line at the edge of the world.” To see a lot more of this base, check this site: https://sogsite.com/nakhon-phanom/ ICM Models often makes combo kits sets with several ICM model kit in a single box giving a better price option to the modeller. This set is a very well packed one with a B-26K, an O-2 Skymaster, and several sets, like U.S. Armament set, a figure set and a landing mat, giving every thing that the modeler needs to represent the Nahkon Phanon base. So let´s crack the big box. And the first thing is: Well, that`s a lot of plastic and fun!! It`s is an impressive combo. There are 196 parts for O-2 Skymaster, 344 parts for B-26K Counter Invader, 88 parts for US Aviation Armament, 38 parts for five figurines and 128 parts for M8A1 landing mat. And this set is really is a mix of all, as you get instructions for each set and kit. There`s not a unique booklet but one for each. All this were already release by ICM in the past individually. In an overload loo, the grey plastic is typical for ICM with very good subtle surface details. The B-26K is a recent tooling from ICM, with parts for the -K, which includes new wings with pylon recesses underneath so that is why, there is lots of are not to being use, including two underwings. The B-26 is compose by fourteen sprues in grey styrene and one in clear. The panel lines are very crisp, narrow and restrained, not deep lines! The surface is very neat-looking, with plenty of engraved and raised features on the parts. Props come as one-piece parts. Such design should be easier to assemble, but a bit more tricky to paint. The clear parts, as usual, are in fact, clear This B-26 only has one decal sheets with the markings, some stencils and the instruments panels. The instruction booklet, which has painting profiles in colour on the rear pages. The schemes gives in the decals sheet are four options included, all in SEA (Light Green/Dark Green/Brown) topside with black undersides. 64-17651, ‘Mighty Mouse’ 56th Special Operations Wing, 609th Special Operations Sqn., Nakhon Phanom 1969 64-17649, ‘Sweet Therese’ Davis-Monthan Air Force Base (AFB), 1970 64-17645, 56th Special Operations Wing, 609th Special Operations Sqn., Nakhon Phanom 1969 64-17679, ‘Special Kay’ 1st Special Operations Wing, USAF Late 1960s. This aircraft has been restored and is the only B-26K currently flying. All the colours are ICM references and no other. Next we see O-2A Skymaster. The Skymaster is a little beautiful aircraft and ICM got their lines in perfection released in 2020. And this kit is exactly the one release in 2020 (even the instructions said model kit n.º 48290) and ICM have had the care to in this release add (DS4804) The Skymaster model only got 3 sprues. Sprue A with the tails tail booms, wings wheels and parts of engine and nose. The Sprue B with upper wing, fuselage cockpit, instruments panels and minor details. The Sprue C are the clear parts set with the front windshield and the side windows. It has a quite window cabin cockpit so some masking will be a must it. My usual mask brand (artscale) doesn’t have mask for it so is very most welcome the masks templates using the printed shapes on the right of the page and the diagrams on the left to create your own masks. The plastic is like the B-26K, in plastic grey (quite good to work with) with very good subtle surface details The construction could bring some alignment issue but ICM gives some good help in the design constructions steps of it so I believe that with some care and patience you can get it done. The decal sheet, with very good color registration, gives the modeler 4 options, the first 3 with blue grey and white on top and blue grey on bottom. The last one is all black. ICM doesn’t give any reference about it, only painting profiles in colour on the rear pages which, nowdays and being in a combo Nakhon Phanon airbase box it should have some information about plane, place, squadron. I went to Scalemate and I just check the instruction for the O-2 Skymaster release in 2020, and the instructions are literally the same. Nothing against but I think ICM could have put some information about the schemes option. Not having hen, it will come up to the modeler to do some research and check which option could be use in this set. Probably all but I`m not at all an expert in Vietnam war. I found some Nahkon base pictures and you can see the Skymaster in black and others in blue gray and aluminum. So, I presume that they are all from Nahkon base, but with no indication, year, pilot, etc…. I would like some information on the instructions about it. The booklet instruction is the usual one from ICM with color indication only from ICM colors. Moving to the others sets that are in this box and all were previous release as set as a stand-alone boxing. Starting with ordnance. The weapons are compose by four sprues and gives a lot for this project and any other in Vietnam: 2 x LAU-10A Pods of 5" Rockets 2 x LAU-69 Pods of 2.75" Rockets 2 x LAU-68 Pods of 2.75" Rockets 2 x BLU-23 500LB Fire bombs (Can be made with or without the fins) 2 x BLU-27 750LB Fire Bombs (Can be made with or without the fins) 2 x Mk.77 750LB Incendiary Bombs 2 x SUU-14 Dispensers 2 x Mk.81 Snakeye Bombs 2 x MK.81 Low Drag Bombs So, no excuses to load up your B-26K with everything: iron bombs, napalm, rockets, you name it! This set has its own decal sheet, and instruction. The decals place indication on the ordnance is quite easy to follow. Next, figures set. You get 5 figures, in different poses and you can use all or just one… It’s just one sprue in grey plastic. but all parts have no flash at all, and the surface detail is very good, as usual now with ICM, with very subtle details on the cloths and on the faces with less seam line from the mold. The figures have the torso in one piece without arms or legs as they are separated. No assembly instructions are given… but if you look carefully we see the parts numbers on the figures. So there`s the assembly instructions. As for the landing mat (even in 1:35) please check our review here. Conclusion Wow! What a combo set!! This box gives the modeler long hours of modelling and joy. The combo diorama with B-26K Counter Invader, O-2A Skymaster, US Aviation Armament, five figurines, and an M8A1 landing mat is a great value for your money. You just need to have the space to put them all together. If not, you can build them separately Every is perfect inside and a great price. The only two things I would add, if I could would be some PE parts (or 3D parts) with seatbelts and color indications besides ICM color… Some AK, or Tamiya, or MRP or Gunze color. Highly recommend this to intermediate/expert modeler


-
Here, the pictures that were shared on facebook!
-
and there is some new pictures of the upcoming Border 1:35 He-111


-
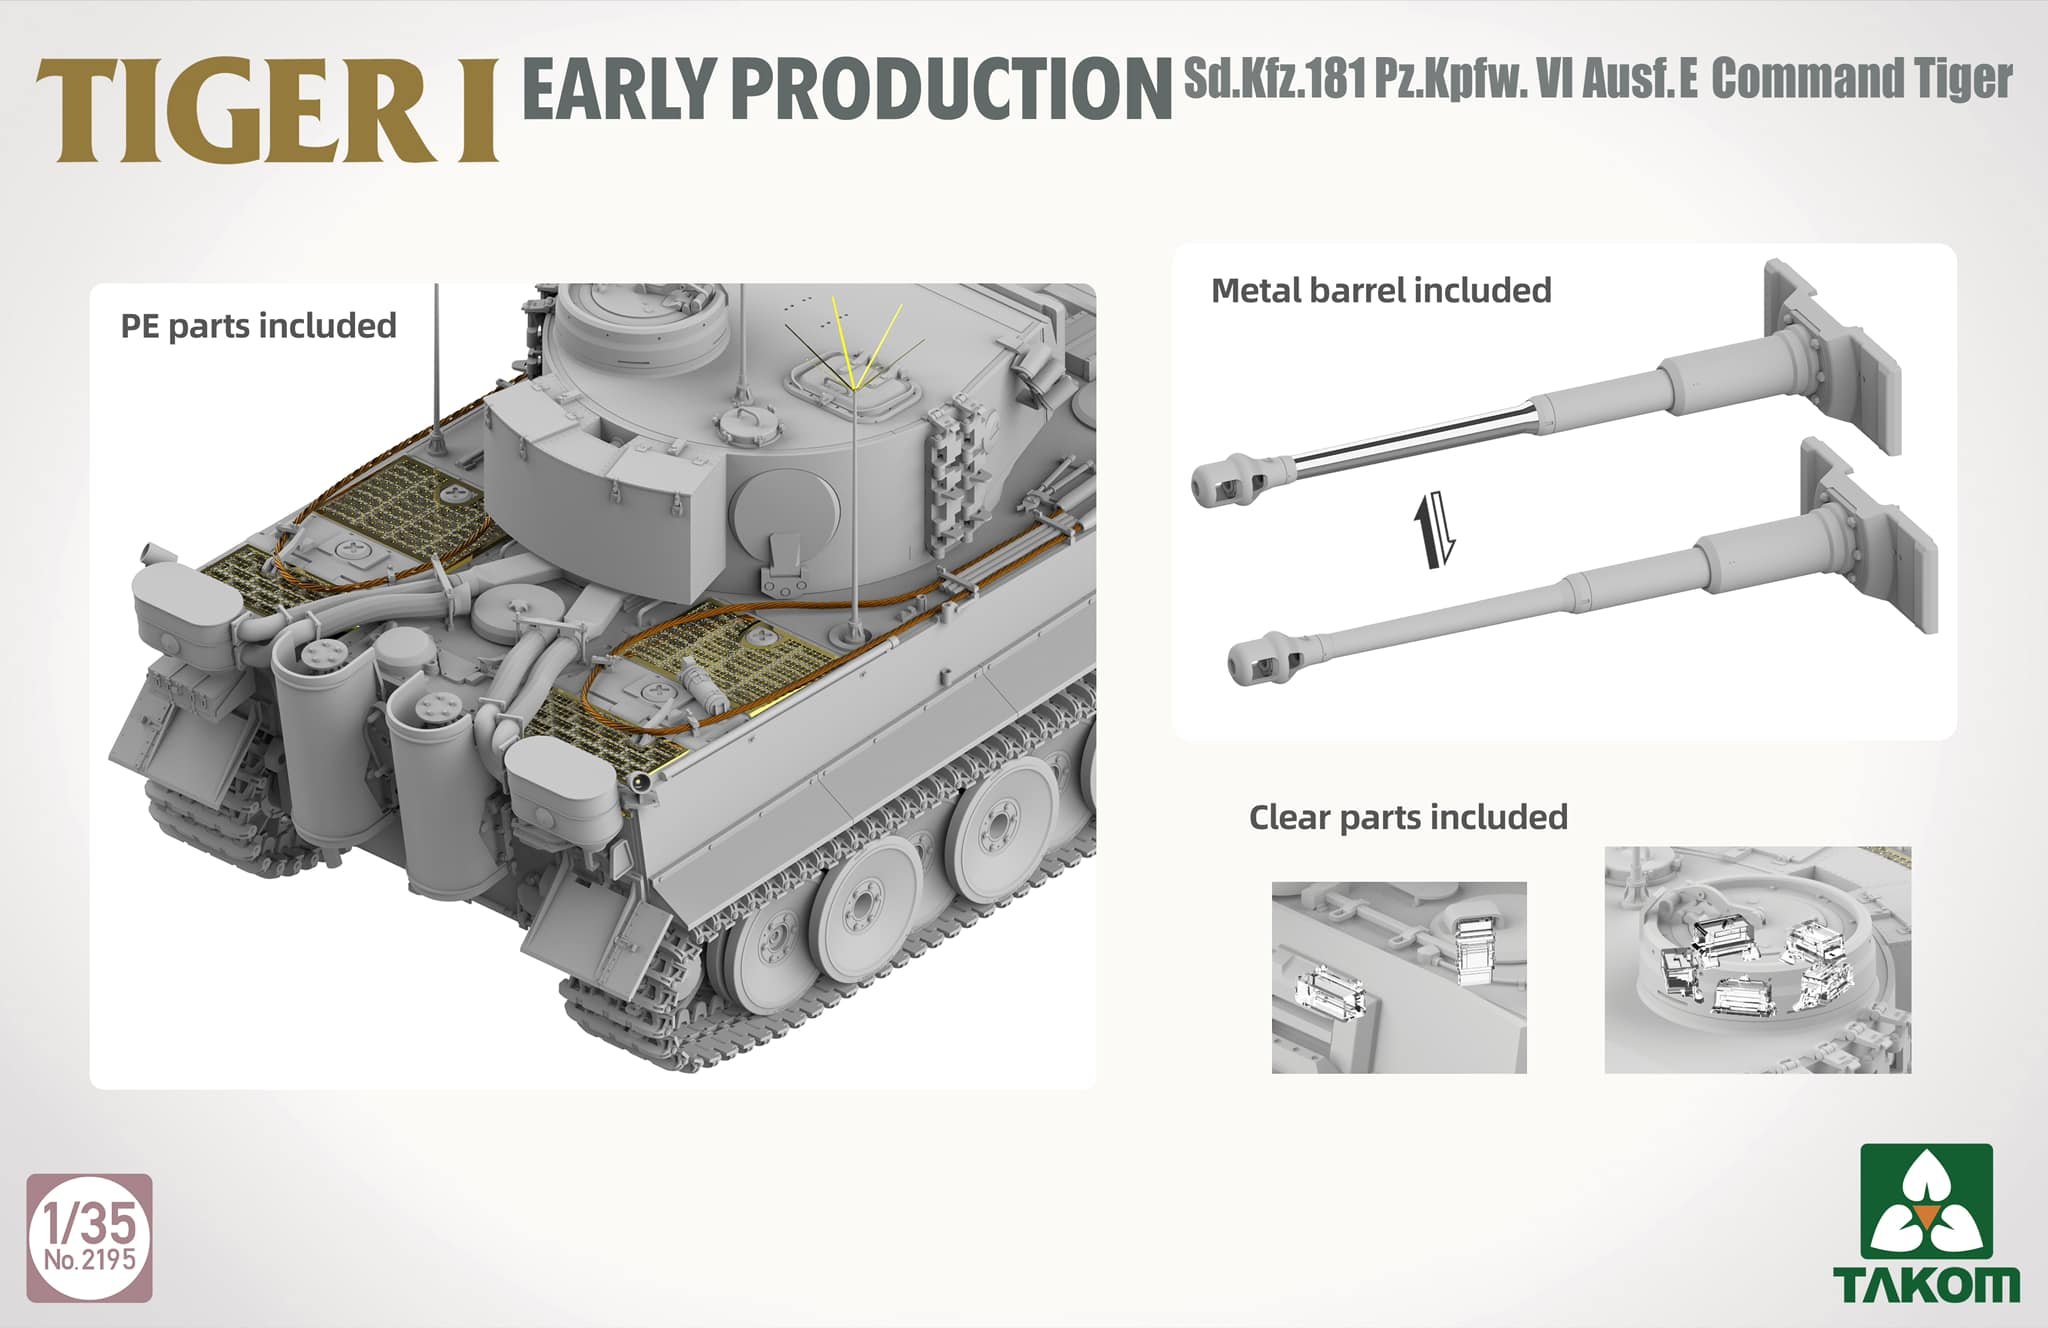
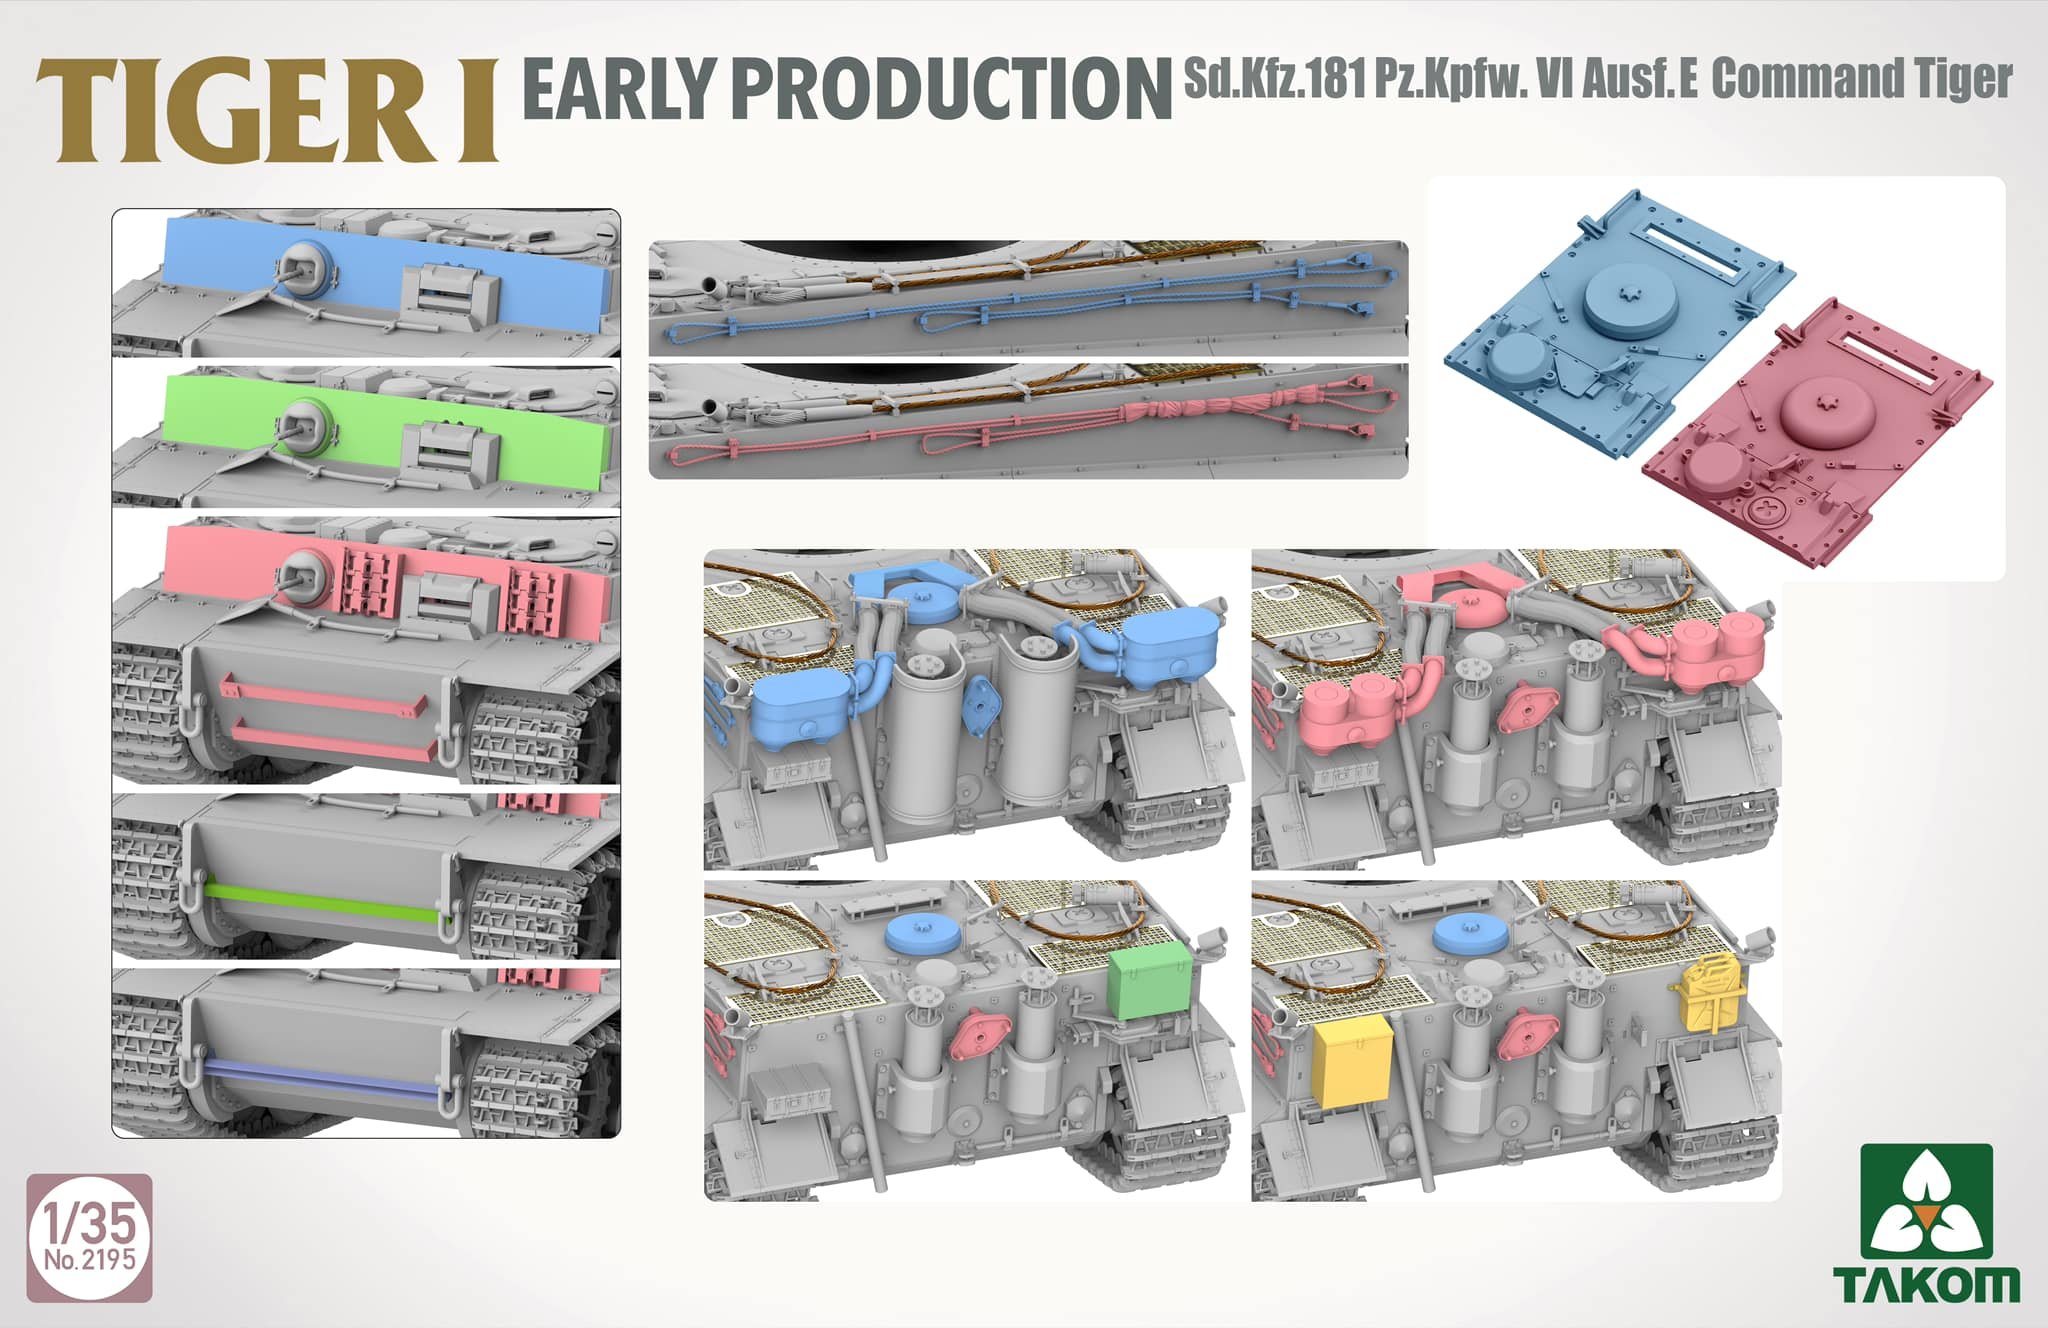
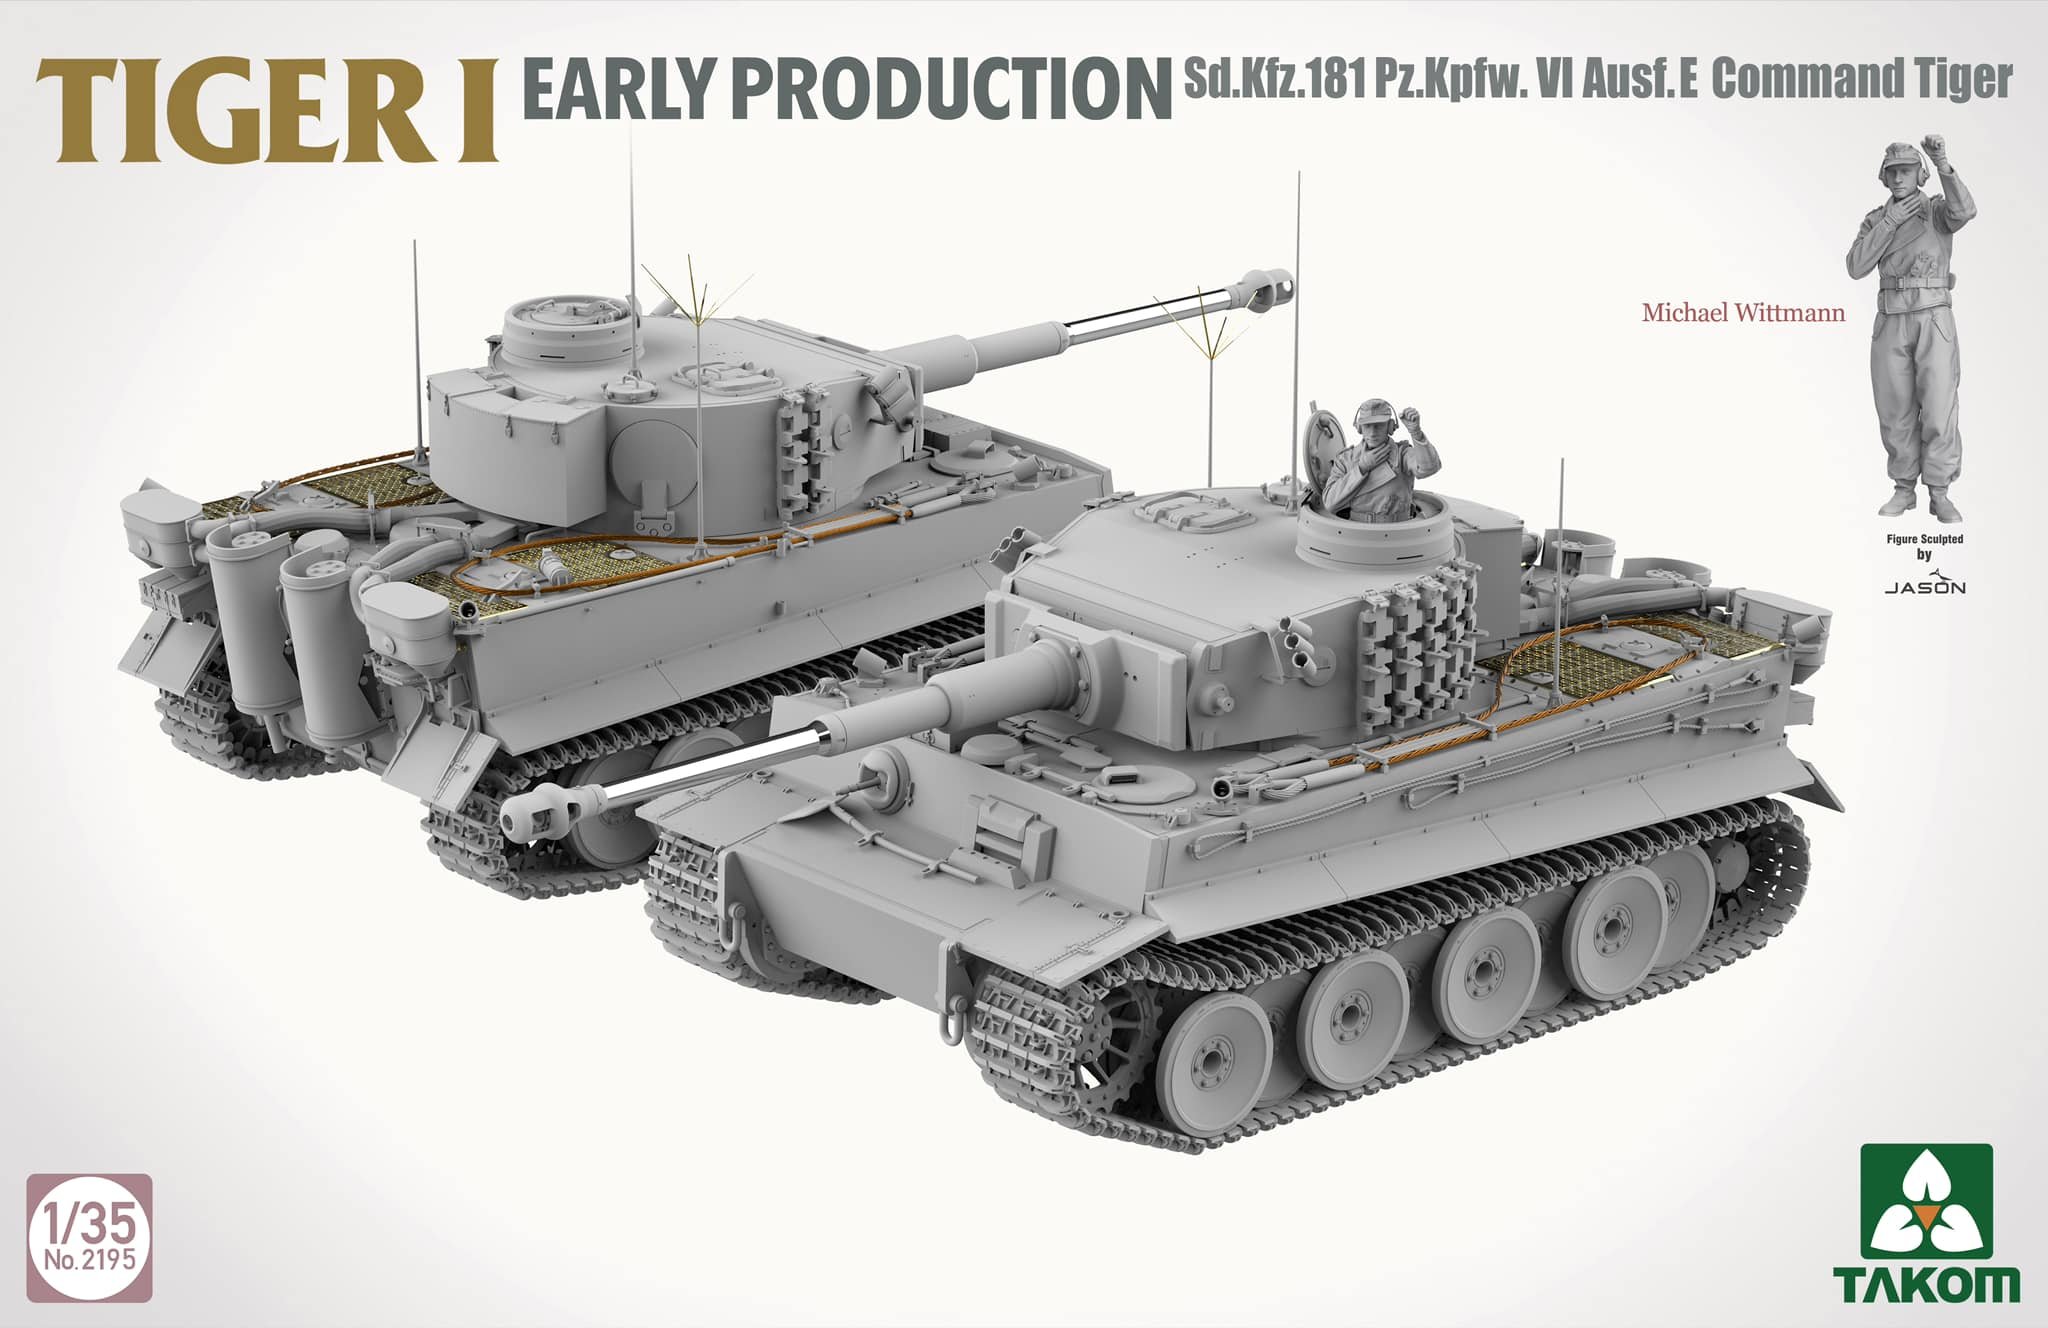
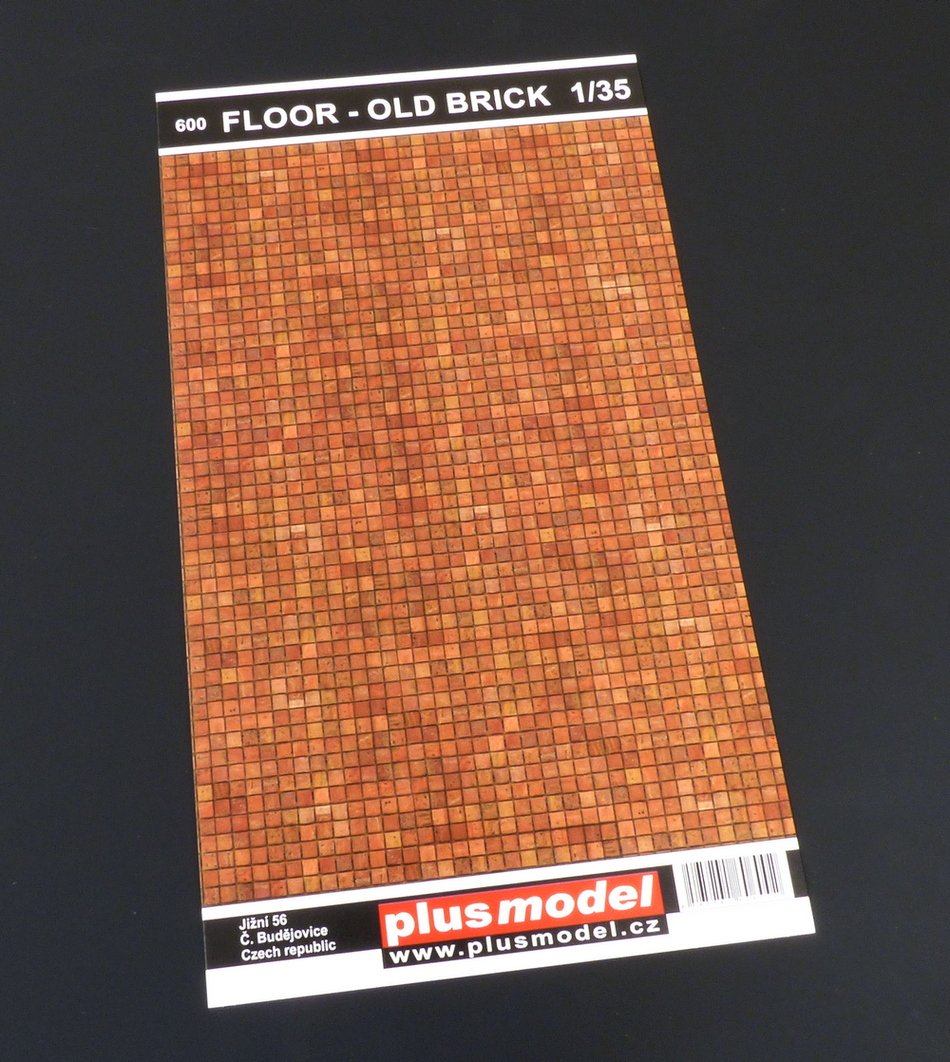
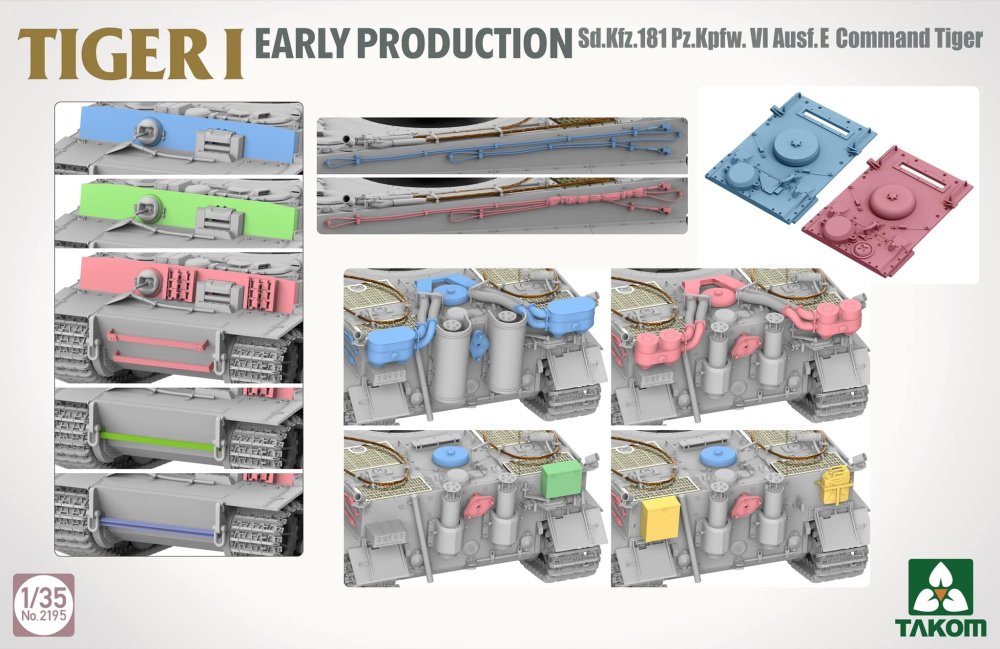
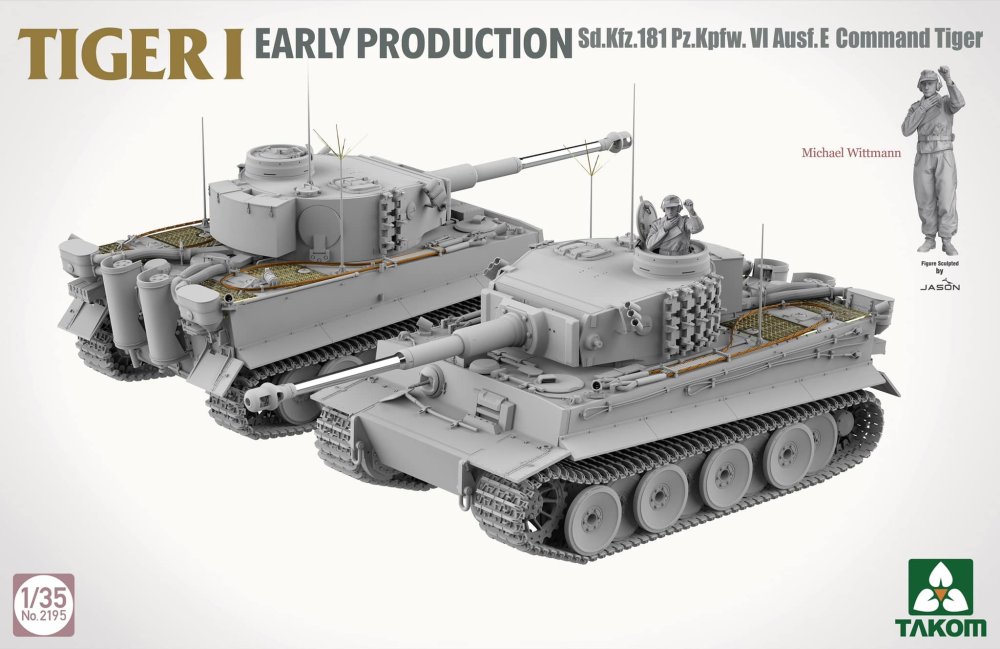
Sorry for the delay in making this tread but Still January 2025!! So still in time!! All the news and upcoming release for Large Scale and Large Model to share to all!! Caproni Lukgrap is closer and closer... I know that the price tag will be 499€. It`s a premium model kit! Another Tiger I from Takom.... and a few new items from Plusmodel, perfect to Dioramas!! (Roof gutters)


-
Wow!! I just found this thread!! What amazing build!! I really hope that it has come to an end!!
-
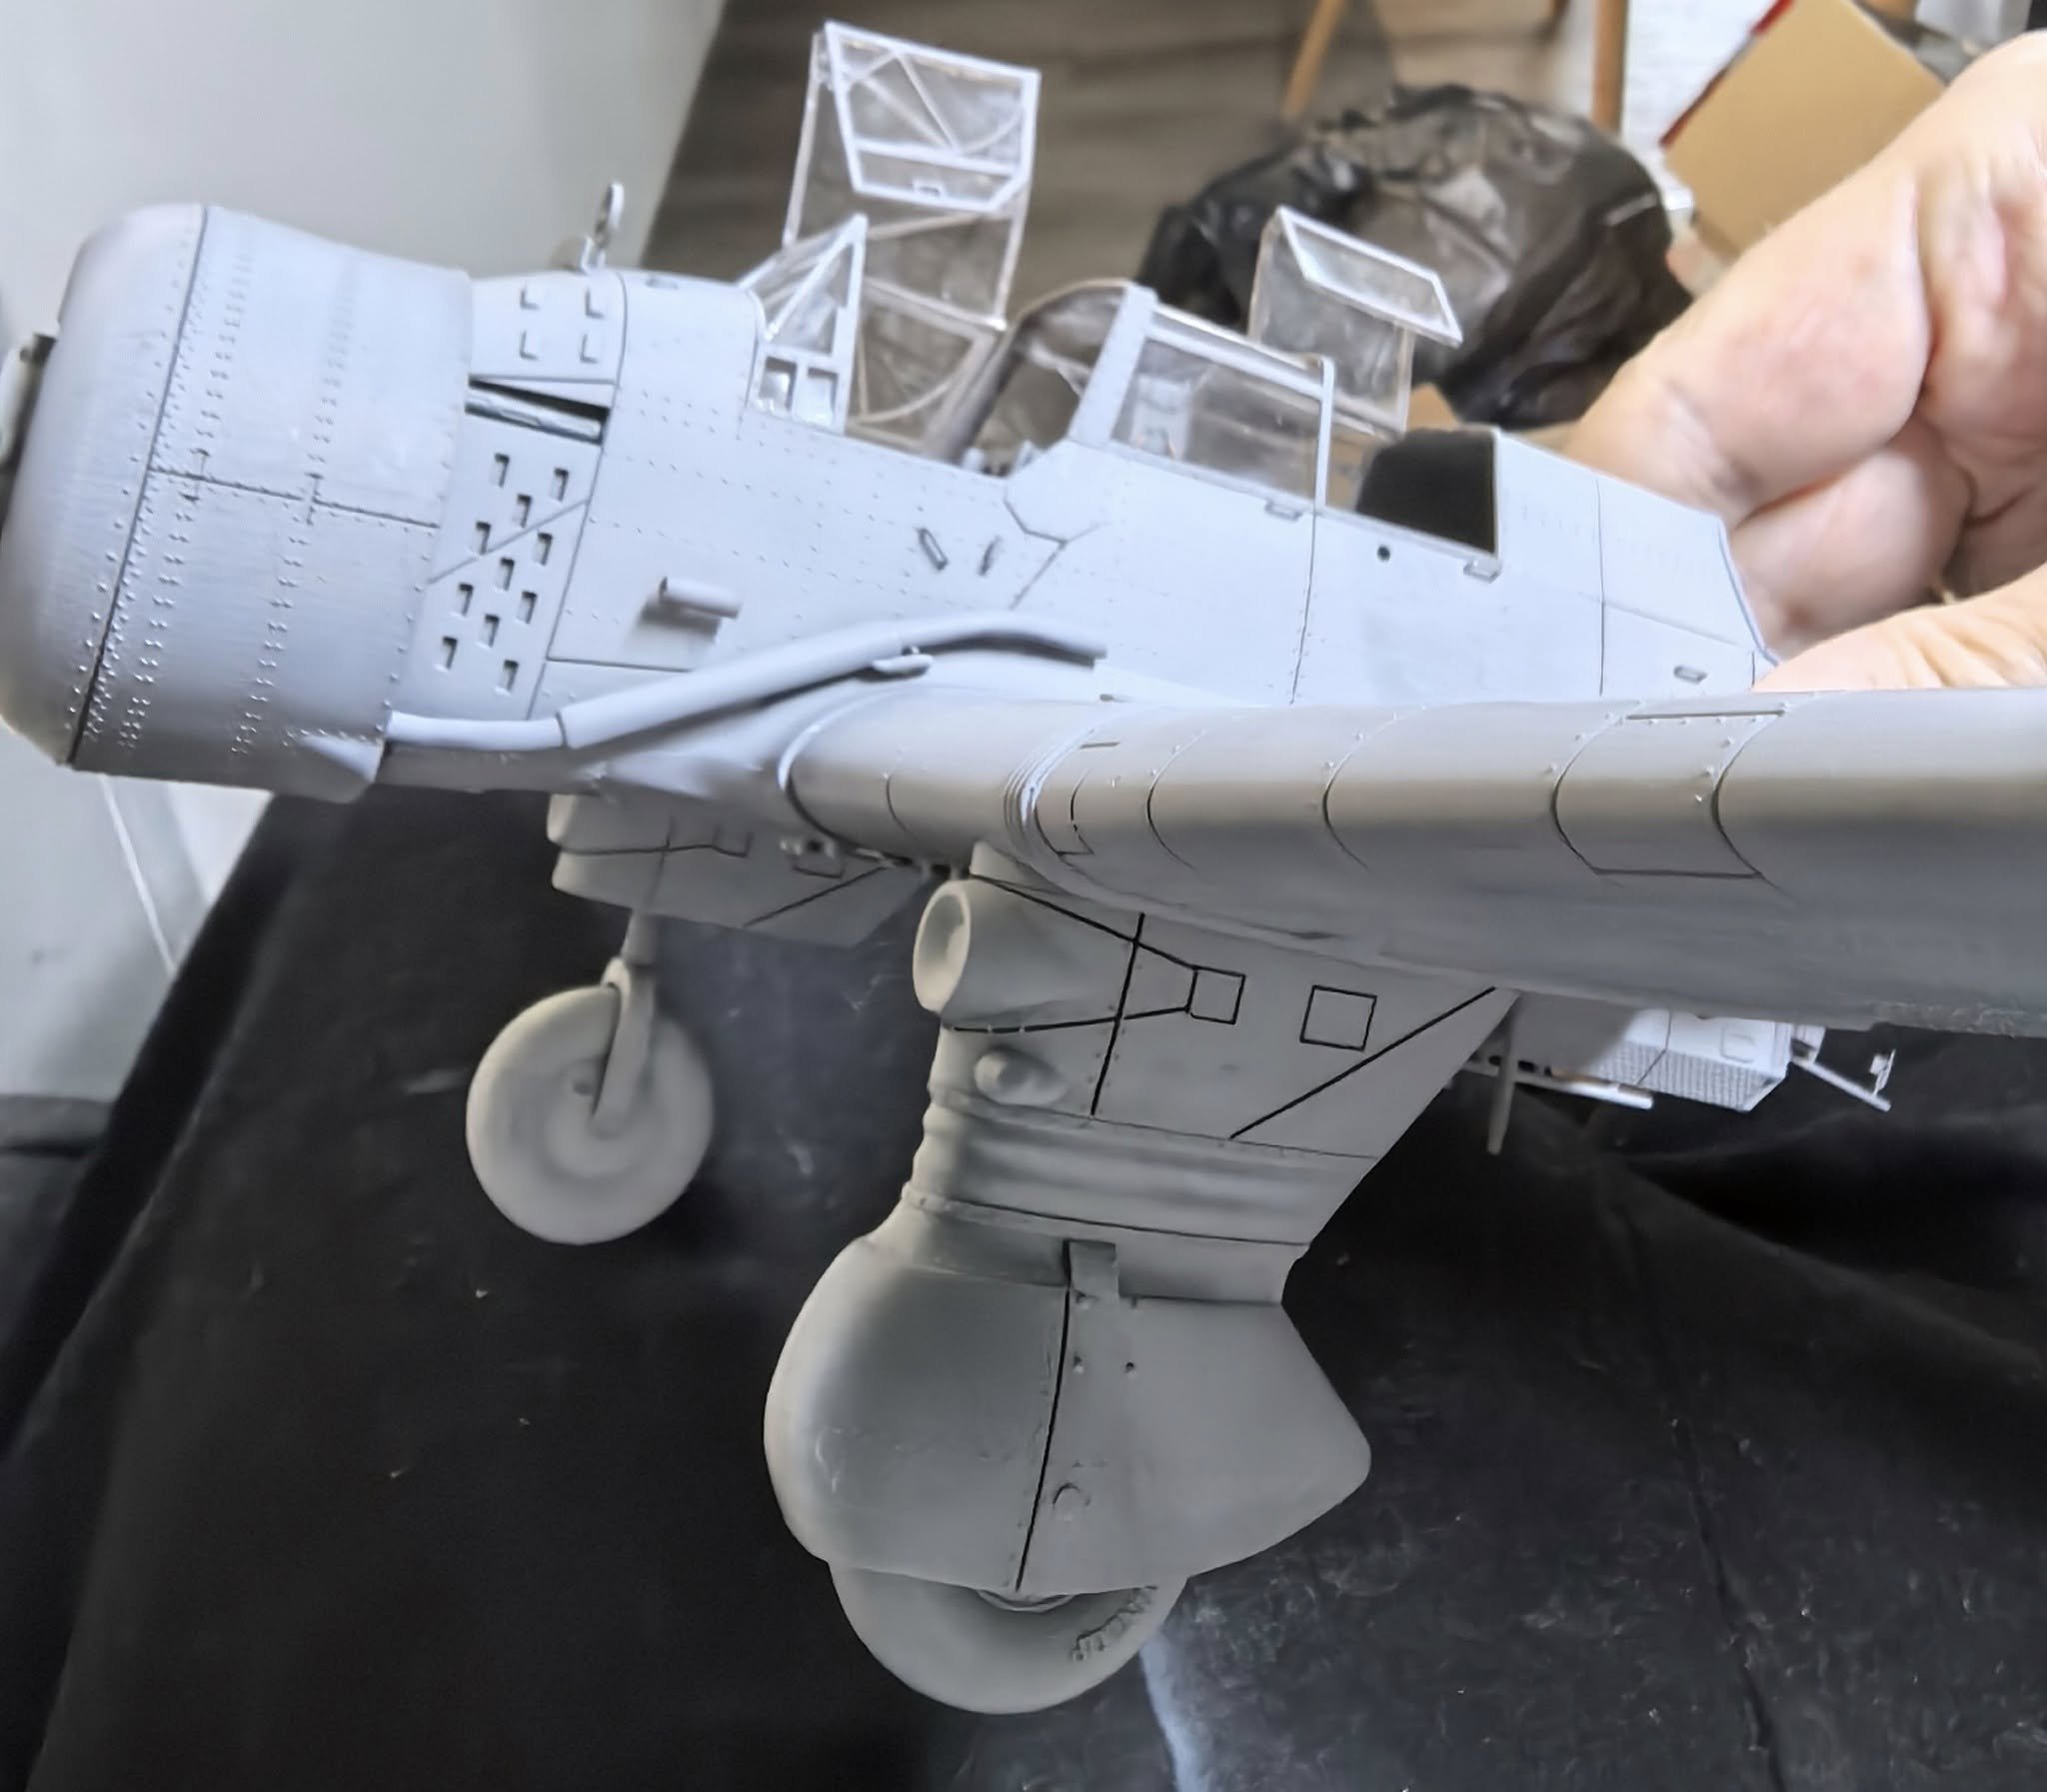
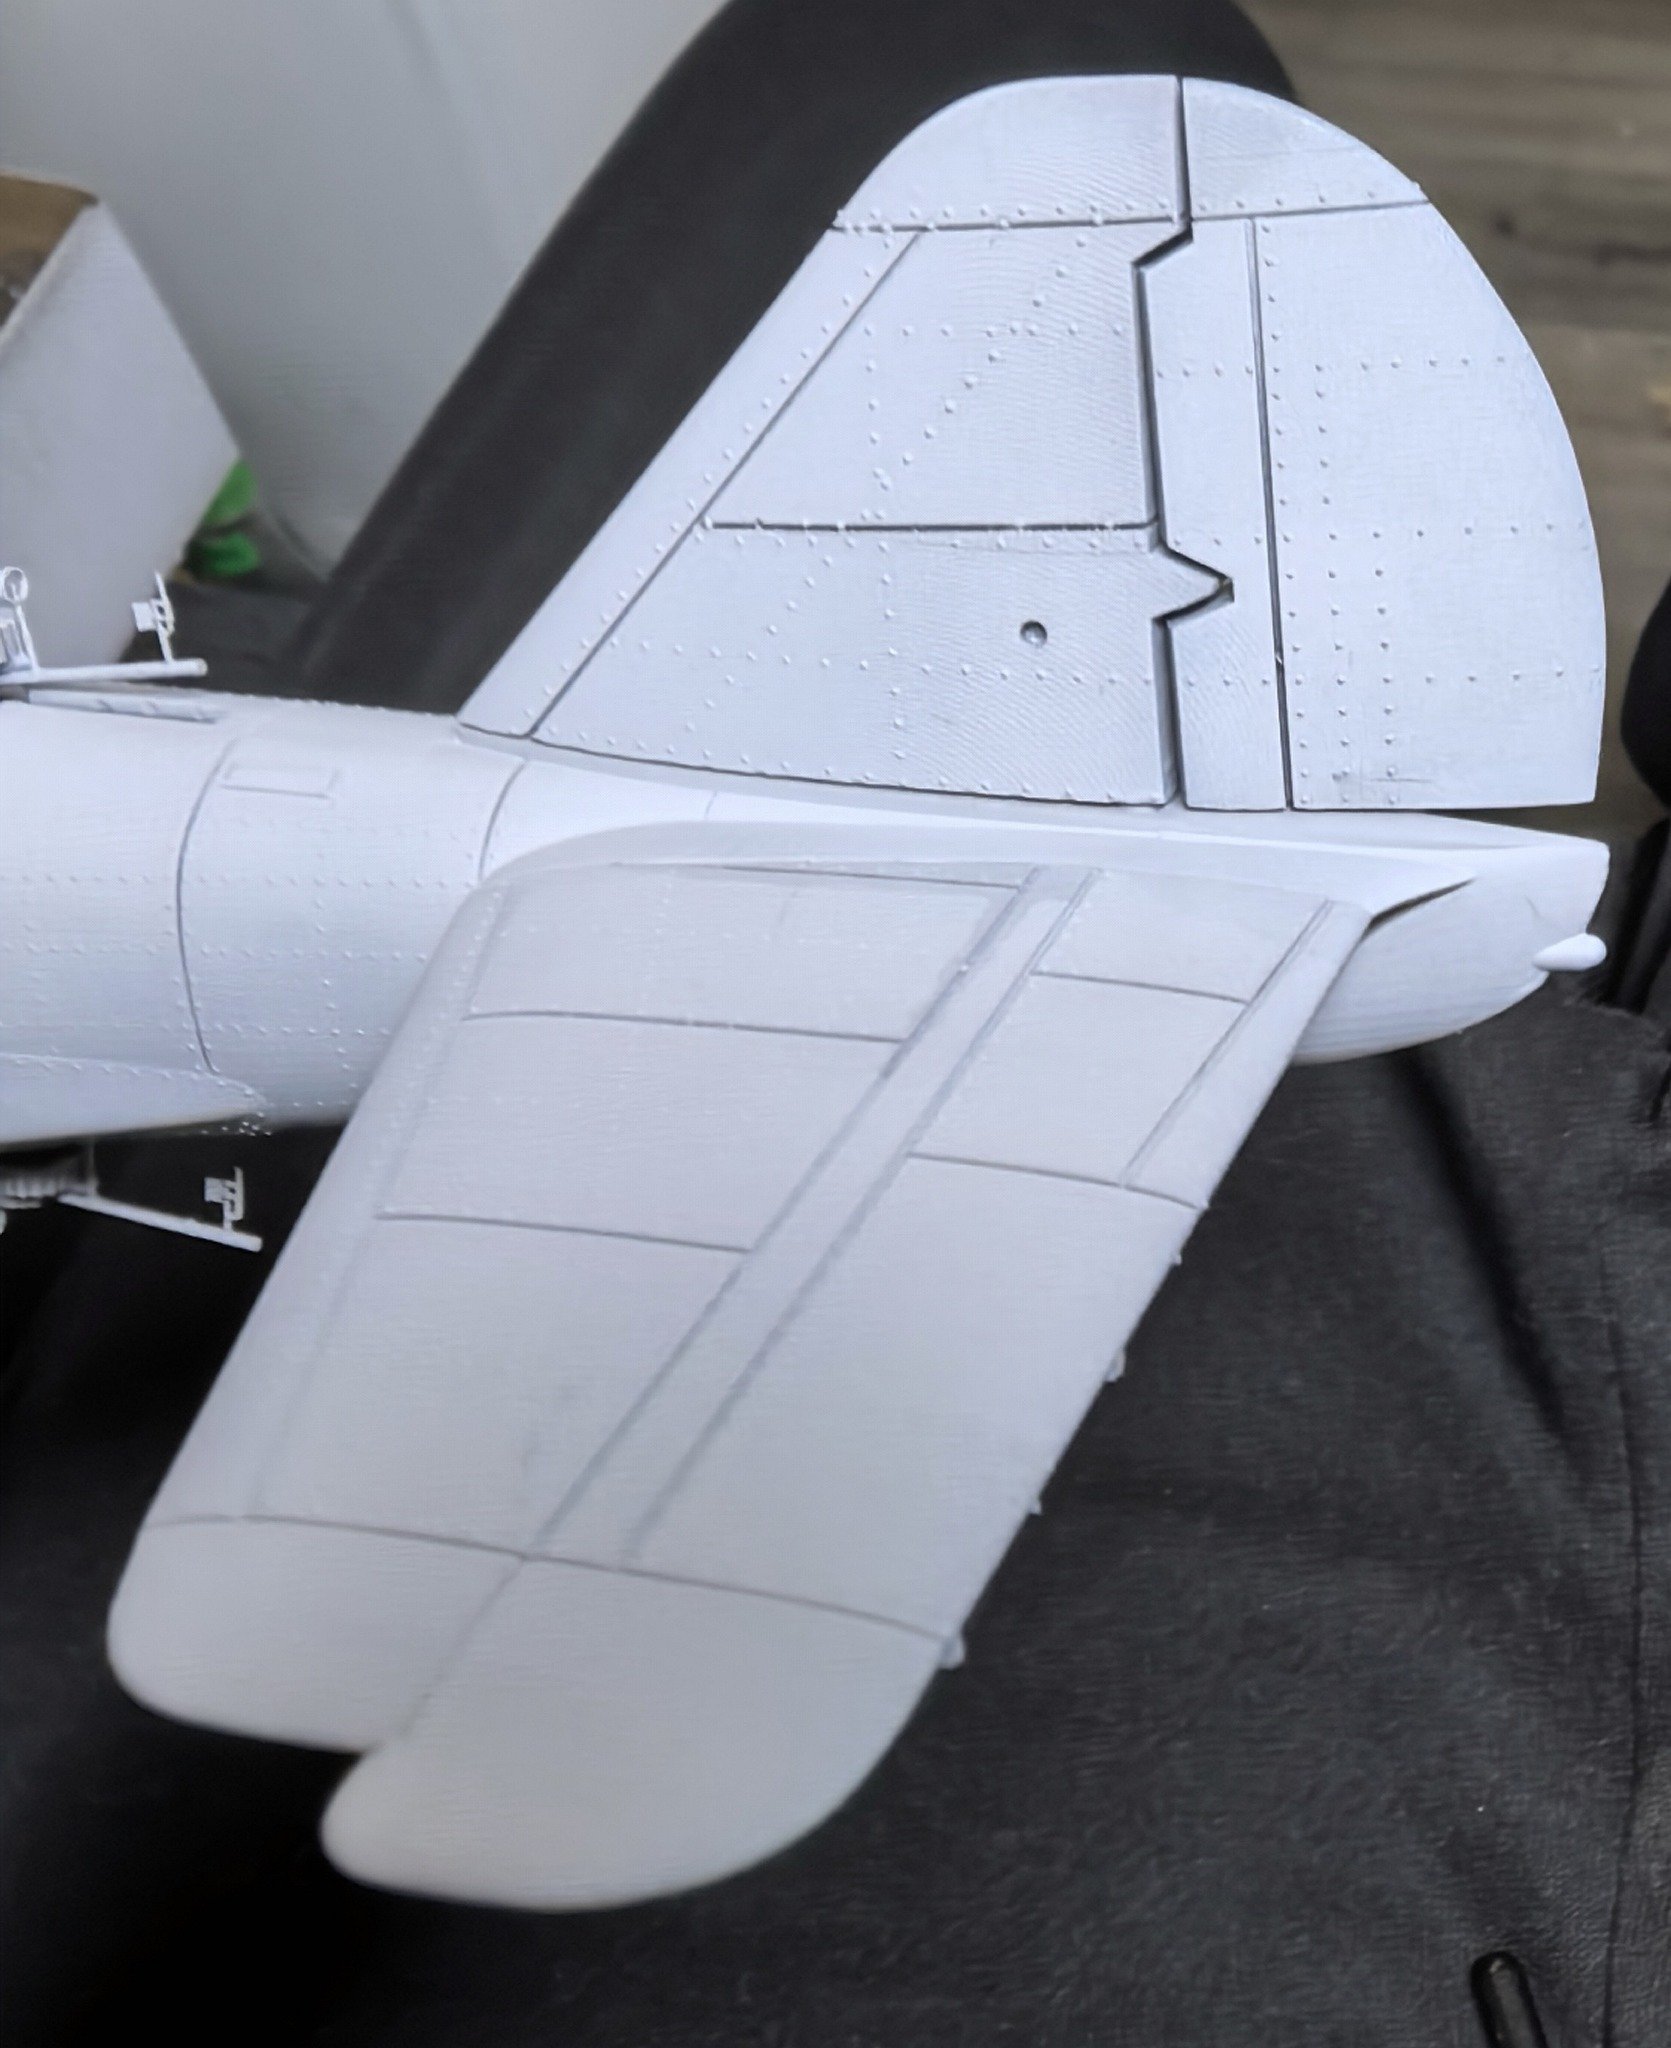
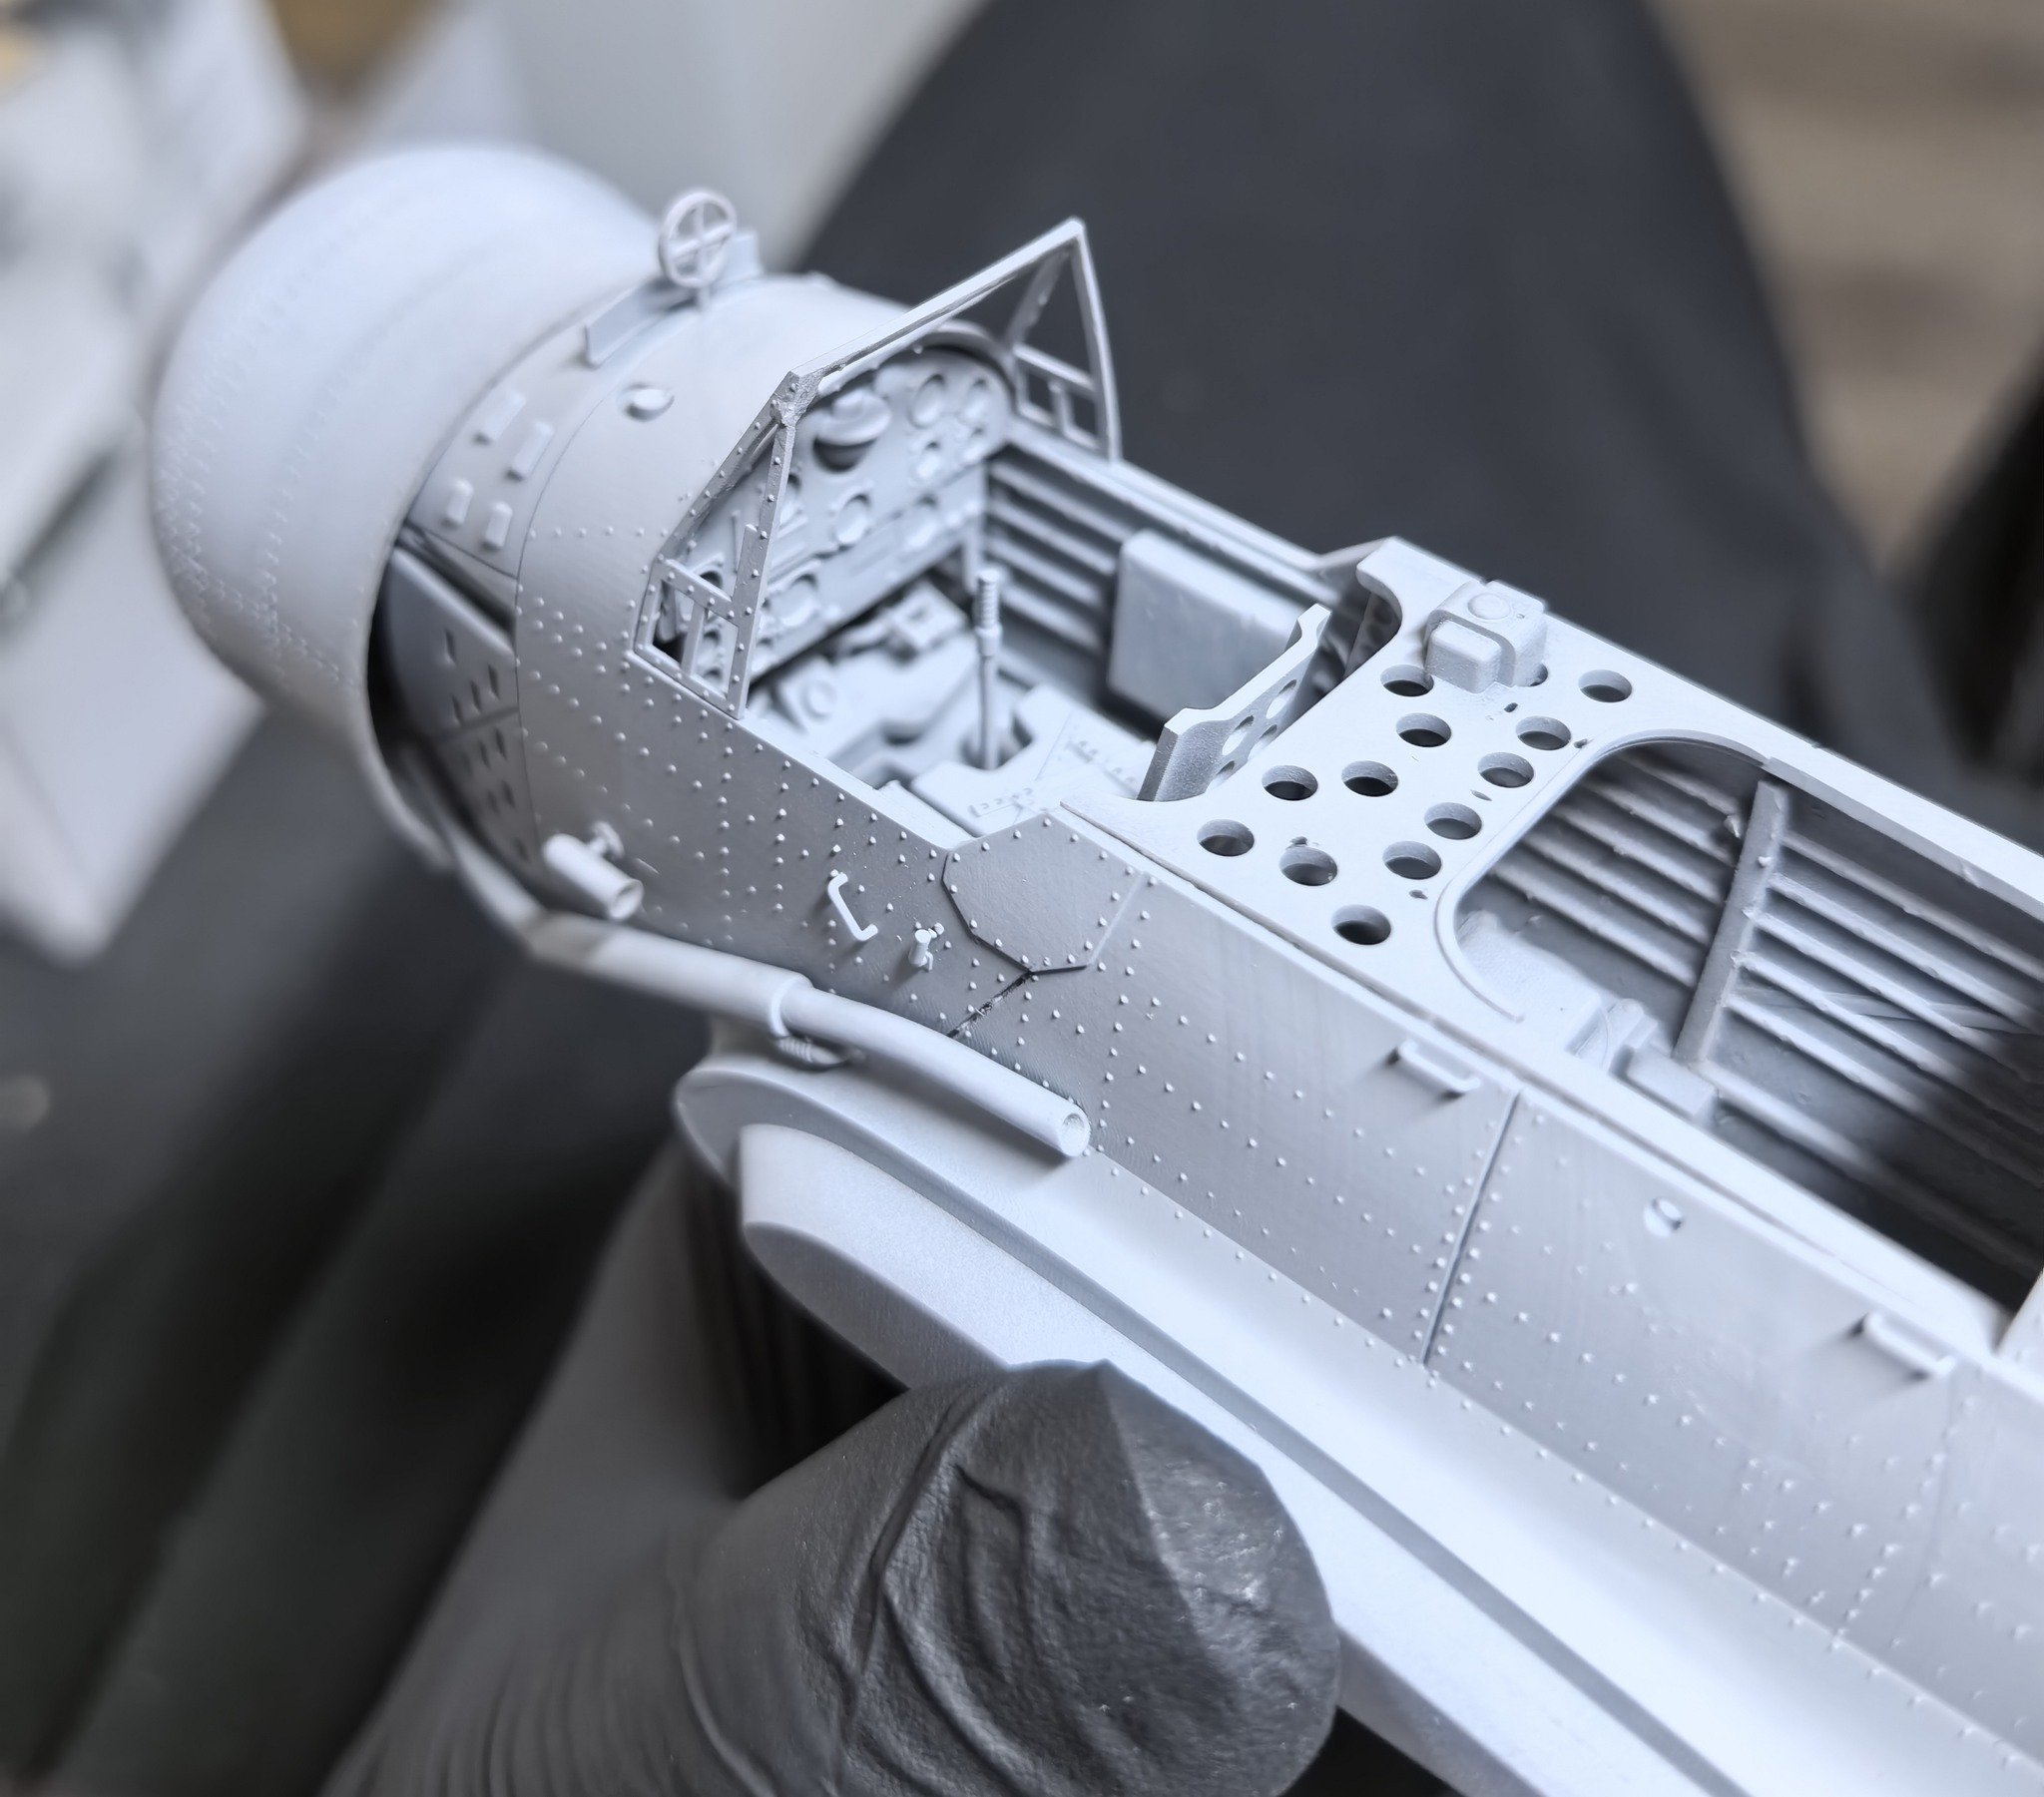
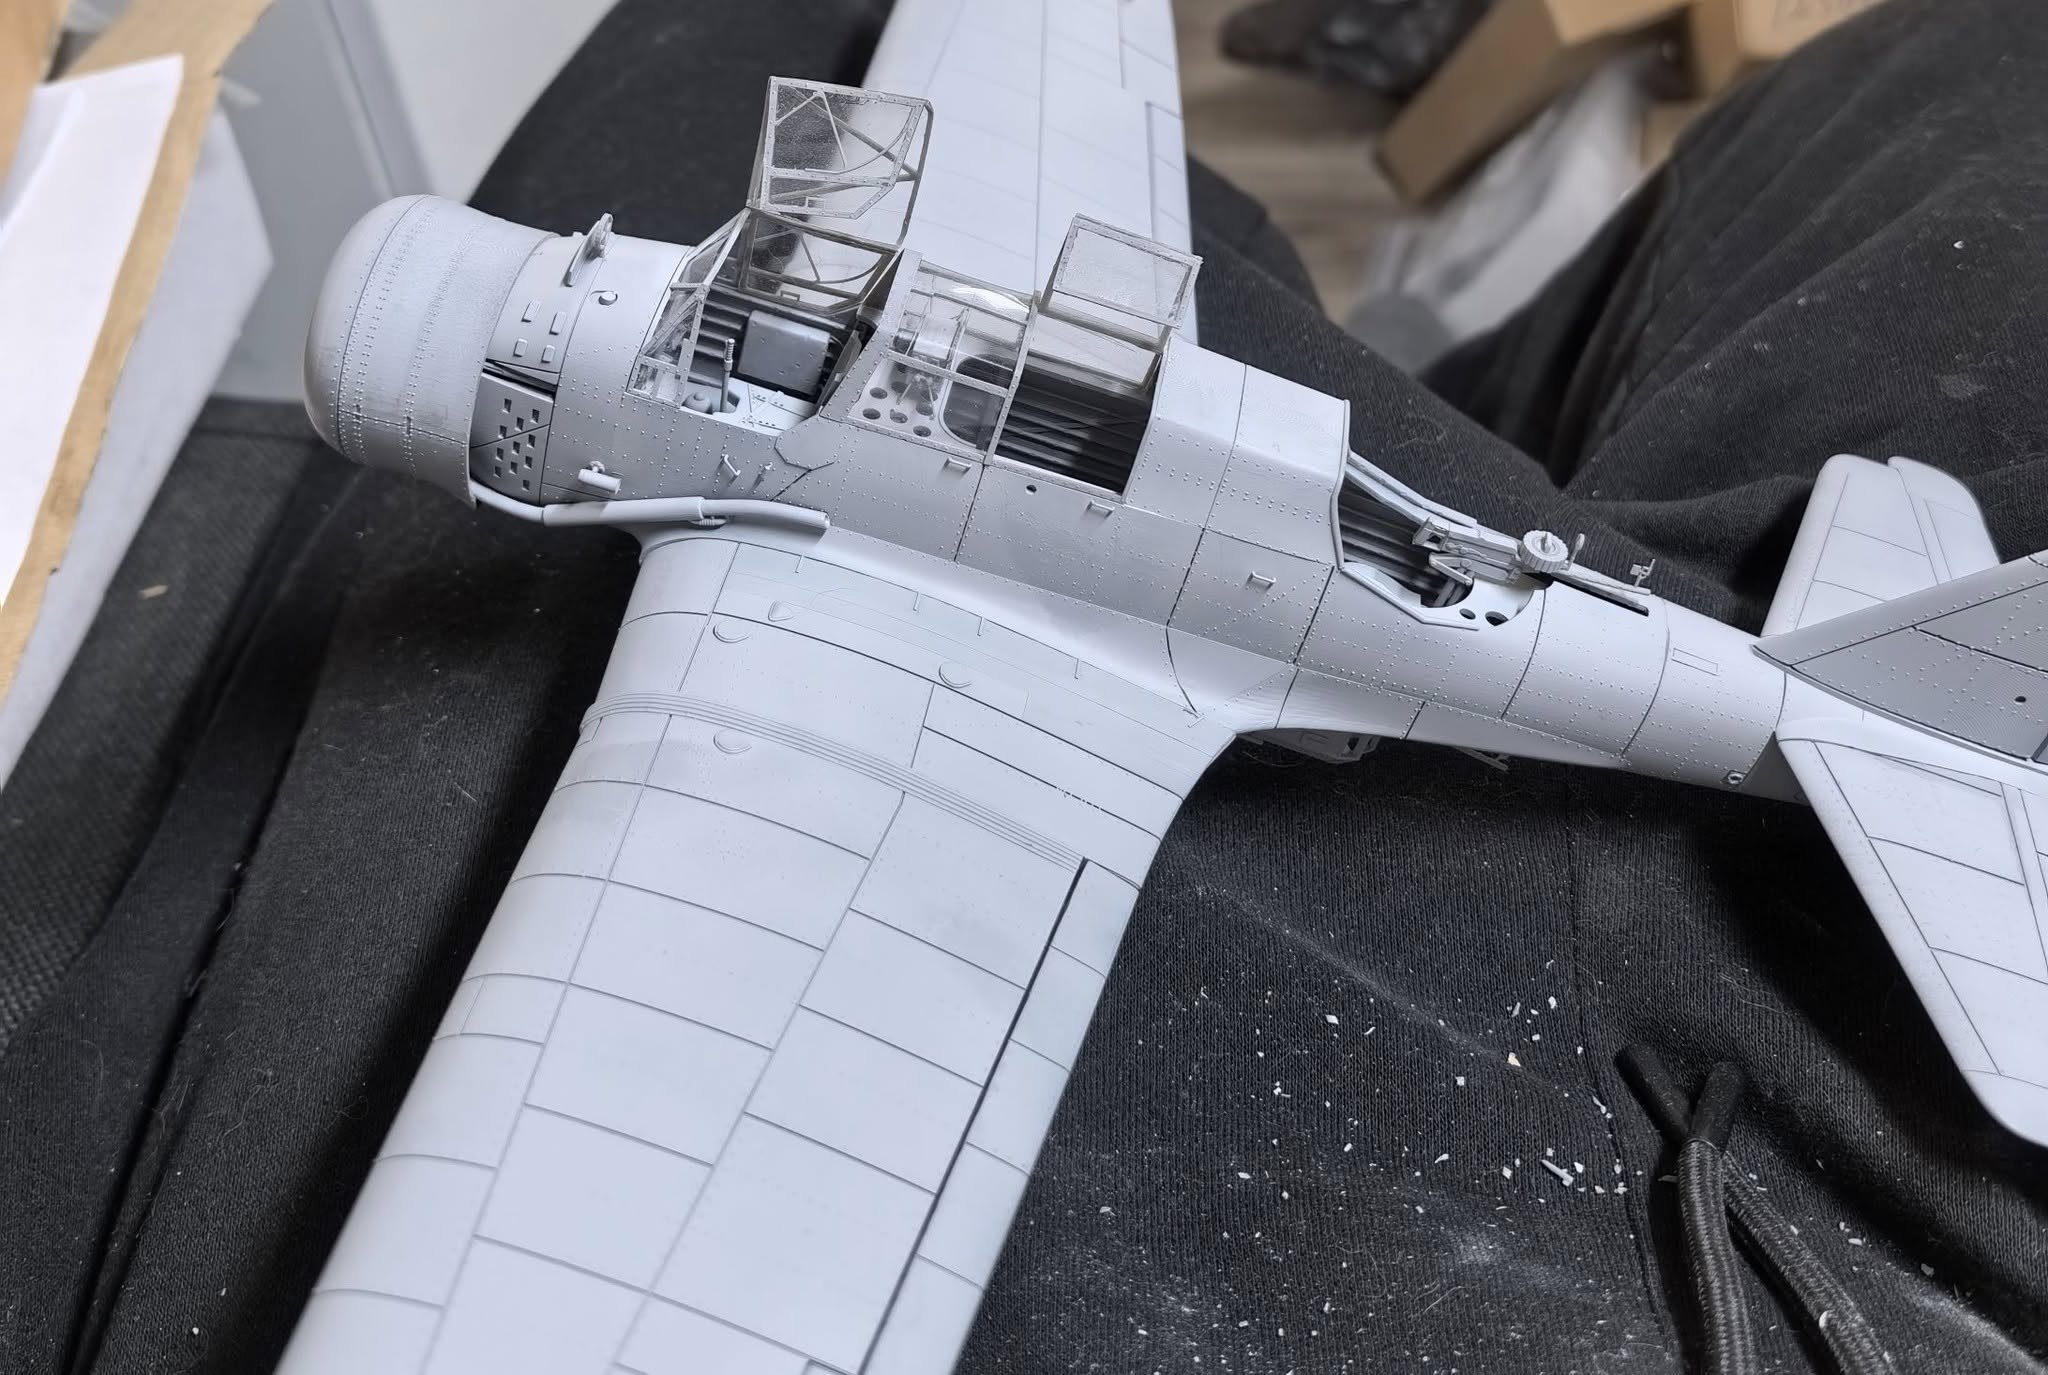
1/32 Curtiss SC-1 Seahawk
Fran replied to BlrwestSiR's topic in LSM 1/35 and Larger Work In Progress
Nice looking model kit! nad really nice work... Sorry to ask, but on those first pictures, how many WIP do you have on the working table??? 😀 -
Hi guys.. I will also join in as all others years. As for the gift, I will enter with the 1:32 Eduard Me-109 E-1 https://www.scalemates.com/kits/eduard-3001-bf-109e-1--115282
-
wow!!! Really Love it Hubert!!!
-
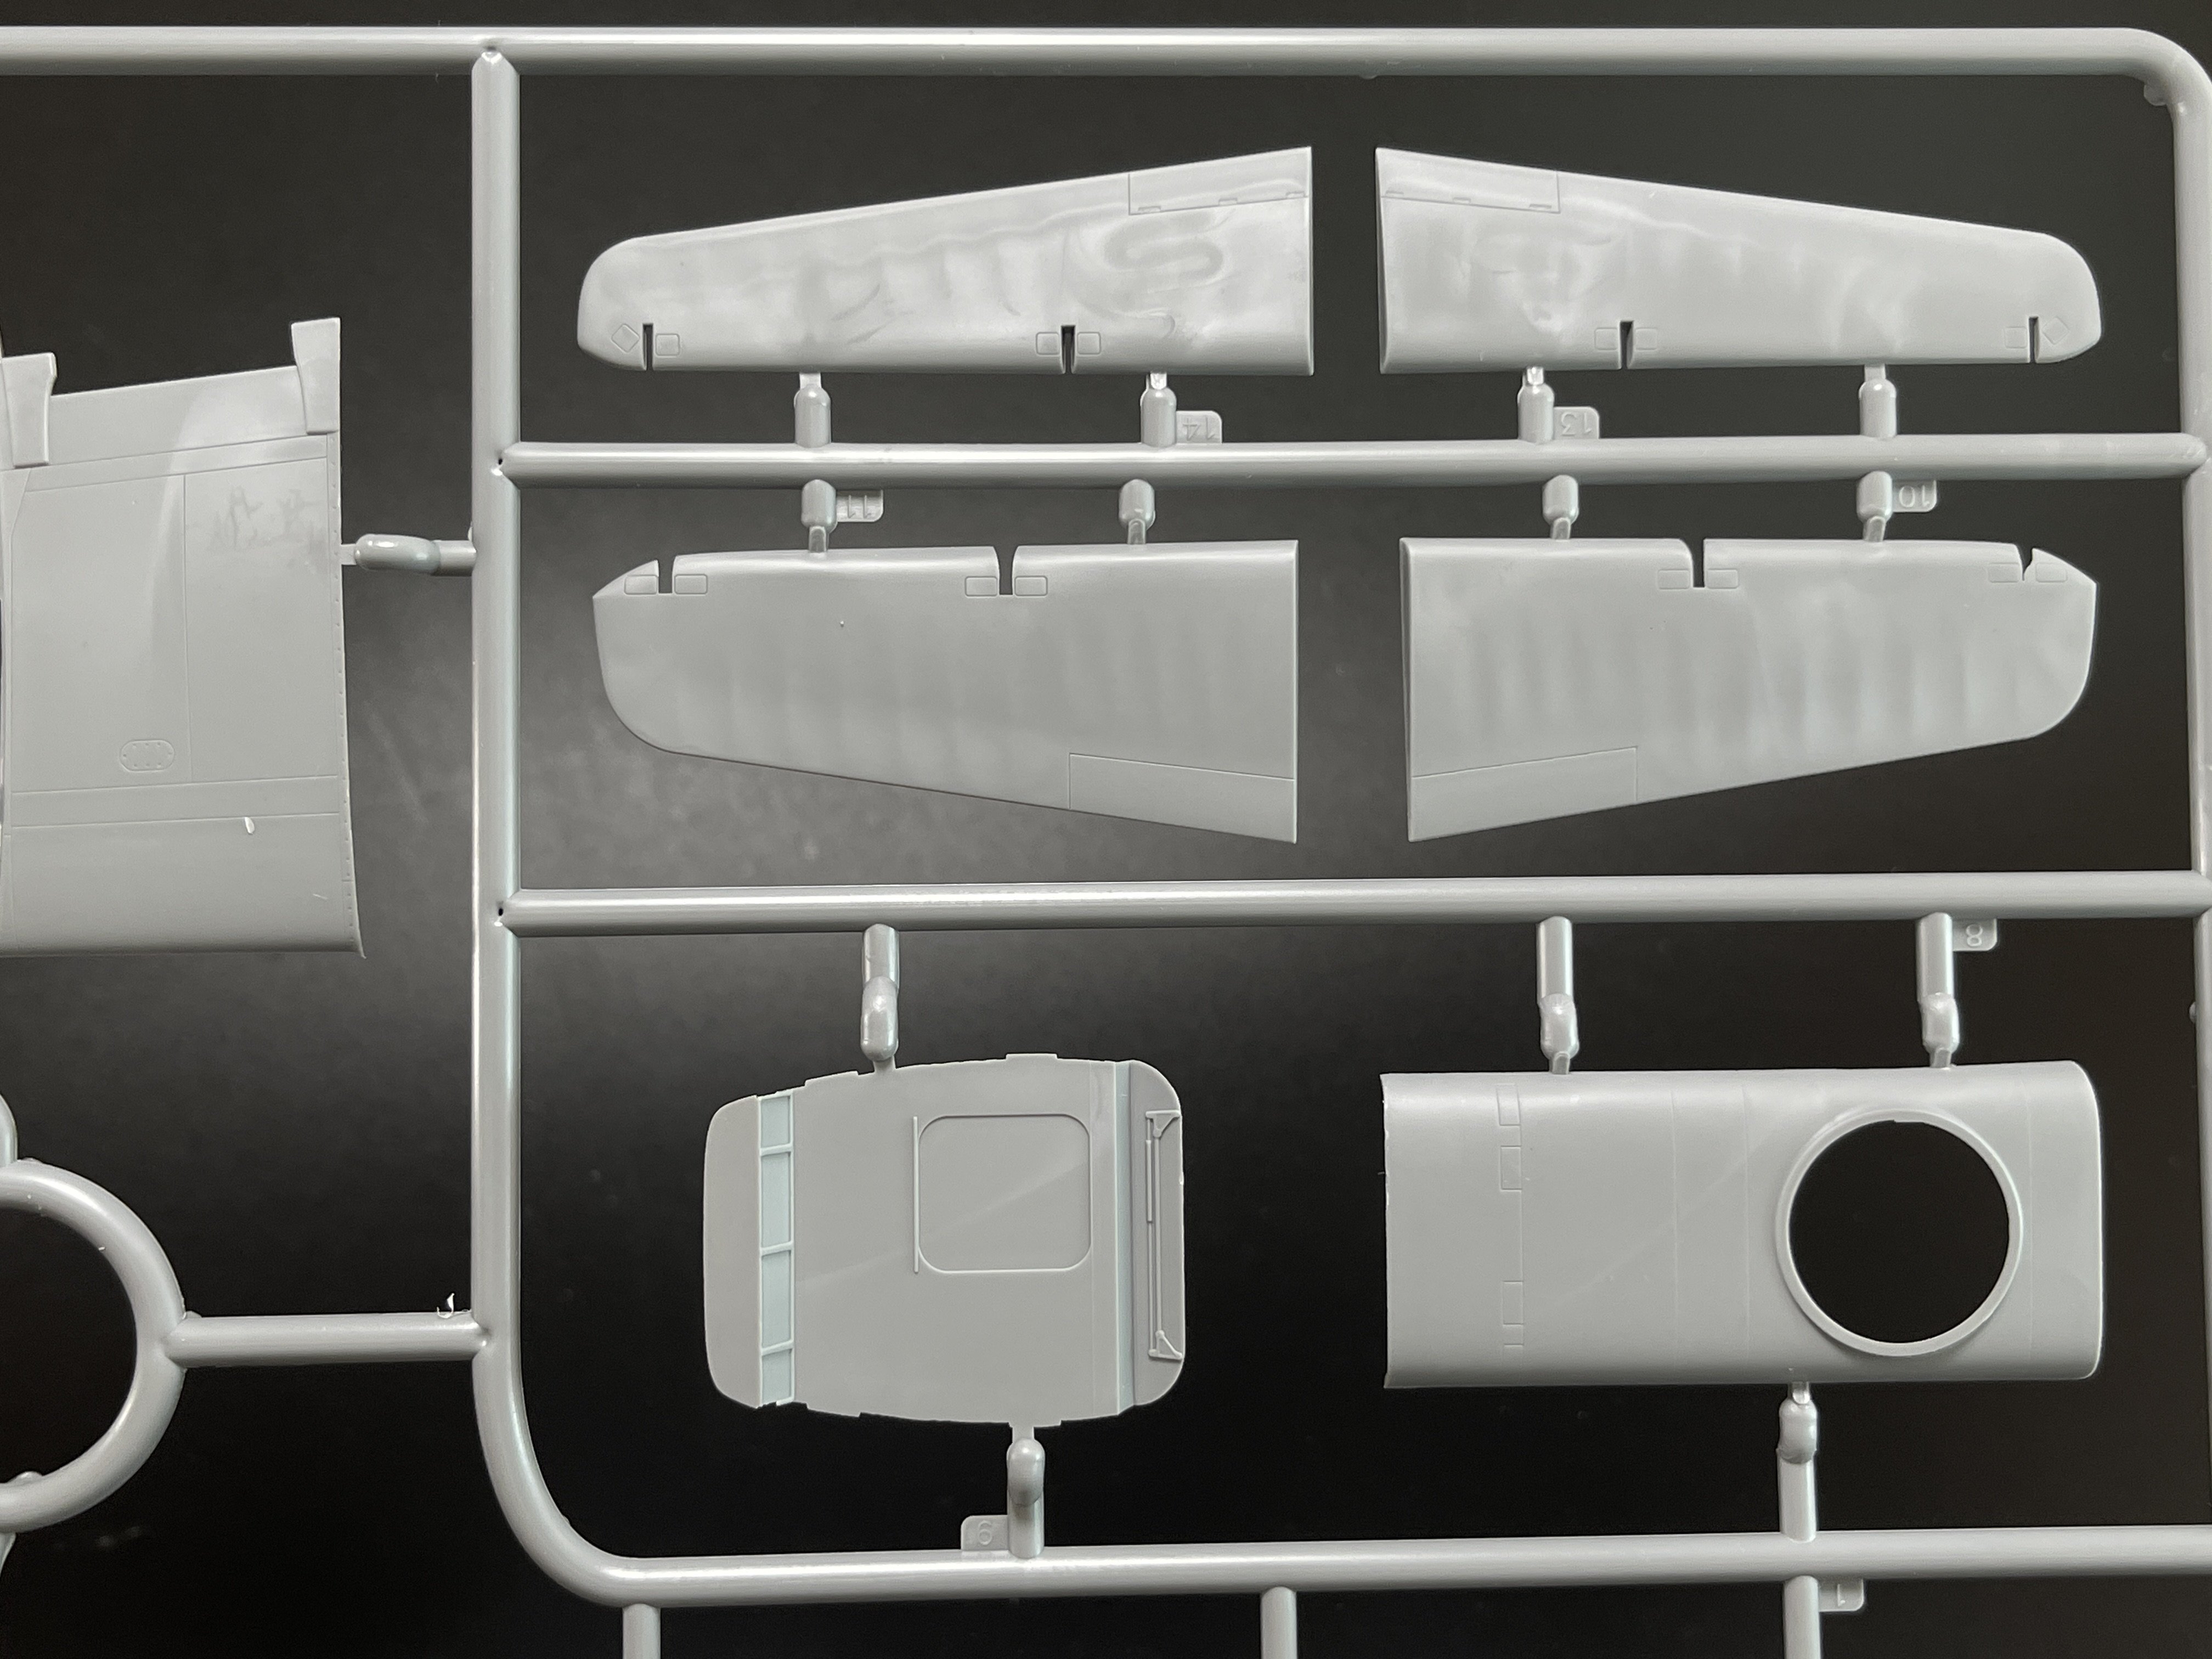
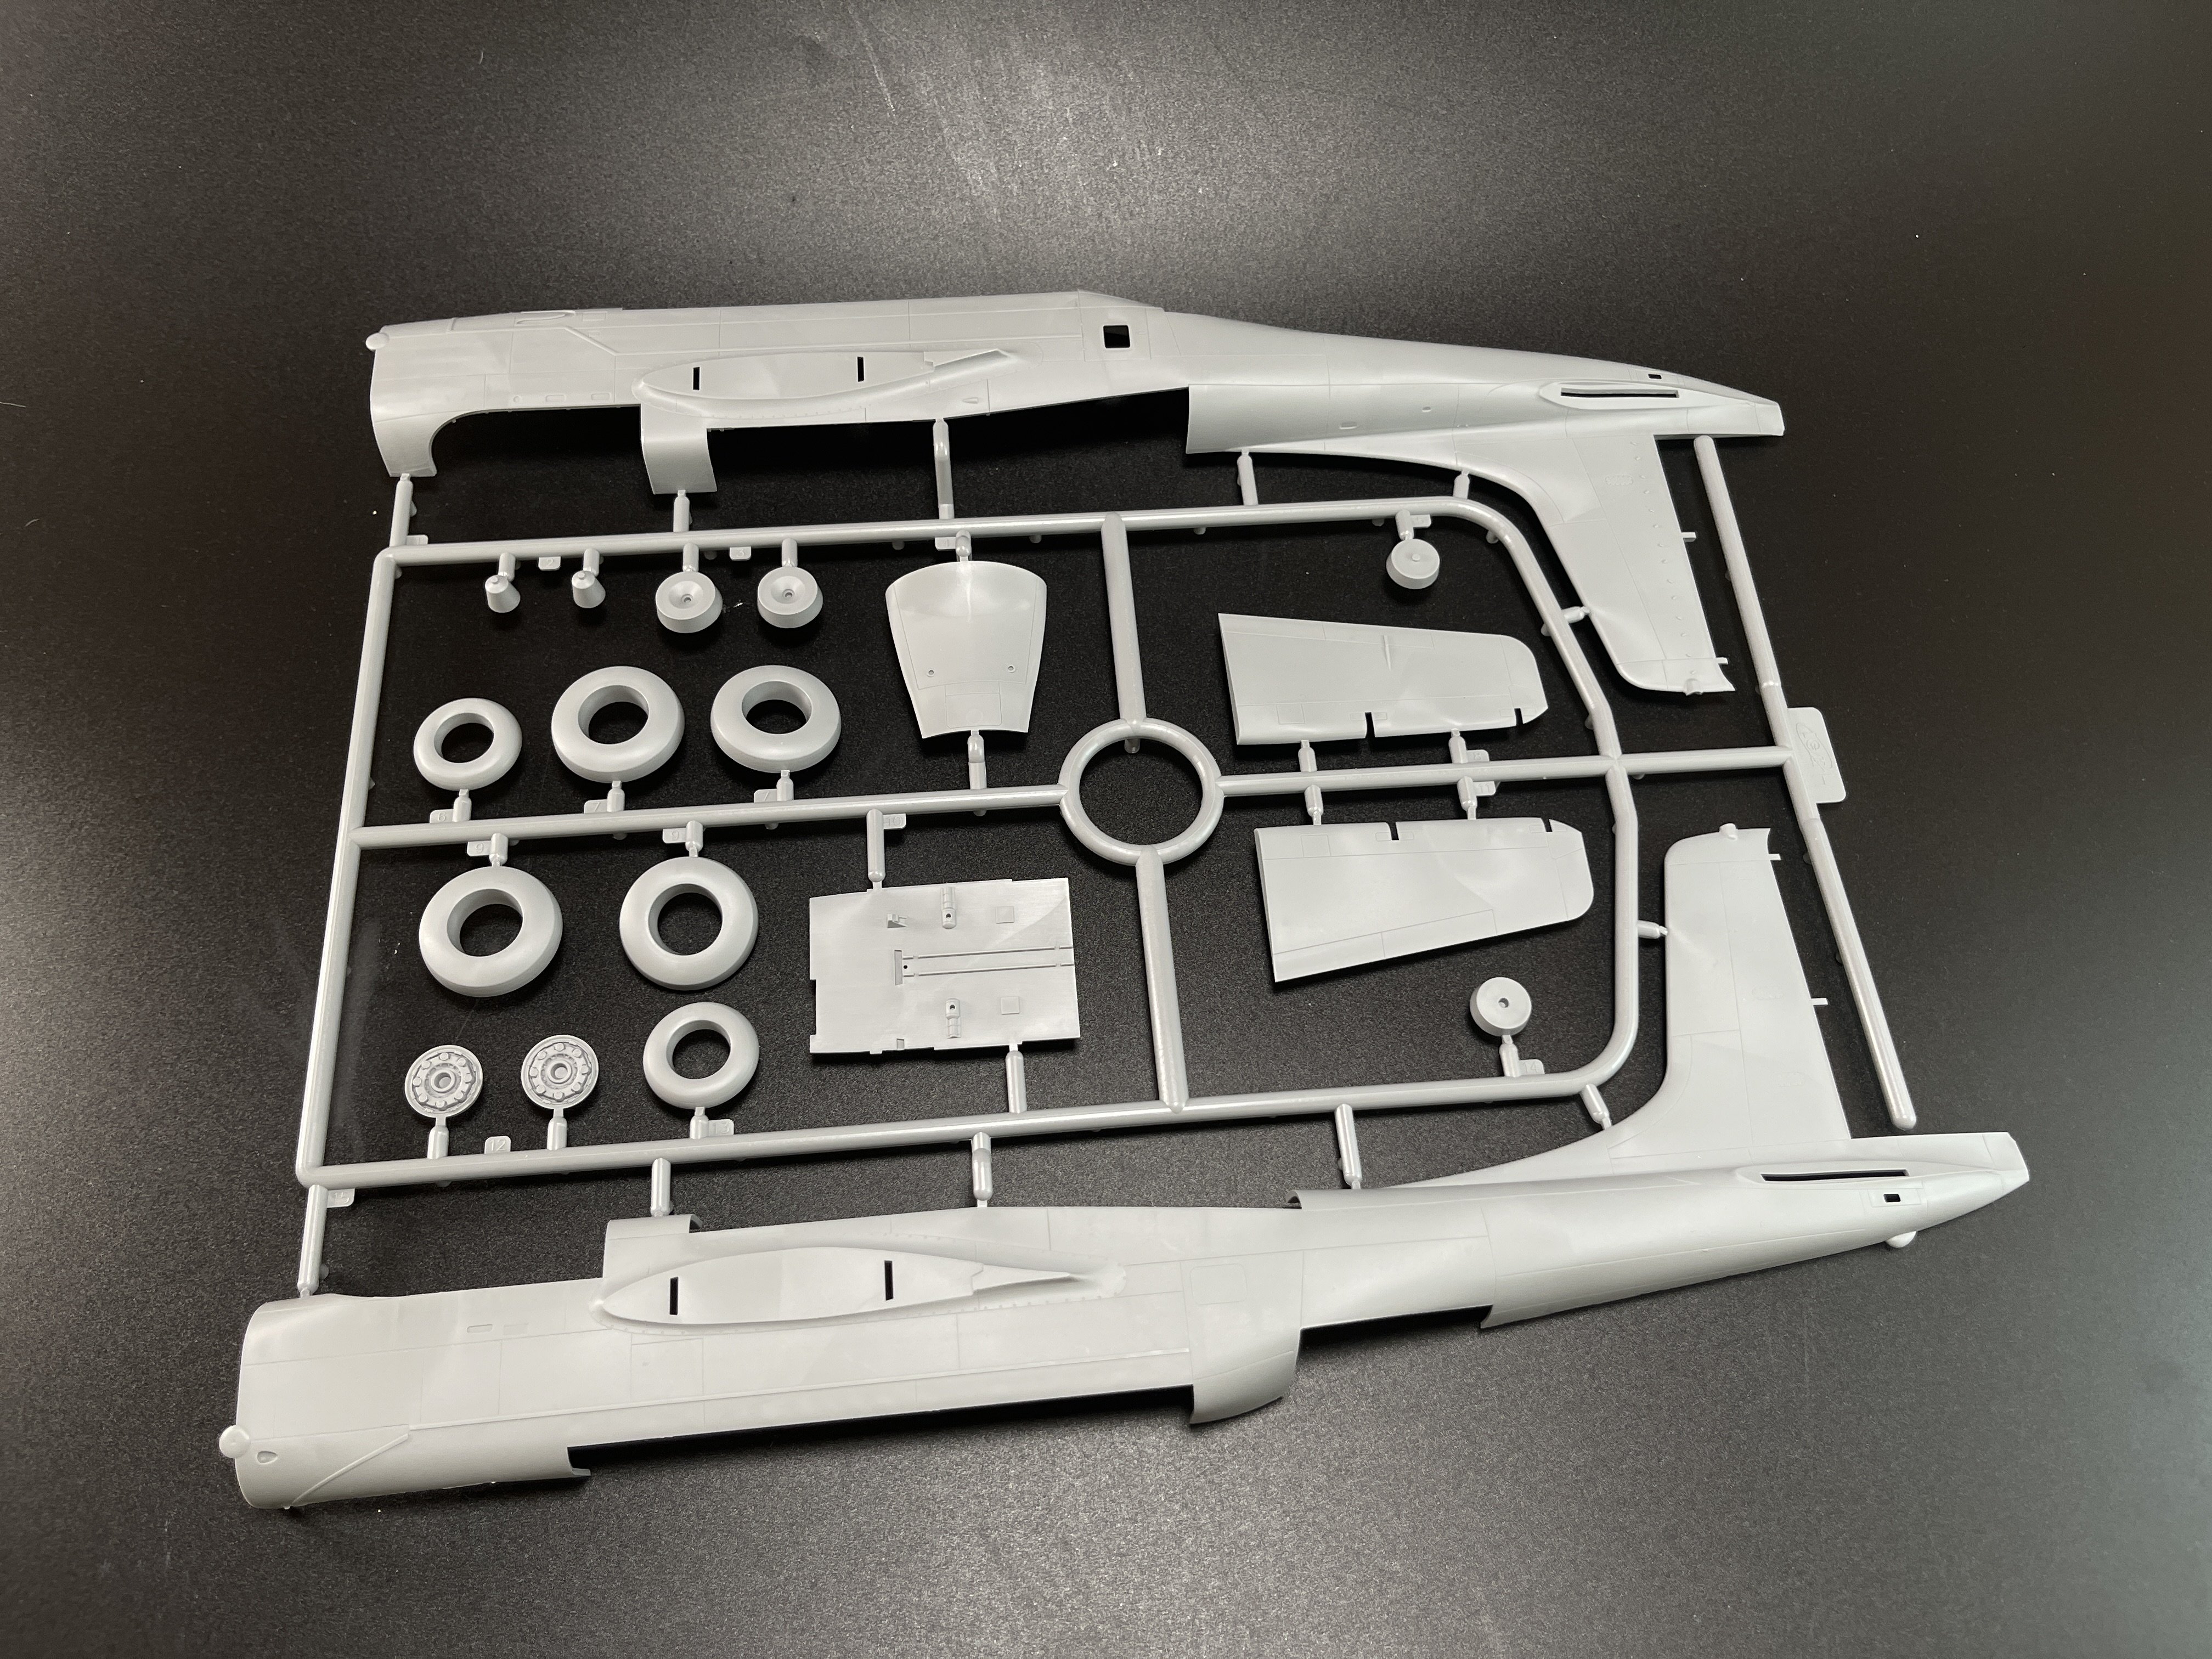
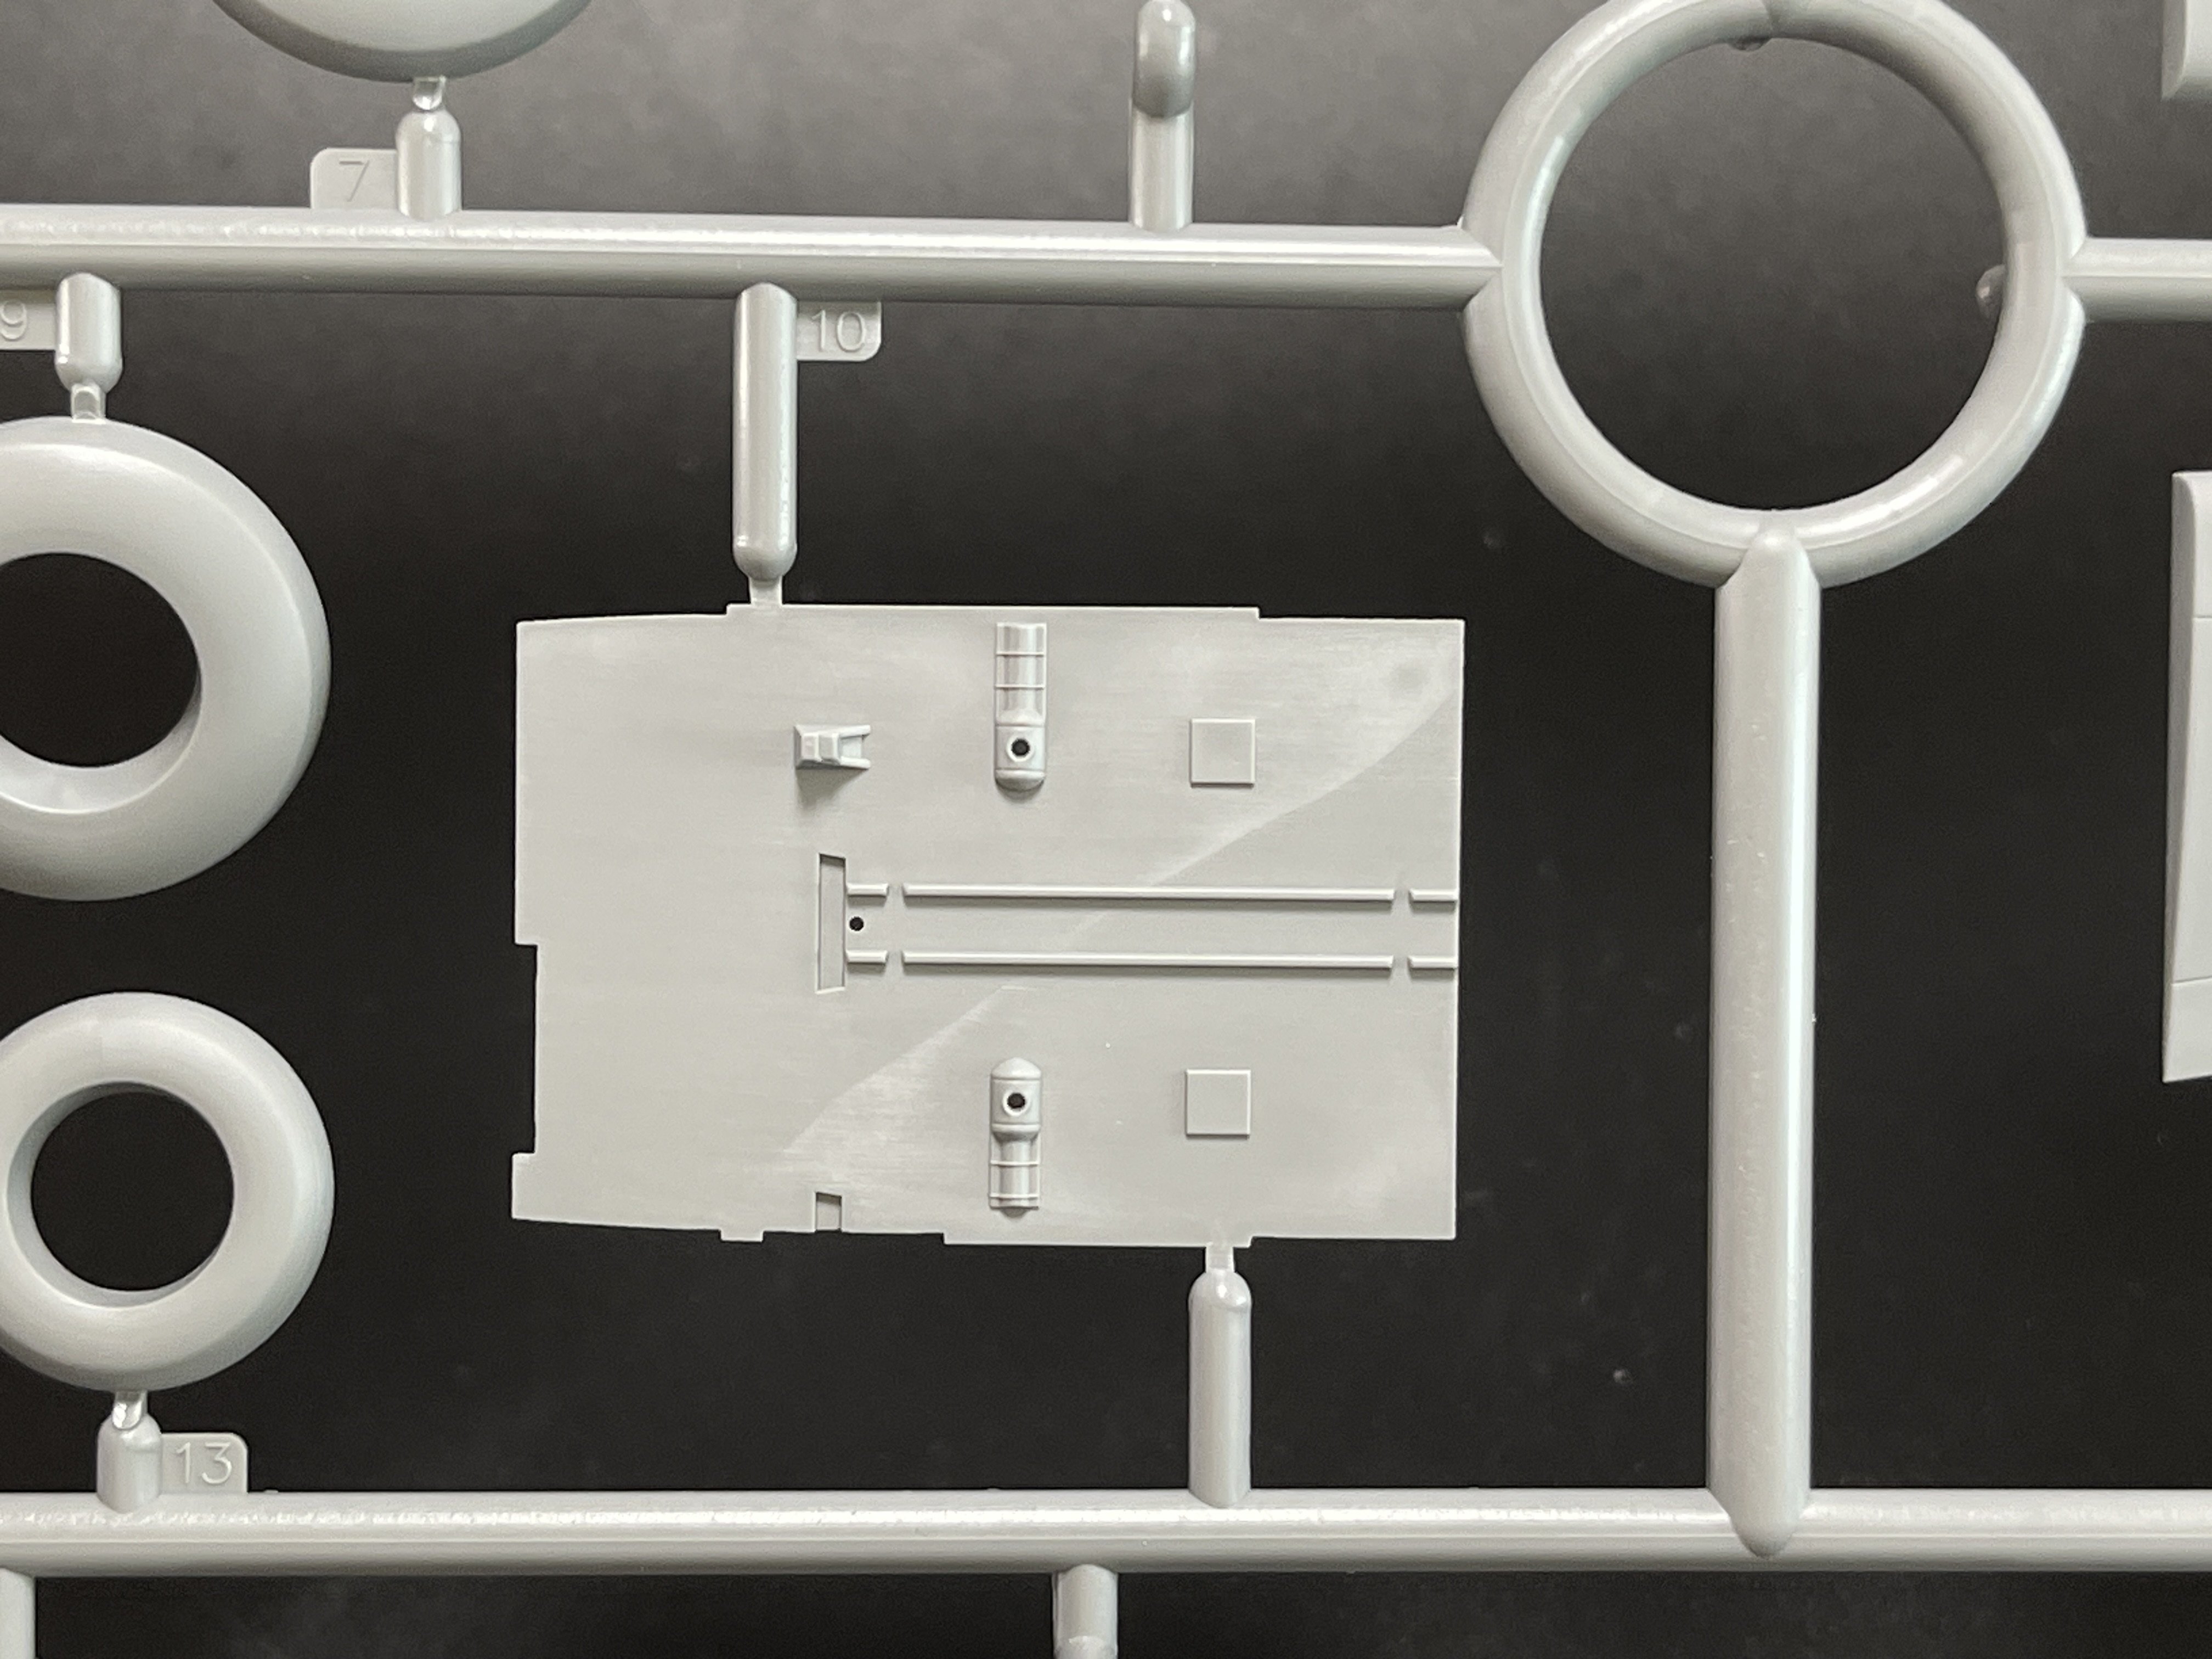
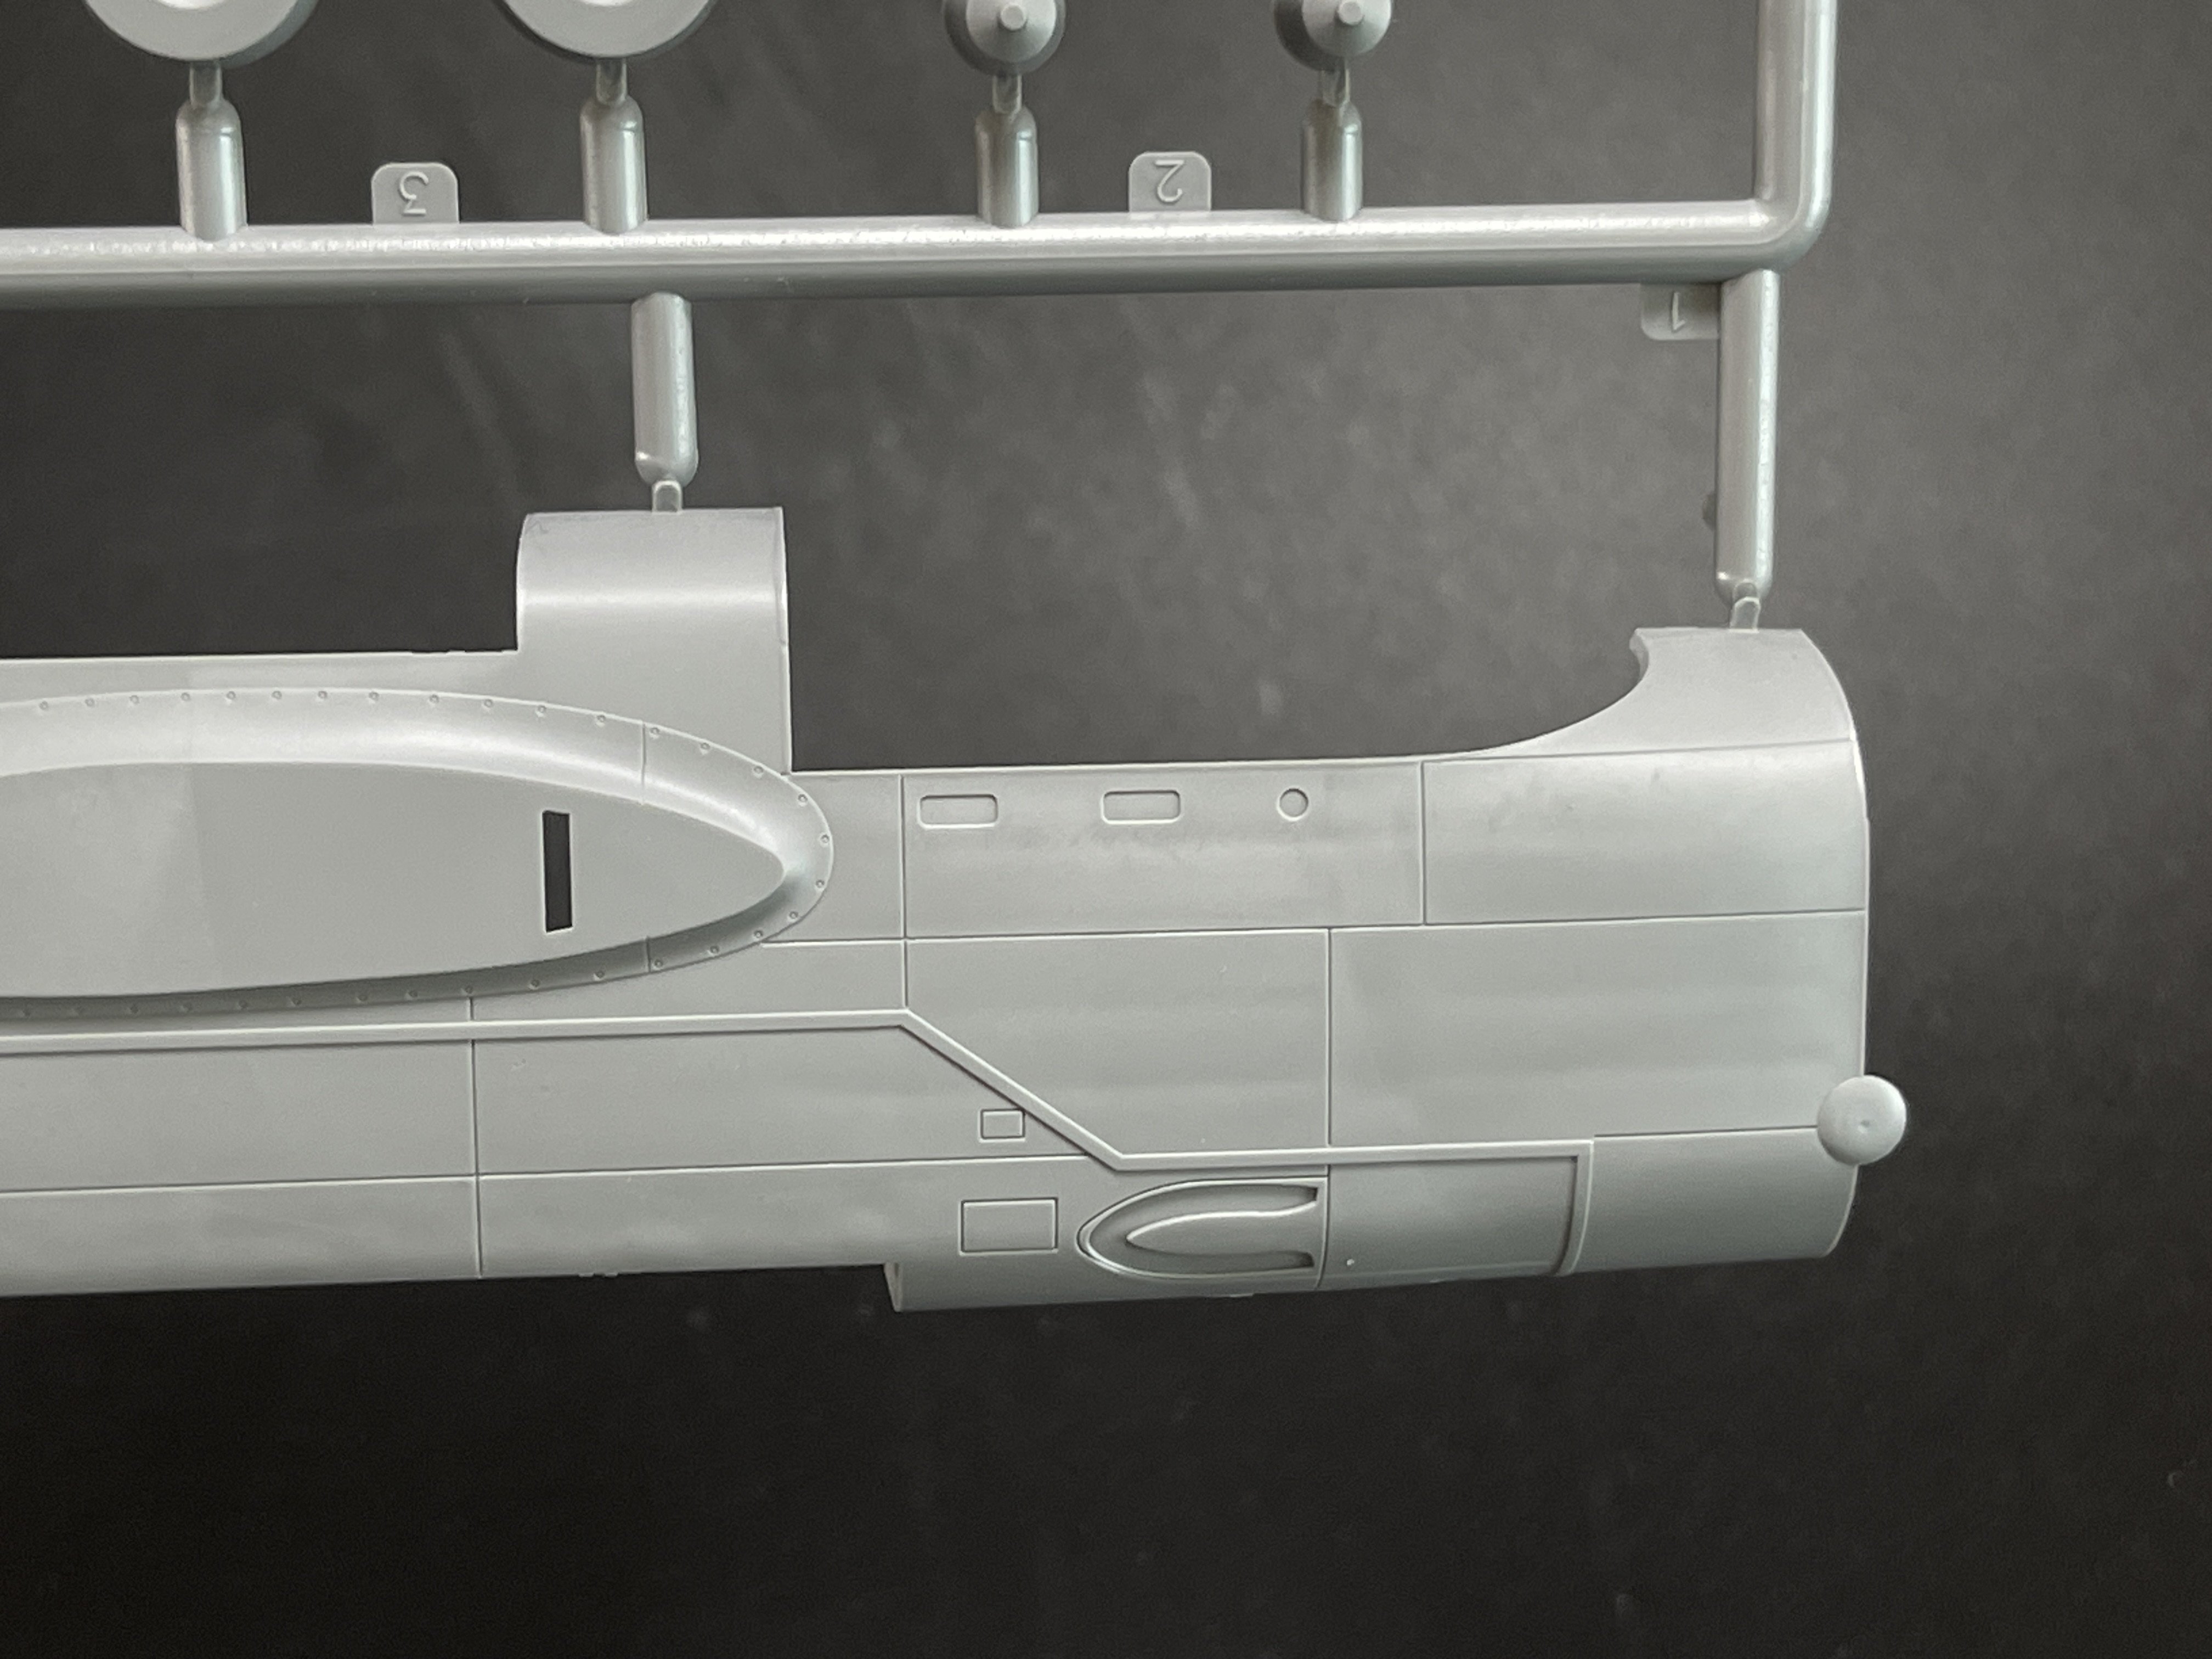
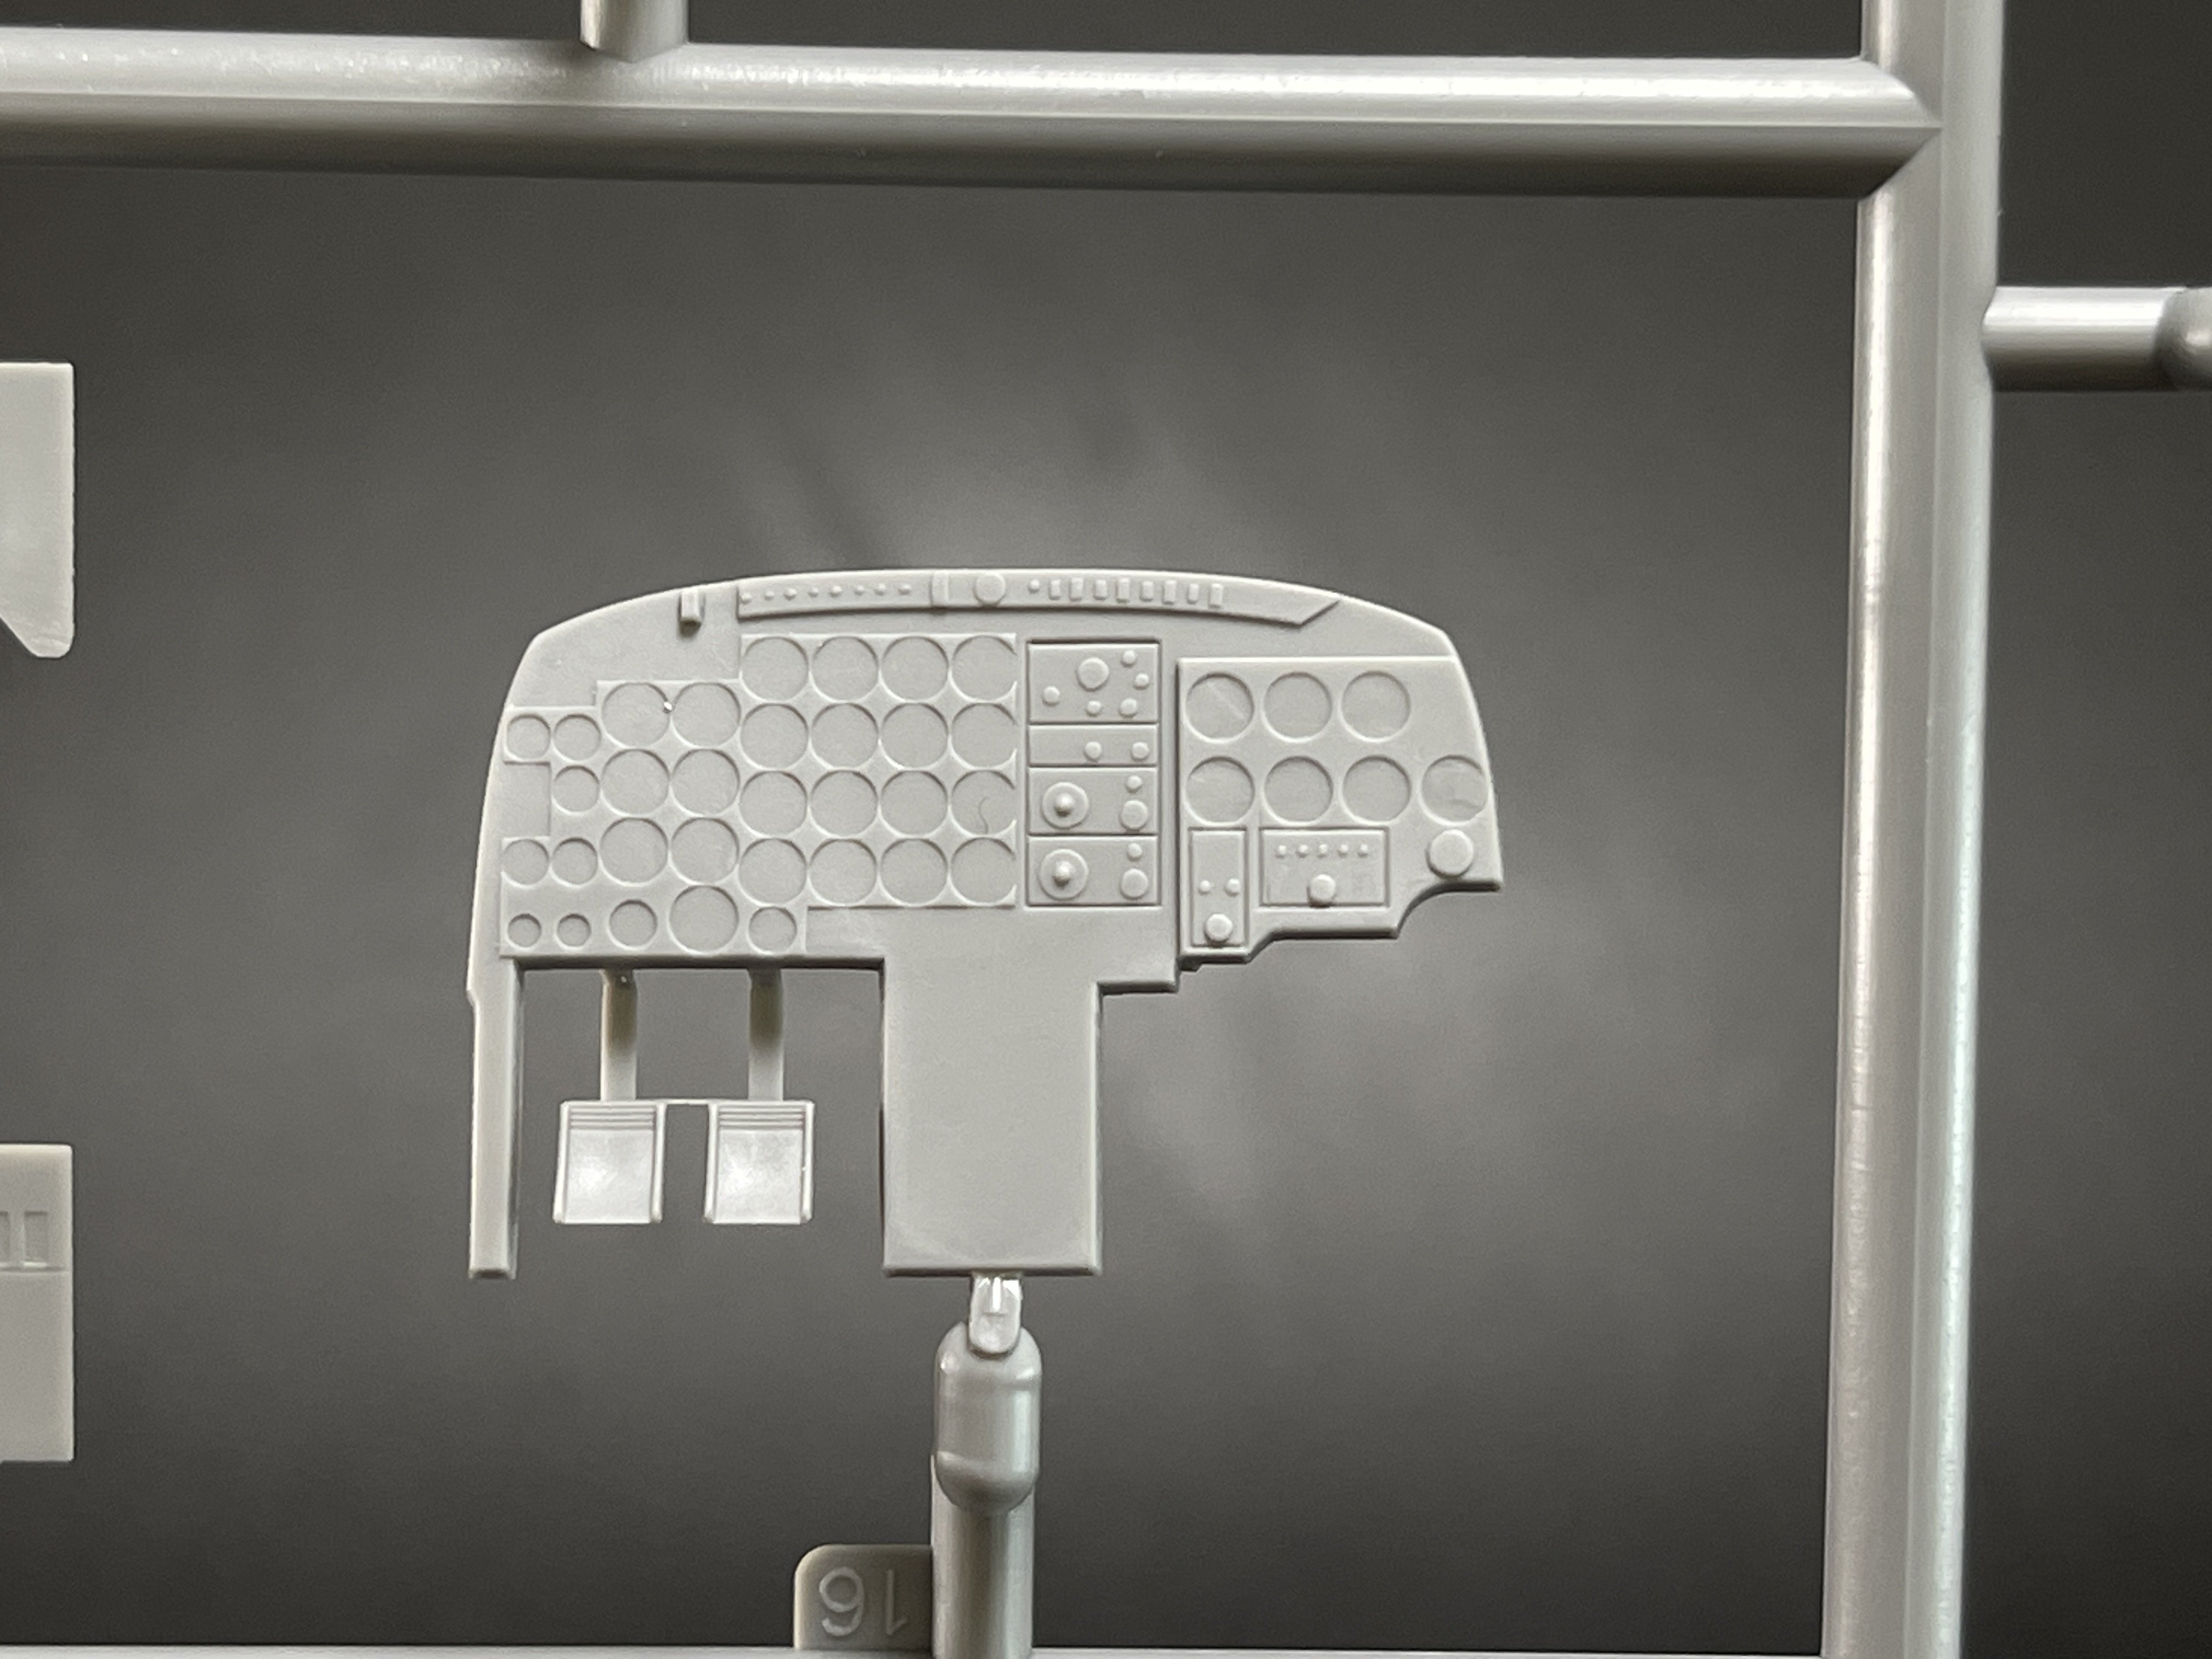
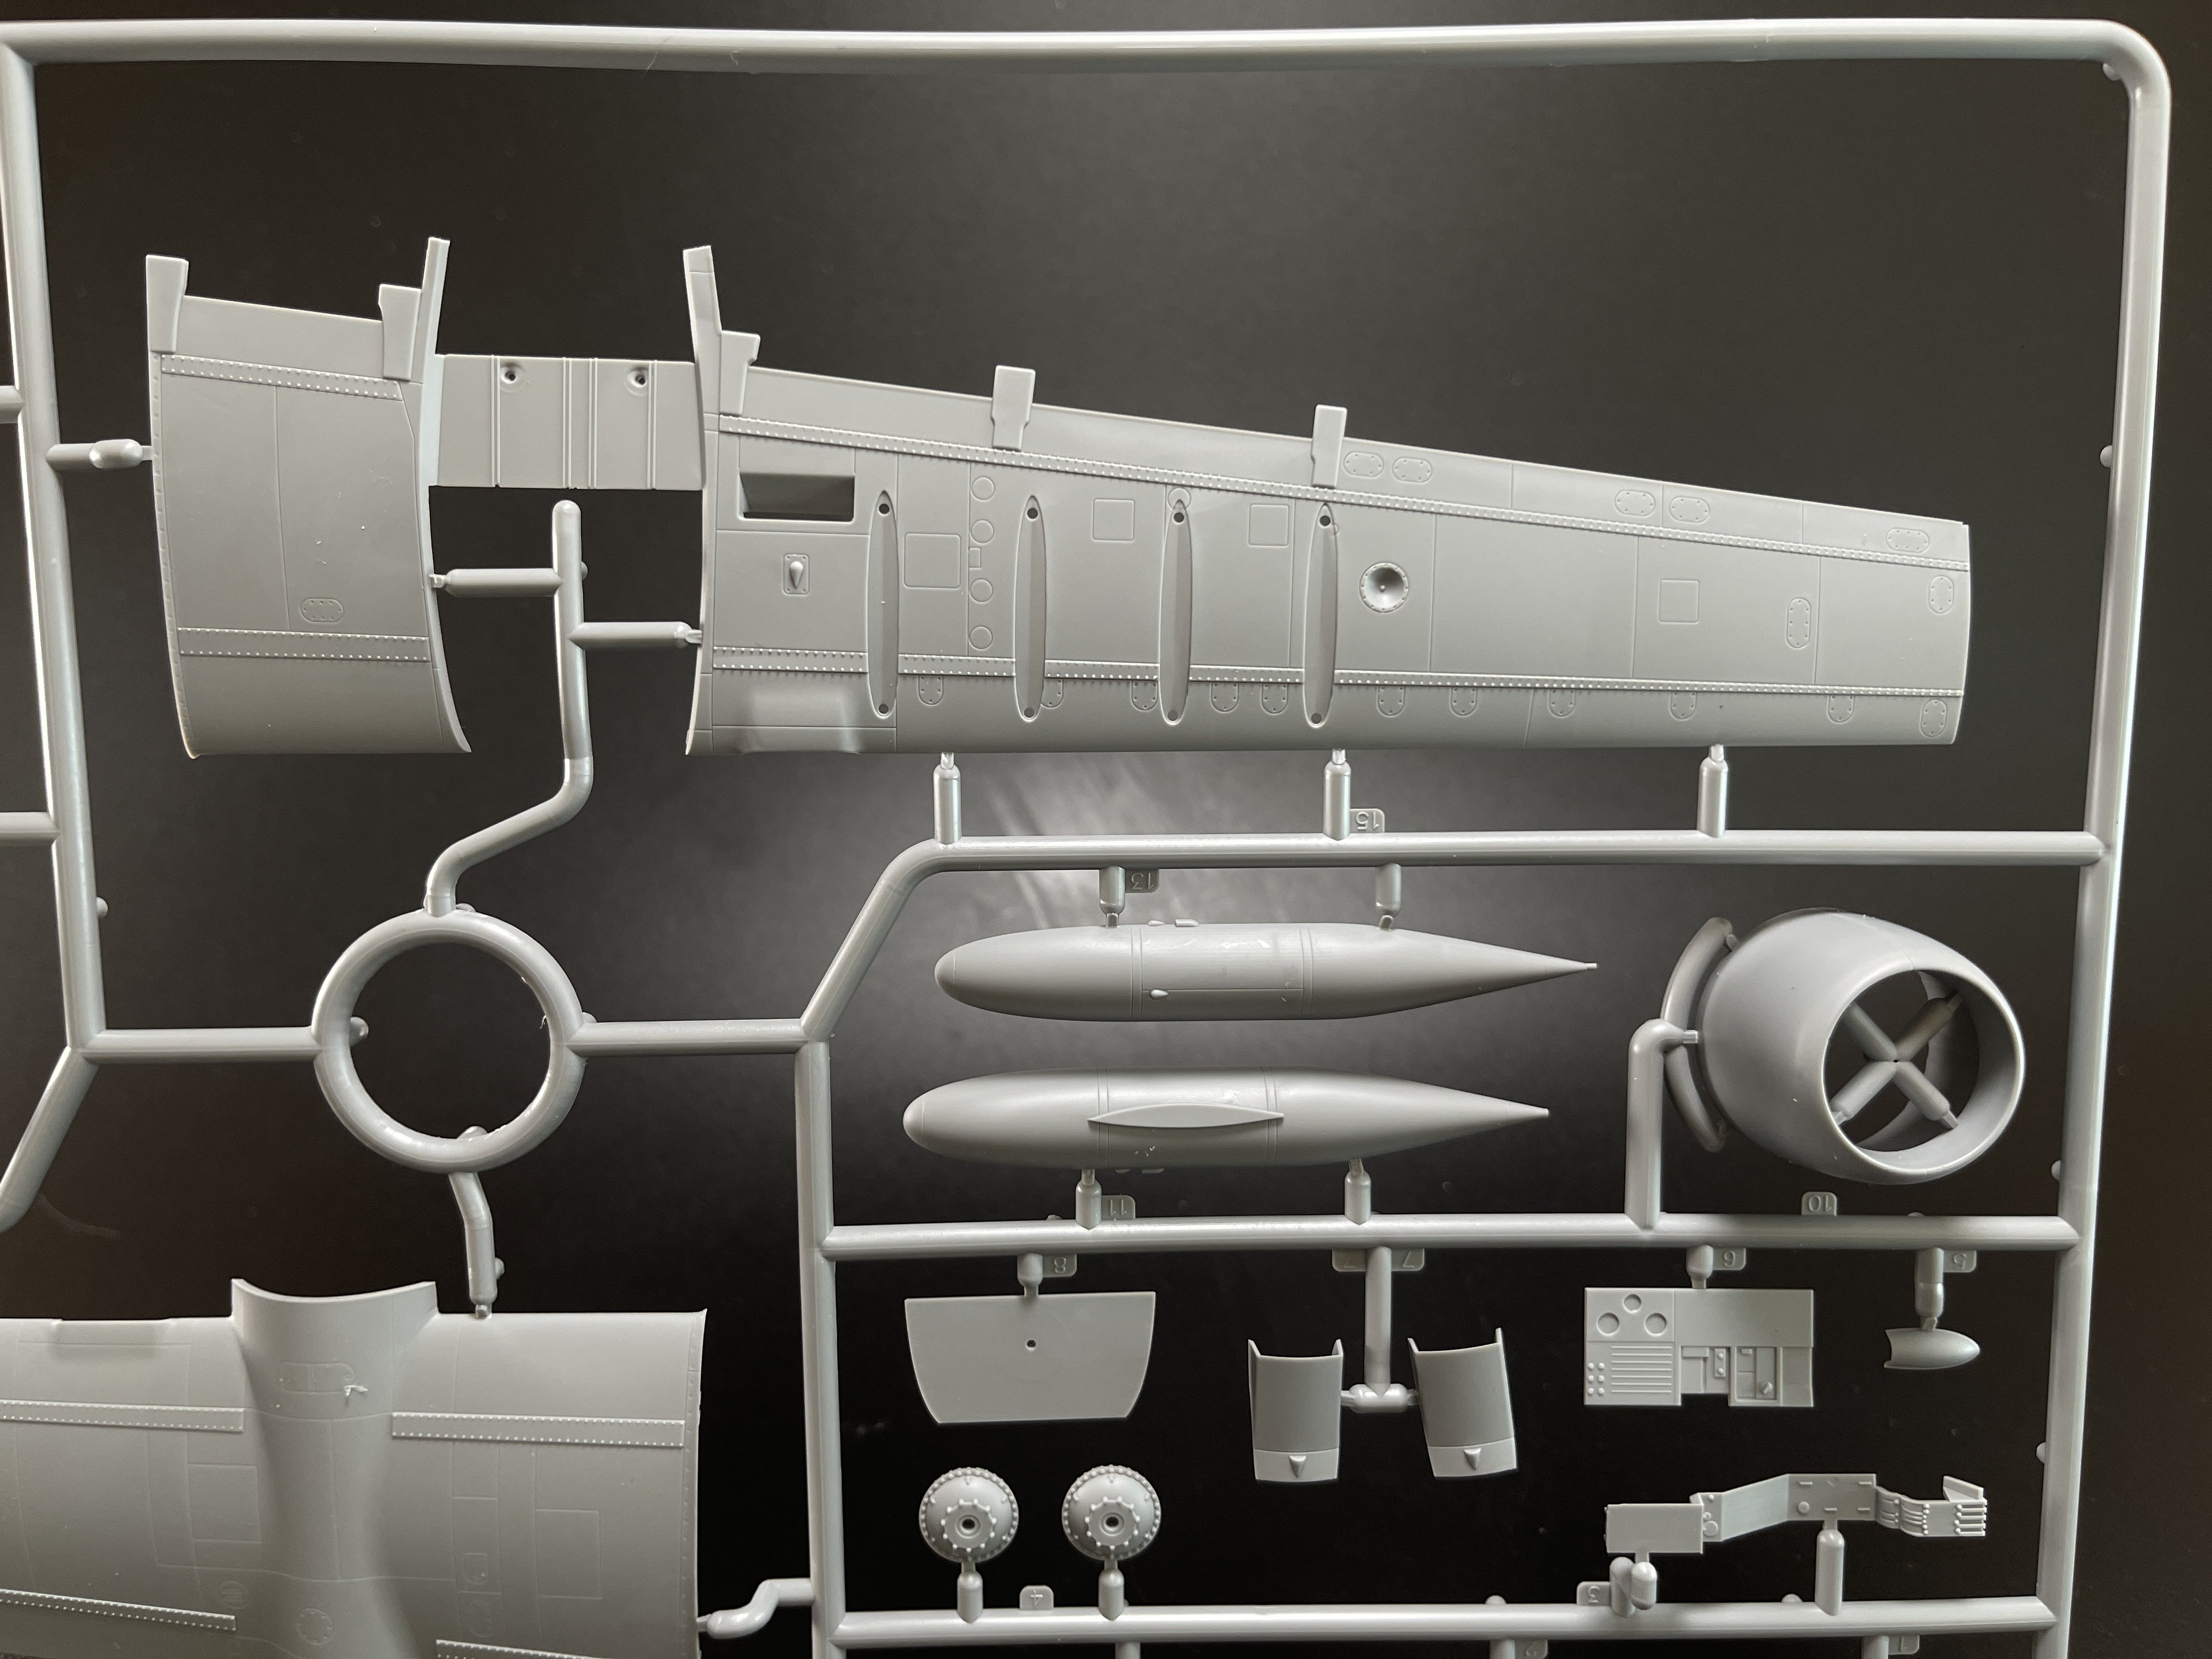
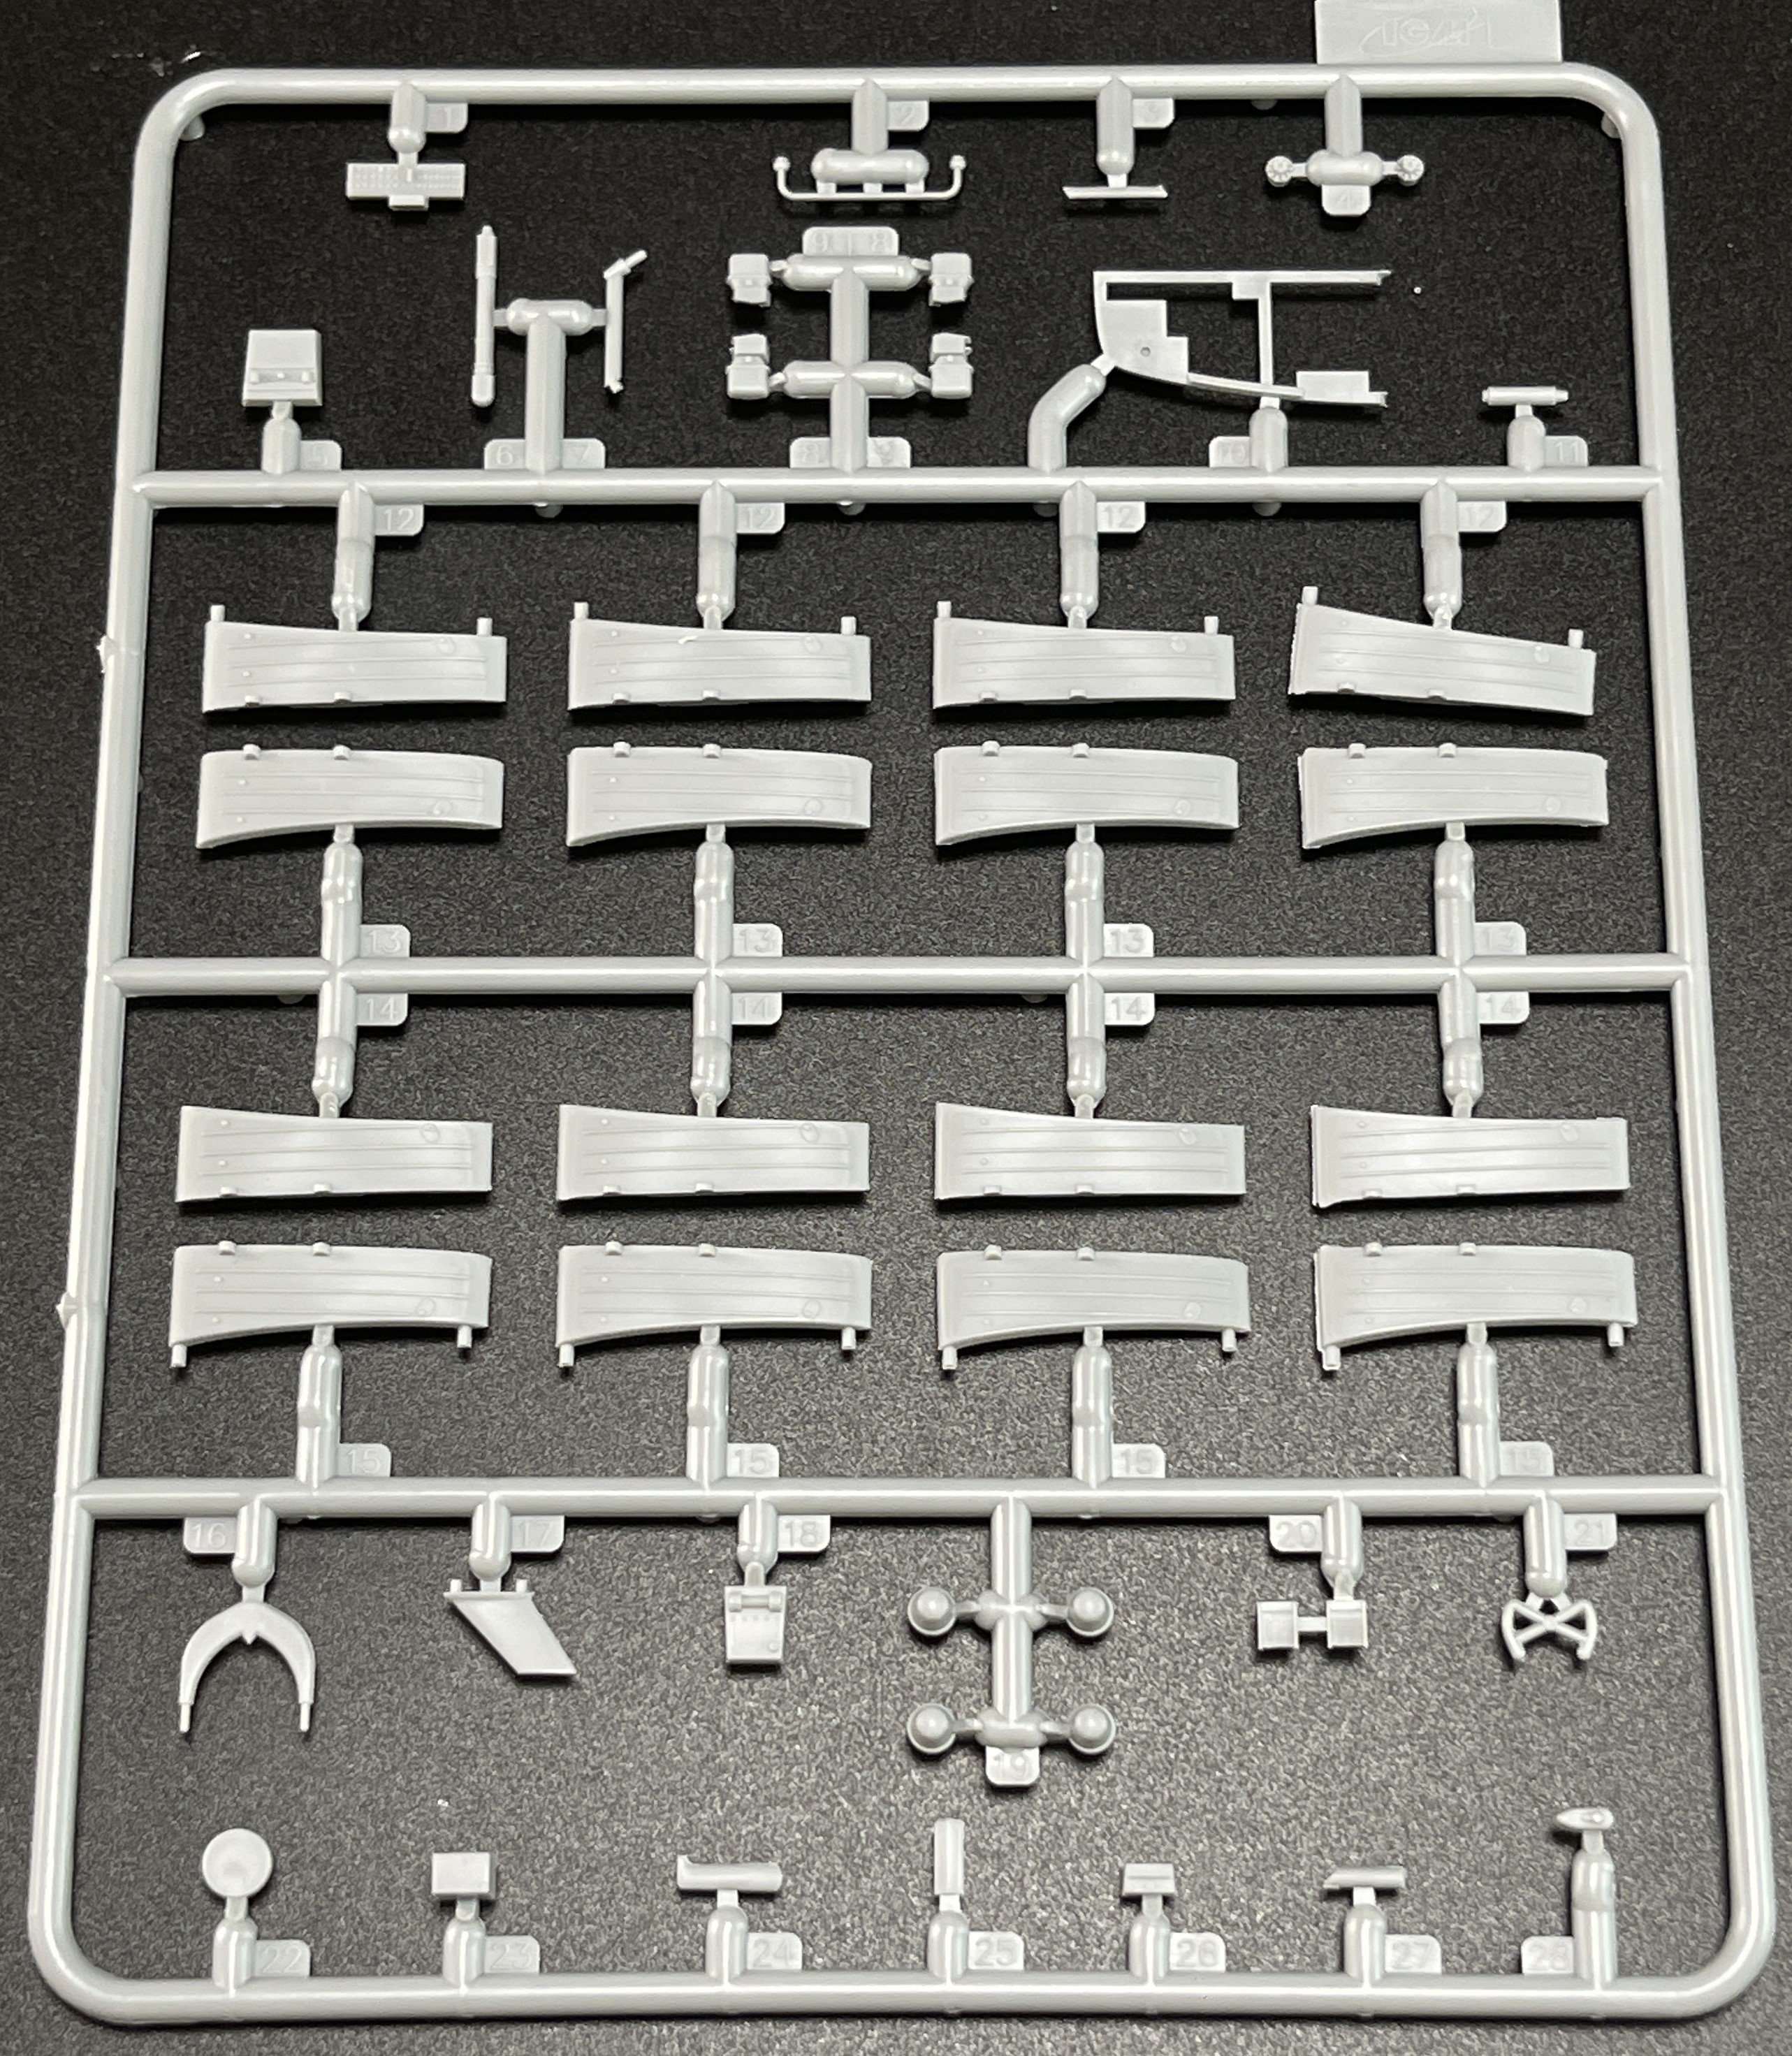
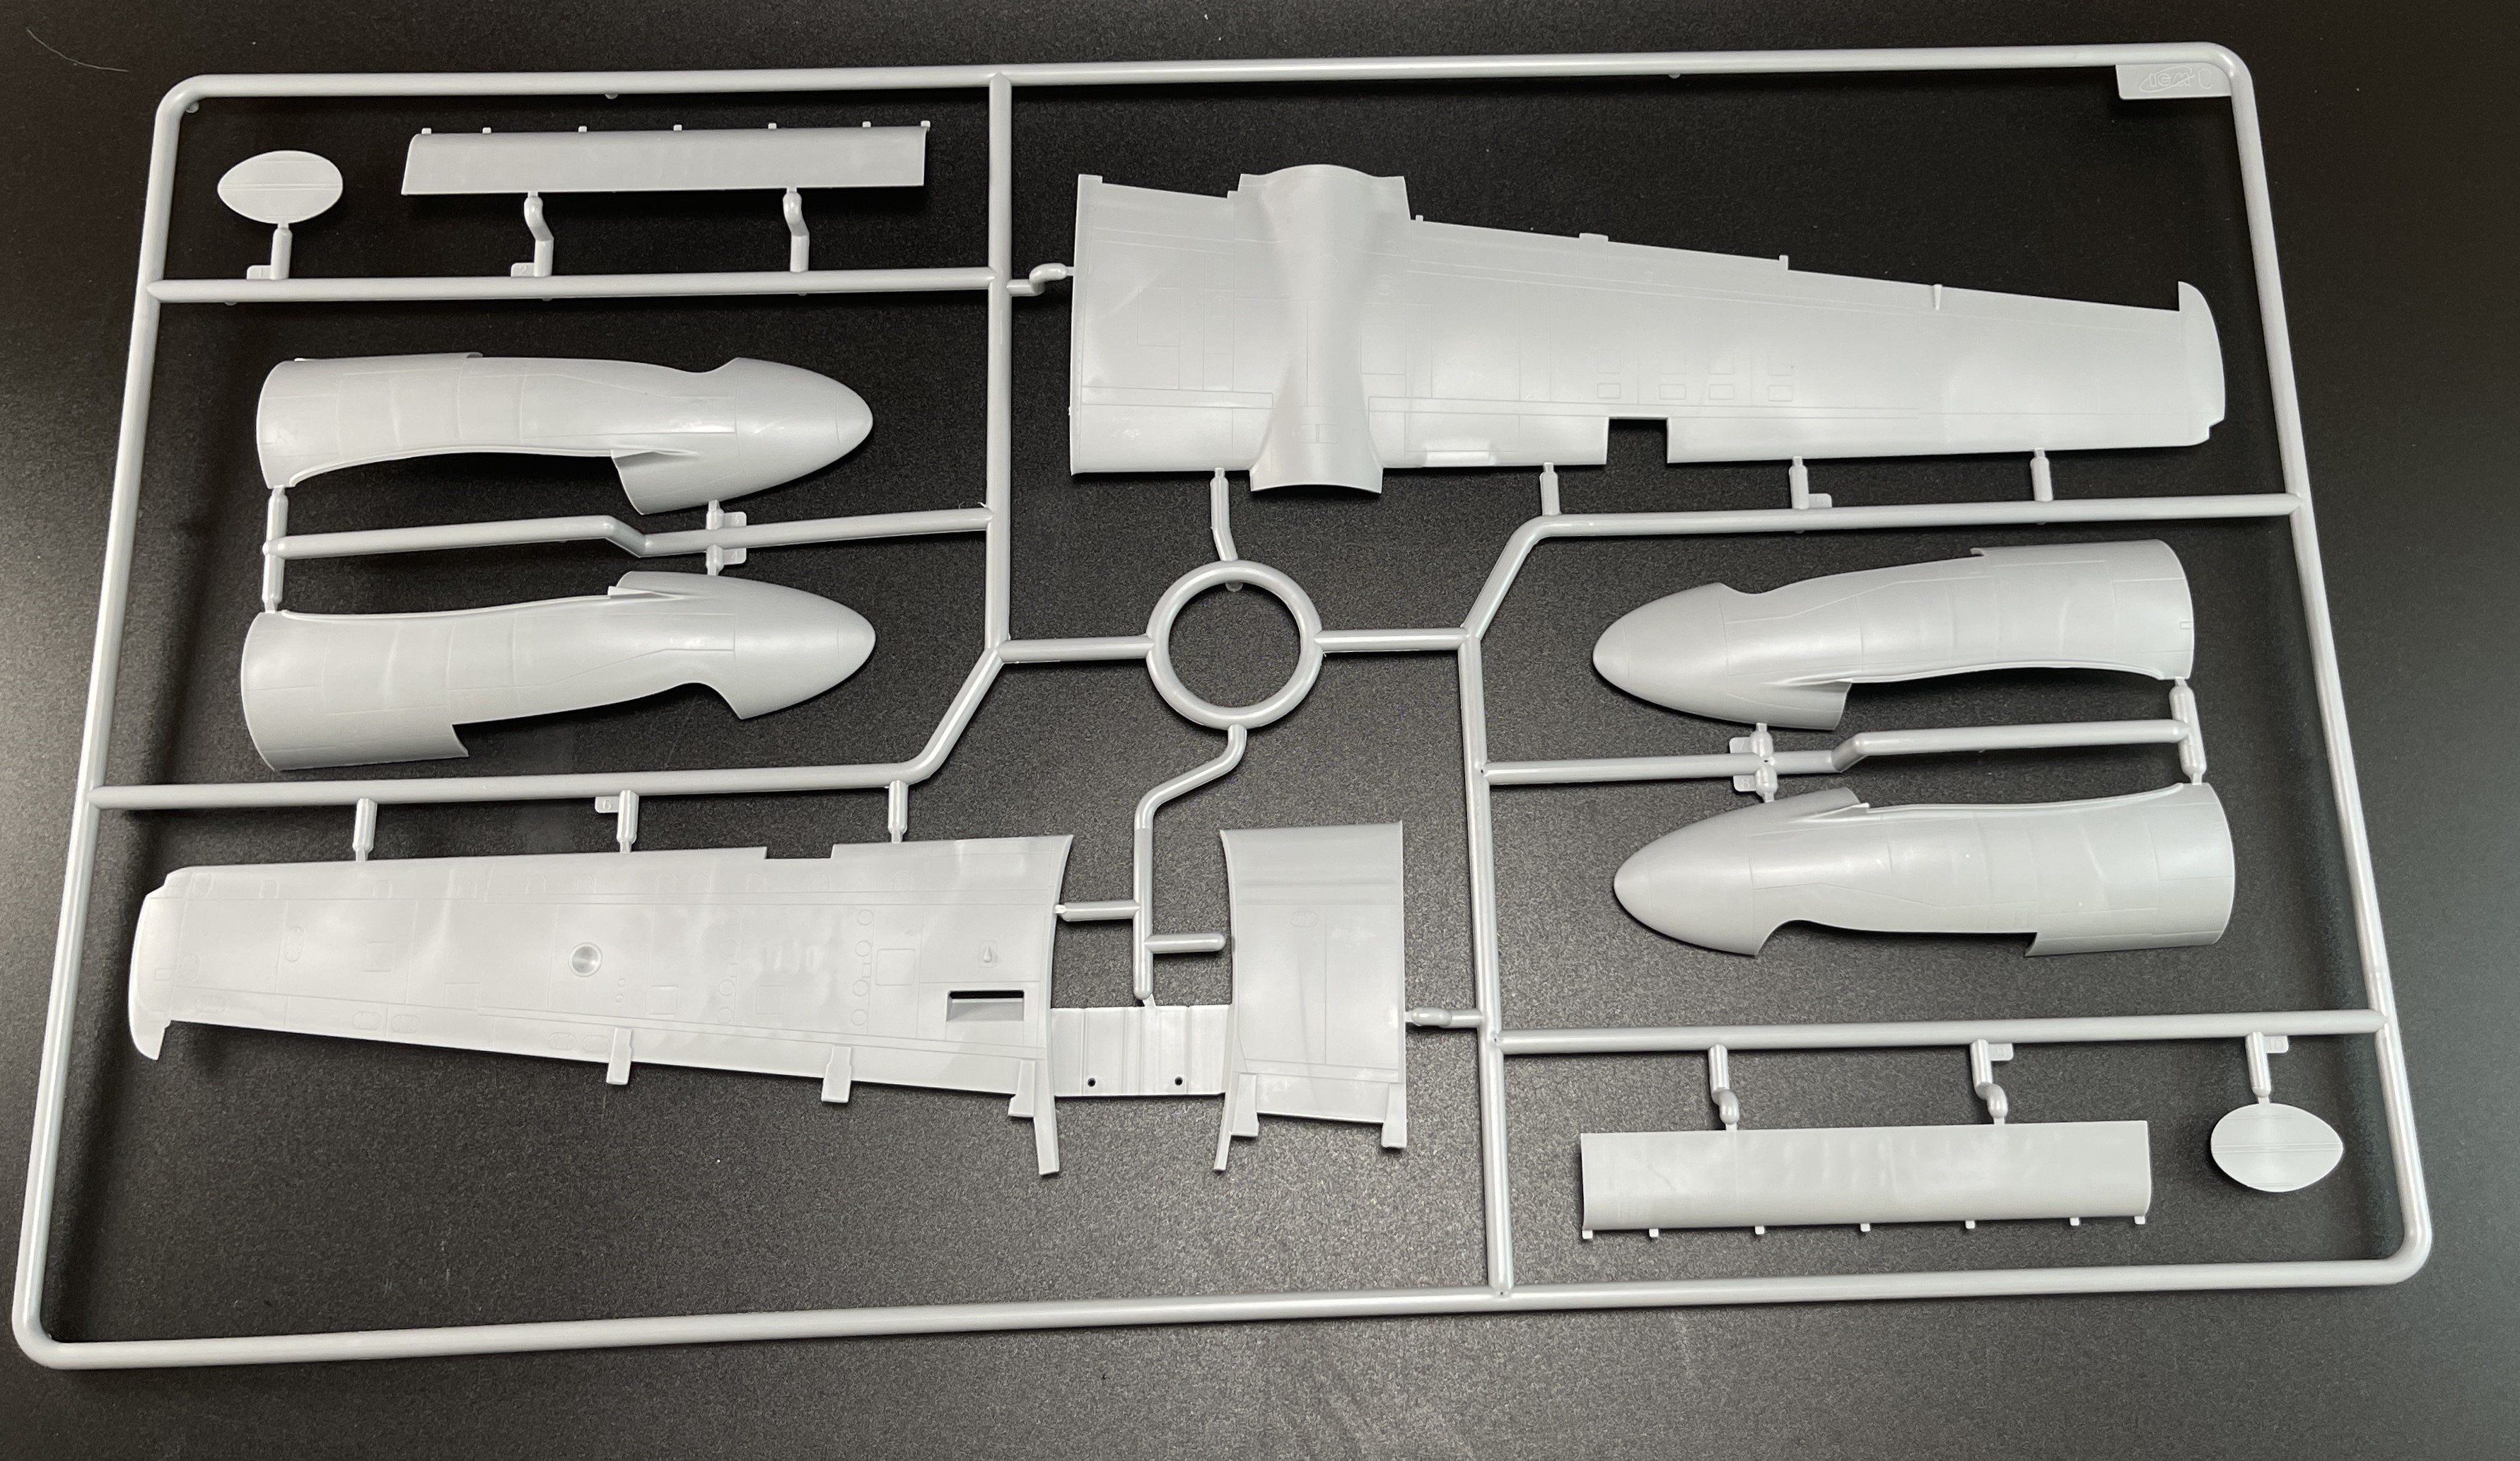
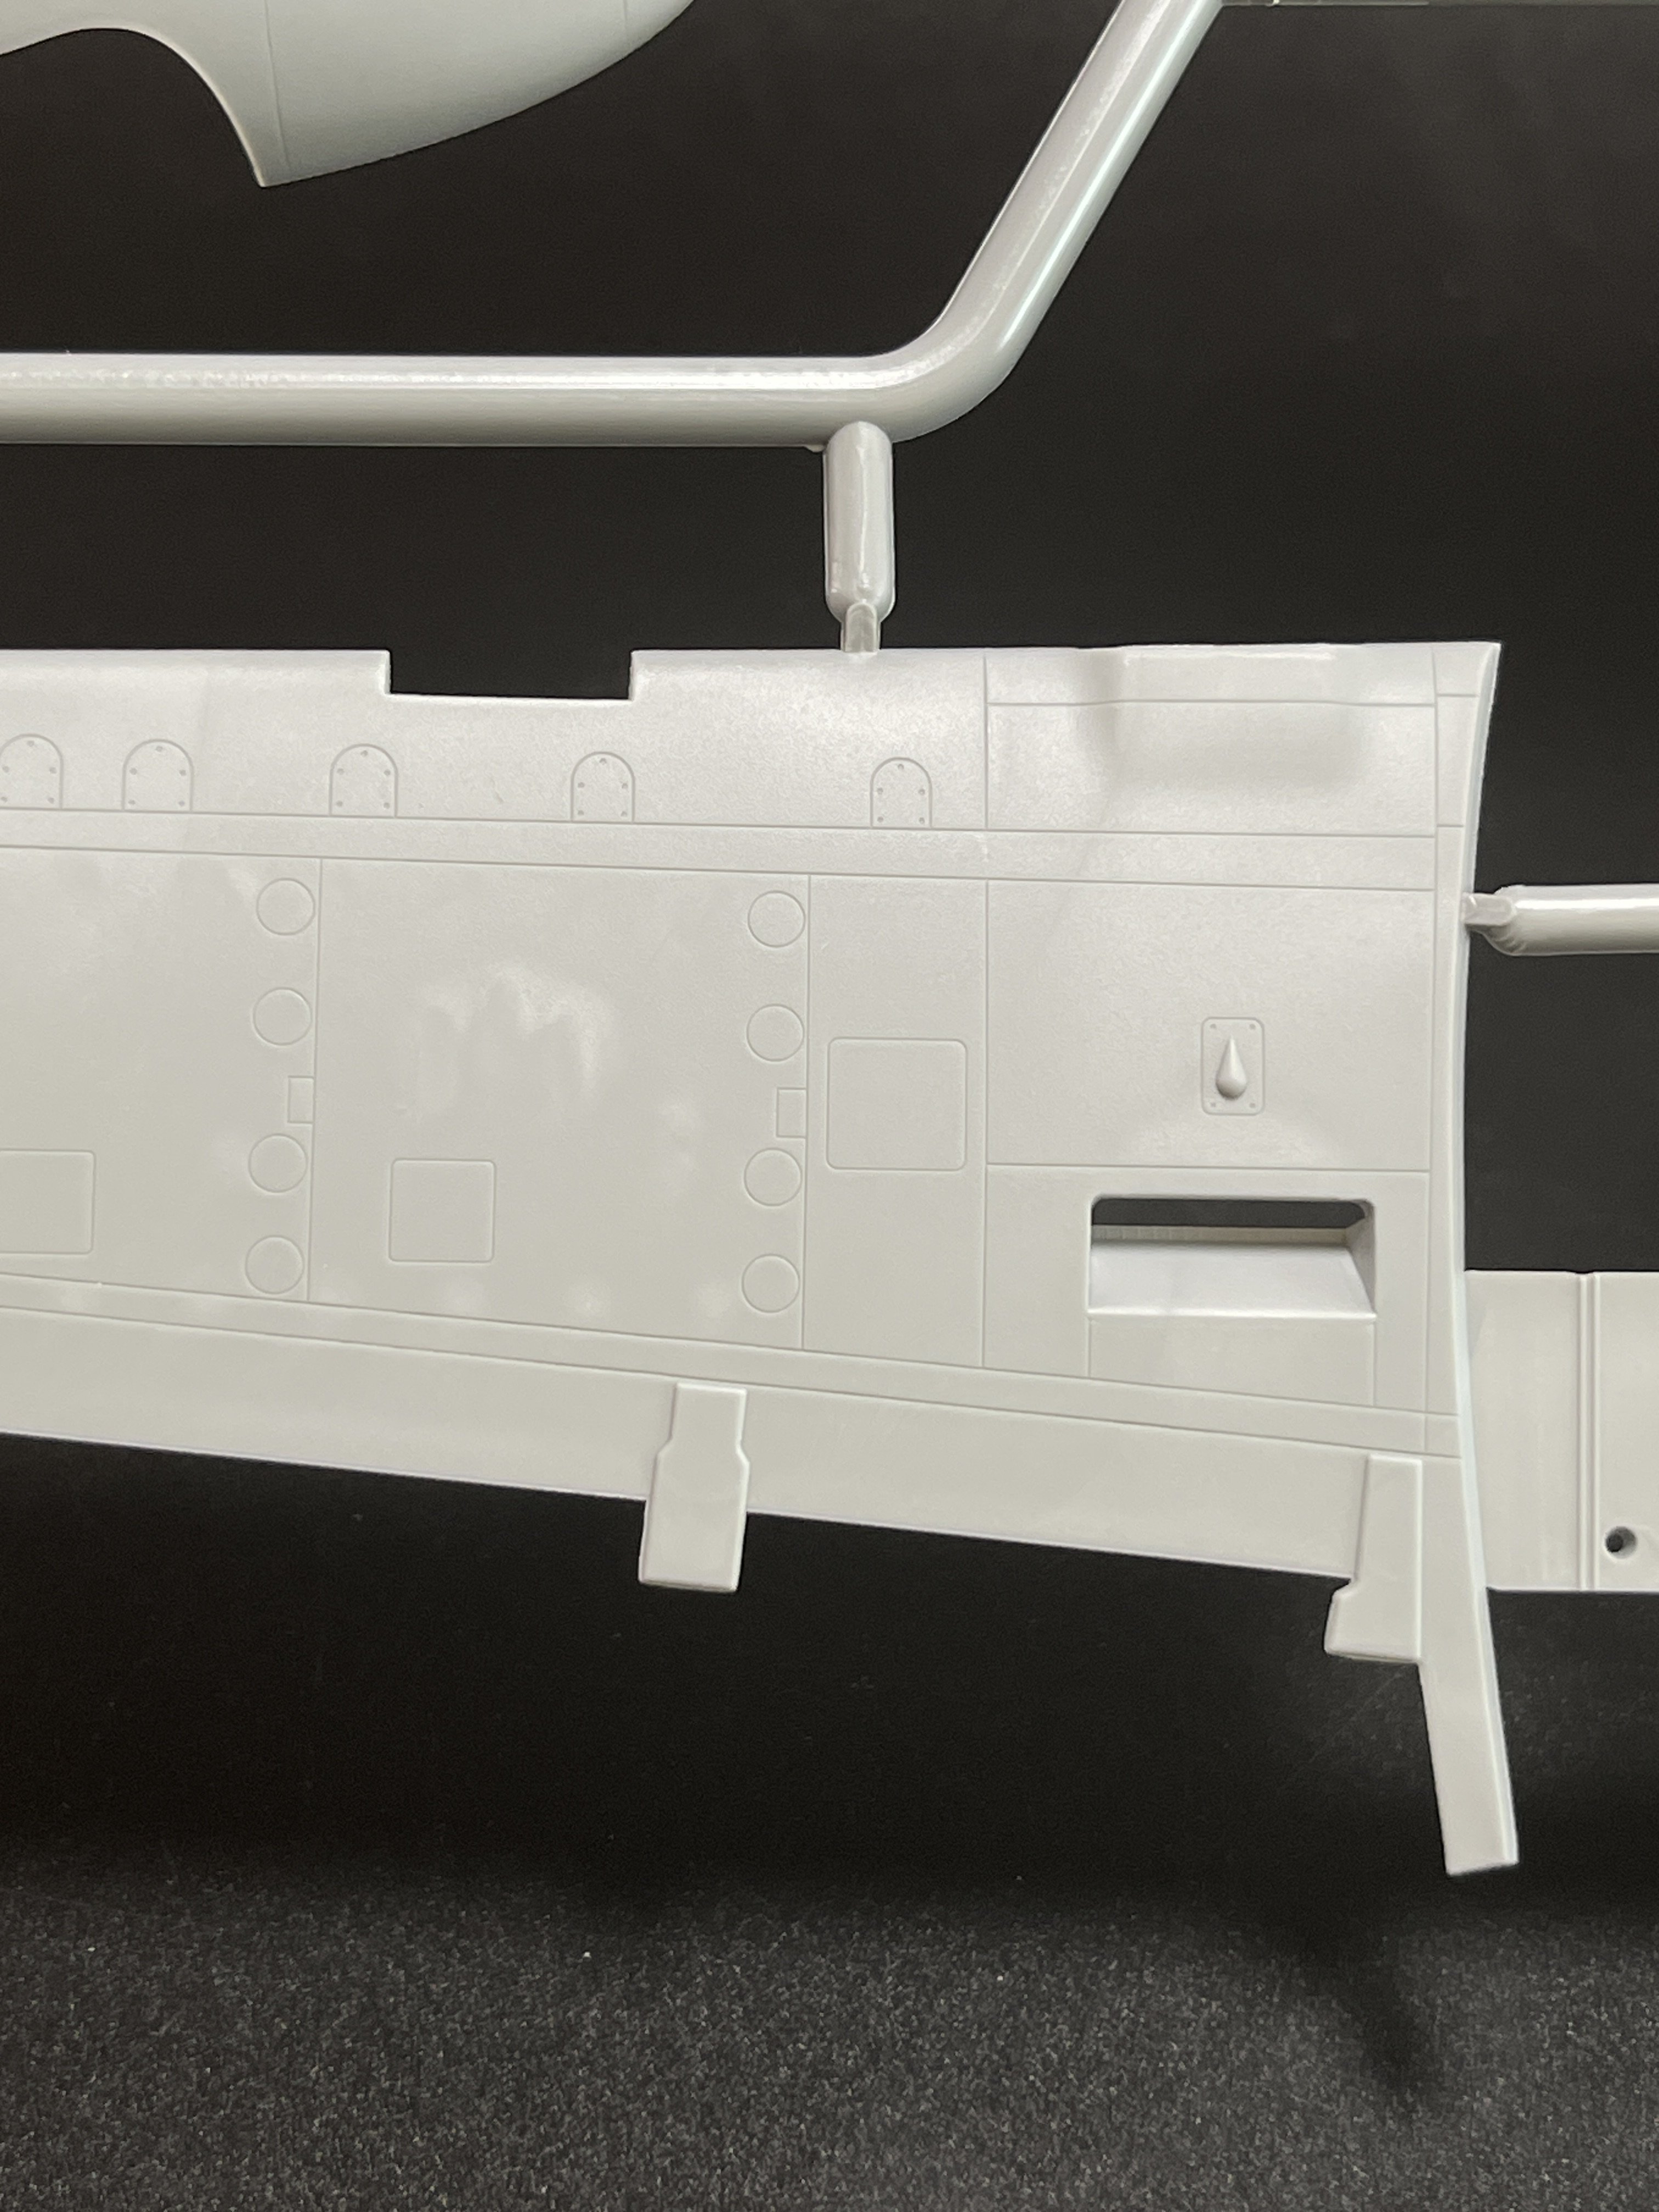
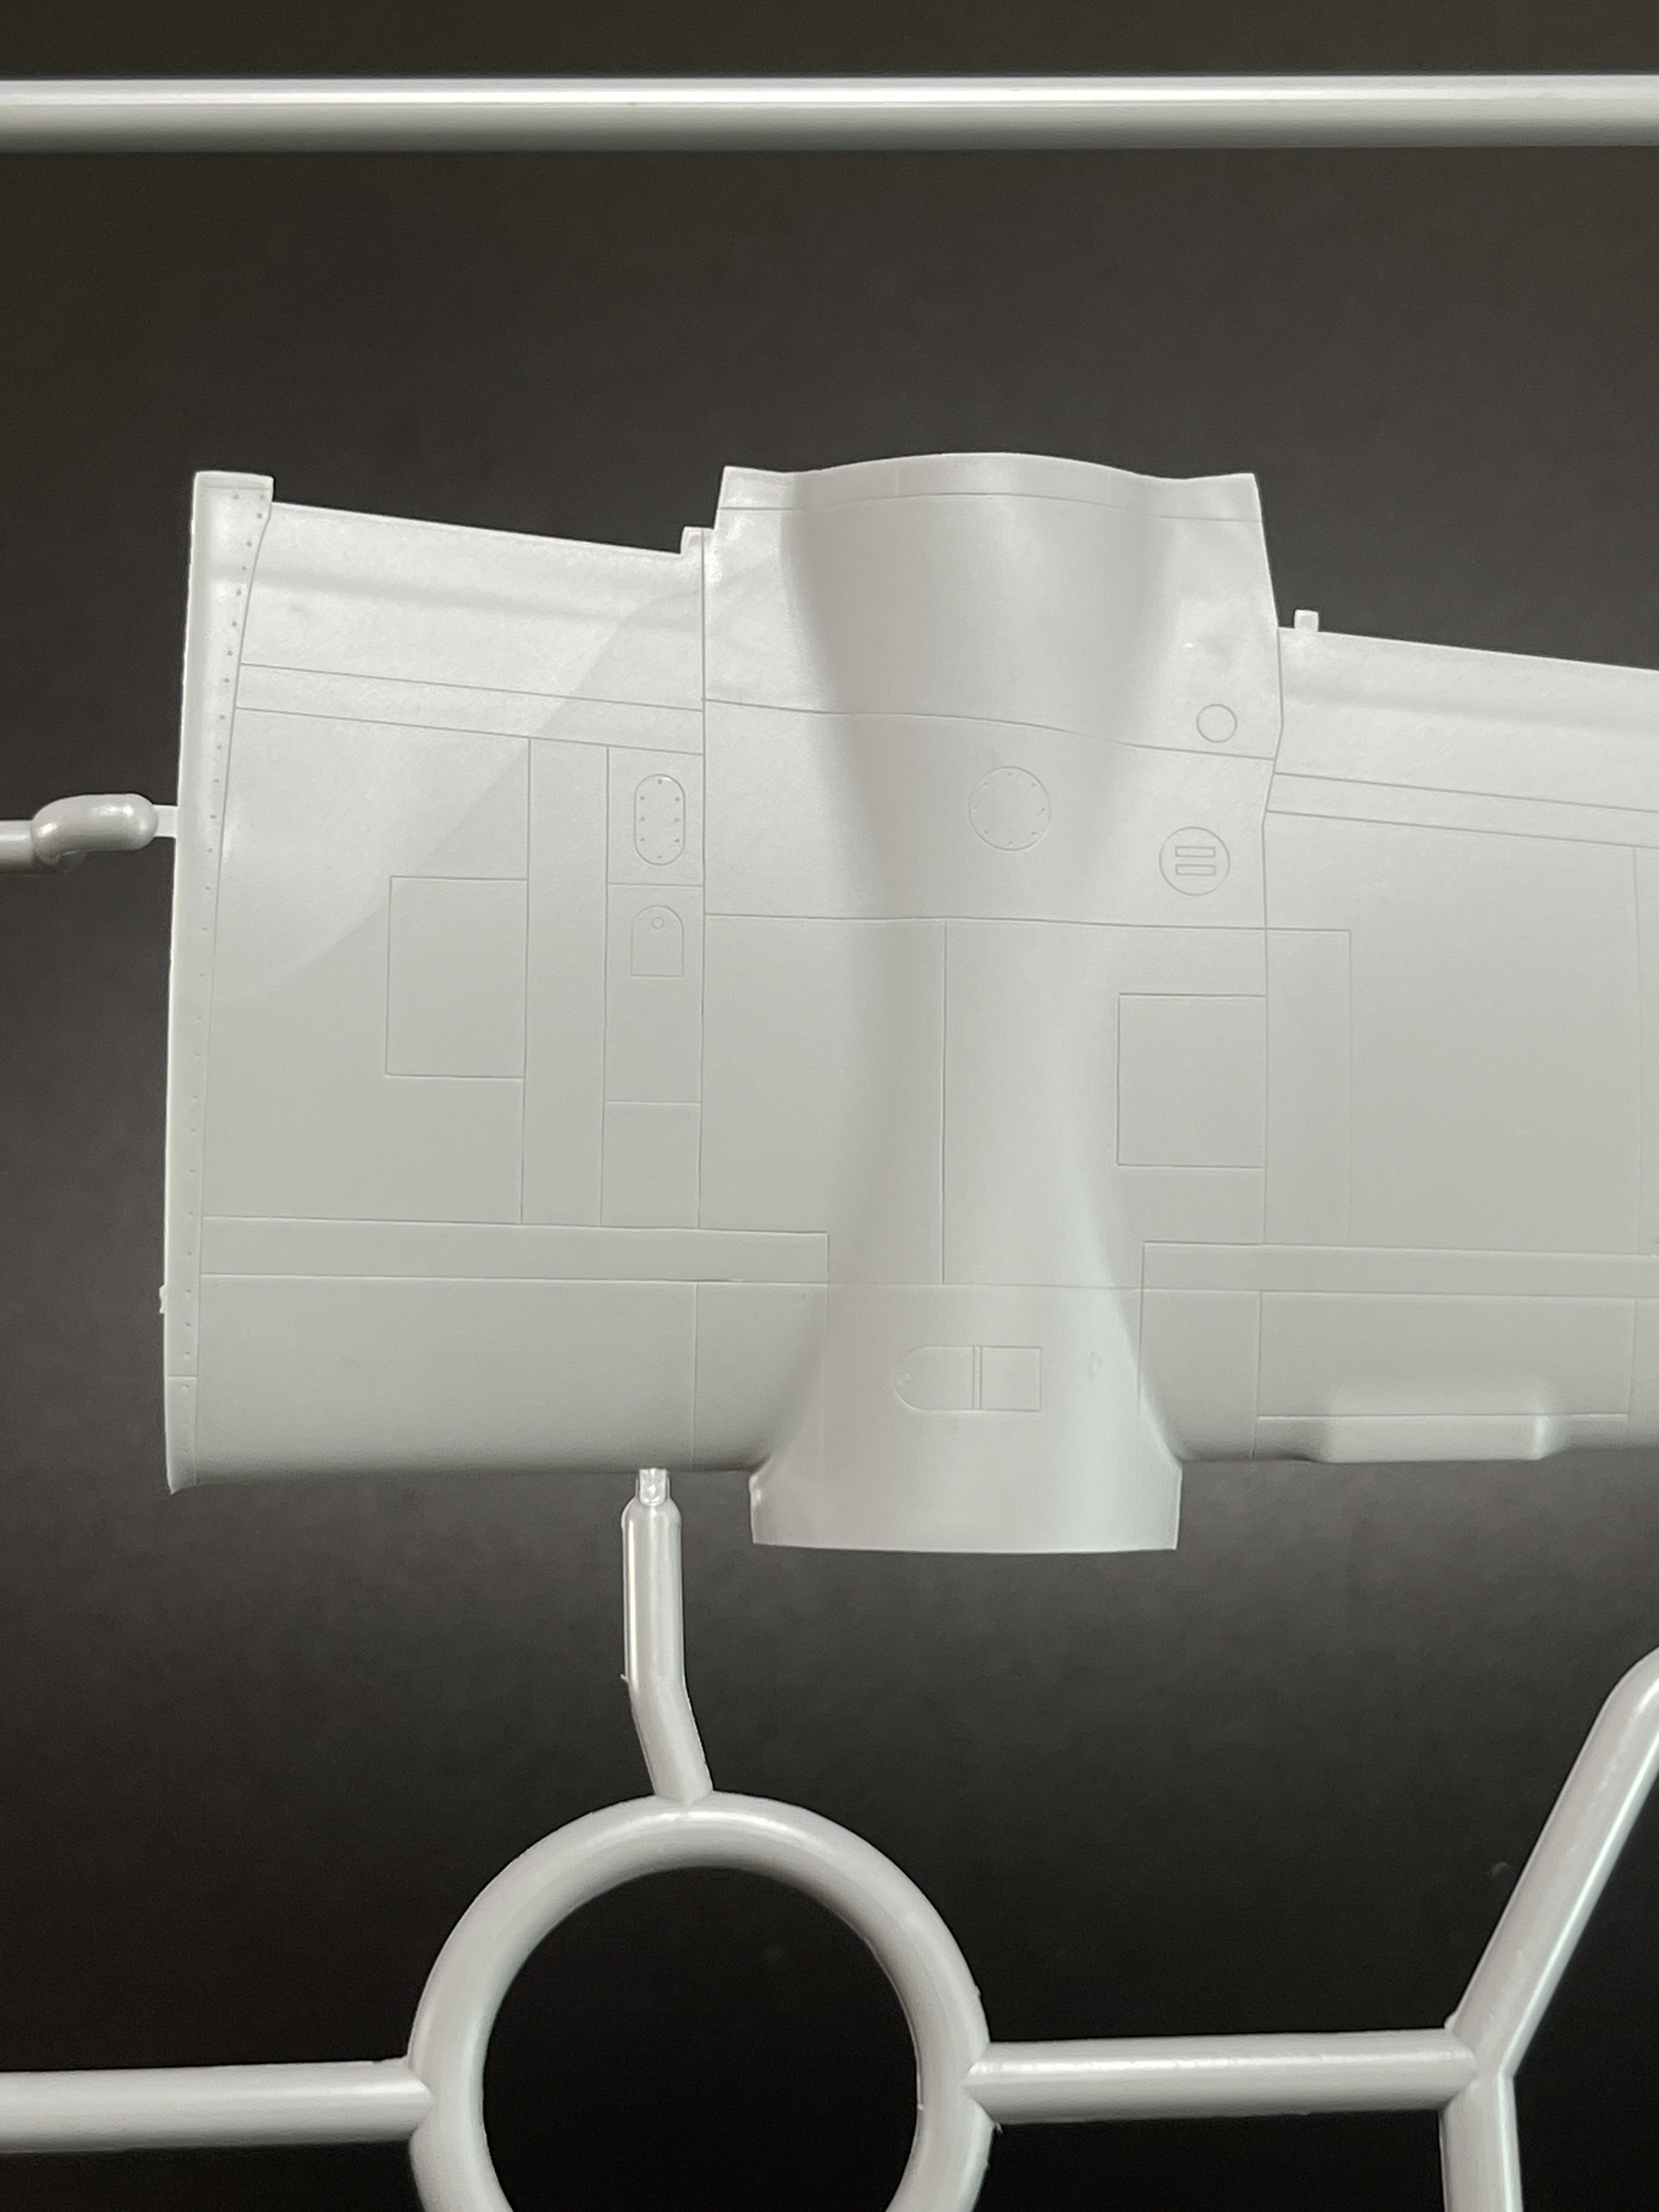
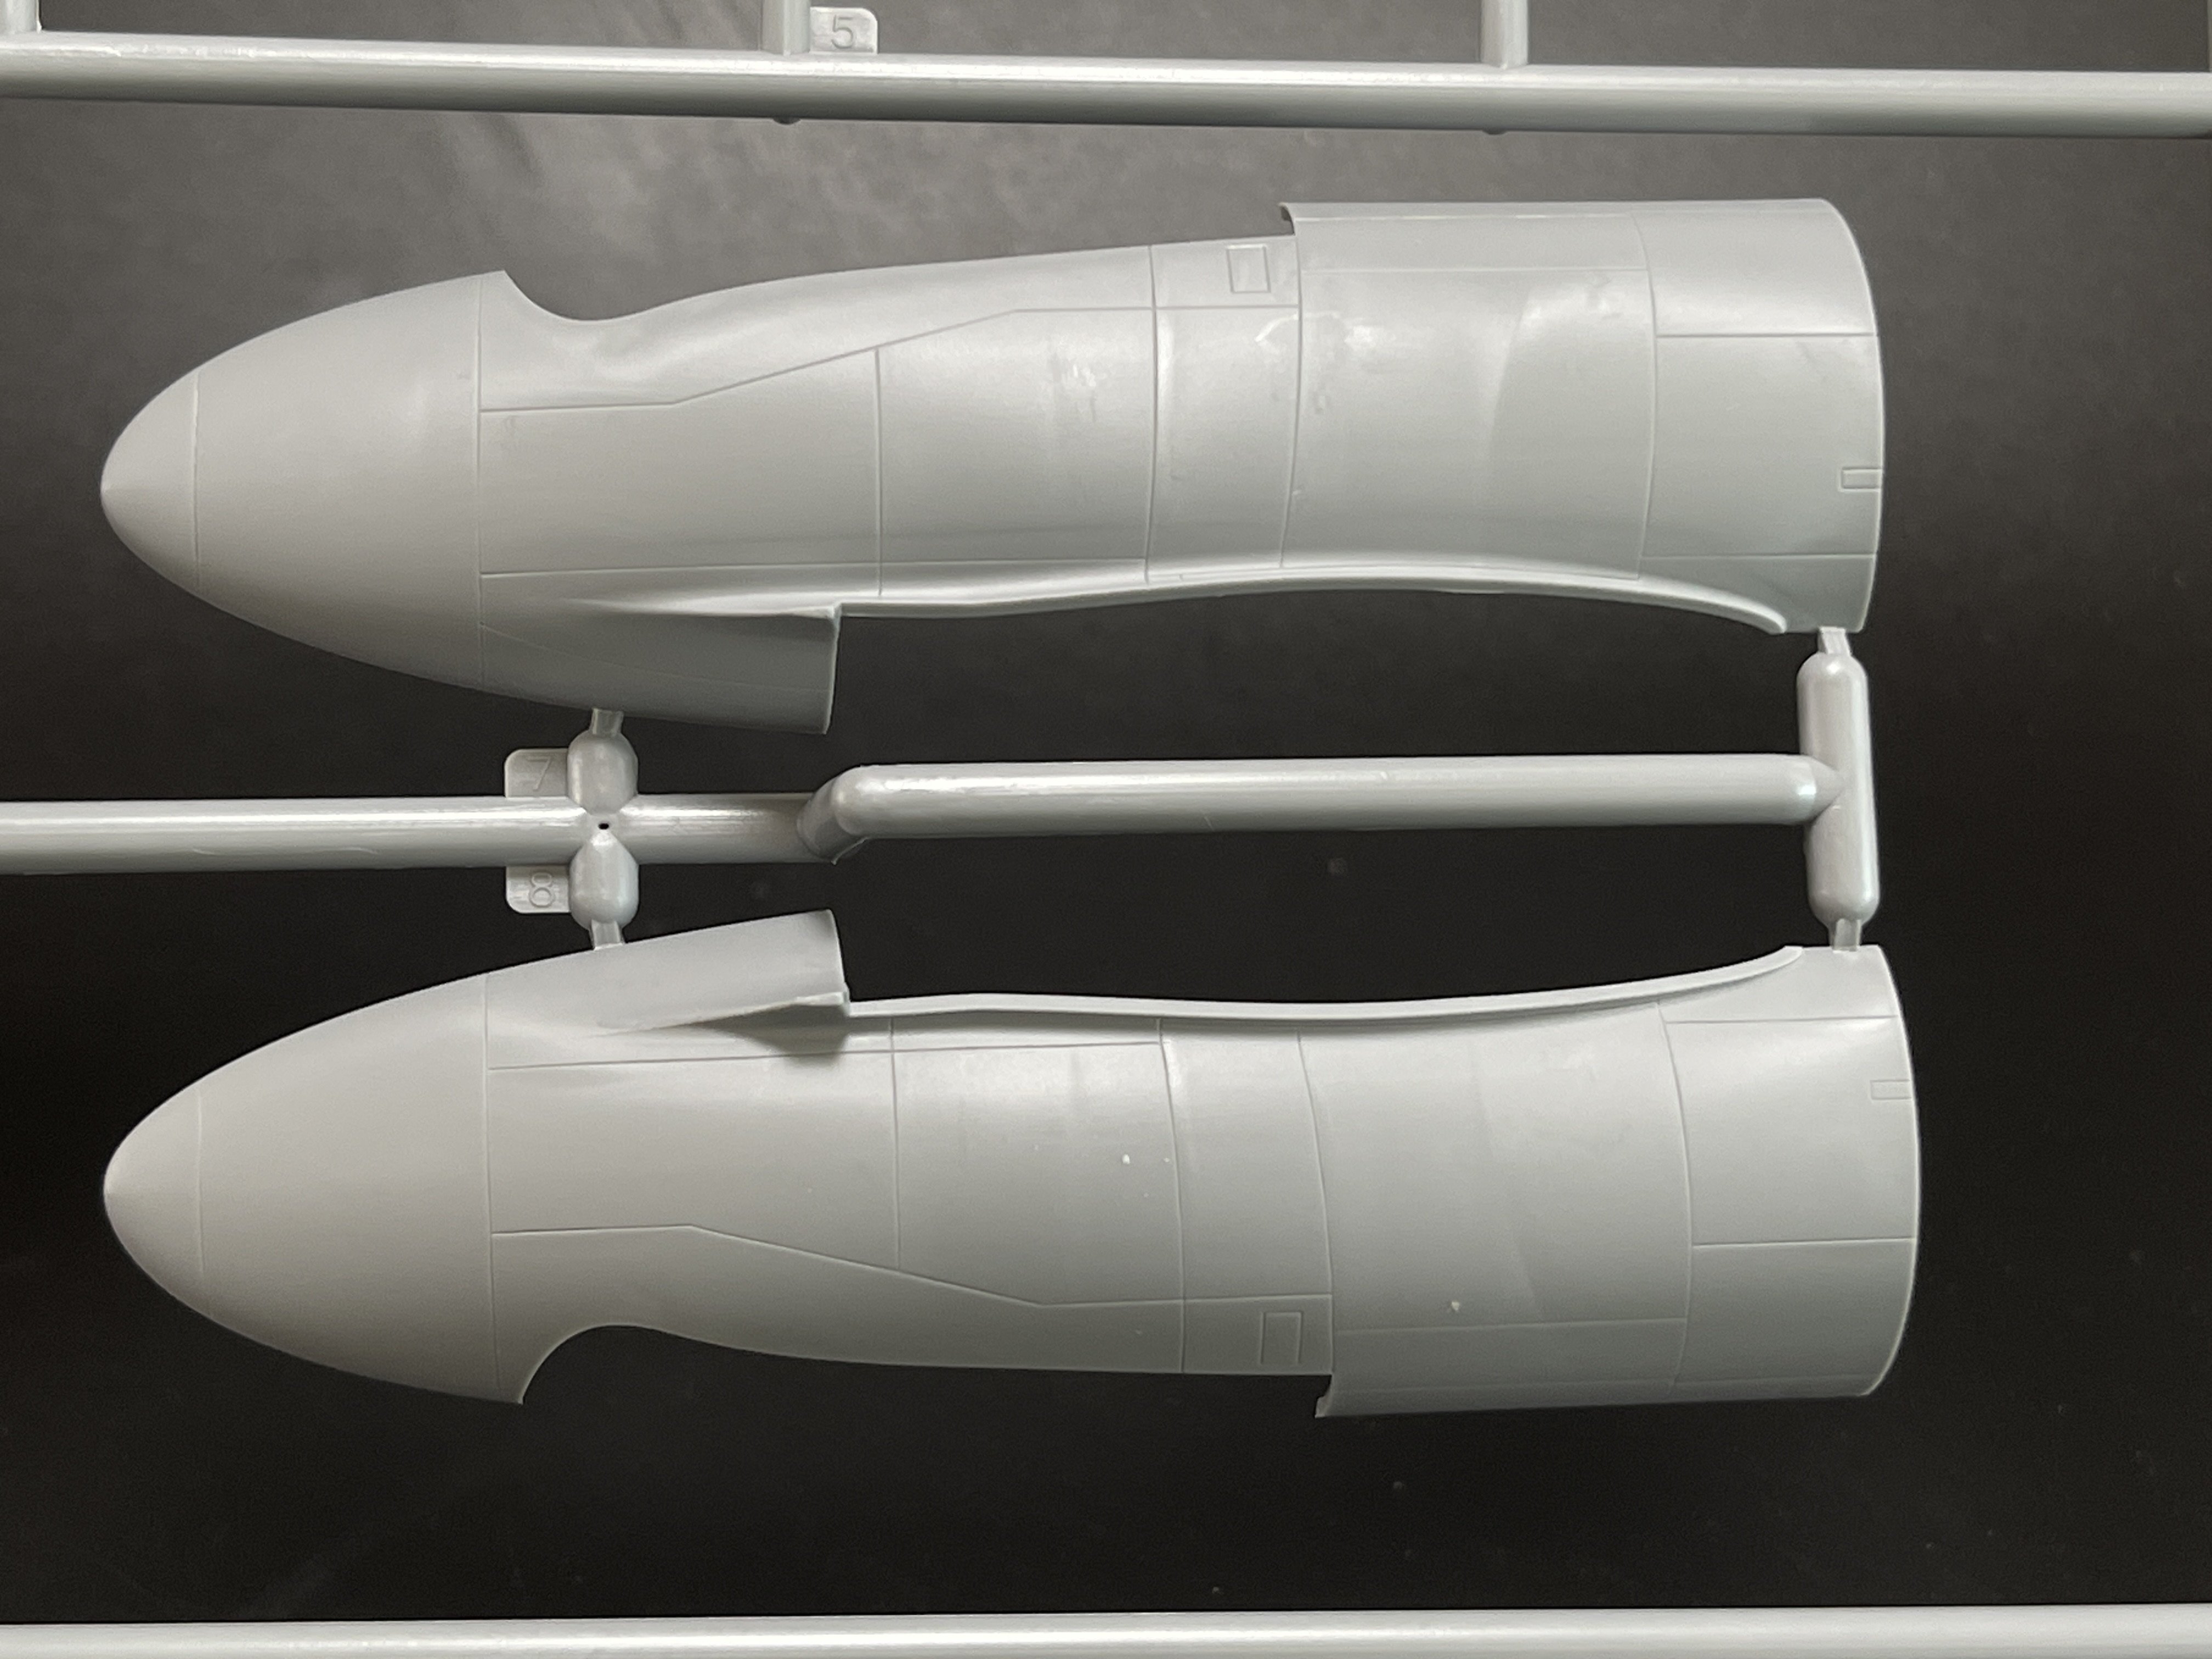
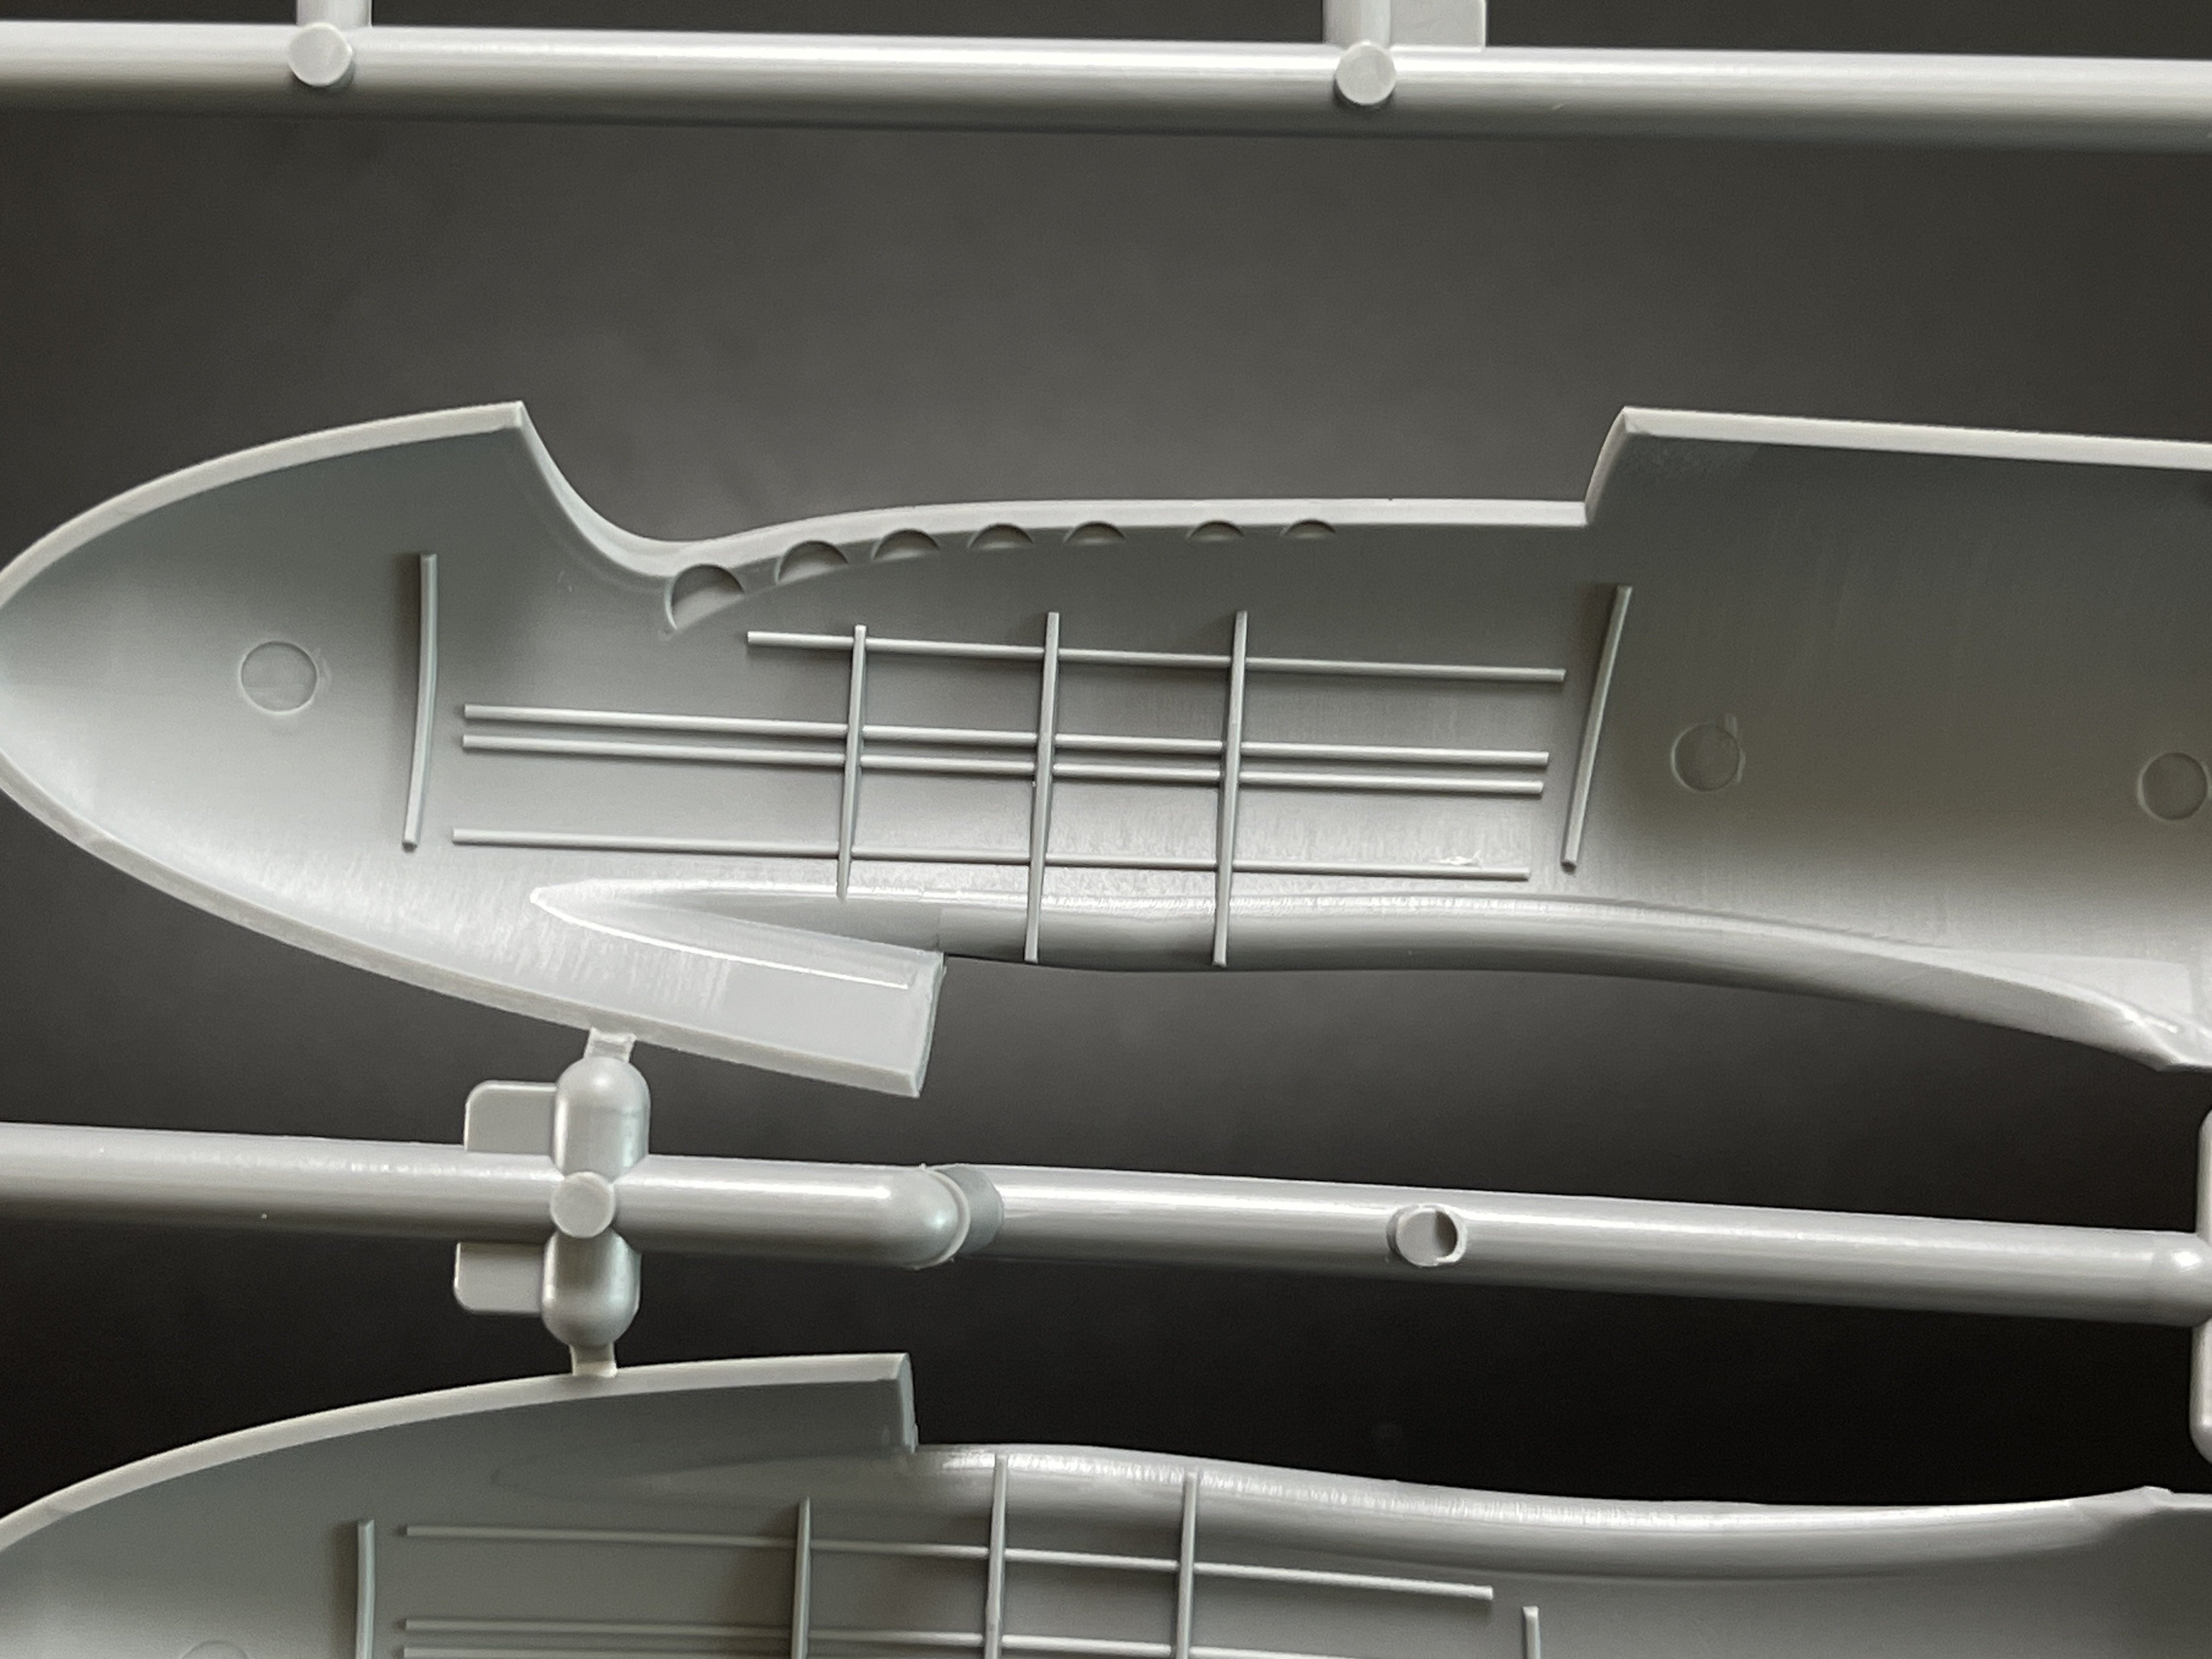
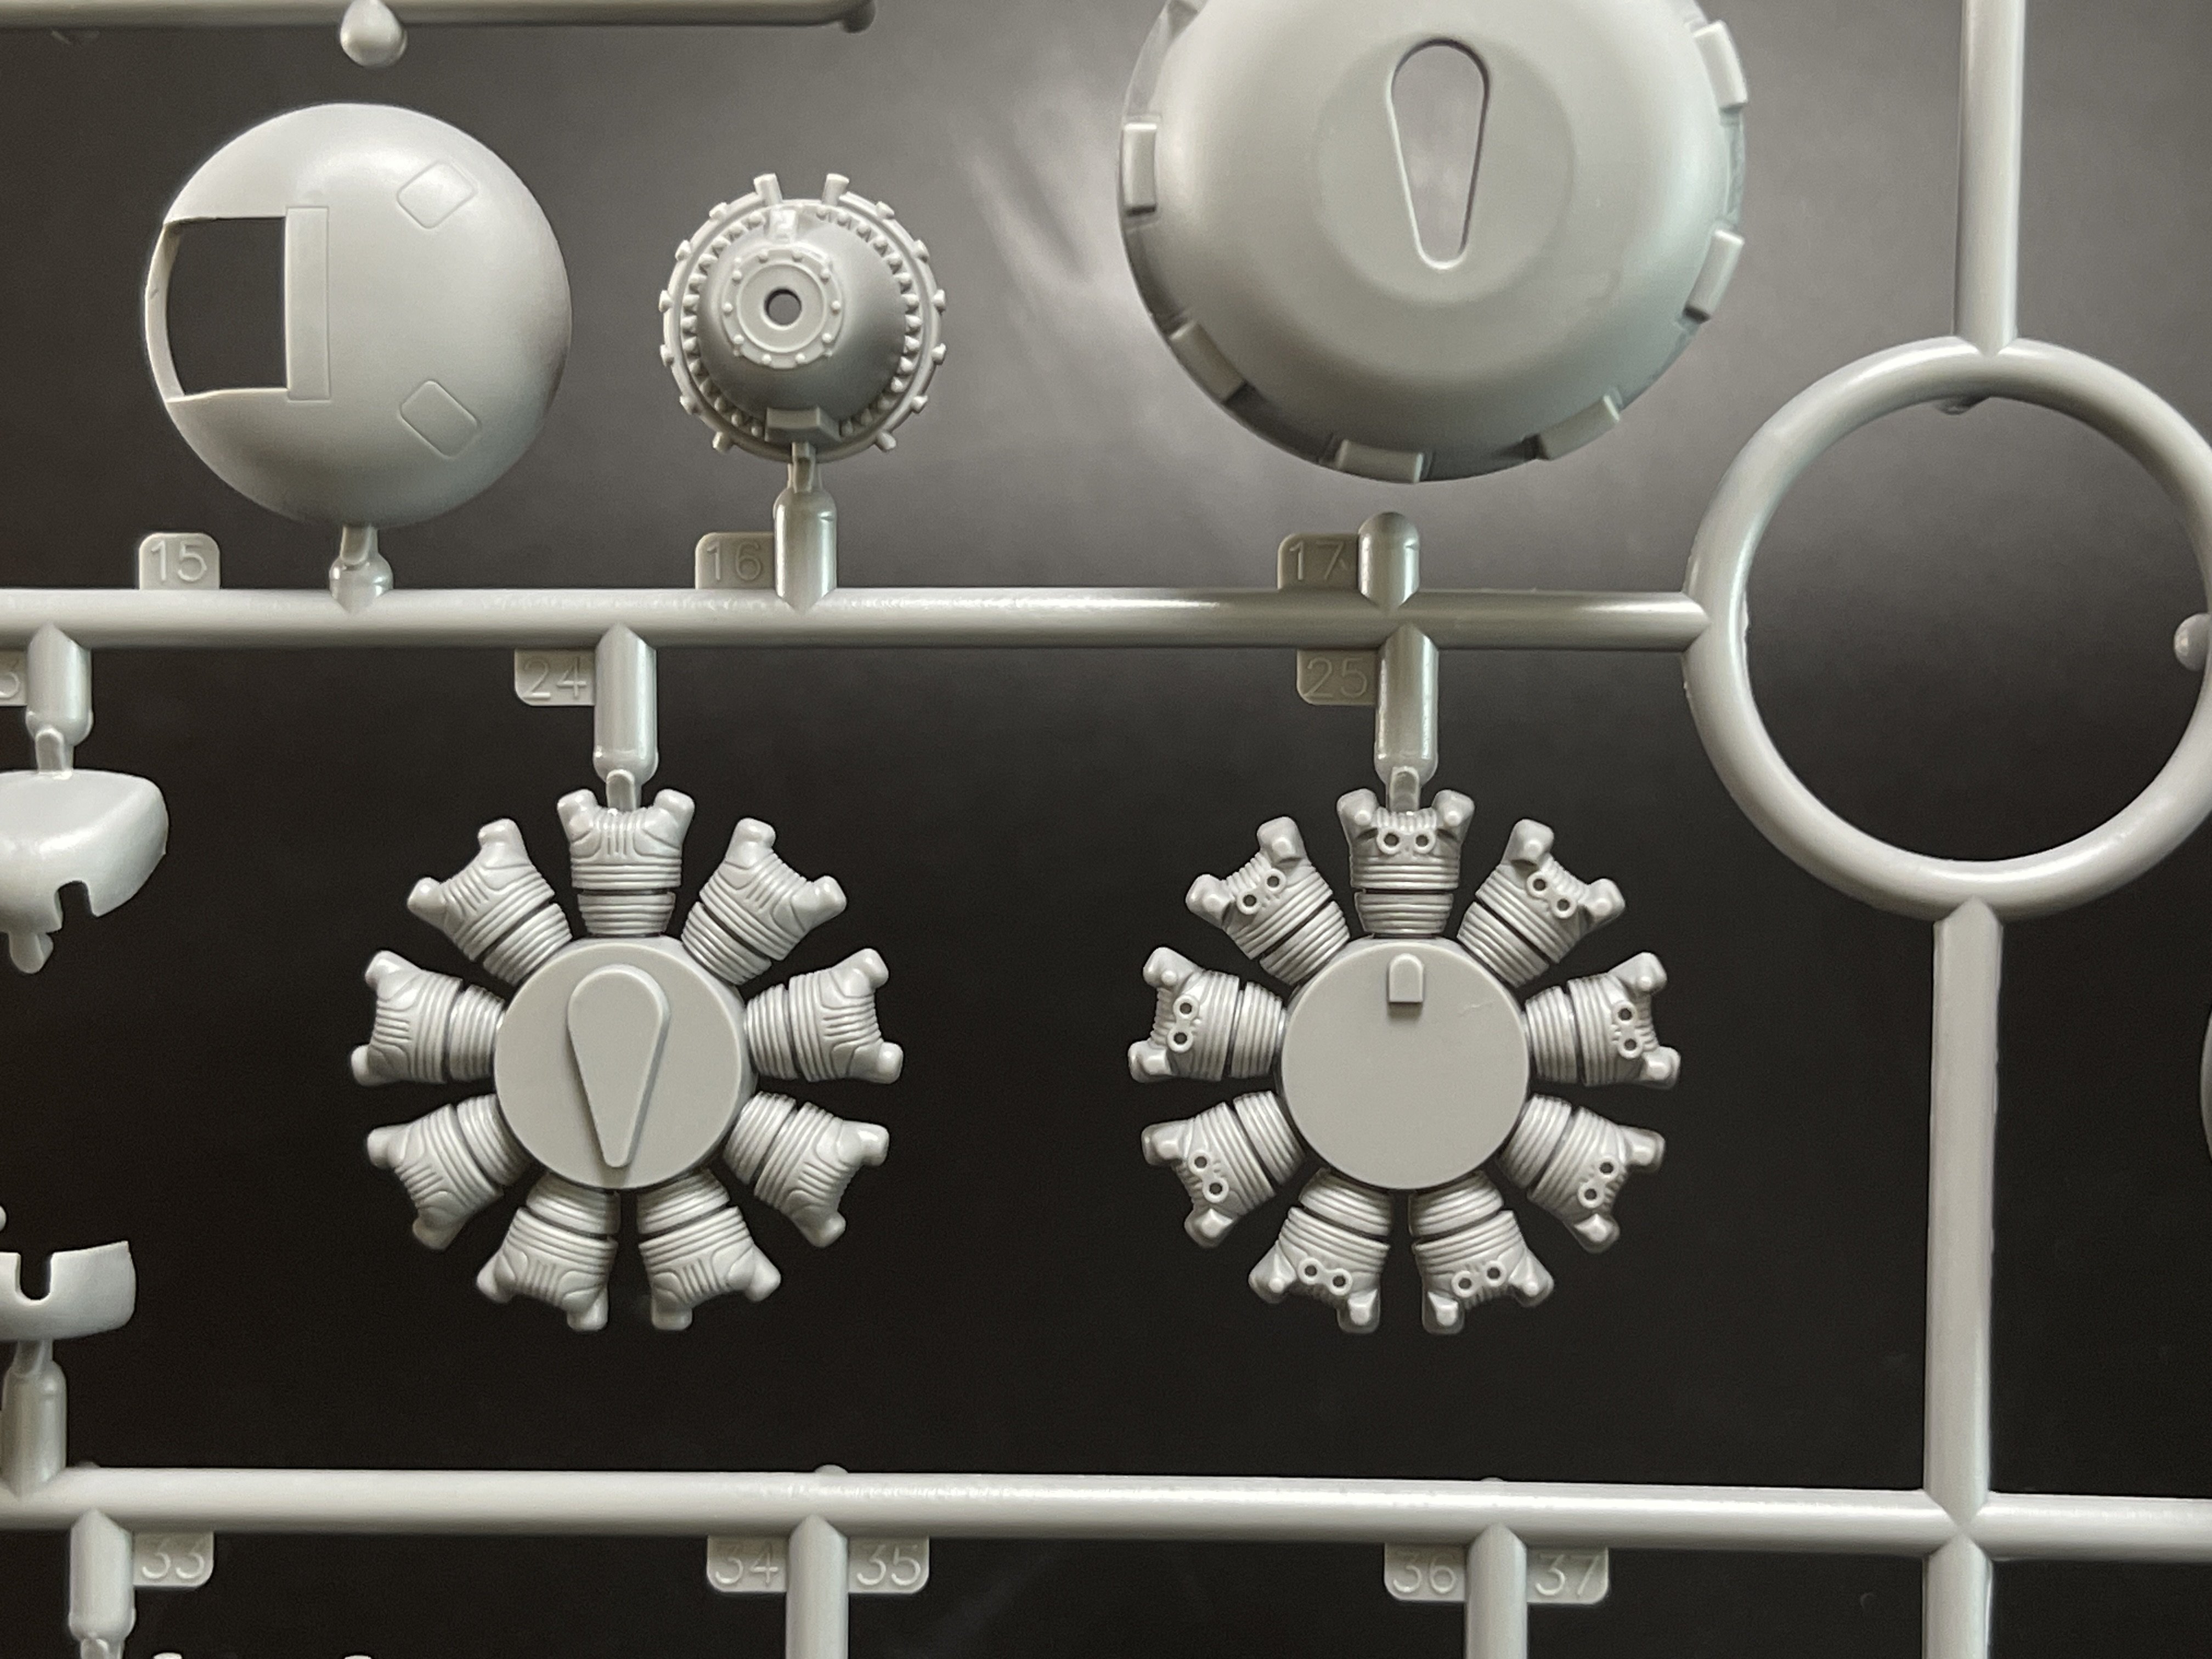
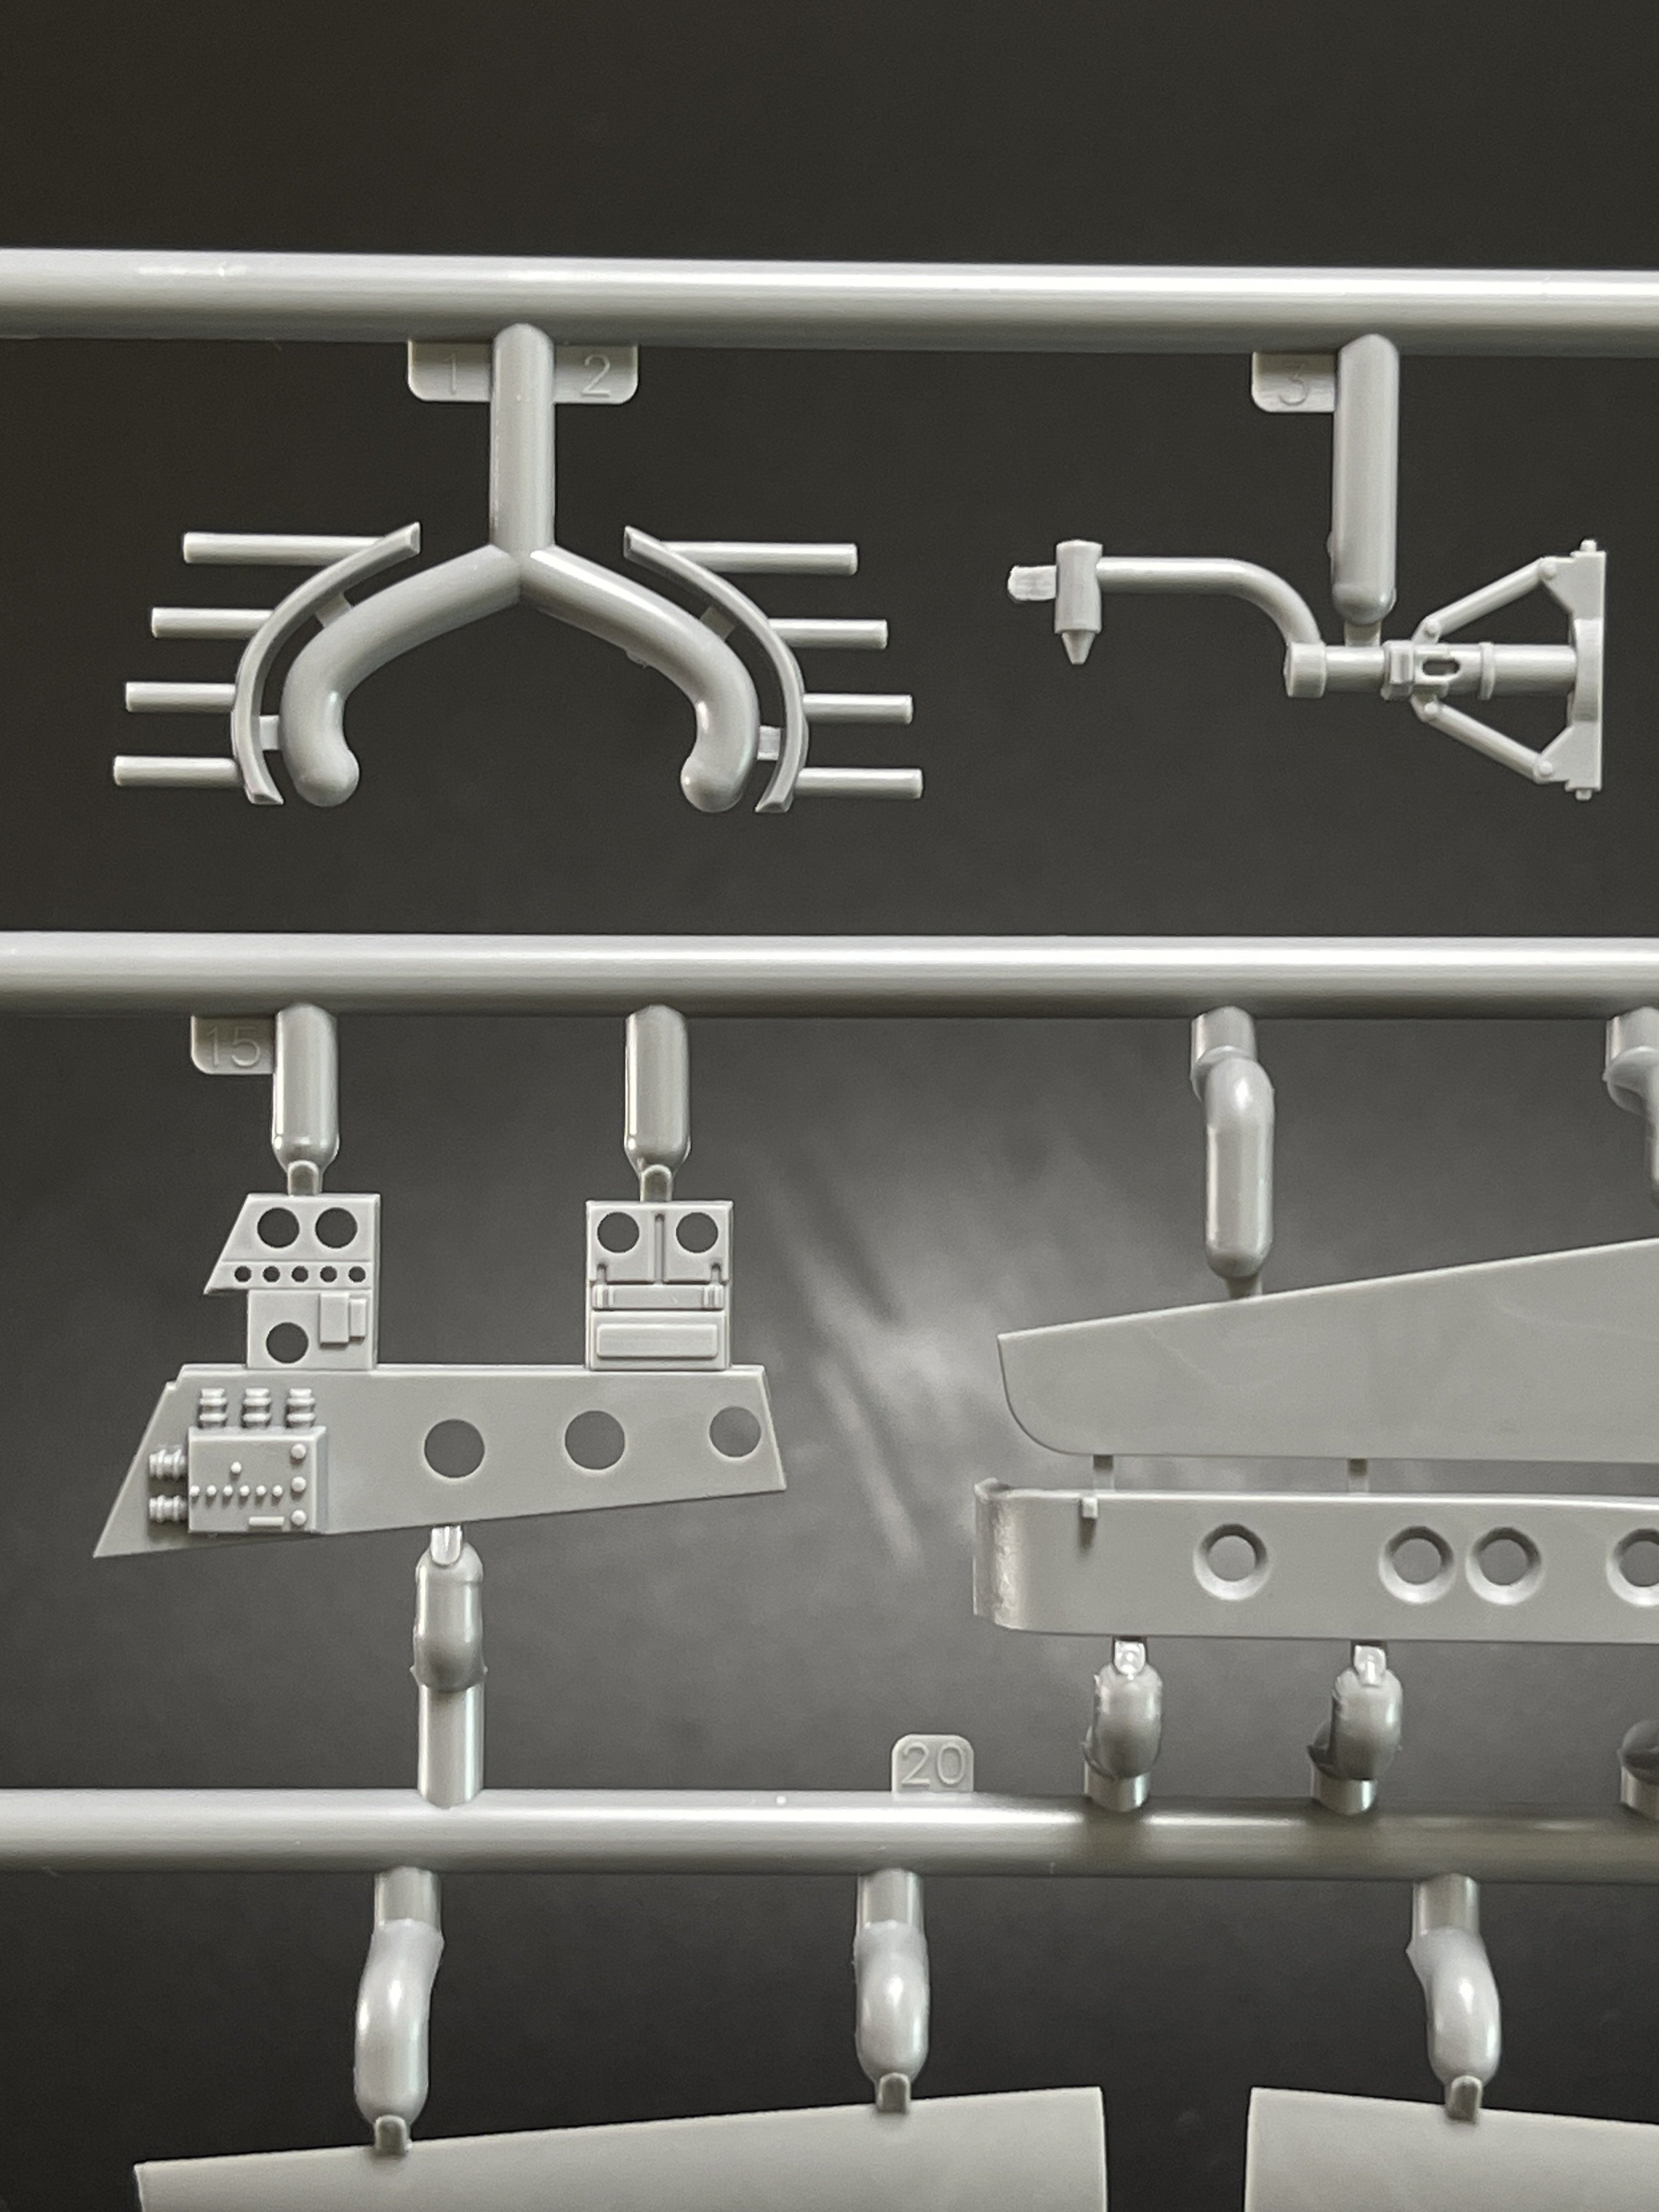
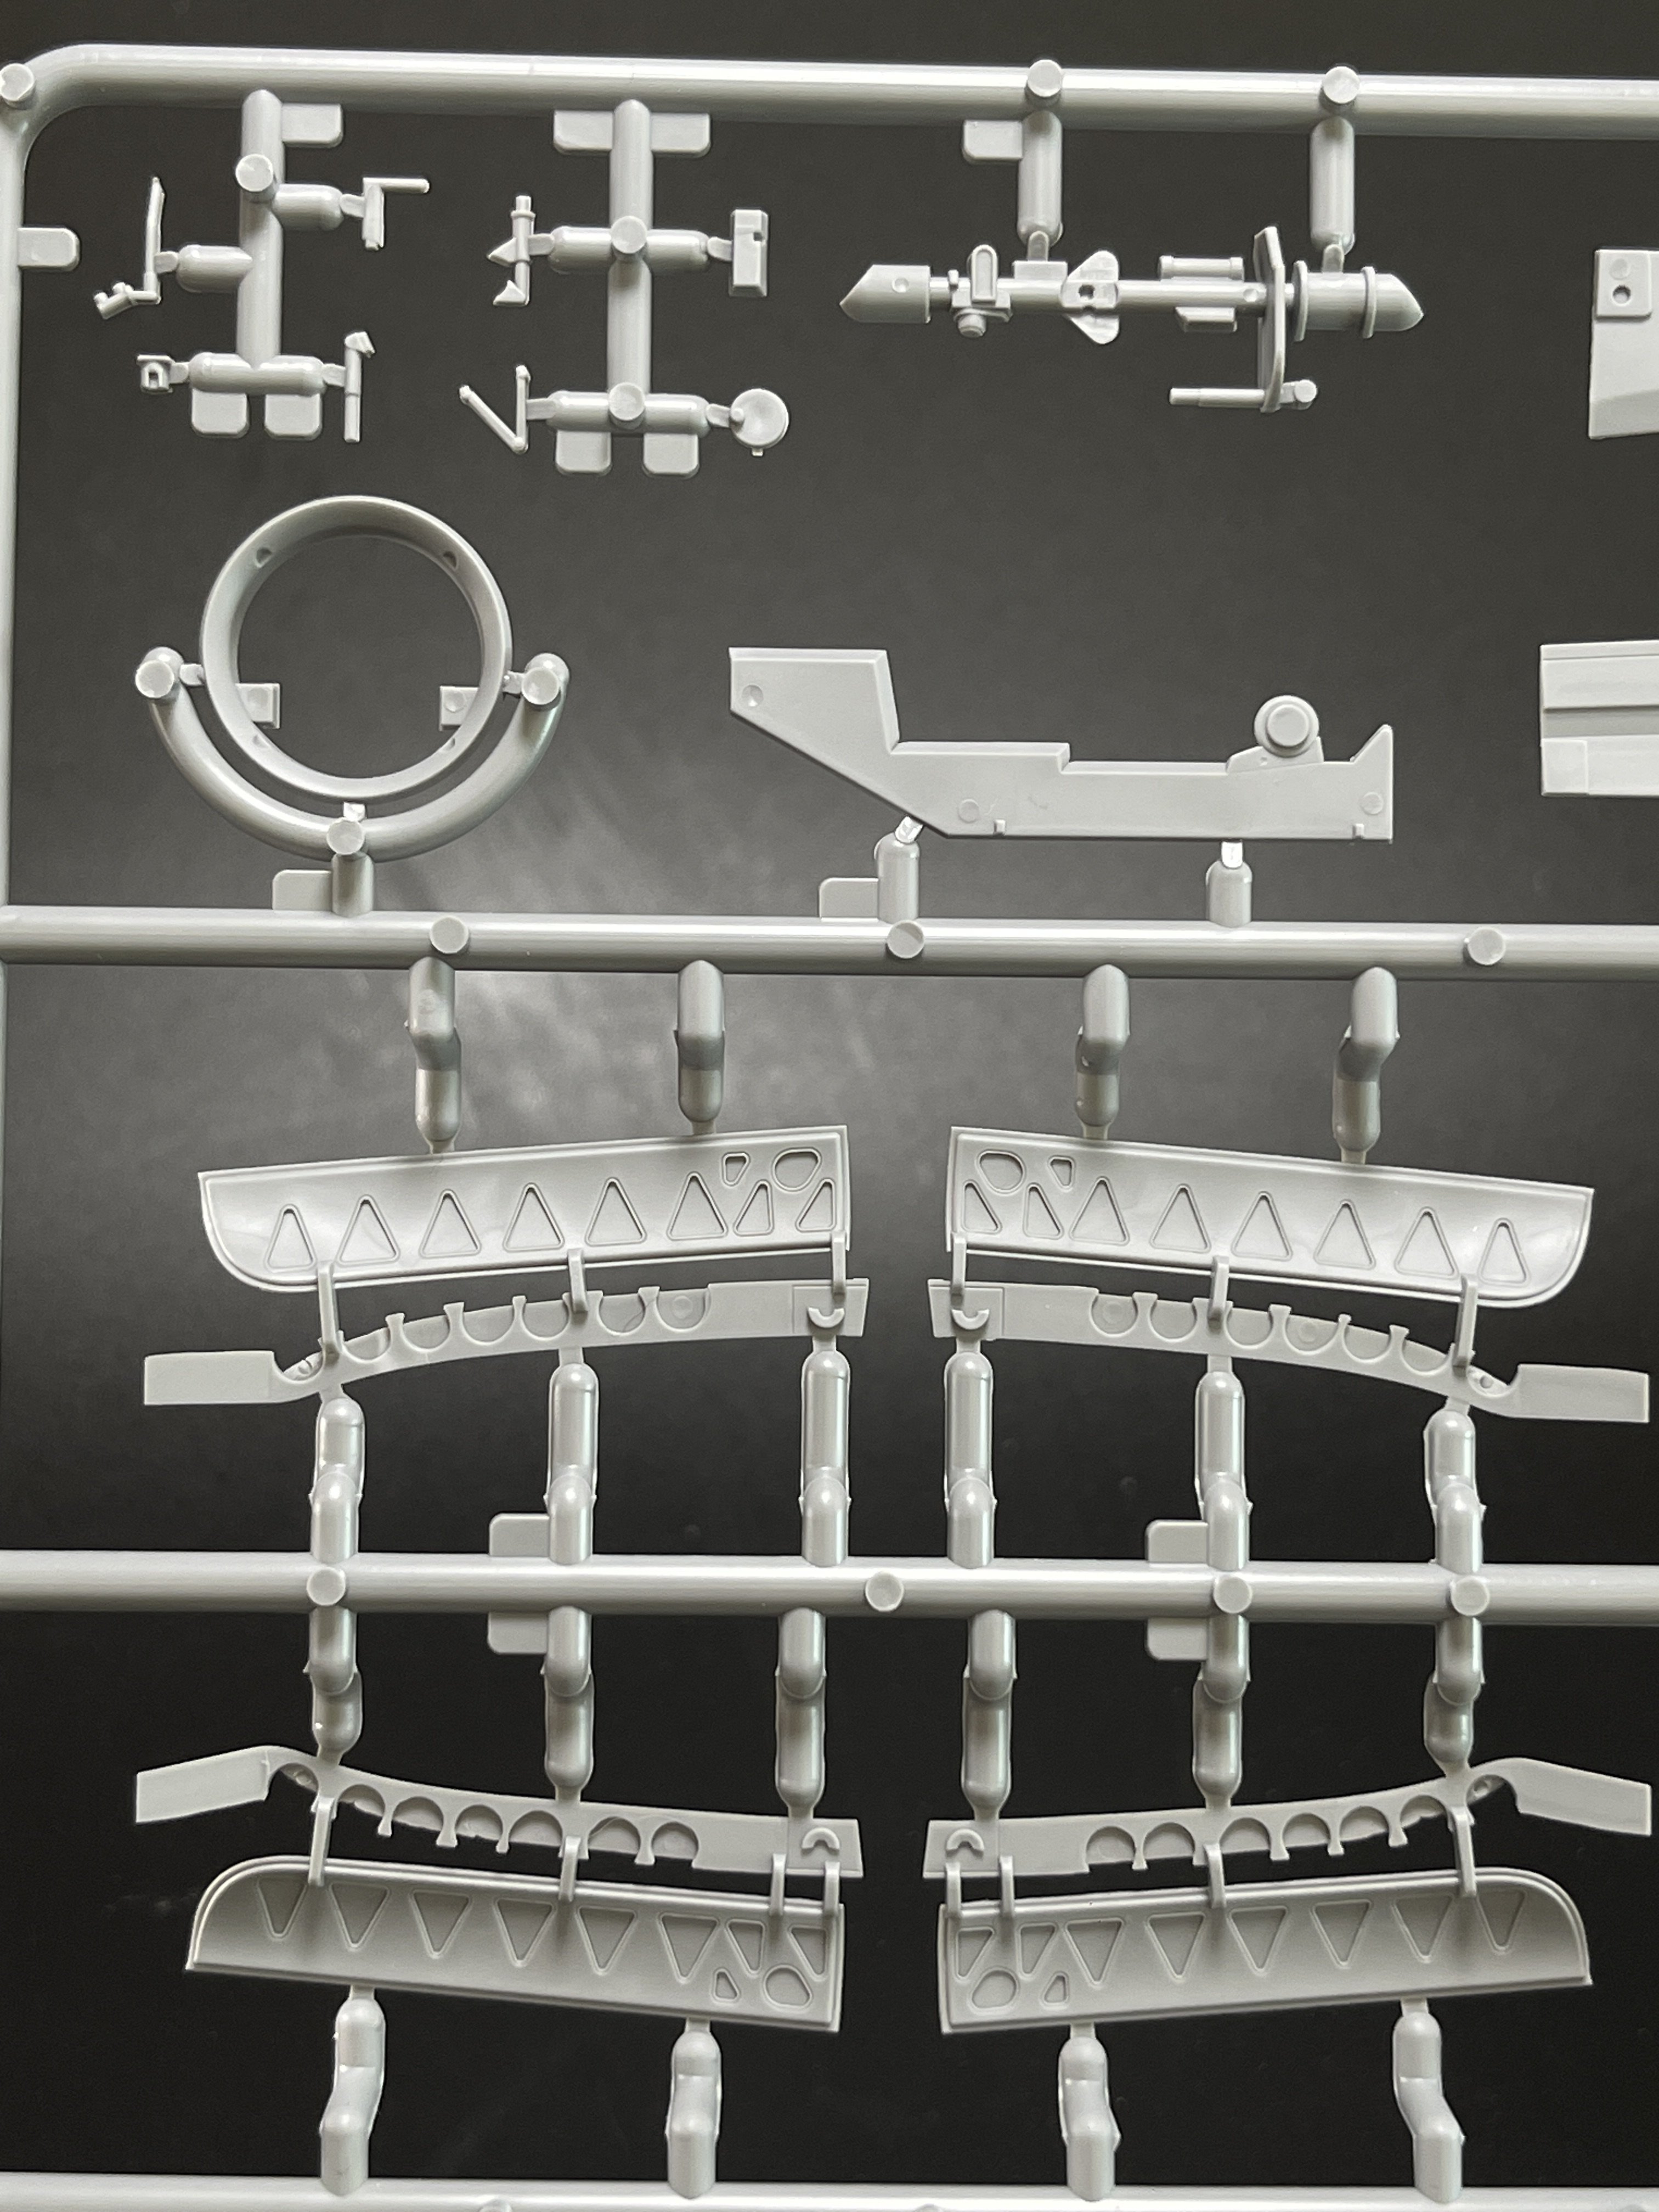
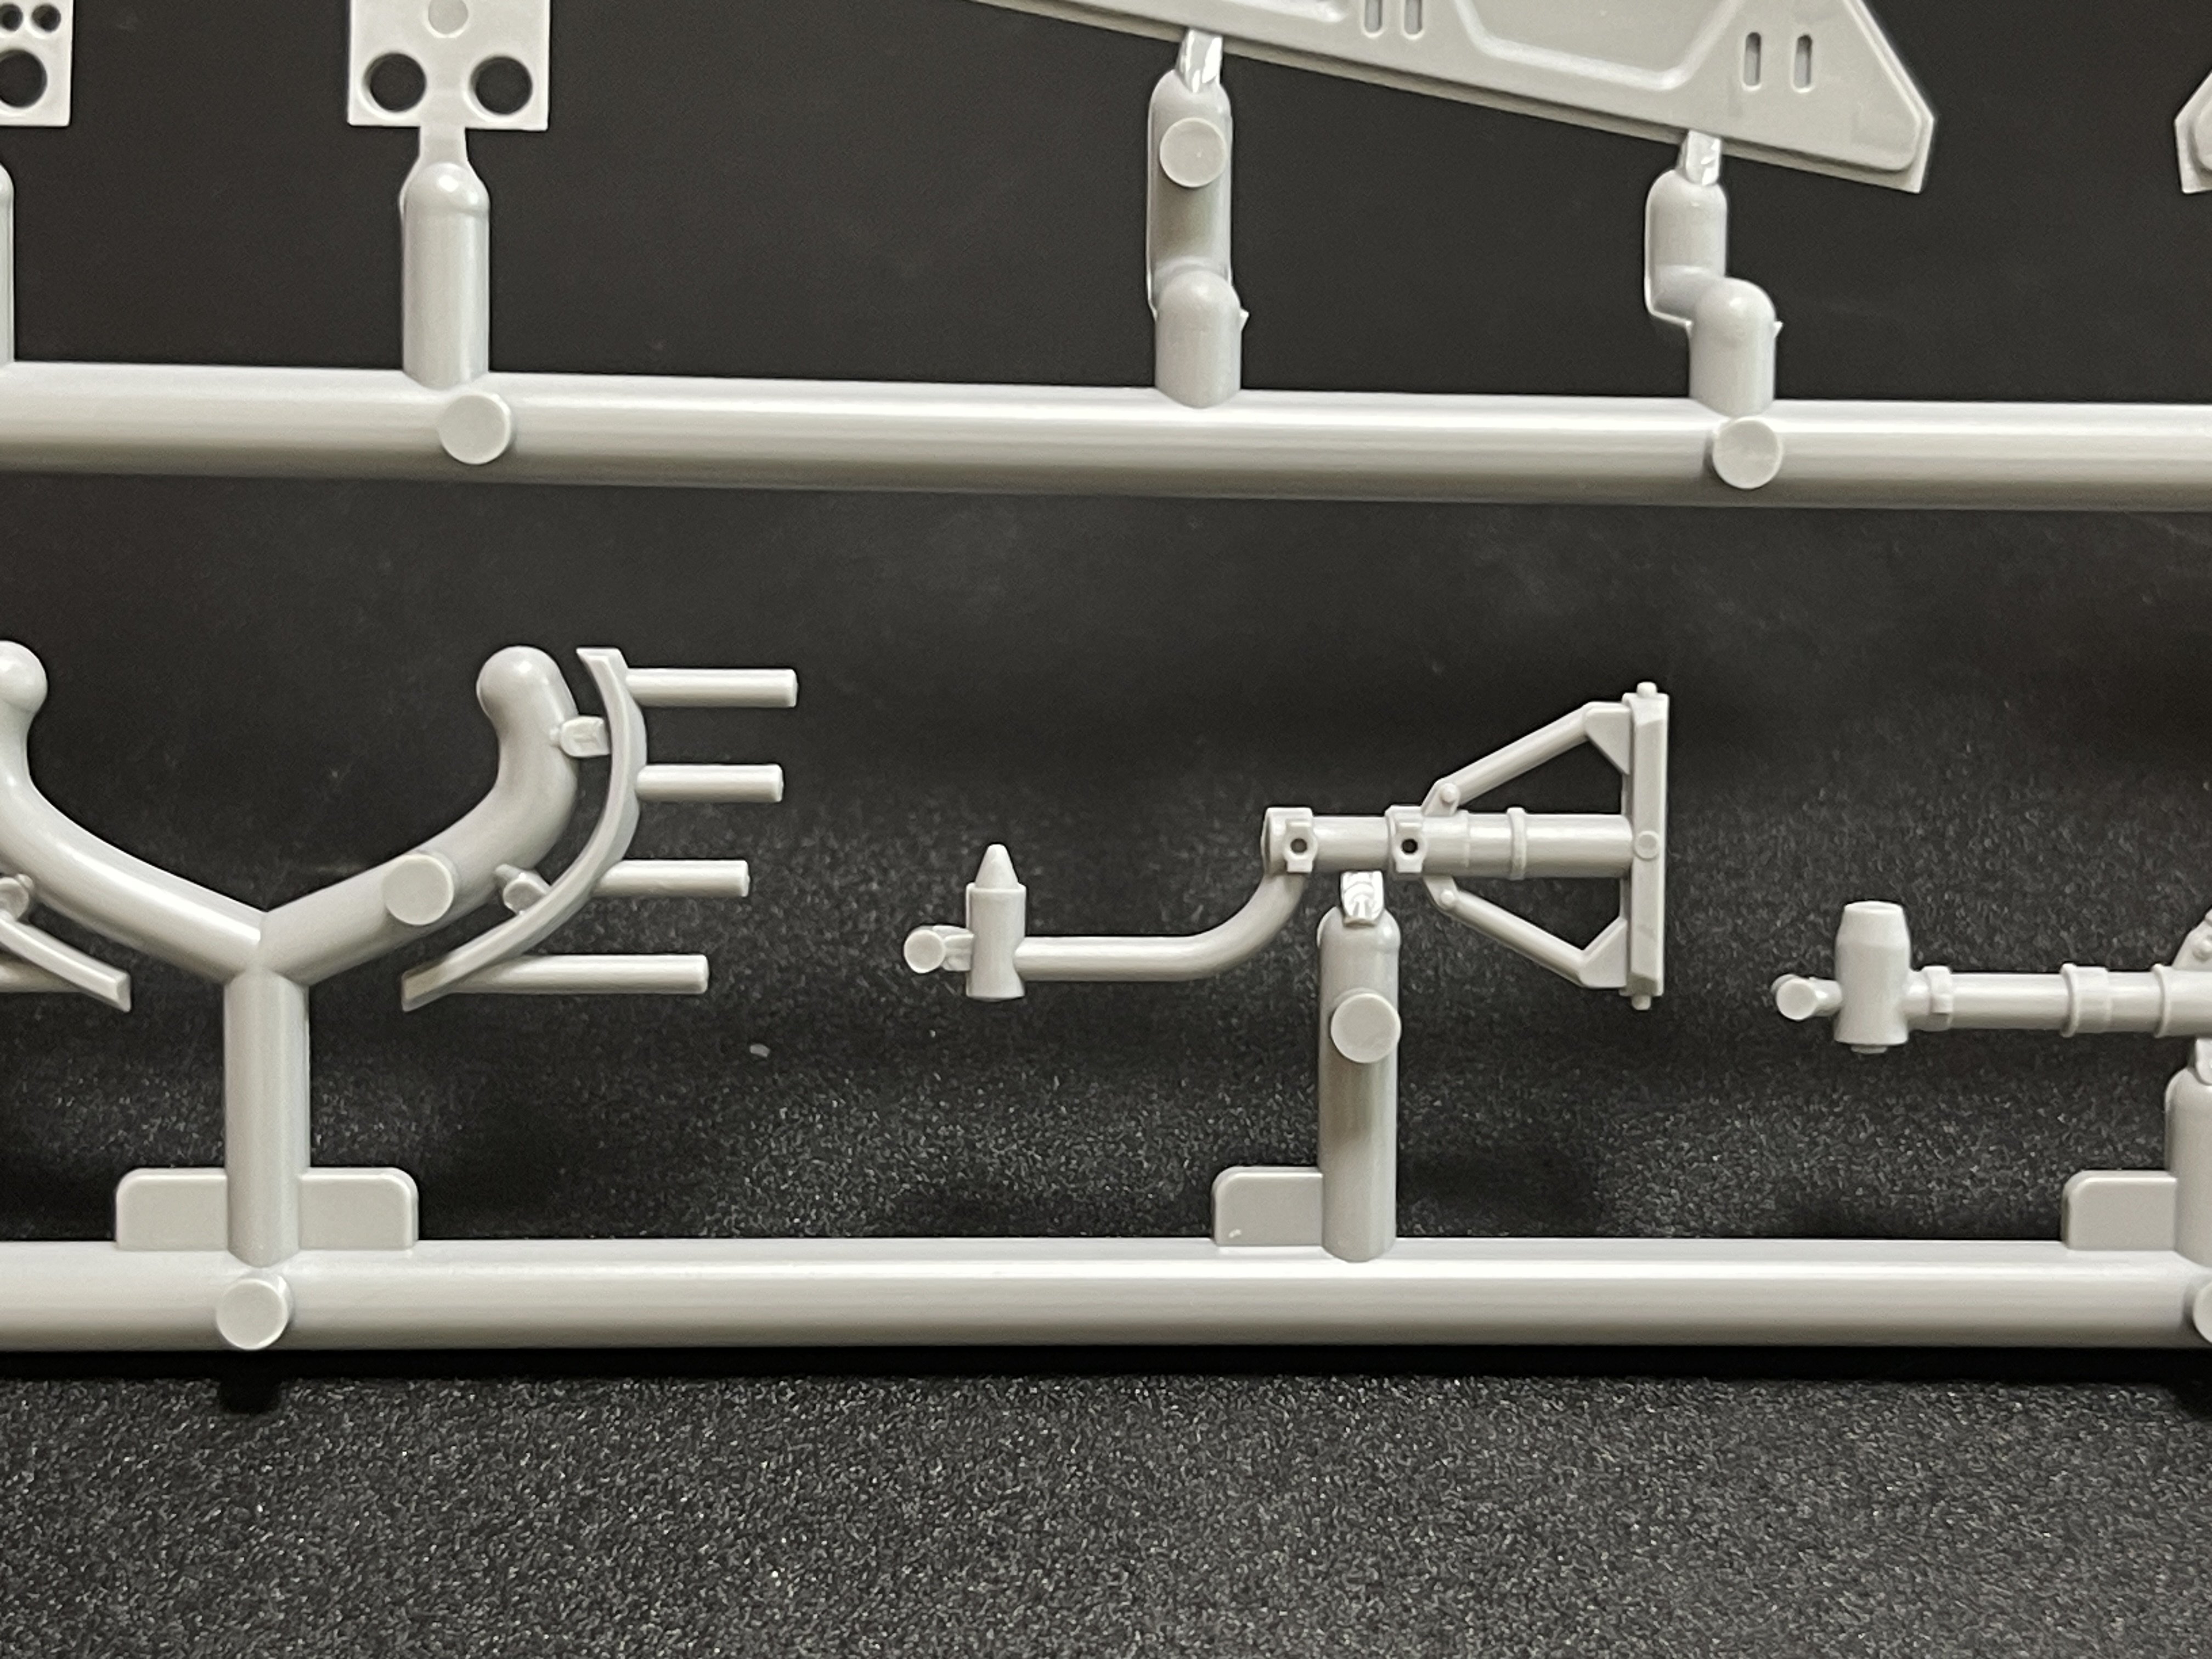
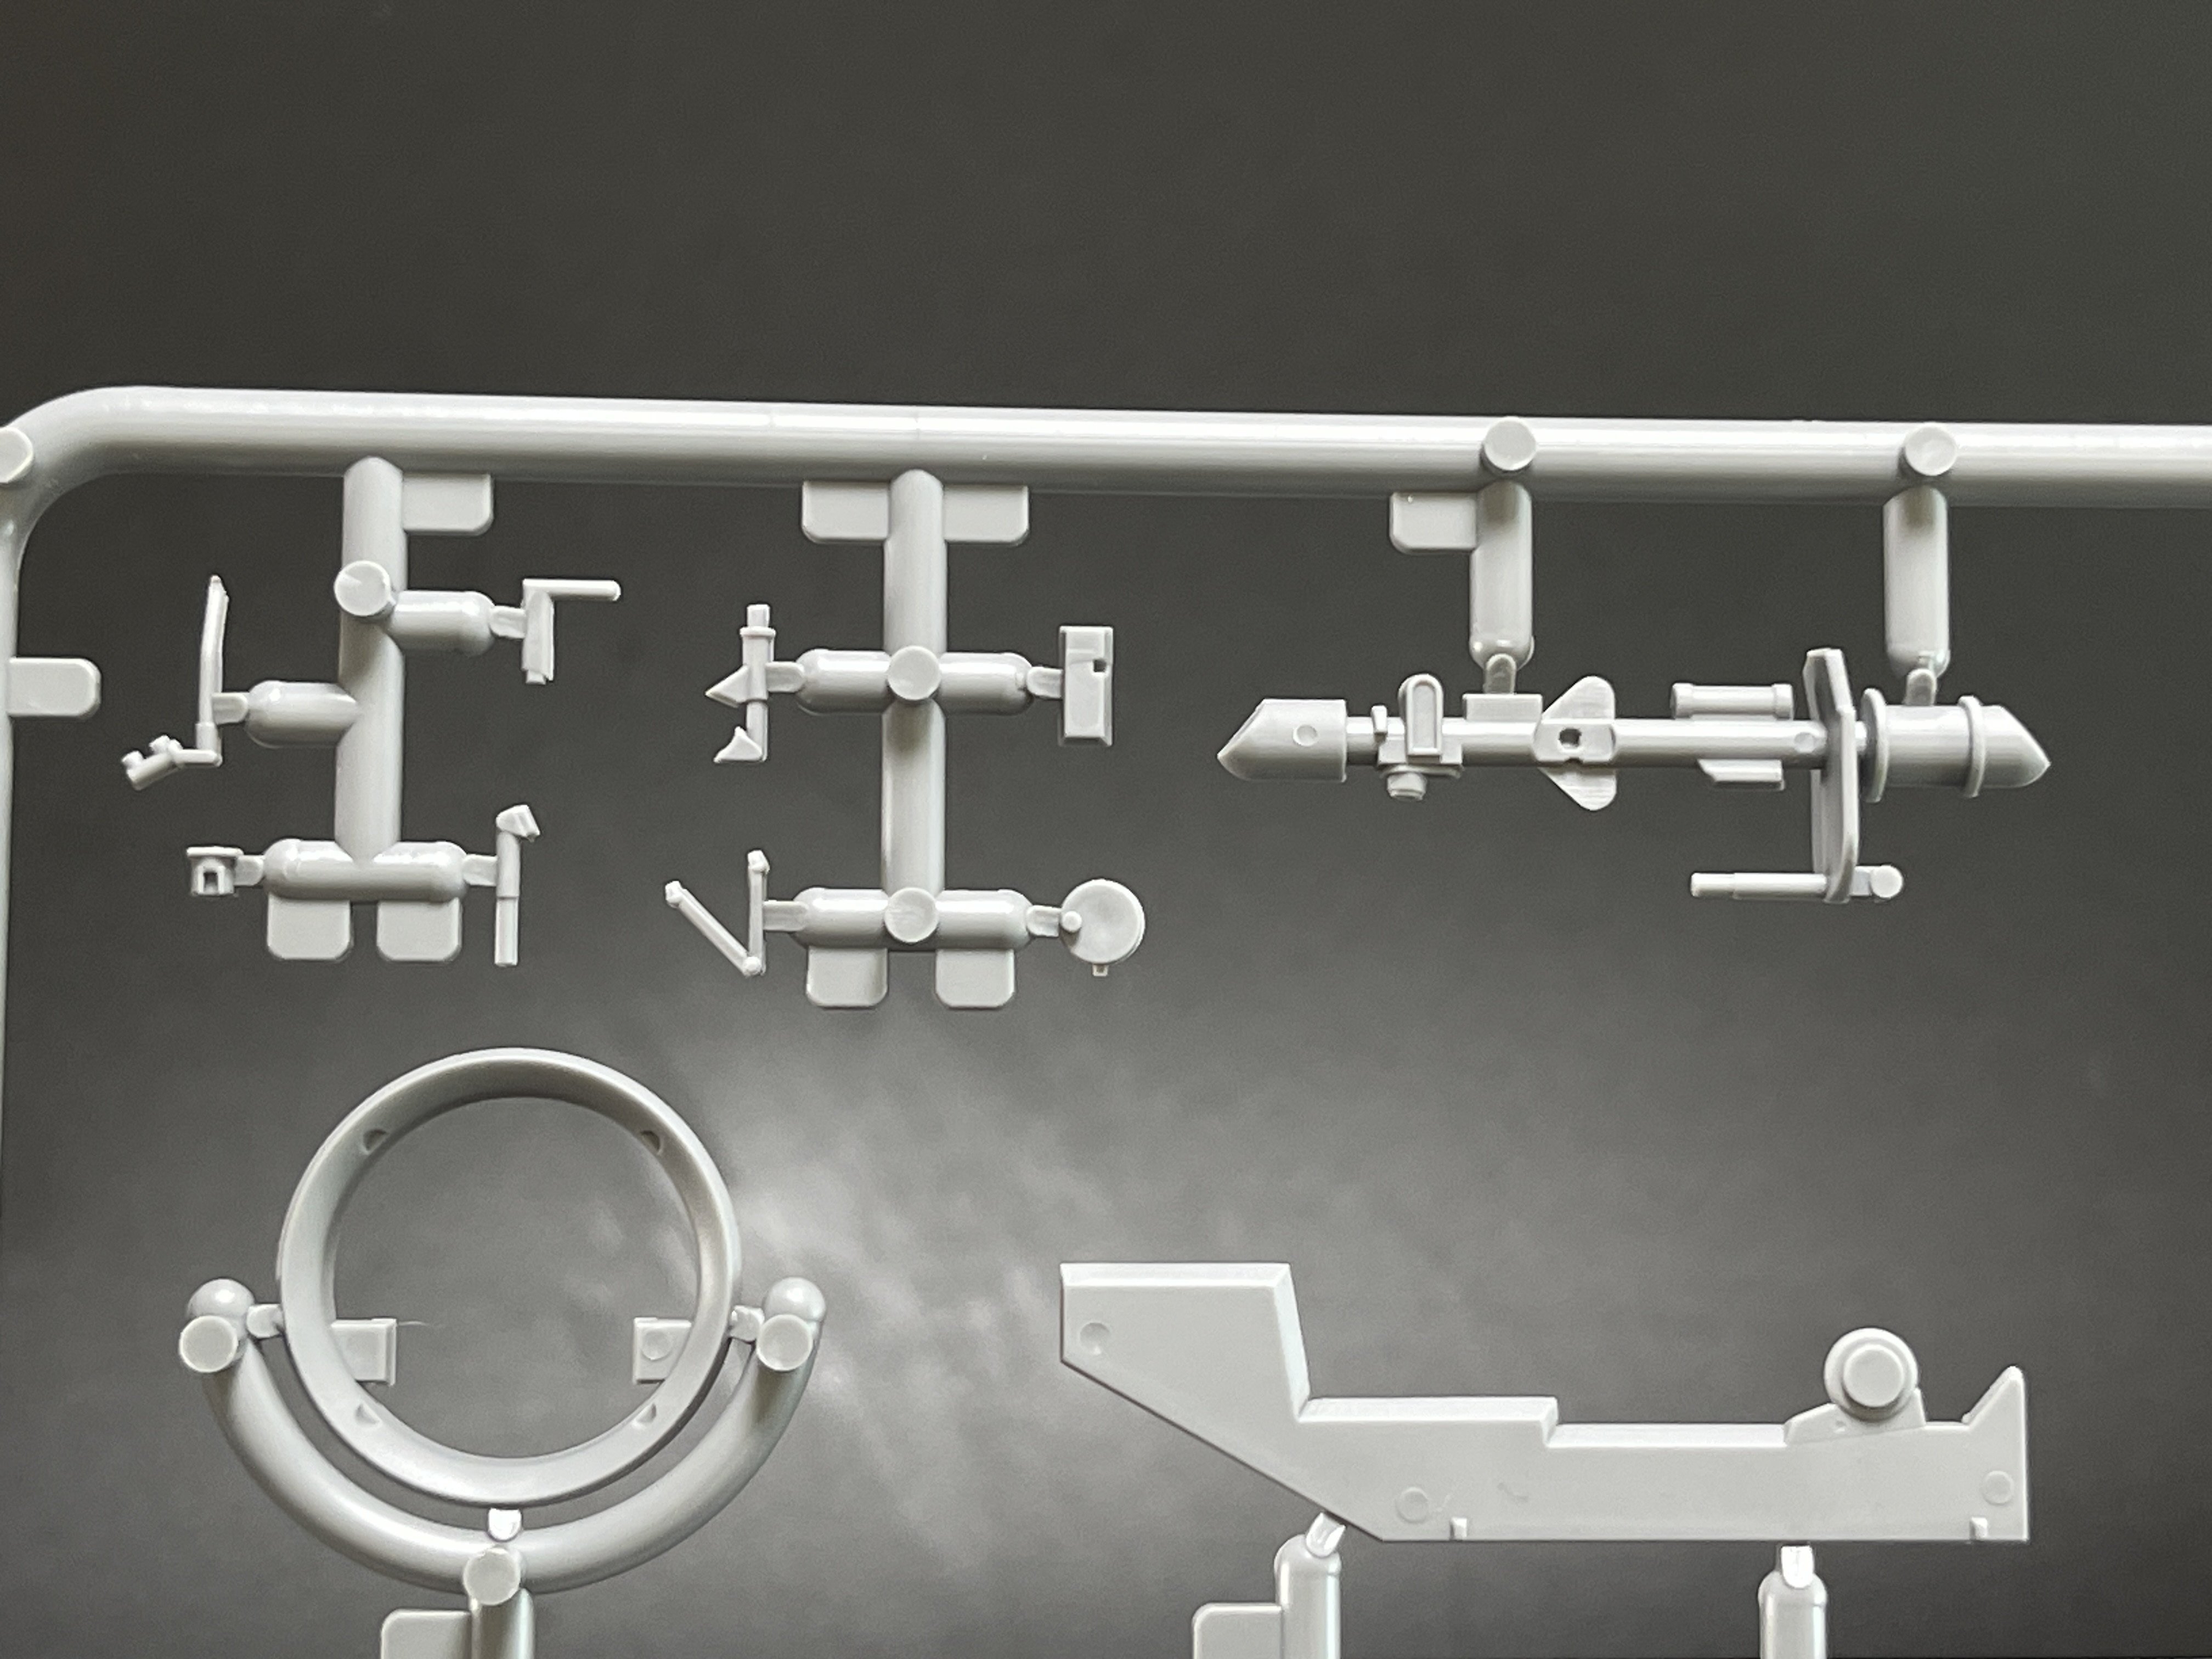
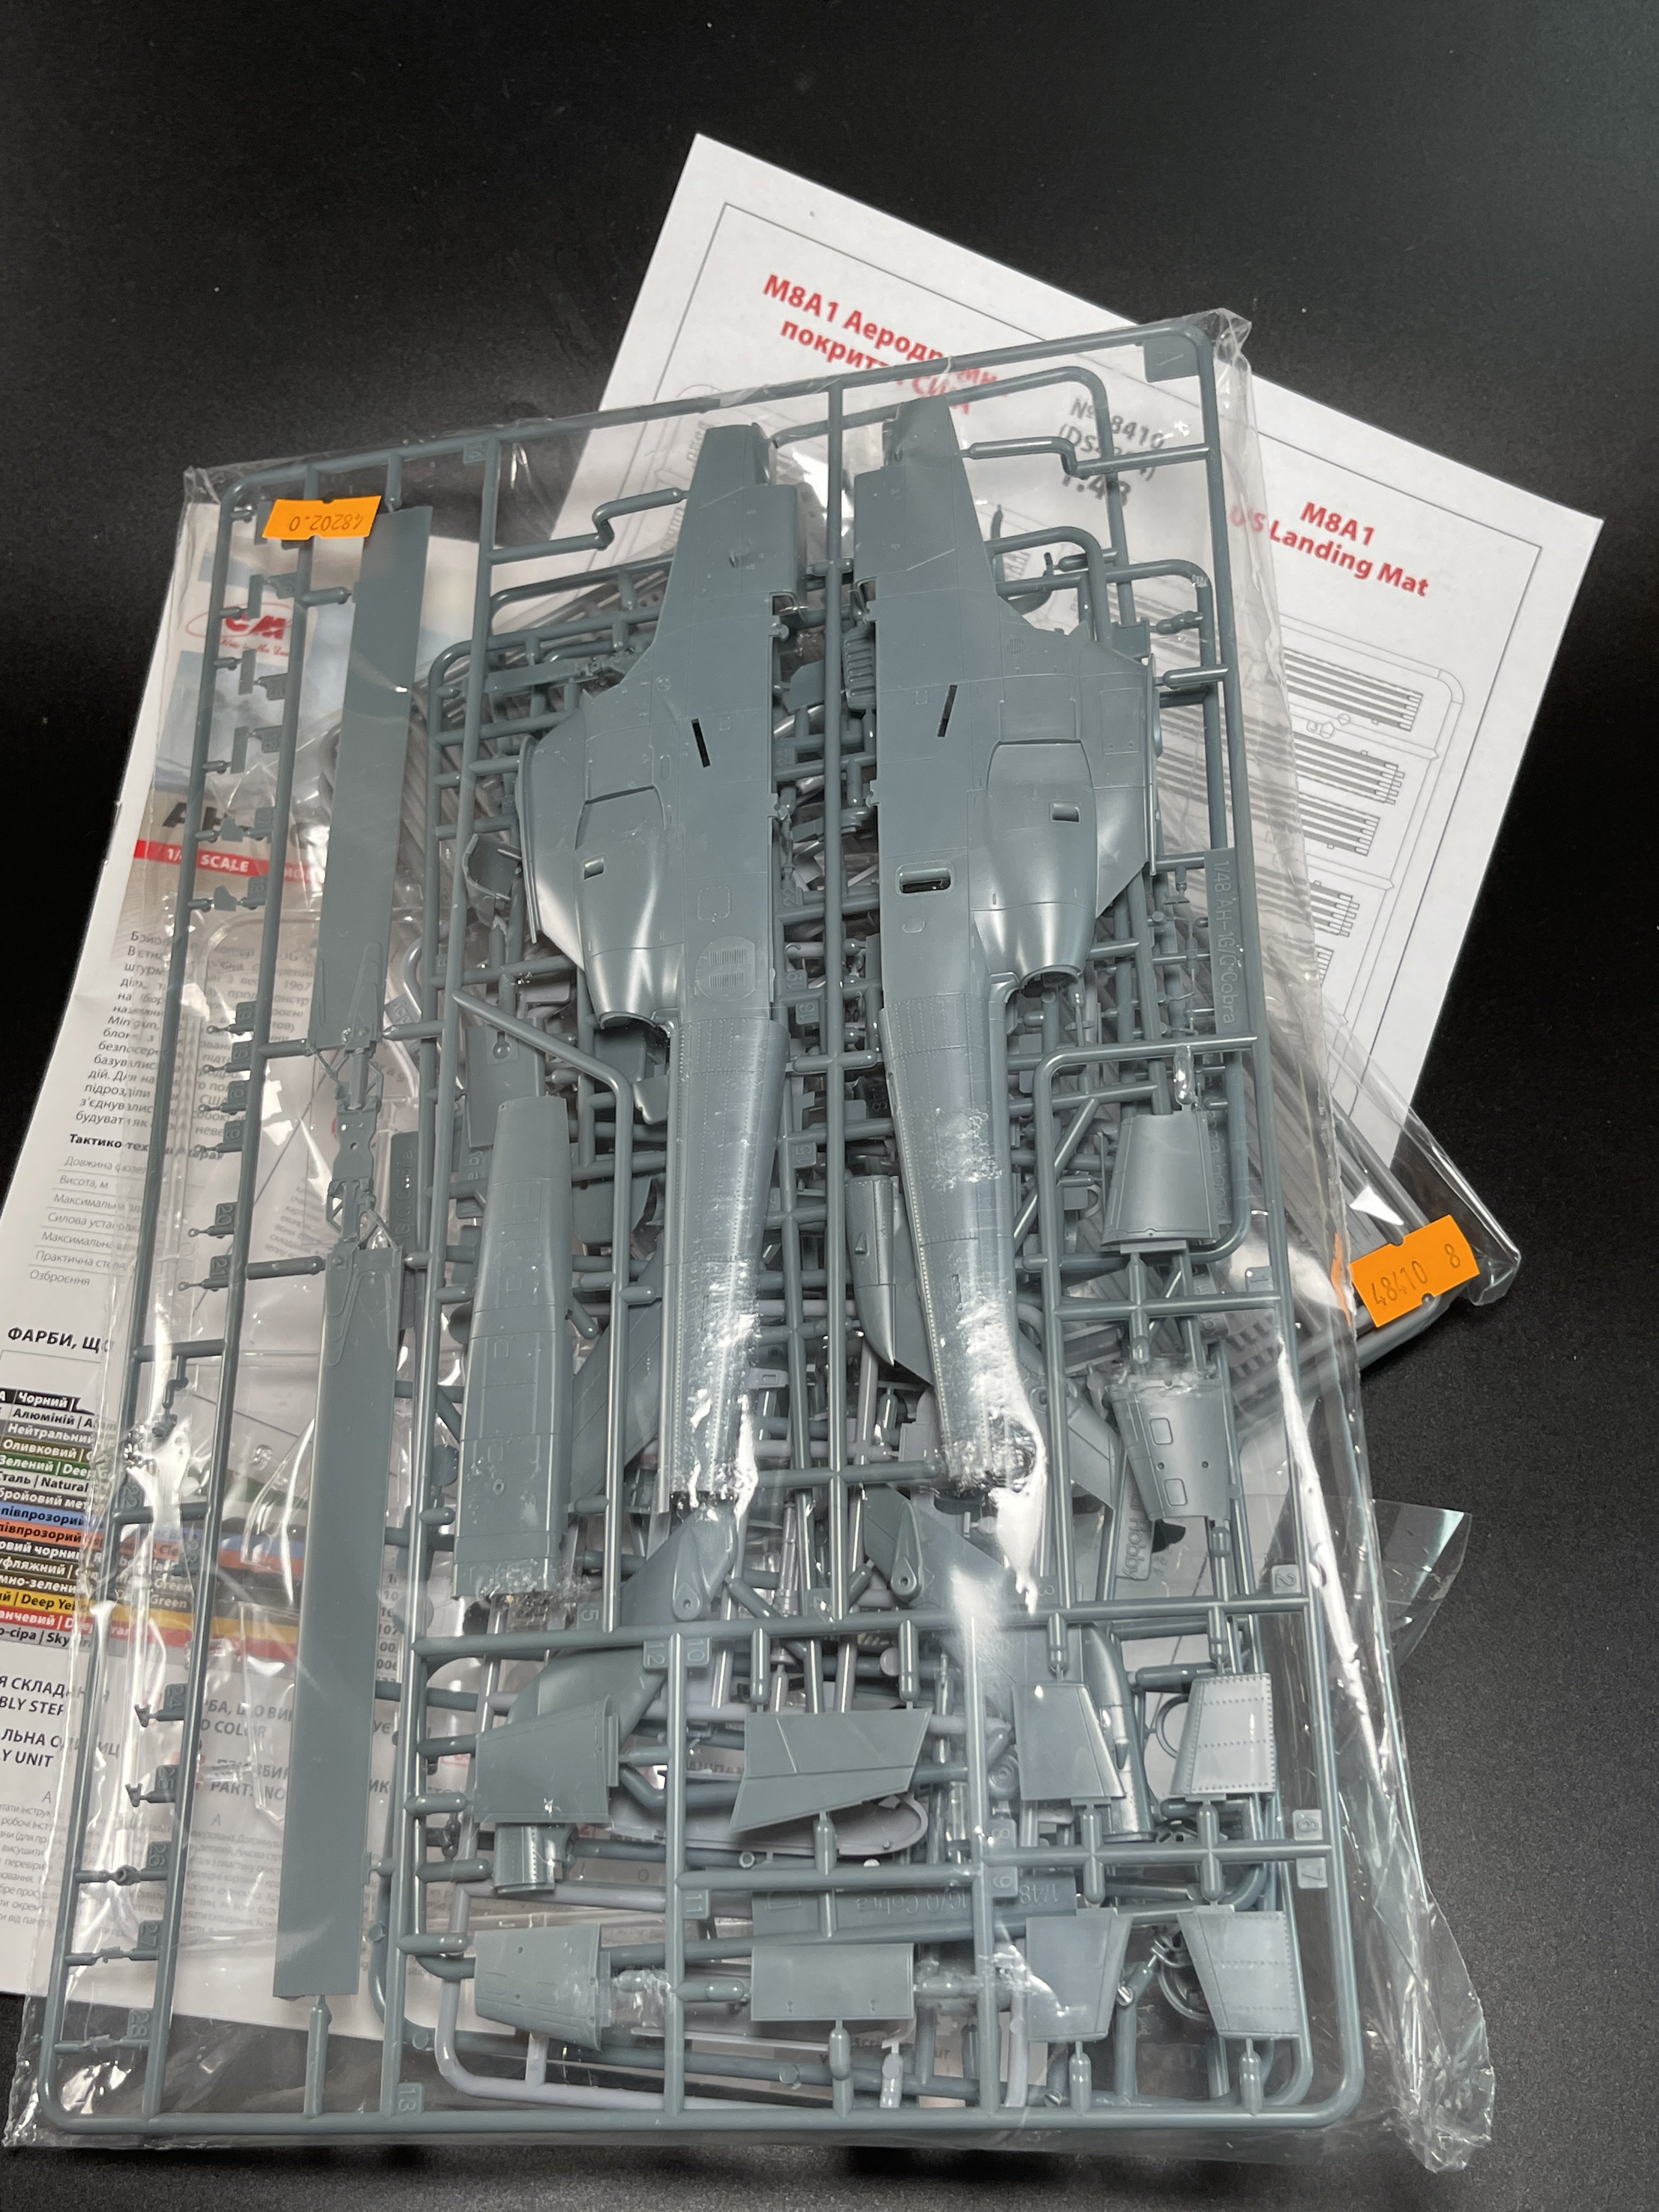
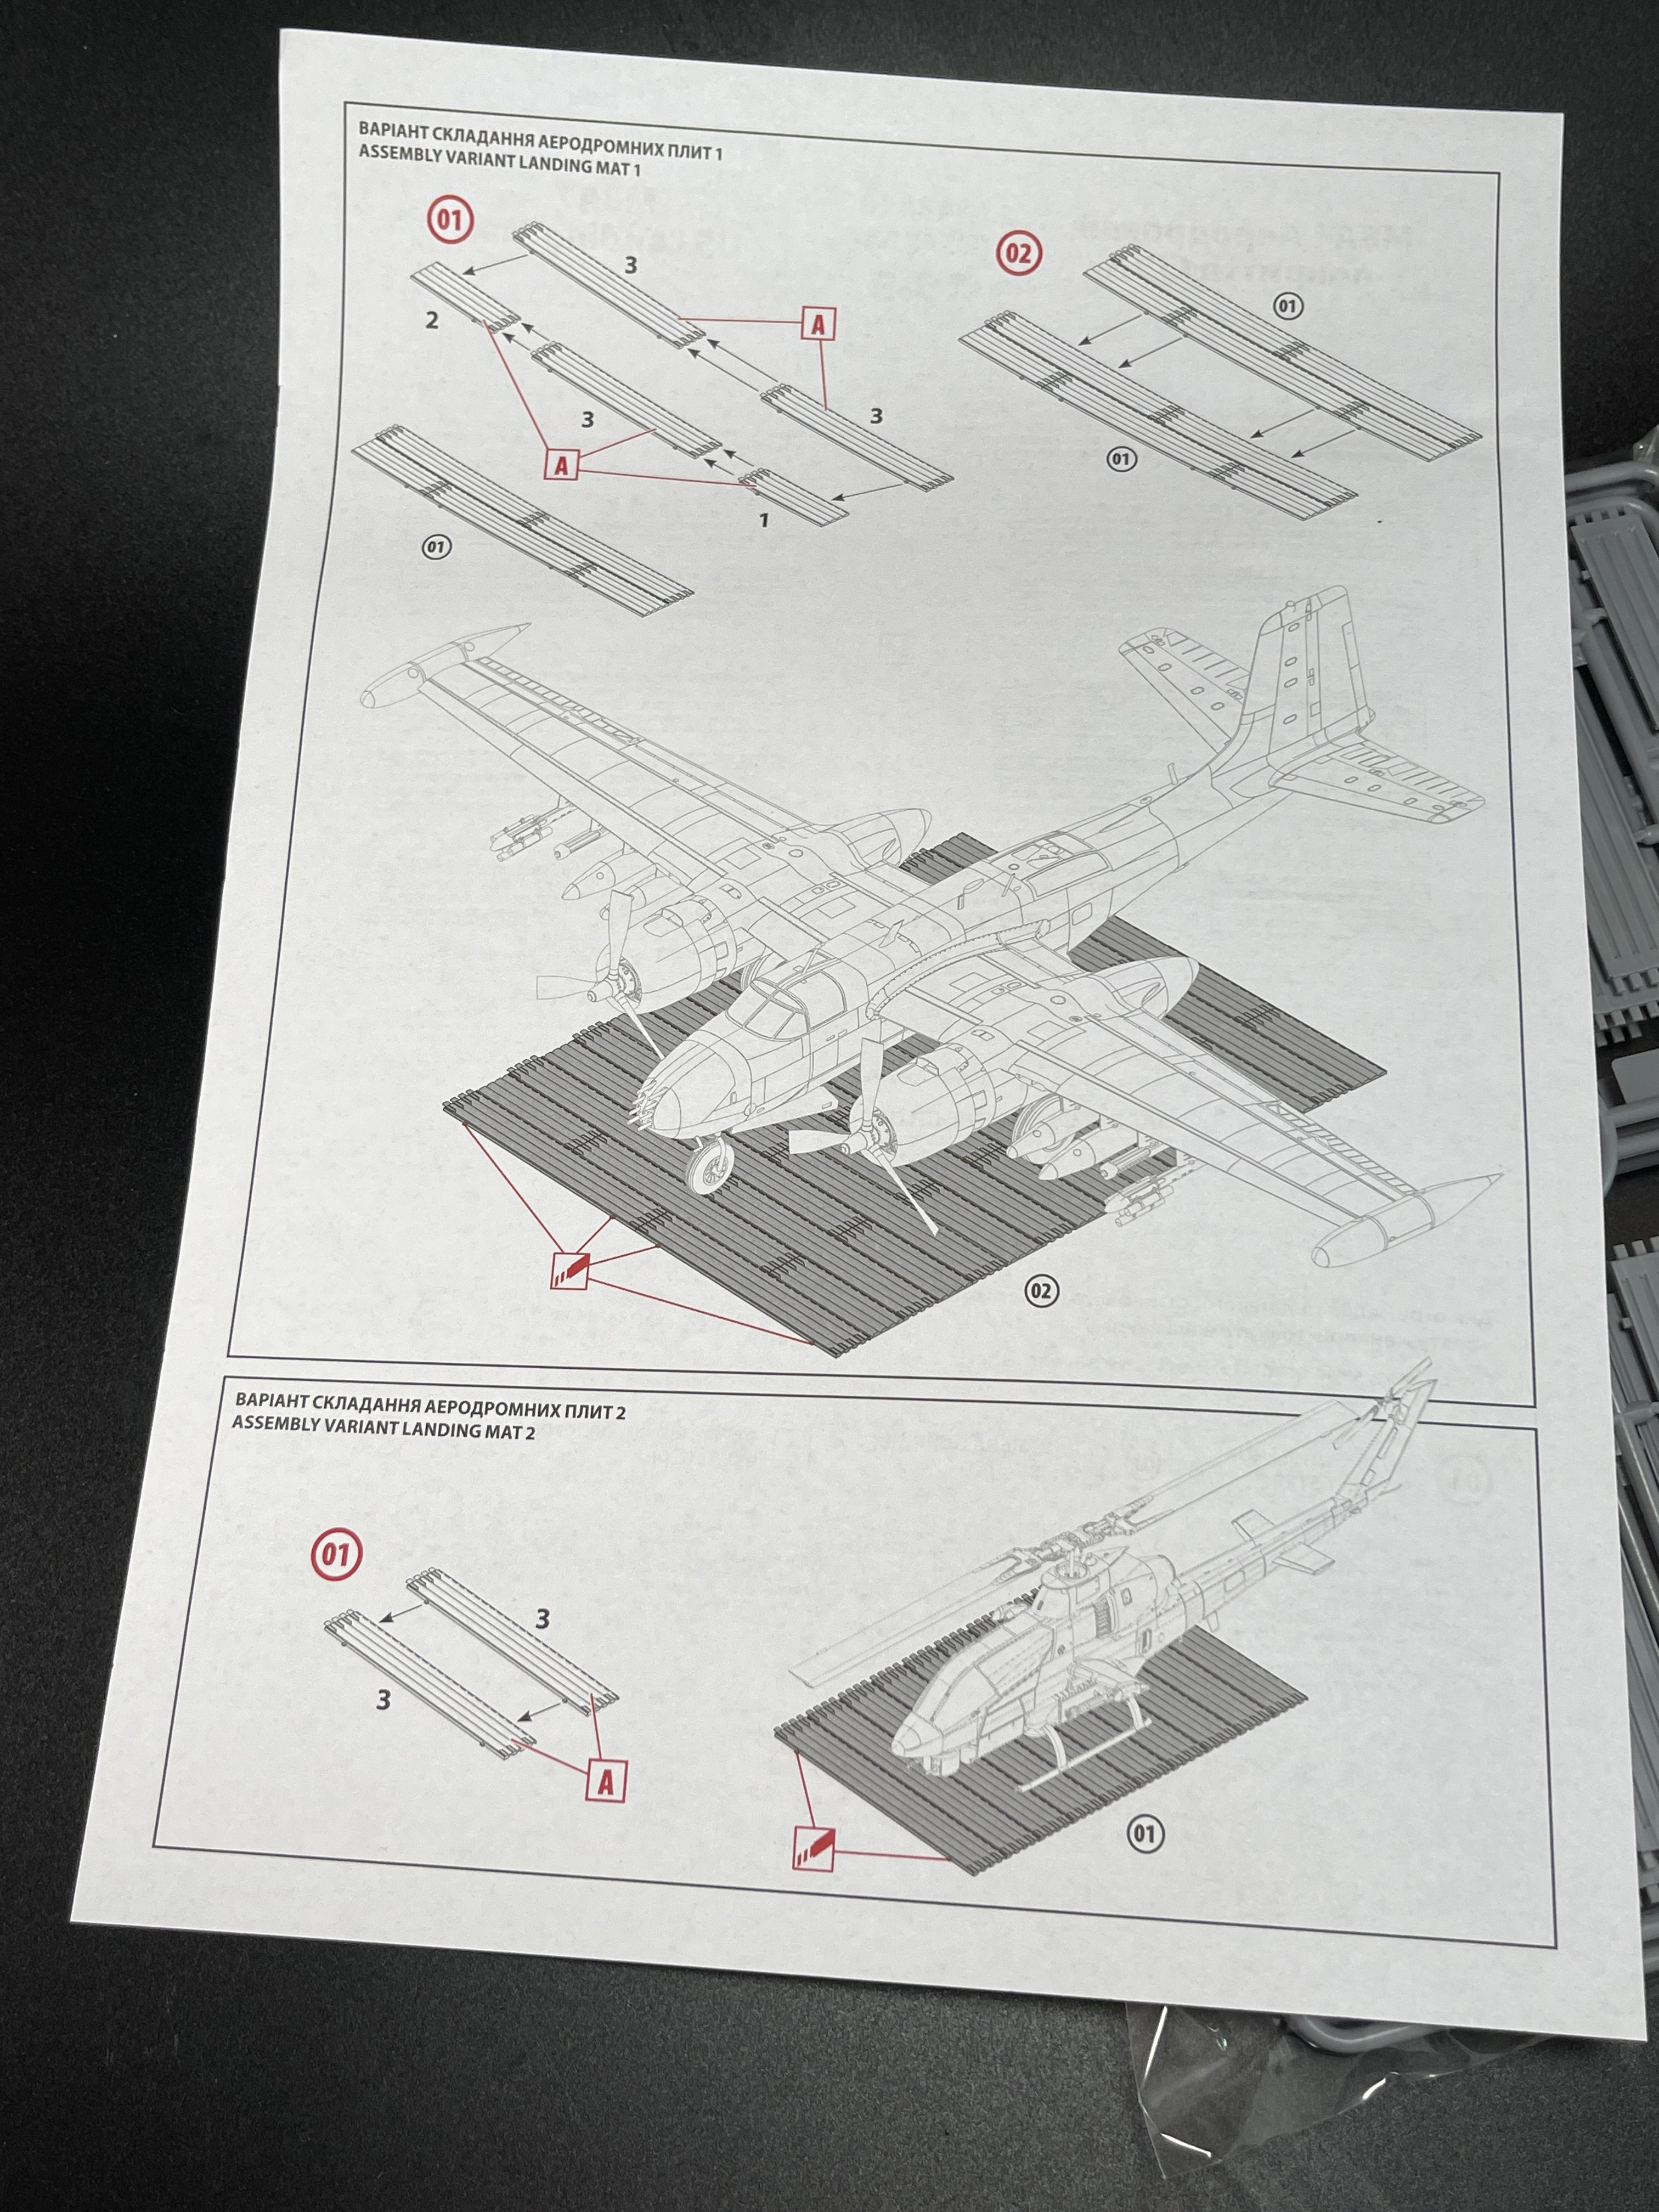
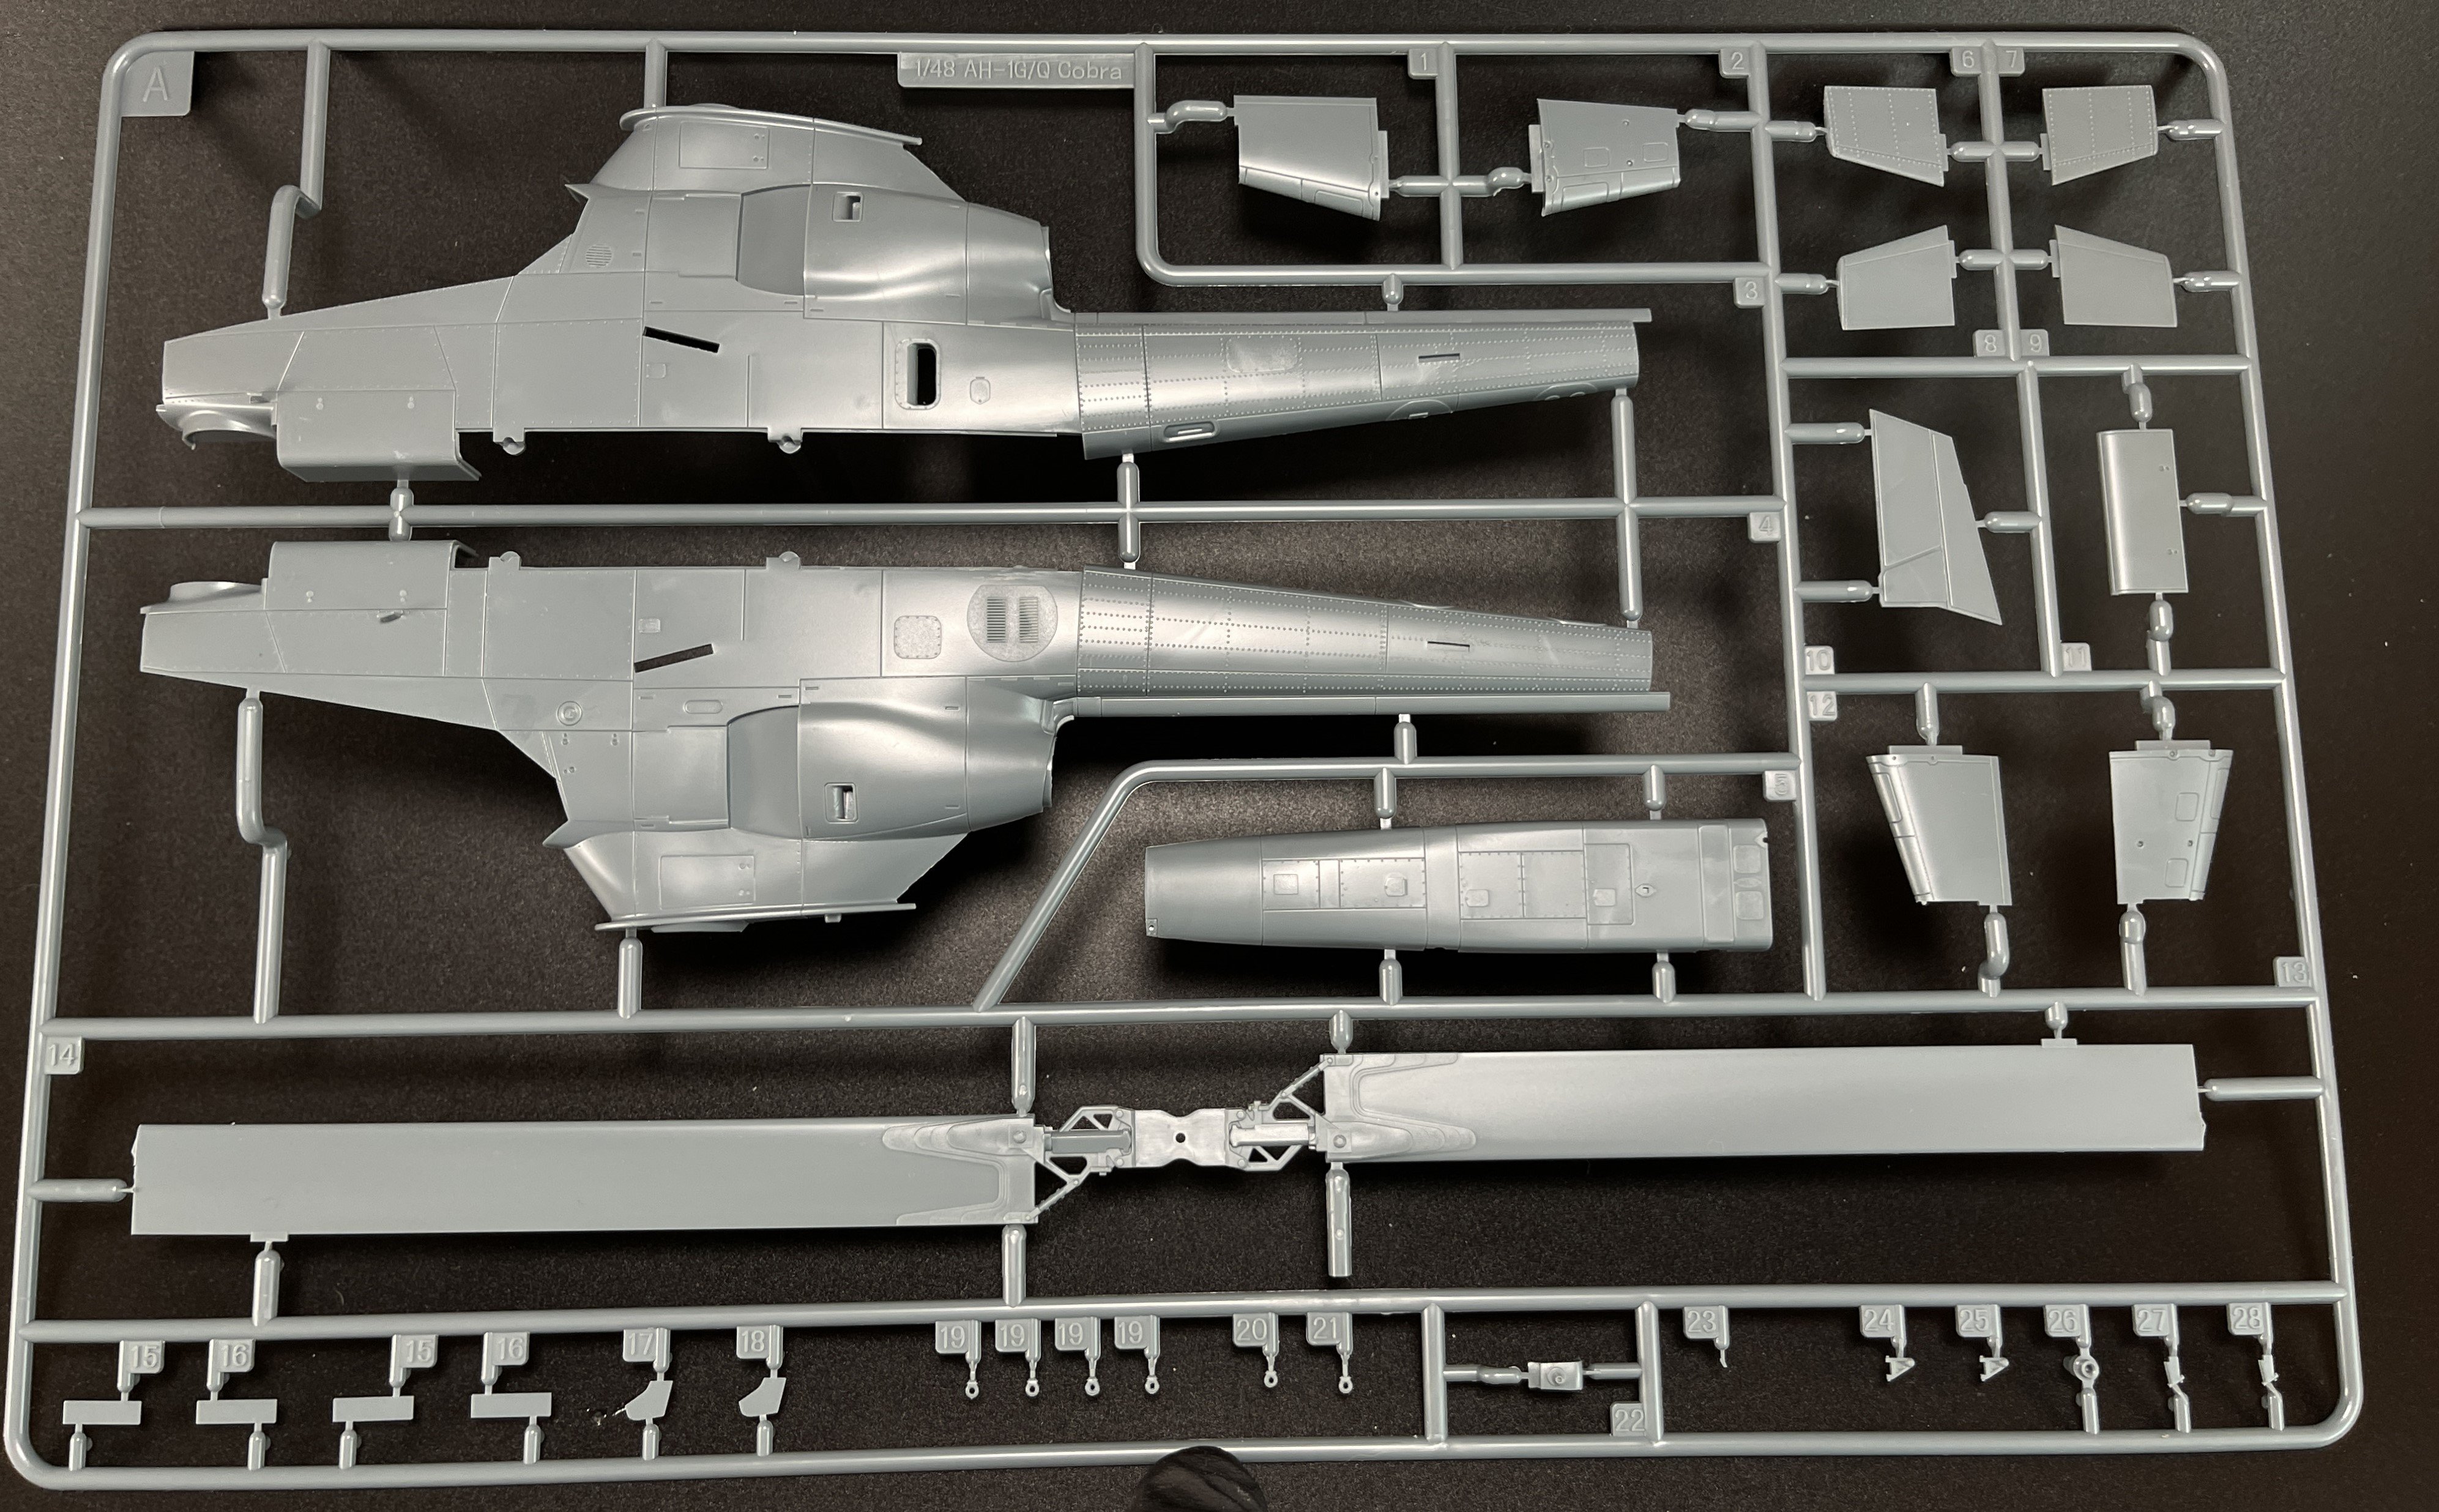
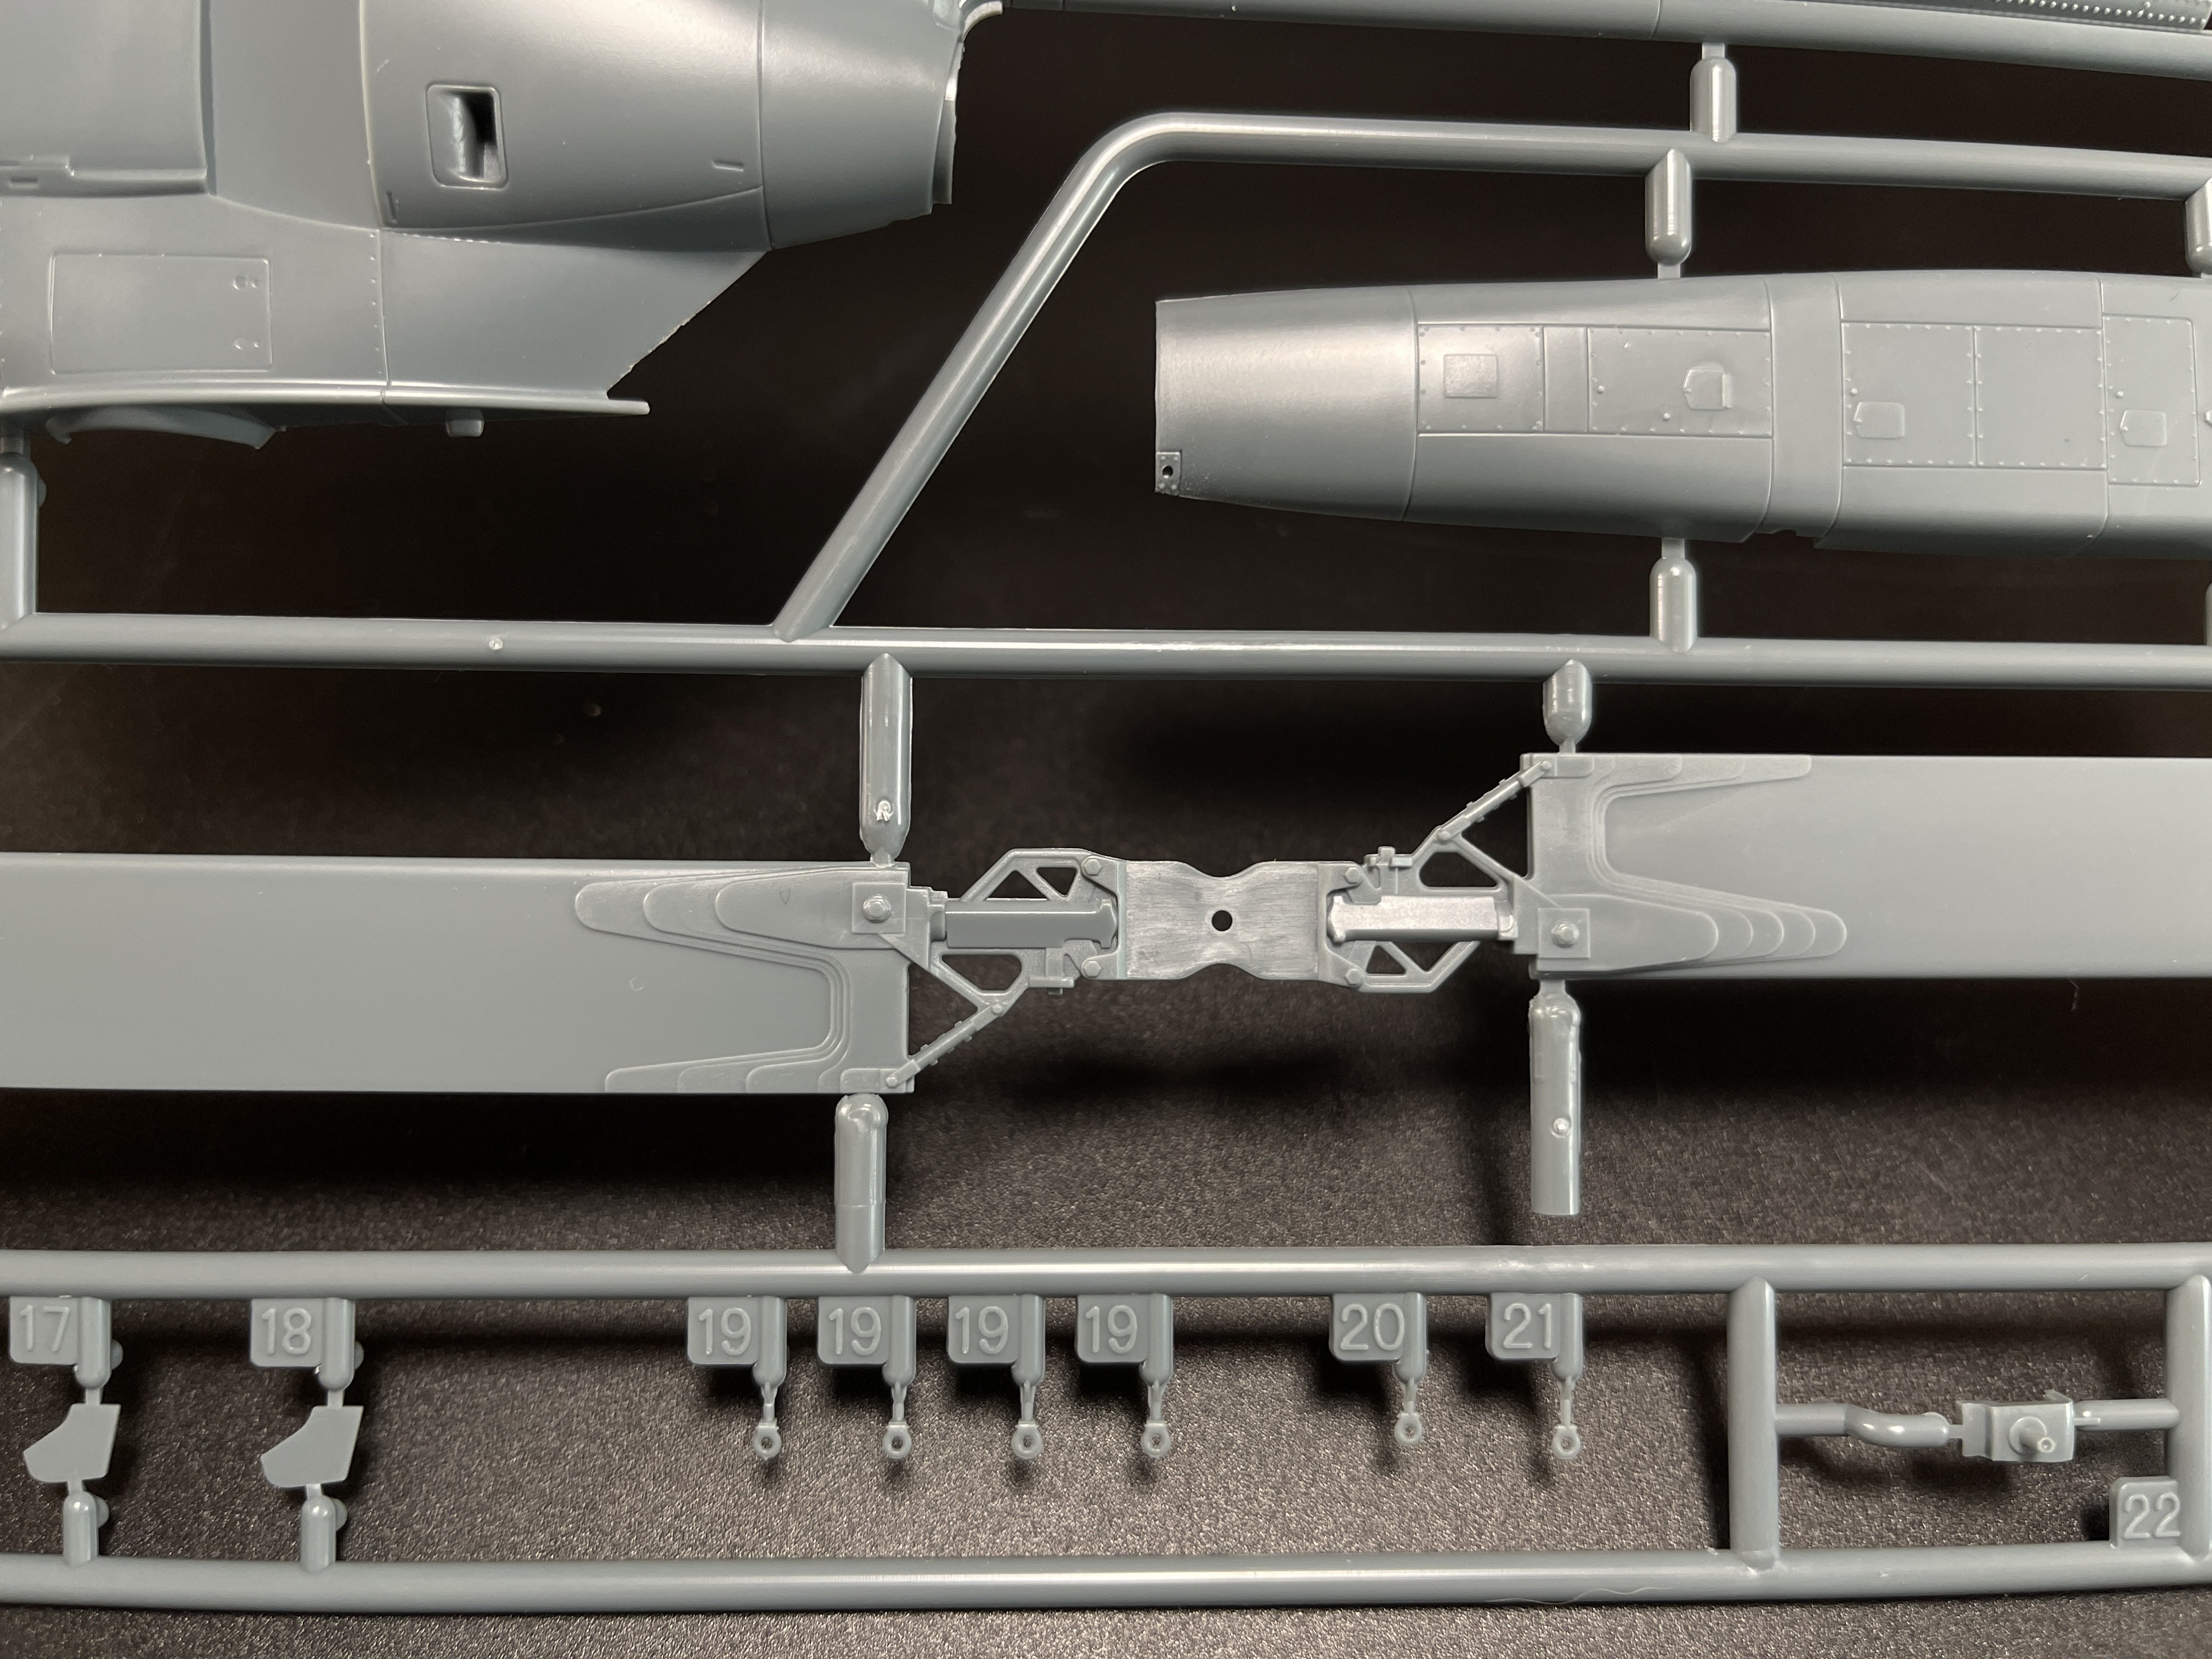
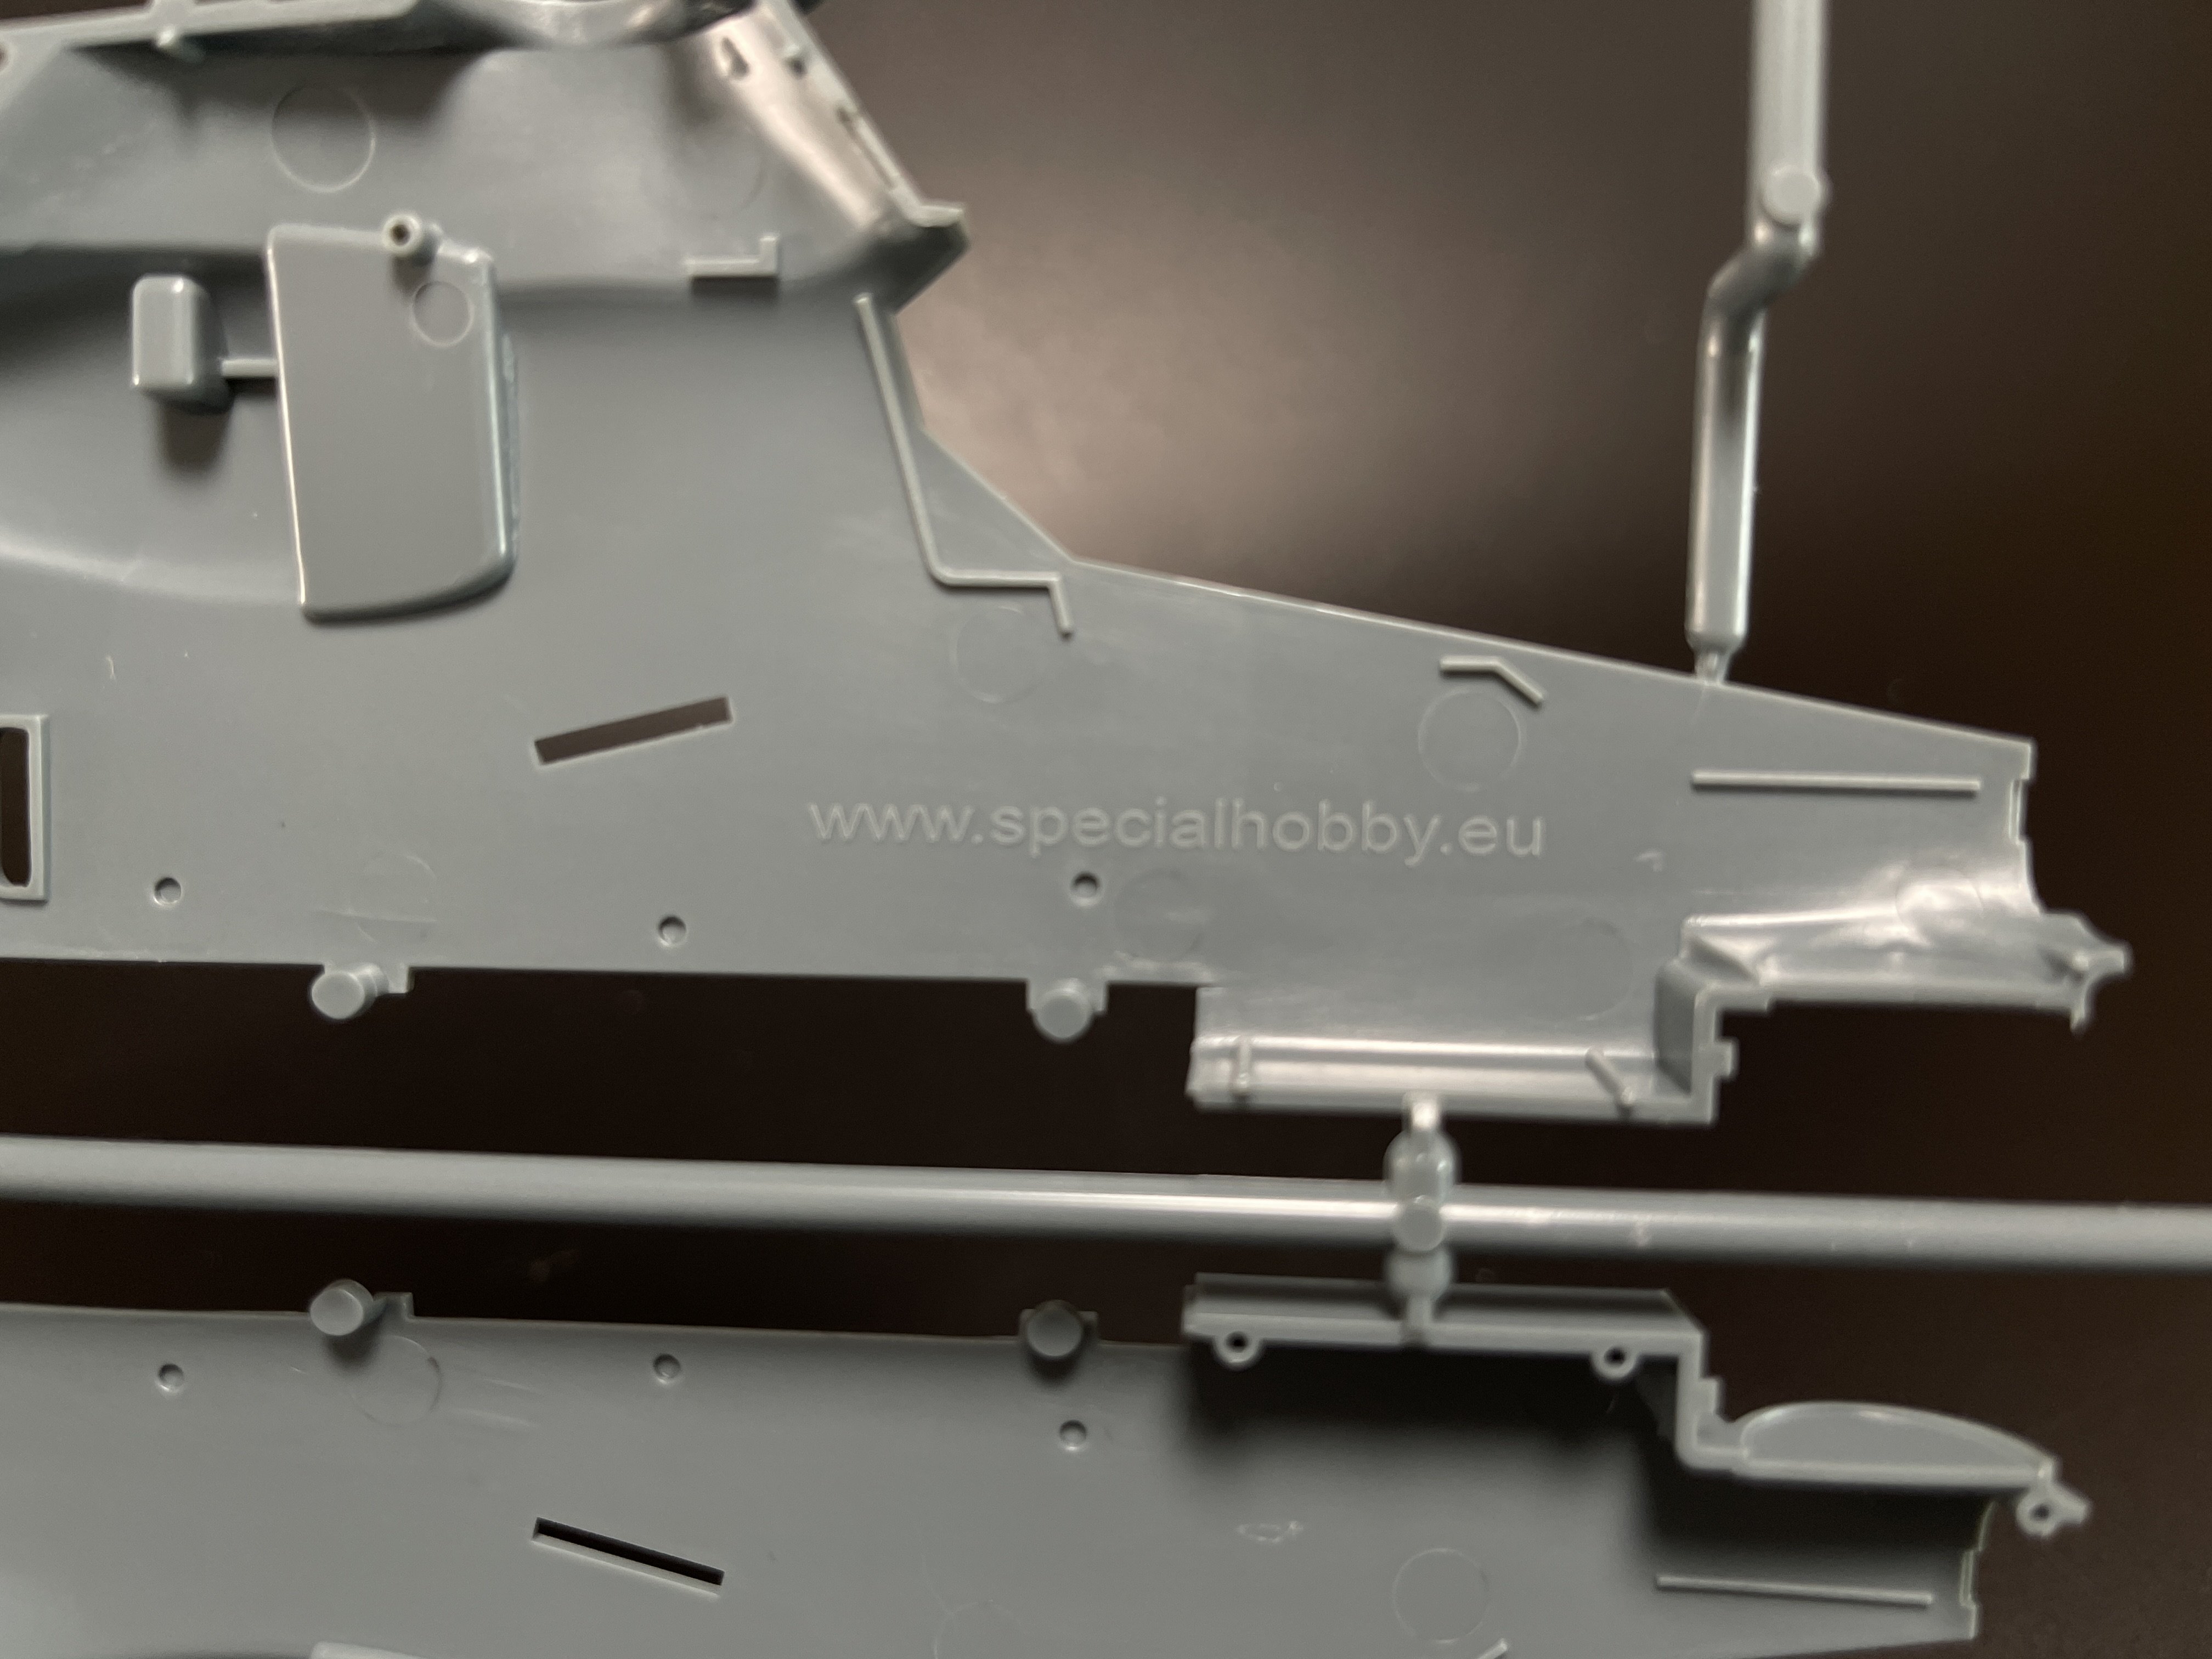
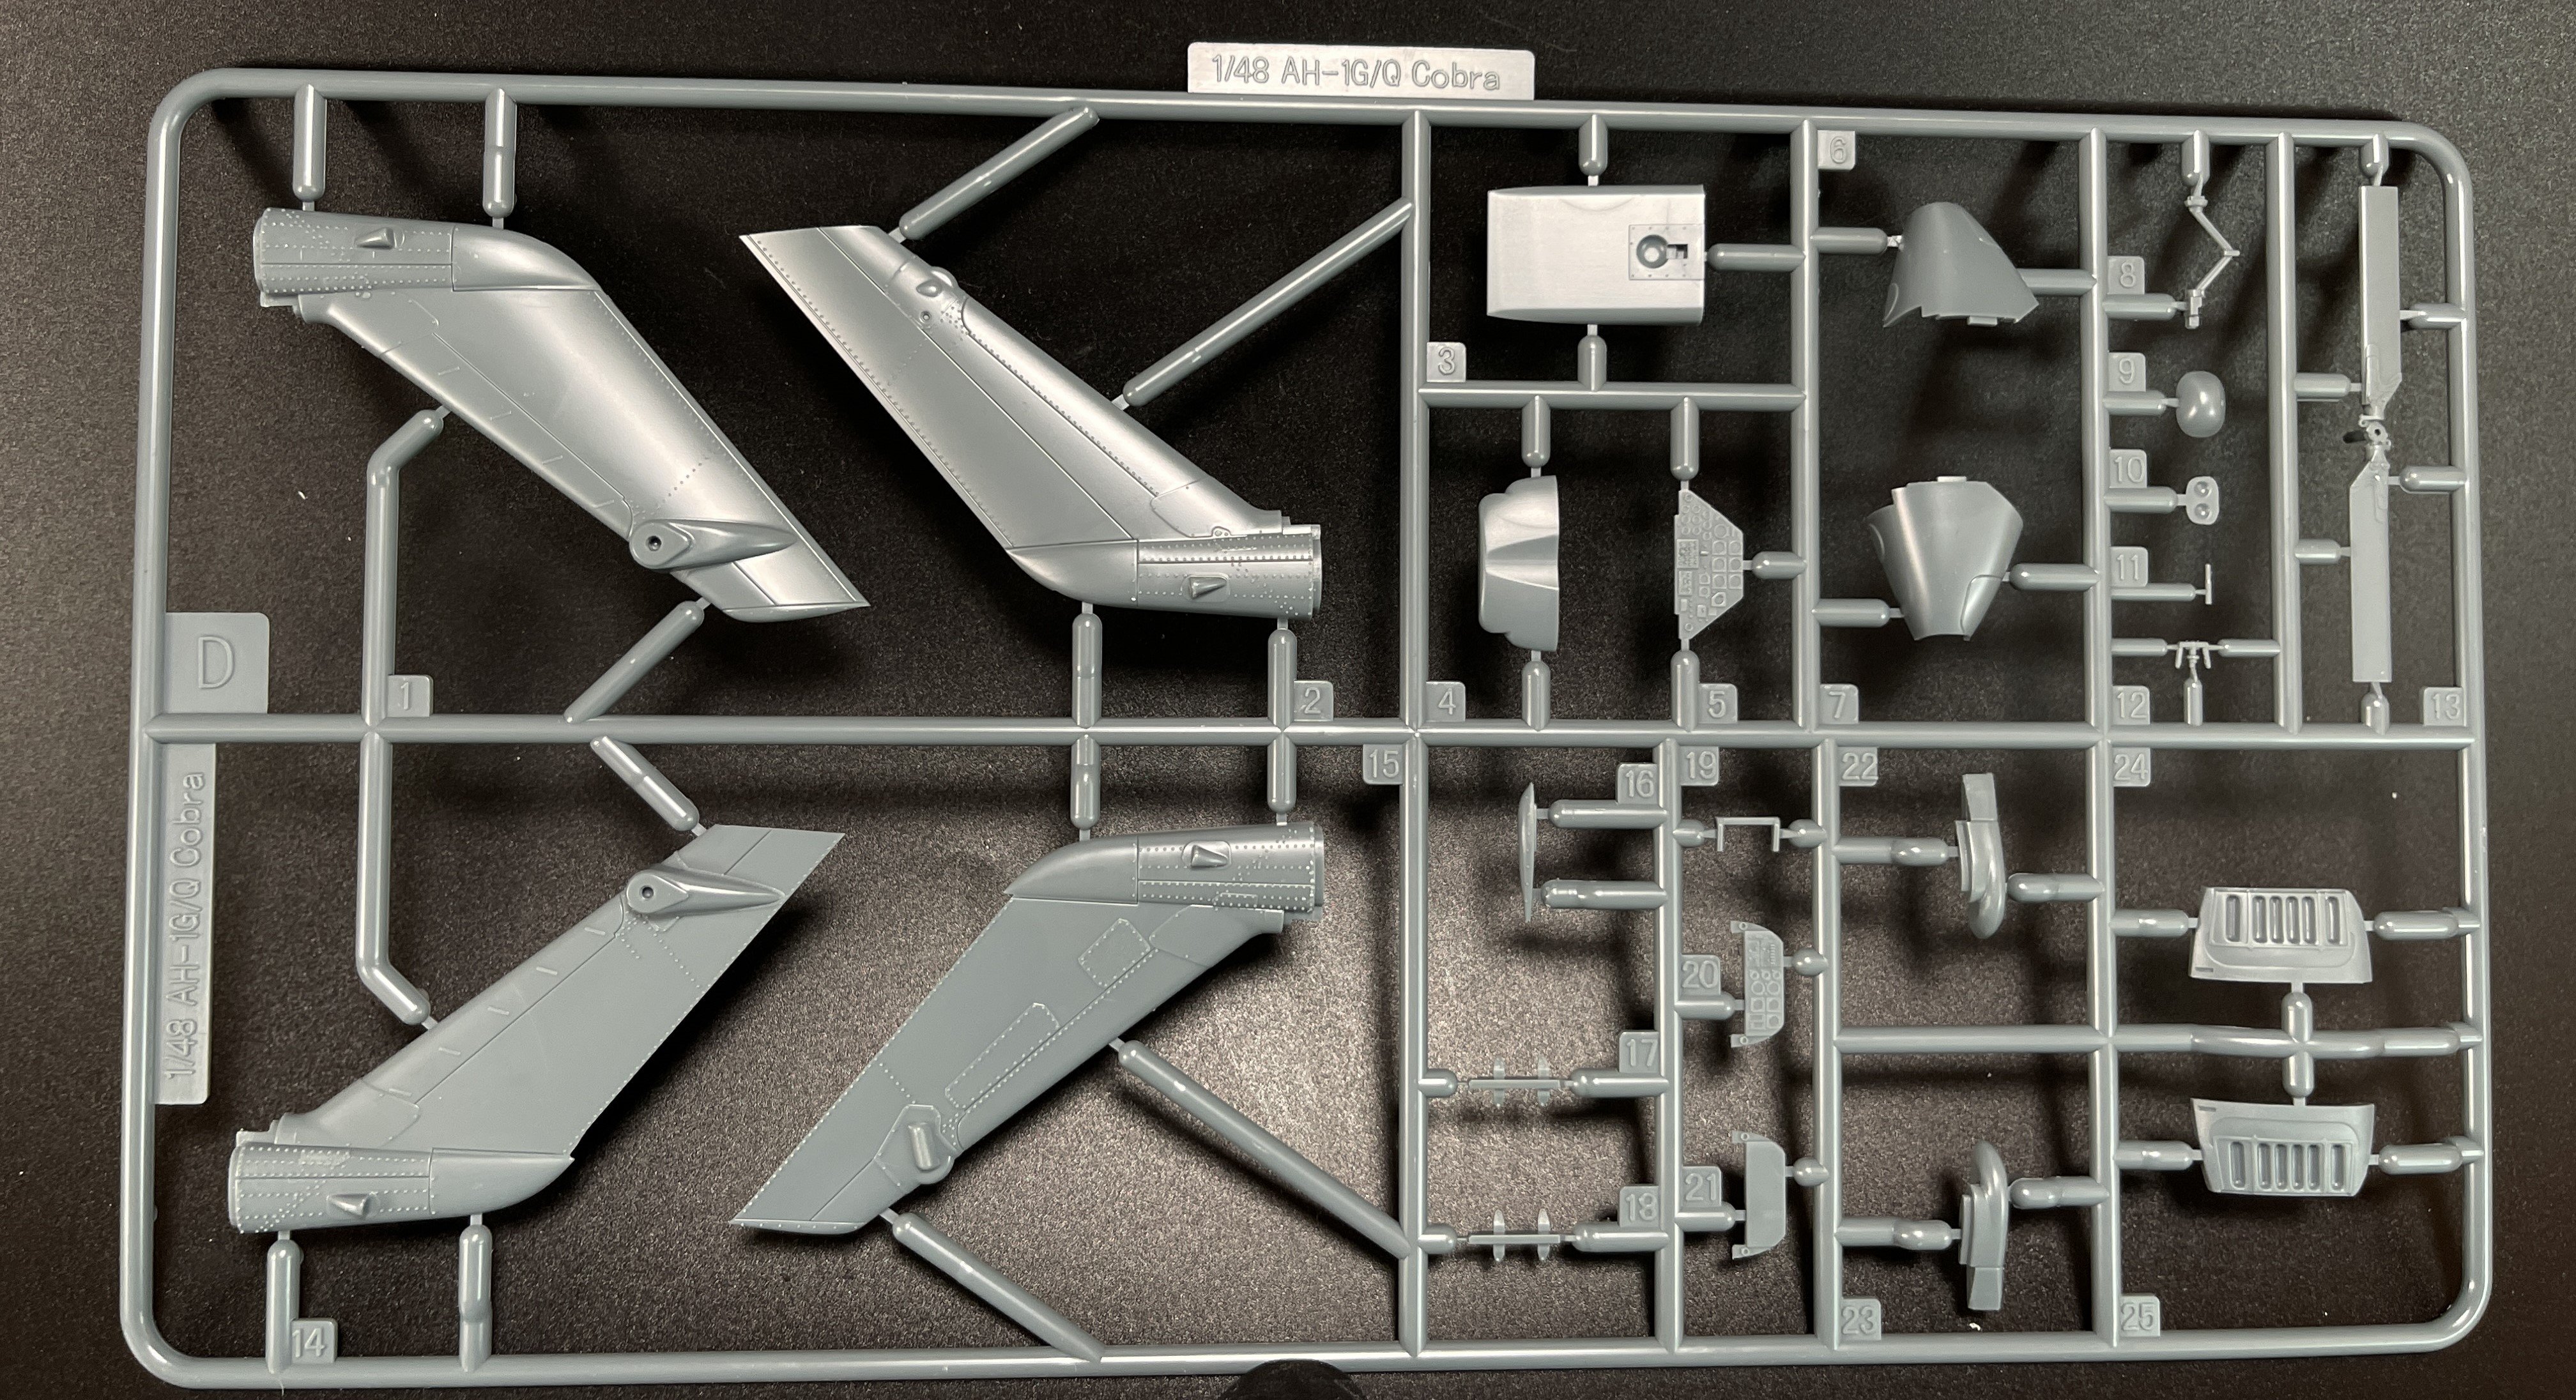
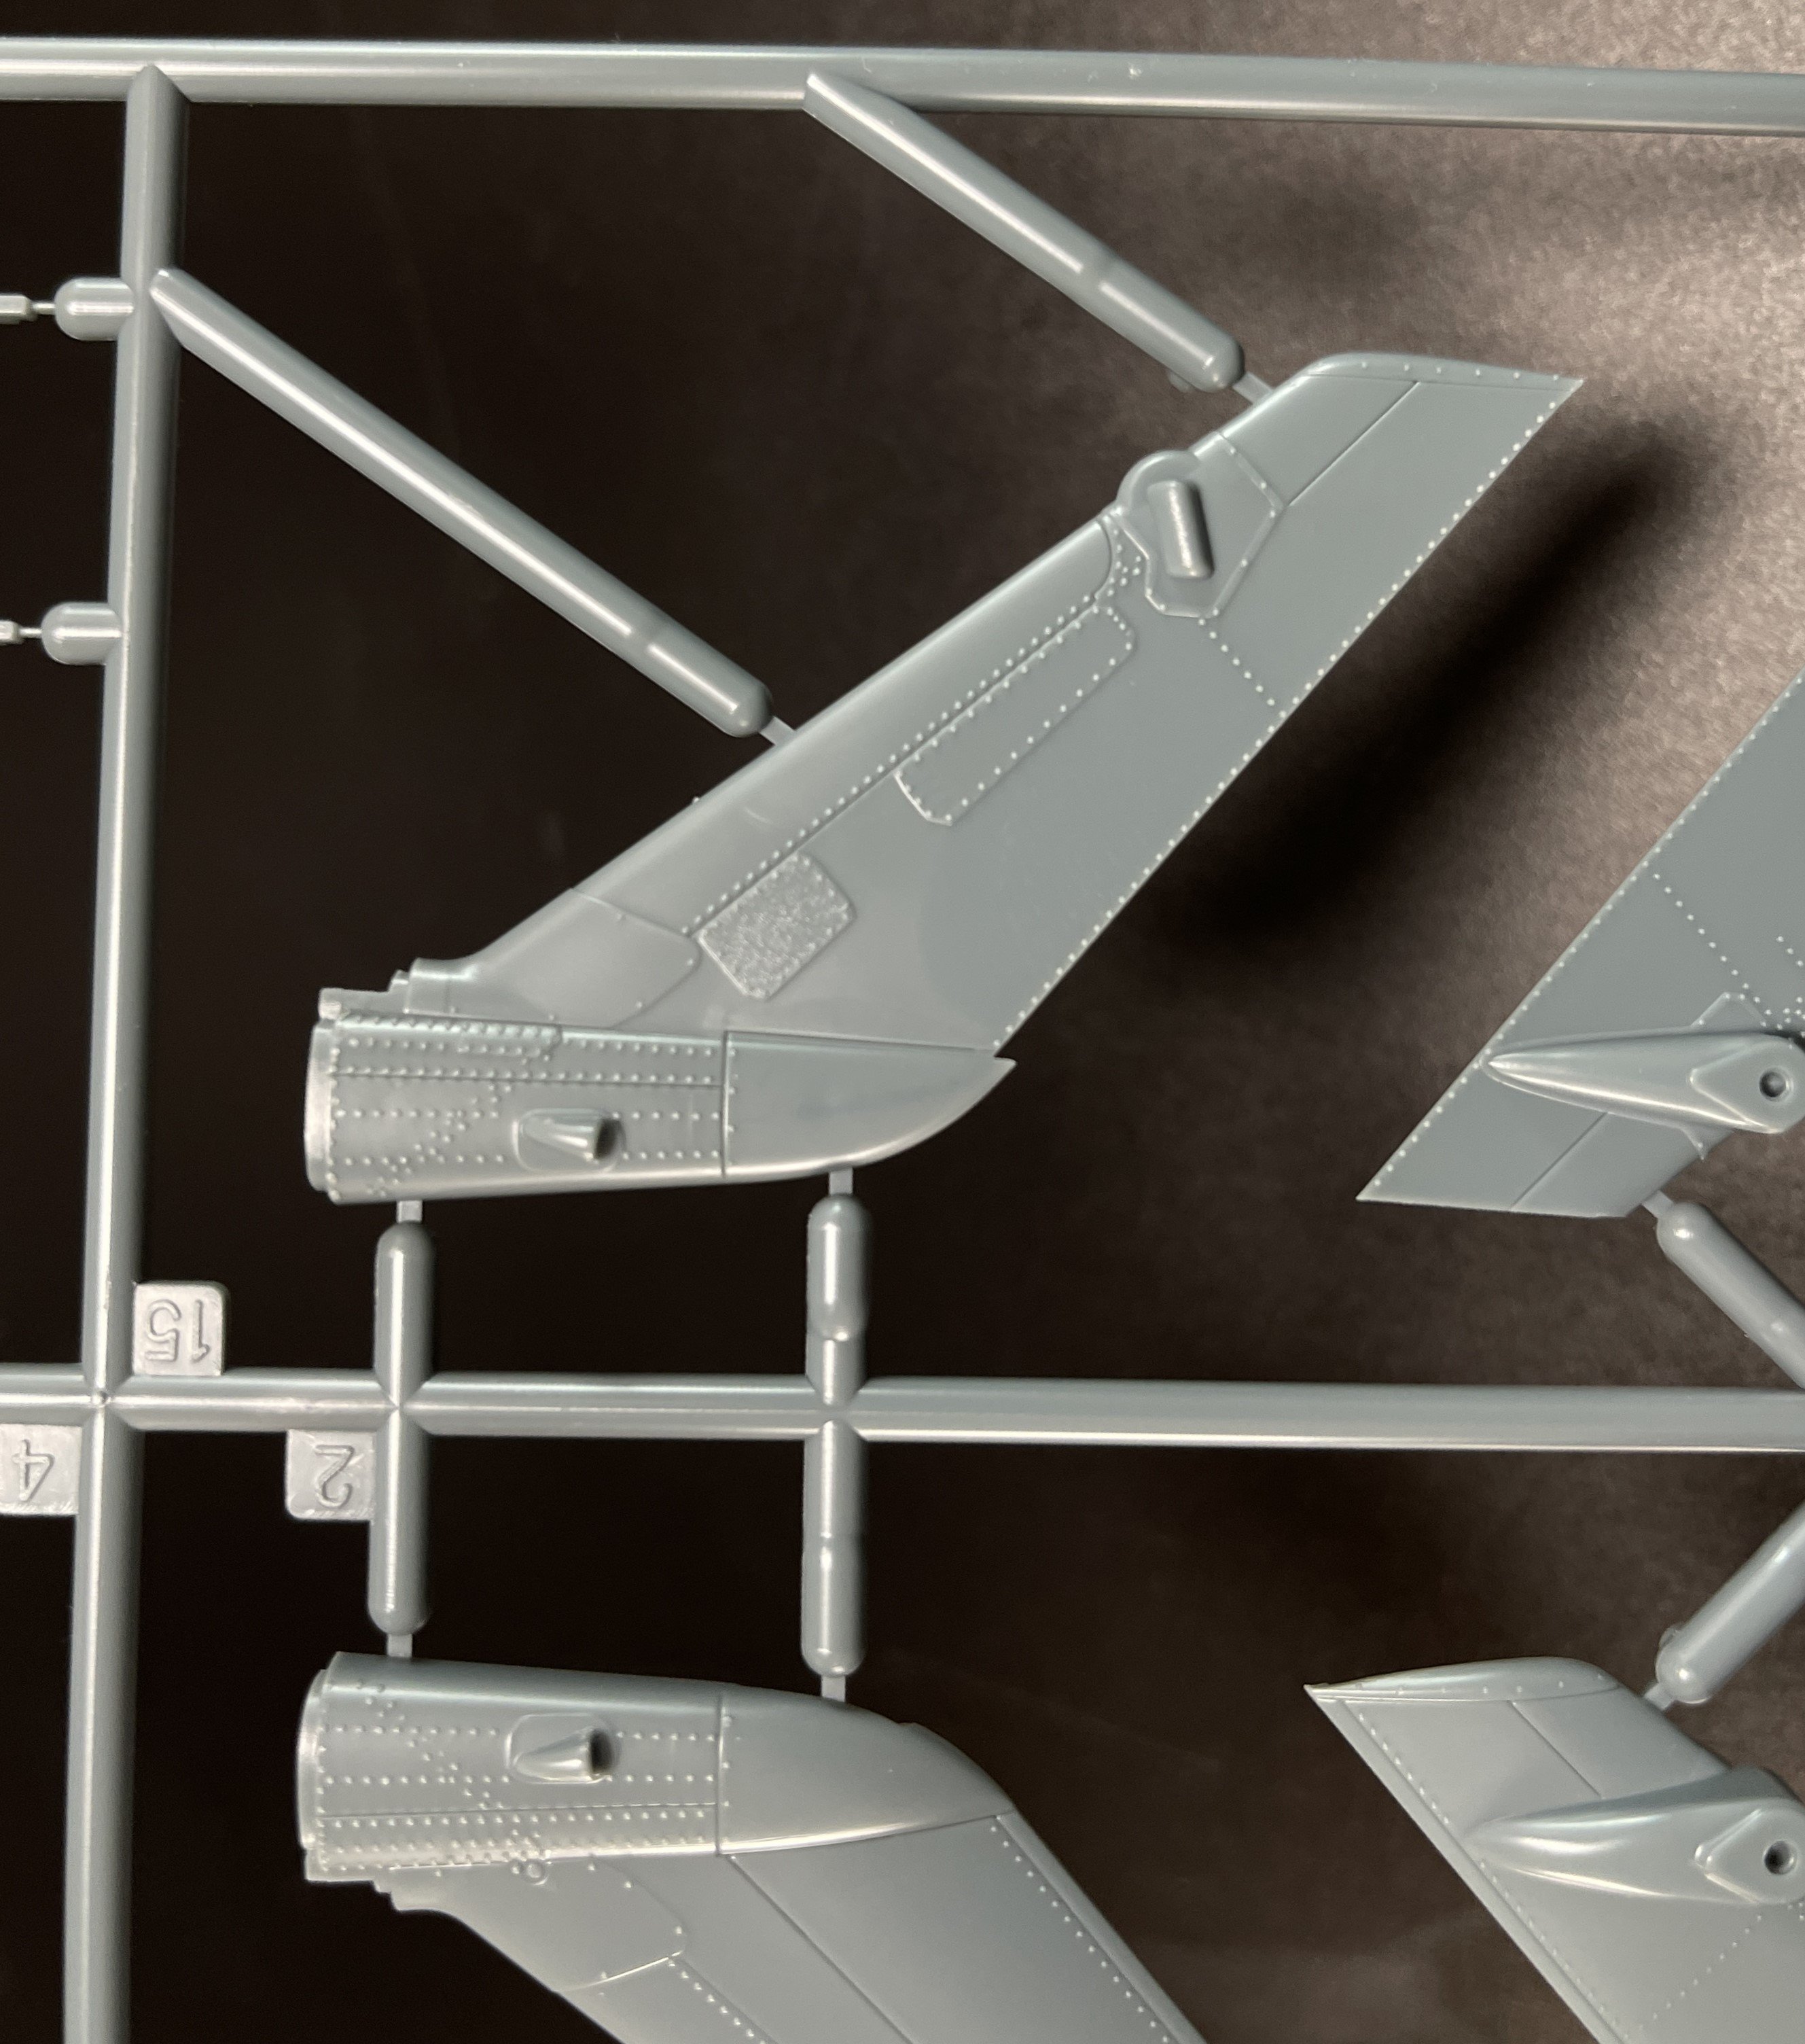
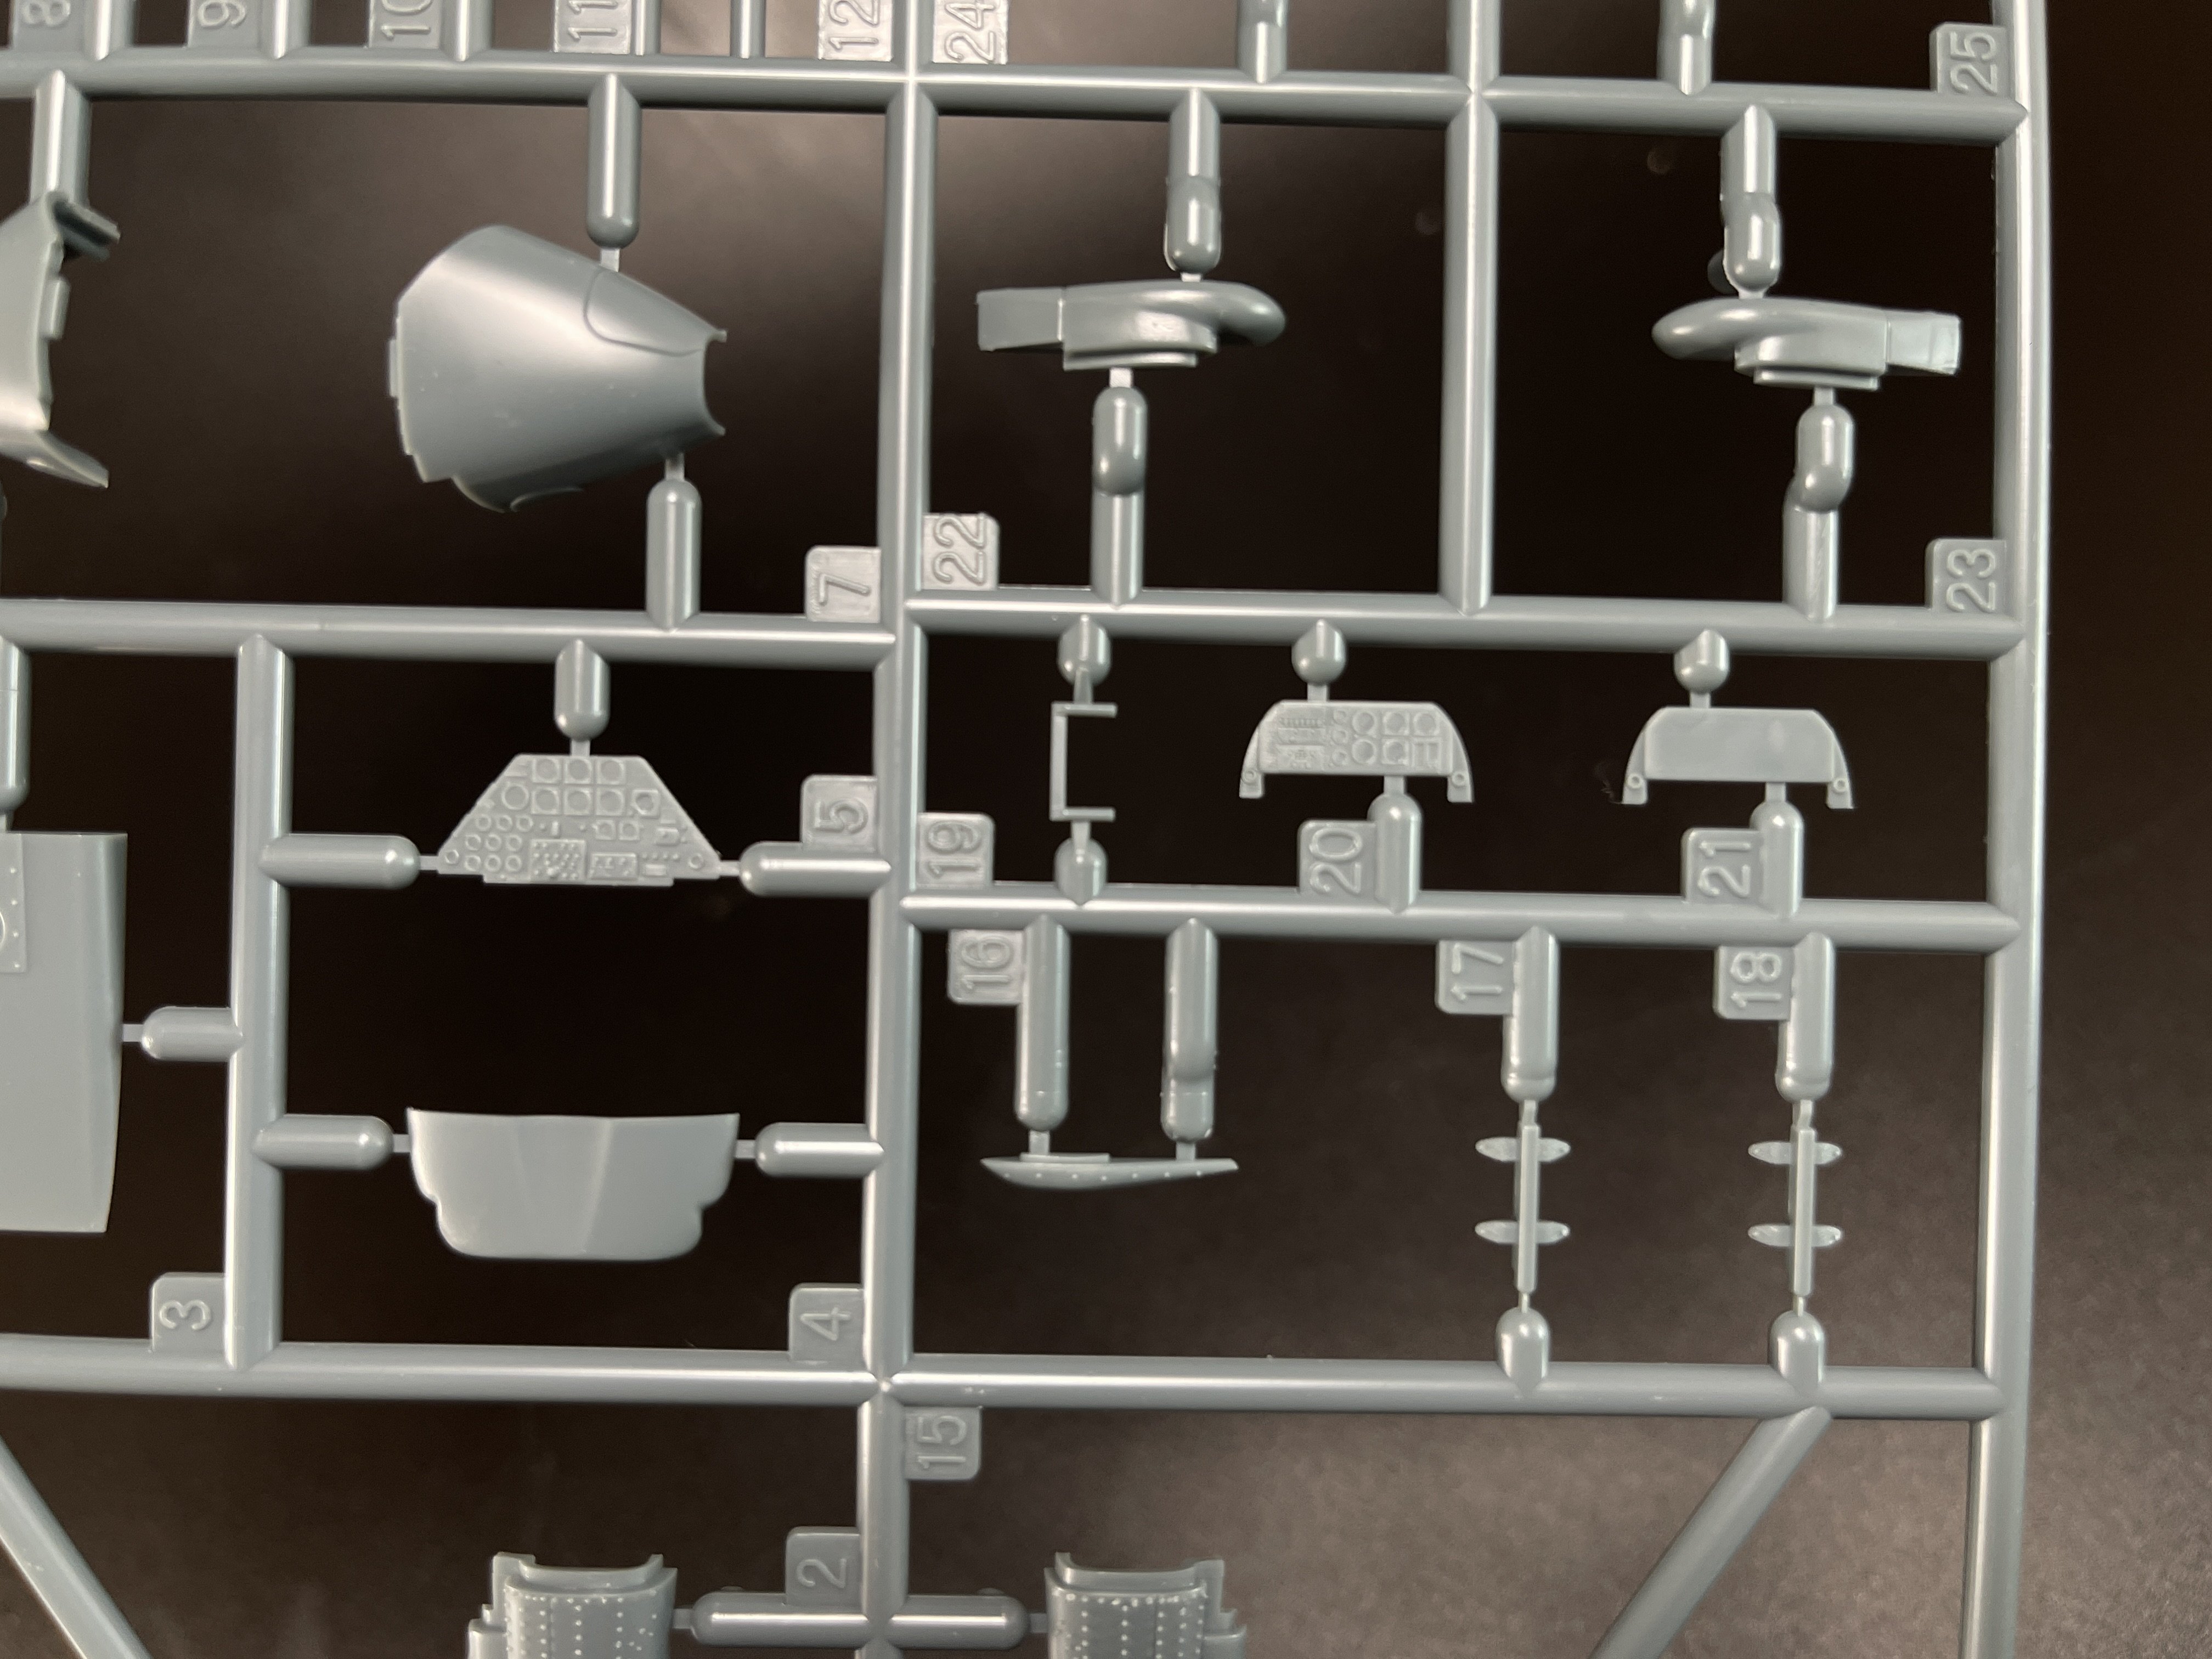
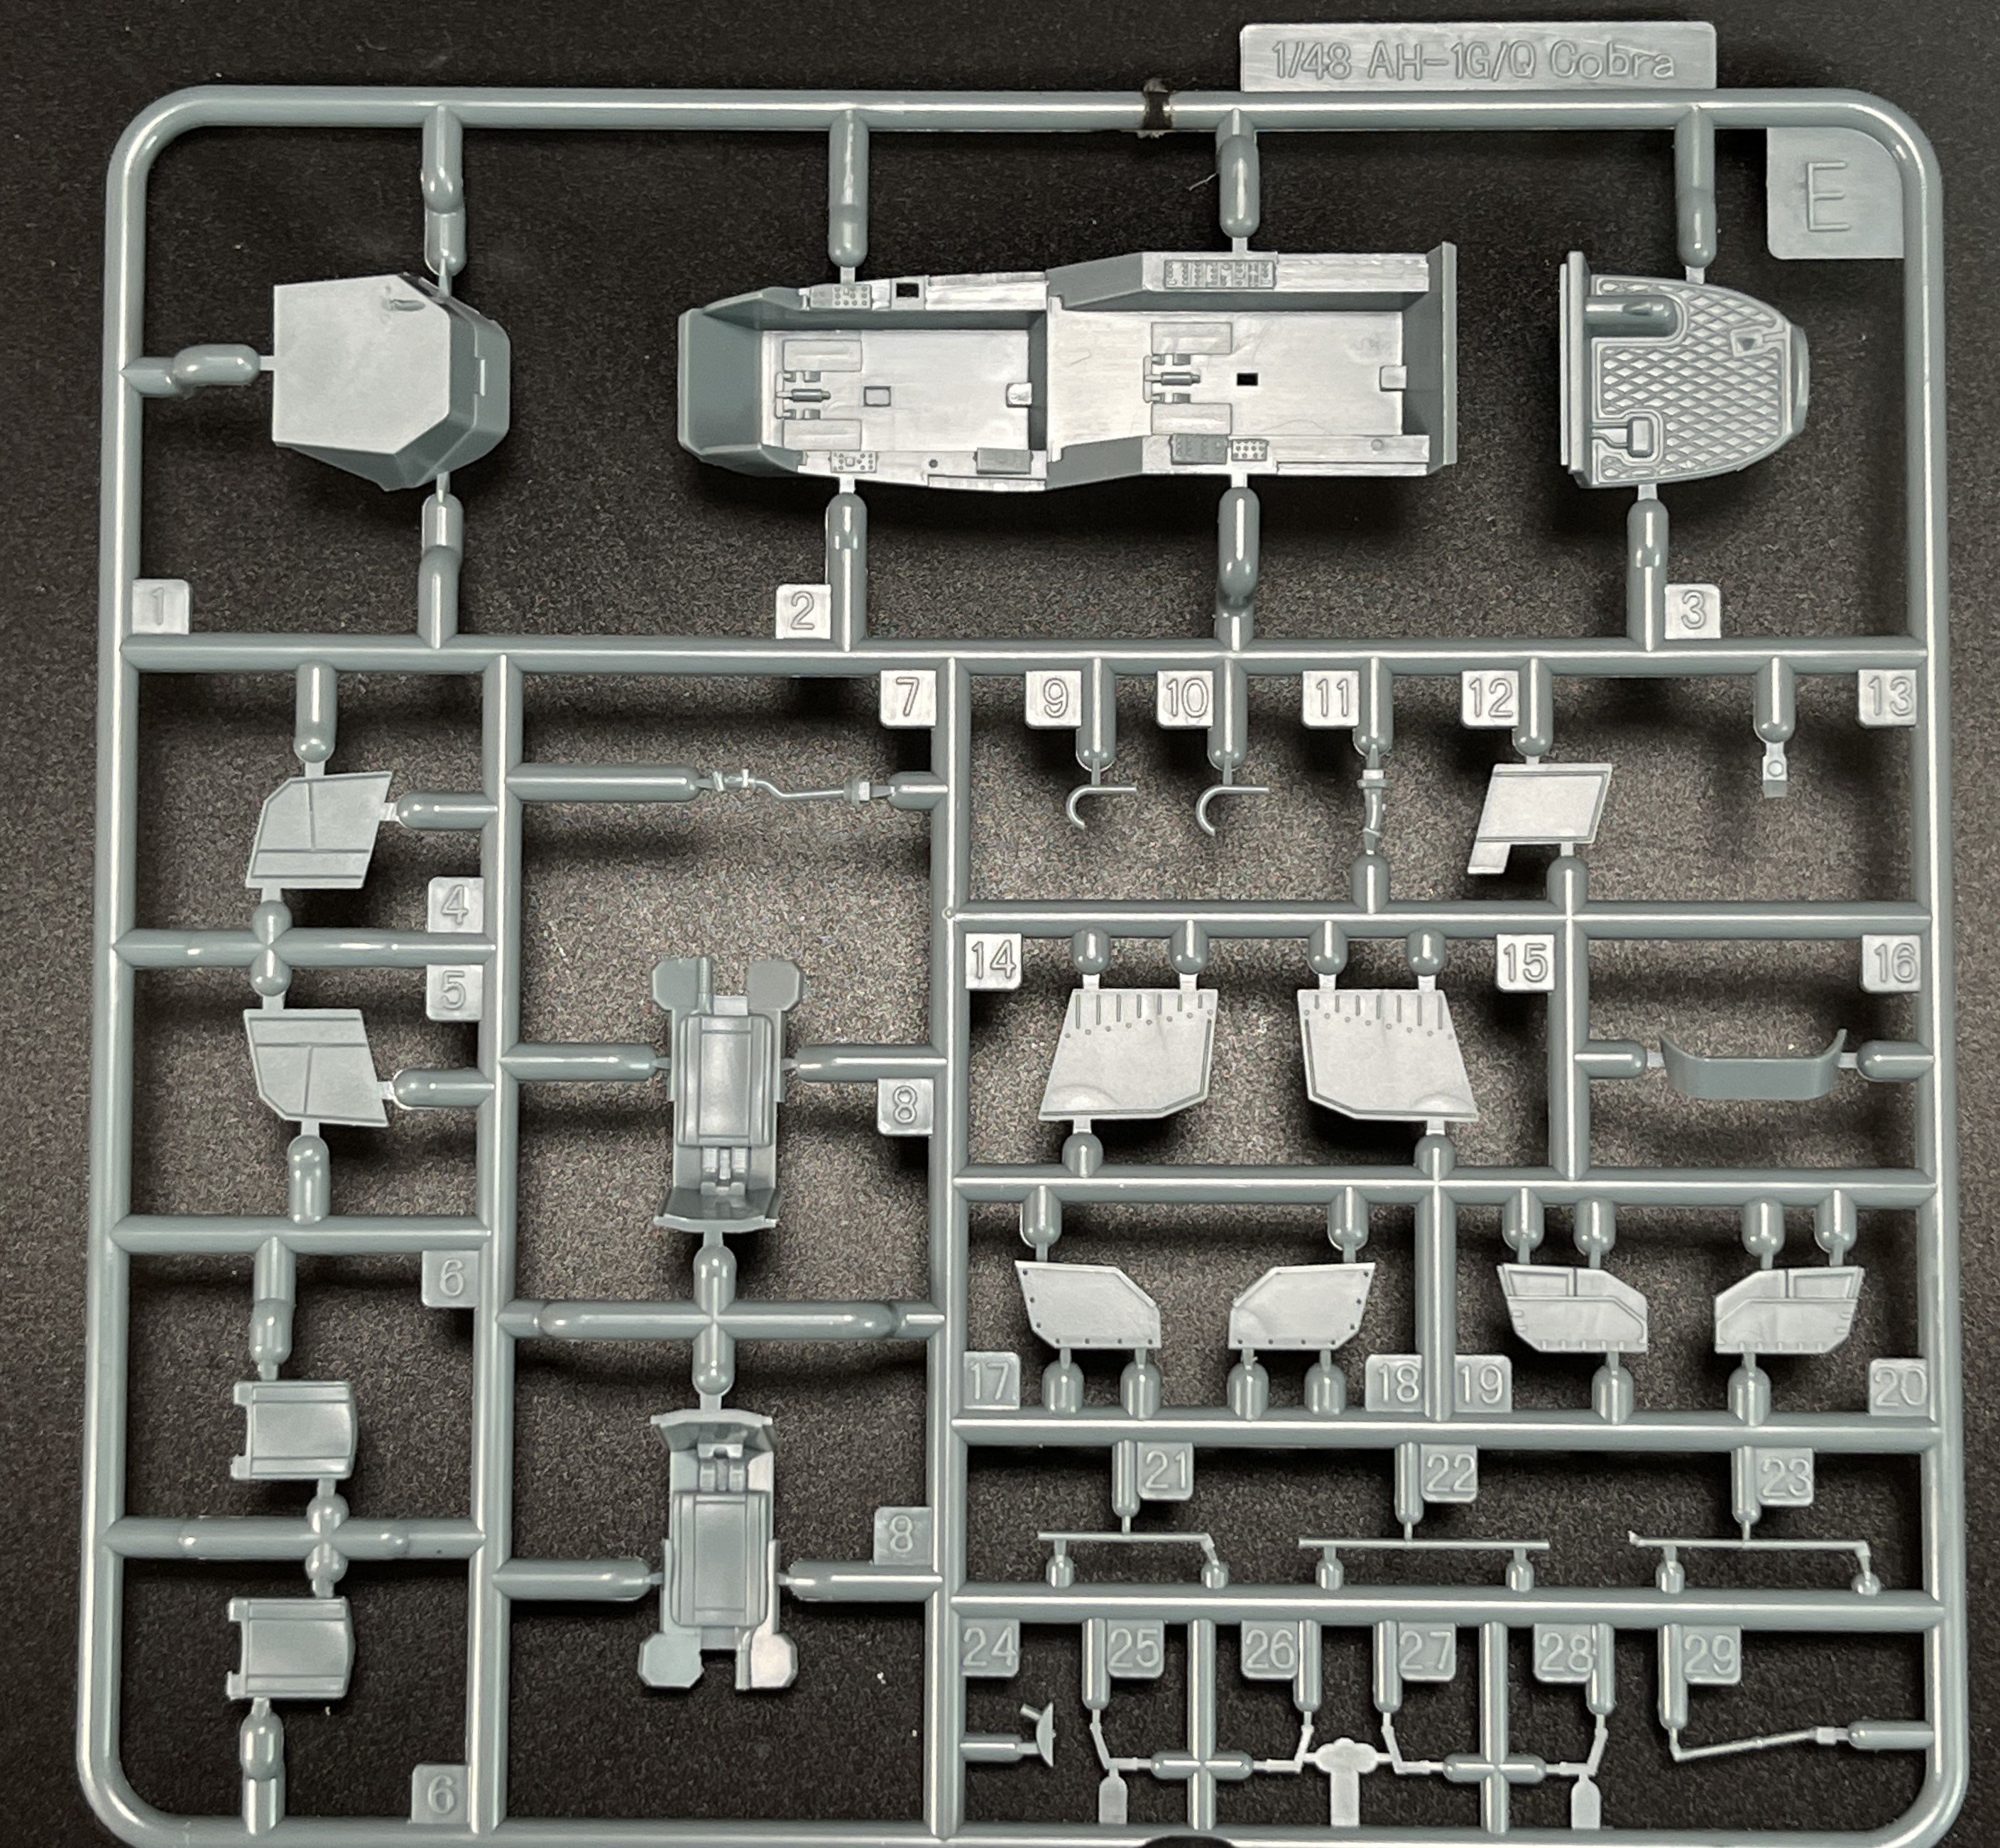
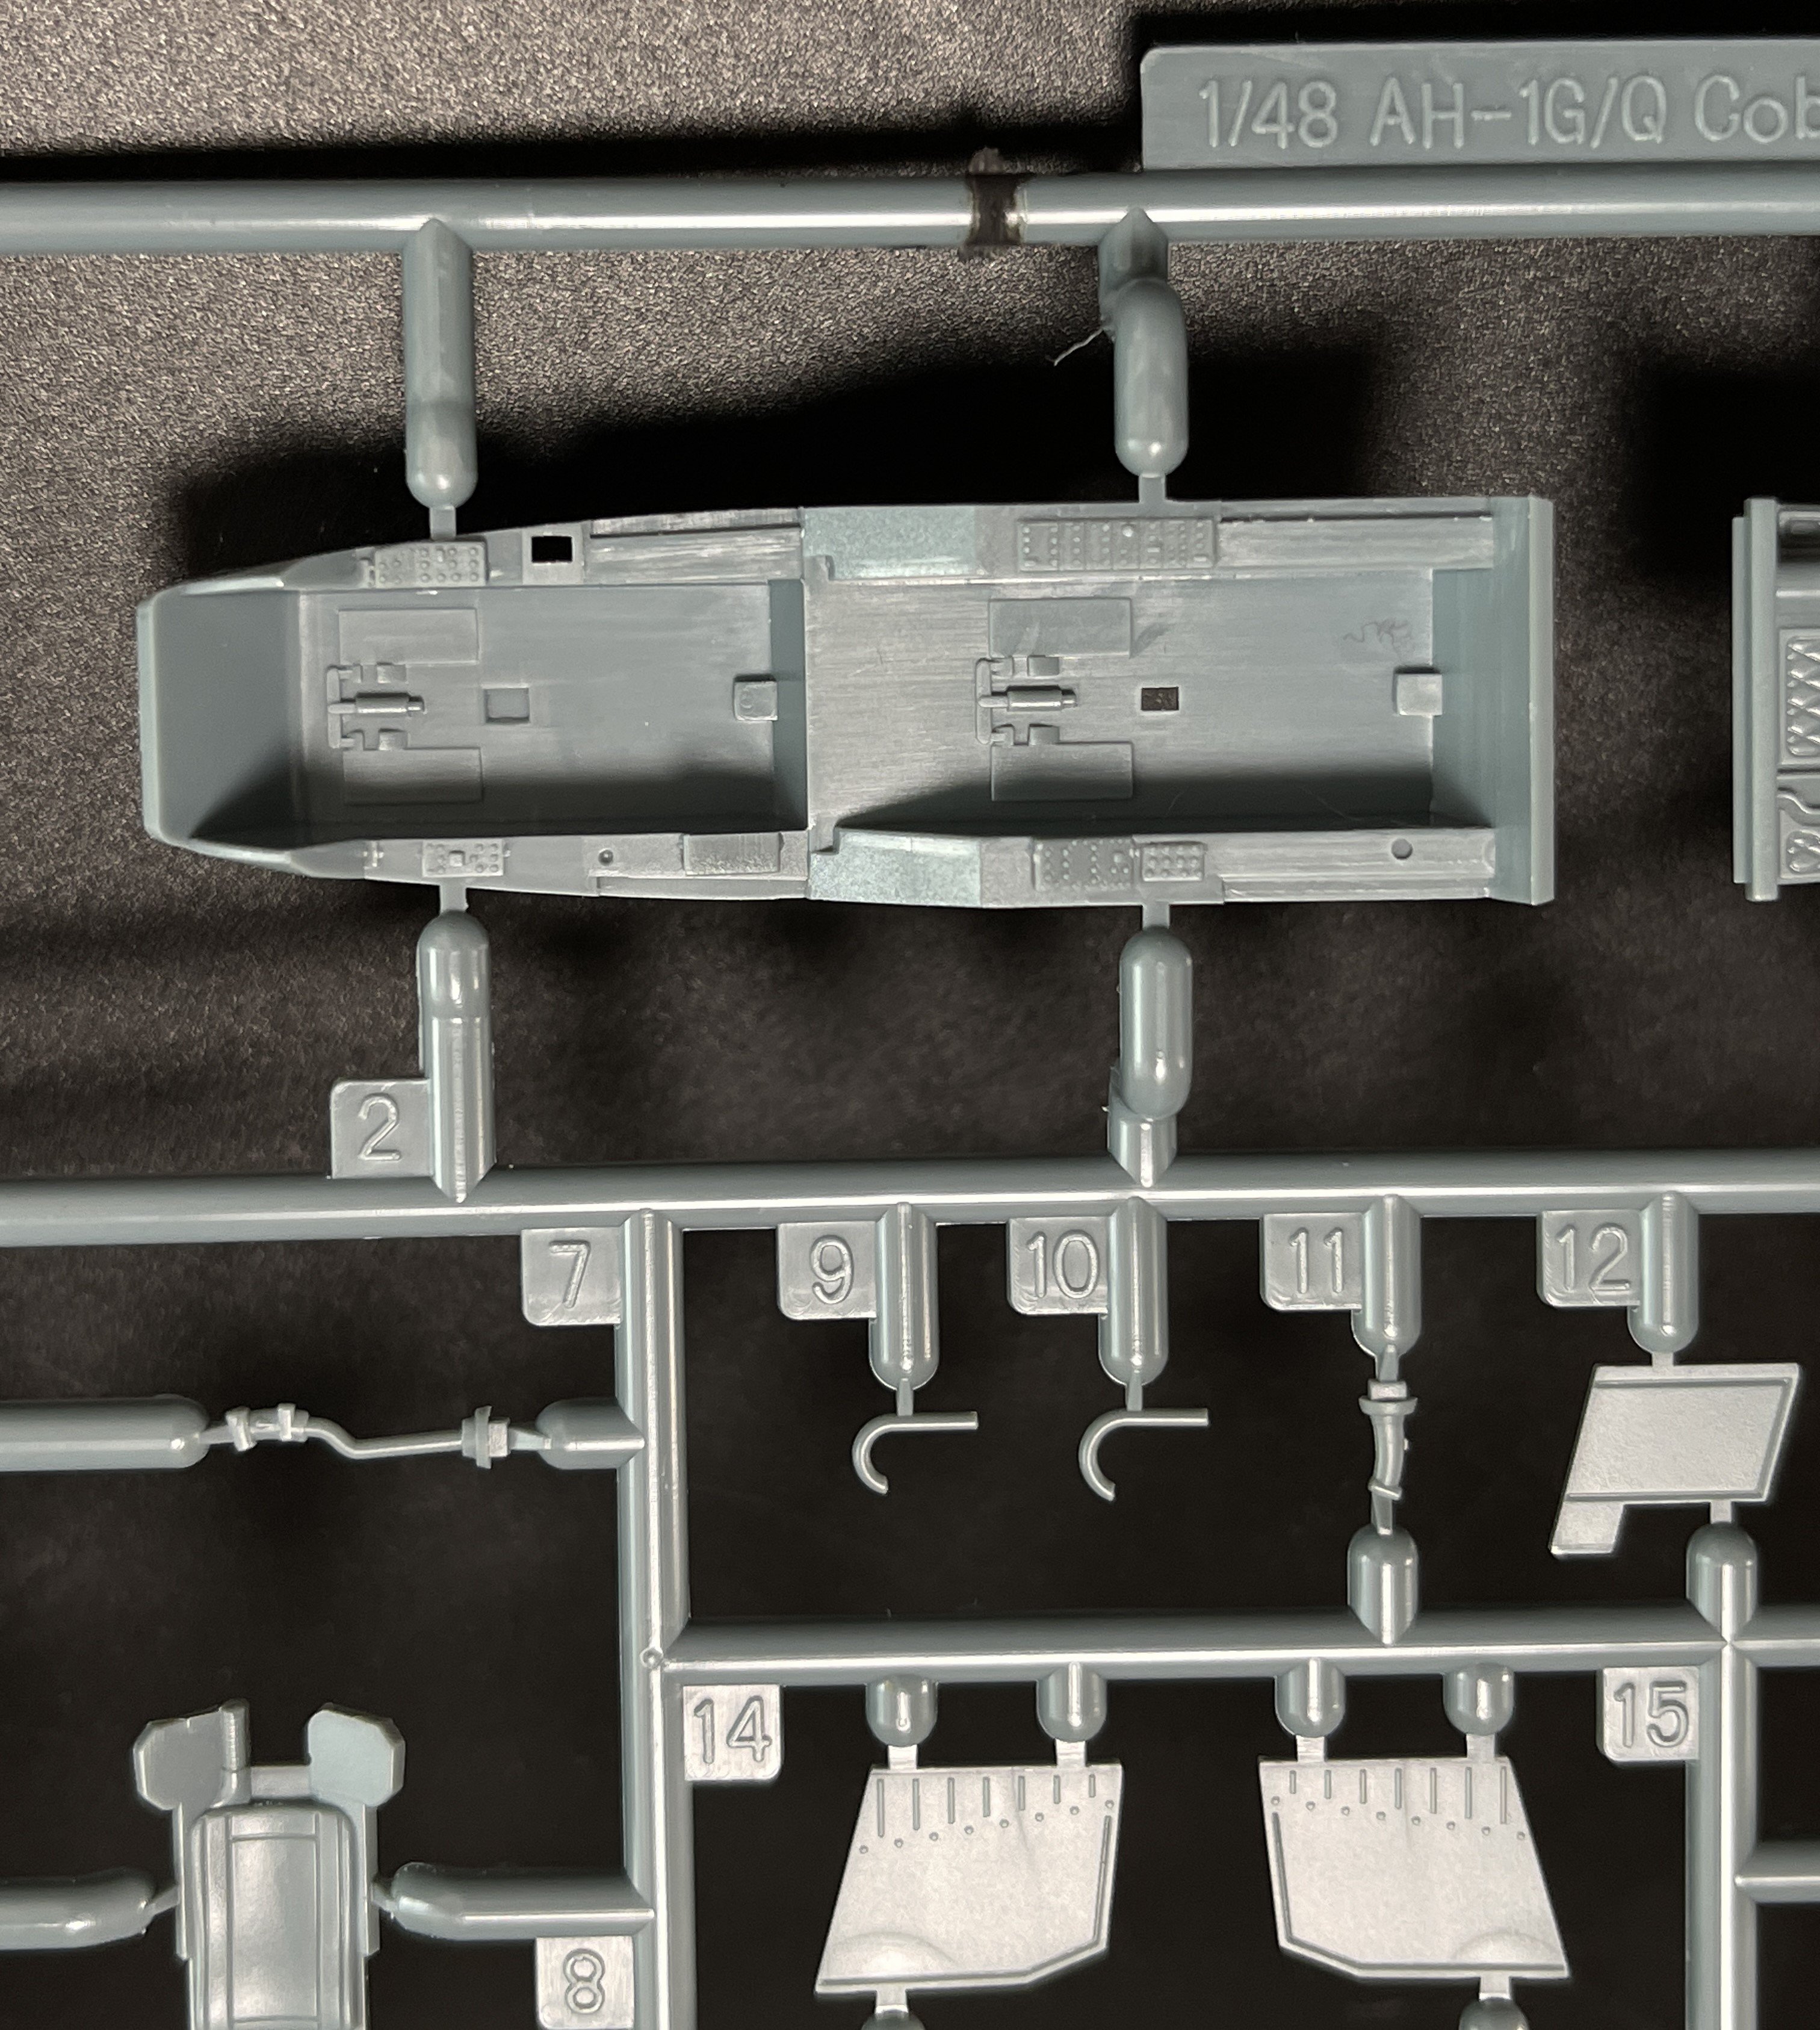
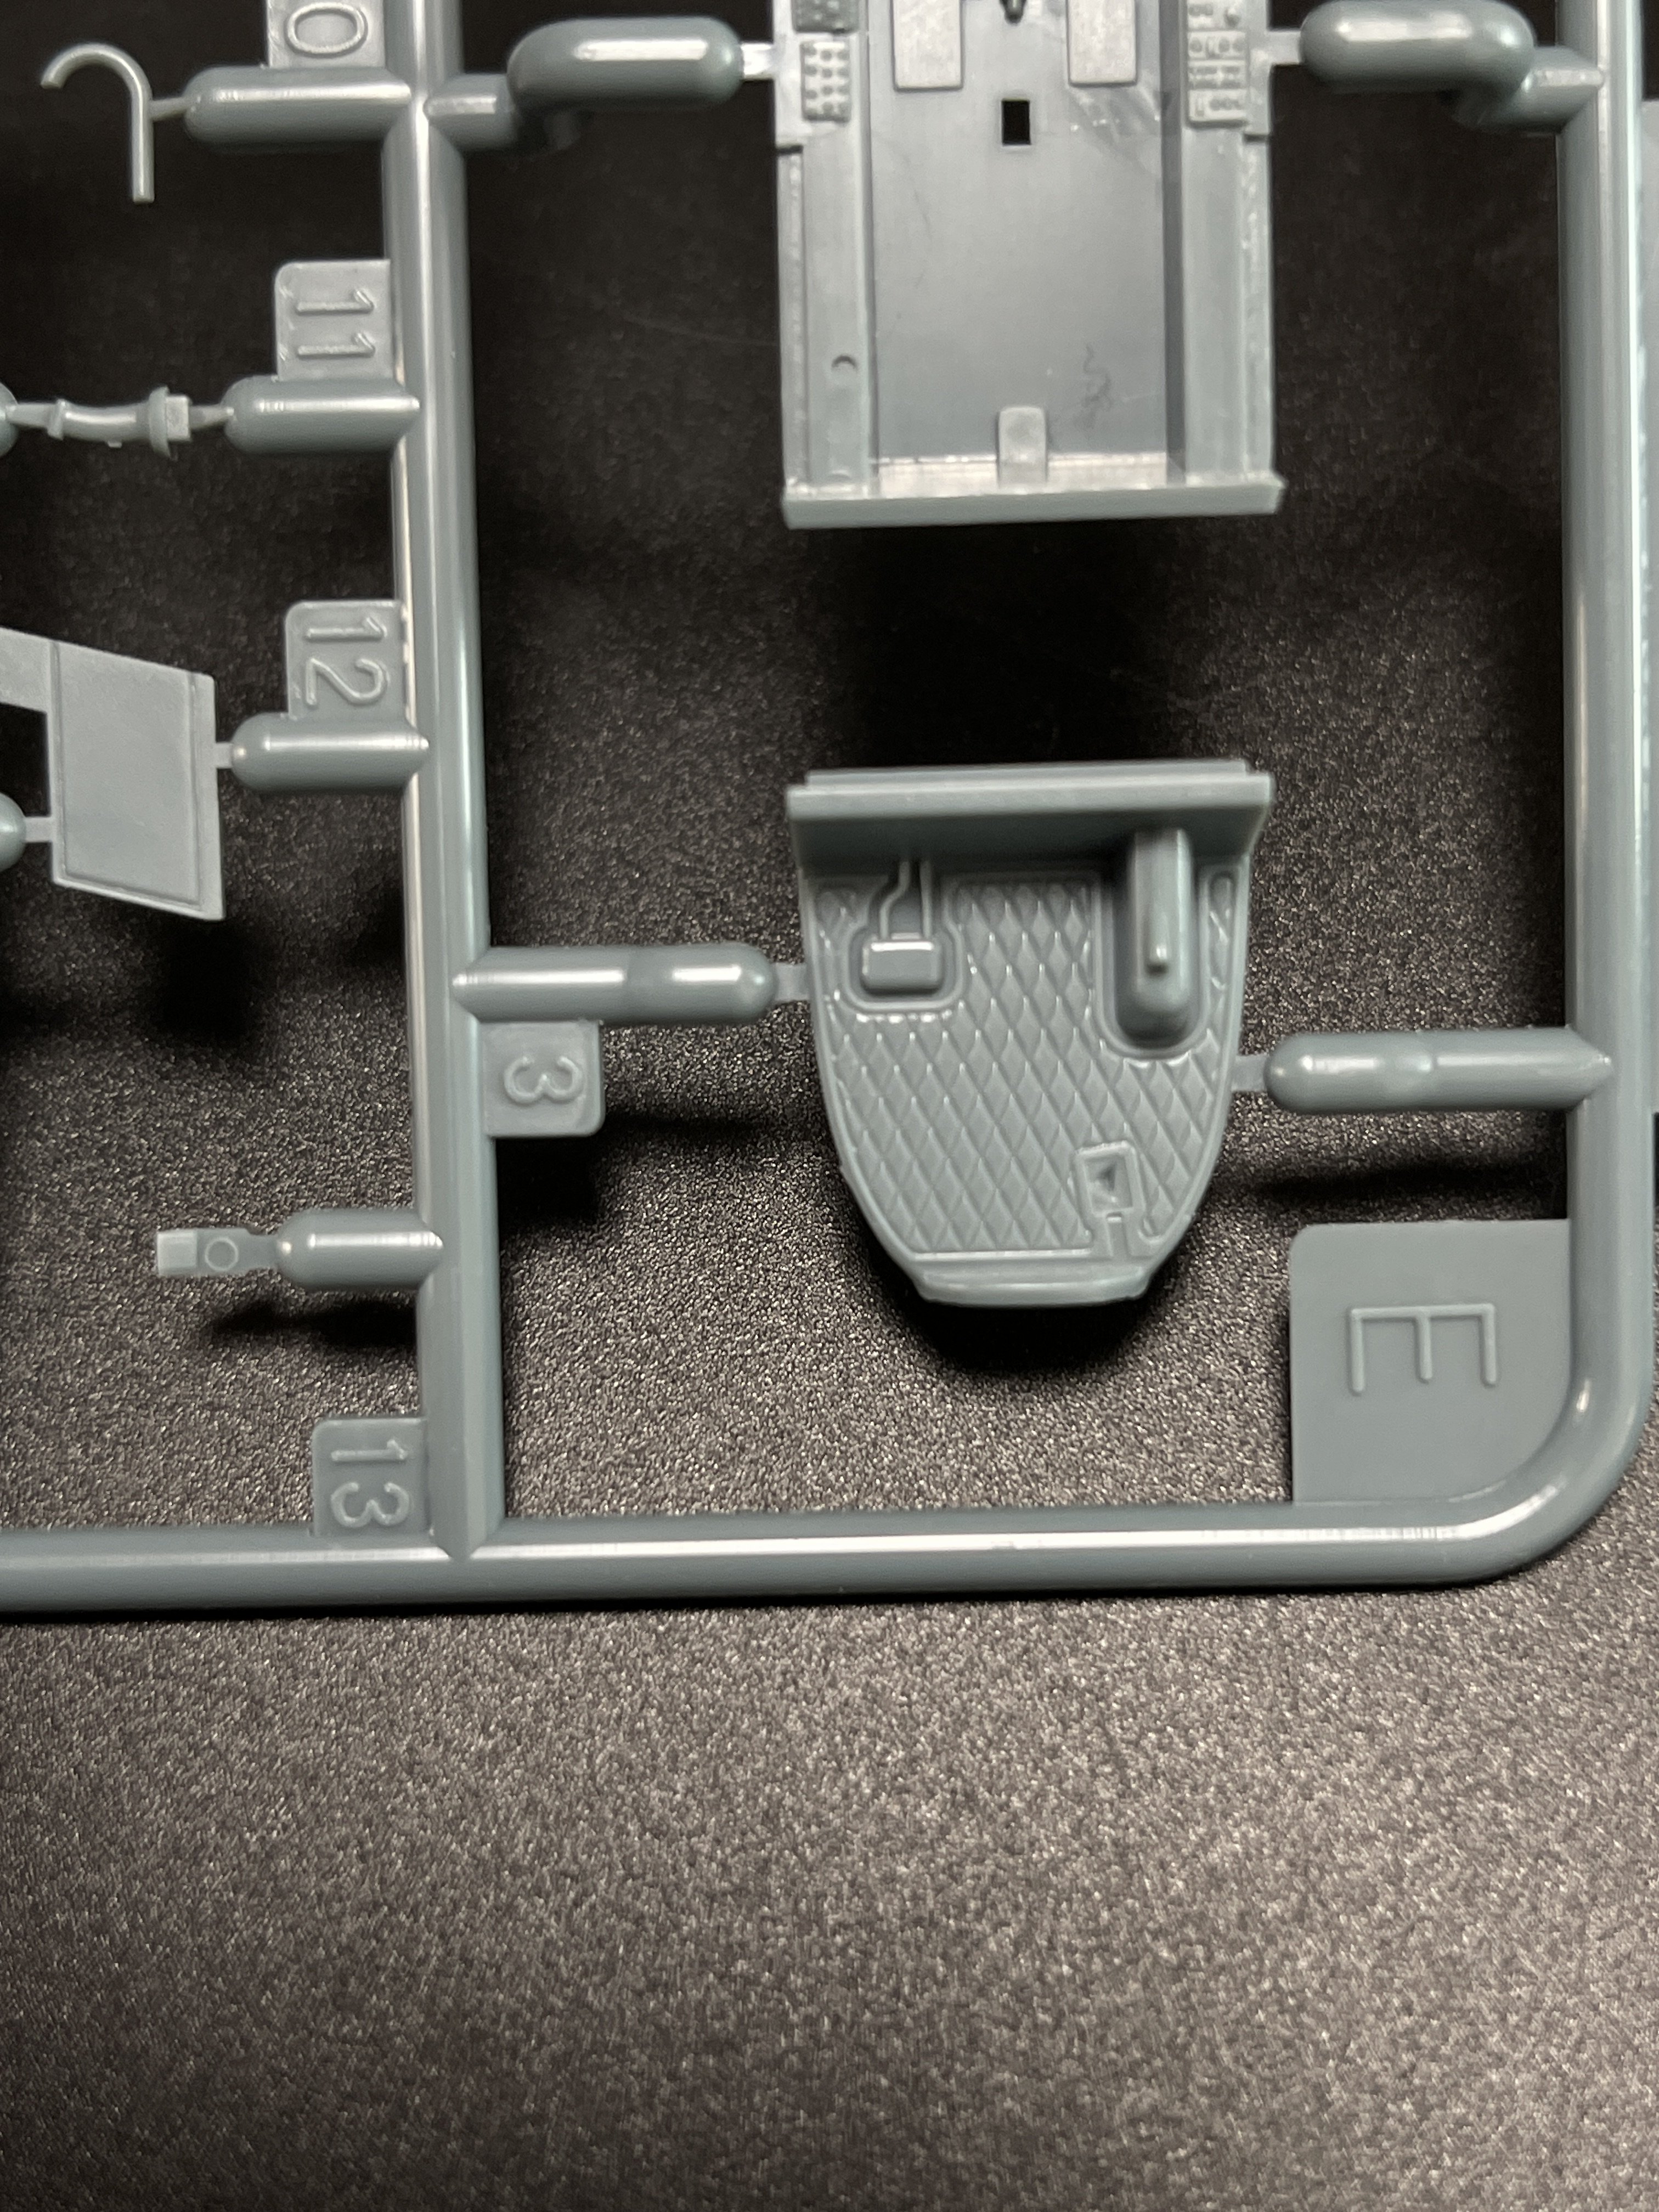
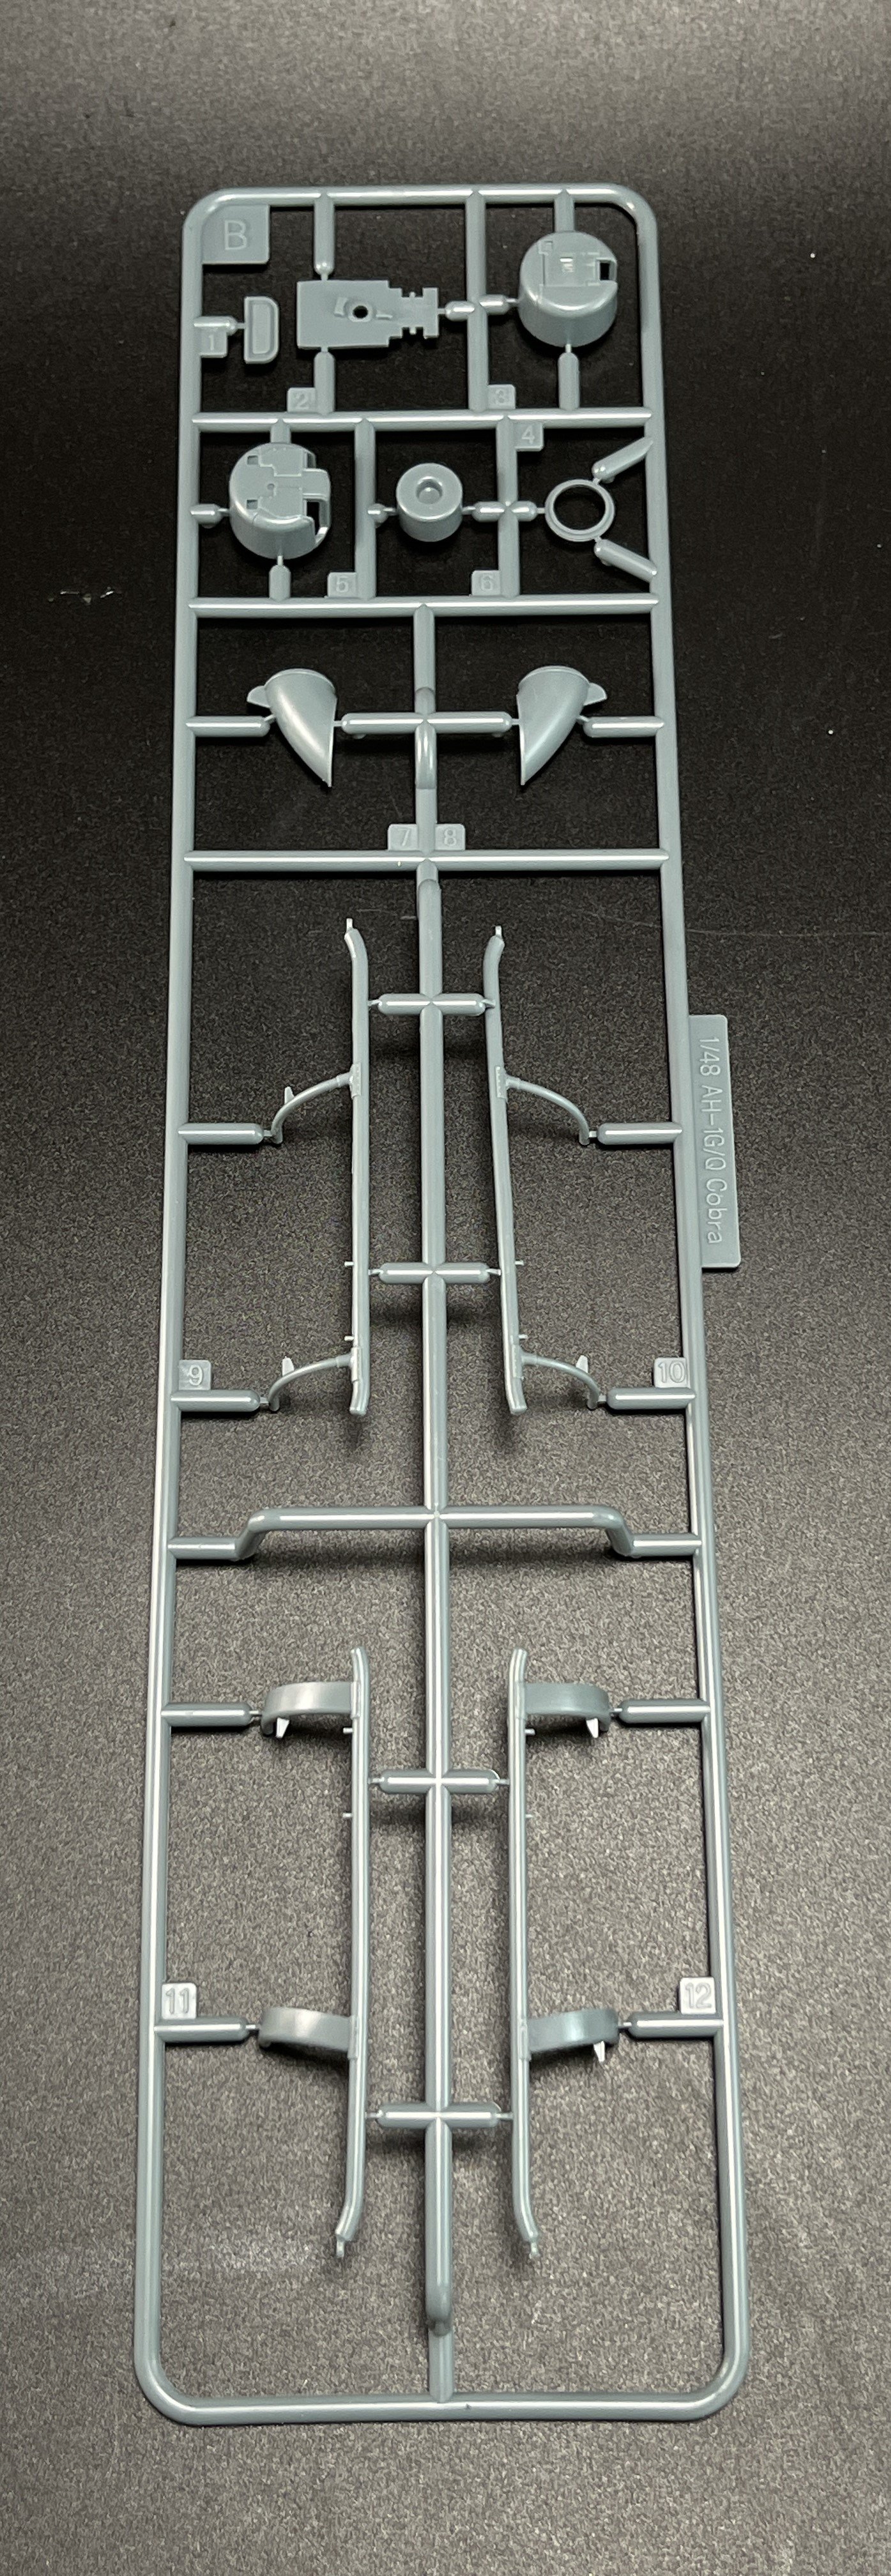
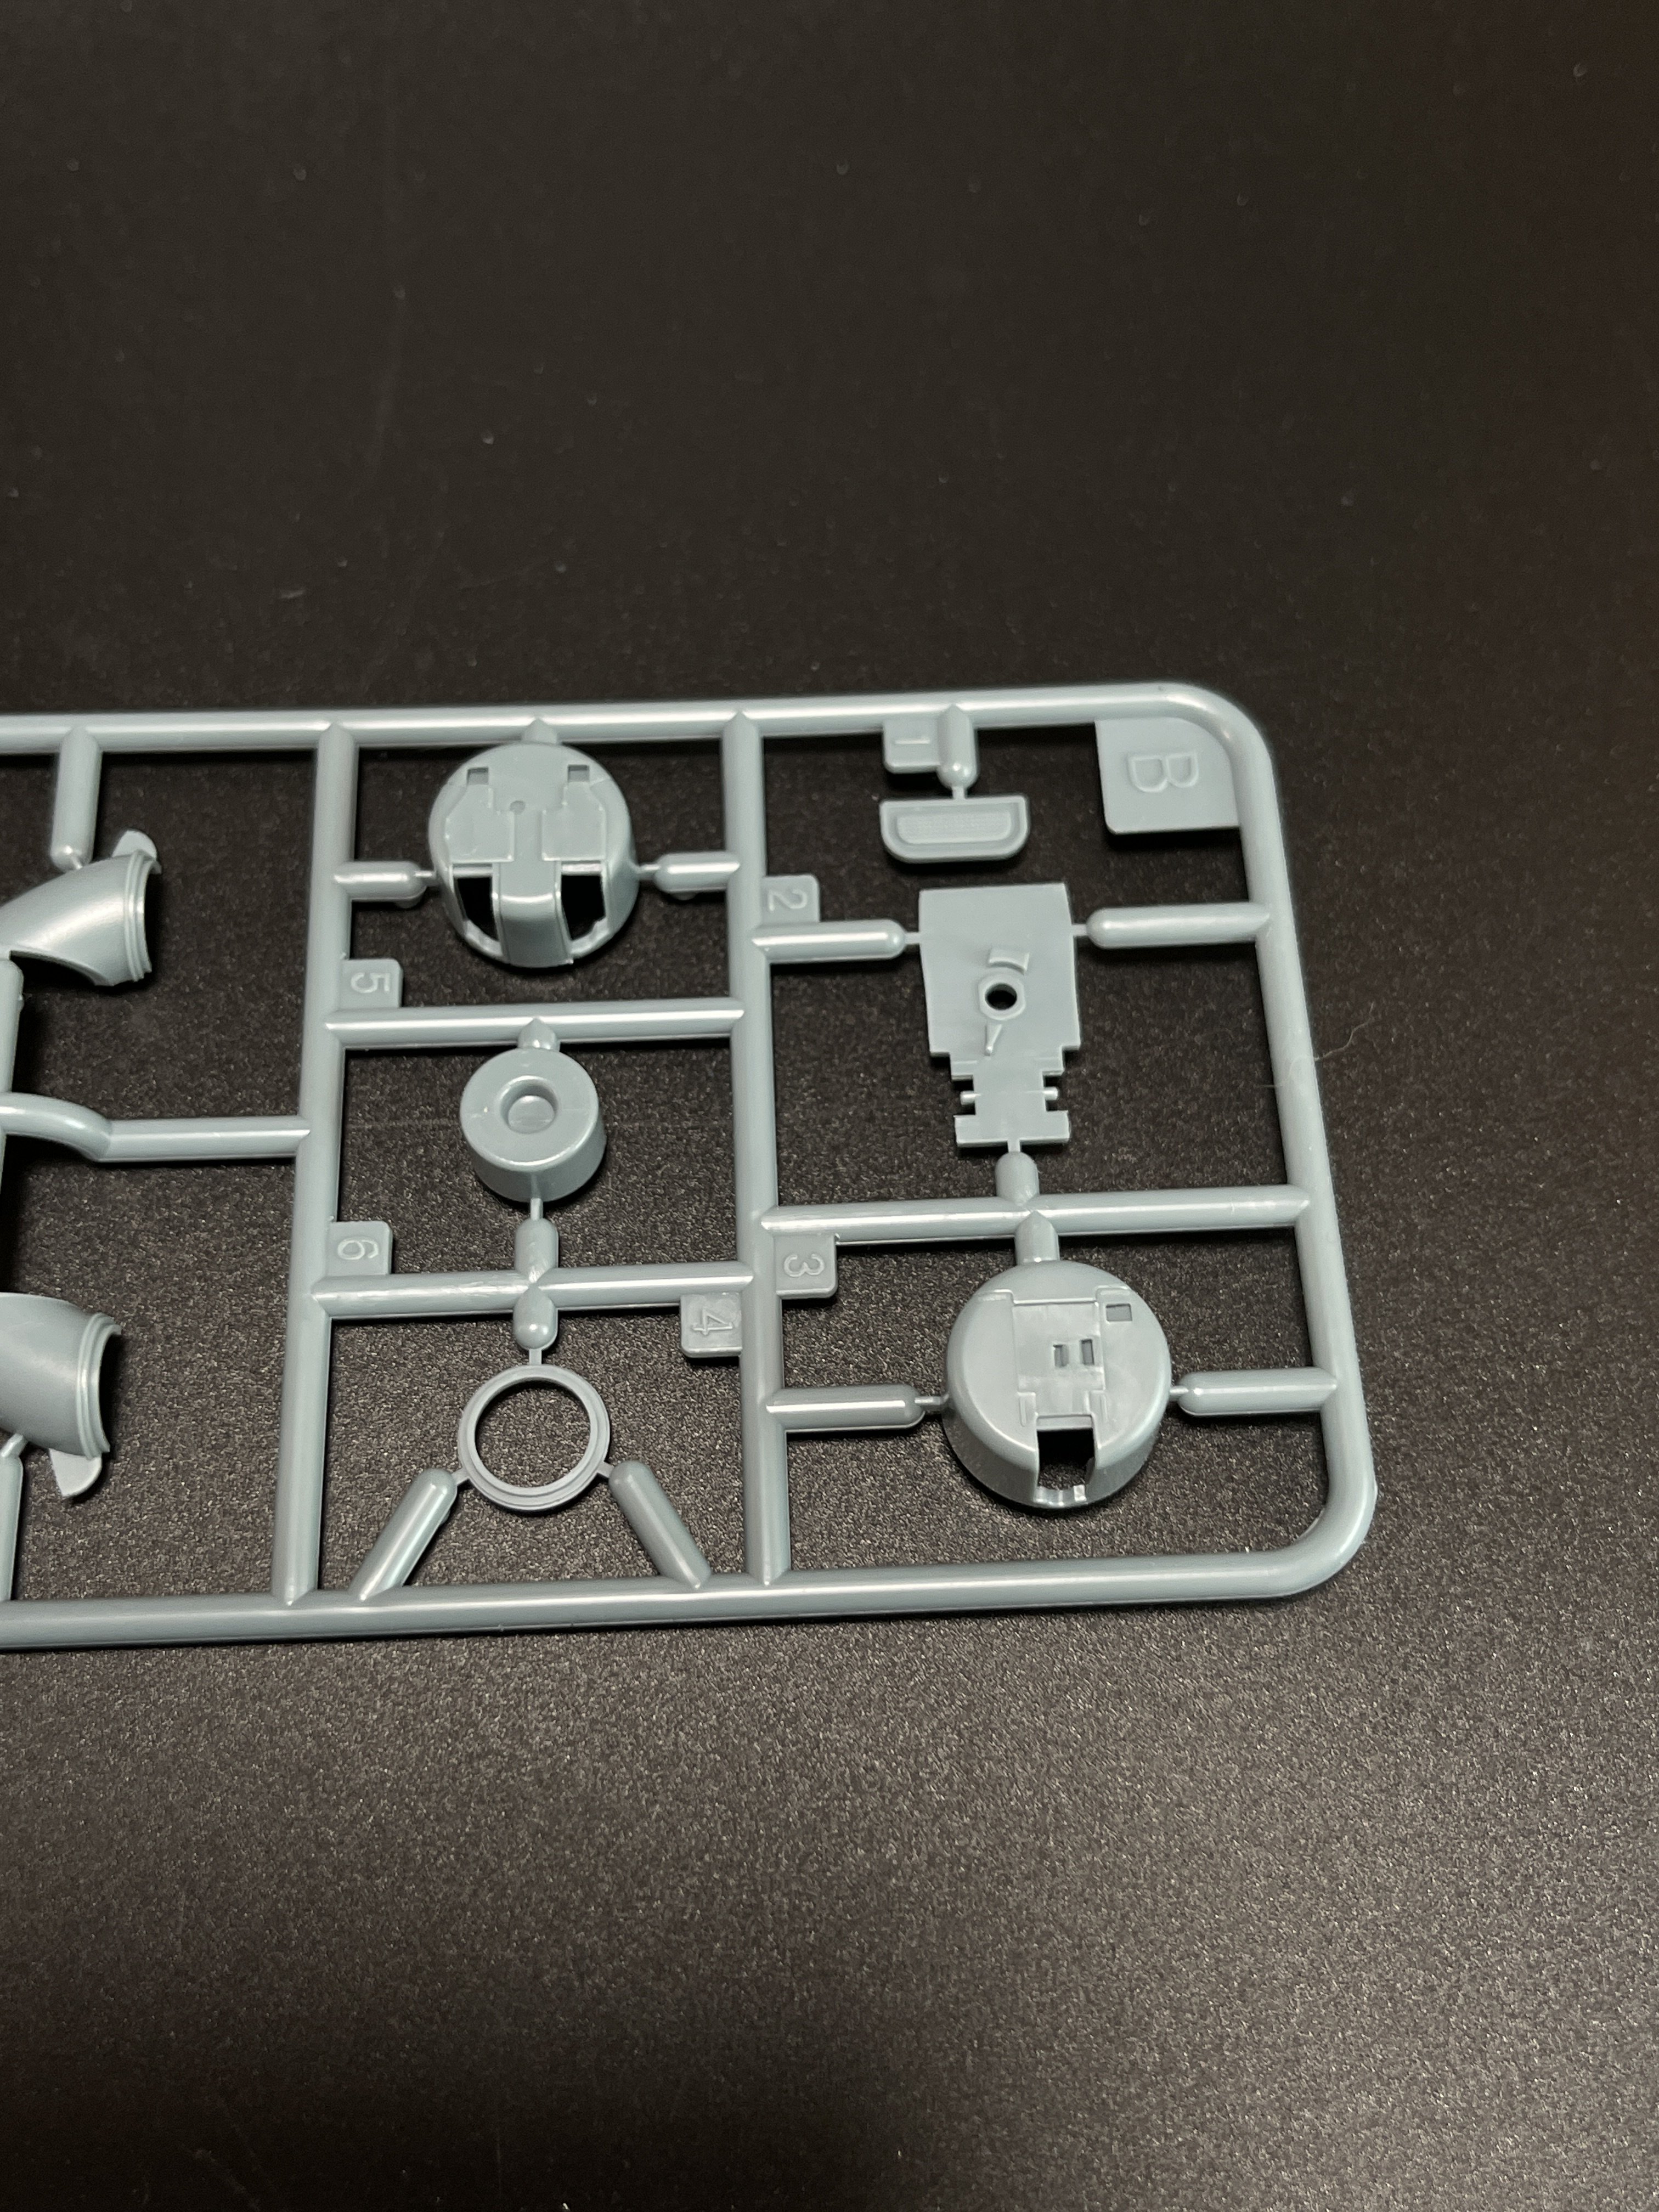
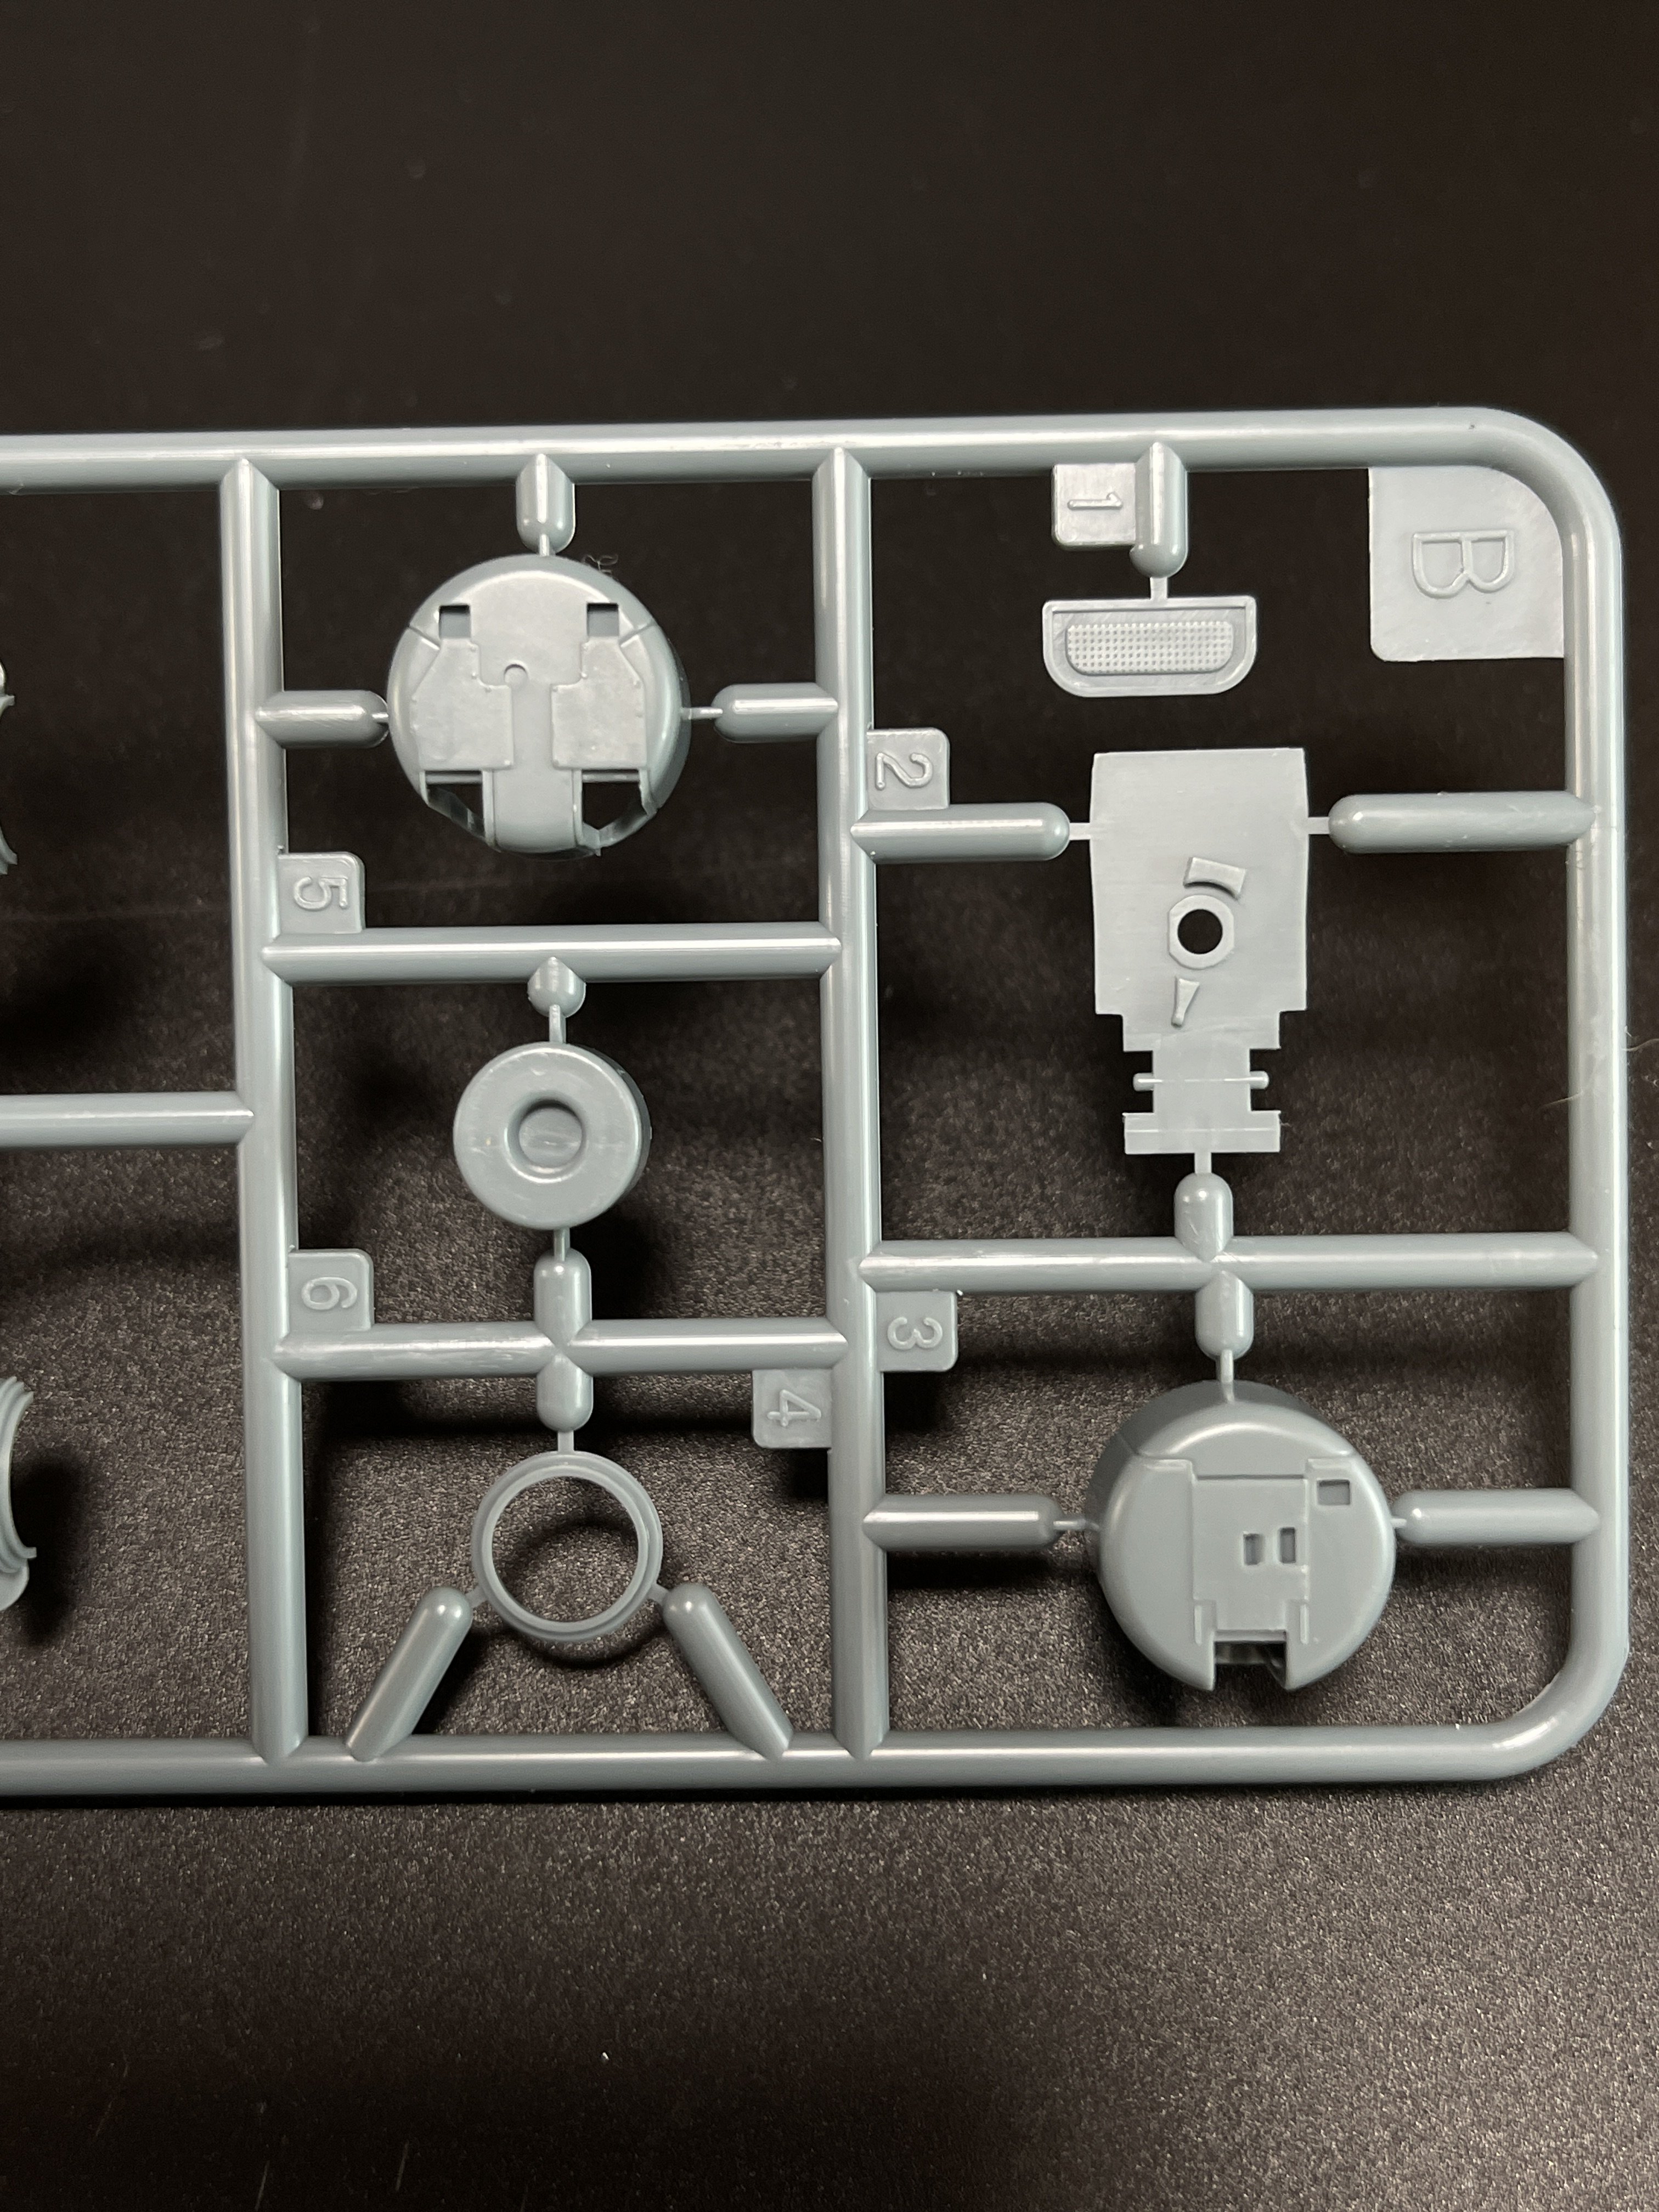
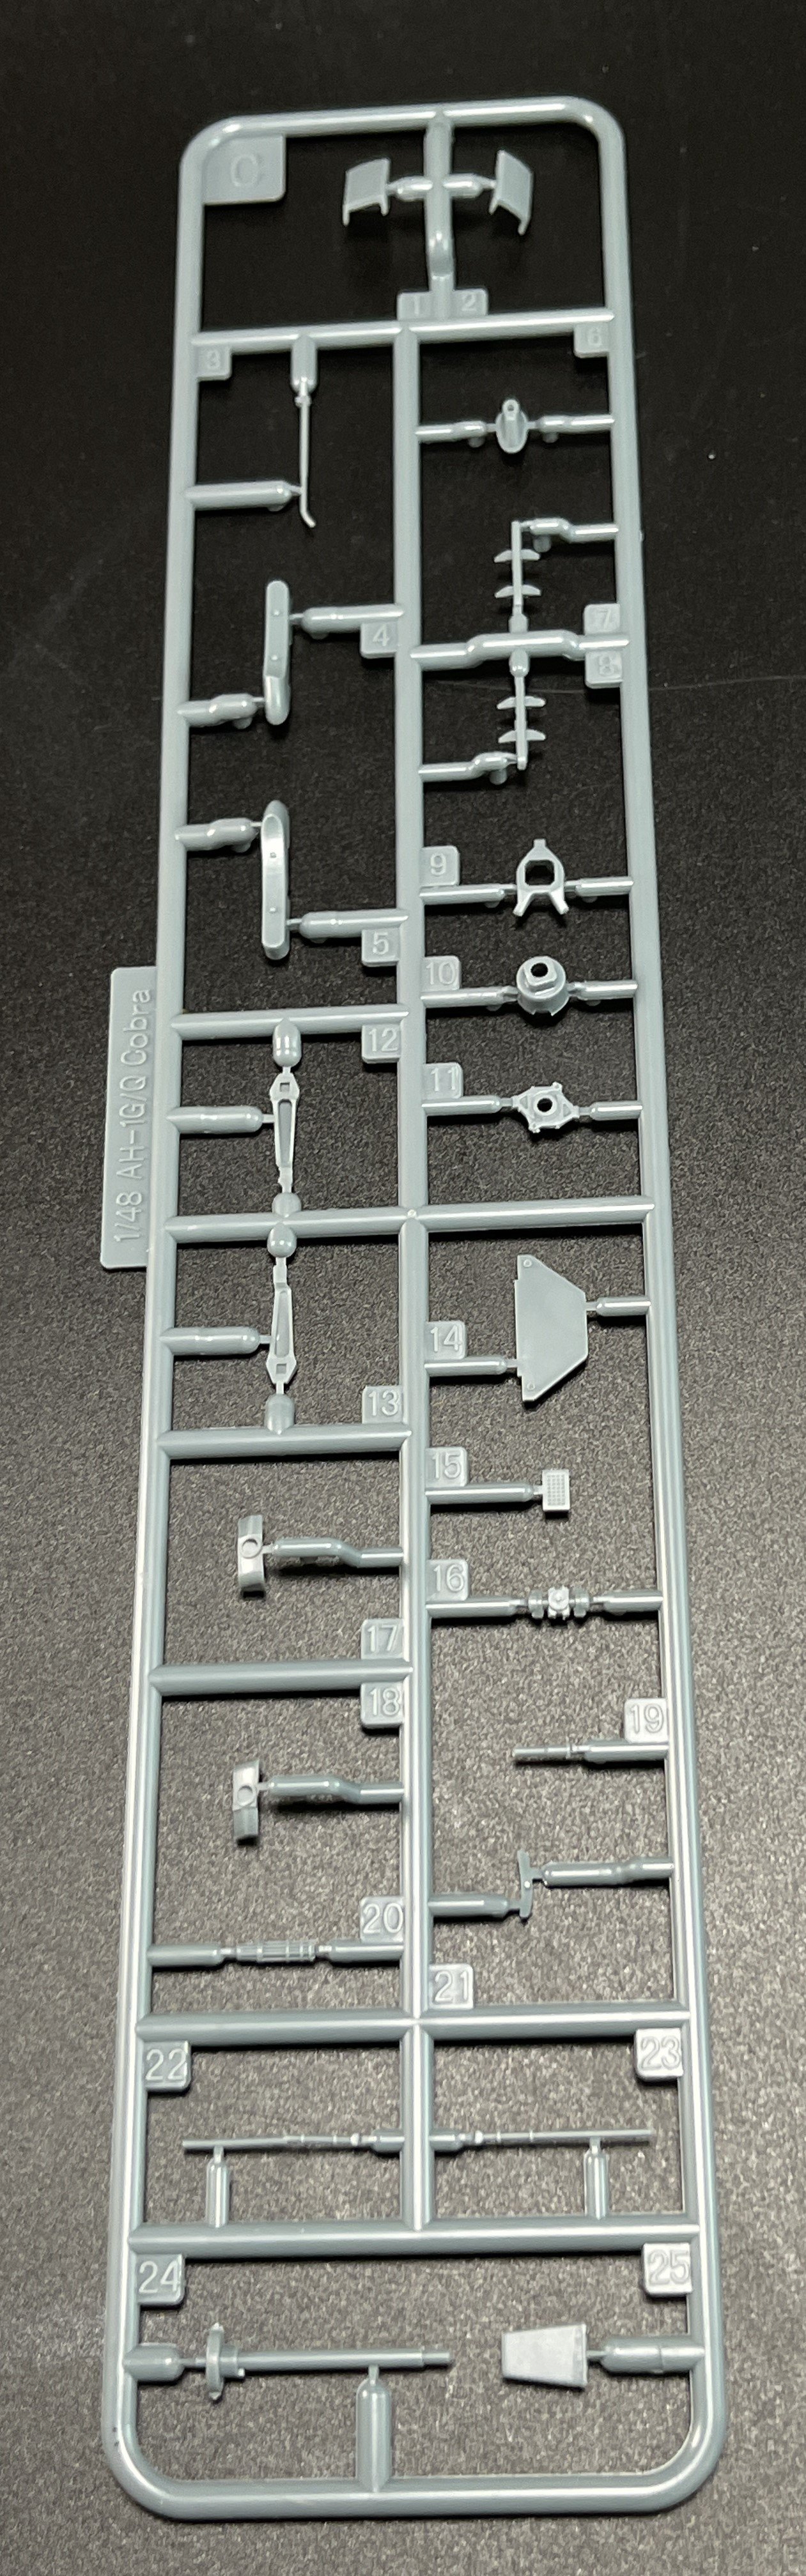
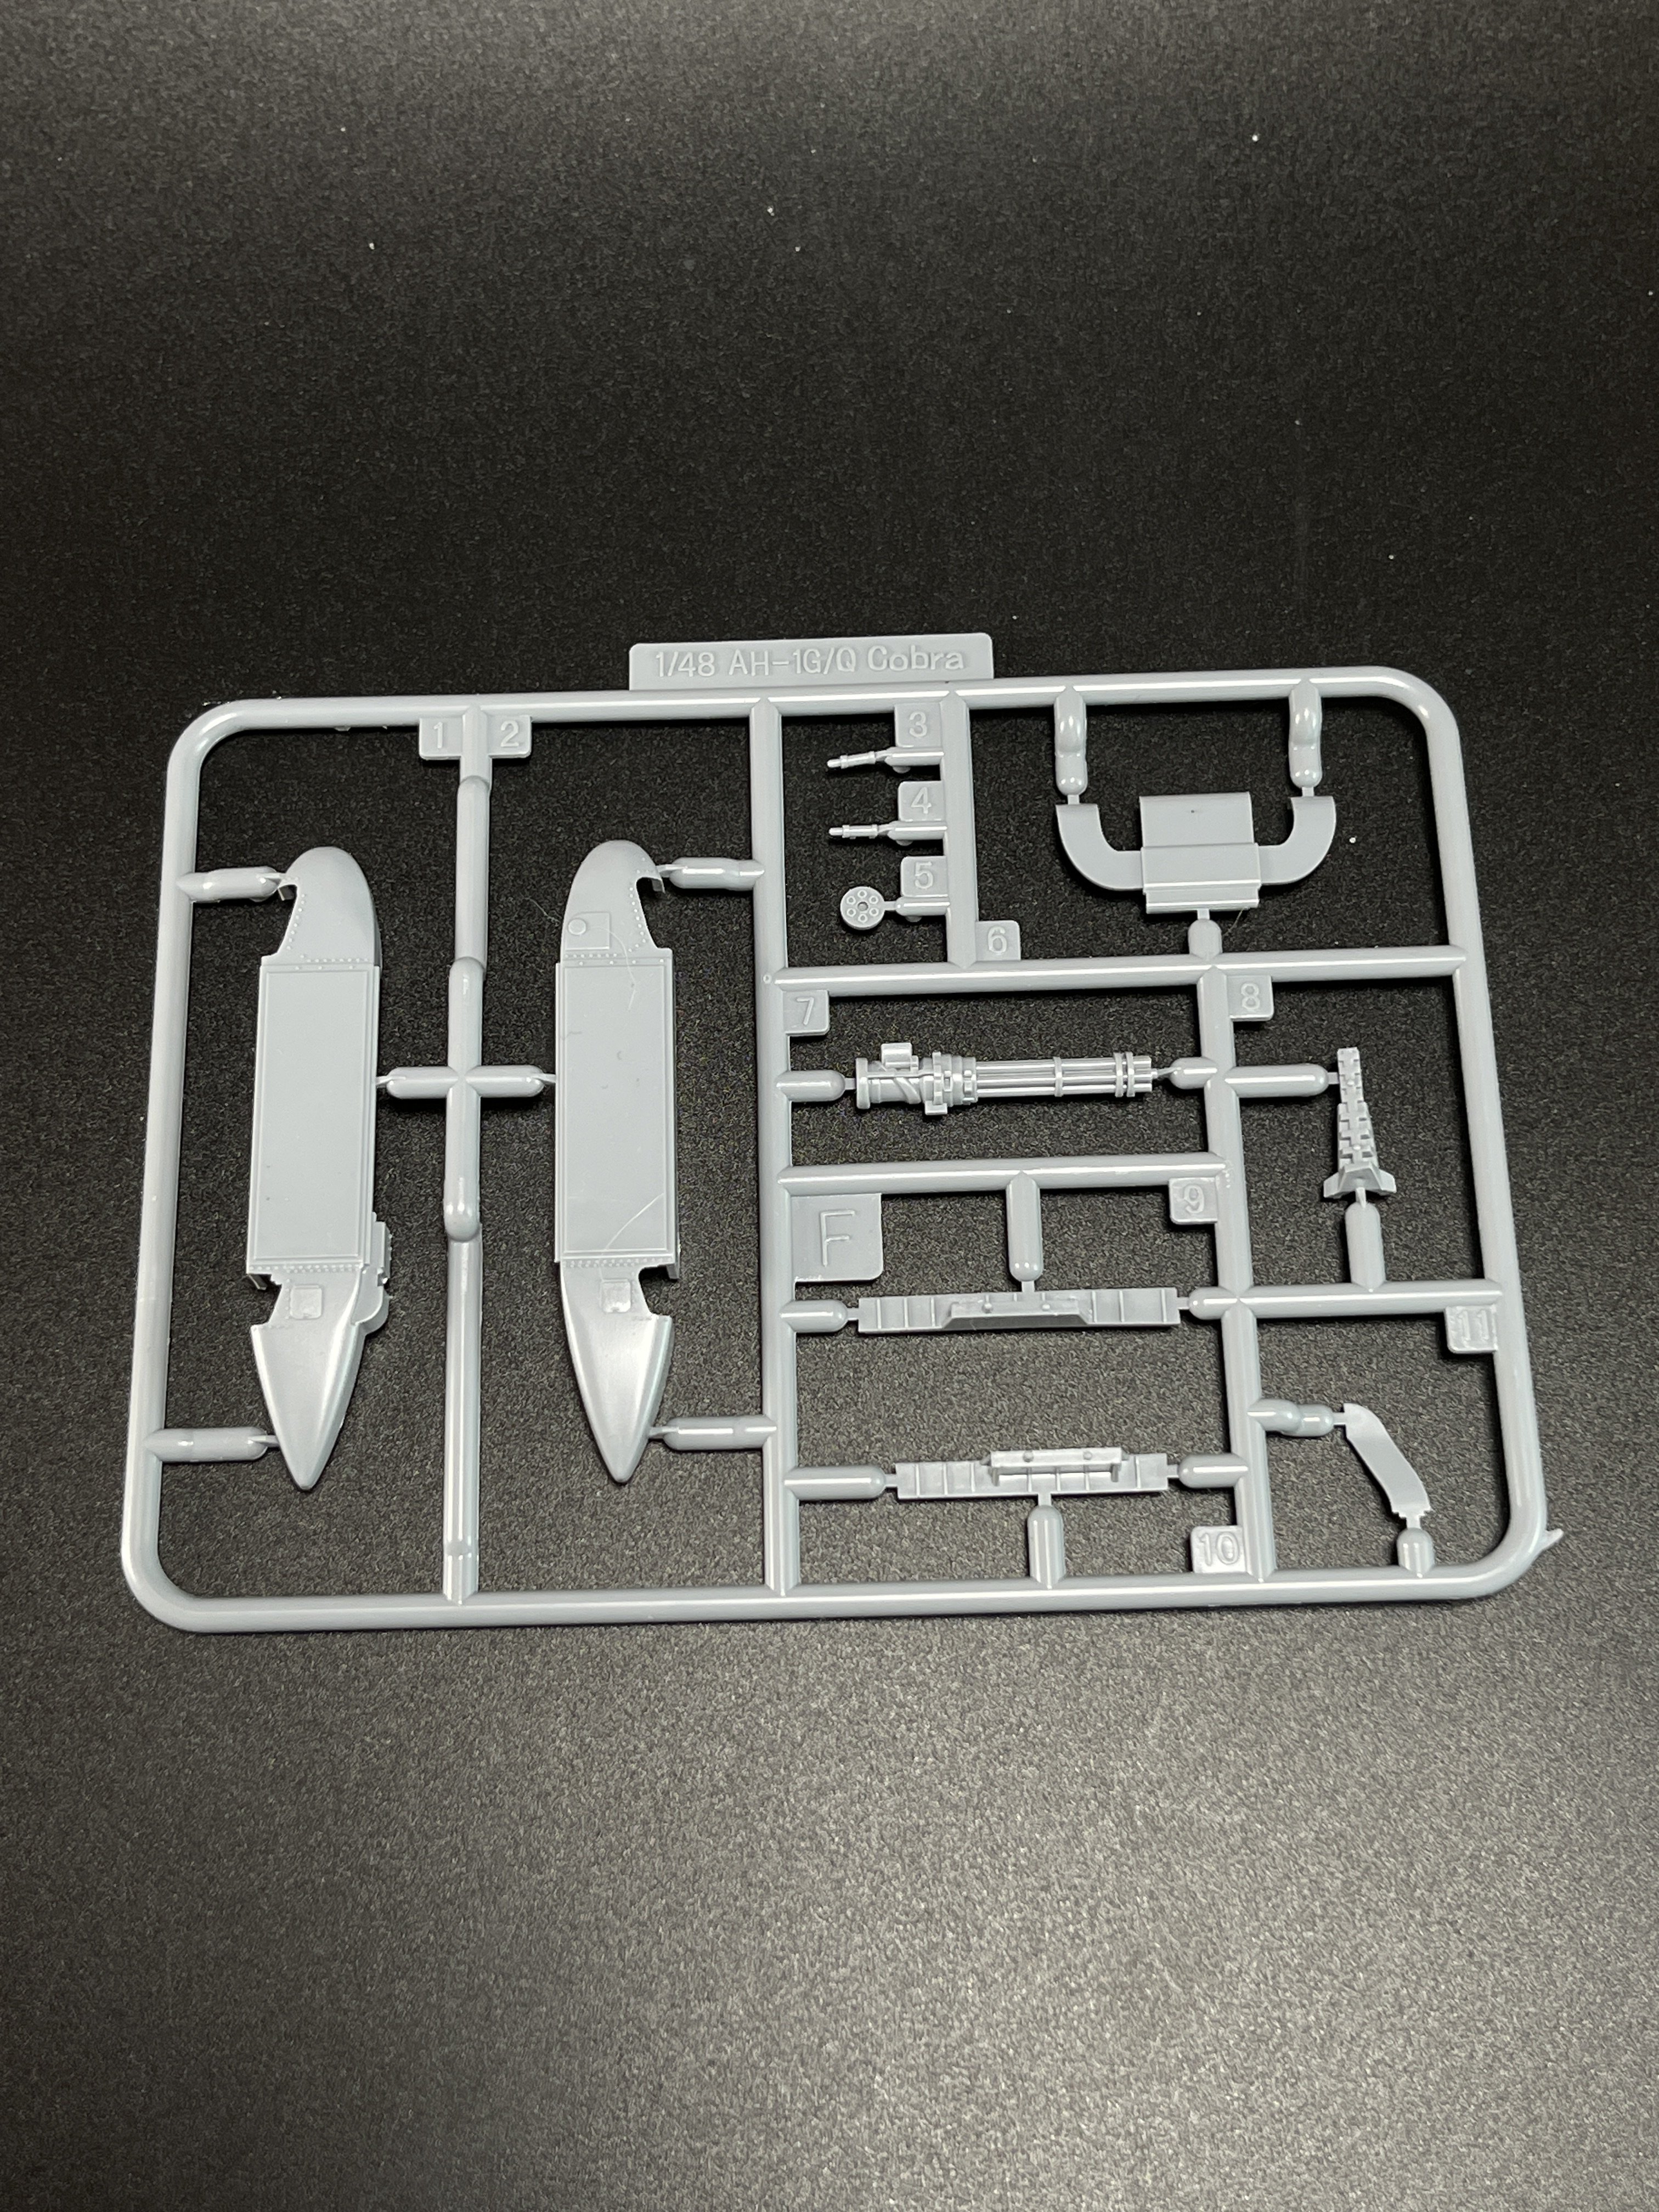
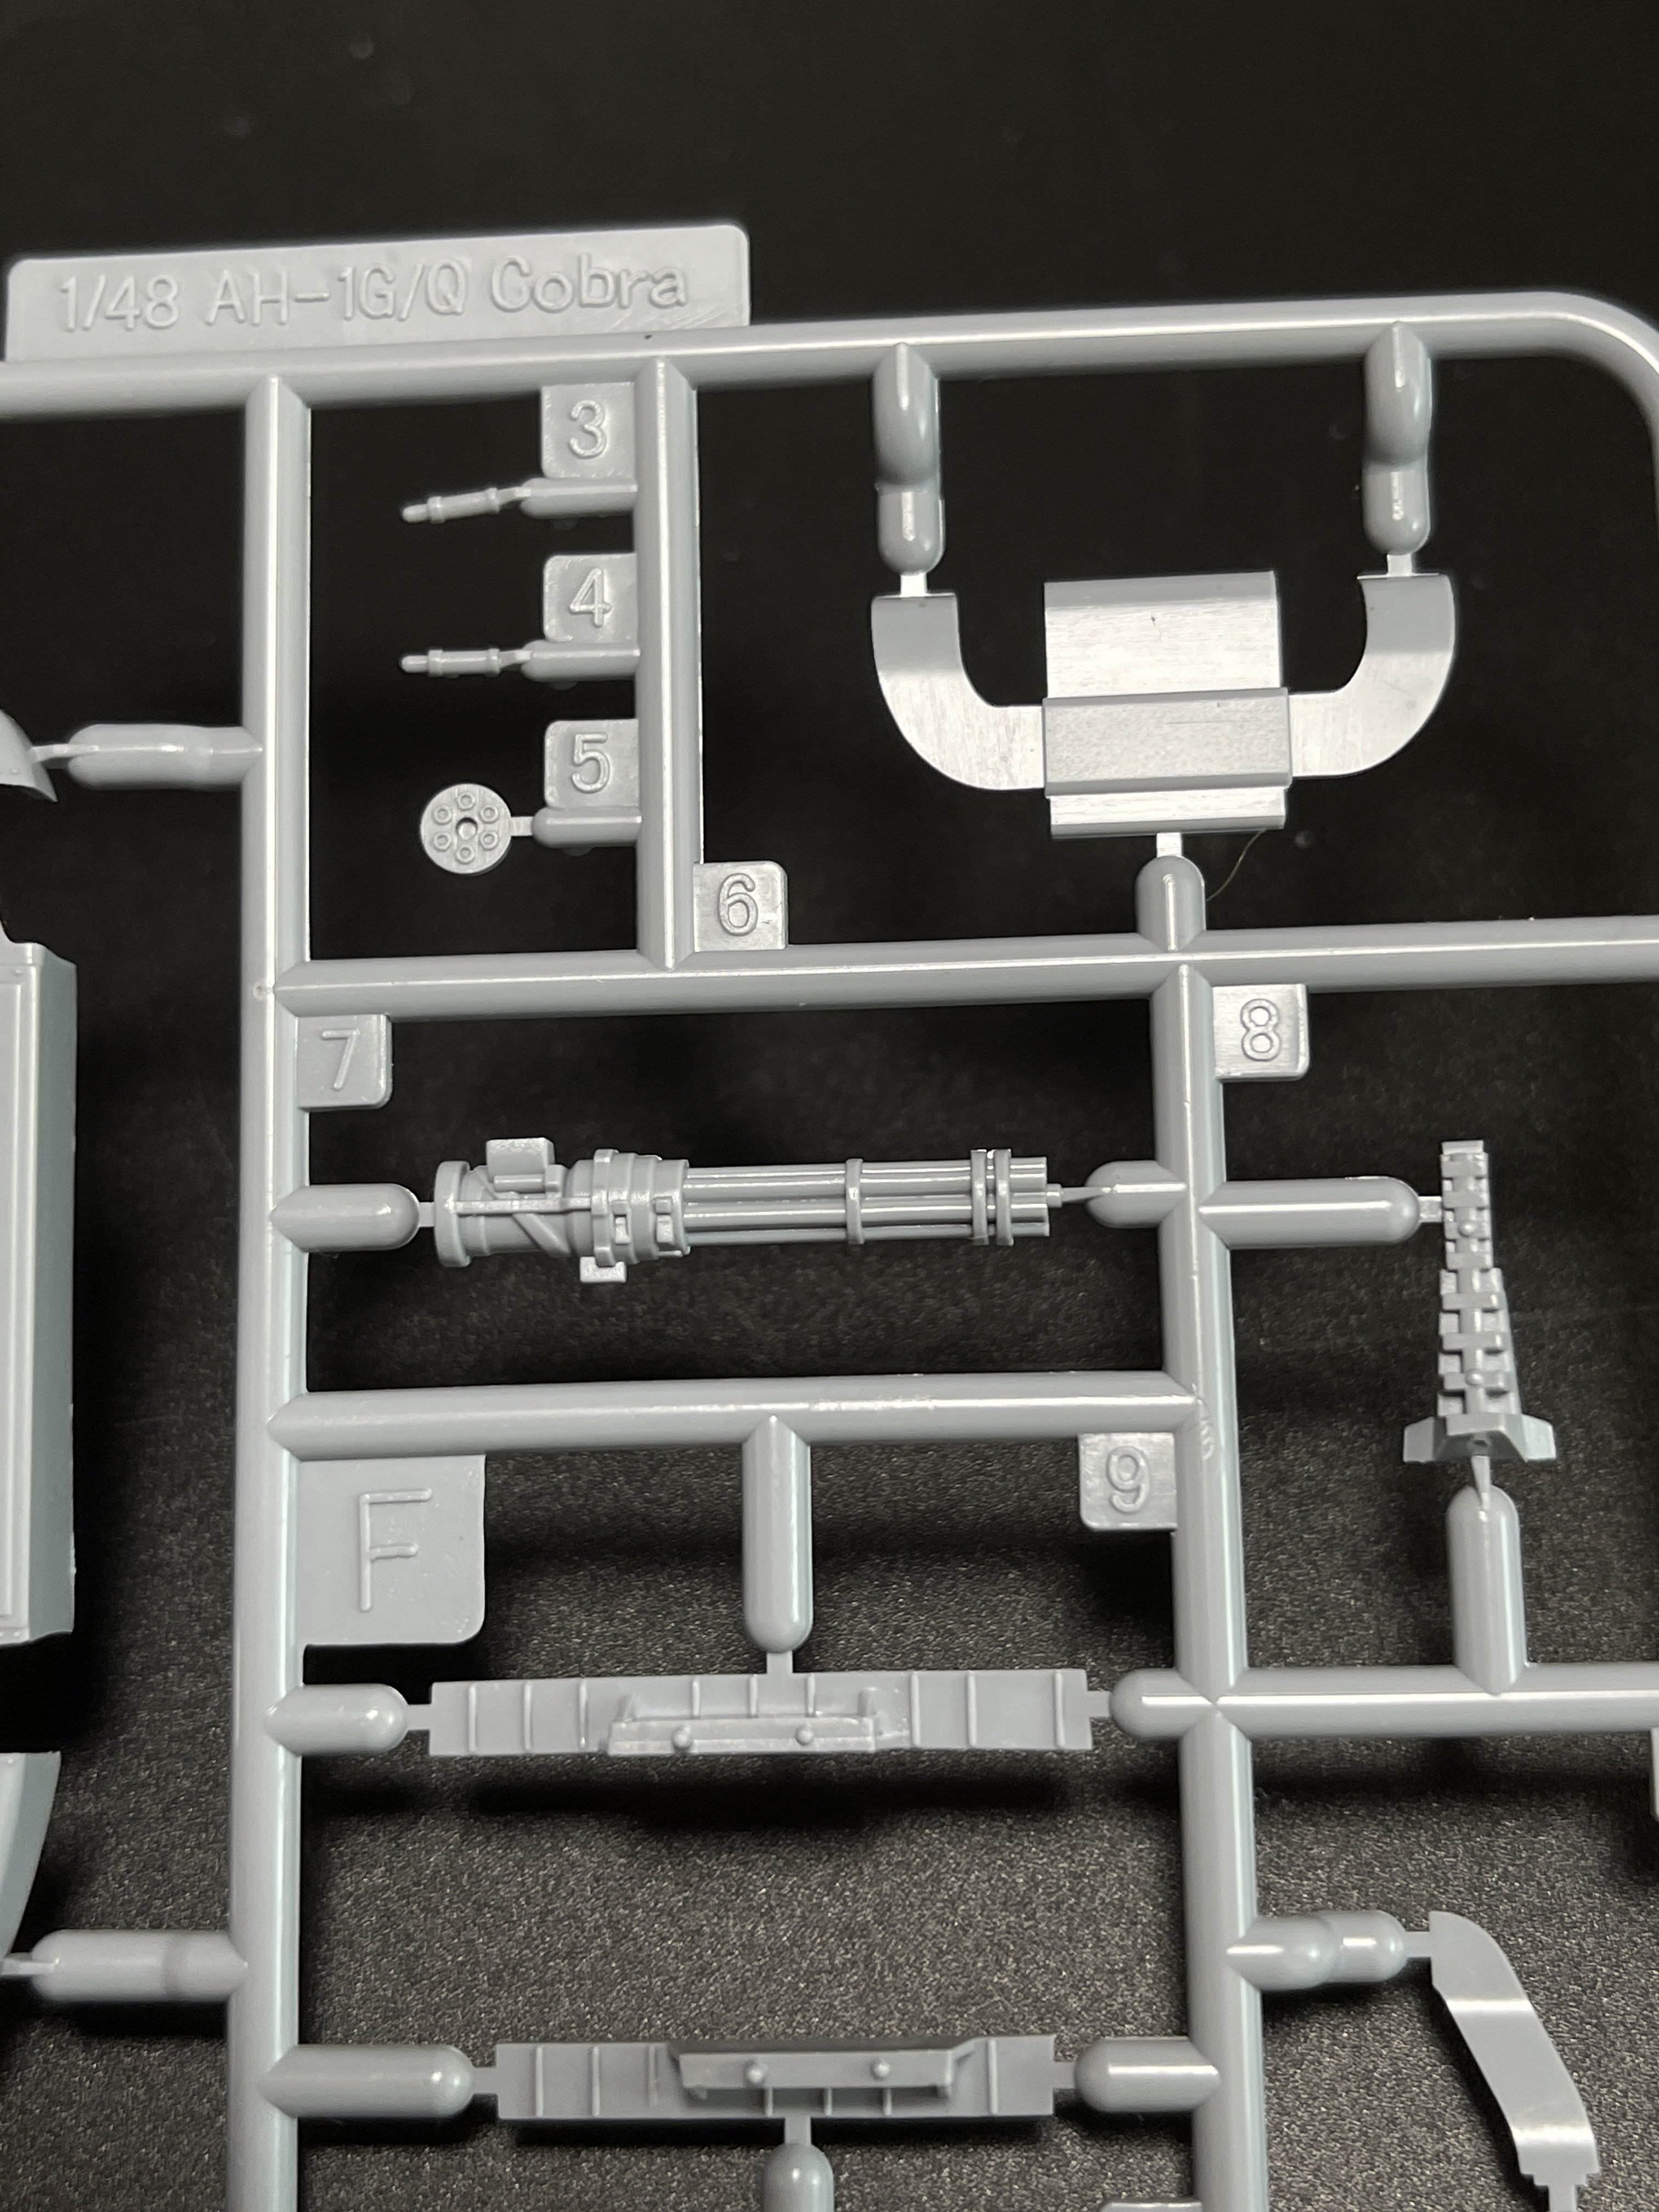
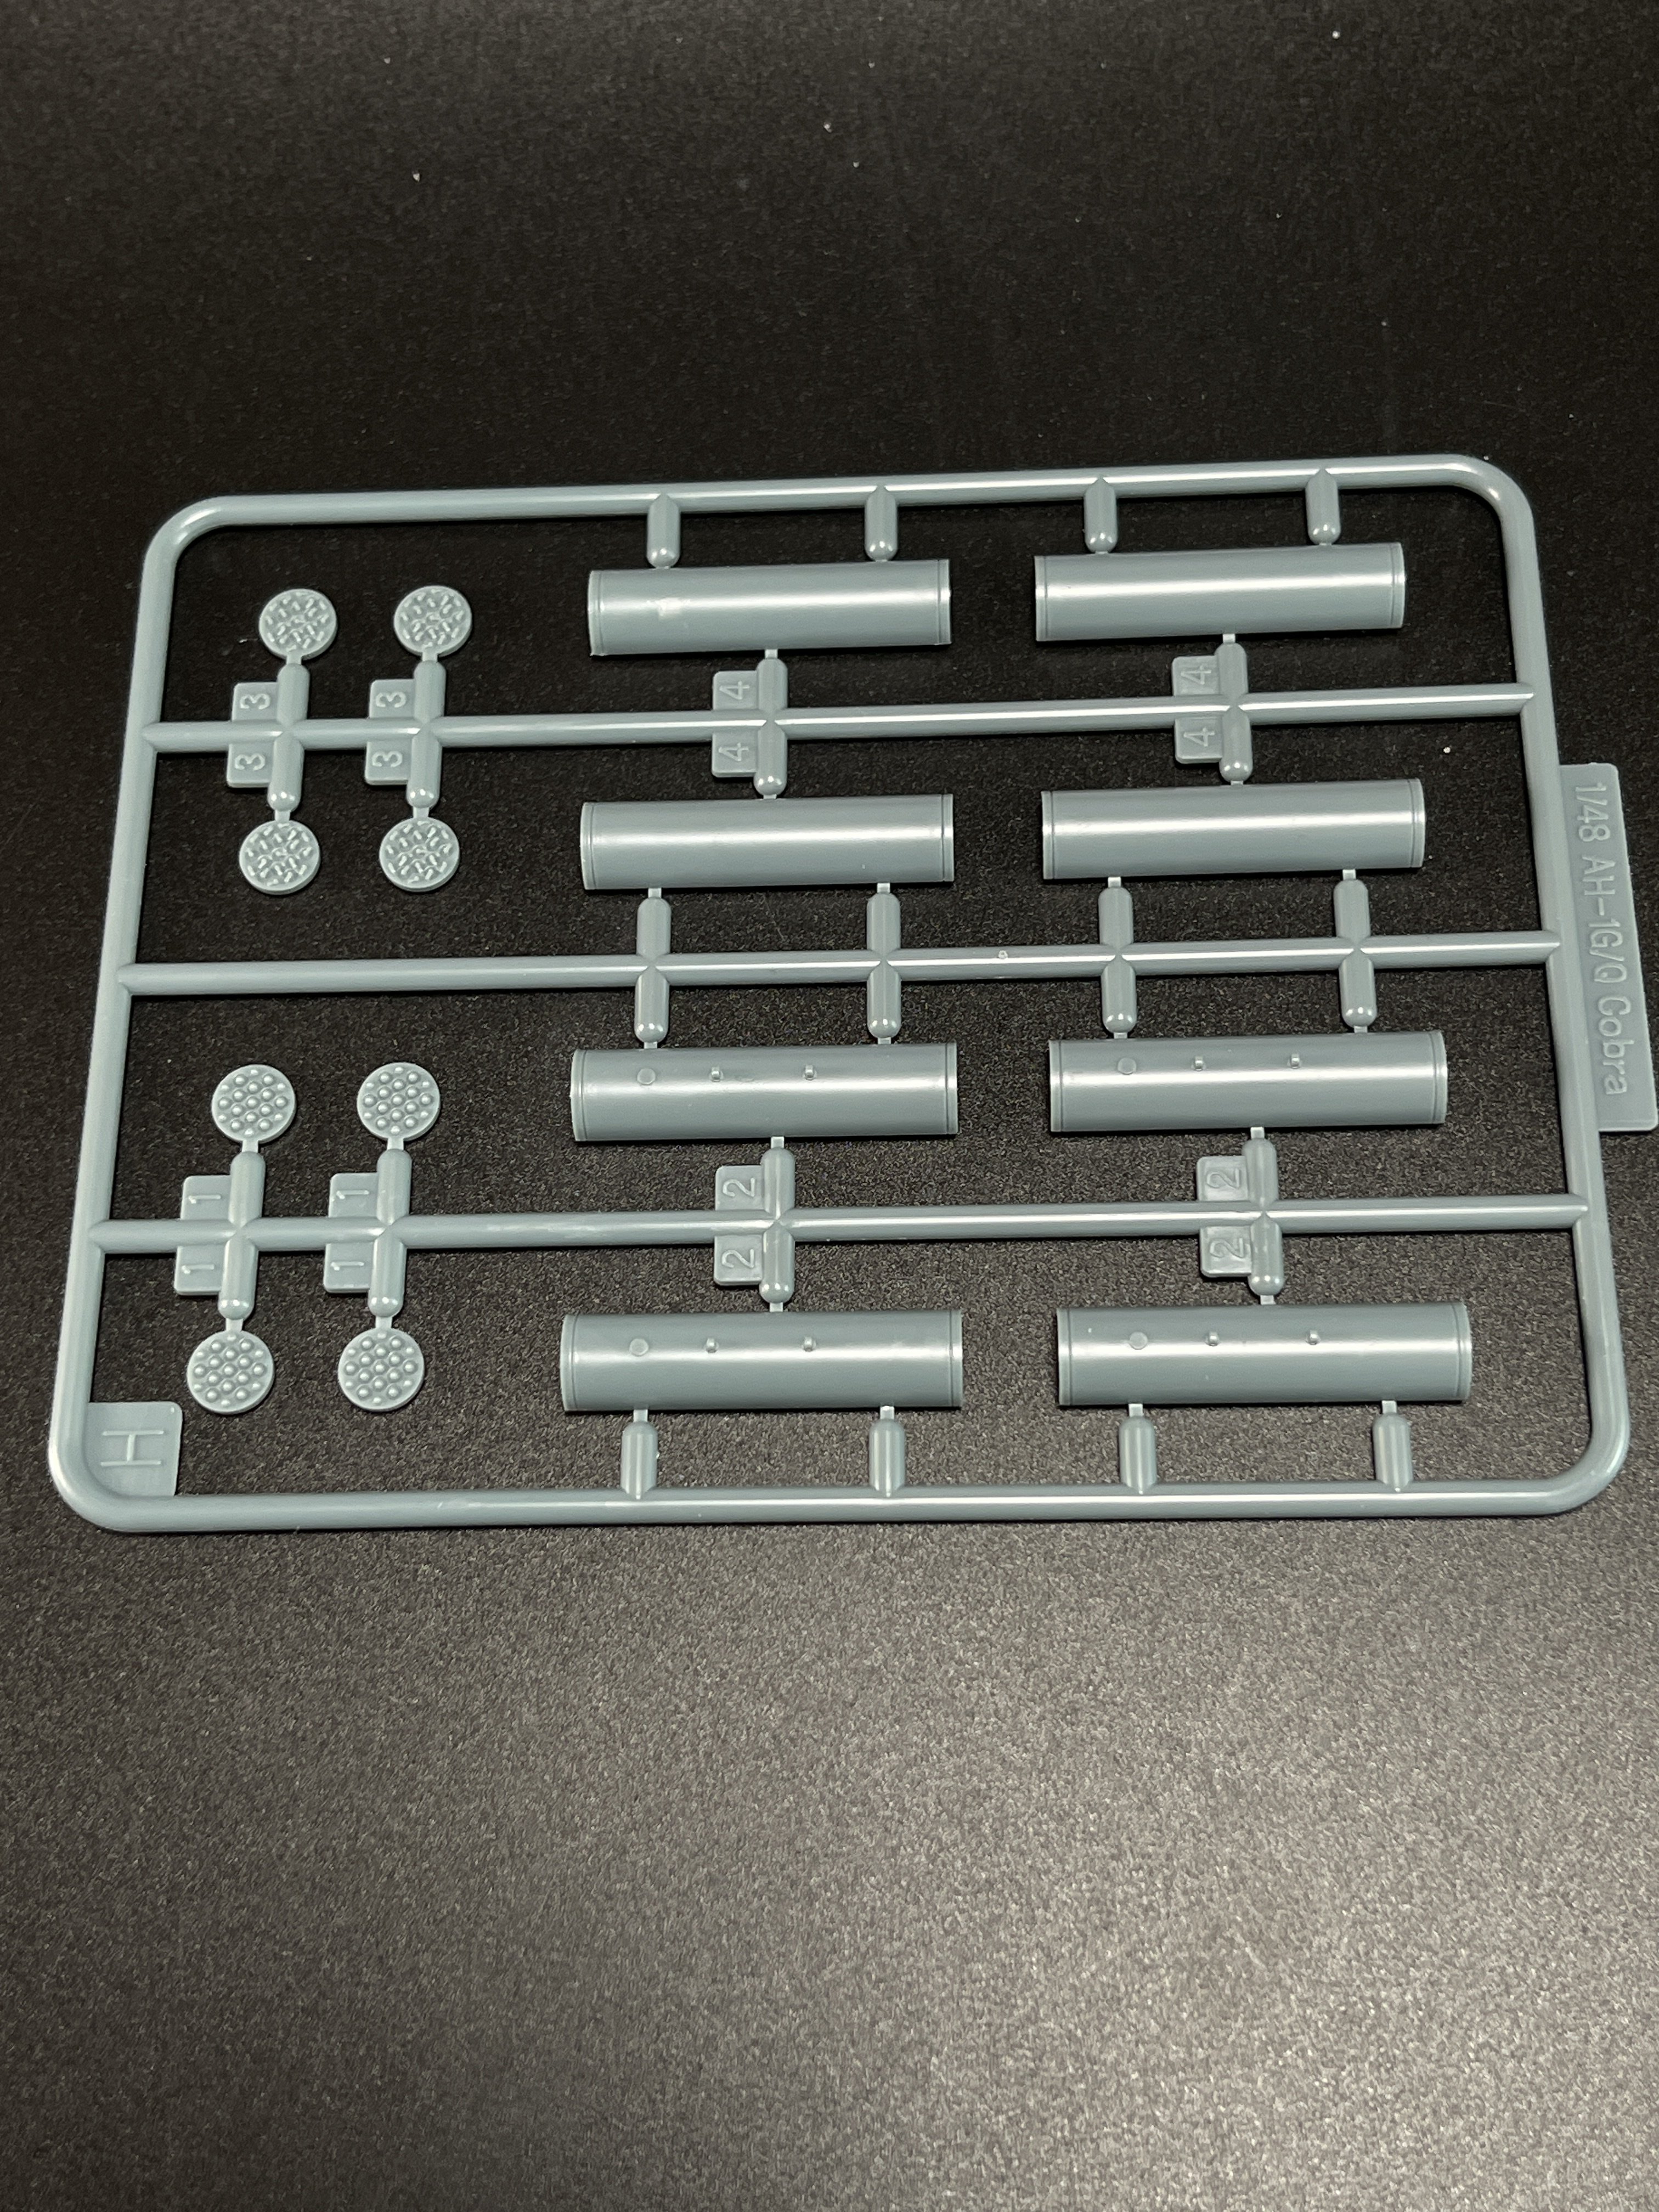
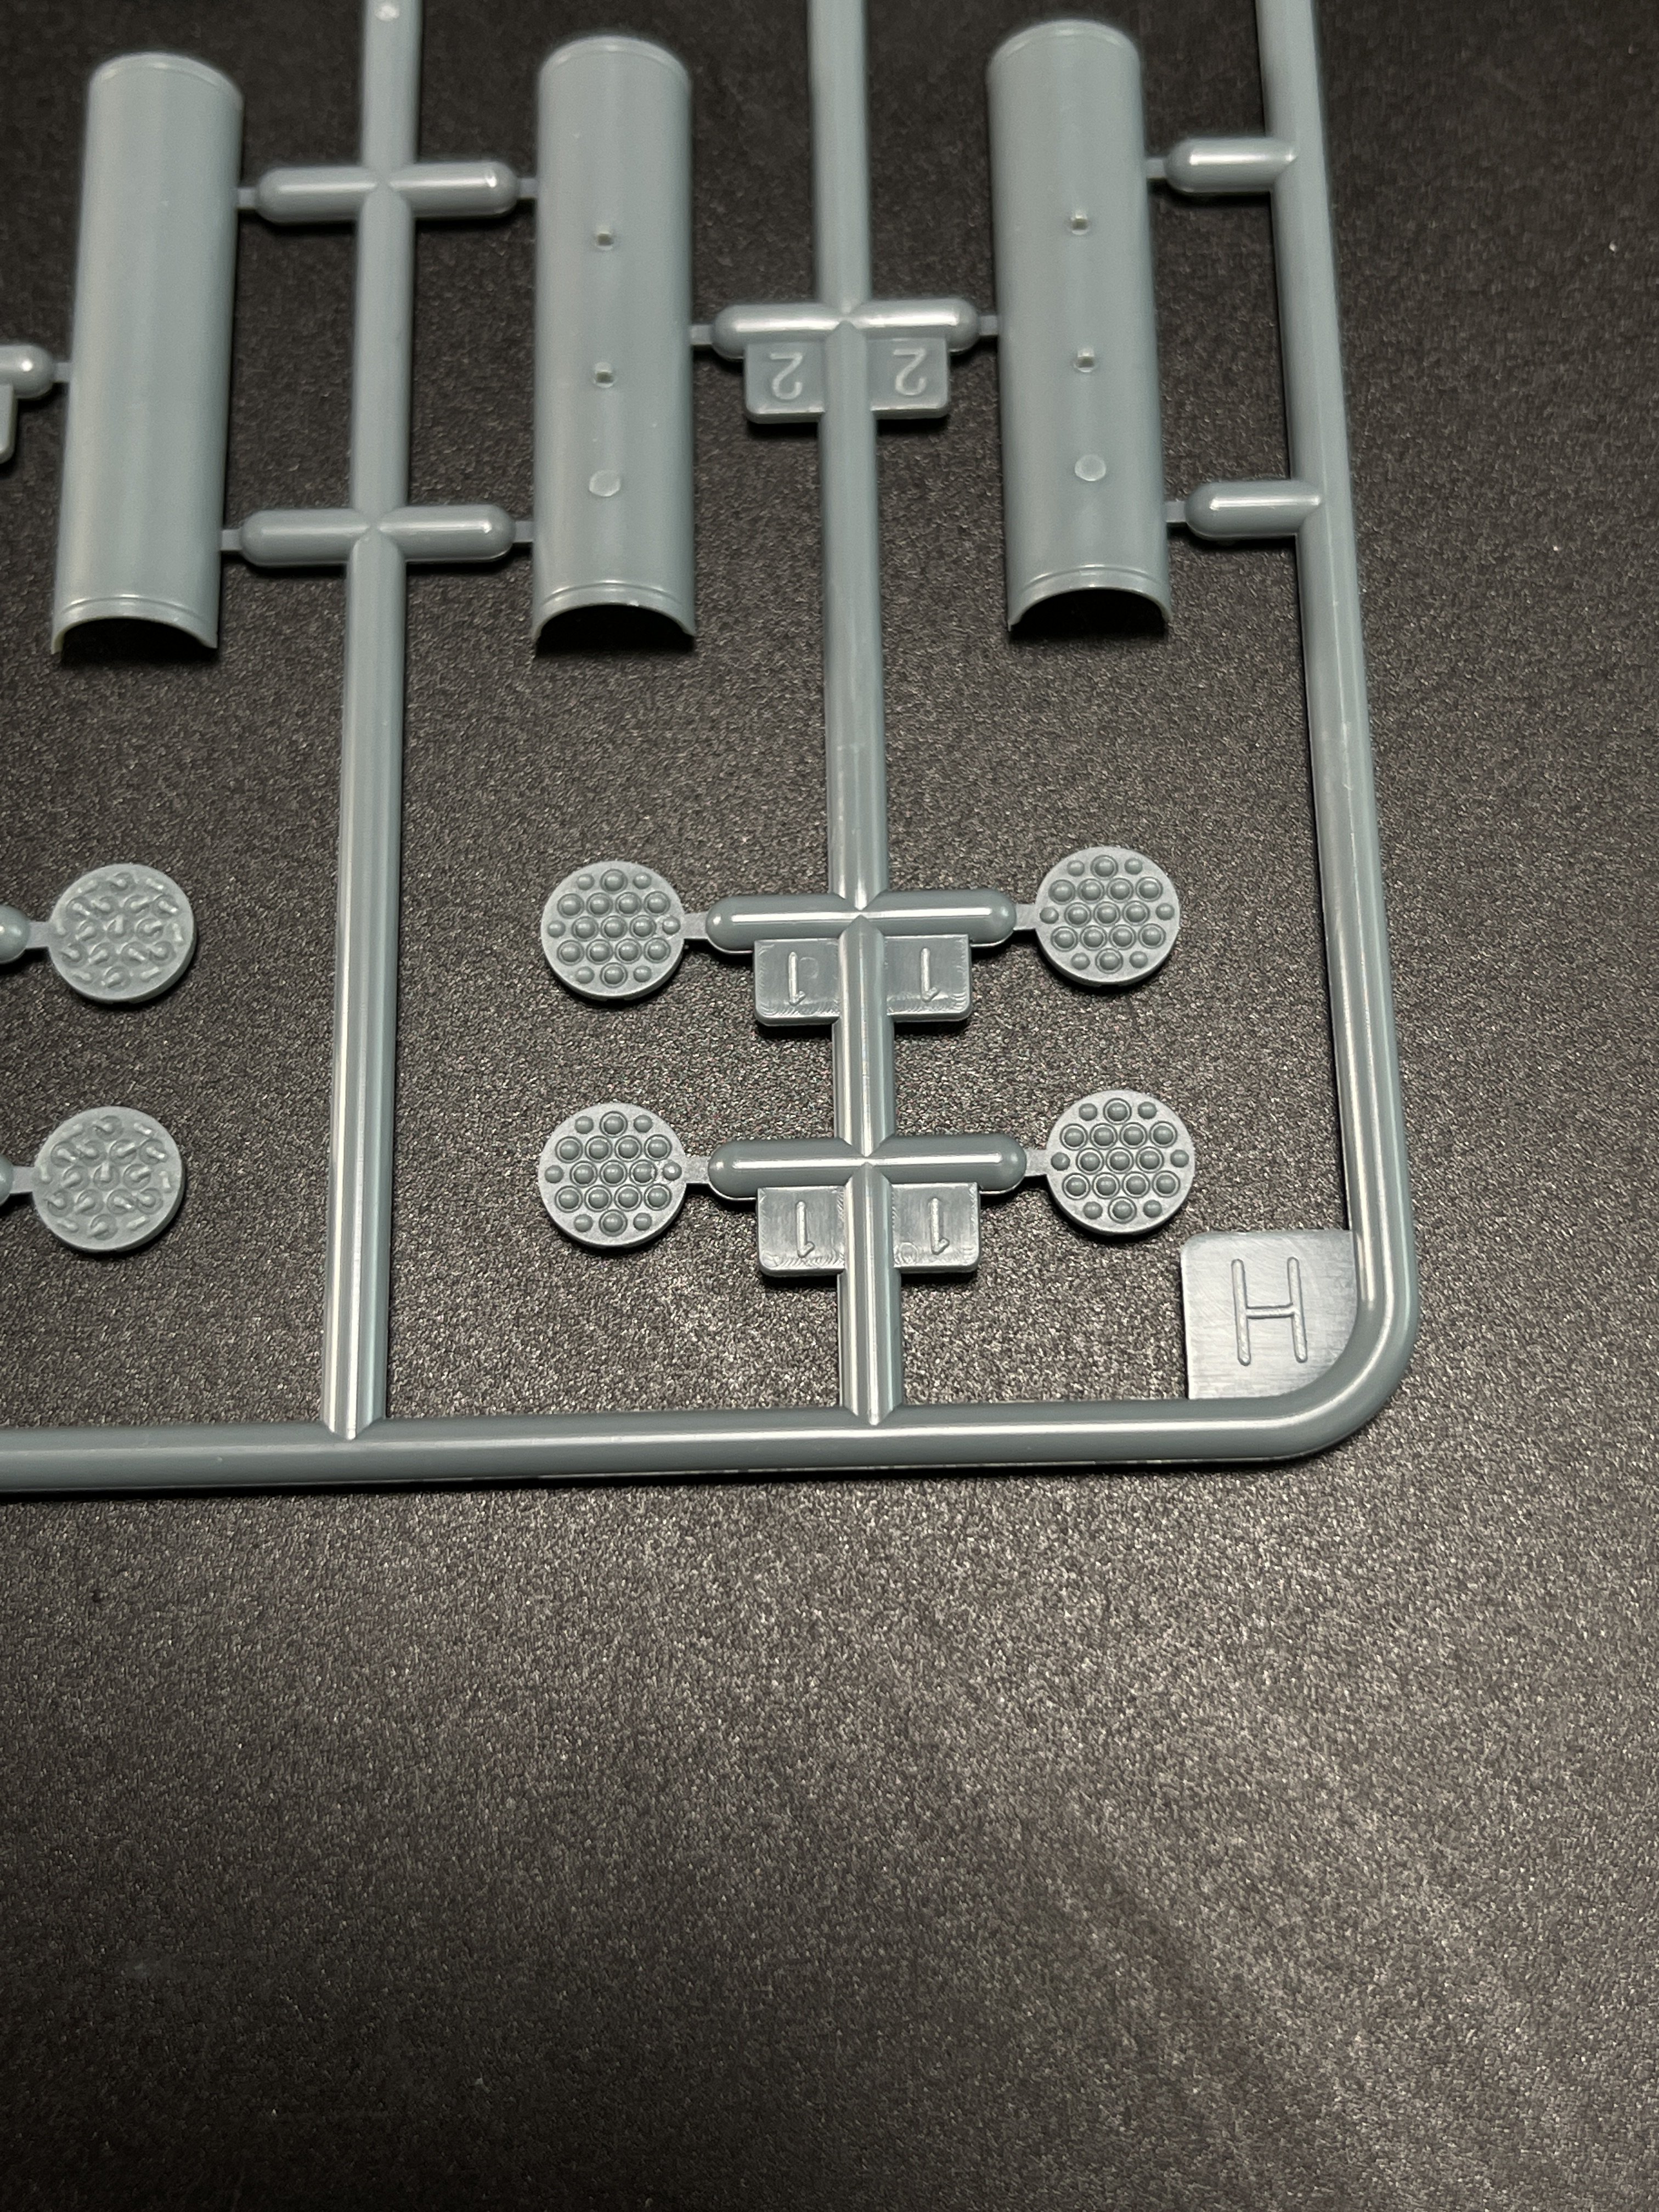
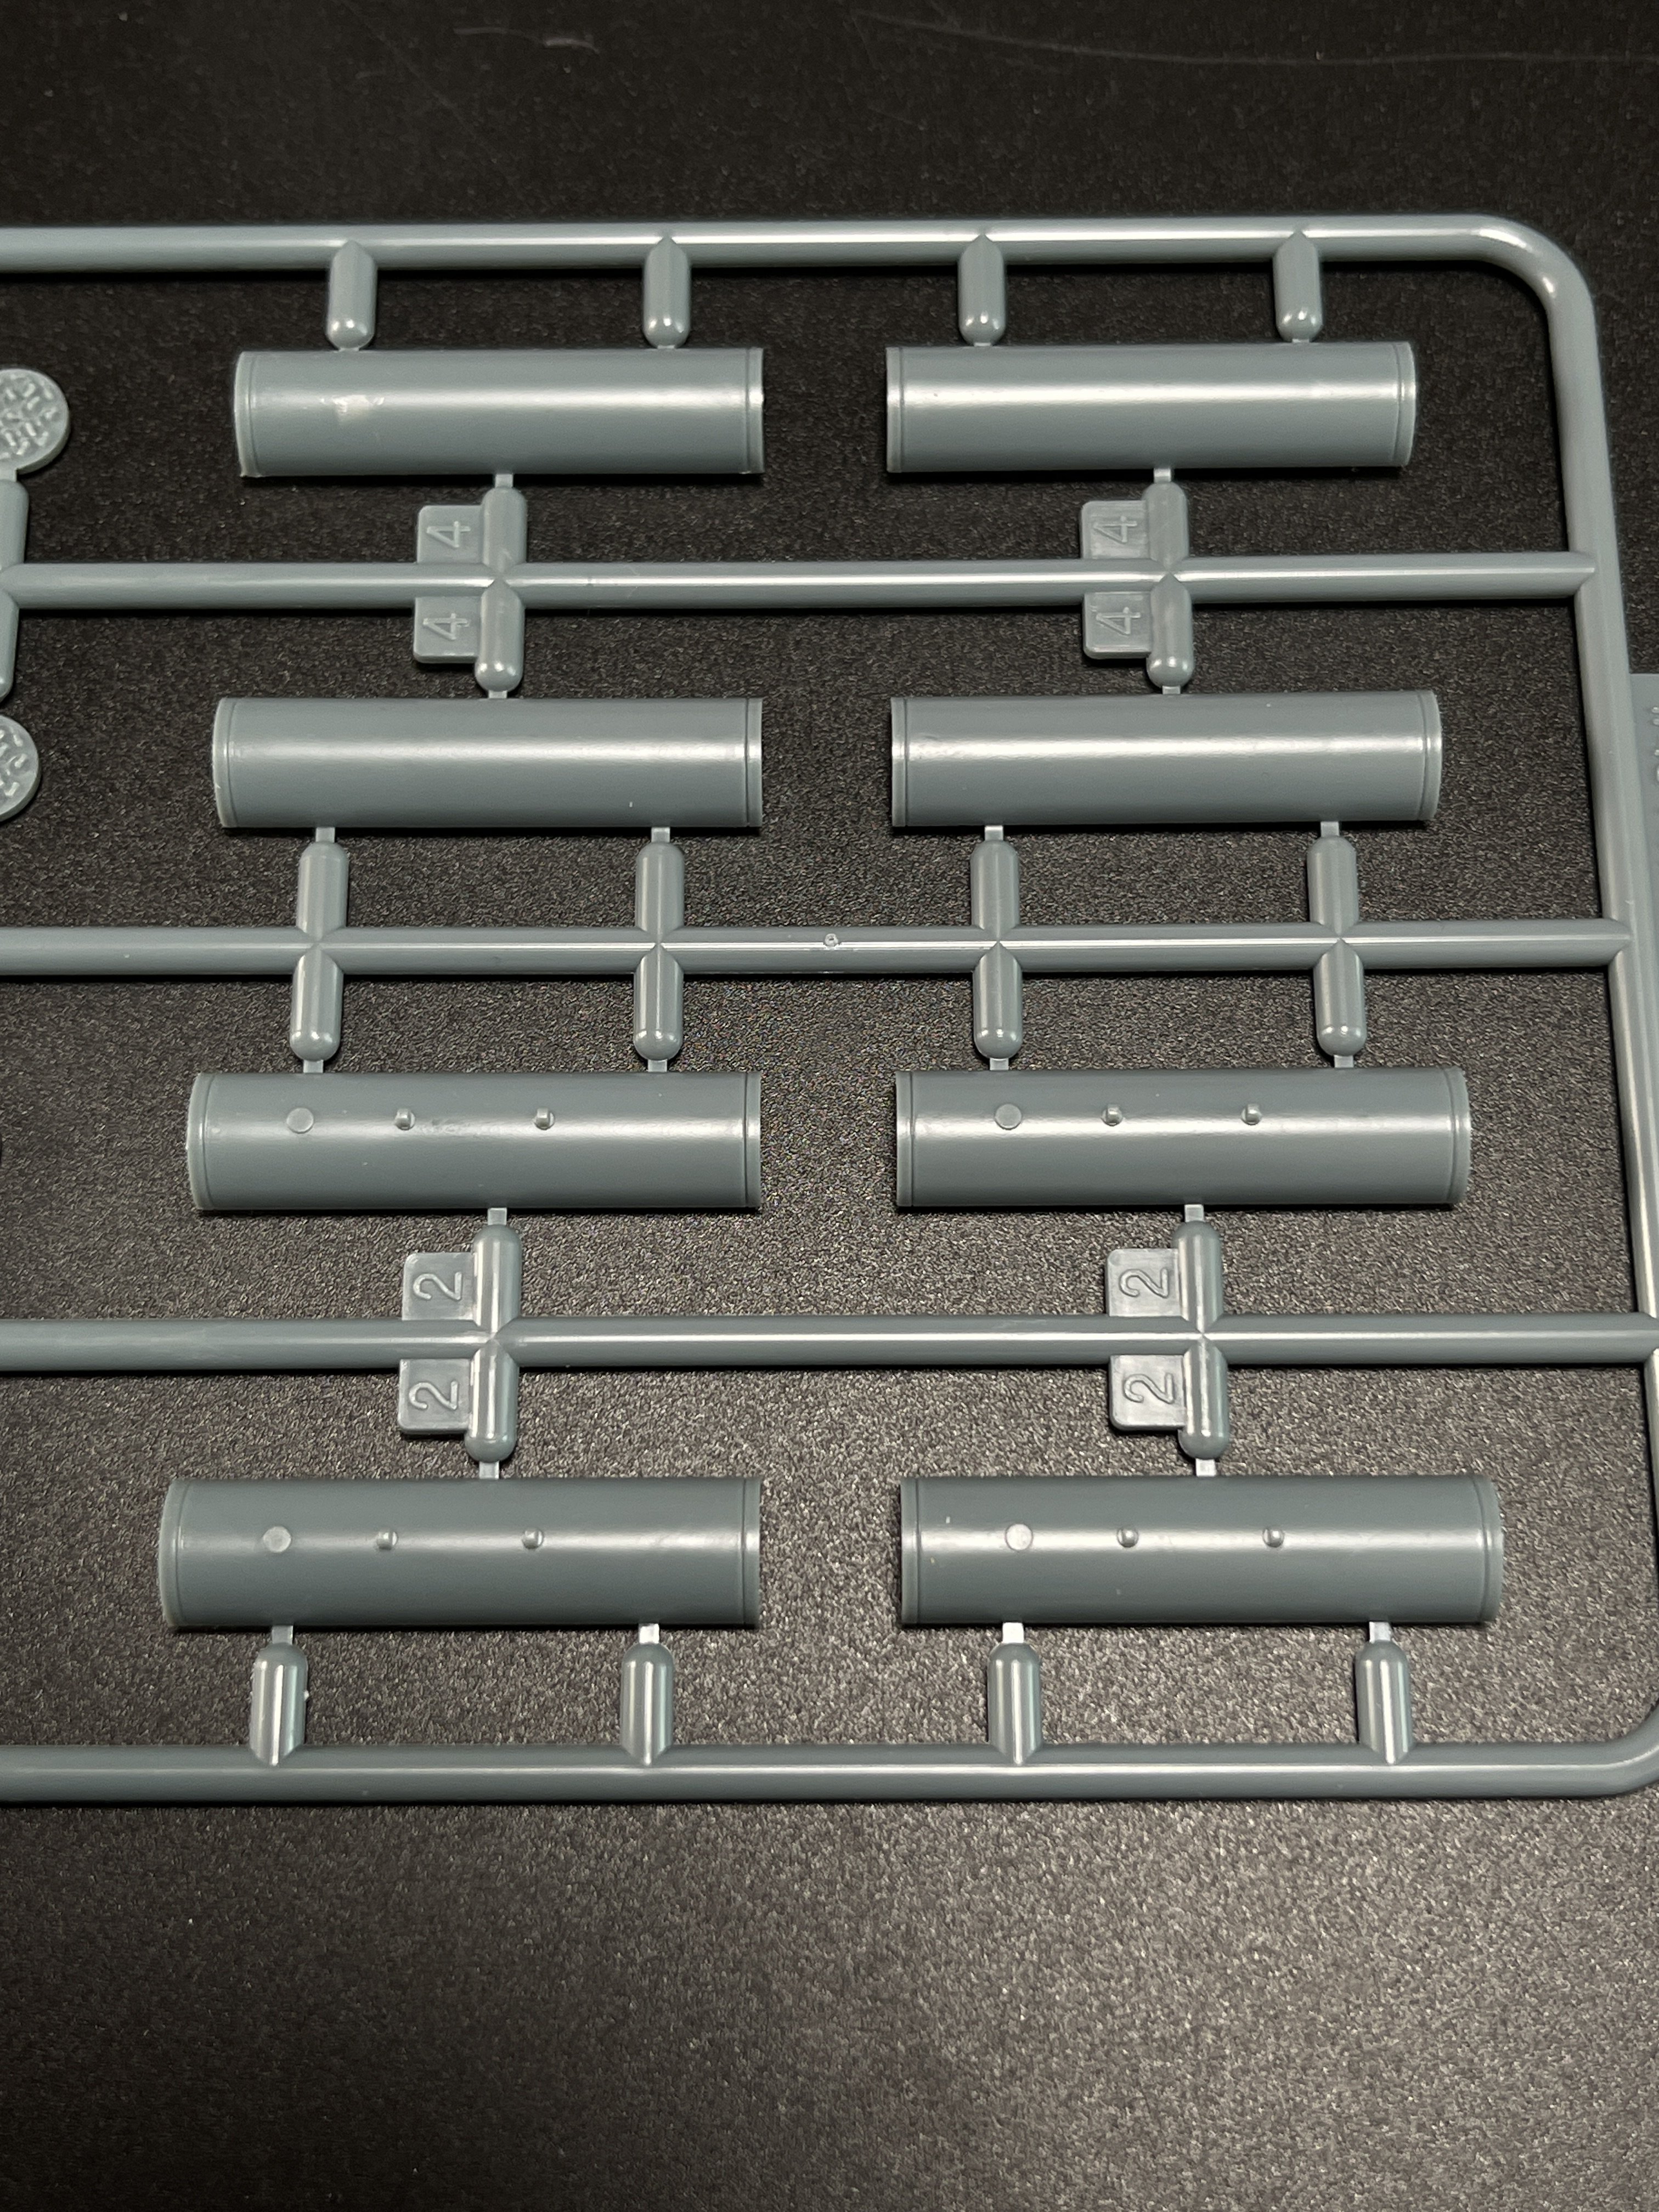
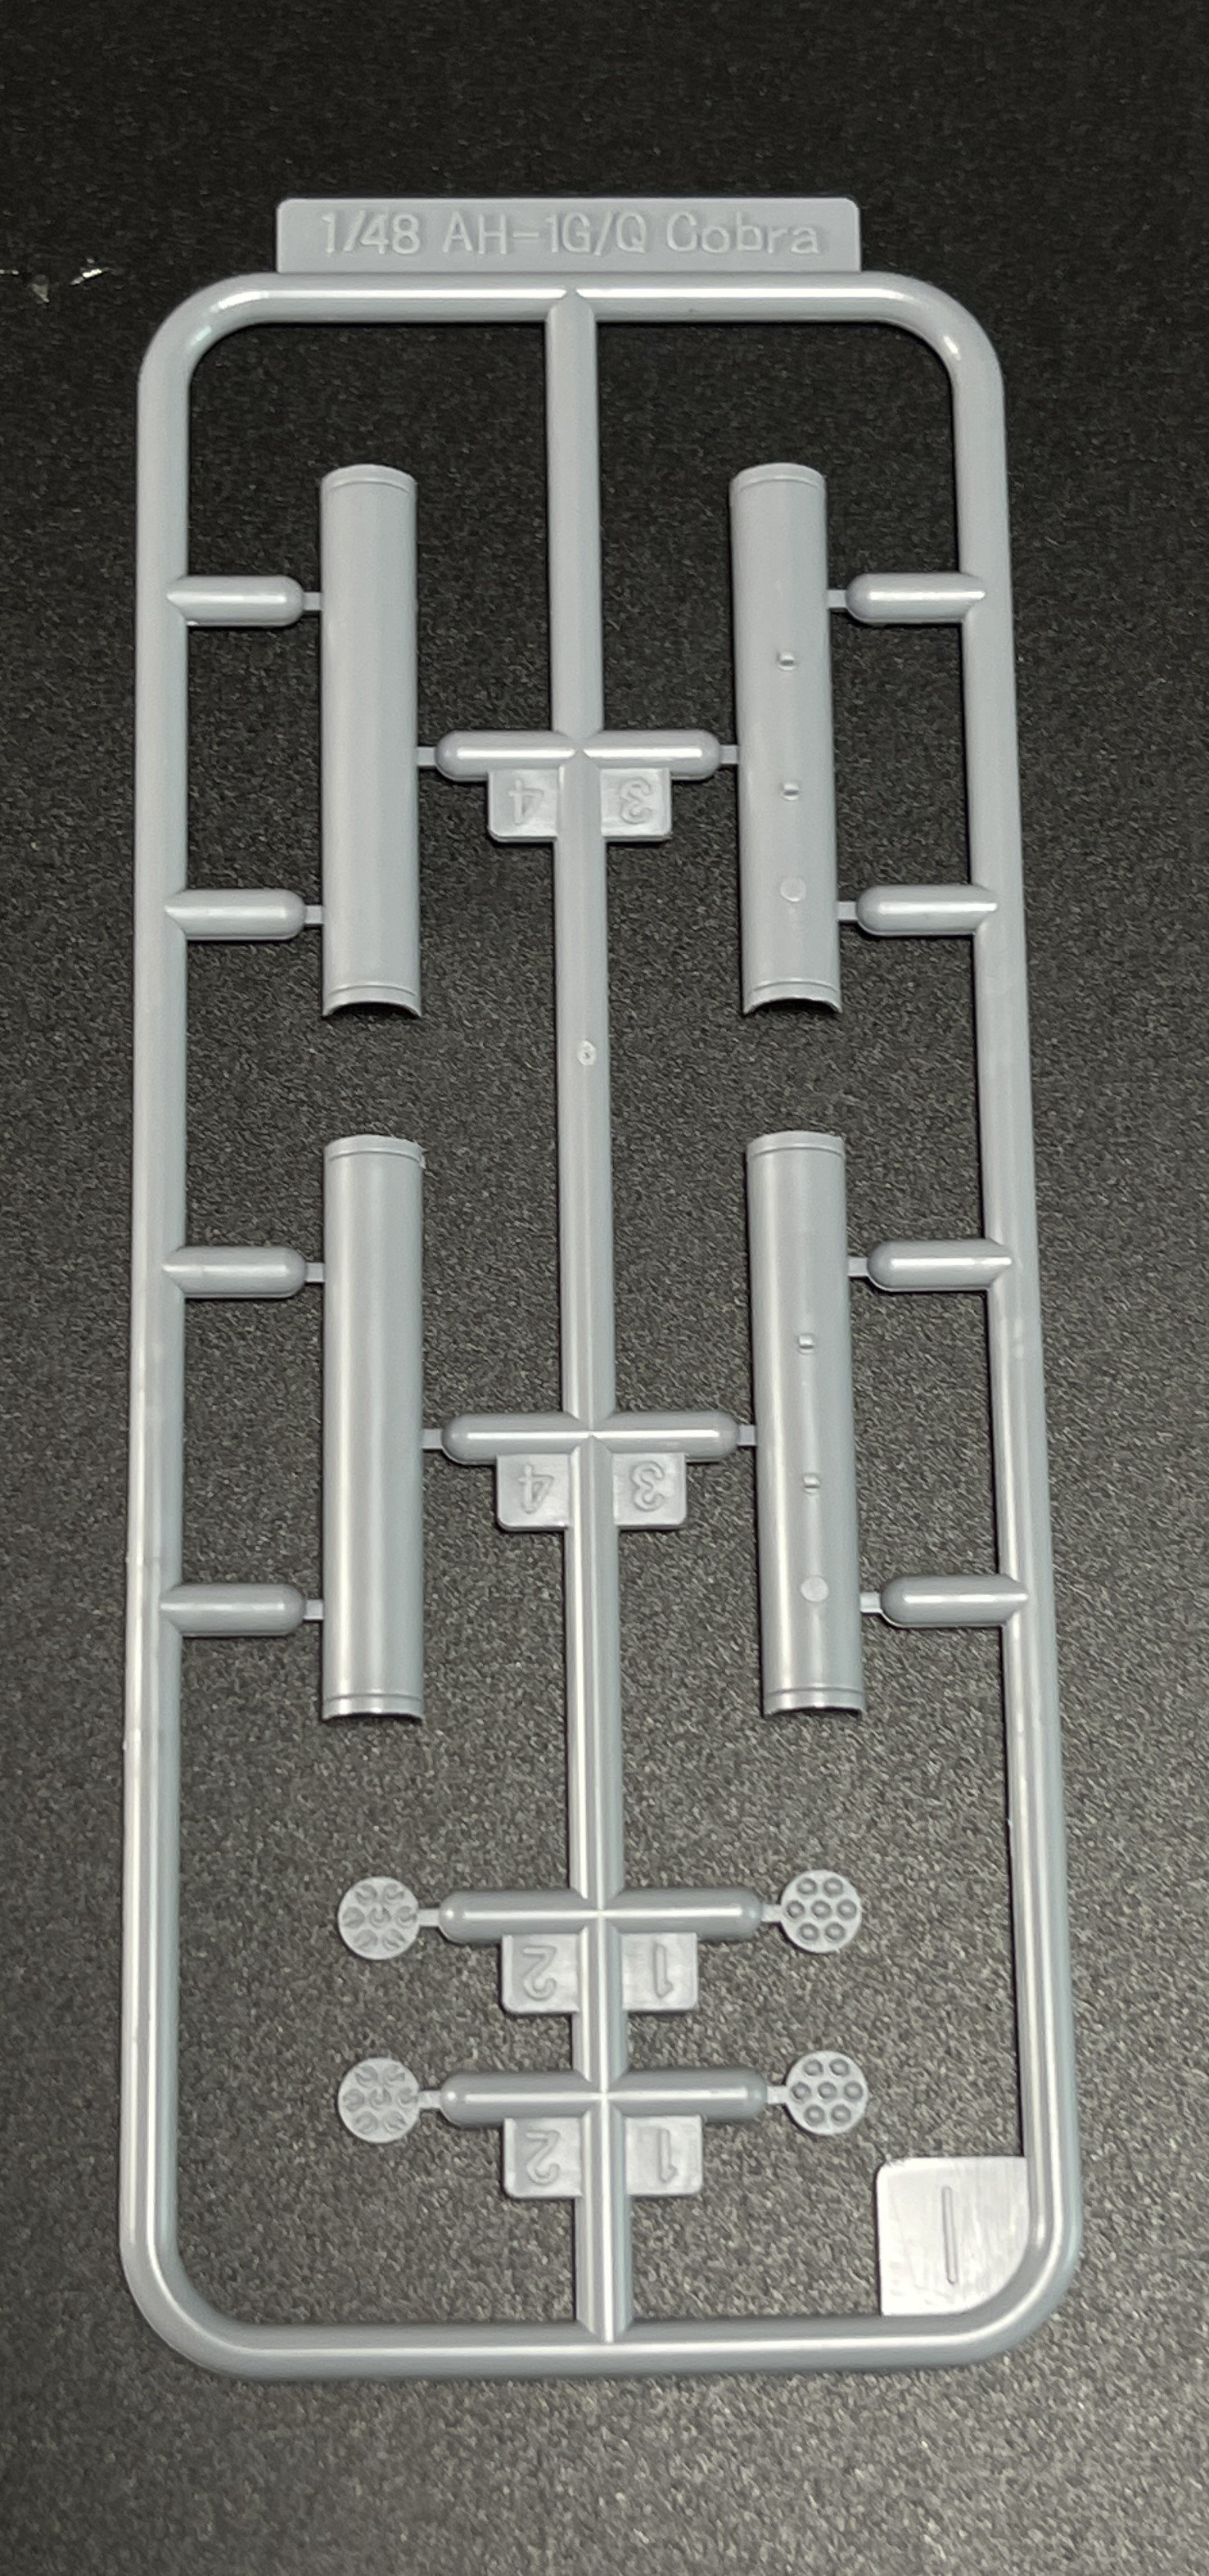
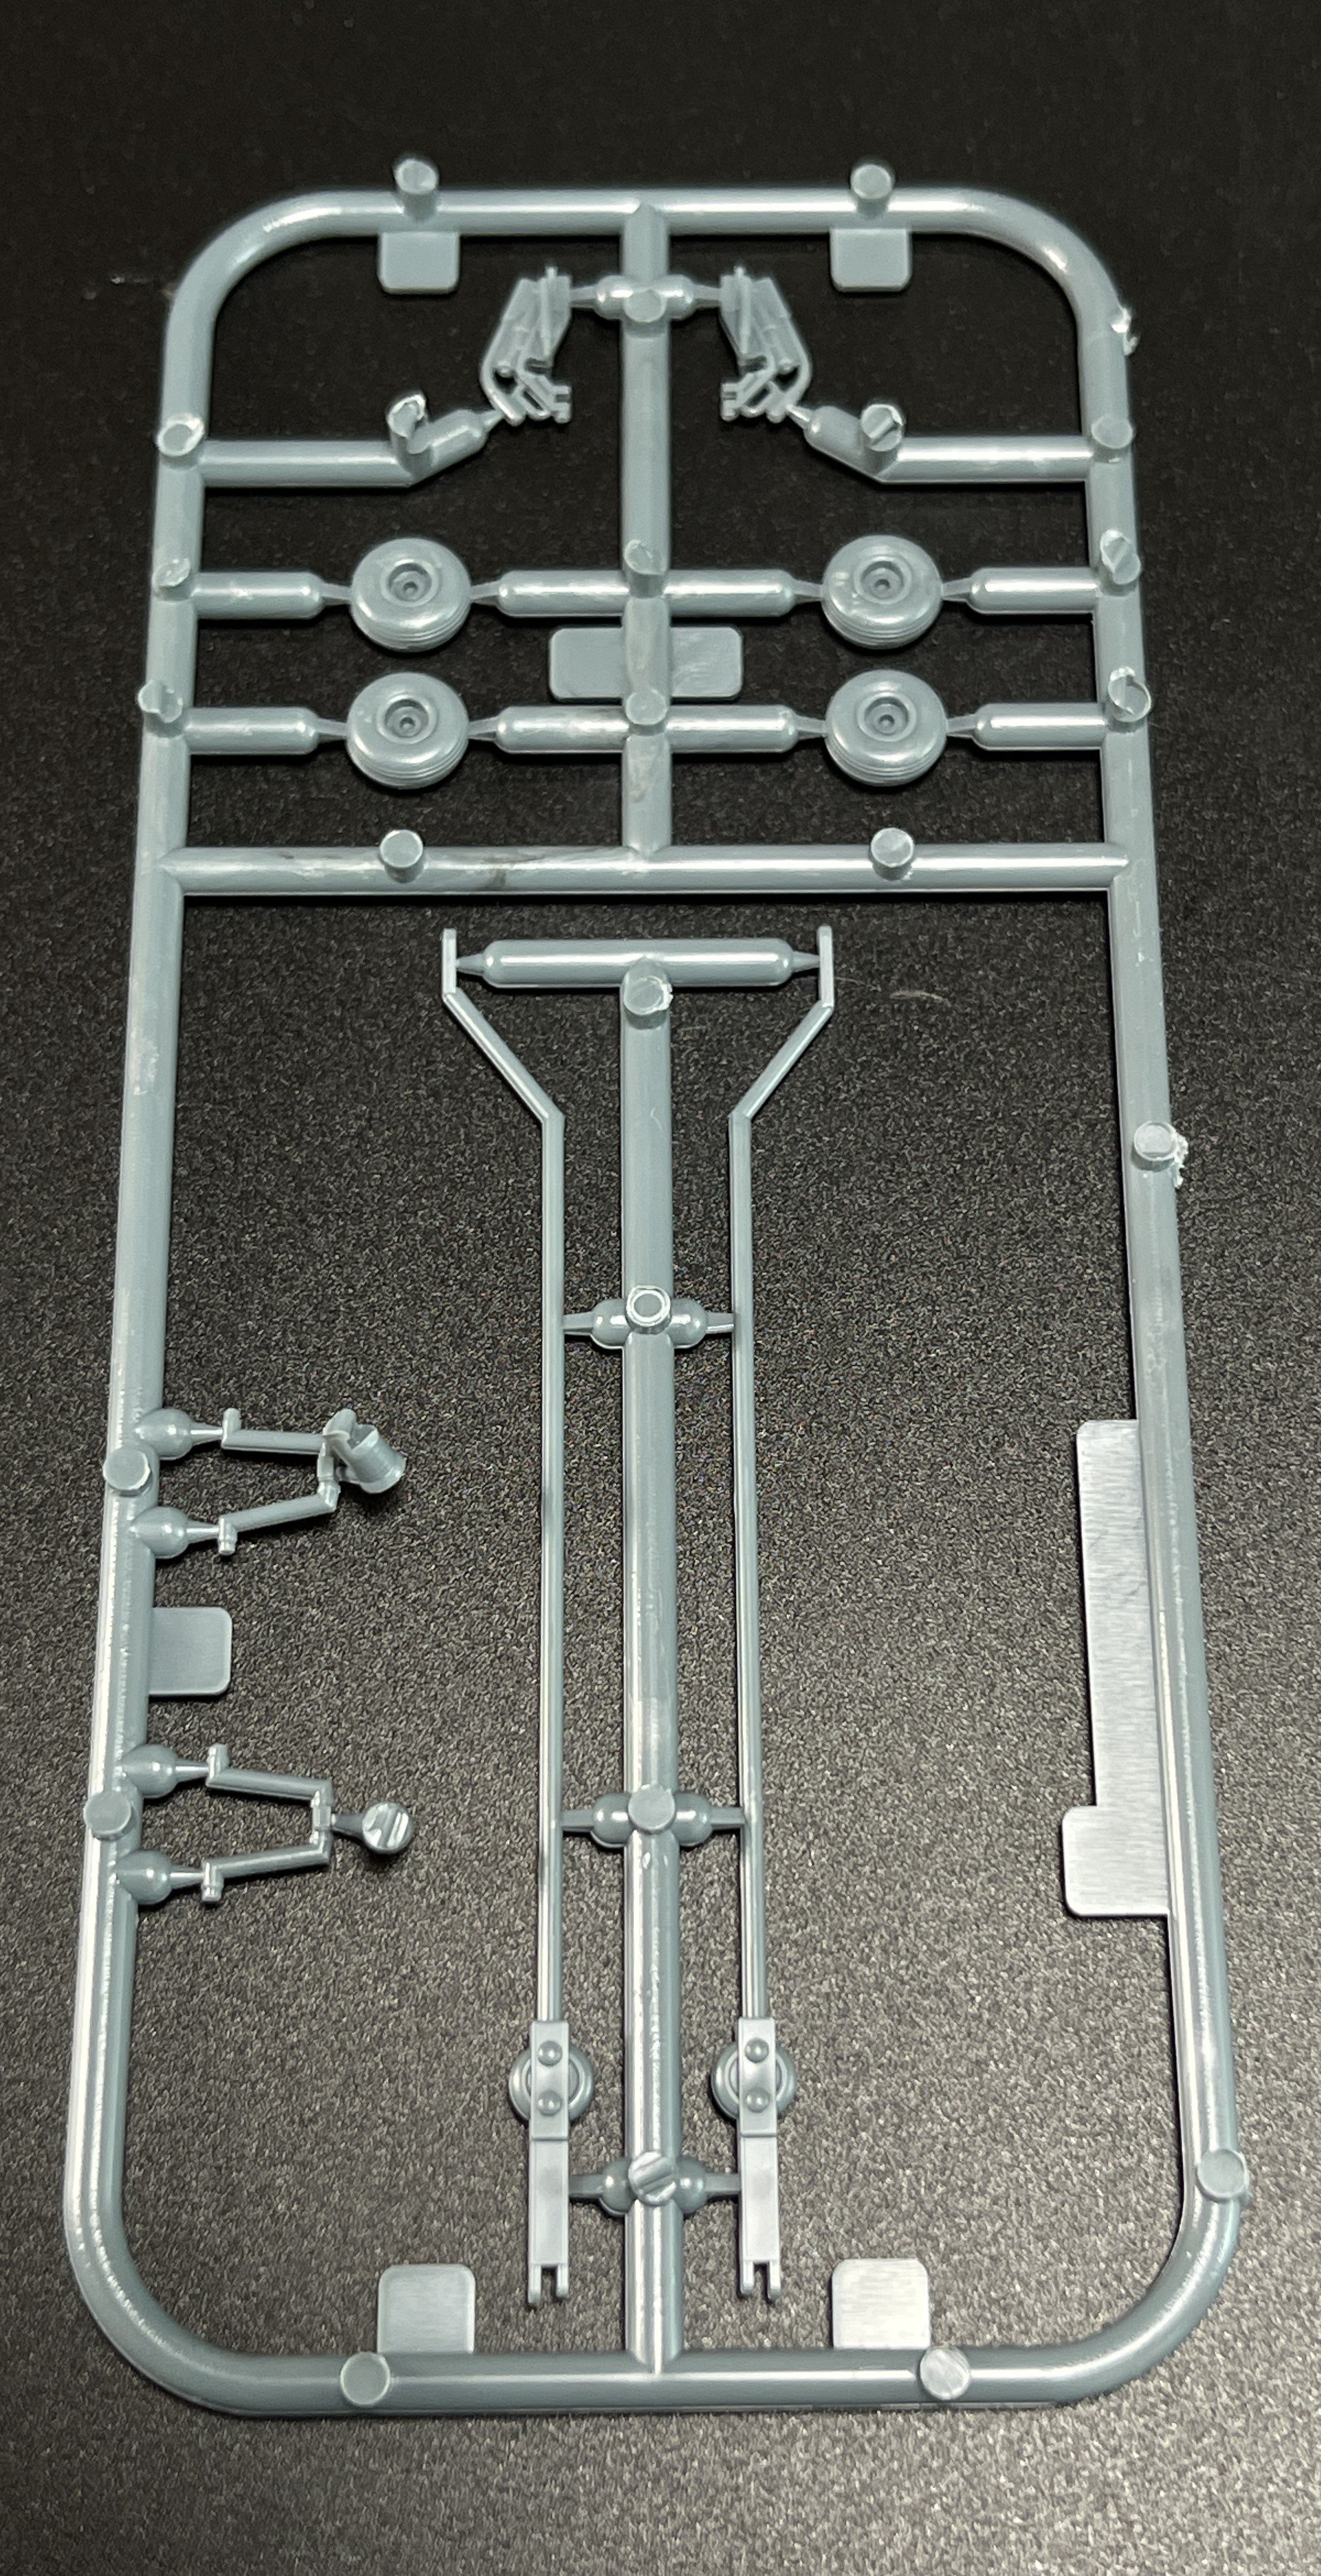
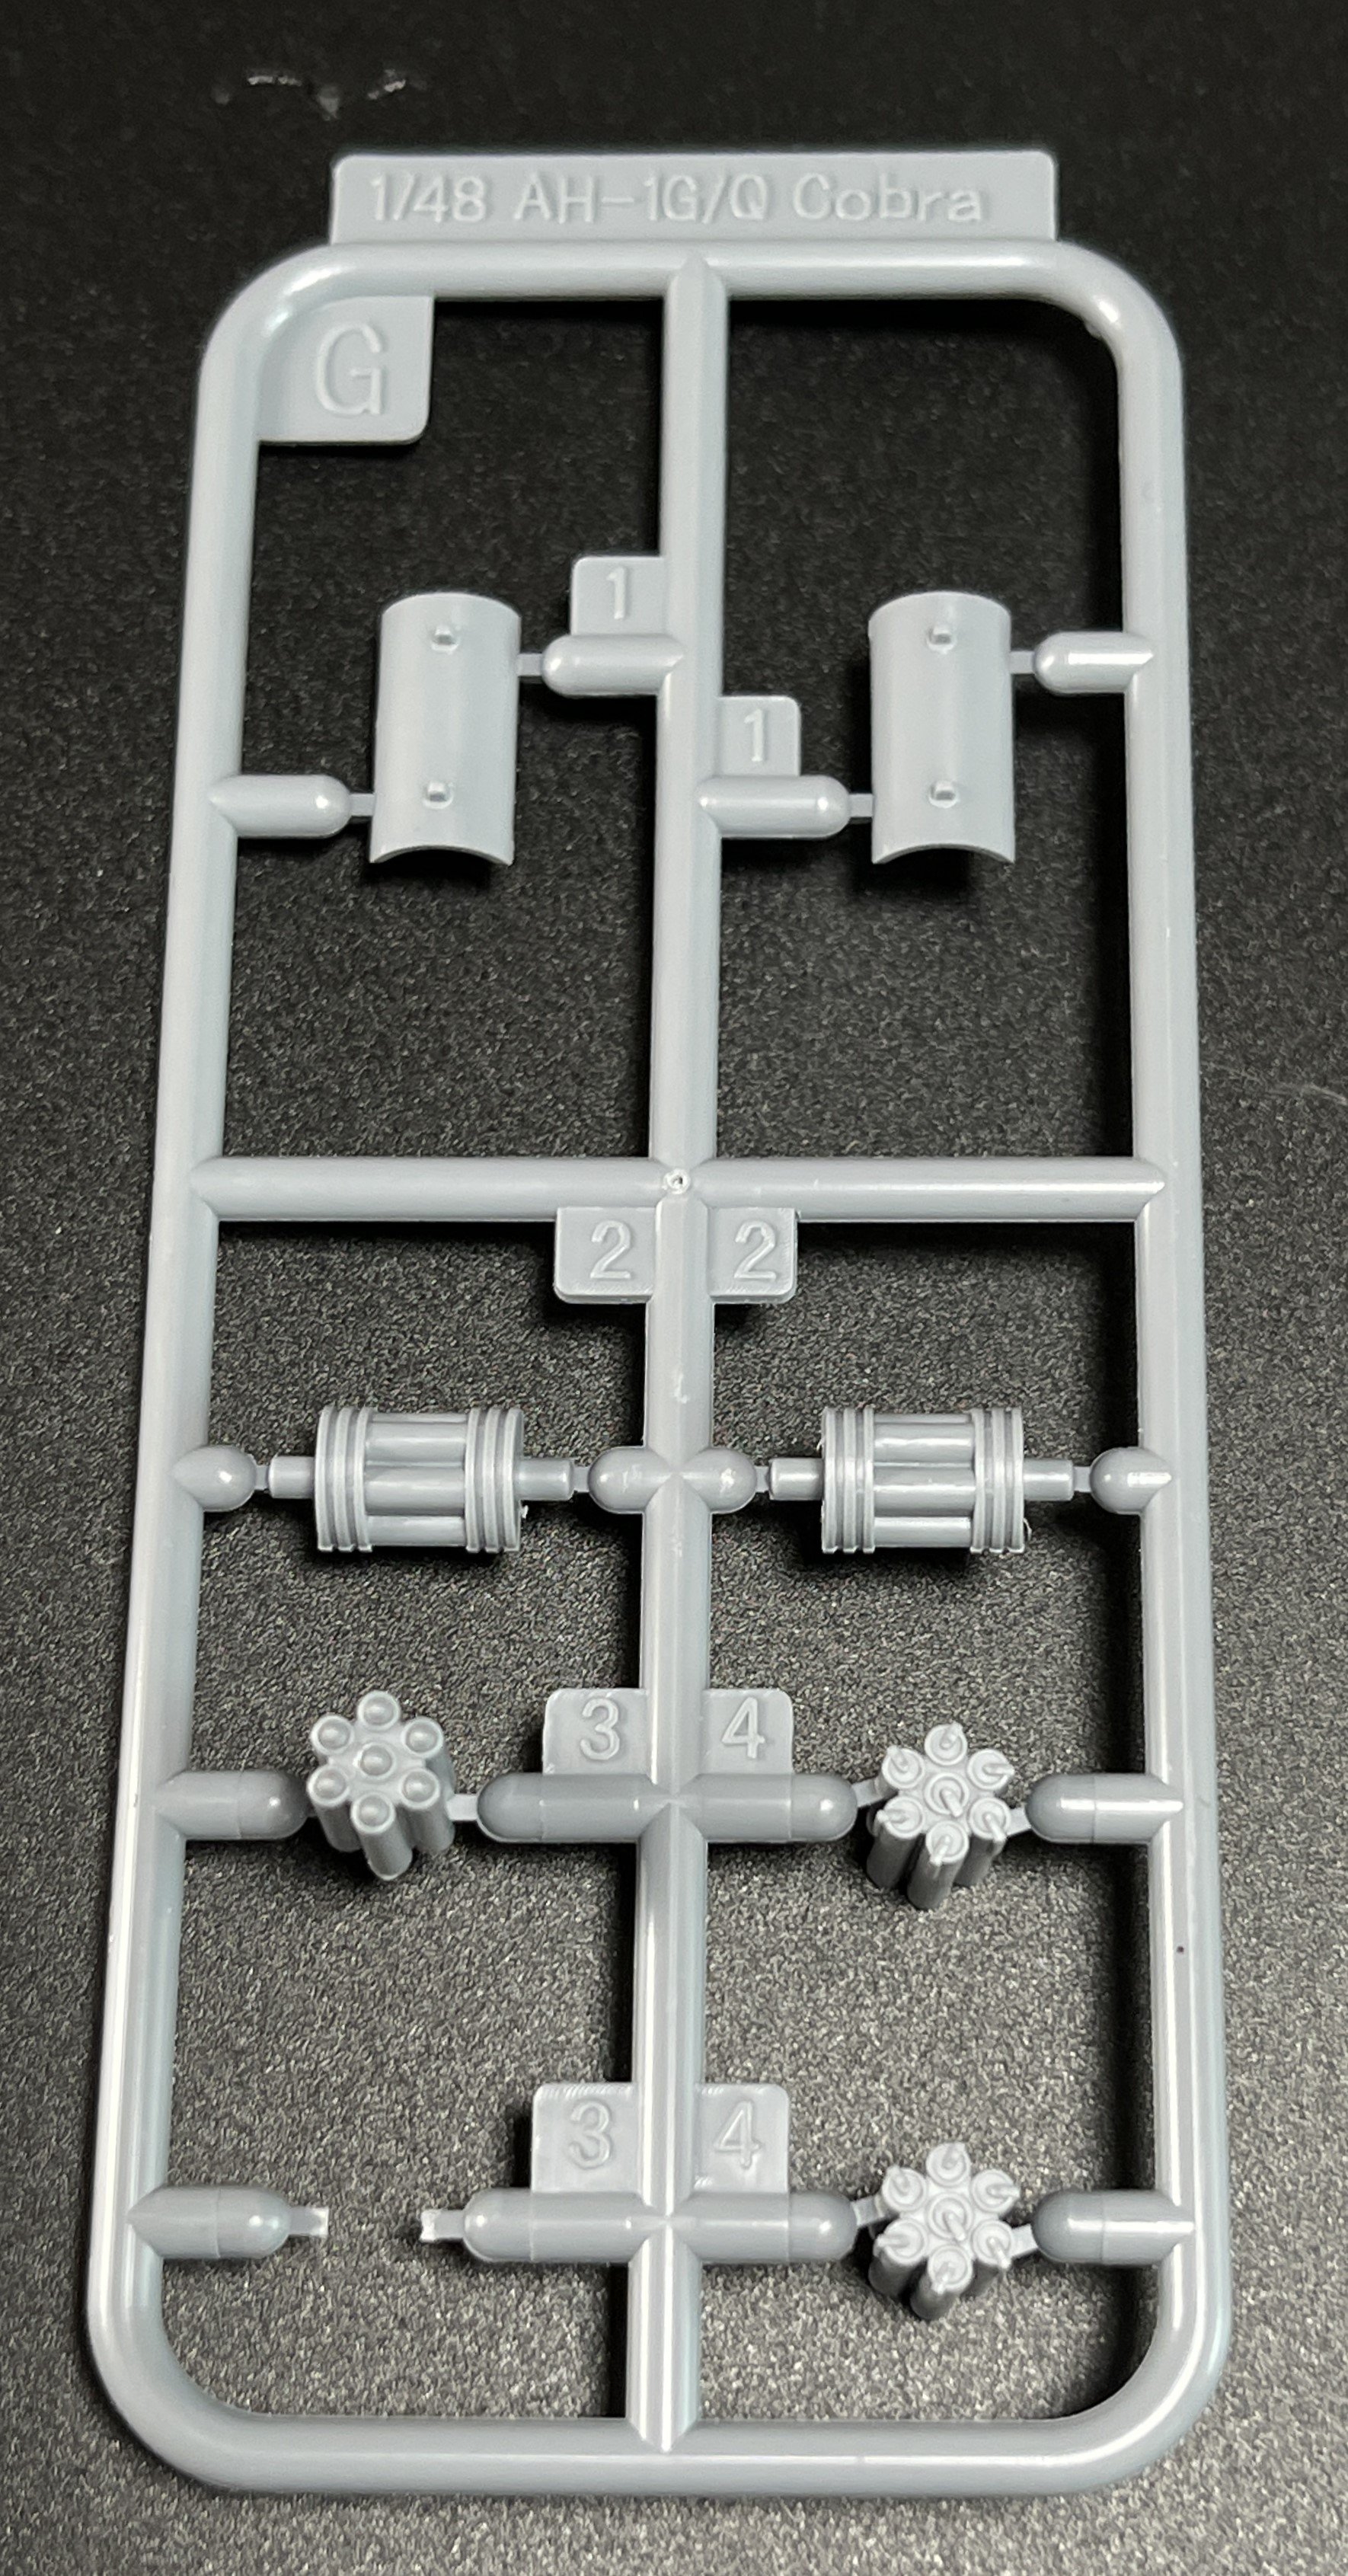
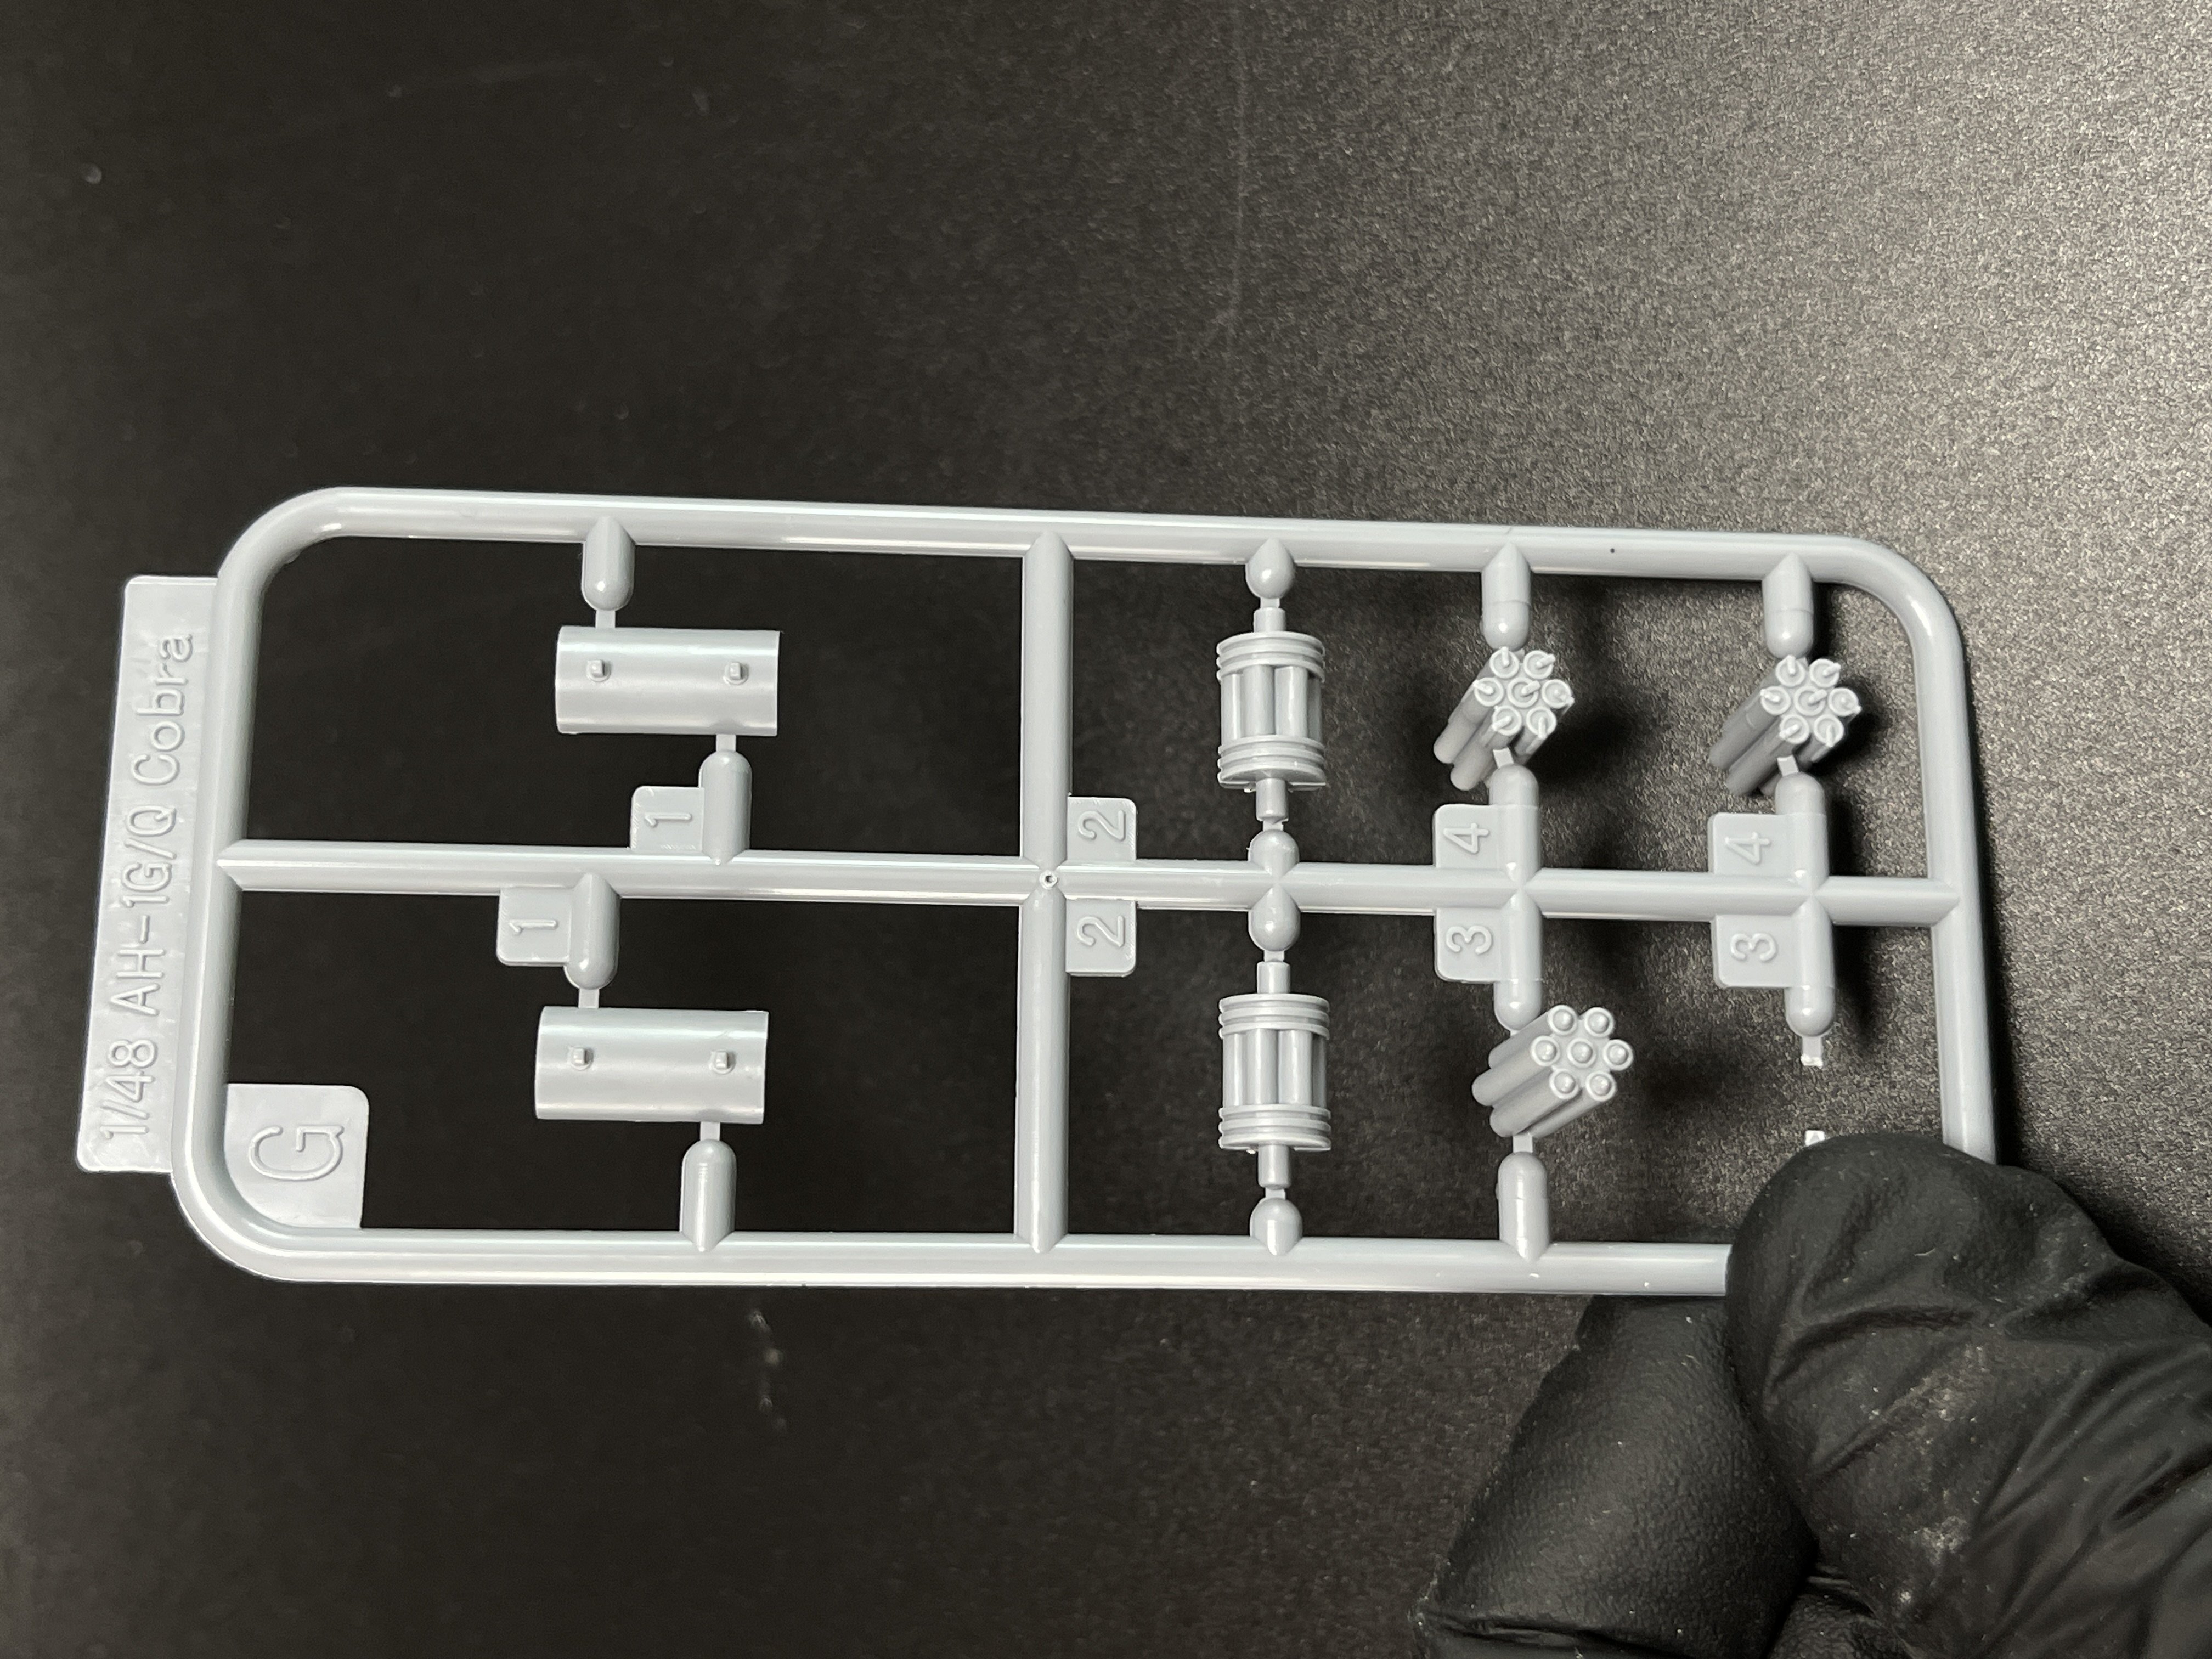
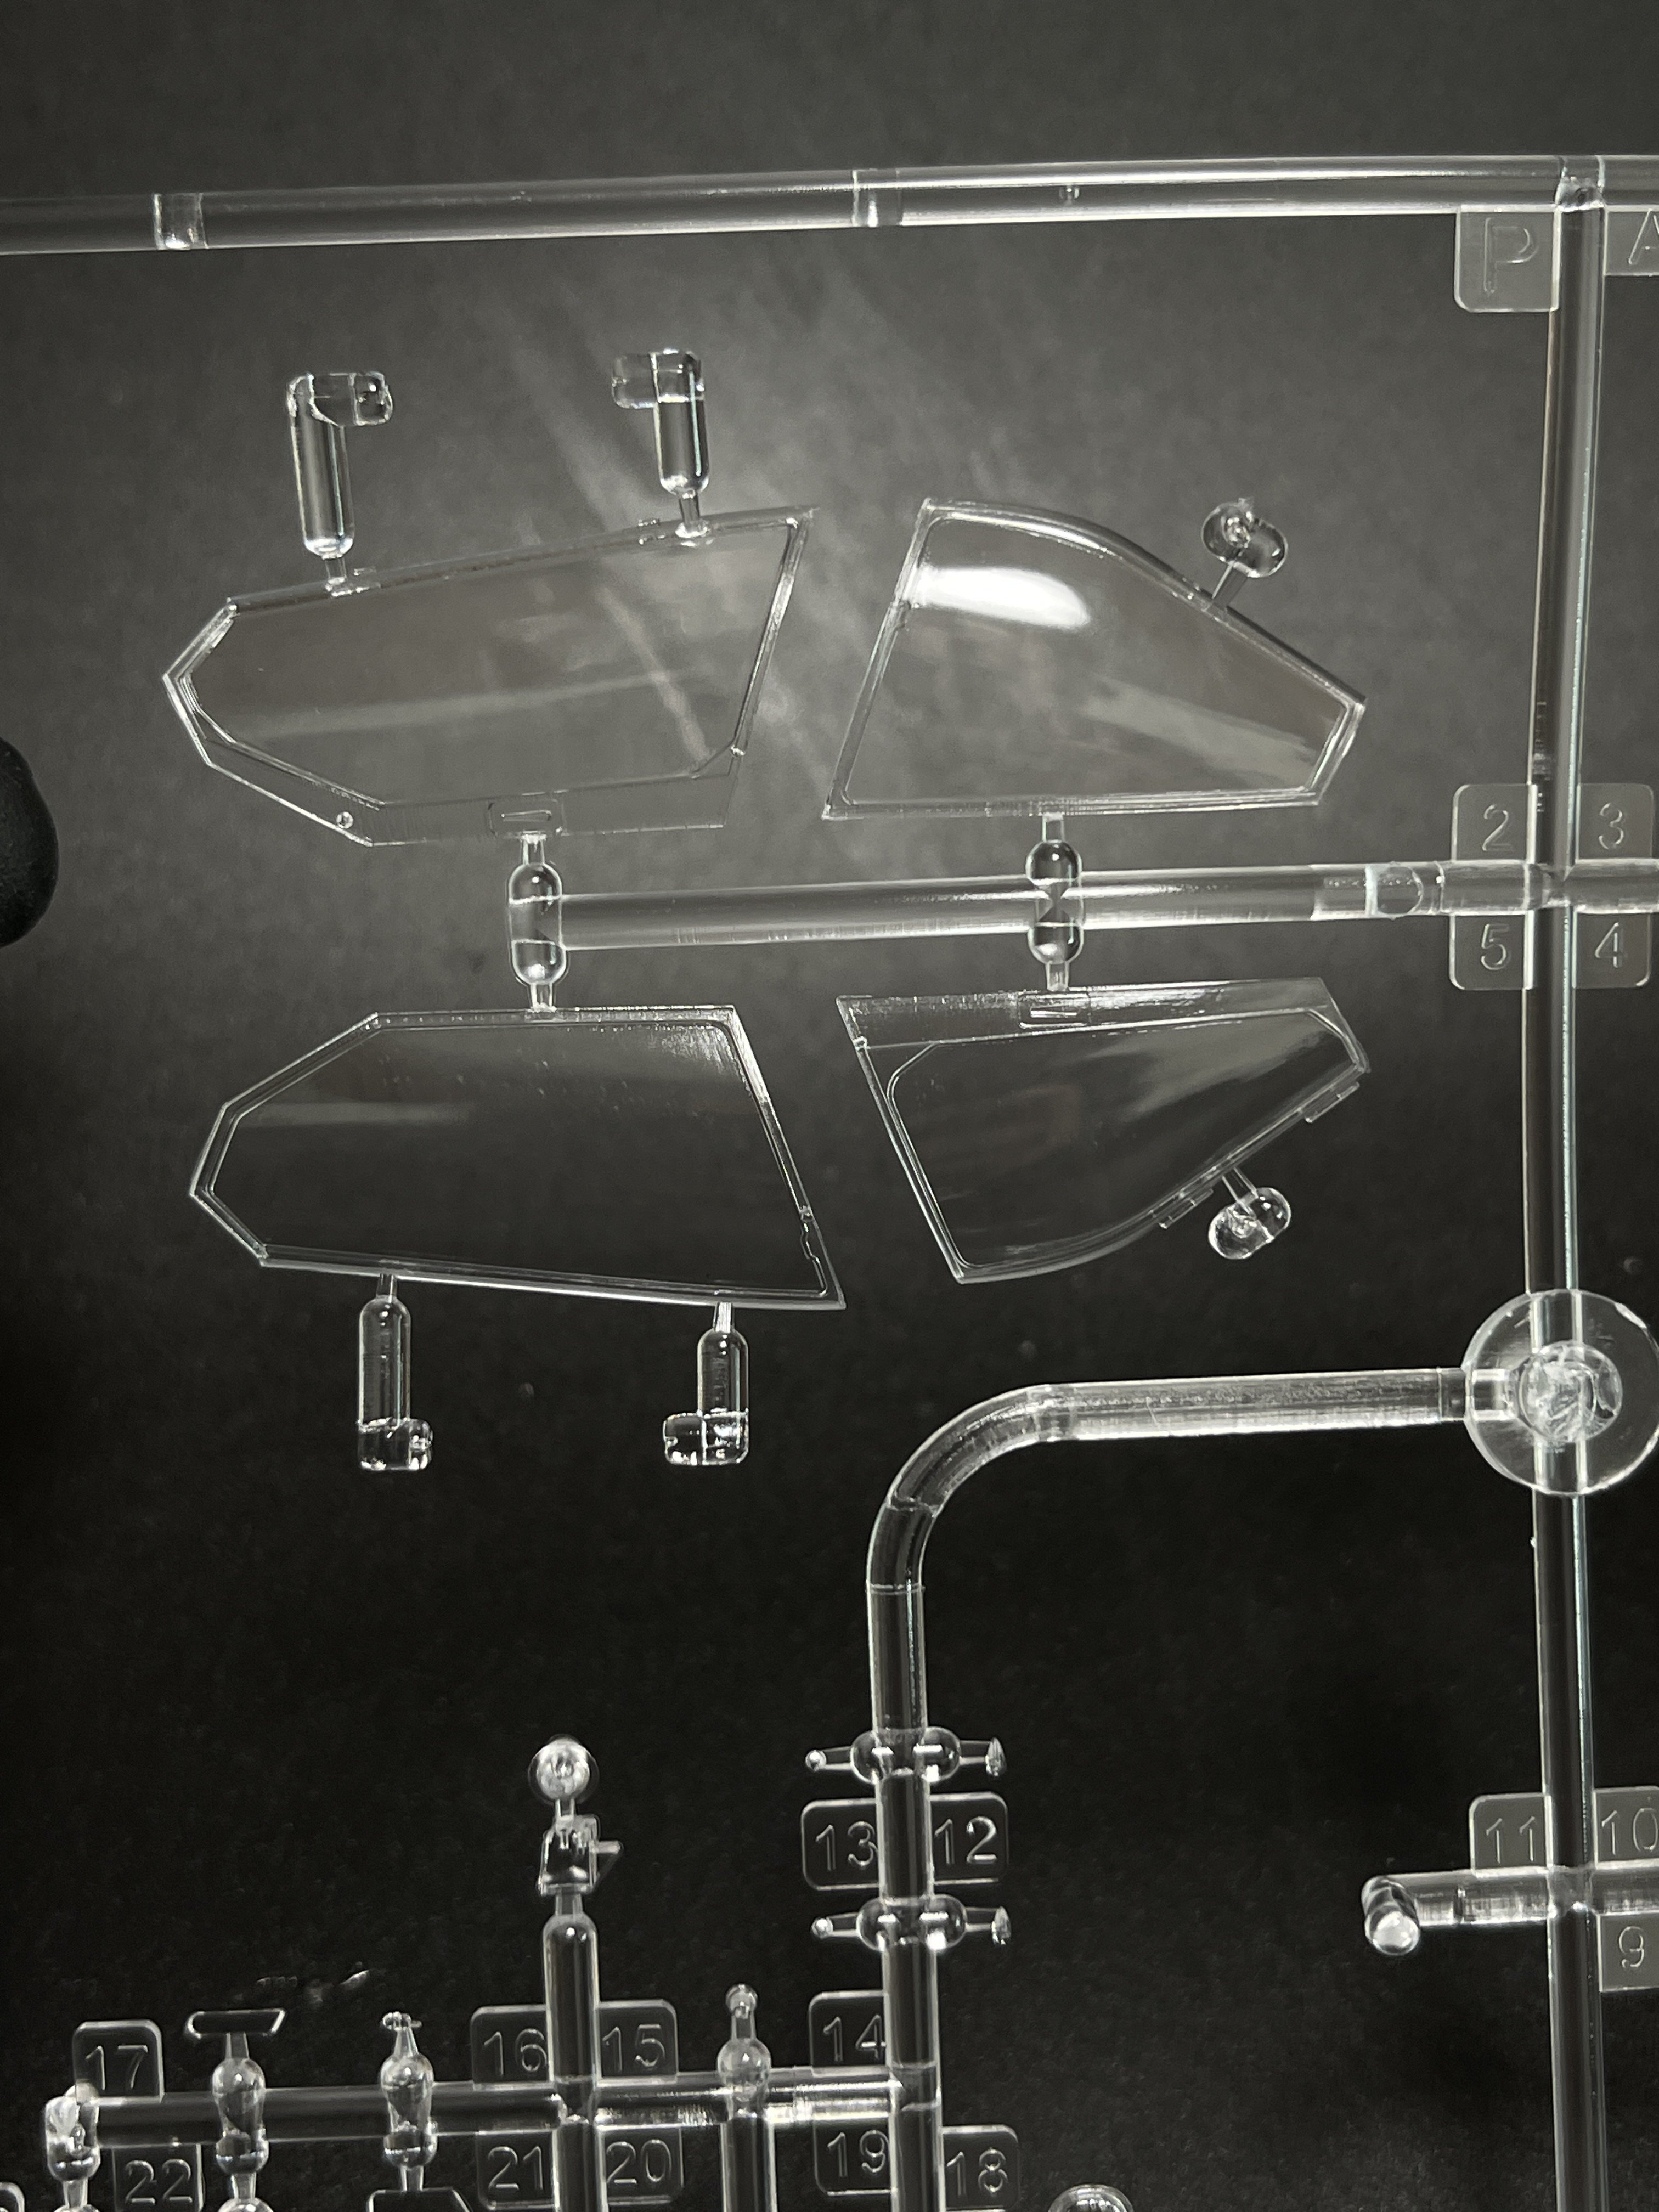
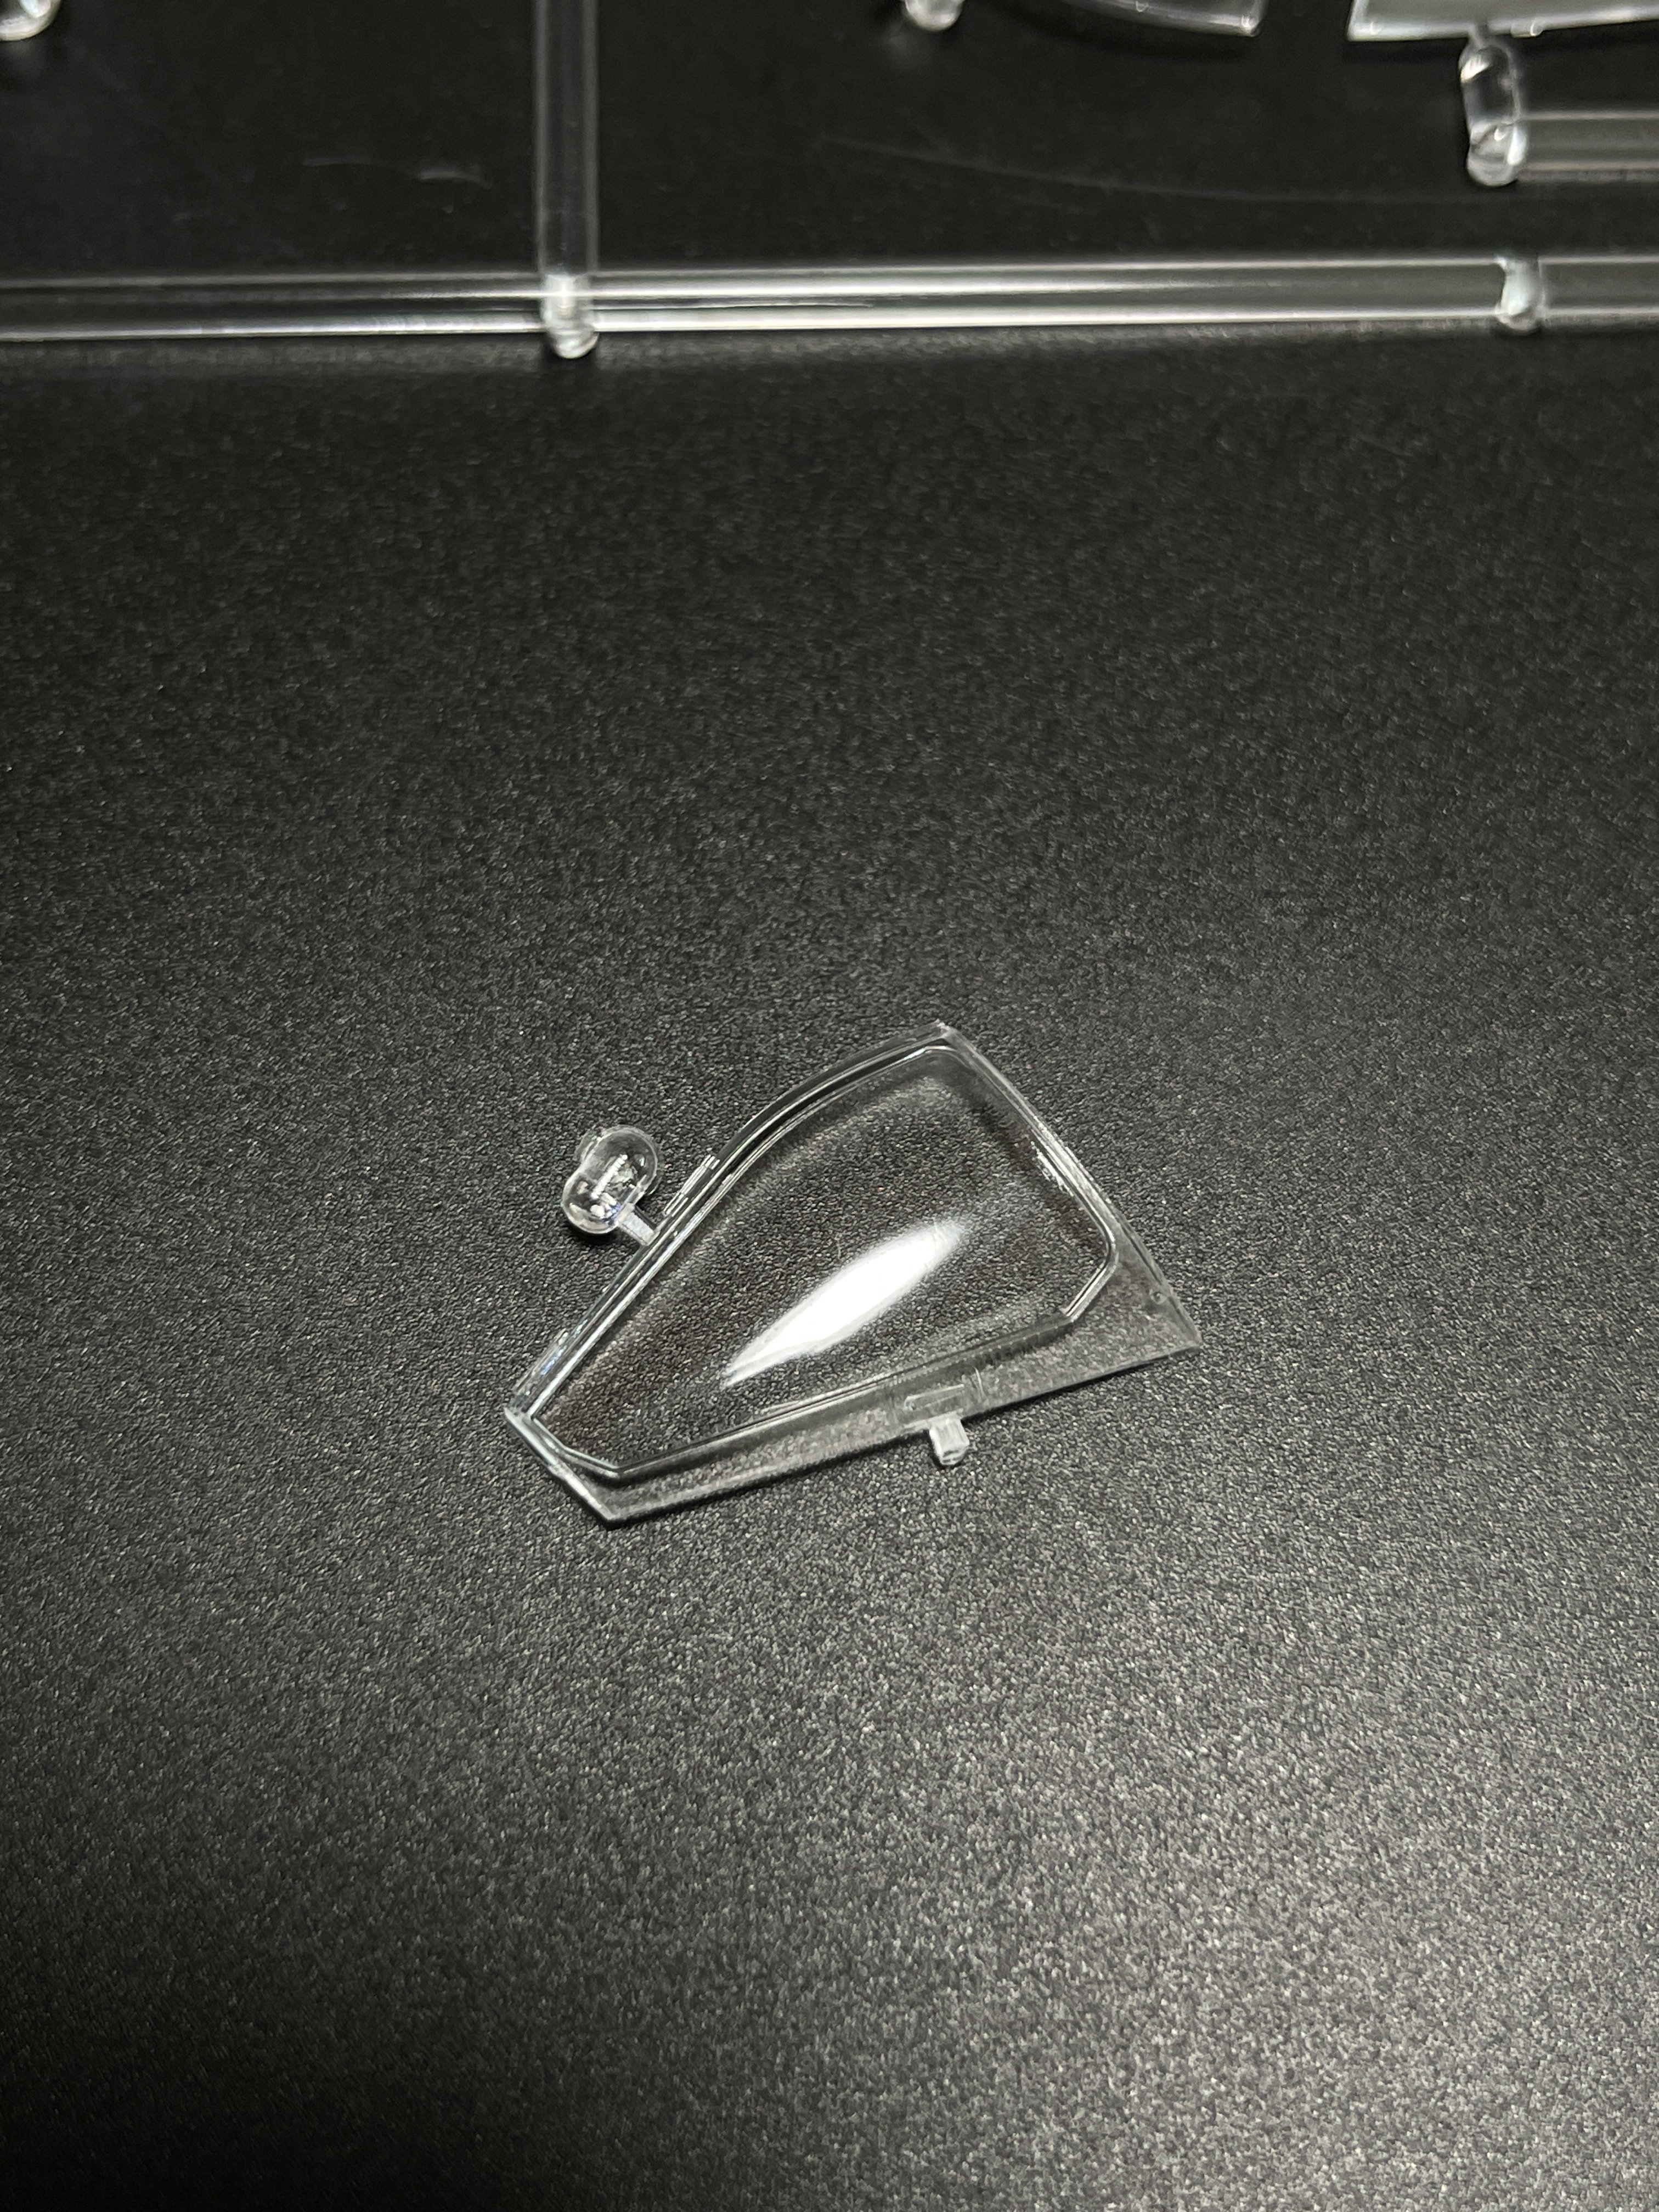
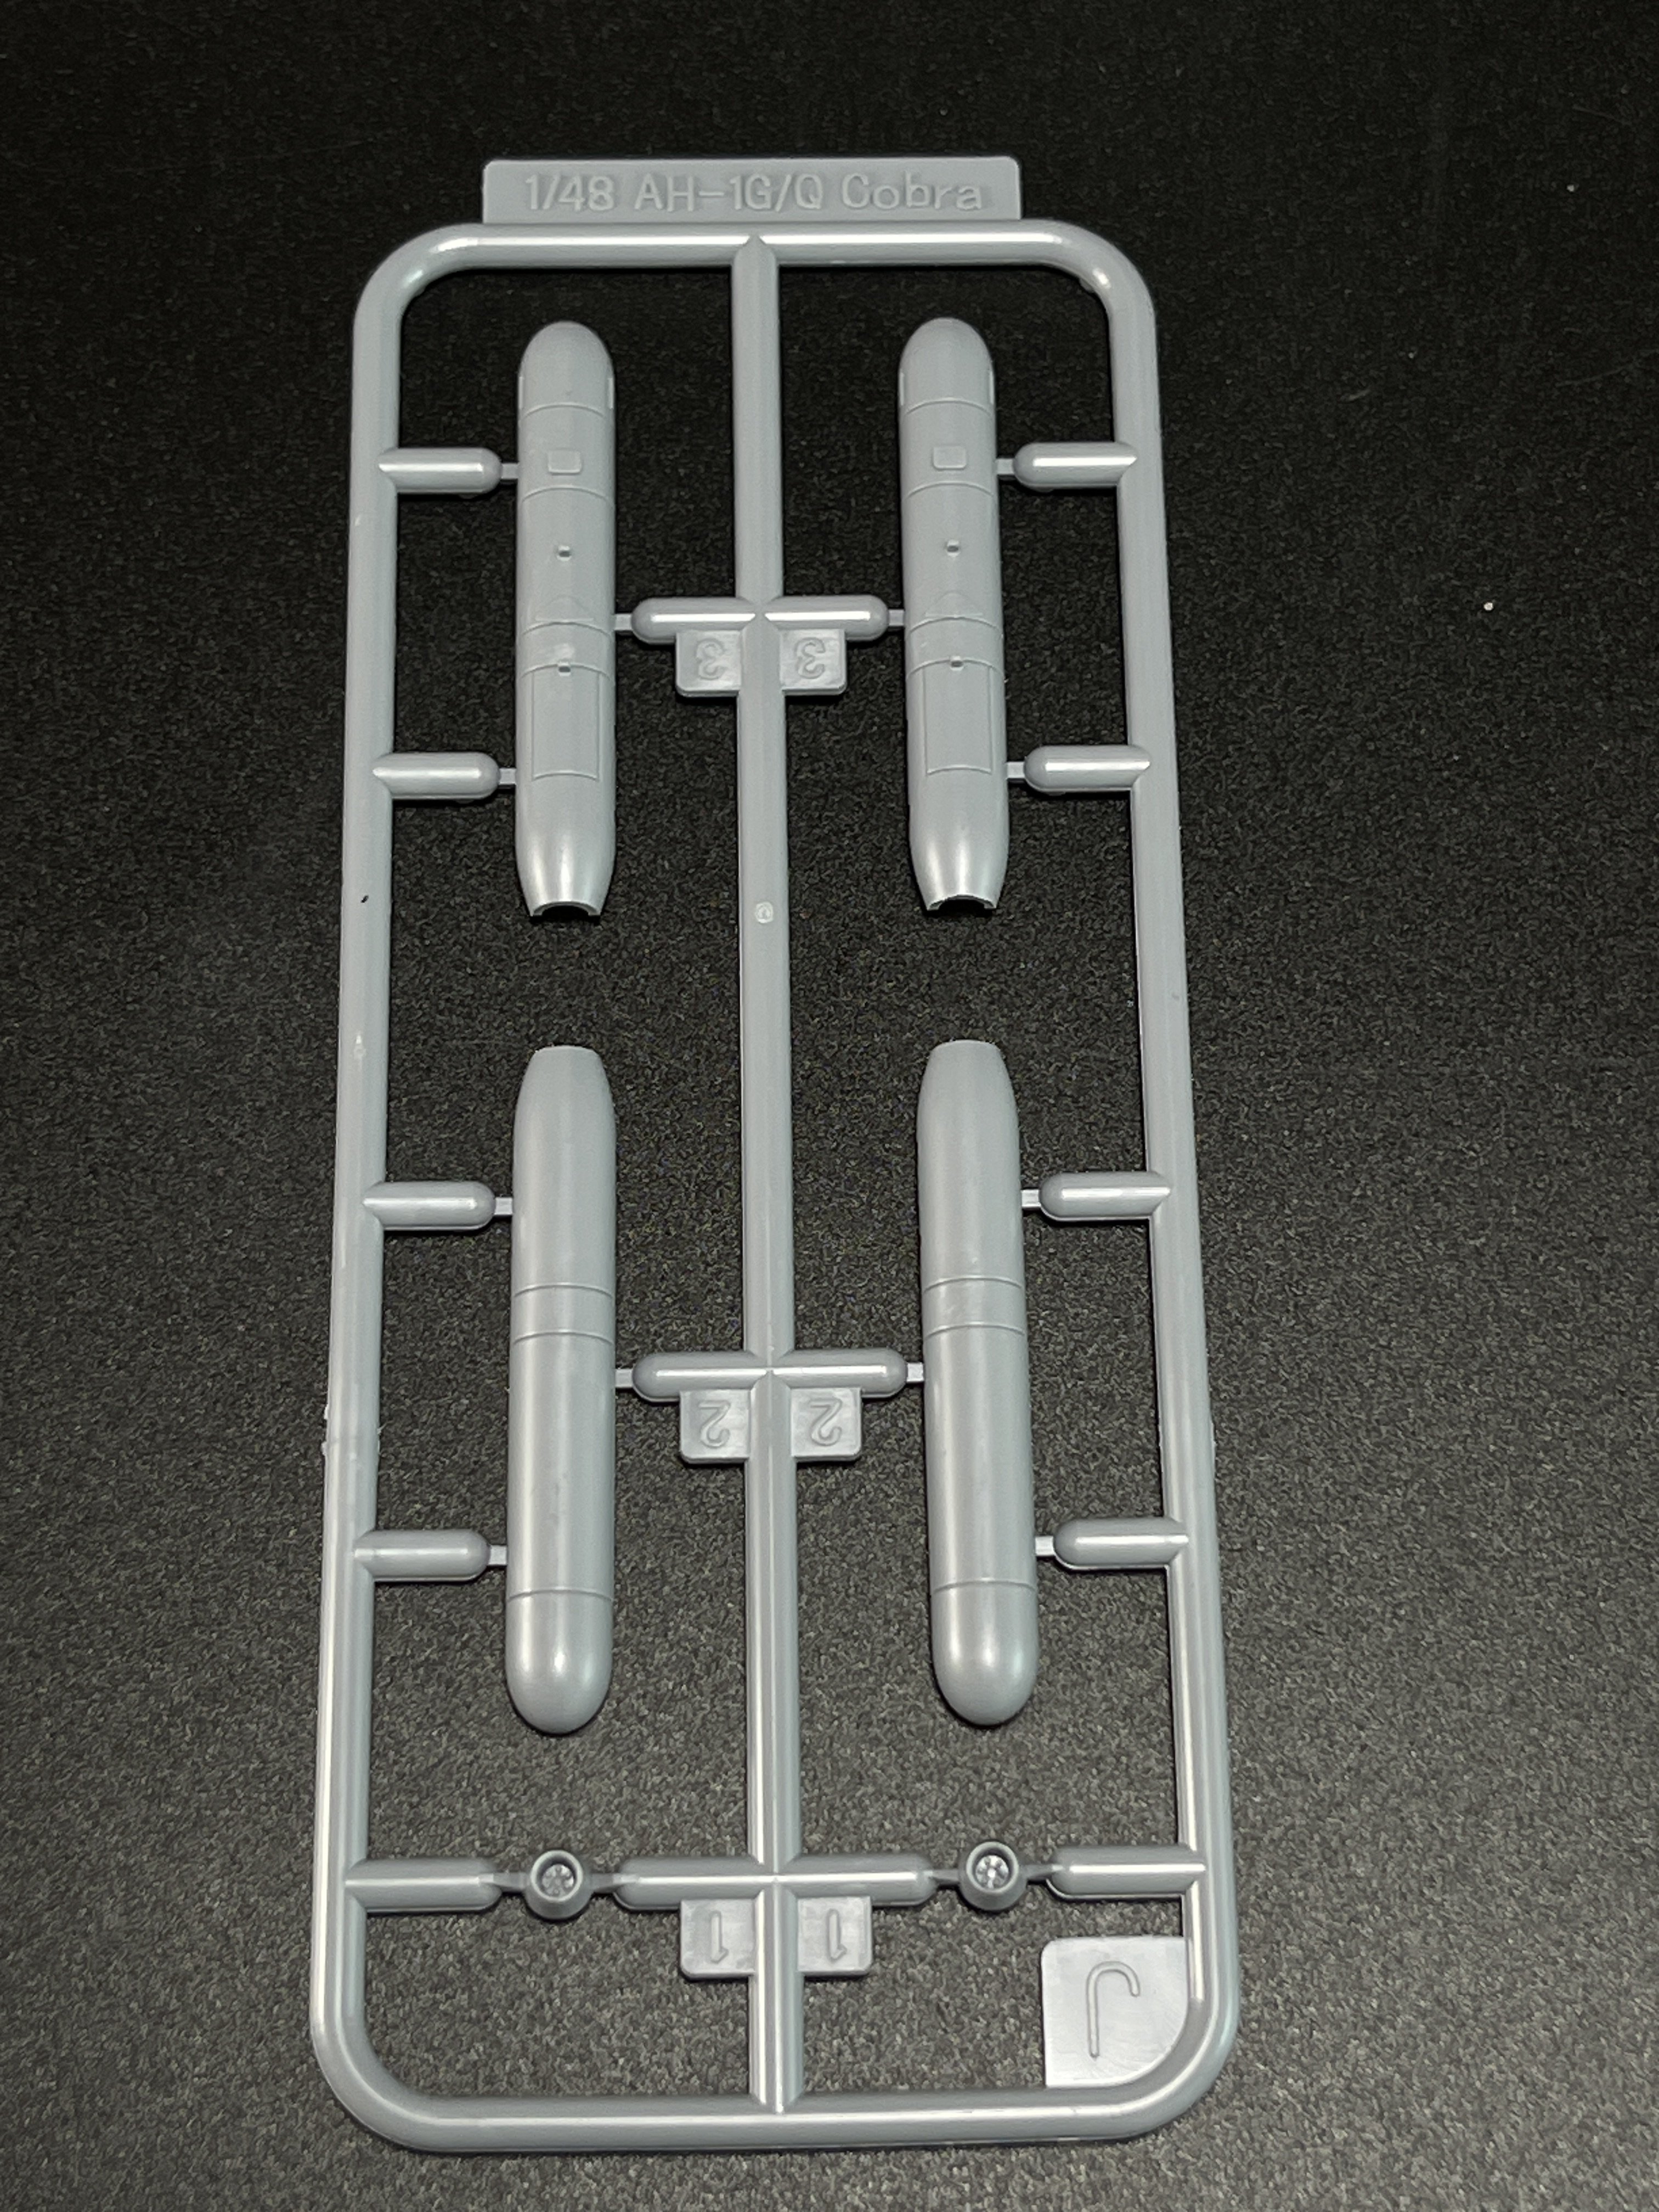
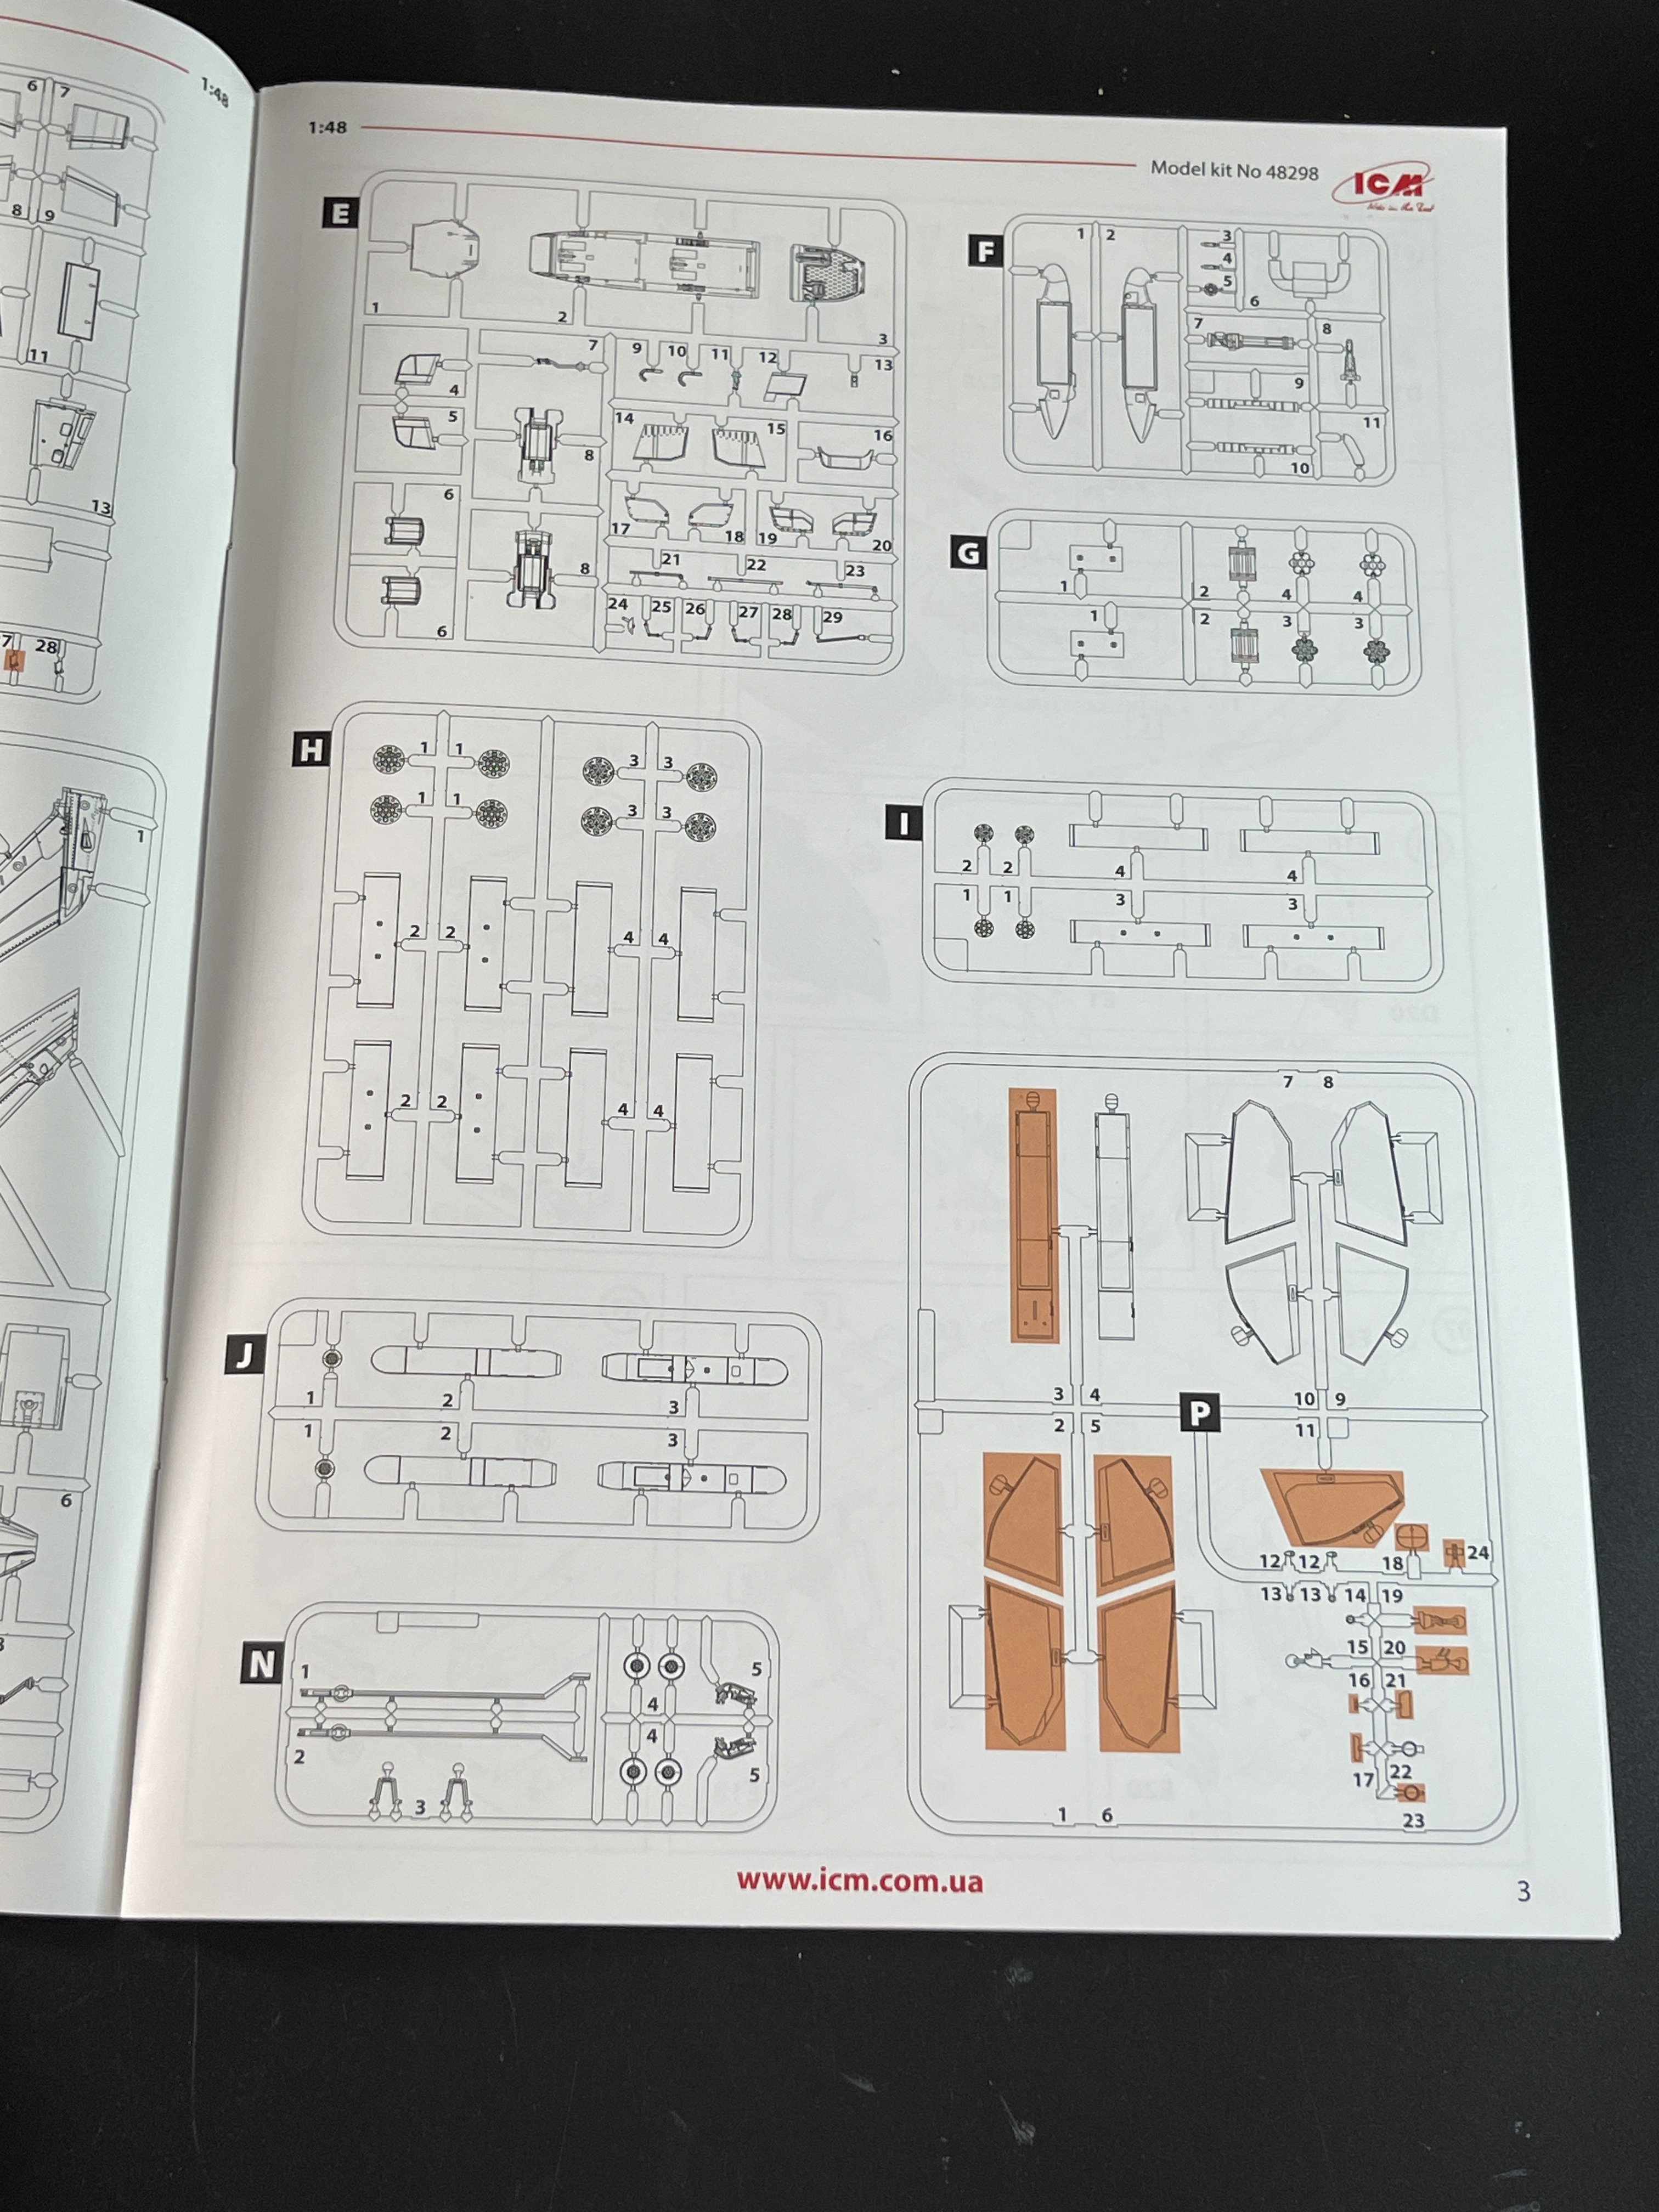
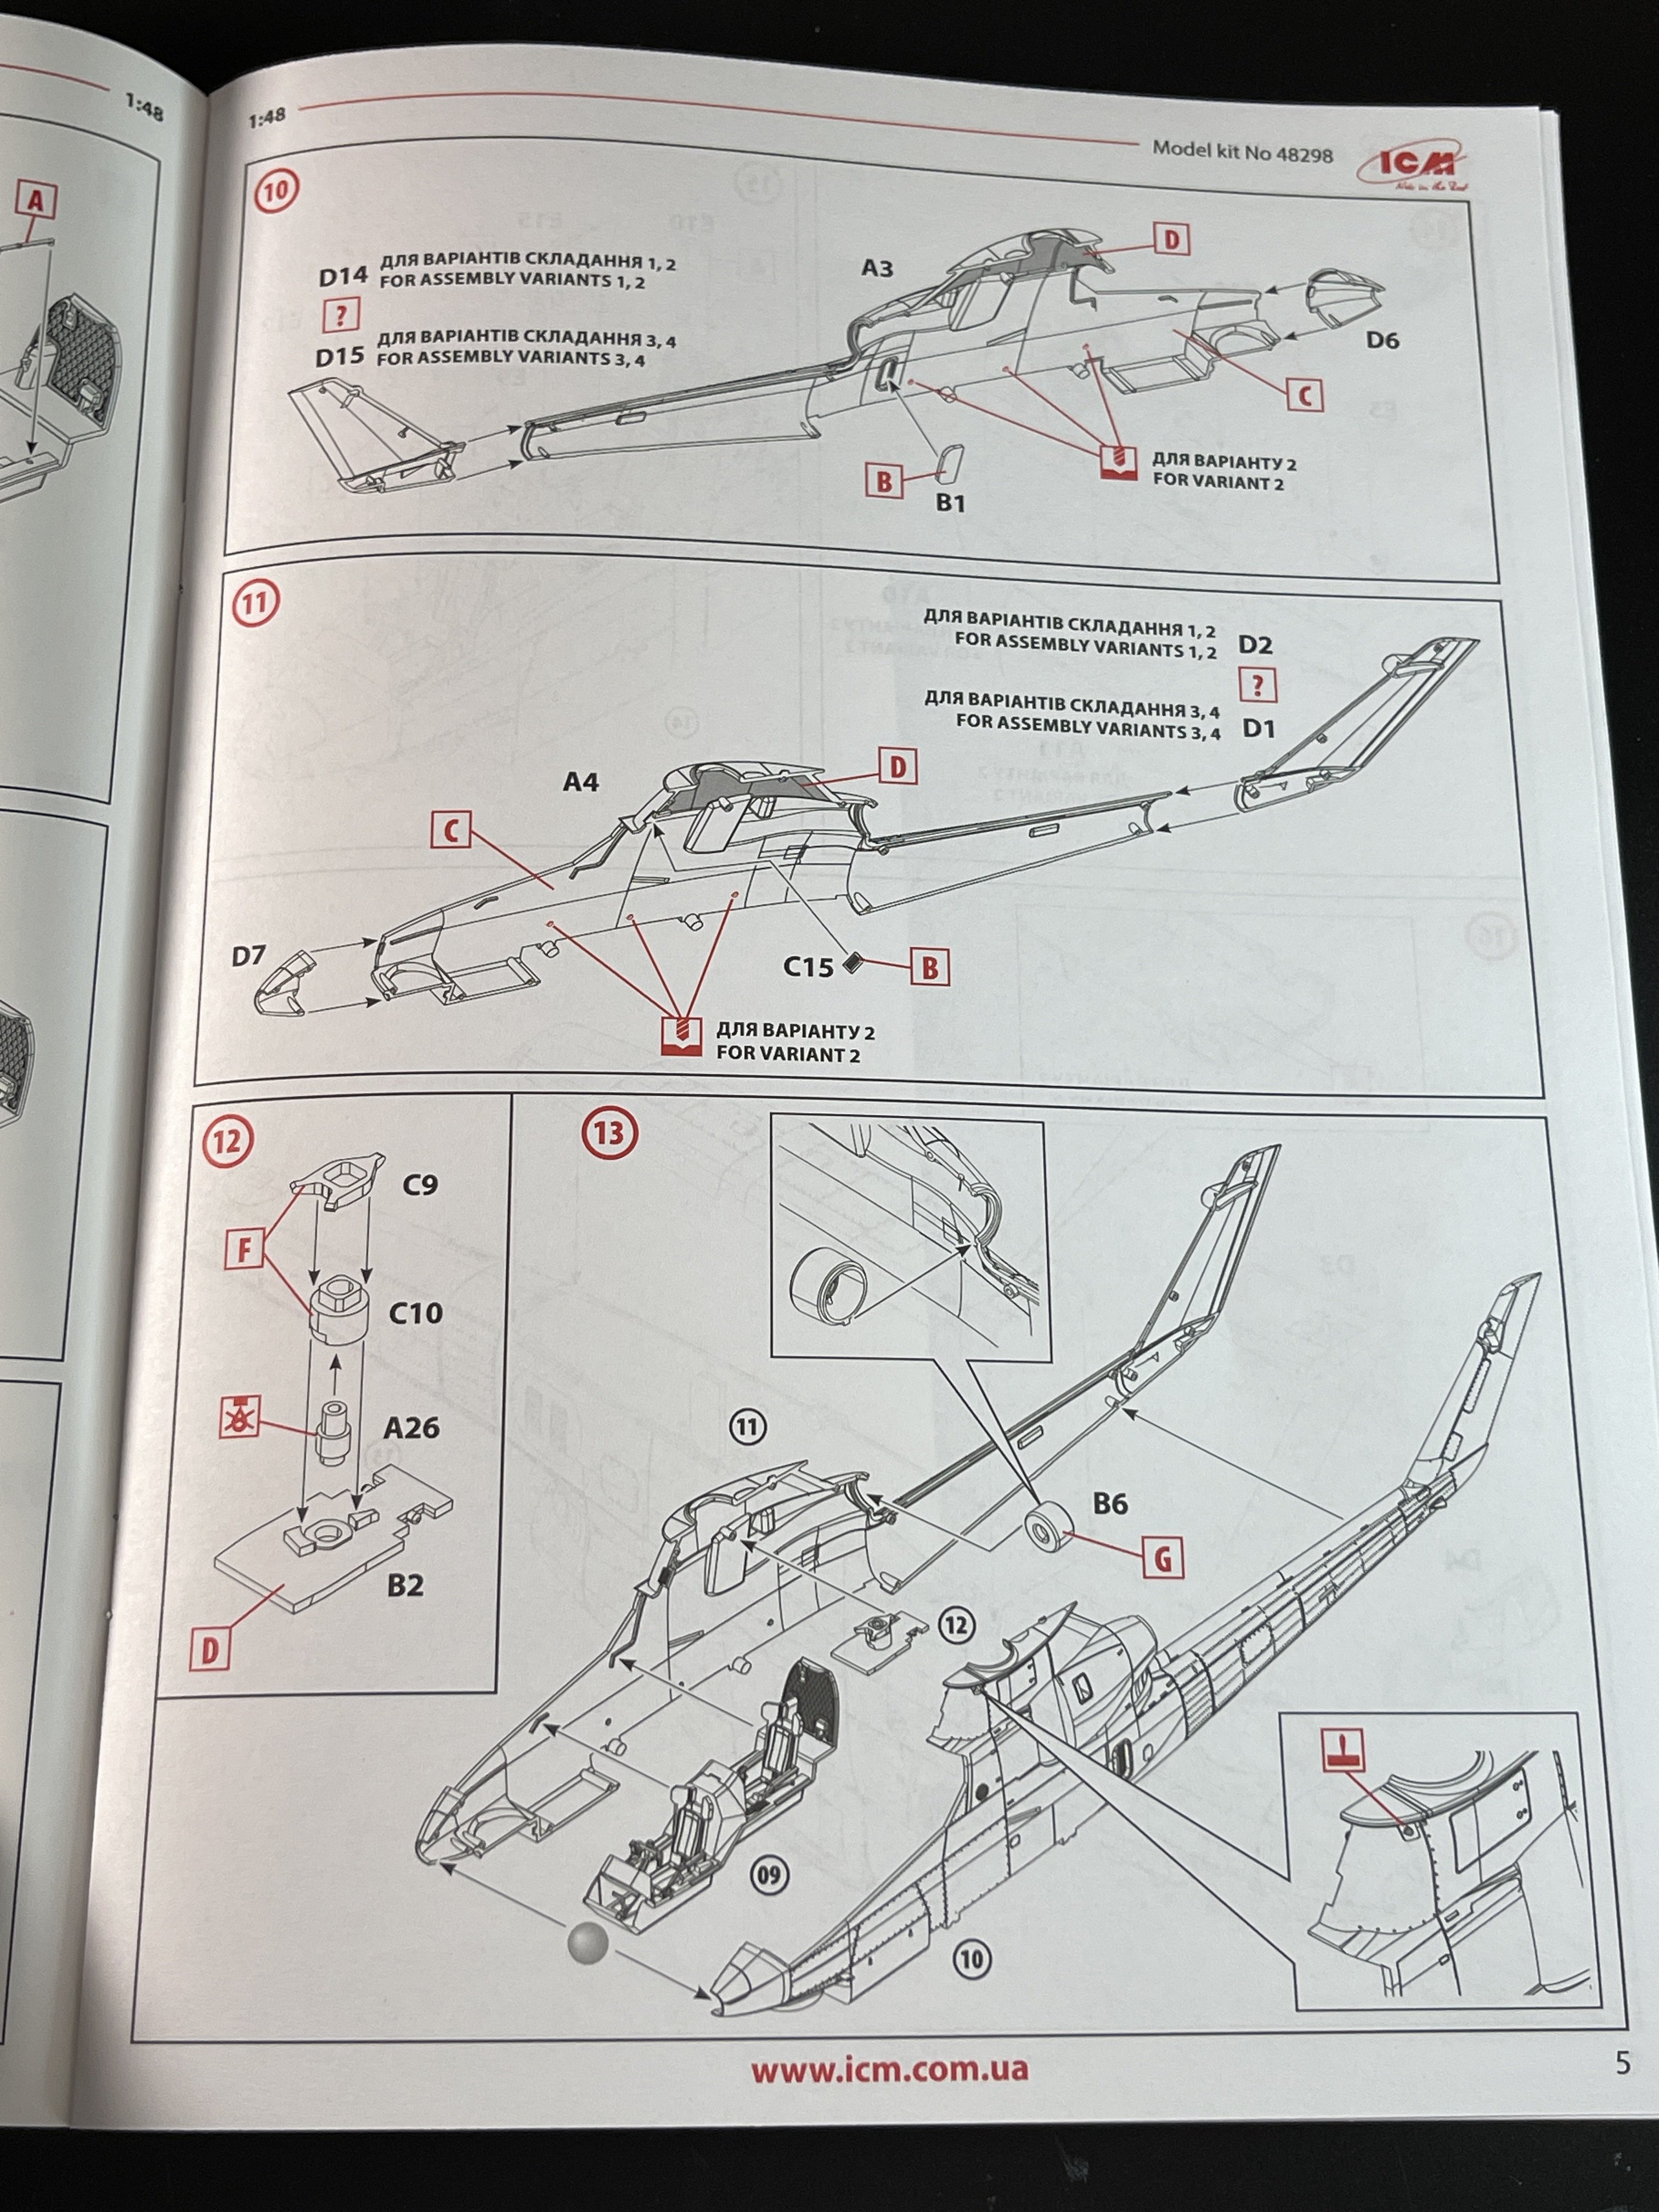
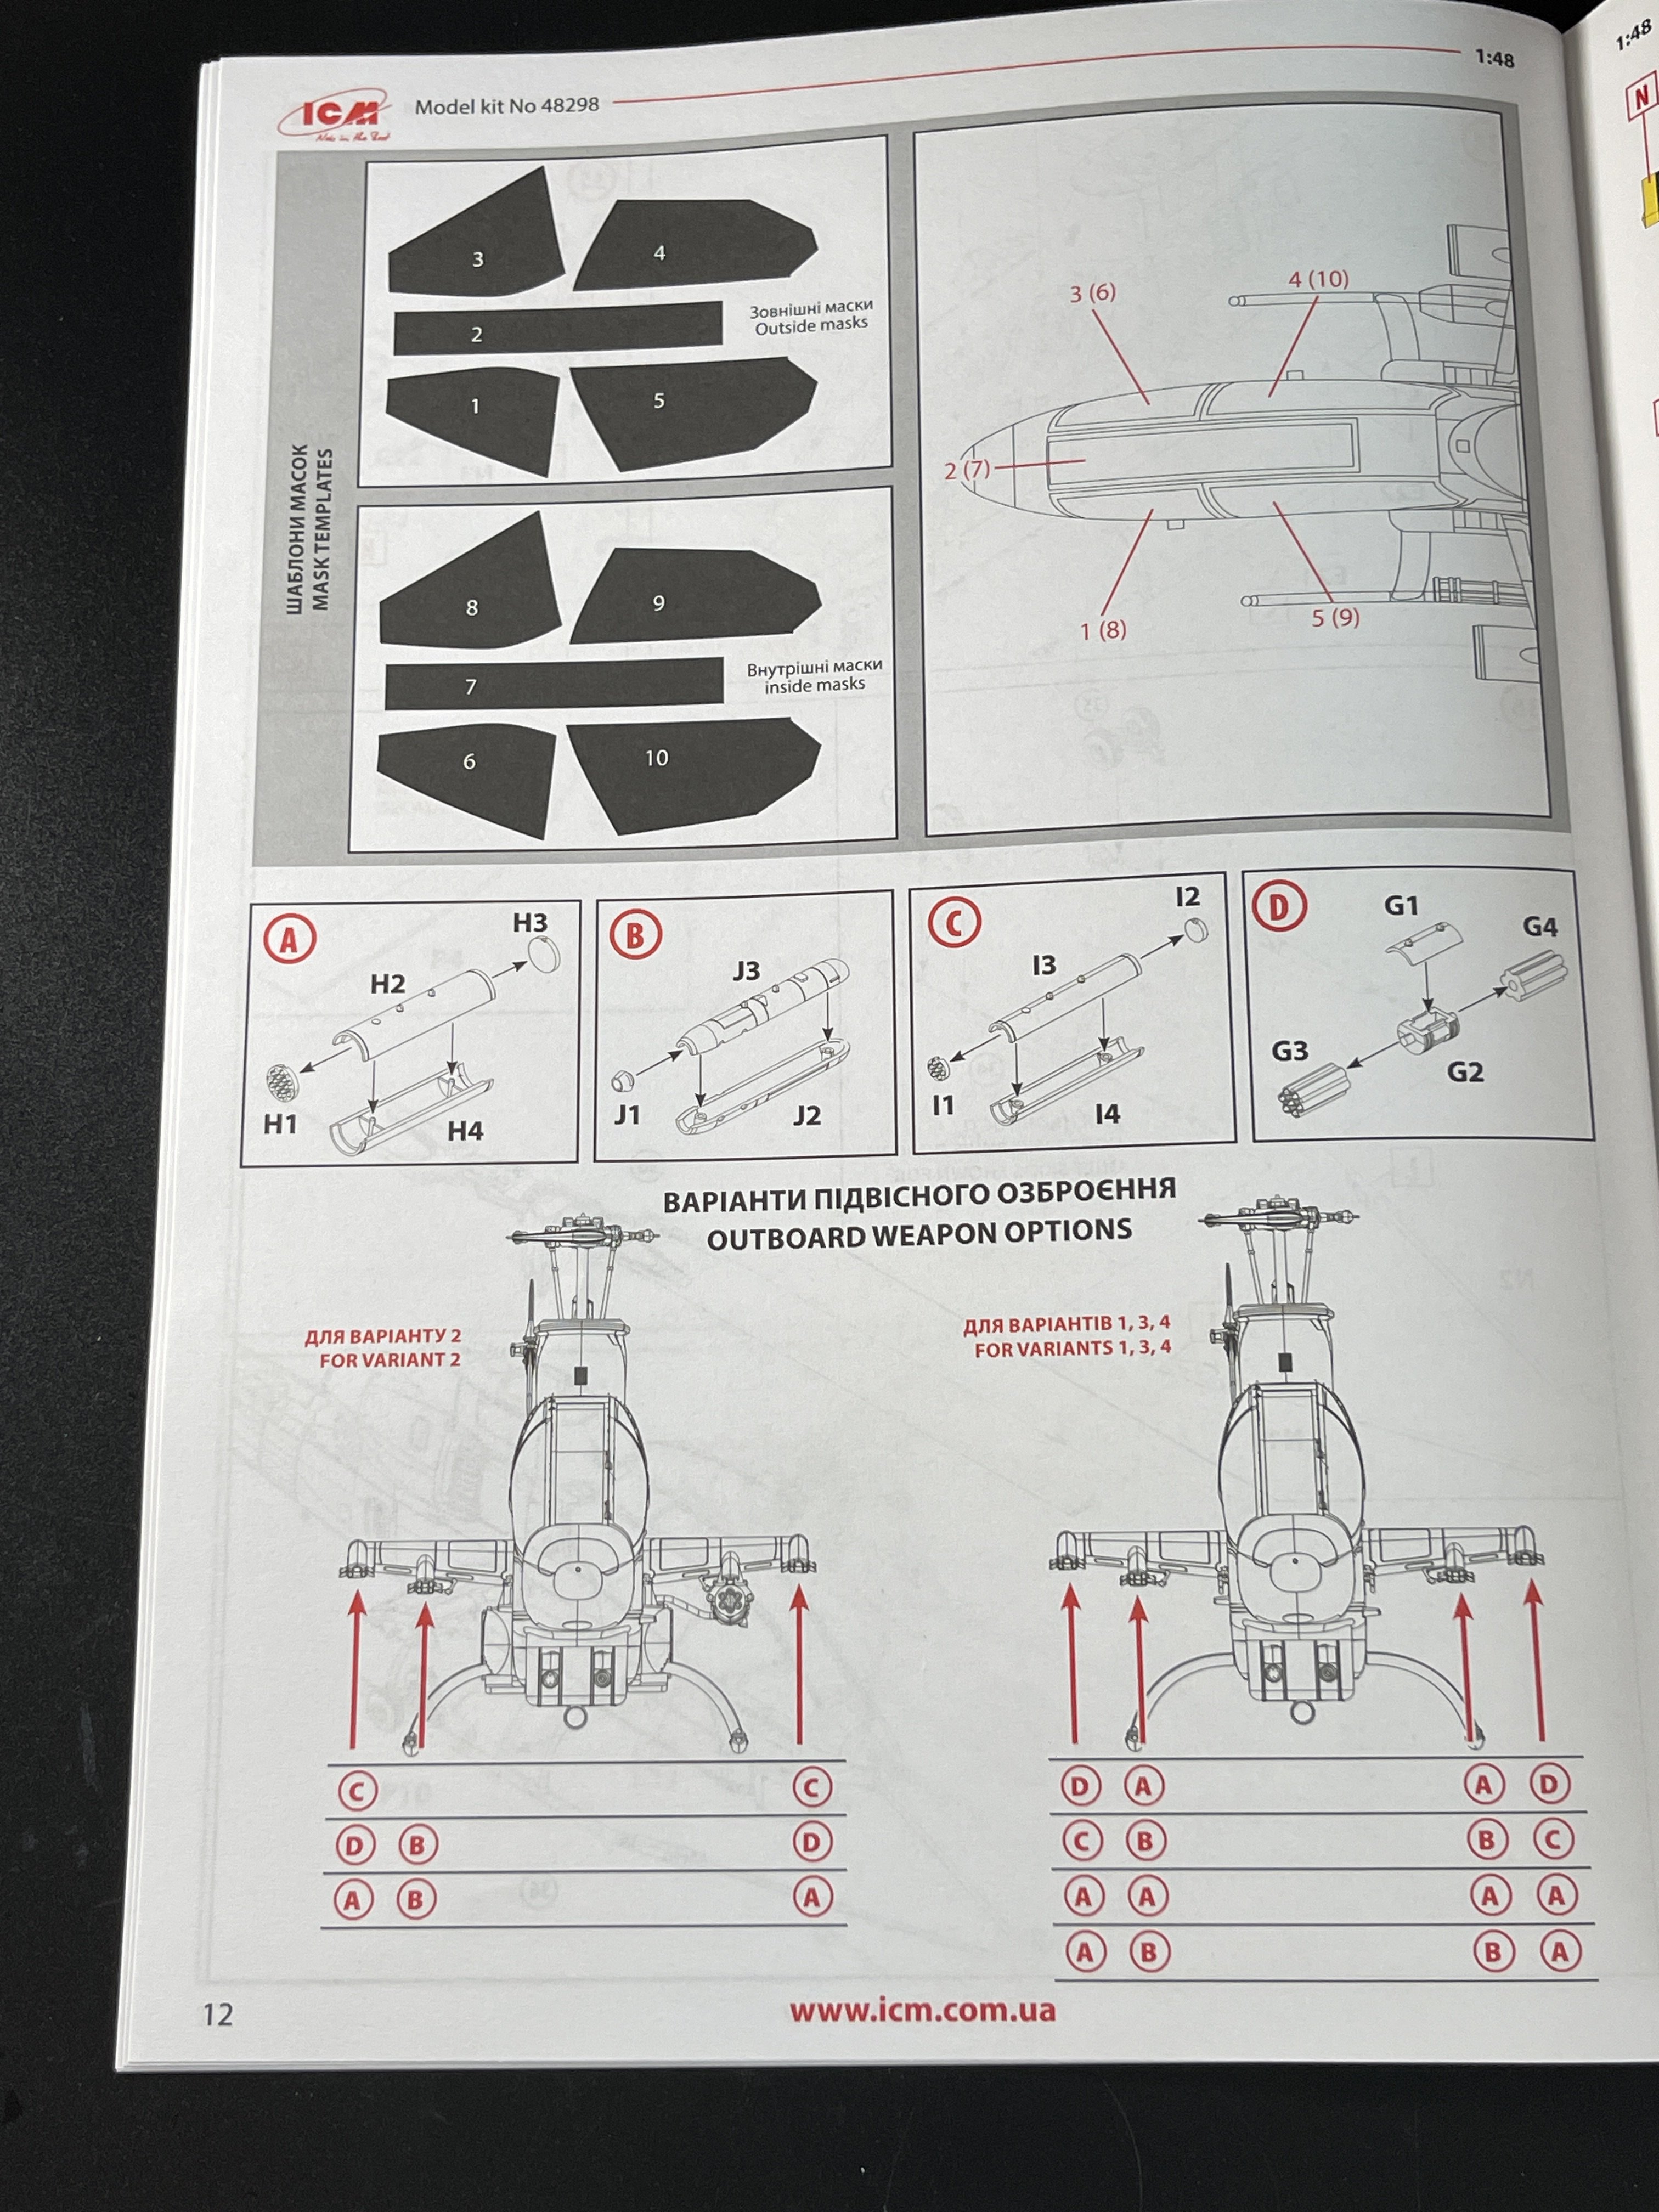
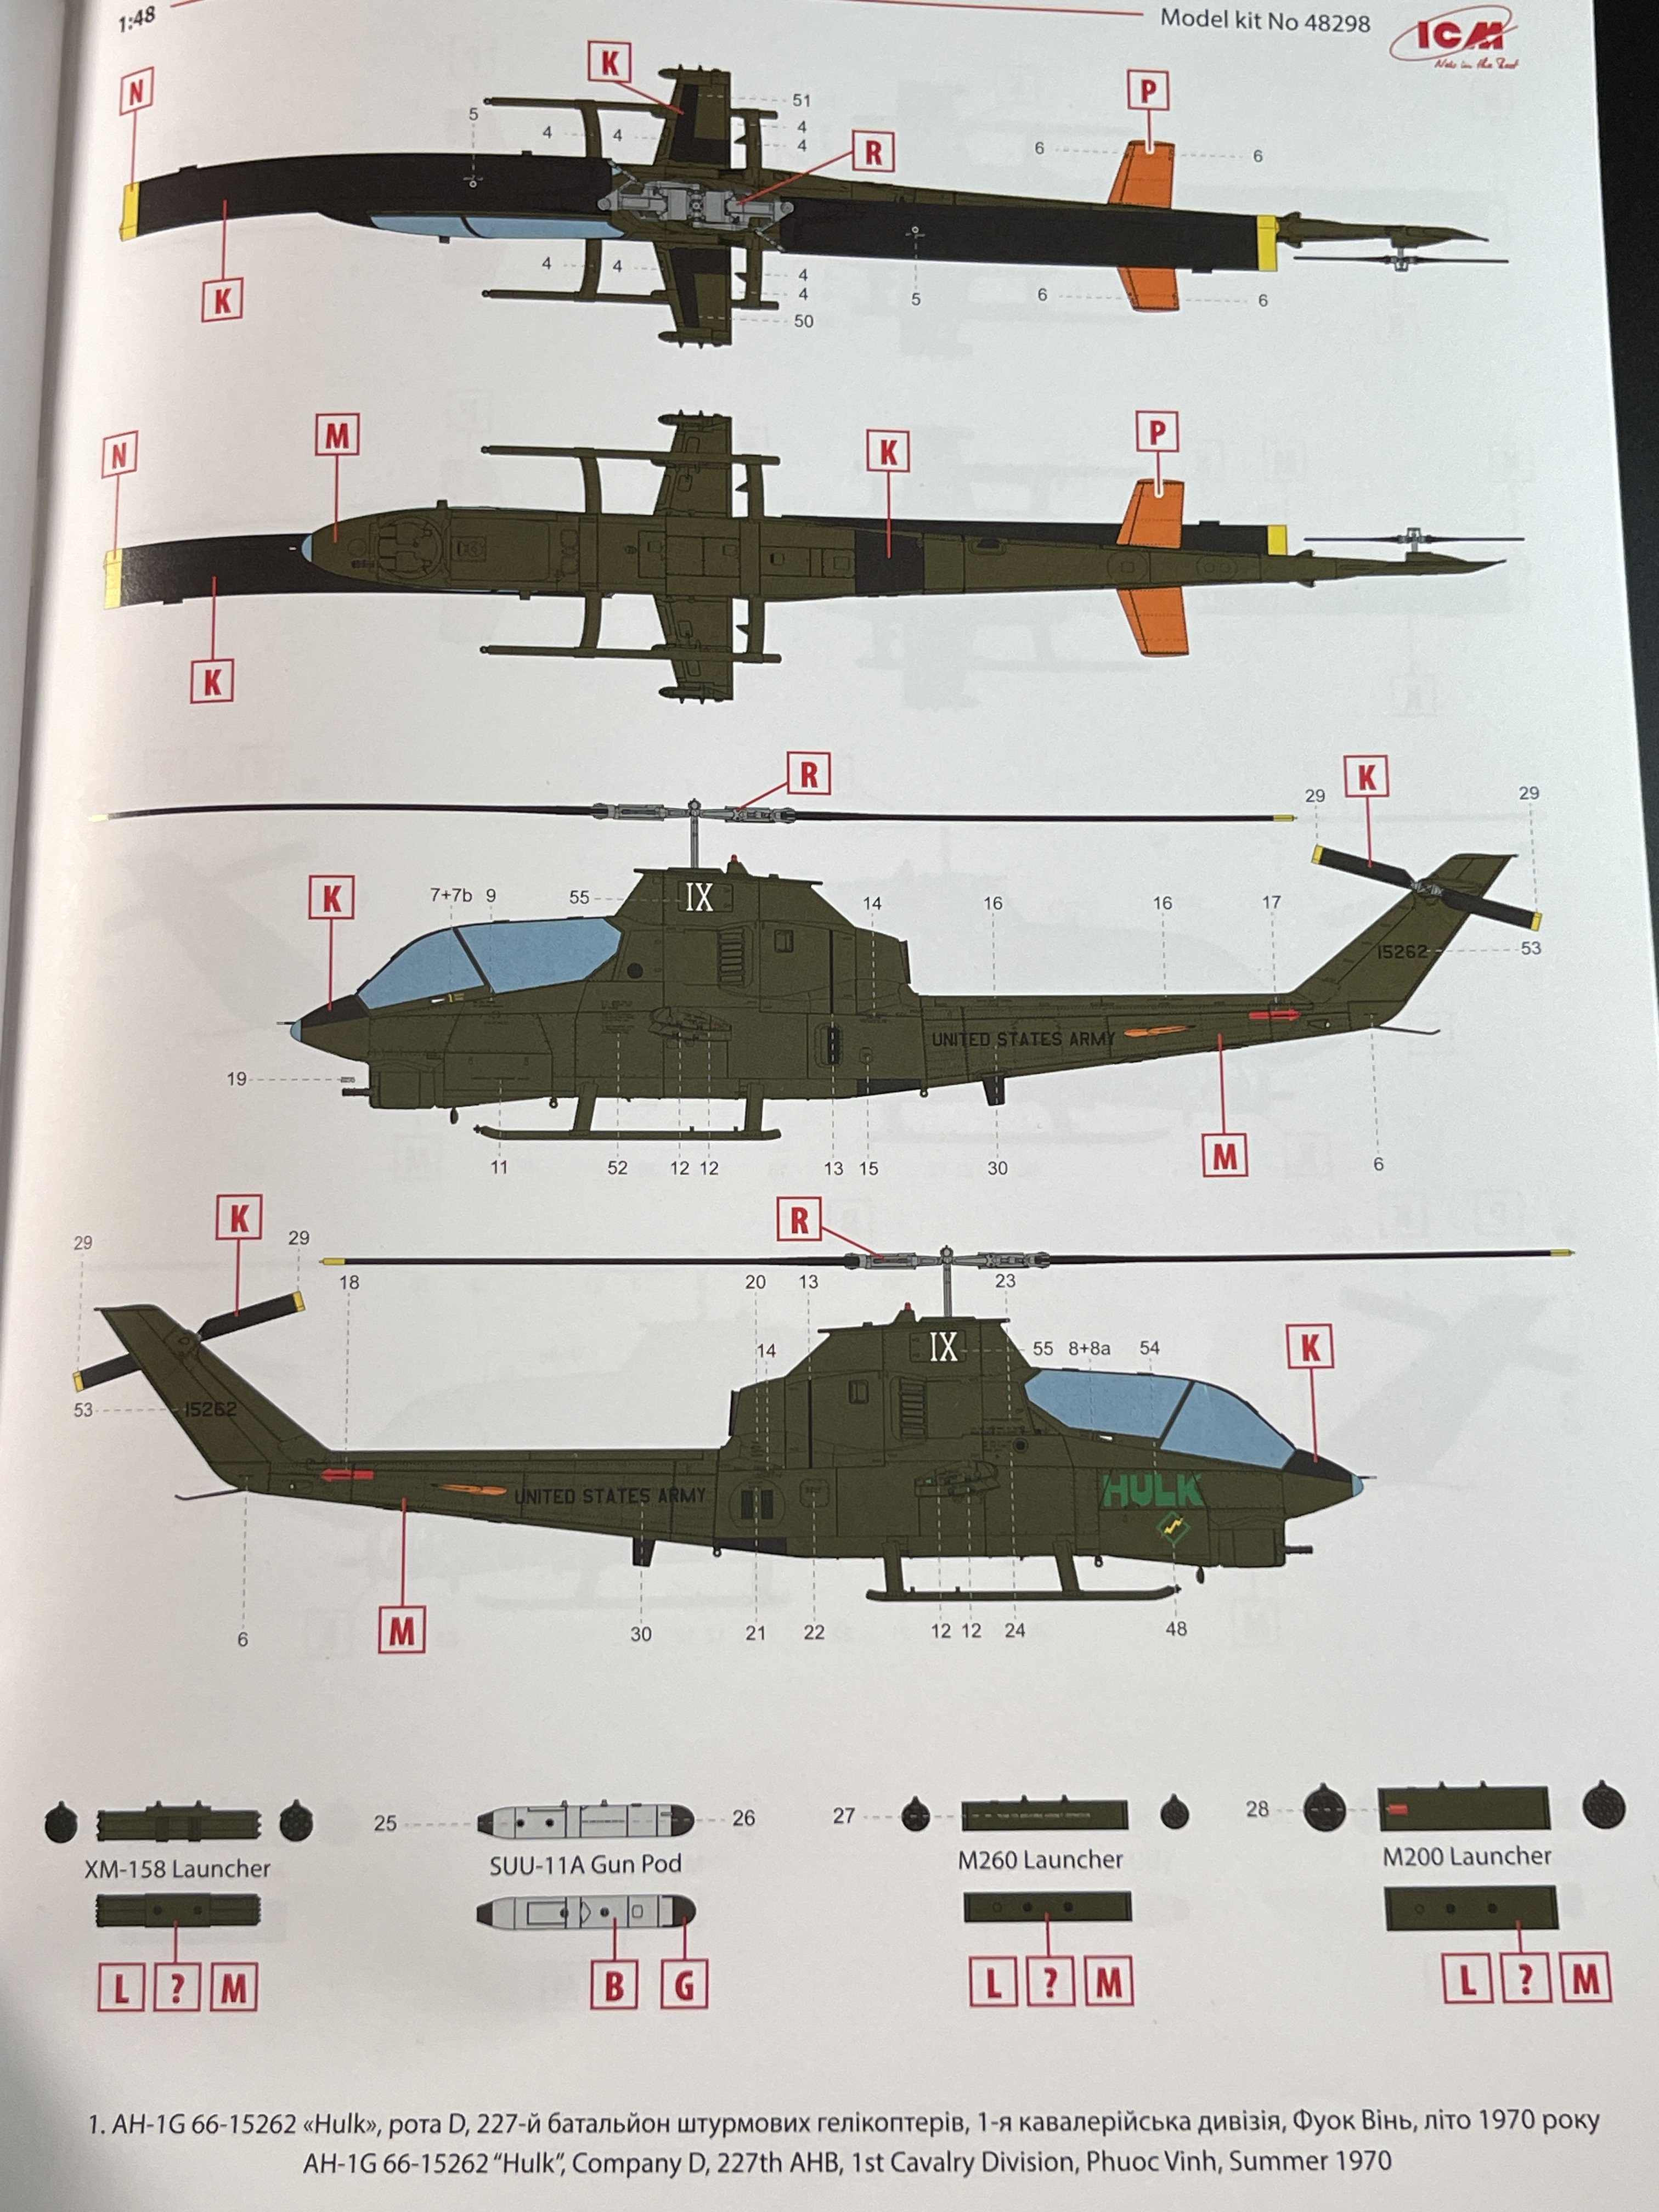
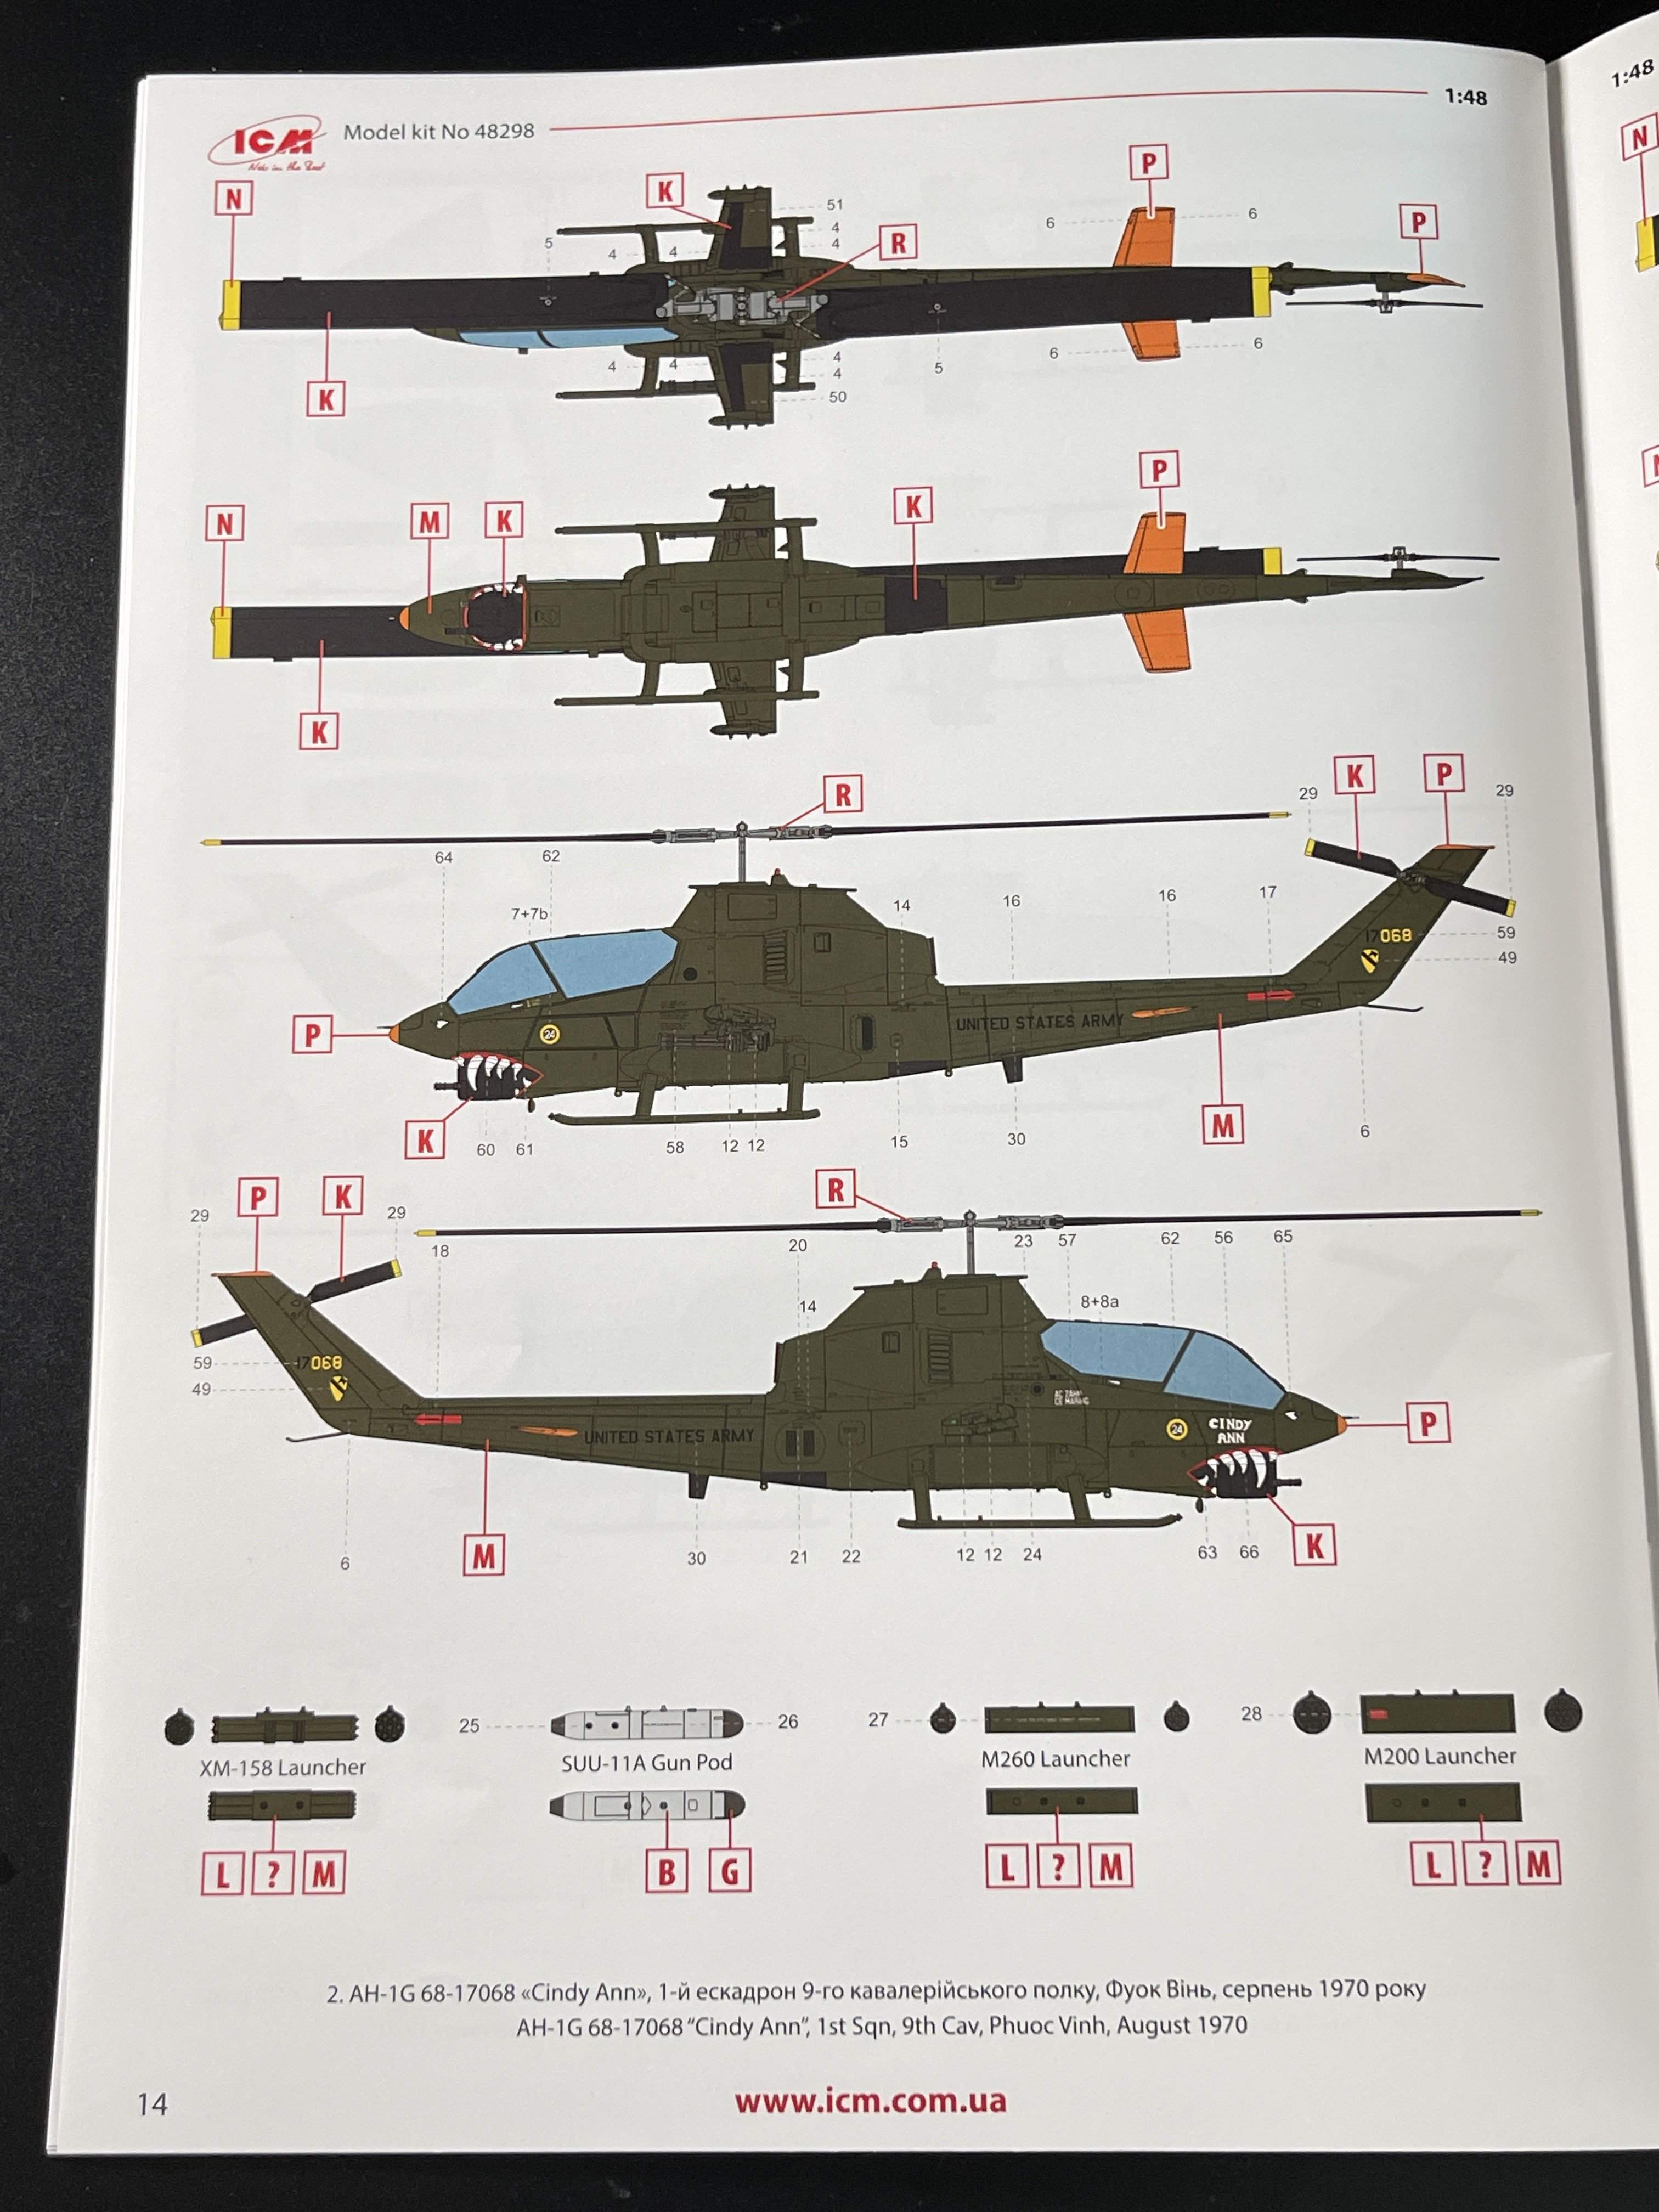
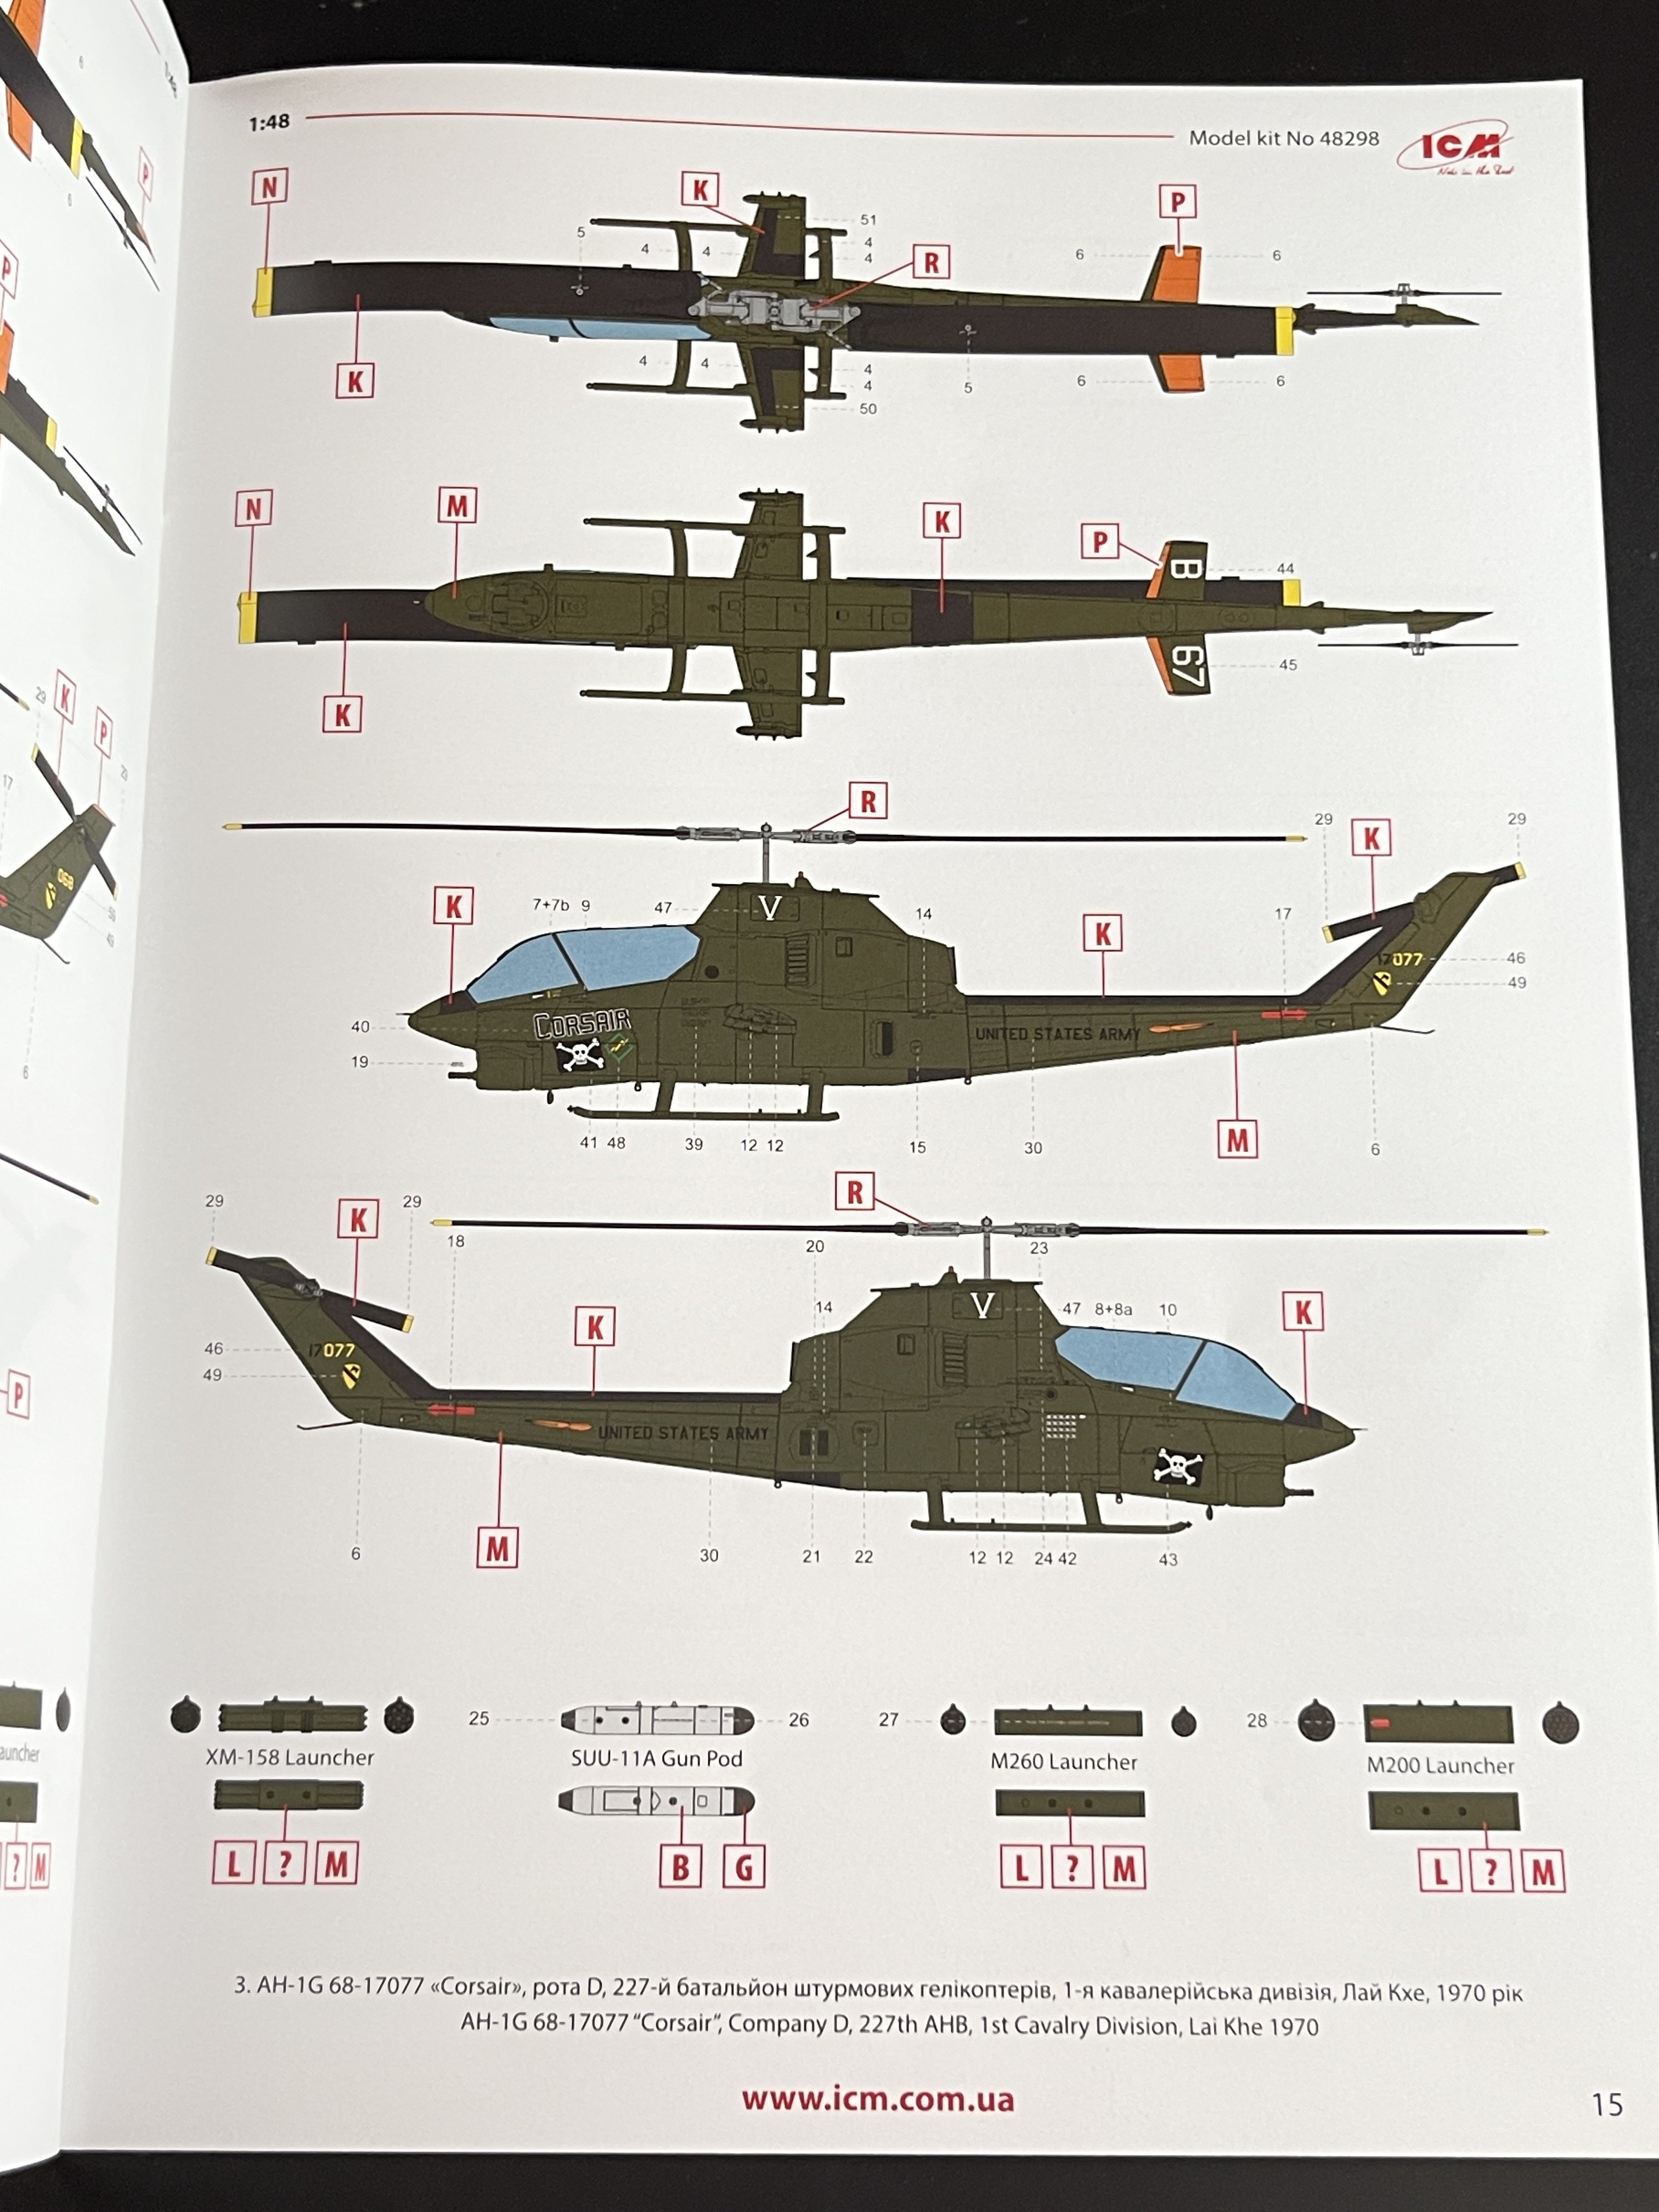
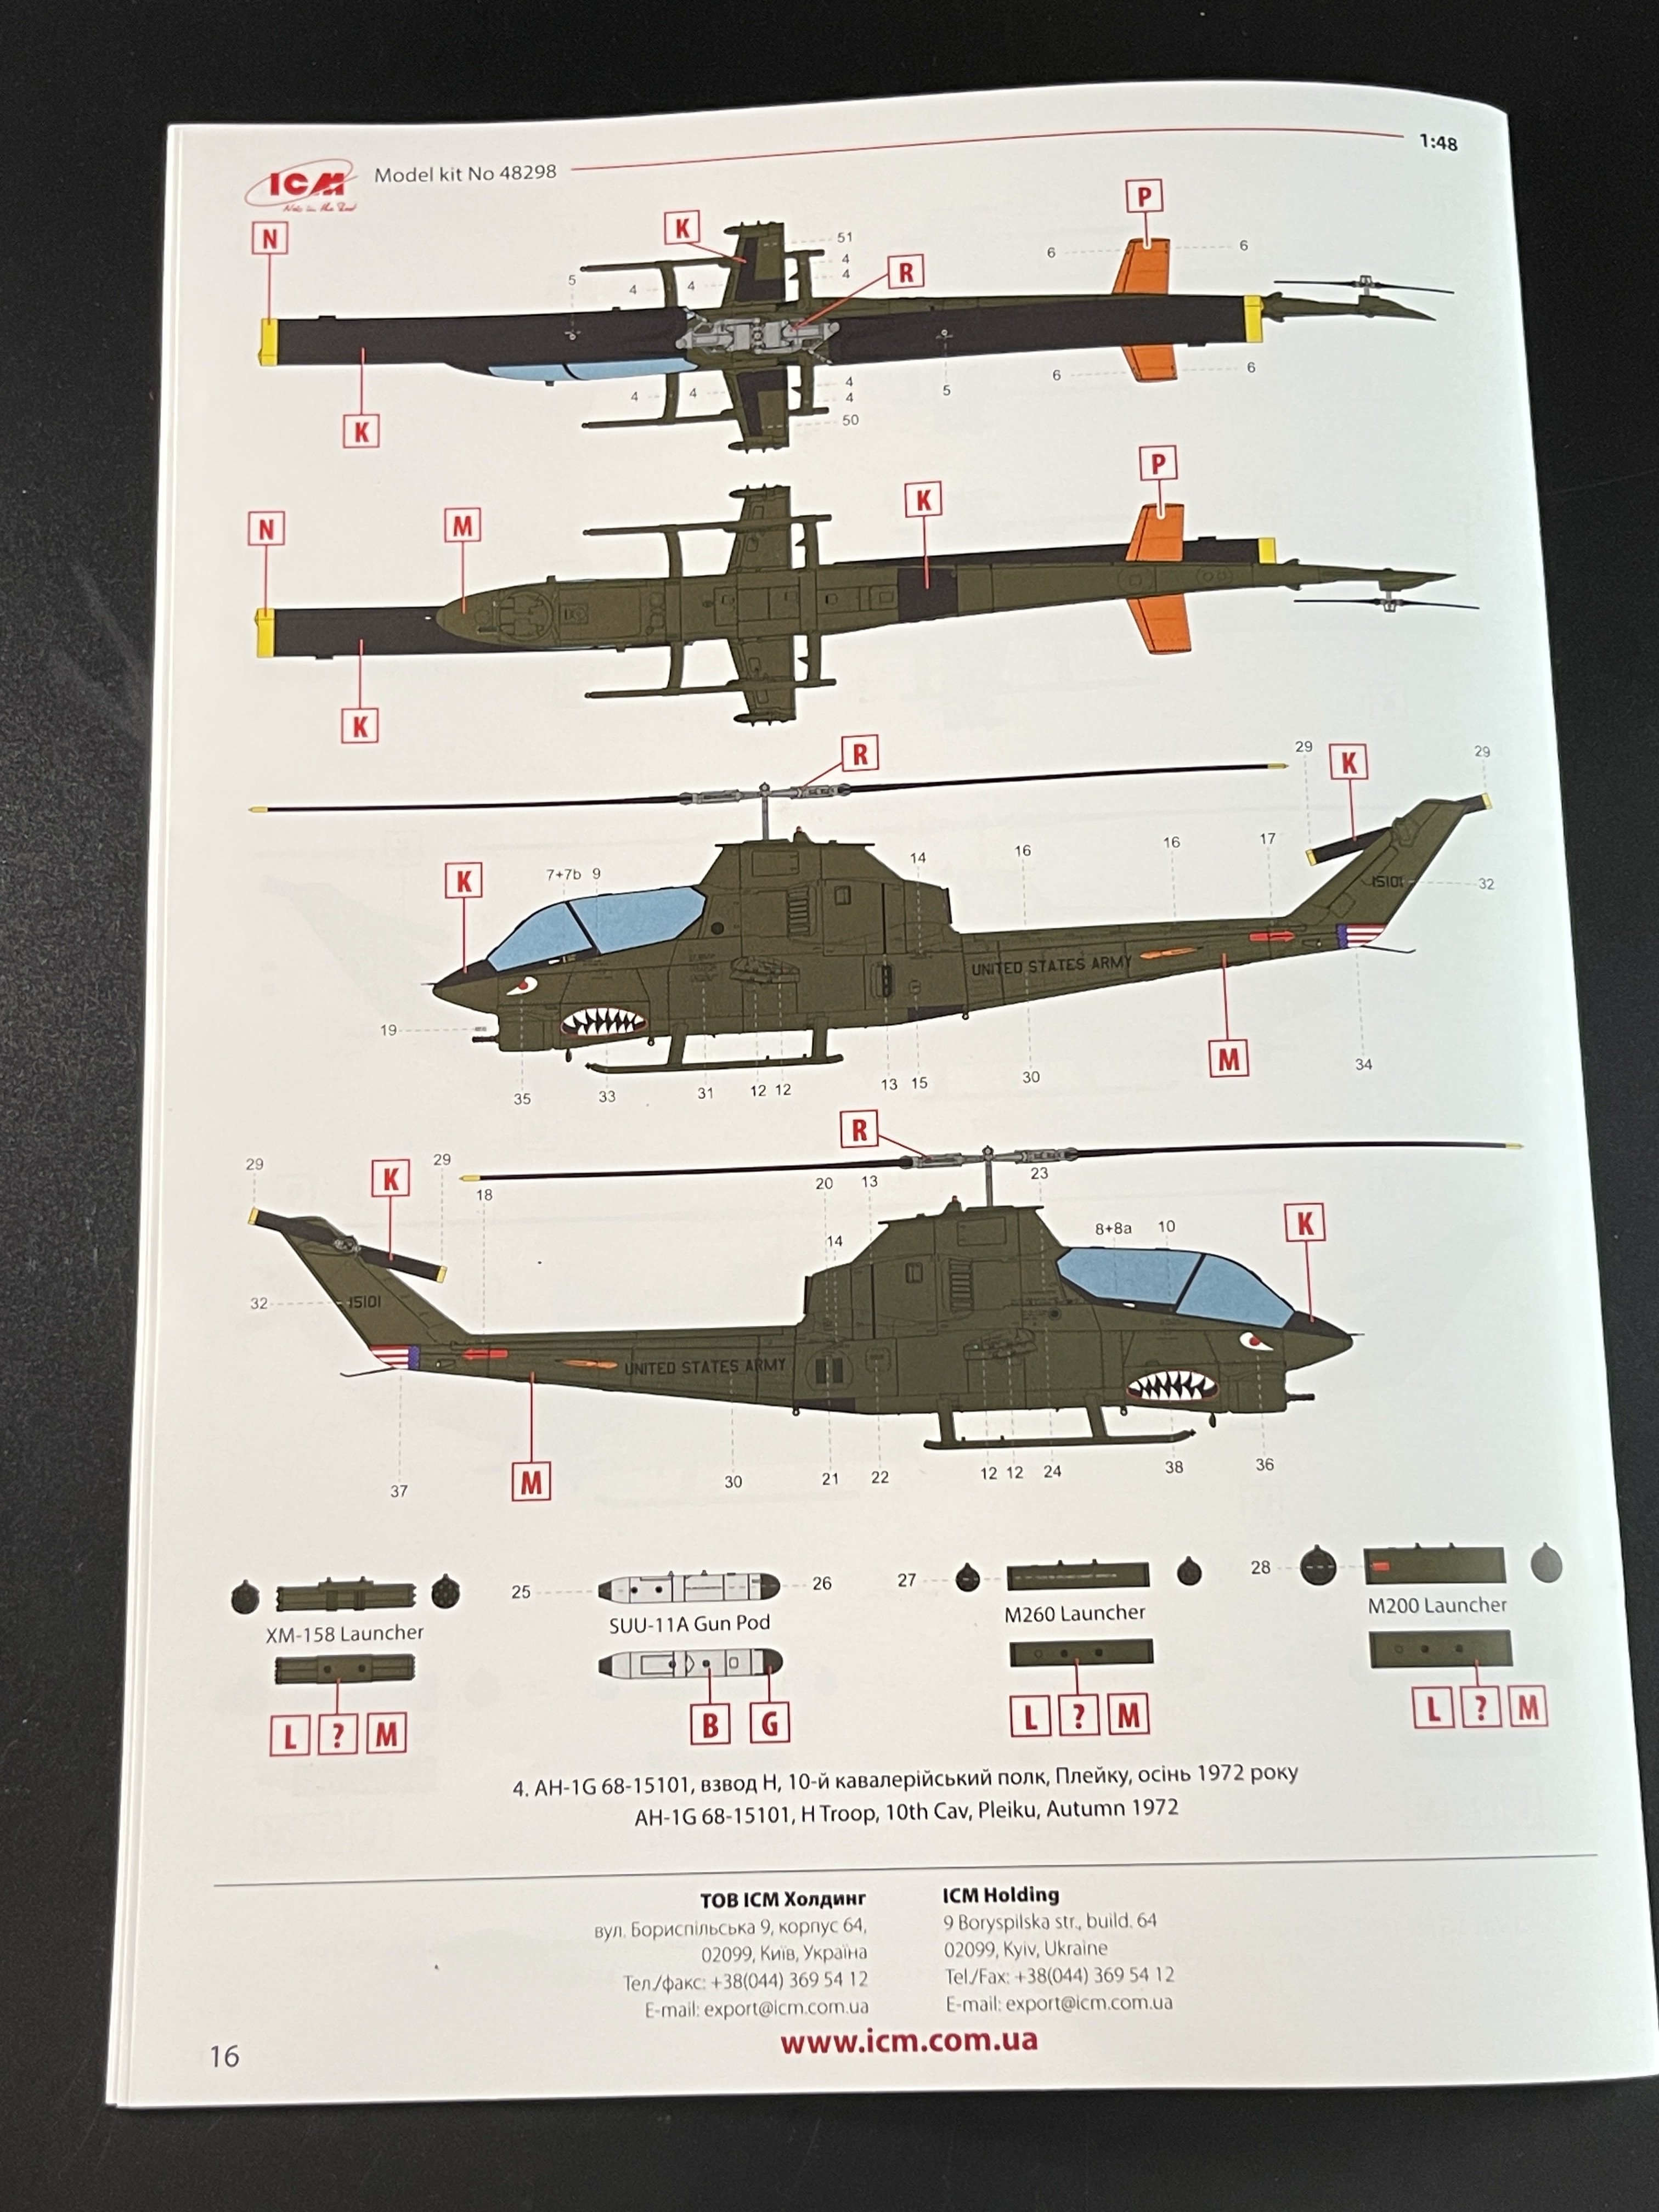
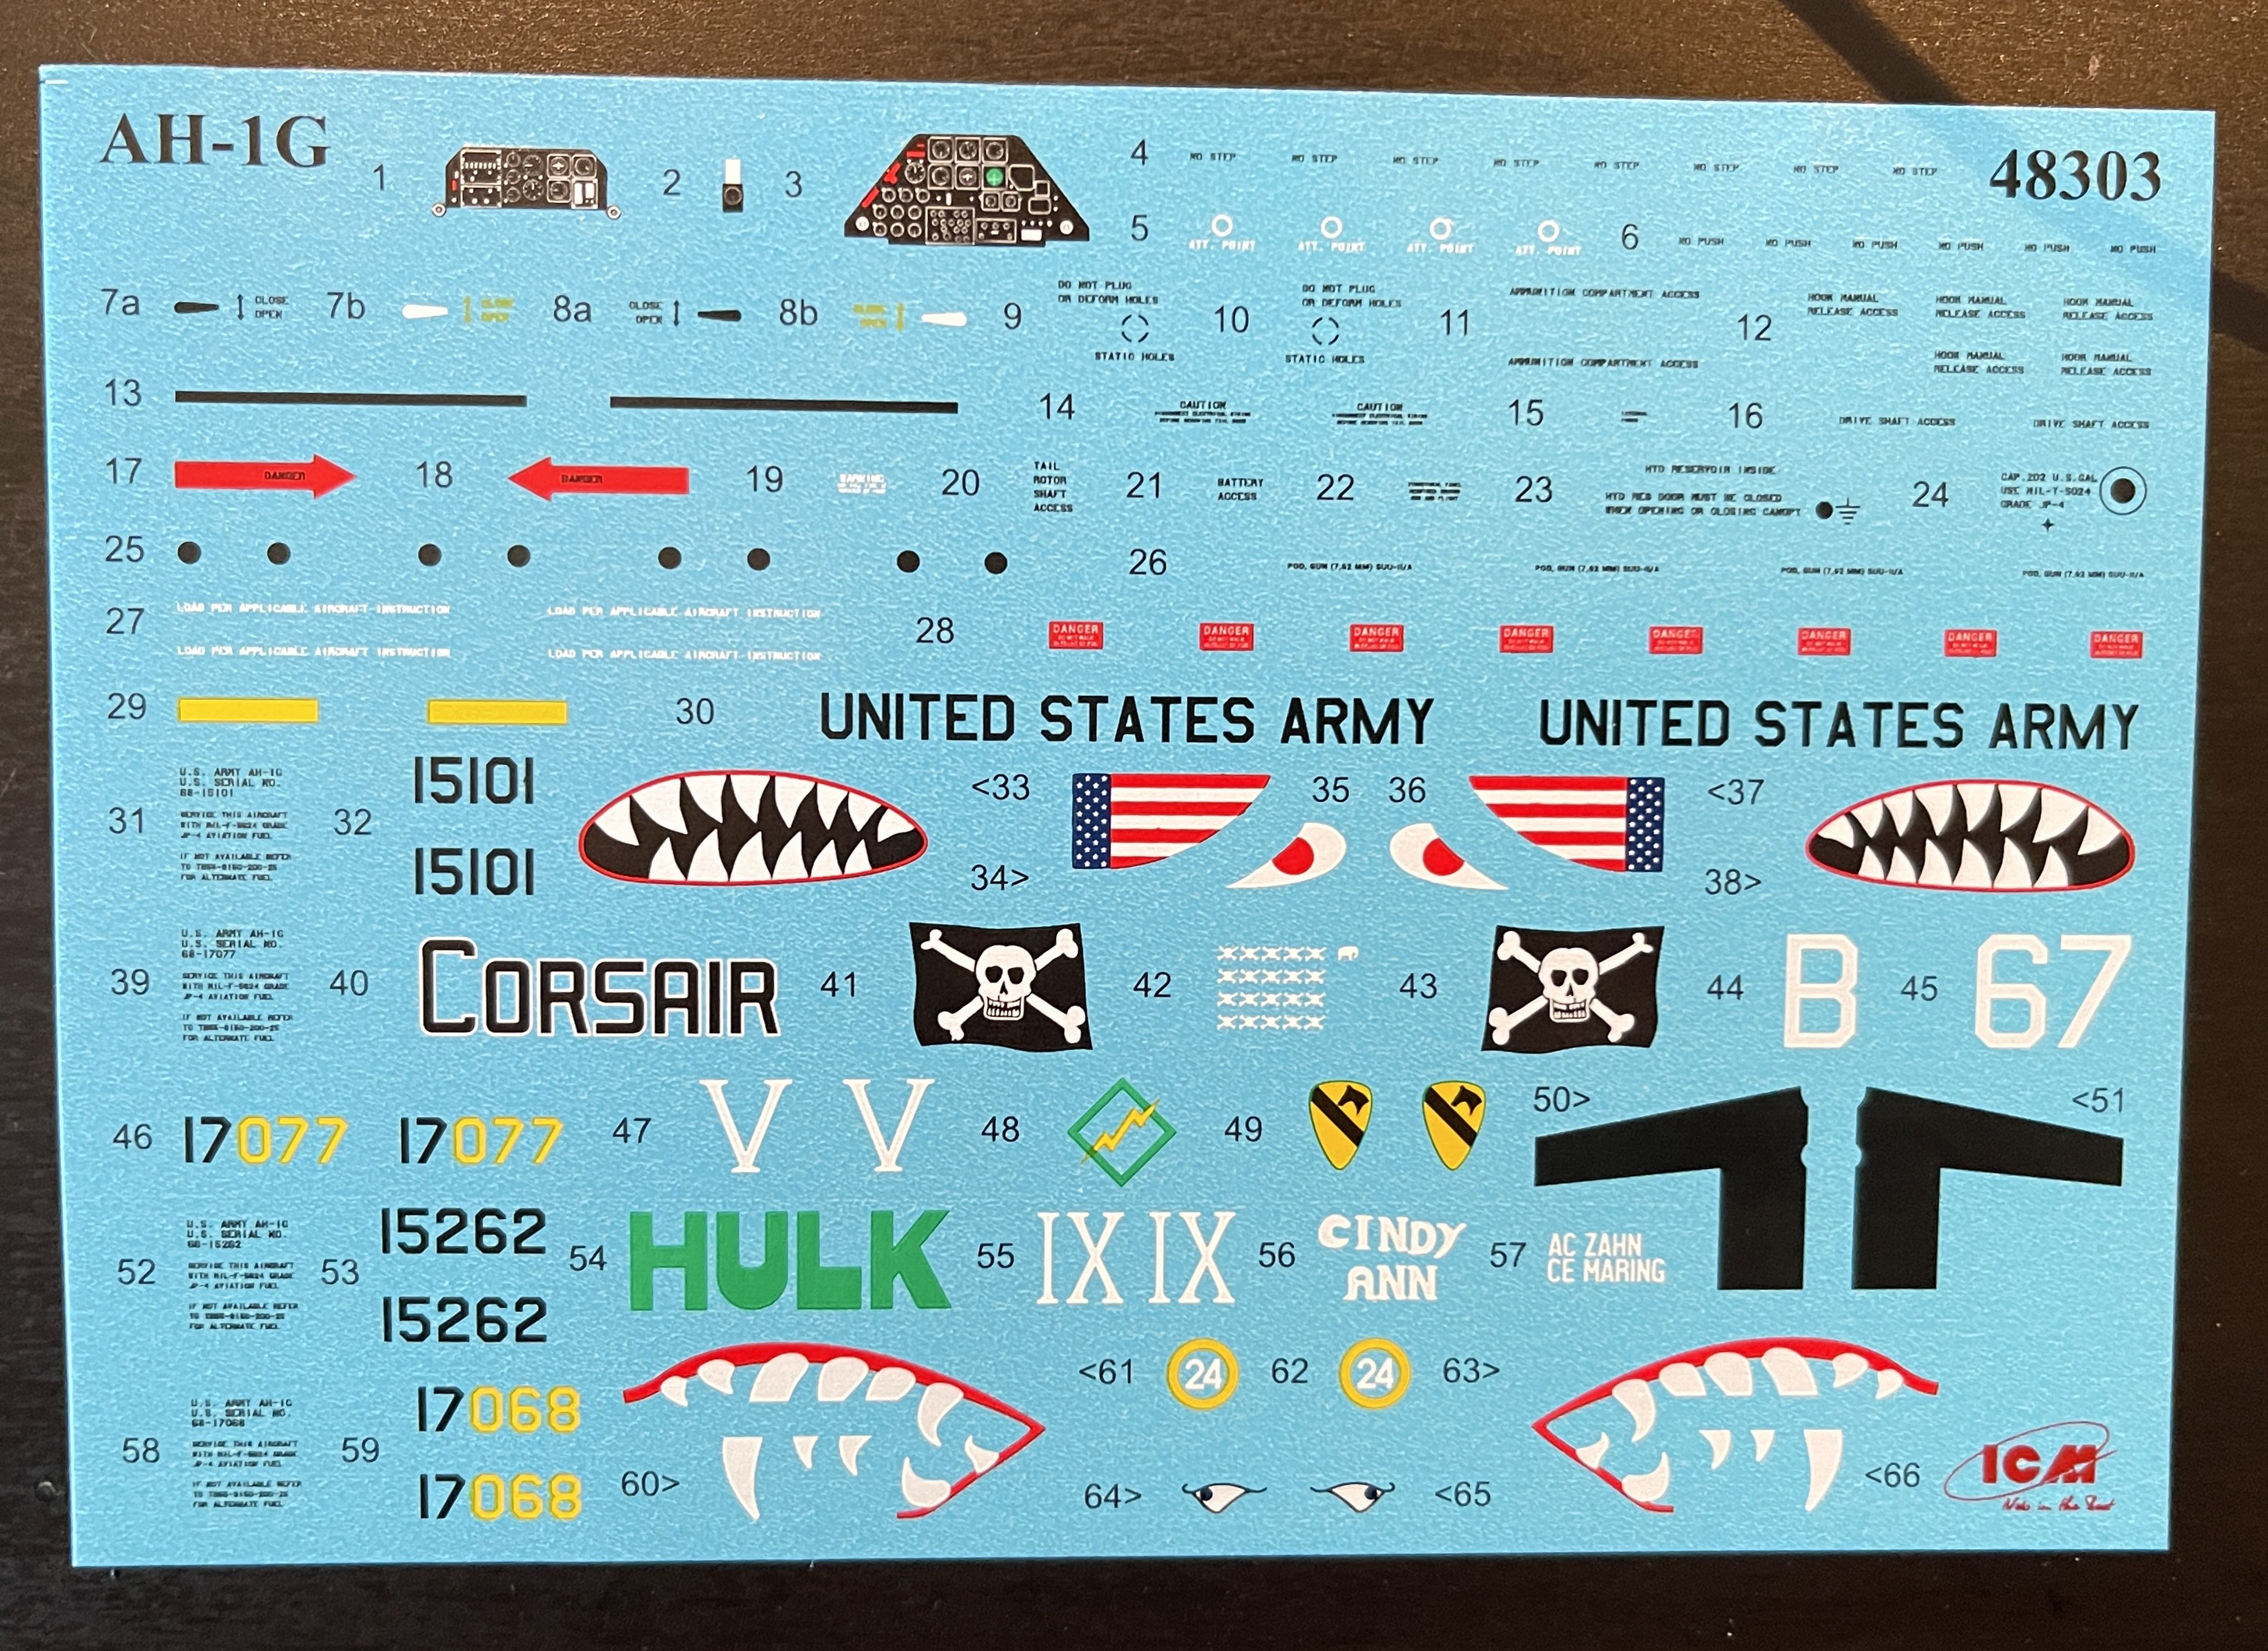
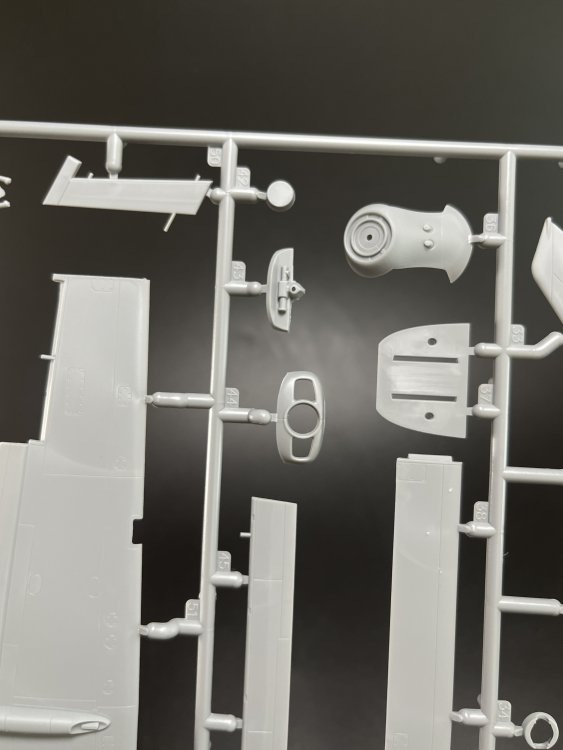
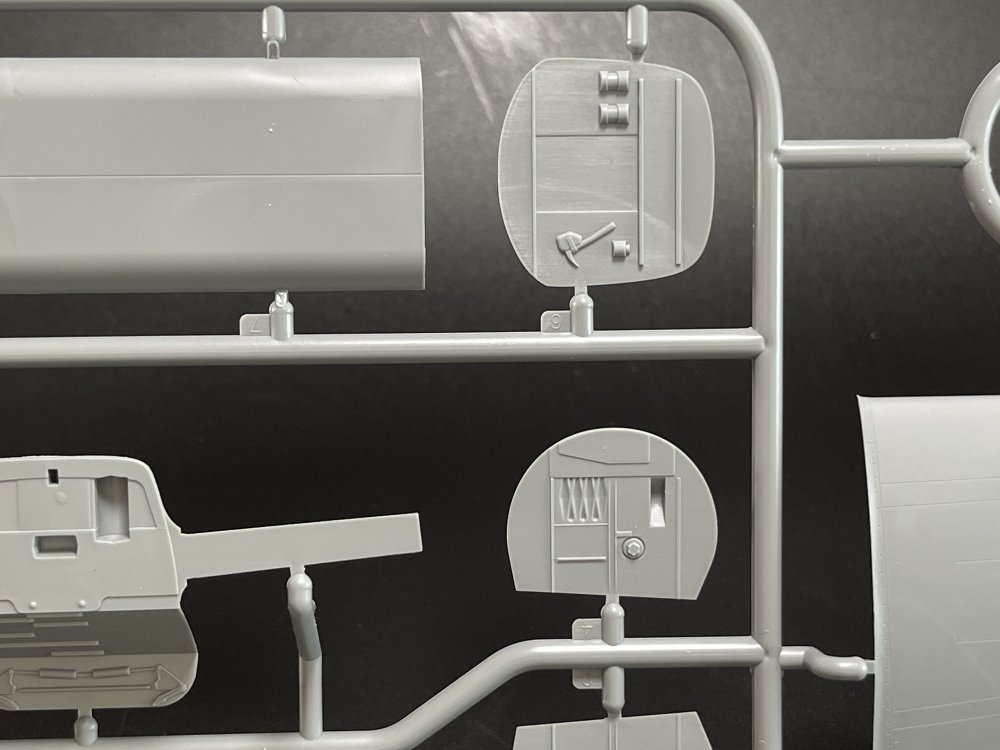
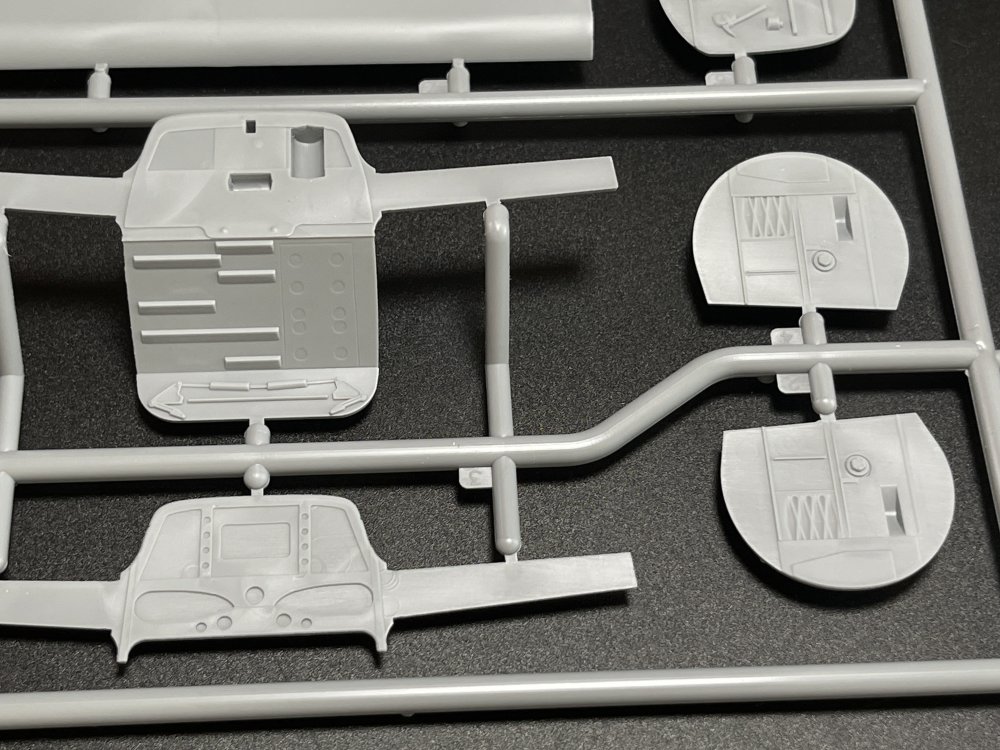
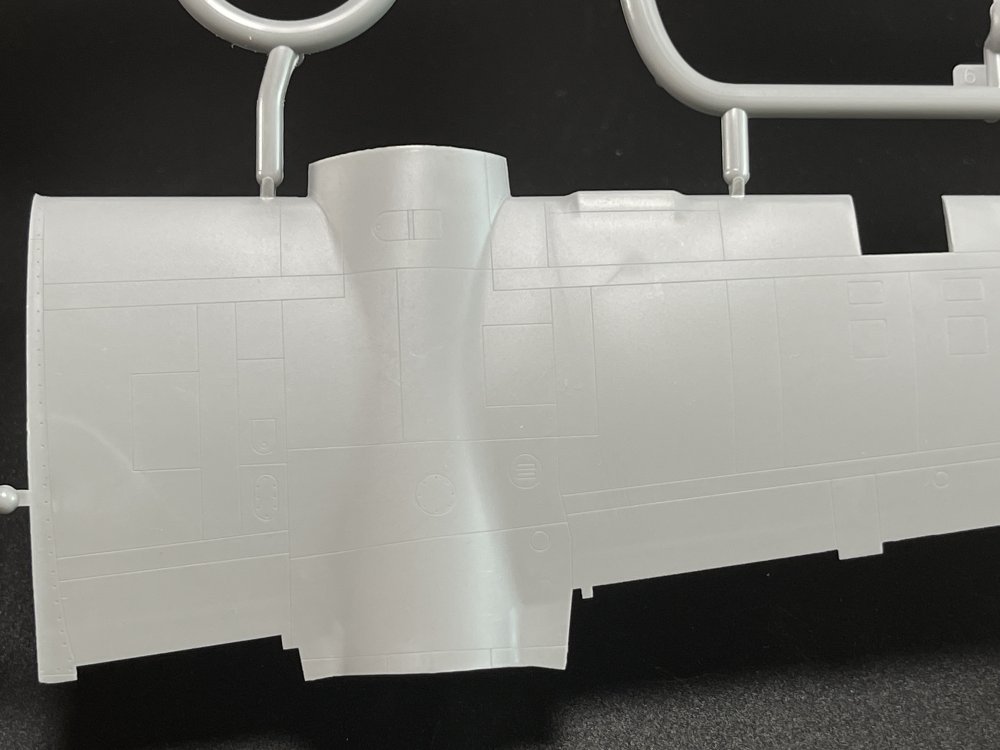
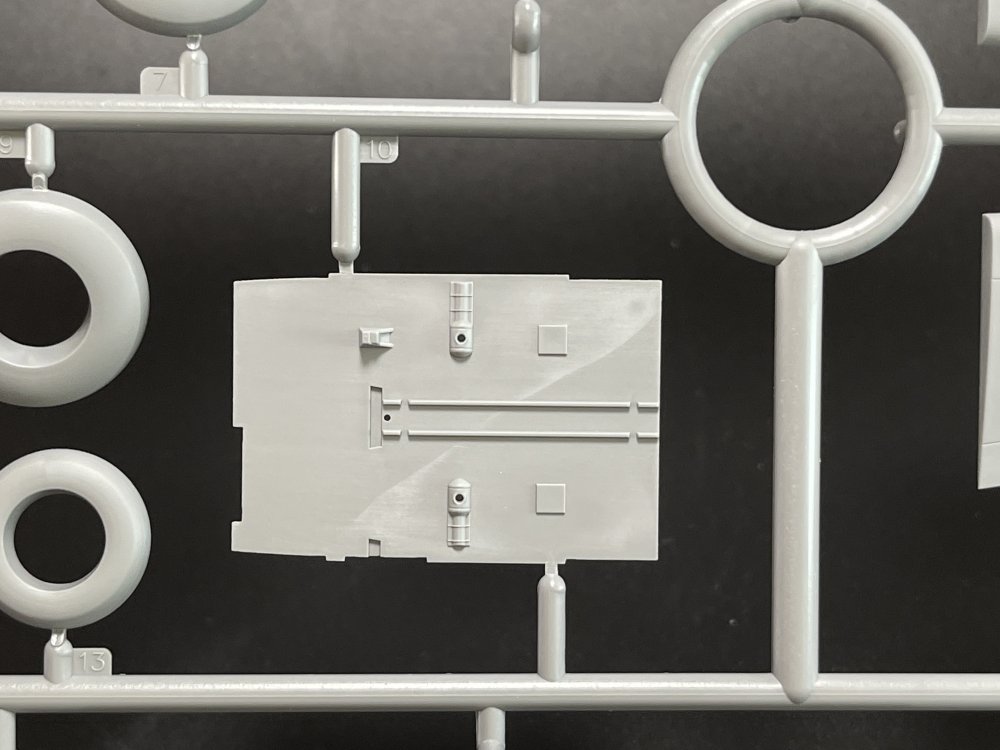
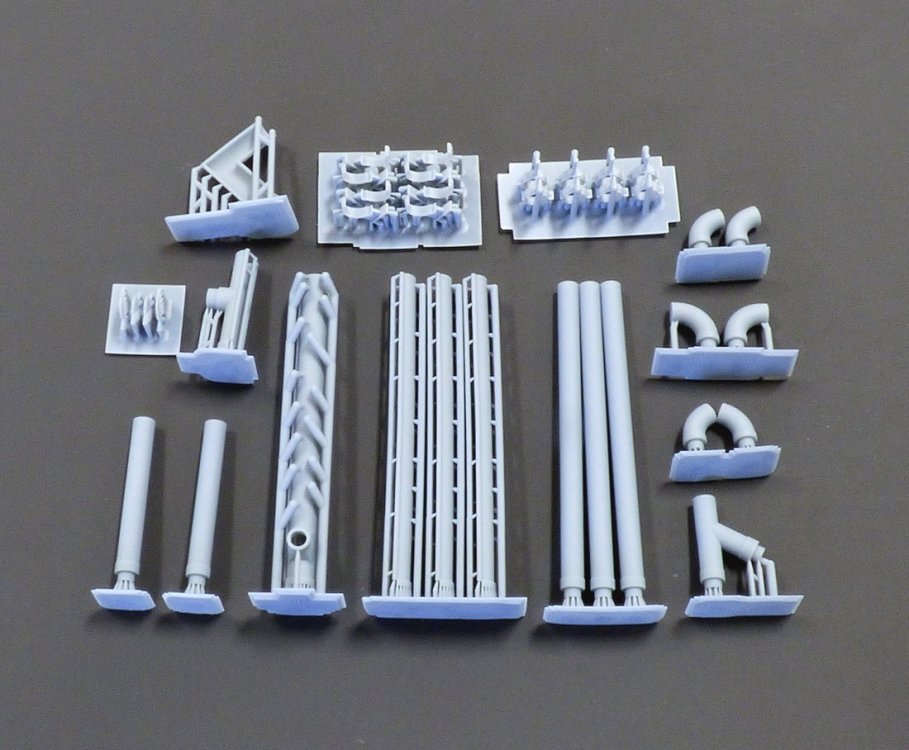
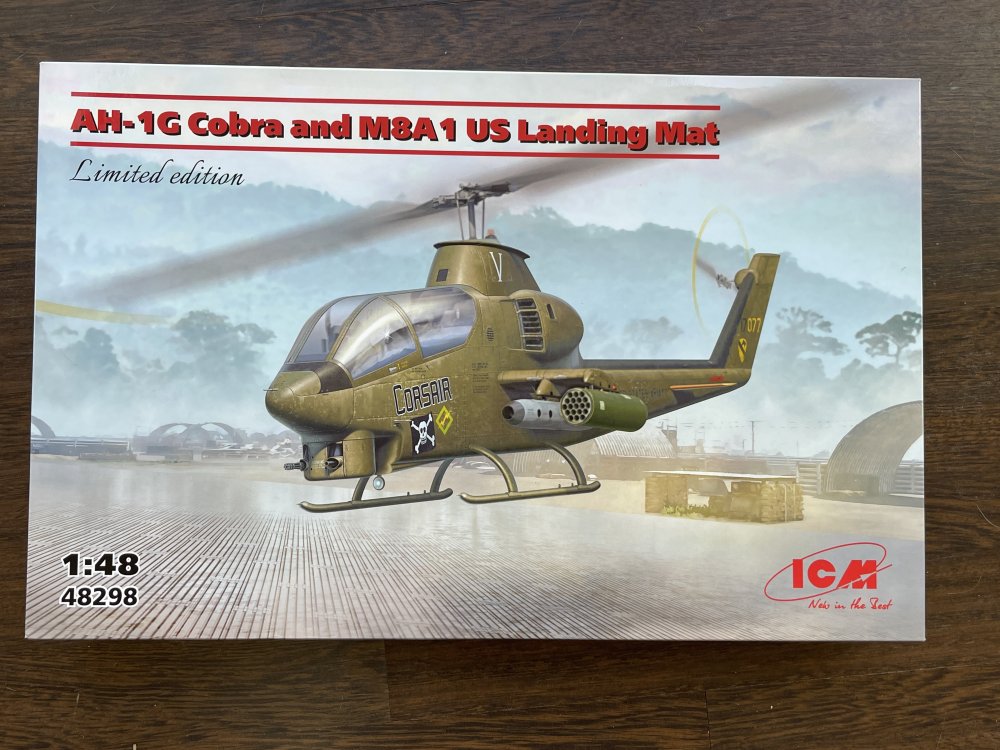
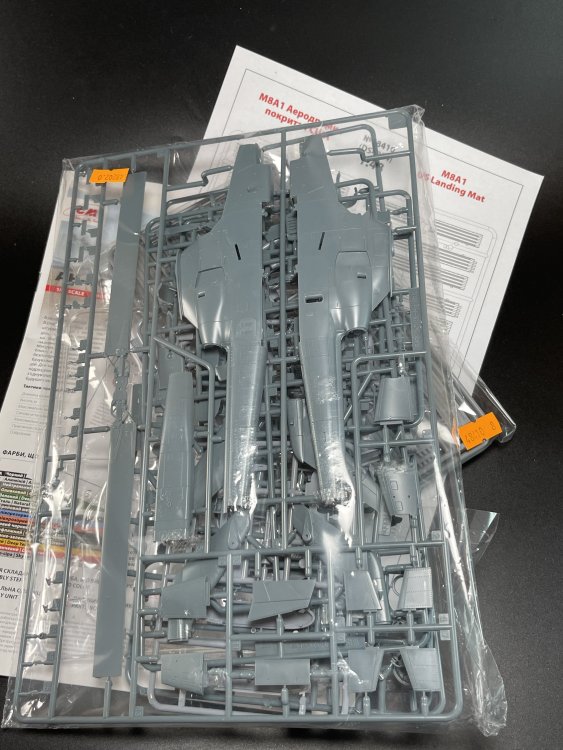
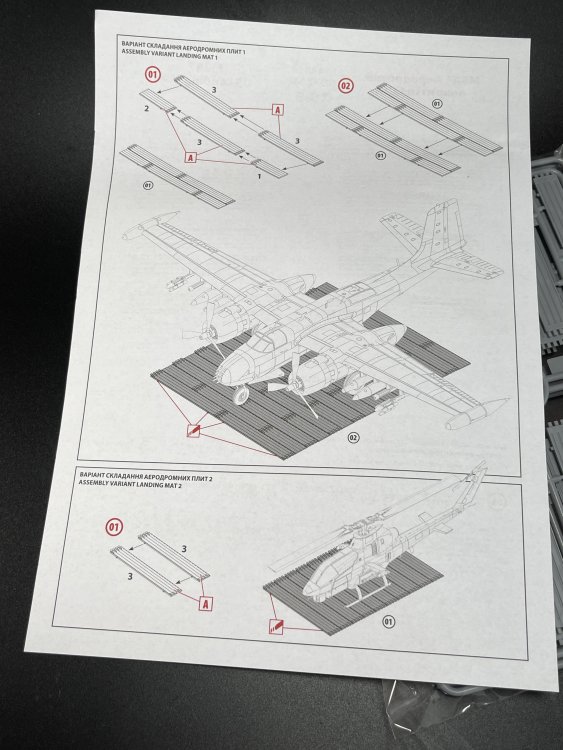
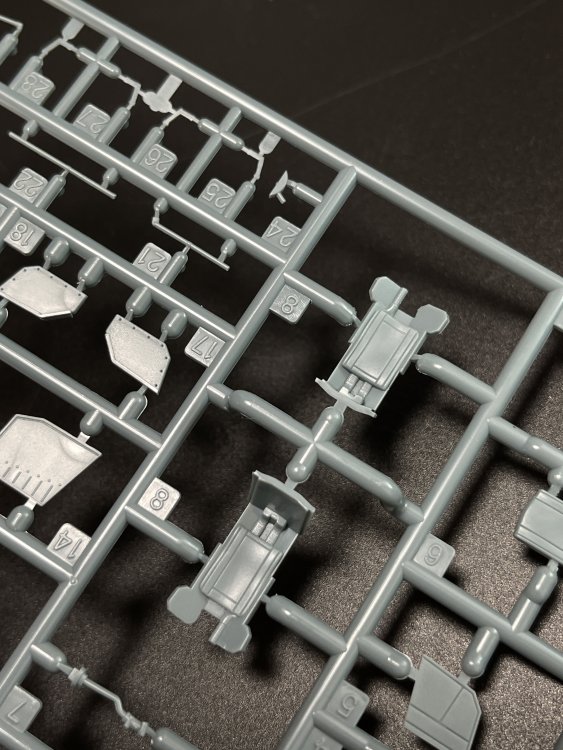
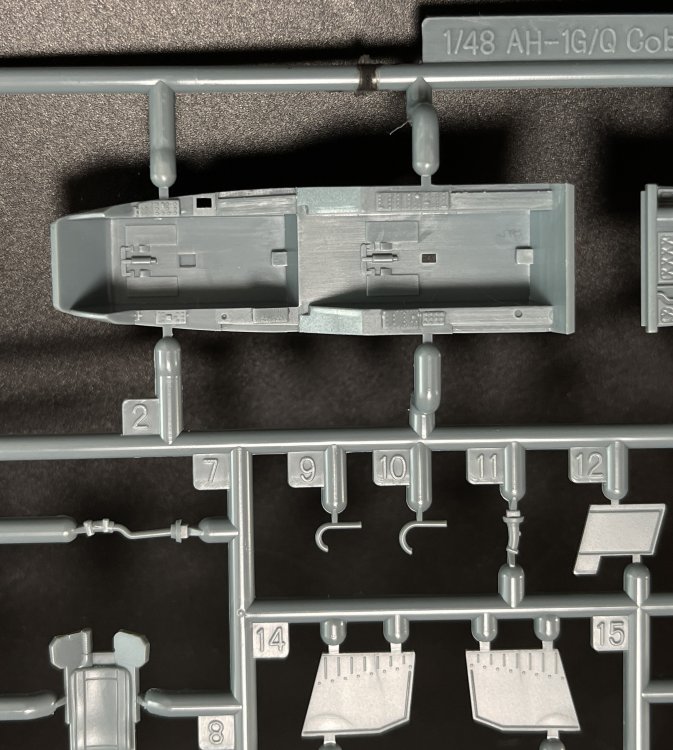
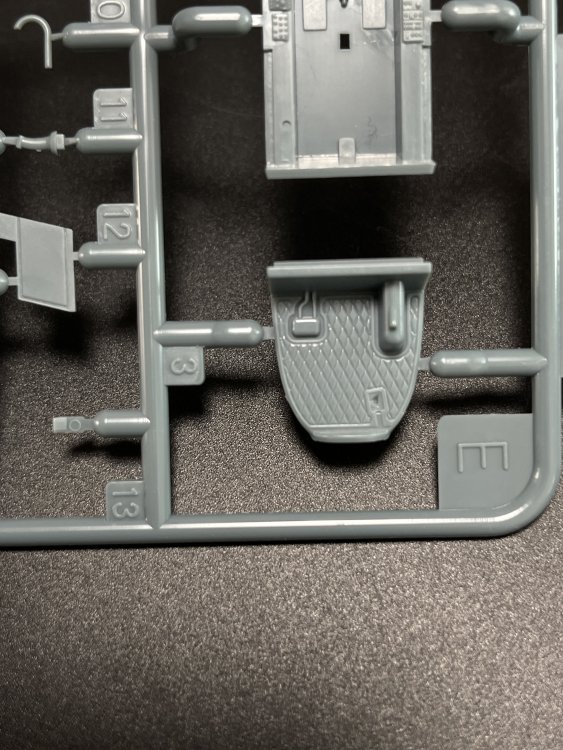
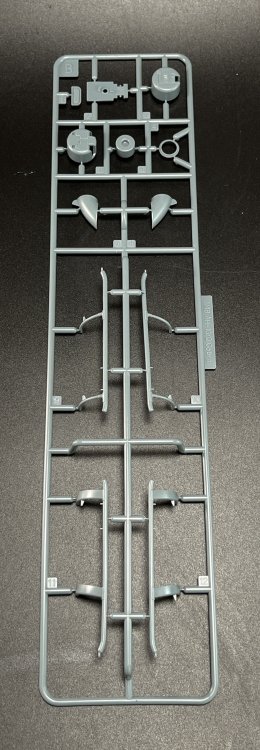
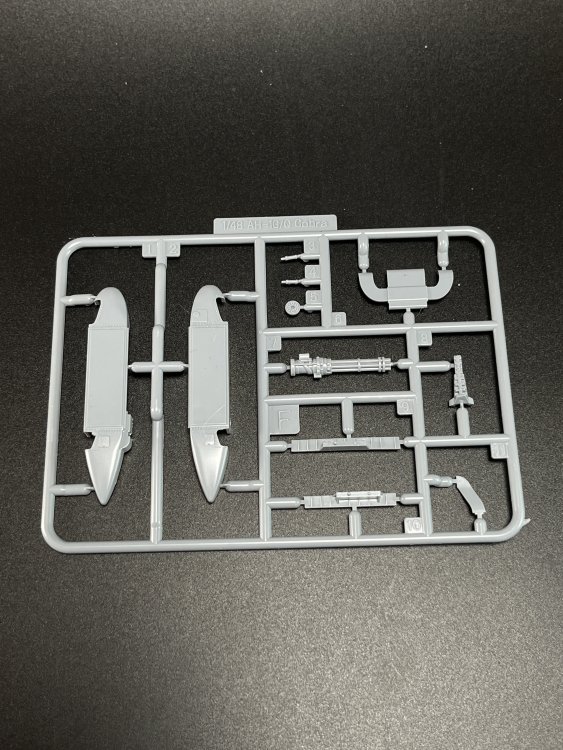
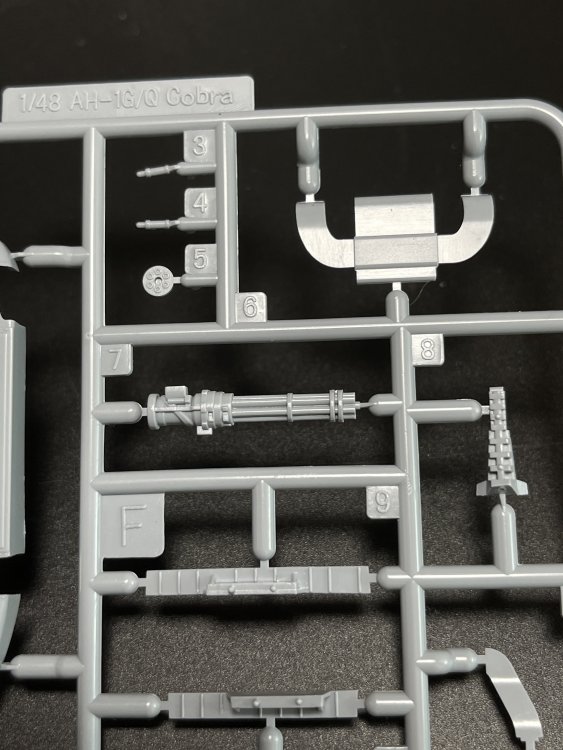
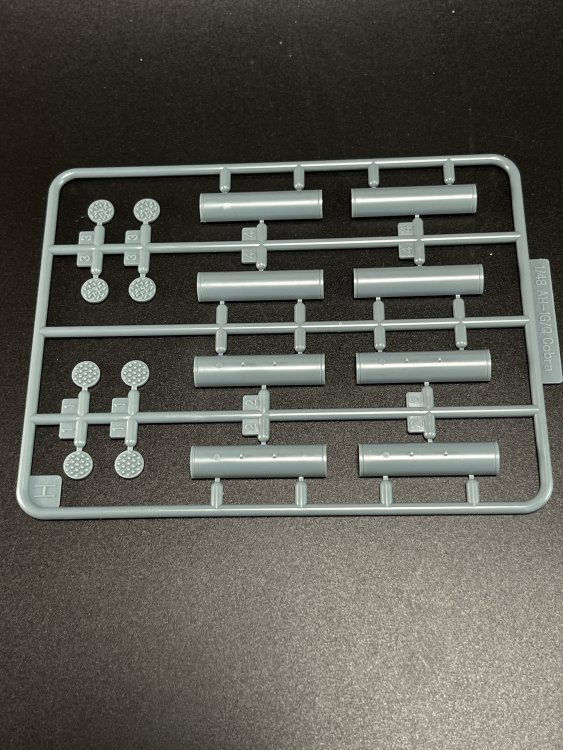
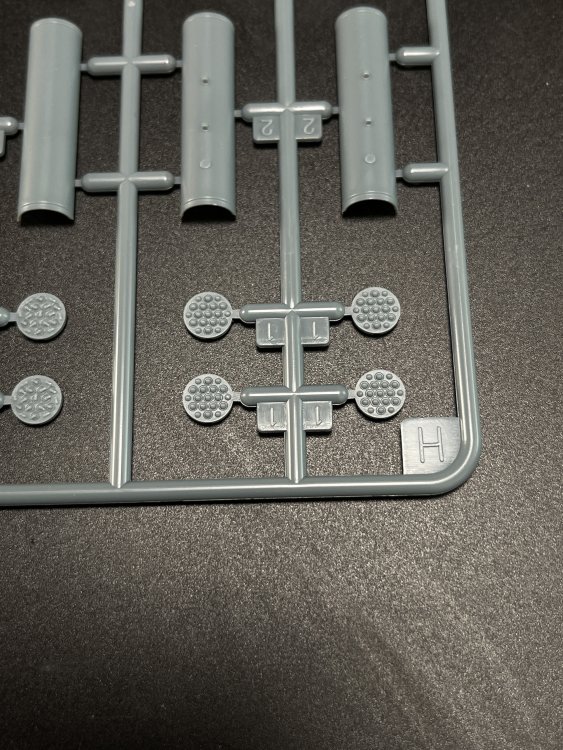
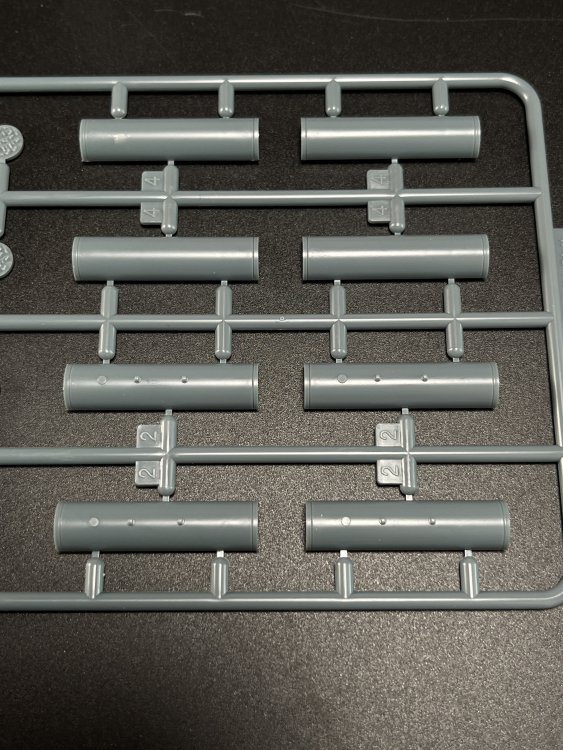
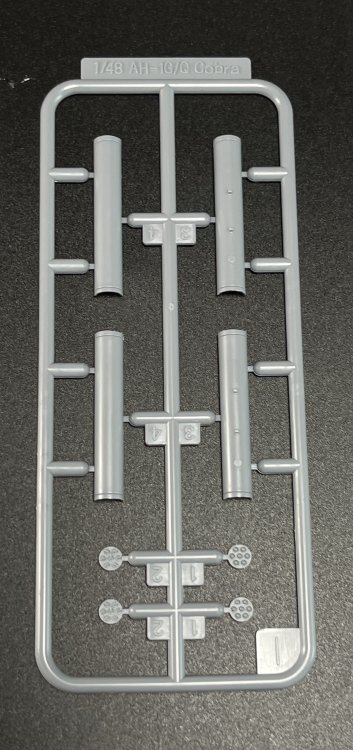
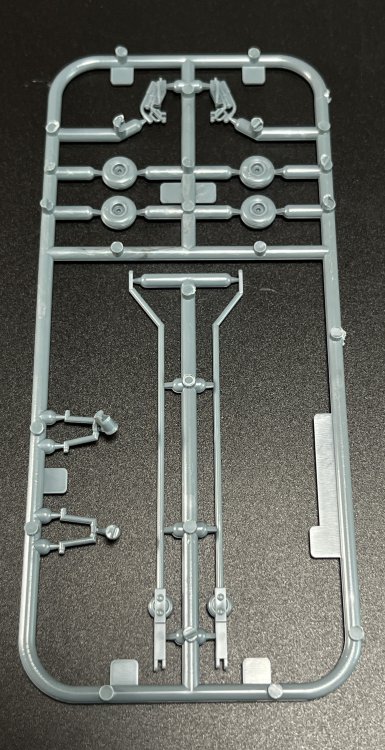
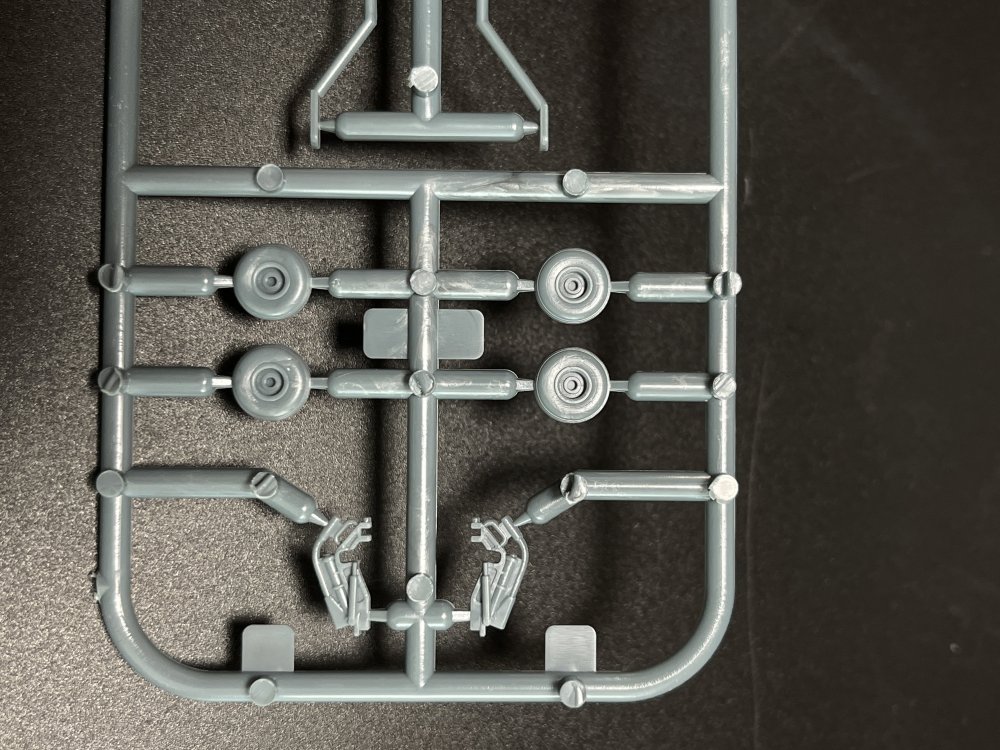
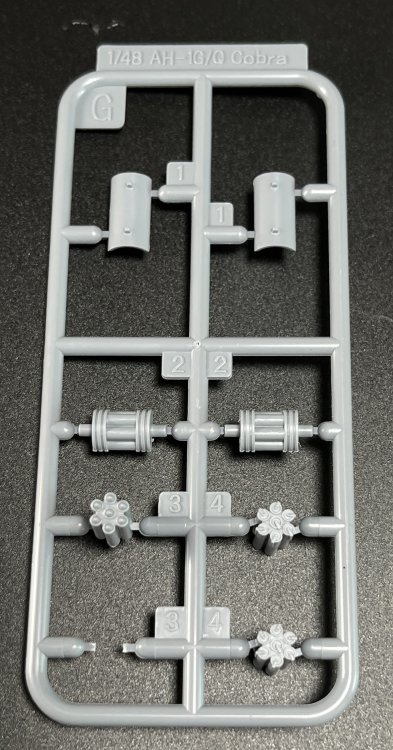
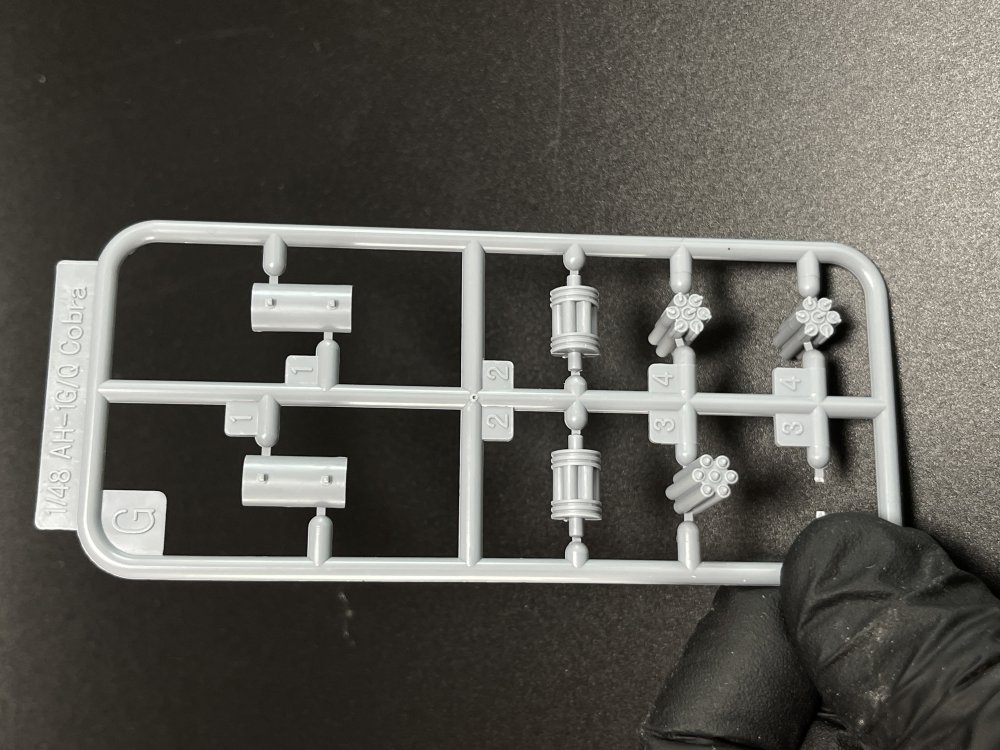
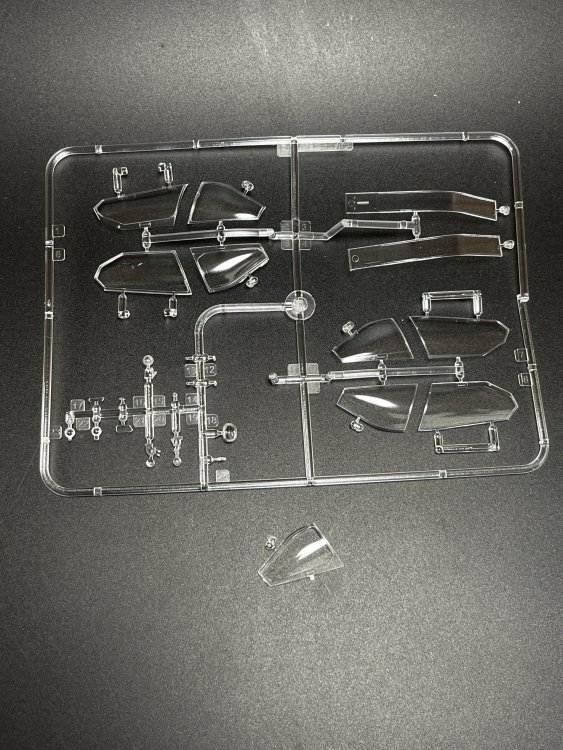
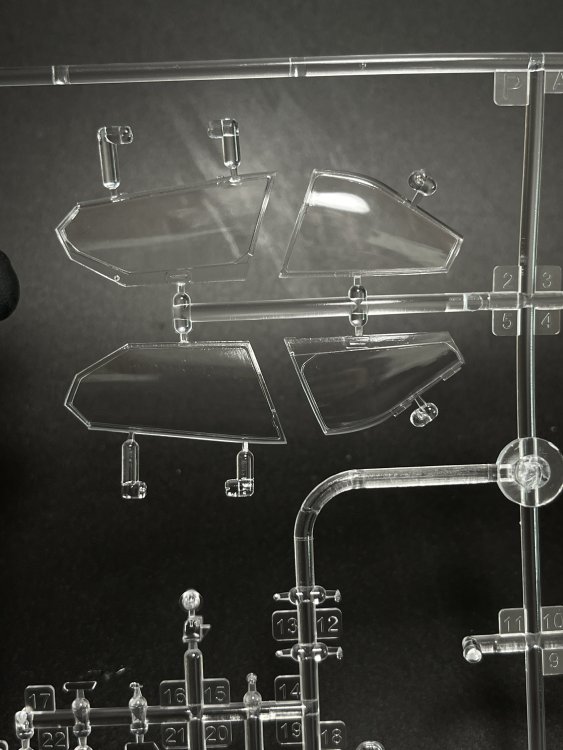
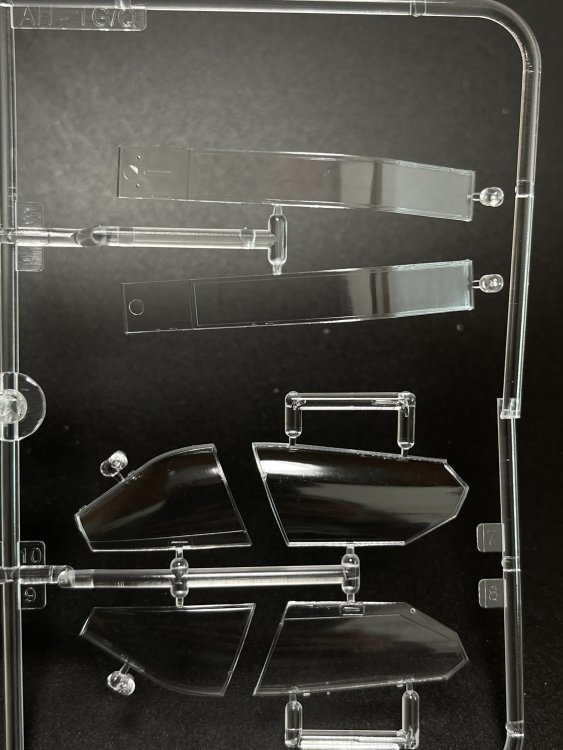
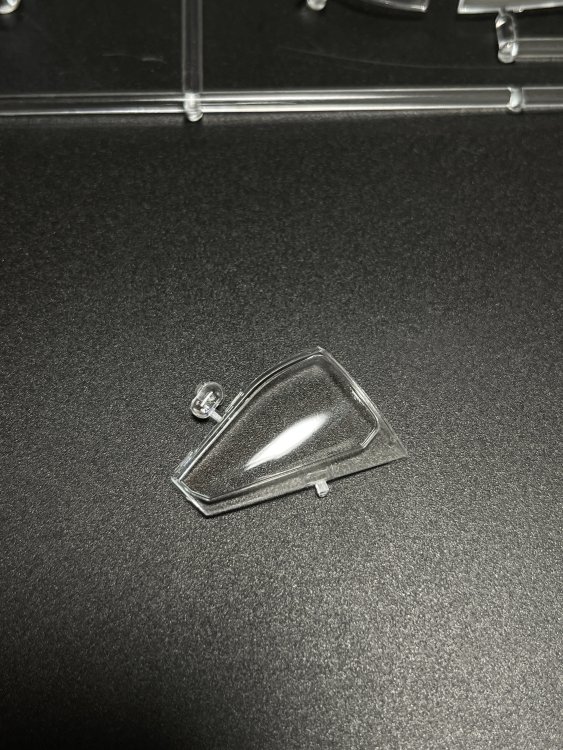
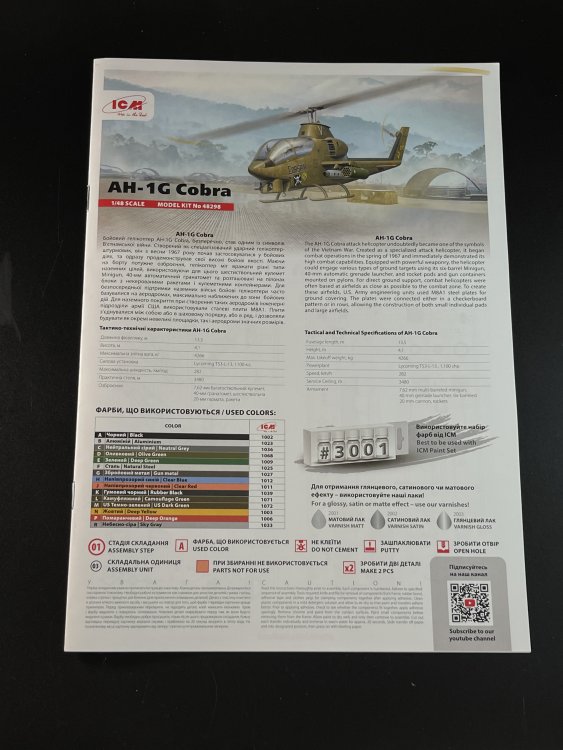
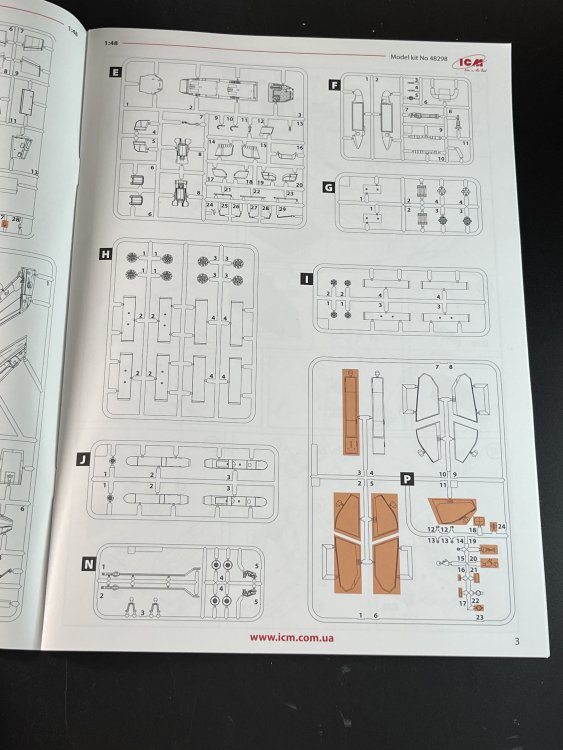
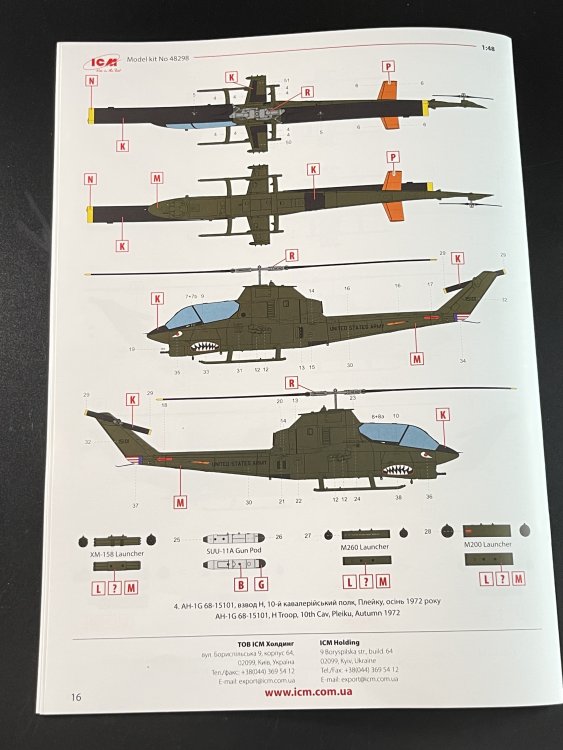
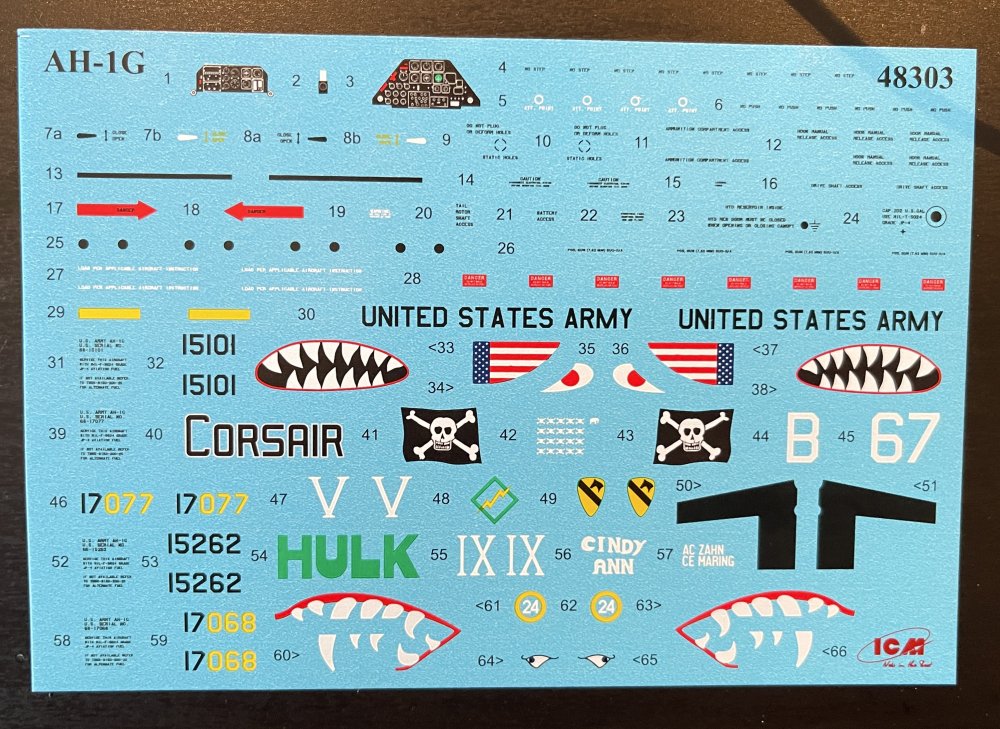
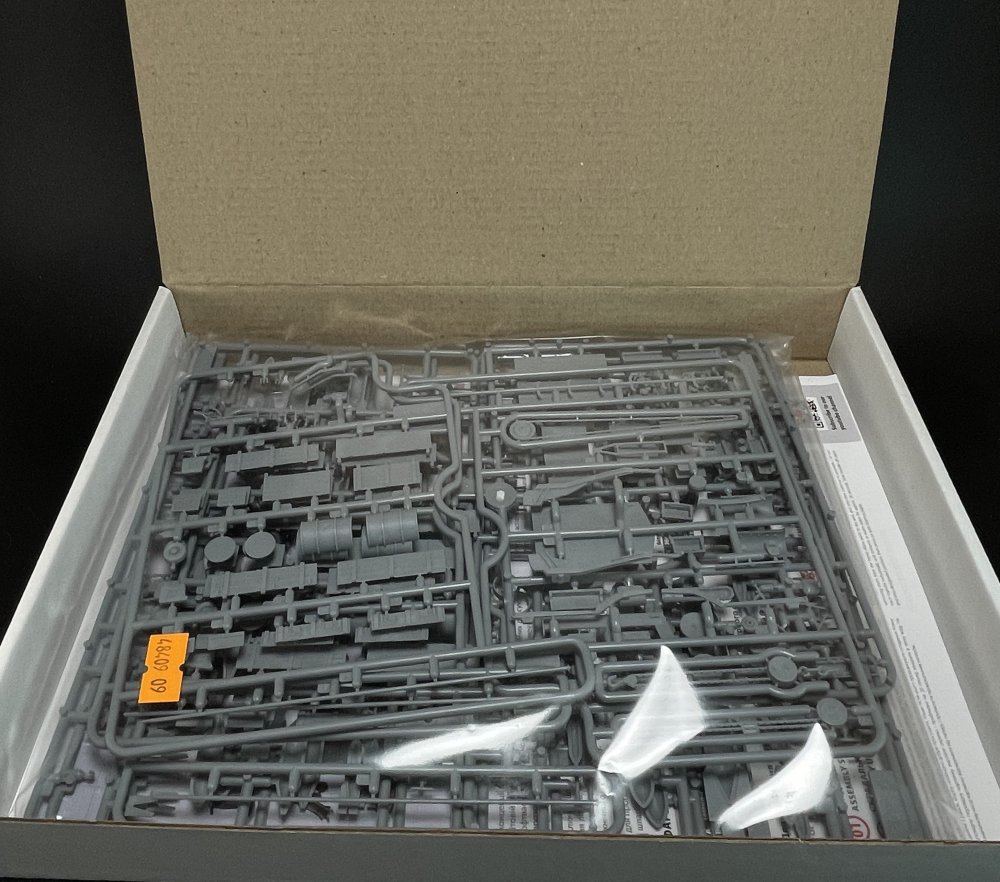
1:48 AH-1G Cobra and M8A1US Landing Mat ICM Catalogue number 48298 Price tag: 37,60€ Cick here to get one Once again we have the pleasure to bring another ICM release, this time the AH-1G Cobra in 1:48. ICM Models is a Ukrainian manufacturer specializing in high-quality plastic model kits. Established in Kyiv in the early 1990s, with limited run kits and in 2000 they chance hands and they start to working much better and with advanced design technologies, precision molding, and attention to historical detail. And ICM doesn’t rest even in a war scenario, releasing a lot of new models kit every month. This one is a Limited Edition (the first I see in a ICM boxing but there was already the “Ah-G1 Artic Cobra”) as a limited edition also) and the plastic is a total Special hobby work. Nonetheless is a great model kit. If you want just check this video build of it… just fantastic! https://www.youtube.com/watch?v=ULkkGf7VJD8 The box is the typical ICM with a lift-top one with the boxart sleeve remove to check the interior of the box. The kit includes 182 parts (169 parts for the Ah-1G and the rest for the landing mat). The rivets are raised on the rotor tail as it should be. Checking the interior parts of the cockpit it includes detailed instrument panels and controls. The clear canopy allows for an open or closed display, and some mask templates are provided (nice touch). However I would prefer to get some from Art Scale! You will need to sort out some seatbelts as this cockpit is quite open even with the canopy close and at least a seatbelts are most welcome as they are very notice if absence. One really nice add is the towing rack to gives you some diorama ideas. I also like the option of the service doors for the engine compartment. It`s just asking to to be detailed… so if you want you need to get some goodies form the aftermarkers boys. As for the armament and their configuration, ICM gives several weapon configurations (4 actually), including miniguns and grenade launchers. There`s also decals provide for the weapons but the instructions are not clear at all in the placement of smaller decals so you will have to get some info and pictures about those. As for the decal sheet is a quite busy but no large size sheet, with all the markings, insignias, instruments and several stencils. The colour and pigmentation looks quite good. I think that they are ICM productions and they usually work well. There are four options on the decal sheet, all but one in light green-grey, differentiated by their unit markings, the final markings having a dense dark green squiggle camouflage scheme over the green-grey. From the box you can build one of the following: 1. AH-G1 66-15262 “Hulk”, Company D, 227th AHB, 1st Cavalary Division, Phuoc Vinh, Summer 1970; 2. AH-G1 68-17068 “Cindy Ann”, 1st Squadron, 9th Cav, Phuoc Vinh, August 1970; 3. AH-G1 68-17077 “Corsair”, Company D, 227th AHB, 1st Cavalary Division, Lai Khe 1970; 4. AH-G1 68-15101. H Troop. 10th Cav. Pleiku, Autumn 1972 The instructions is a booklet with good drawings, simple to follow and see where all parts goes as usual with the minor report about the weapons decals. The first 3 pages and the last 3 pages are in satin paper. It`s usually like this and I don’t understand why and I don’t see any reason for that. The colour indication. So, all the colour indication are ICM references. There`s not much colour indication (could be better) and the ones that are, are ICM color… I now that ICM already release several acrylic paints and they really work really well but I would like to see other brands but I understand the ICM option. As for the Landing mat, check our review here. Conclusion: The molding quality is excellent, with well-defined panel lines and raised rivet details as it is a great model from Special Hobby and in good time ICM rebox it. A very versatile weapon loadouts and display options is a very good add and I love the markings options given, being quite appealing ones. So you can get a really nice model straight from the box (you really need to sort out some seatbelts) Overall, the ICM 1:48 AH-1G Cobra is a well-designed kit offering an excellent balance of detail and build complexity, making it ideal for both intermediate and advanced modelers looking for a rewarding project My Thanks to ICM for making the Limited Edition. Fran


-
(RFI) S.M. 79-II „Sparviero” 1:48 Trumpeter
Fran replied to Kriss's topic in LSM 1/48 Aircraft Ready for Inspection
Love it!! great work! -
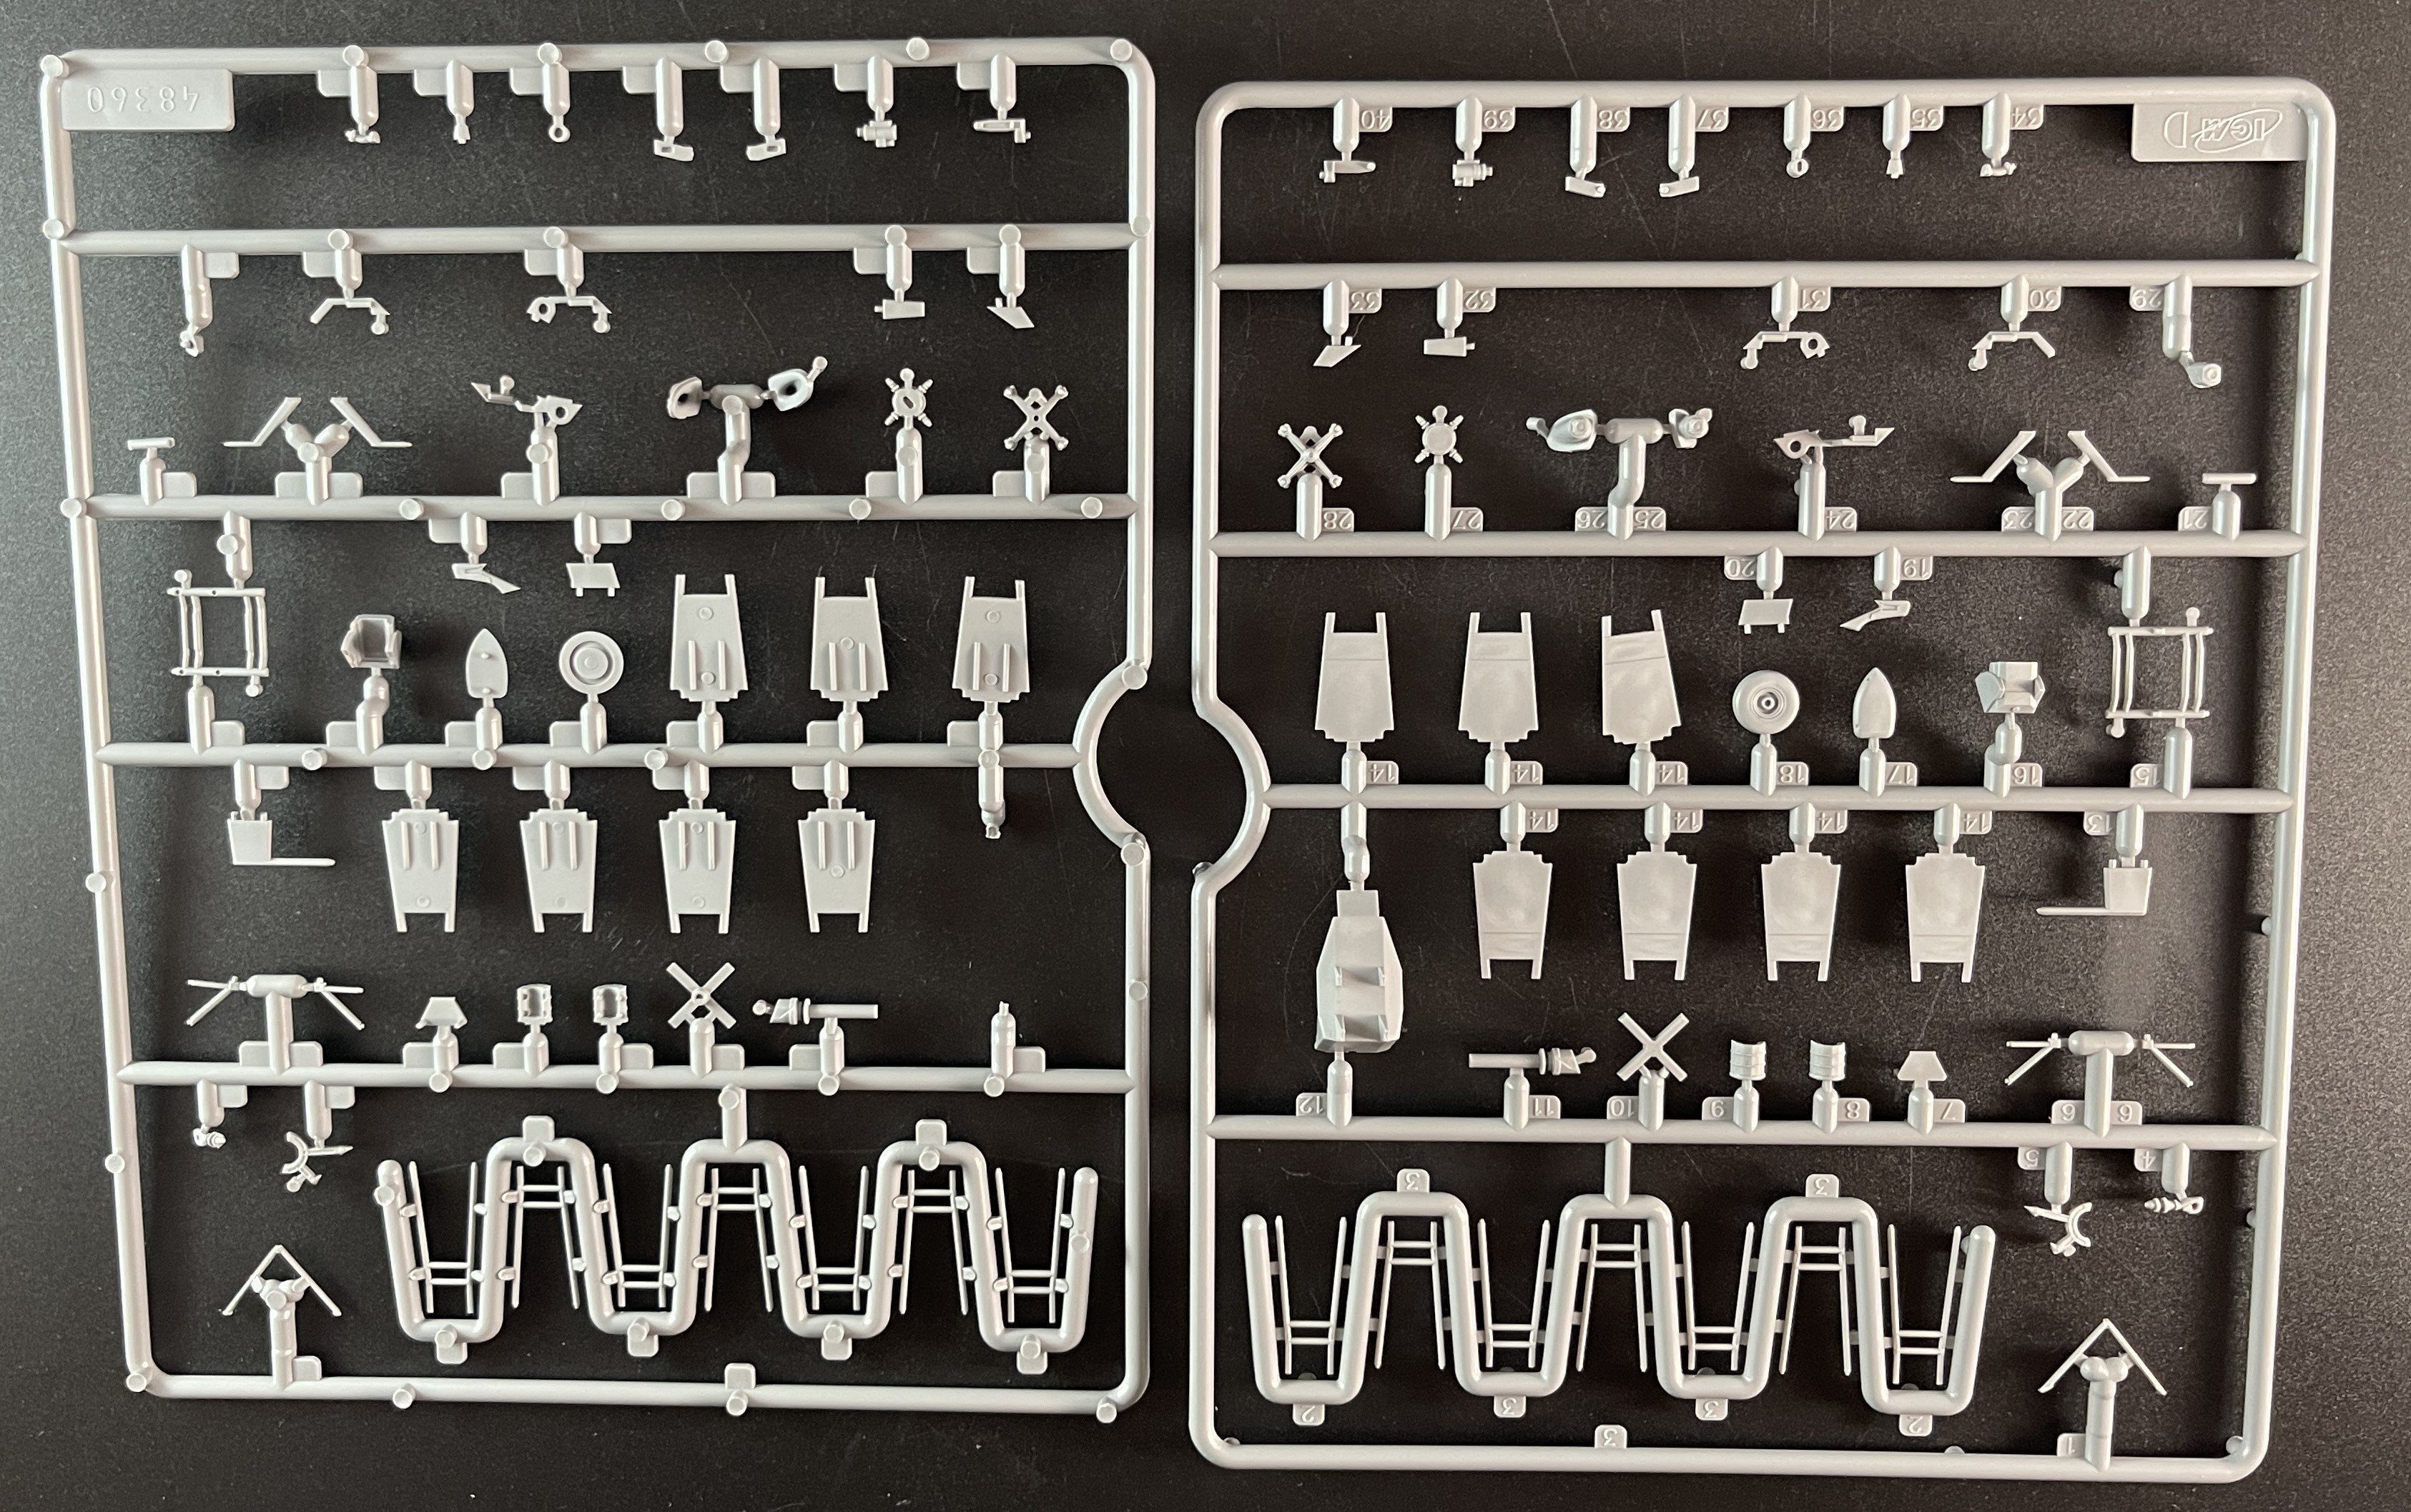
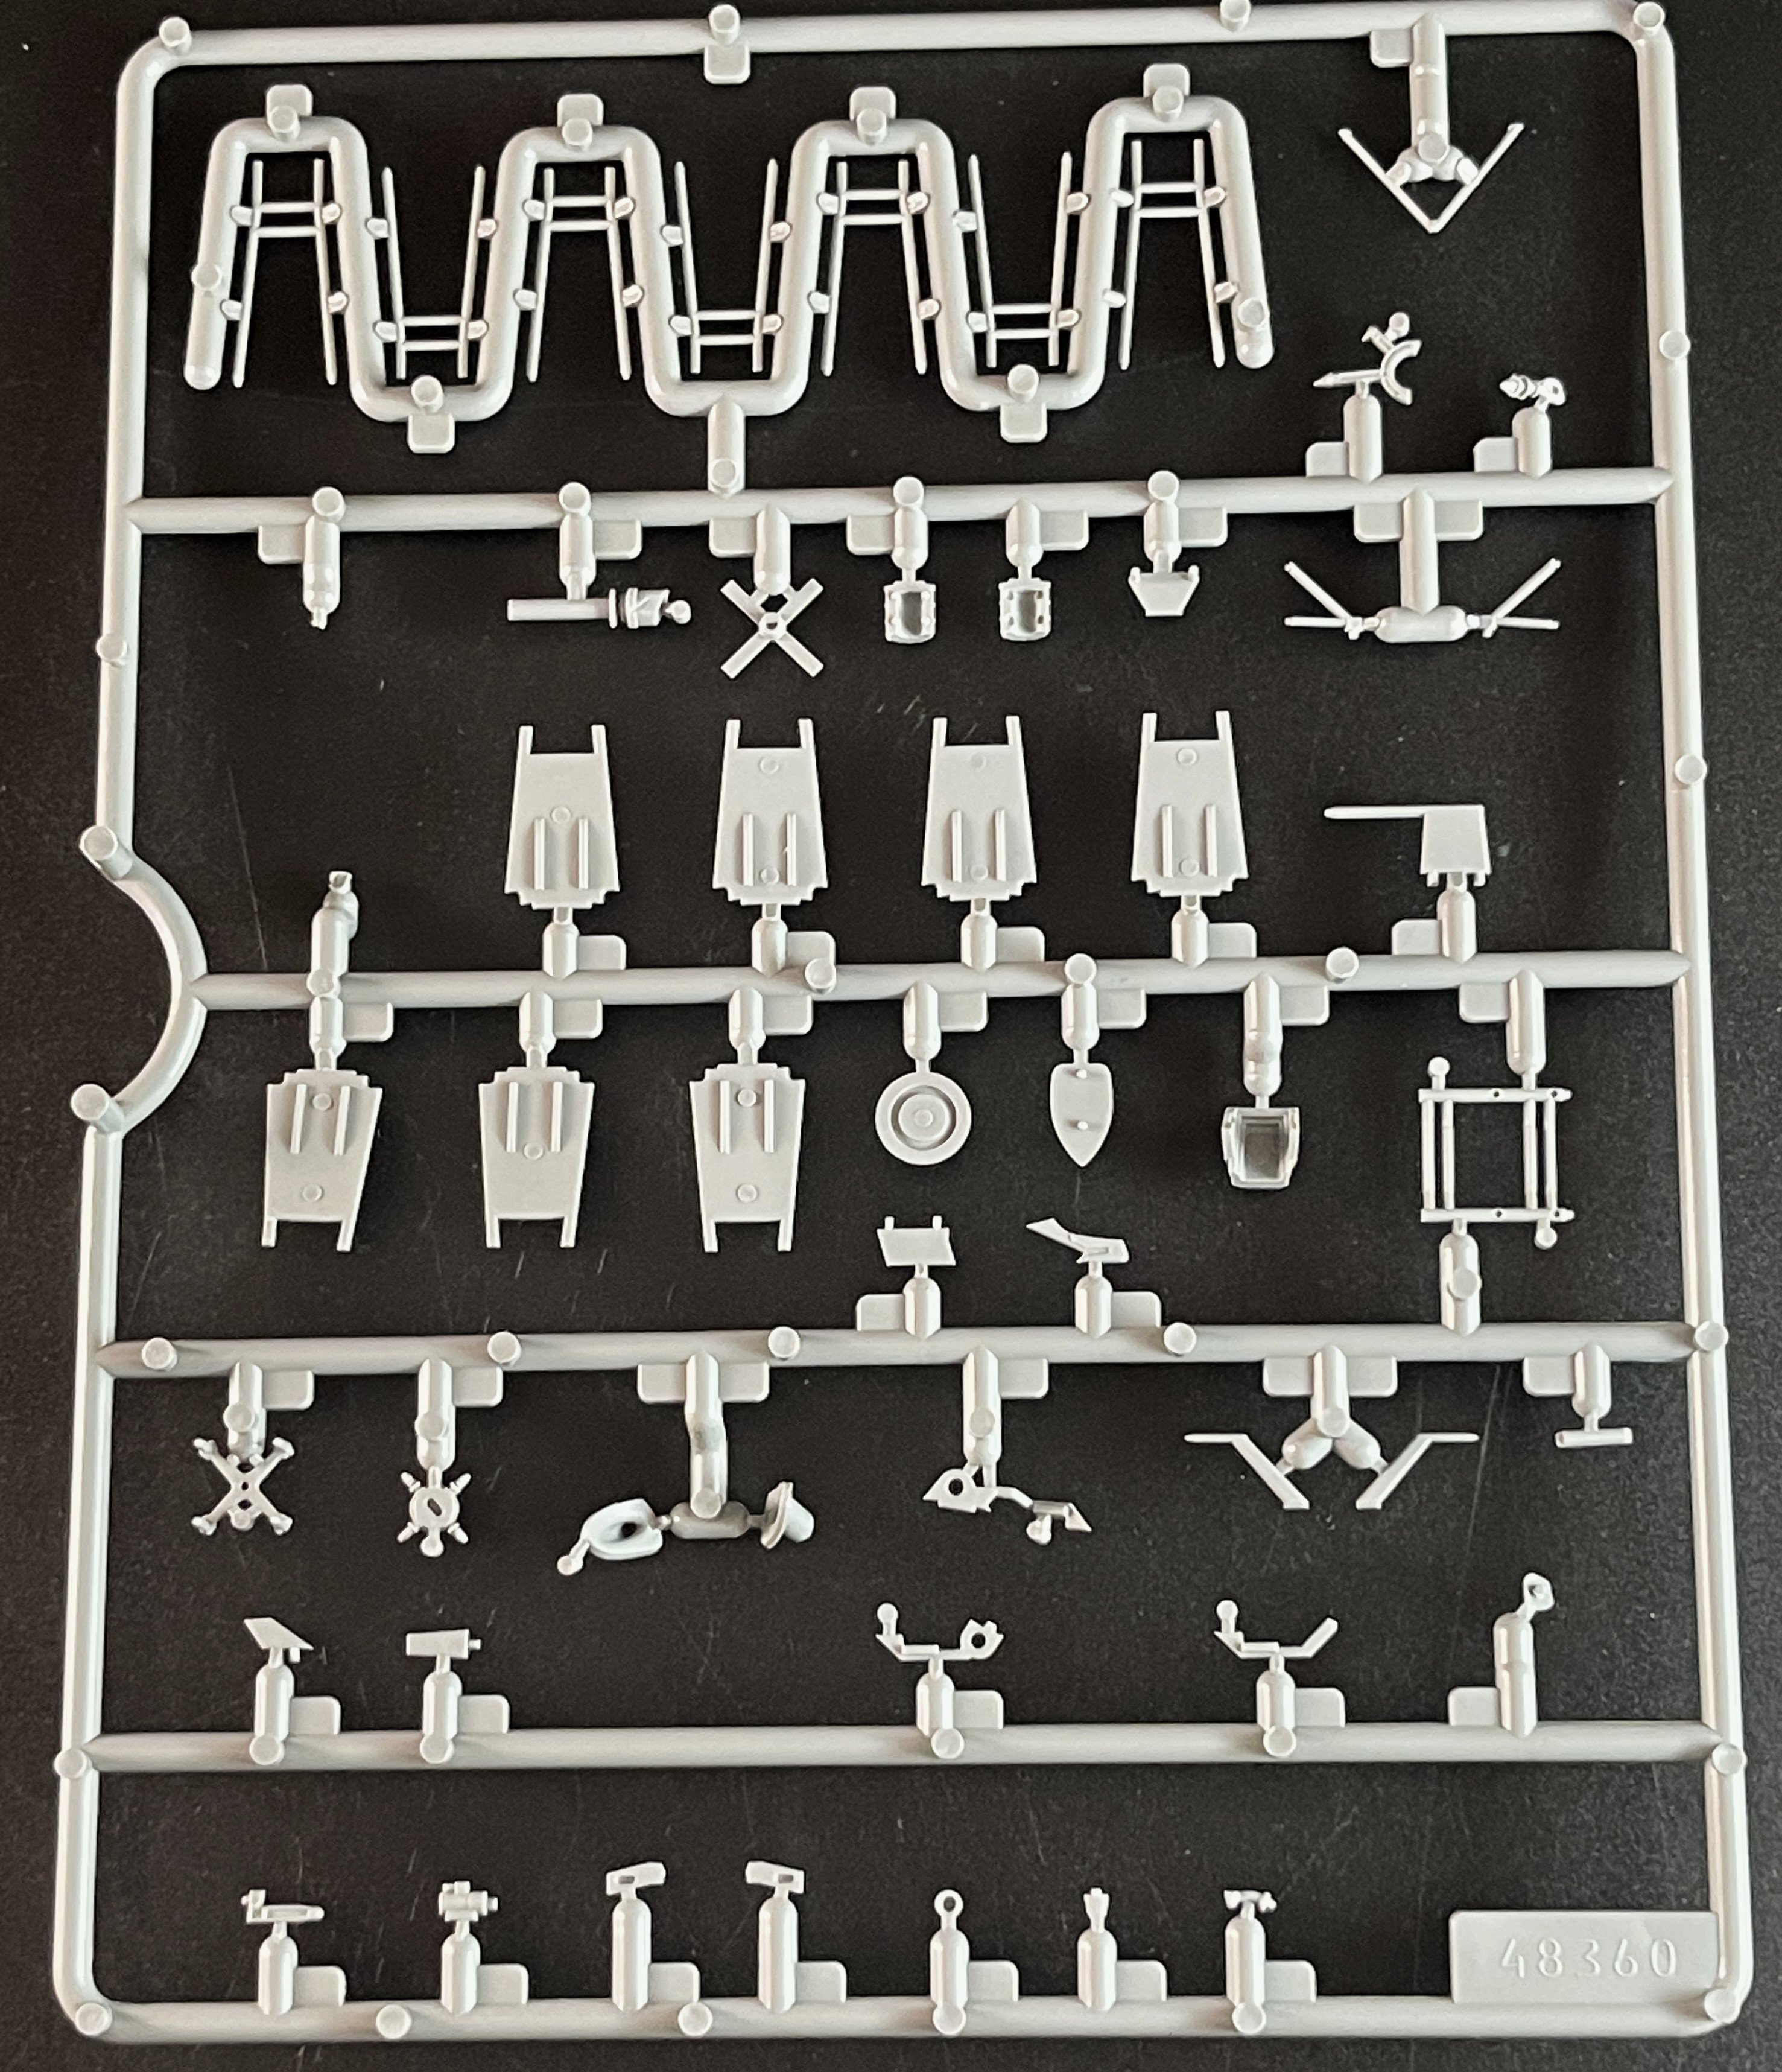
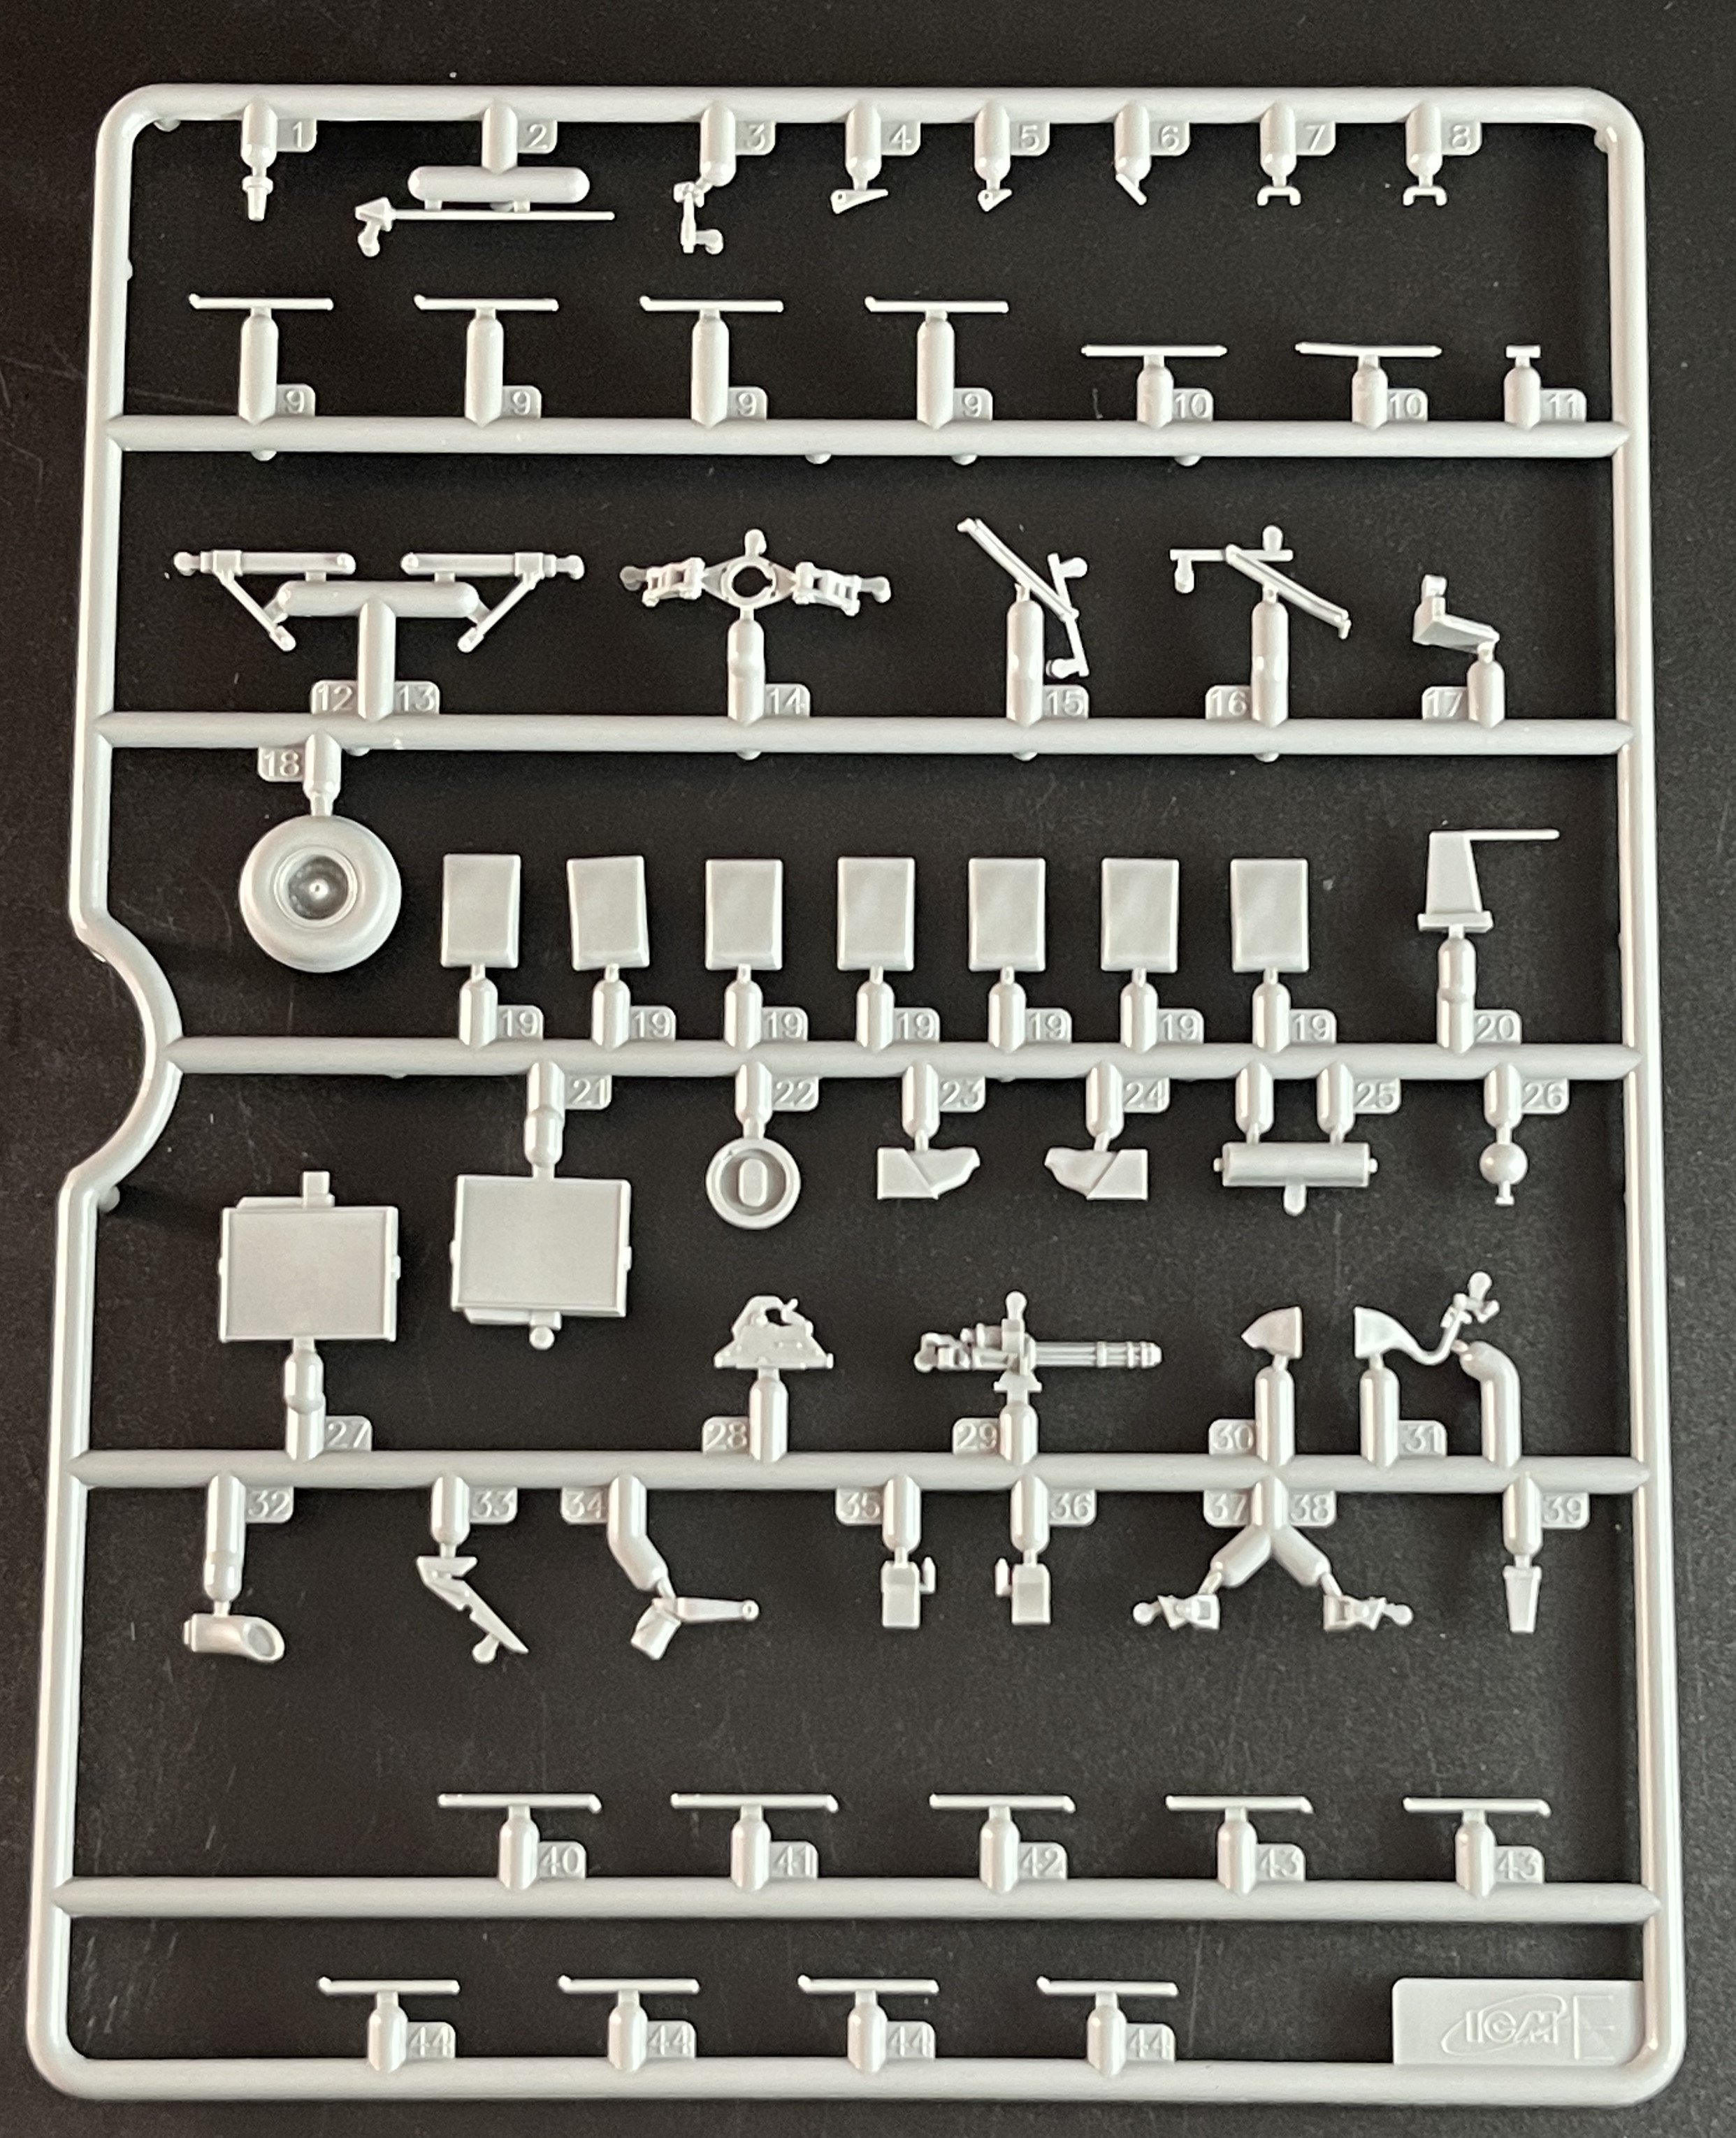
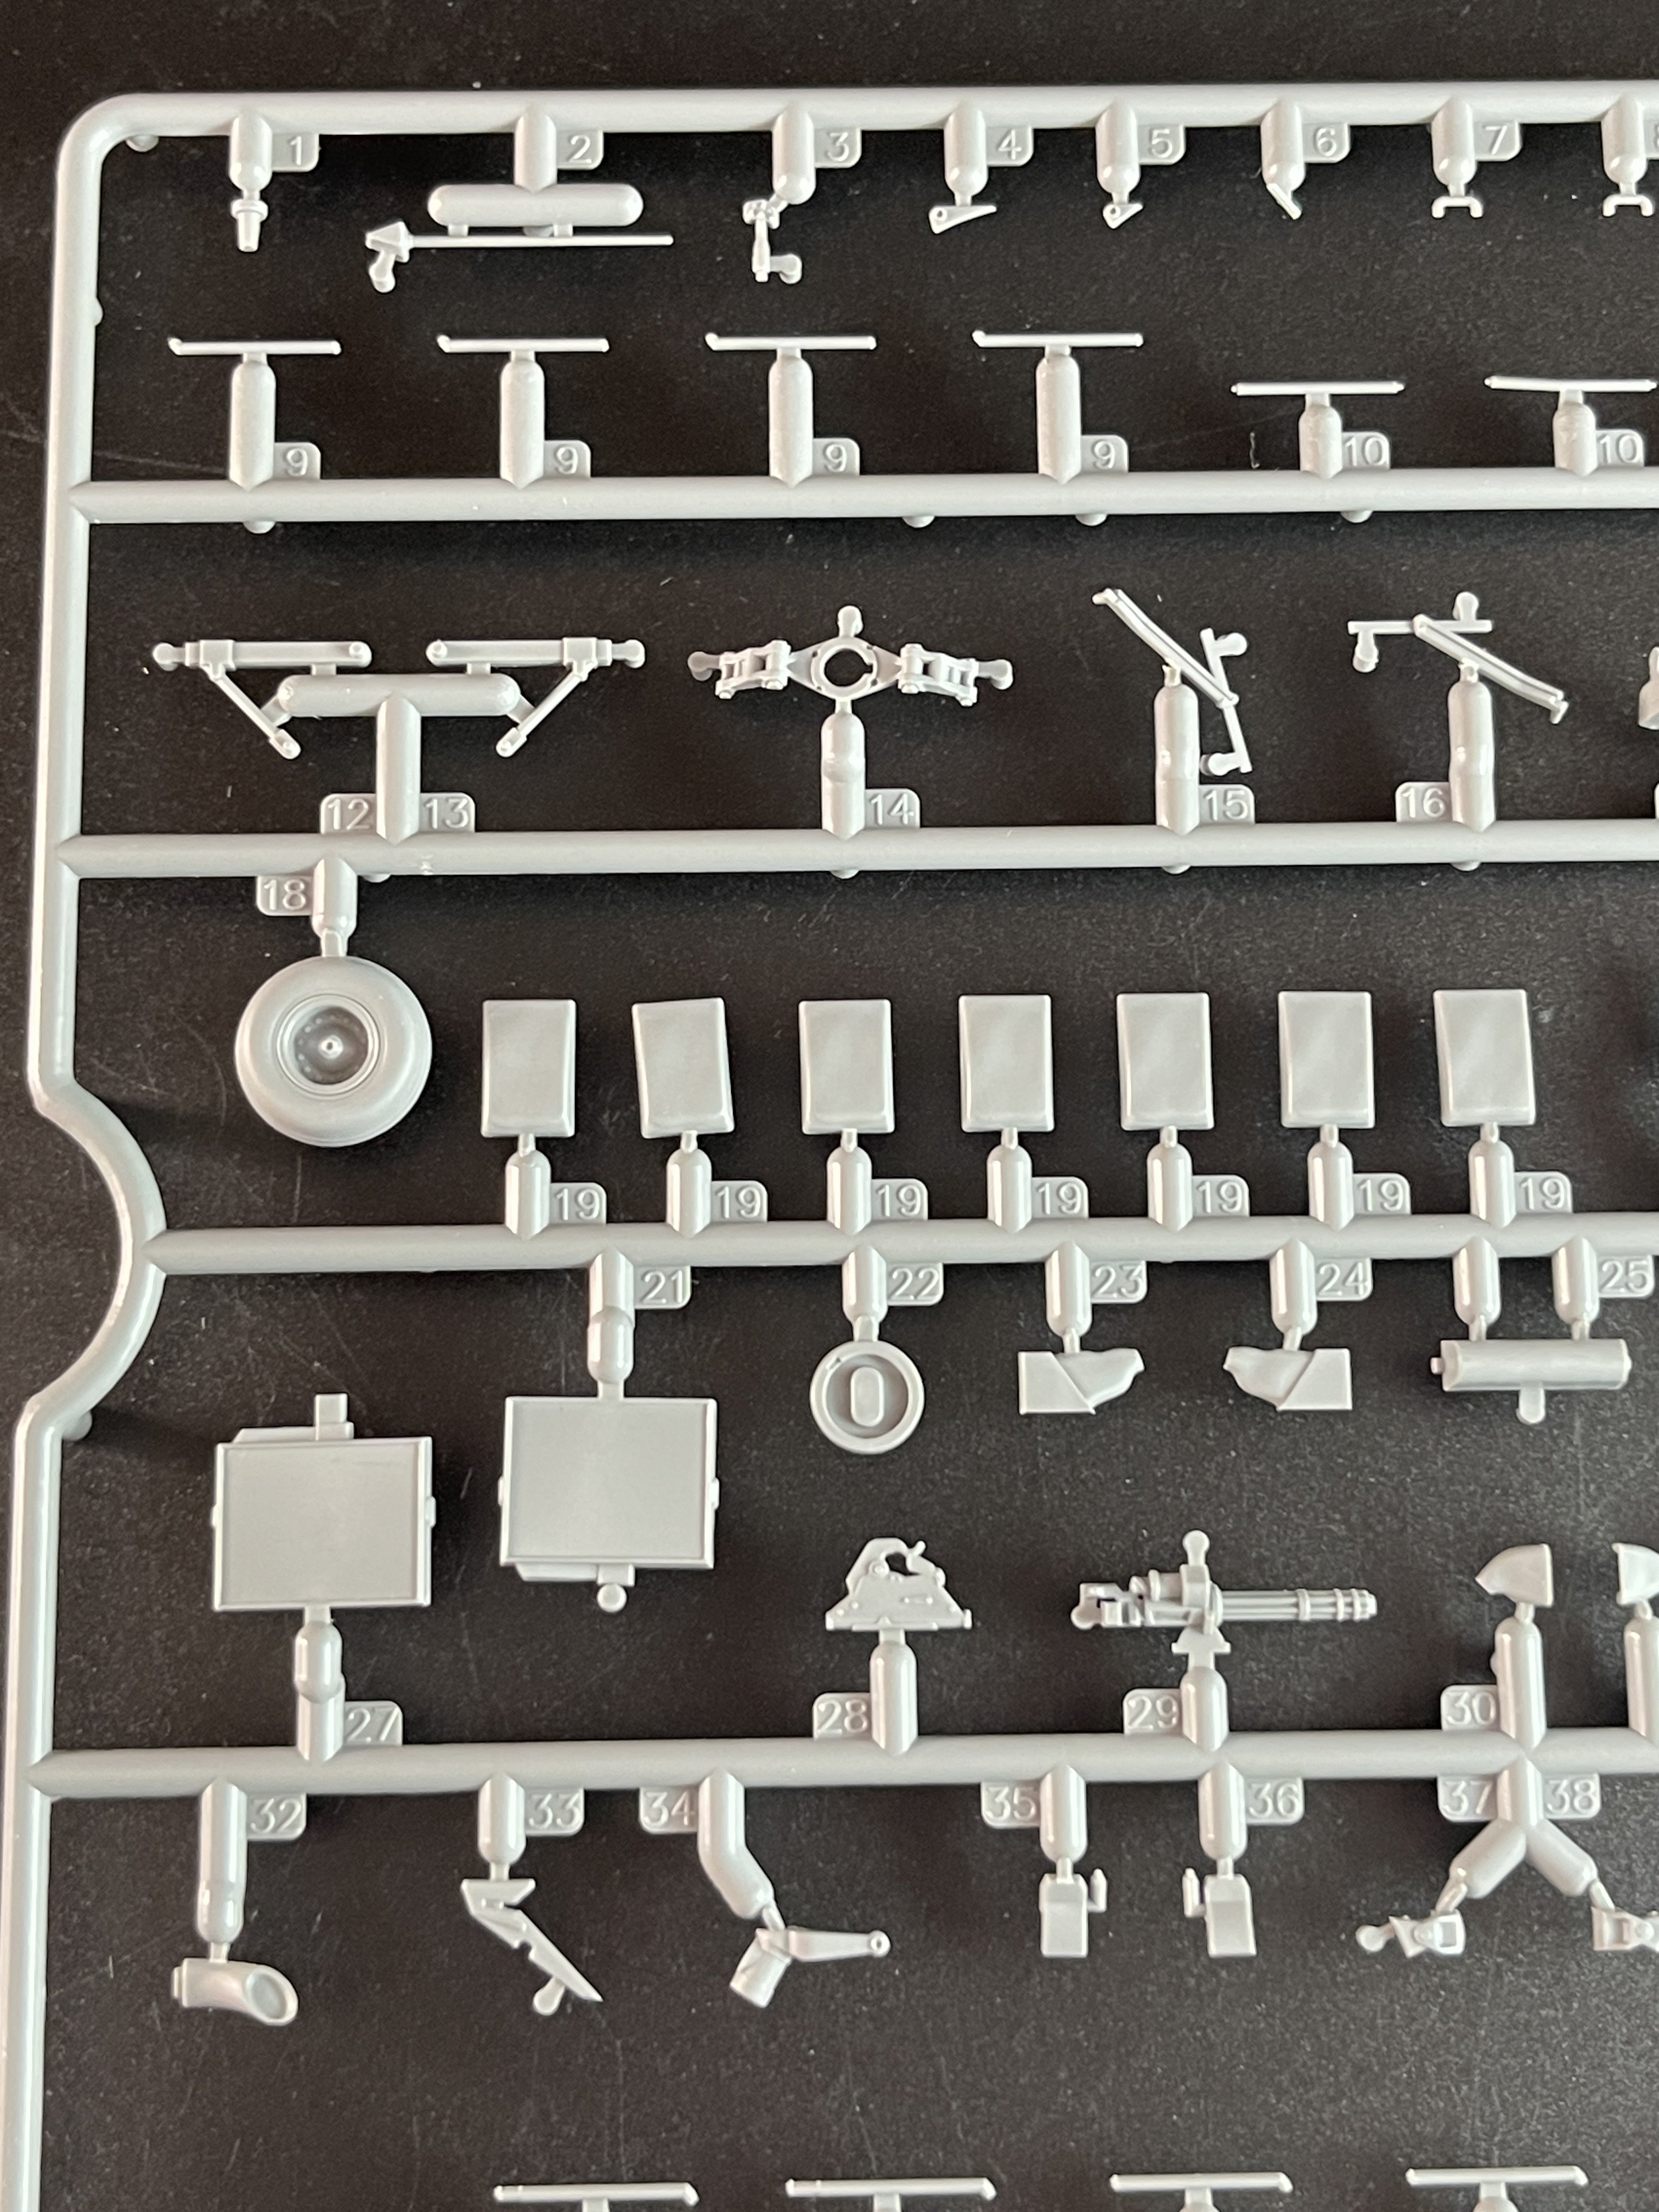
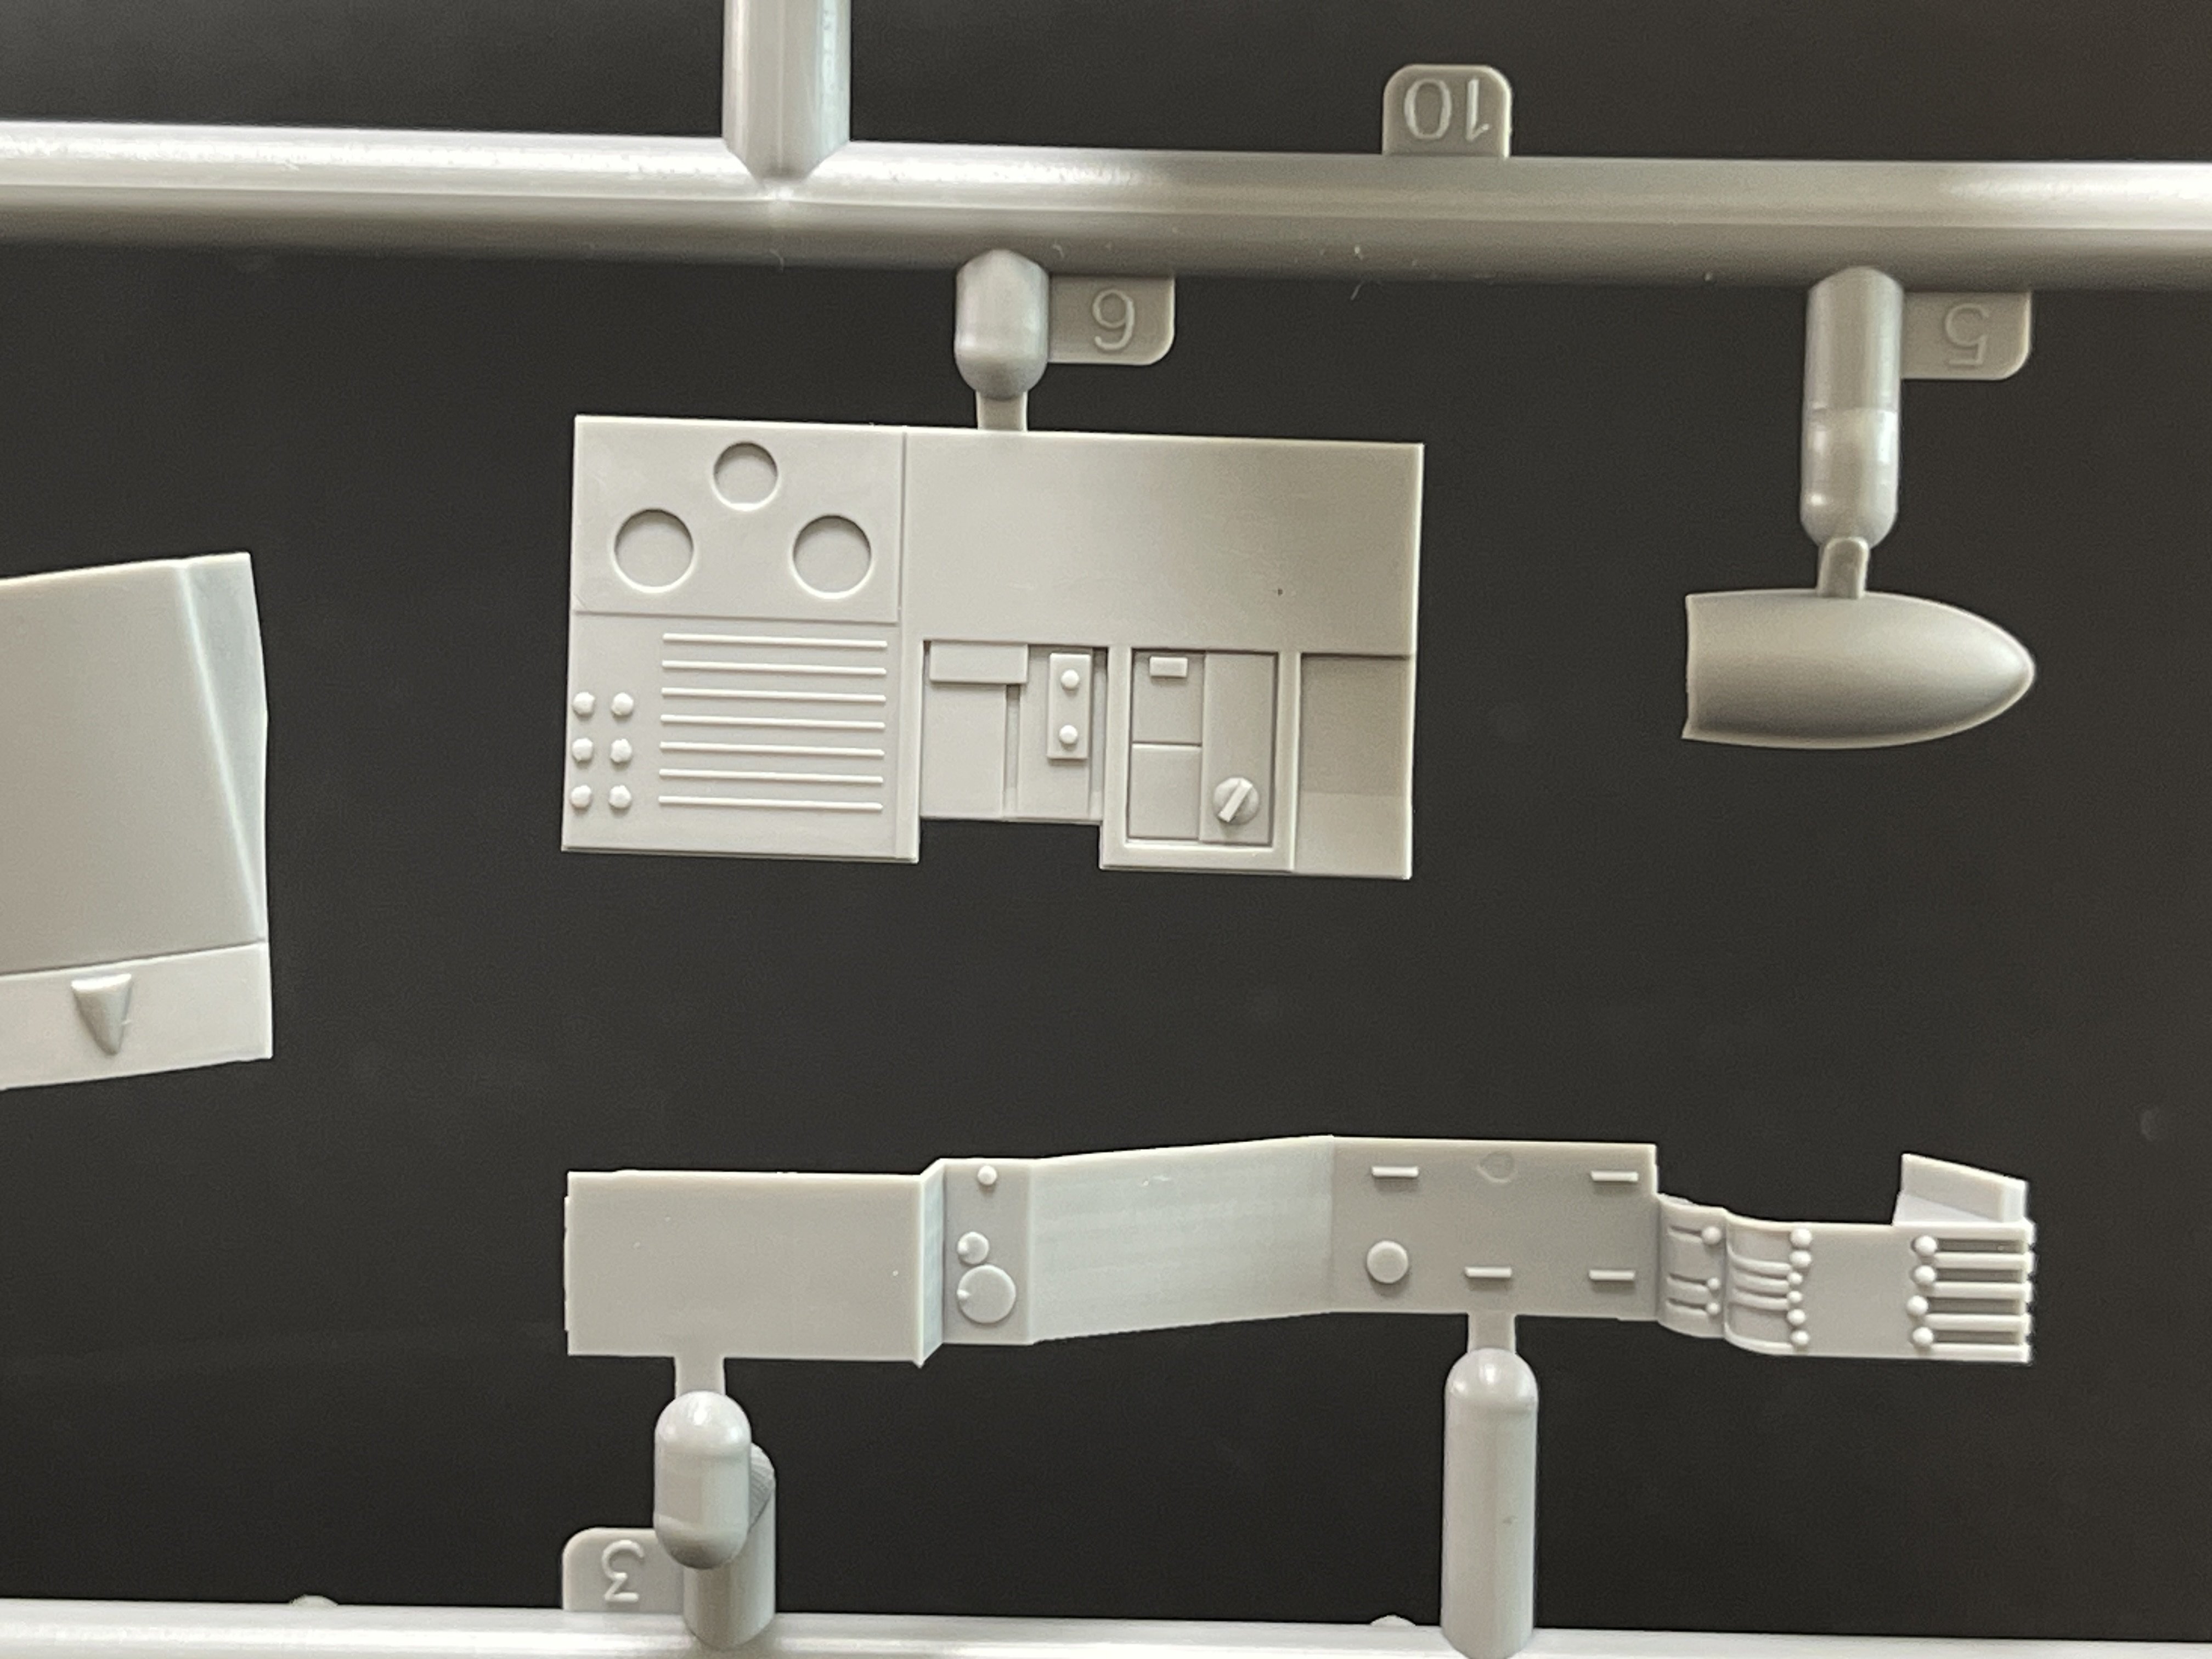
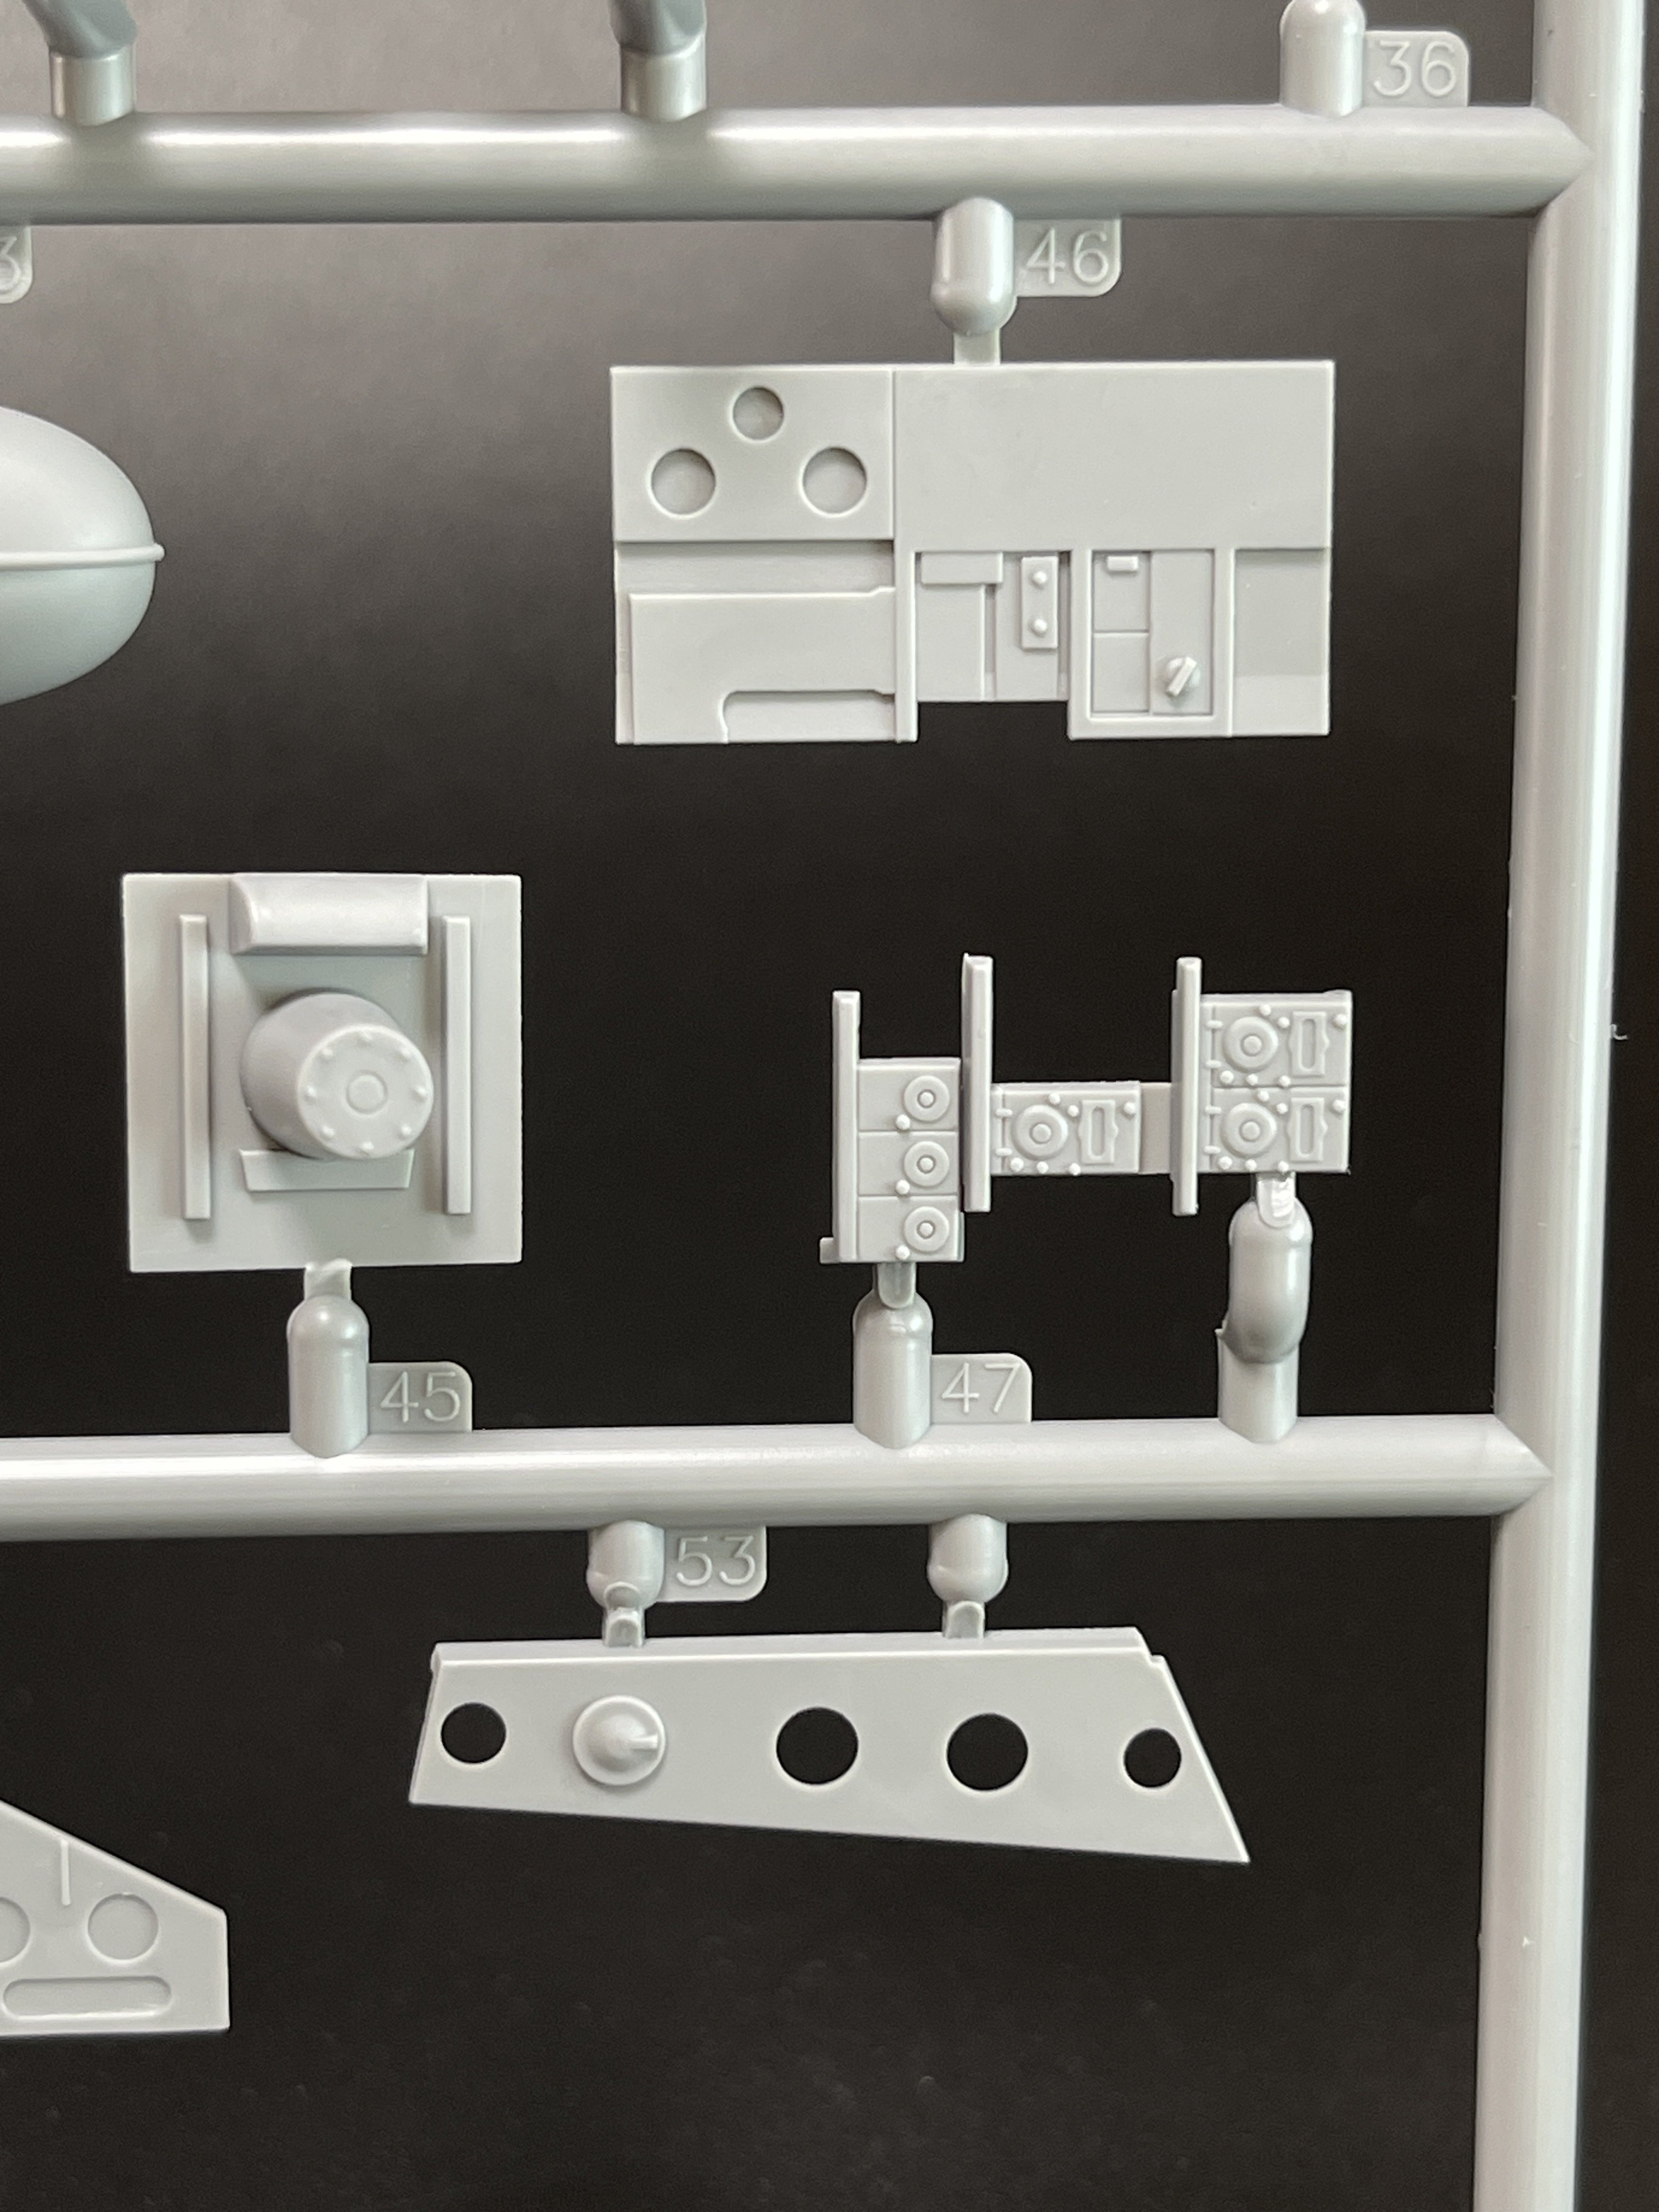
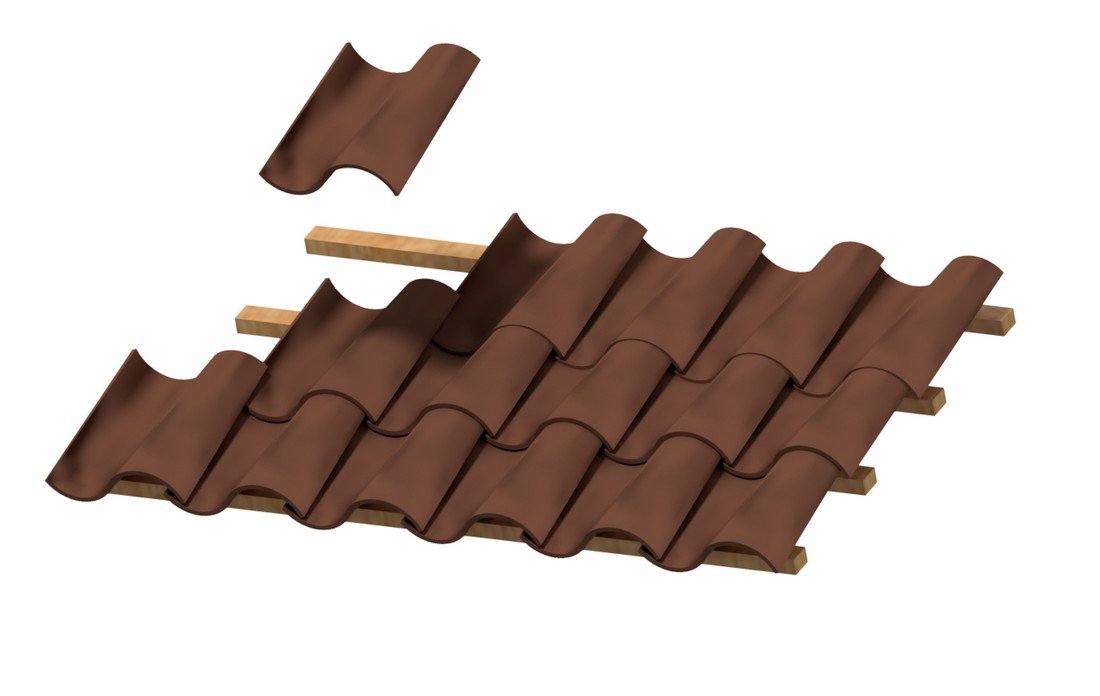
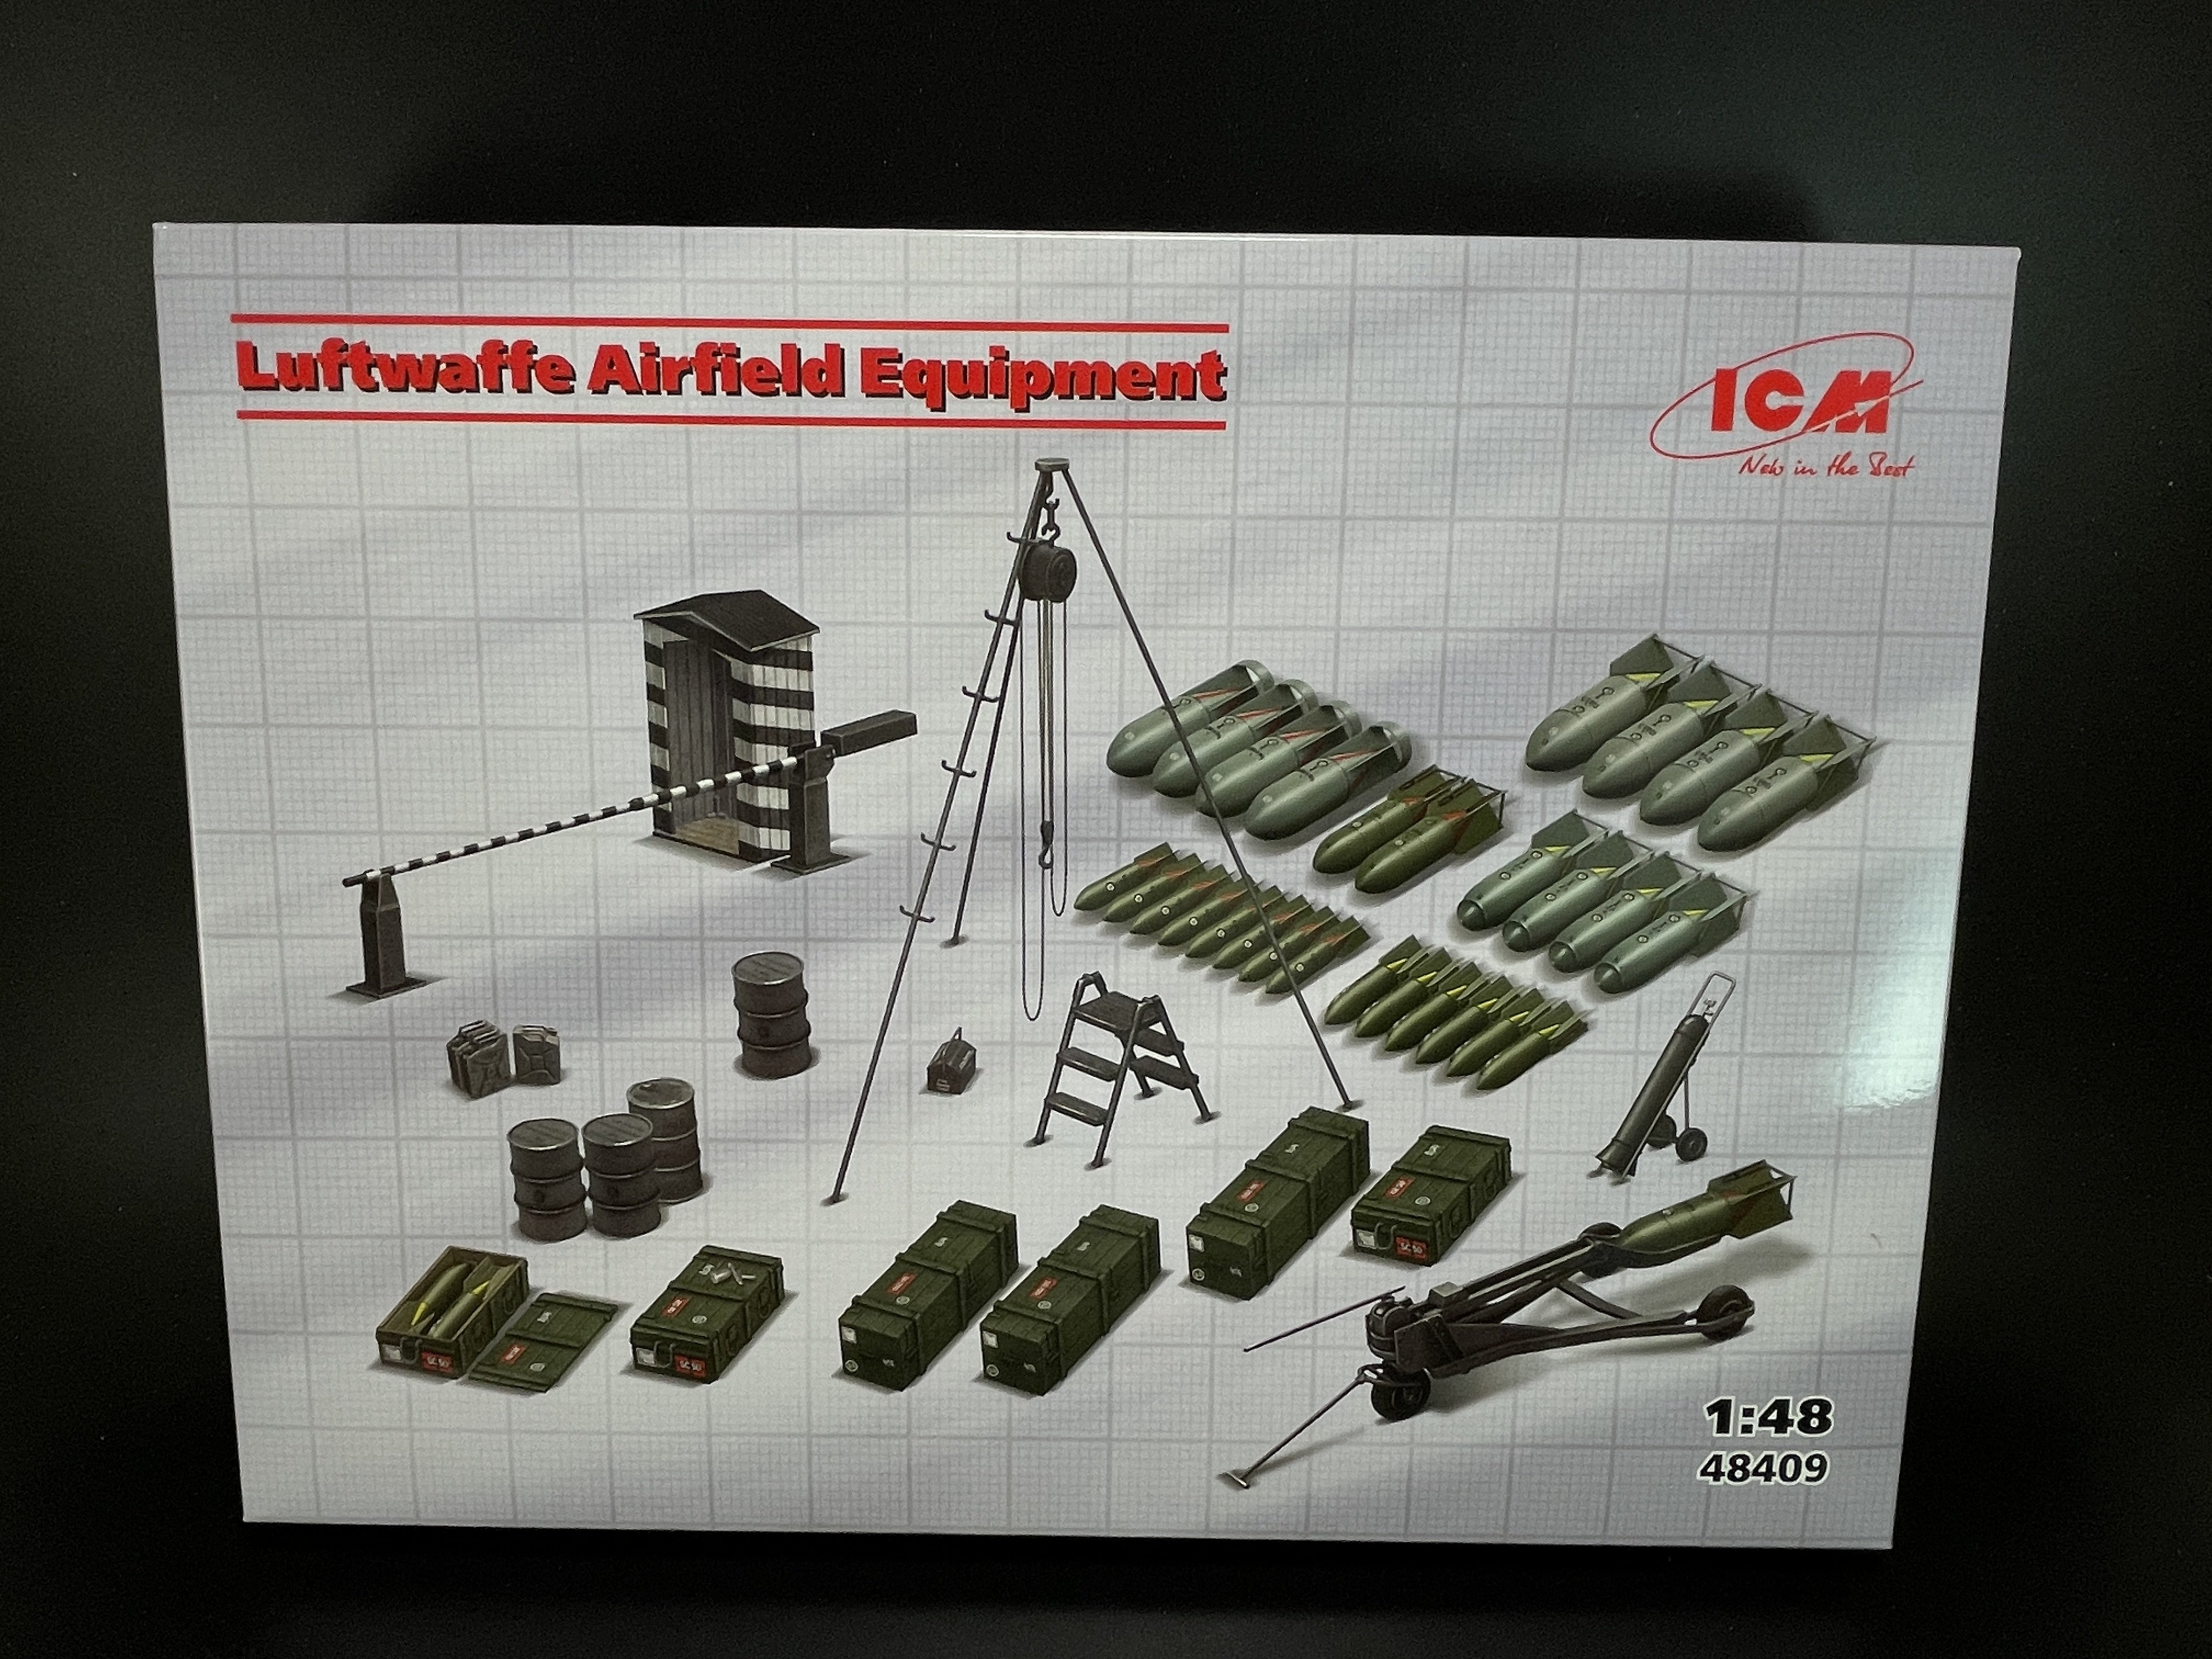
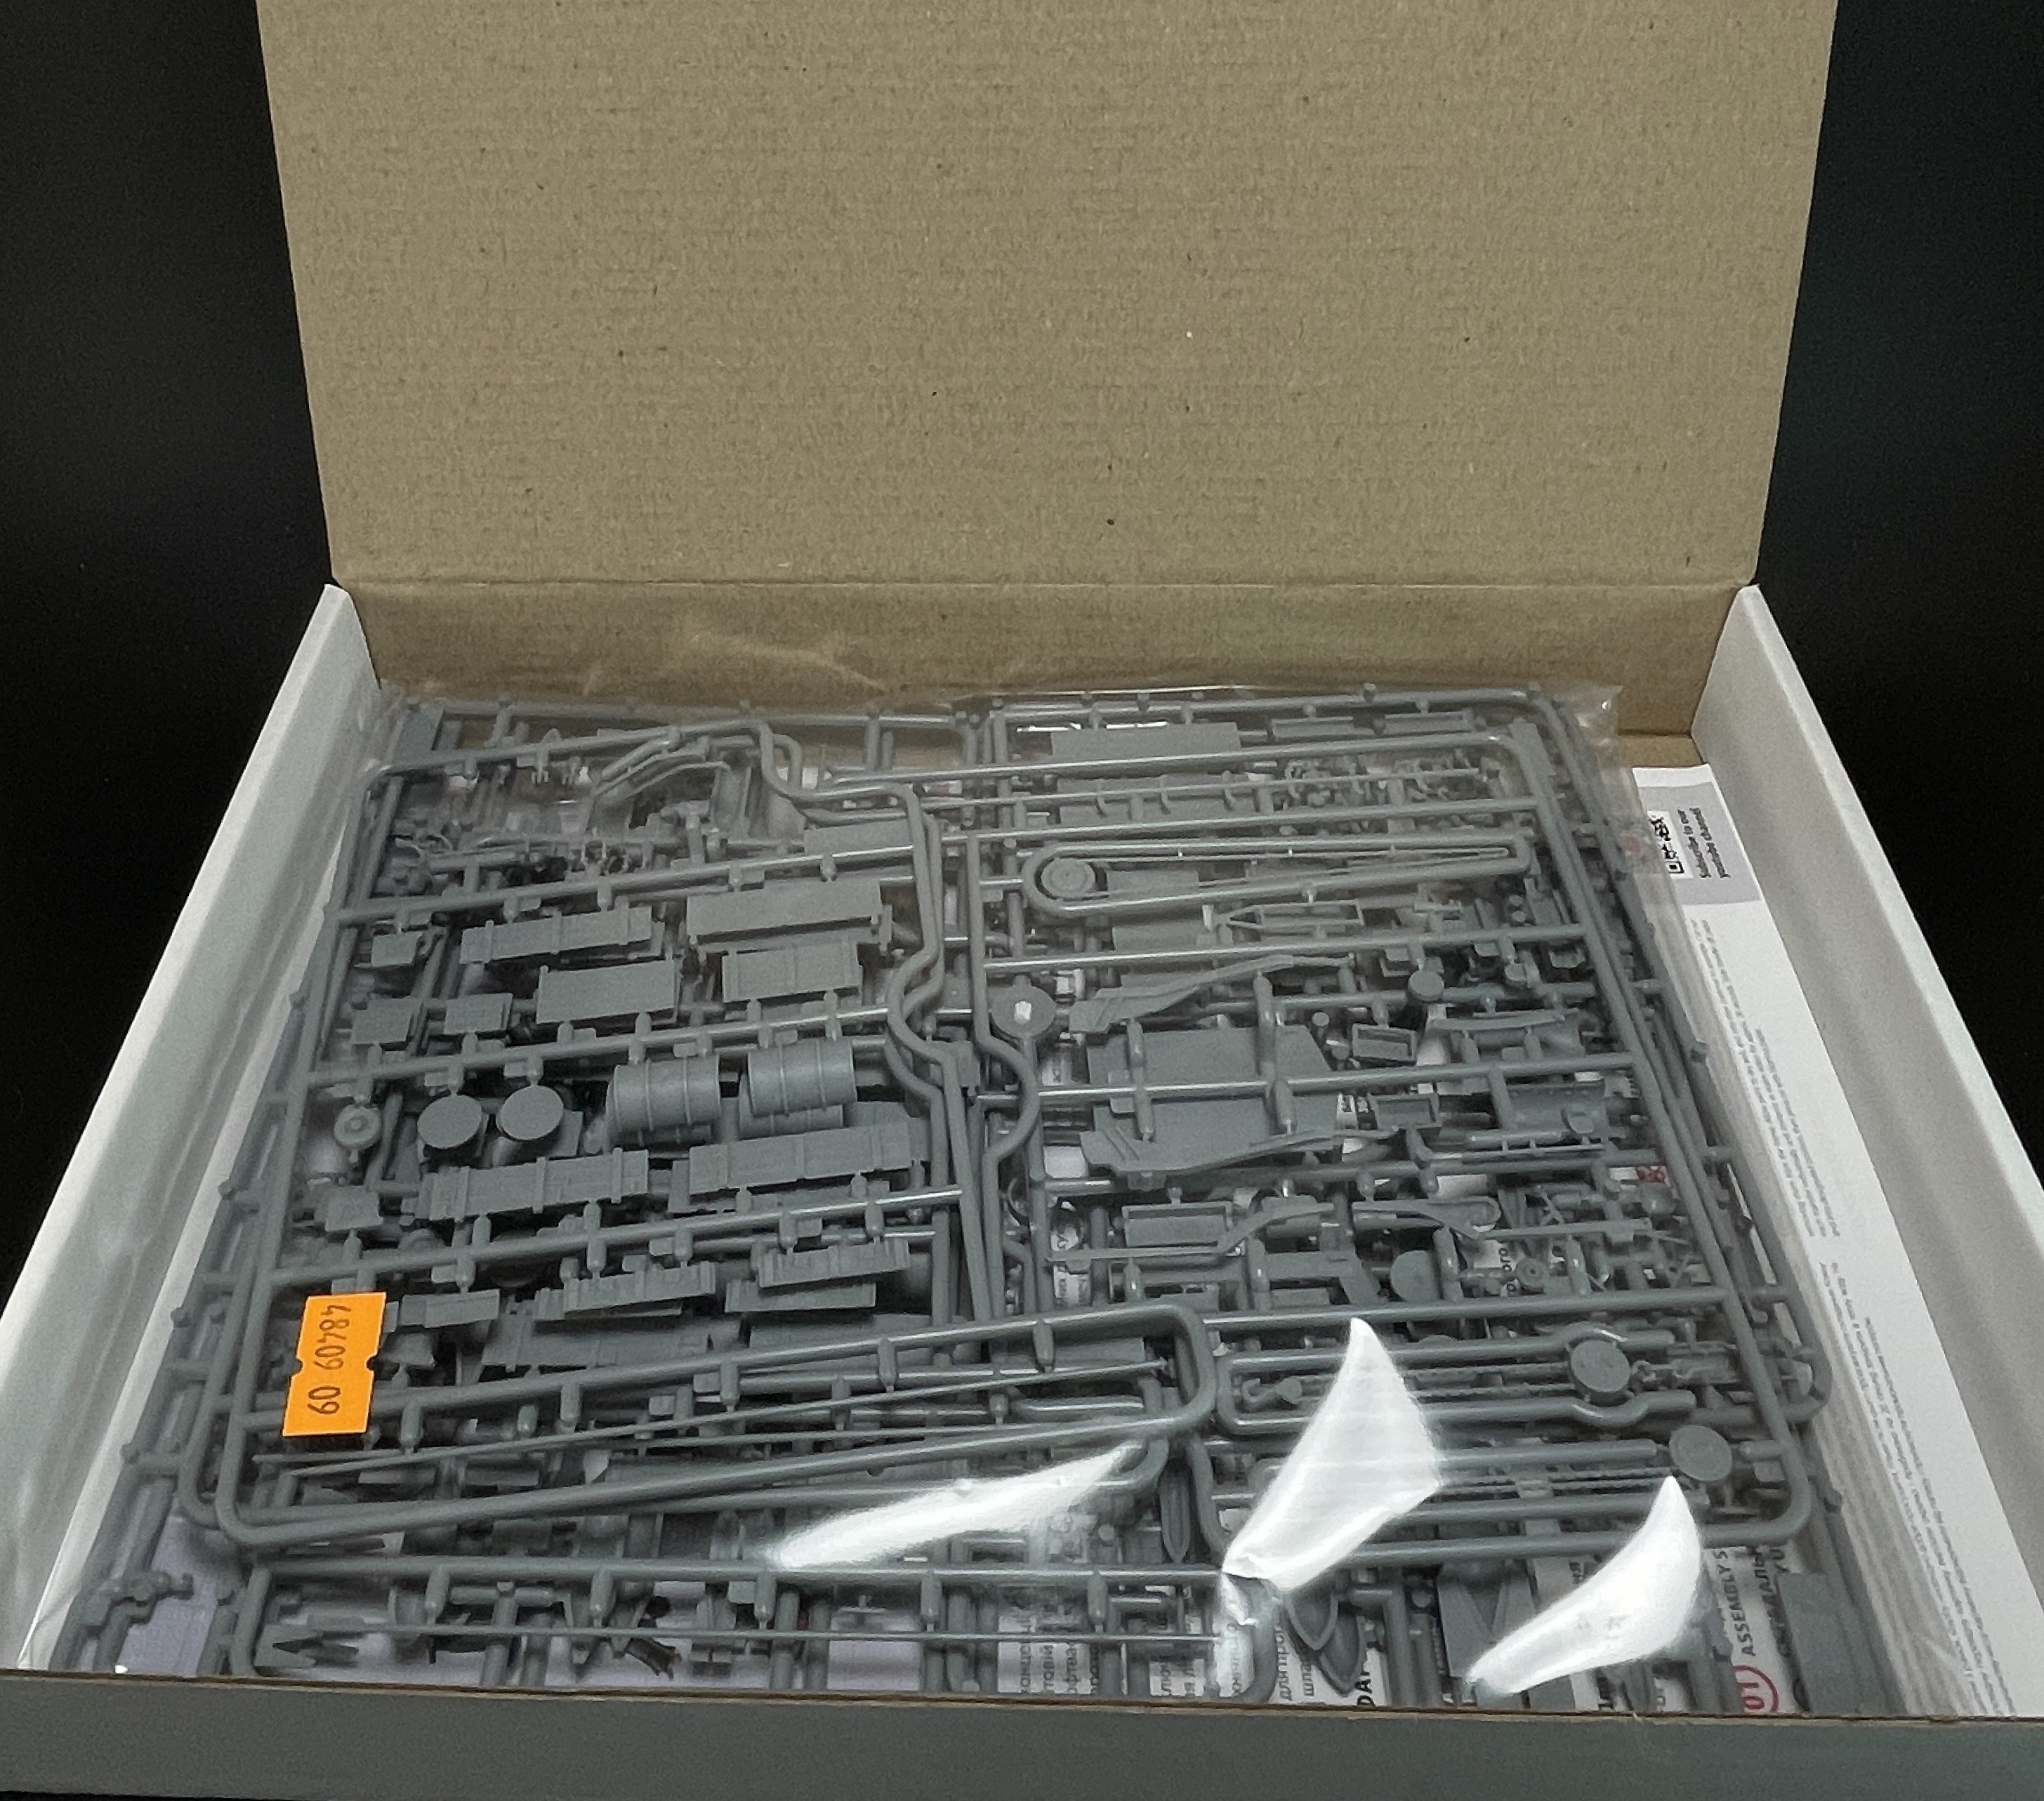
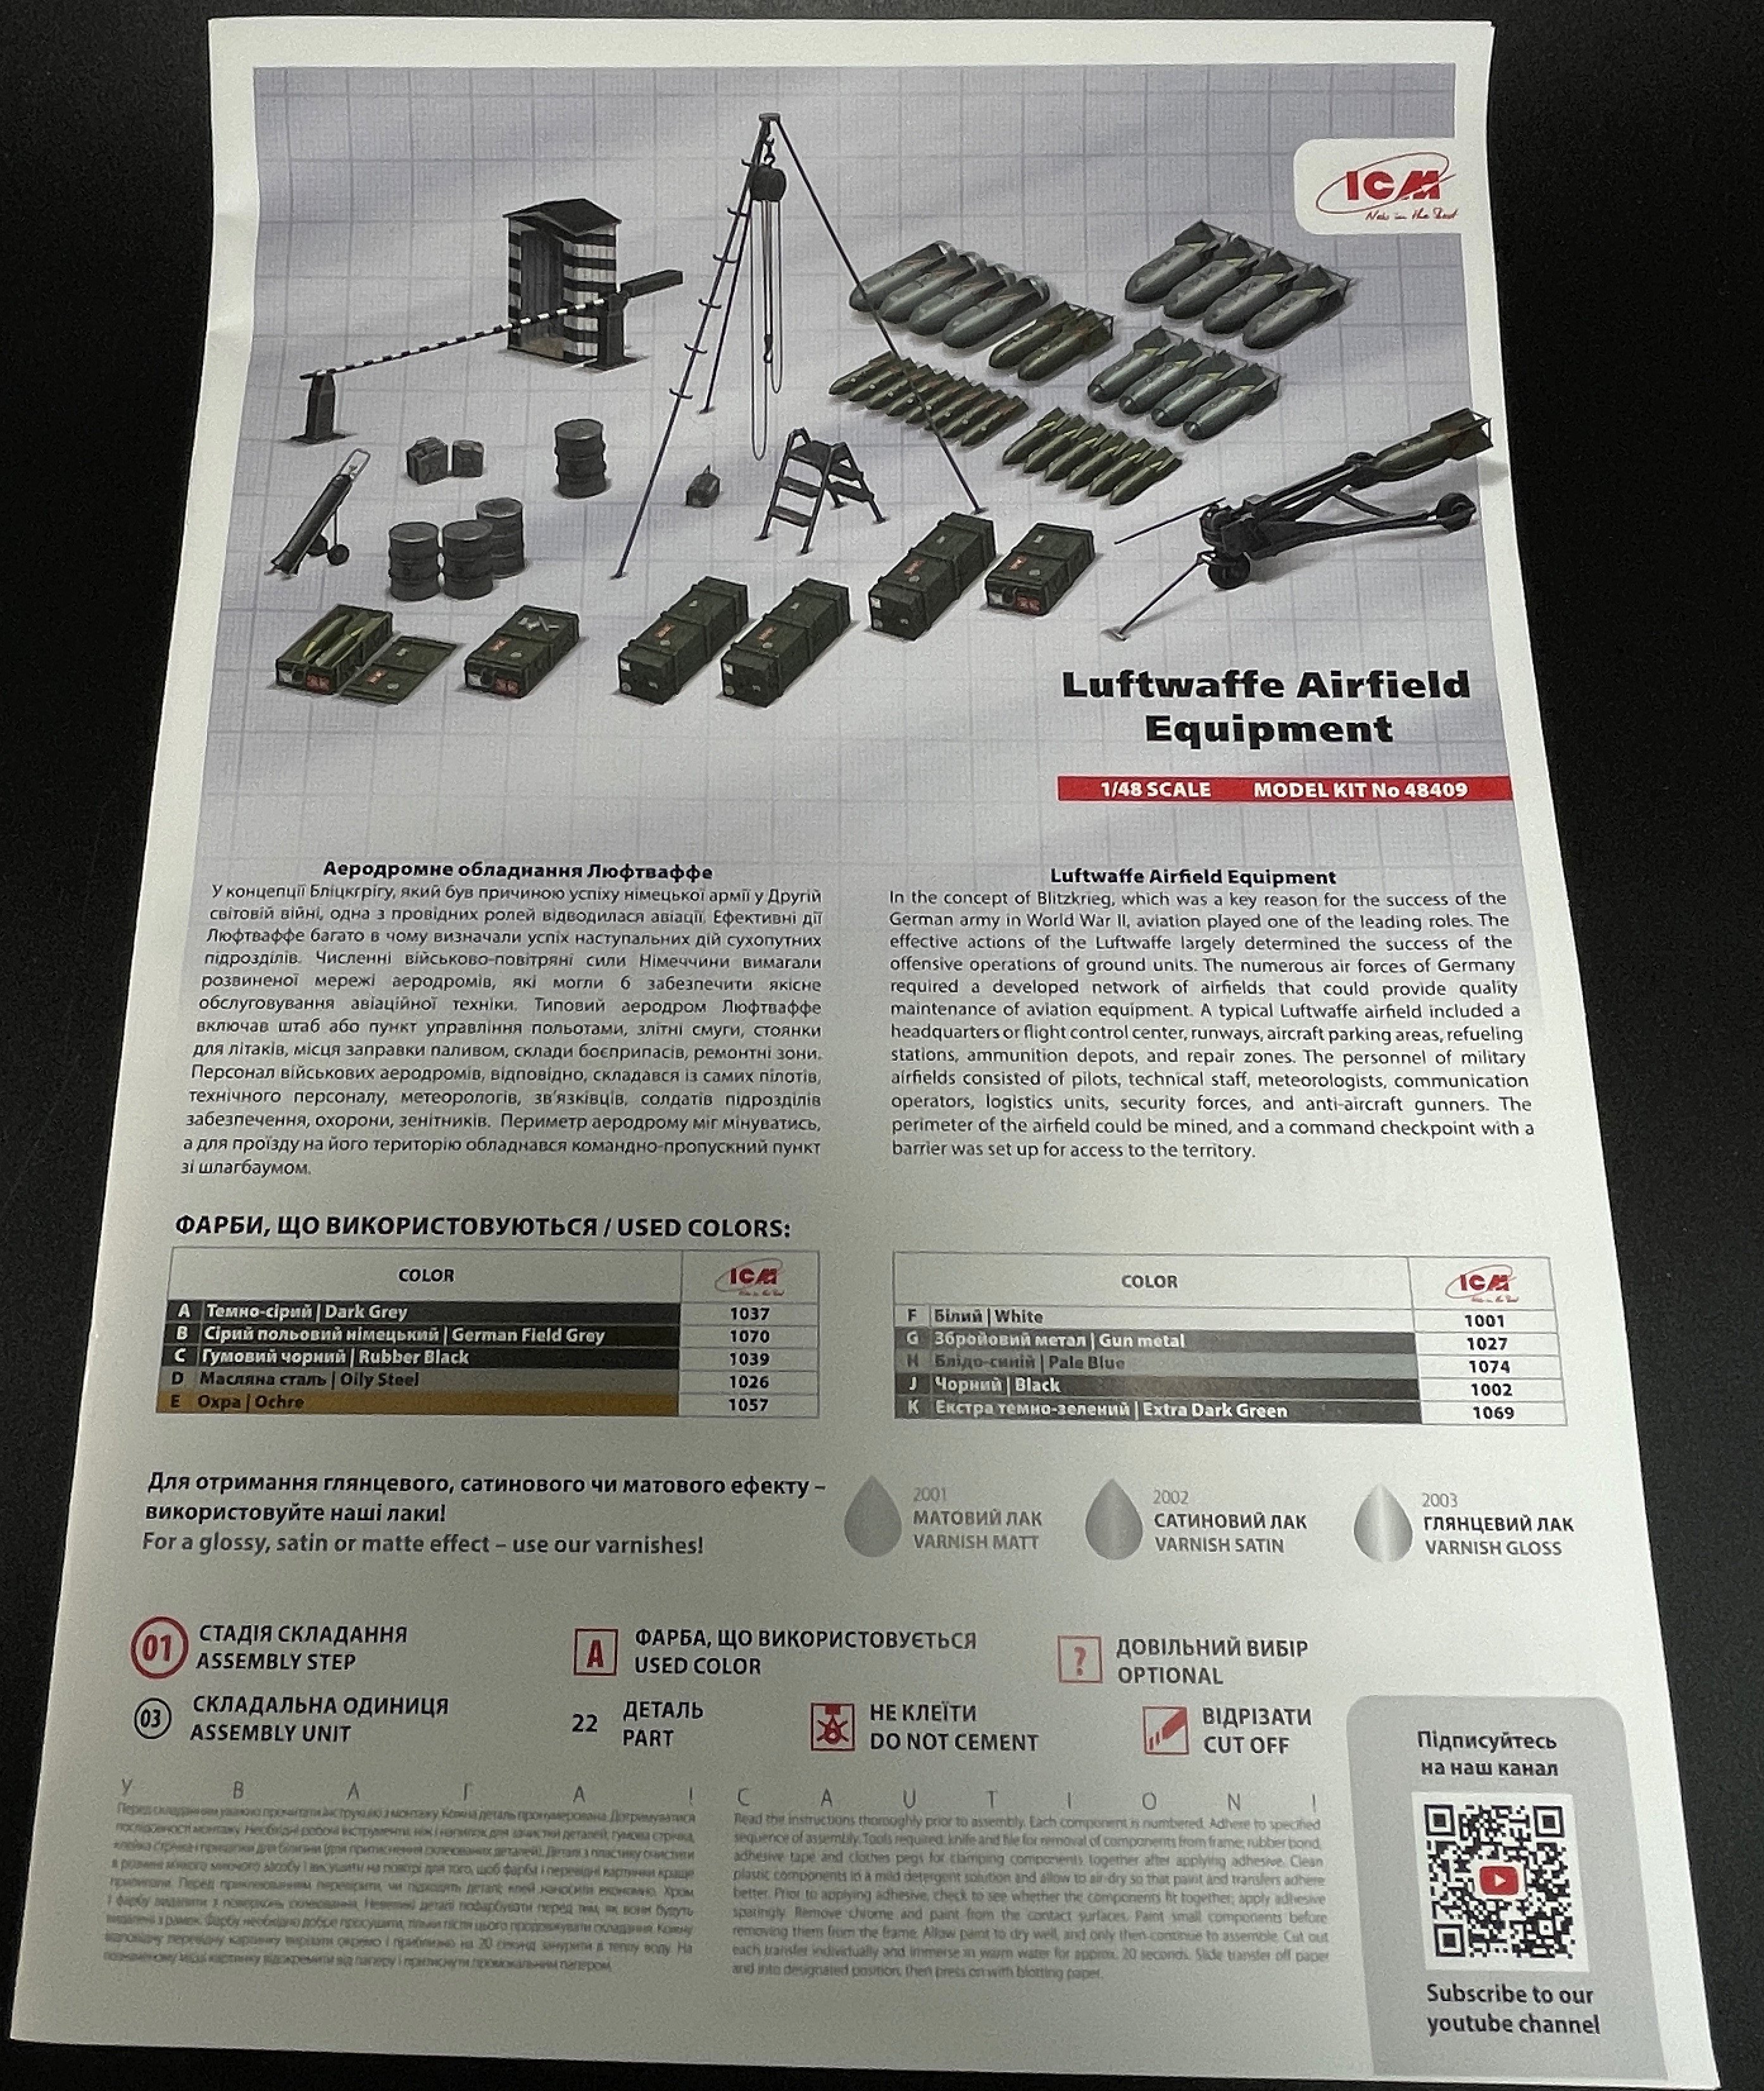
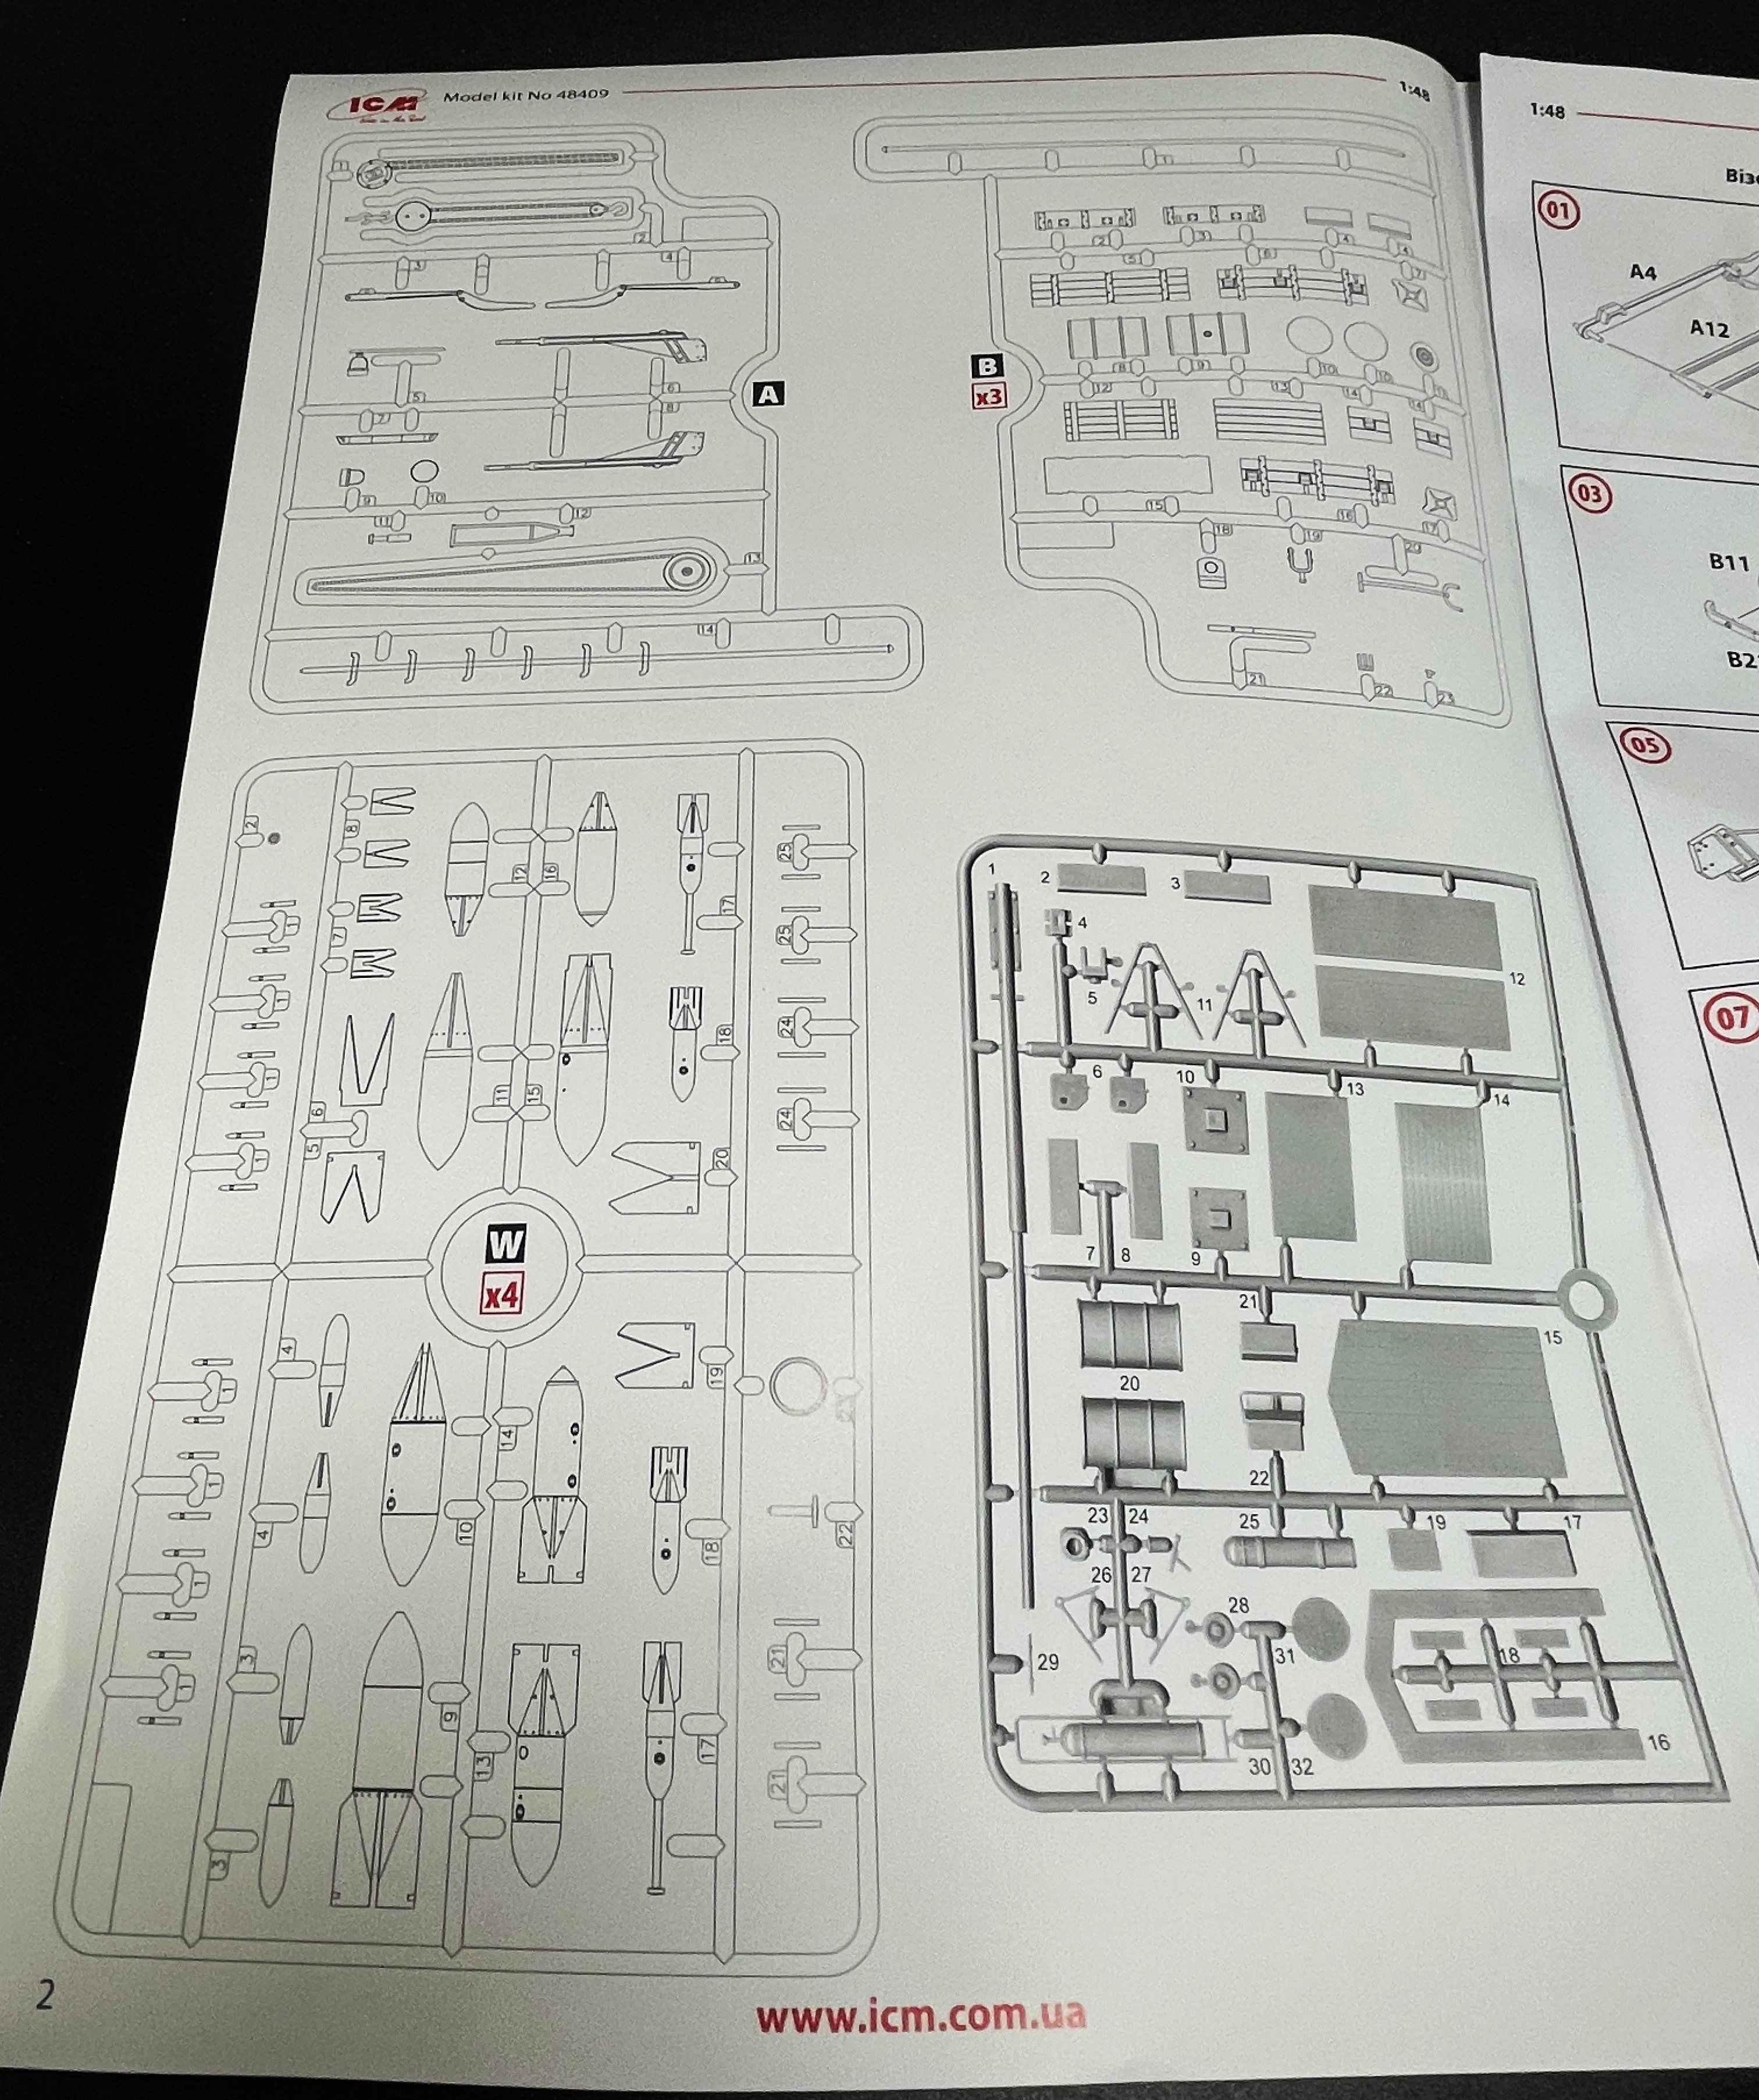
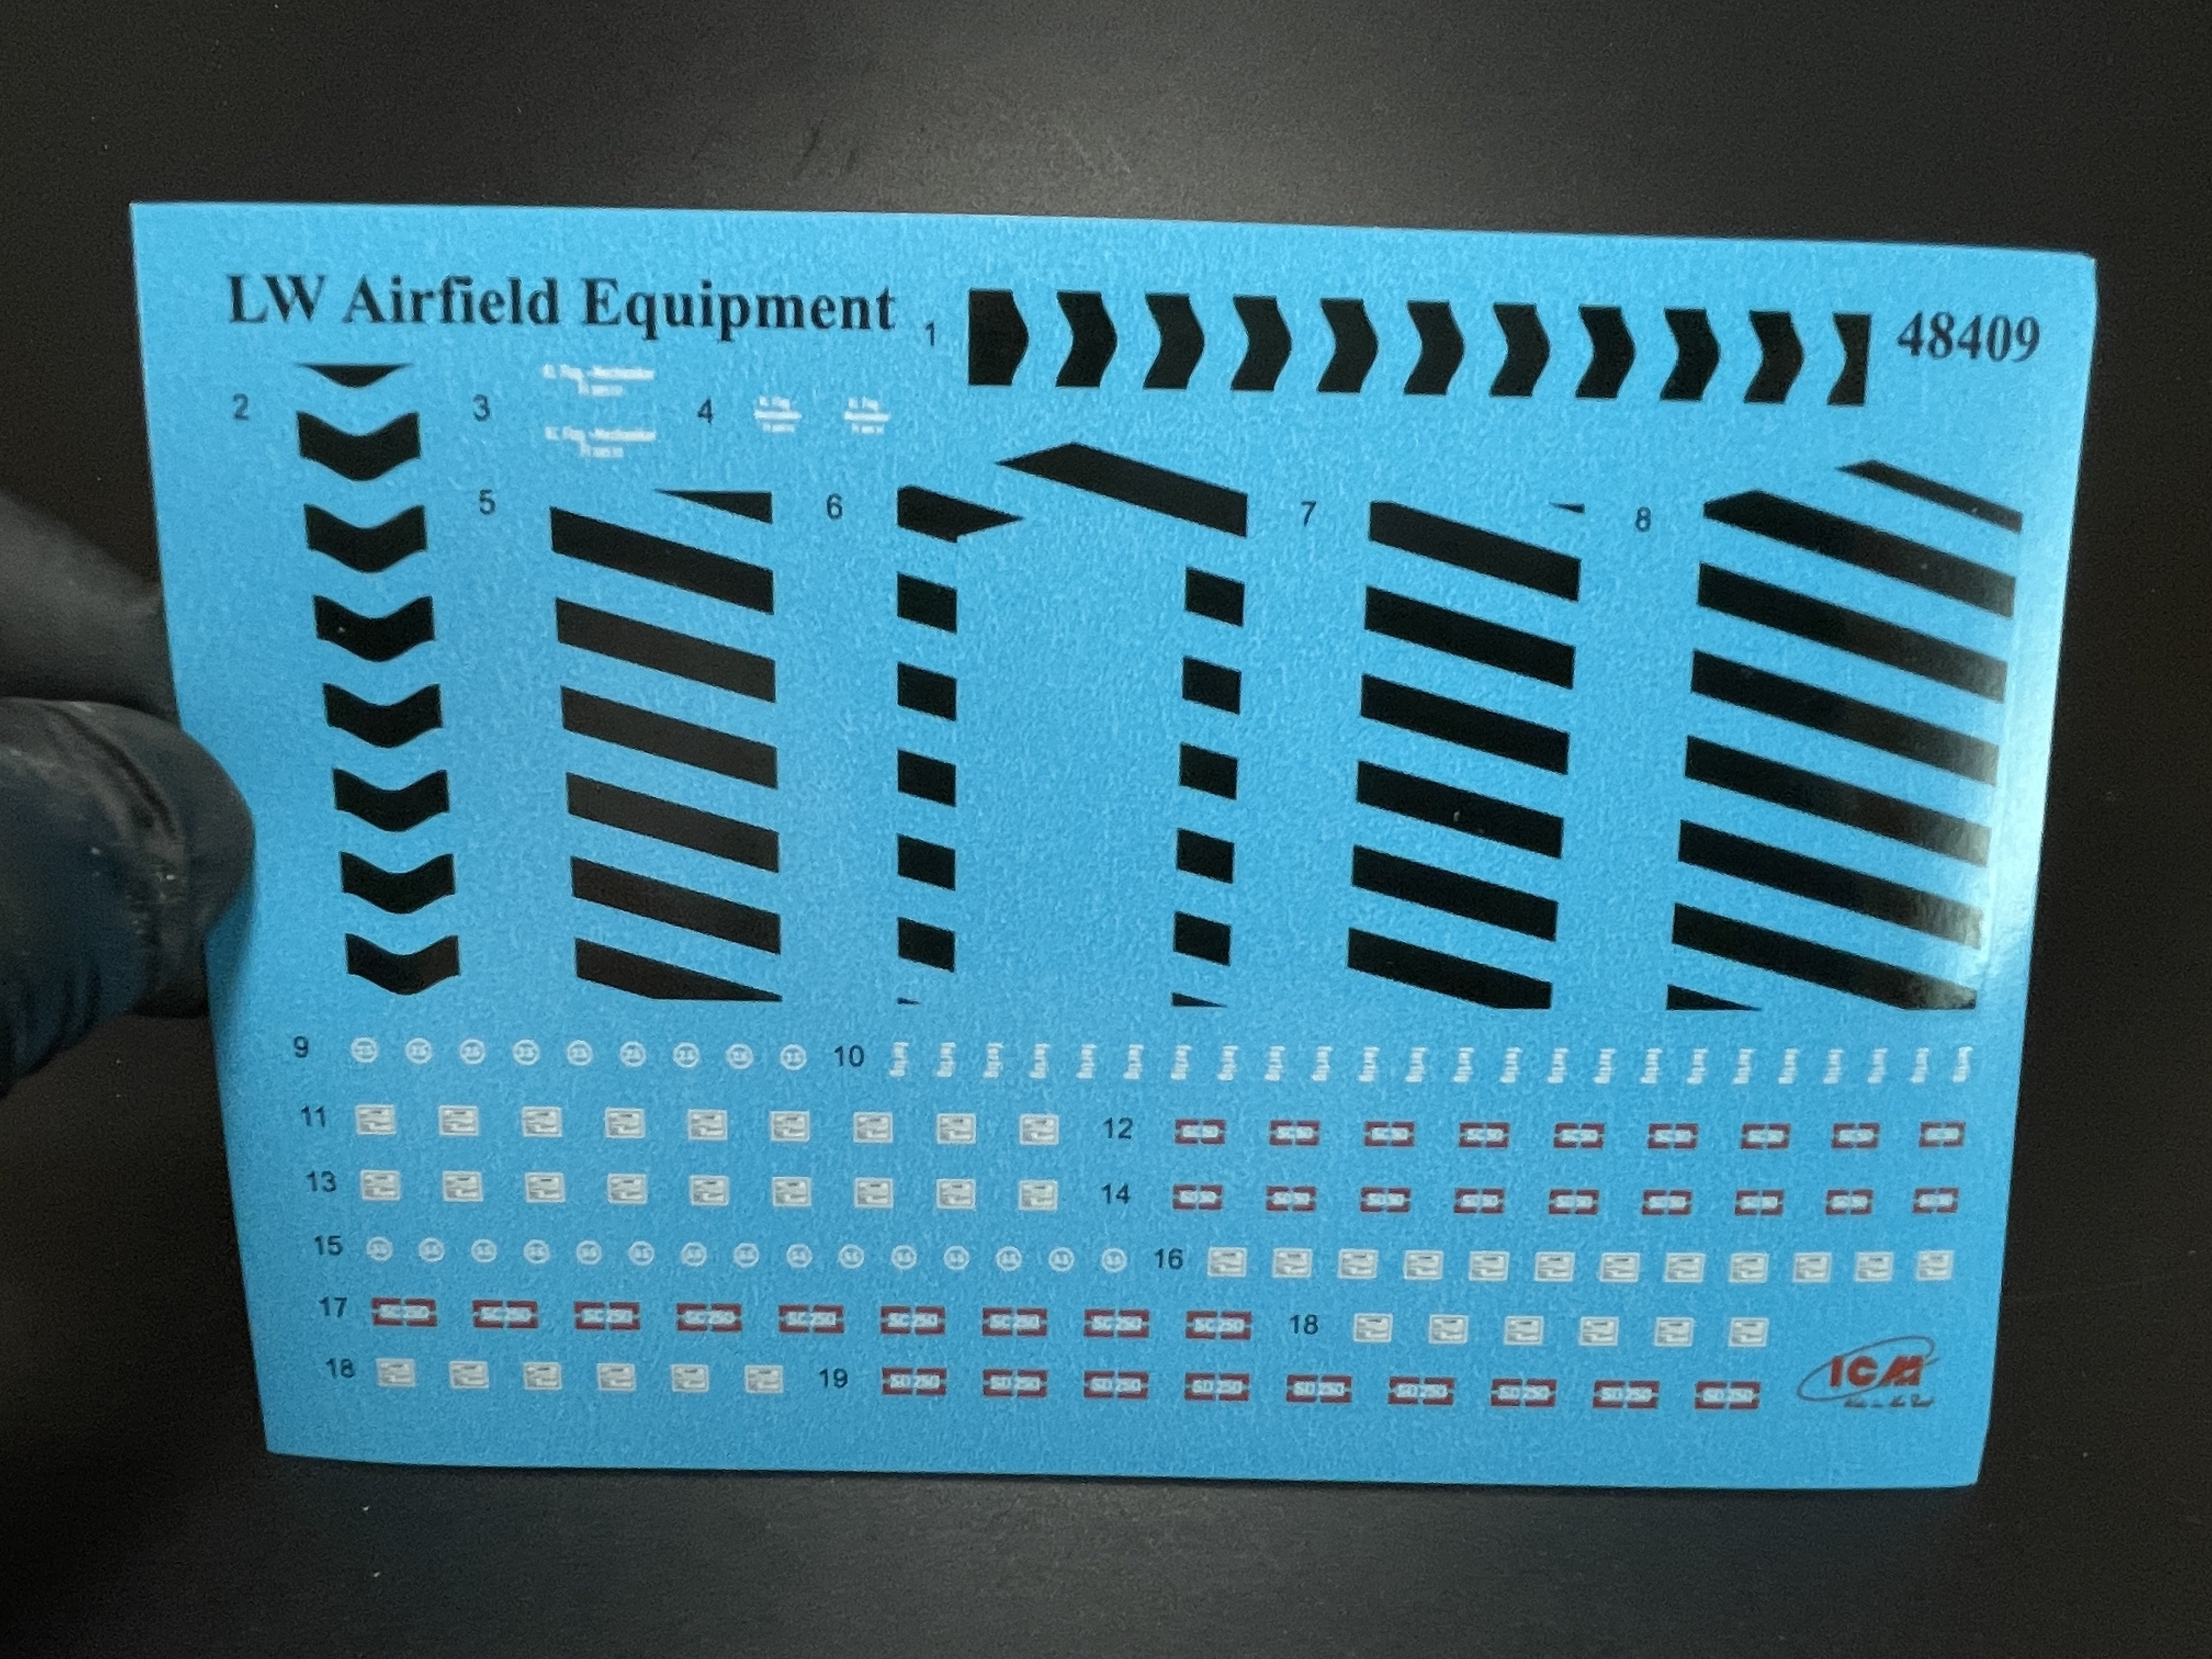
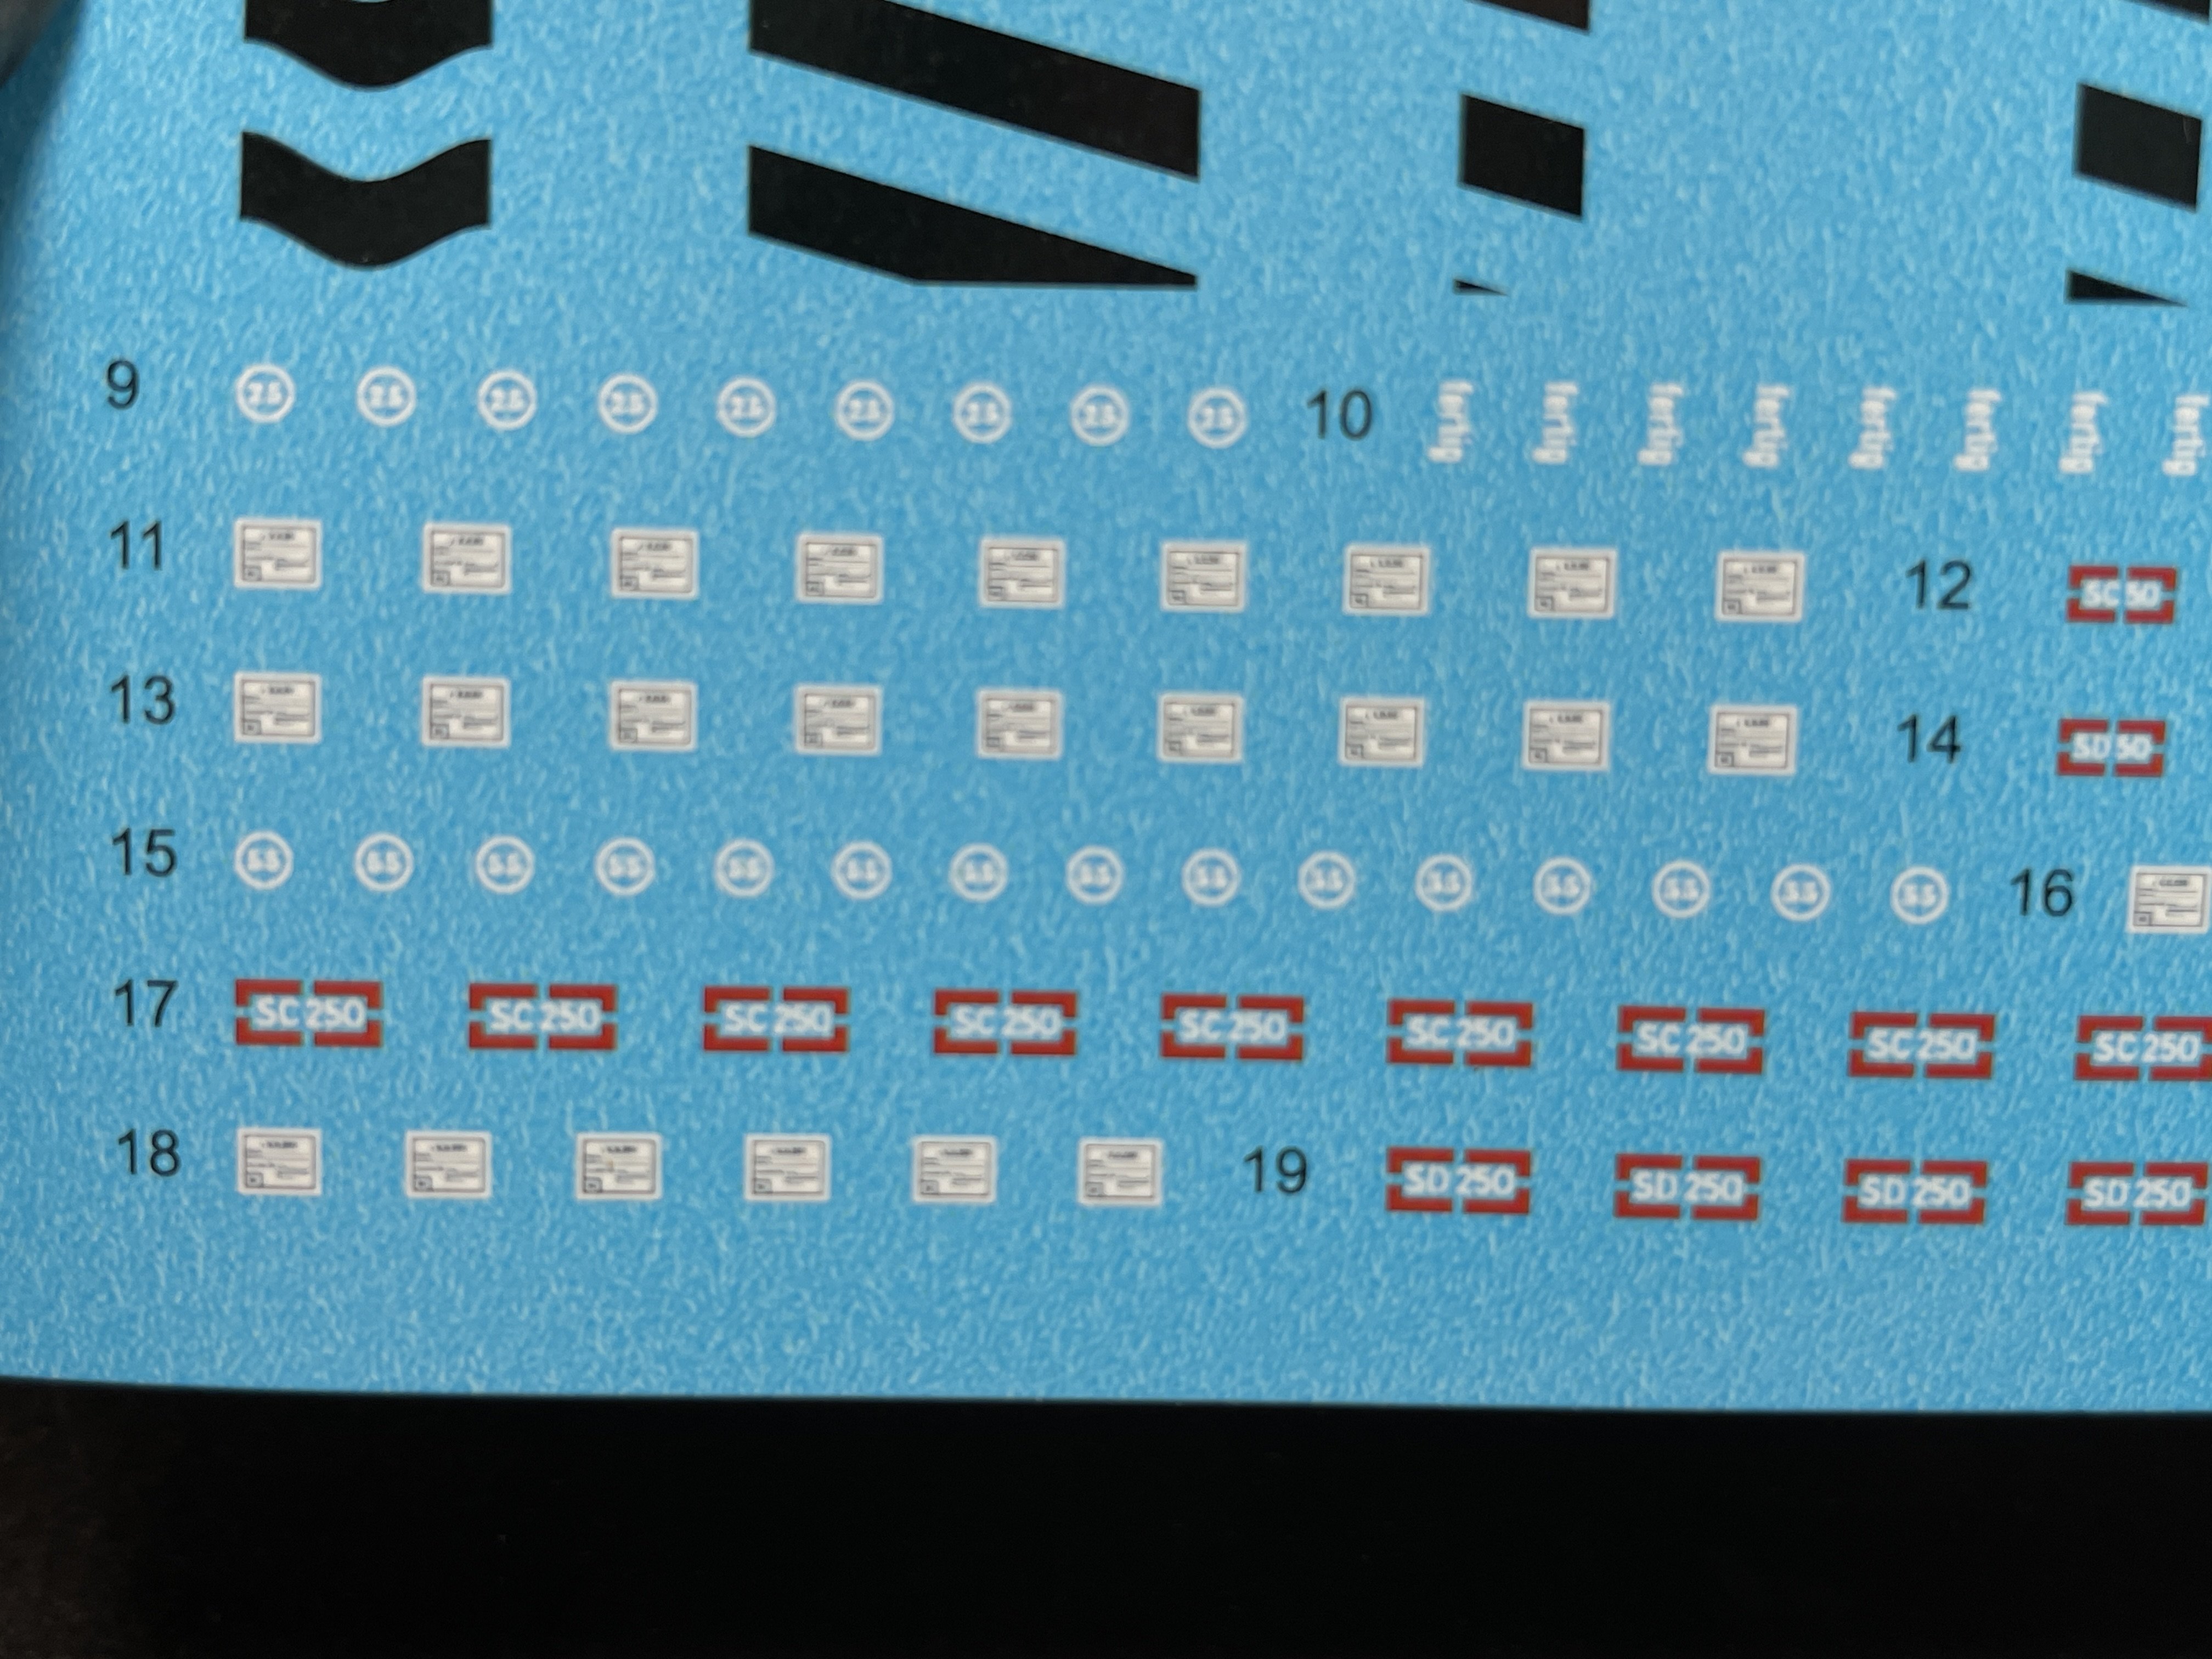
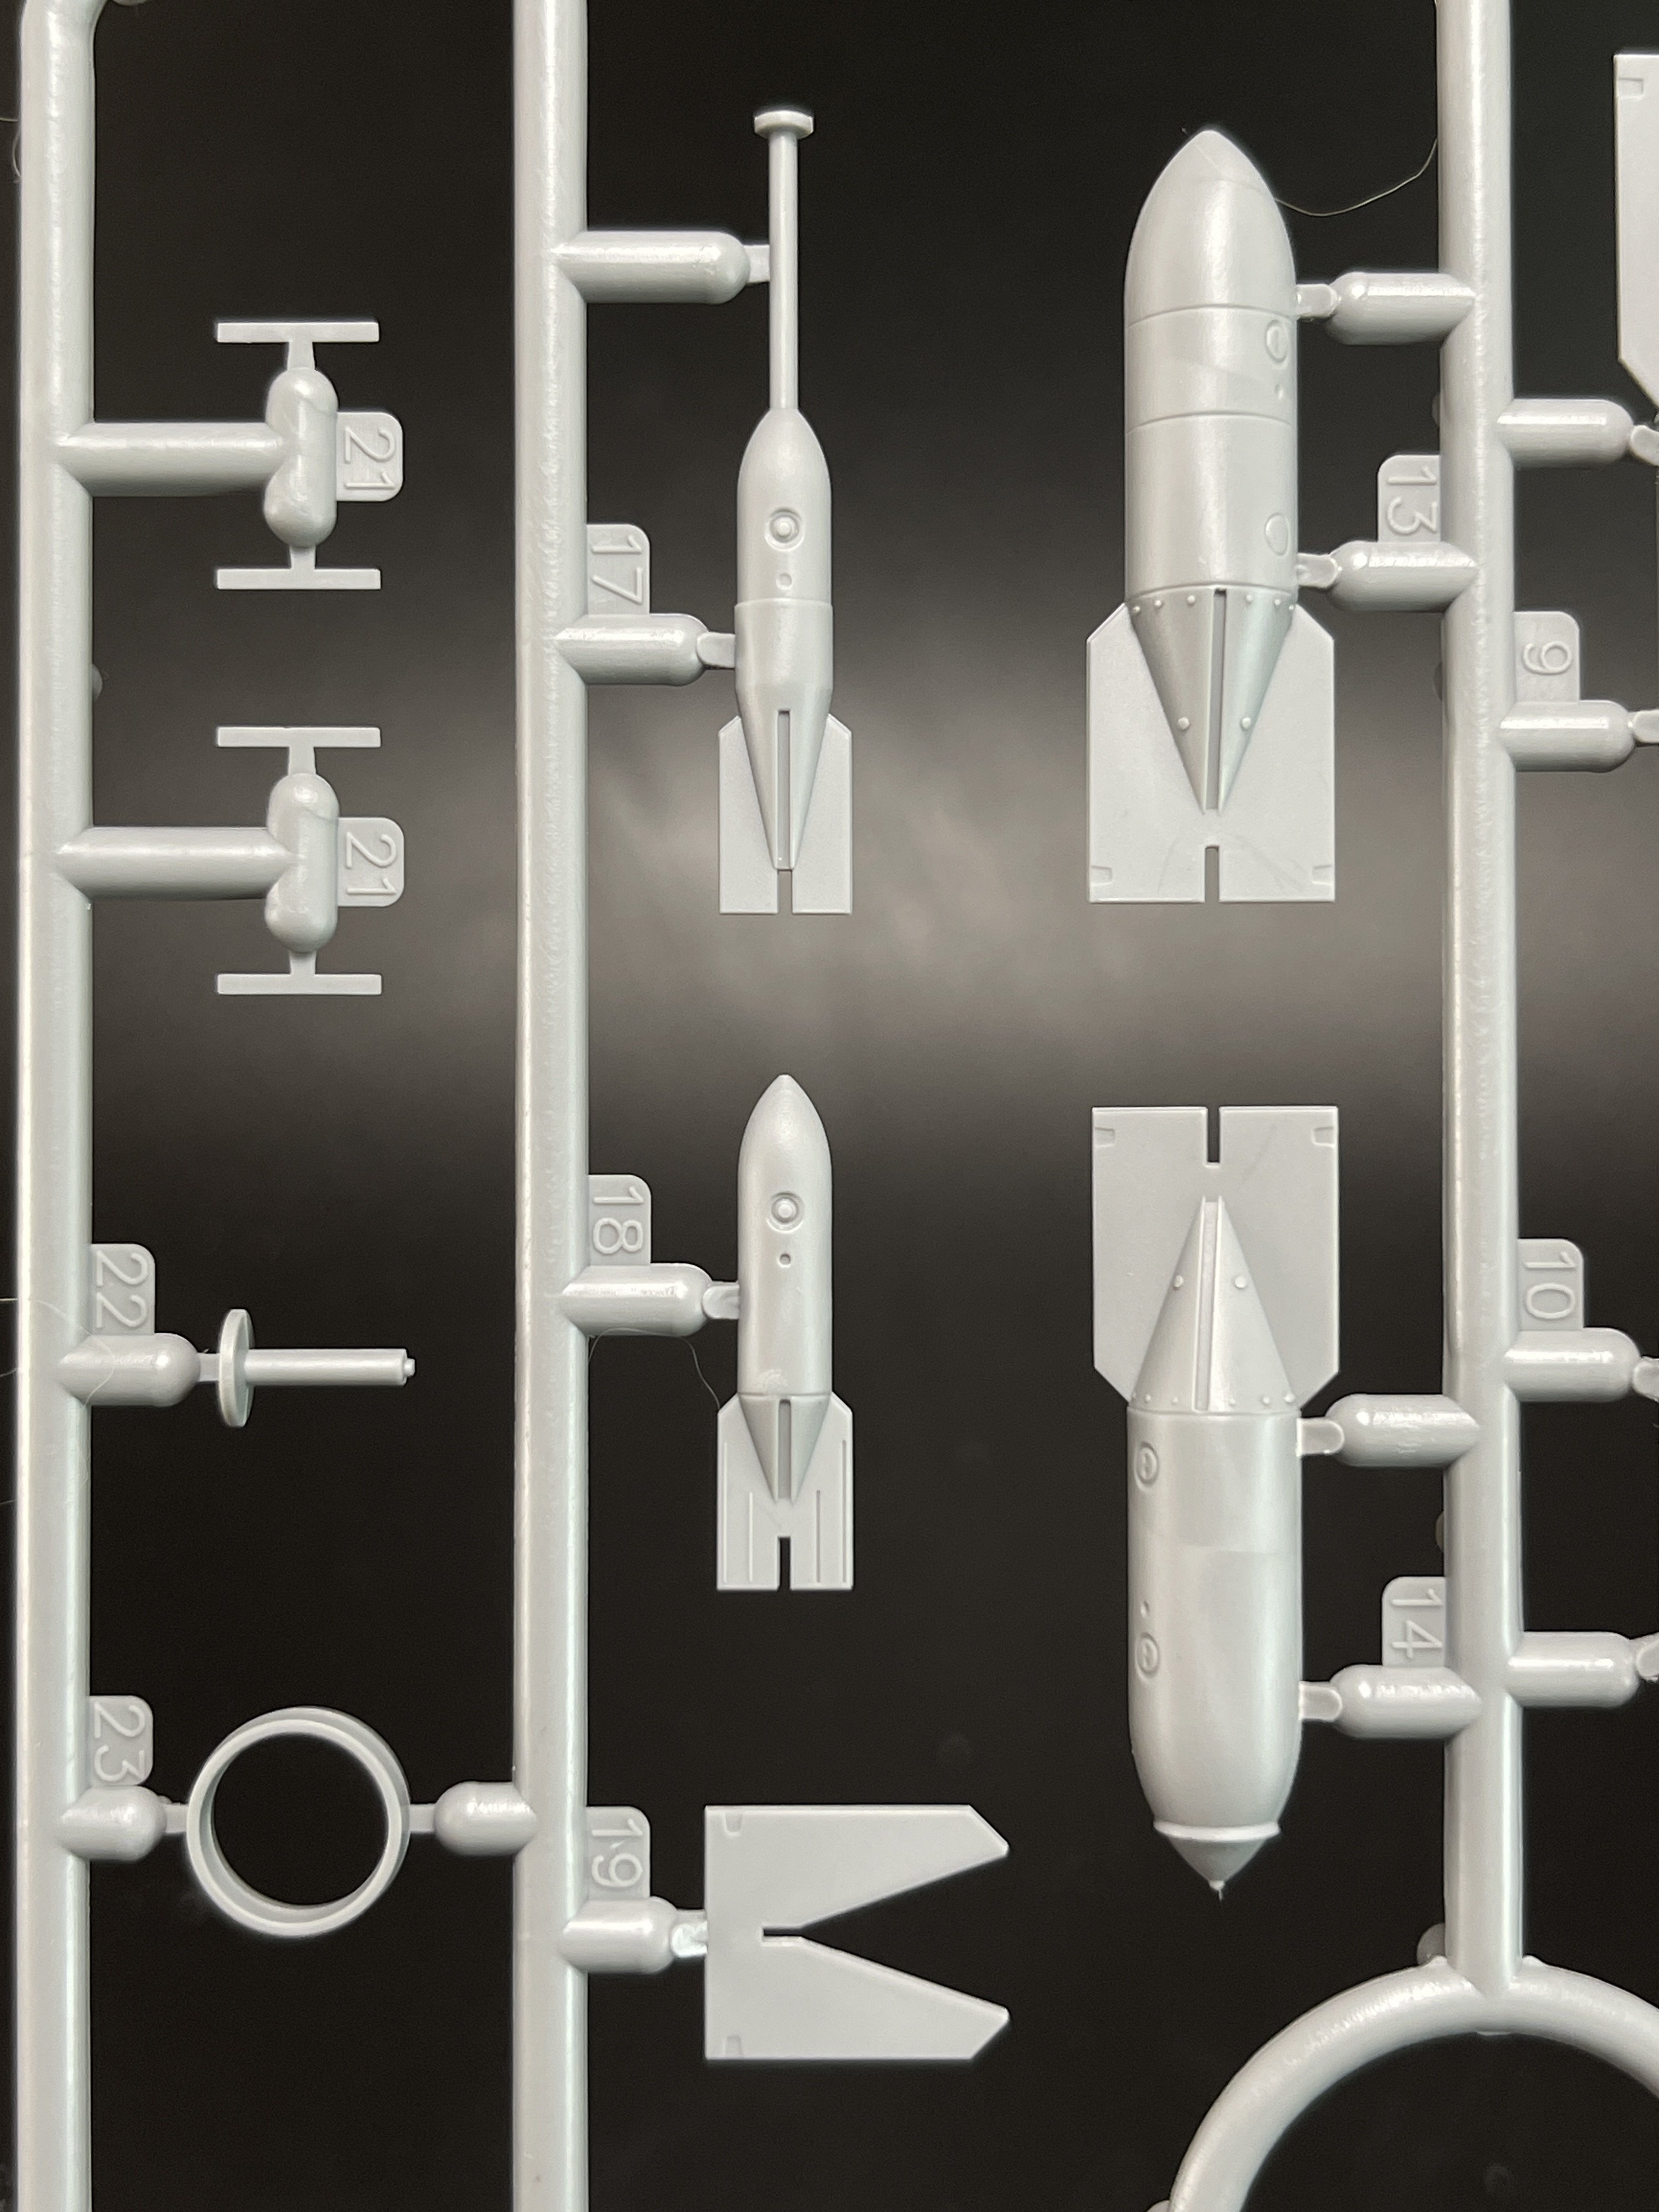
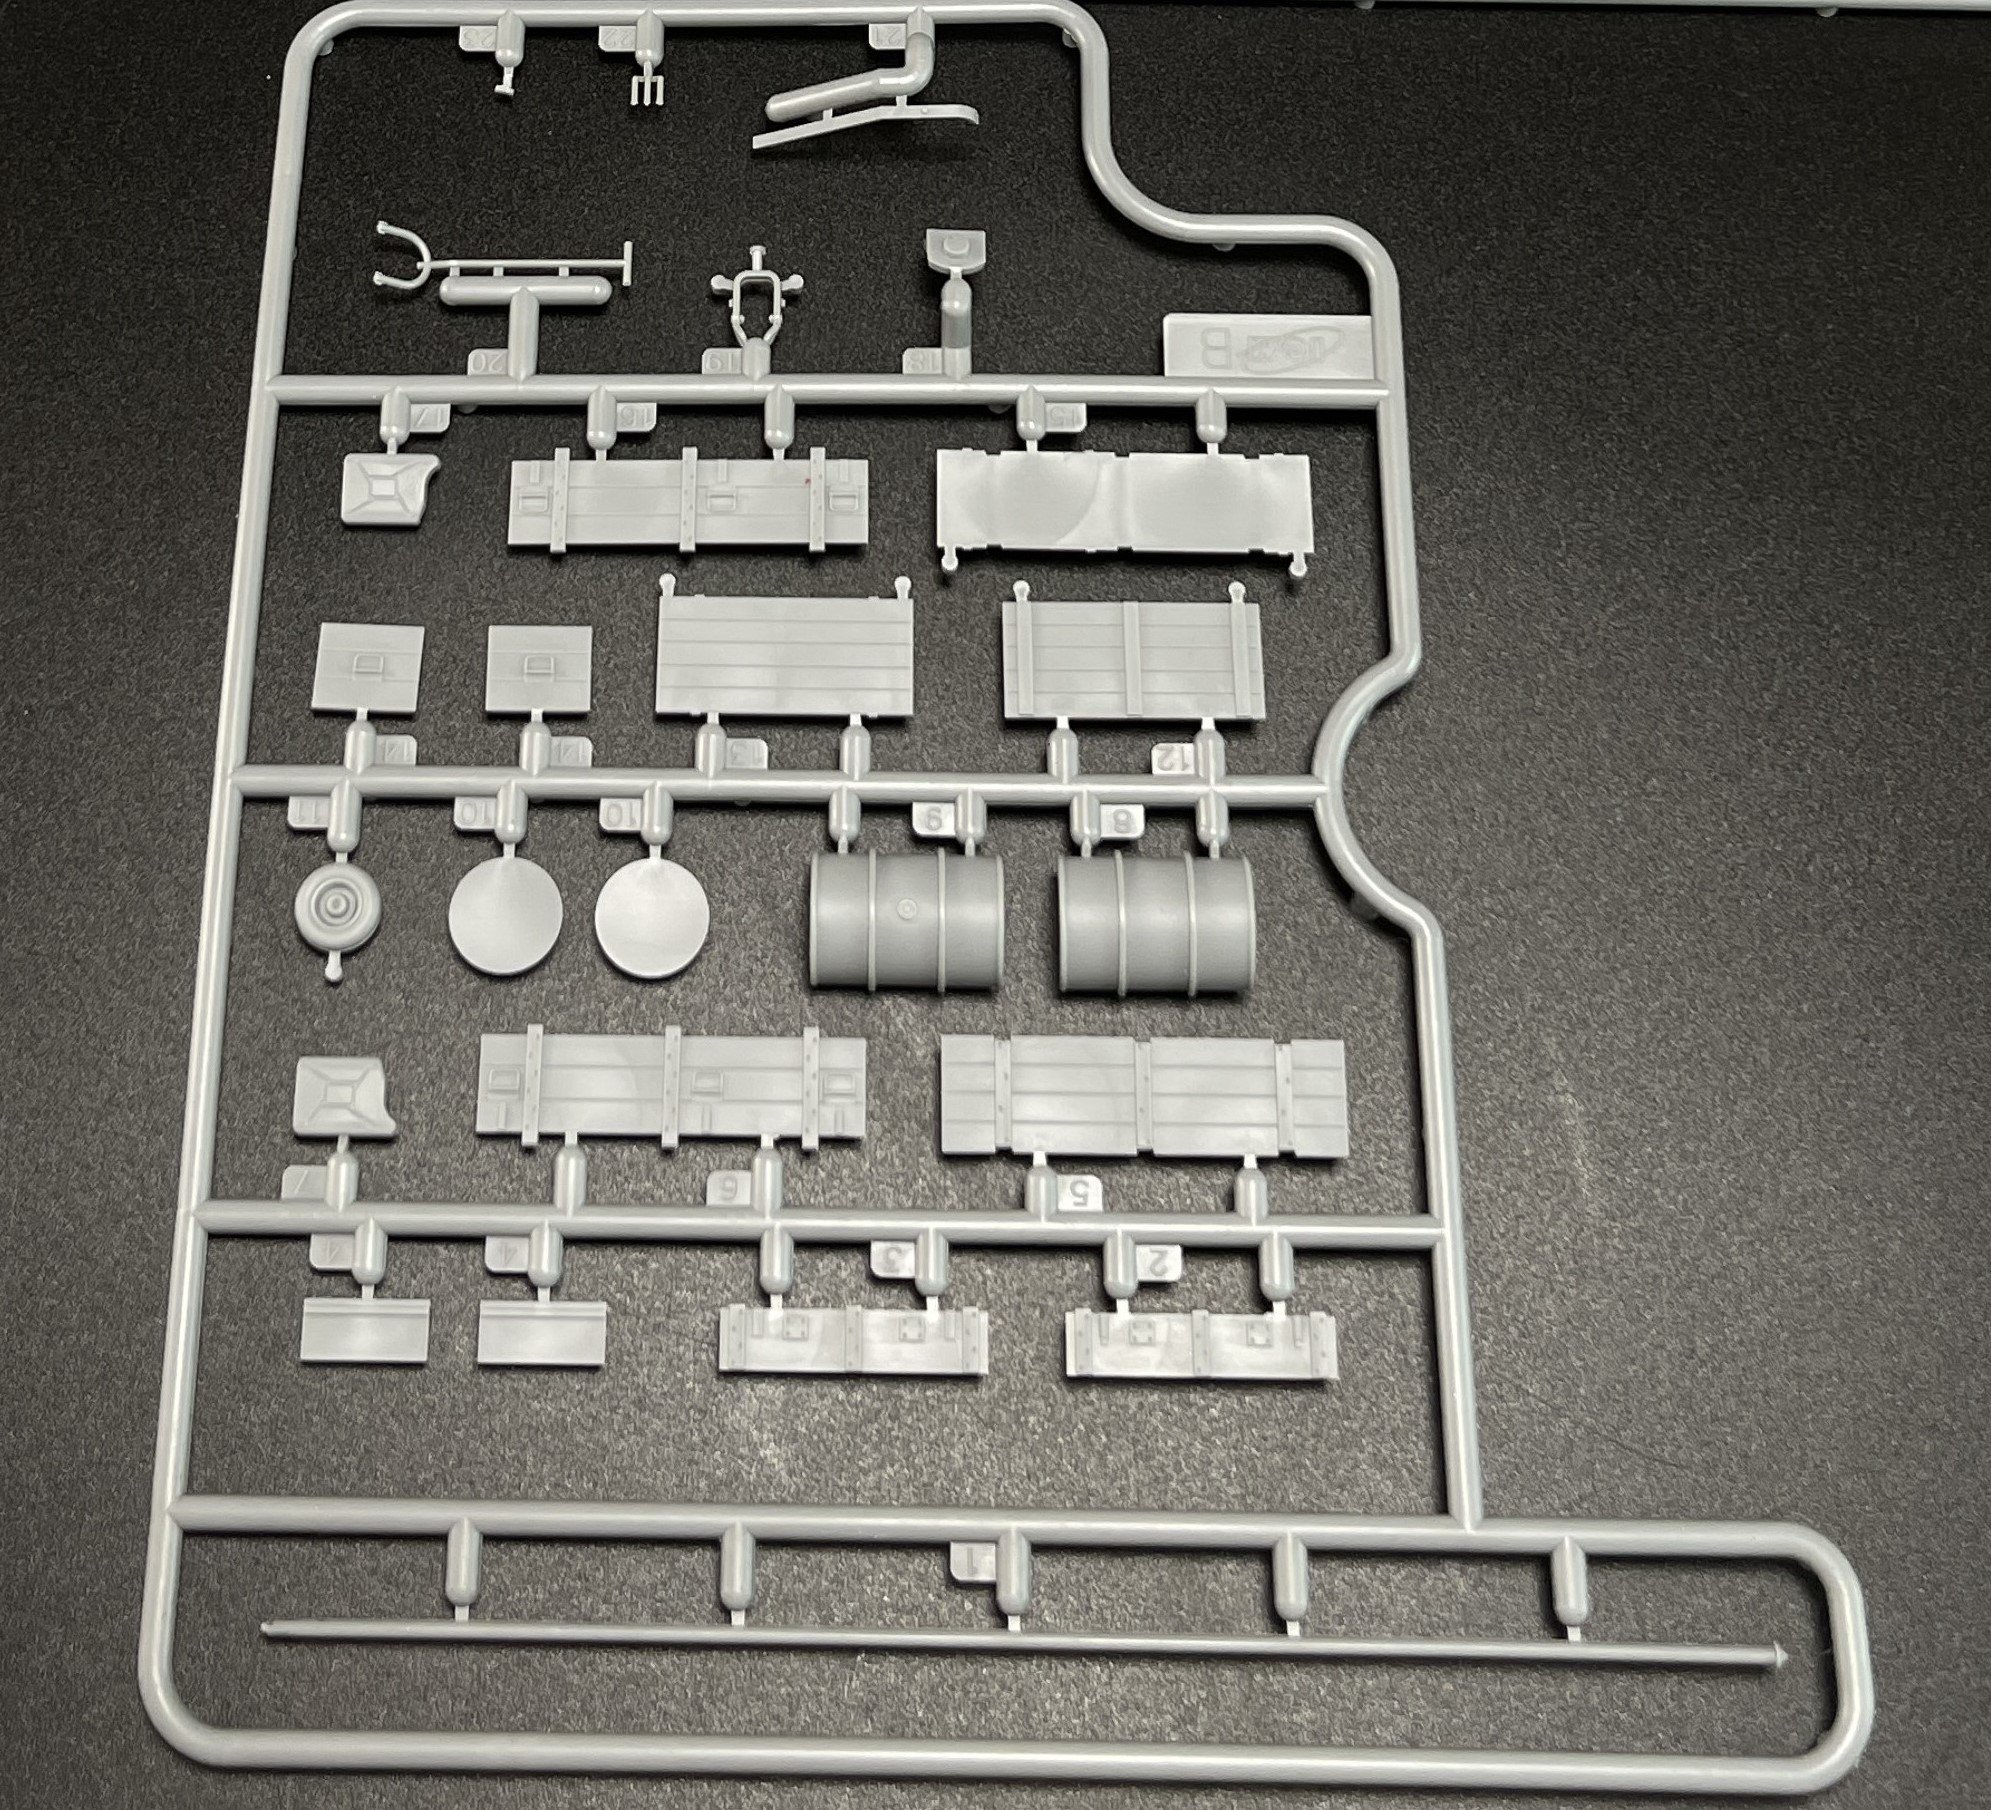
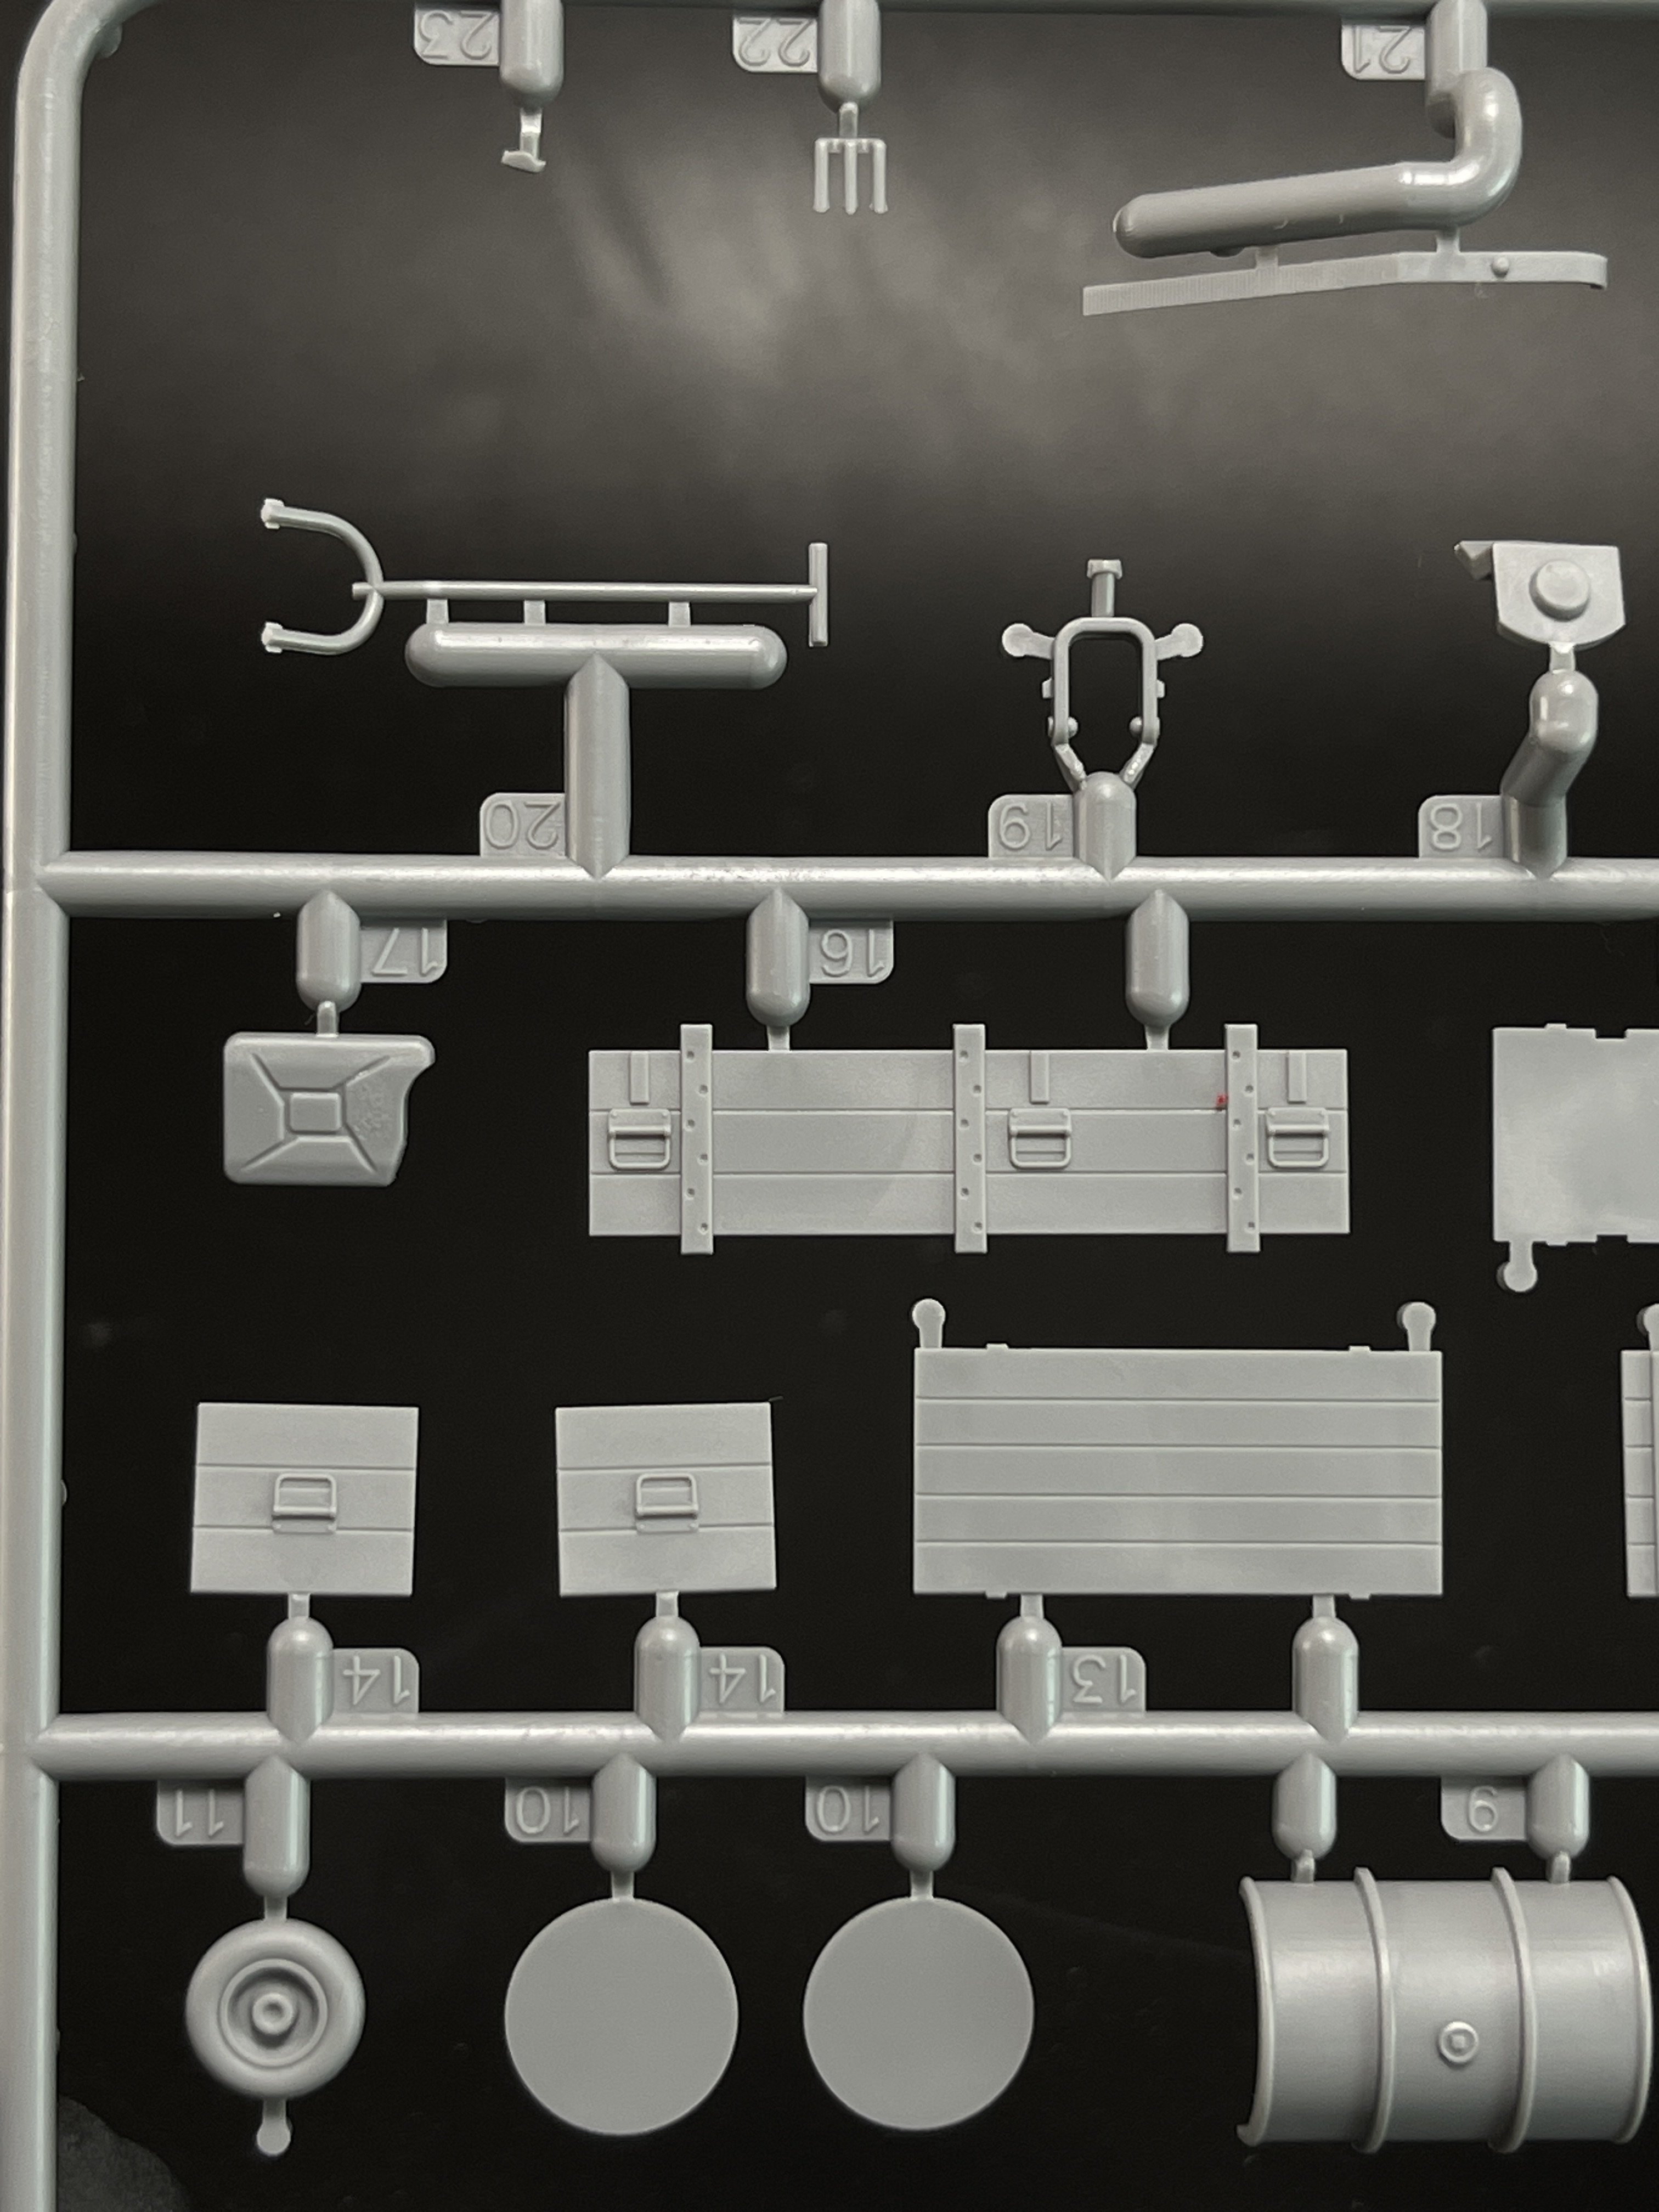
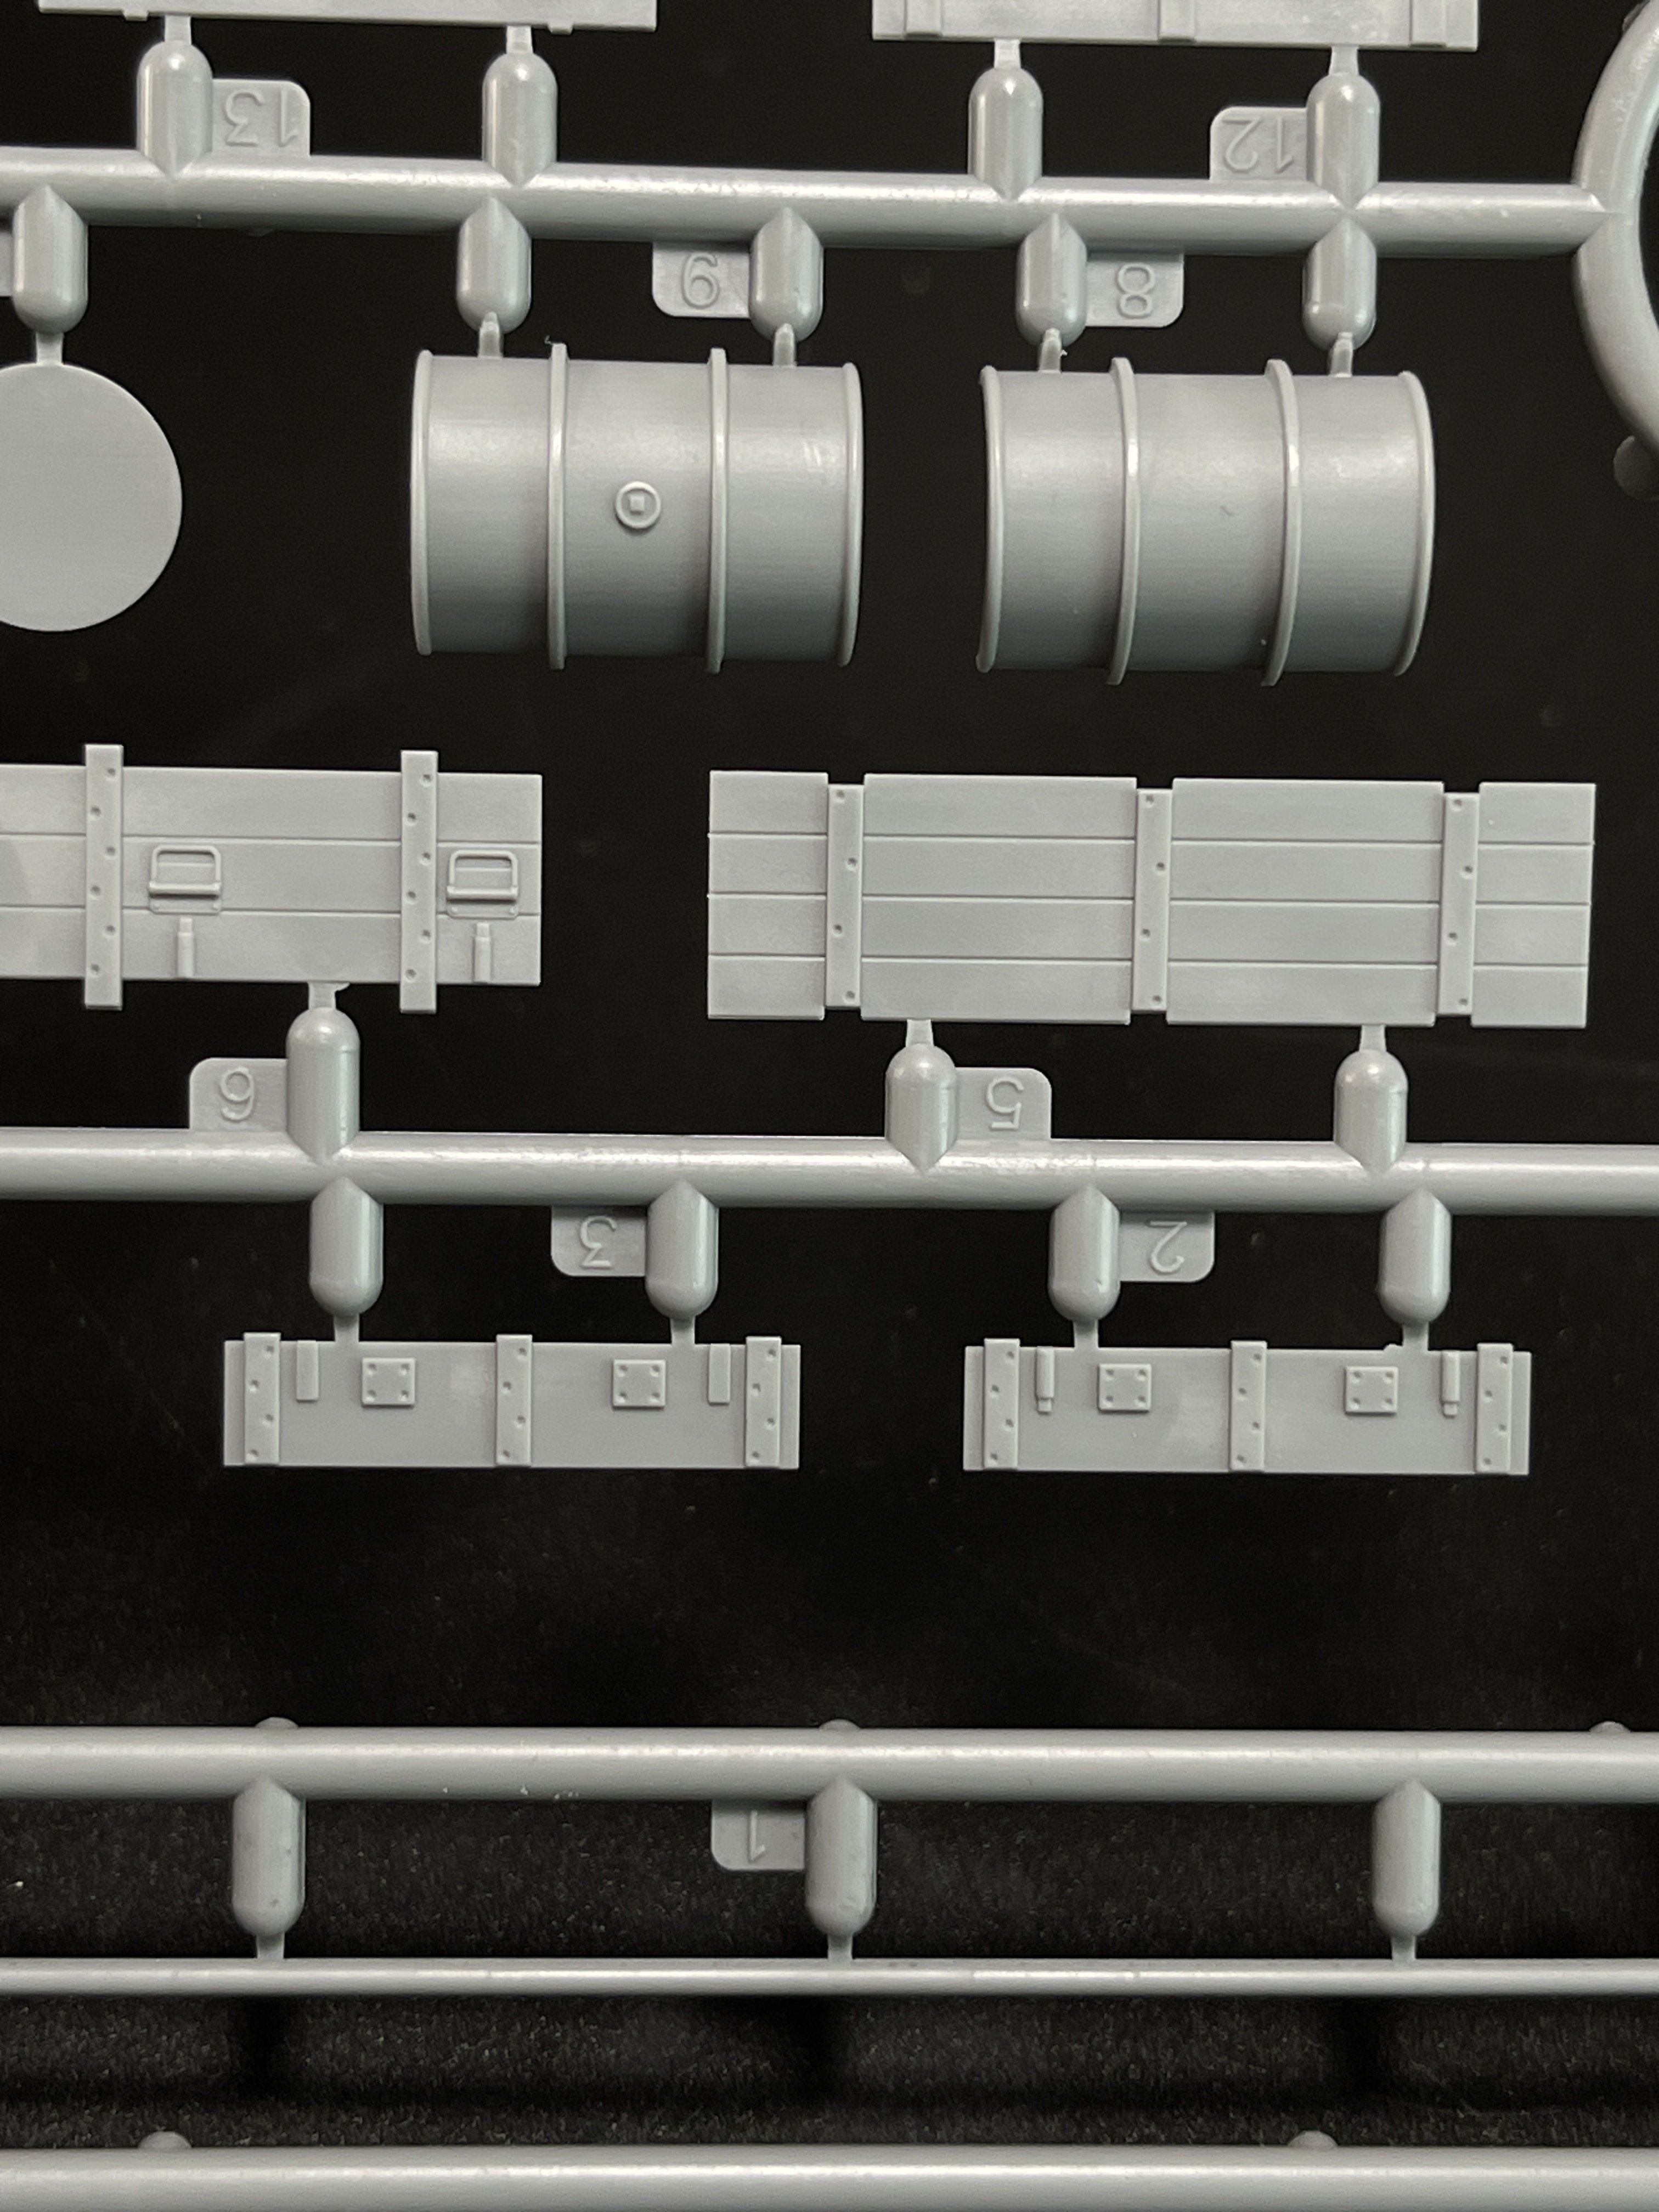
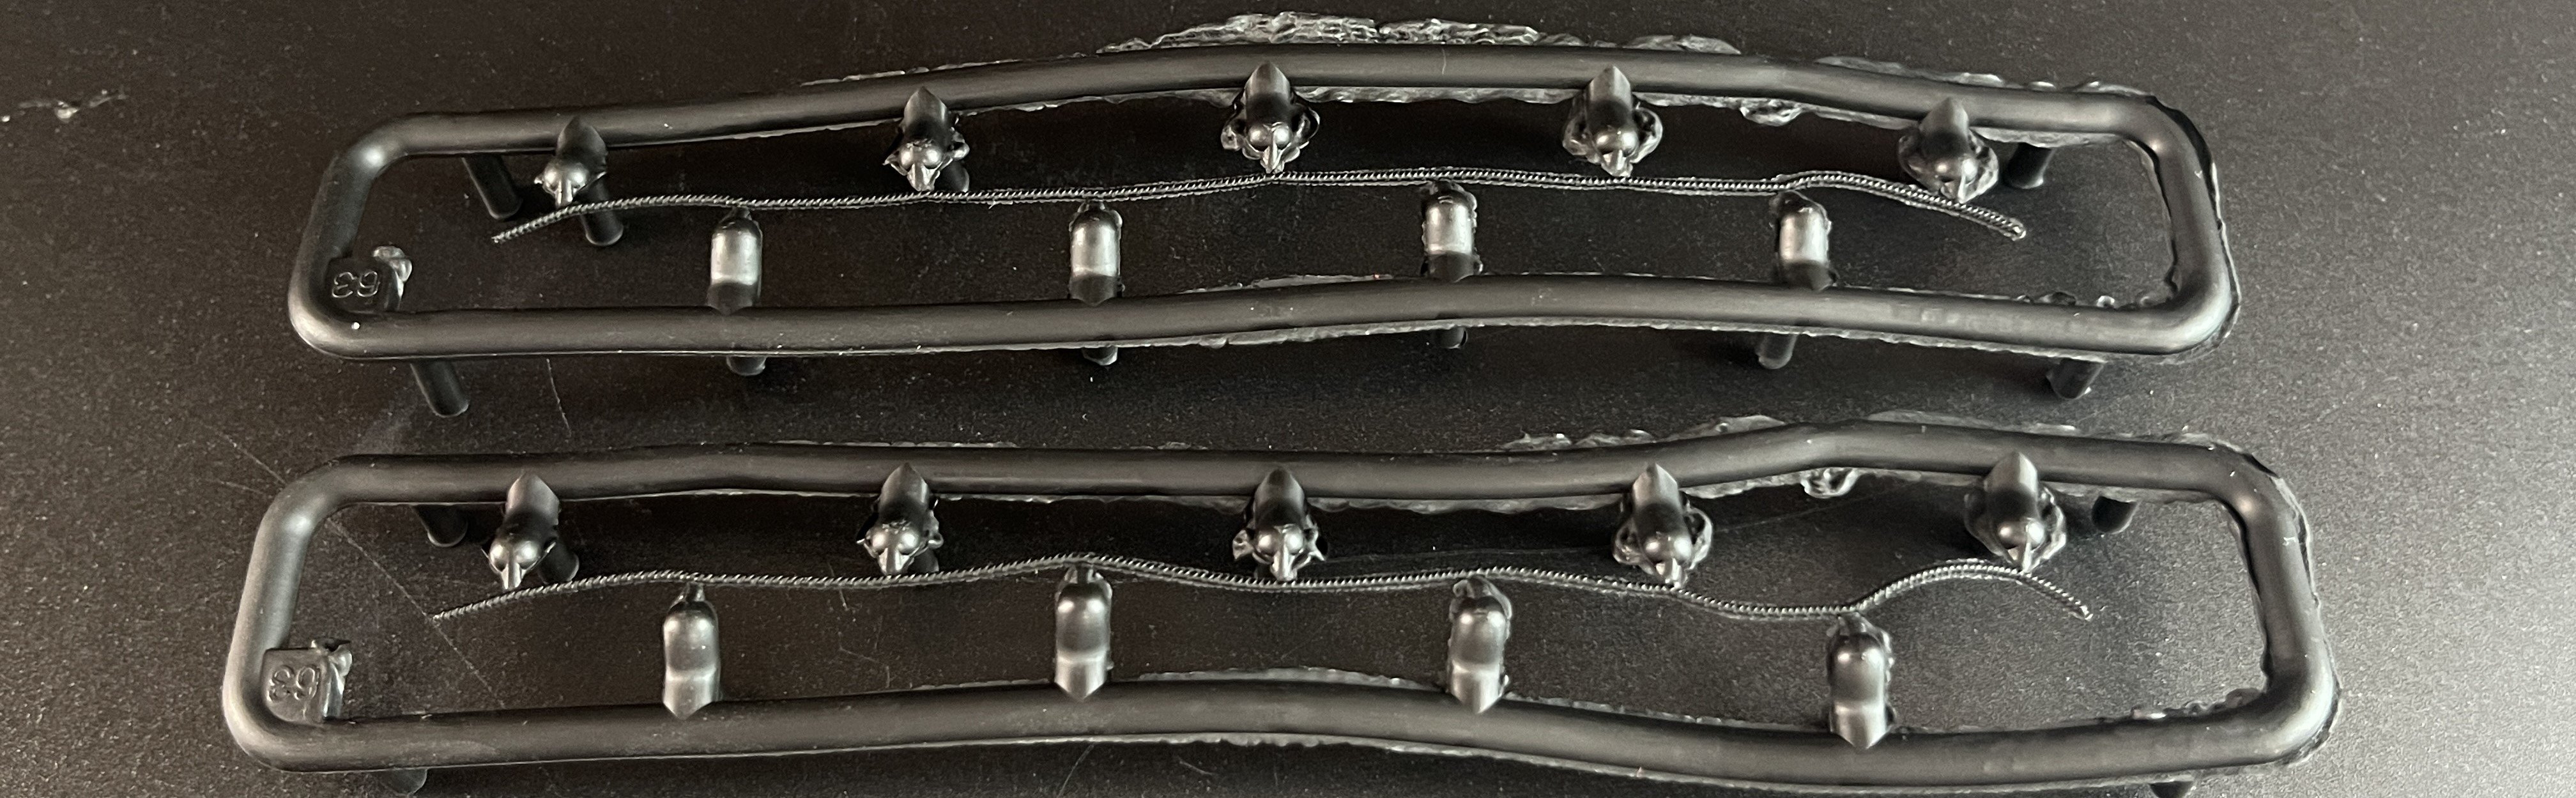
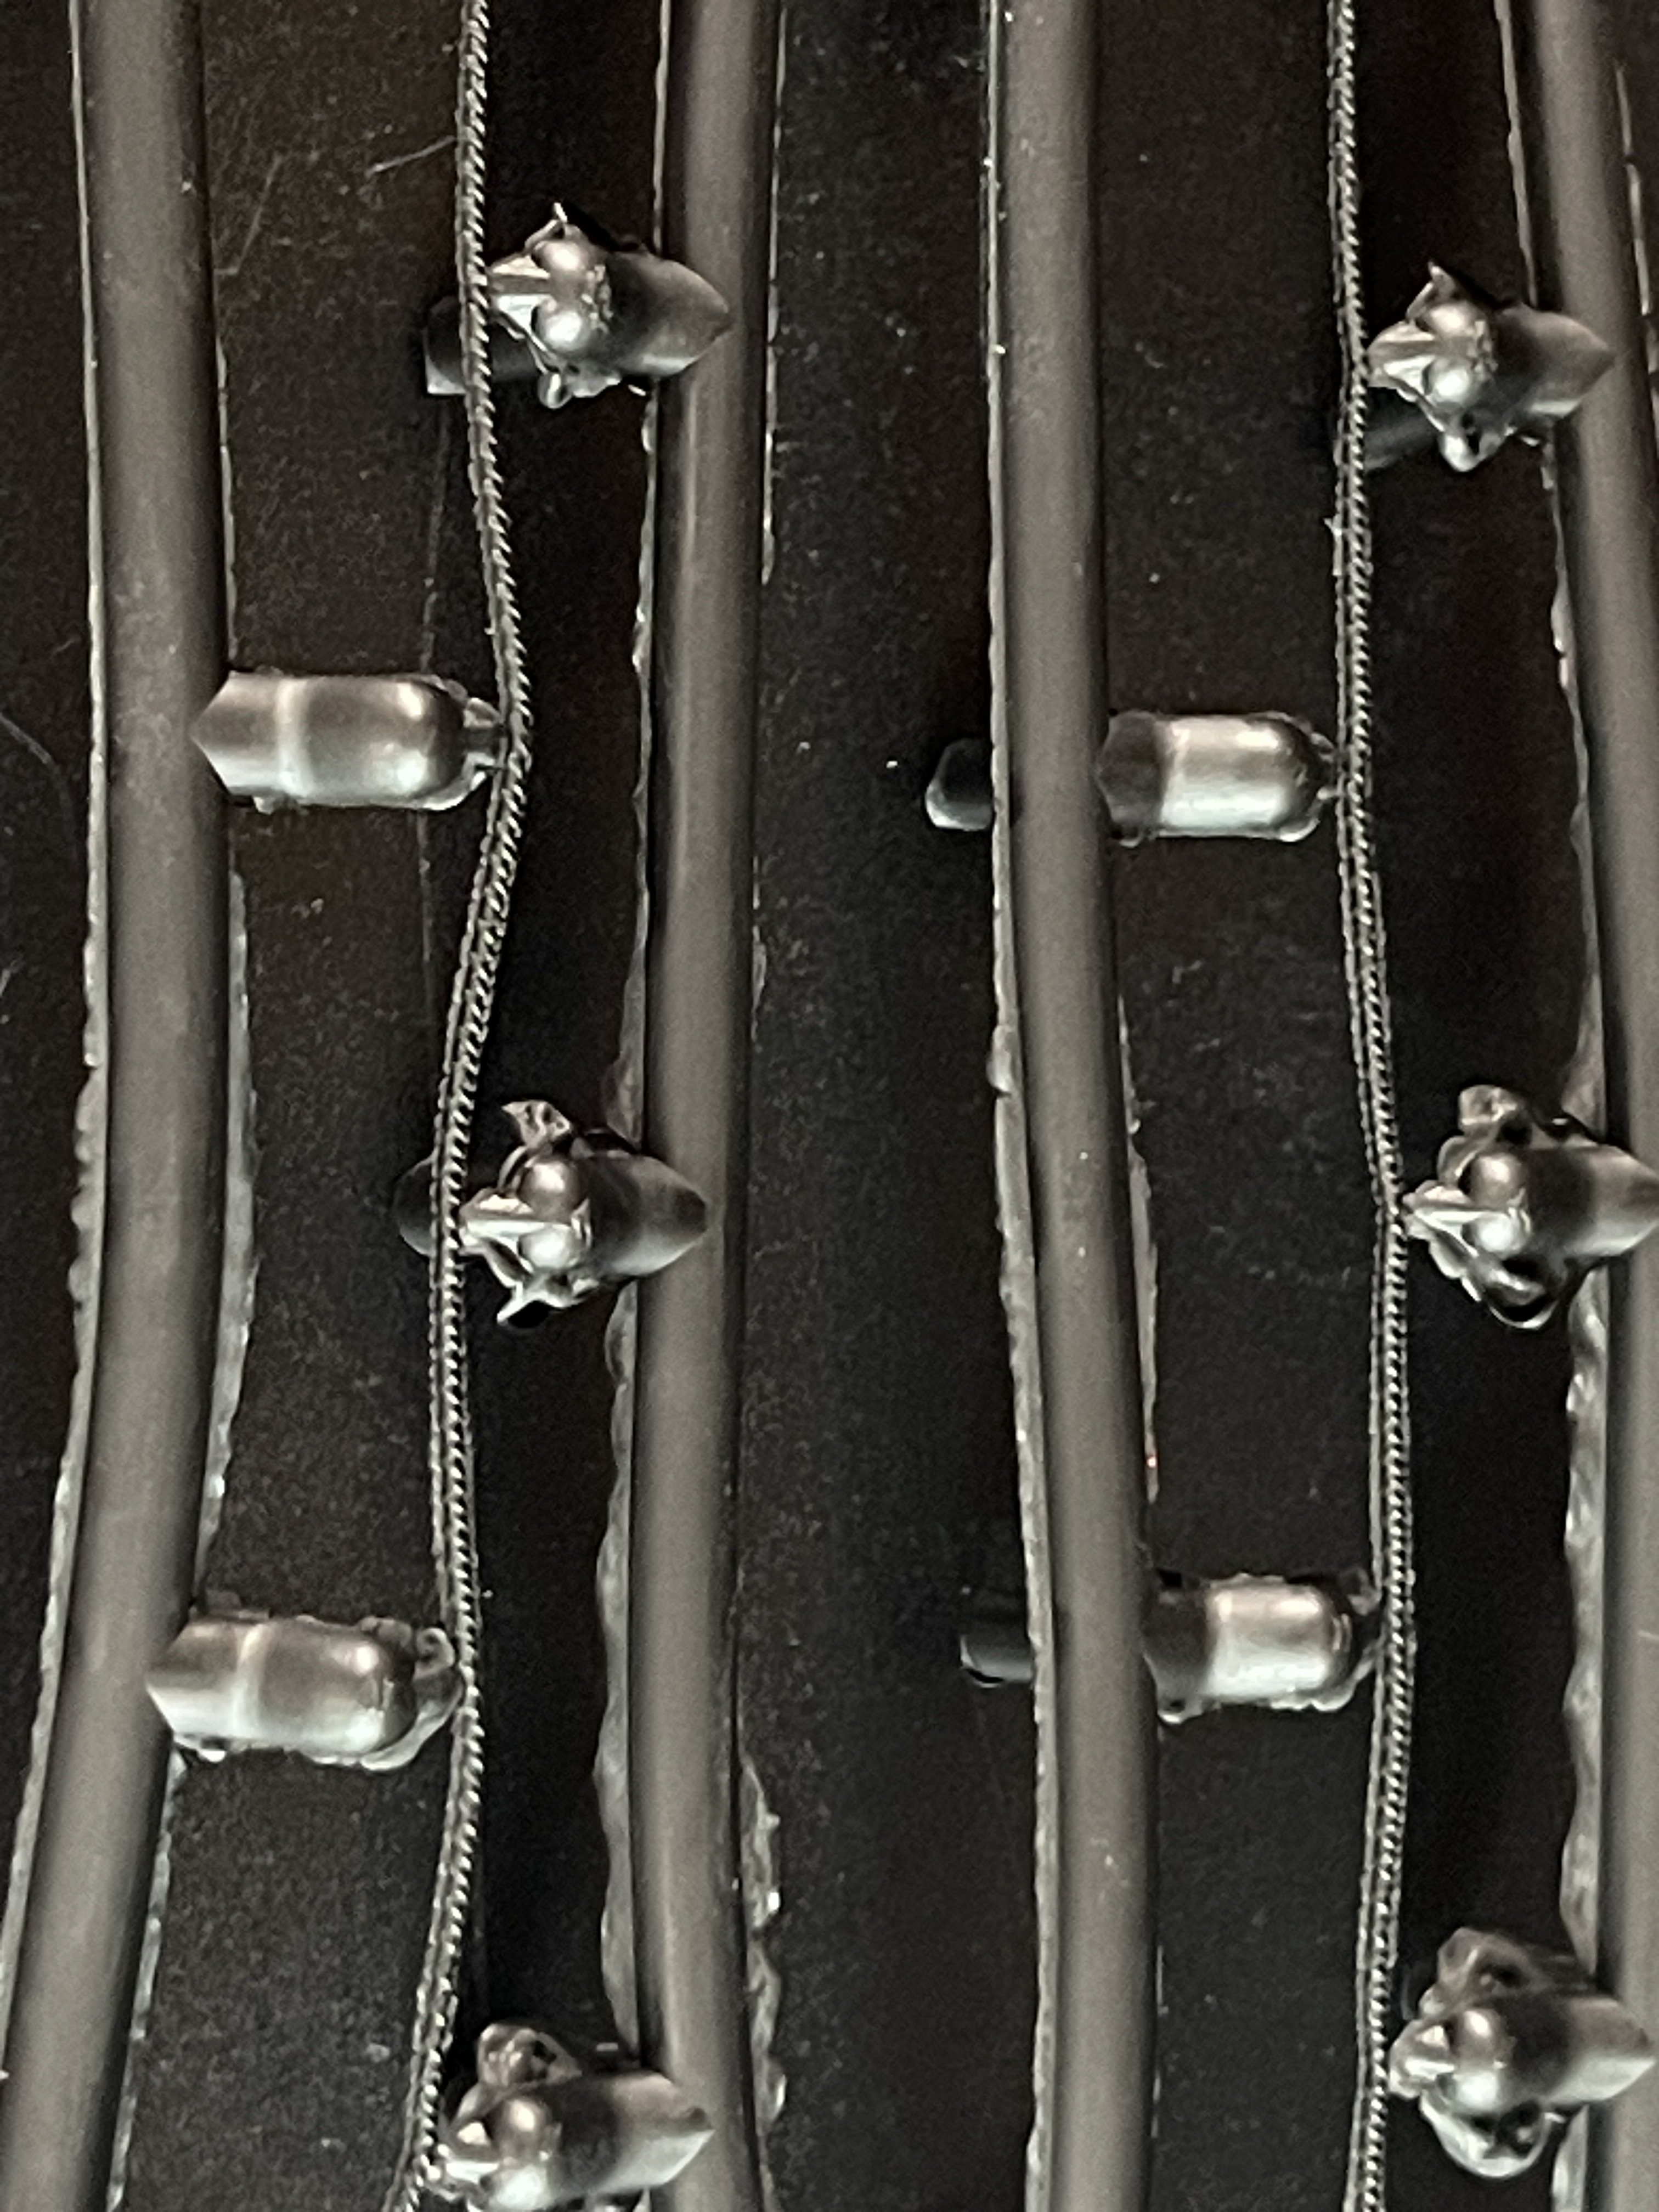
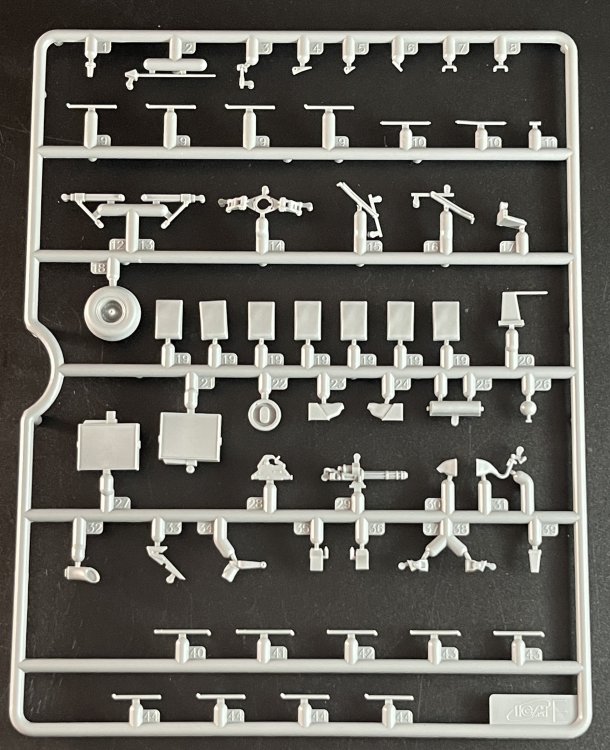
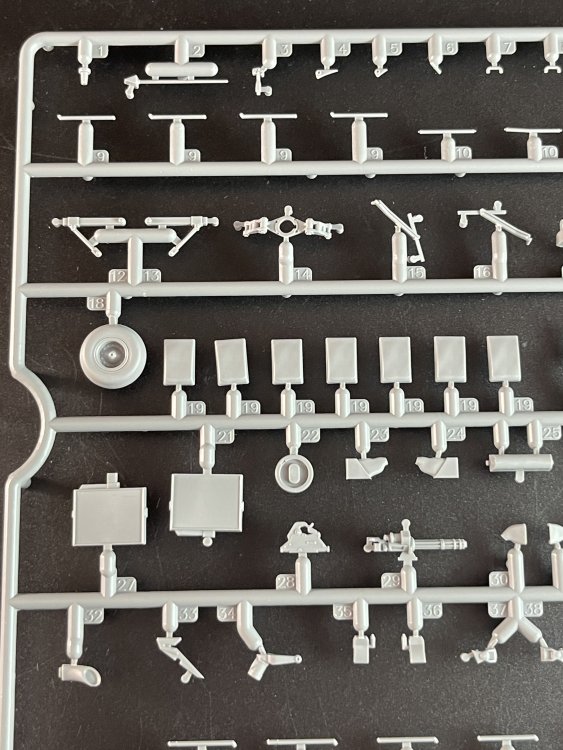
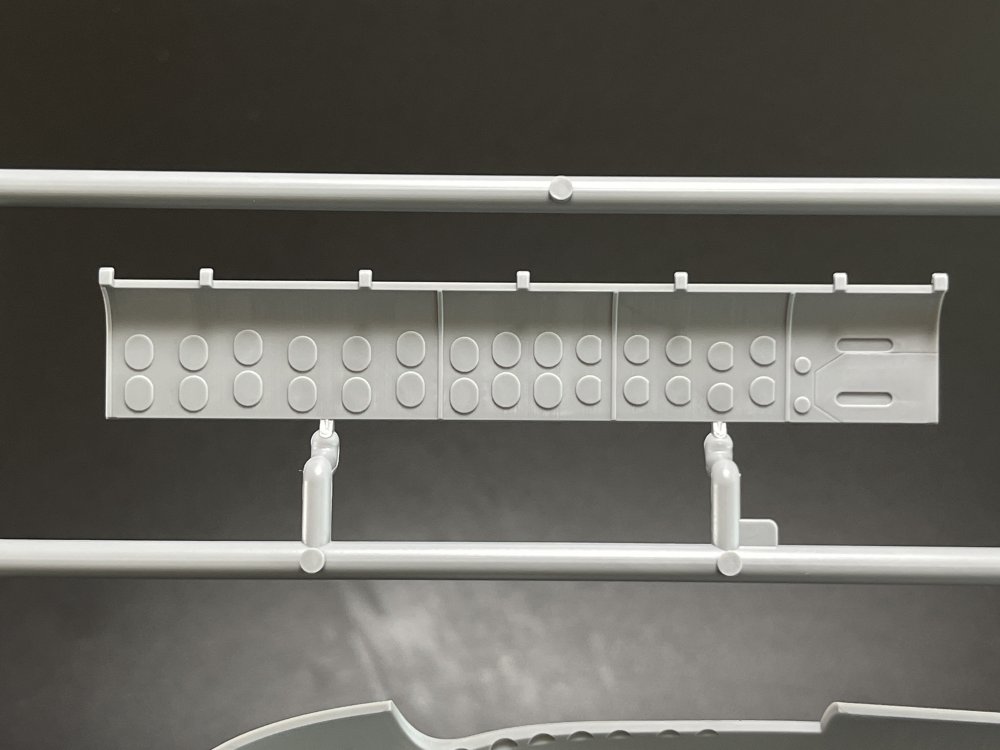
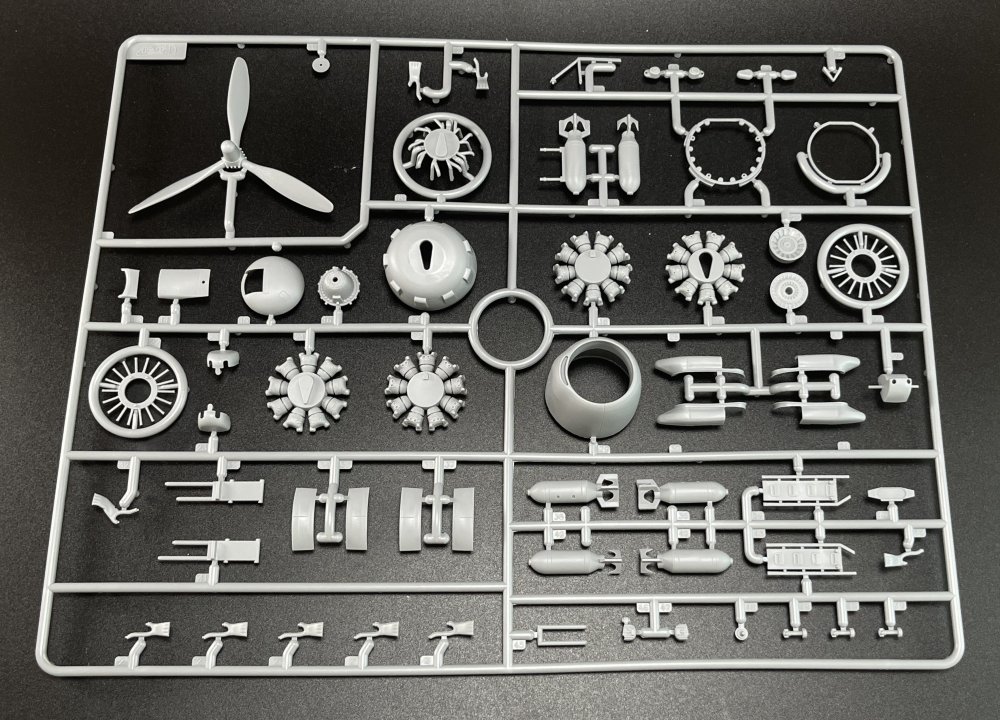
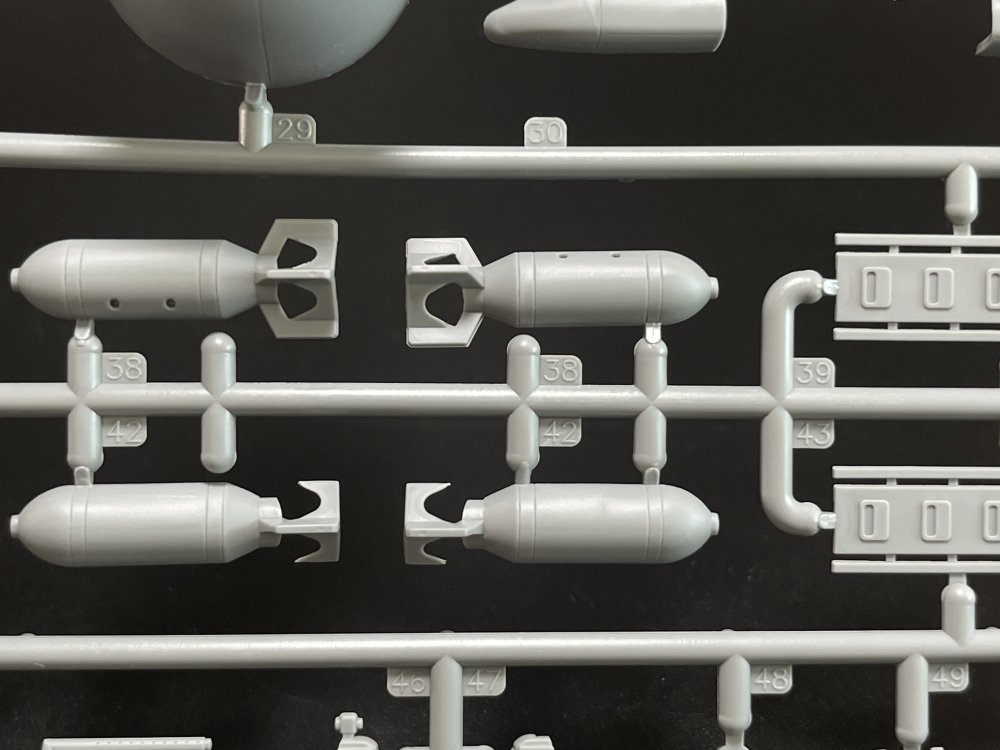
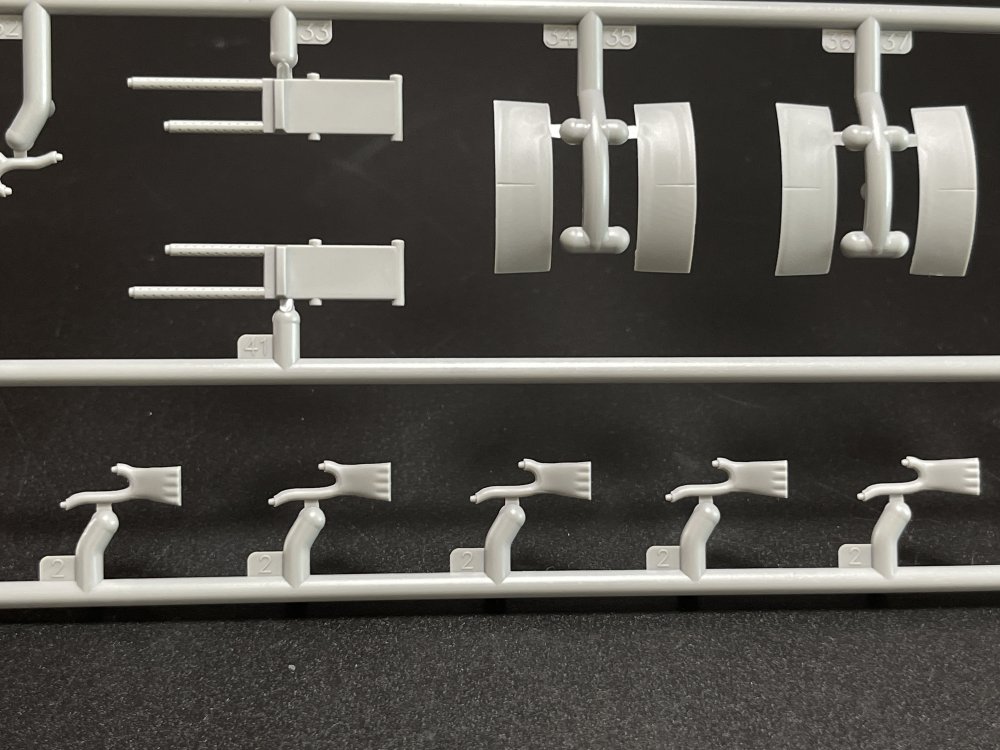
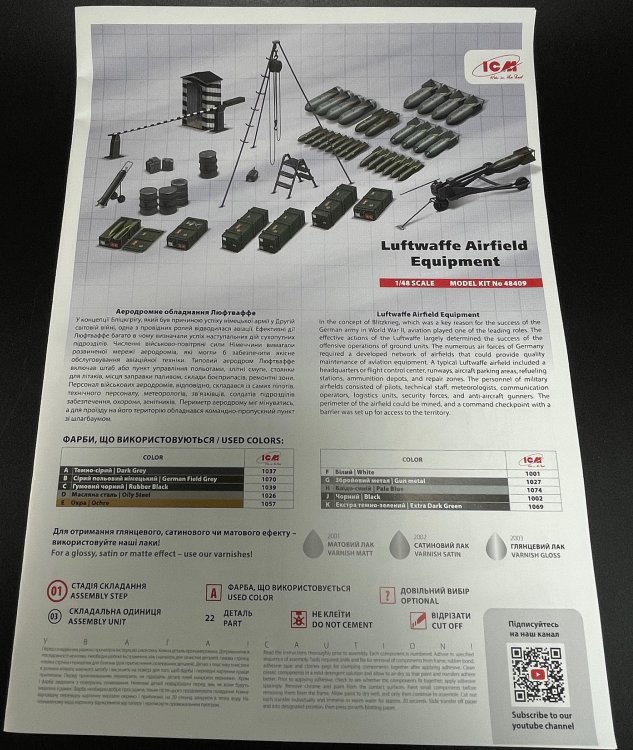
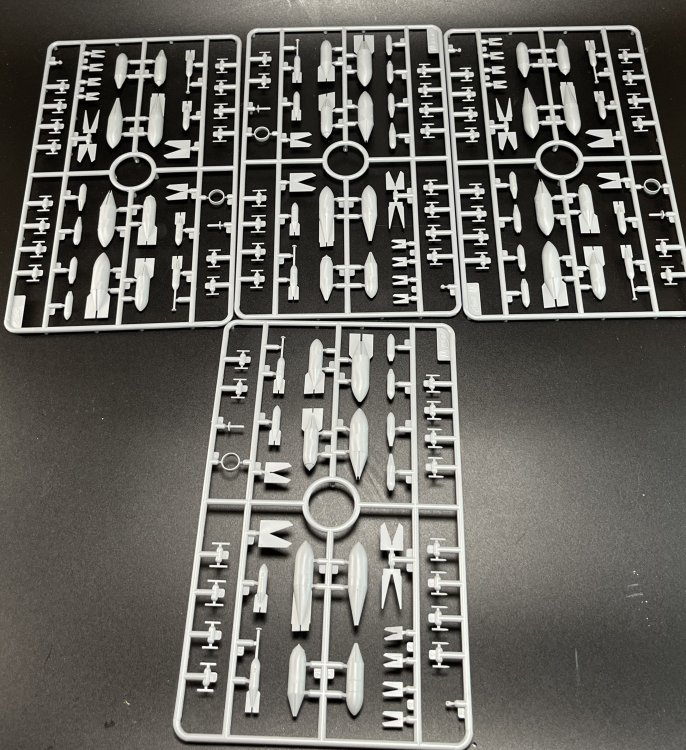
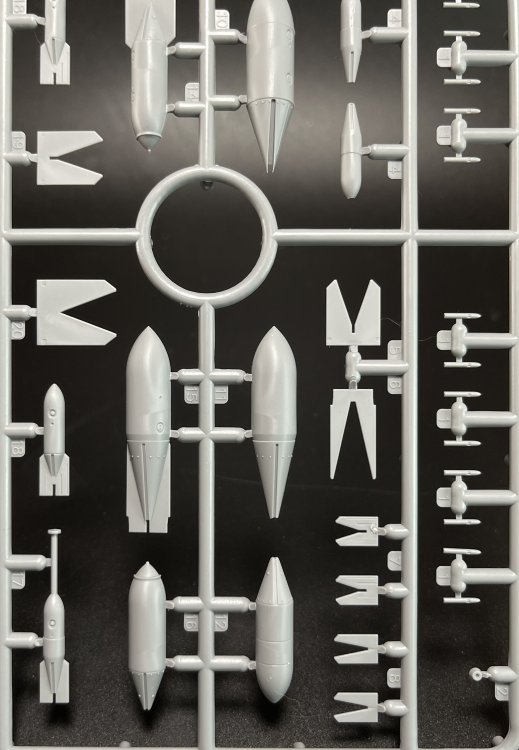
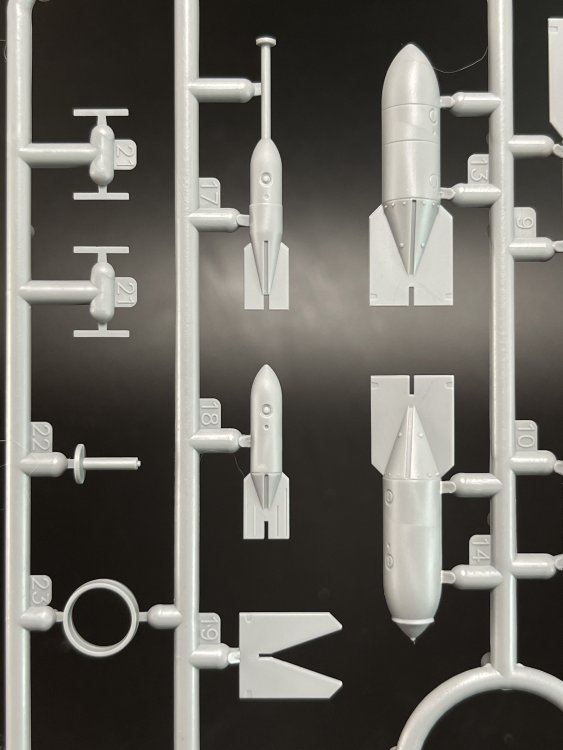
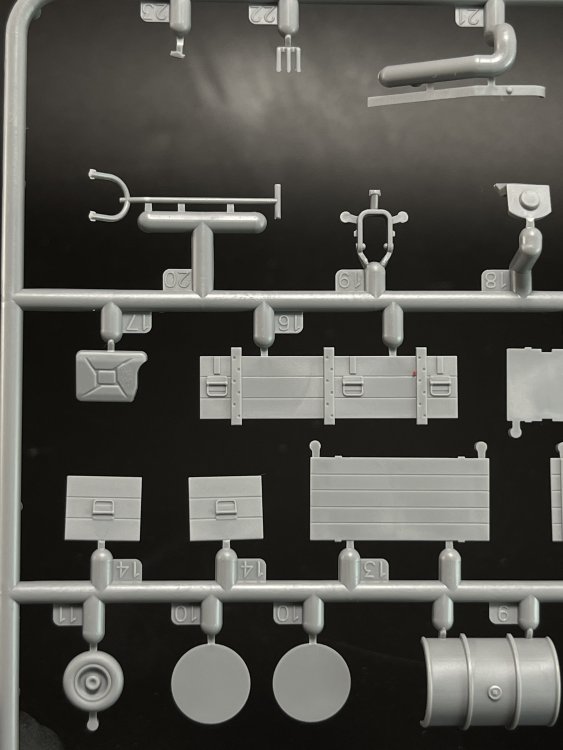
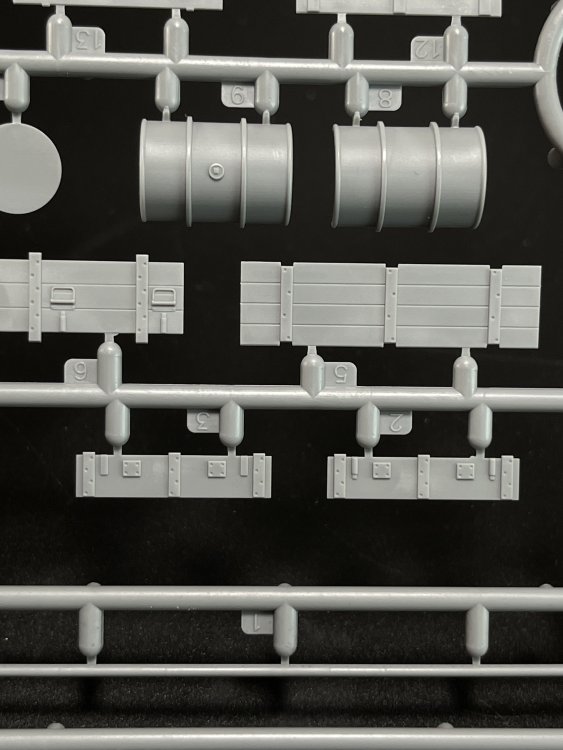
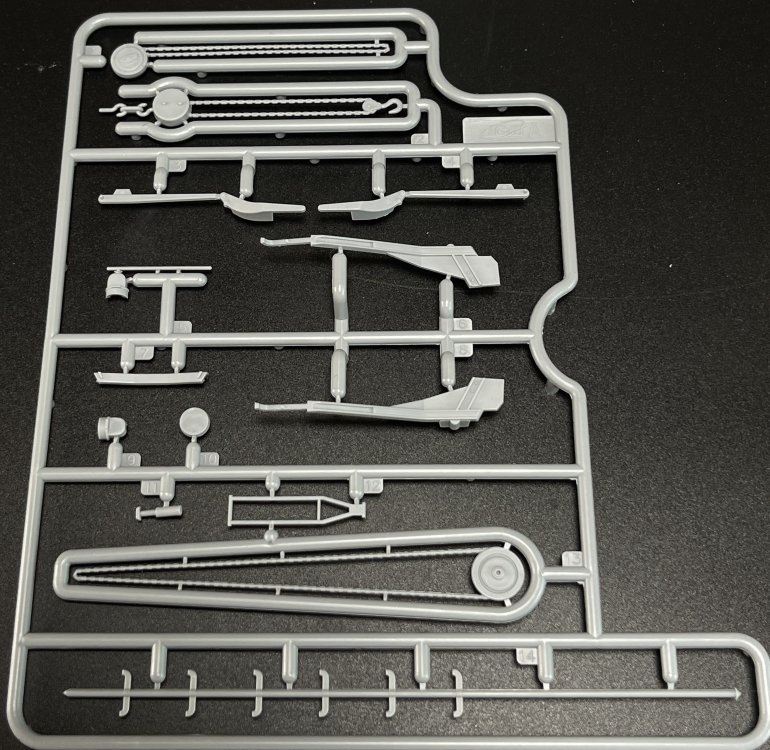
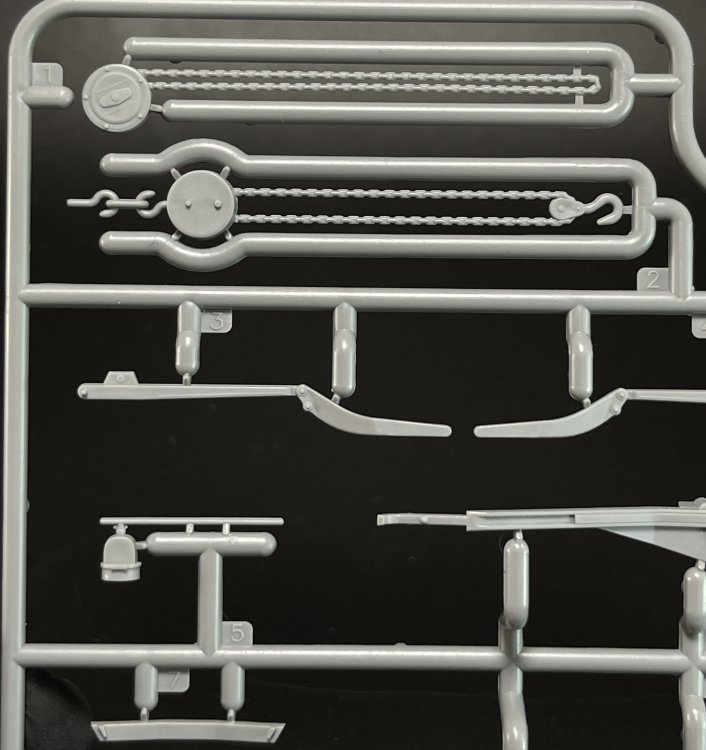
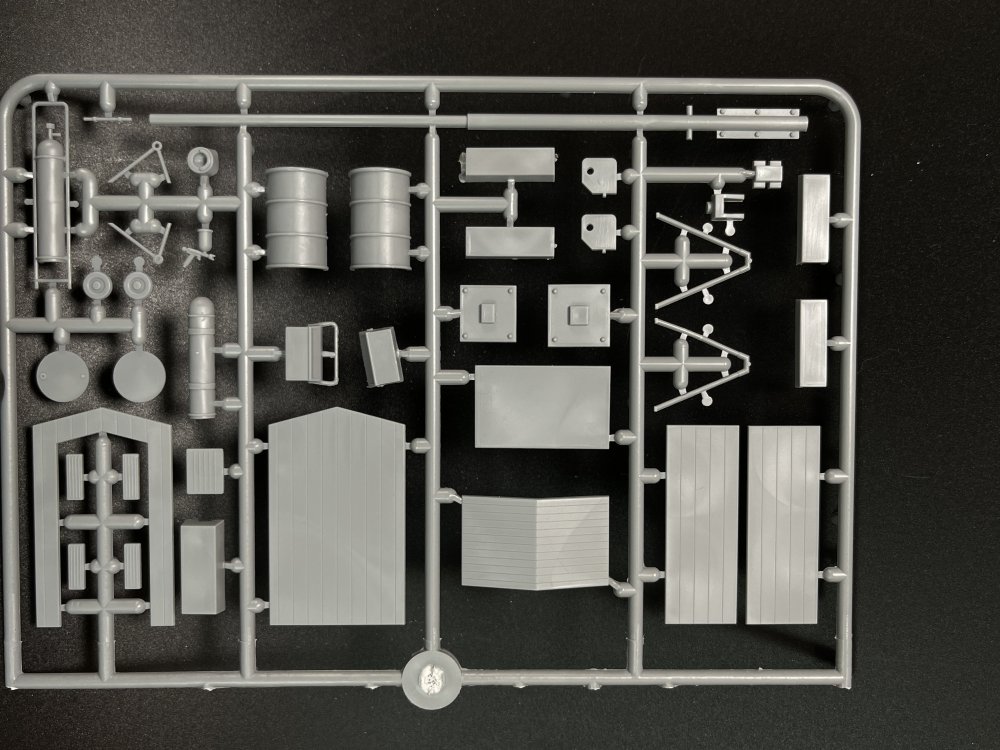
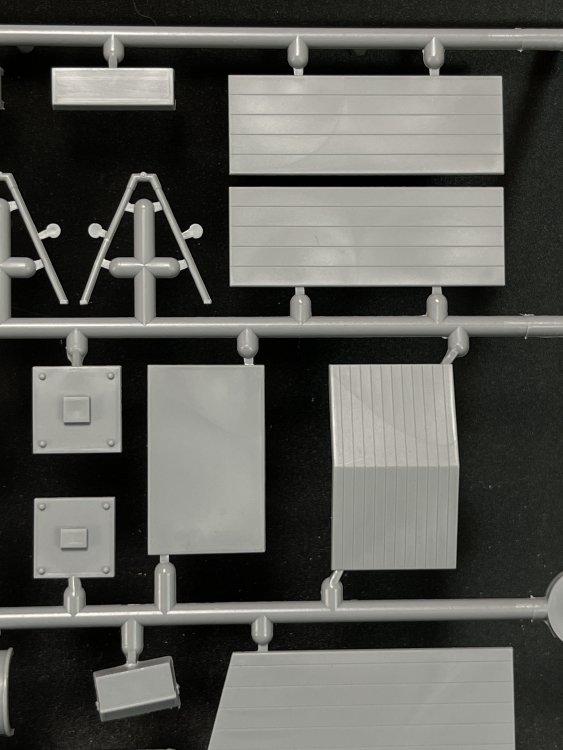
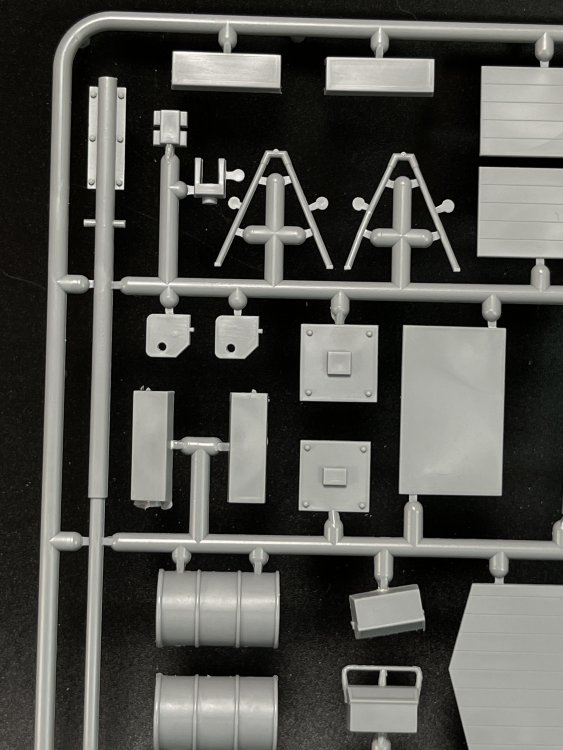
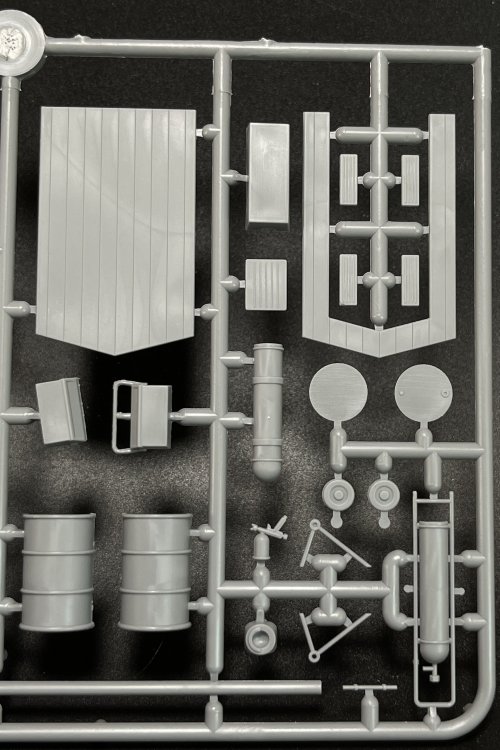
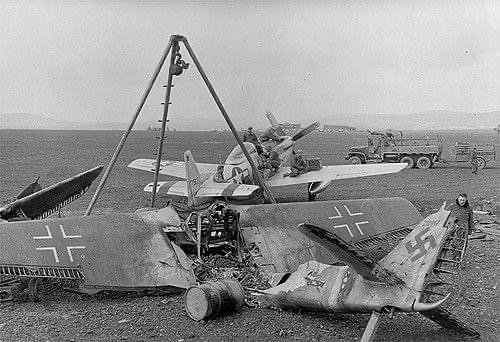
ICM 1:48 Luftwaffe Airfield Equipament Price Tag: €17,80 Catalogue number 48409 ICM is unstoppable. Now a new important 1:48 for Aircraft modeler to adventure themselves to the diorama world. As you can see in the boxart, inside the box, some 50kg bomb crane, 250kg bomb crane, jerry can, fuel barrel, barrel for lubricants, compressed air cylinder, toolbox and even an airbrush. A LWC 500-IX (finally one in plastic in 1:48) and fabulous field tripod crane. The parts are very detailed even the chain in plastic is well made for 1:48 but if there is anything that is worth upgraded is the chain and it’s an easy upgraded to make. If these wasn’t enough, ICM gives you even more, a road barrier, a watchman`s booth and a small stepladder. To complete this beautifull airfield set, a decal sheet for the crates, barrier and booth. All these plus a full ordnance set. All parts have no flash at all, and the surface detail is very very good as the actual ICM standards. The small parts like a tiny 1:48 airbush are just perfect and very well mold with no flash and very little cleaning or almost none. The connection points sprues in perfect places to make easy the cut from the sprues. BUT, This set has much more to offer than ordnance. We already review part of this set when we took a look on the Luftwaffe ordnance so everything is here too inclusive a large decal sheets for the bombs. Just check here. The instructions are very clear and easy to understand as usual. Th color charts is only with ICM paints. Conclusion Wow! What a set! A Perfect invitation at low cost to all aircraft modeler to make a diorama!! No excuses anymore! Kudos ICM! VERY HIGHLY RECOMMEND. Our sincere thanks to ICM for making this fantastic set. To get one just click here Francisco Guedes www.largescalemodeller.com


-
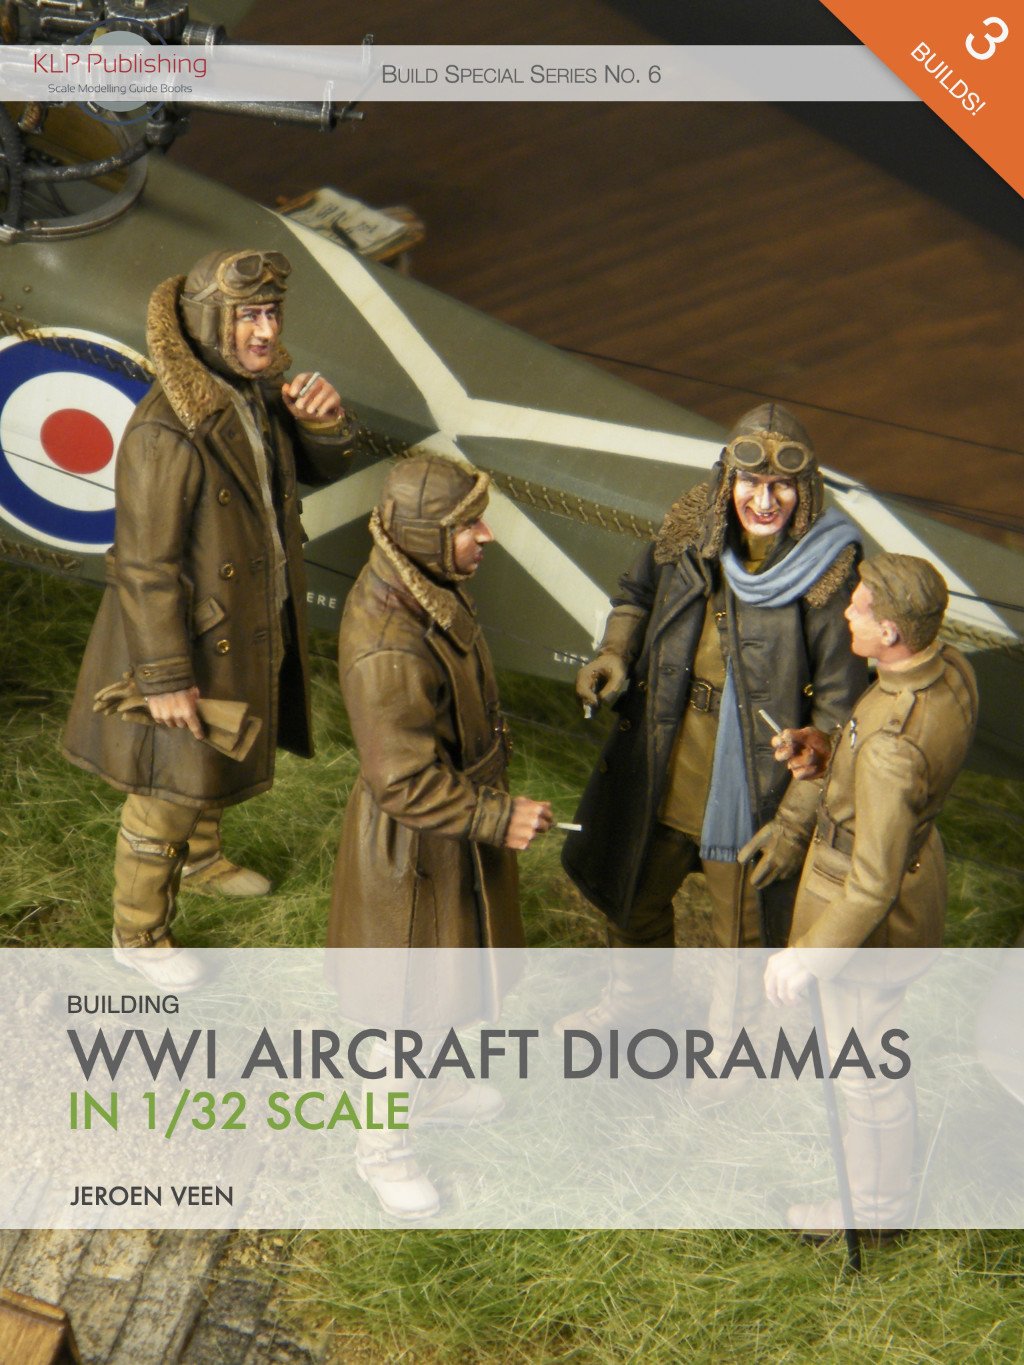
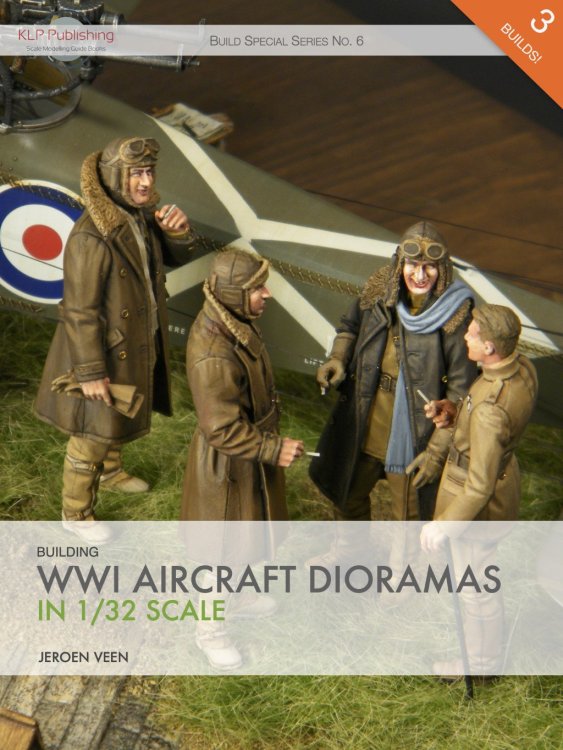
Building WWI Aircraft Dioramas in 1:32 Scale Jeroen Veen
Fran posted a topic in Tools, Books & Misc.
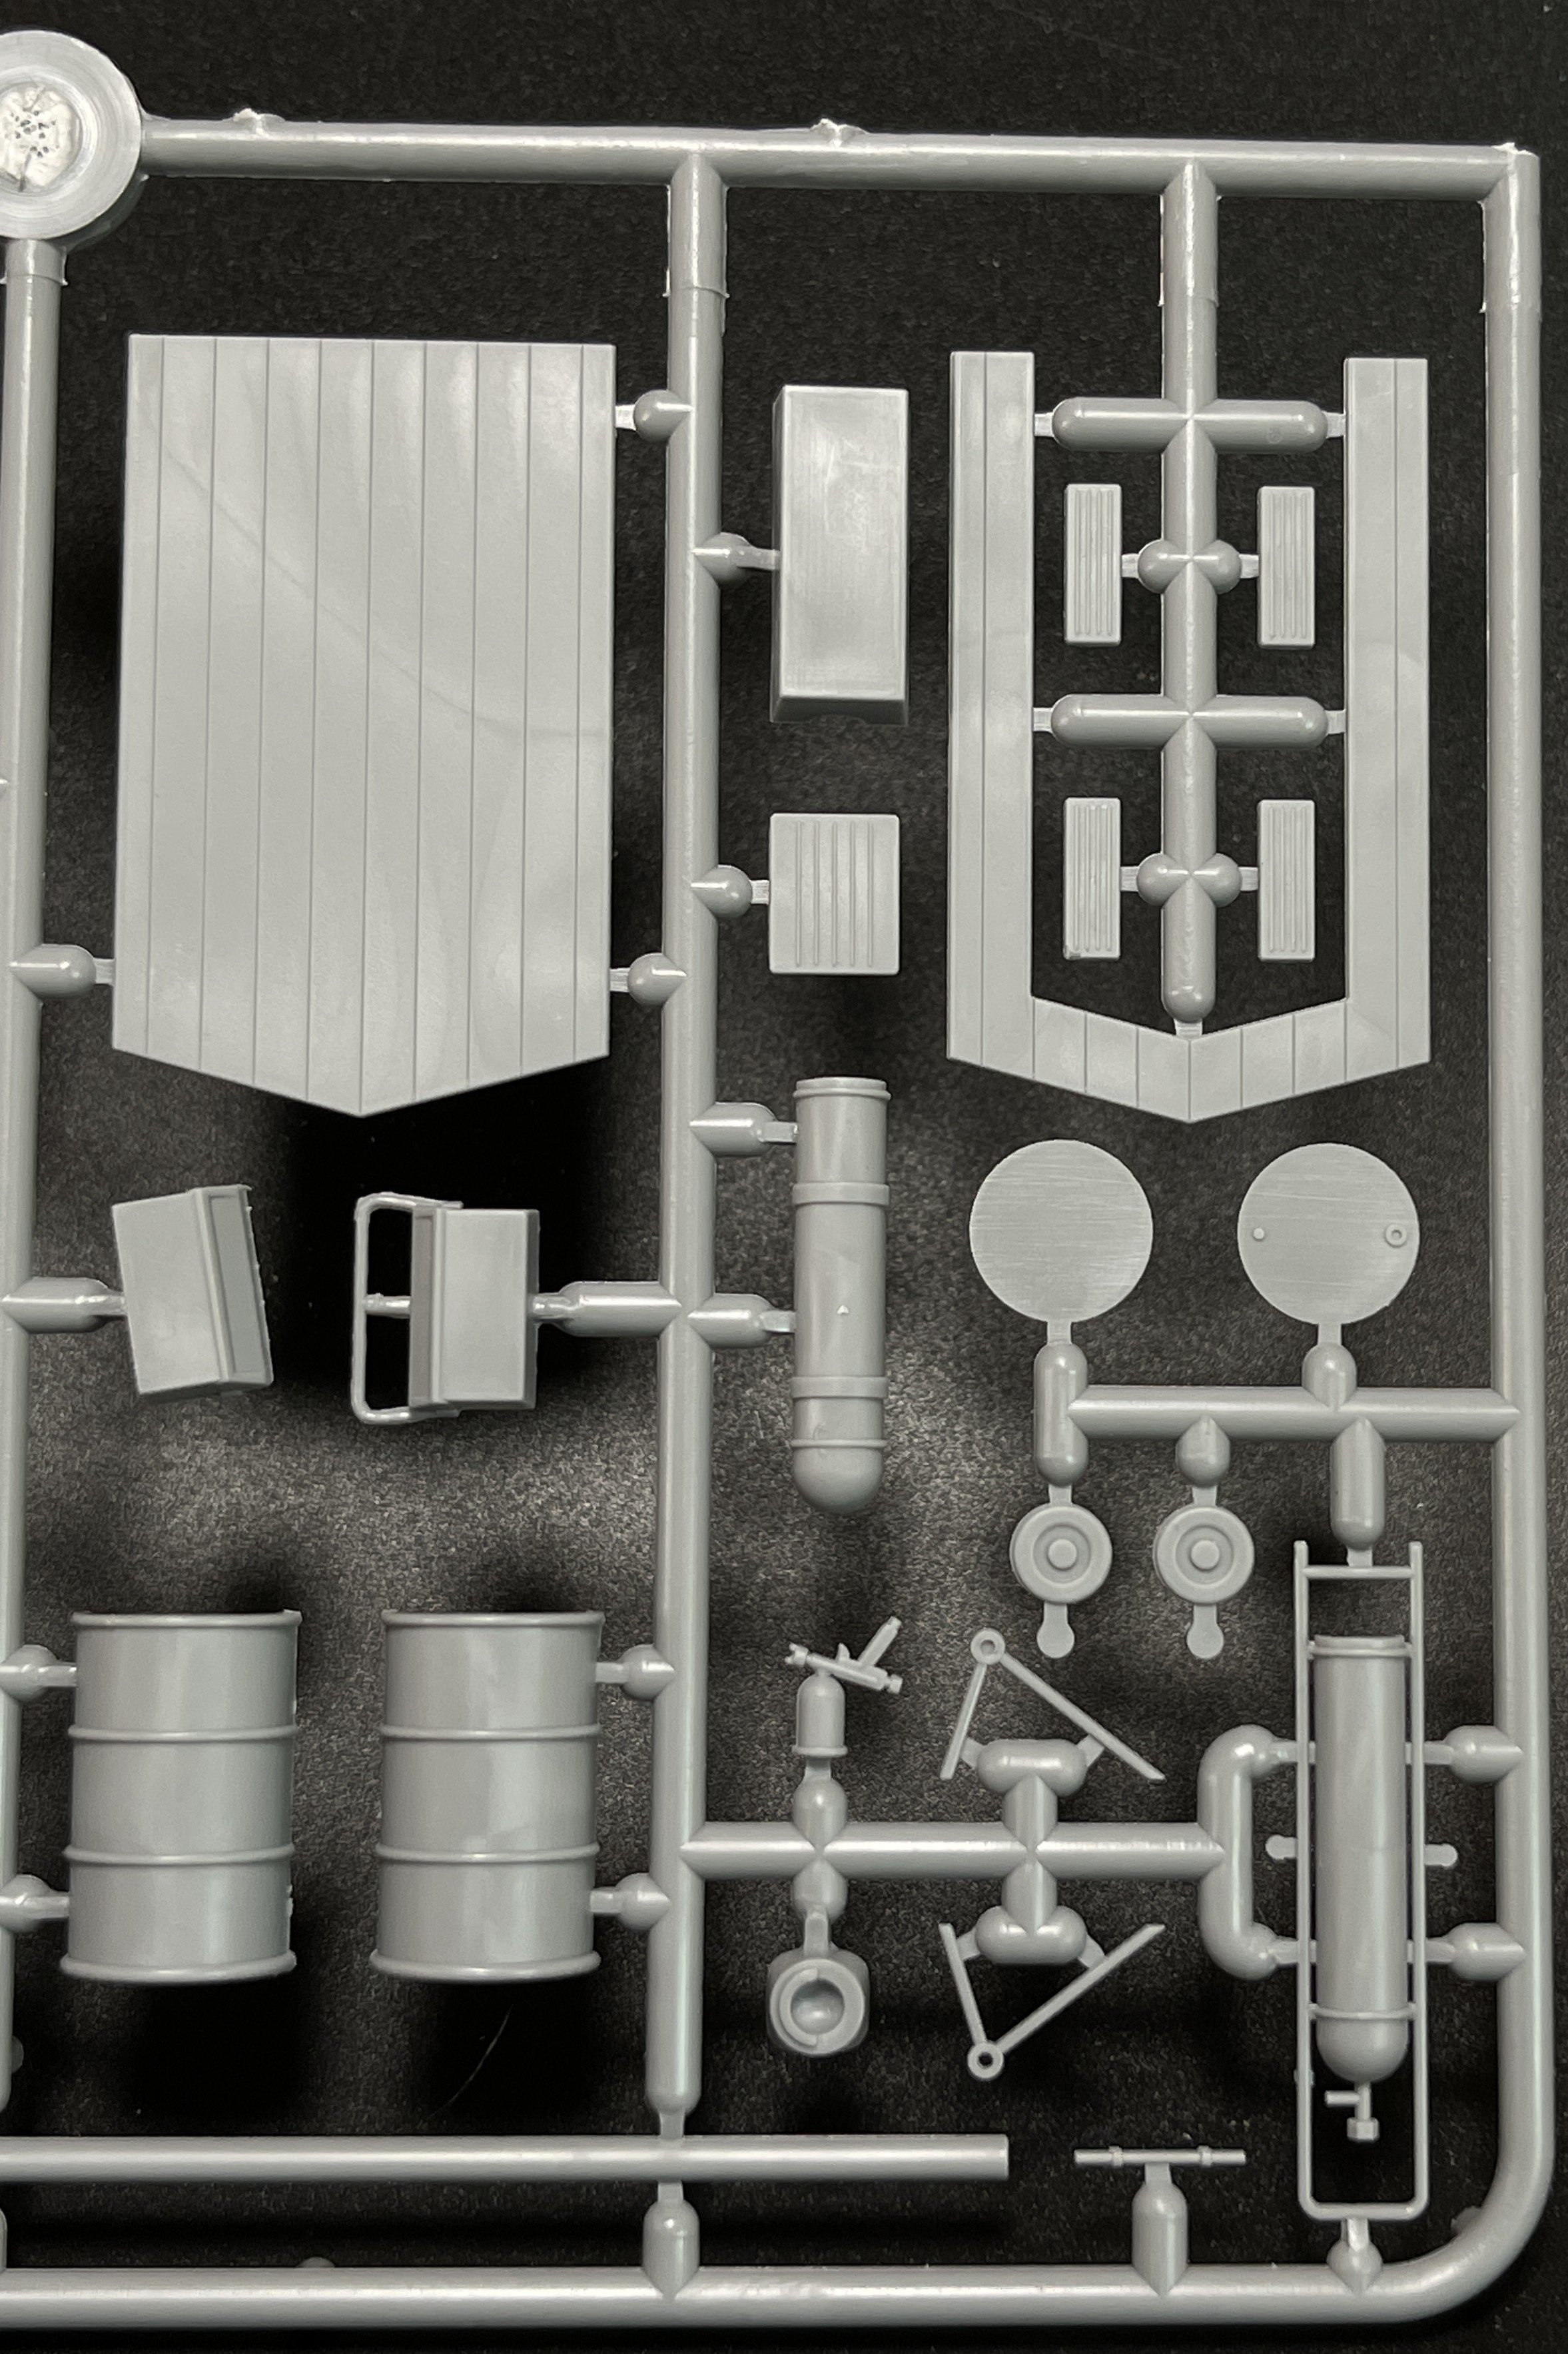
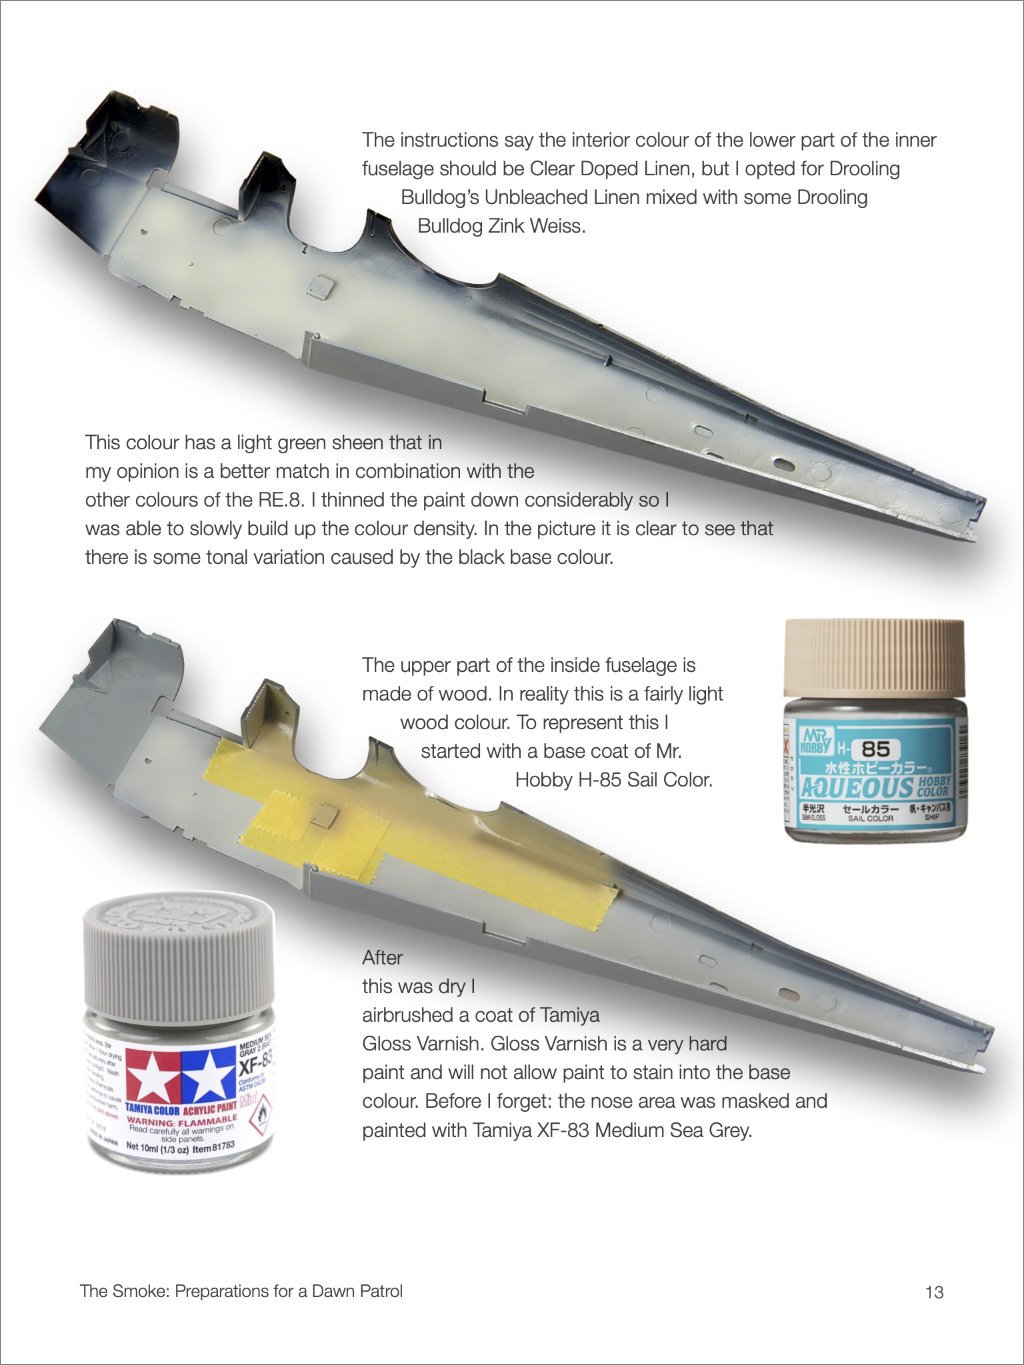
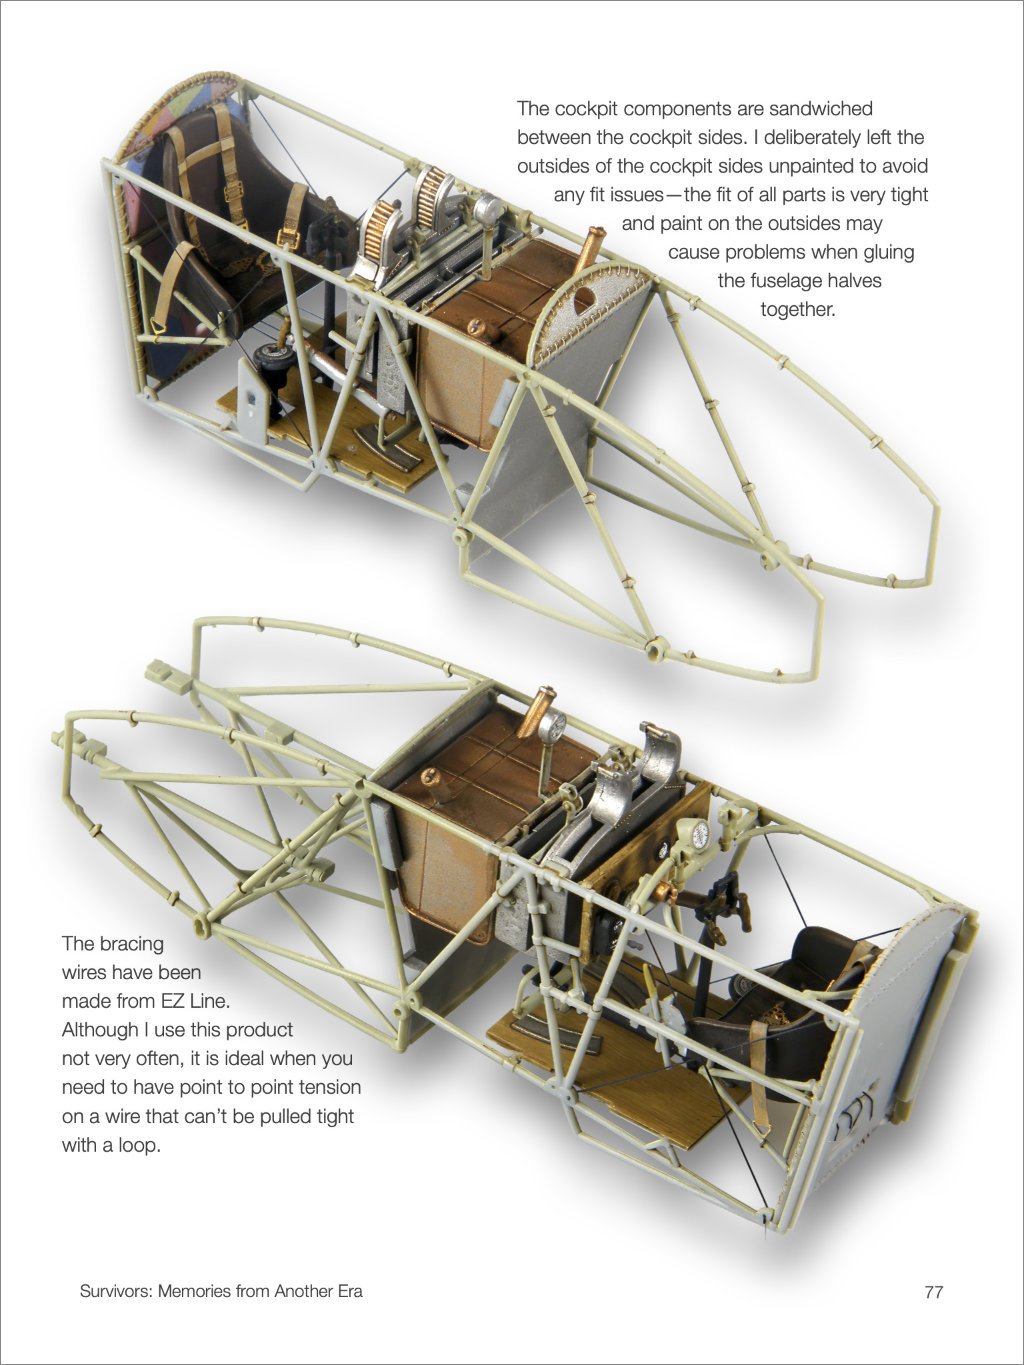
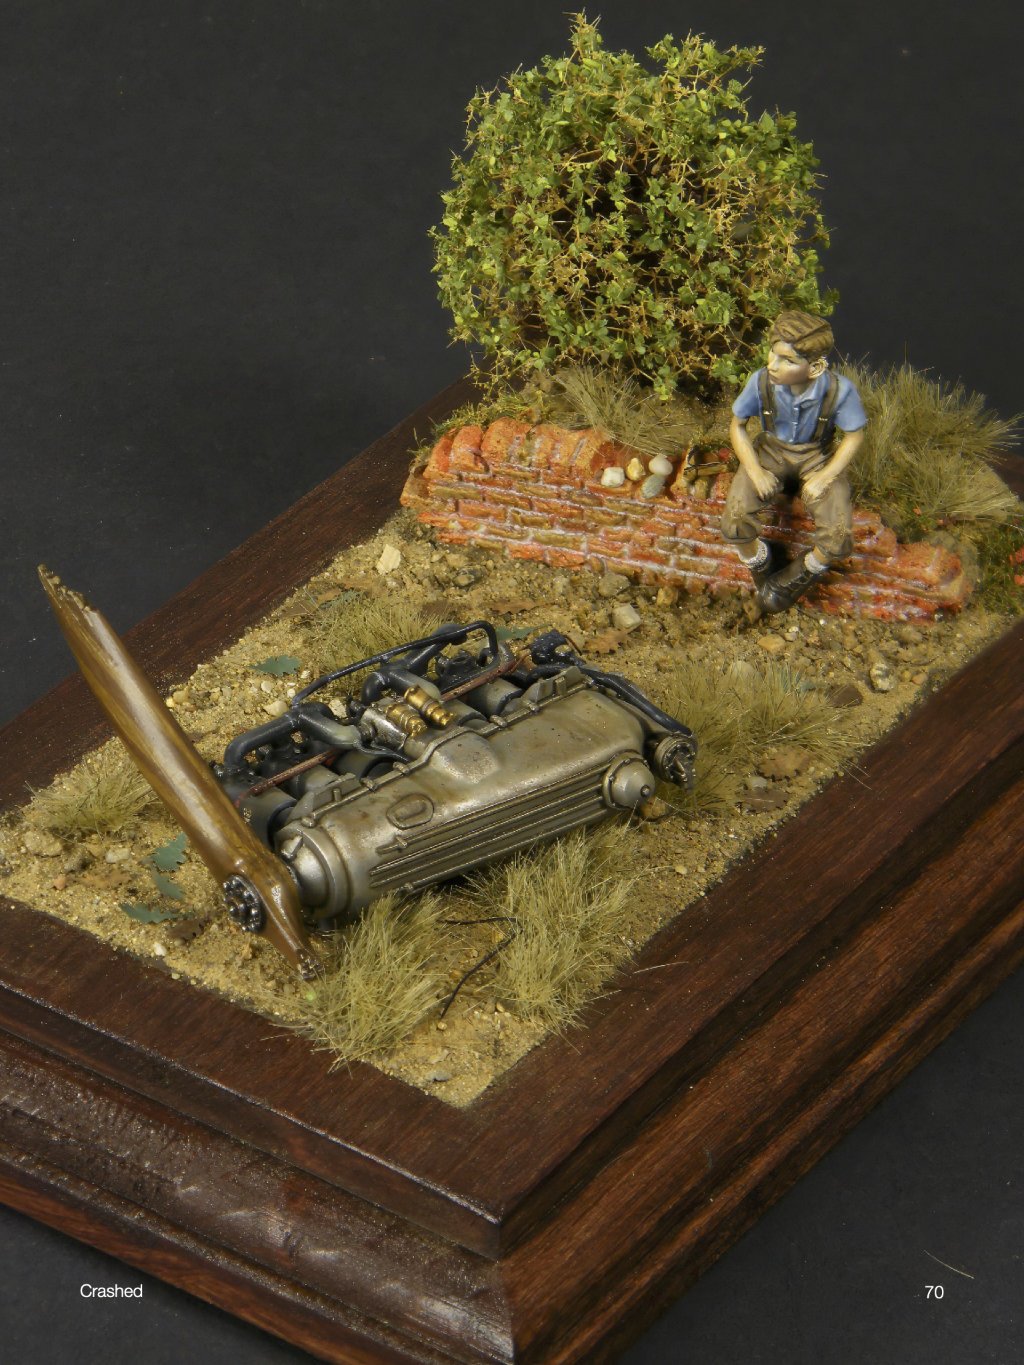
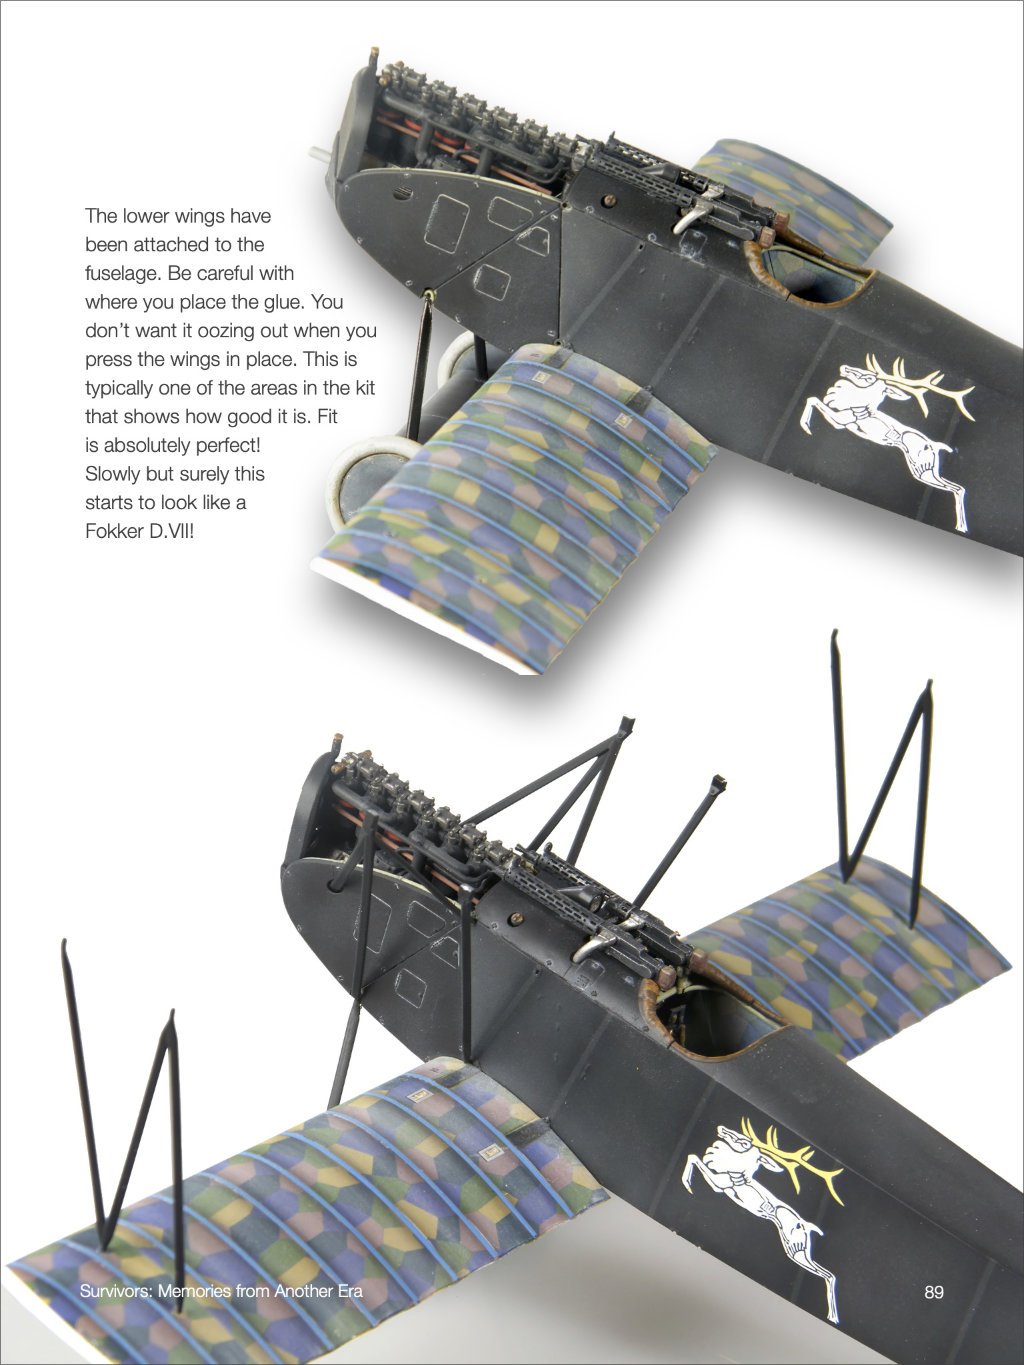
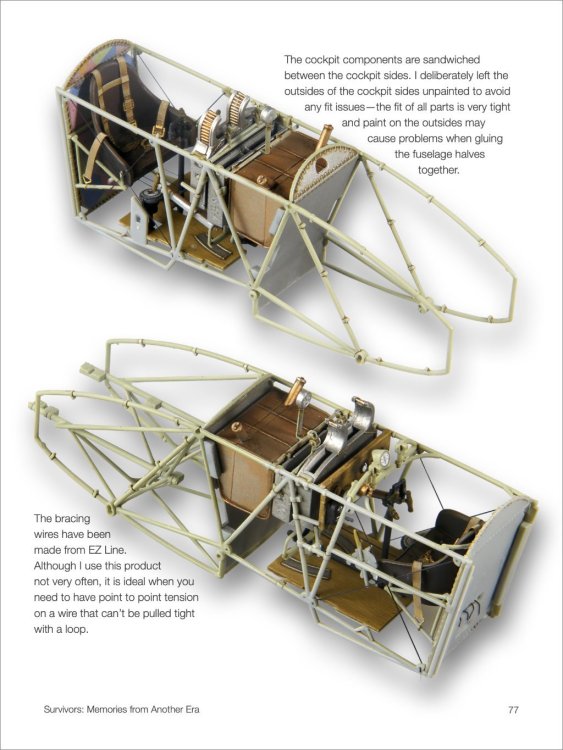
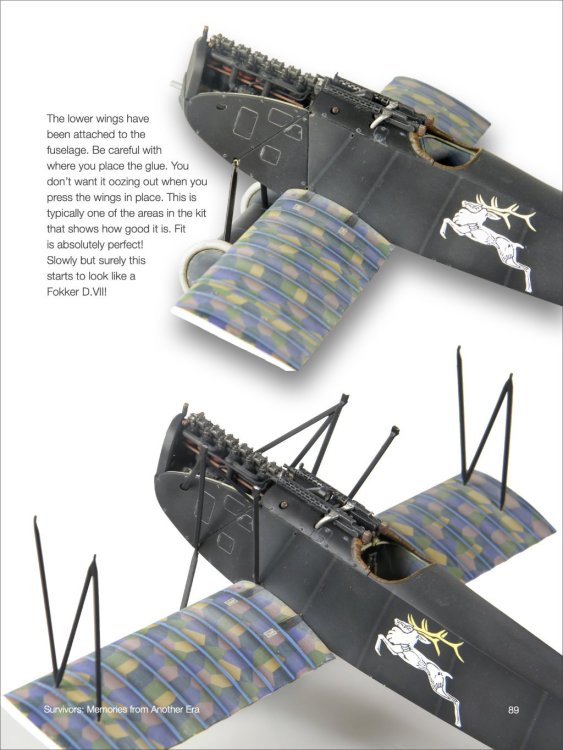
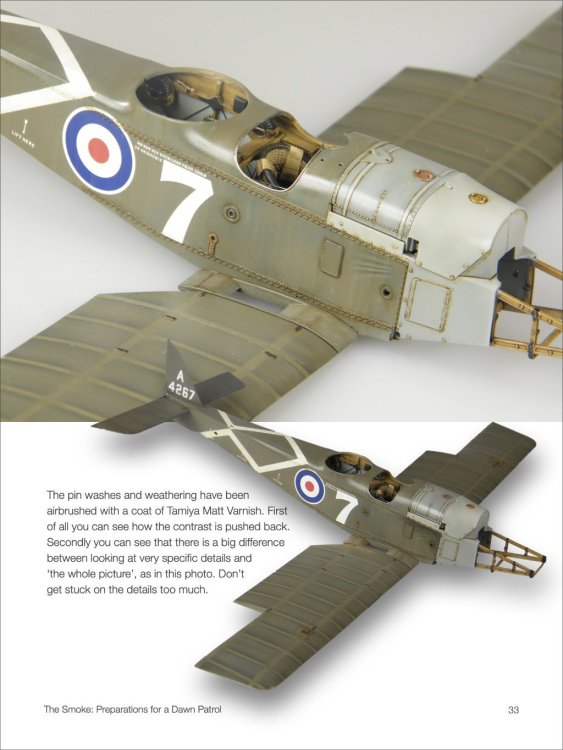
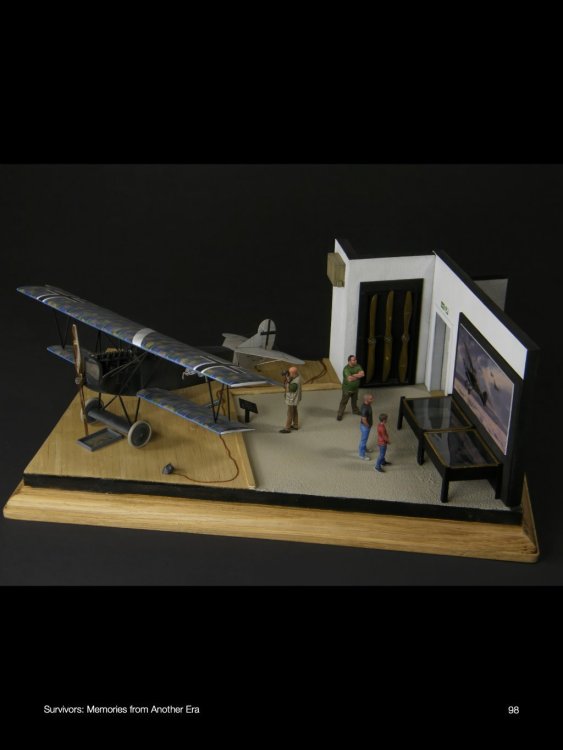
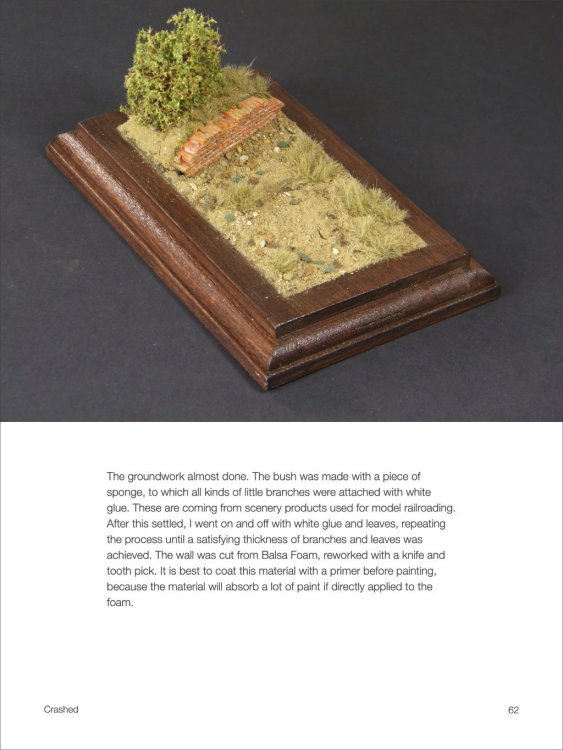
Building WWI Aircraft Dioramas in 1:32 Scale Jeroen Veen Publisher: KLP Publishing 106 pages Landscape format (A4 size with softcover) in all digital format 3 full features build Price tag: 15 $AUD (around 9€ and 9,5$) Click here KLP Publishing is an all-digital publisher that have in Kevin Futter is CEO. I think is a one man show and for quite a few year having published several digital books of modelling several subjects that are quite inspiring and gives the modeler reader quite a boos in the mojo. I know because I do have two previous digital books releases by KLP, the Felixstowe and the Fw-189 and they are both great. This time, I had the honour to be asked to make a review of the latest release: Building WWI dioramas by the great modeler (and also friend) Jeroen Veen. This book has 106 pages, is divided in 5 chapters - Introduction - About Jeroen Veen - The Smoke - Crashed - Survivors The book is full with very quality pictures and step by steps of the 3 dioramas named “The Smoke”, “Crashed” and “Survivors” as the chapters name. The first diorama is “The Smoke: Preparations for a Dawn Patrol” and it`s with the a RE.8 “Harry Tate”, probably my favourite British aircraft made by Wingnut Wings and it is always a pleasure to see one full build in such a quality. The author shows every single step of the building with very nice tips for all modellers. I mean it as some of those I already has forgetten and others I never heard about, so I need to try them out! I cant tell you which one as for that you need to get the e-book. The inside wood work and all the busy interior is marvelous. The build goes for more than 30 pages, before it enter to the base diorama itself for more than 10 pages of WIP. Despite of having several figures, there`s nothing about the painting of those. At page 57, starts the “Crashed” It’s a very small vignette, very intriguing but fantastic. Here, the figure has a bit of text to explain the modifications made specially on the hair but there`s not step by step of painting job. On this chapter, the step by step pics are much less and only a few on the engine. However the explaning text is quite rich and comprehensive and you can almost “see” the steps made by the Author. Now moving to my favorite diorama on this book is the “Survivors – Memories from another era” It stars at page 73 until the end of the e-book (pag 106) Here again several step by step on the Fokker DVII build, with a very comprehensive explaning text. It`s a joy to see the step-by step pictures alongside the text.! Really inspiring. For the Page 93 starts the diorama construction but there`s no step by step of it specially for the base itself (the Floor, the wall, figures etc) but you get the display cases scratchbuild, the propeller rack and he Wade Meyer`s painting Conclusion: It´s a great e-book for 9€ (or 9,50$) that gives you good tips and very inspirational stuff along 106 pages. For just 9€, you will have a grat reading and re-reading and watching over and over again all those pictures It´s a great book to all modeler that have some interest in WWI. And also it`s a mojo elevator looking for Jeroen Veen works. Highly Recommend Thanks to Jeroen Veen for the chance of making this review and go to KLP website to get yourself a digital copy – click here.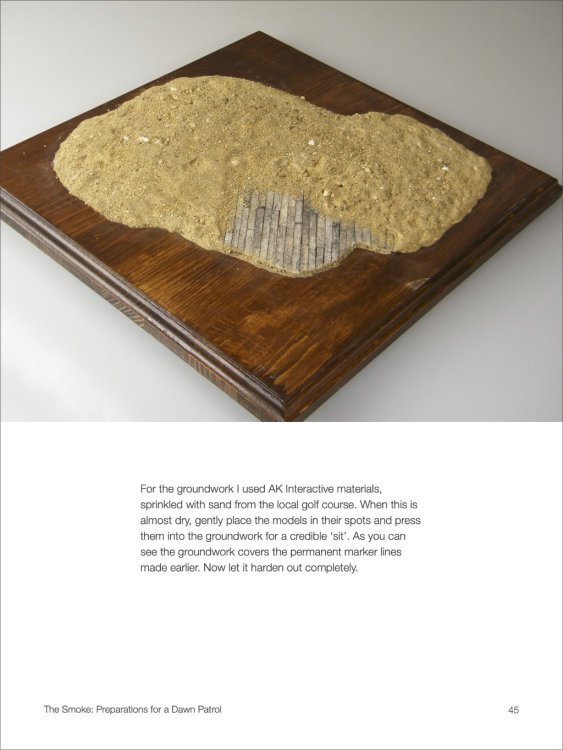


- 2 replies
-
- 4
-
-
-
- e-book
- jeroen veen
- (and 3 more)
-
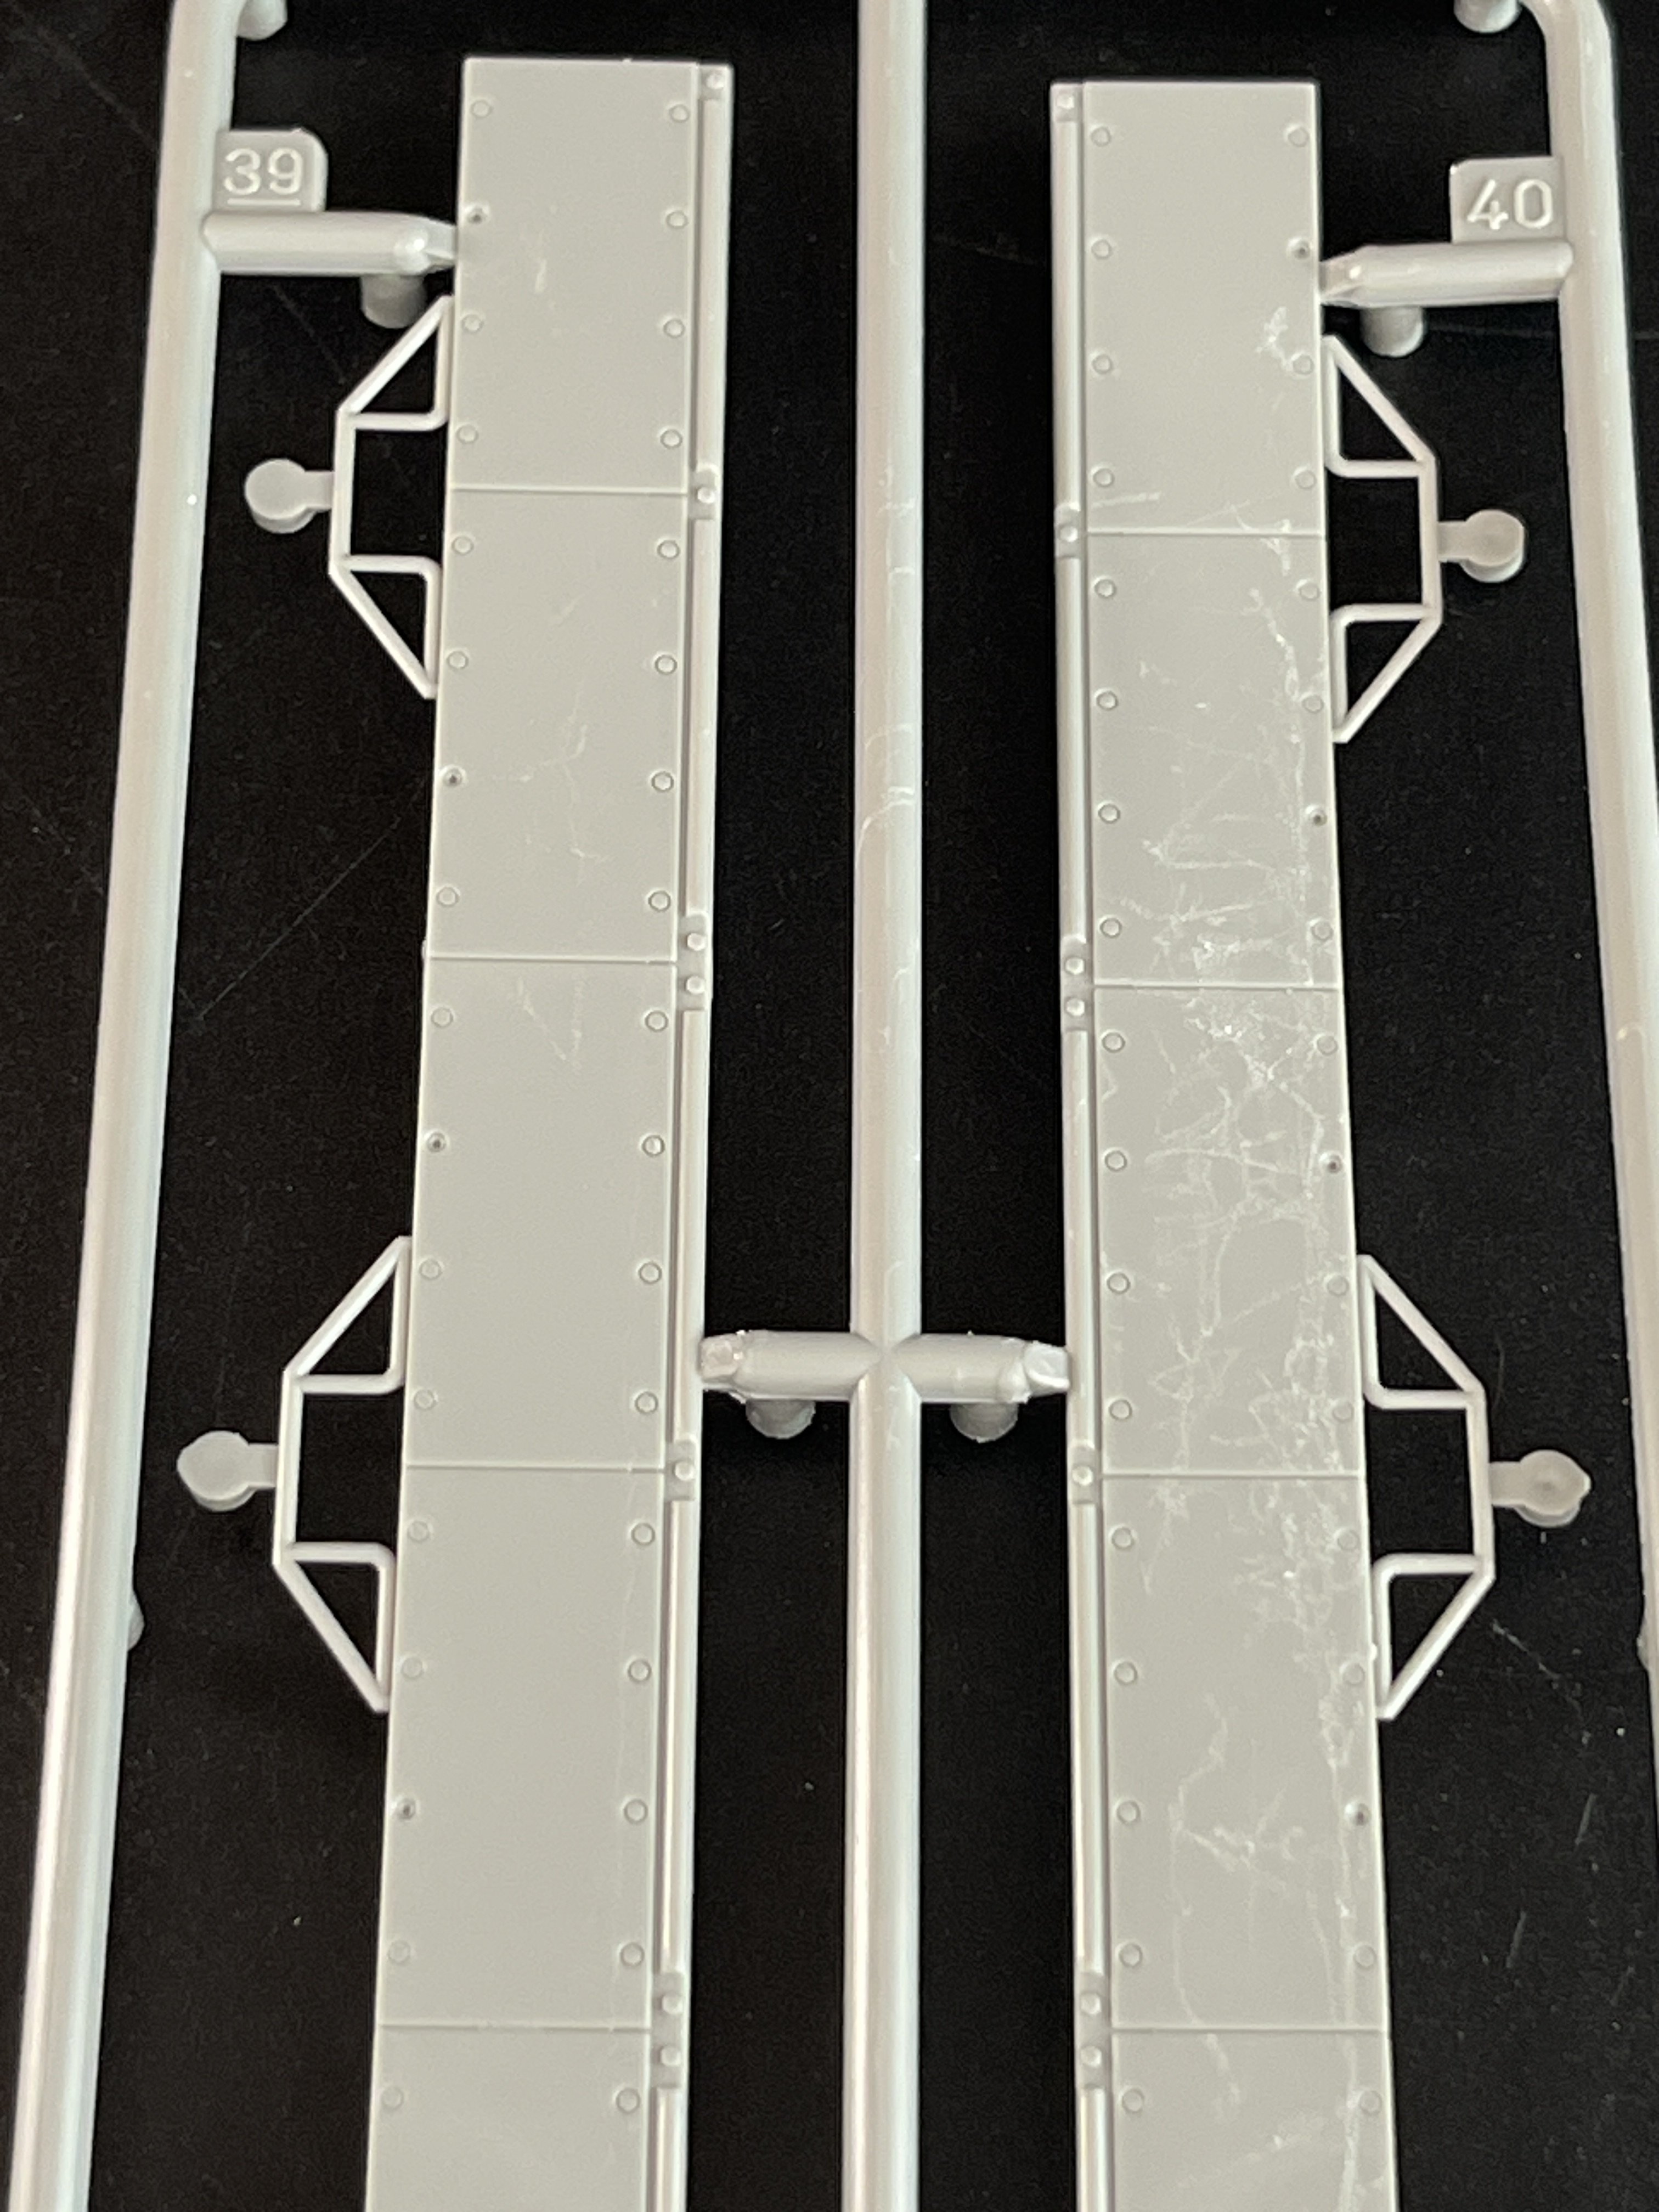
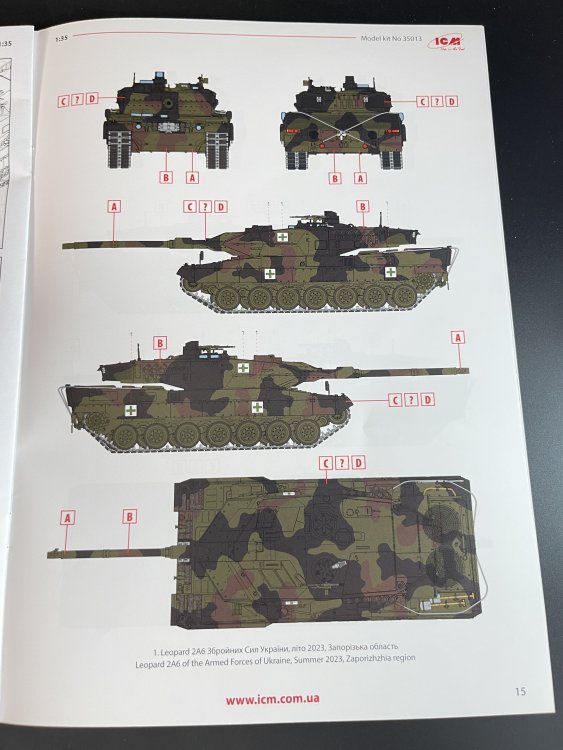
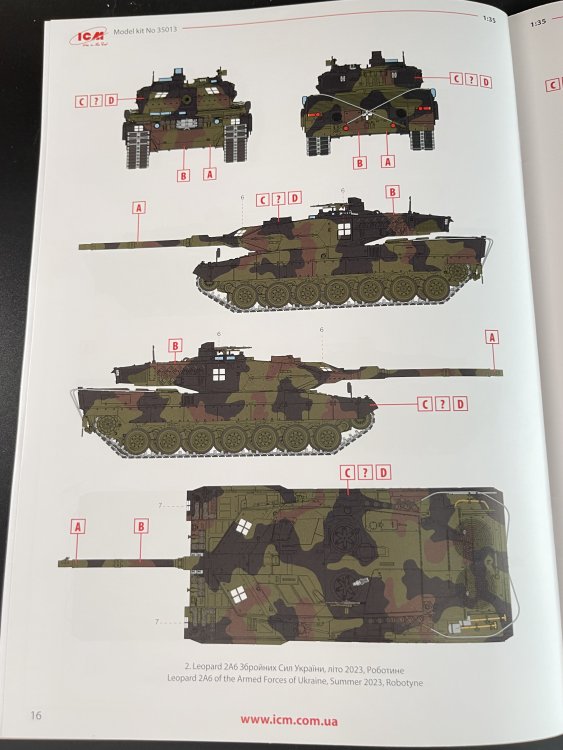
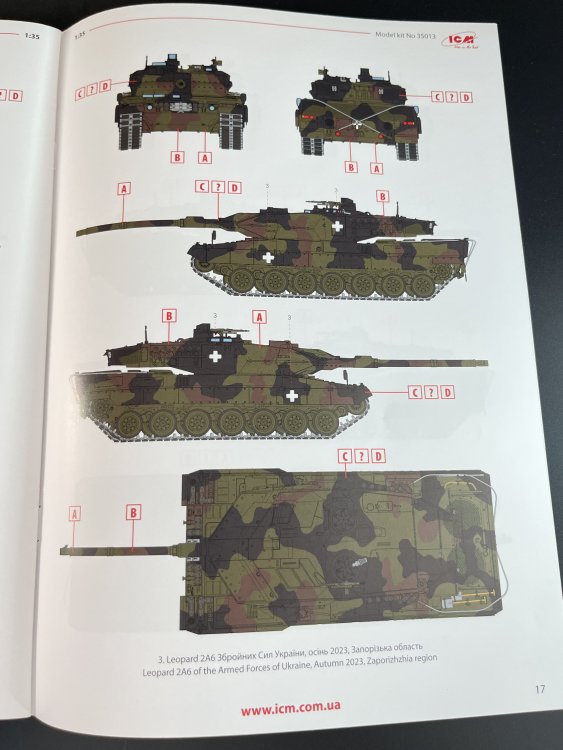
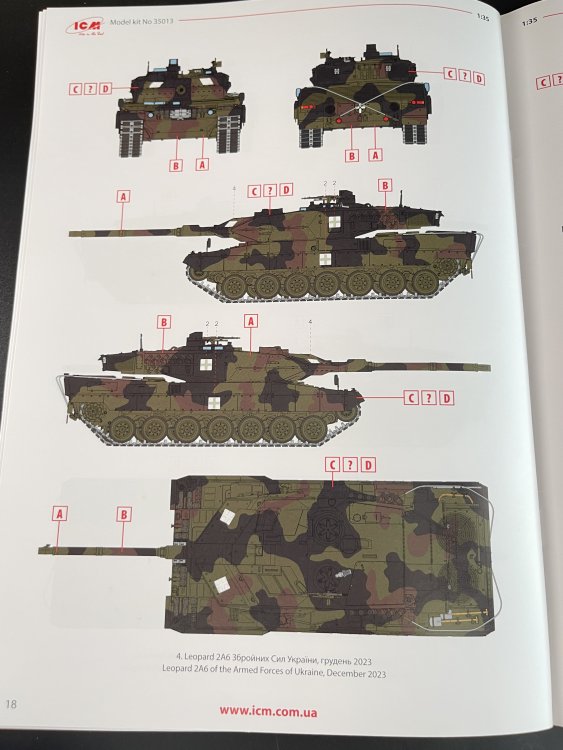
icm 1:35 ICM Leopard 2A6 with Crew Armed Forces of Ukraine
Fran posted a topic in Armour/AFV Reviews
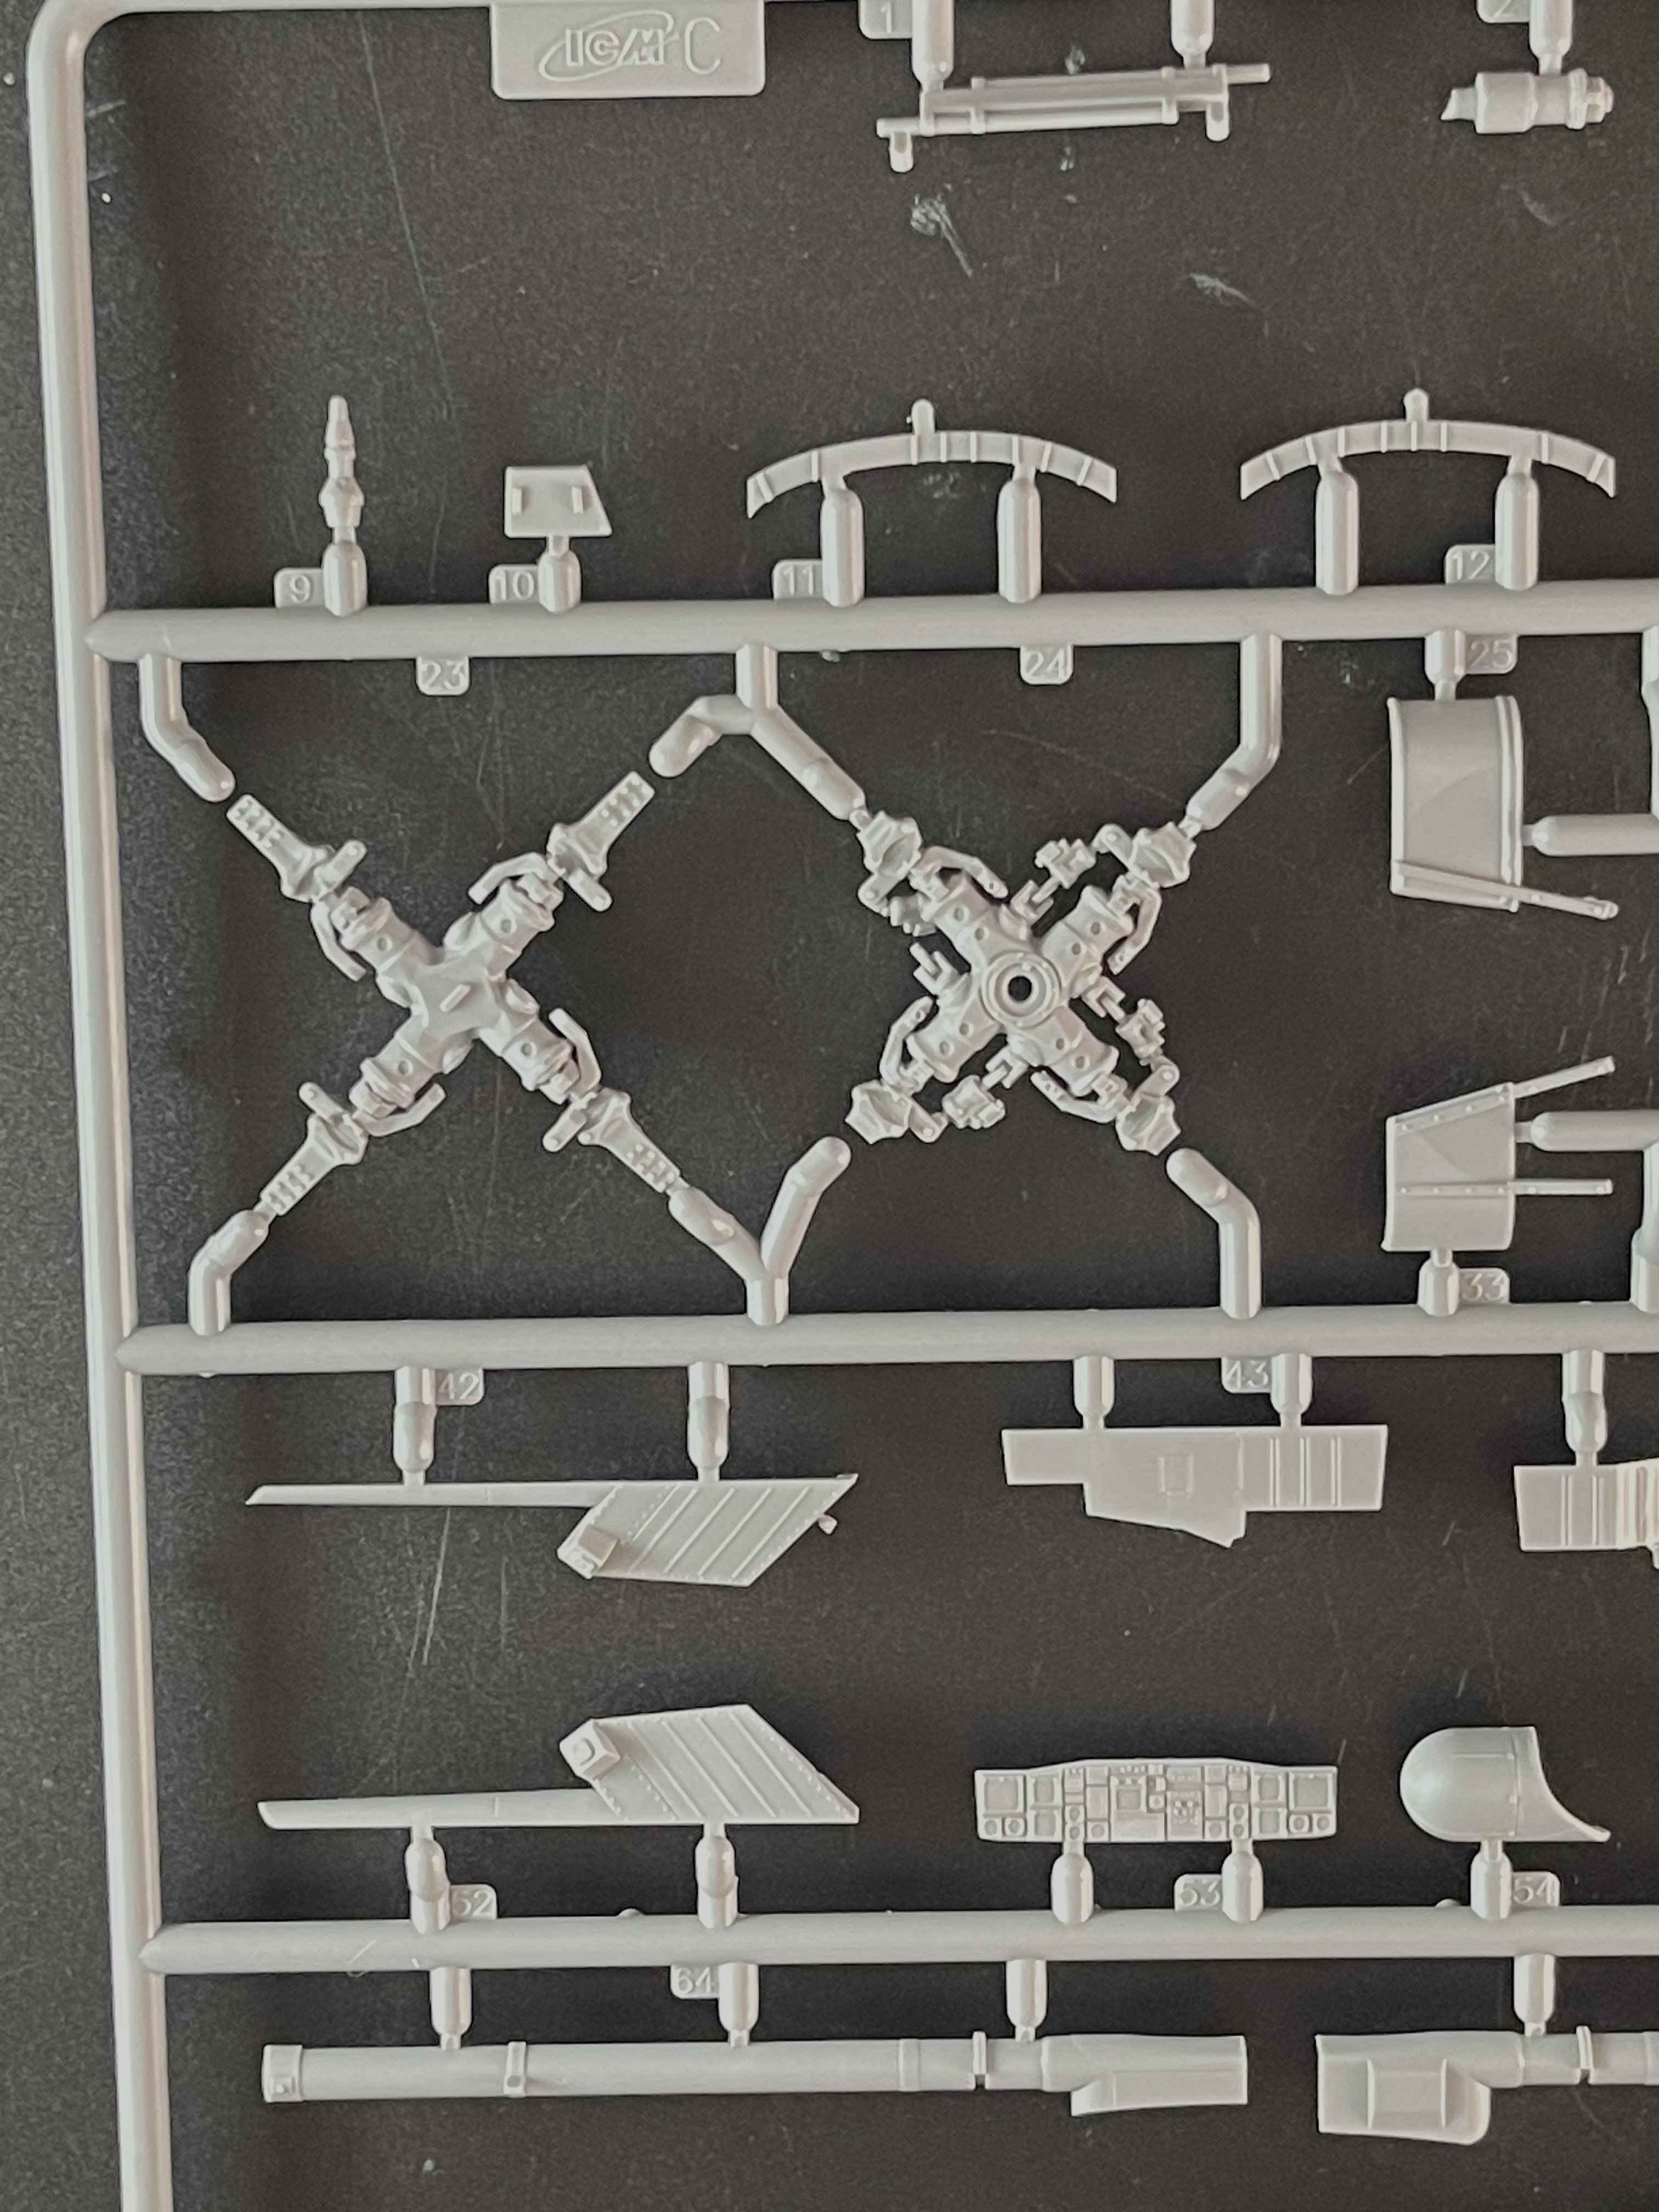
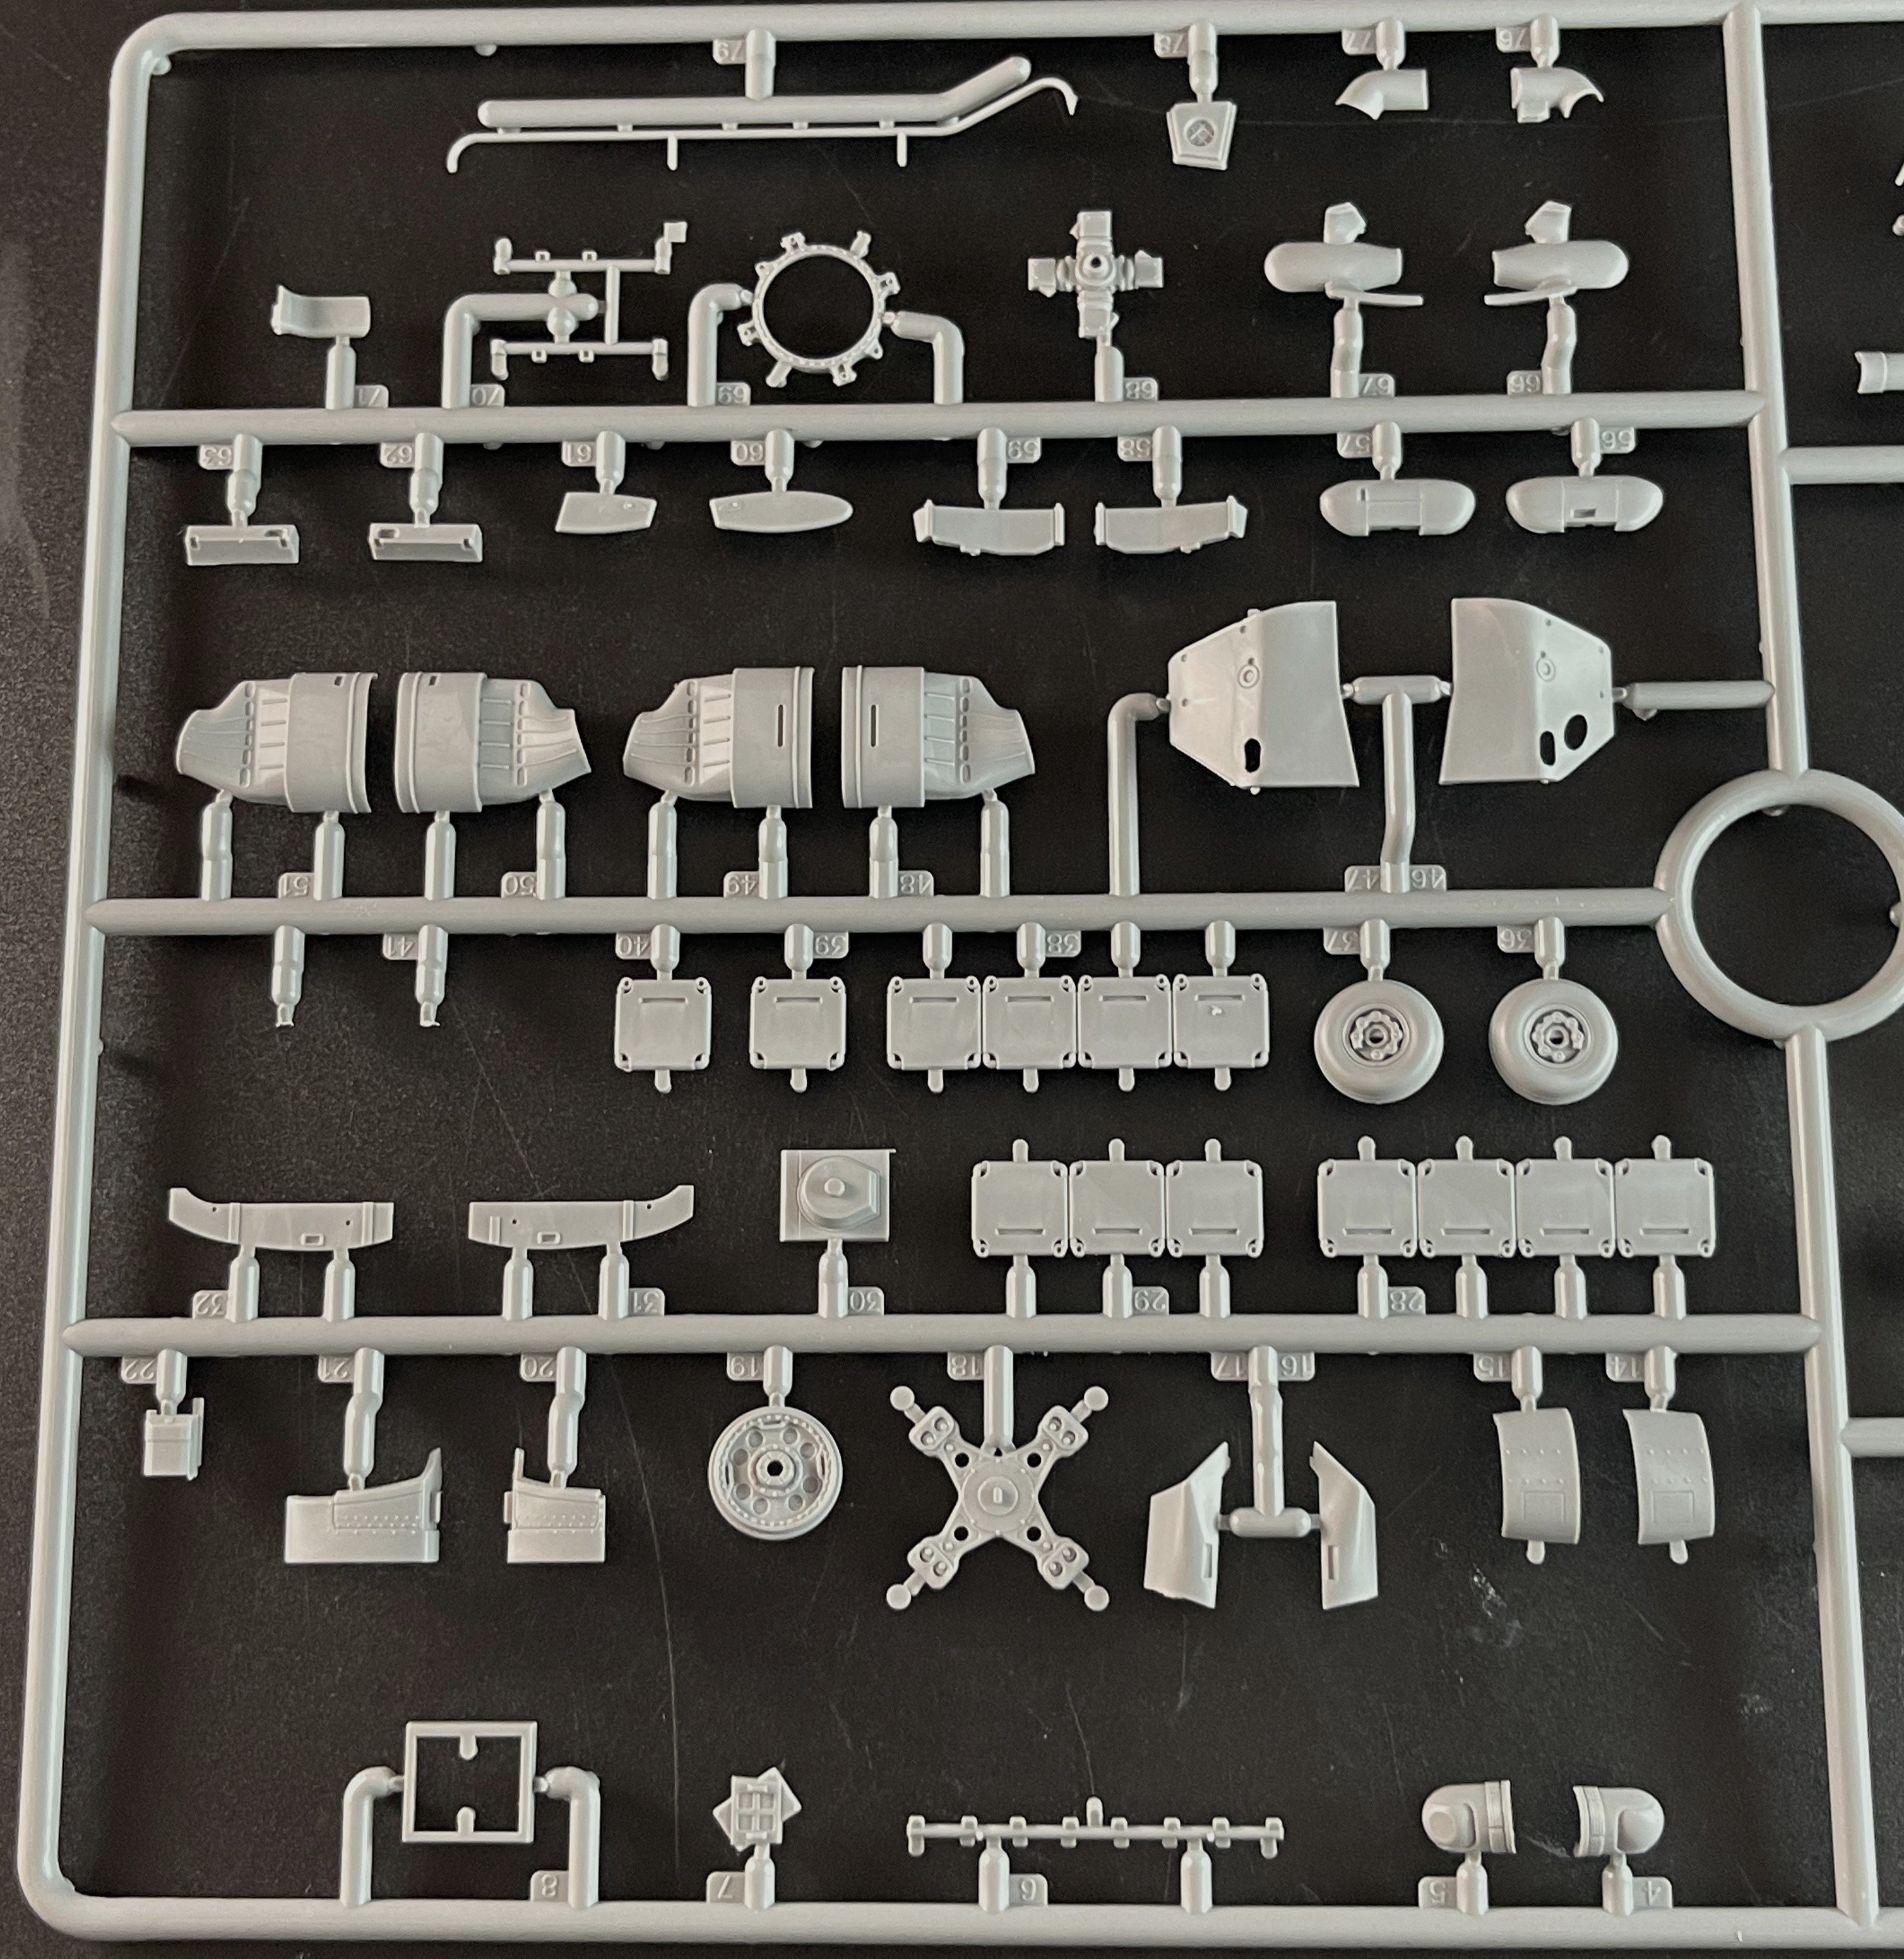
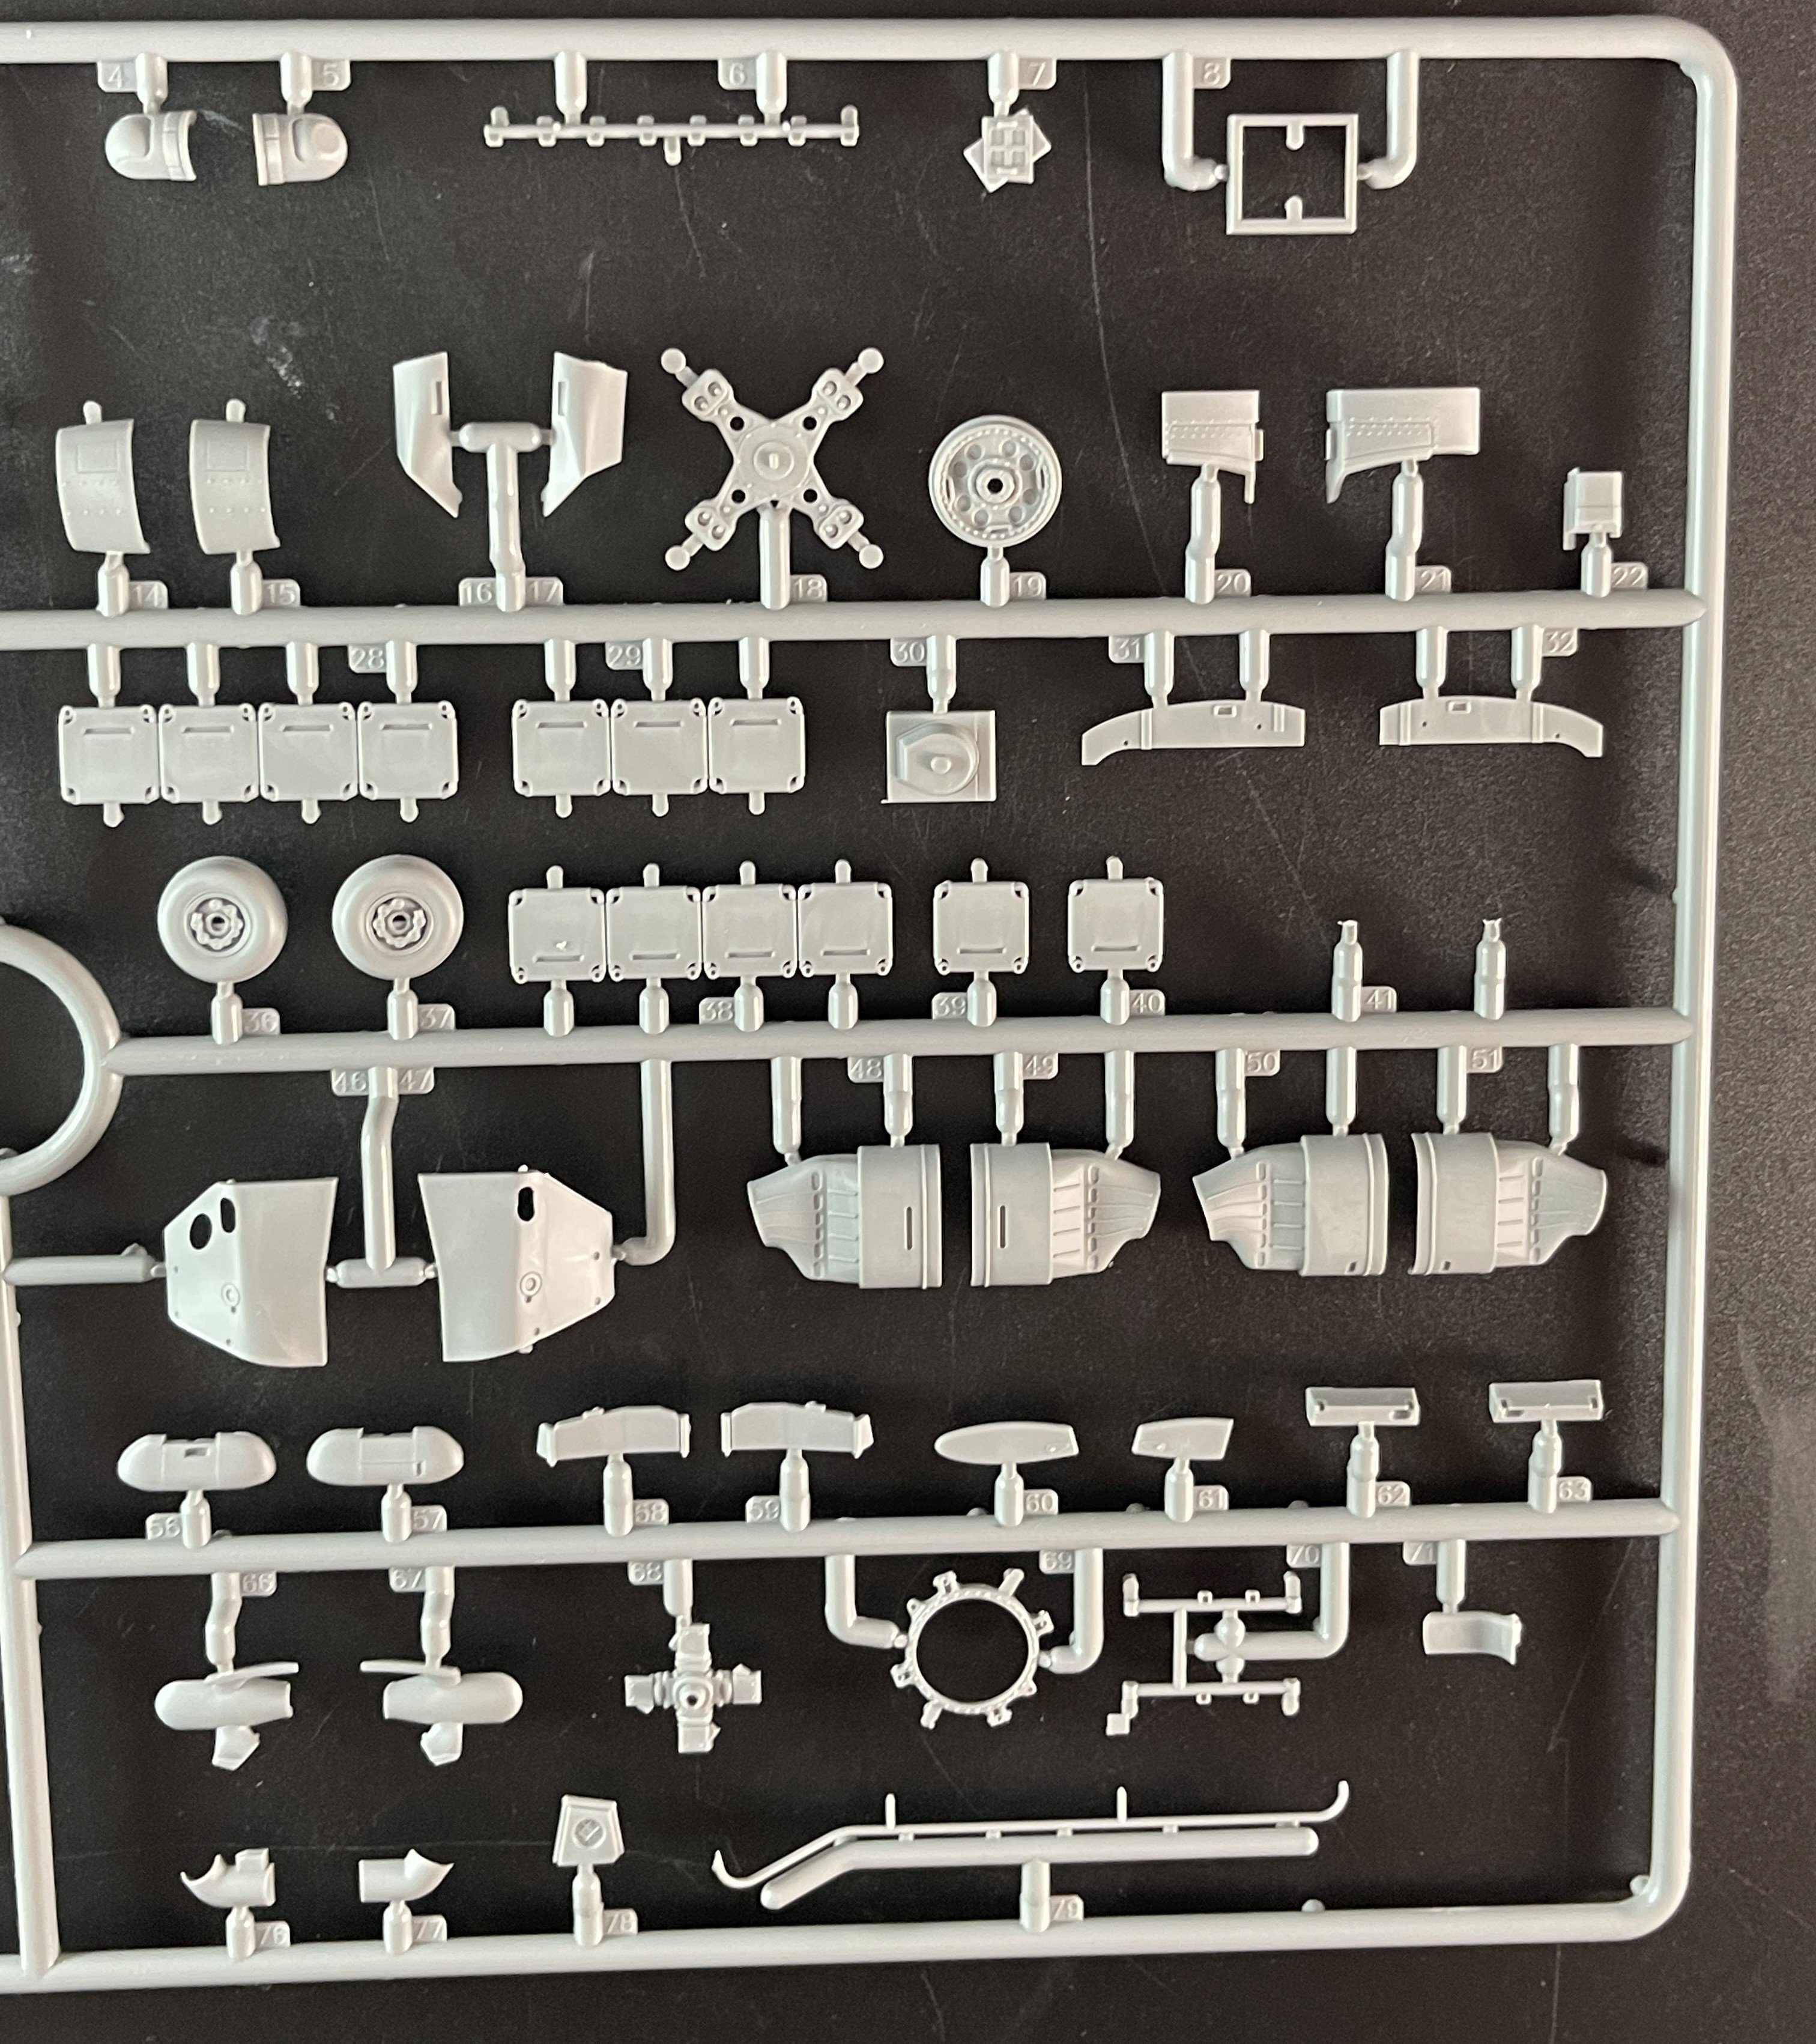
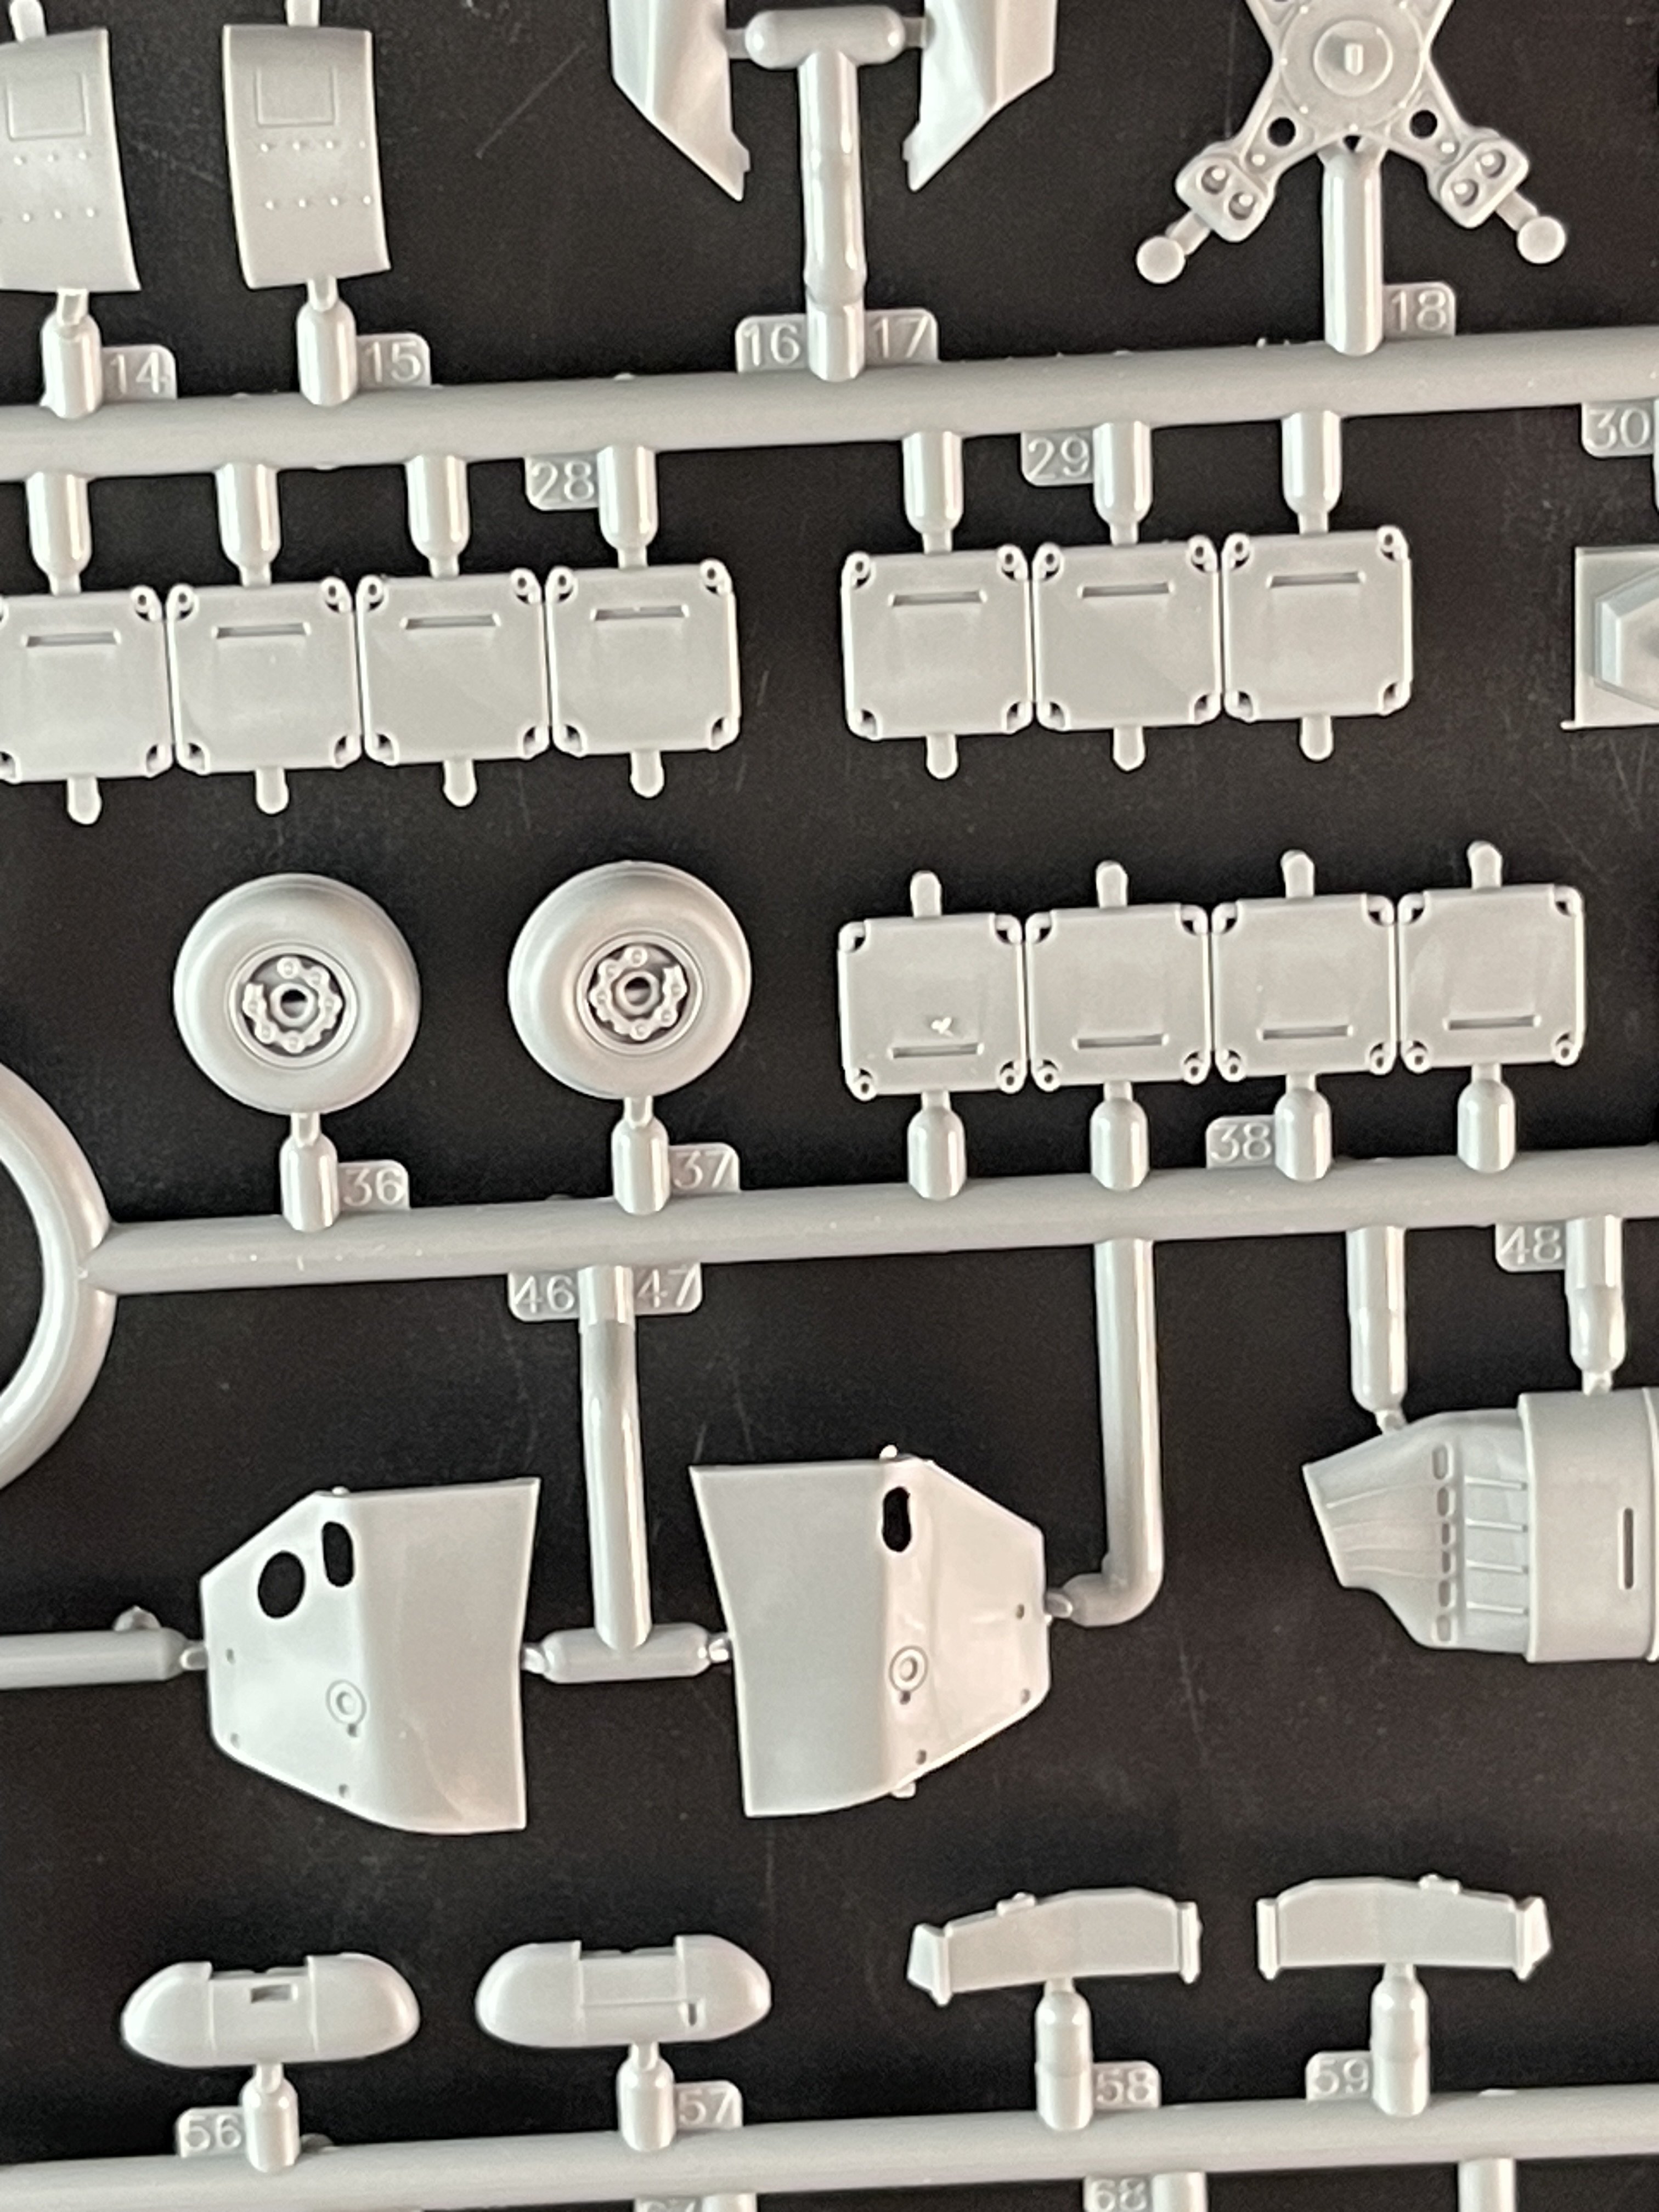
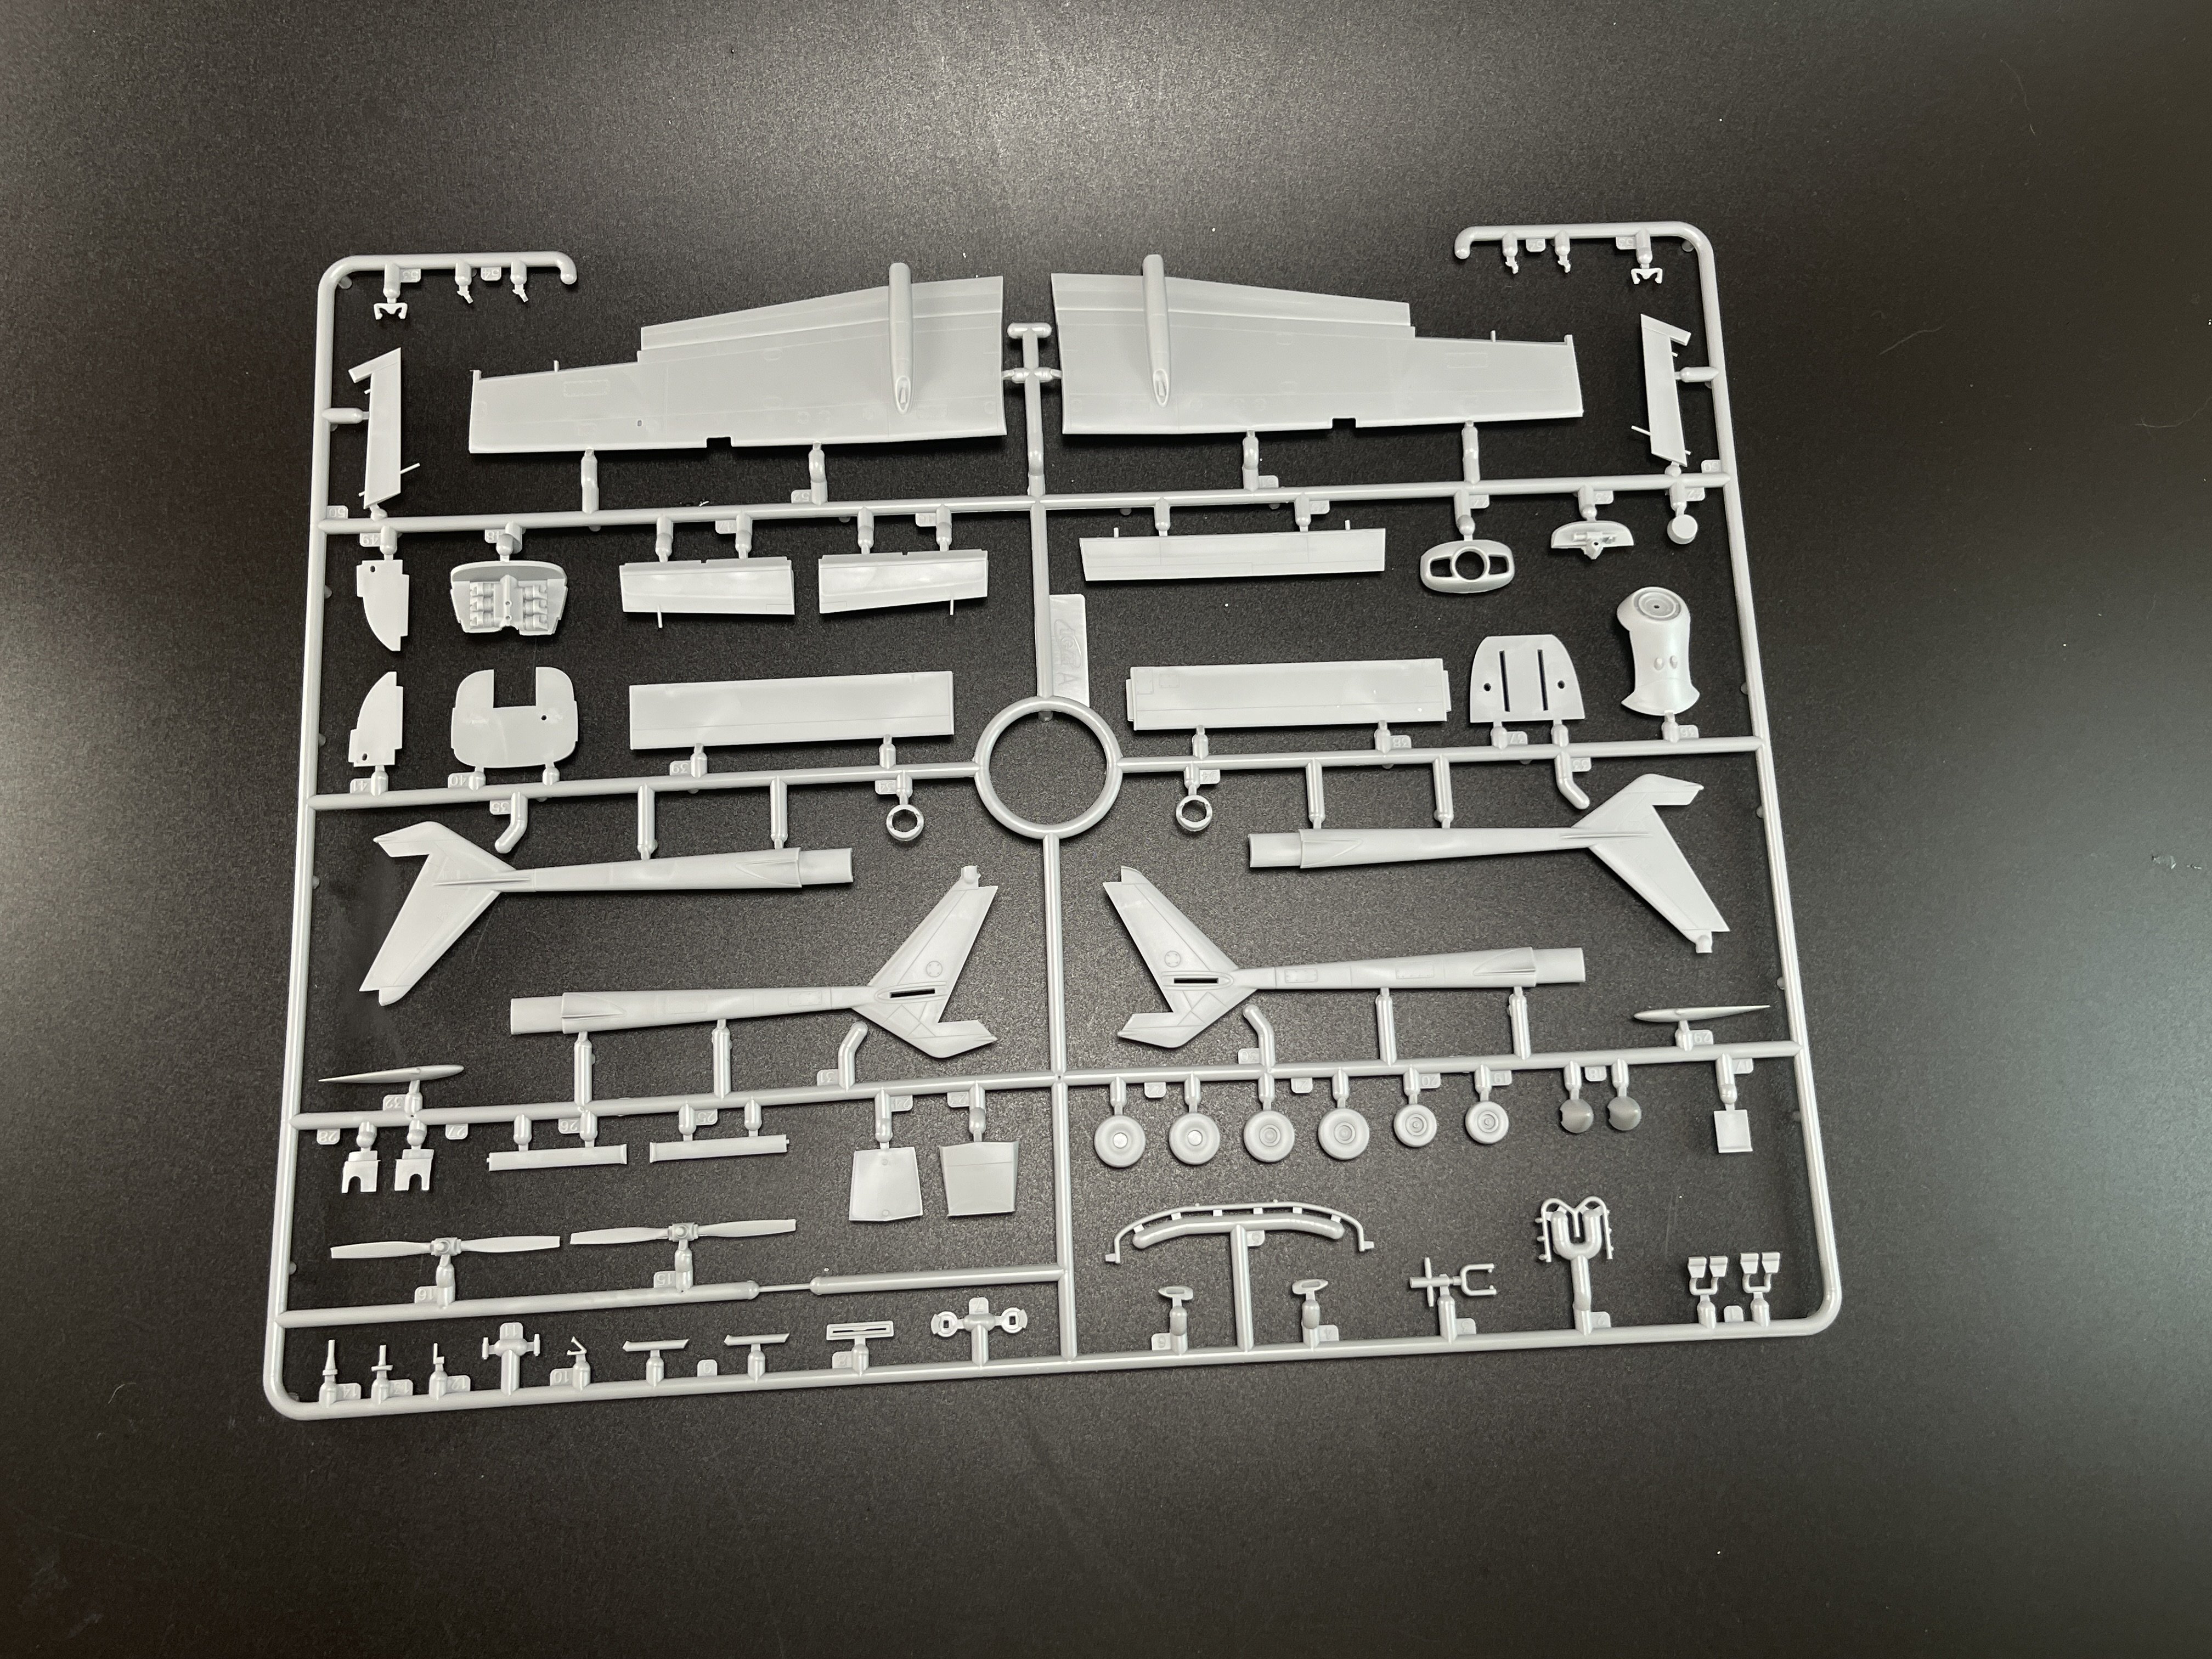
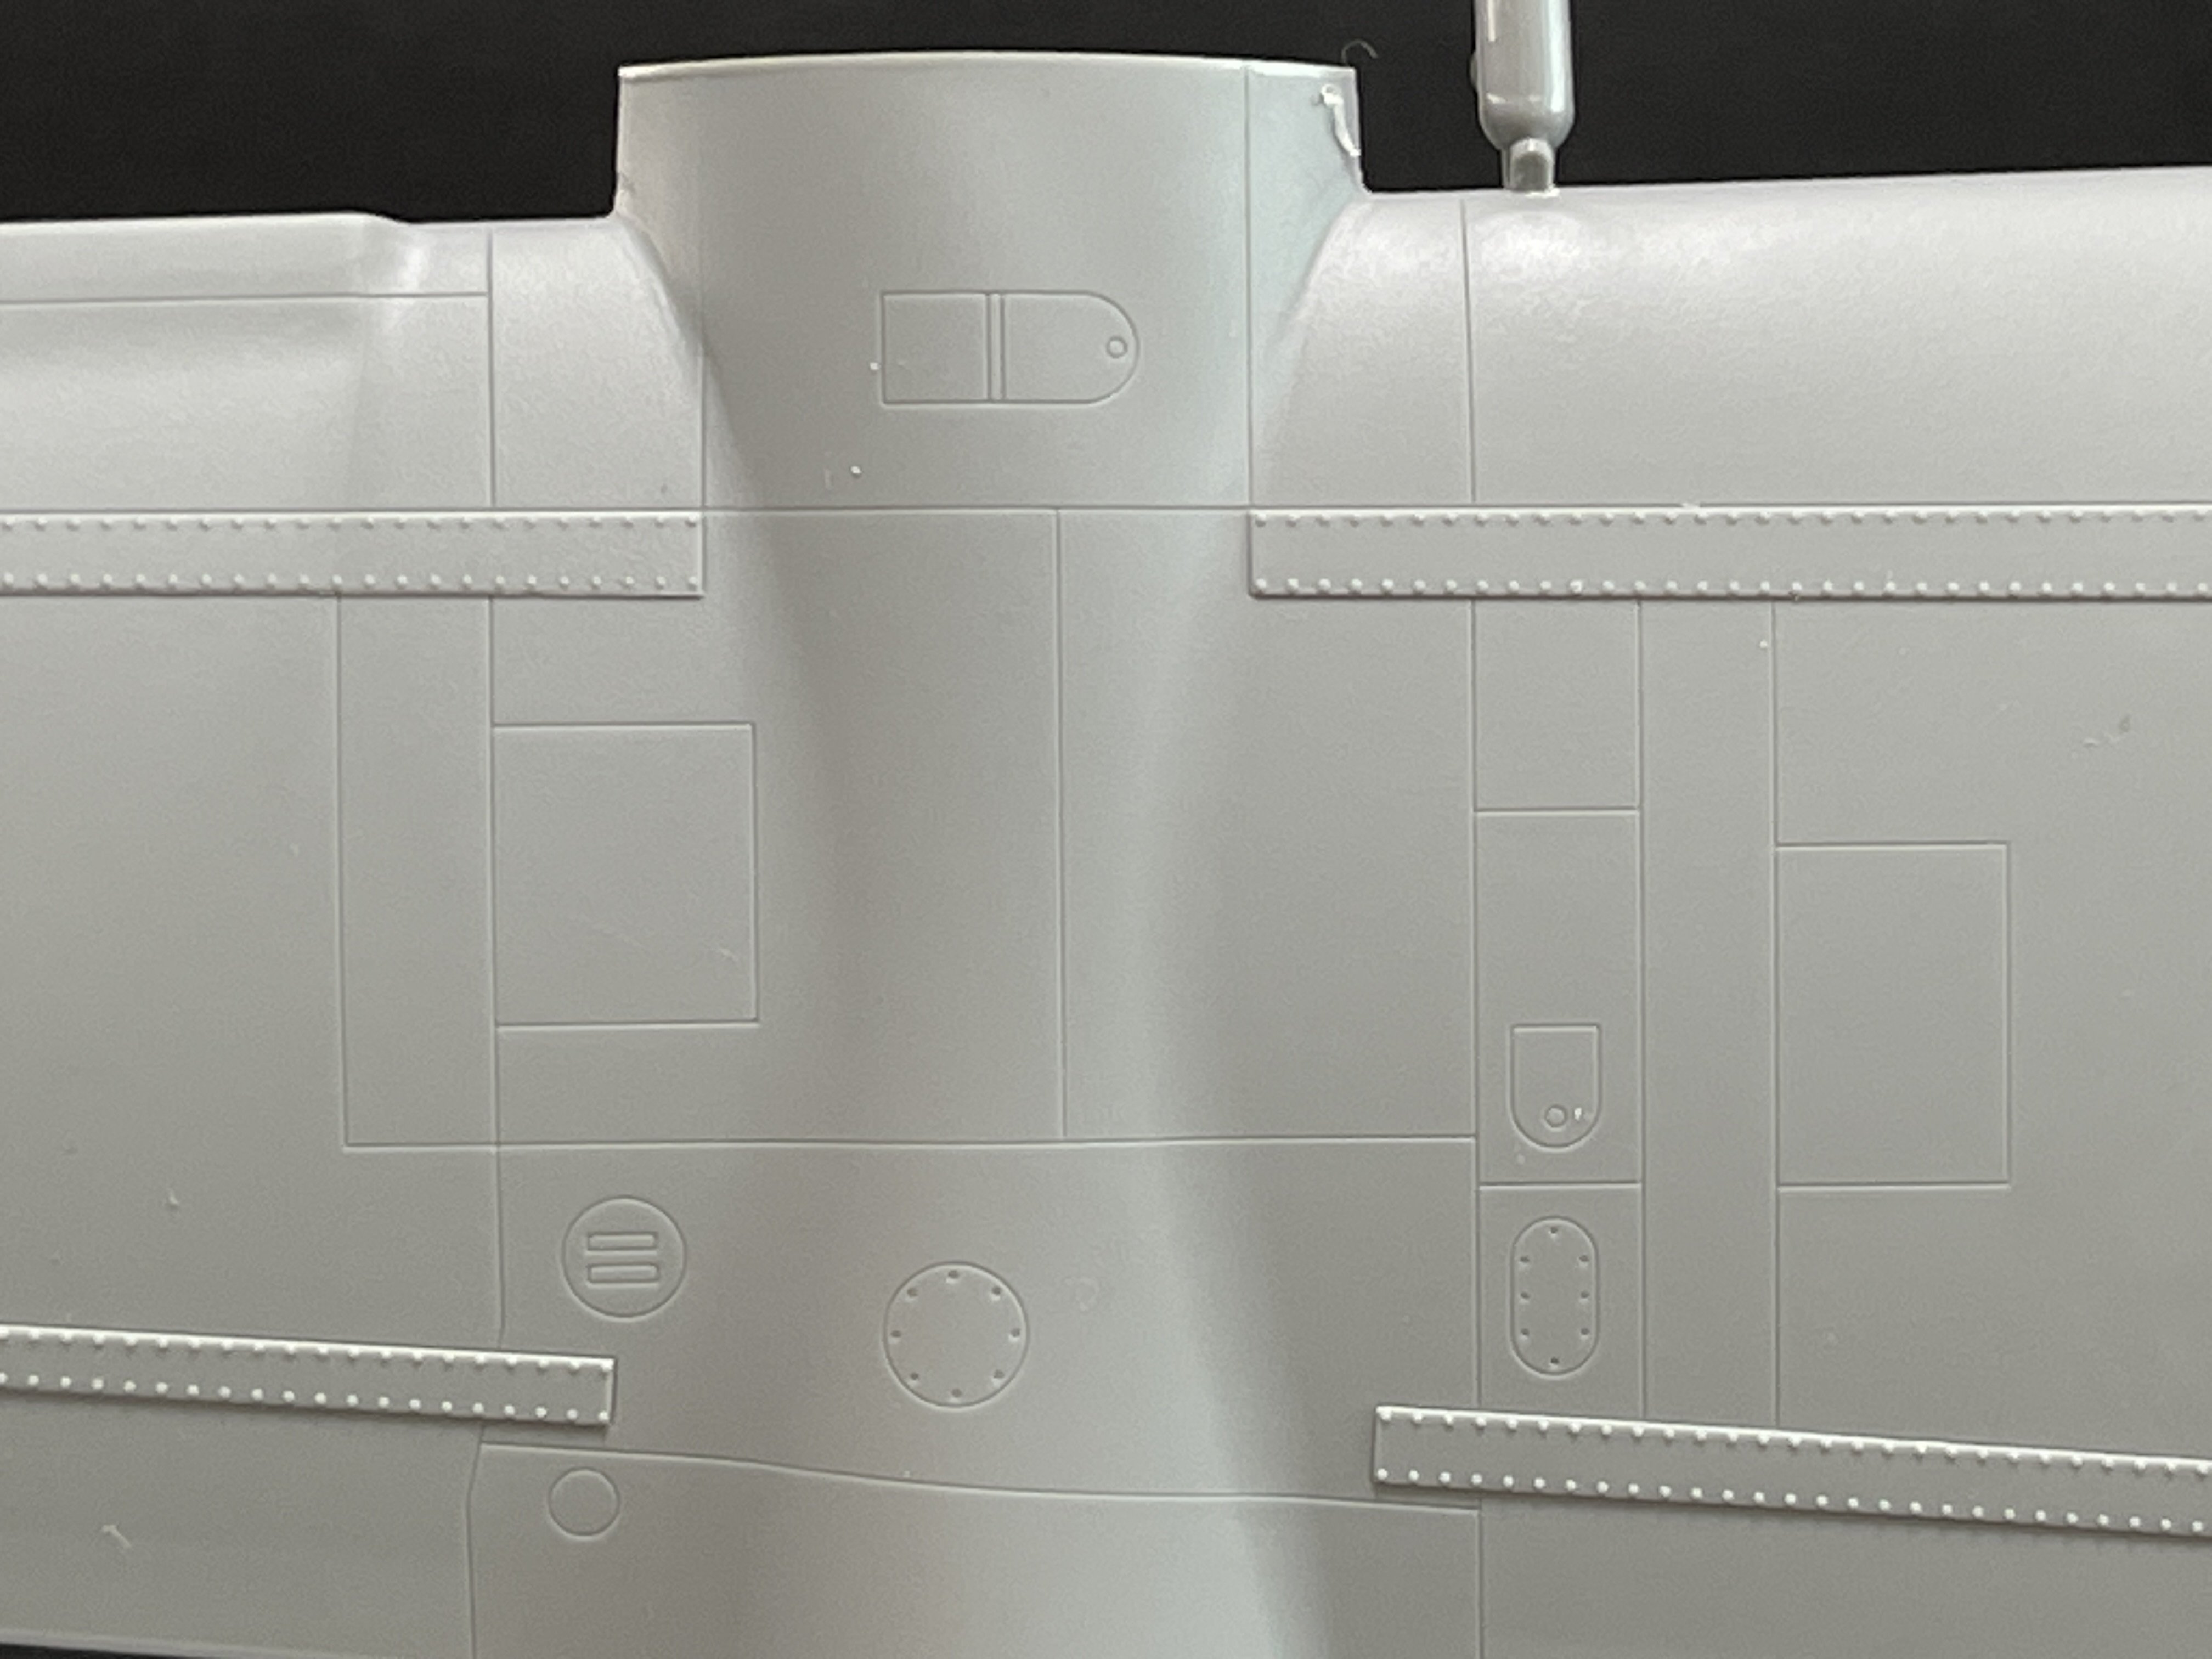
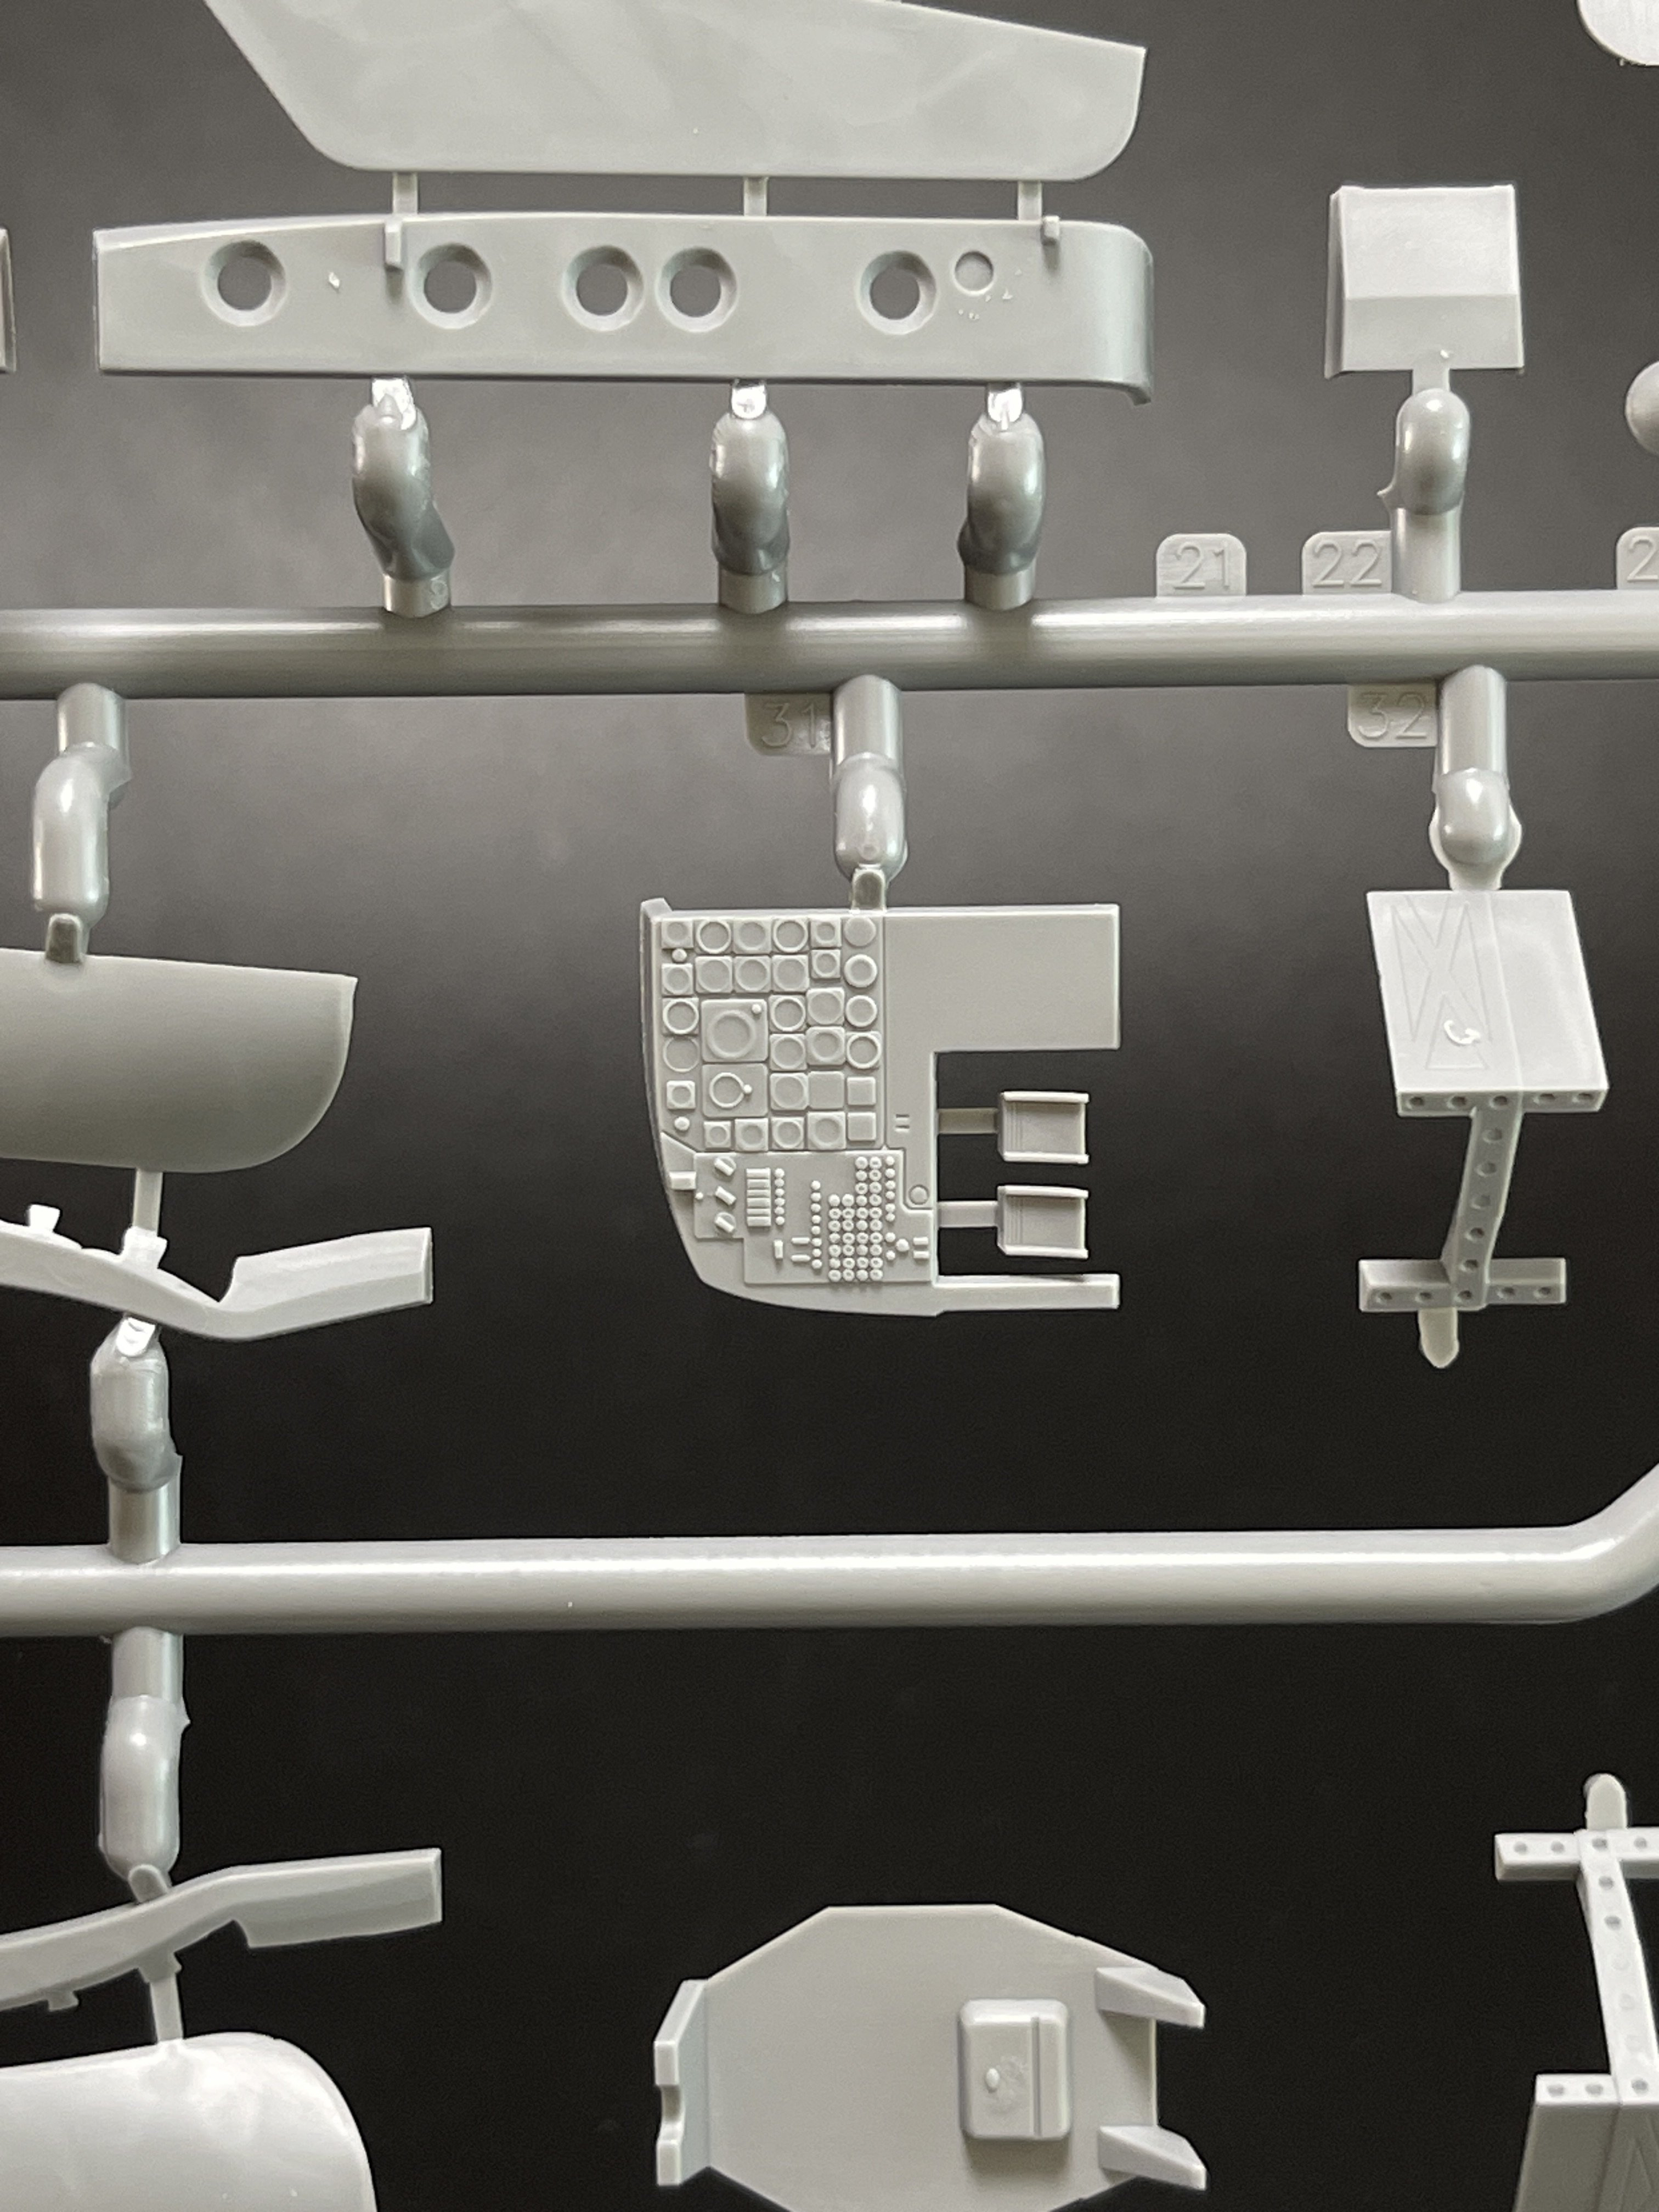
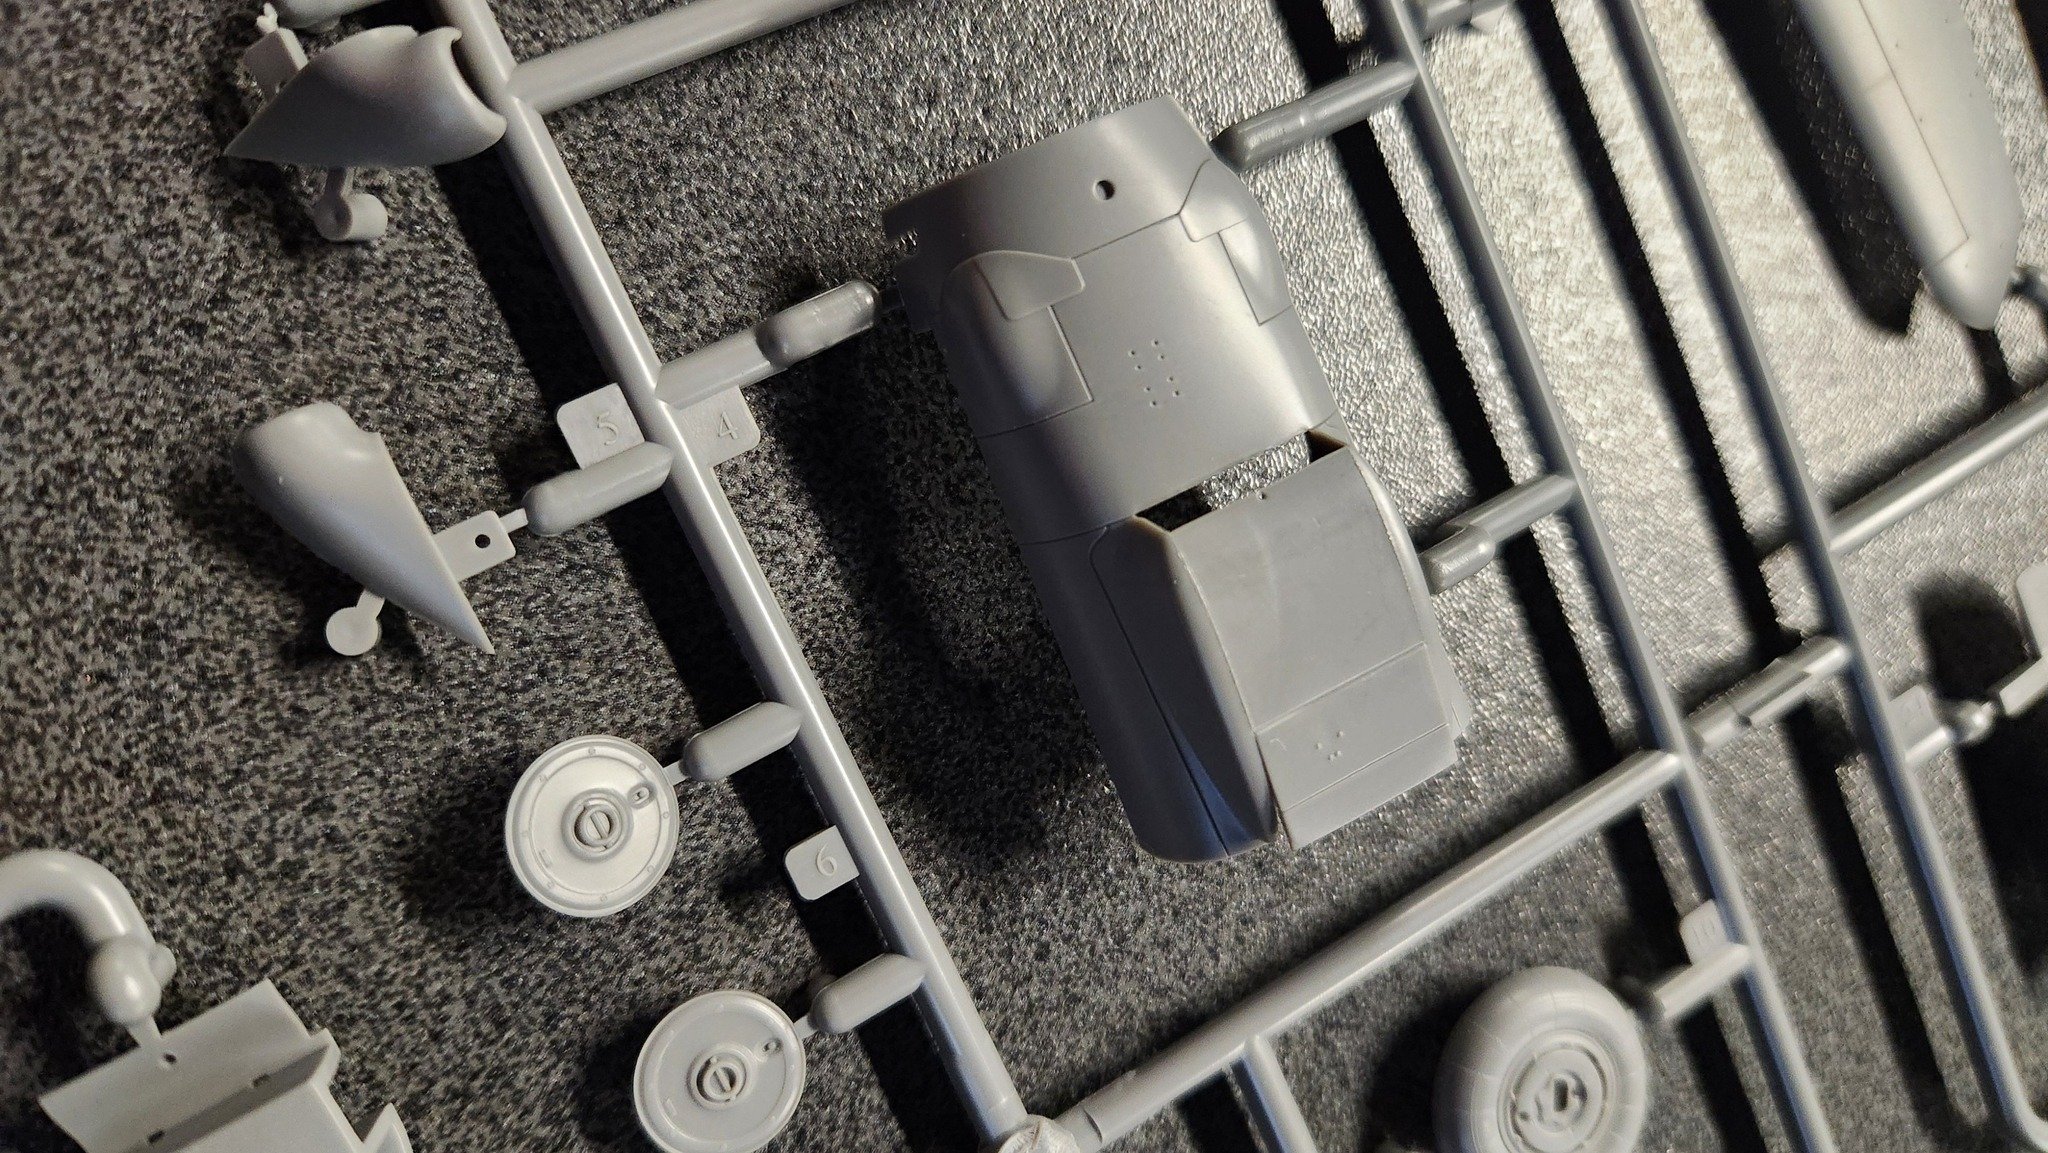
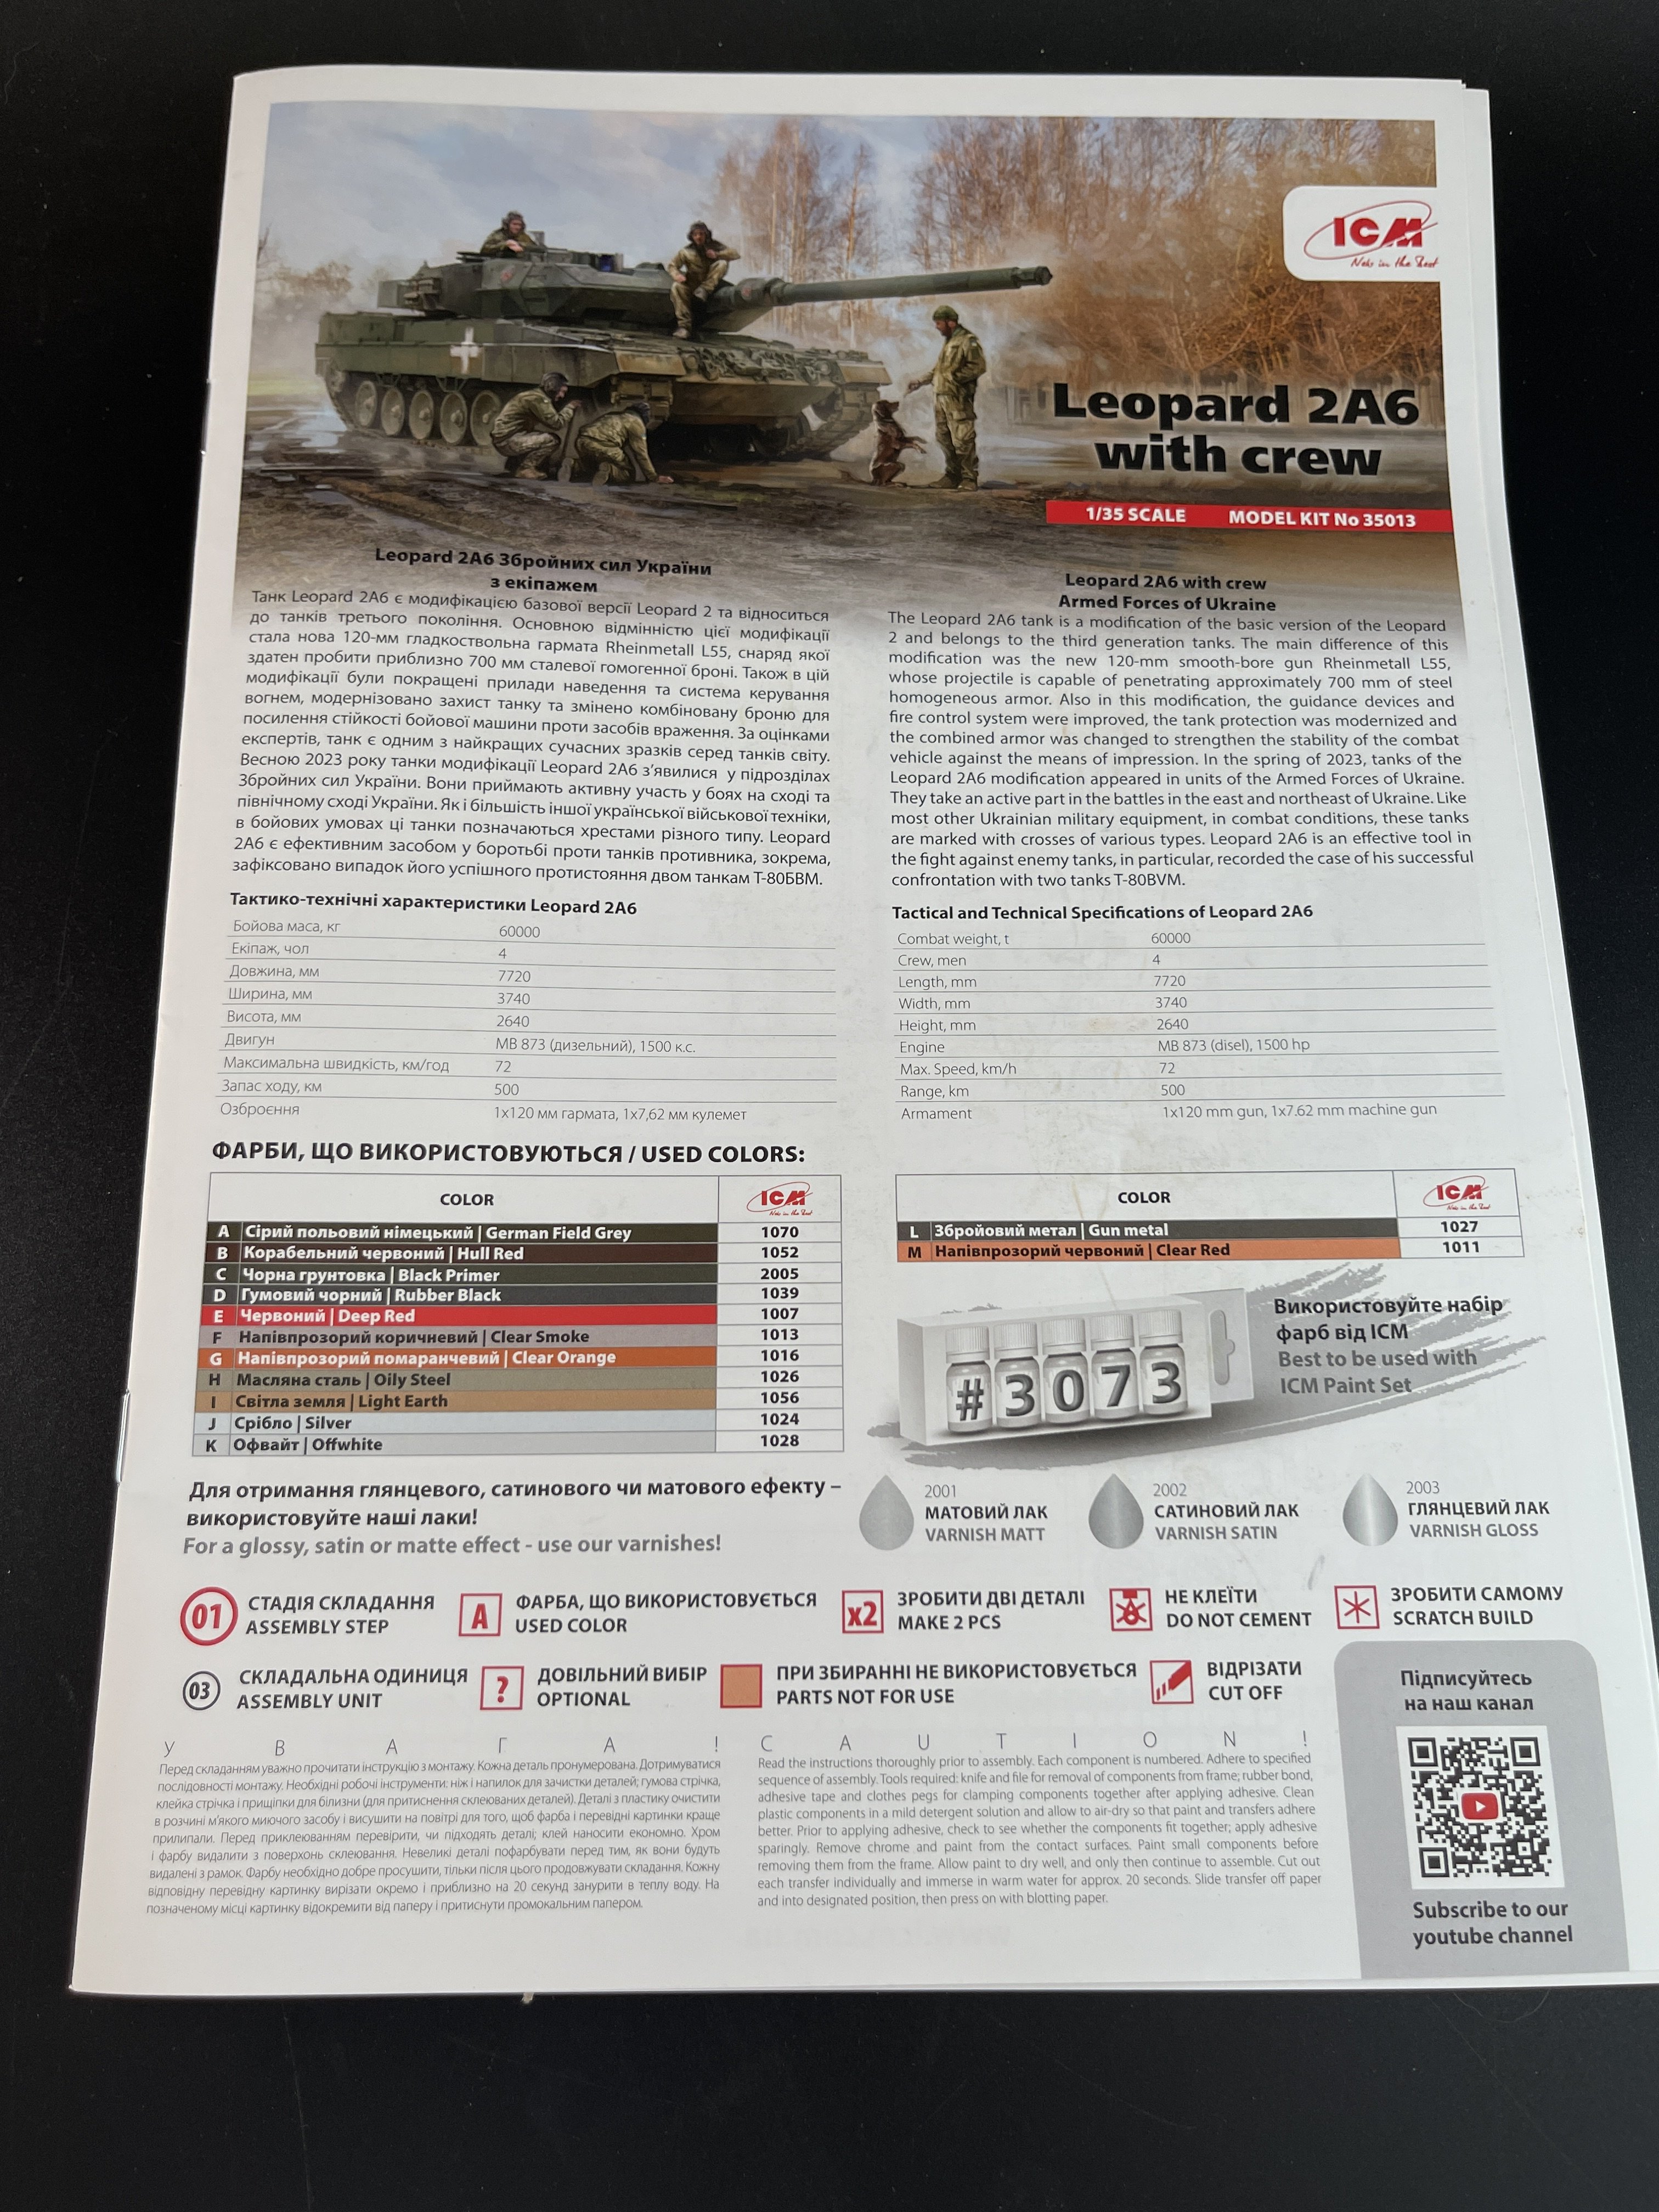
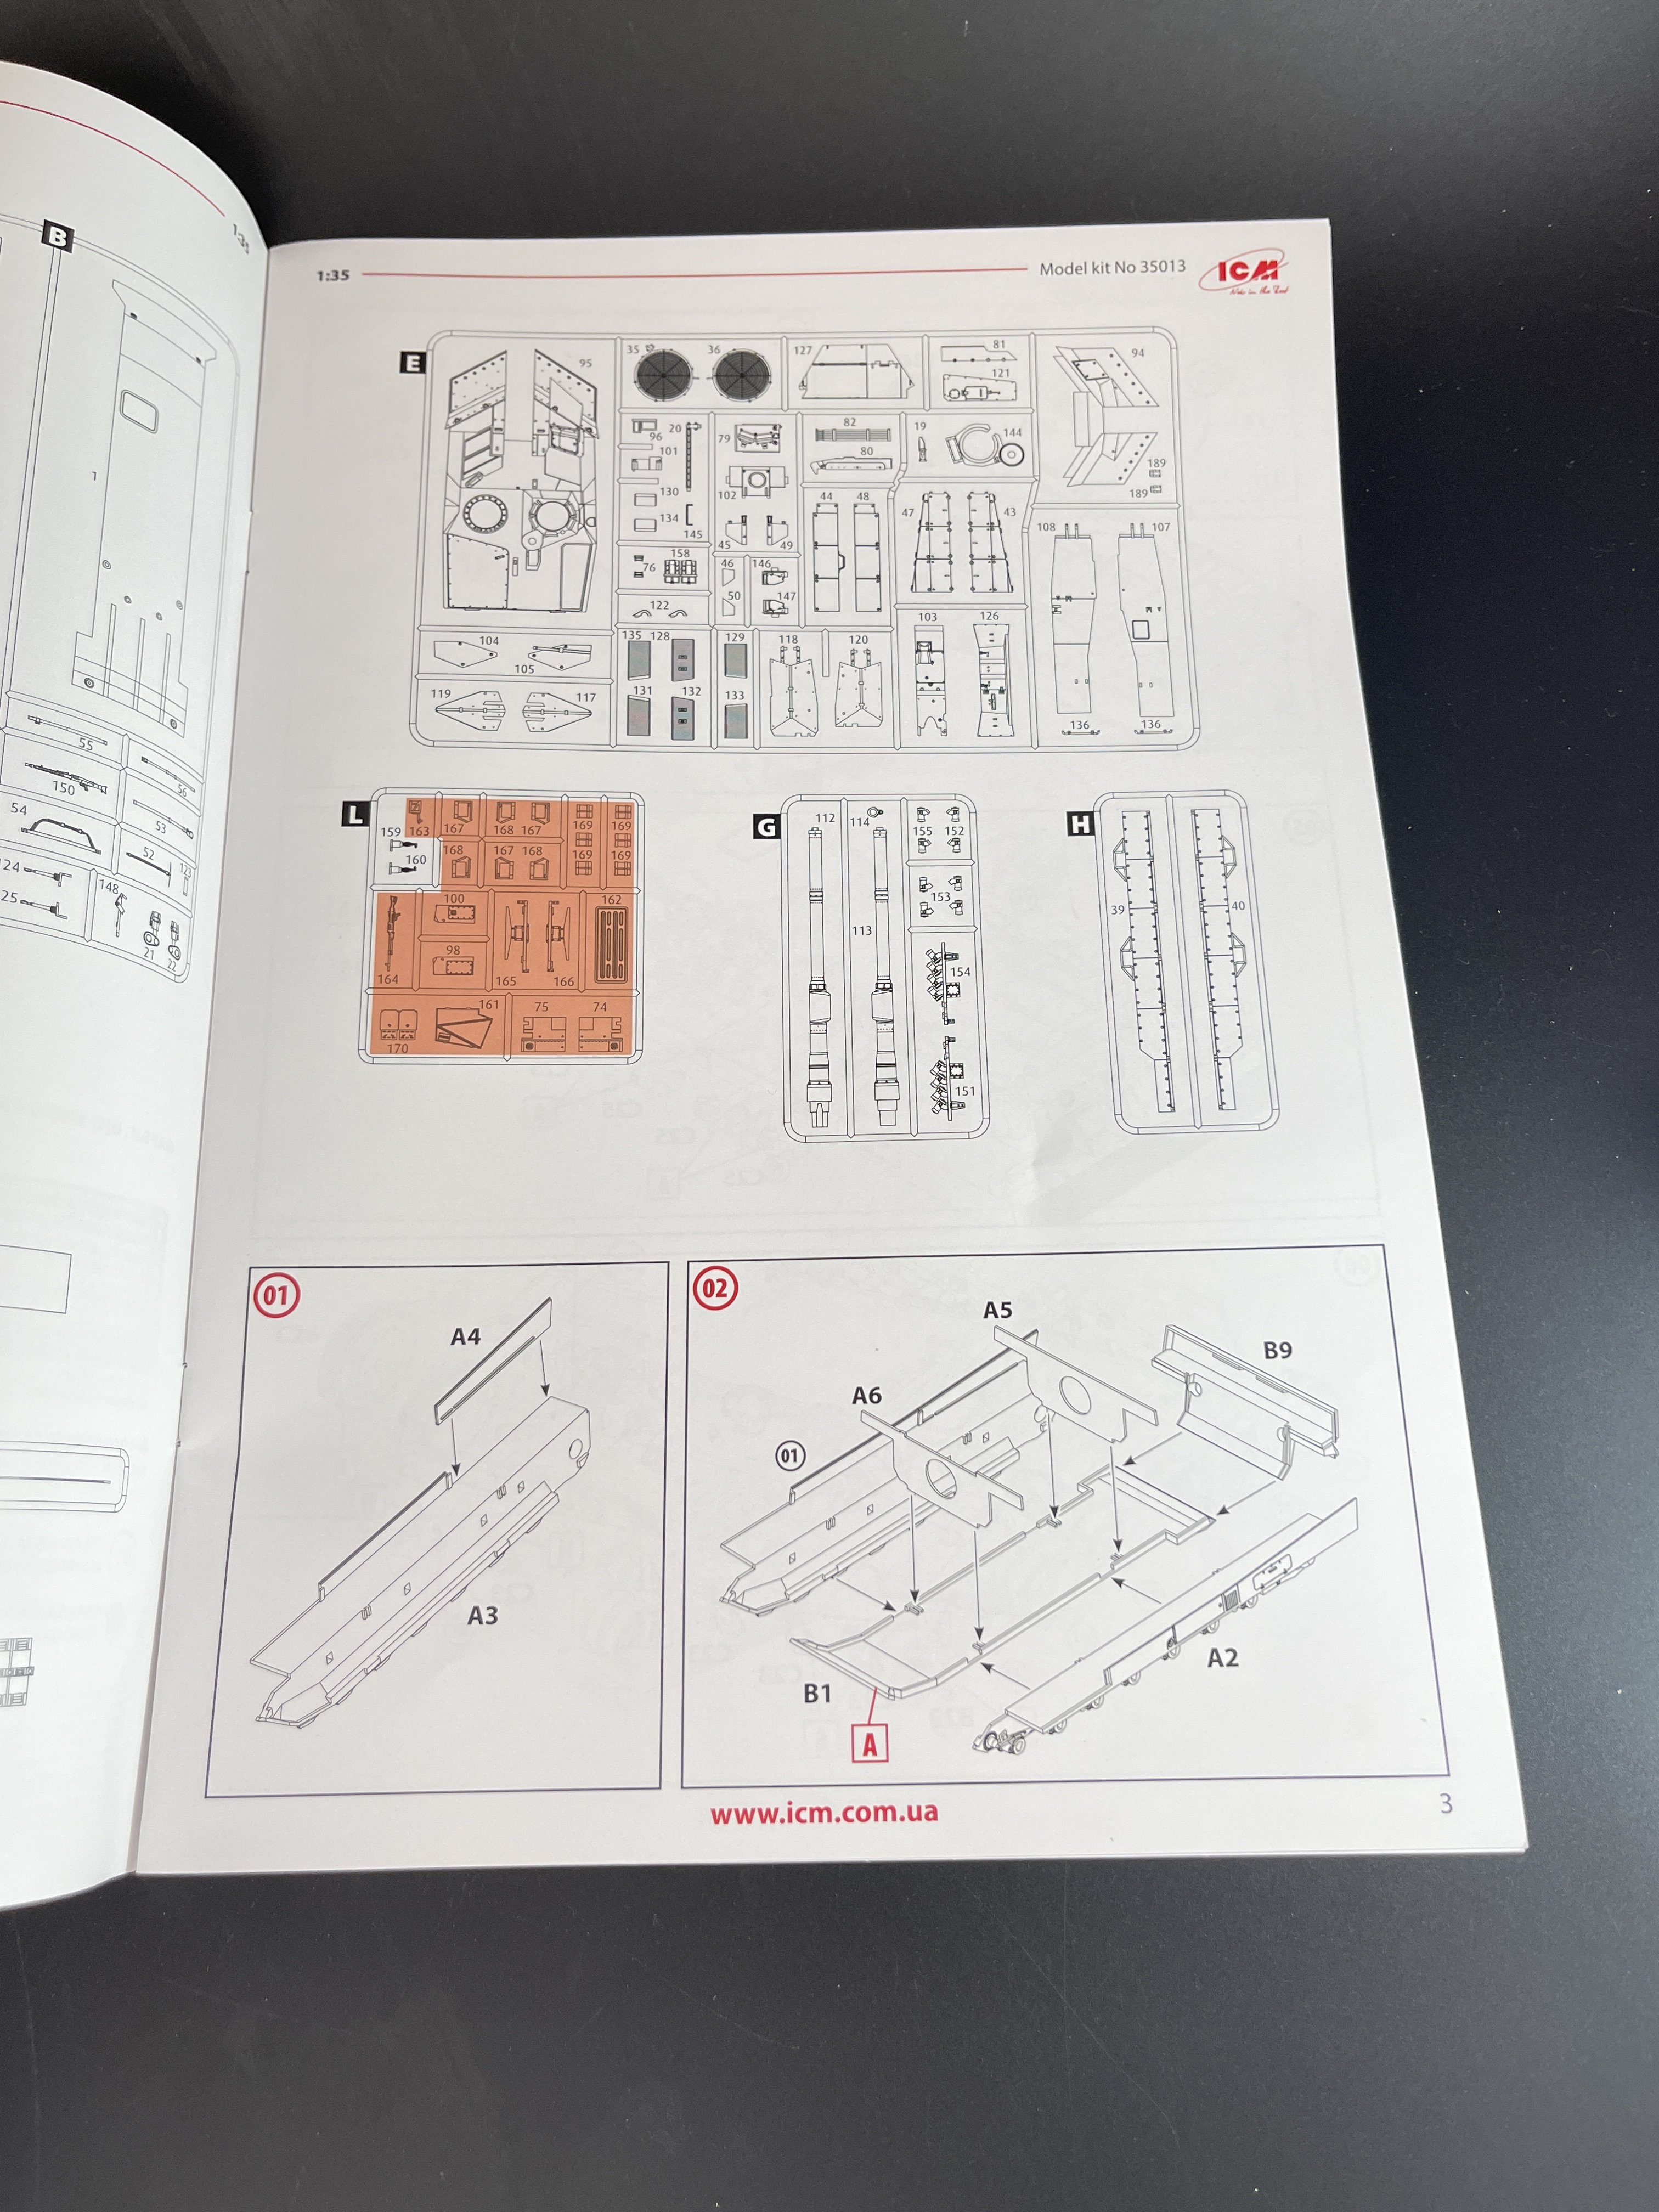
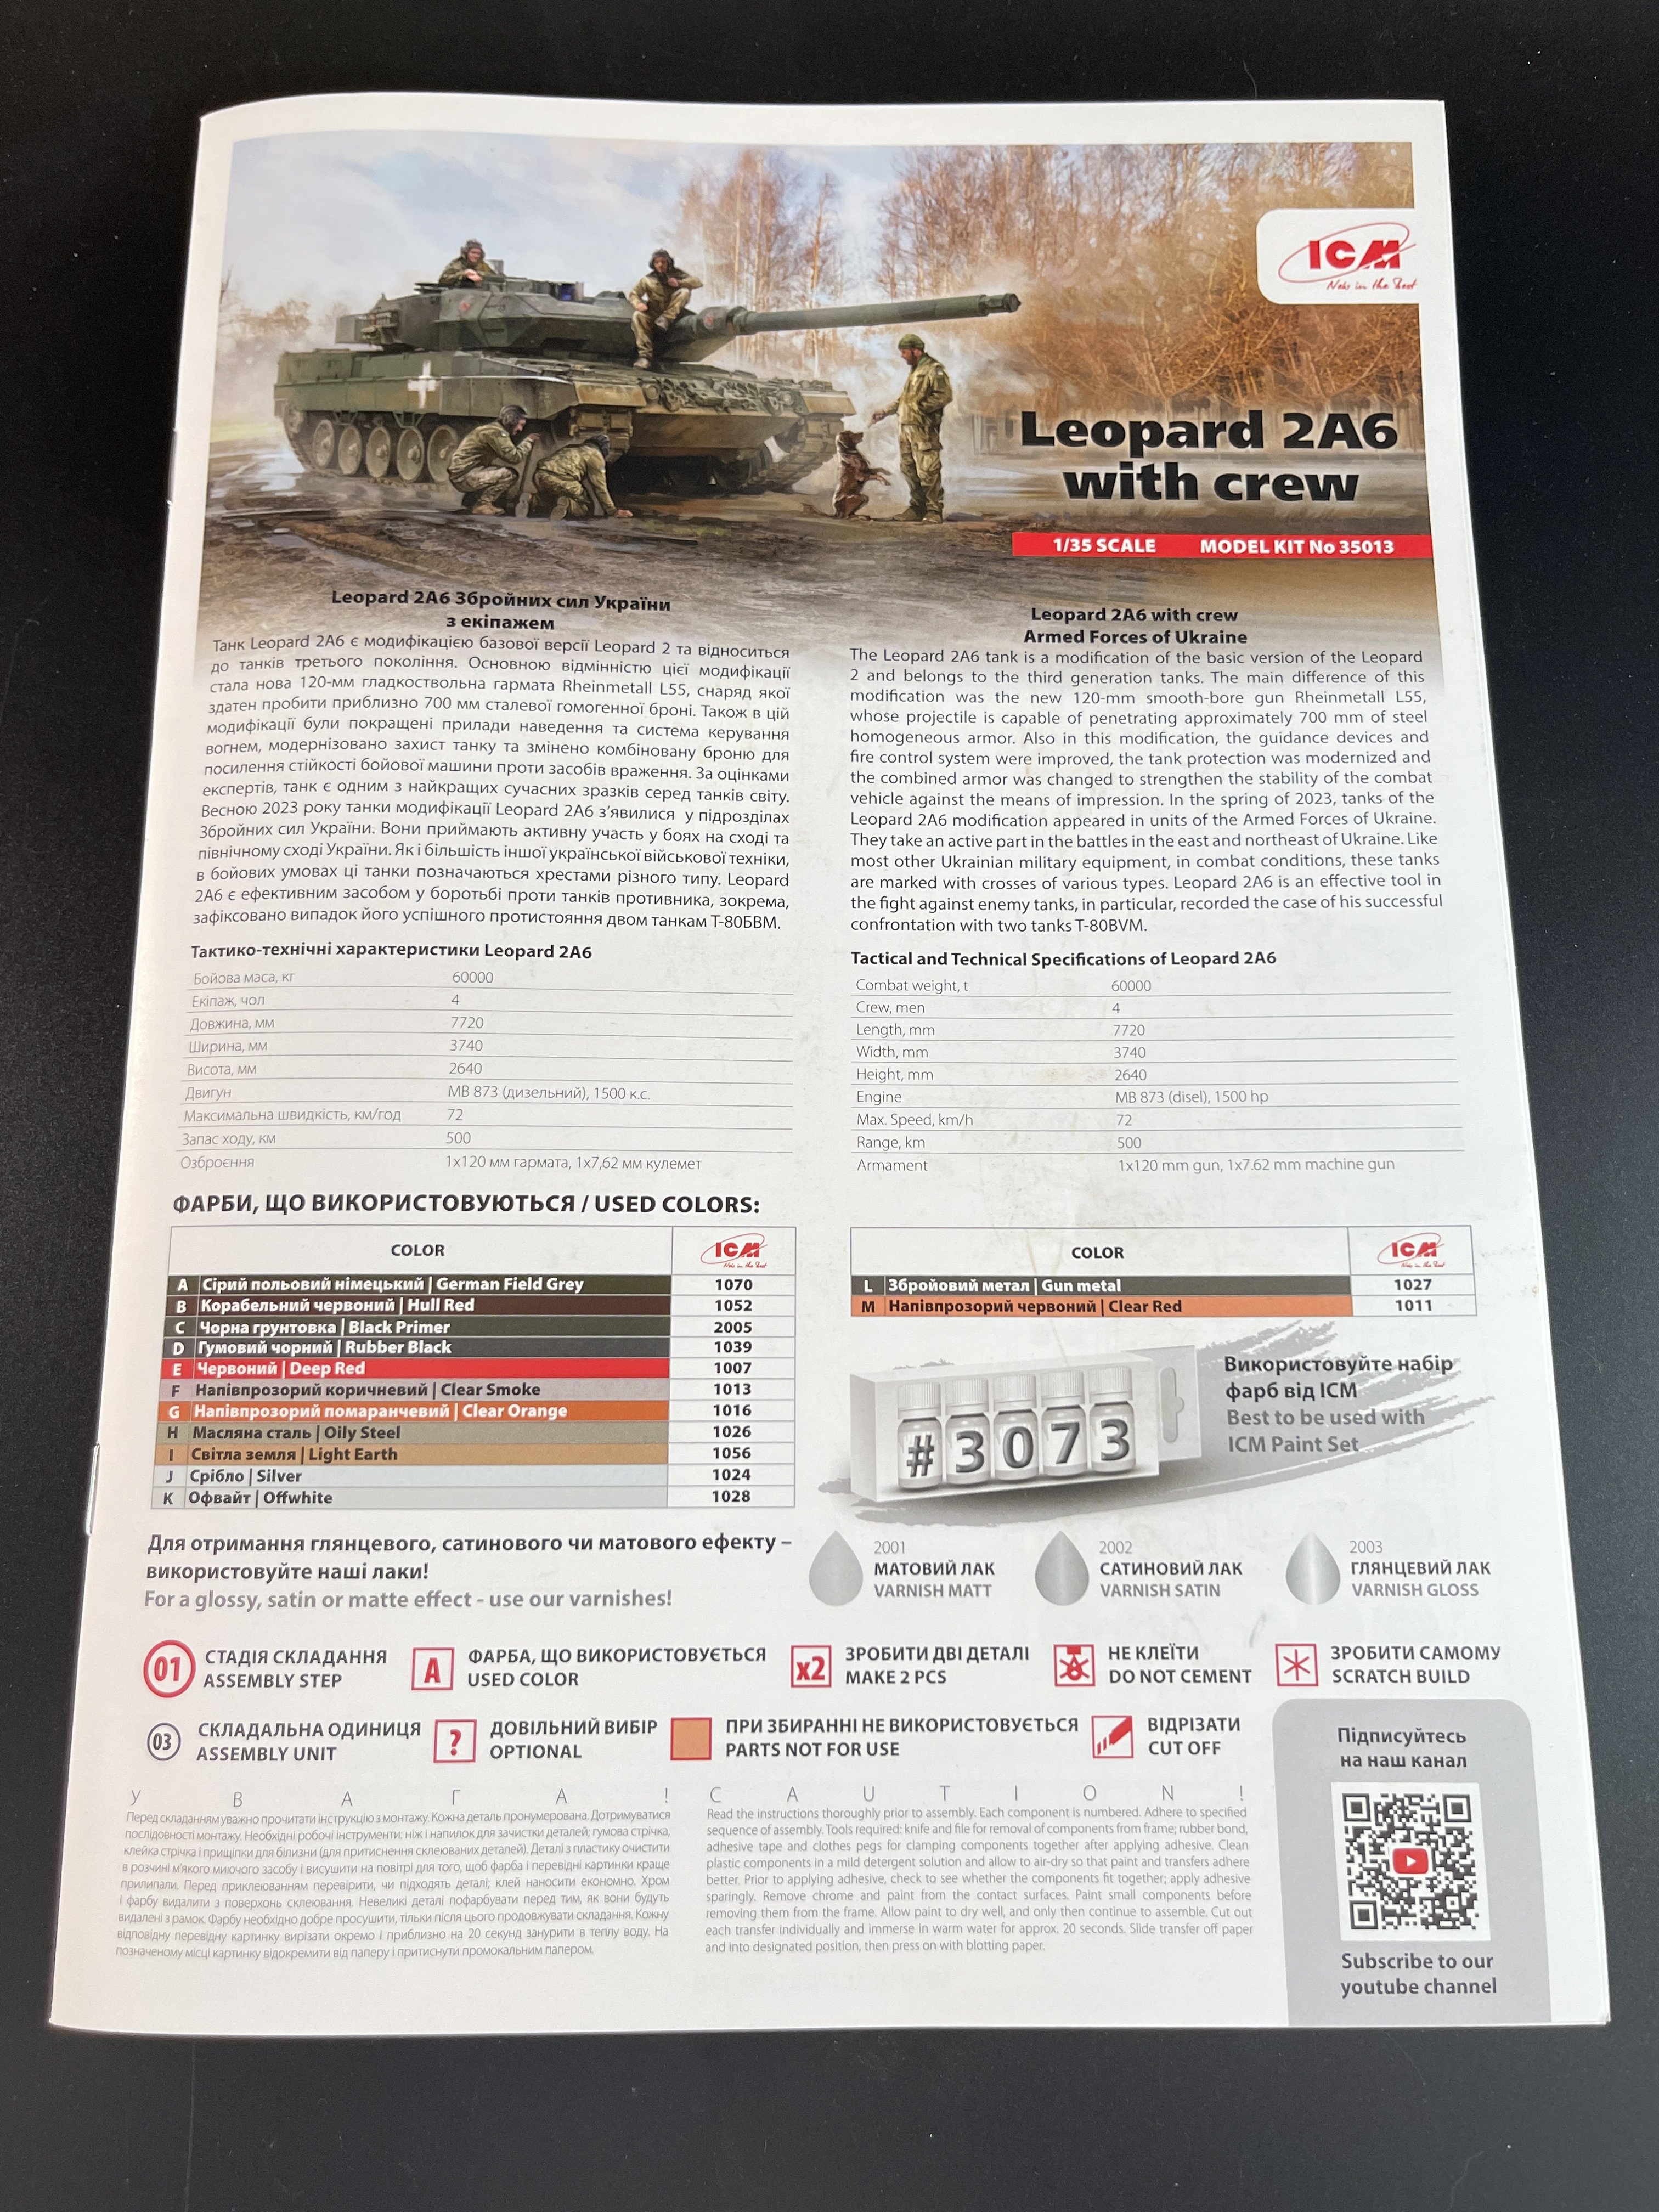
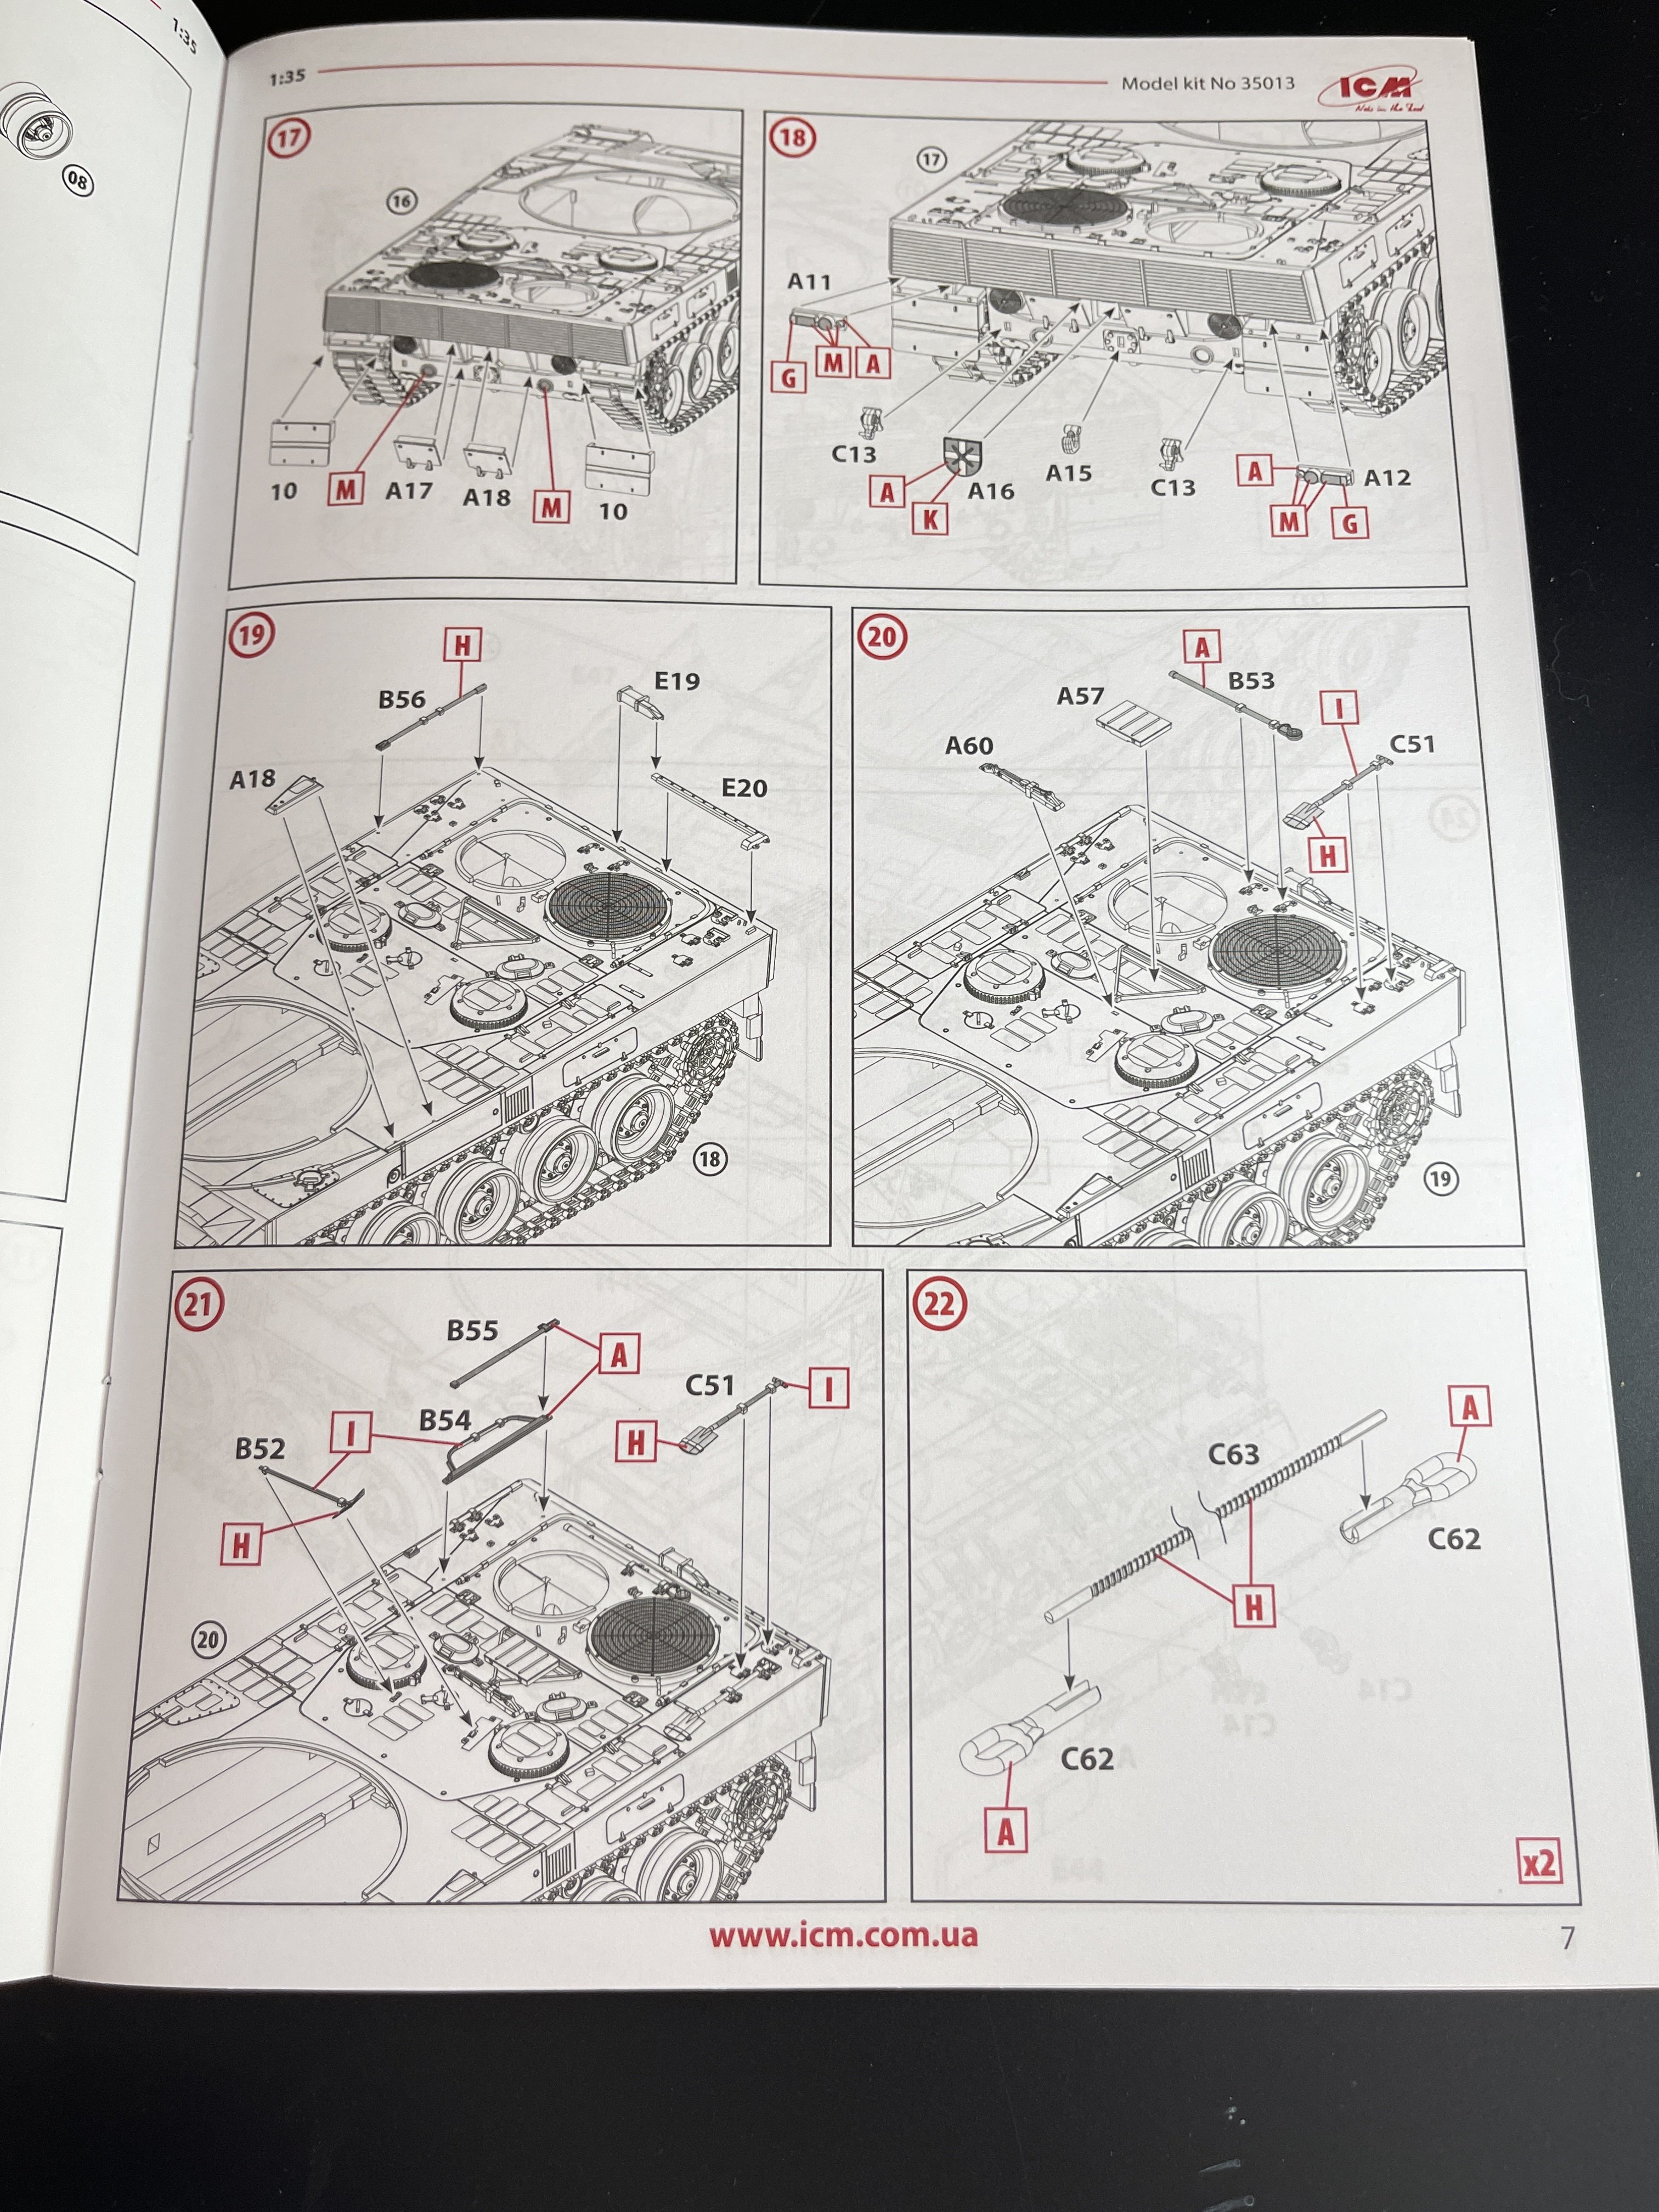
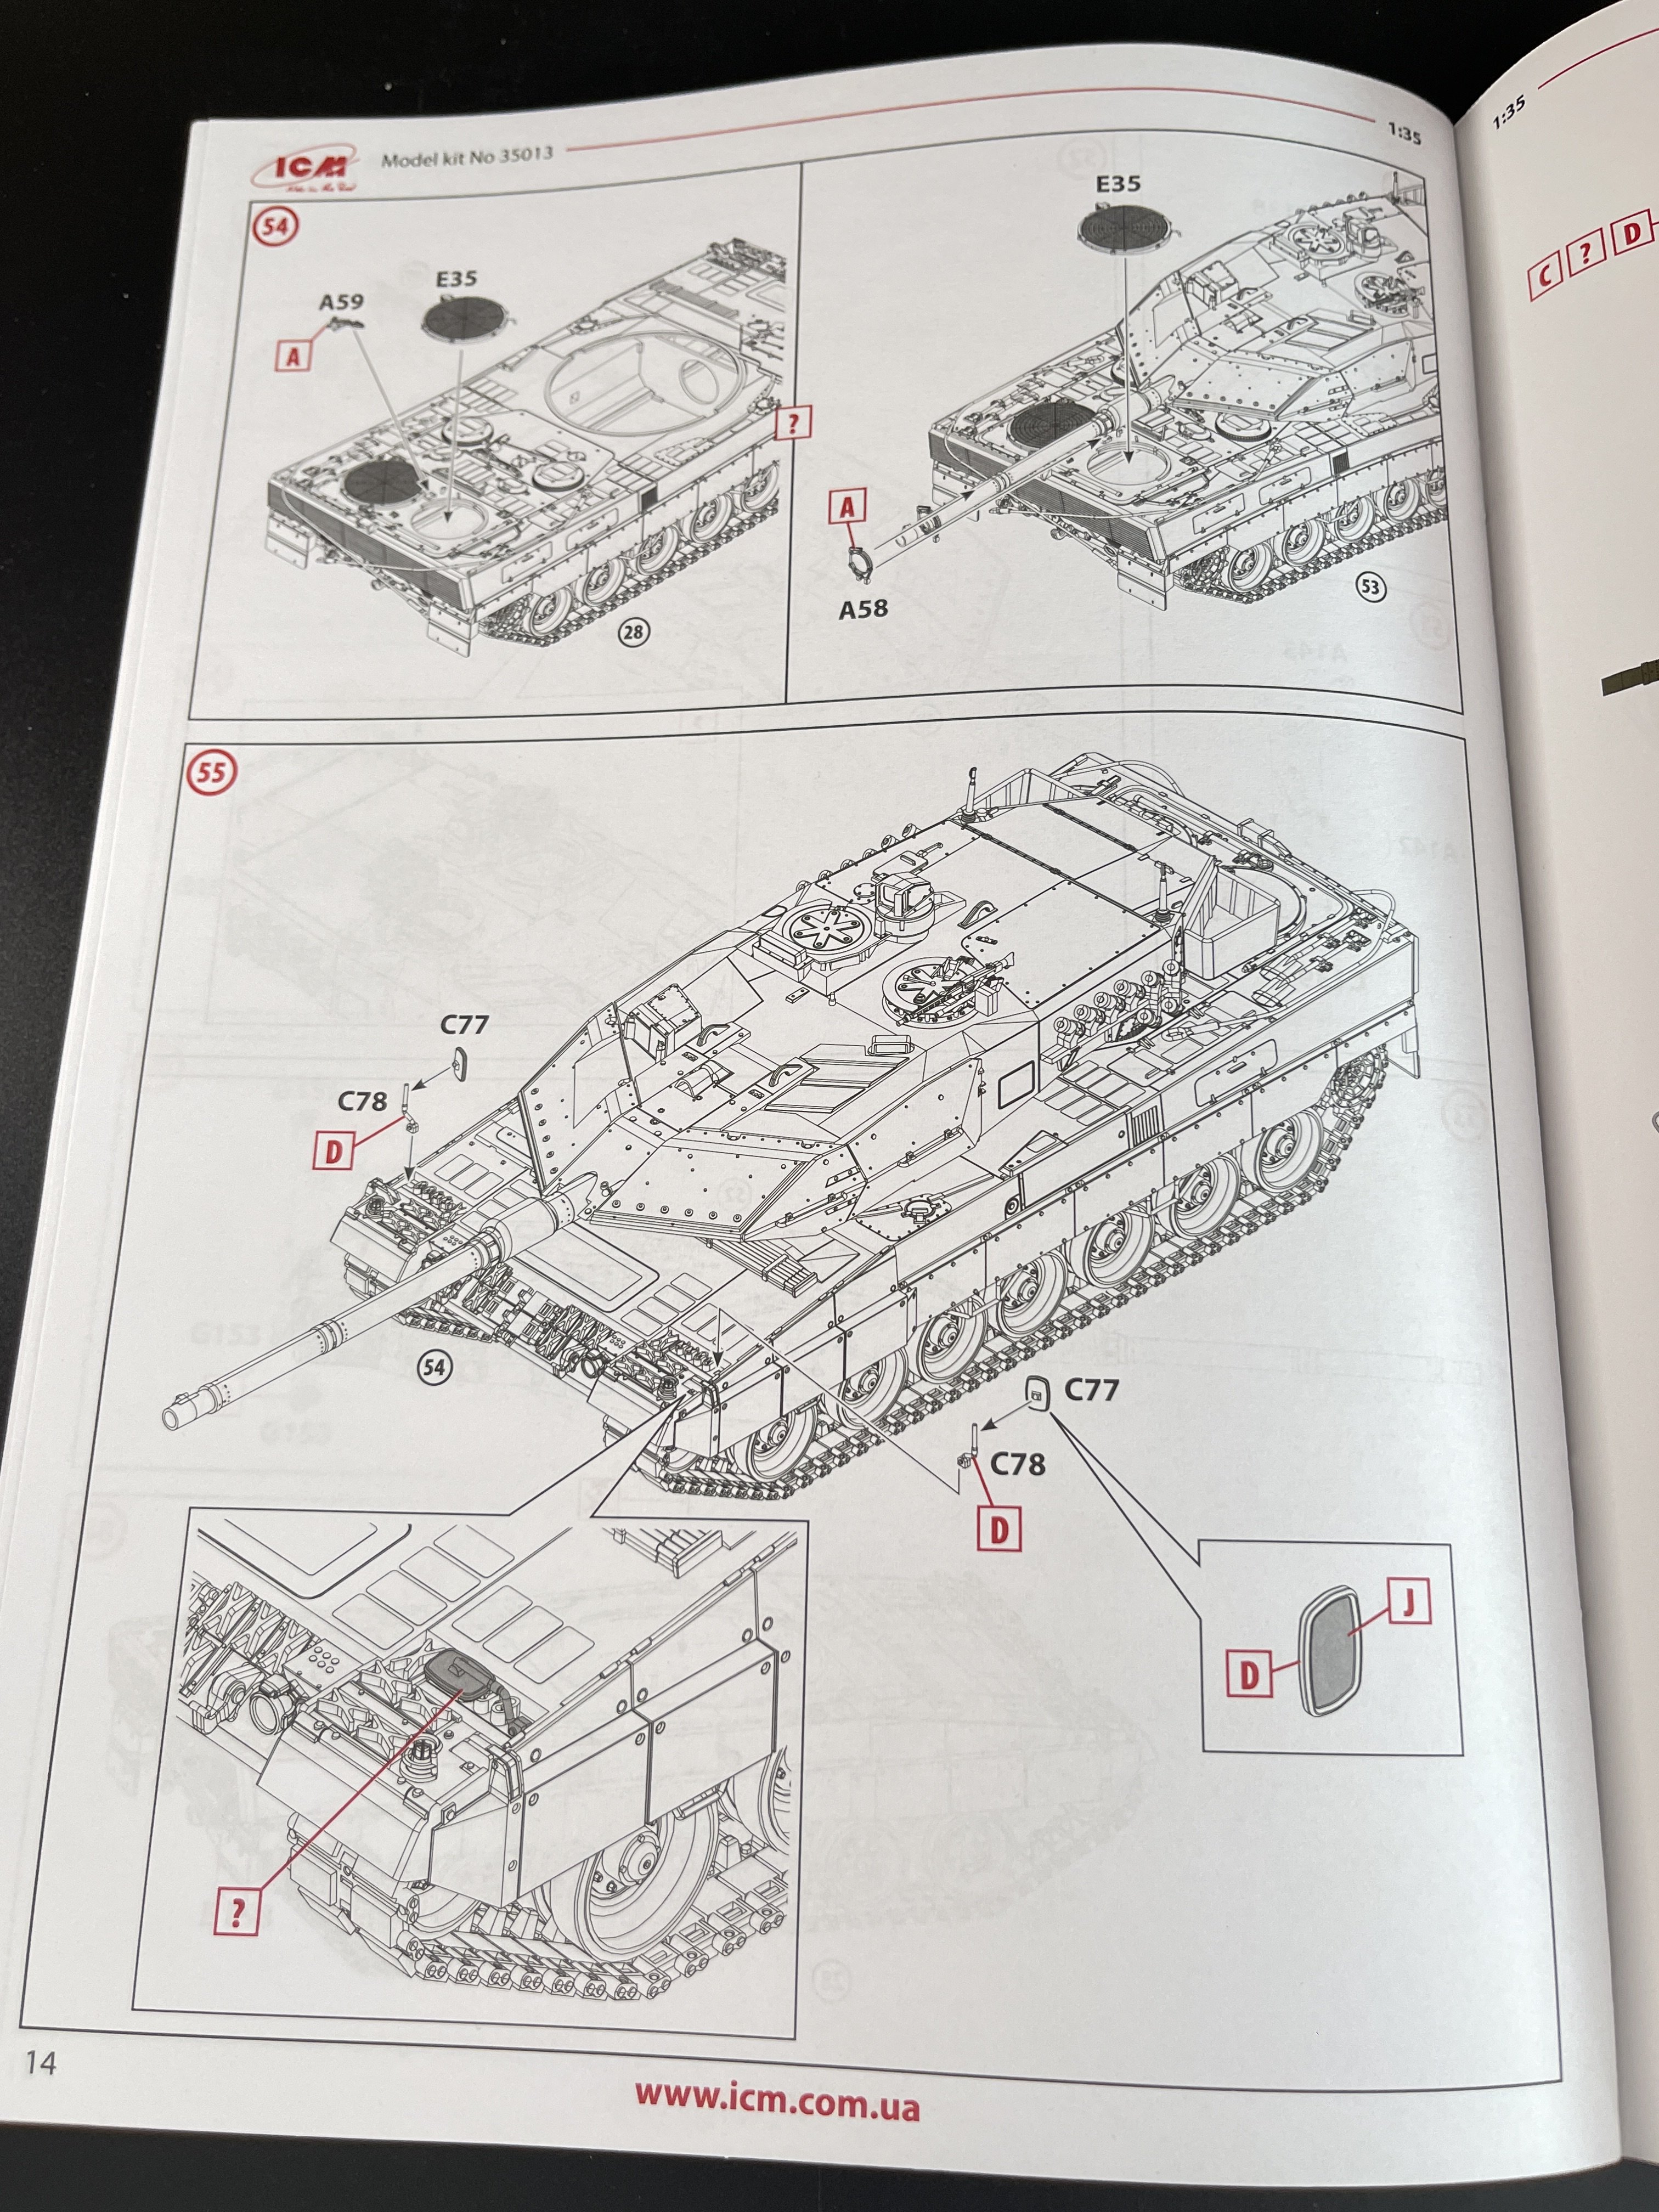
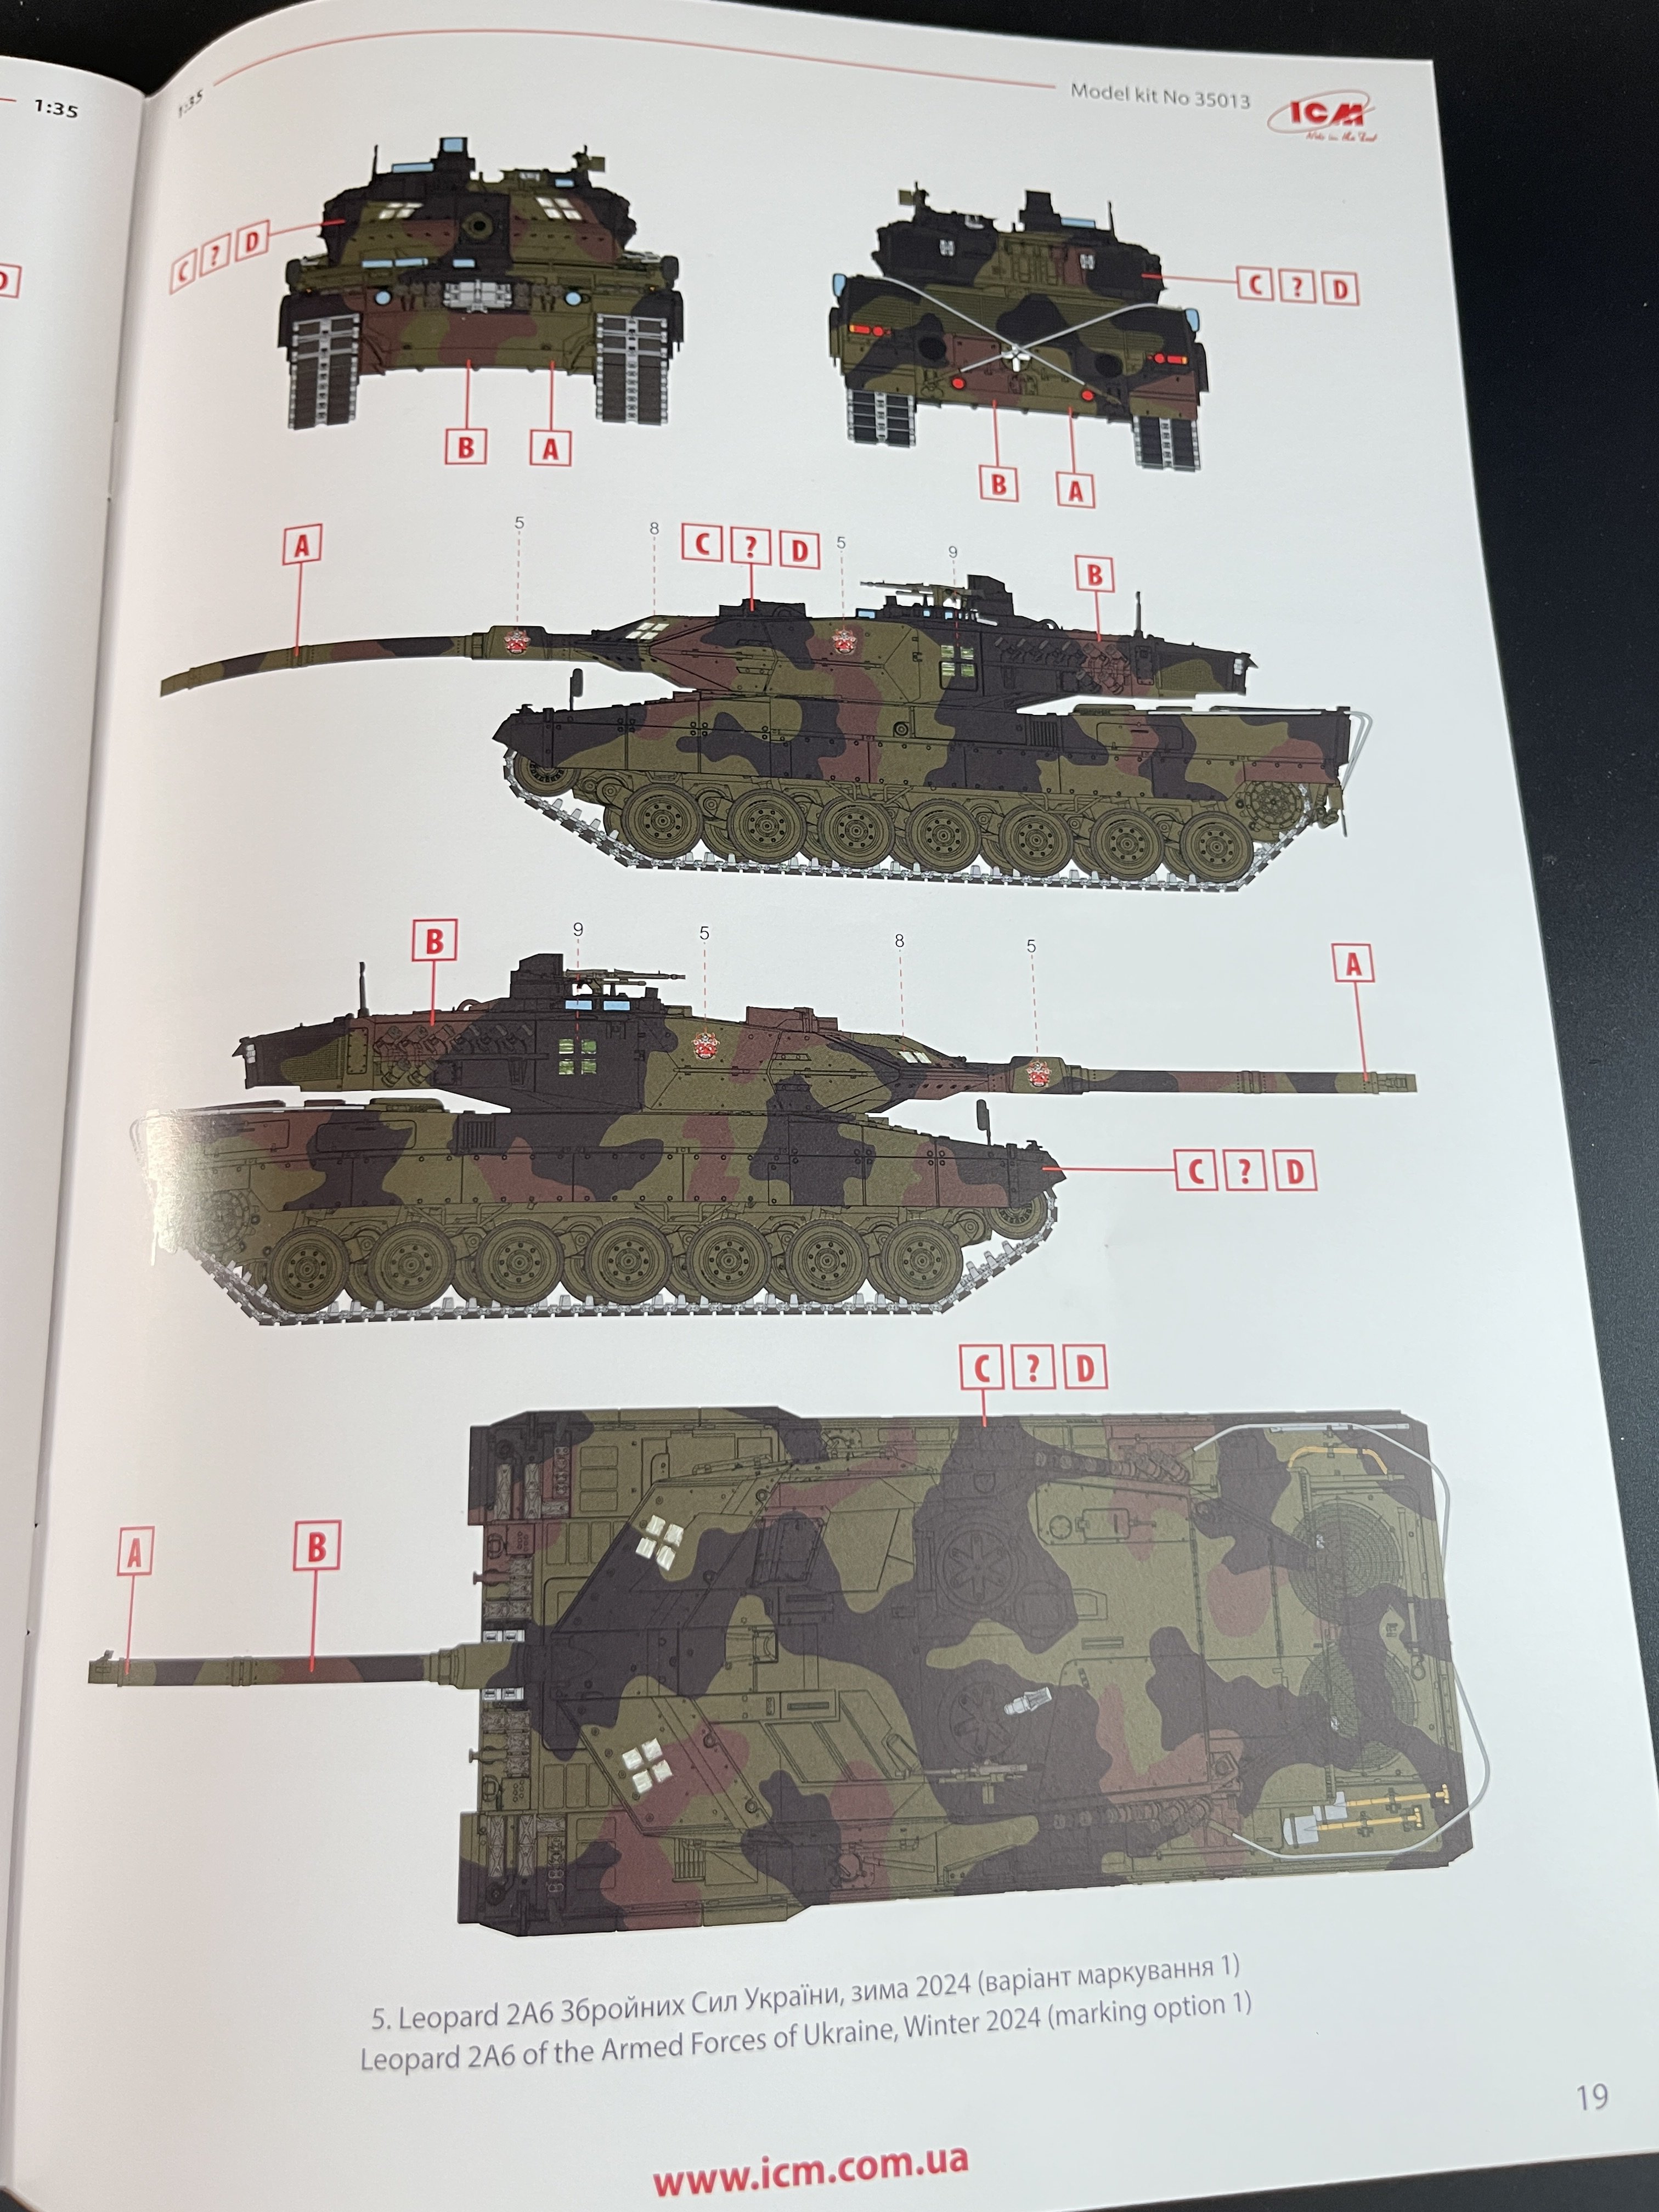
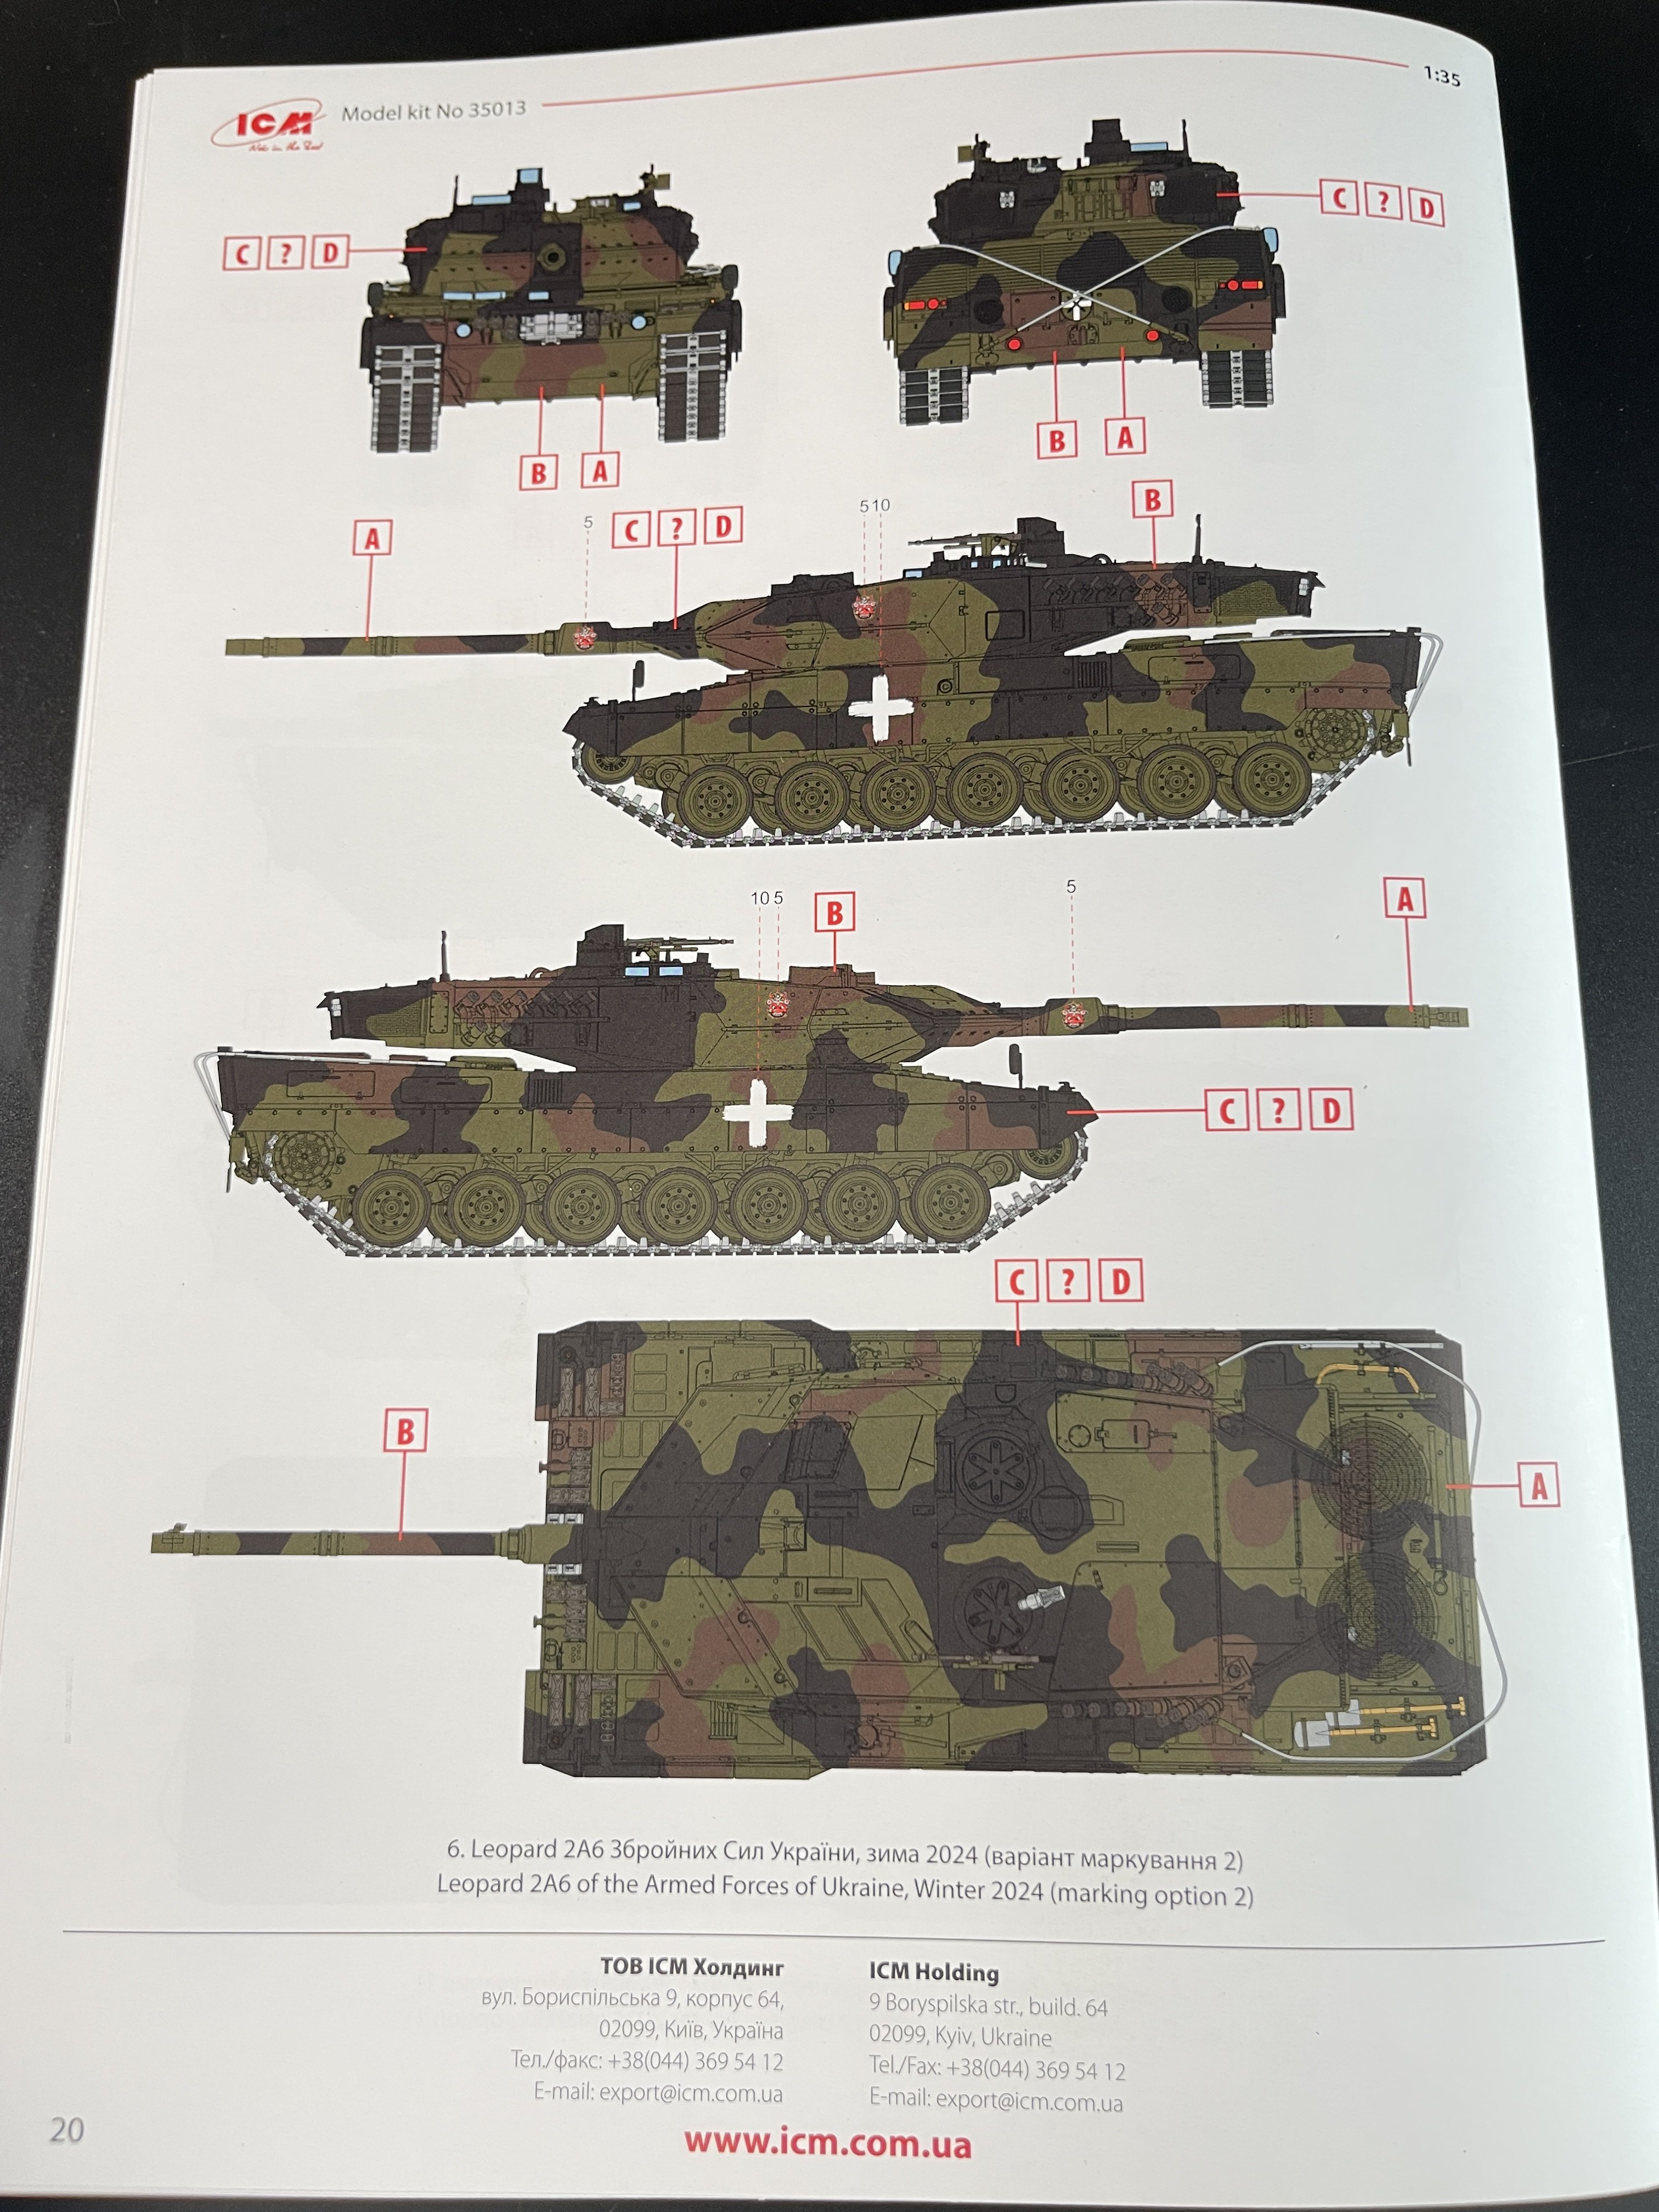
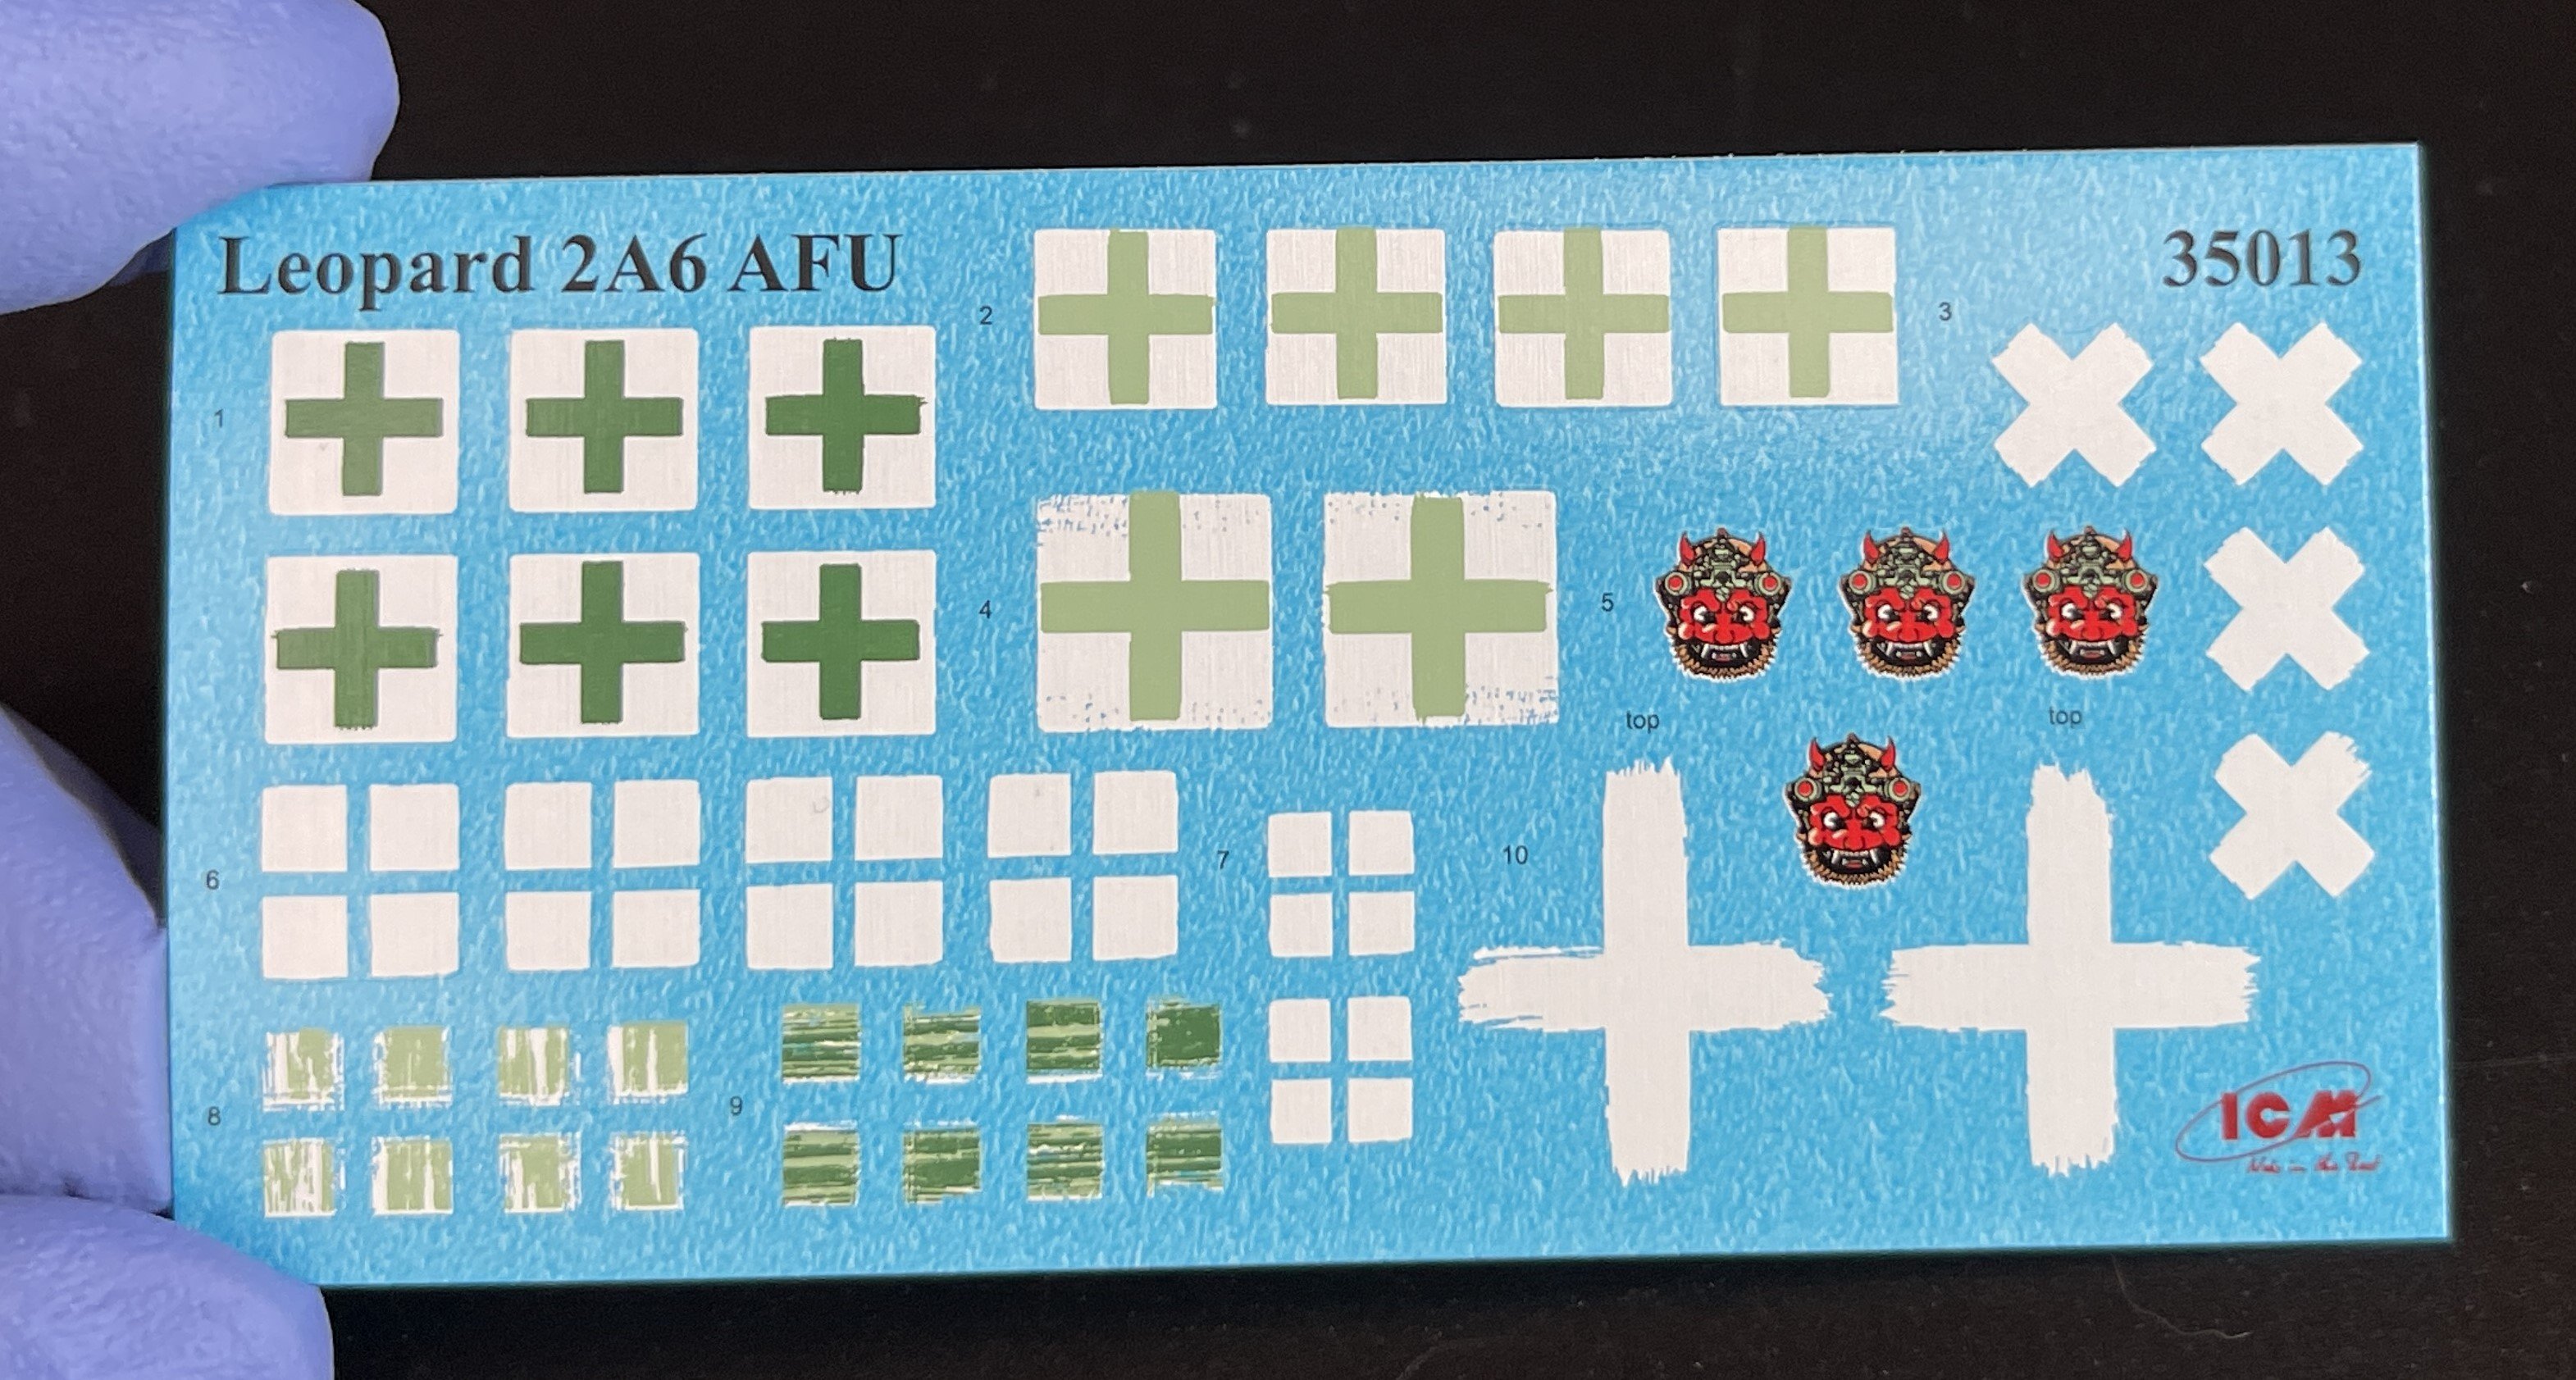
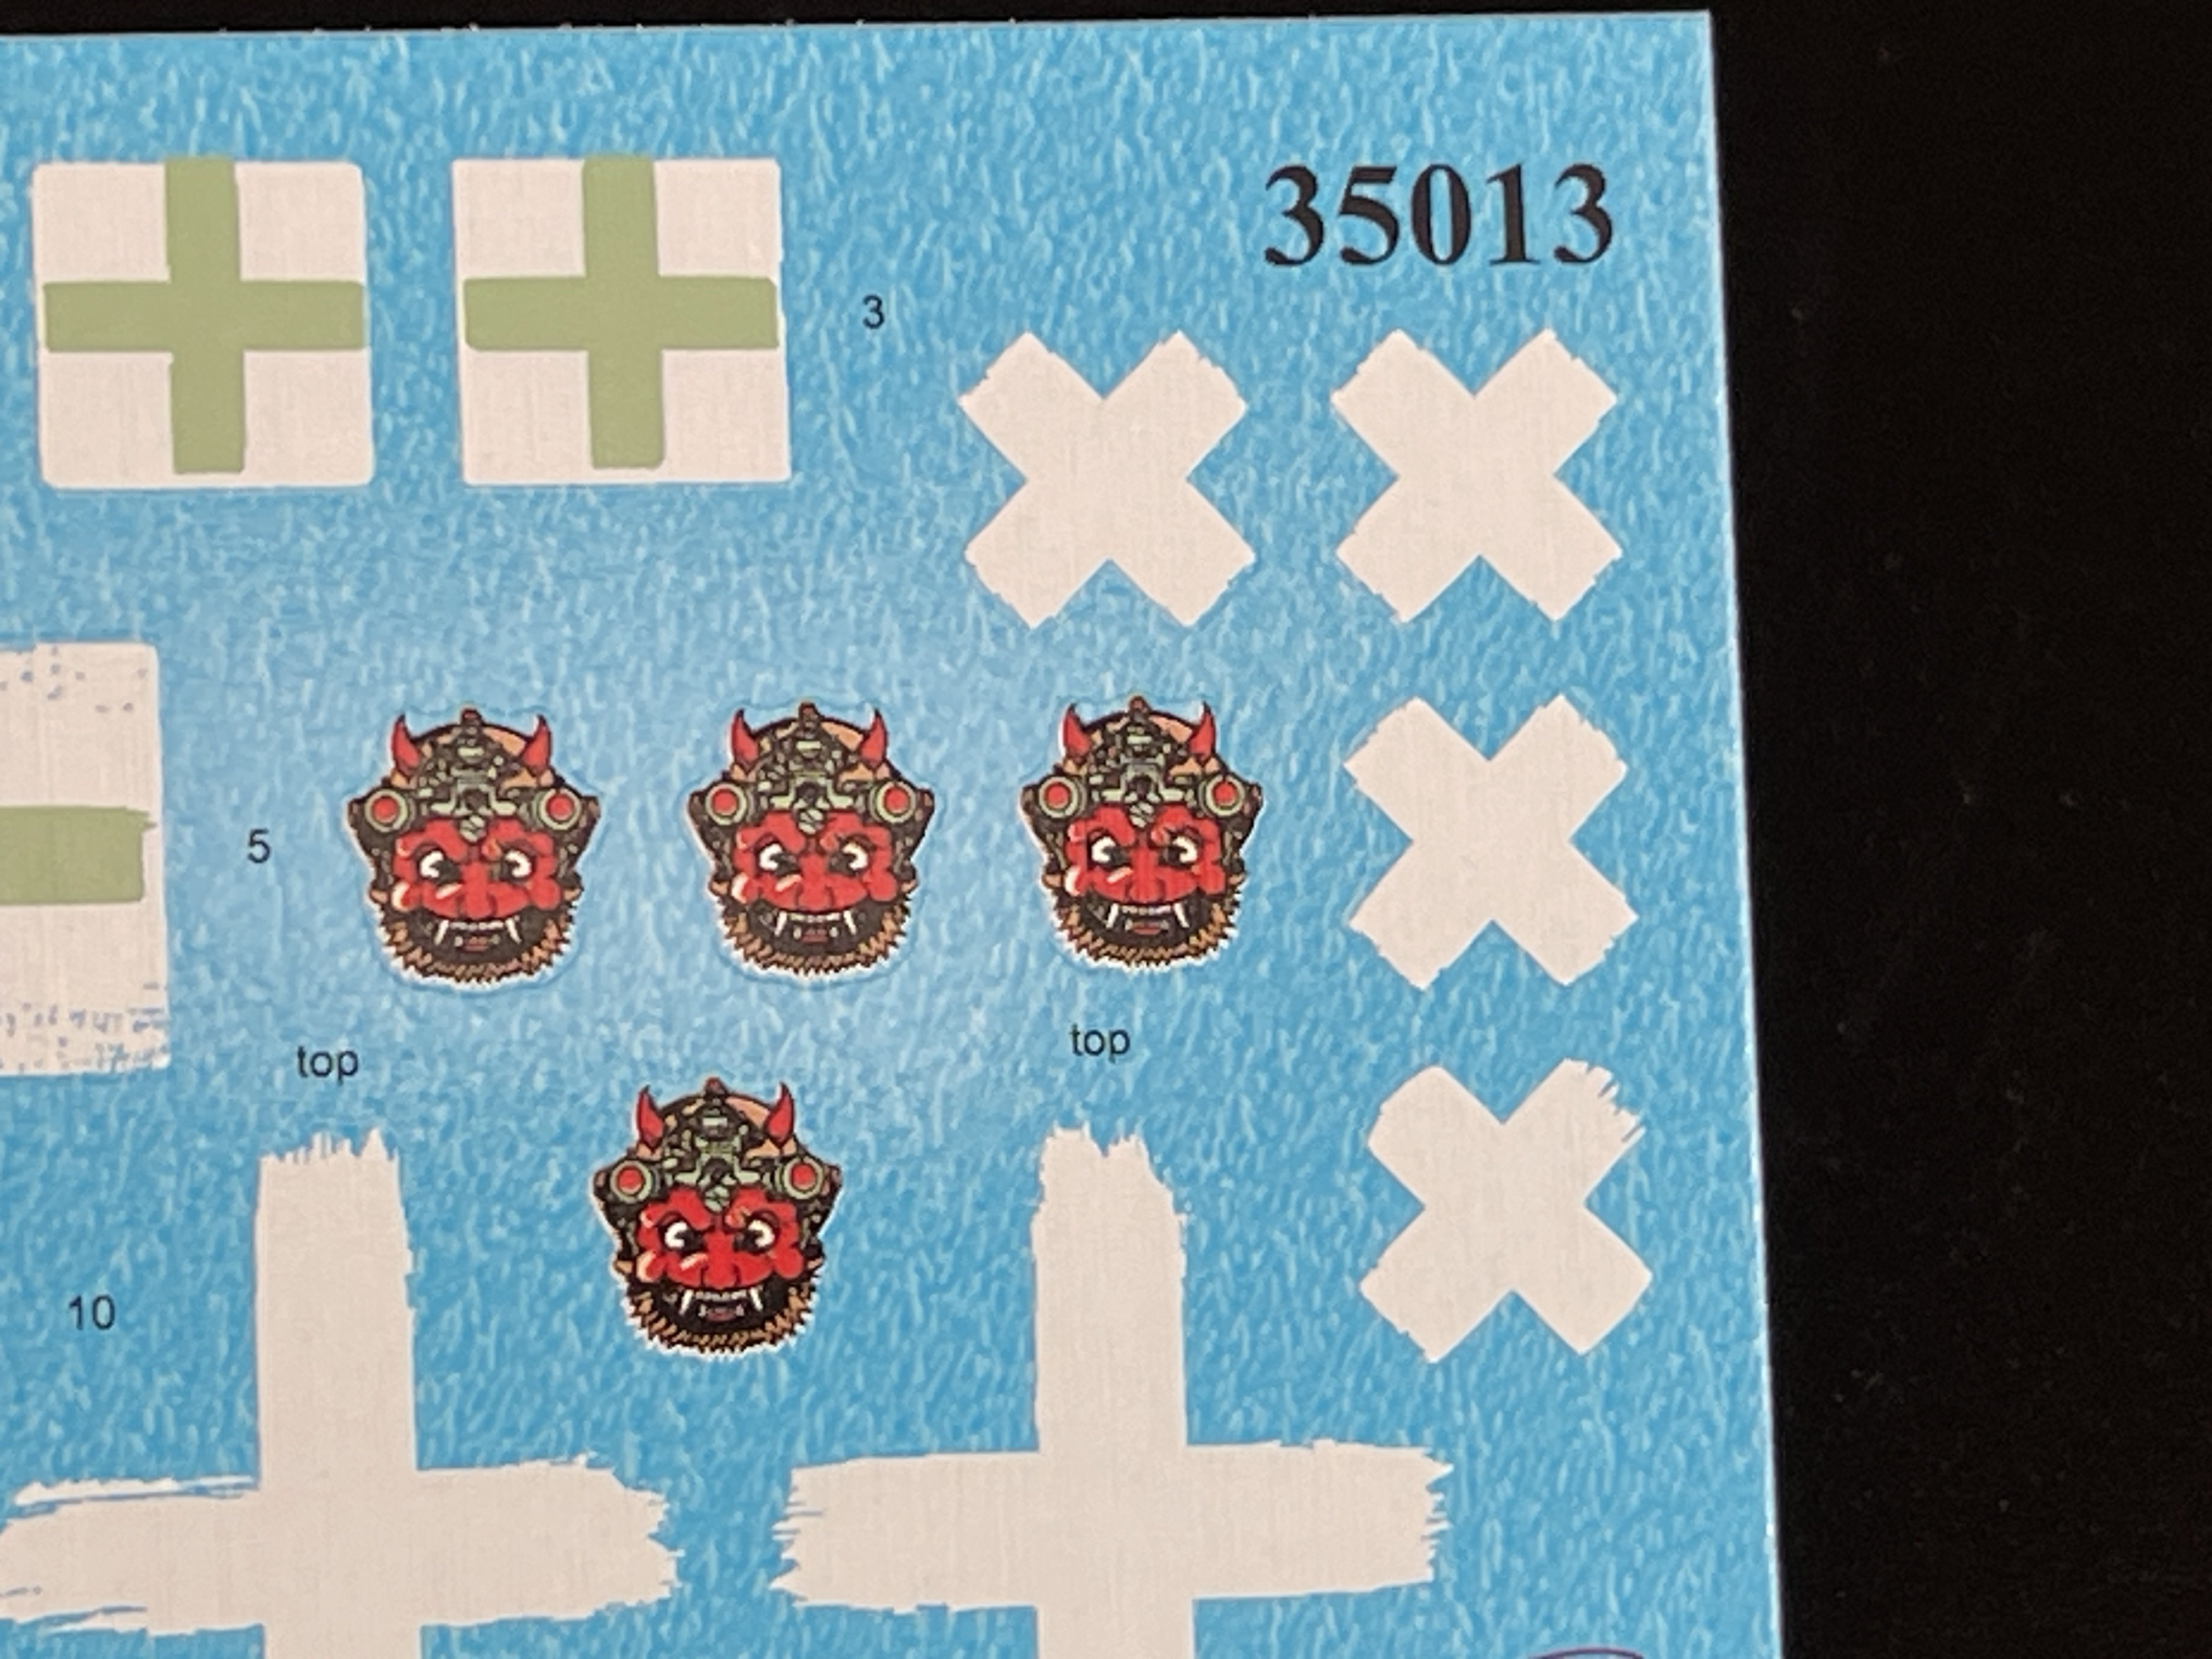
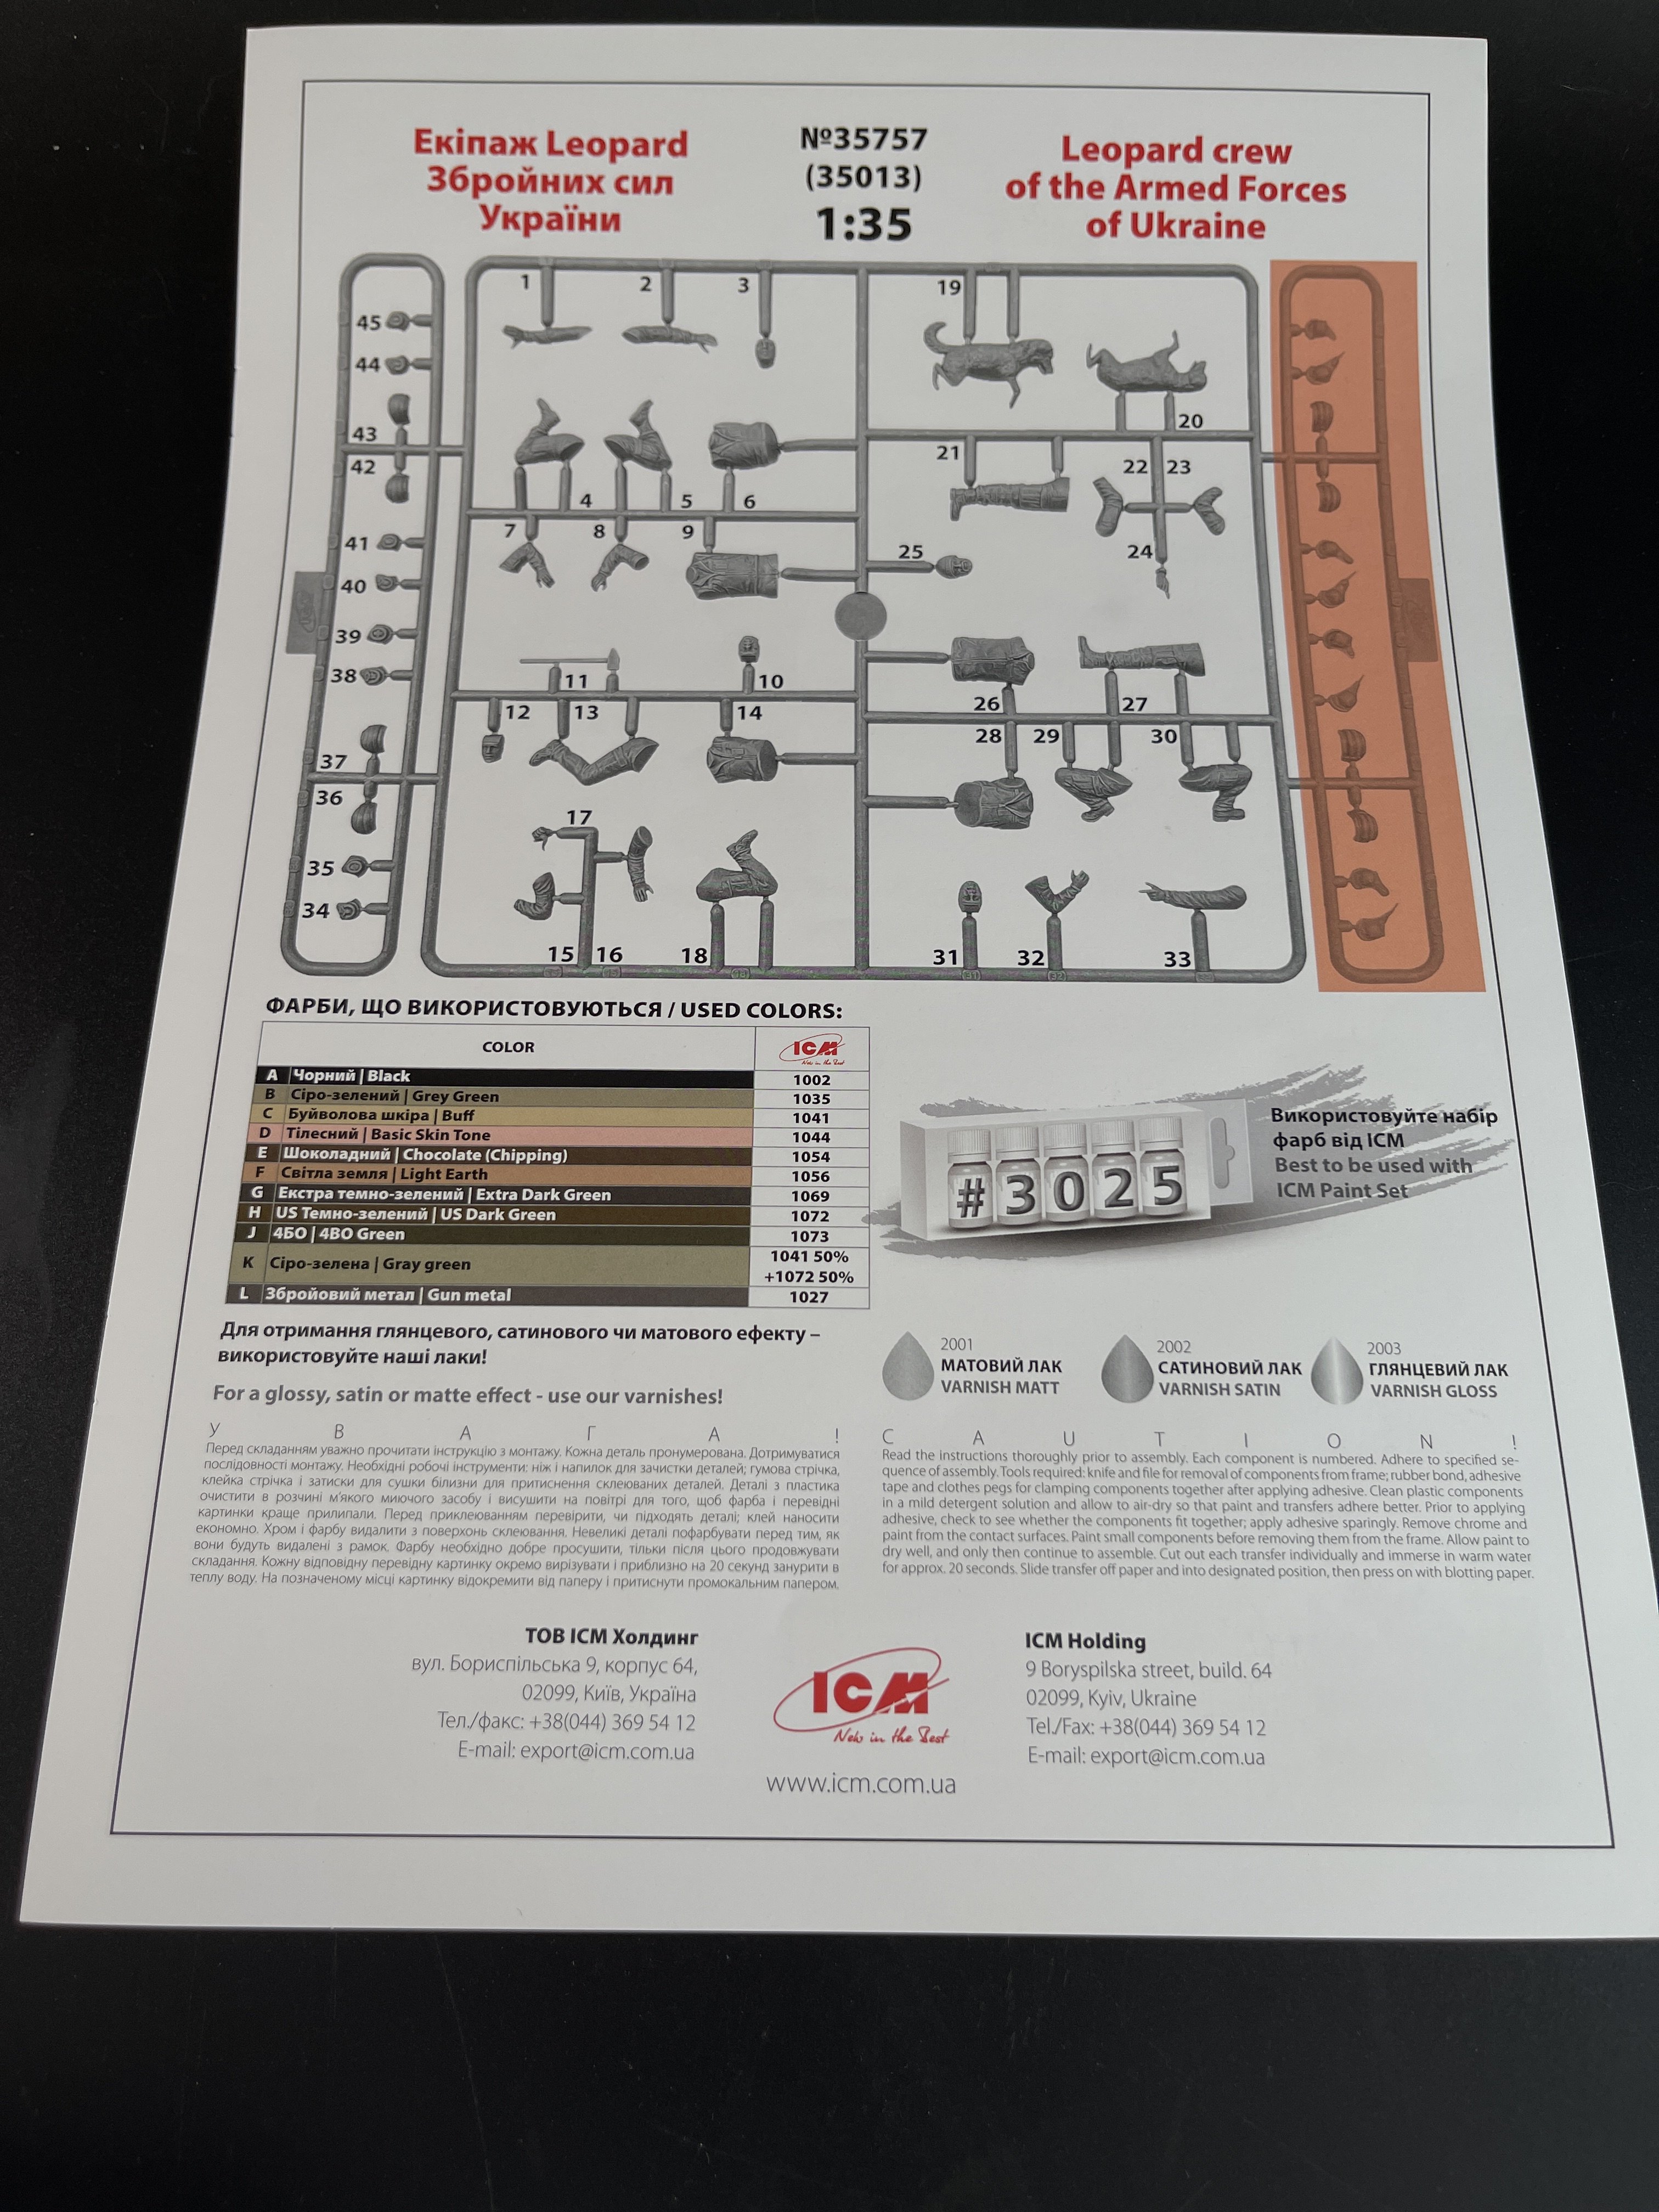
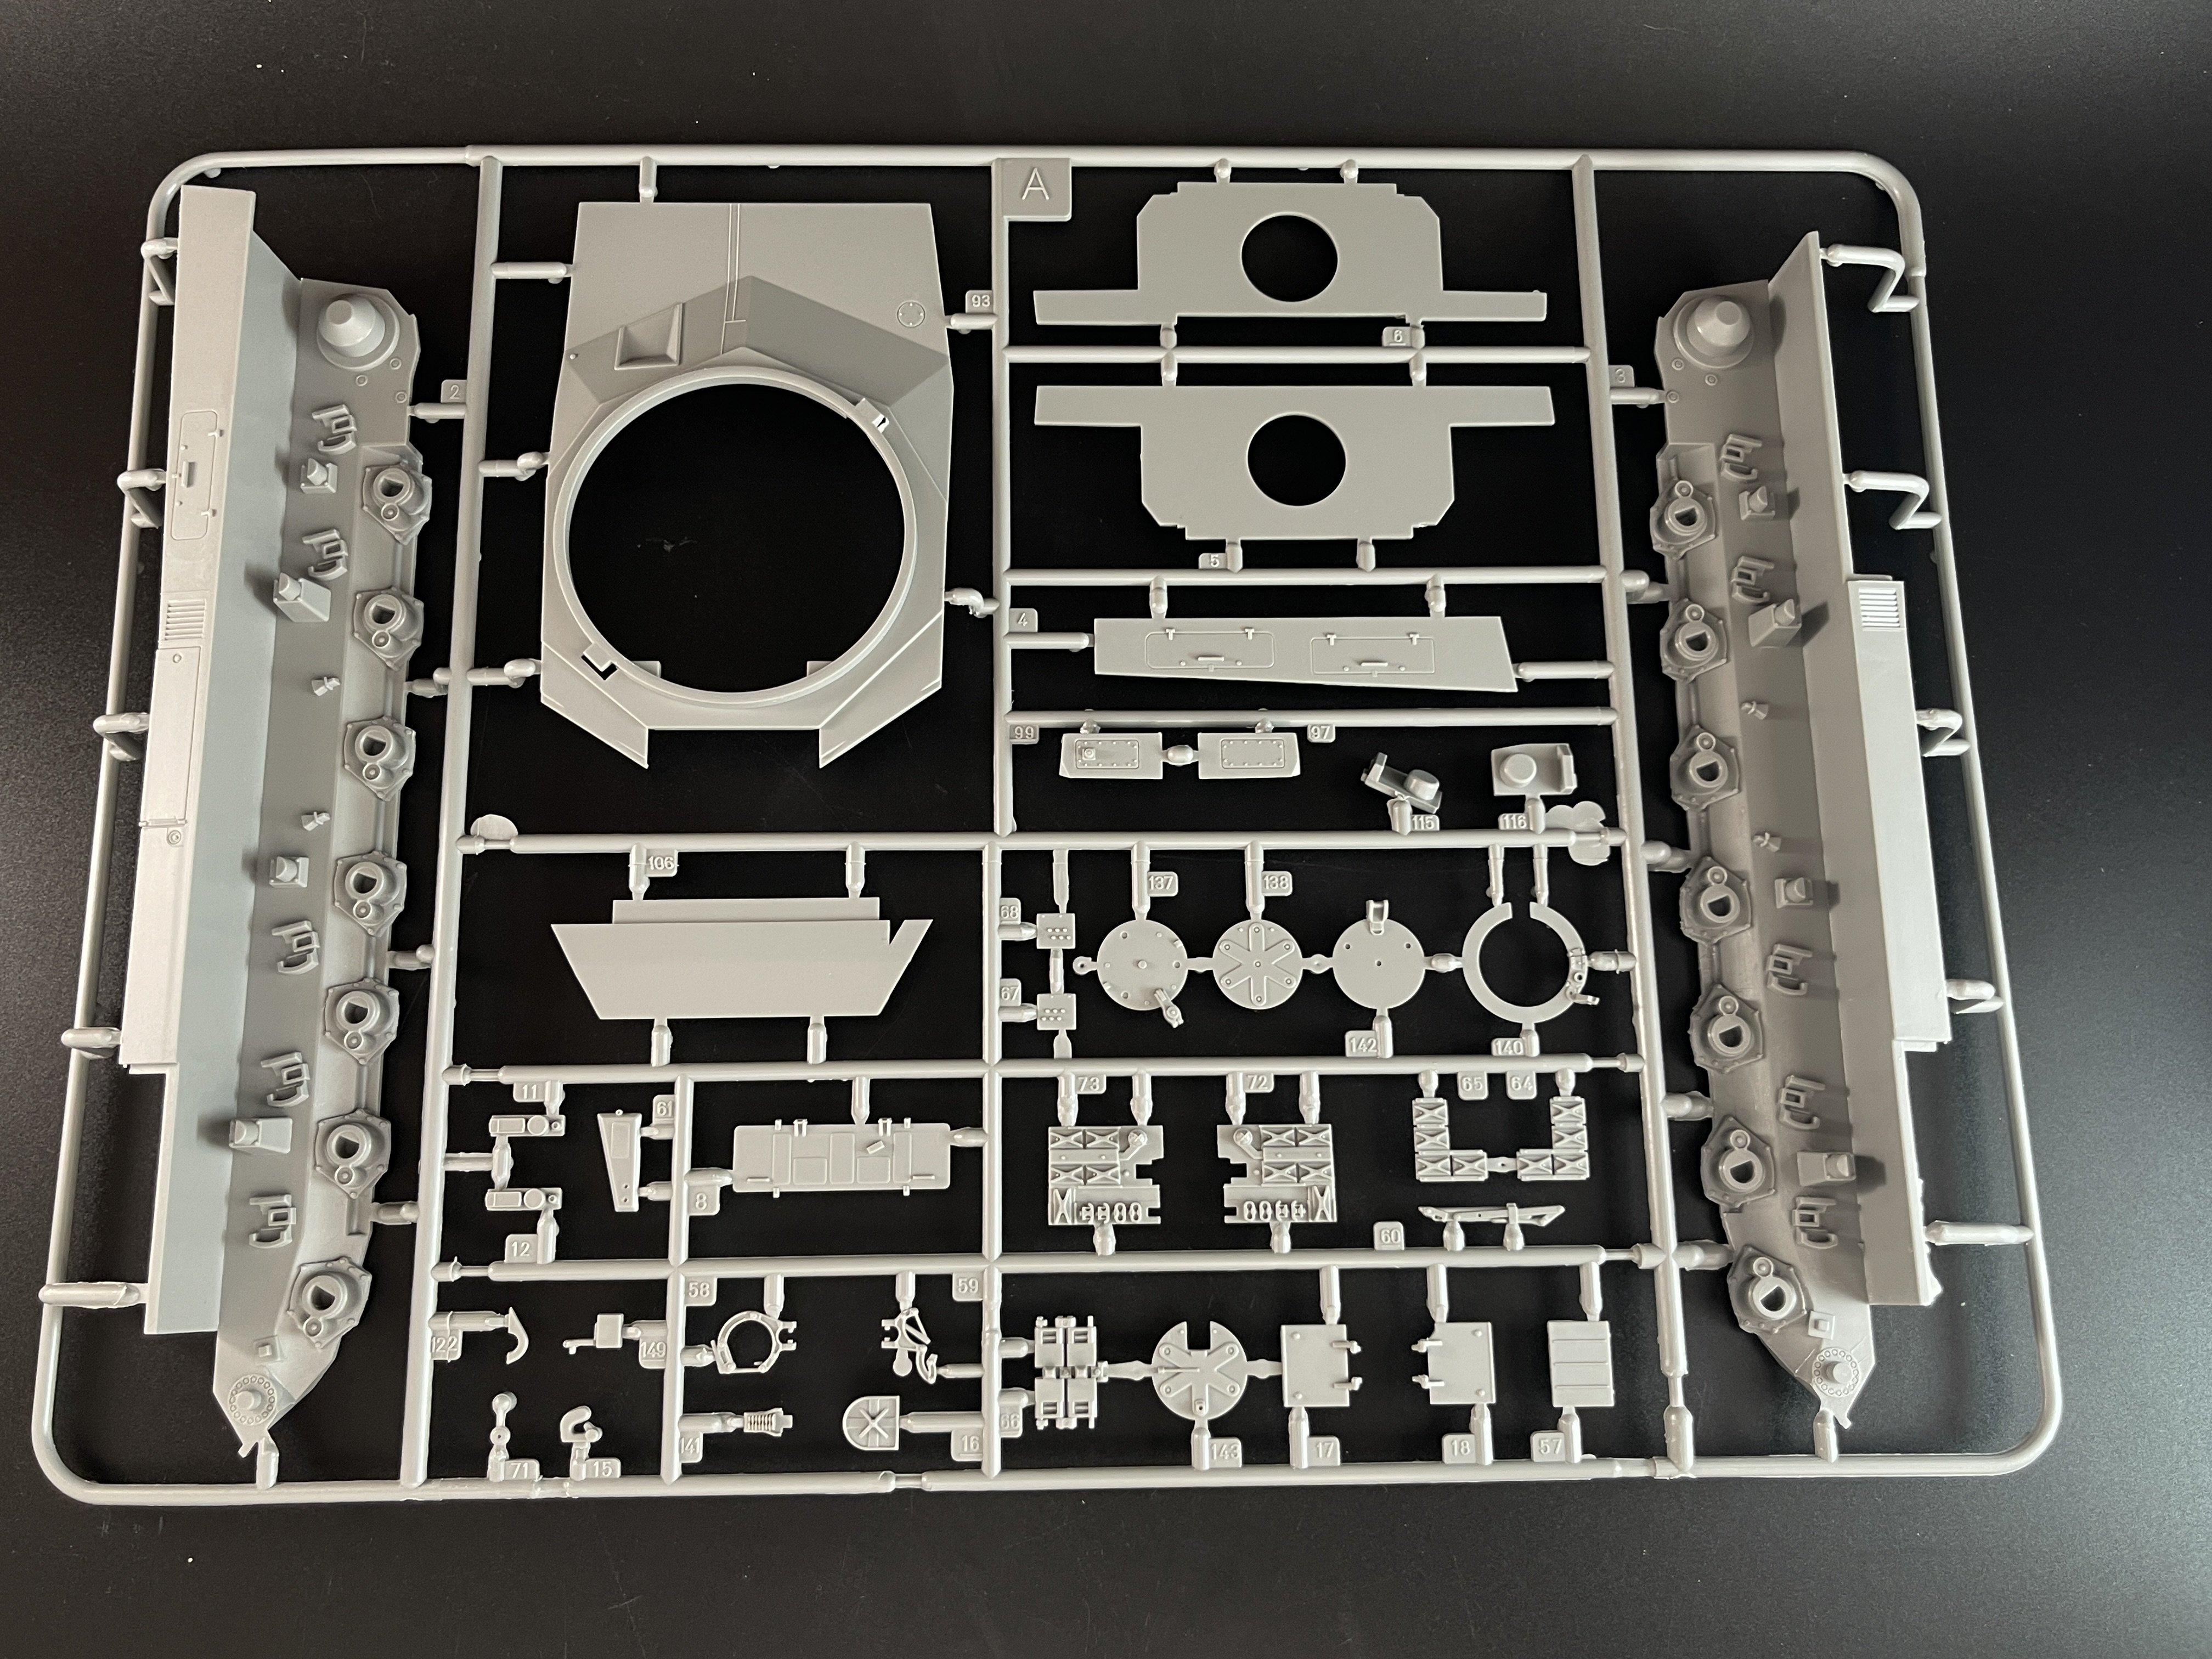
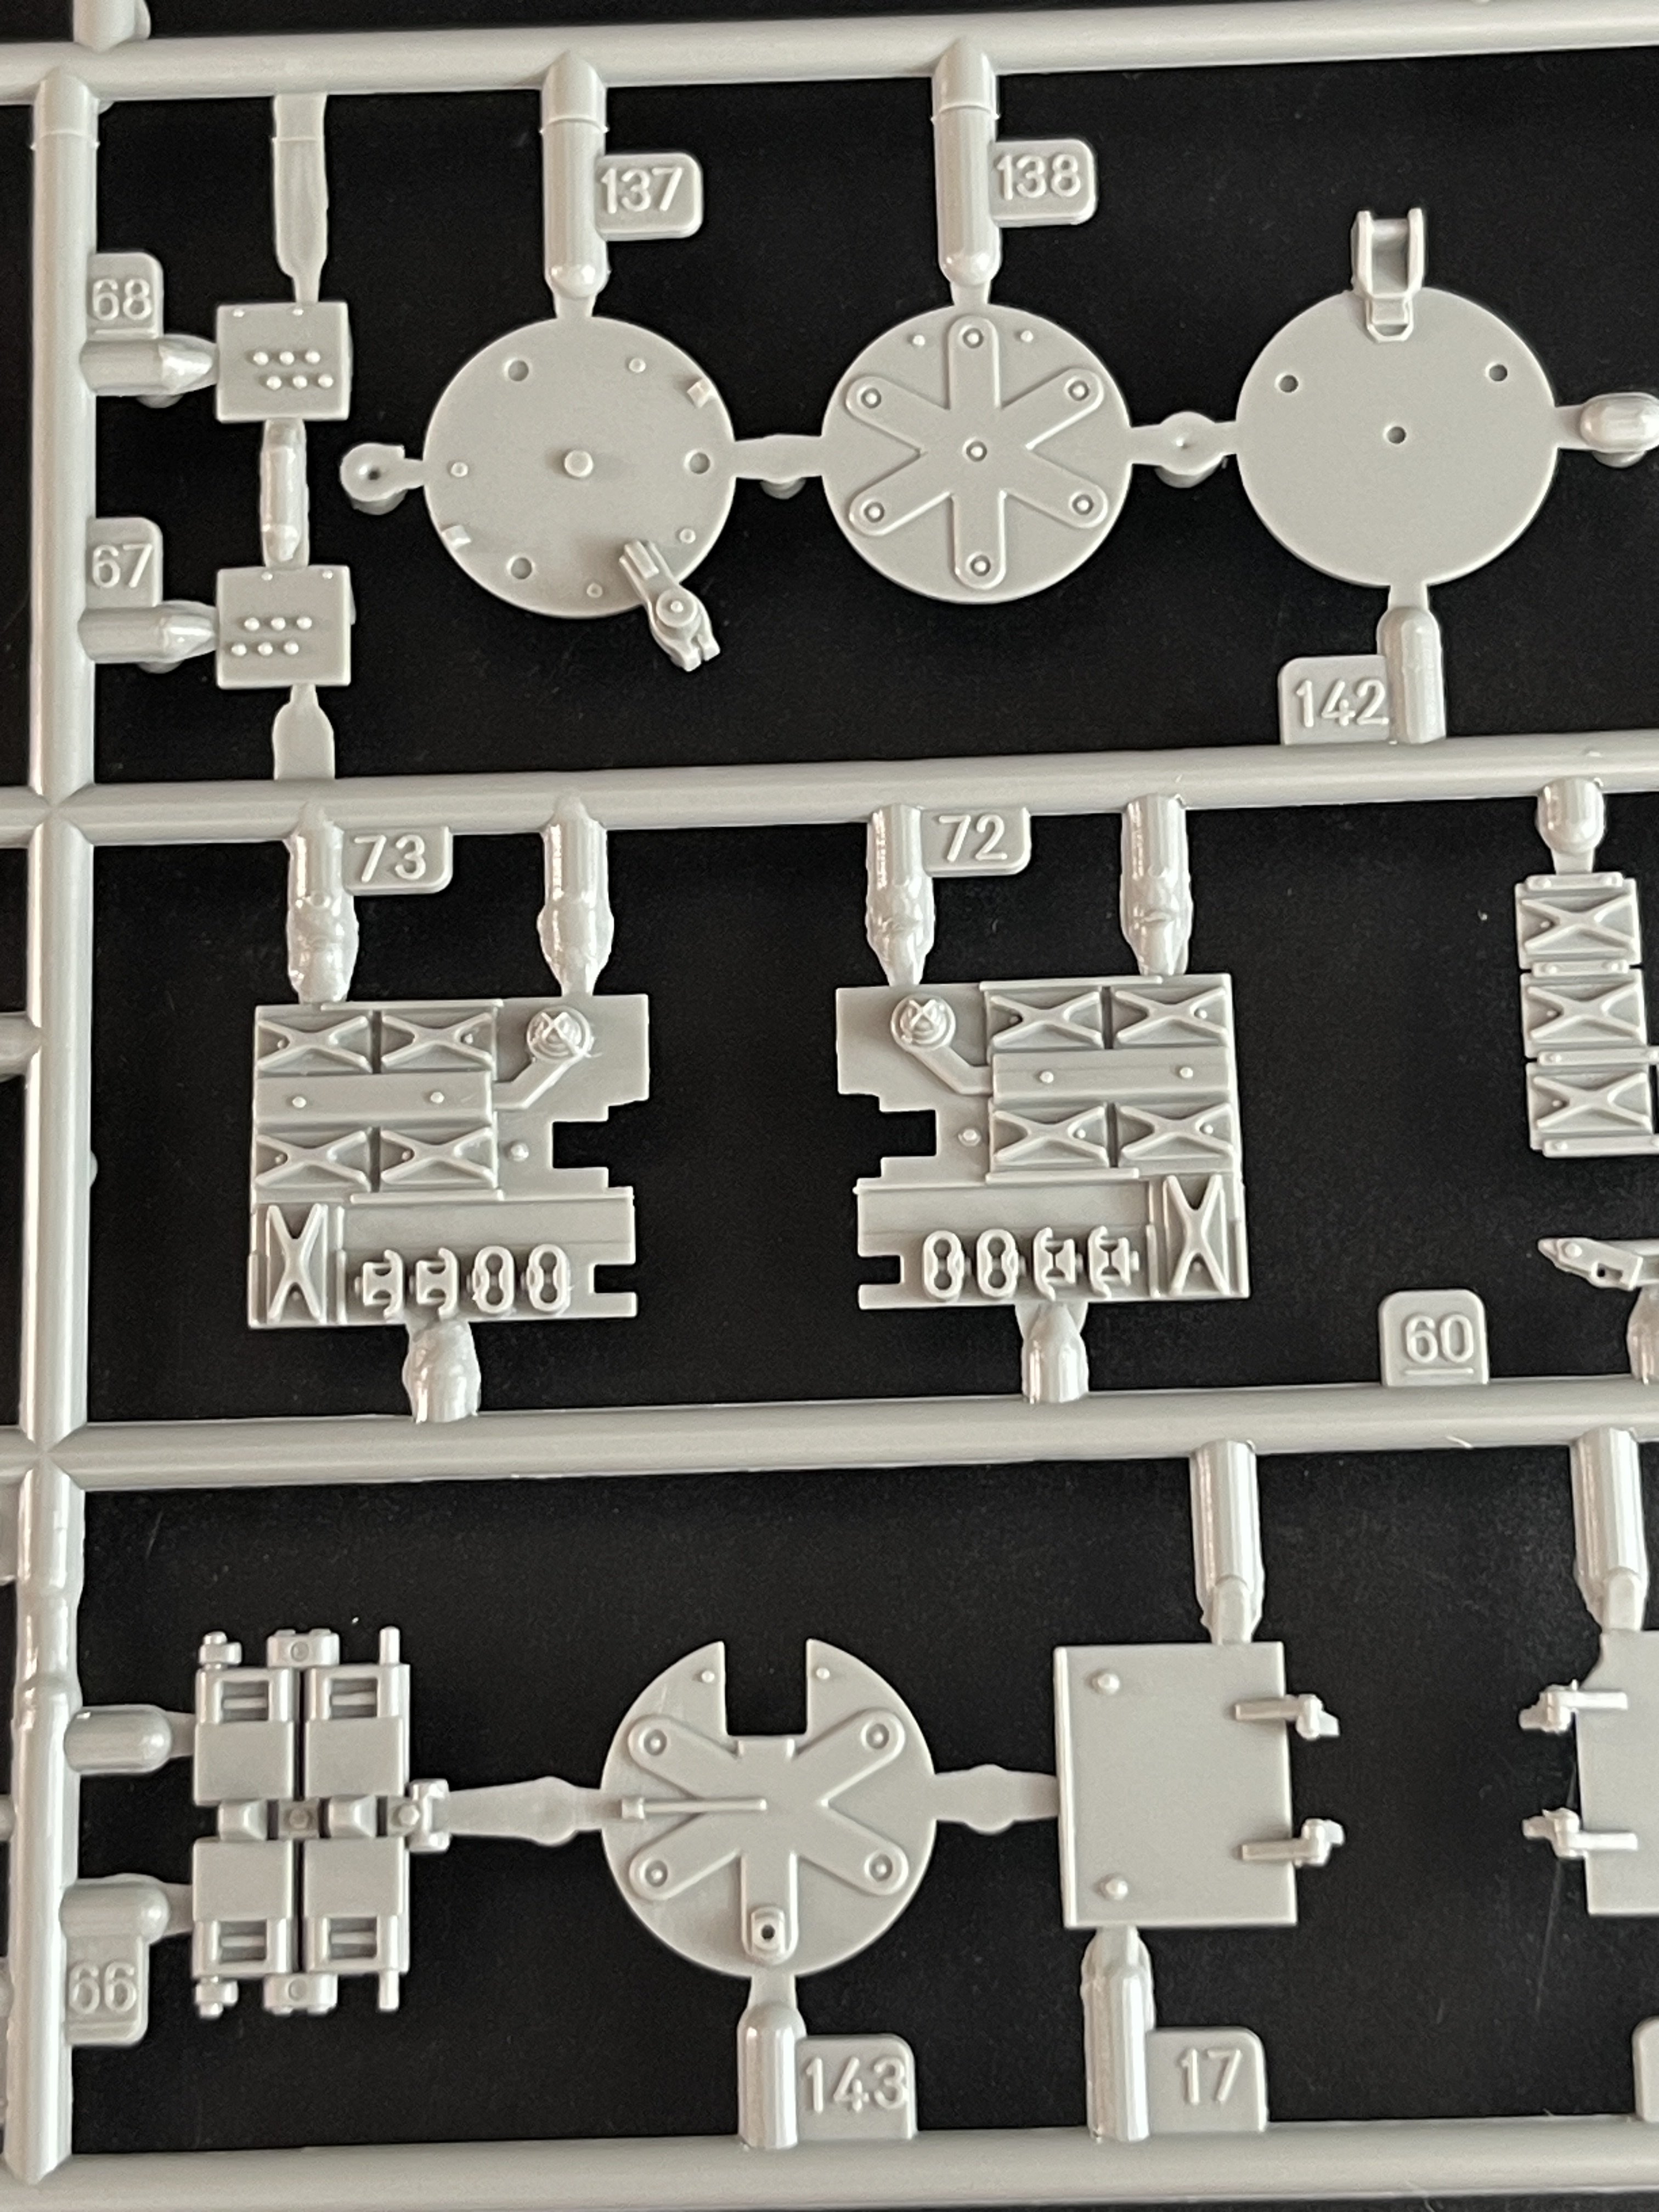
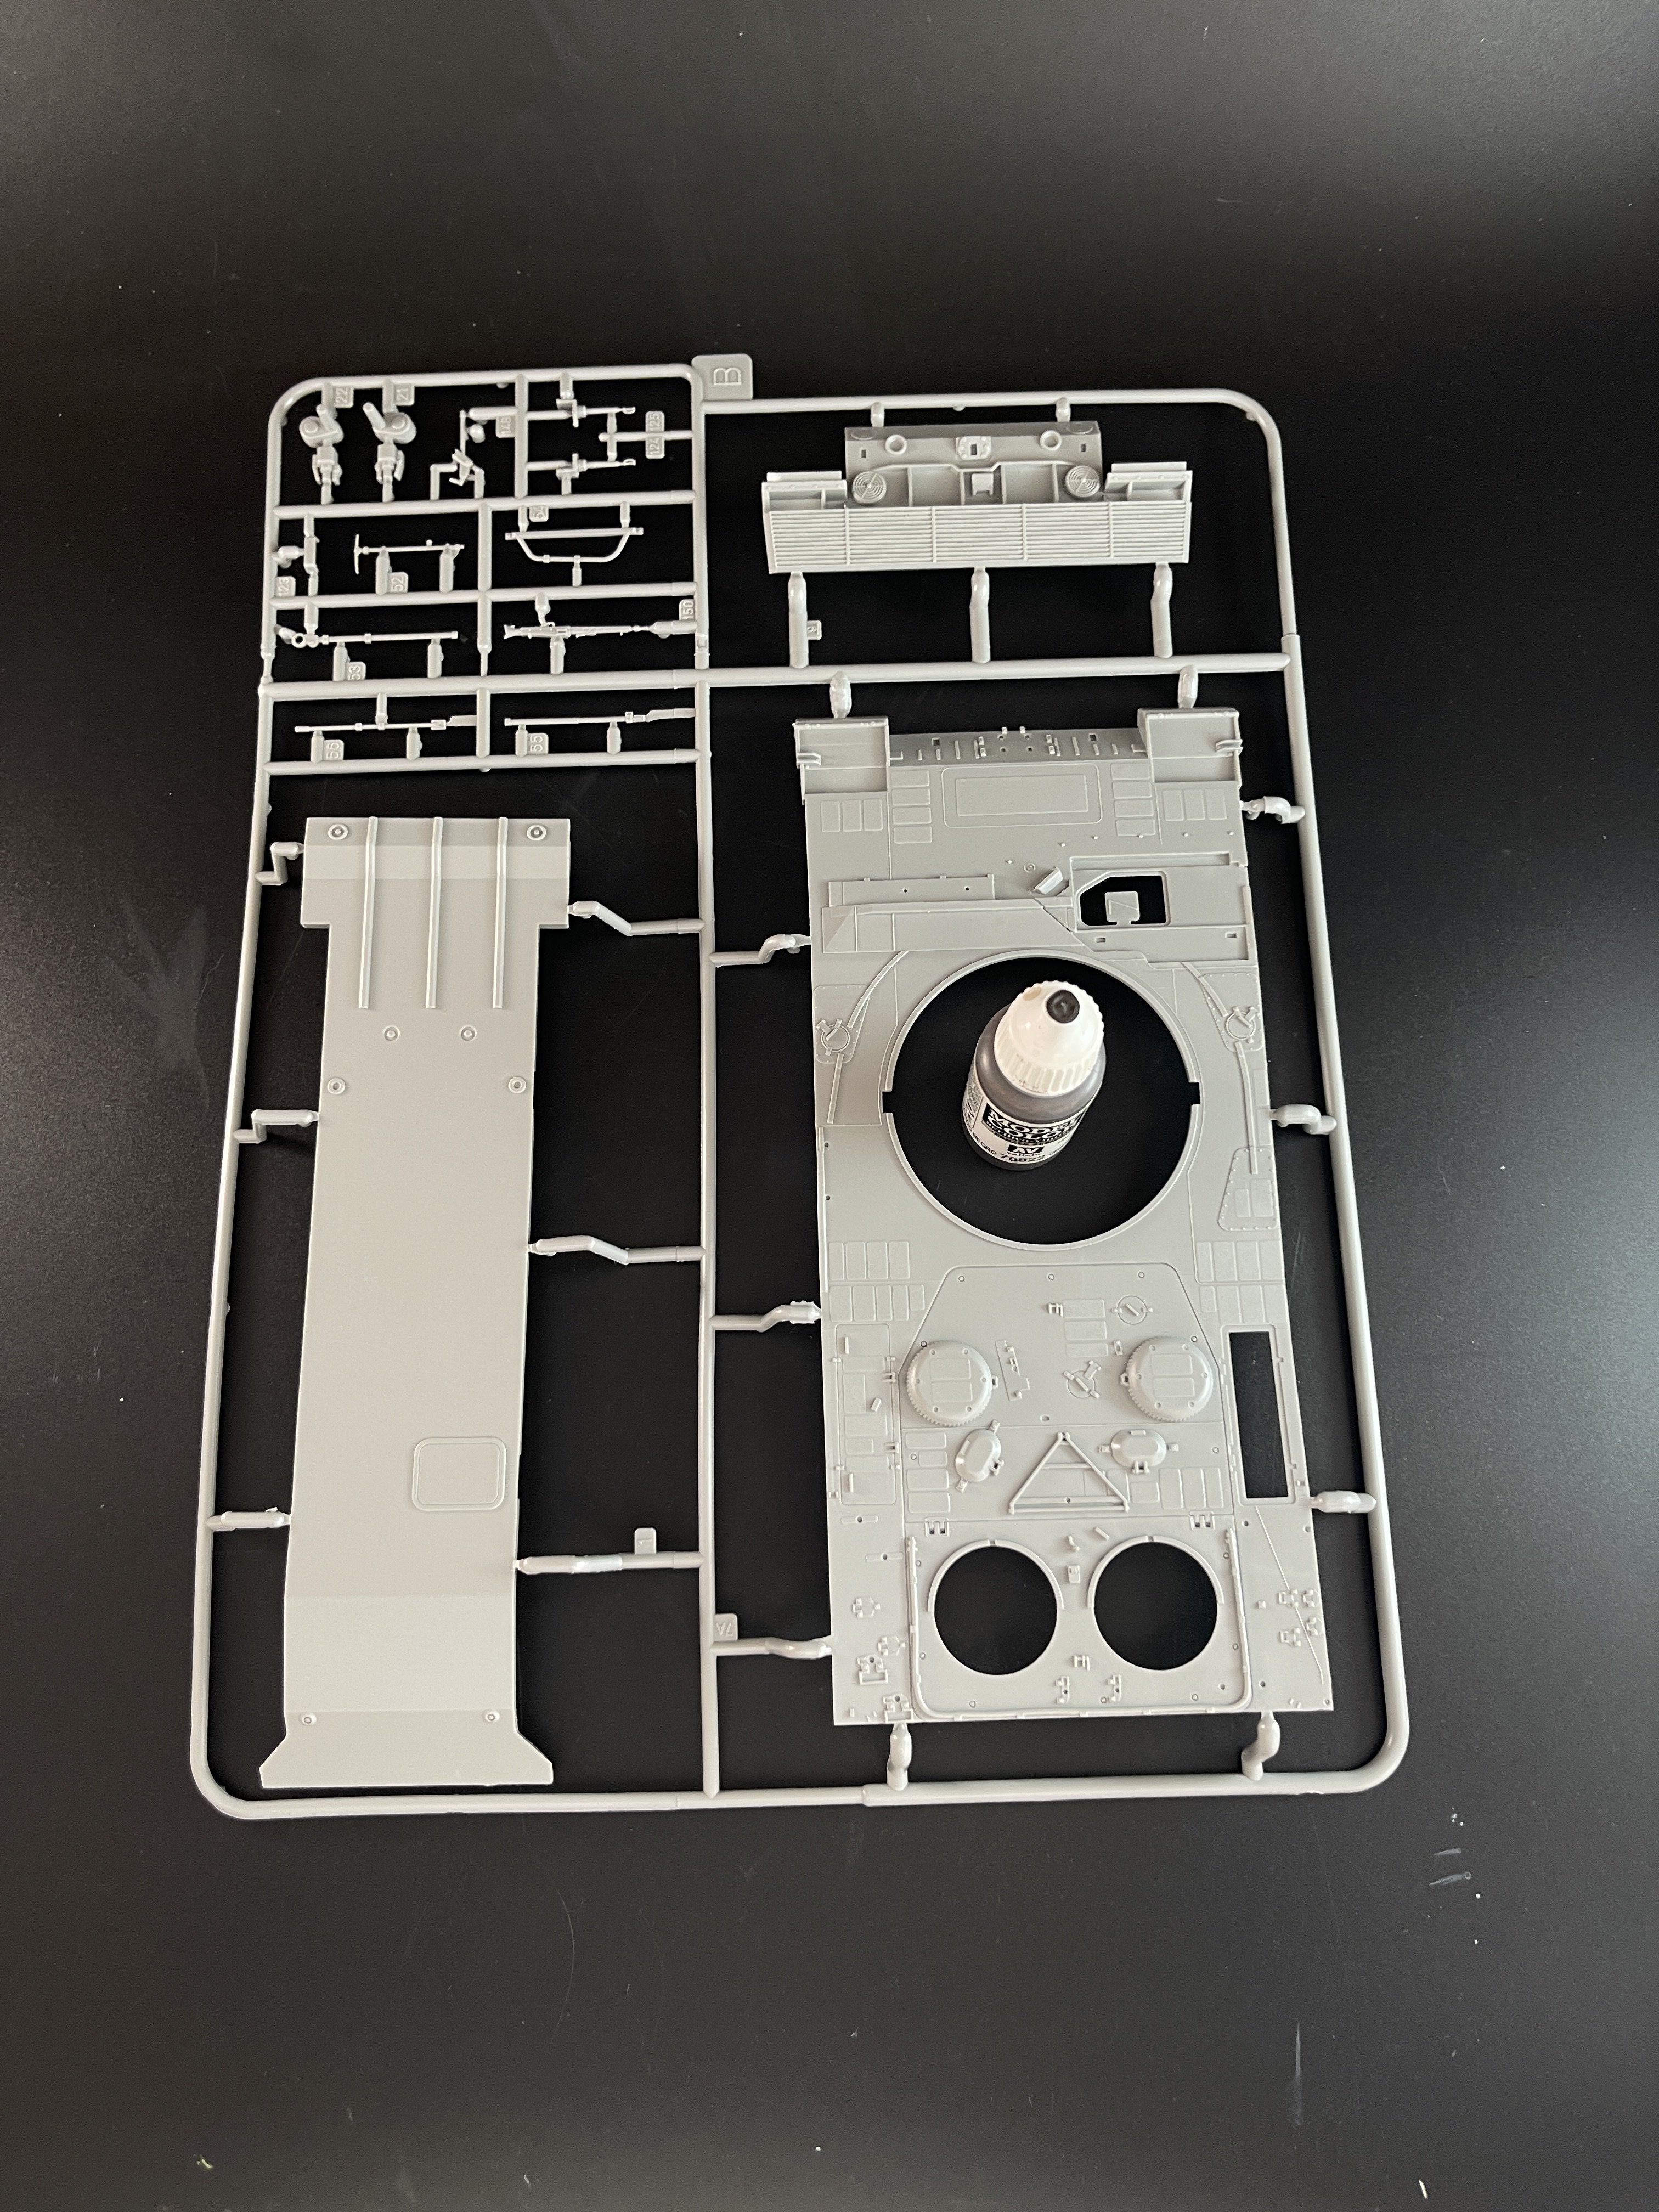
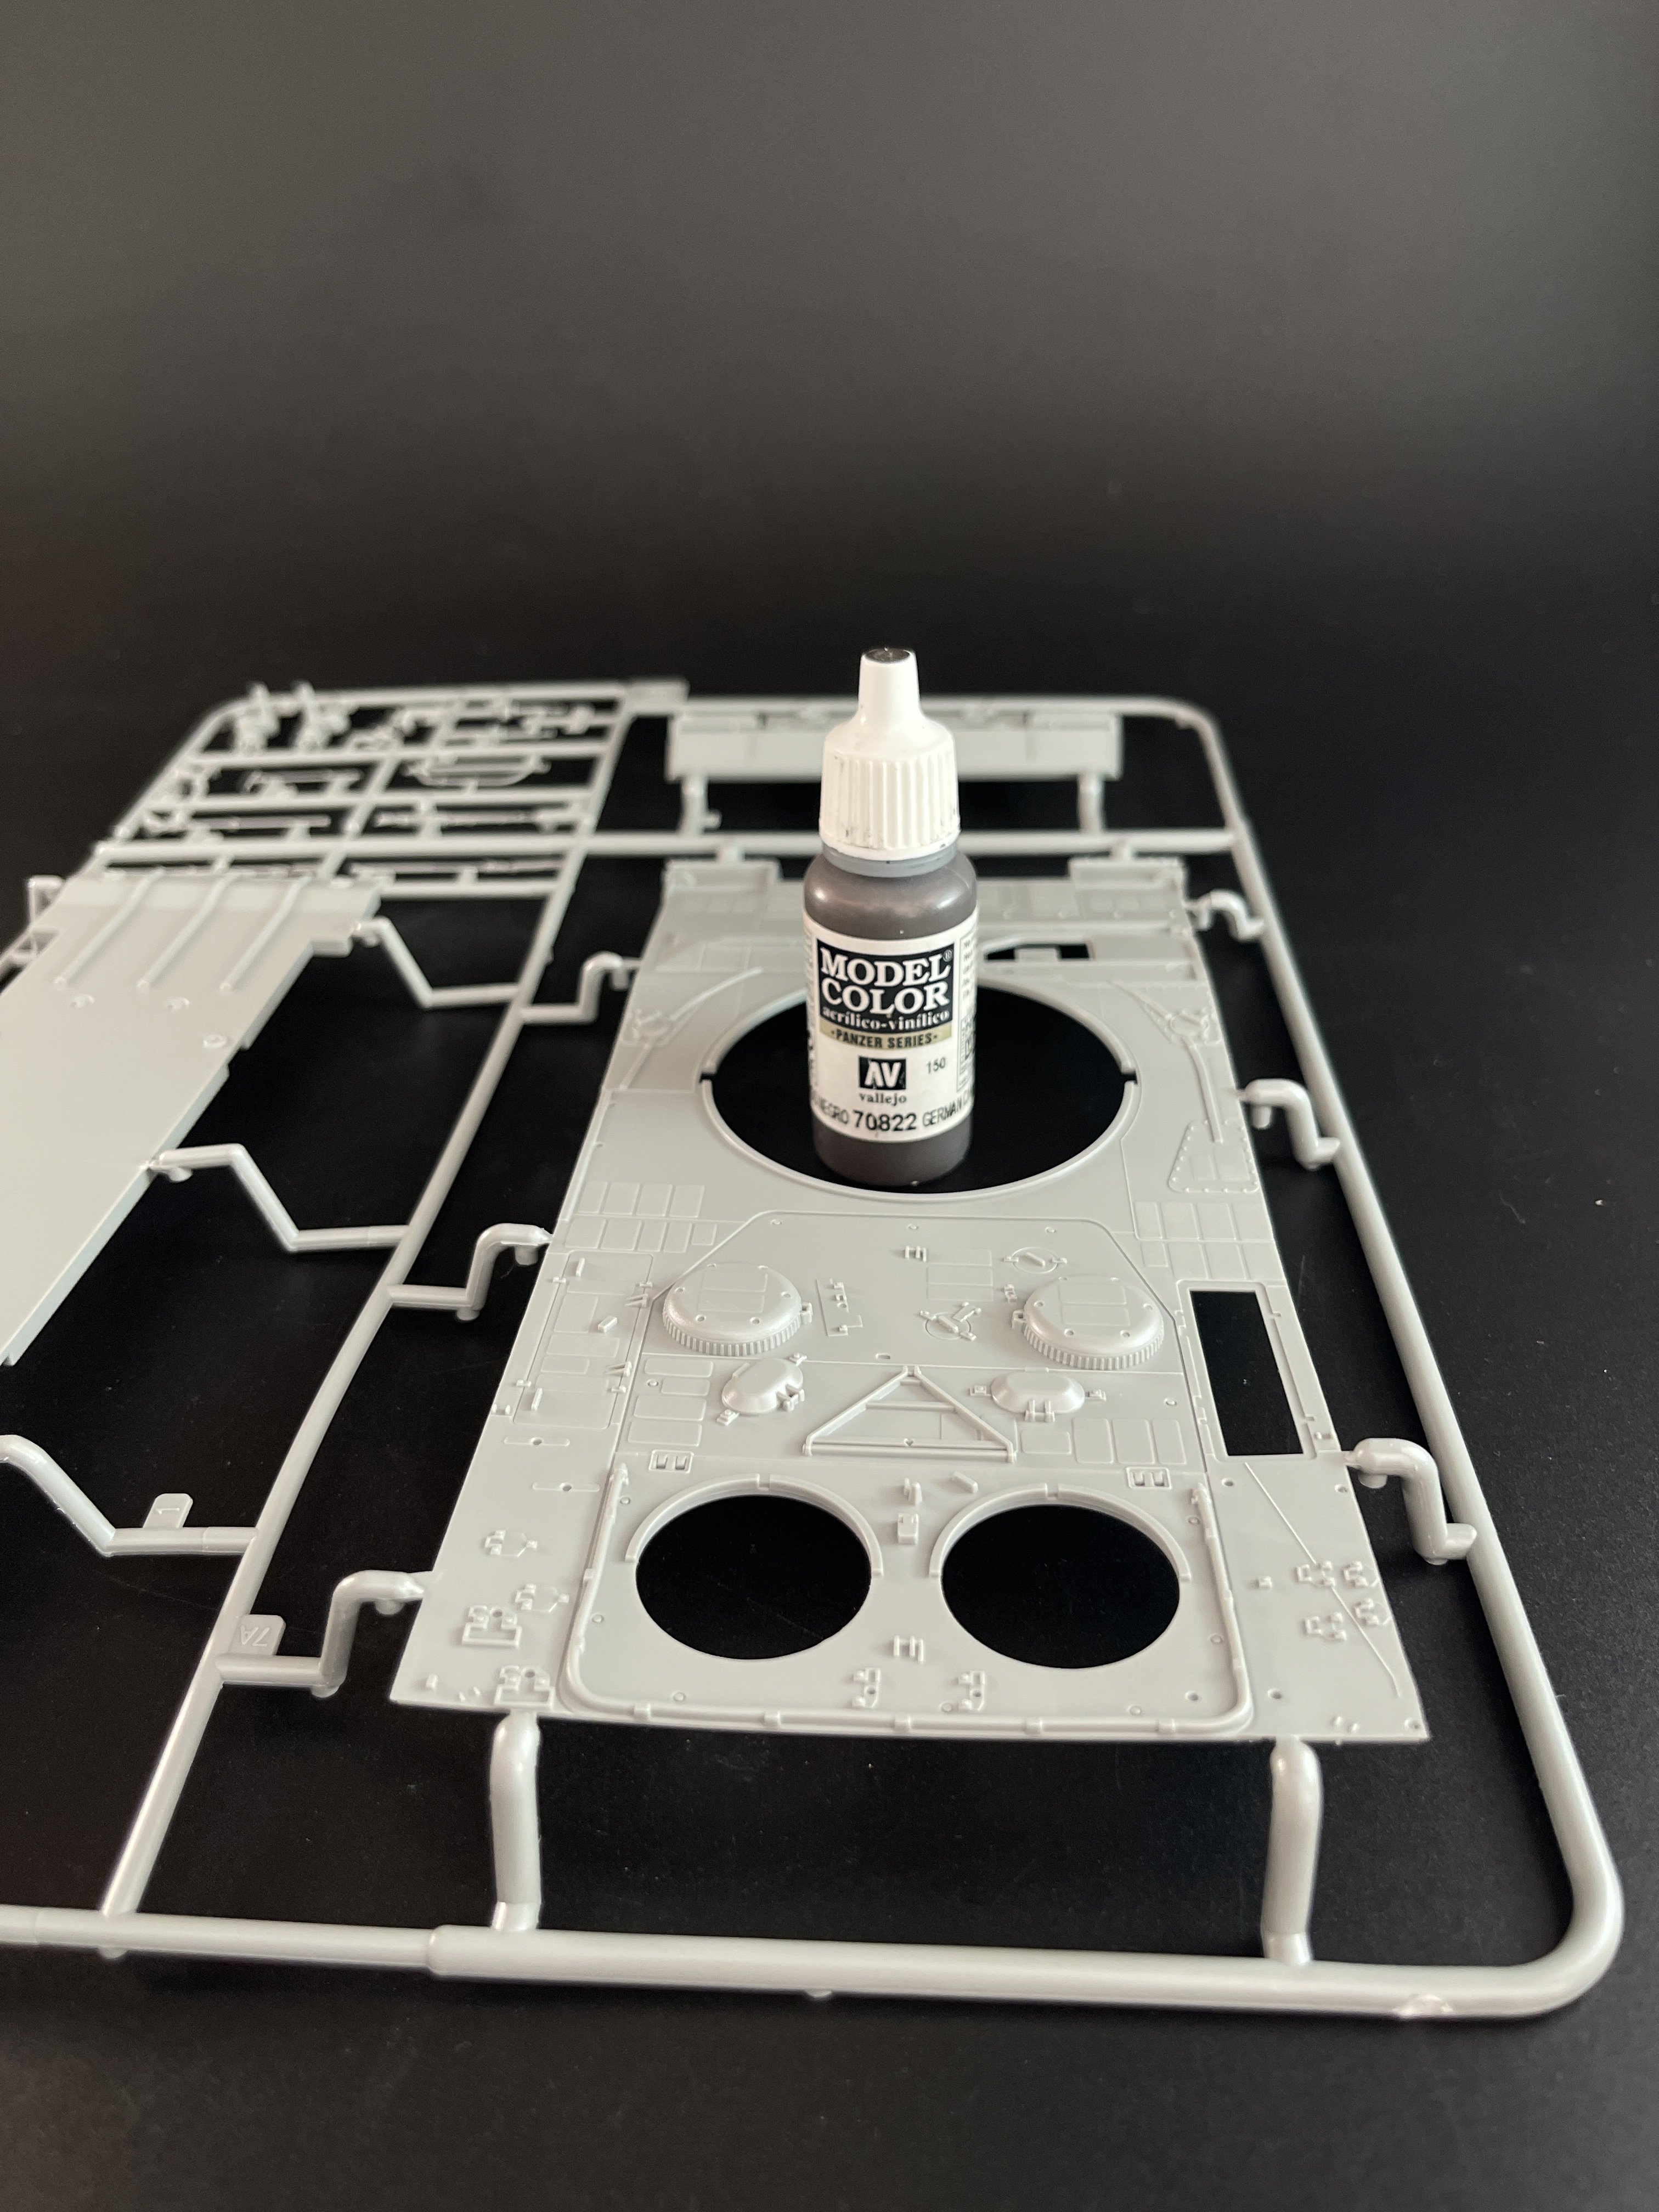
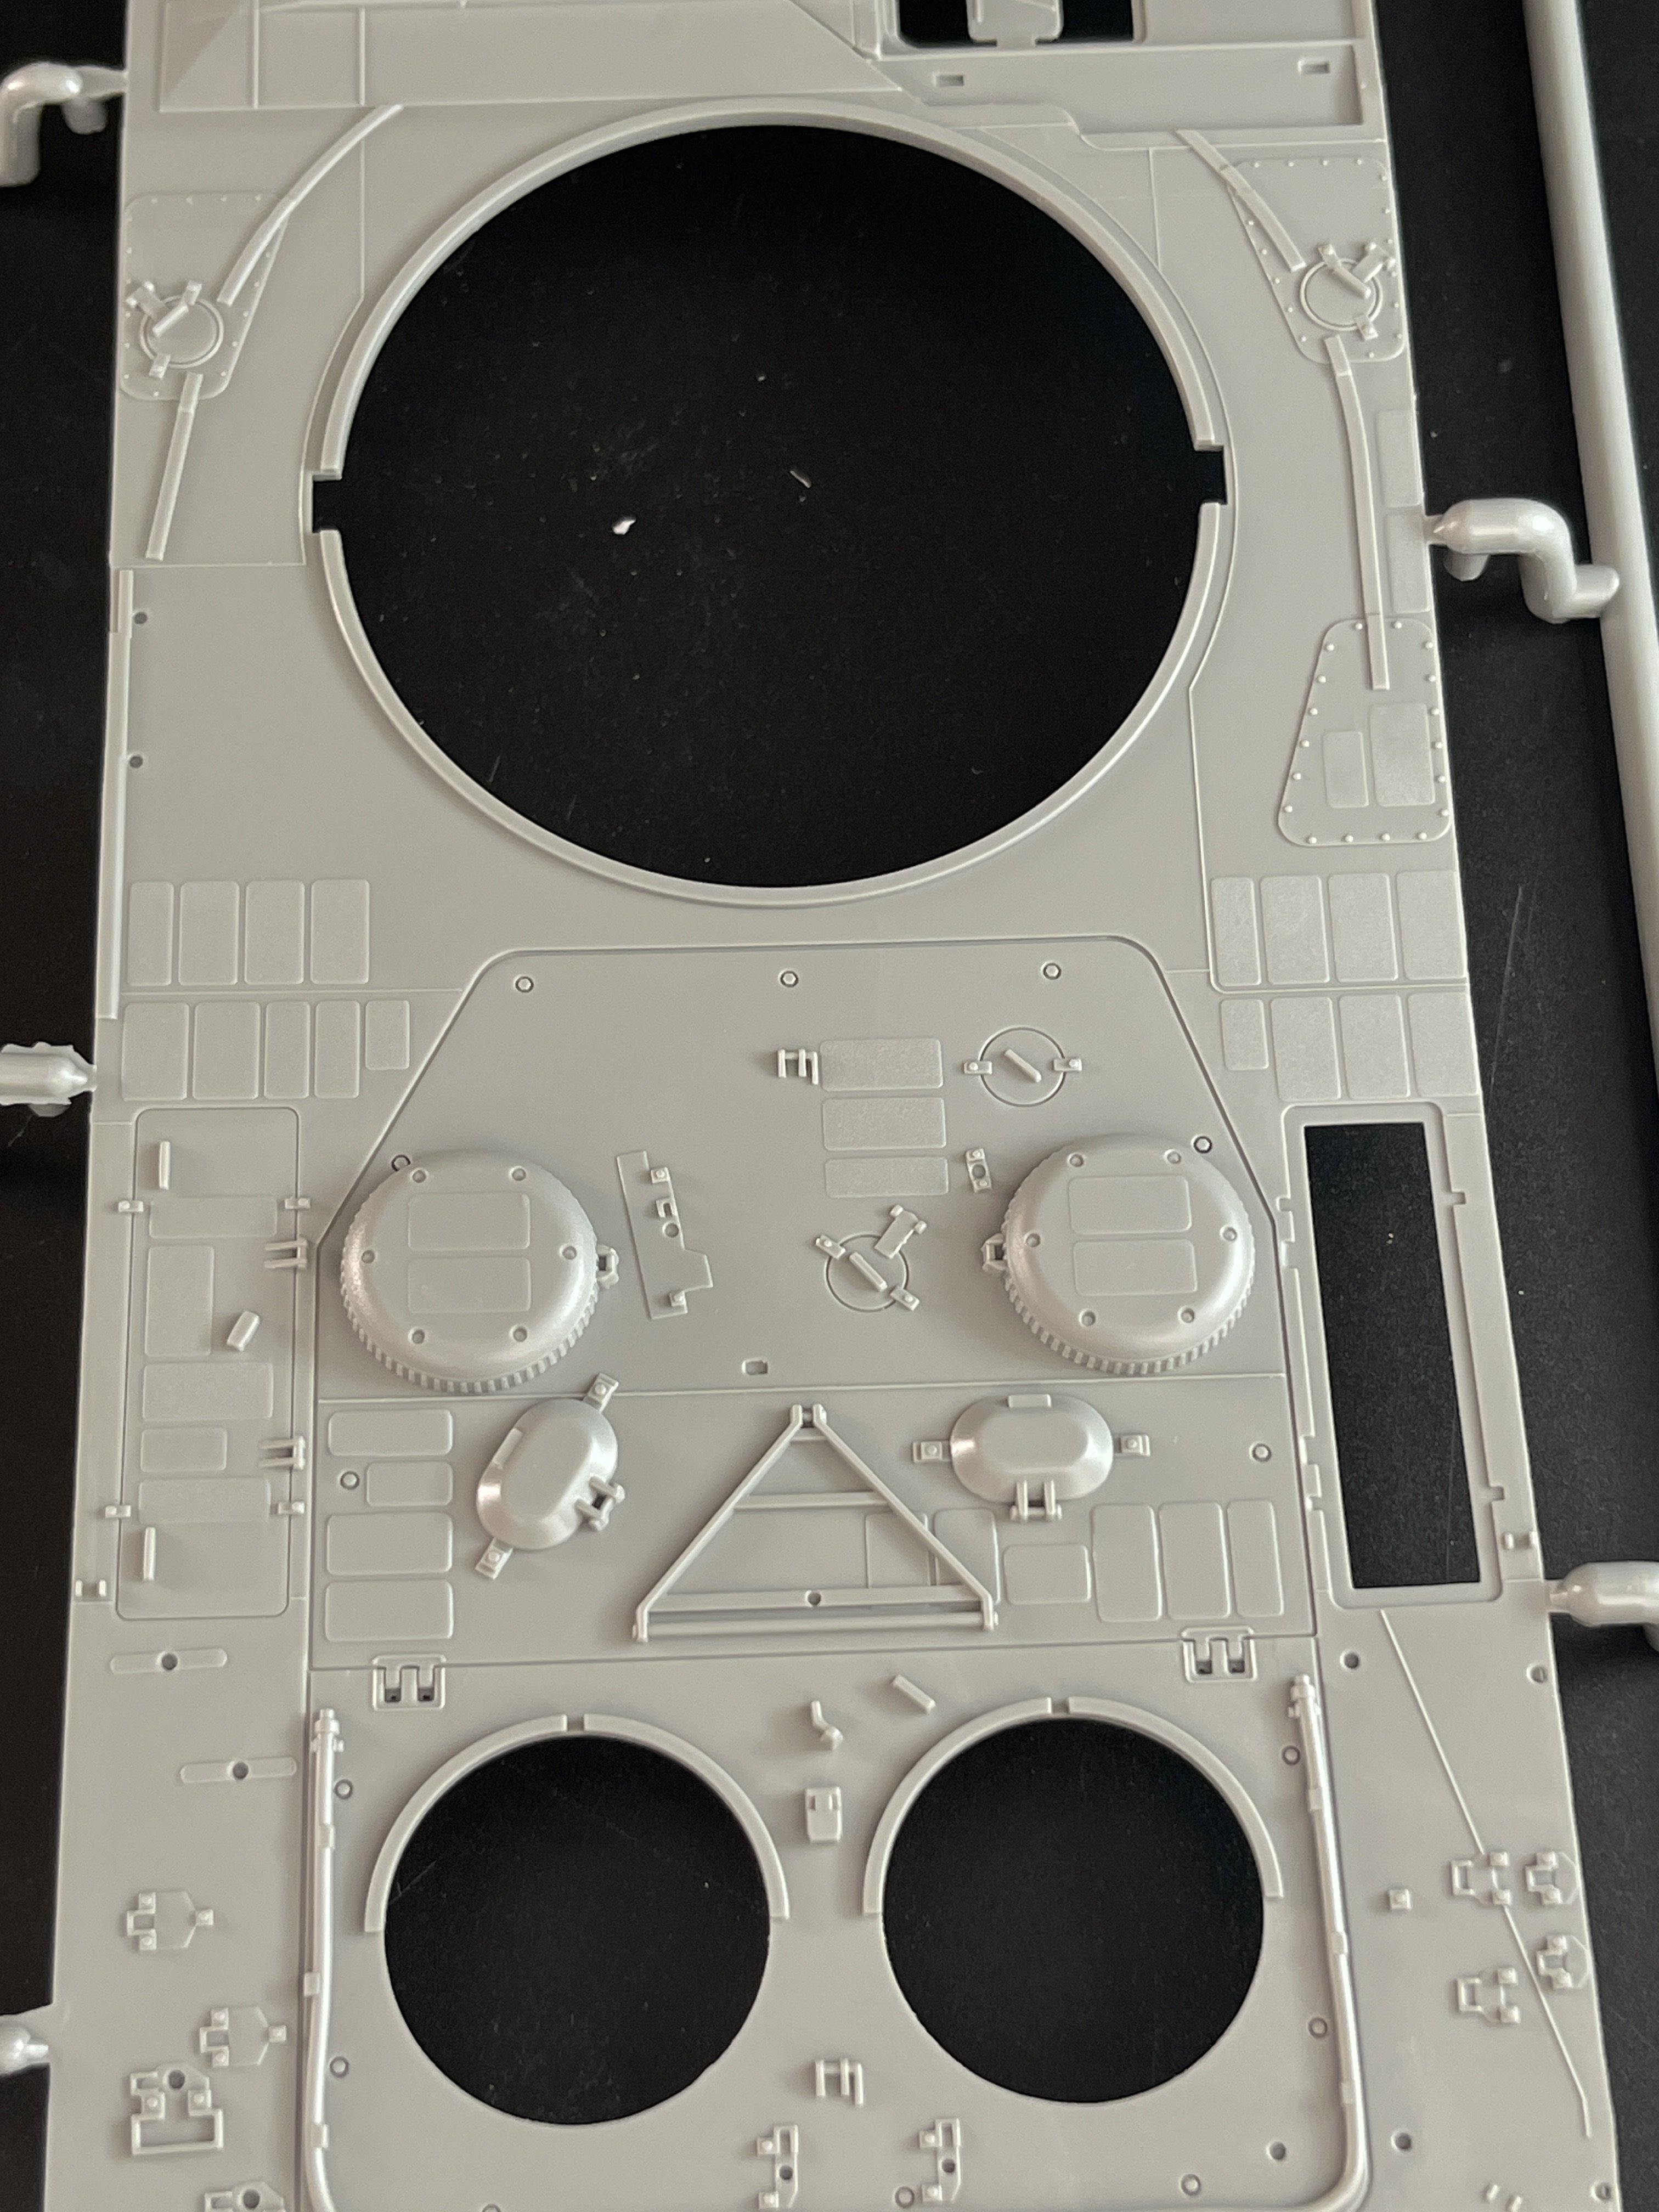
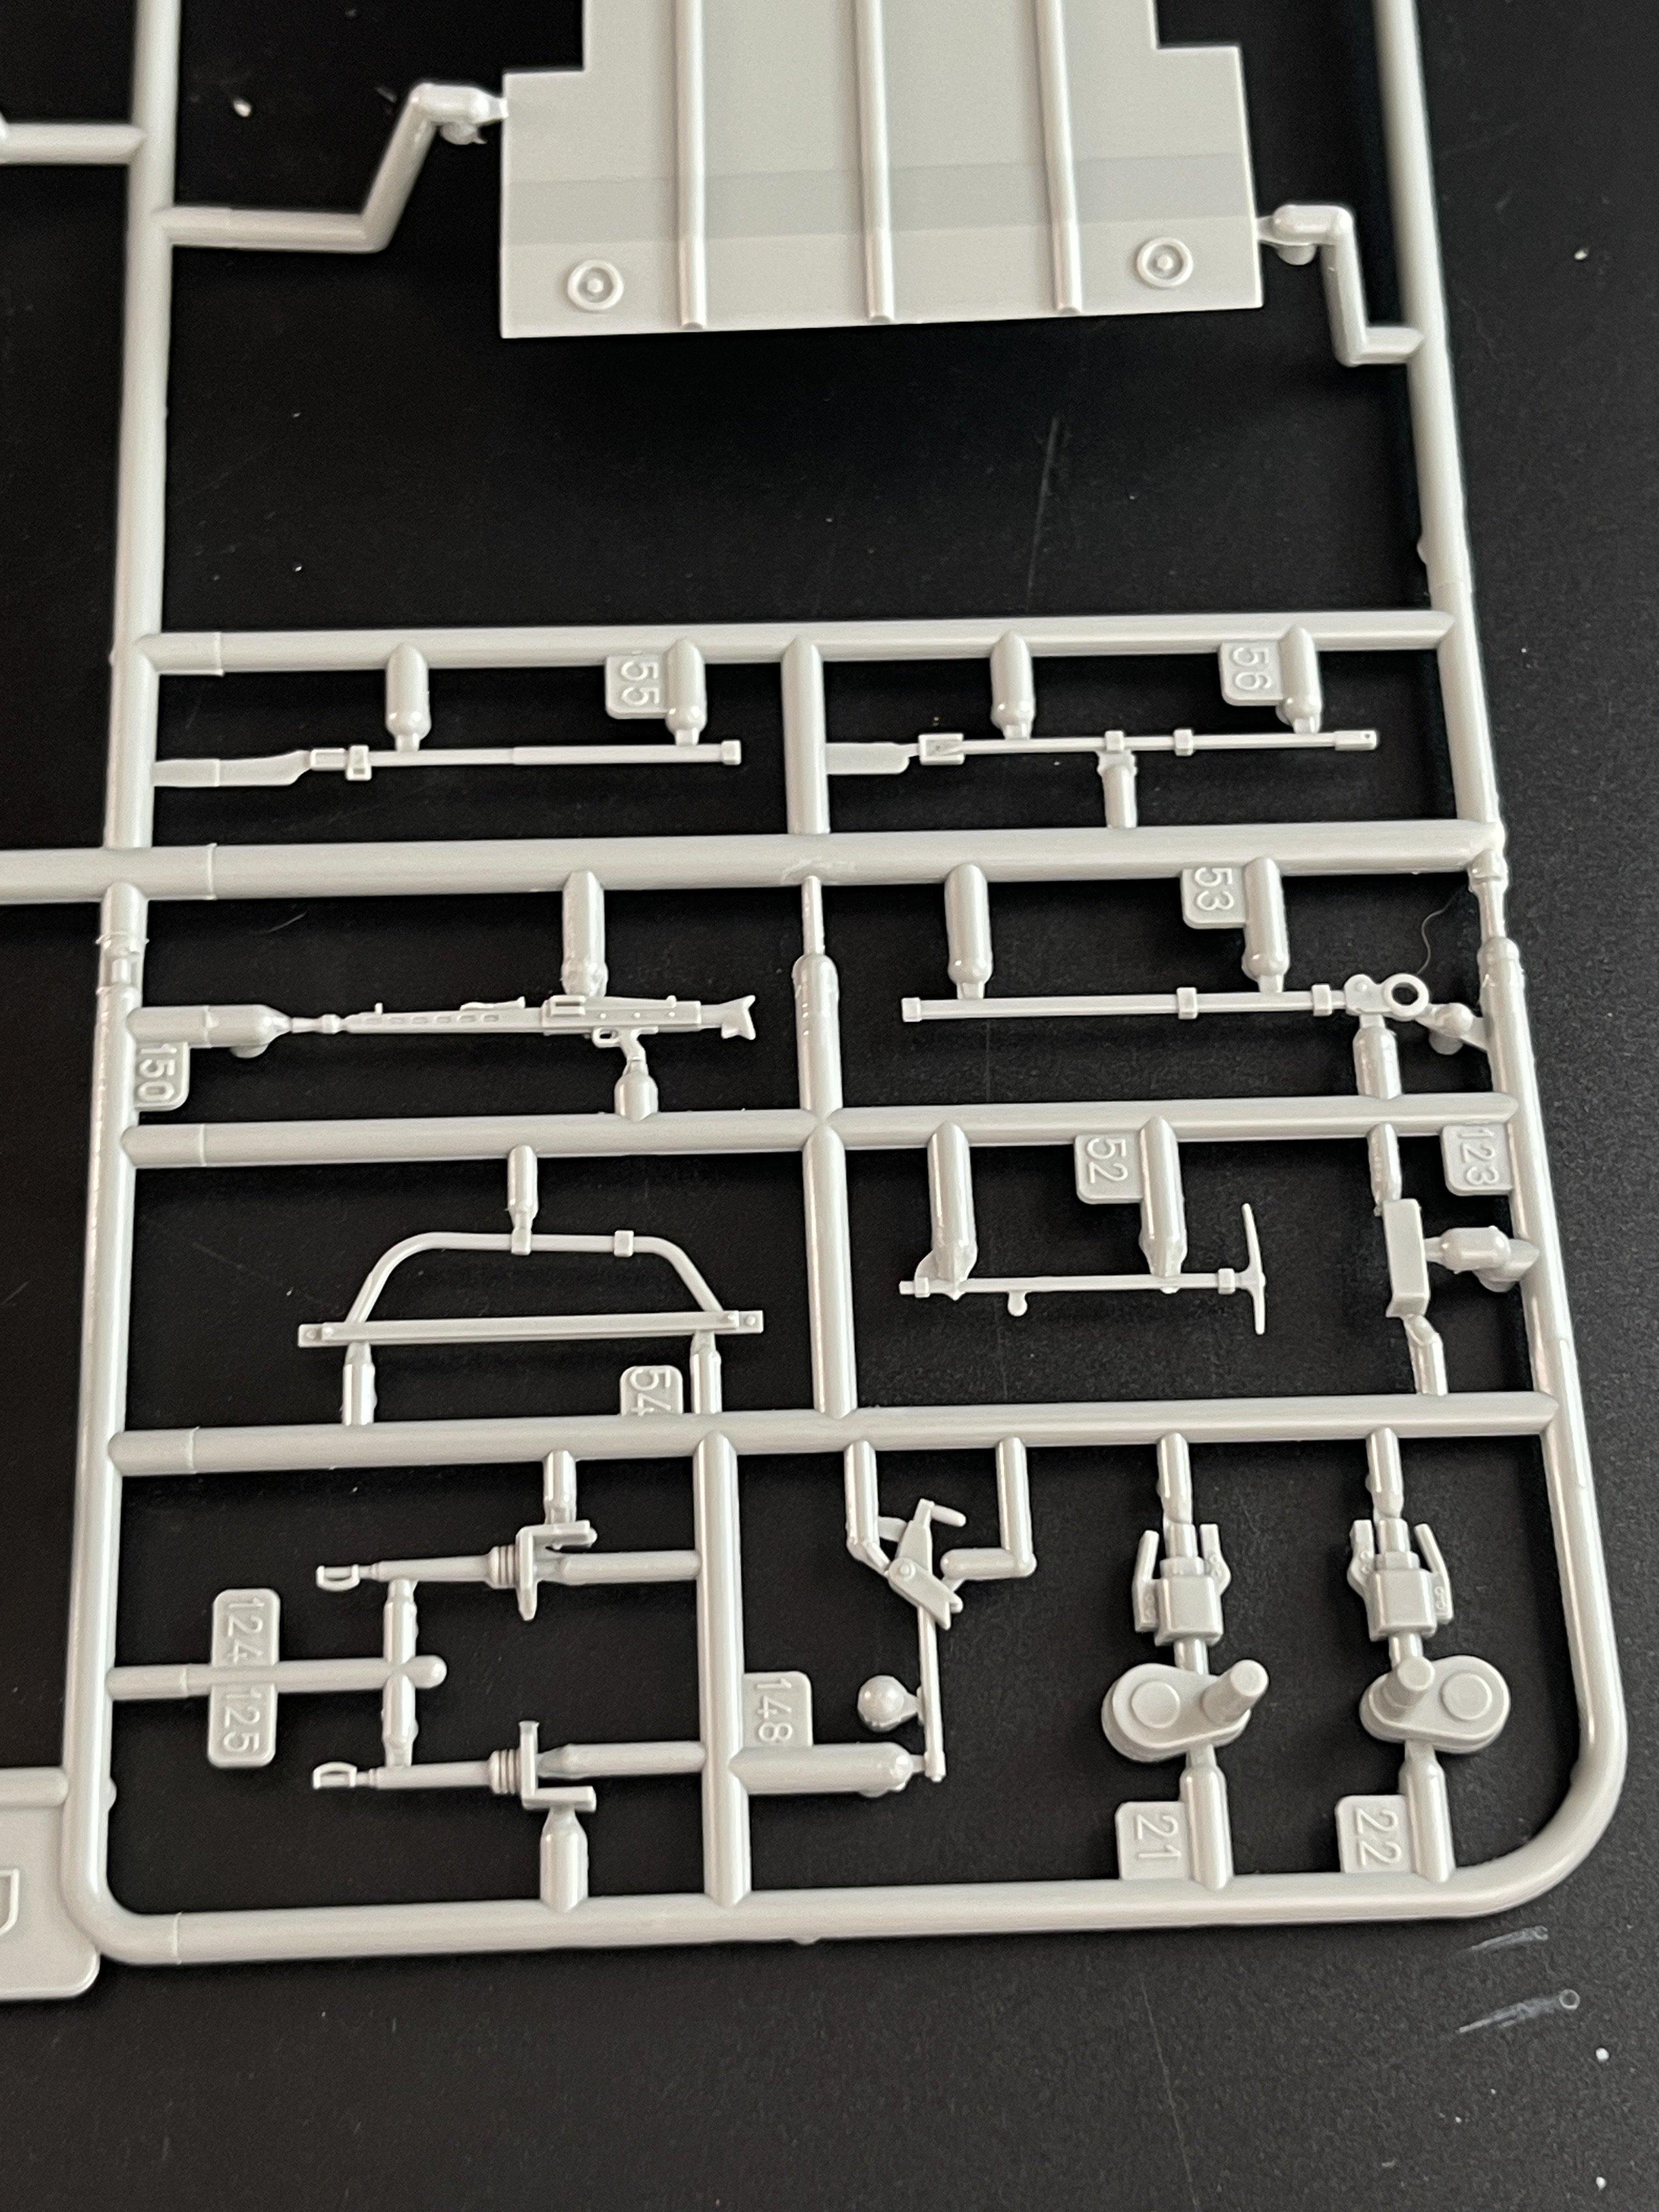
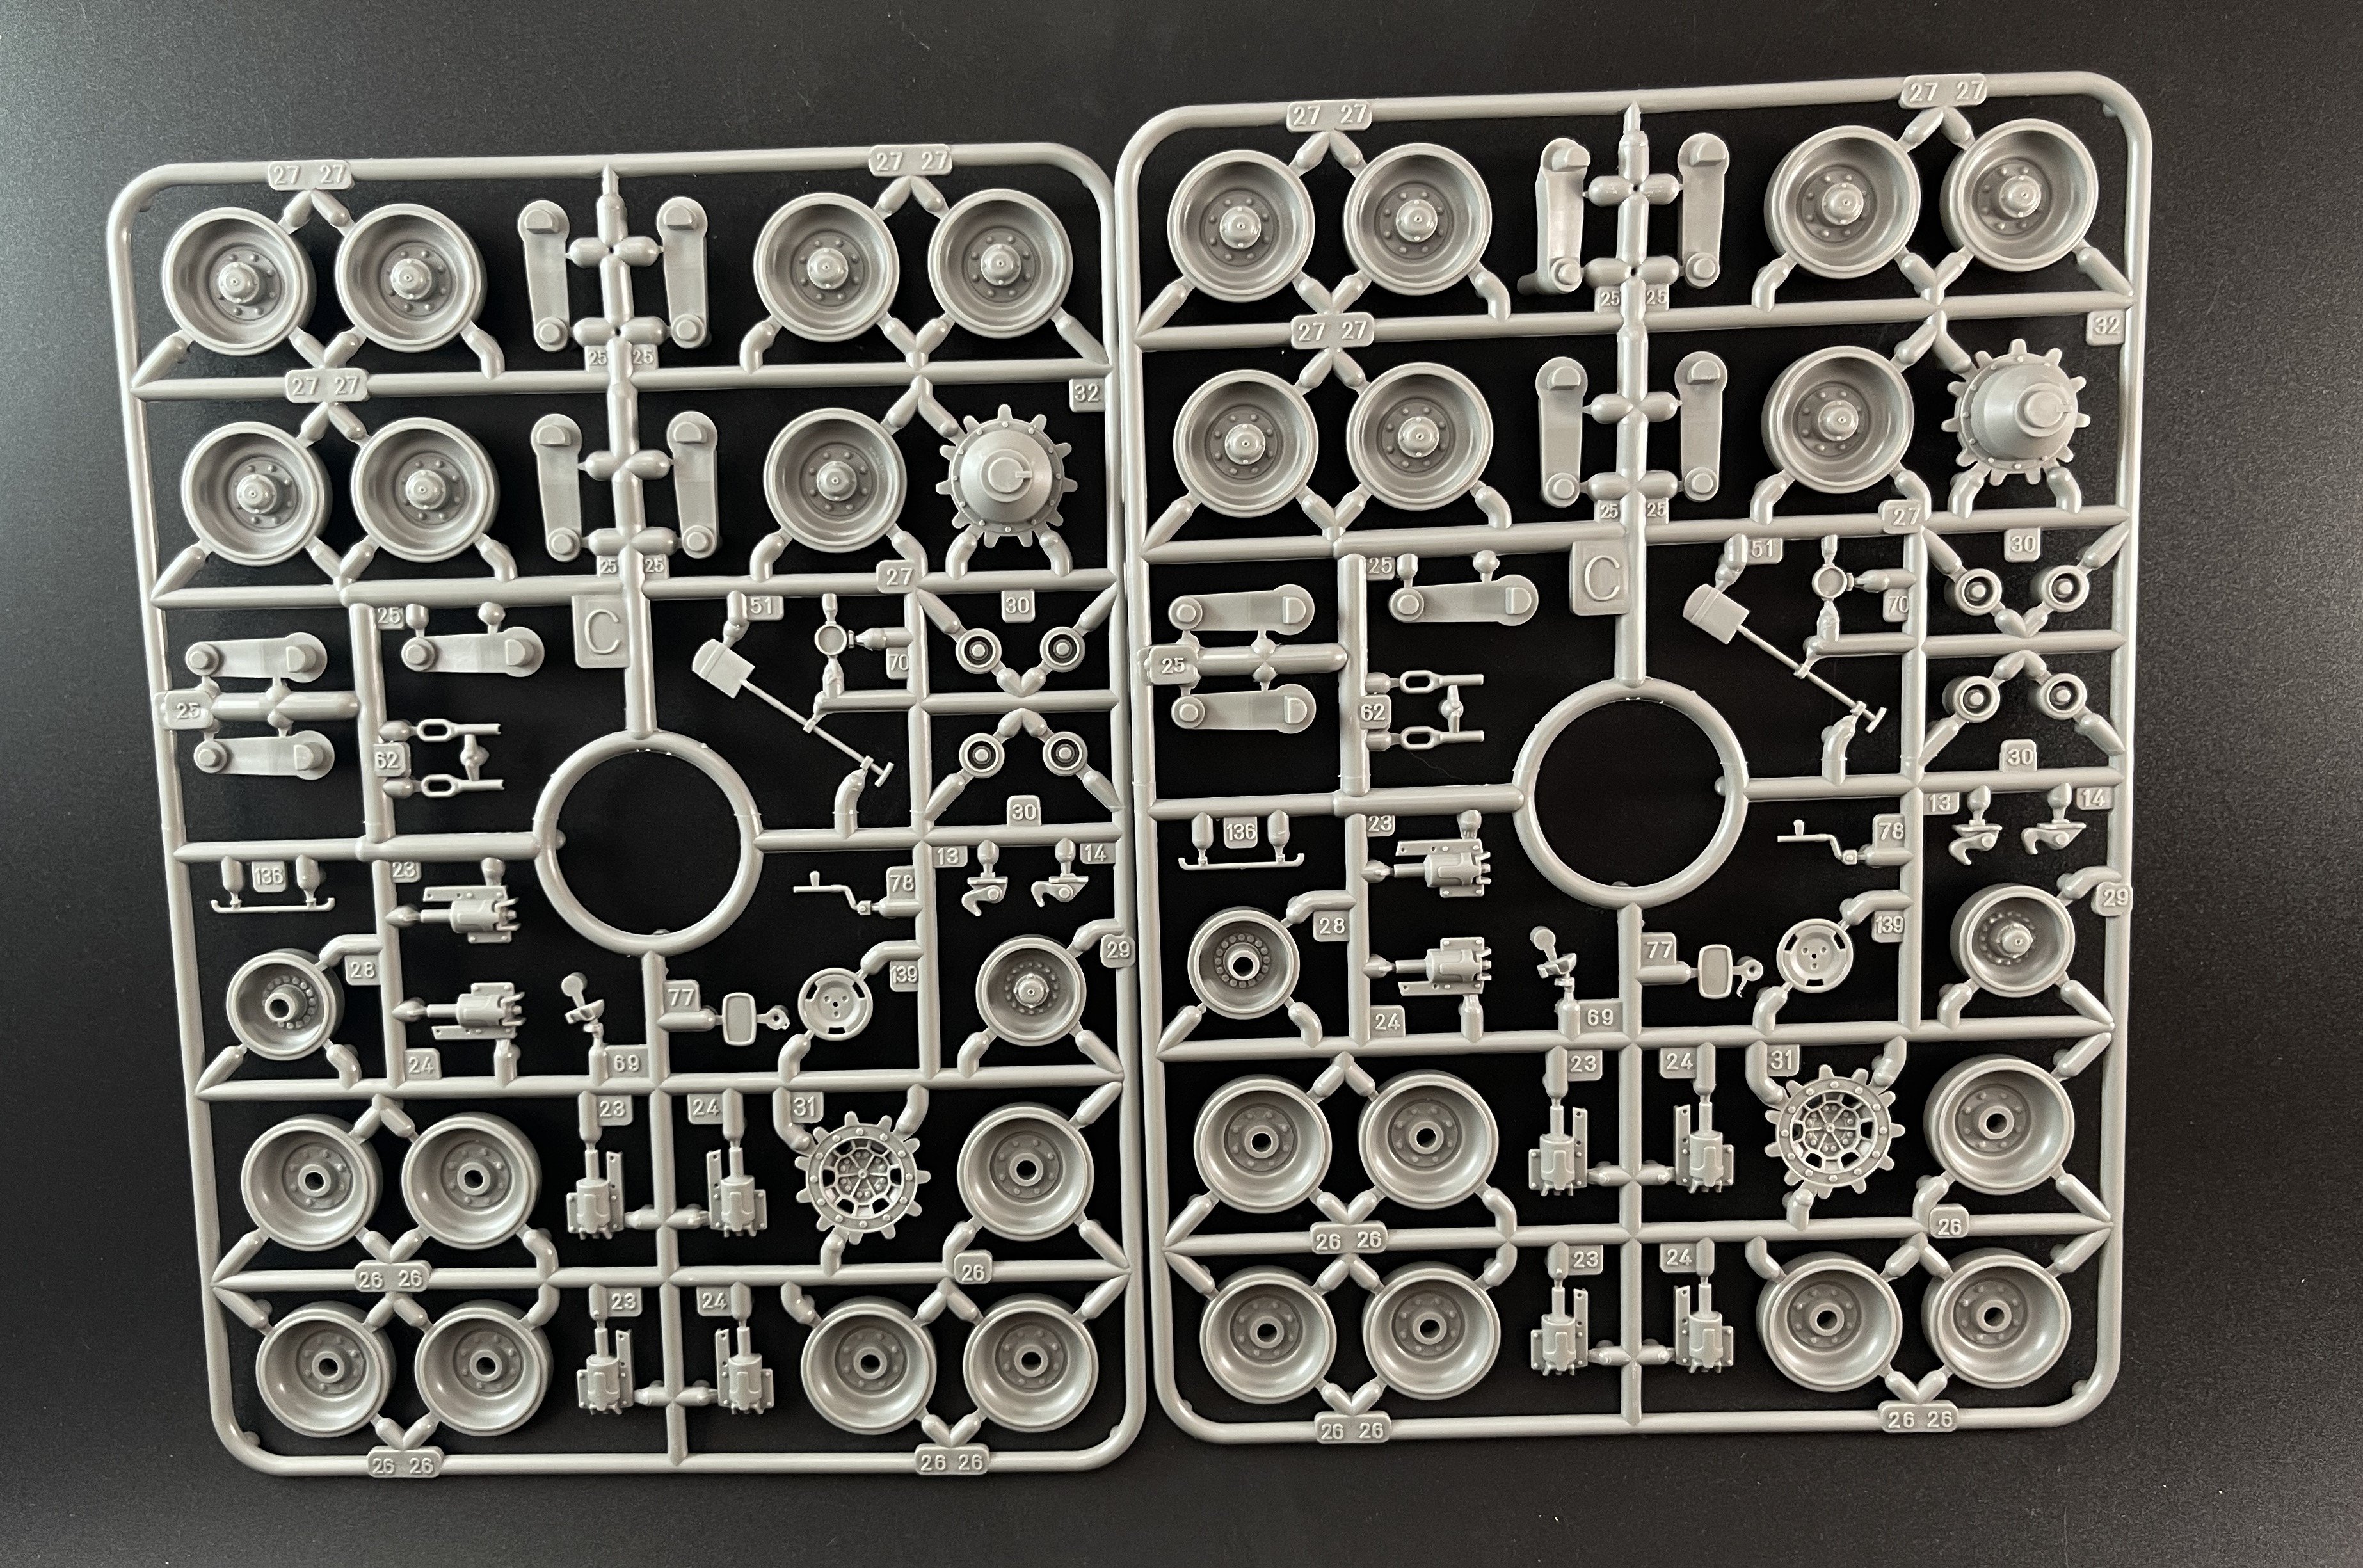
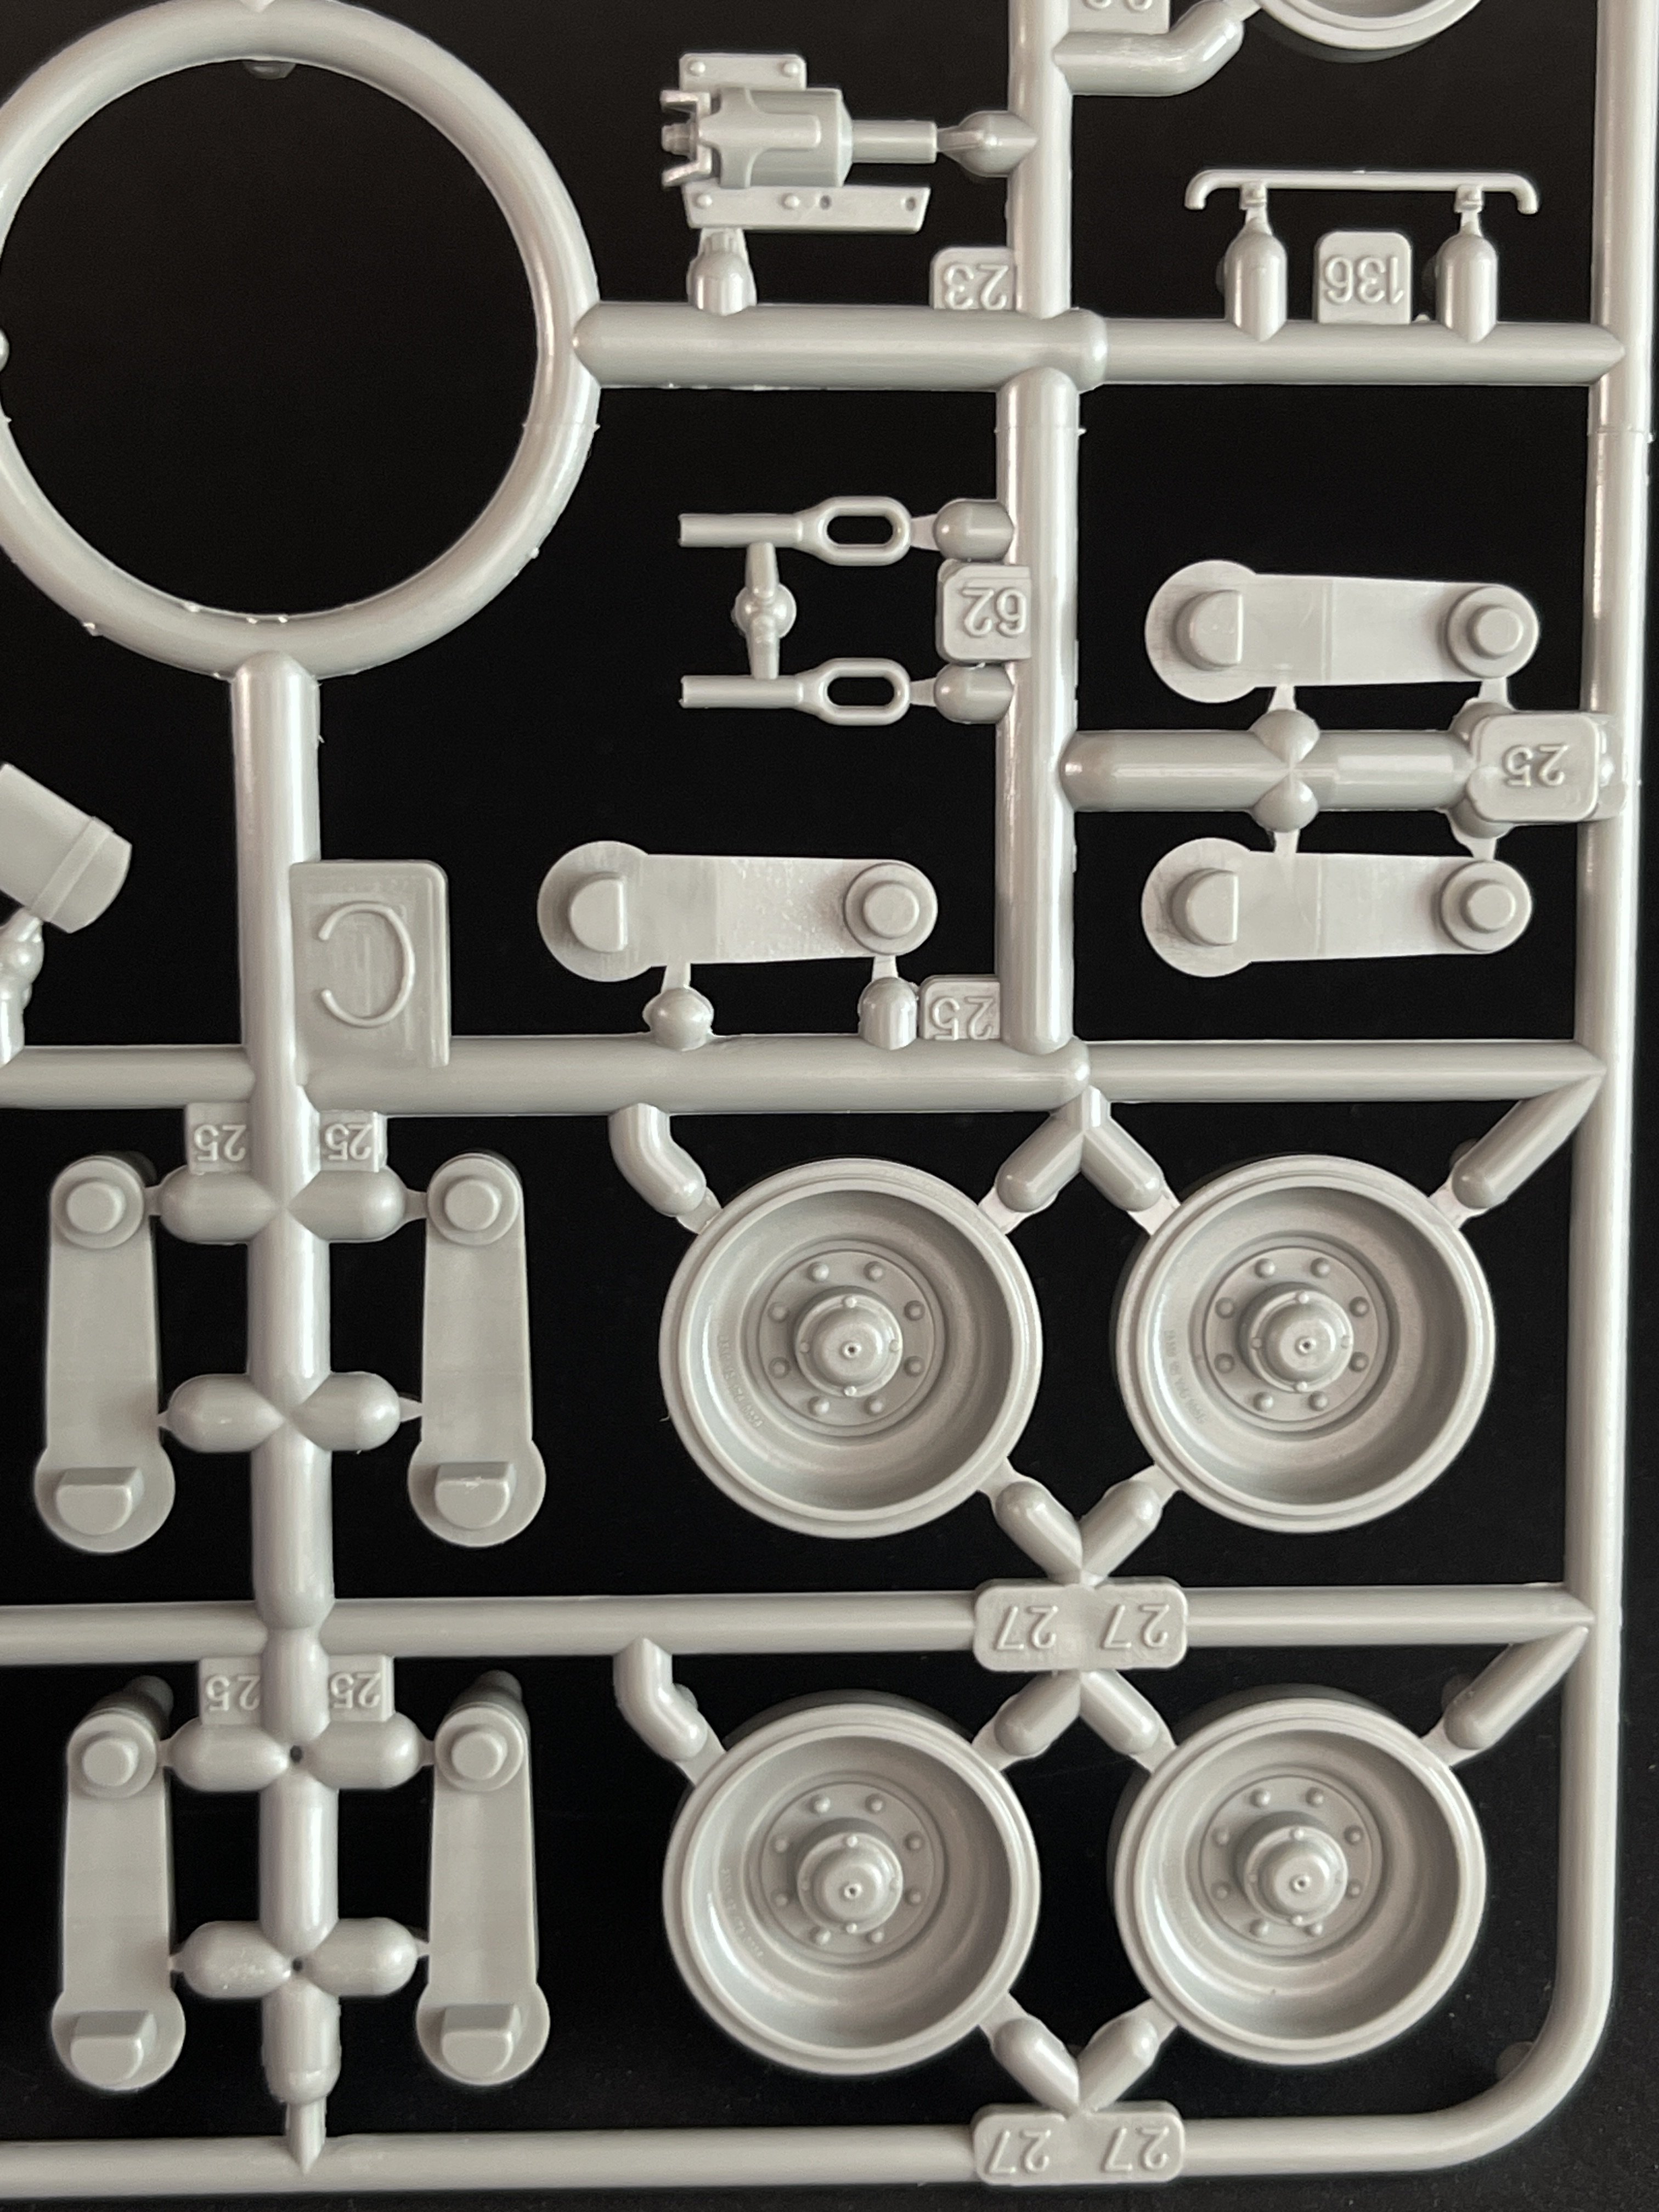
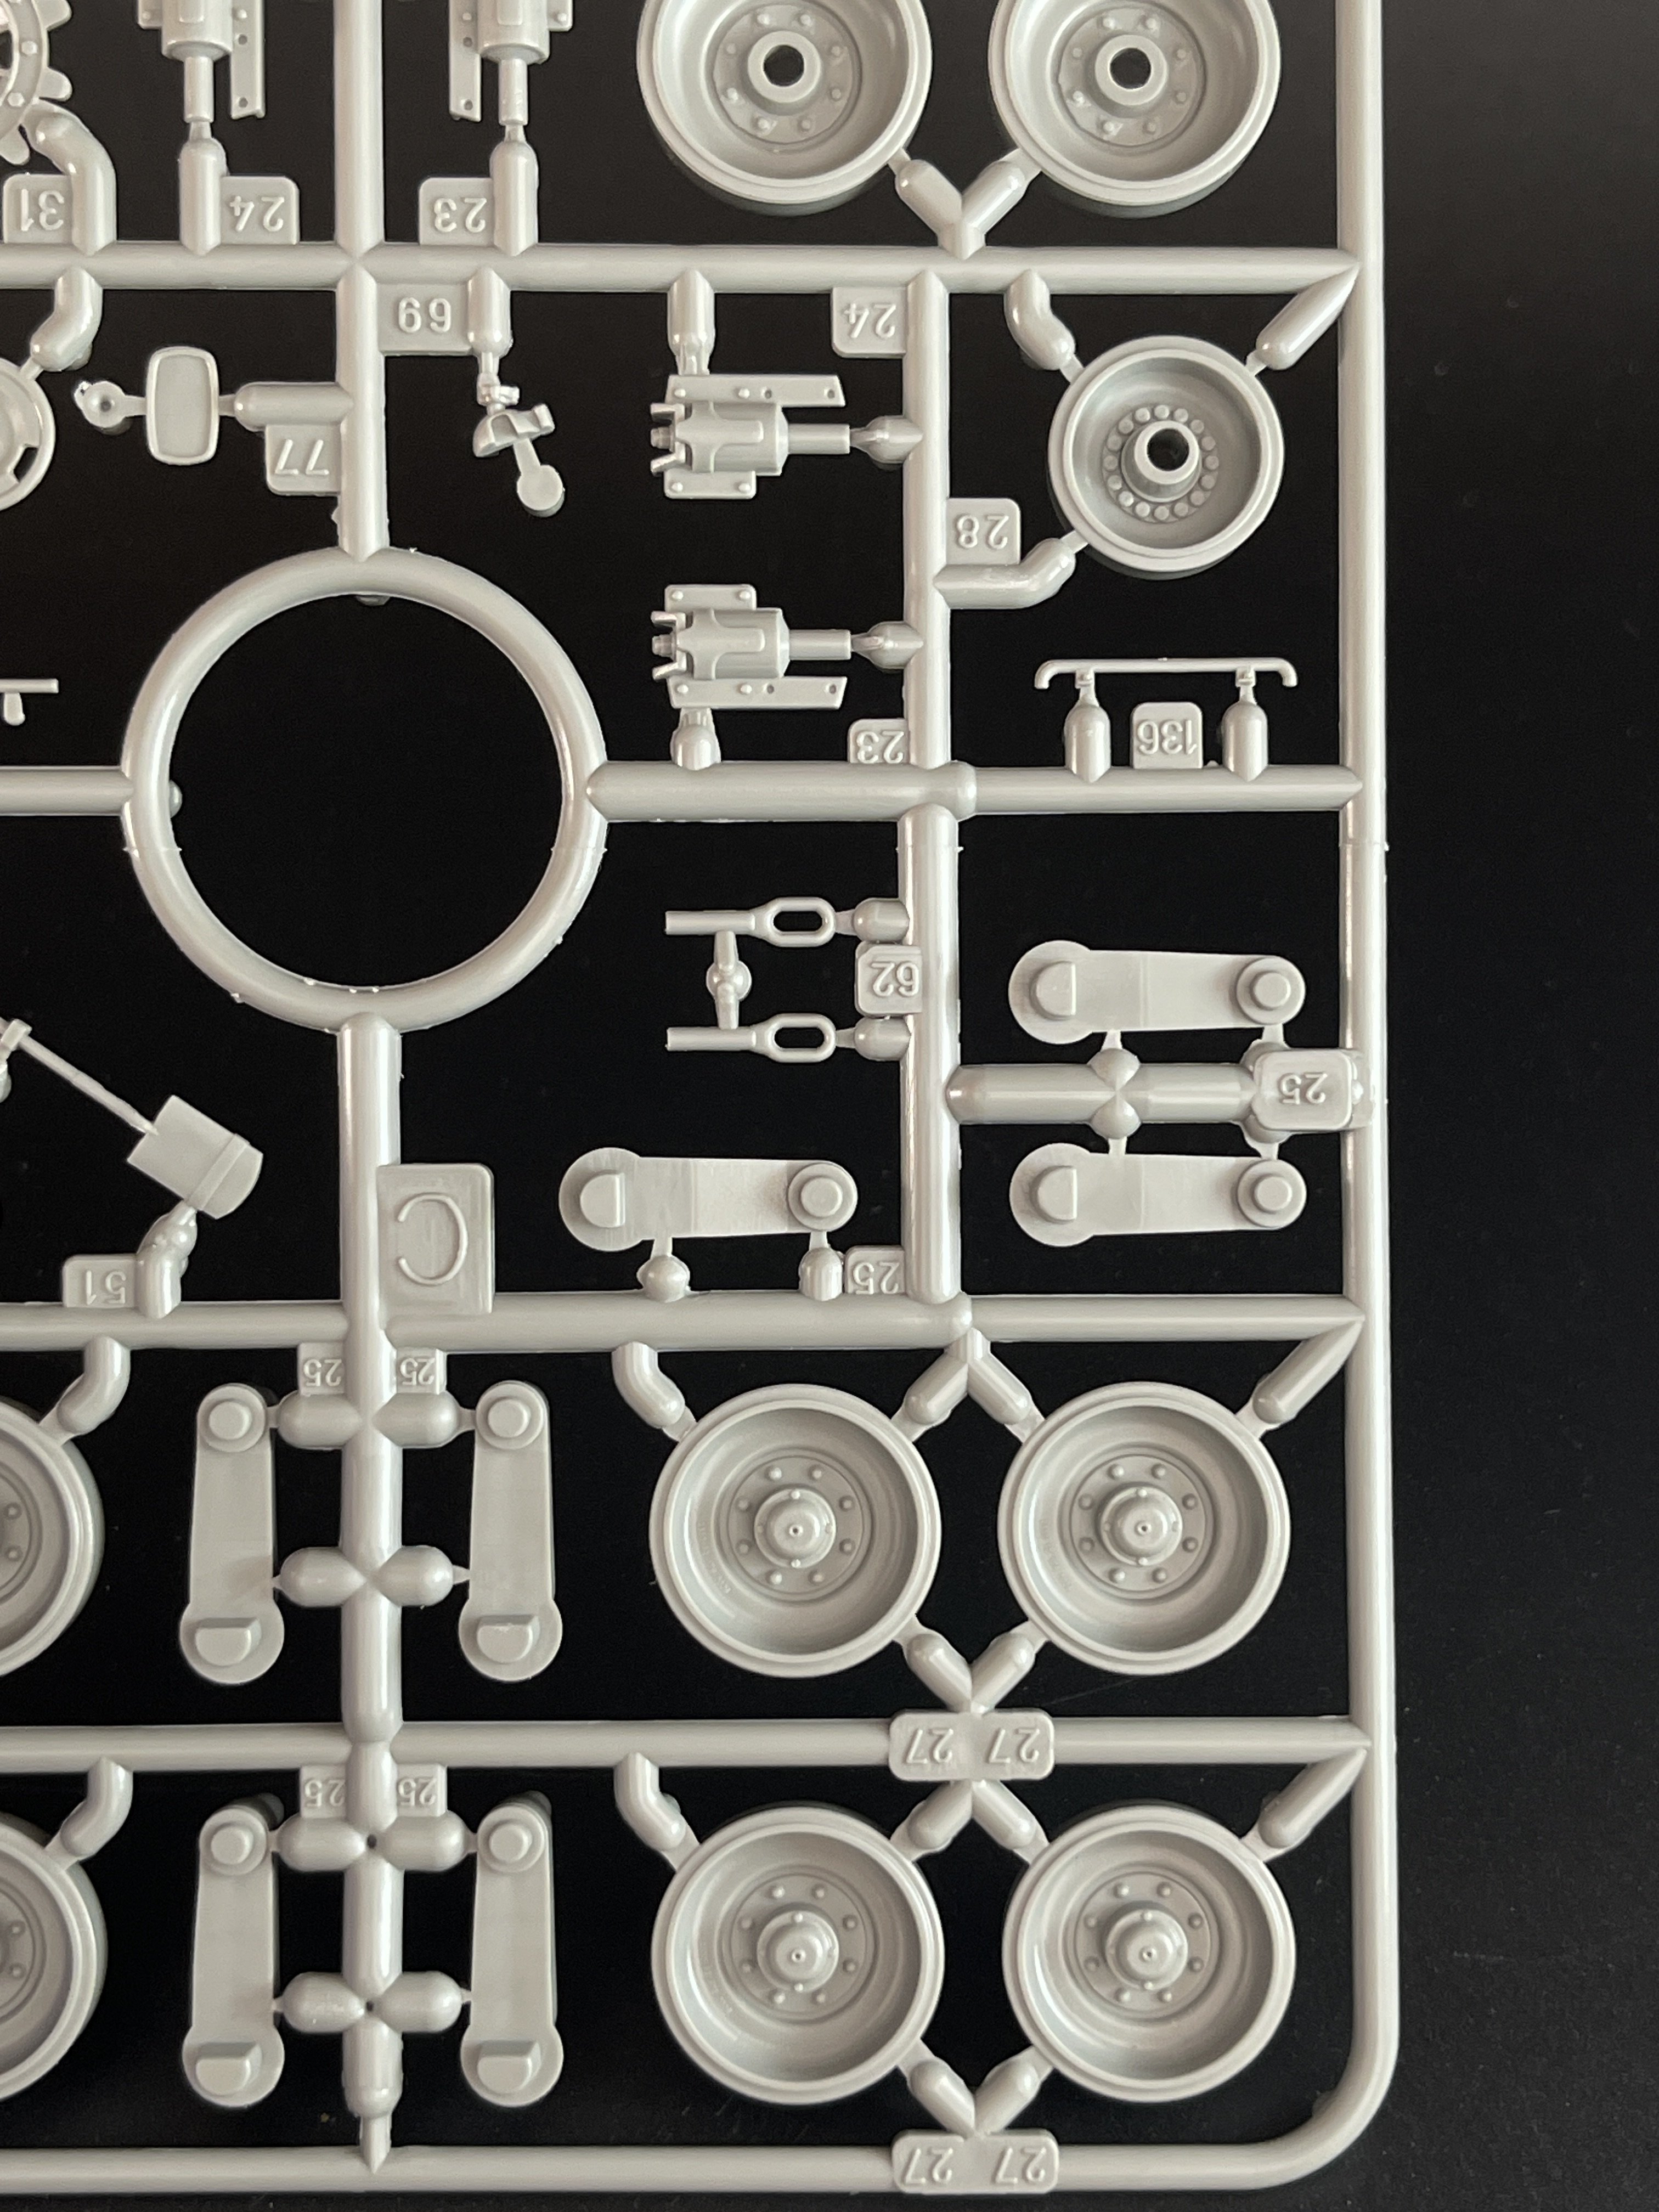
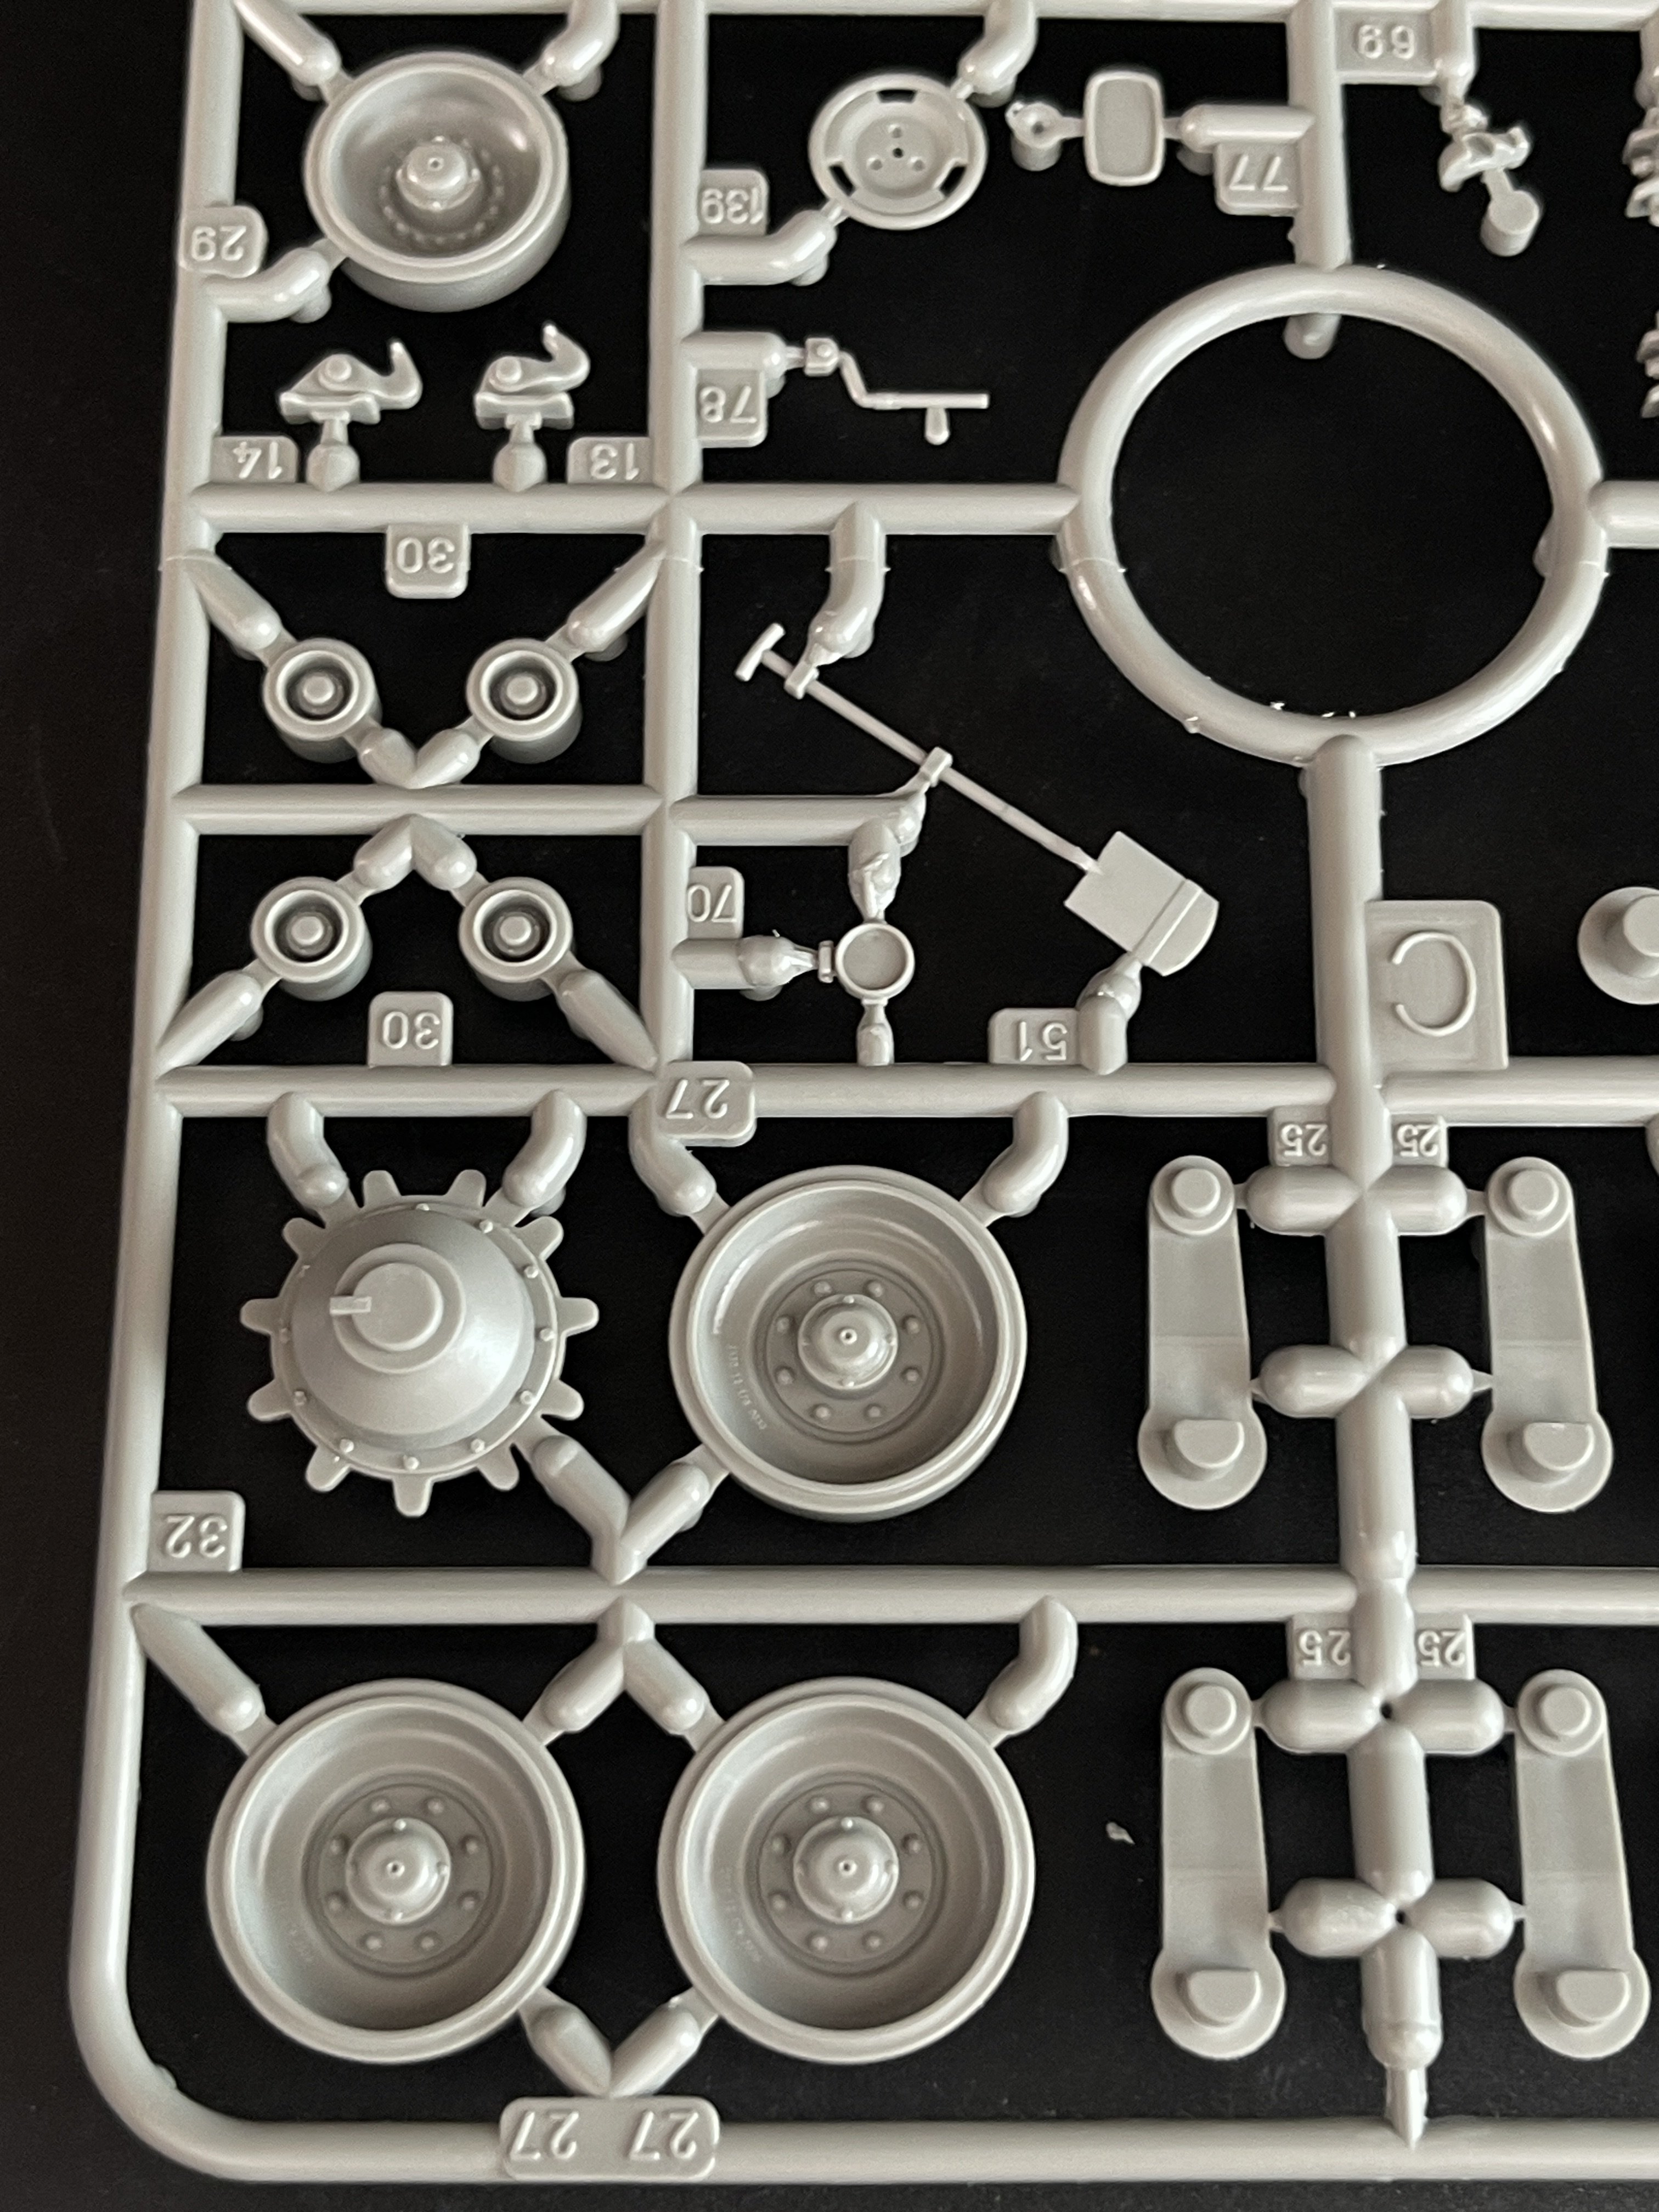
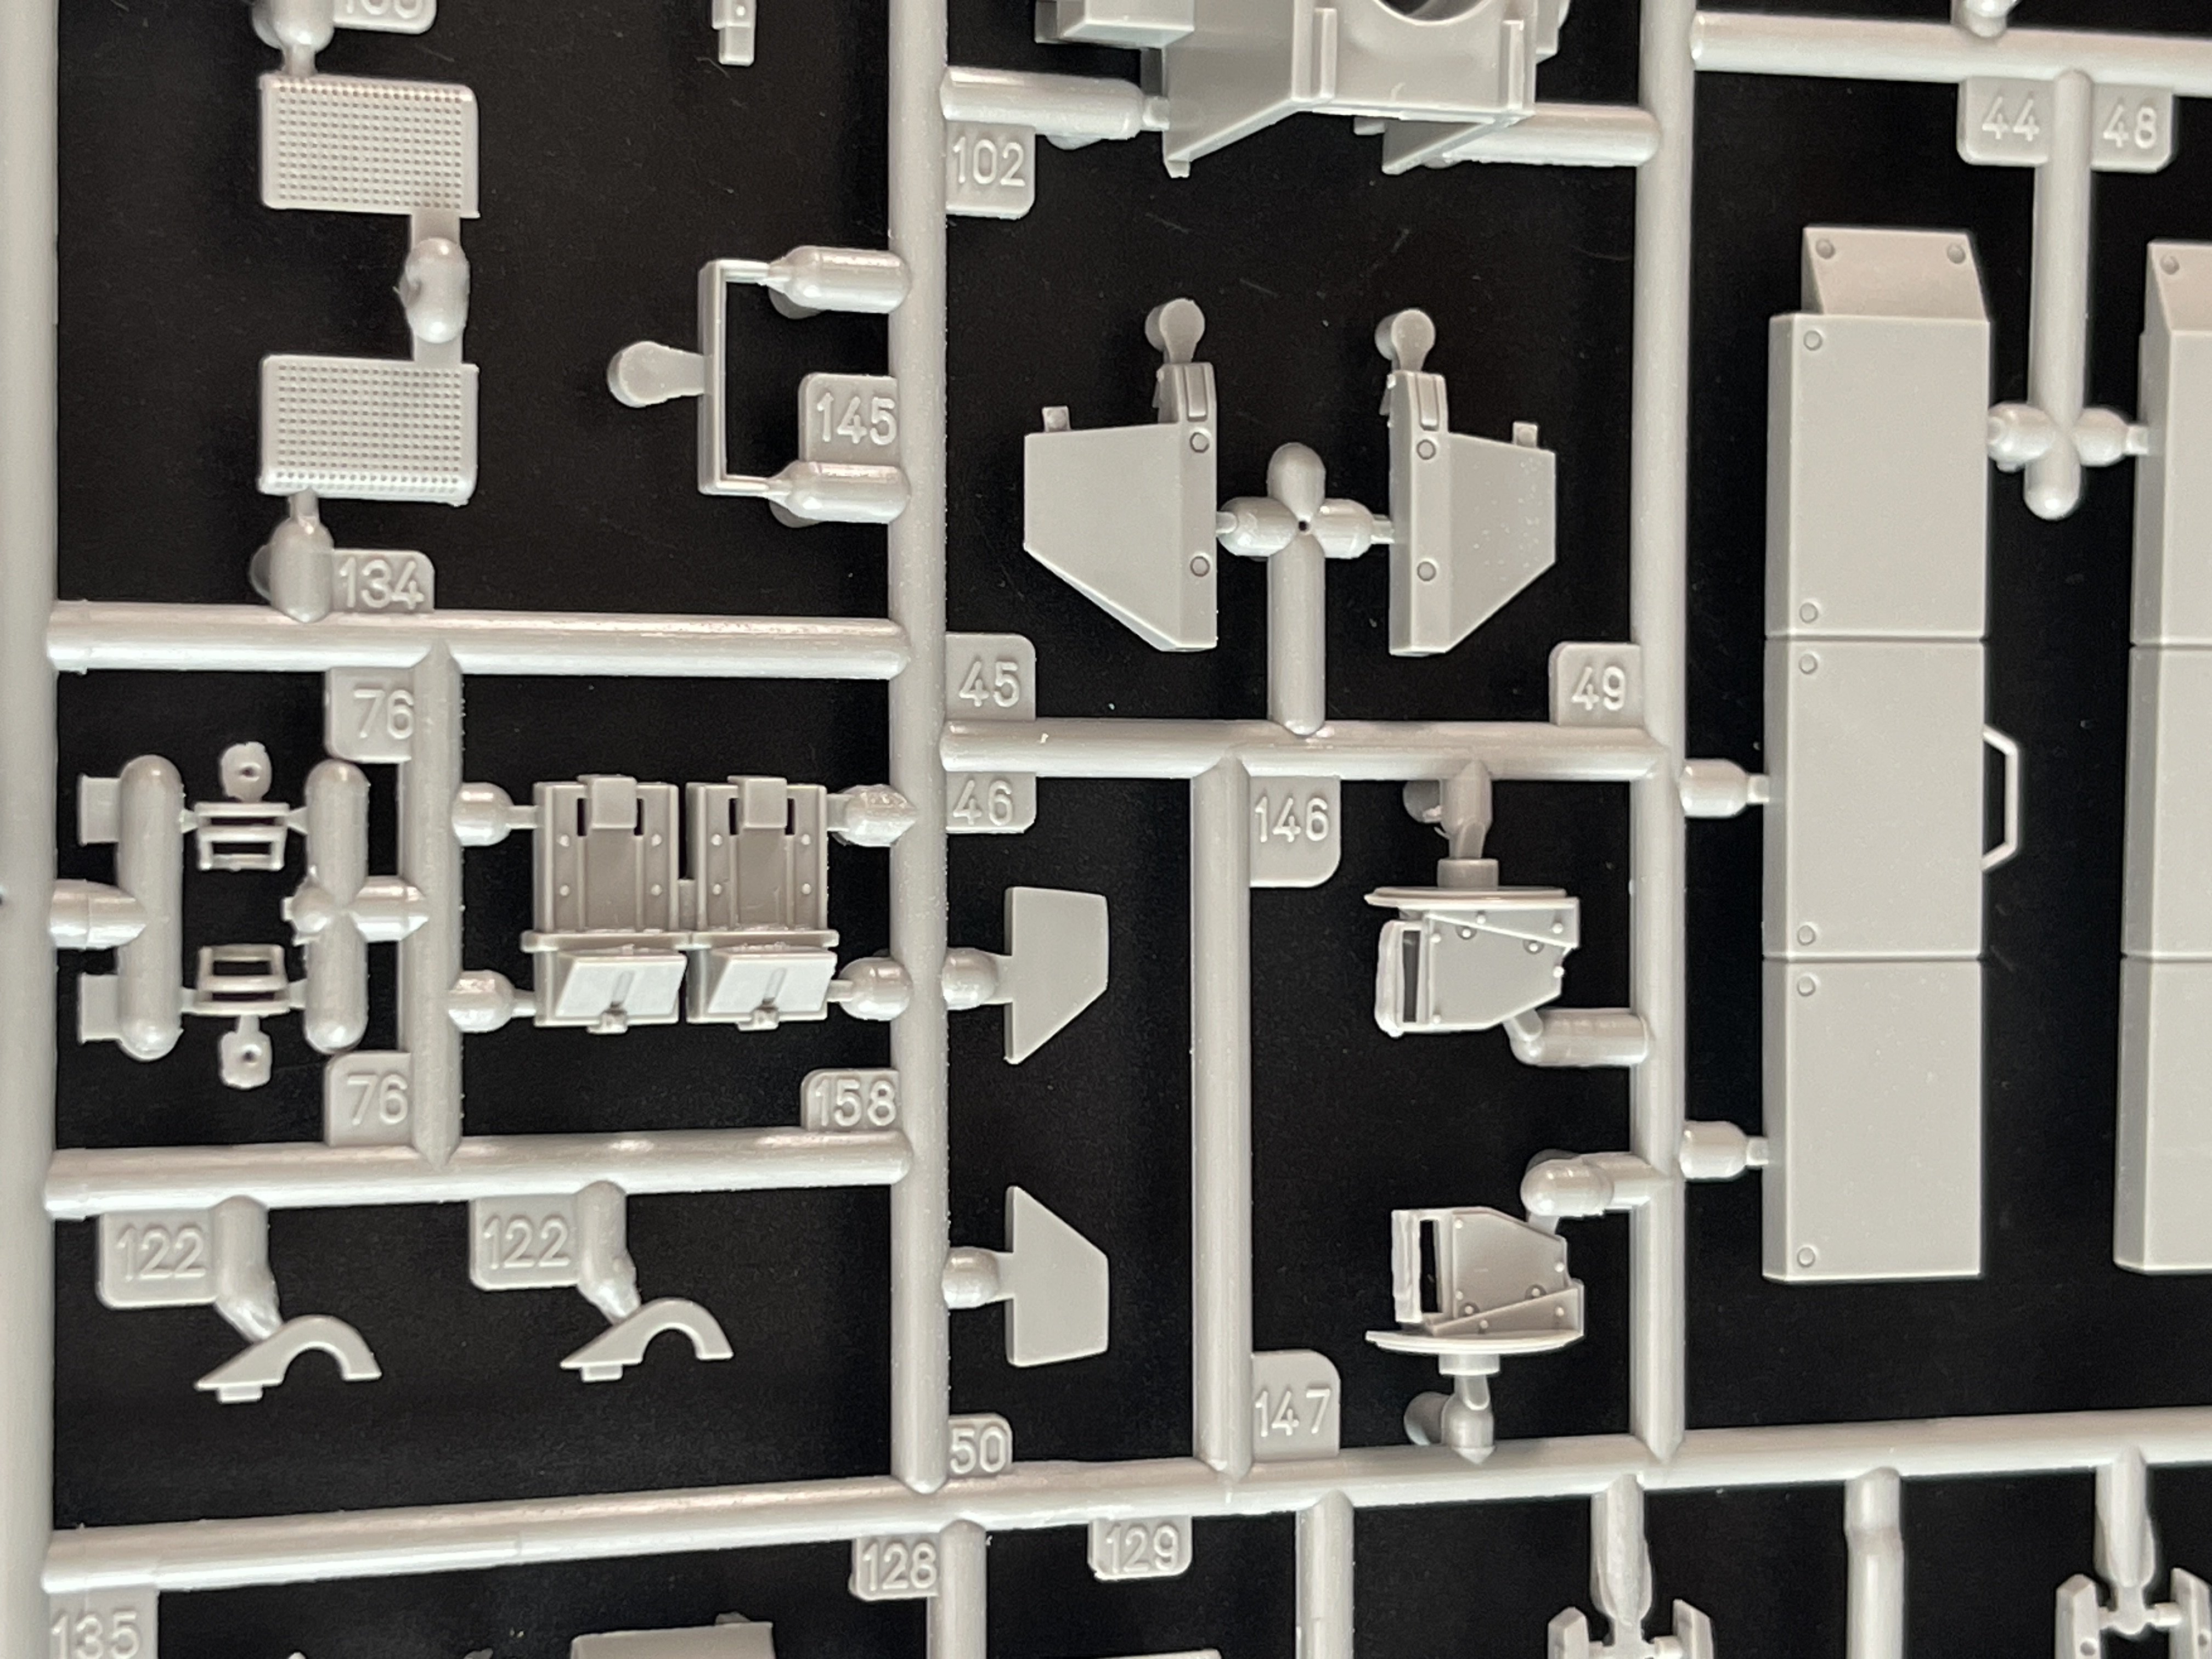
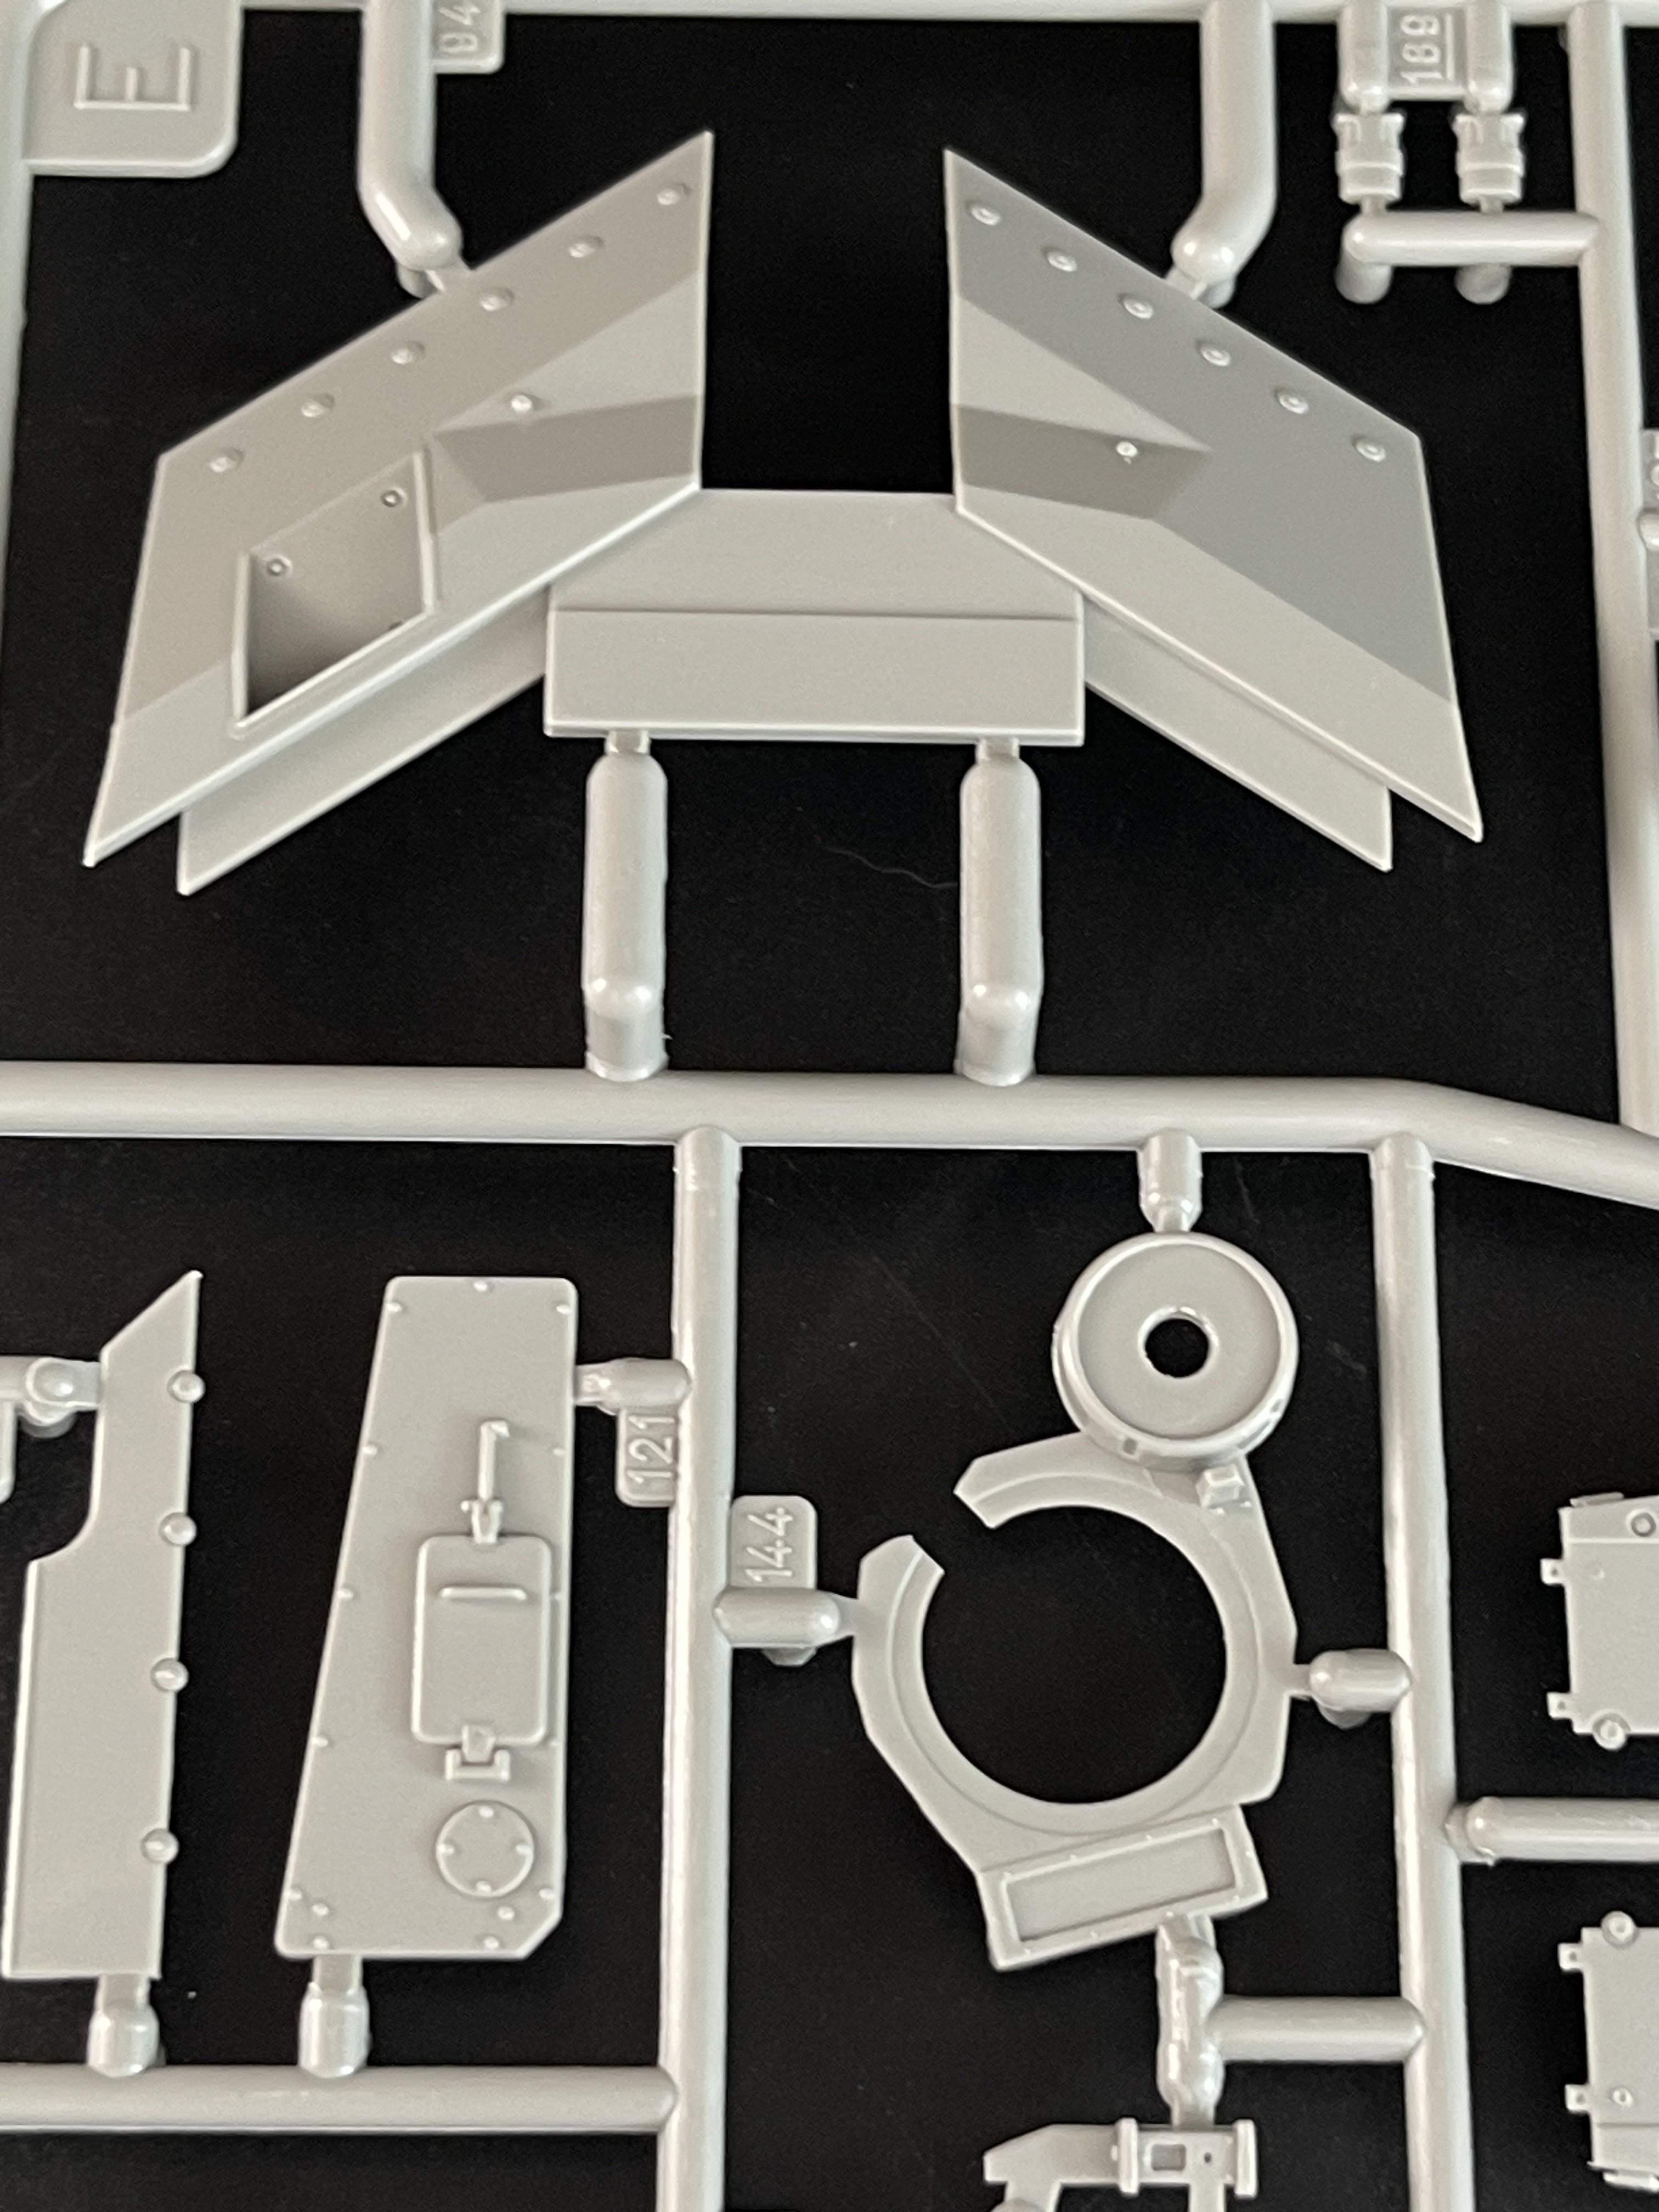
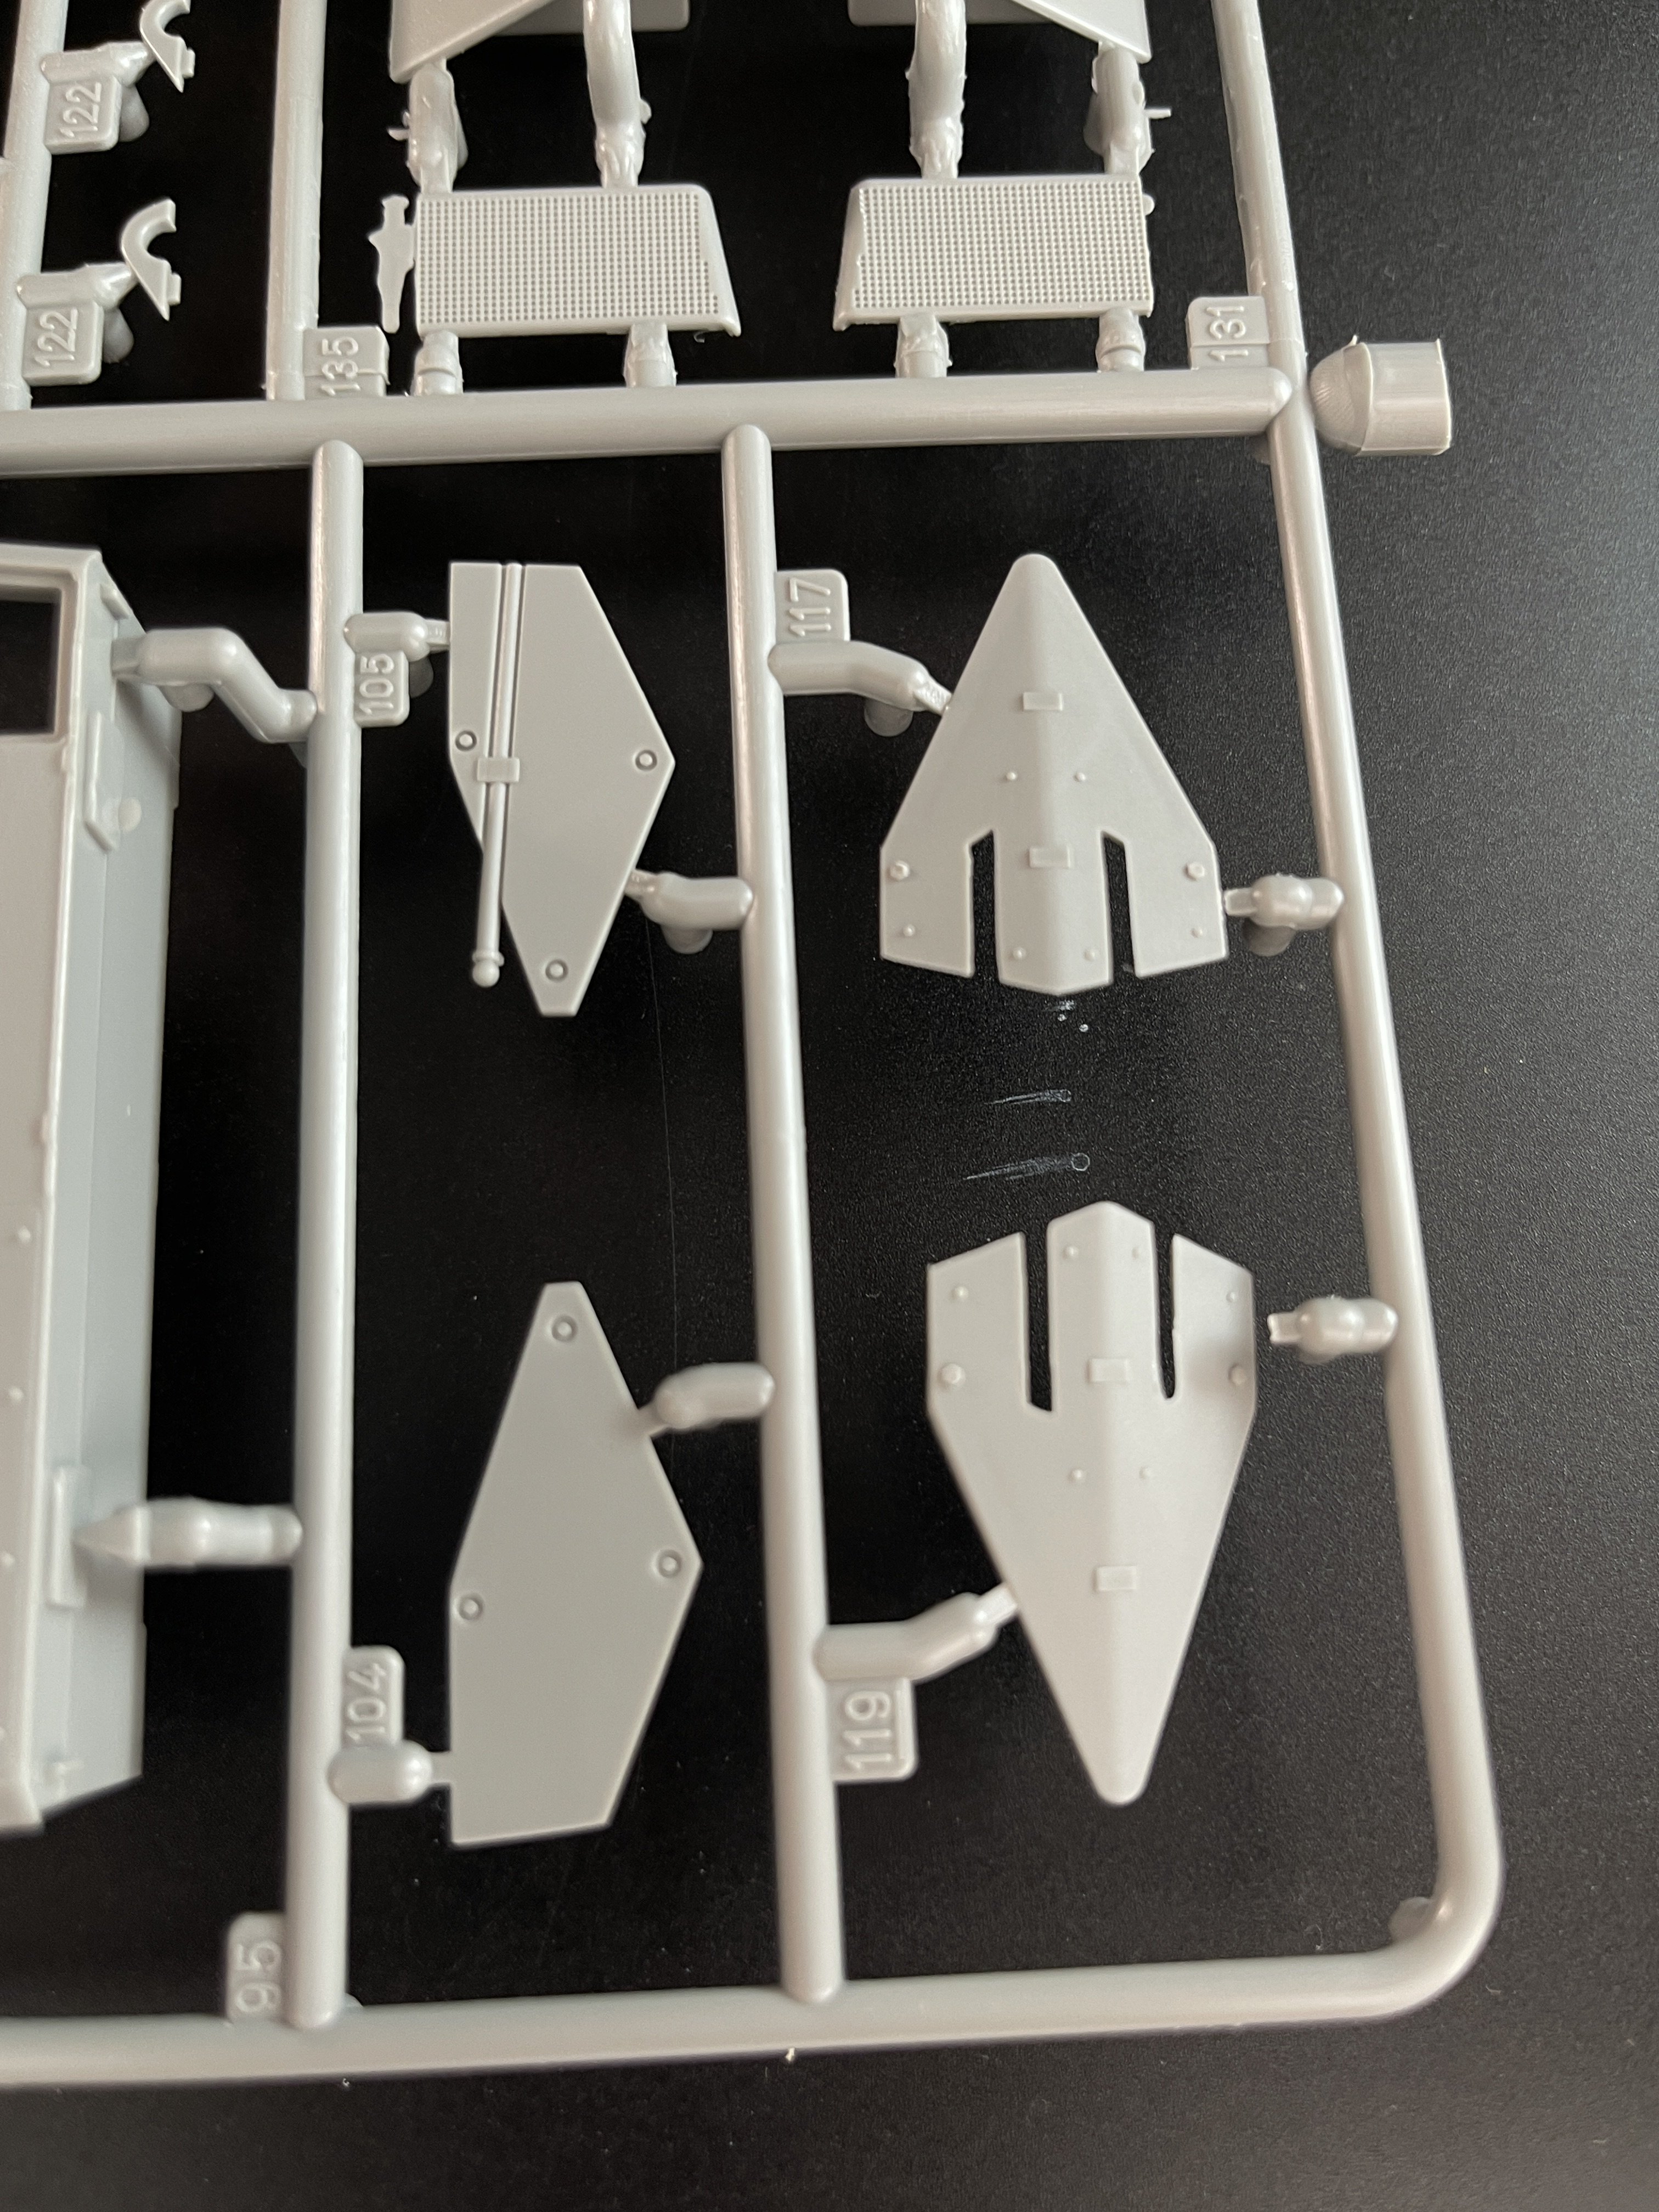
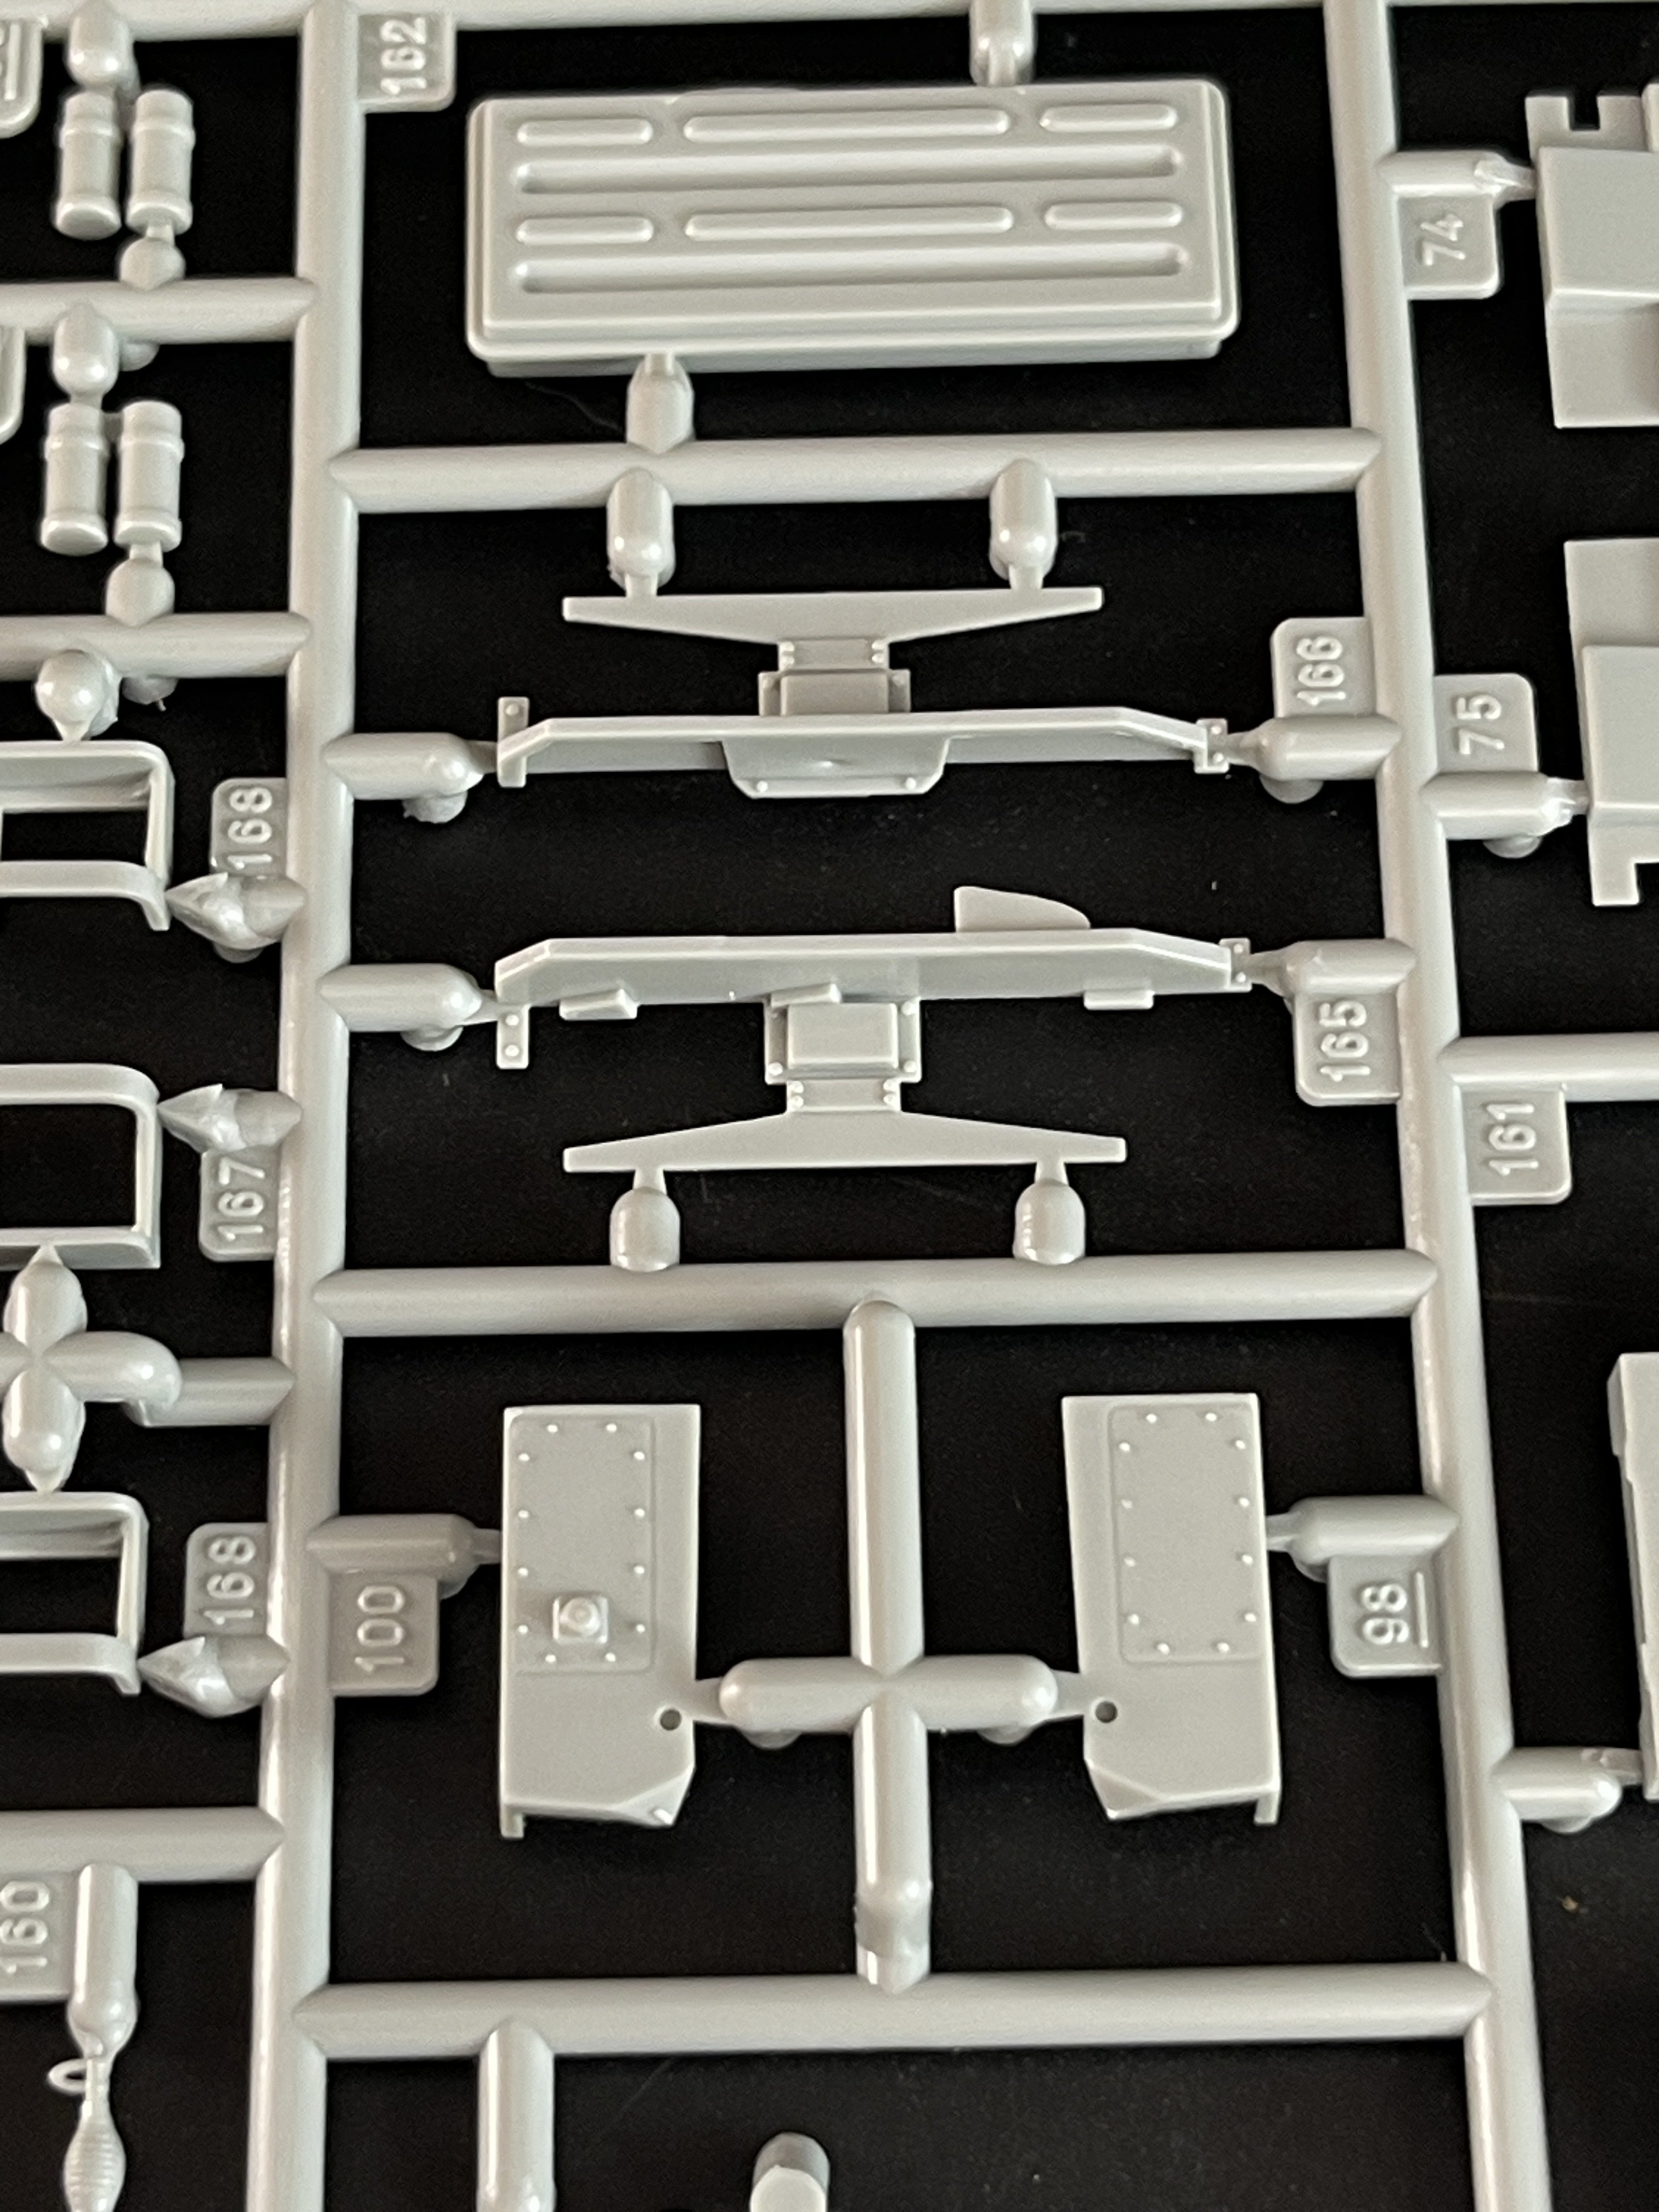
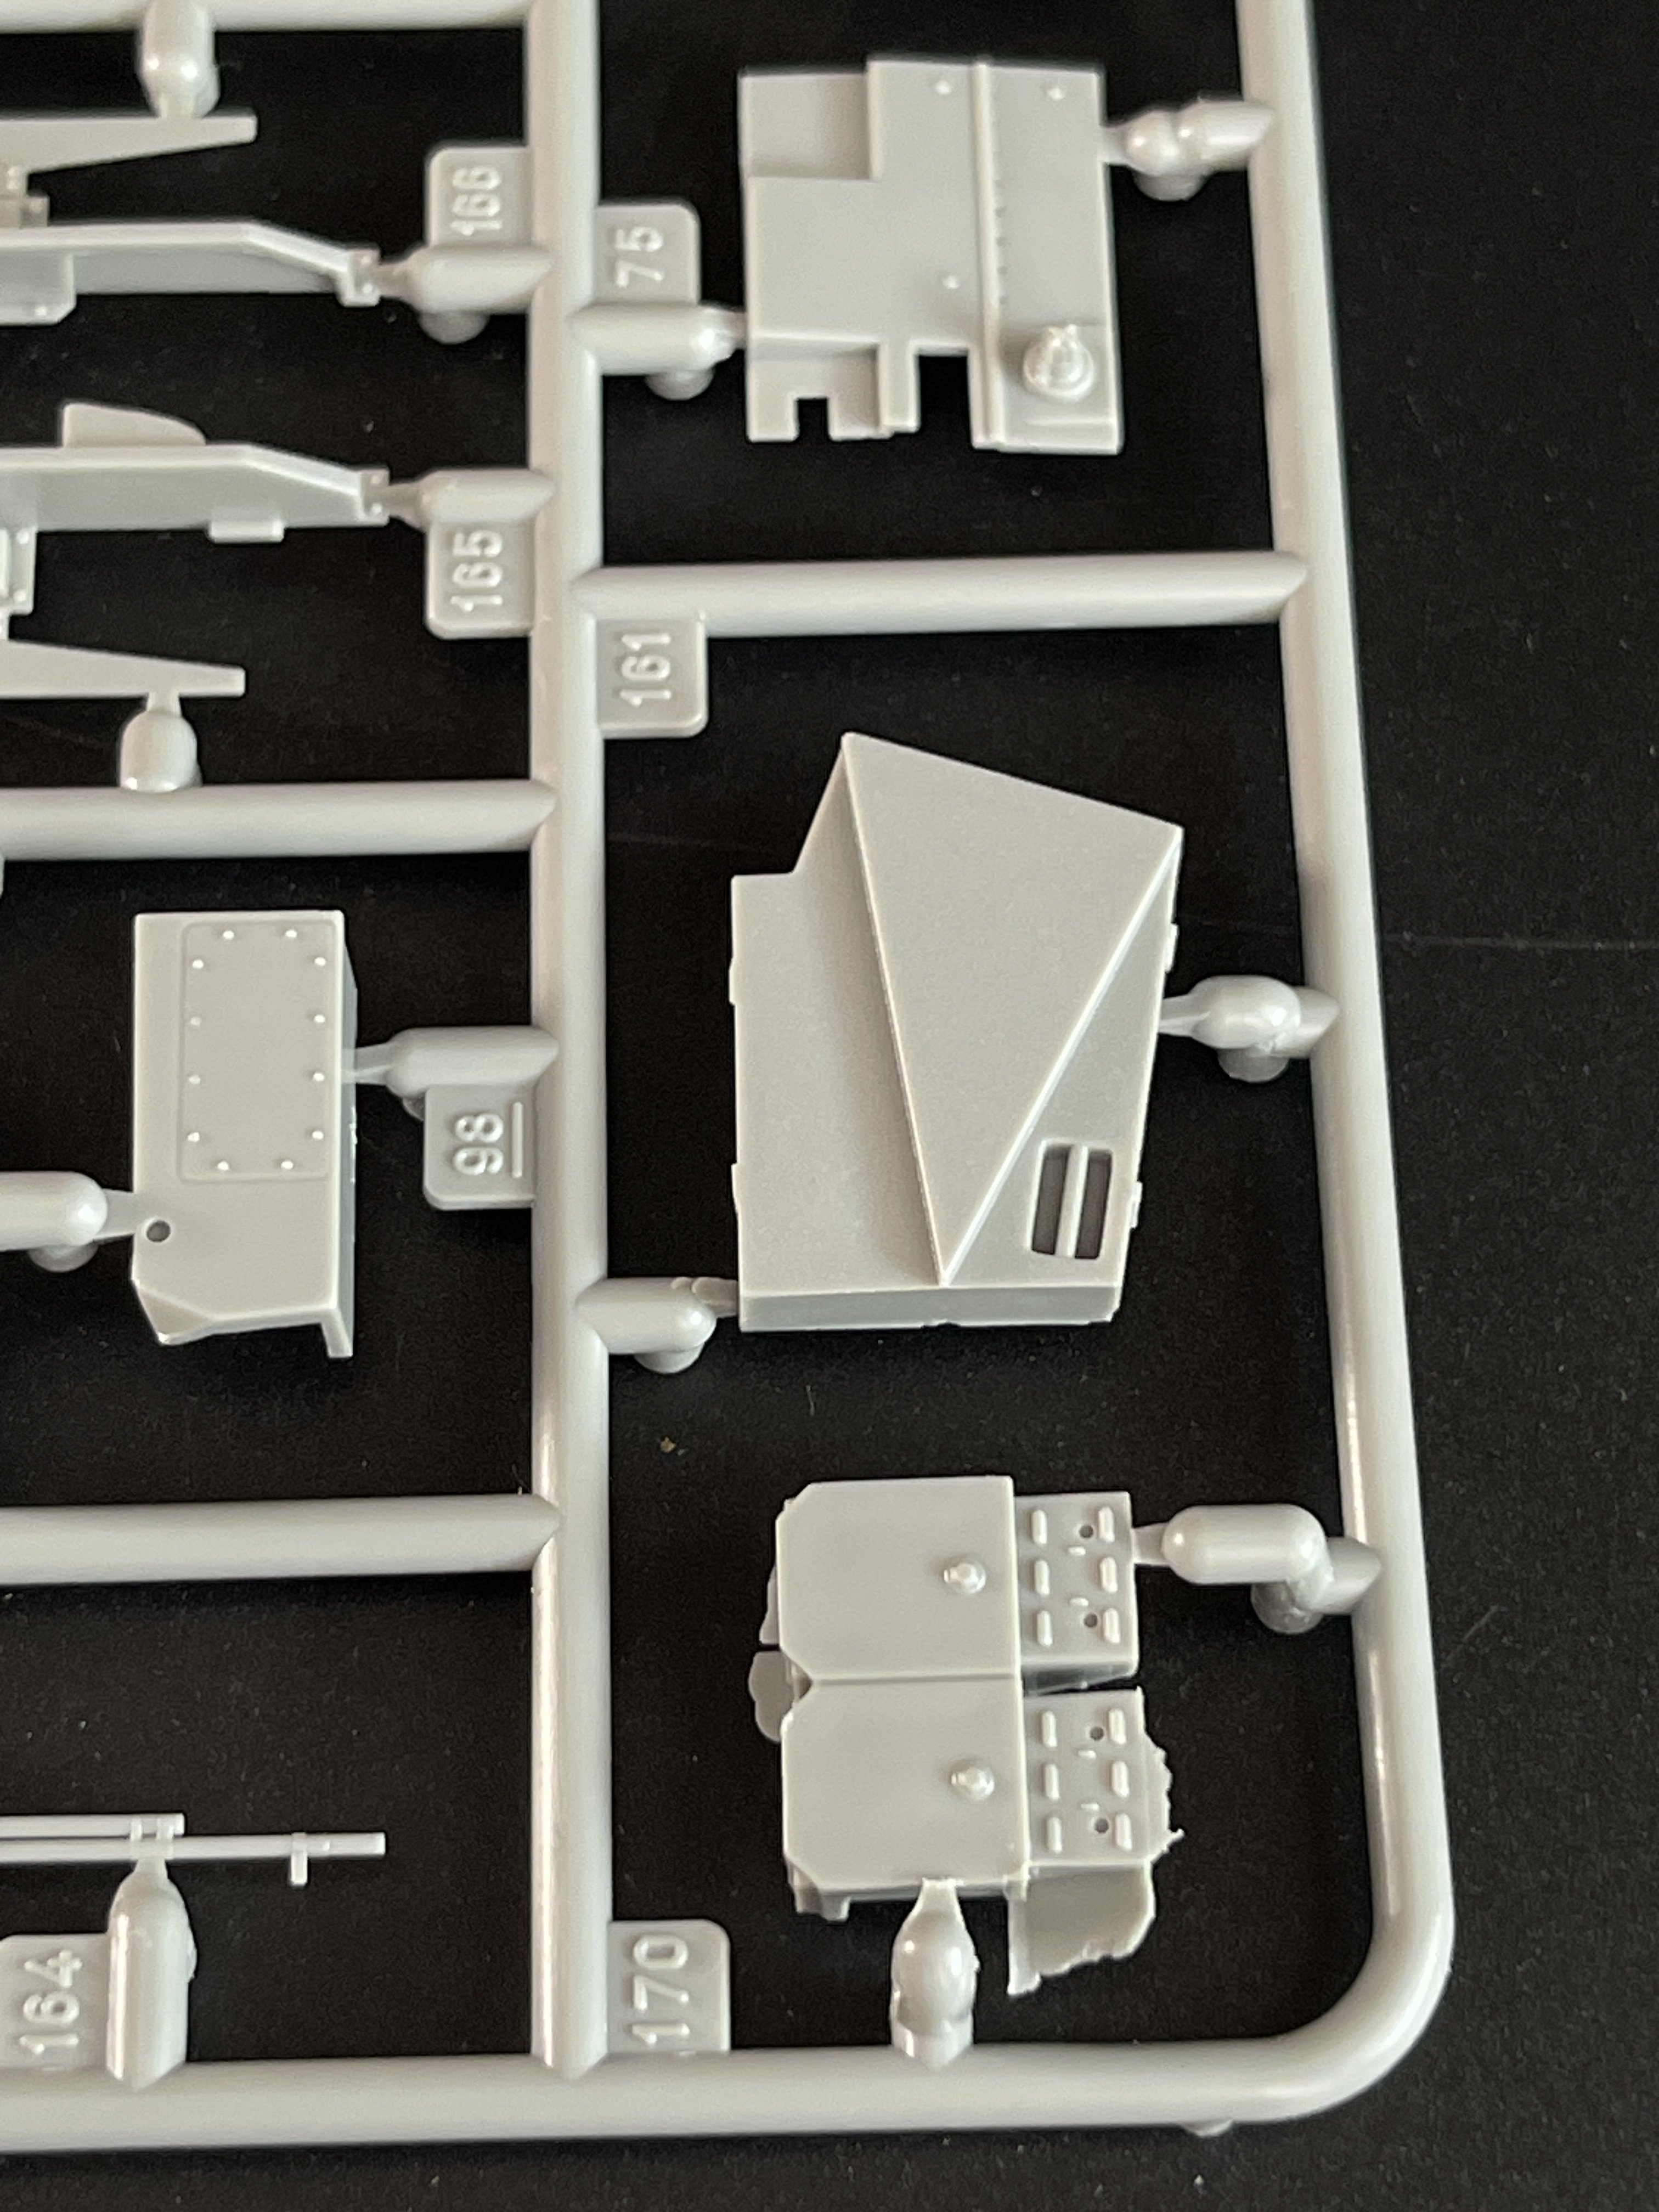
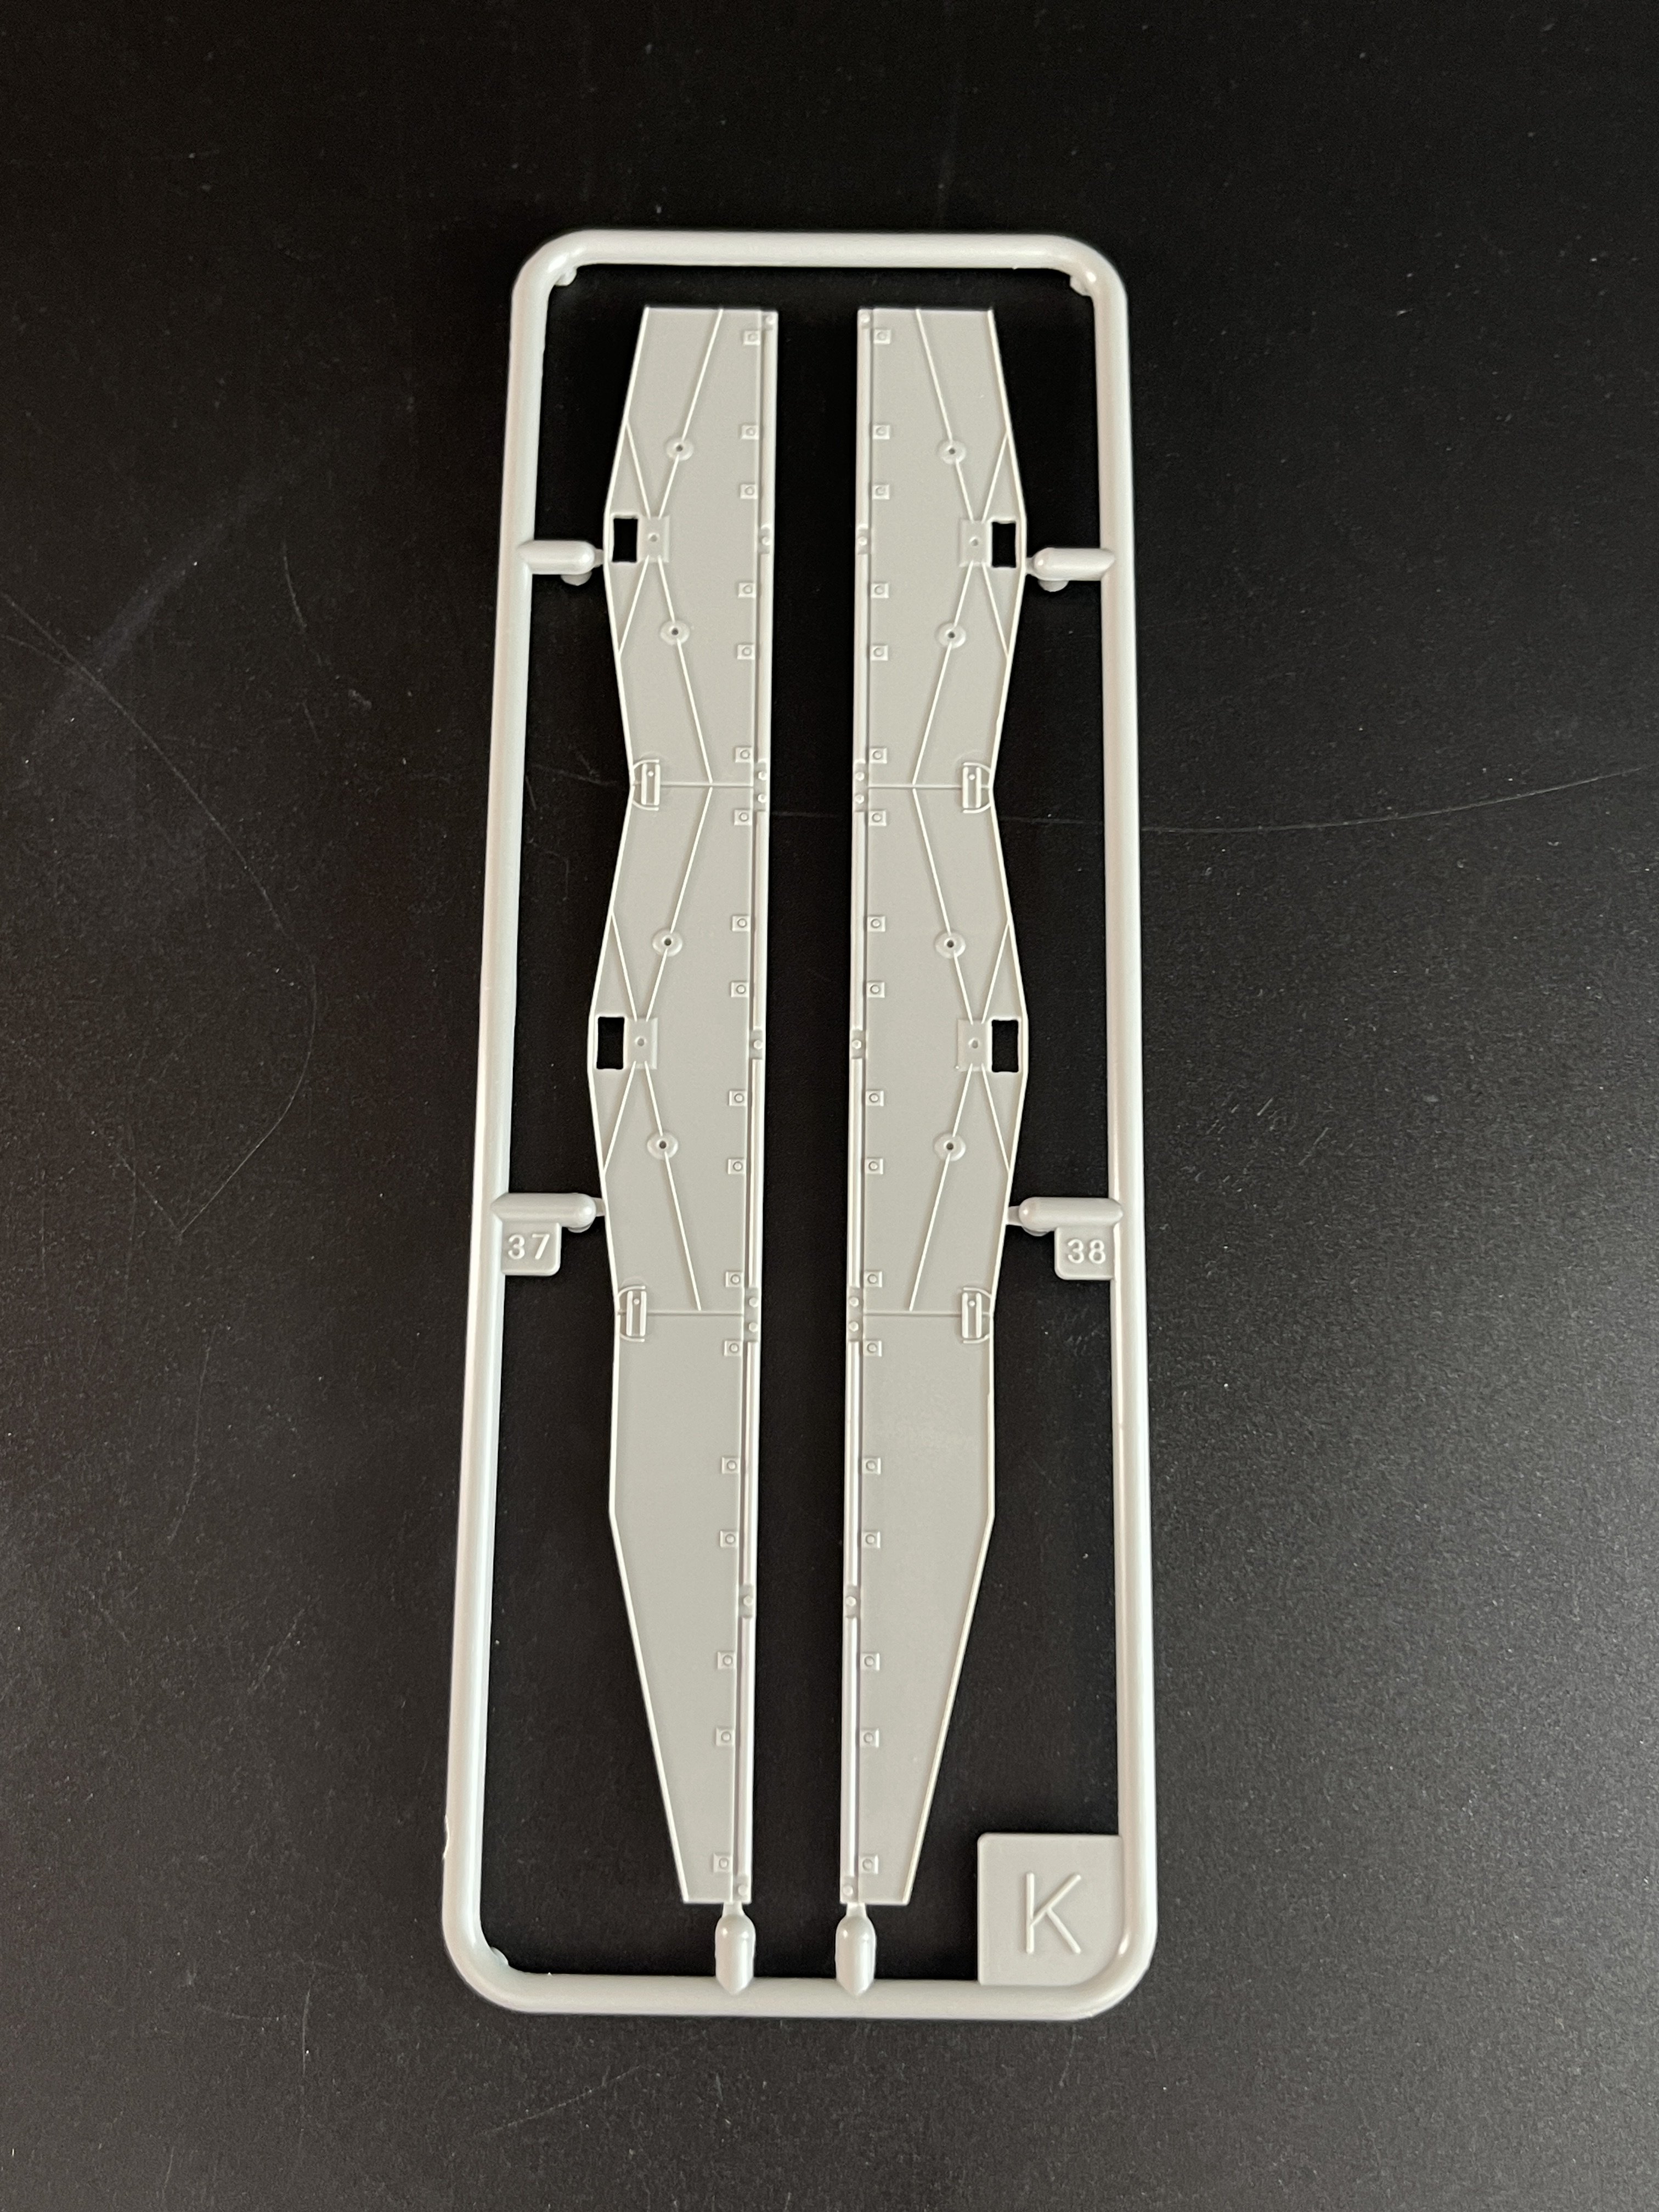
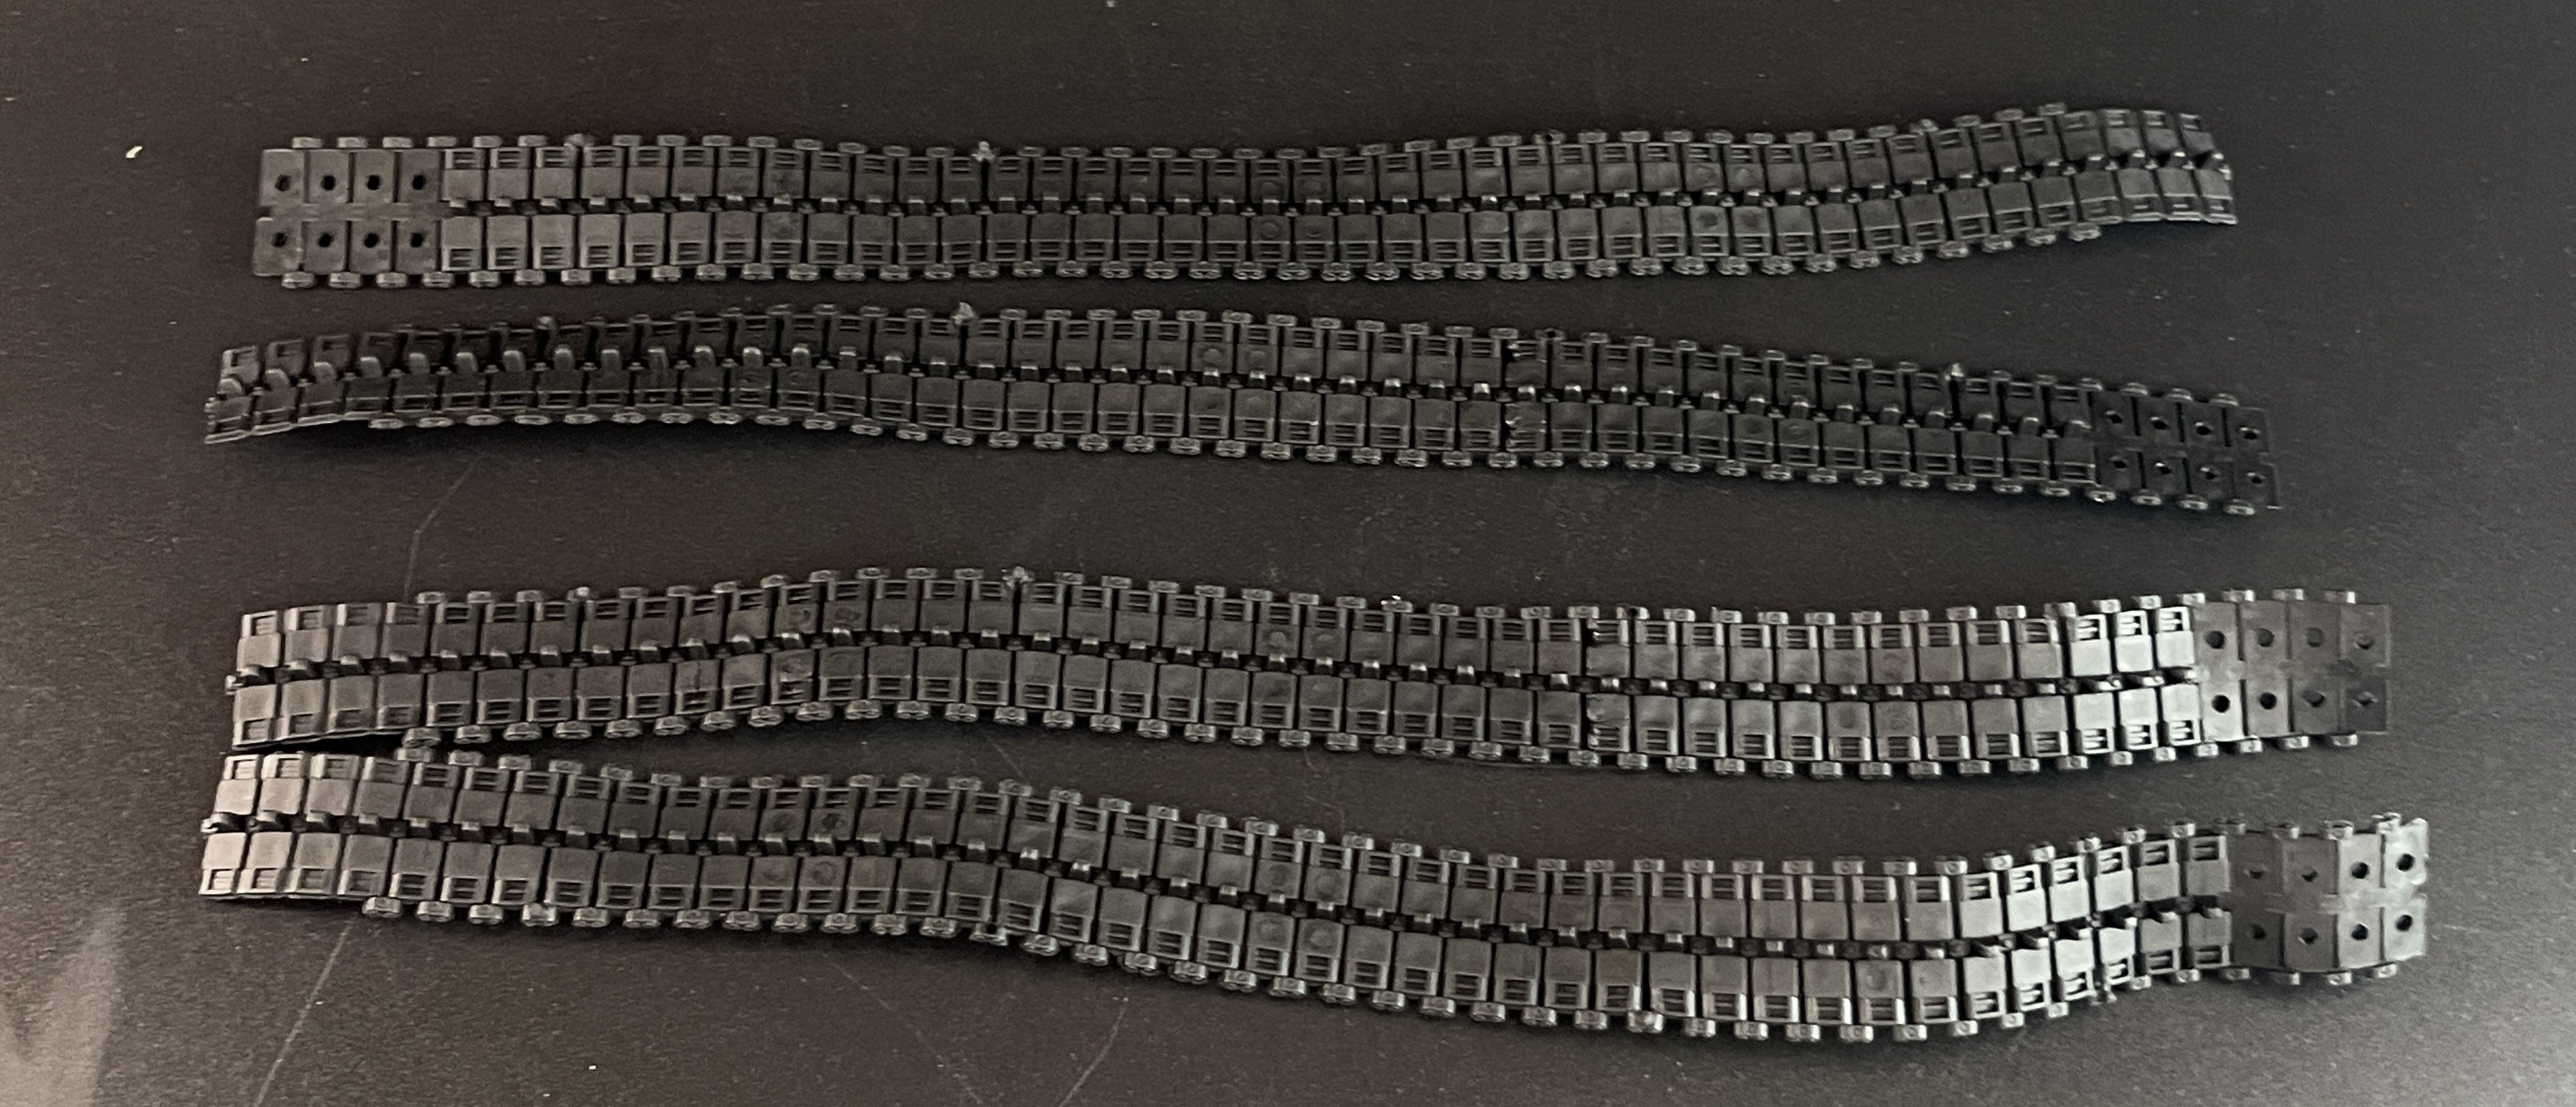
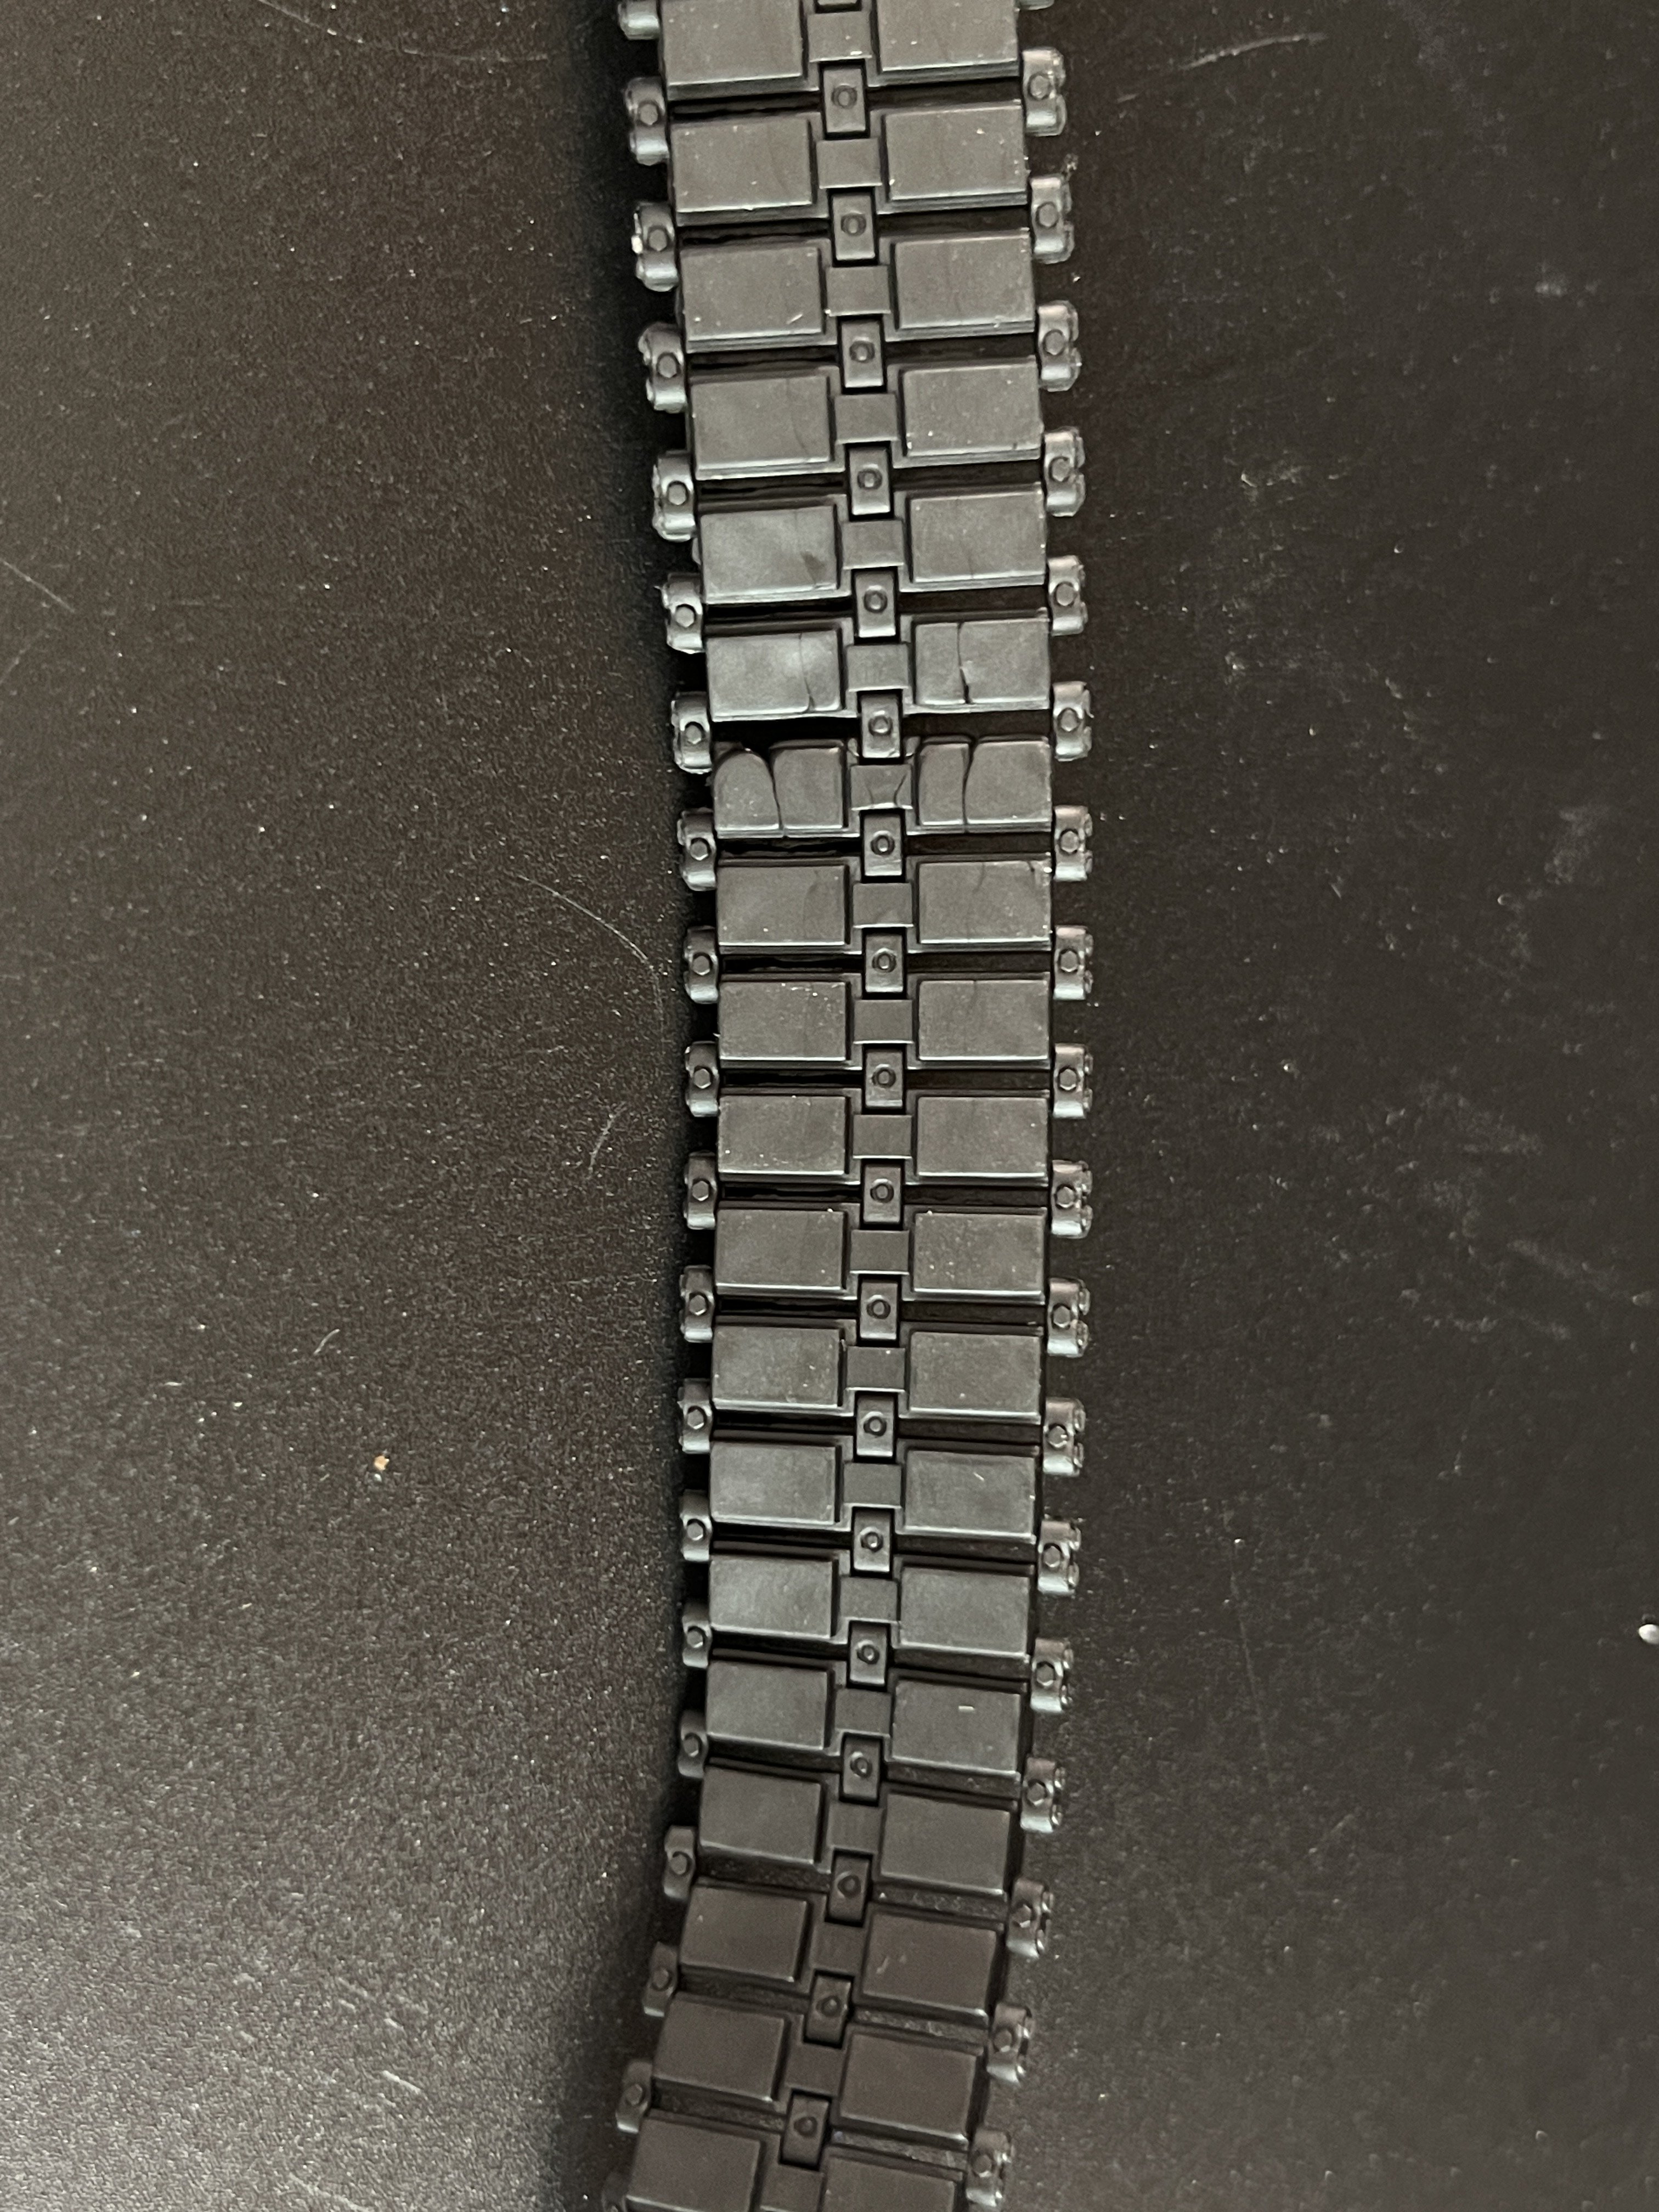
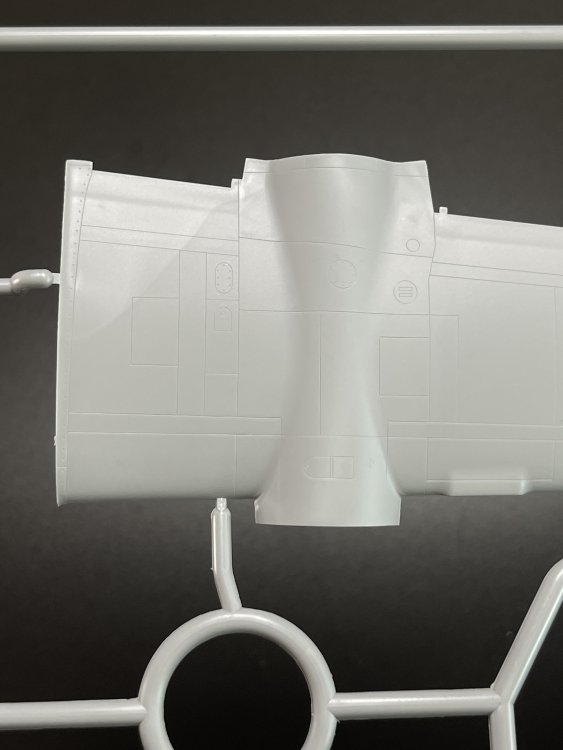
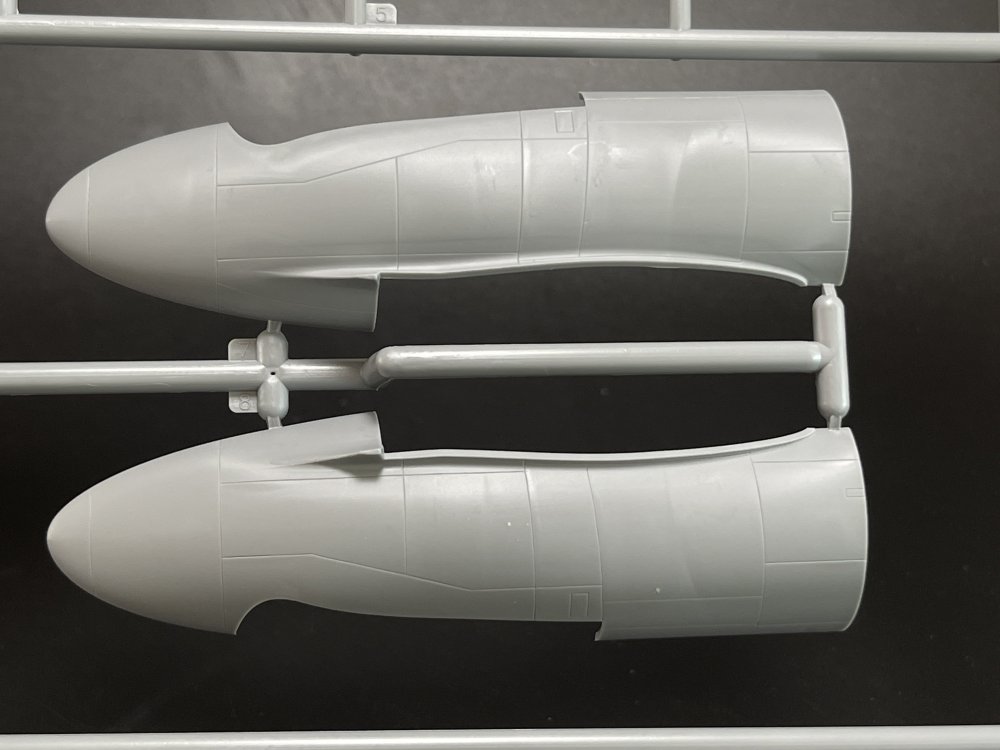
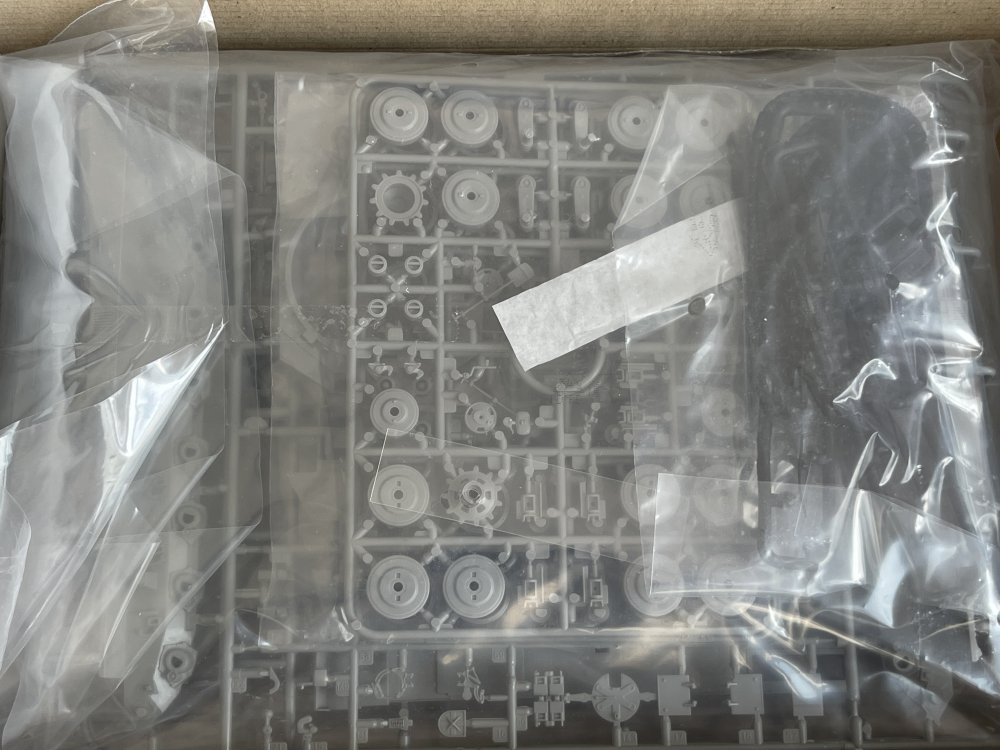
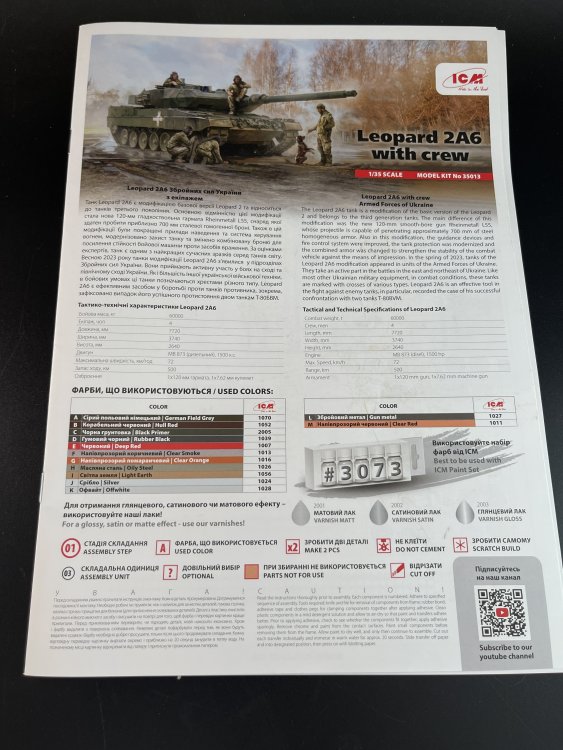
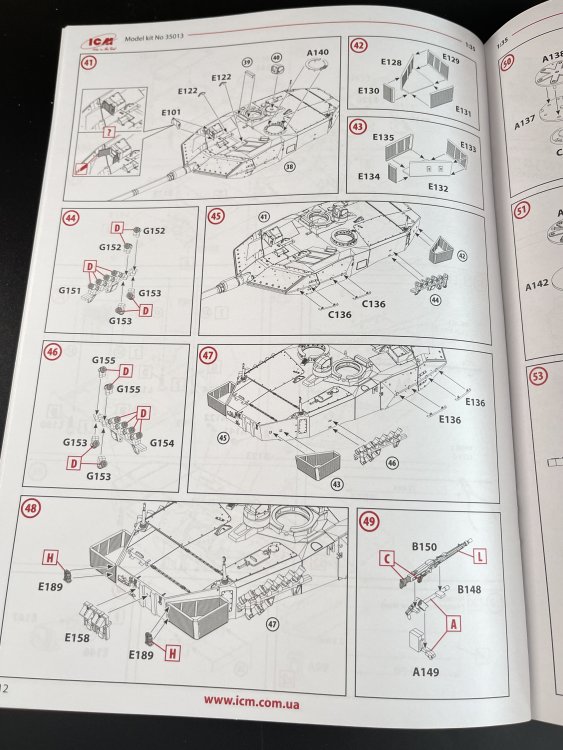
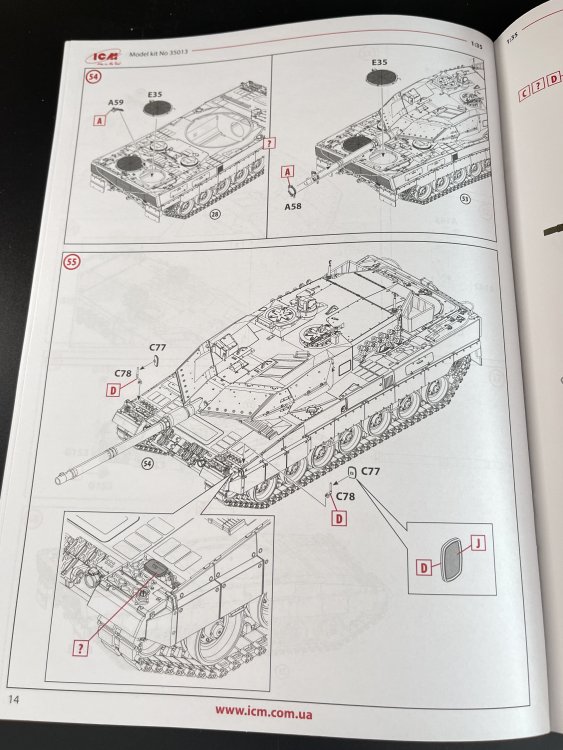
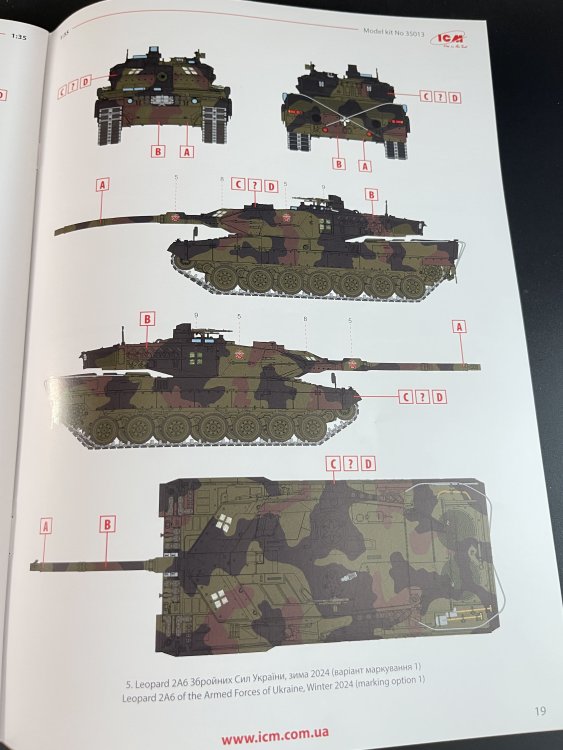
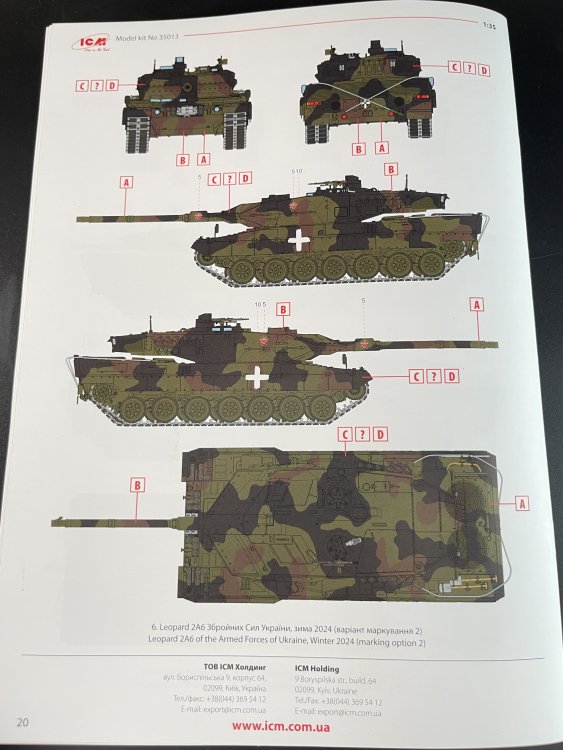
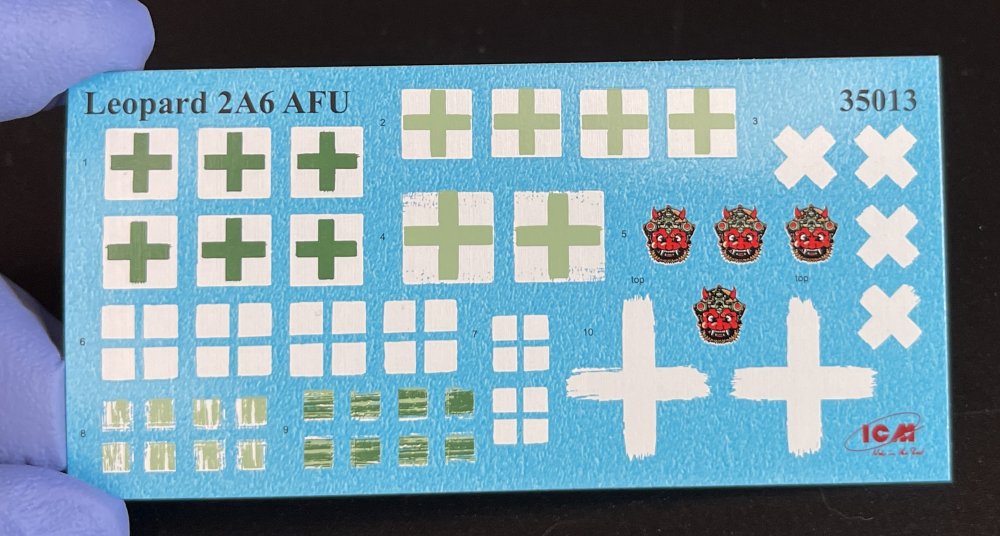
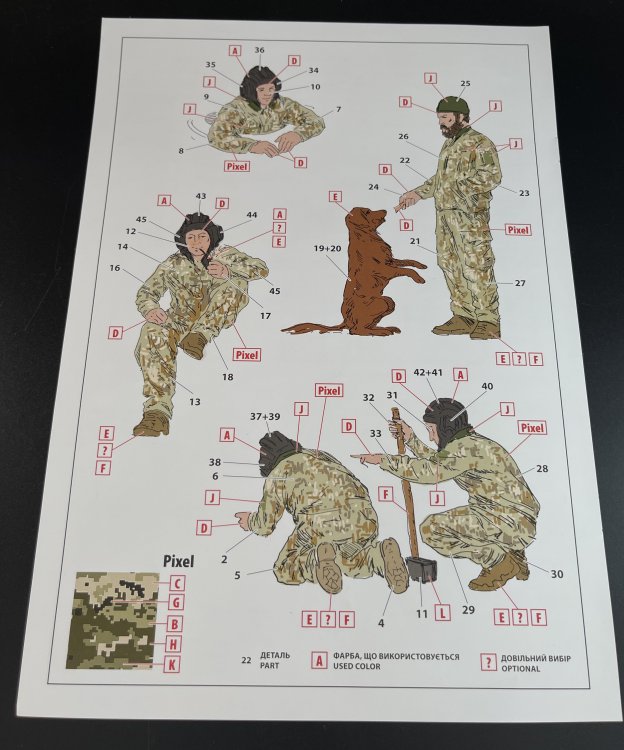
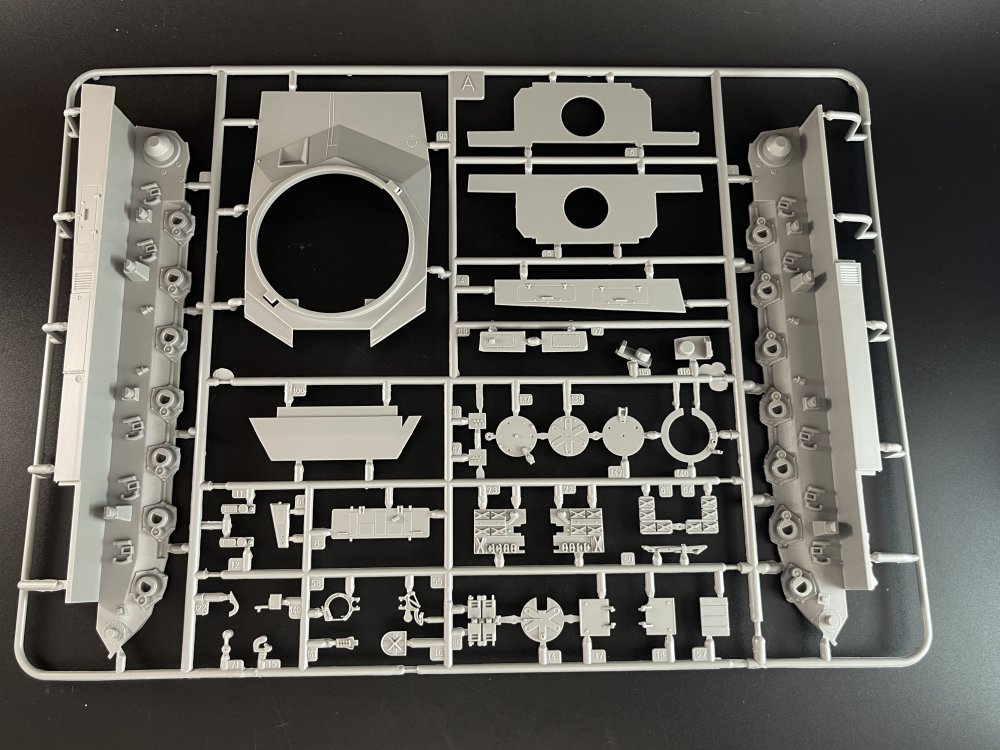
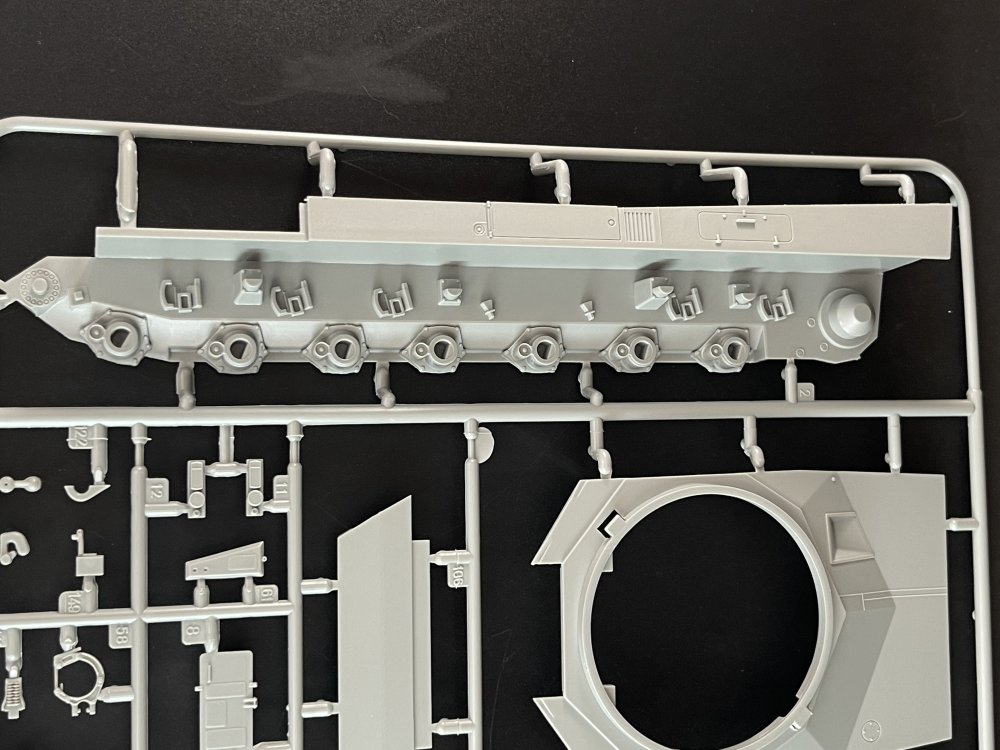
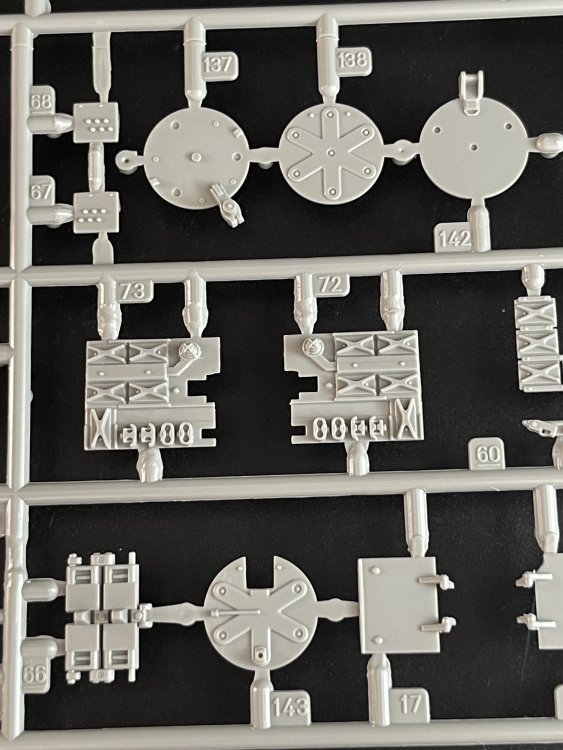
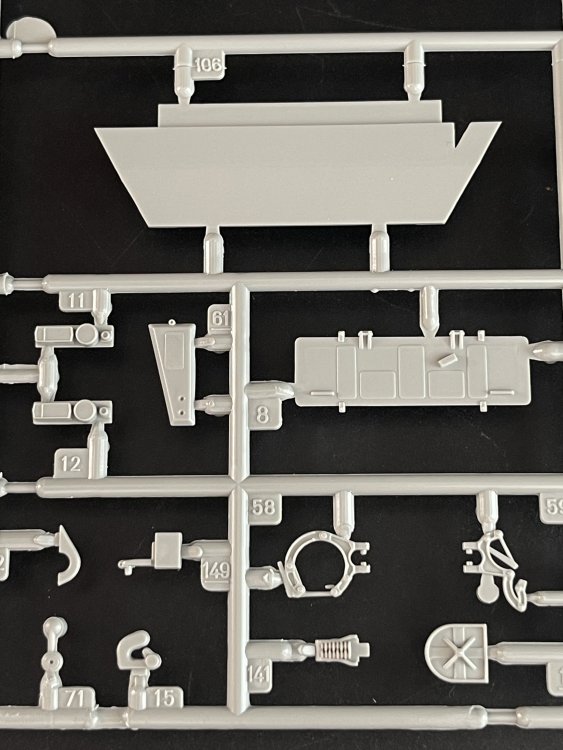
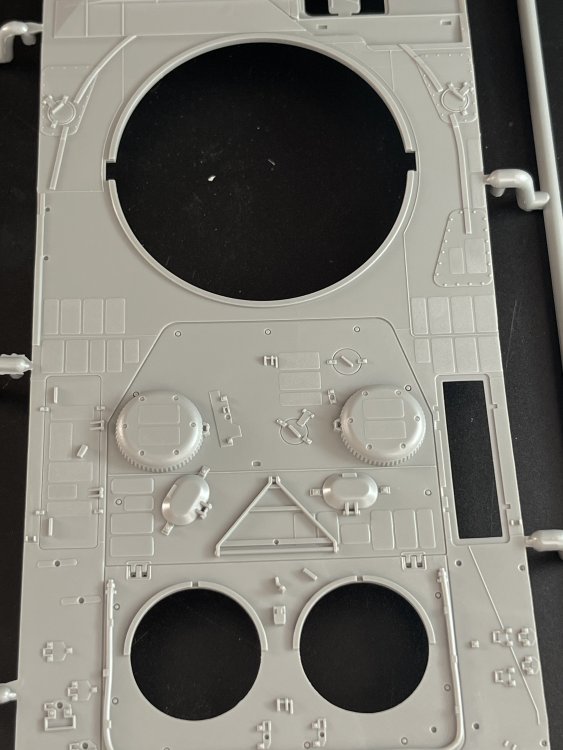
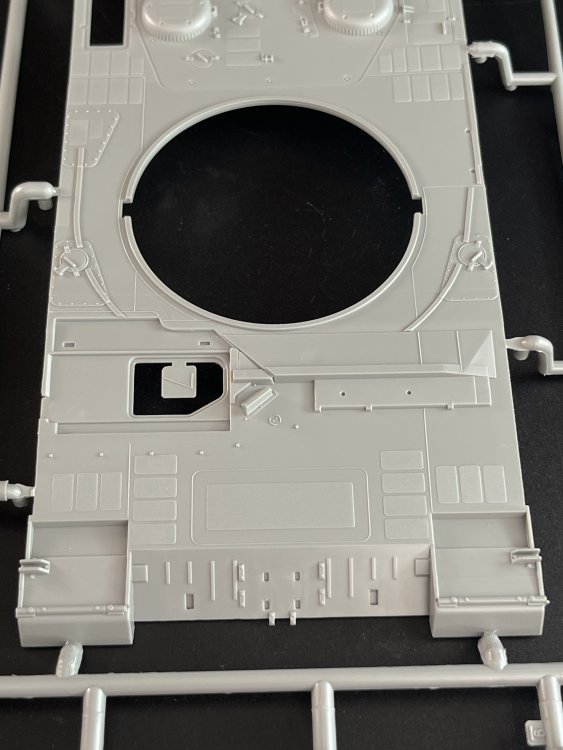
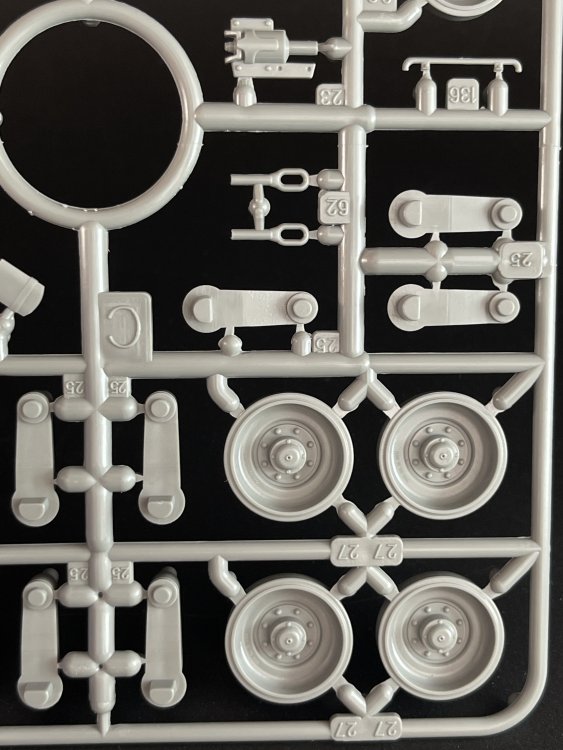
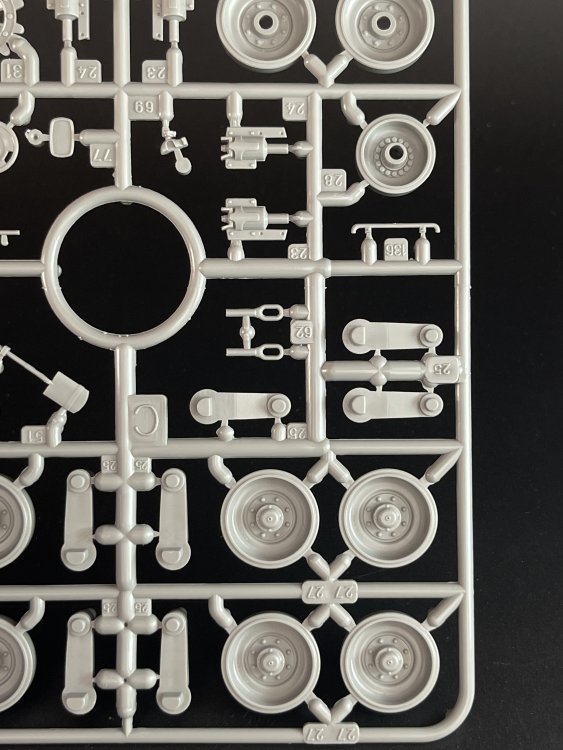
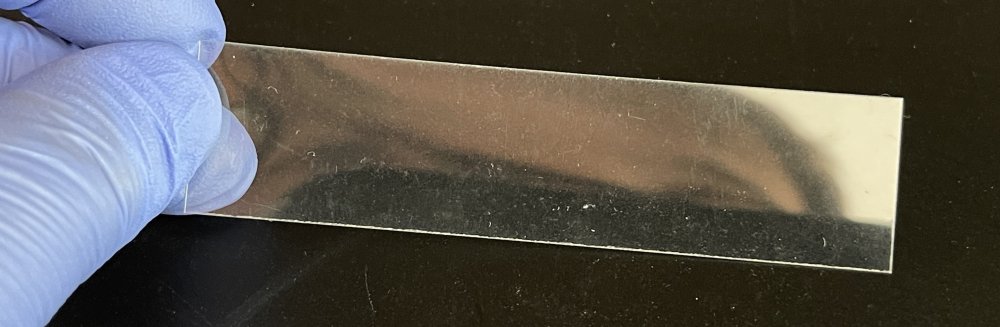
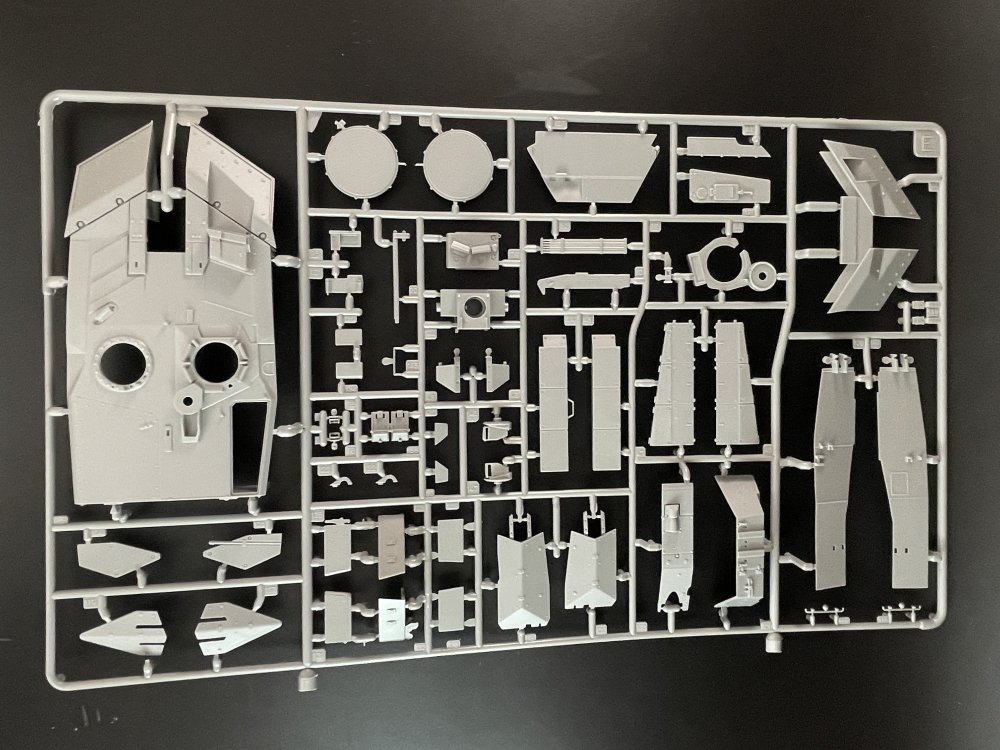
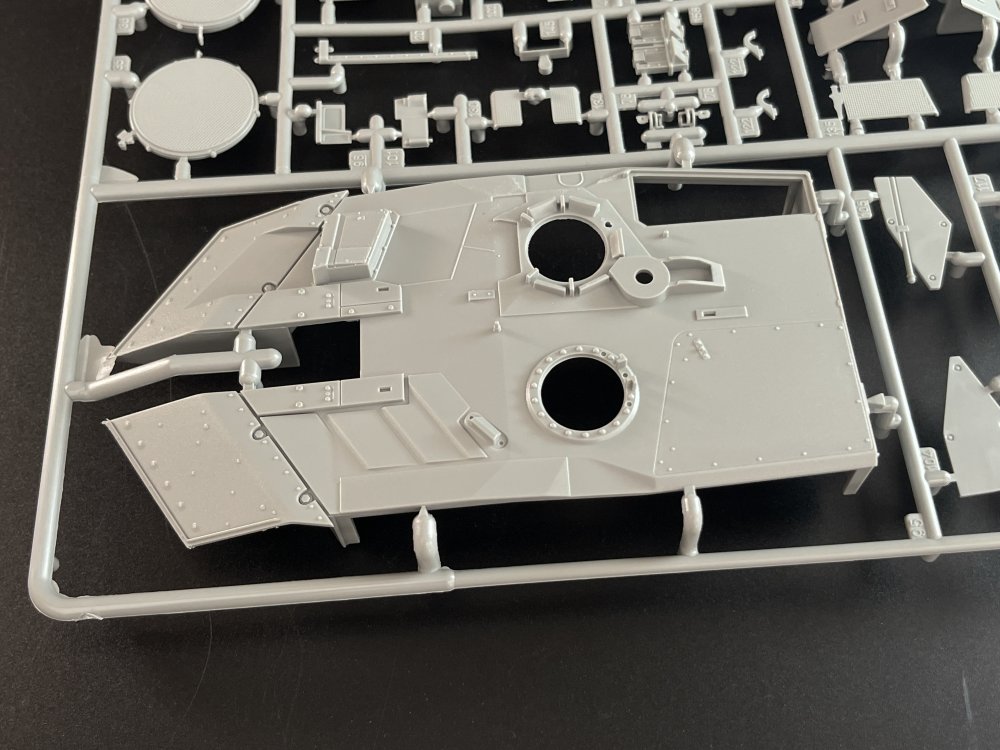
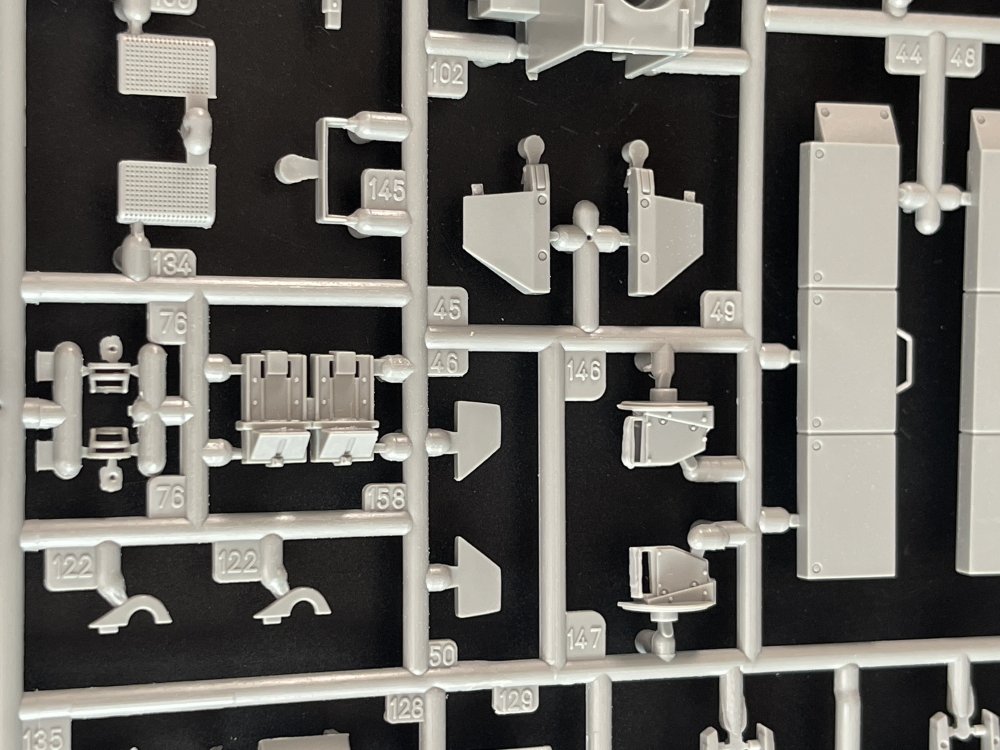
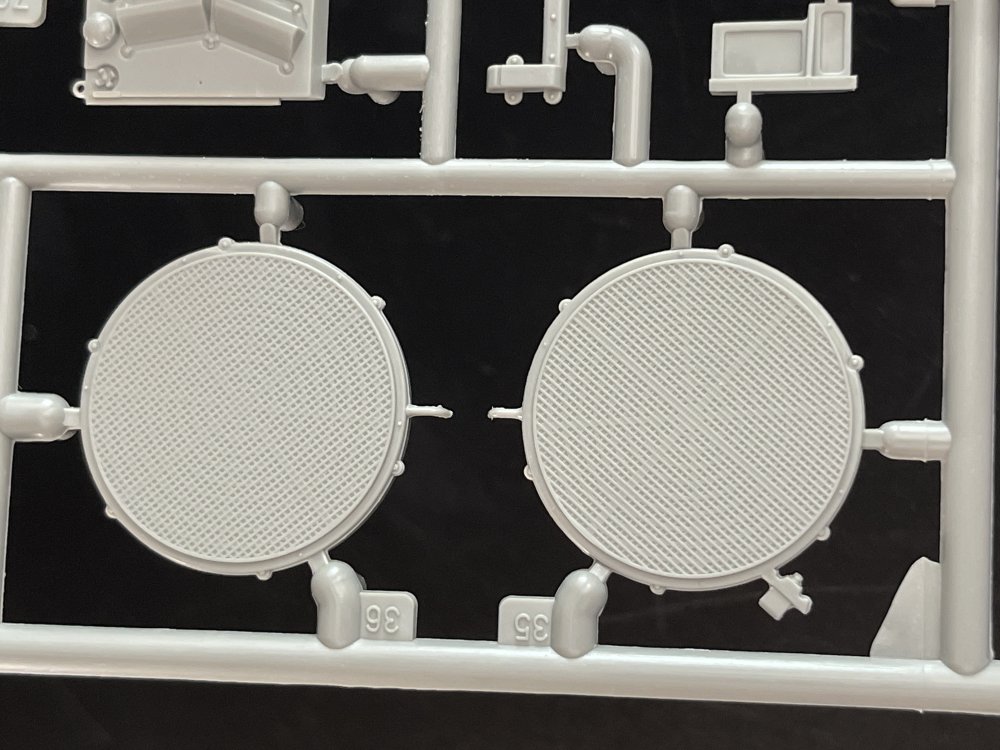
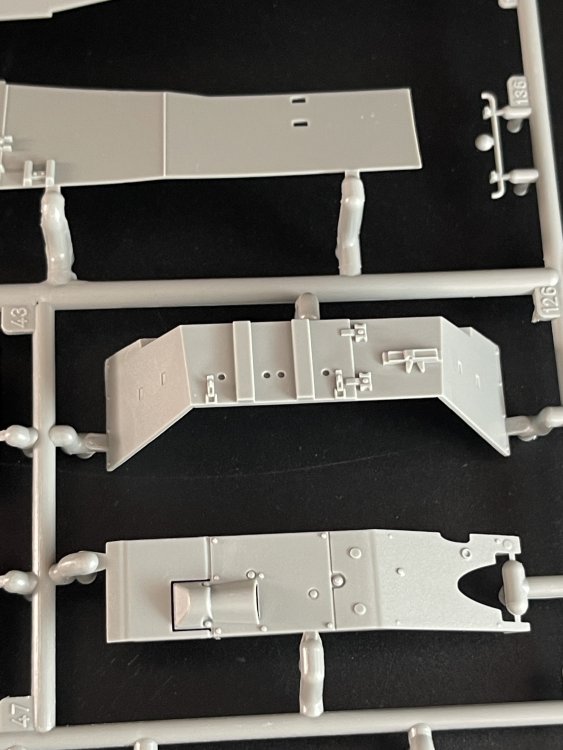
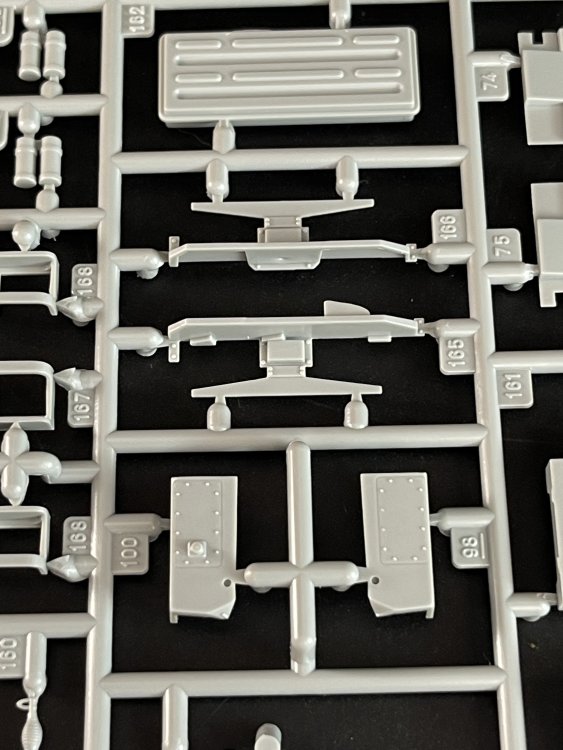
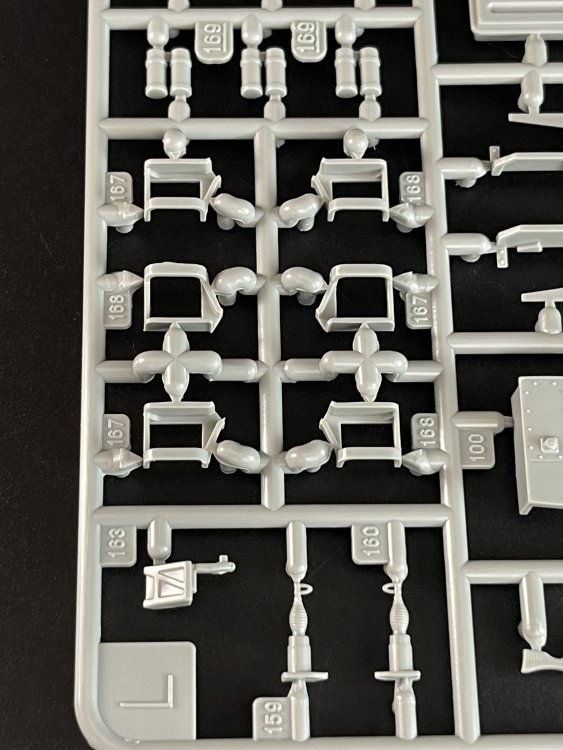
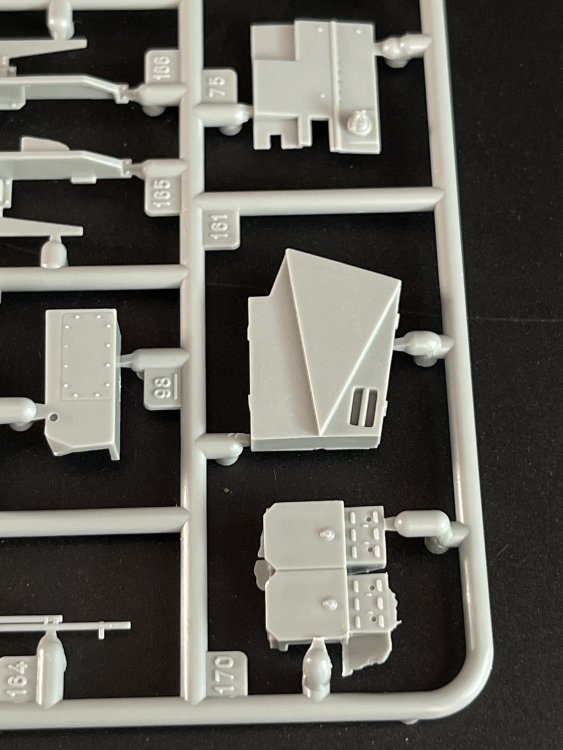
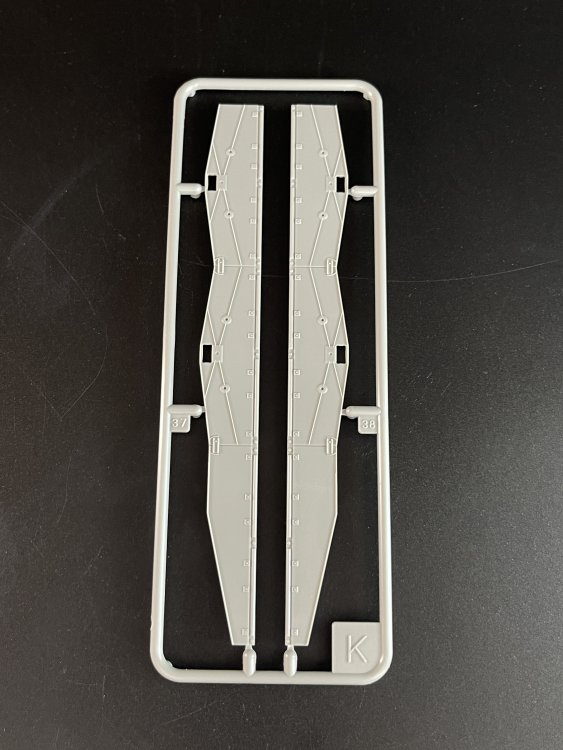
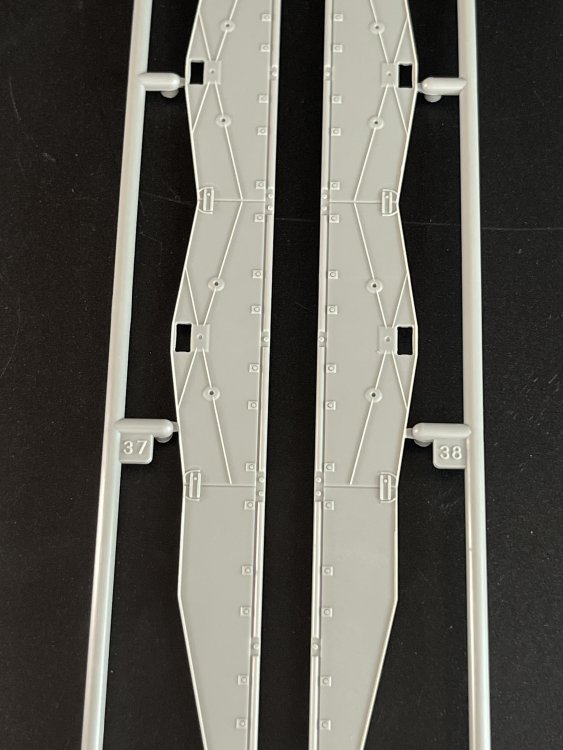
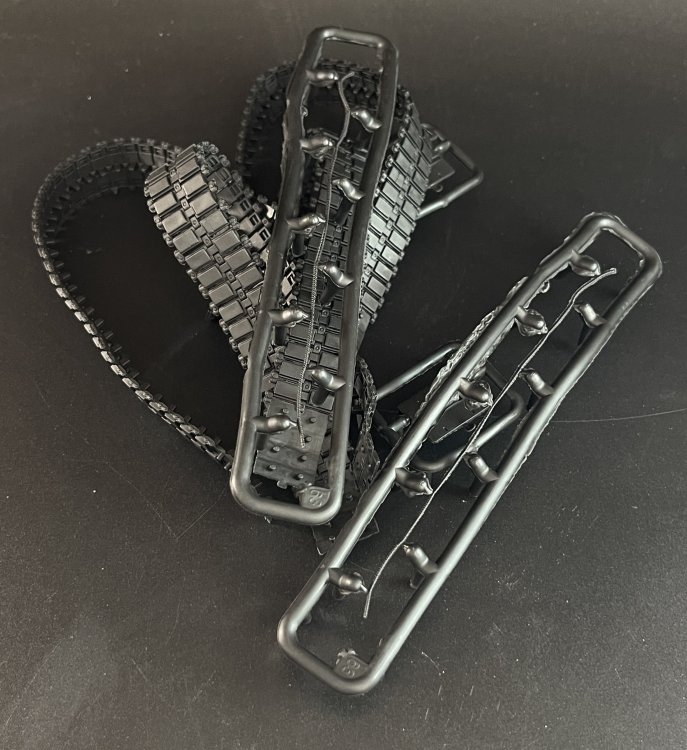
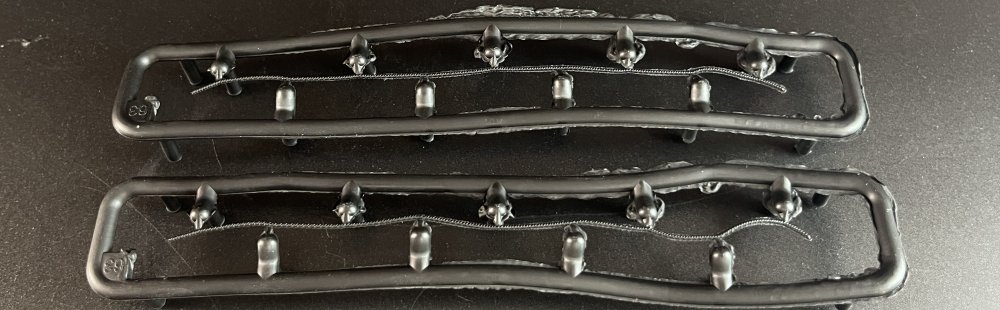
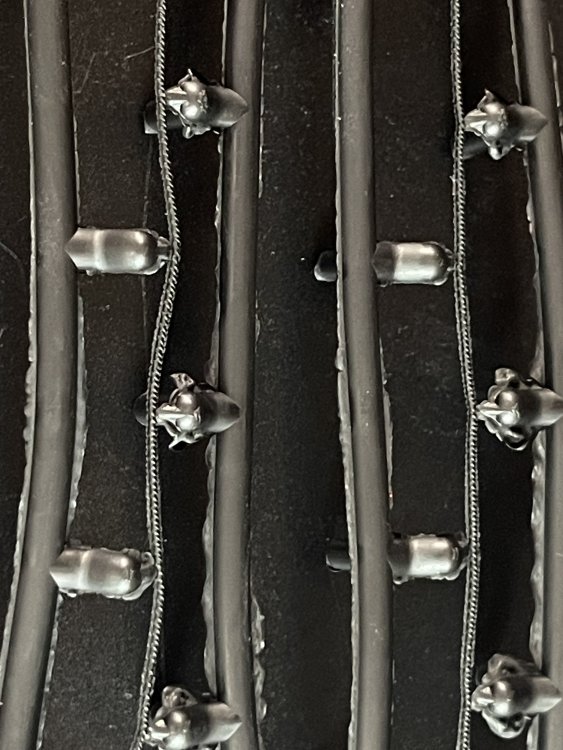
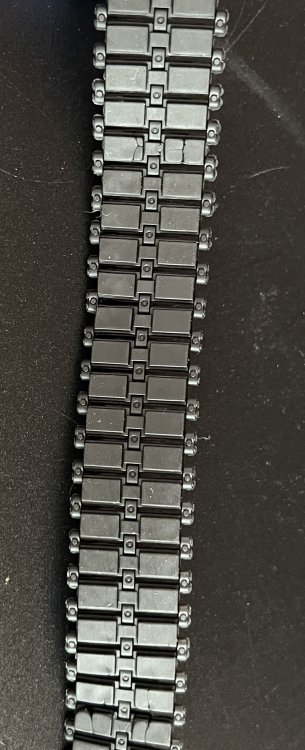
1:35 Leopard 2A6 with Crew Armed Forces of Ukraine ICM Catalogue # 35013 Available from Art Scale Model for 49€ Click here. ICM is a train at full speed even with a war at their literally, at their door step!! Brave ICM!! So here we are again checking the contents of the new limited edition Leopard 2A6 with Ukranian crew. So the Leopard A26 is the Revell mold, very well rebox in ICM boxing, a big box with 291 parts (246 for the assembly tank and 45 for figures). This release don’t have the green plastic originally release from Revell but the later one, in grey color and much more friendly to work with. Anyway, still Revell plastic and Revell injection and is a very good one. So it`s in fact a very good choice from ICM to rebox it with some figures. Checking the interior of the box, it`s comes in a plastic bag, different of the usually of other ICM boxes. Looks like that it come directly from Revell, and packed on the ICM box. Its my first time seeing the Leopard… it`s not really my cup of tea but I must confess that I`m very impressed. The parts that it impress me the most was the large circular cooling fans on the rear decking are particularly nicely done as separate parts, The parts are flash free (except the muzzle and towling cable in vinyl) and with very nice surface detail like the patches of anti-slip coating on the surfaces. The side suspension also being the side walls of the lower deck and the lower turret are on the sprue A. The side hull along with the lower hull looks like being quite easy to aligned. This is normal daily in AFV plastic kits as you have two bulkheads that sit in the central are of the chassis. The constructions looks like quite straightforward with the wheels and suspension being the step that probably will take more constructions time unless you decided to get some metal tracks. The turret is in one single piece. I think that if it comes in several parts, you could`t get it all aligned properly. The turret is a big one and a bit complex shape but easy to construction. The upper hull come in a single large and big piece with very very good surface details The back end also is given with great surface detail. For me the most impressive detail parts are the engine covers. The small parts are quite good with sharp detail and no flash that is always difficult to remove in such small parts. The side-skirts are model in a single part to make easier for the modeller A clear part is given with a simple acetate sheet. The wheels and suspension system are quite detail Speaking of wheels tracks, the vinyl tracks does have some good details. Personaly, this point is almost a non subject.I always get some AM tracks but it’s a personal choice (details and weathering) as with these vinyl tracks in the model you can get some good results. Two things here: the main barrel and the antennas. Well, the antennas will have to be yourself to build them. As for the barrel, comes in two halves. I don’t like to have a two parts barrel but with care and some work you can get a solid barrel. Or you can get an aftermarket one (I know I will). If with these two things every modeller could live with, I think that the towing cable in vinyl is the worst part in the entire kit. Flash and very hard to paint and weathering so a strong recommendation is to get some AM stuff like XXL Eureka cable. As for the figures set, just check our review - The decal sheet is quite comprehensive and I didn’t don’t know where ICM make their decals but they do have a good color saturation and good printing details, but it’s a quite small decal sheet. So with this decal sheet ICM gives the modeler 6(six) options (with the standard 3-color scheme): 1. Leopard 2A6 of the Armed Forces of Ukraine, Summer 2023, Zaporizhzhia region 2. Leopard 2A6 of the Armed Forces of Ukraine, Summer 2023, Robotyne 3. Leopard 2A6 of the Armed Forces of Ukraine, Autumn 2023, Zaporizhzhia region 4. Leopard 2A6 of the Armed Forces of Ukraine, December 2023 5. Leopard 2A6 of the Armed Forces of Ukraine, winter 2024 (marking option 1) 6. Leopard 2A6 of the Armed Forces of Ukraine, winter 2024 (marking option 2) The instructions booklet. These are in an ICM way, with the first pages in stain paper and the rest on normal paper with 55 steps, quite easy to follow. A small information about the model, and the color references, as always, only with ICM references. I already said in past reviews that it would be nice to have other references as Tamiya or AK. Conclusion This Leopard rebox with figures and Ukranian markings are most welcome to armour modern modellers. The plastic and tolling are not actually from ICM but from Revell. The quality is very good but there`s a little bit of flash in some parts (barrel muzzle) but nothing hard to remove. The figures are very good and an extra to make his box are all in vignette! Highly recommended My sincere thanks to ICM for making this! To purchase directly, click HERE. Fran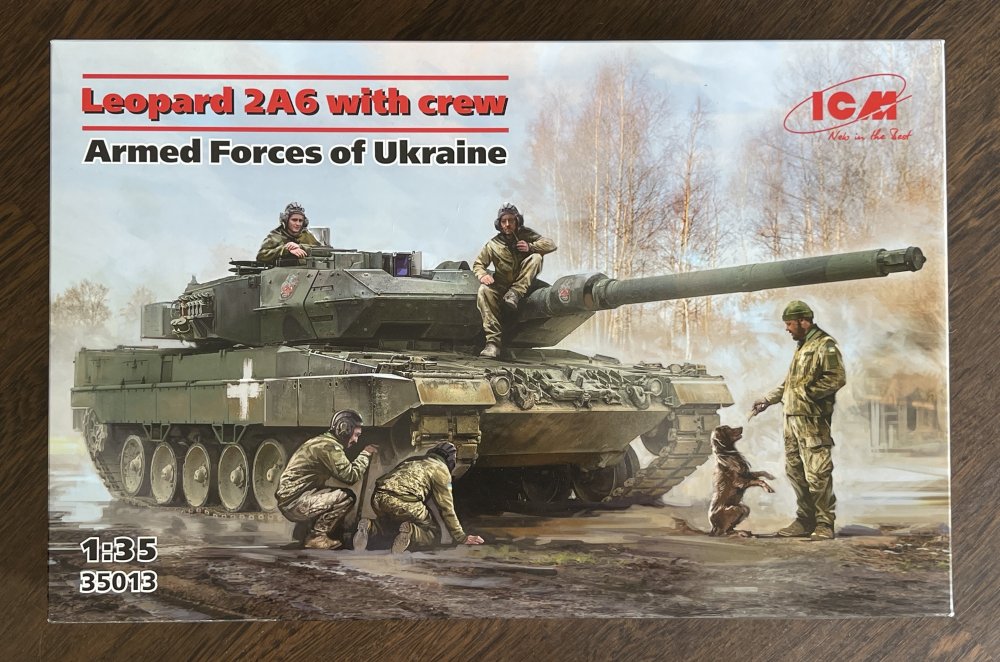


-
LSM Modelling News 2023 merged Fran and Artful69’s threads
Fran replied to Fran's topic in Modelling Discussion
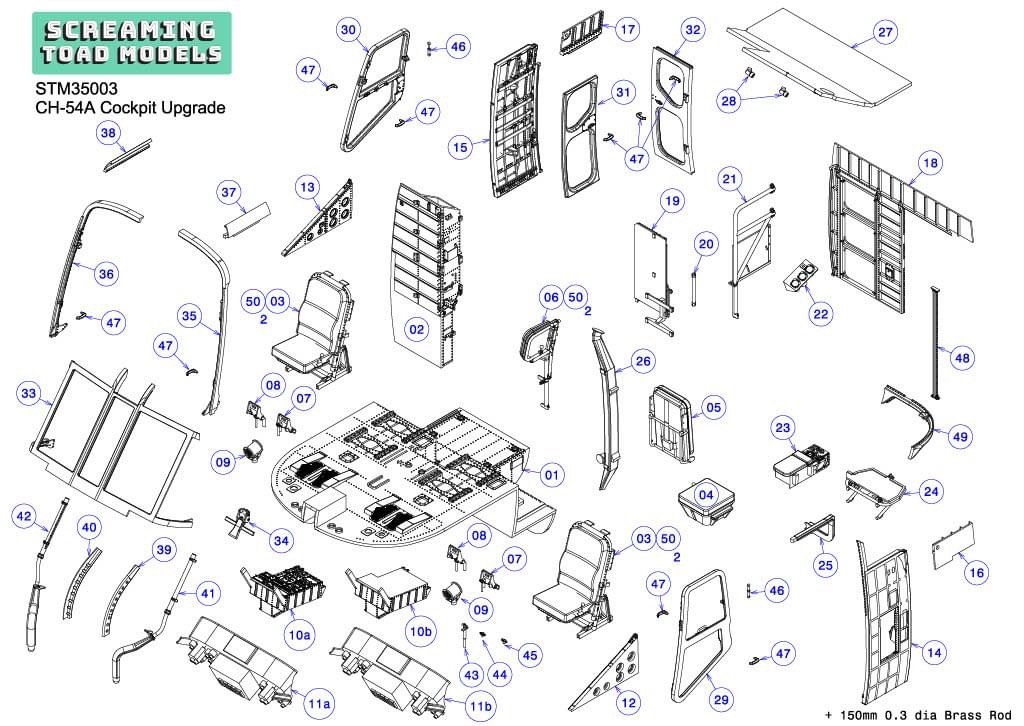
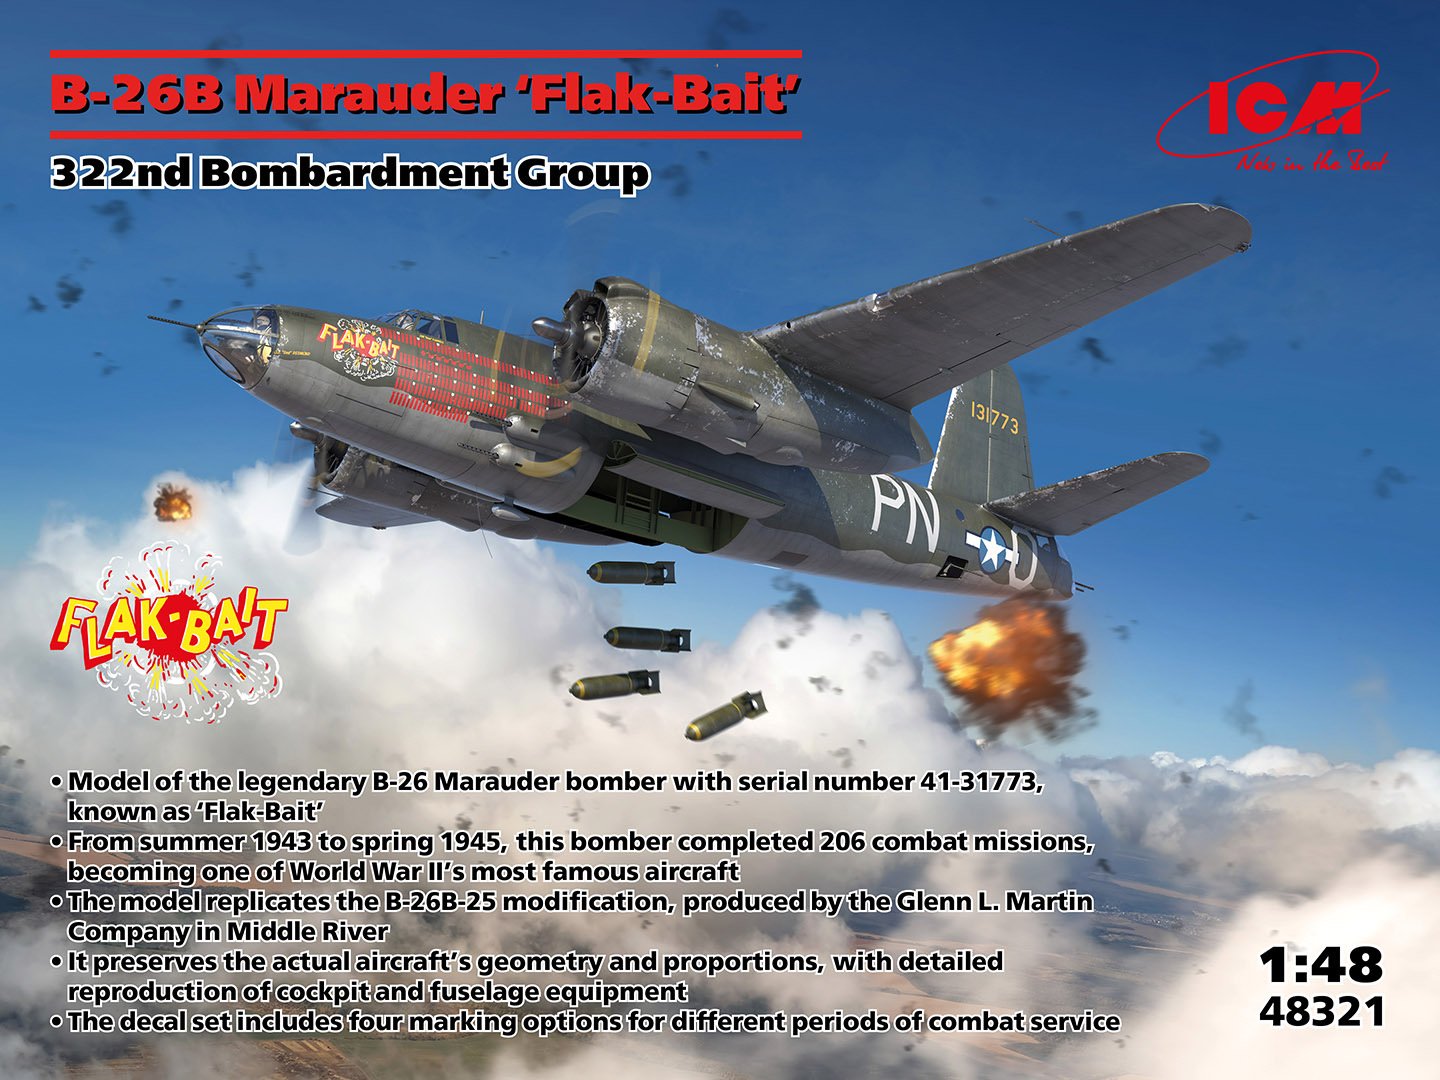
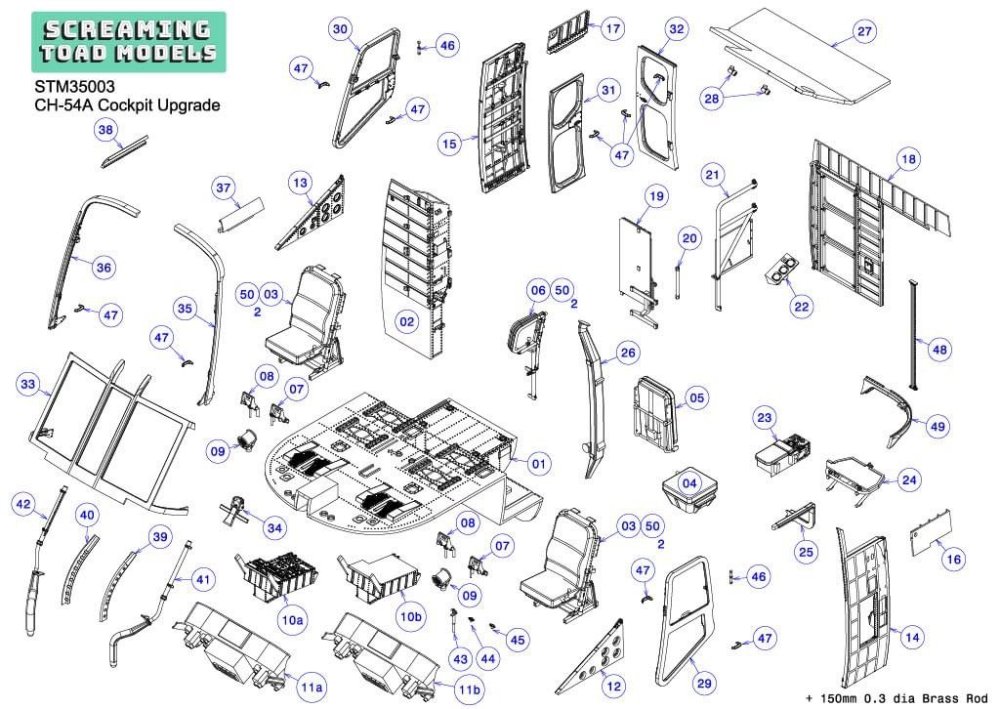
An entire new cockpit for the ICM CH-54 from Screaming Toad (price 68 £) And brand new 3D in 132 CAPRONI Ca3!!! and finally a new Re-box from ICM Marauder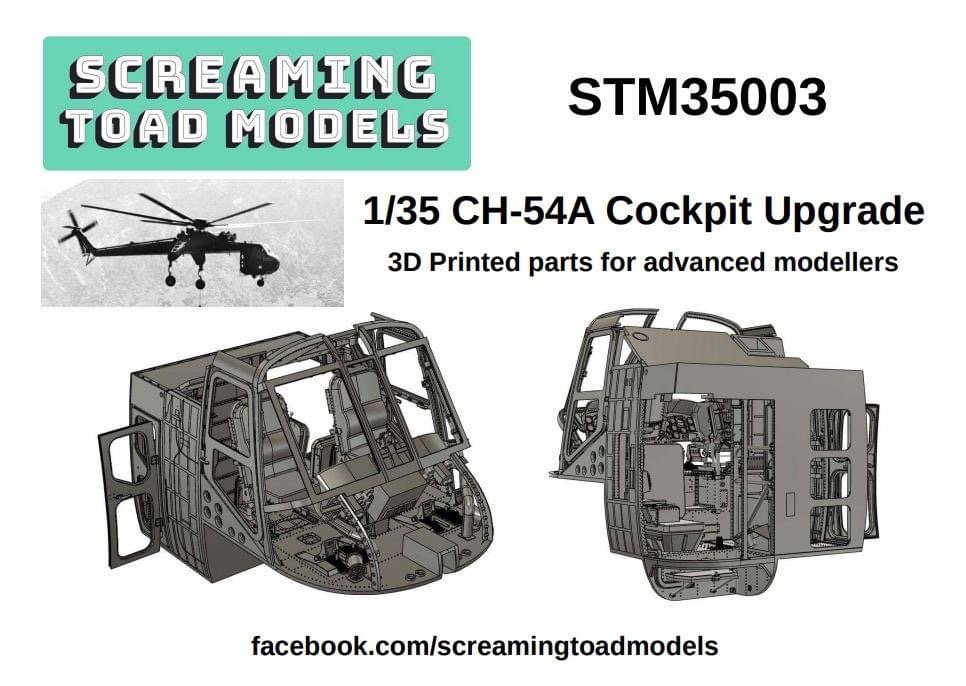


-
@Lusitanian and @HubertB, well, looks like that we will have to have a LSM dinner sometime soon here in Portugal!!
-
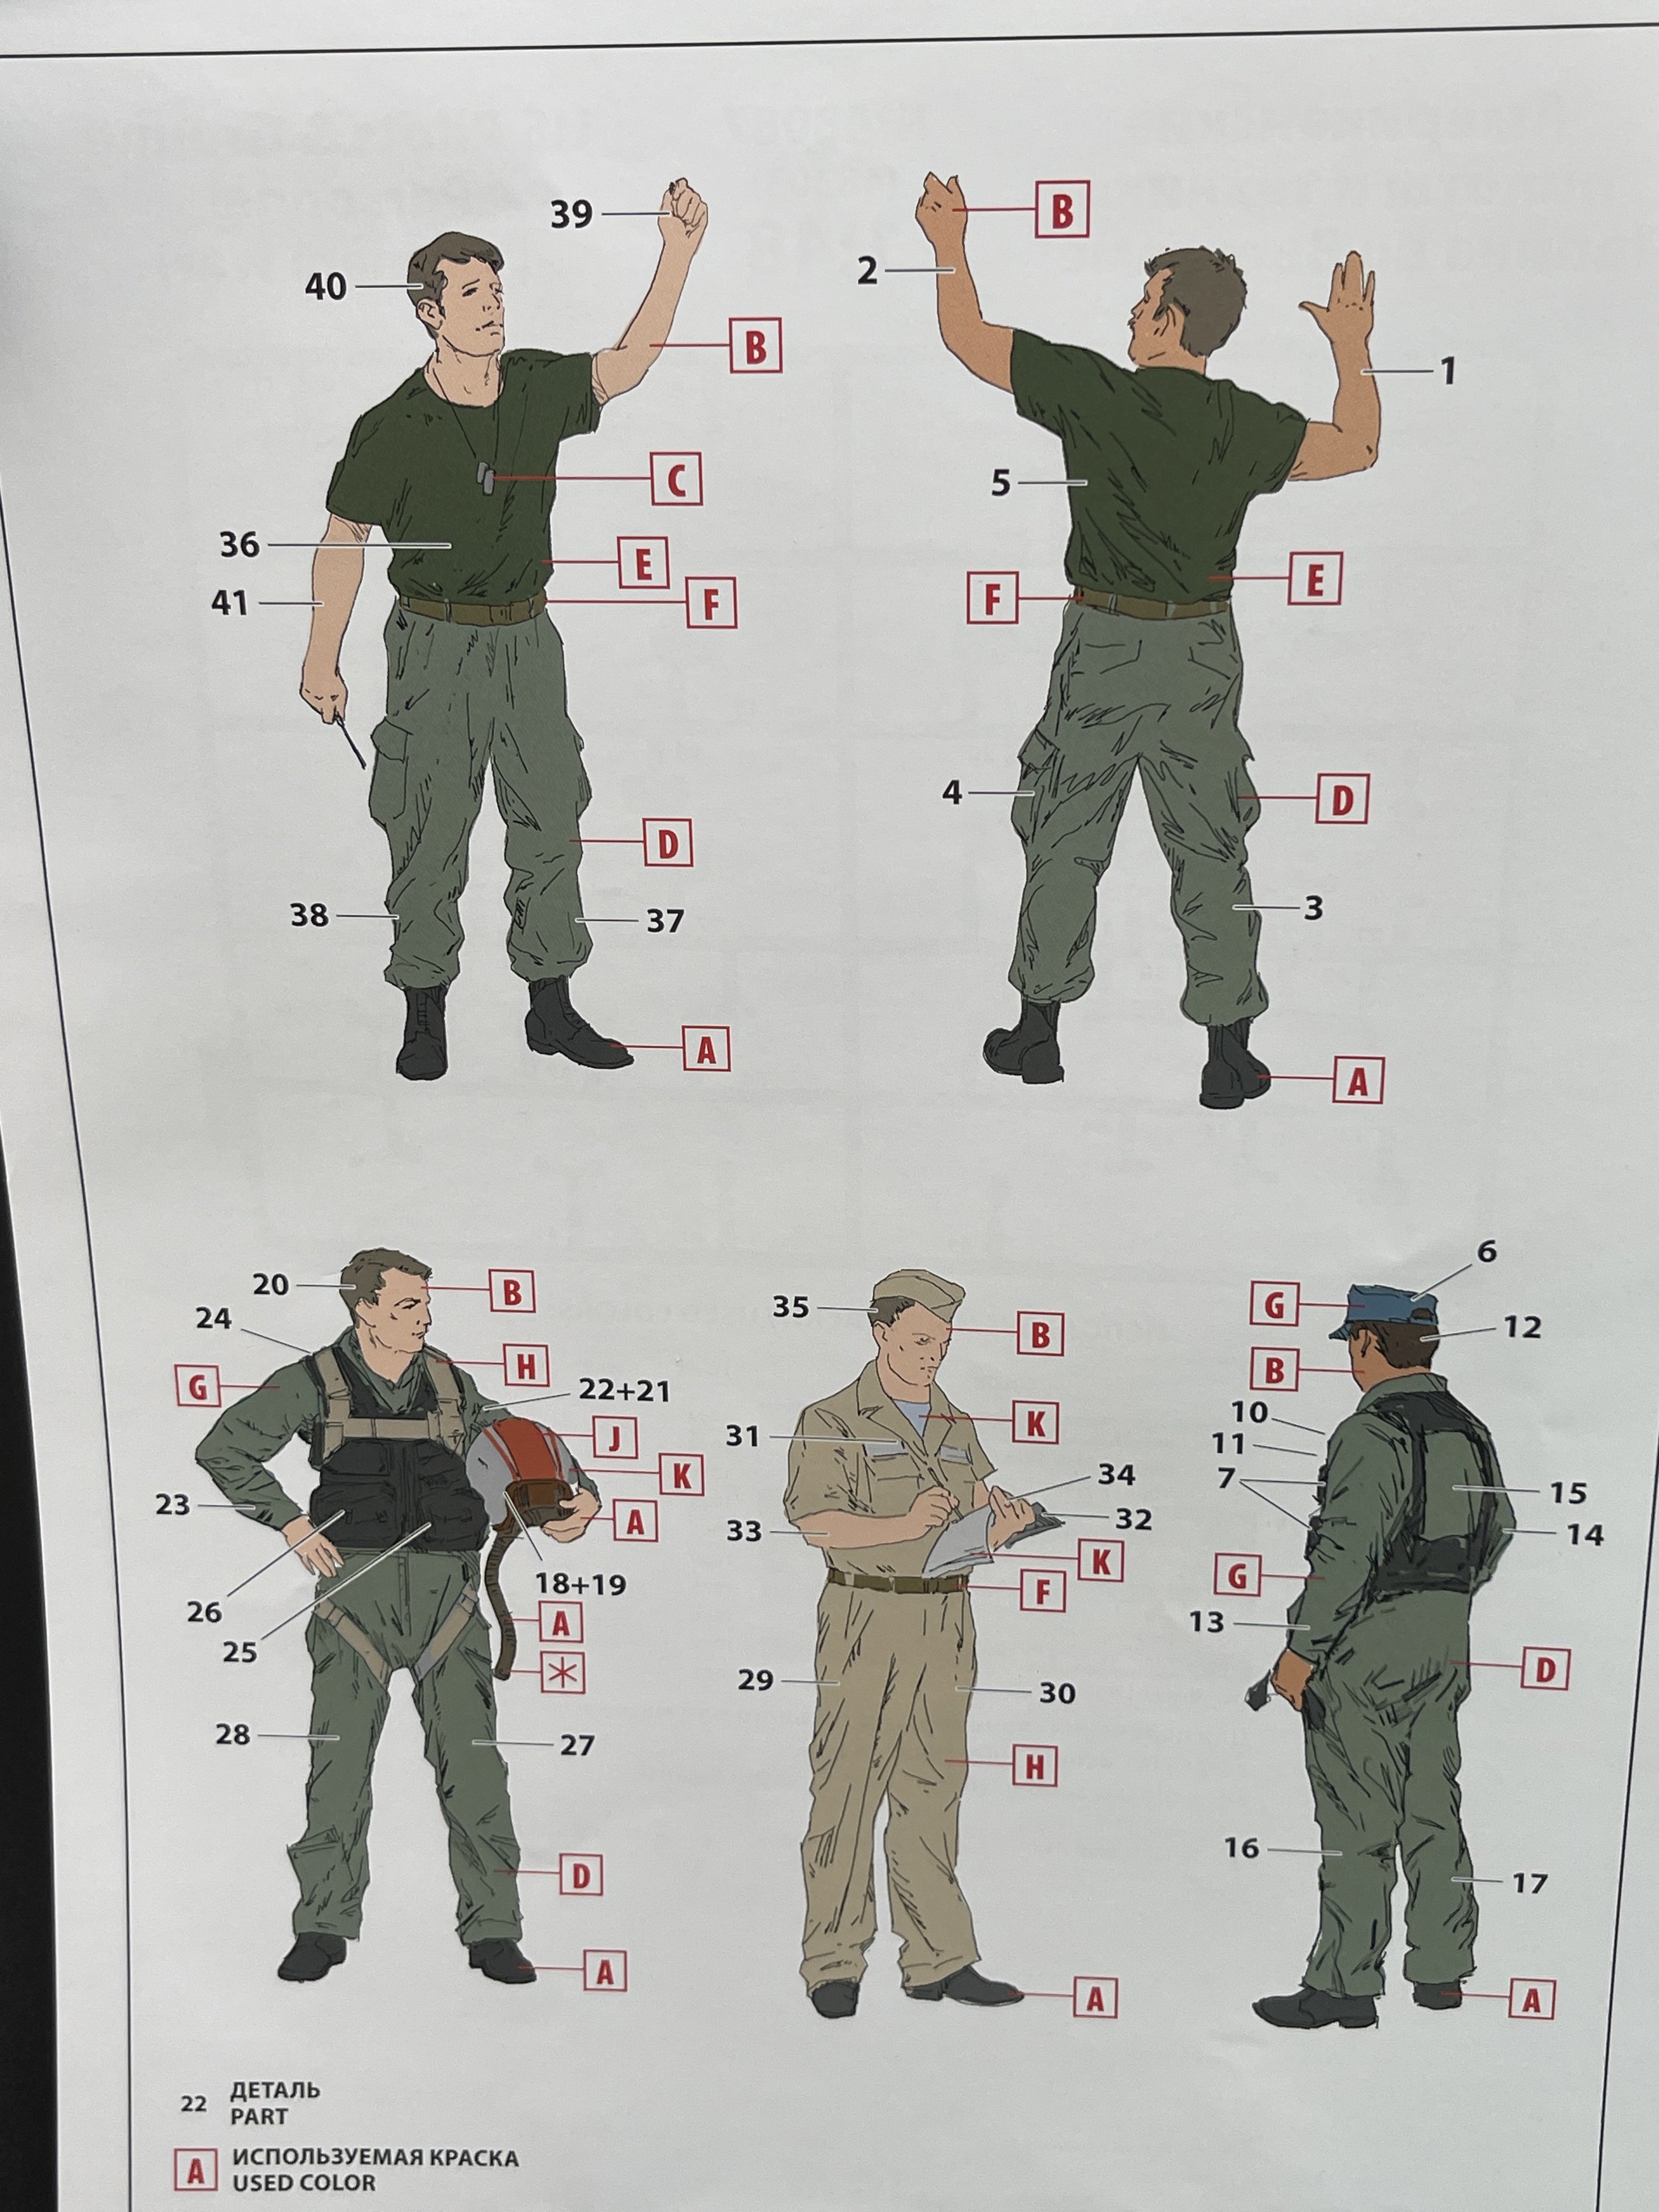
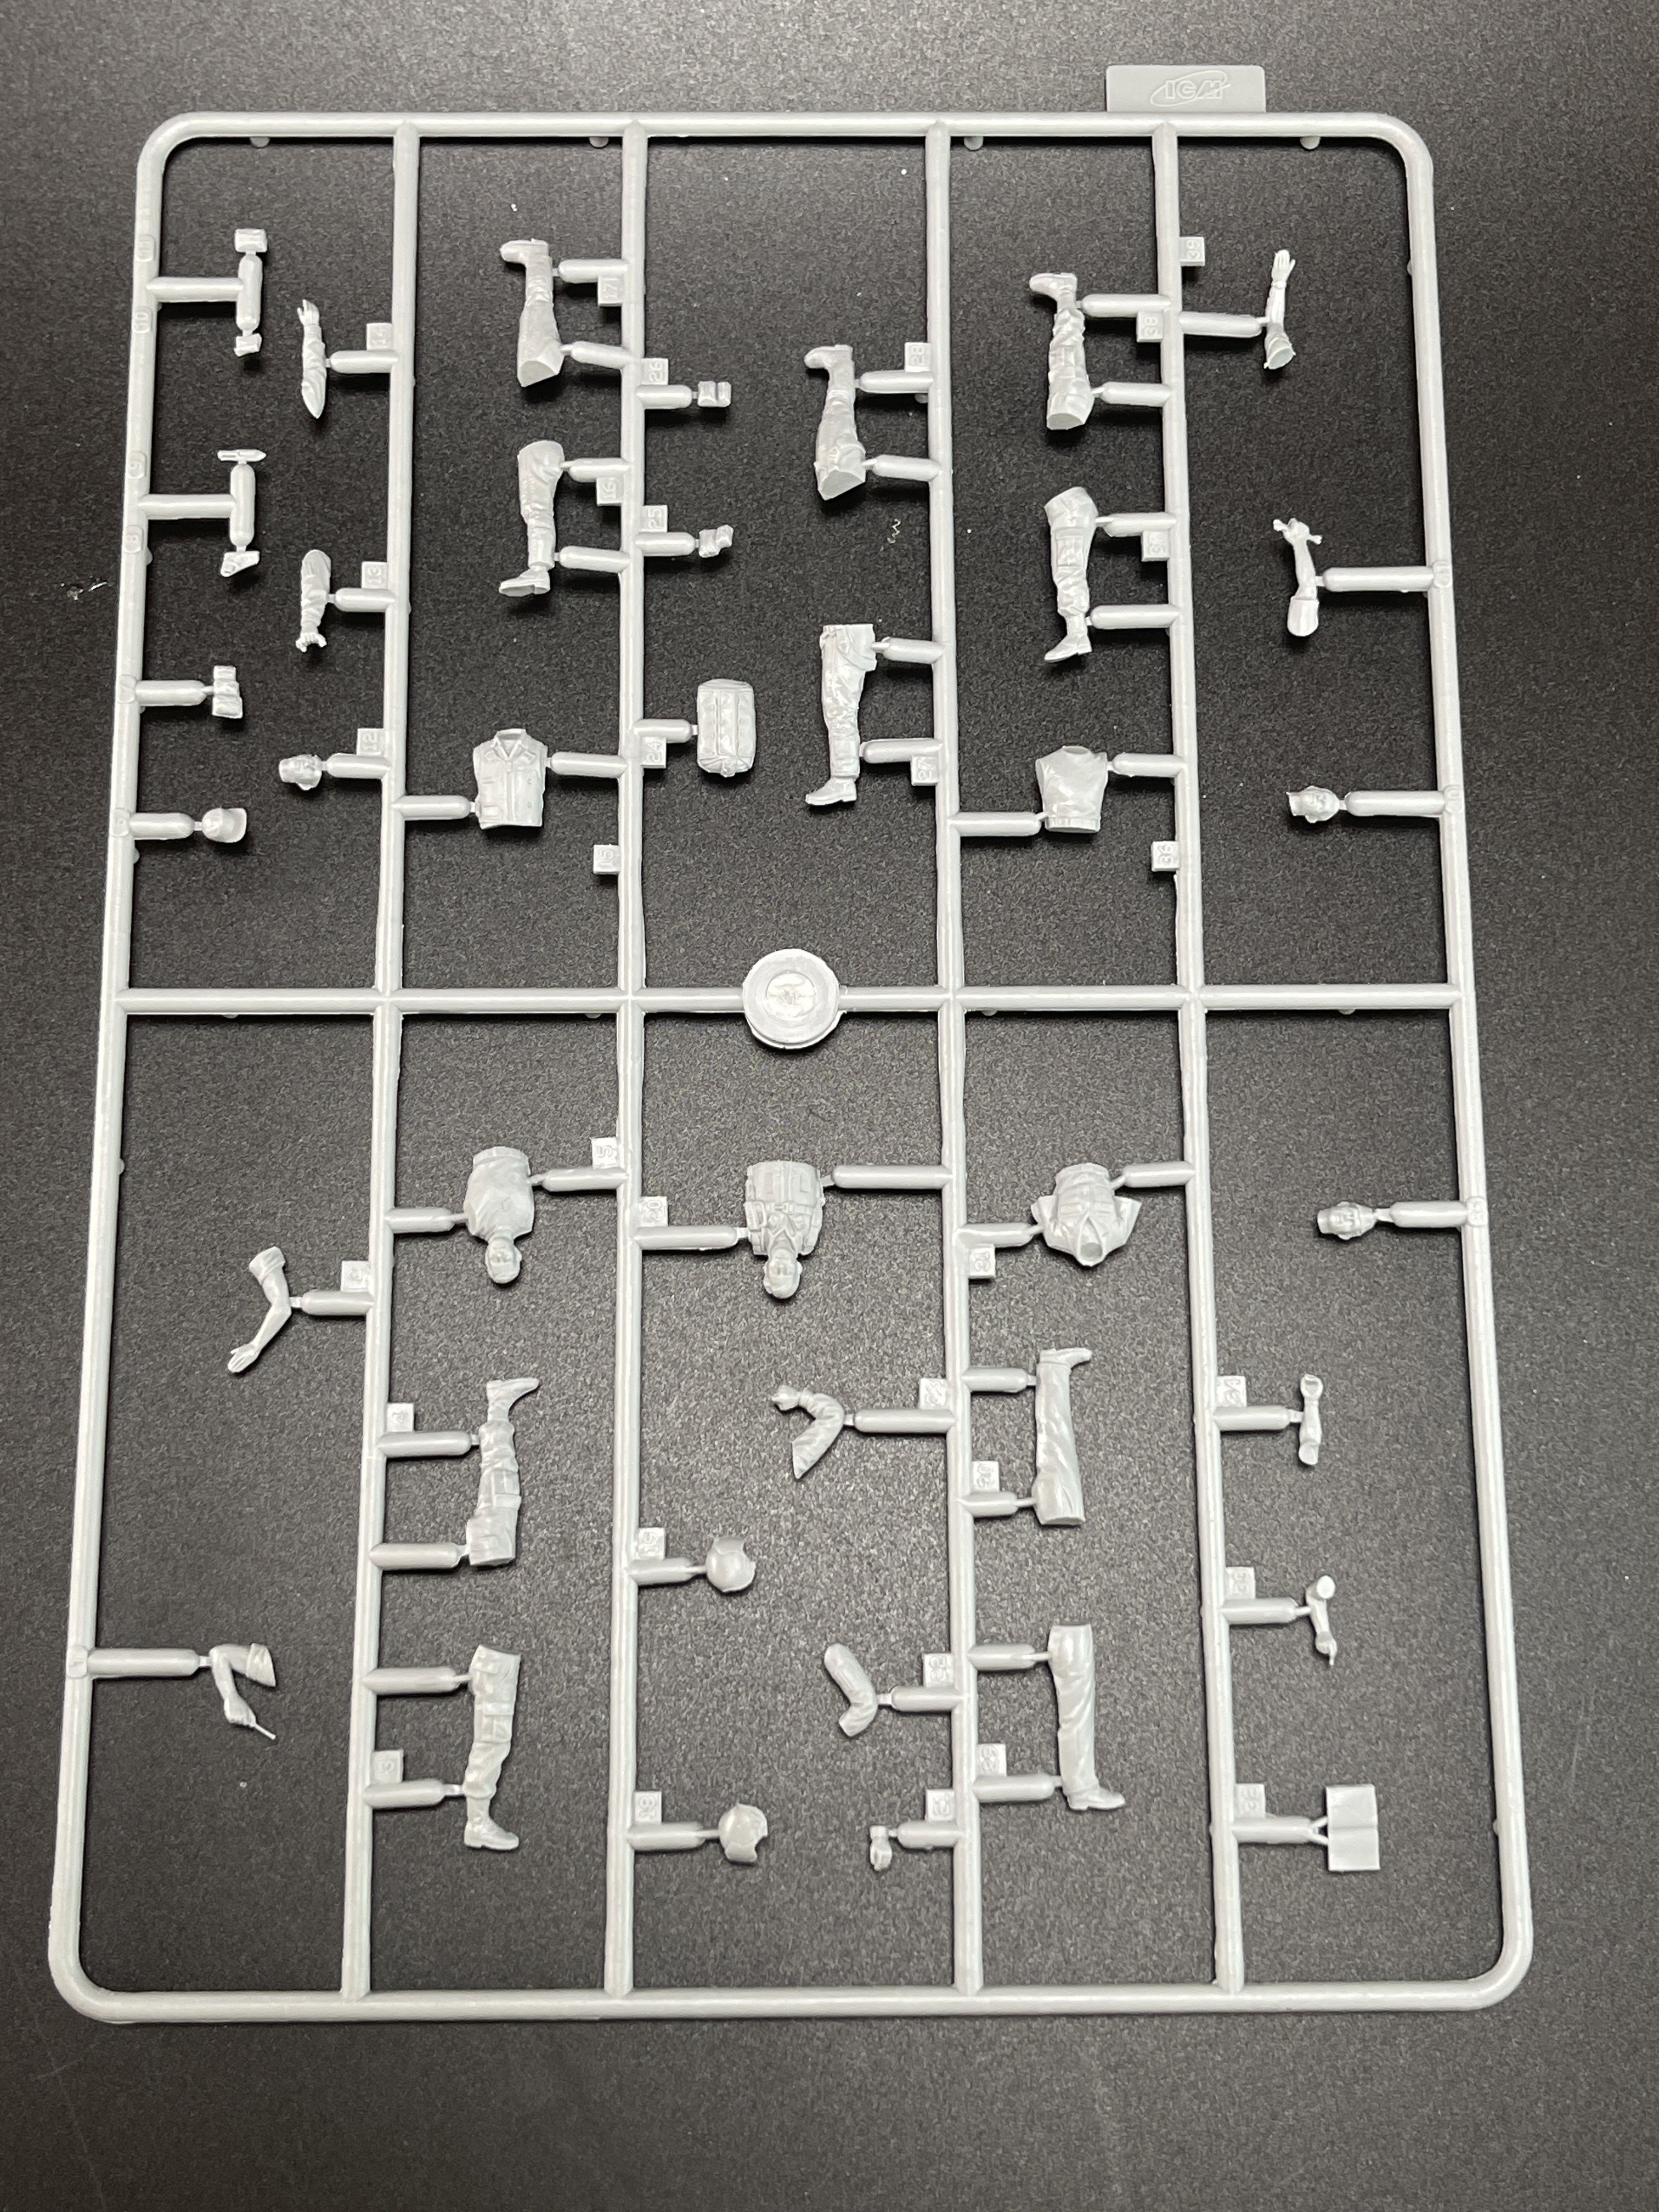
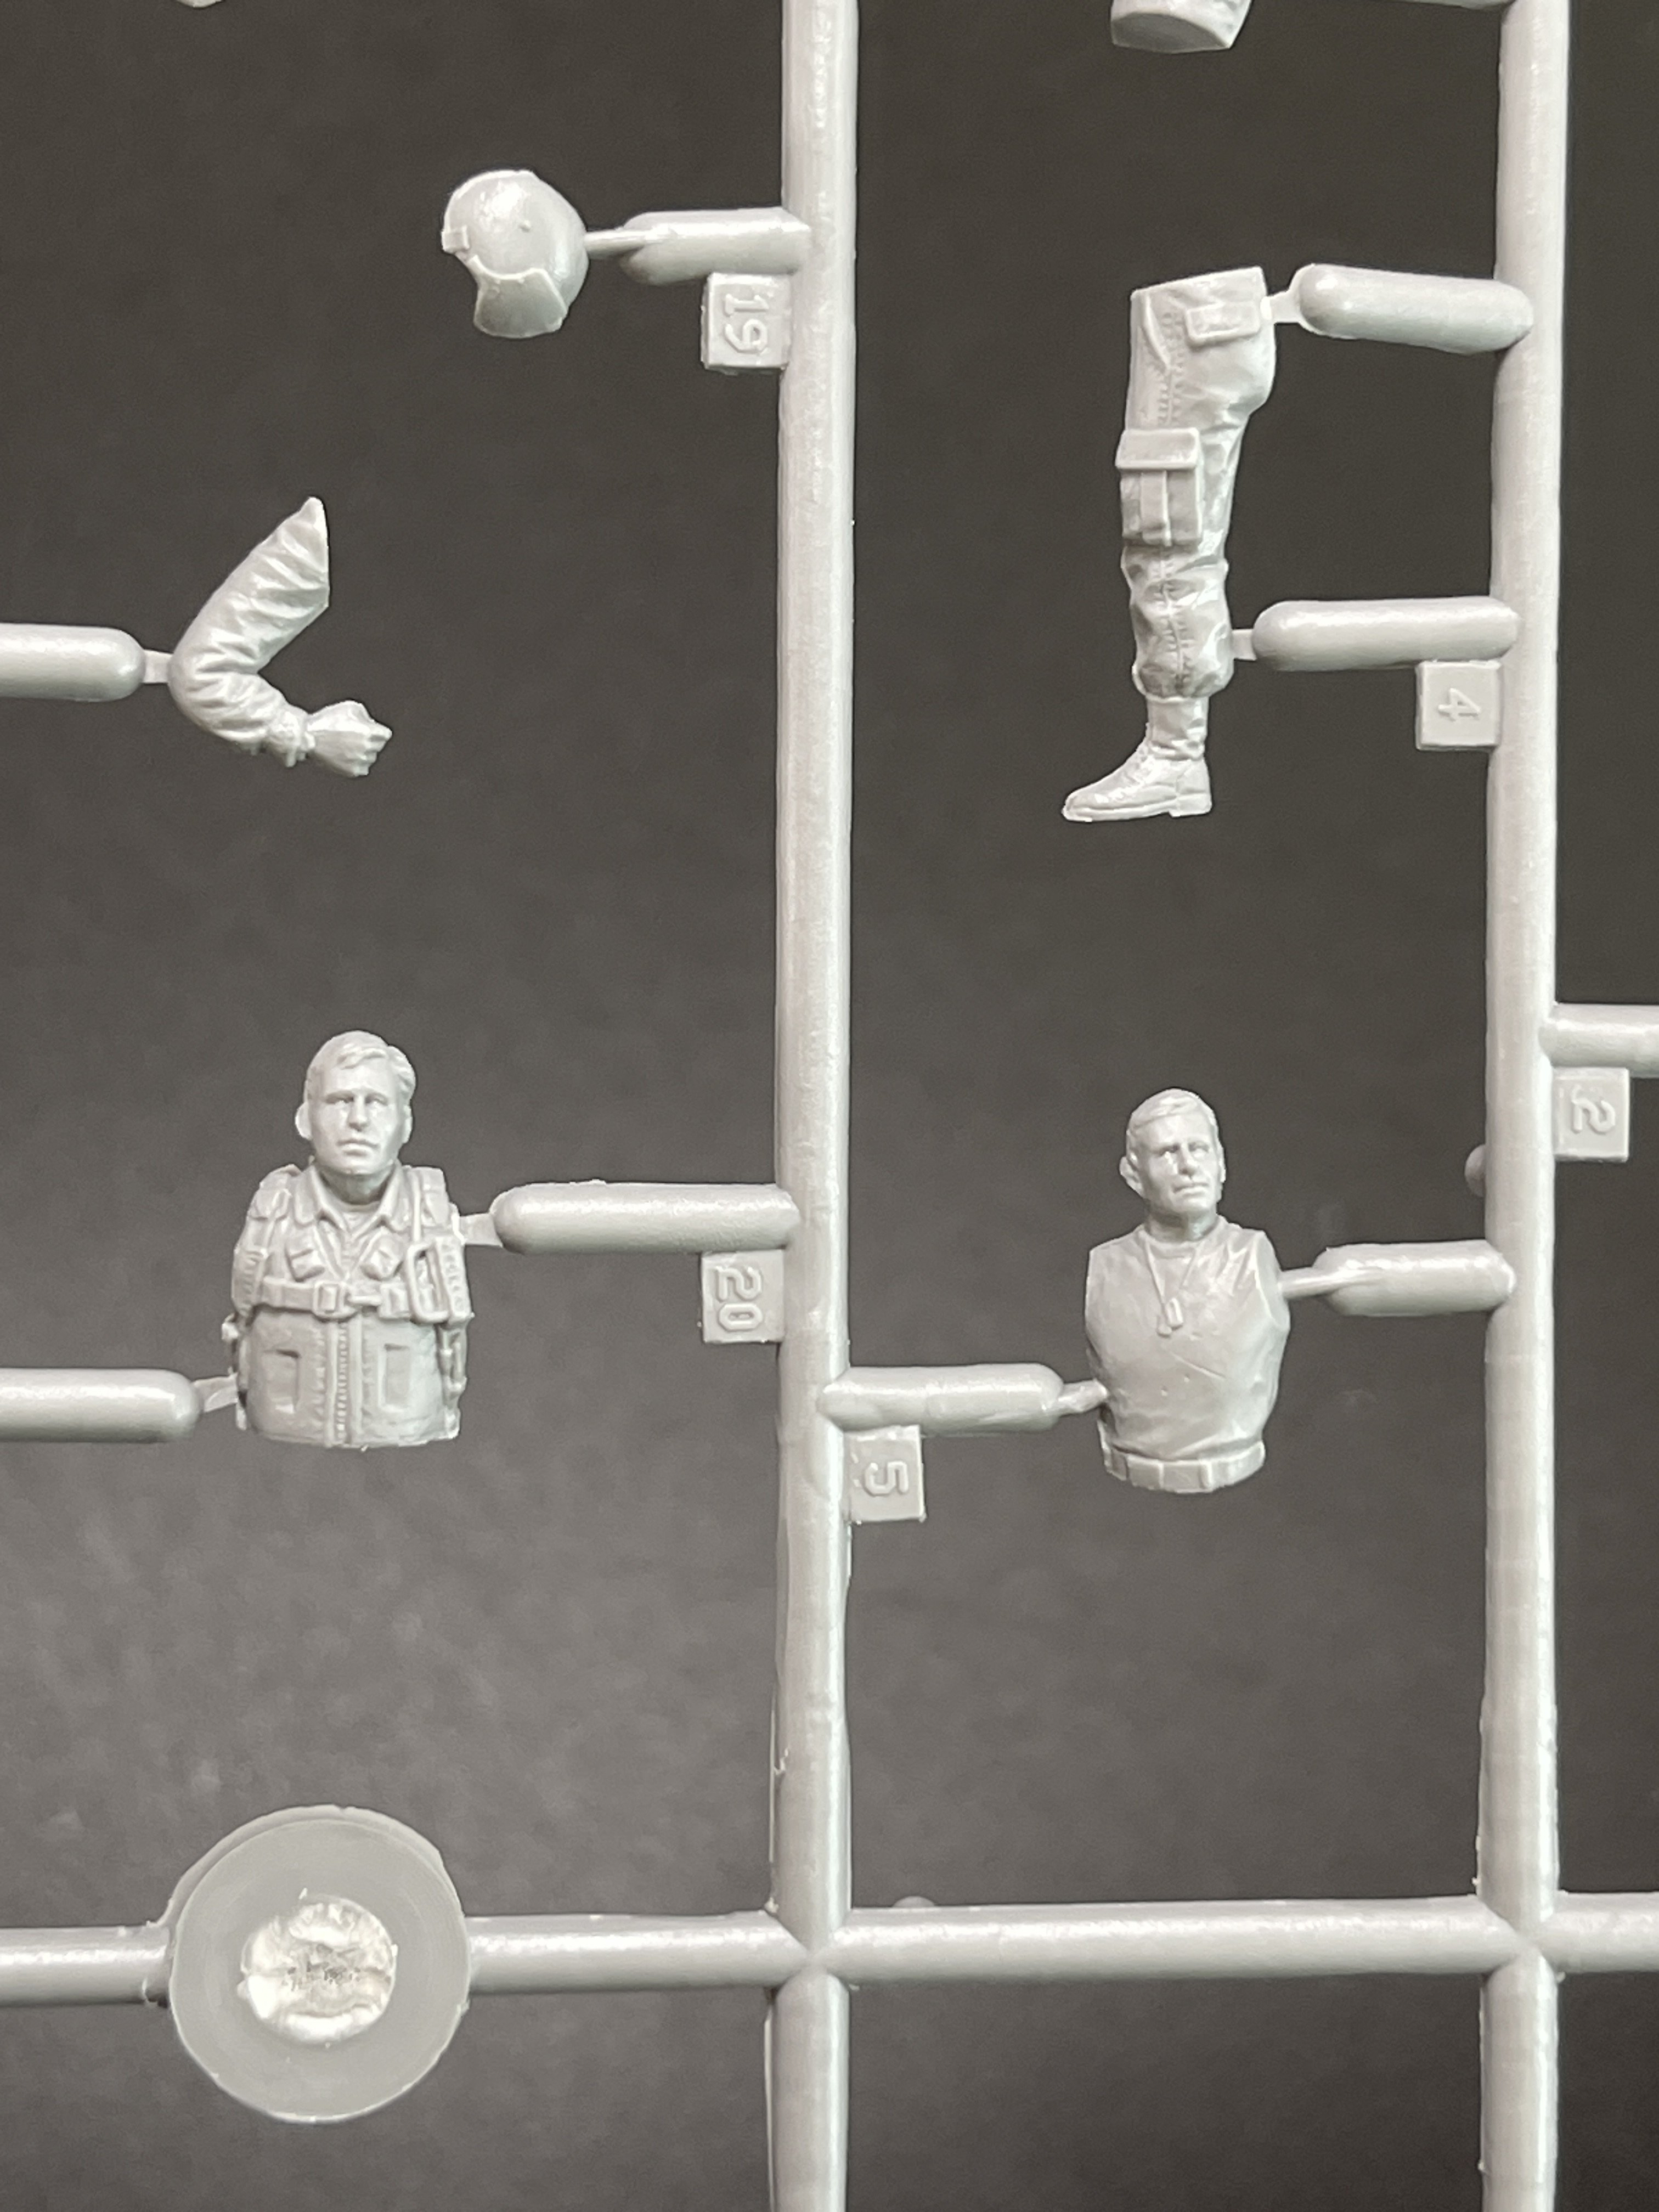
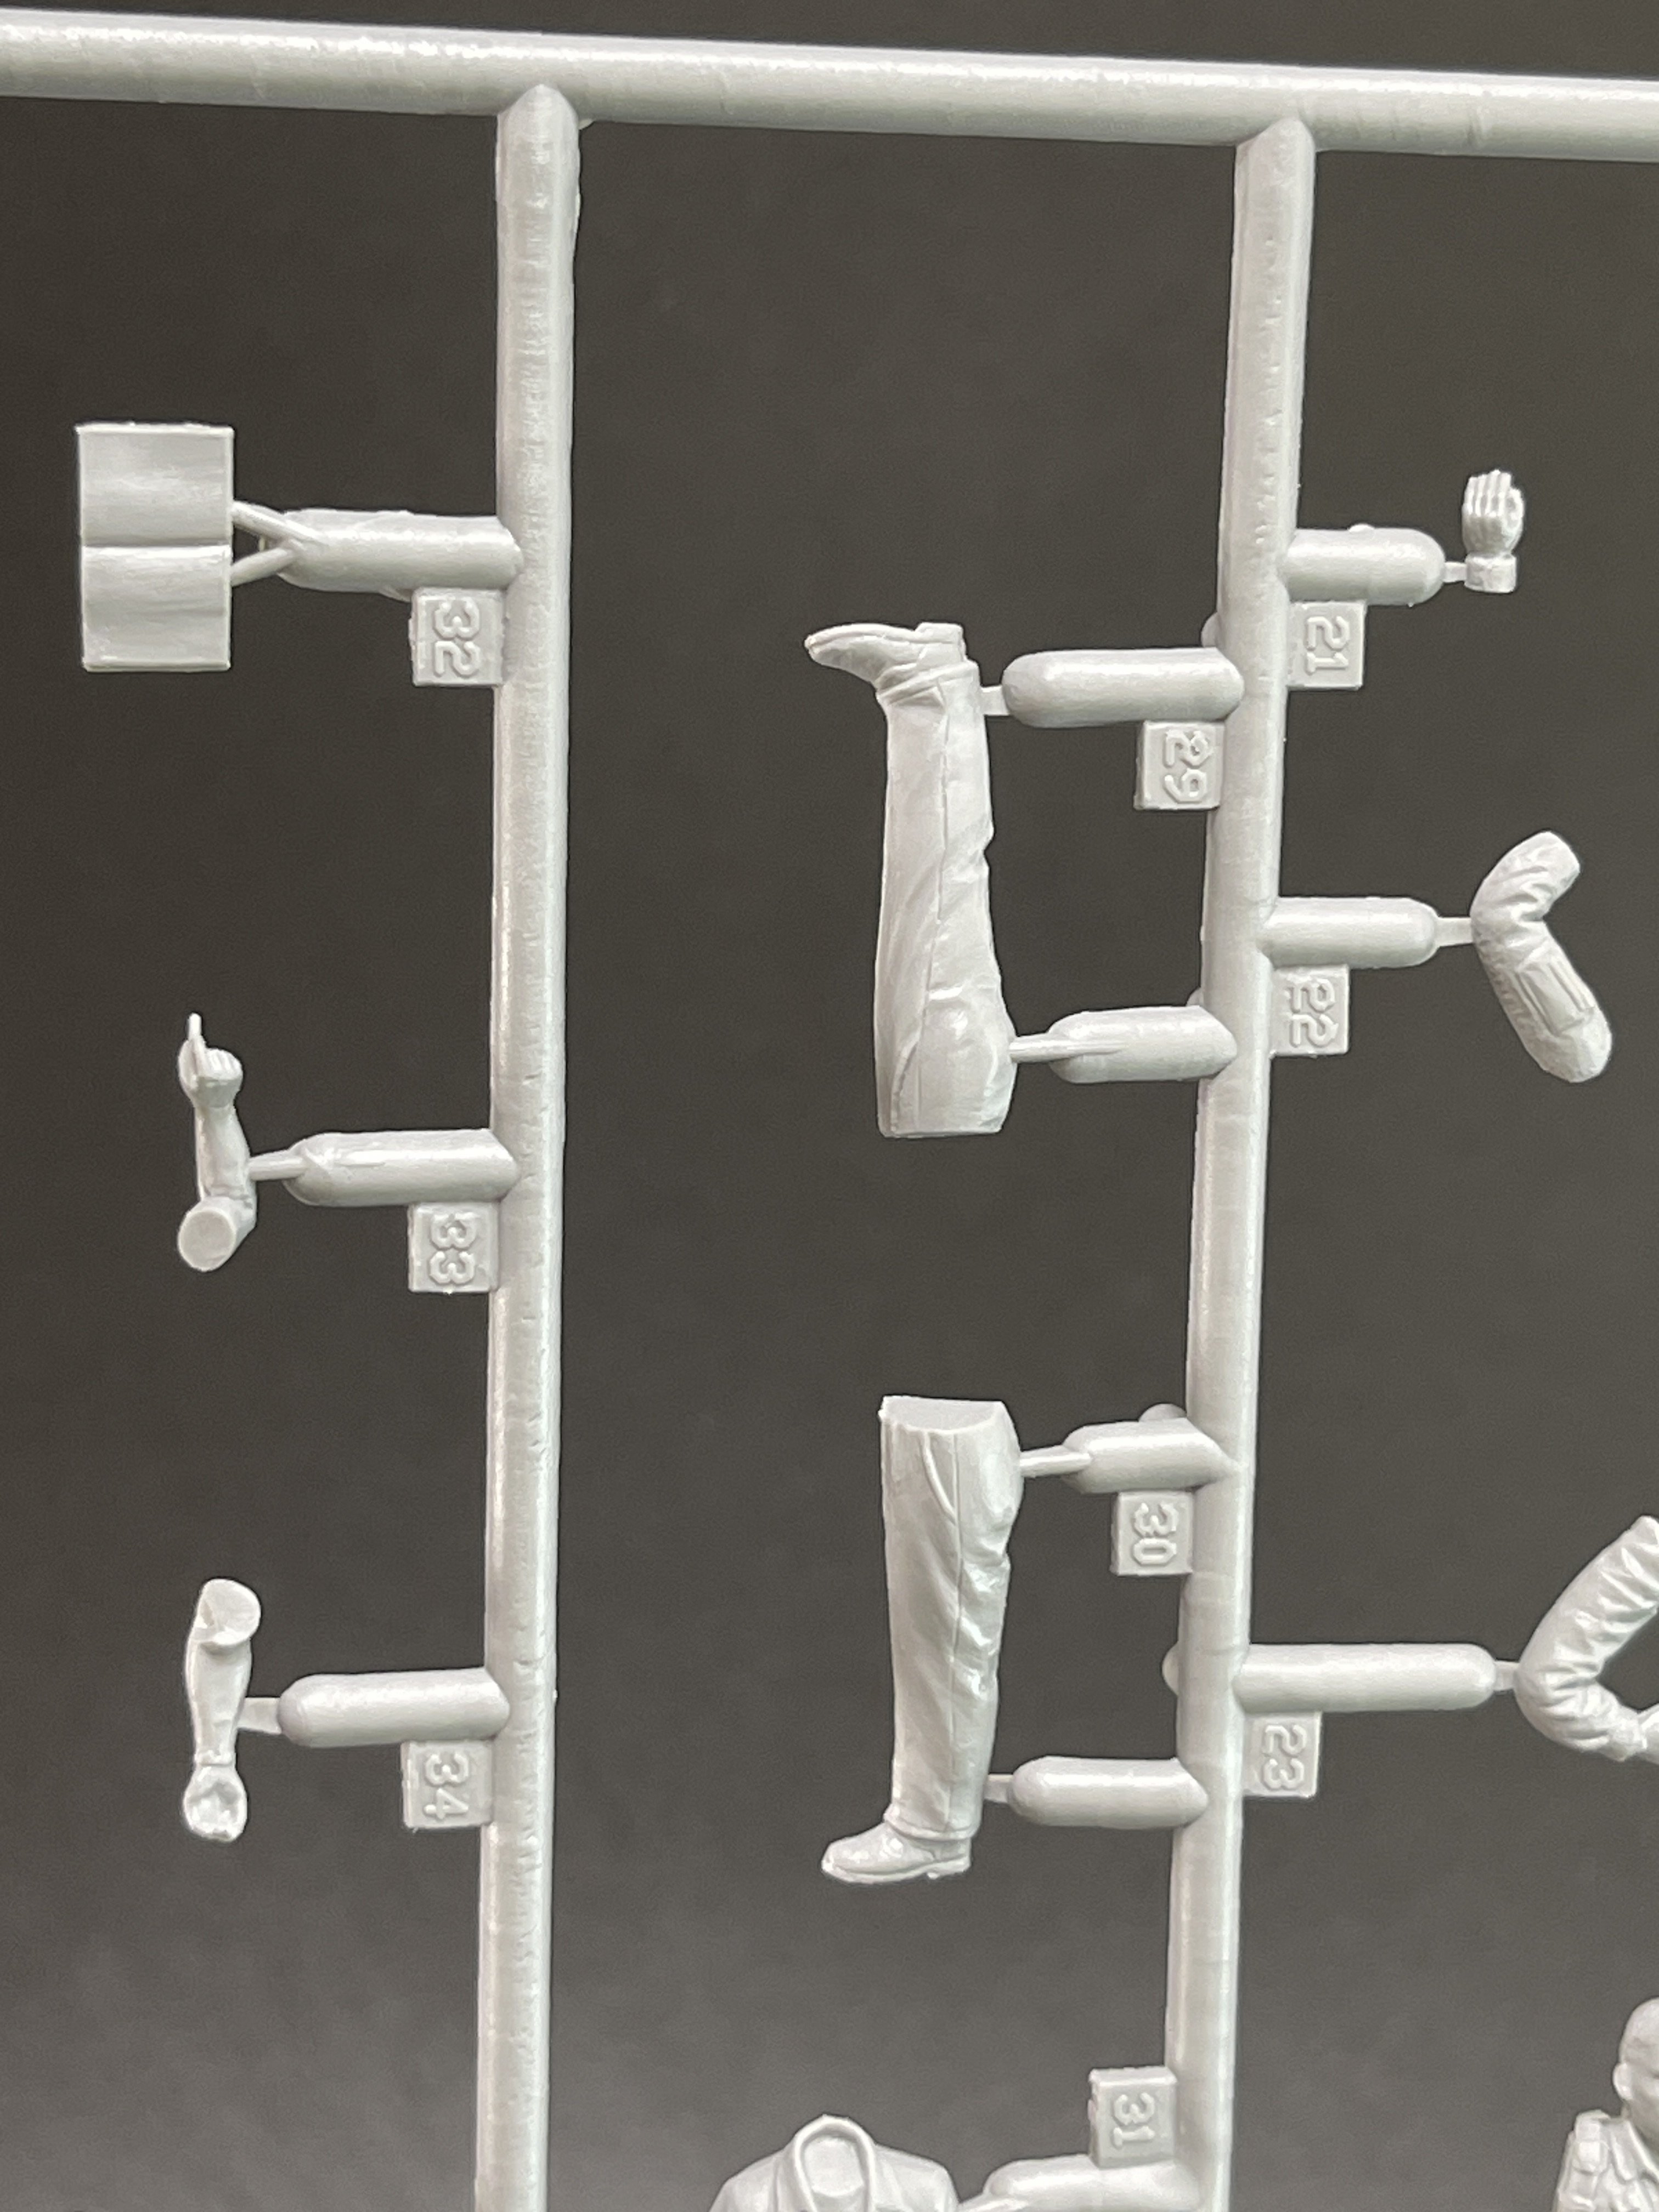
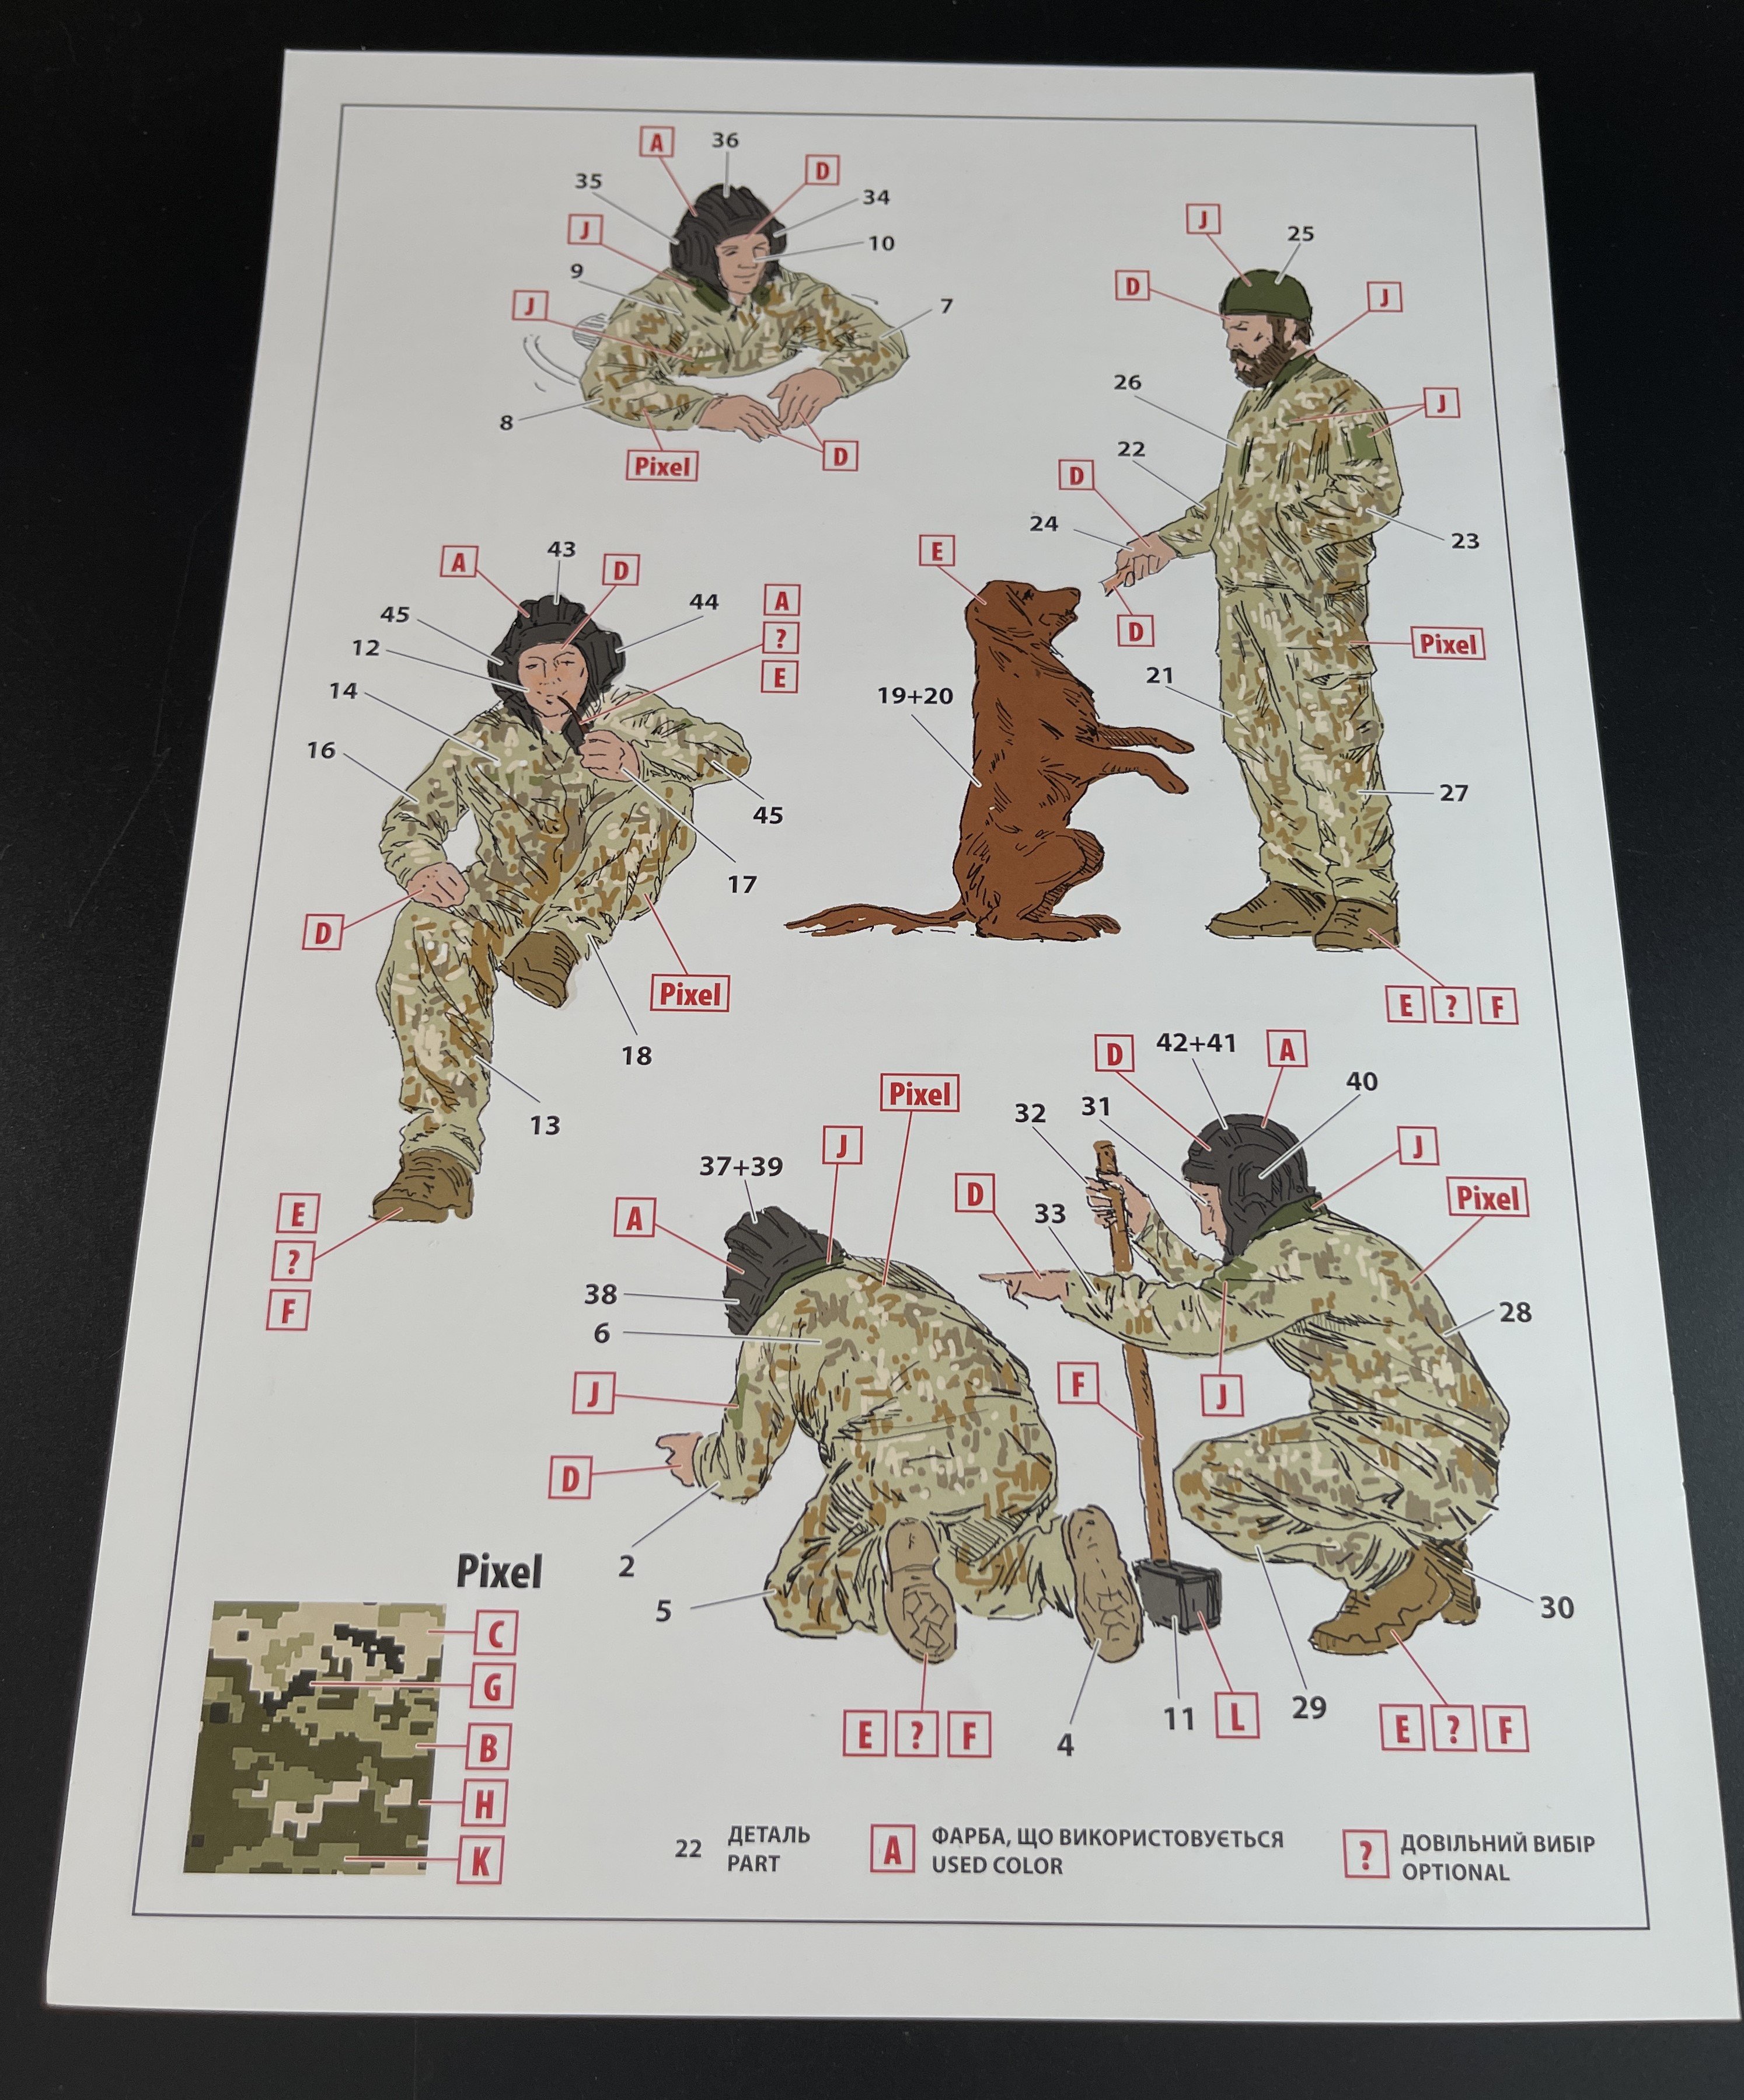
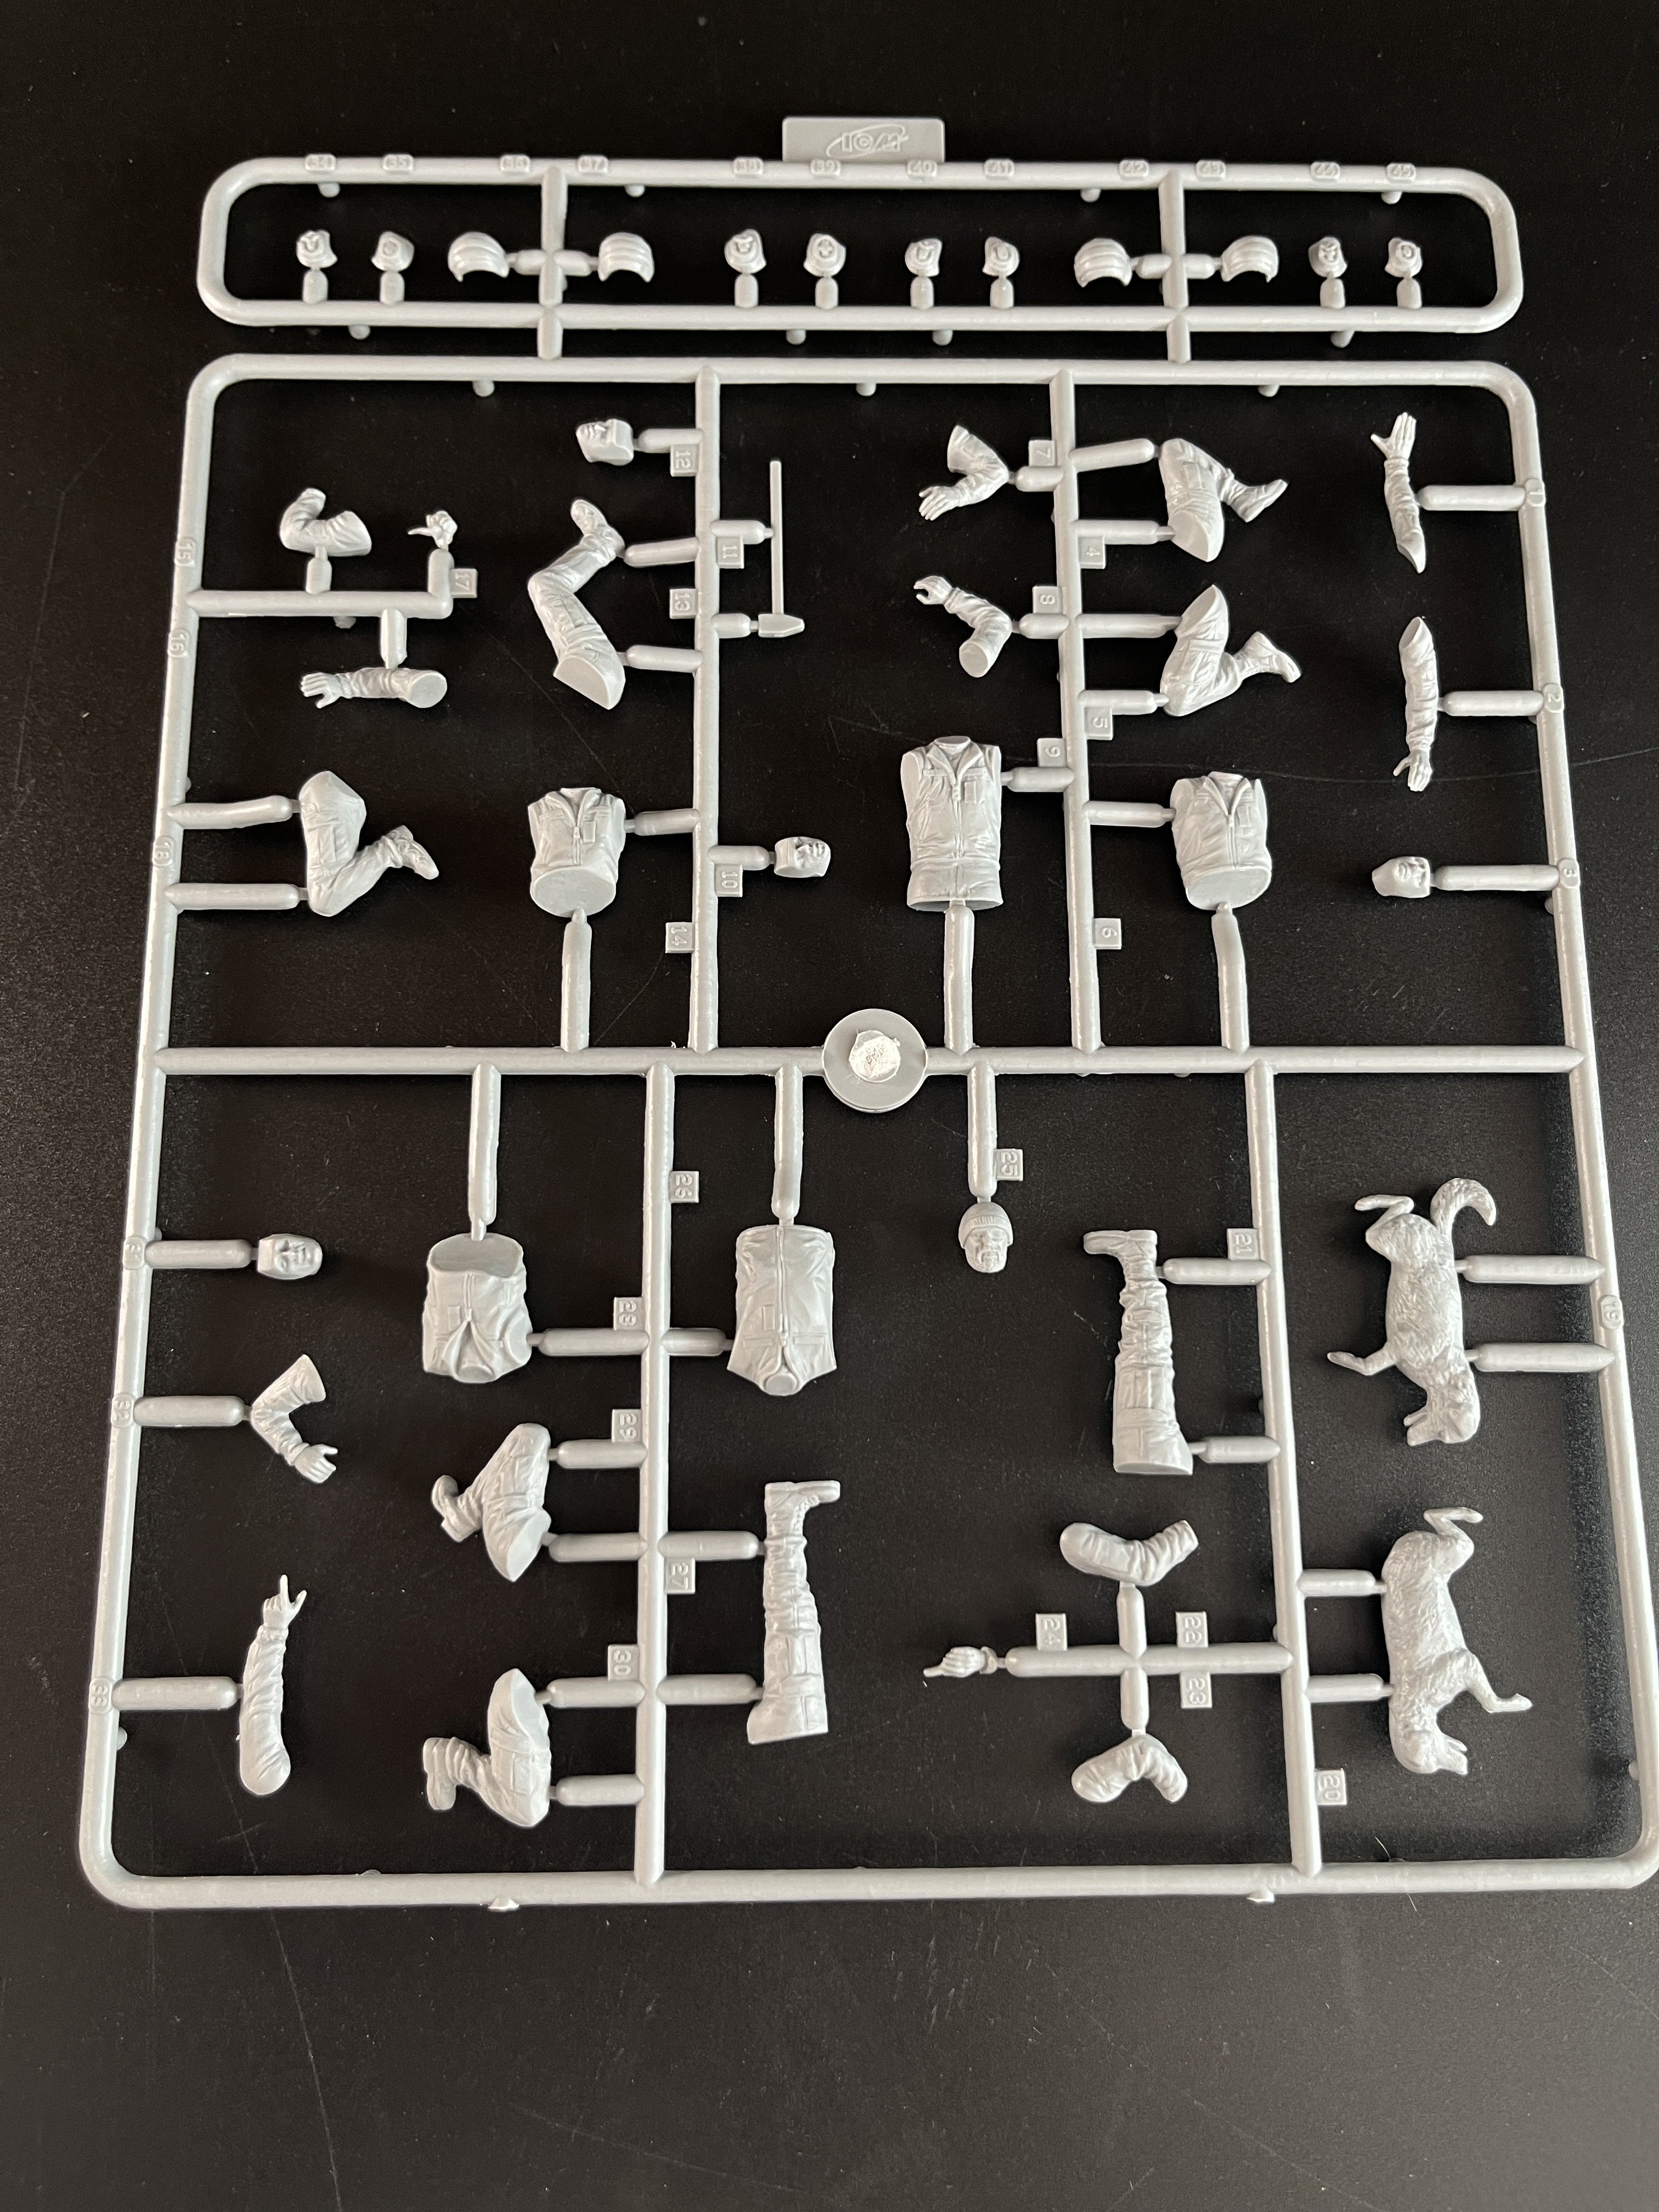
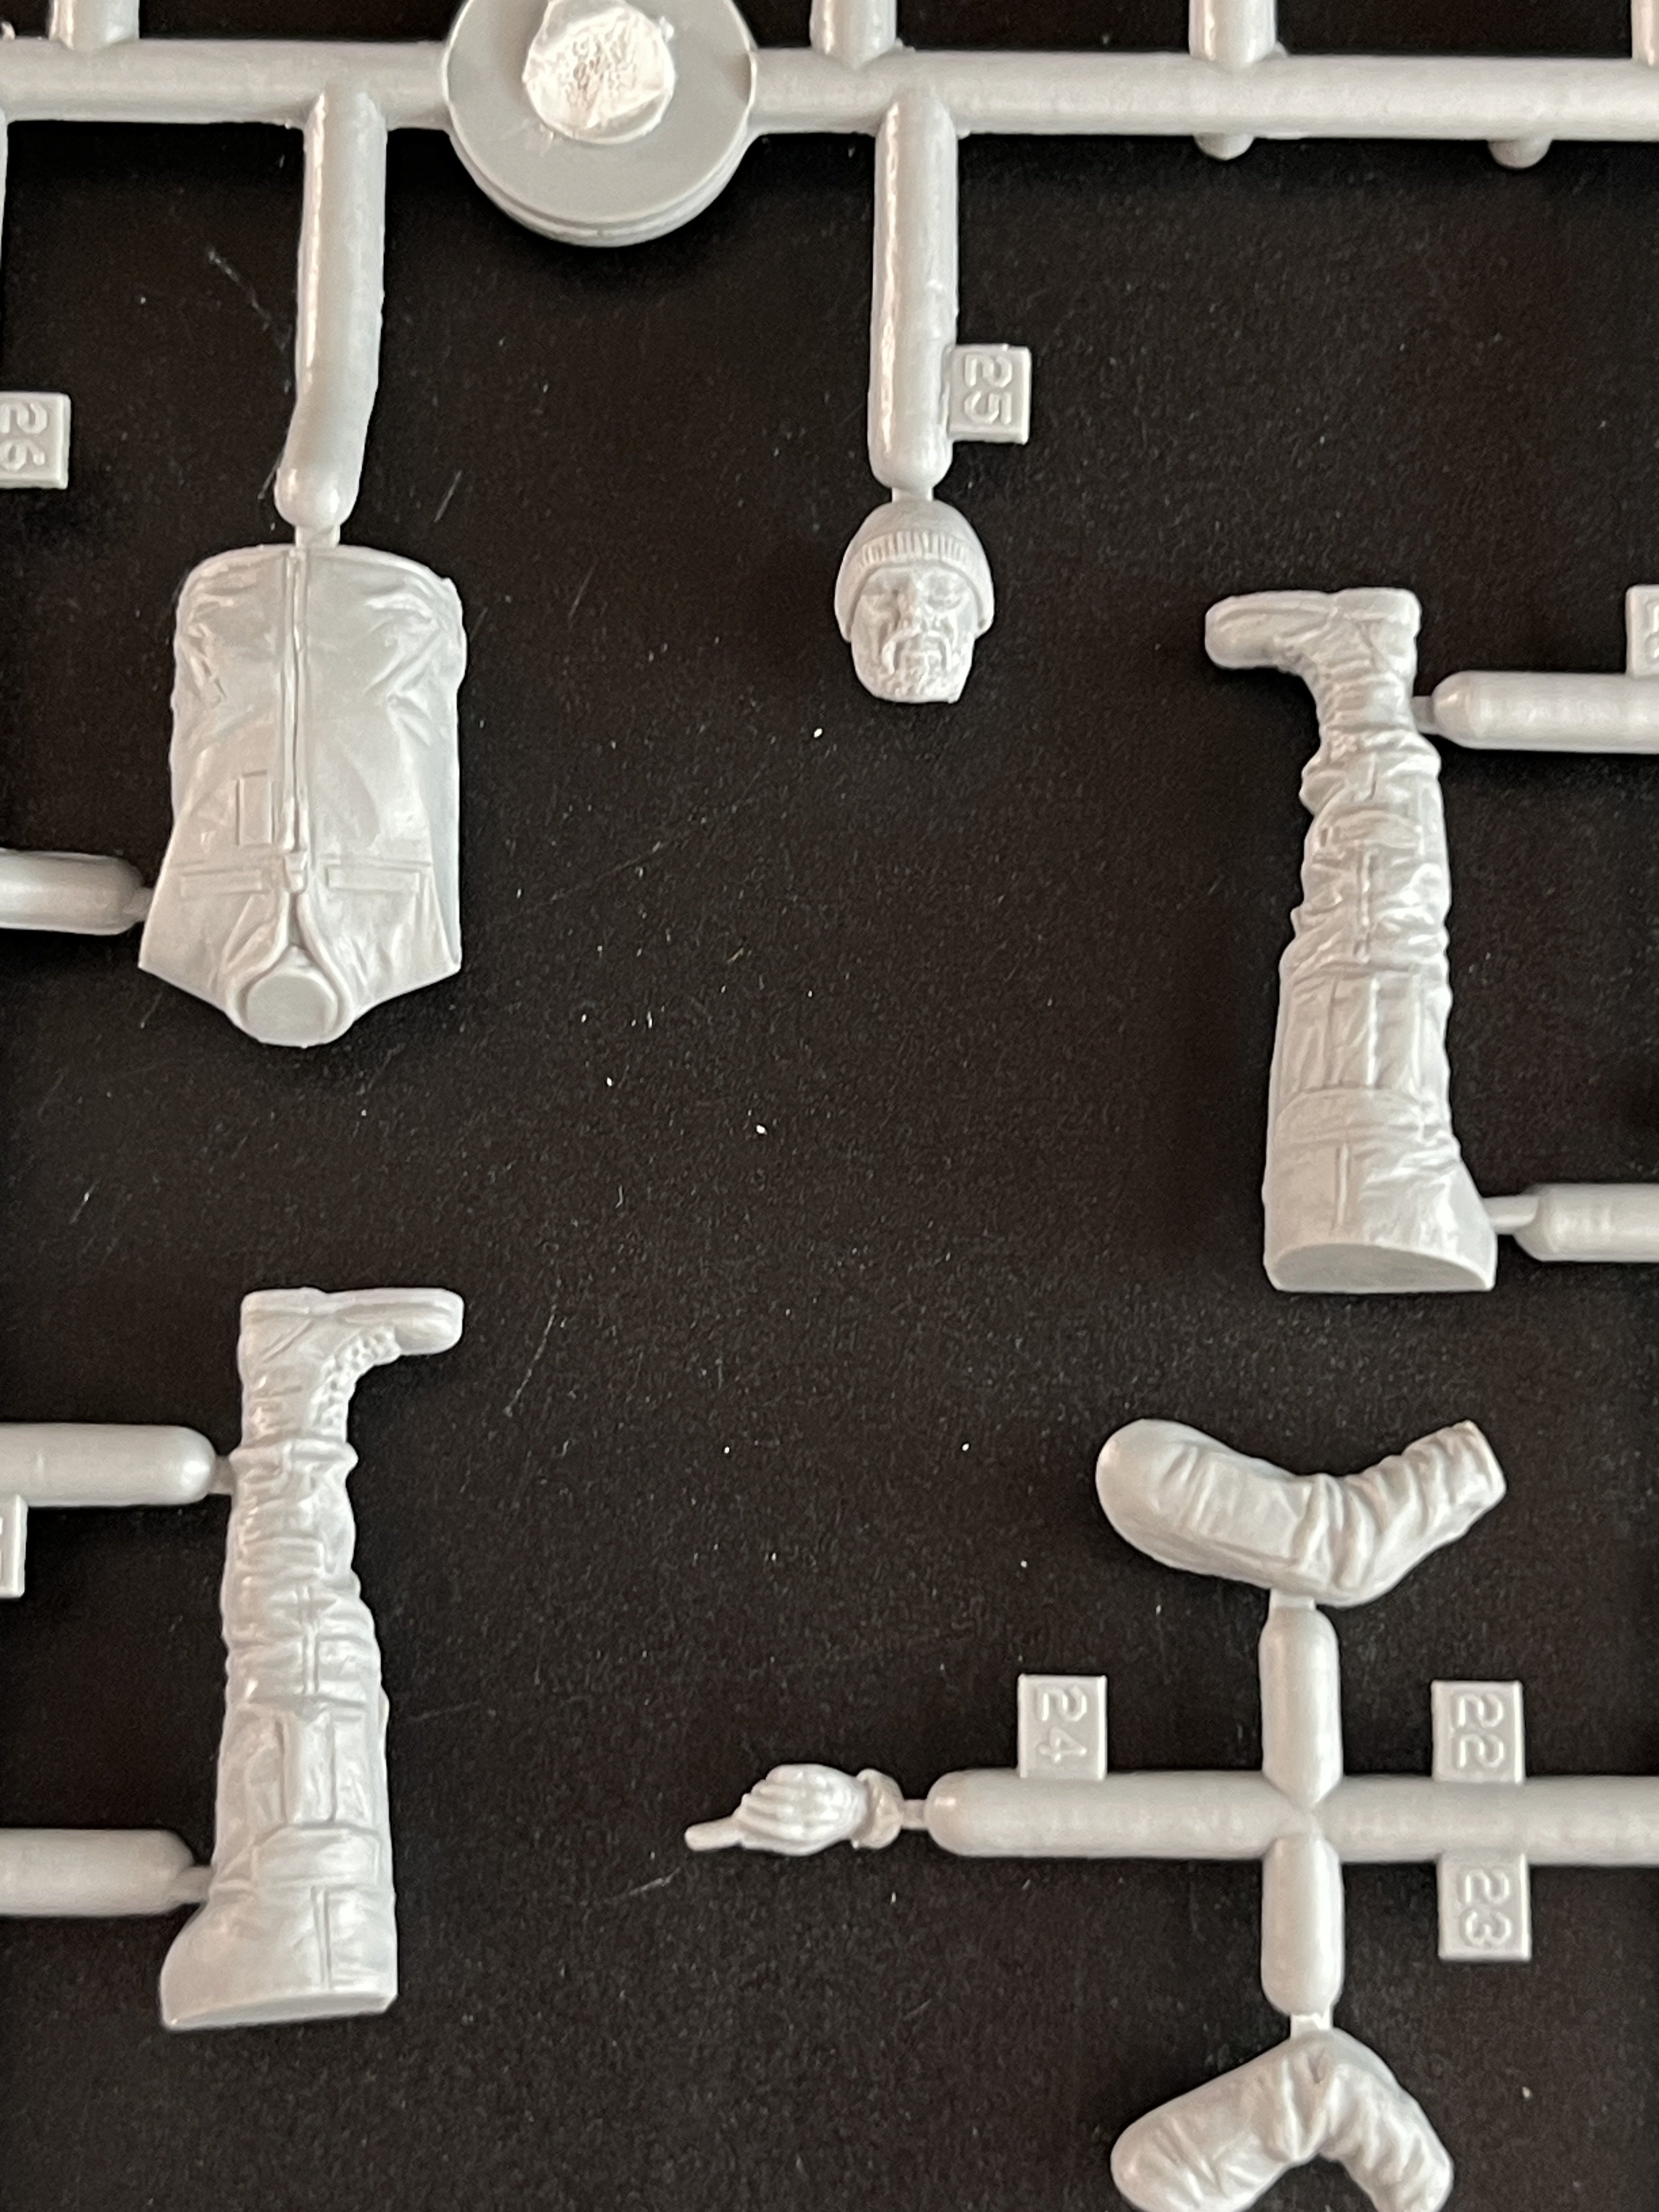
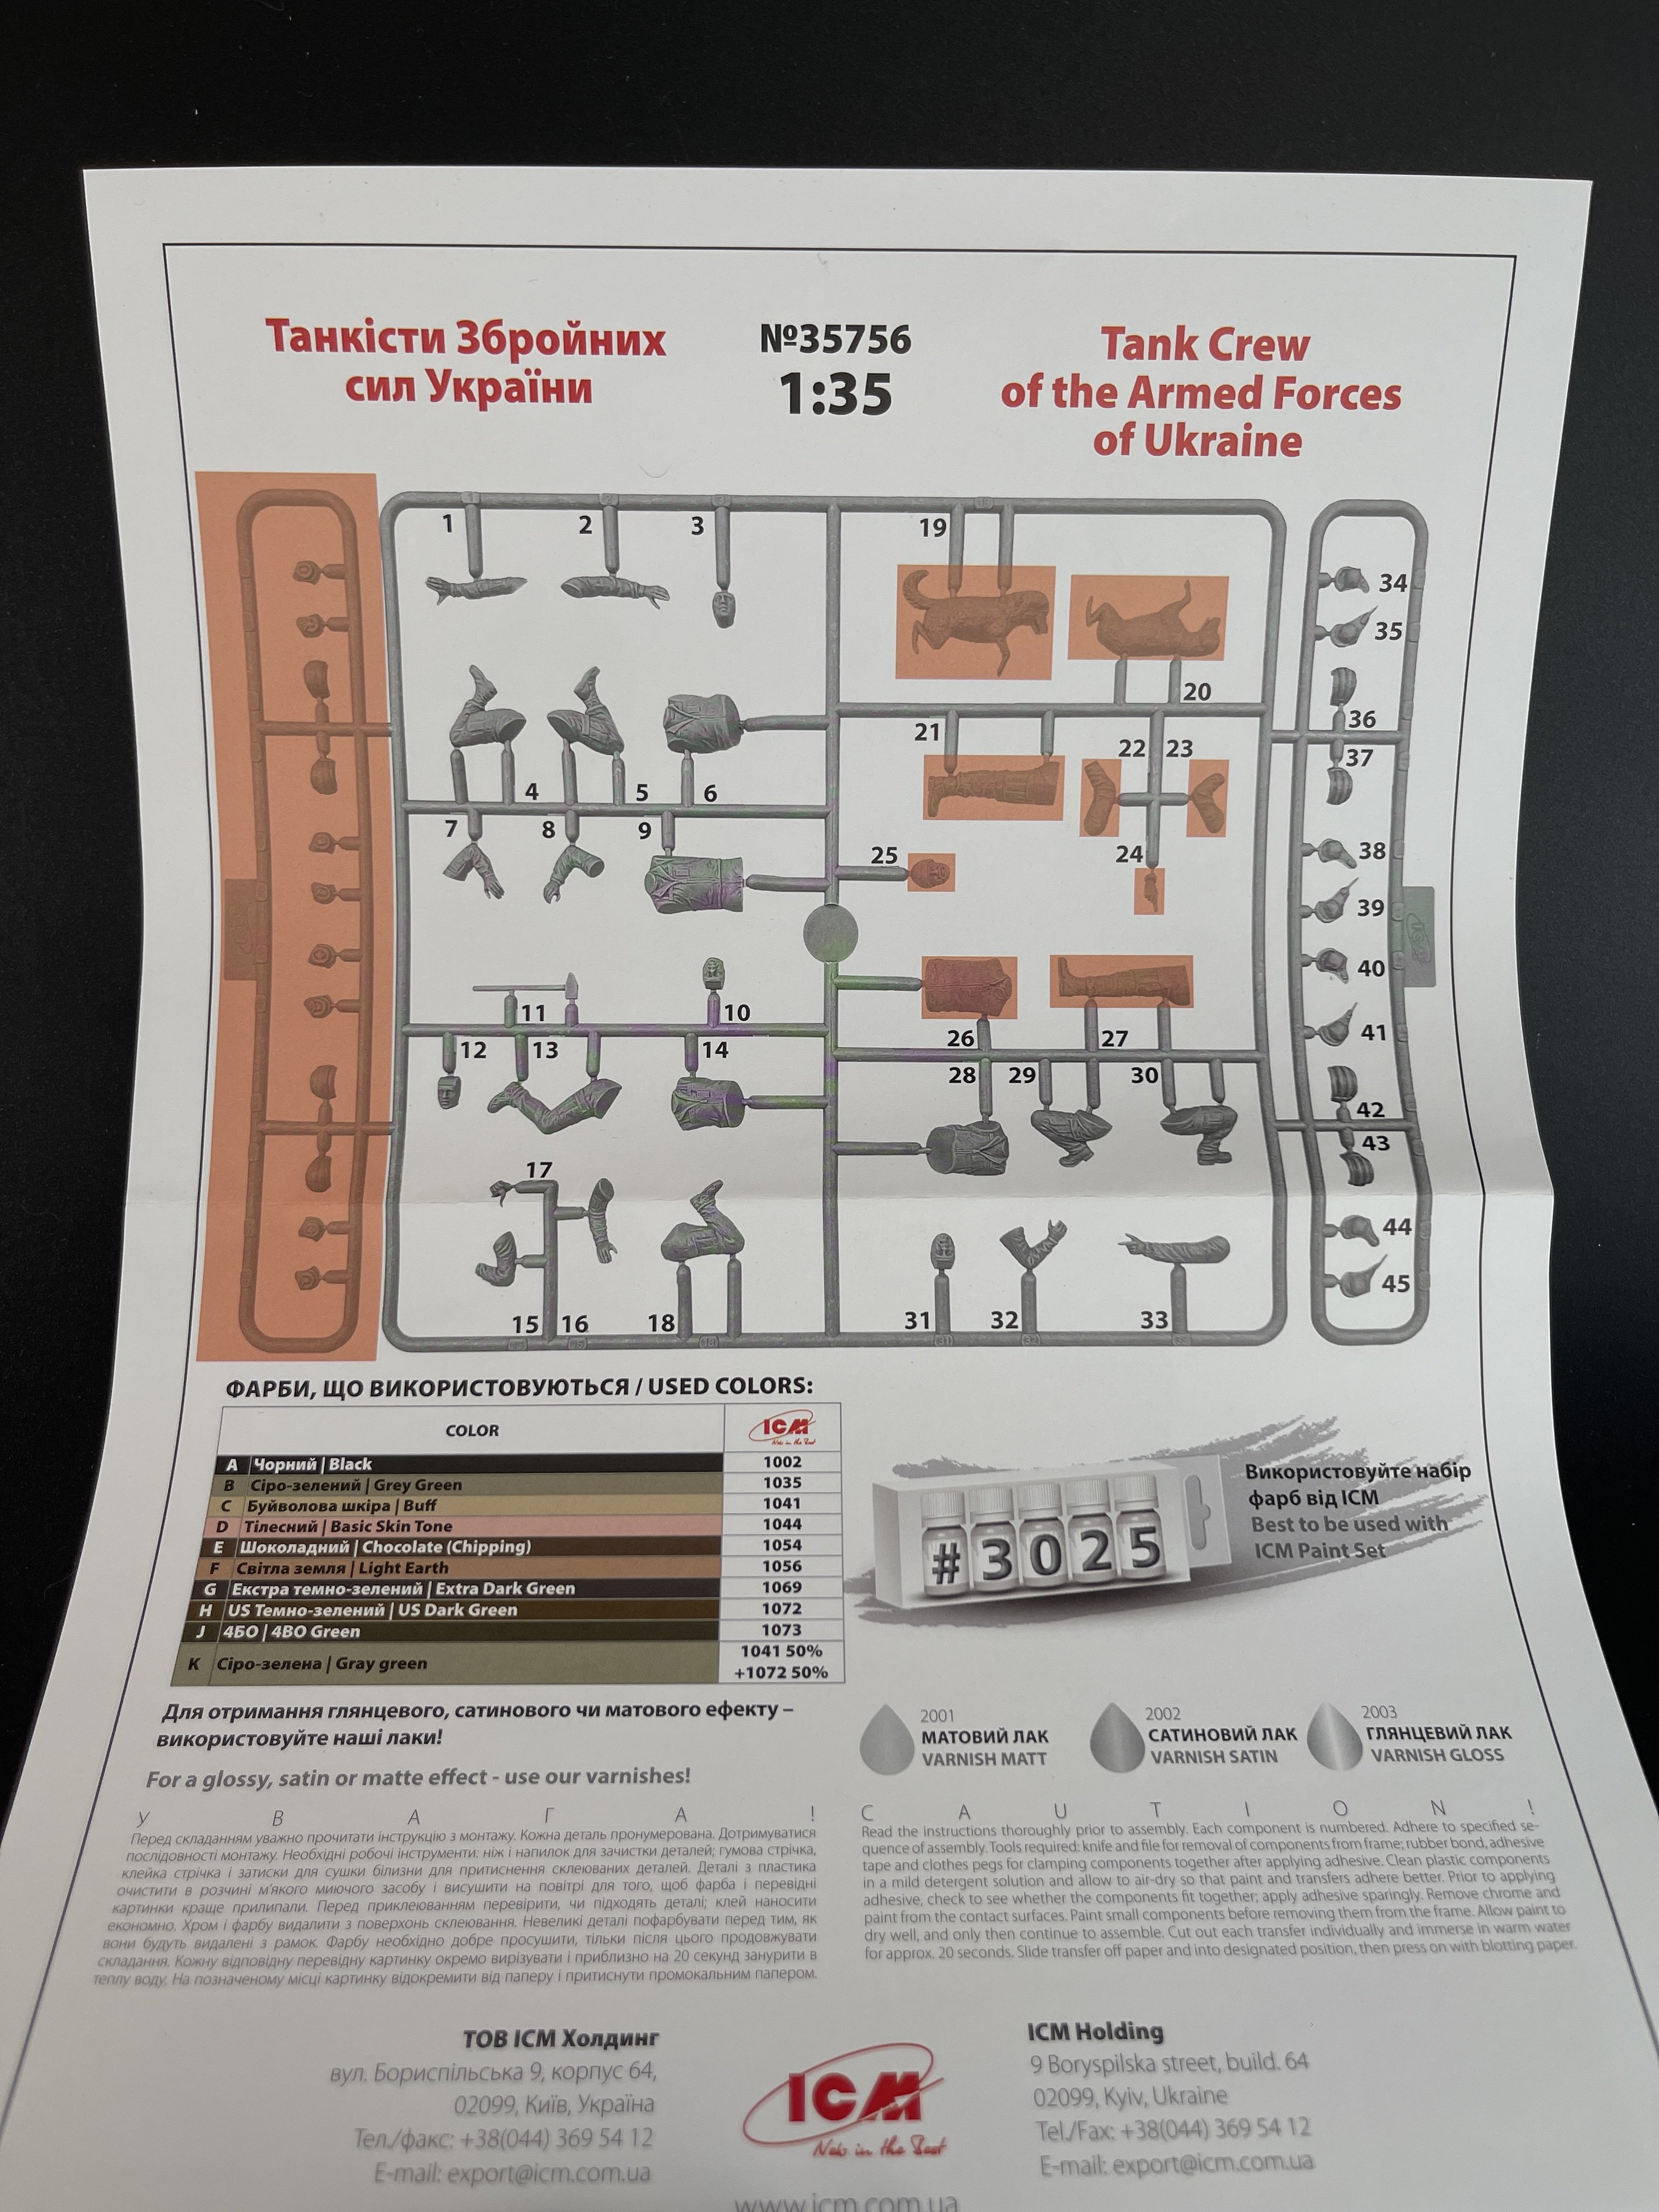
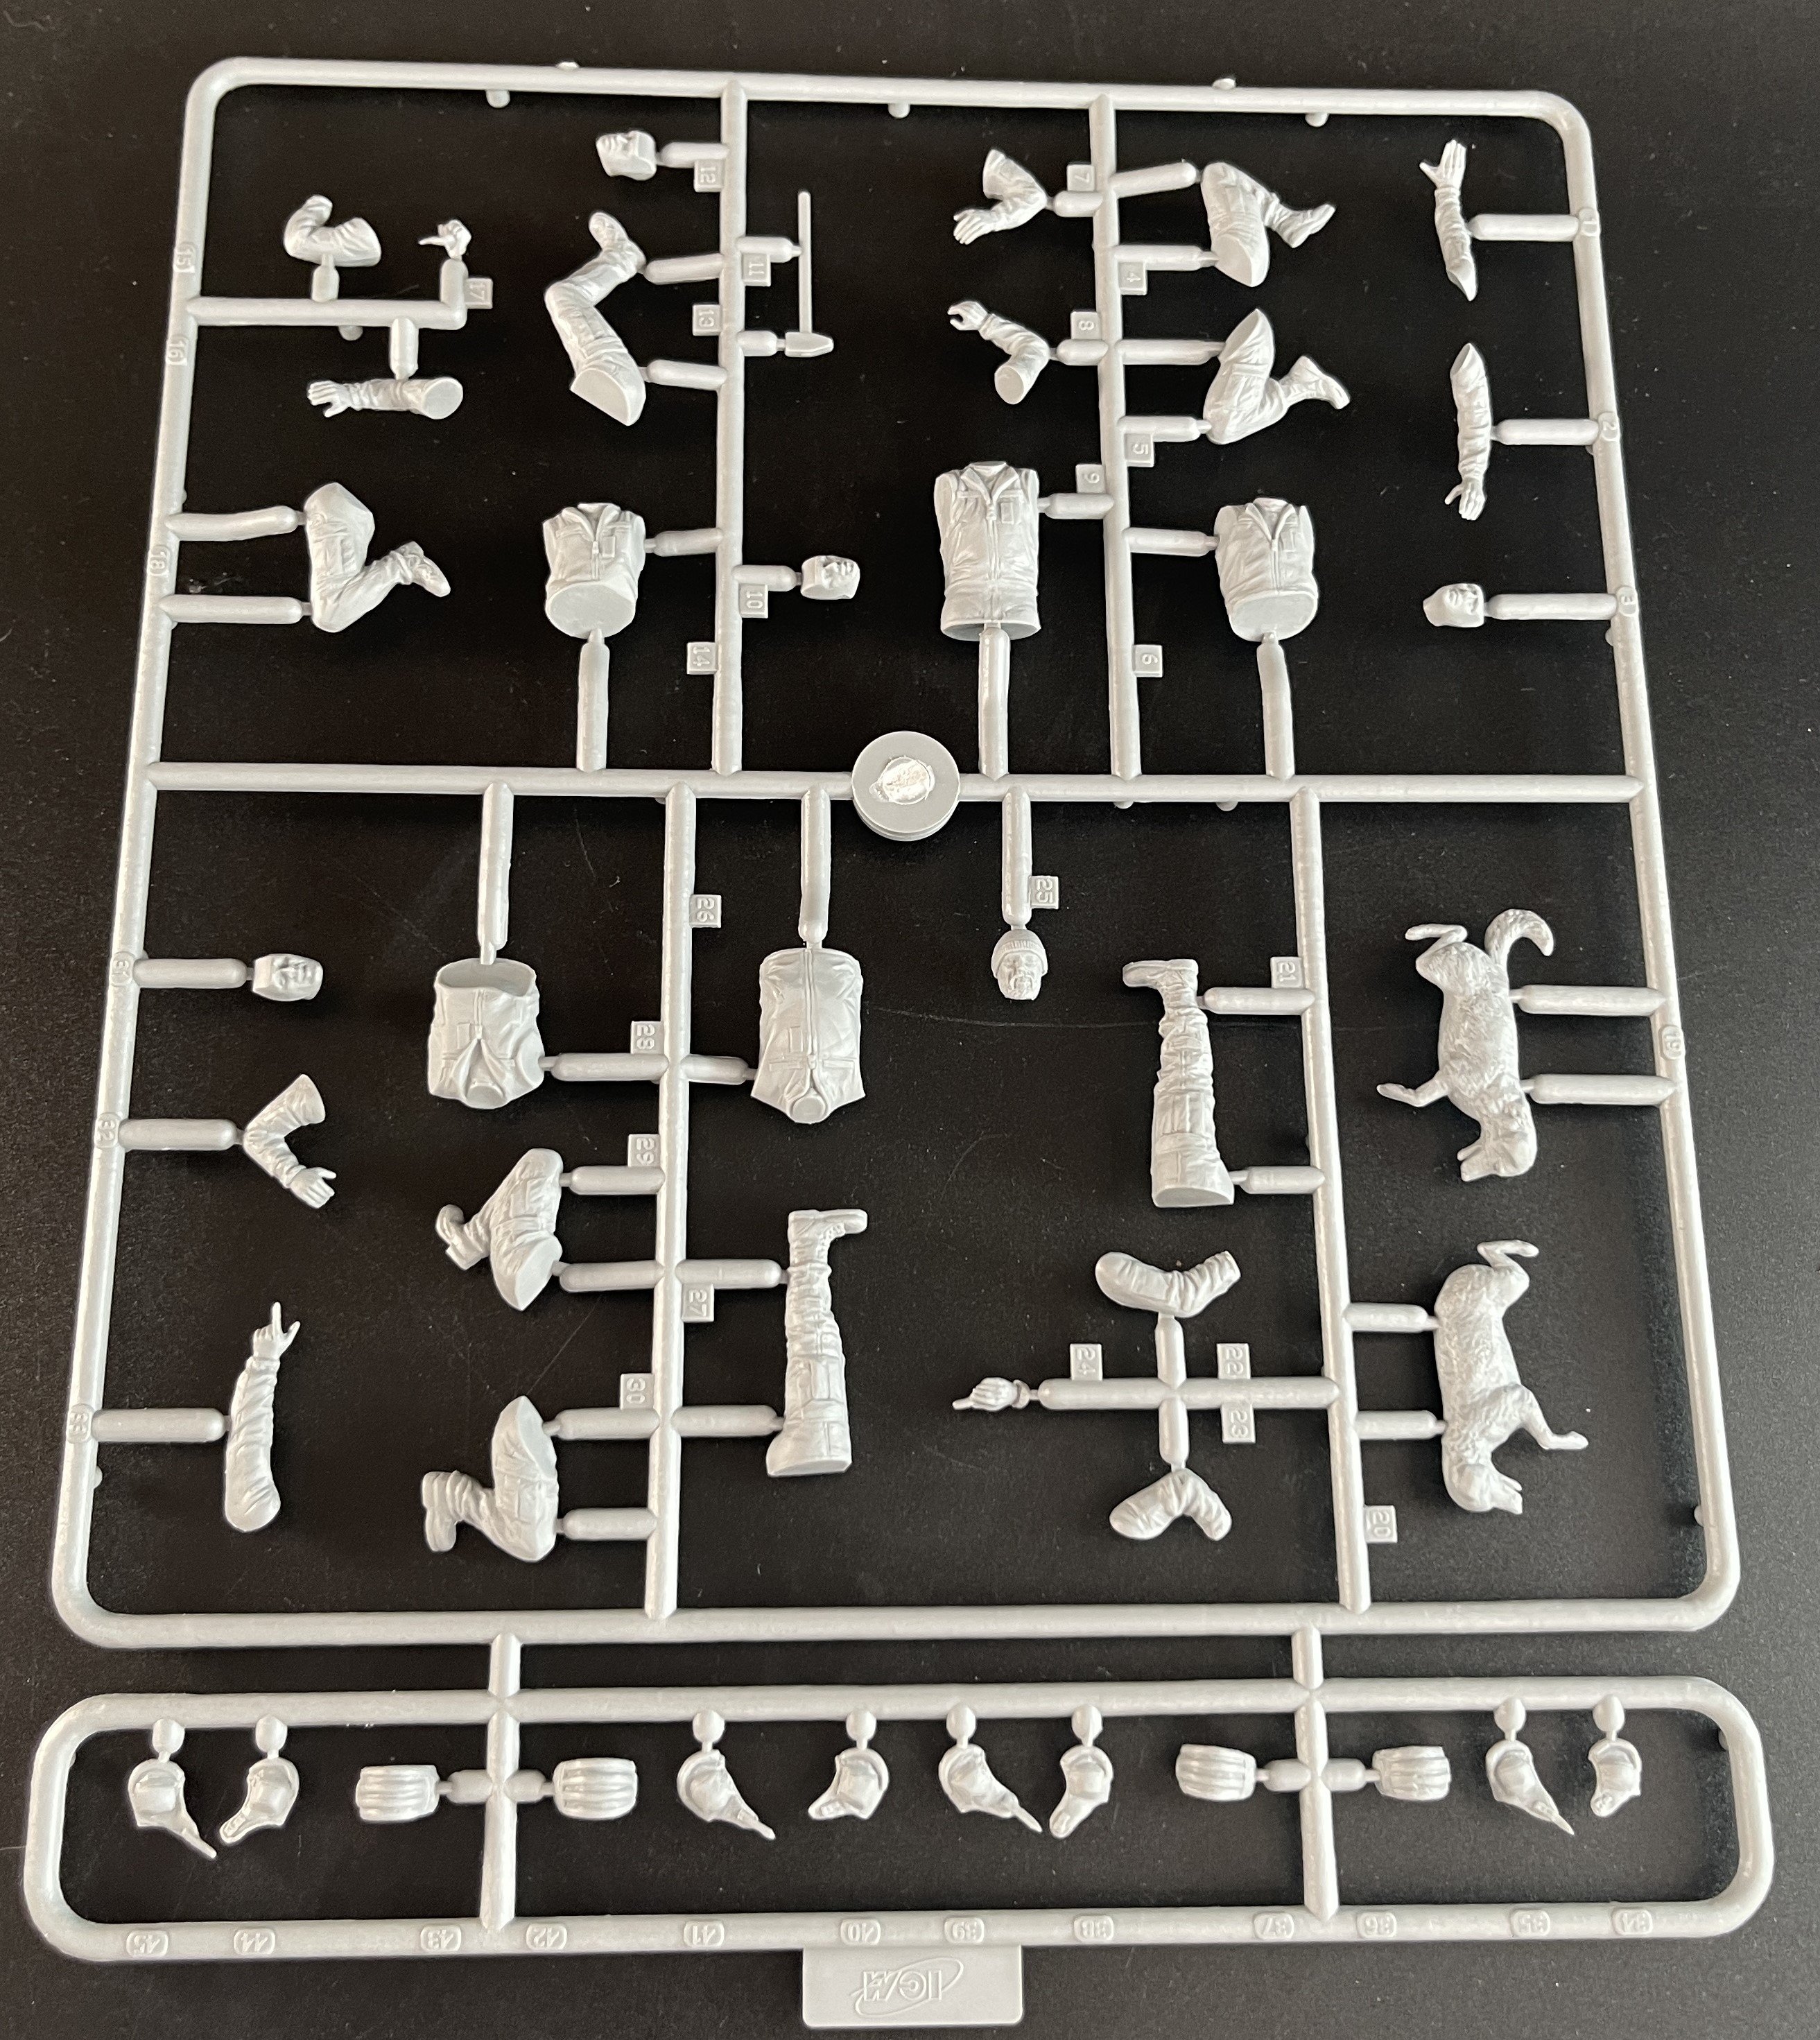
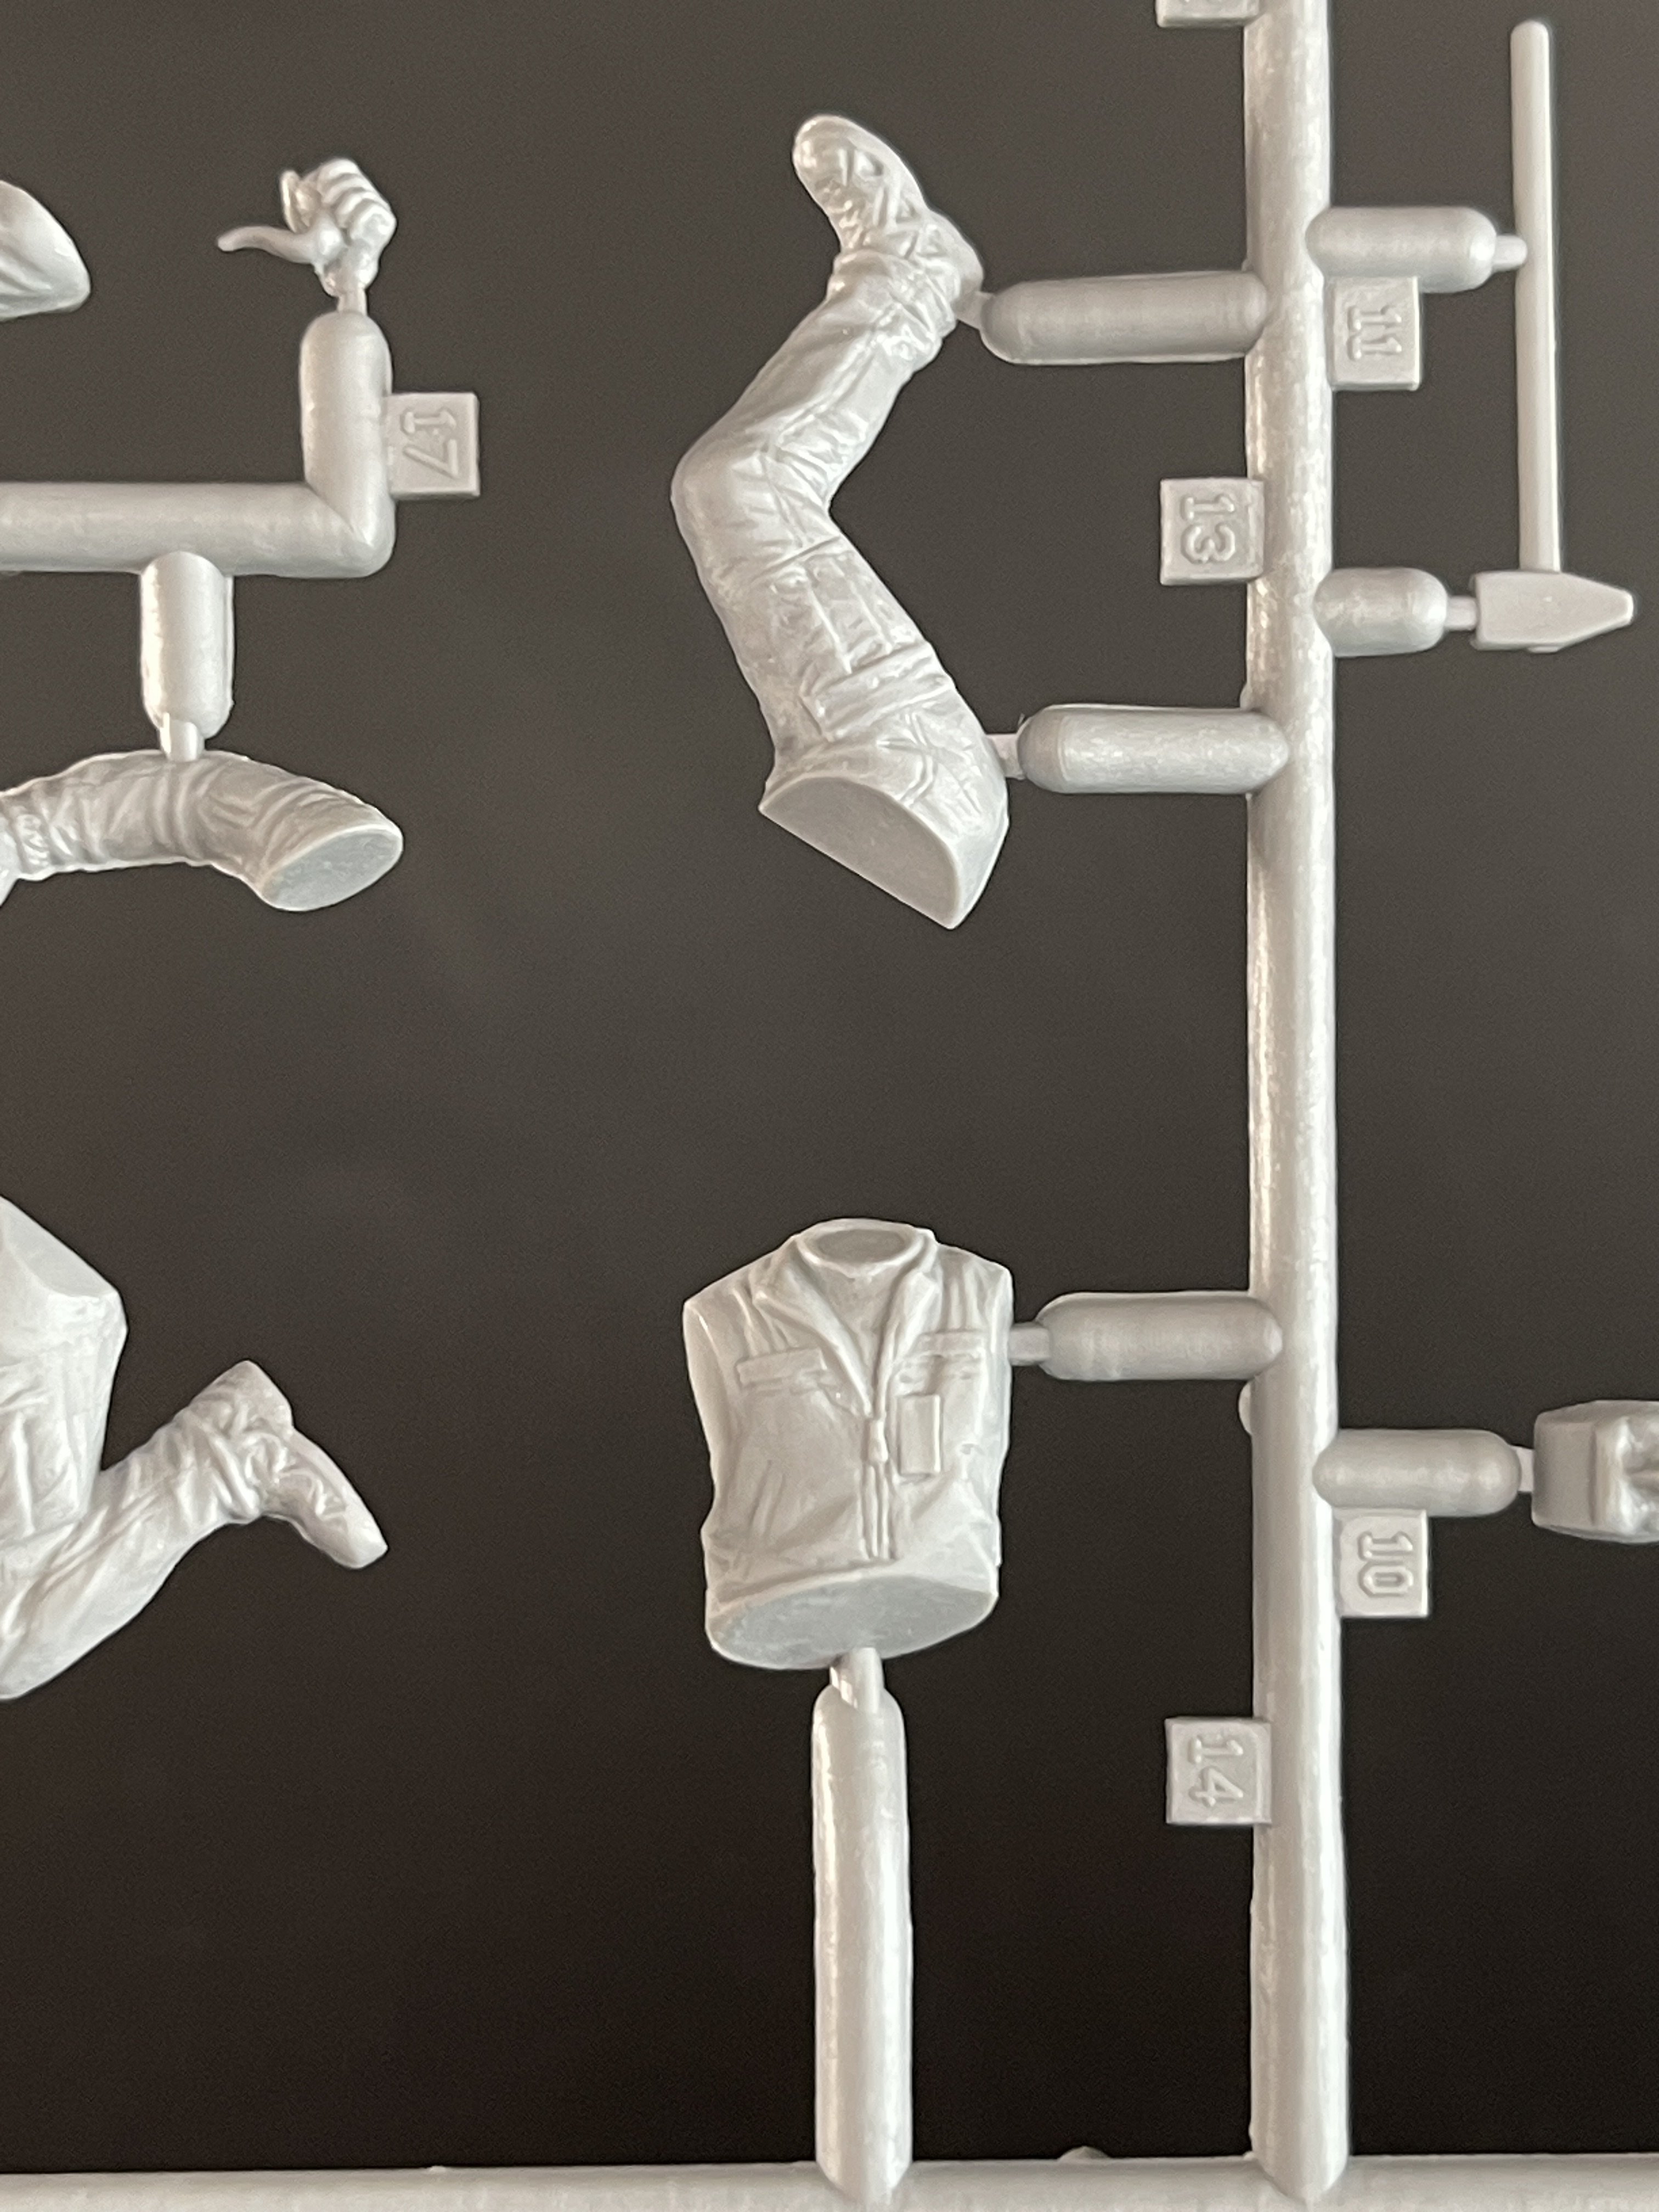
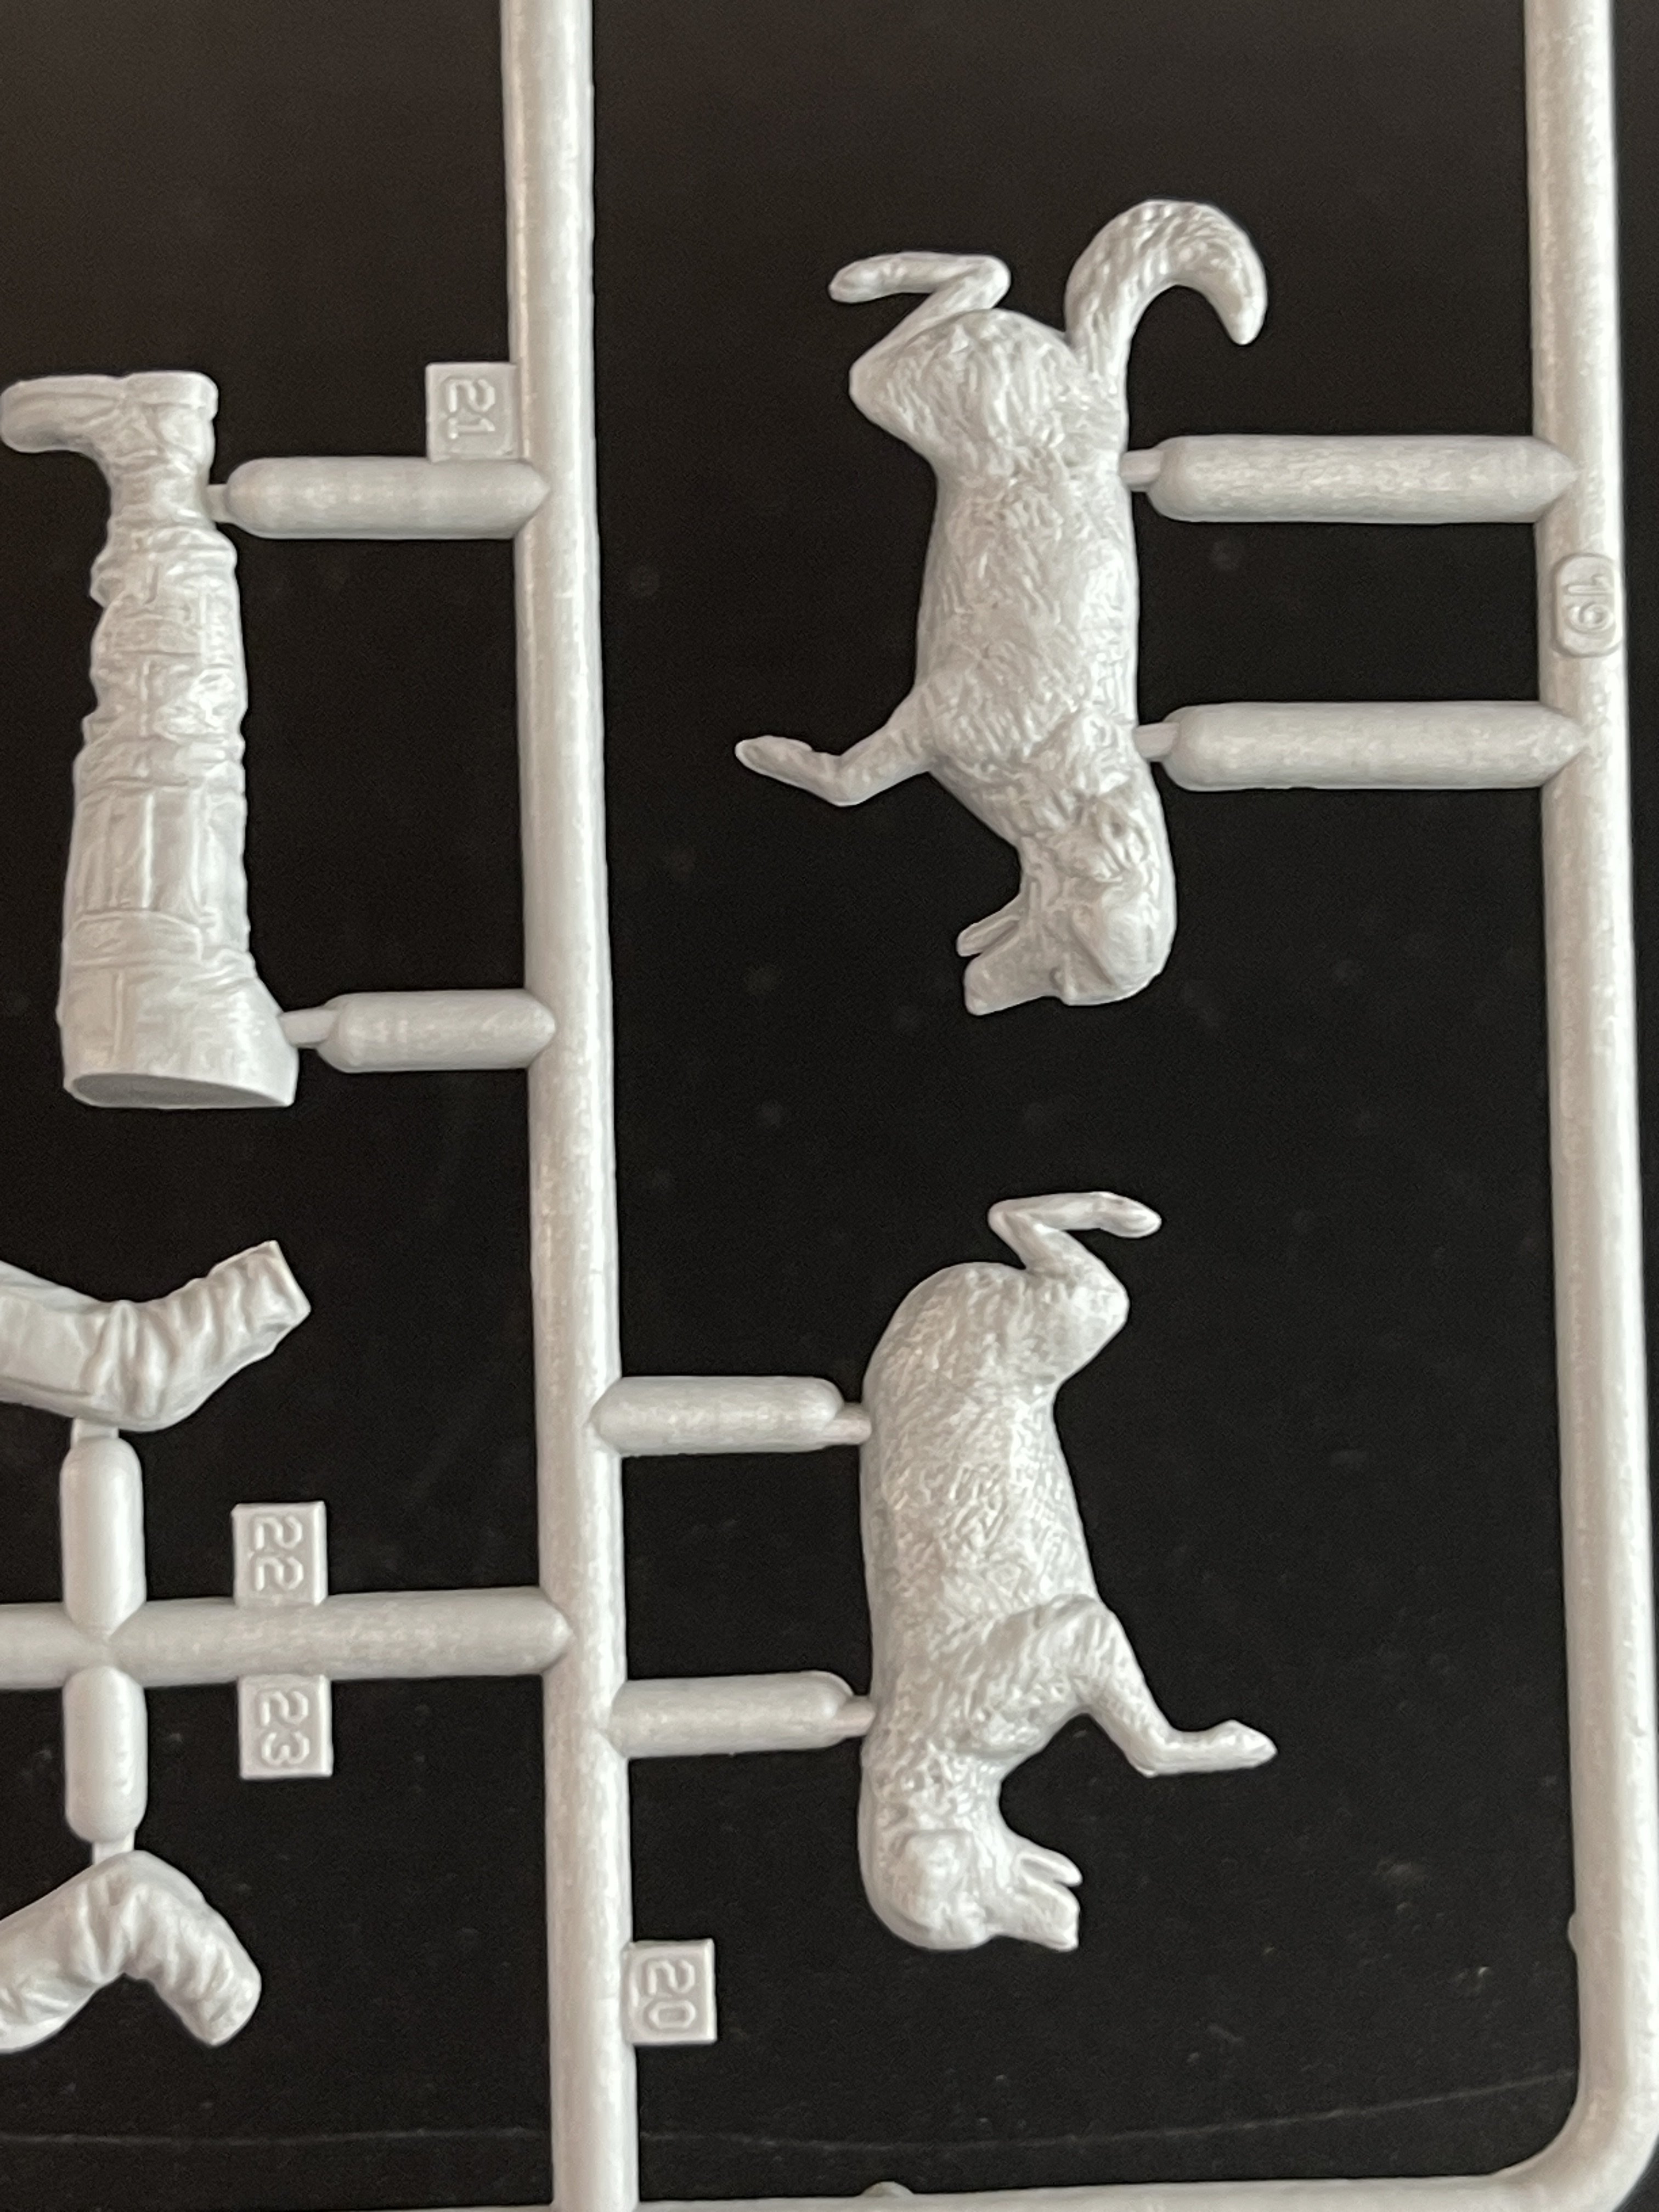
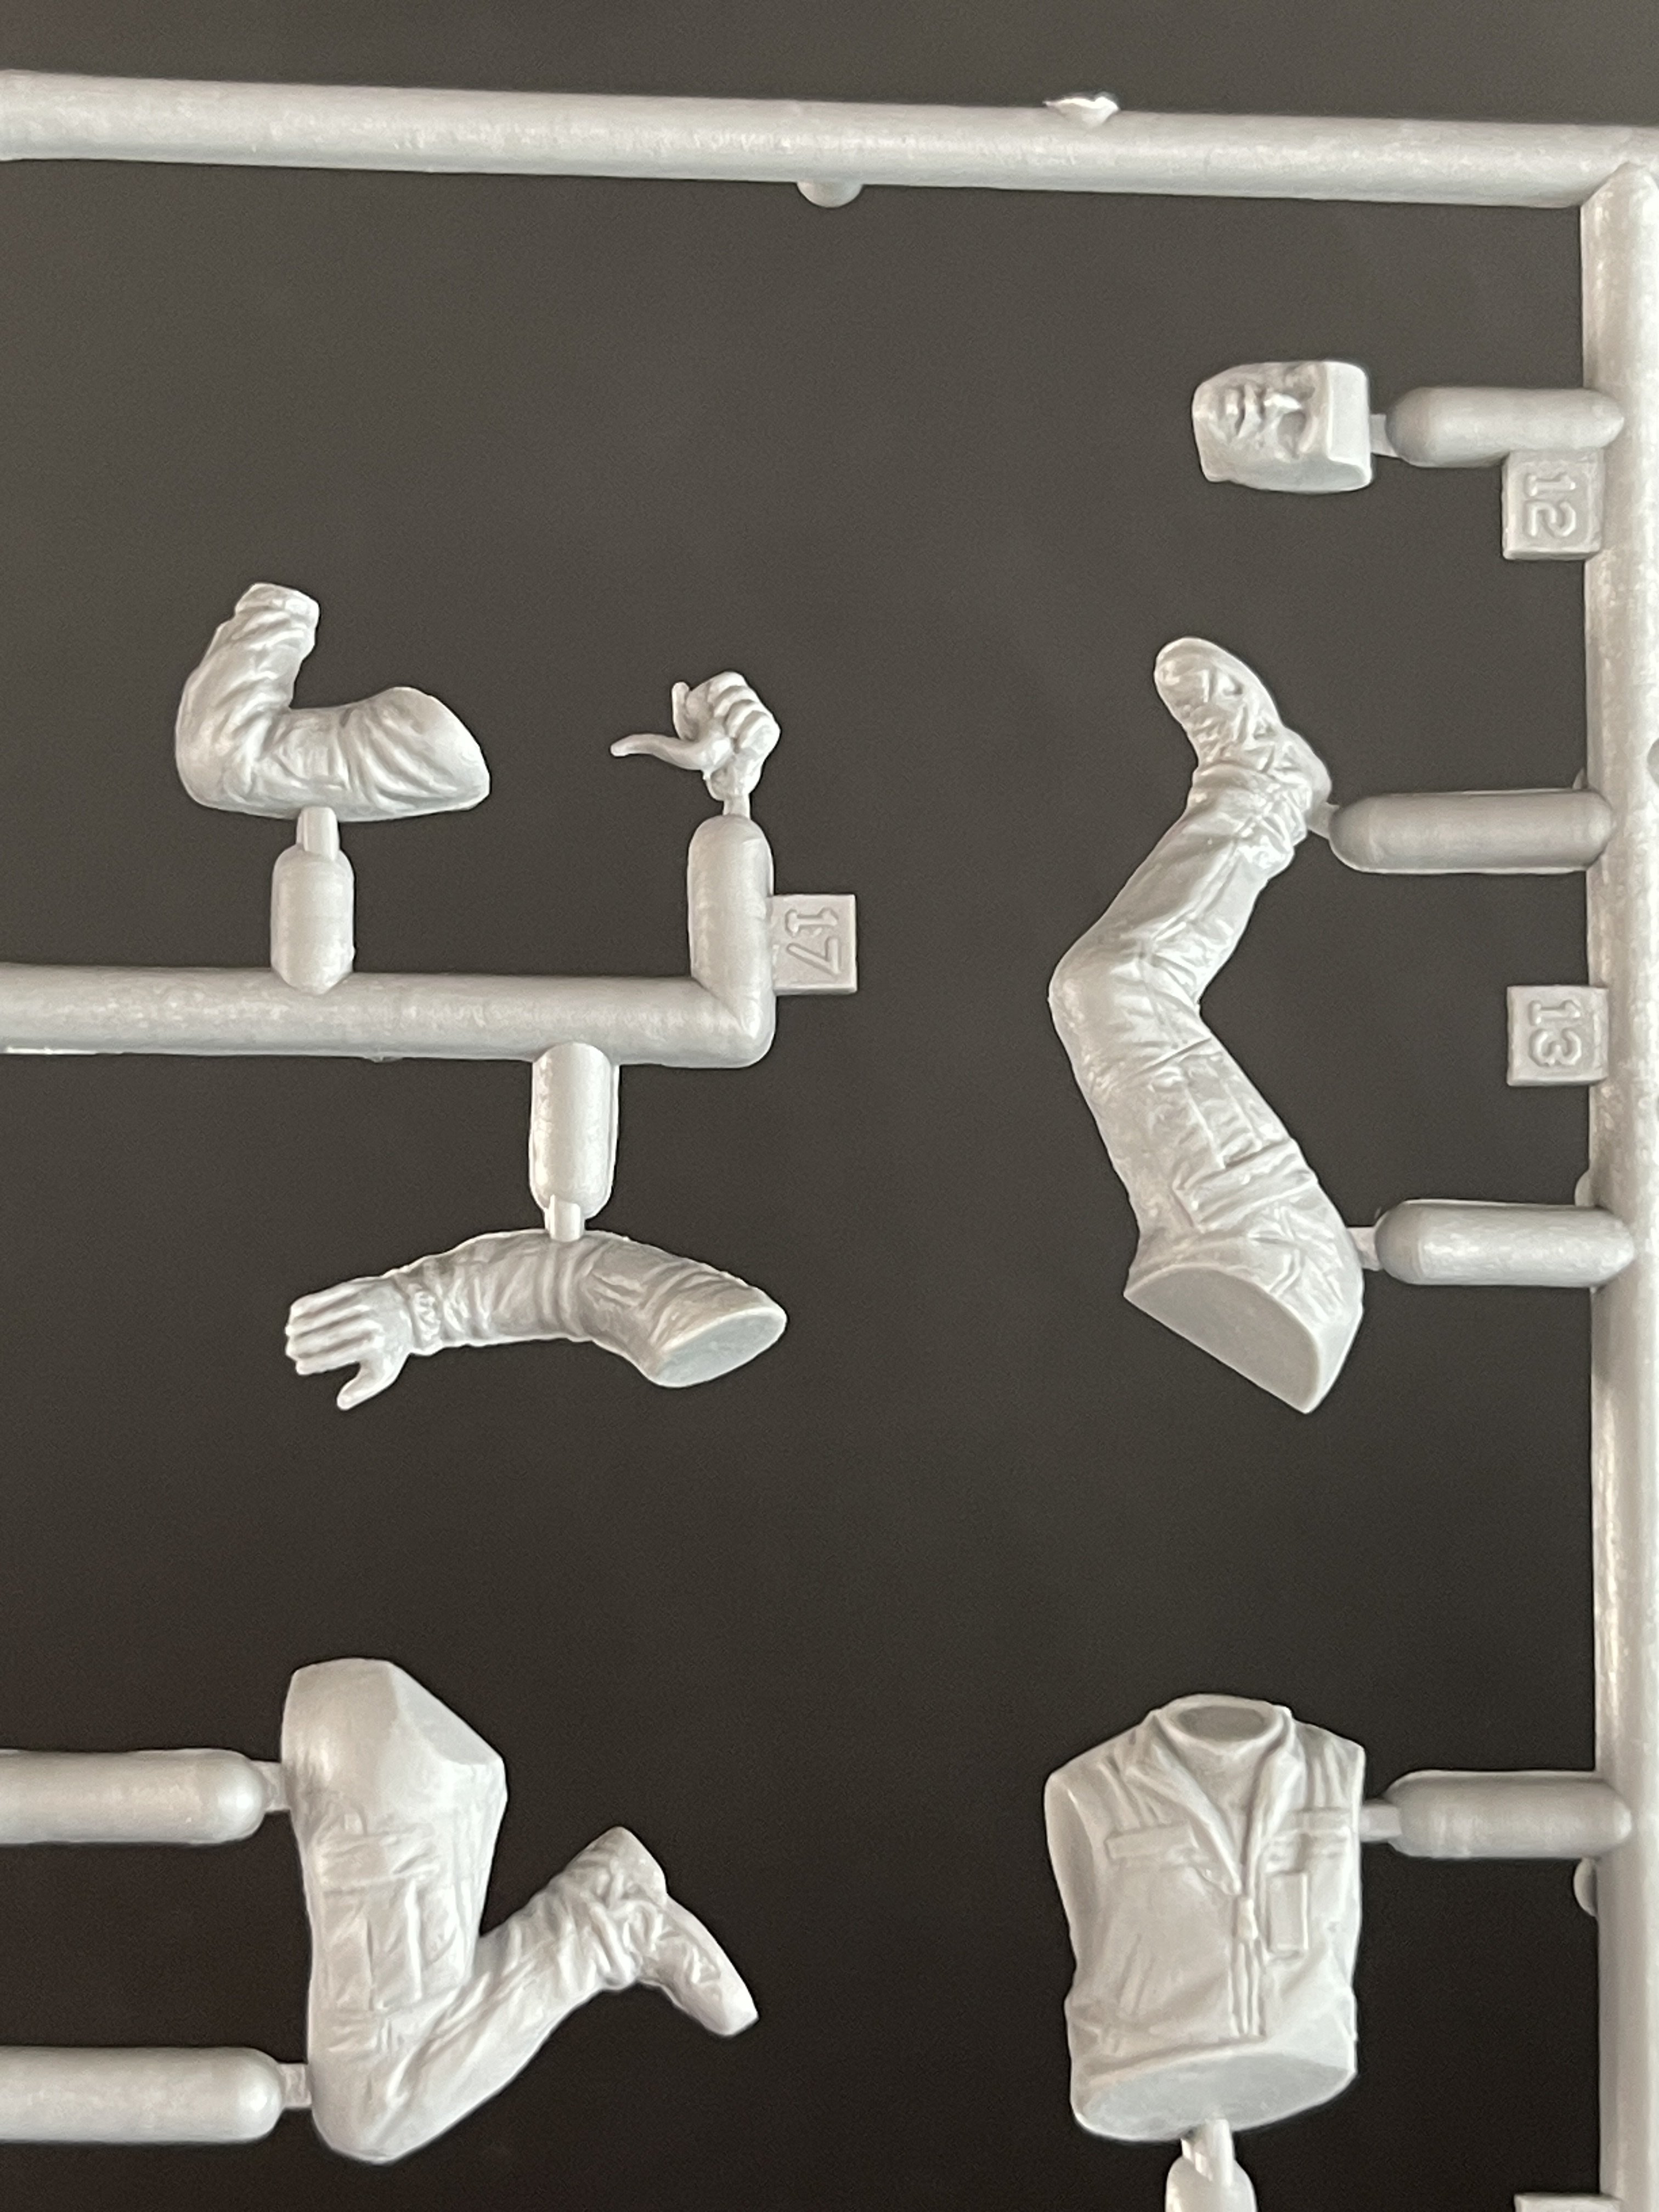
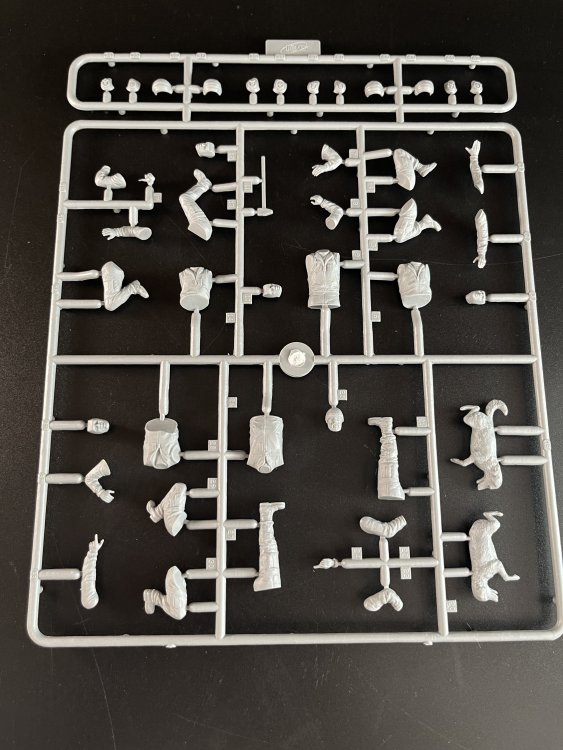
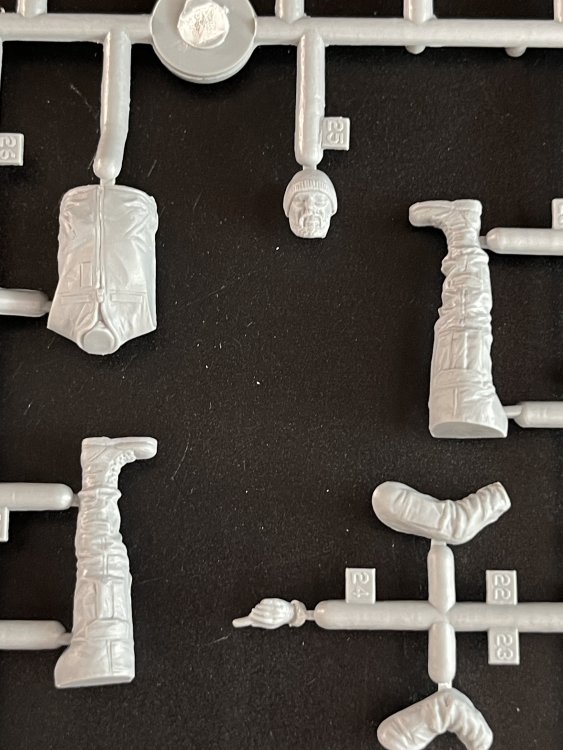
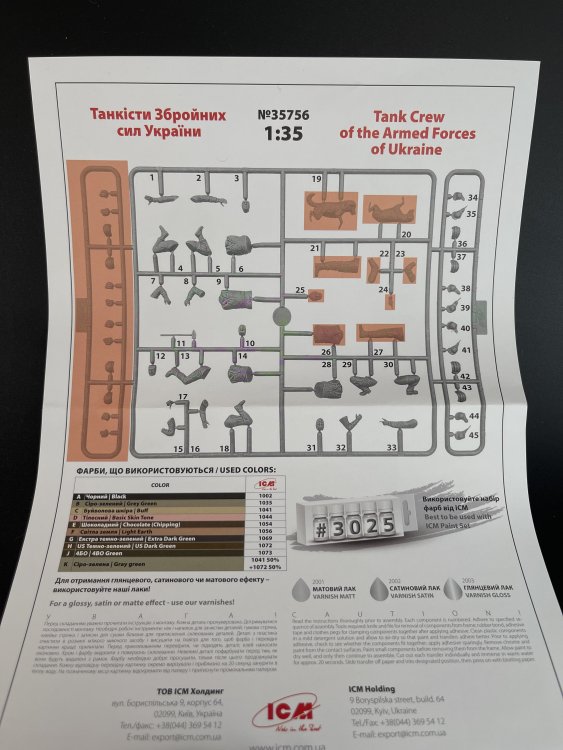
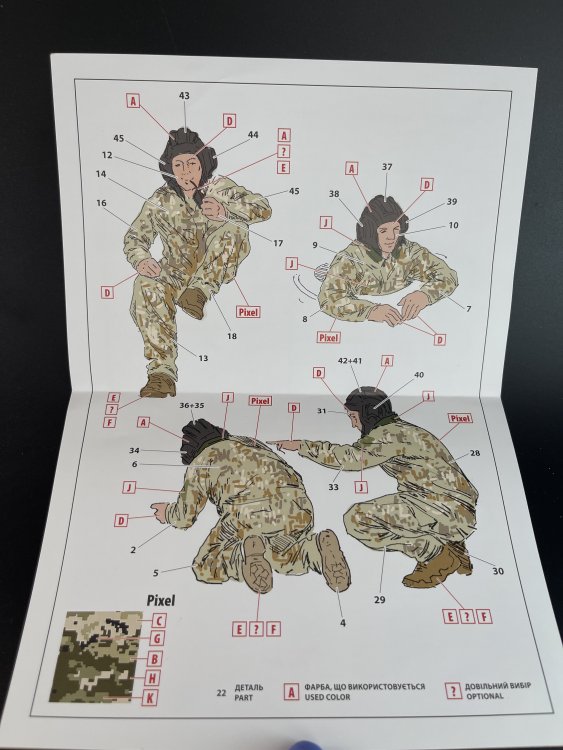
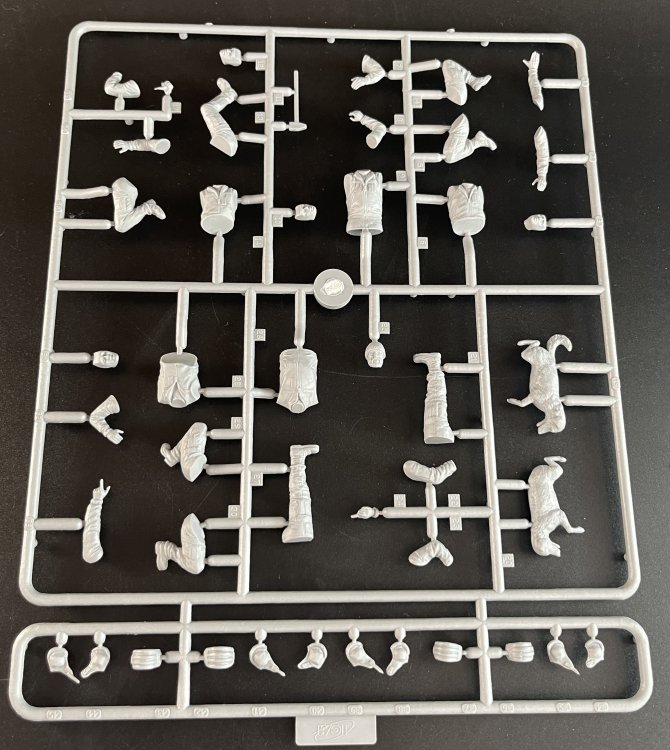
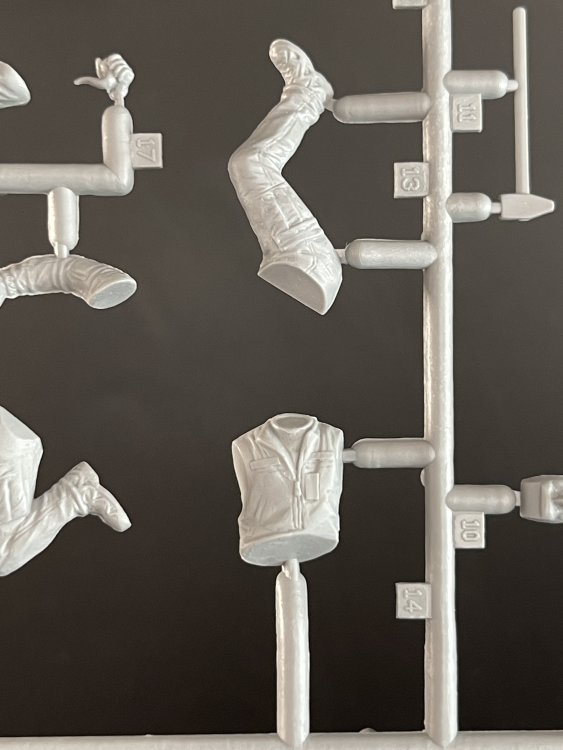
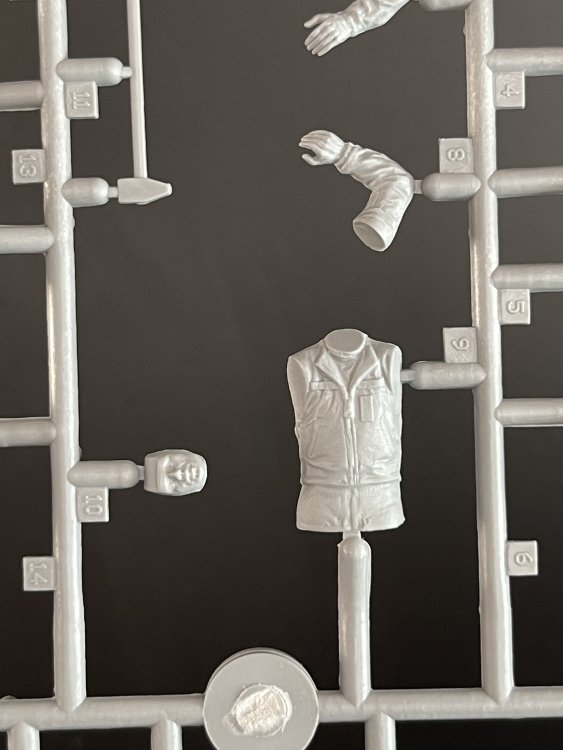
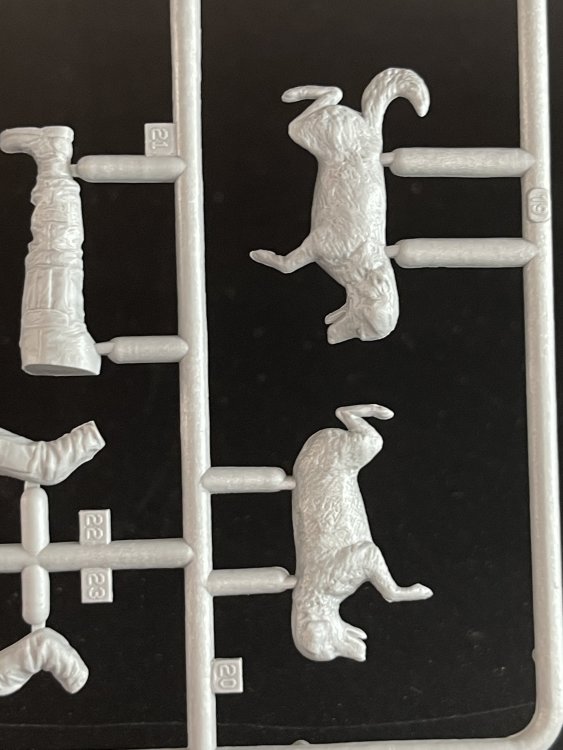
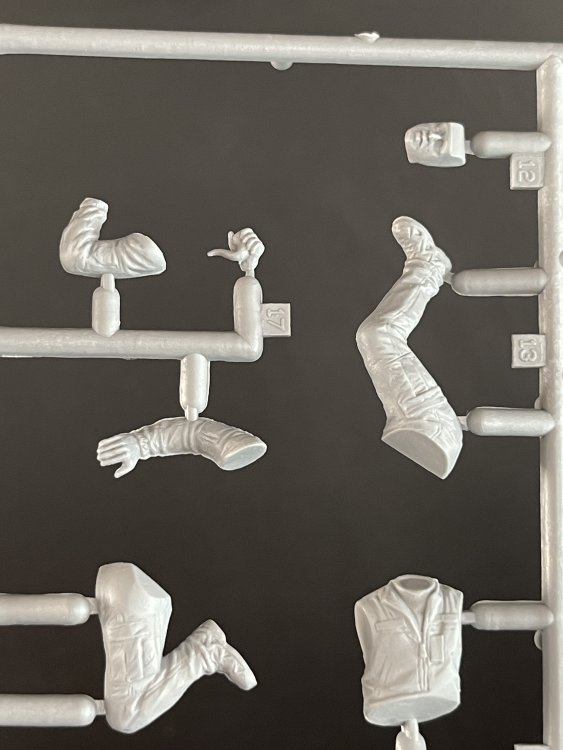
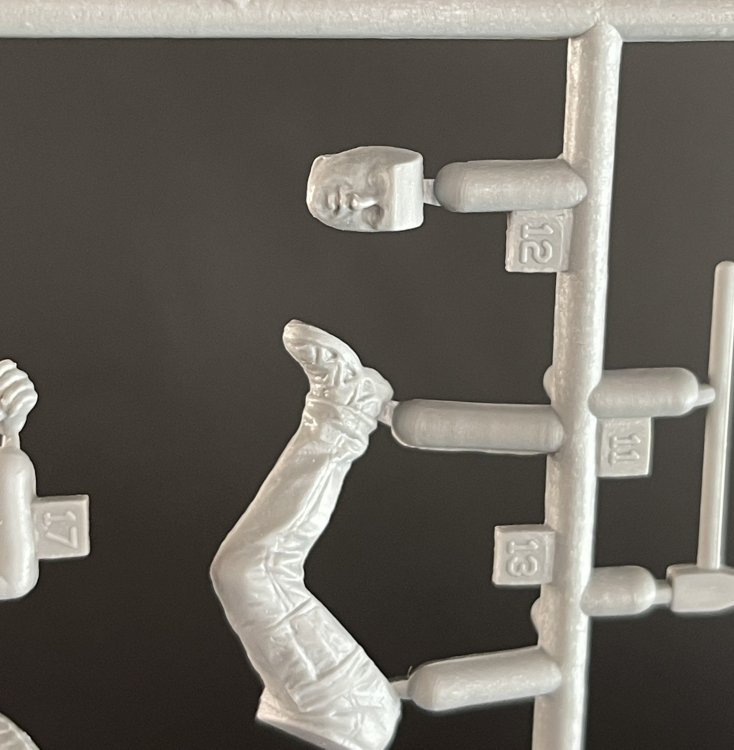
ICM 1:35 Tank Crew Of The Armed Force of Ukraine (Catalogue number: 35756) Price Tag: 13,80€ ICM is a quite prolific model manufacture, releasing AFV, Airplane and figures, in 1:48 and 1:35. This set is n 1:35 and it´s perfect for a diorama in honor in the brave women and men that are in the front in combat again the invasion of their country. And they put the pride on the box, as they should. So you get four figures in the poses that you can see in the box, appropriate for any modern tank, specially the Leopard. But inside the box, you can get five figures (not 4) and an extra dog. All parts have no flash at all, and the surface detail is the best I ever seen from ICM I saw a vast improvement when I had the pleasure to review the 1:48 Sally figures. That quality is also present in this set, with very sutble details on the cloths and on the faces with less seam line from the mold. The figures have the torso in one piece without arms or legs as they are separated No assembly instructions are given… but if you look carefully we see the parts numbers on the figures. So there´s is assembly instructions. Well done ICM and thank you for an extra figure and a dog! Conclusion As usual, ICM delivery are very good product at very good price, despite working every day in their country in war and fight against the invader!! Brave ICM and stay strong! So you can really get a very good figure set, using all together or just one as the posture could be used in several other scenario, with an extra bonus is having an extra figura and a dog that are not expected when you see just the box. Great Work ICM! Keep Then coming! HIGHLY RECOMMEND. Our sincere thanks to ICM for making this fantastic figure set. Get yours here. Francisco Guedes www.largescalemodeller.com


-
For me, one of the best liquid mask is the one from Deluxe Material https://deluxematerials.co.uk/products/masking-magic-opaque-40g
-
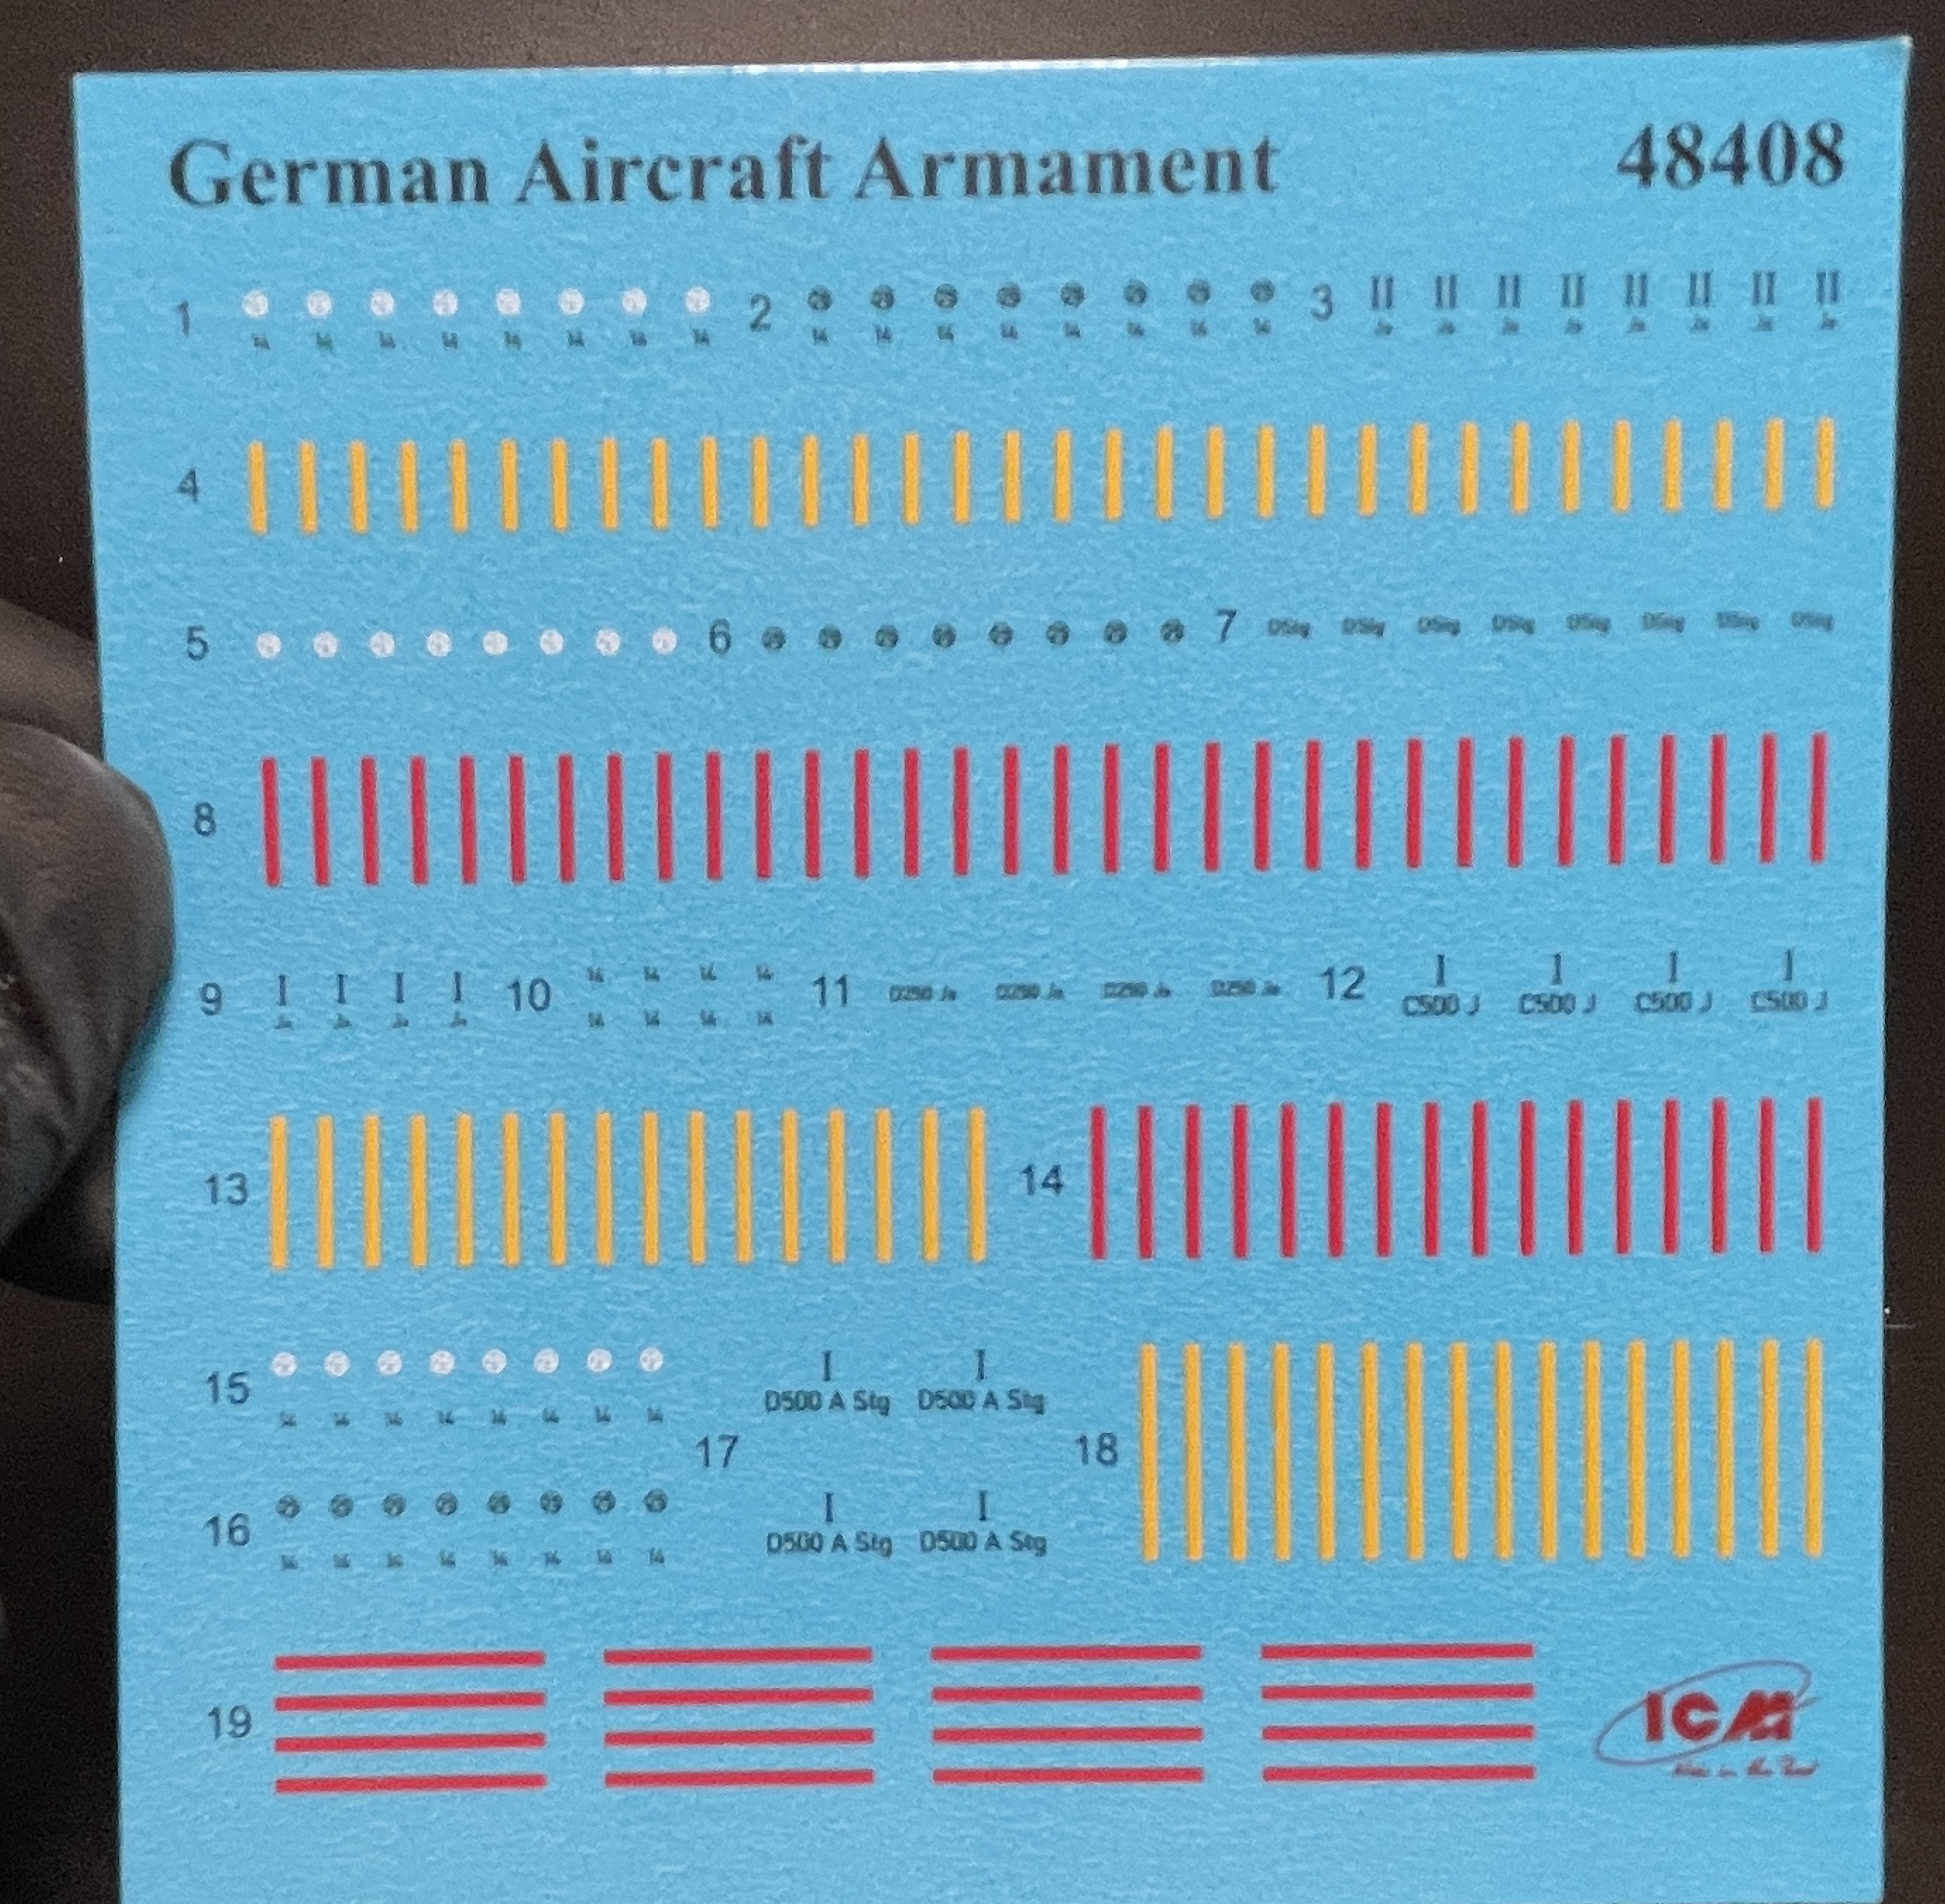
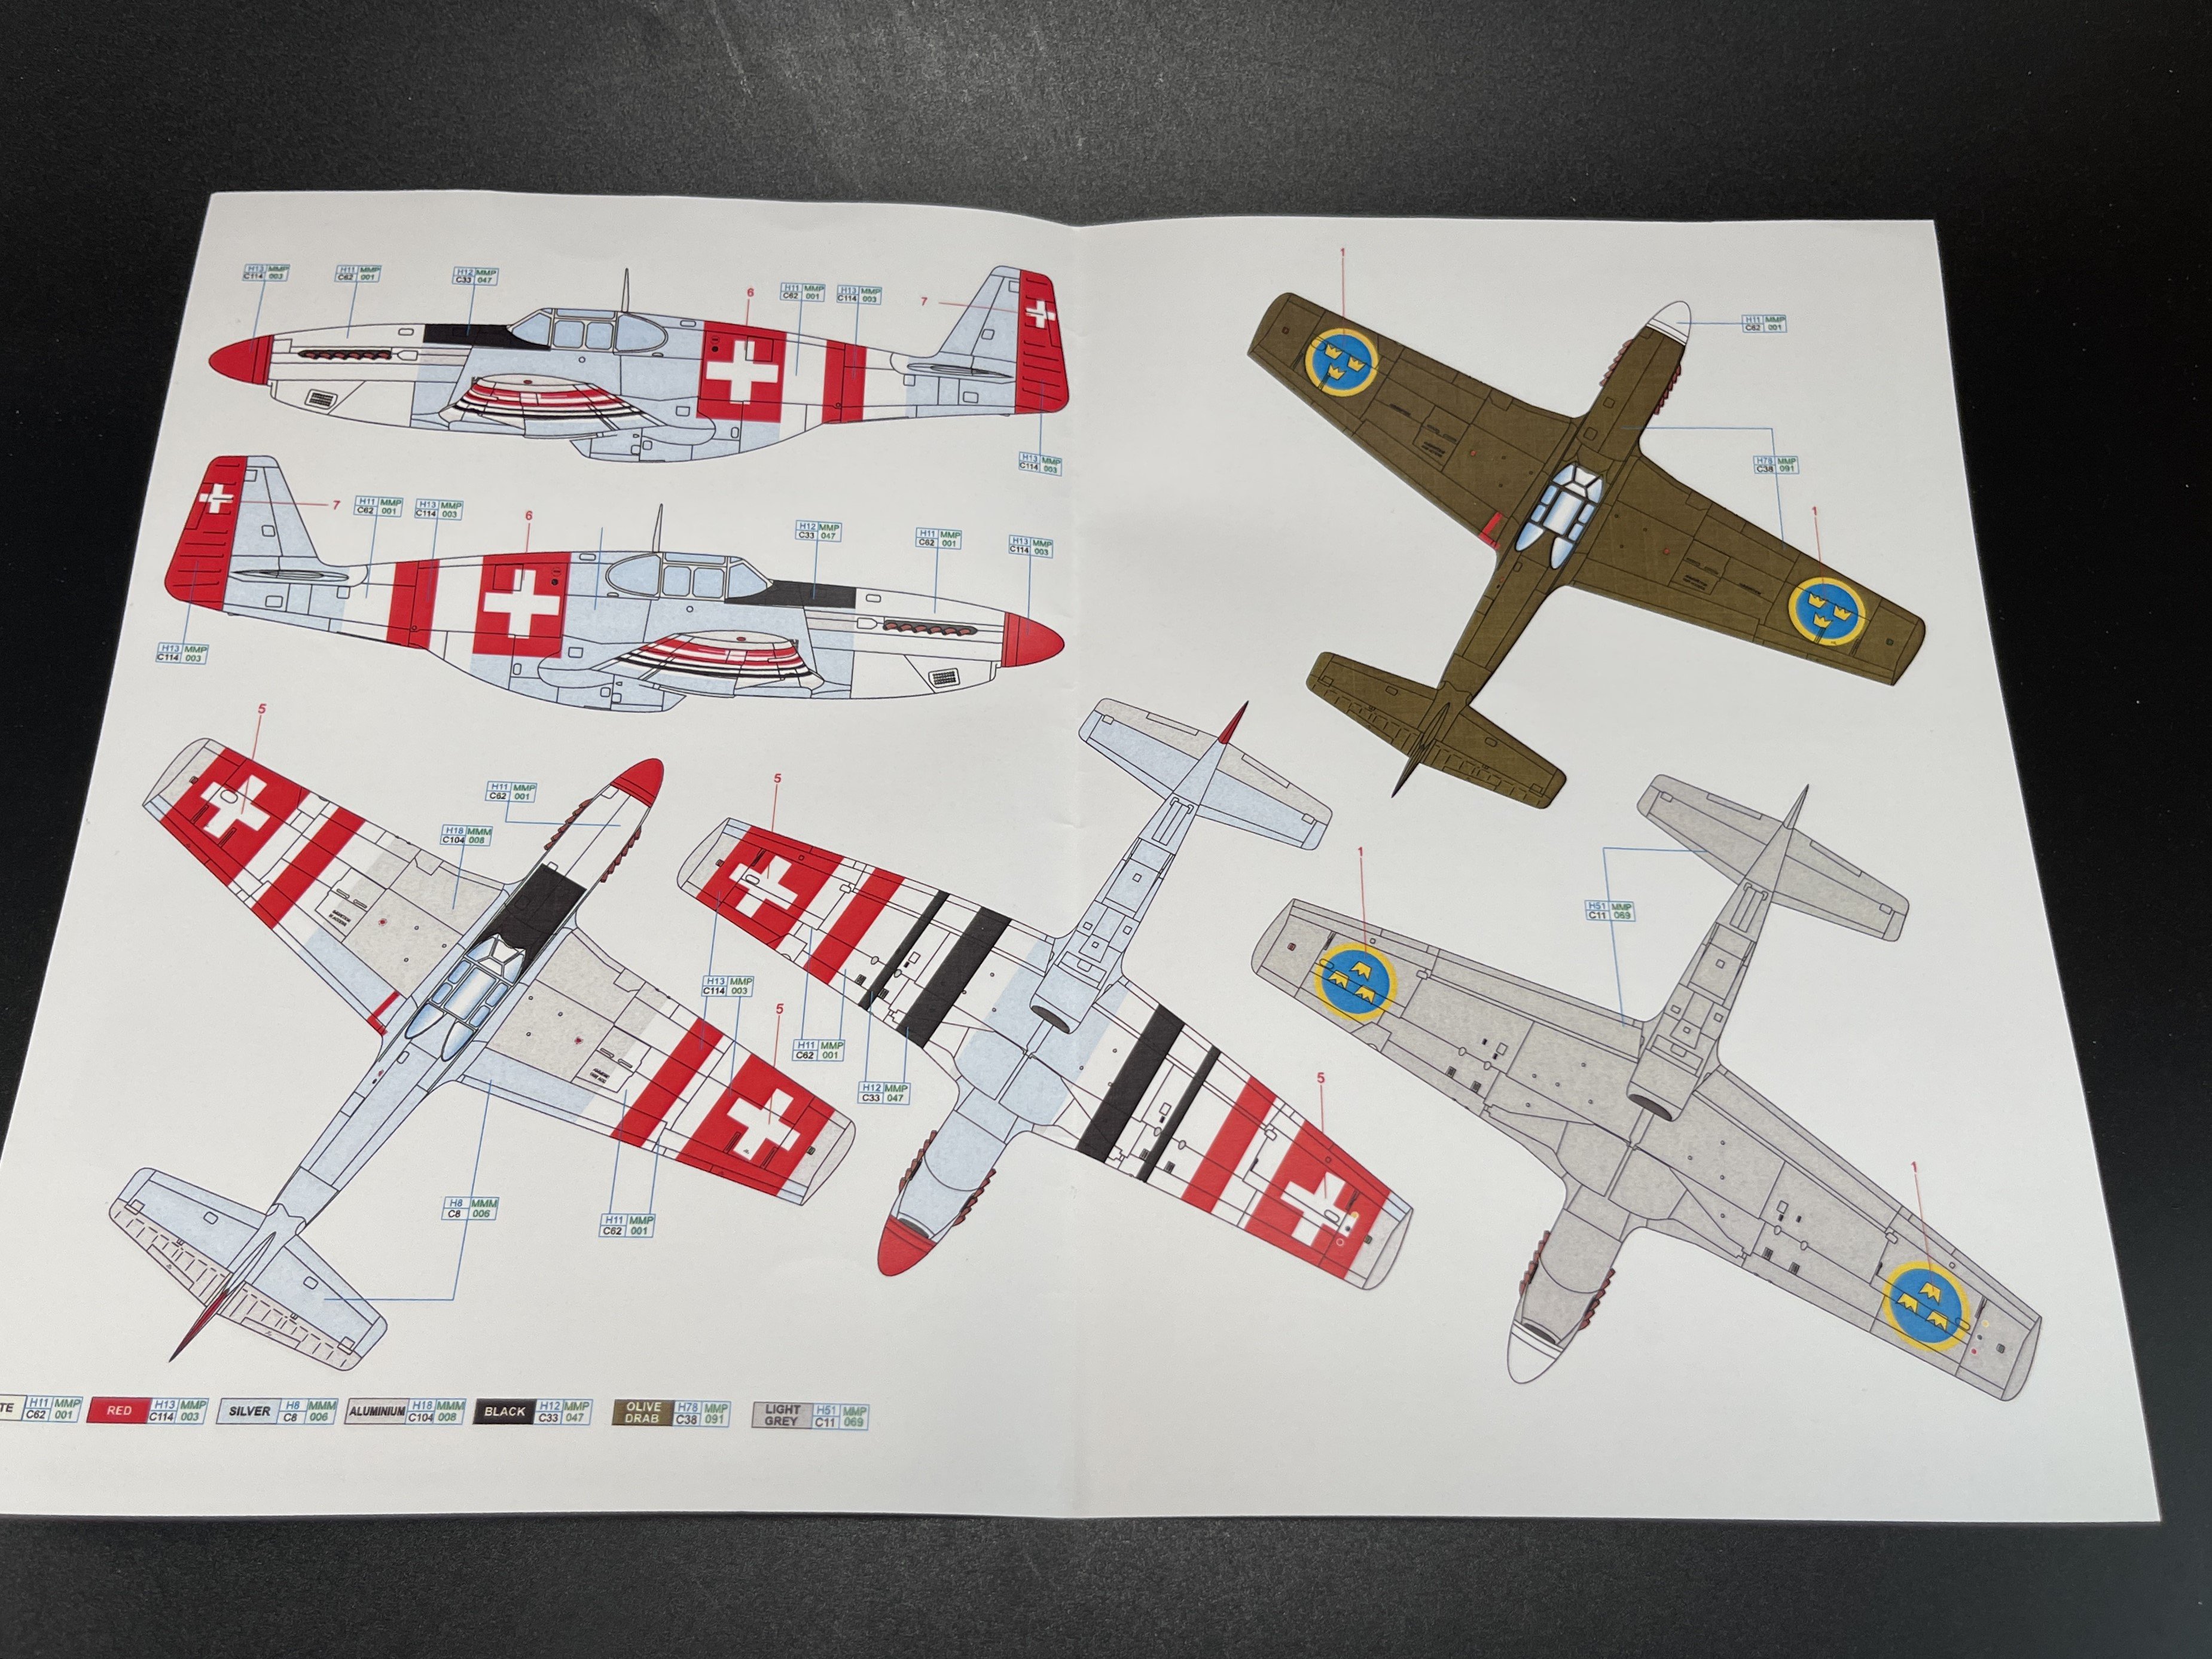
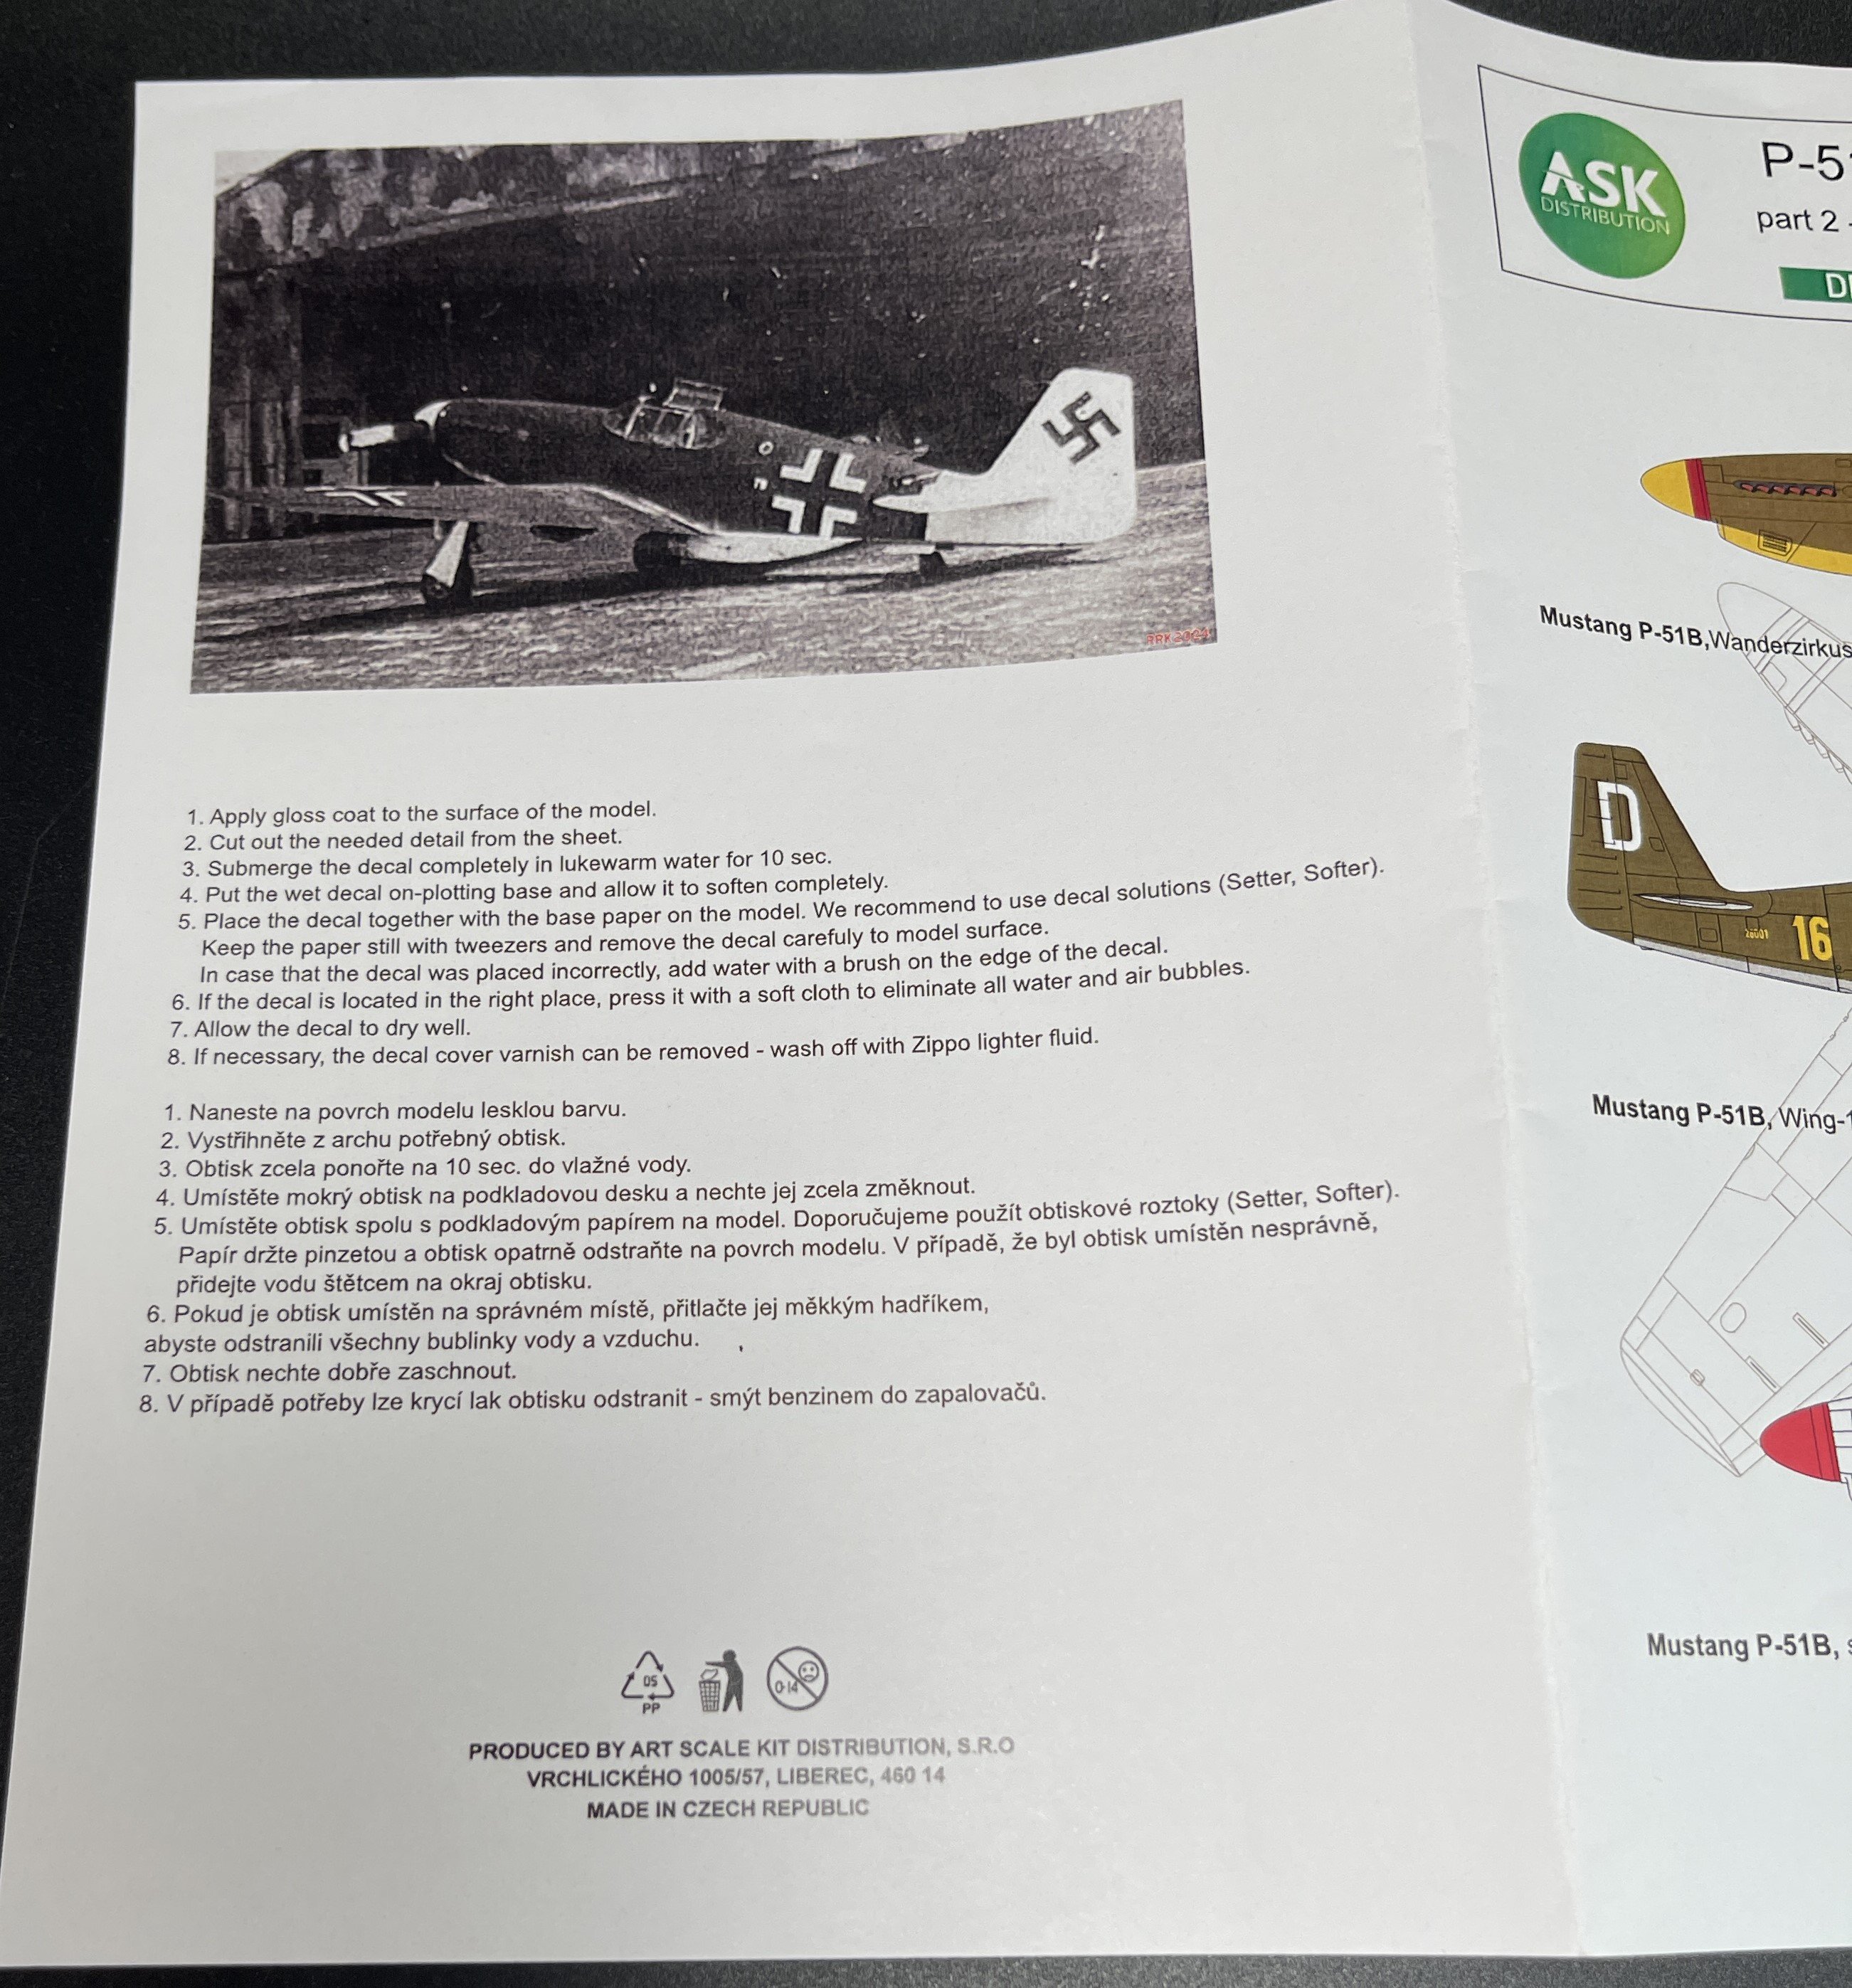
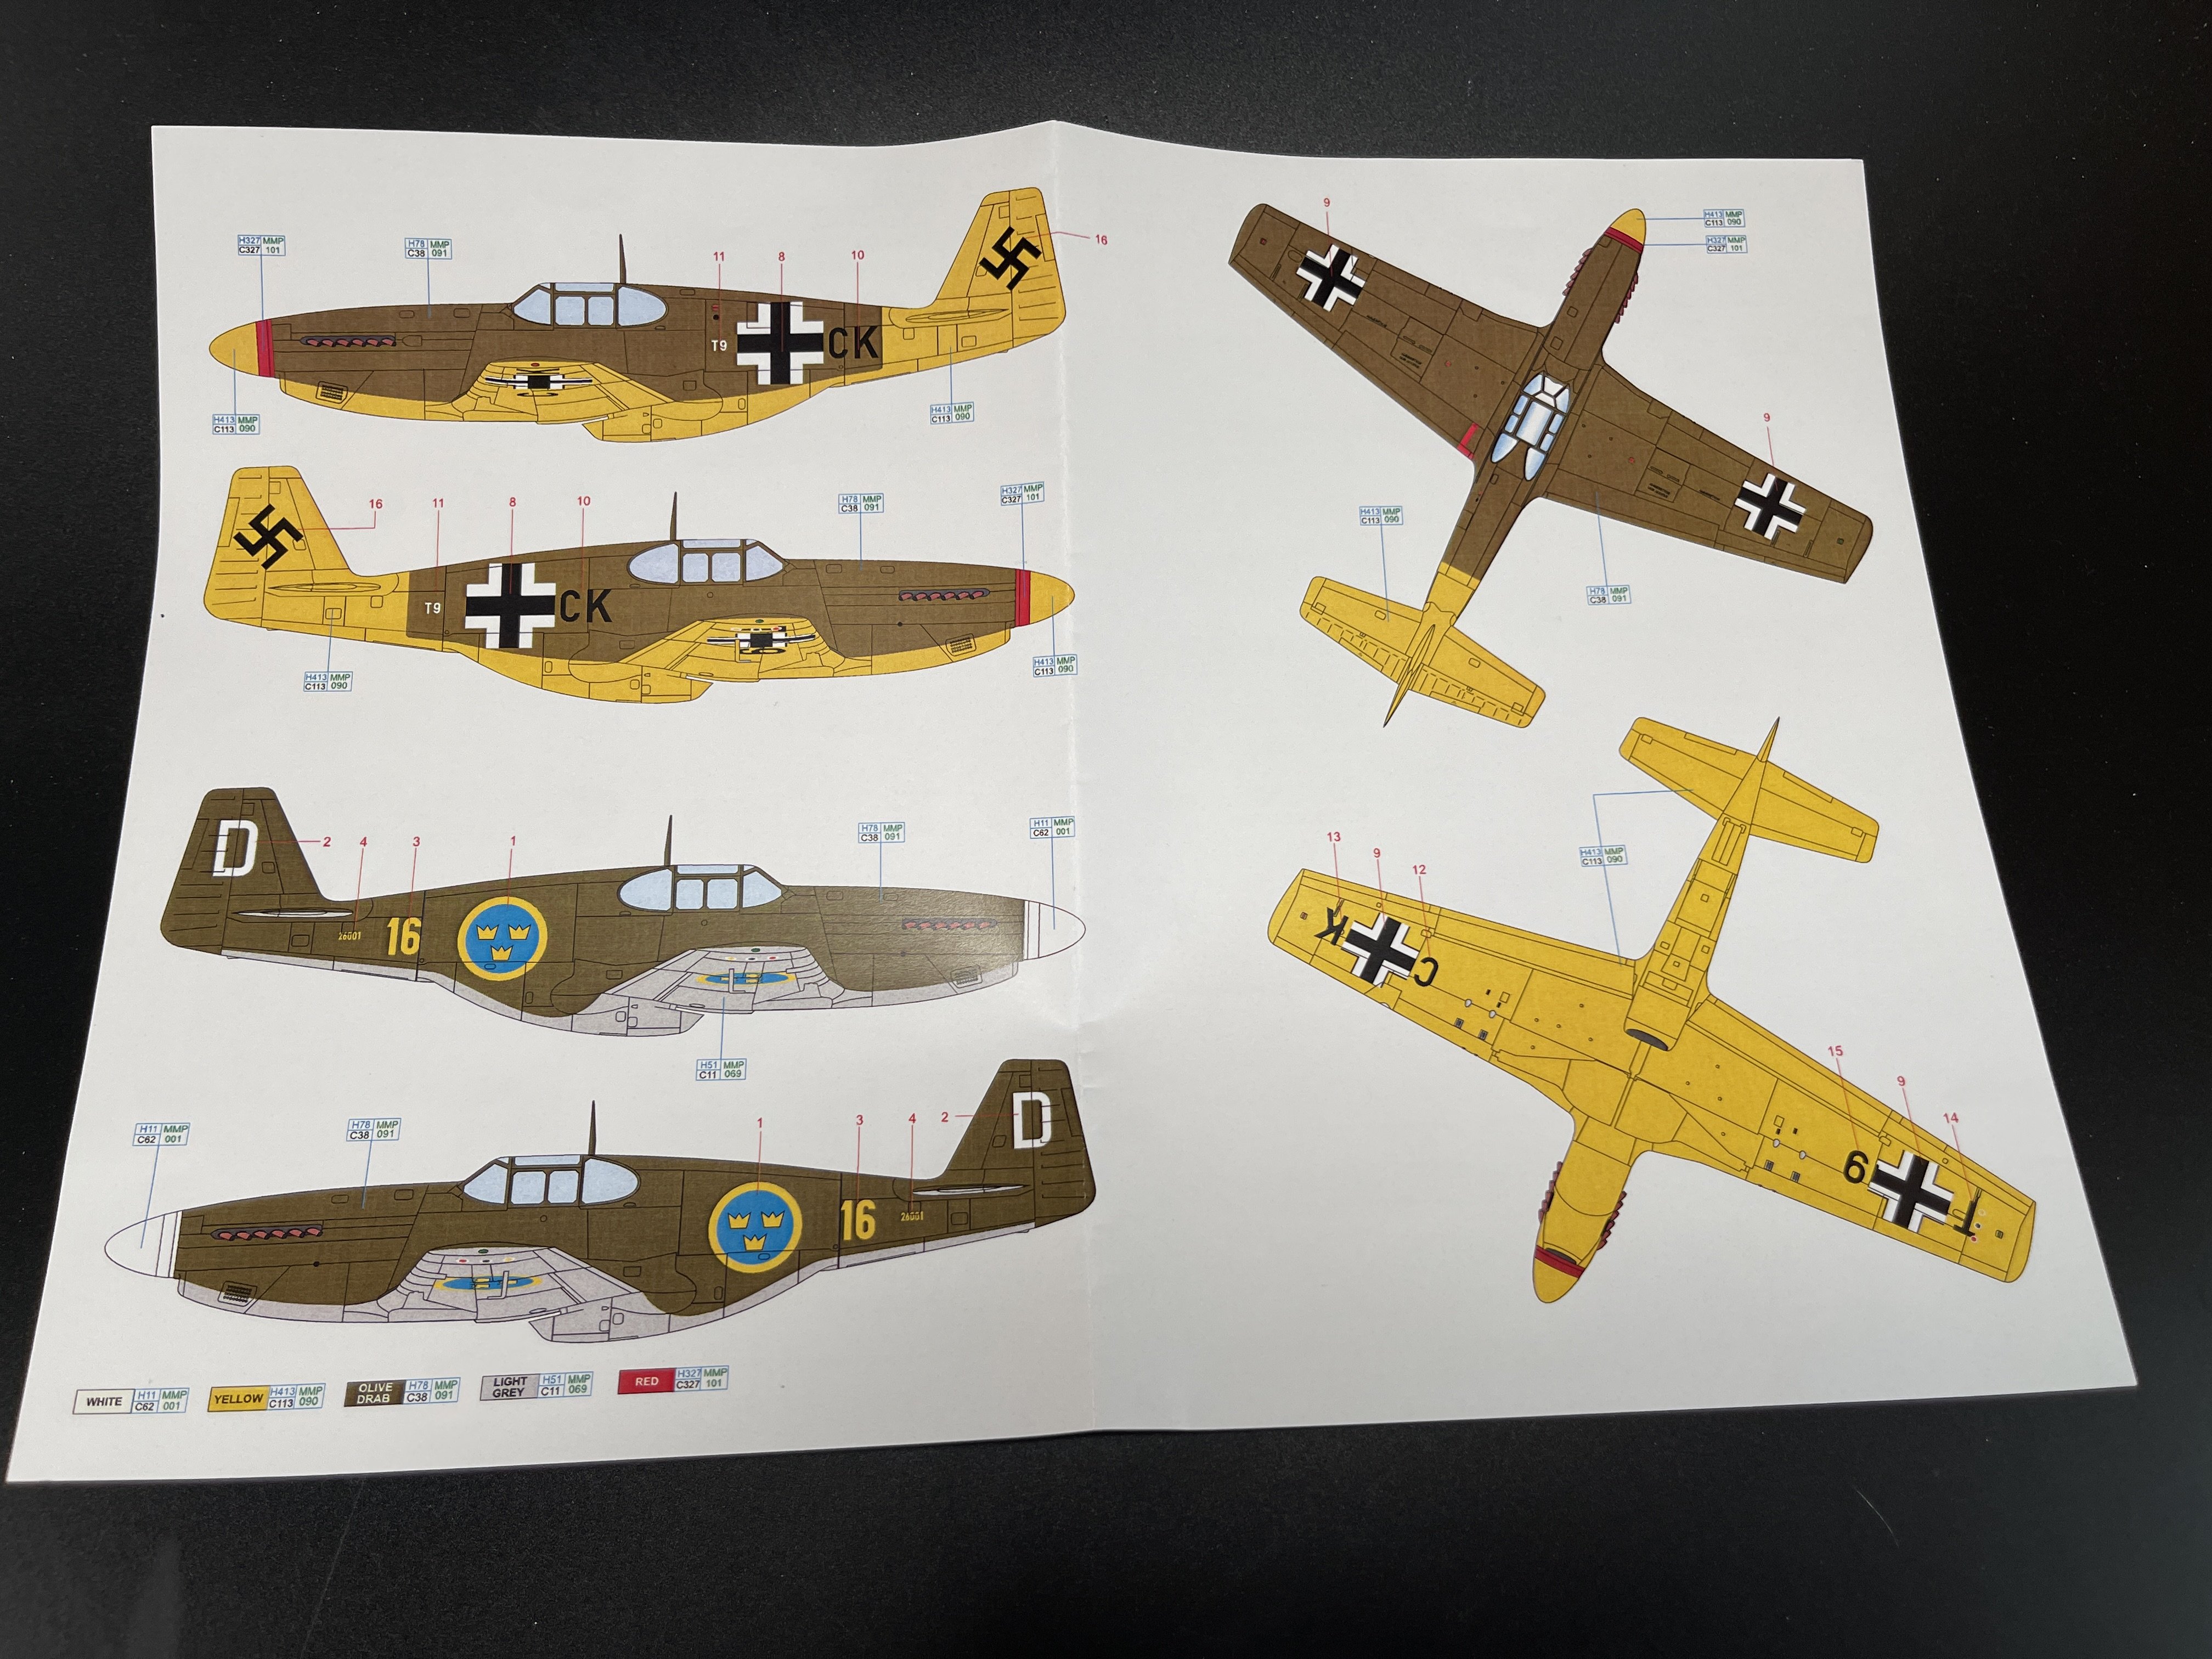
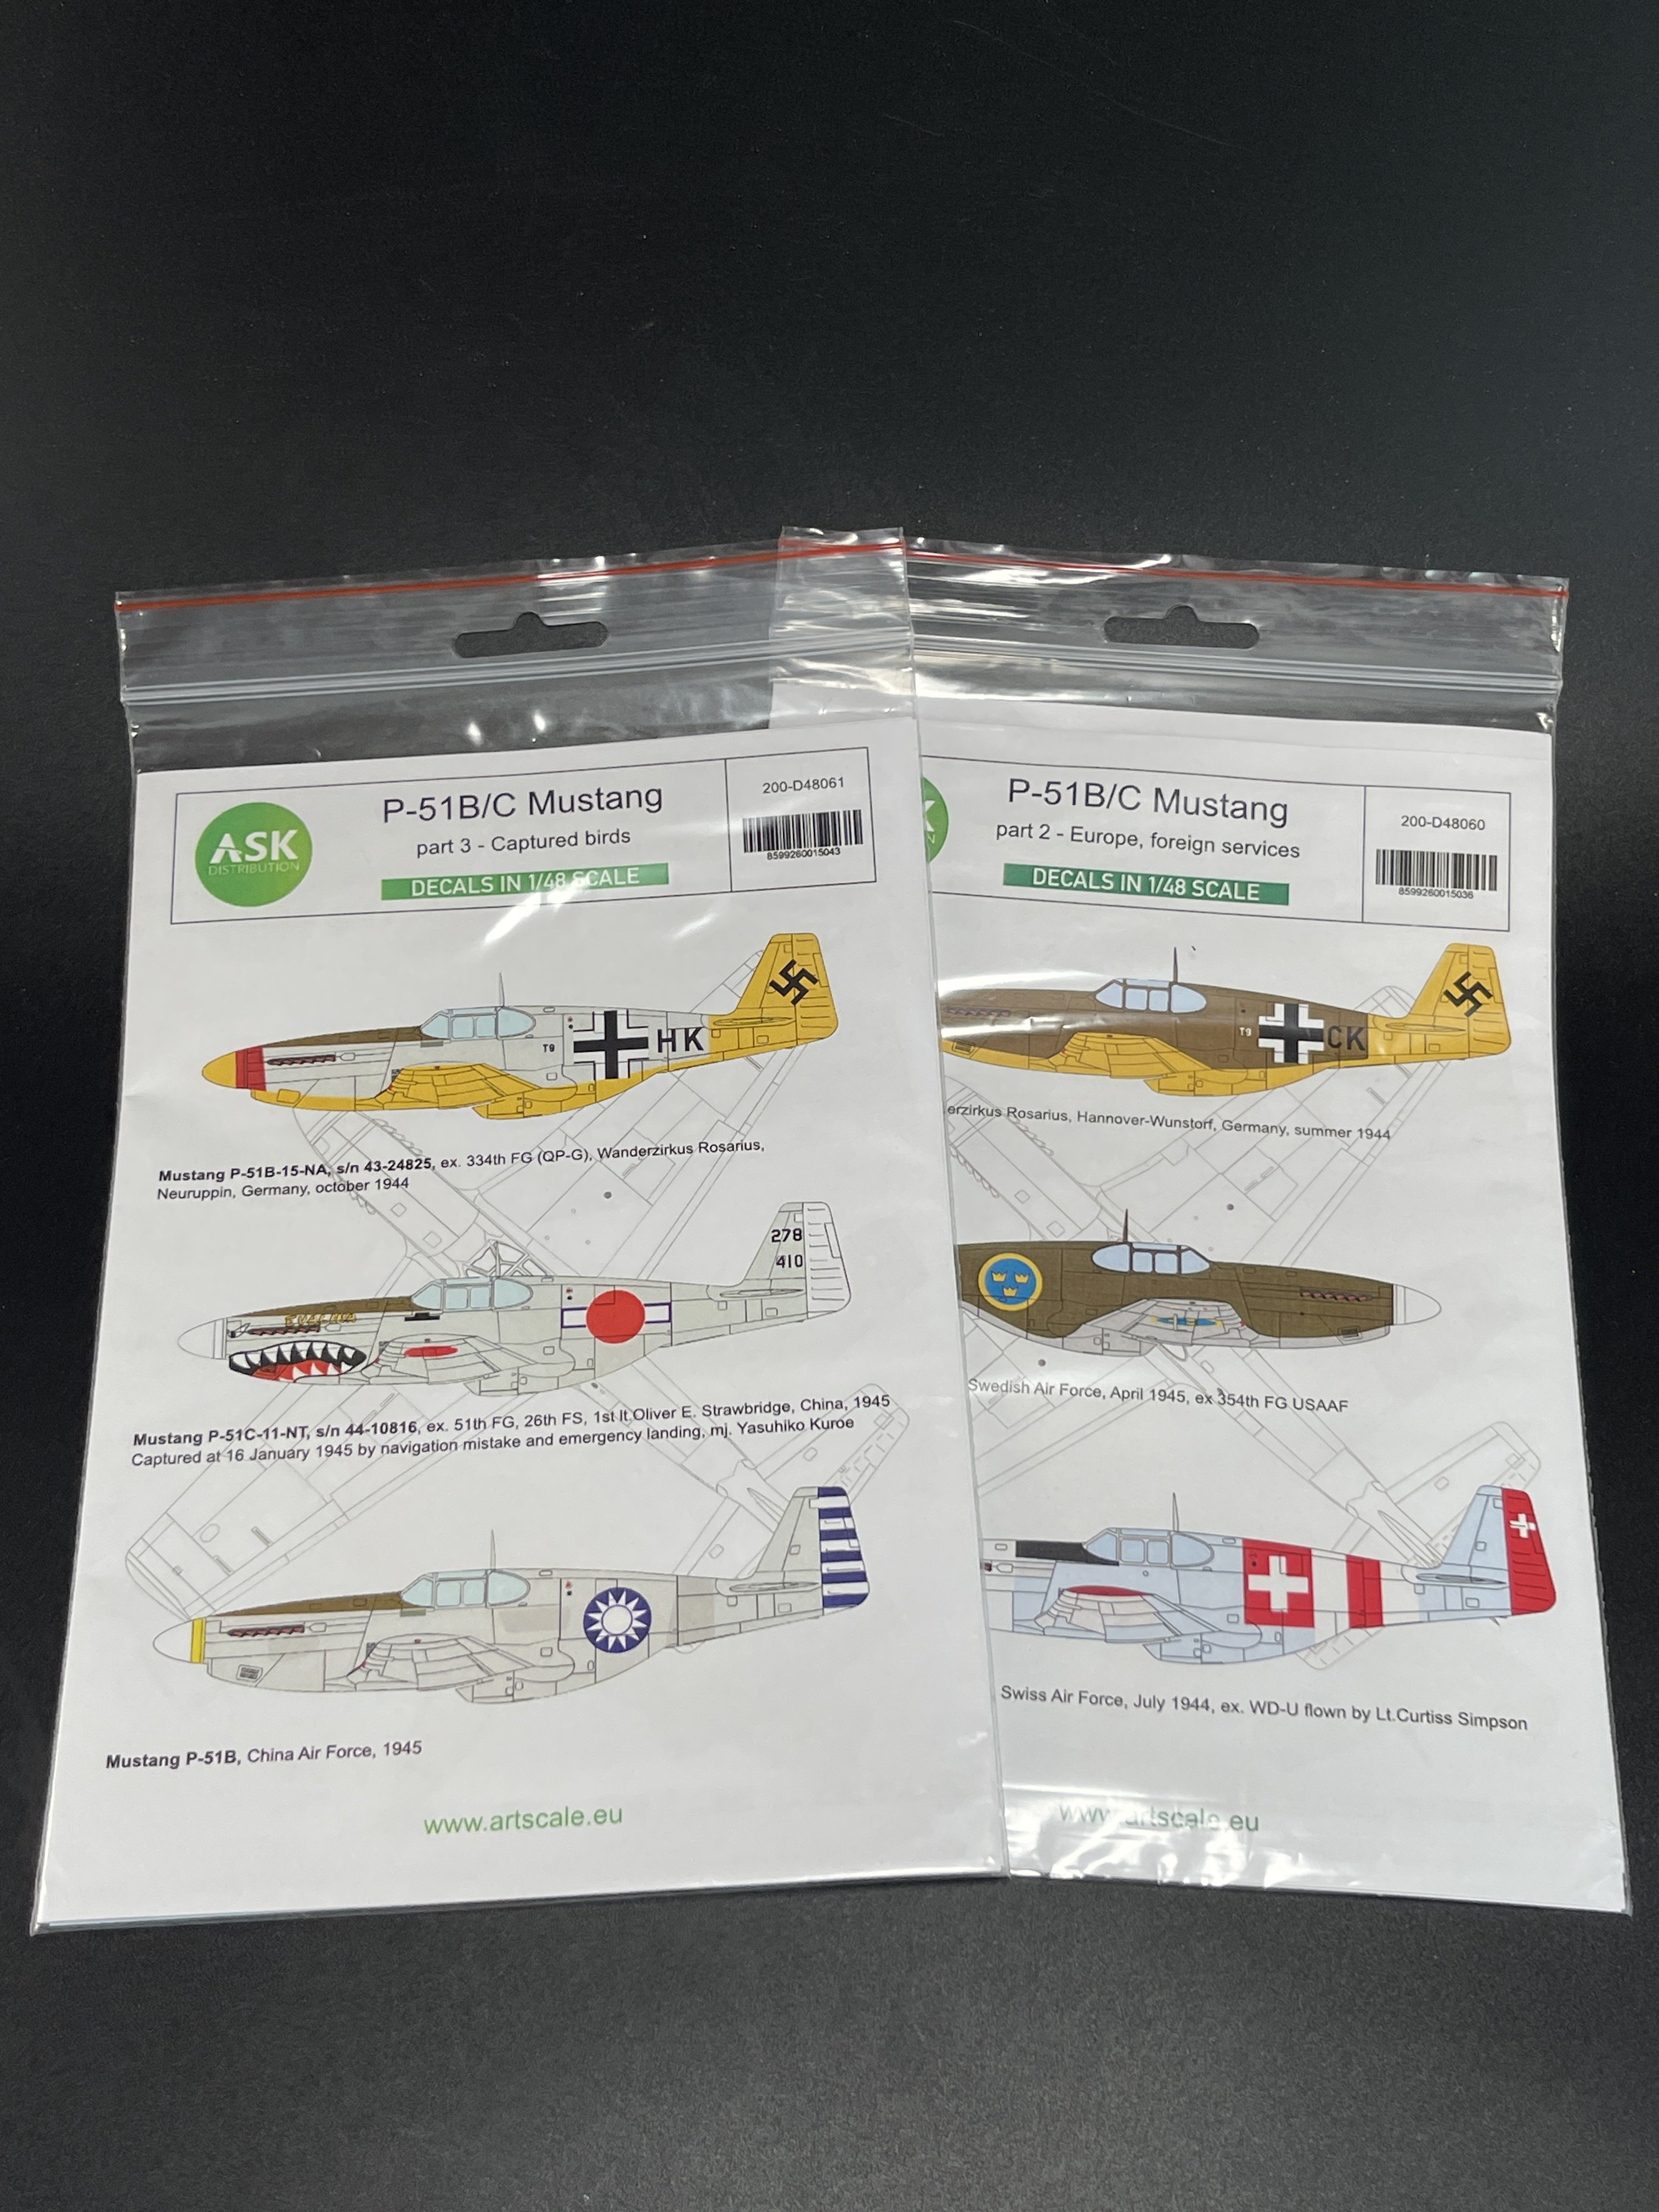
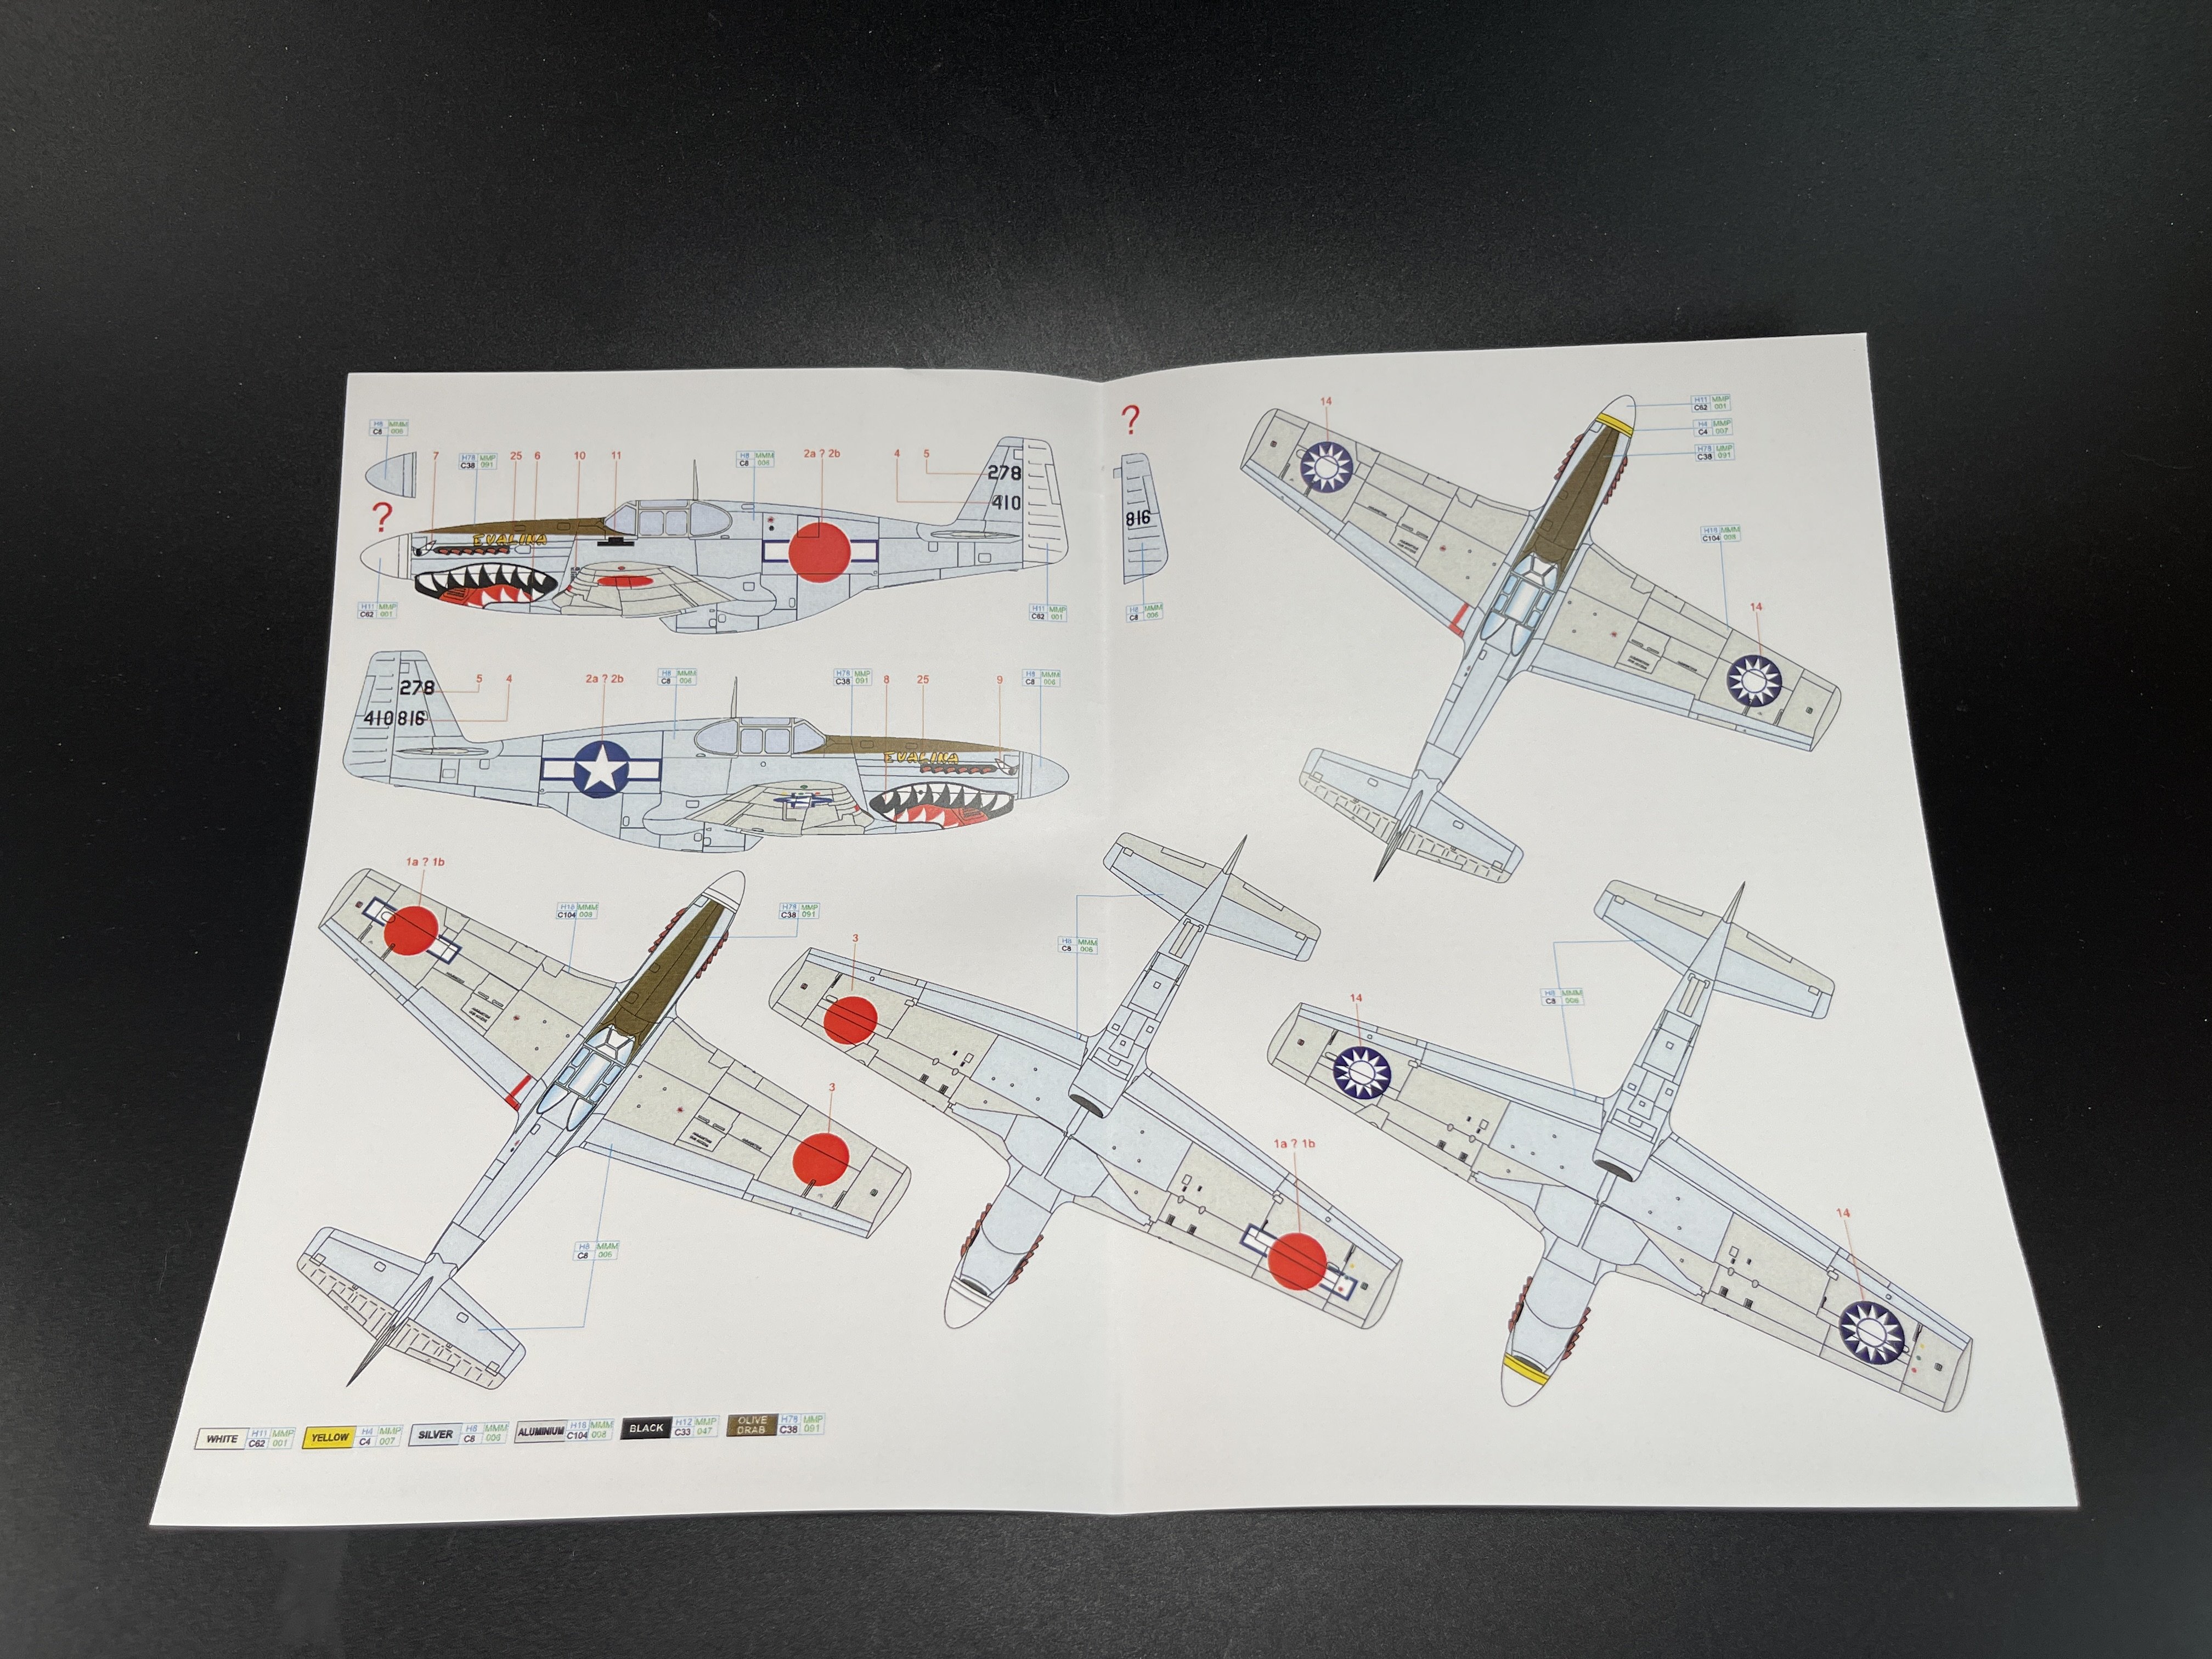
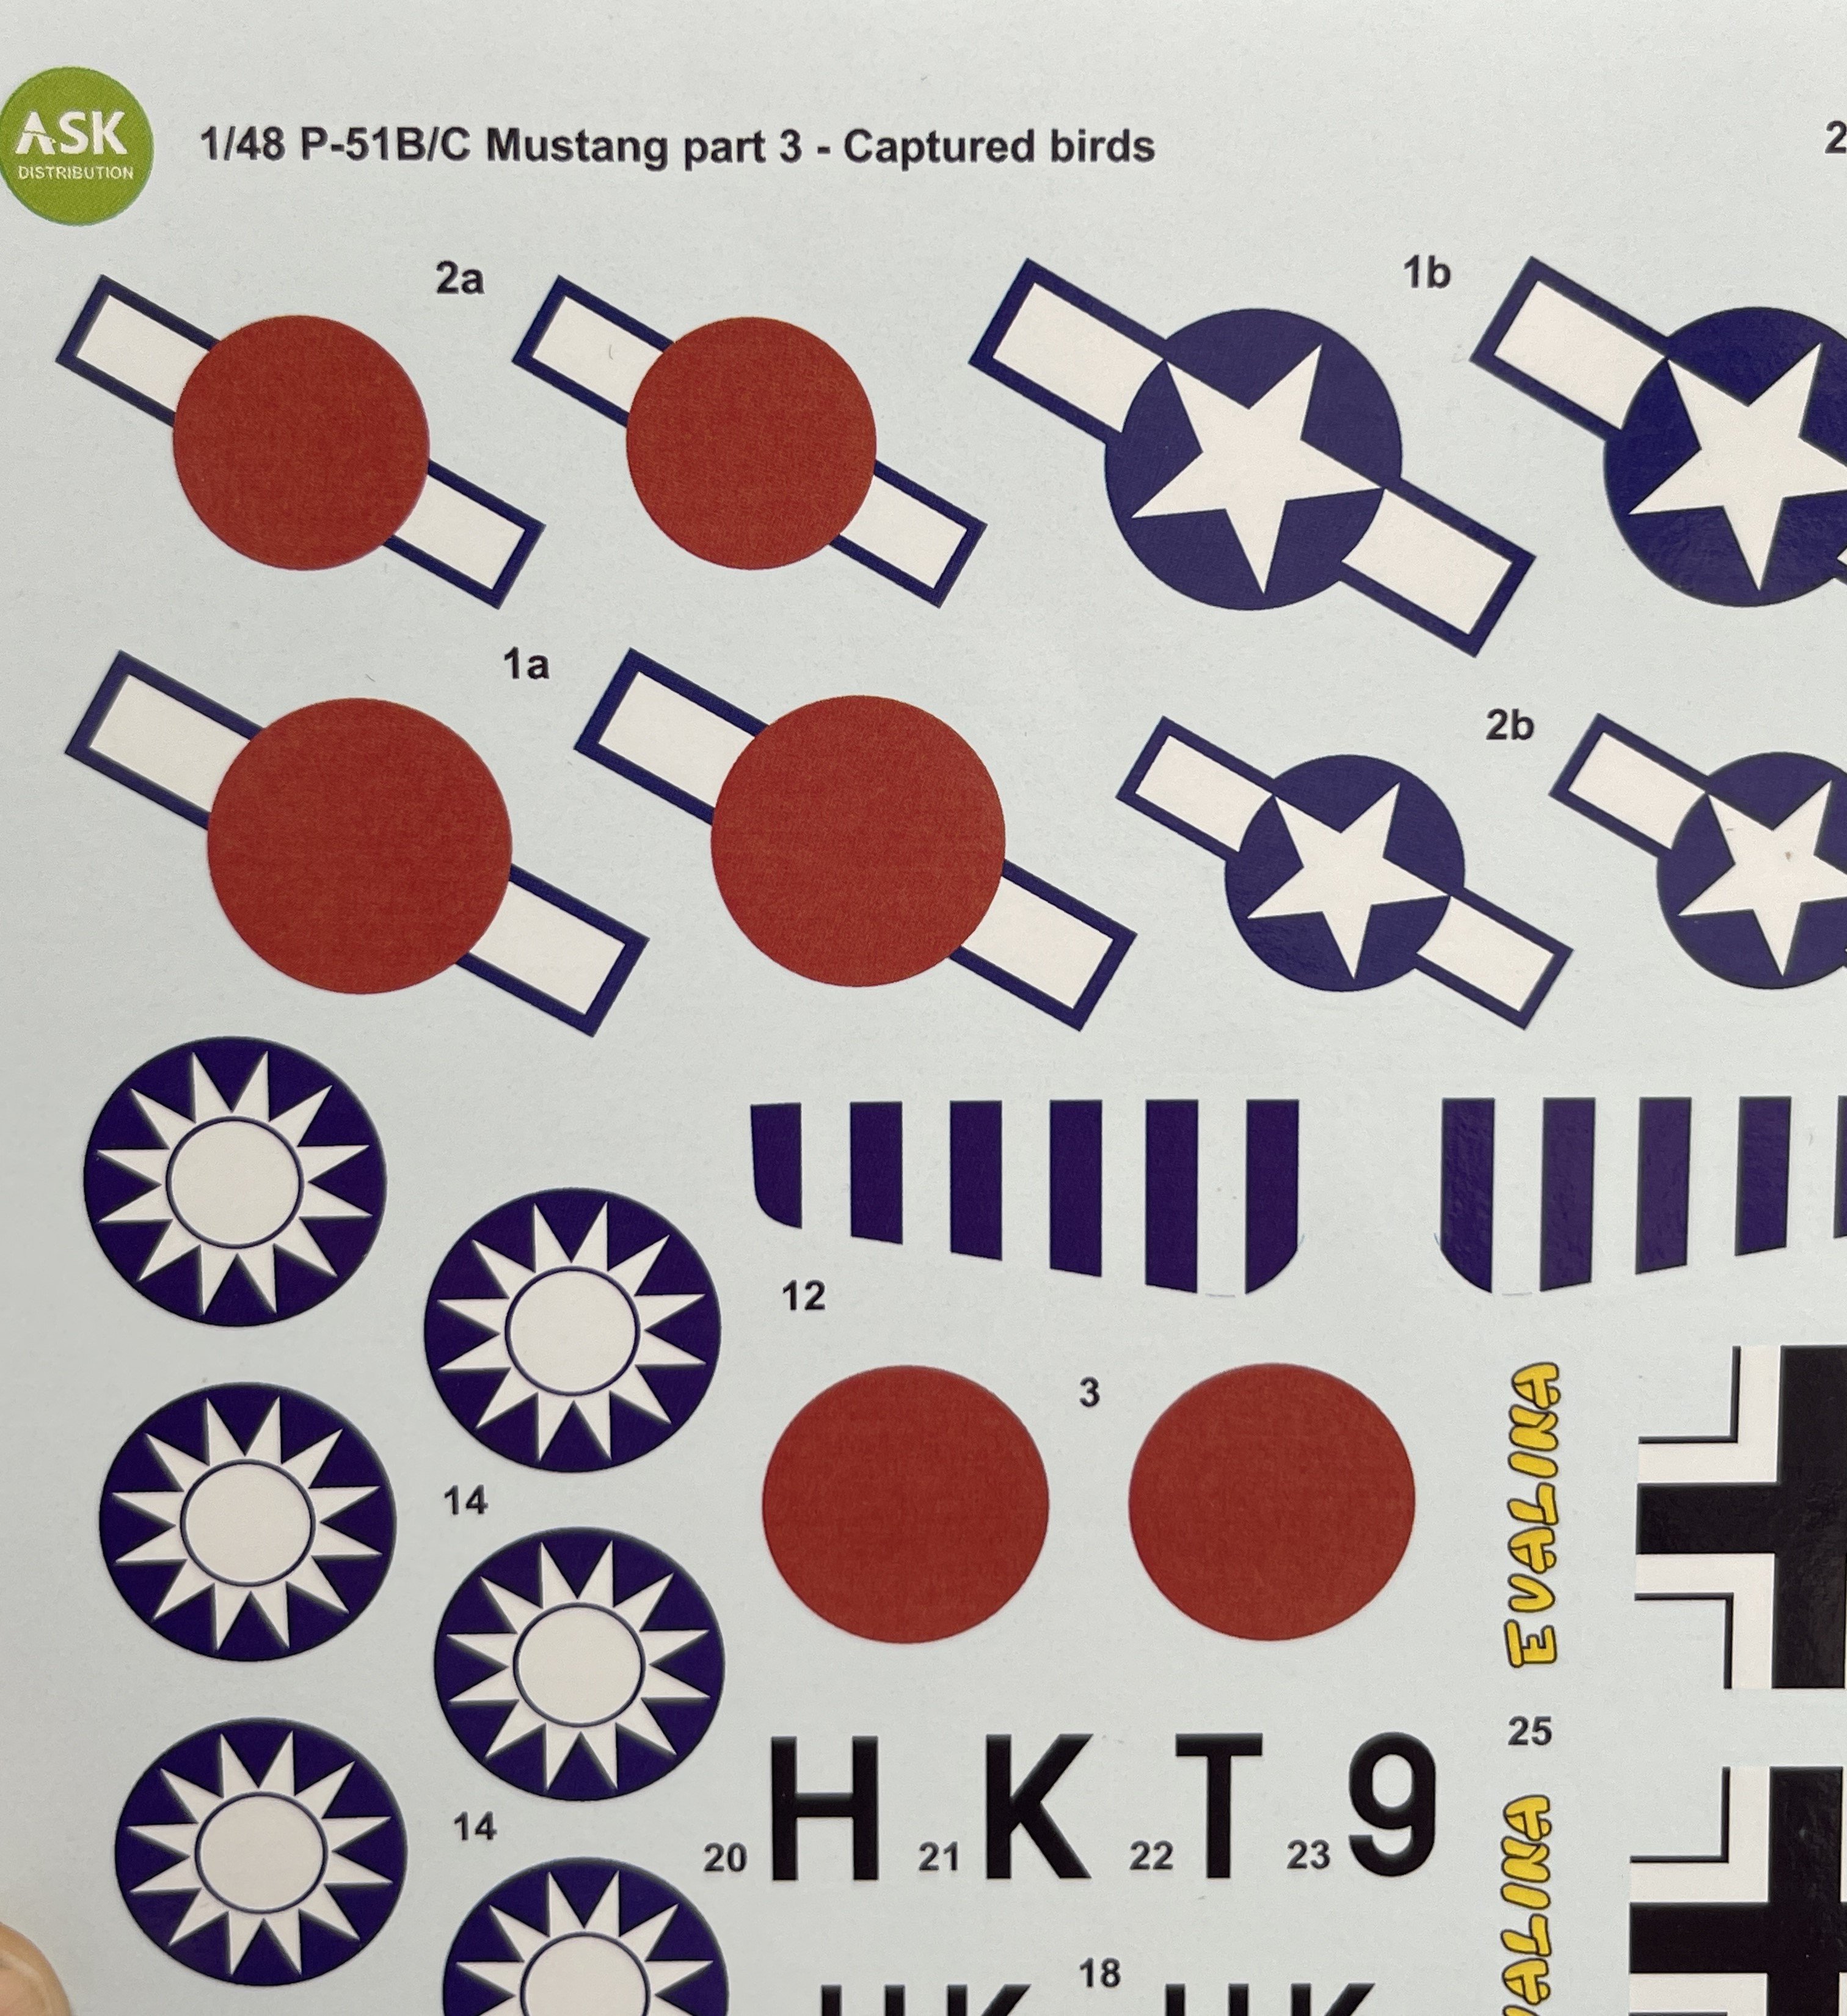
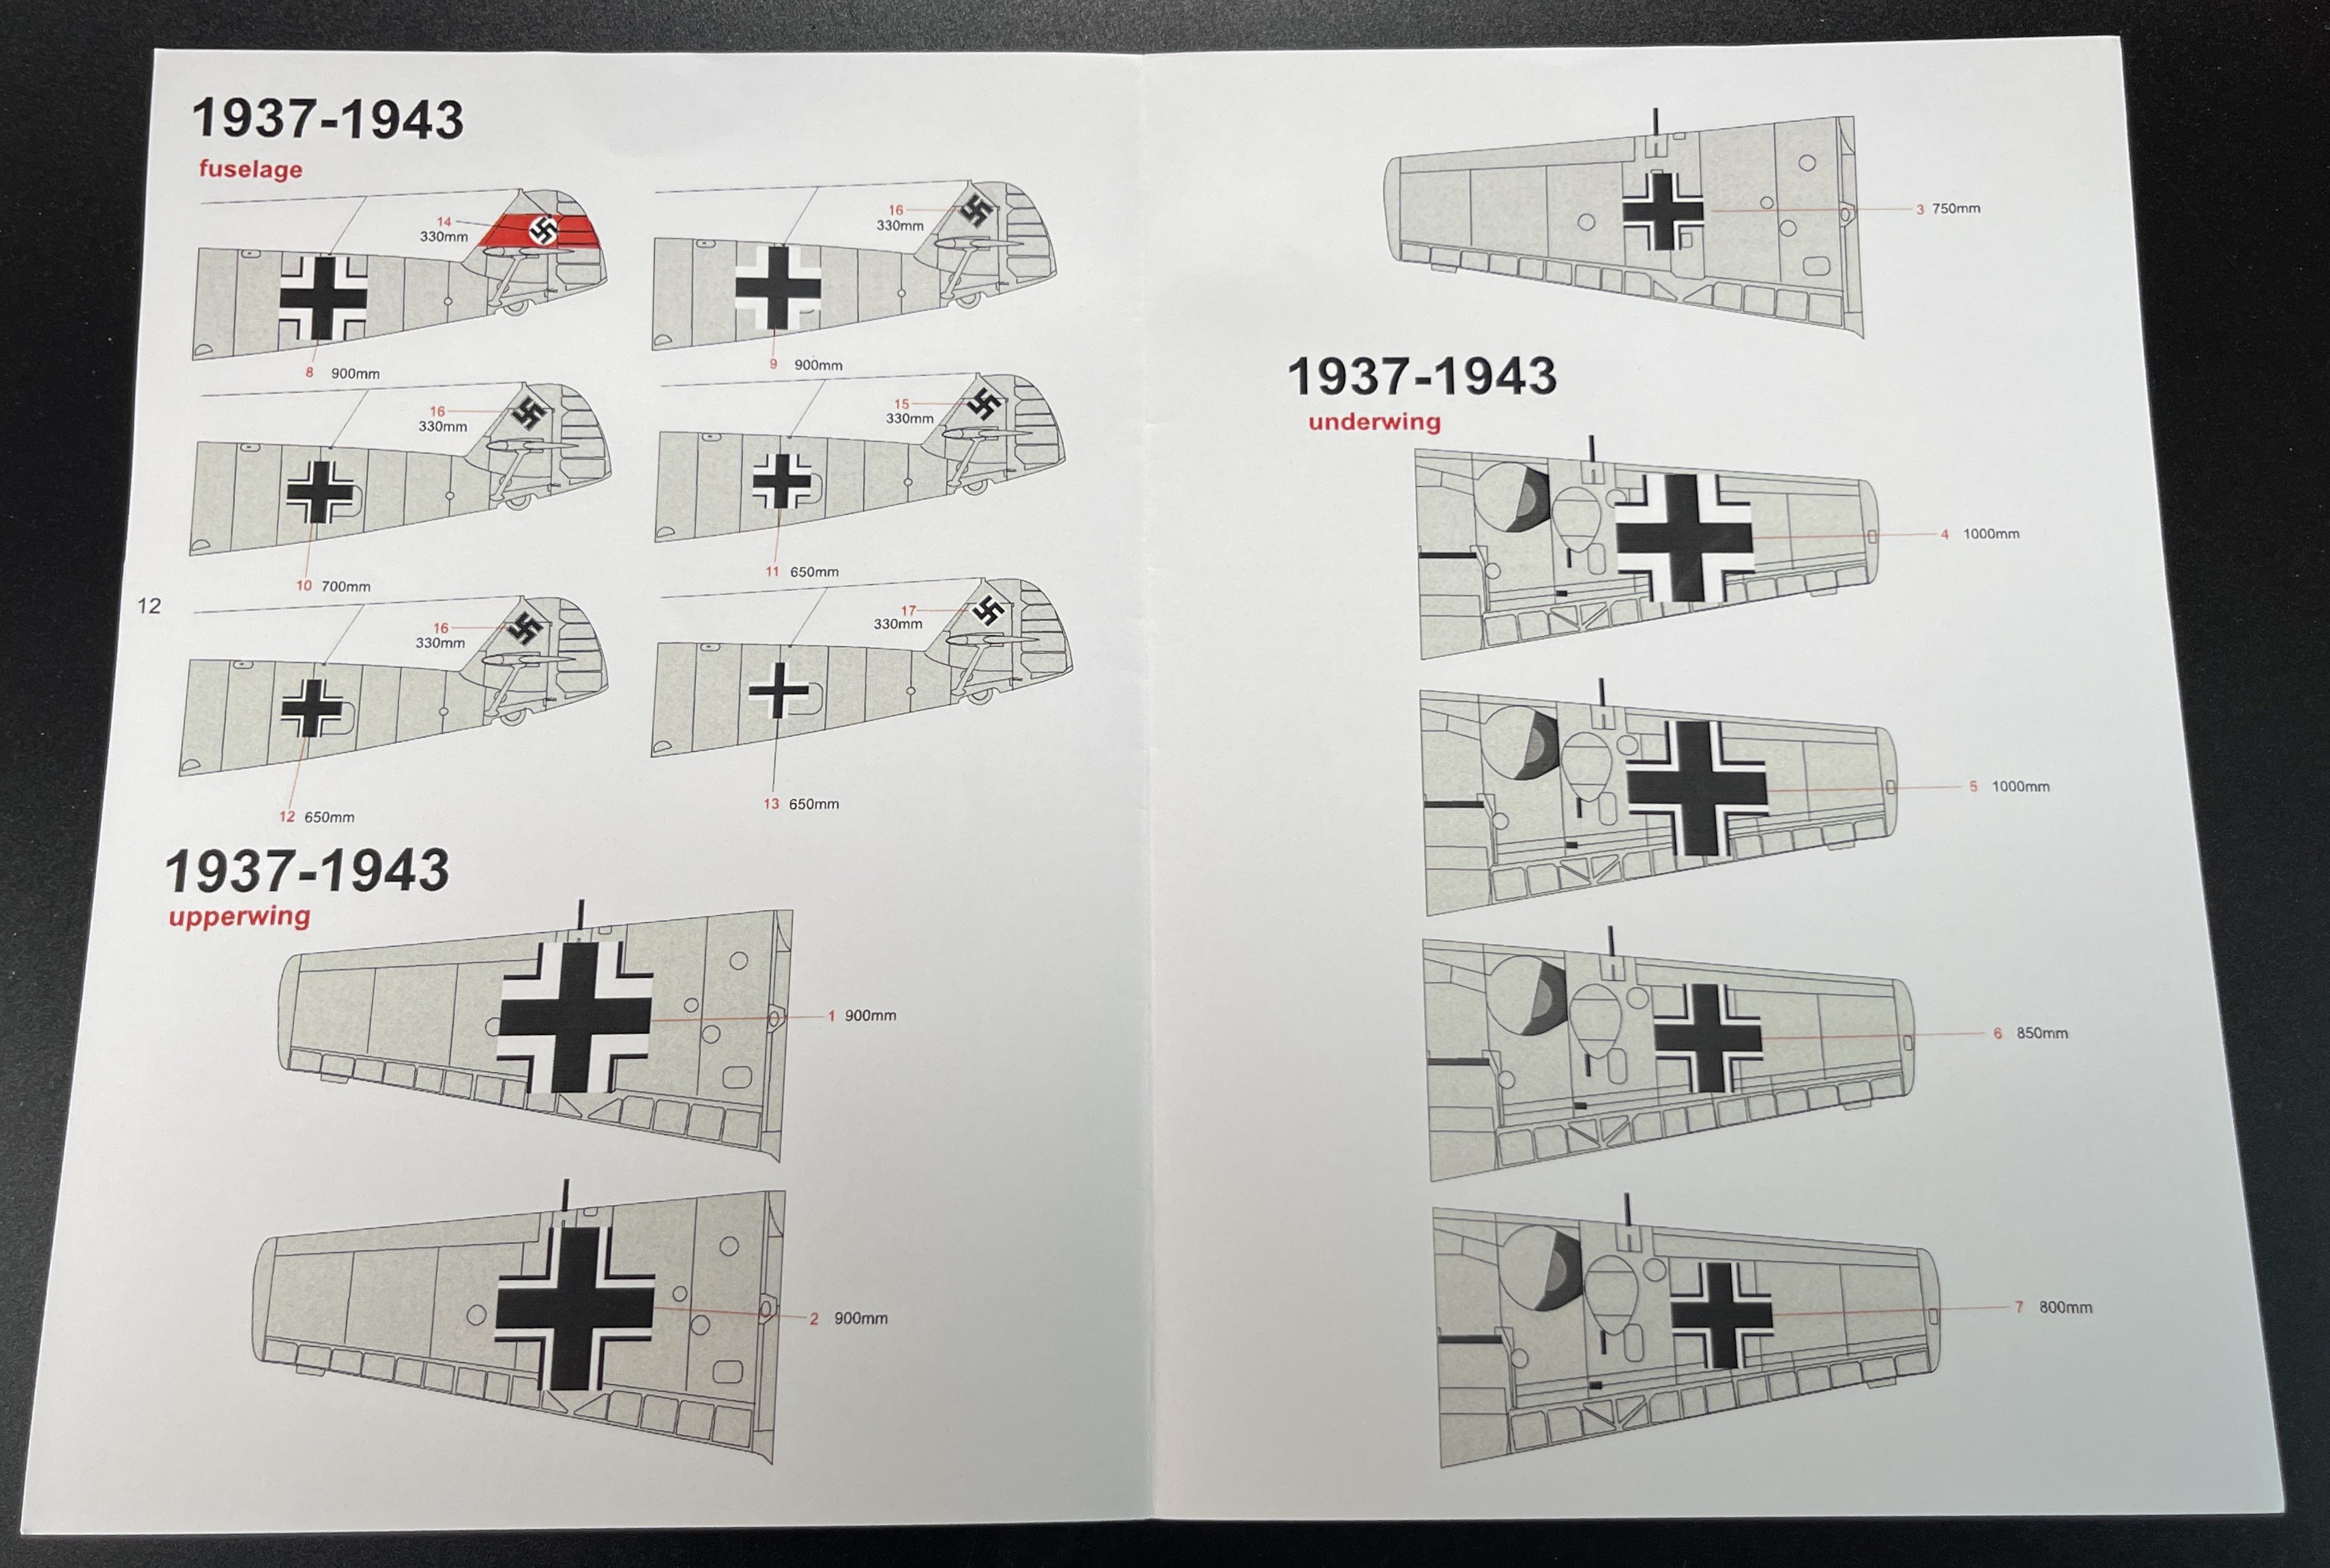
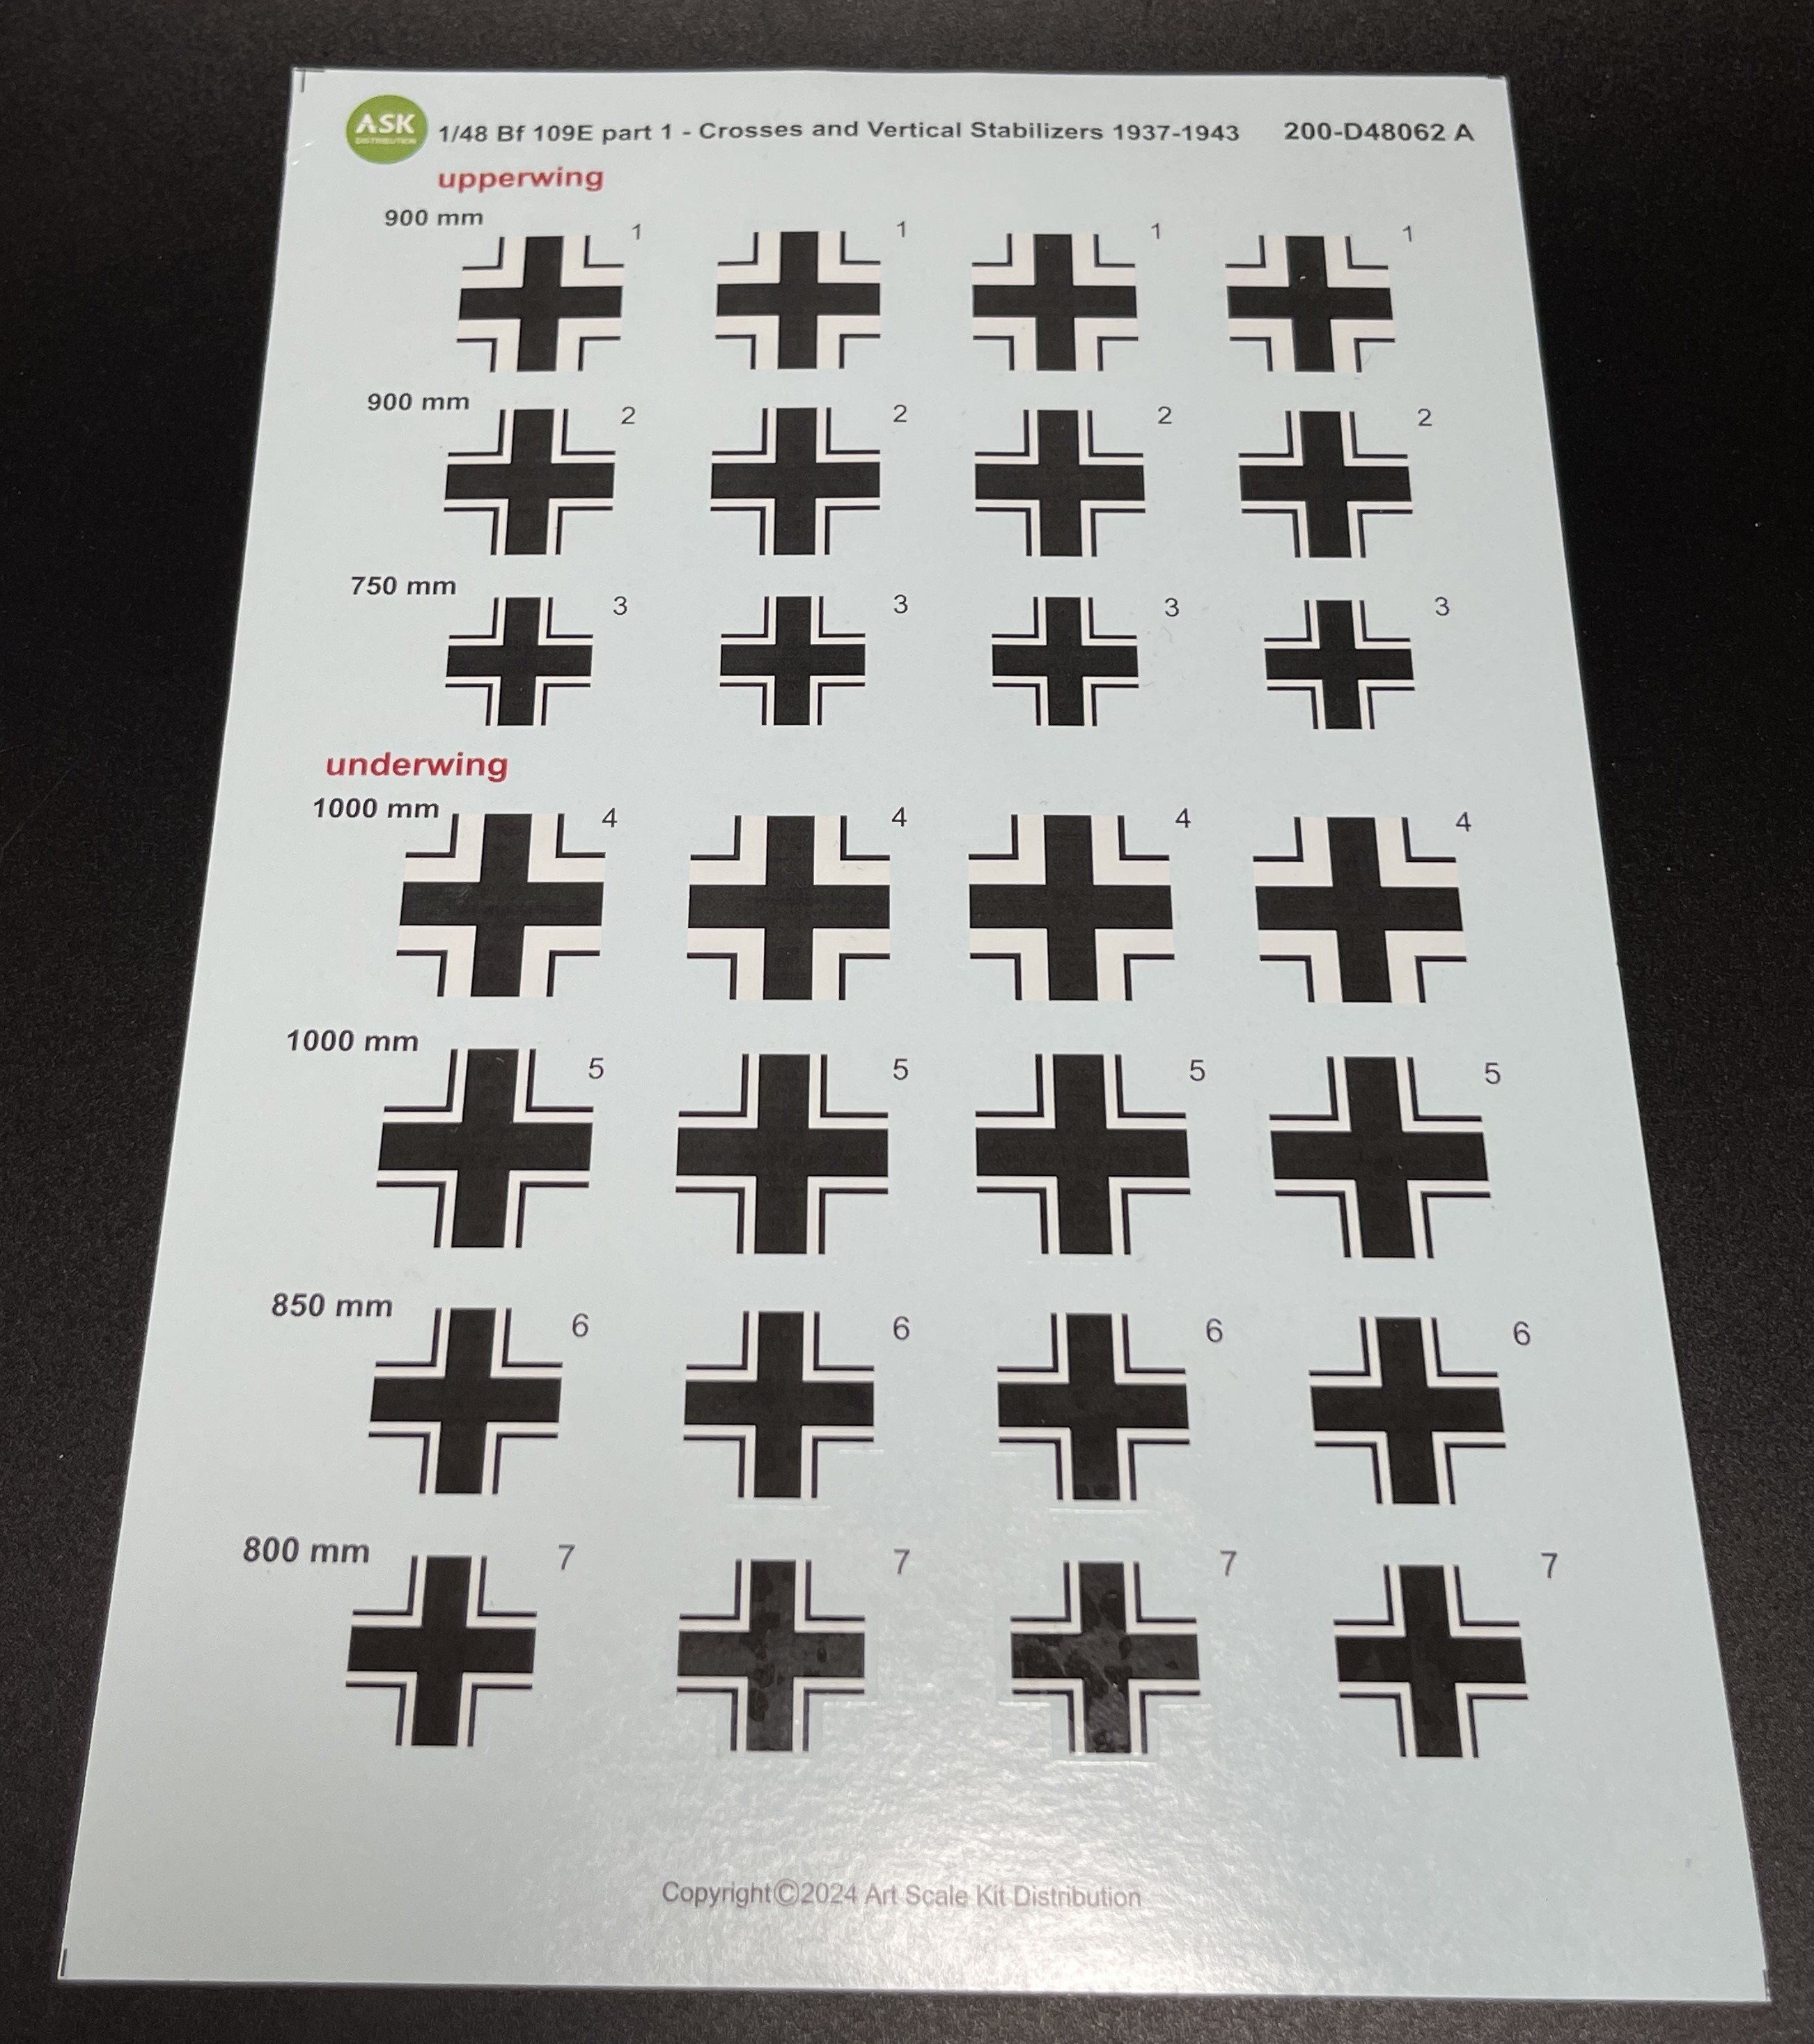
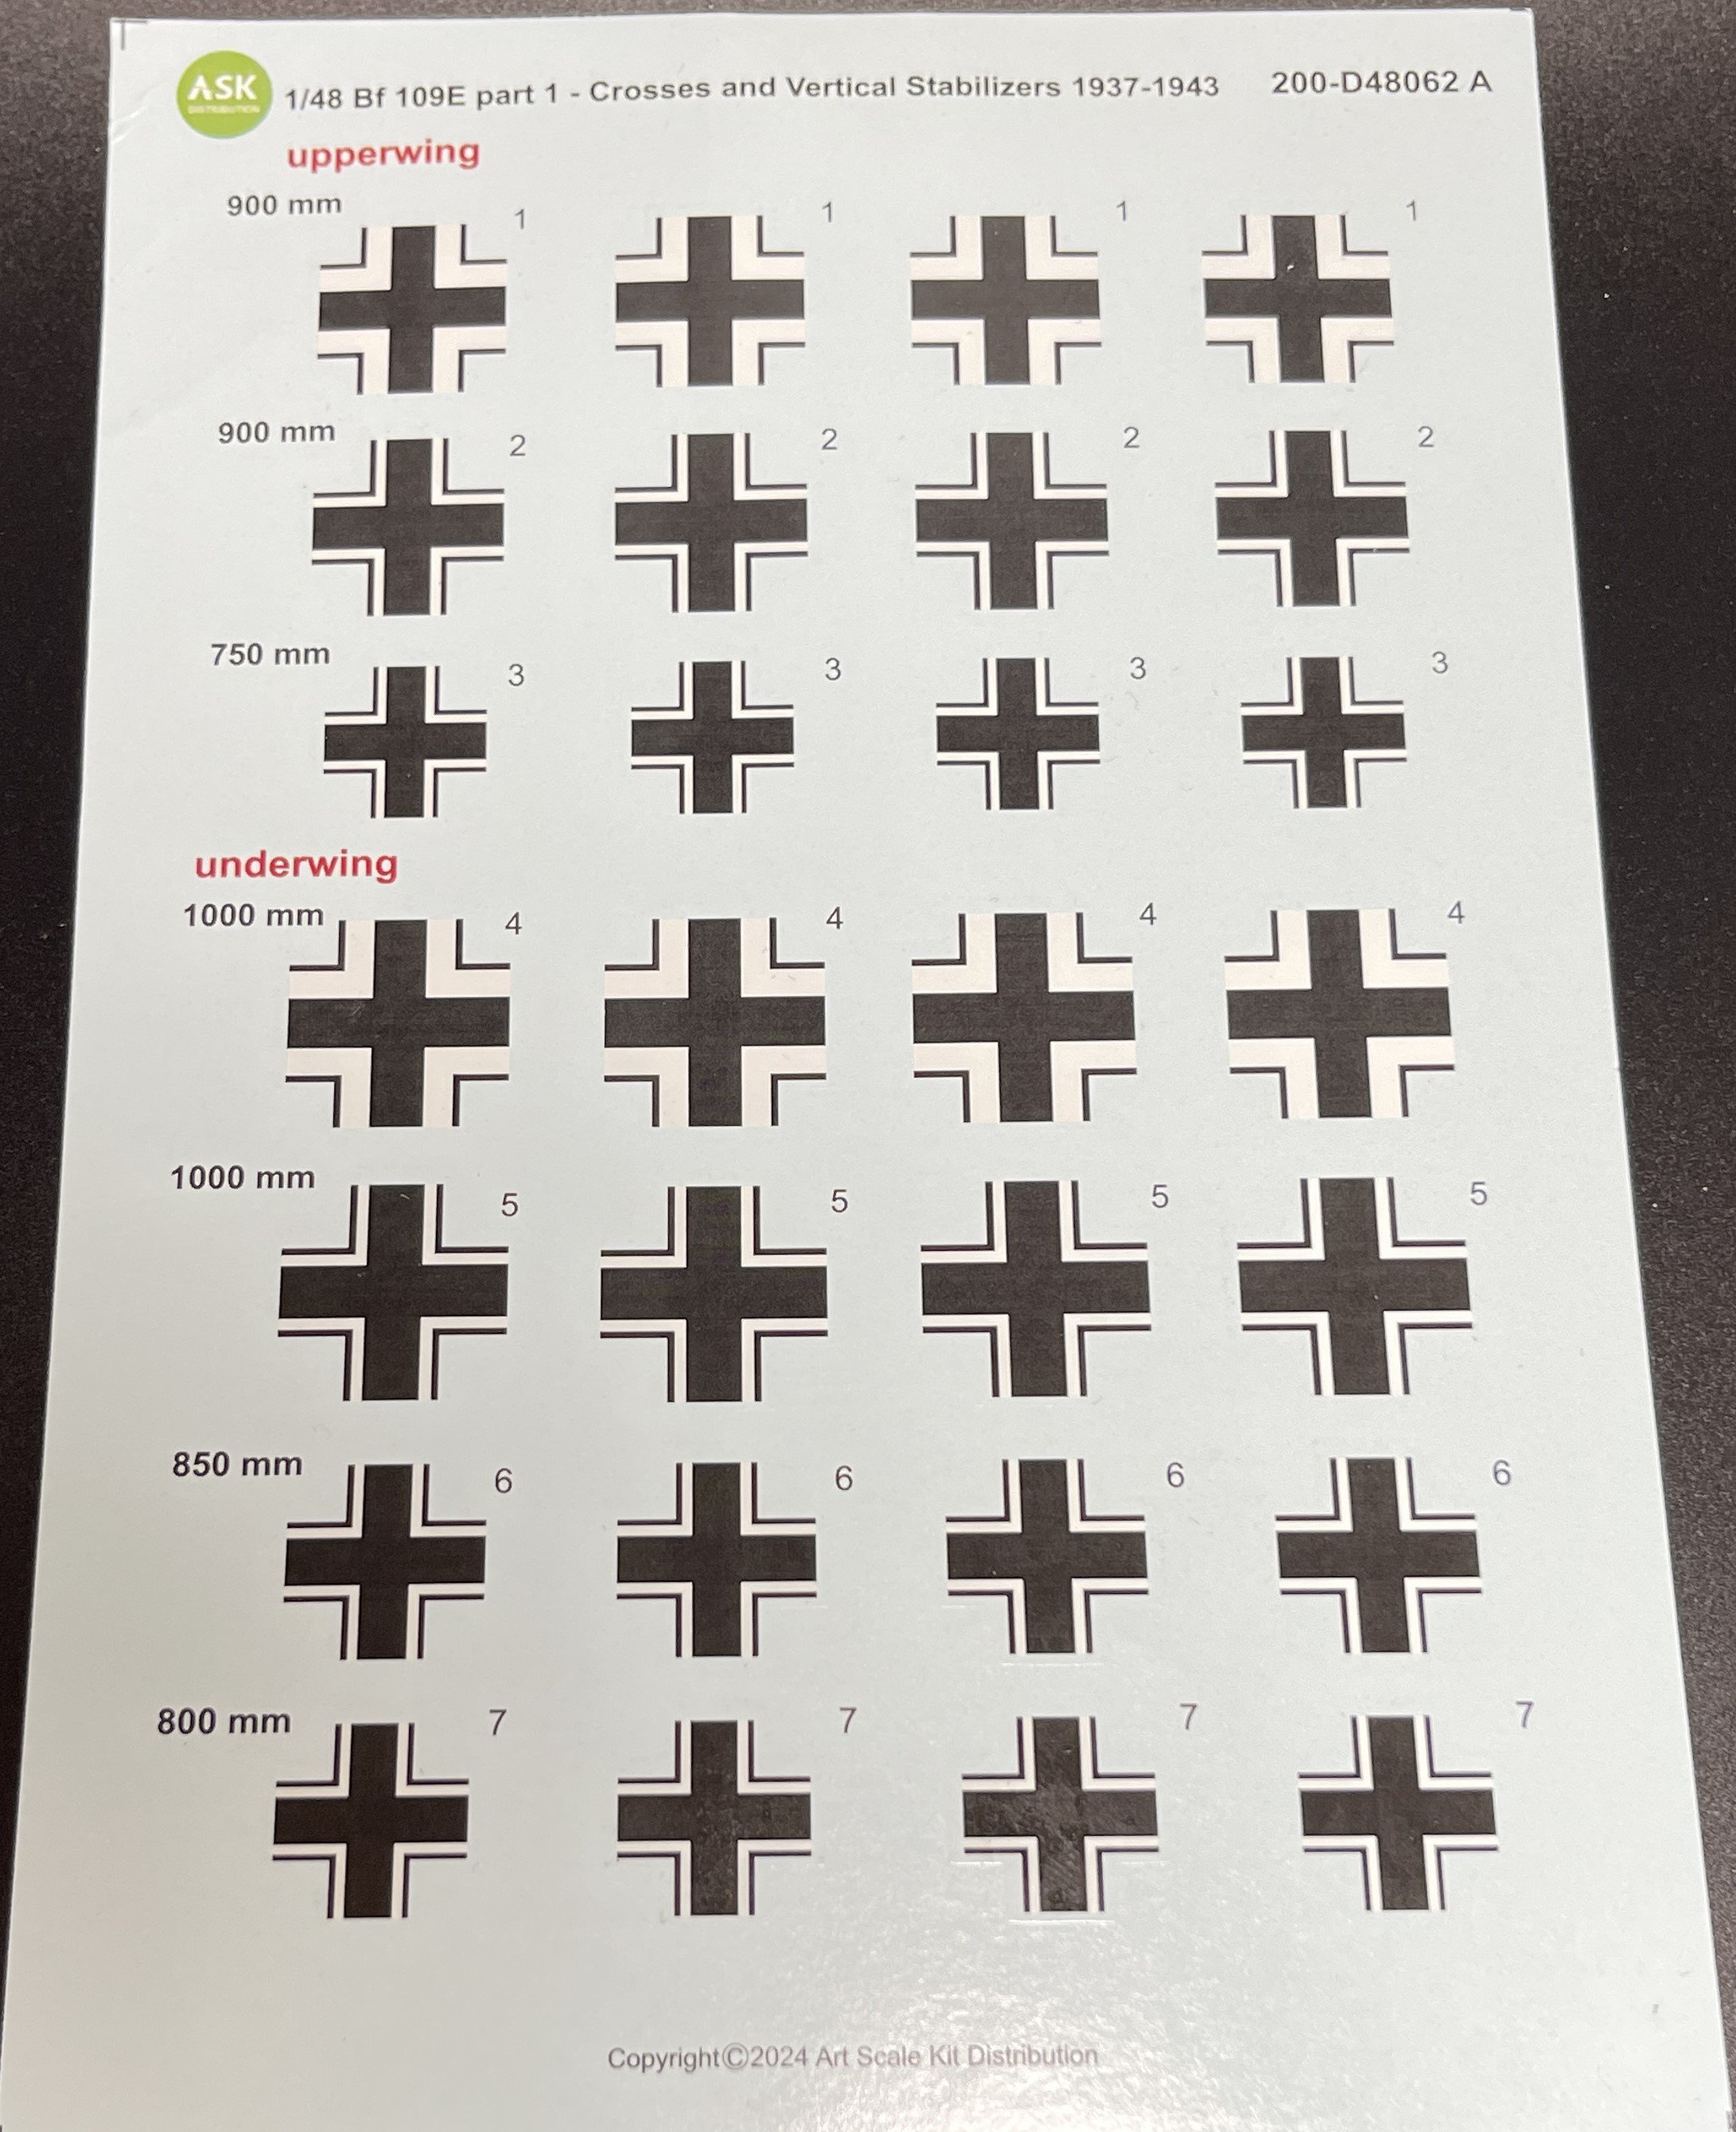
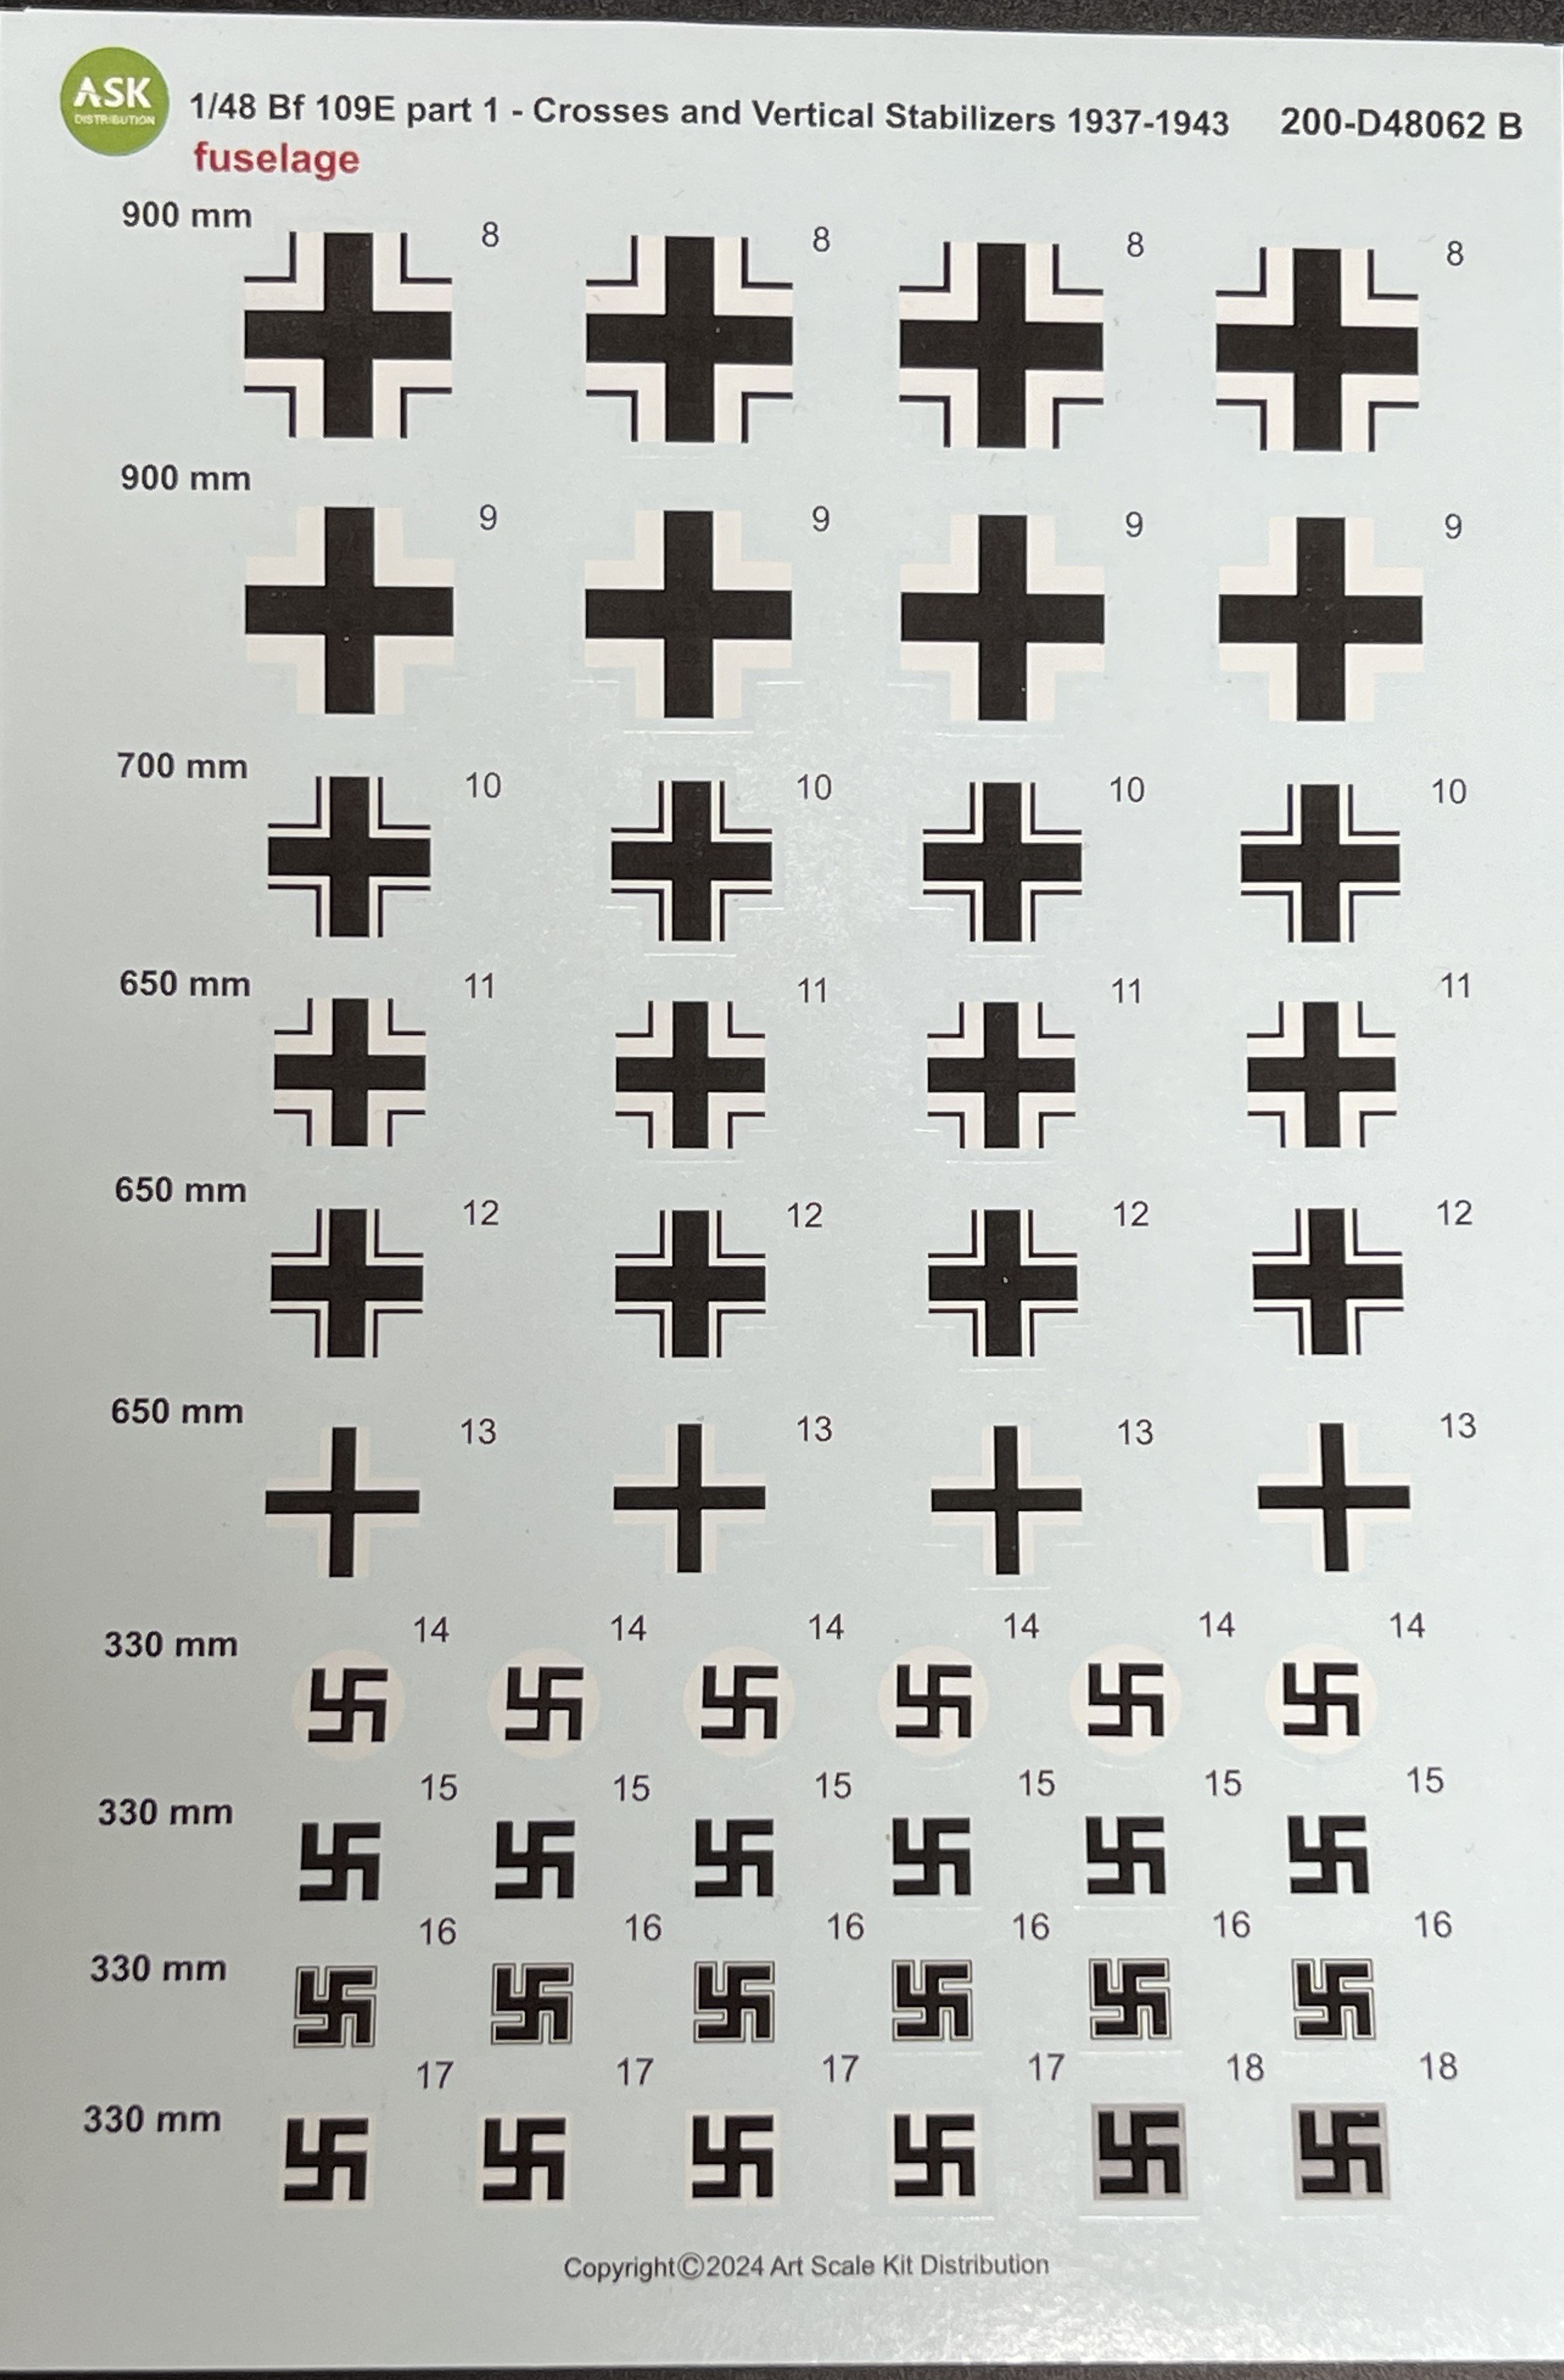
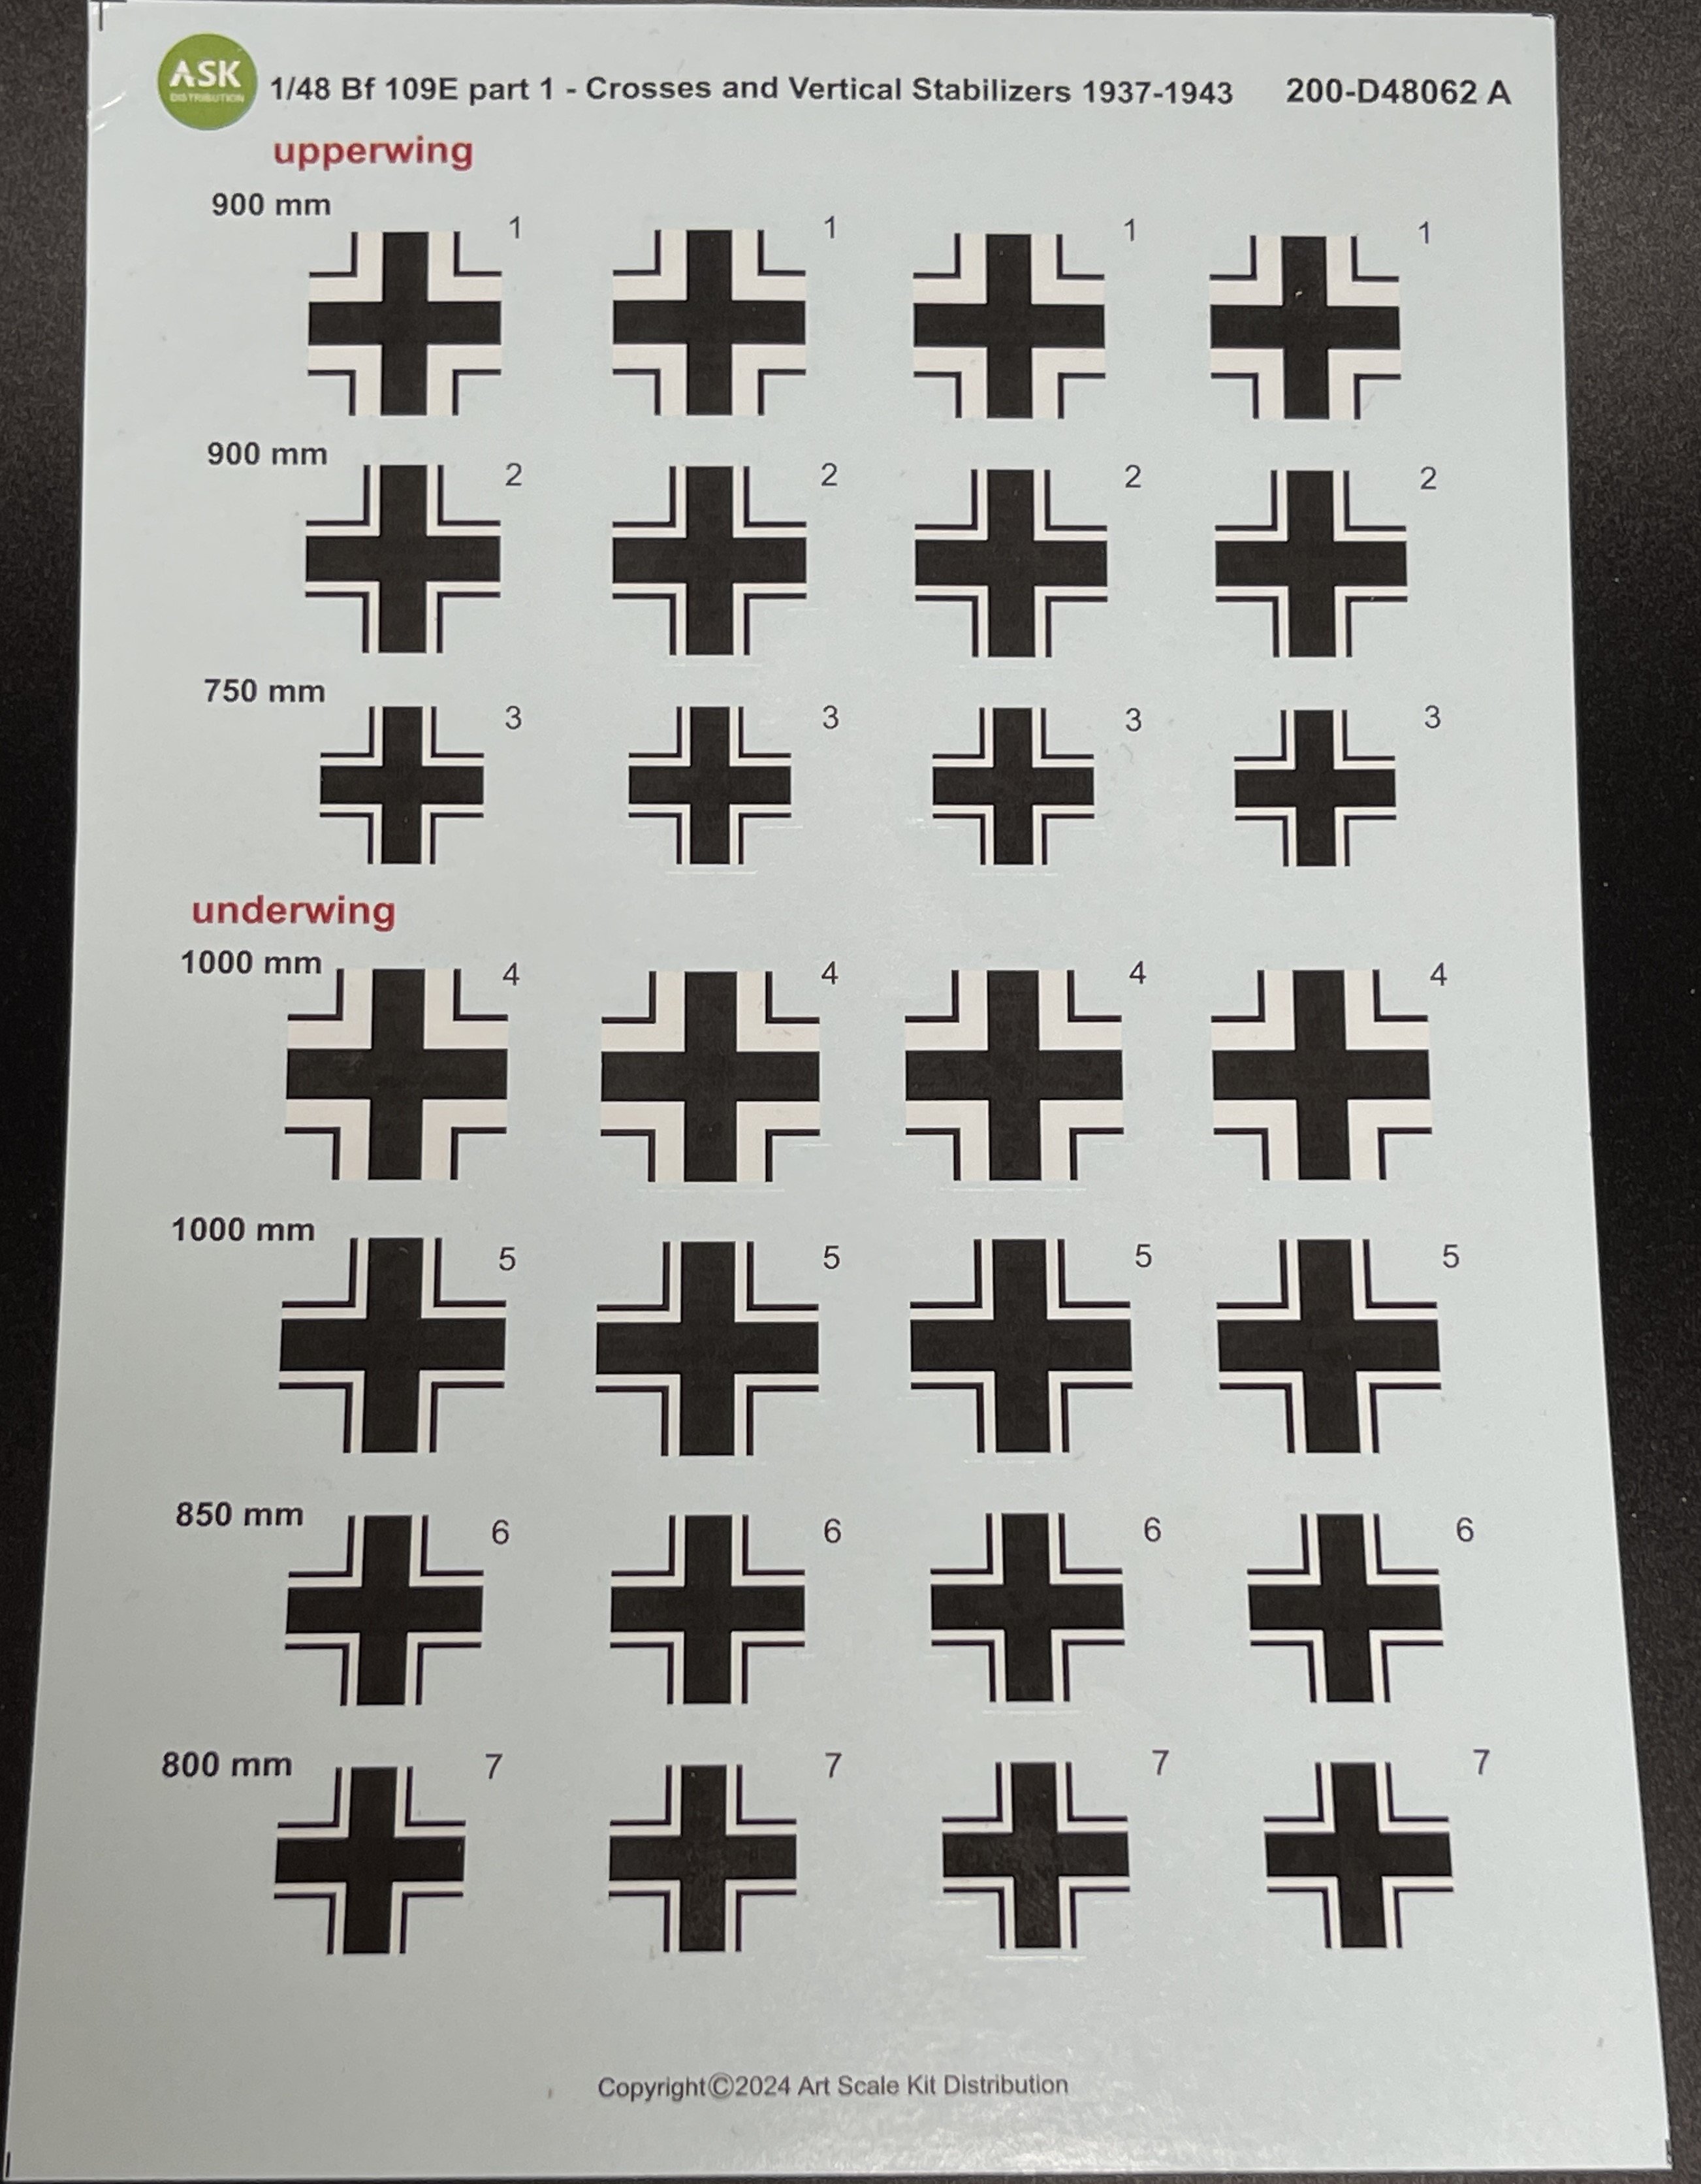
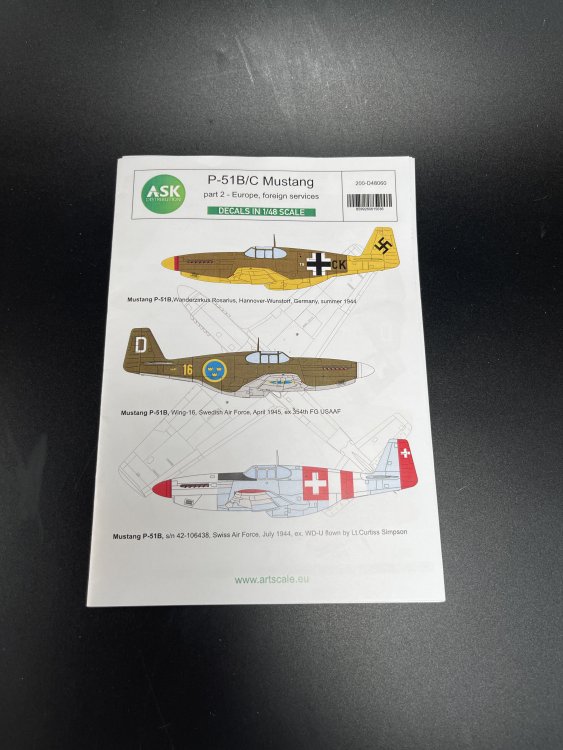
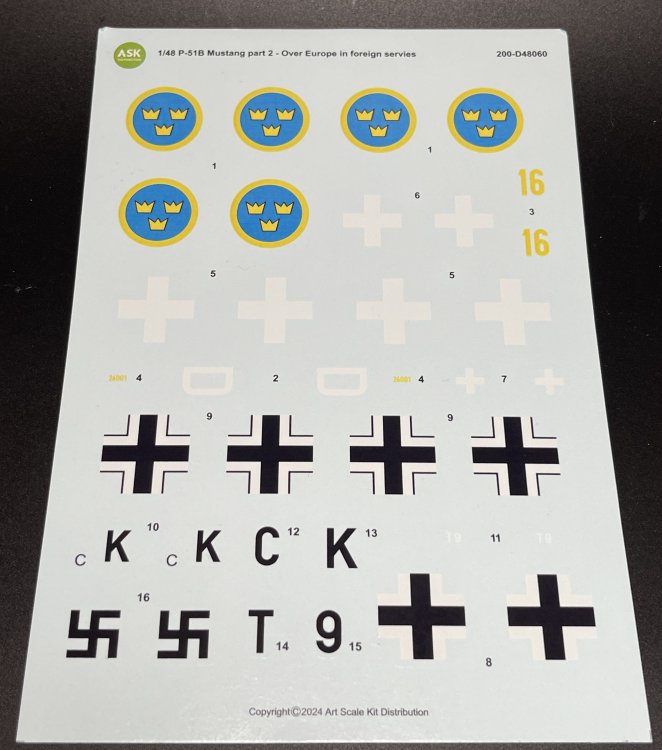
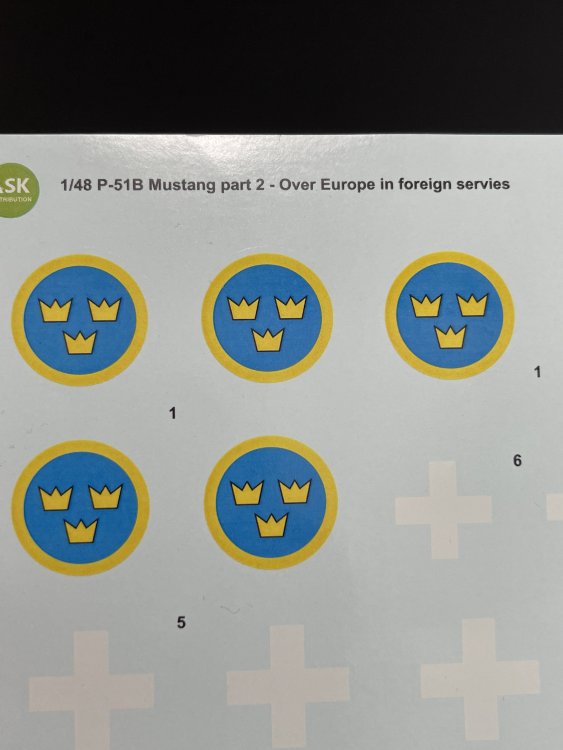
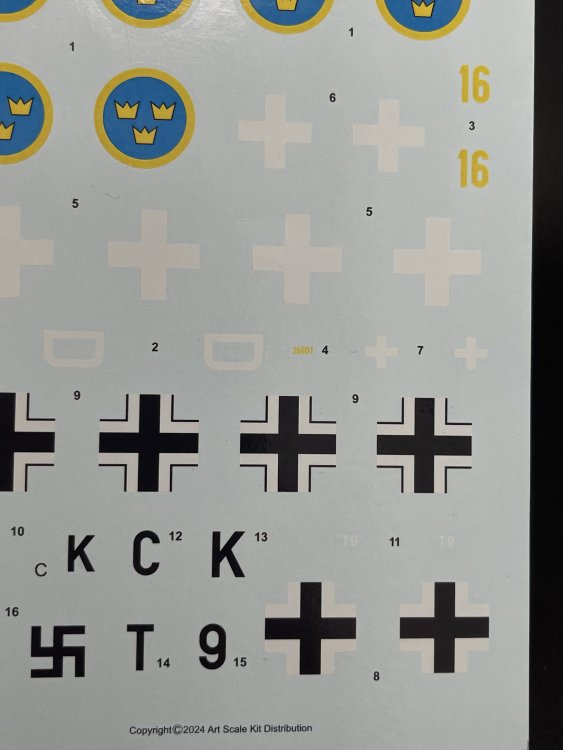
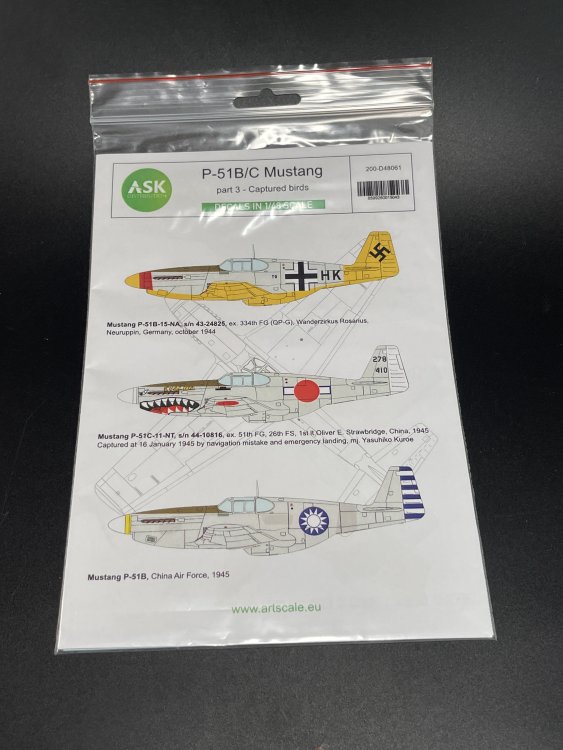
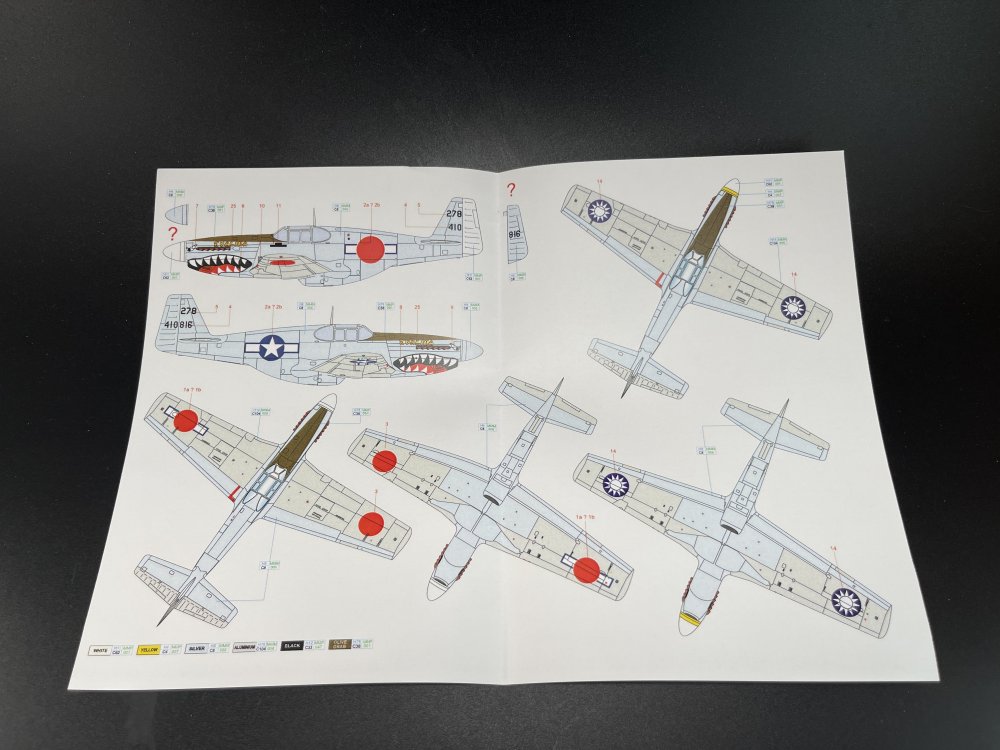
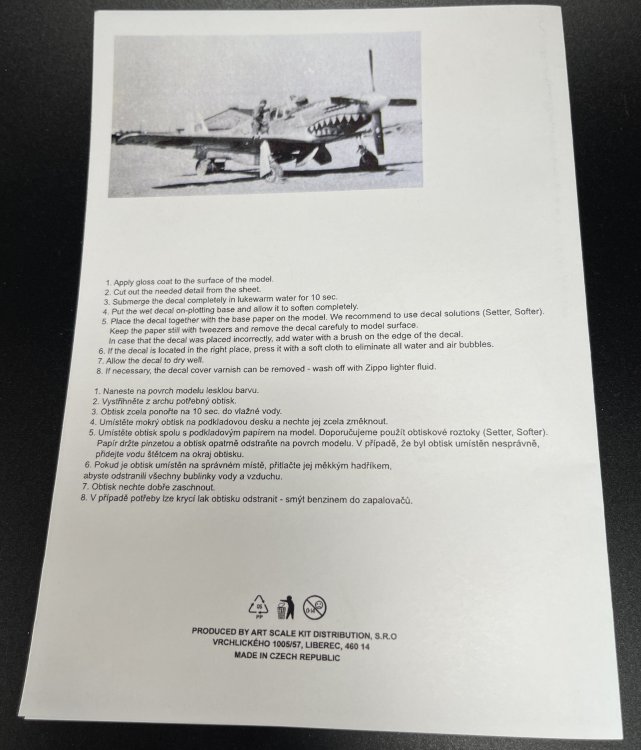
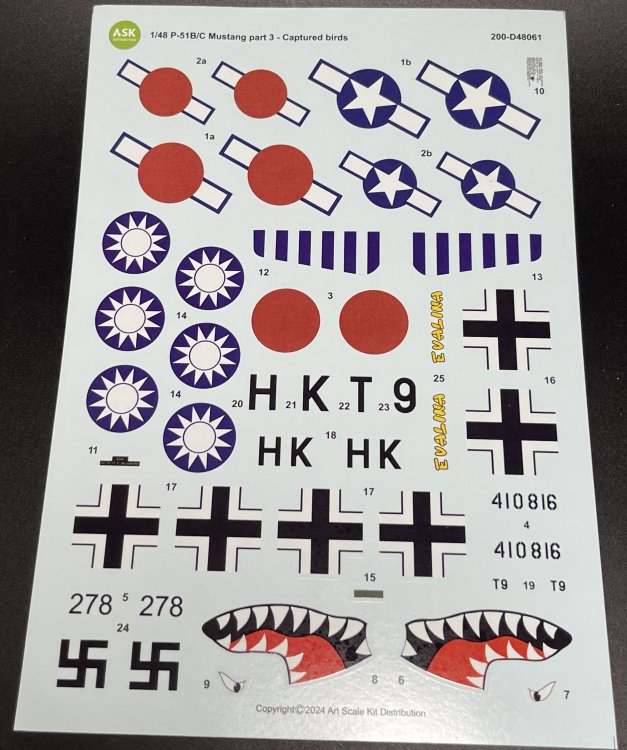
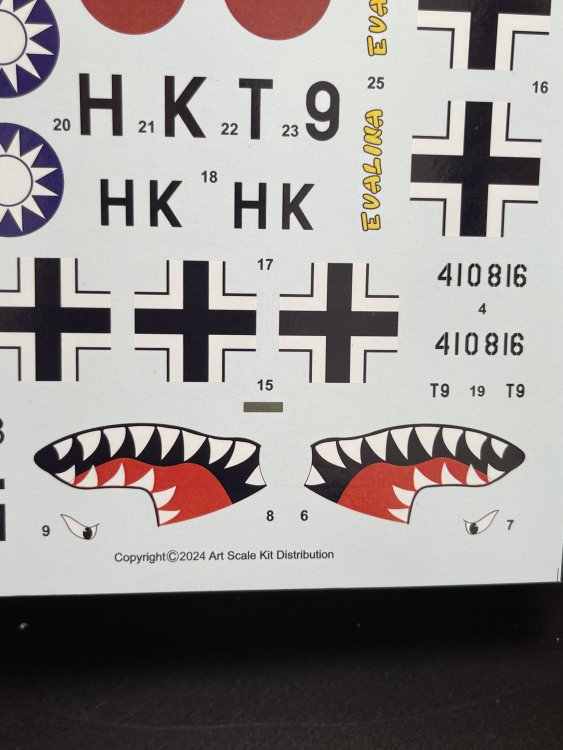
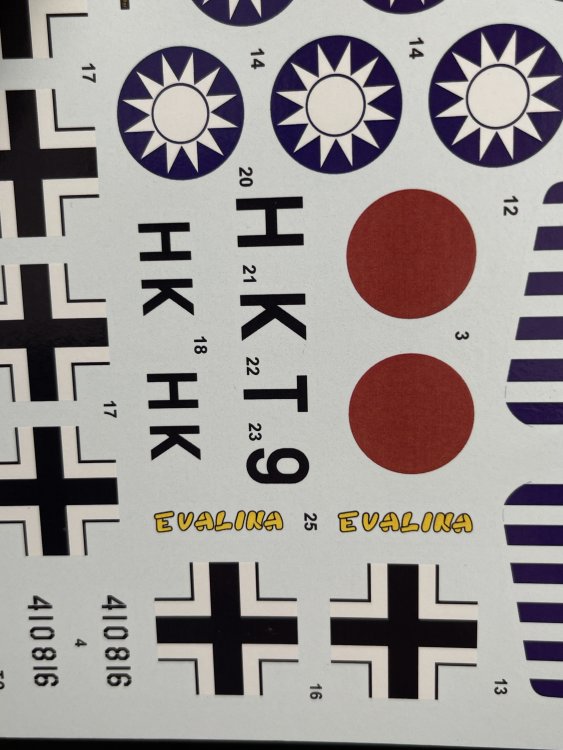
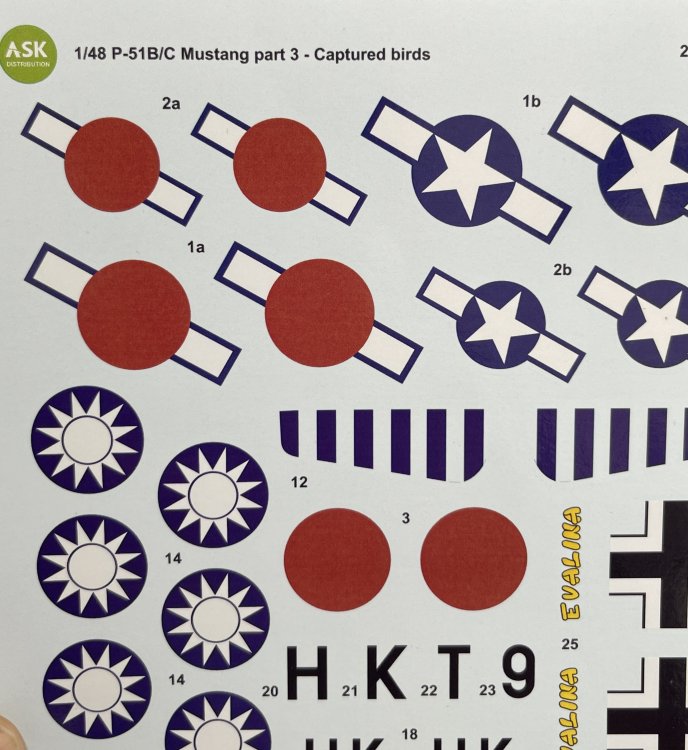
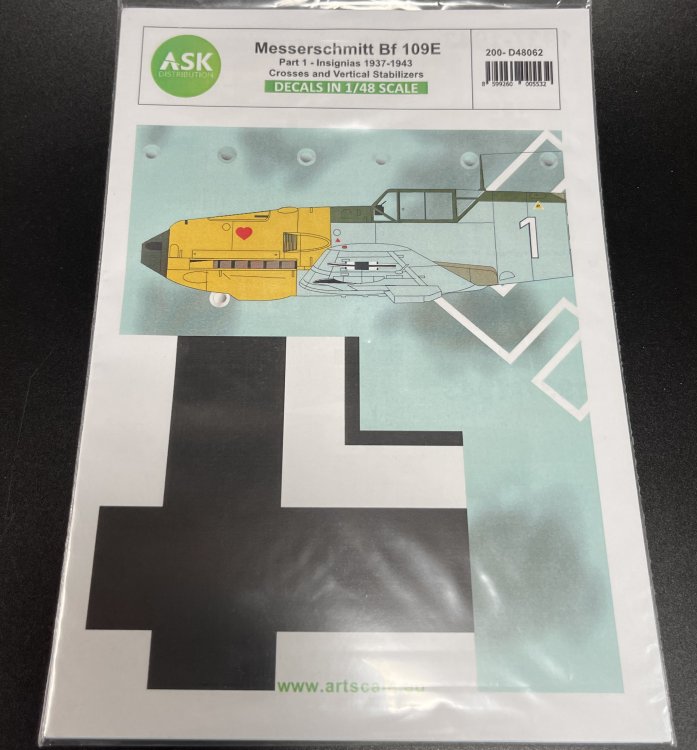
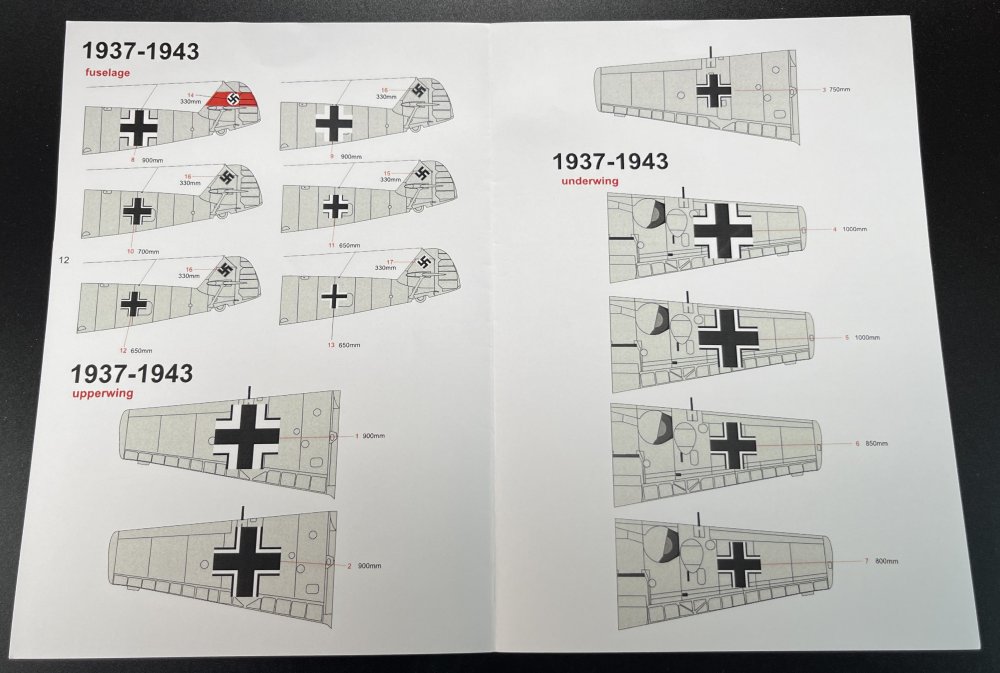
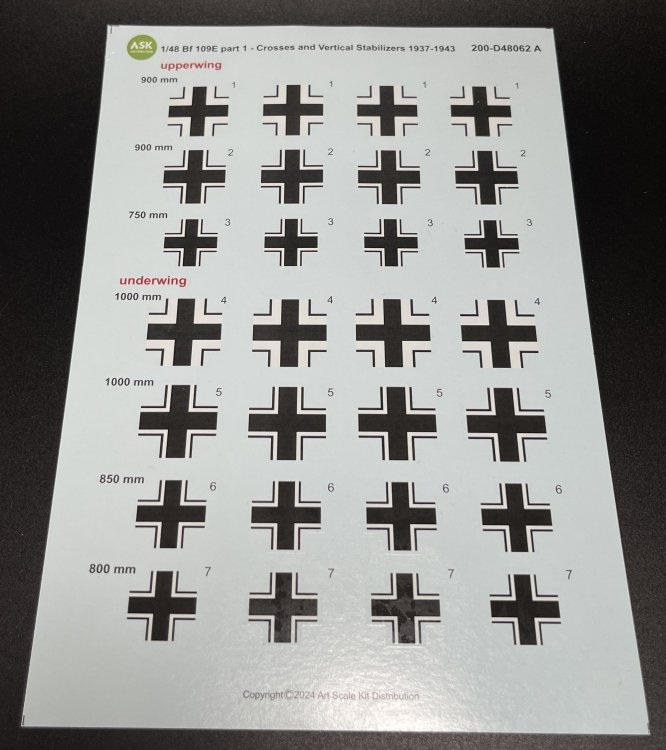
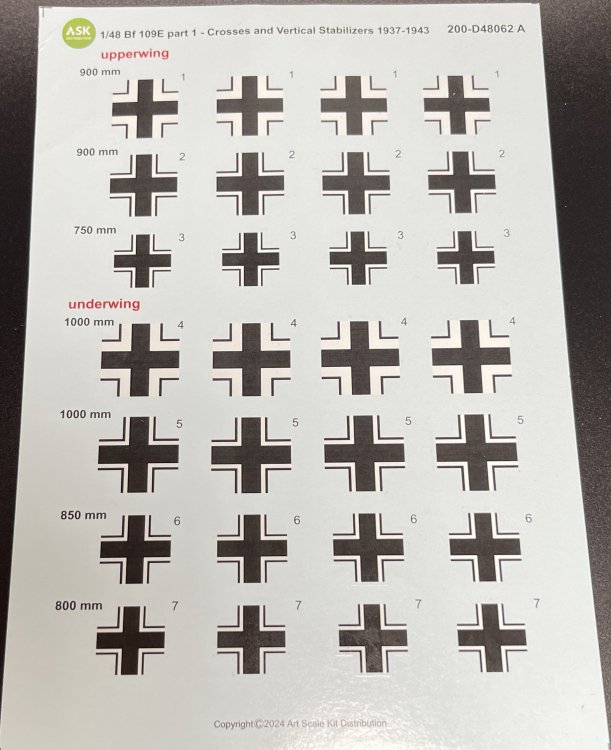
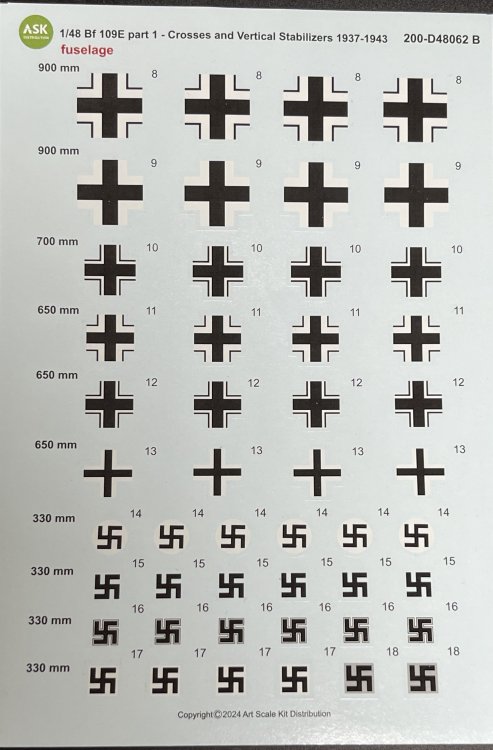
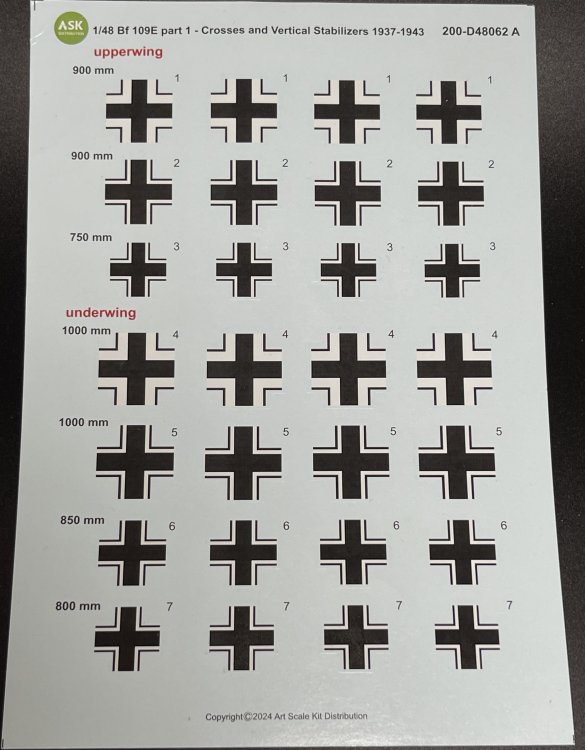
1:48 Art Scale Kit P-51 And Me-109 Insignias Several Sheets Art Scale Kit (also known as ASK) is a model hobby shop and now it known in the modelling world all around for their decals, tools and 3D productions. And ASK can`t stop of releasing decals sheets. Today, I´m going to review two decal sheet from ASK with six striking schemes for the rand new Eduard P-51B and a very useful one: Me-109 insignias! All sets came in a ziplog bag, small A5 size sheet with profiles colors instructions steps how to apply ASK decals. The Me-109 brings the wings and fuselage indication place and which cross to put and where. So let’s looks to the P-51 option schemes first. Here, unlikewise the B-26 sheets (that are an exception) only on picture of one of the schemes is given so theres`s real photo of one of the airplanes that are represented on the decal sheets. P-51 B/C - Part 2 – Europe, foreign services Catalogue number200-D48060 Price: 11,90€ To order, click here. This sheet has 3 schemes options of P-51 B in foreign, more concretely a German, a Sweden and a Swiss scheme. 1 - P-51B Mustang, Wanderzirkus Rosarius, Germany, Hannover-Wunstorf, summer 1944. 2 - P-51B Mustang, Wing-16, Swedish Air Force, April 1945, ex 354th FG USAAF. 3 - P-51B Mustang, s/n 42-106438, Swiss Air Force, July 1944, ex. WD-U flown by Lt. Curtiss Simpson. P-51 B/C Part 3 – Capture birds Catalogue number200-D48061 Price: 11,90€ To order, click here. Here, some striking Mustangs with some unusual markings, like German or Japanese. 1. Mustang P-51B-15-NA, s/n 43-24825, ex. 334th FG (QP-G), Wanderzirkus Rosarius, Neuruppin, Germany, October 1944. 2. Mustang P-51C-11-NT, s/n 44-10816, ex. 51th FG, 2.6th FS, 1st Lt.Oliver E. Strawbridge, China 1945, captured at 16 January 1945 by navigation mistake and emergency landing. Mj. Yasuhiko Kuroe. 3. Mustang P-51B, China Air Force 1945. And finally, a very usefull sheet Me-109 Part 1 – Insignias 1937-1943 Crosses and vertical stabilizers Catalogue number200-D48062 Price: 19,80€ To order, click here. Several swastikas (lets never forget… erasing the past, is the way to repeat it in the future) and several types of Balkenkreuz, all for Me-109 in 1:48 with the clear specification that is for the timeline from 1939 to 1943. So, for sure that this sheet will be a most to all aircraft modeler. ** Checking the decal sheets, as usual the color registration e density is great and a very good definition of the details. The decals have a thin film, in fact looking very thin and delicate. Once again, there is no indication where are they printed so I assume that will be in ASK house. The printing quality is quite good, as they are sharp, with outline very well defined. The instructions are the general ones that are applicable to all decals, it is always important to remember the general principles of decal application. In this case, there is no specific rule for applying these decals. The profiles draws contains lots of information, with side view (both side) and top view with precise decal indication. *** Conclusion: So, theses sheet is quite sparkle with very striking and attractive schemes. Thanks to ASK to keep releasing these decals in the modelling world. The location indication of the decals is quite good and very perceptible. The decals as already said, have a very good colour registration, very thin, with minimum decal film, and they work quite nice! My thanks to Art Scale for producing these fantastic decals. Francisco Guedes .


- 5 replies
-
- 5
-
-
-
- art scale kit
- ask
- (and 3 more)