
Fran
-
Posts
2,286 -
Joined
-
Last visited
Content Type
Profiles
Forums
Events
Gallery
Everything posted by Fran
-
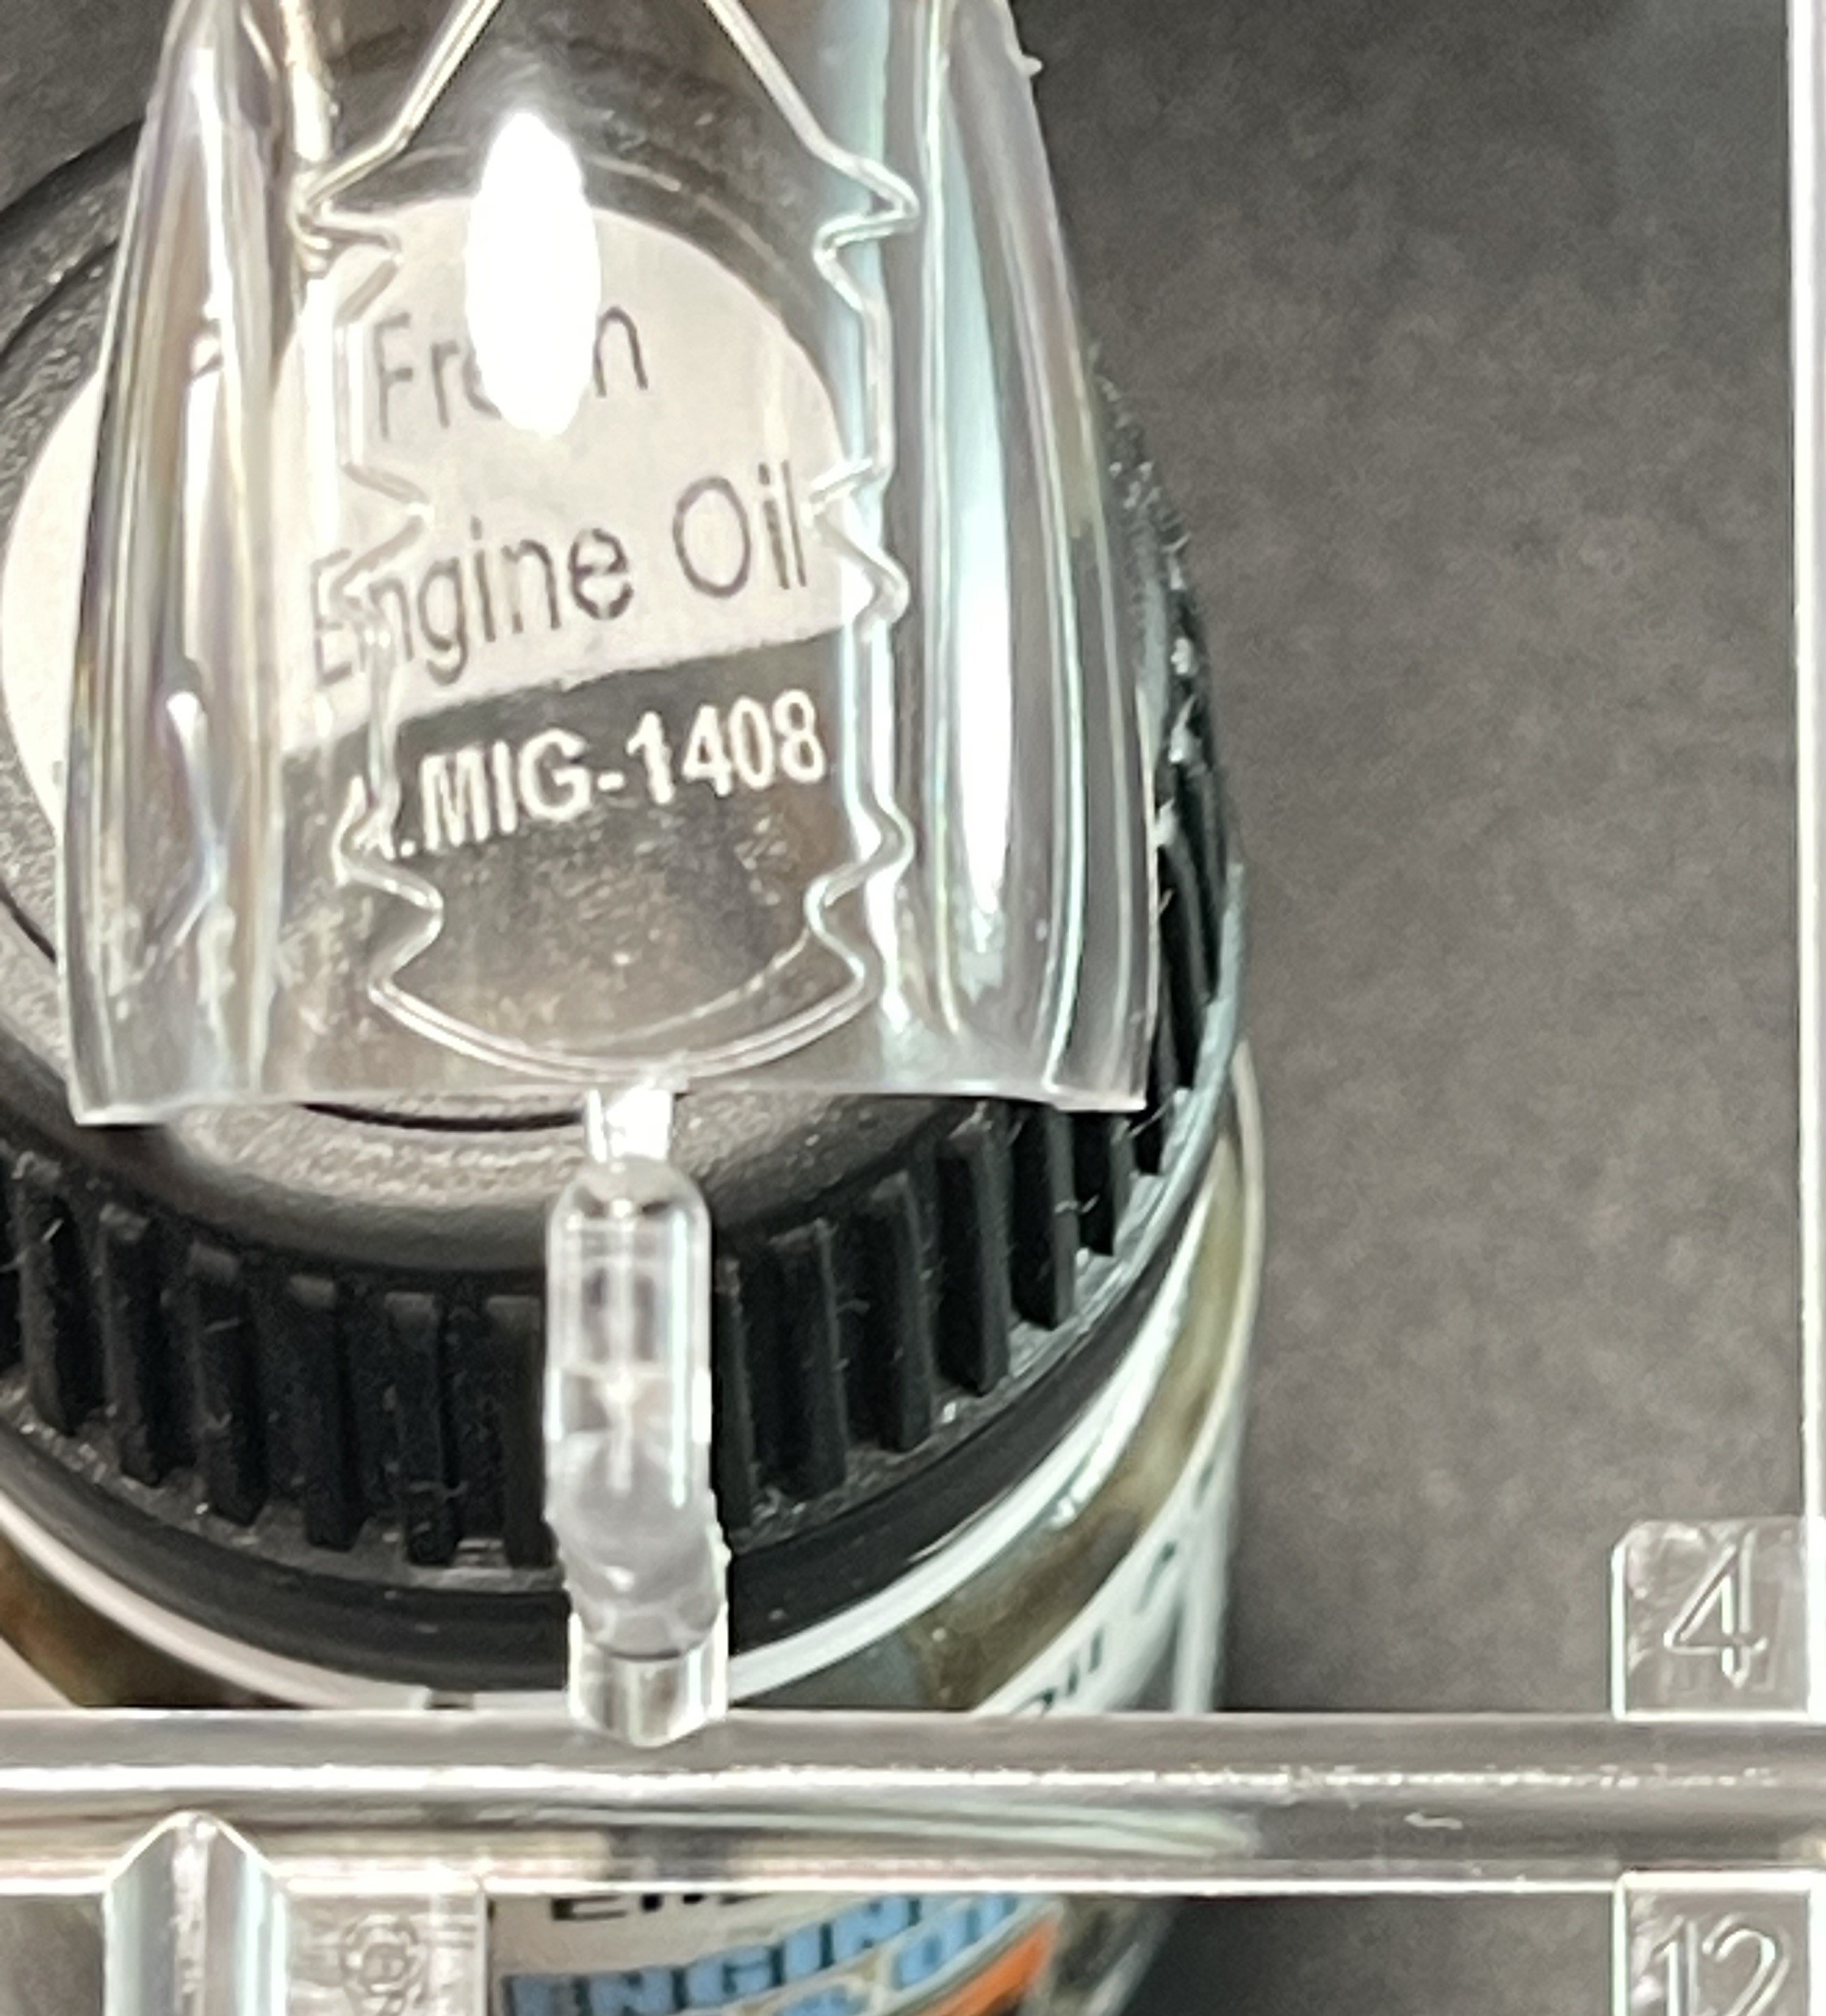
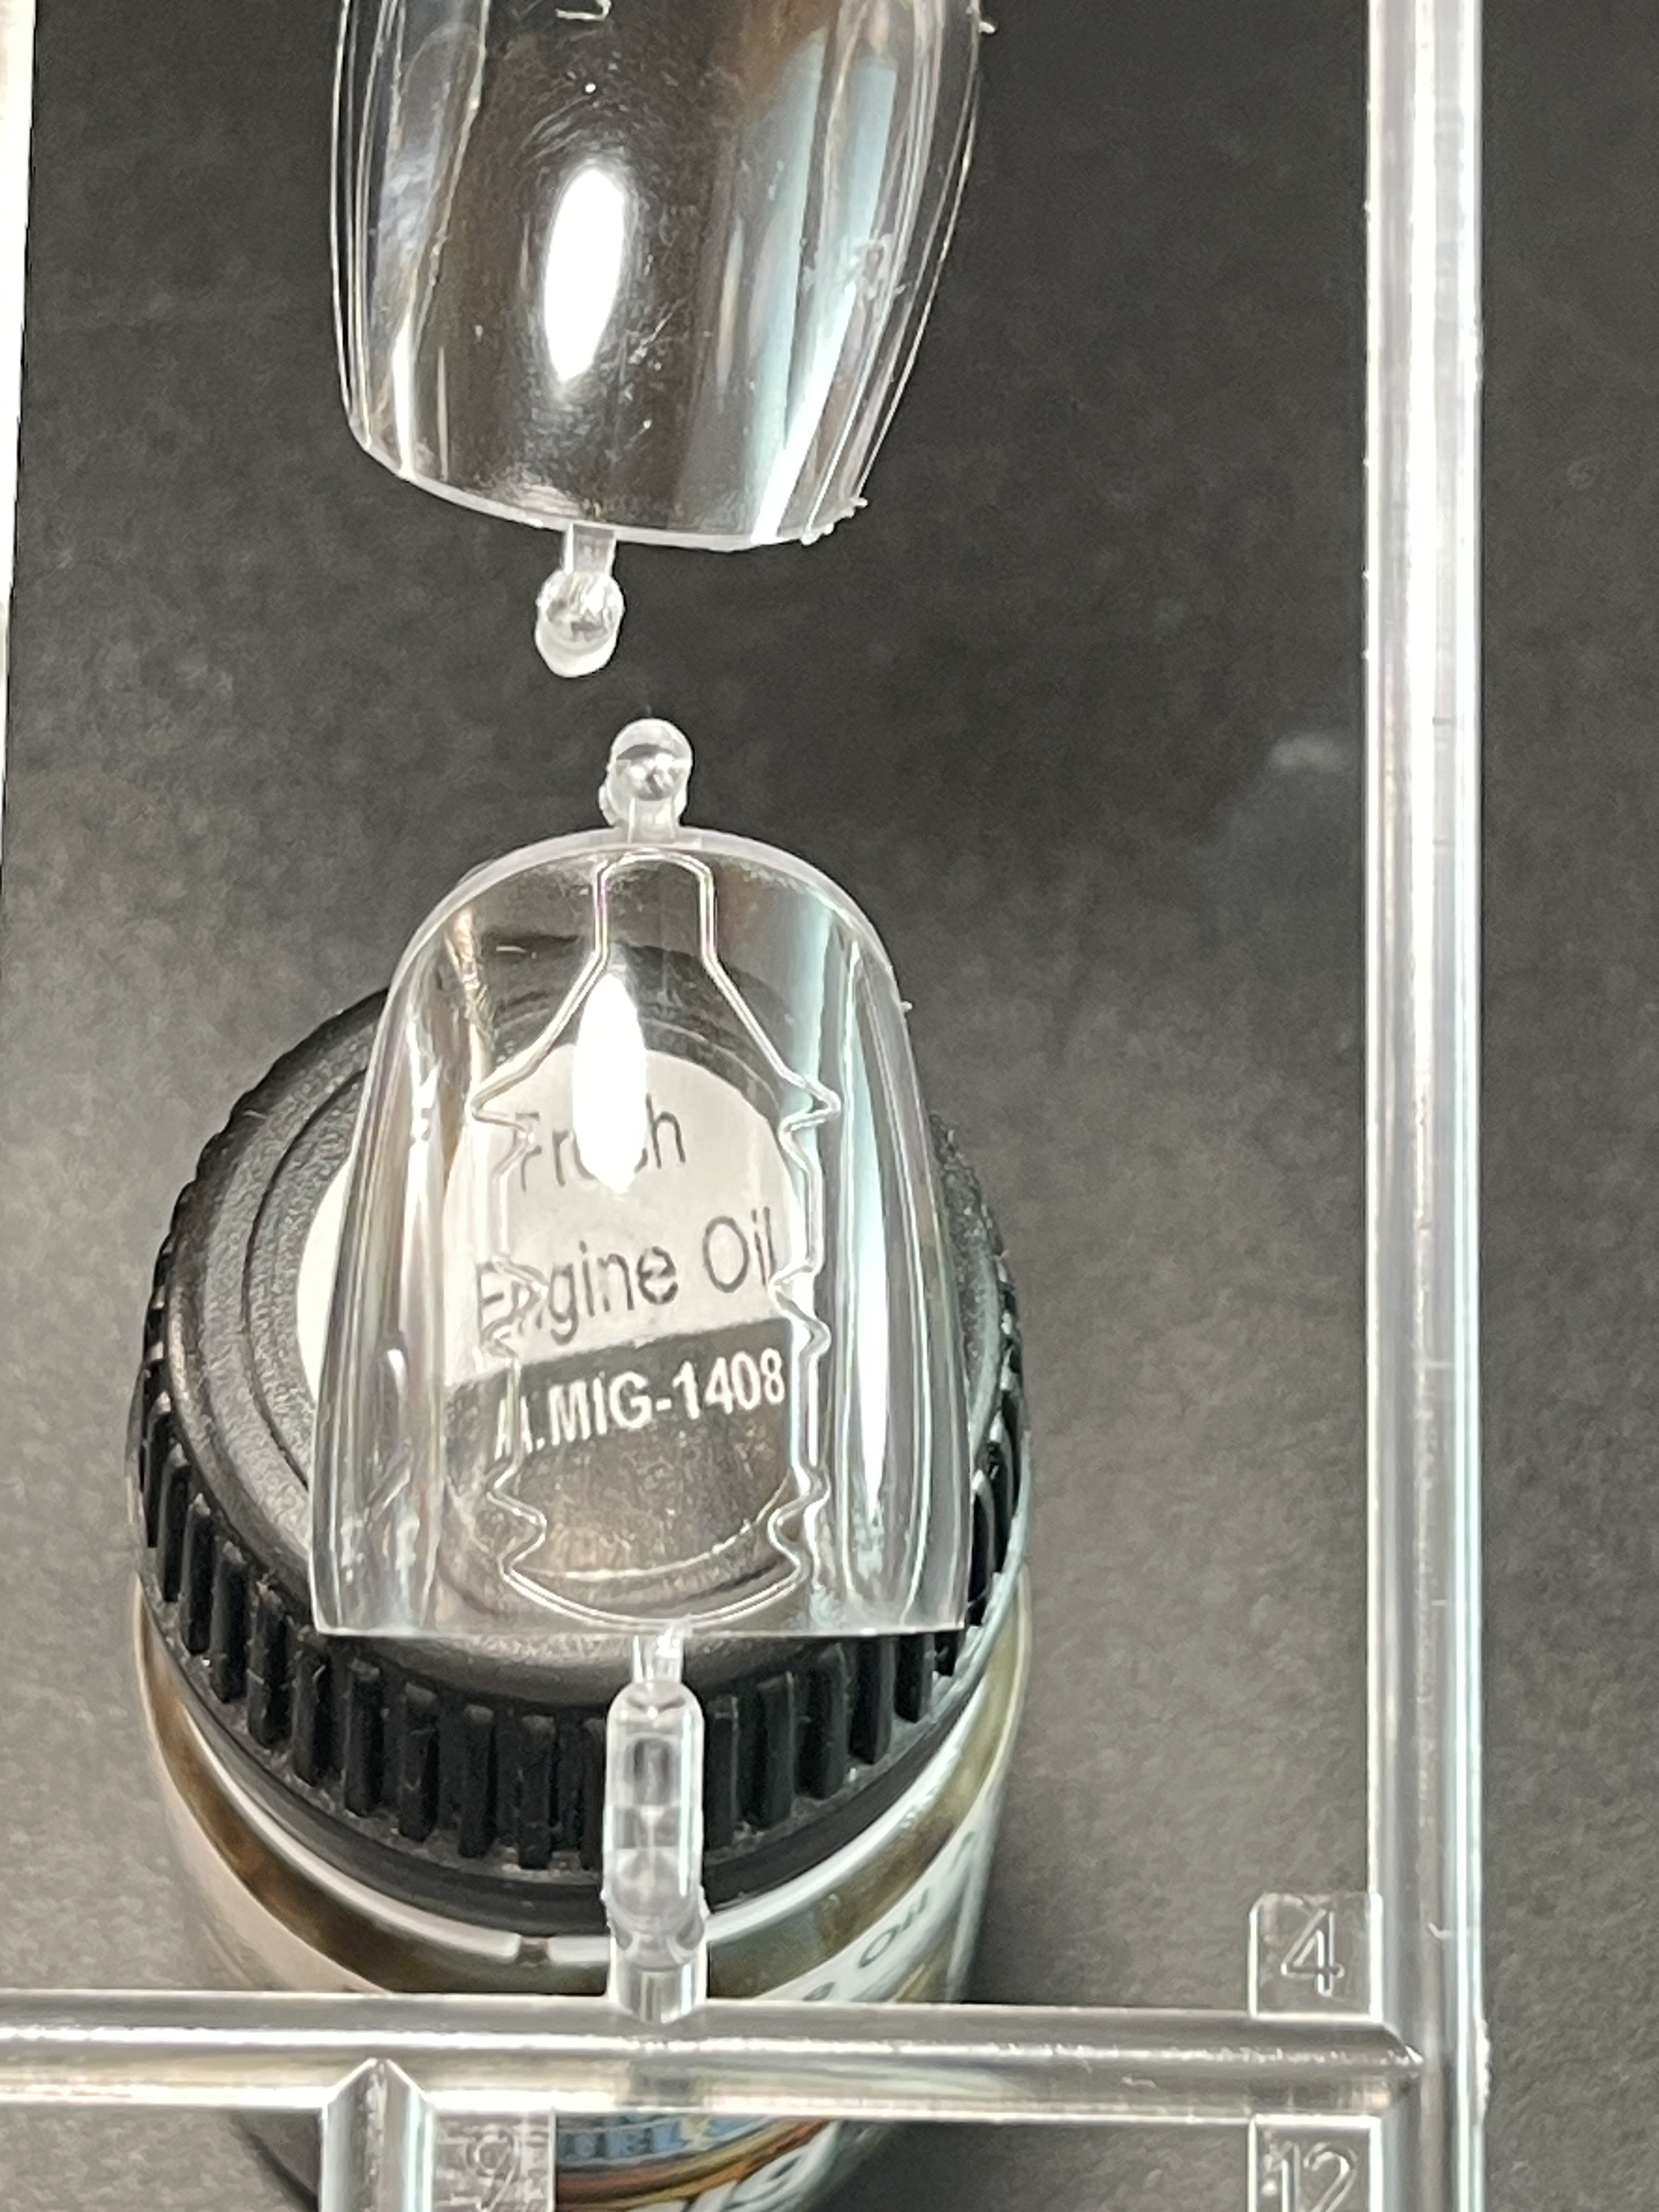
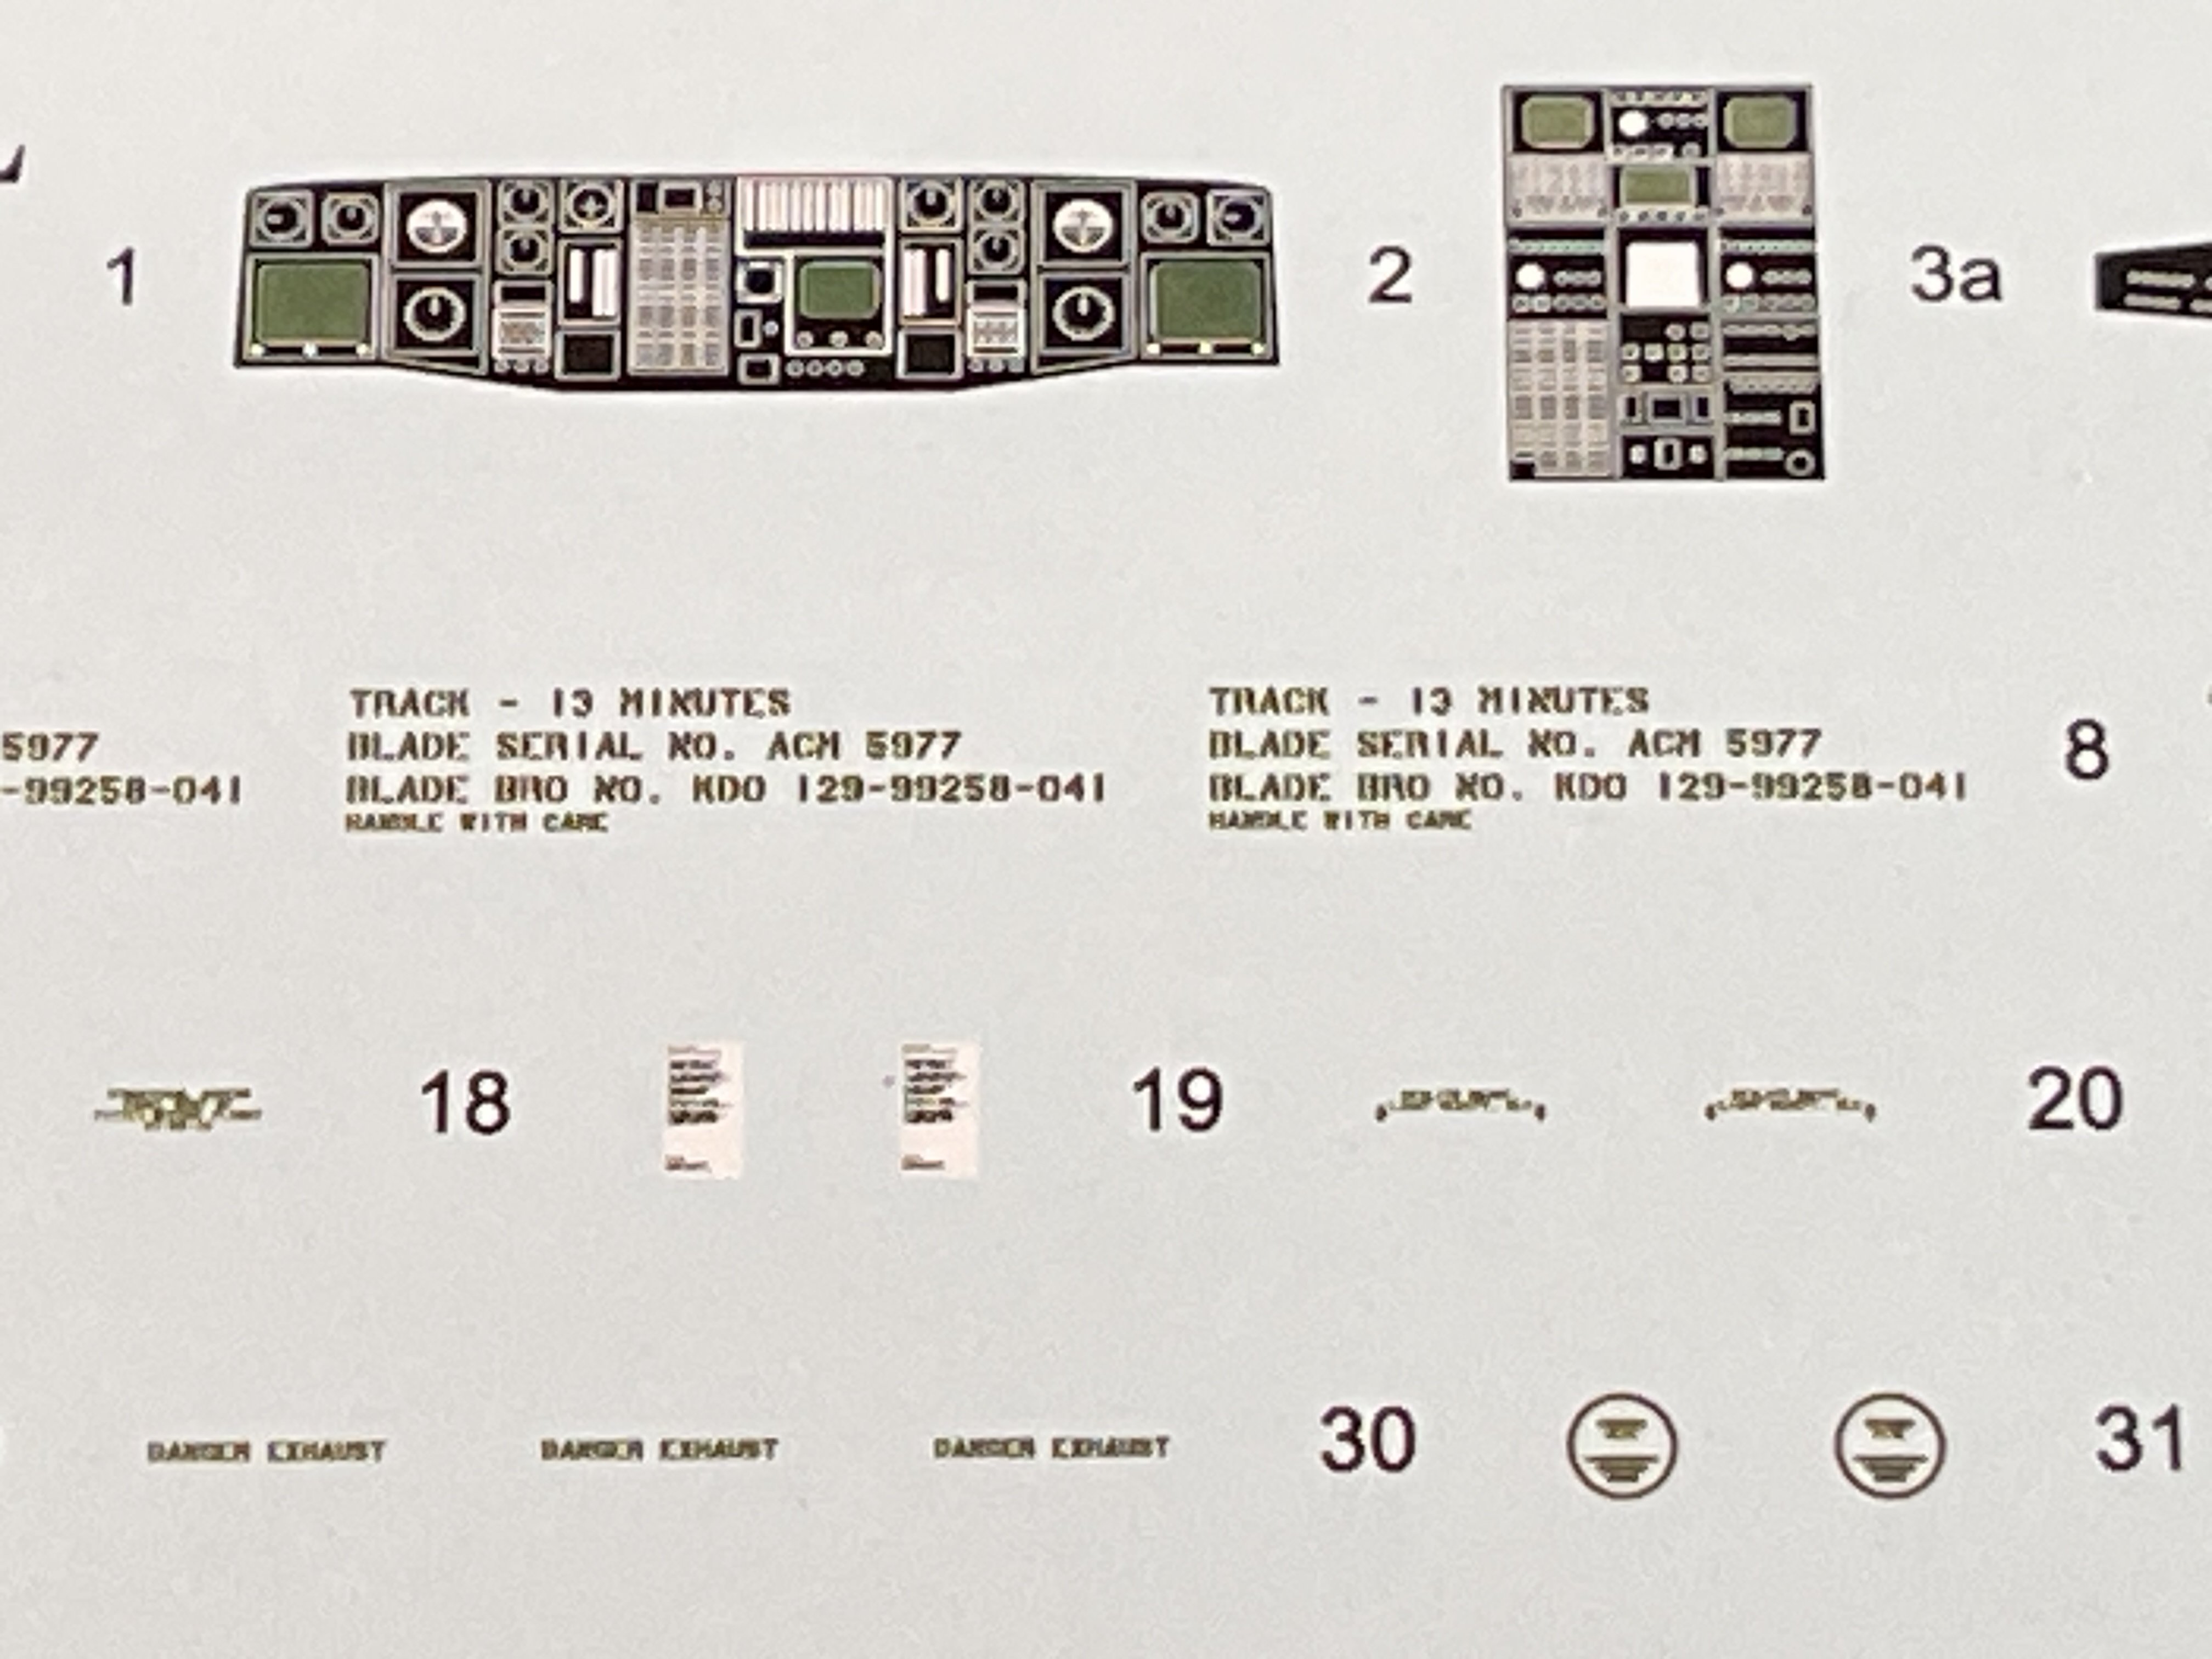
FAQ 2 Aircraft Scale Modeling By Daniel Zamarbide To get one just click here. A few years ago, Daniel Zamarbide publish the FAQ1 published by AK Interactive. The FAQ book was previous release as a AFV and Diorama modelling book. The FAQ1 was the first in deep large book for aircraft, since a long time, as the best that were available were form the great master Juan Manuel Villalba and other series books from another manufacture. So, the FAQ was very welcome into the modelling aircraft community. Time was past and modelling world and techniques seen some evolution and new perspective but also new products arrived into our bench. A new FAQ is more than welcome. FAQ 2: Aircraft Scale Modeling by Daniel Zamarbide, published by AK Interactive in July 2025 with official release in World Model Expo 2025, Versailles, that took place in July. This second edition clocks in at an impressive 568 pages of softcover directed by my good friend Daniel Zamarbide and featuring contributions alongside other international modelers. This book targets every single aircraft modeler both novice hobbyists dipping their toes into aircraft modeling and seasoned builders seeking advanced weathering tricks or even master ones everyone can learn from this fantastic book! Opening the book the index tells us how deep this book goes covering almost all aspect of aircraft modeling, dividing all the parts of making a model in chapters and in each chapter sub-chapters with more detail and specific area, making very easy to follow. The first chapter is “Assembly, Preparation, and Materials”. You could think that chapter is a small one but it goes from page 9 to page 59 and goes from the evolution of modeling, plastic quality, Photoetched and the first tips, cutting moving surface or how to fix pour fitting fuselage. I really like the part of making positive panels and denting panels. Great tips of a hard task of making raised panels or even worse, destroyed planes! Along this, I found quite interesting the resin model kit chapter. Unfortunaly, there’s nothing about vacuform model kits. Passing to the next chapter, “Transparencies”. And it begins with the author sanding hard a canopy with no fear! And bring it to a very shining and clear canopy. The chapter gives you all the insights and tips to work with canopies in the best way. The next big chapter – “Concepts prior the Painting Phase”. Here we are given a deep dive into colour and the several types of colour (acrylics, enamel, laquers, inks, watercolours pencils) and how you should work with them, with several stepy-step to get the best of paint or the subtle effects of the watercolours pencils. Also a special look into the masking as a modulation color technique and not only as a masking canopy. The next one is “cockpit detailing and painting” and get all type of cockpits (well almost) with a prior introduction of what is wanted to achieved. So the first are wooden cockpit, then WWI cockpit (yes it`s not the same), scratchbuild cockpit (very very good tips here) and modern cockpits (jet and helicopters) Probably a 1:72 civilian (airliner) cockpit example would be great on this matter. The next one is for me, probably the best part of the new FAQ2. Engines! Not only gives you lots of tips how to improve the detail of your engine and painting tips and techniques but also gives historical evolution of the rotary, radial, inline and “v” type engines. Now, that is great. Beside that, a full painting example of each and the aircraft is goes ( no all but the main ones) Next it goes to jet and helicopter engines with very good painting jobs and how to get it alongside the detailing part. The next chapter is the interior parts. So what are the interior parts in this FAQ2? All but not the cockpit. So, on this chapter the author gives us several tips od detailing the wheel bays, avionics compartments, weapons bay etc. And he won’t leave without painting techniques to these specifics’ places and prior to that, a few add up that make it much more real. On this chapter, while not an interior part, a tutorial about to make new a realistic pitot is also given alongside of a entire sub-chapter for super-detailing. A side note here, and I will mention later. I`m not given any clue of the techniques used or I will put any picture with the entire technique. For that, you will need to get the fantastic book Moving on, the chapter 7 “Painting and weathering tecnhiques” Here, its all about pre-shading, pre-paneling (yes, it´s different and it works), paneling and post-shading. Well this chapter is utter fantastic as Daniel is a master in these techniques so there’s a lot to learn and drink from all the imagens and text. Now an “odd” chapter, the number 8 – “effects by zone”. But when you start, it very easy to understand – wings fuselage joints, engine covers (fairings), and these are the details that make the difference. And the first effect showed is the “wear and chipping on wing-fuselage joints”. Well, this area is a must weathering zone to all aircrafts, specially militaries and Daniel makes it so realistic, using several techniques, like pencils and/or oils. The next is fairings (basically, engines zones) and gives a full step by step with heavy weathering on a Polikarpov I-16 and in a P-51. Passing to “fades and contrasts through wear”. In this sub-chapter is the one for more experience modeler, or modeler that want to do bring their models to the next step! Is not chipping, or dirt by its own, scratches.. no! “Simply” wear panels, faded panels by the sun and nature elements. Great stuff in this. Passing to dirt and exhaust stains, calling for all types of exhaust stains. Nothing is left behind here!! A really must have. Chapter 9 – Decals, more correctly “placement and integration of decals” The best part of this chapter for me (besides gives the elements rules about decals) is their integration. Now that also is the “thing” if you want to bring your model to the next stage. Moving to “camouflages and special finishes”. As for the others chapter, intruductions and general information about camouflage (special the types of camouflage as hard-edge, soft-edge, lozenge, night, splinter, and so one) and then it moves to the first one: metal fuselage. One of the hardest one to achieved and that is visible since page 404 to 419. Fantastic work. After the metal, the wood. Fantastic step by step of he fuselage preparation, and the wood itself by oils. While it’s my favorite way to make wood, there are another´s that are not present in this book like the wood decals, pencil wood technique (for me the hardest one) and real wood (fine plywood sheets). The next two are “have a glass grey paint” and “night paint”. This late one “nightpaint” is utter fabulous with works on a Flying Pancake, a Hurricane, a F-117 and a 1:32 He-217 “Uhu”. Now a totally different chapter – “Civilian Aircraft” with a 1:32 M-18 Dromader with several constructions phase (a resin model with lots of issues). I saw this one live in World Model Expo in Versailles and its amazing. It’s a very big airplane with gigantic yellow wings (yellow is a pain to cover well). There are more two models made in this chapter and very good ones, but you have to buy this book to know it. The almost last one chapter is “wing load painting”. So everything that can go under the wings is painted in this chapter and the attention to detail also in these is amazing. Its starts with auxiliary fuel tanks and then the pylon! Every ordnance goes attached to a pylon! Then a series of bombs and missiles is painted and weathering step by step! And them the last (but not the least) the “scenery”. Here, that introduction is very usefull to all aircraft modeler, as most are not use to make a scenery or a diorama with an aircraft. The author gives several examples and pictures of works (that are well known as the Lexington in 1/700 from Marijn Van Gils but the credits are not on the picture as it is on all others so it passed to the verification. Not serious as Marijn Van Gils is worldwide knowed. So you can see works from Airtor Azkue, Spencer Pollard, André Kliebisch Ruben González, etc. Fantastic works, all of them! Then, the author gives several sceneries, like concrete runway, printed runways (and how to make them much more real), commercial bases and custom design. Finally and to give an extra to your diorama, the author focus in ground and deck vehicles with step by step weathering! Ahh.. almost forgot, framed sprues… you save the cutter and sanding time! CONCLUSION Wow!! Now this is a long review! But the book is quite big! And heavy! The 568 pages are full with high-resolution color photographs illustrating each step, showing all the steps since patiting to the final result. Compared to the 2015 original (385 pages), this edition nearly doubles the page count, incorporating updated techniques influenced by advancements in 3D printing and new modeling products. The step-by-step explanations are crystal clear. The photography is exceptional: sharp, well-lit images that capture subtle nuances. The book gets almost everything in modelling but it didn’t cover vacuform models (or vacuform canopy) that still available (for example Falcon from NZ makes very accurate vacuform canopies) and Titan Models makes great model kits with vacuform fuselage and wings and 3D details. A small chapter dedicated to vacuform canopies would have be perfect. The book is a must have to all modelers, for all skills, starting with the beginner that can drink tons of awesome tips and showing that good results can be achieved. But also the expertise modeler, as there always something to learn or simply to get inspired and get your big mojo back! I can only VERY Highly recommended! It should be in every aircraft modeler bench! Daniel, my friend, fantastic job!! Kudos! My truly Thanks to Fernando from AK-Interactive for the opportunity to make this review. To get one just click here.


-
Anyone has the contact of Red Pills Models? Or the name of the owner? Thanks
-
I`m not as pickdetailer as you are... I should! it would have saved me from buying a 1:32 F-105 with a lot of AM! ahaha!!!
-
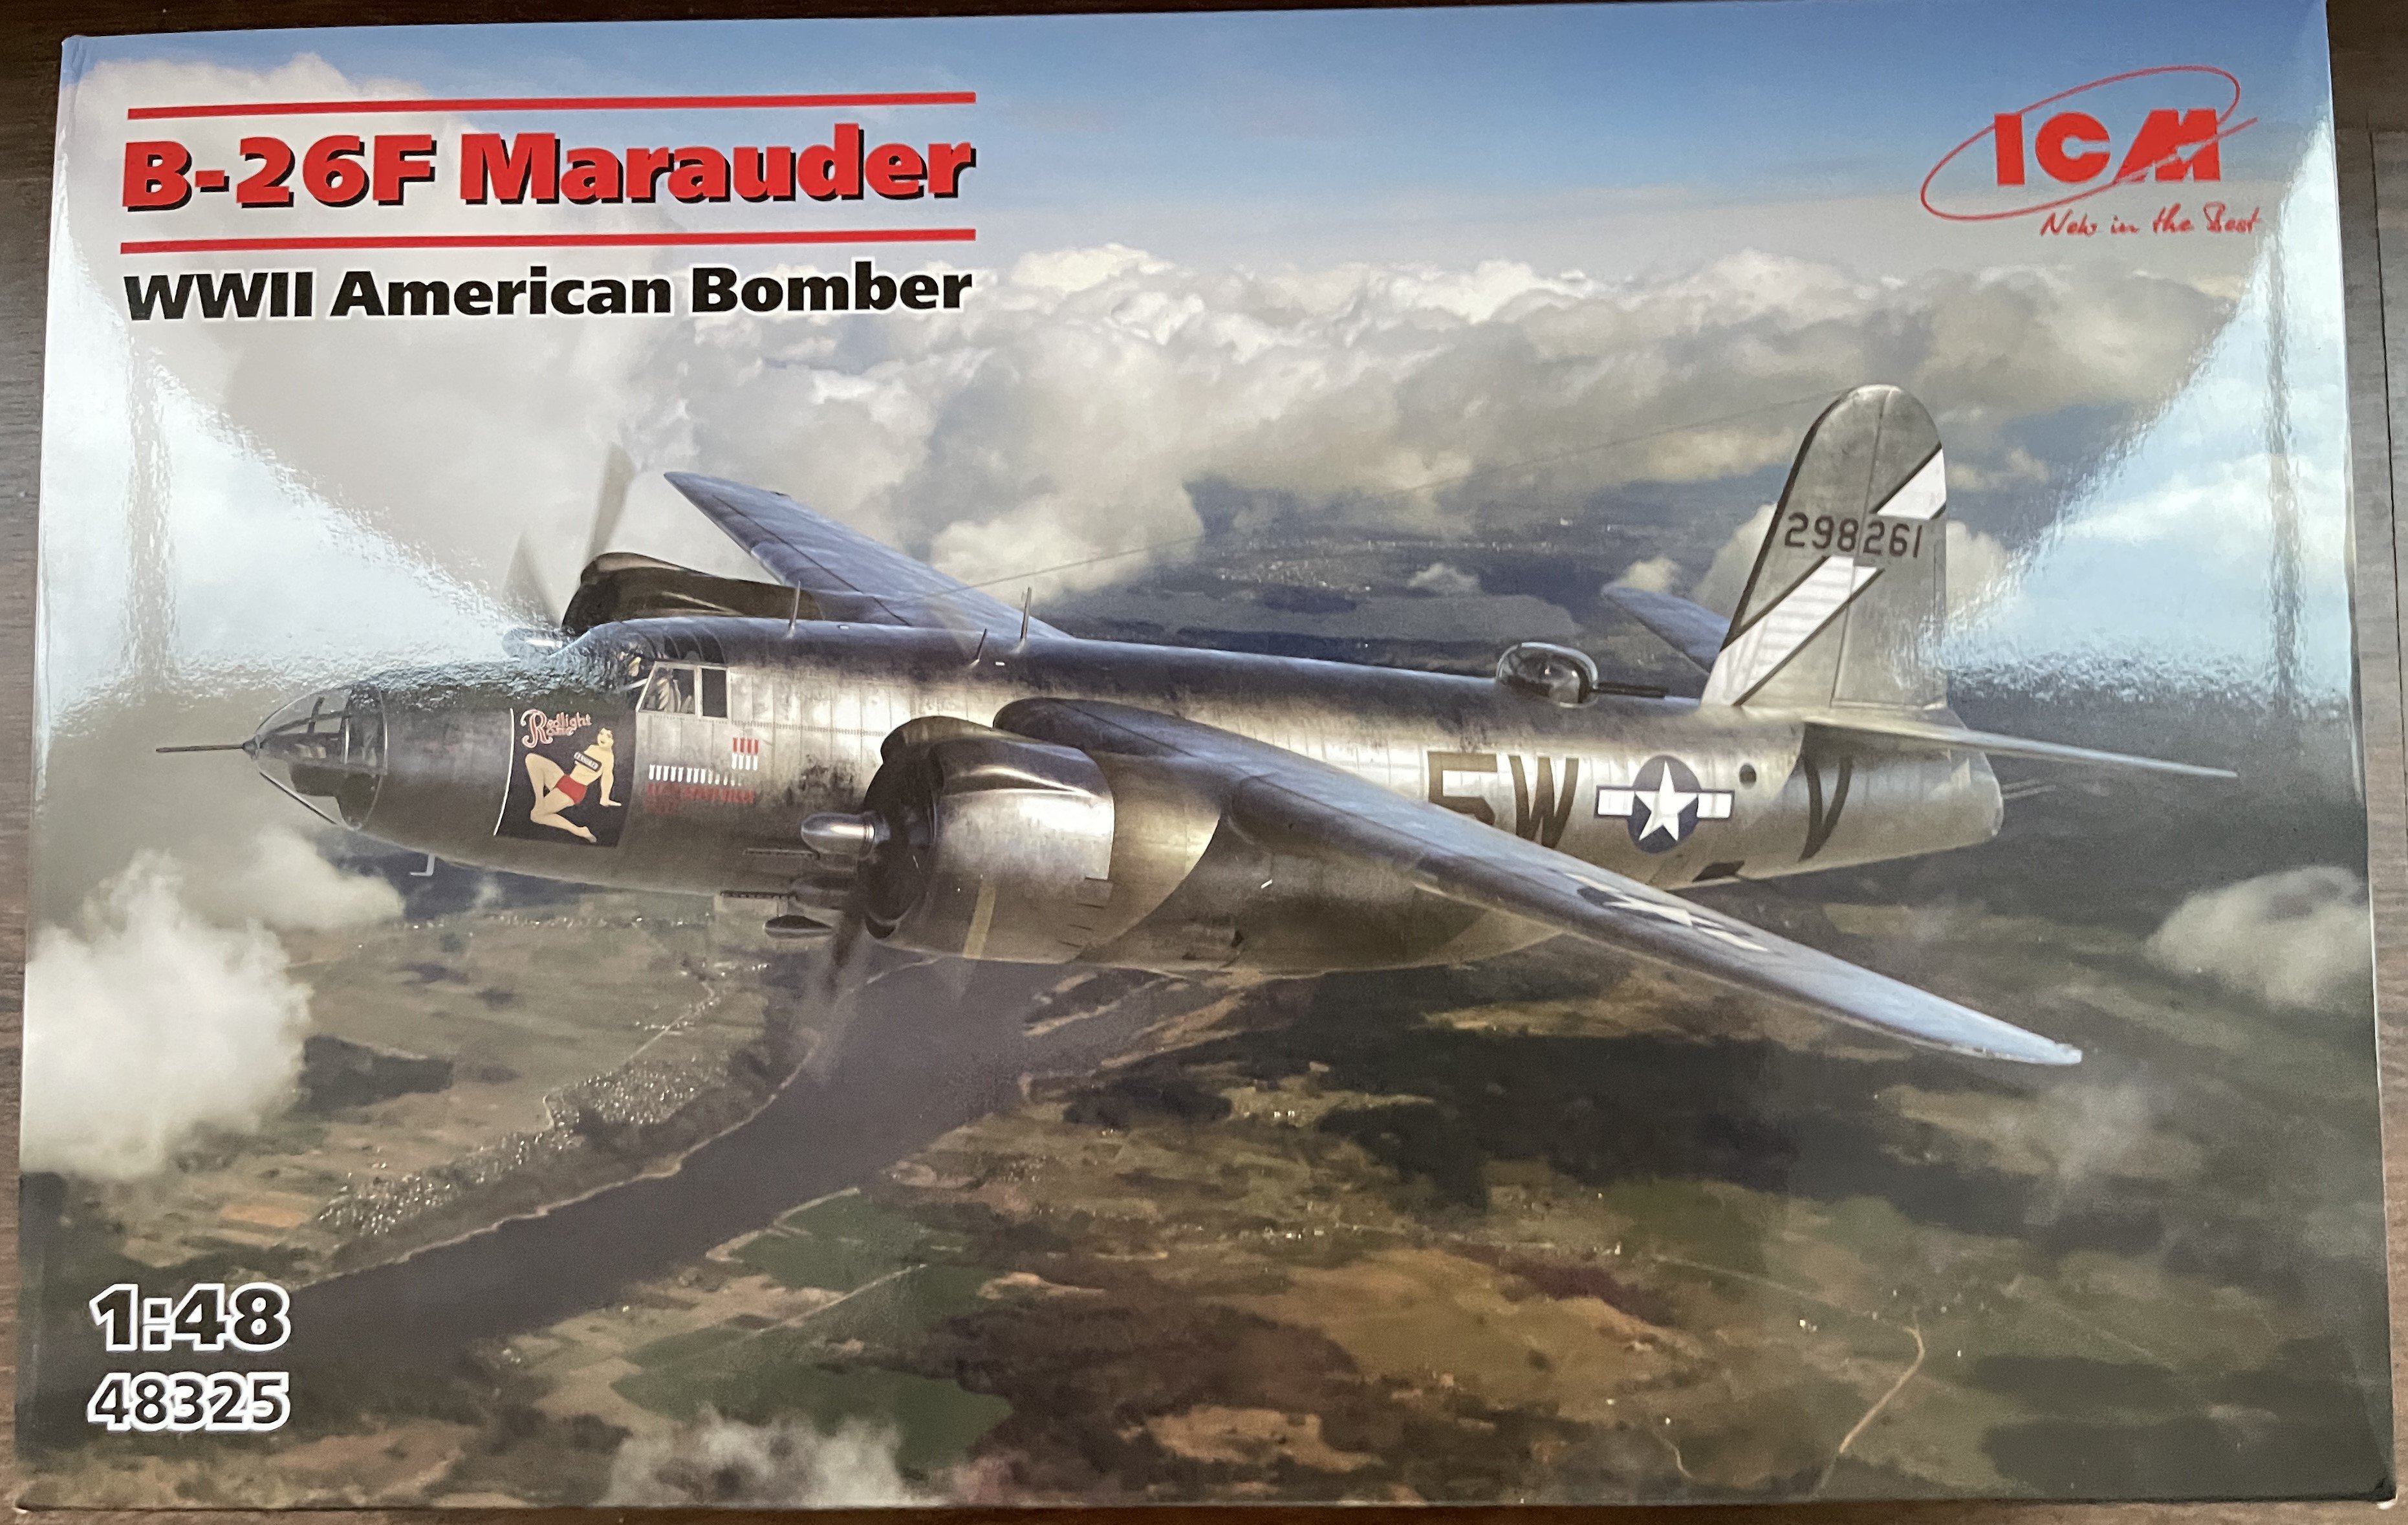
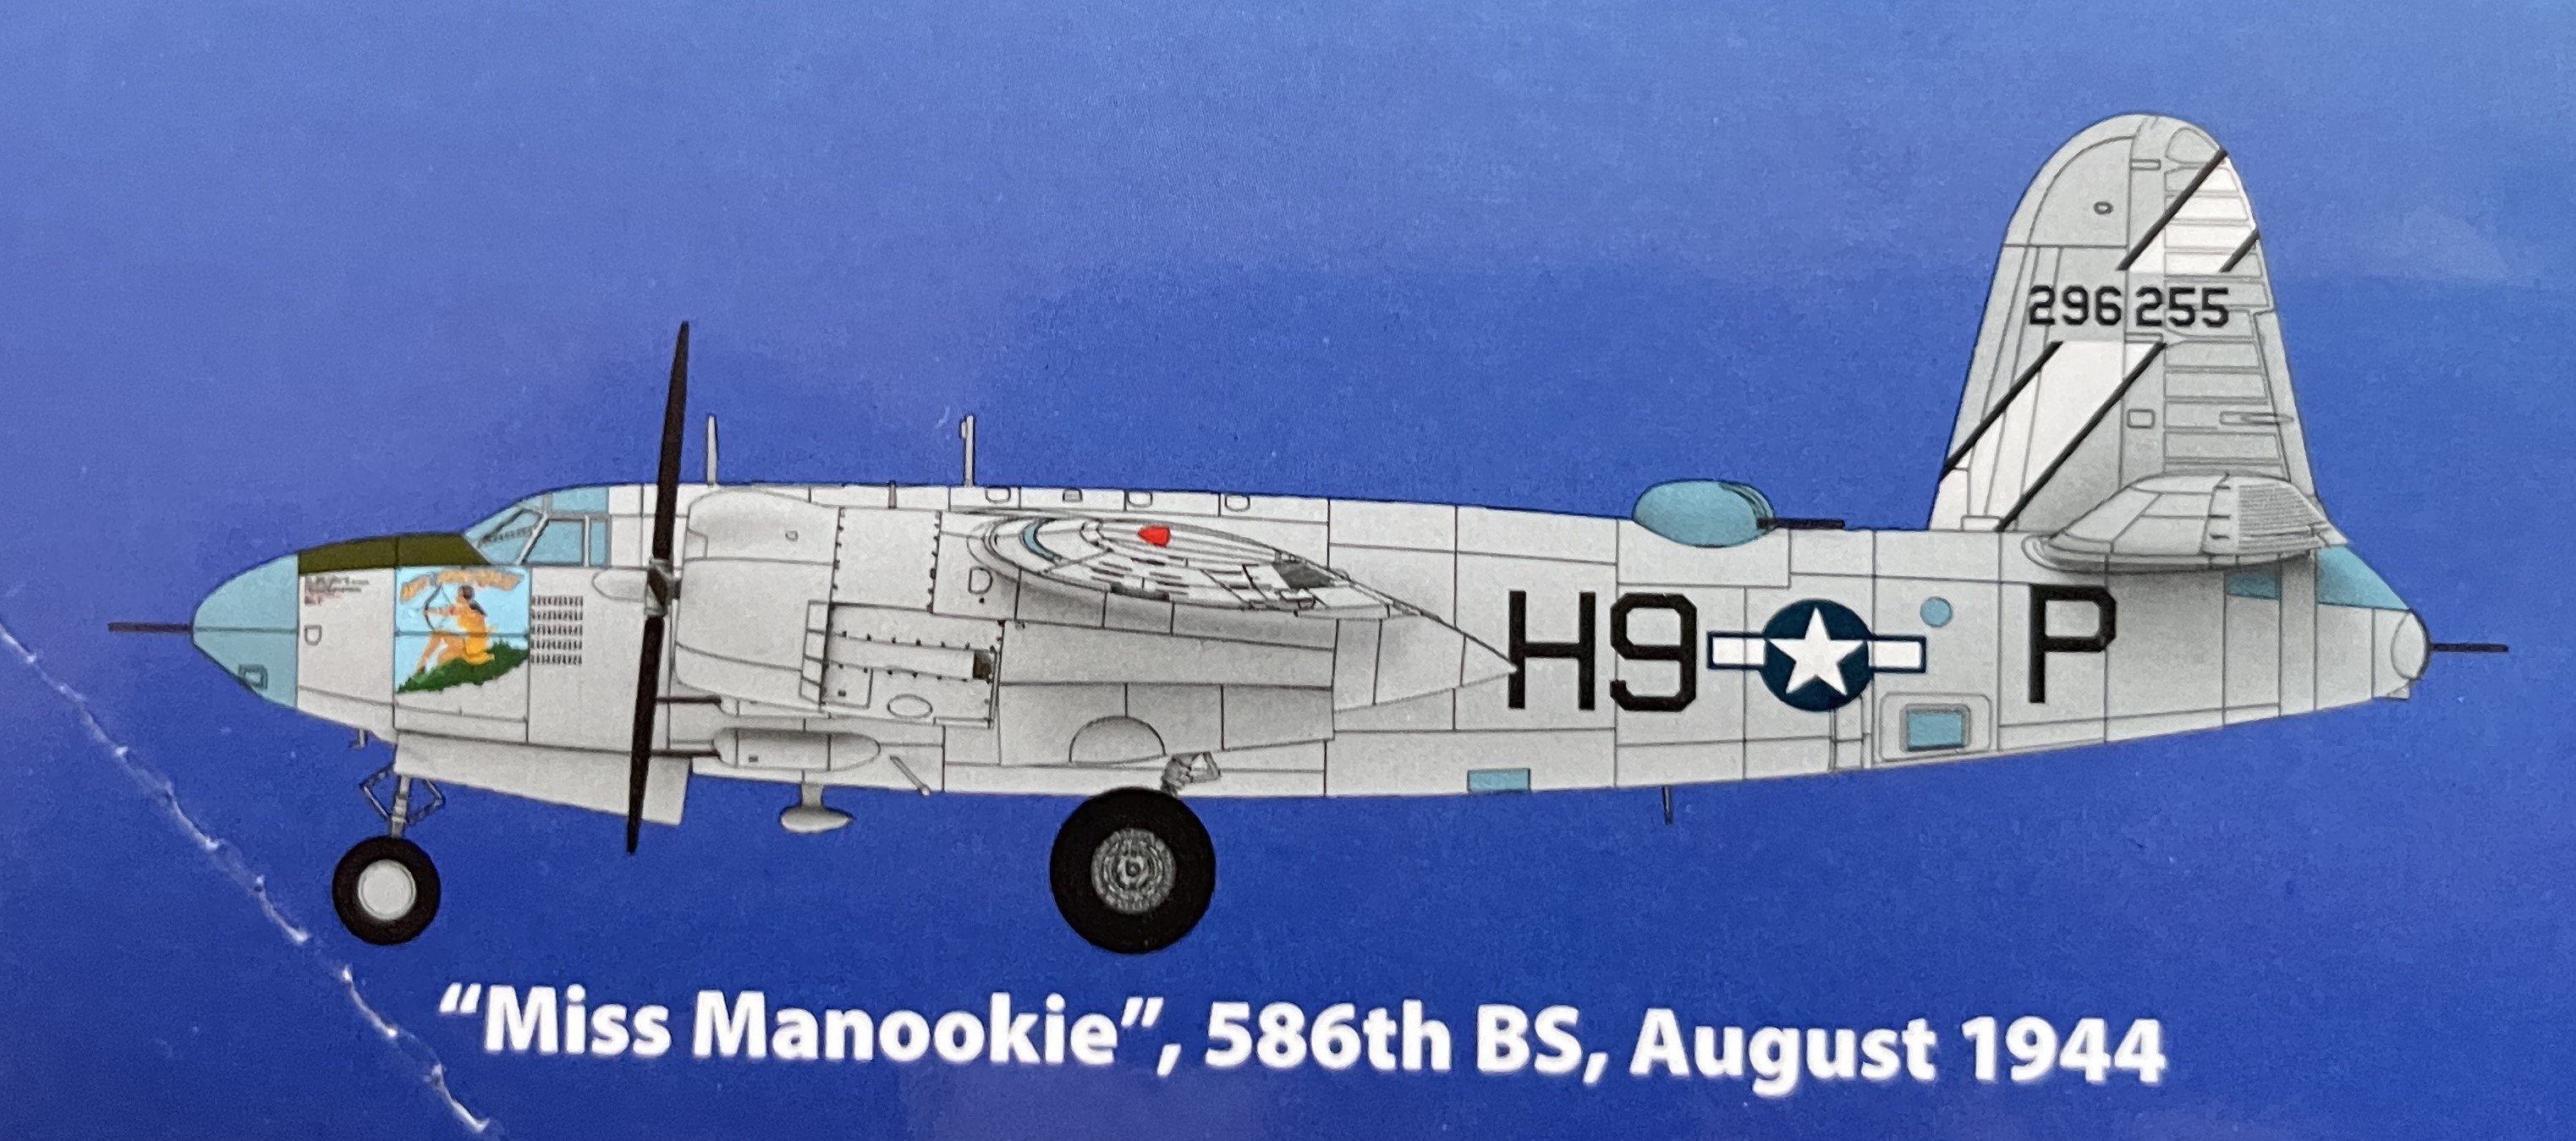
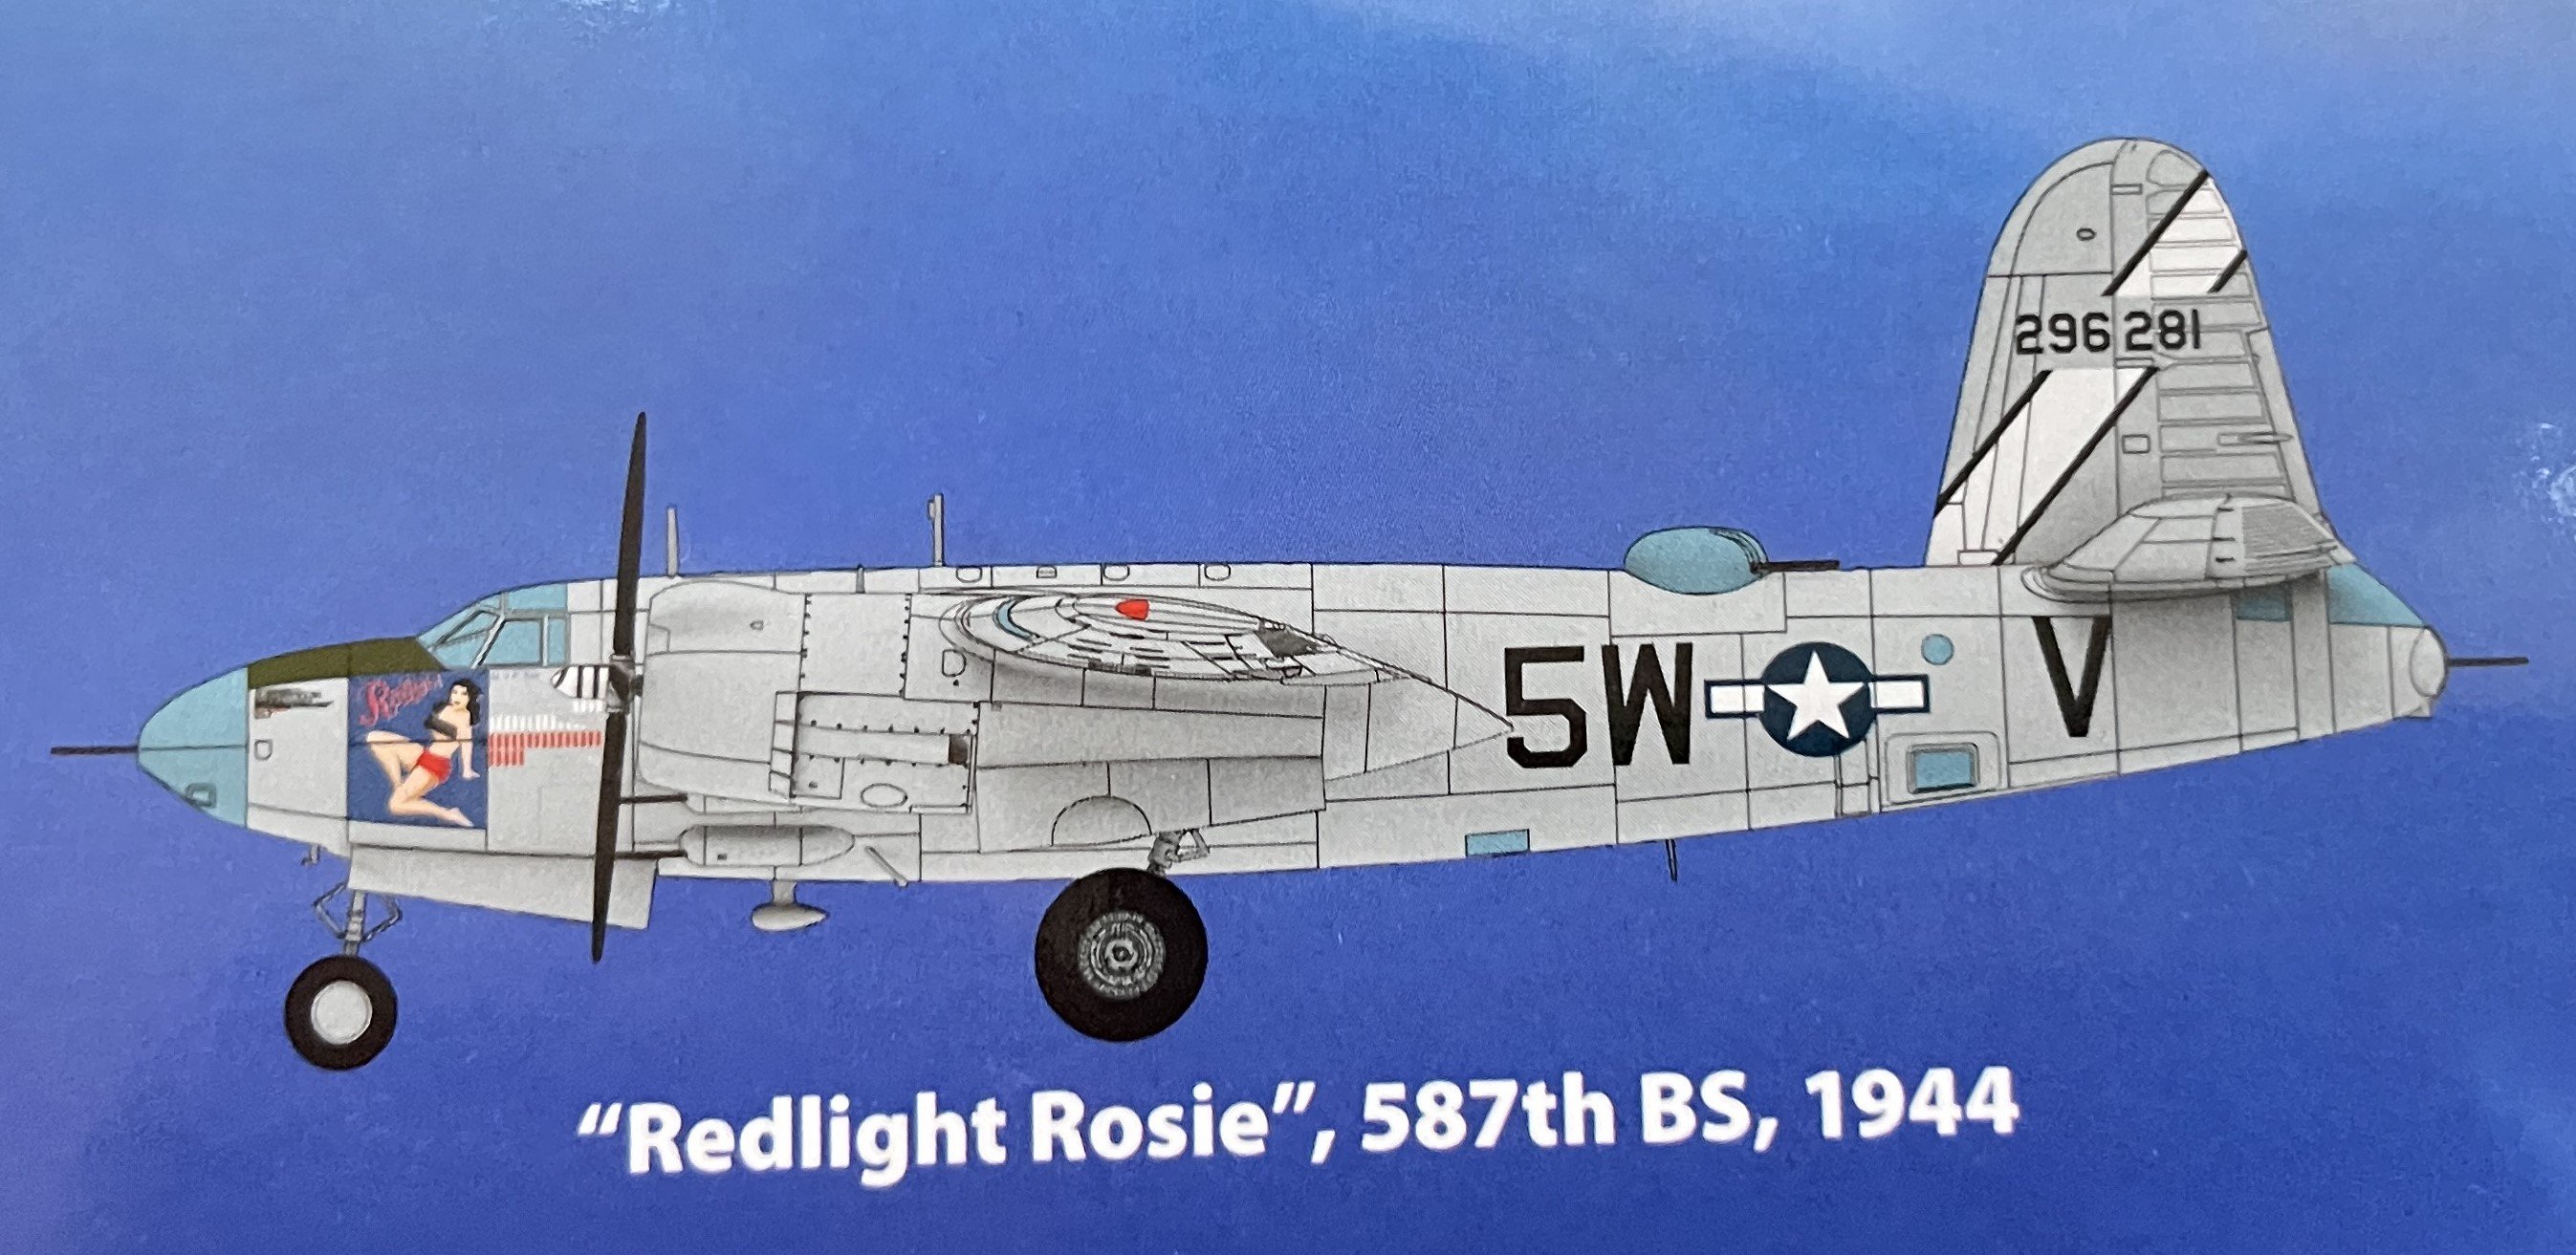
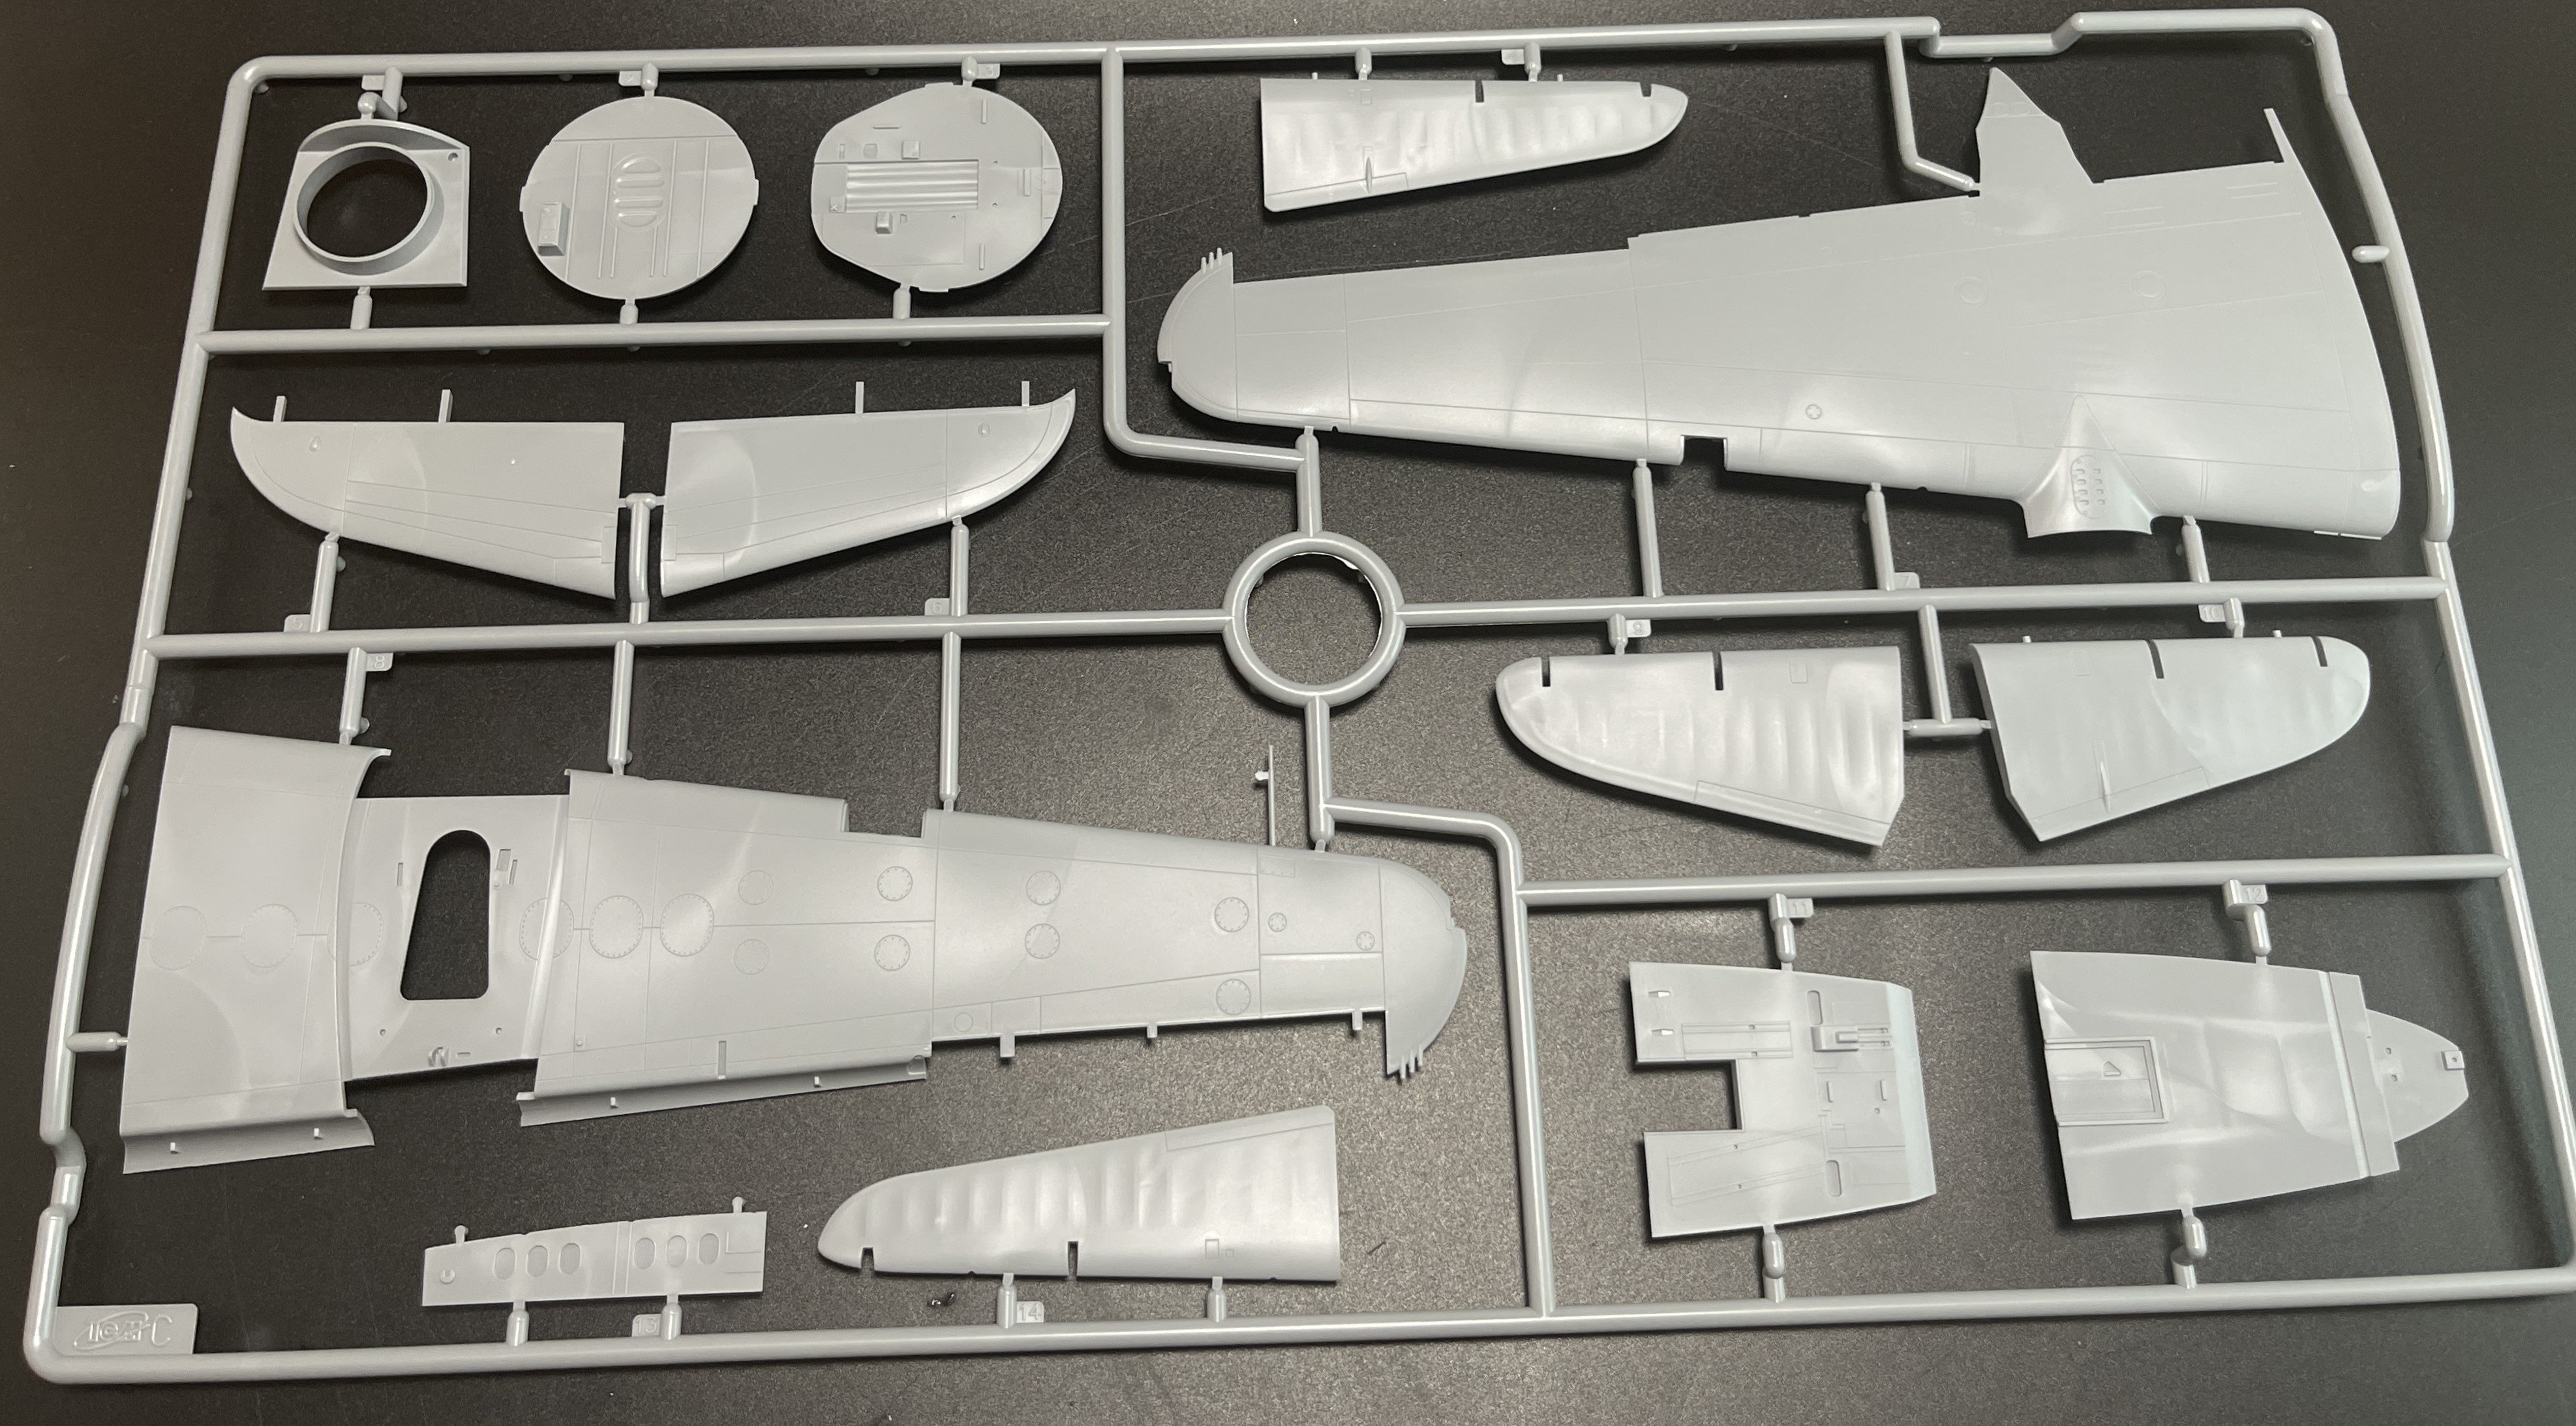
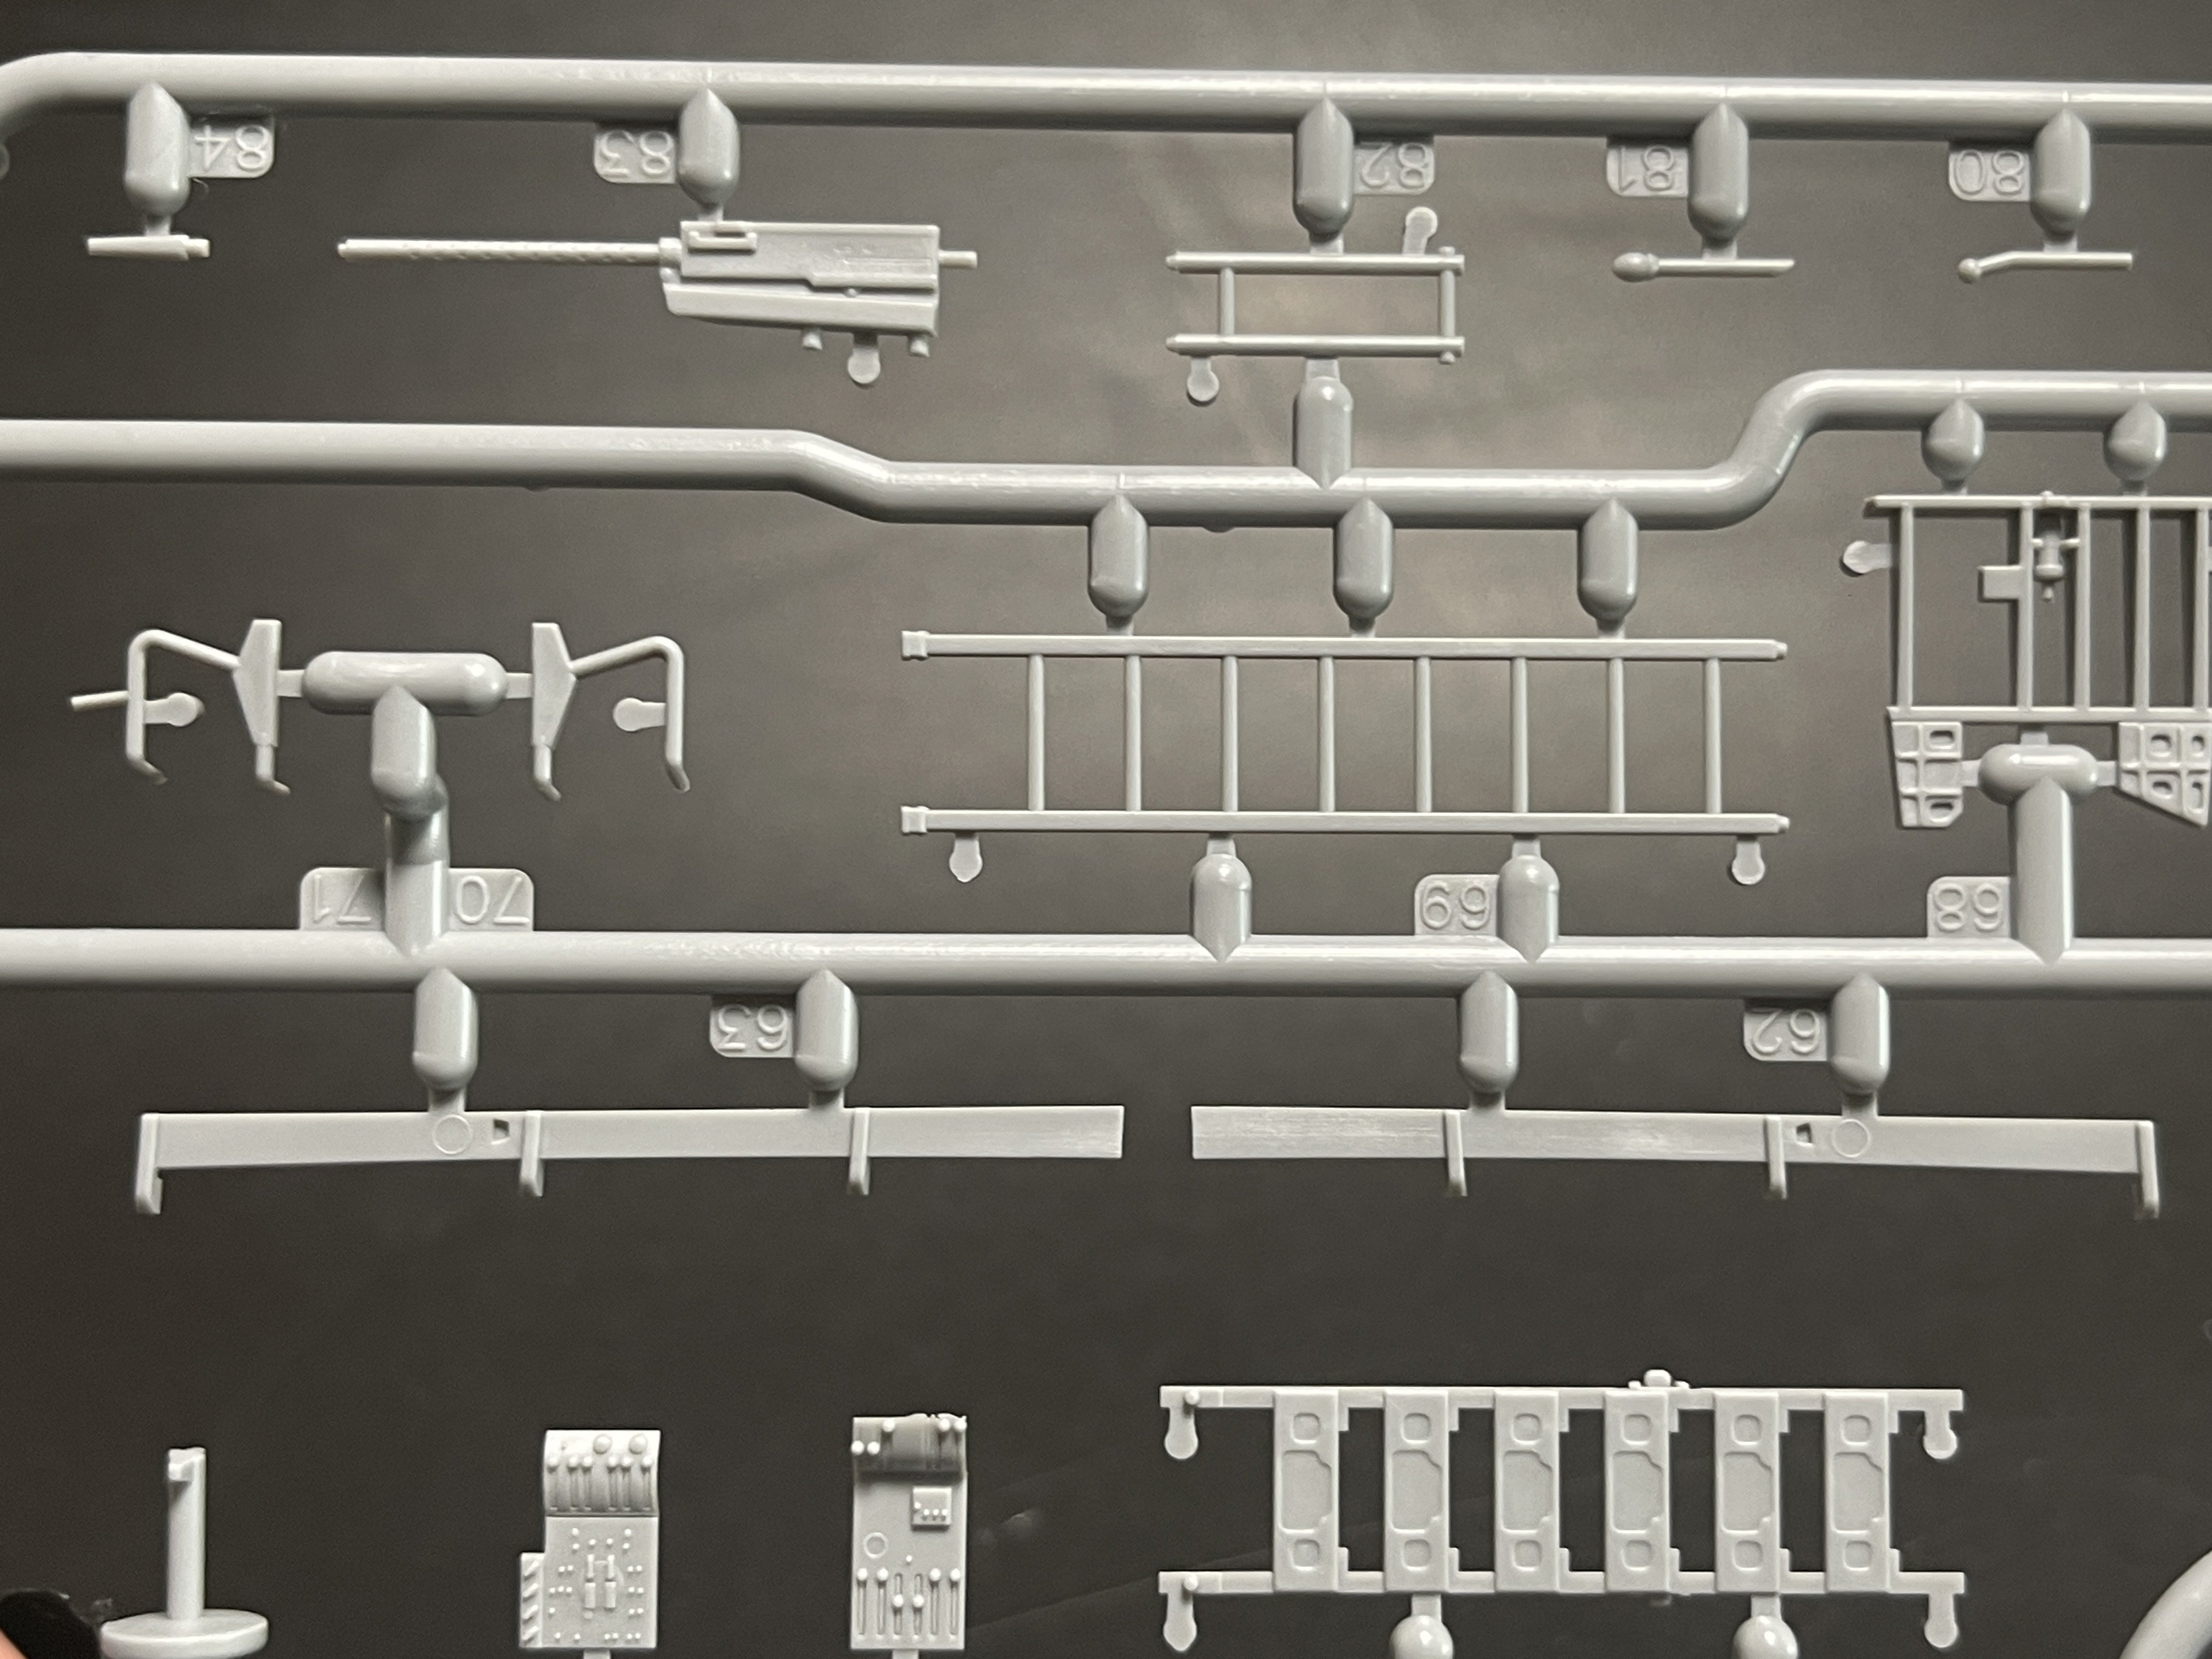
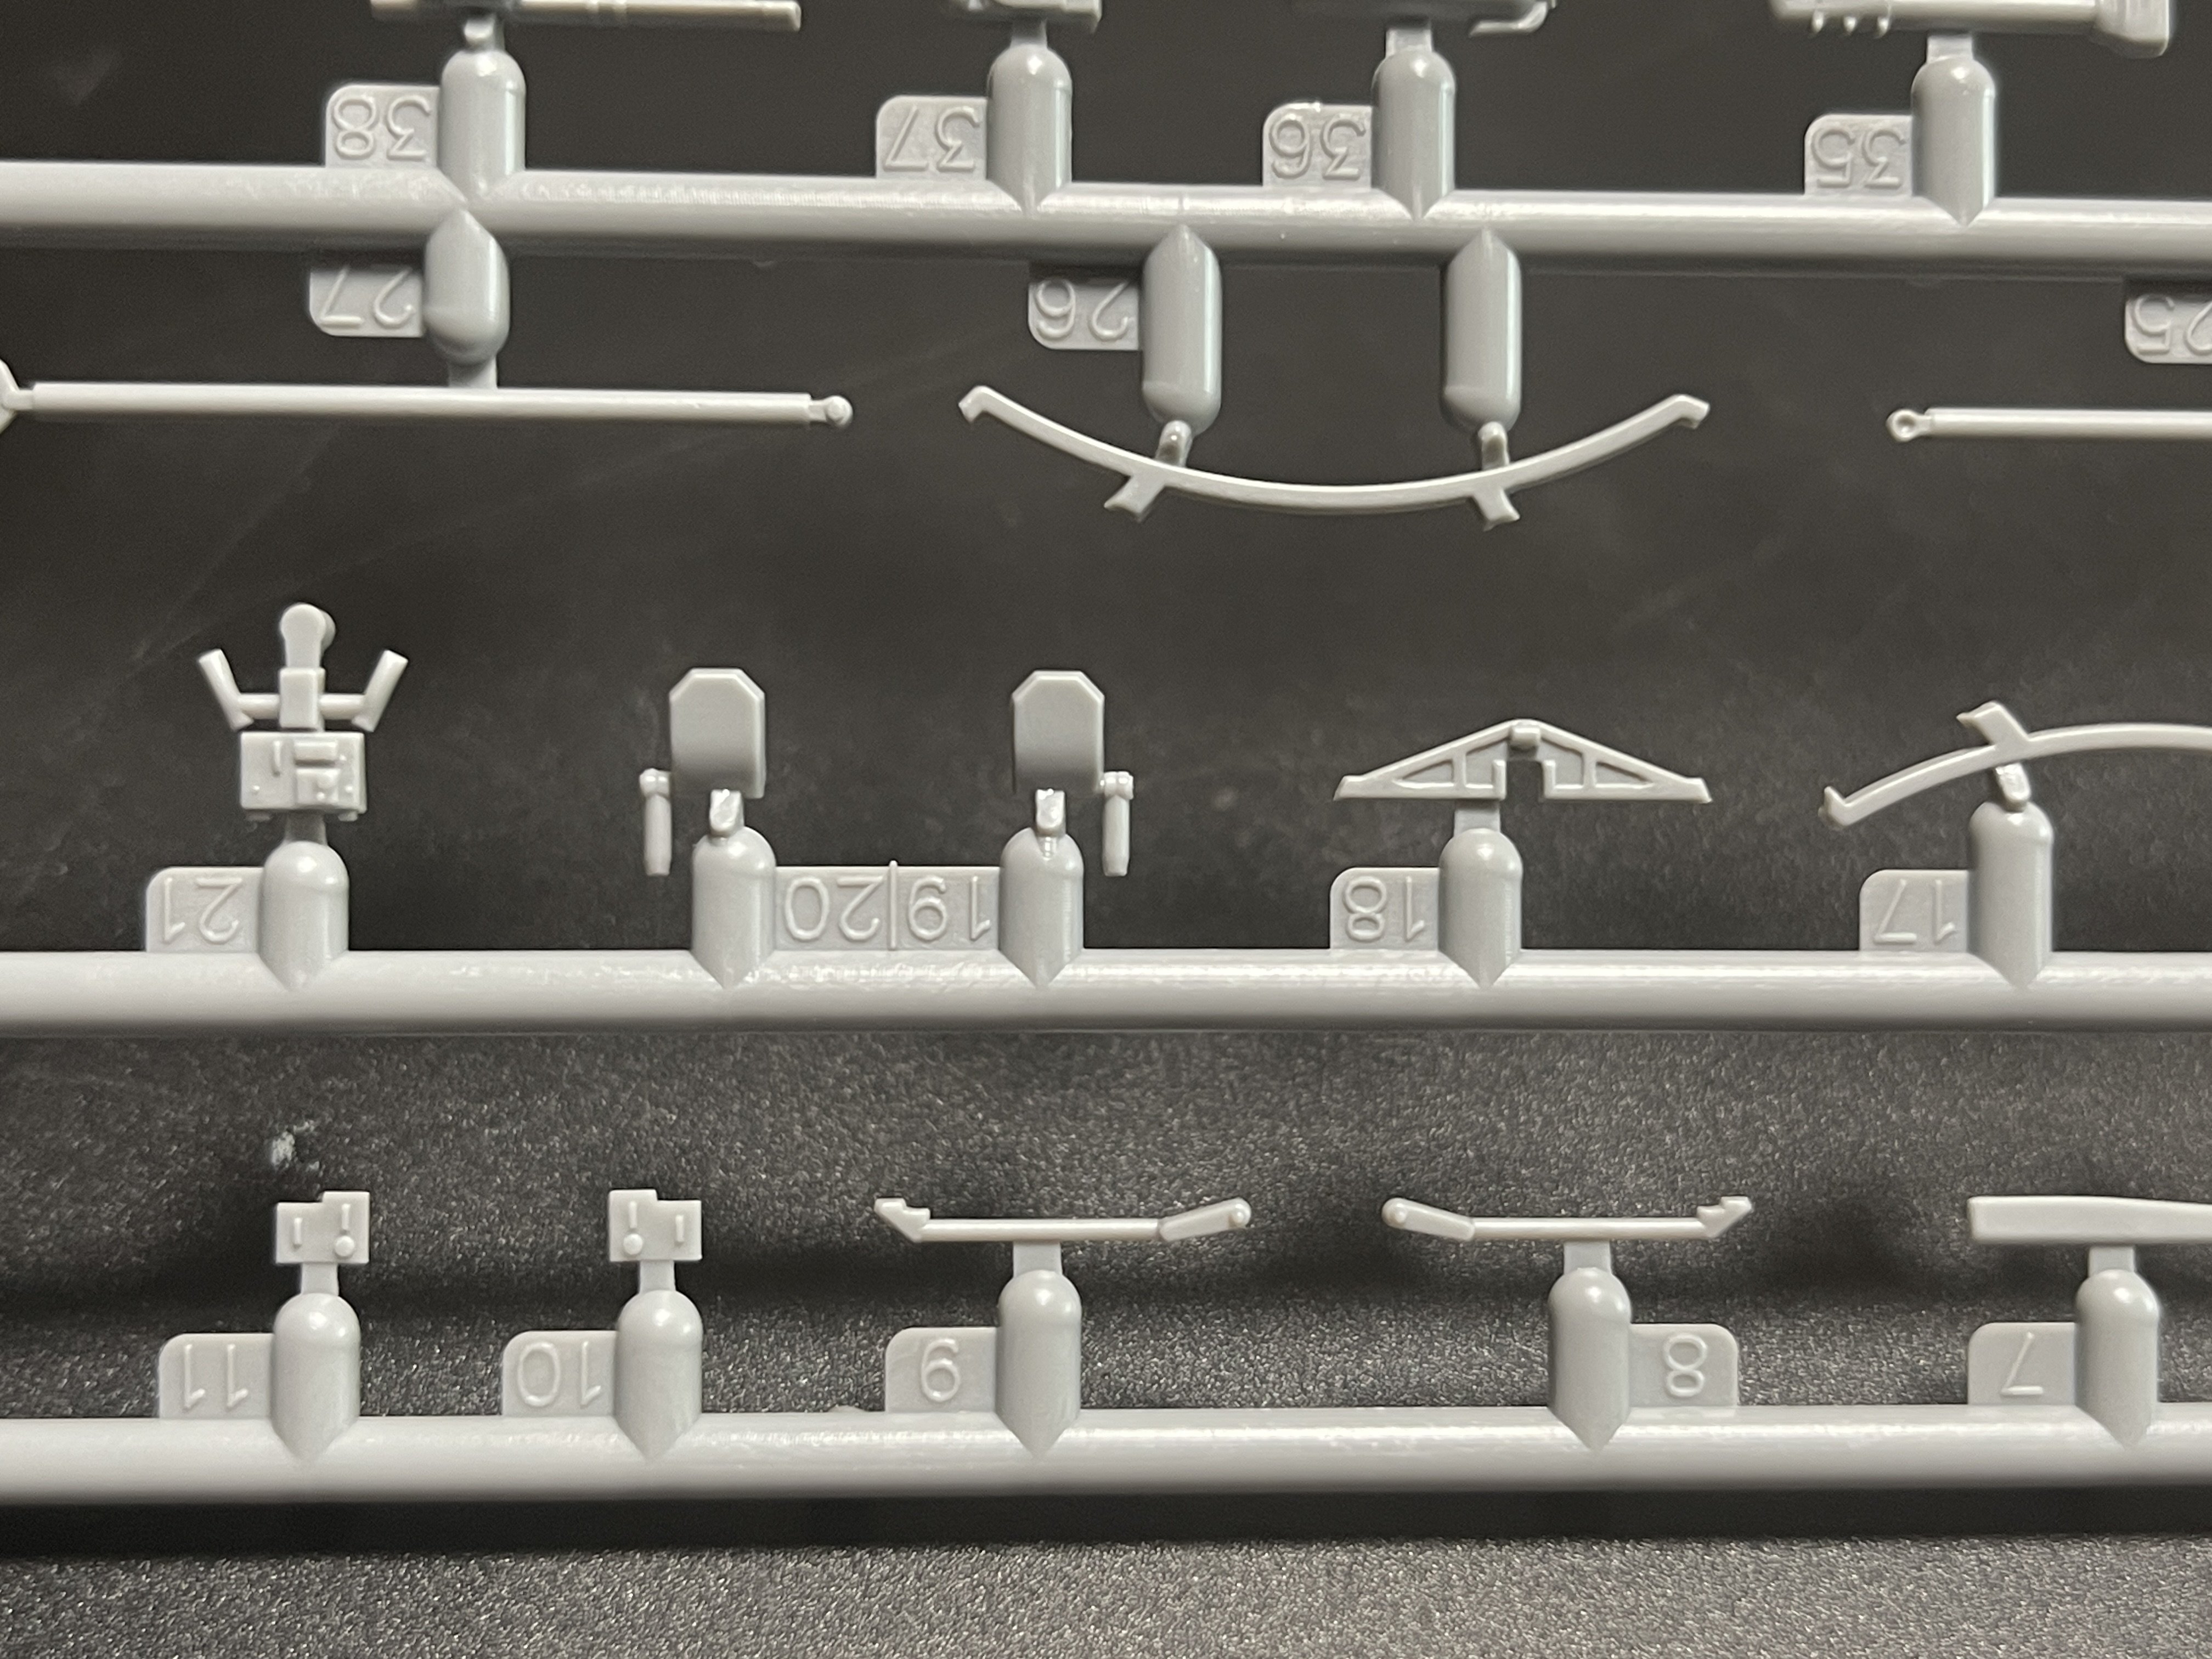
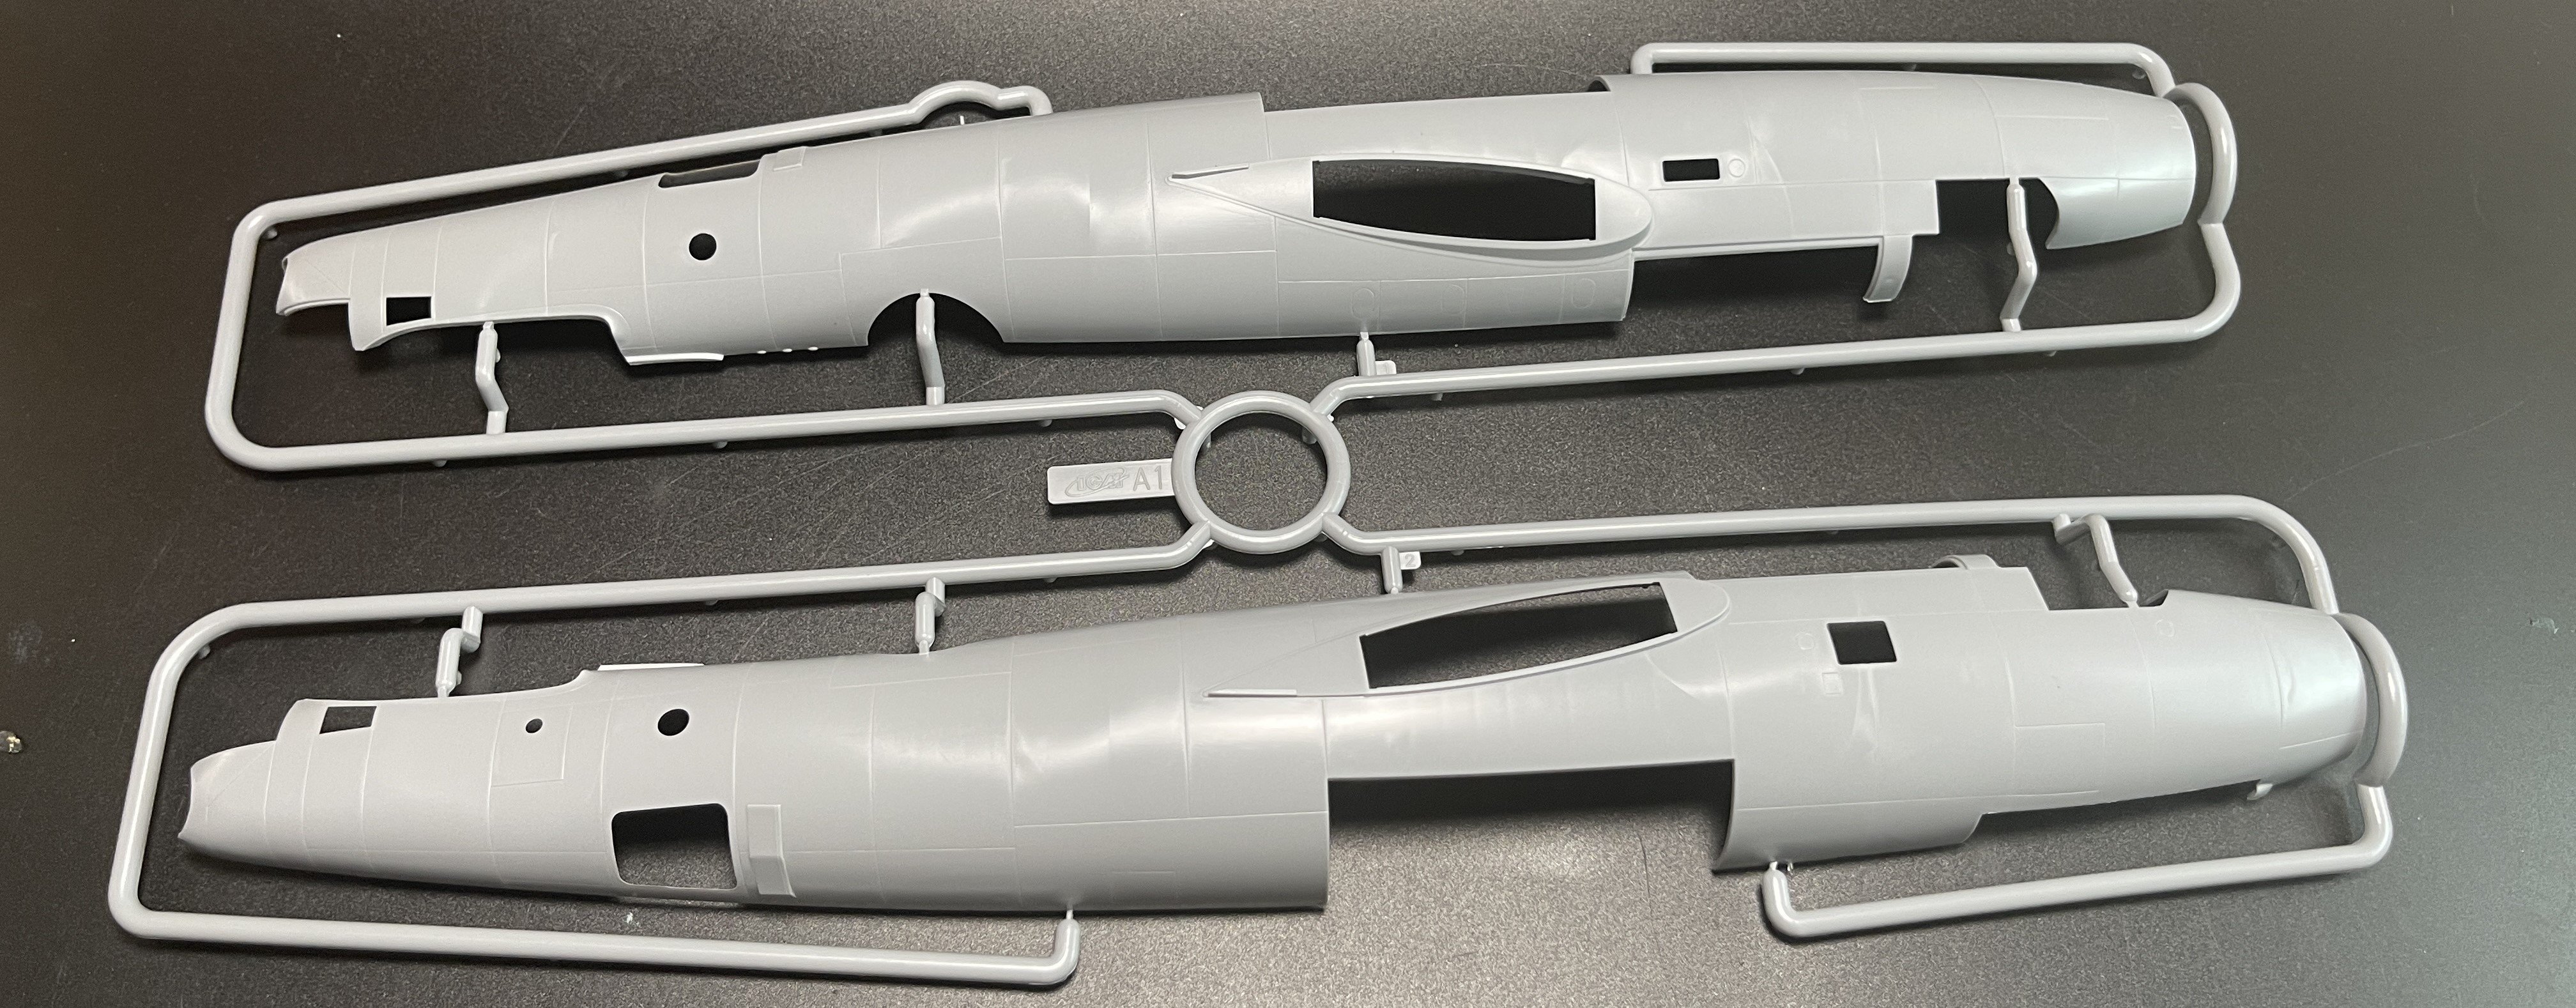
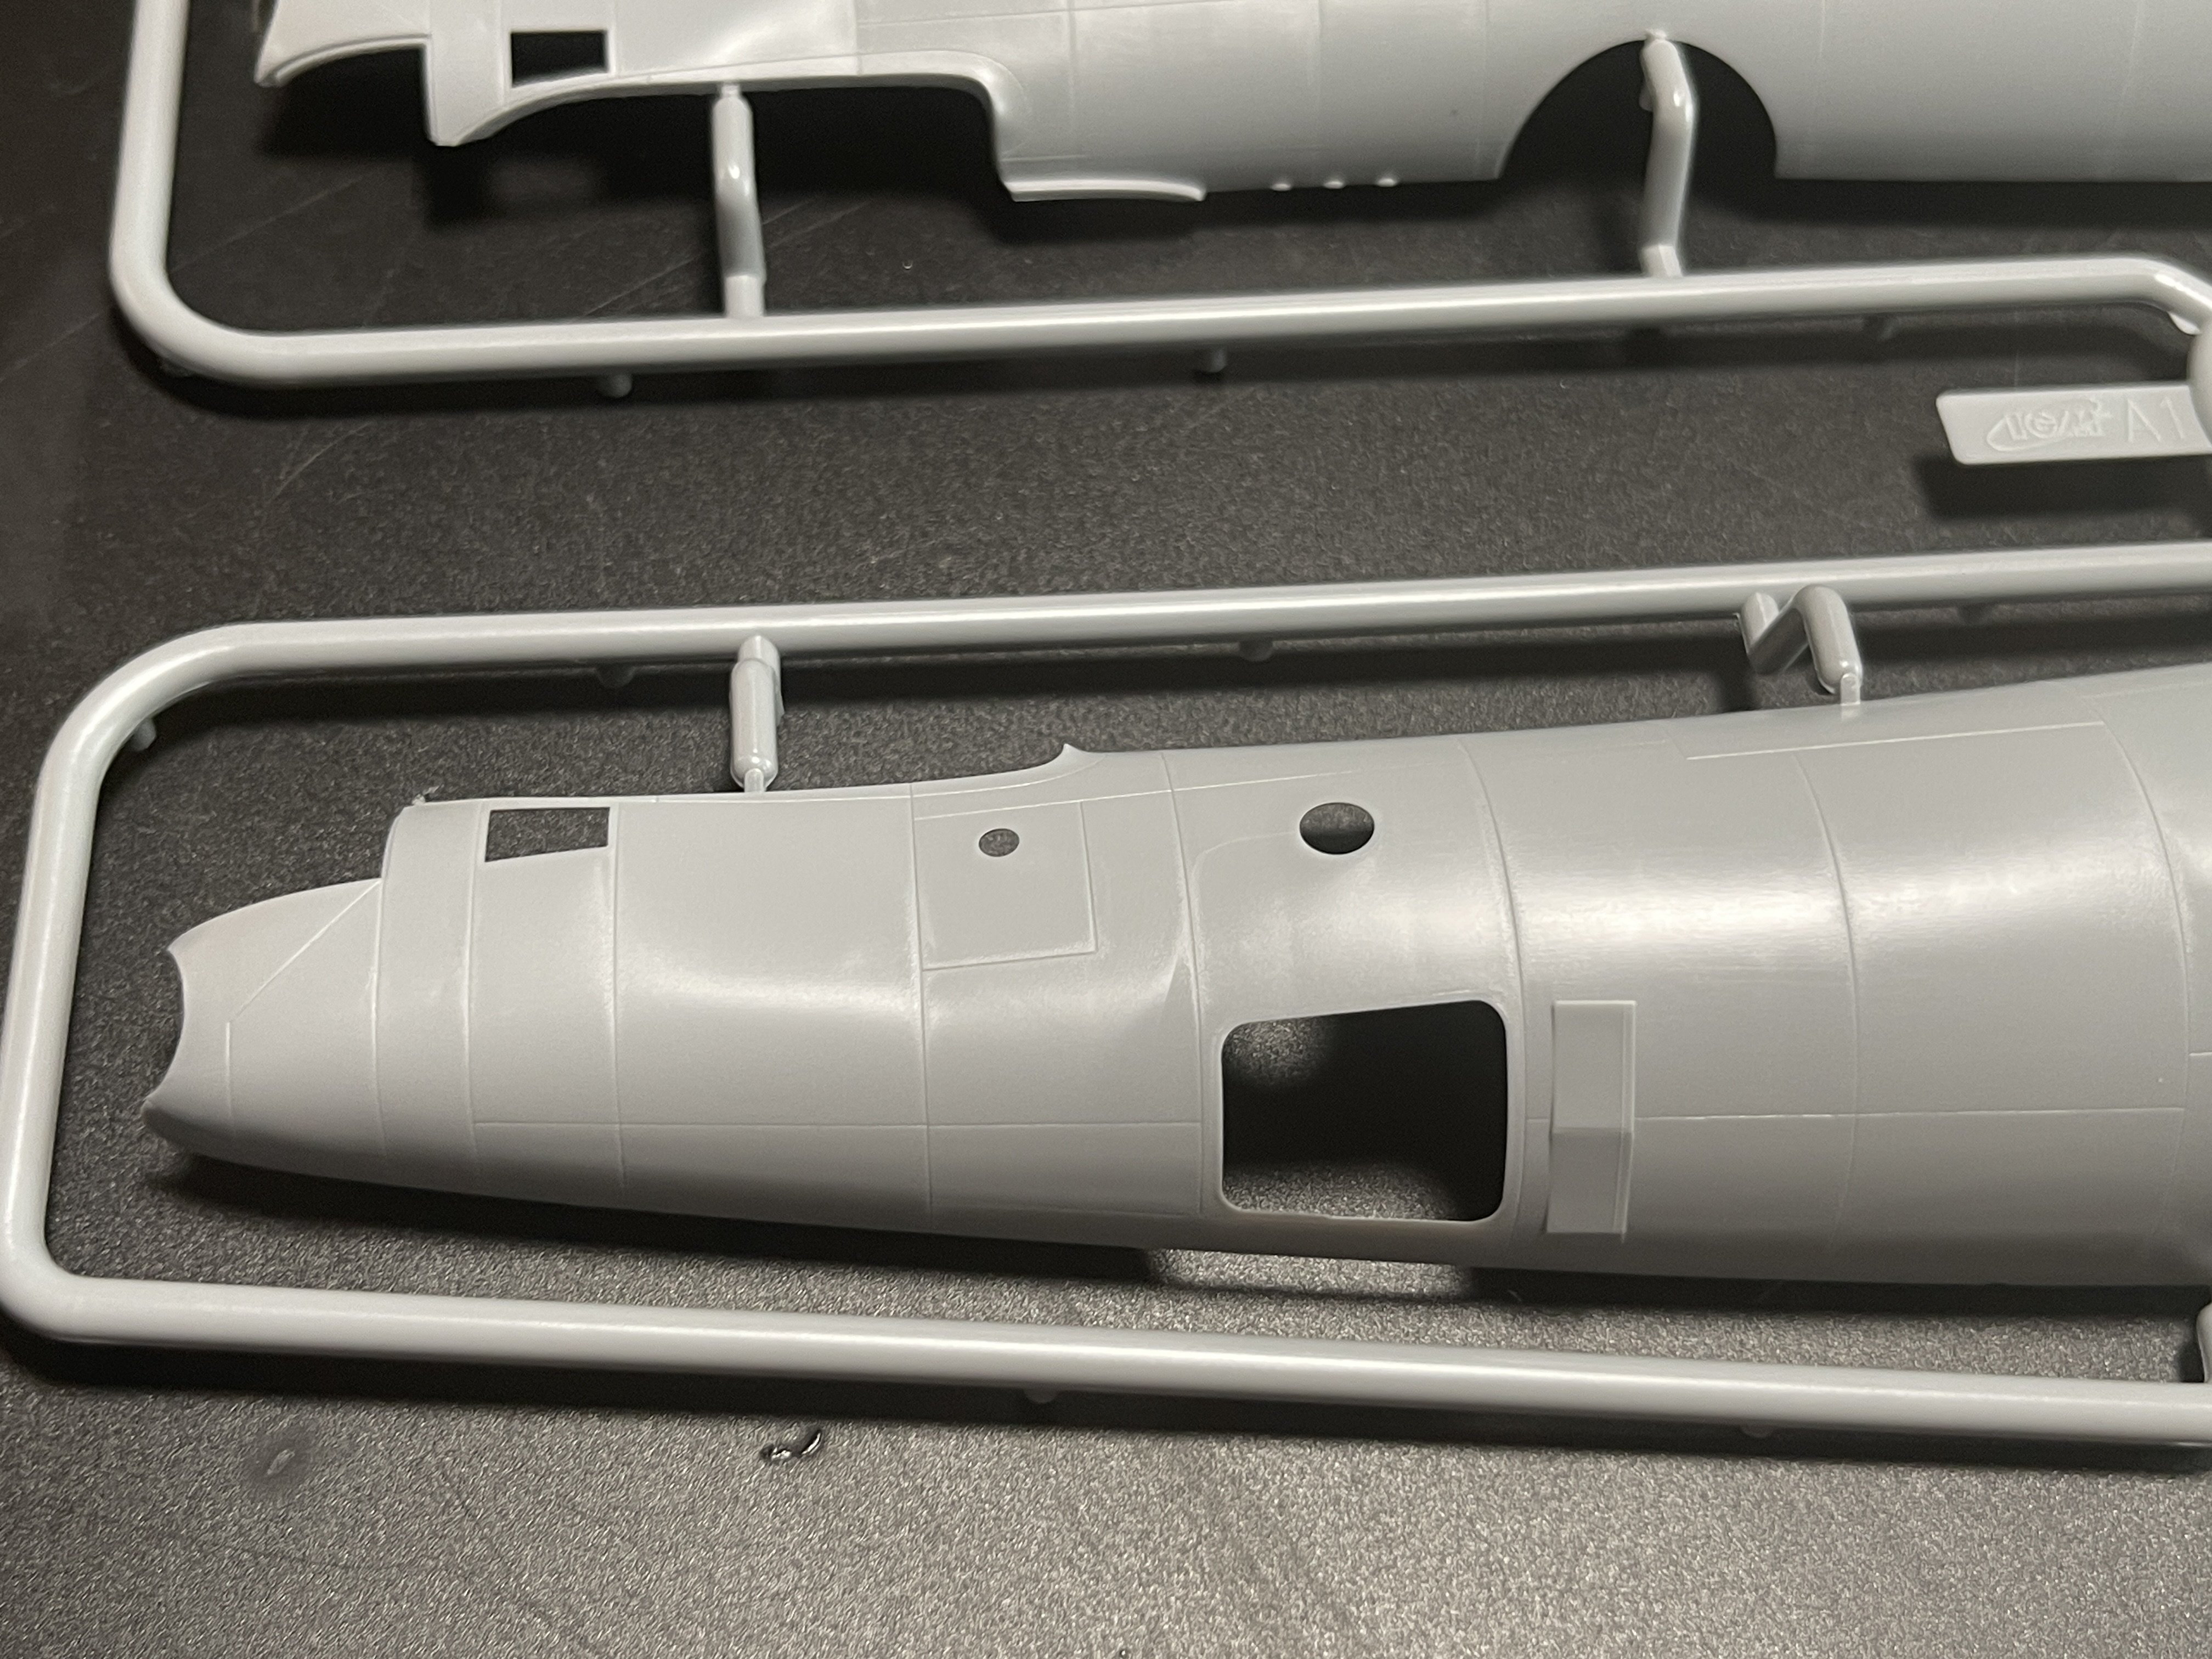
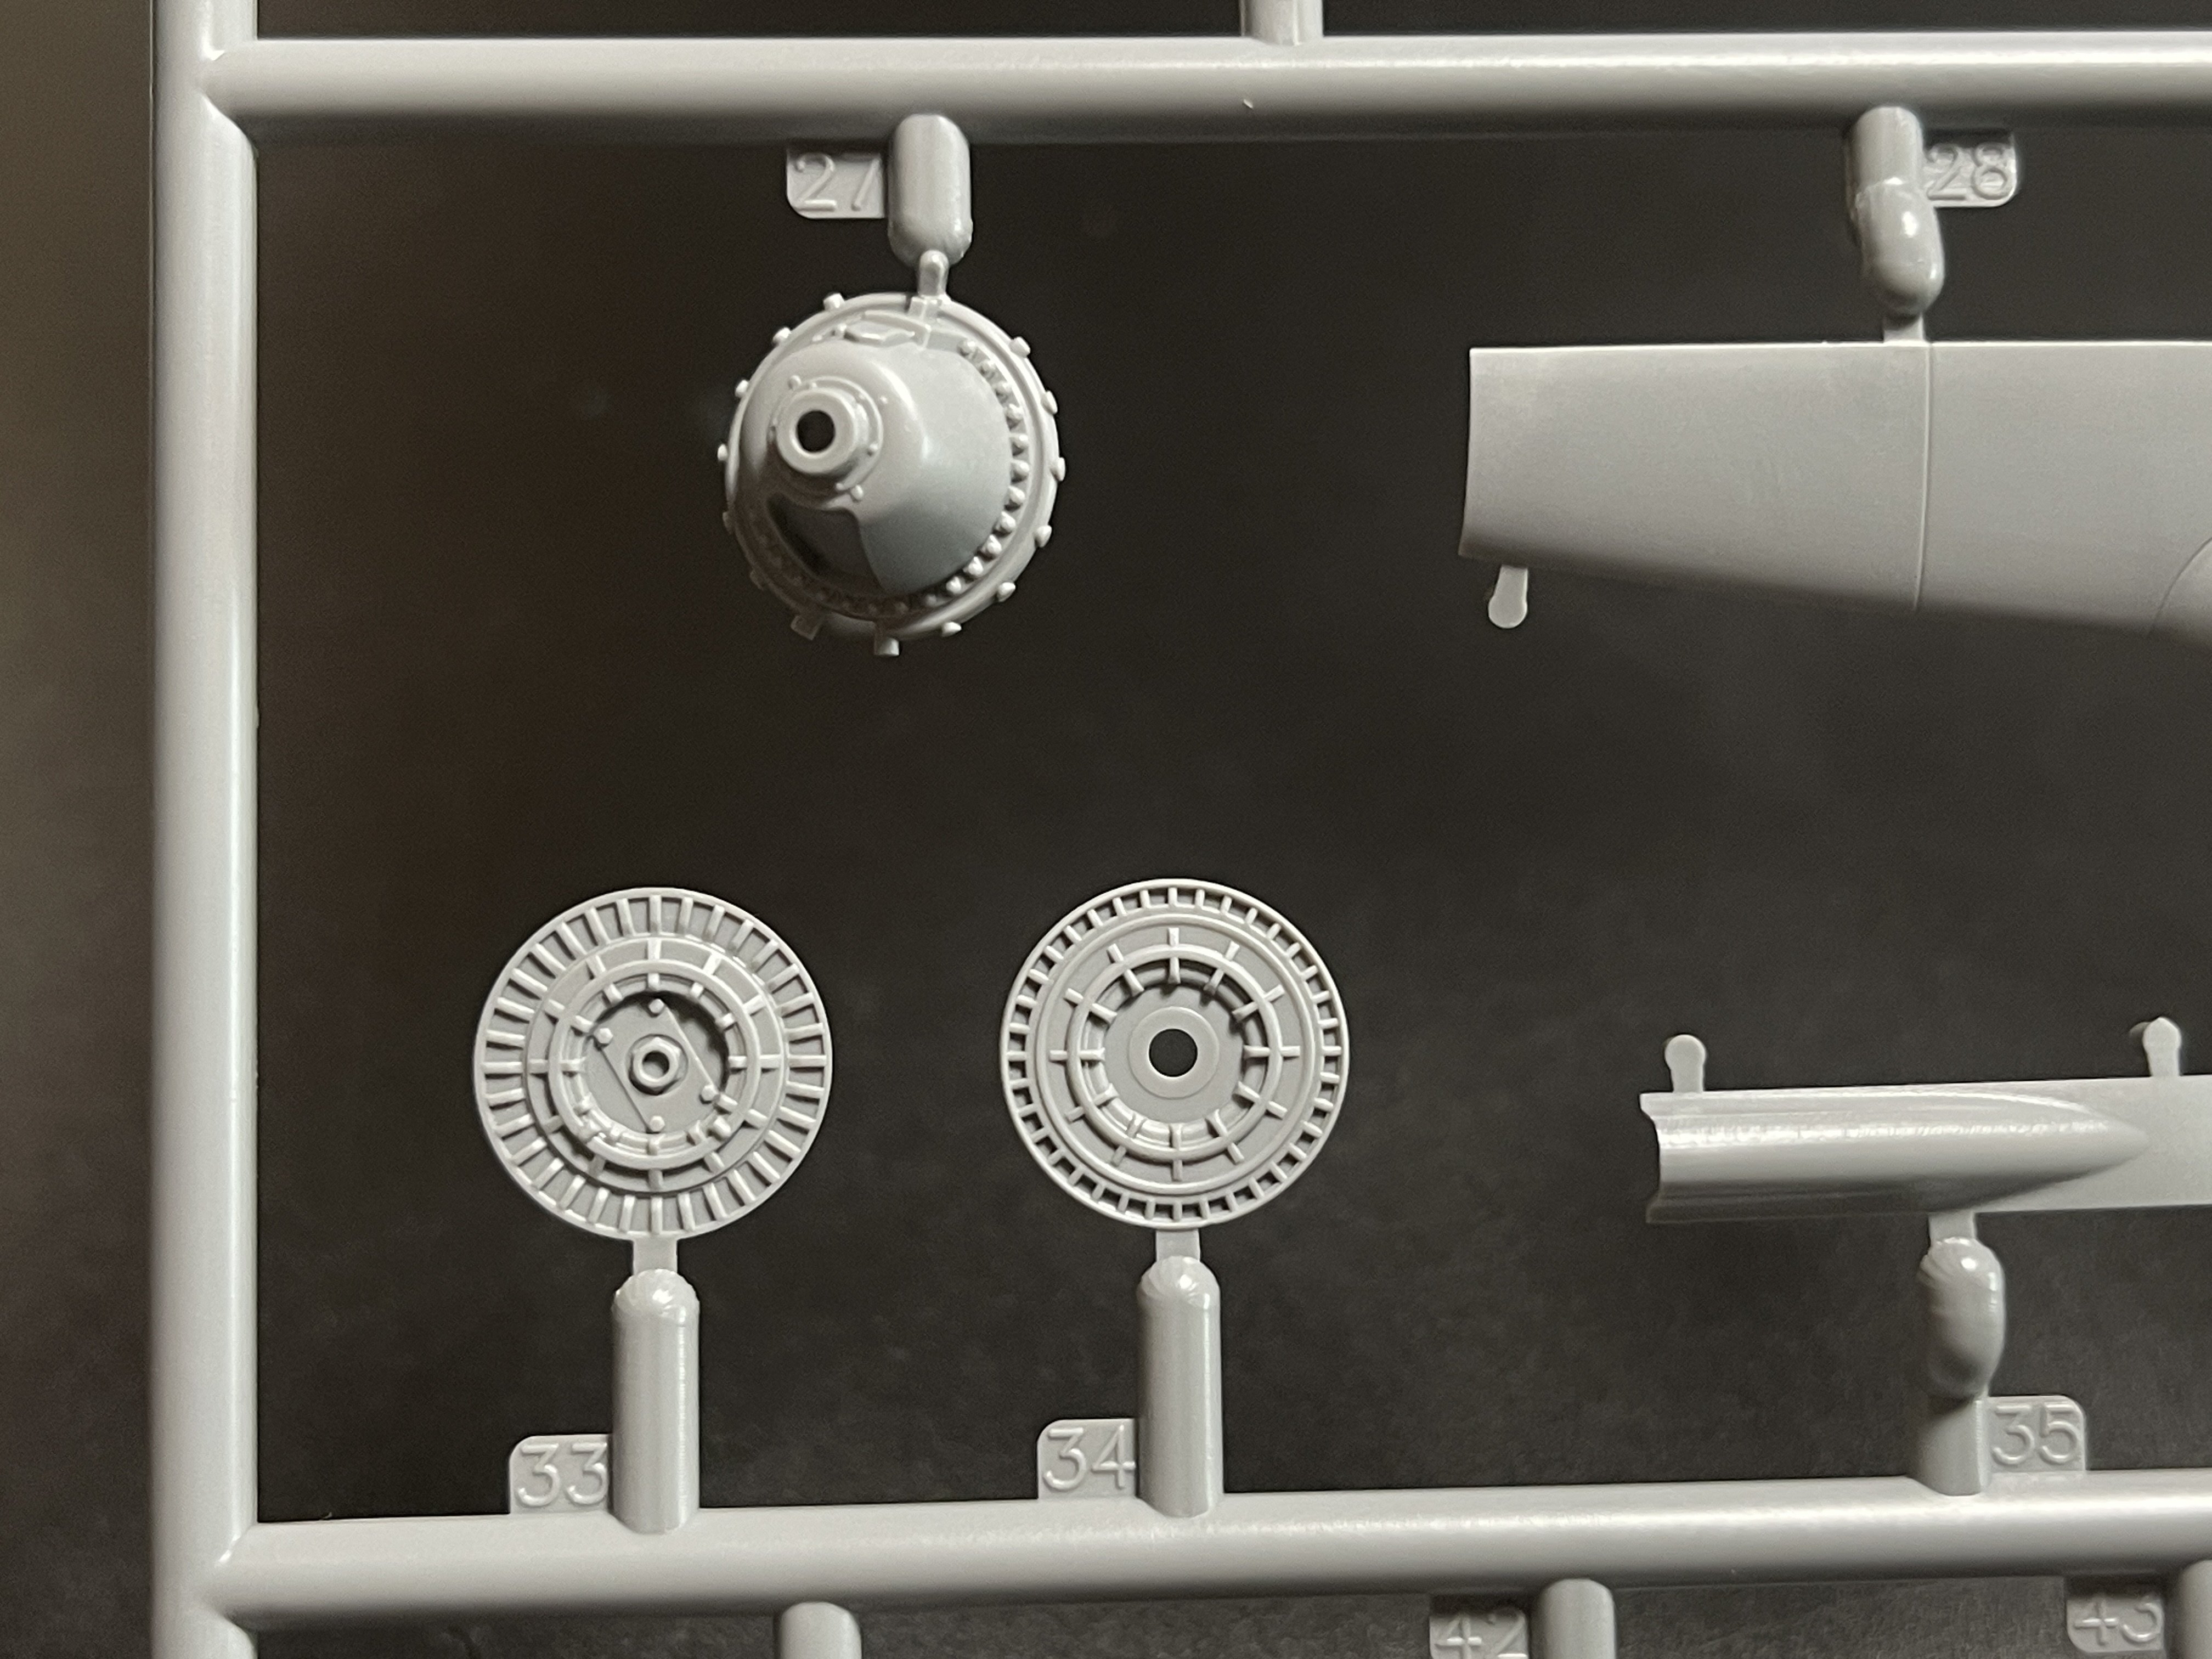
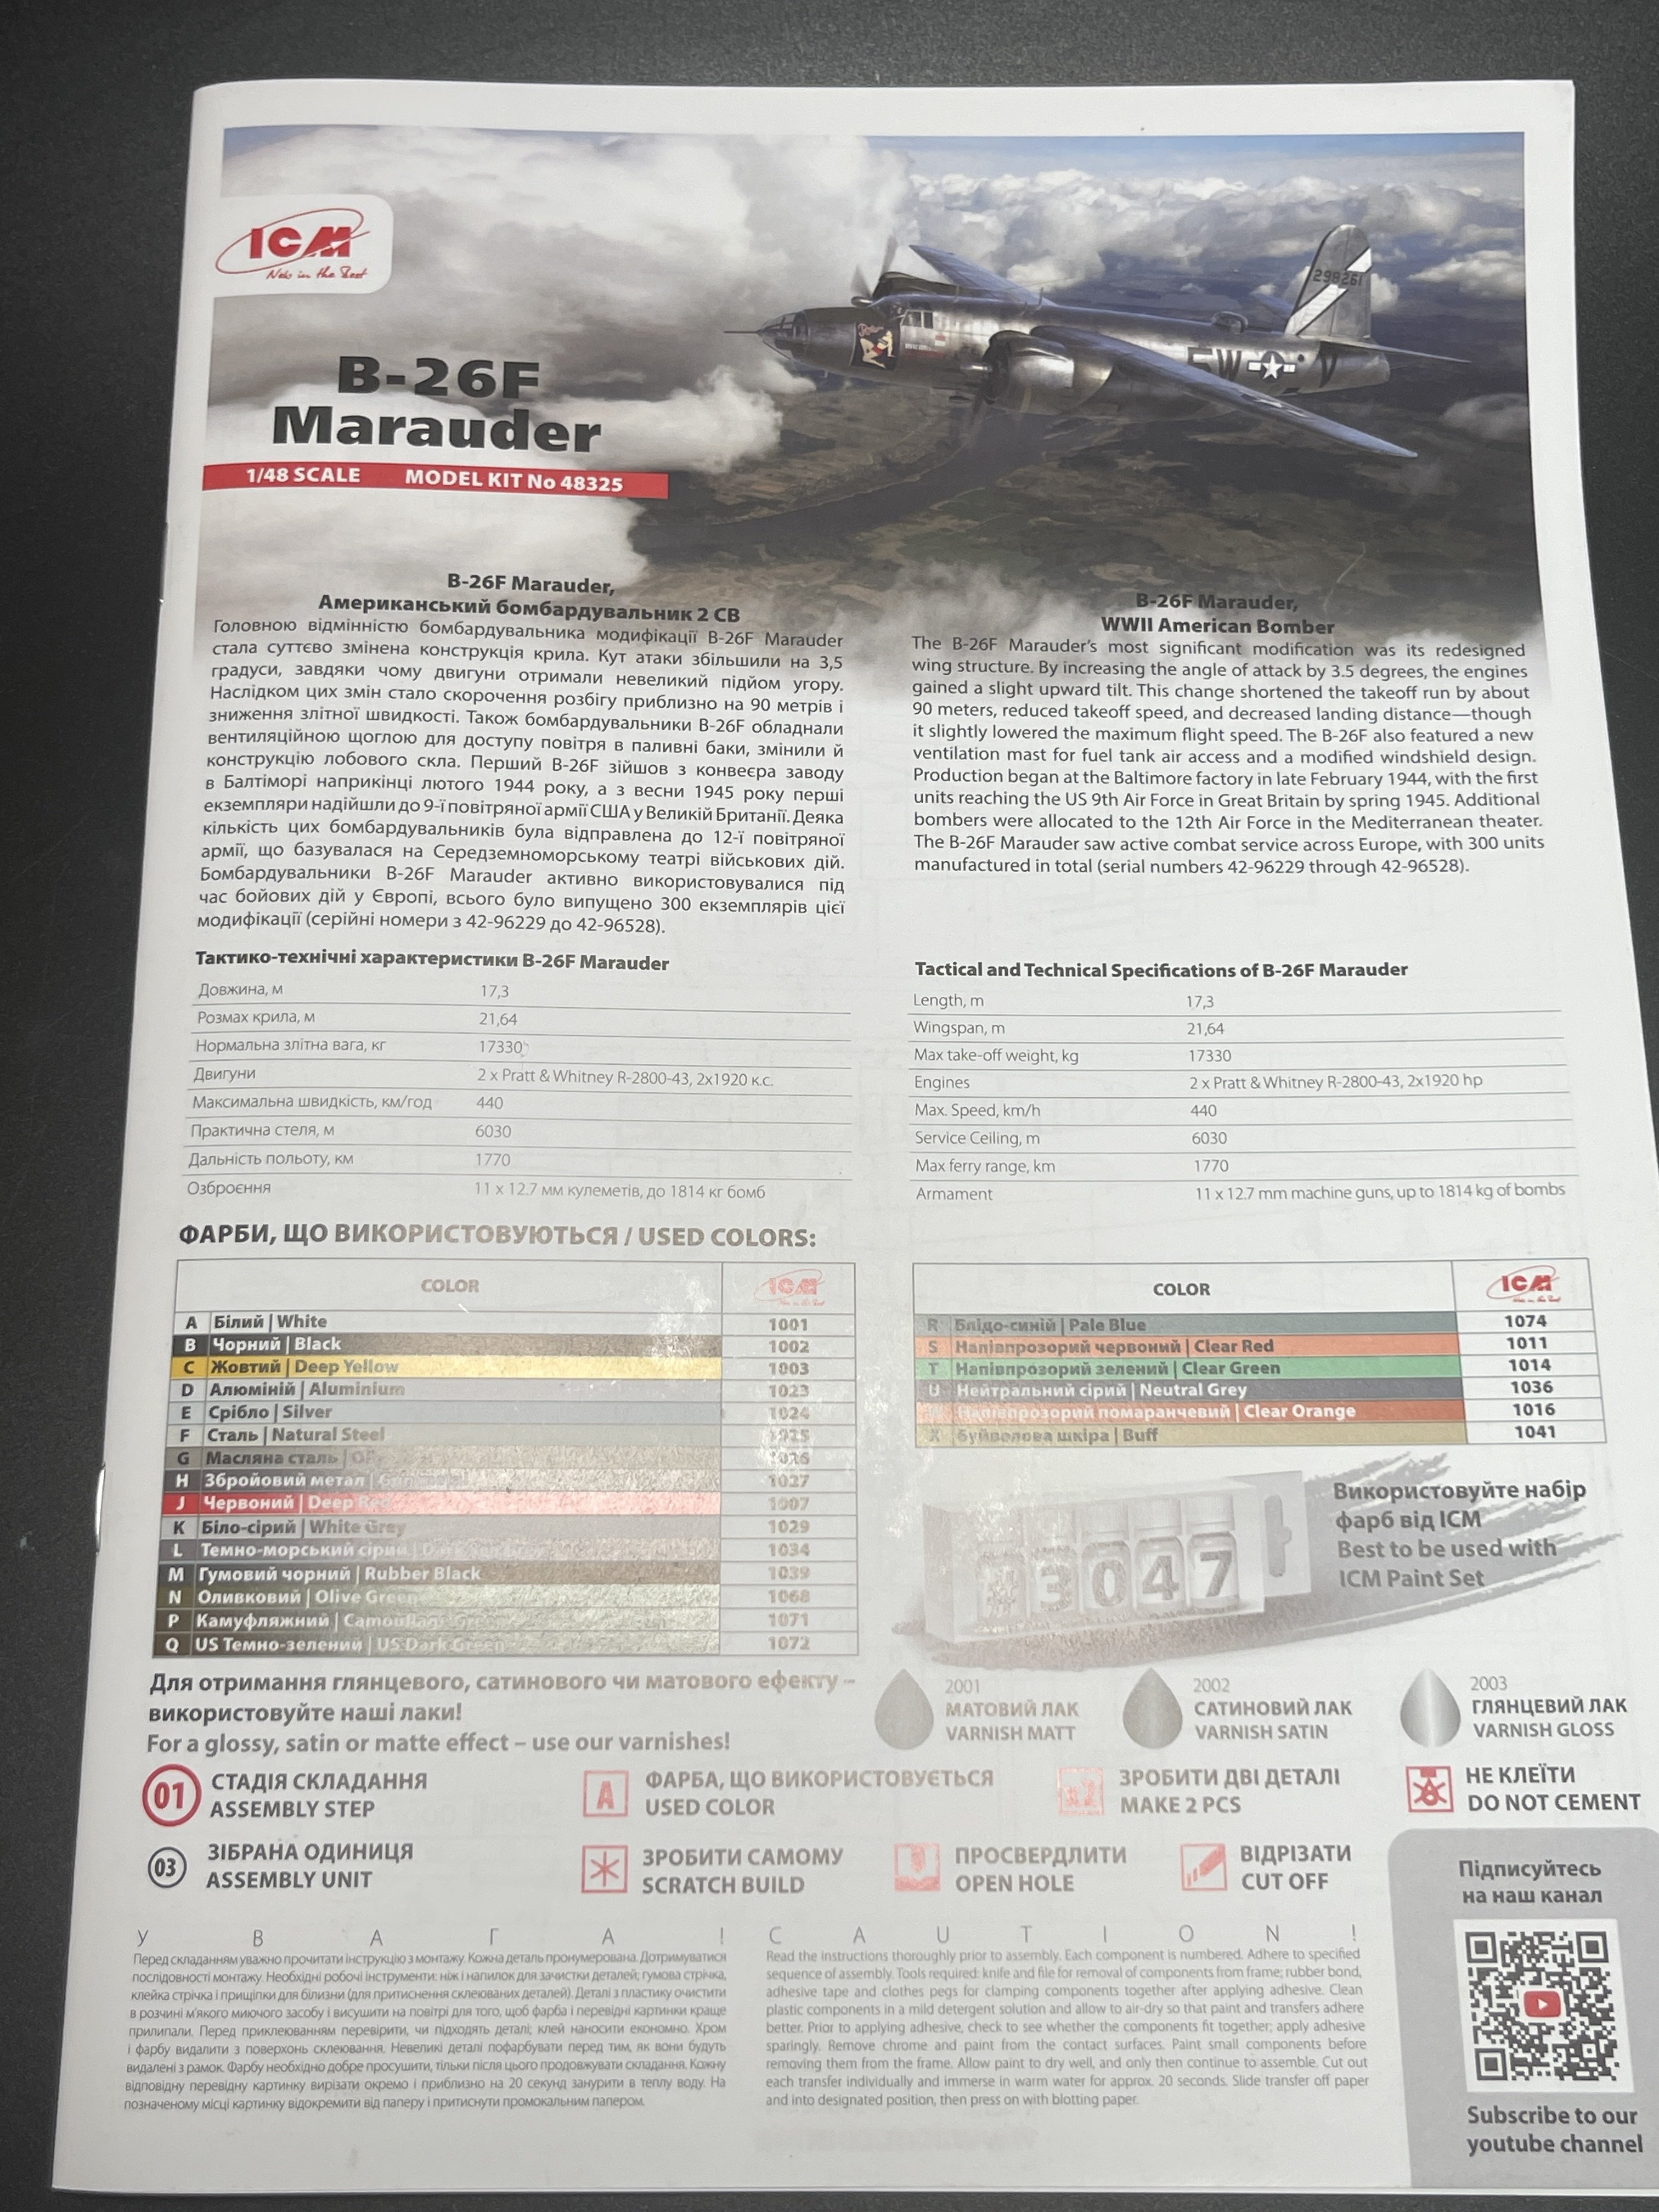
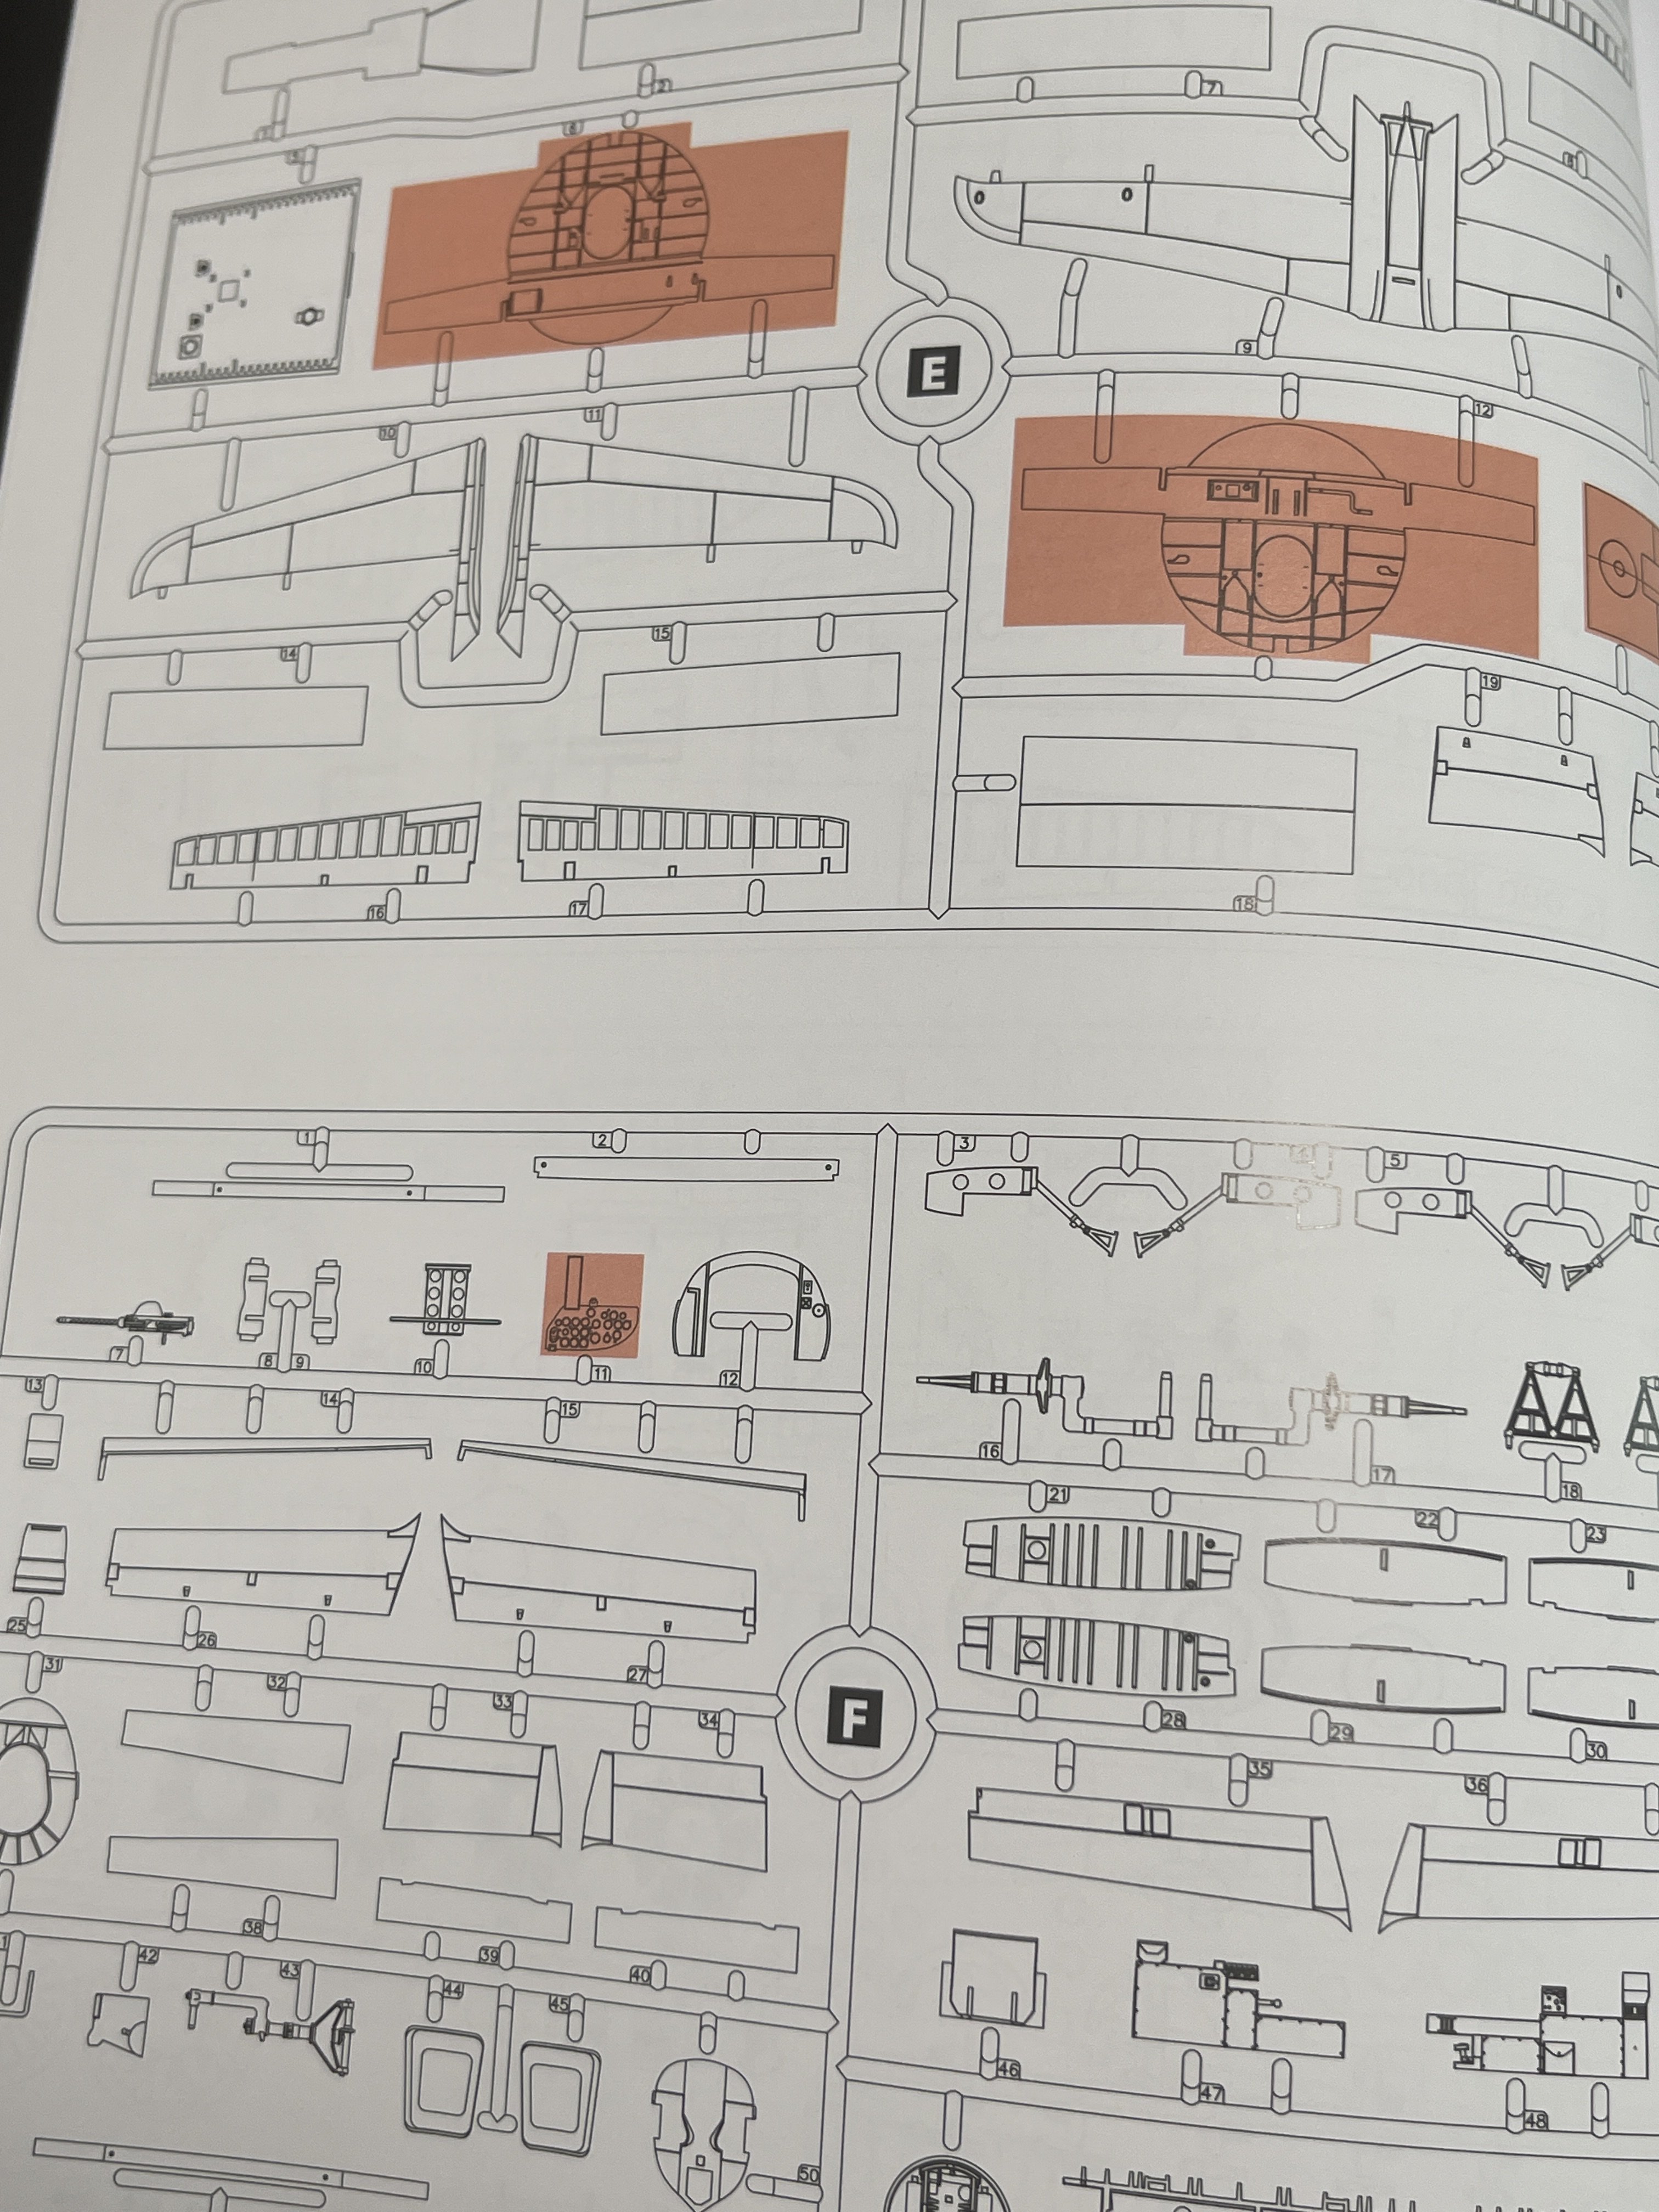
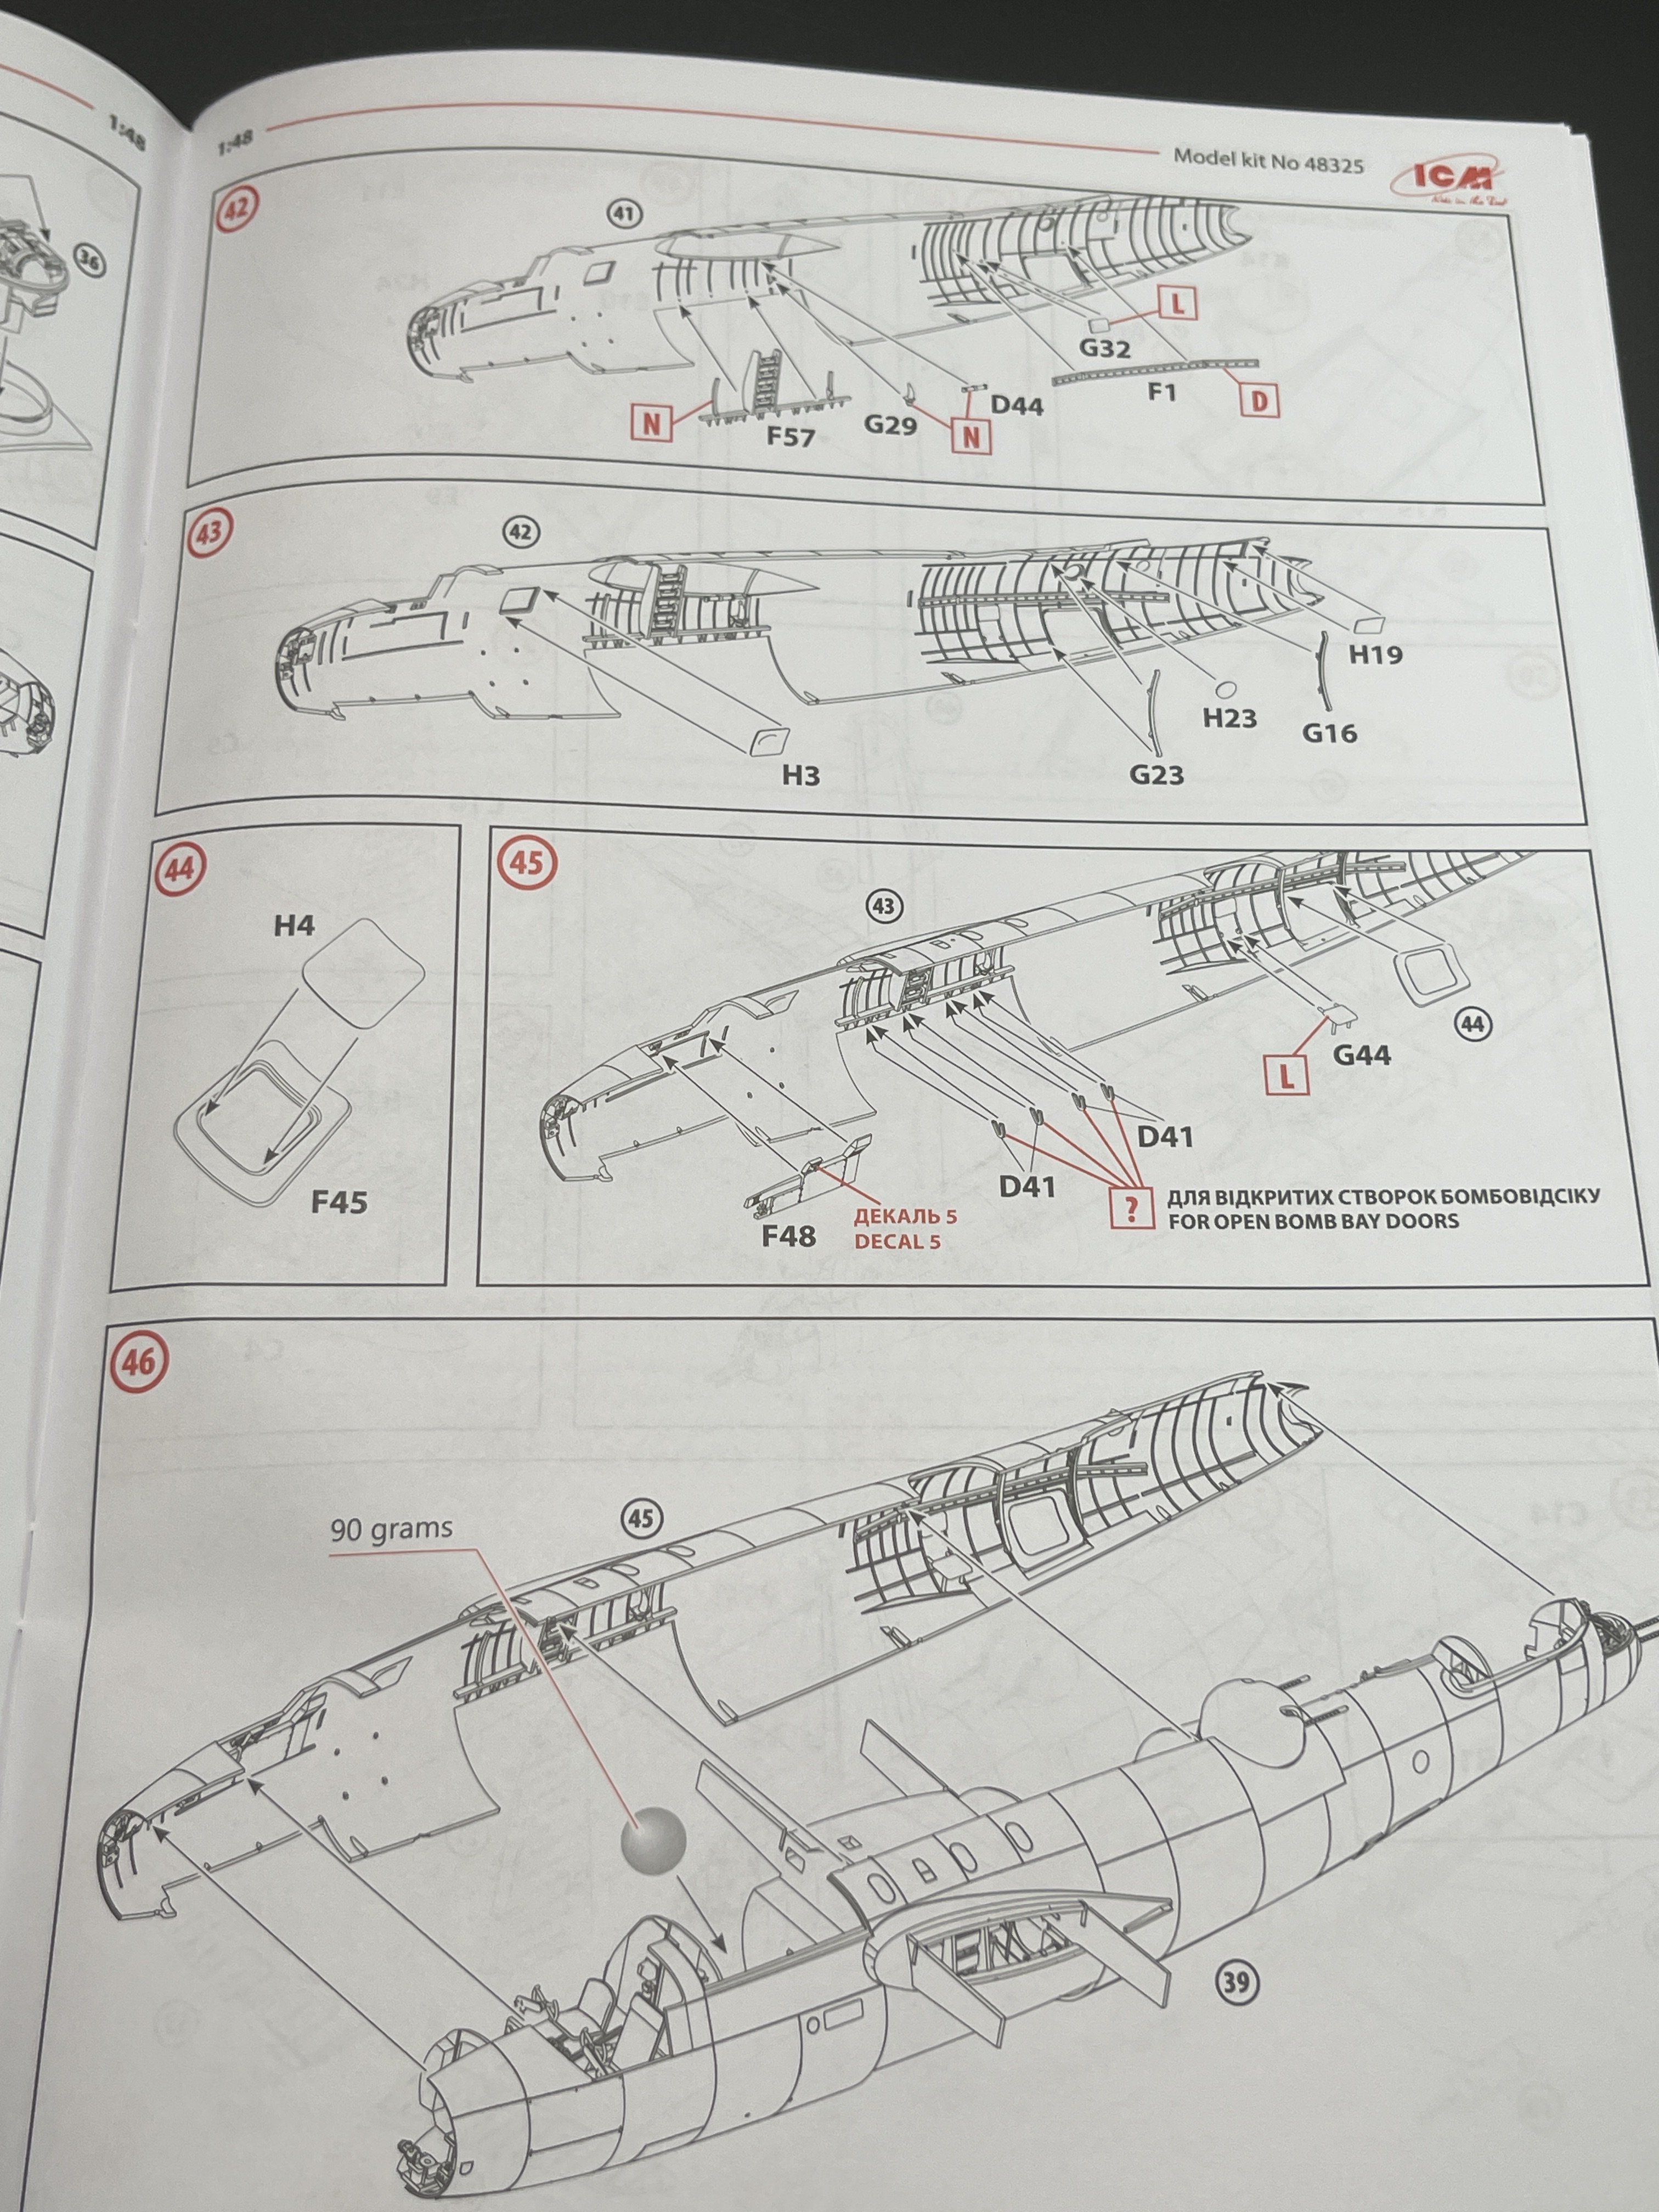
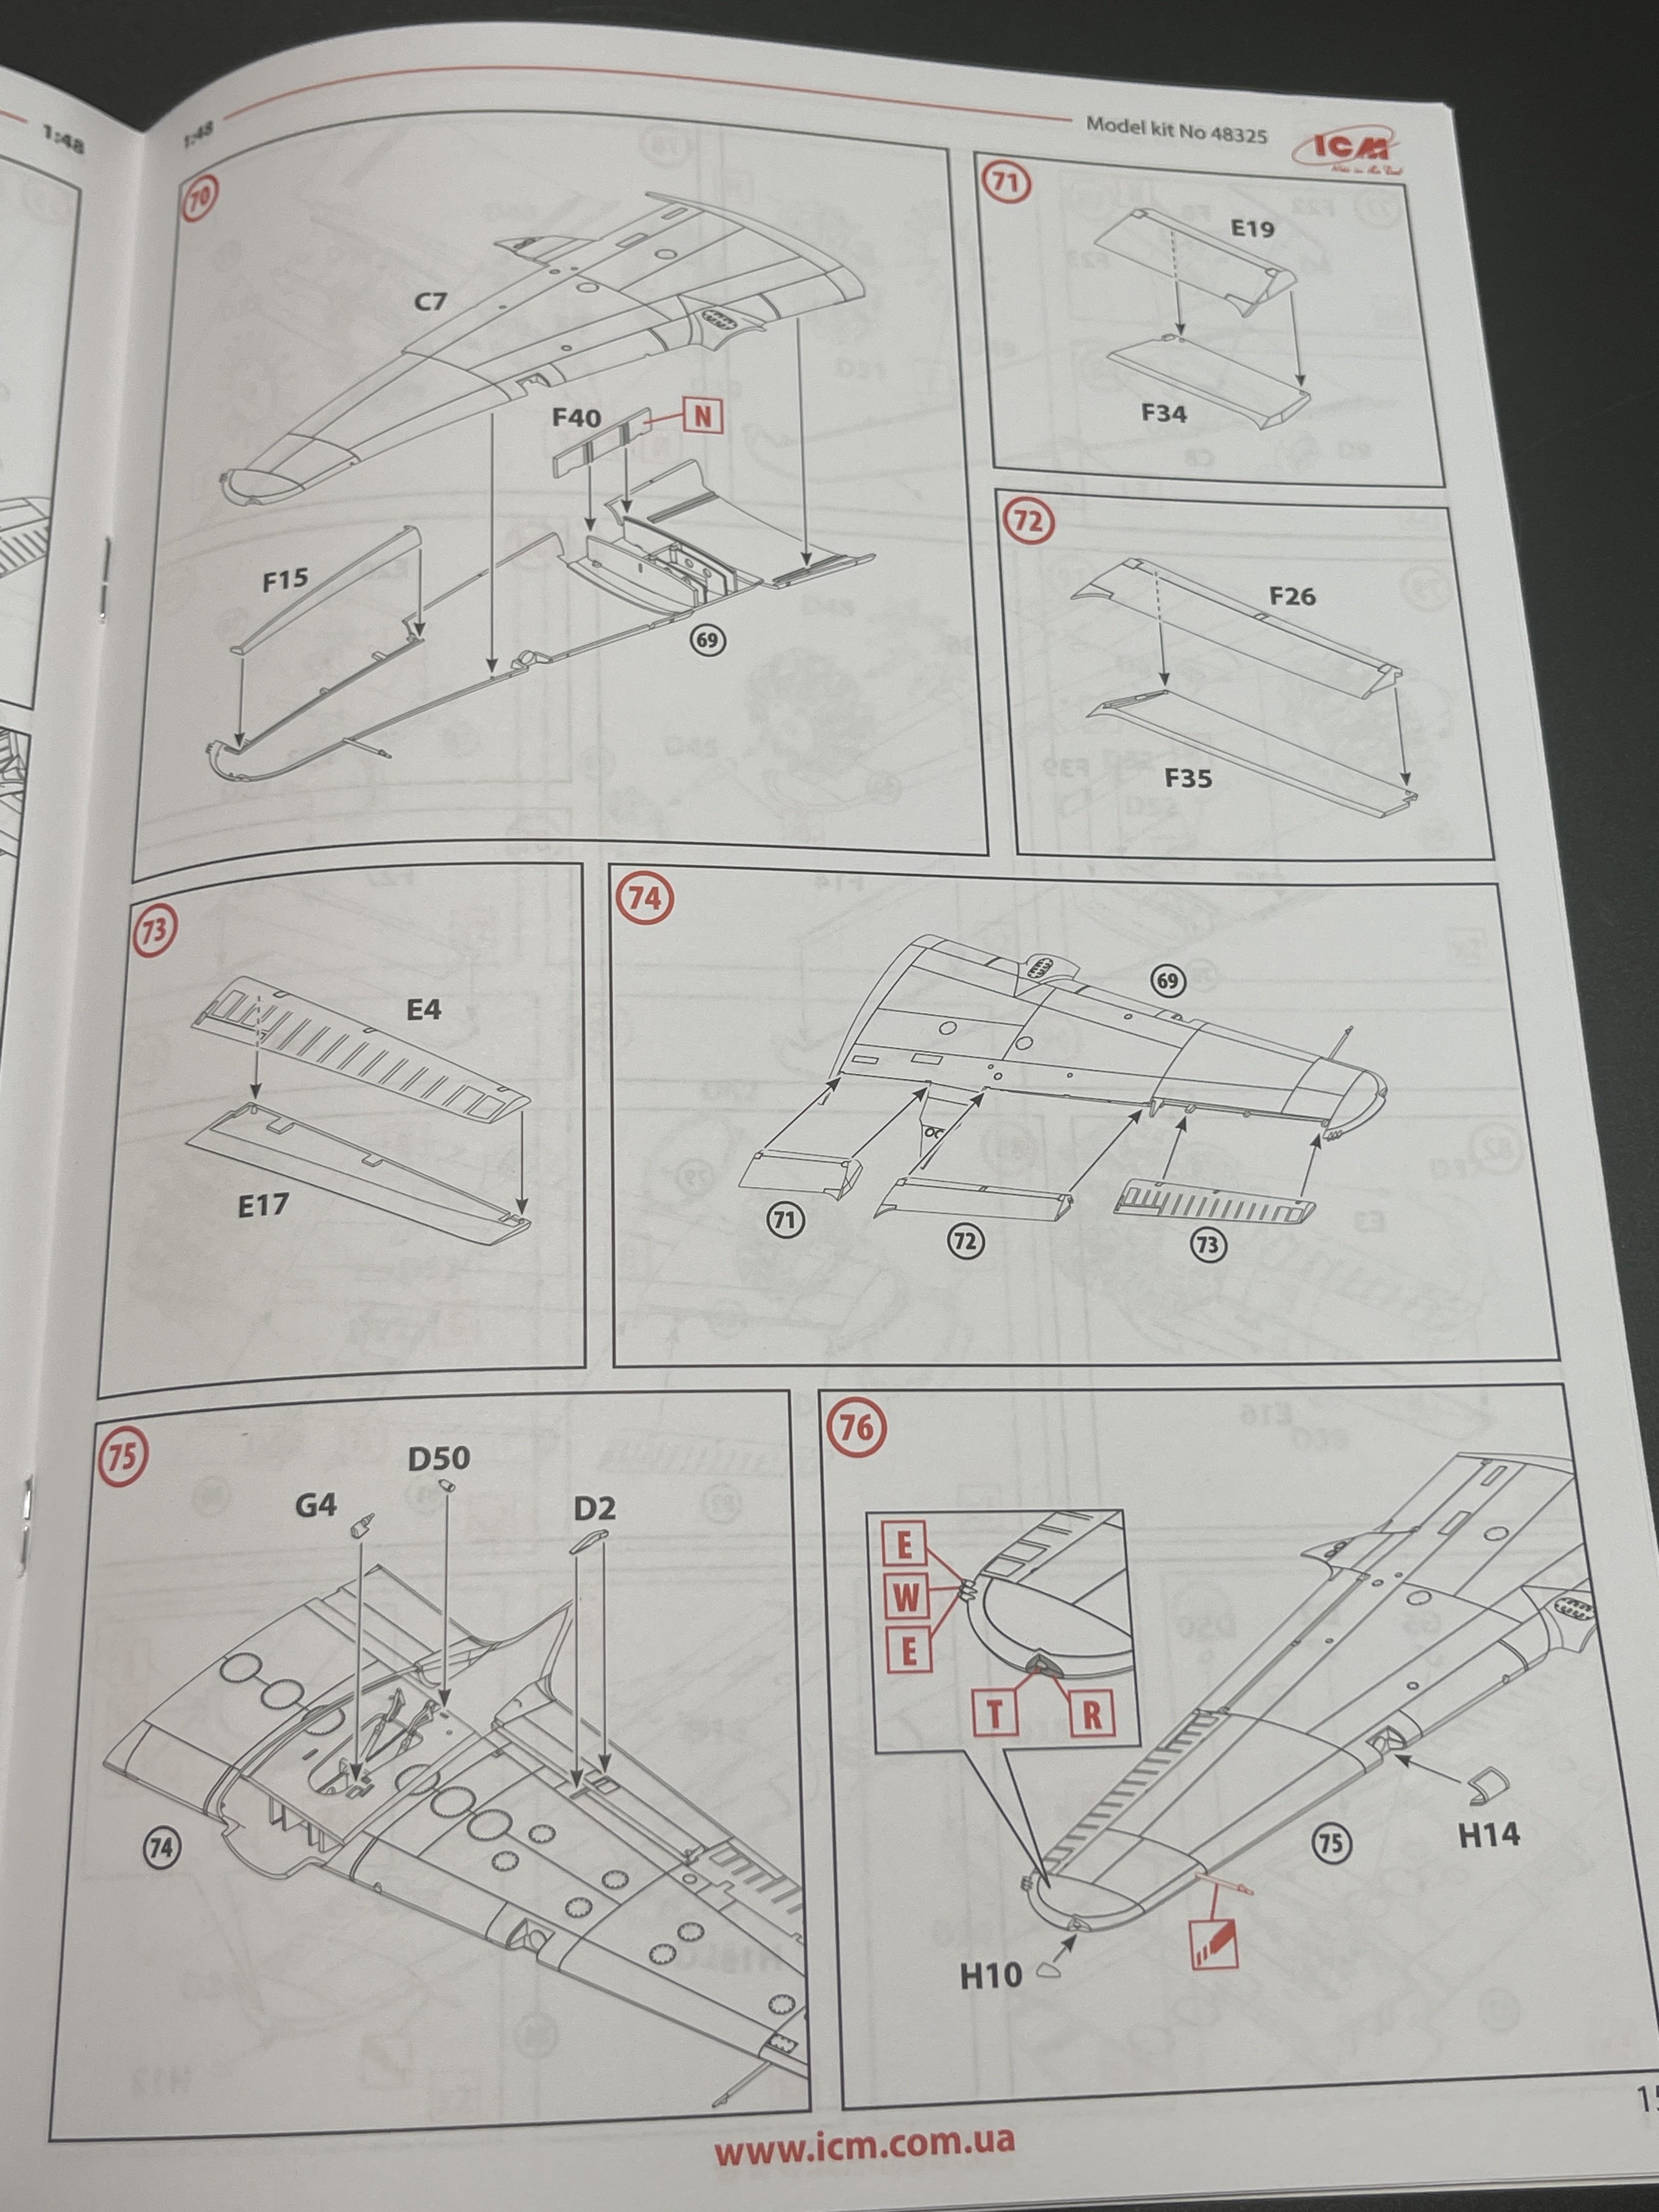
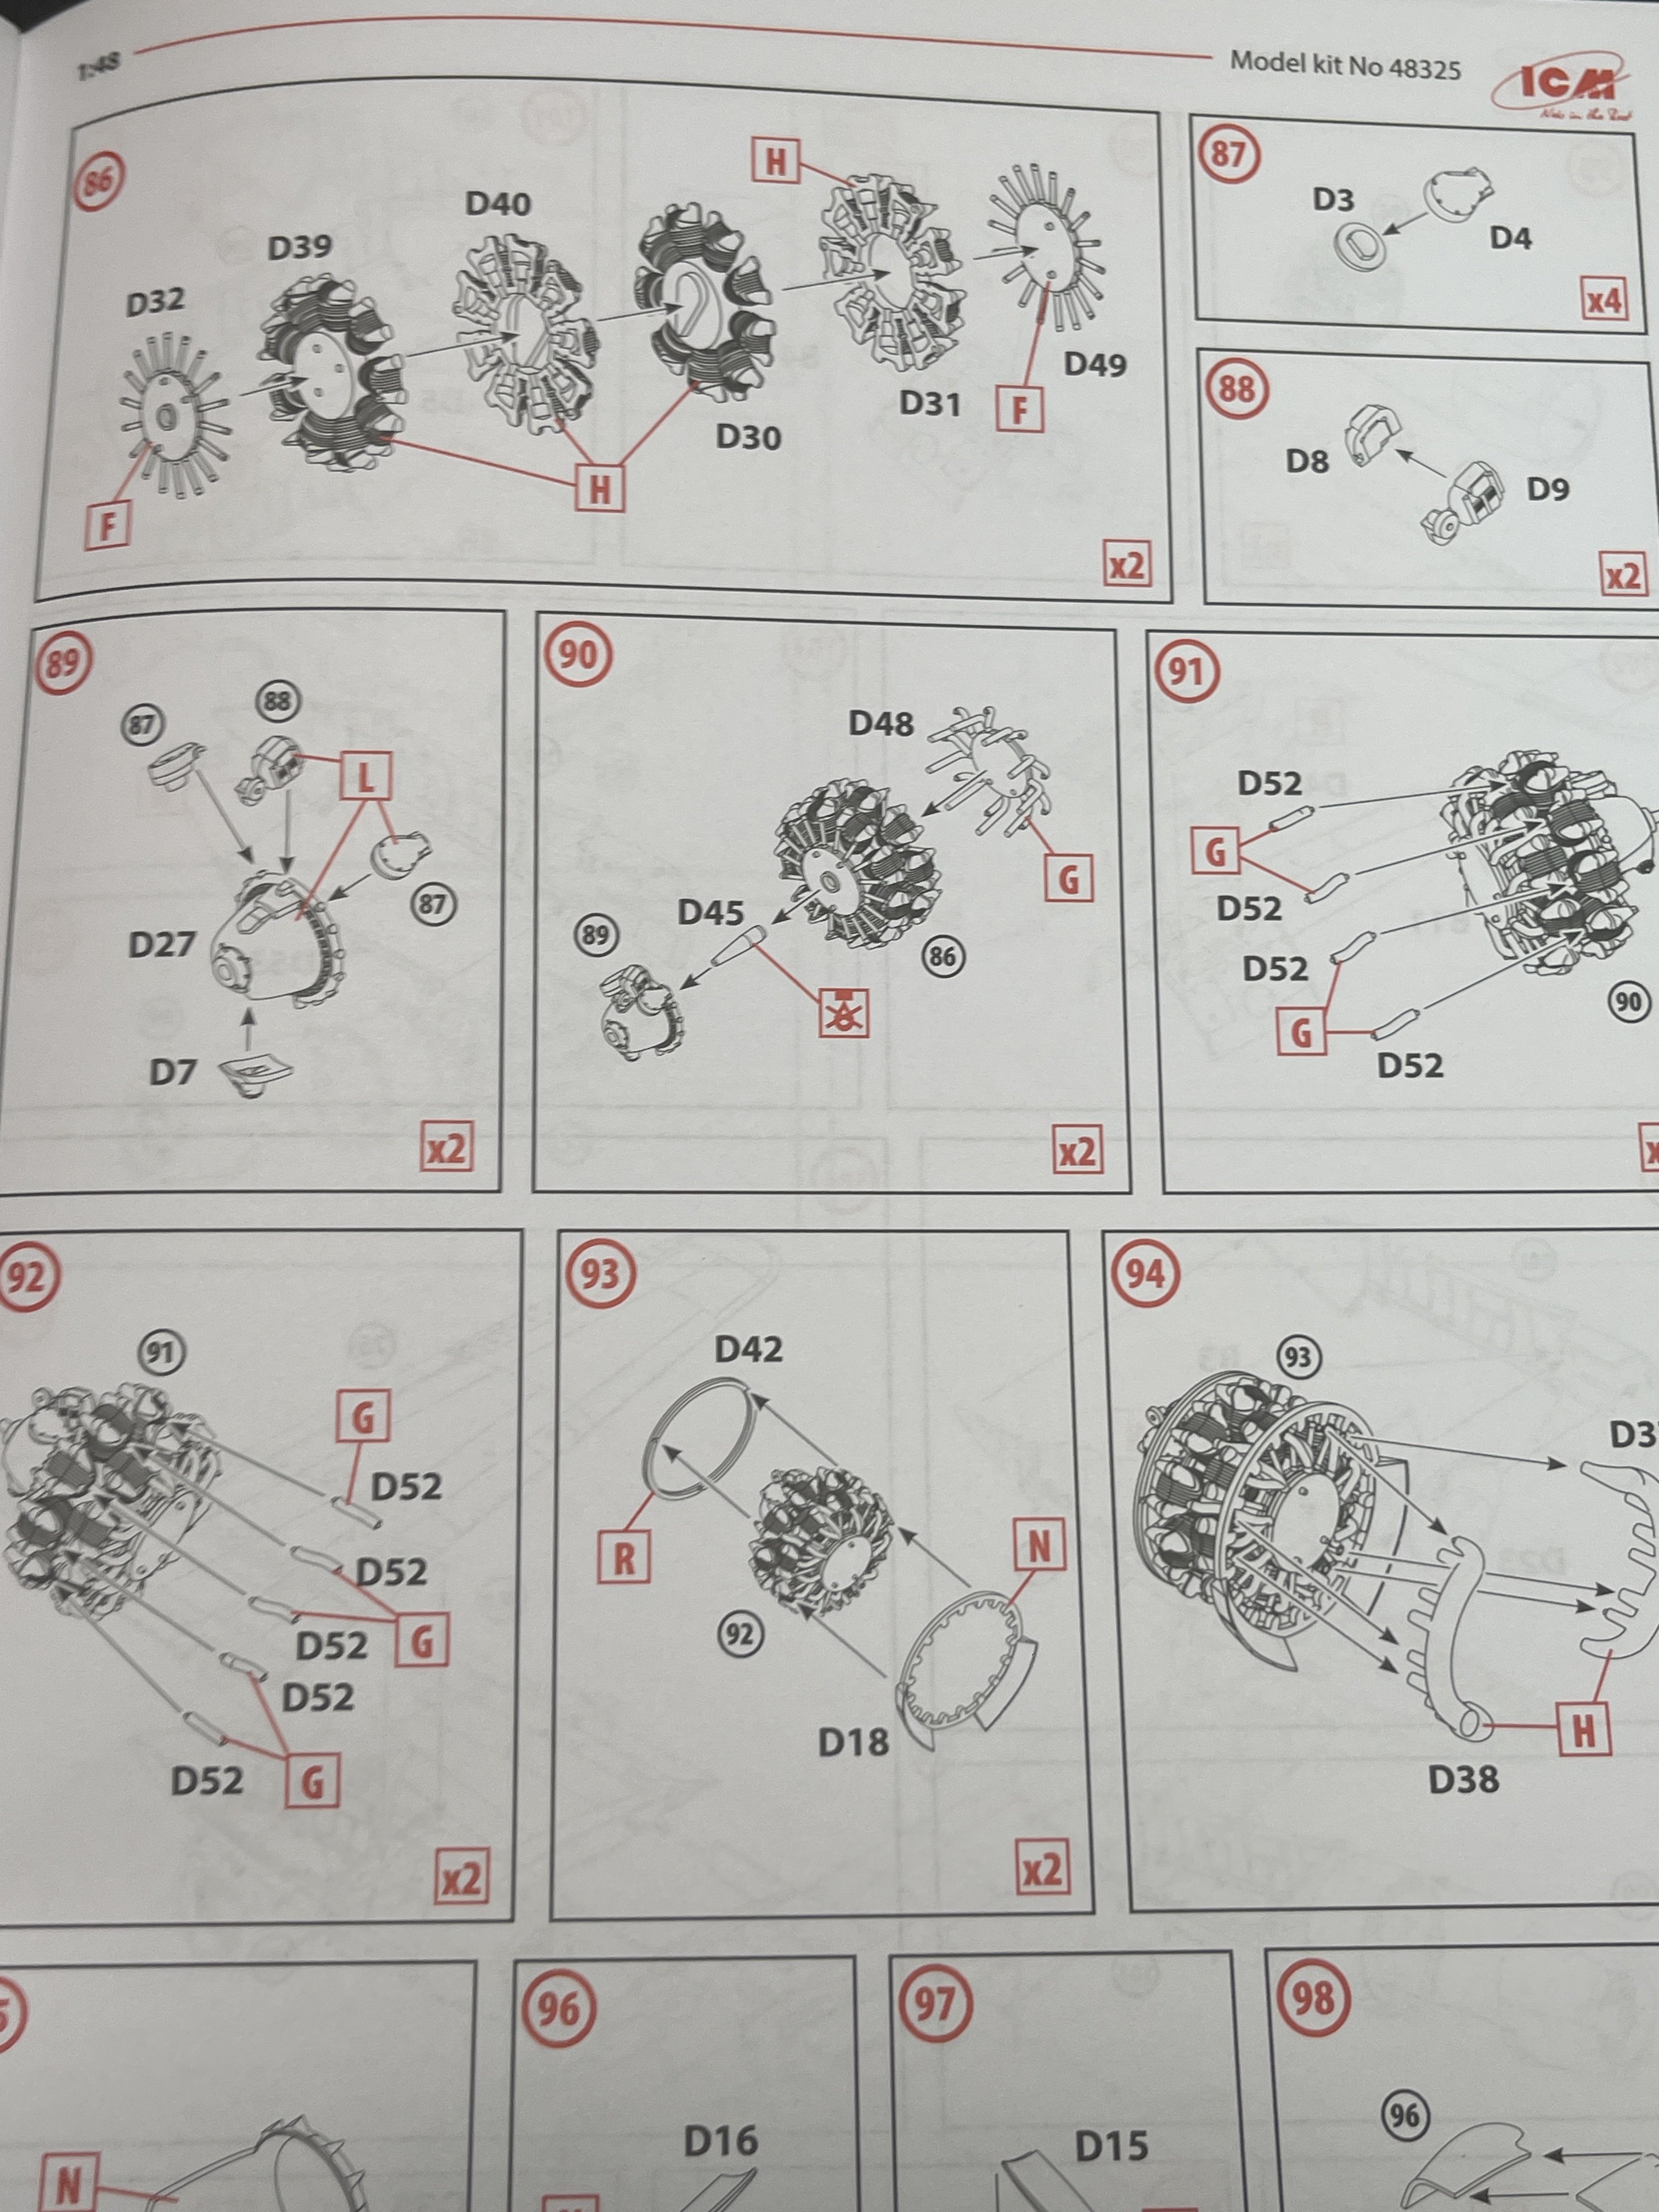
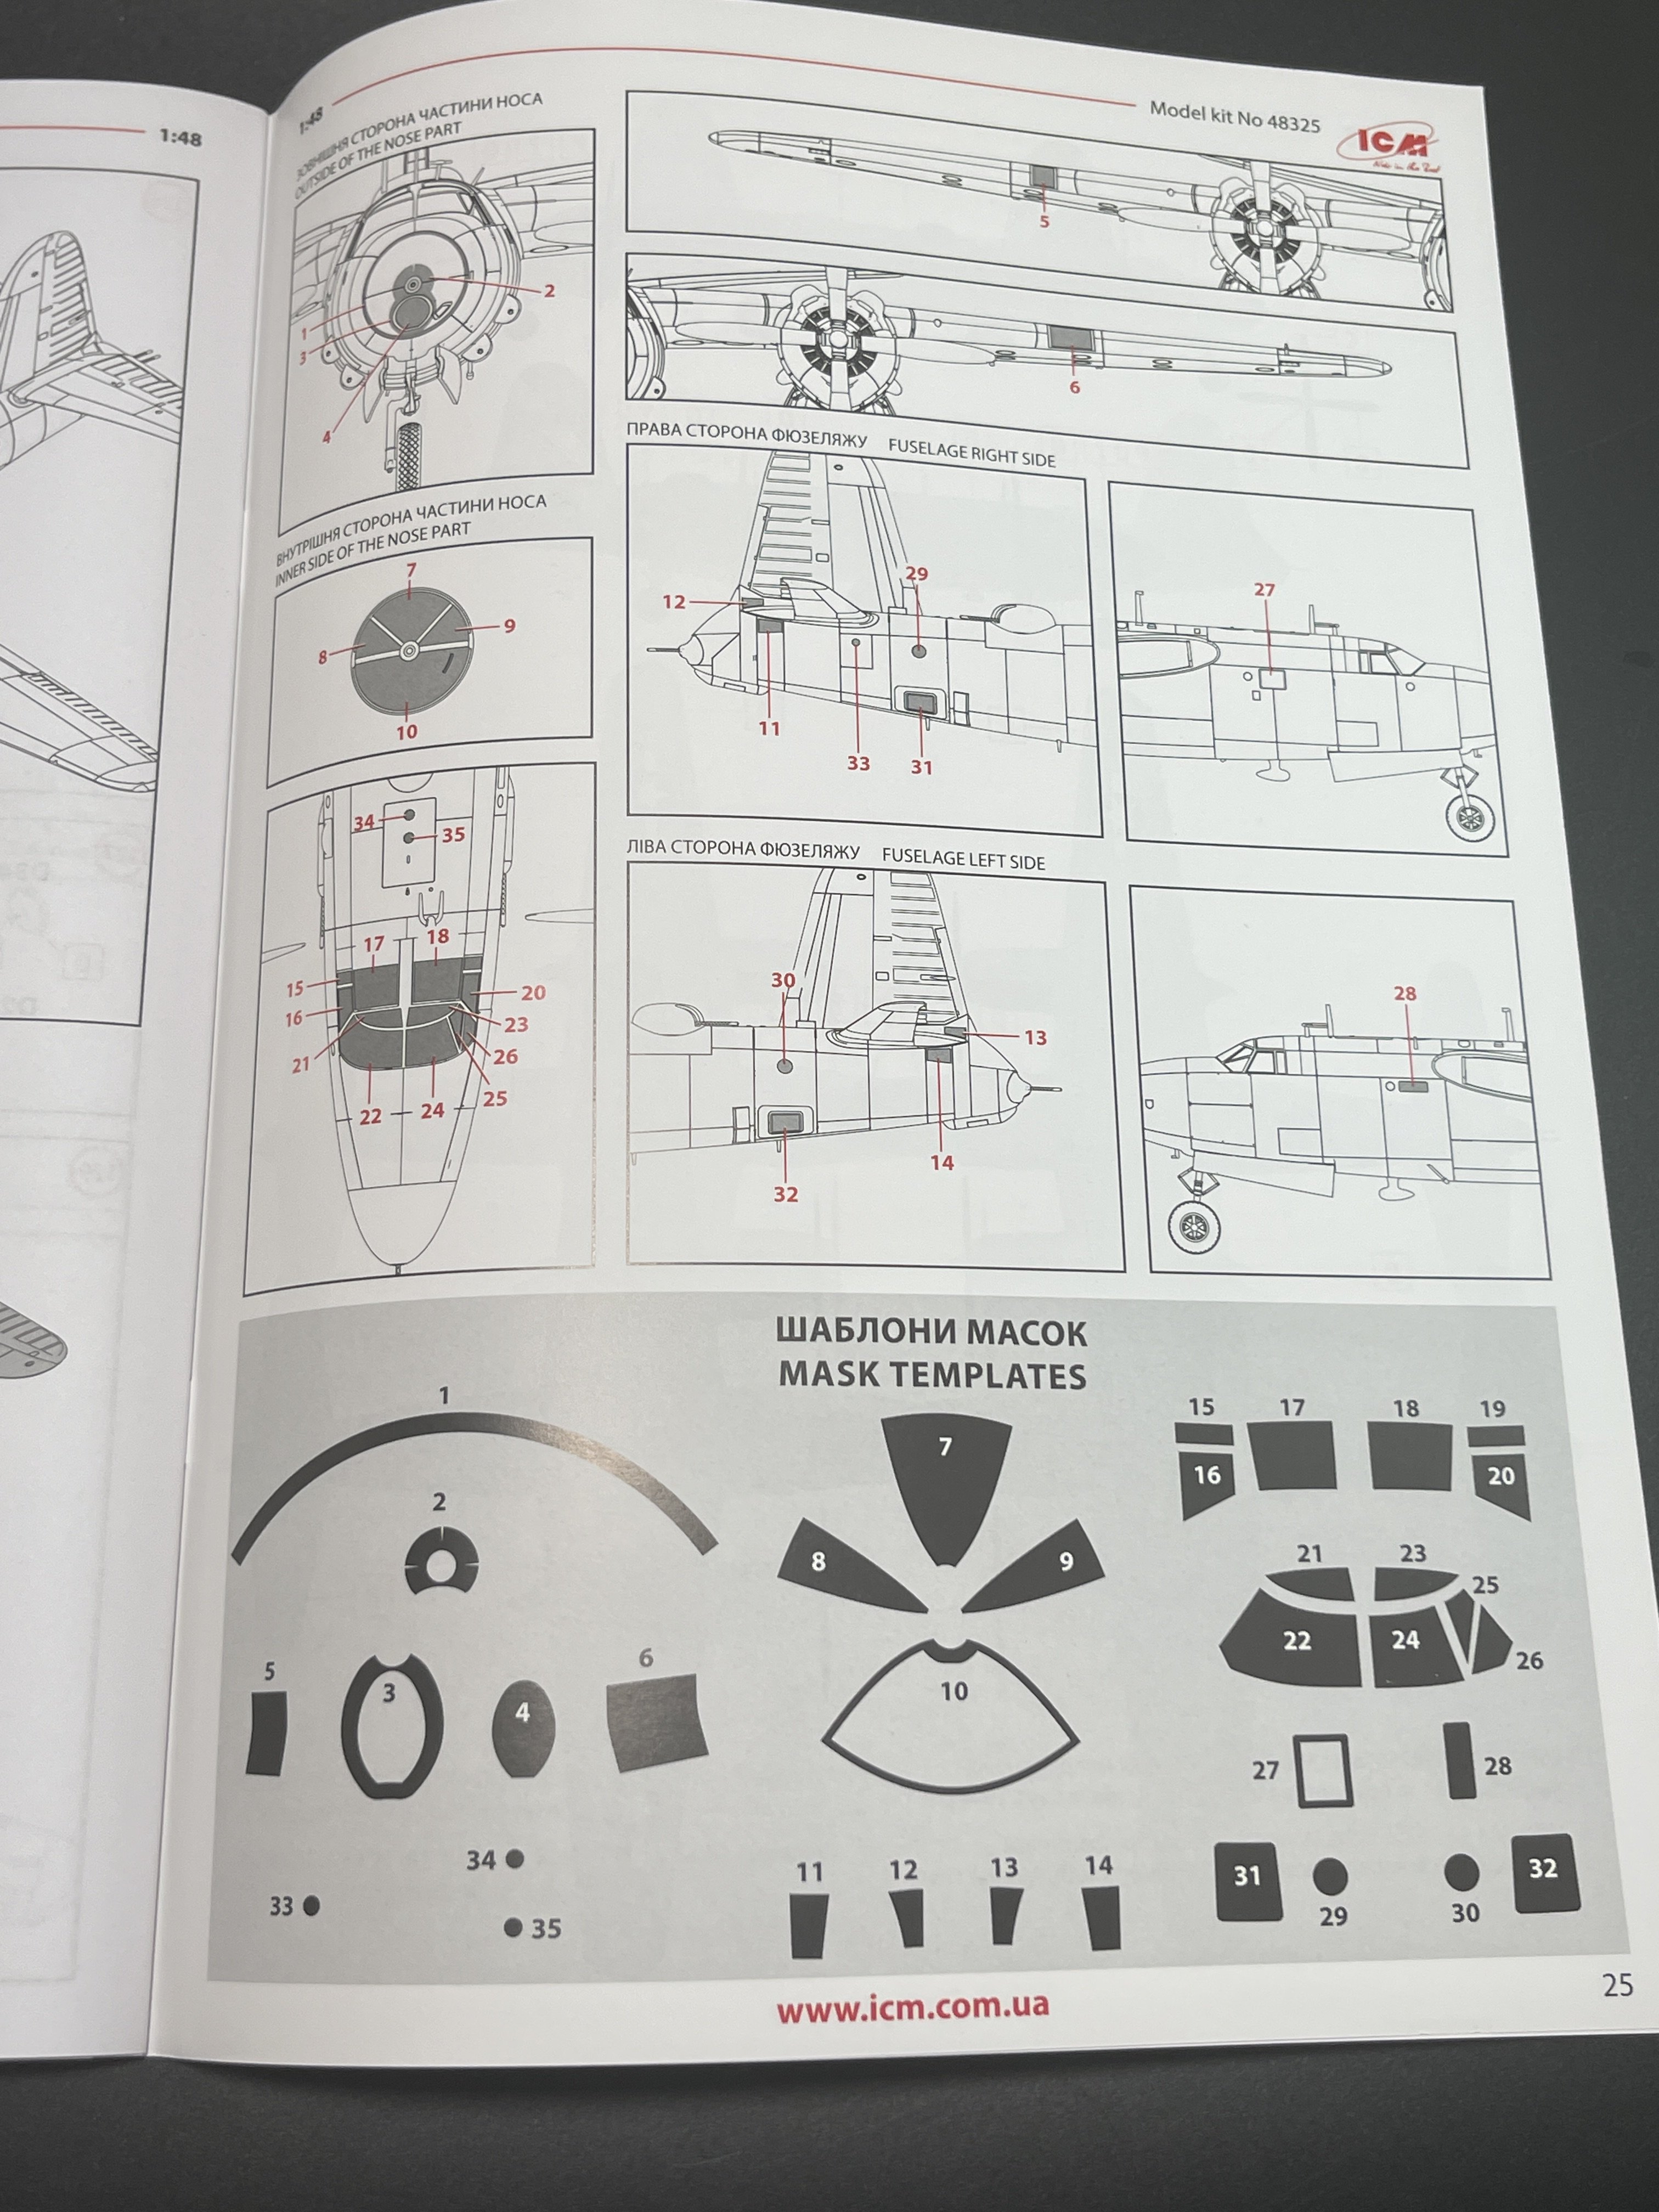
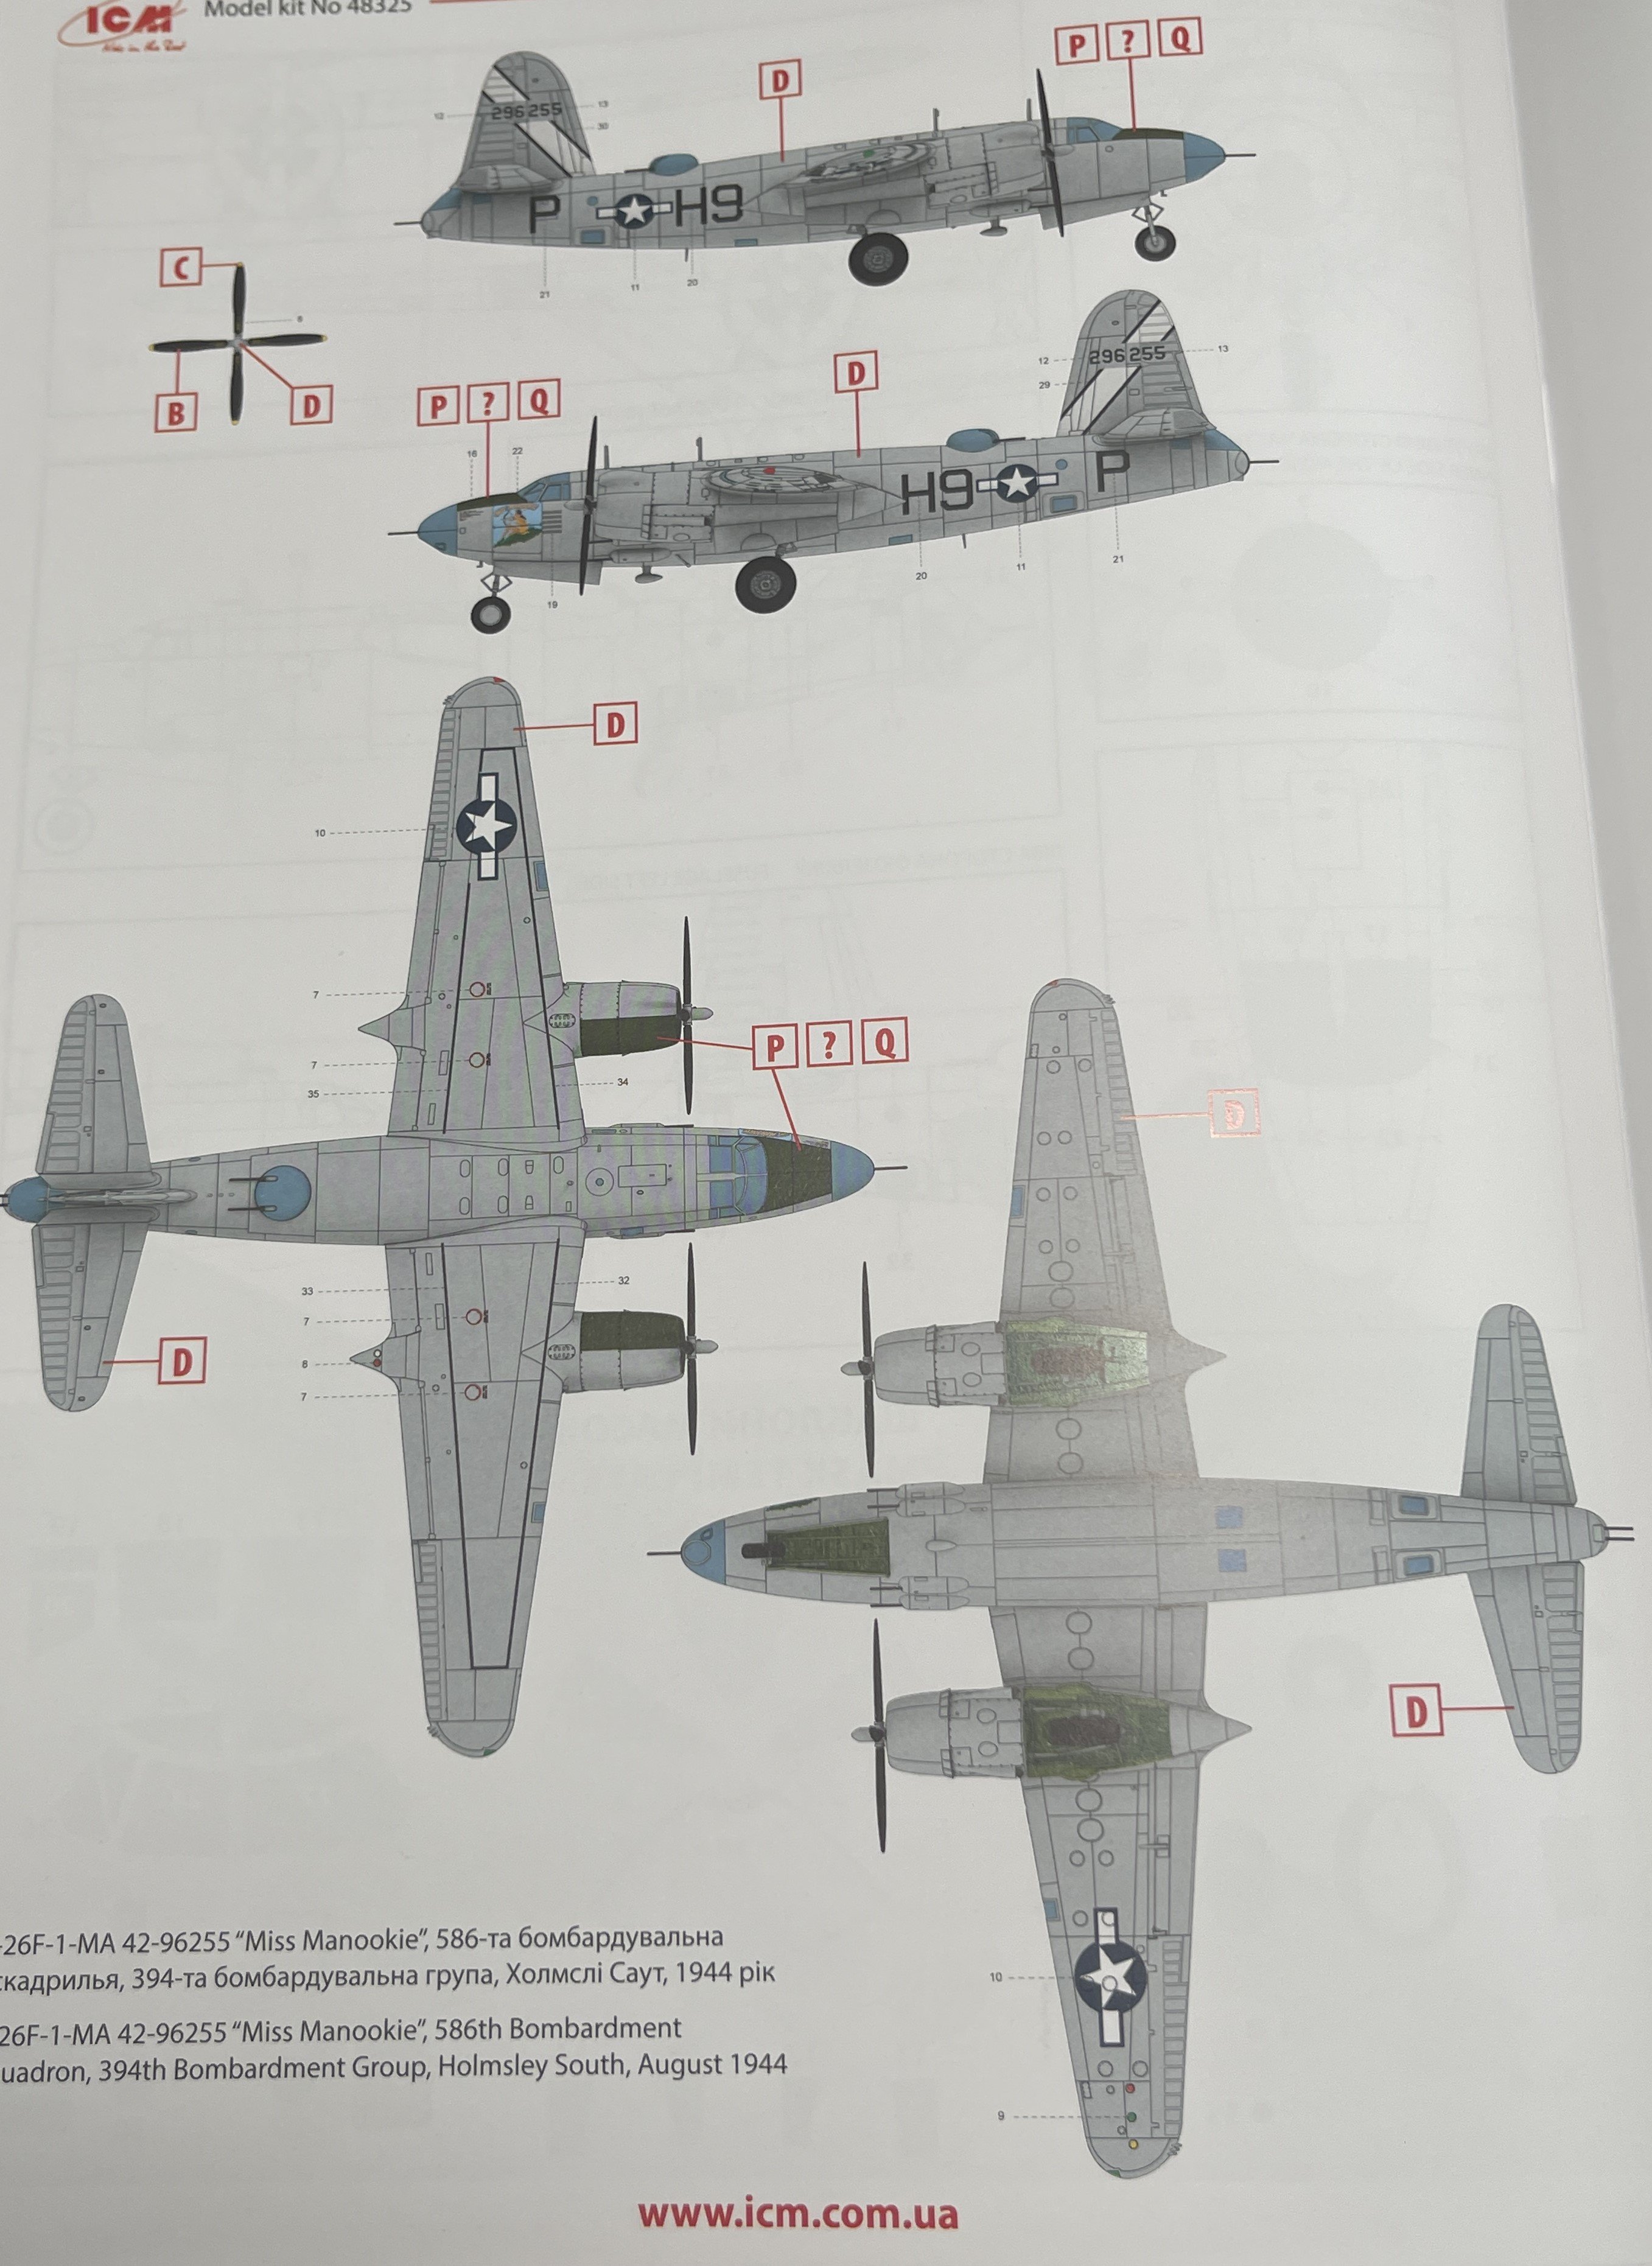
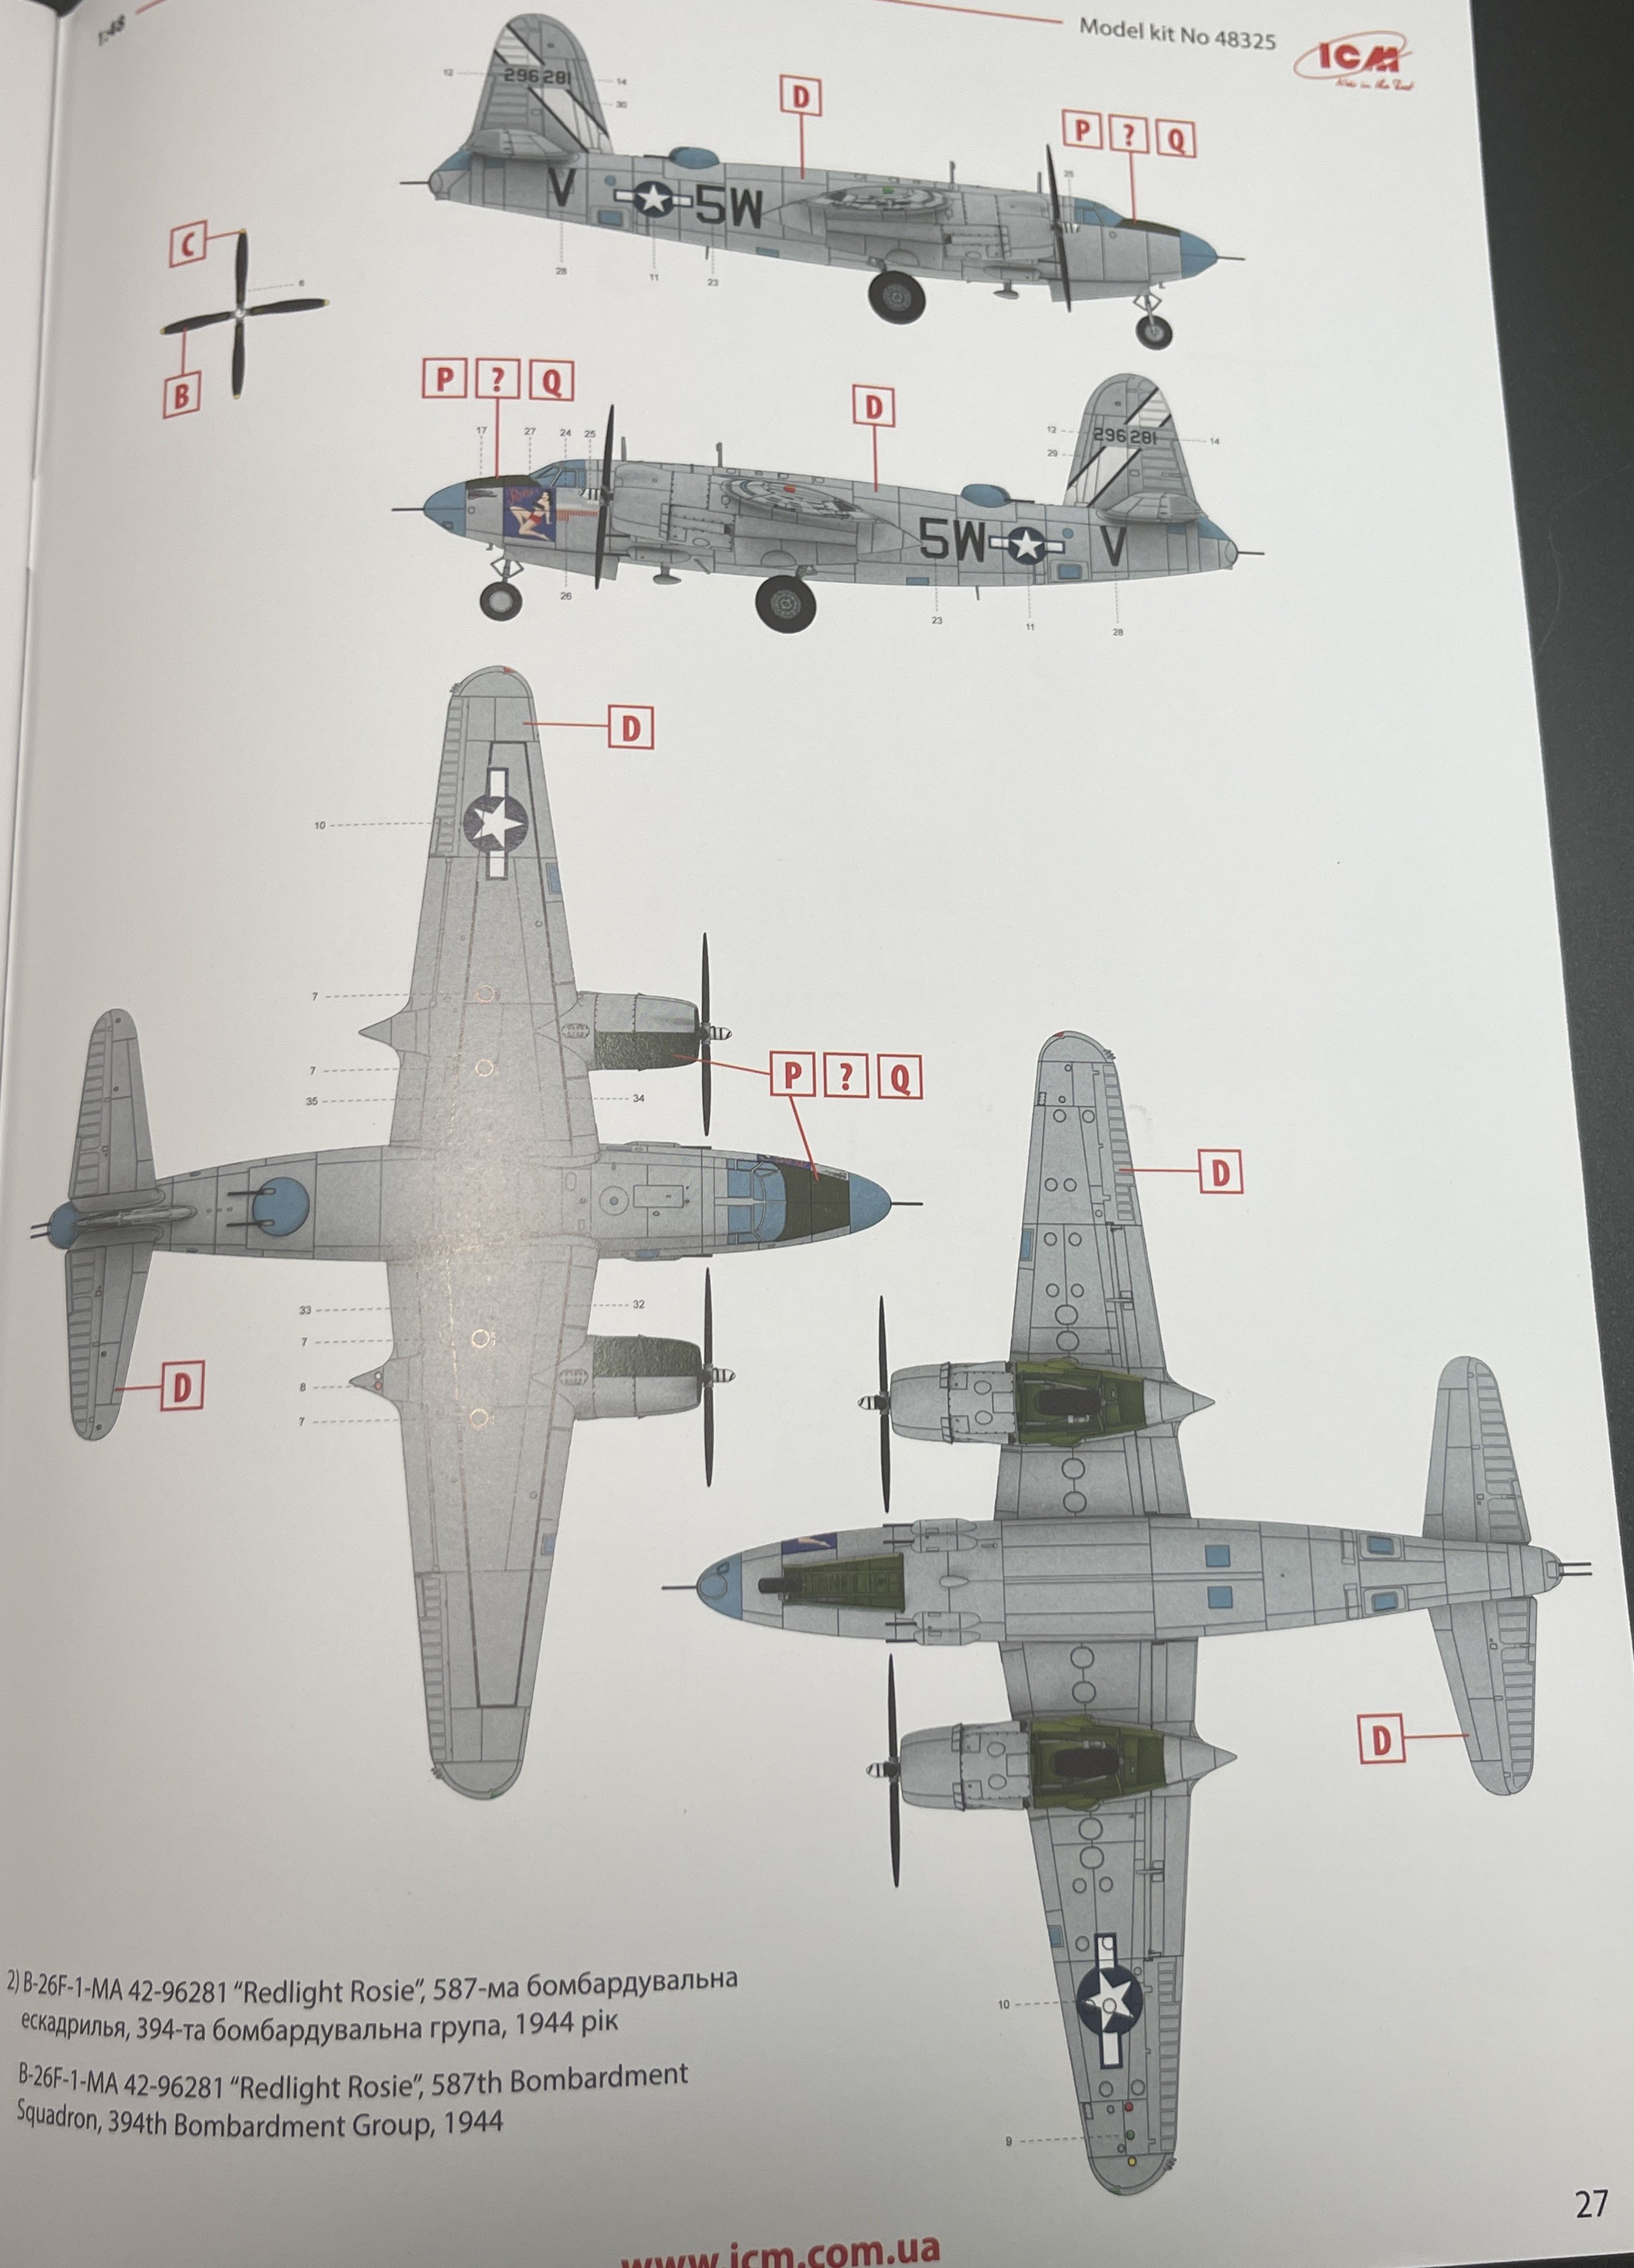
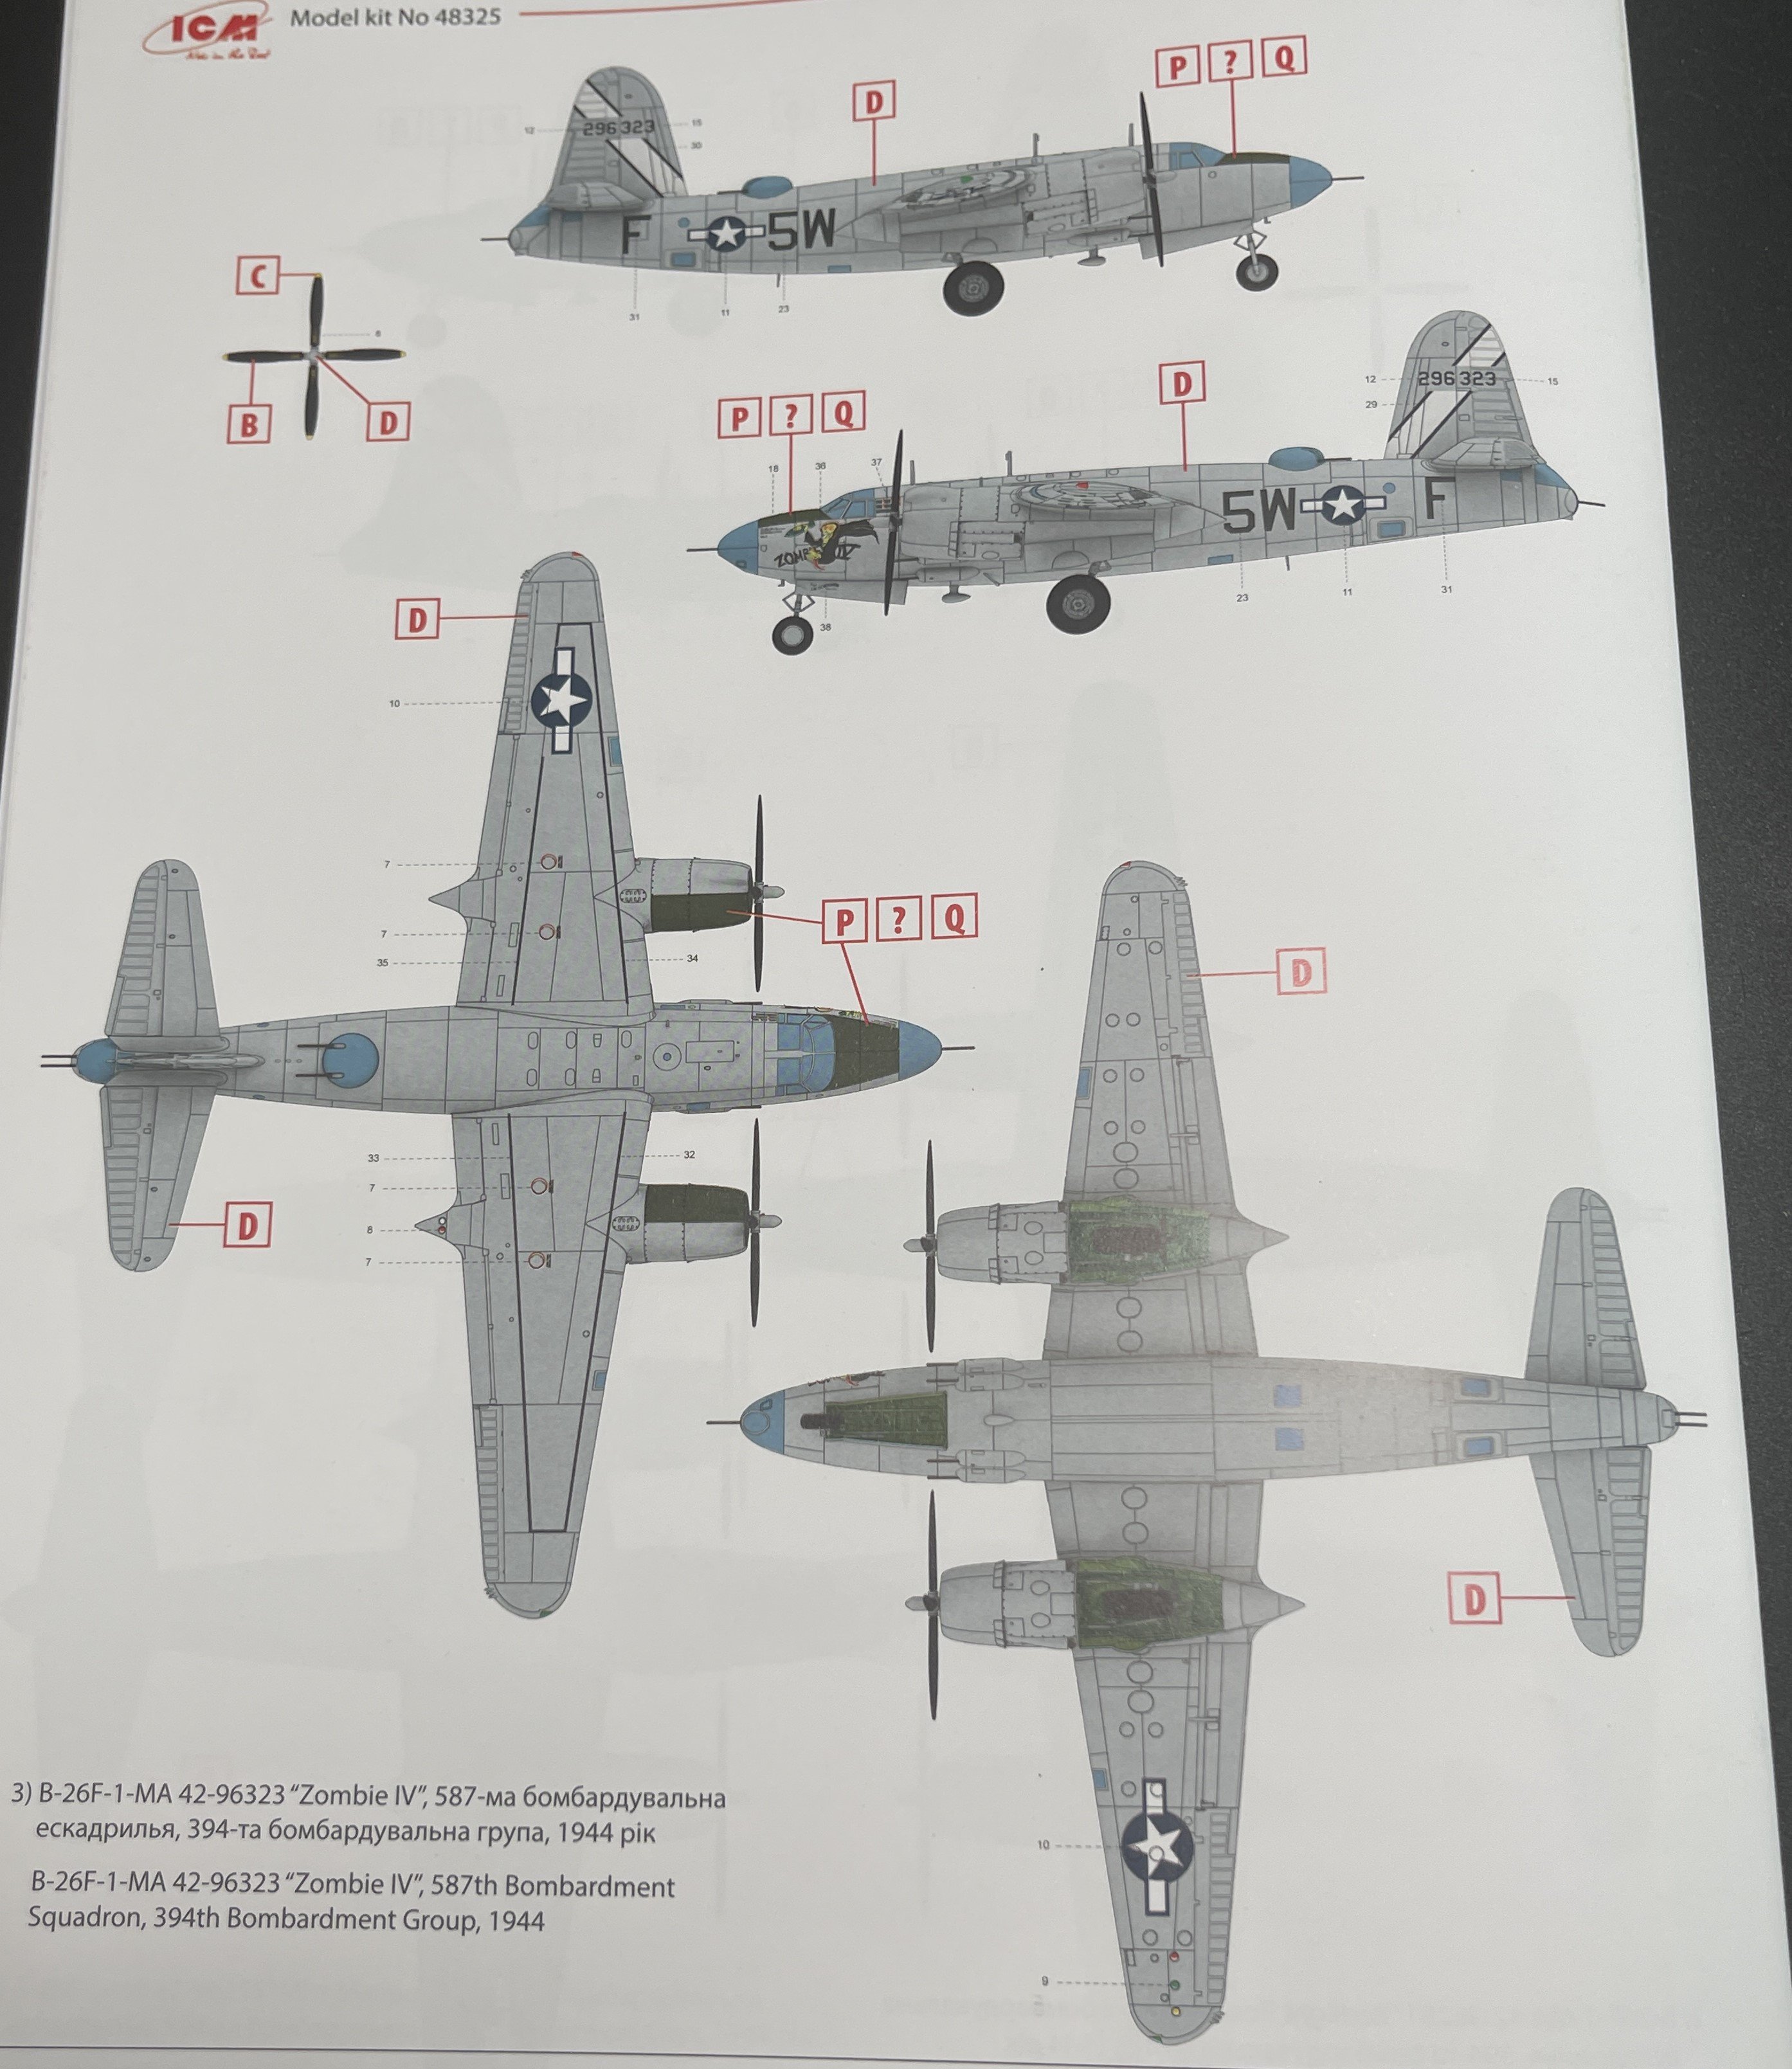
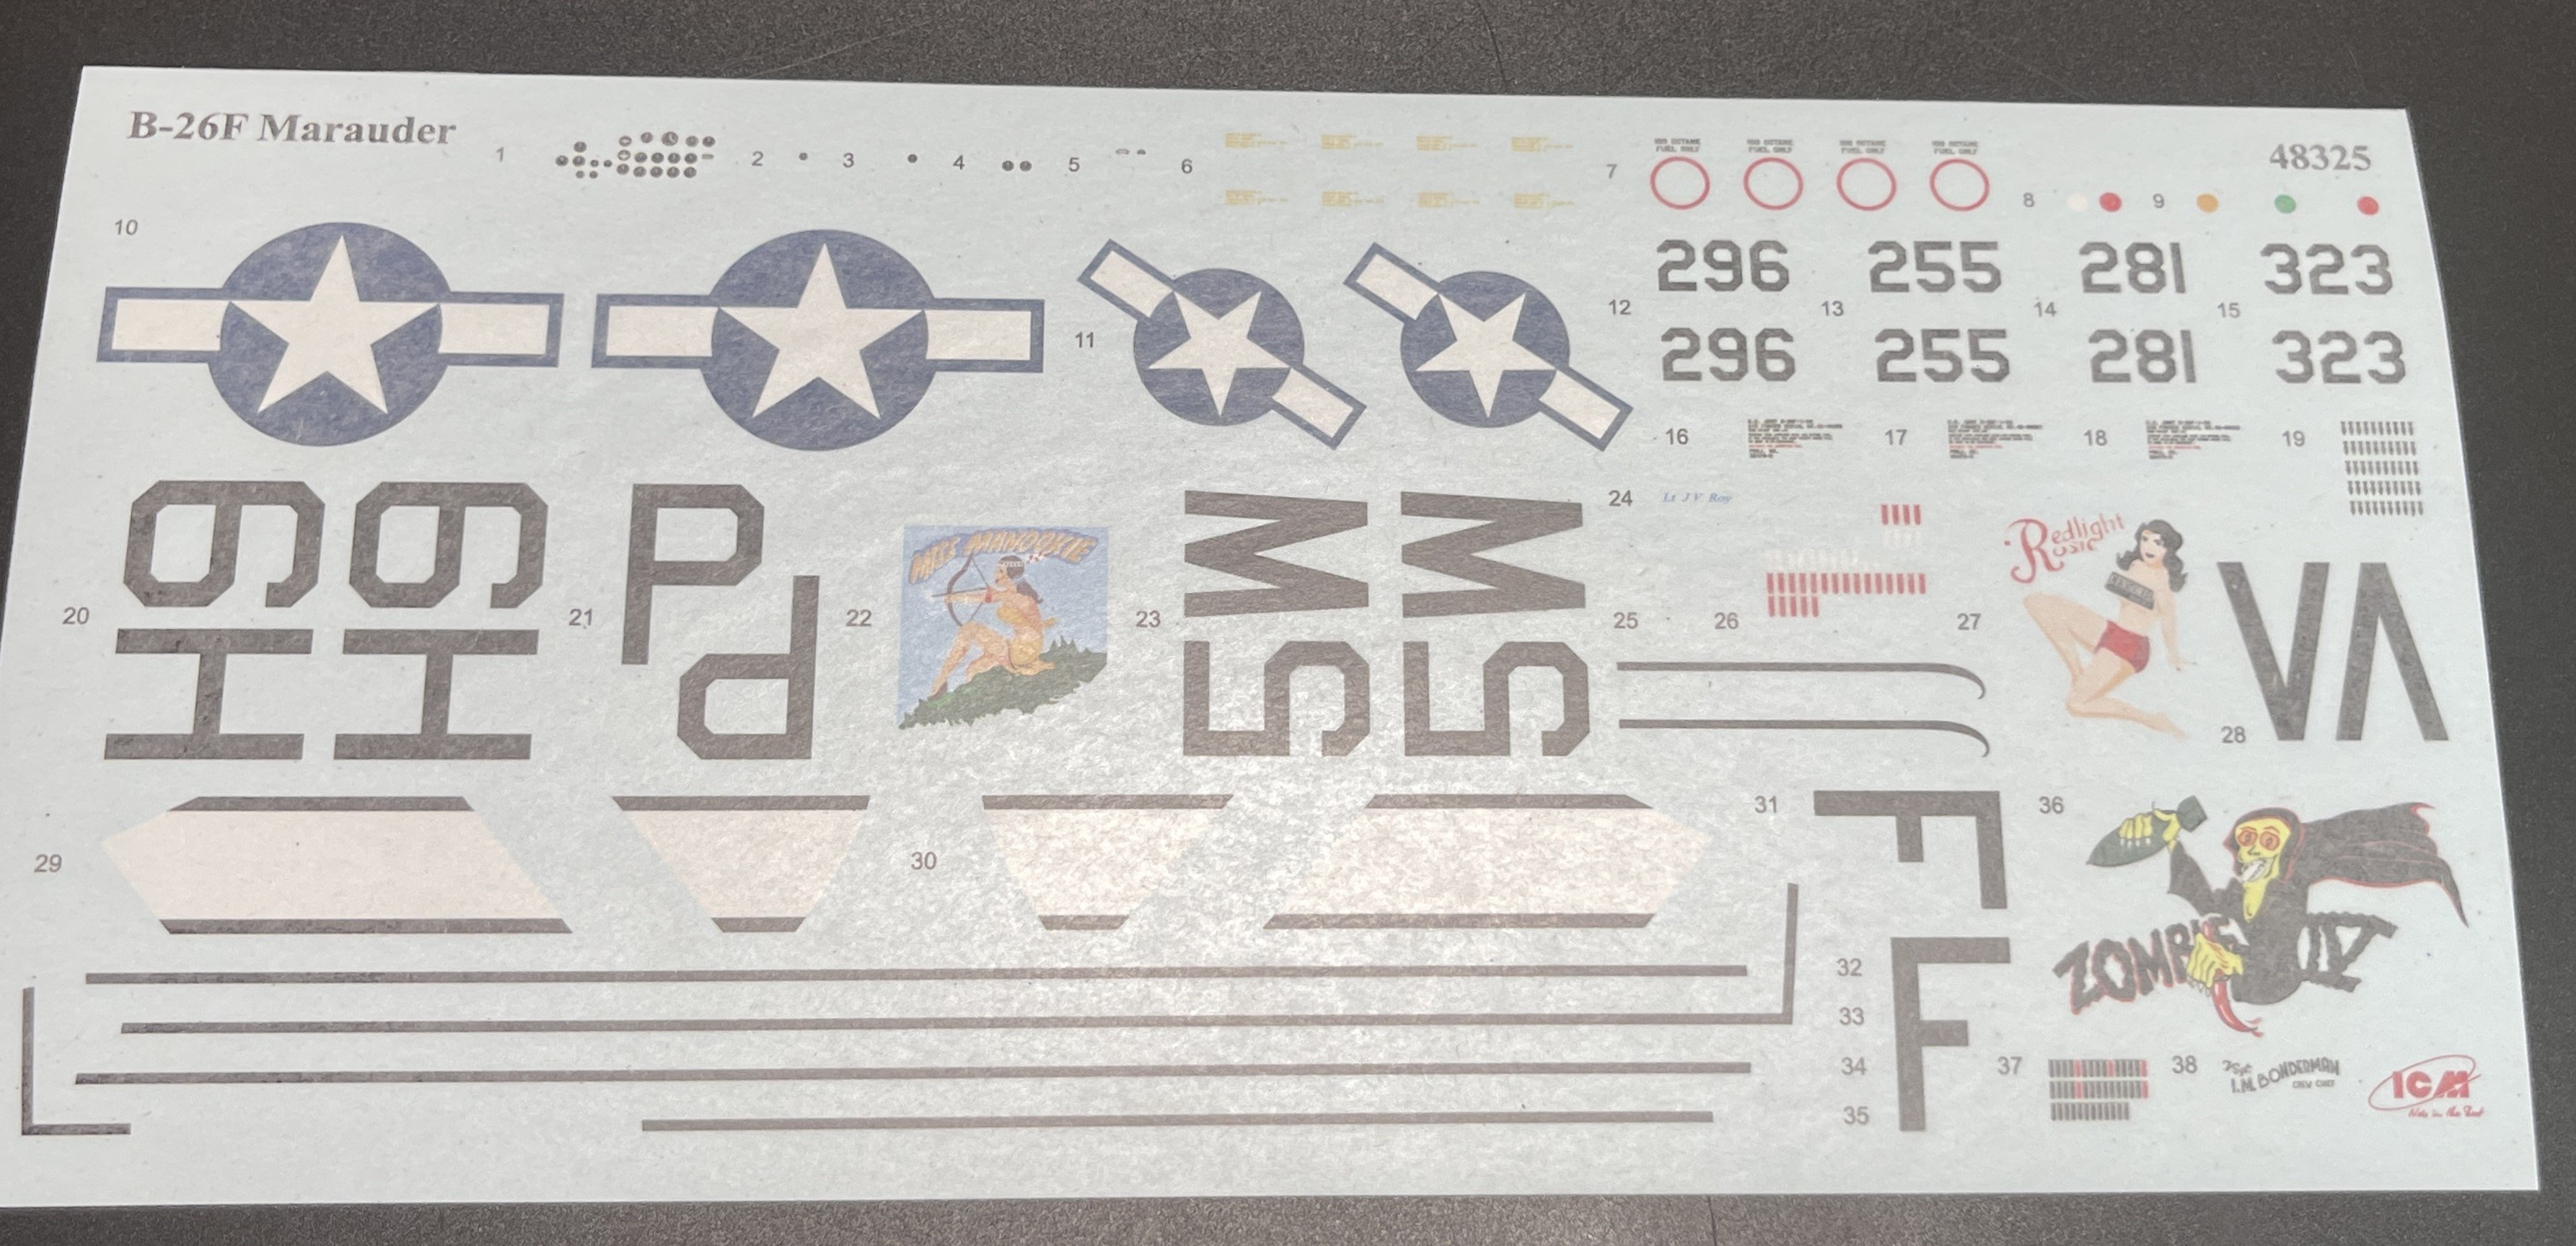
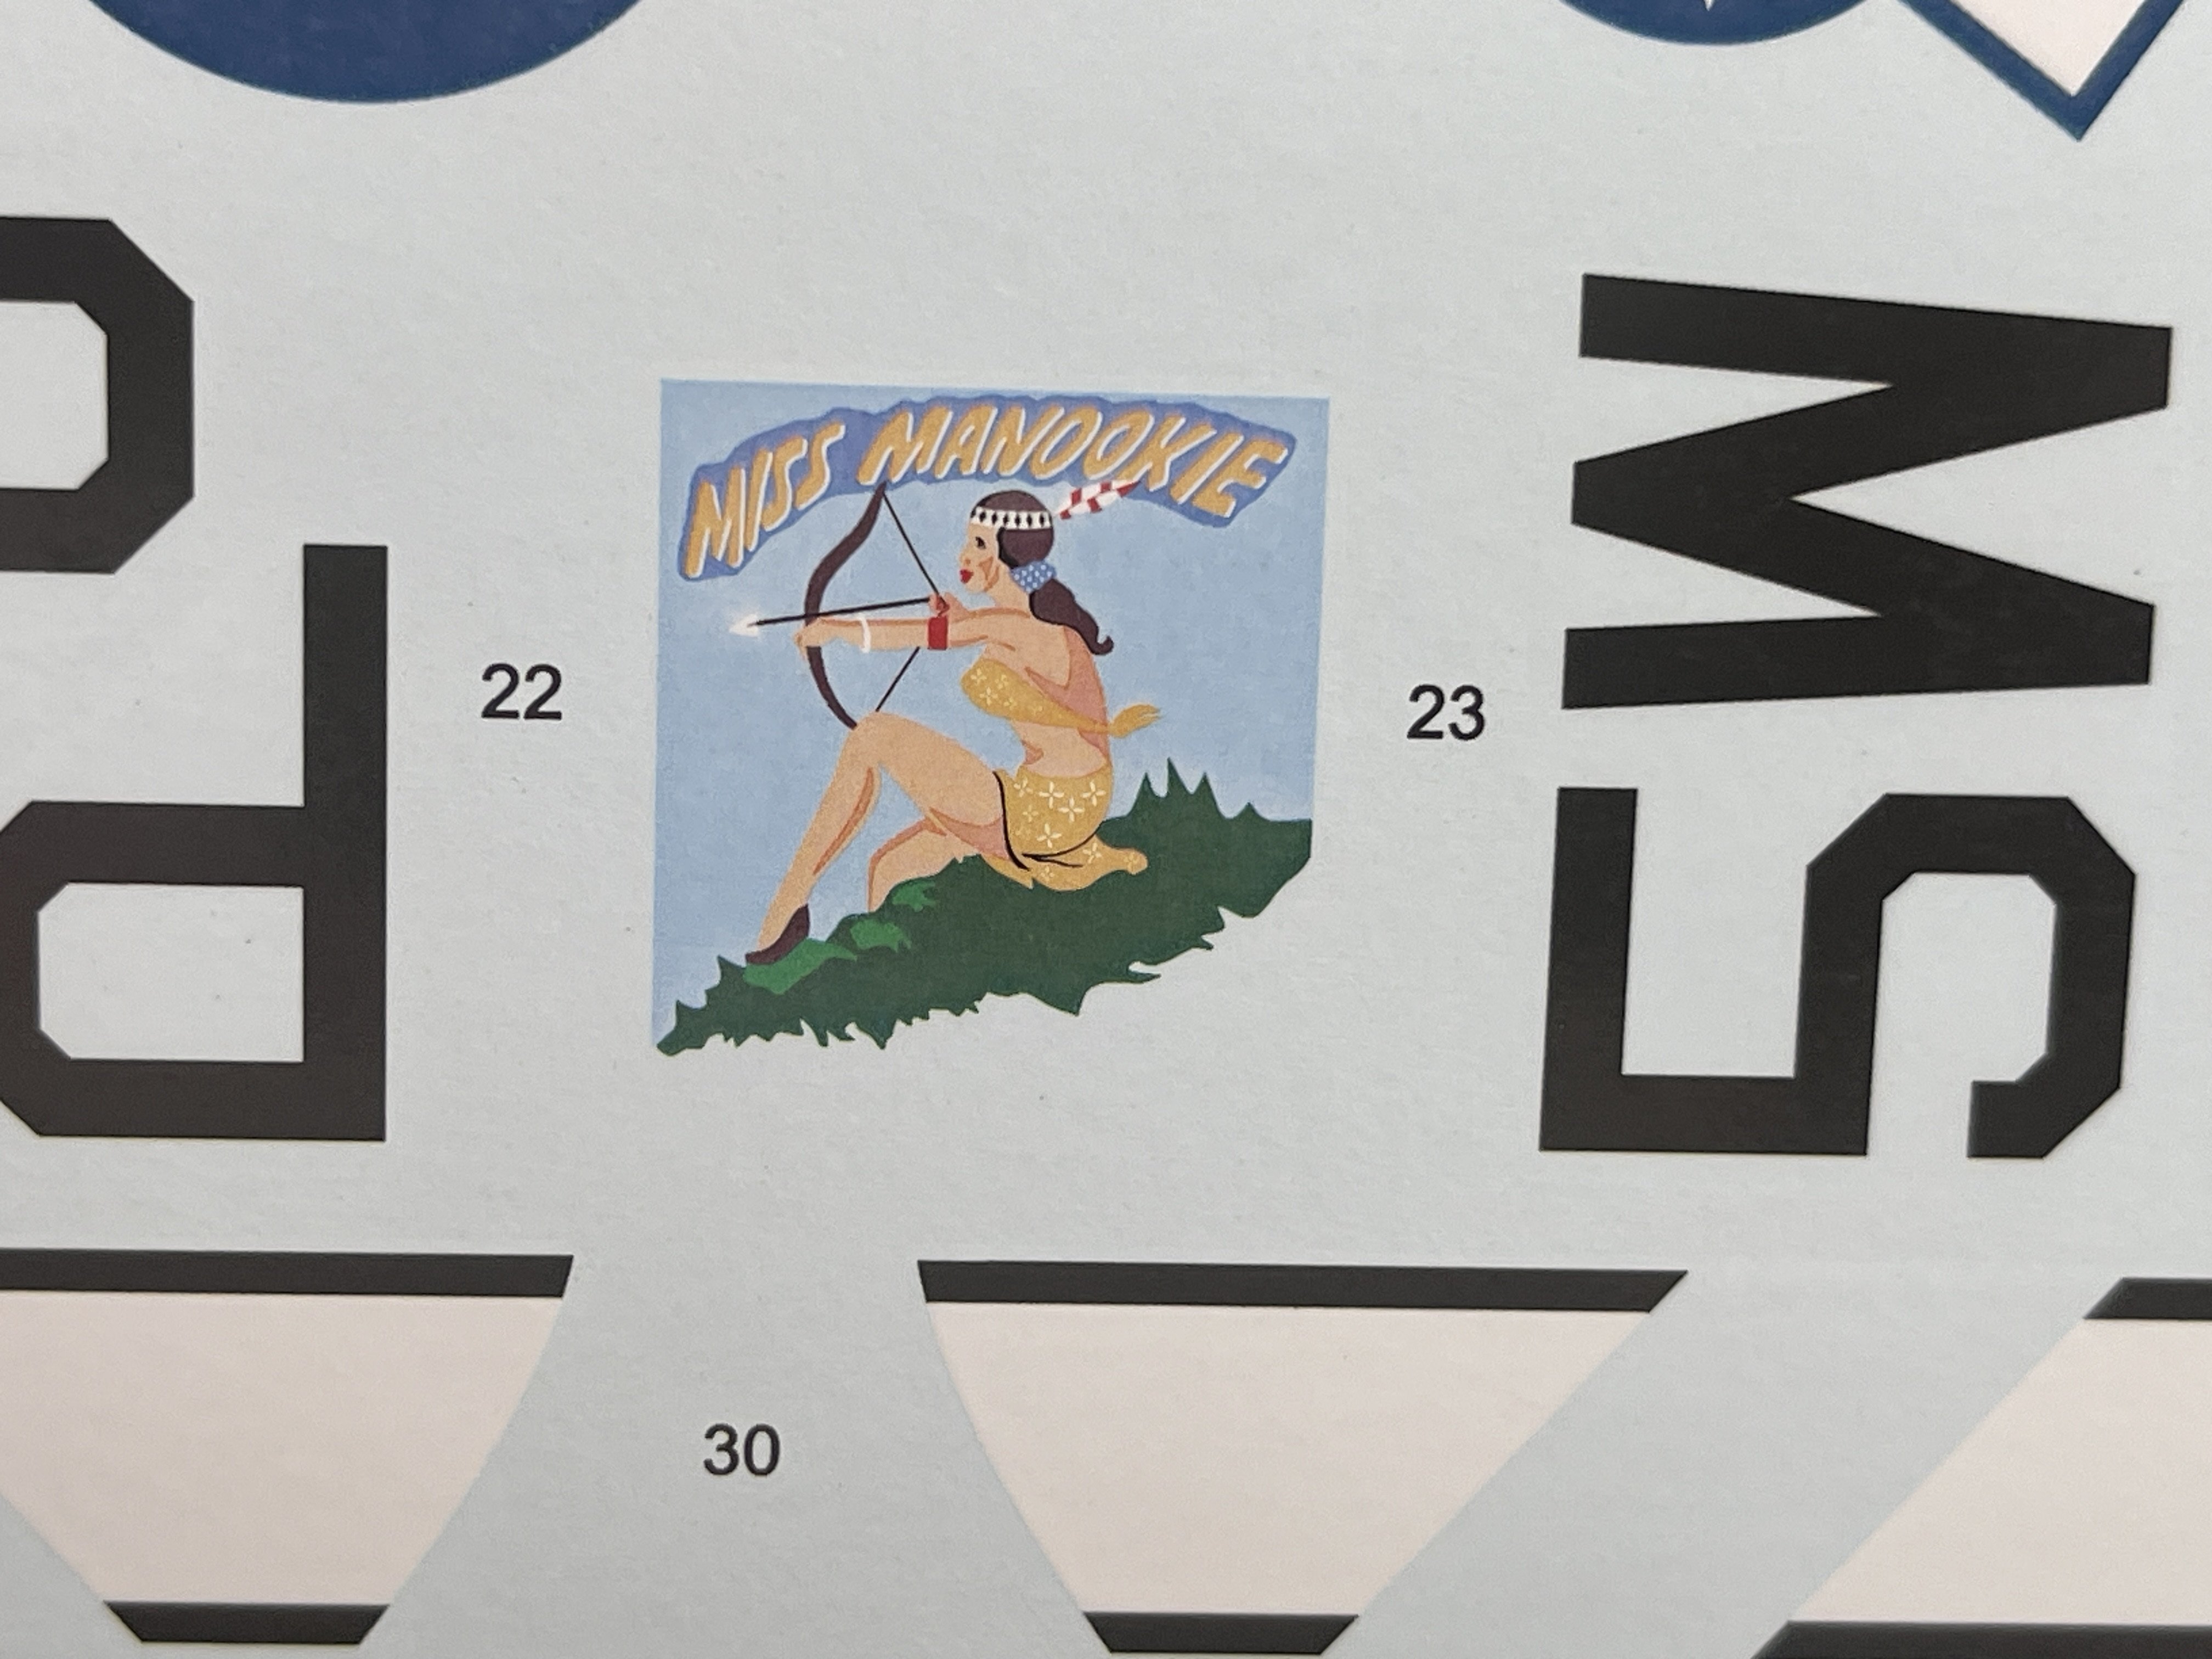
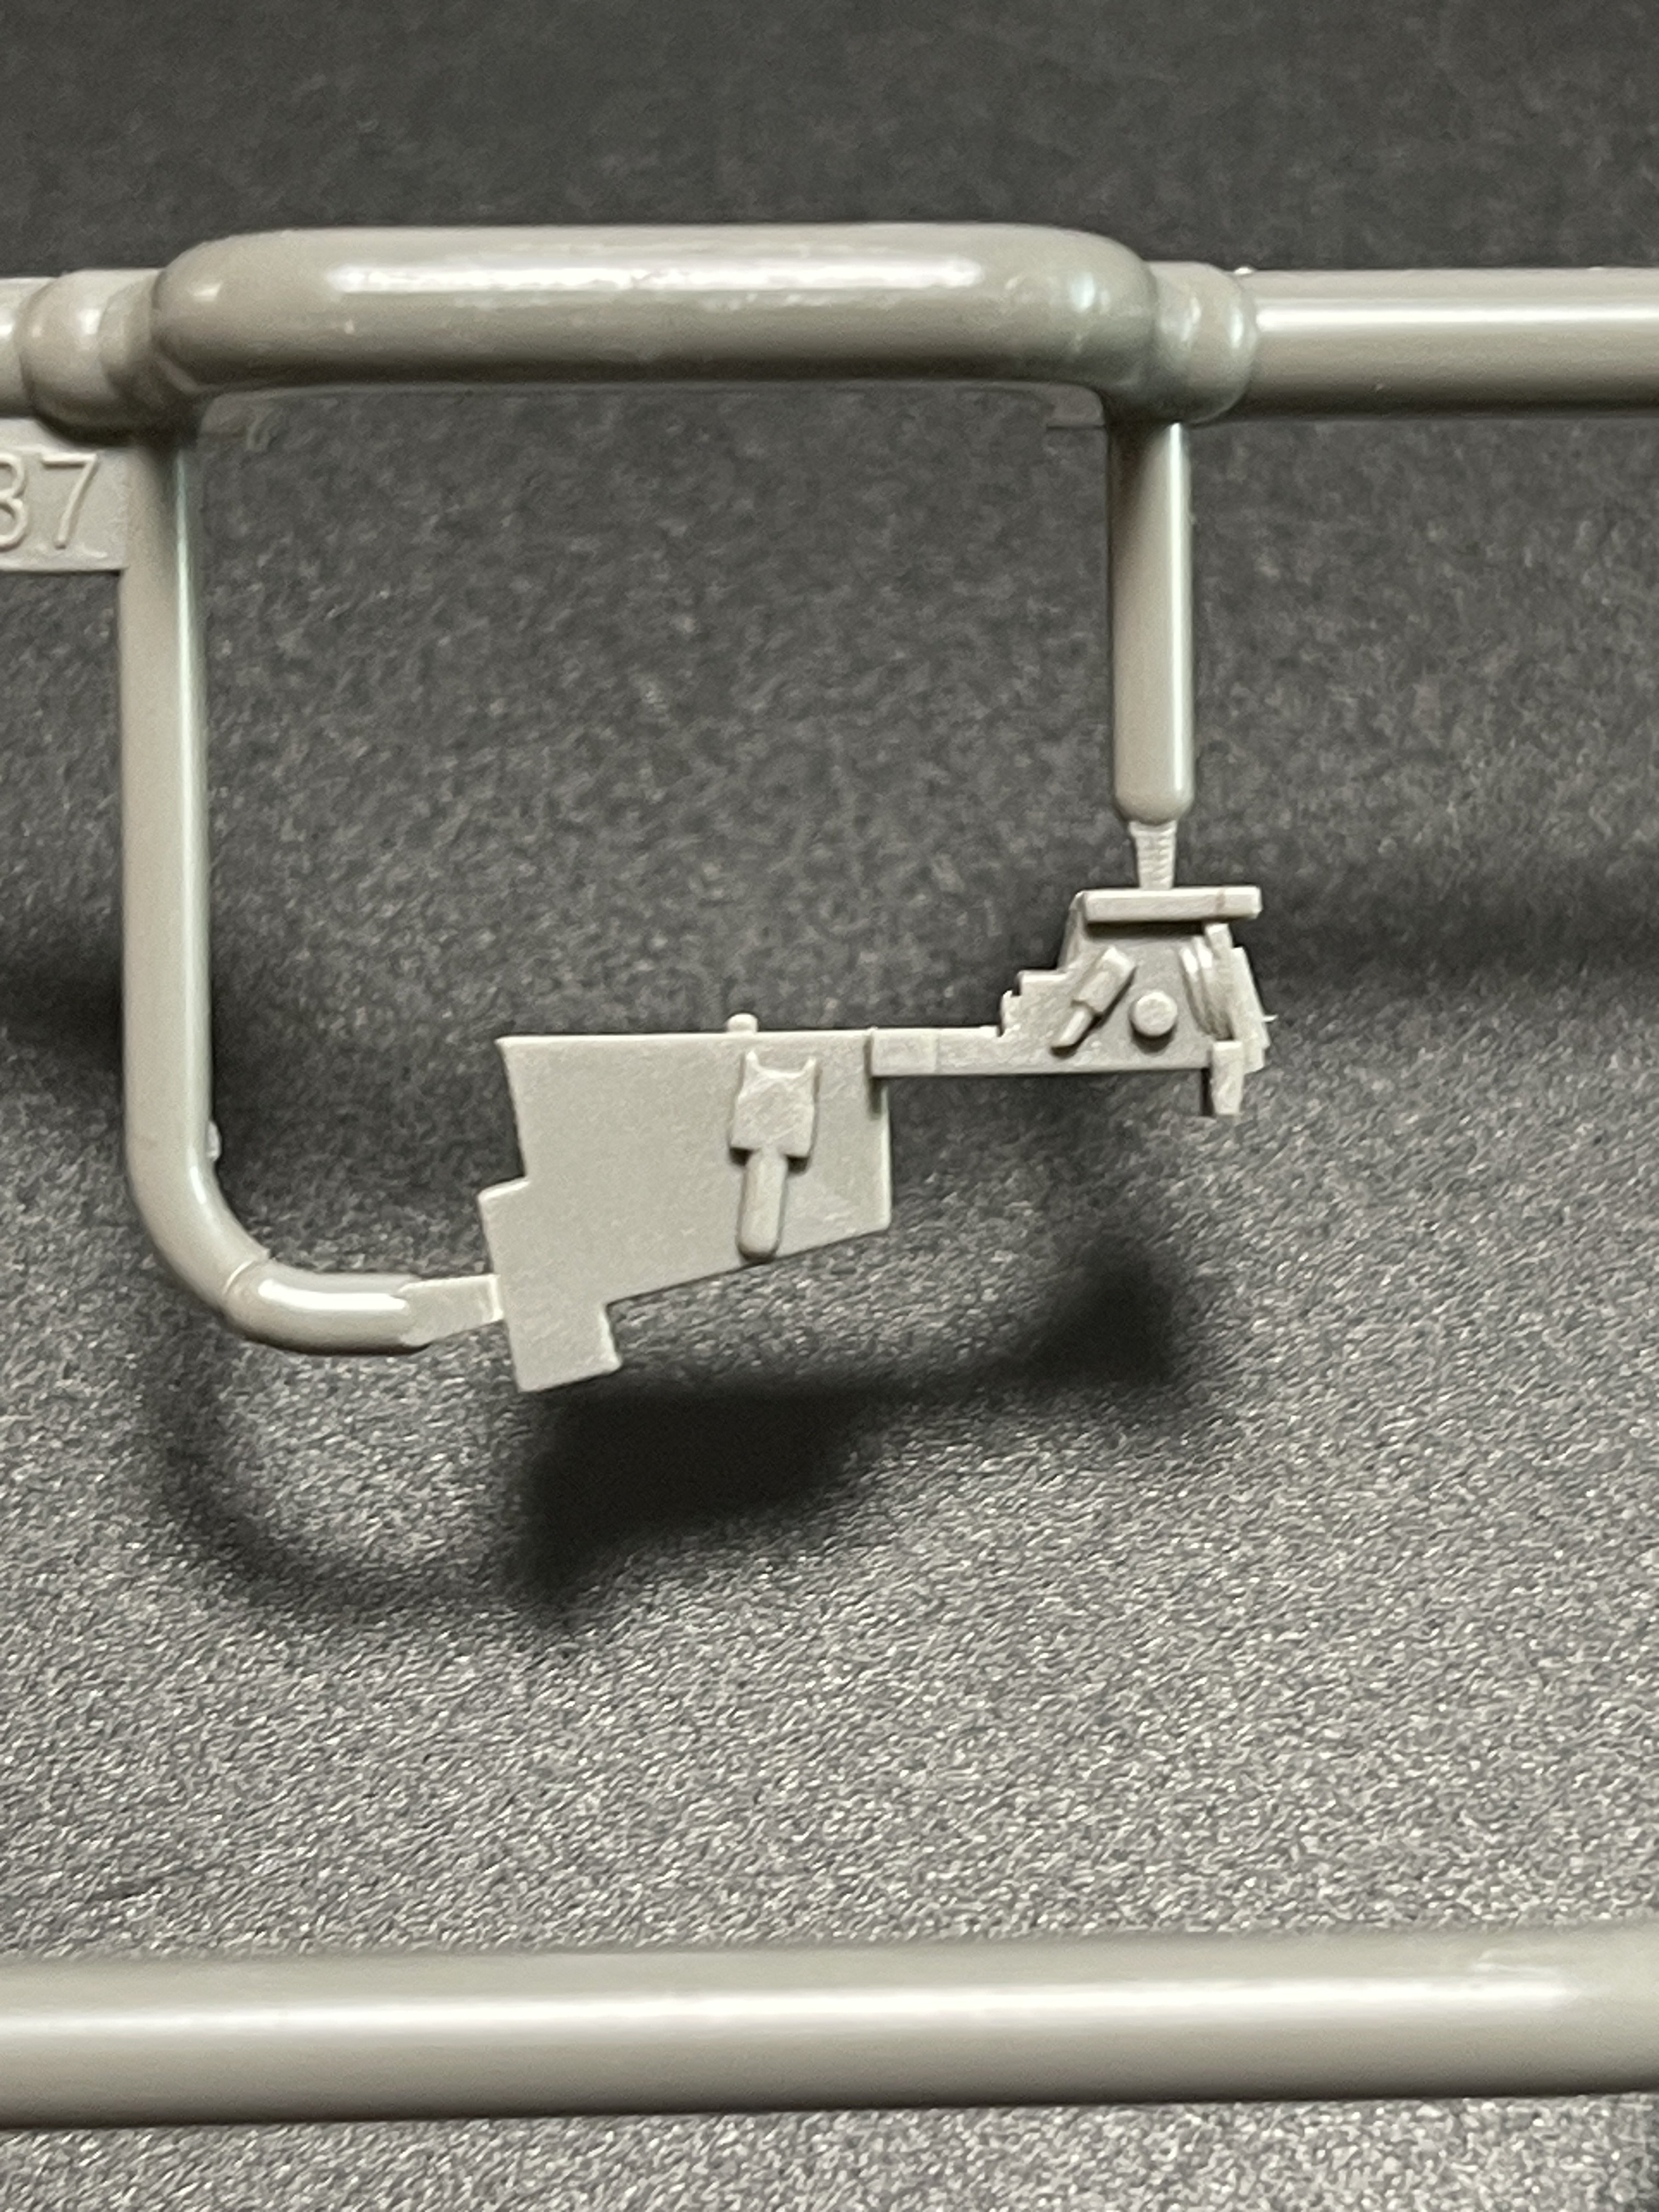
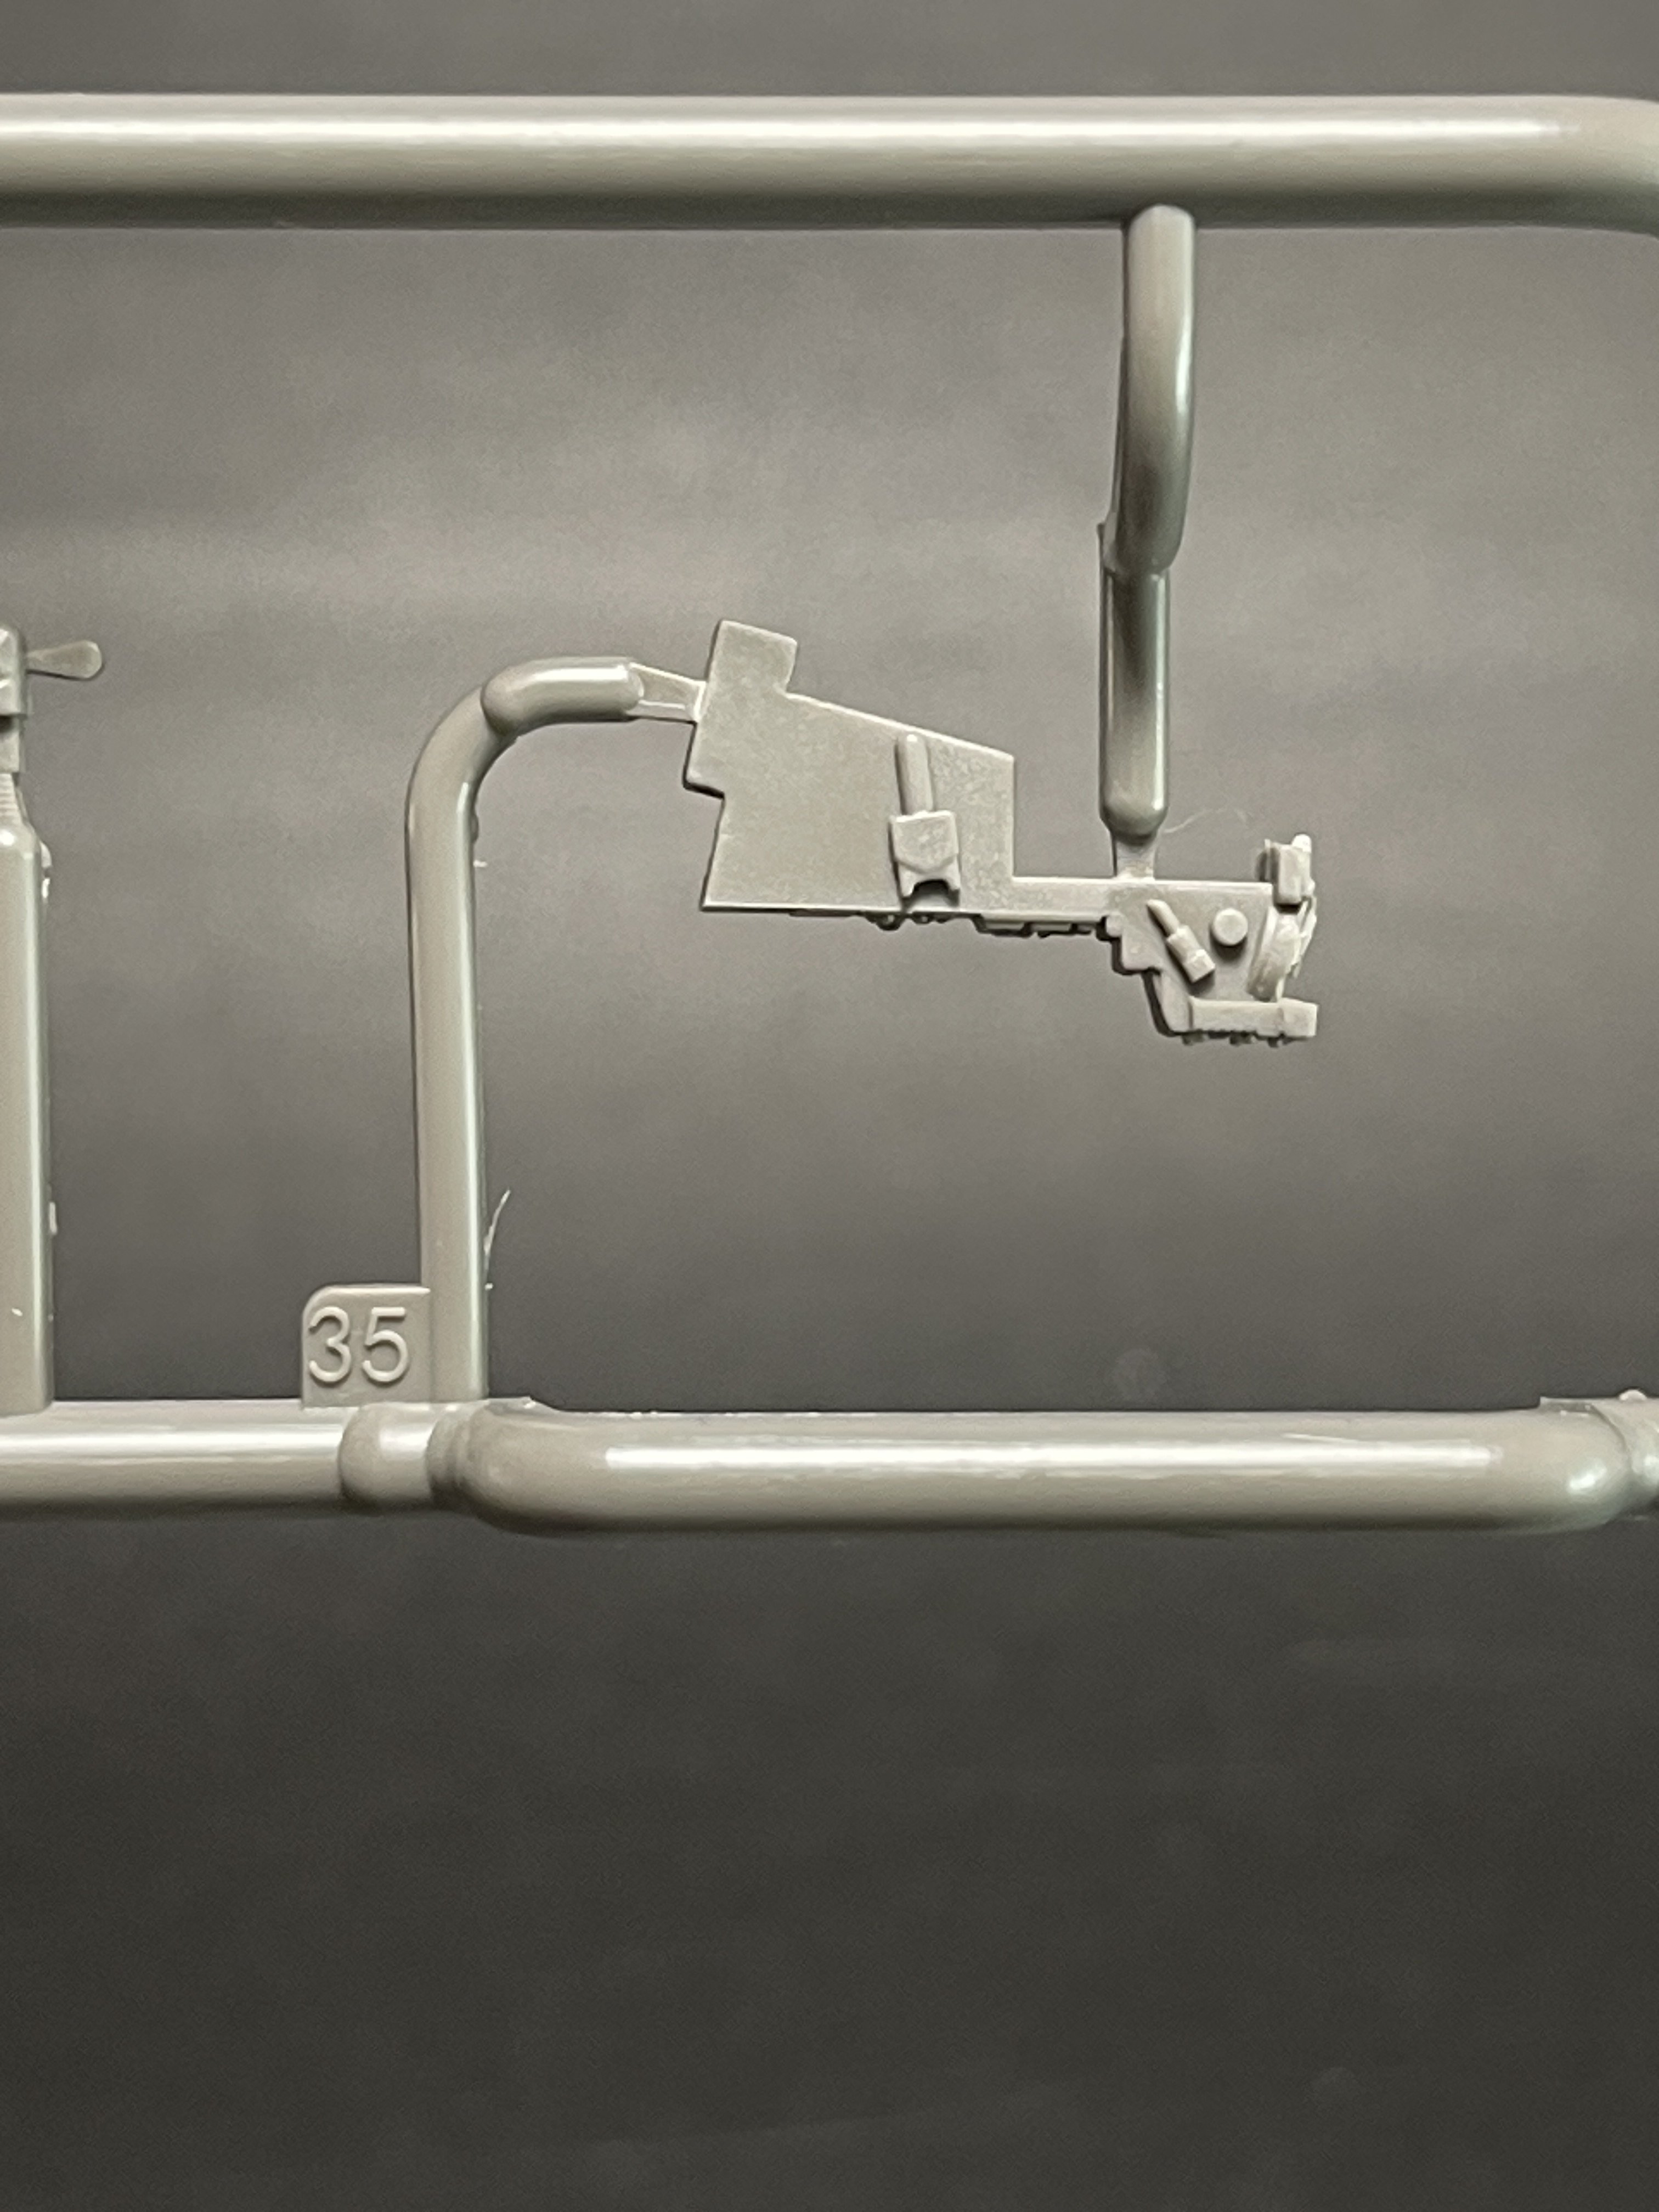
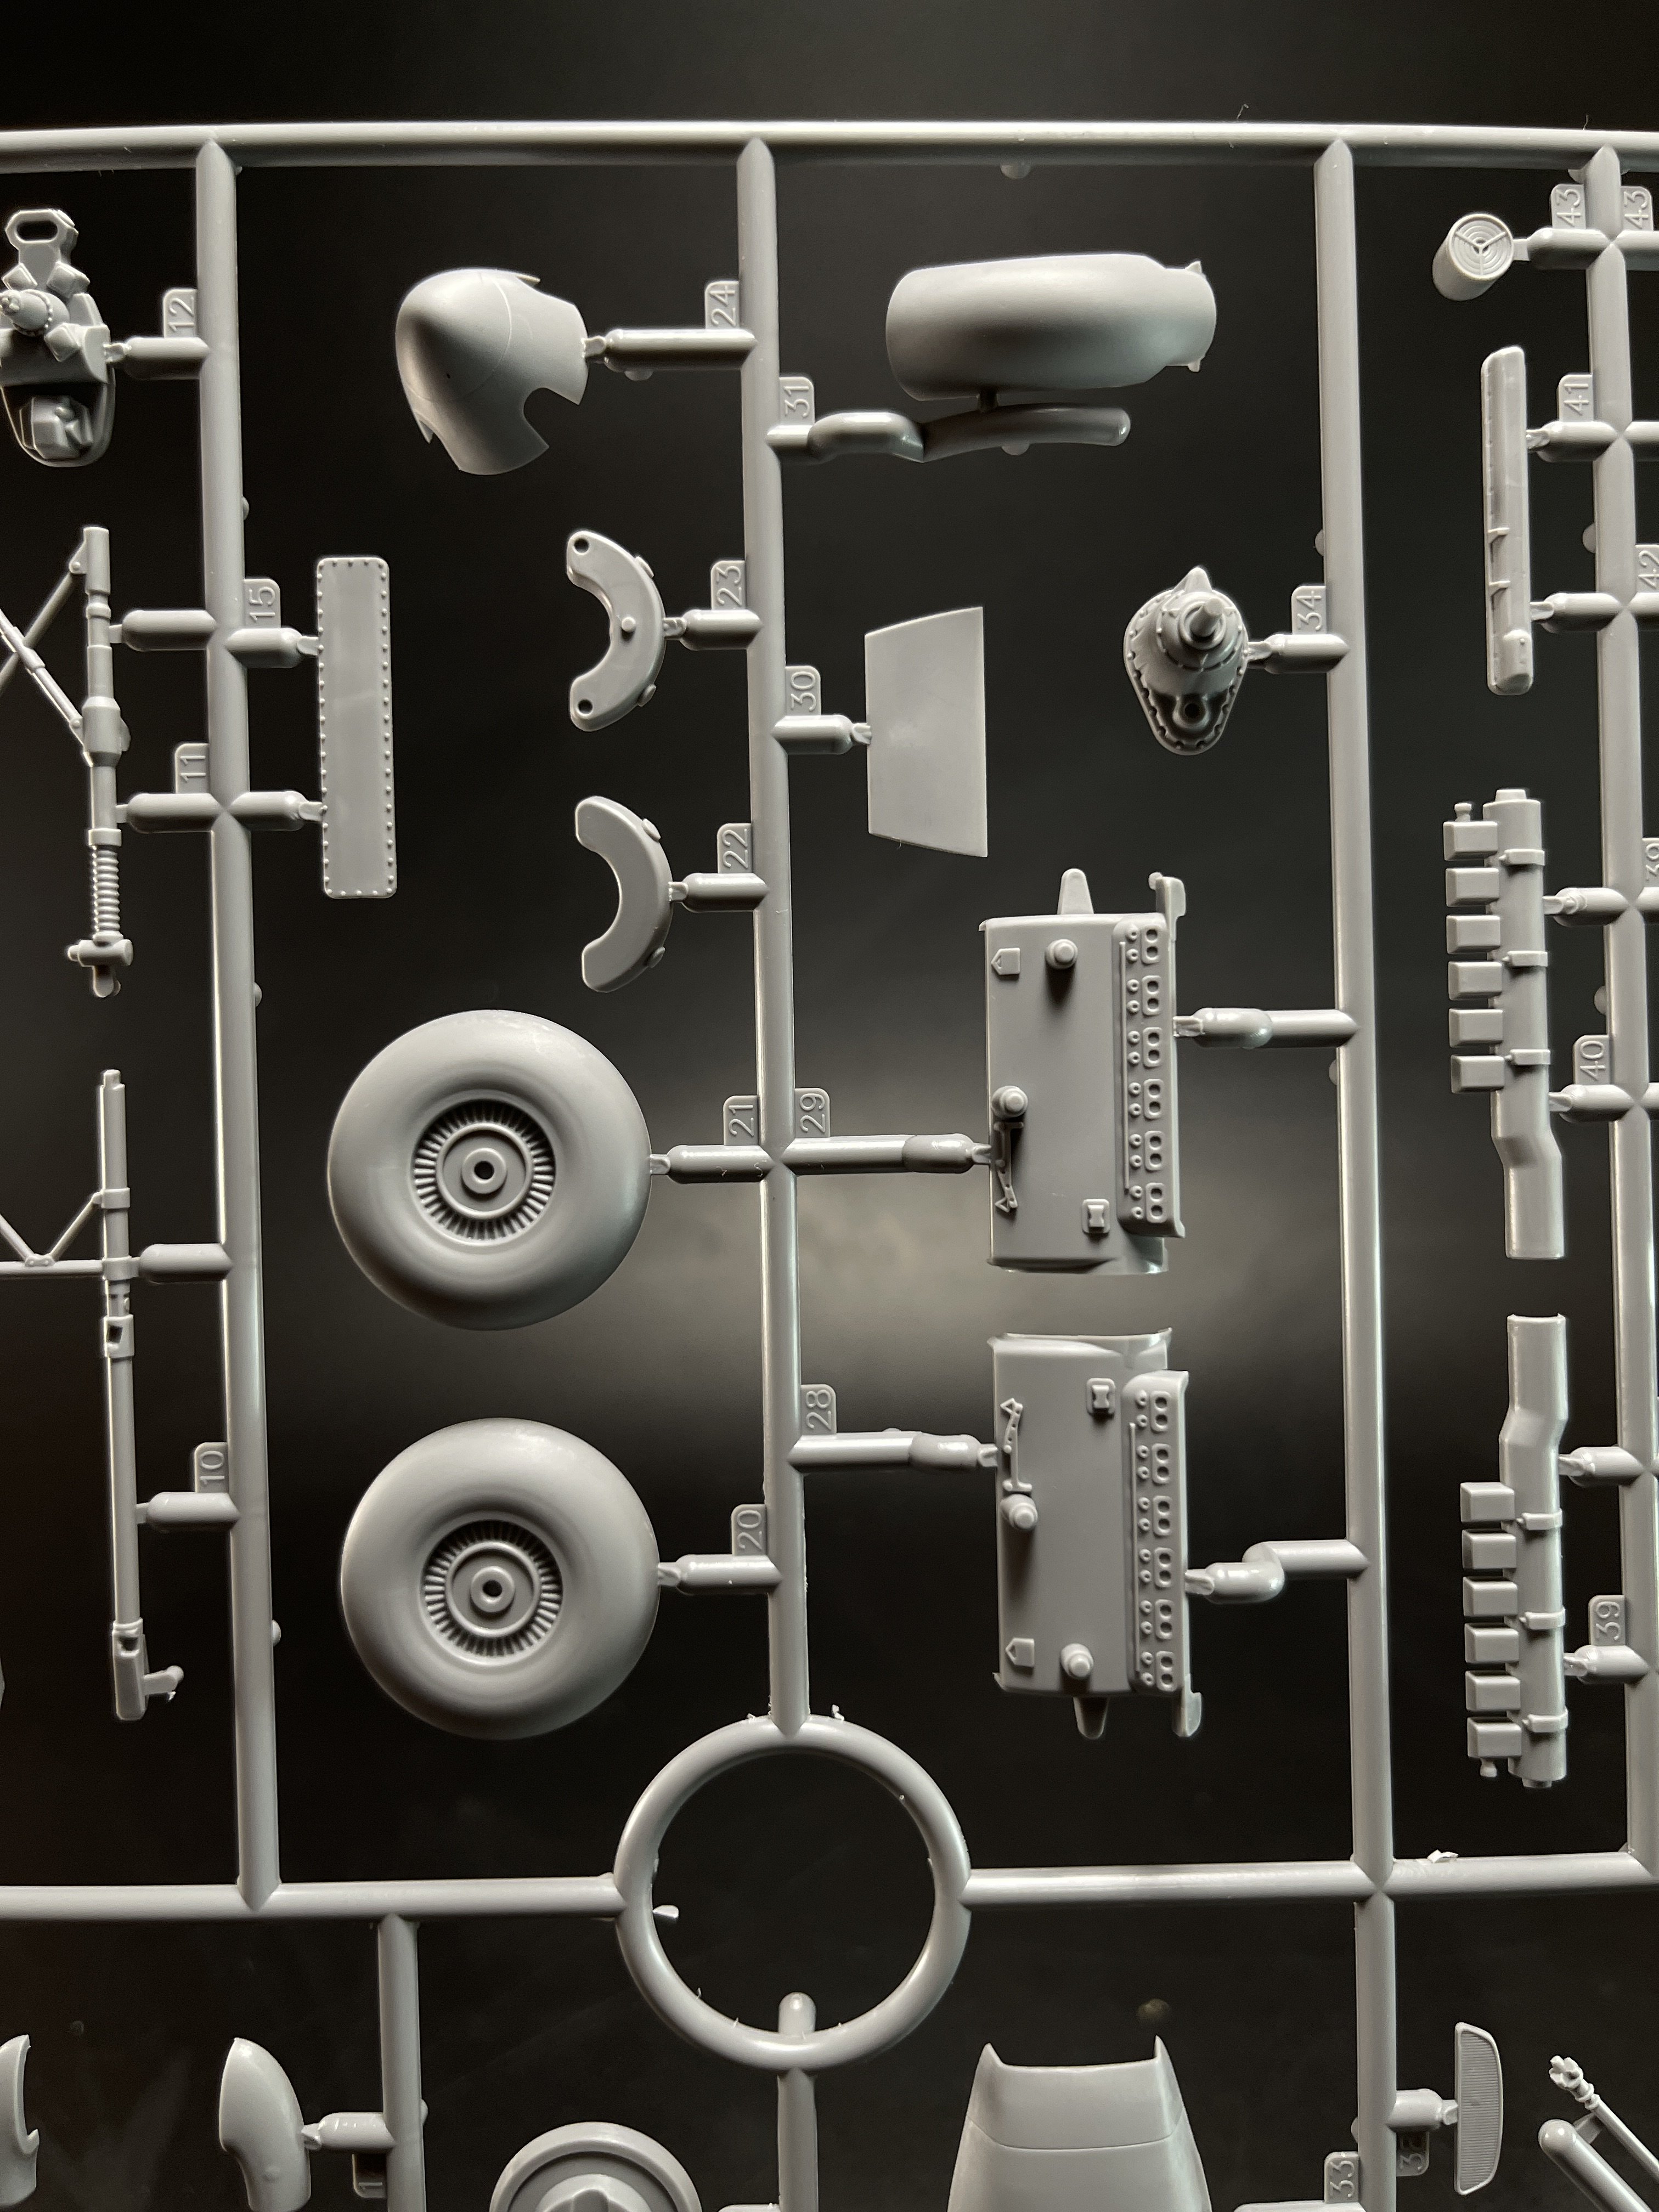
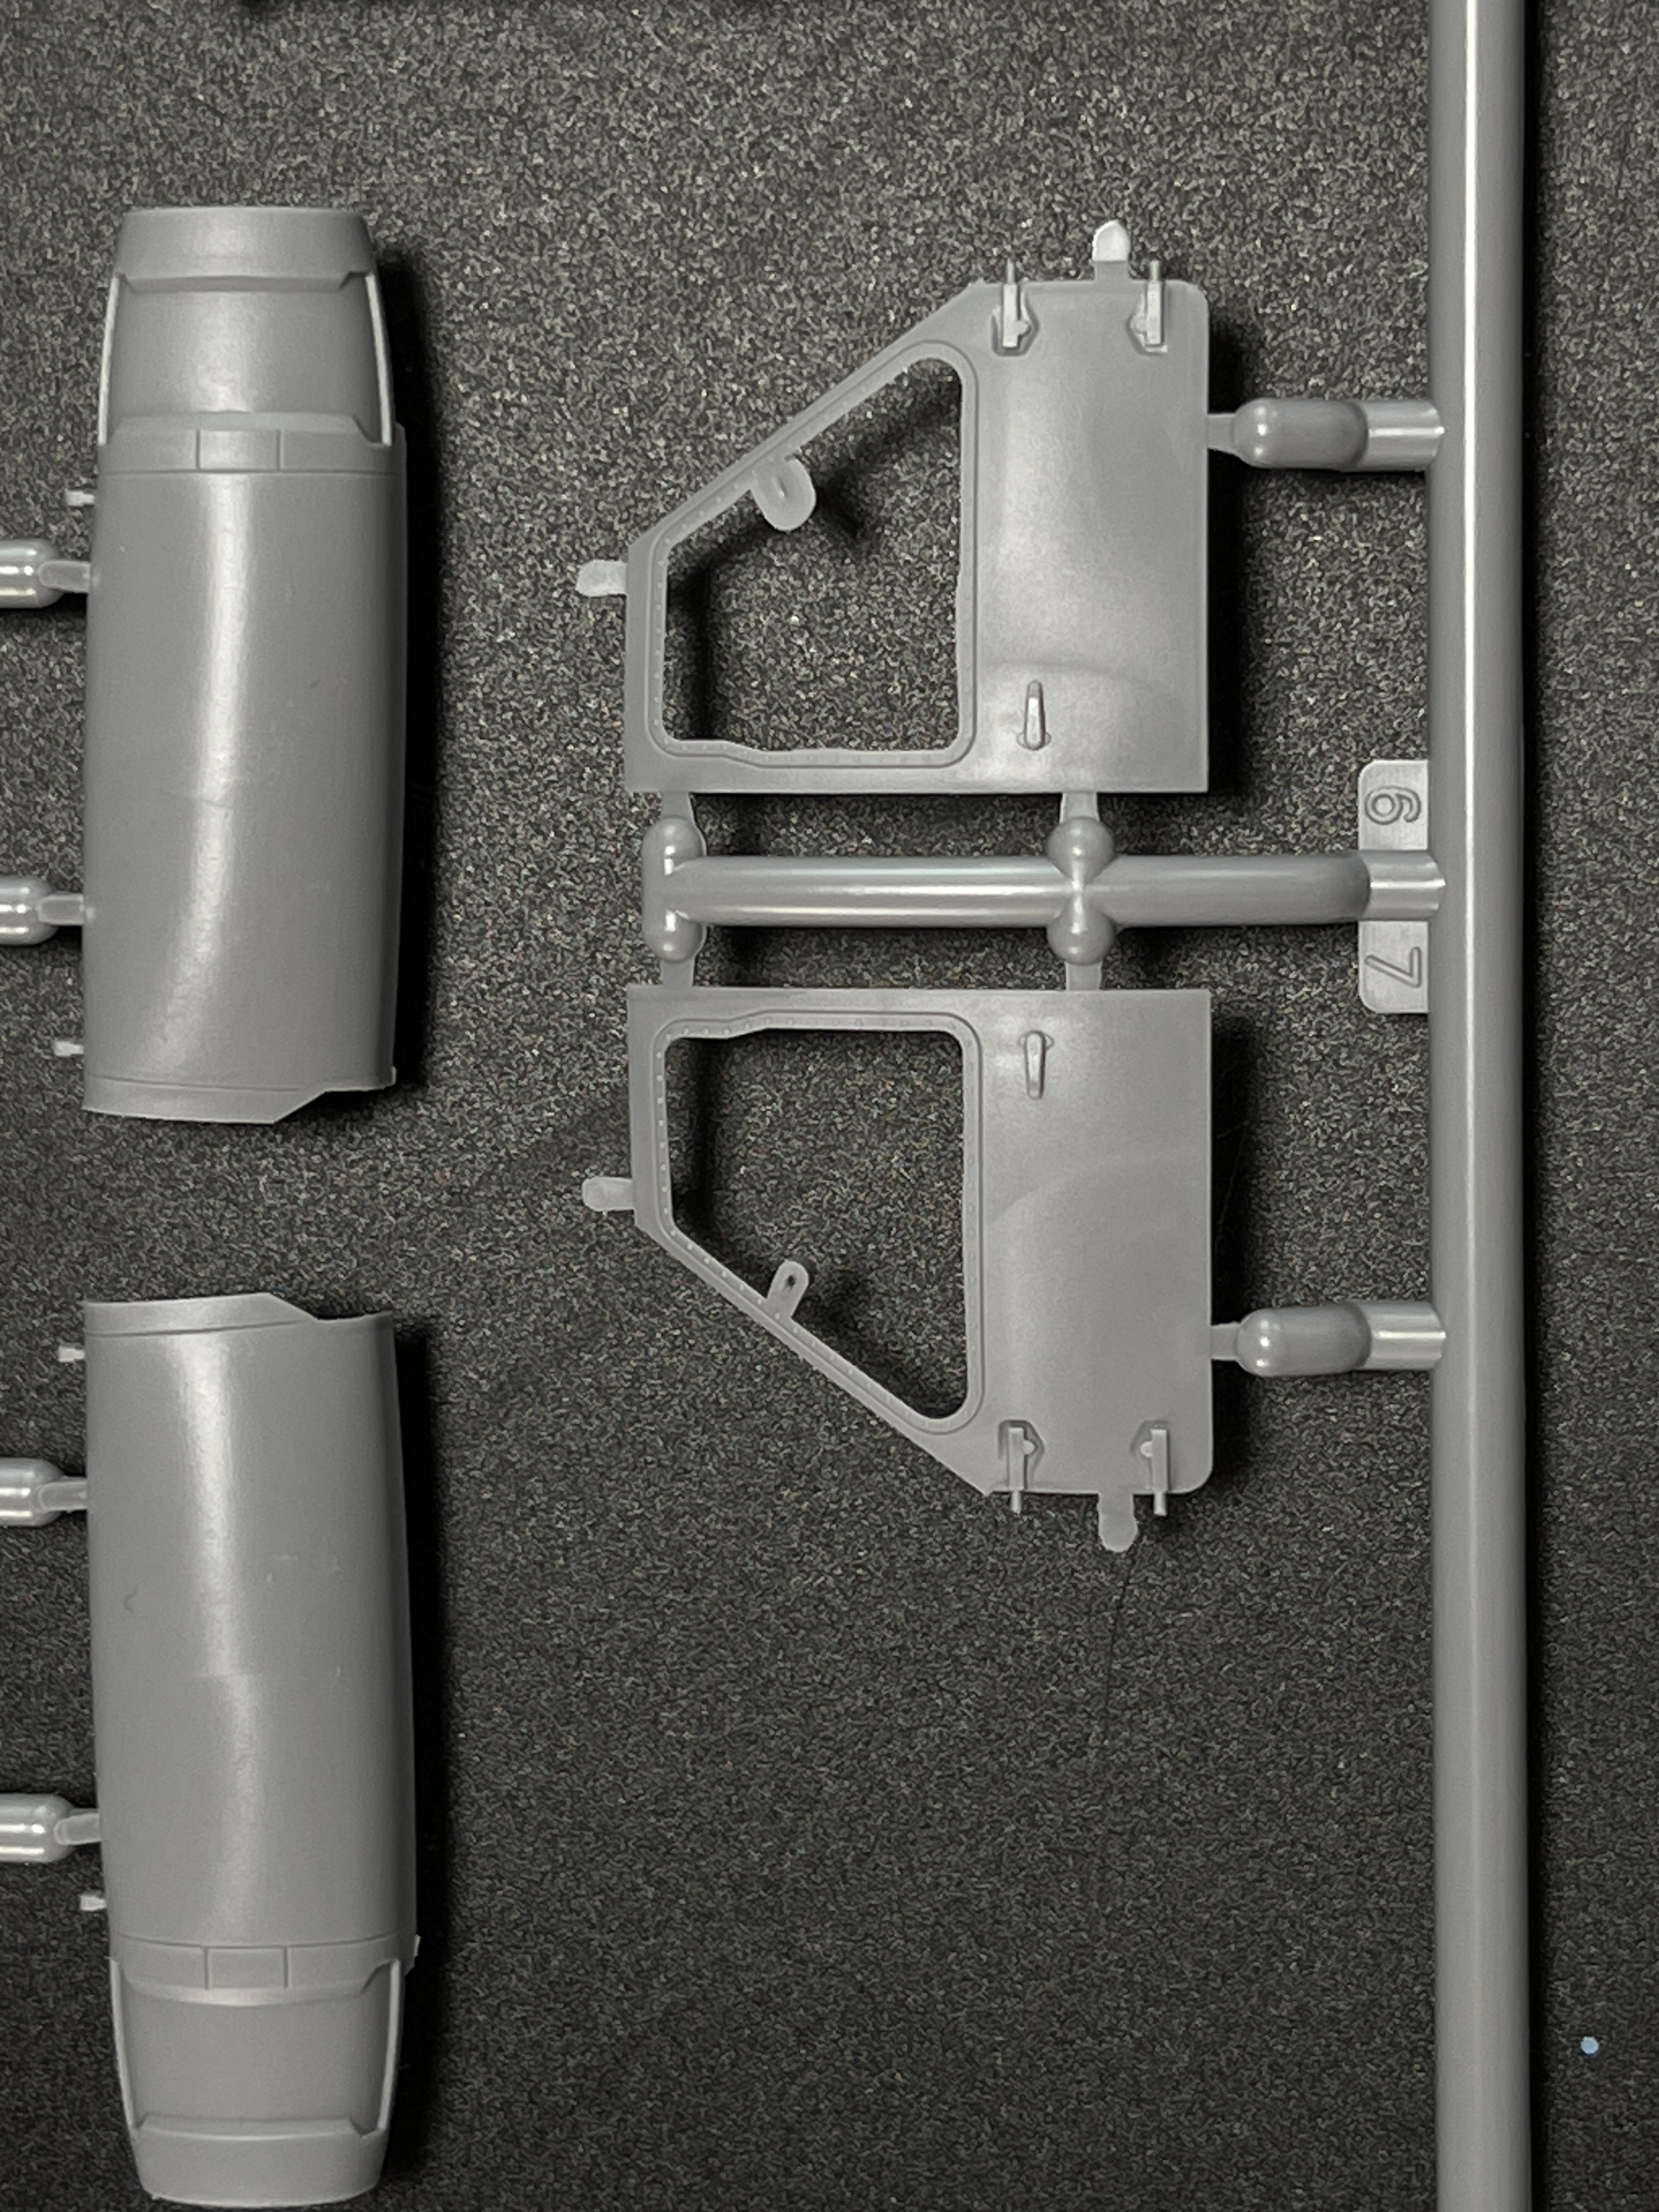
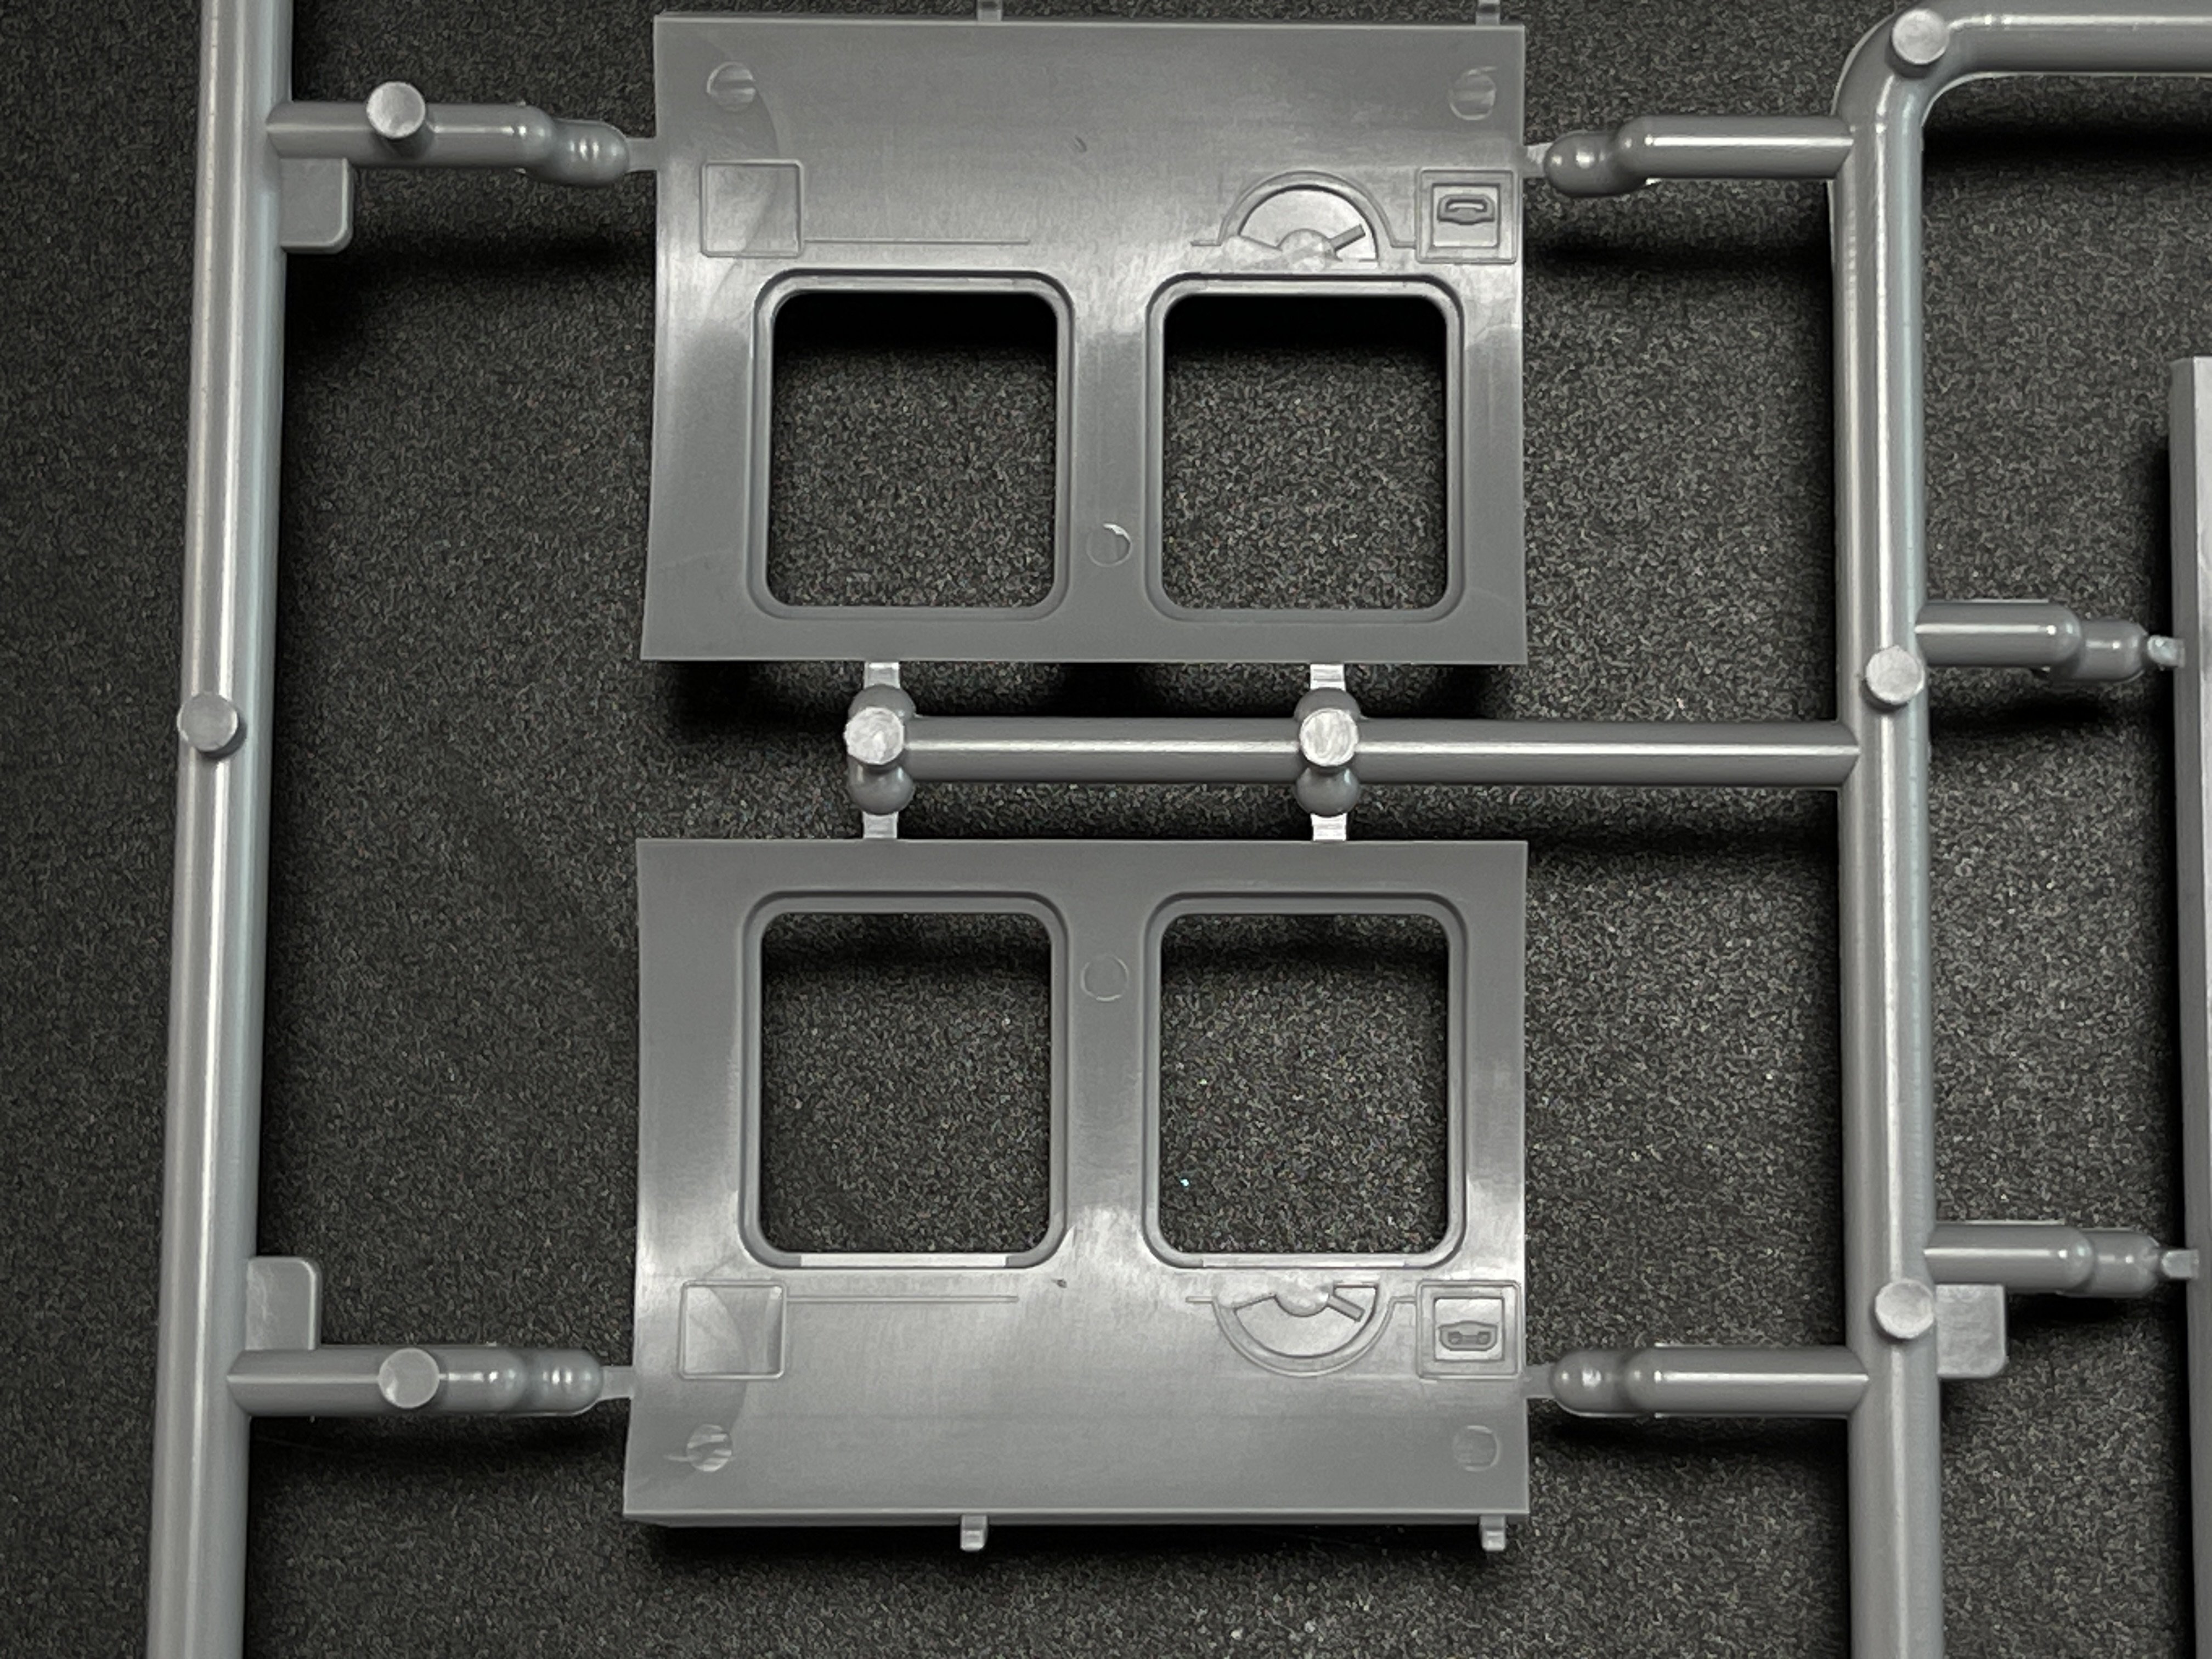
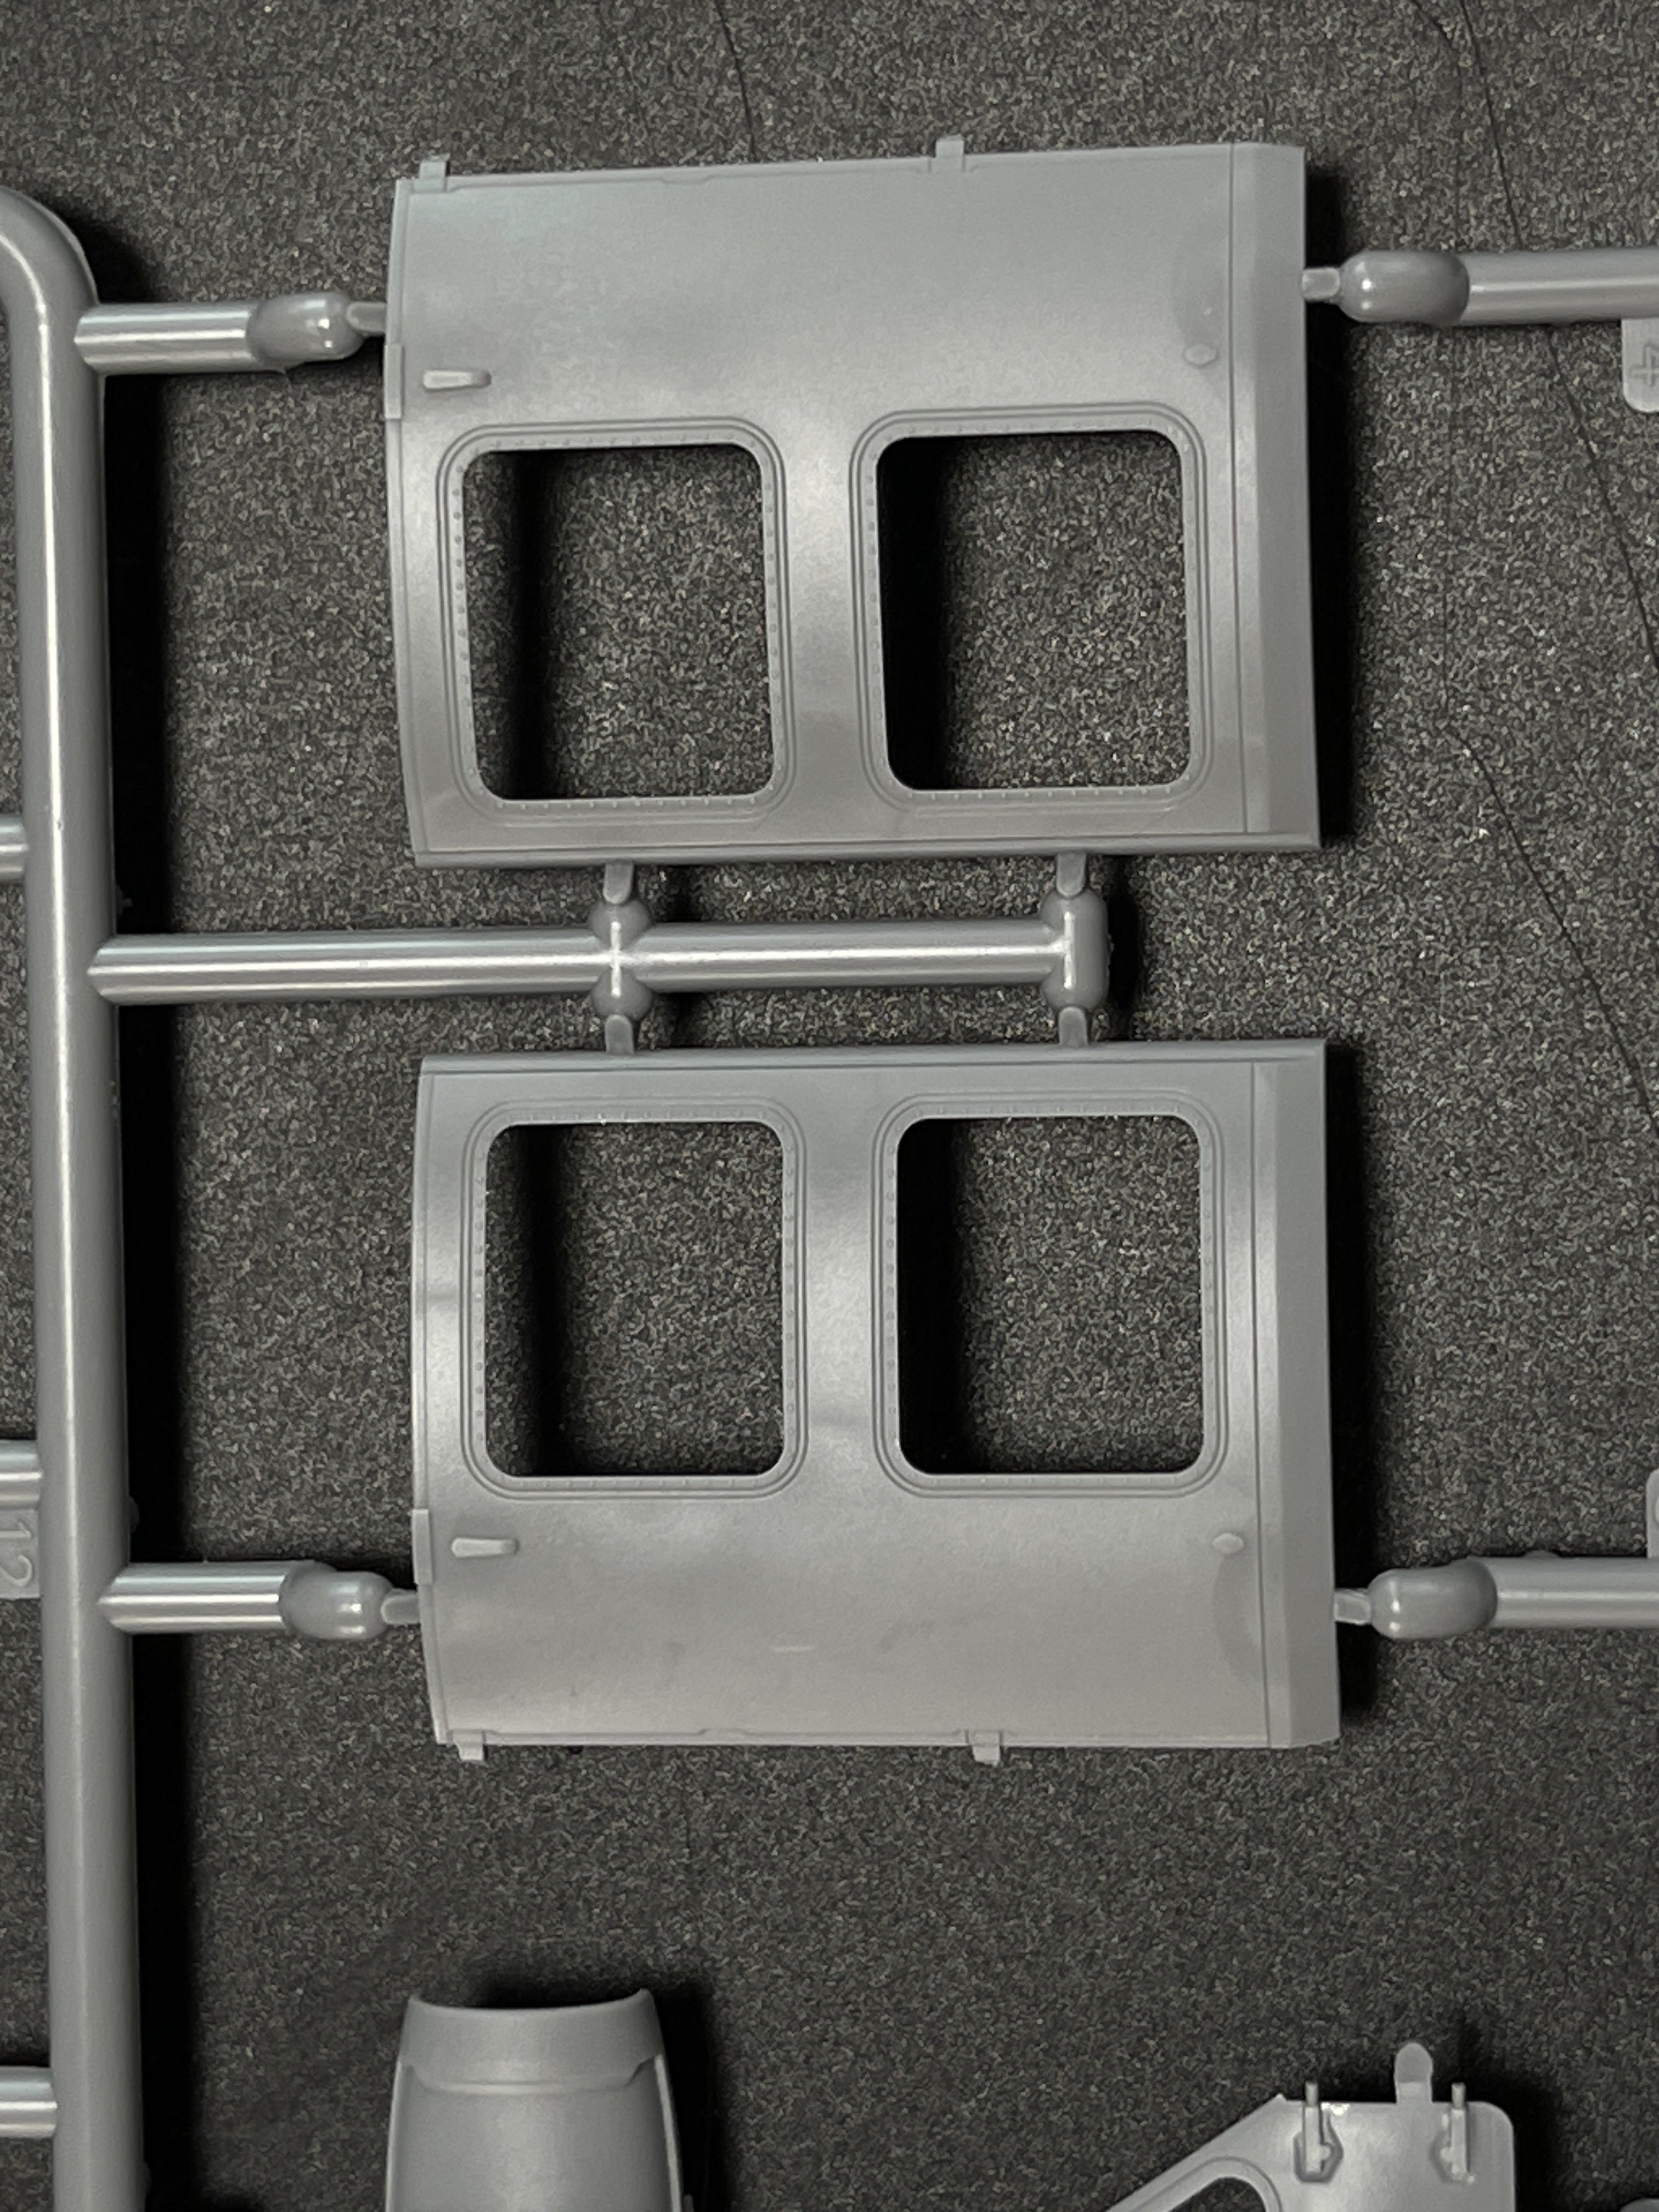
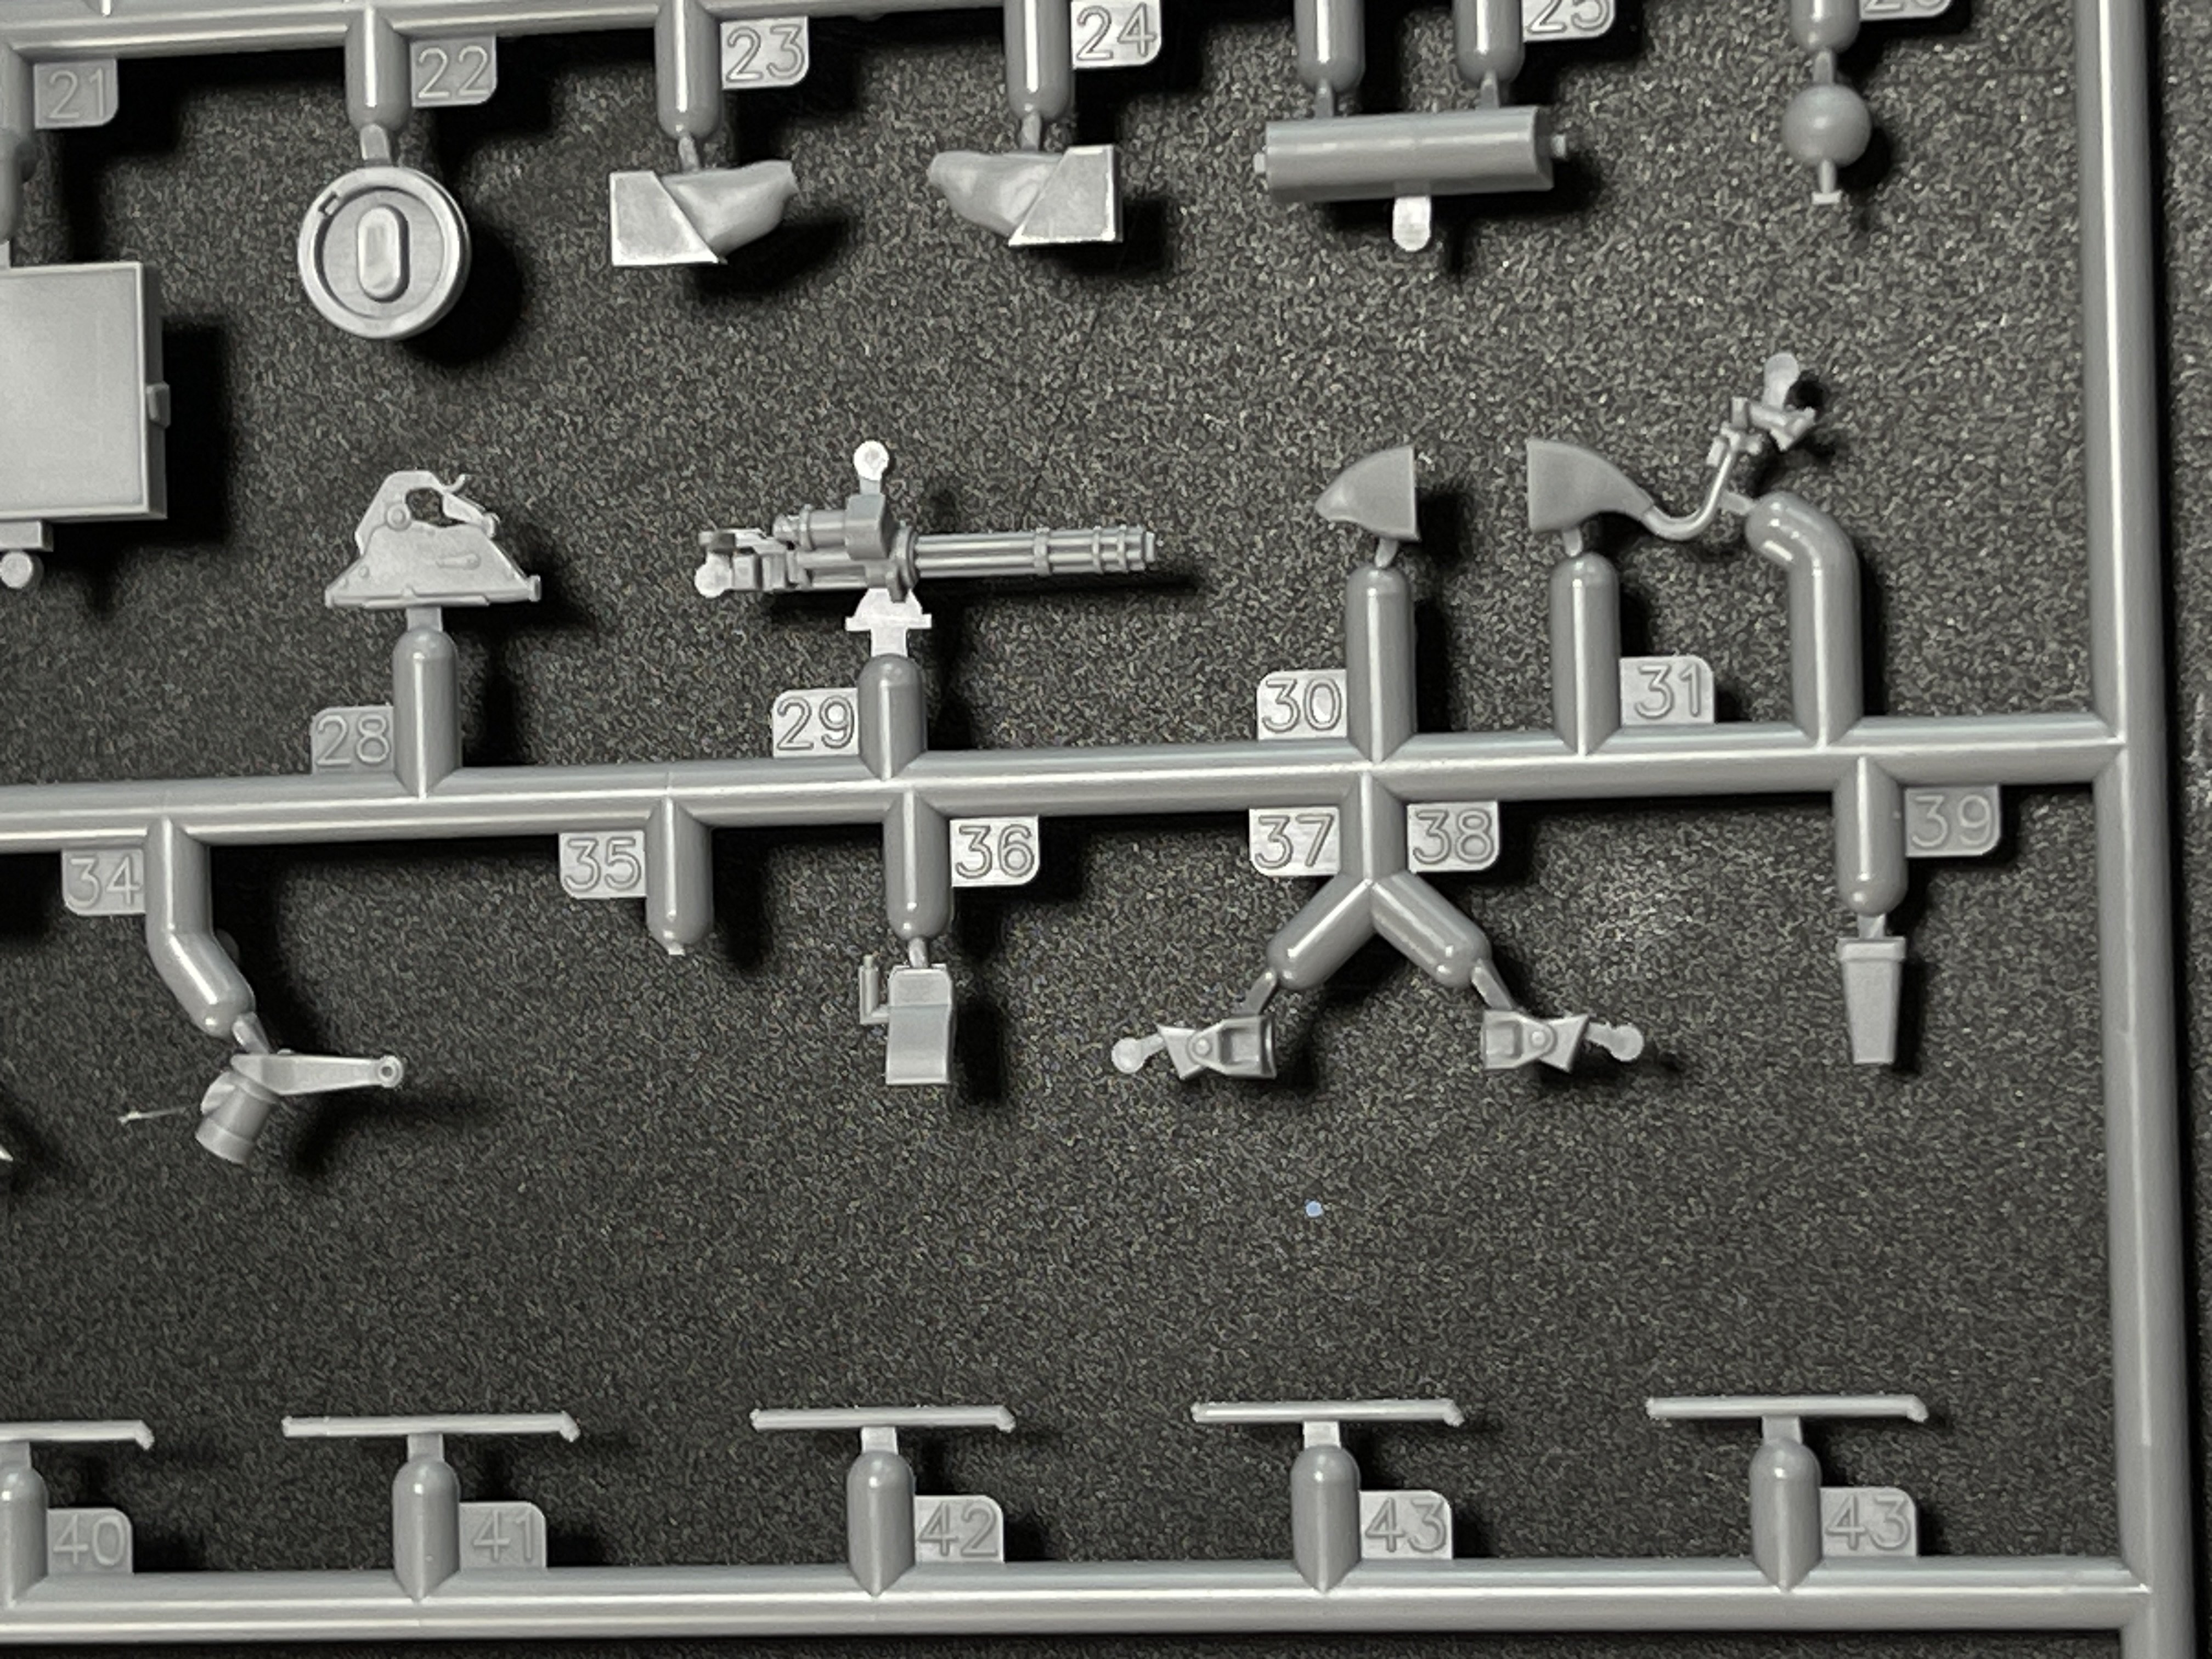
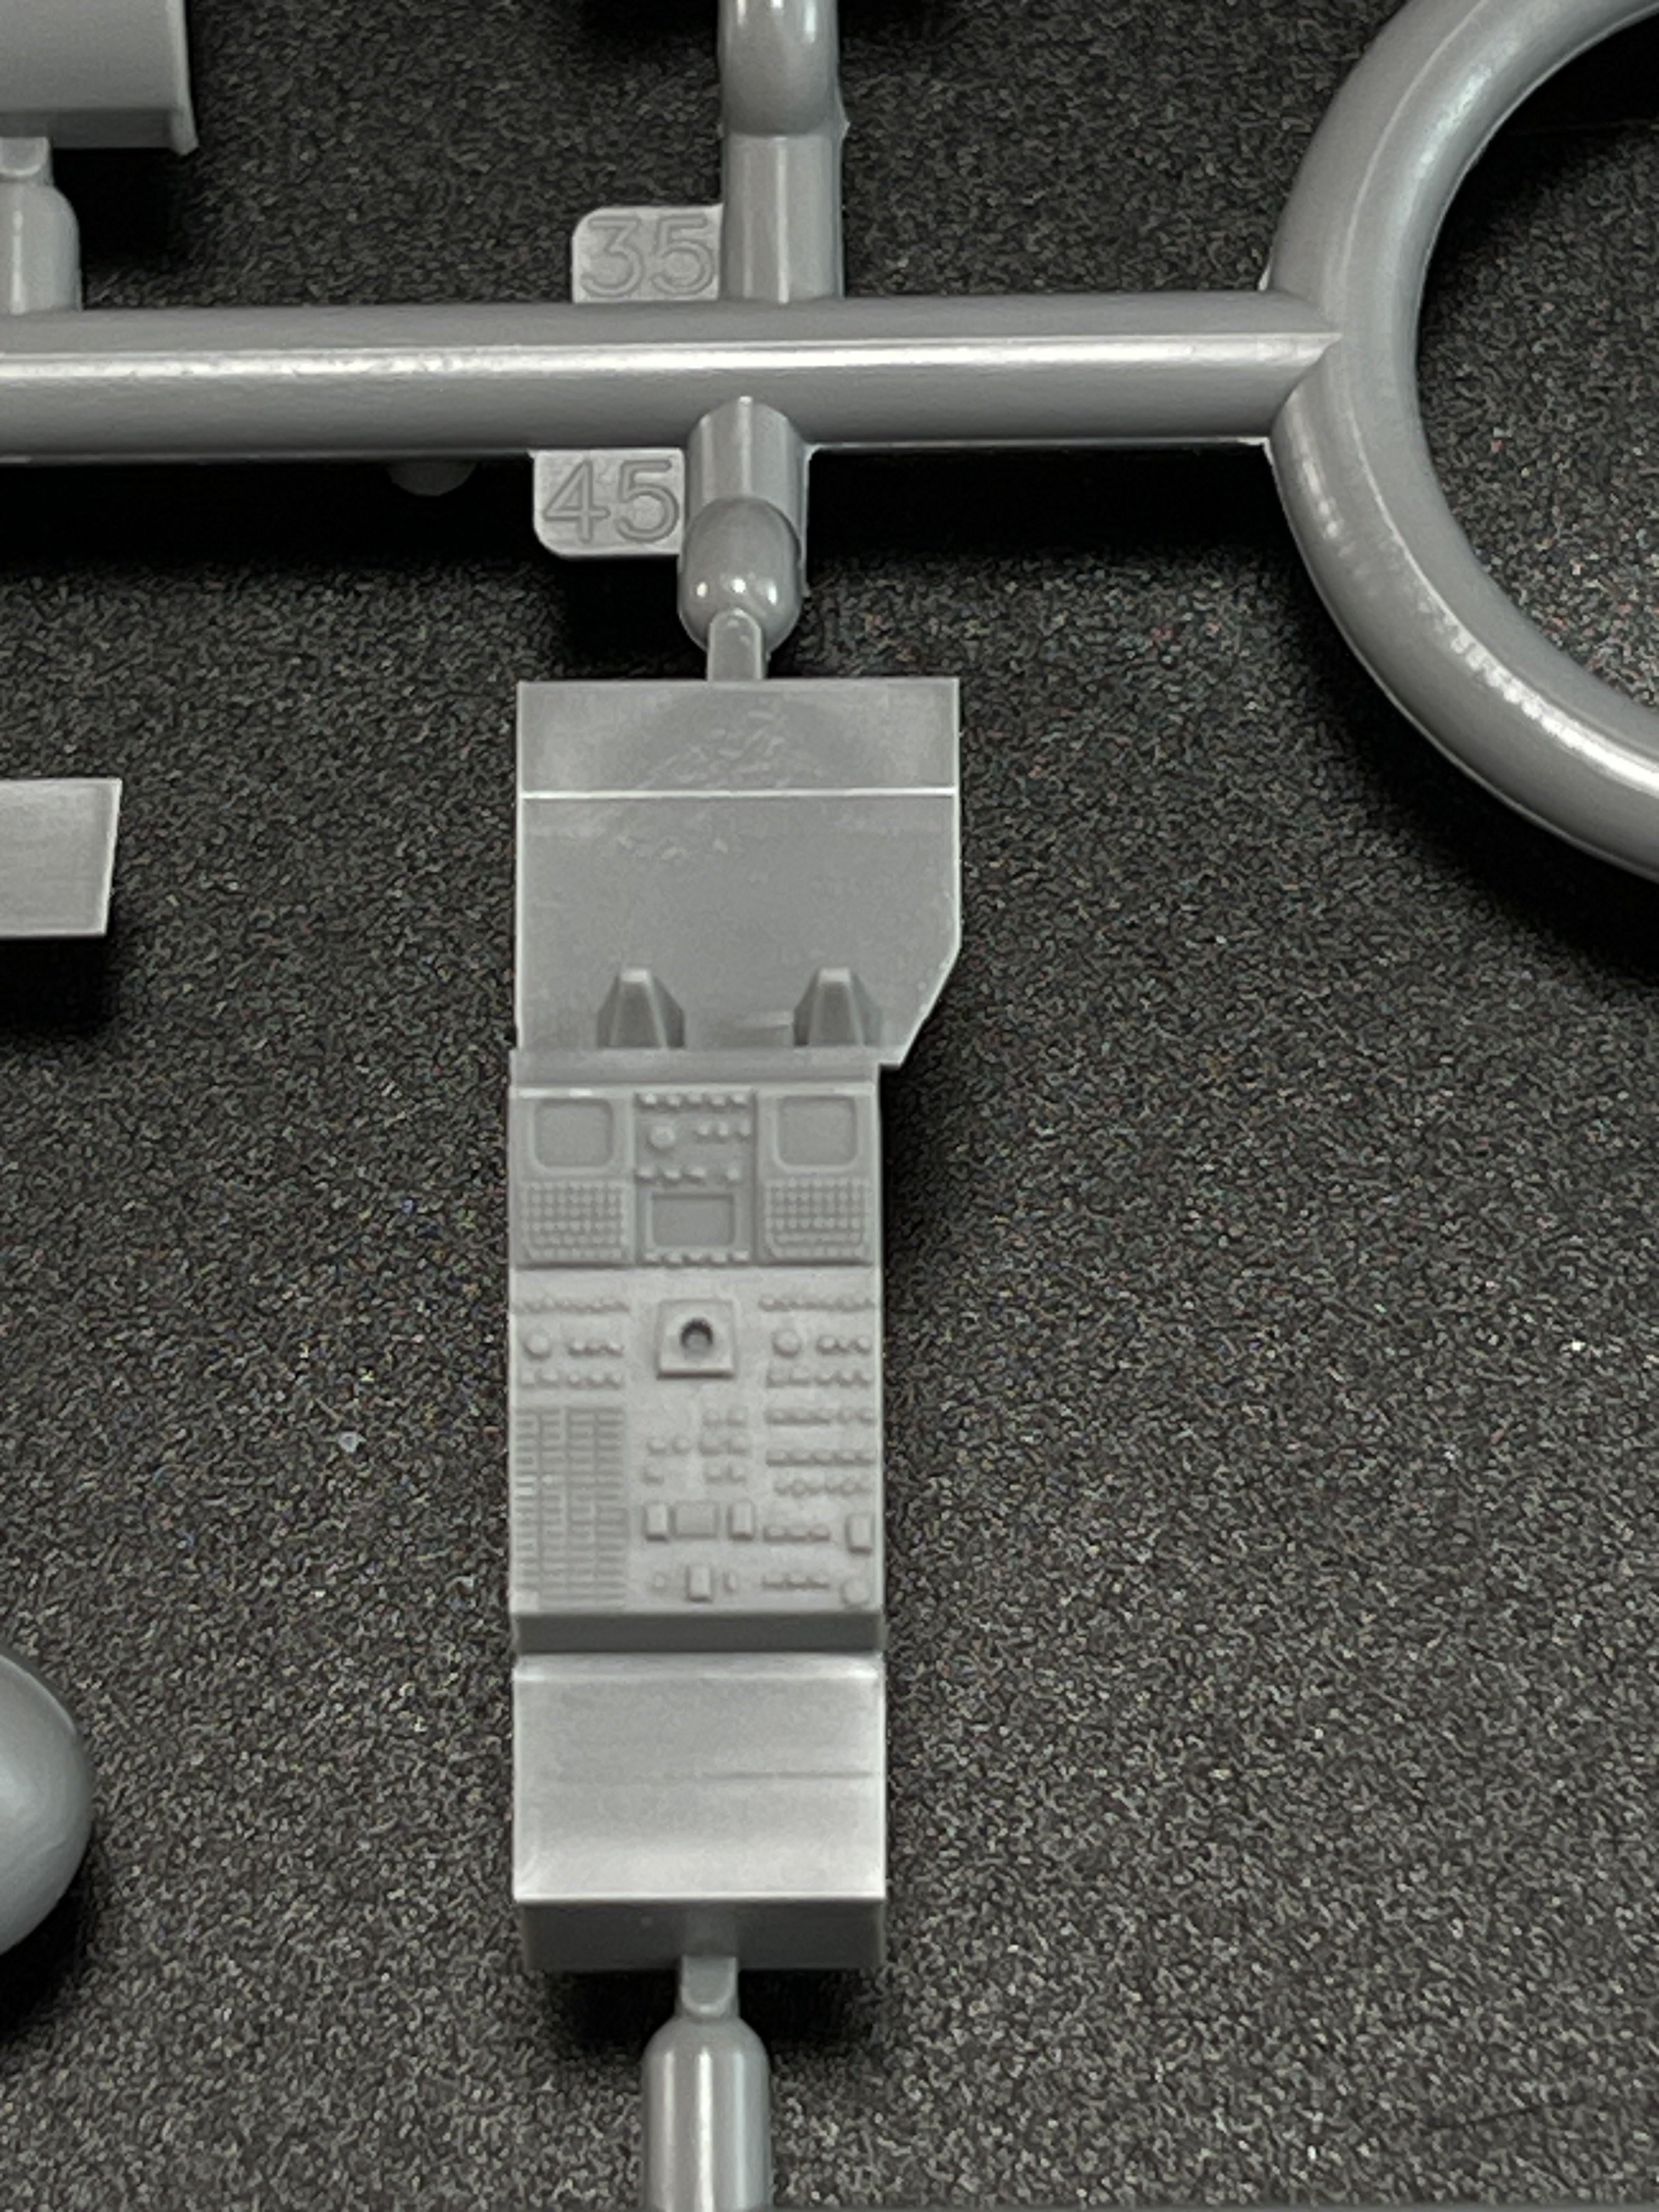
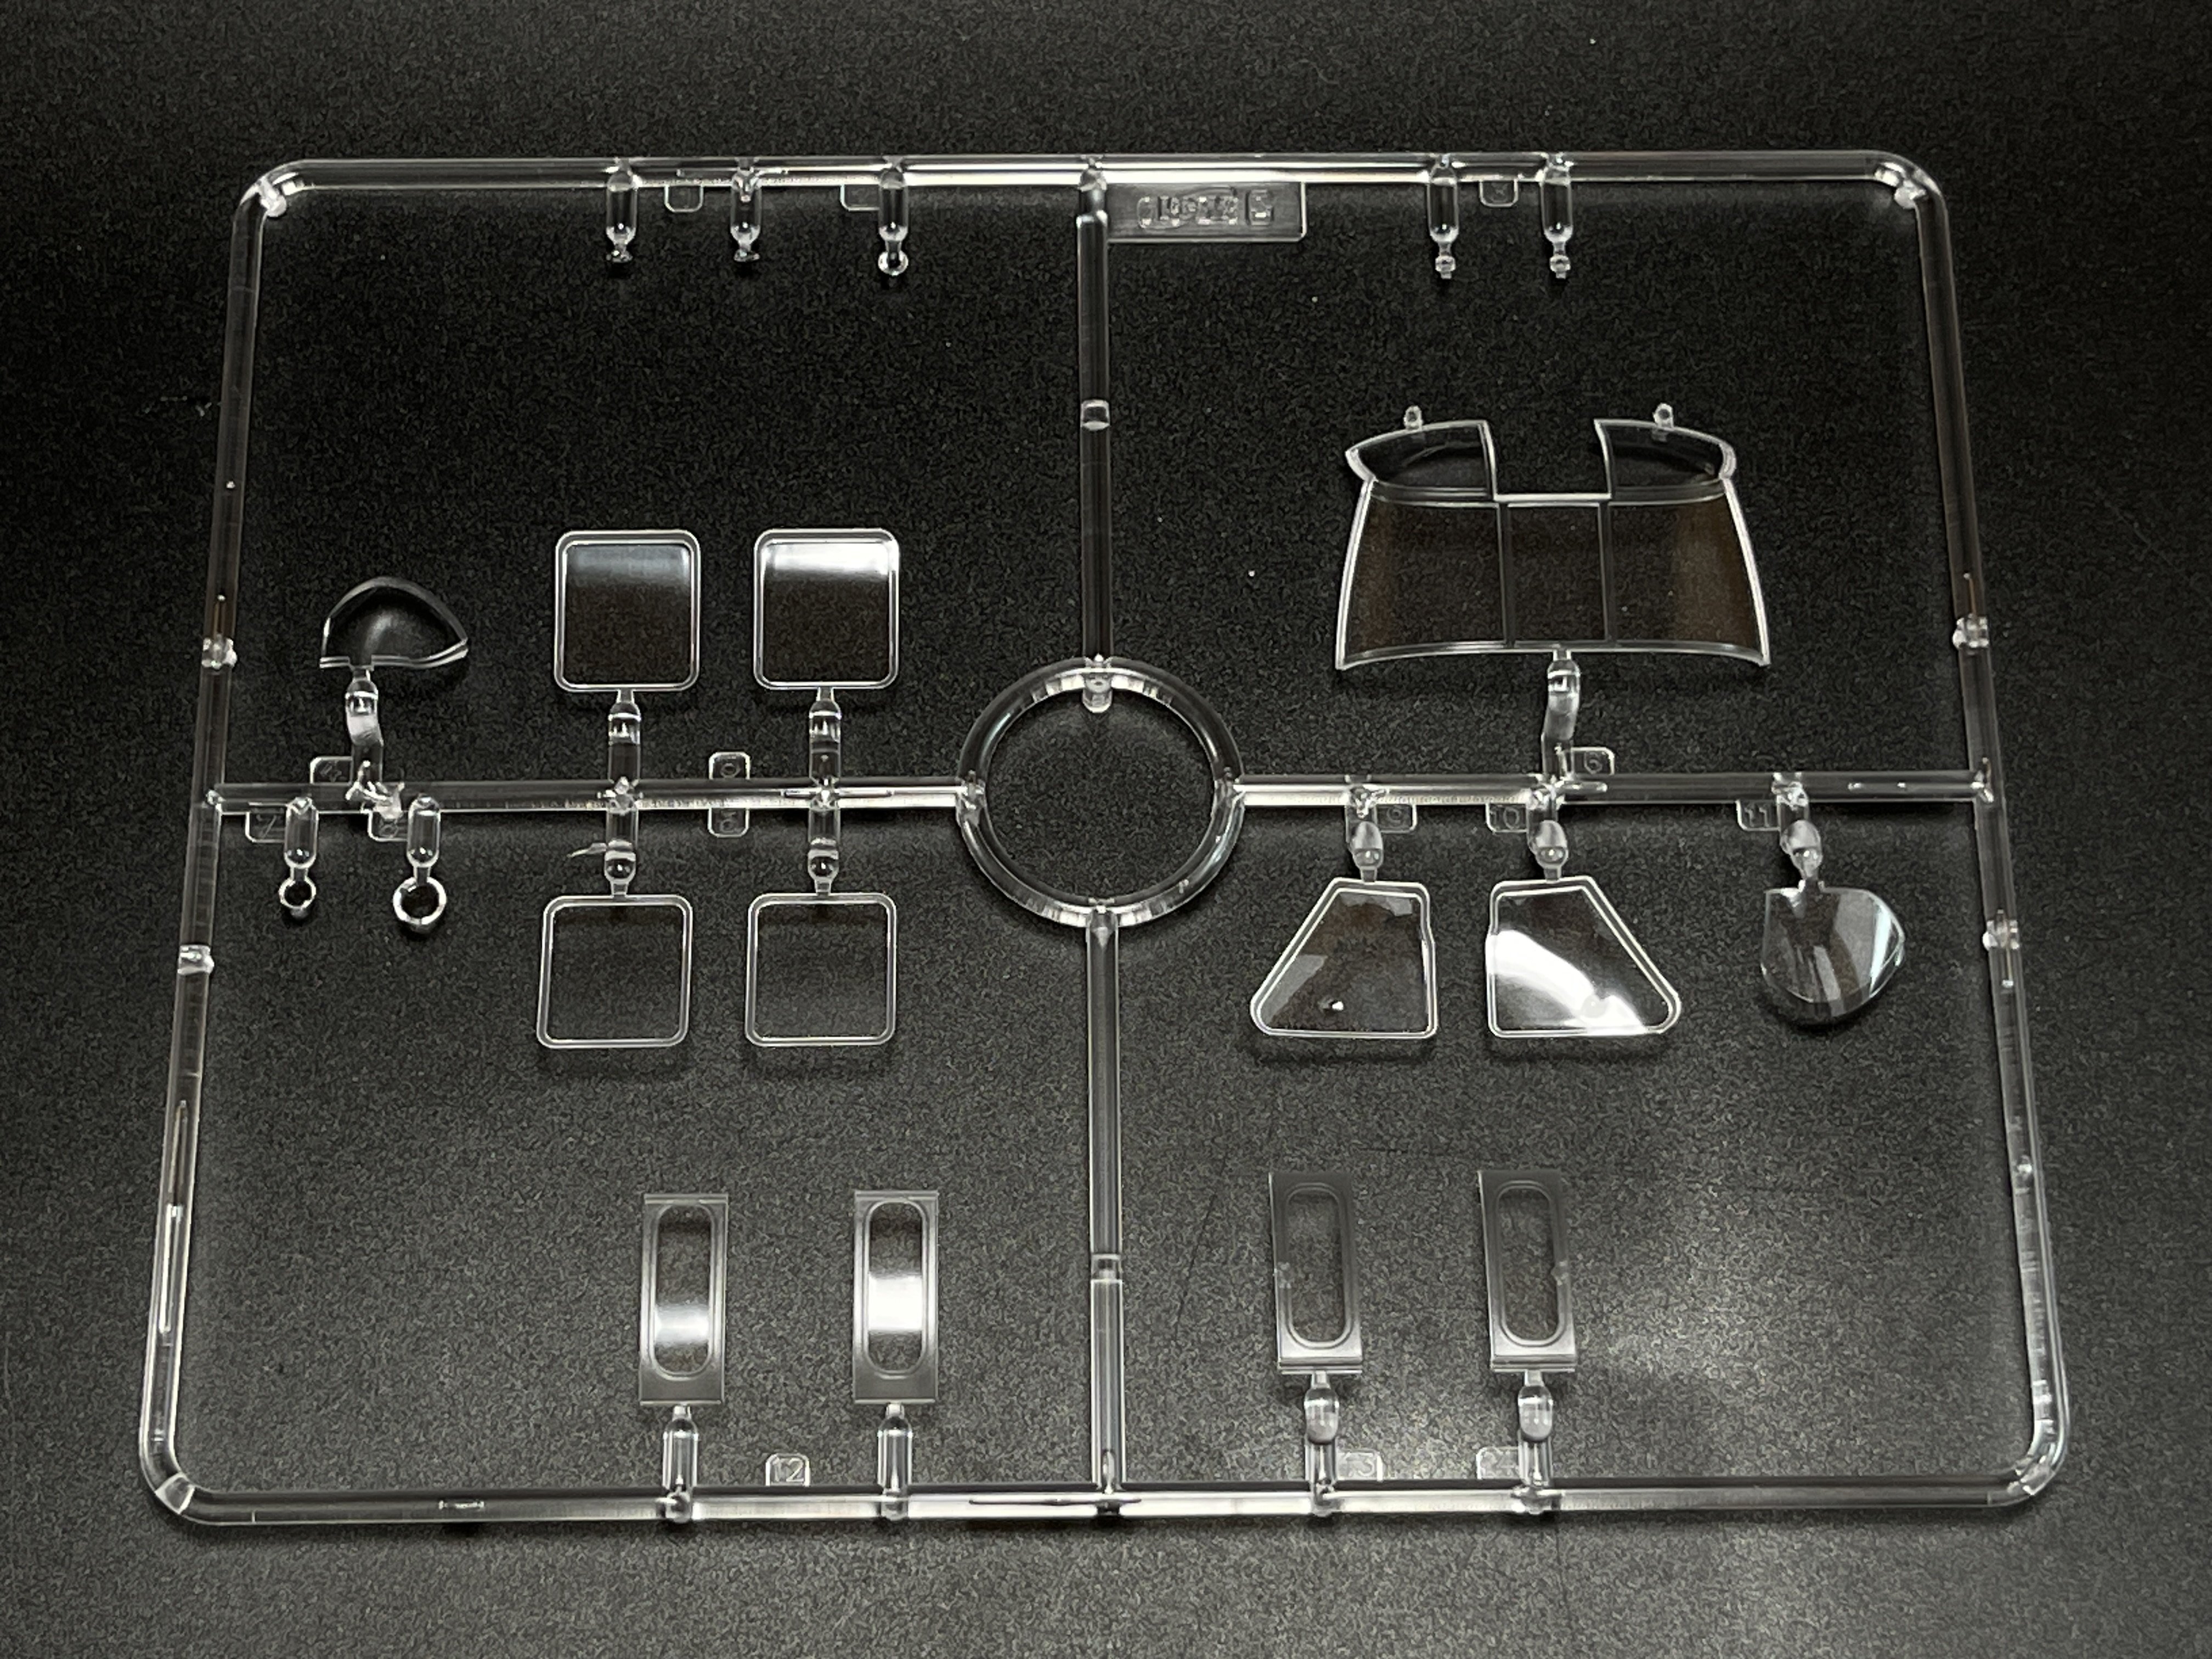
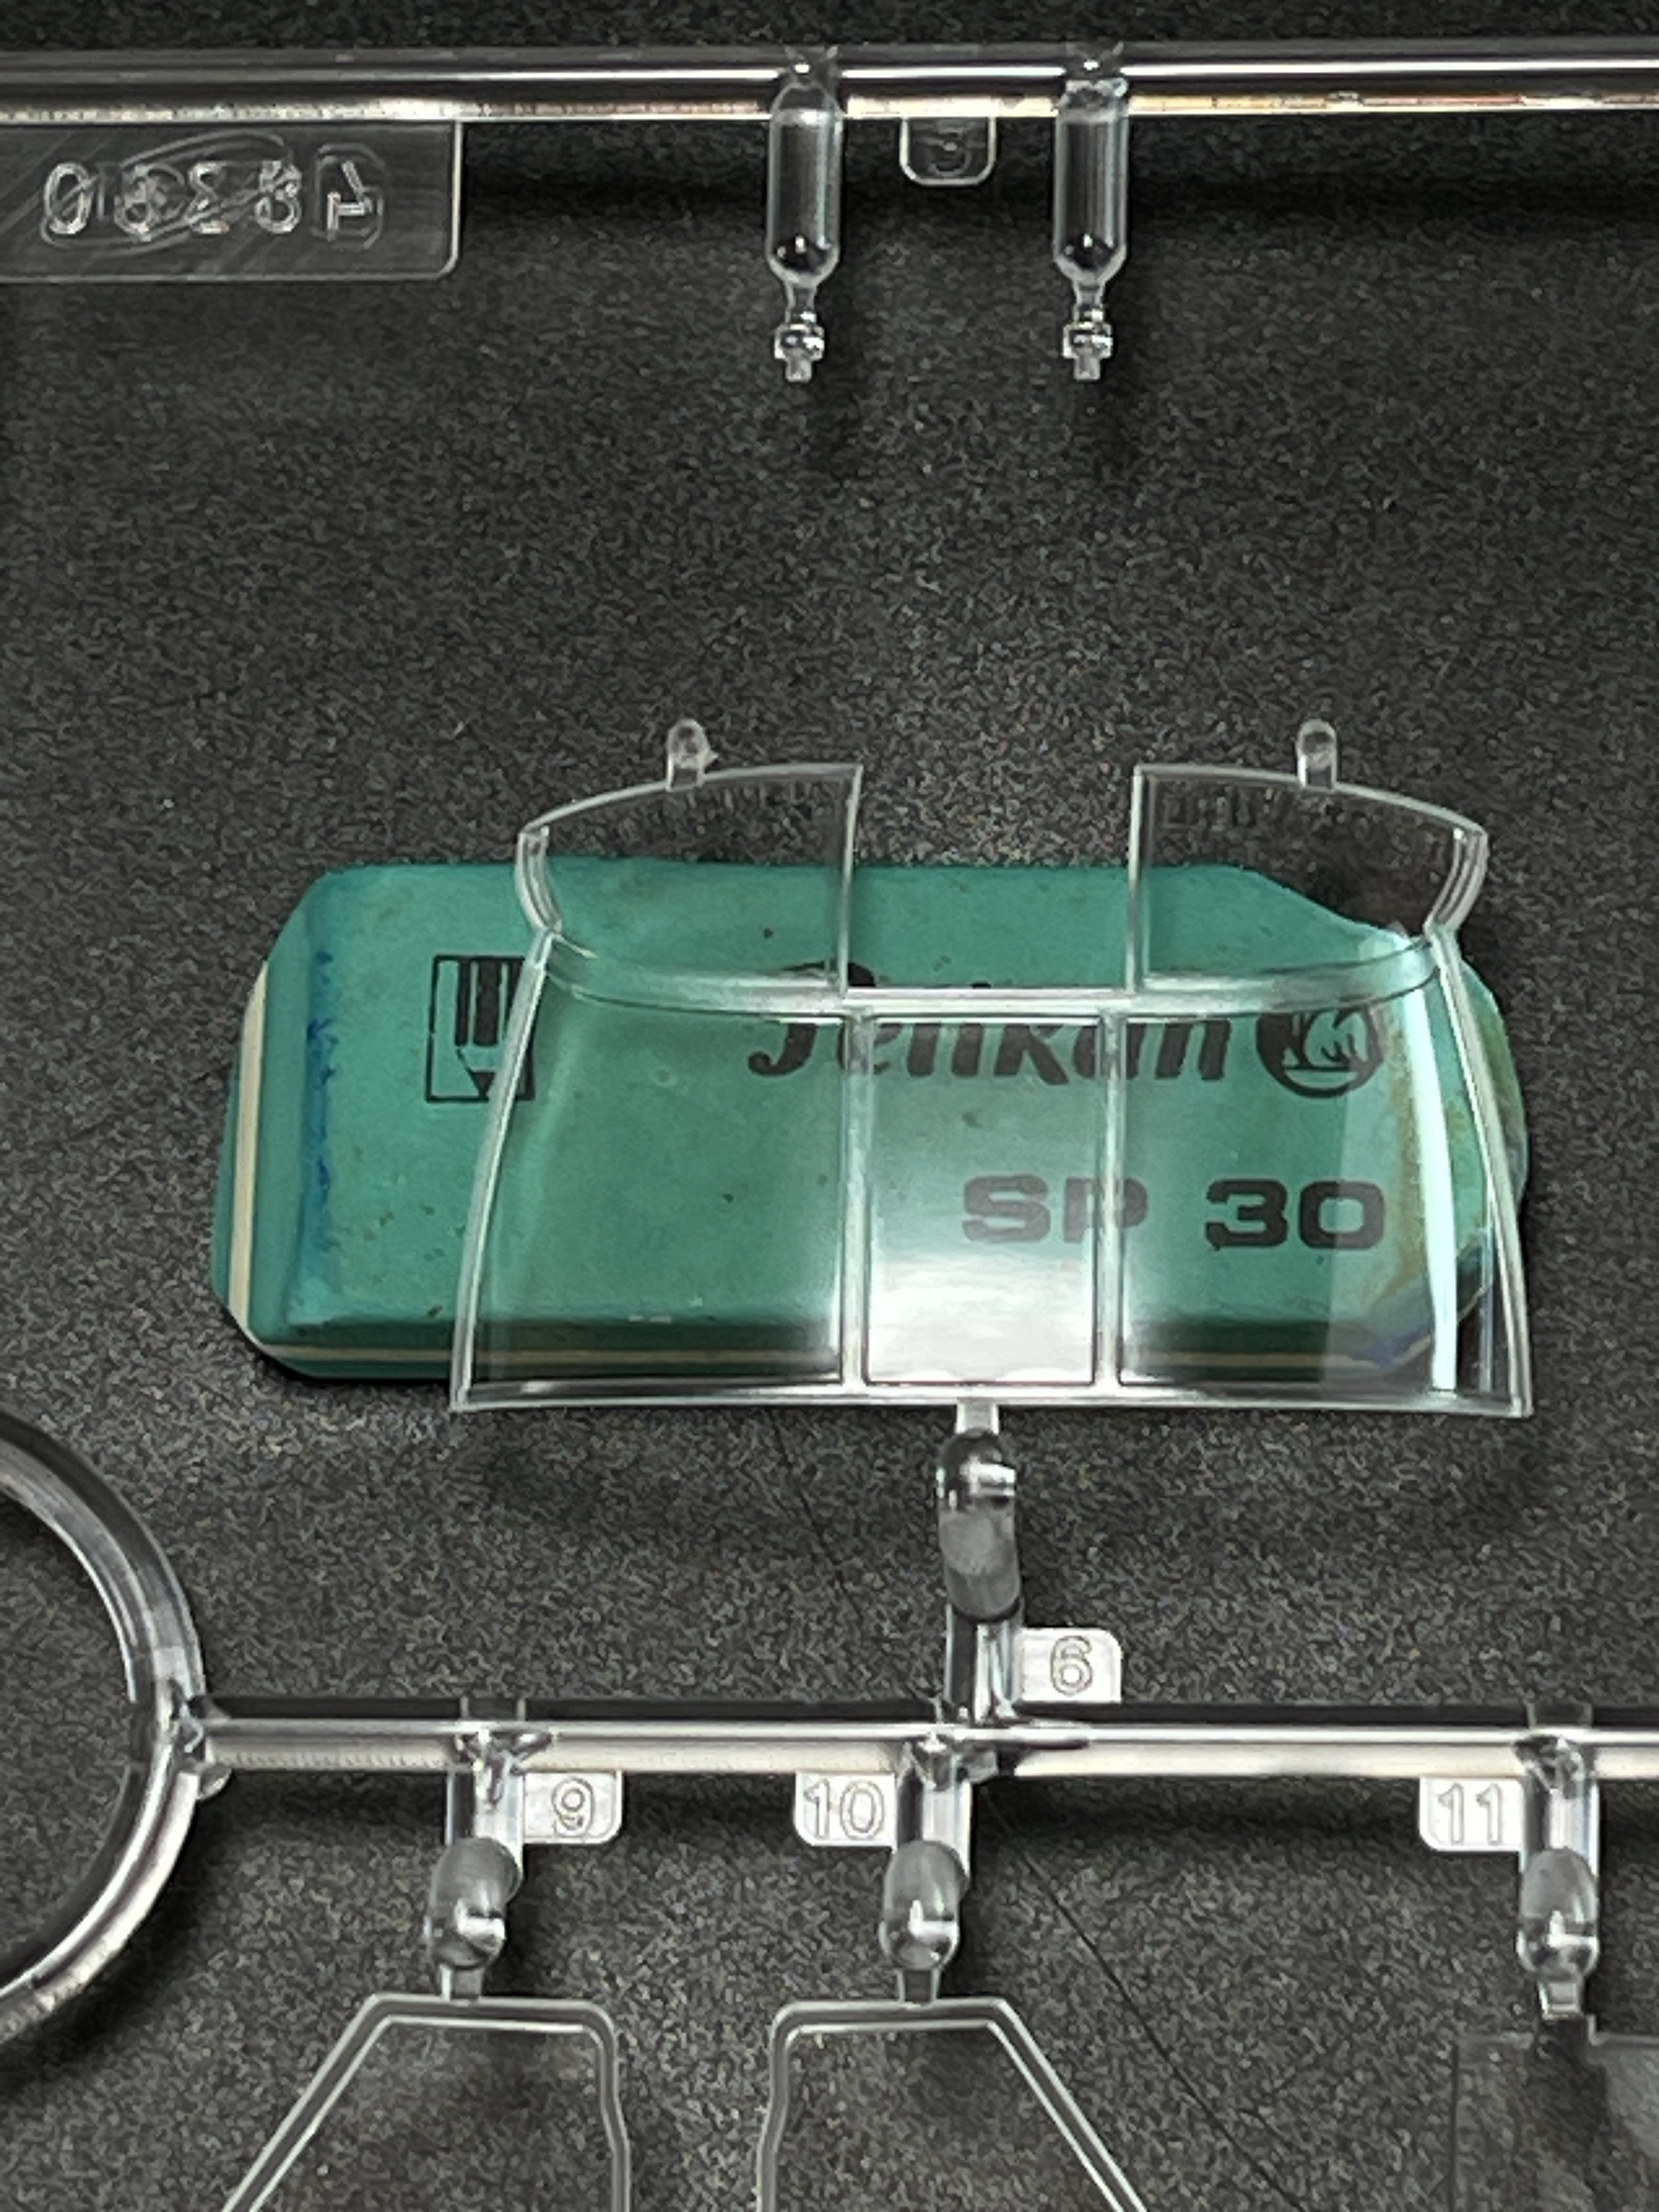
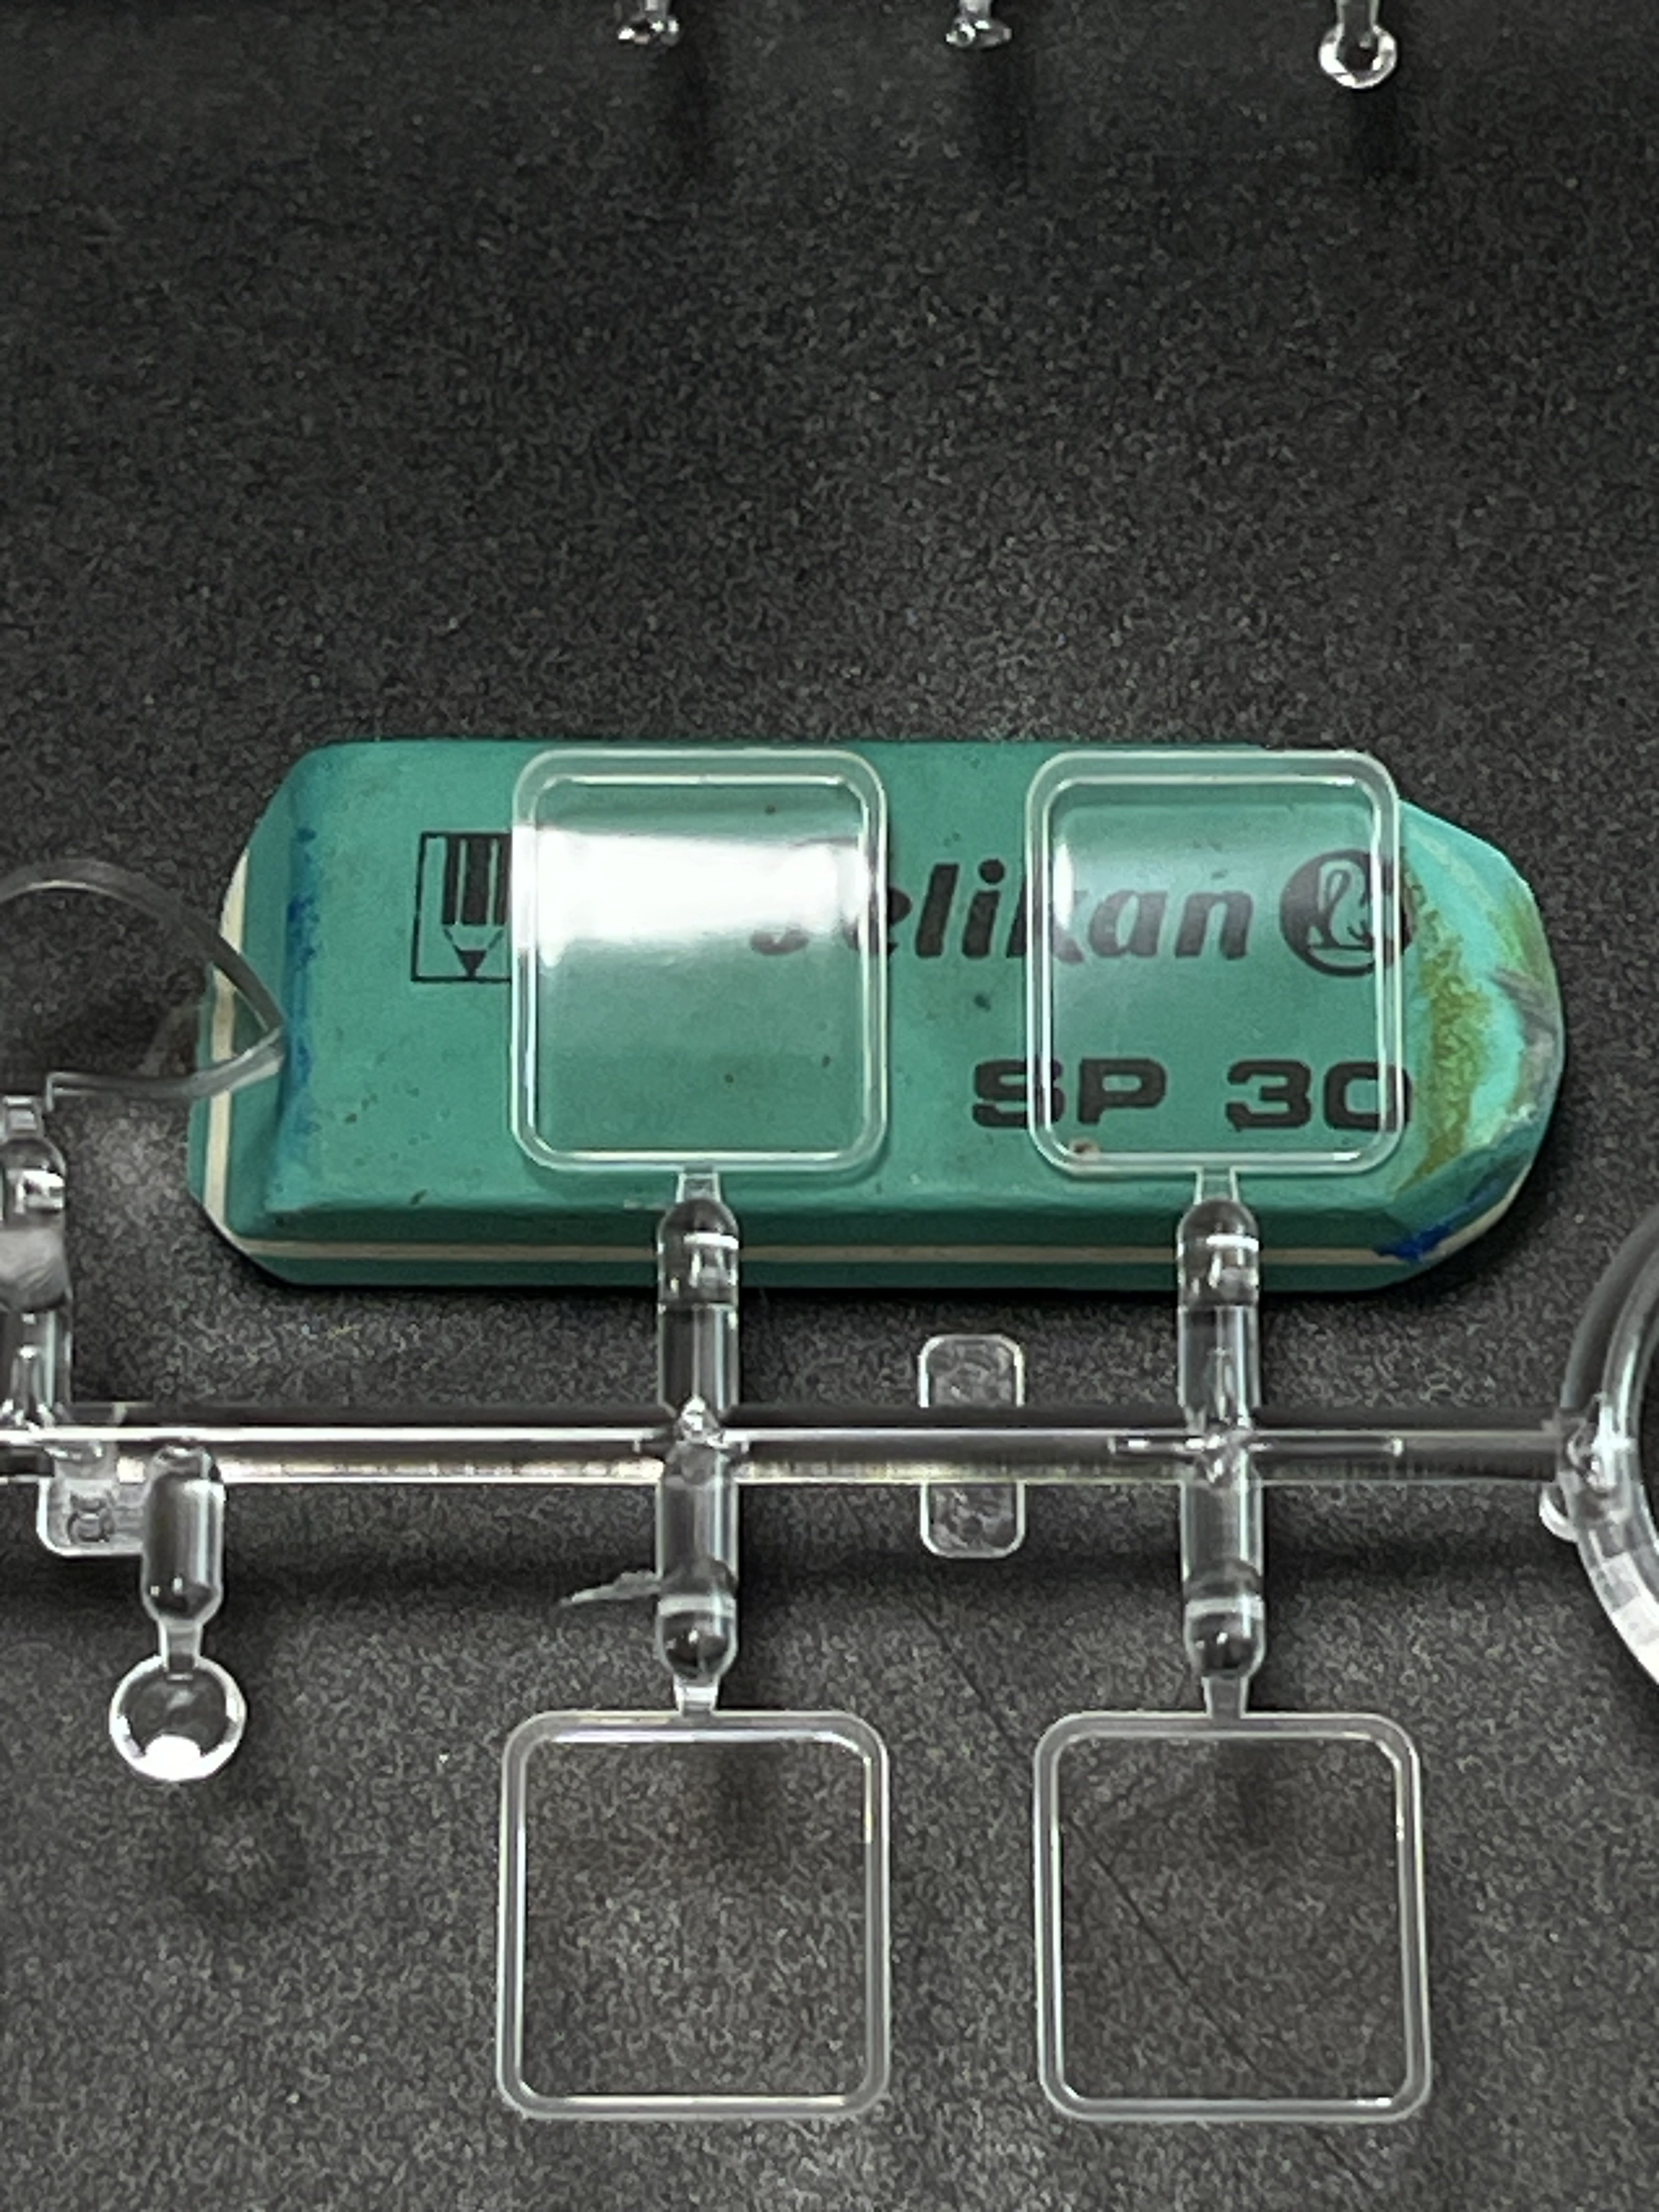
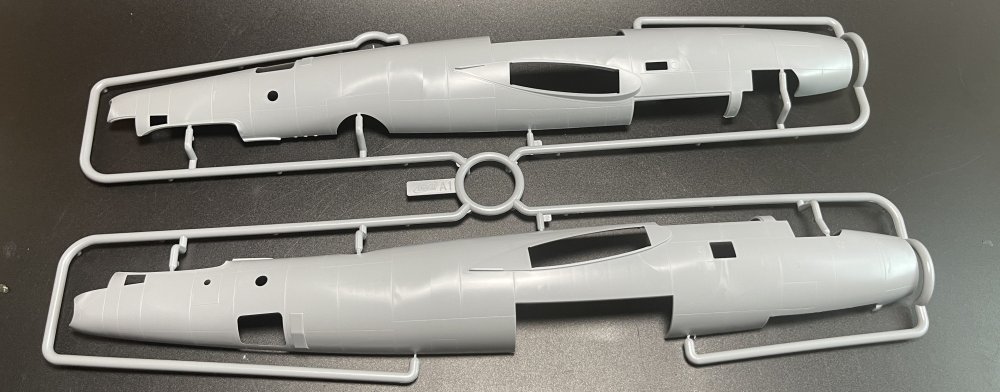
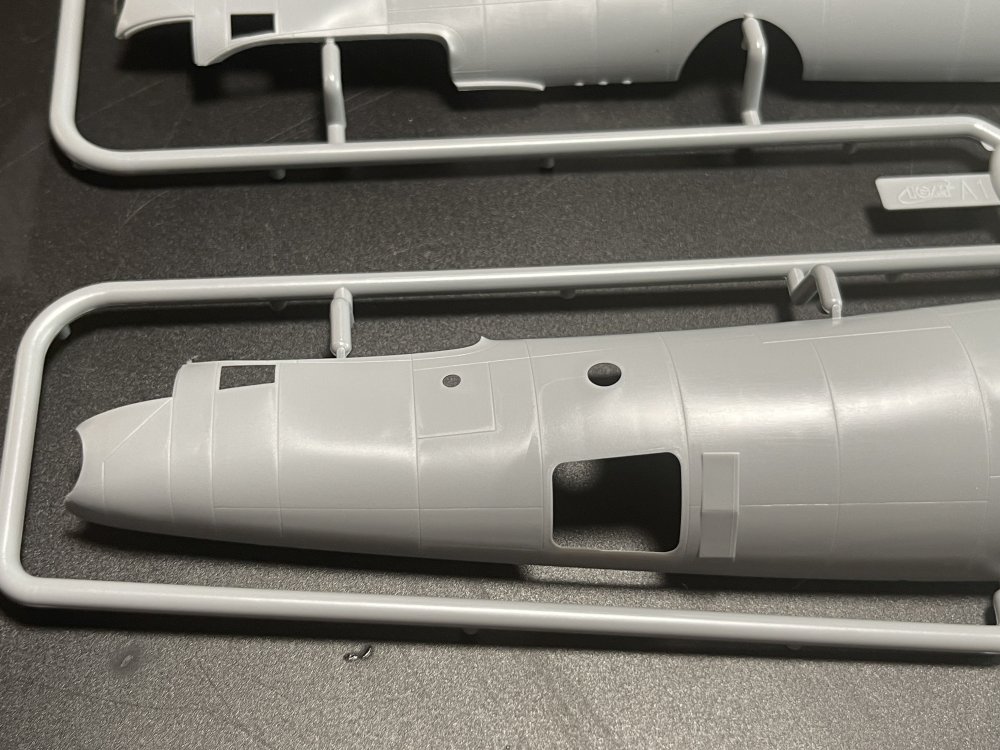
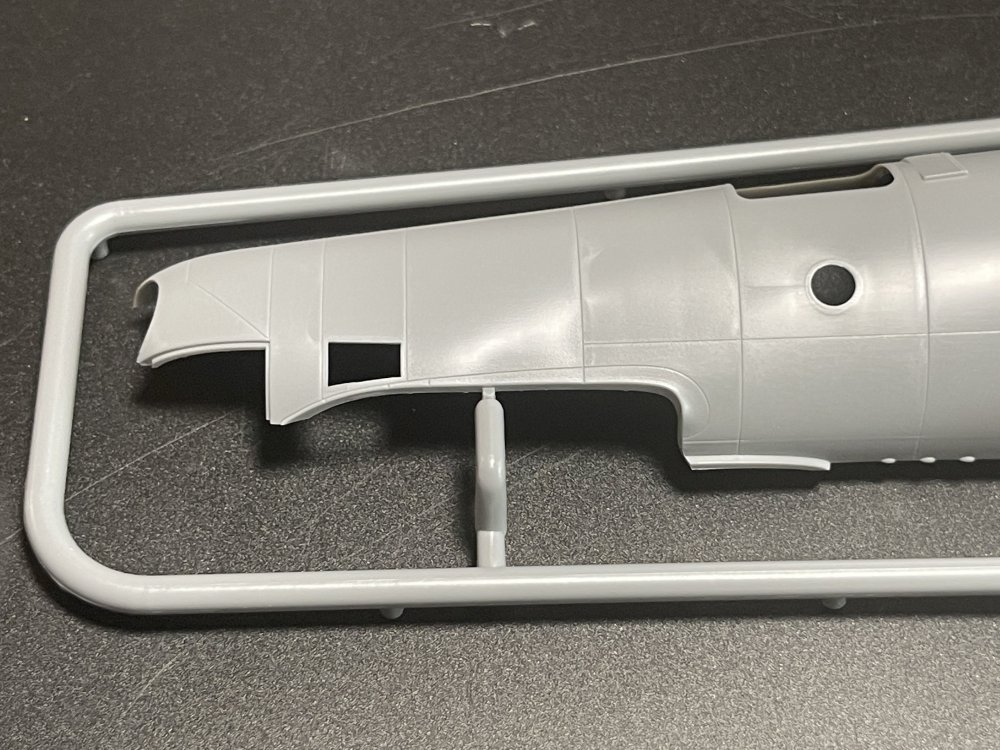
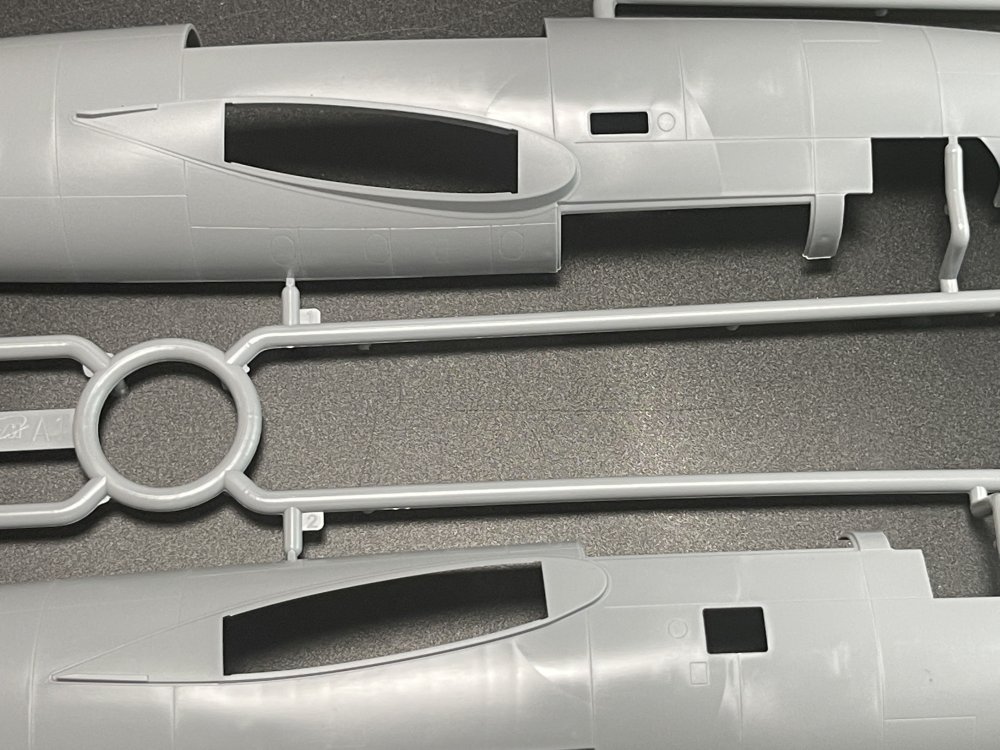
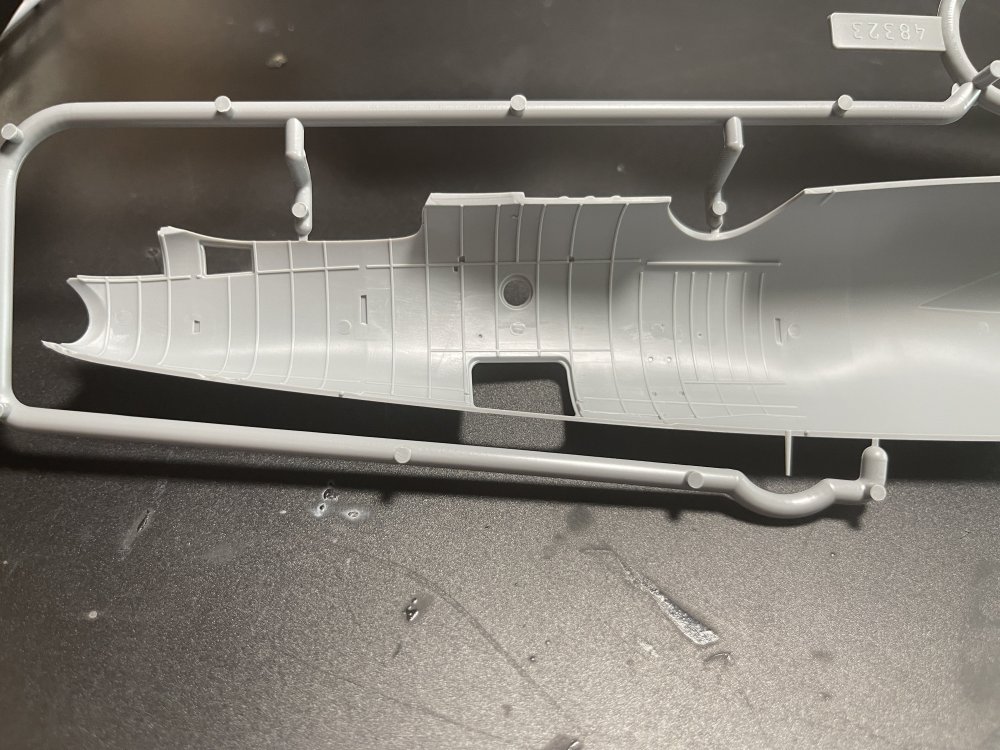
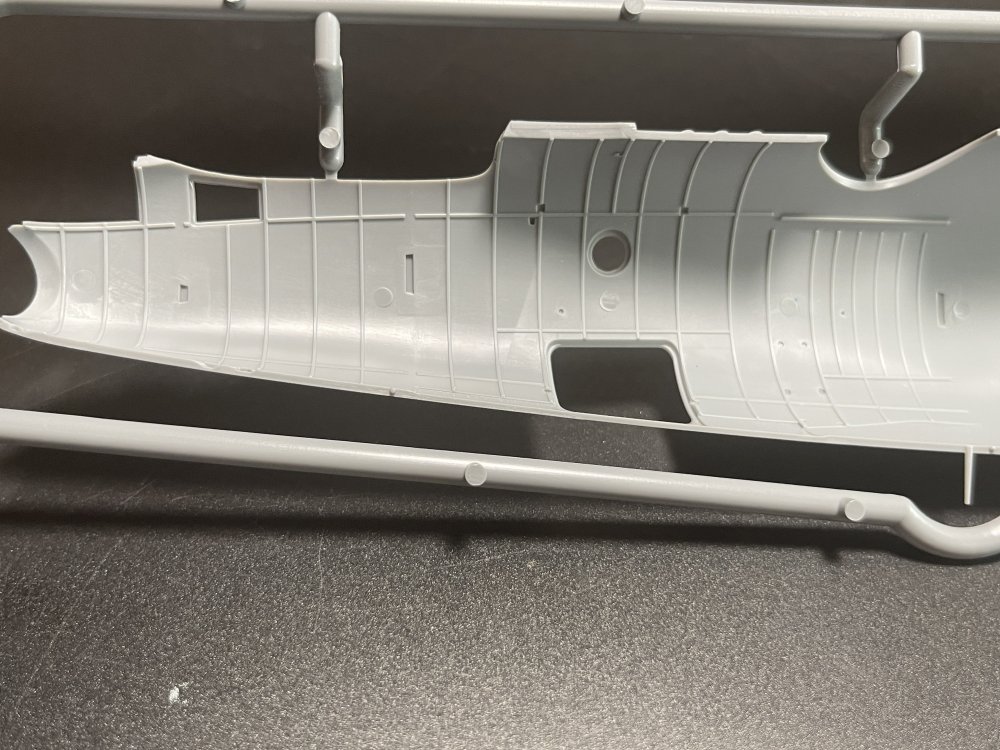
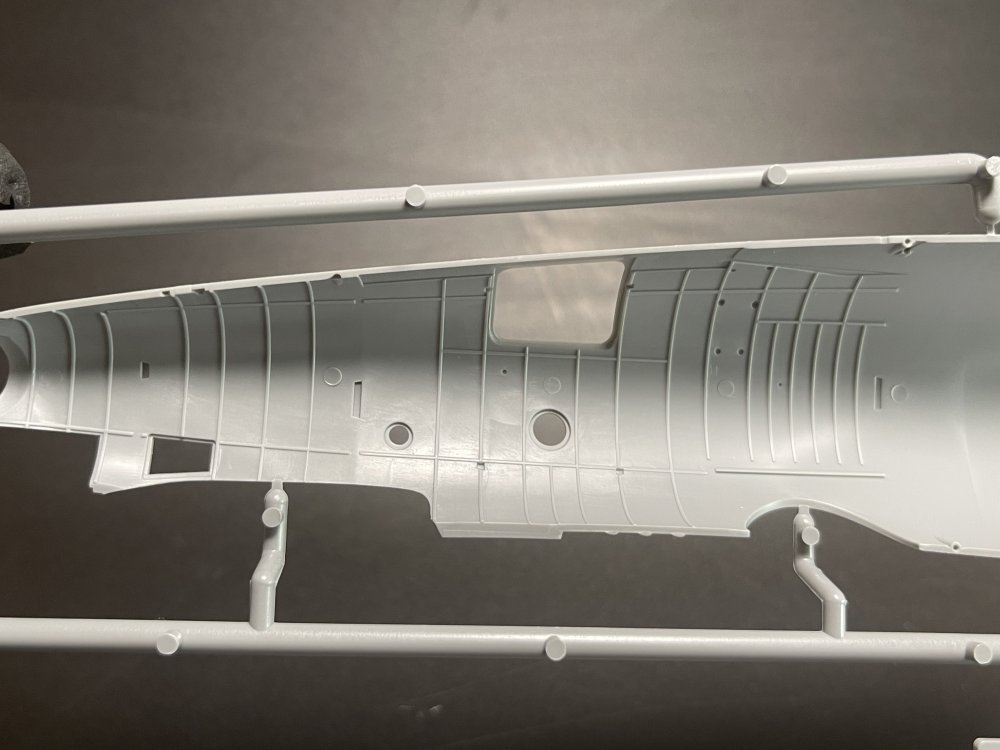
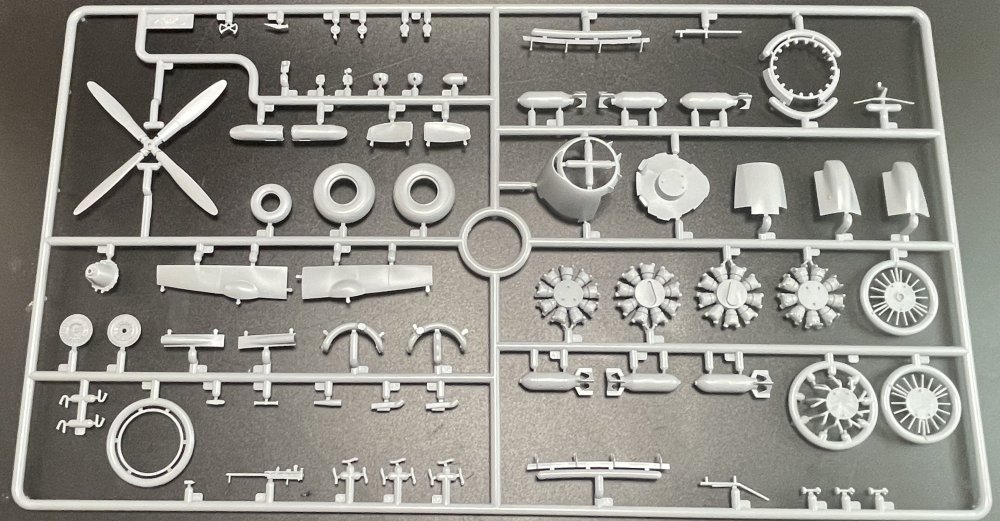
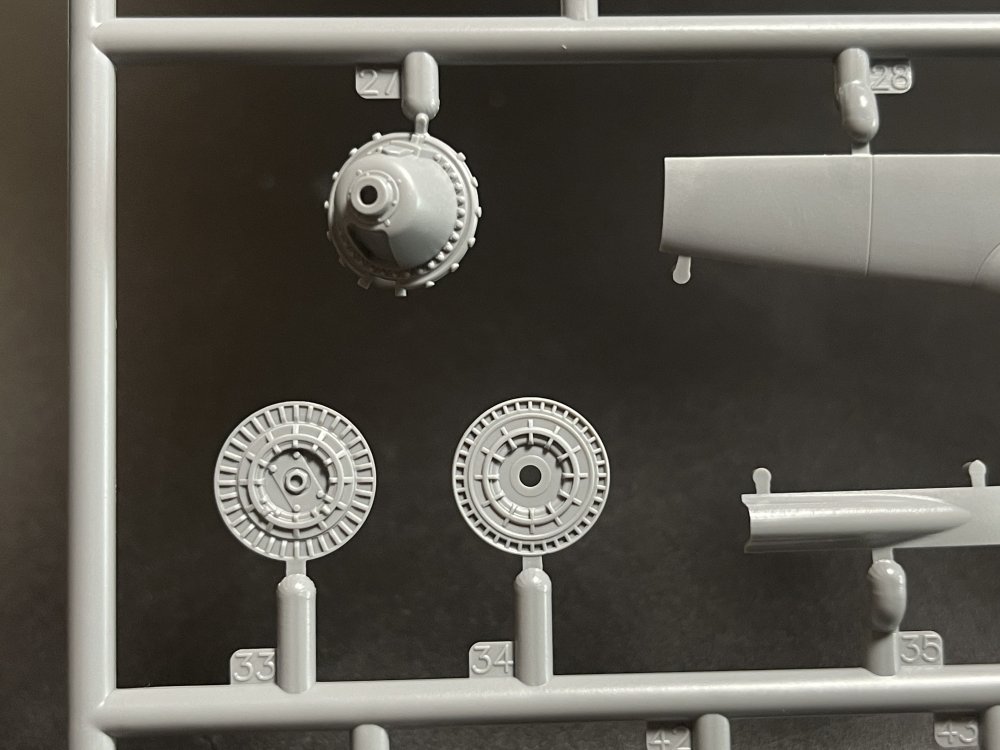
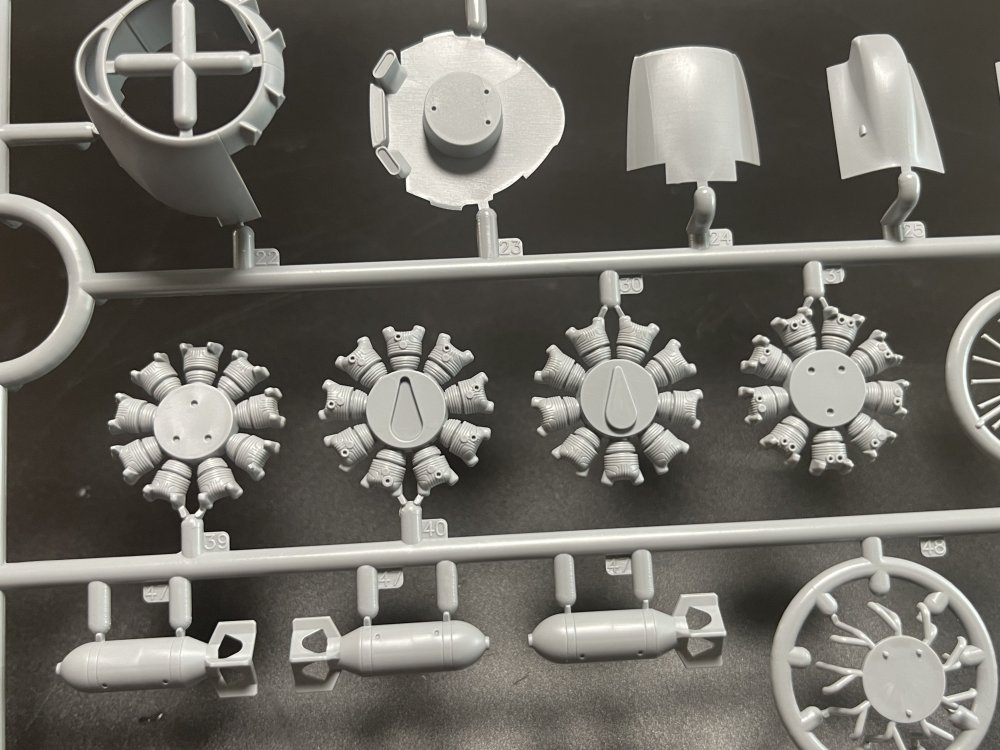
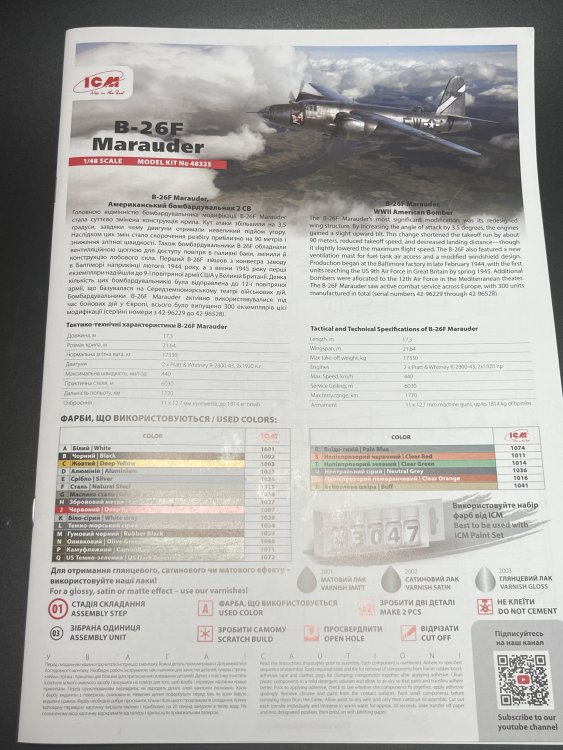
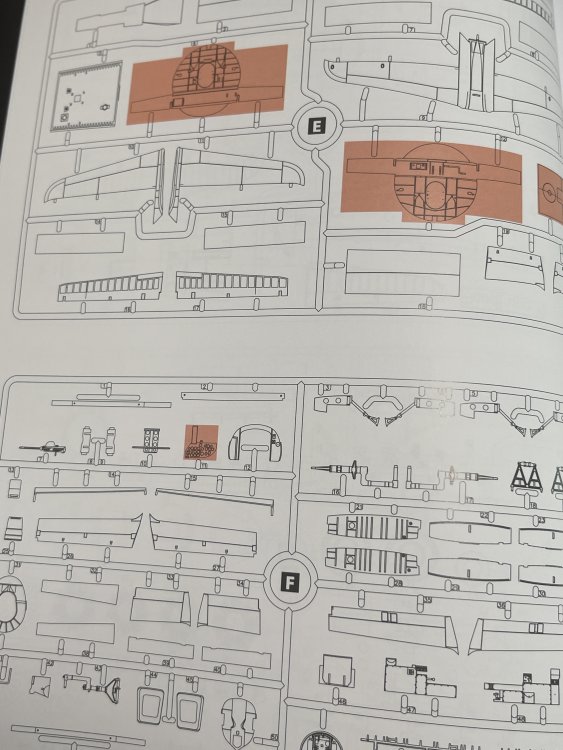
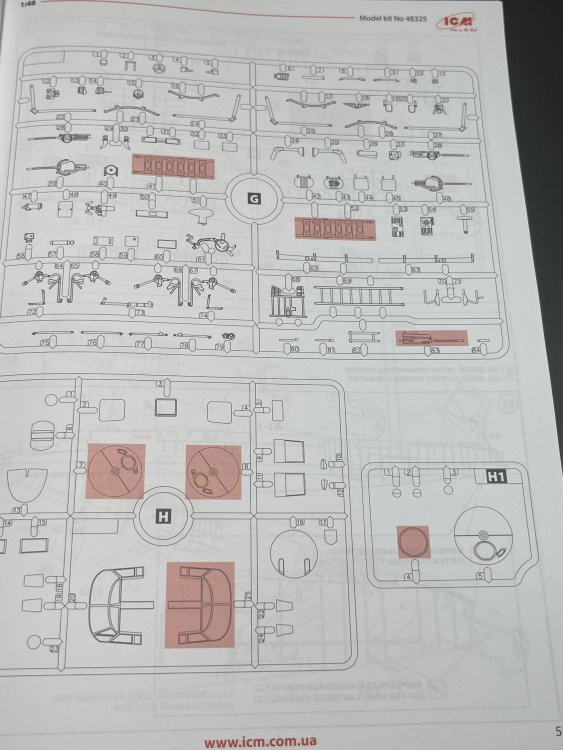
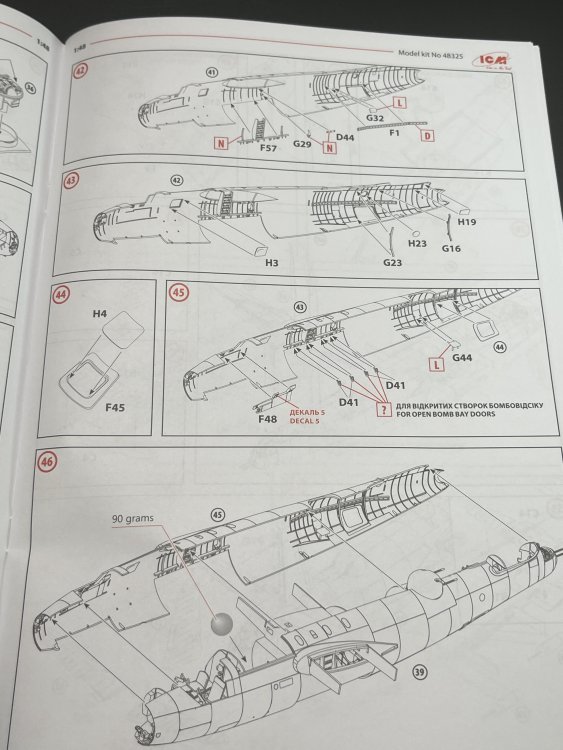
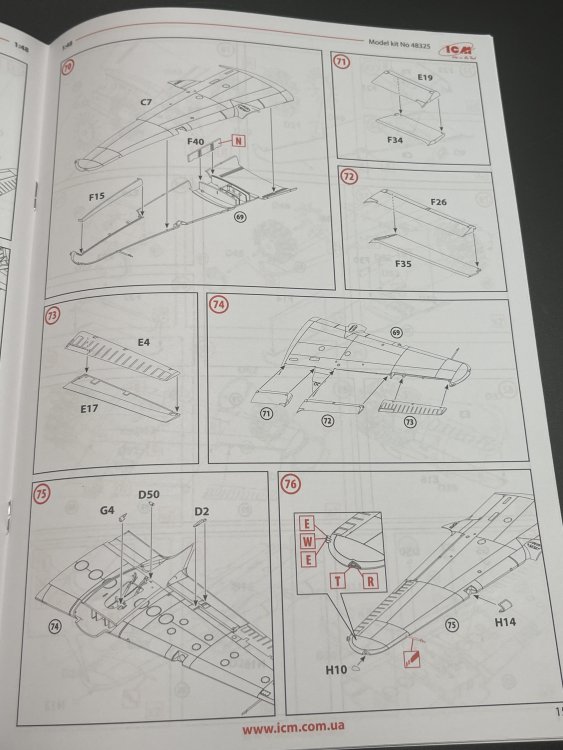
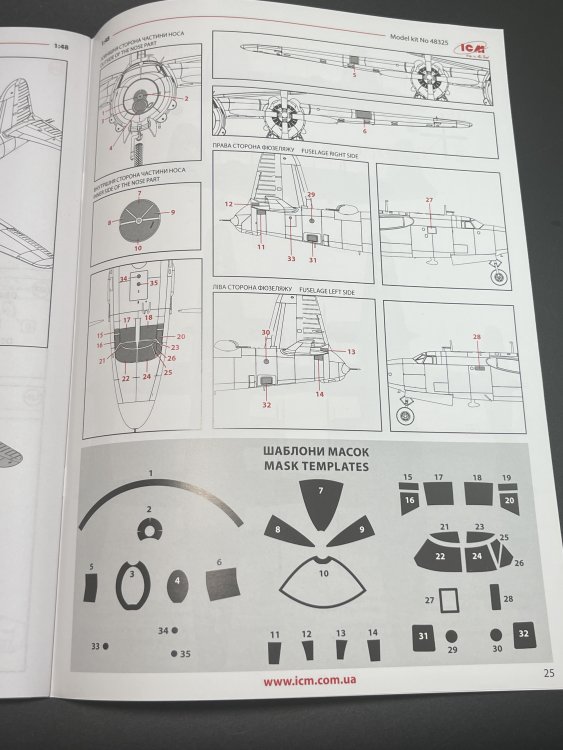
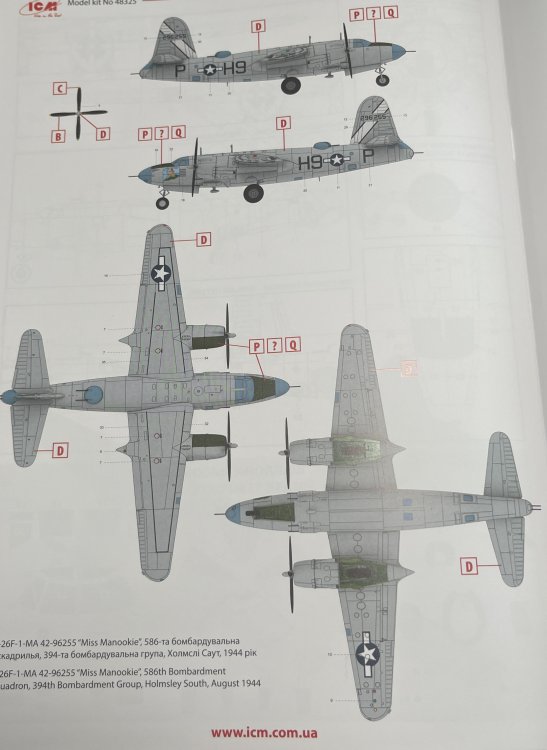
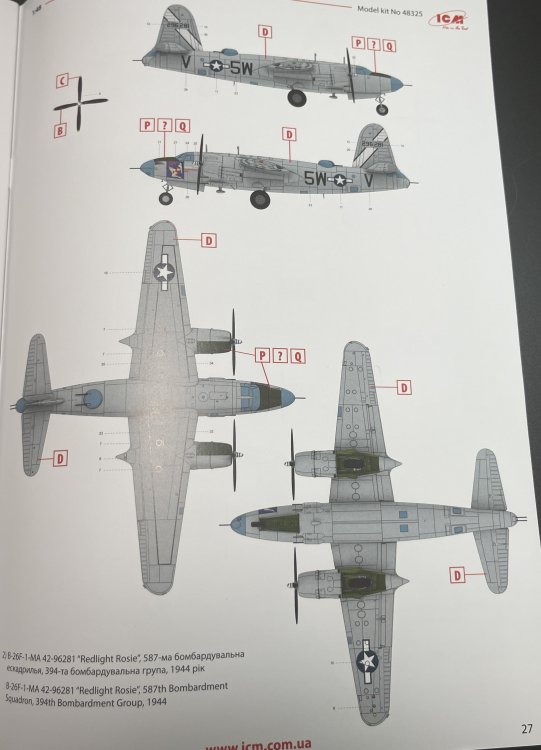
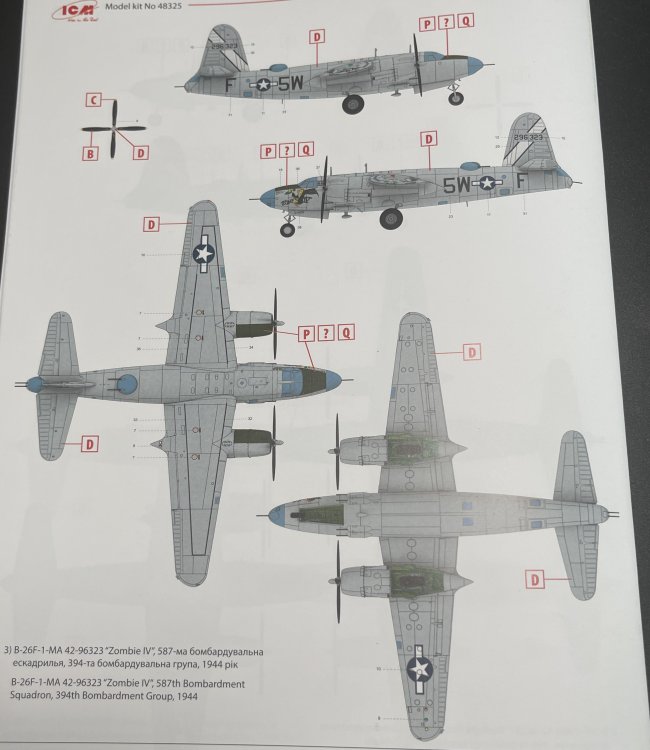
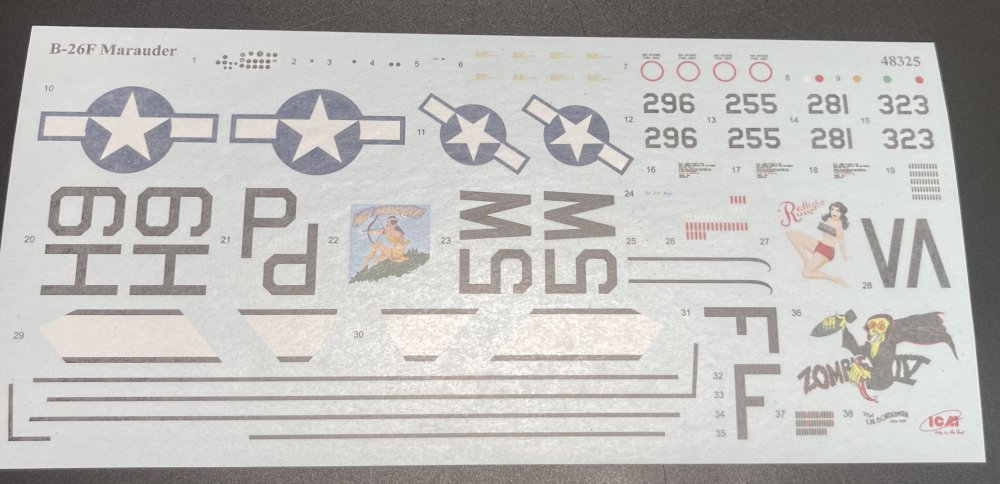
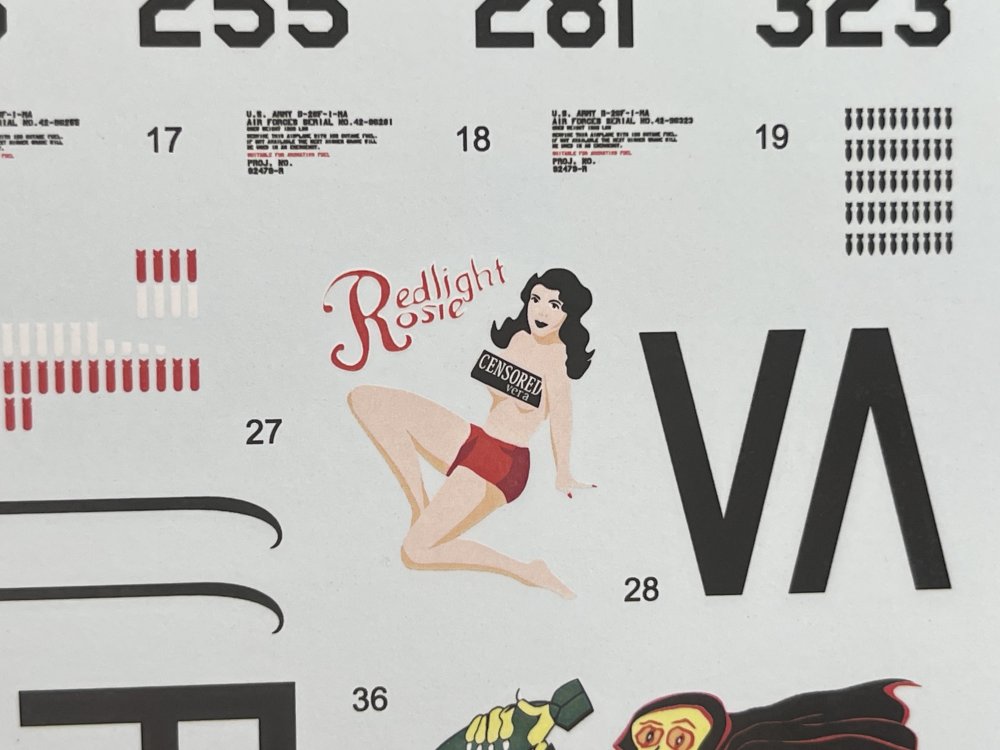
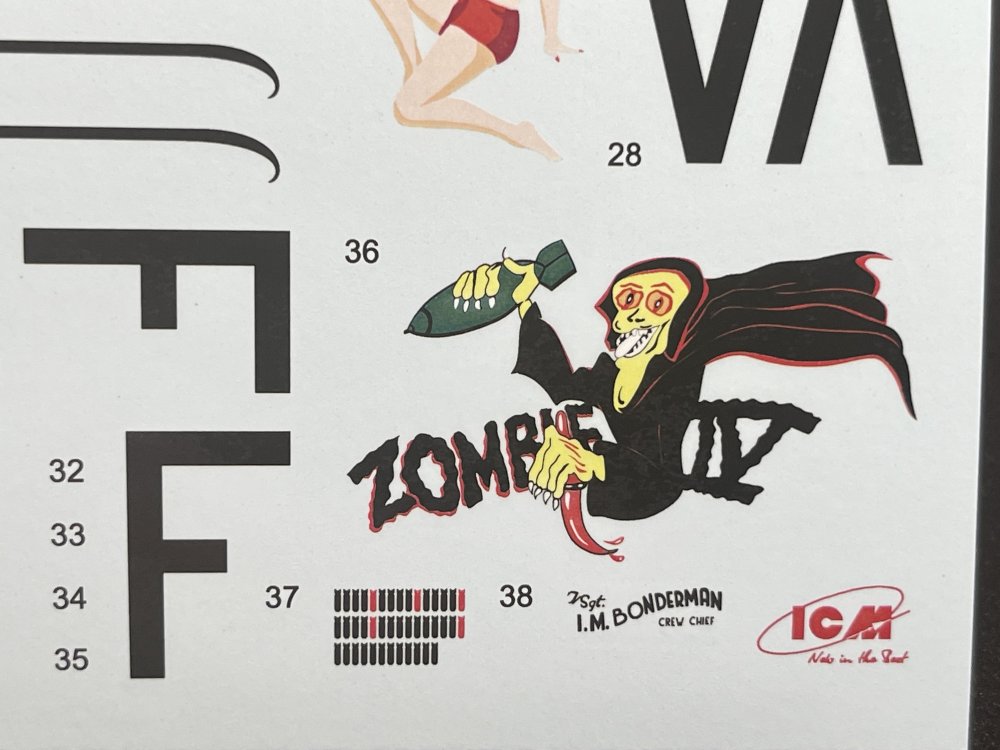
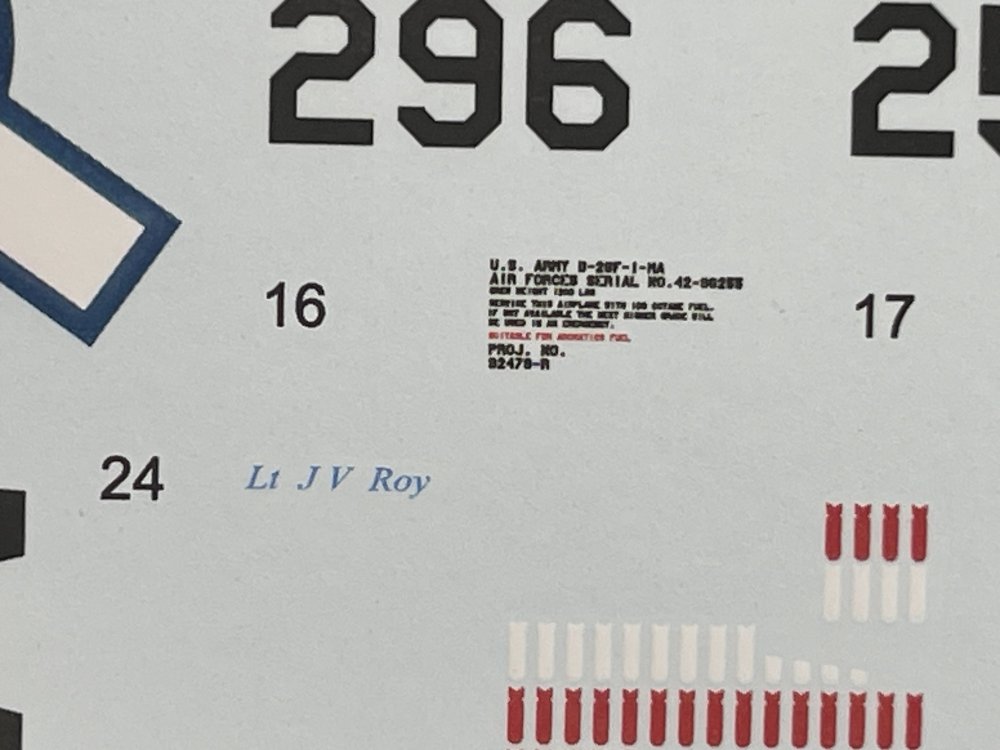
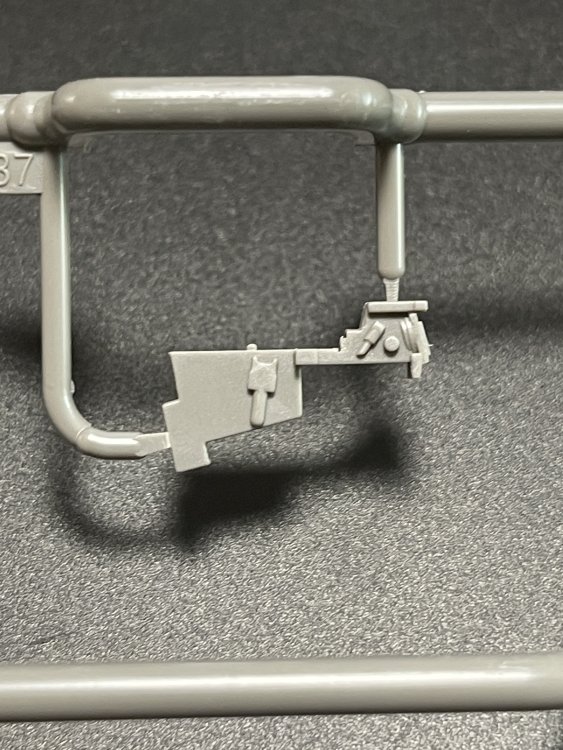
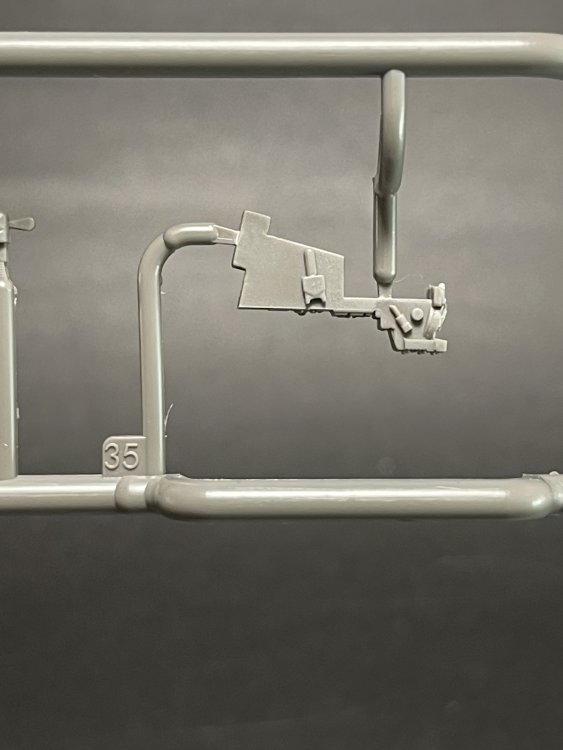
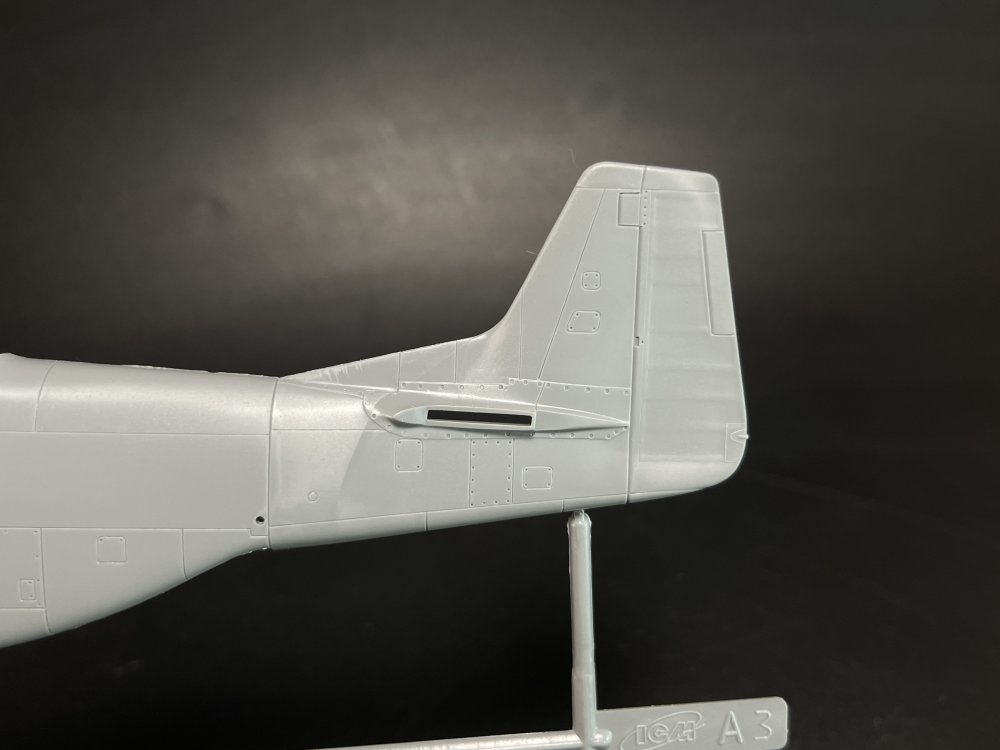
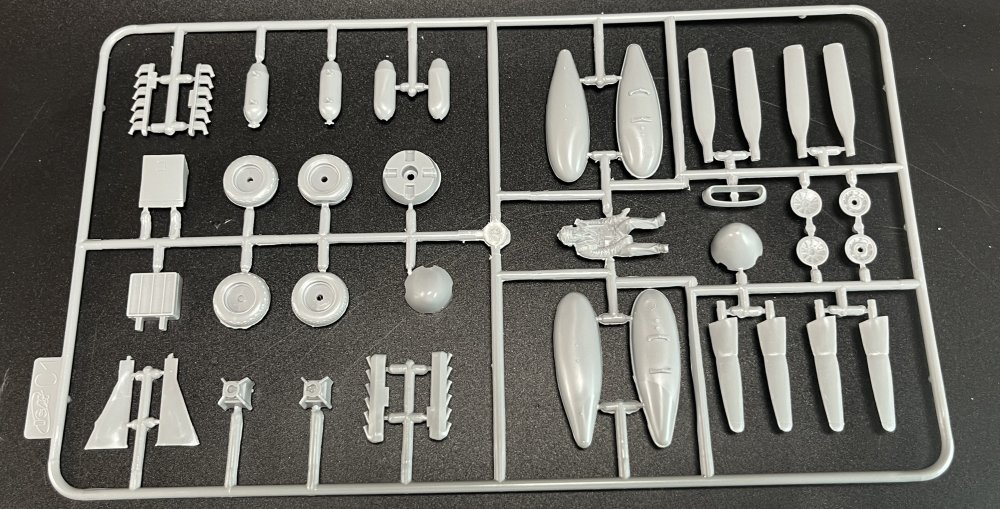
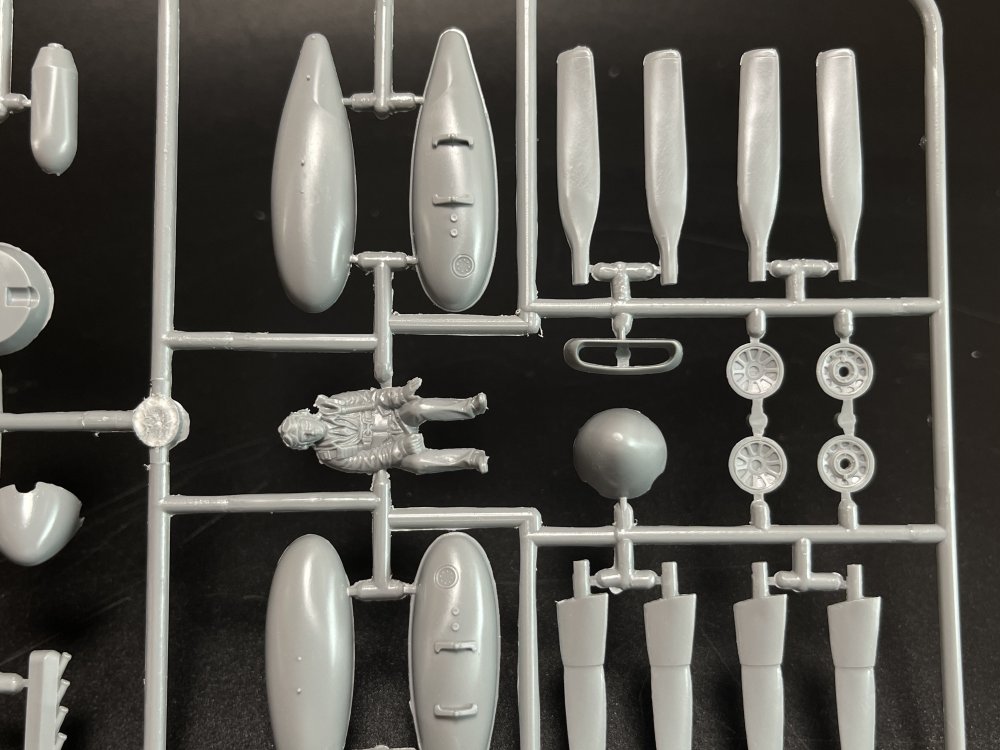
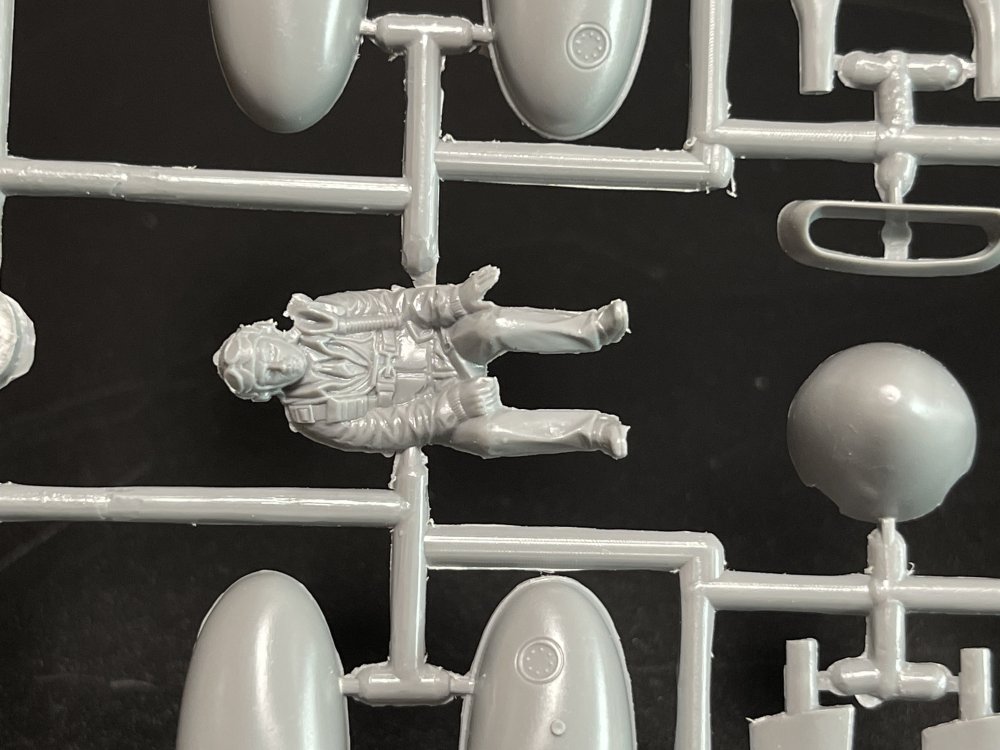
1:48 B-26F Marauder ICM Catalogue number 48325 Price: around 70€ “The Glenn L. Martin Company's Model 179 answered a January 1939 Army Air Corps specification for a high-speed bomber. The Army ordered the streamline twin-engine, all-metal monoplane, designated the B-26 Marauder, in September and the first production example flew in November 1940. The design incorporated several new innovations. The high wing loading of the design and the resultant increased landing and take-off speeds caused many accidents in training. Intimidating epithets such as the "Widow Maker" and "One-a-Day-in-Tampa-Bay" added to the B-26's initial reputation as it underwent Congressional scrutiny. As those problems were being resolved, Marauders immediately went into combat after American entry into World War II. On June 4, 1942, Army Air Forces (AAF) Marauders defending Midway Island attacked Japanese aircraft carriers with torpedoes, but failed to score hits. The AAF sent Marauders to North Africa after the Allied invasion in November 1942 for service with the Twelfth Air Force. Eighth Air Force B-26s flew the first bombing mission against German forces in Europe on May 14, 1943. In preparation for the invasion of France, the Eighth's Marauders were transferred to the Ninth Air Force, the primary American tactical air force in Europe, in October 1943. Like the M1 Garand combat rifle, the Sherman tank, and the LST, the Marauder was an important weapon in the war against the Axis powers. B-26 crews flew over 100,000 sorties and dropped approximately 150,000 tons of bombs, primarily against Nazi Germany. The AAF lost fewer Marauders than any Allied bomber it flew—less than one-half of one percent. Besides the United States, the air forces of Great Britain and France operated Marauders in combat. Few Marauders survive today out of the 5,266 produced by Martin. *History from National Air and Space Museum. Just a brief history for a very well know aircraft. ICM Model released the 1:48 B-26F Marauder (kit number 48325) in 2025 as a follow-up to their very well-received 2024 B-26B kit (48320). This is essentially a rebox with new parts to capture the F variant's specific features, such as the adjusted wing angle and modified nose. We also review already the G version. You can see it here. And as for the G version, the F version also have the same ergonomic wing incidence. The early versions of this model exhibited landing and take-off characteristics that resulted in a high rate of accidents during these phases of flight. To reduce the landing and take-off speeds, the wing incidence was increased by 3.5 degrees. This modification lowered the landing and take-off speeds, but at the expense of maximum speed, which was reduced to 277 mph. Another significant change was the standardization of internal equipment, thus creating the “G” version of the B-26. The last of the 1931 B-26G units left the production line on 30 March 1944. Economic concerns and the reputation created by the early versions of the B-26 (nicknamed the “widowmaker”) led to the abandonment of this model and its replacement largely by the A-26 Invader, which had greater range and speed. Meanwhile, for example, a B-25 had 25% lower production cost. Externally, the B-26F is nearly identical to the B-26G. The main difference is that B-26G featured more standardized interior equipment compared to the B-26F. So, both models sprue are identical. Sprue A1 includes the fuselage with modifications to the wing angle (which differs from earlier versions). Others close details of the tail. And the inside halves of the fuselage: Similarly, sprue K1 provides the specific parts for this version, featuring spars for attaching the wing root, a new instrument panel, and the wheels' rims for the landing gear. Sprue H1 supplies the specific plexiglass nose for this version. With a wingspan of about 454mm, when assembled, it's a substantial model that replaces outdated offerings like the 1978 Monogram kit, which suffered from fit issues and limited detail. The usual ICM flip top cardboard with a separate card lid showing the artwork. featuring eye-catching artwork of a B-26F in action. Inside you have sprues separated in two plastic bags and the clear parts in another bag and full protected. You'll find around 380 plastic parts (up from 348-363 in the B-26B kit, accounting for variant-specific additions), molded in gray styrene with two clear sprue for canopies and windows. Parts are bagged separately to prevent damage, with the clear pieces protected by foam for excellent clarity and no scratches. The sprues are cleanly molded with minimal flash and sharp, narrow panel lines representing rivets and fasteners—far superior to the raised details on older kits like Monogram's. The plastic is soft and flexible, which is a mix felling as it which helps prevent breakage of delicate parts like antennas and gun barrels, but I used Deluxe Materials in a current ICM model that I making and the glue melt part of the plastic… So try to use a “delicate” glue on this plastic. The interior with separate bulkheads, crew access doors (via the nose wheel well), and a fully equipped bomb bay that can be posed open or closed with inserts is quite good from the box. Cockpit features like instrument panels and seats are crisp, but aftermarket boys are already making their patch offering excellent options to ultra realism of the B-26 cockpit, at least of the B version. Check Essentials Elements sets on facebook. The engines detail looks quite good. No doubts a very good effort have being made in giving a nice looking detail engines on this one. Kudos engine. To make it almost perfect in this scale you just need to add some wires. The clear parts, as usual are pristine and very clear with no distortion at all. The usual standard from ICM with a booklet with the first and last page in satin paper and the rest in normal paper. The color table chart only have ICM paint range and it start to make some sense (at least in Europe) as you start to have some online store that sell them as Art Scale Kit. The decal sheet has a good color registration and supply 3 finishing options B-26F-1-MA 42-96255 “Miss Maookie”, 586th Bombarment Squadron, 394th Bomb Group, Holmsley South, August 1944; B-26F-1-MA 42-96281 “Redlight Rosie”, 587th Bombardment Squadron 394th Bombardment Group, 1944 B-26F-1-MA 42-96323 “Zombie IV”, 587th Bombardment Squadron 394th Bombardment Group, 1944 A negative aspect that I already pointed when I review the B version. So if you watch carefully the sprues, you have notice something that is not the best solution (at all) from ICM… ICM decided to mould in the pitot probes in the fuselage and in the wings…. Why??? This is the best way to break during construction. I bet that at least 98% of those will be broken in the construction…. So the best way will be remove both, make the respective hole and store it an put it in only in the final steps of construction. It`s a negative aspect on this beautiful kit. Conclusion ICM's B-26F captures the variant's nuances well, including the increased wing incidence (reflected in wing root and spar design), absent nose gun (faired over), and modified windshield. It represents a late-production F model accurately, with the larger wingspan and 8-degree tail dihedral matching historical specs. The detail out of the box is very good and it will make a very good replica. For the expert and keen modeler some AM will make some extra detail to make this beauty into a total masterpiece. The construction is not totally straightforward as there are several sub-assembly that you need to take care and time (as undercarriage is a complex sub-assembly steps) to get it right on spot., so the novice could have some trouble in build this one. But all other modelers can make from this a truly fantastic model of the B-26F VERY Highly recommend this to intermediate/expert modeler My thanks to ICM for making this fantastic model.


-
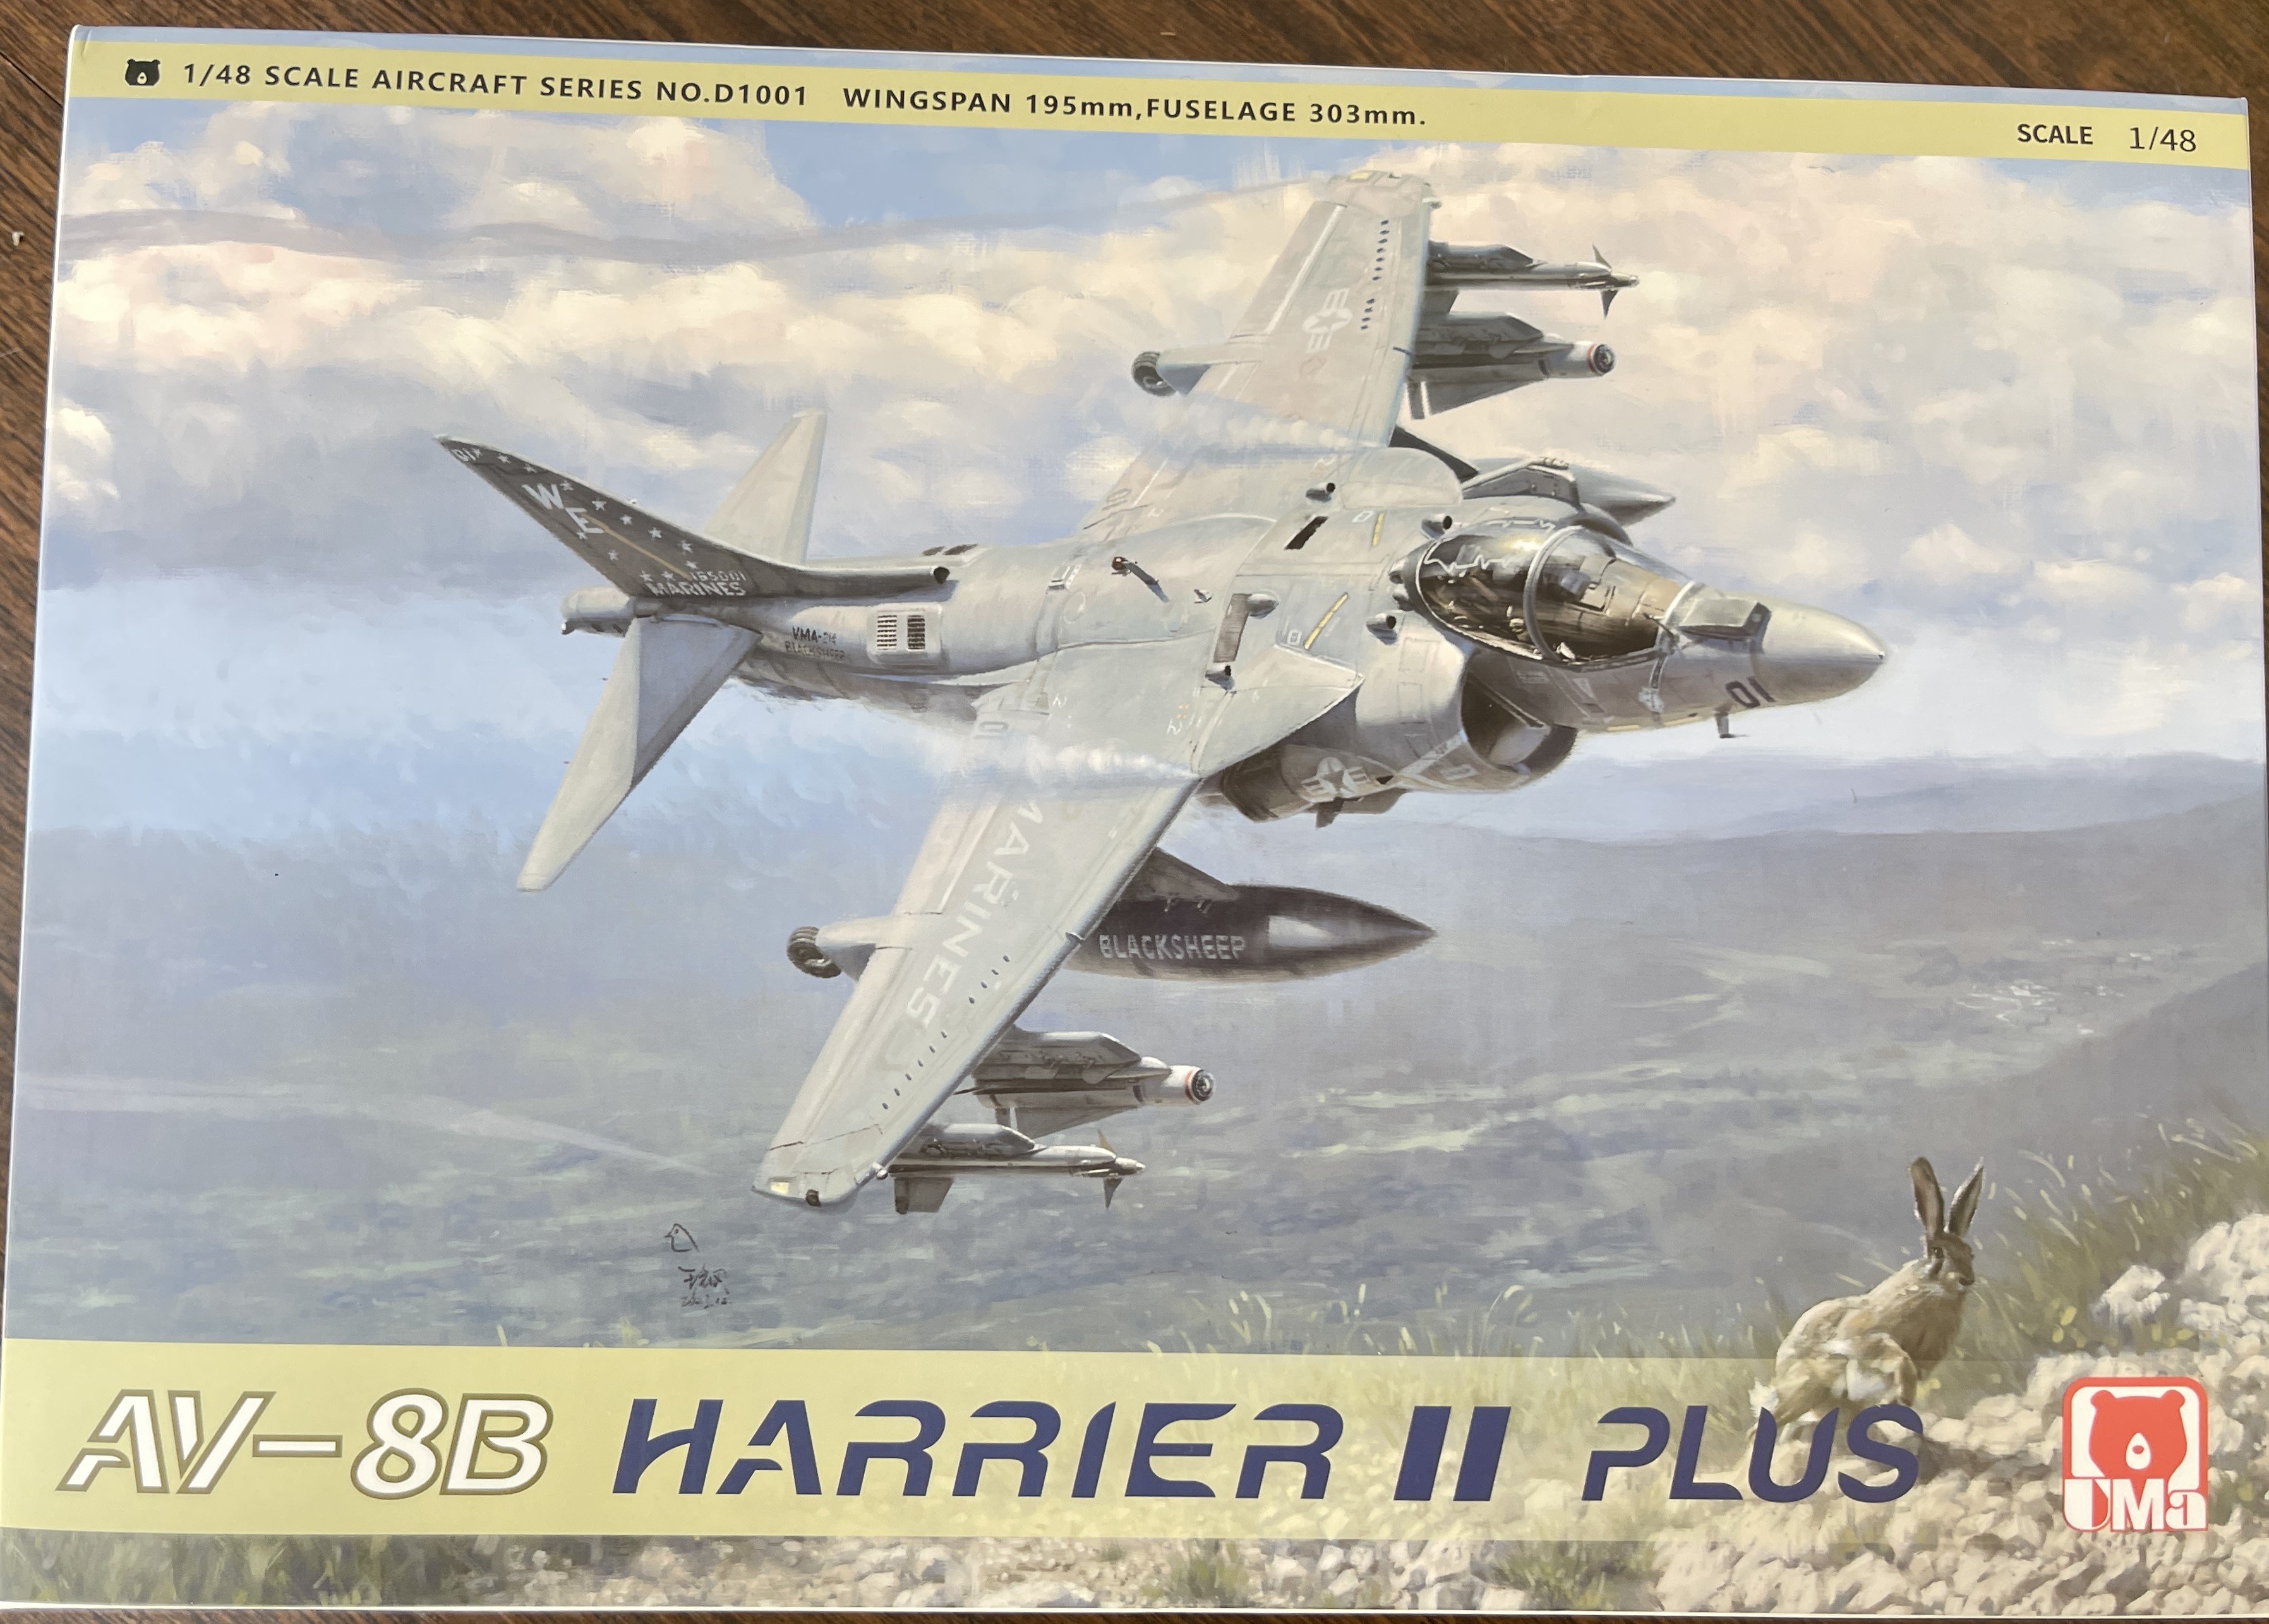
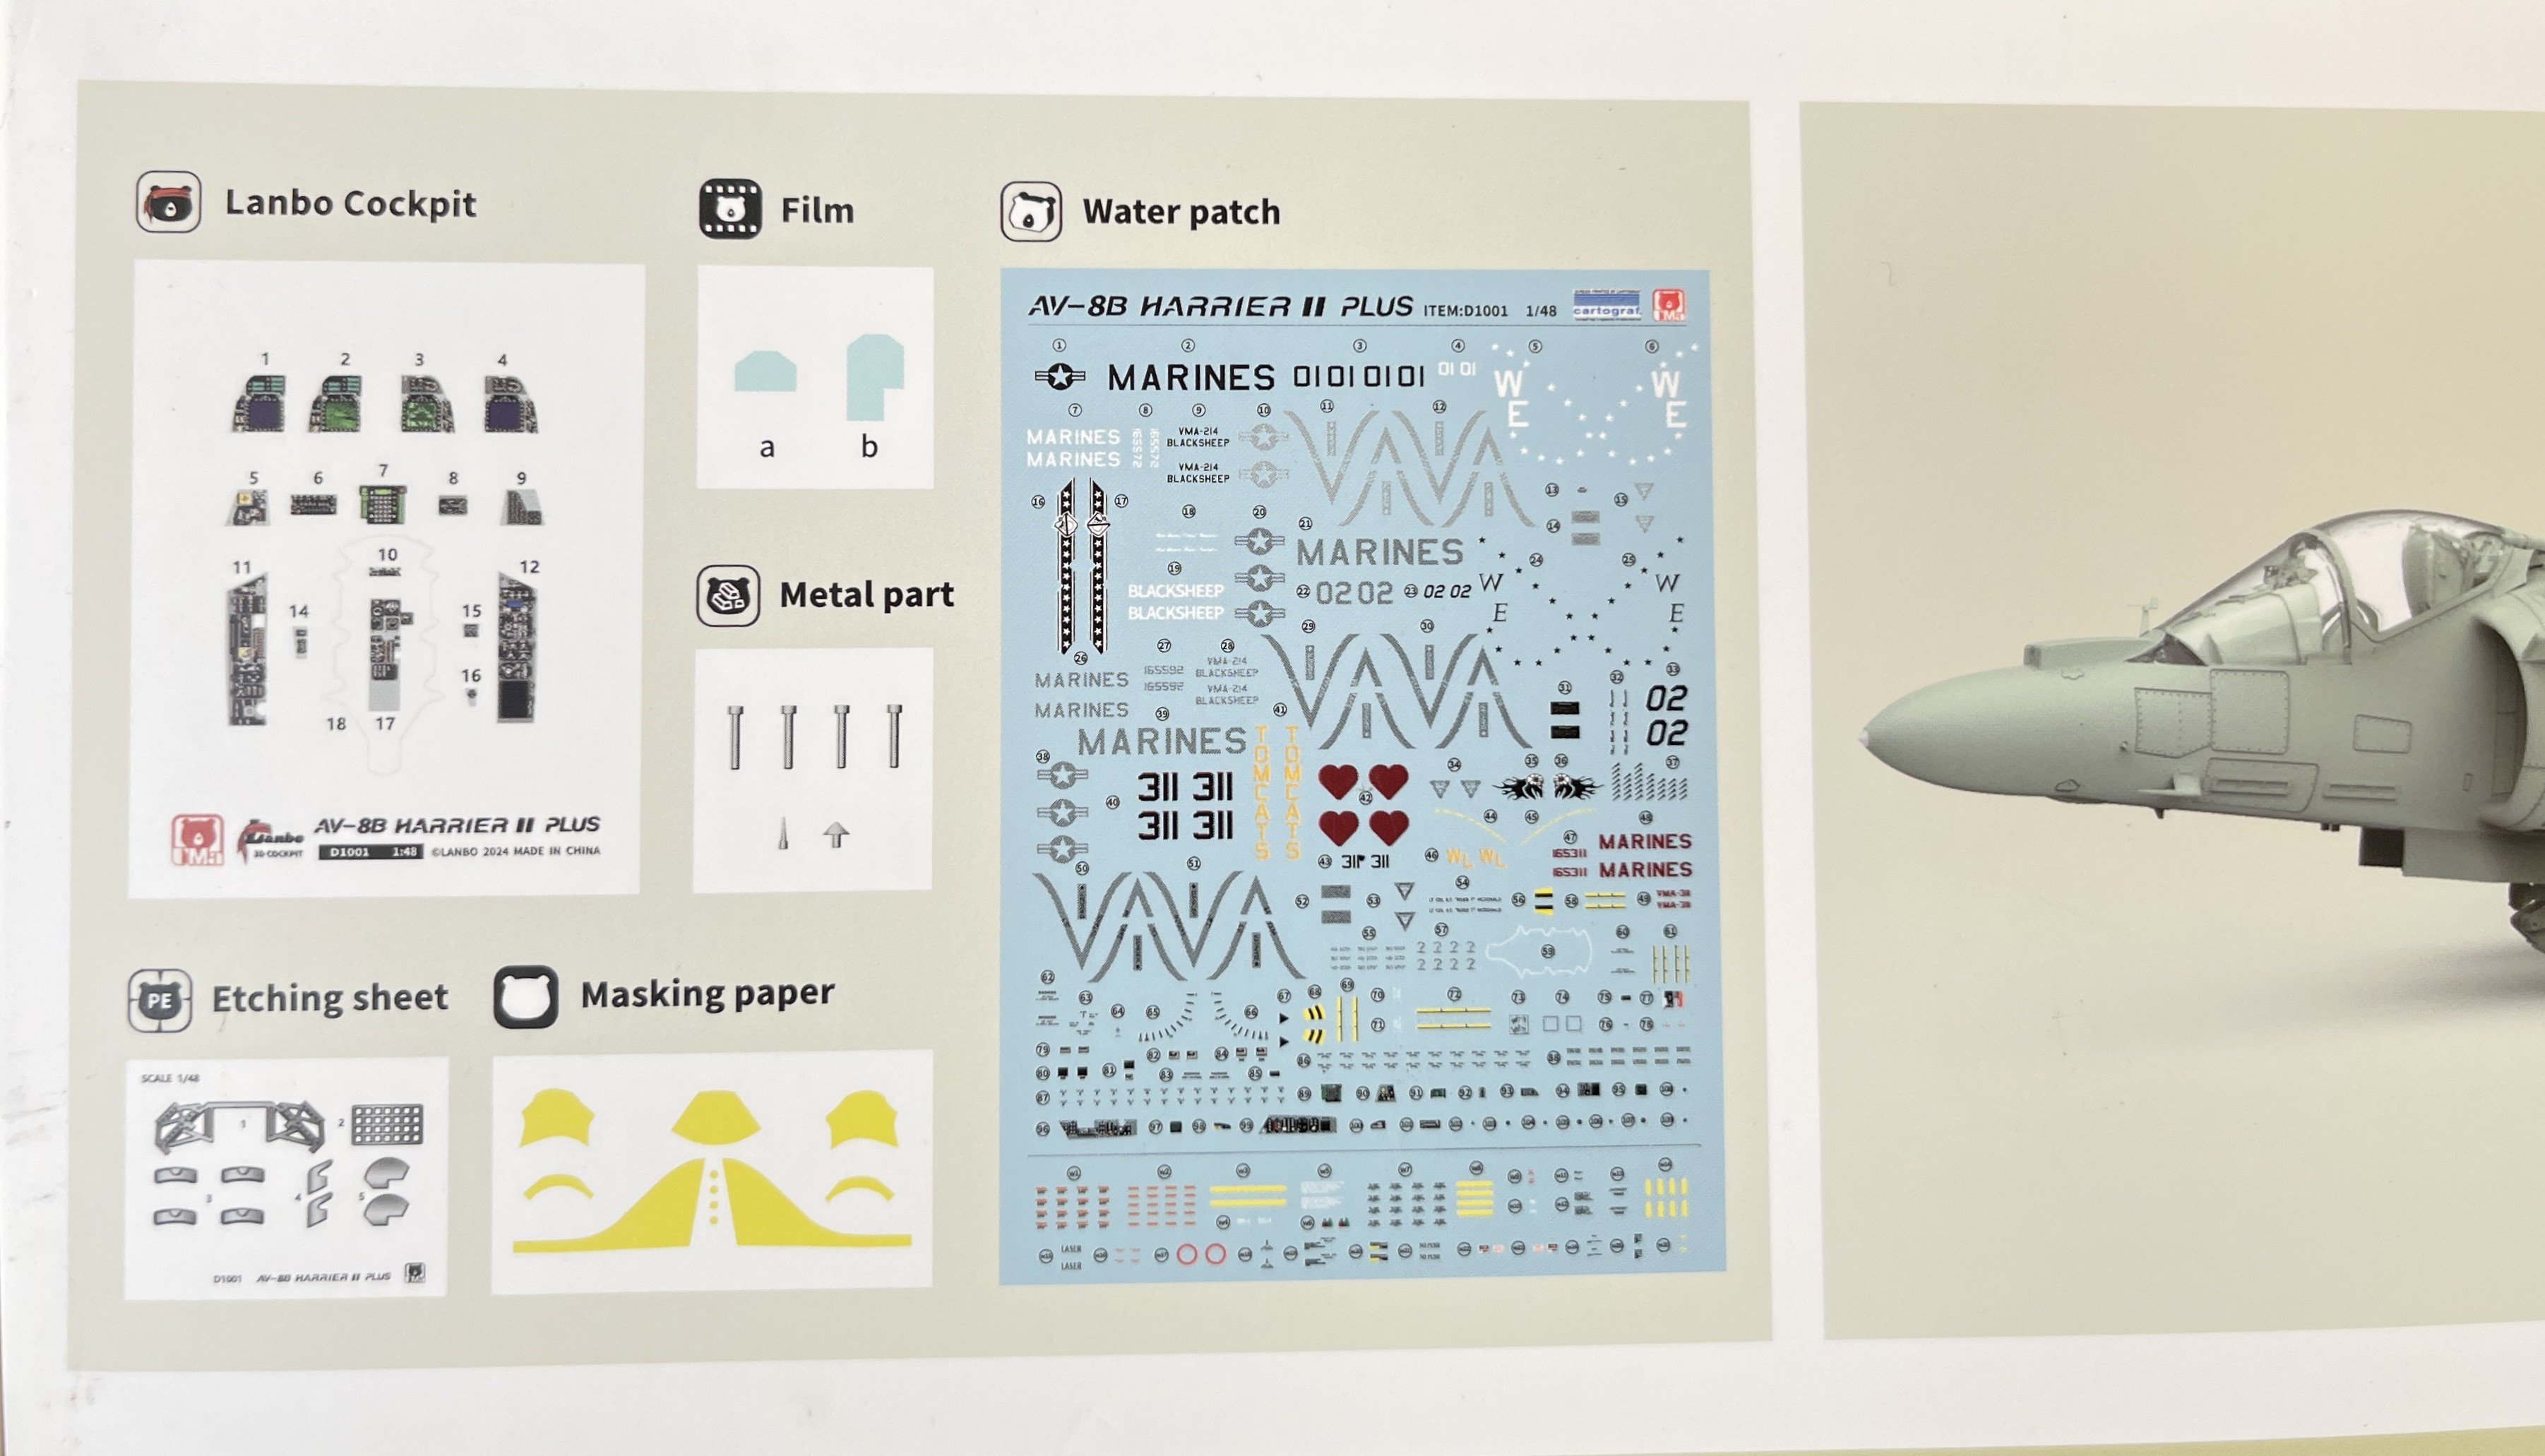
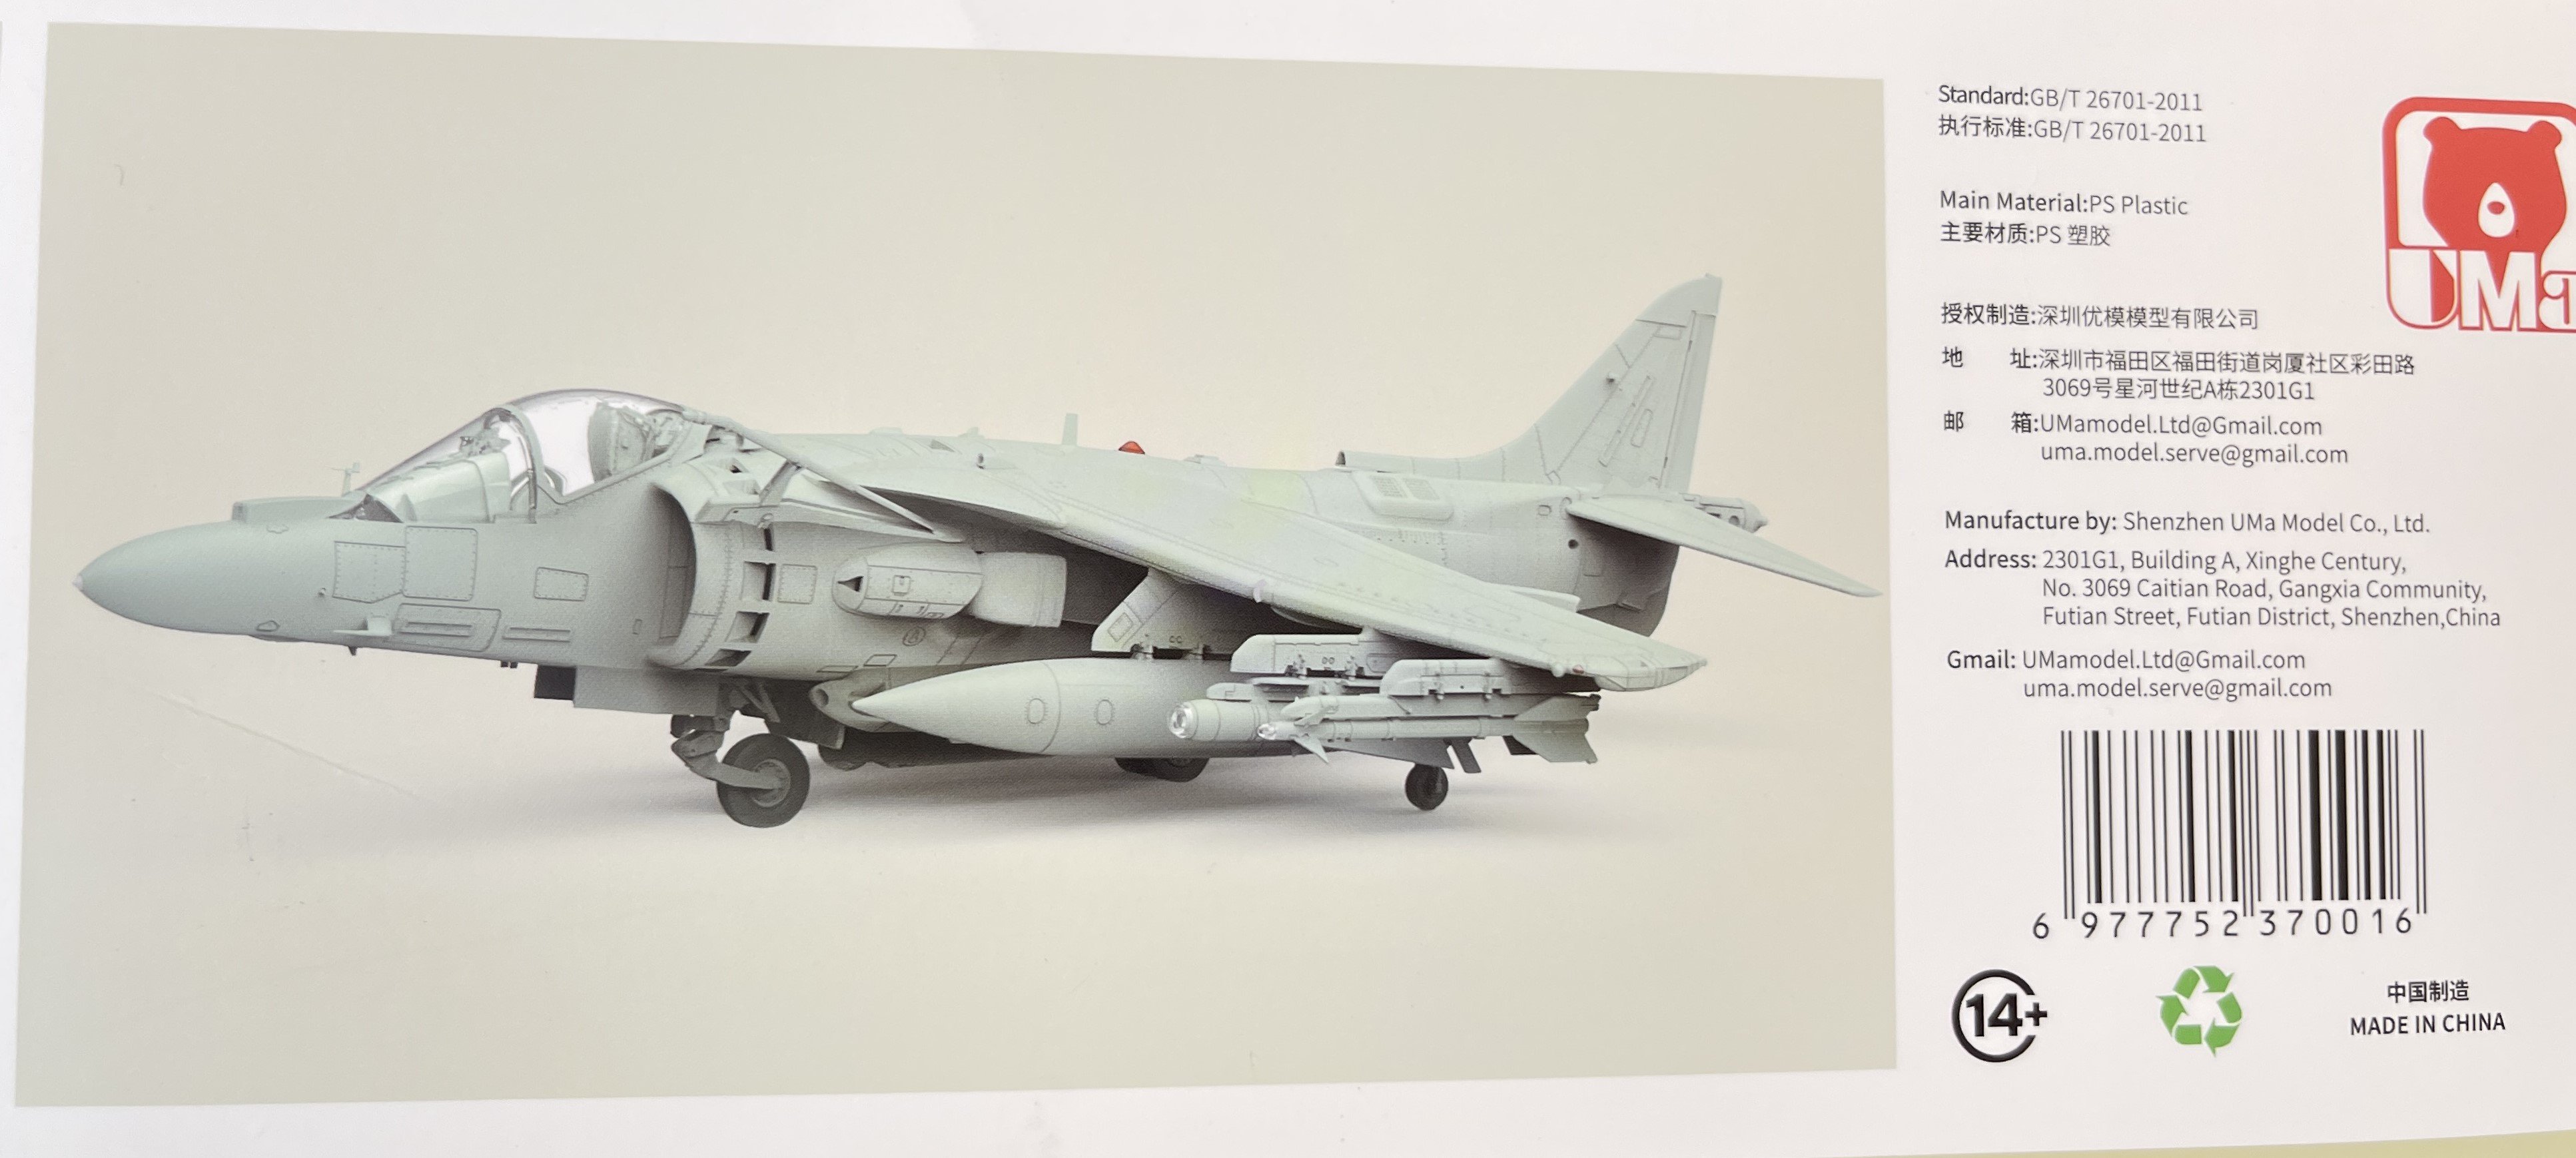
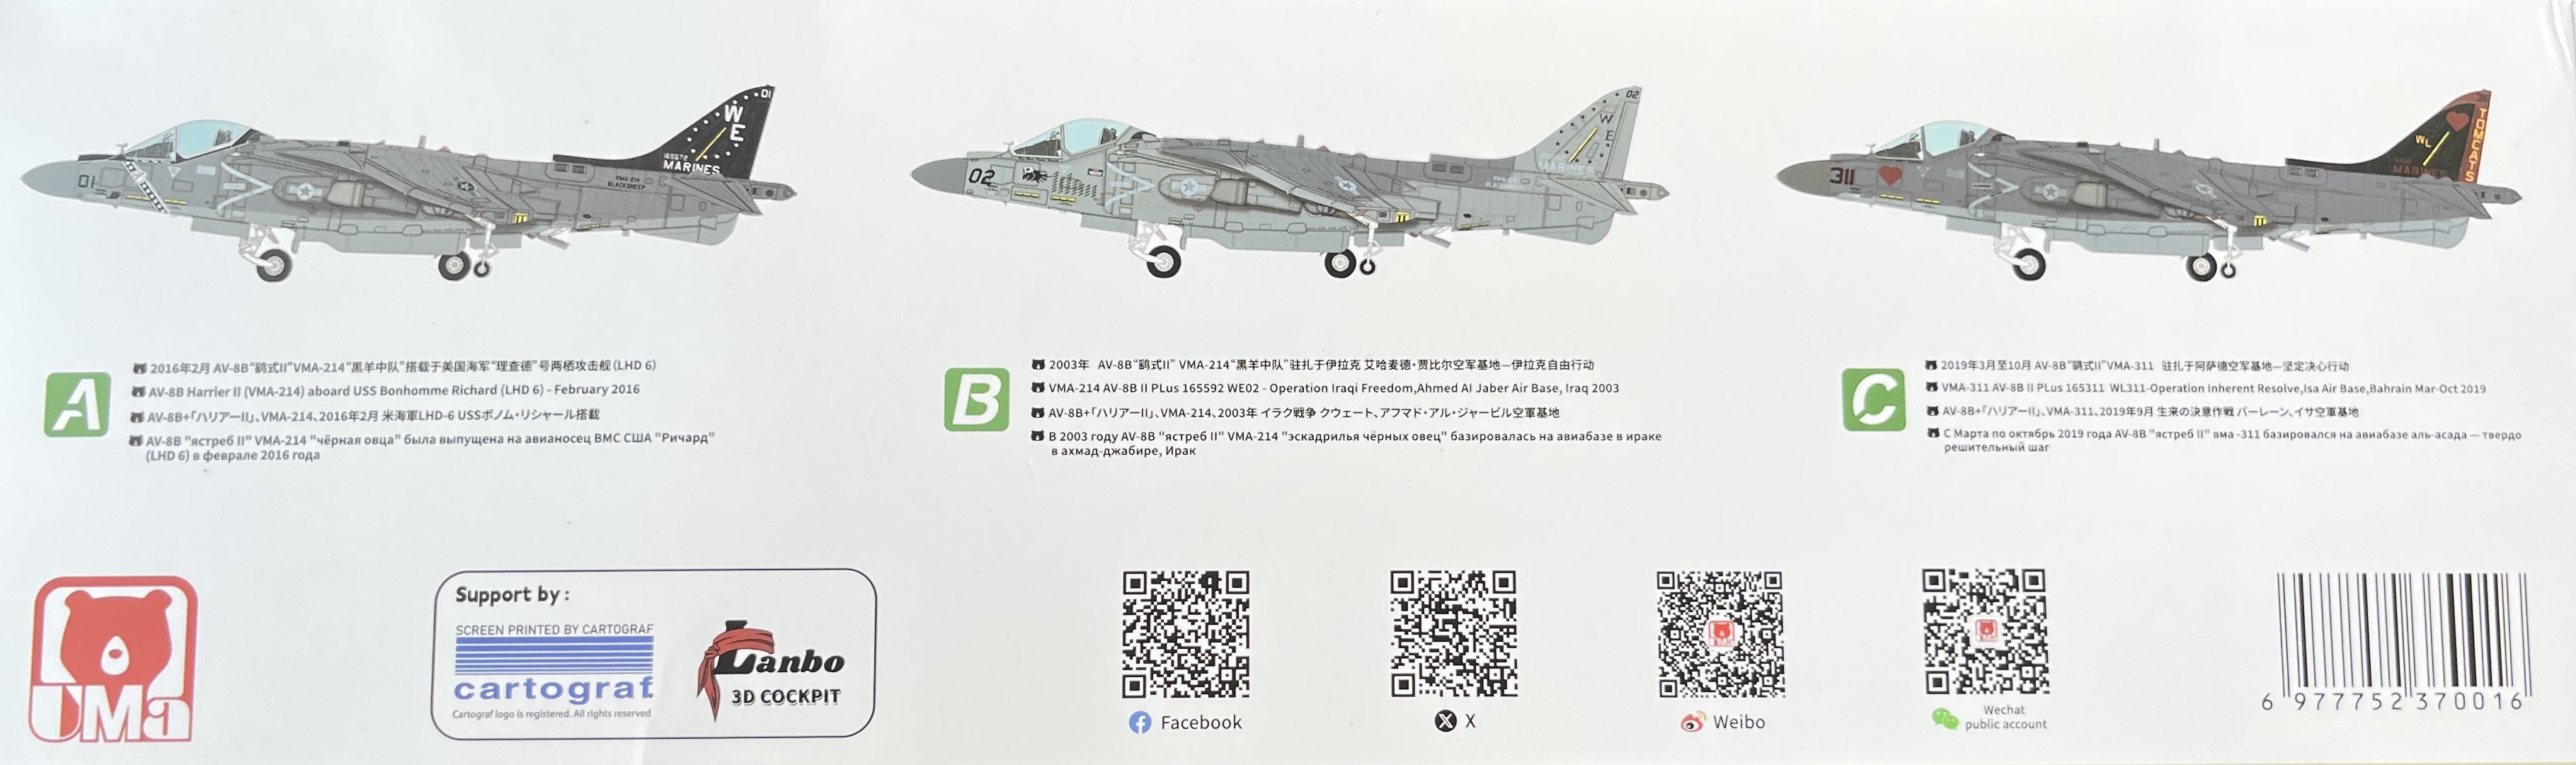
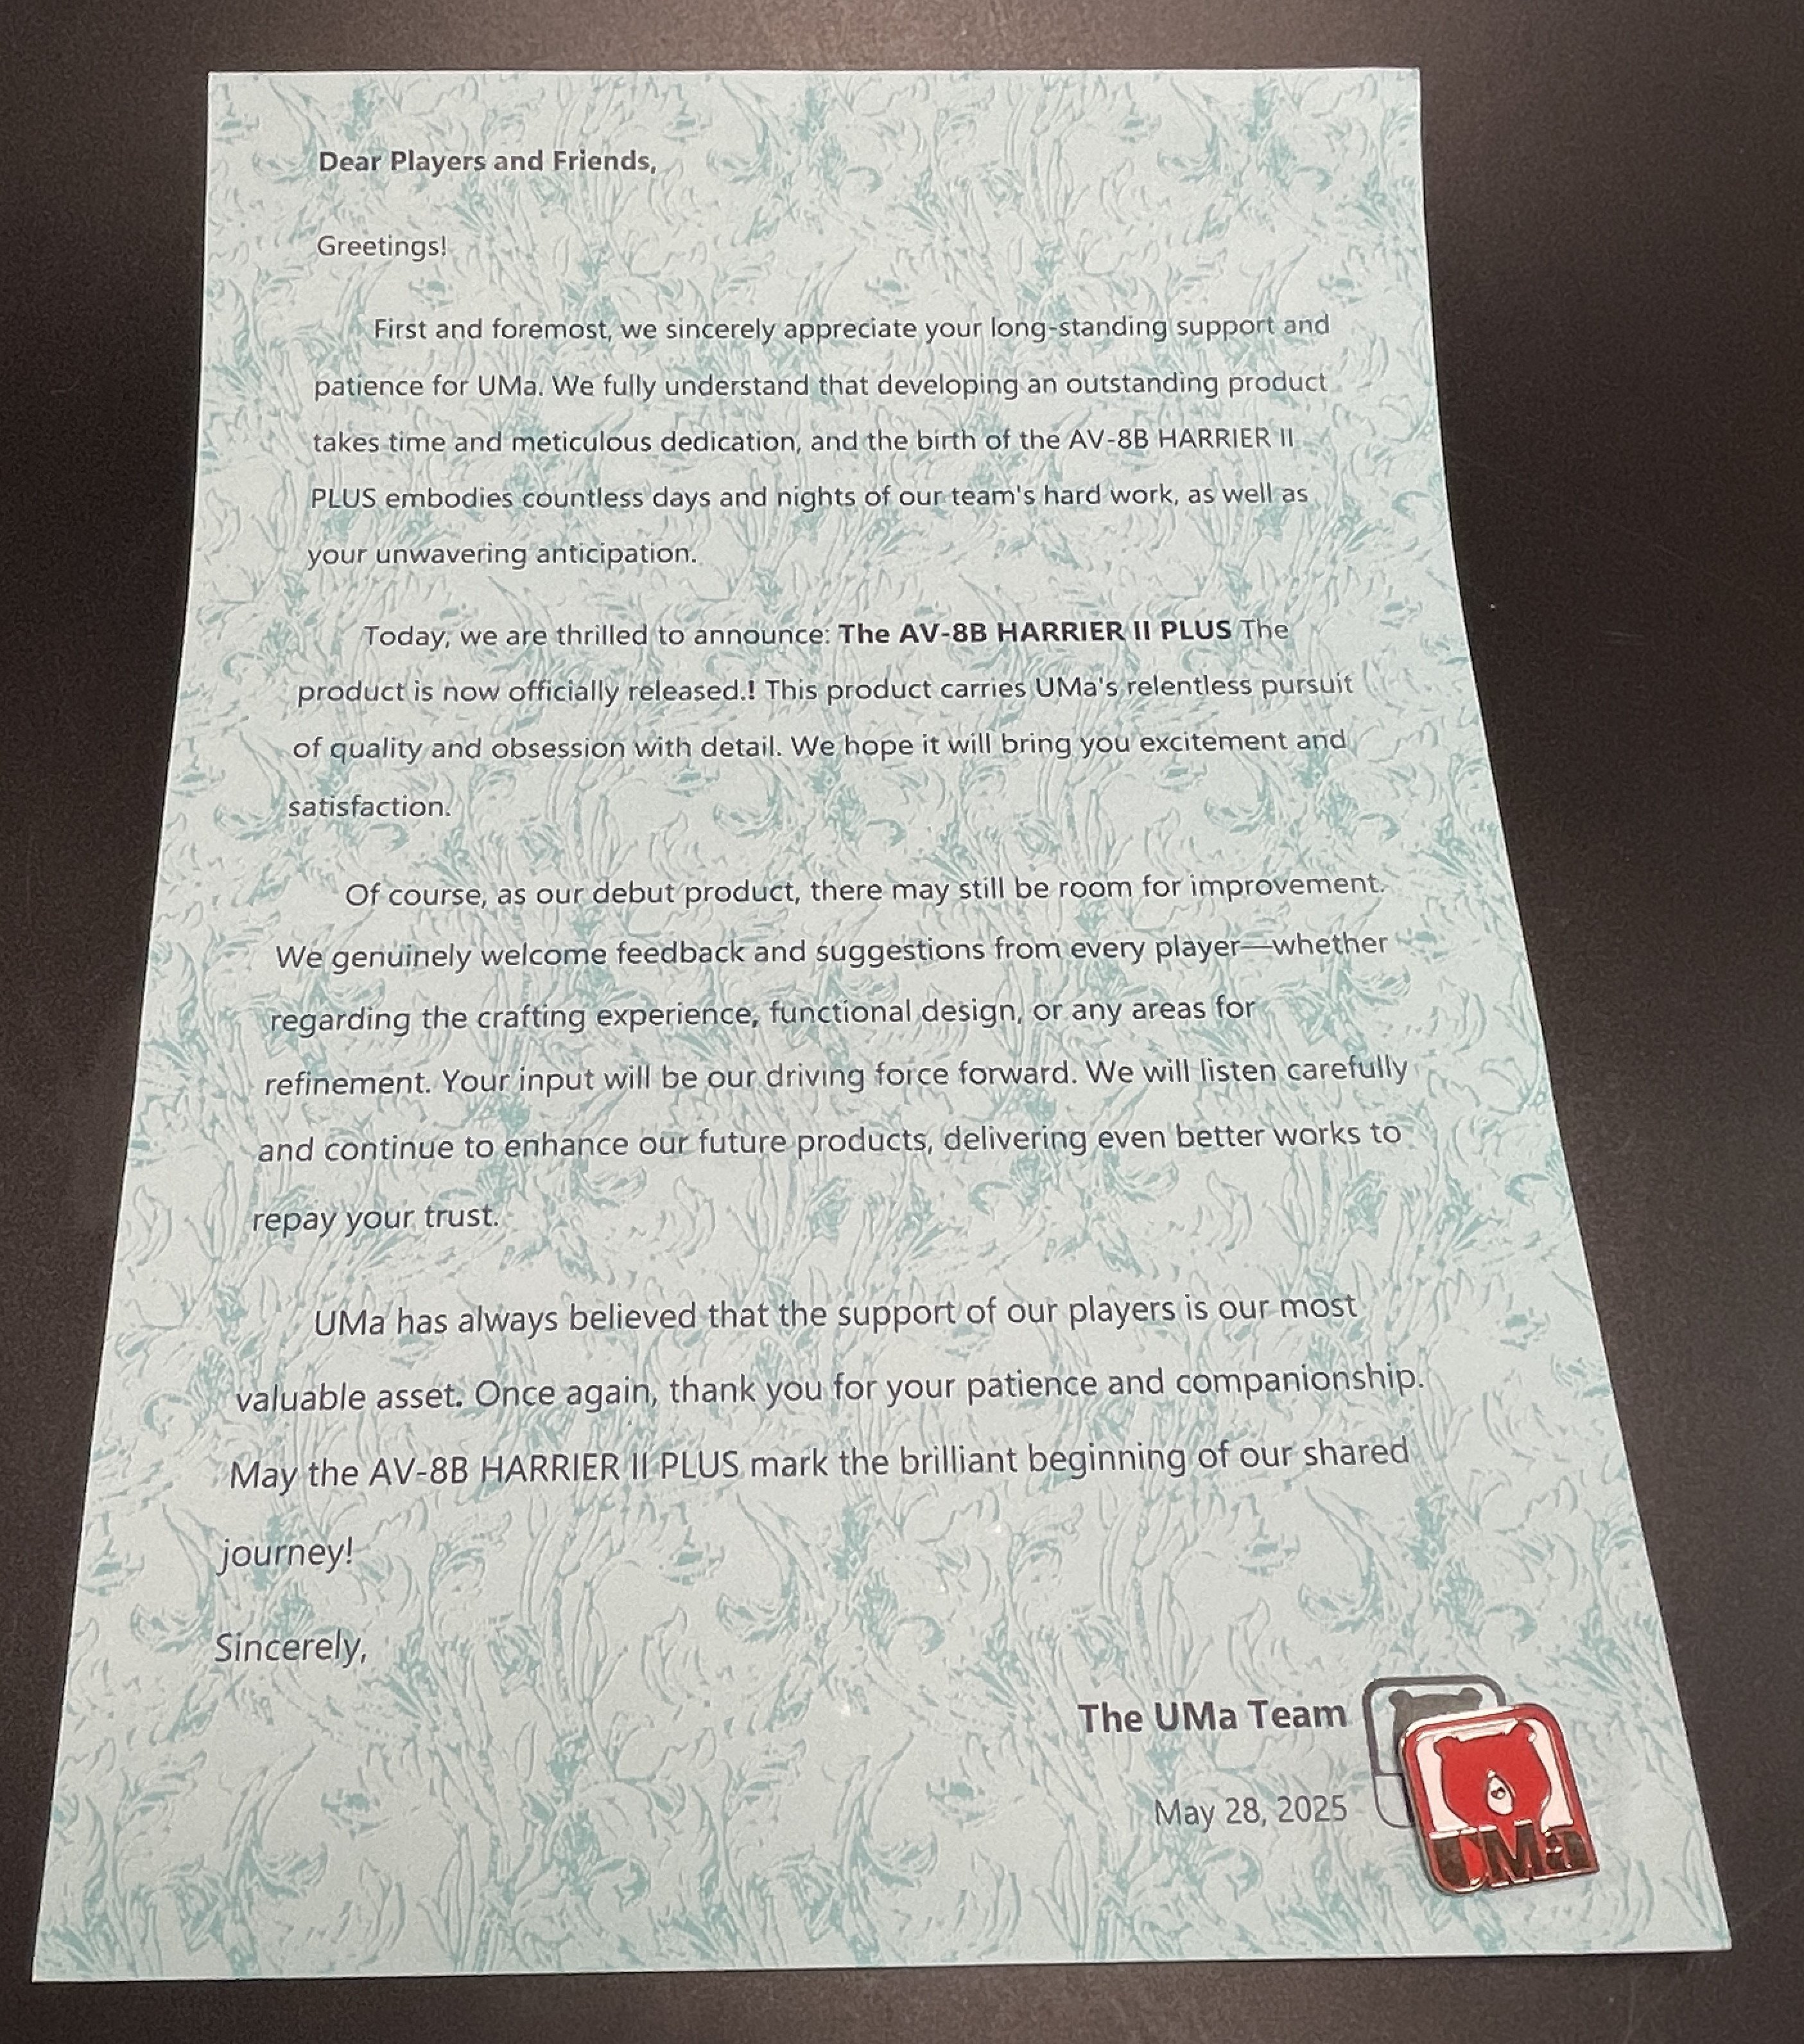
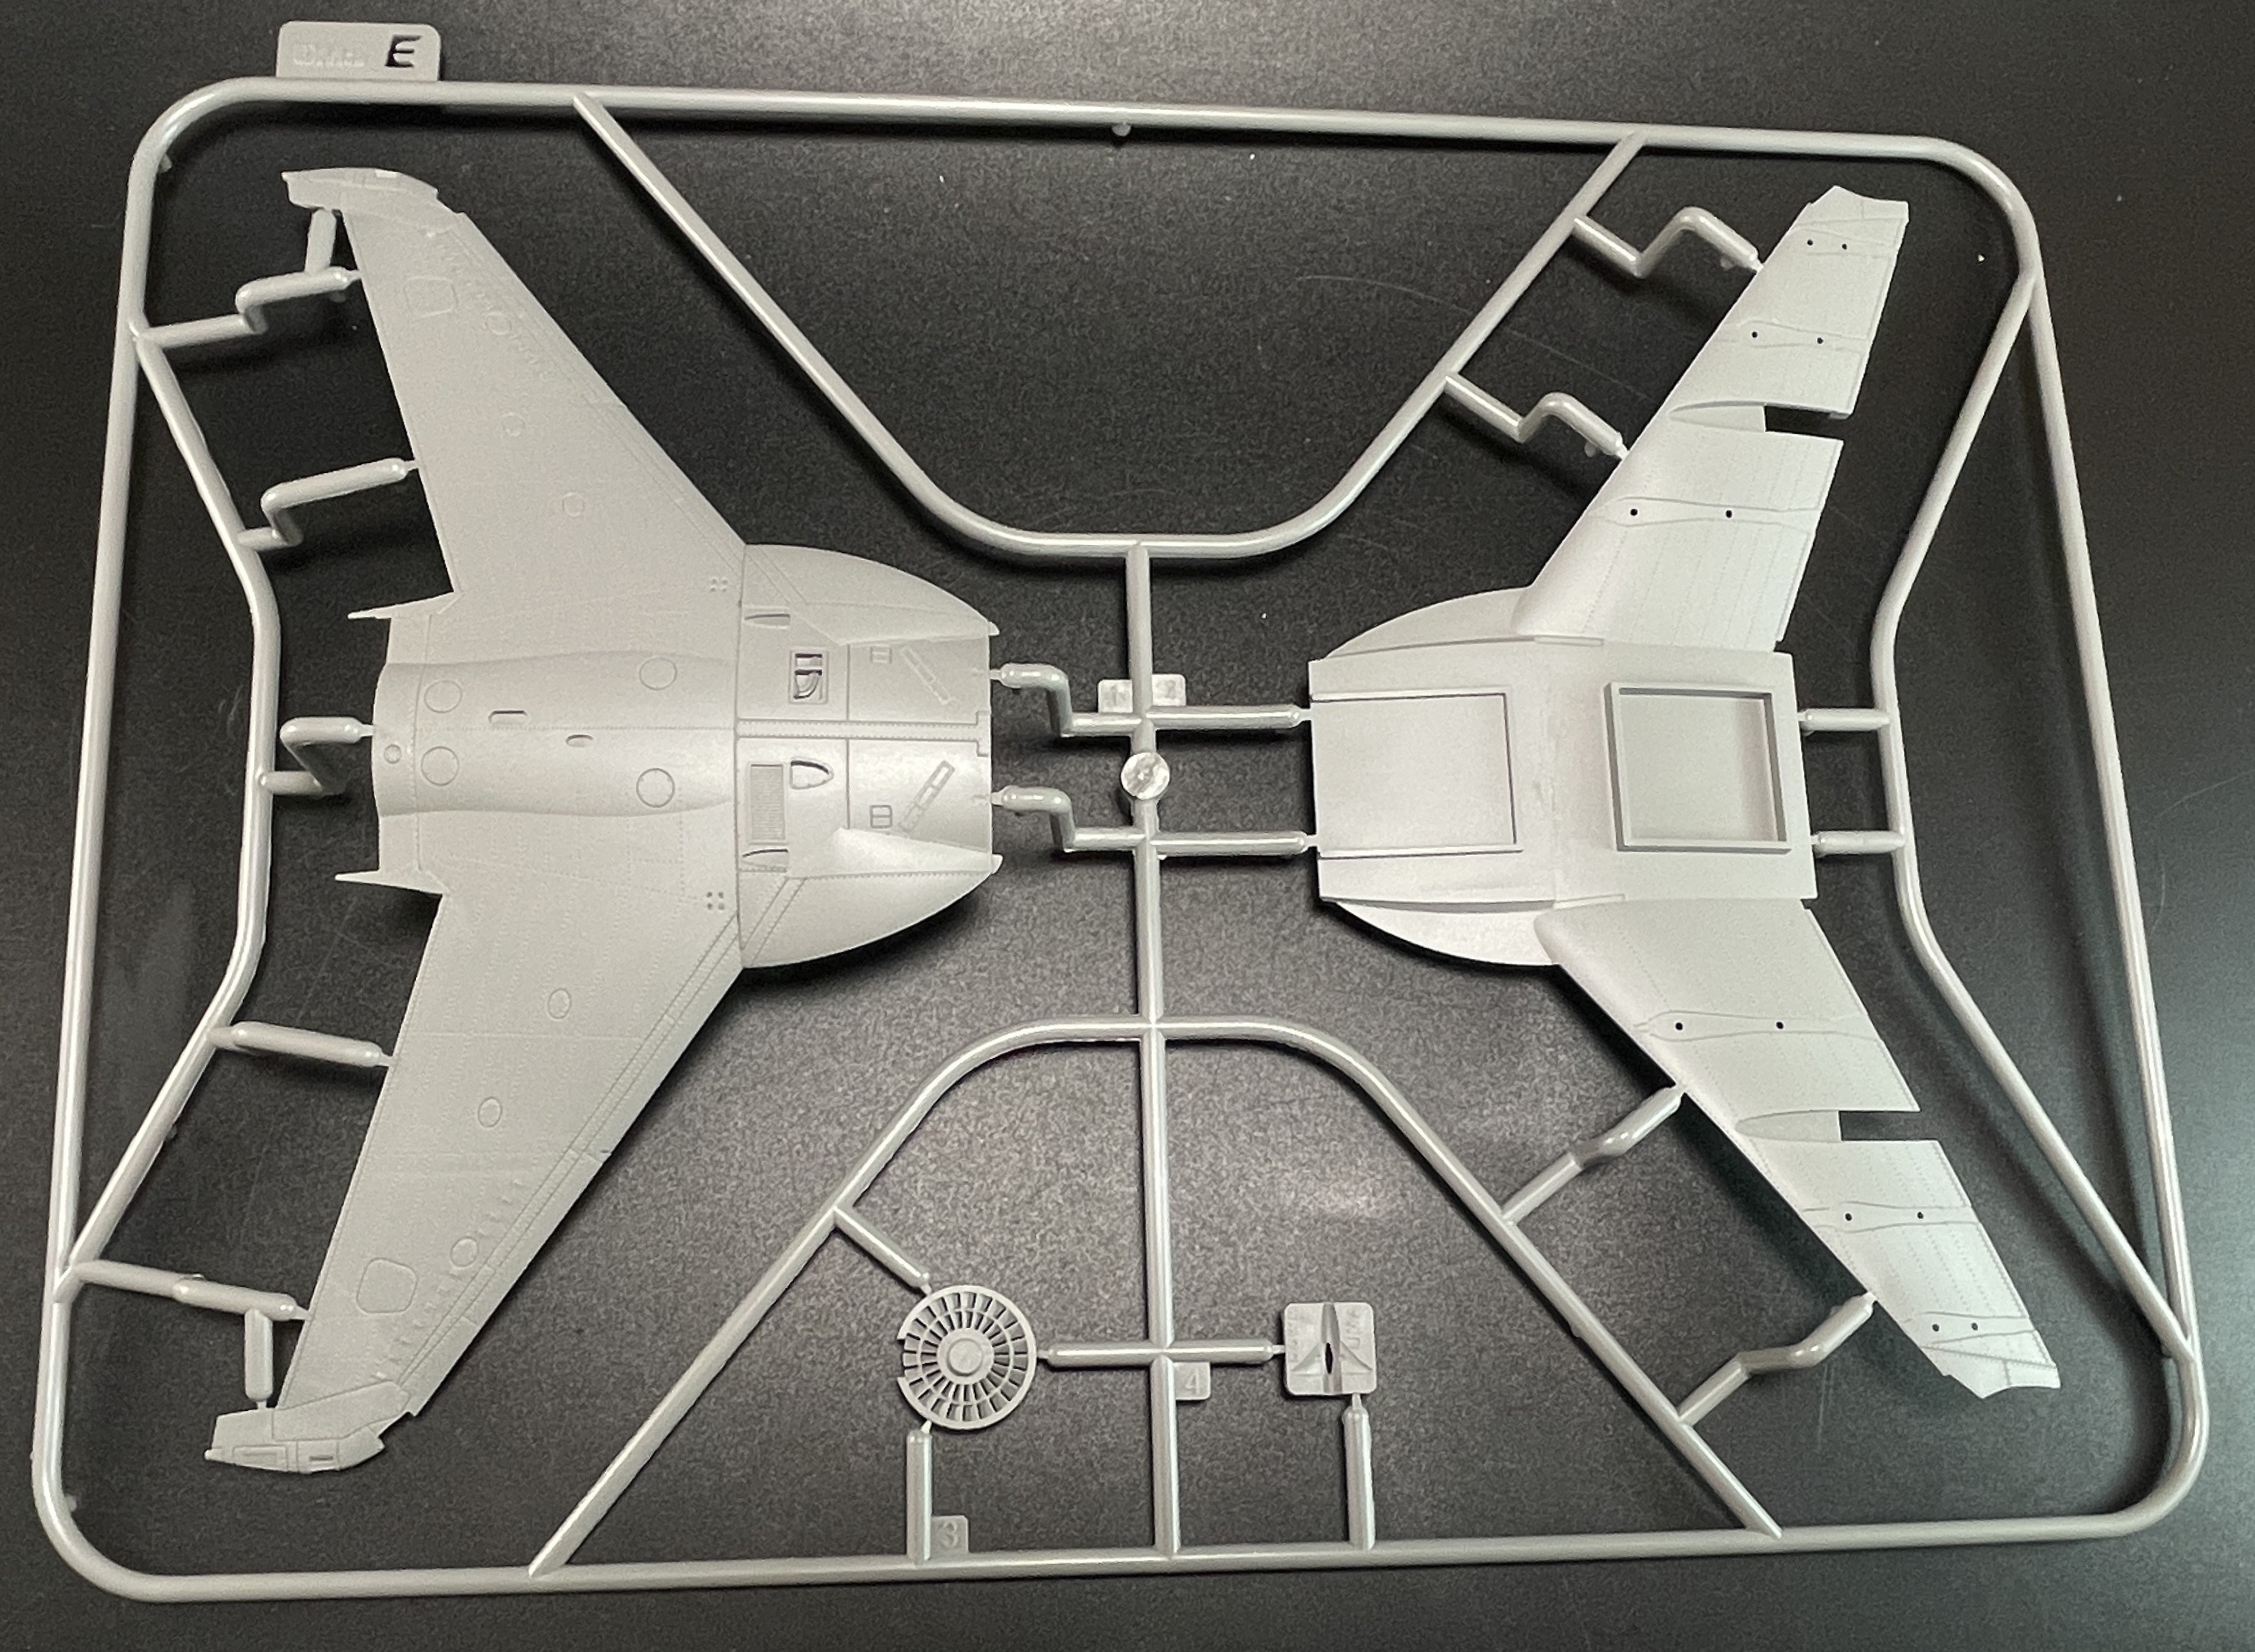
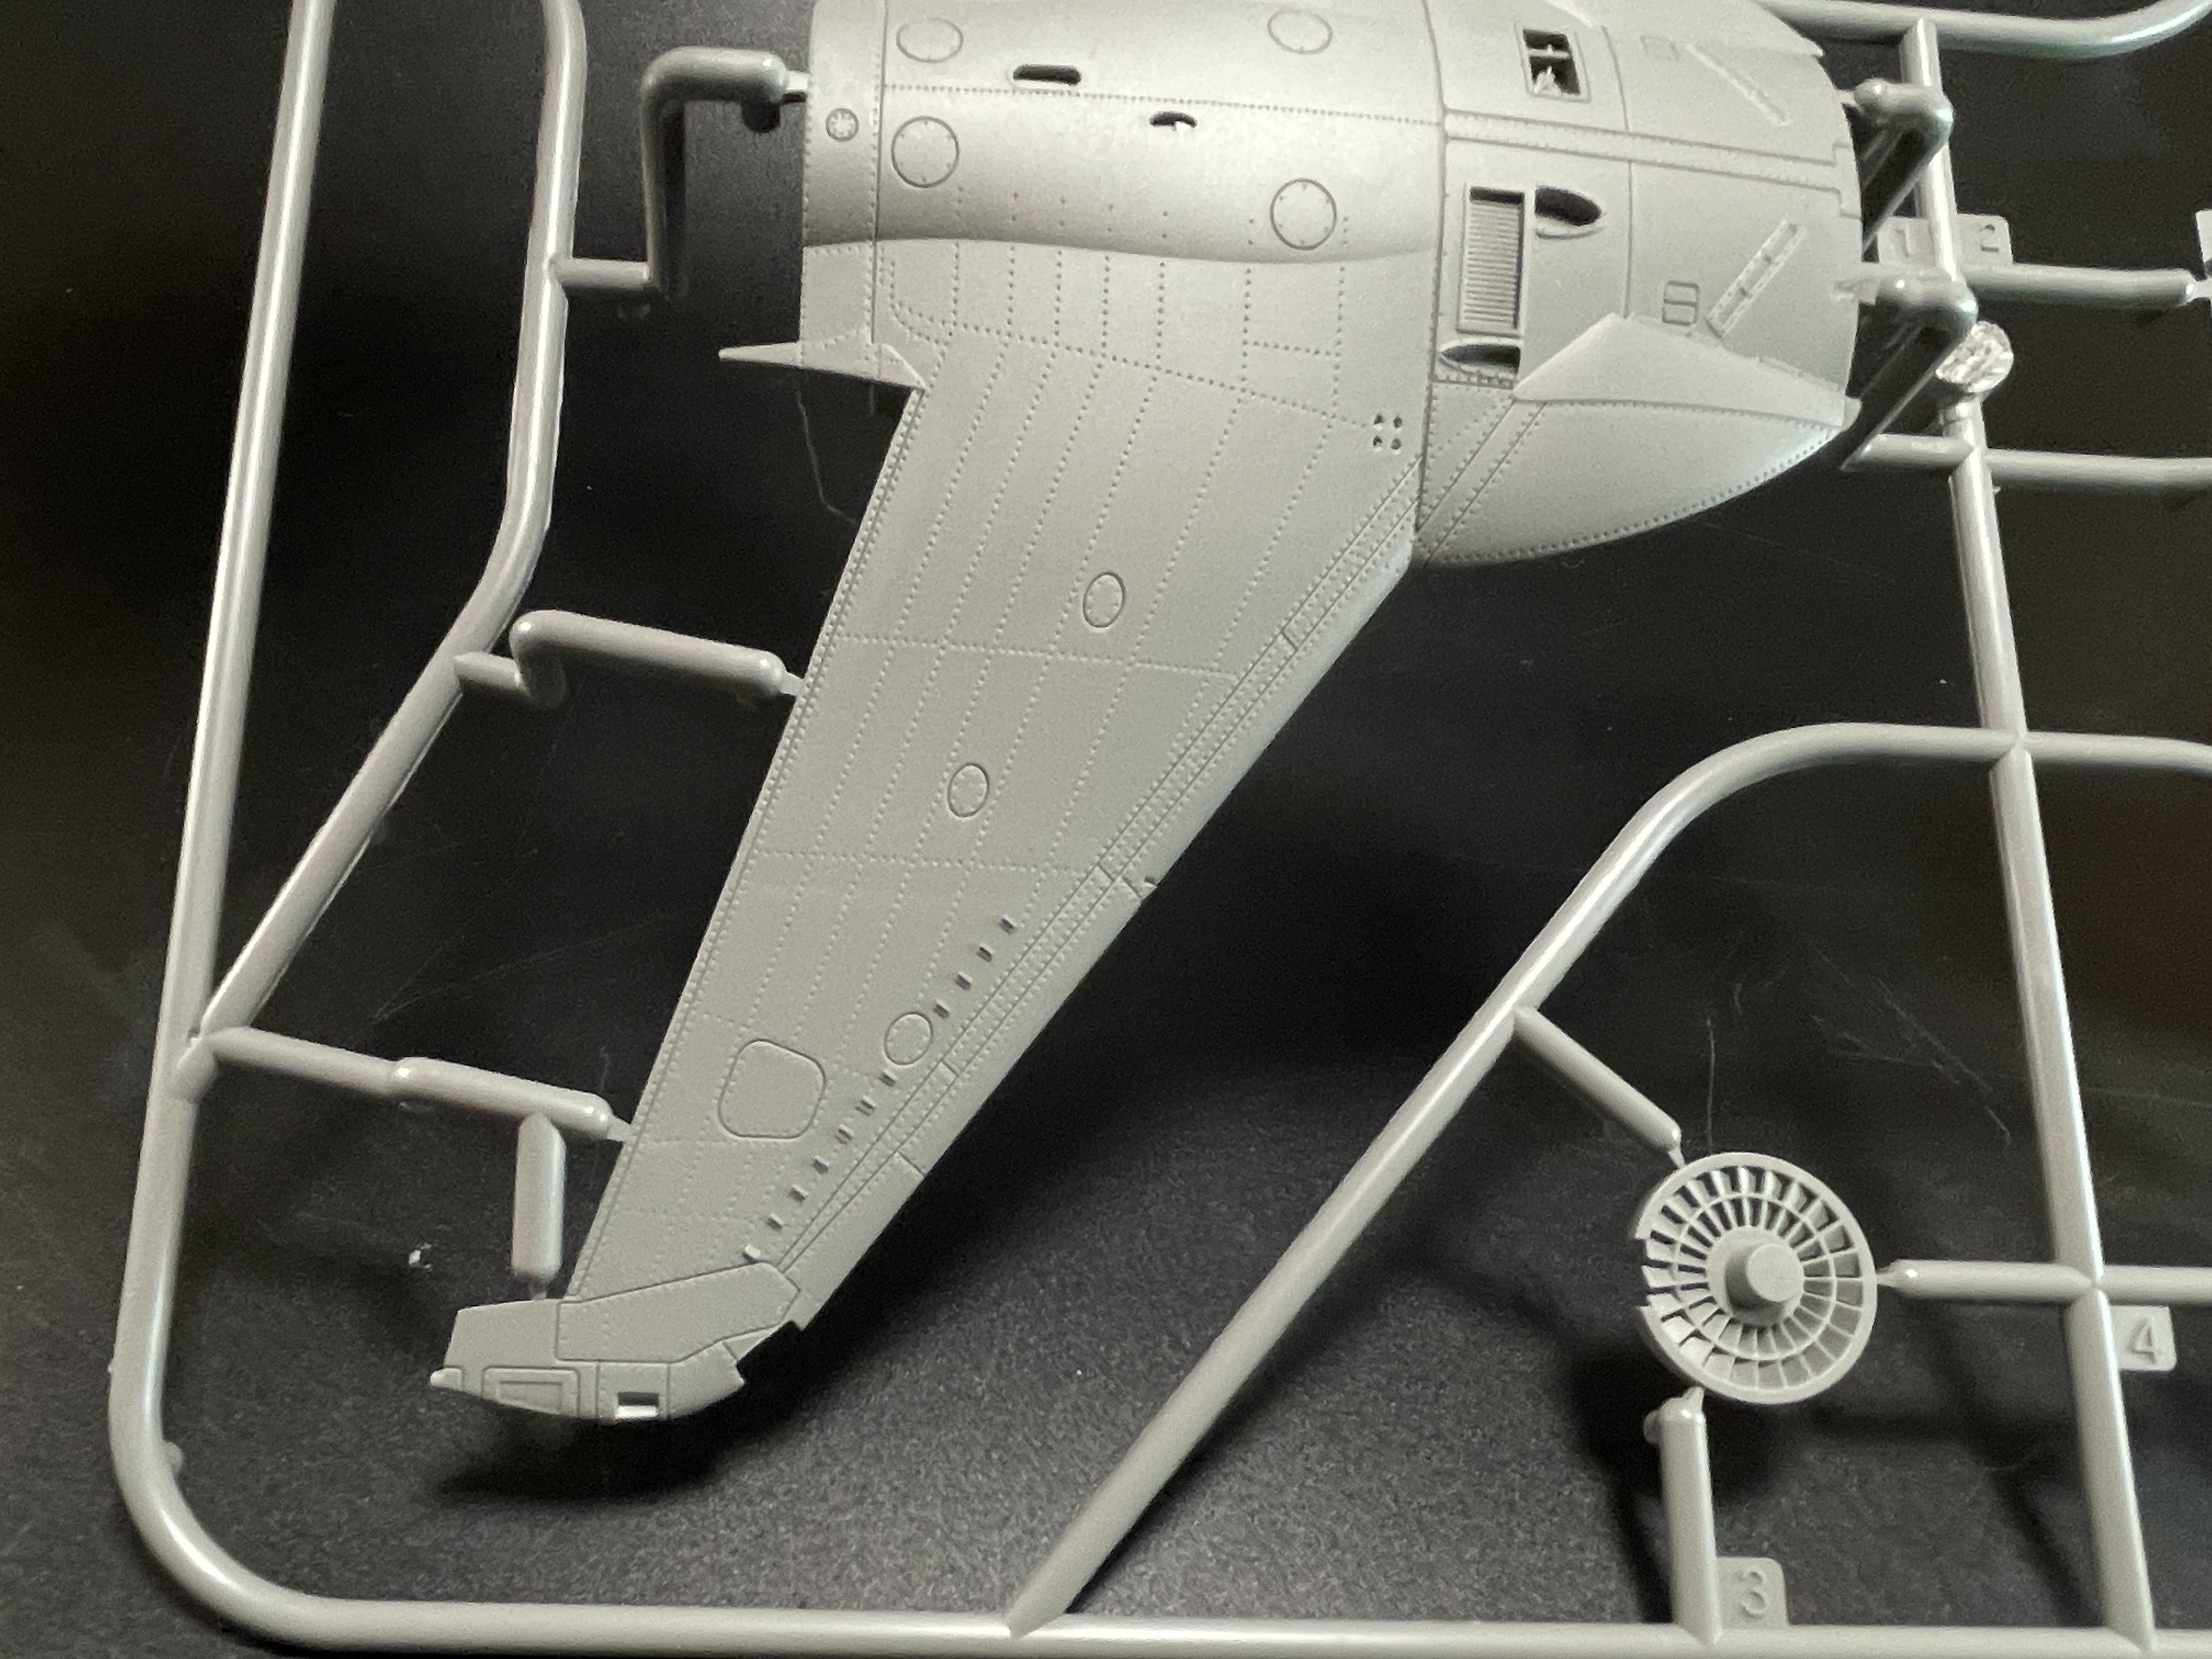
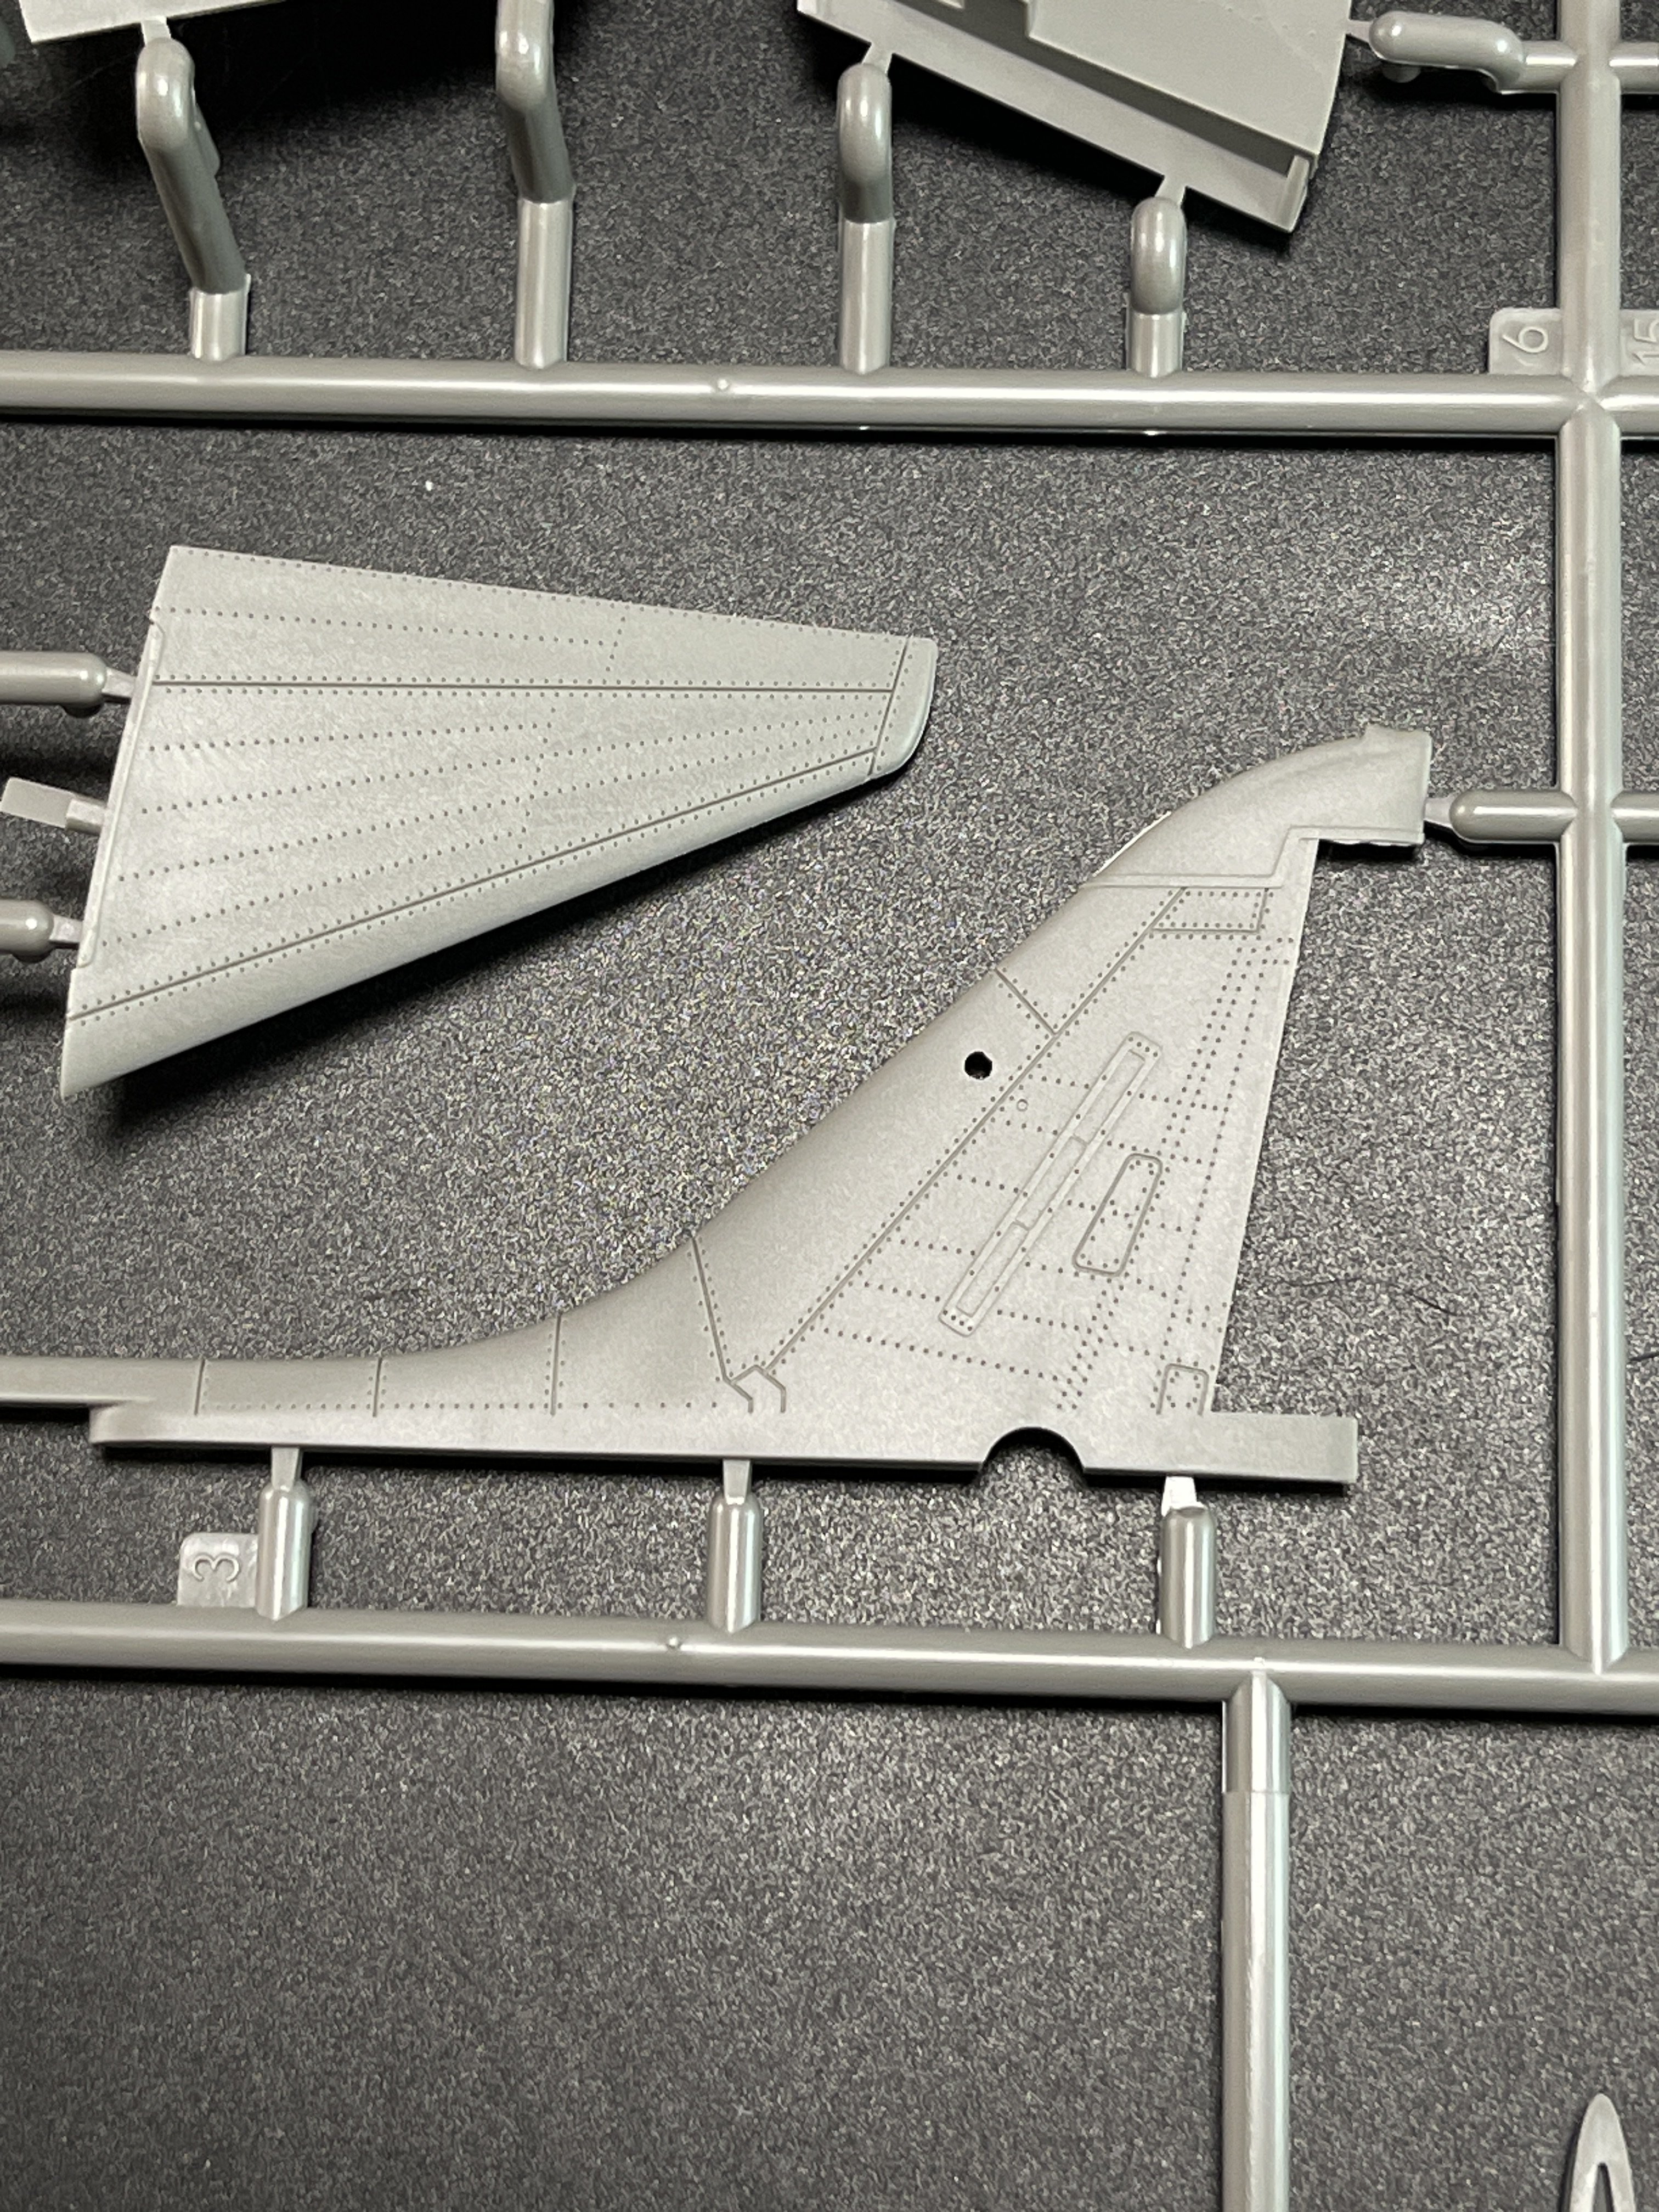
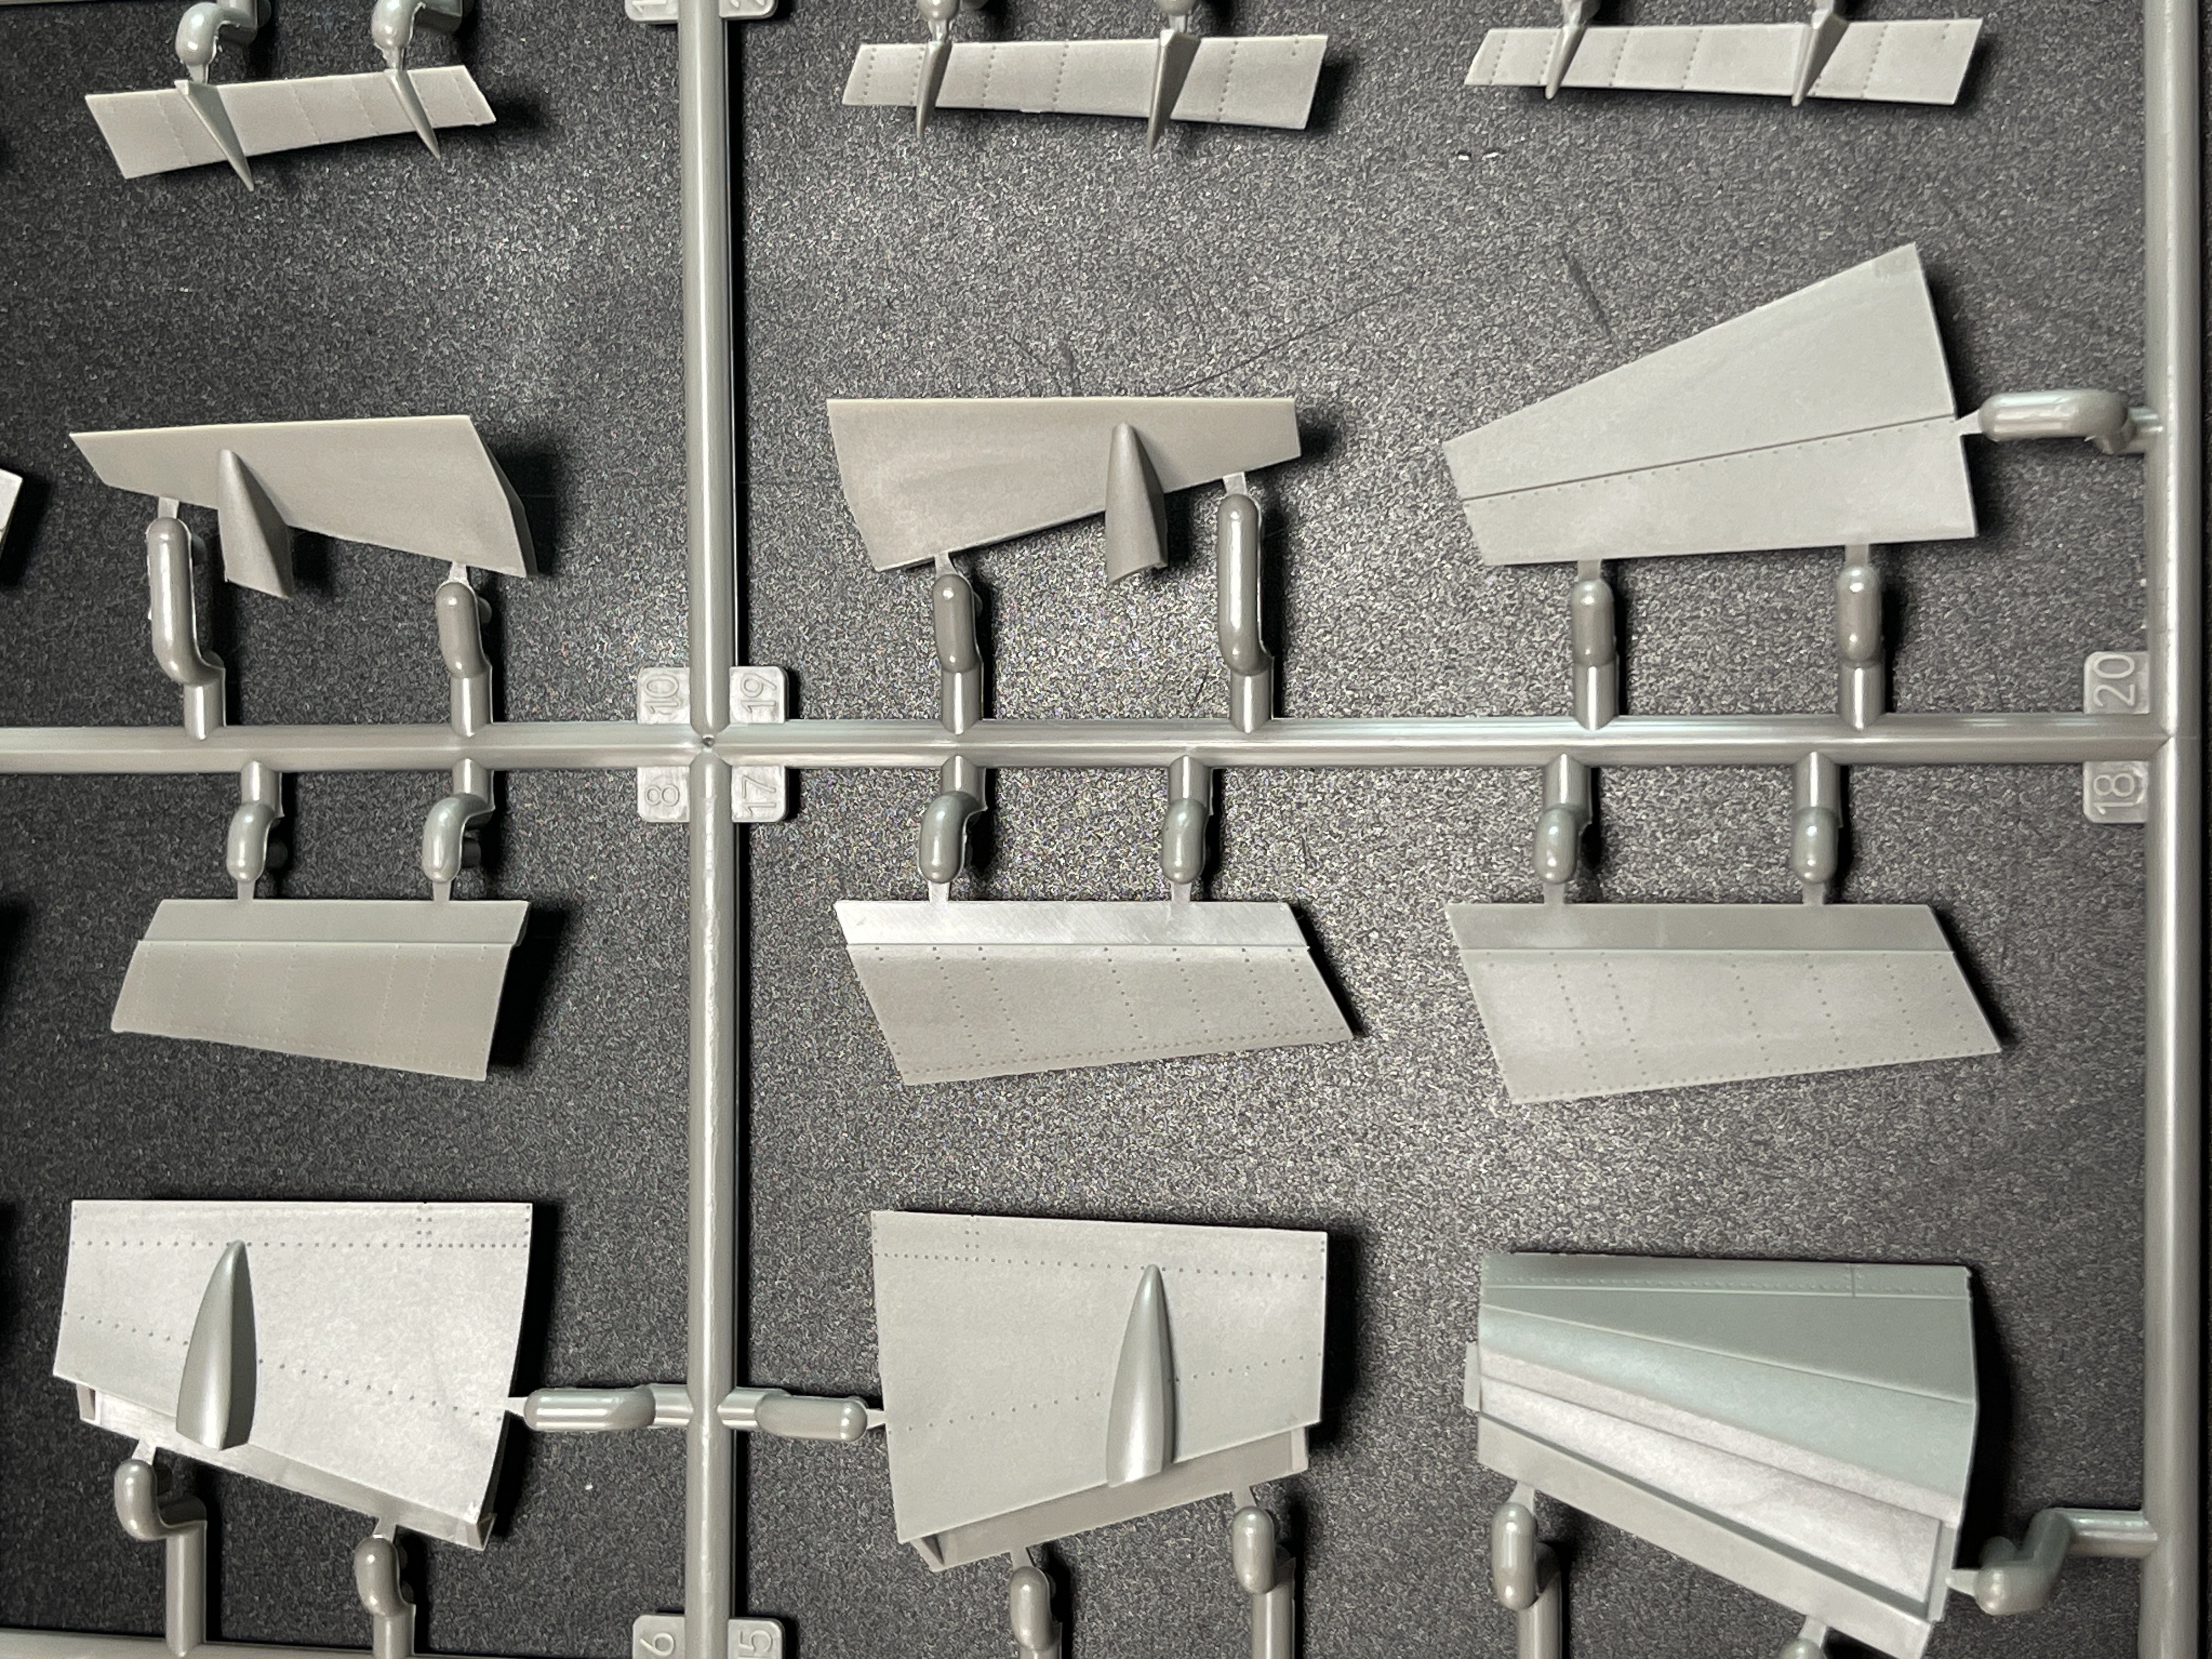
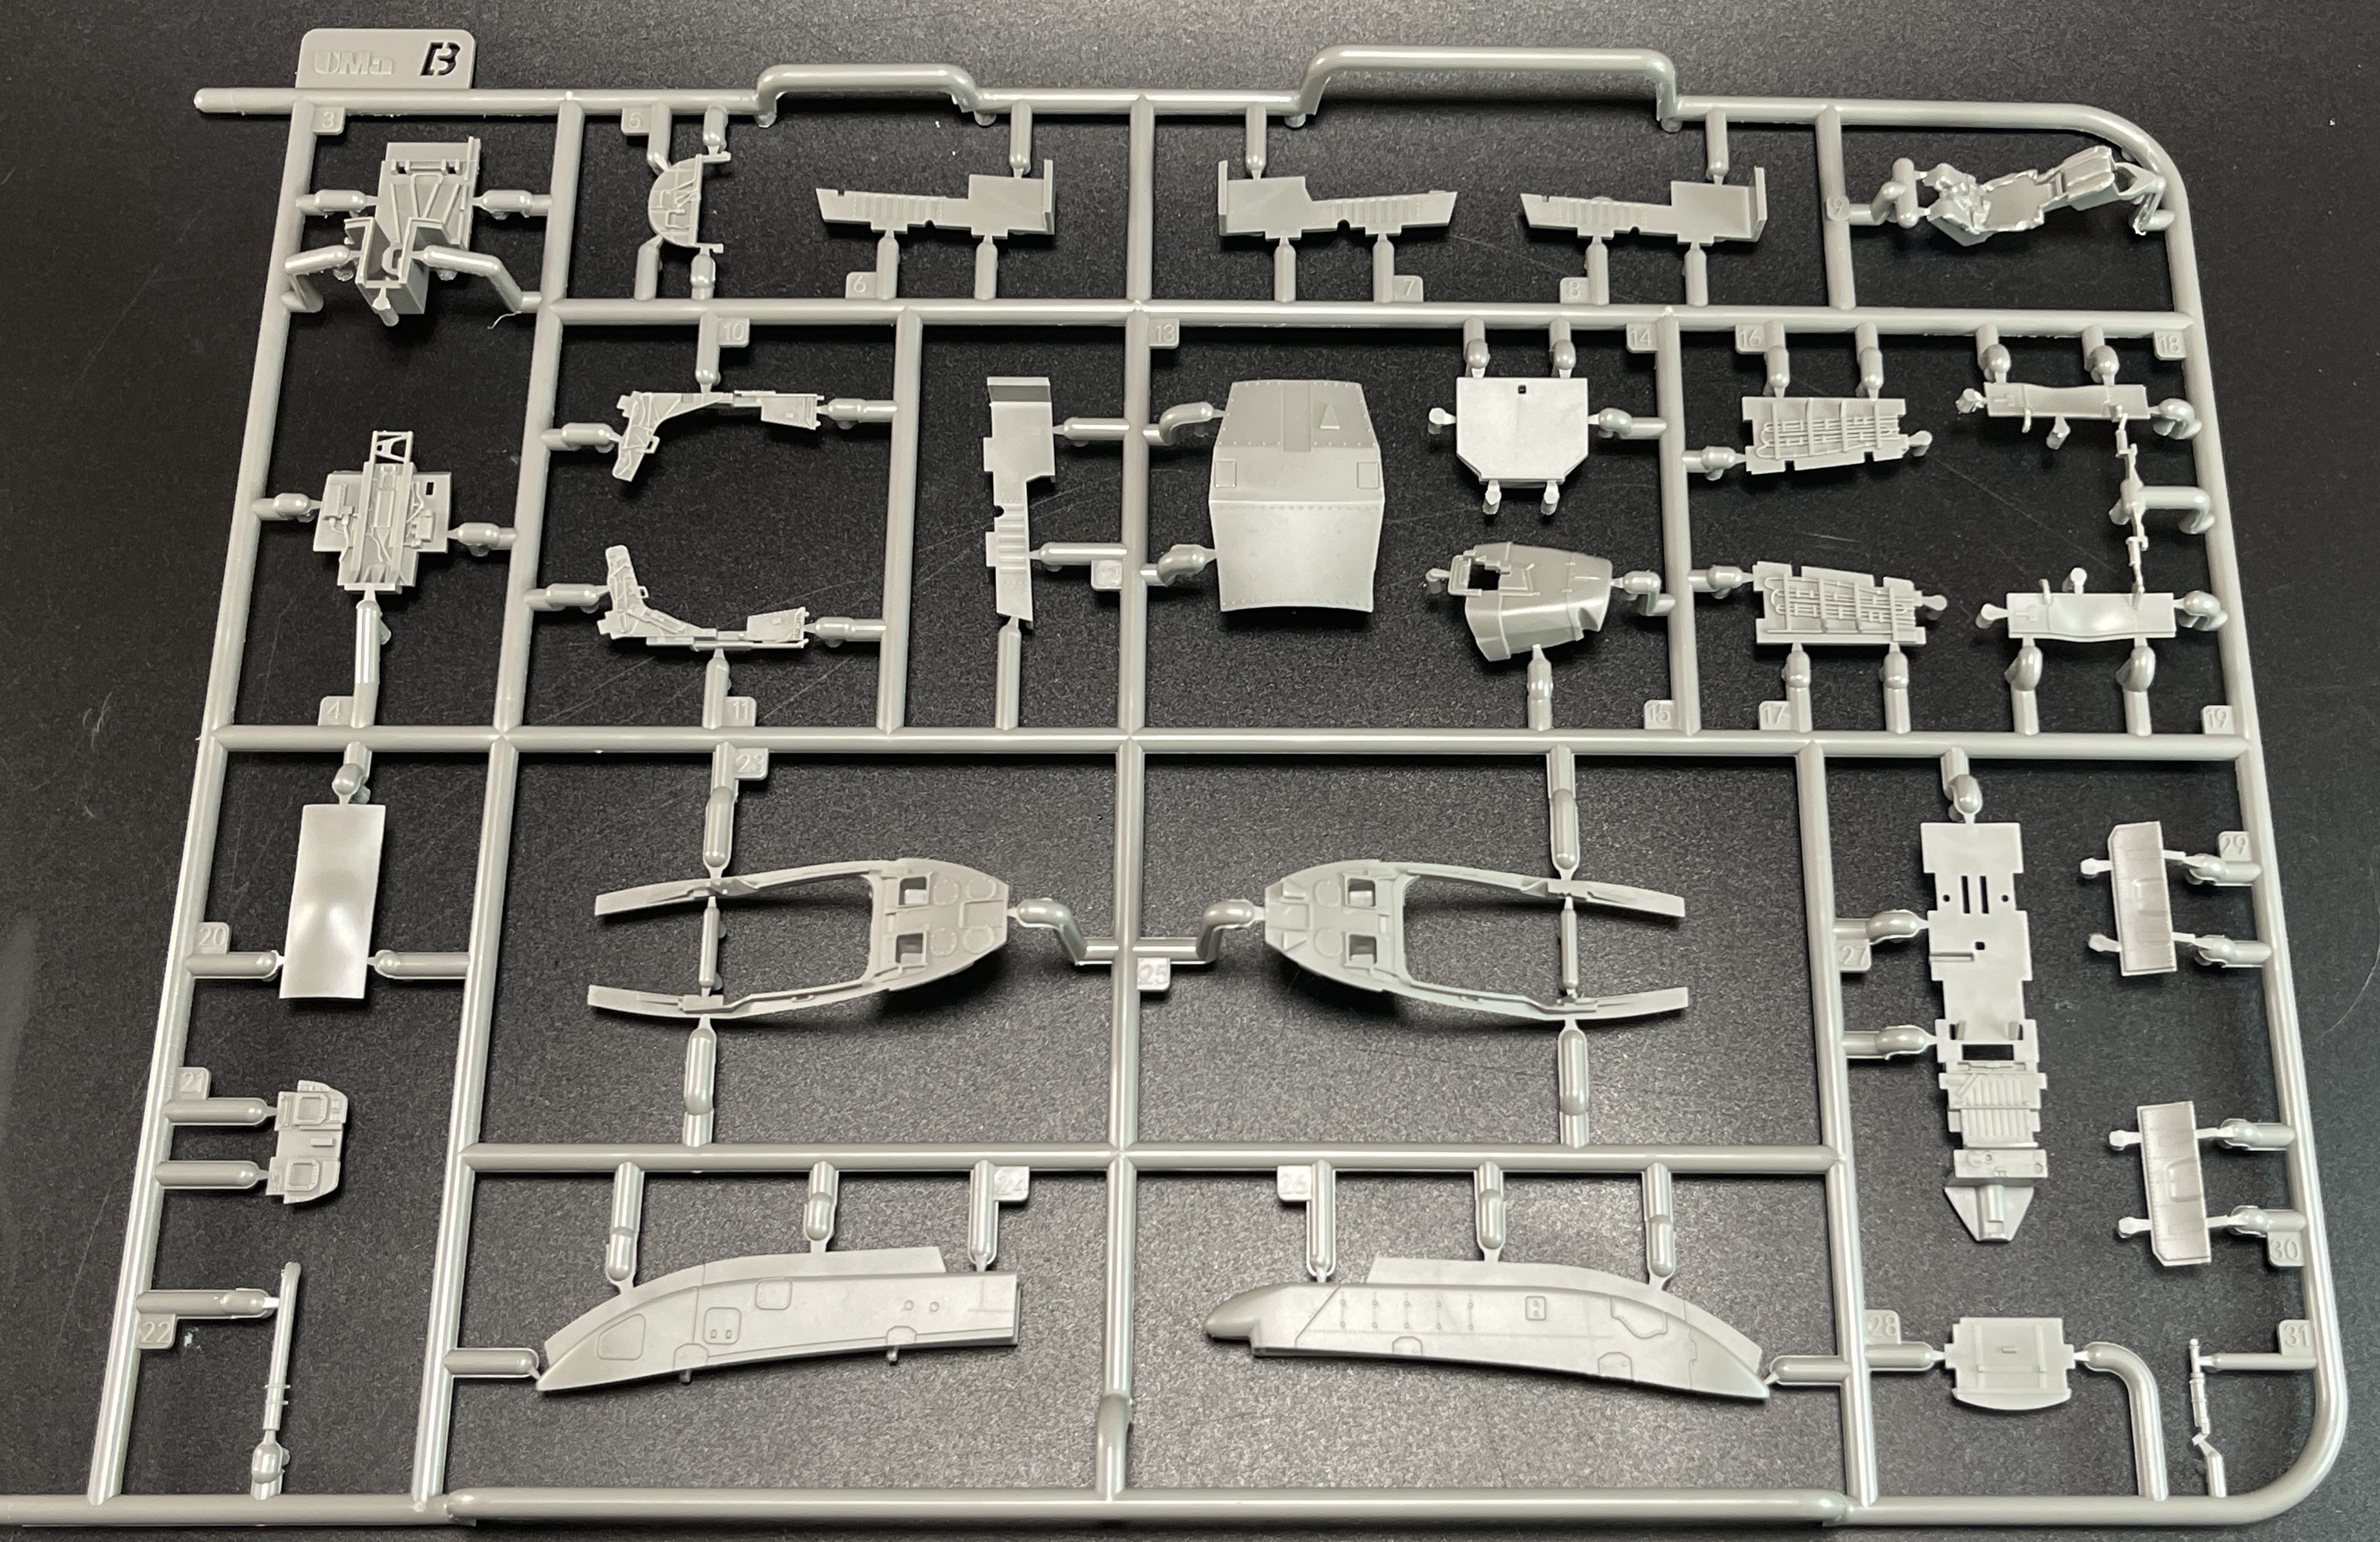
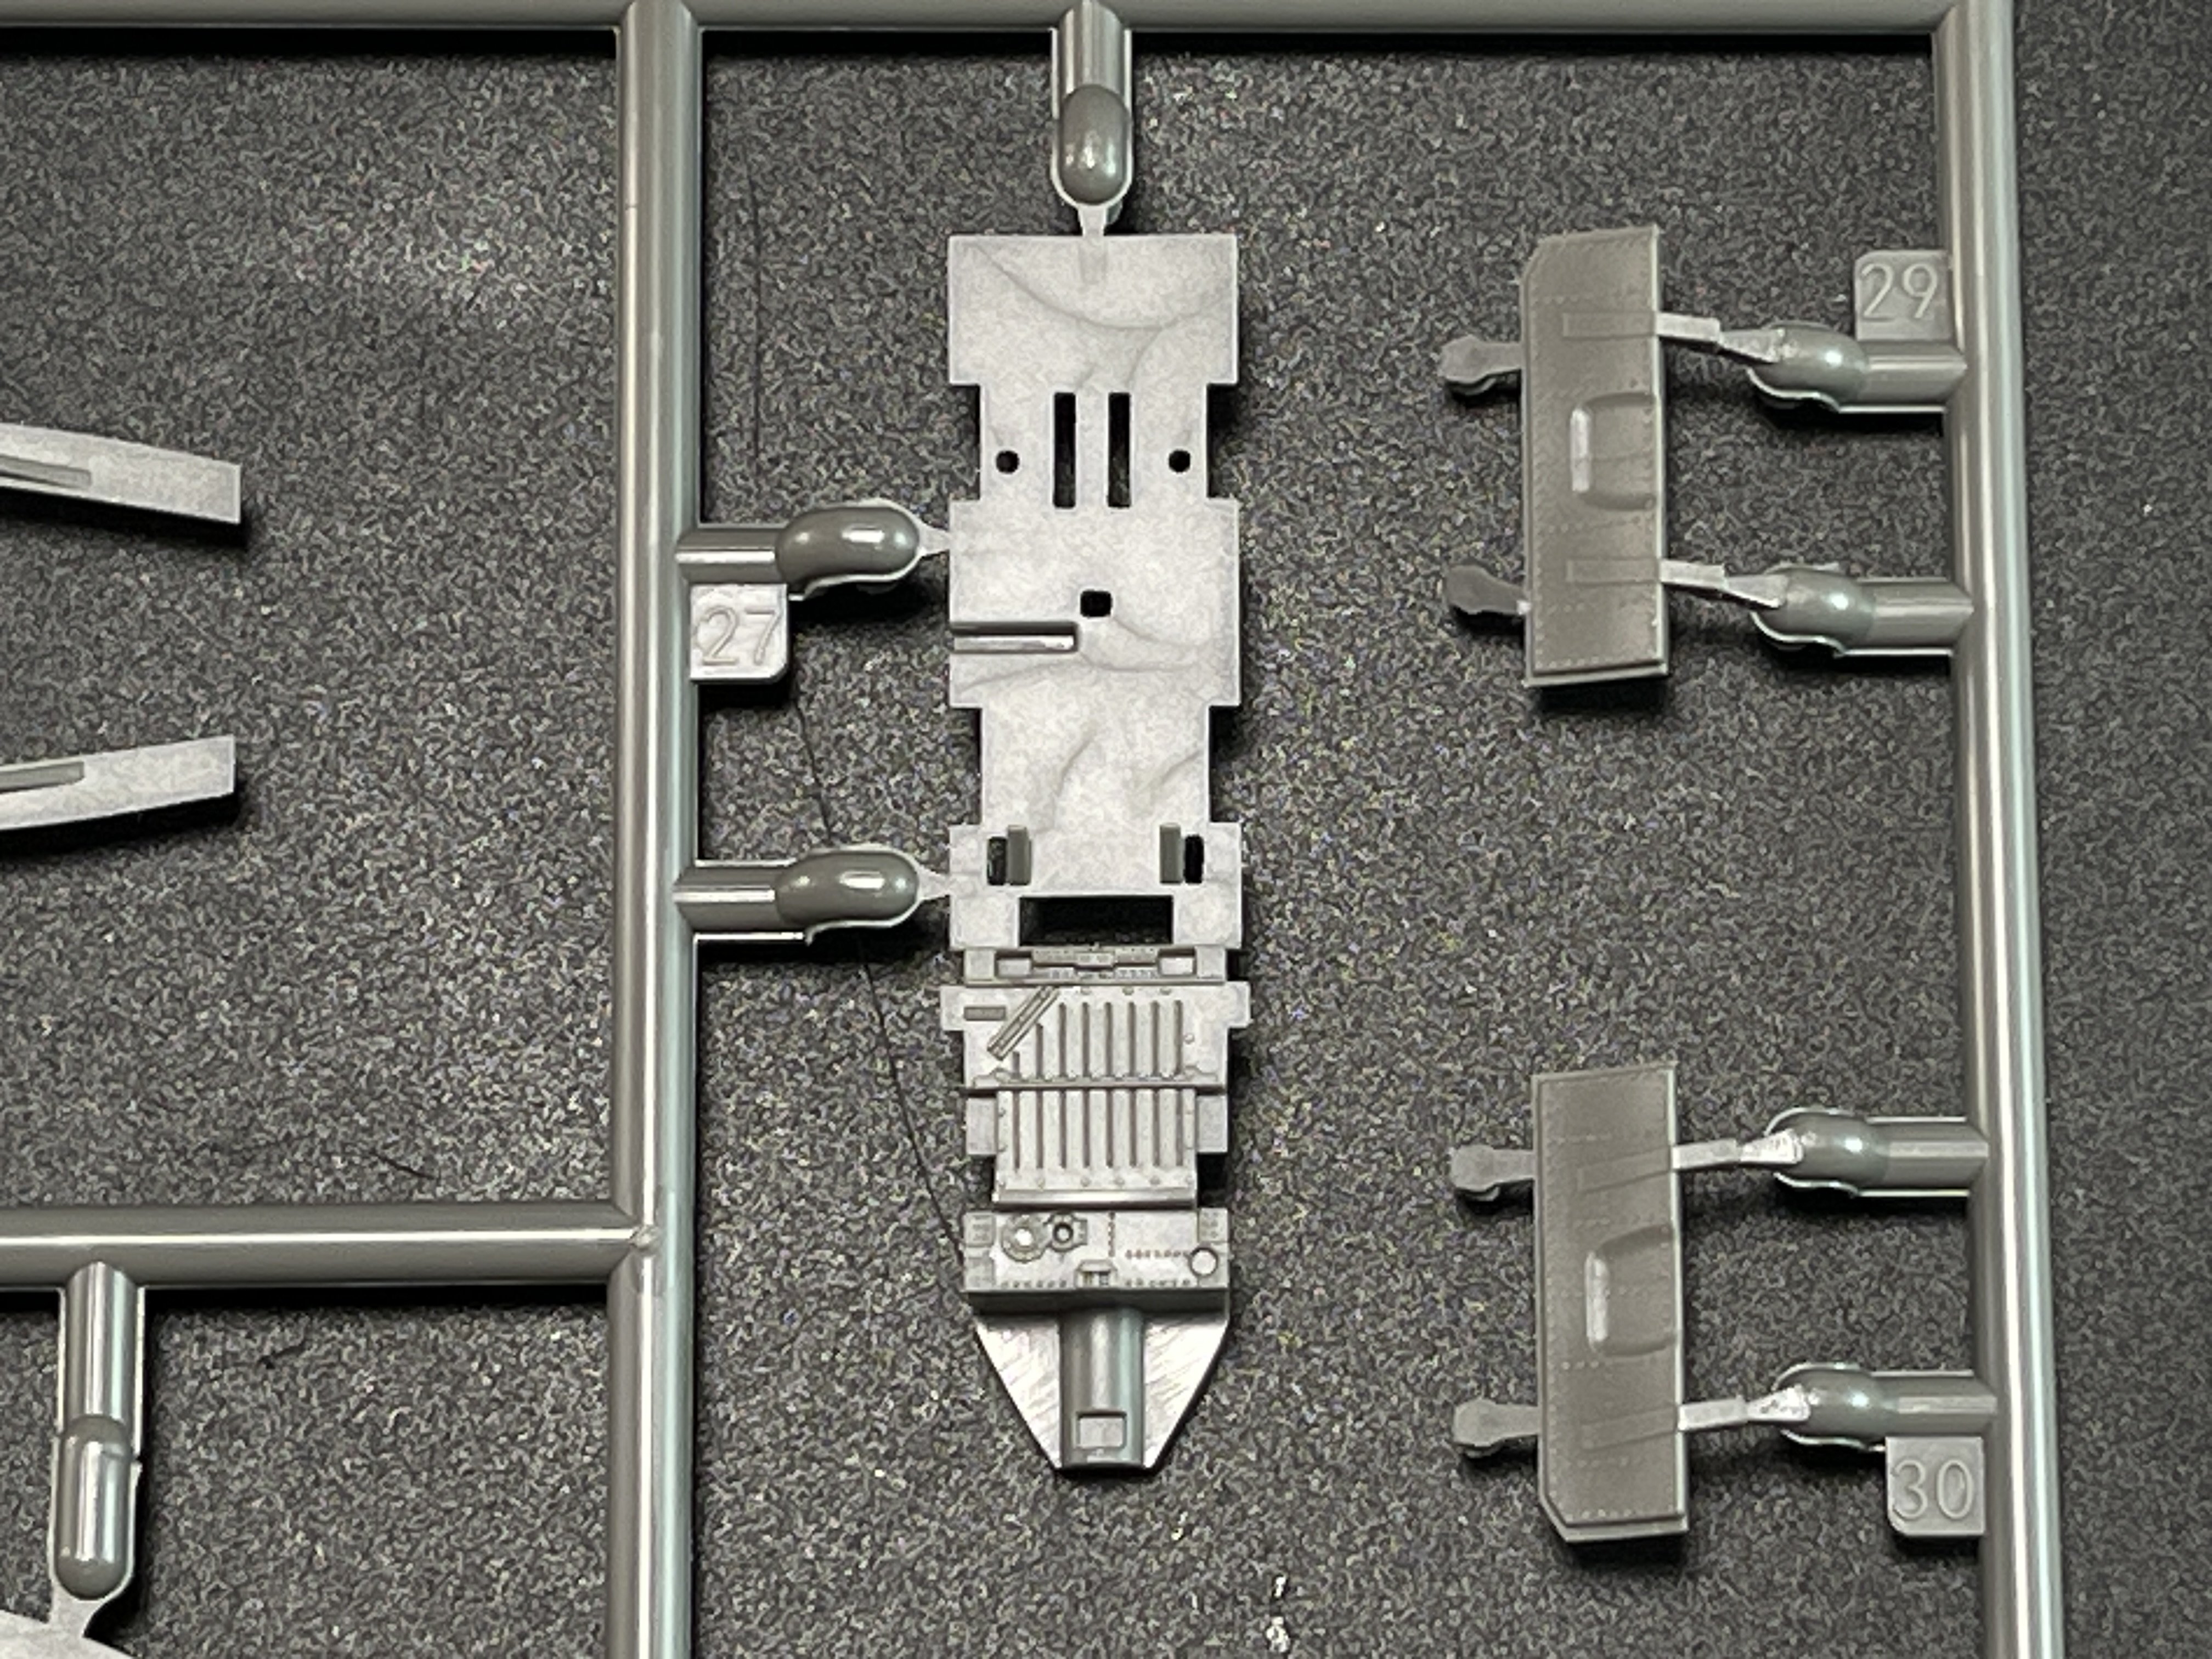
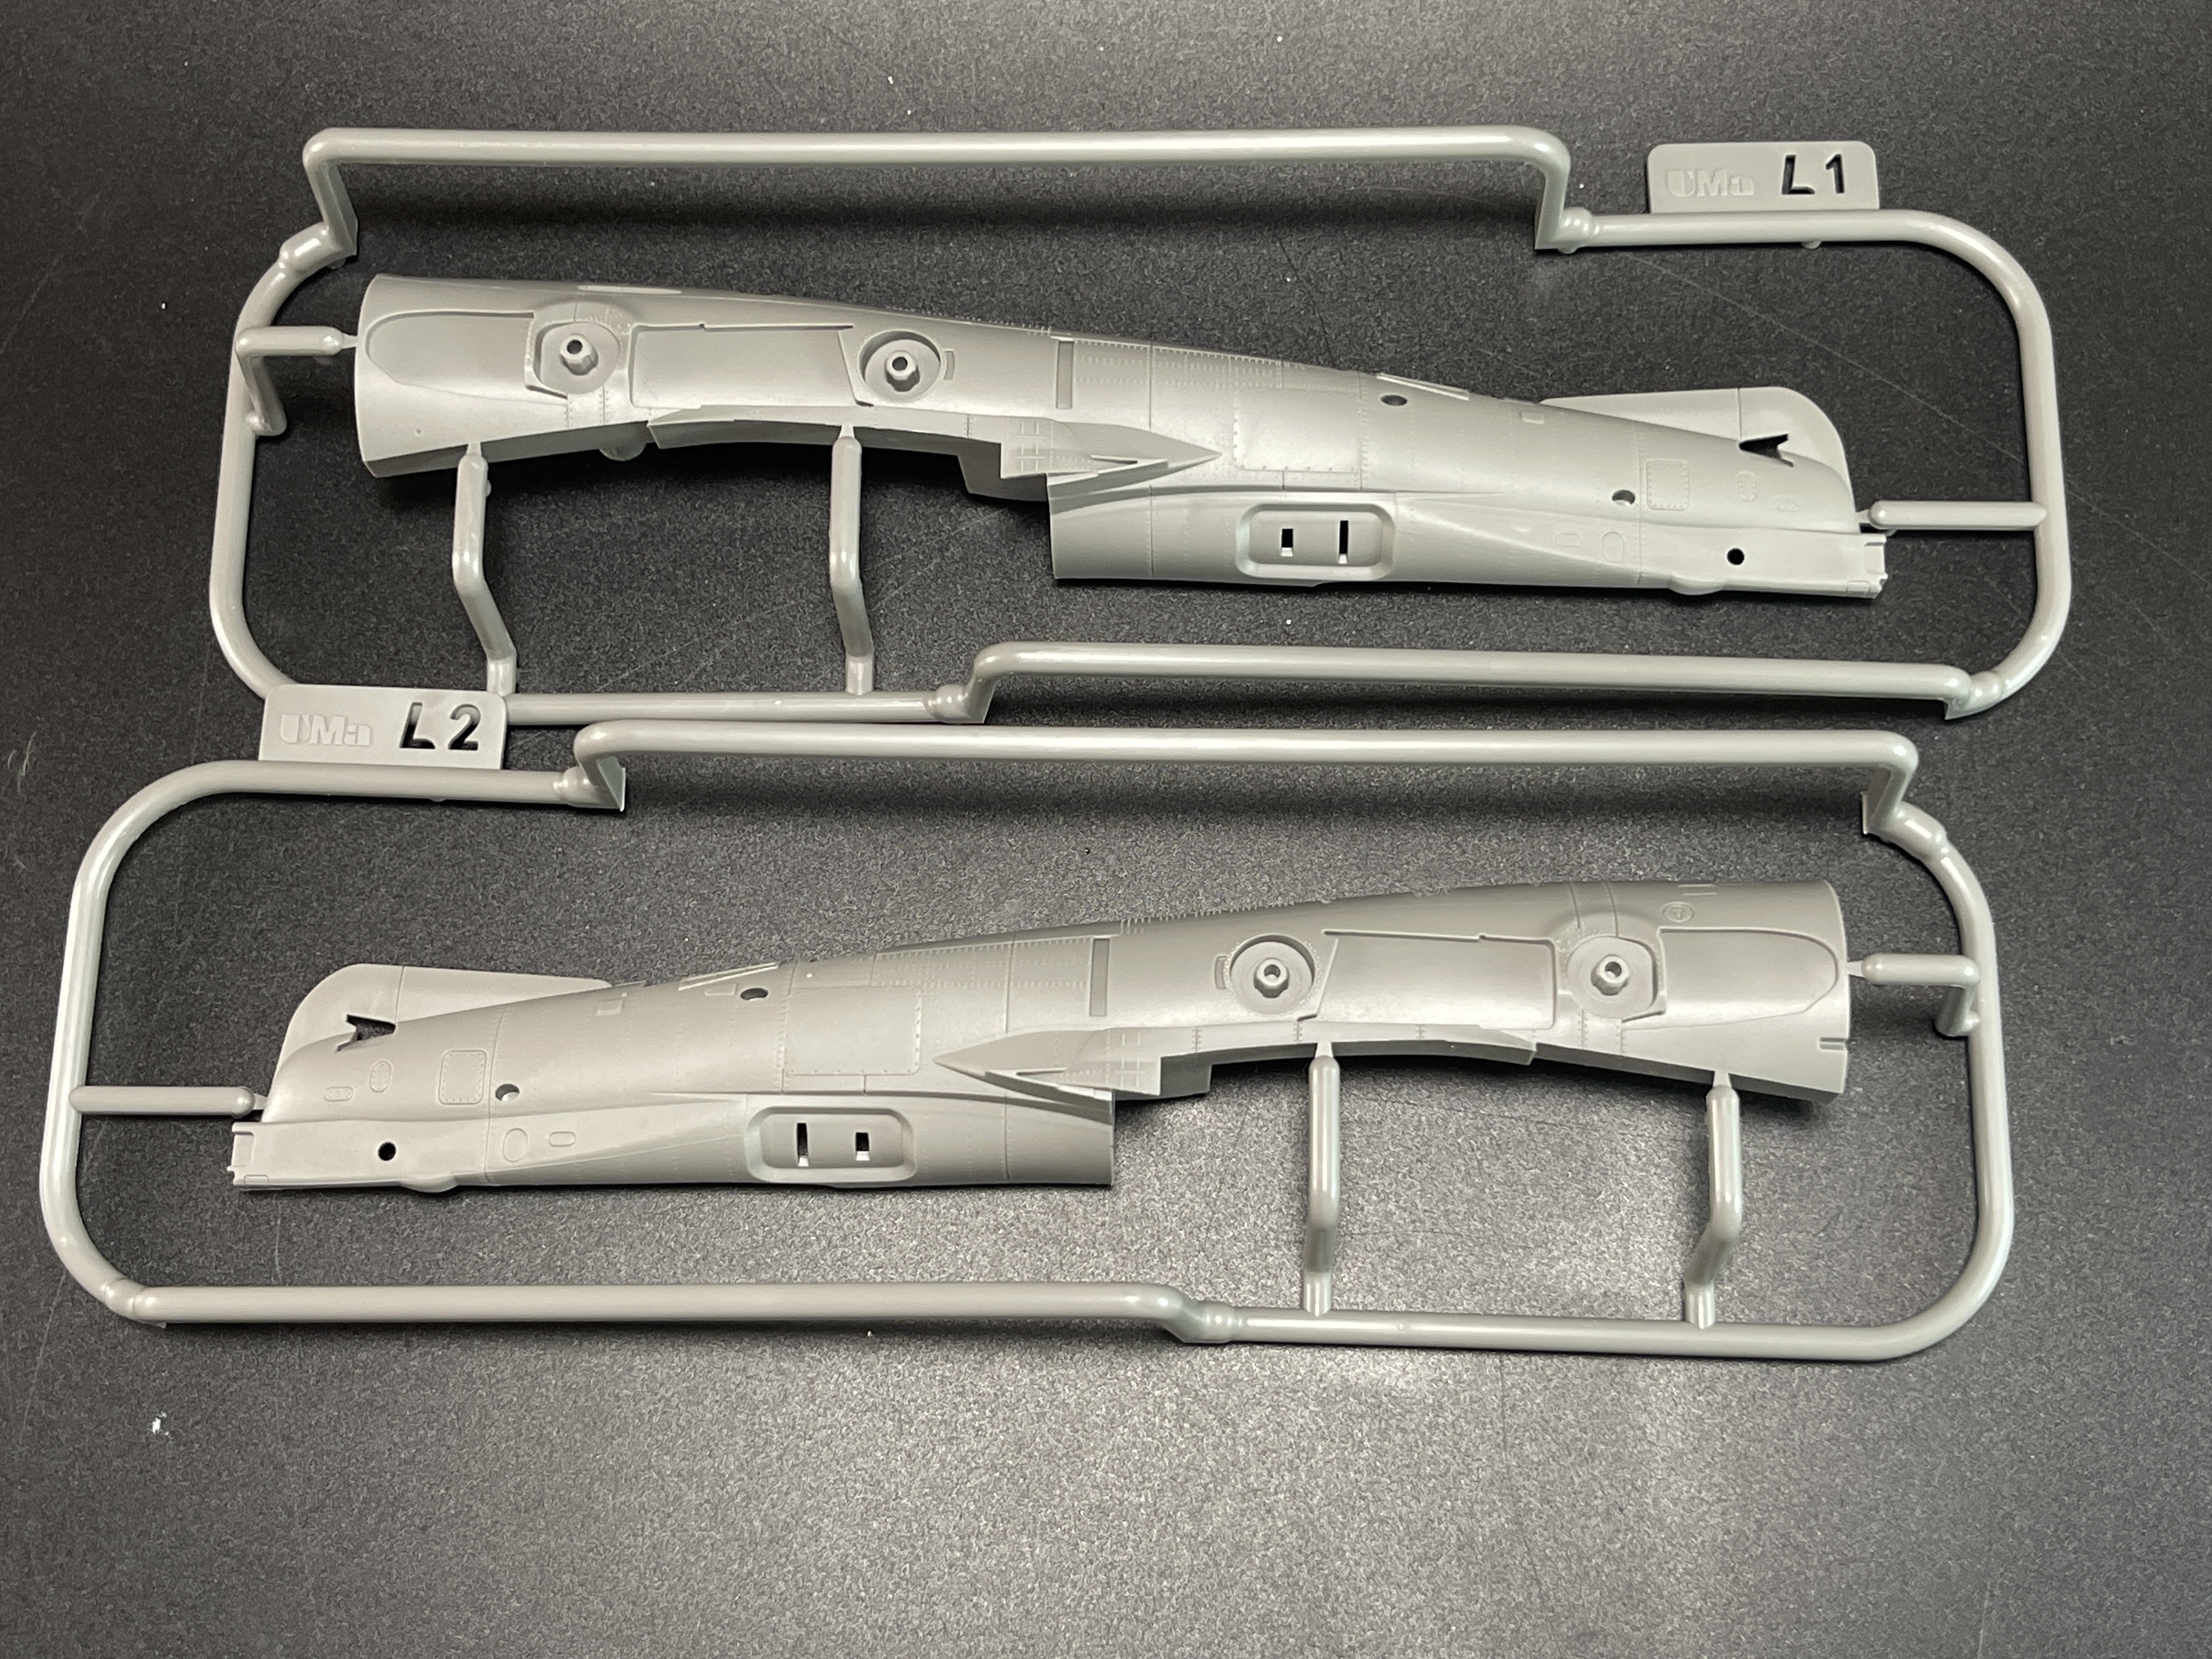
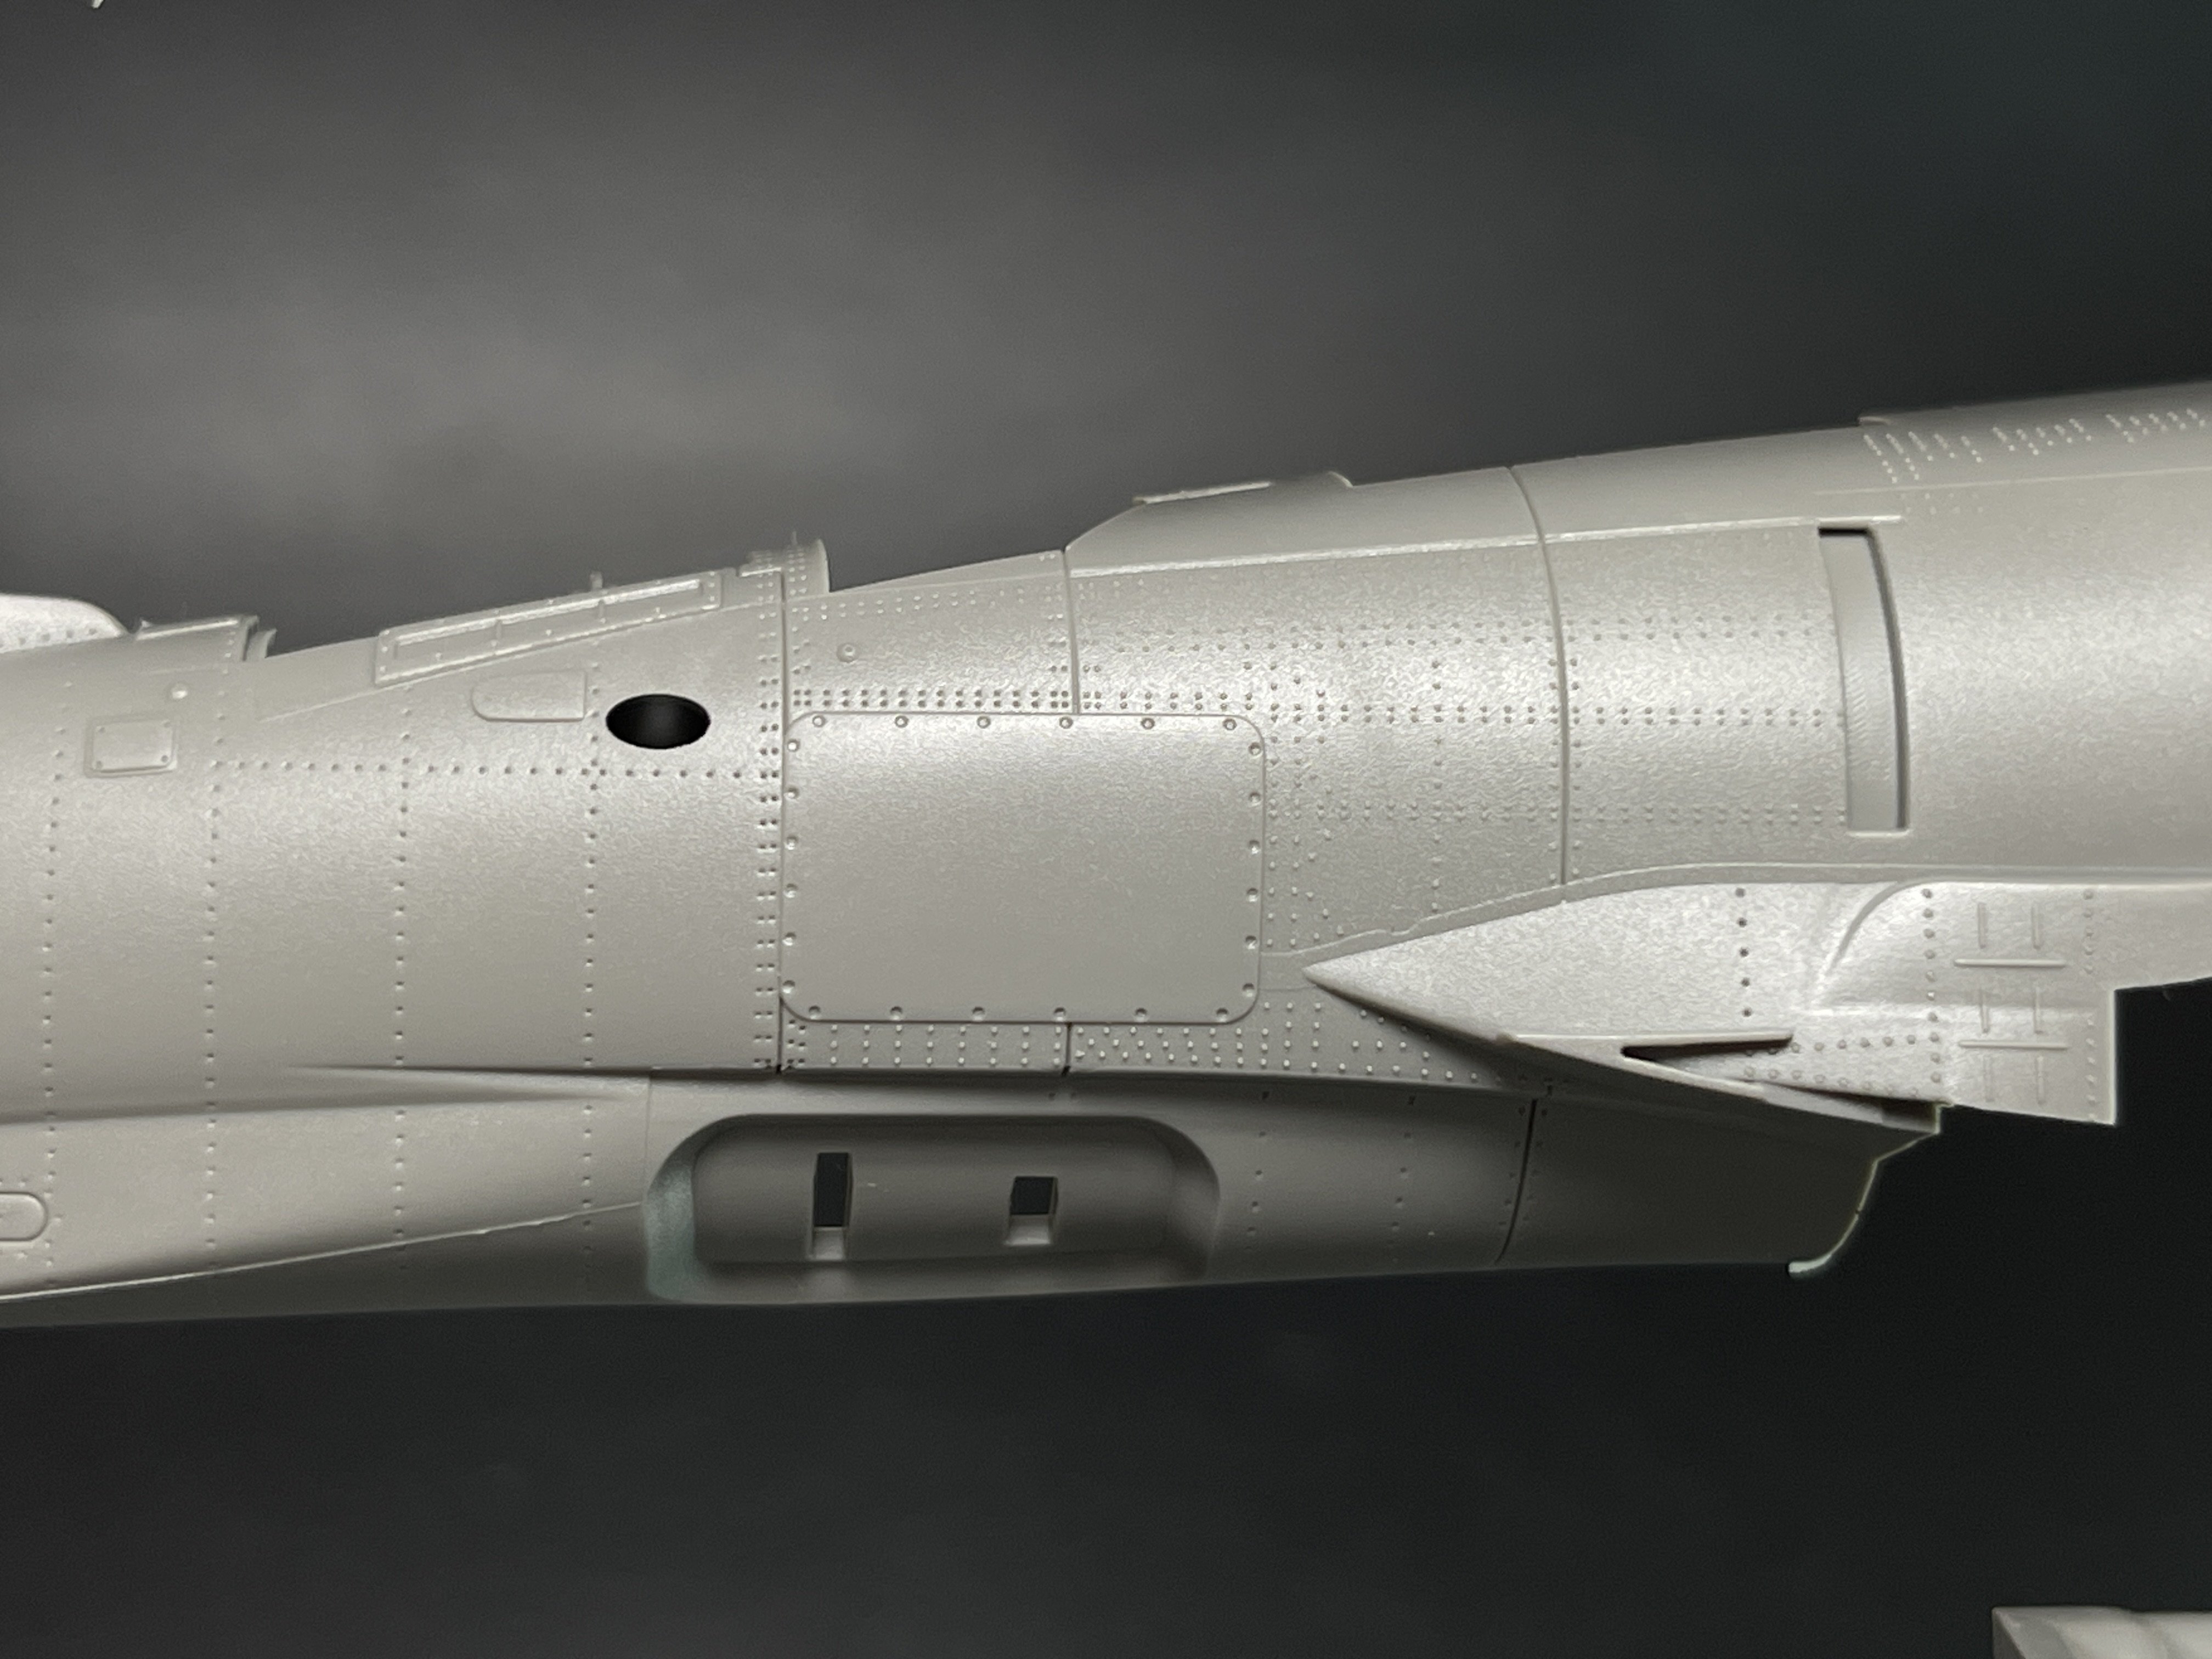
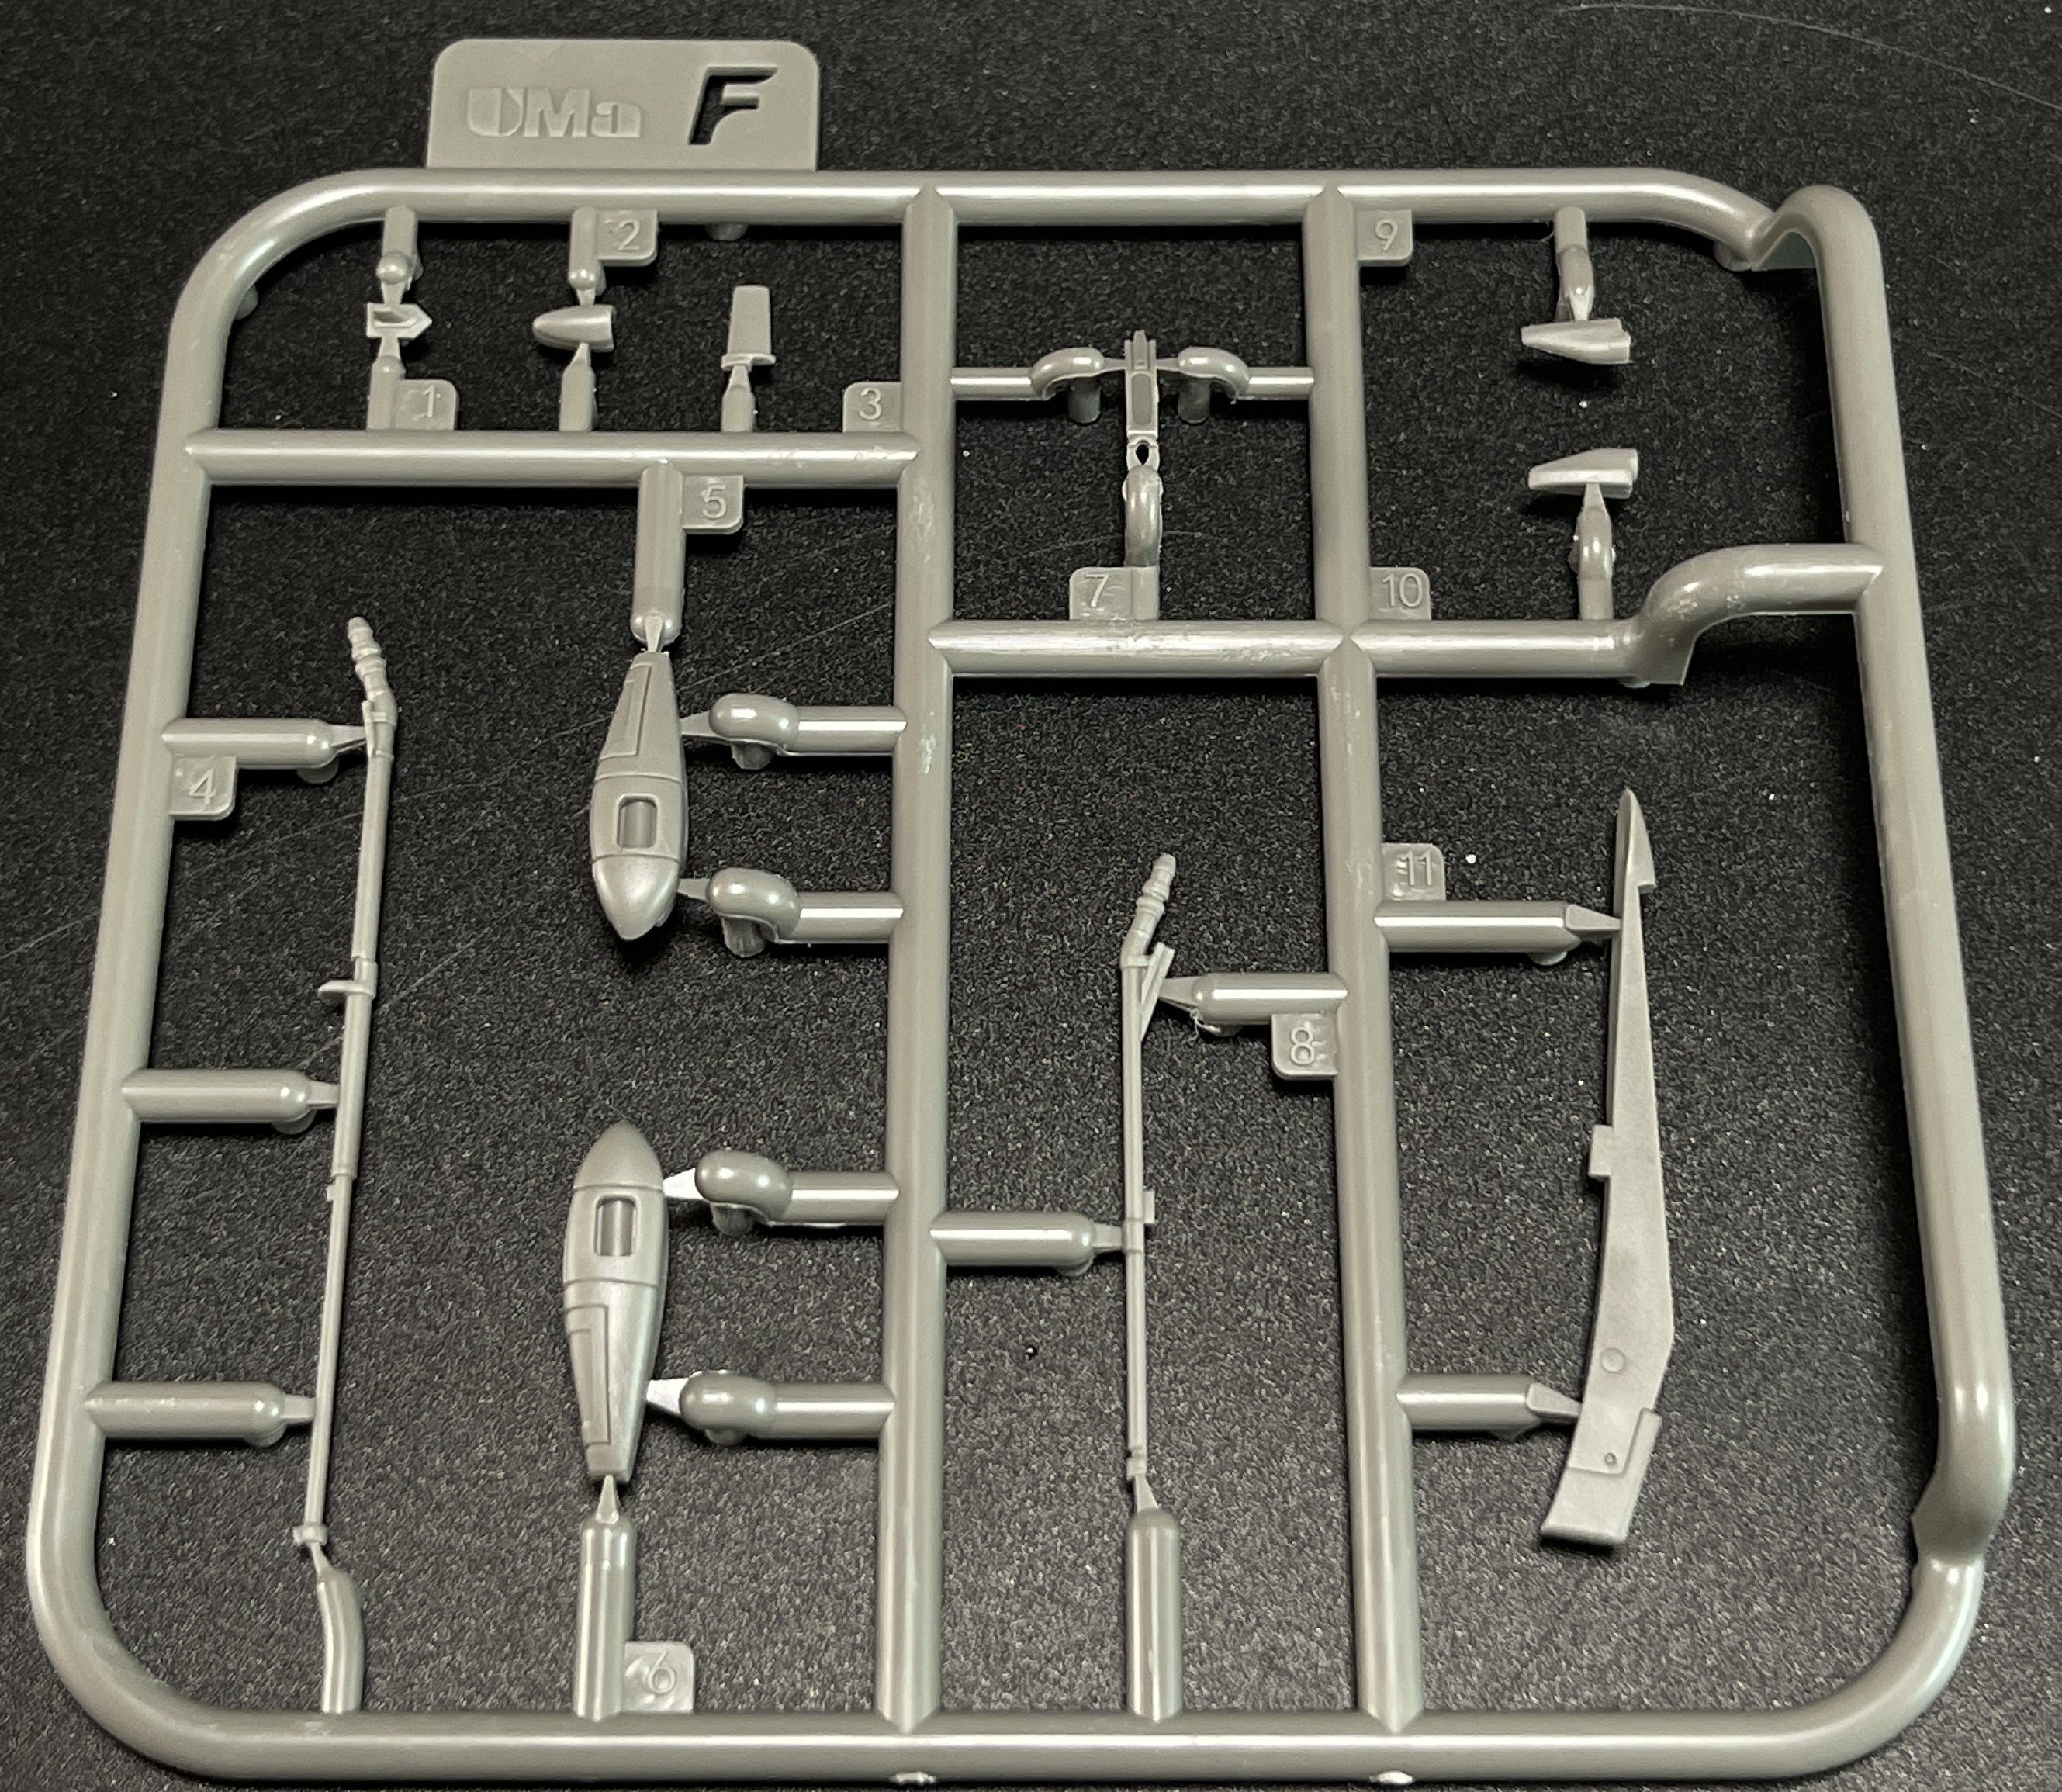
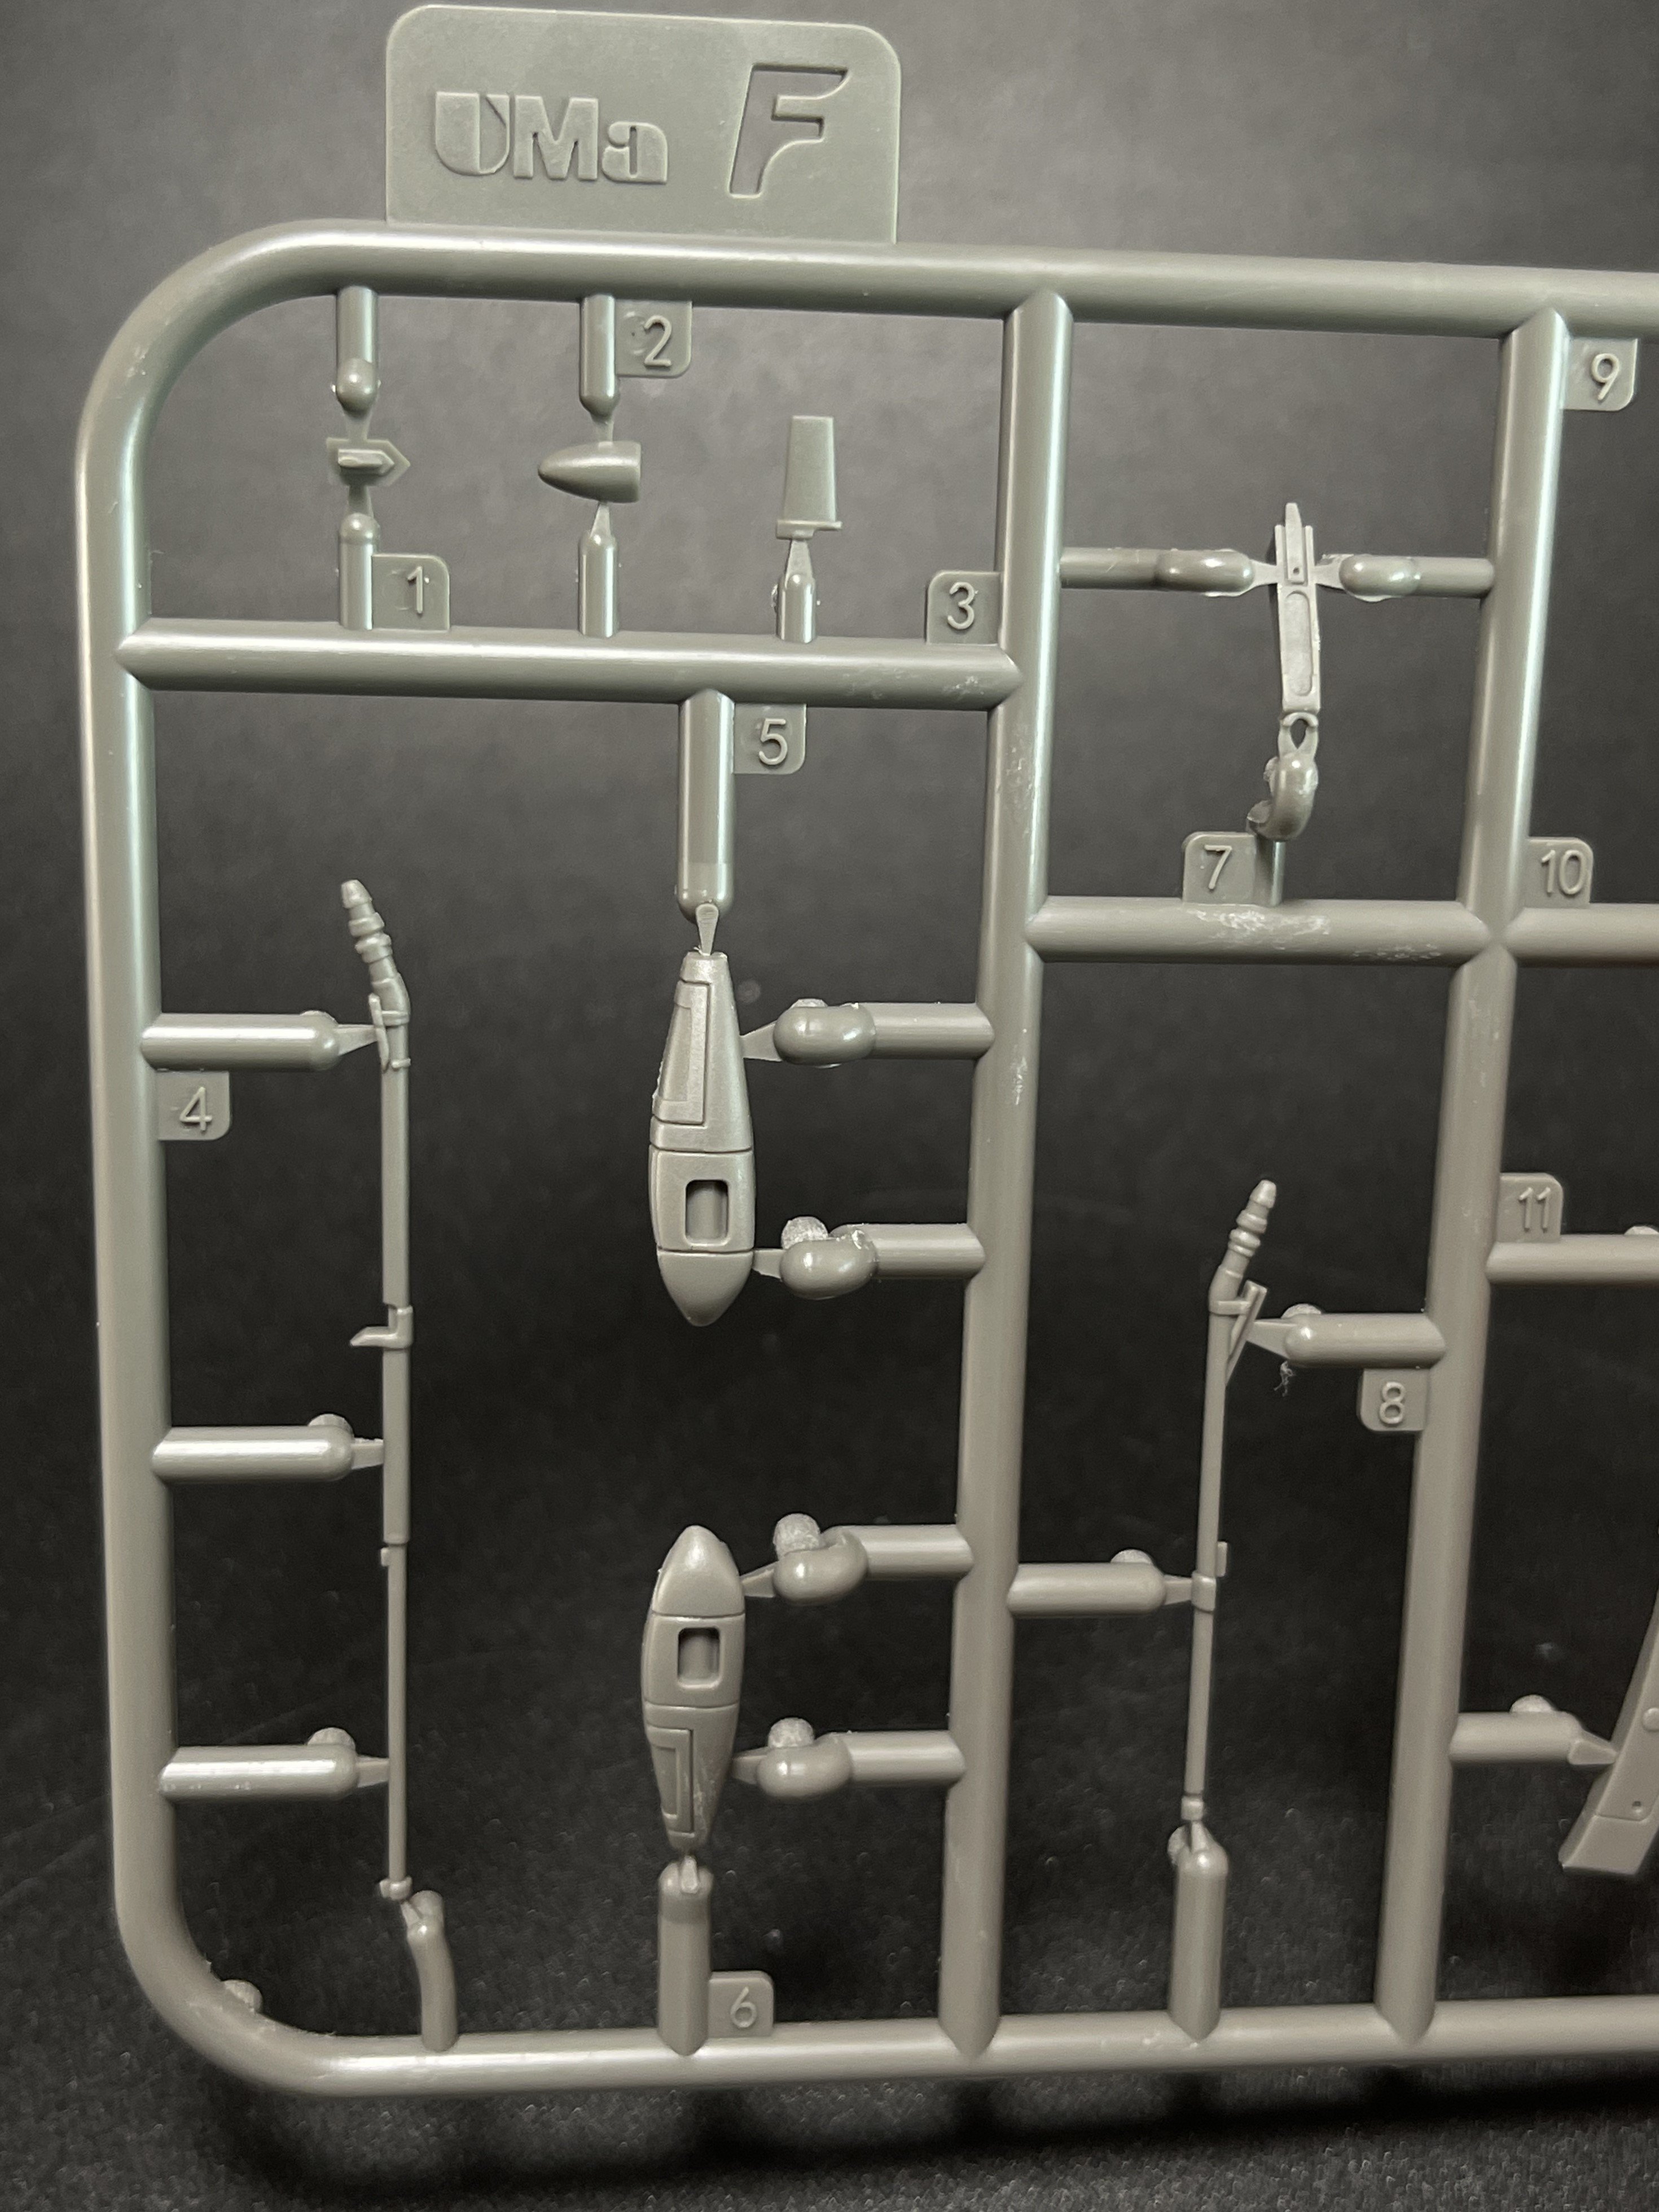
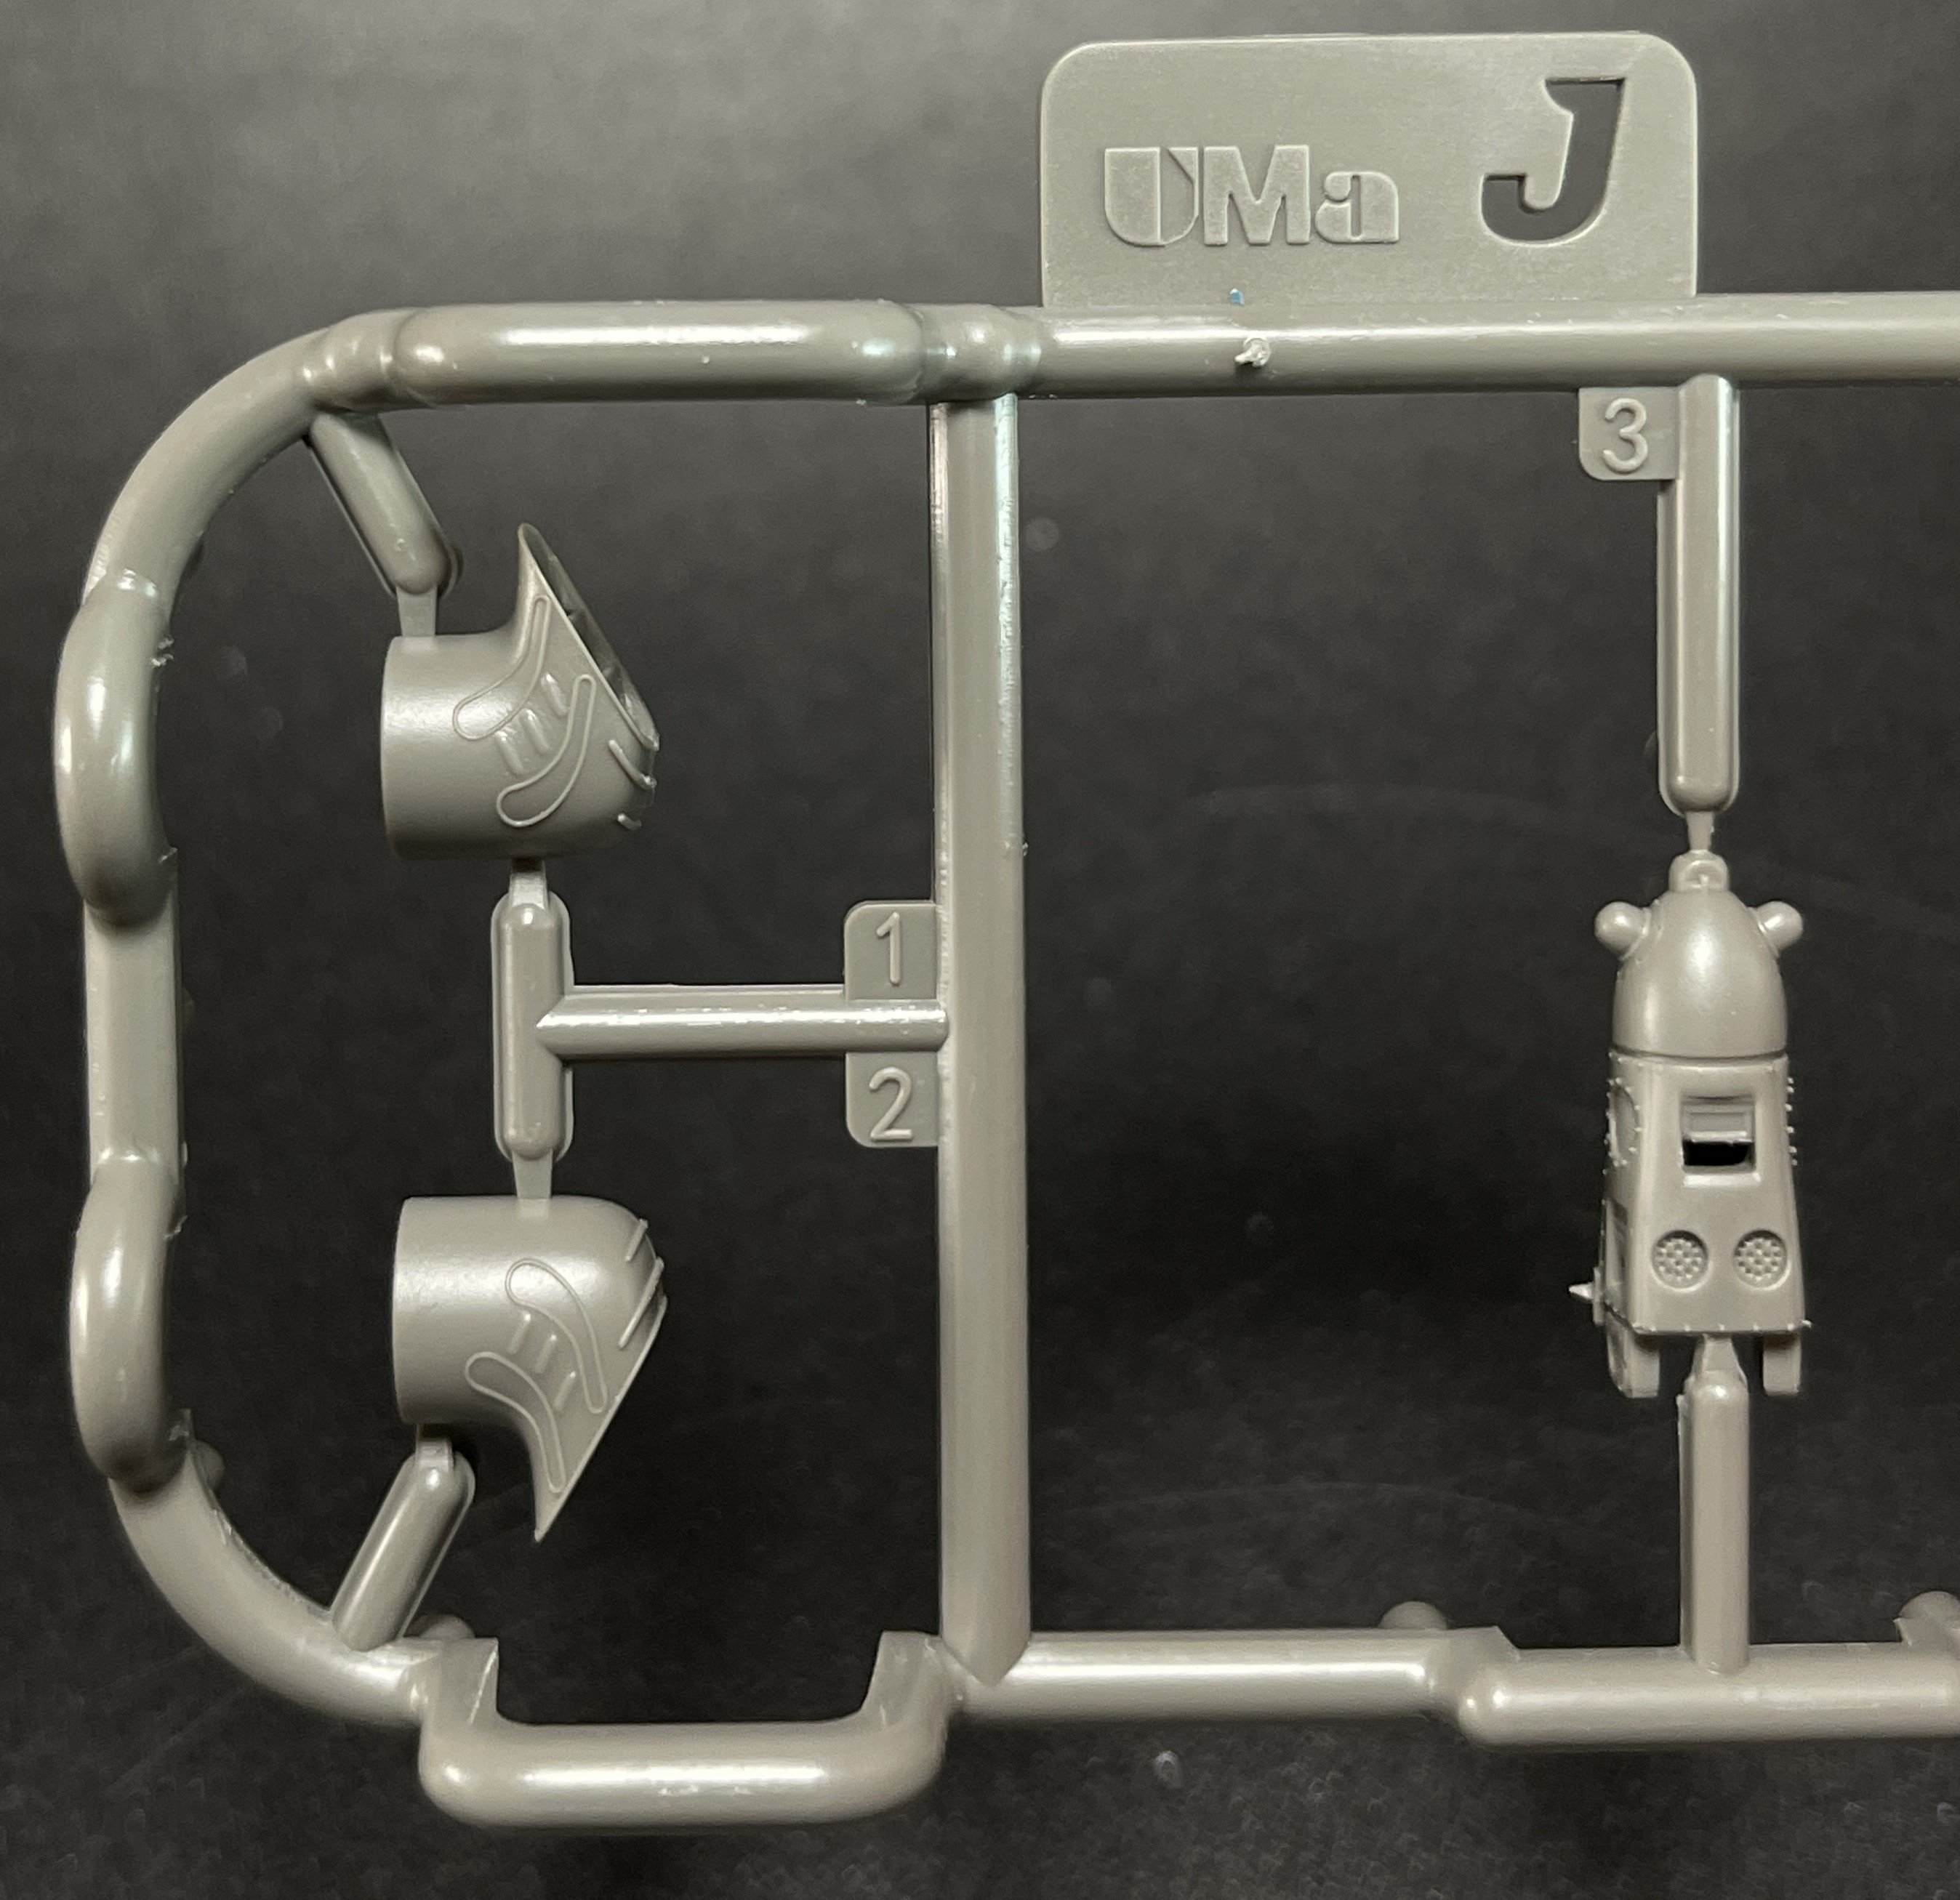
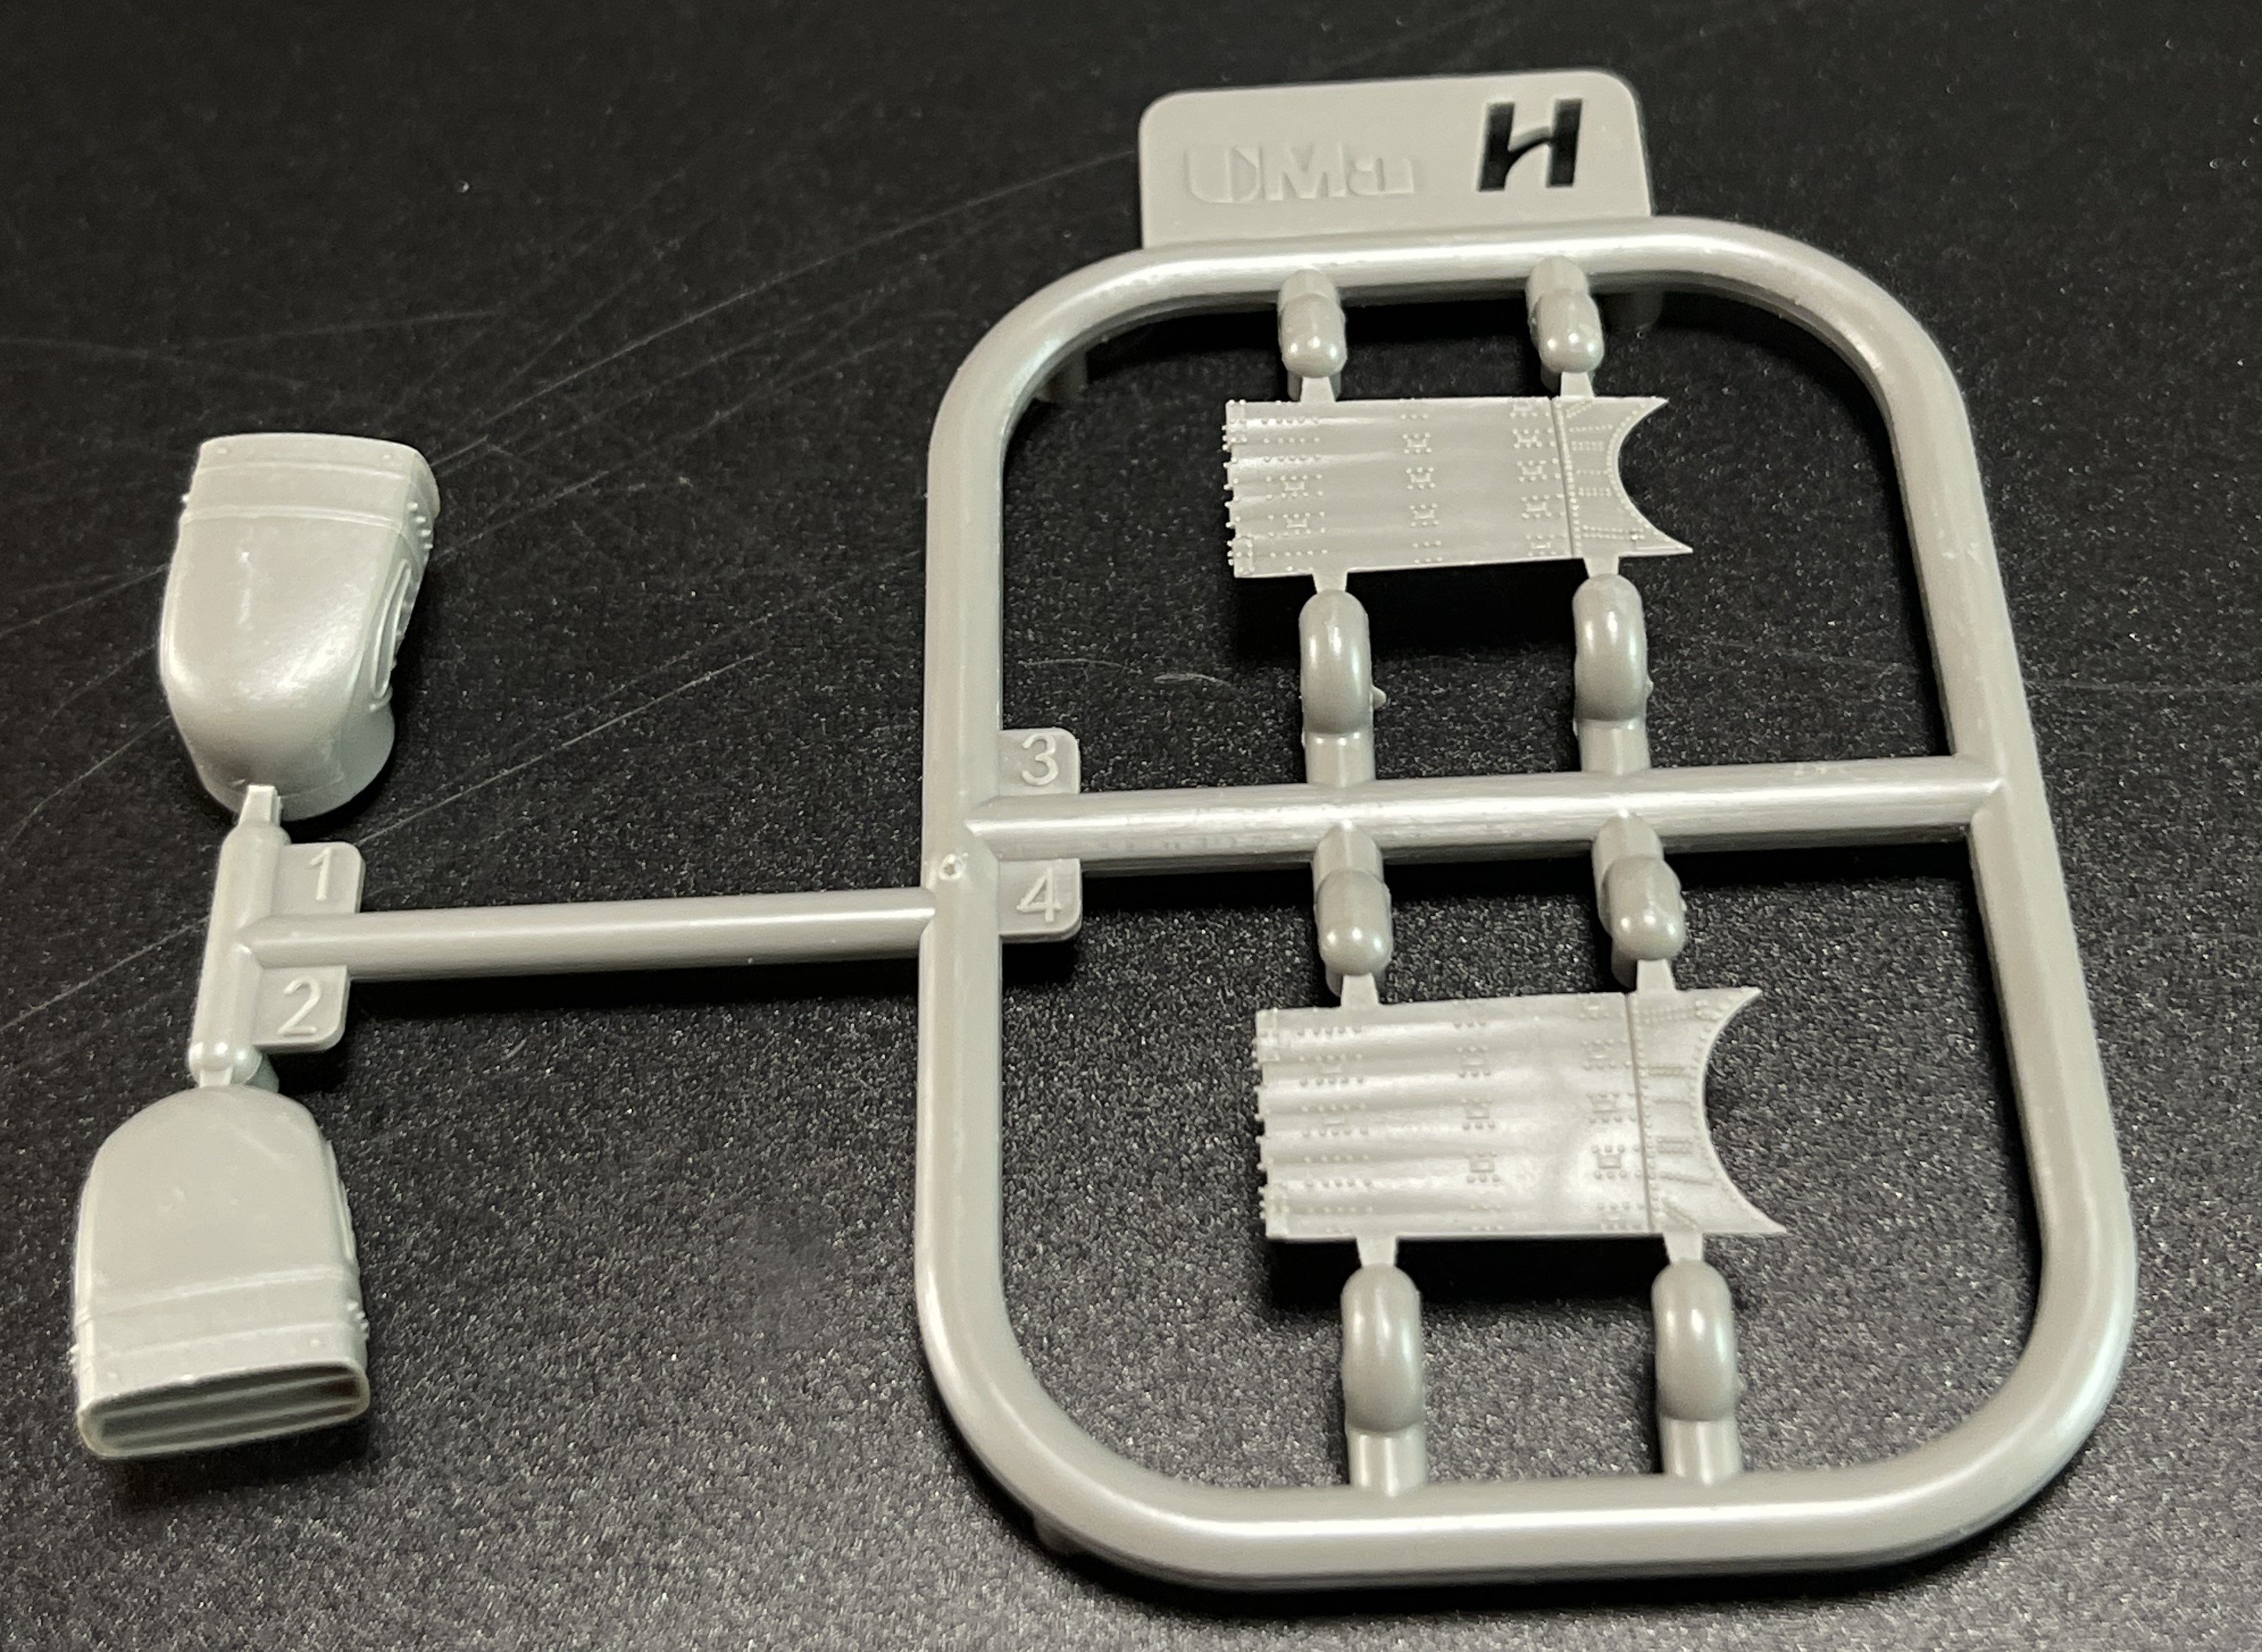
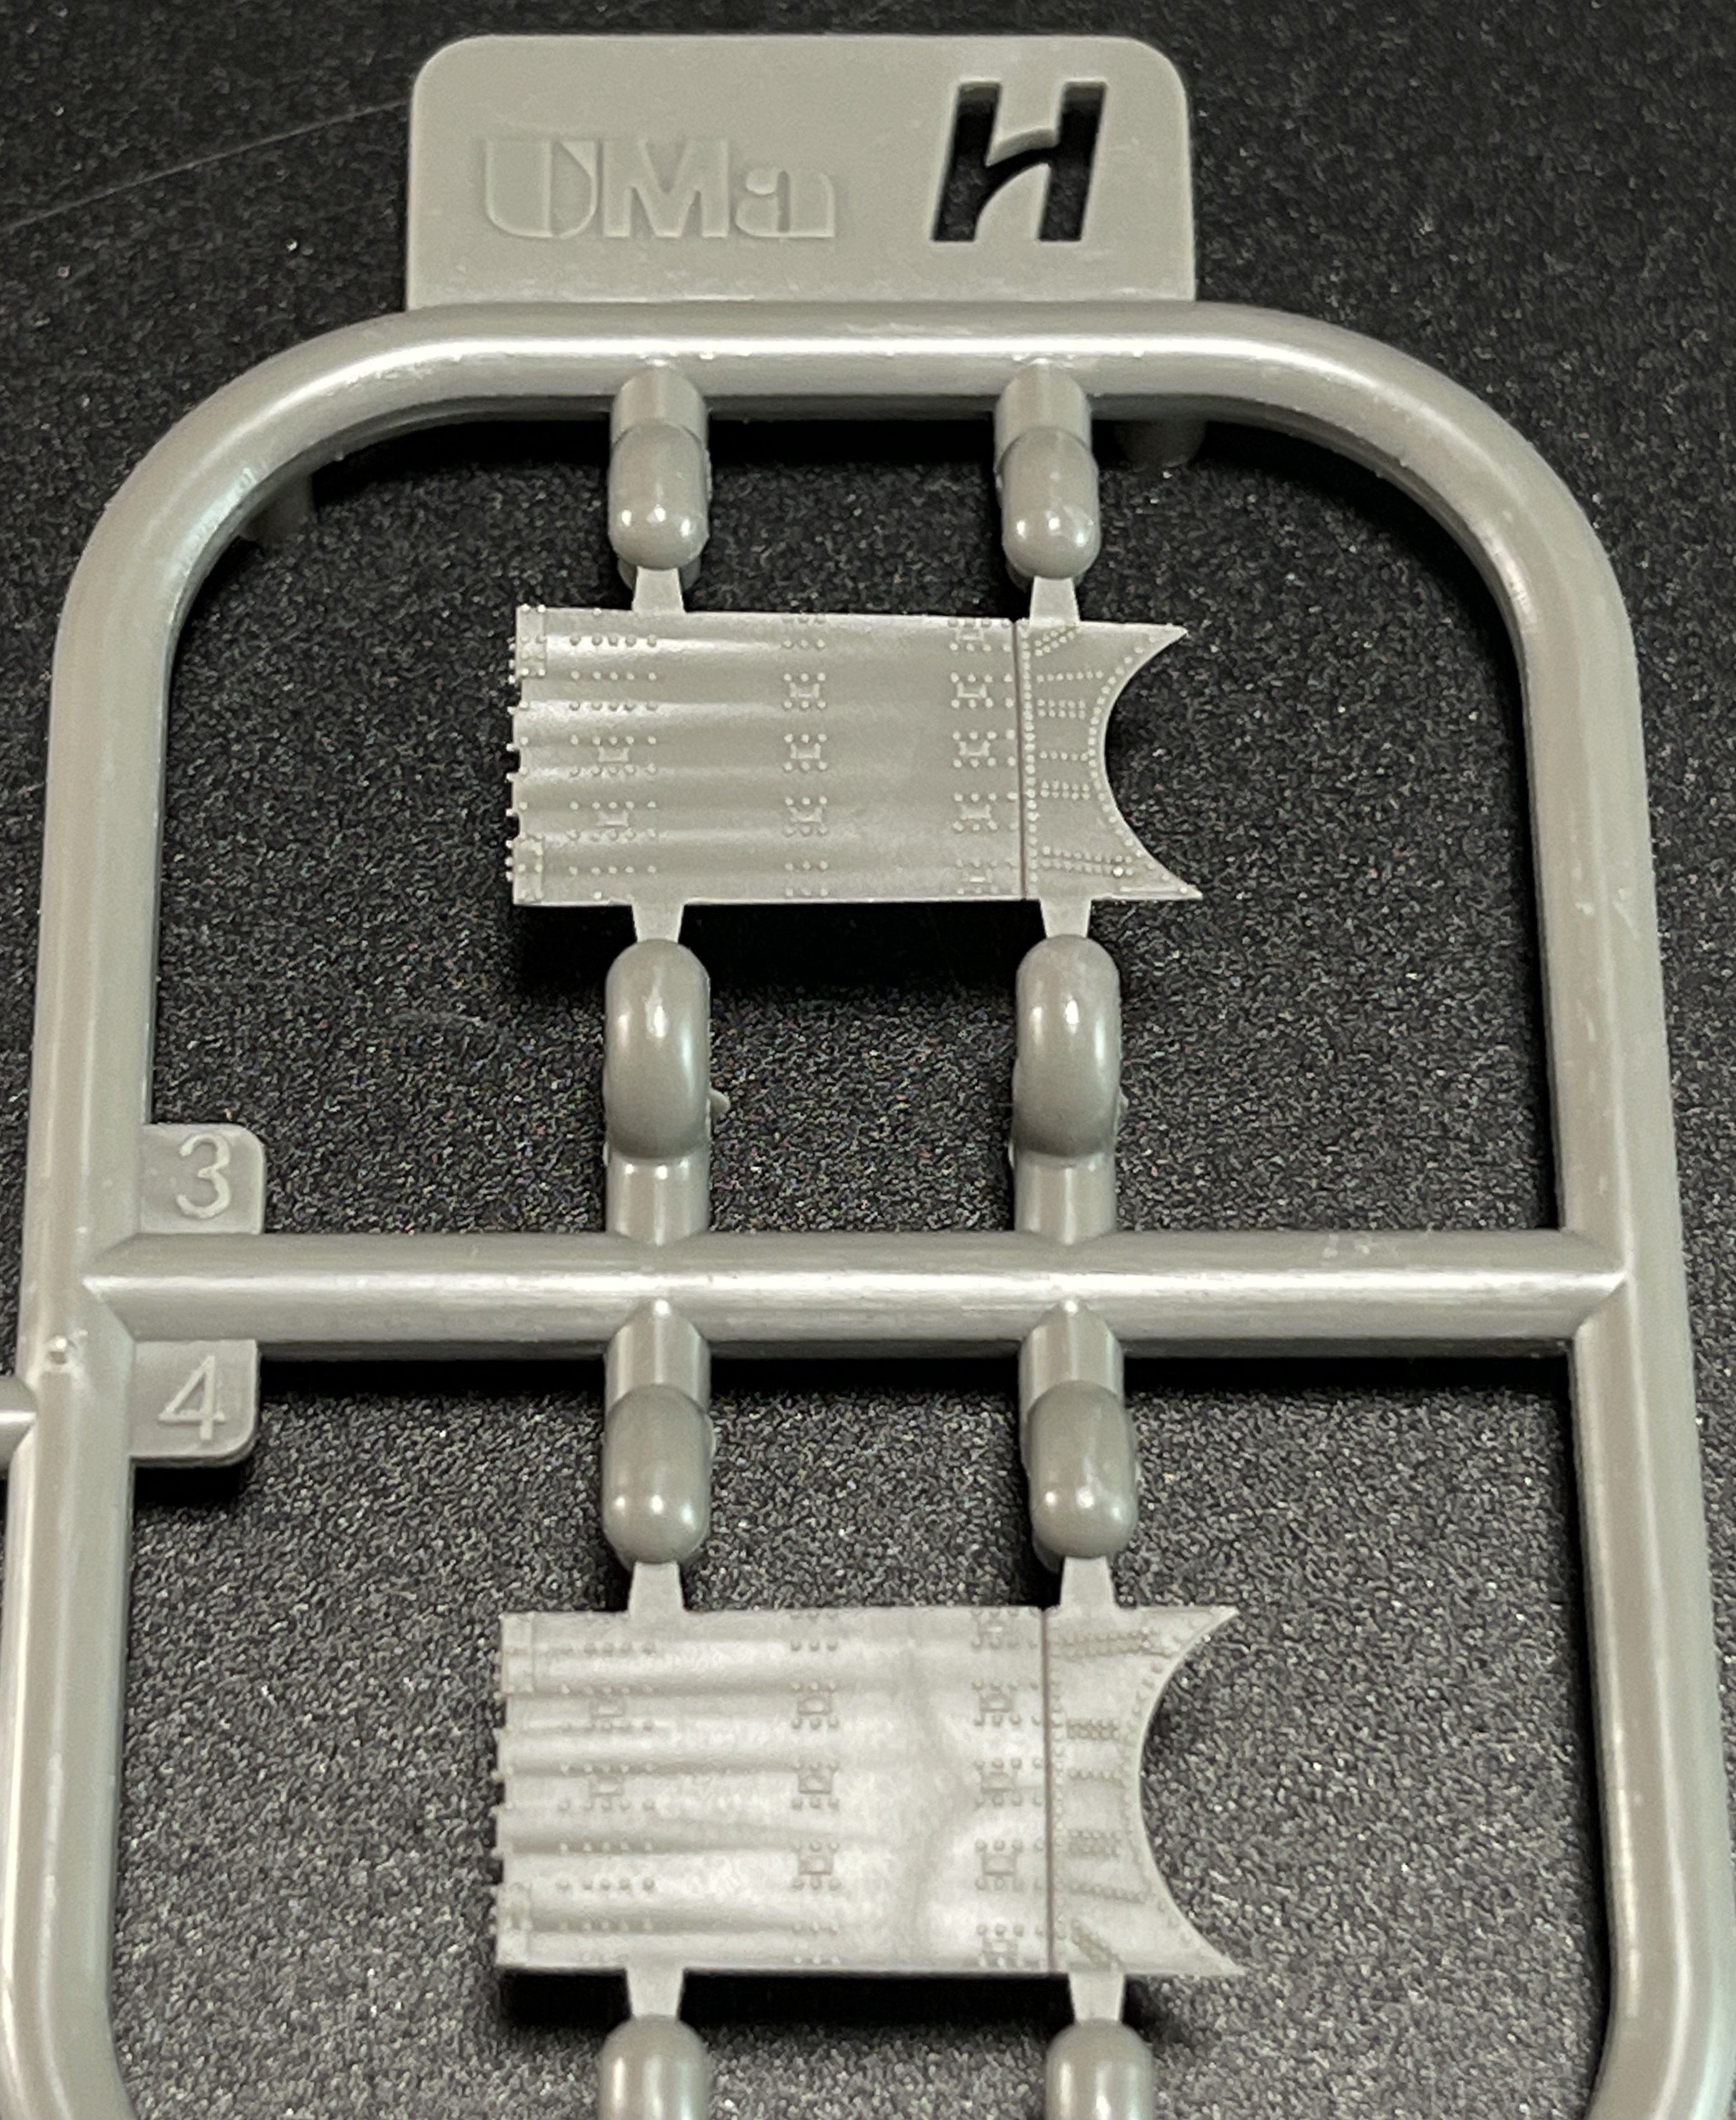
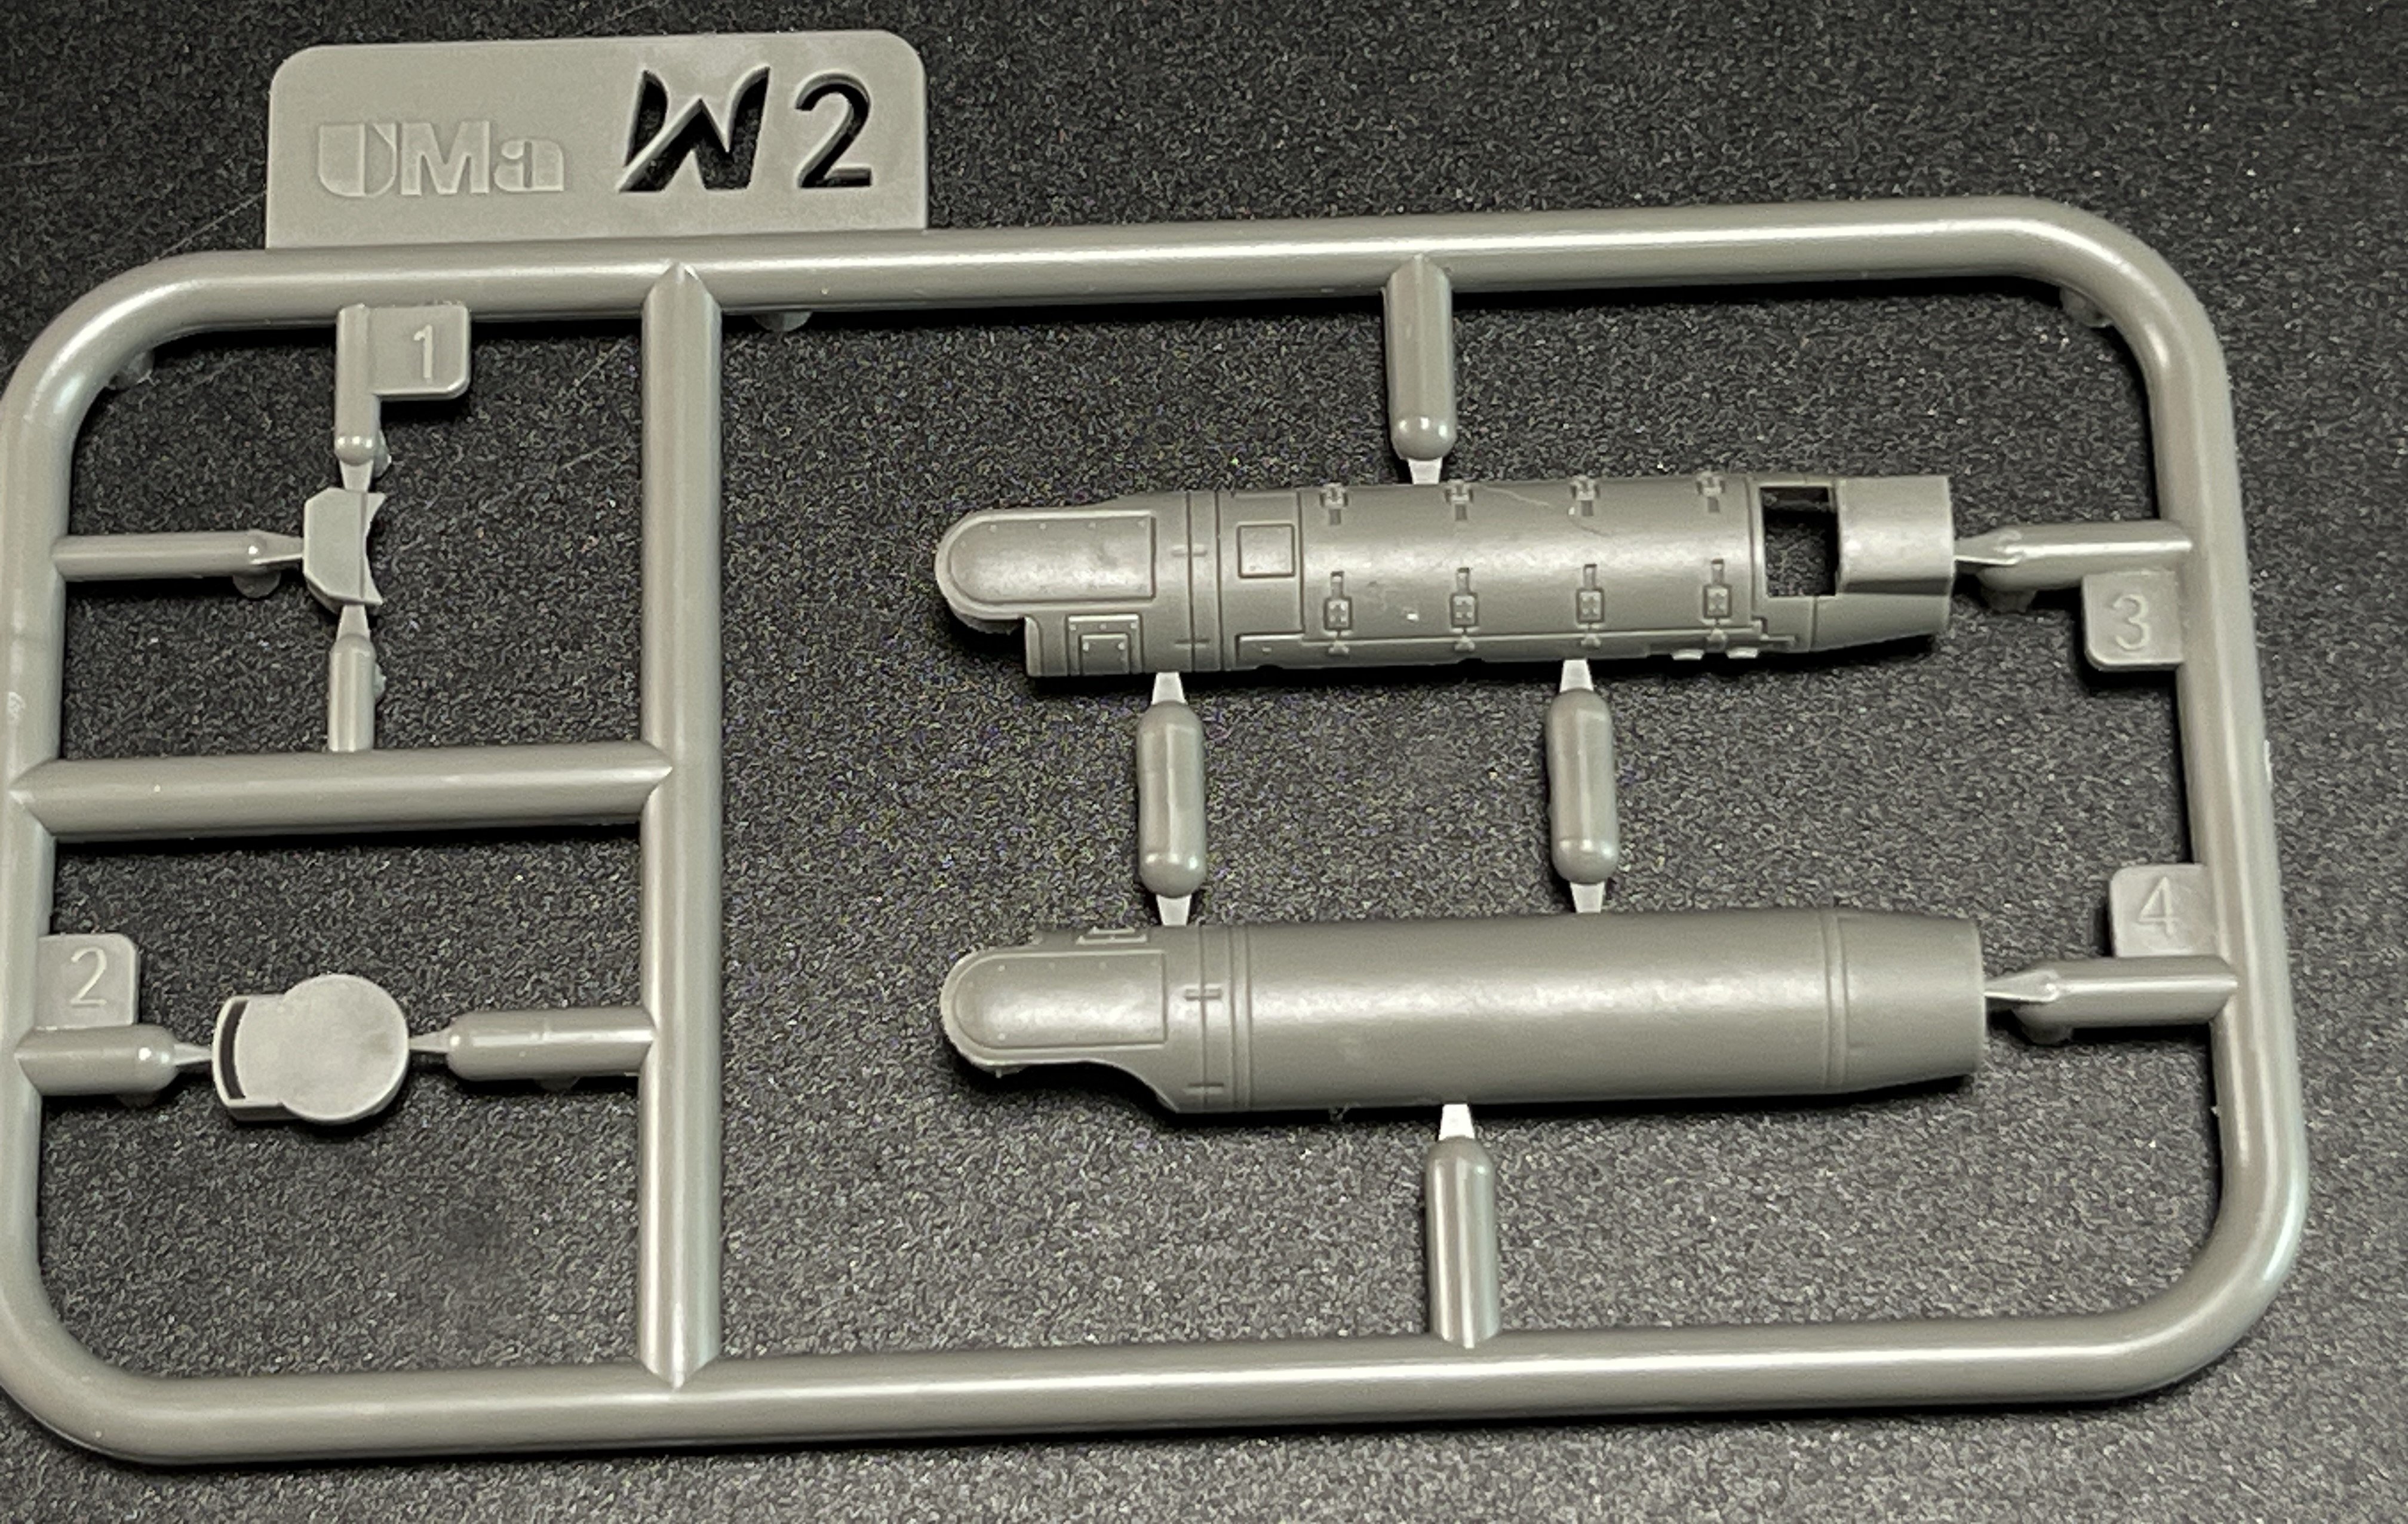
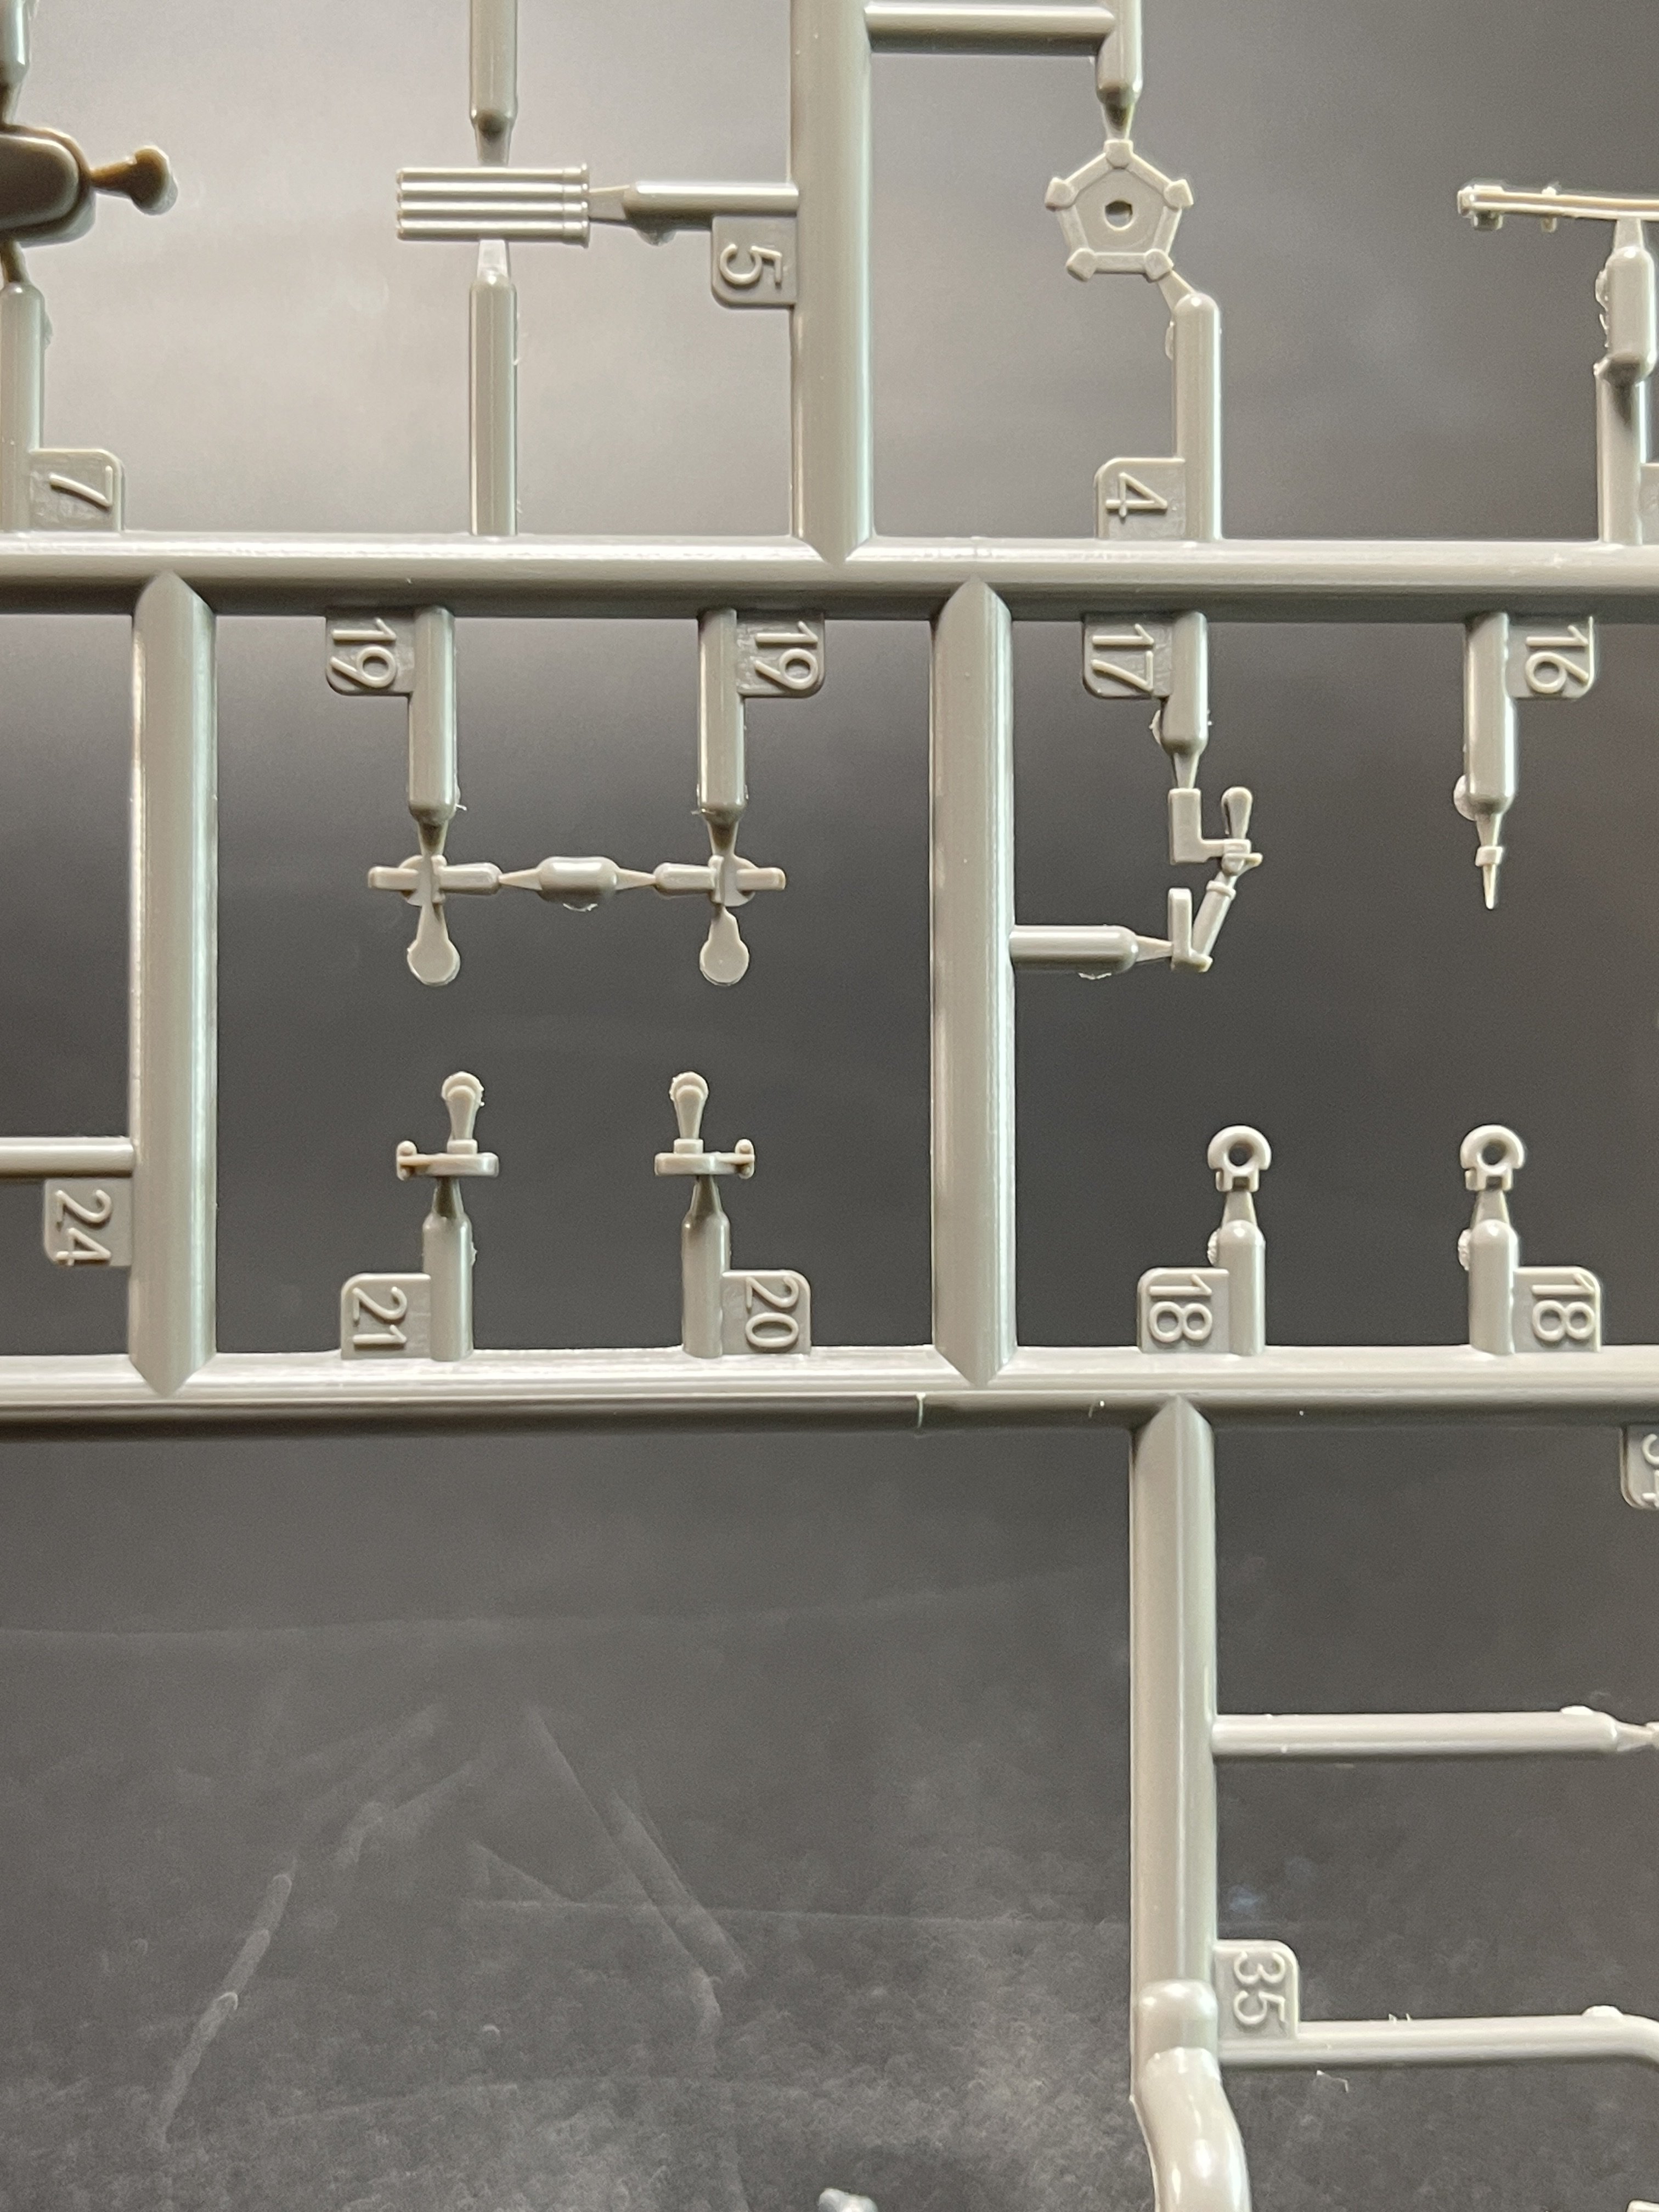
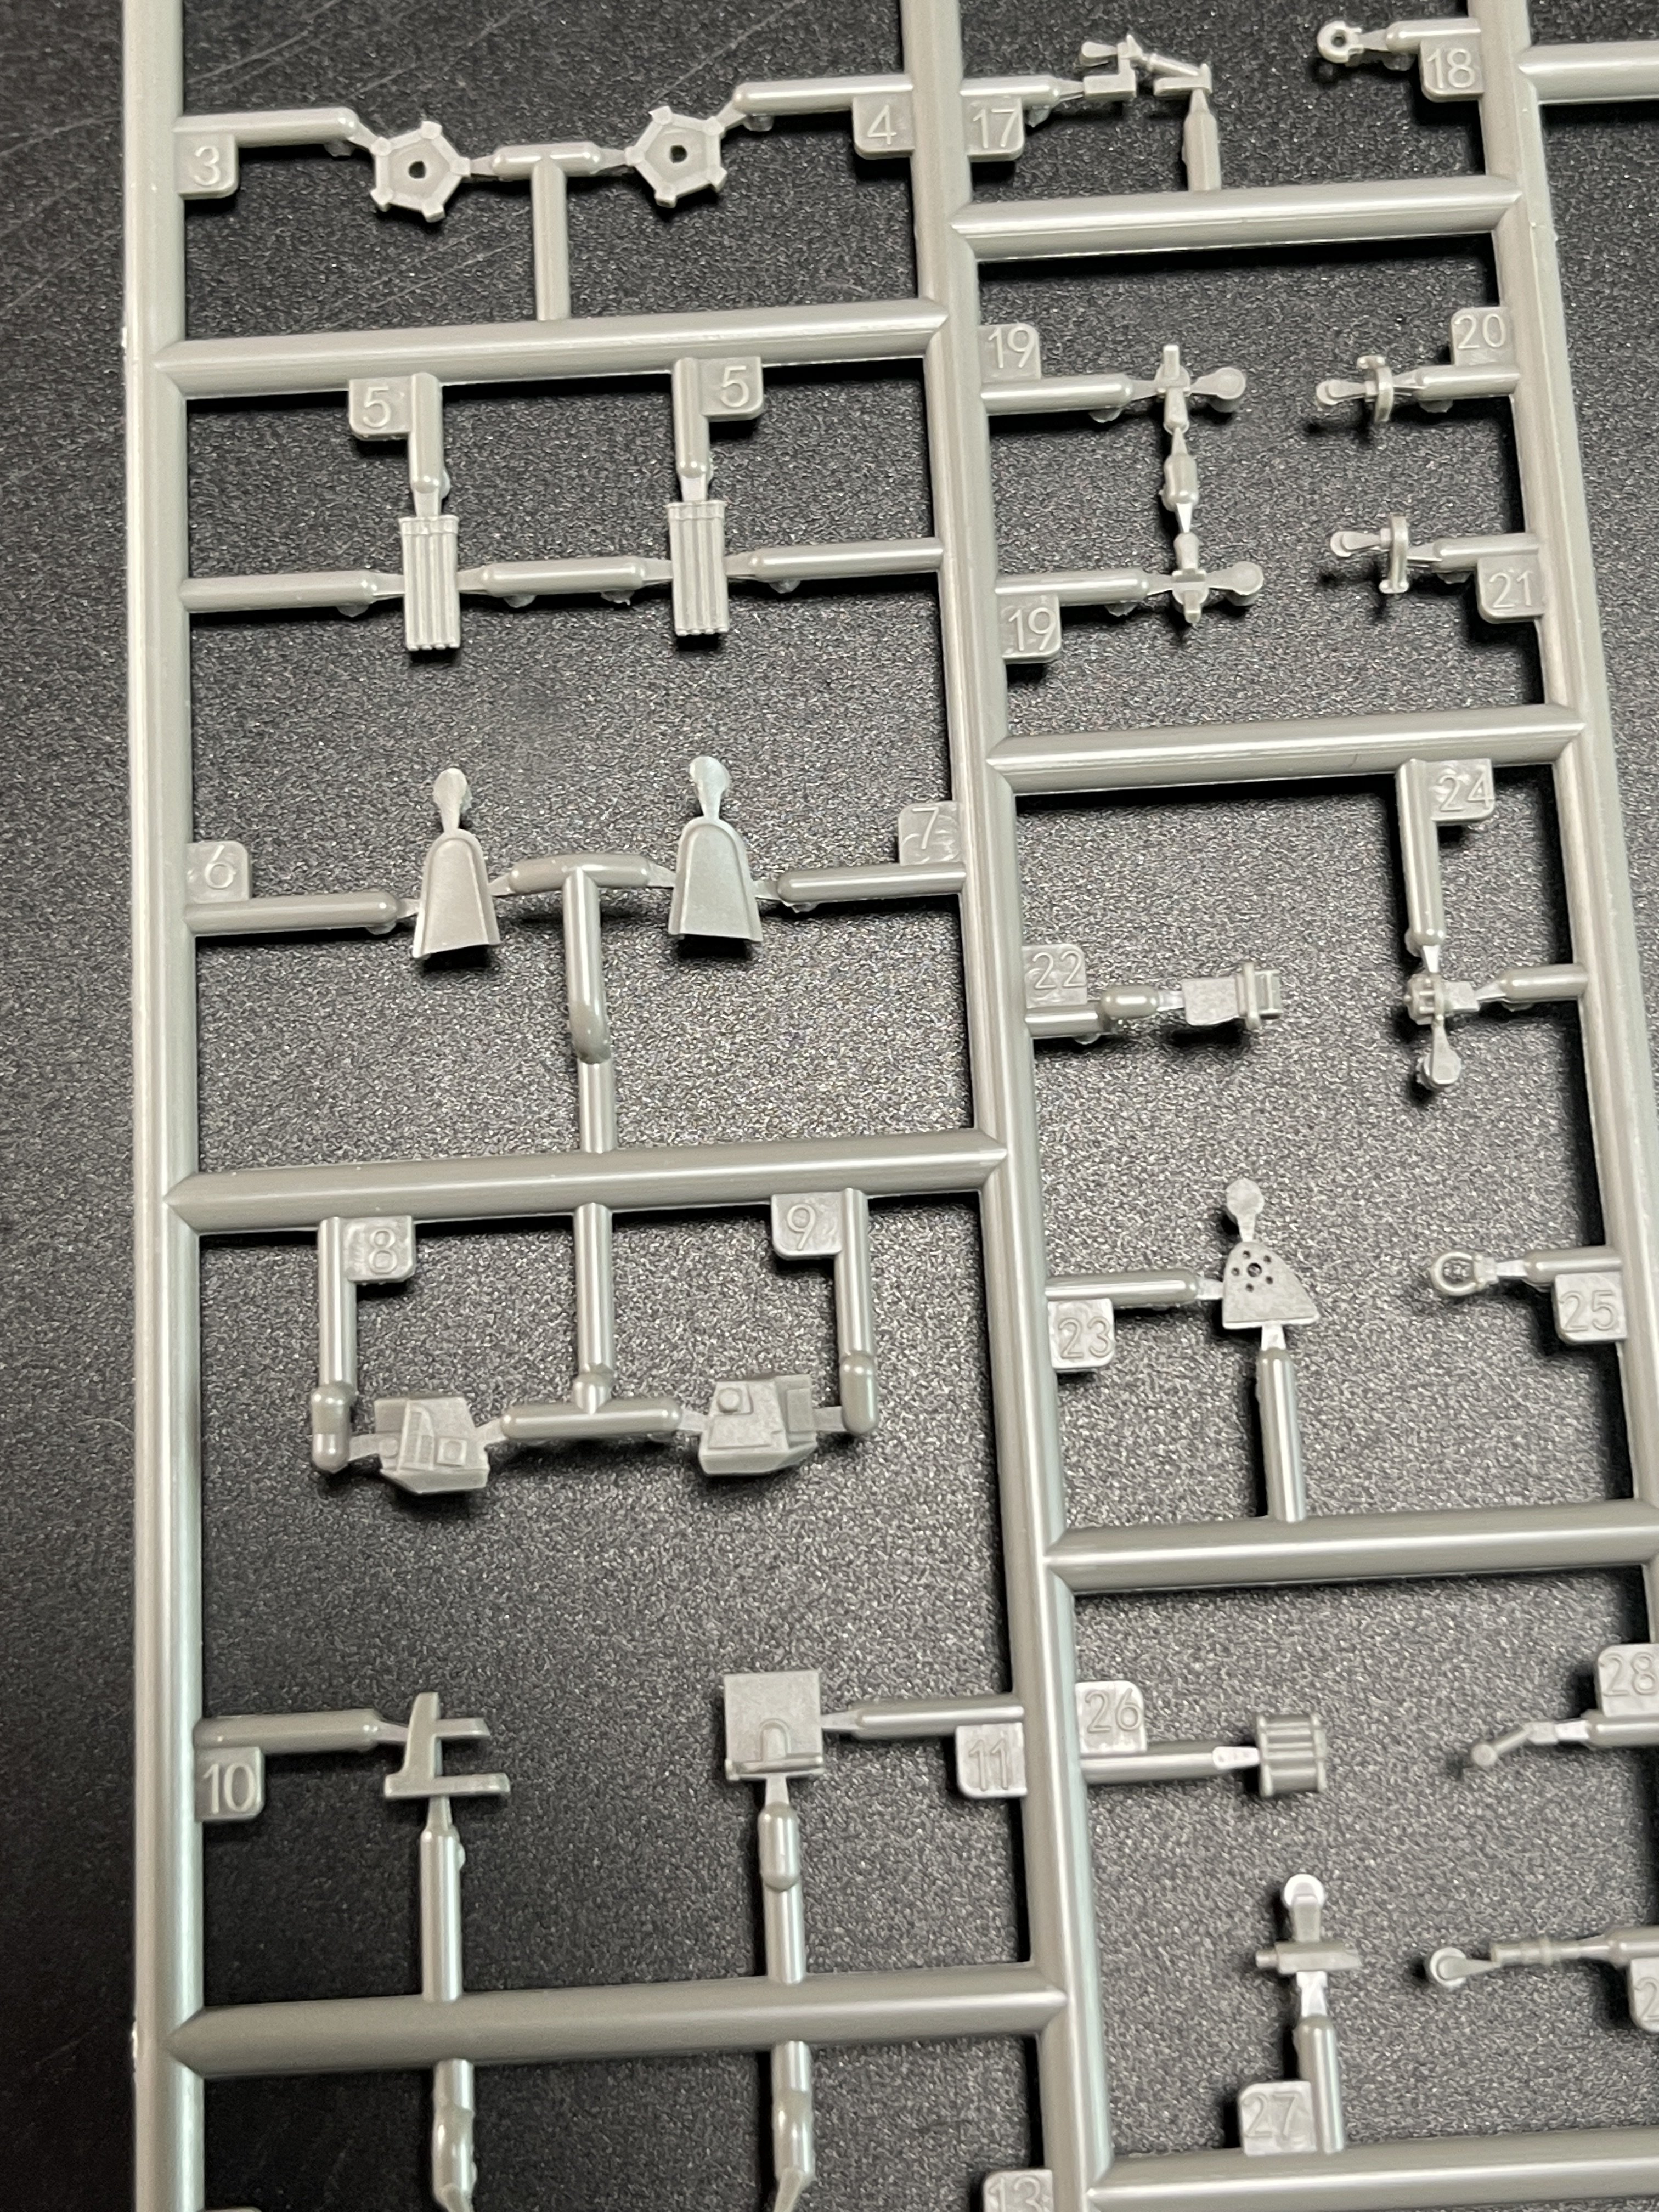
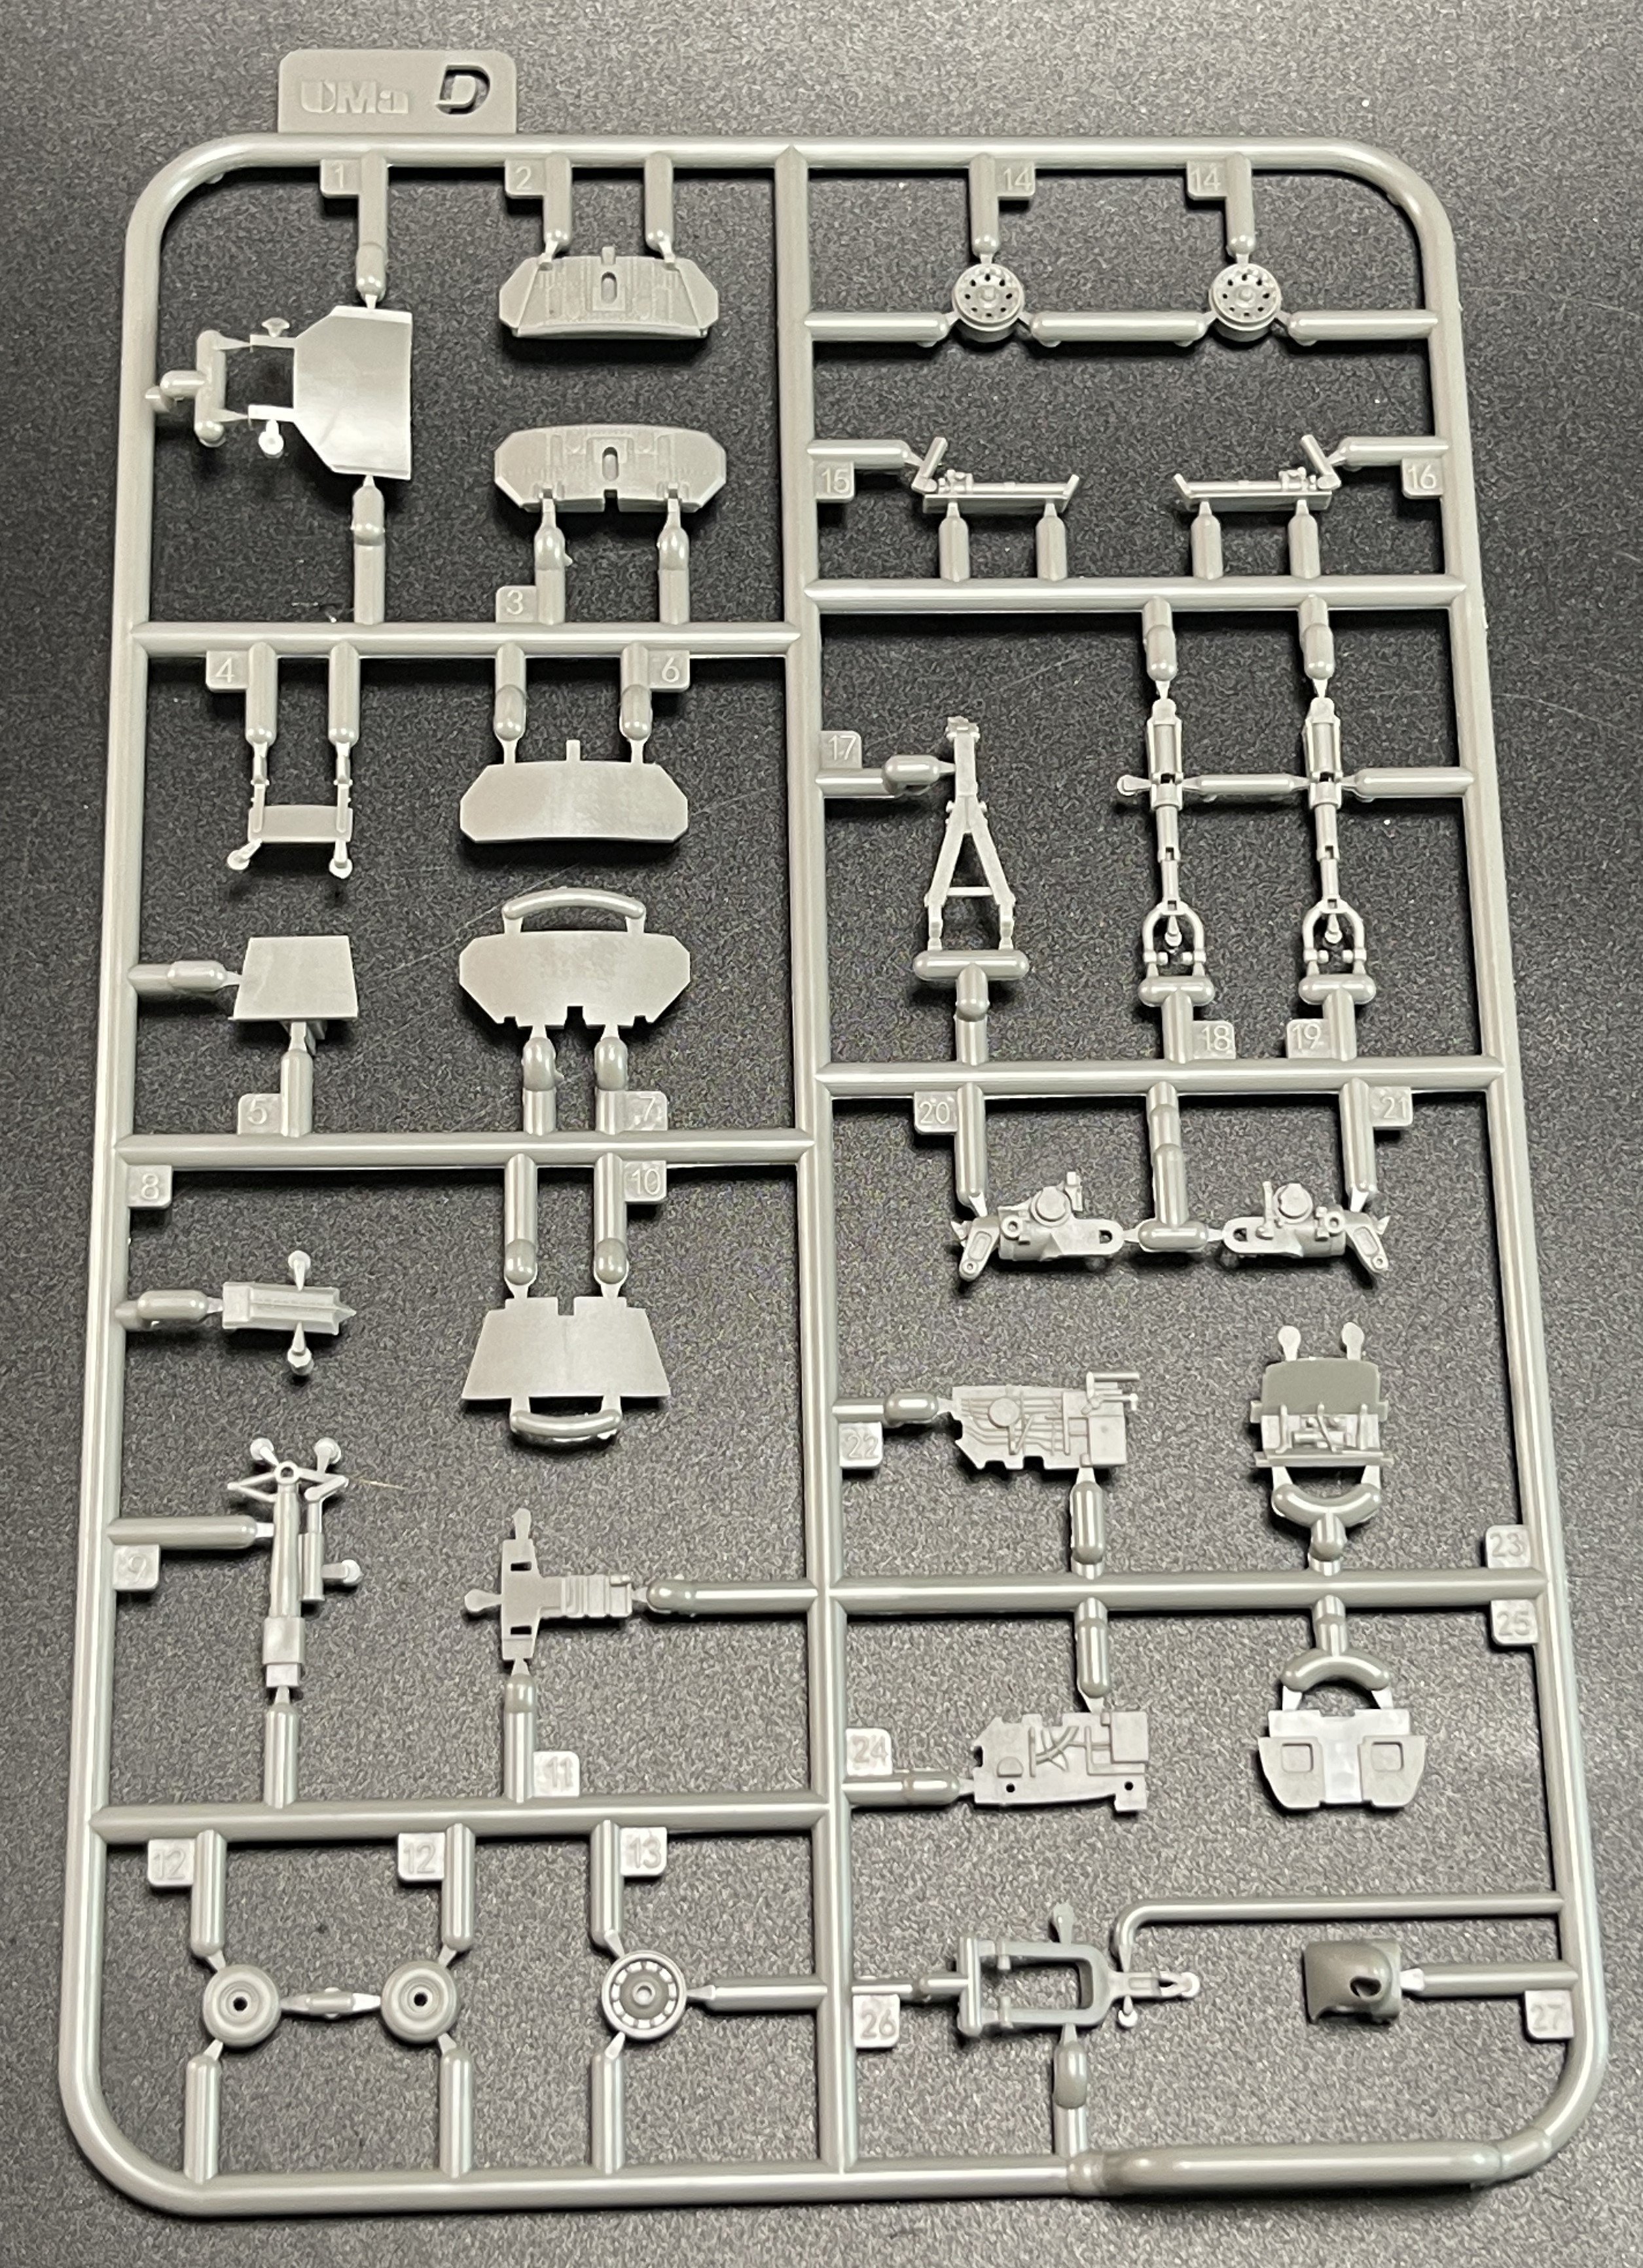
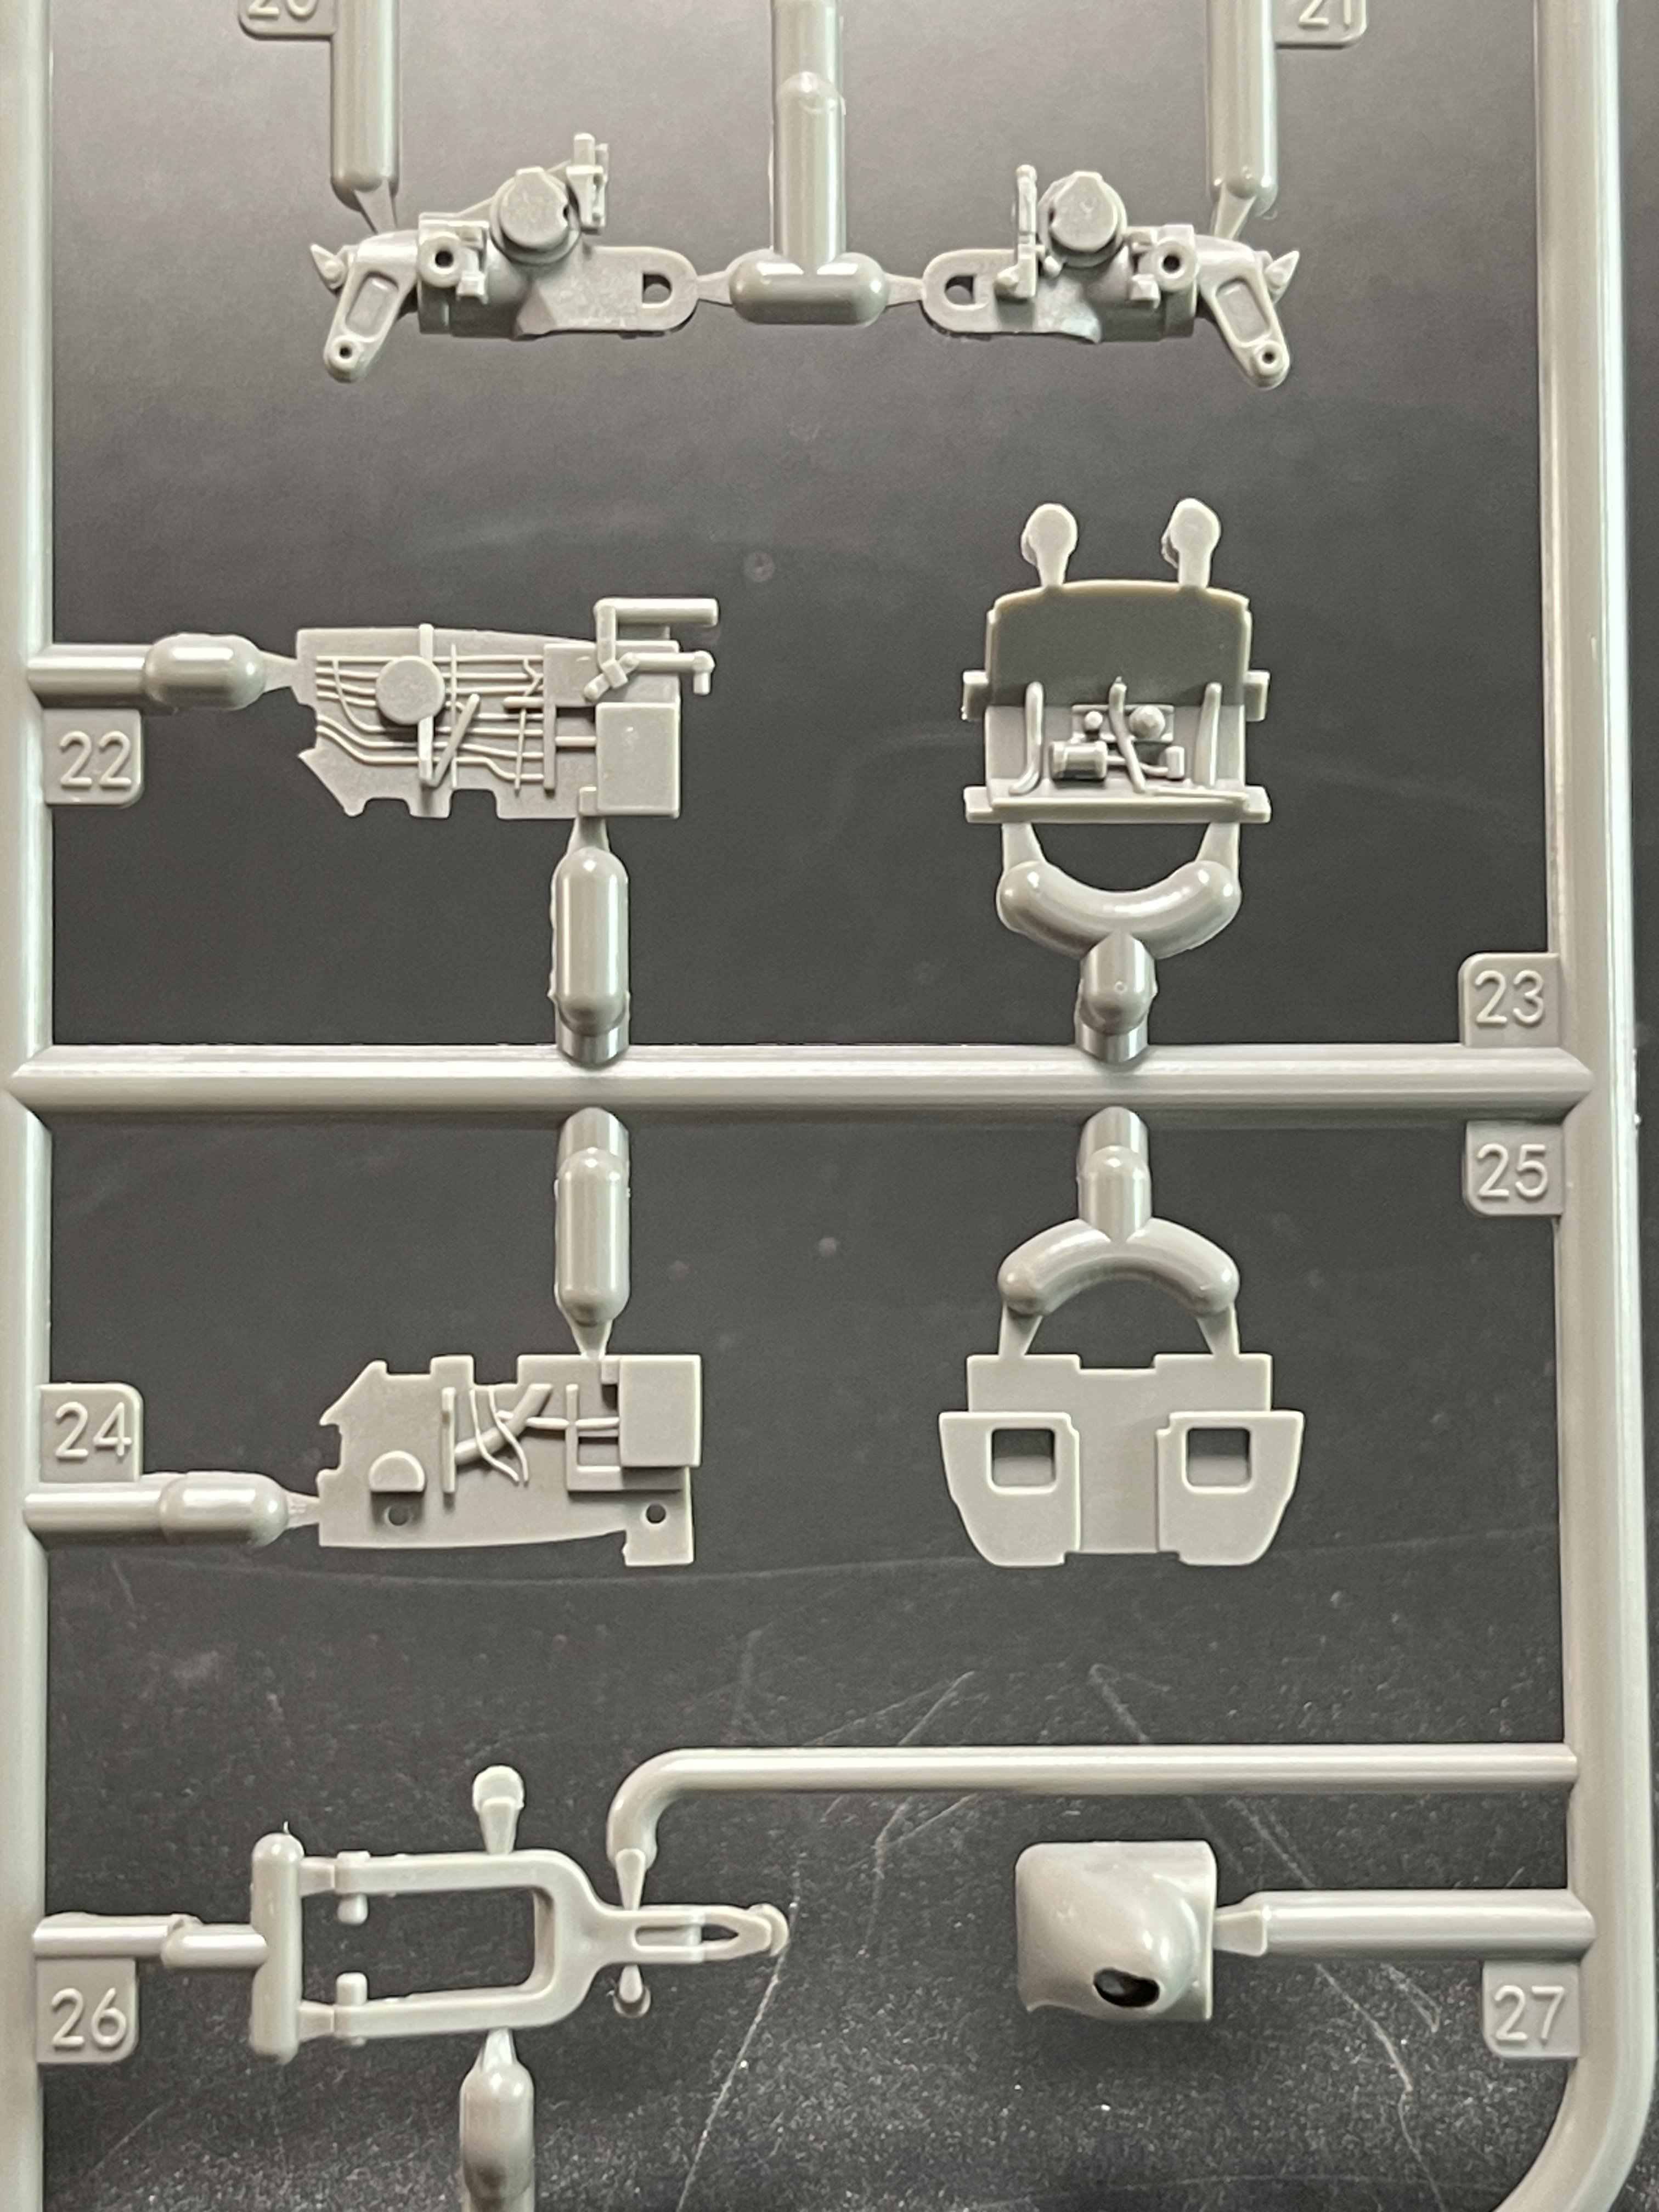
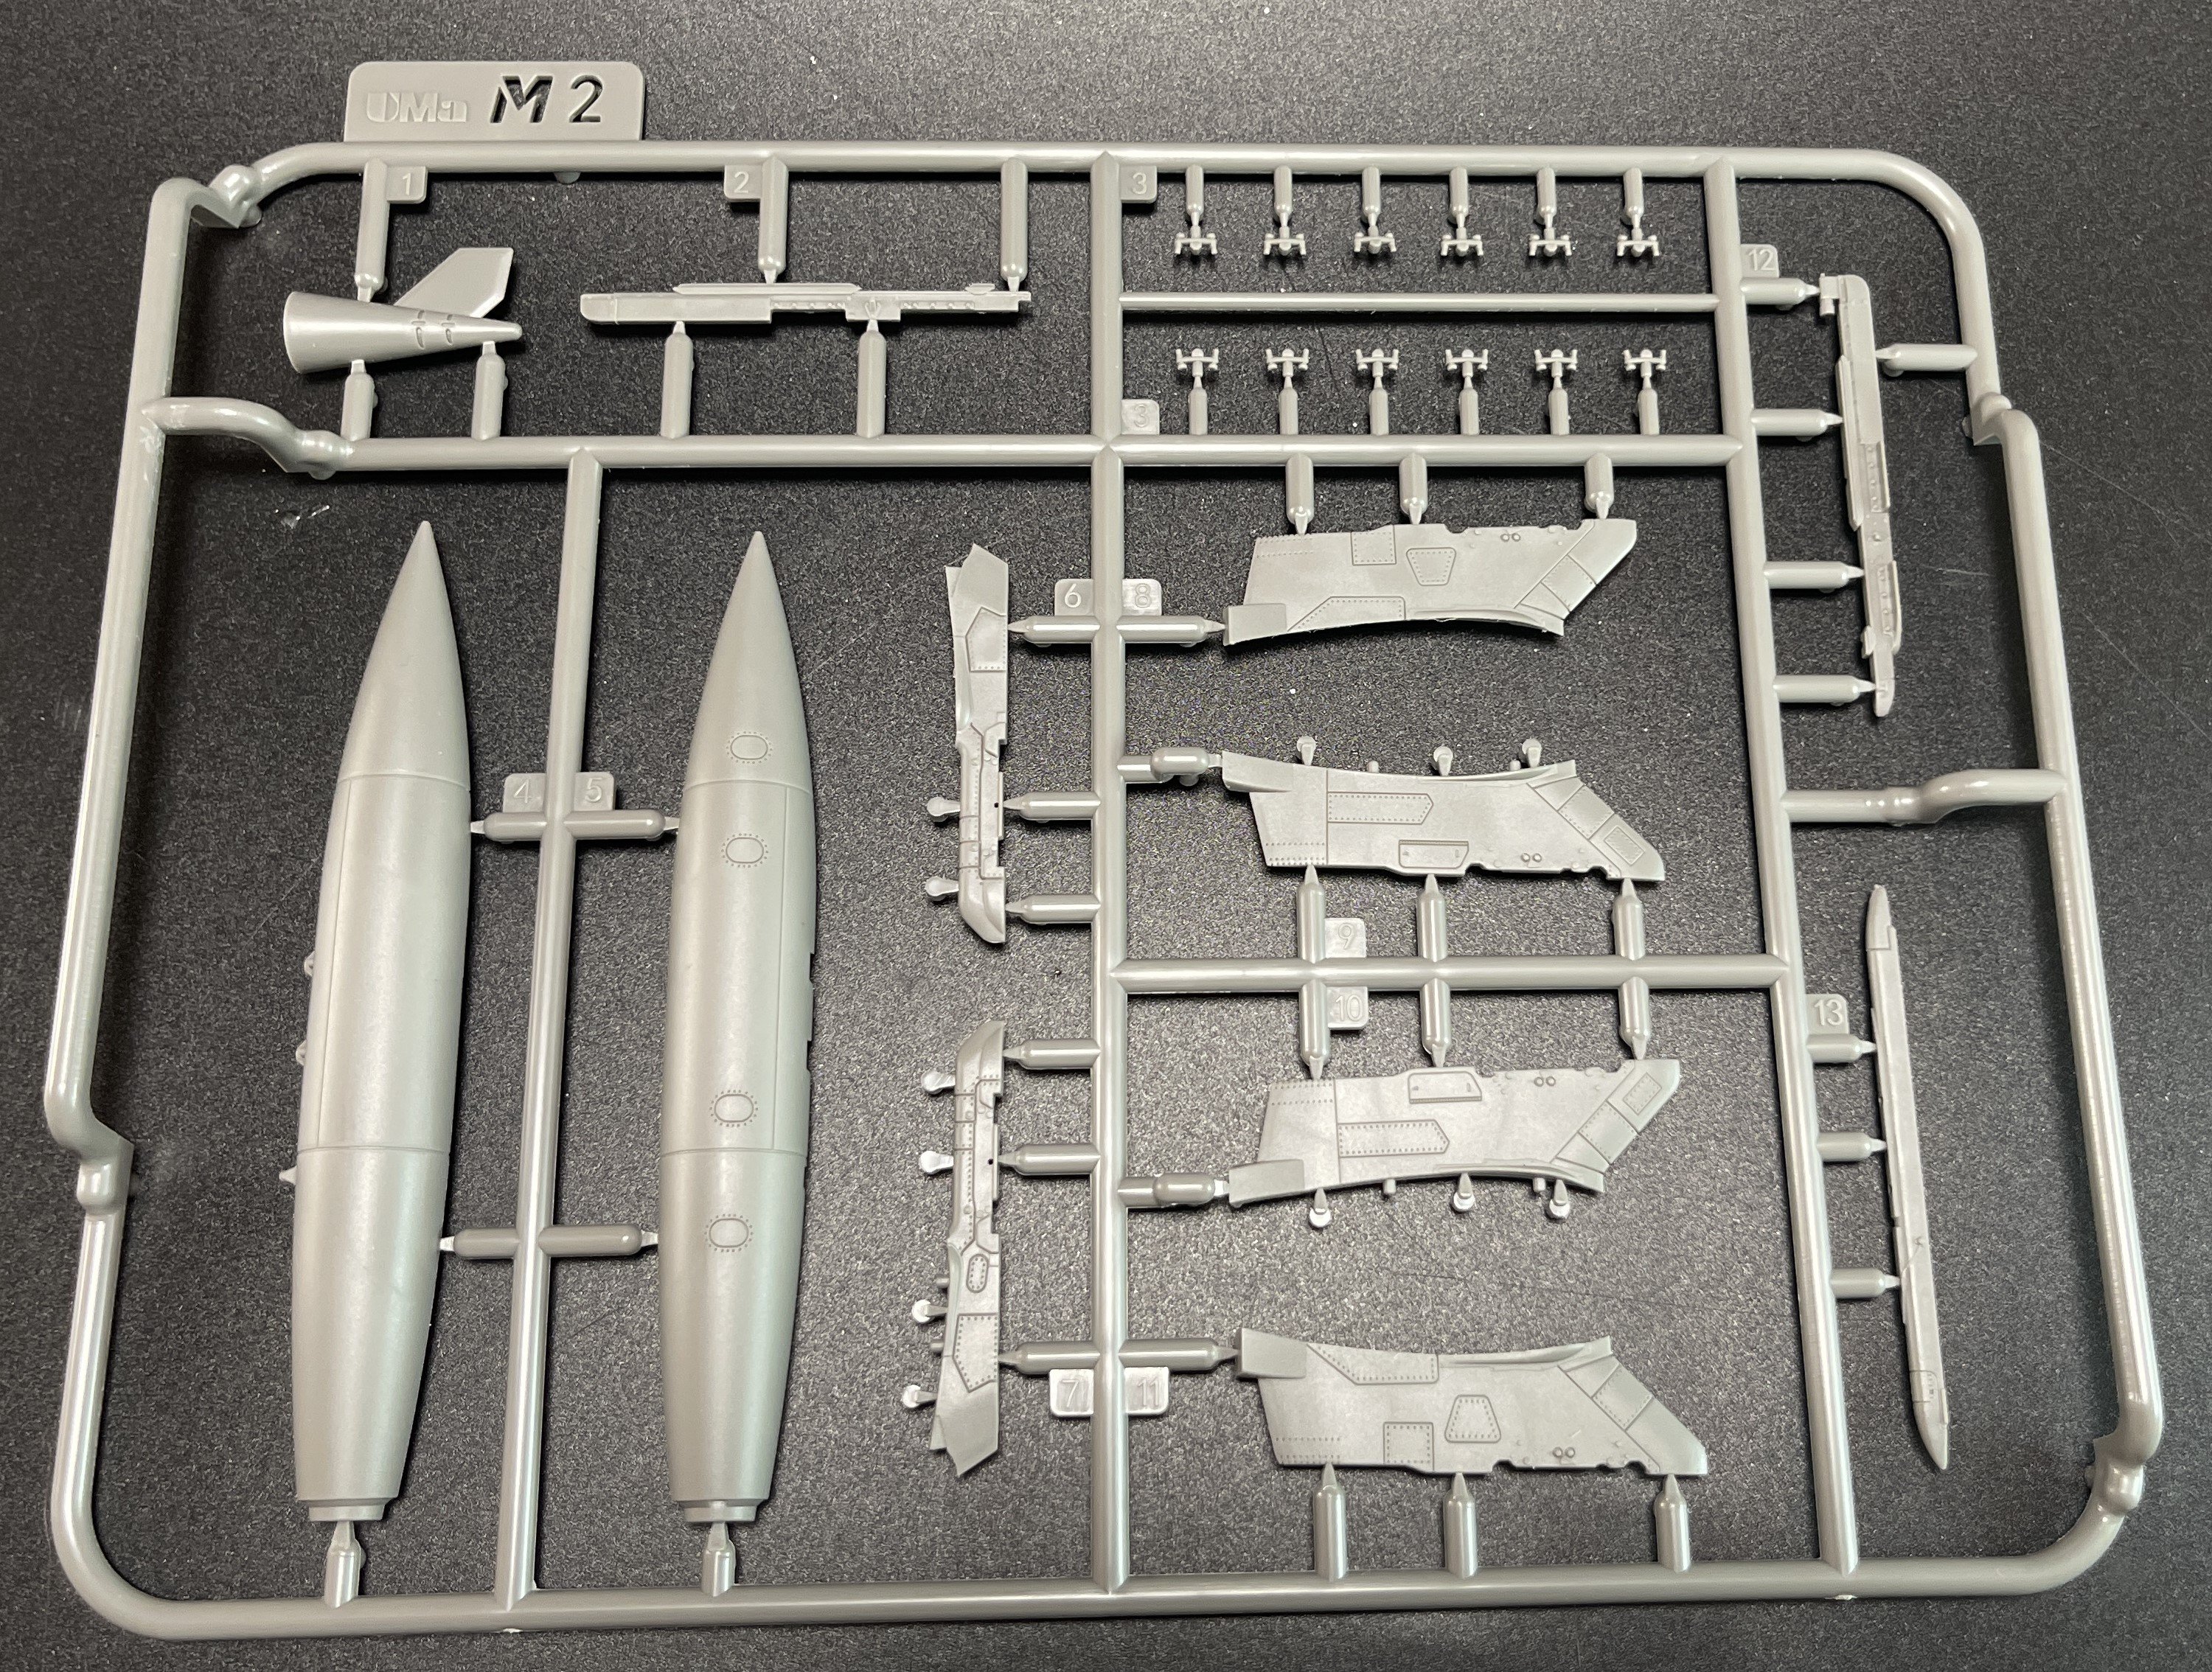
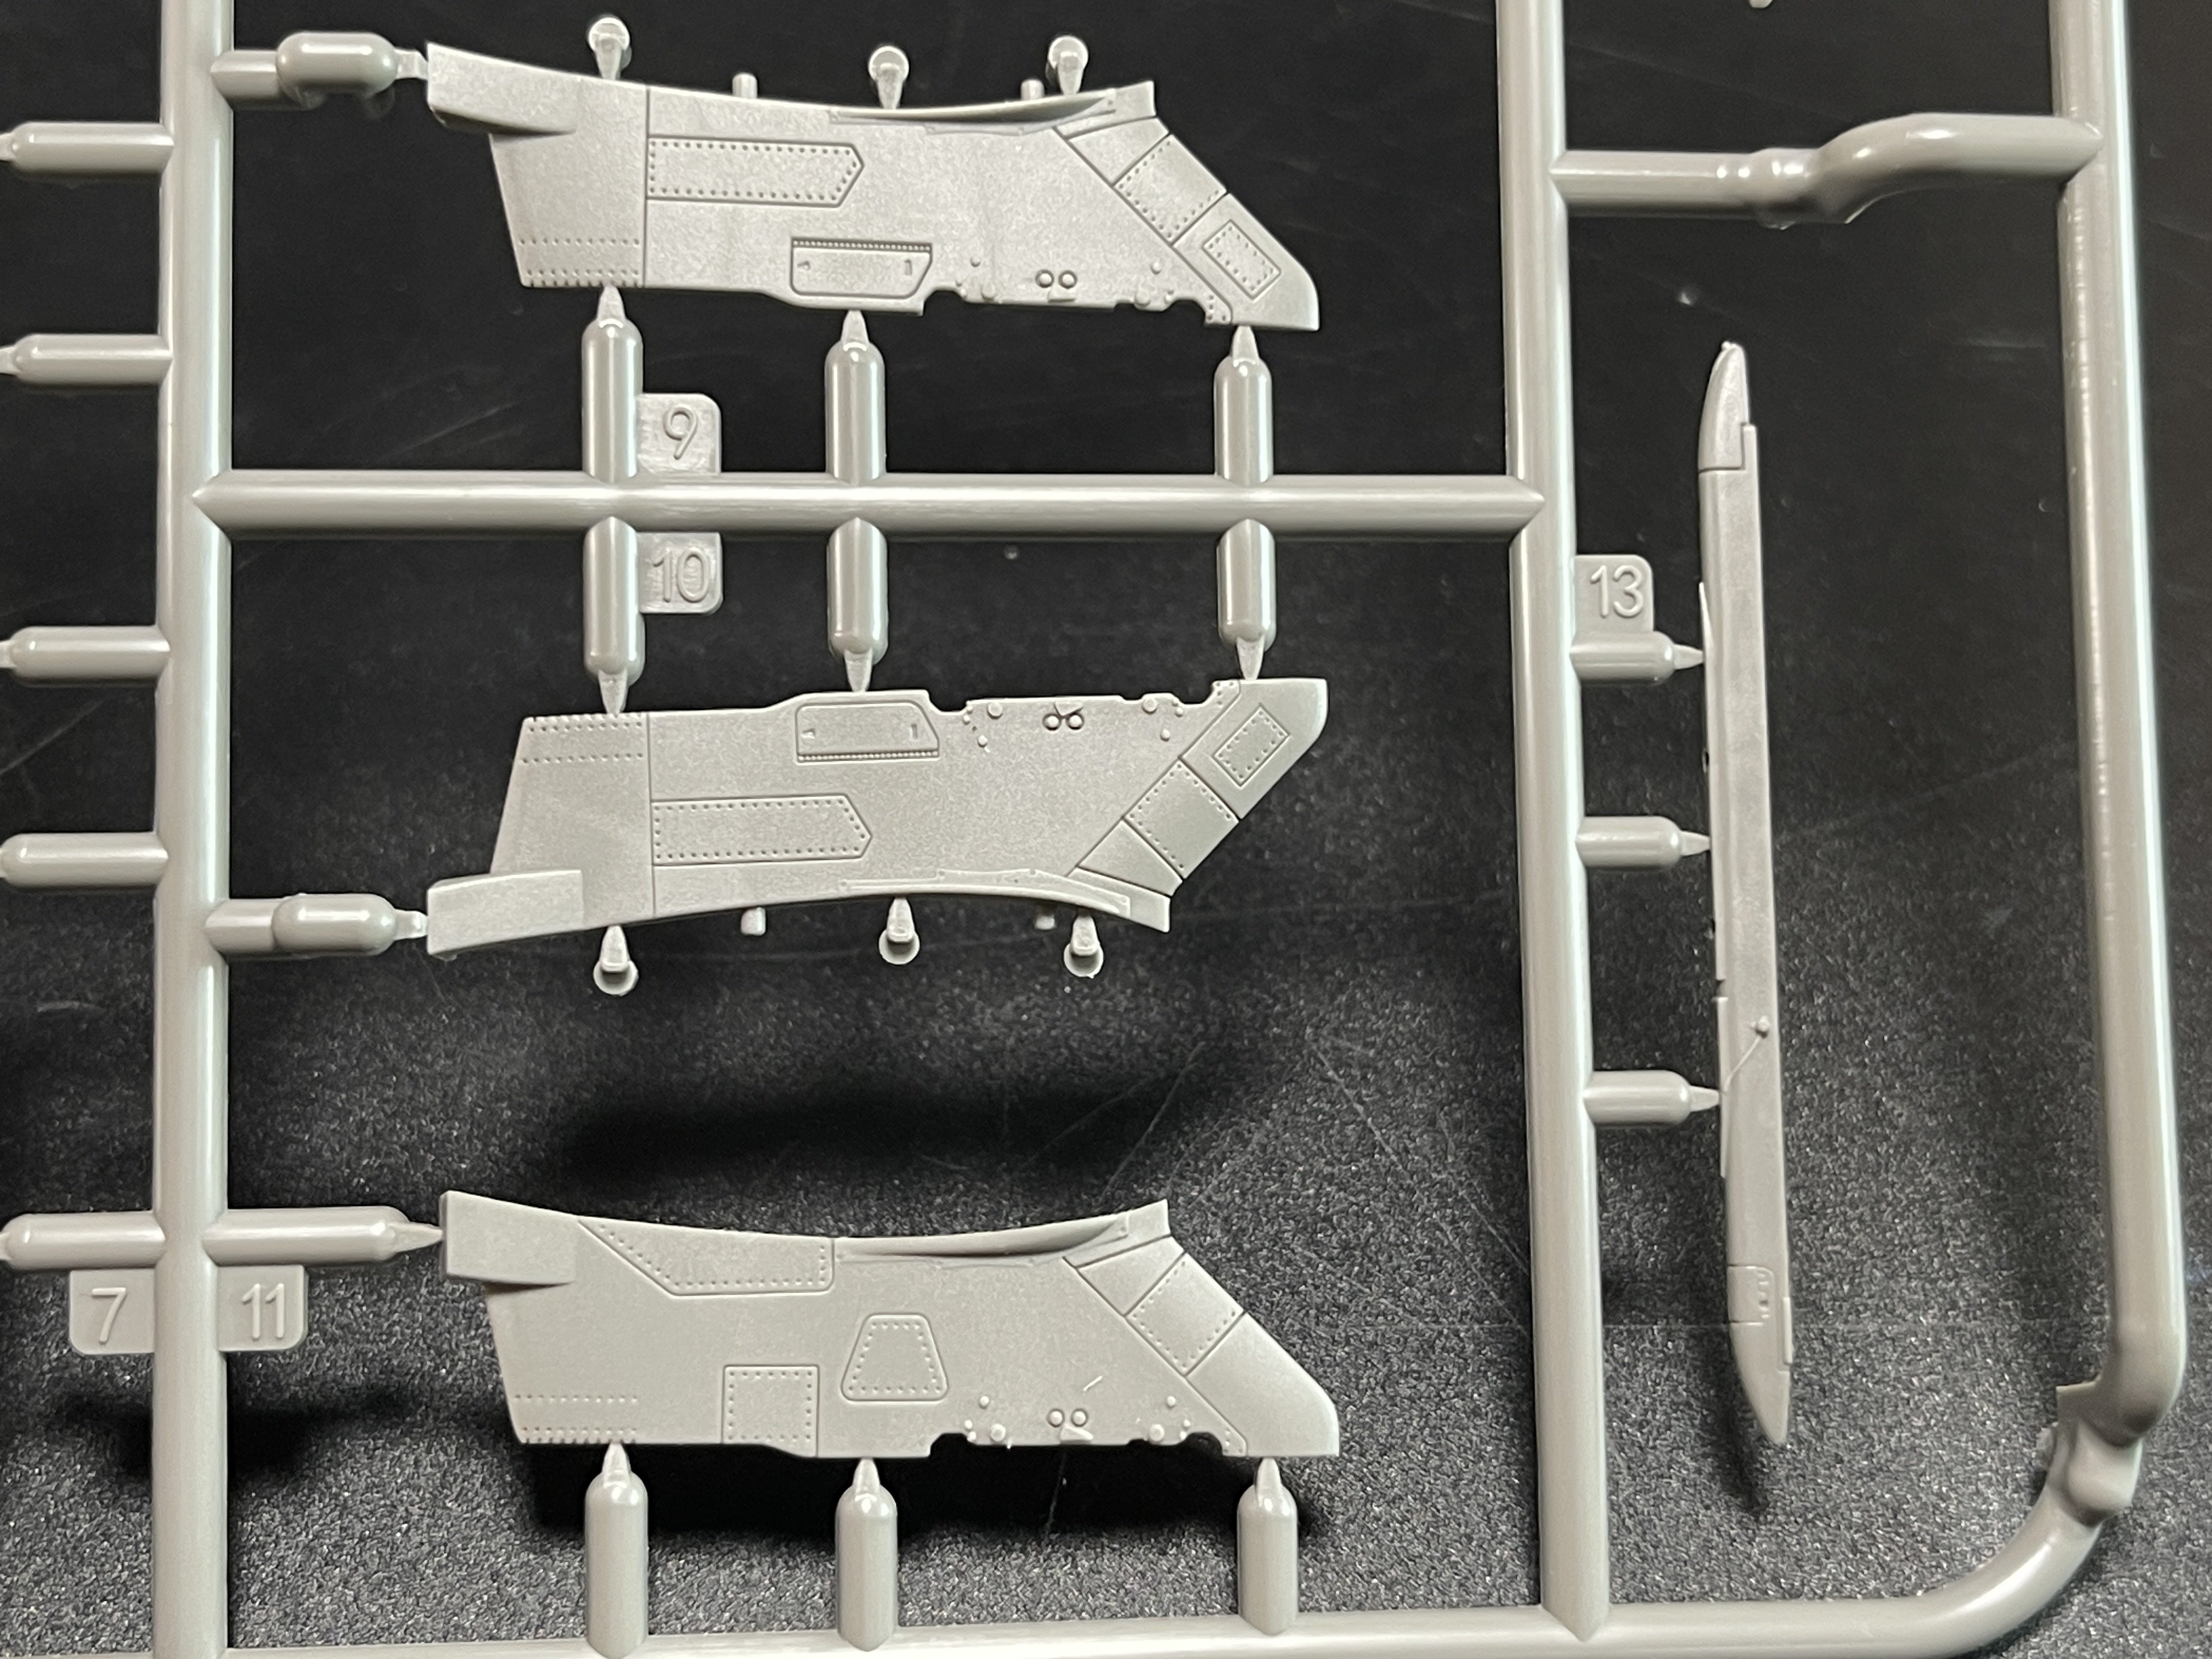
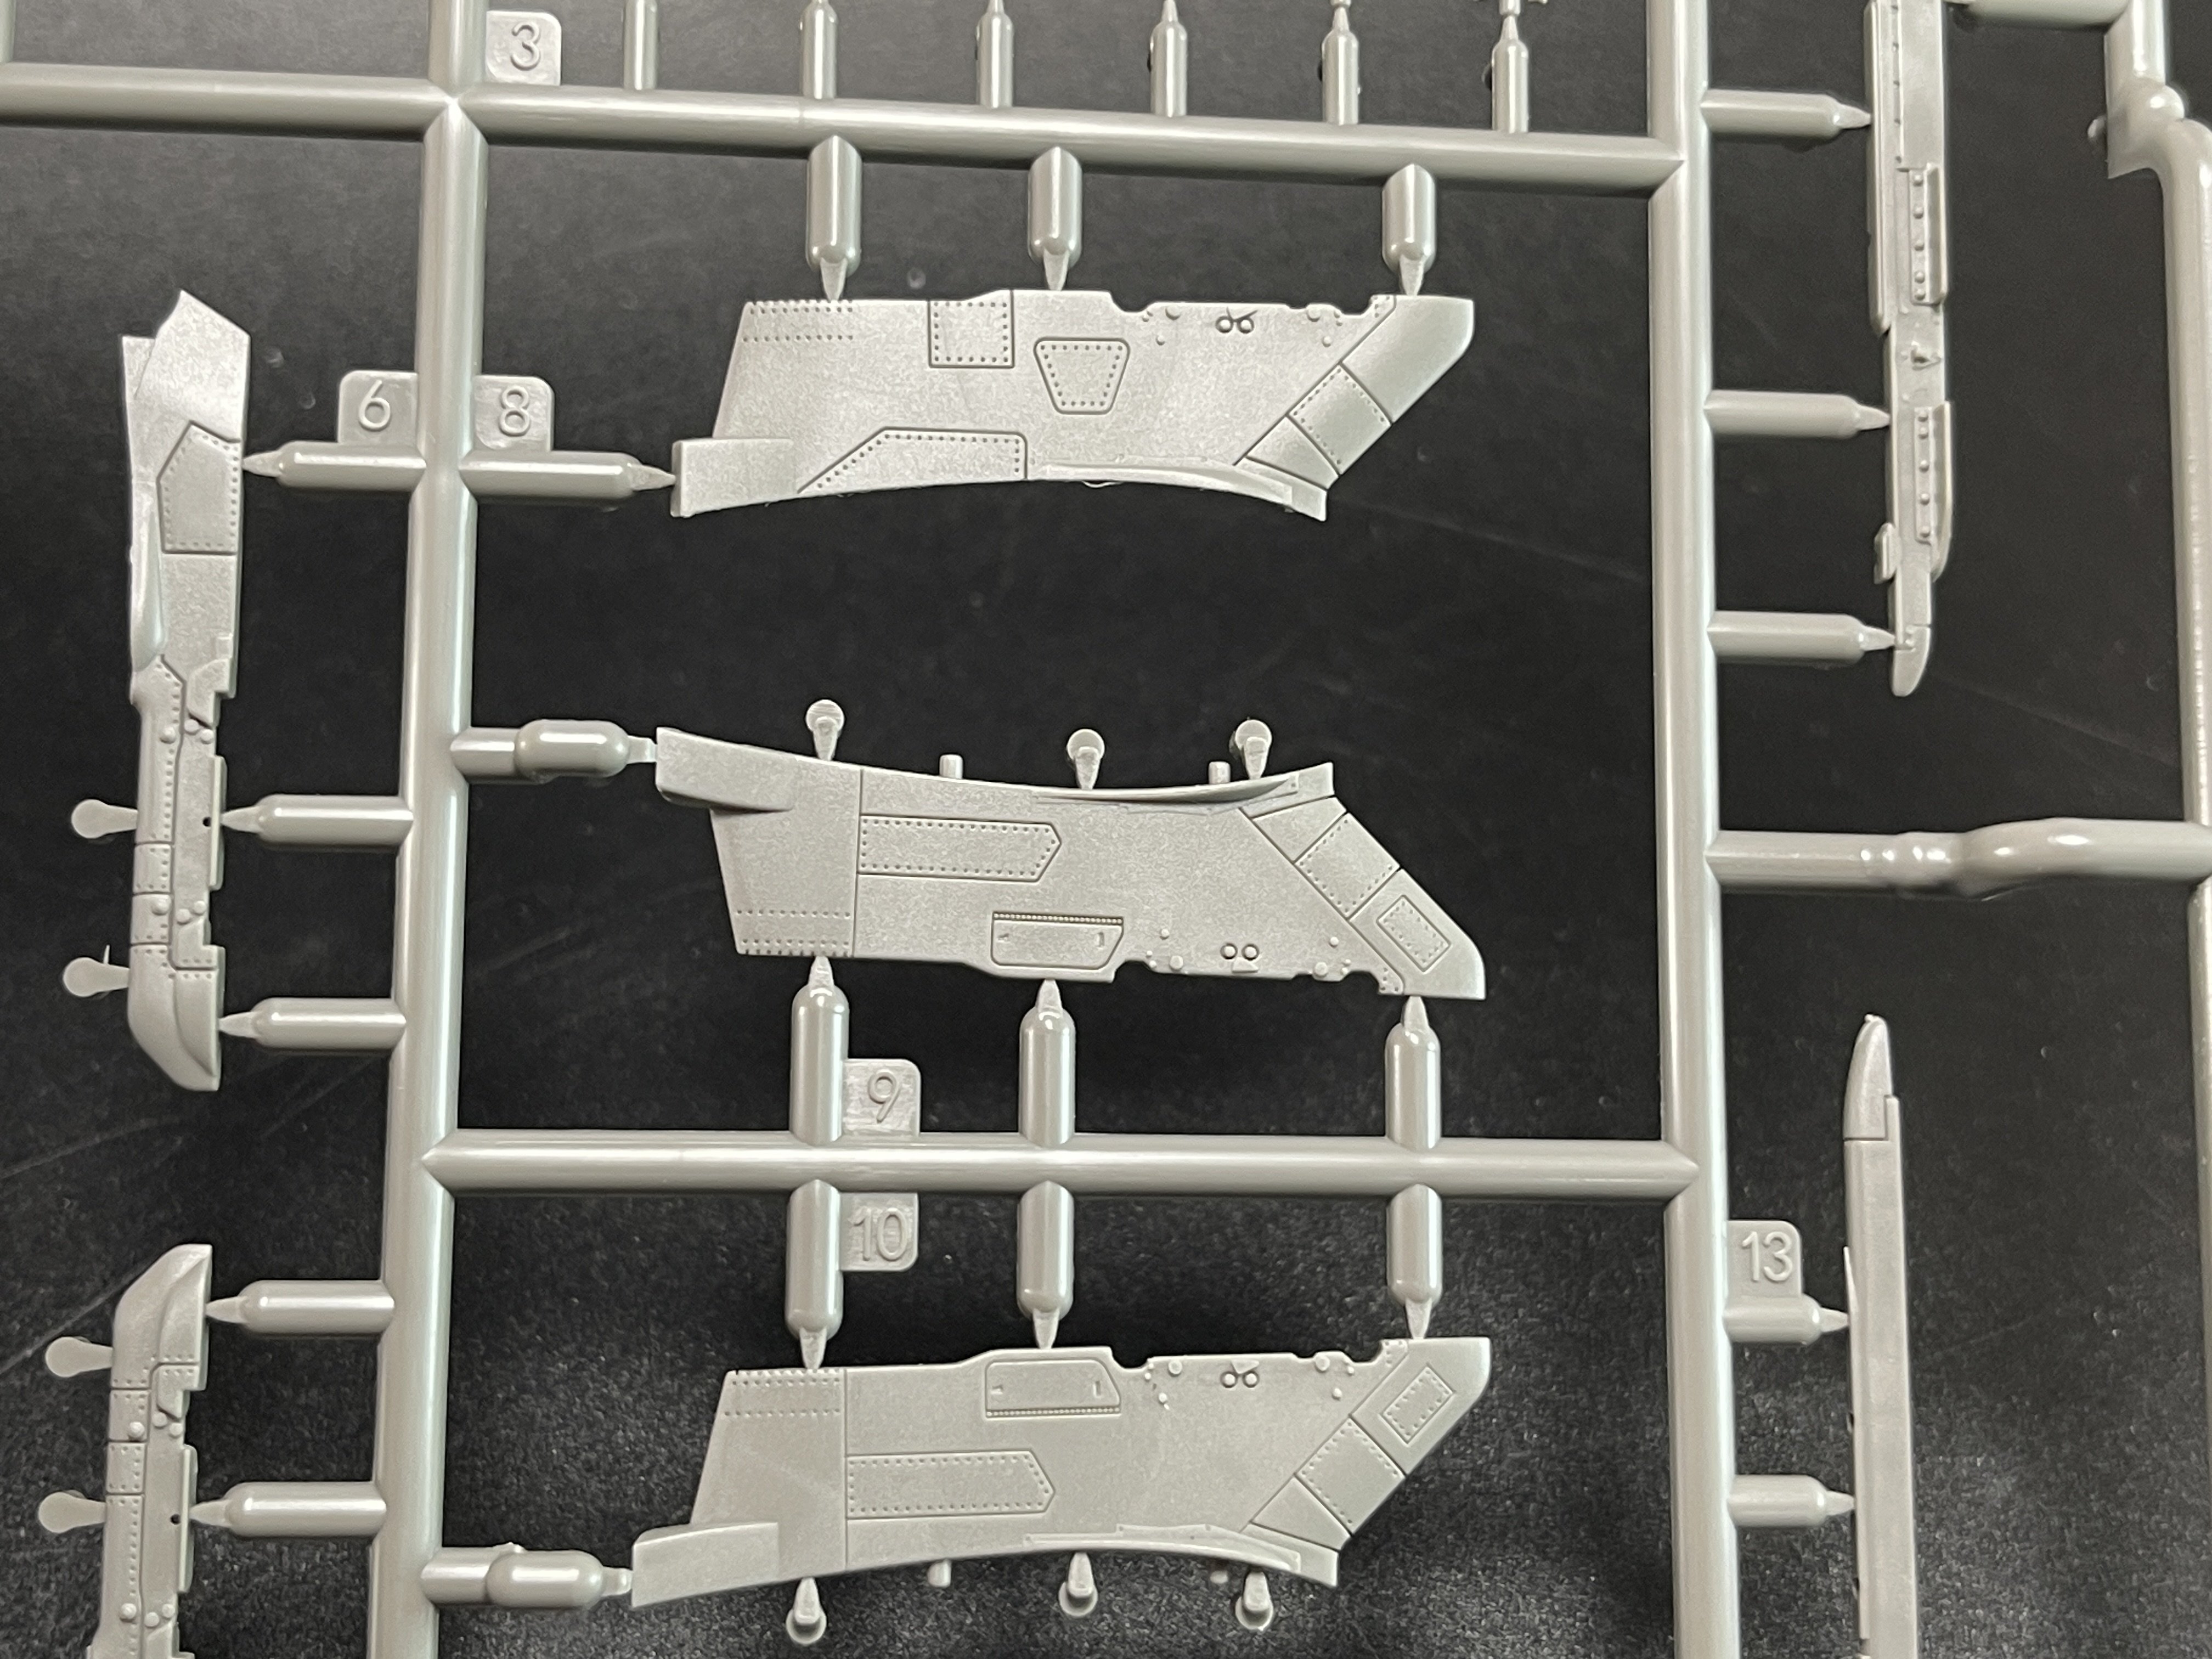
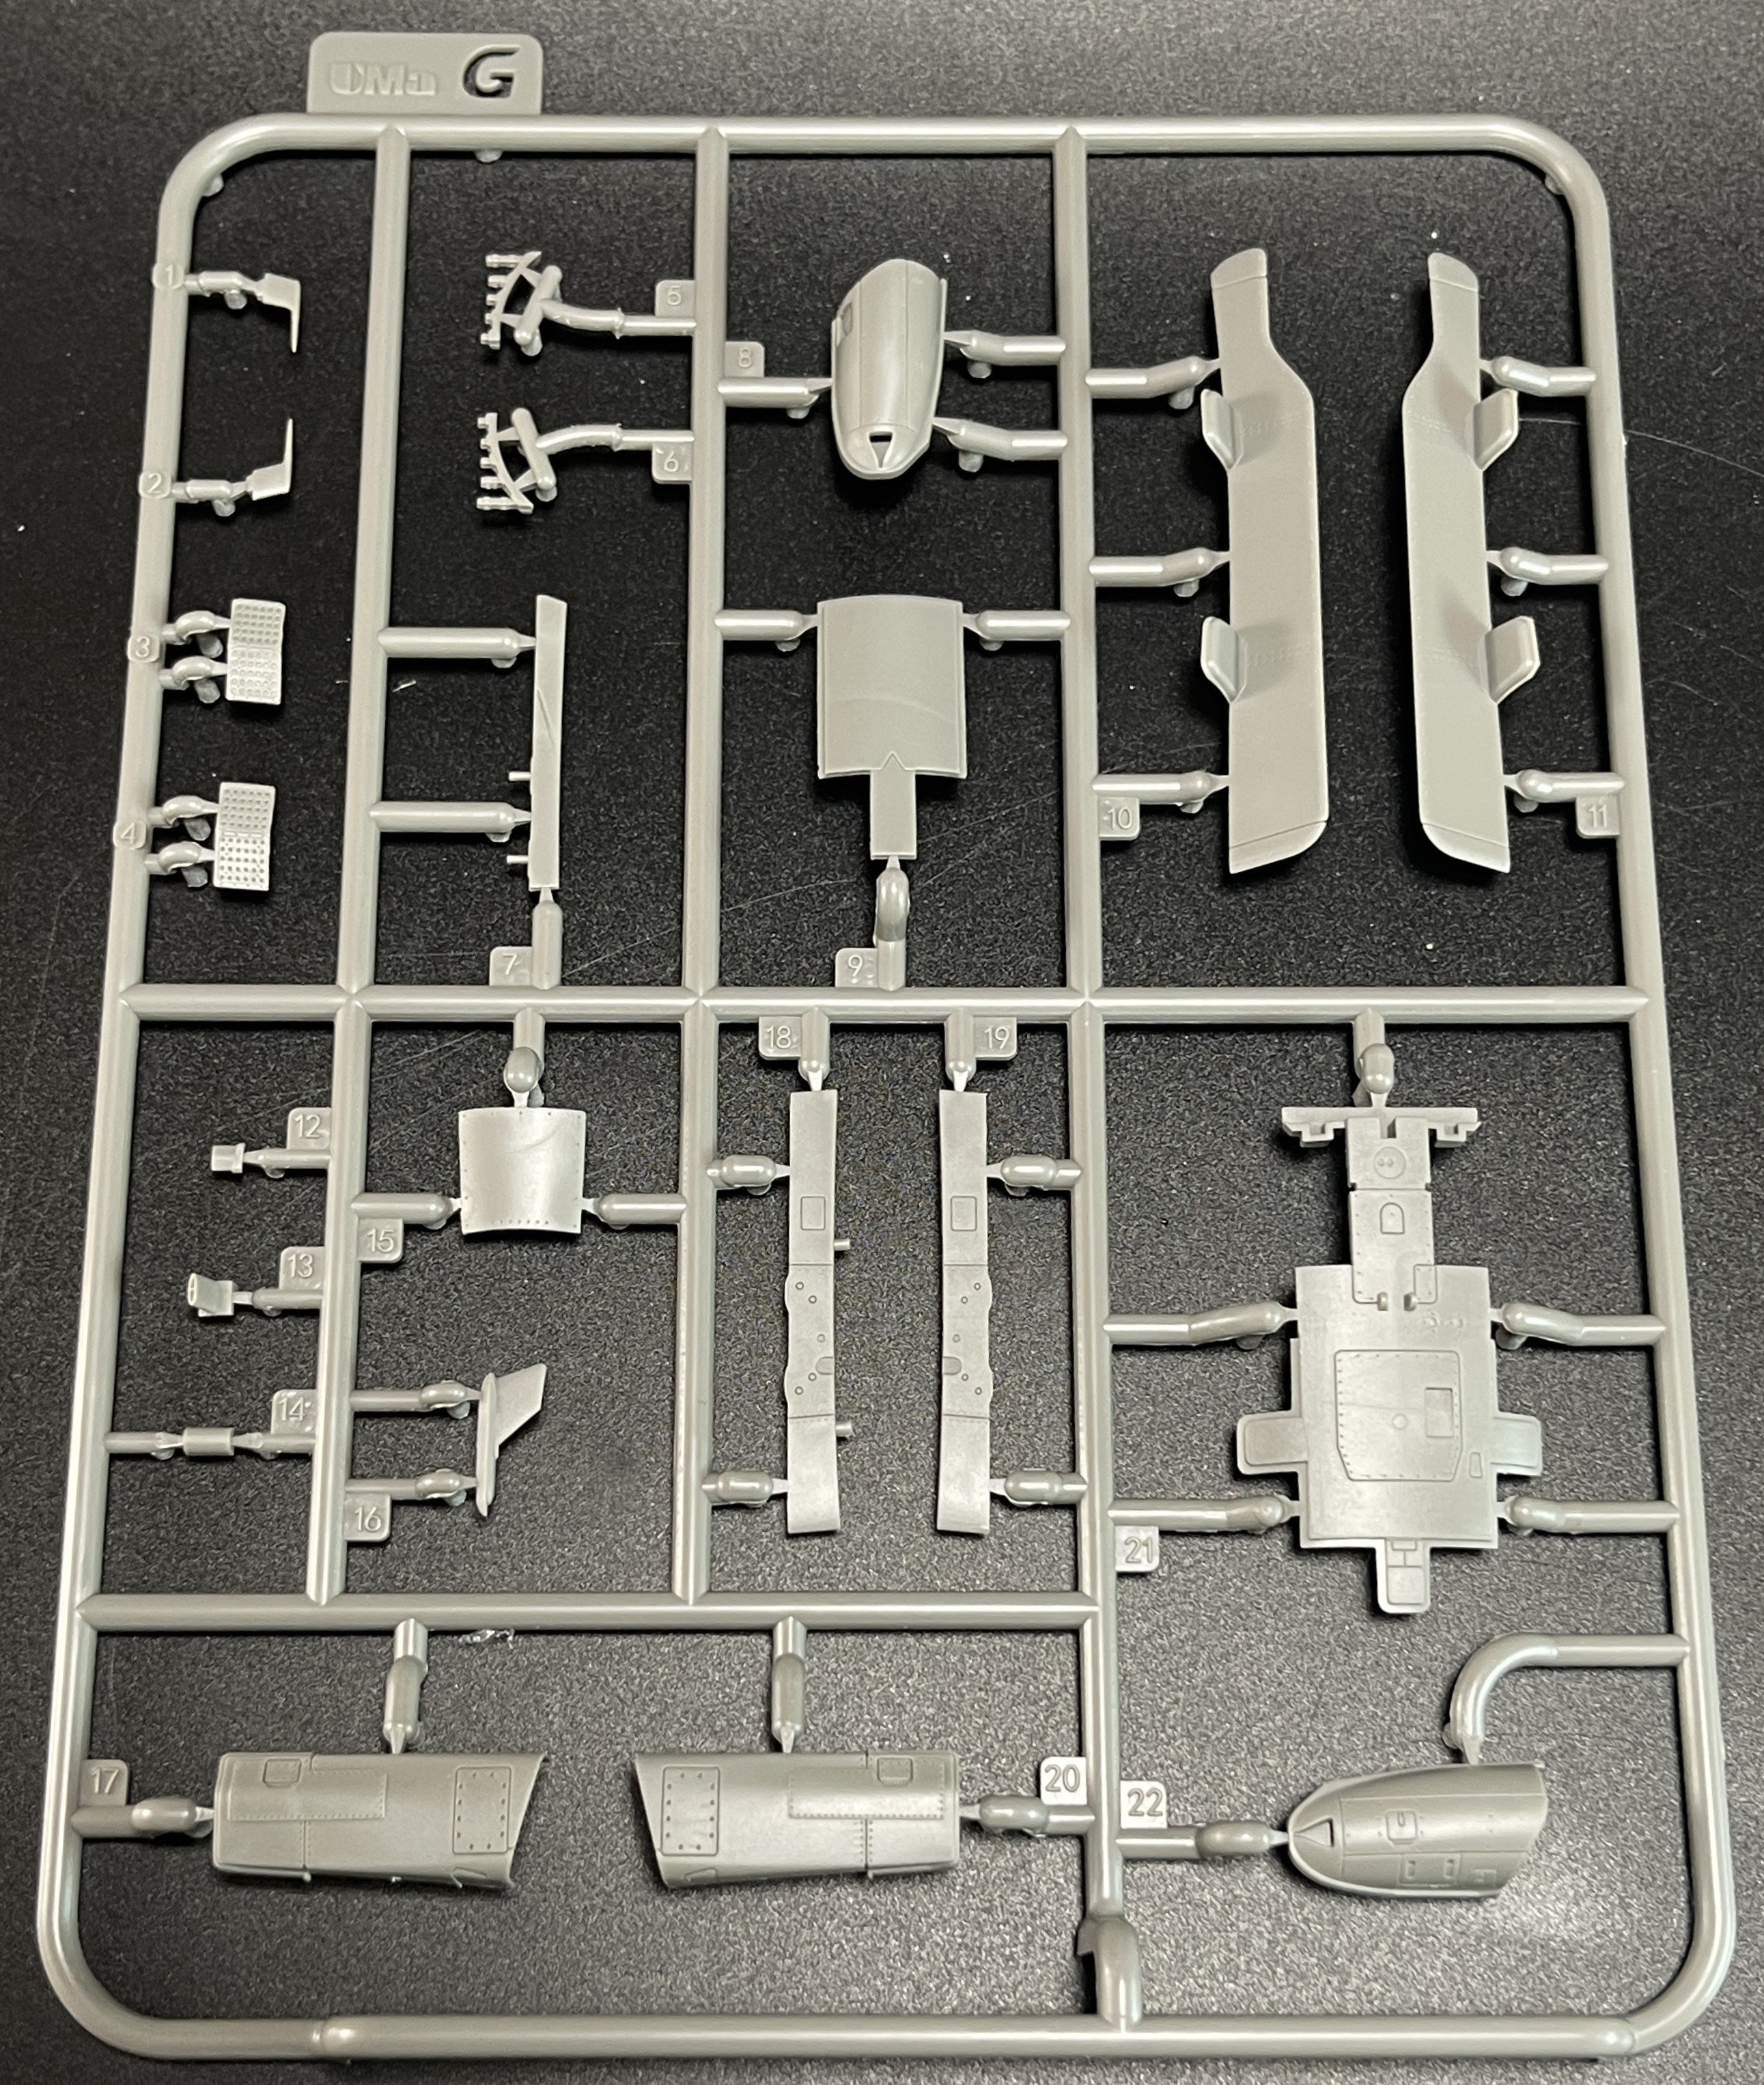
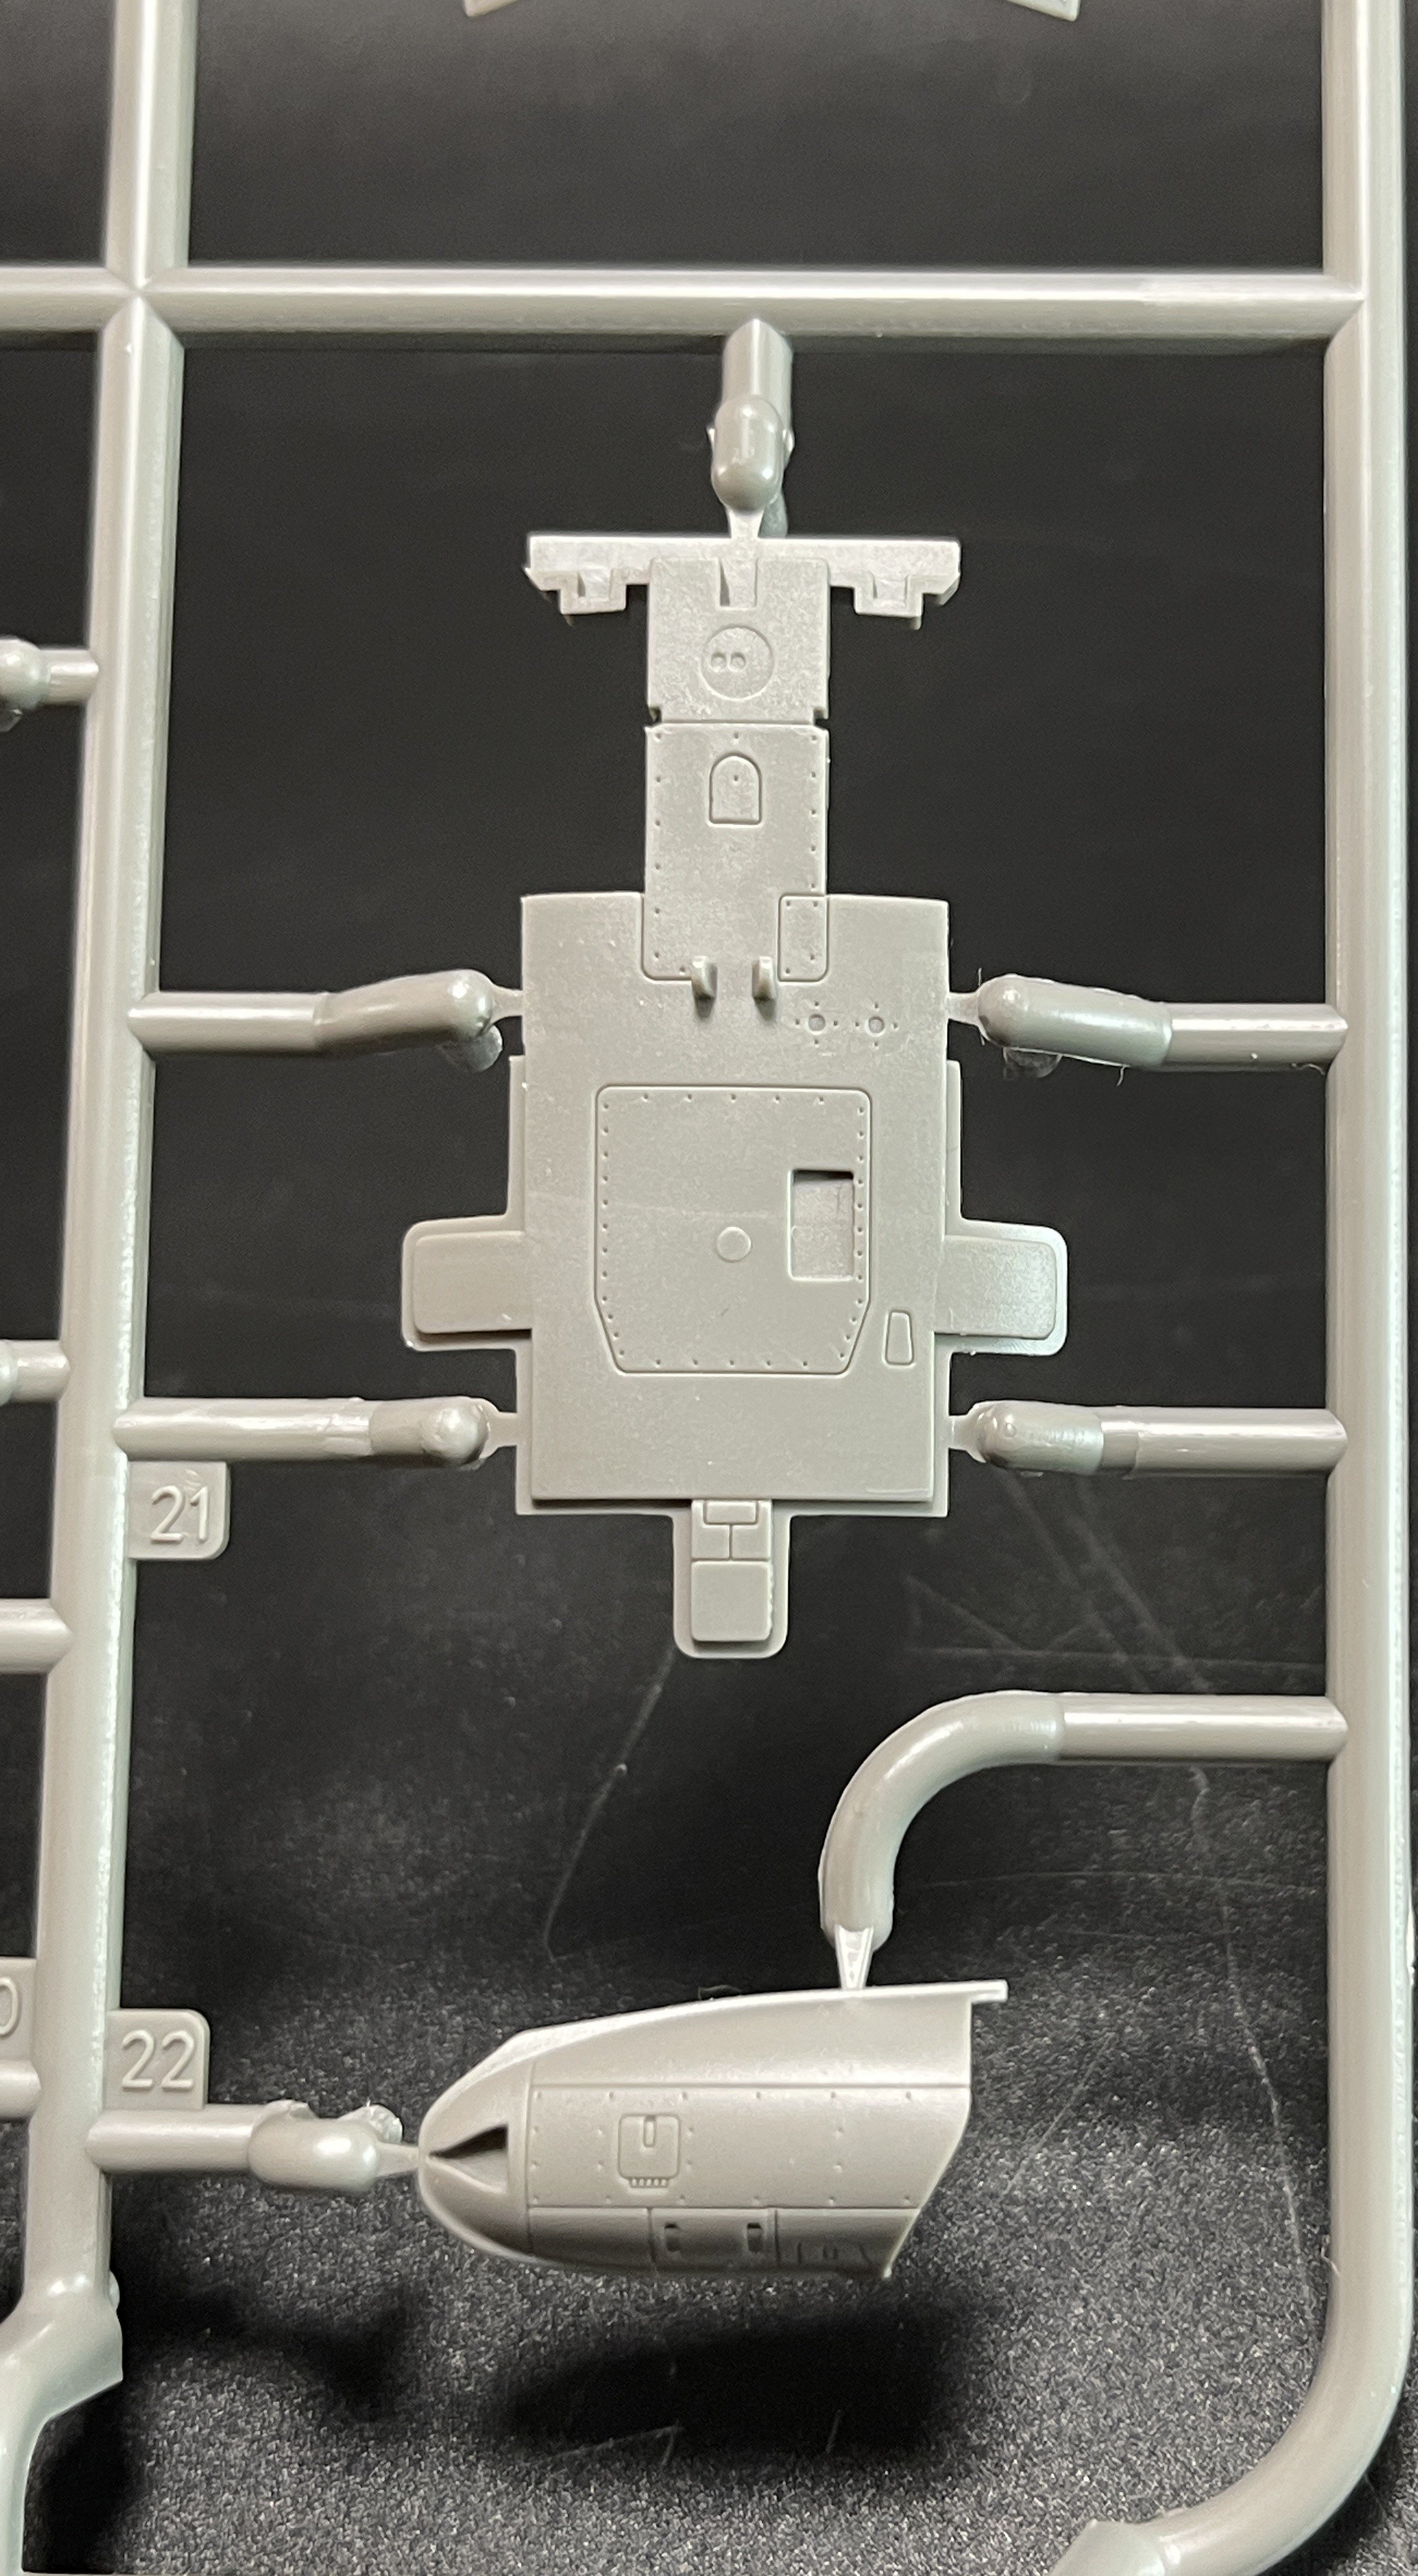
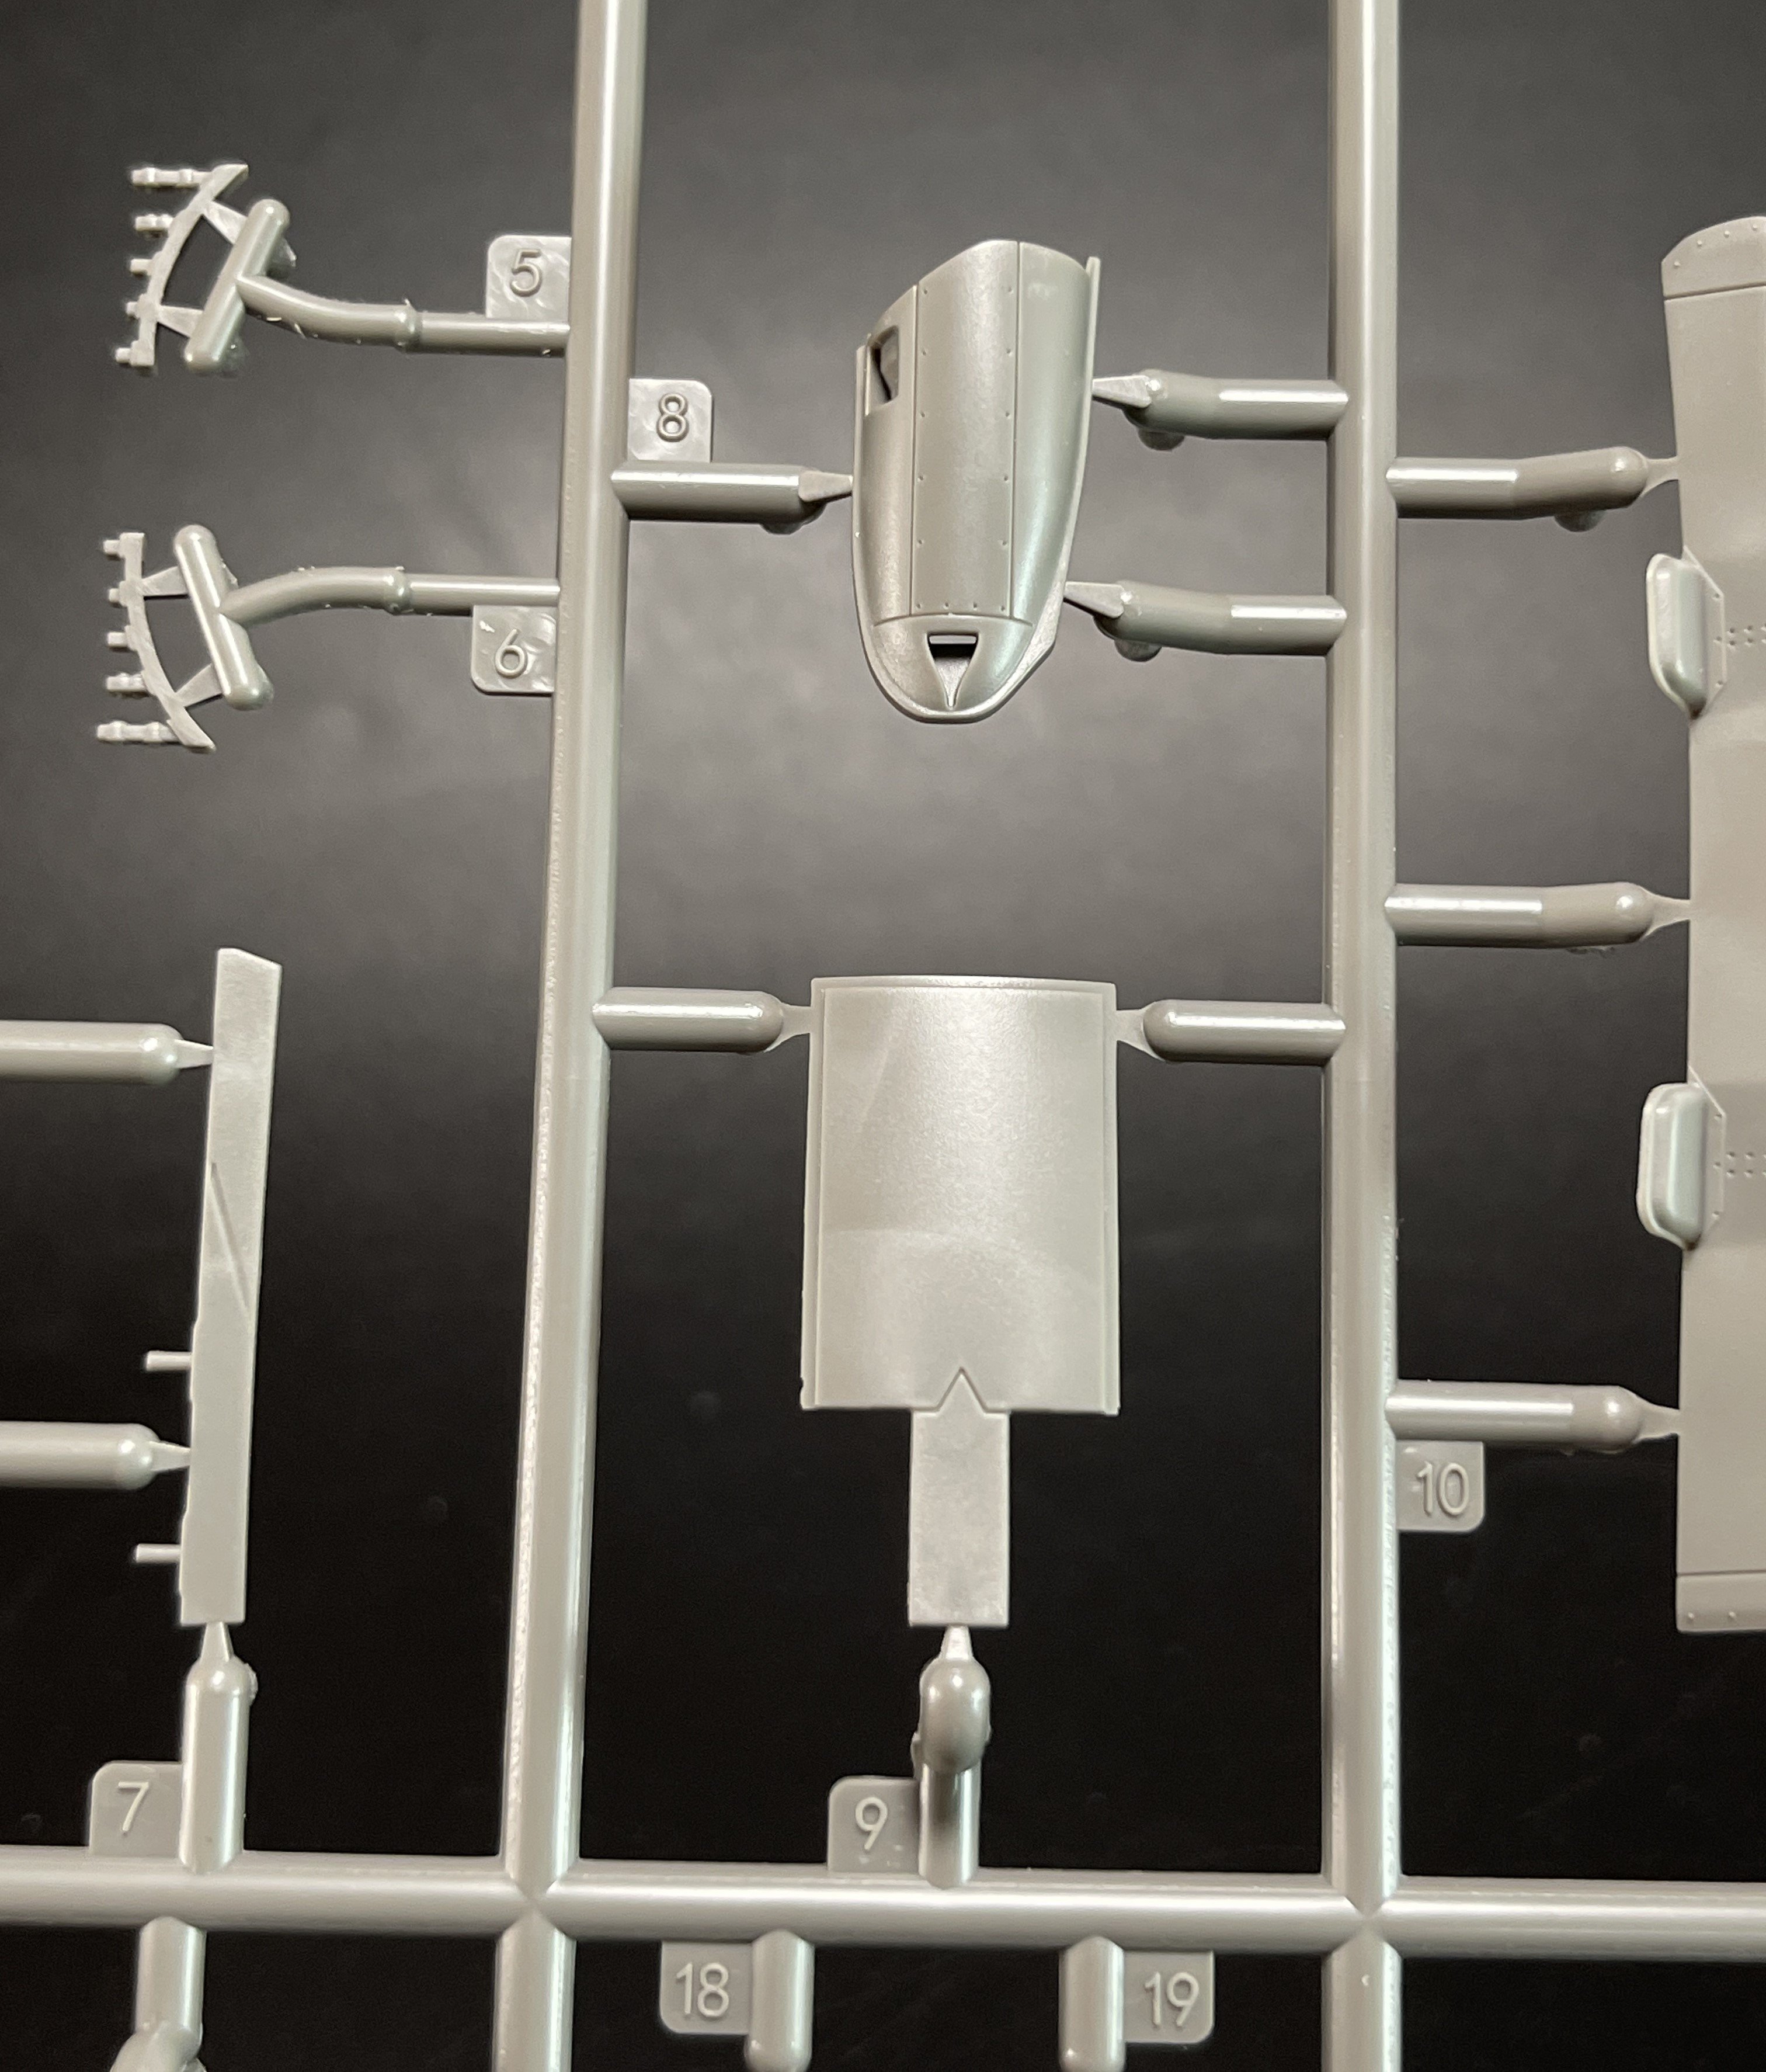
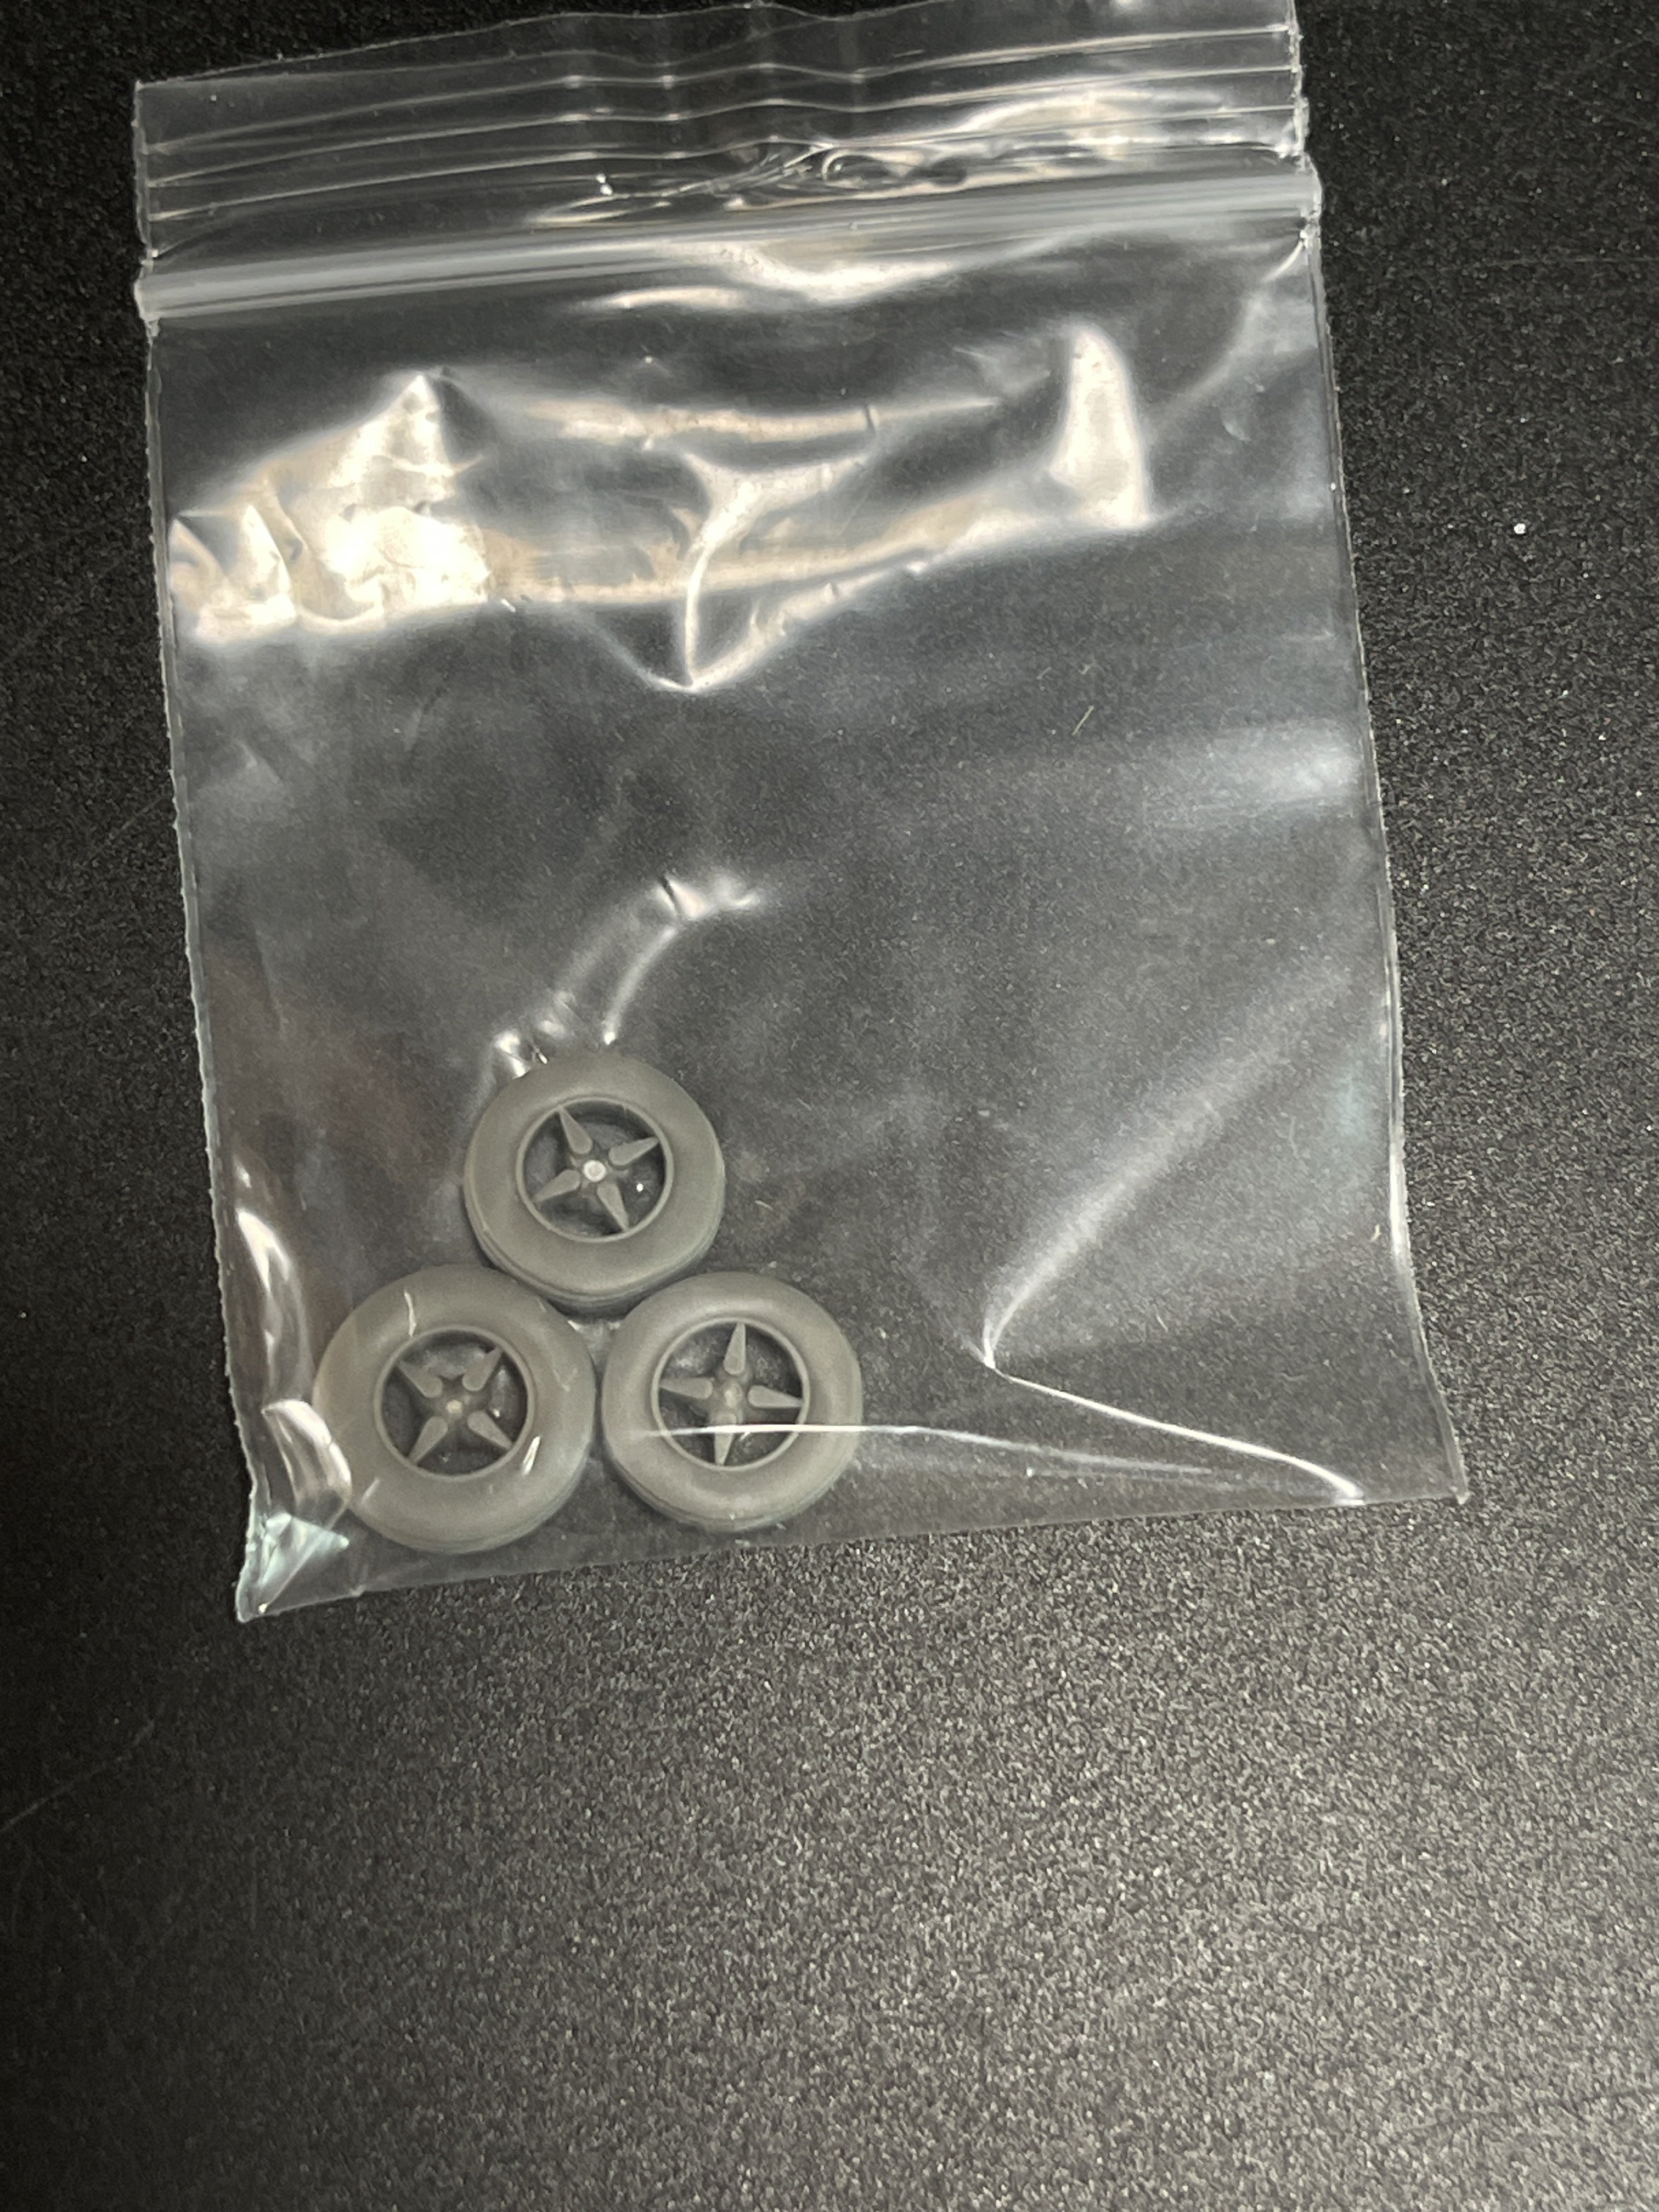
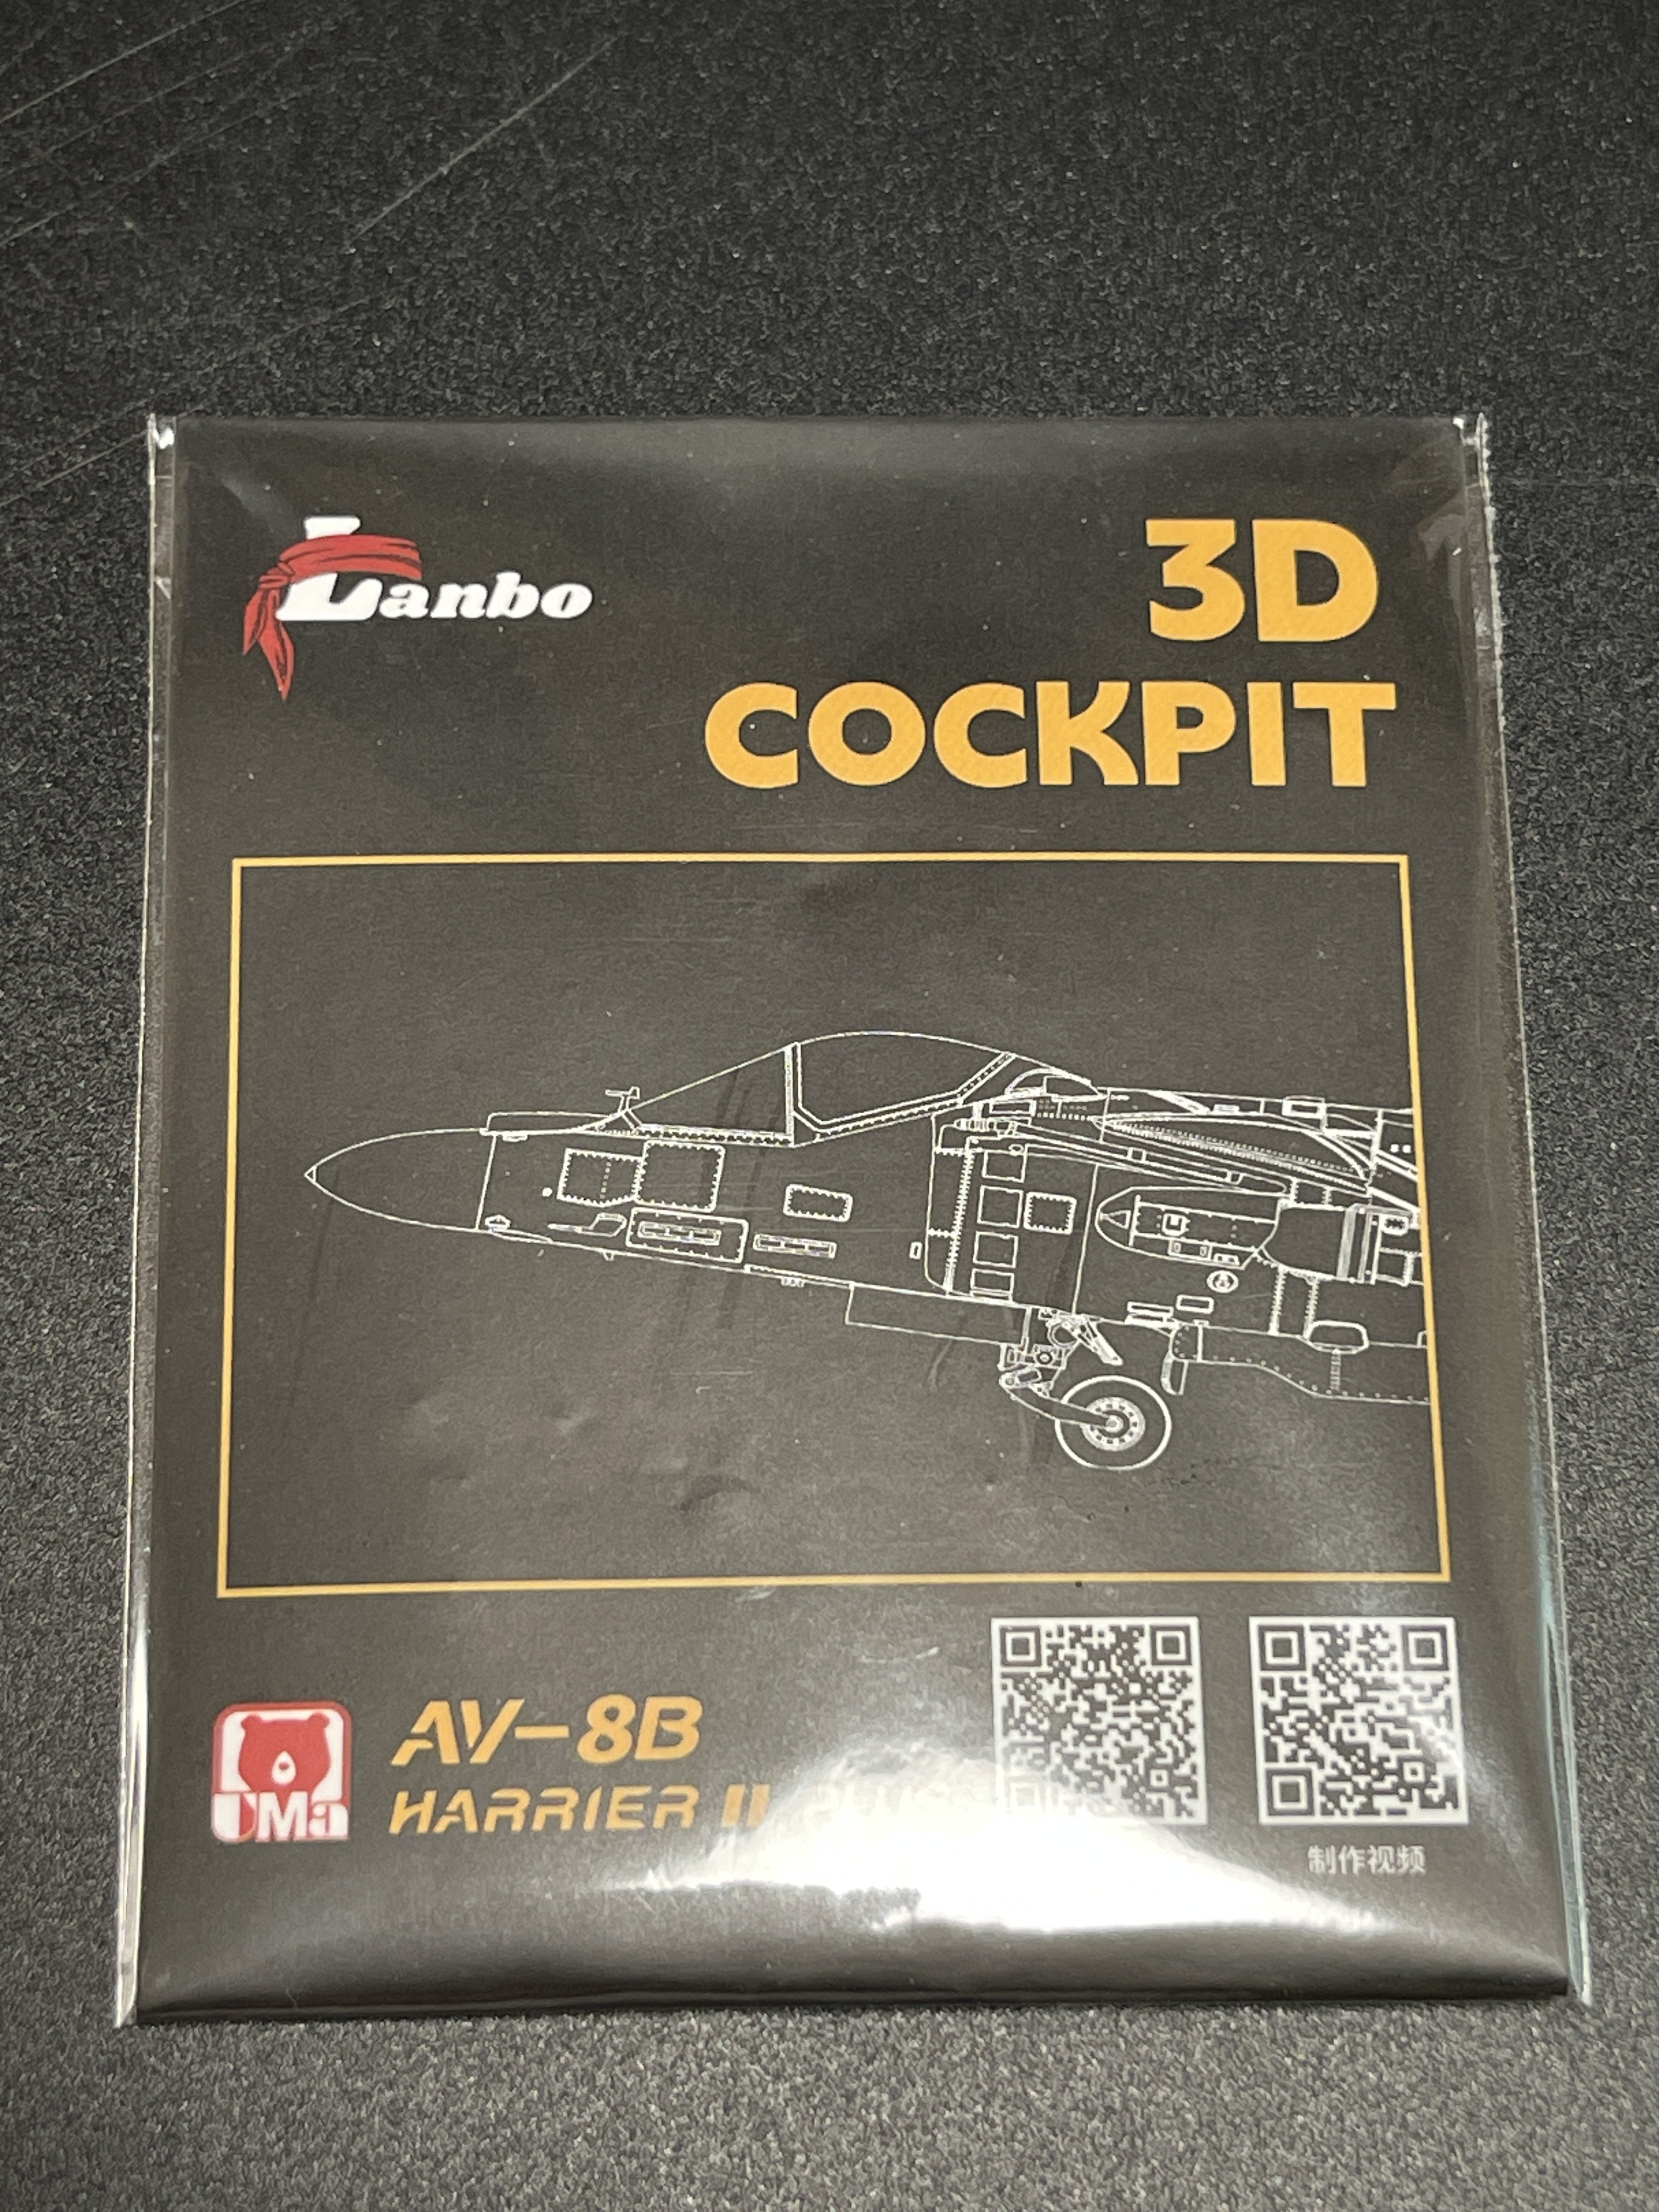
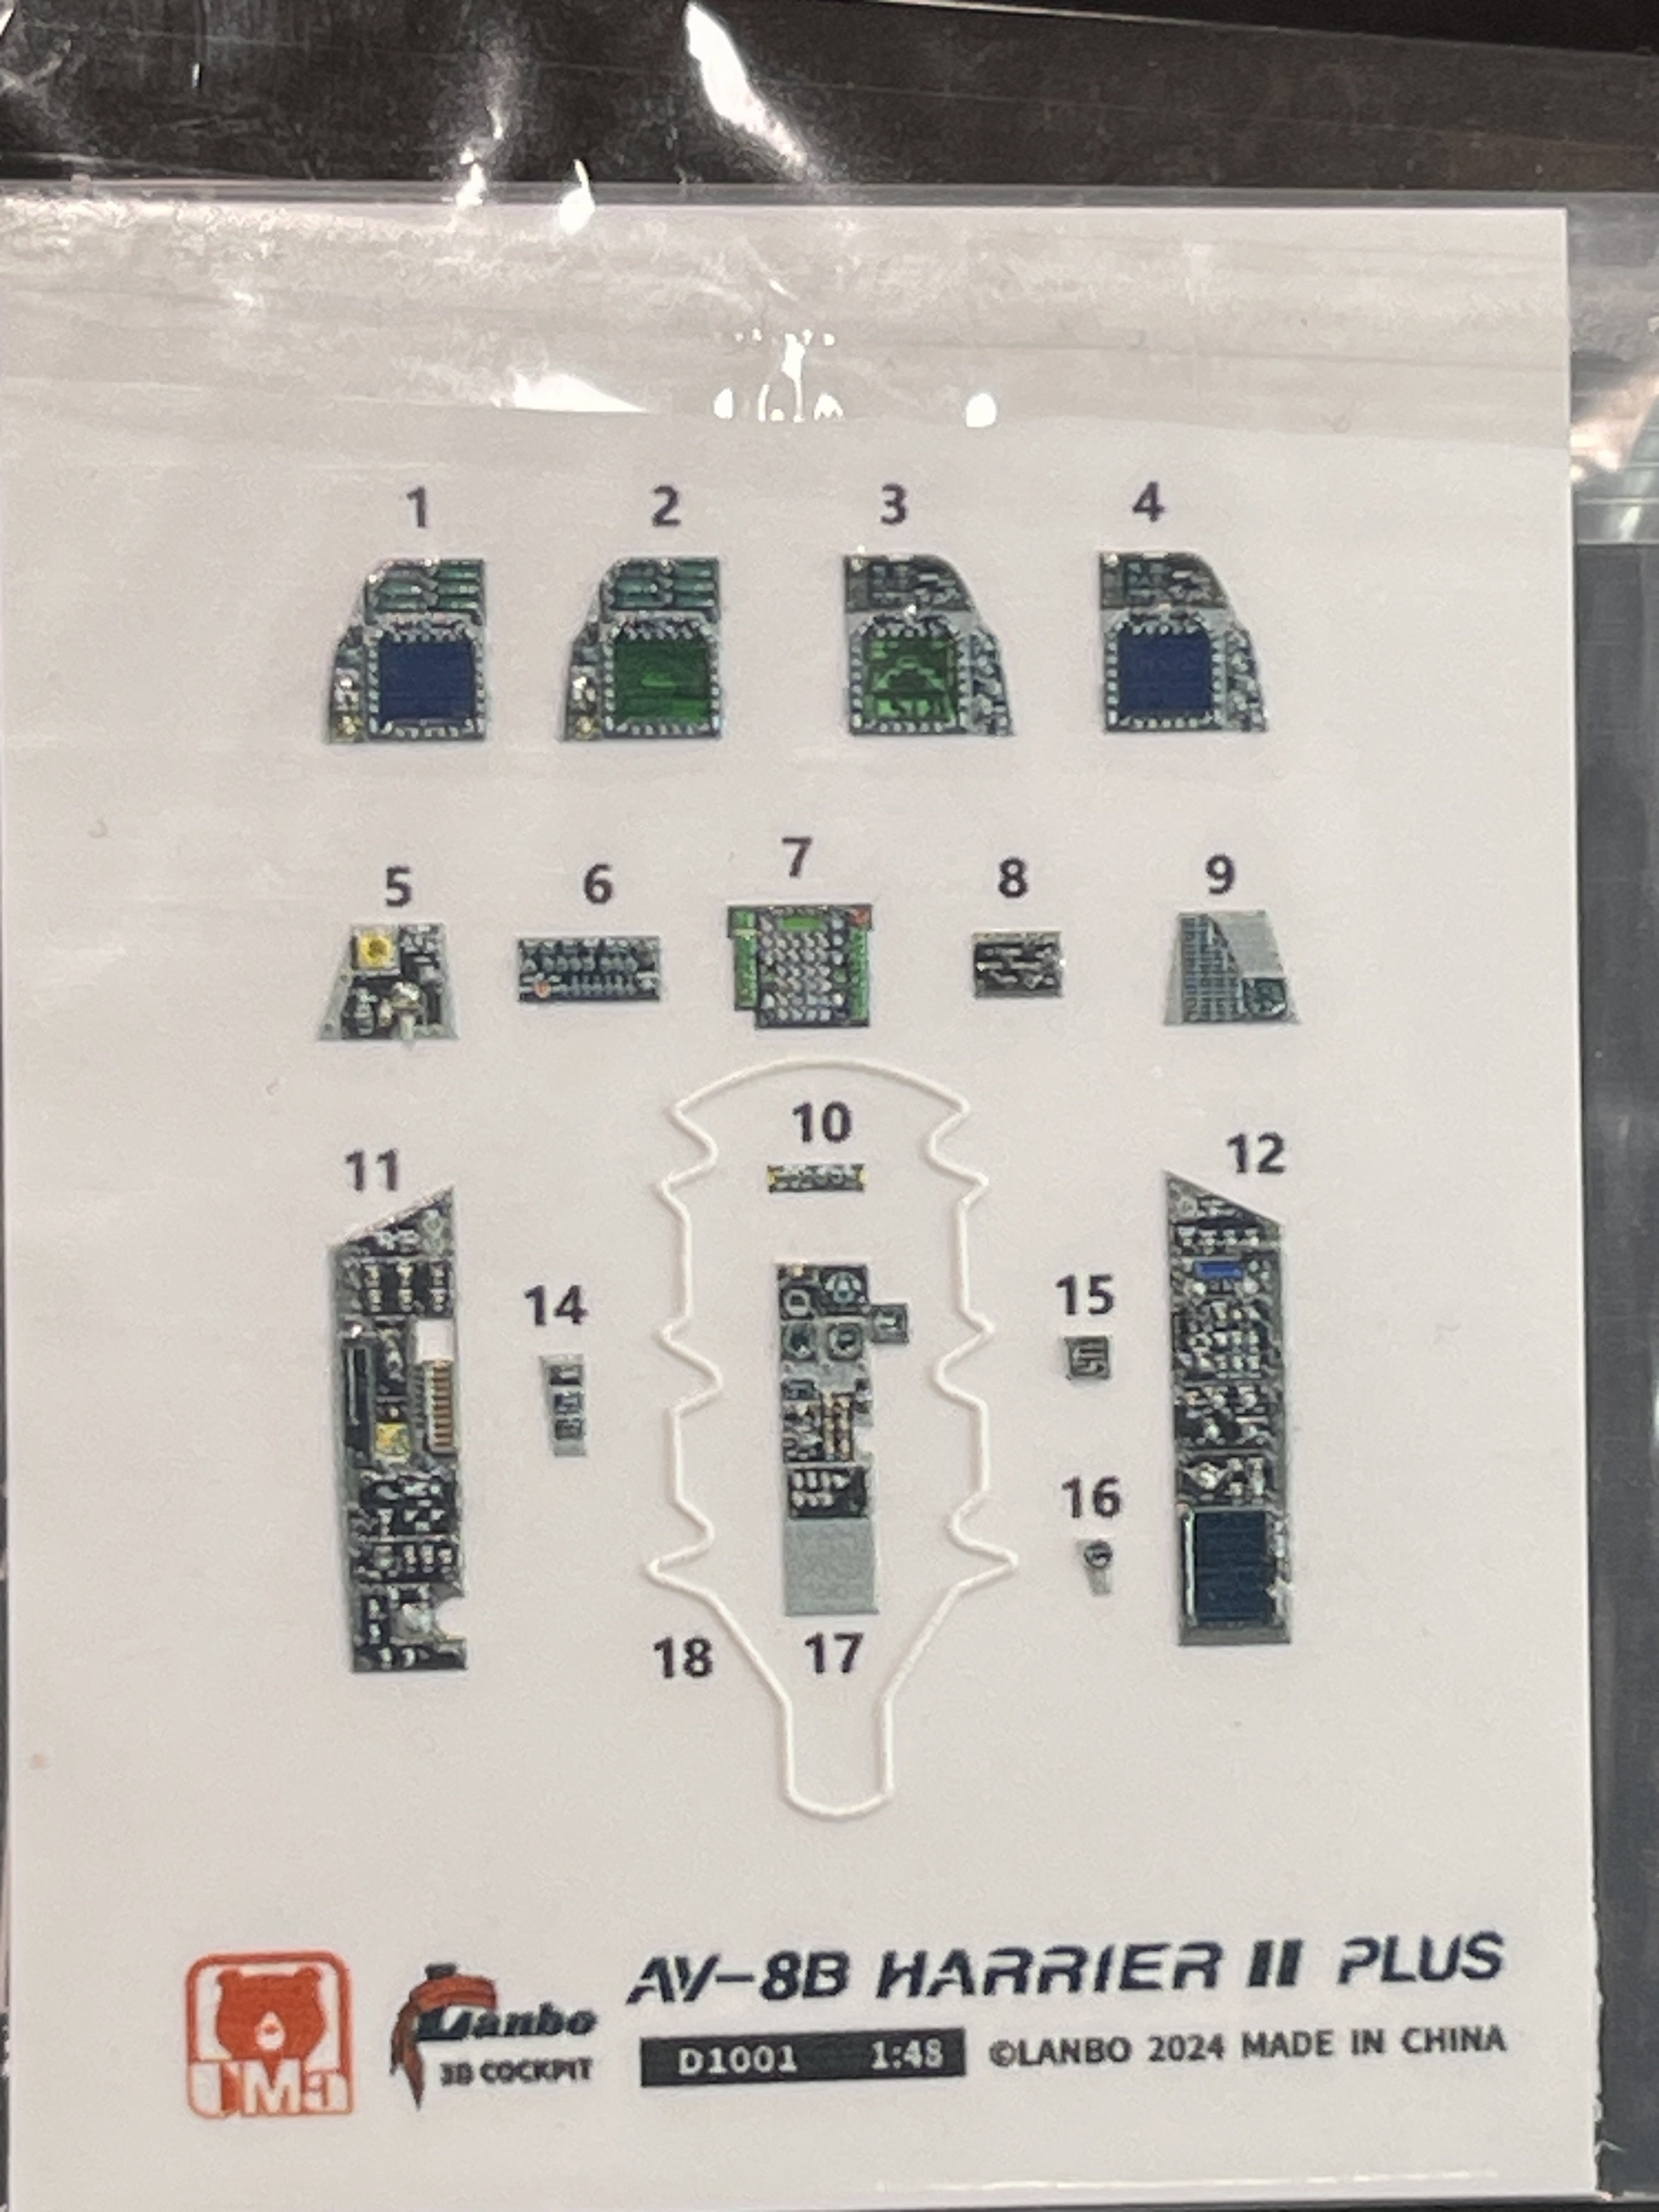
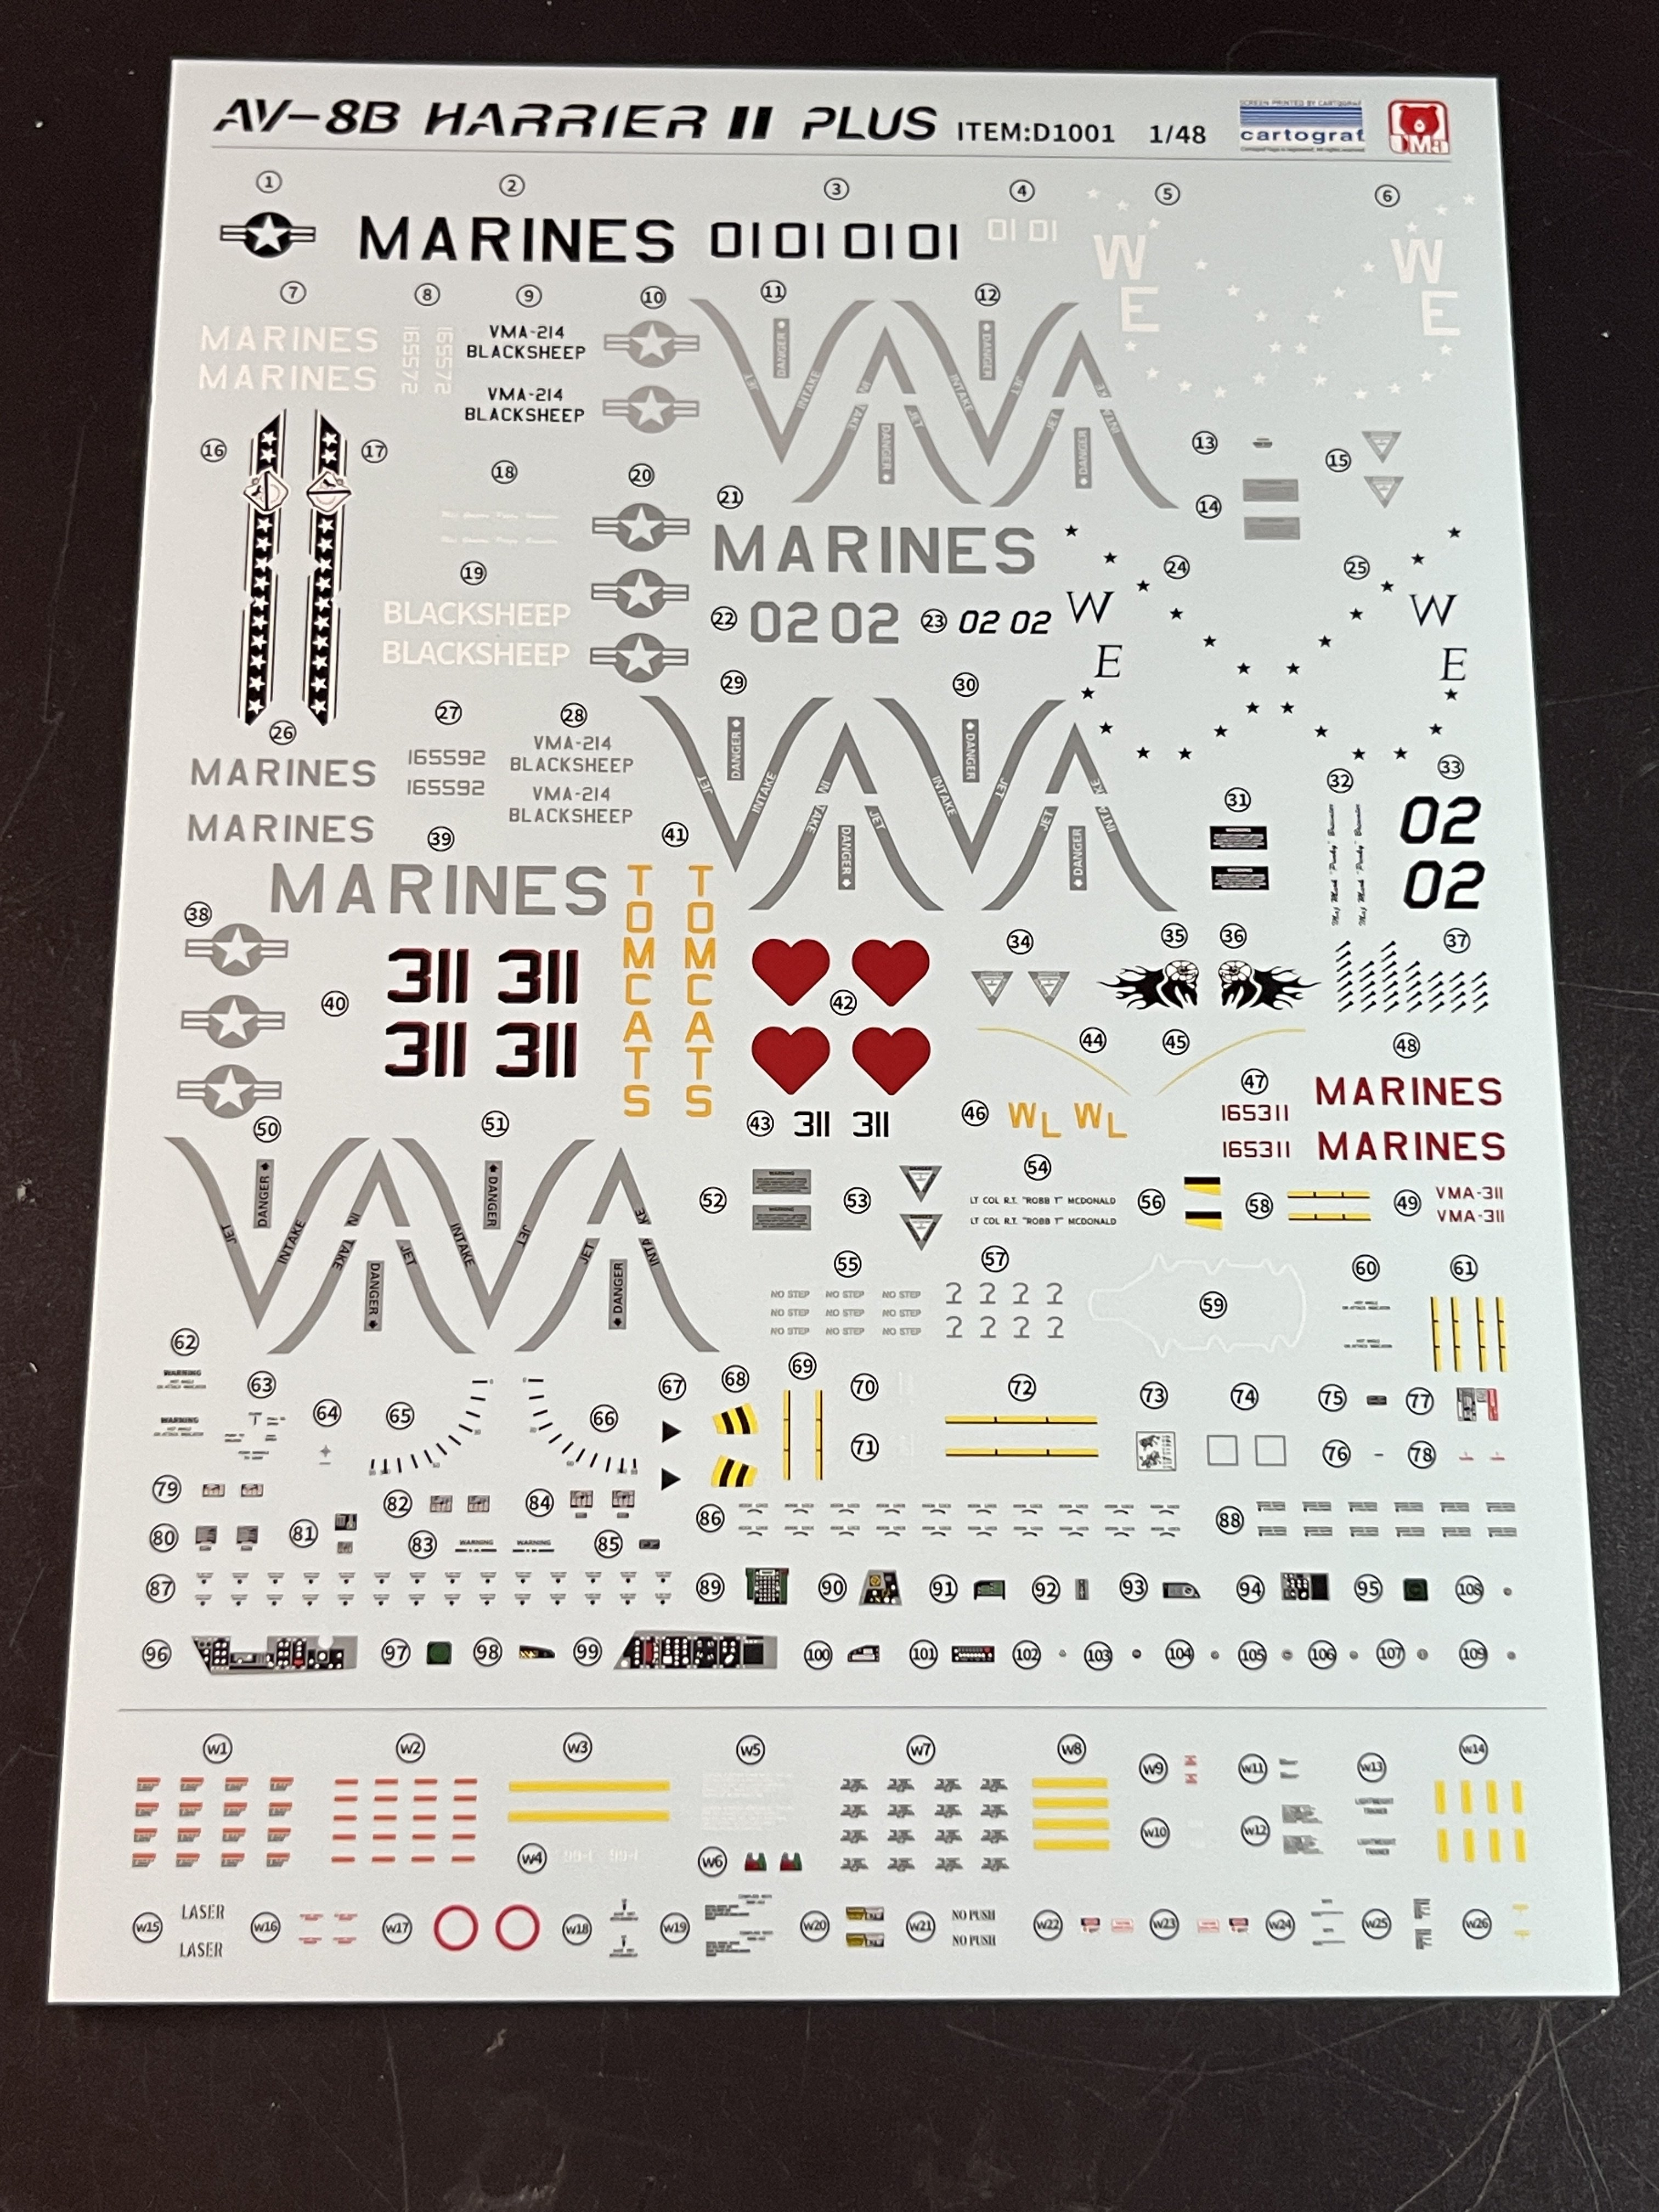
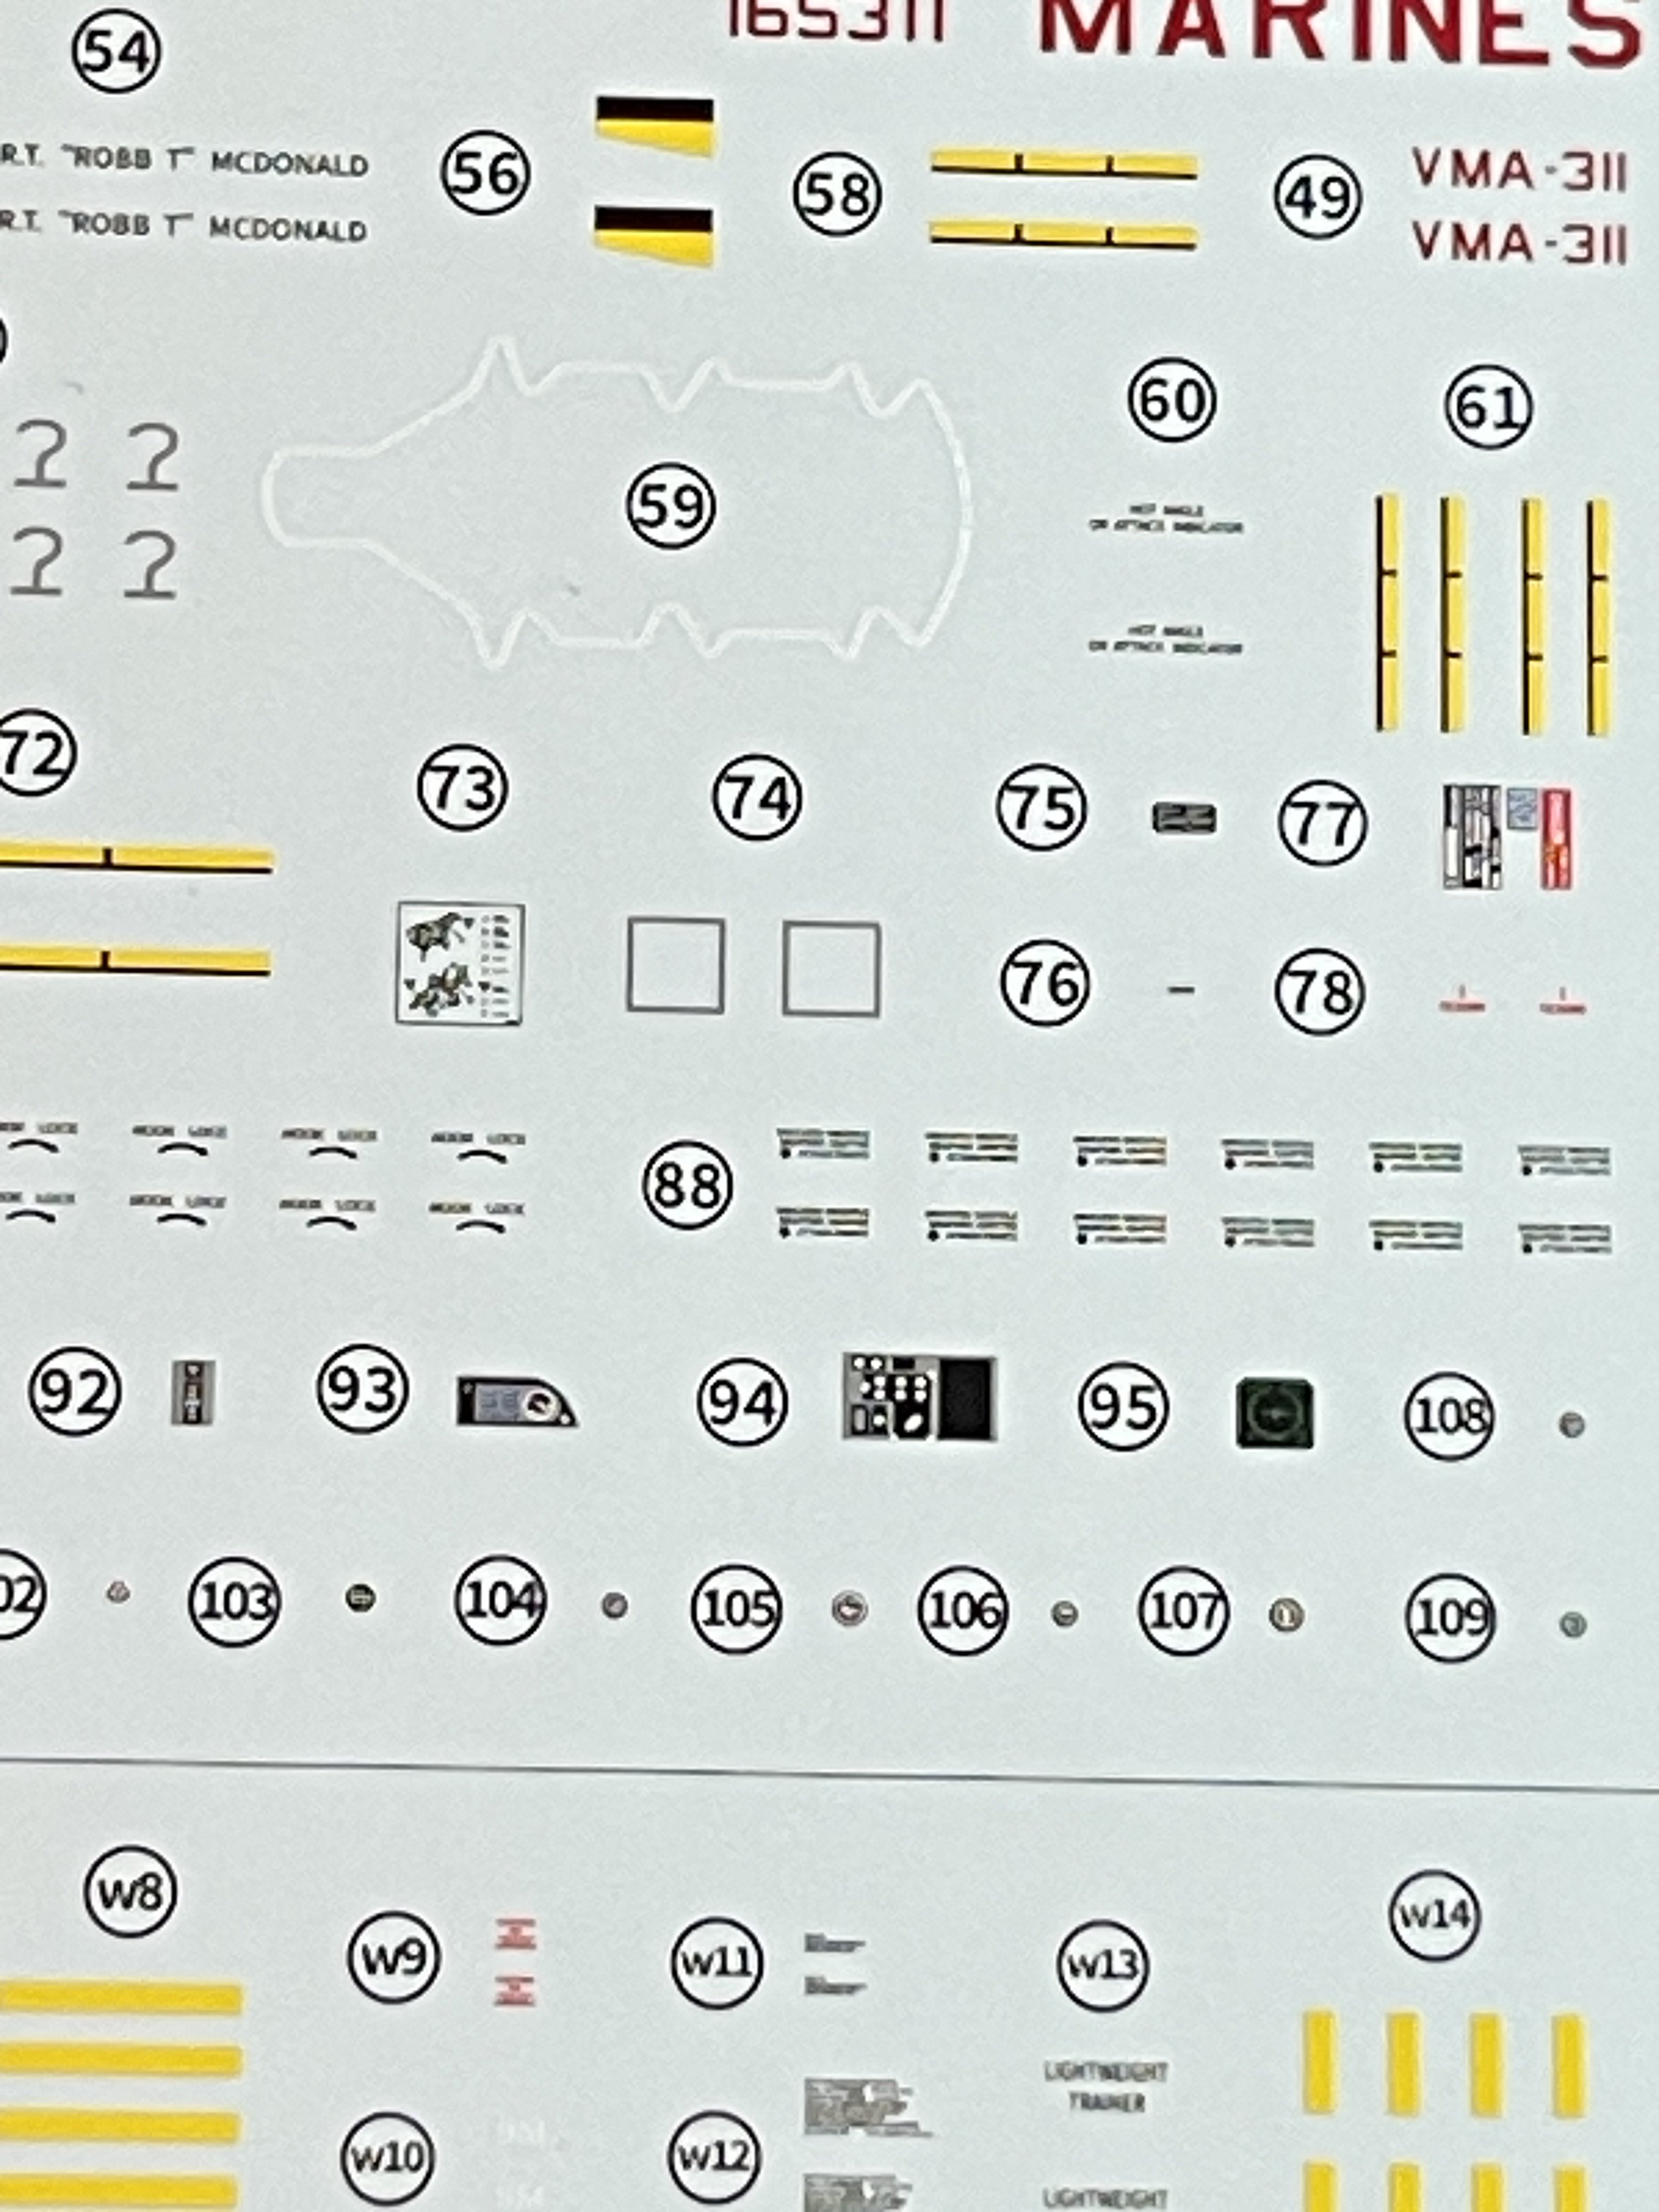
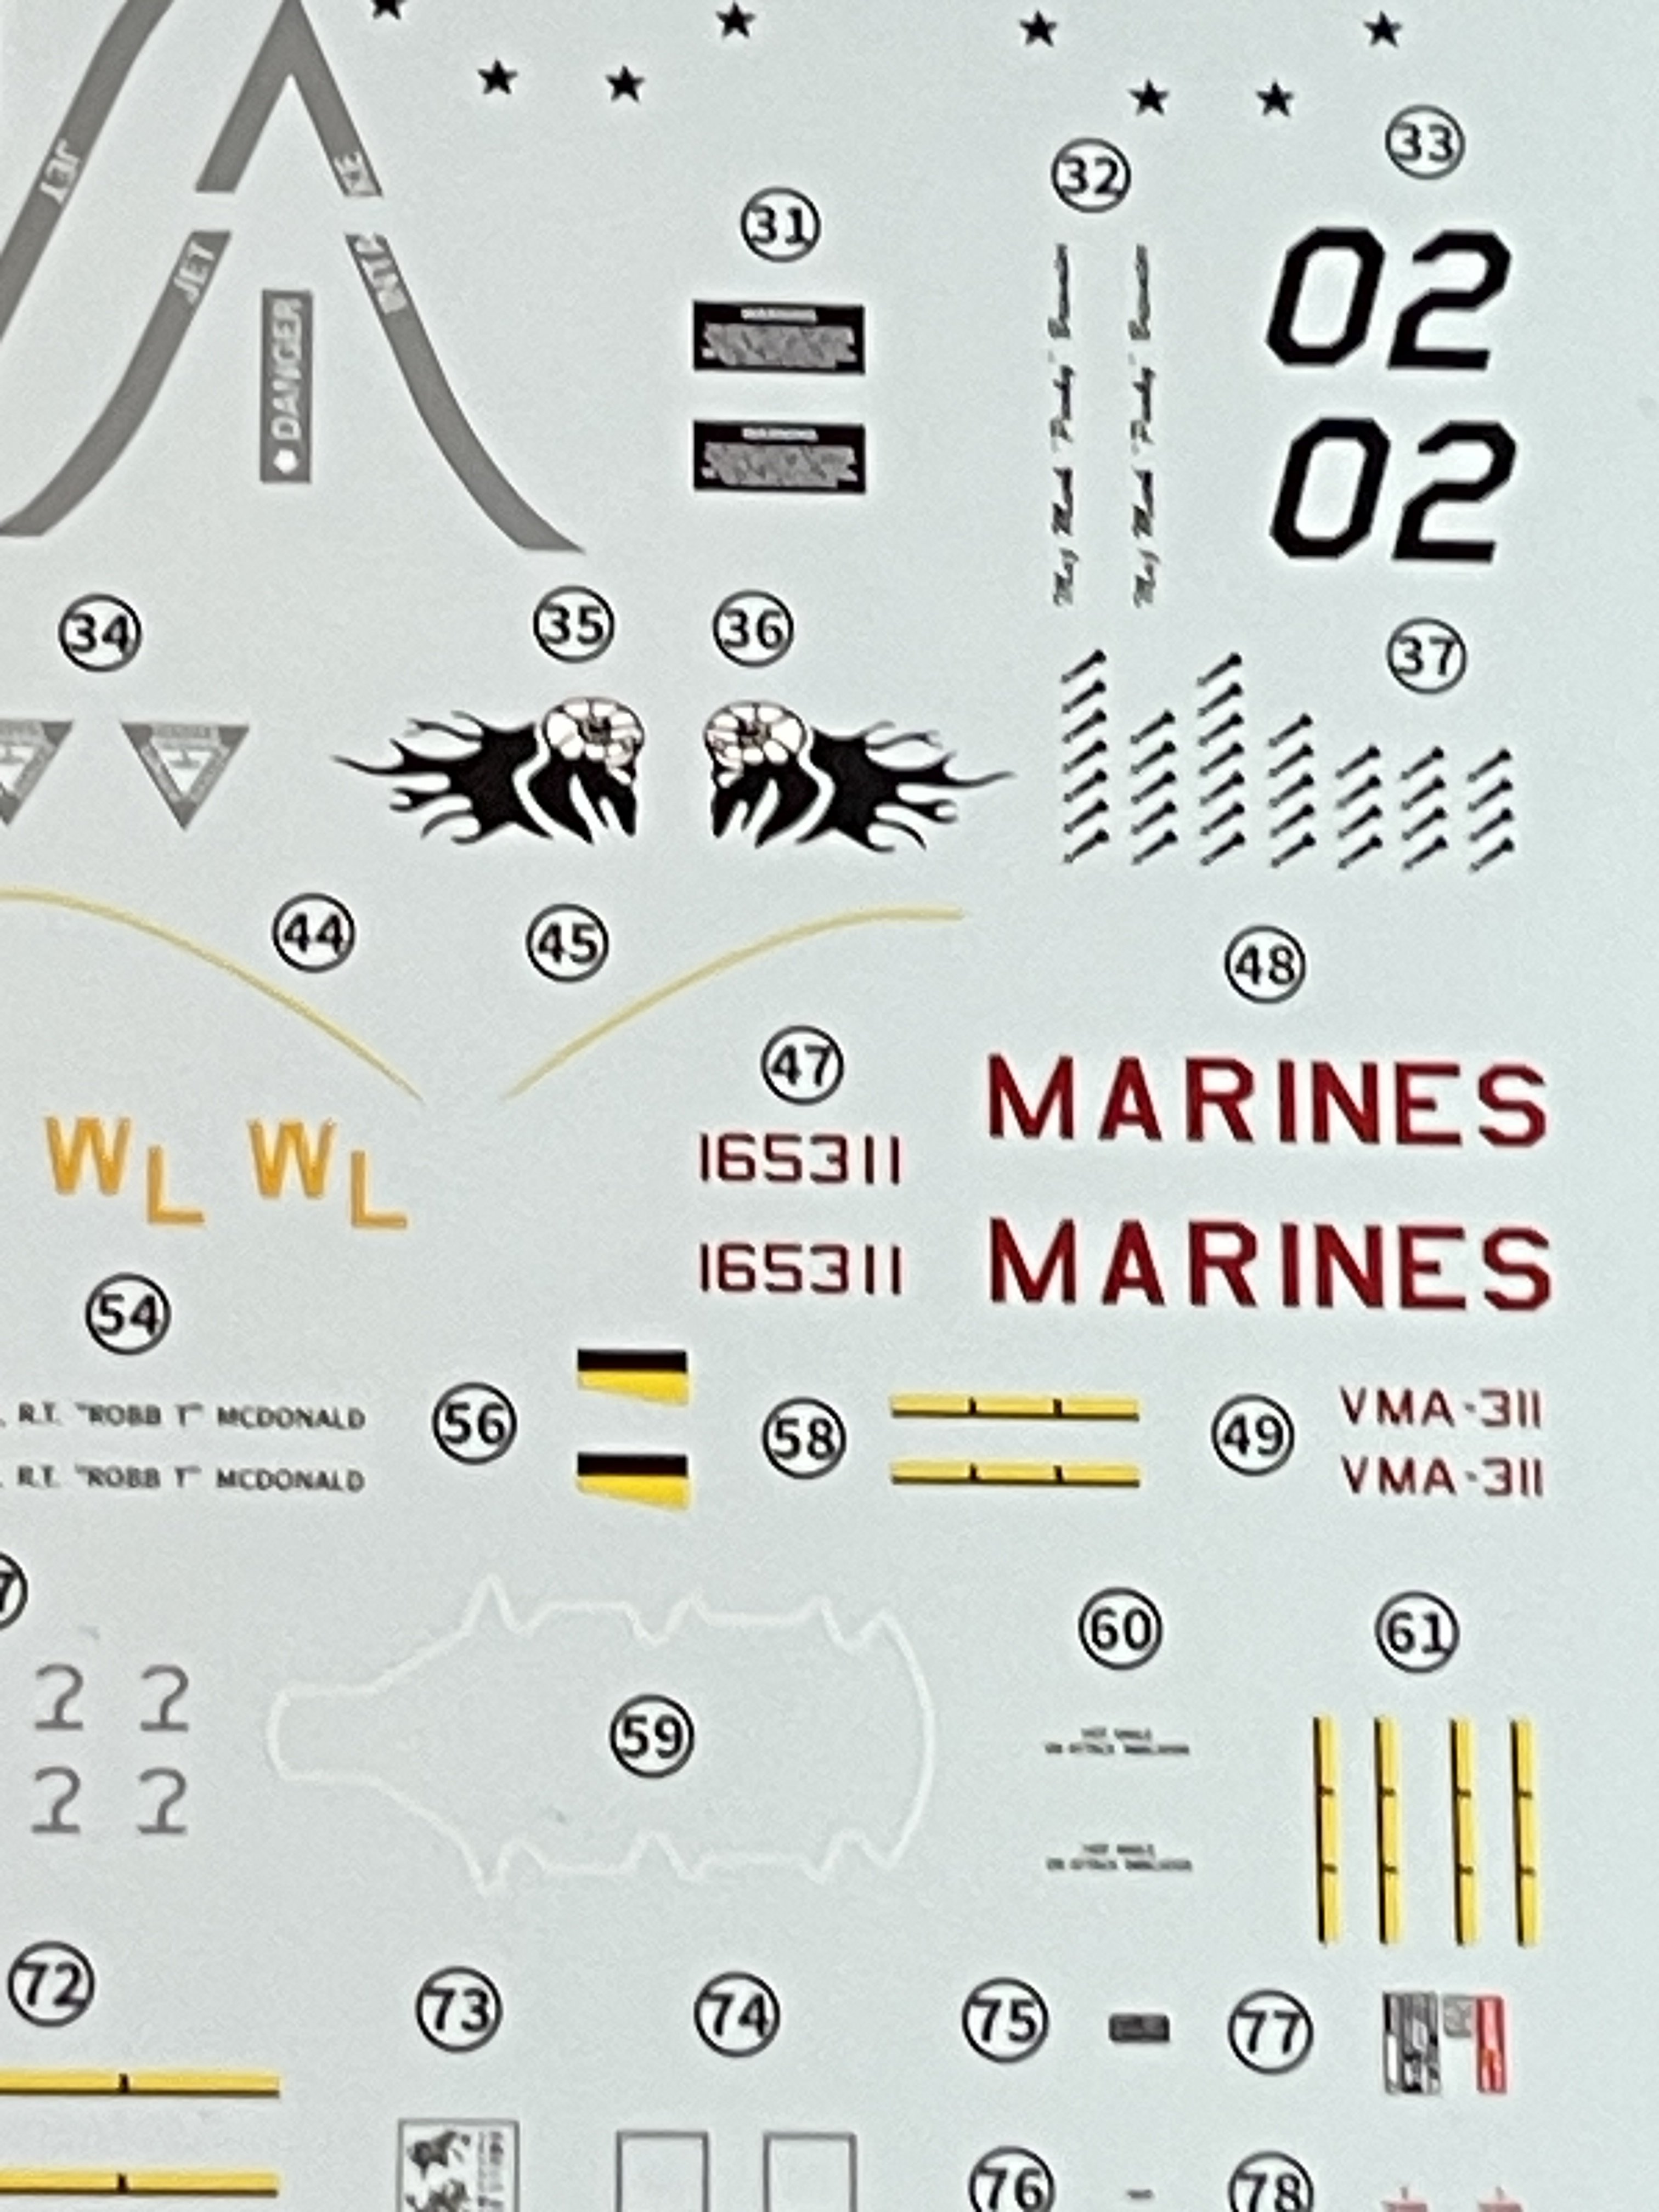
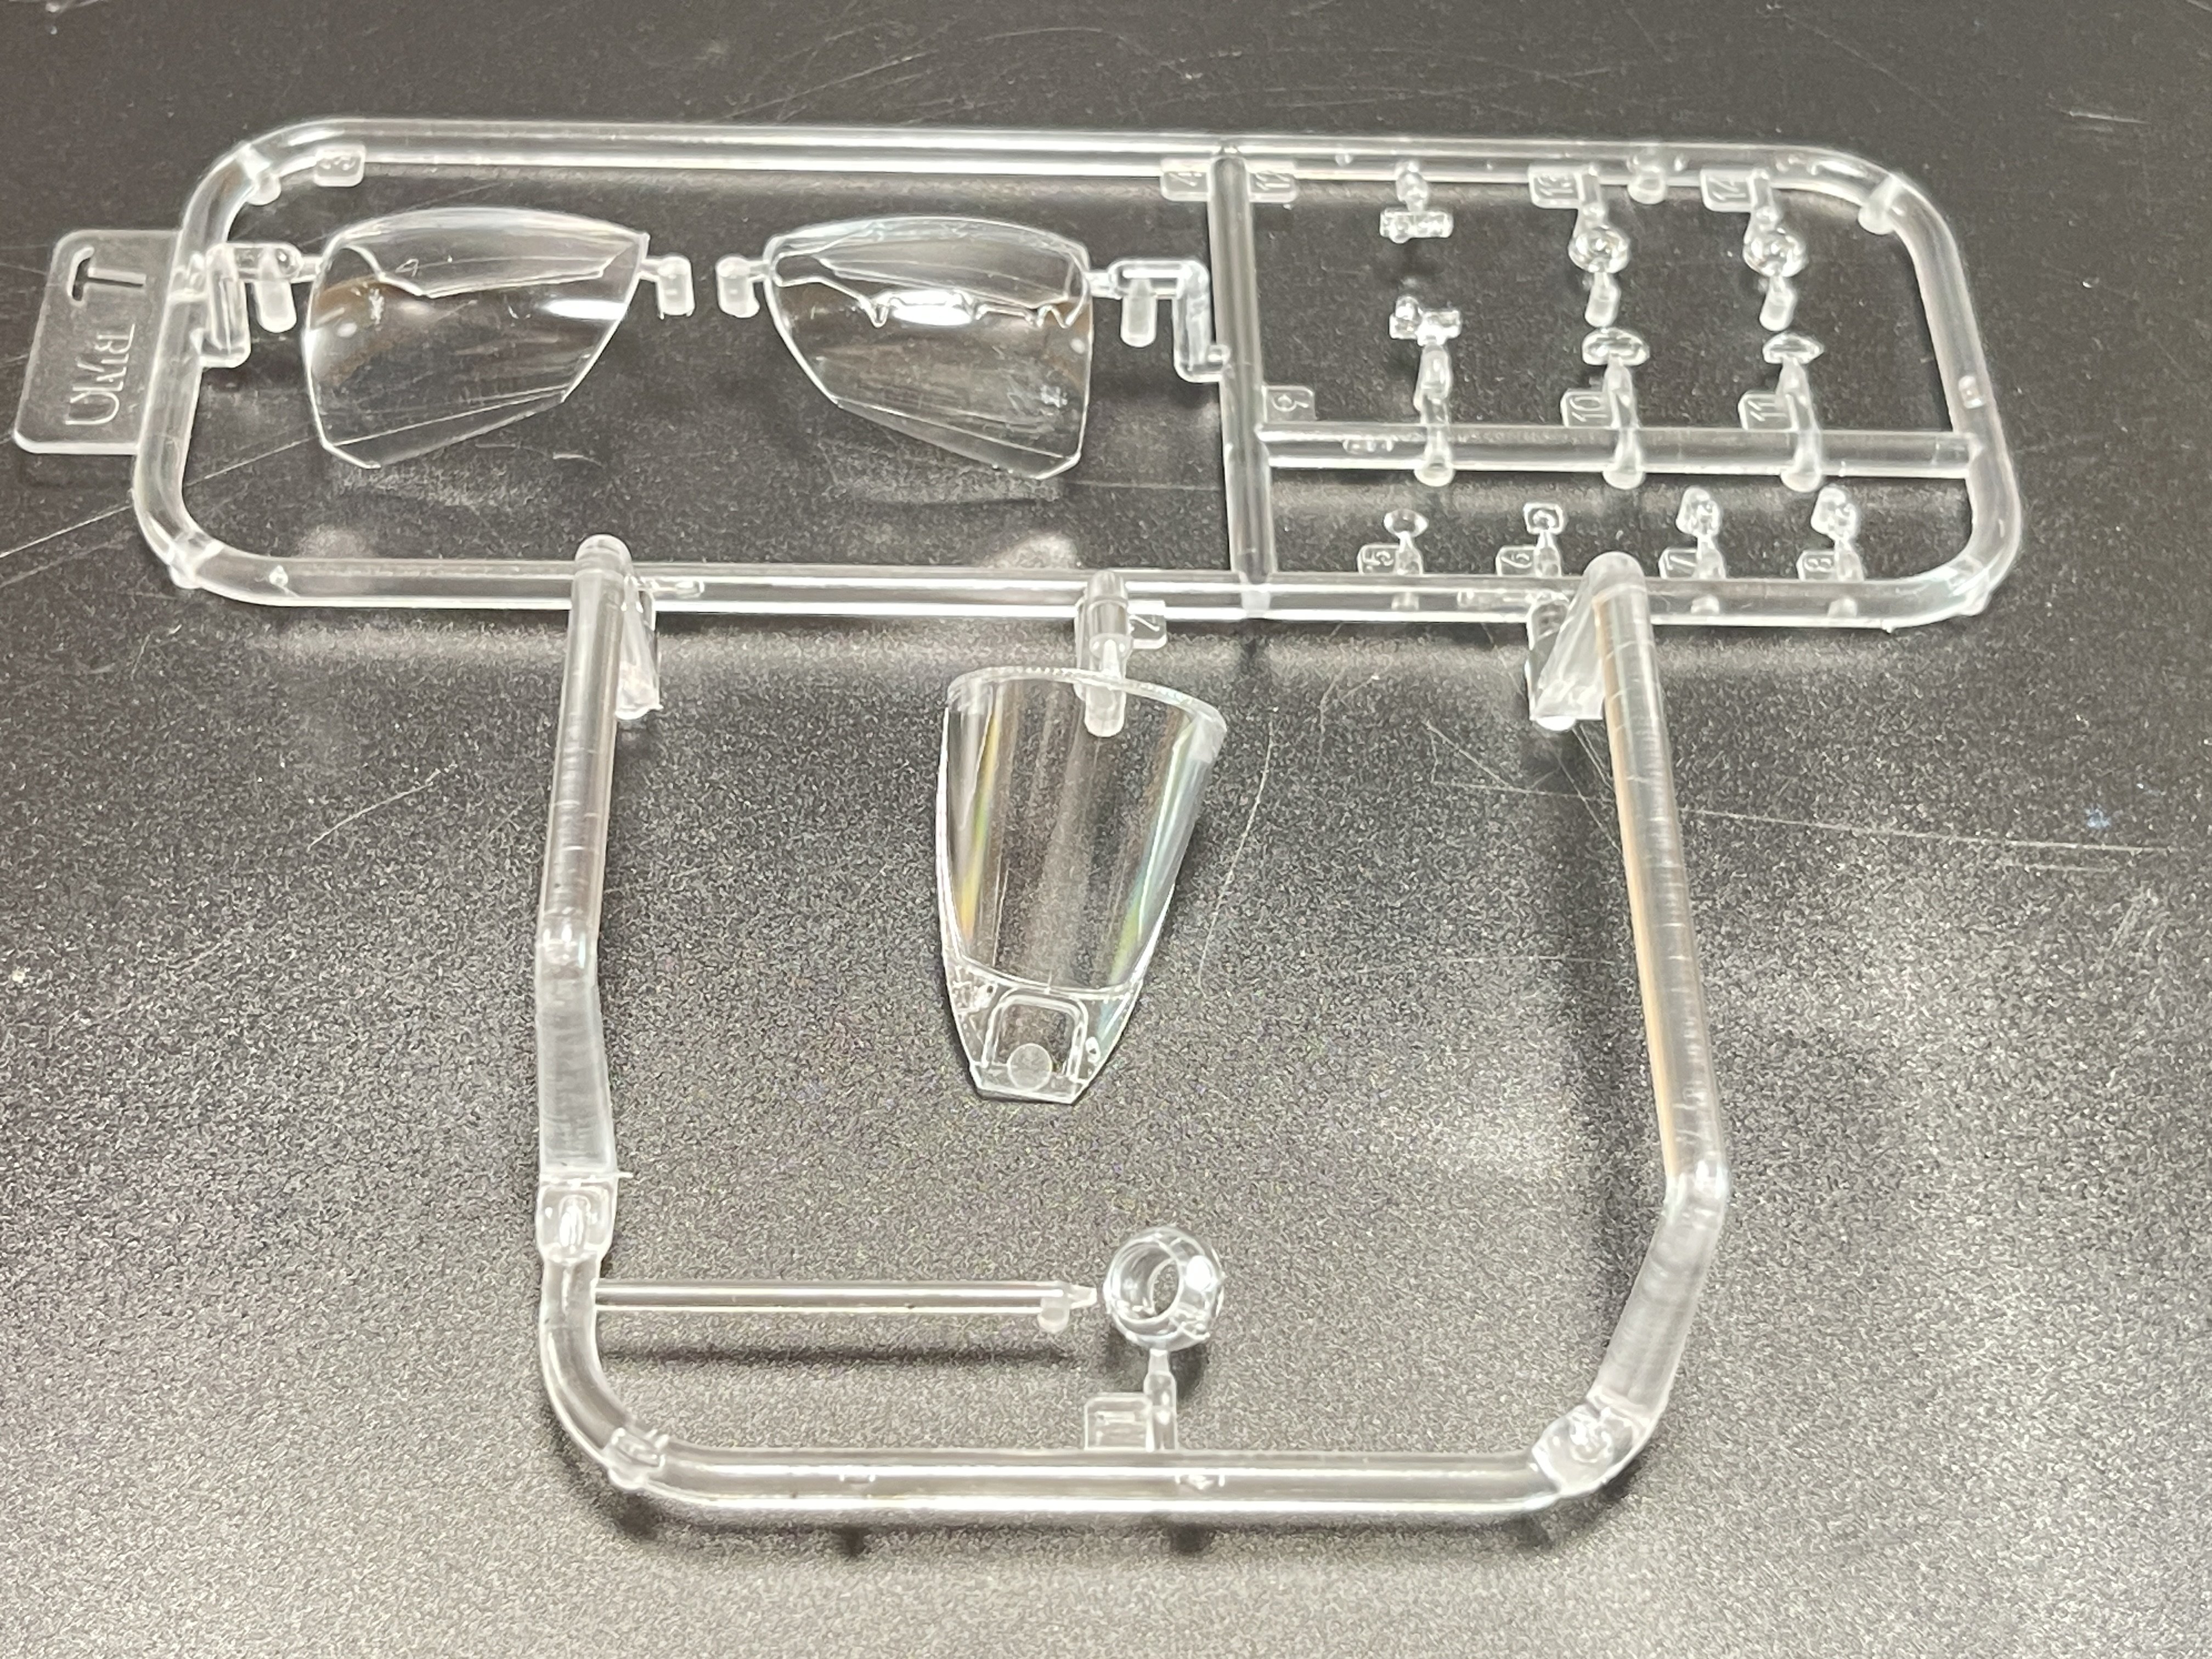
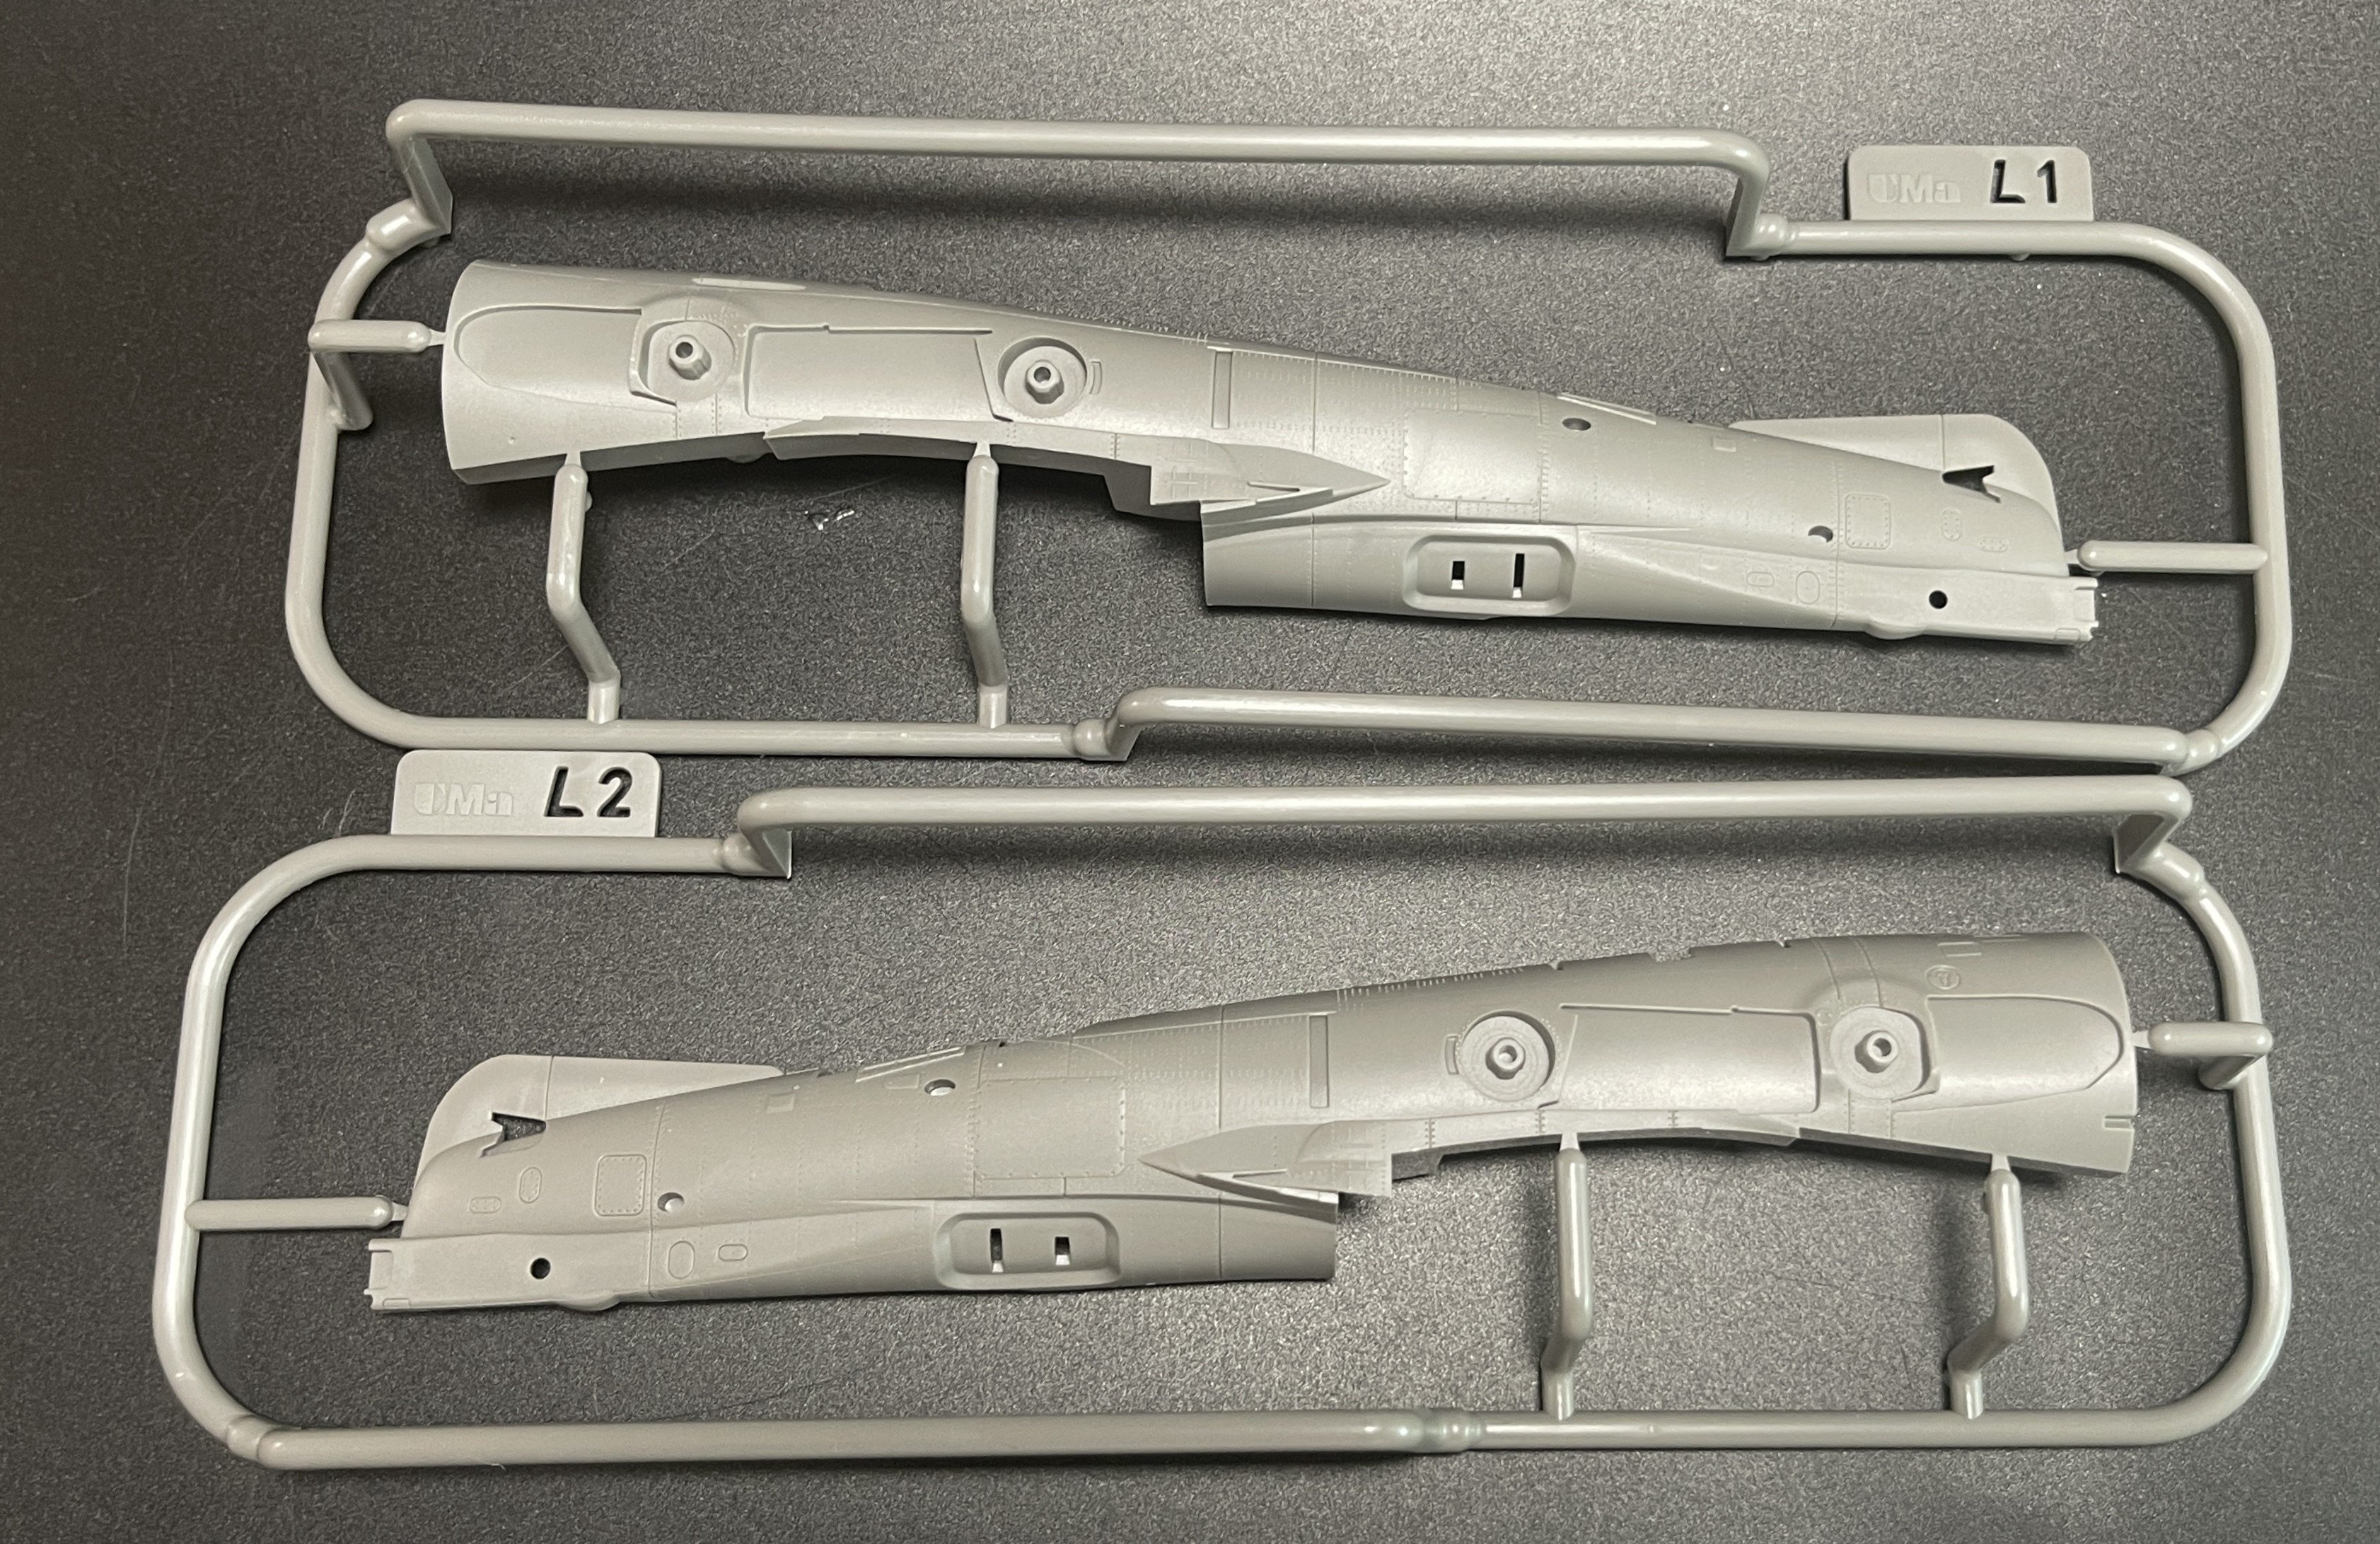
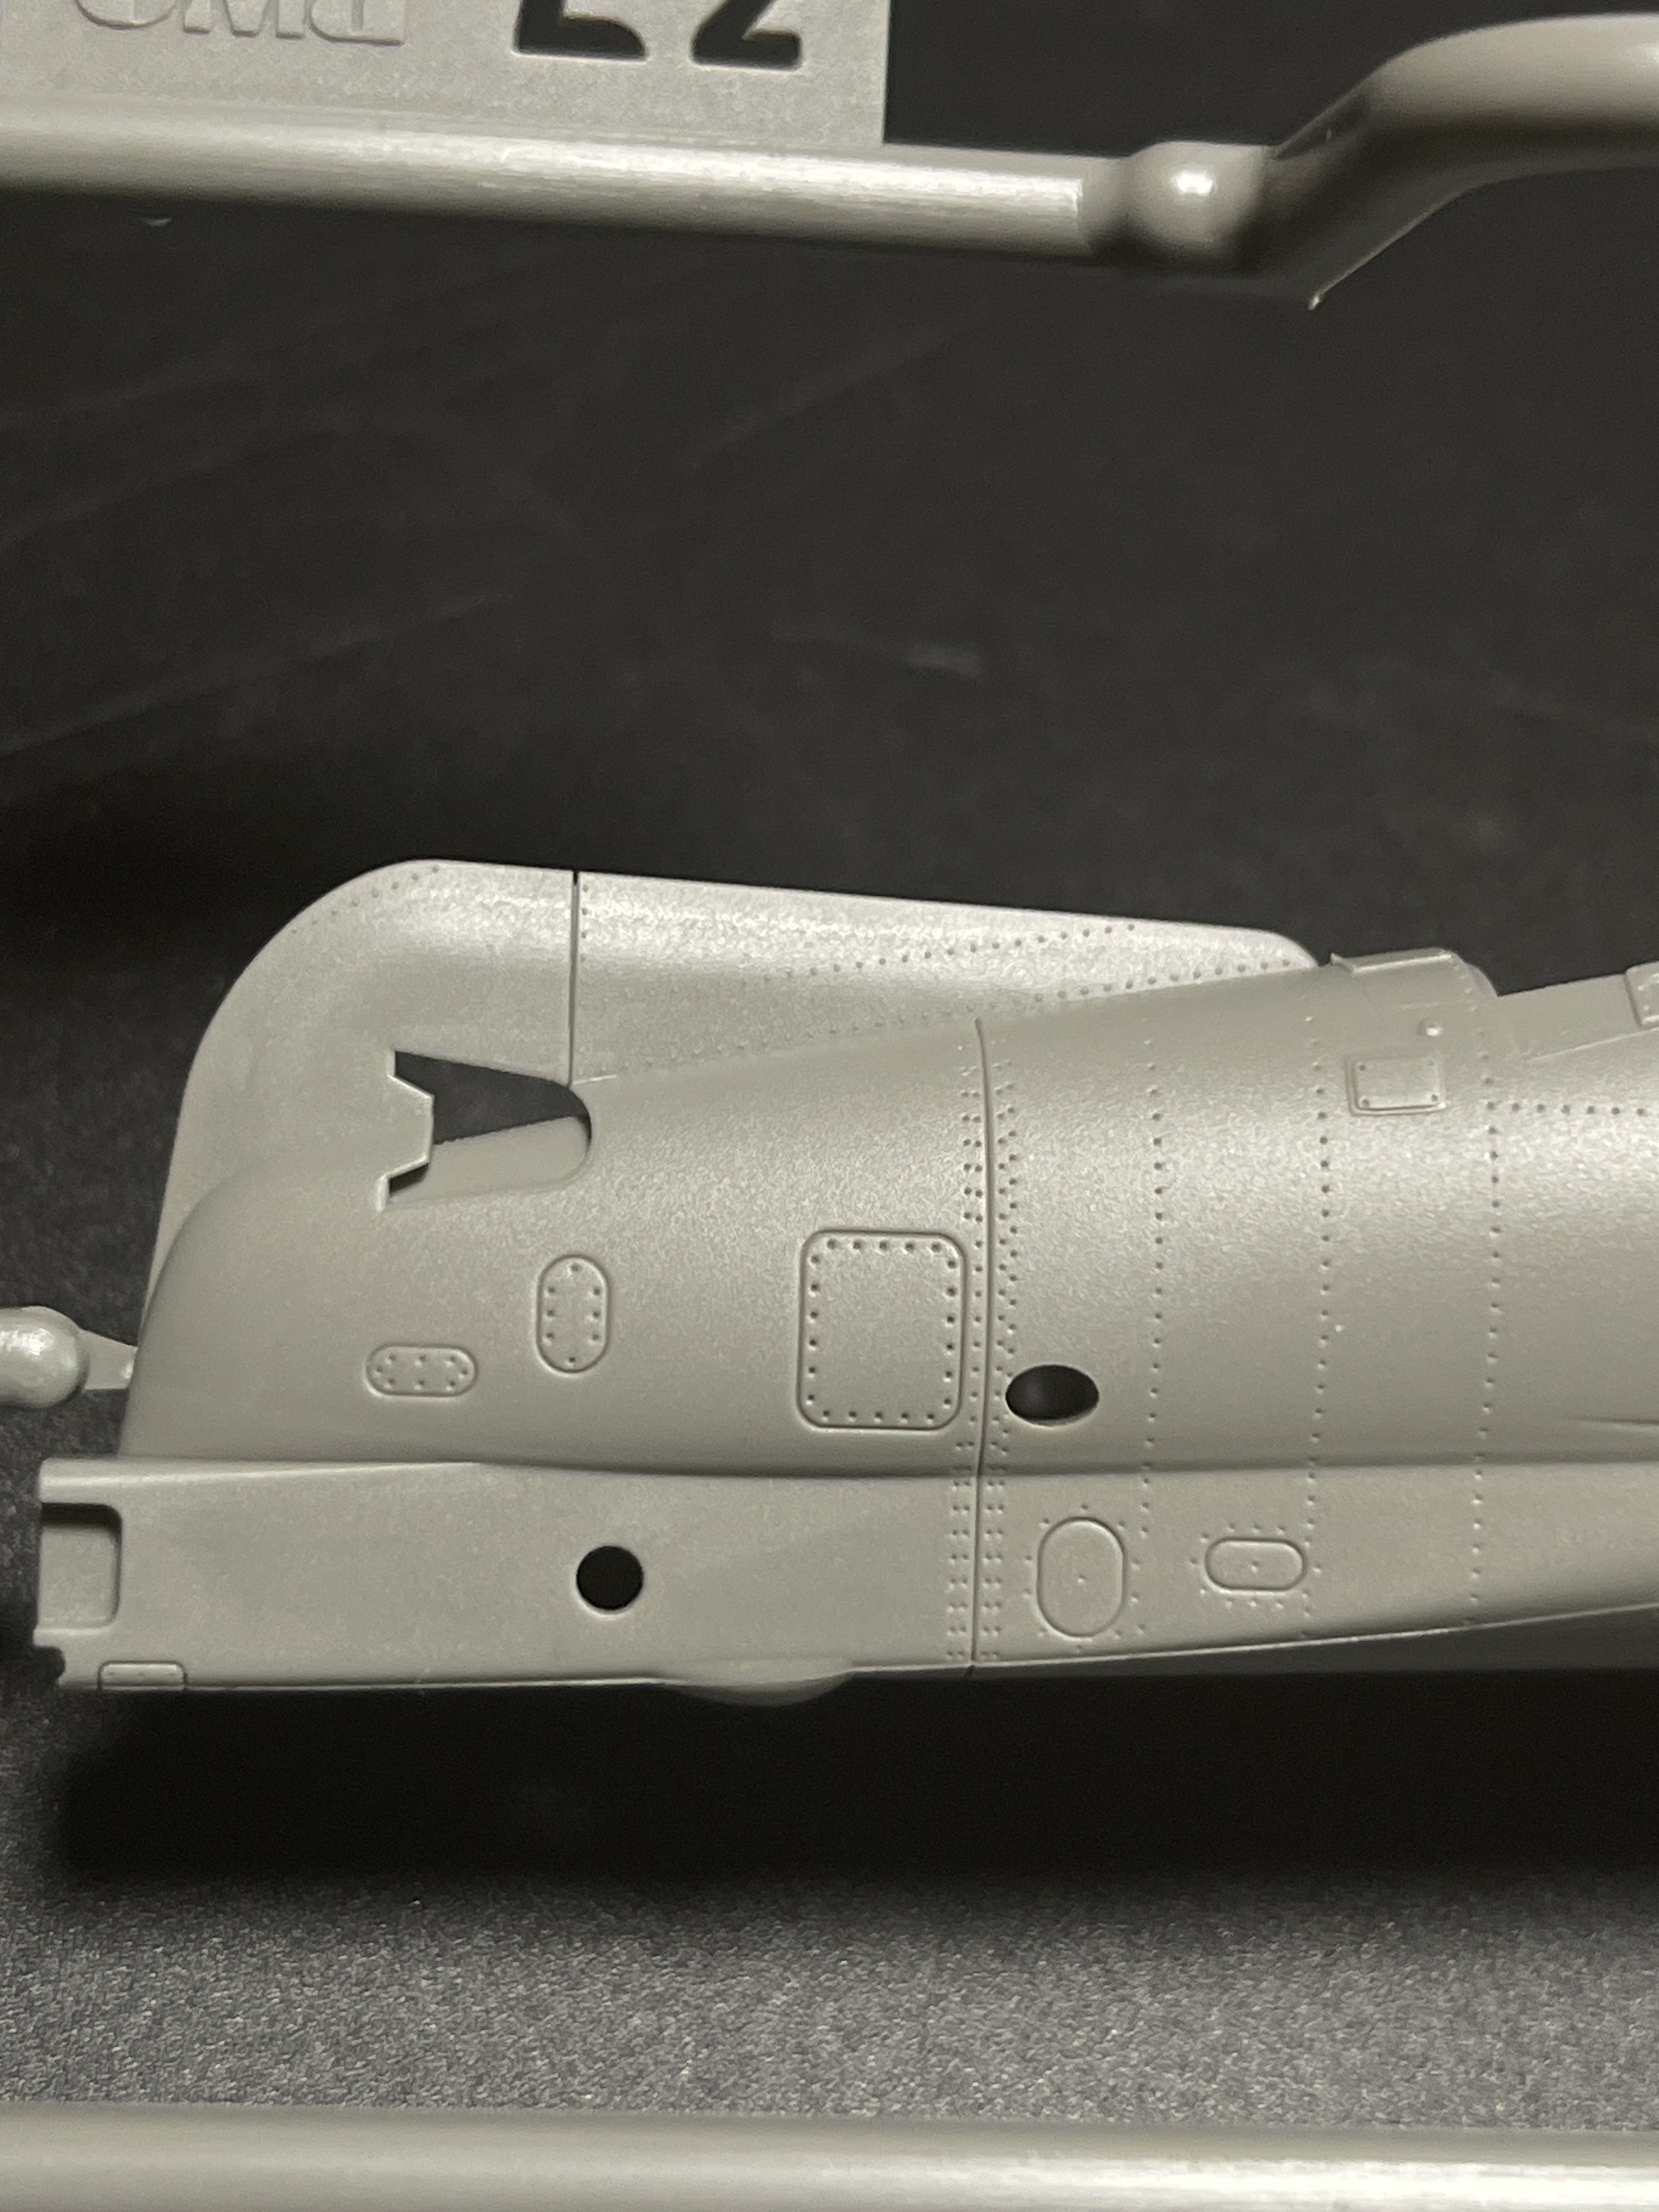
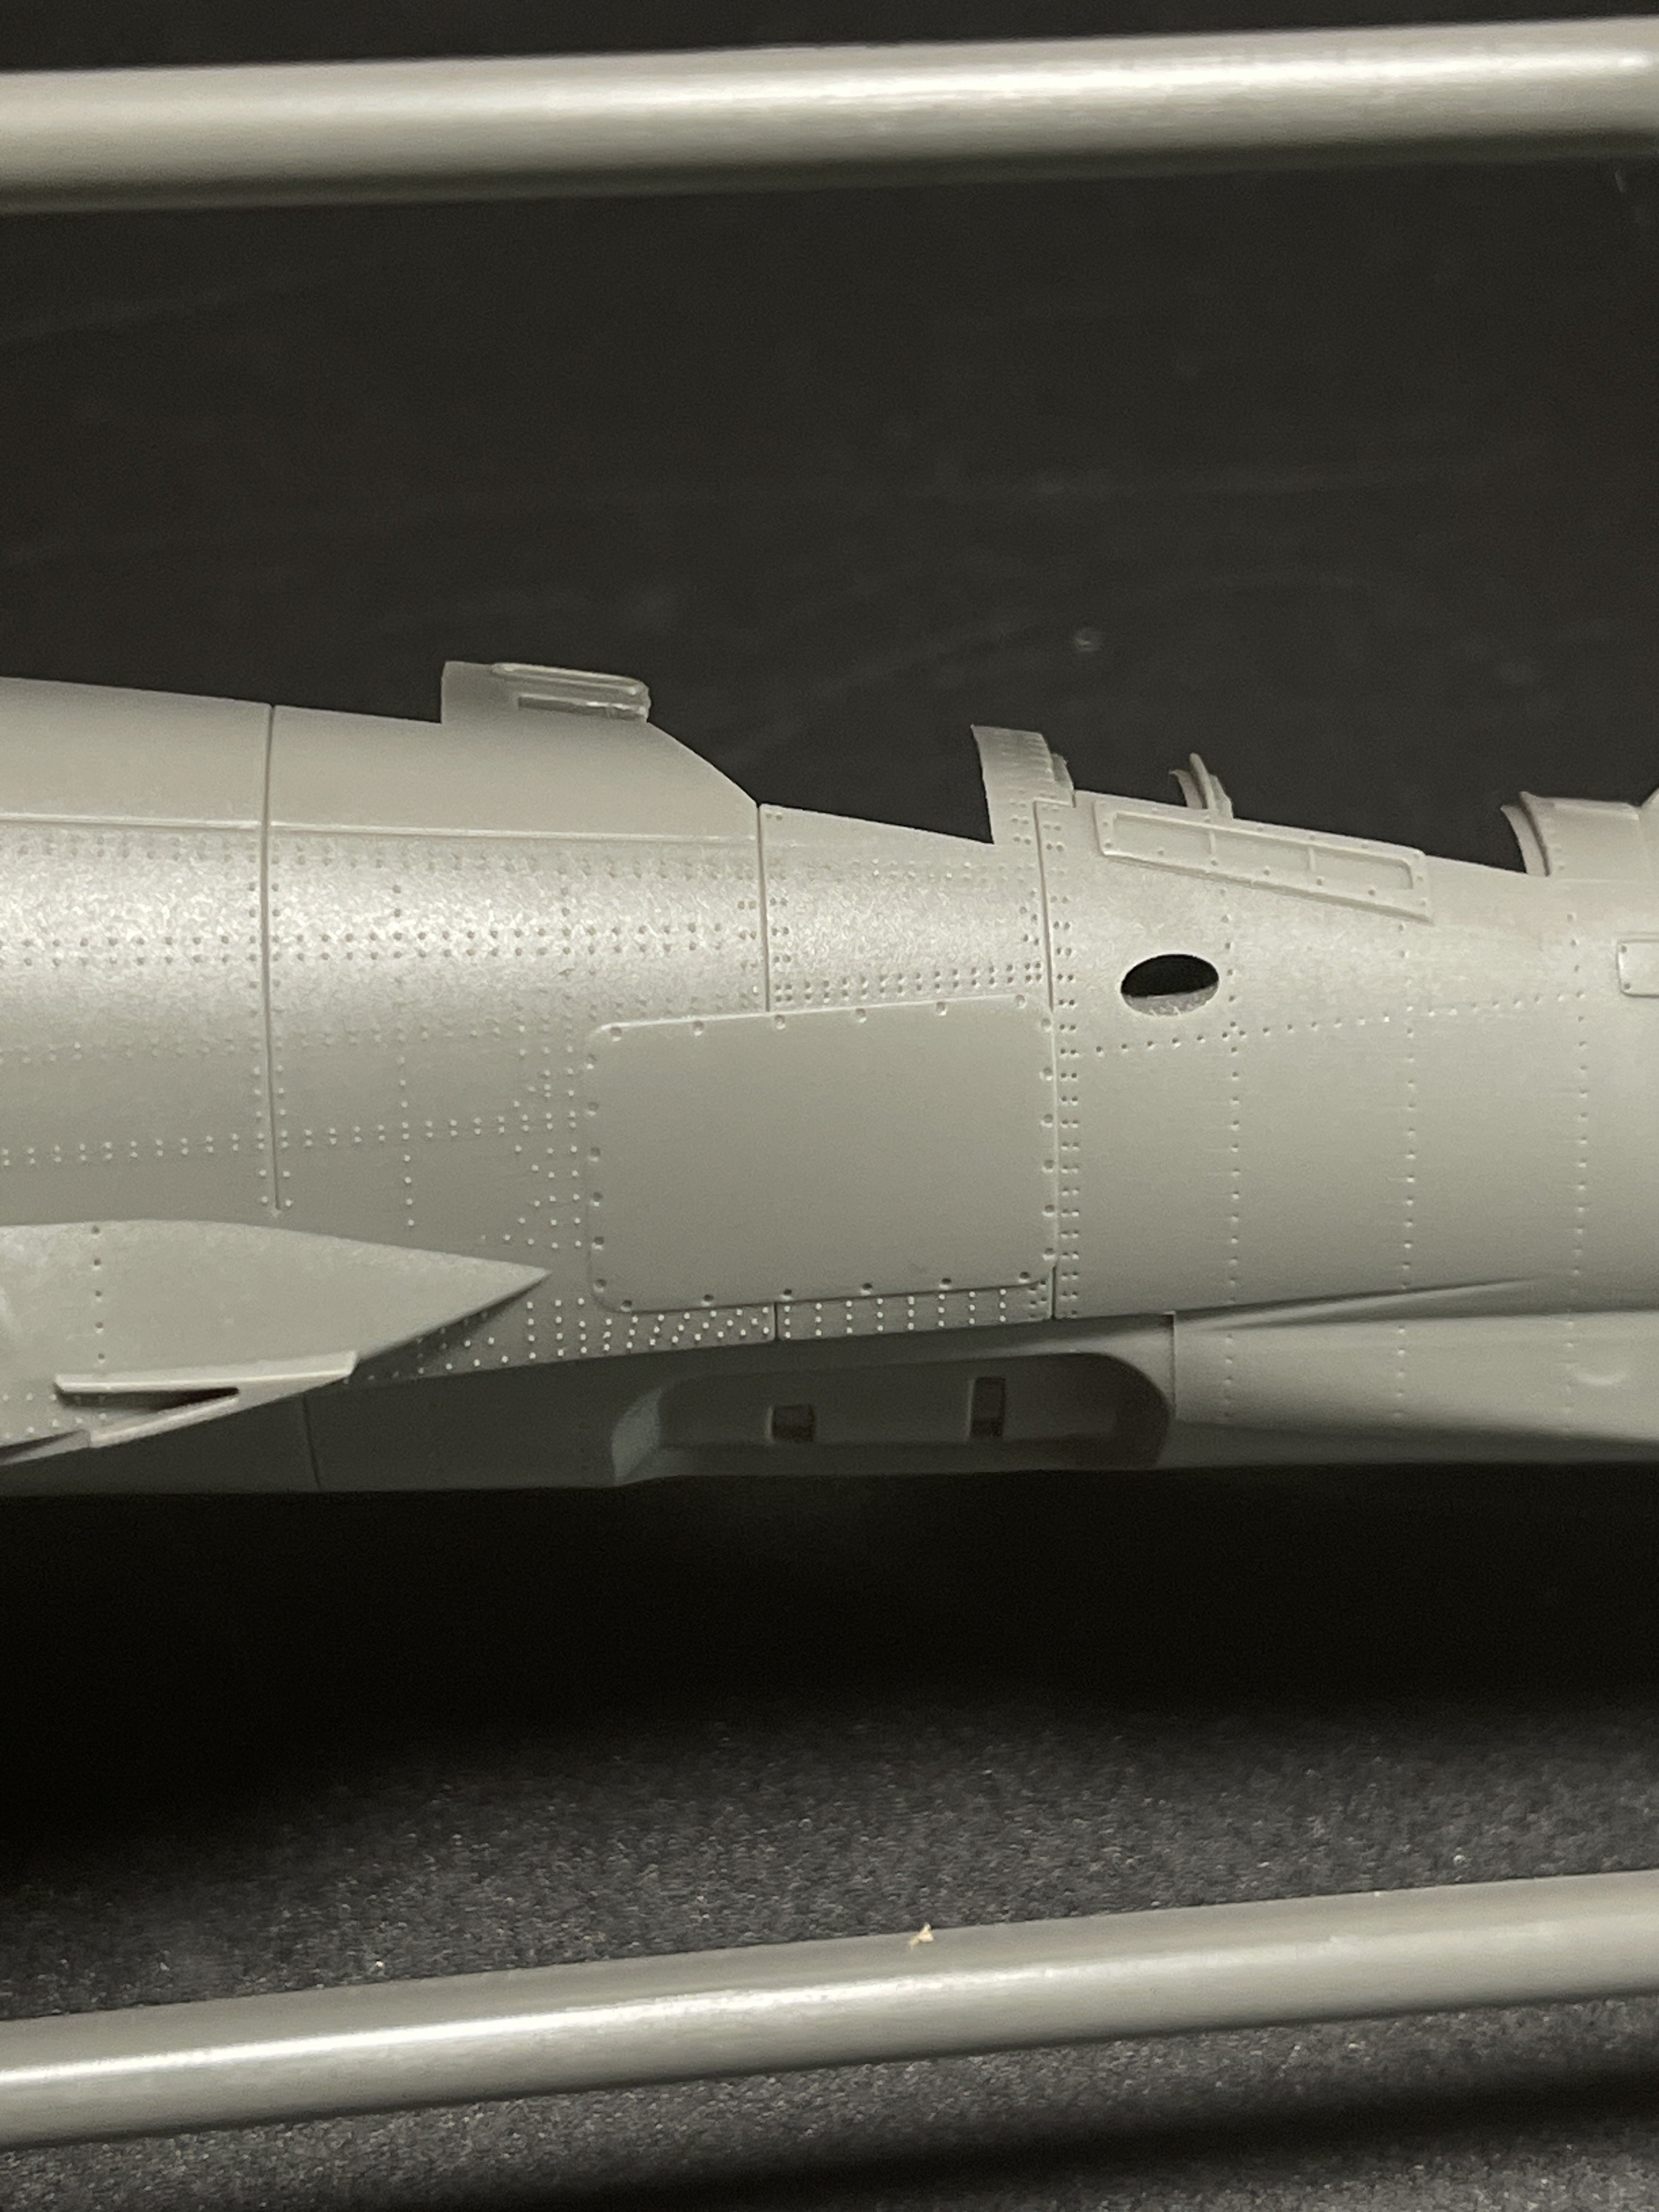
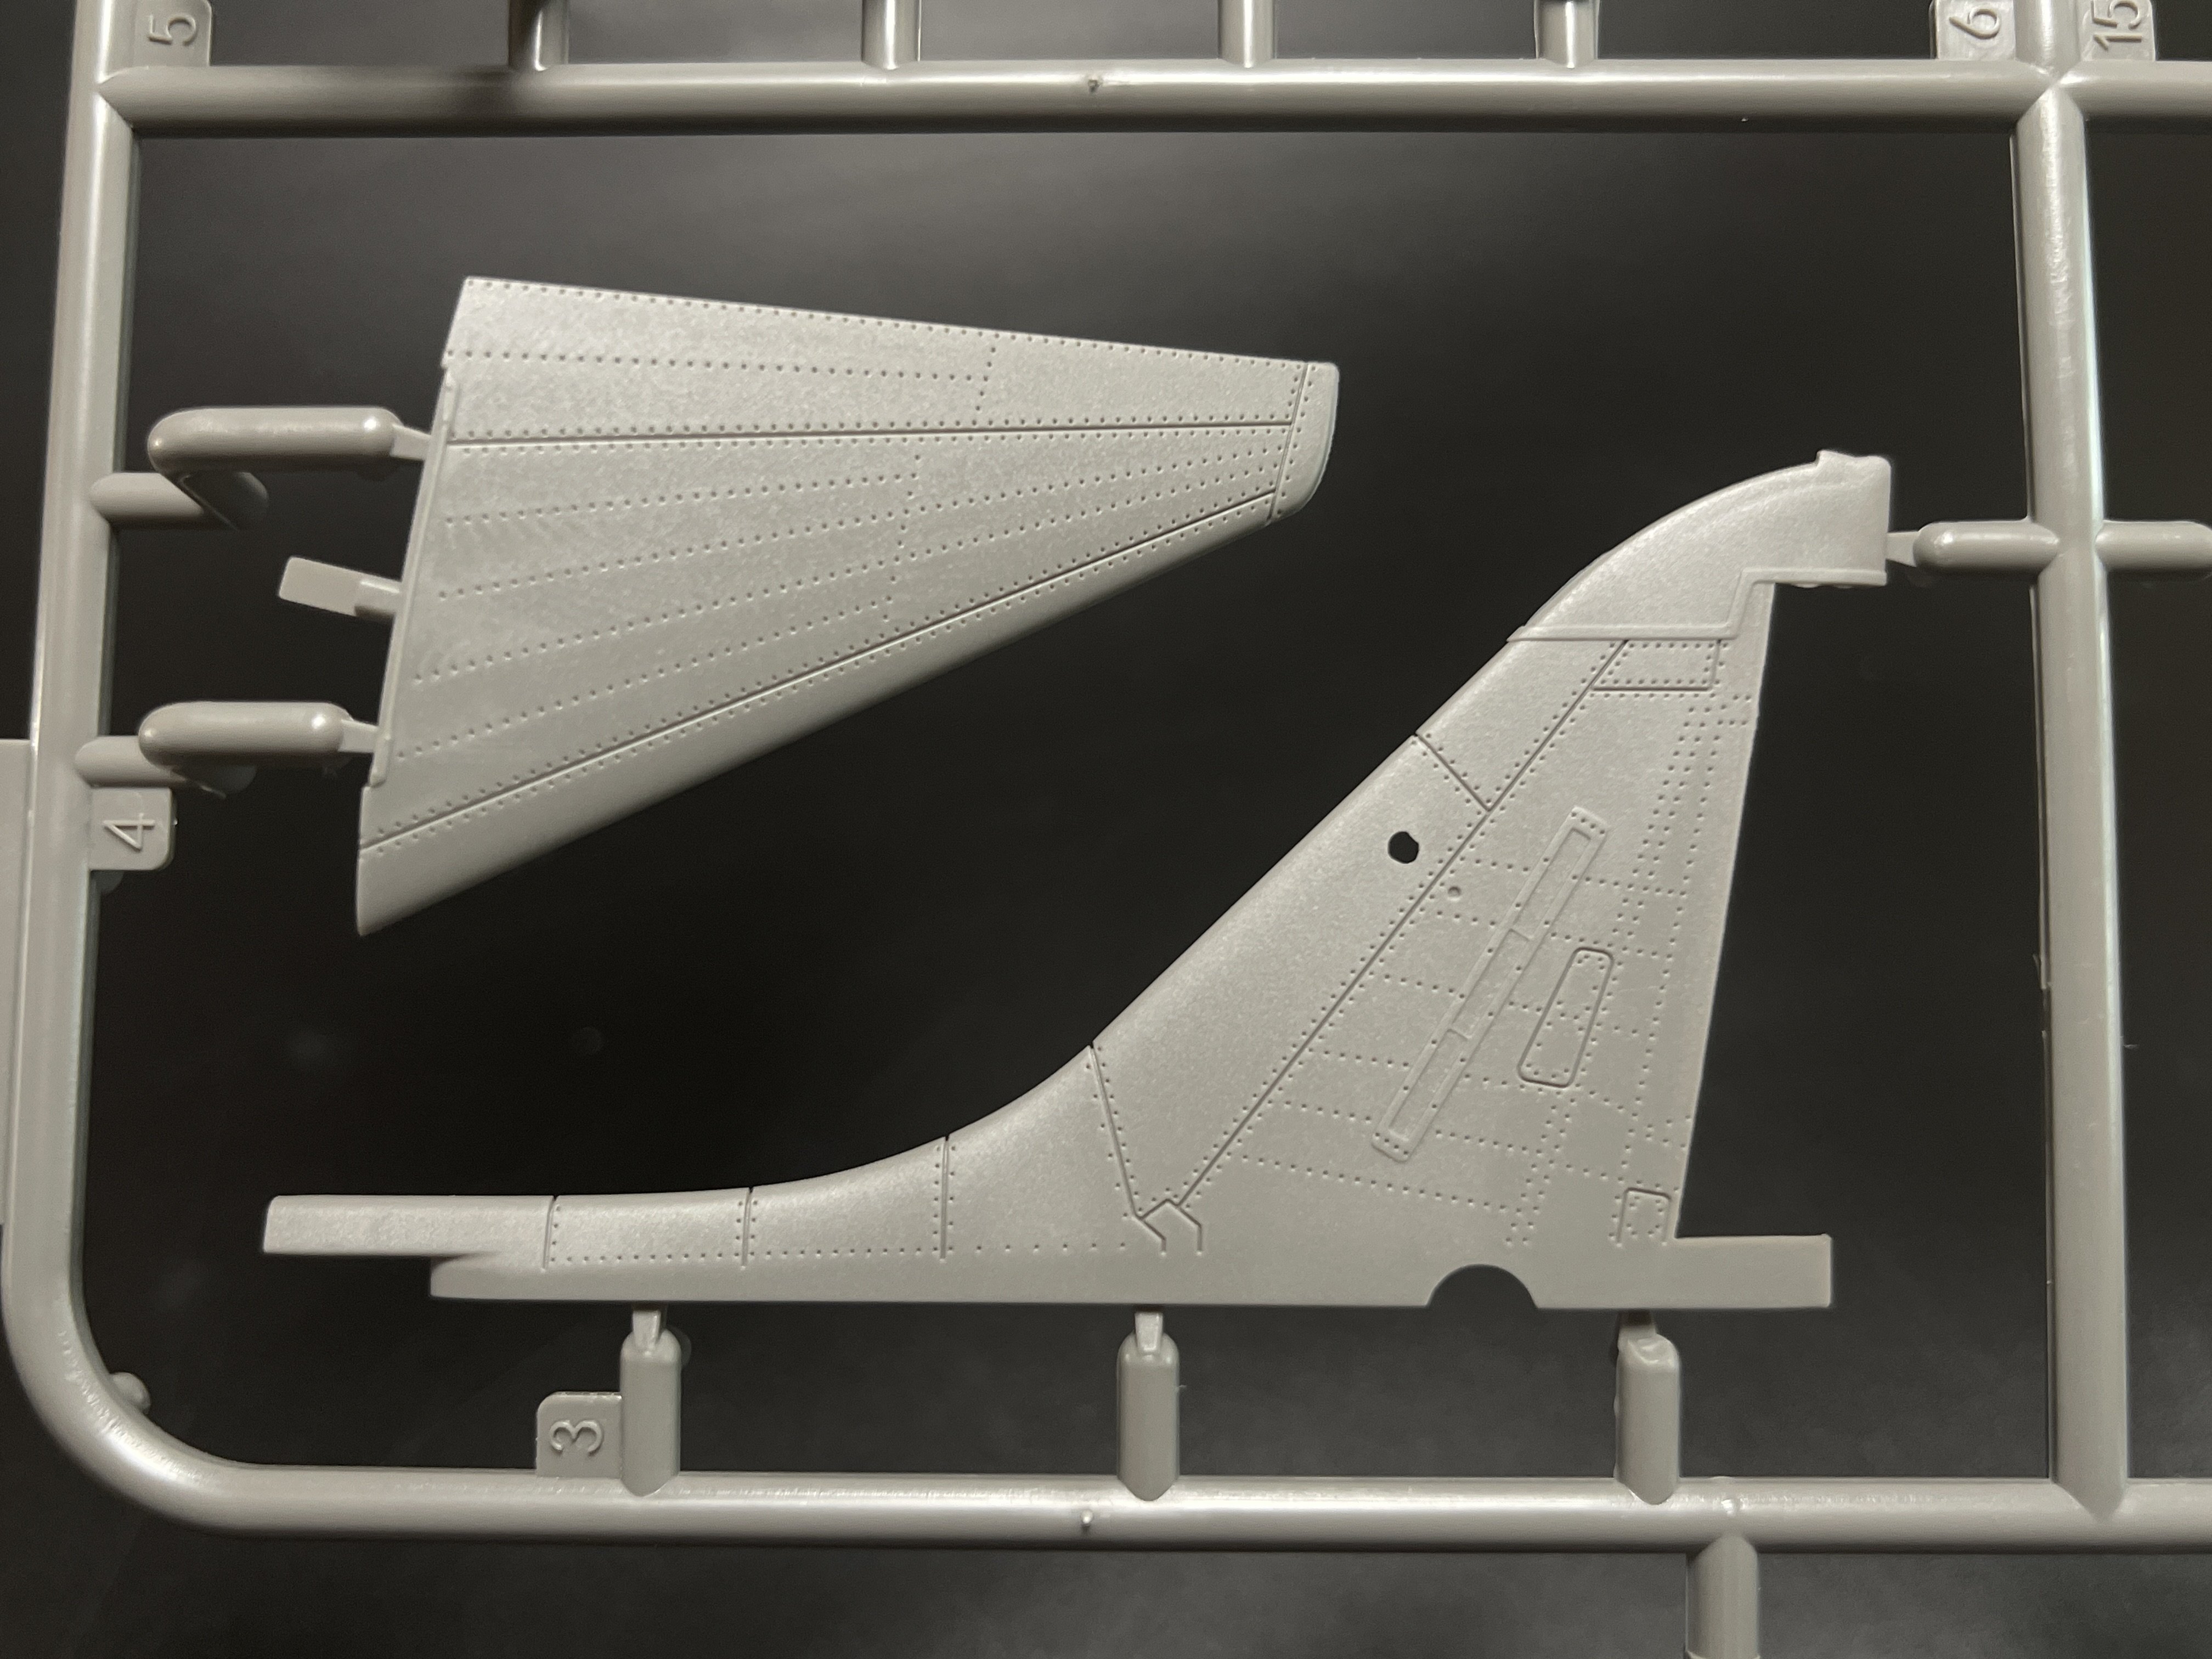
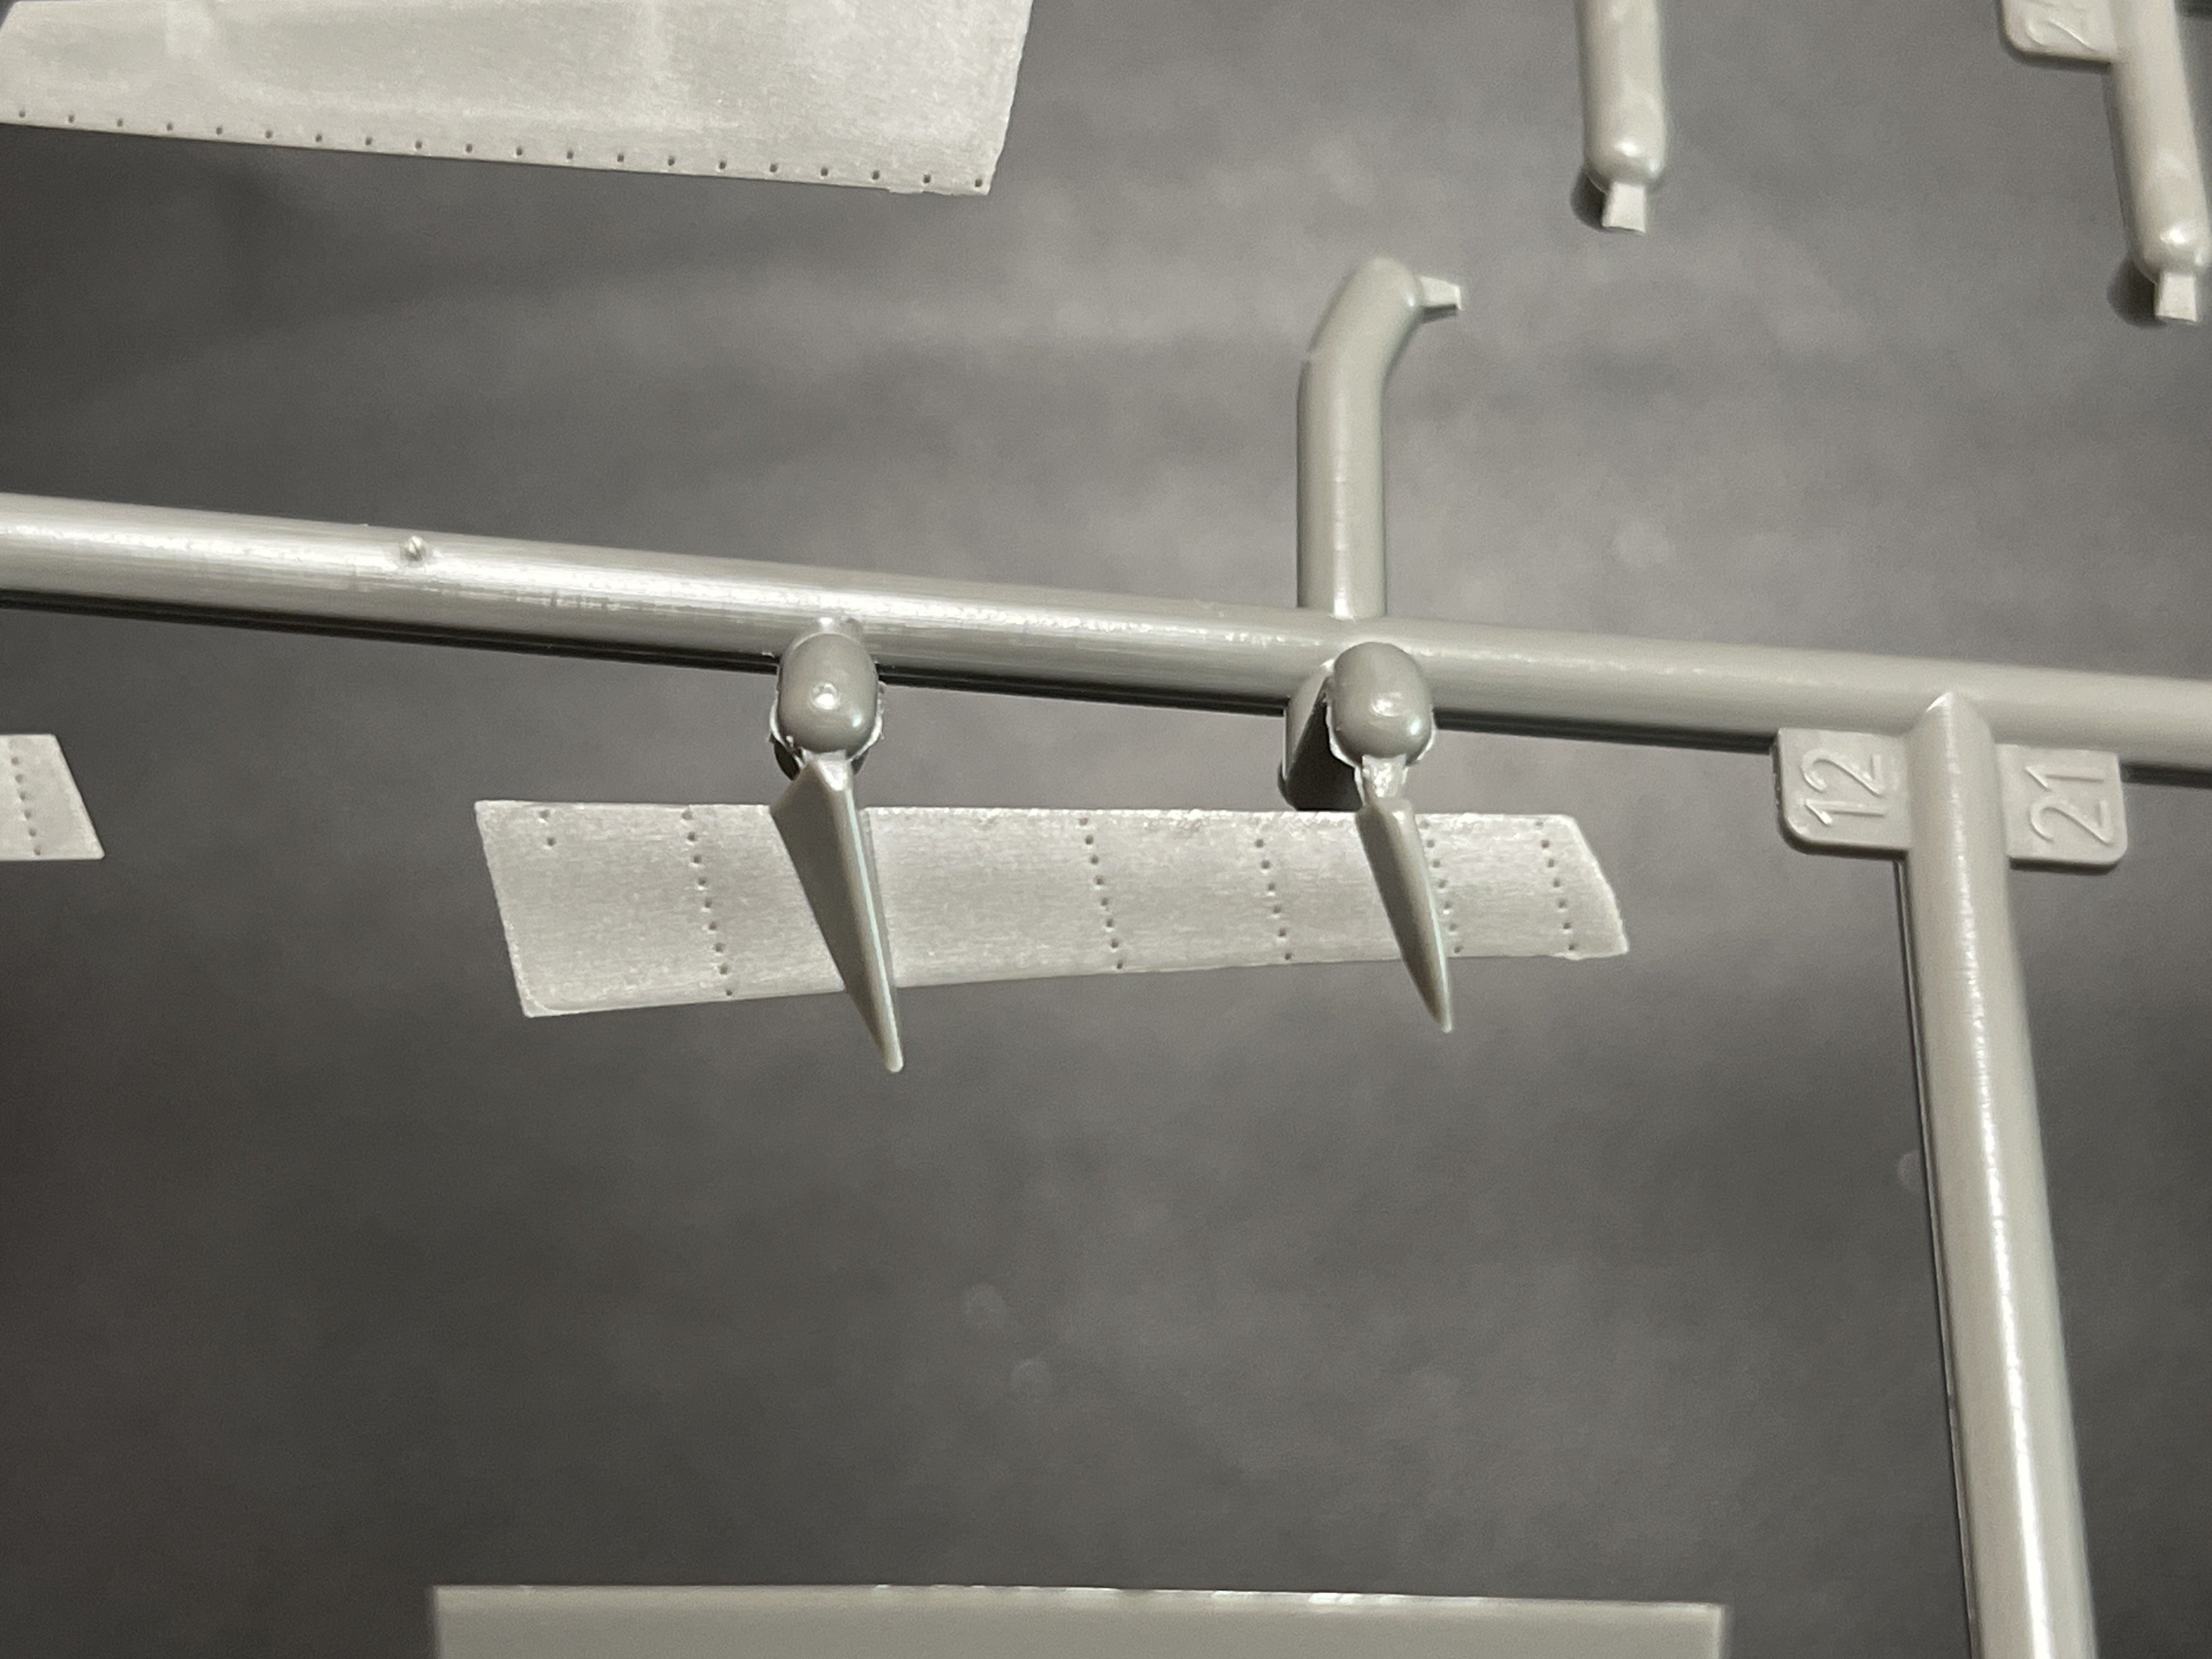
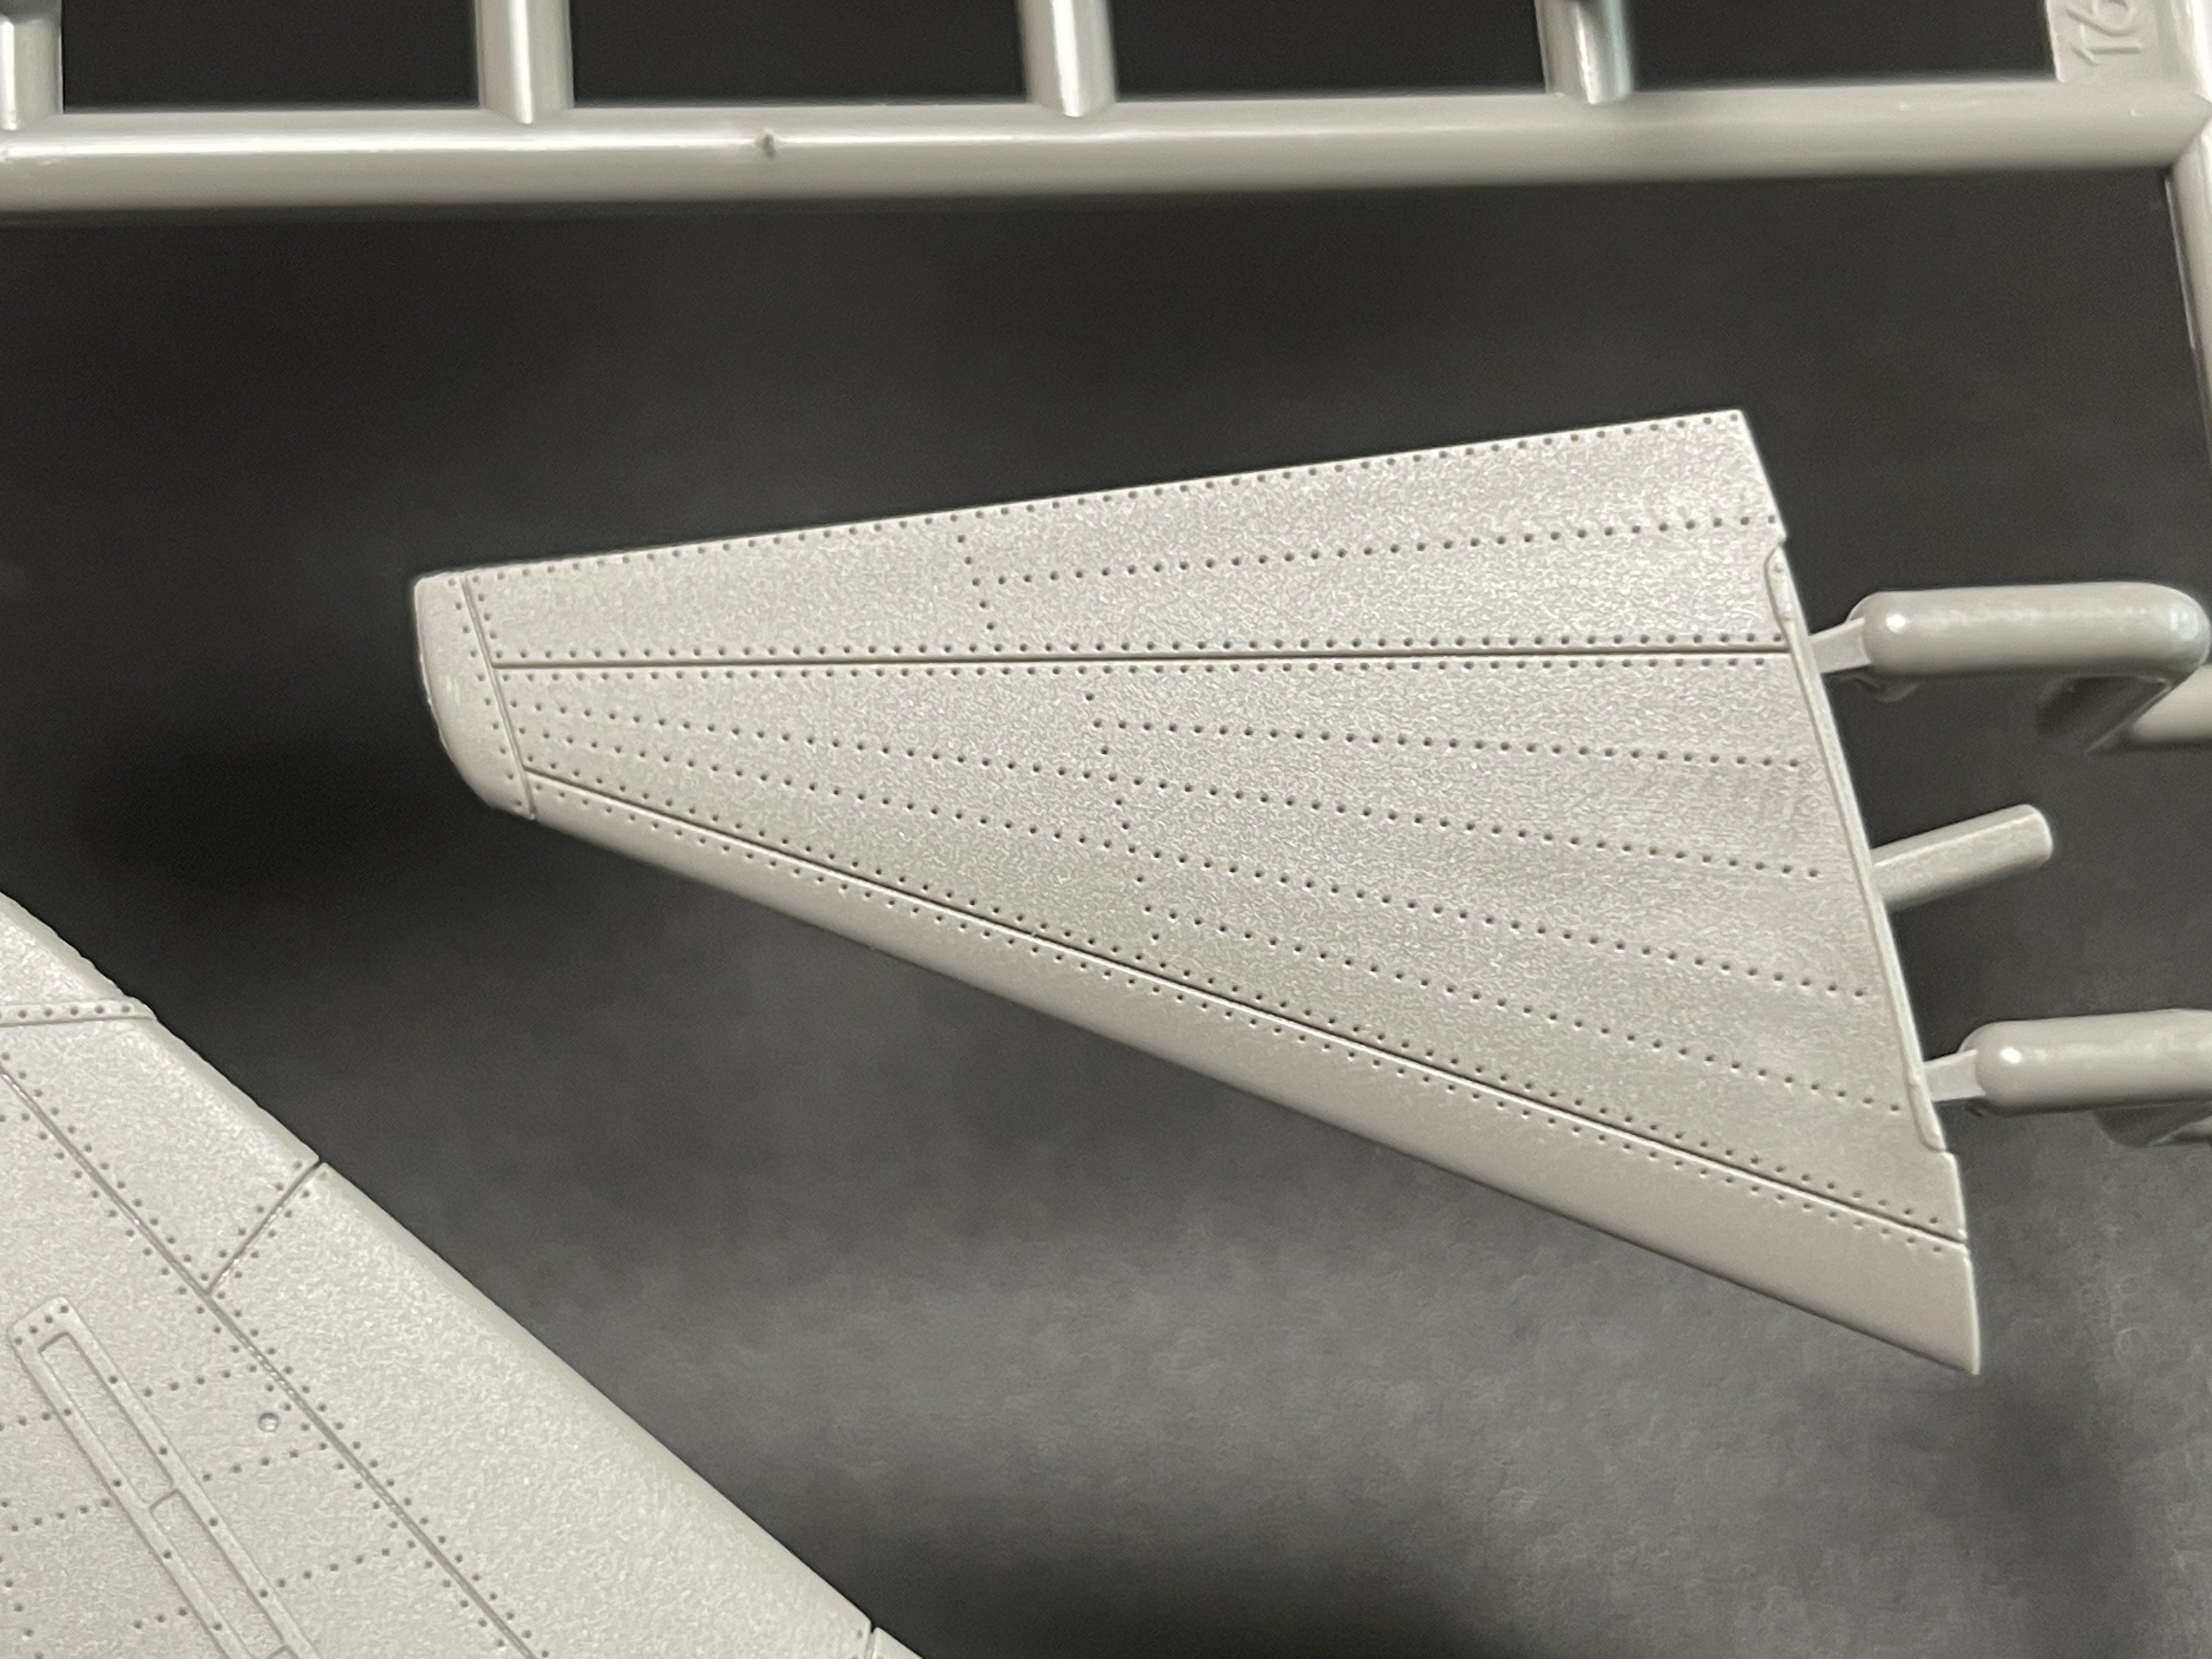
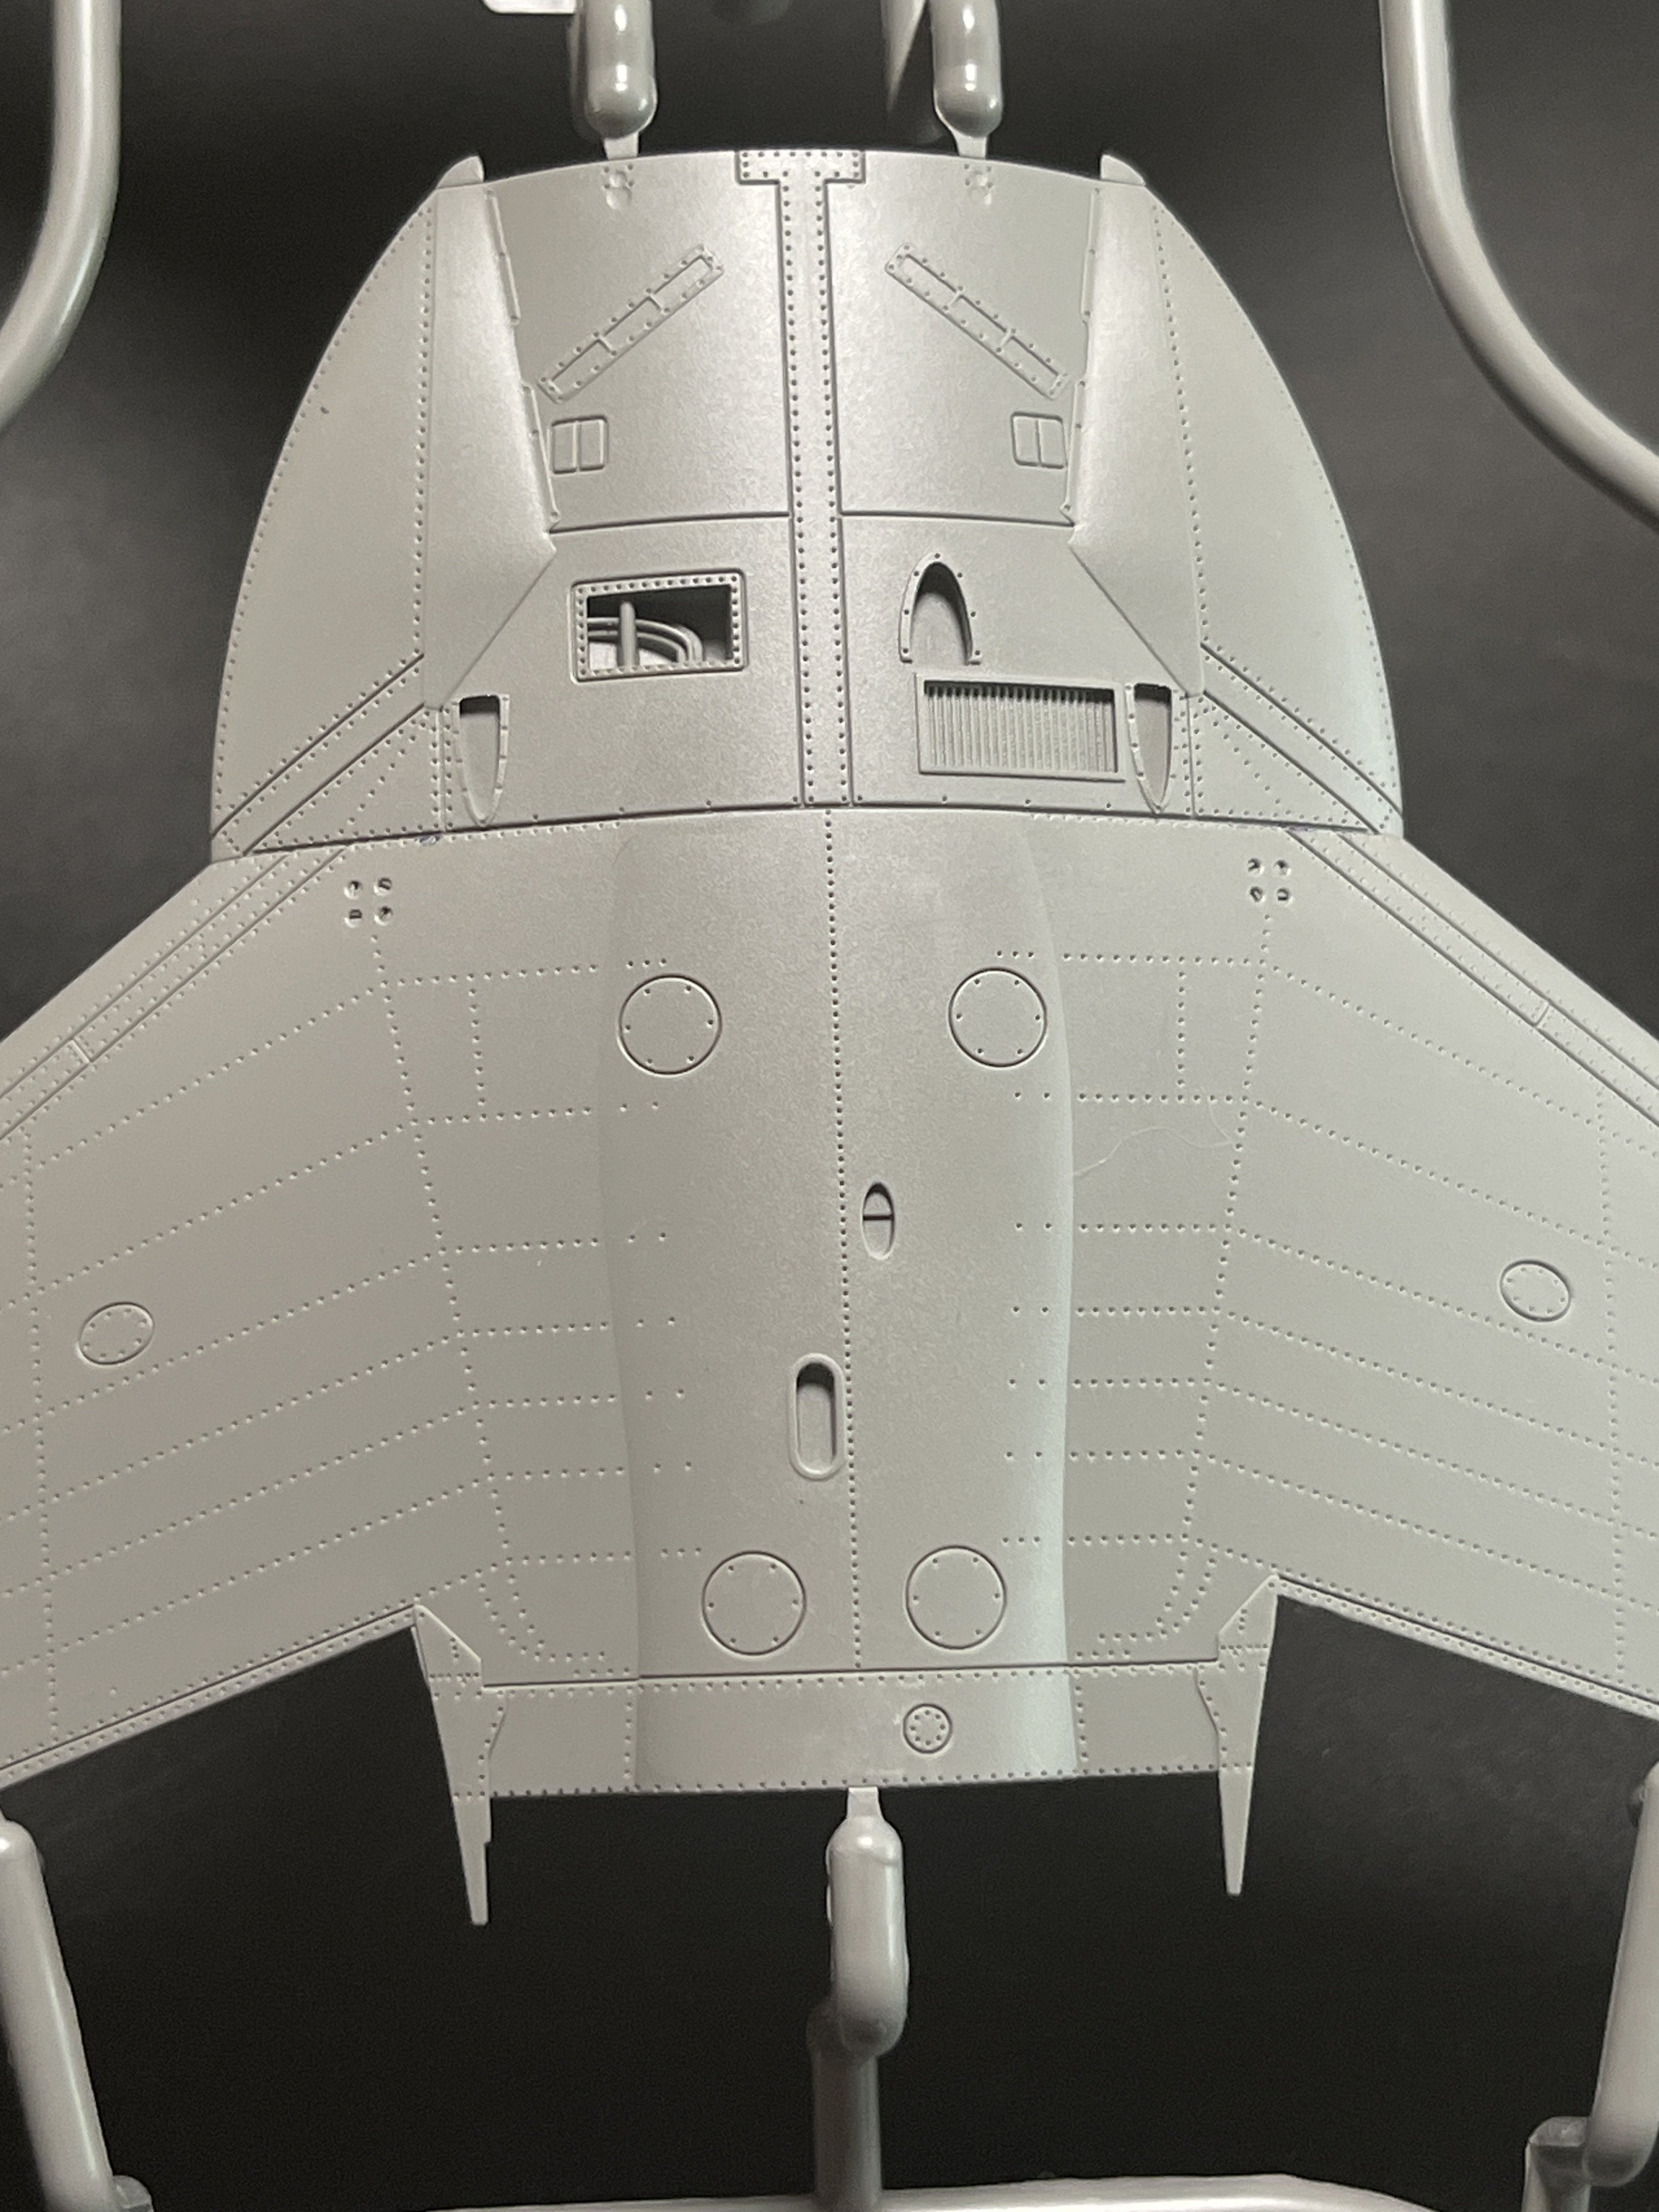
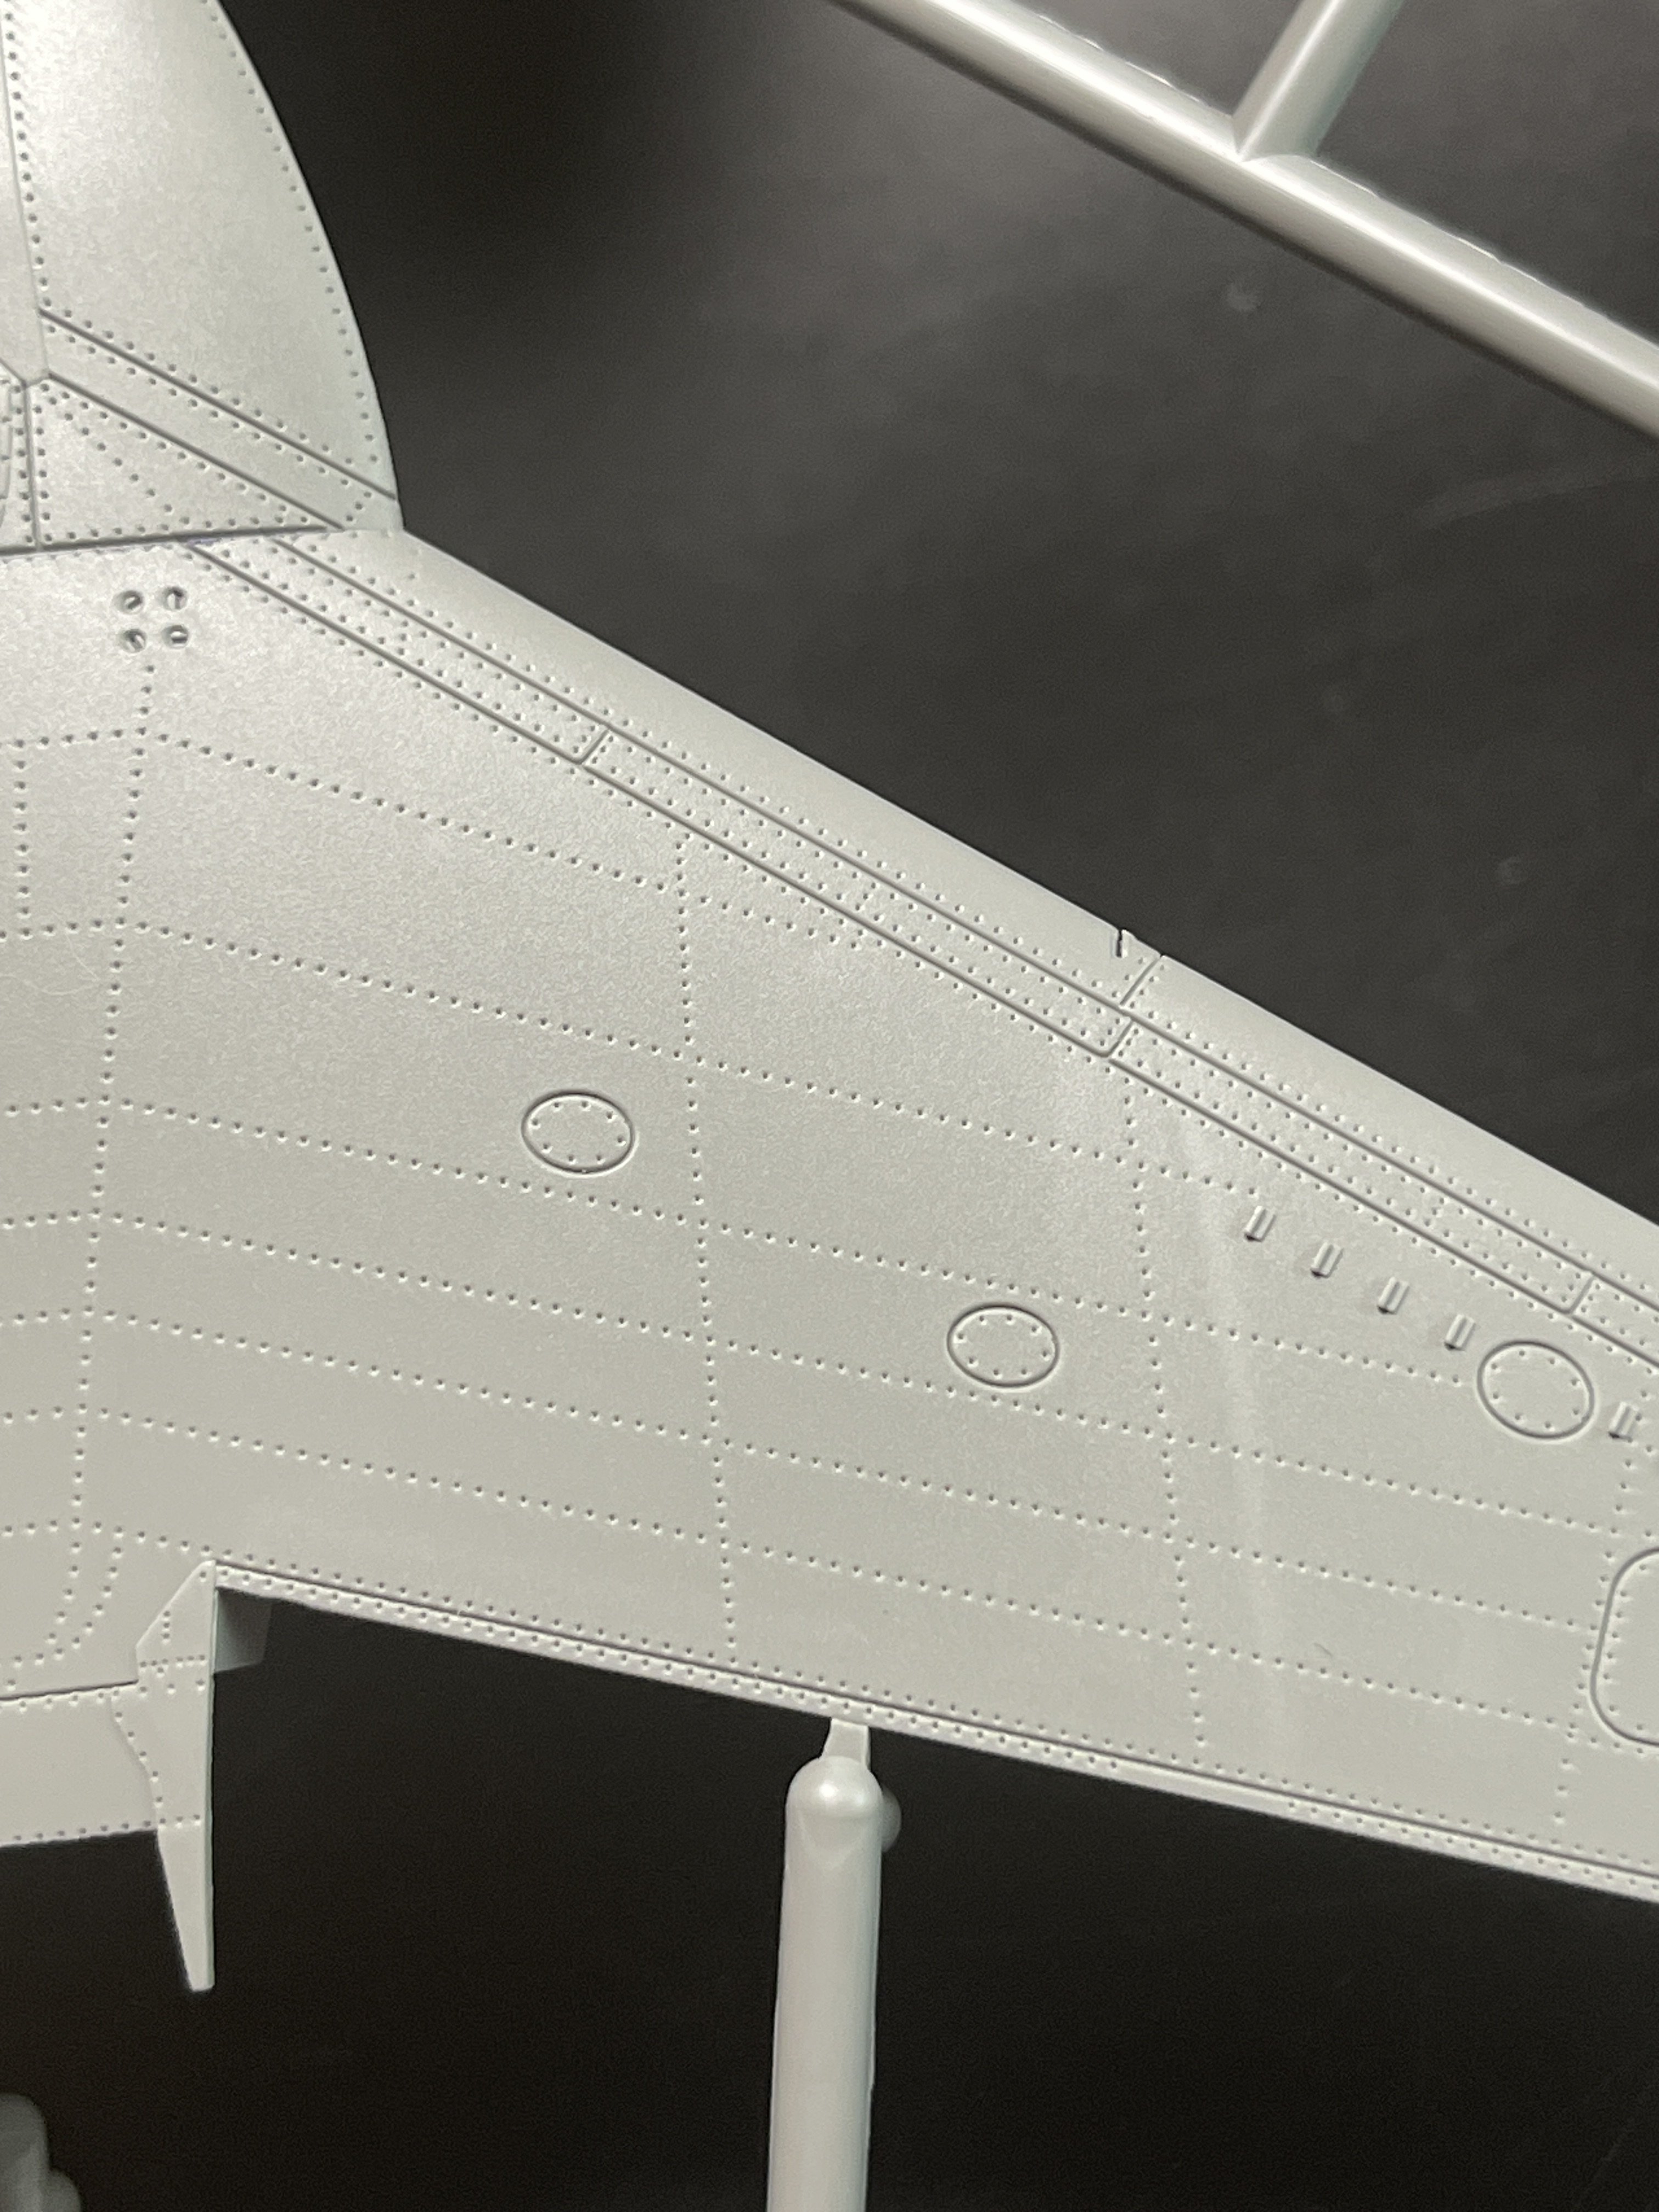
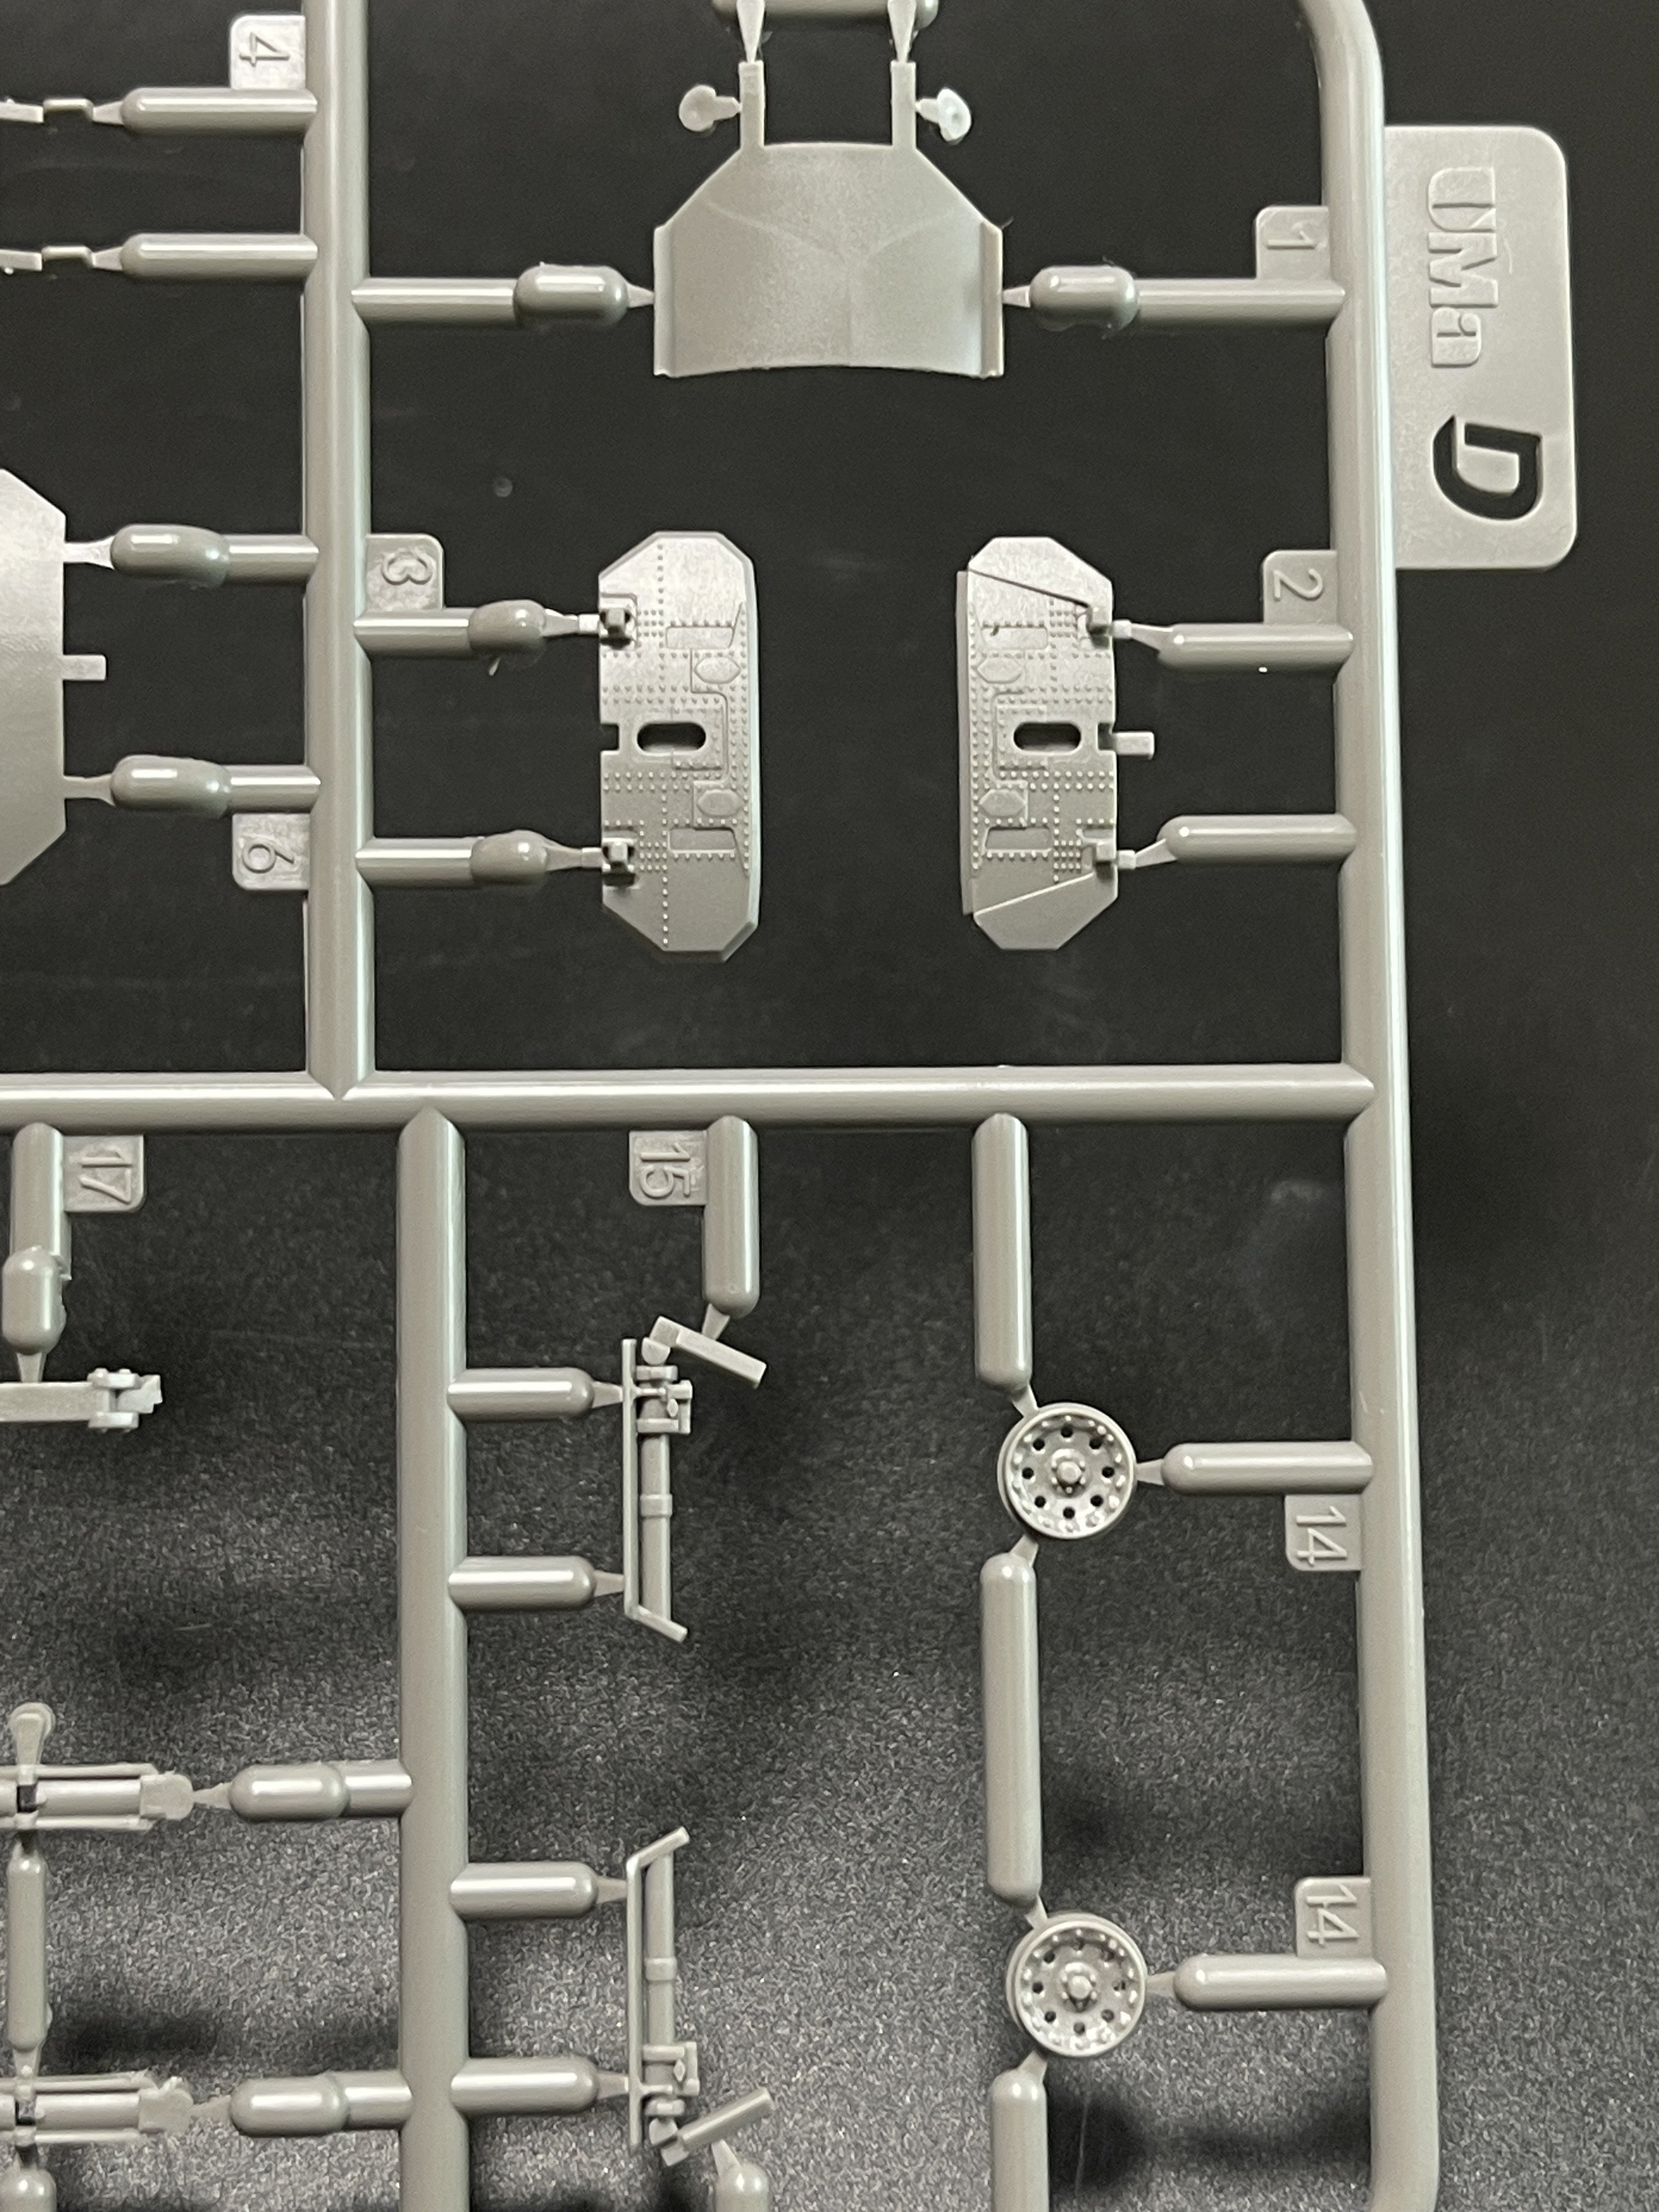
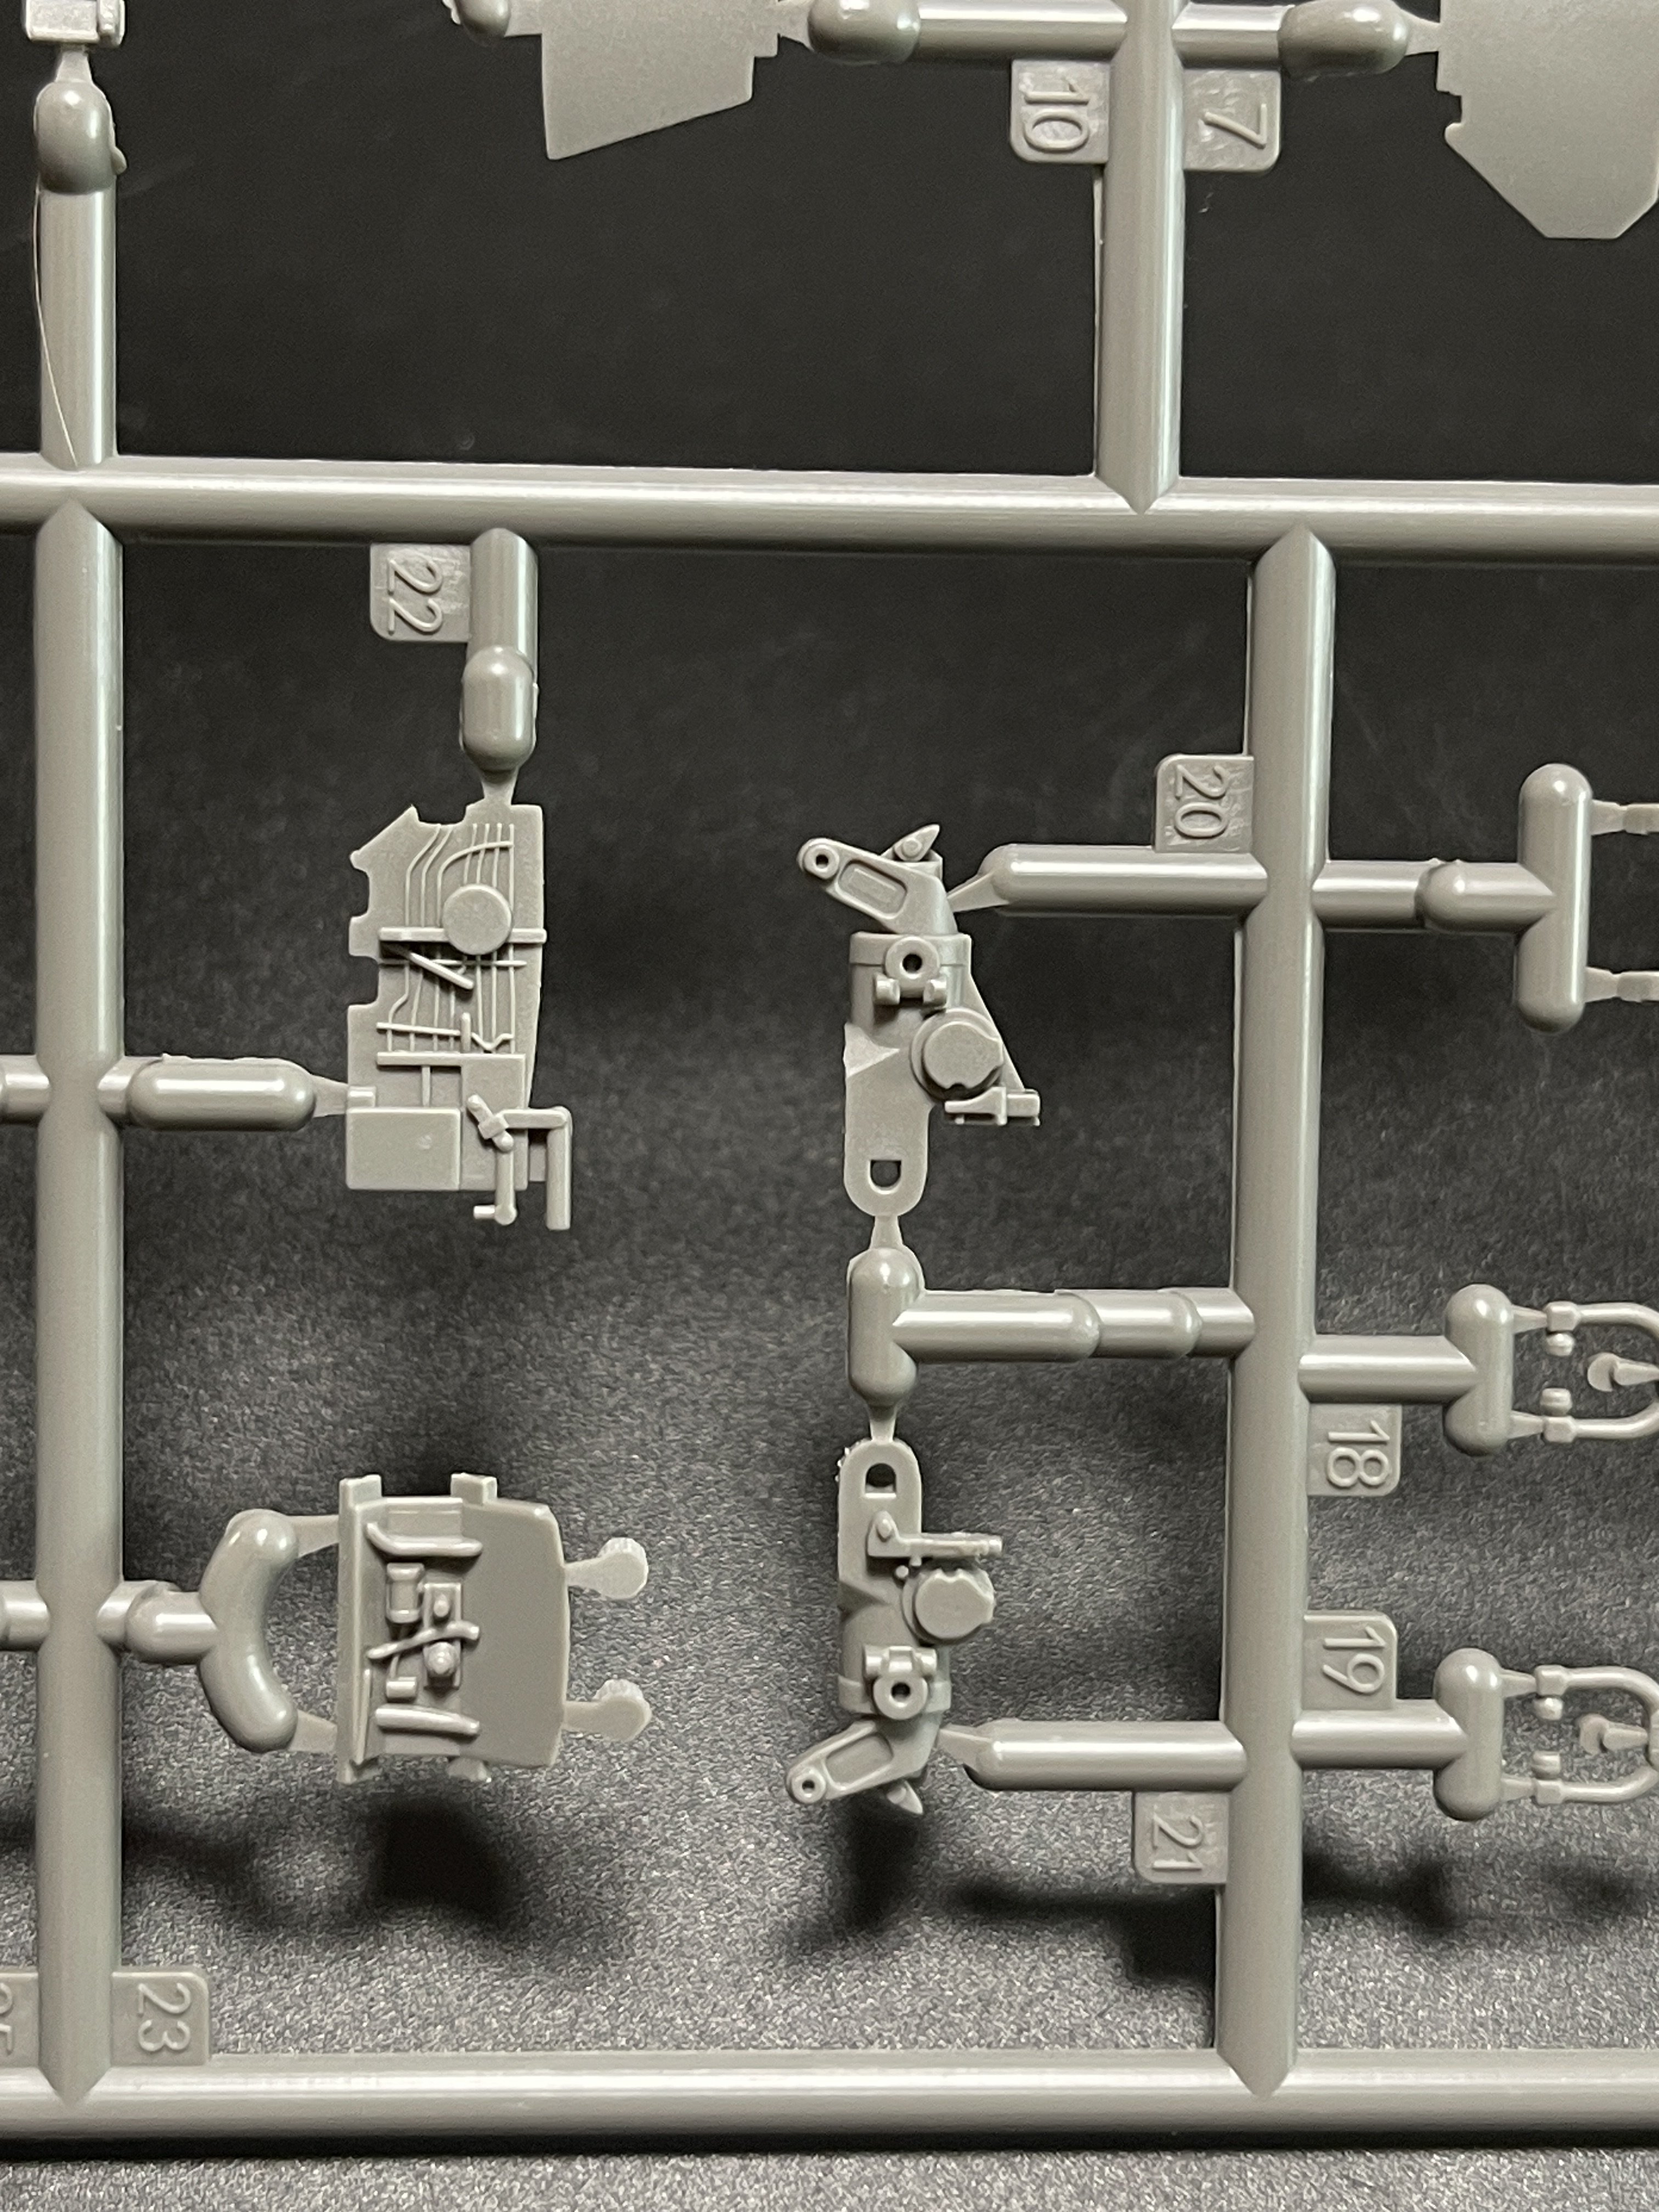
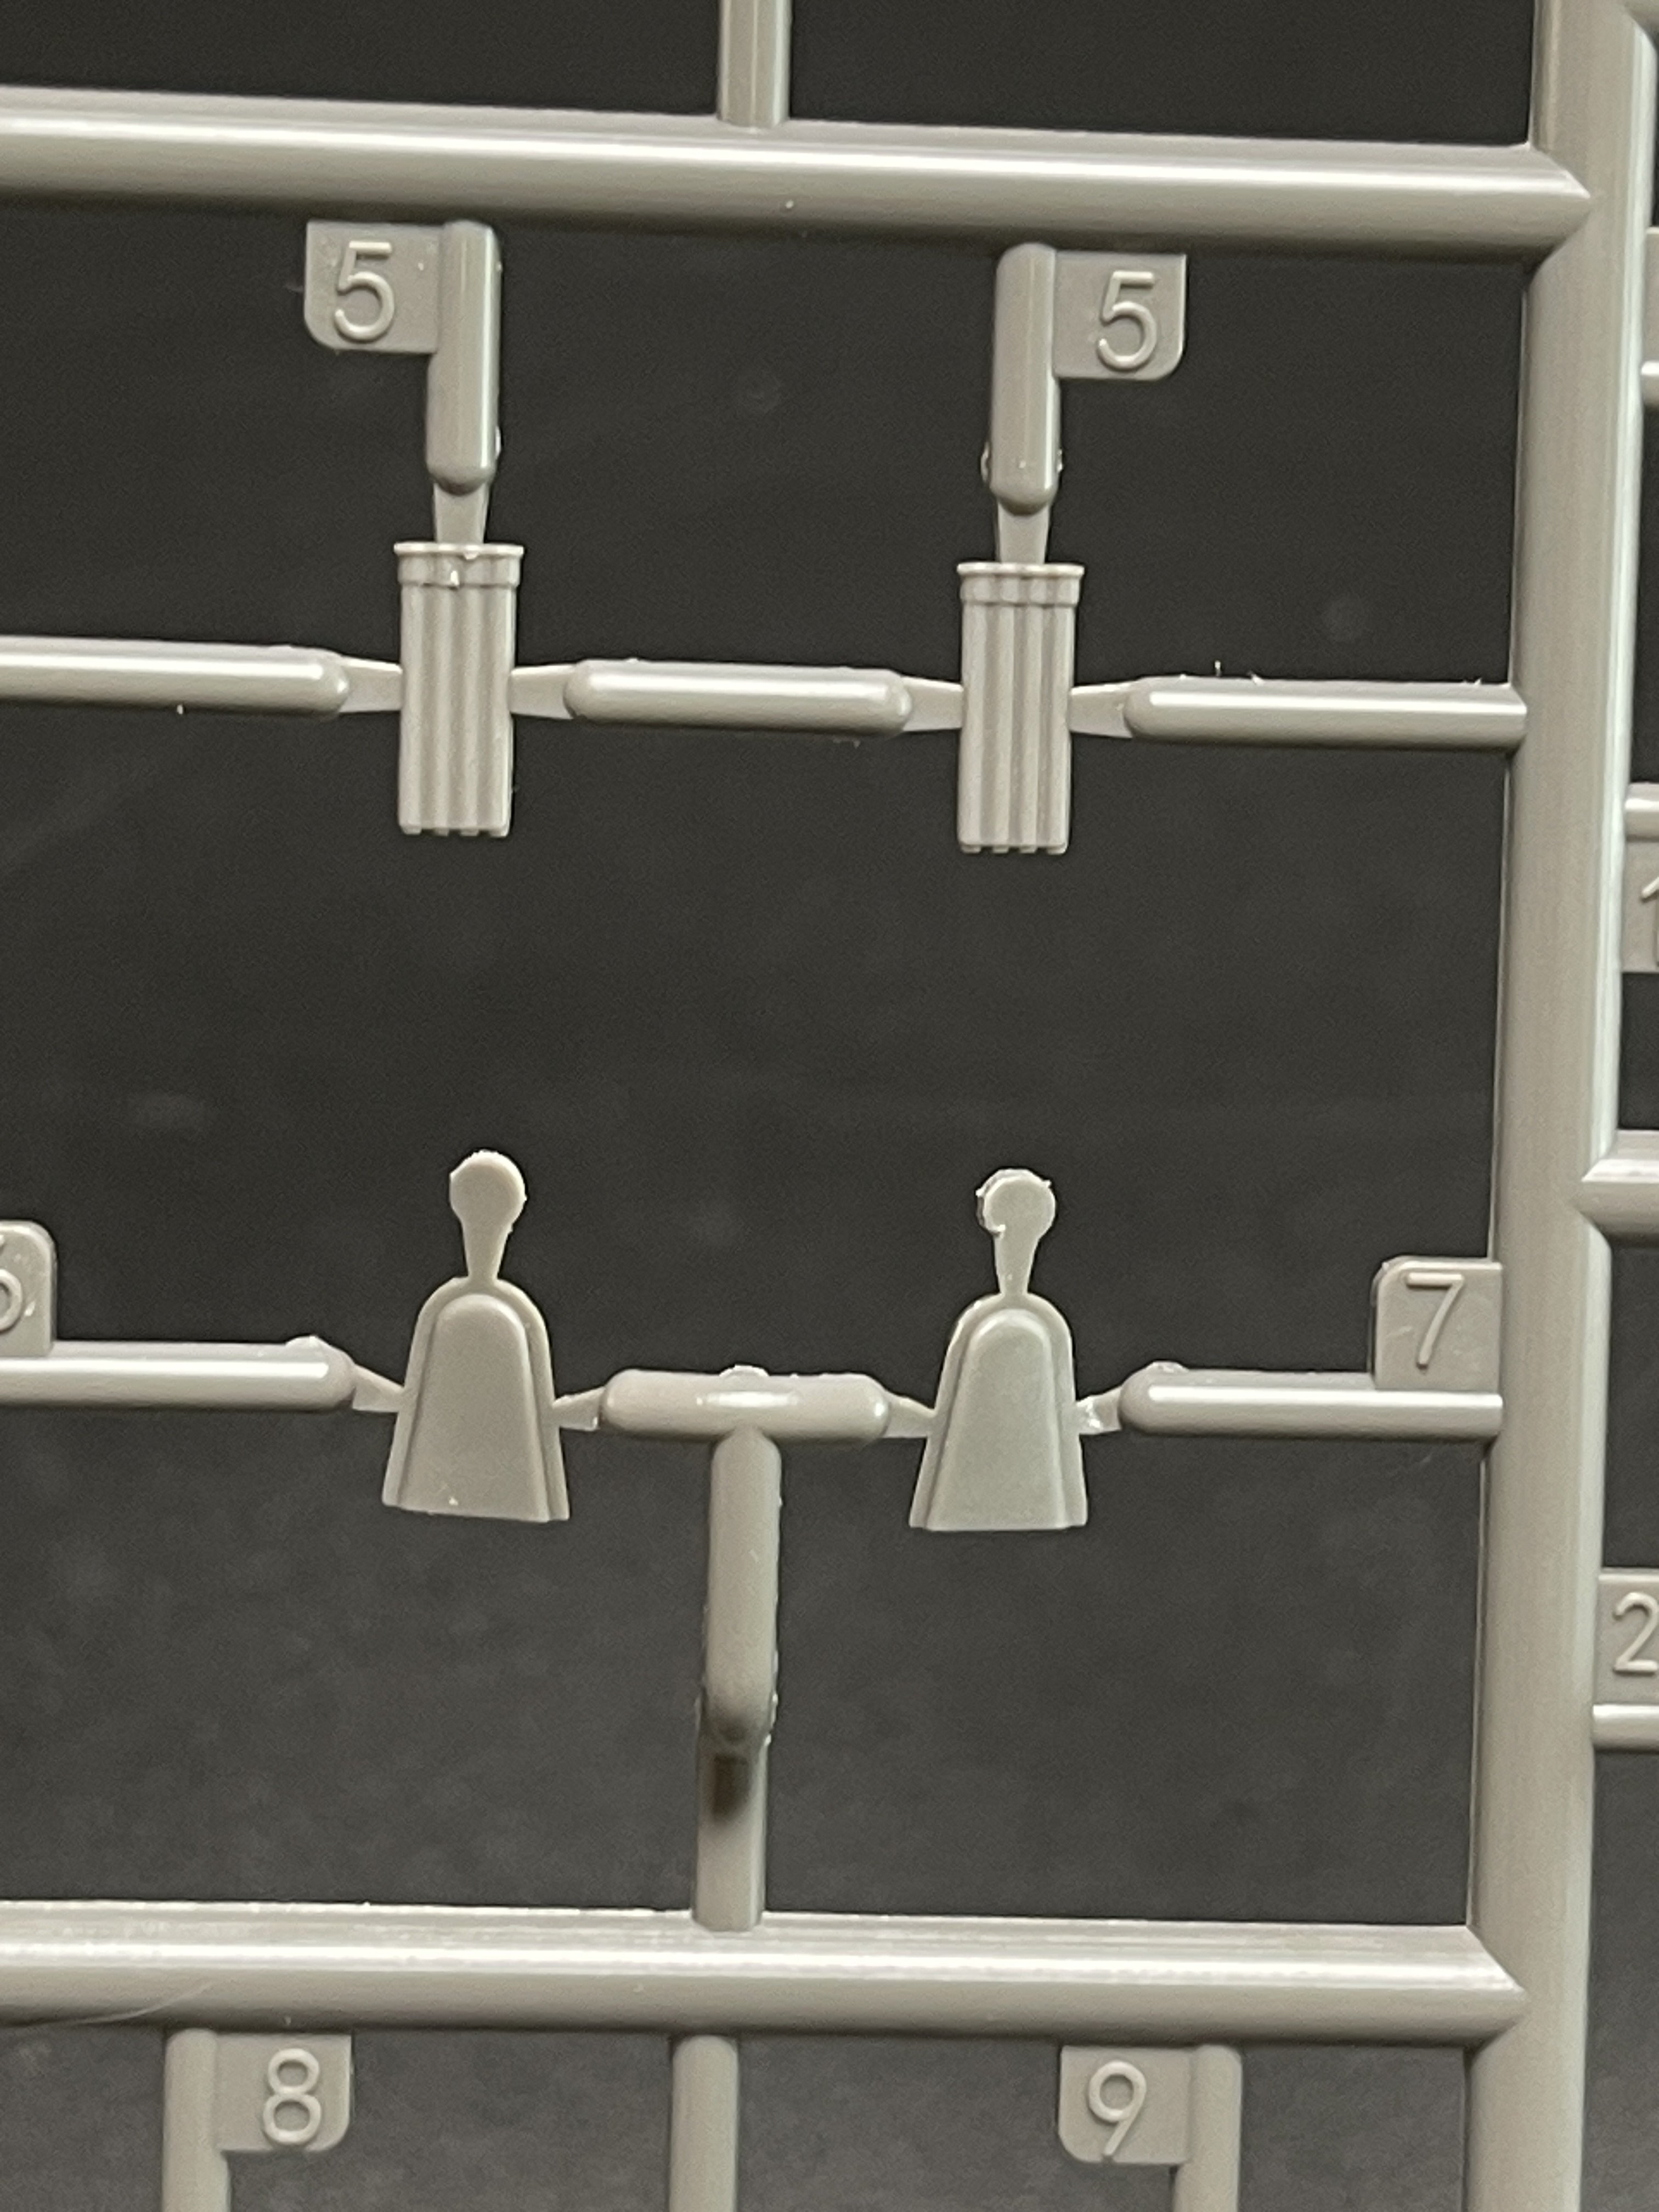
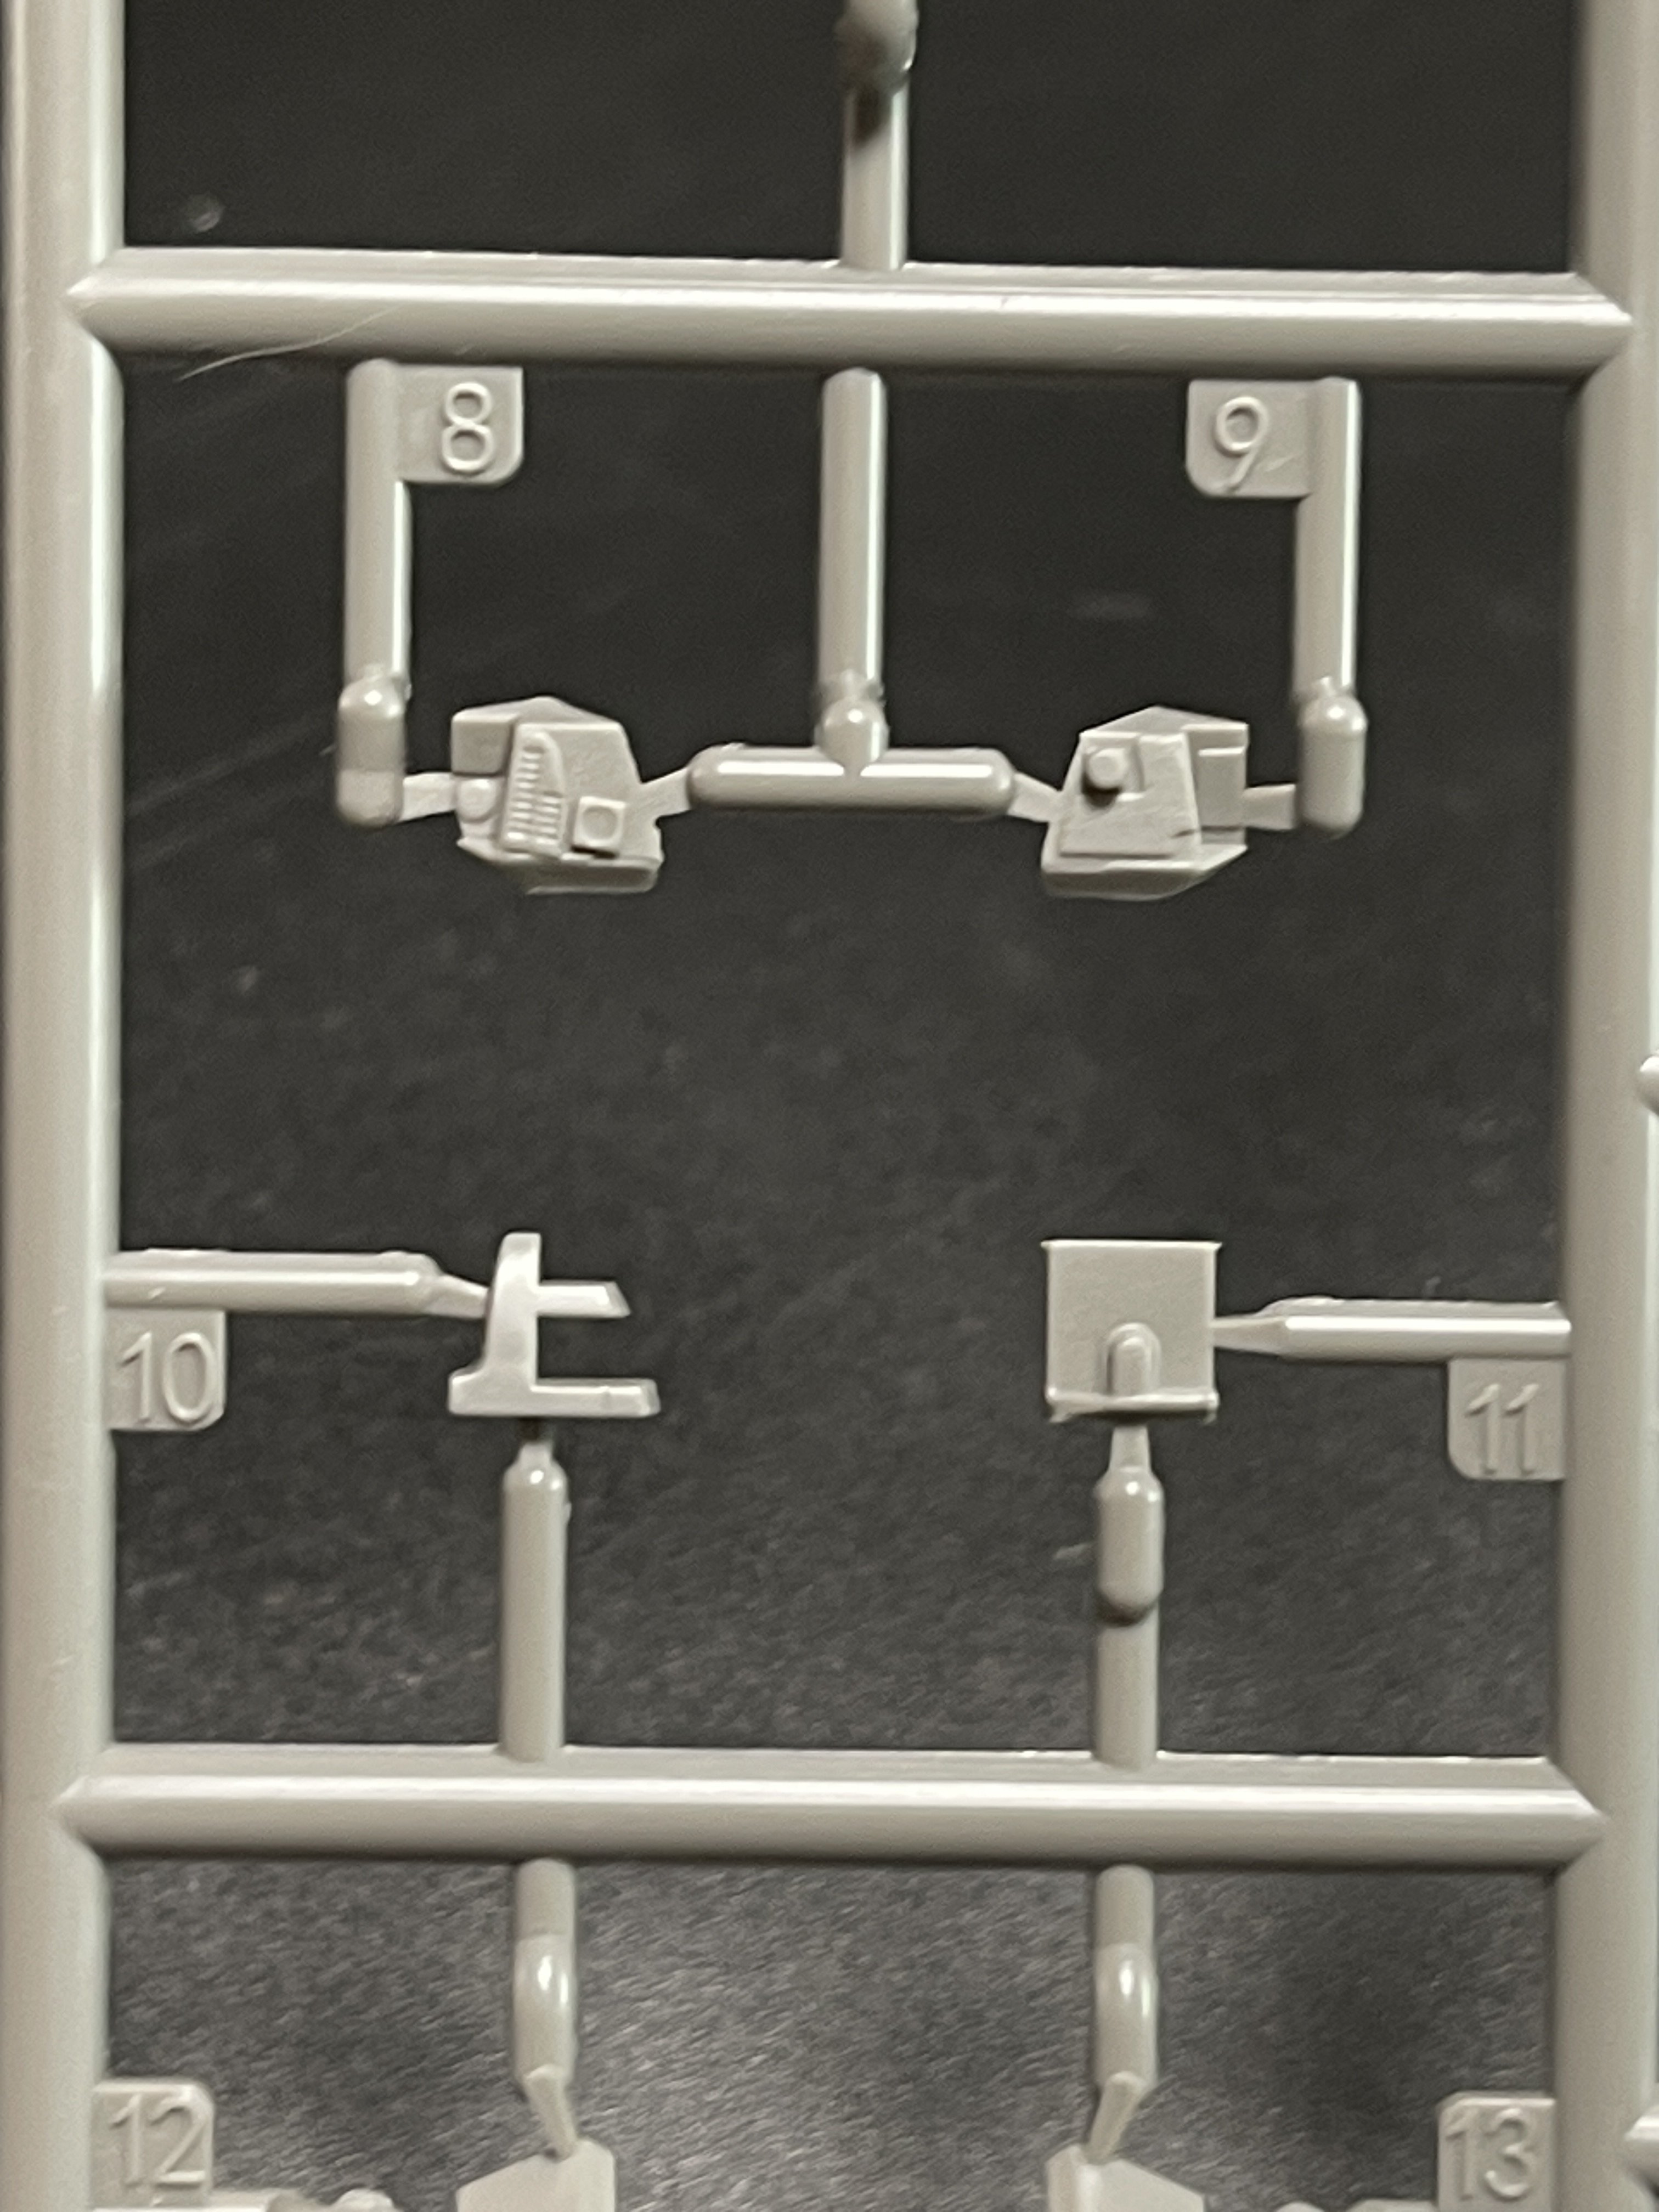
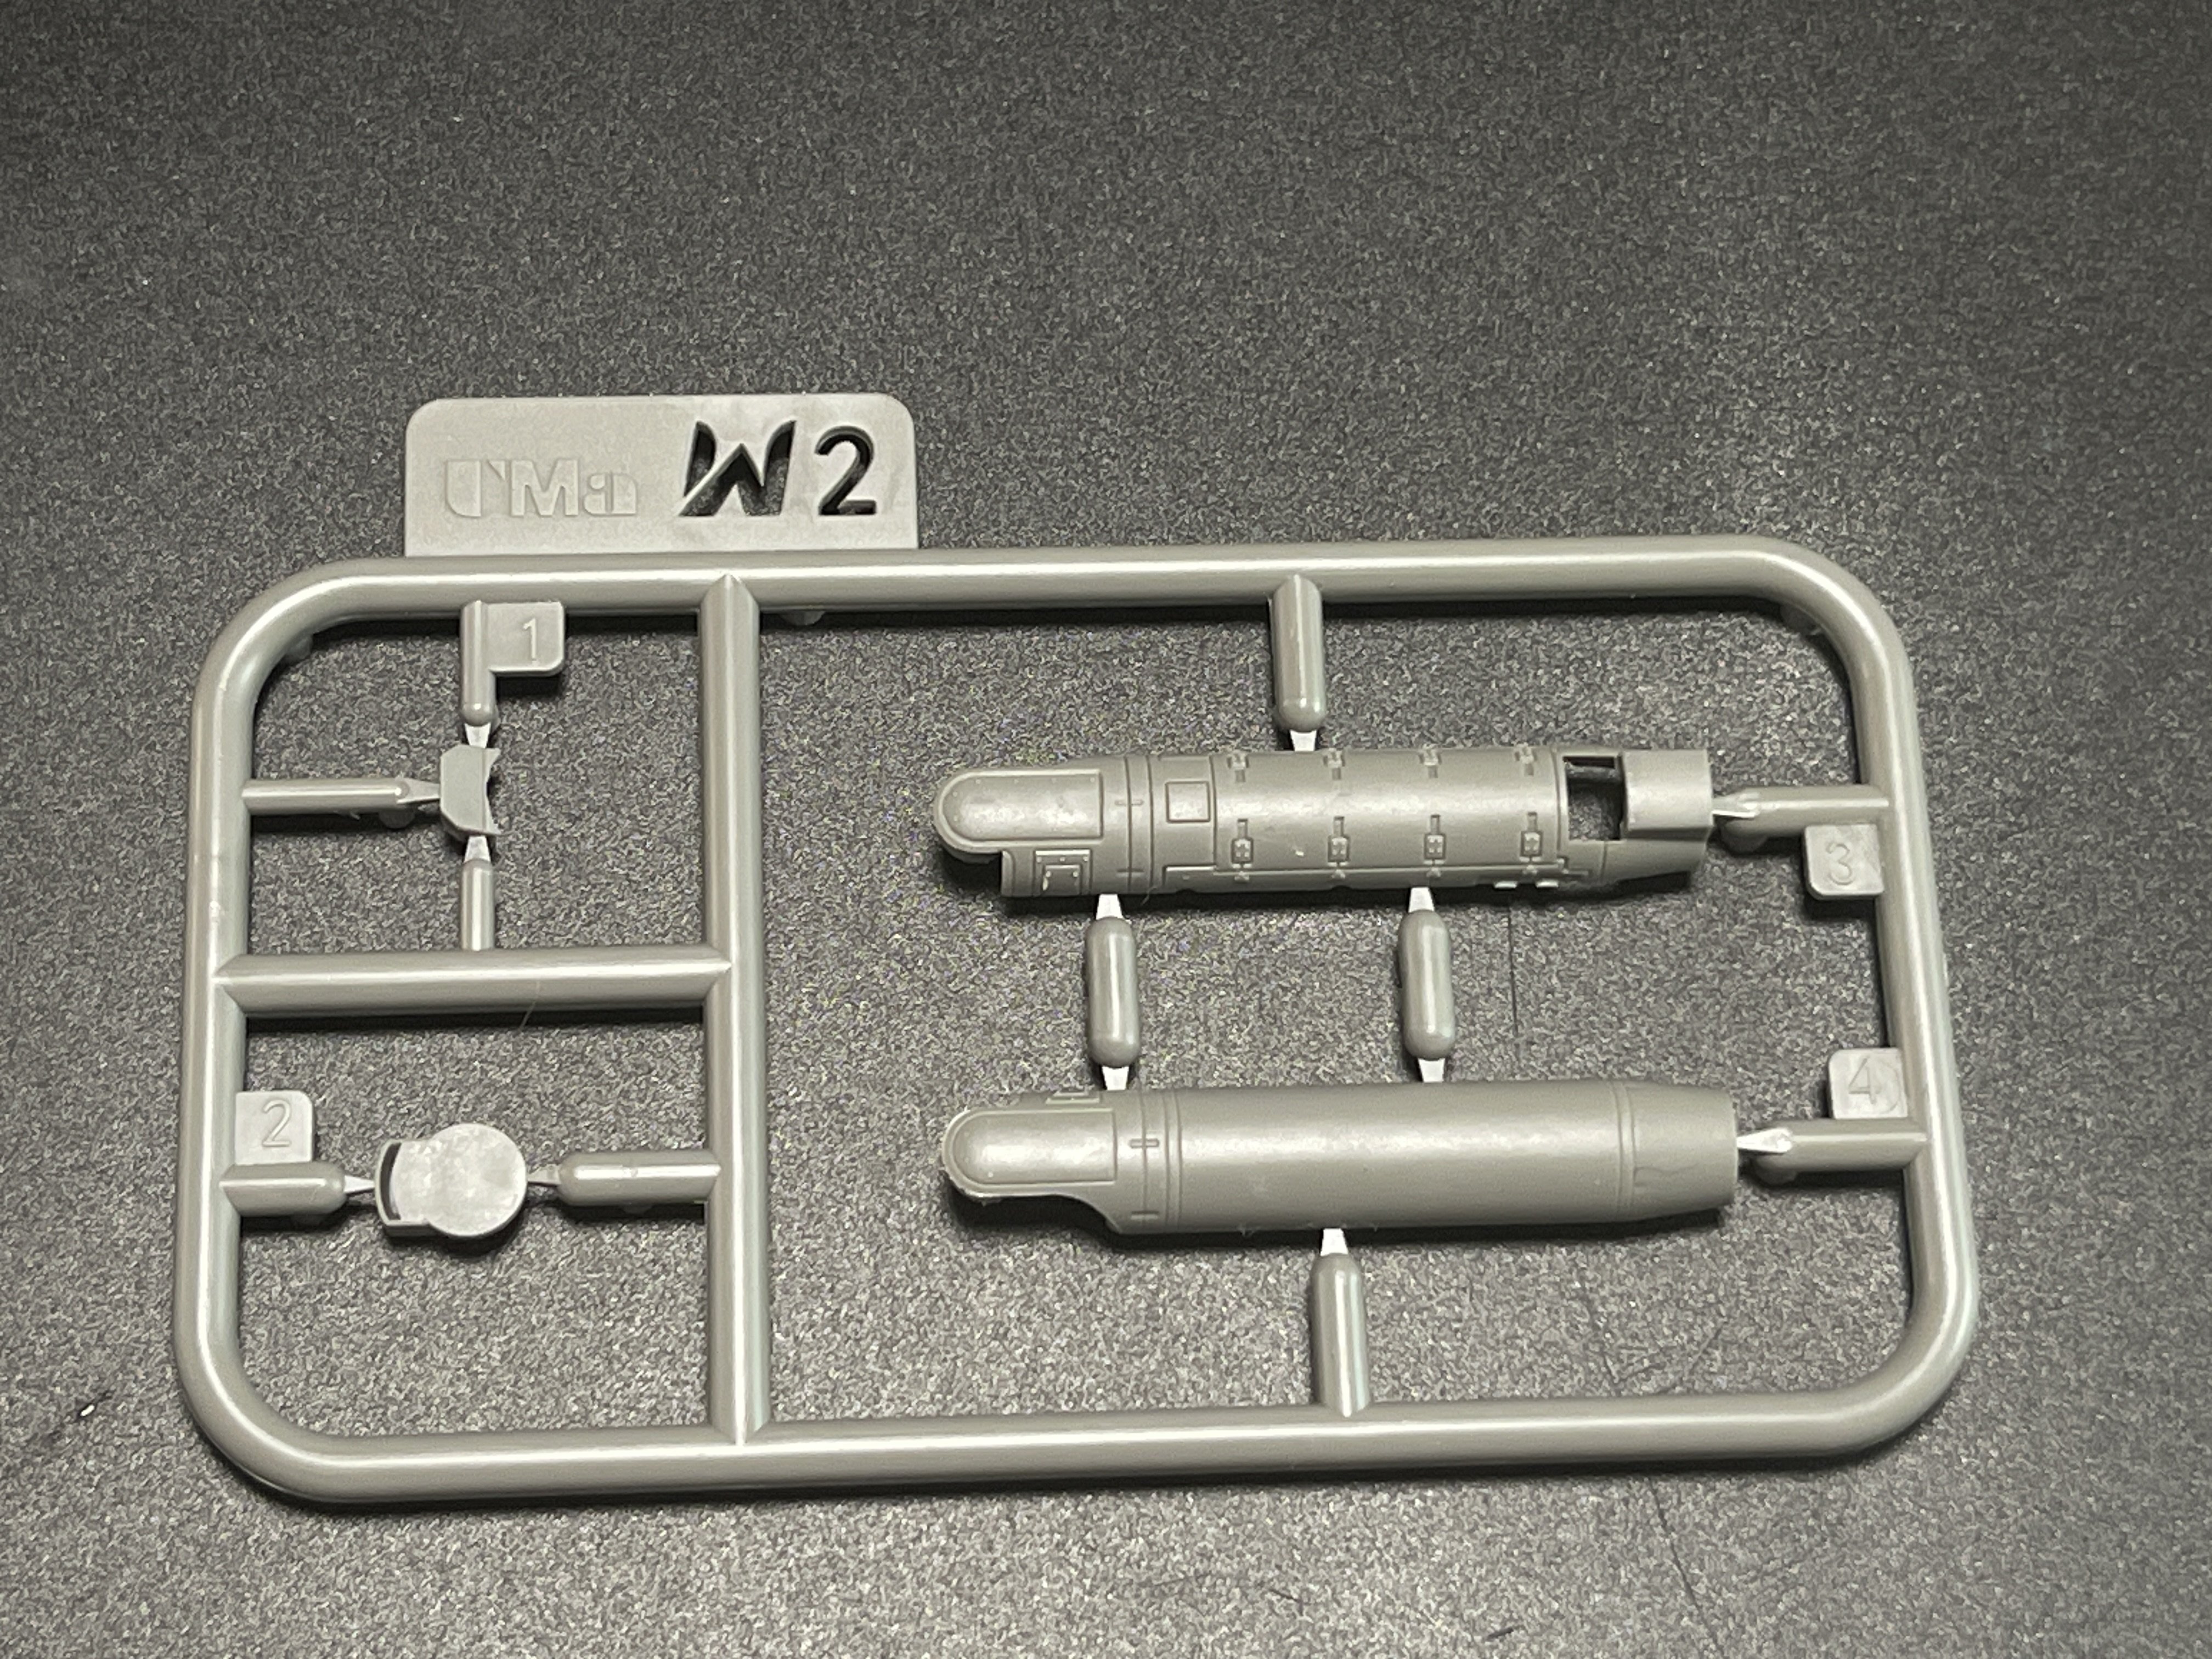
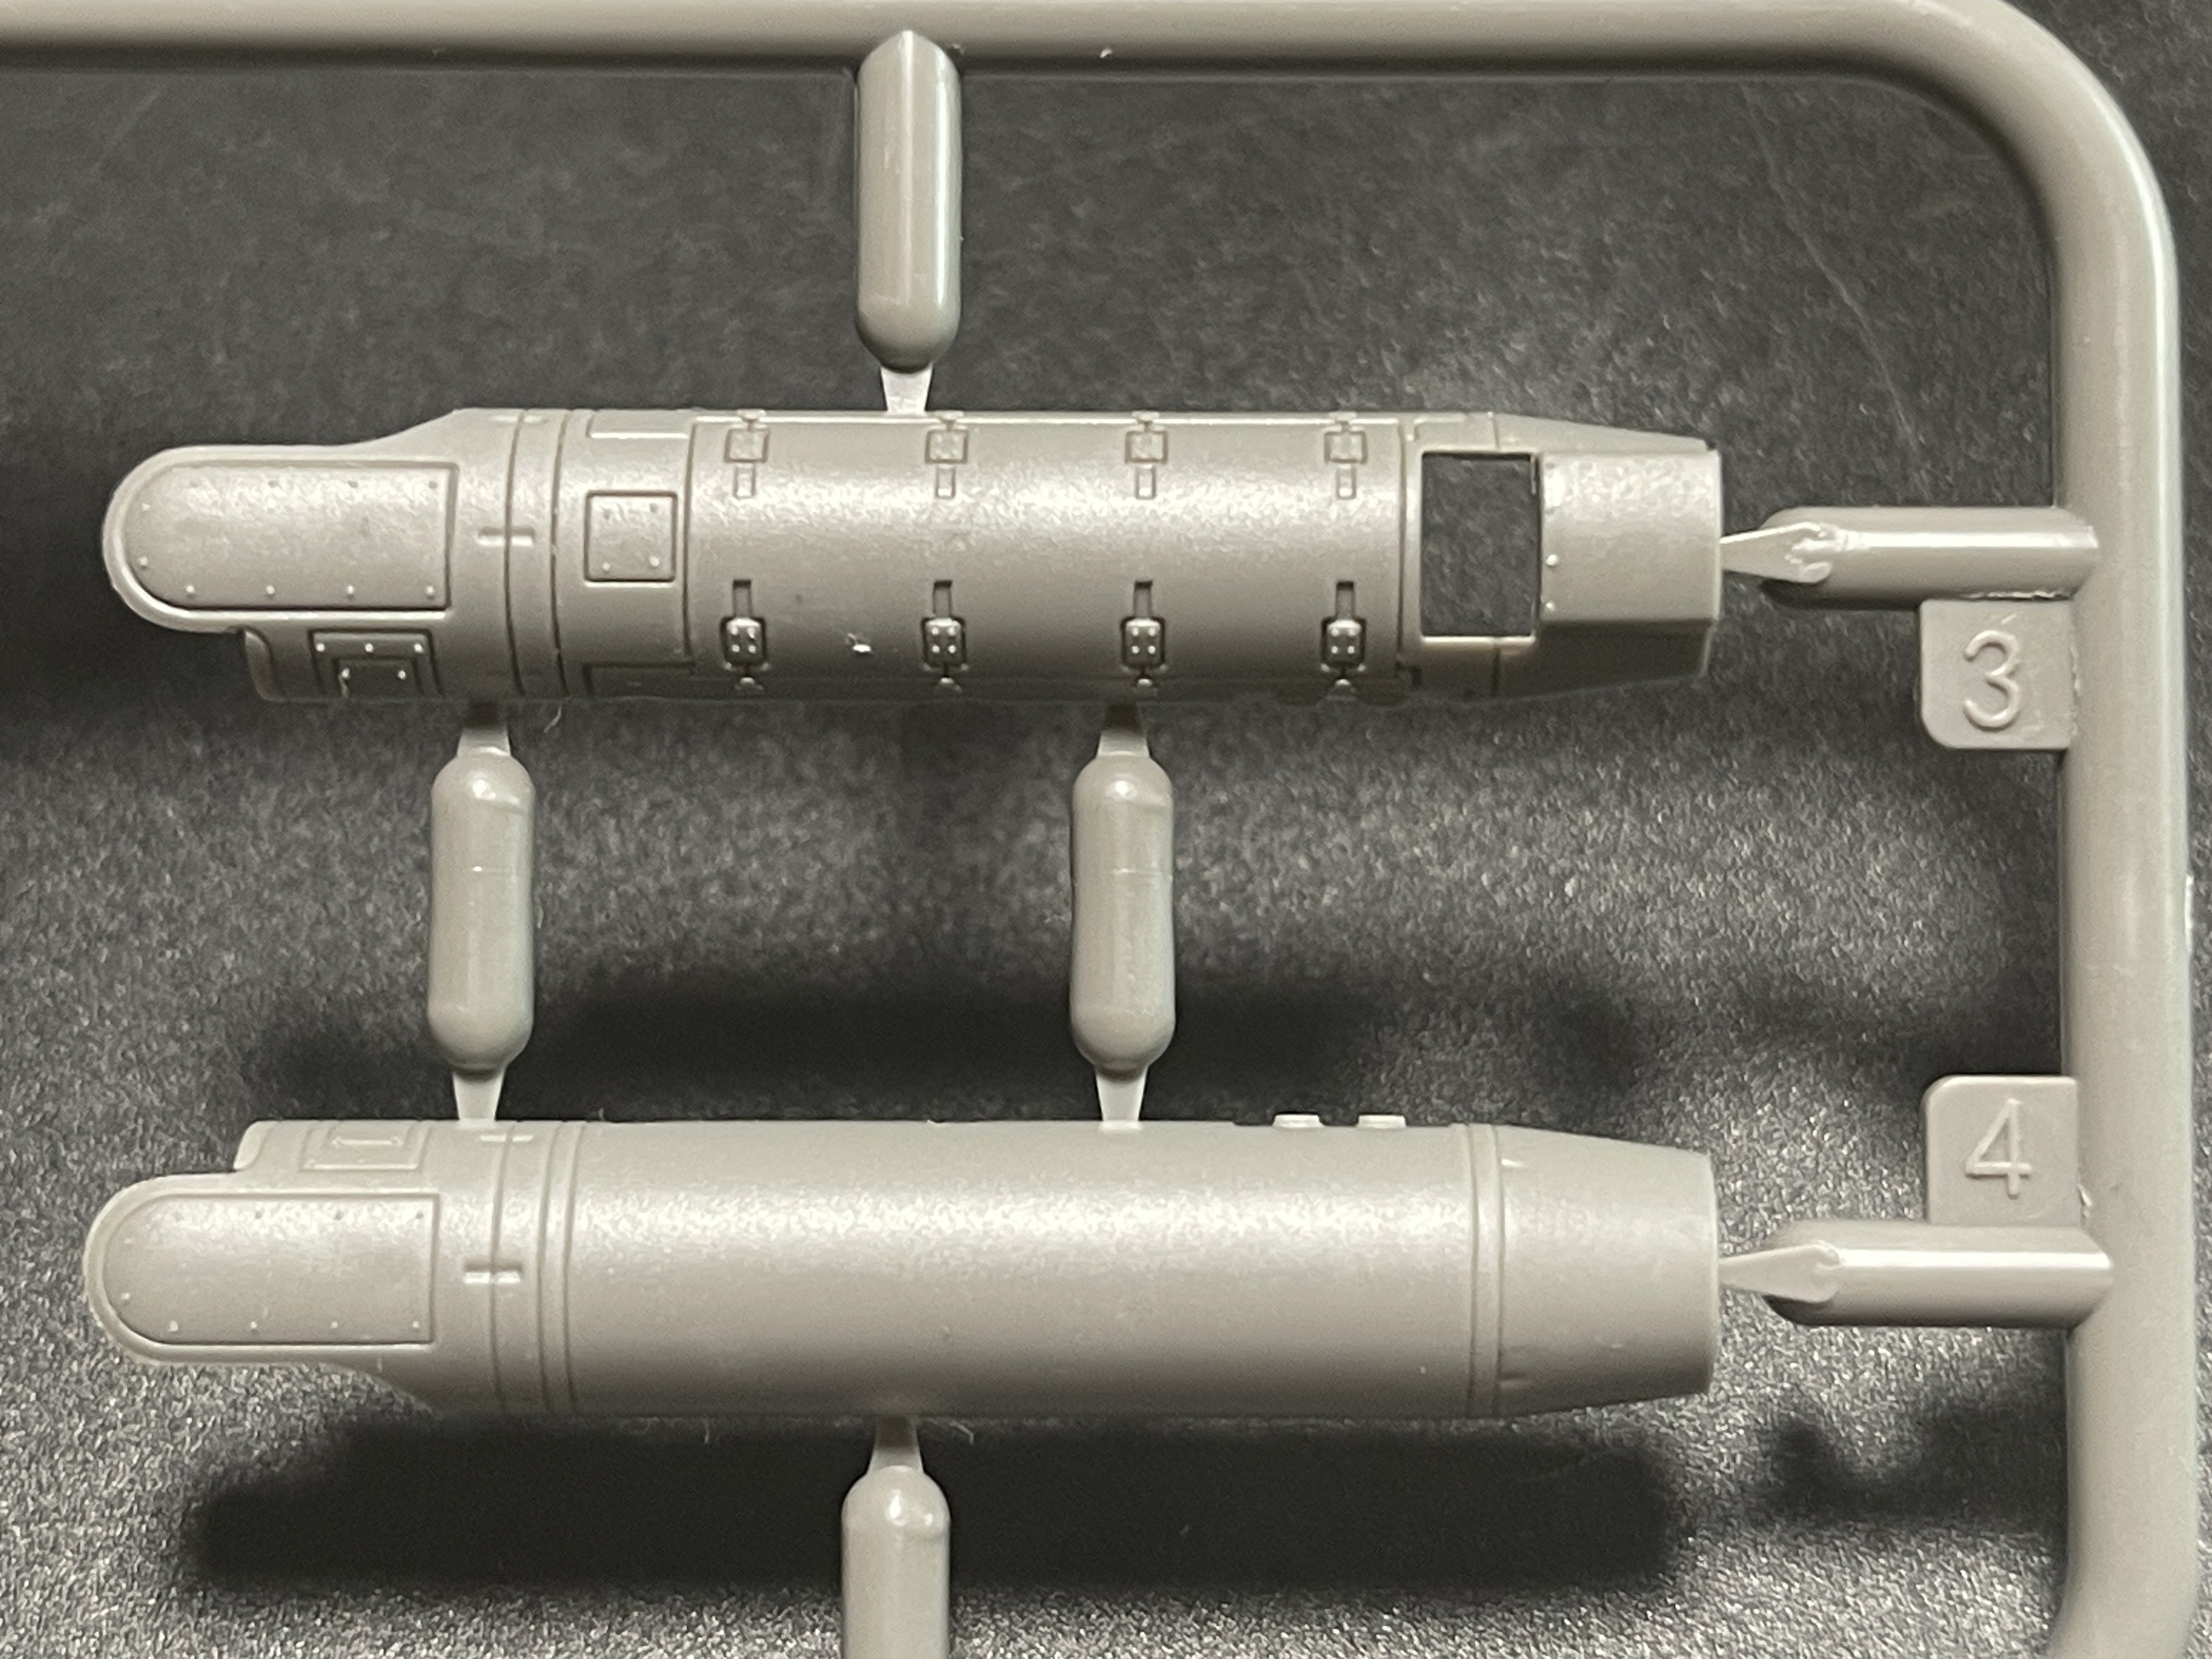
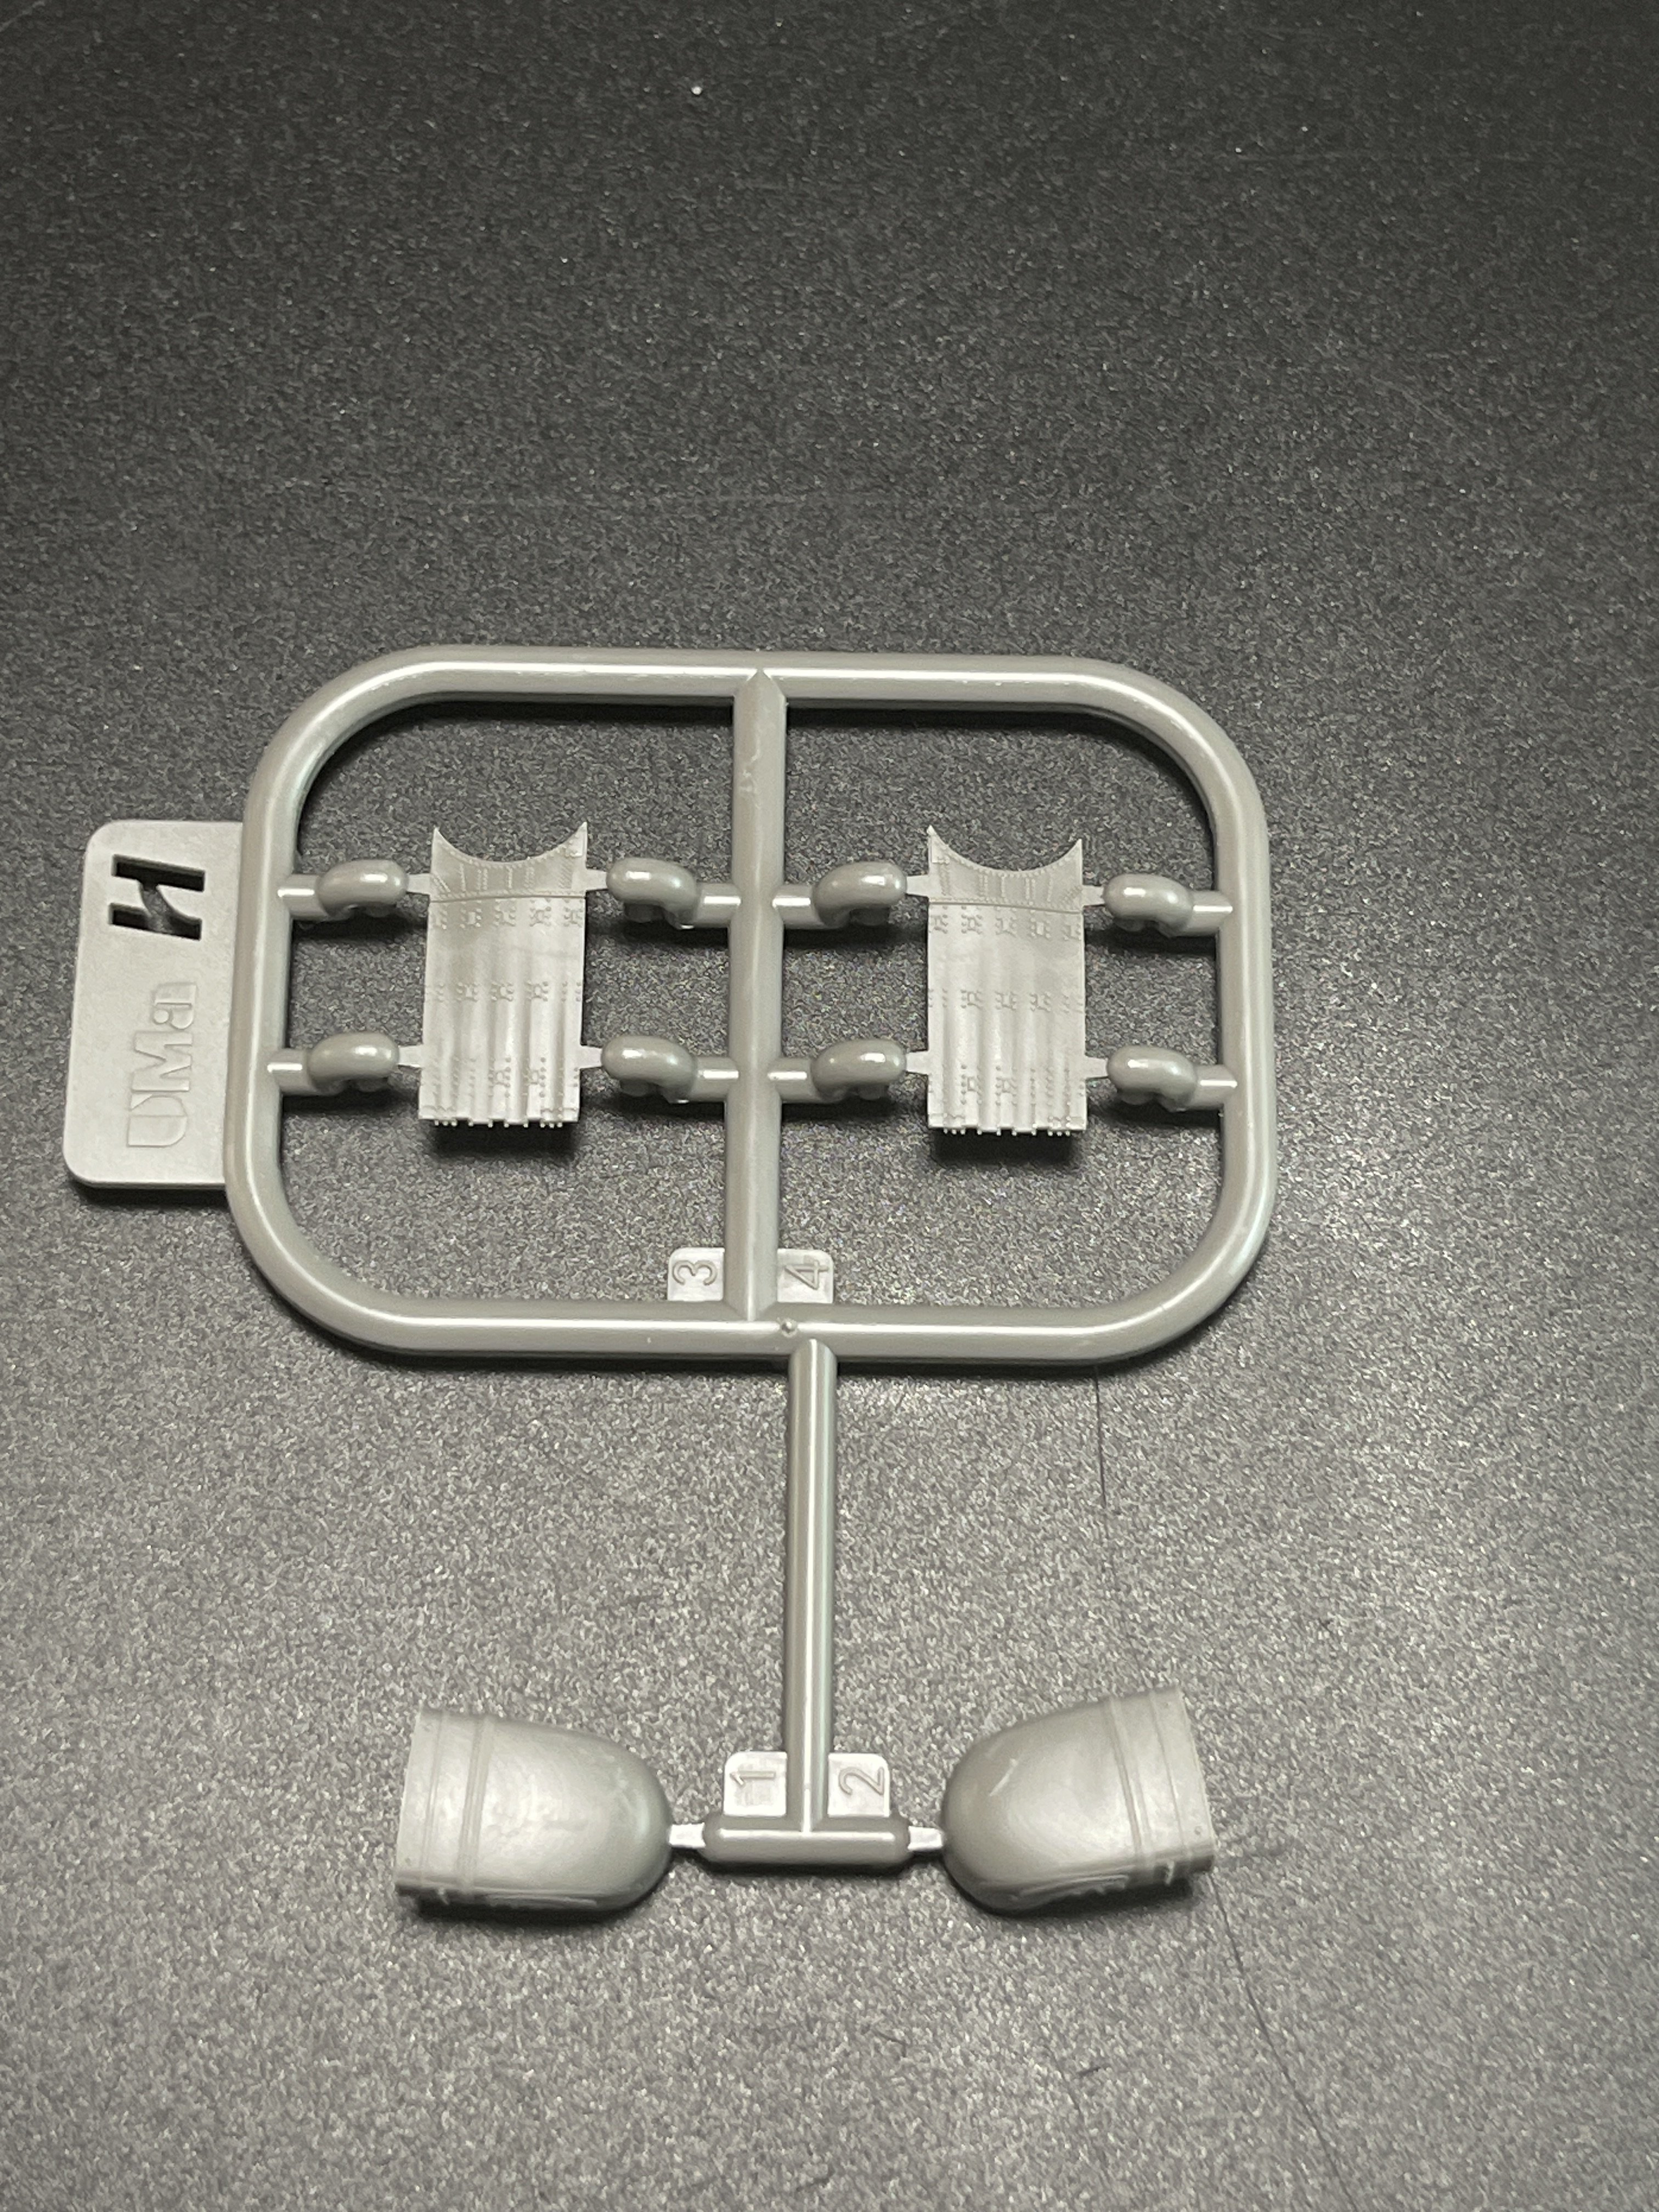
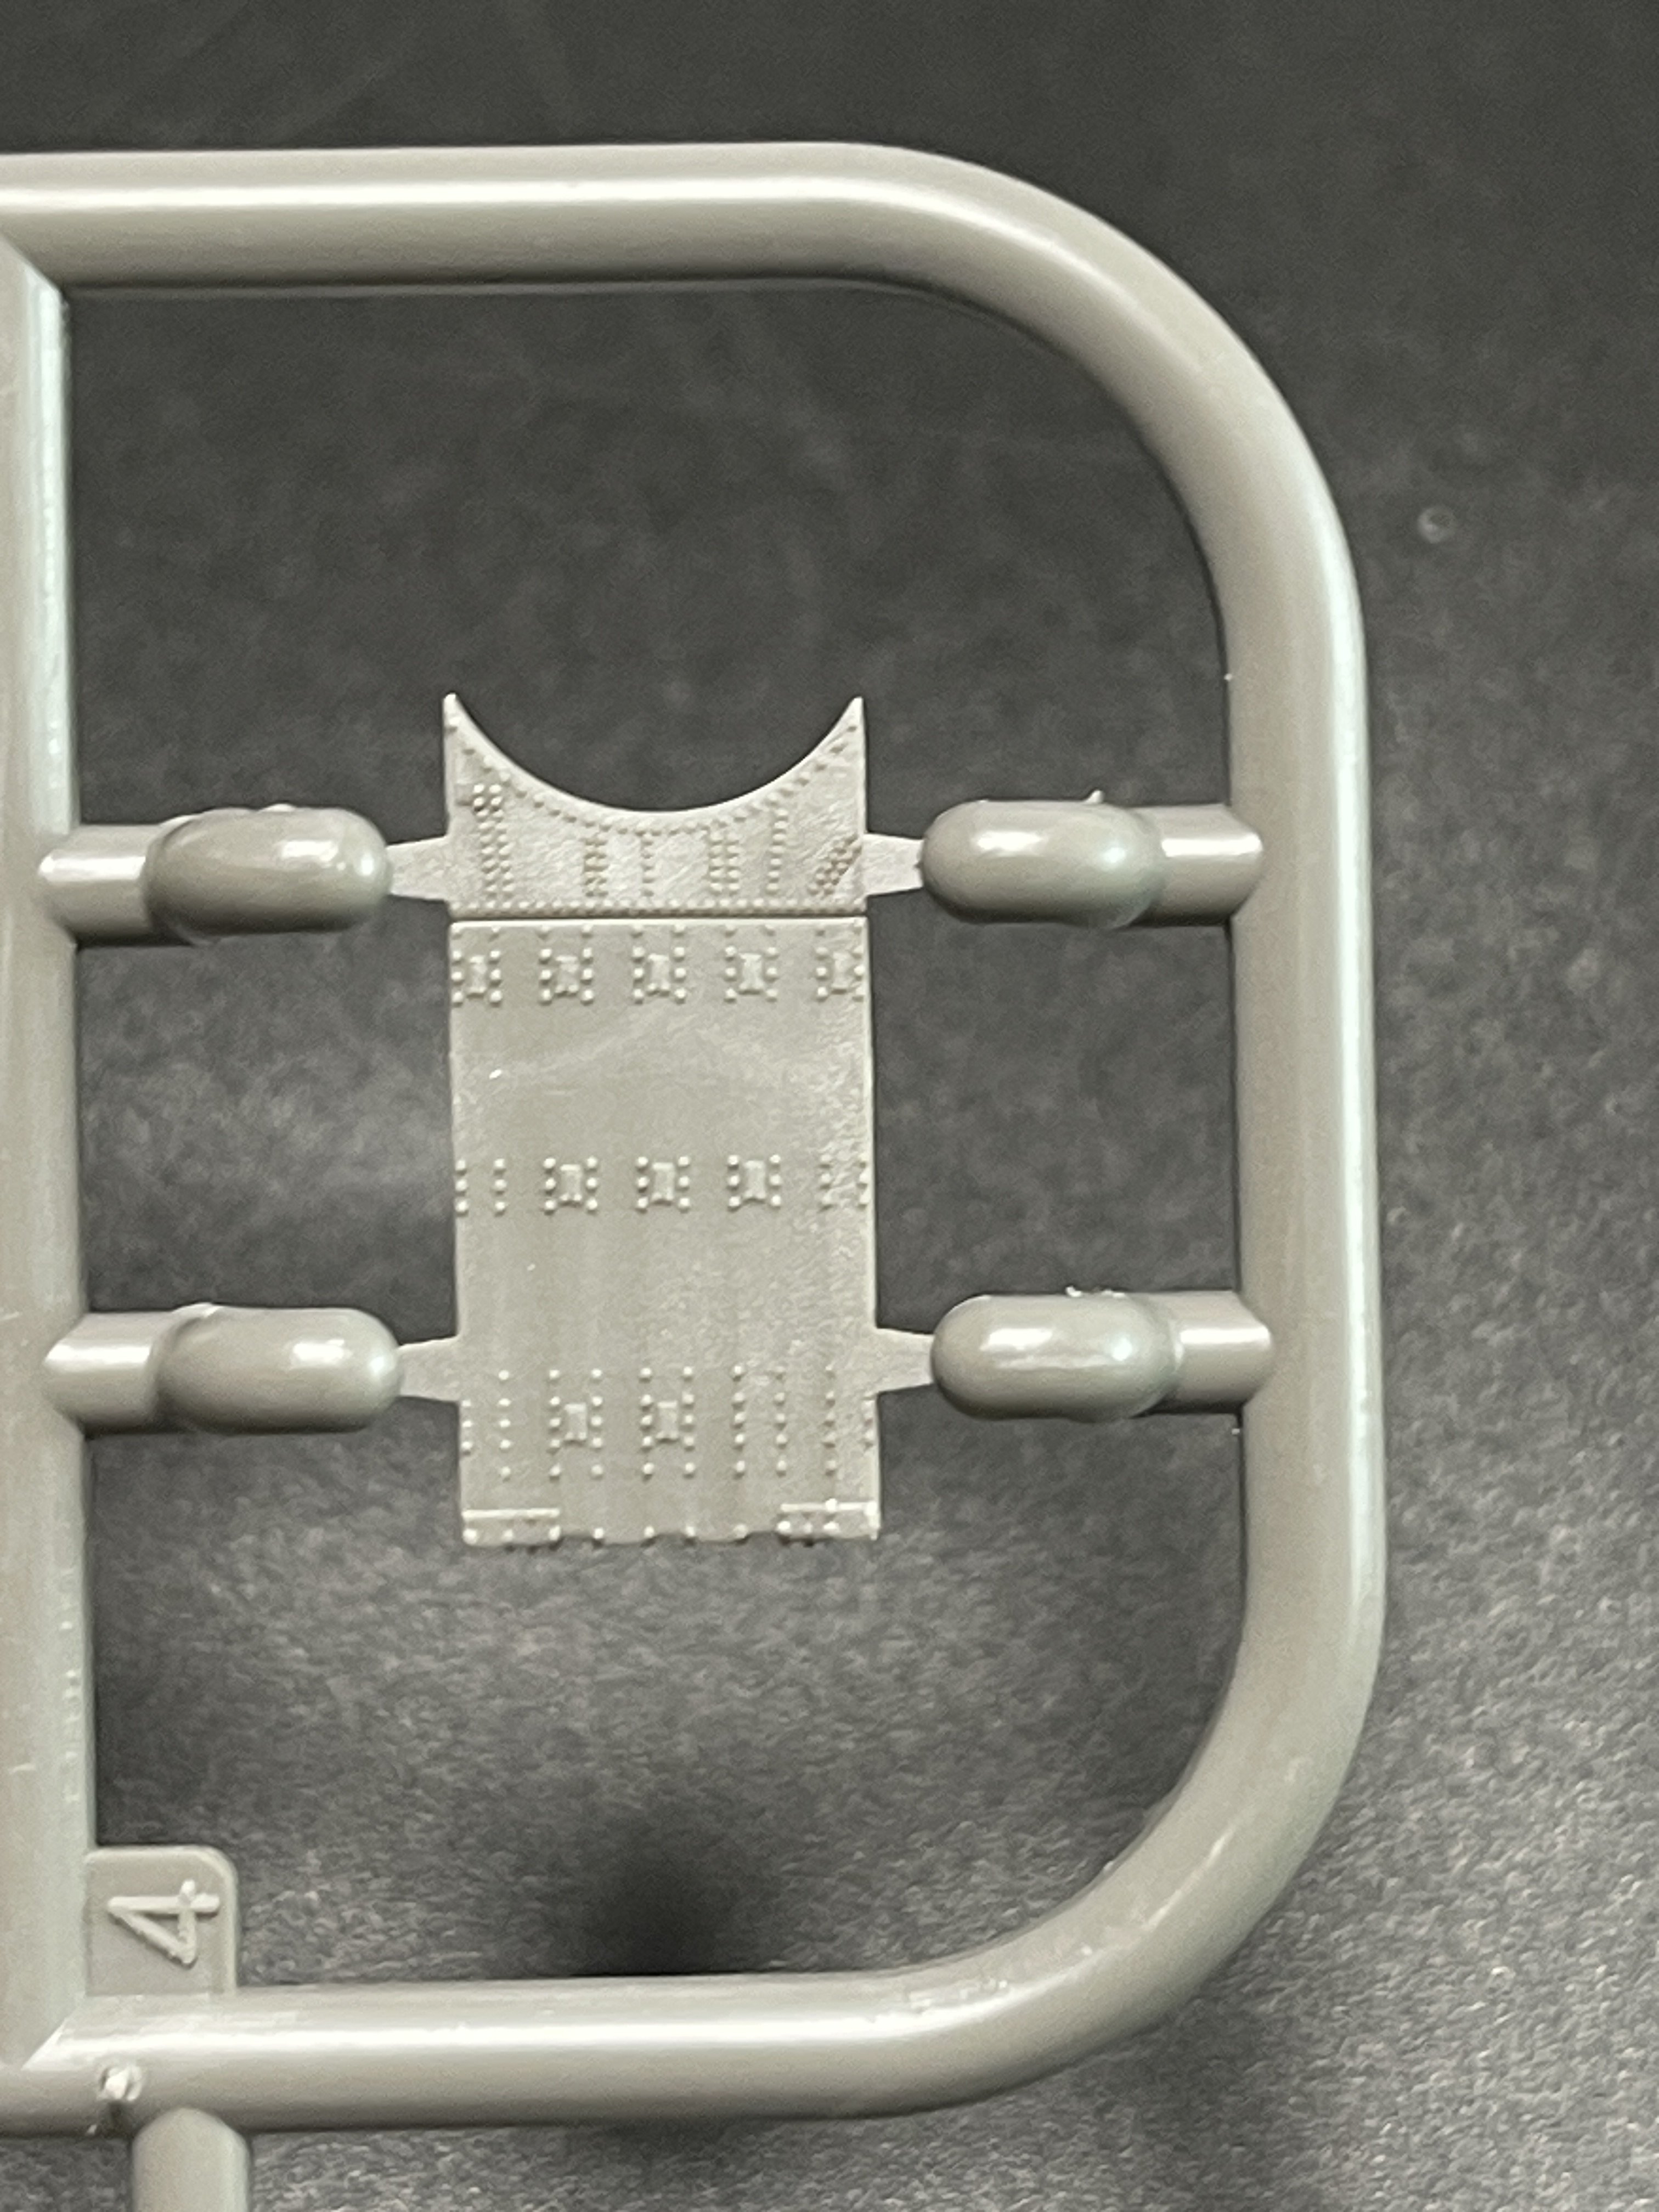
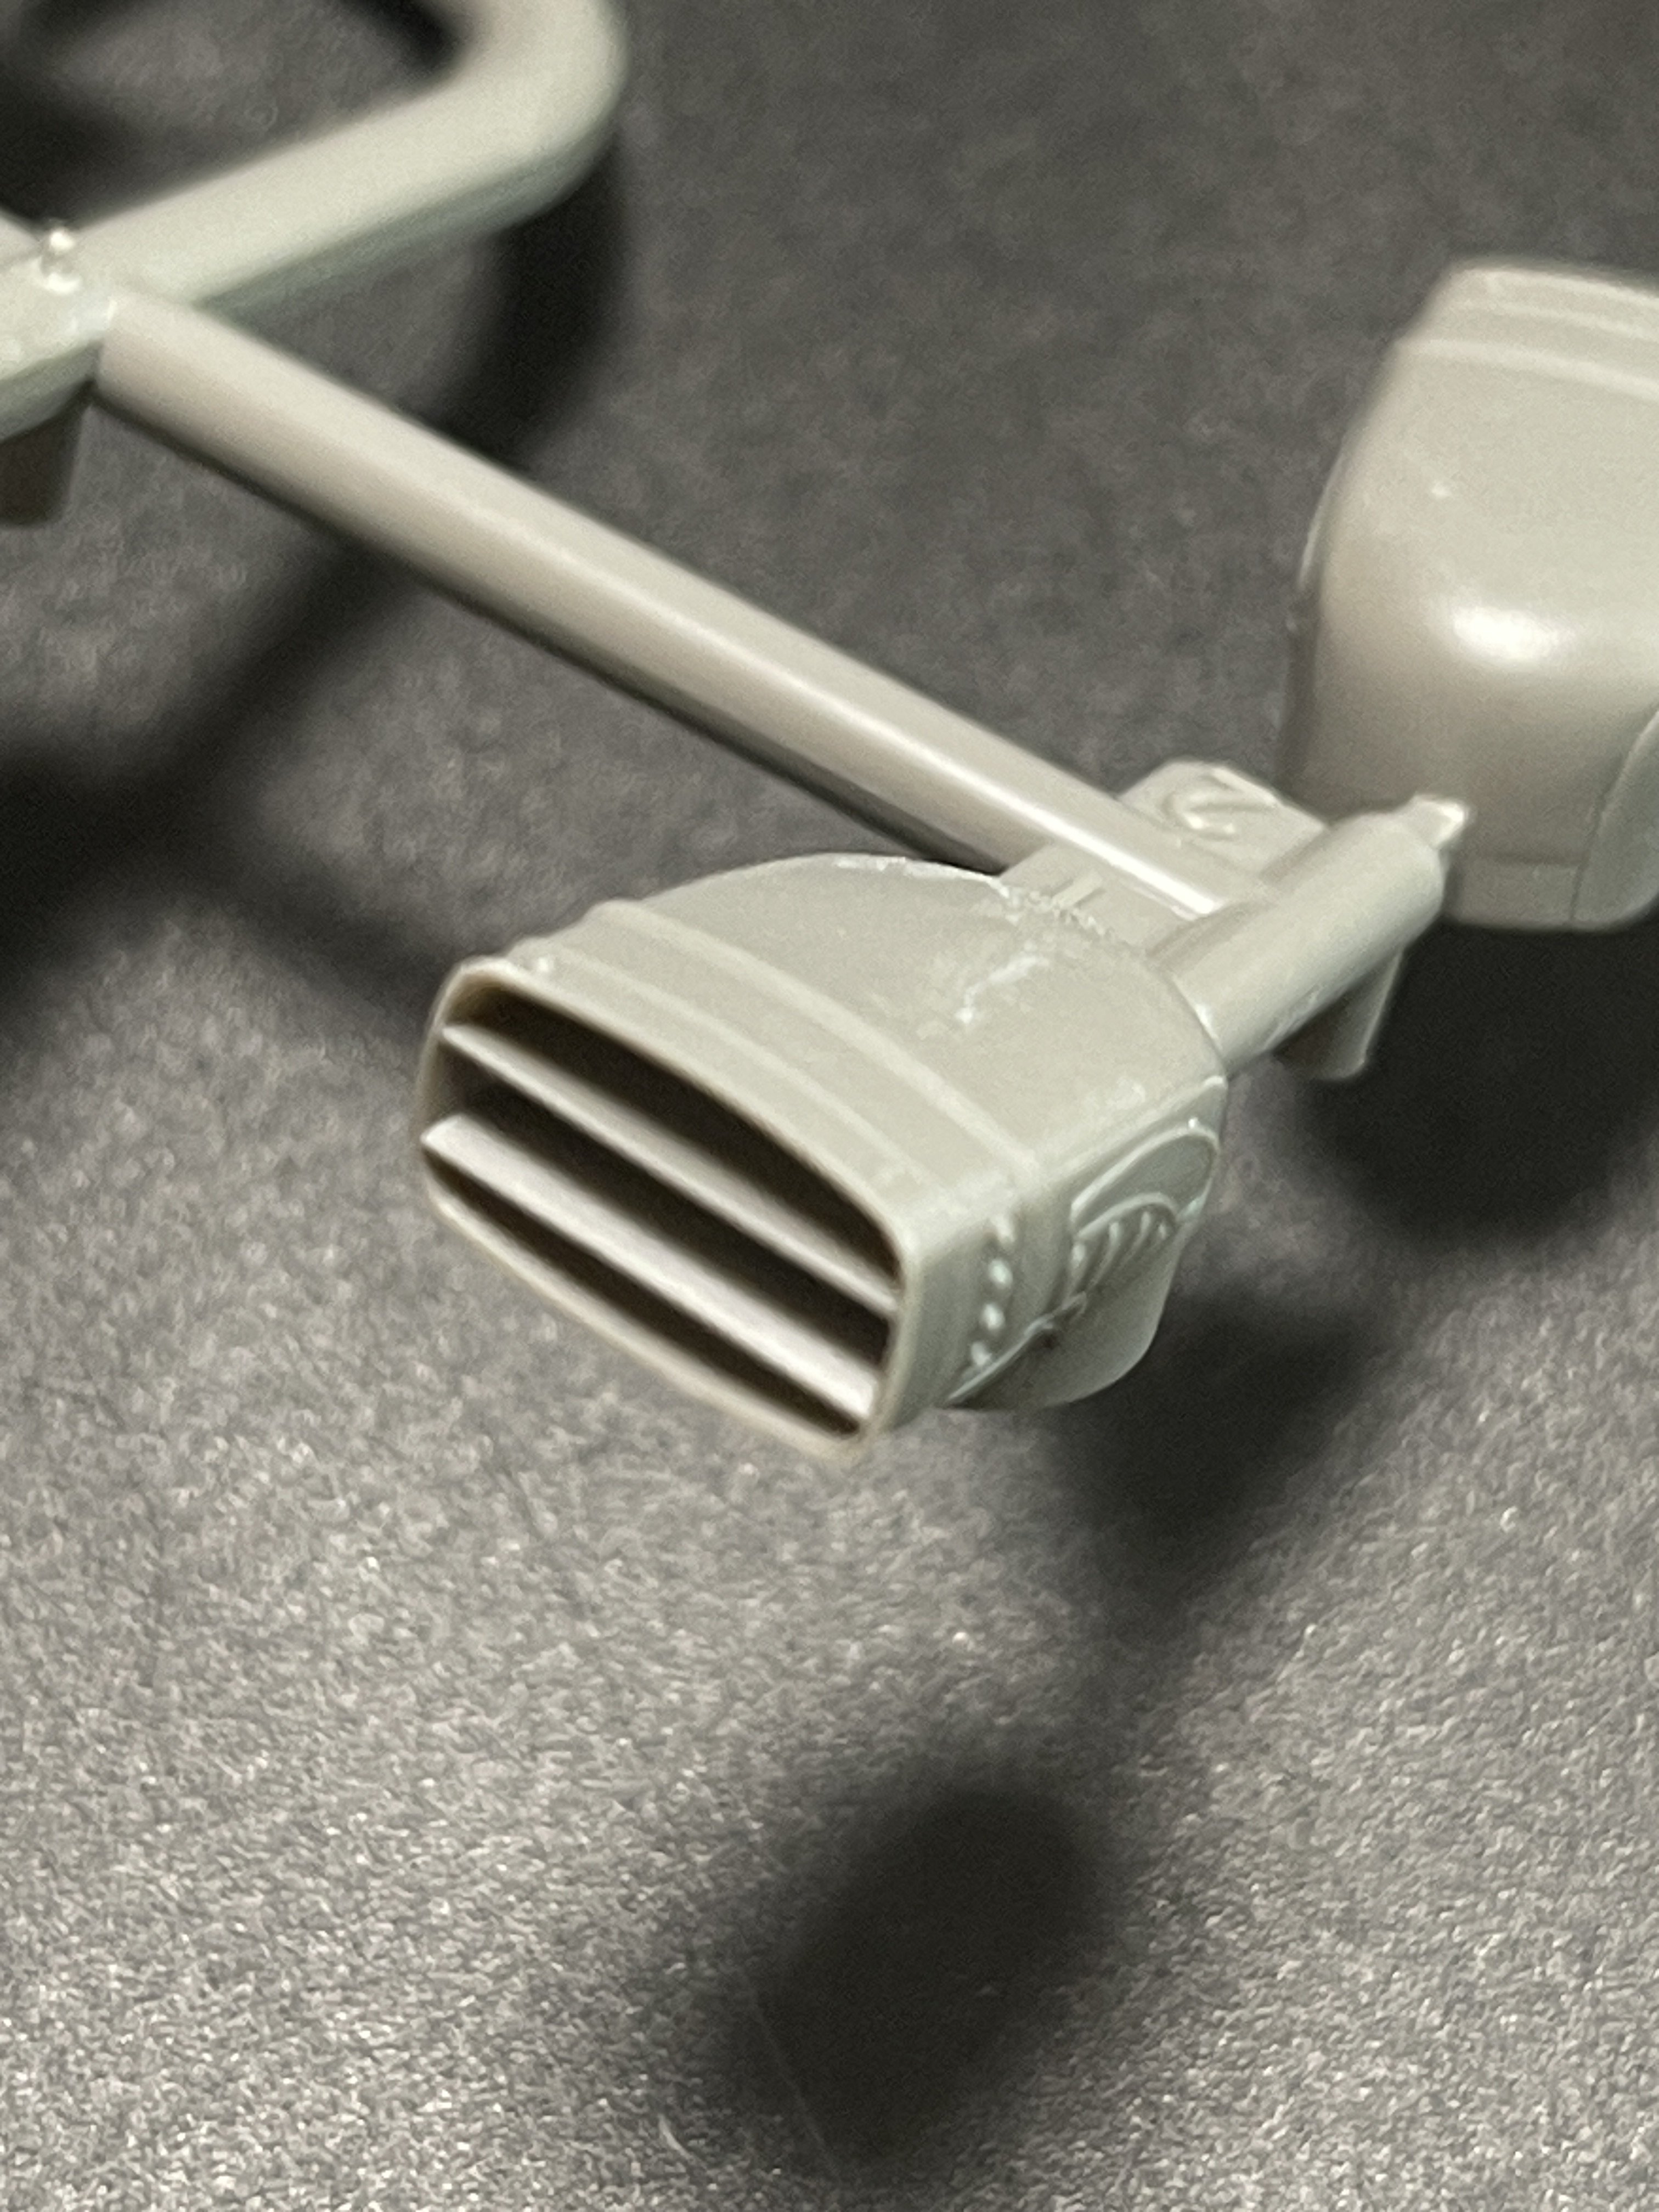
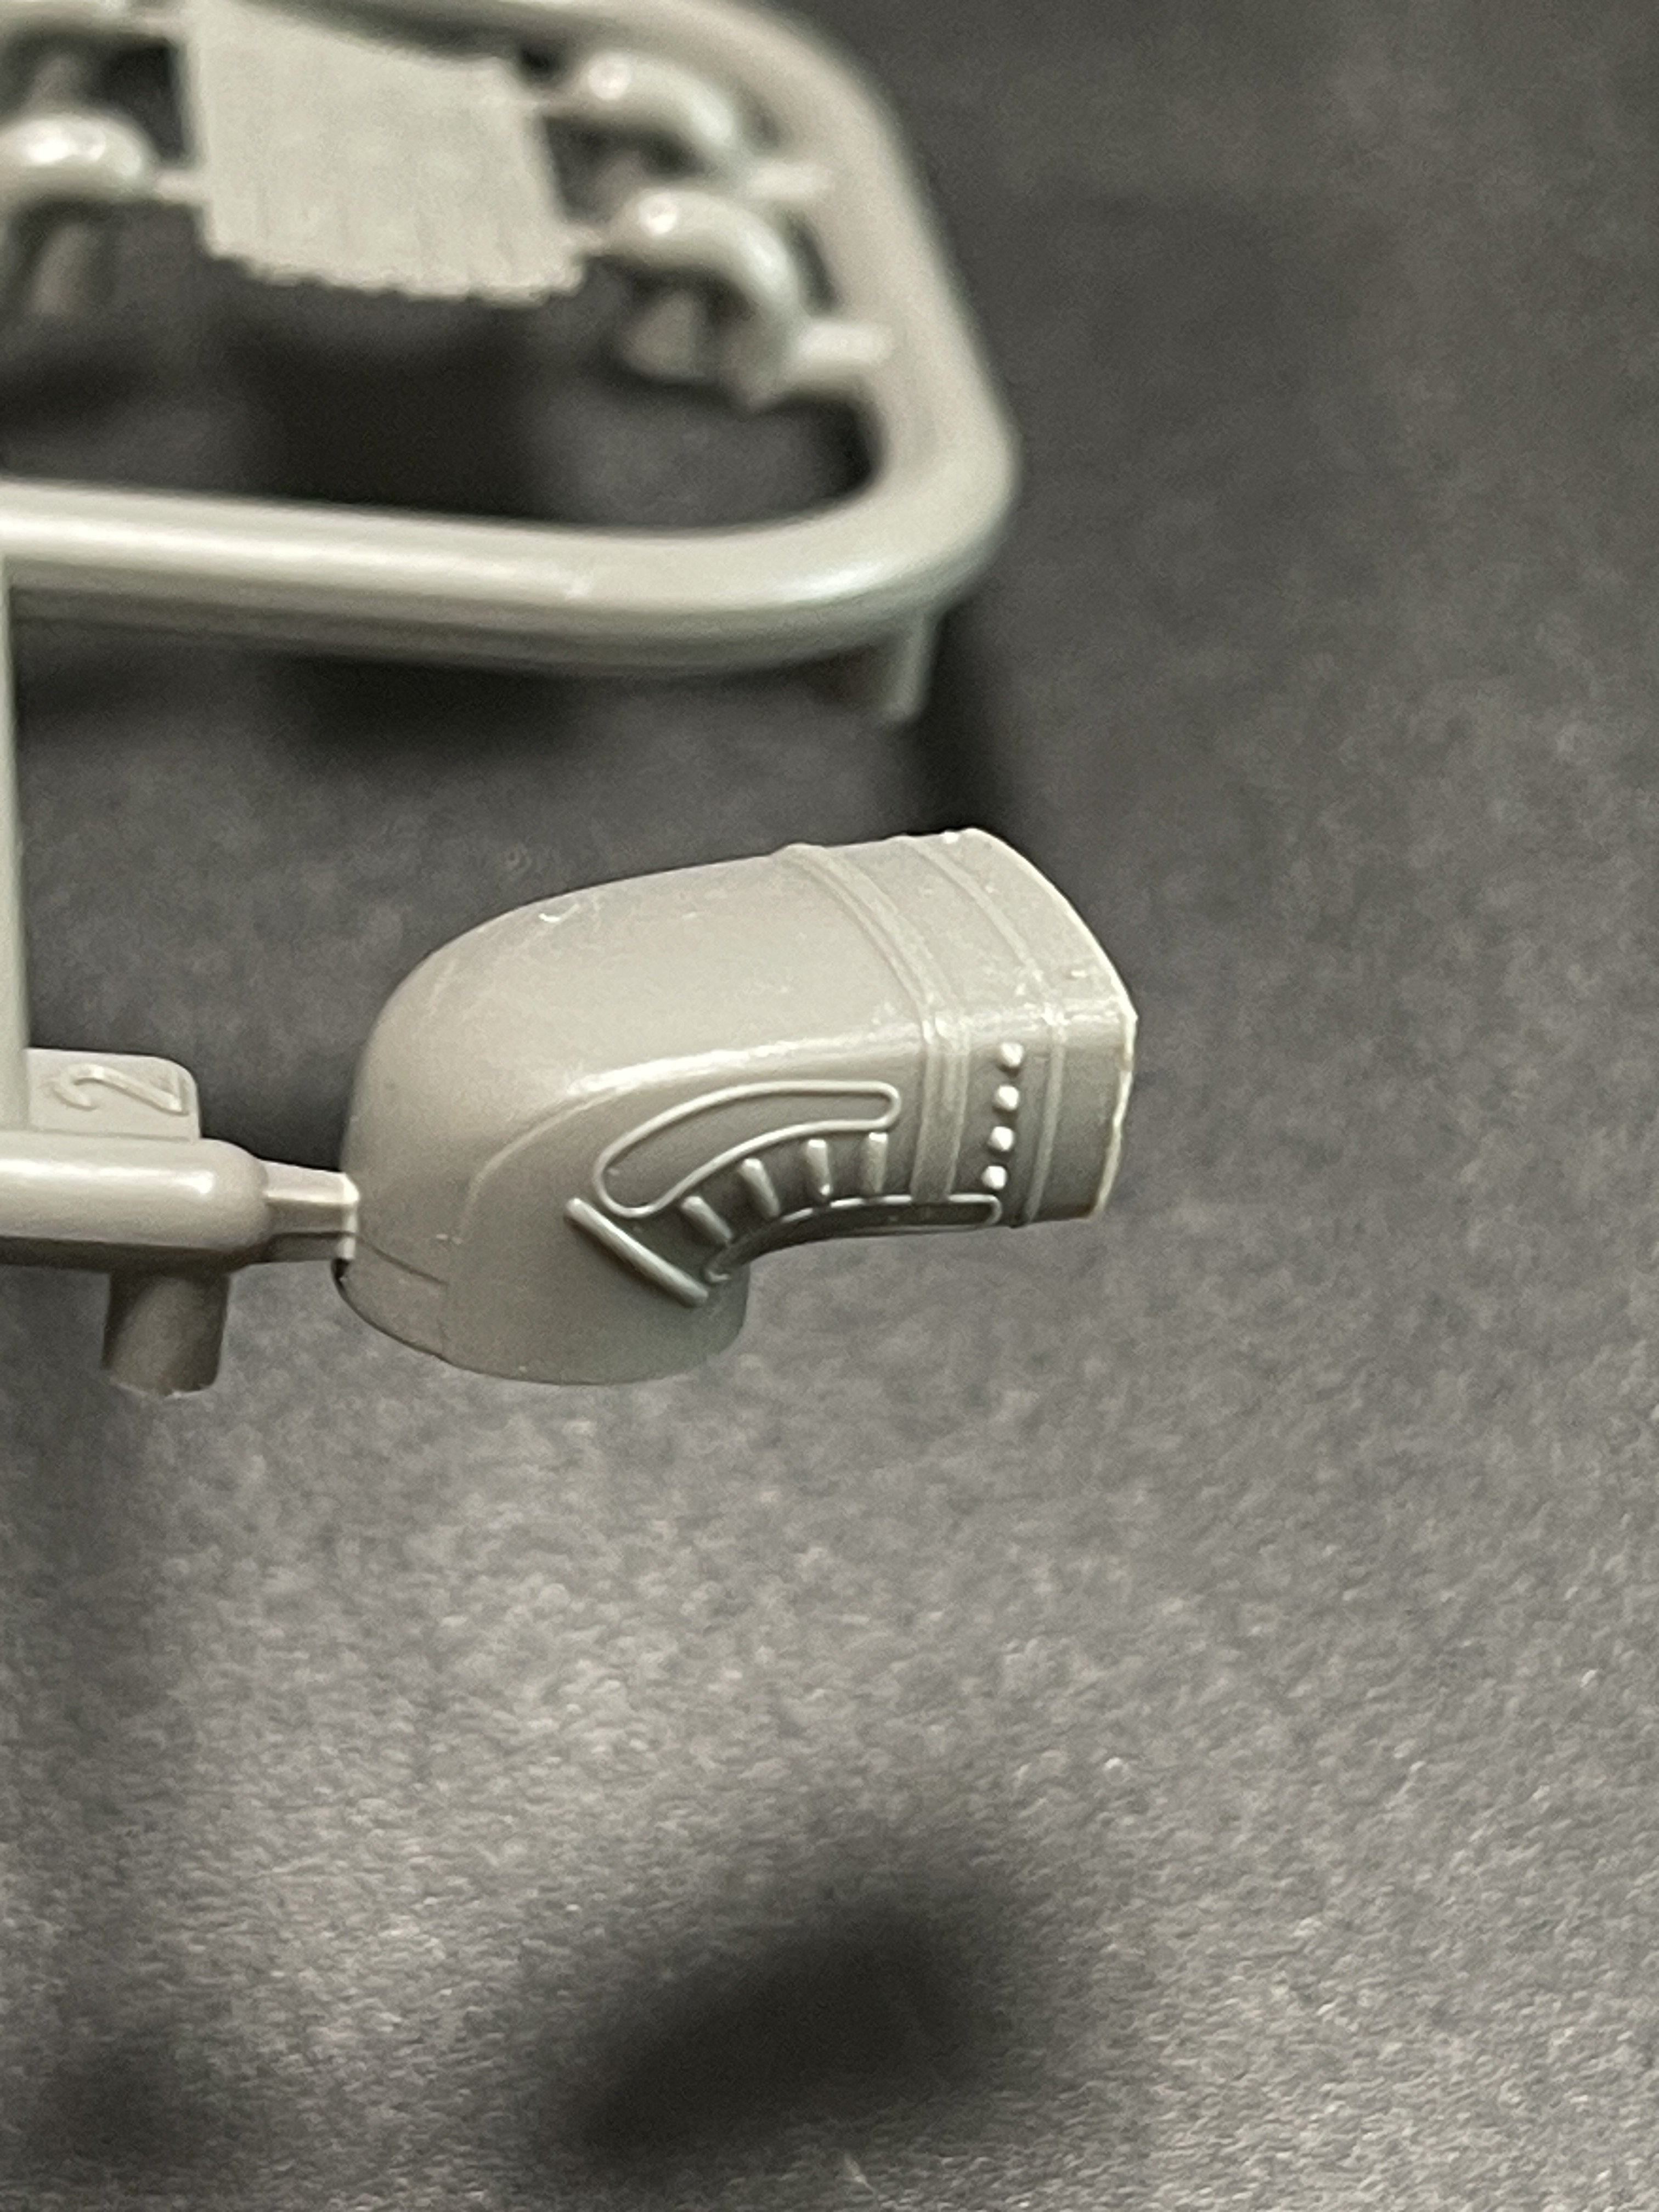
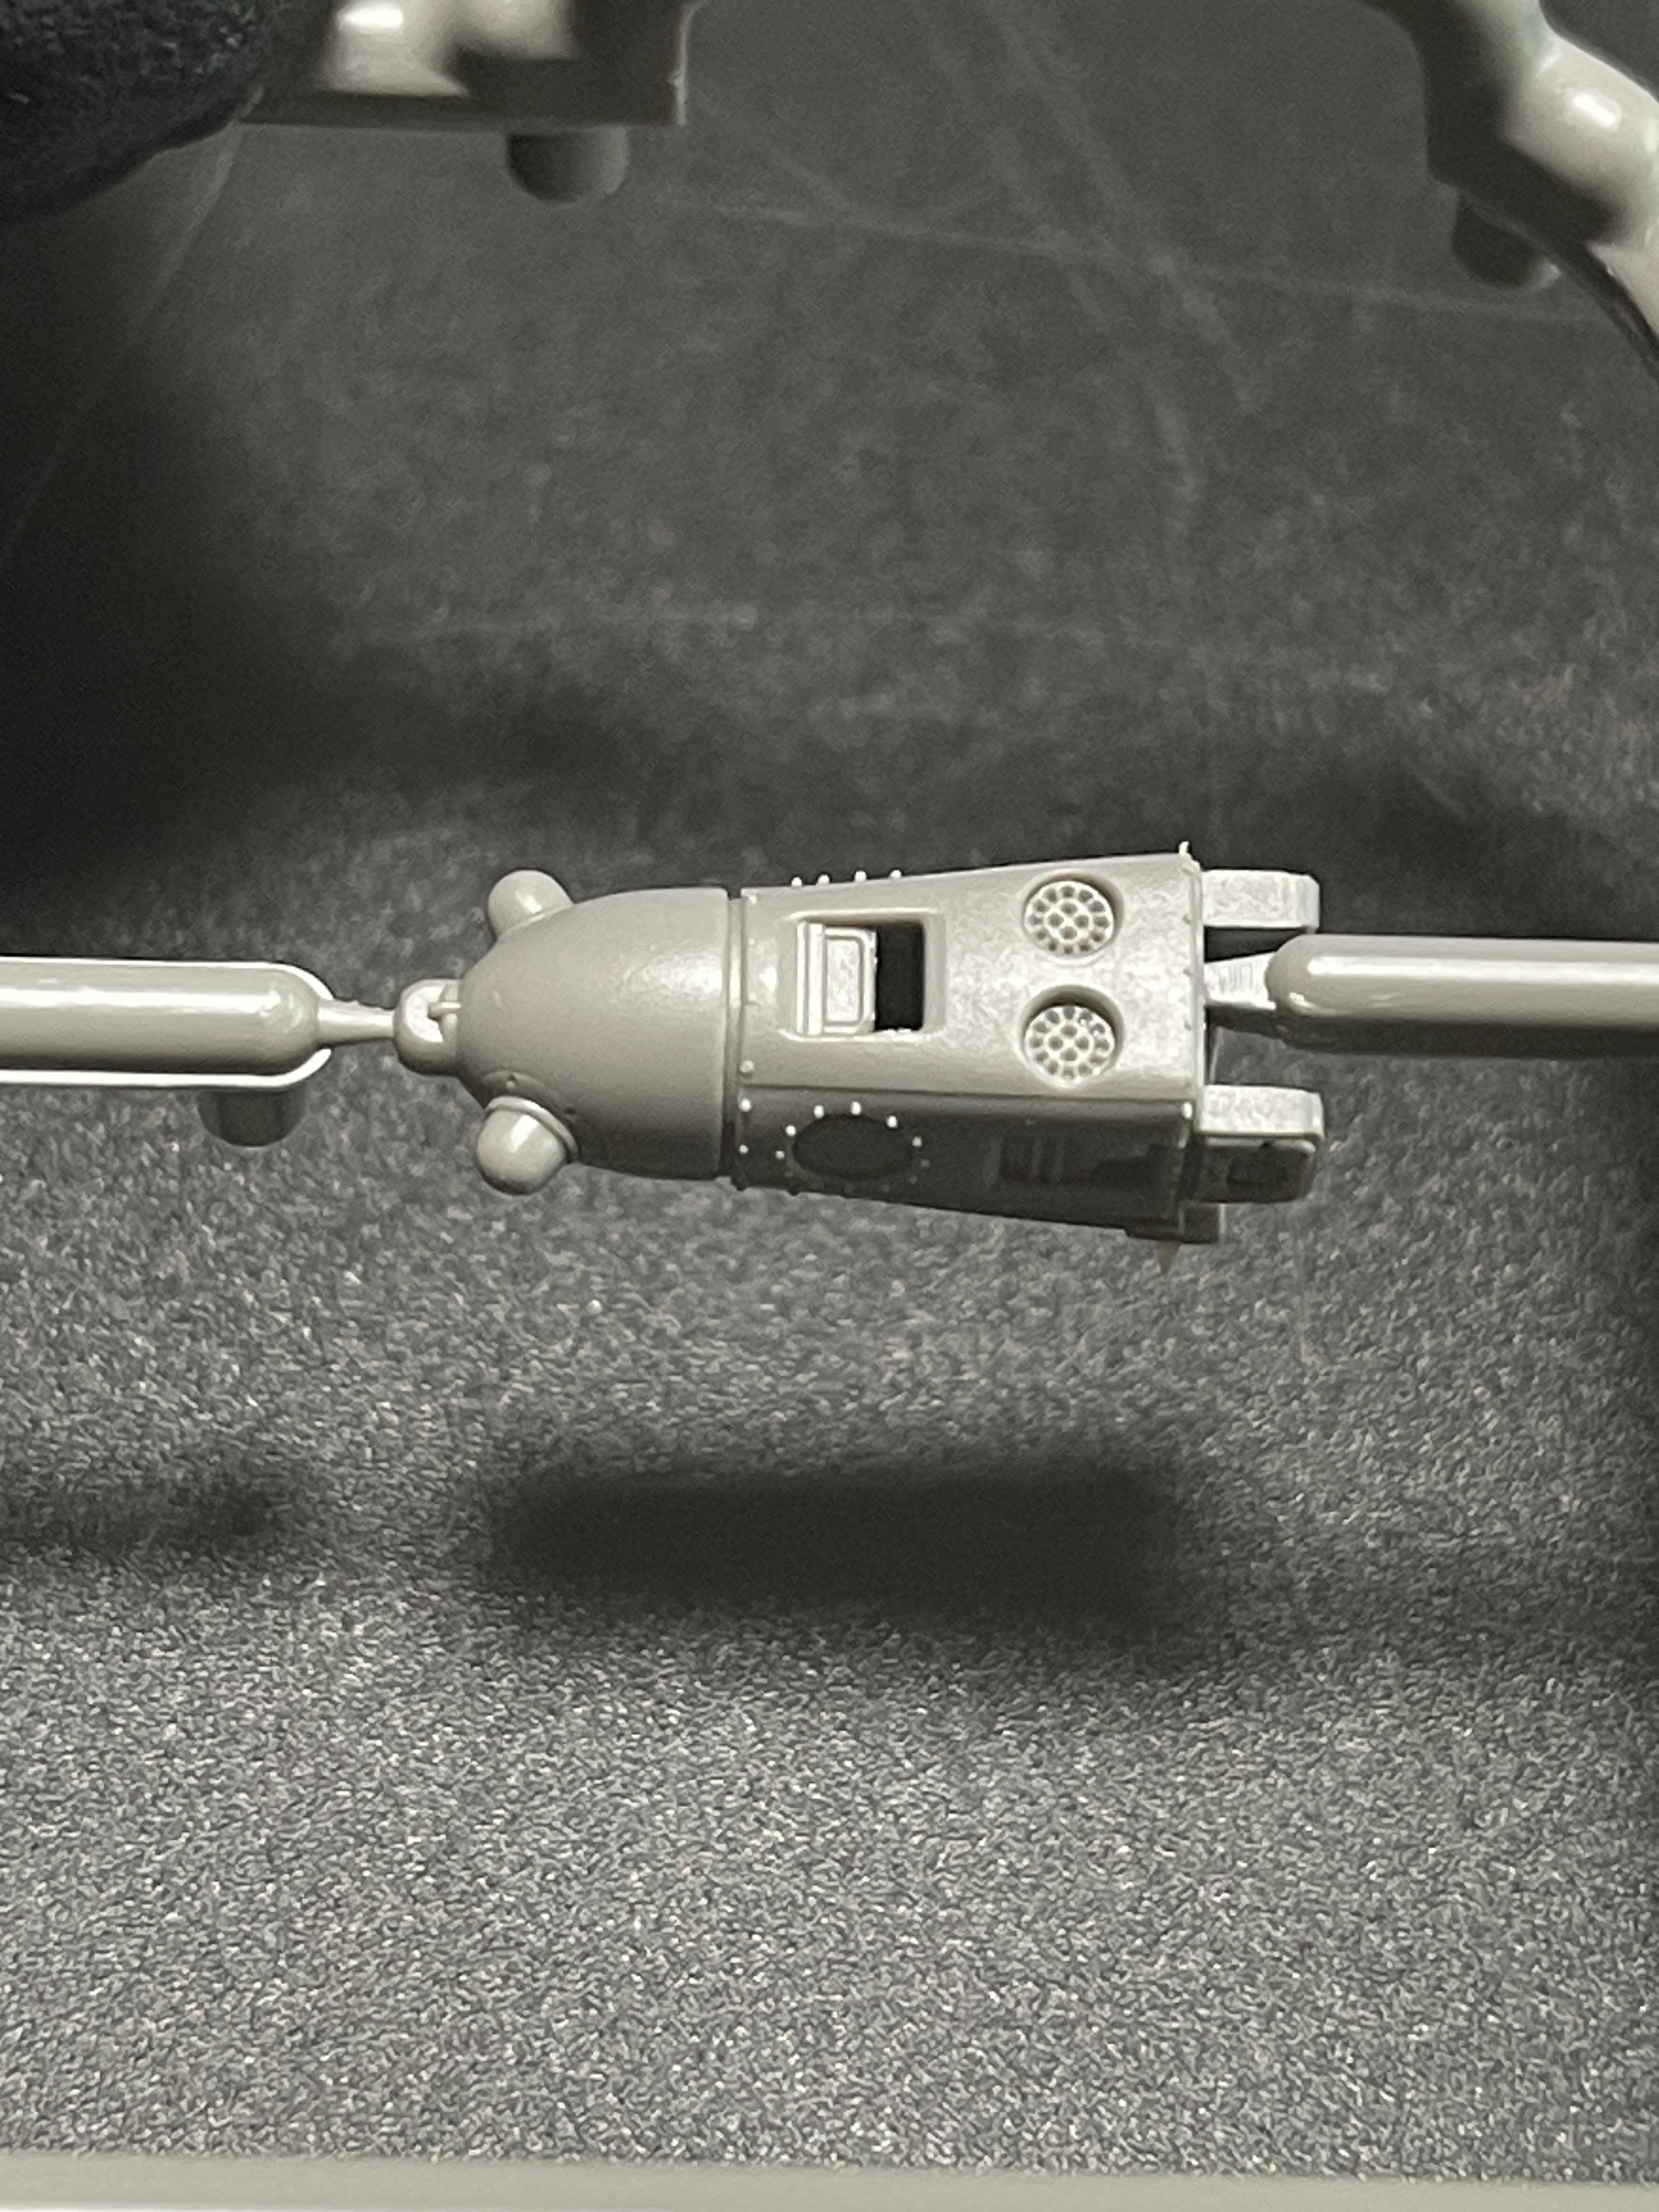
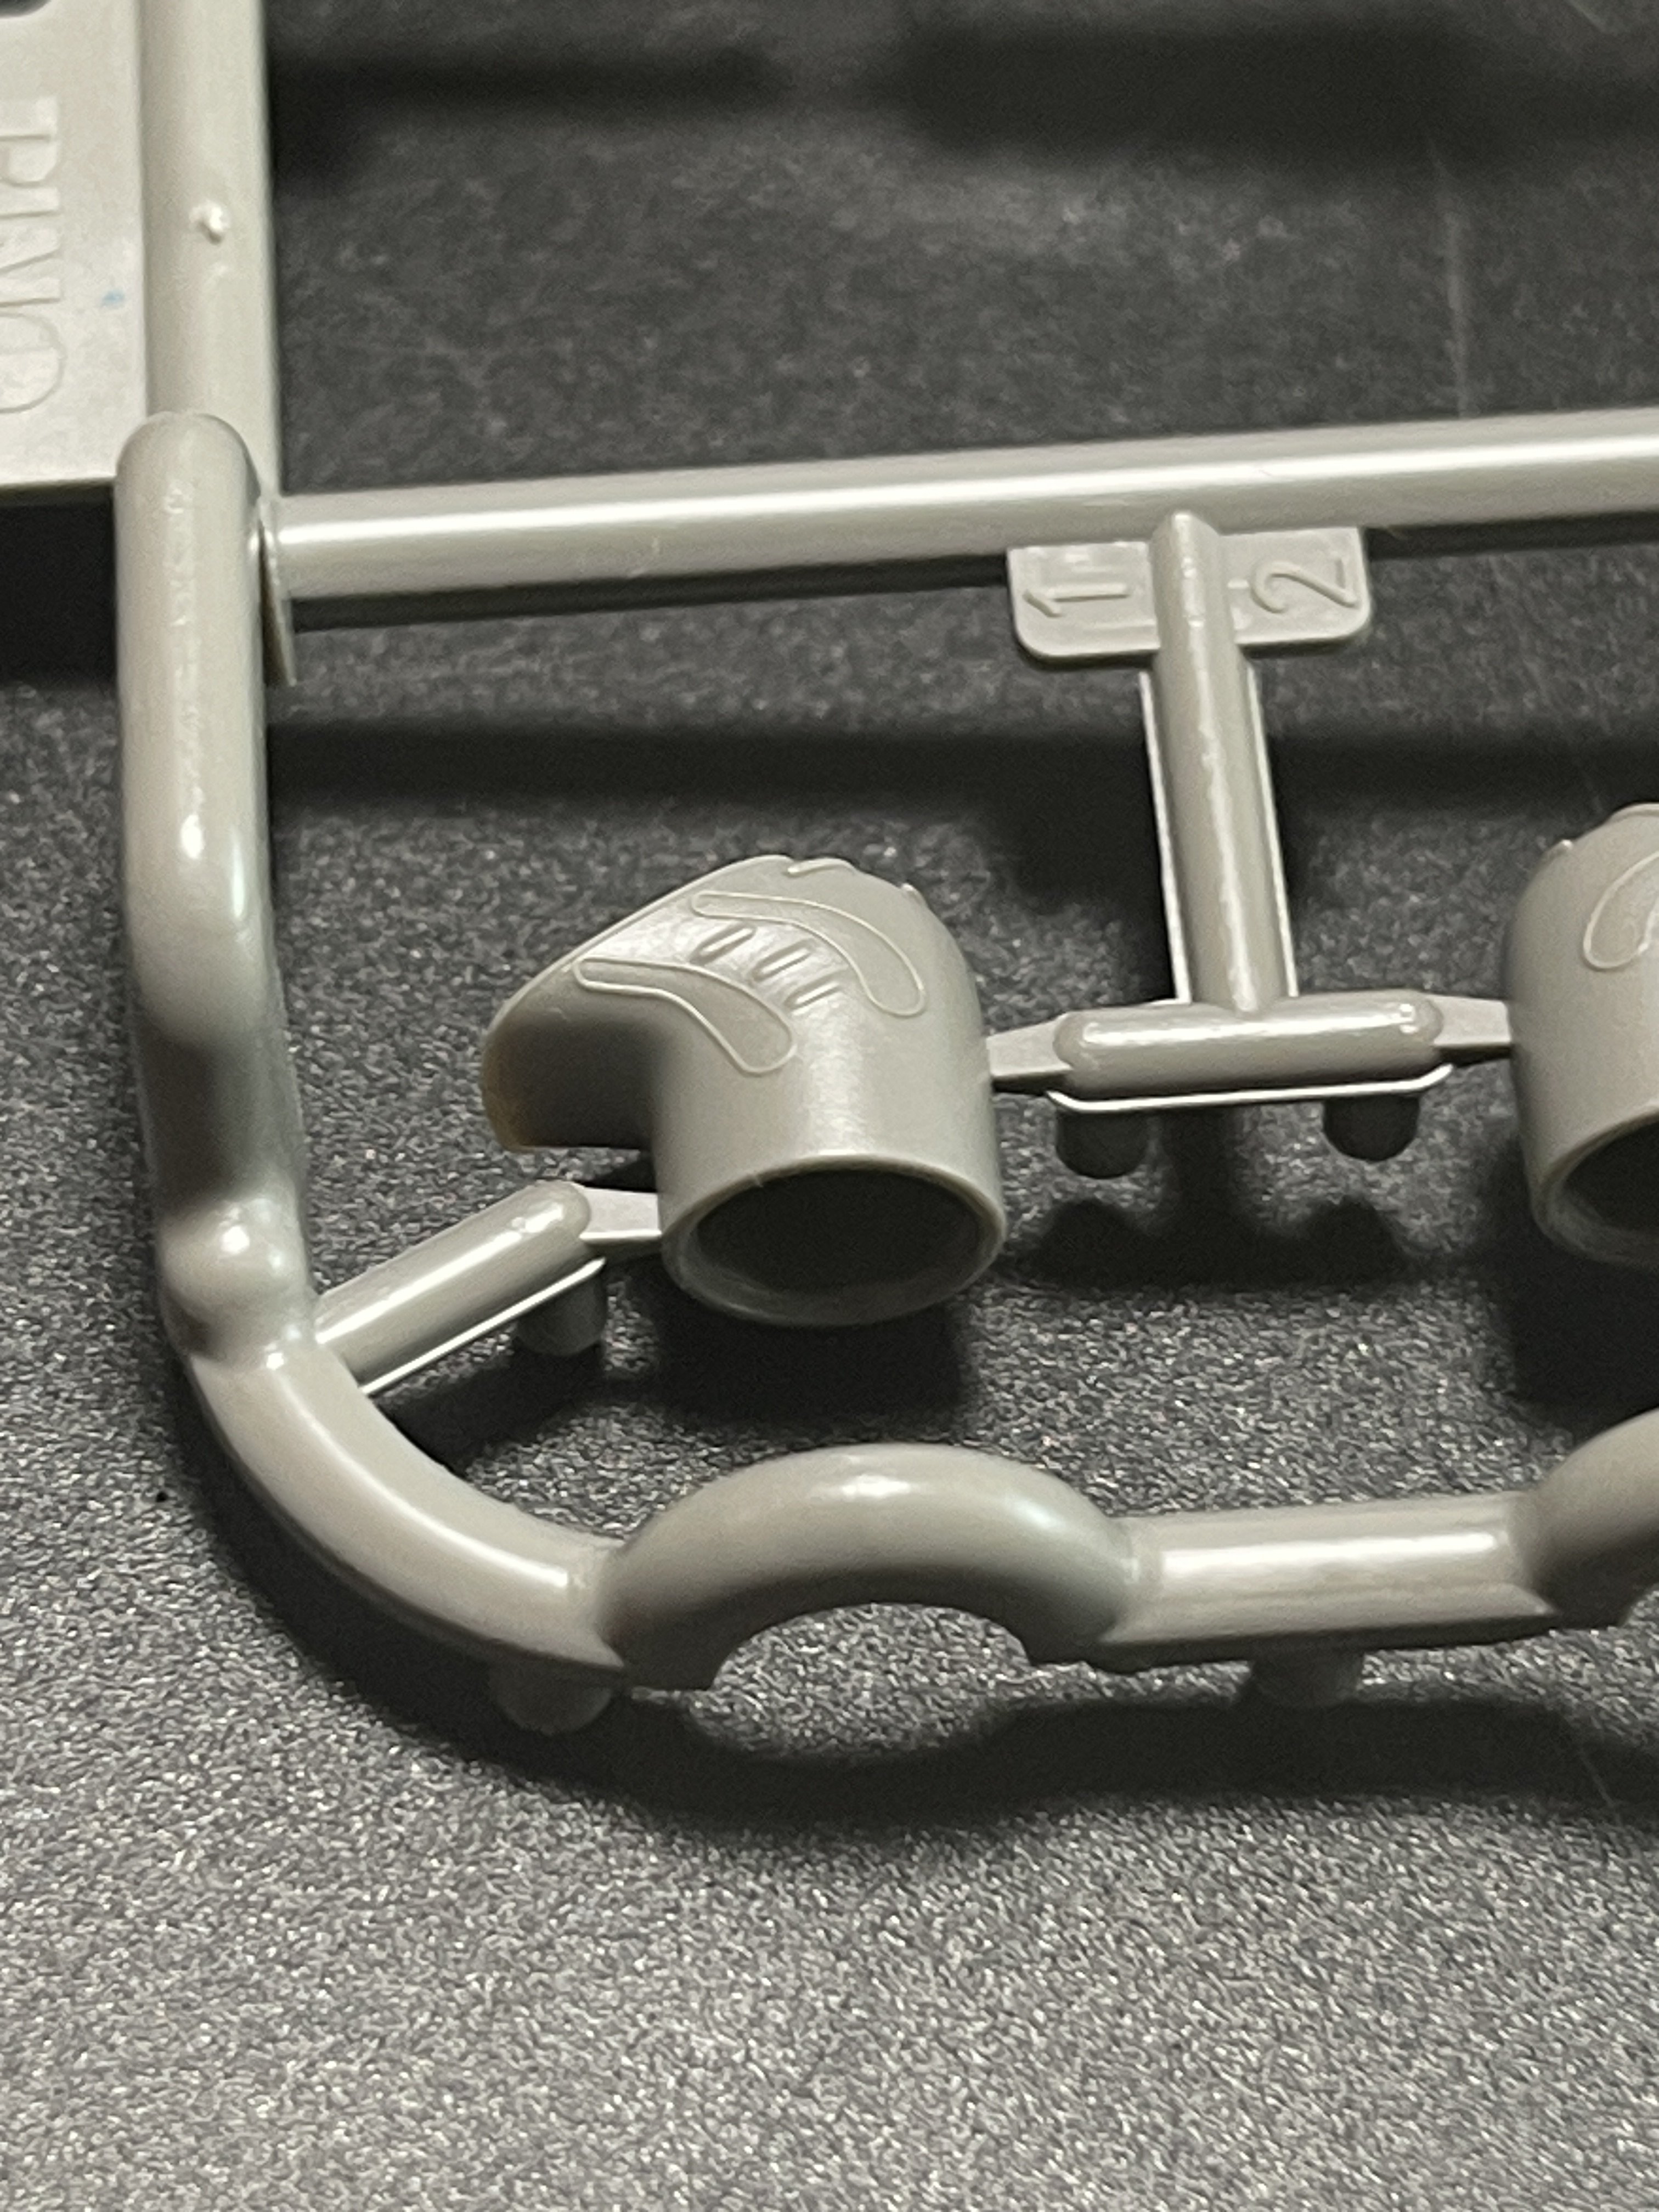
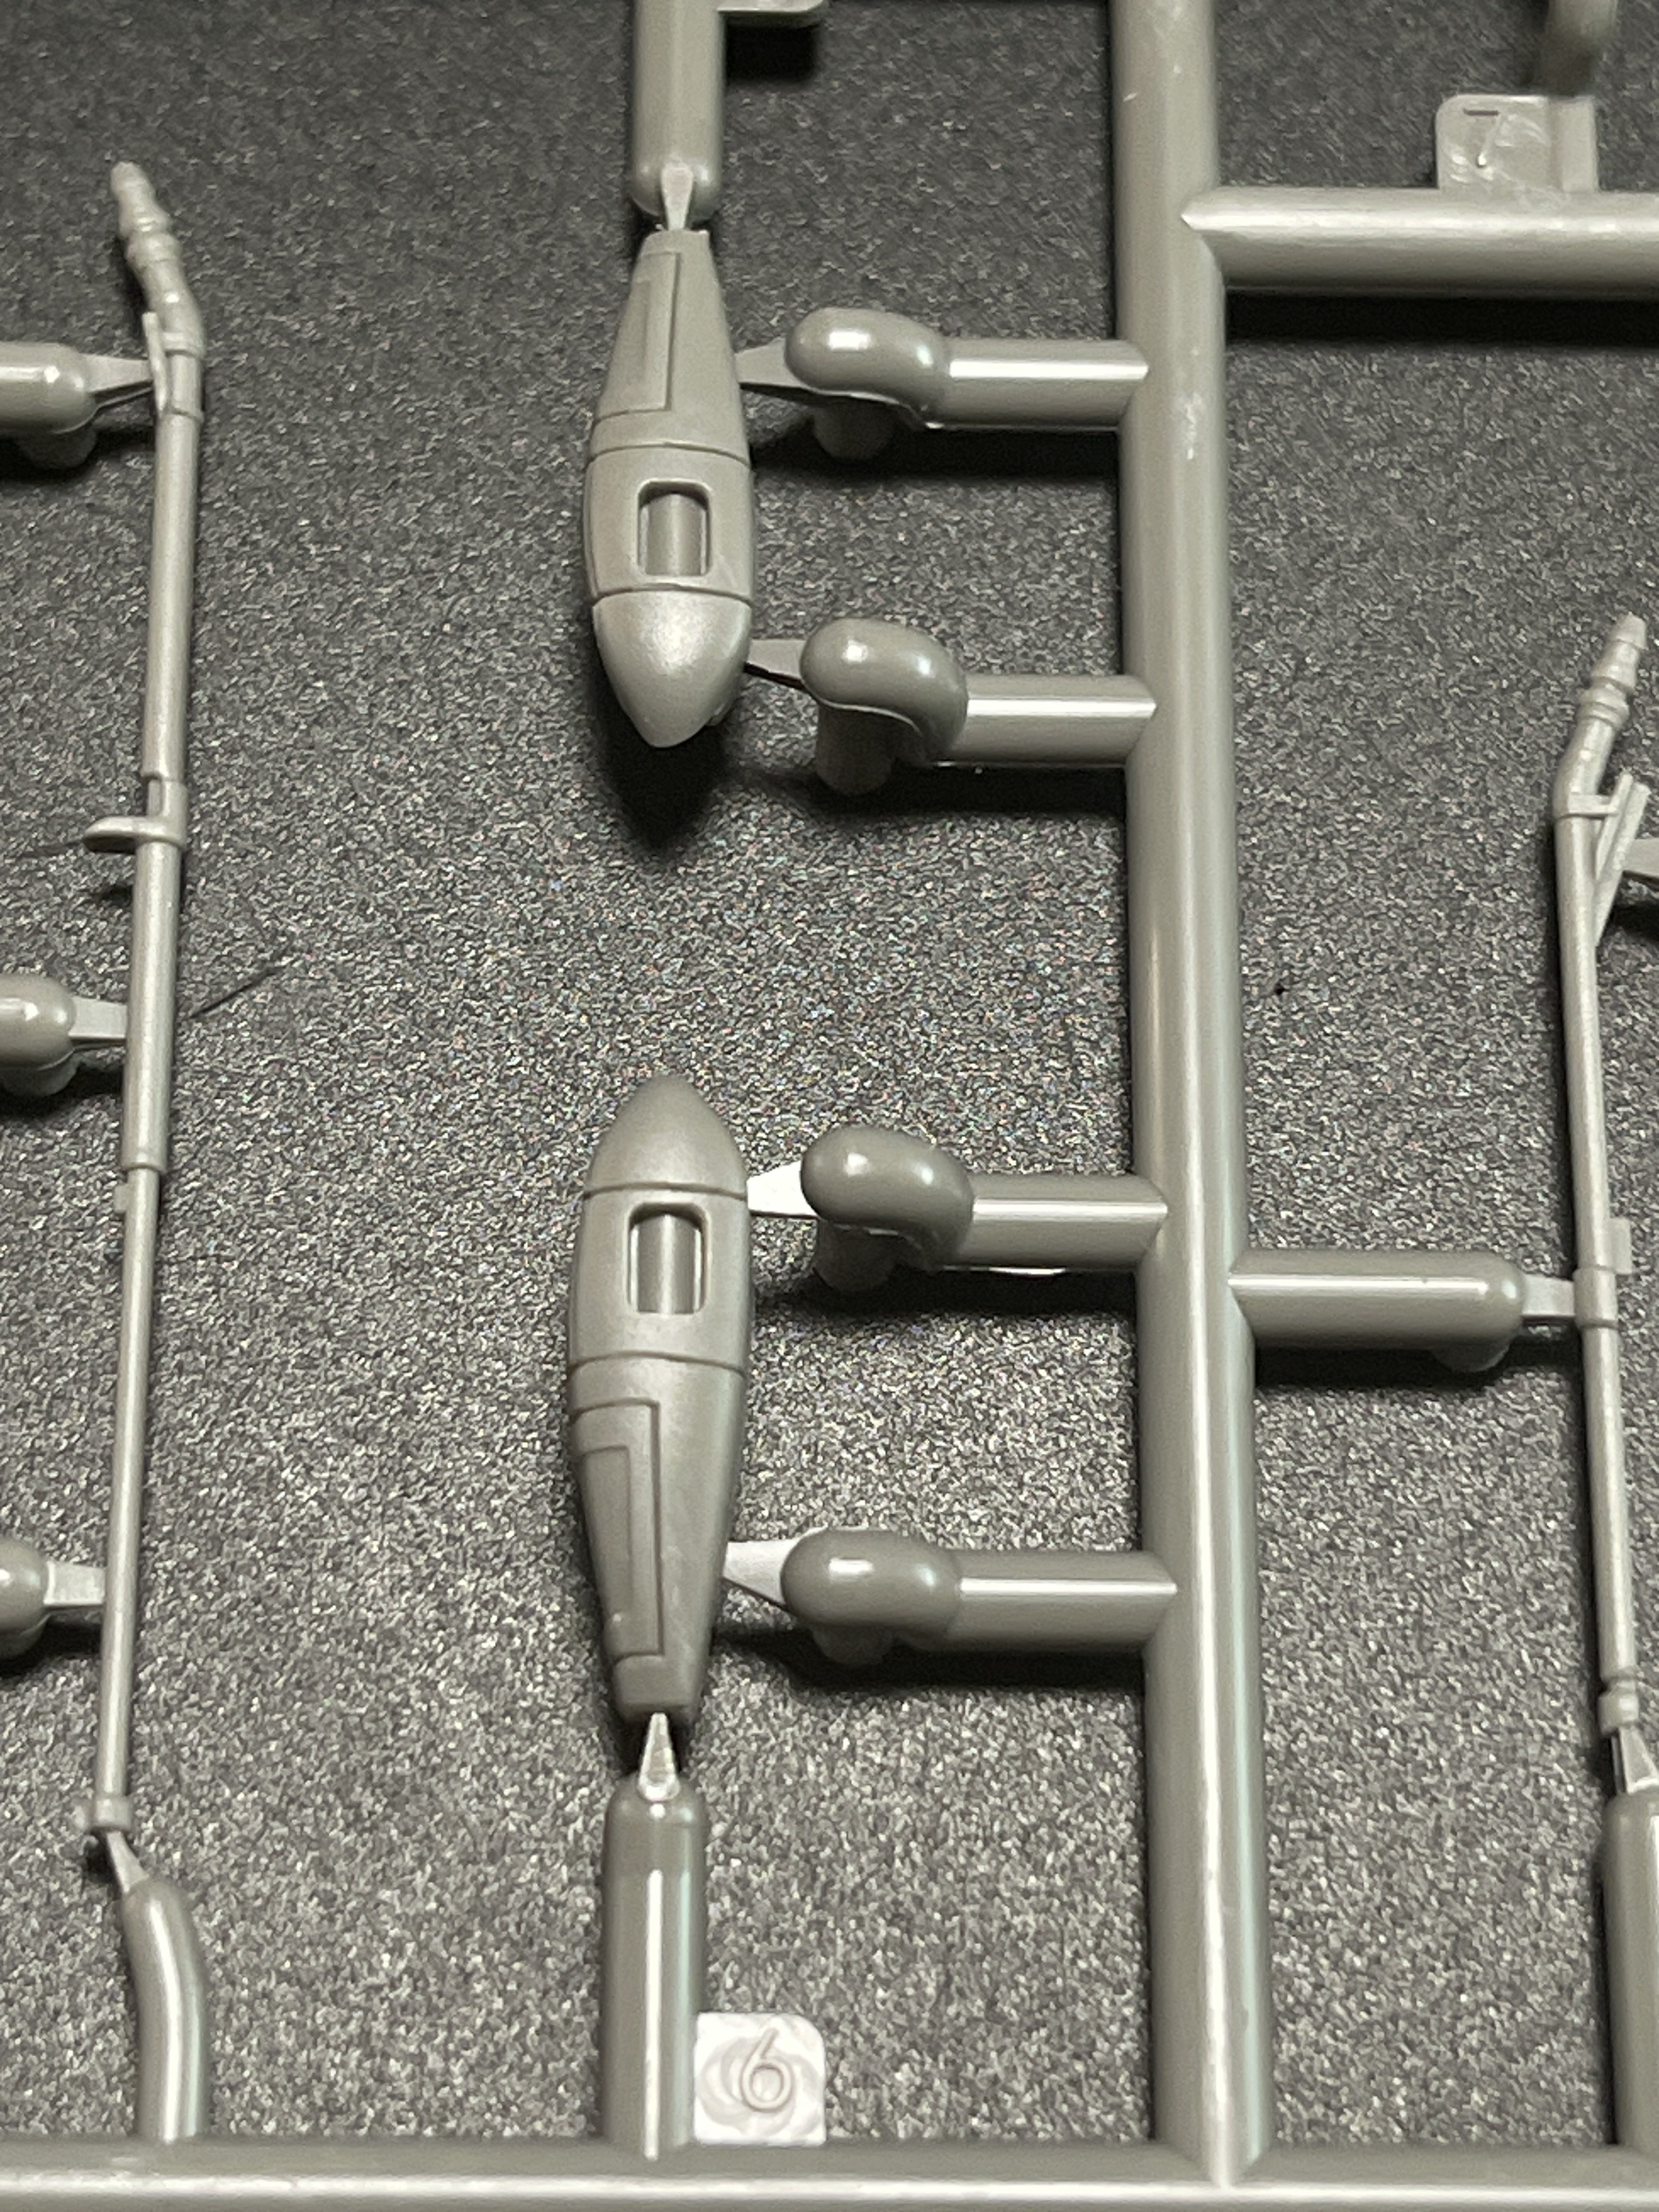
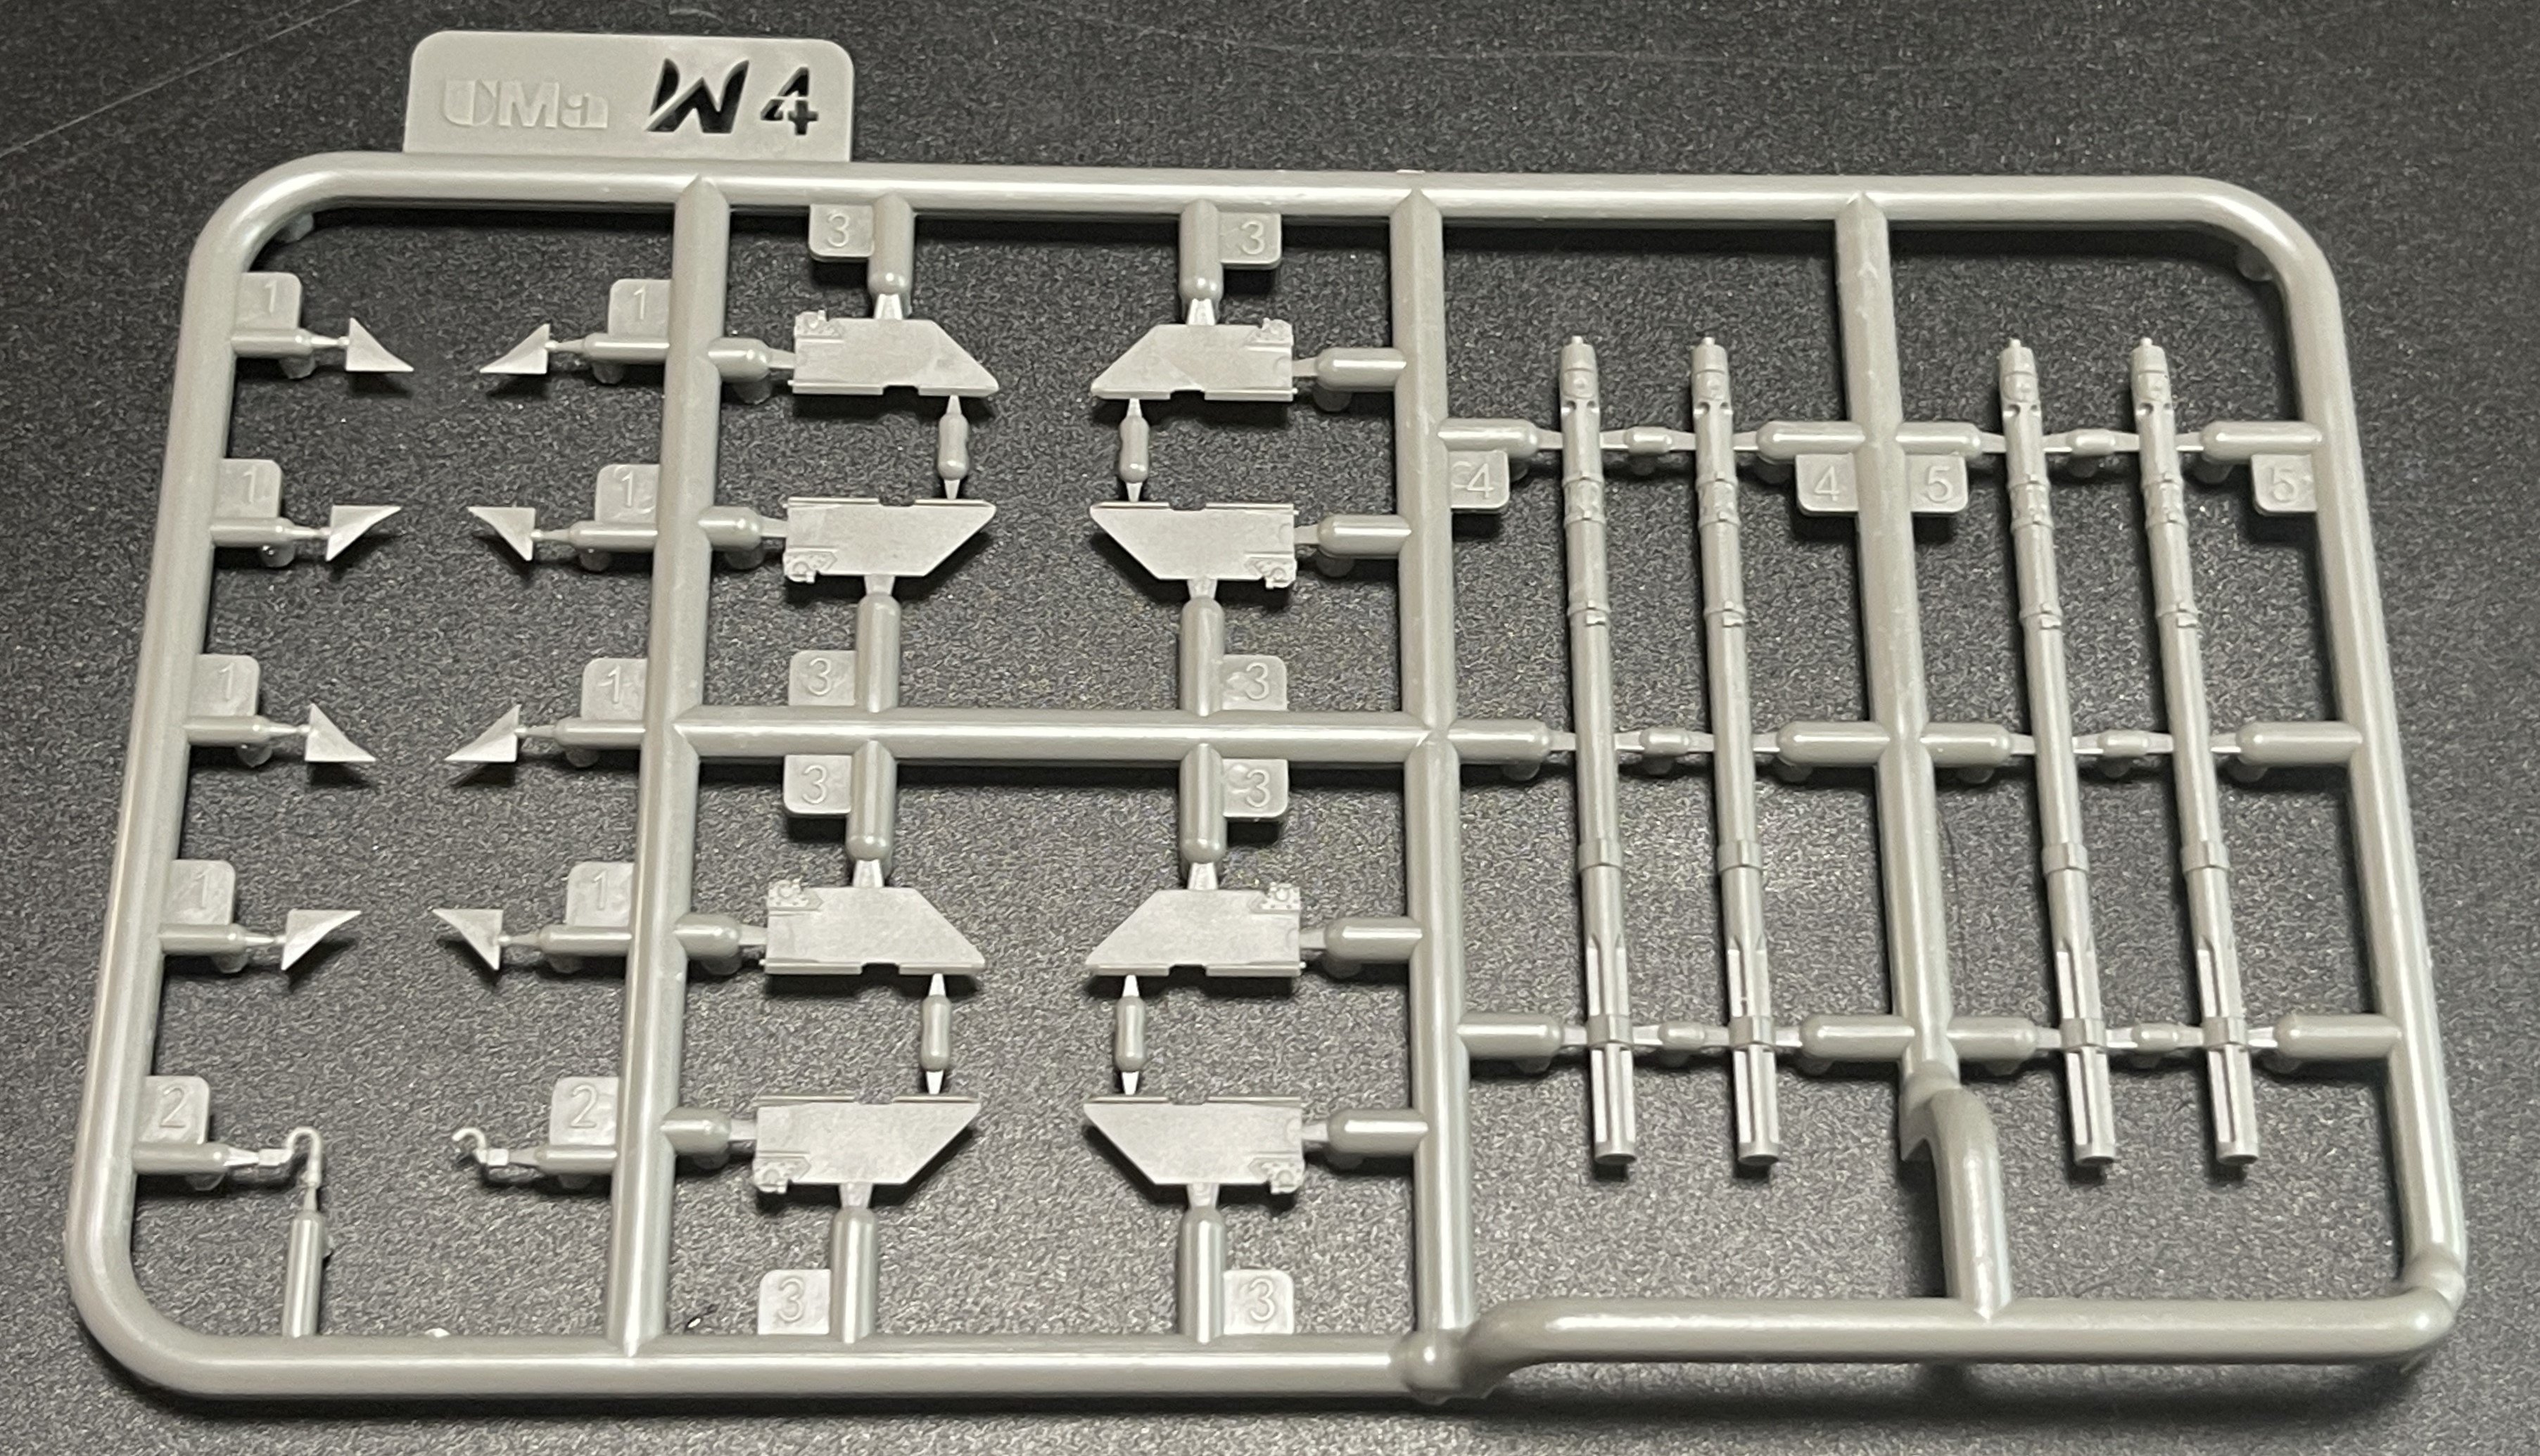
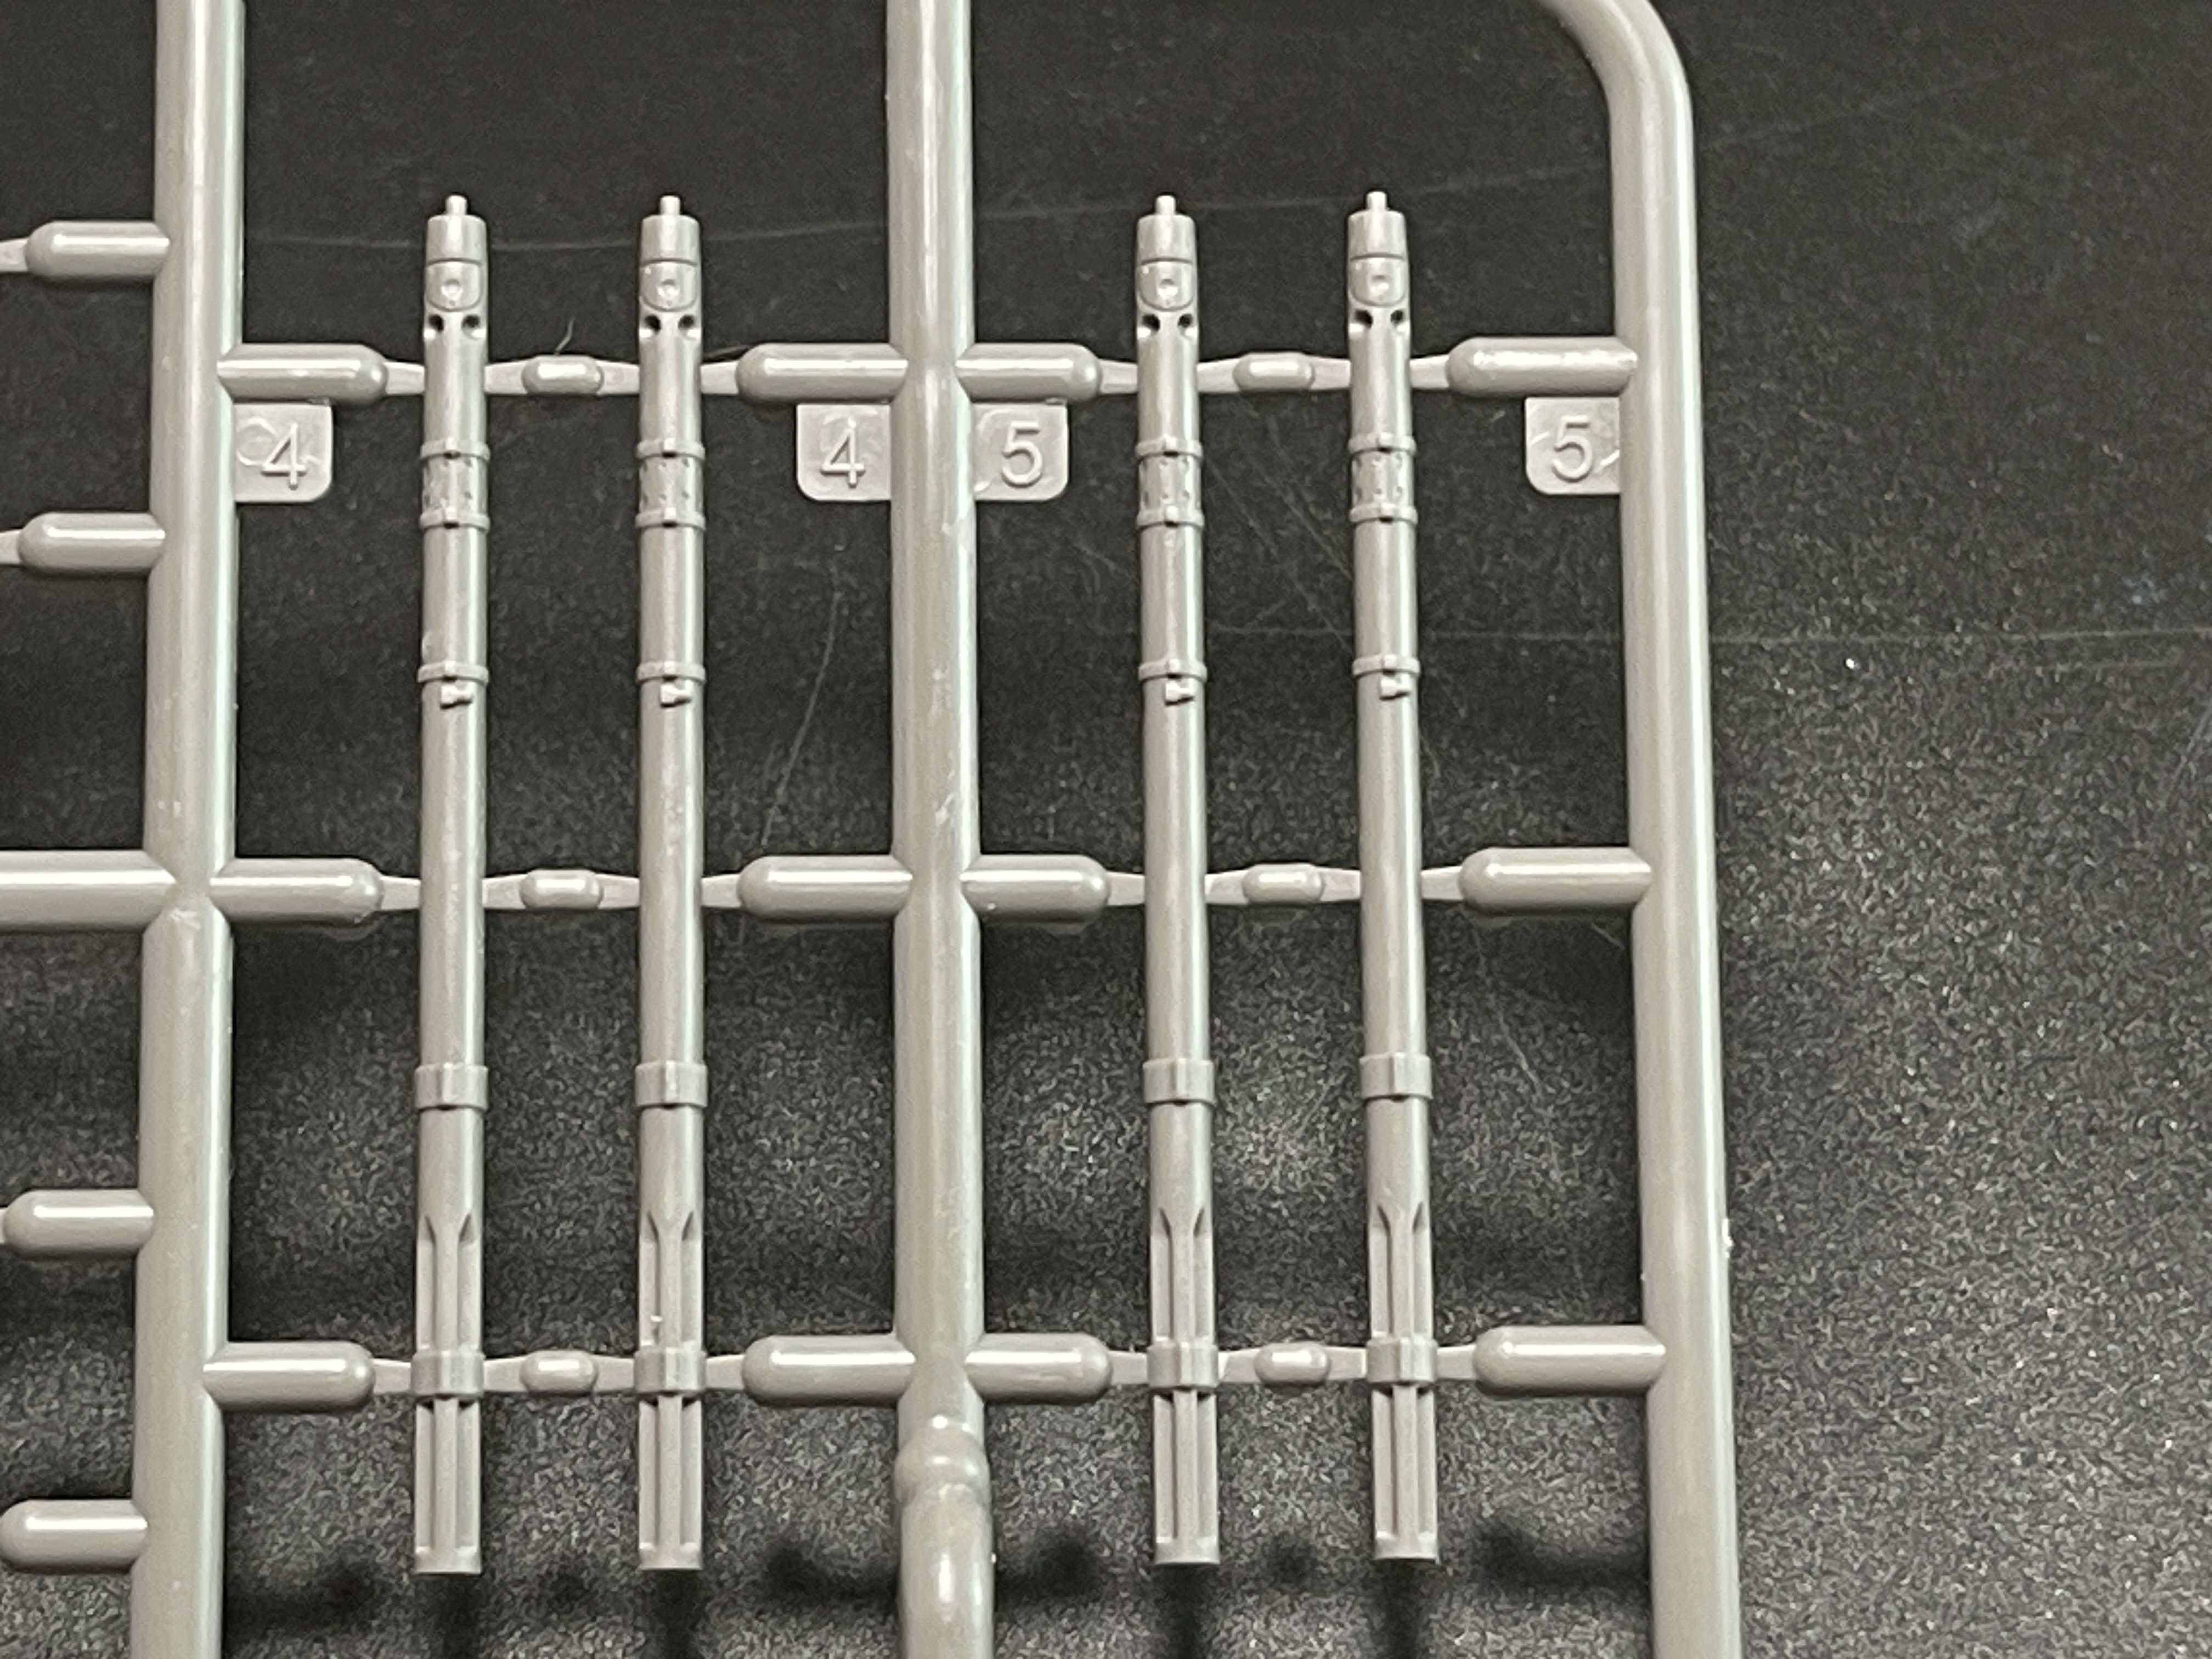
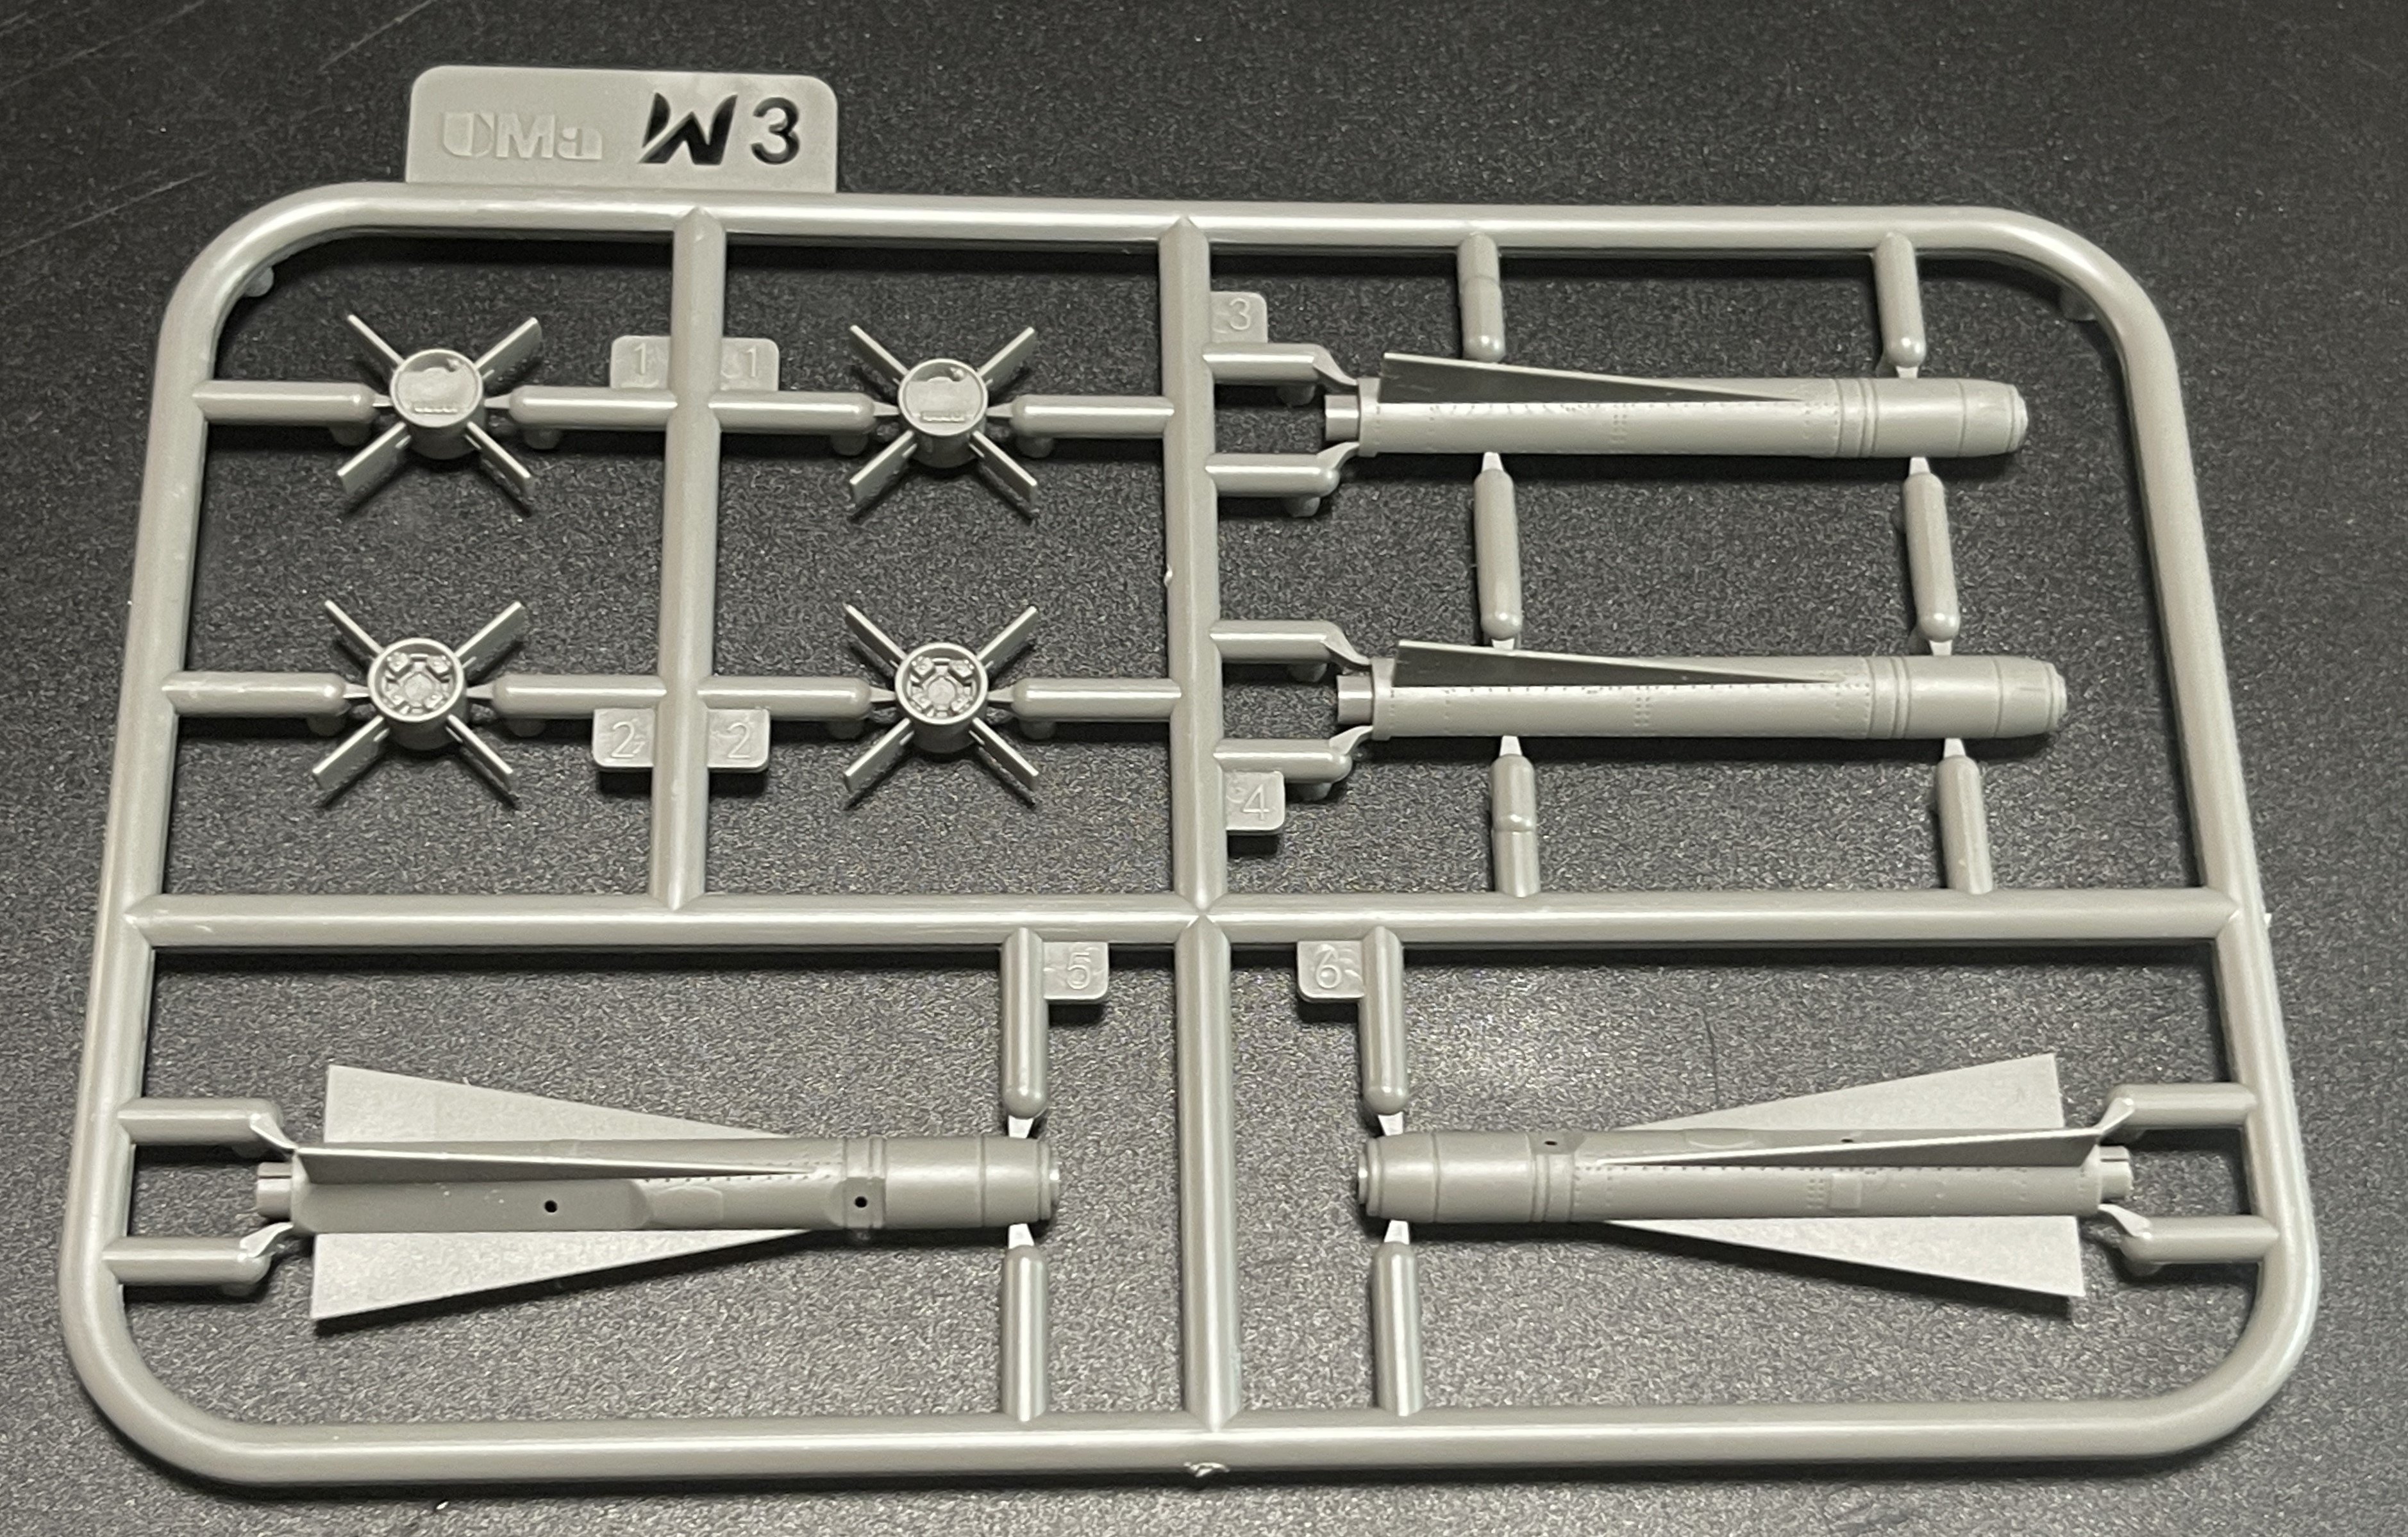
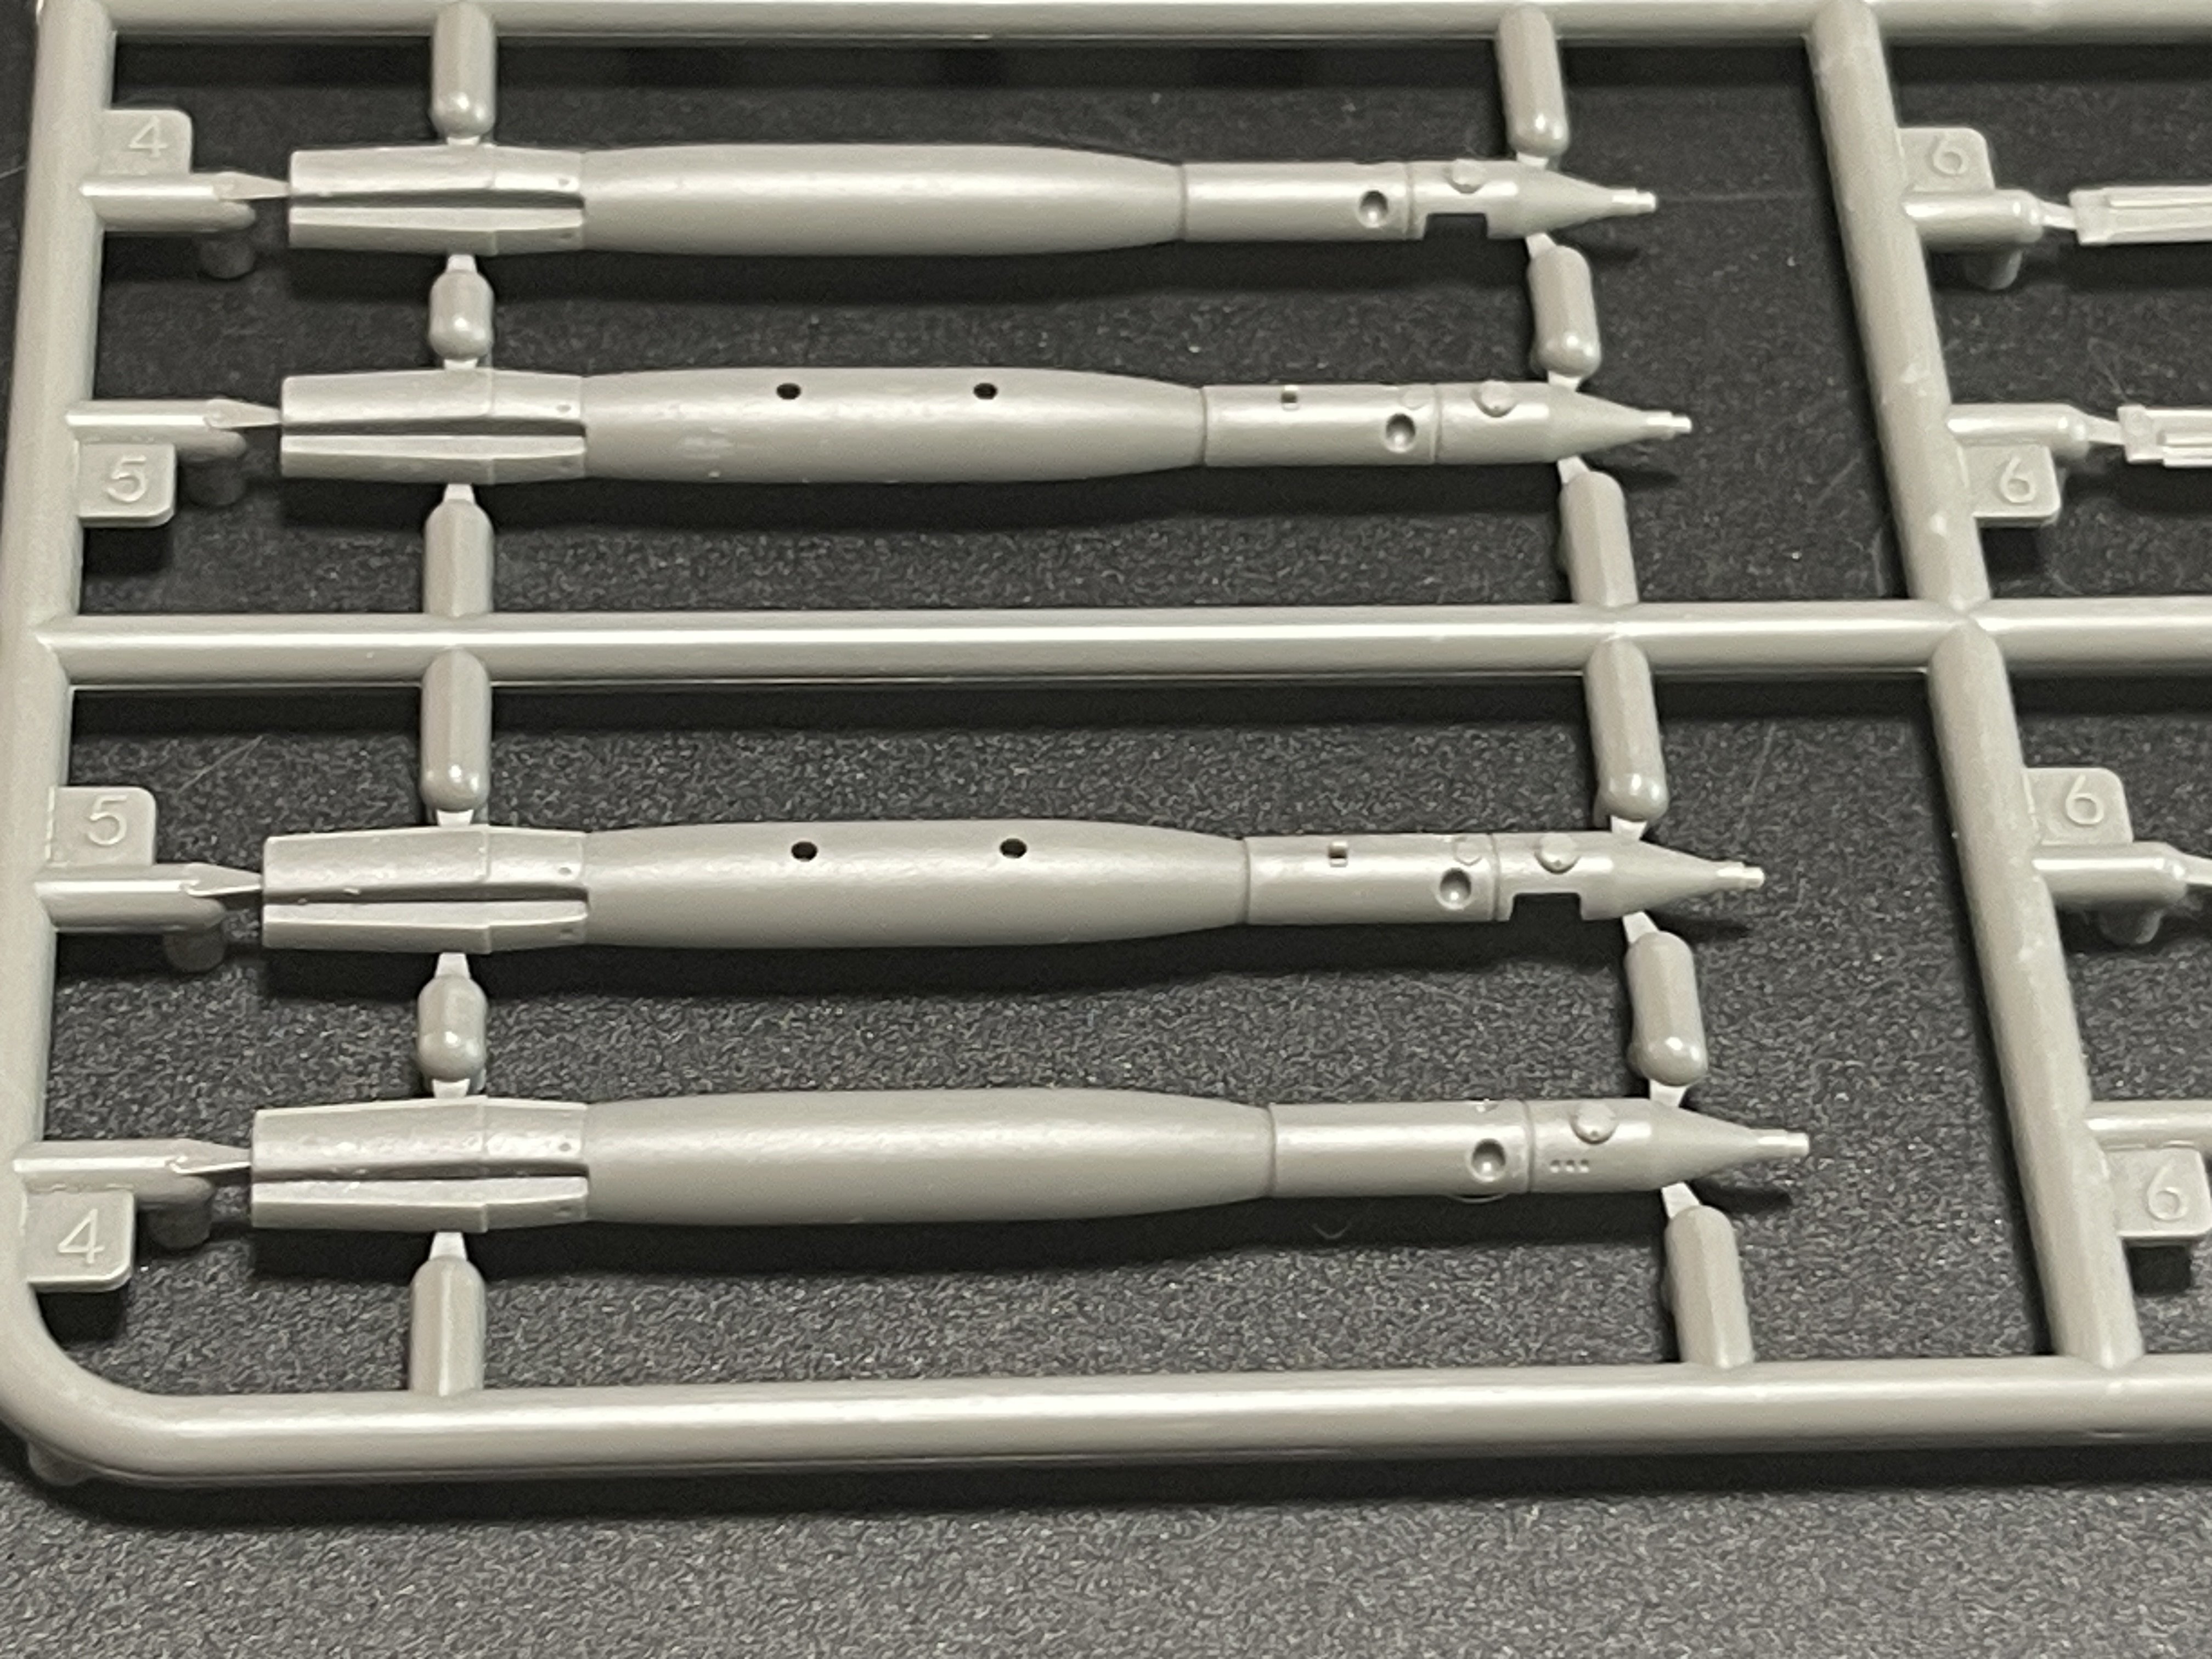
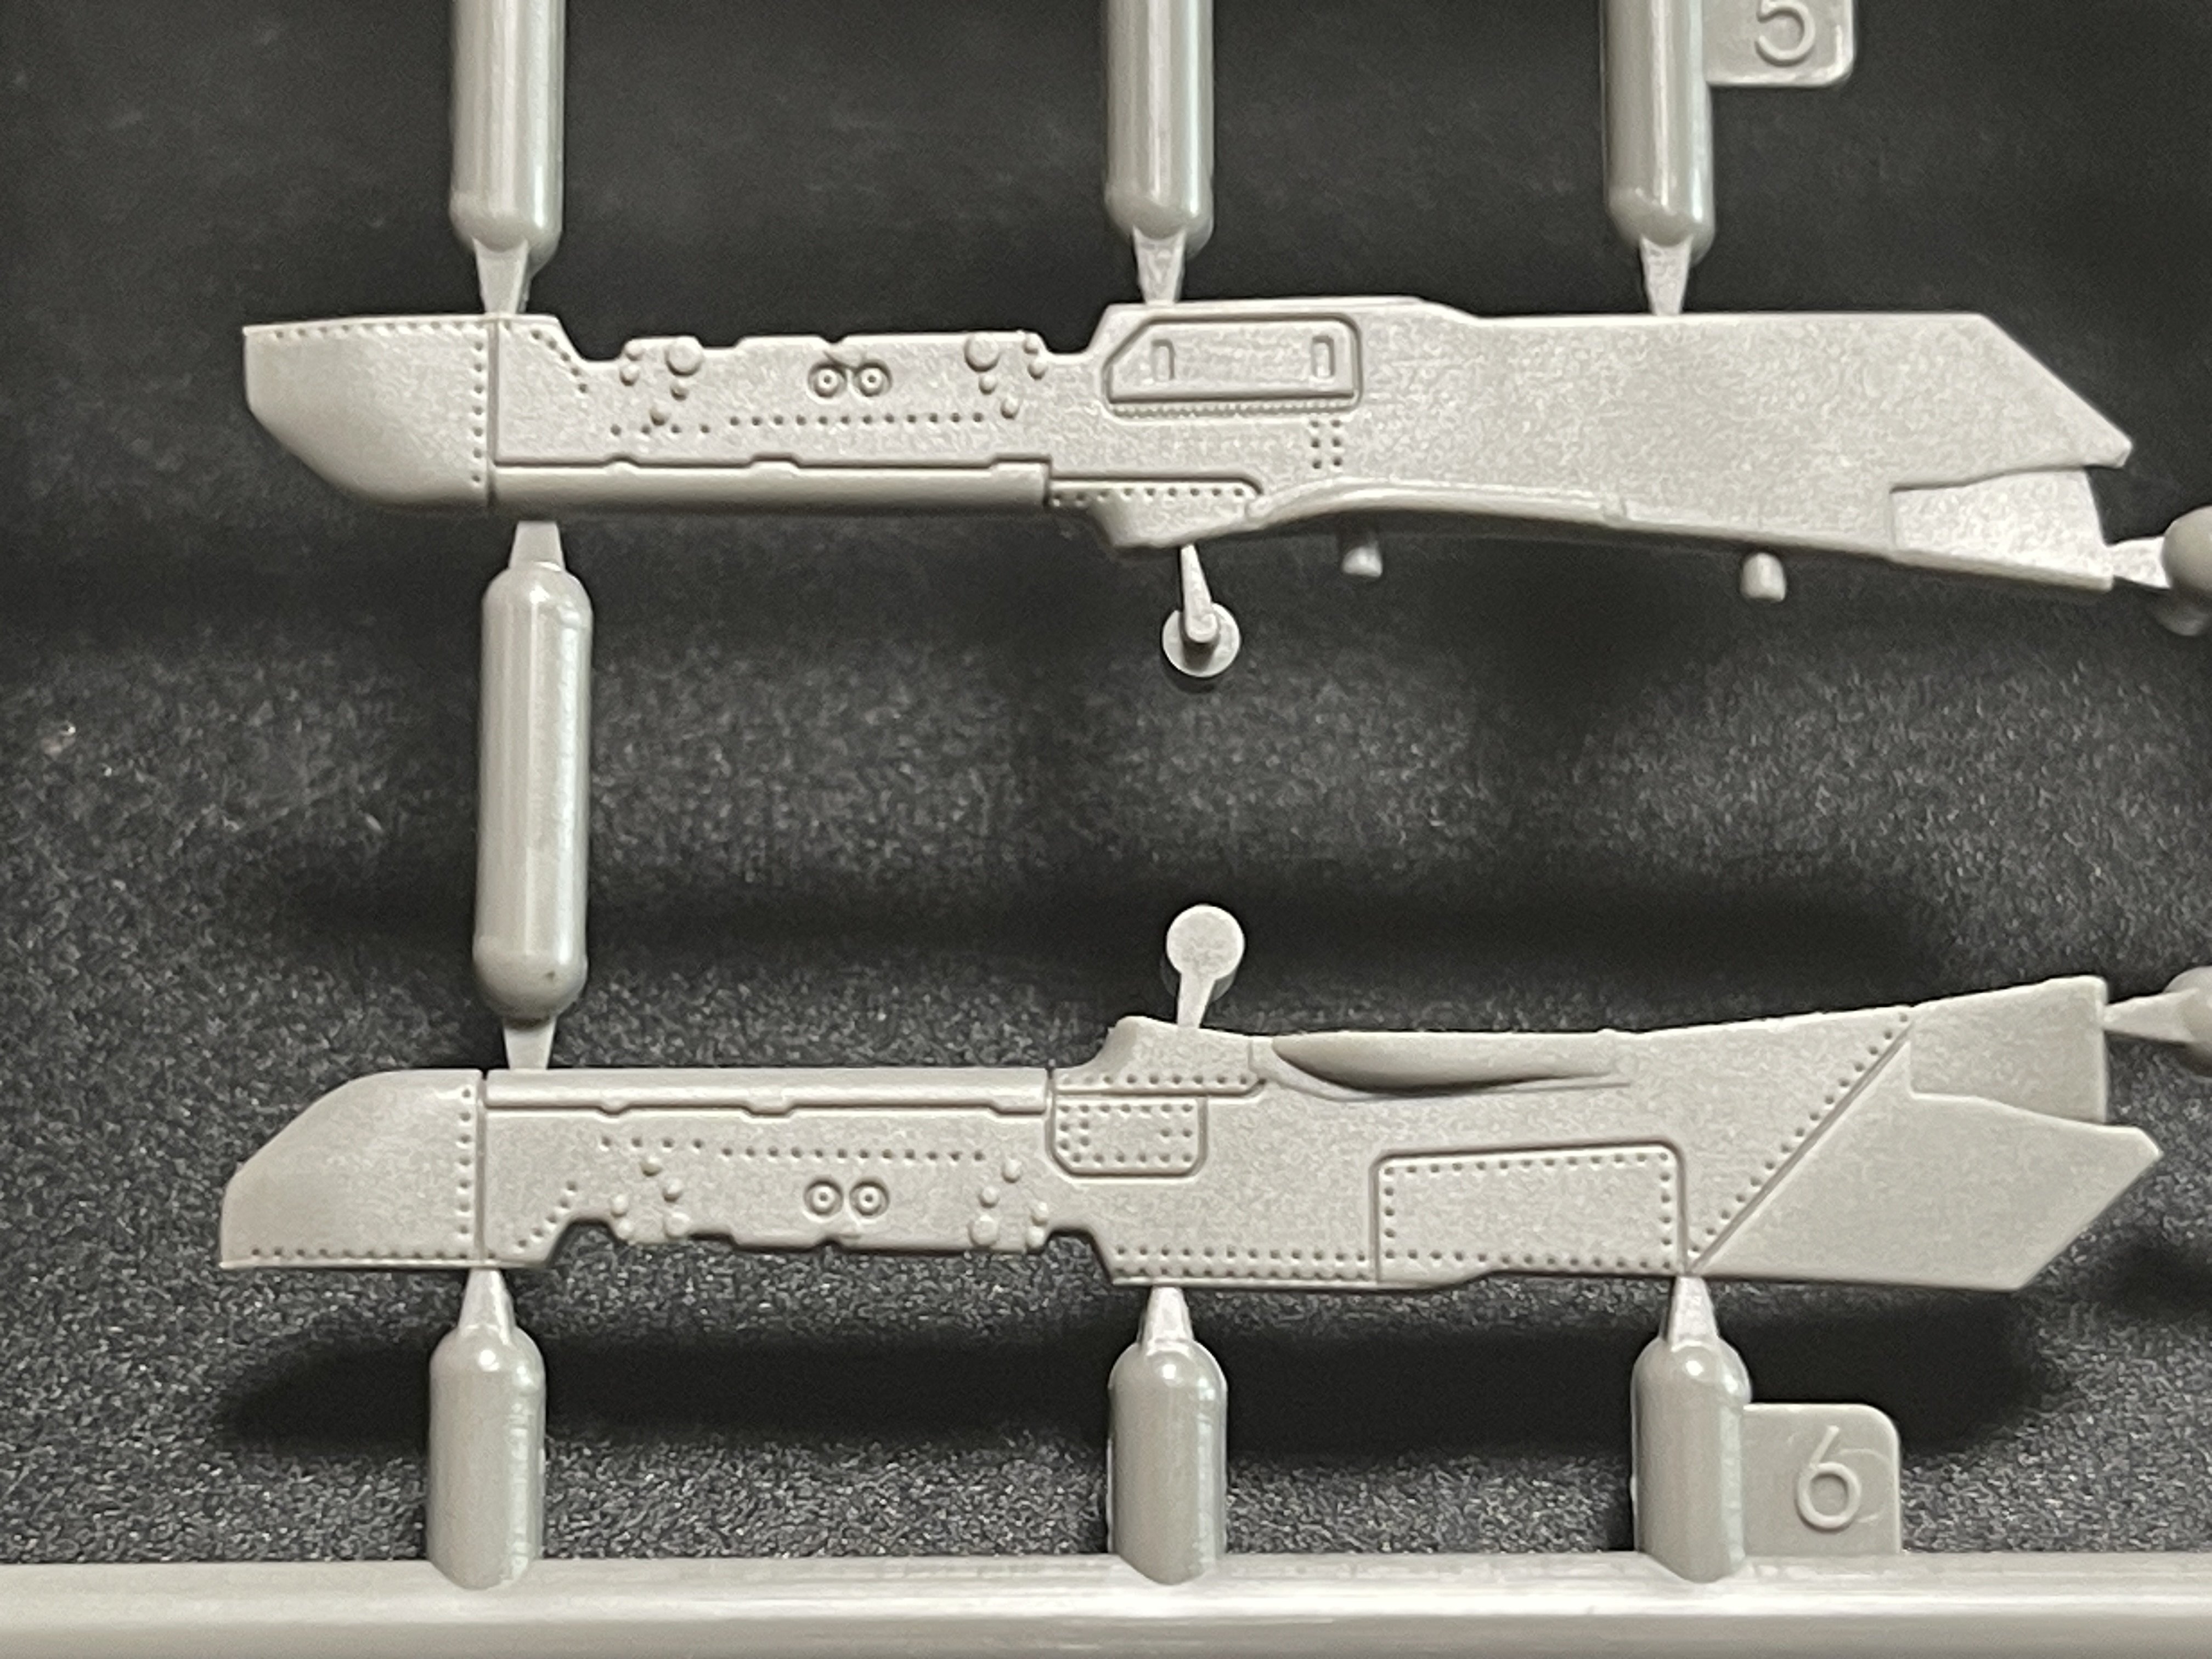
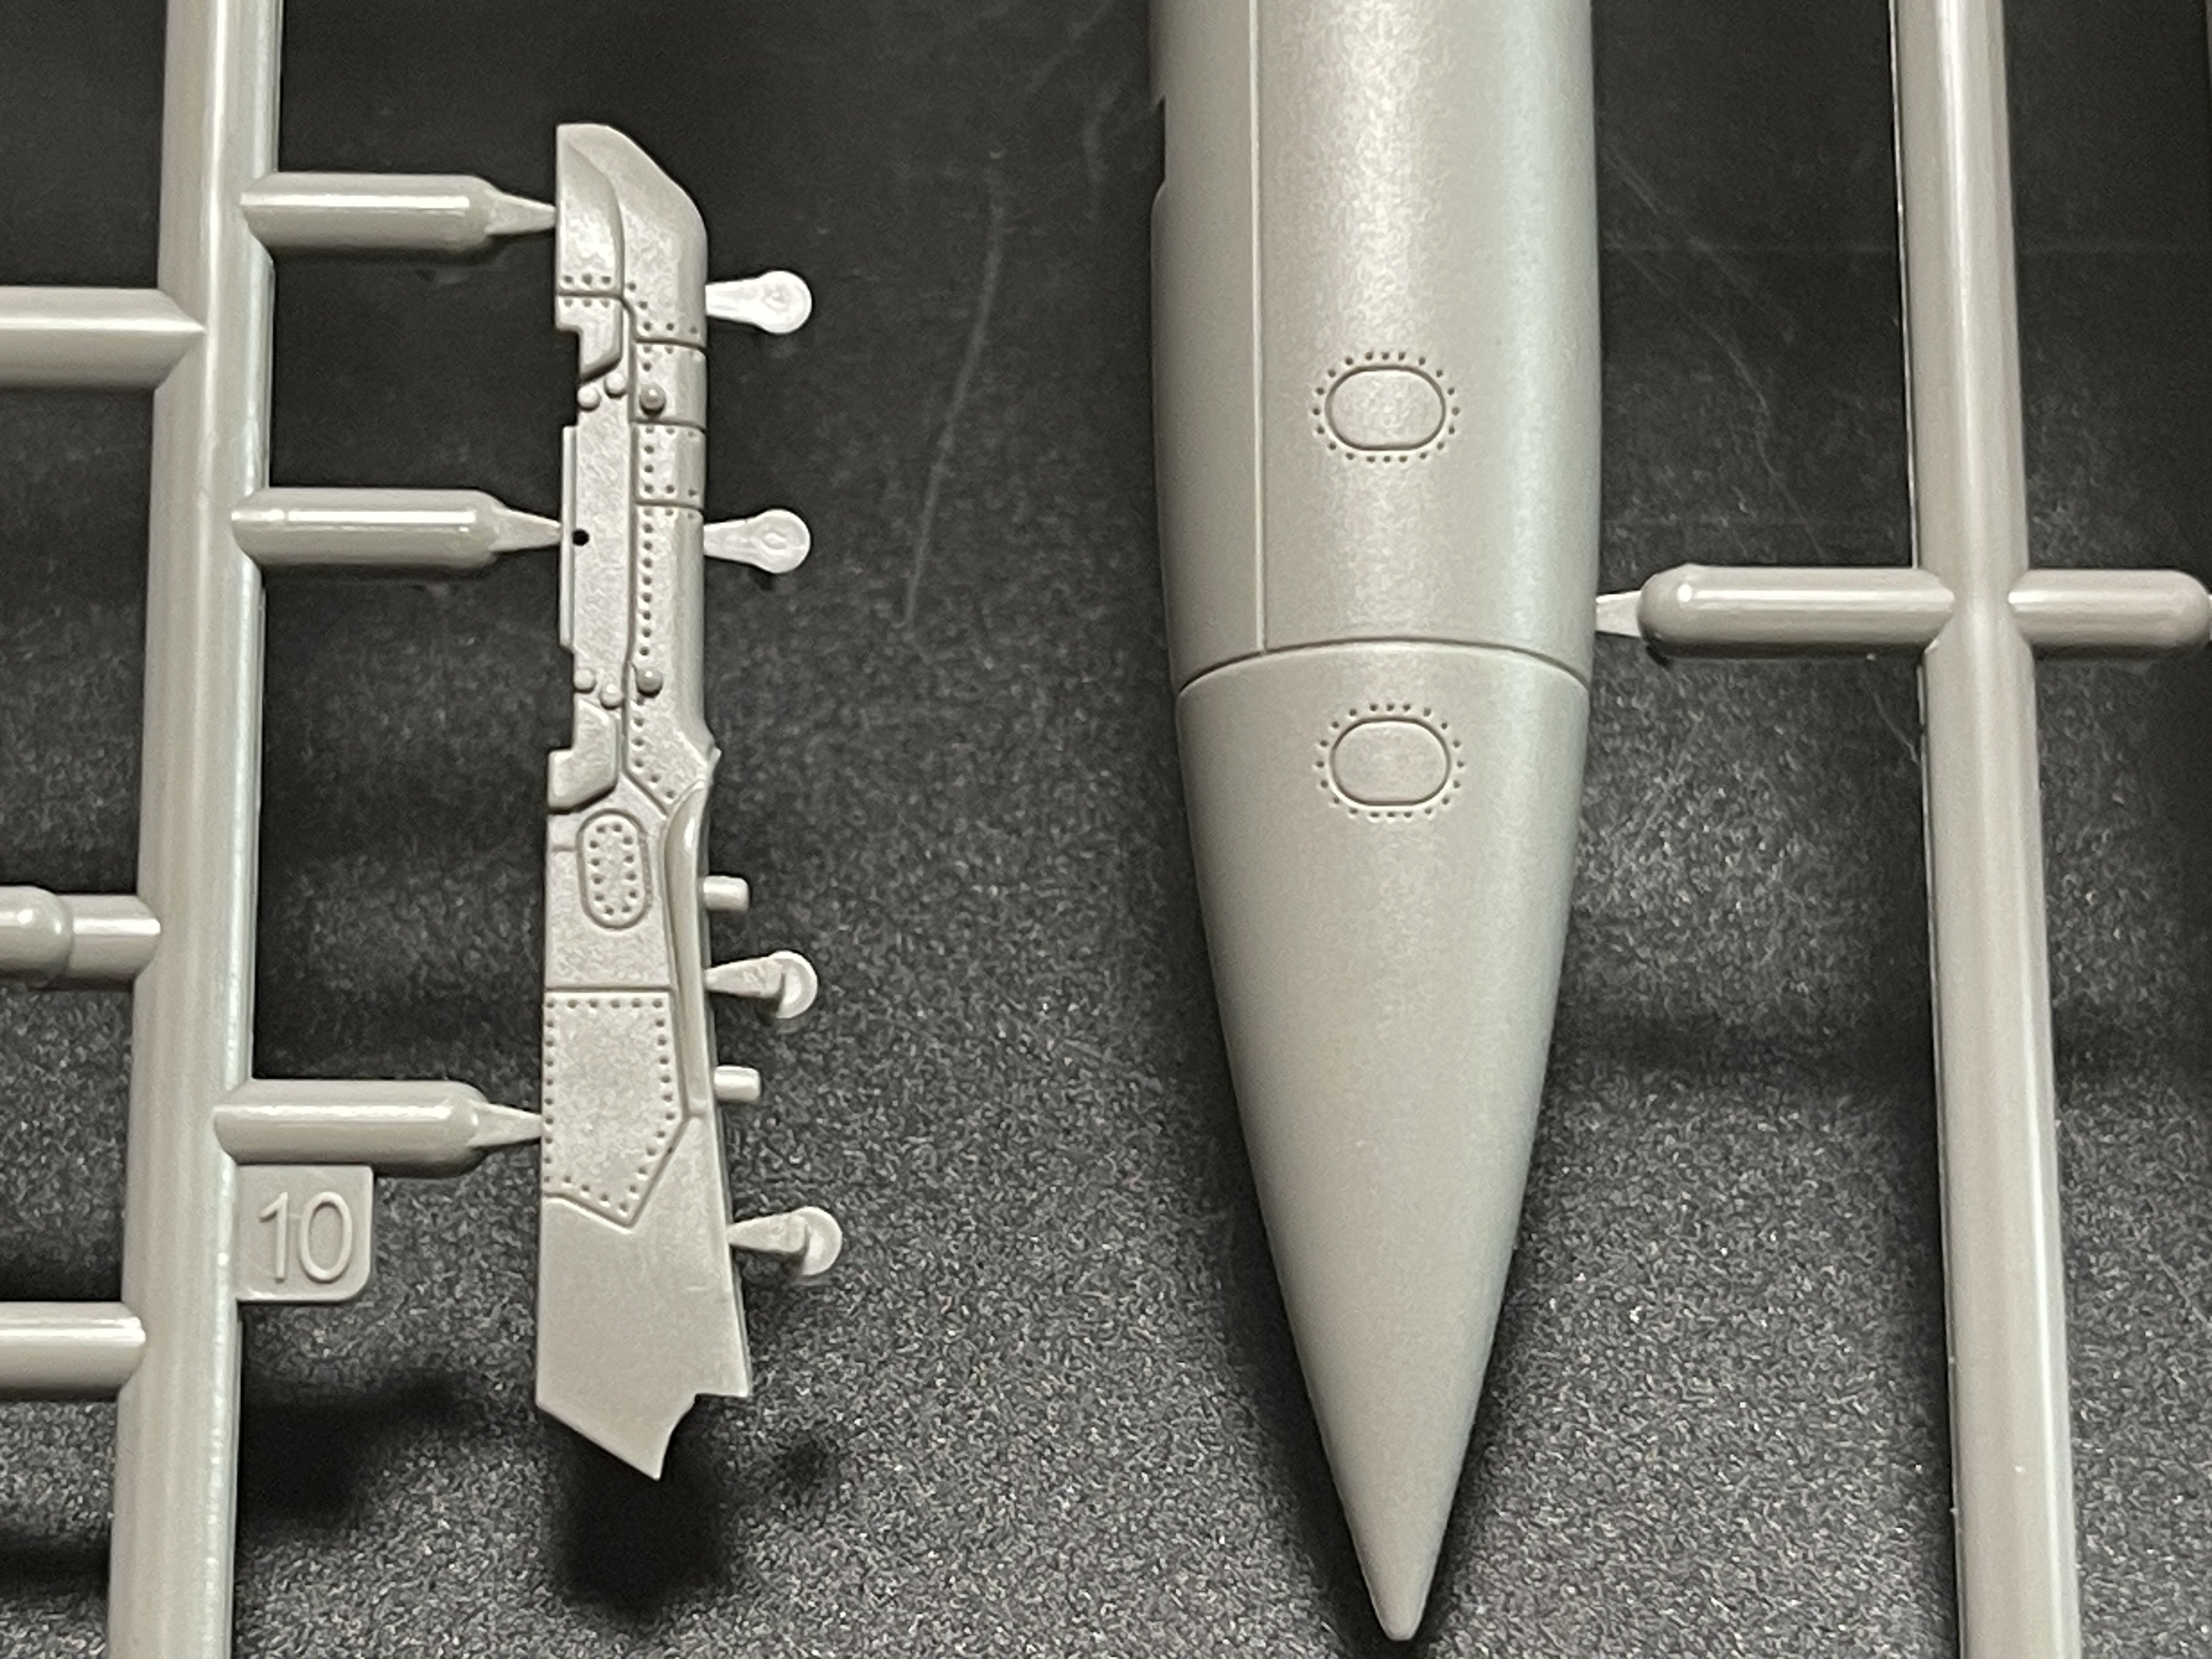
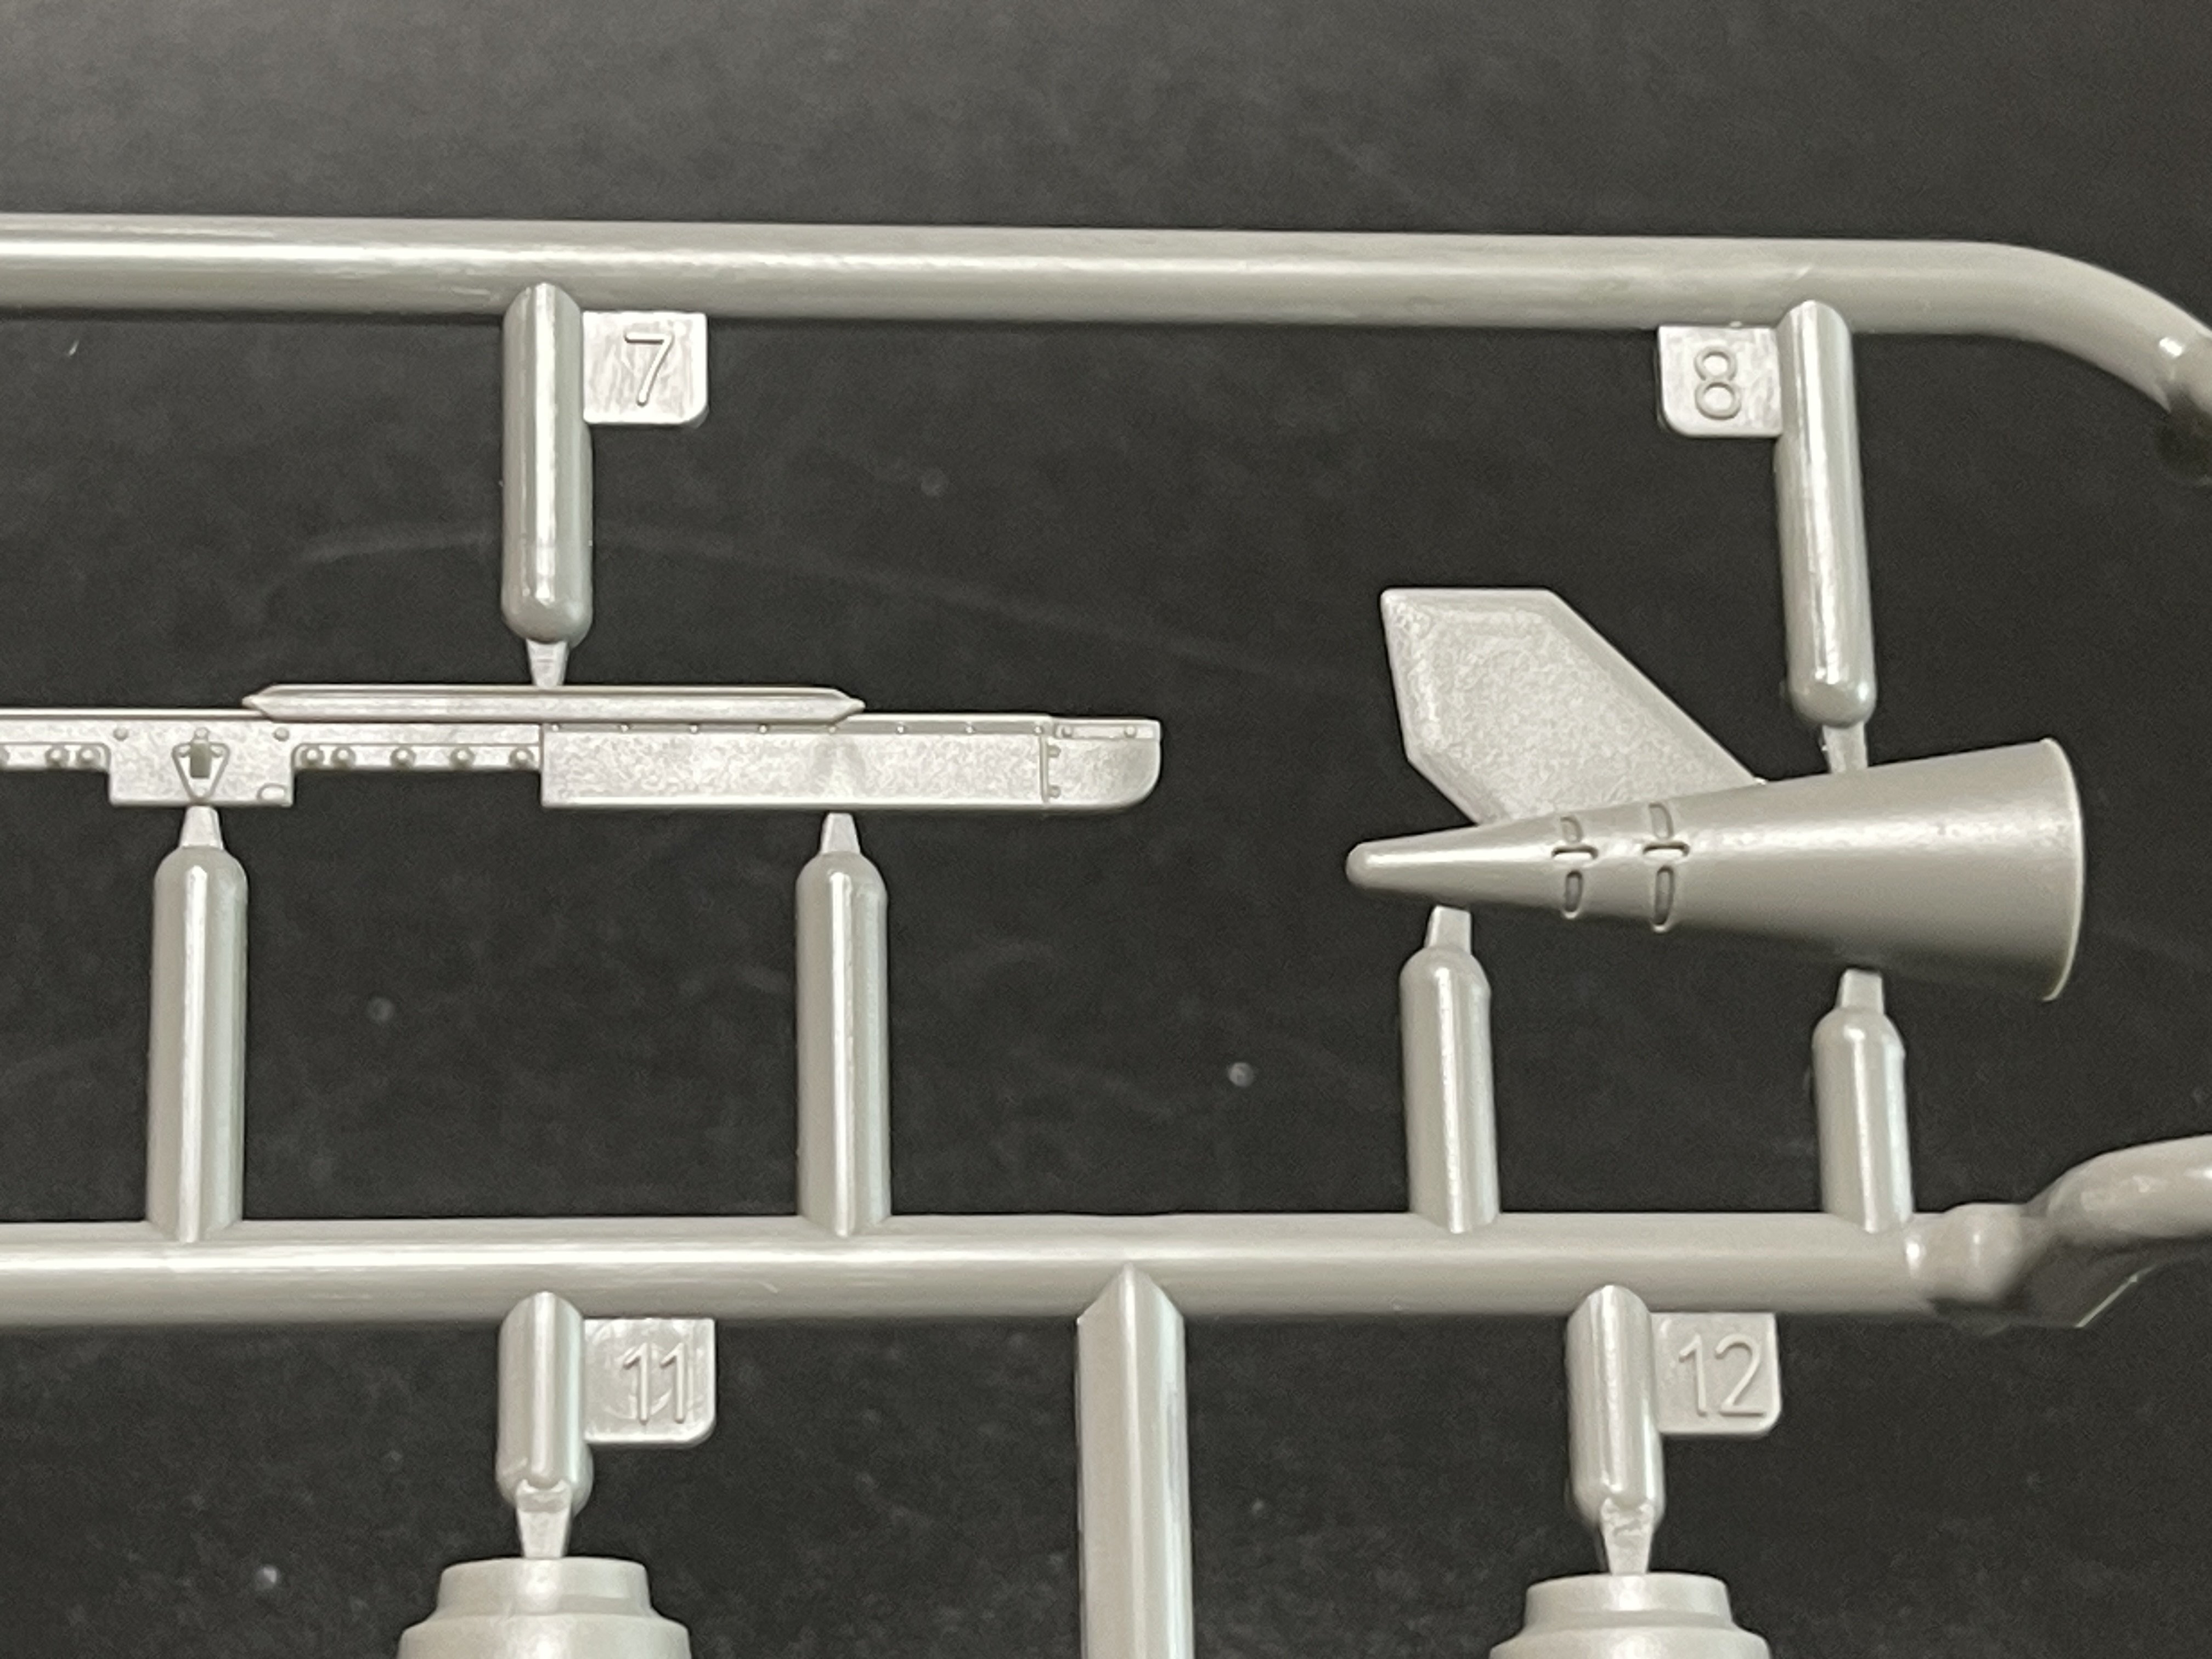
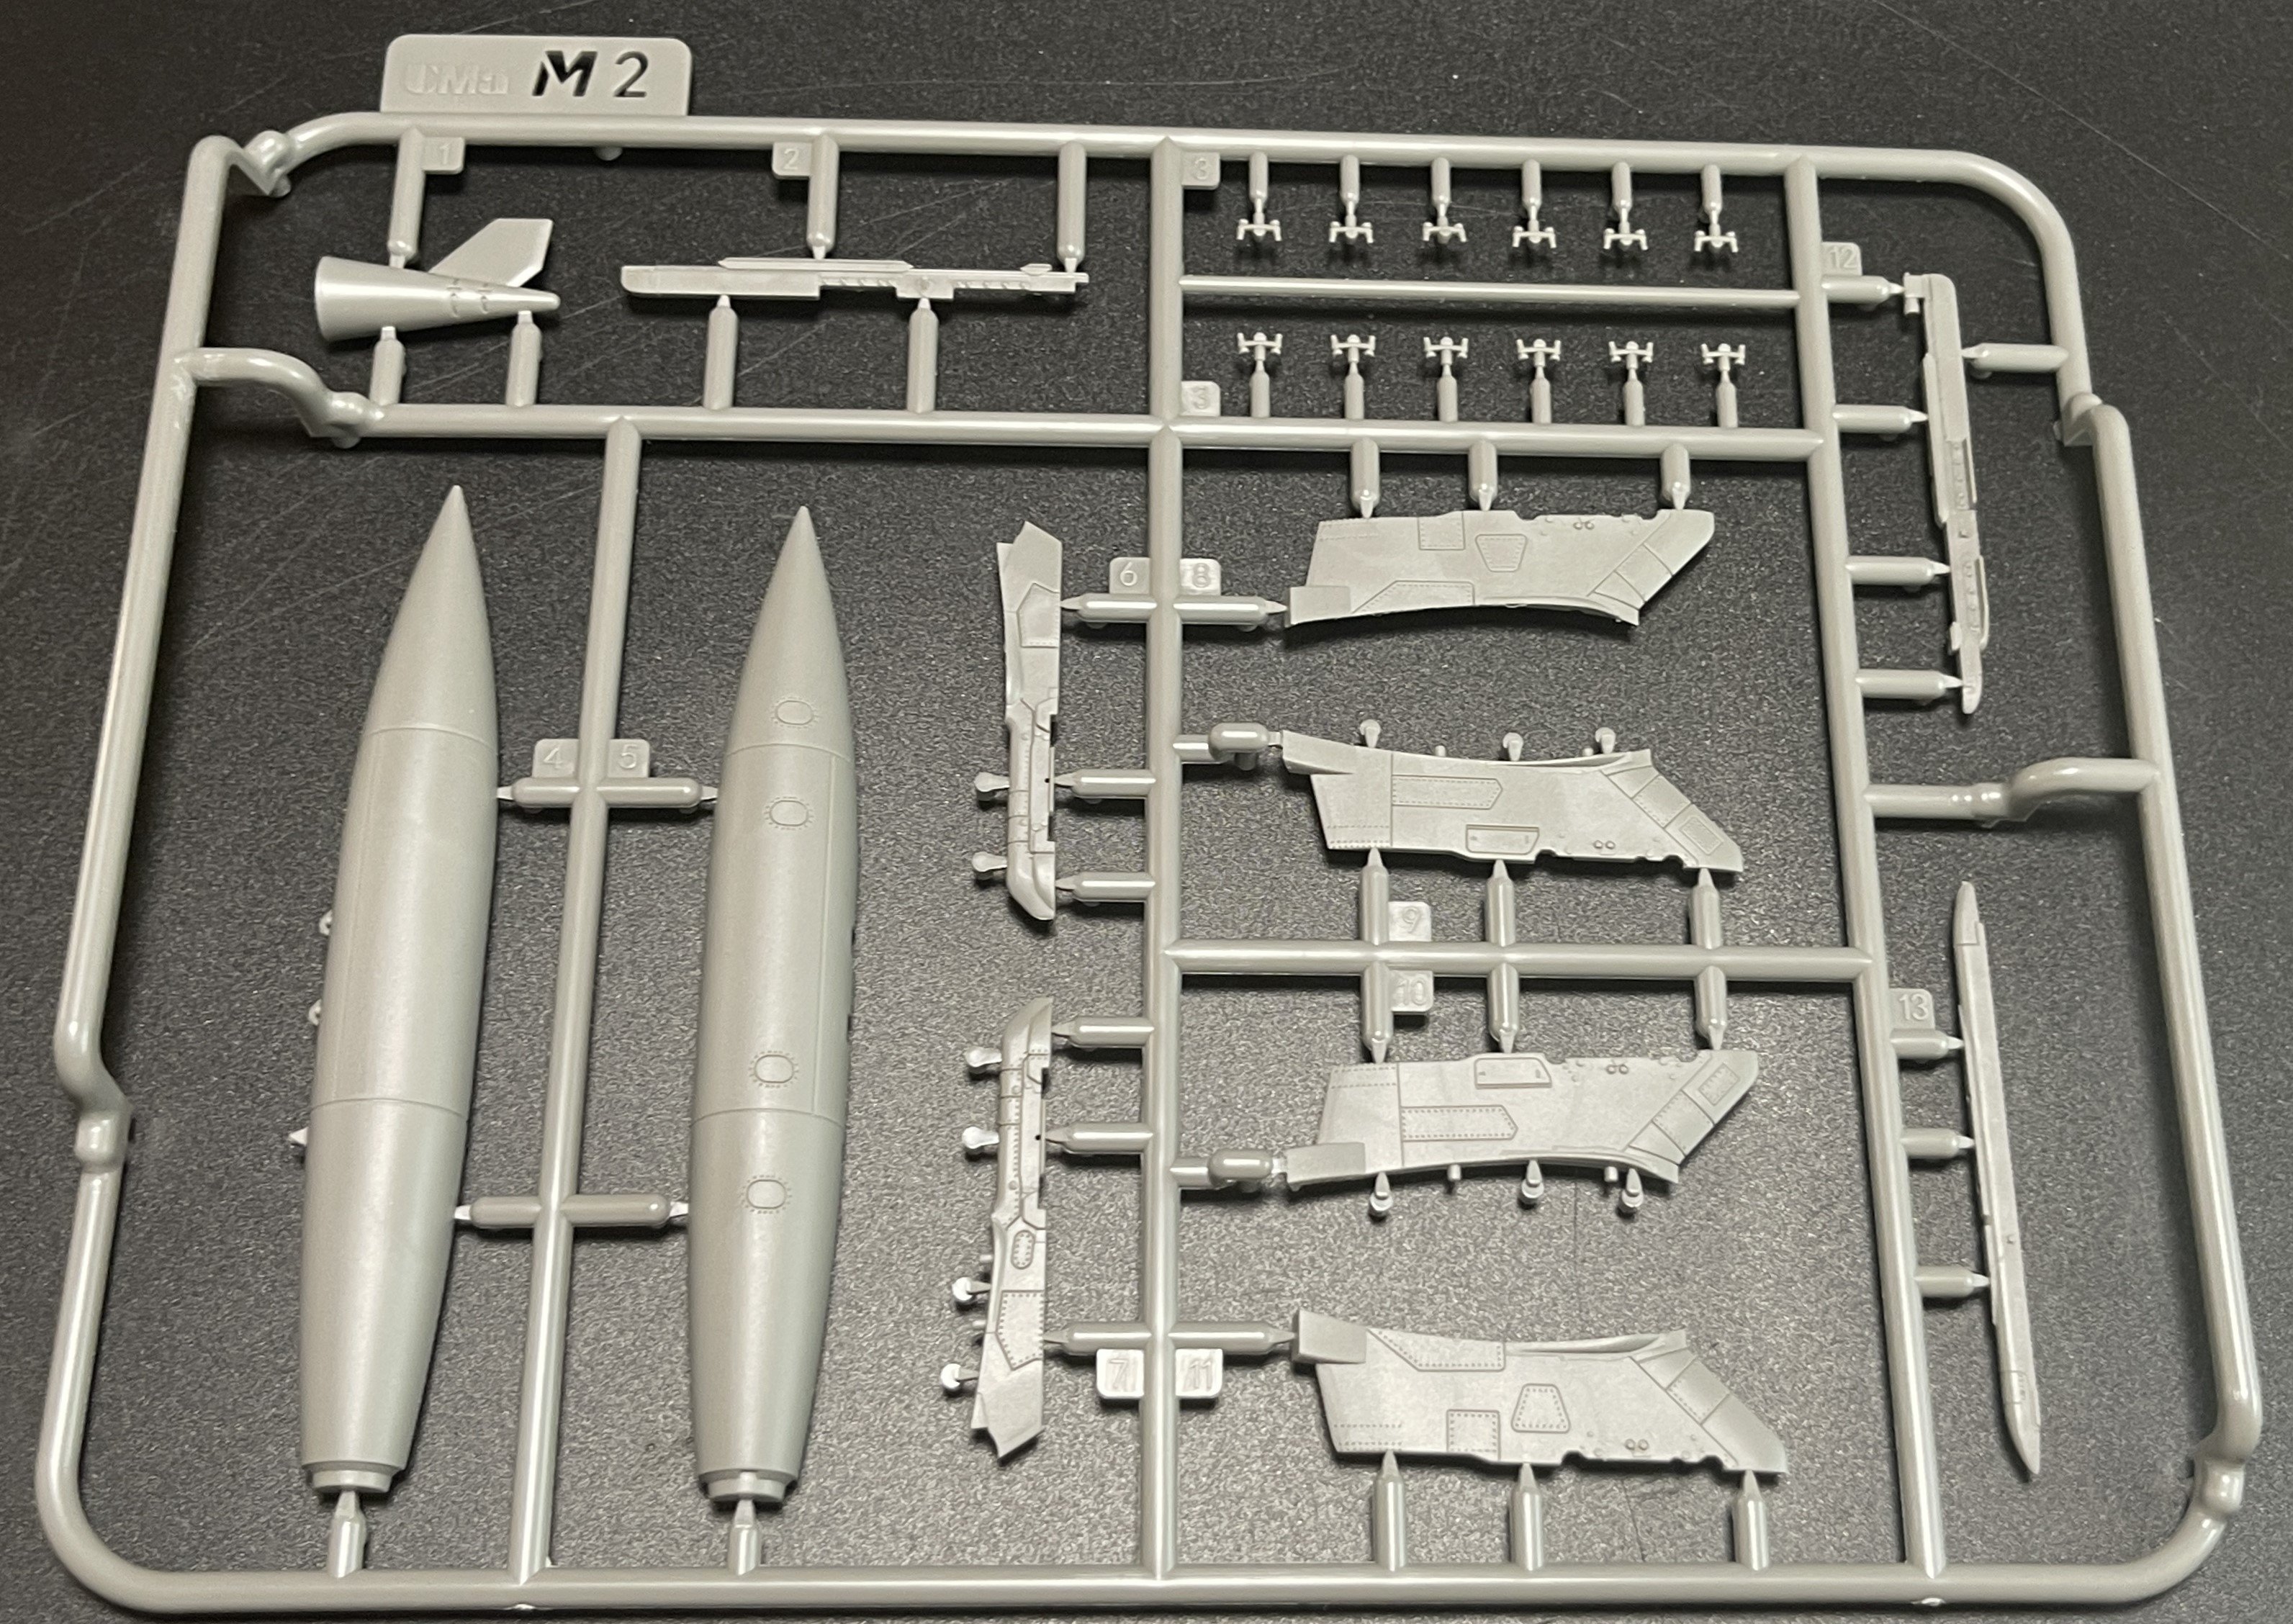
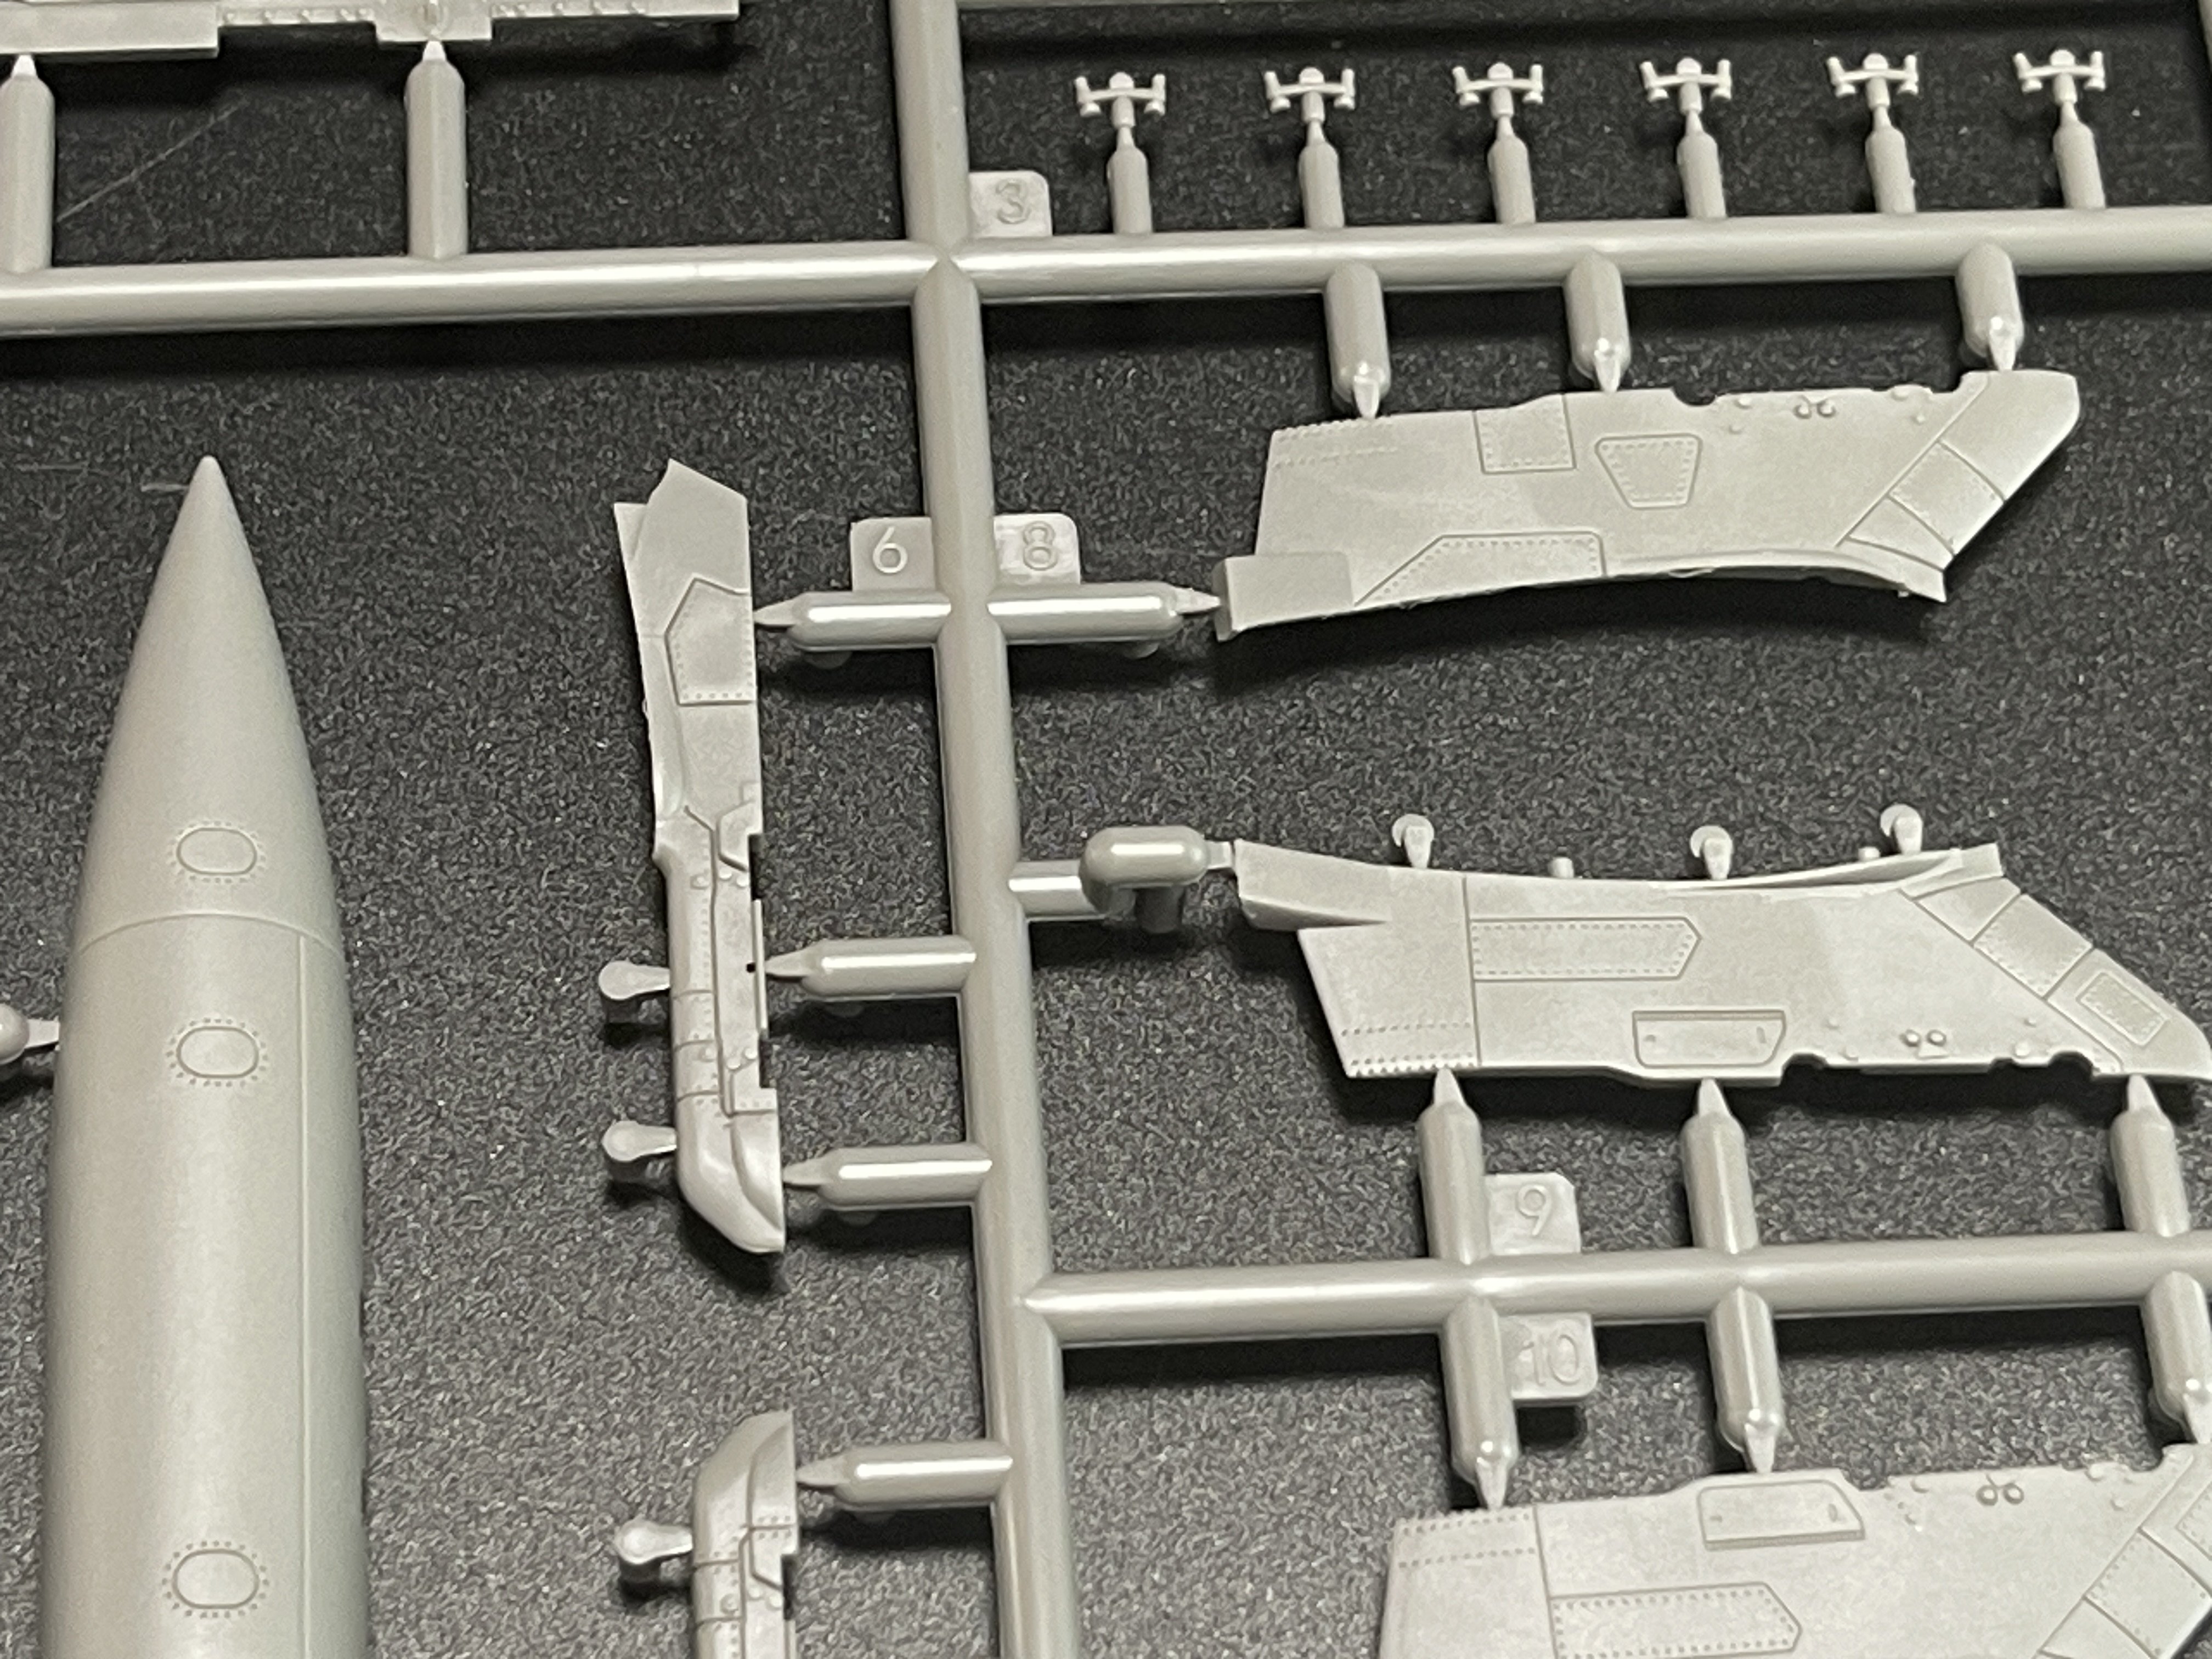
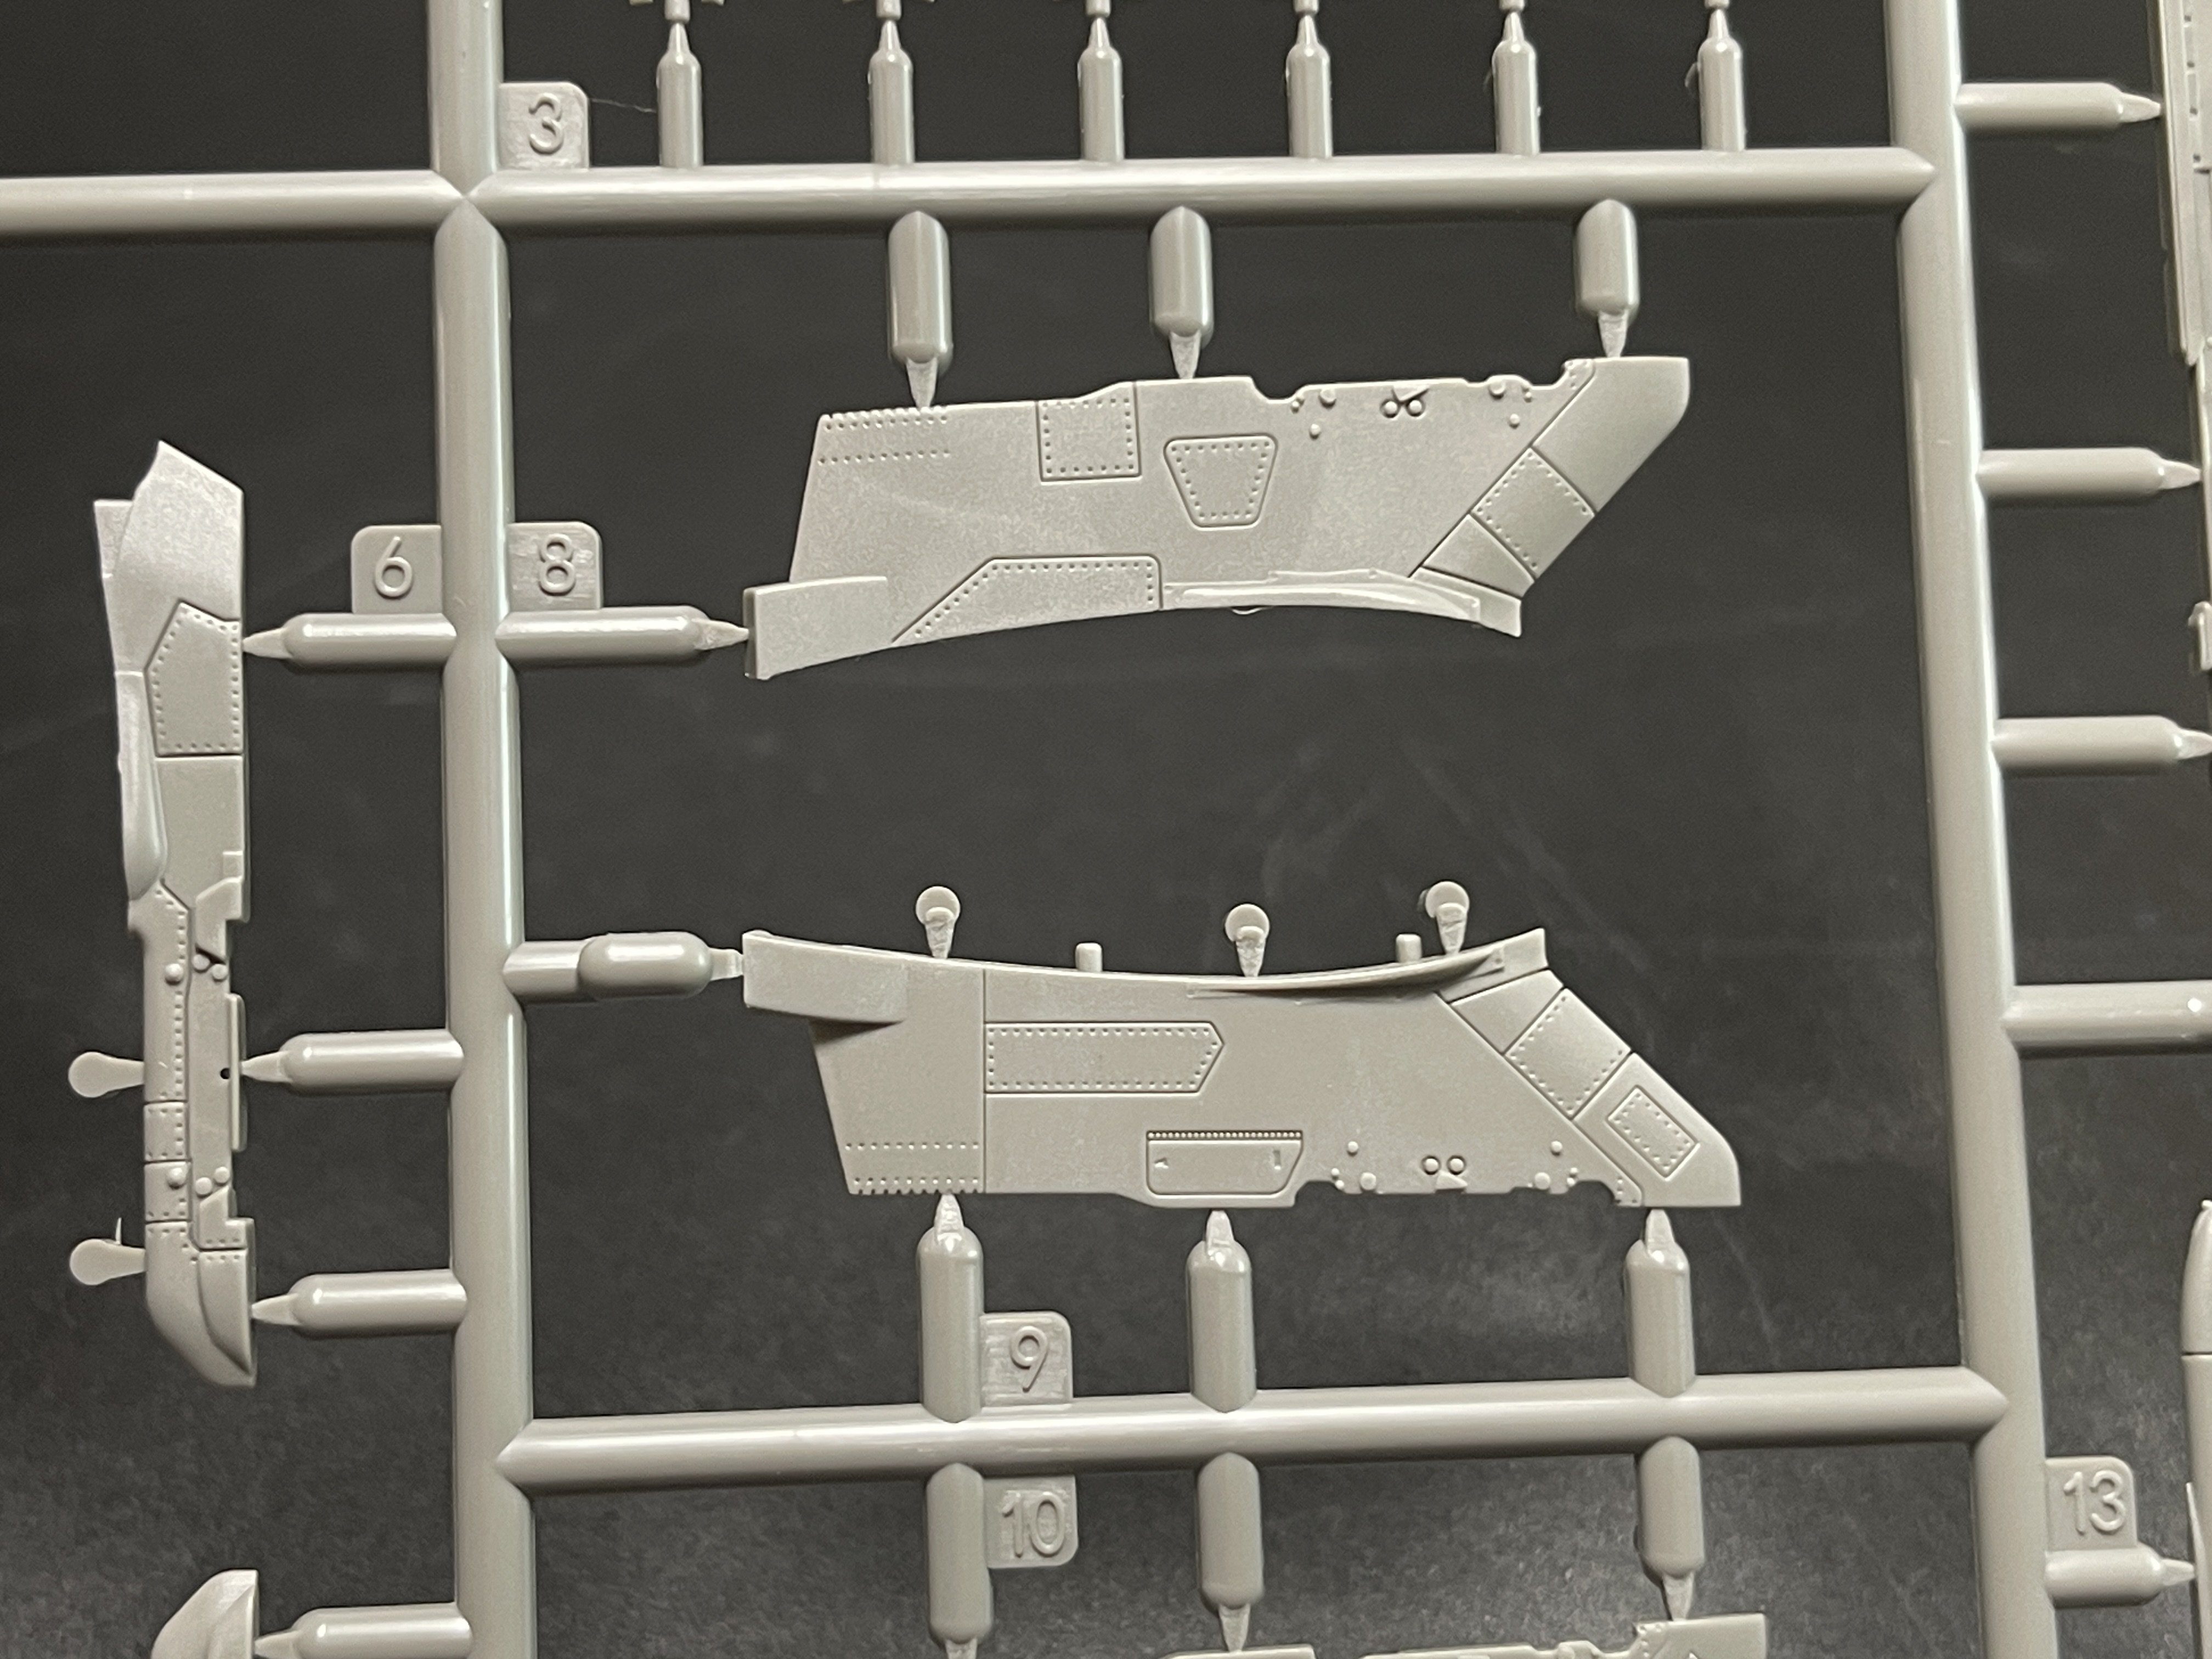
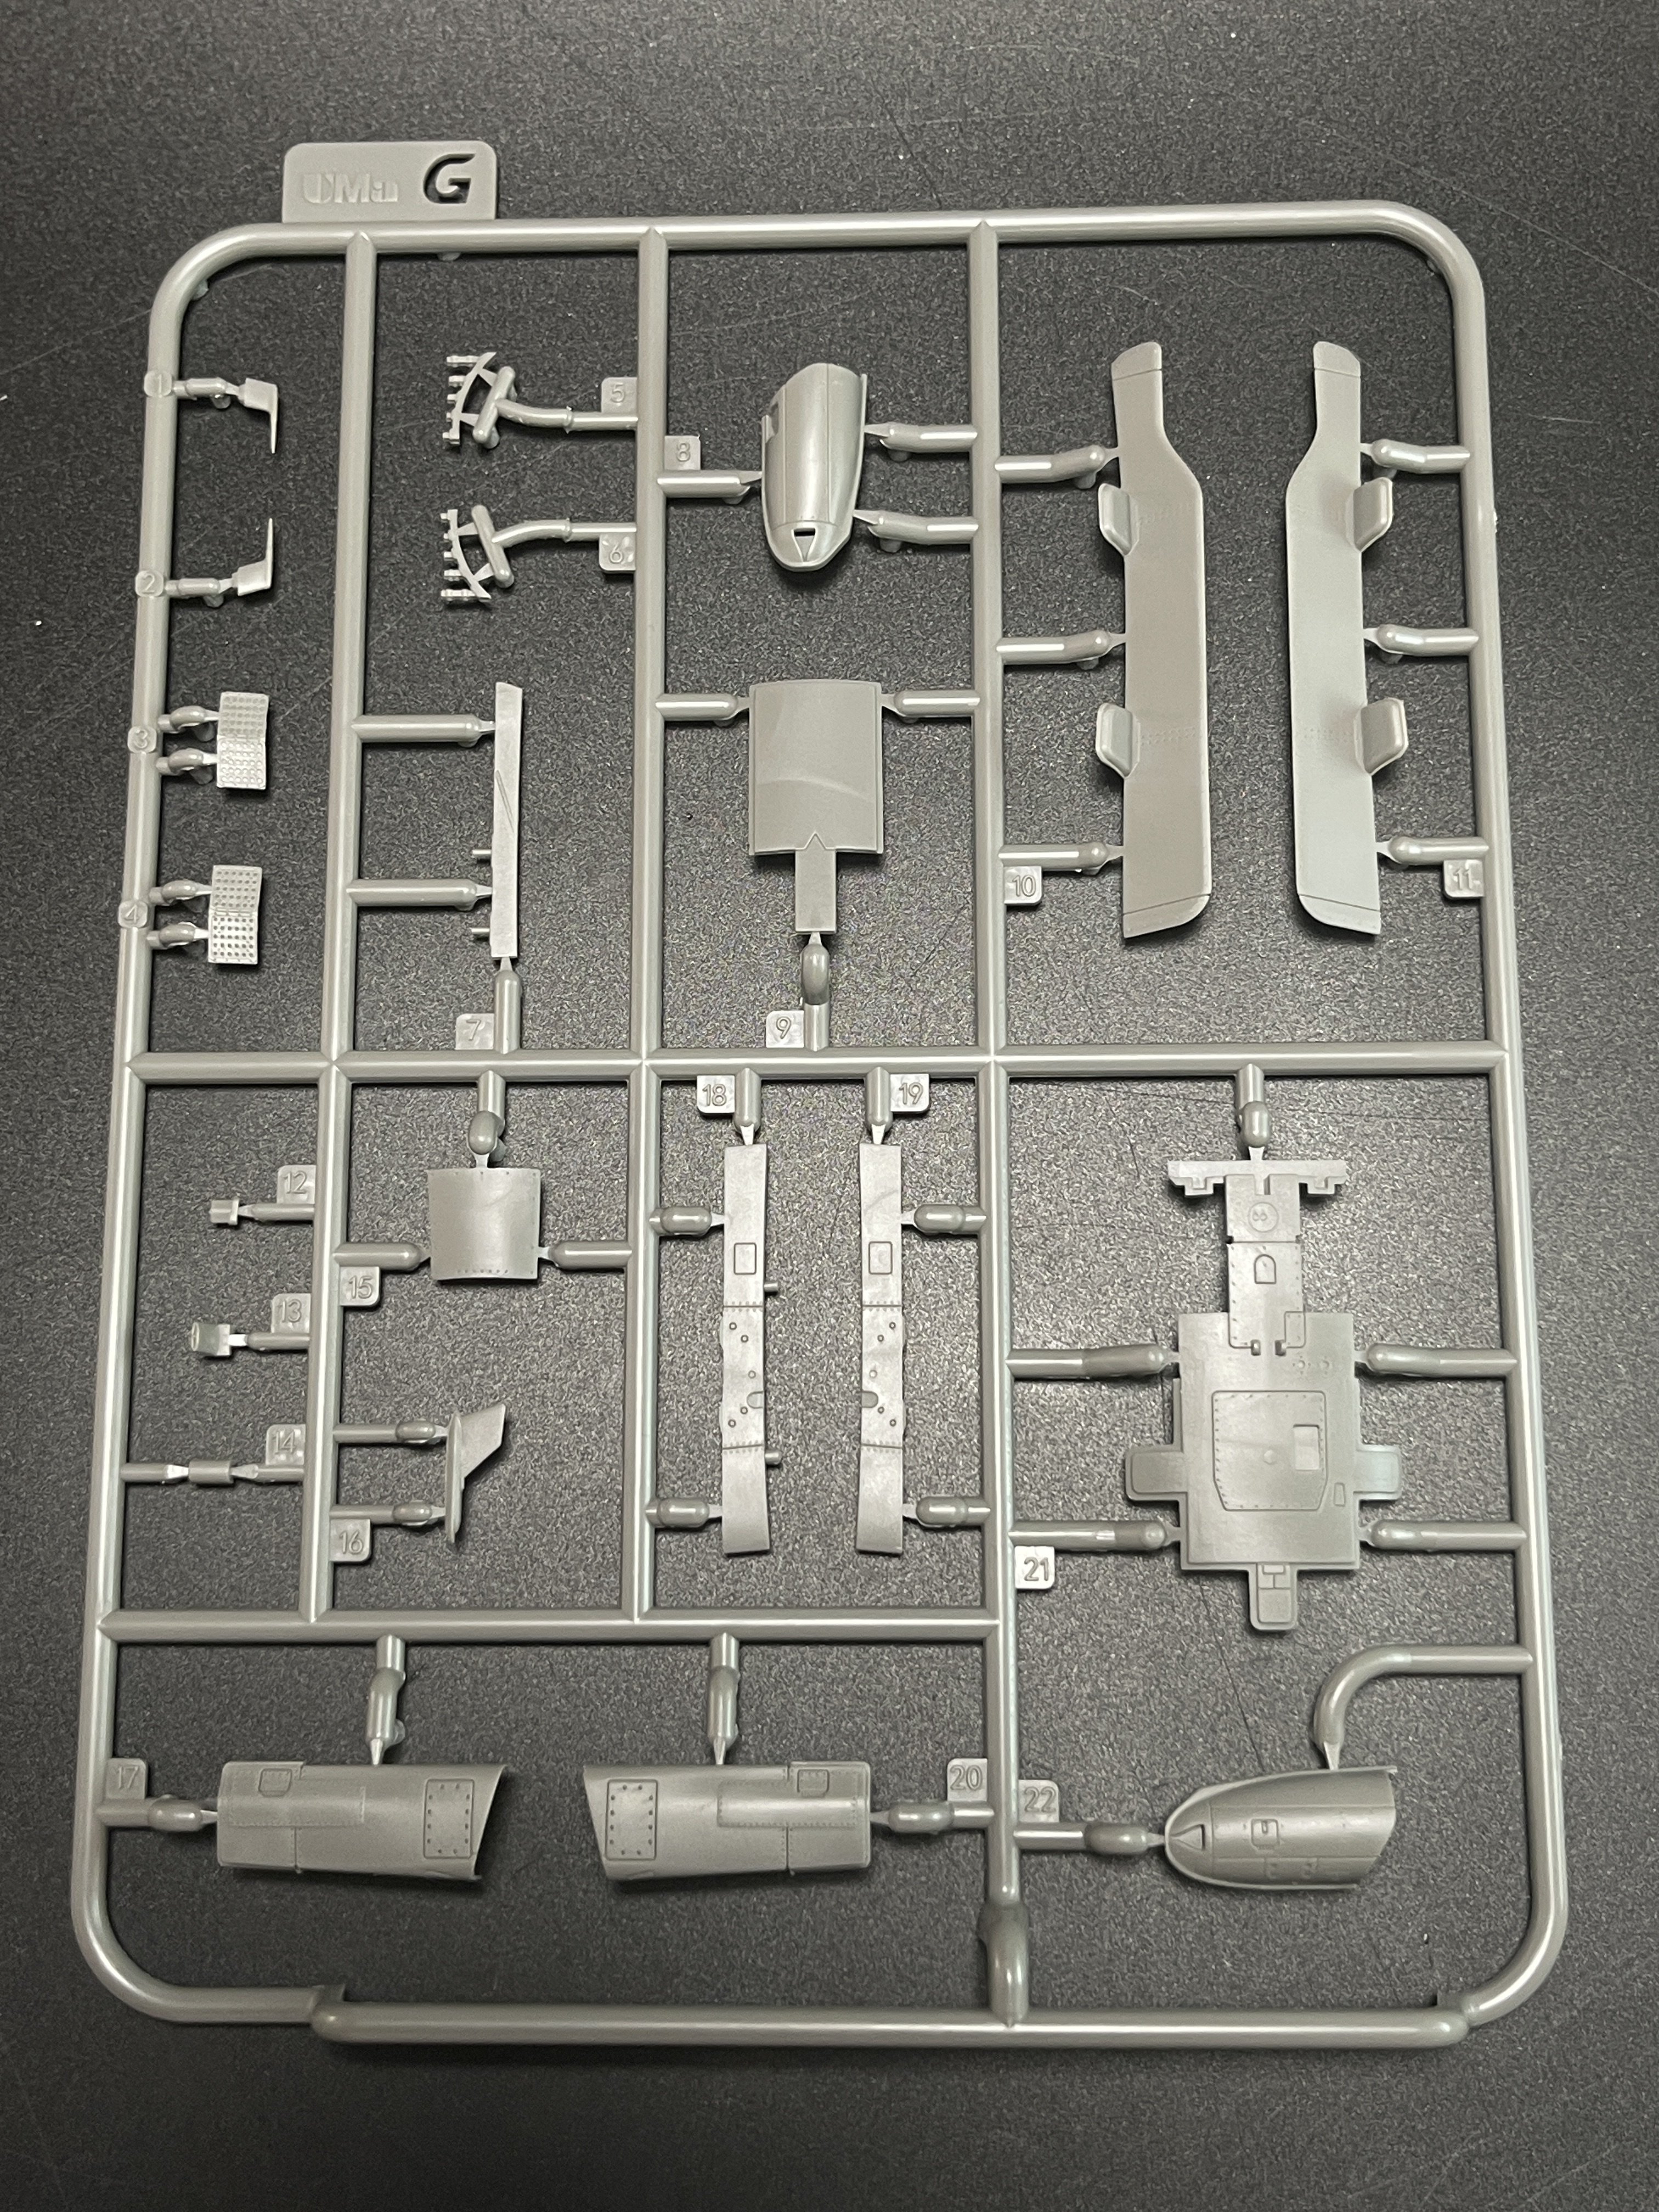
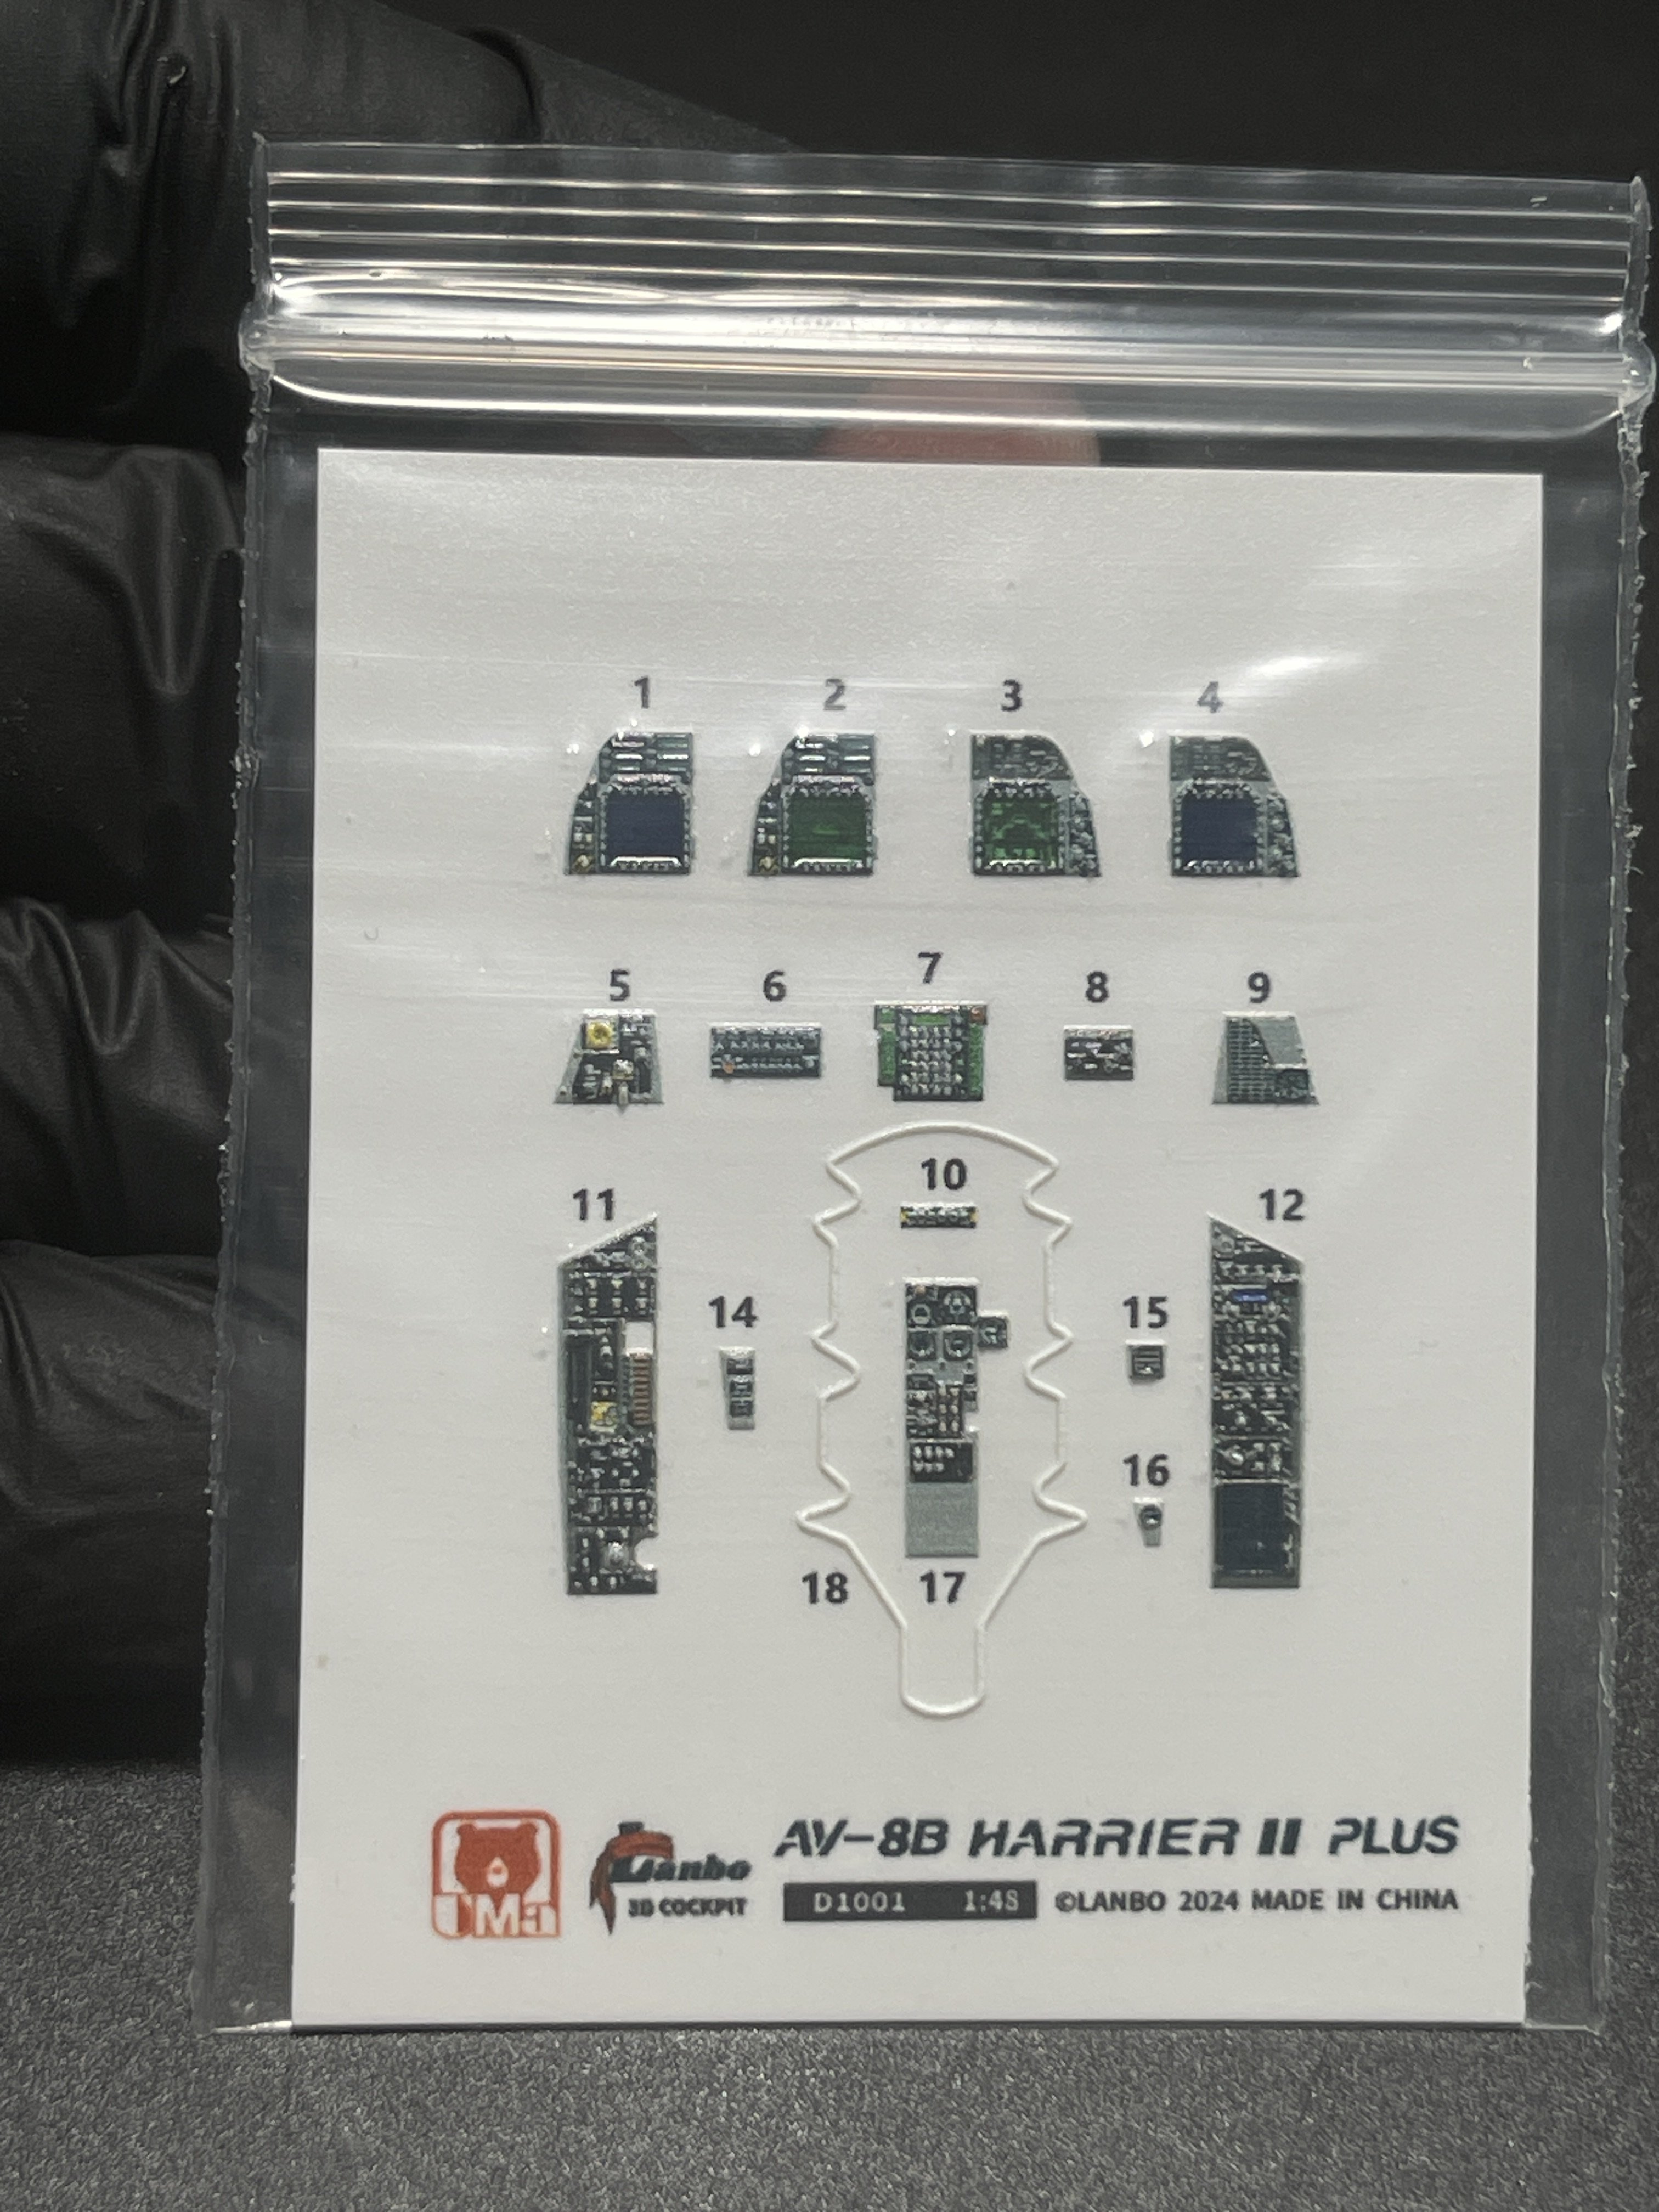
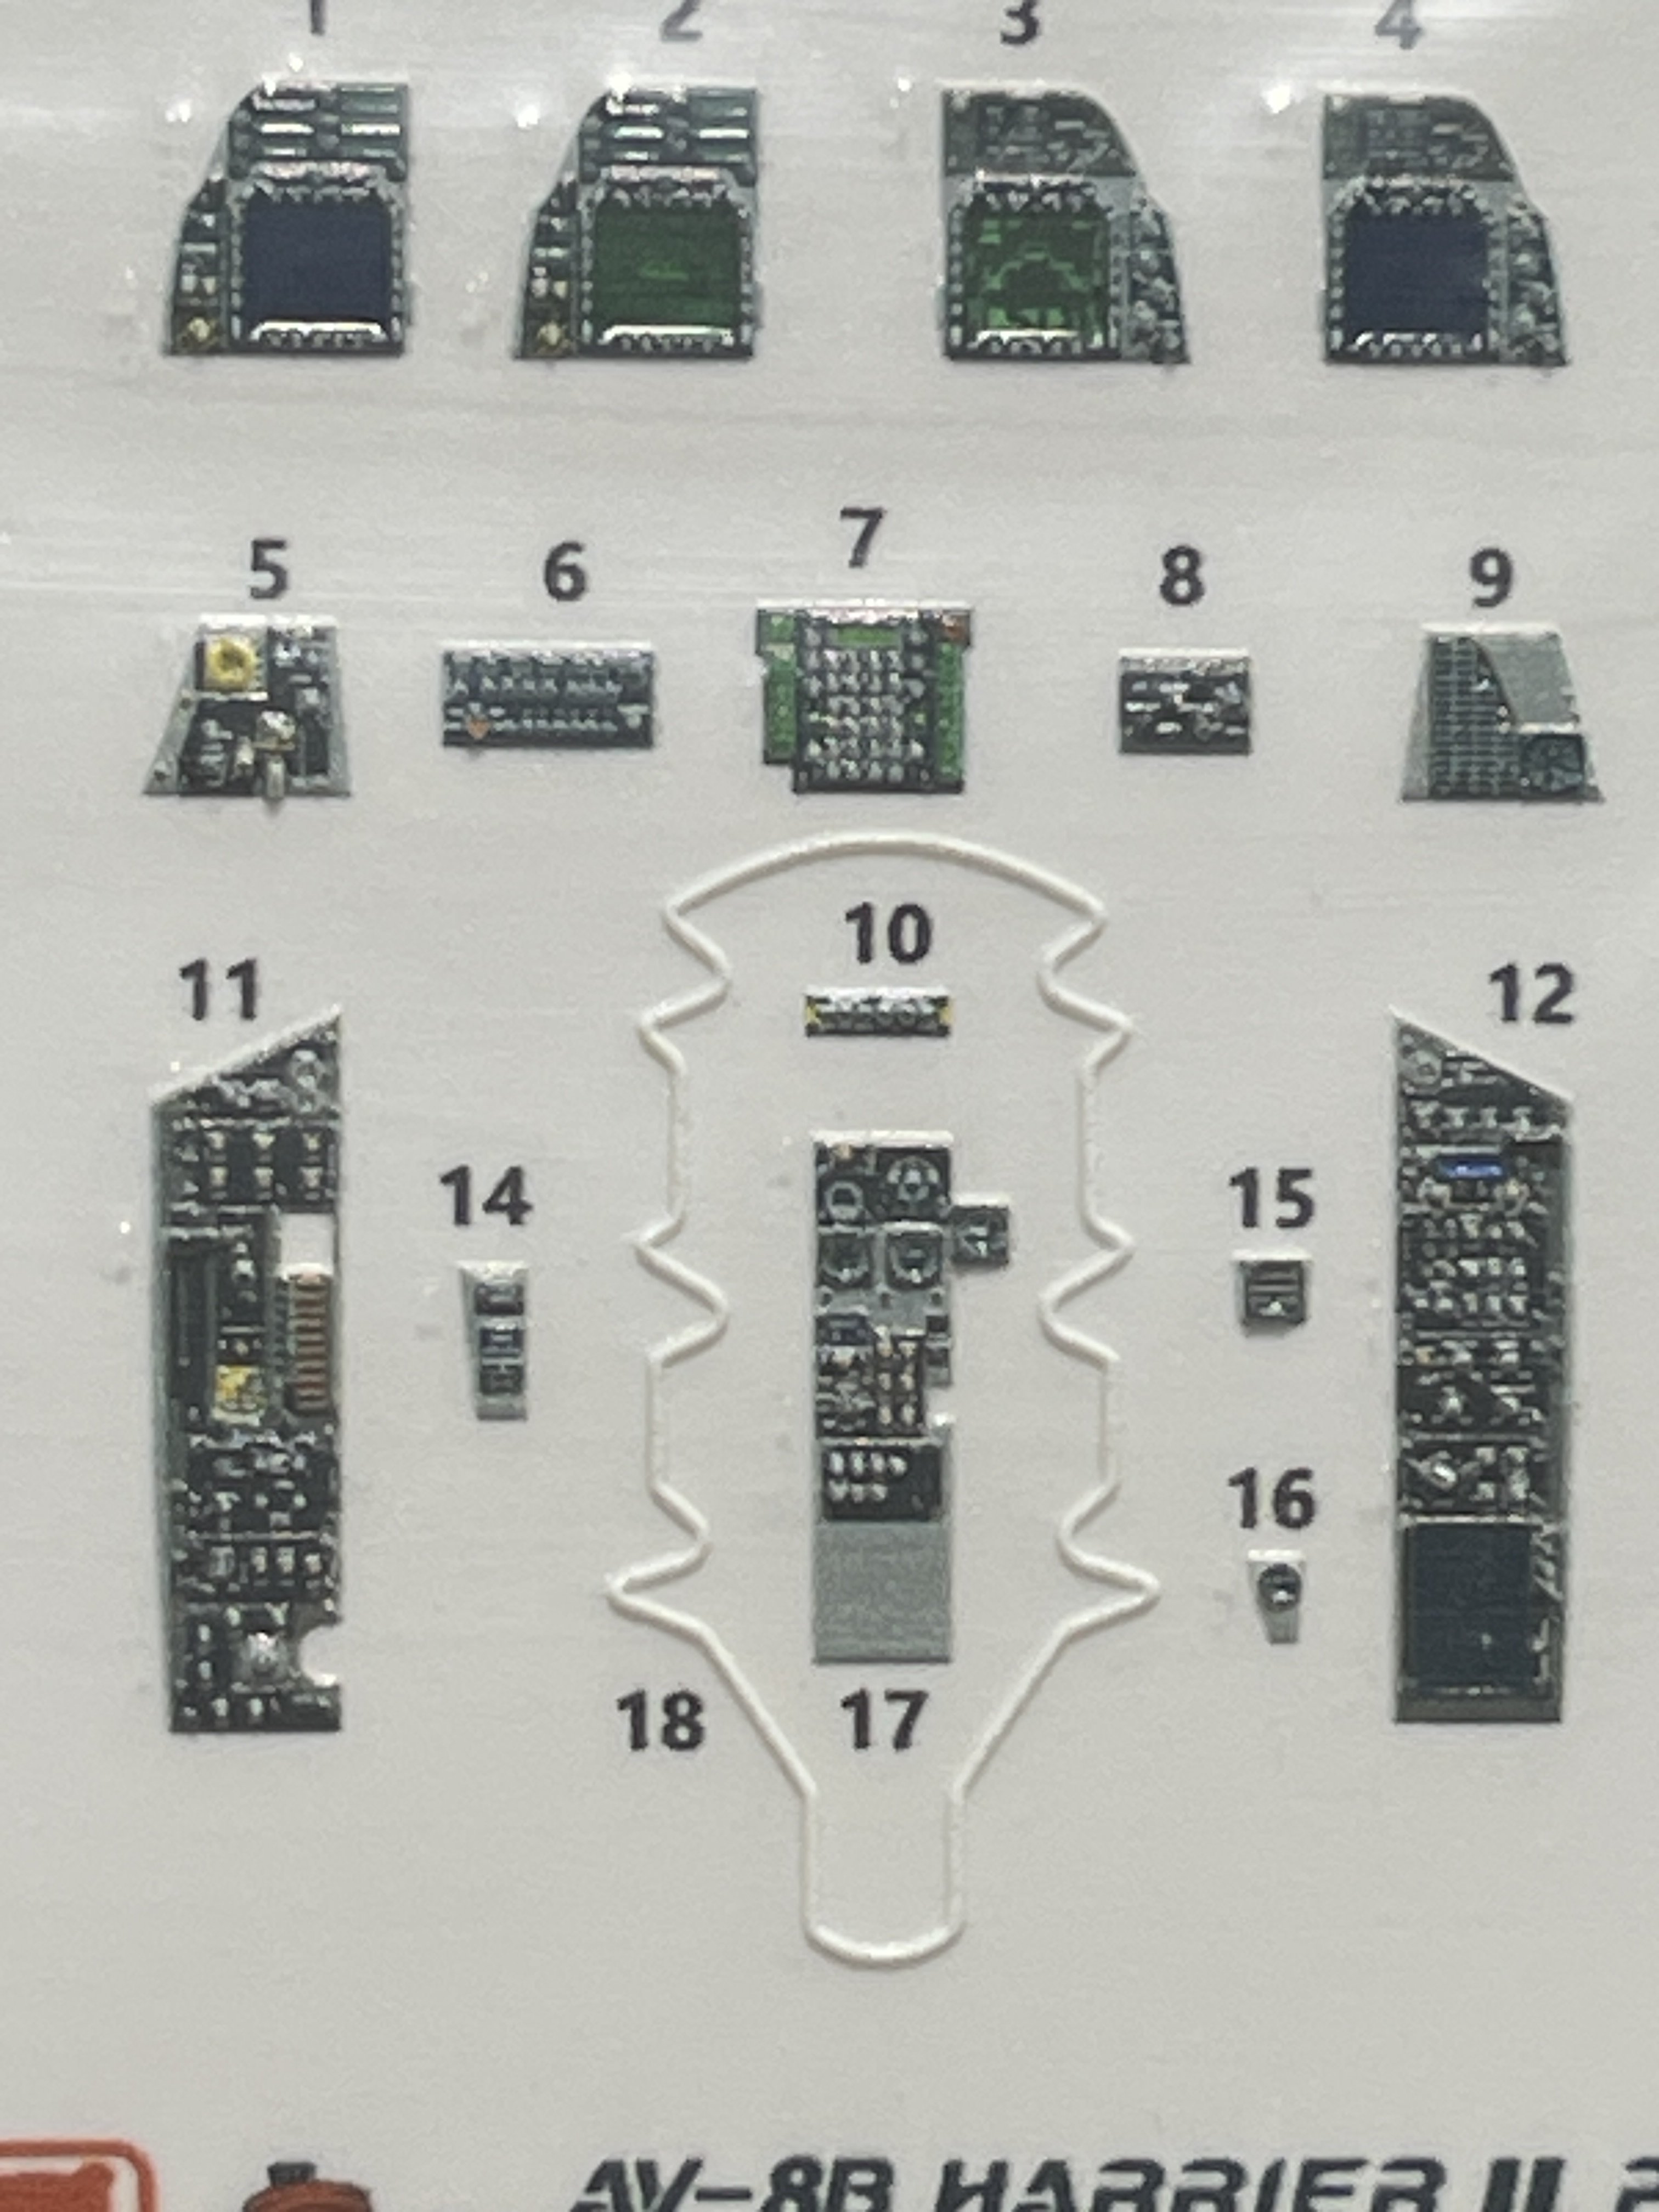
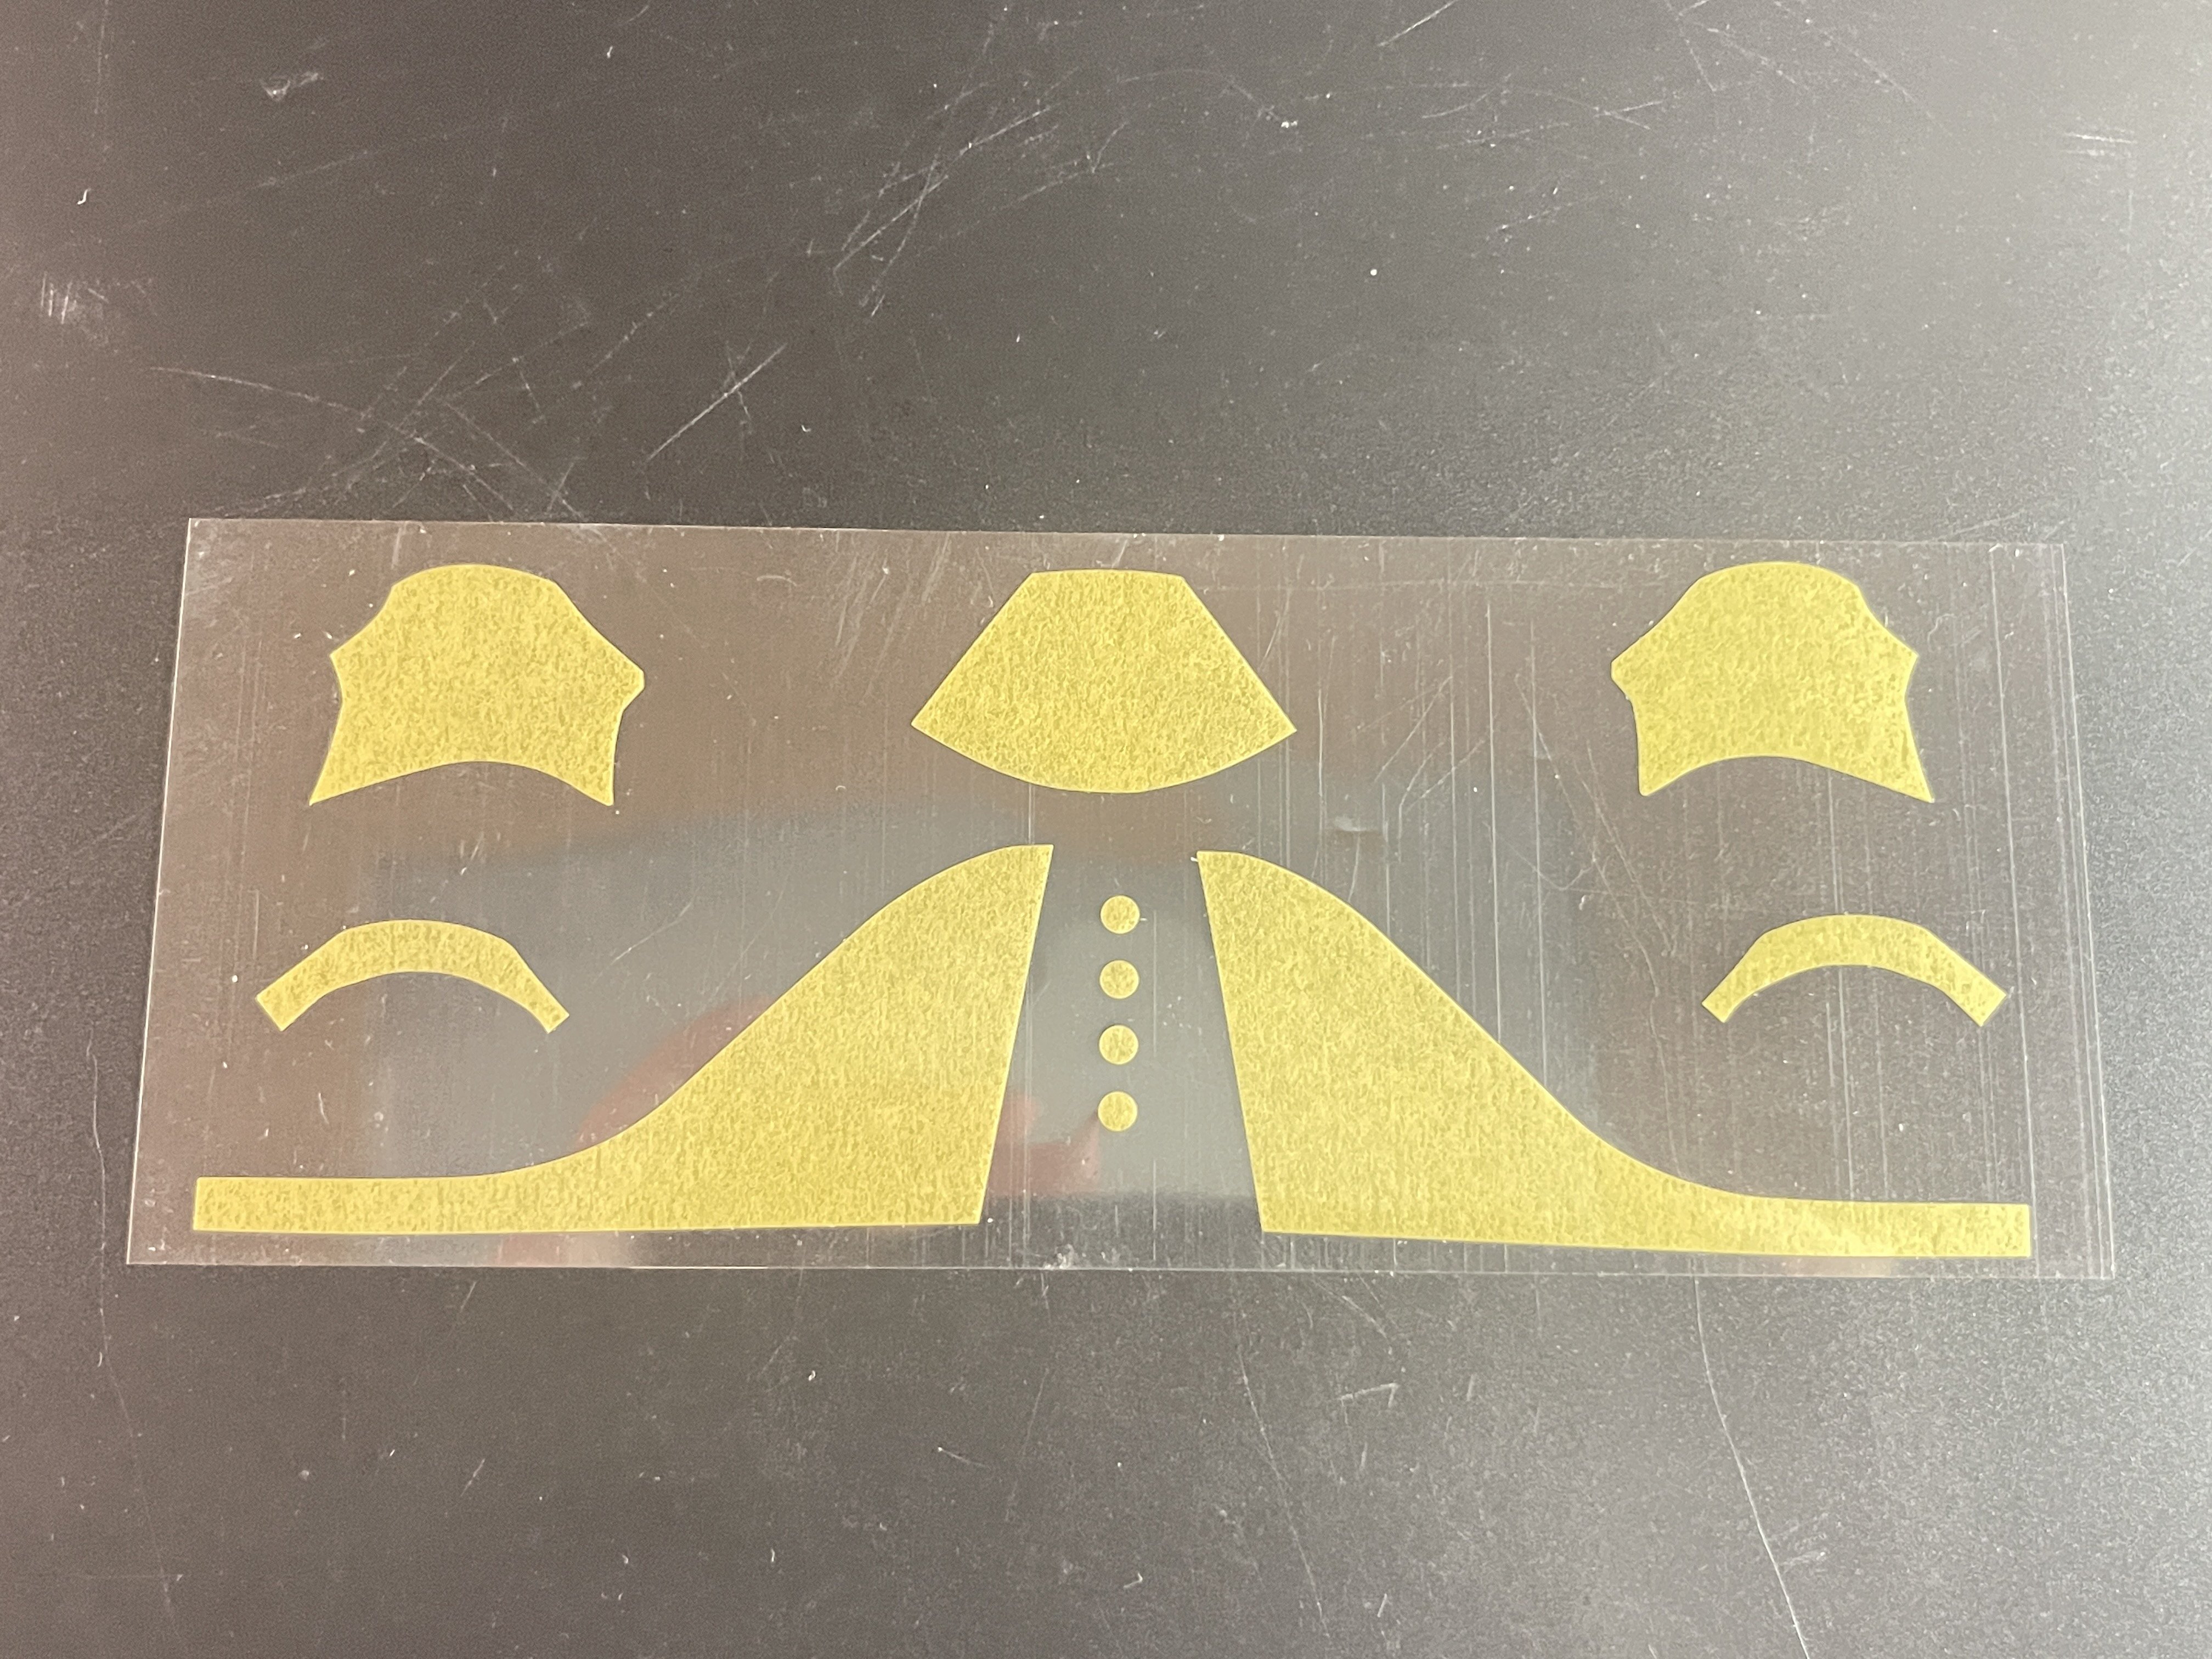
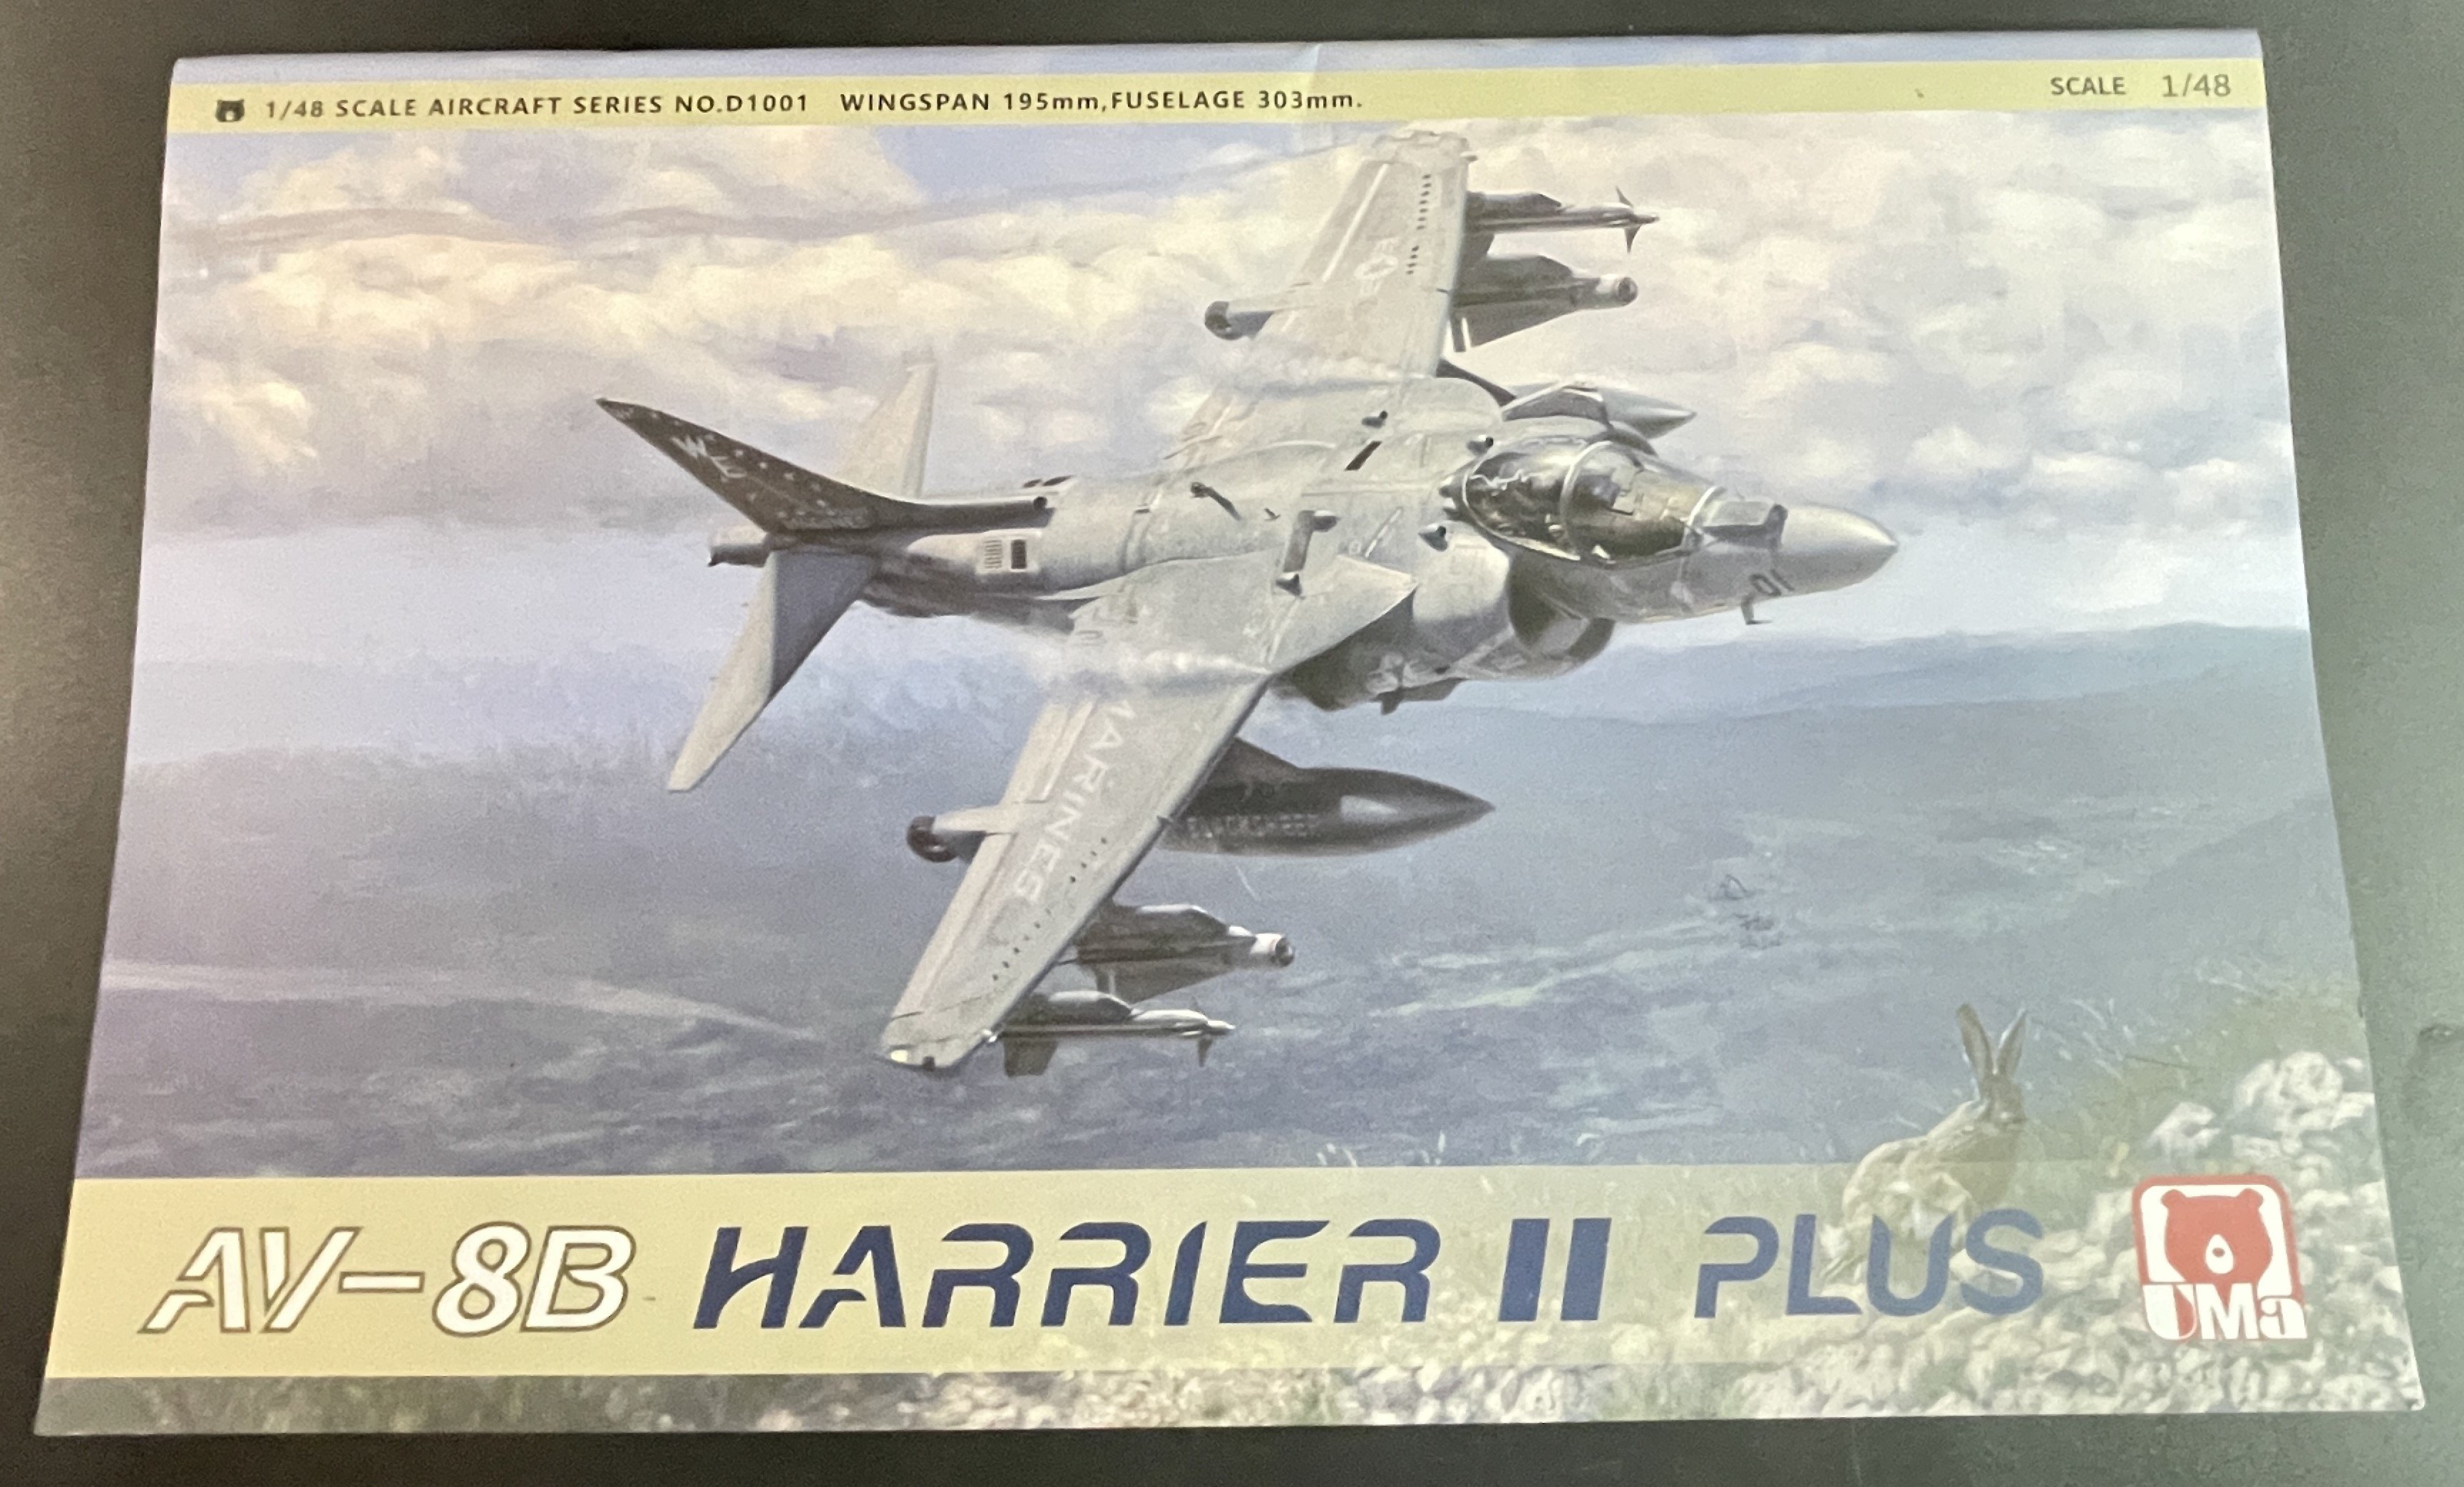
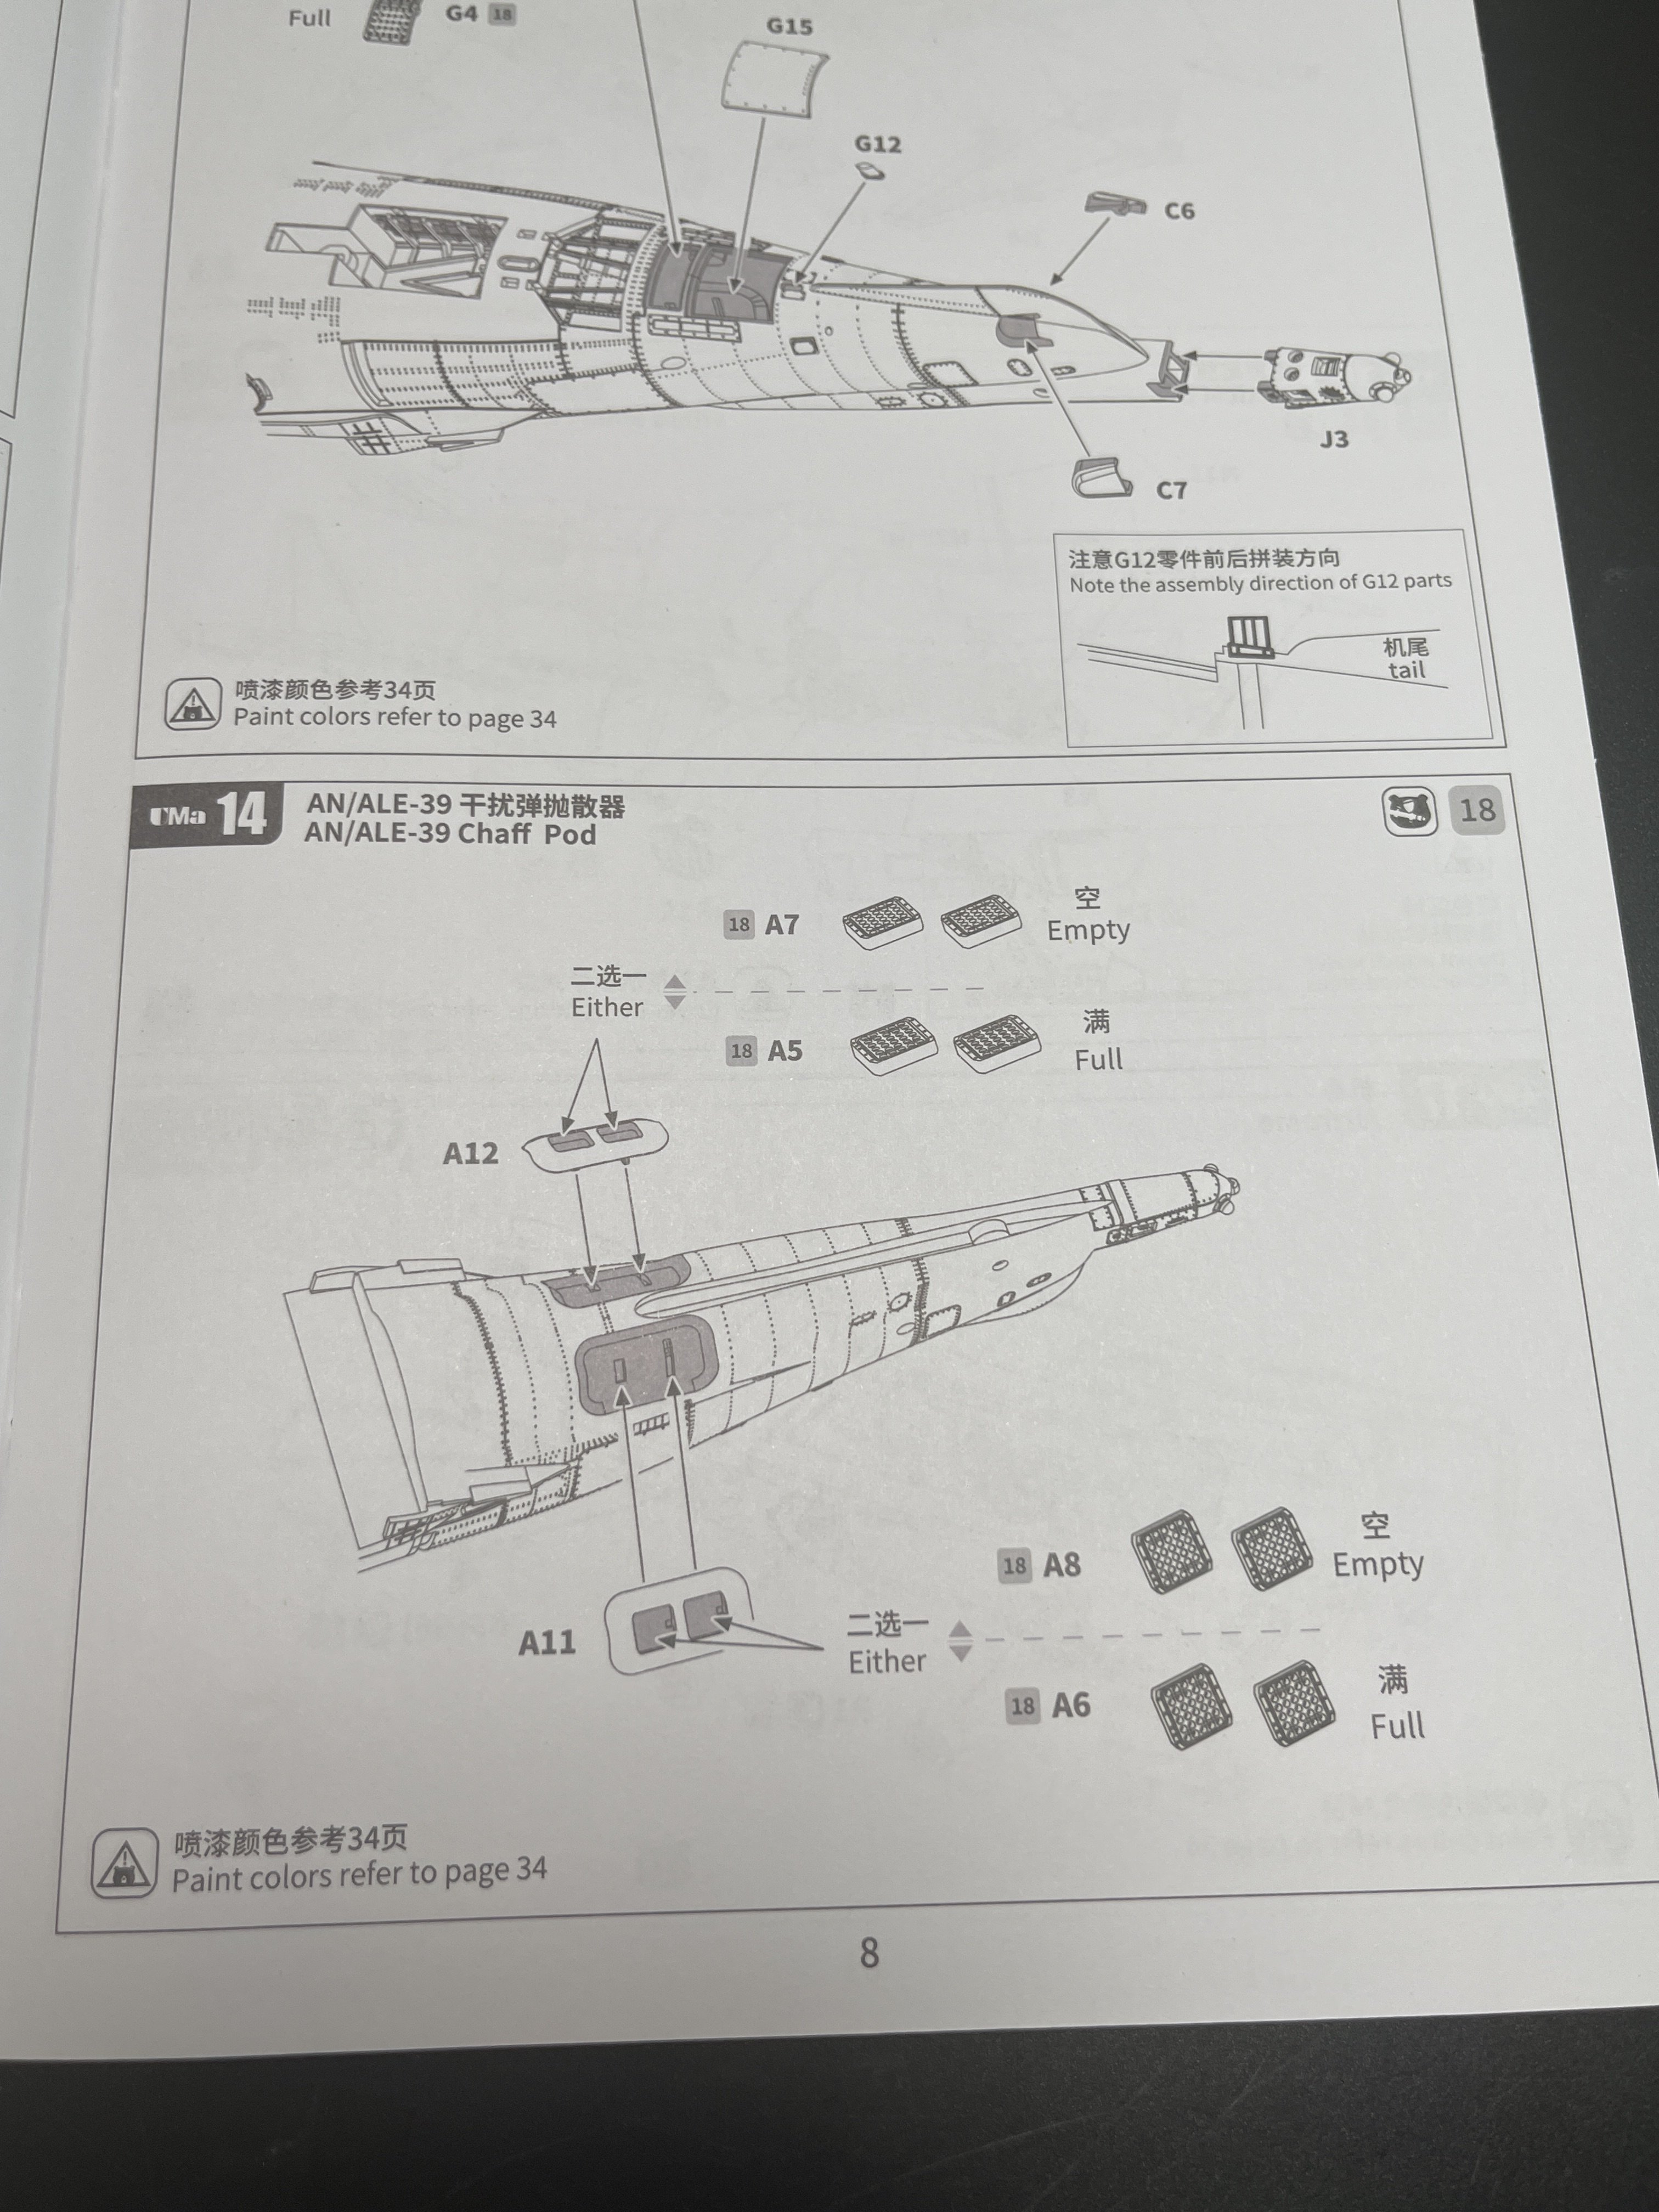
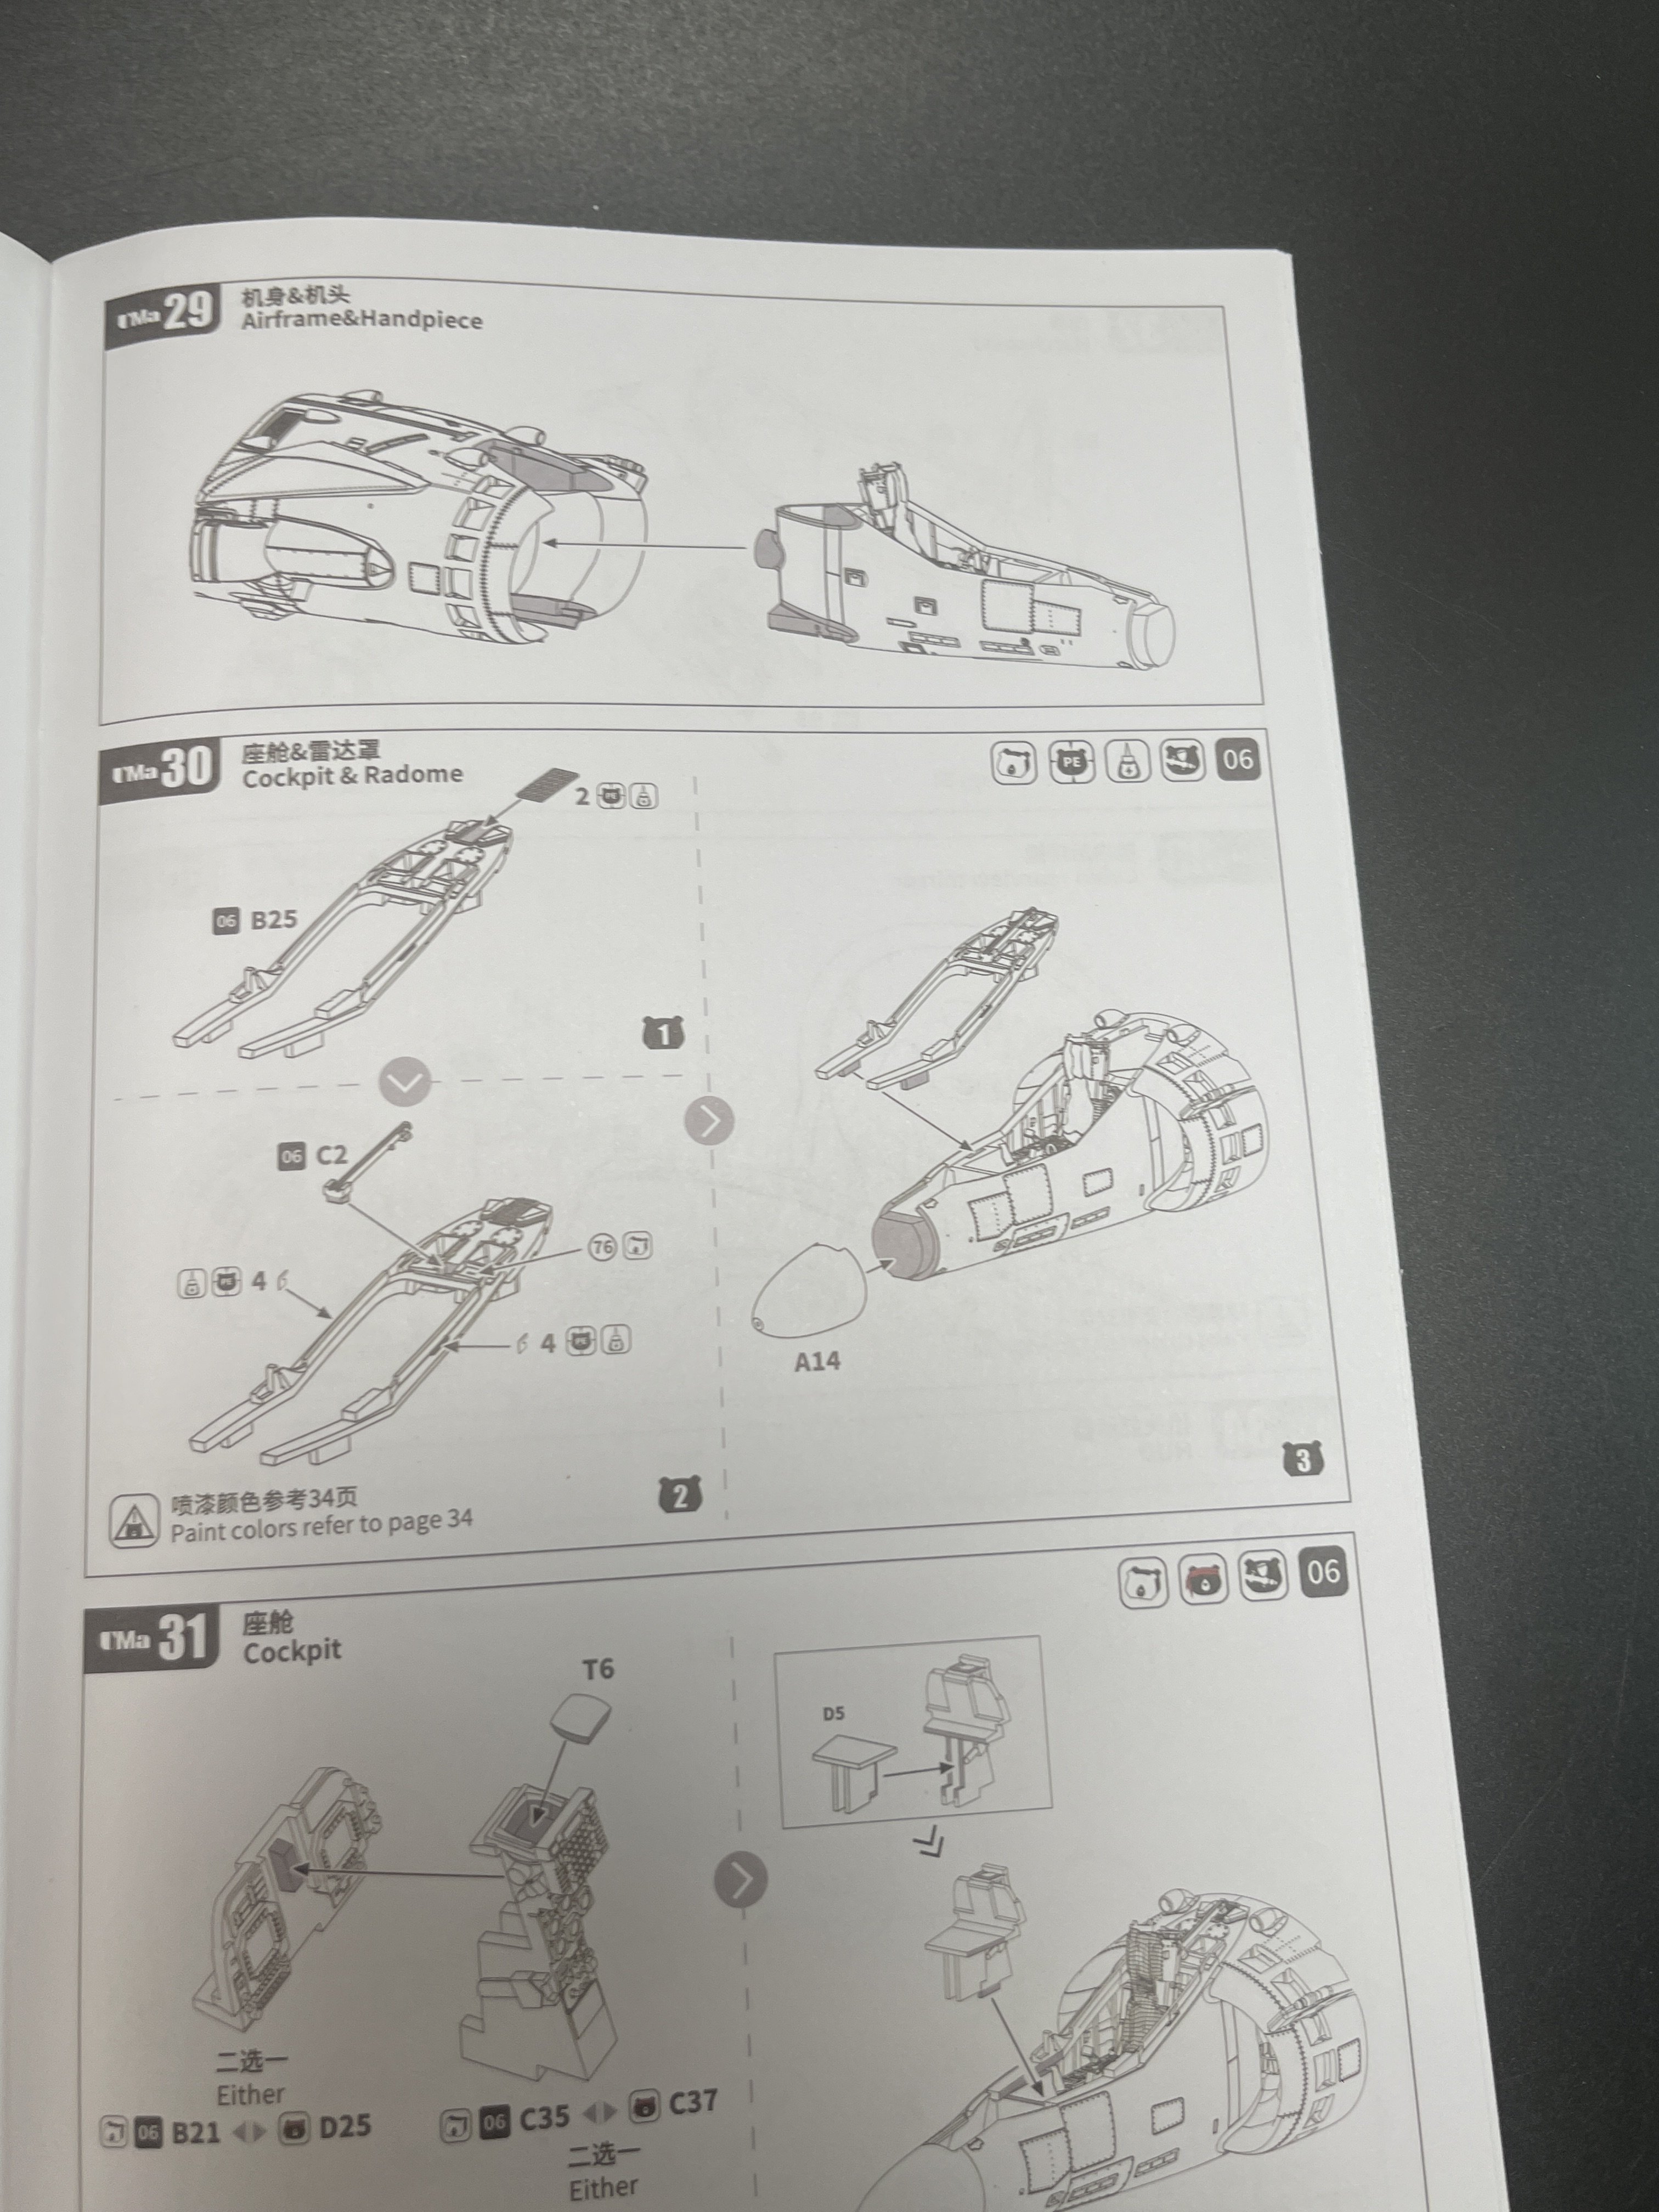
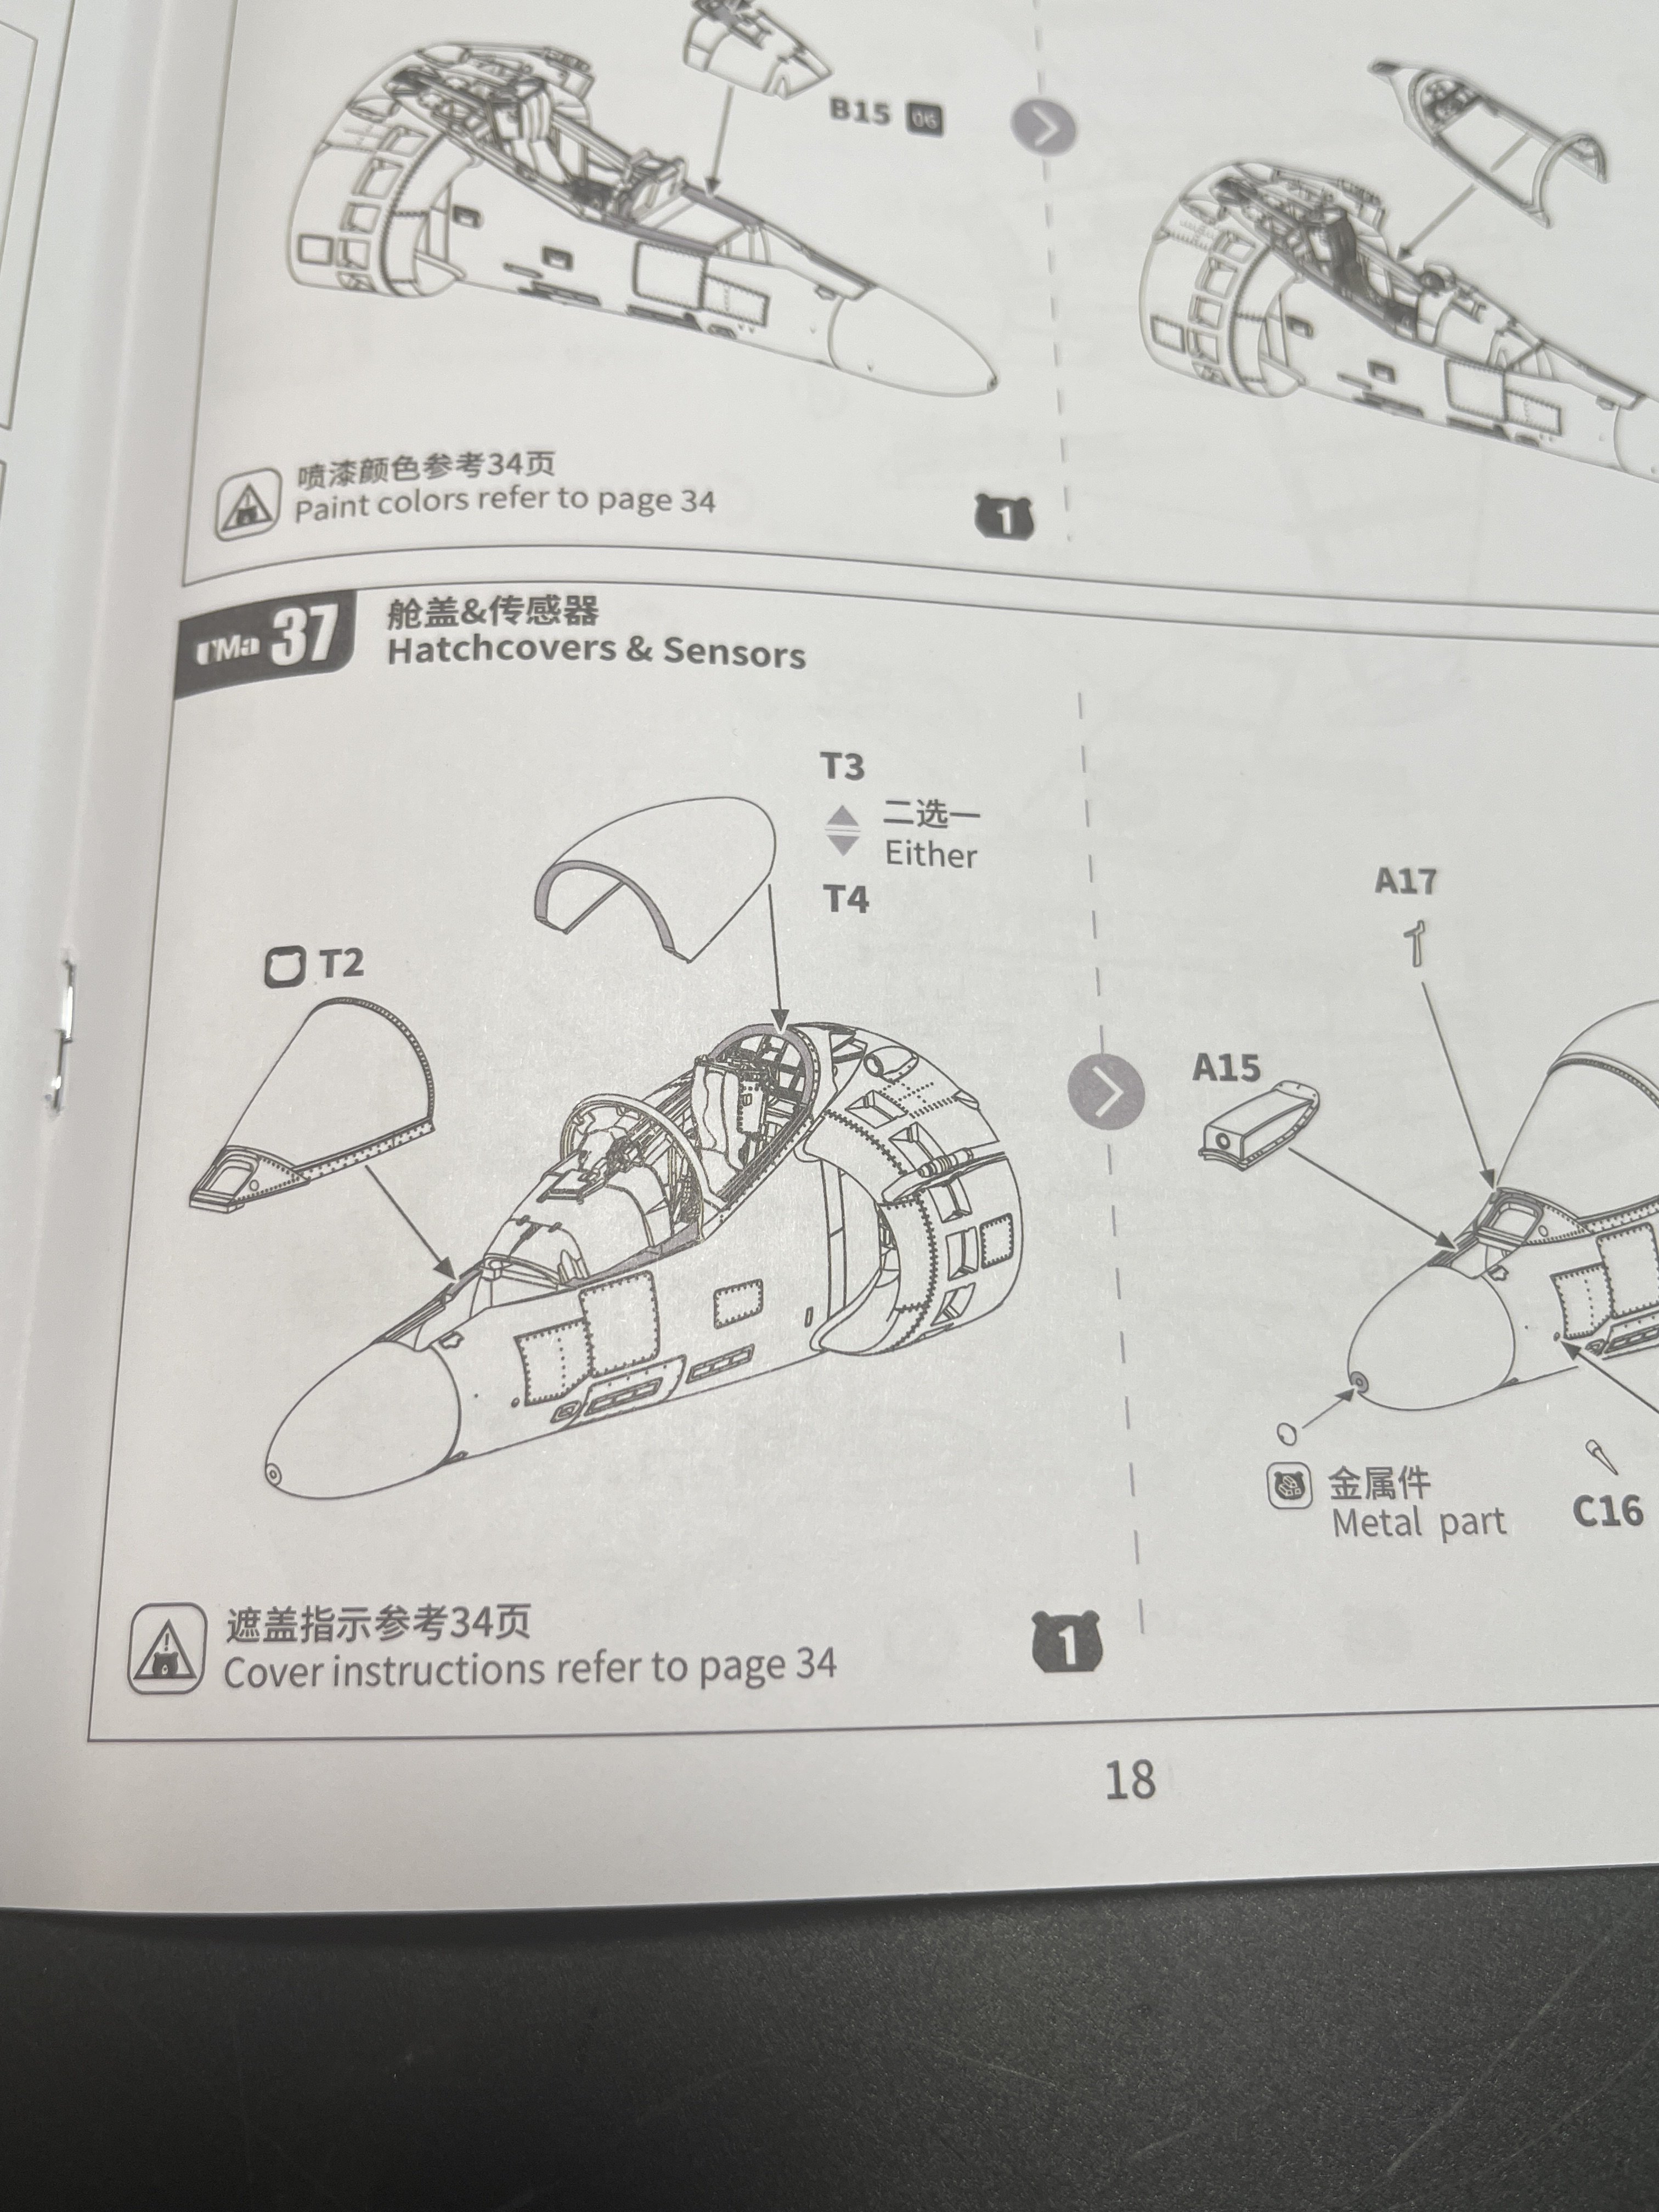
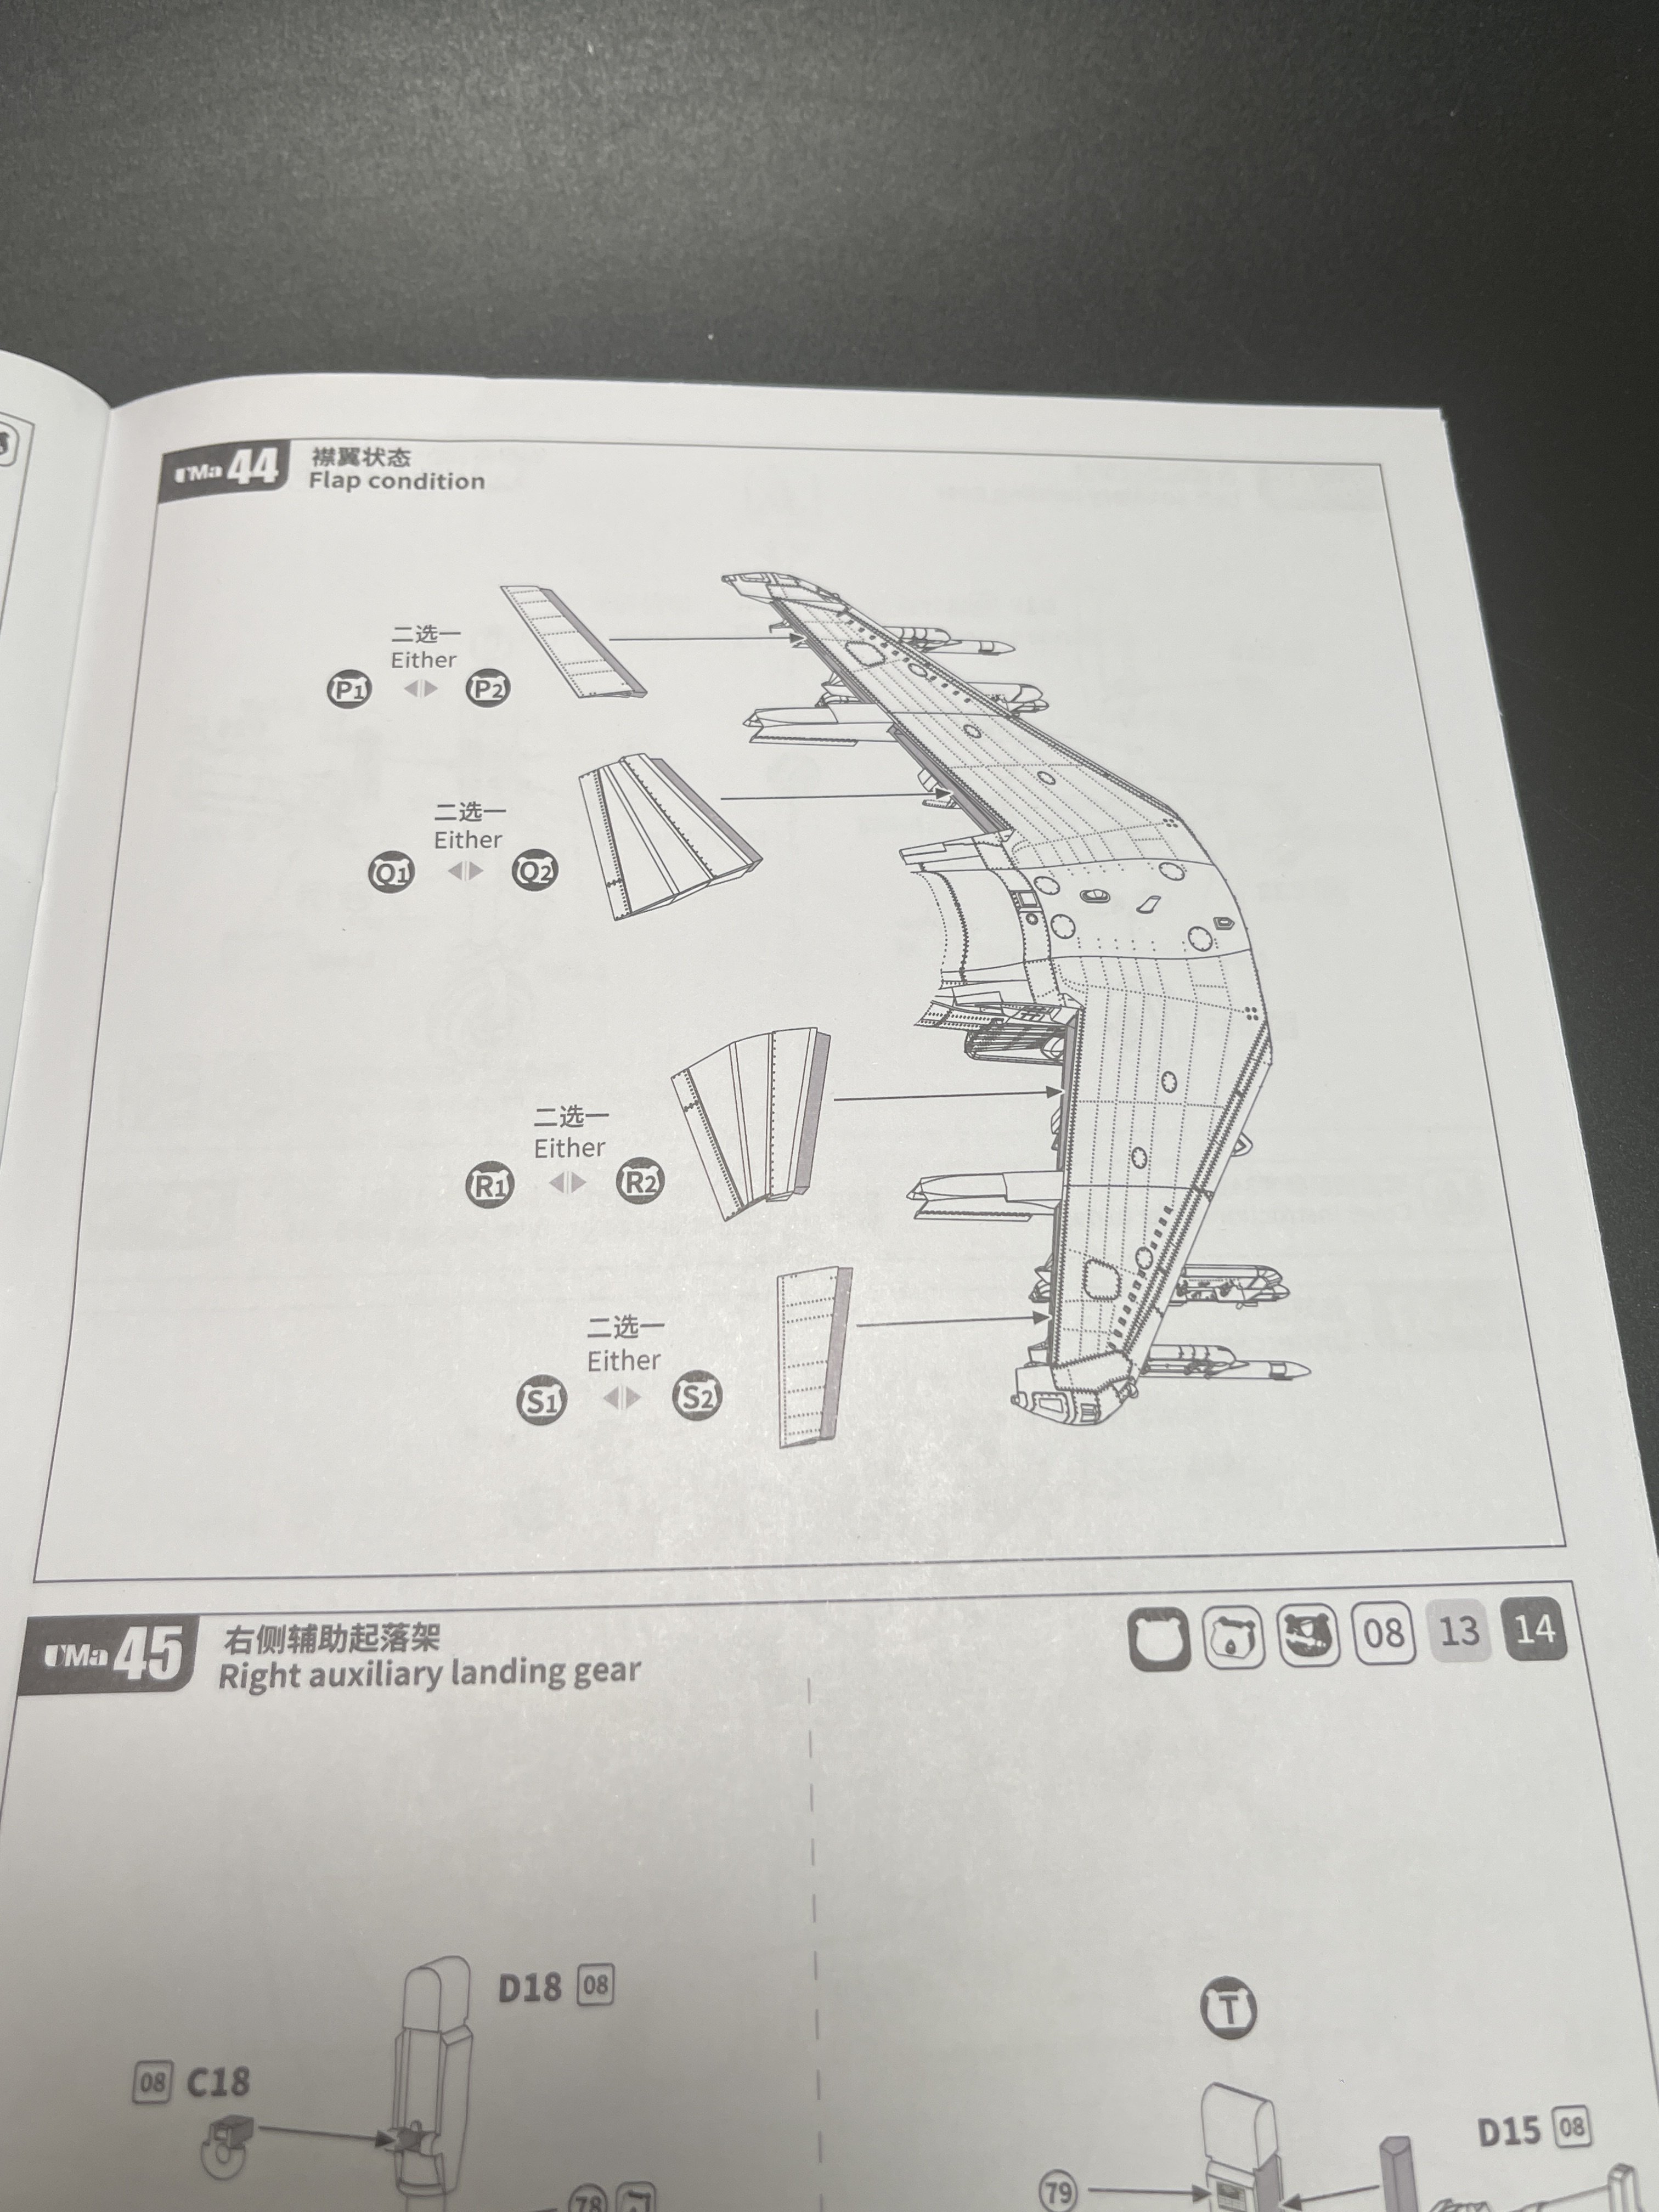
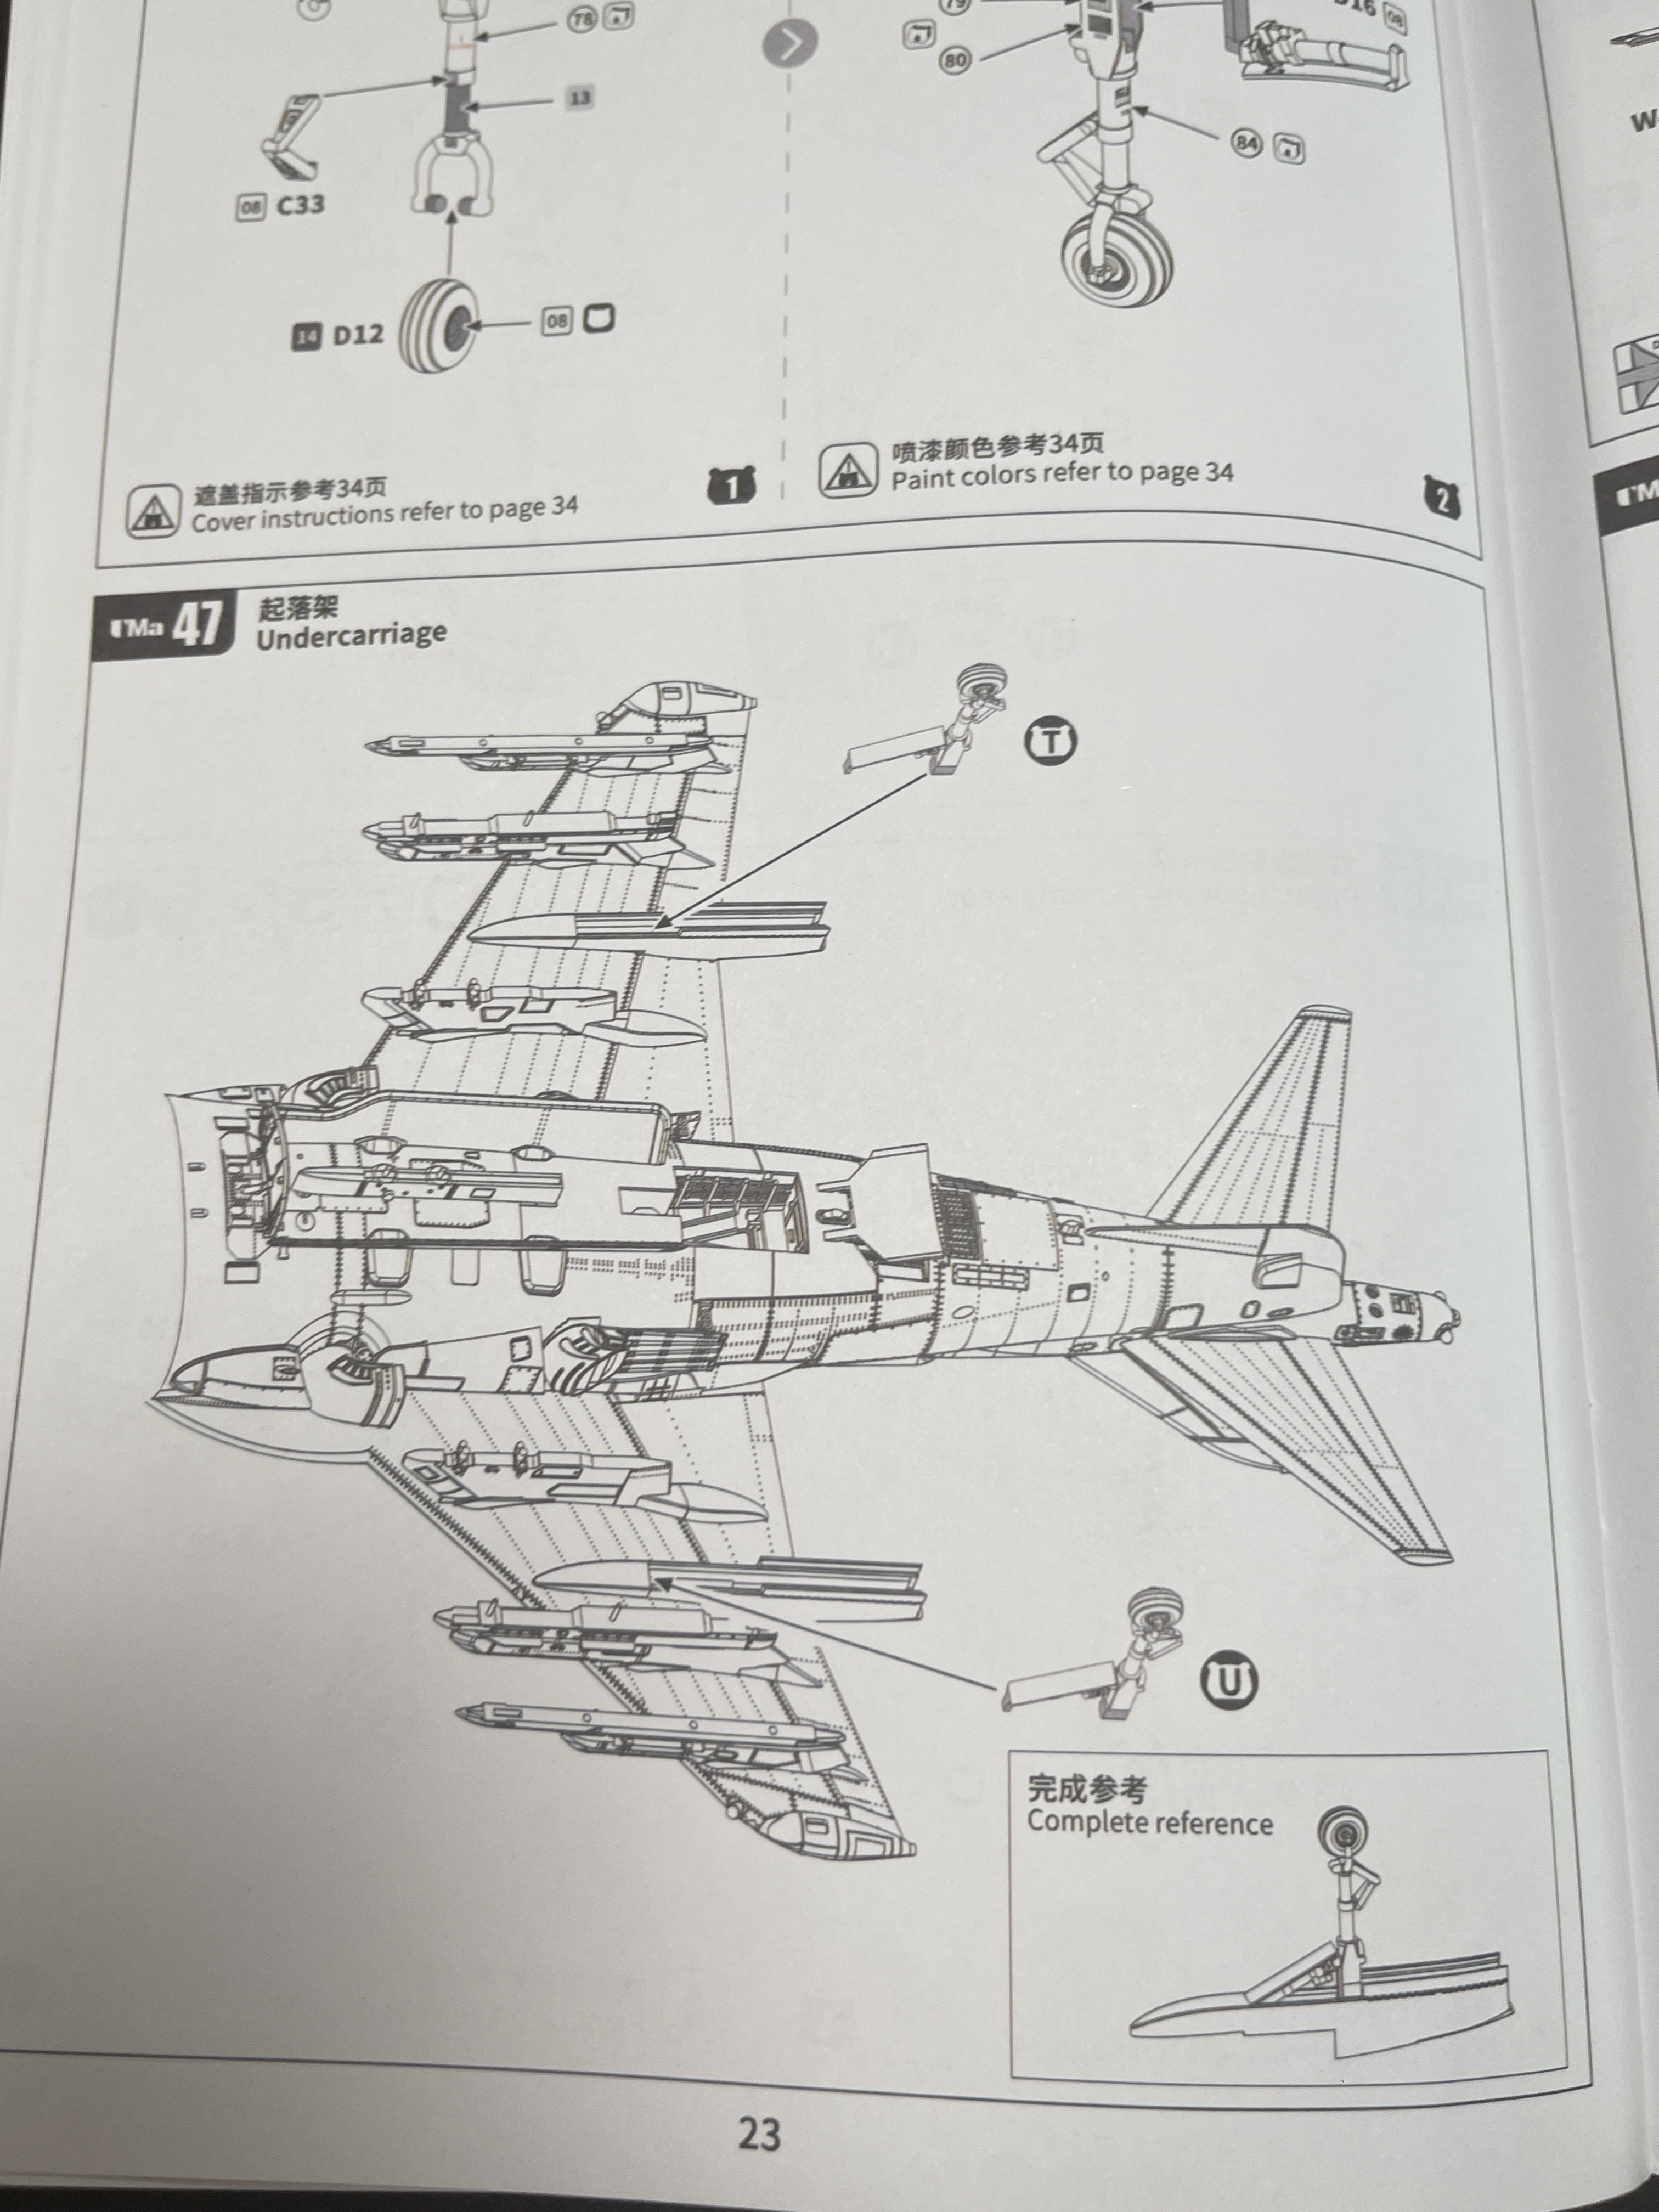
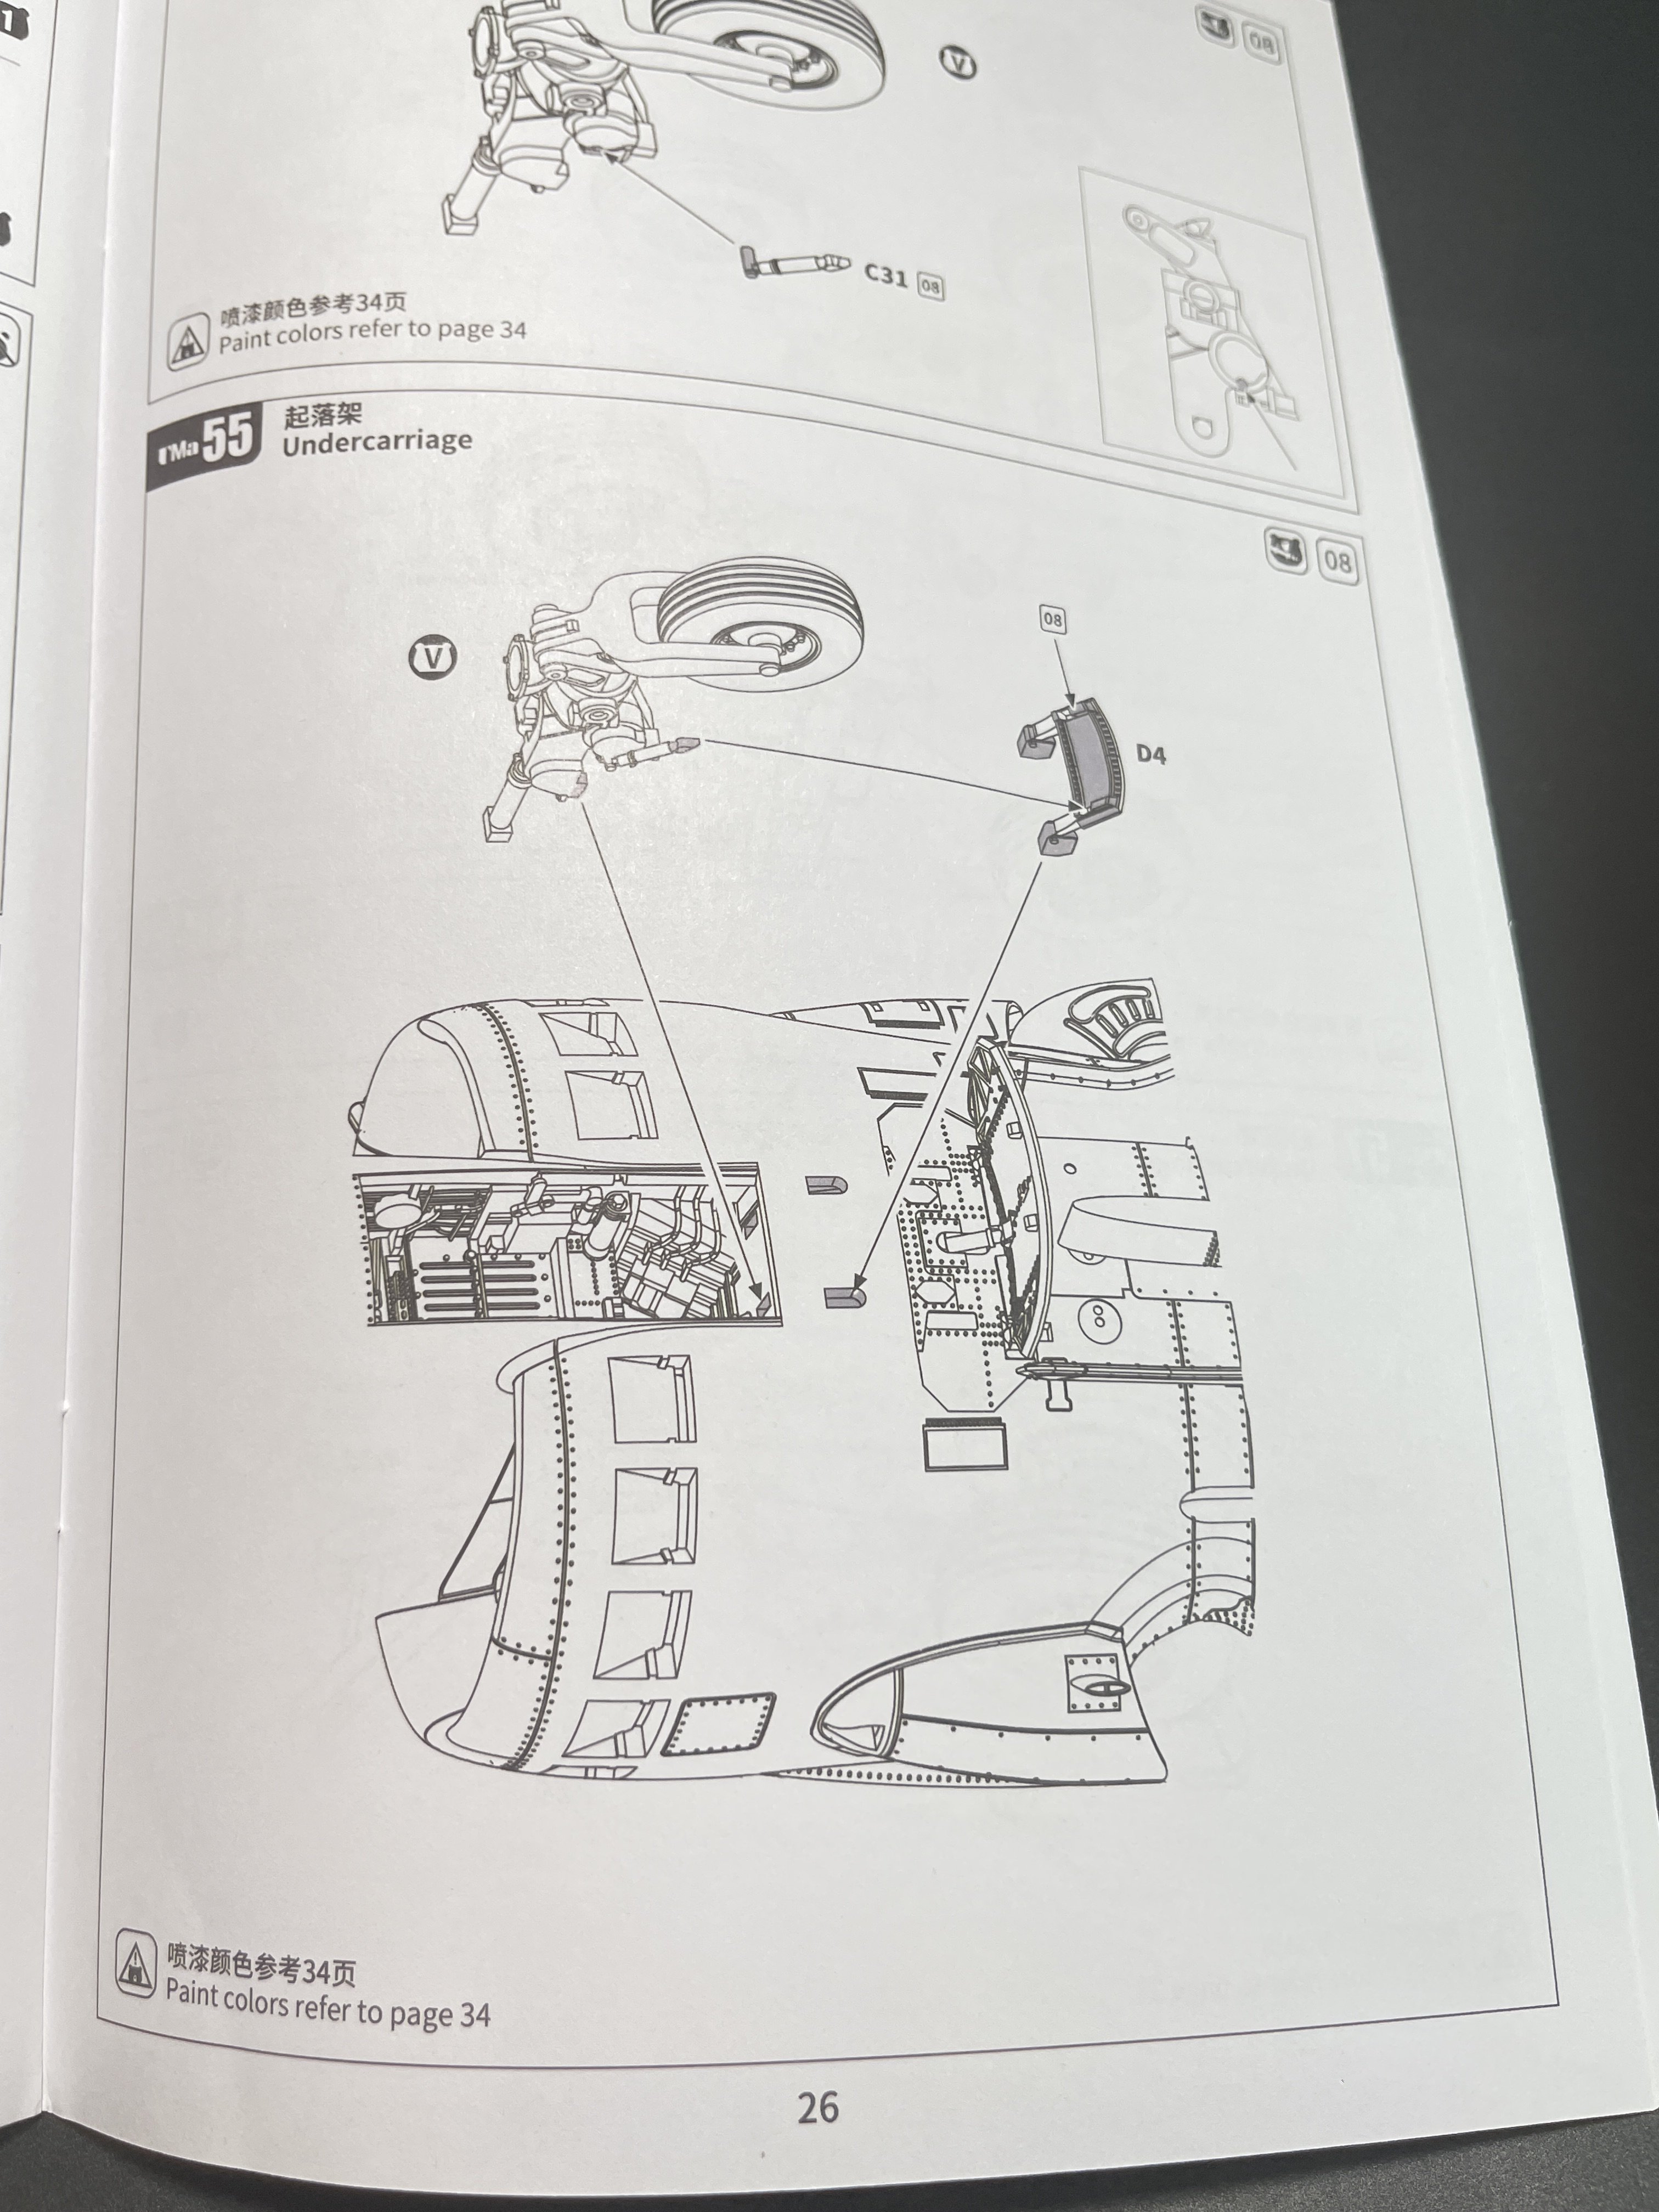
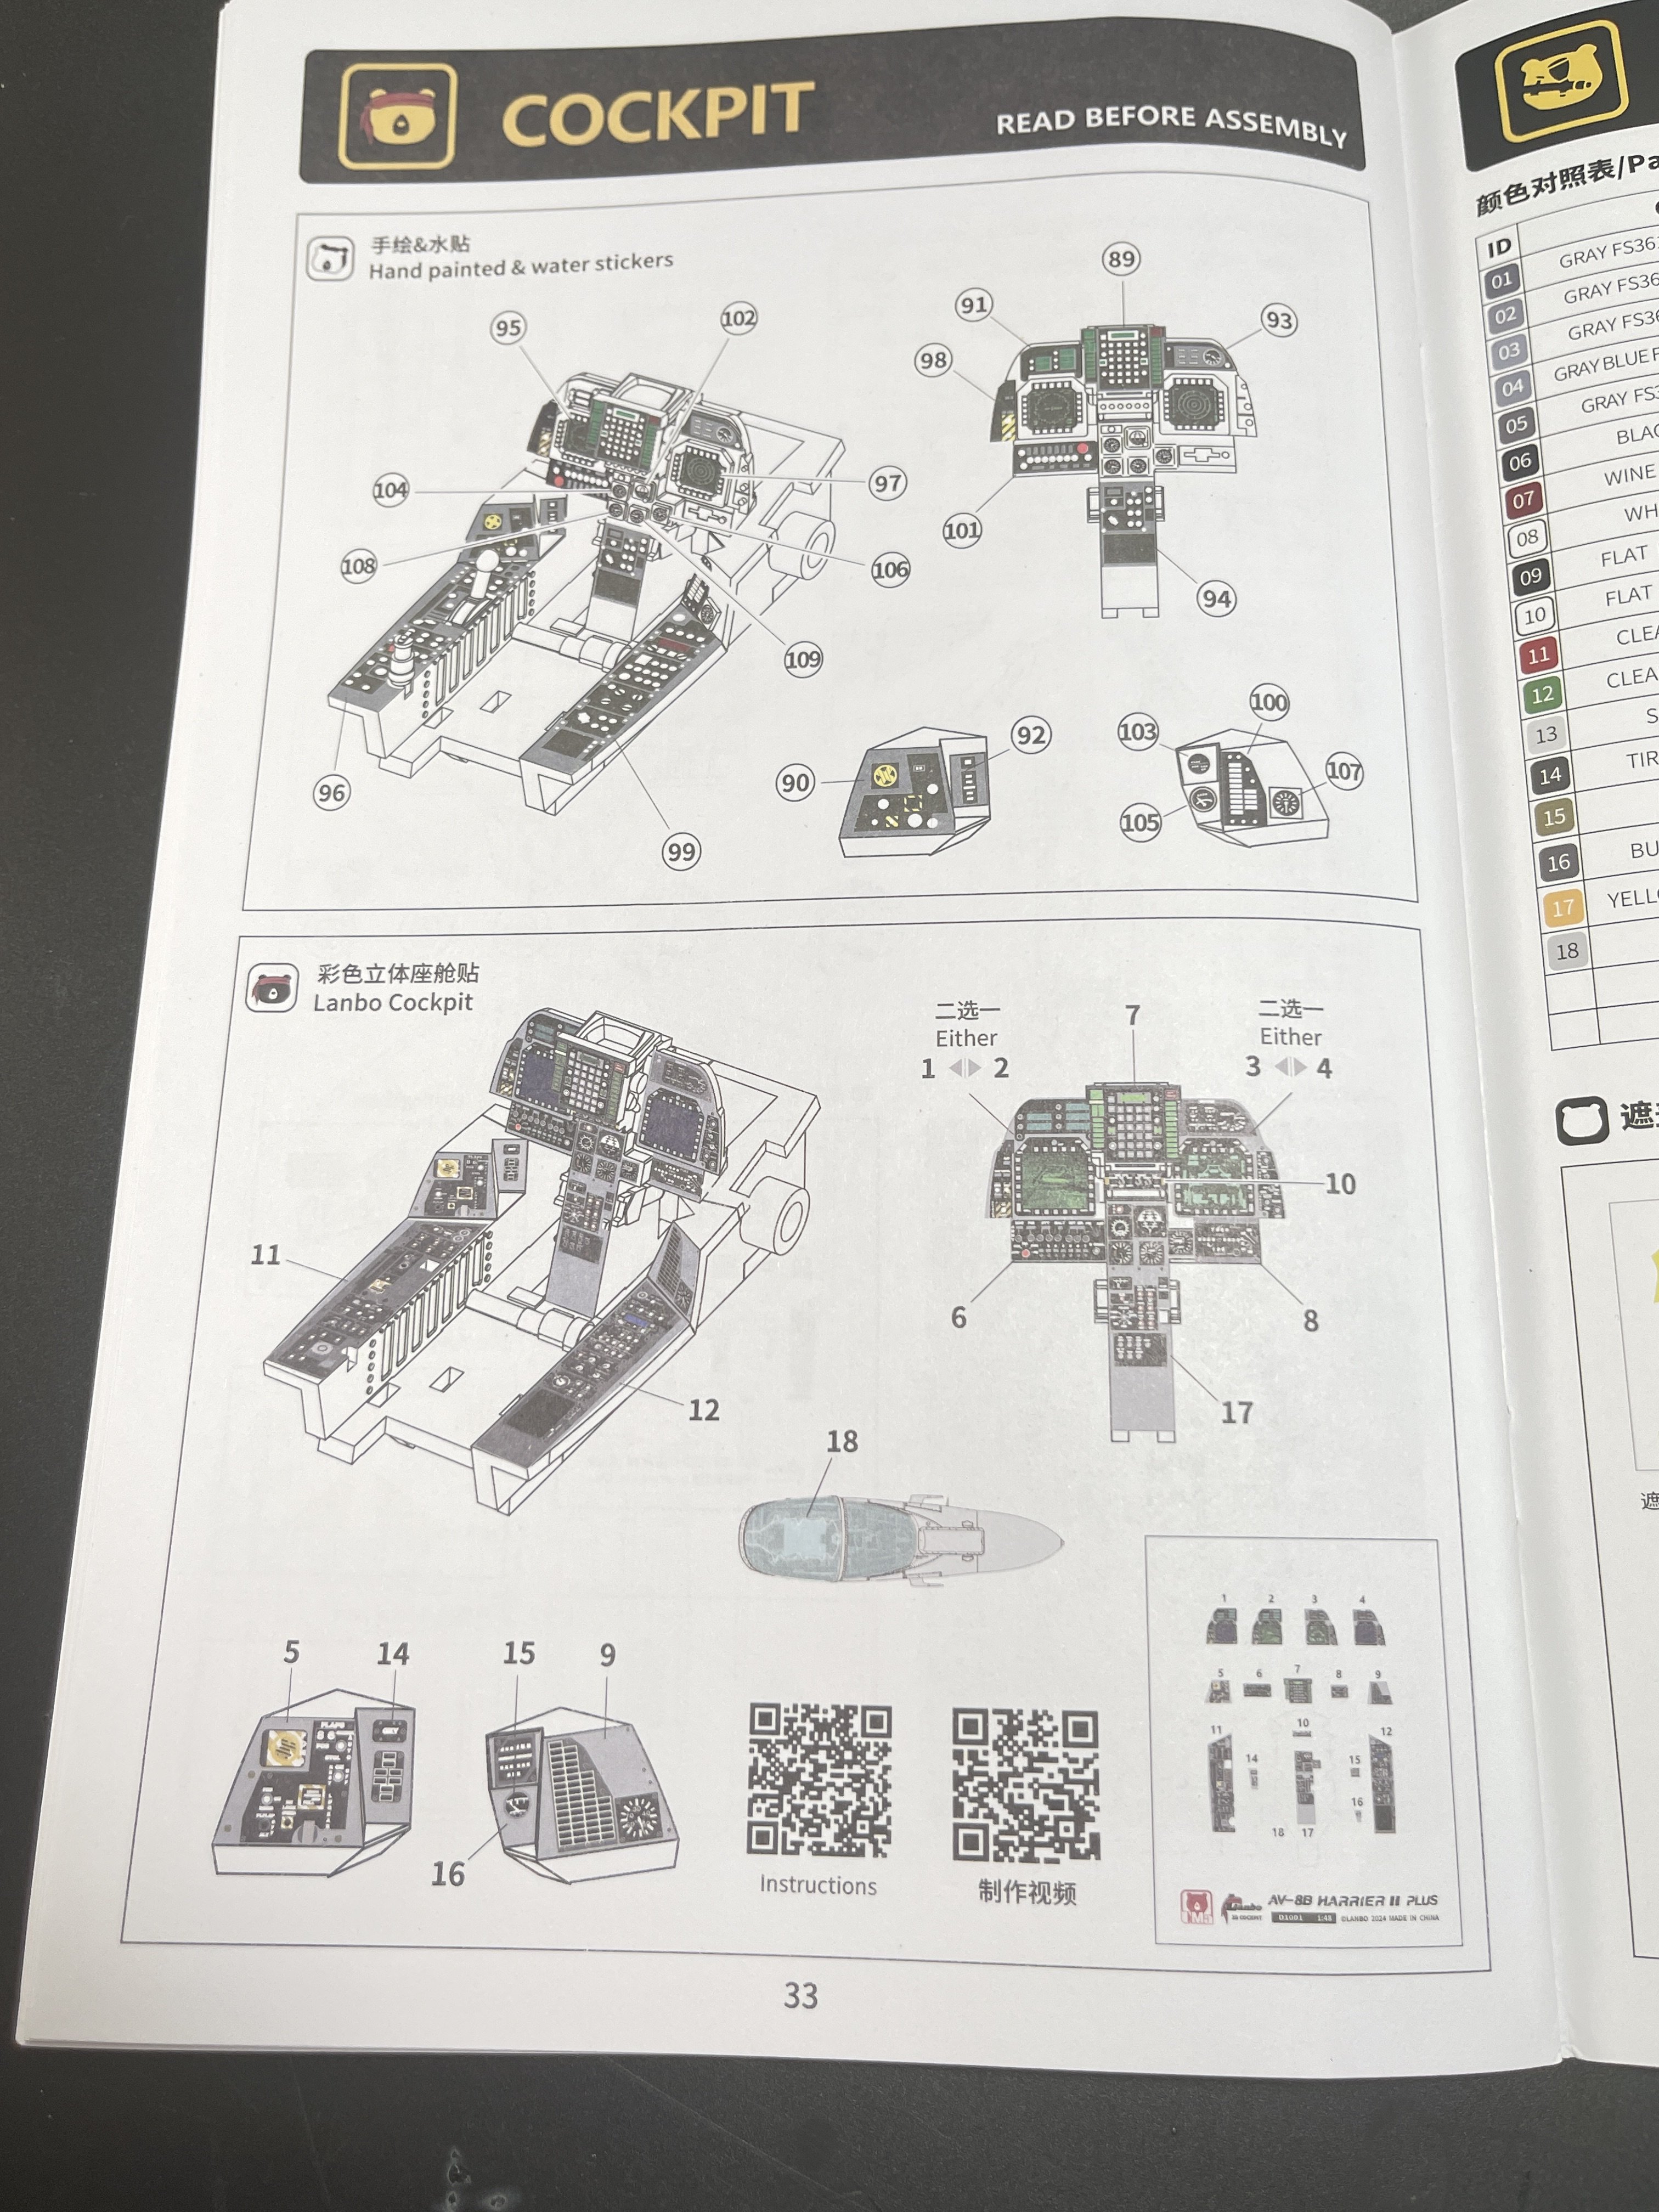
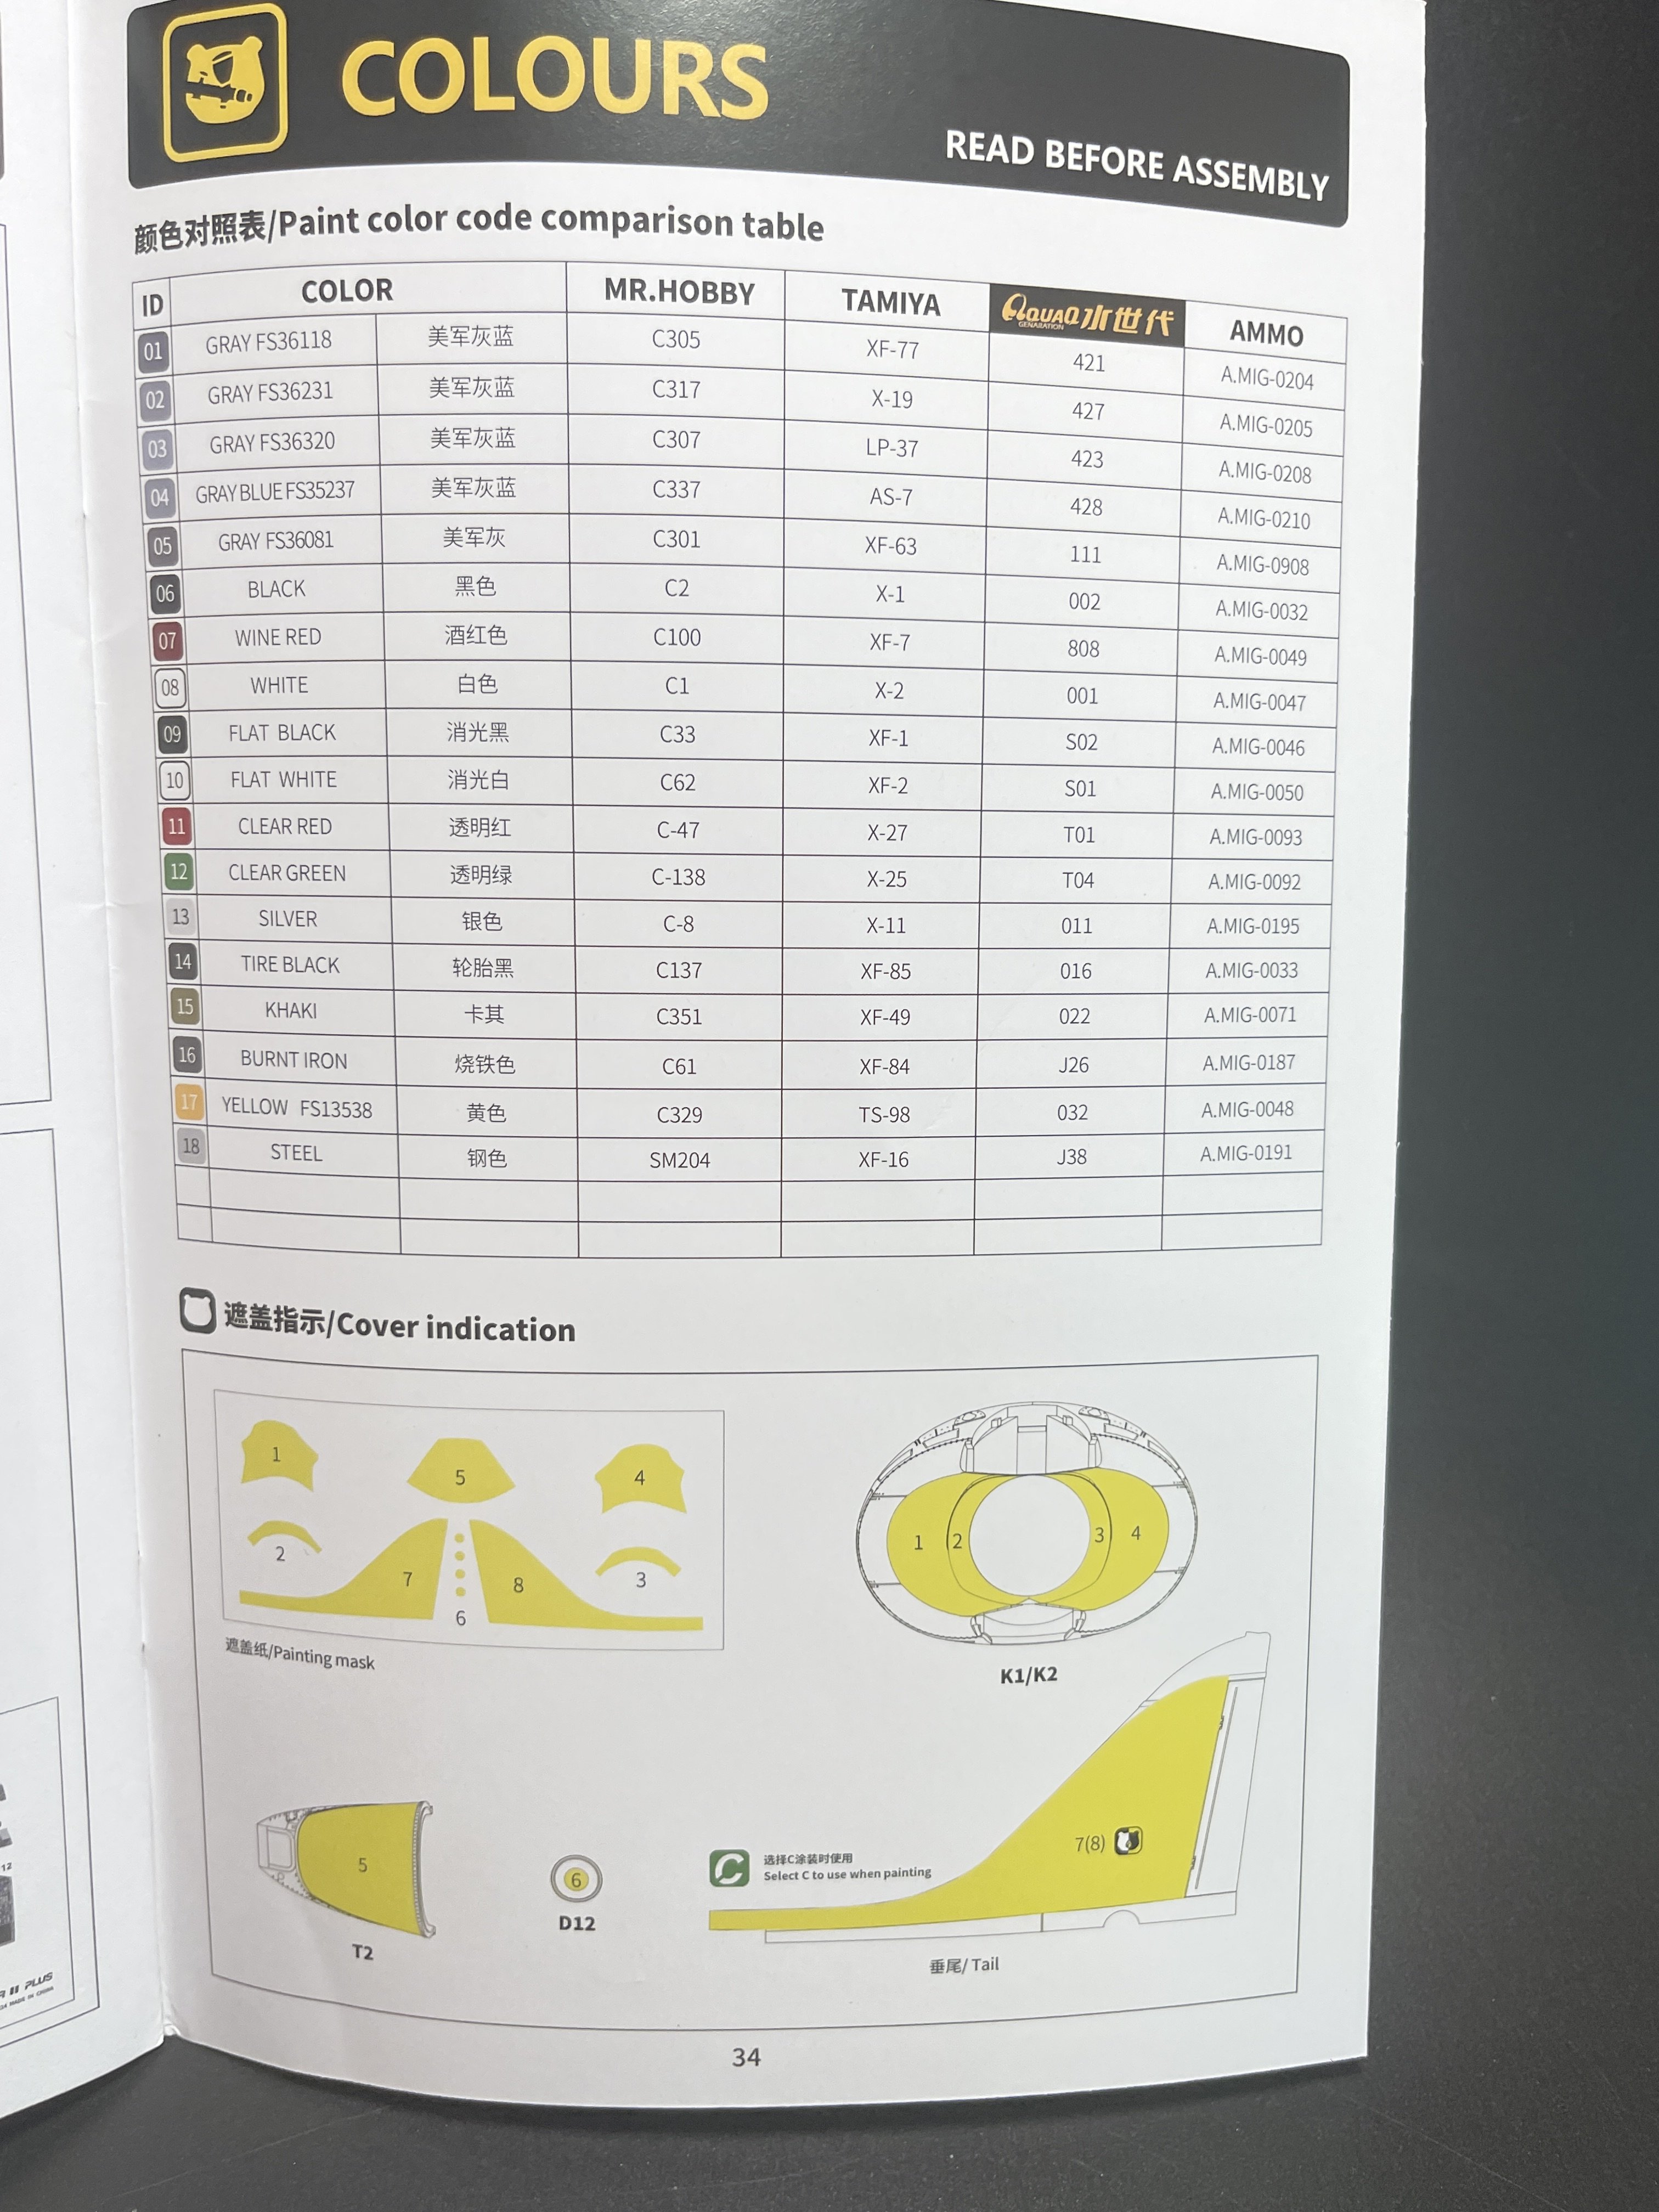
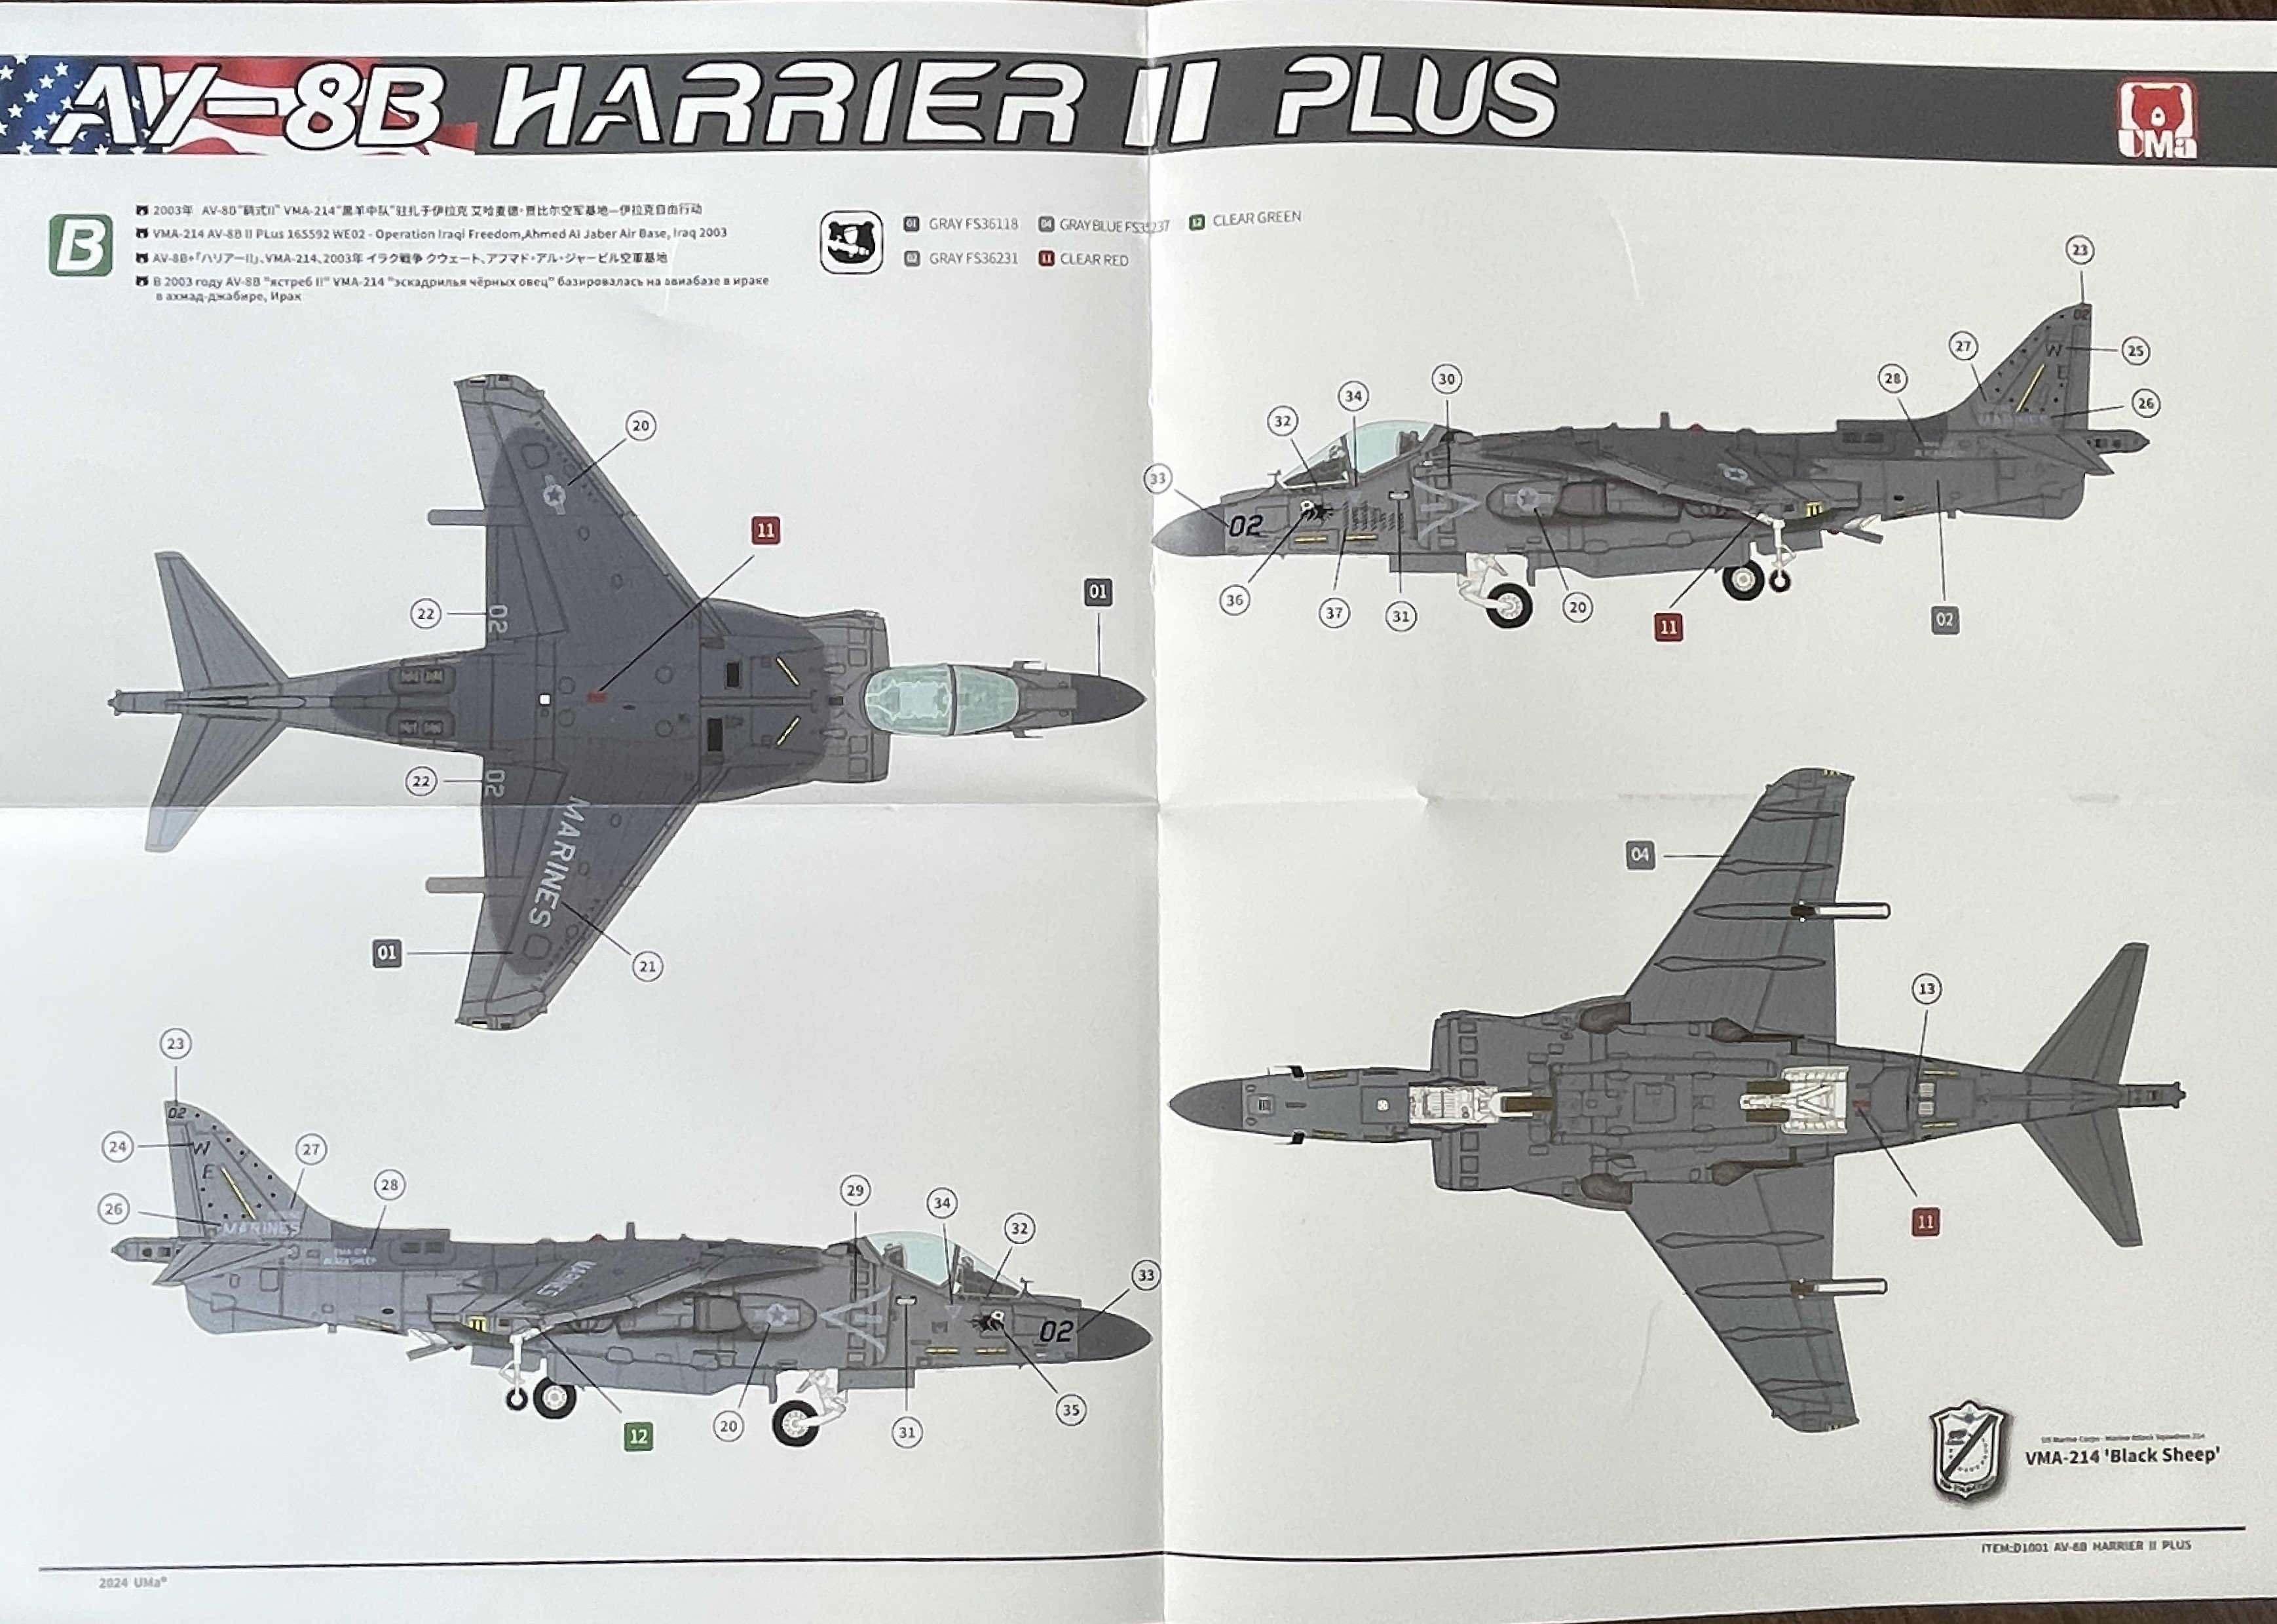
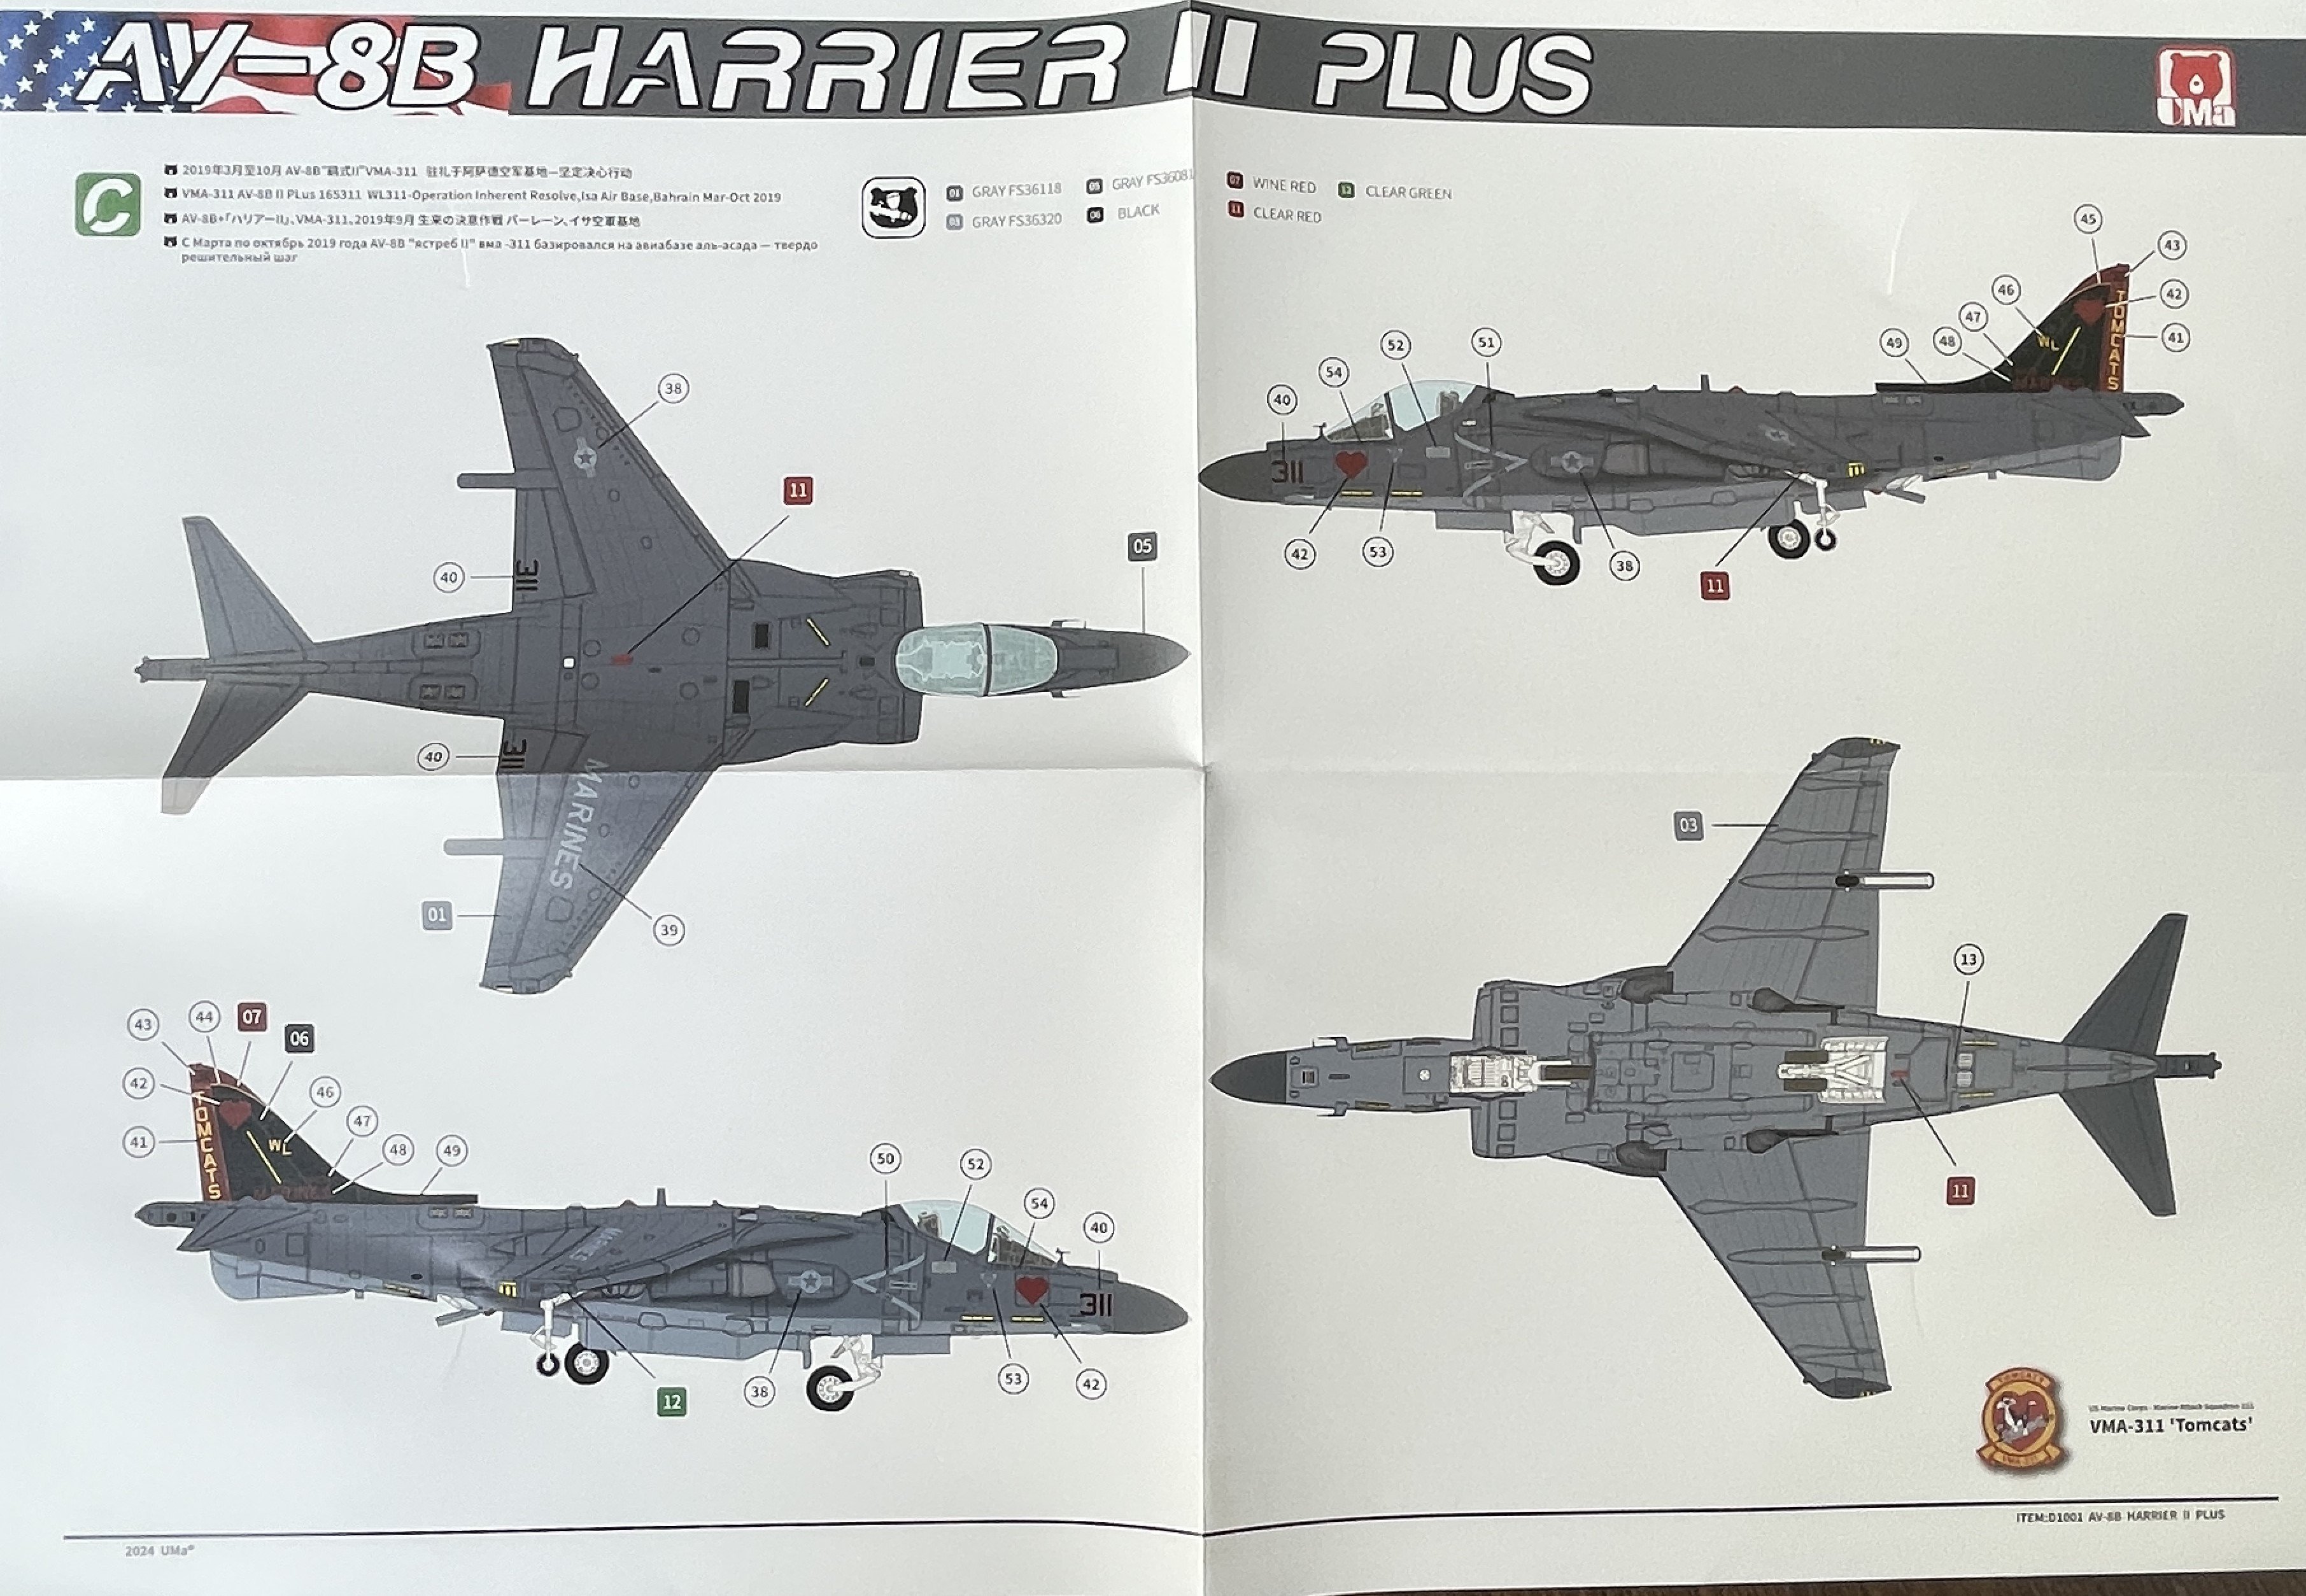
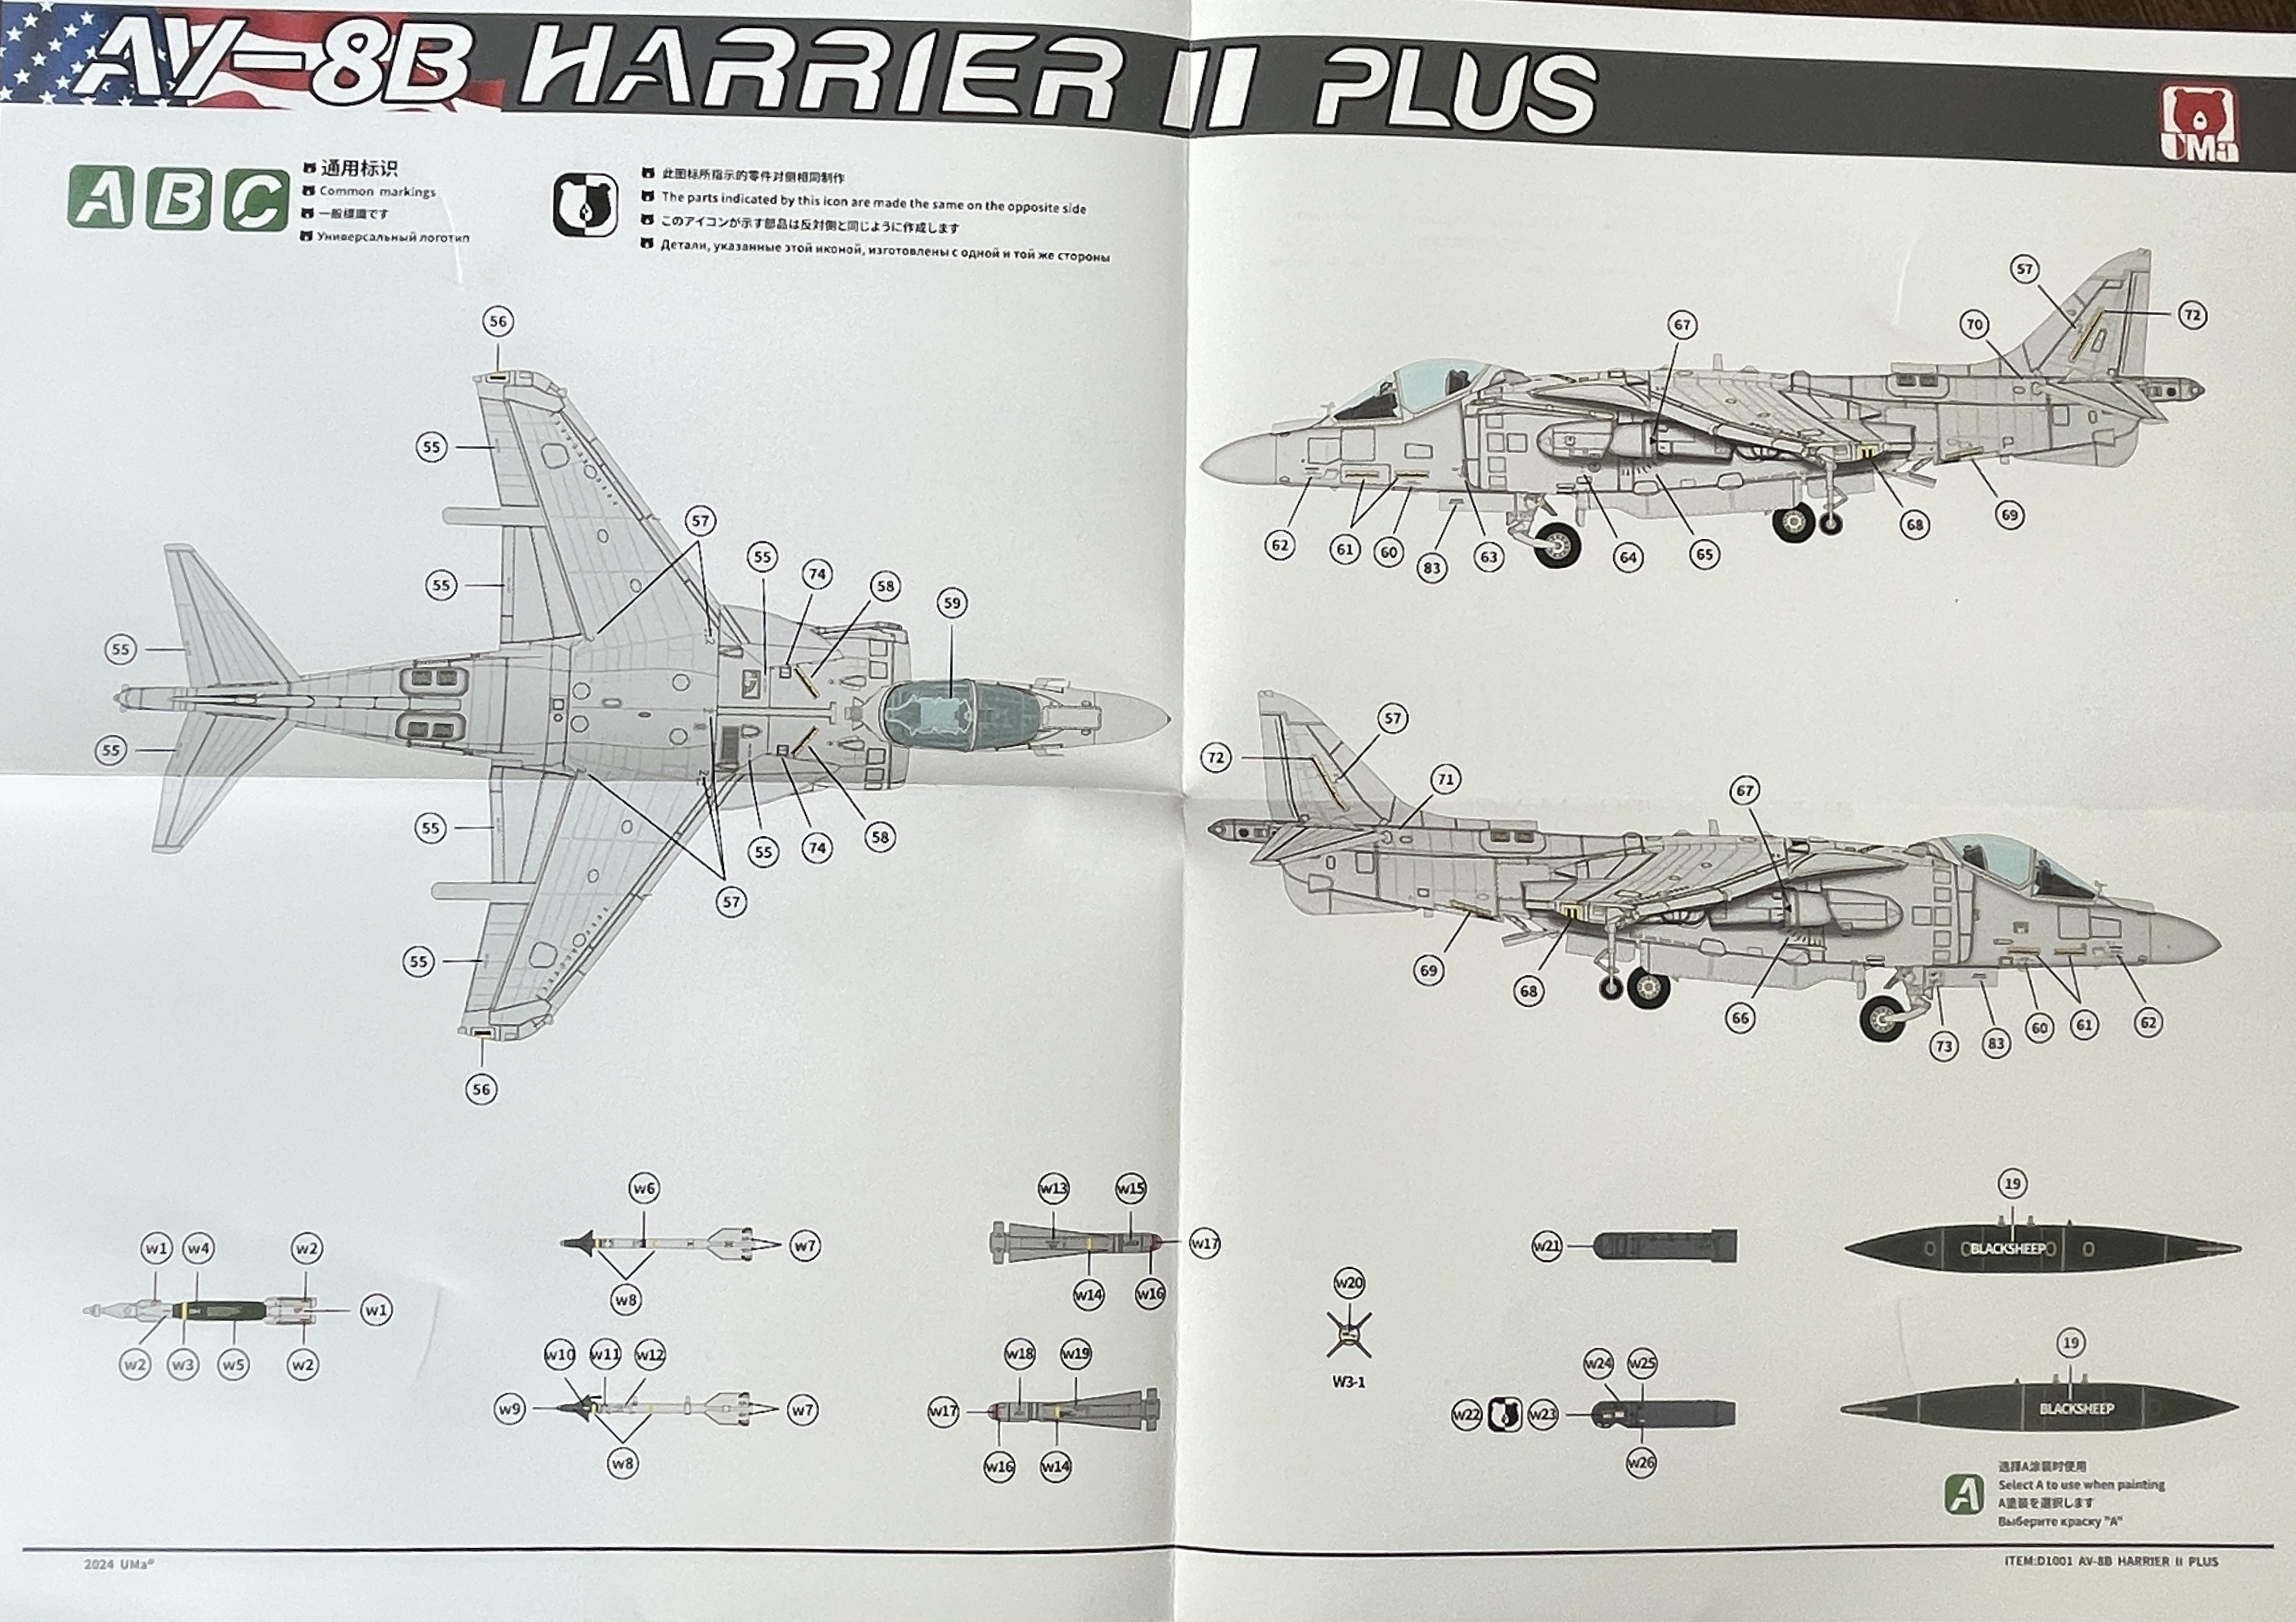
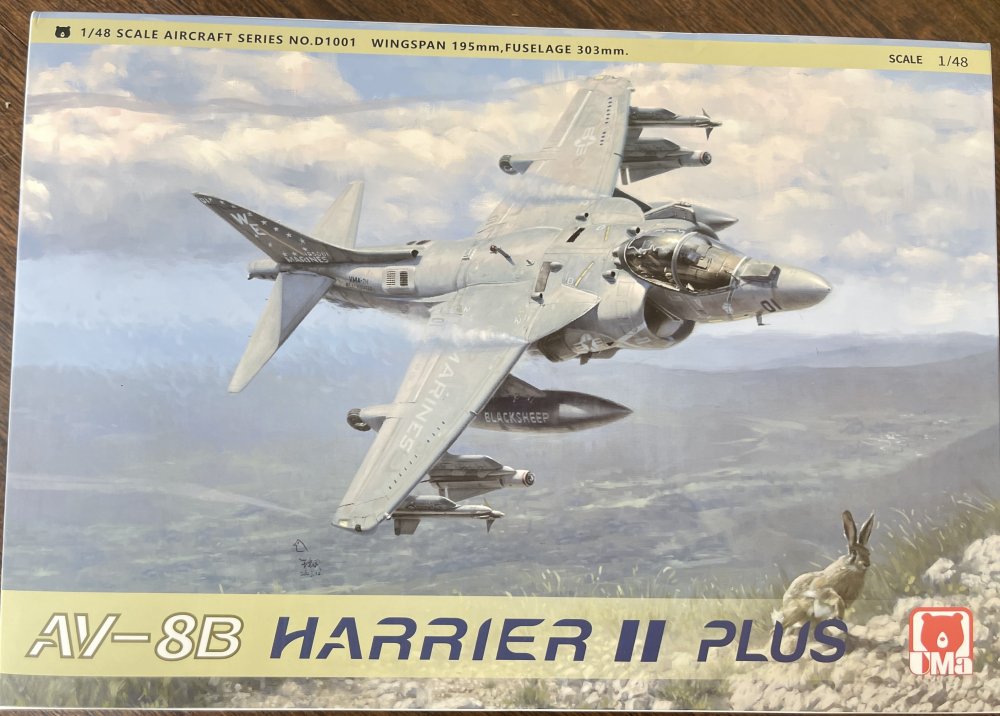
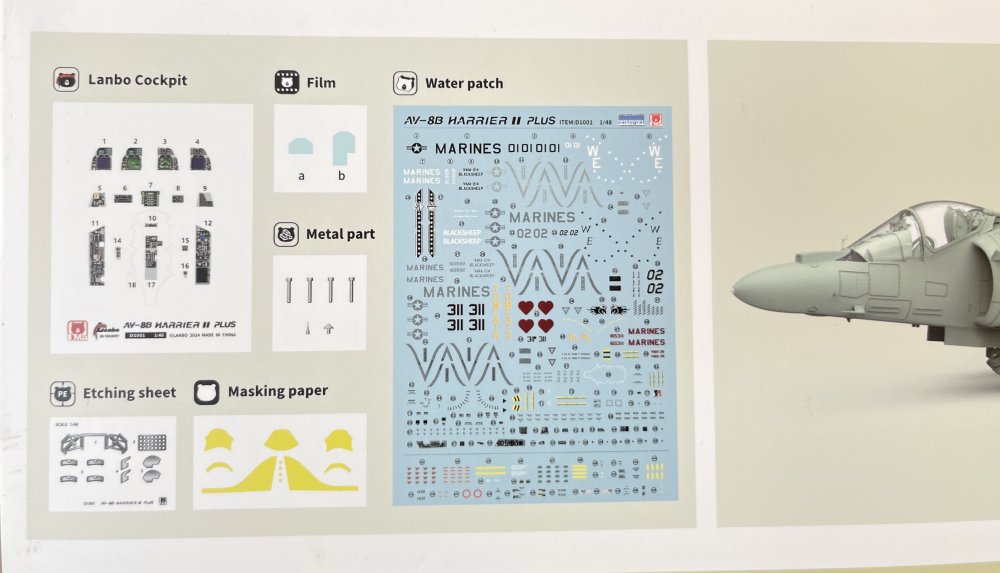
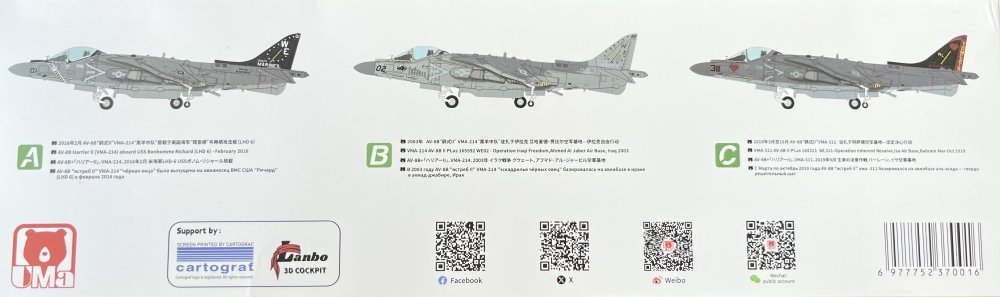
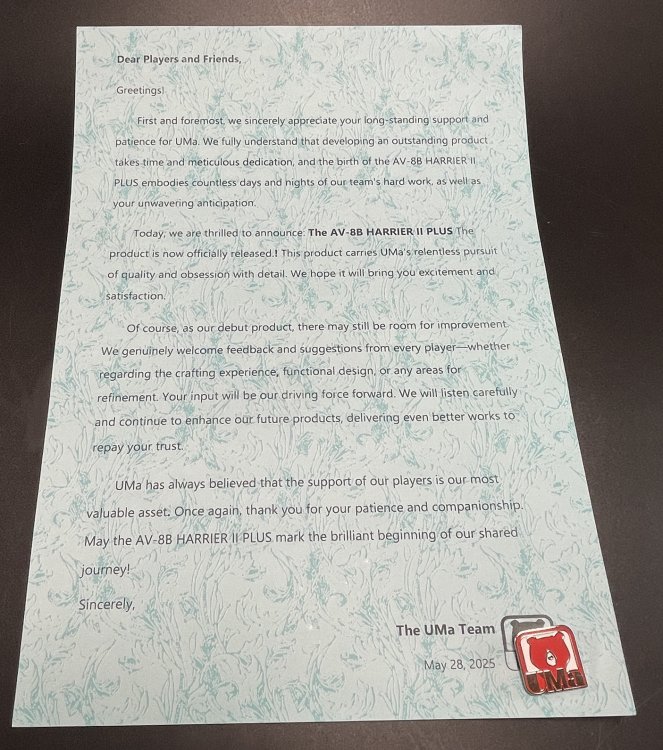
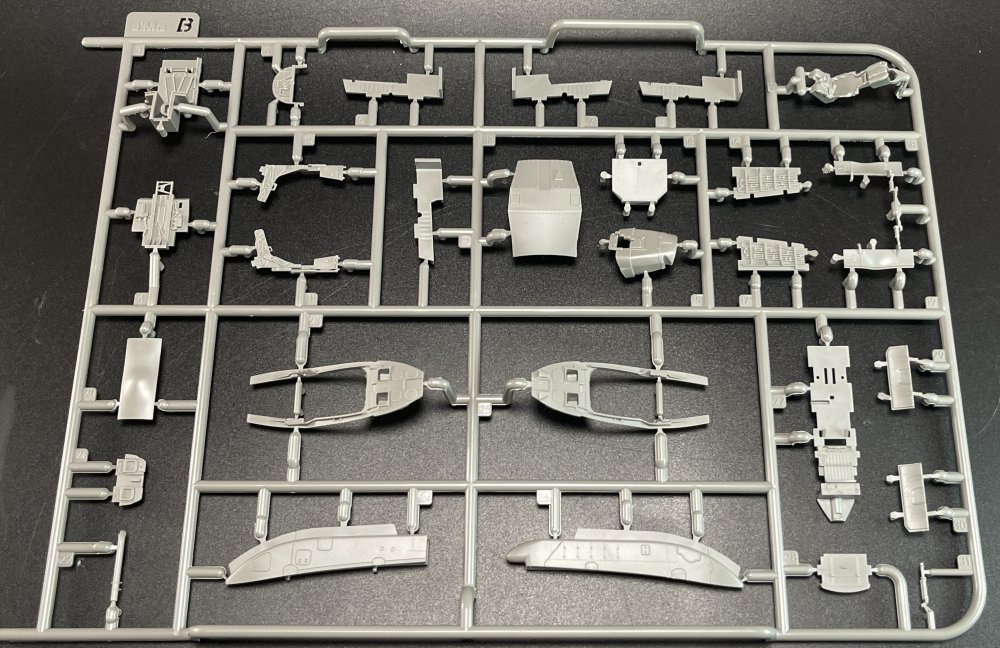
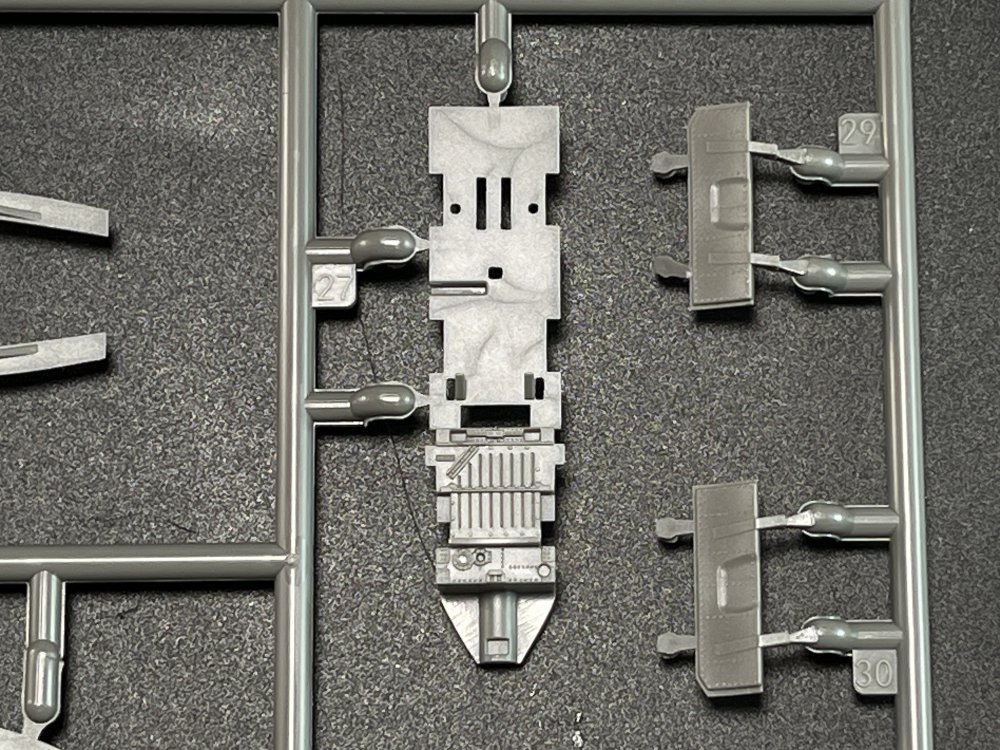
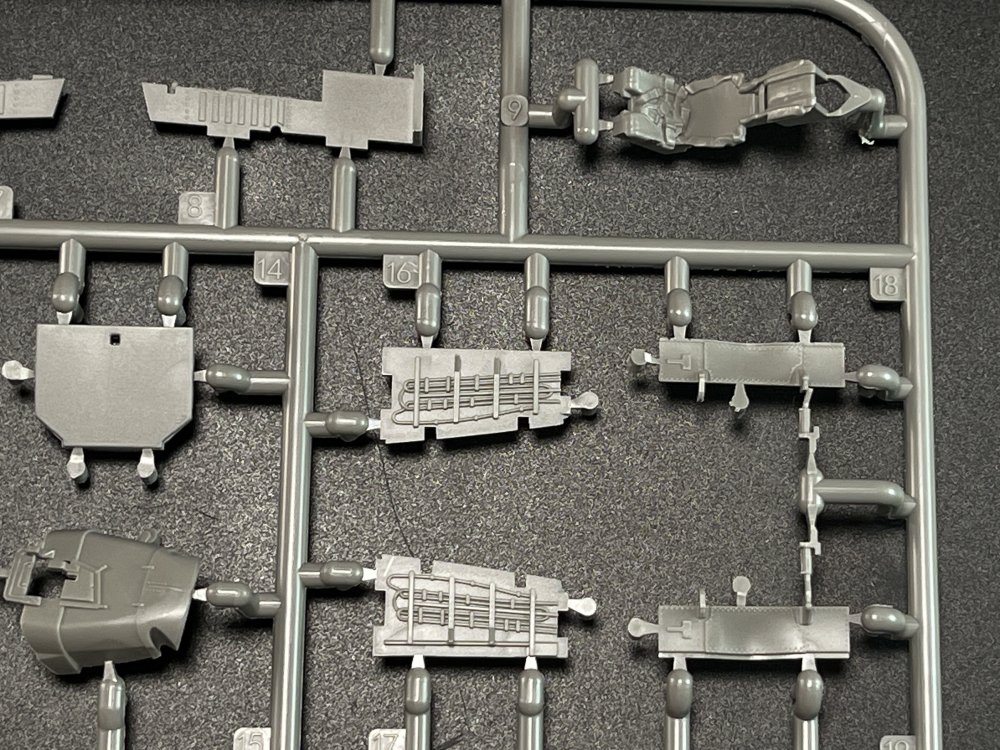
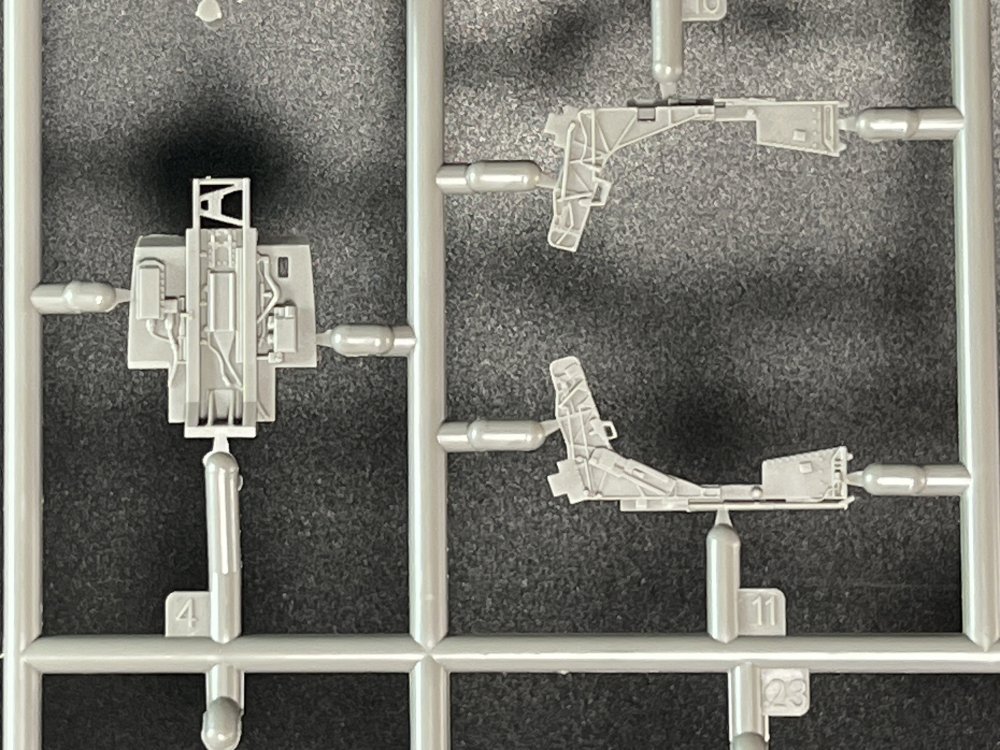
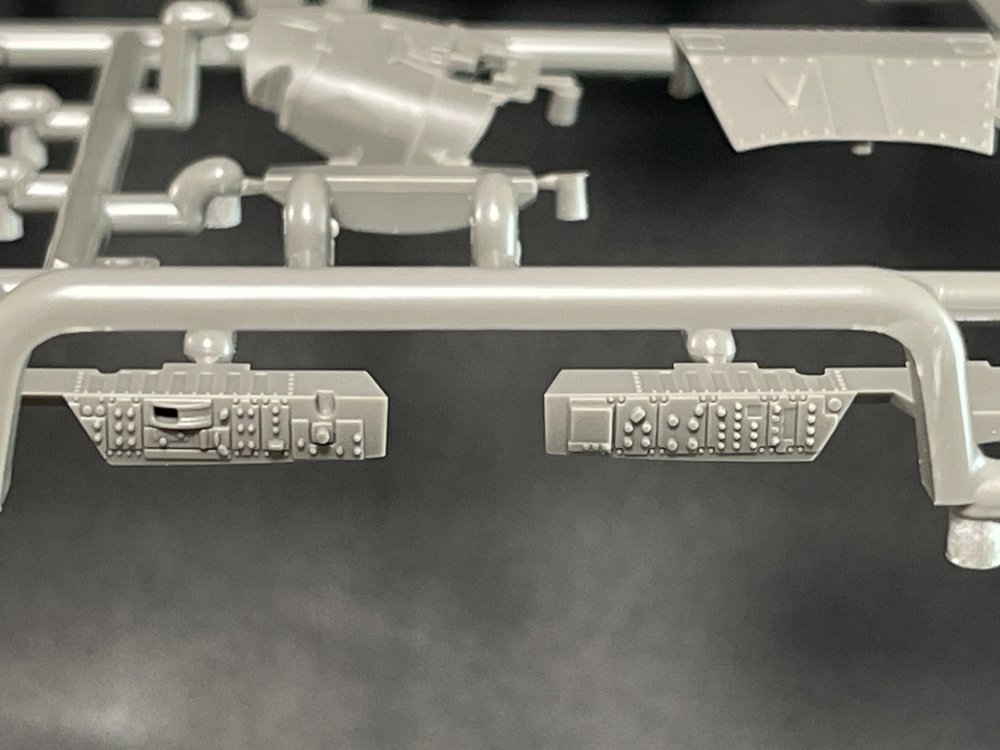
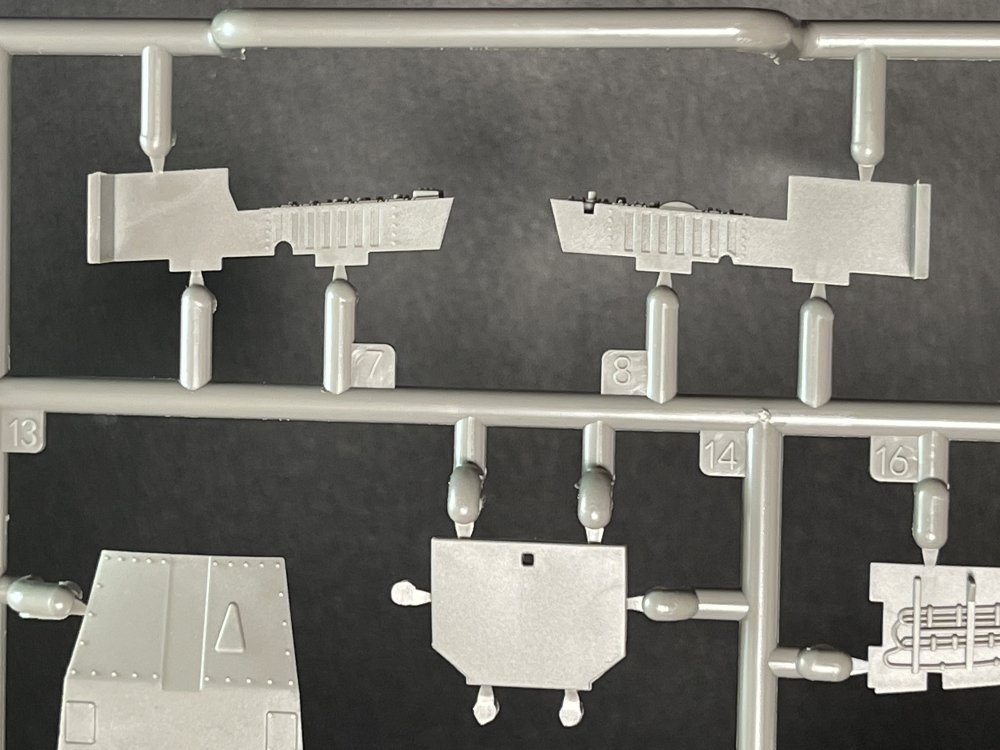
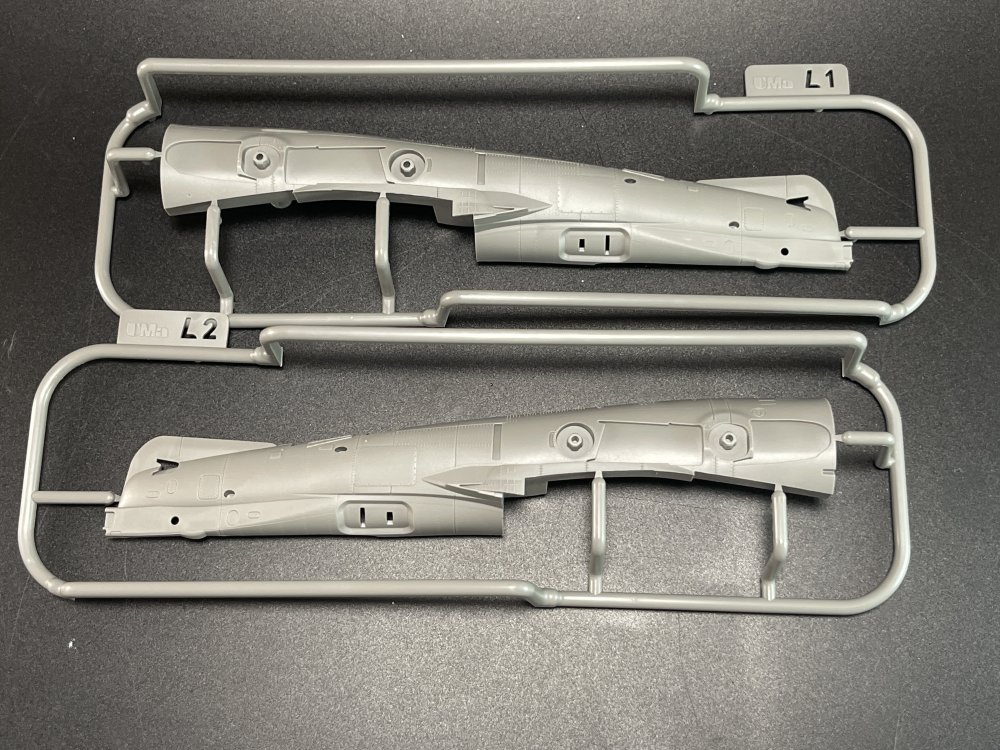
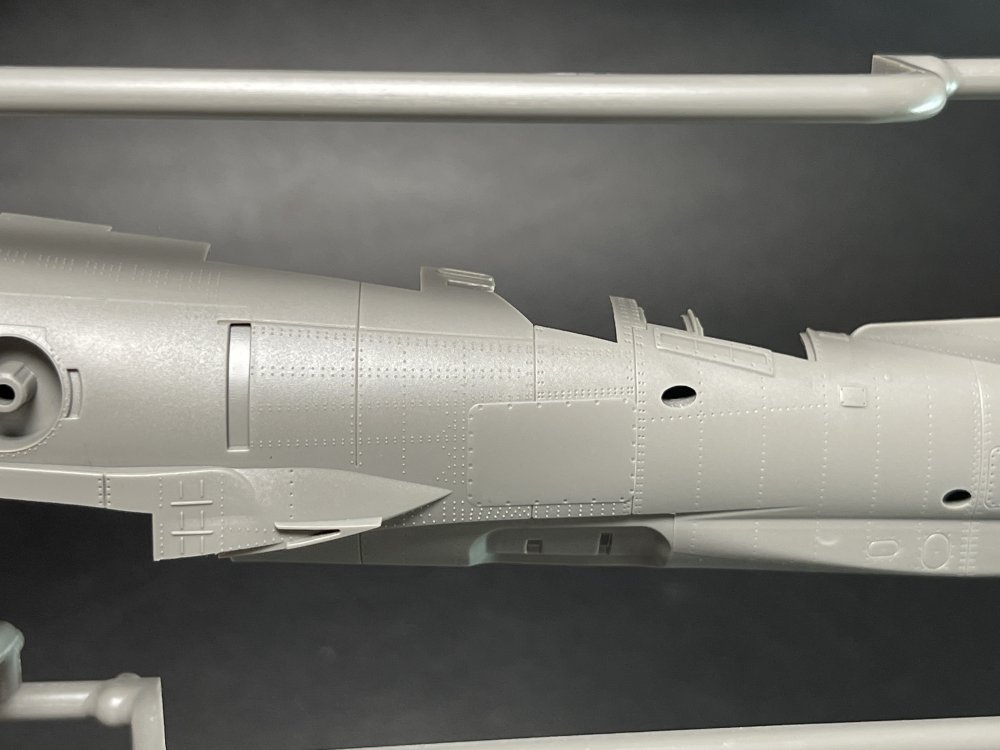
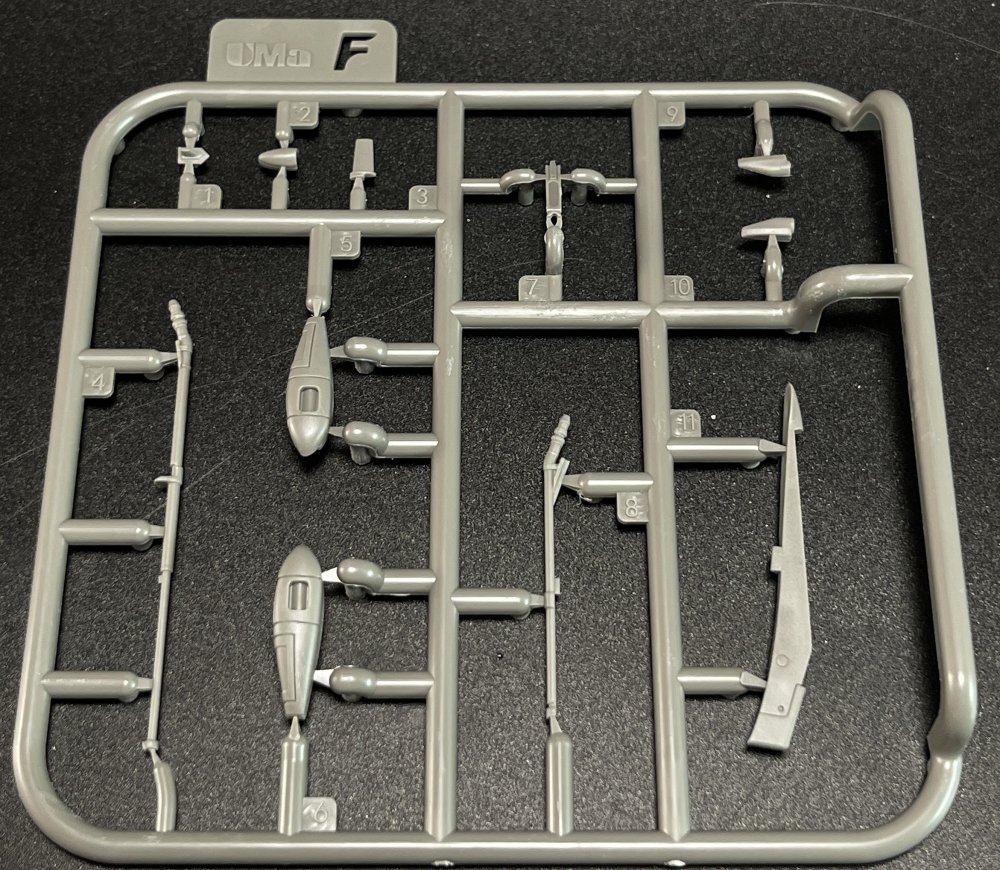
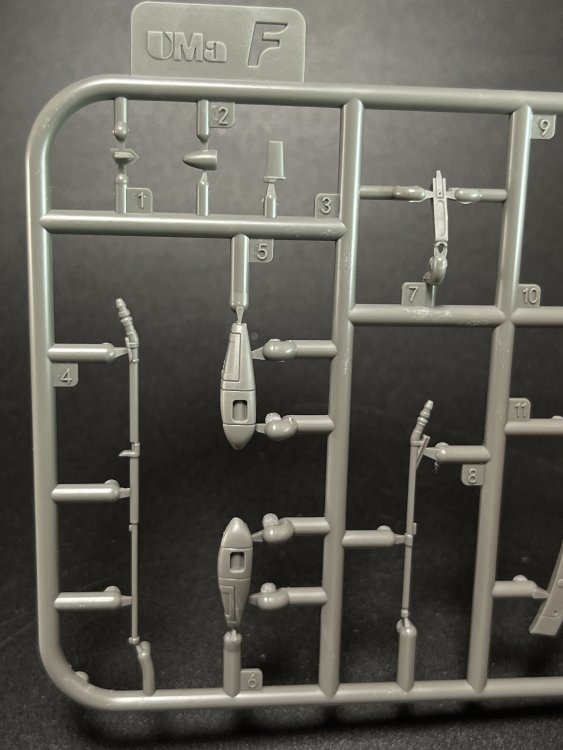
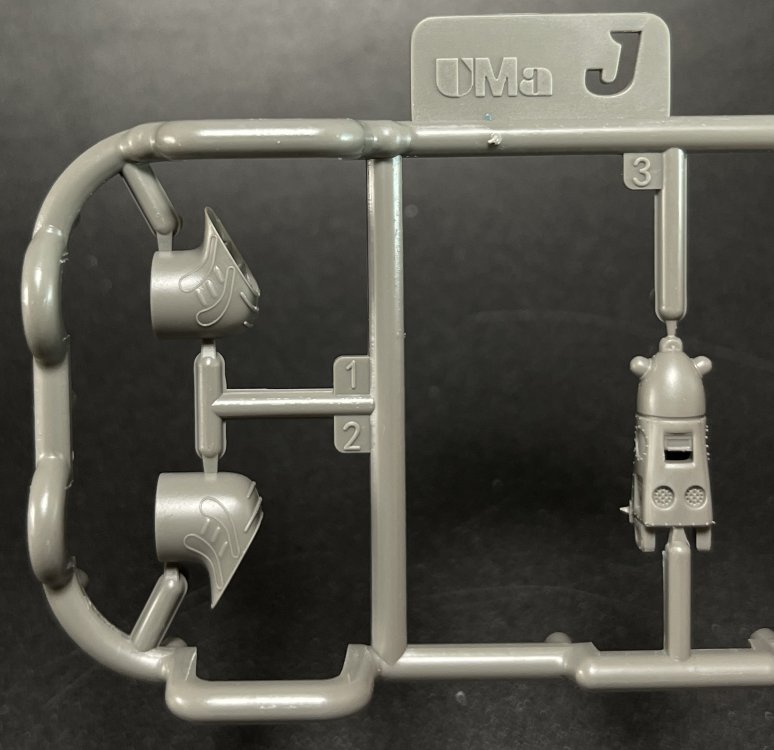
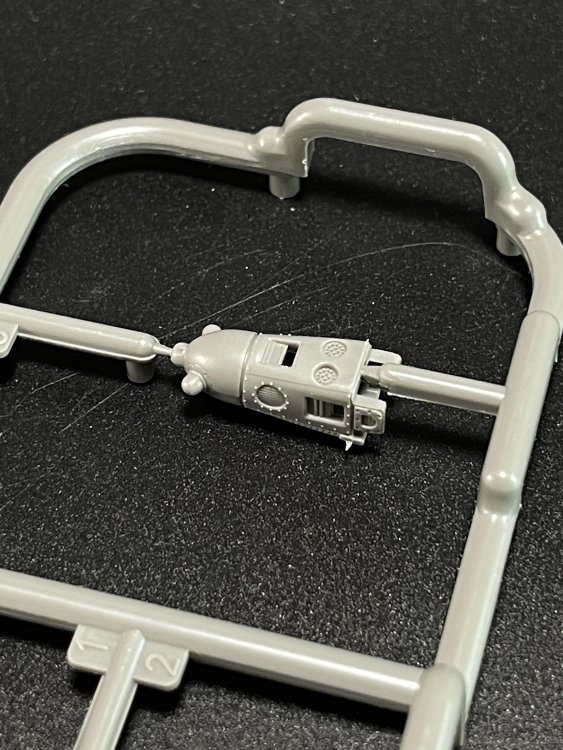
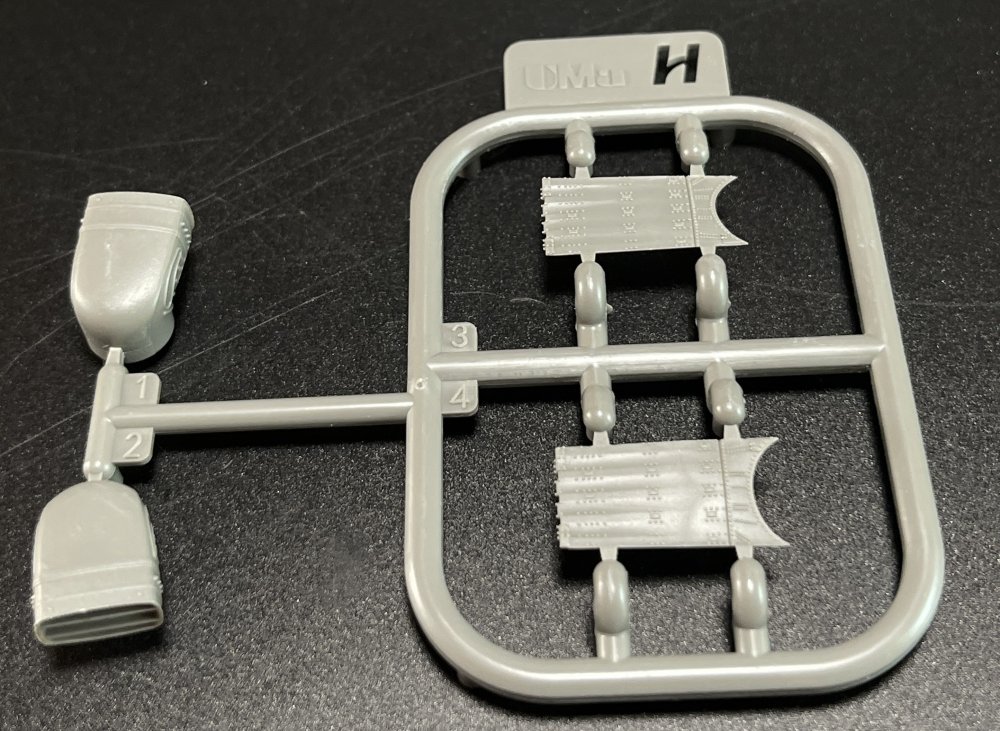
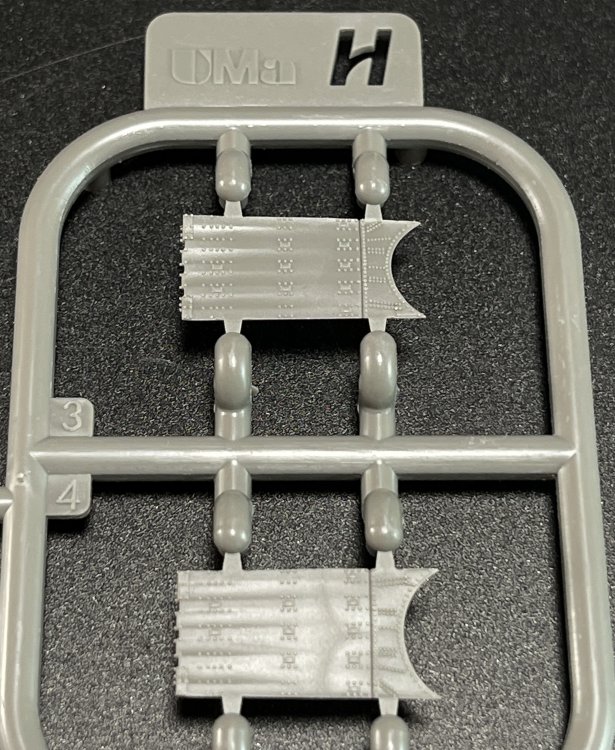
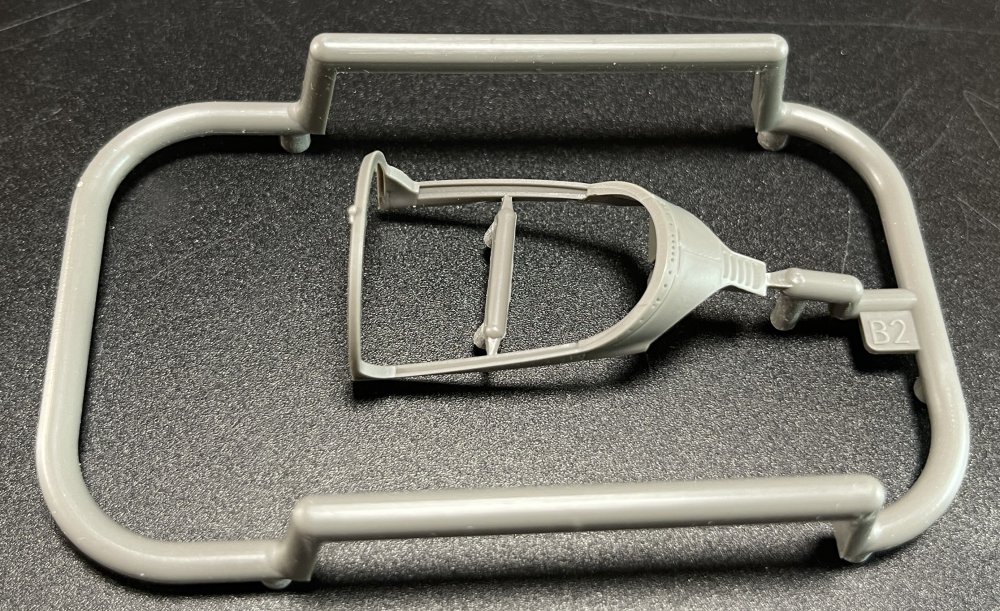
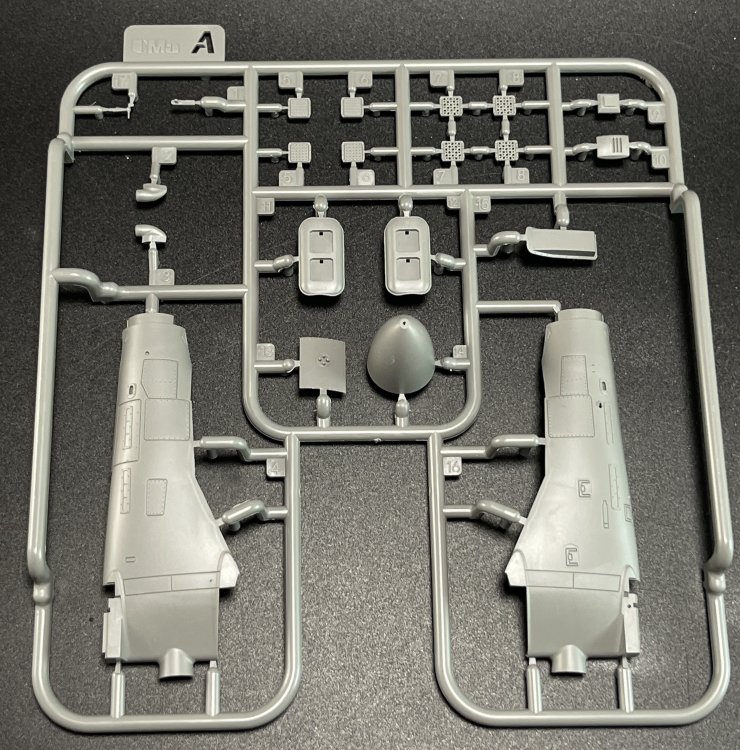
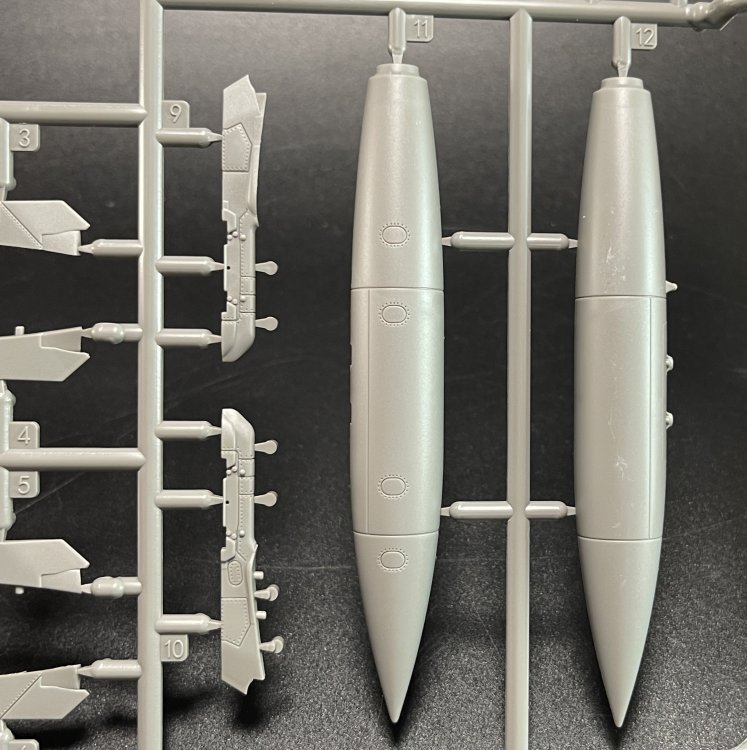
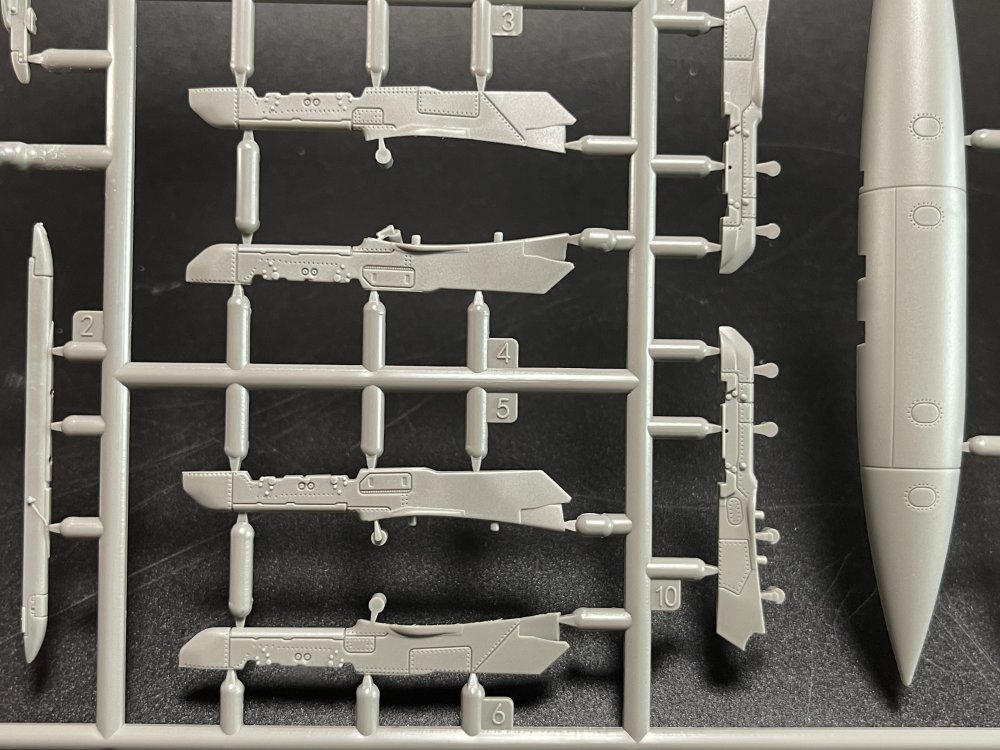
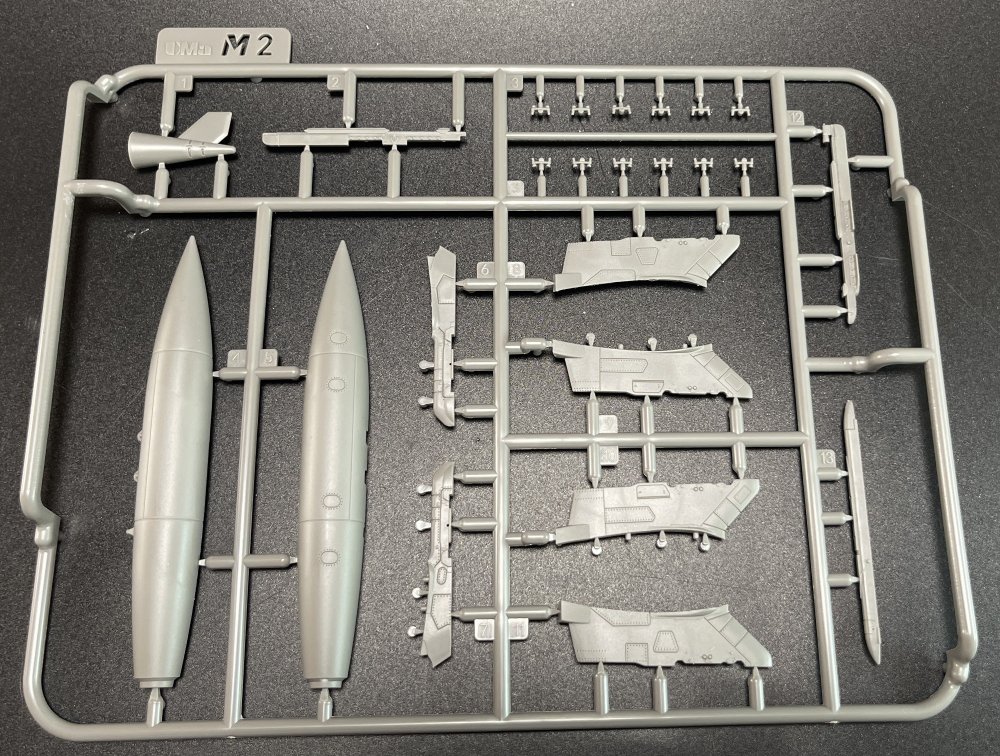
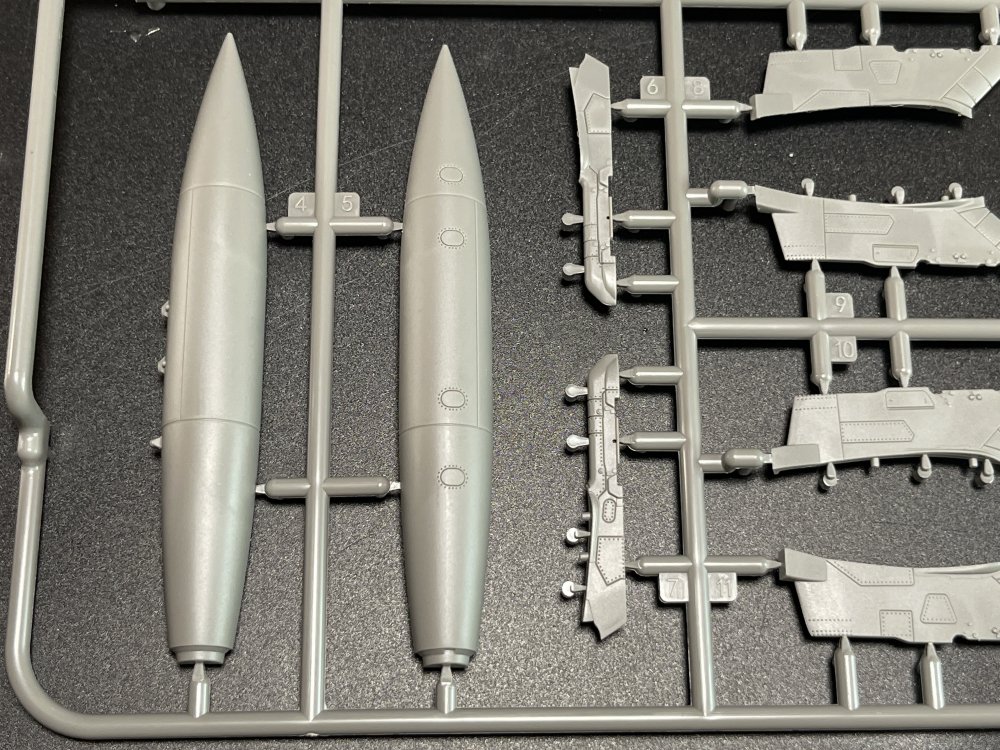
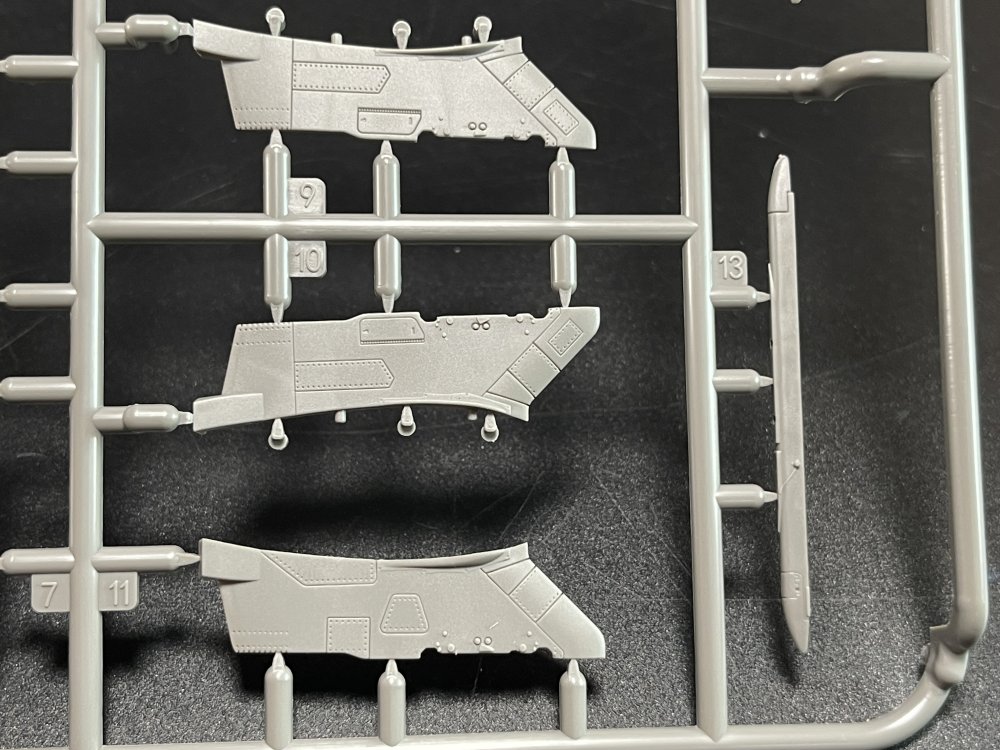
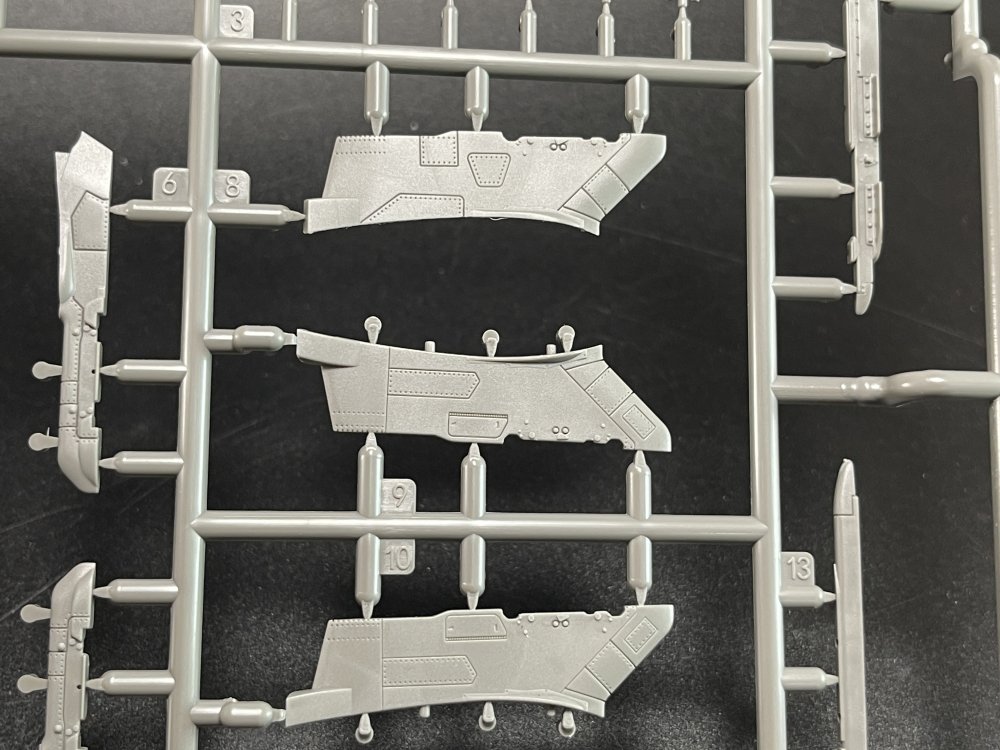
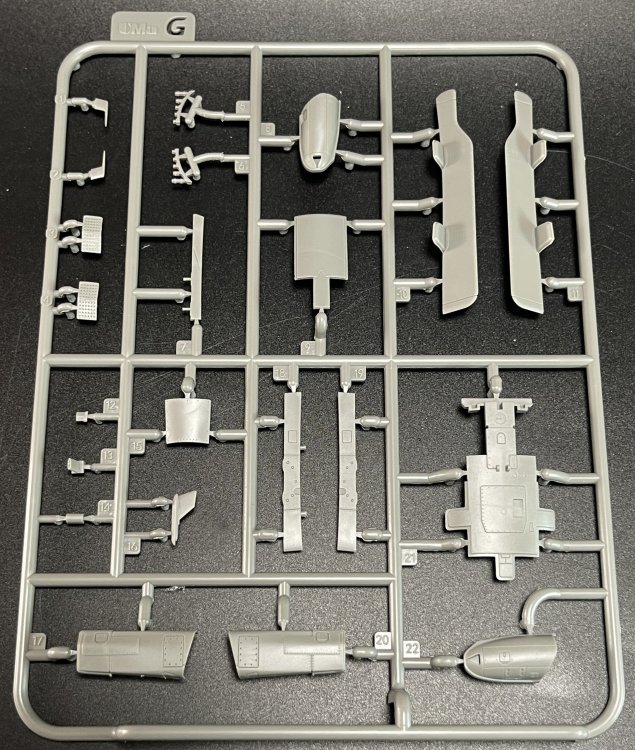
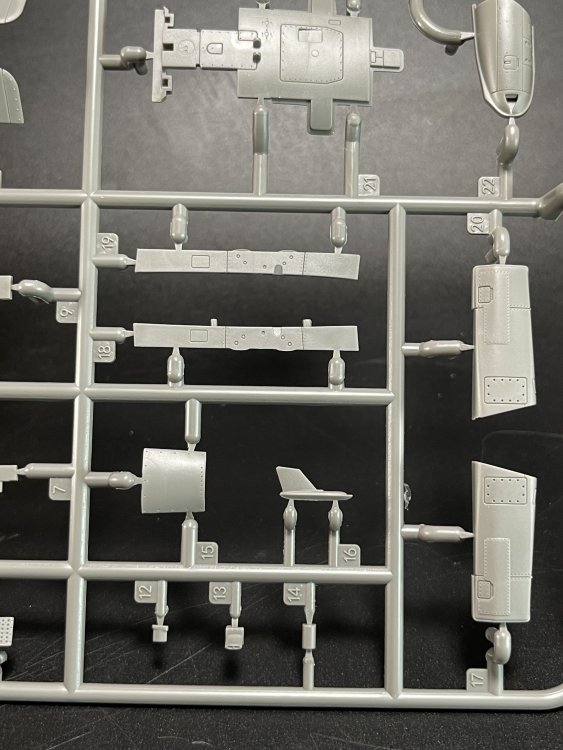
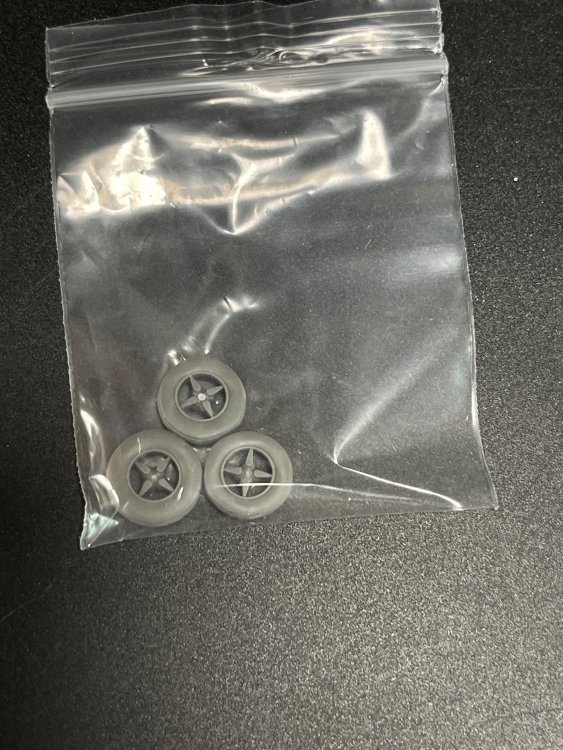
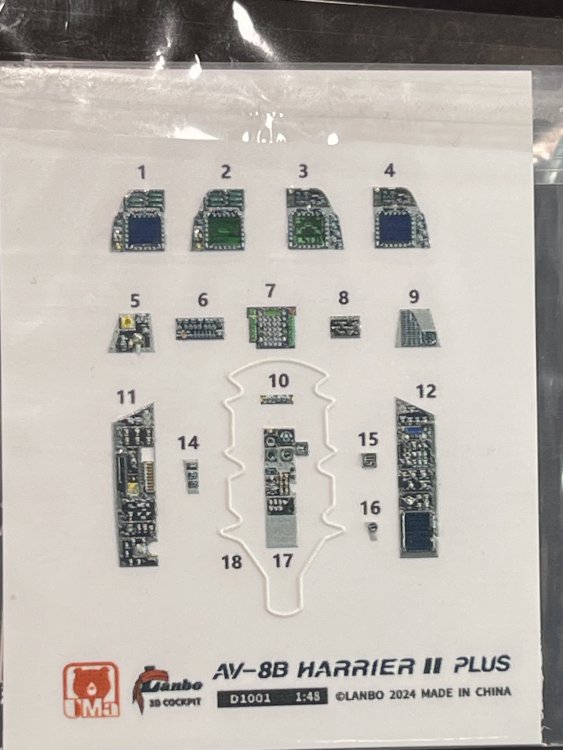
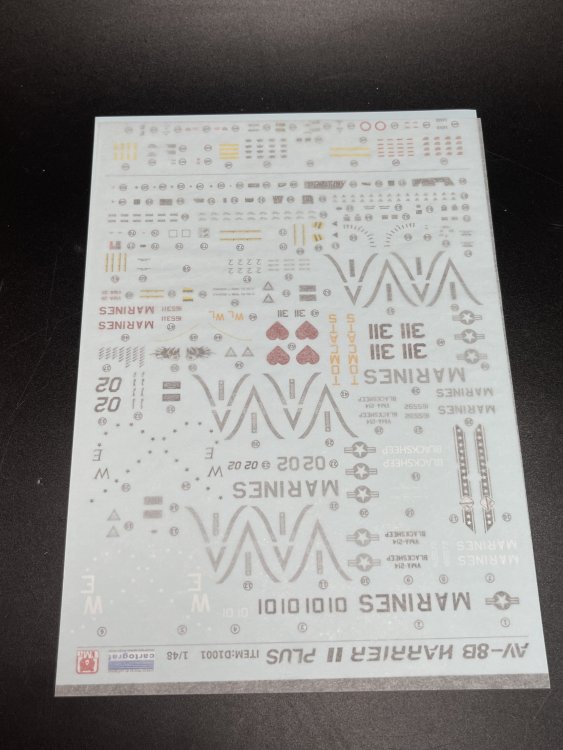
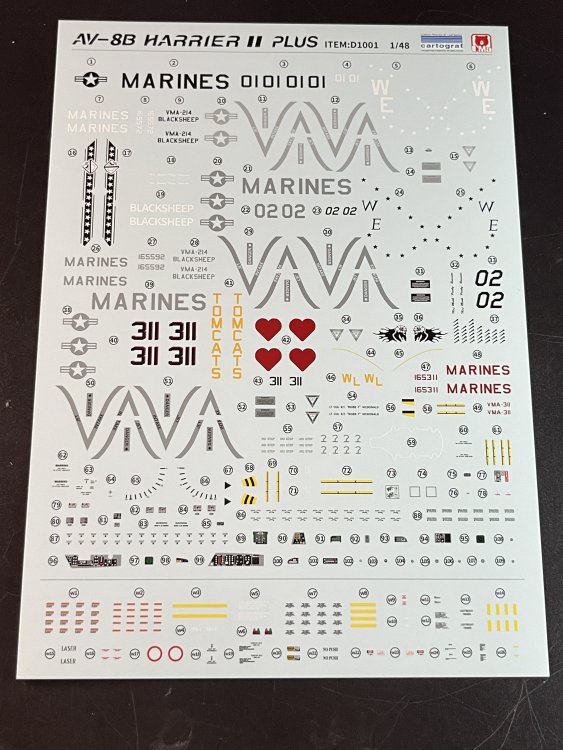
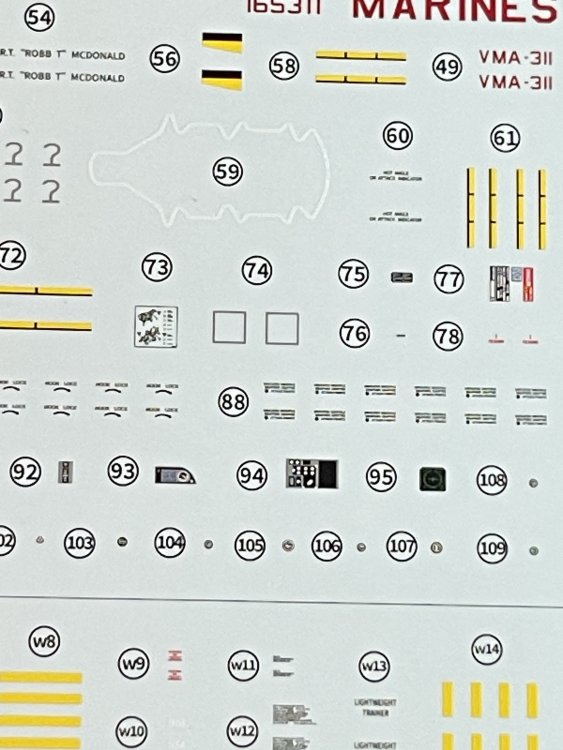
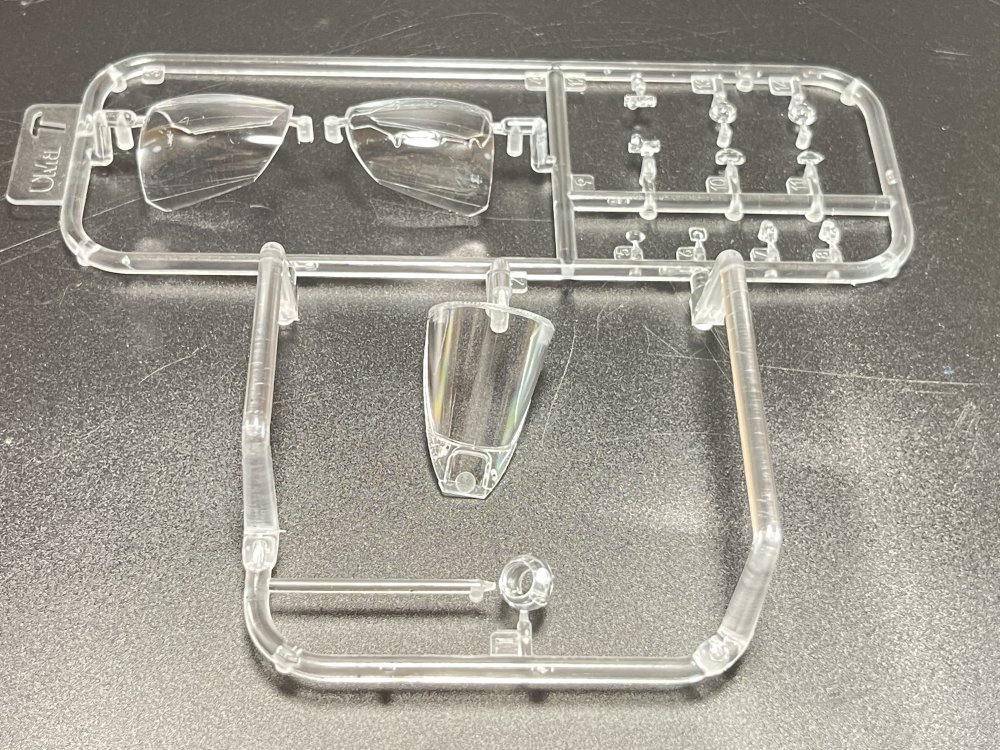
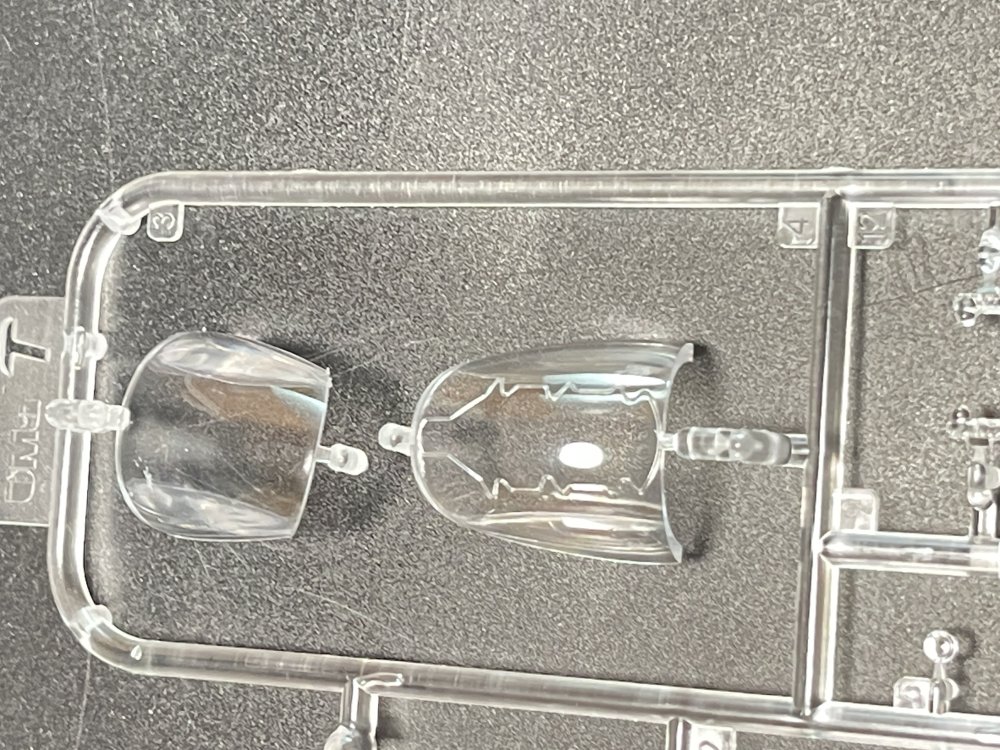
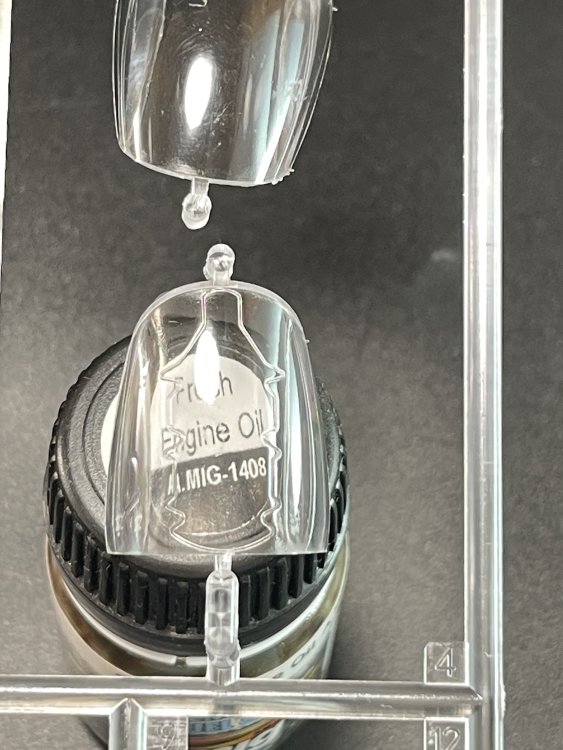
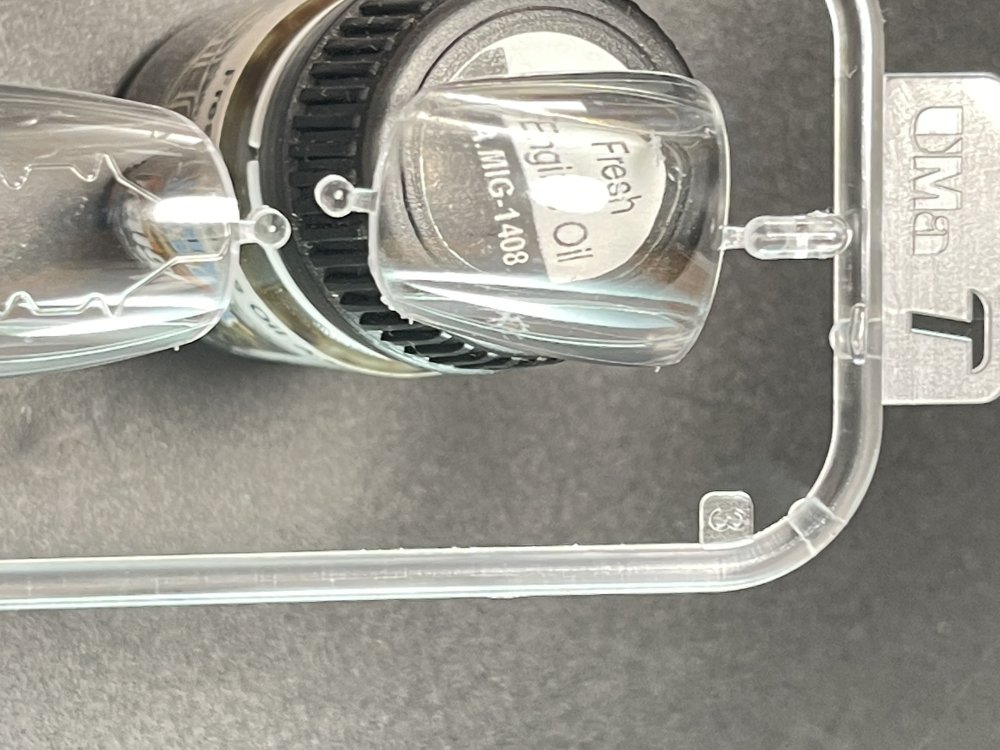
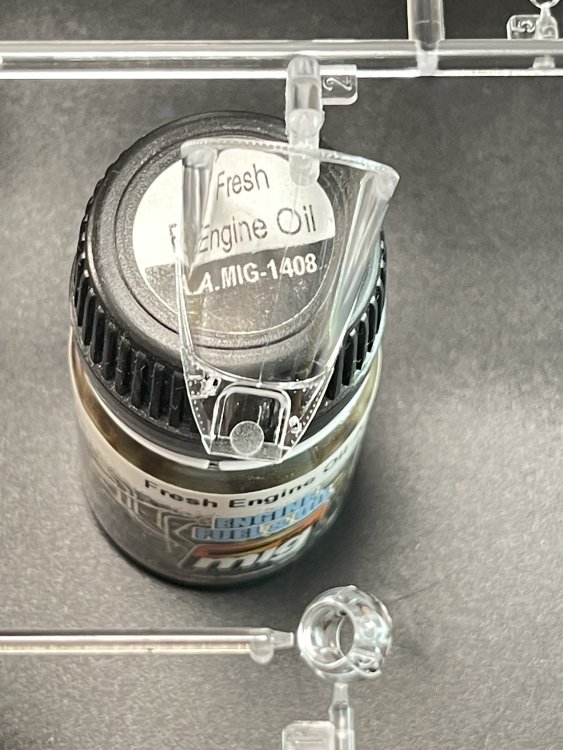
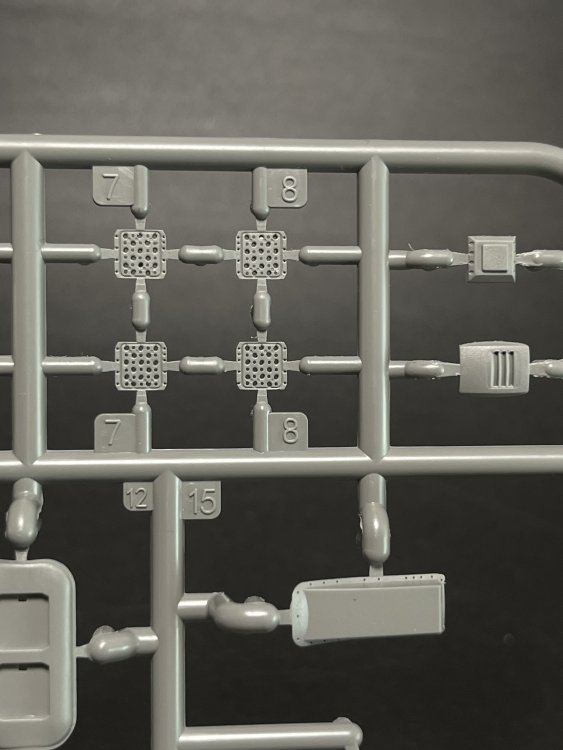
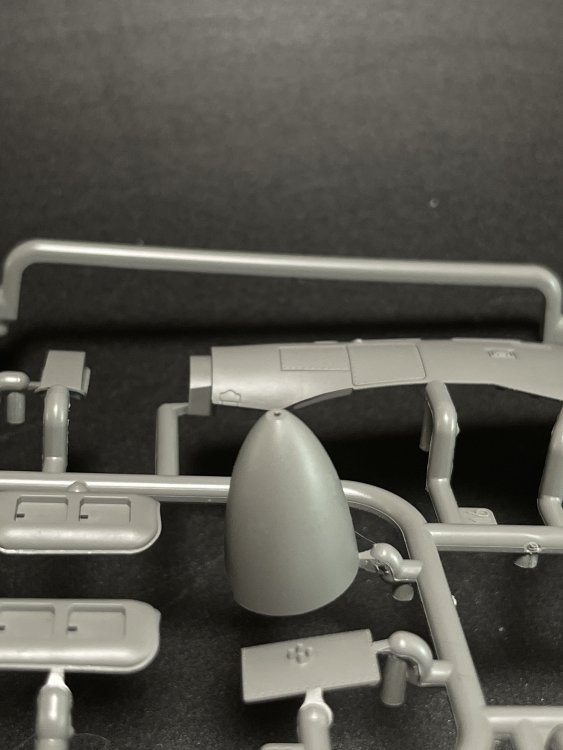
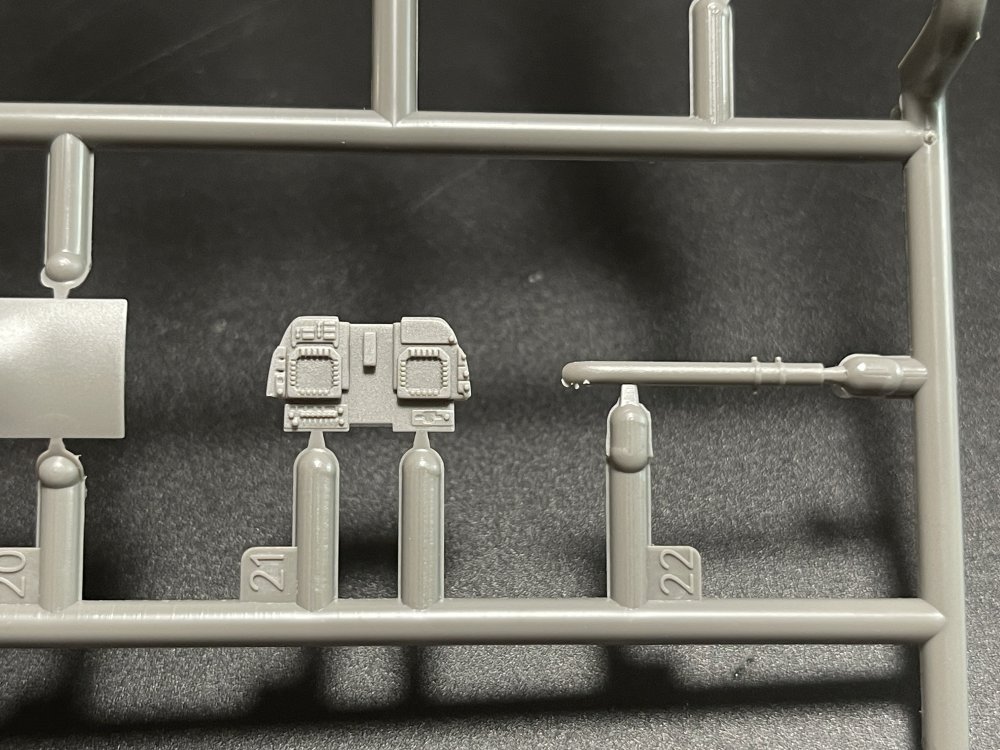
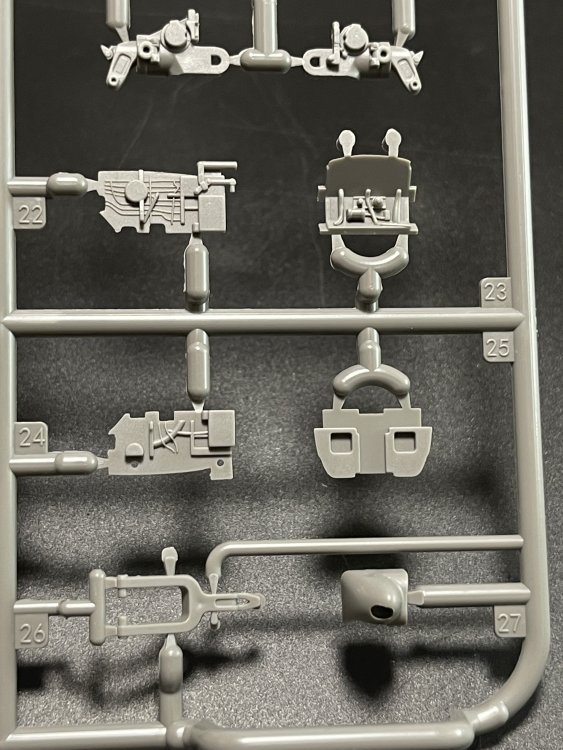
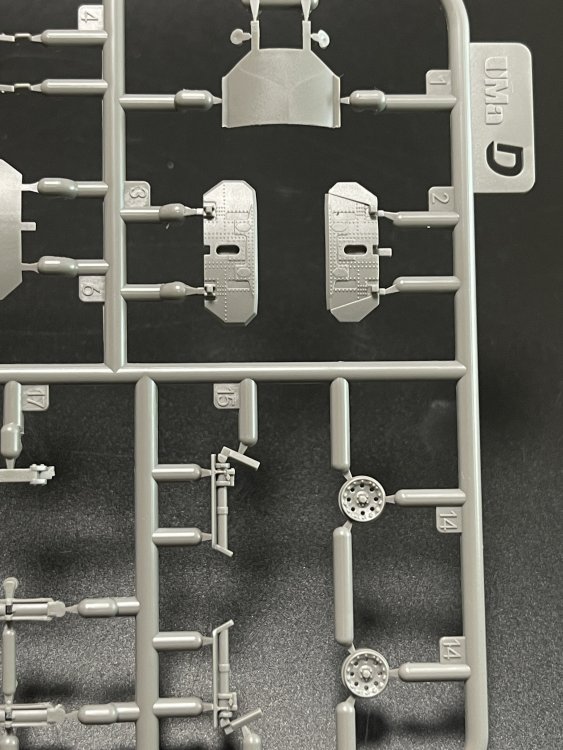
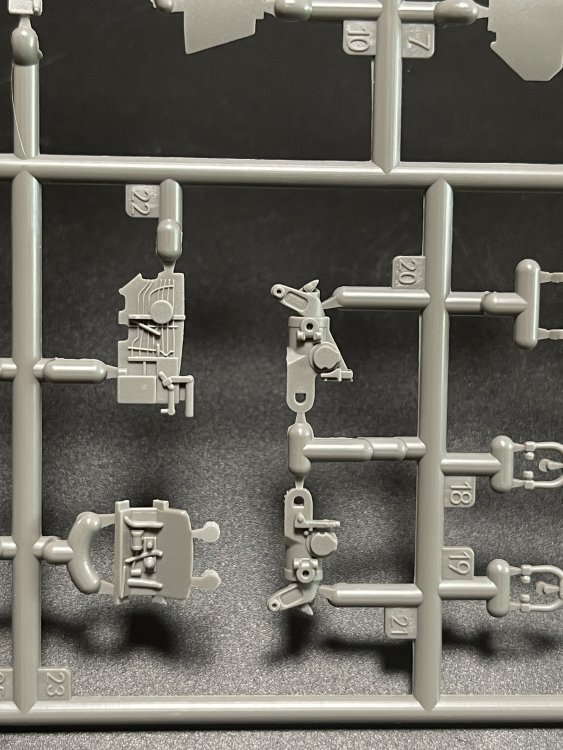
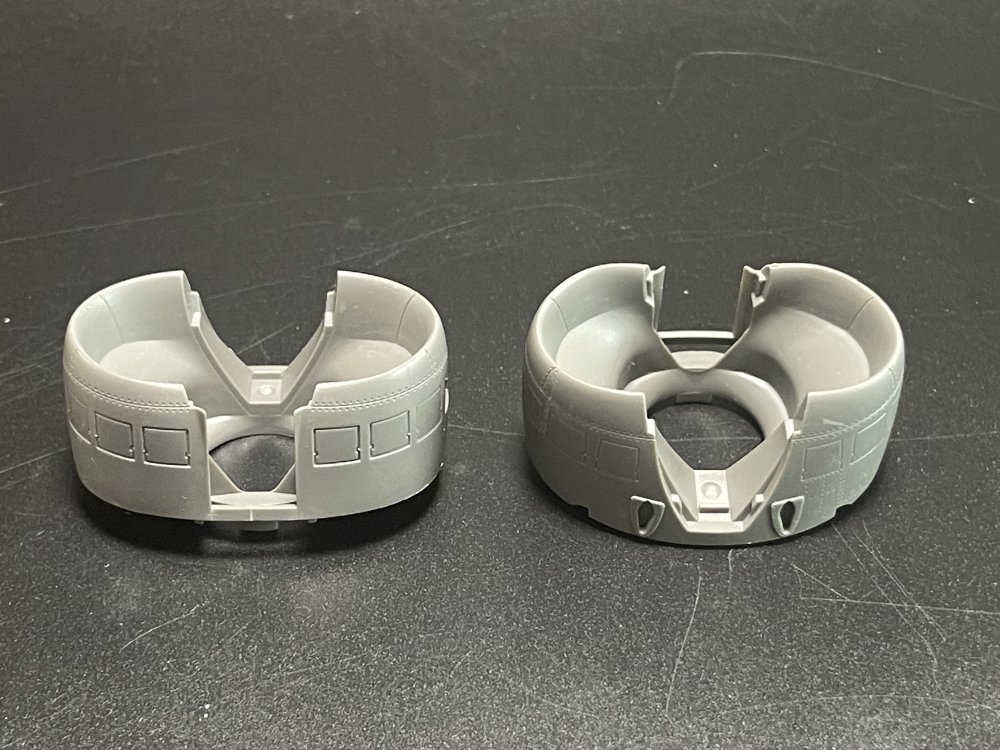
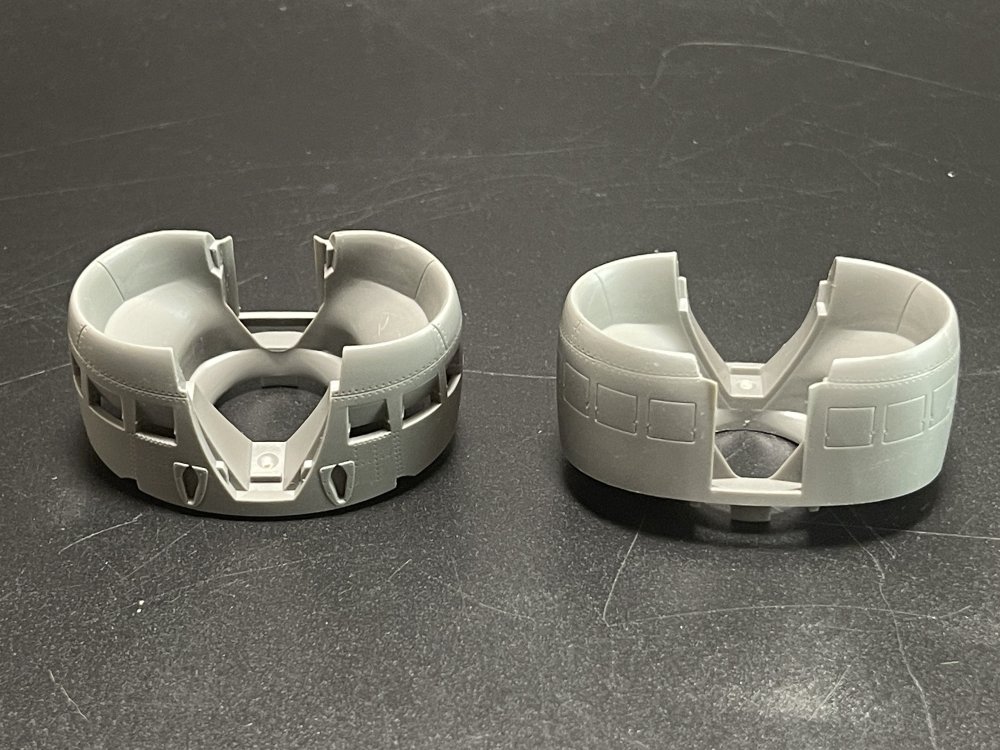
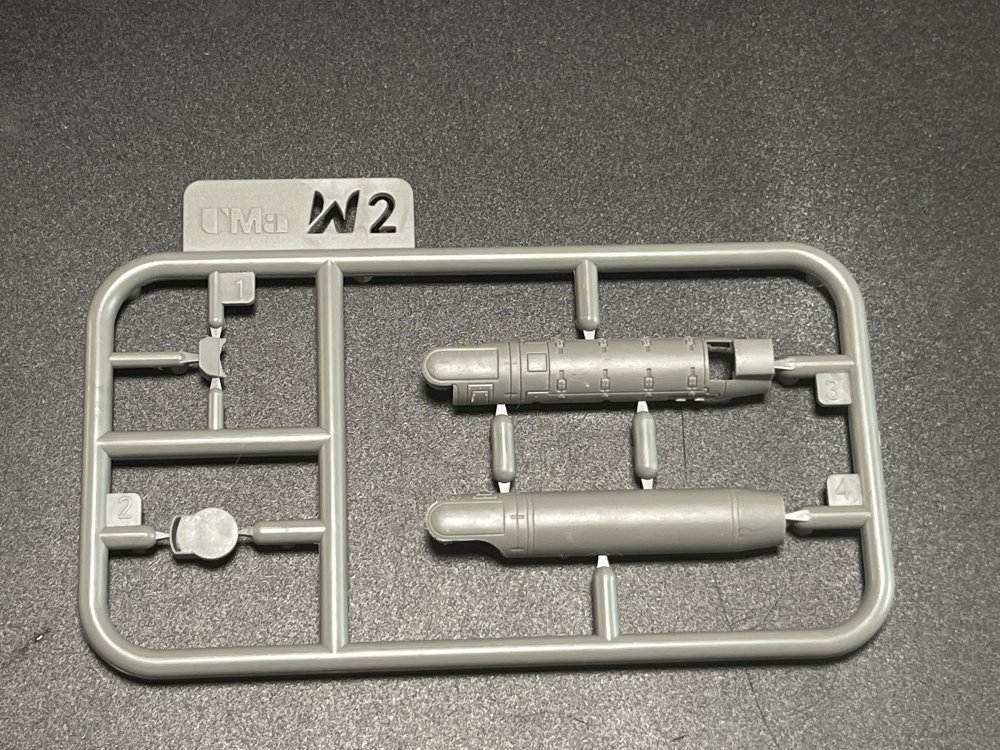
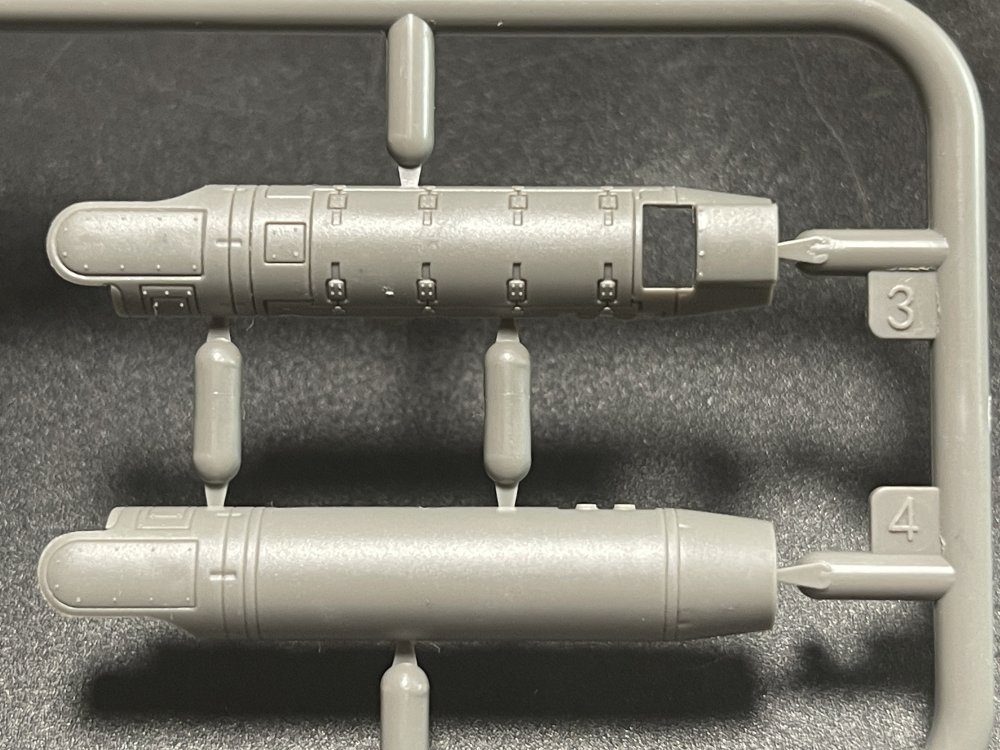
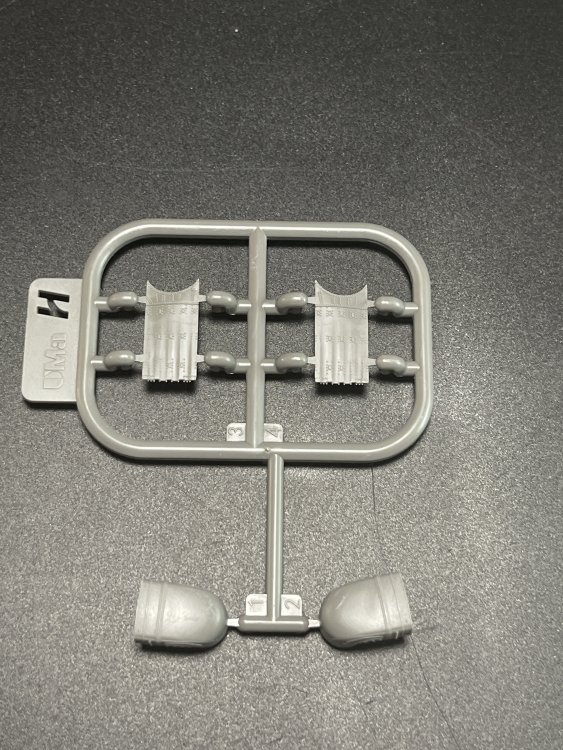
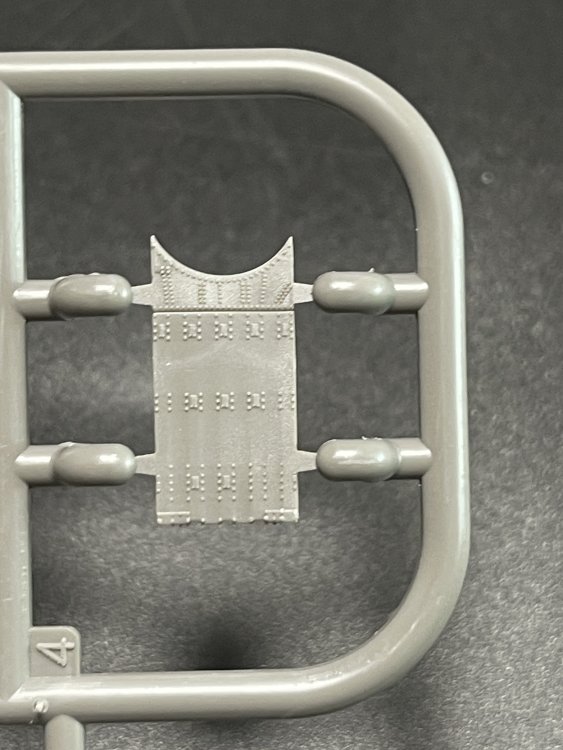
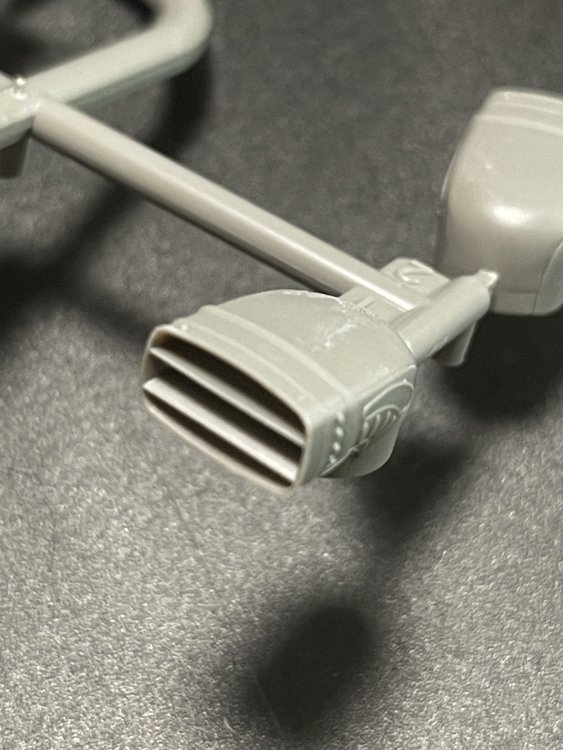
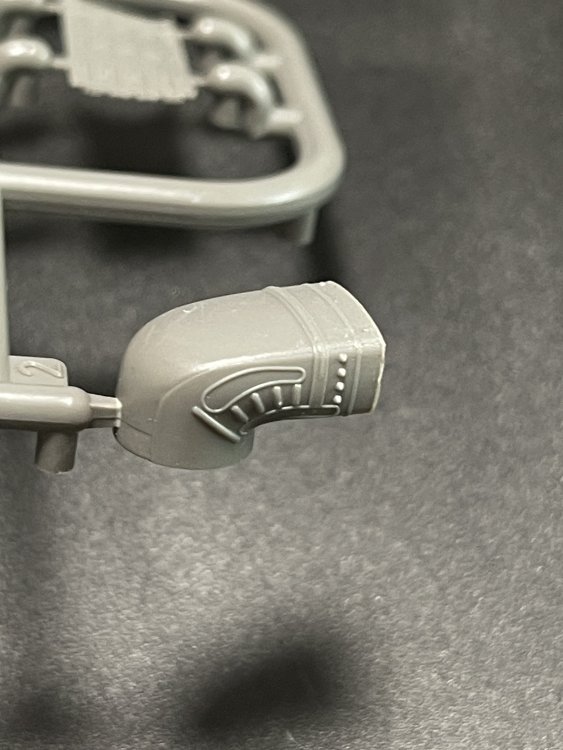
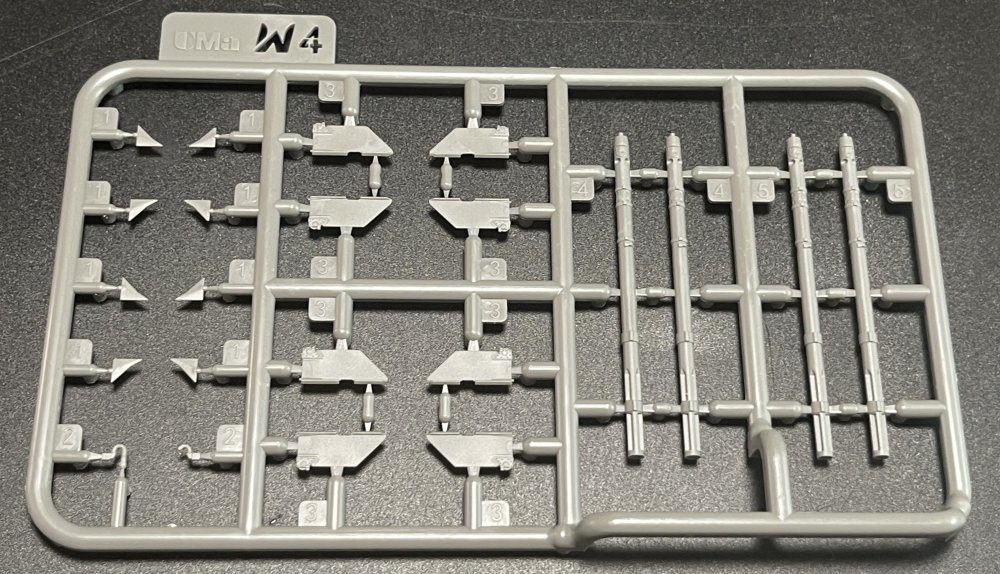
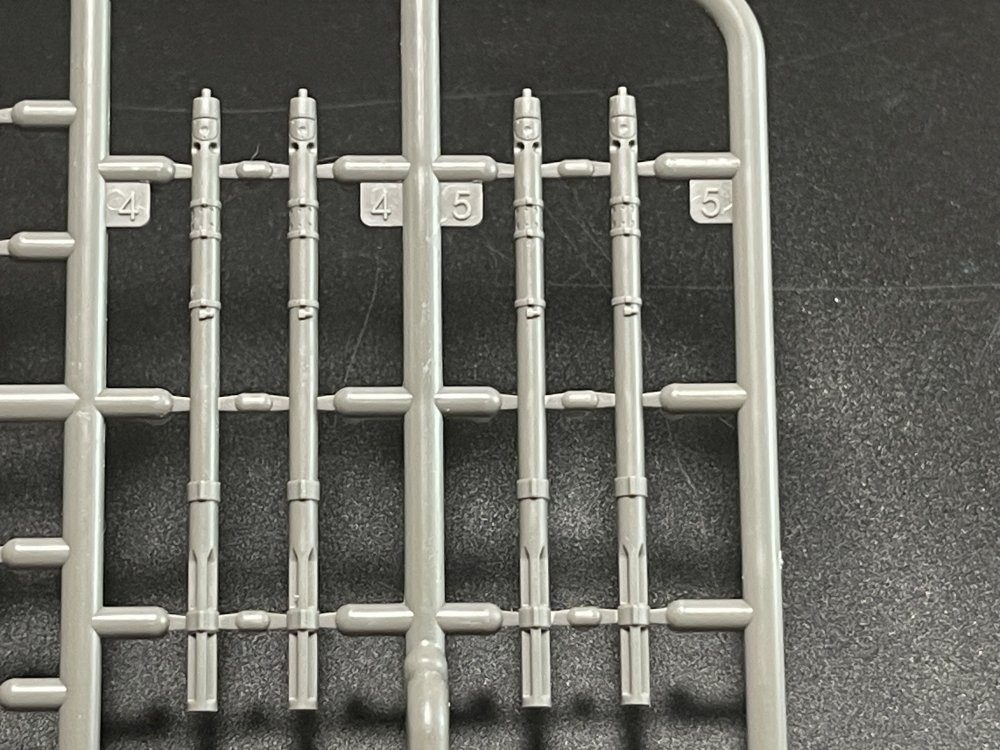
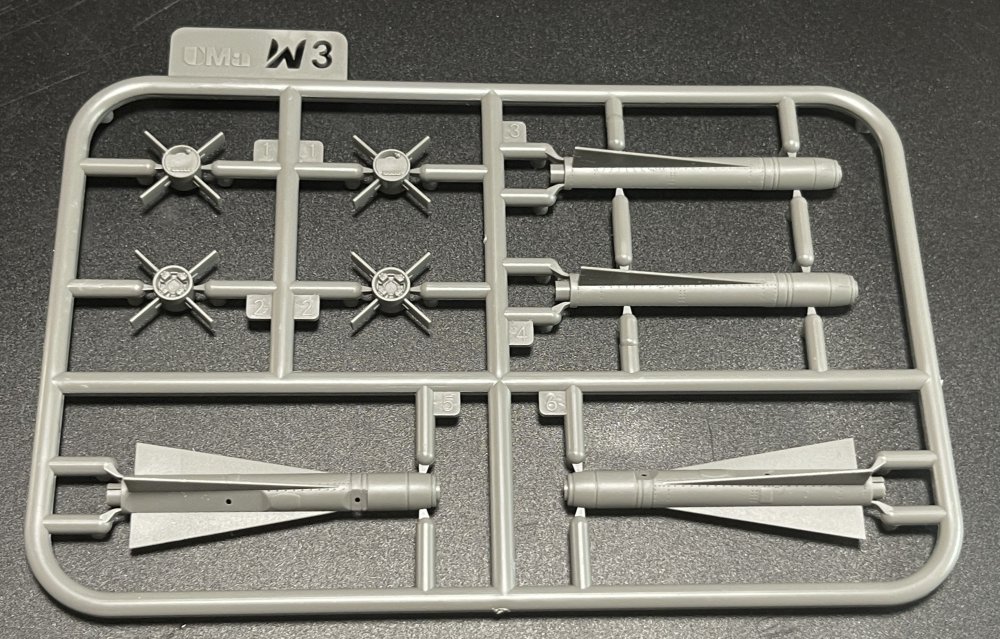
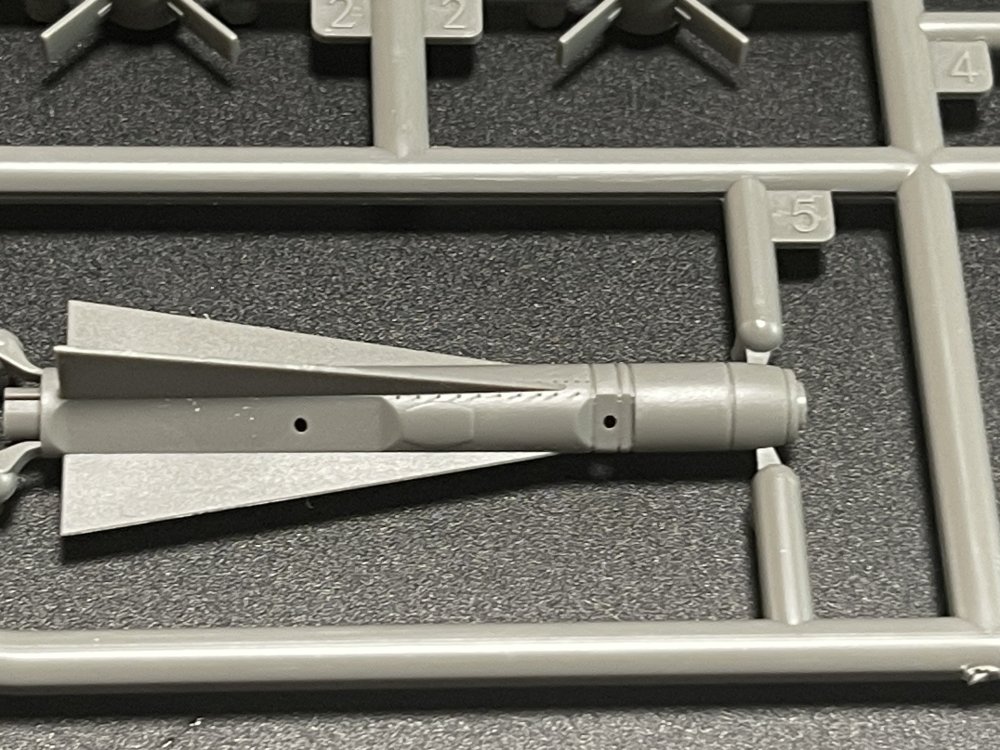
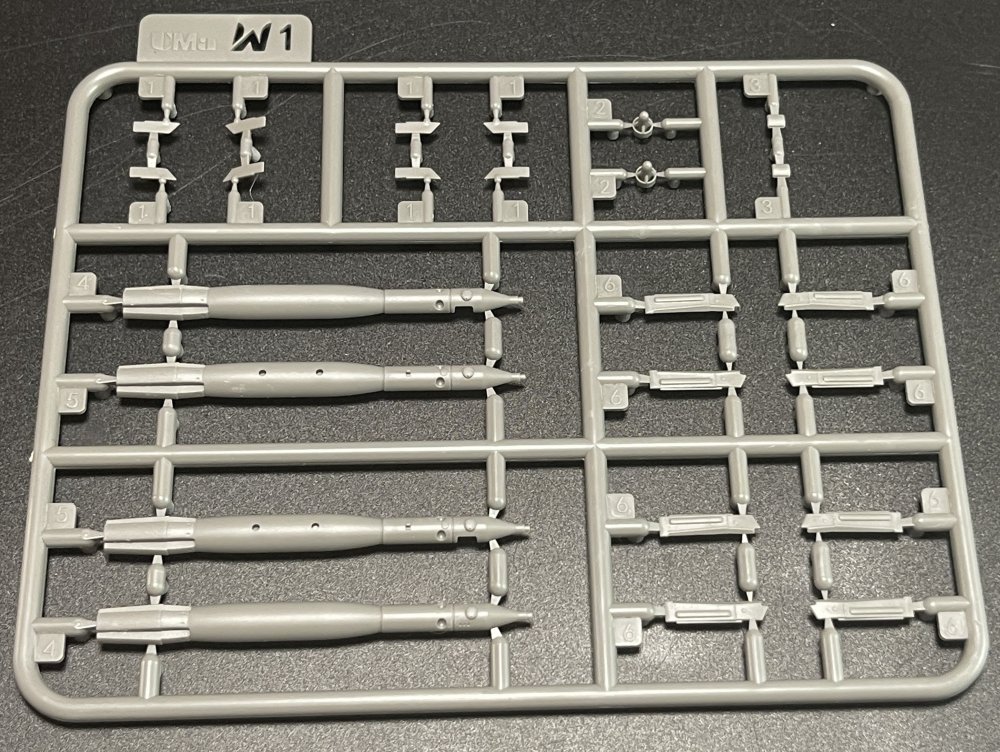
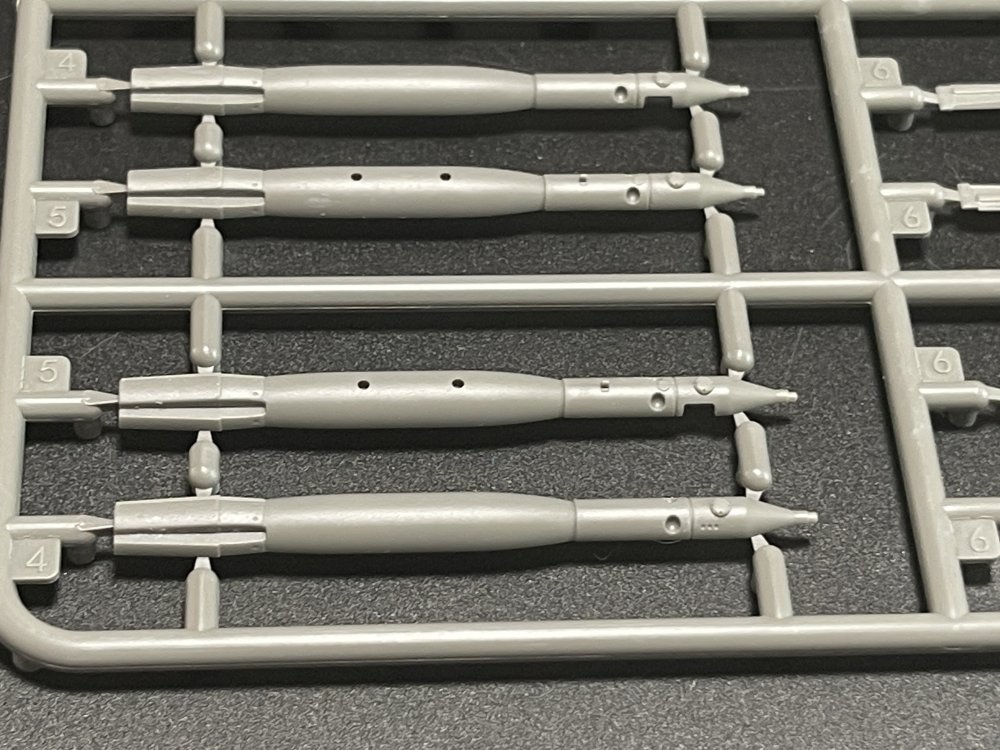
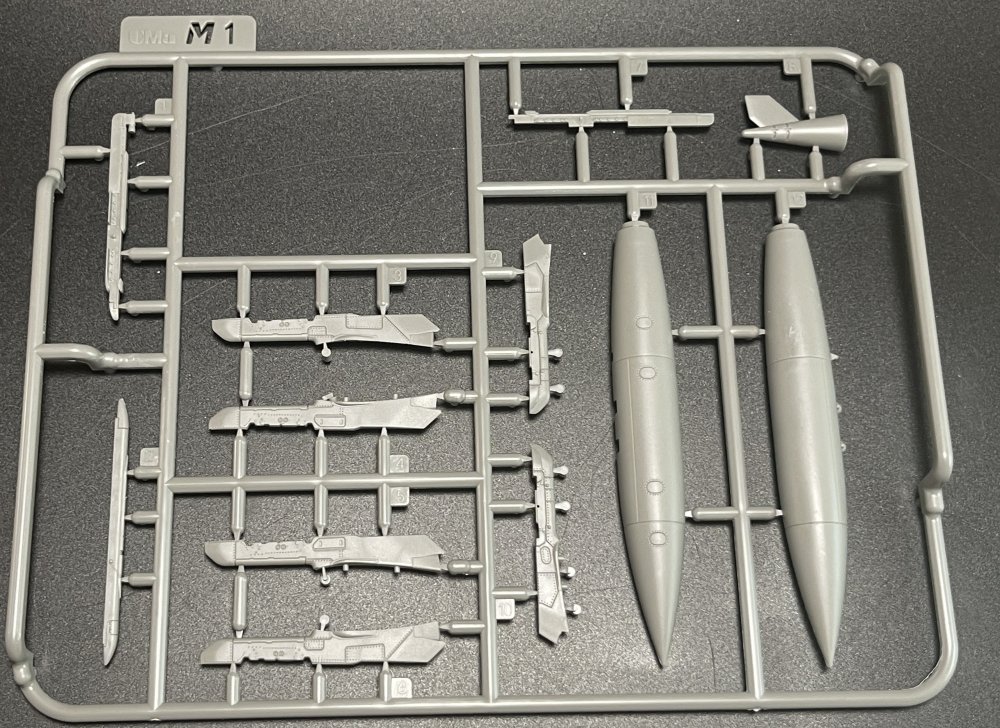
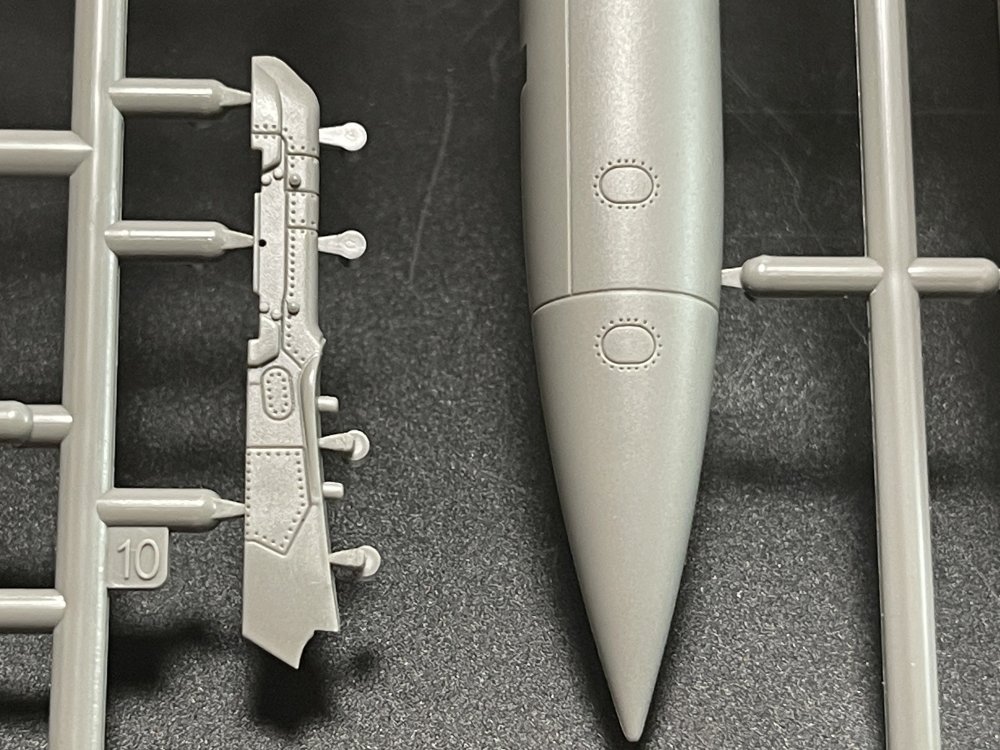
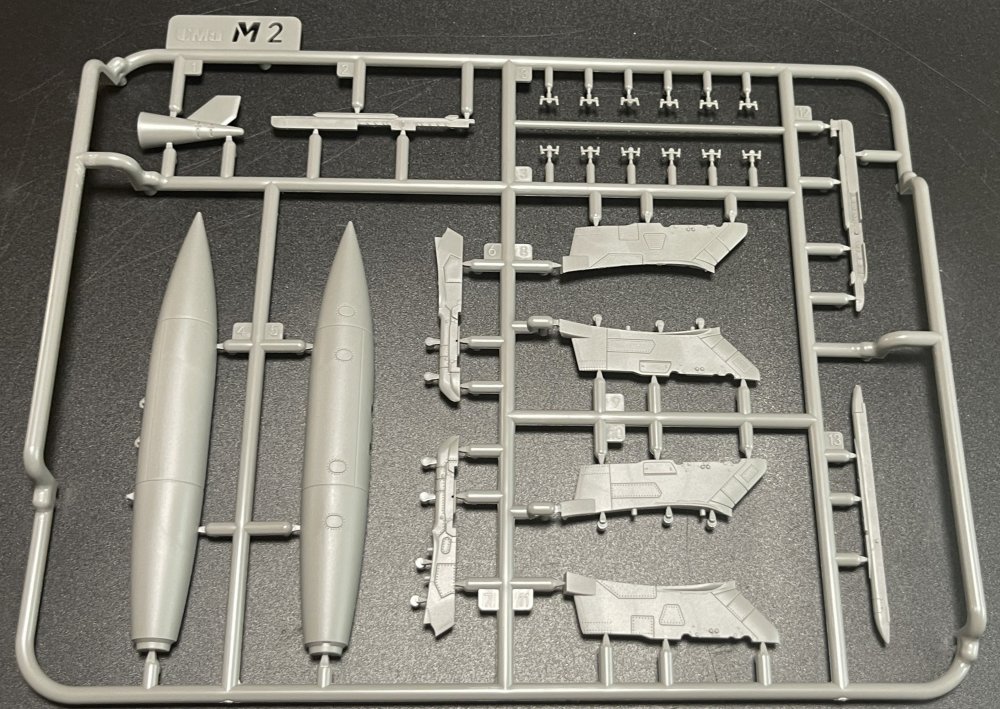
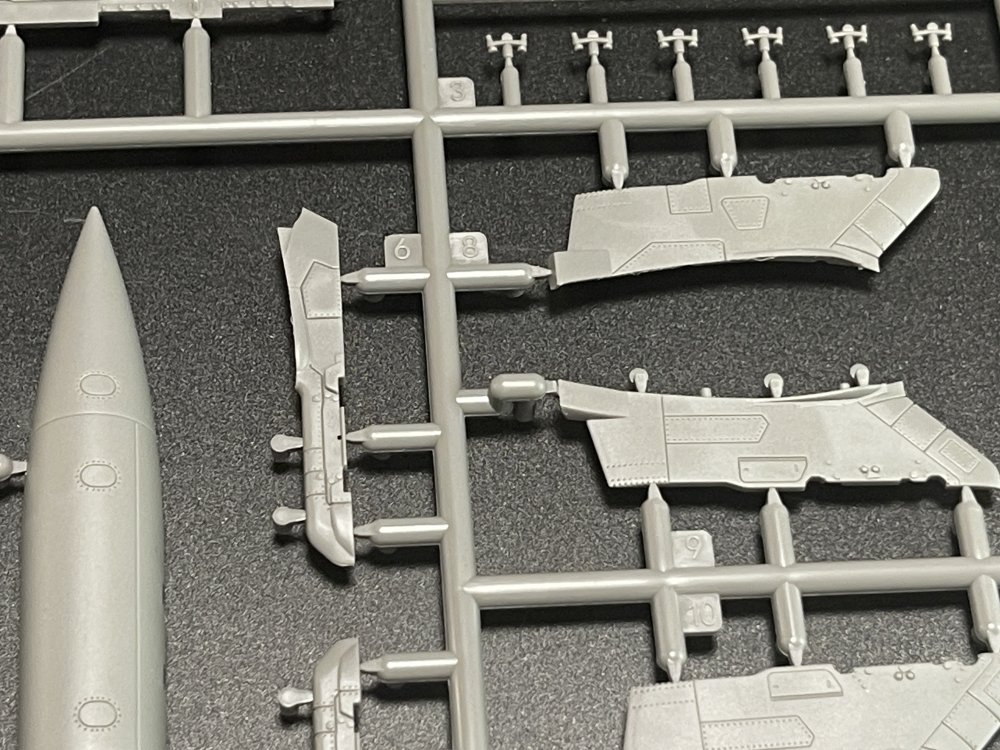
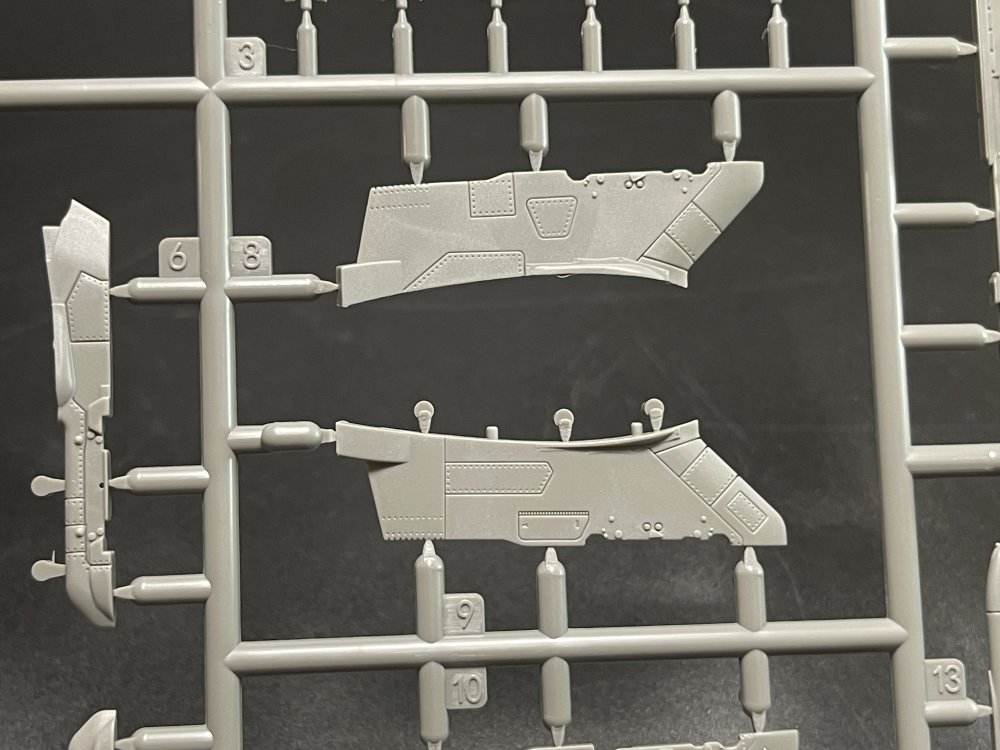
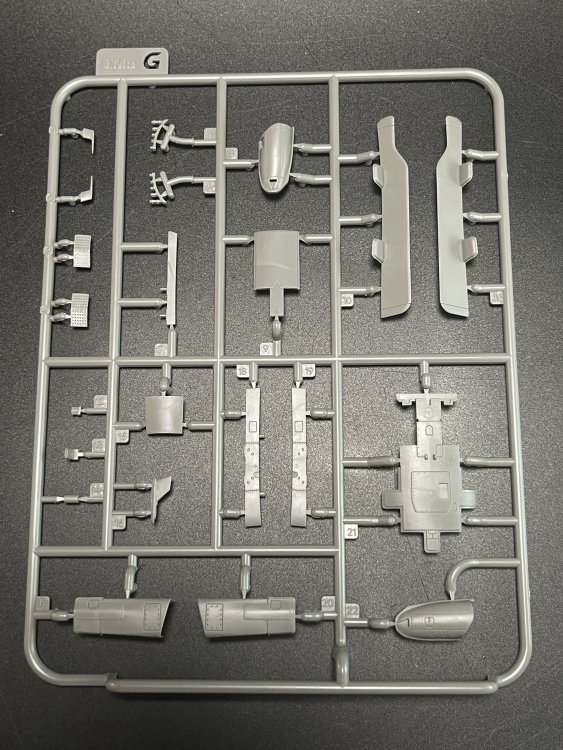
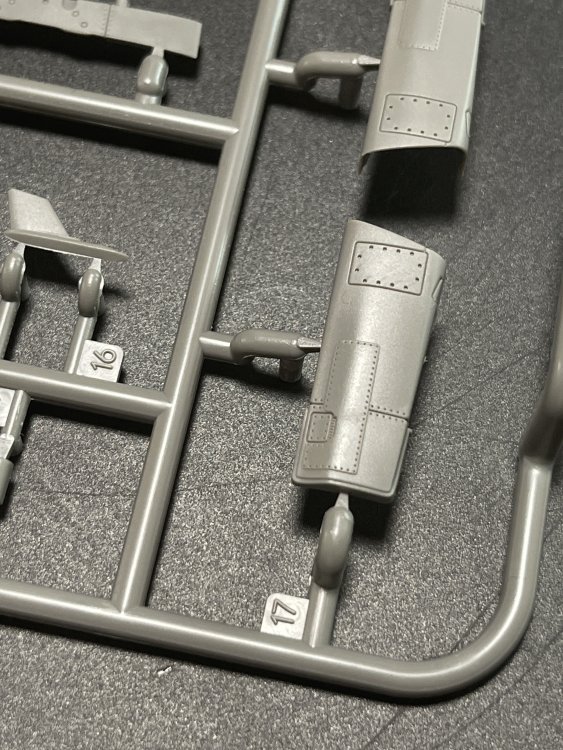
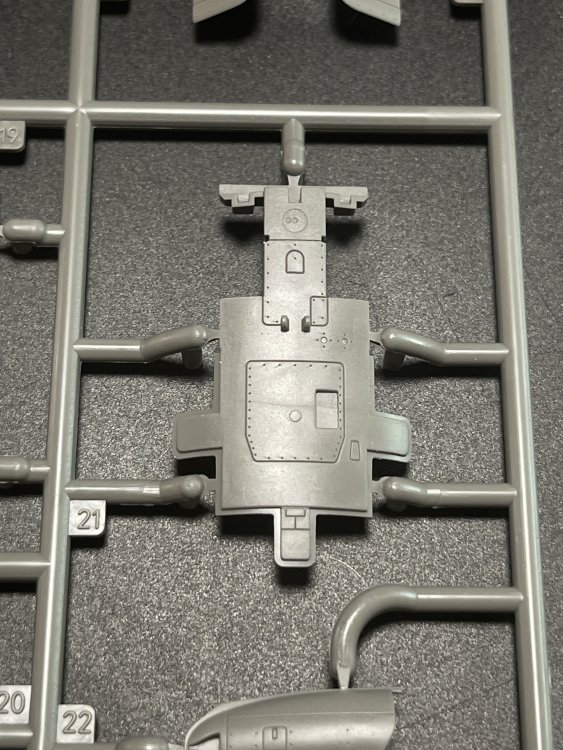
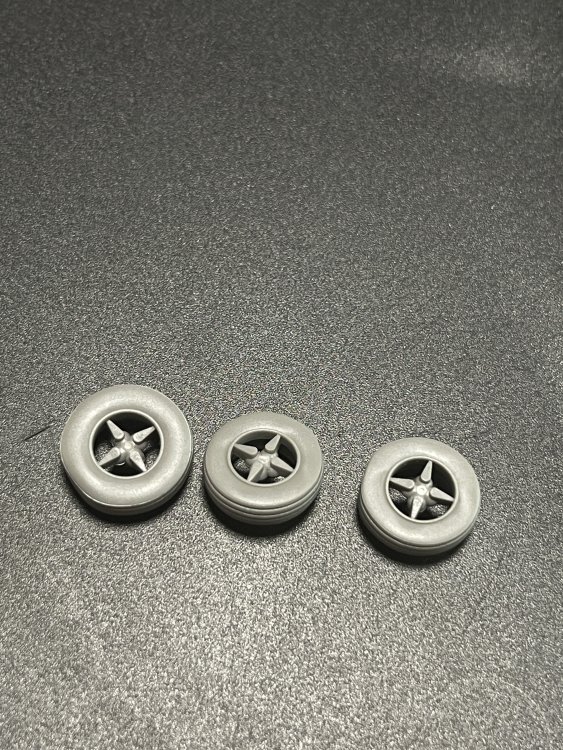
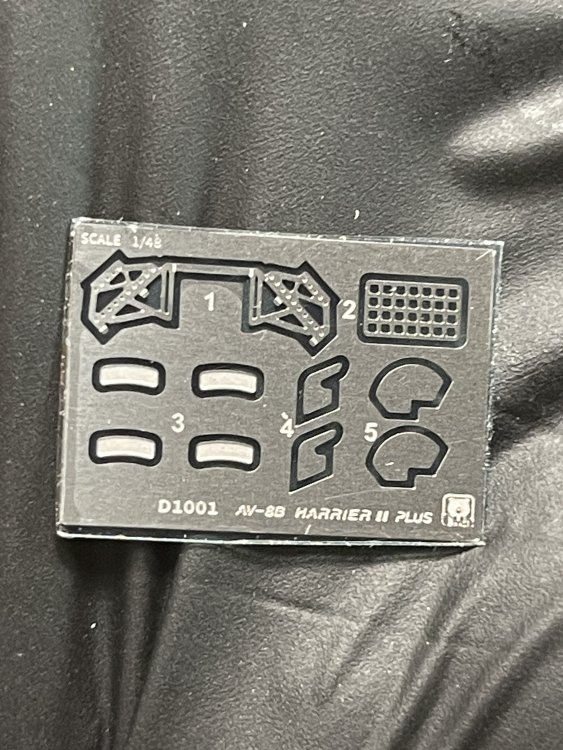
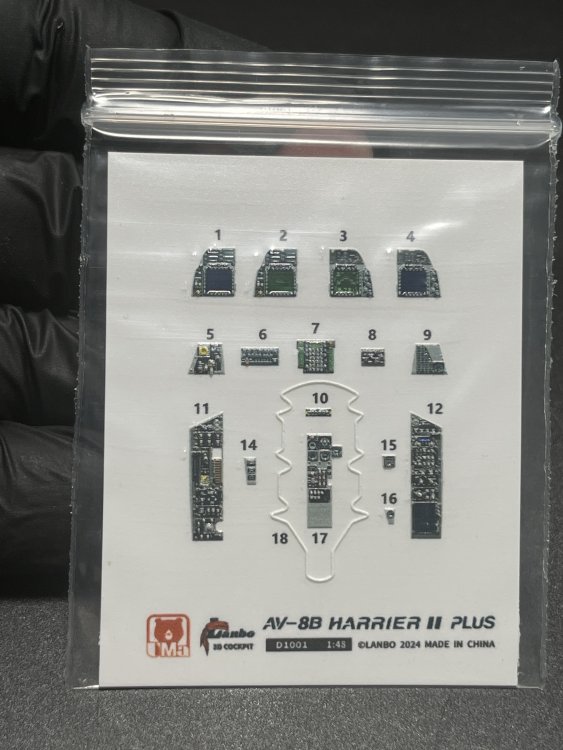
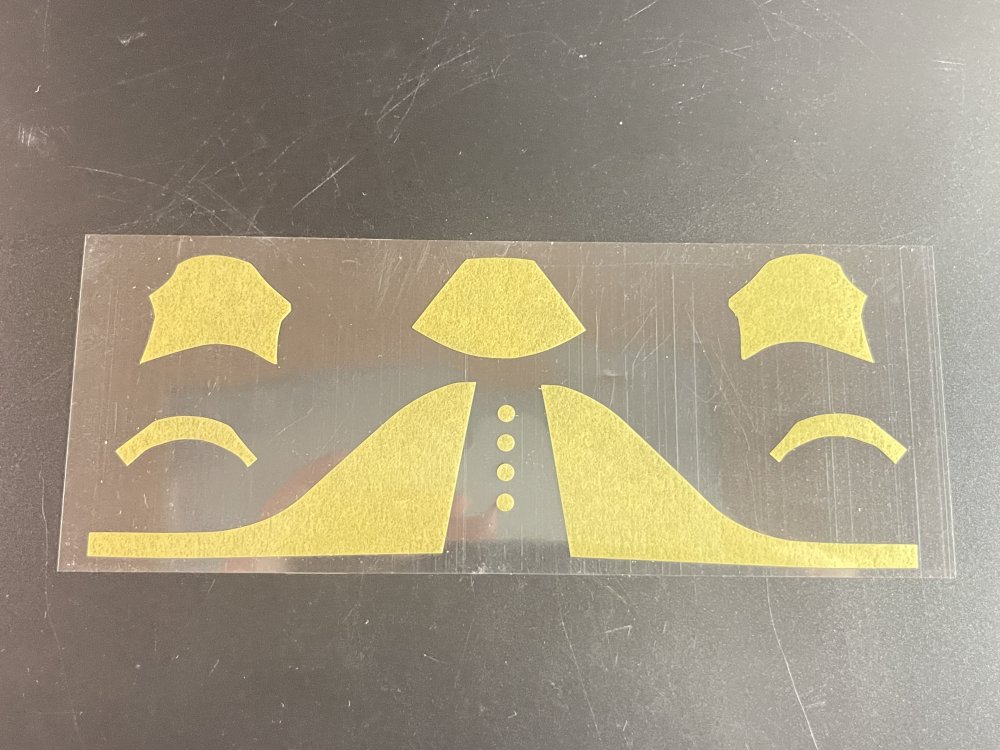
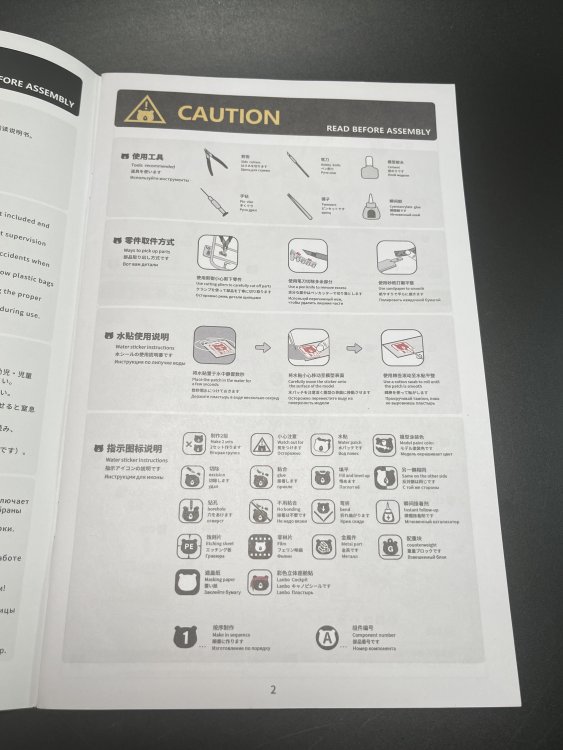
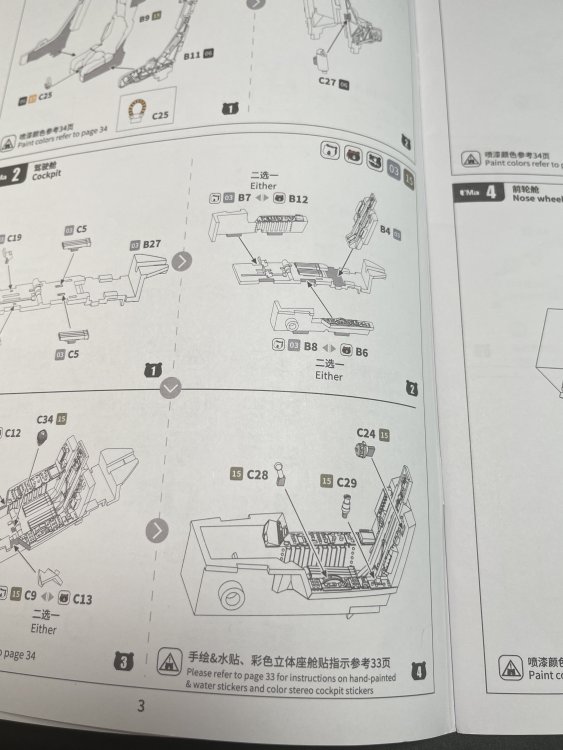
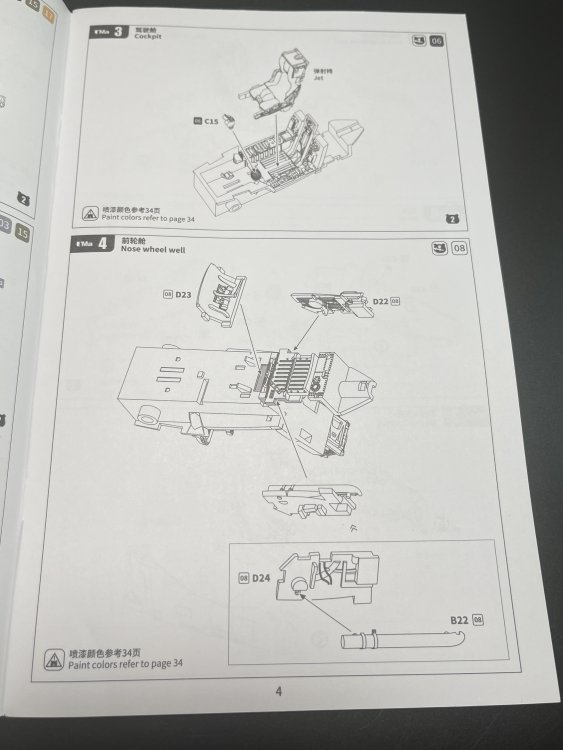
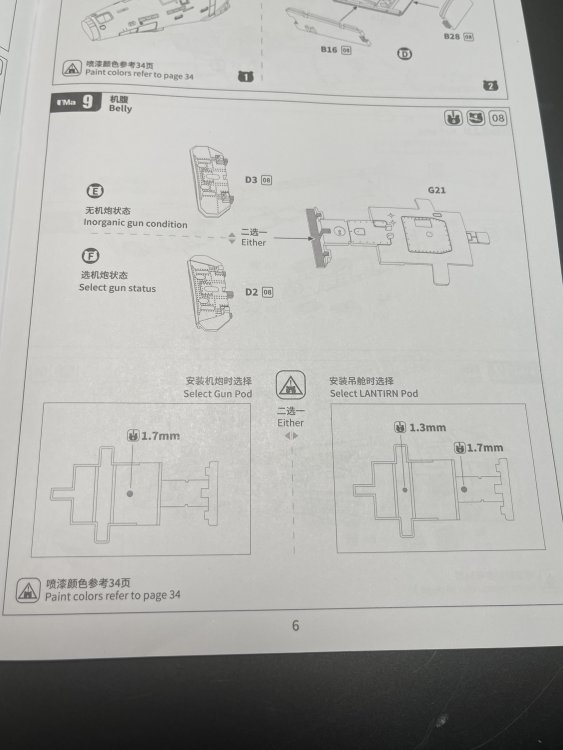
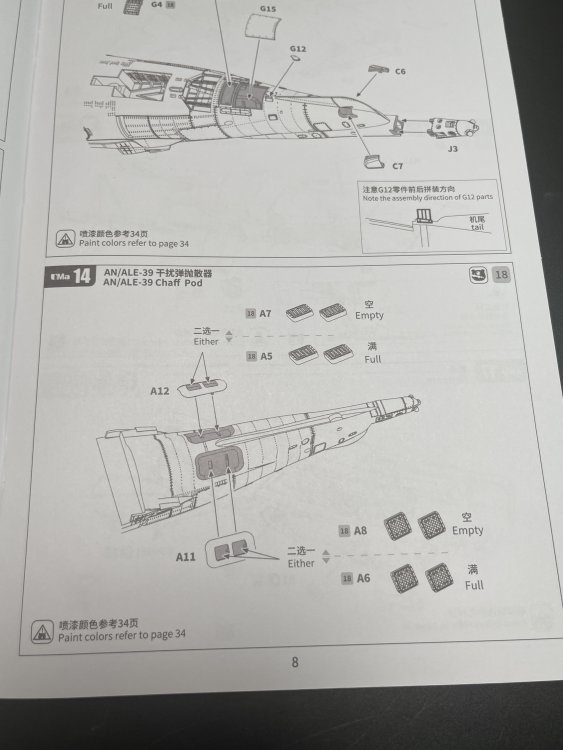
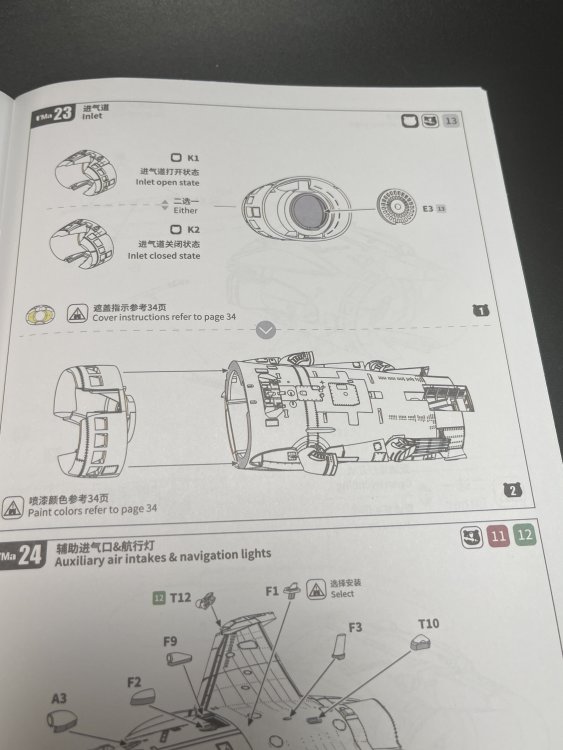
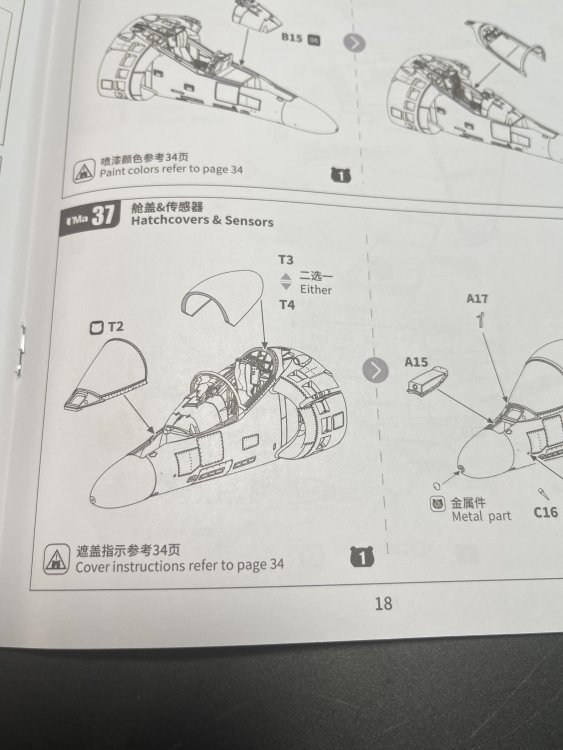
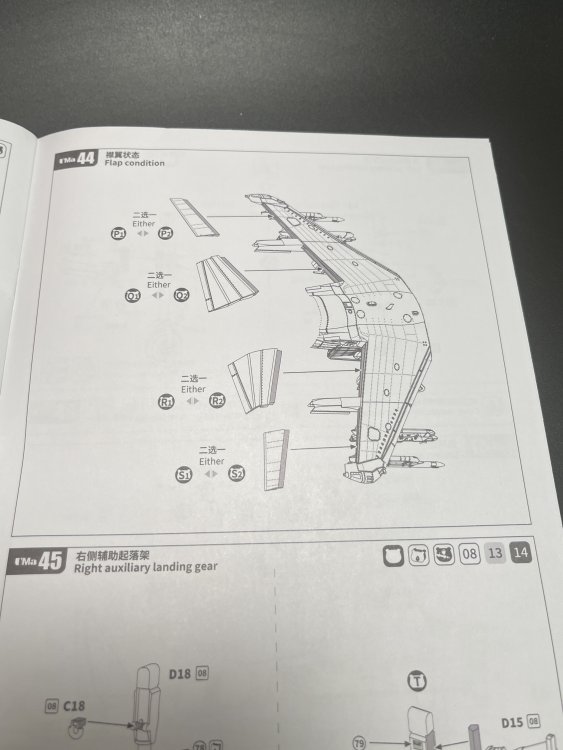
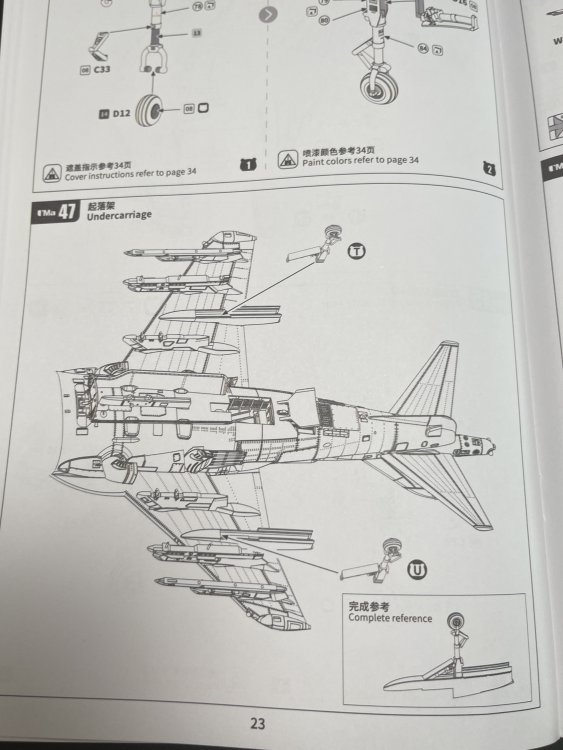
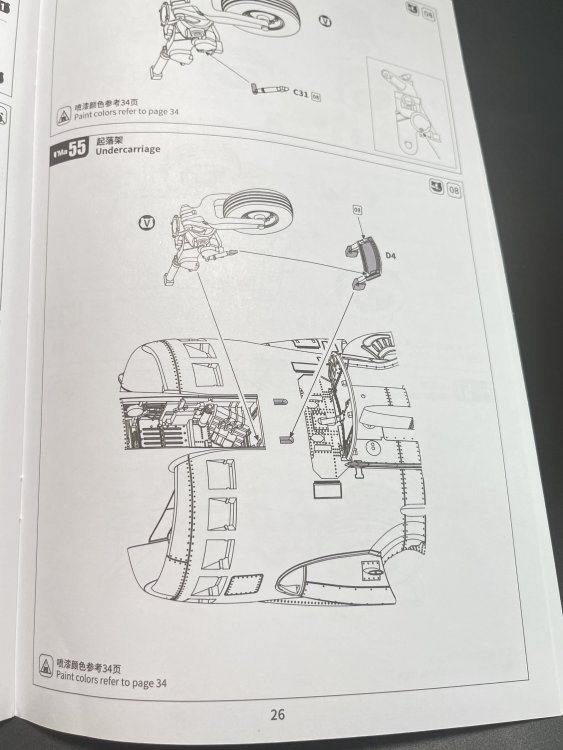
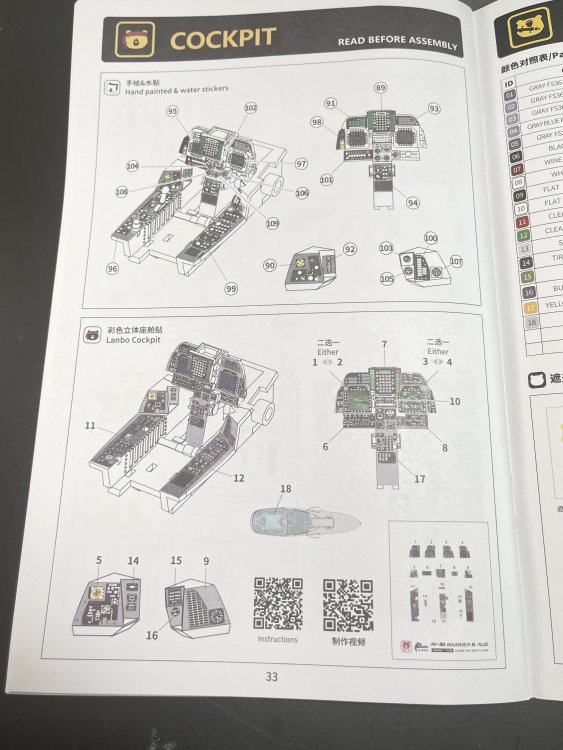
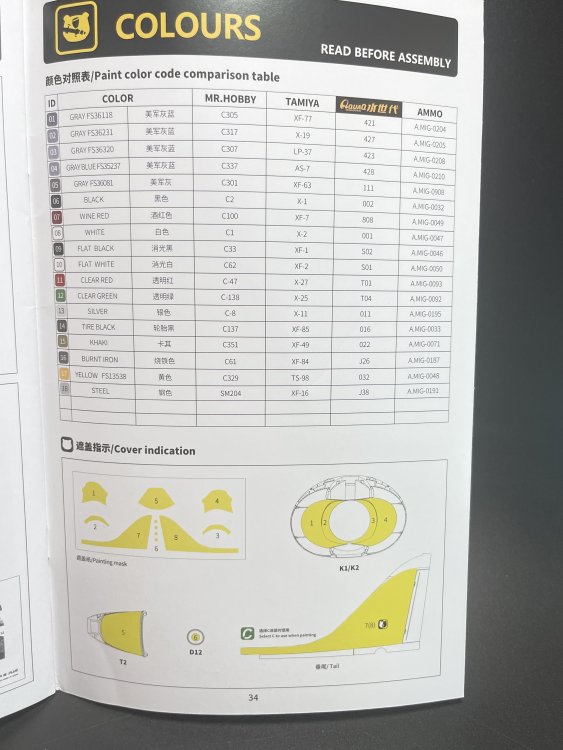
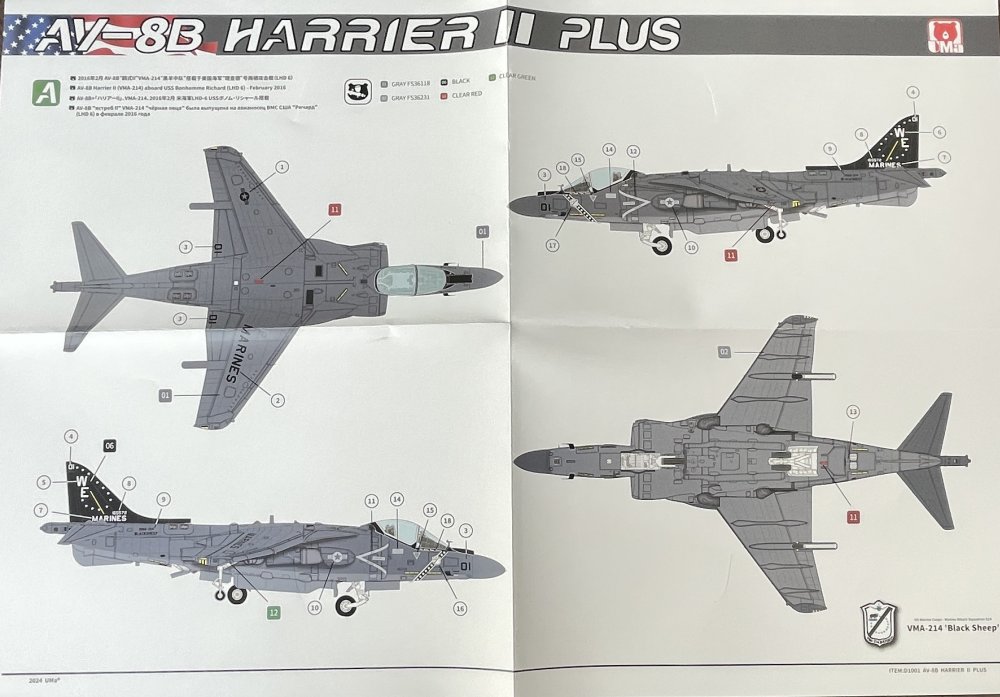
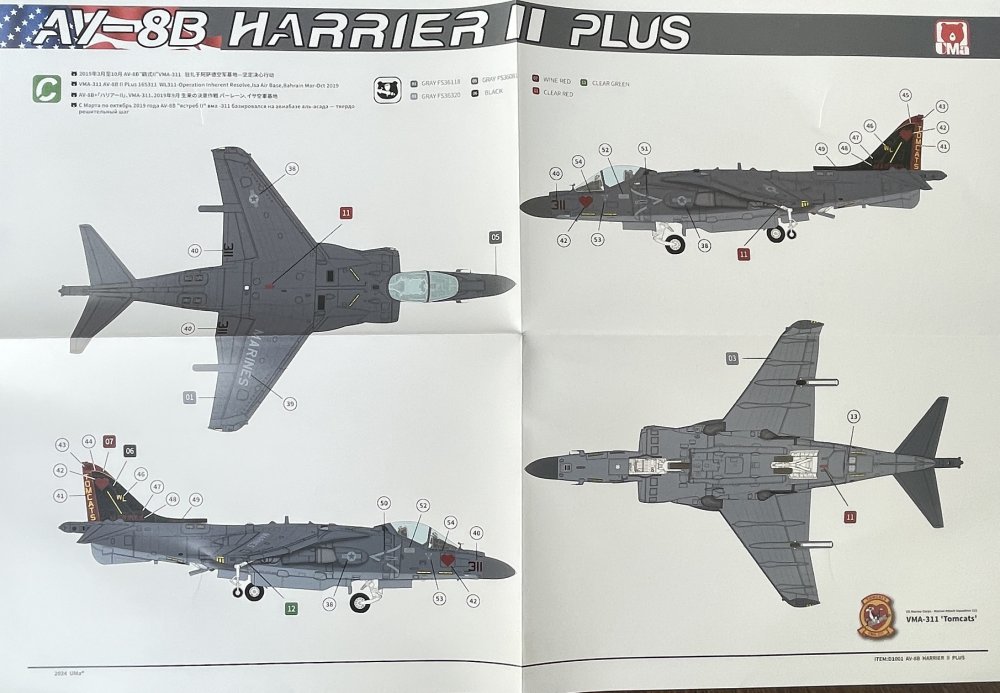
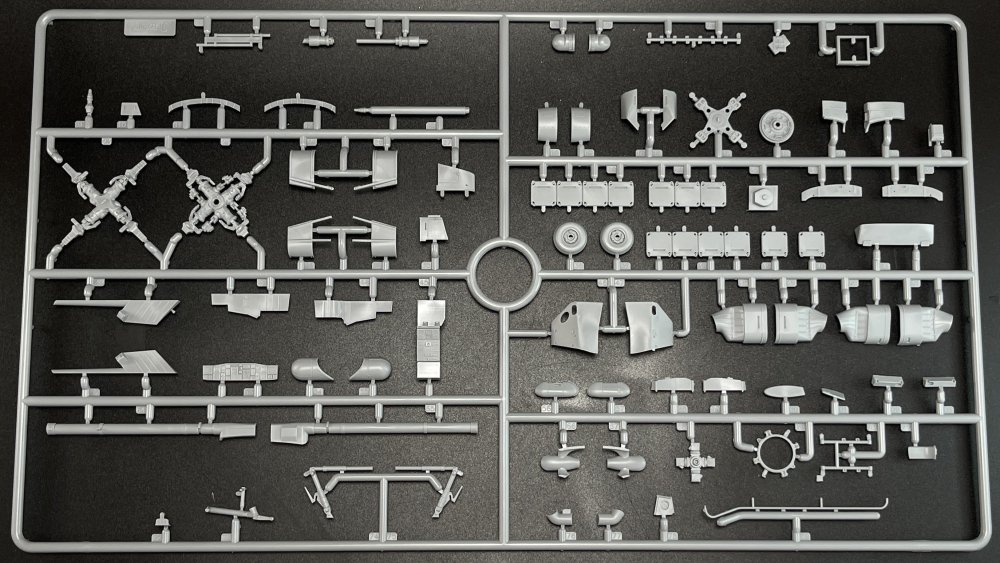
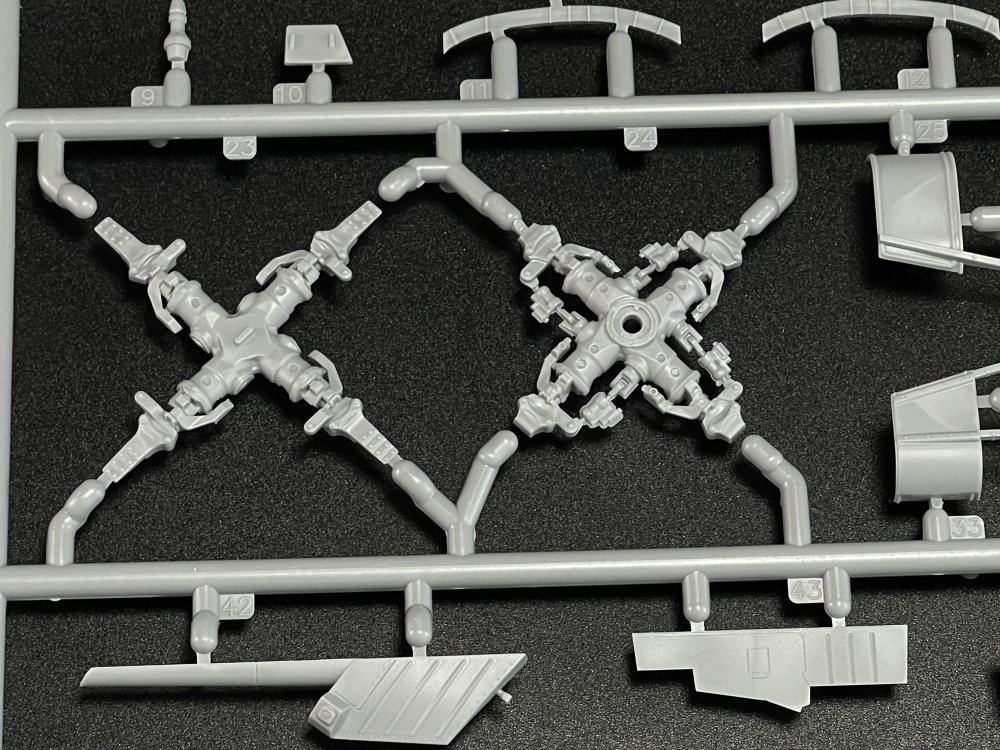
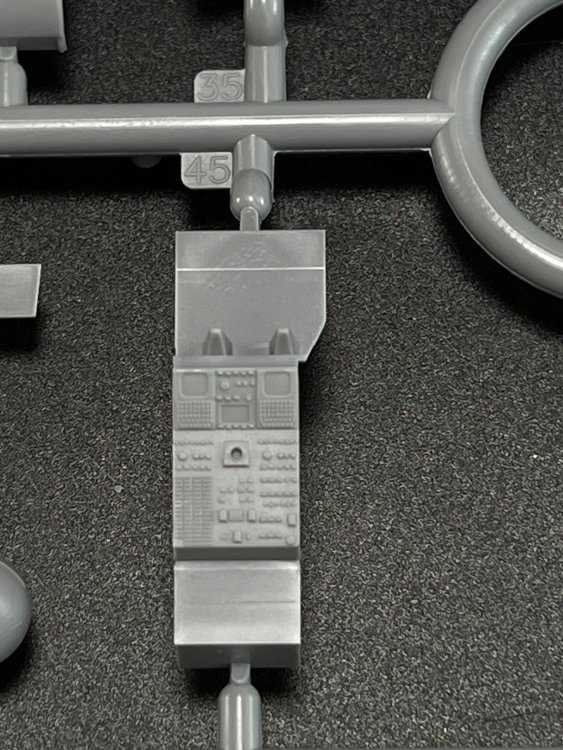
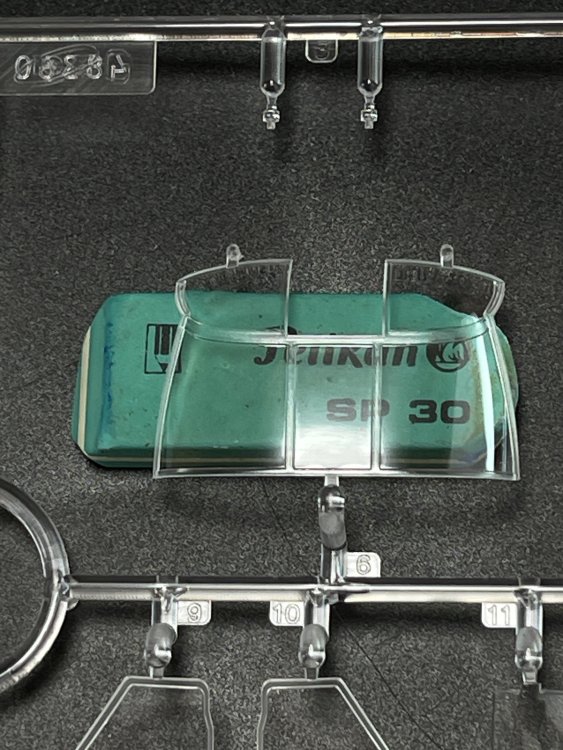
1:48 UMa Hobby AV-8B Harrier II Plus Catalogue n.º D1001 Available at Artscale for €70 (just click here) The UMa Hobby 1:48 scale AV-8B Harrier II Plus (D1001), marks an impressive debut for the new model kit manufacturer. This model kit is making a big impact in modelling world, with high-quality components, innovative engineering, and comprehensive inclusions. If you check Scalemate (today, 17-8-2025) is in the first place of the Hot Kits. The box has arrived and we already made some unboxing videos of the beautiful model kit that you can see here: https://www.facebook.com/share/r/1ApYzMtQQN/ https://www.facebook.com/share/r/1GETMhJ5Df/ https://www.facebook.com/share/r/1F8tRyvR37/ https://www.facebook.com/share/r/1EEykoeHWC/ https://www.facebook.com/share/r/1B3ZGBf6Qh/ https://www.facebook.com/share/r/14QtQao58eb/ Now, let`s open the box. The kit comes in an eye-catching box featuring a low-flying Harrier with realistic condensation effects from high-speed maneuvers. The box sides provide additional details, including 3D renders of the built jet, paint options for VMA-214 Black Sheep and VMA-311 Tomcats, and logos for Cartograph decals and Lambo 3D cockpit. All in the box! The first thing that is on this first models to get ot is a letter from Uma Hobby thanking for supporting them in their start in the modelling world. And I must say, just now, what a start! It`s “almost” like WnW in jet aircraft…. I just need to build it to said if is or not a “almost” WnW” start! UMa’s AV-8B Harrier II Plus sets a new standard in surface detail. The recessed details and raised detail are superb. The plastic quality is top-notch. The plastic features finely engraved panel lines, multiple rivets, access hatches, and a full ordnance to be include. Several options are included like the inlet in open state or close state, with two different parts, and also different parts from the open by tubing or close by tubing. As for ordnance, its all here. To updated the cockpit the Lambo 3D prints cockpit are simply fantastic and a great add on directly from the box. Yet te cockpit even without then, is fantastic. The wheels are made in 3D print! Nice. A very small Photo-Etch (PE) fret is also present for with cockpit head mirror and front “visor” scoop on the cockpit. The clear parts, including the main canopy, are of high quality with minimal distortion. UMa employs an innovative approach by replicating the metal frame of the real canopy in standard light gray plastic, while the transparent sections are made from clear material. The decals are top noch either in quality either in schemes offers. The decals are offered by Cartograf Decals so quality is guaranteed and it notice of the color pigmentation and thinnest of all. Speaking of schemes, the kit offers three US Marines AV-8B paint schemes, all from the 21st century: VMA-214 Black Sheep (2016, USS Bonhomme Richard). VMA-214 Black Sheep (2003, Operation Iraqi Freedom, Ahmed Al Jaber Air Base). VMA-311 Tomcats (2019, Isa Air Base, Bahrain). A full stencil diagram: And if masking is the worse part for you (even minor works) UMa thought about you. Mask are also present provided for the canopy, intake, and vertical stabilizer (for C scheme) simplifying a lot all the masking and saving a lot of time to the modeler. Checking the instructions, first of all, the construction sequence is not the usual one as it is quite separate. First is the cockpit and that`s is normal. But then you have assembly sequences for the nose, the for part of the fuselage, then you pass for the belly fuselage, then tail. Next step is all wings… and air-intakes. and then for the wings that will be fixed on the central fuselage. The engineering appears modeler-focused, with thoughtful additions like a missile fin alignment tool and options for flaps (up/down) and AGM-64 and AIM-9M missiles in maintenance or ready-to-launch positions. Also GBU12 is in the box. Them fuel tanks and LANTIRN pod. Everything is in the box indeed. As for the painting guidance, at first, I didn’t see it but after checking the color chart and the ID paint, is quite easy to see along the steps and the paint used in all parts. So, the painting indication are very good indeed. This model is all in box, as net the 3D cockpit detail from Lambo are very good and add a lot of fantastic detail. Conclusion The UMa Hobby 1:48 AV-8B Harrier II Plus it is a “WOW””. It is a remarkable debut from UM Hobby offering fantastic surface detail, quite innovative engineering in the construction and all in box since ordnance to aftermarket products. In fact, it always space for aftermarket but with this kit is a much hard for then. This model kit is right on the top of the to do pile! My truly thanks to Uma Hobby to make this fantastic Harrier!


-
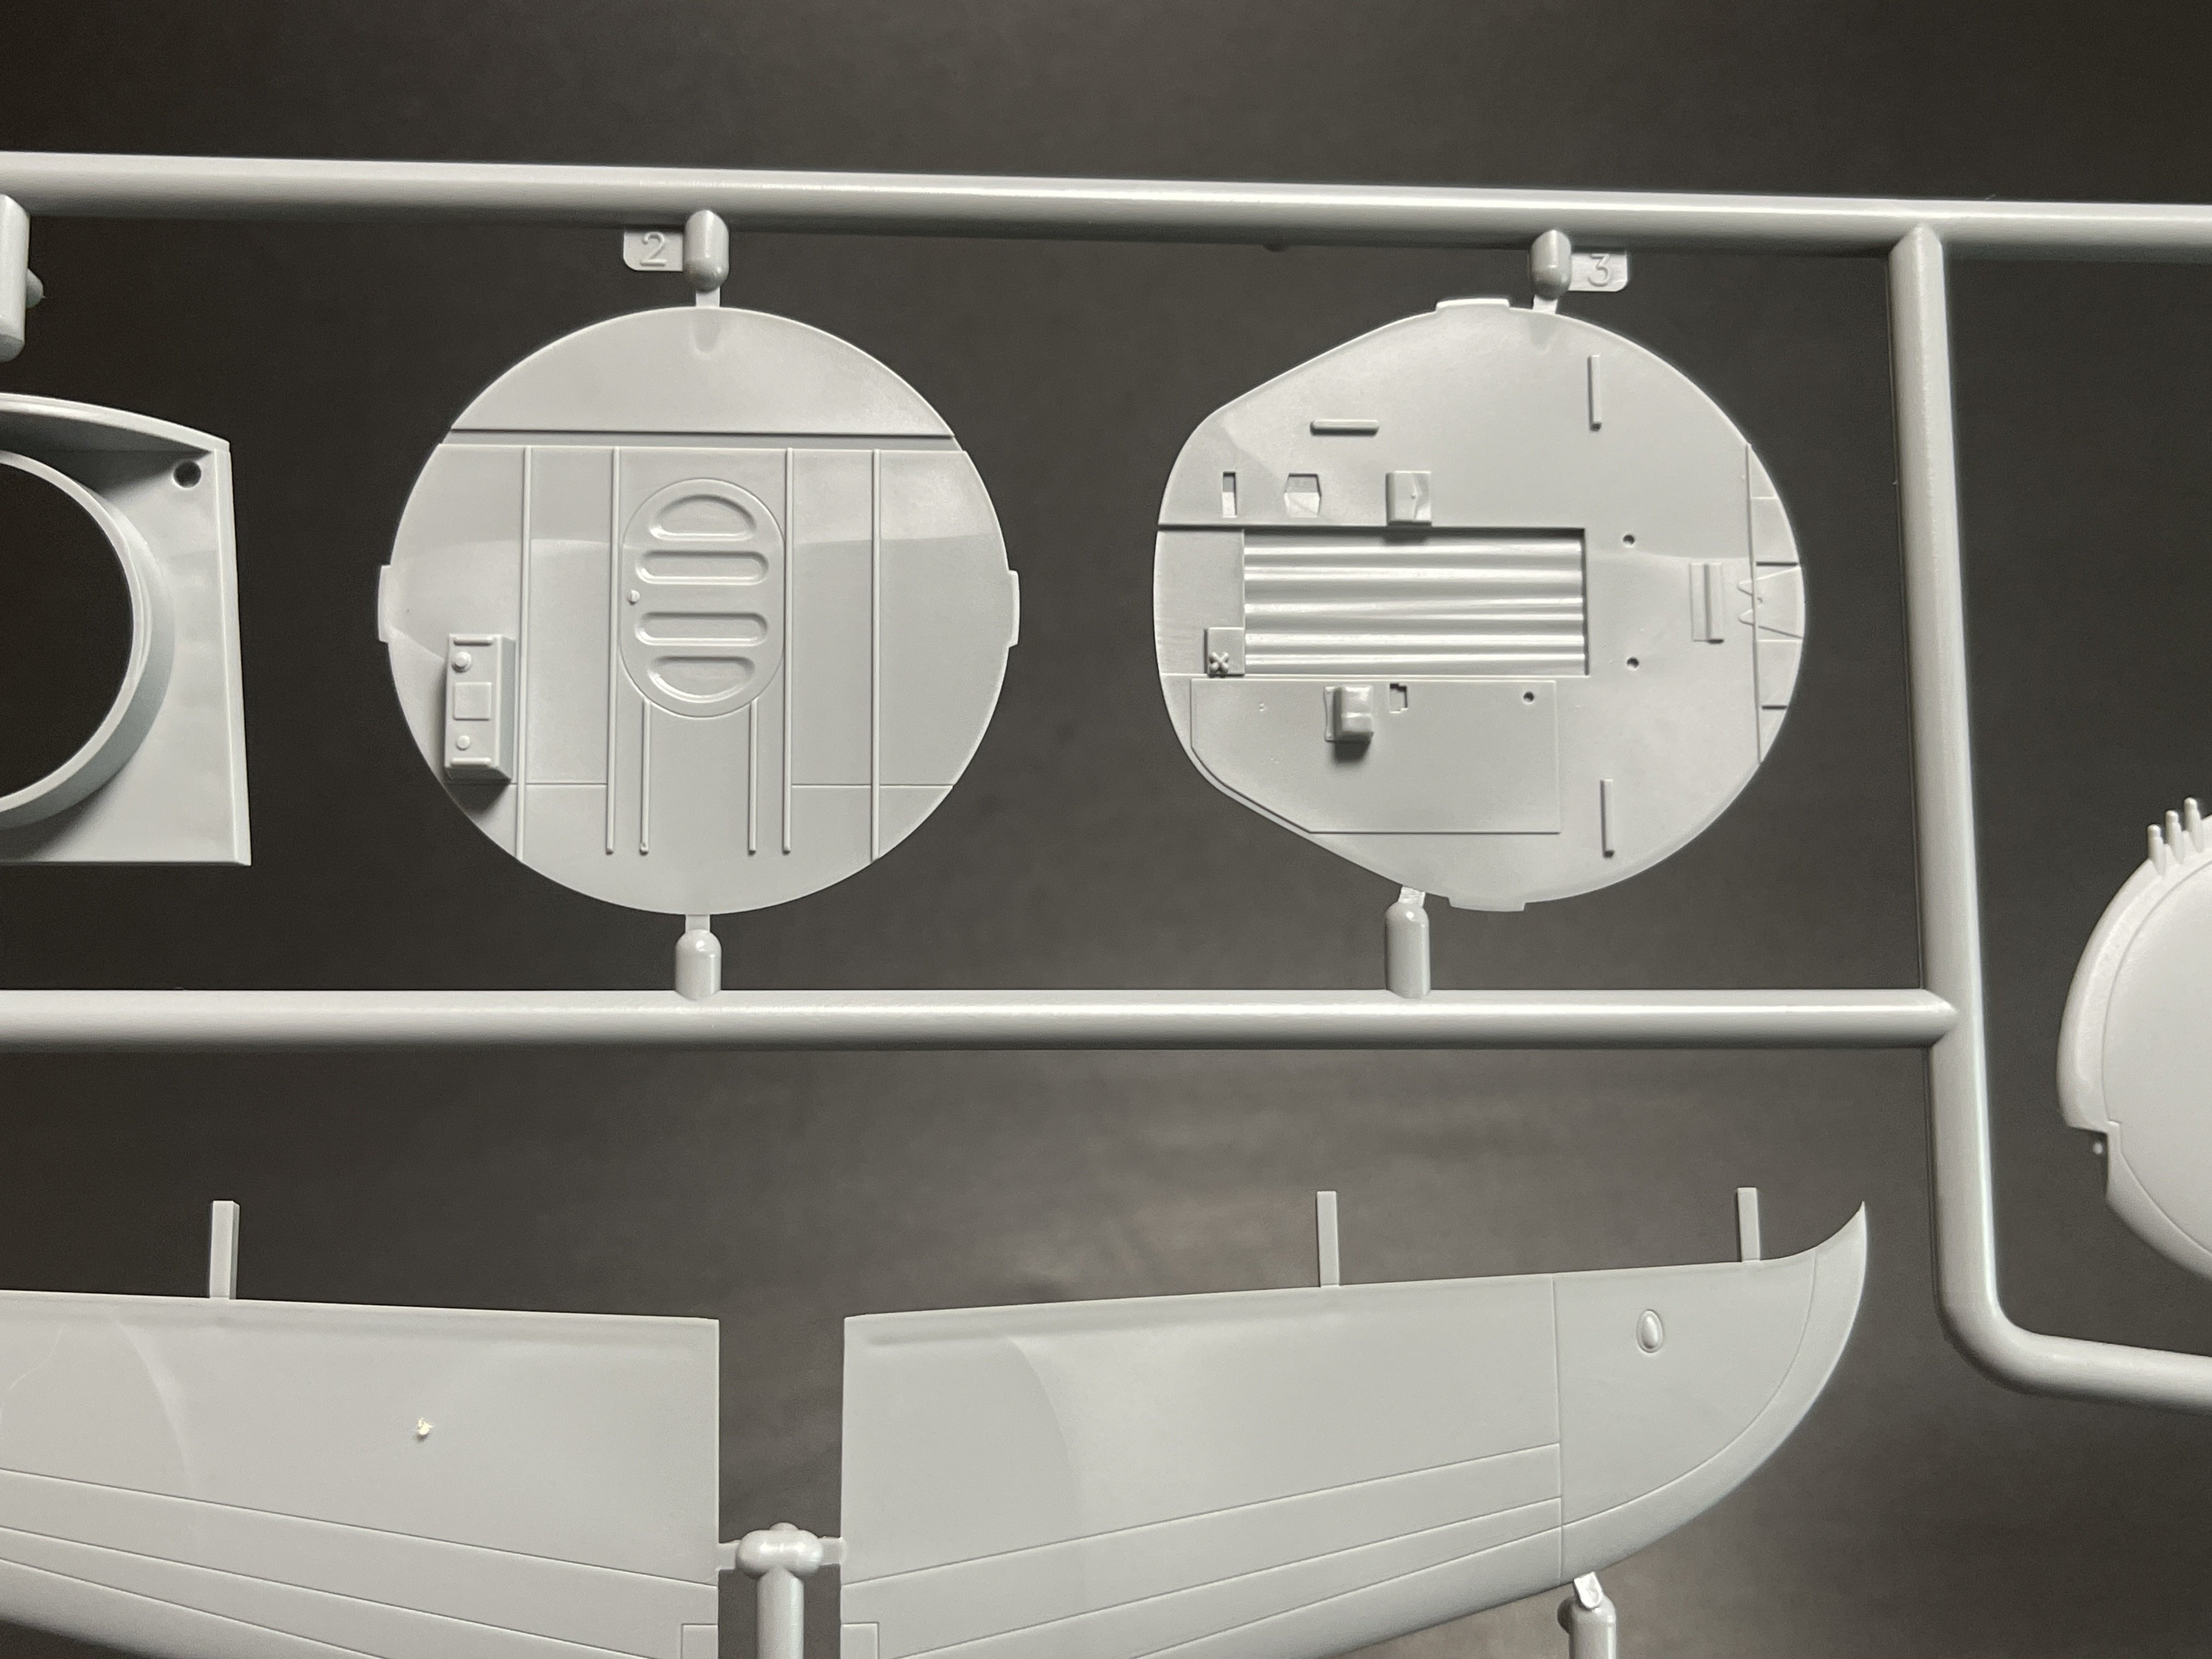
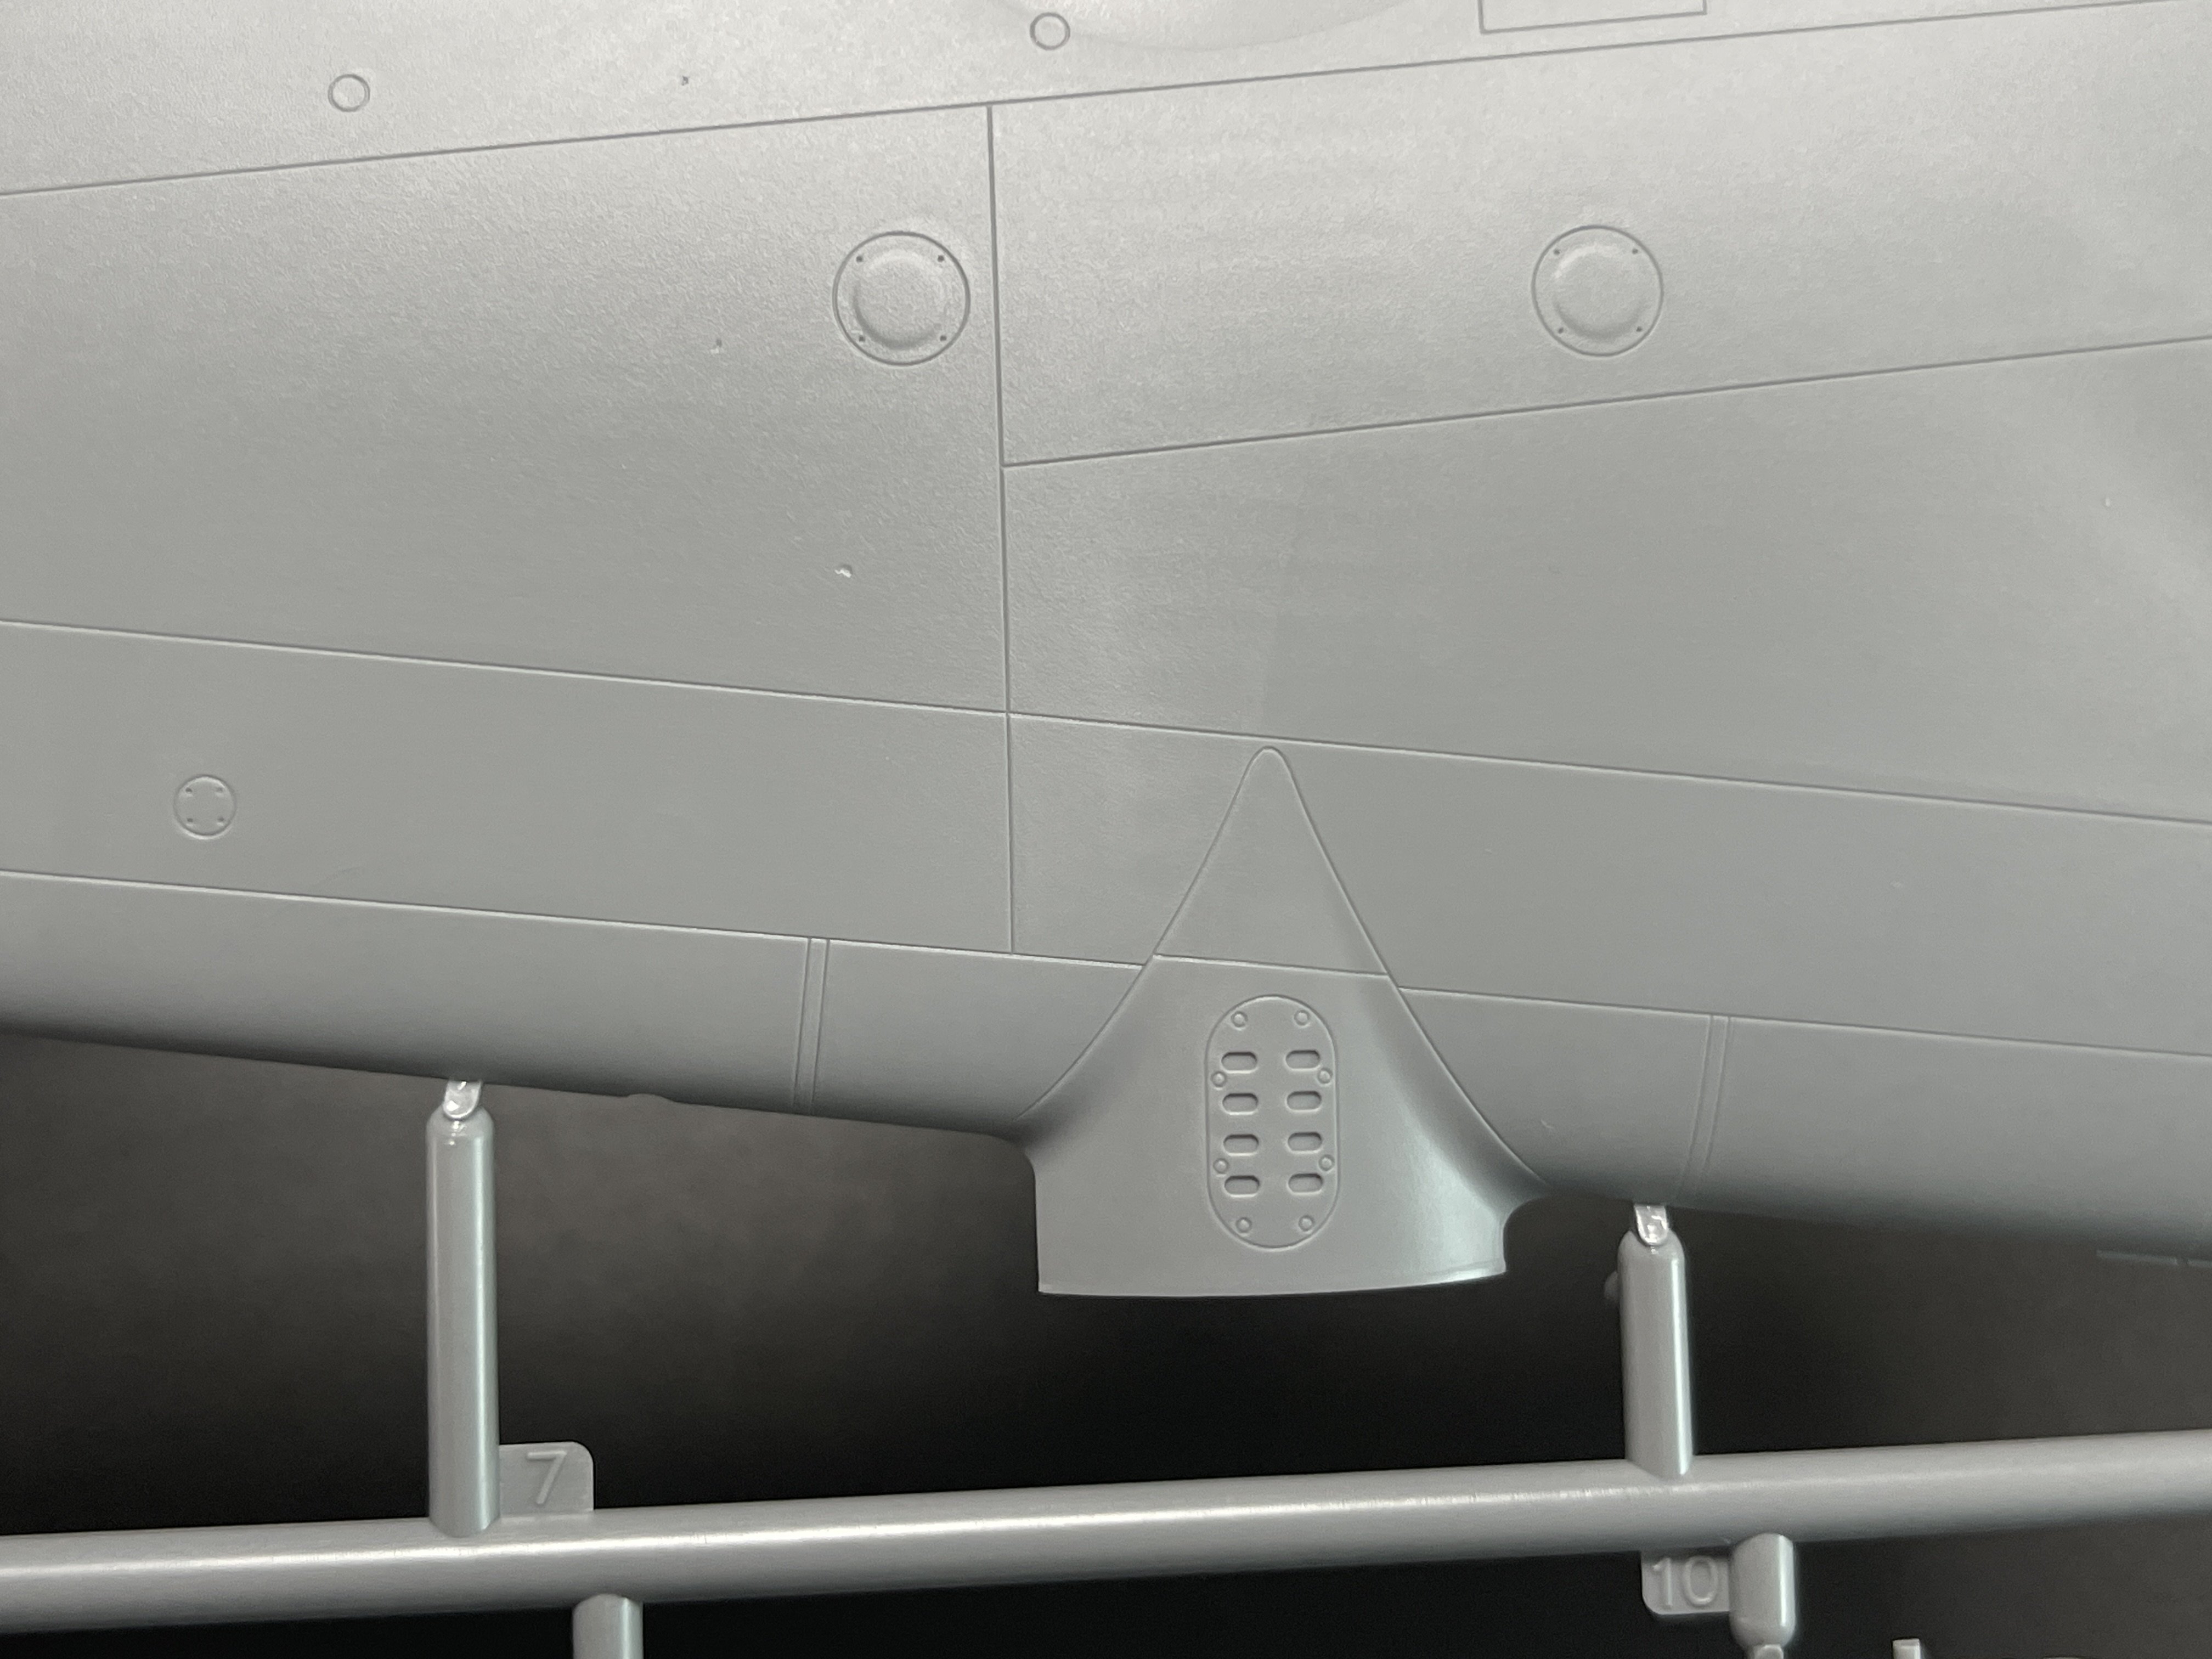
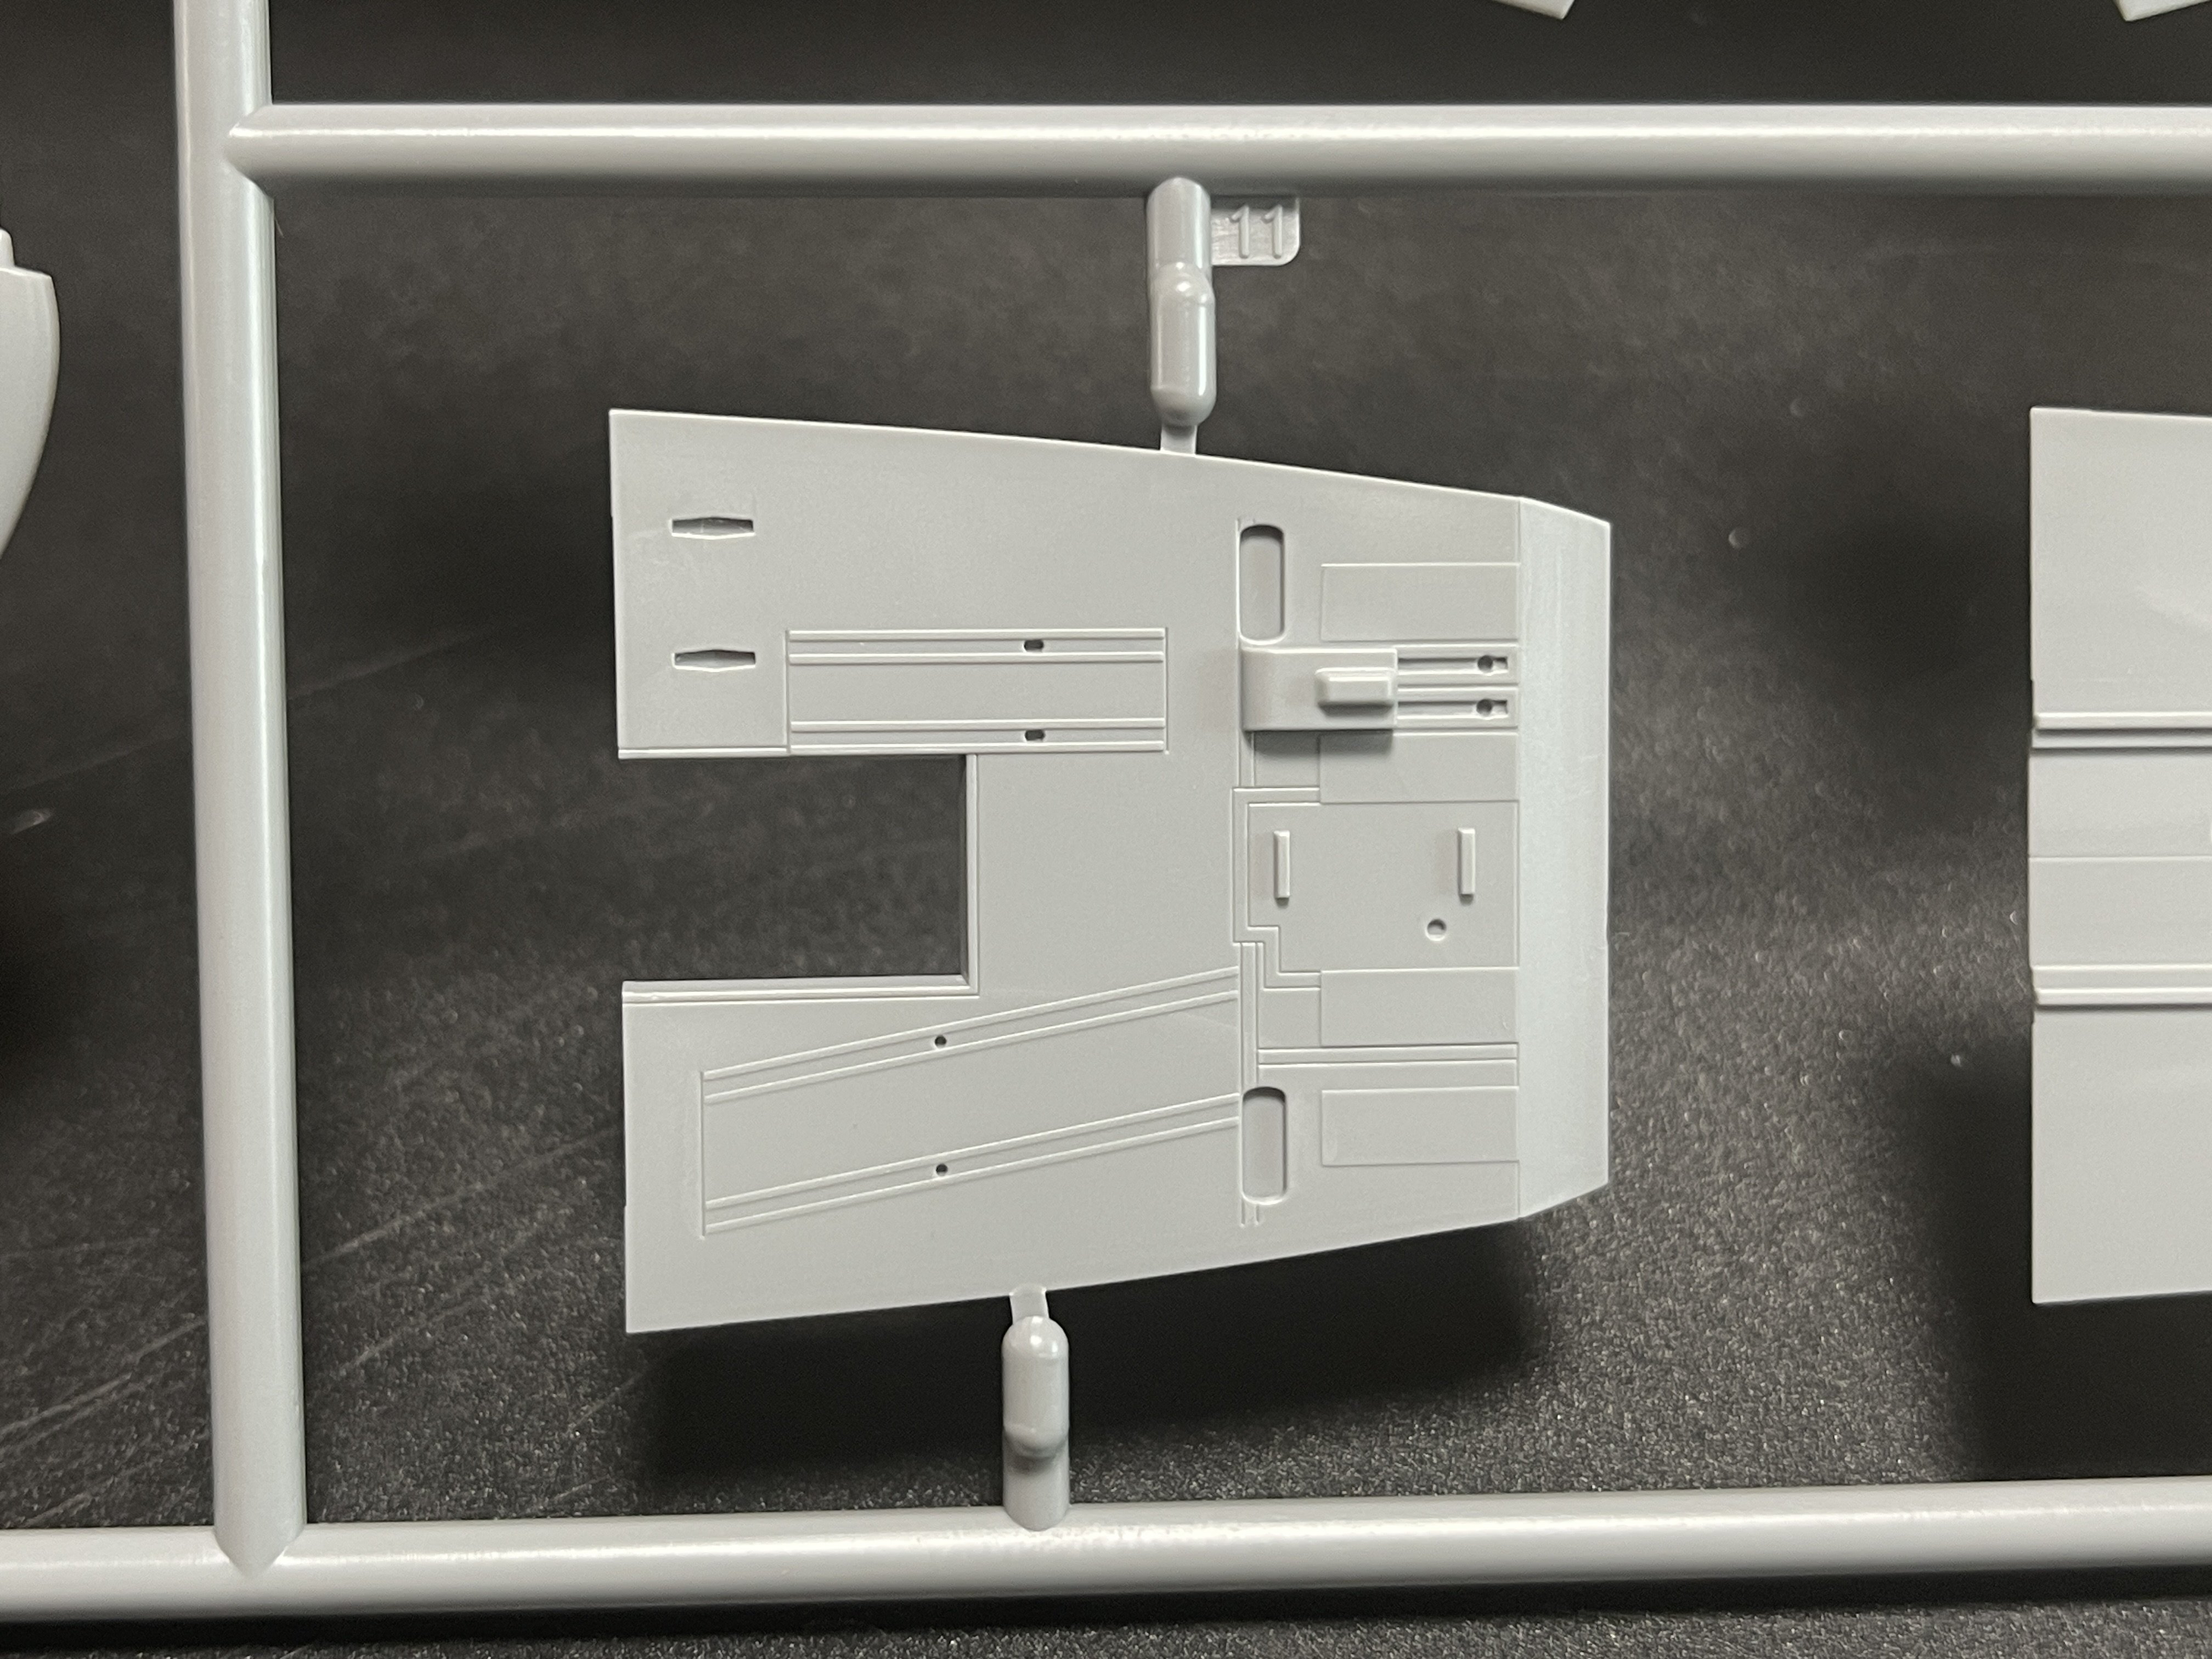
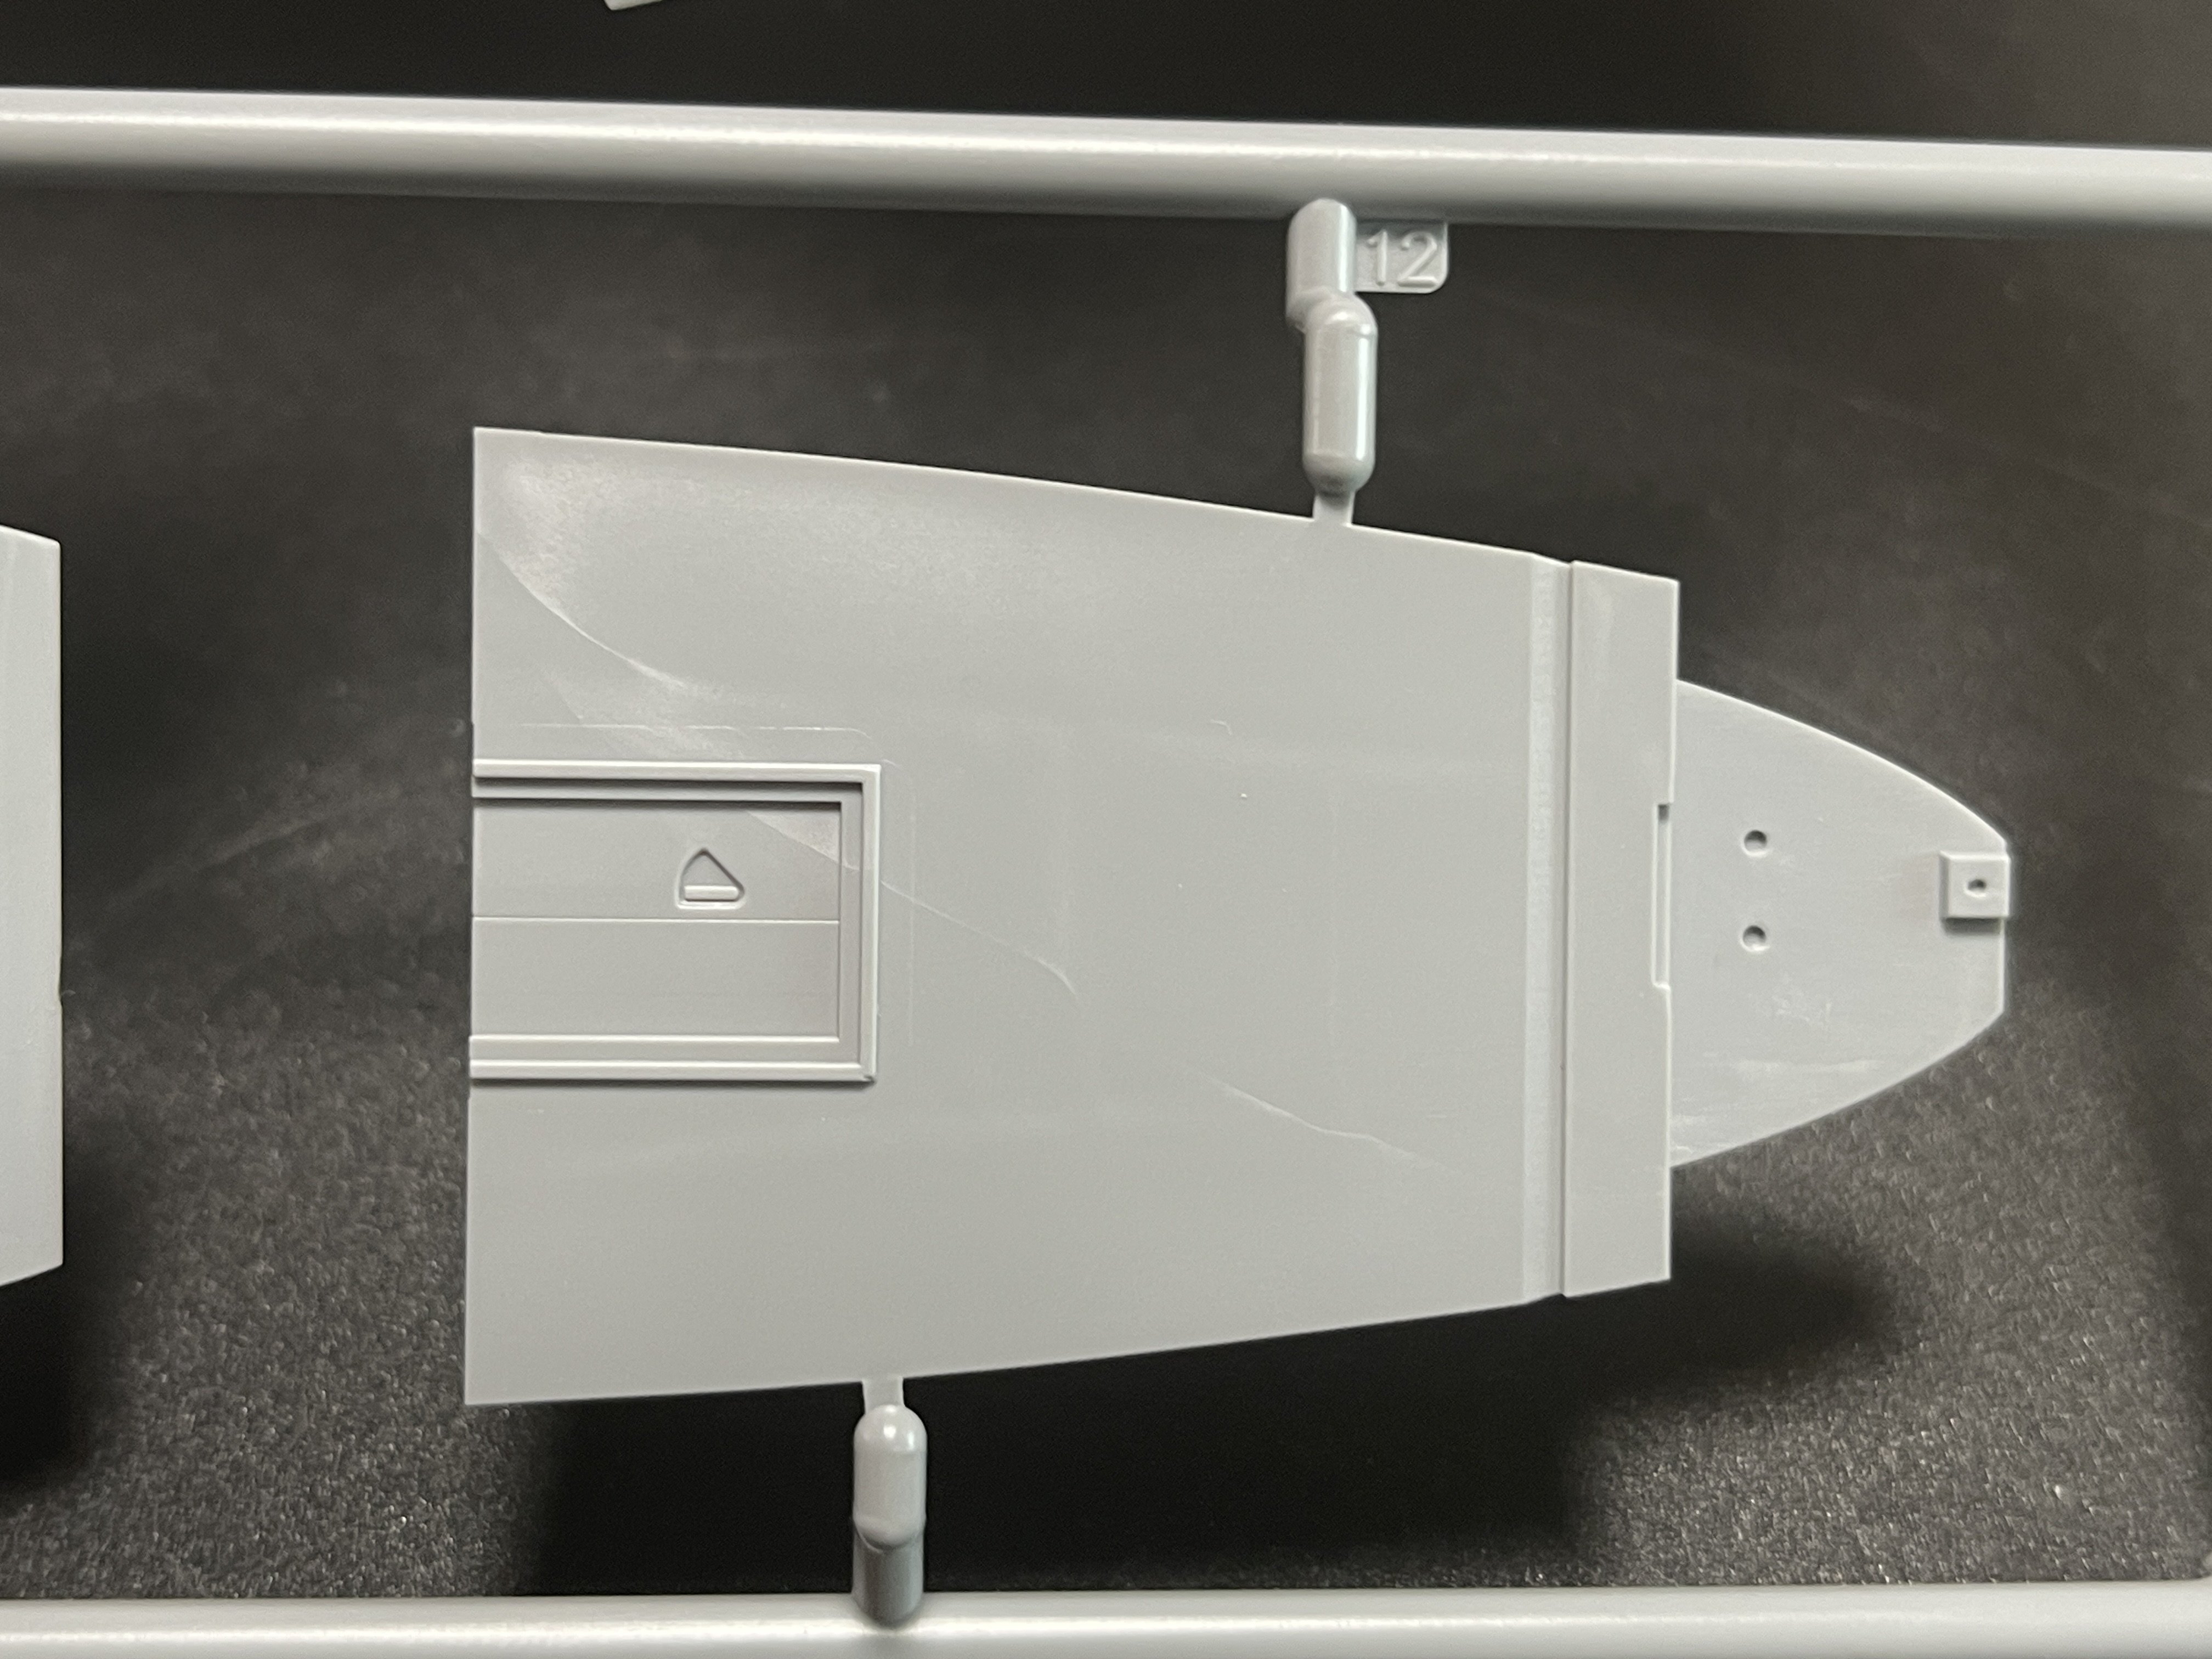
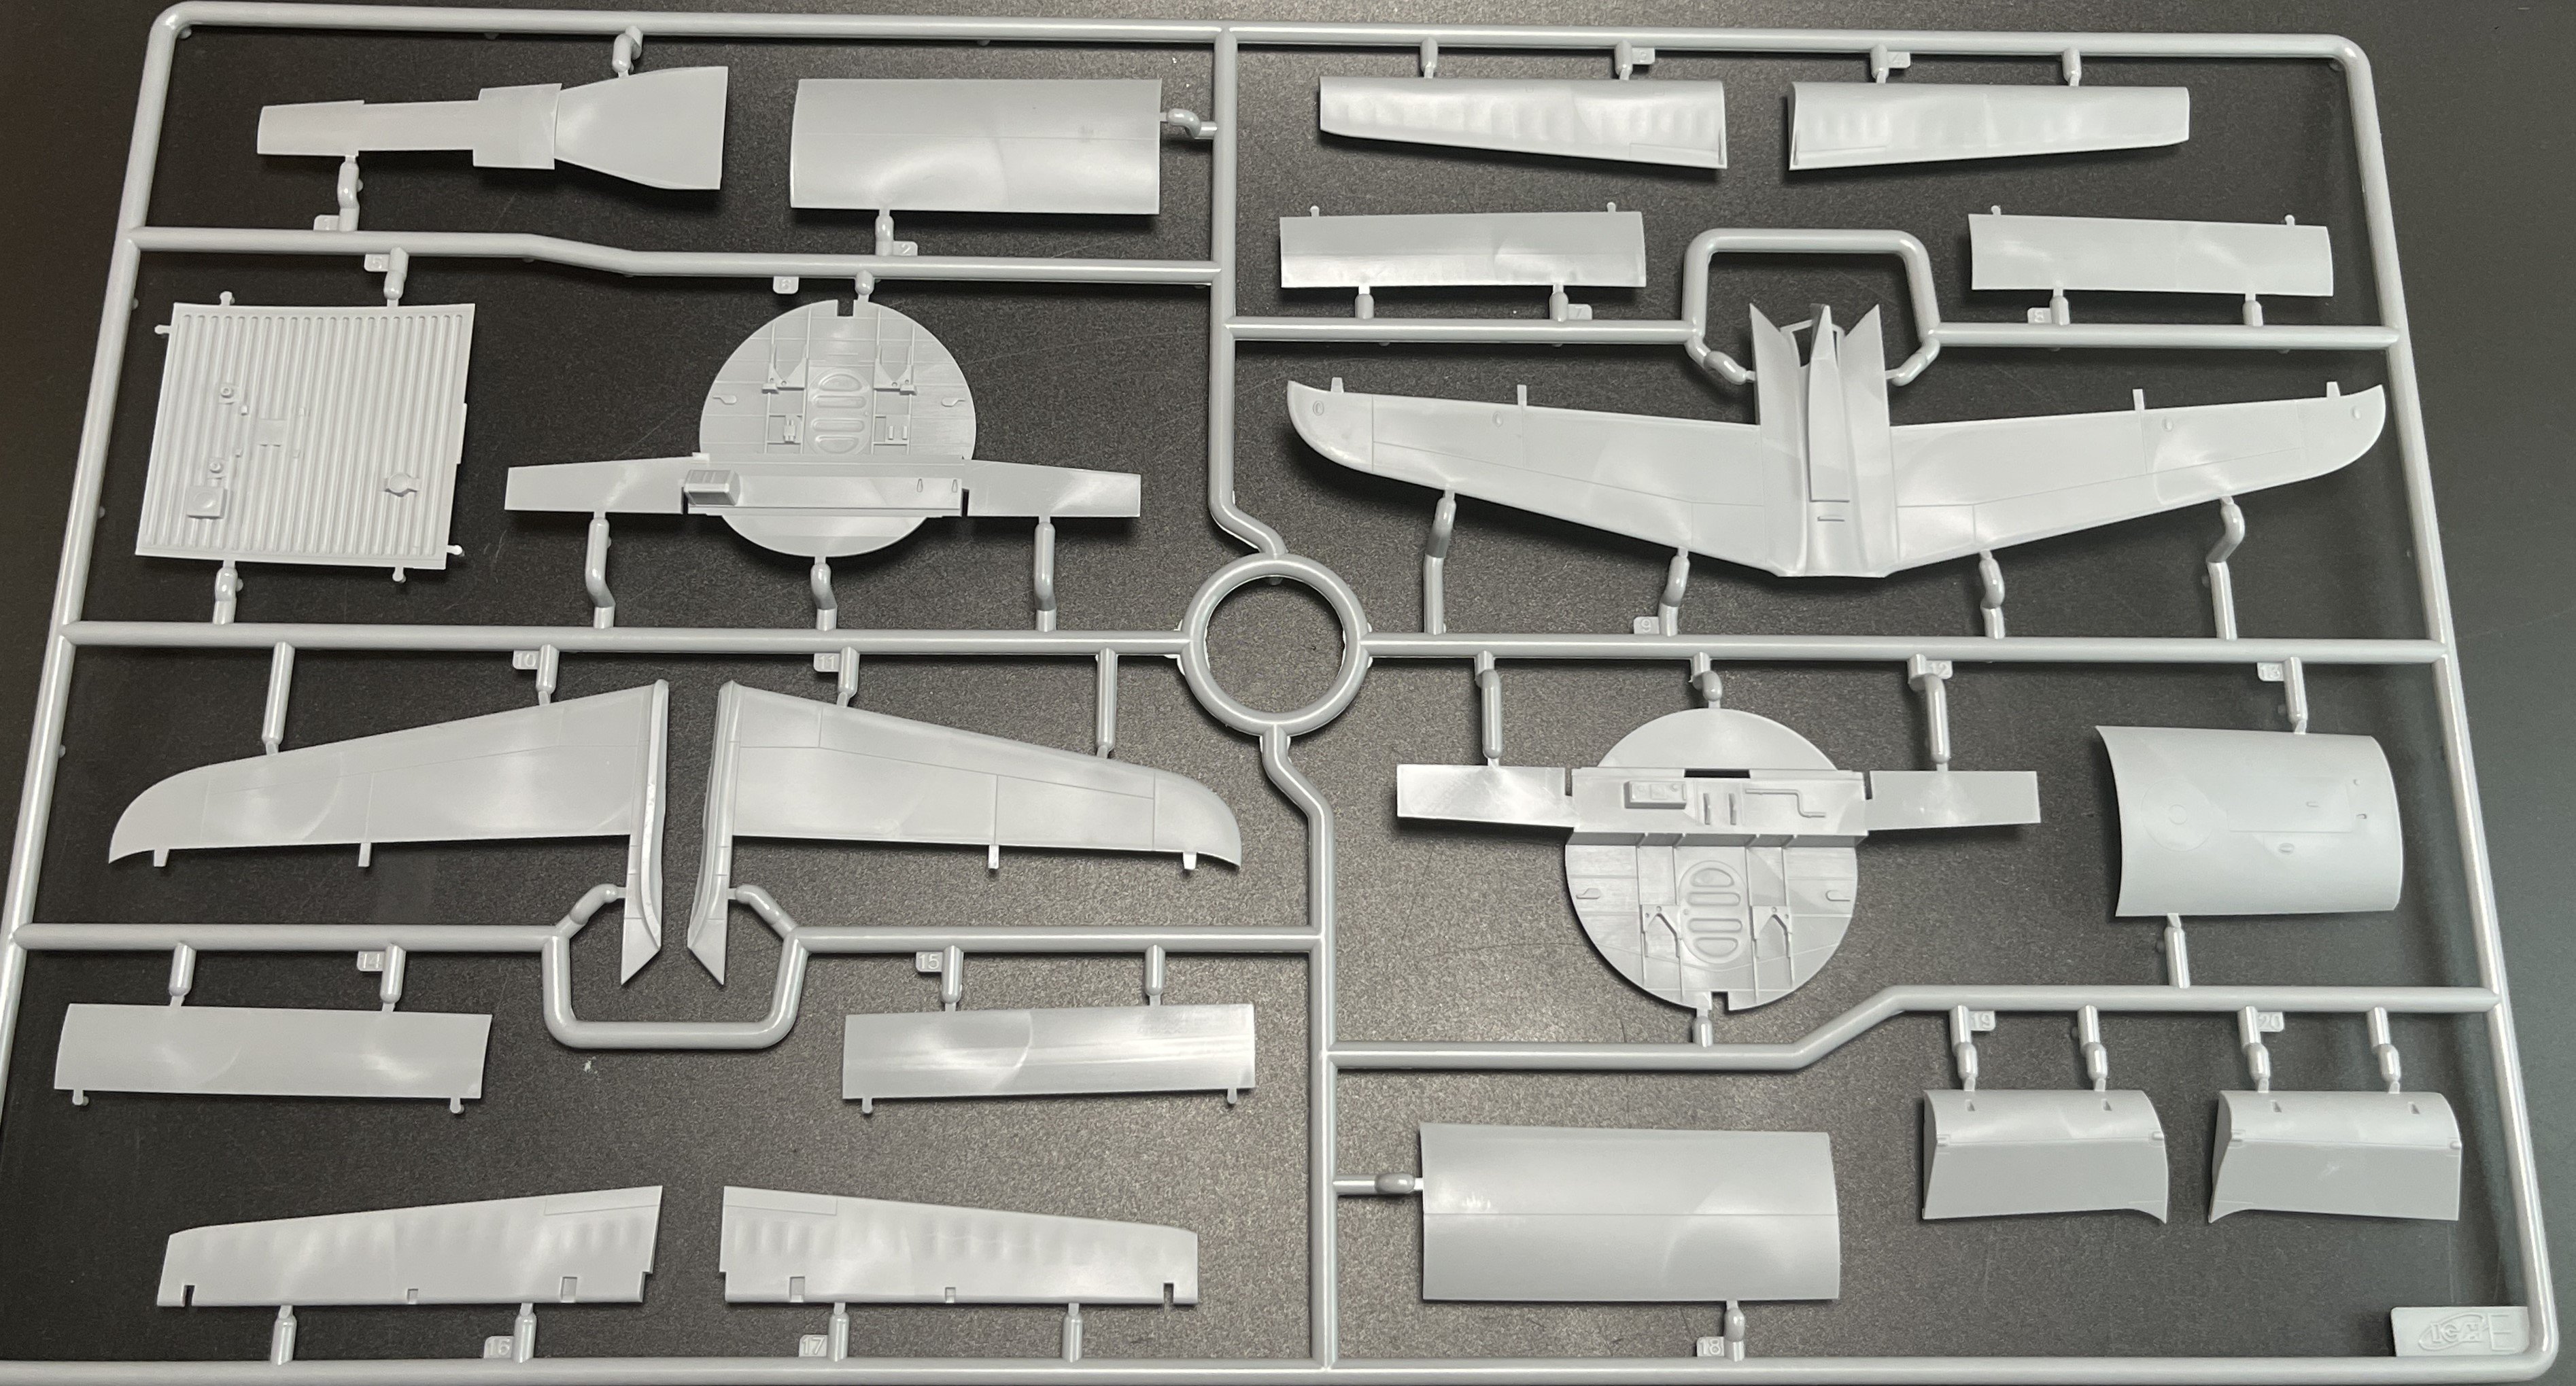
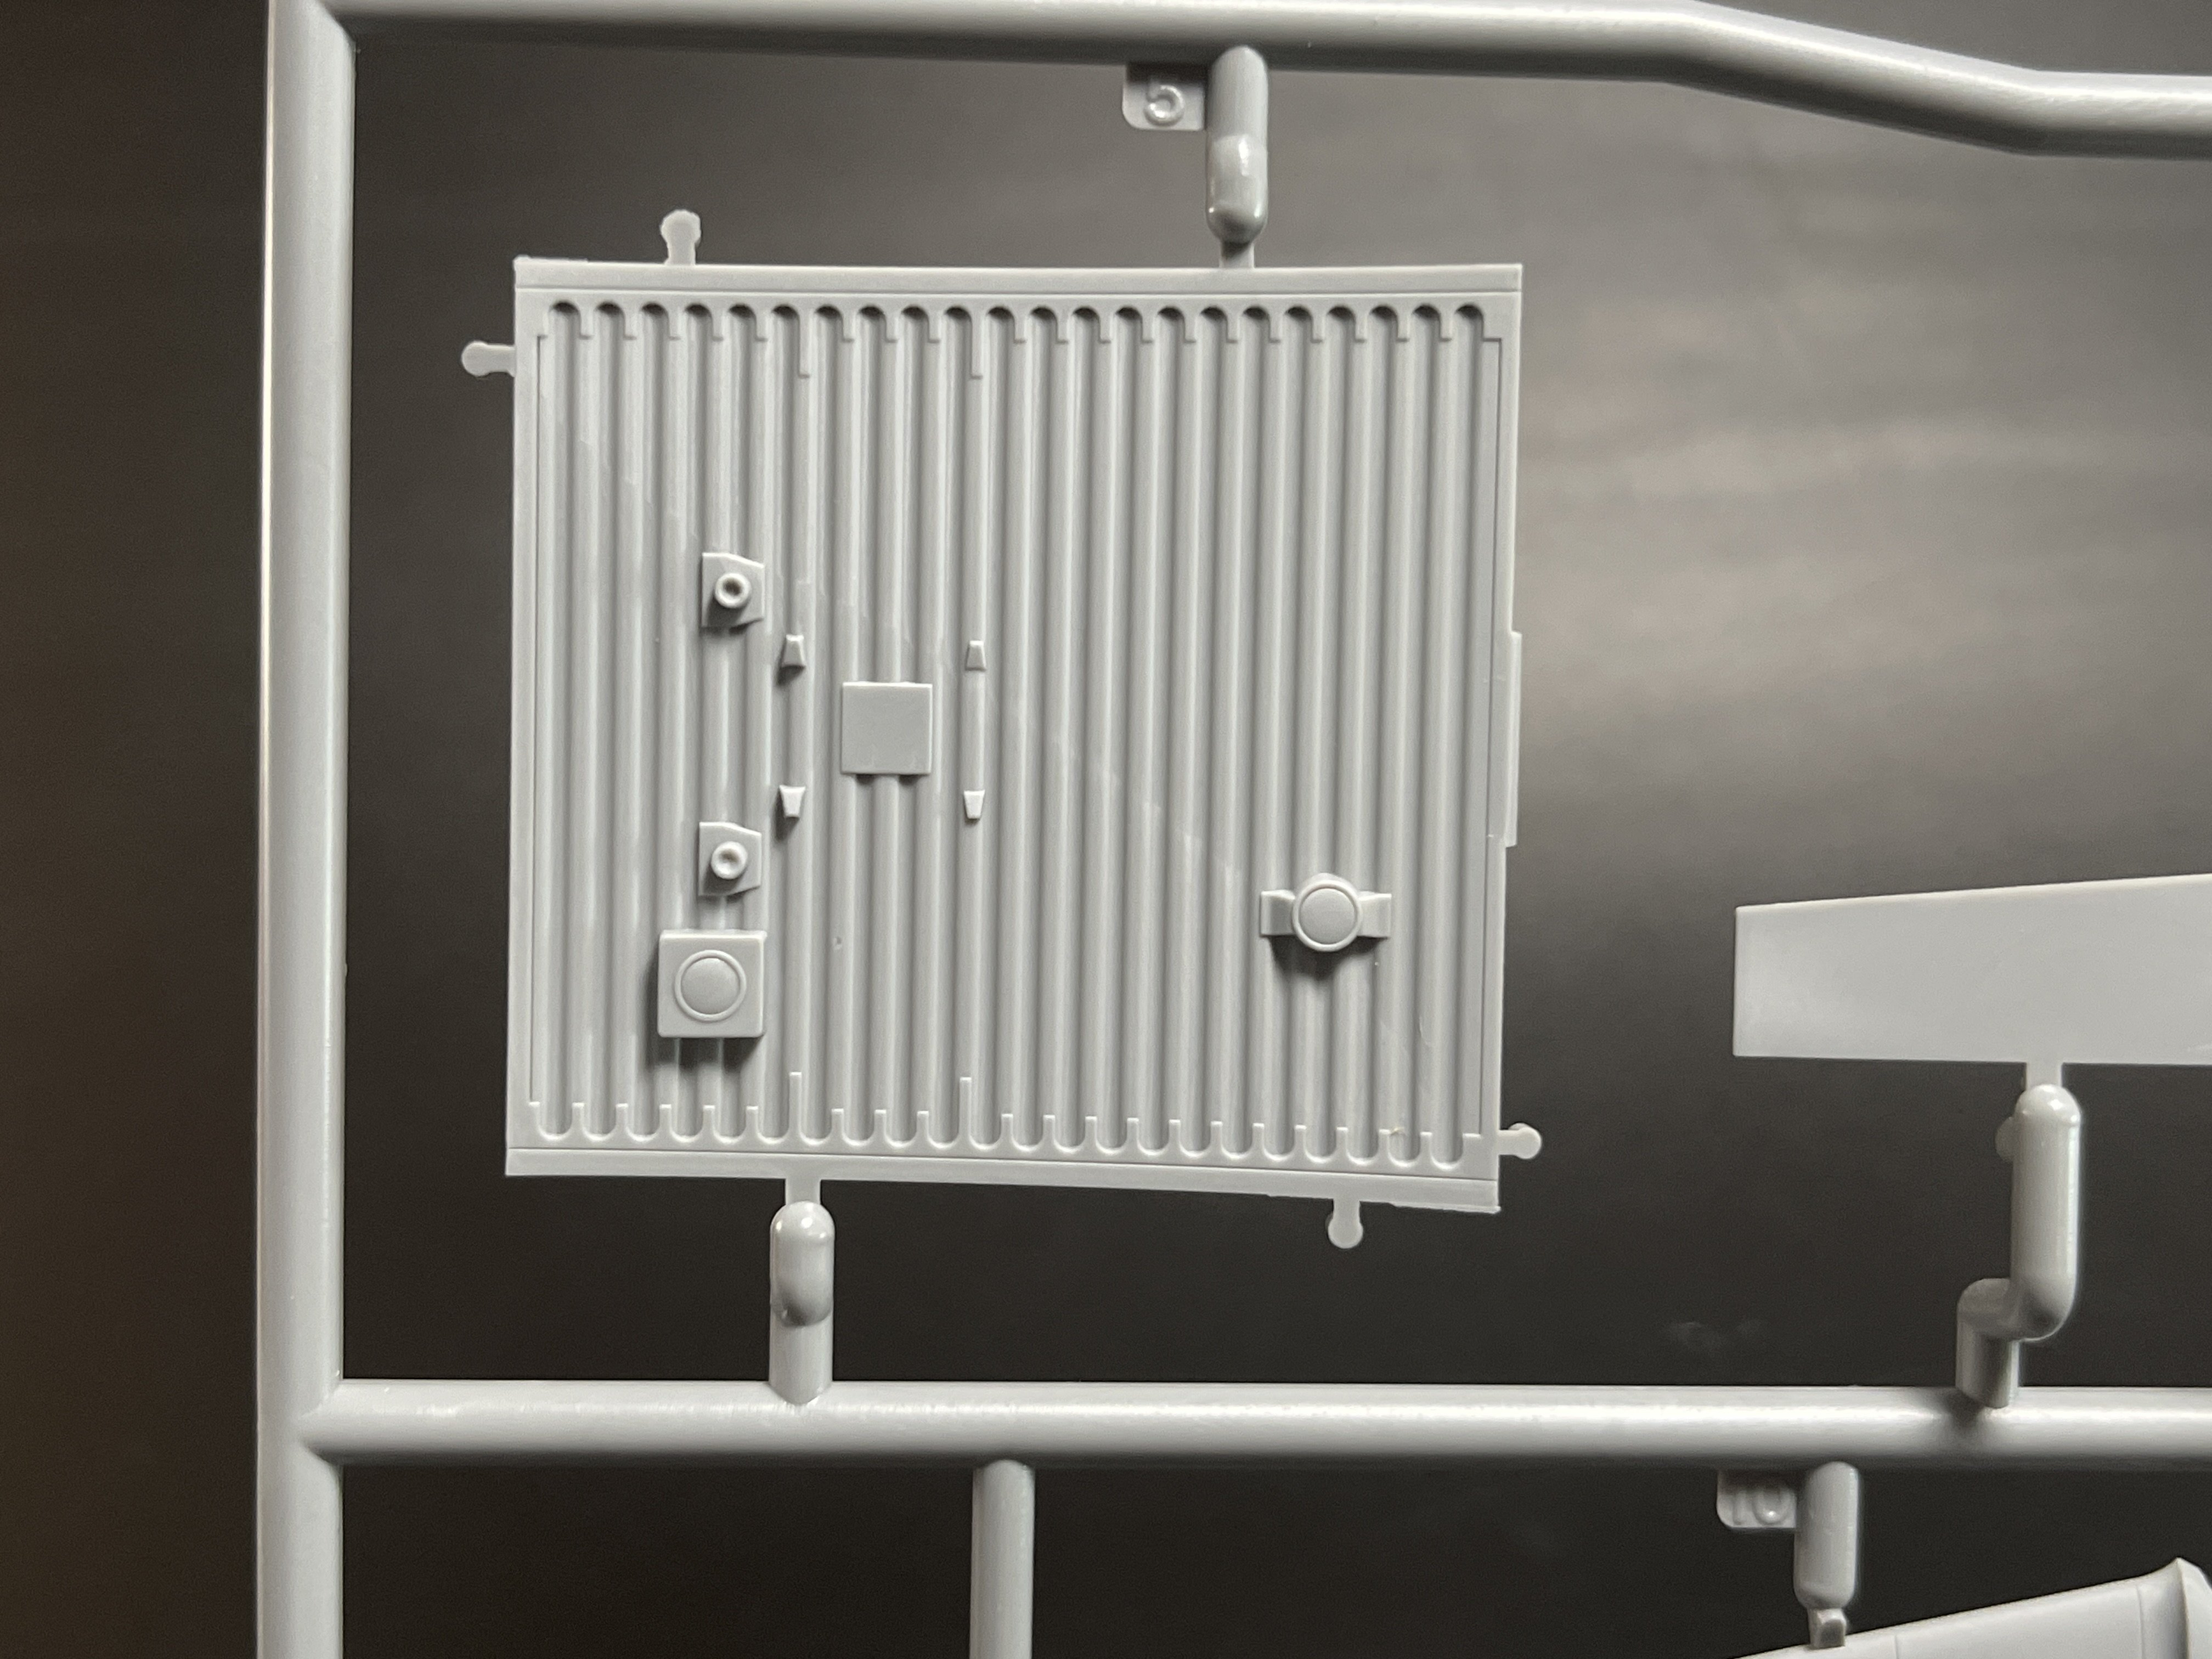
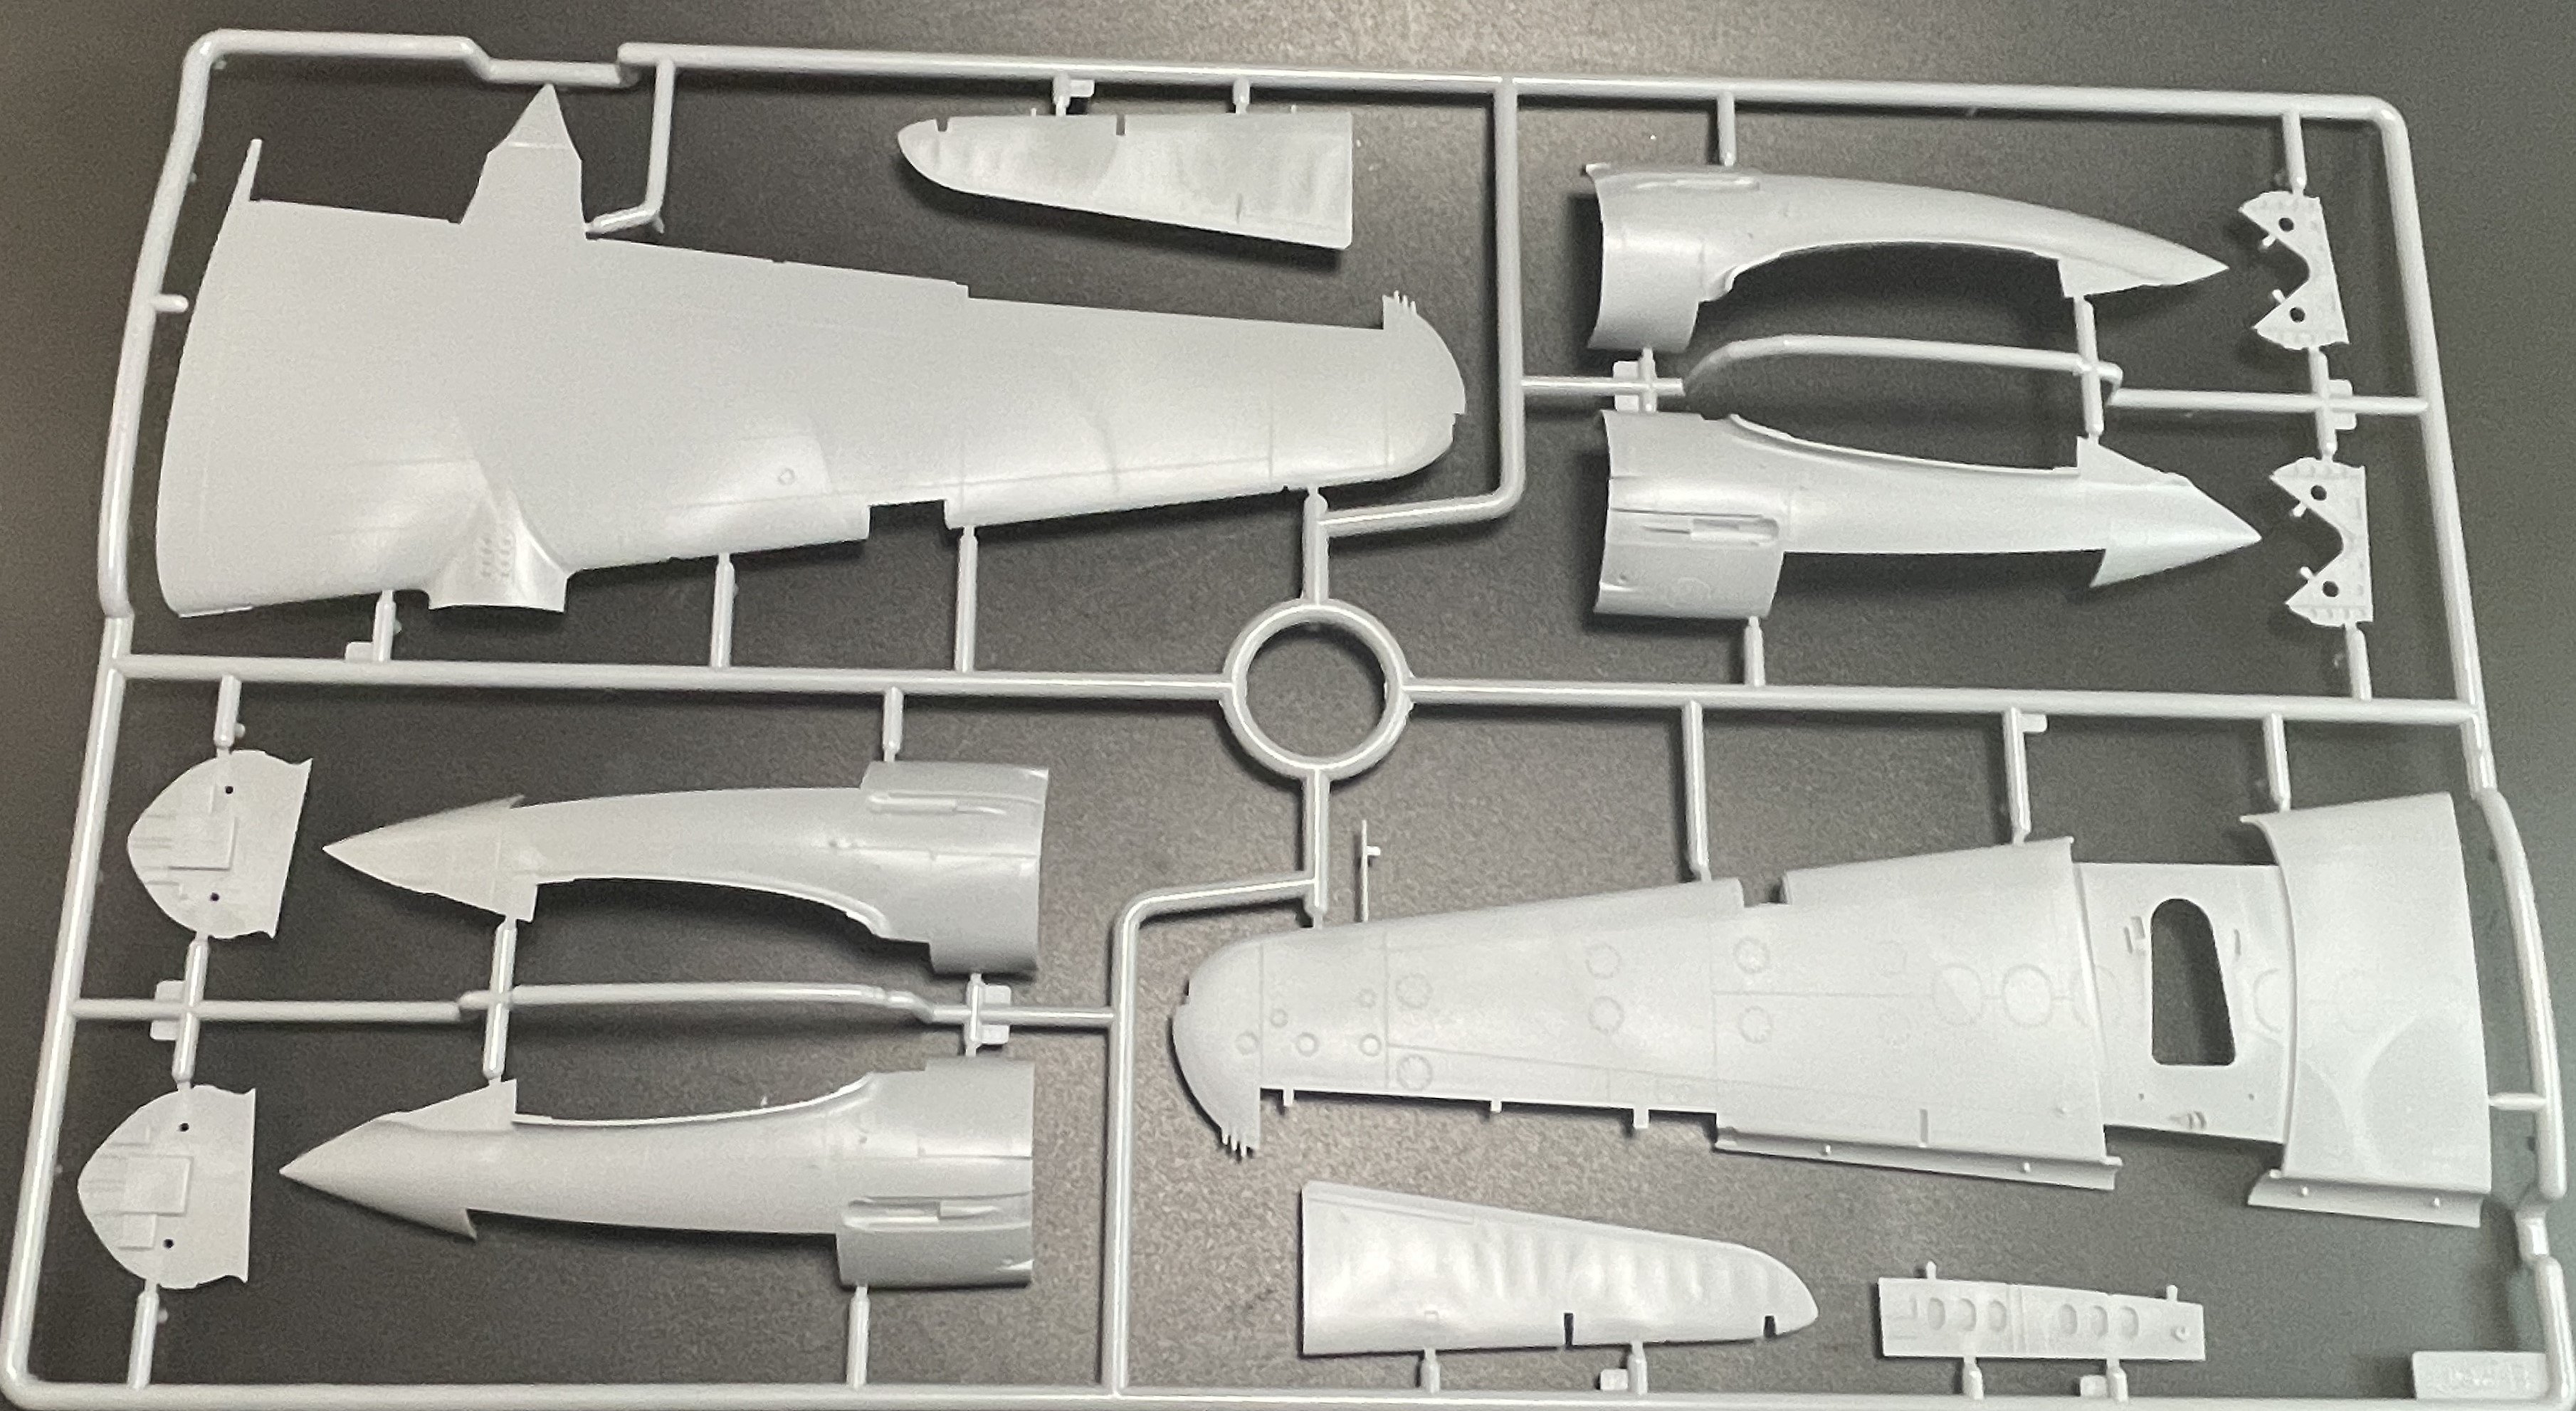
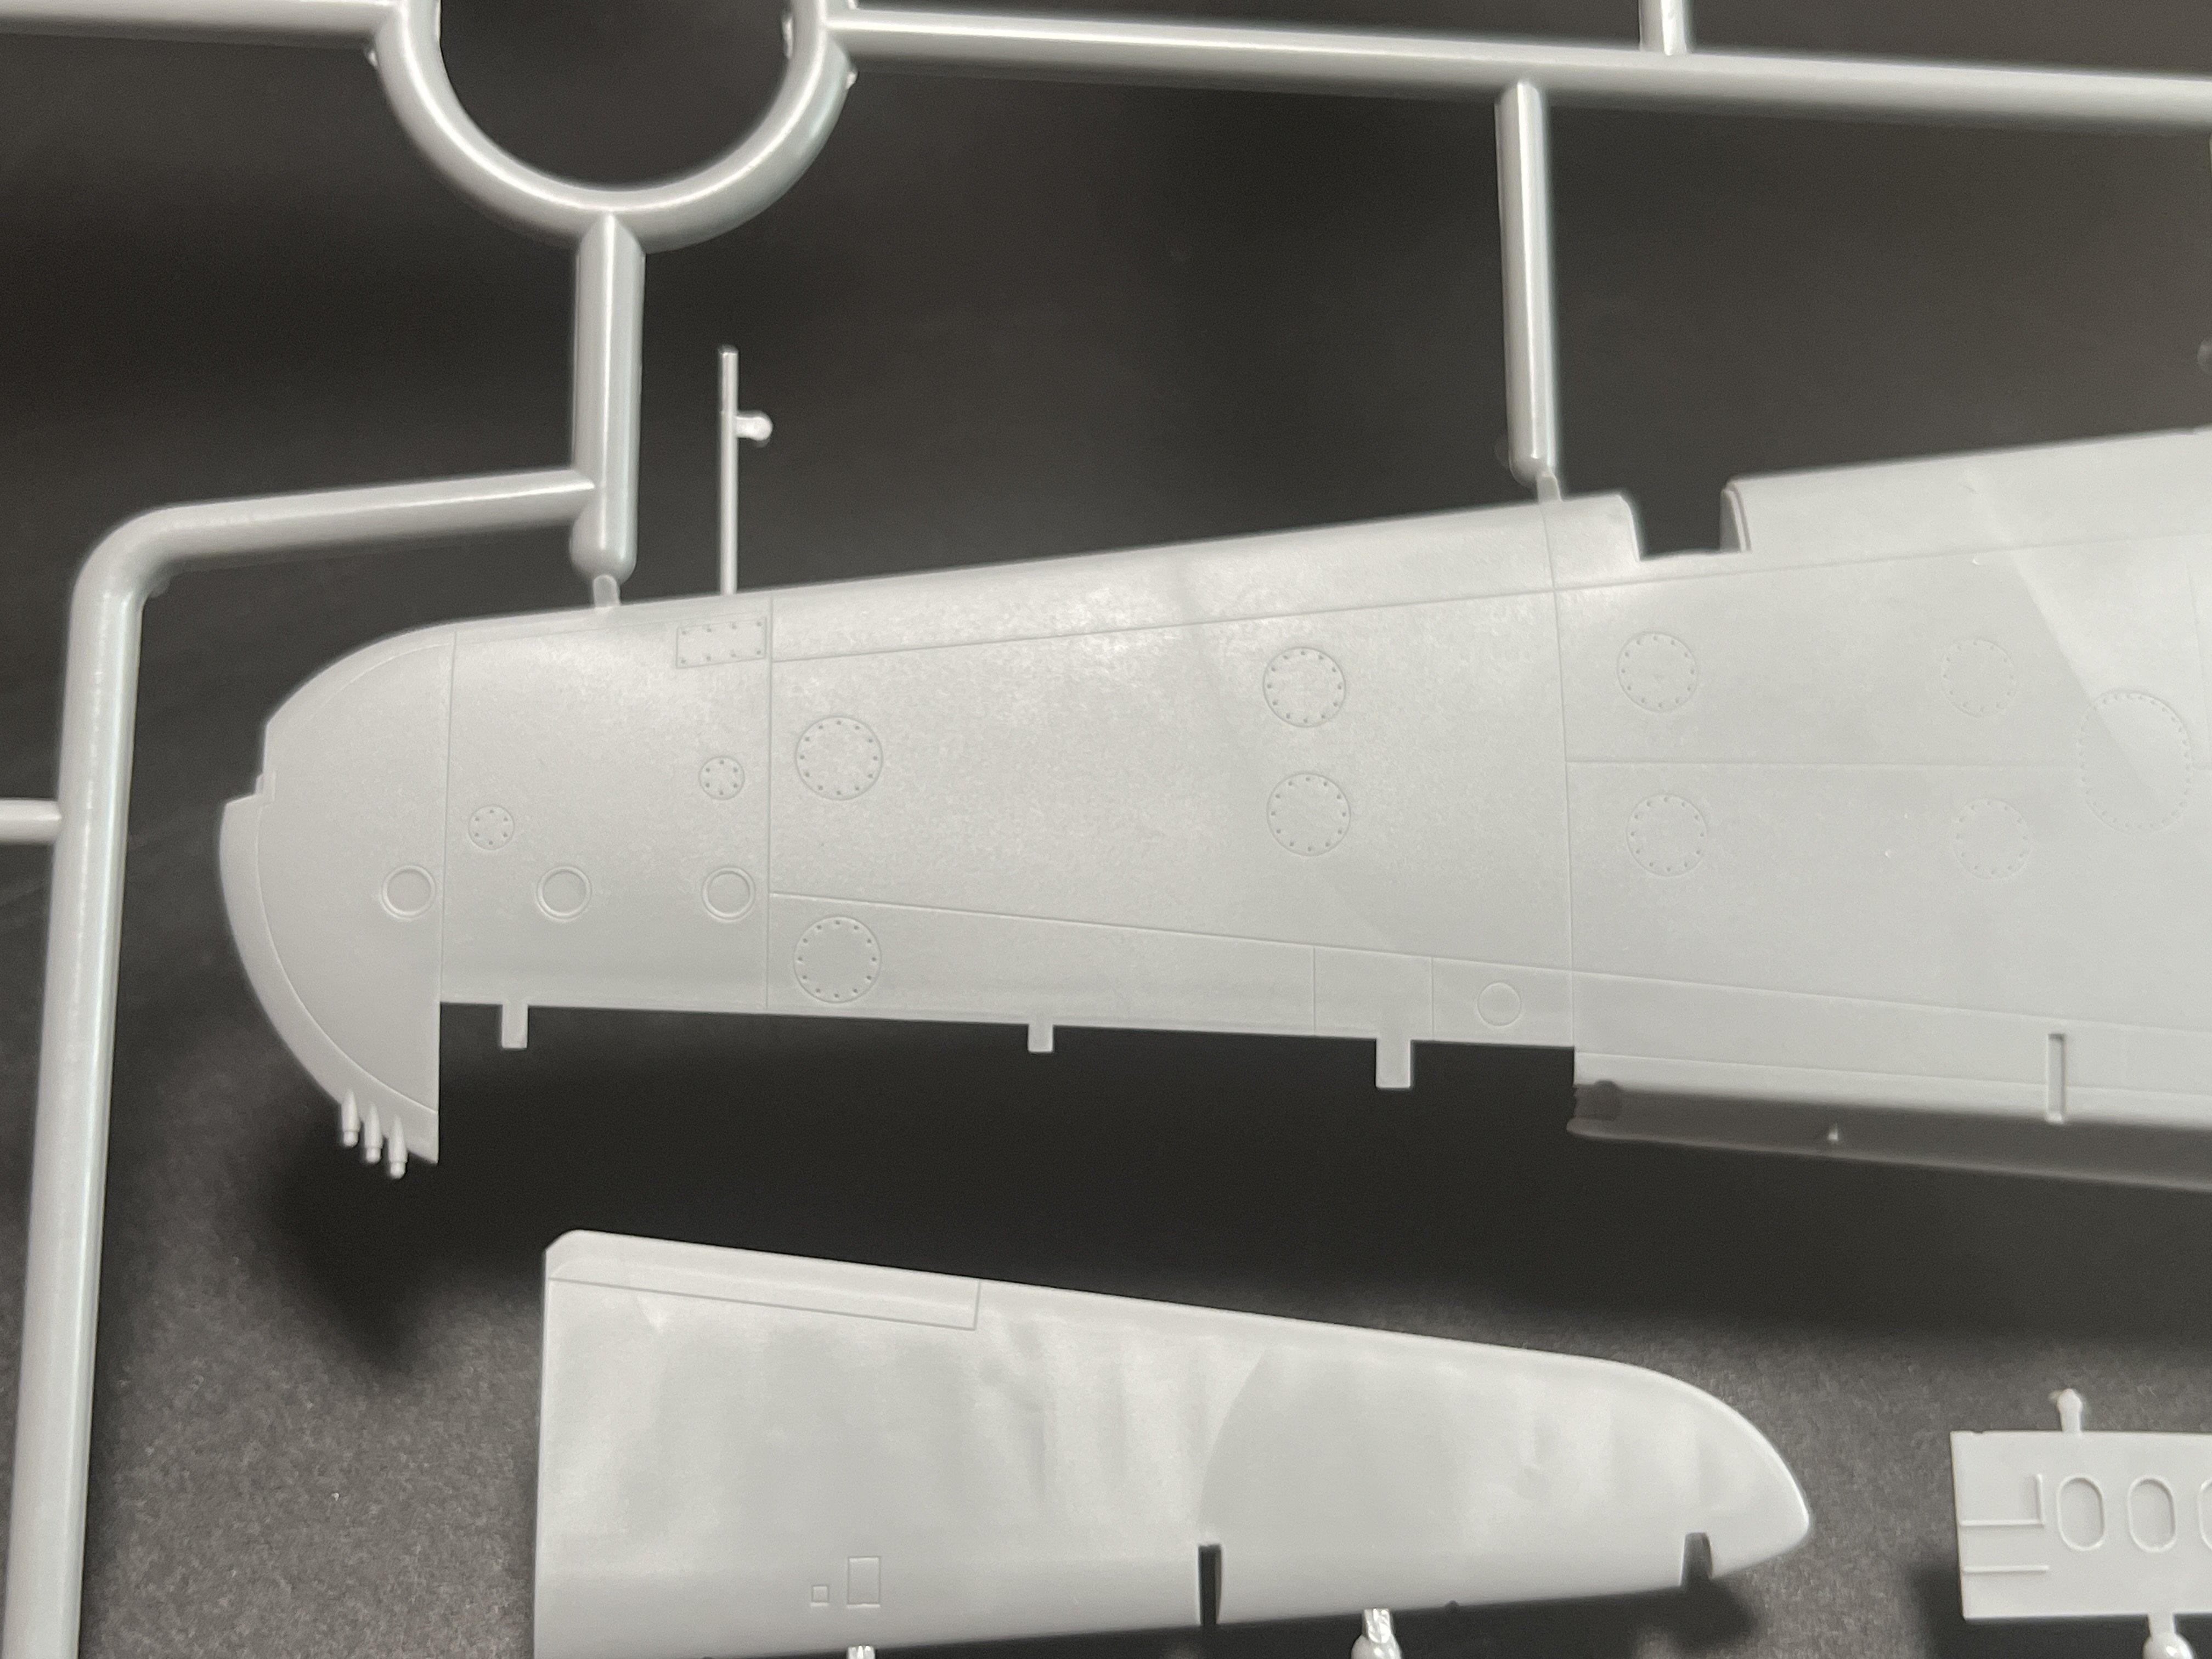
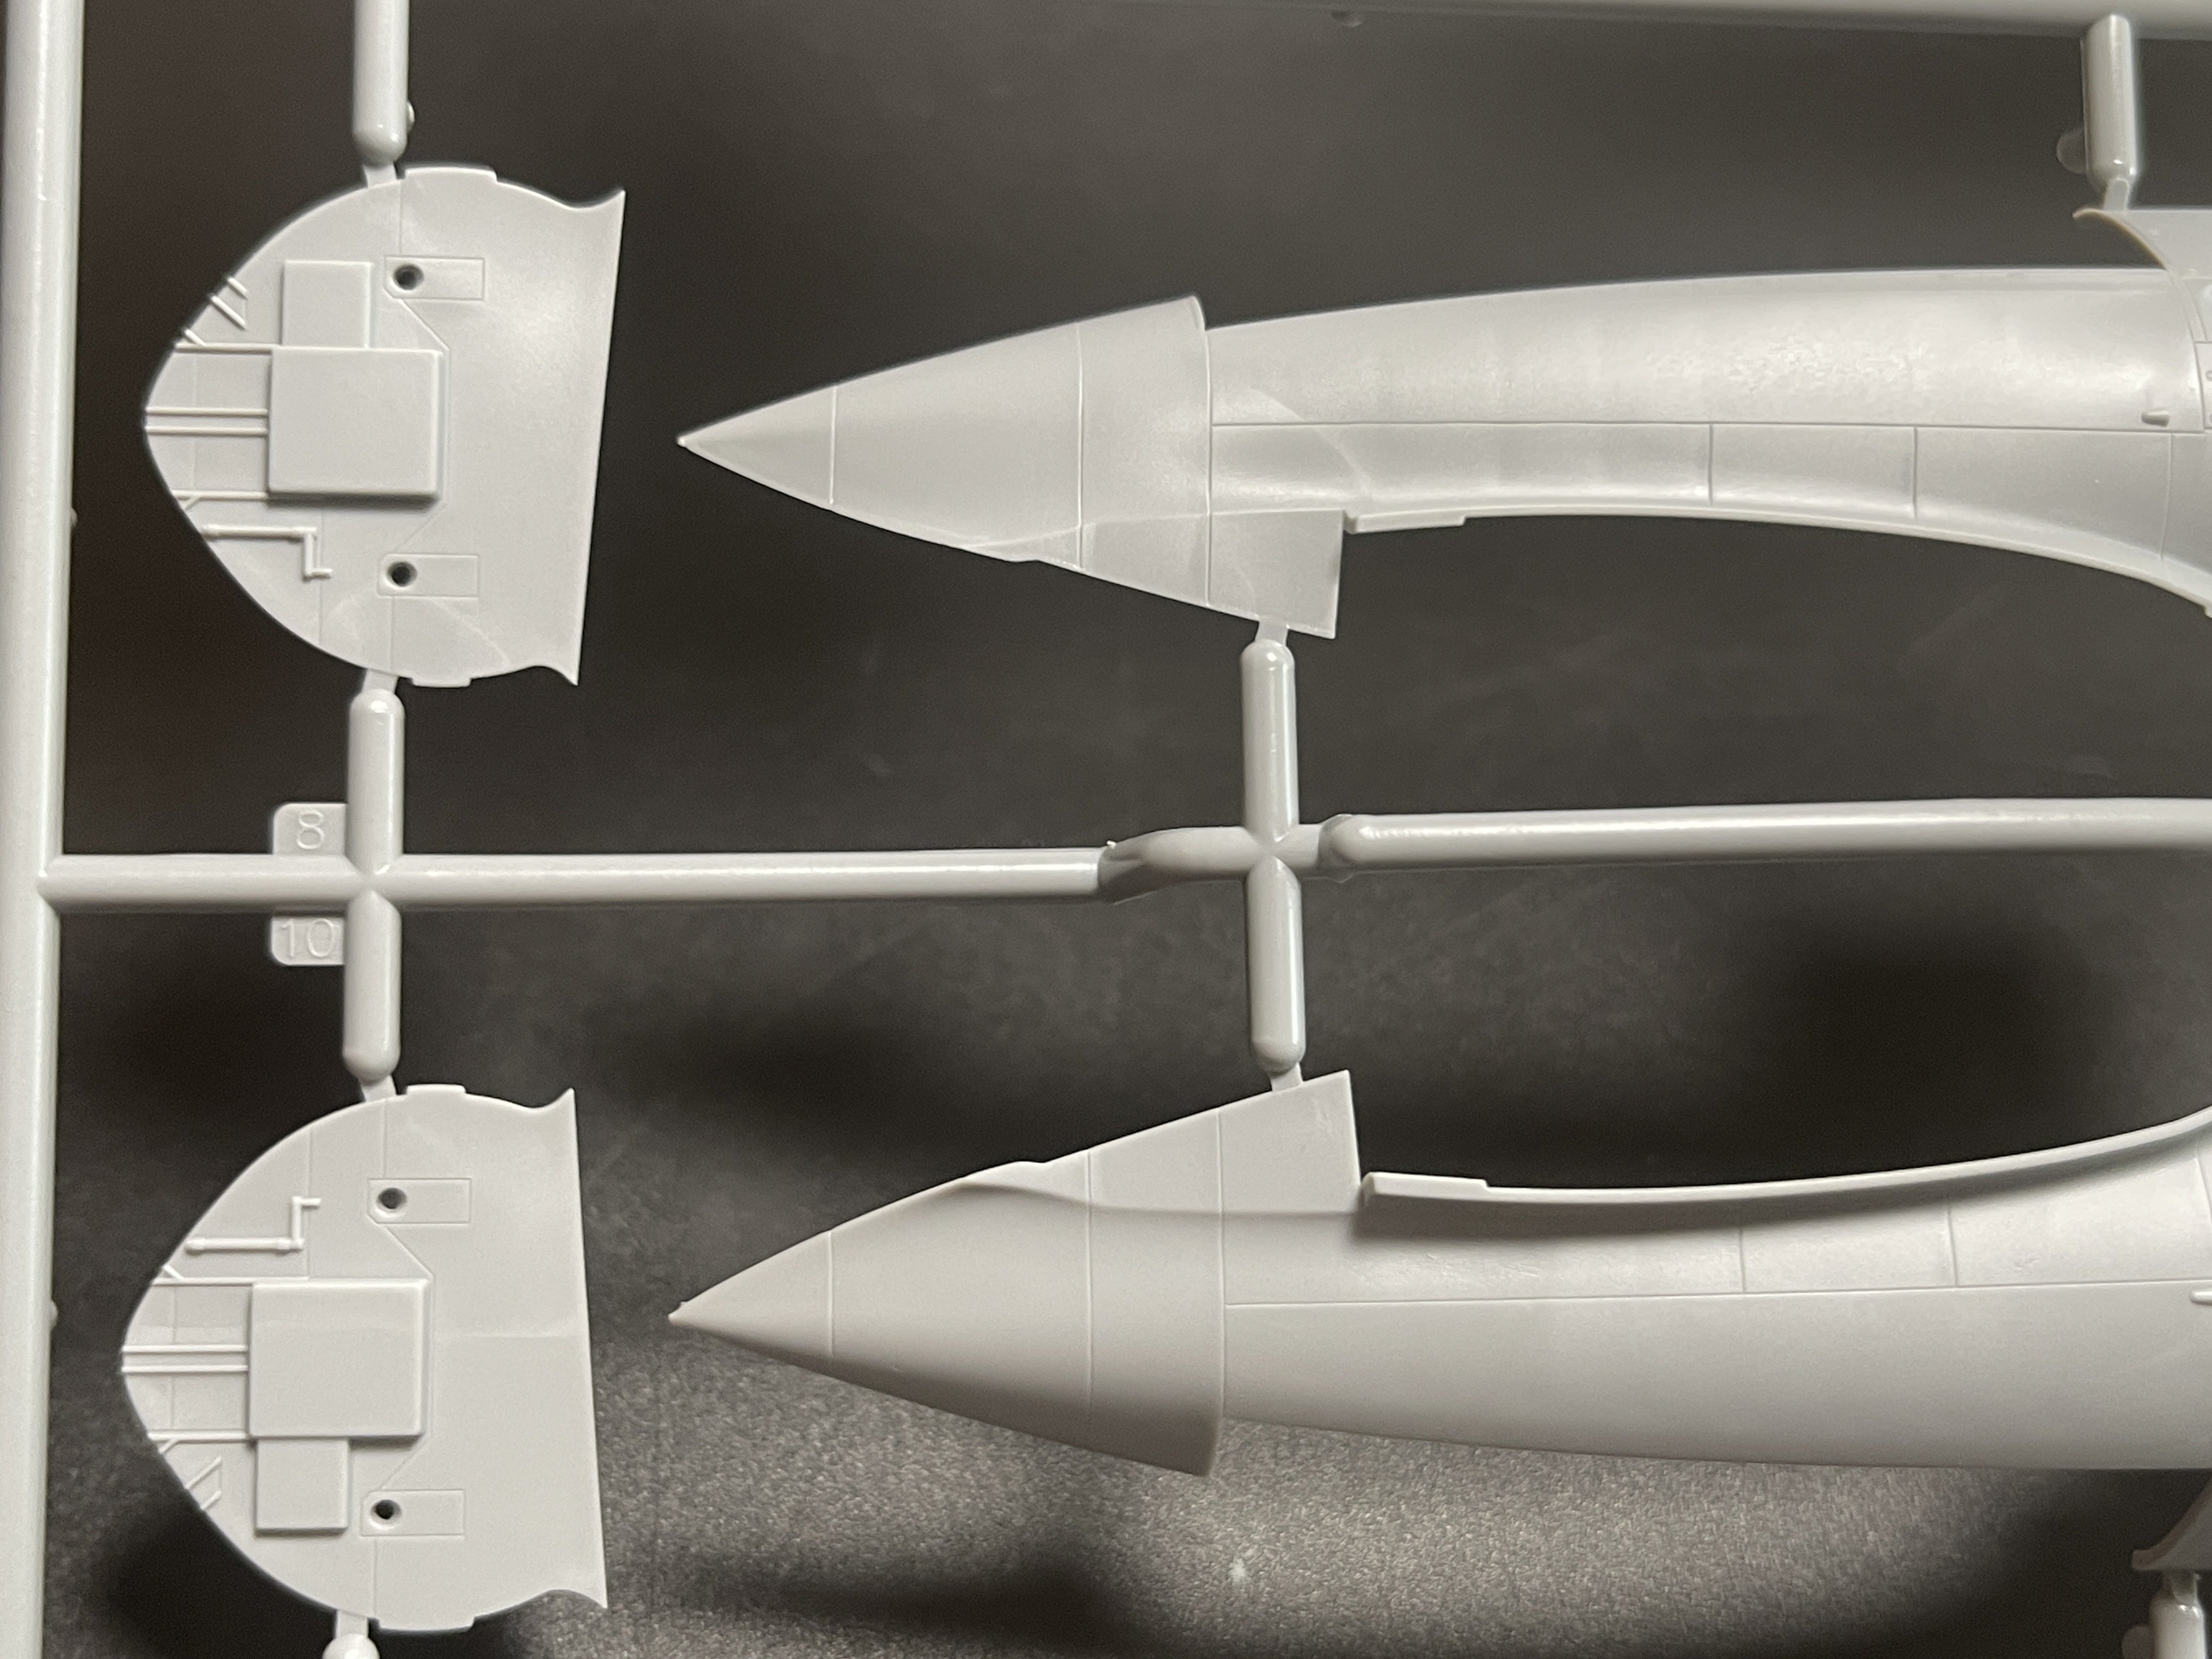
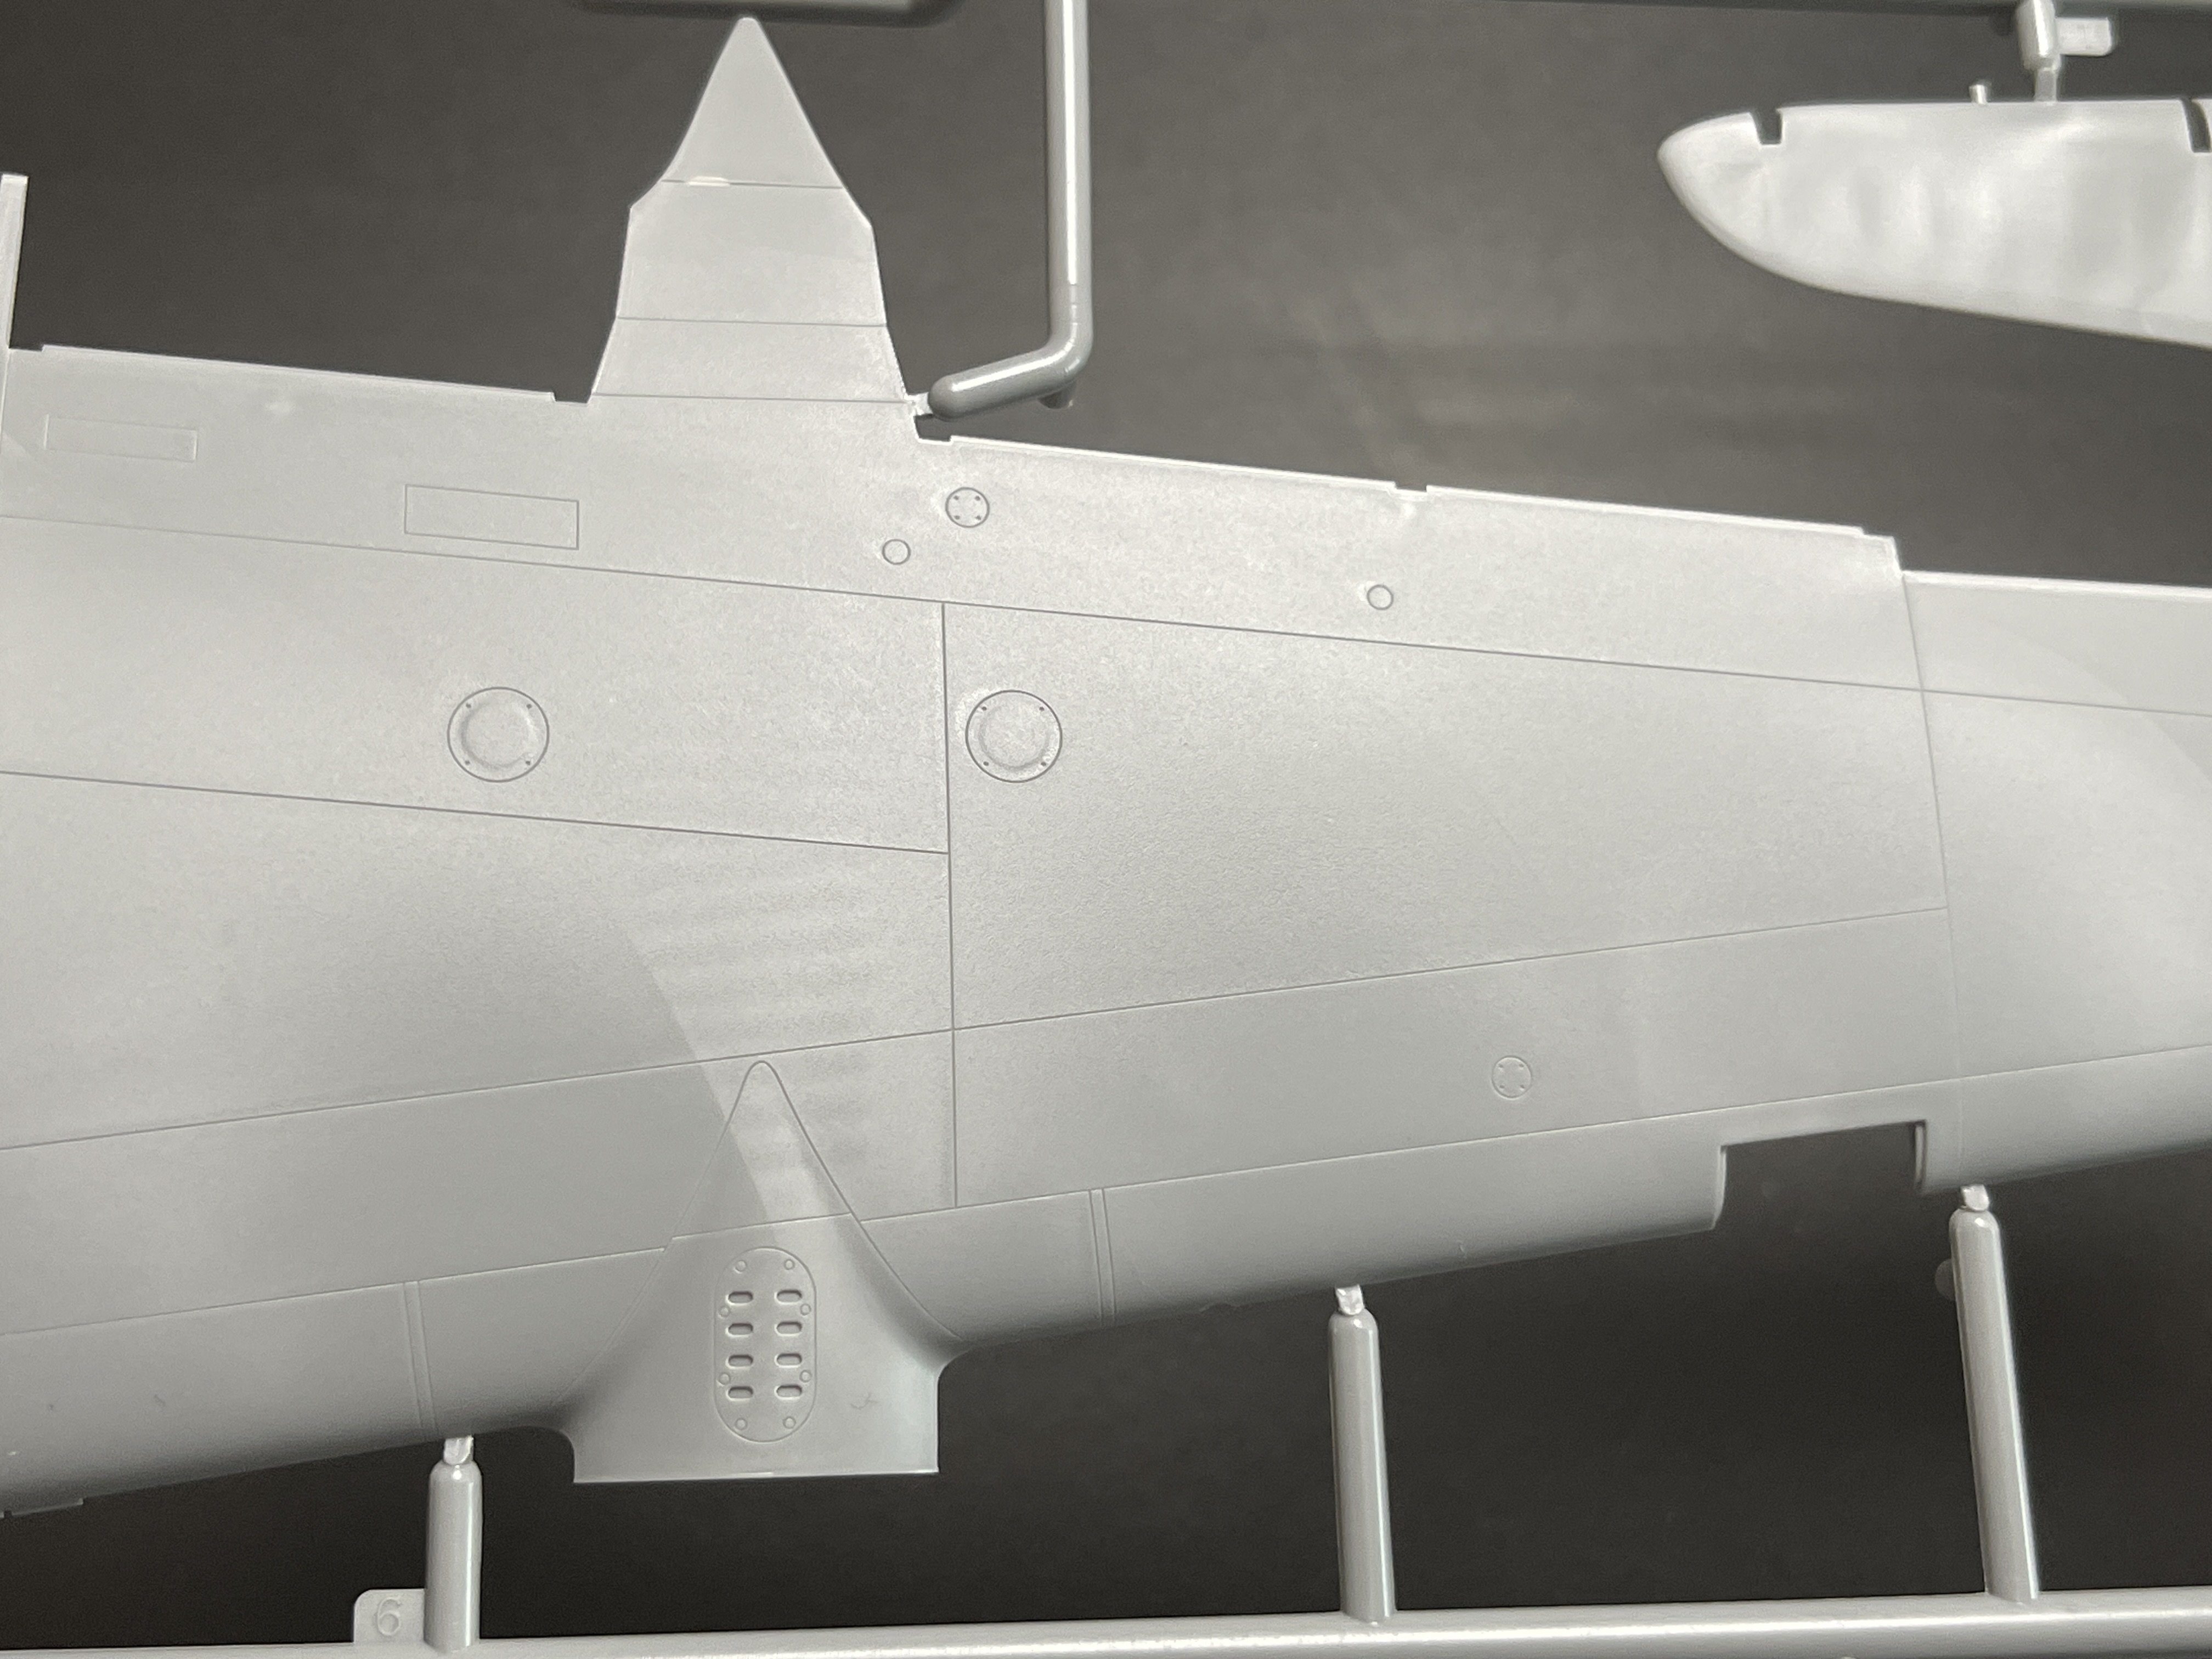
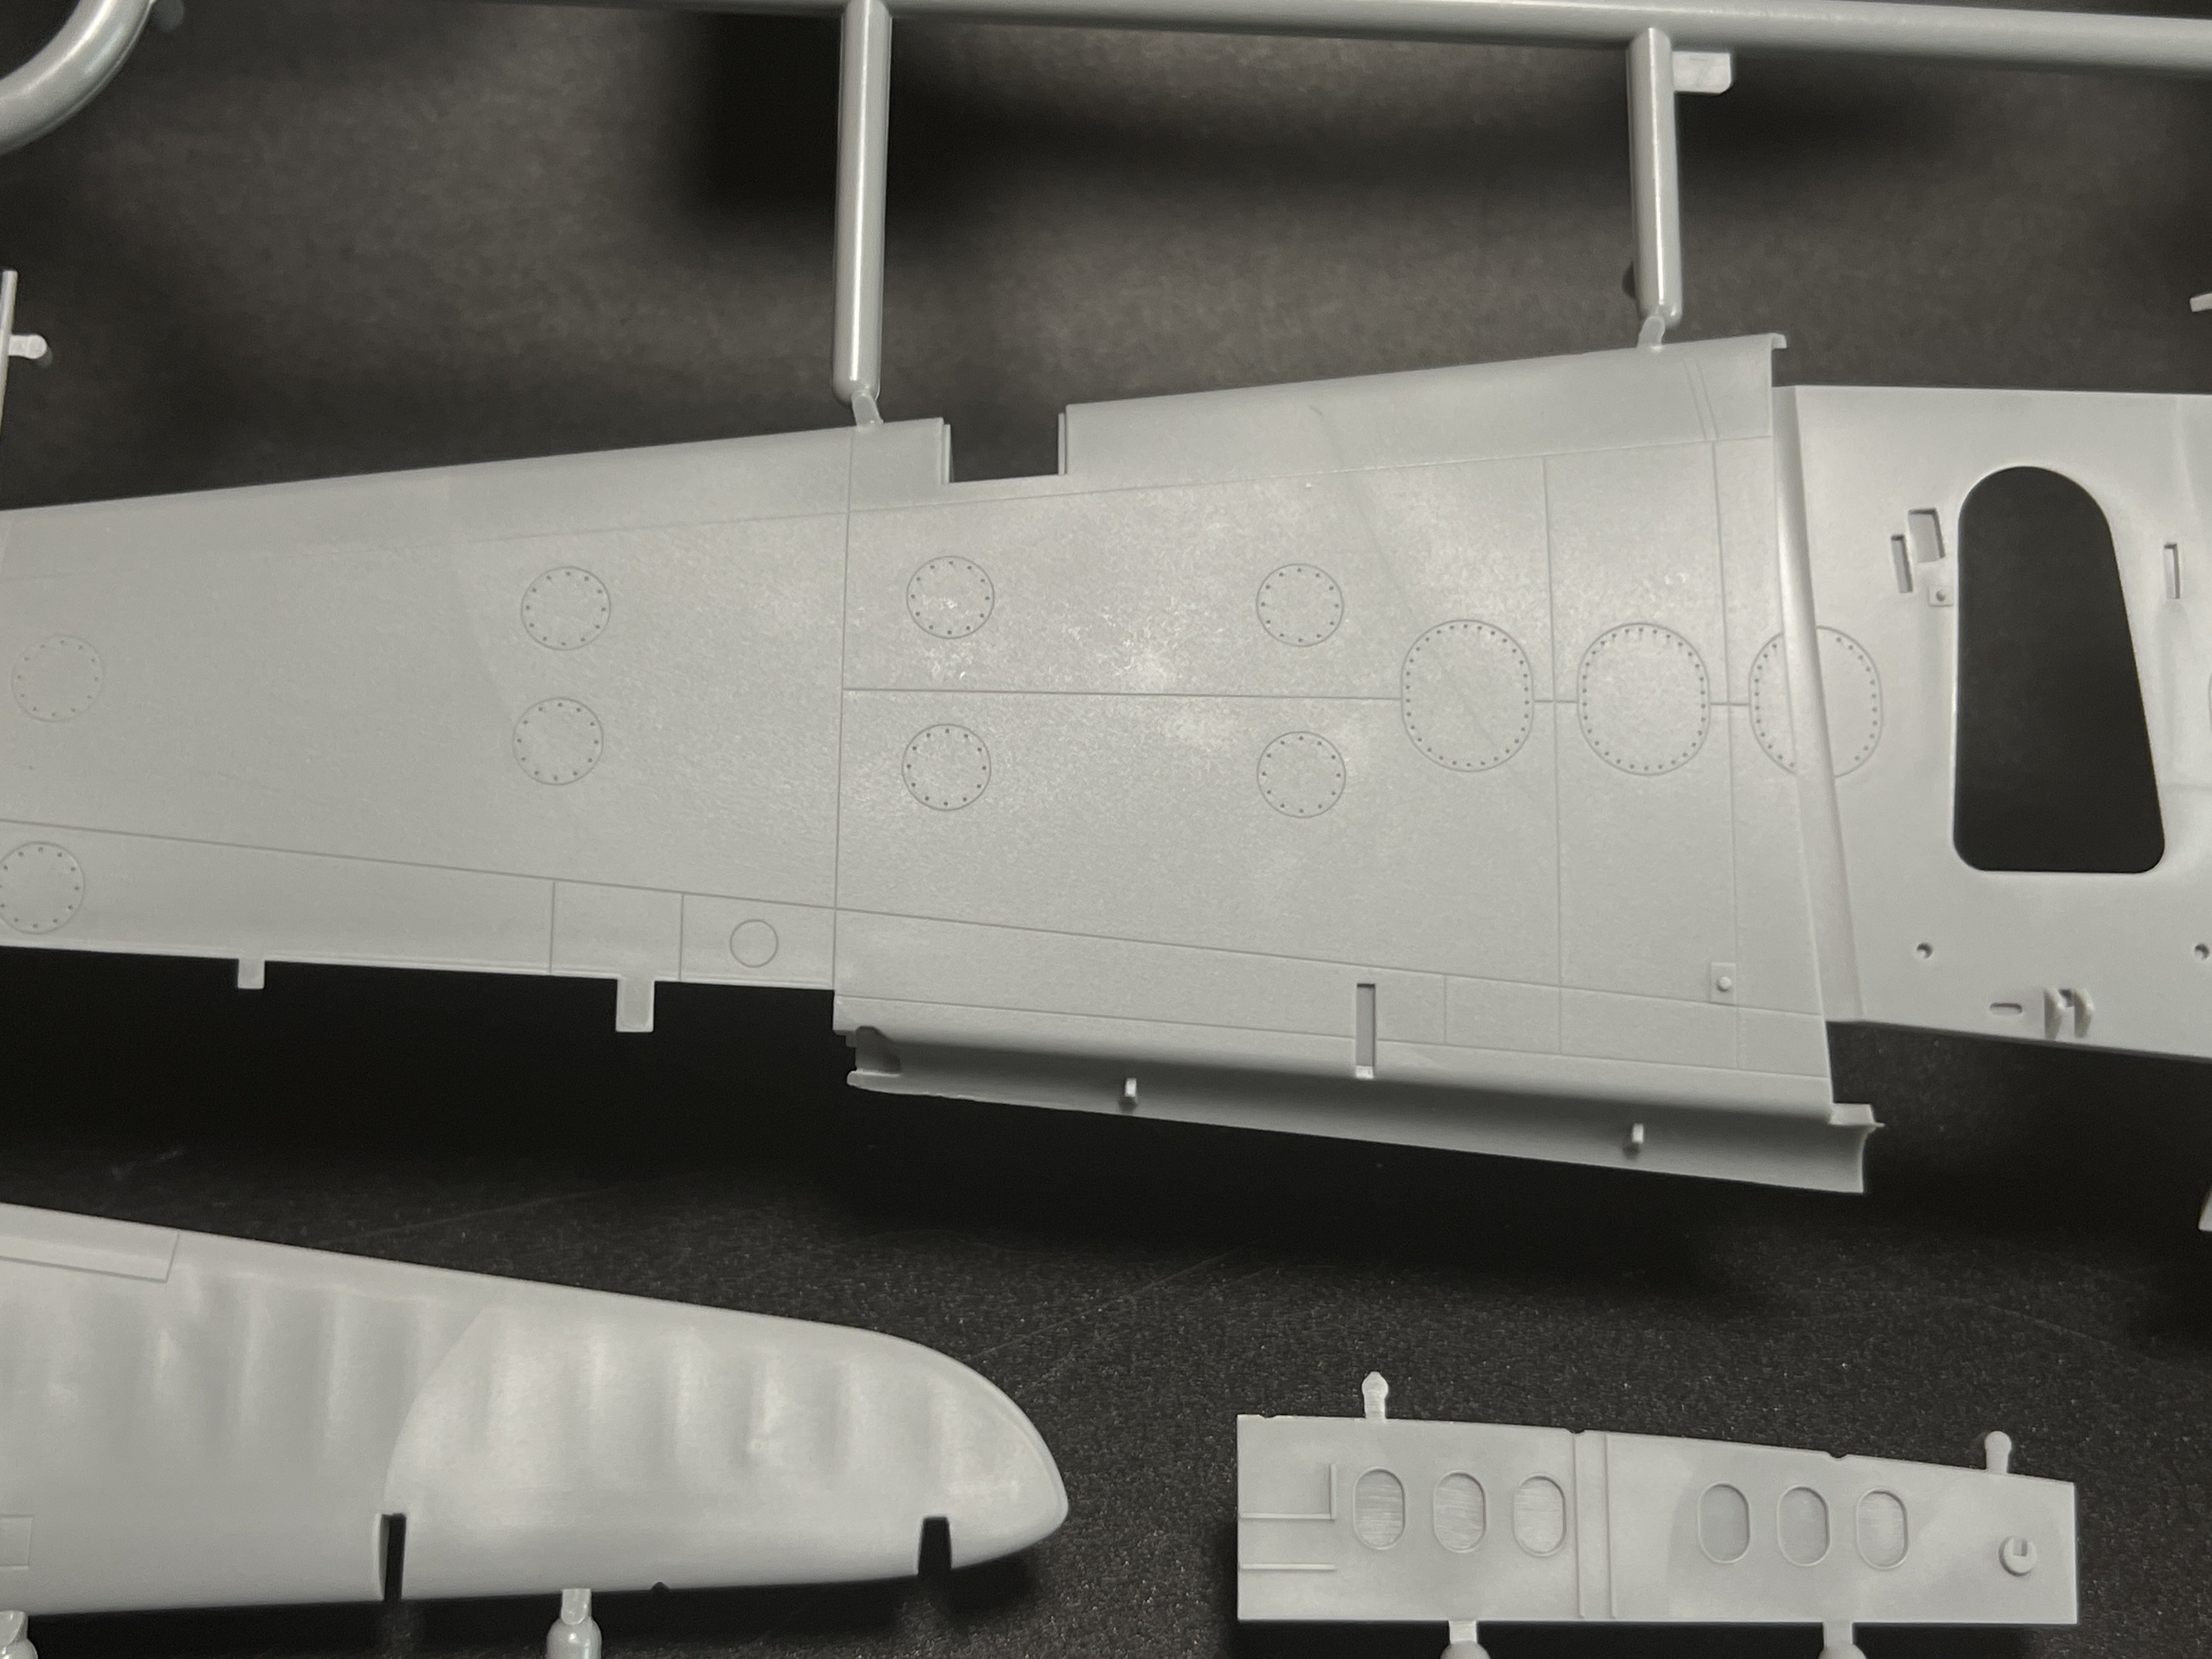
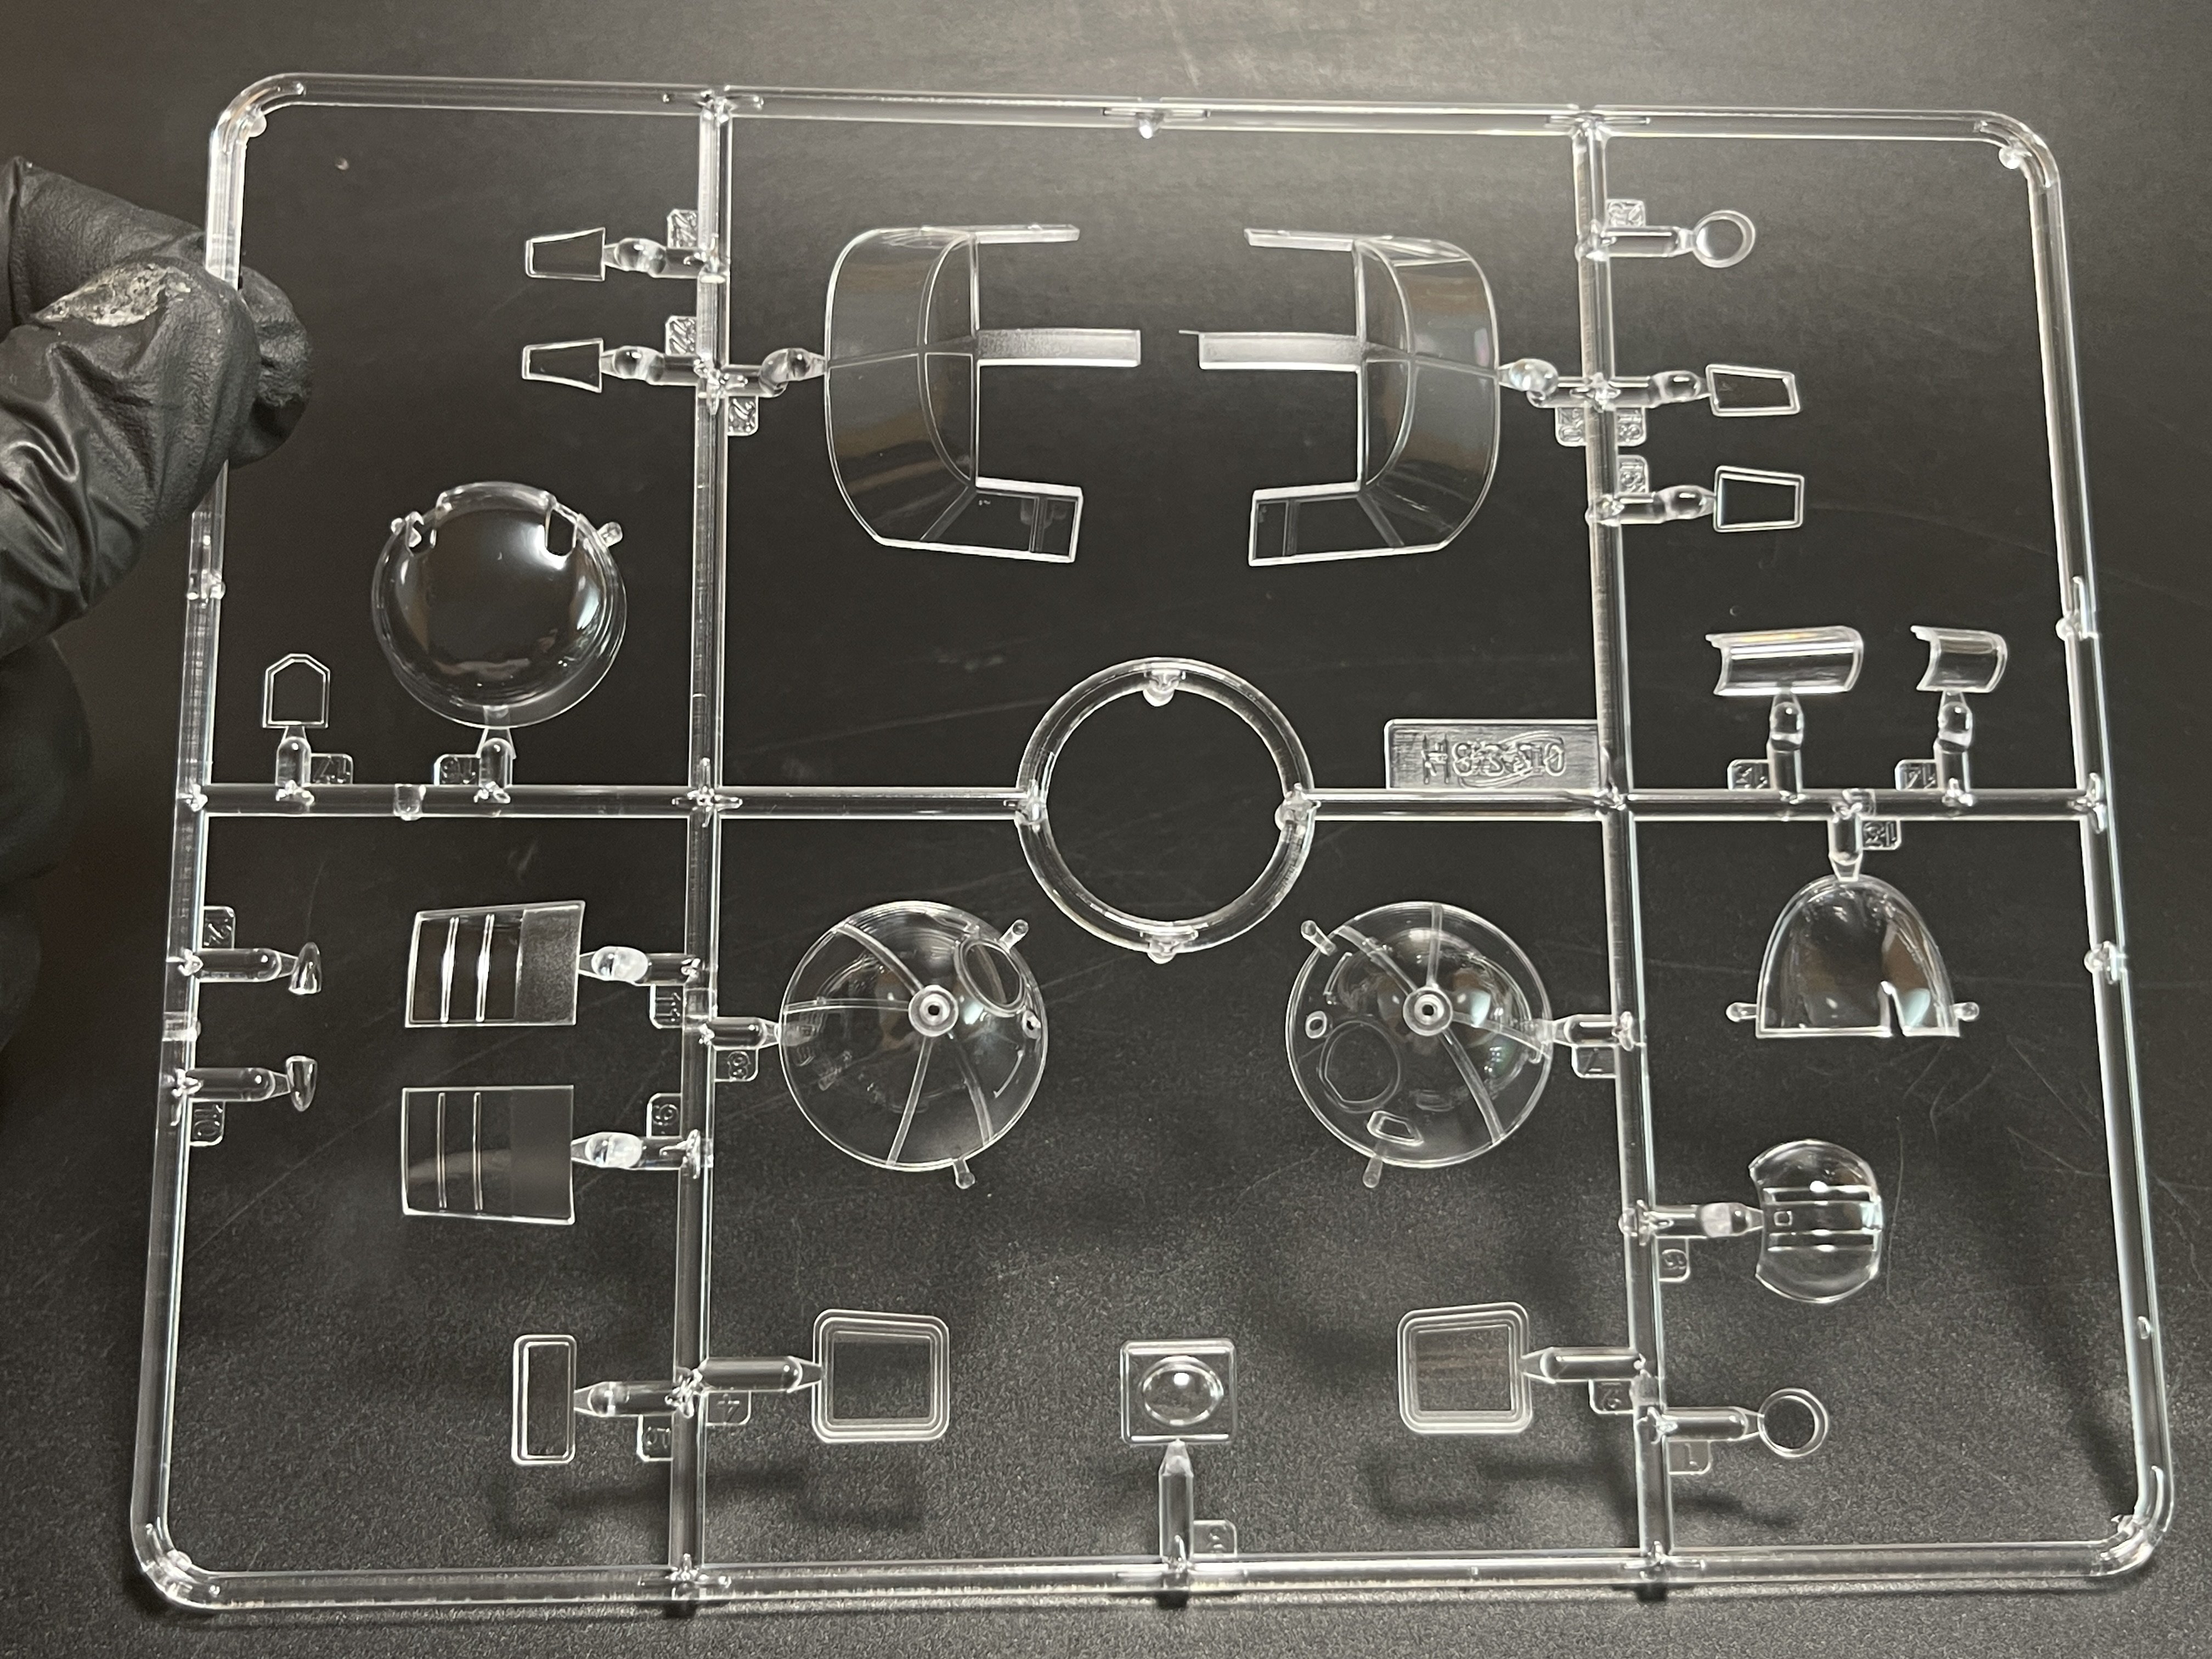
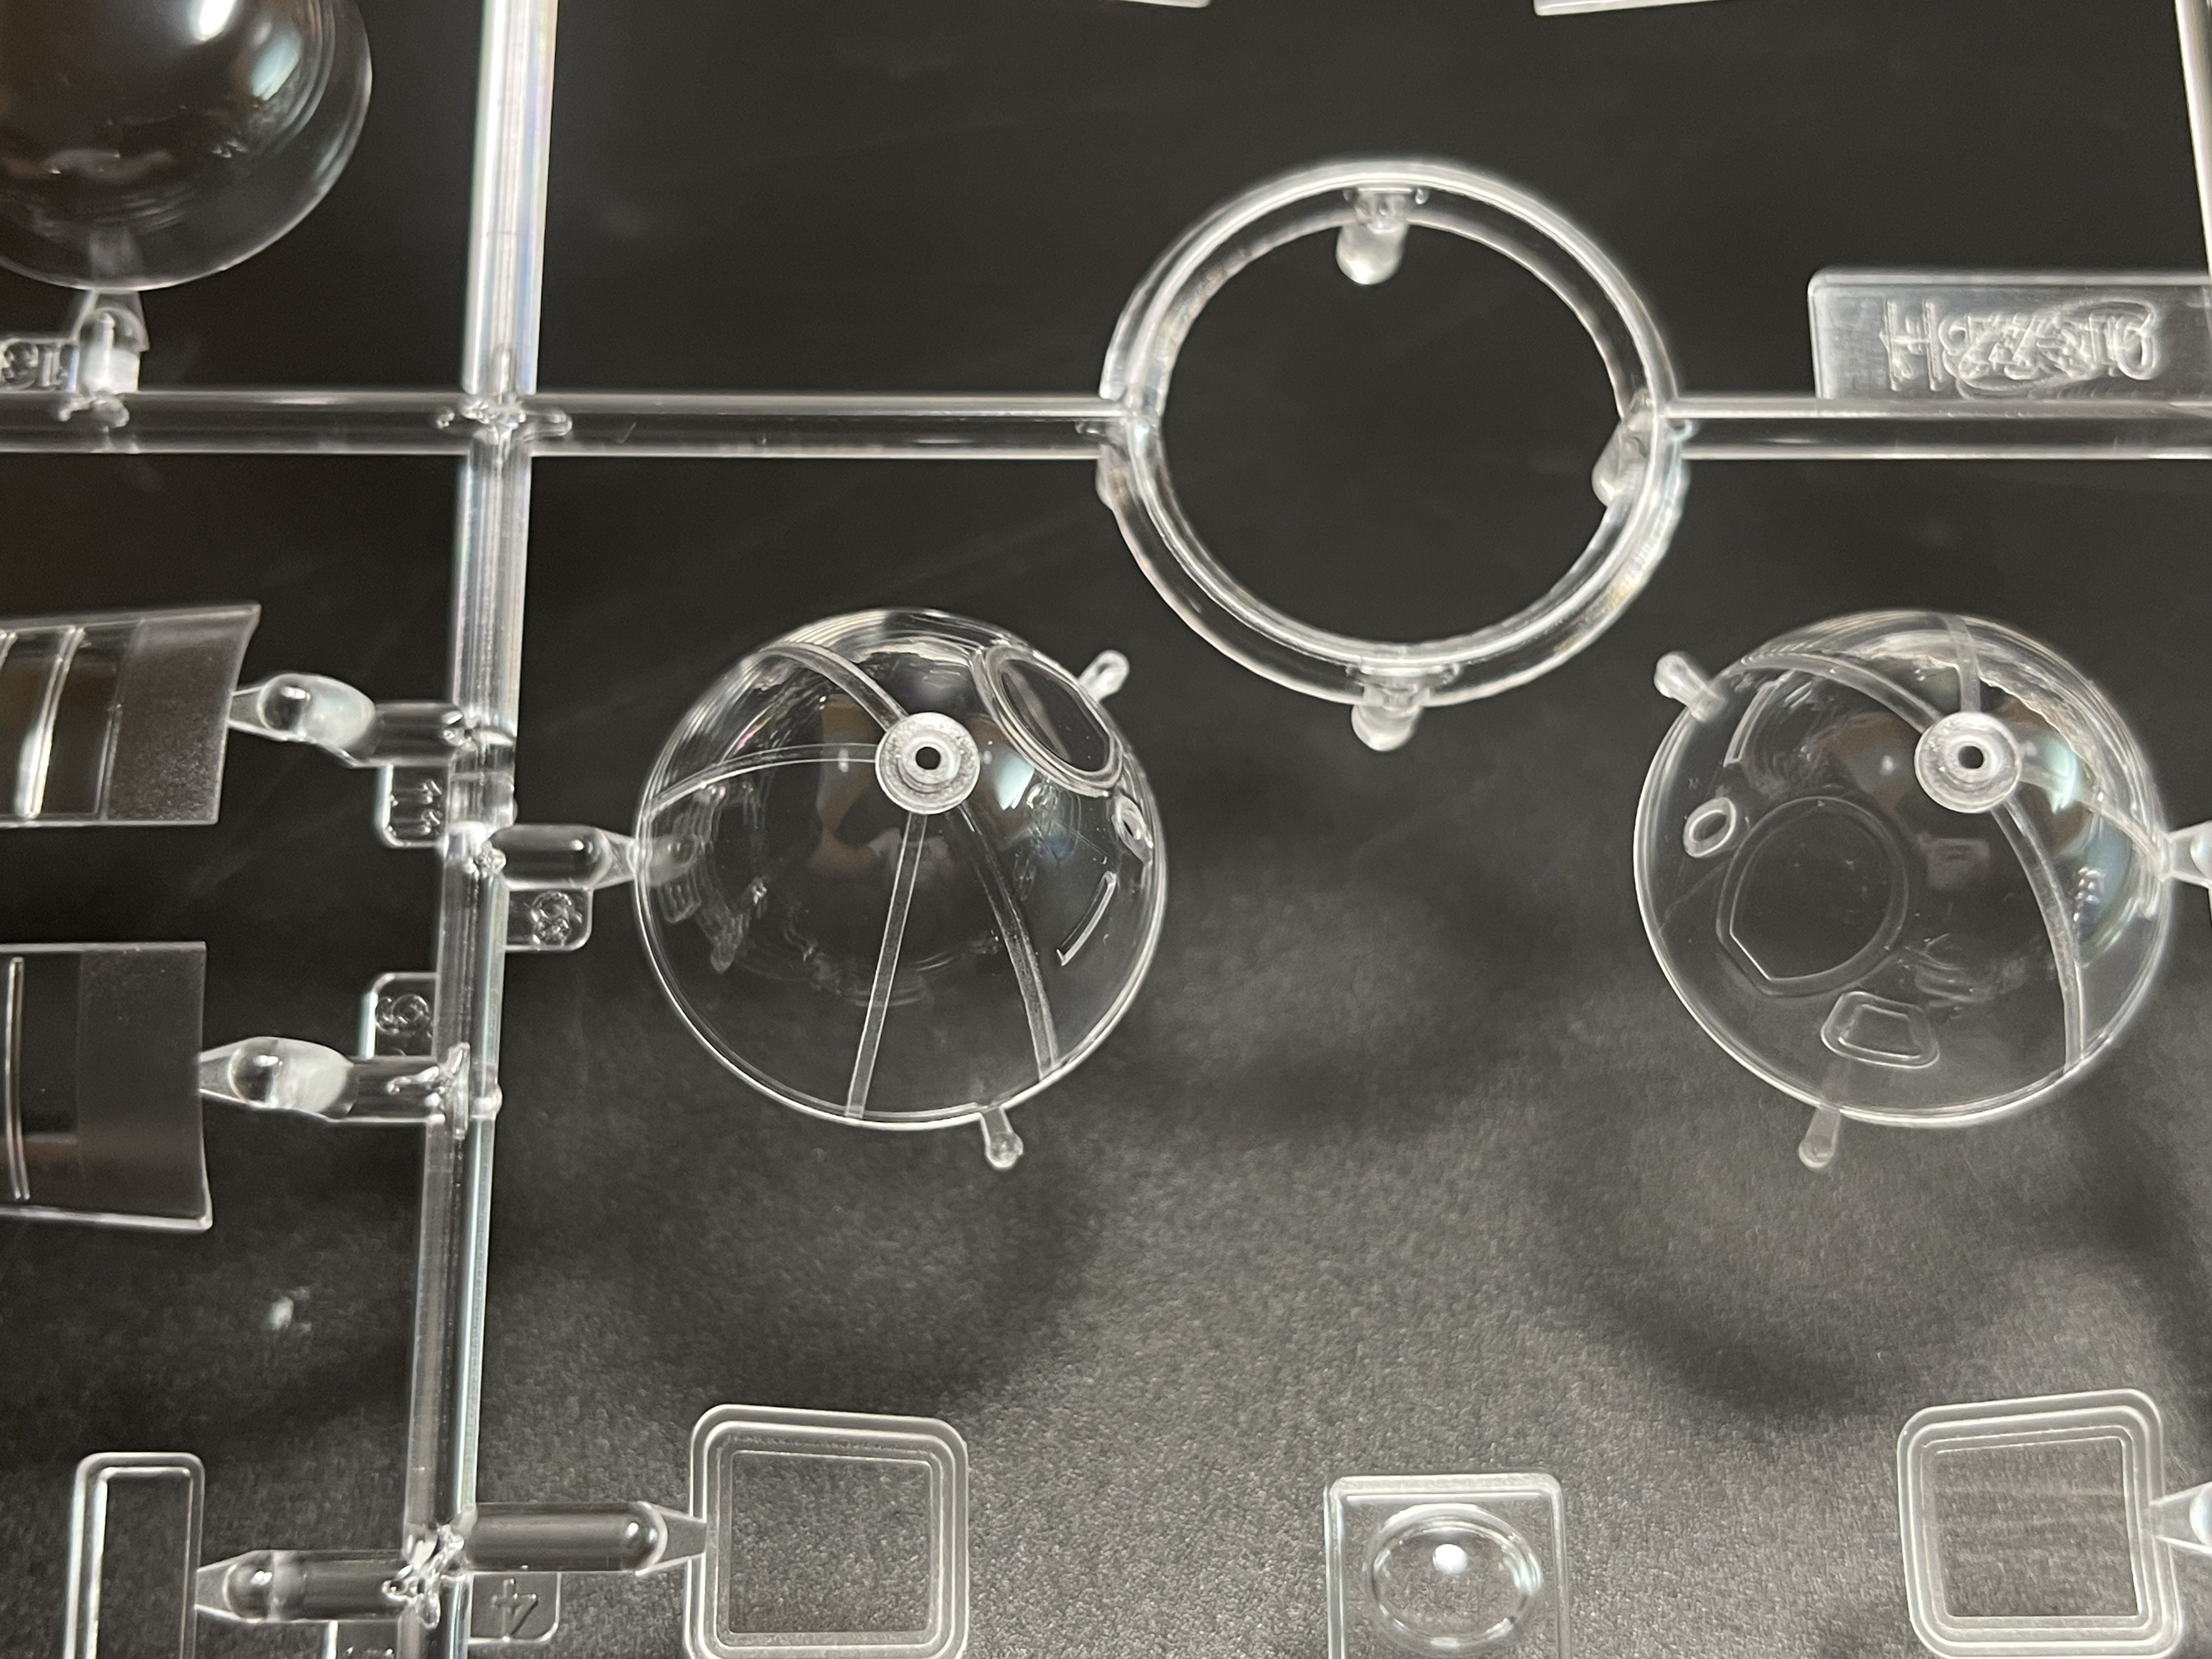
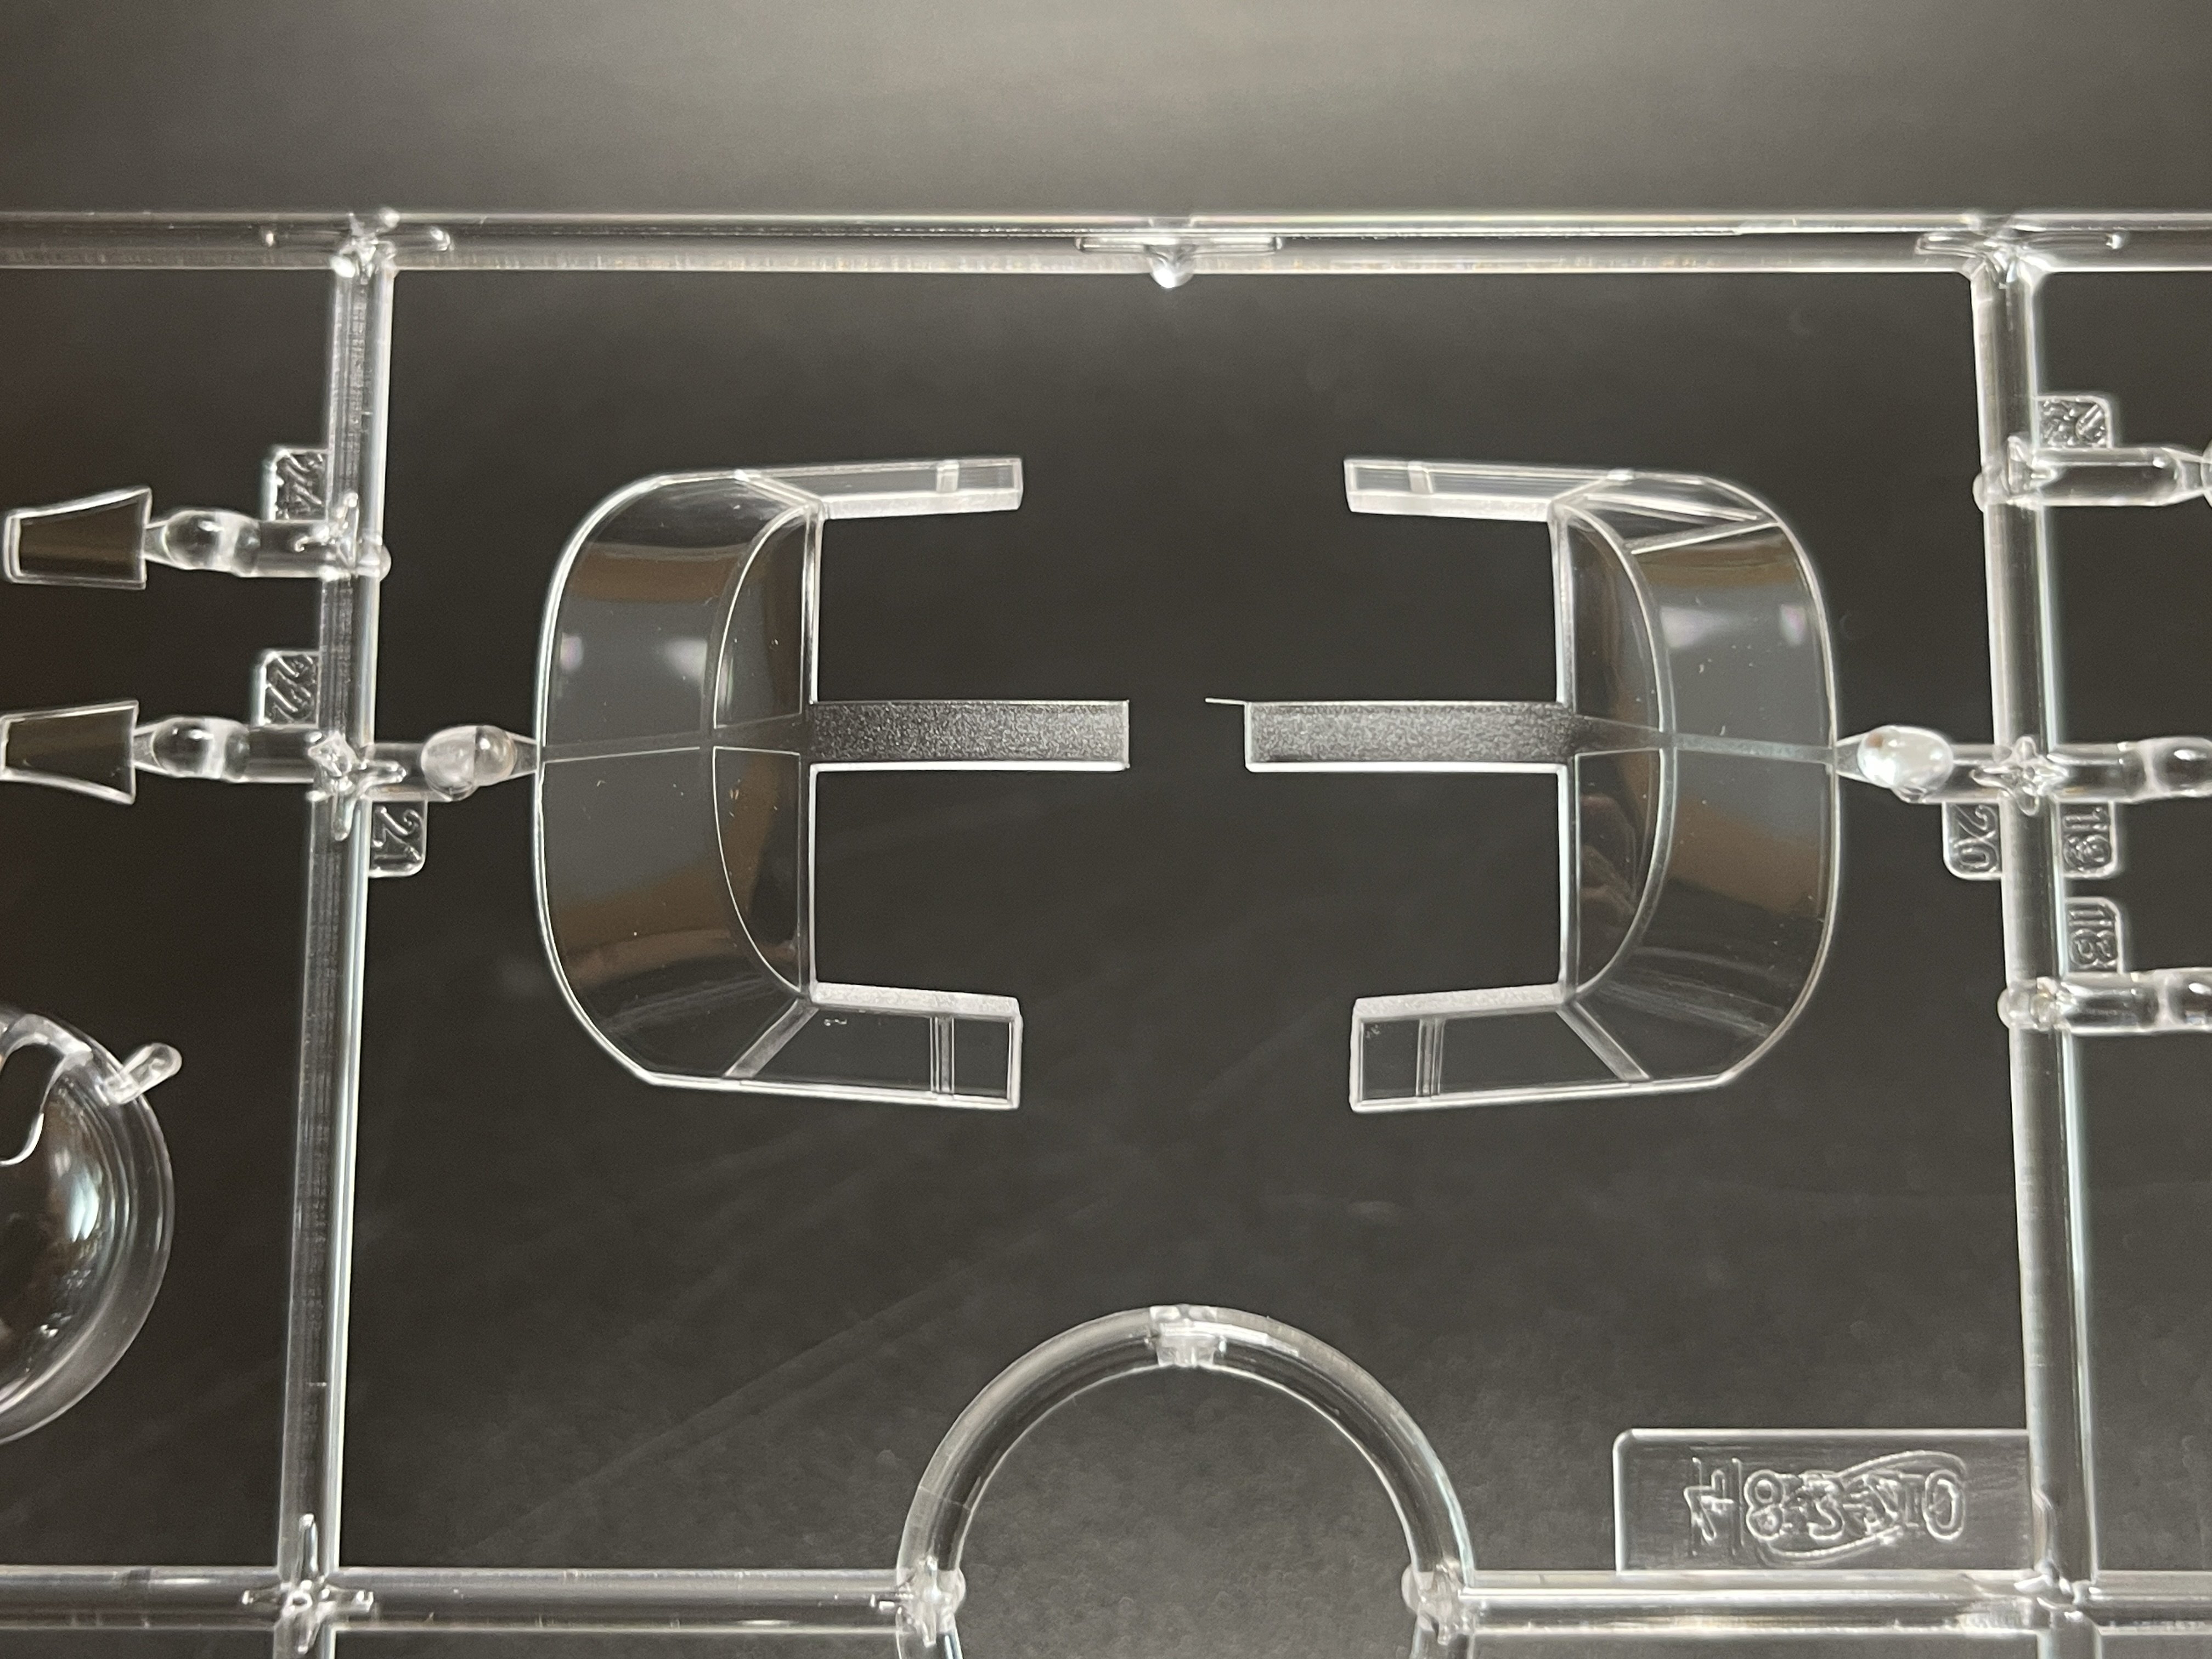
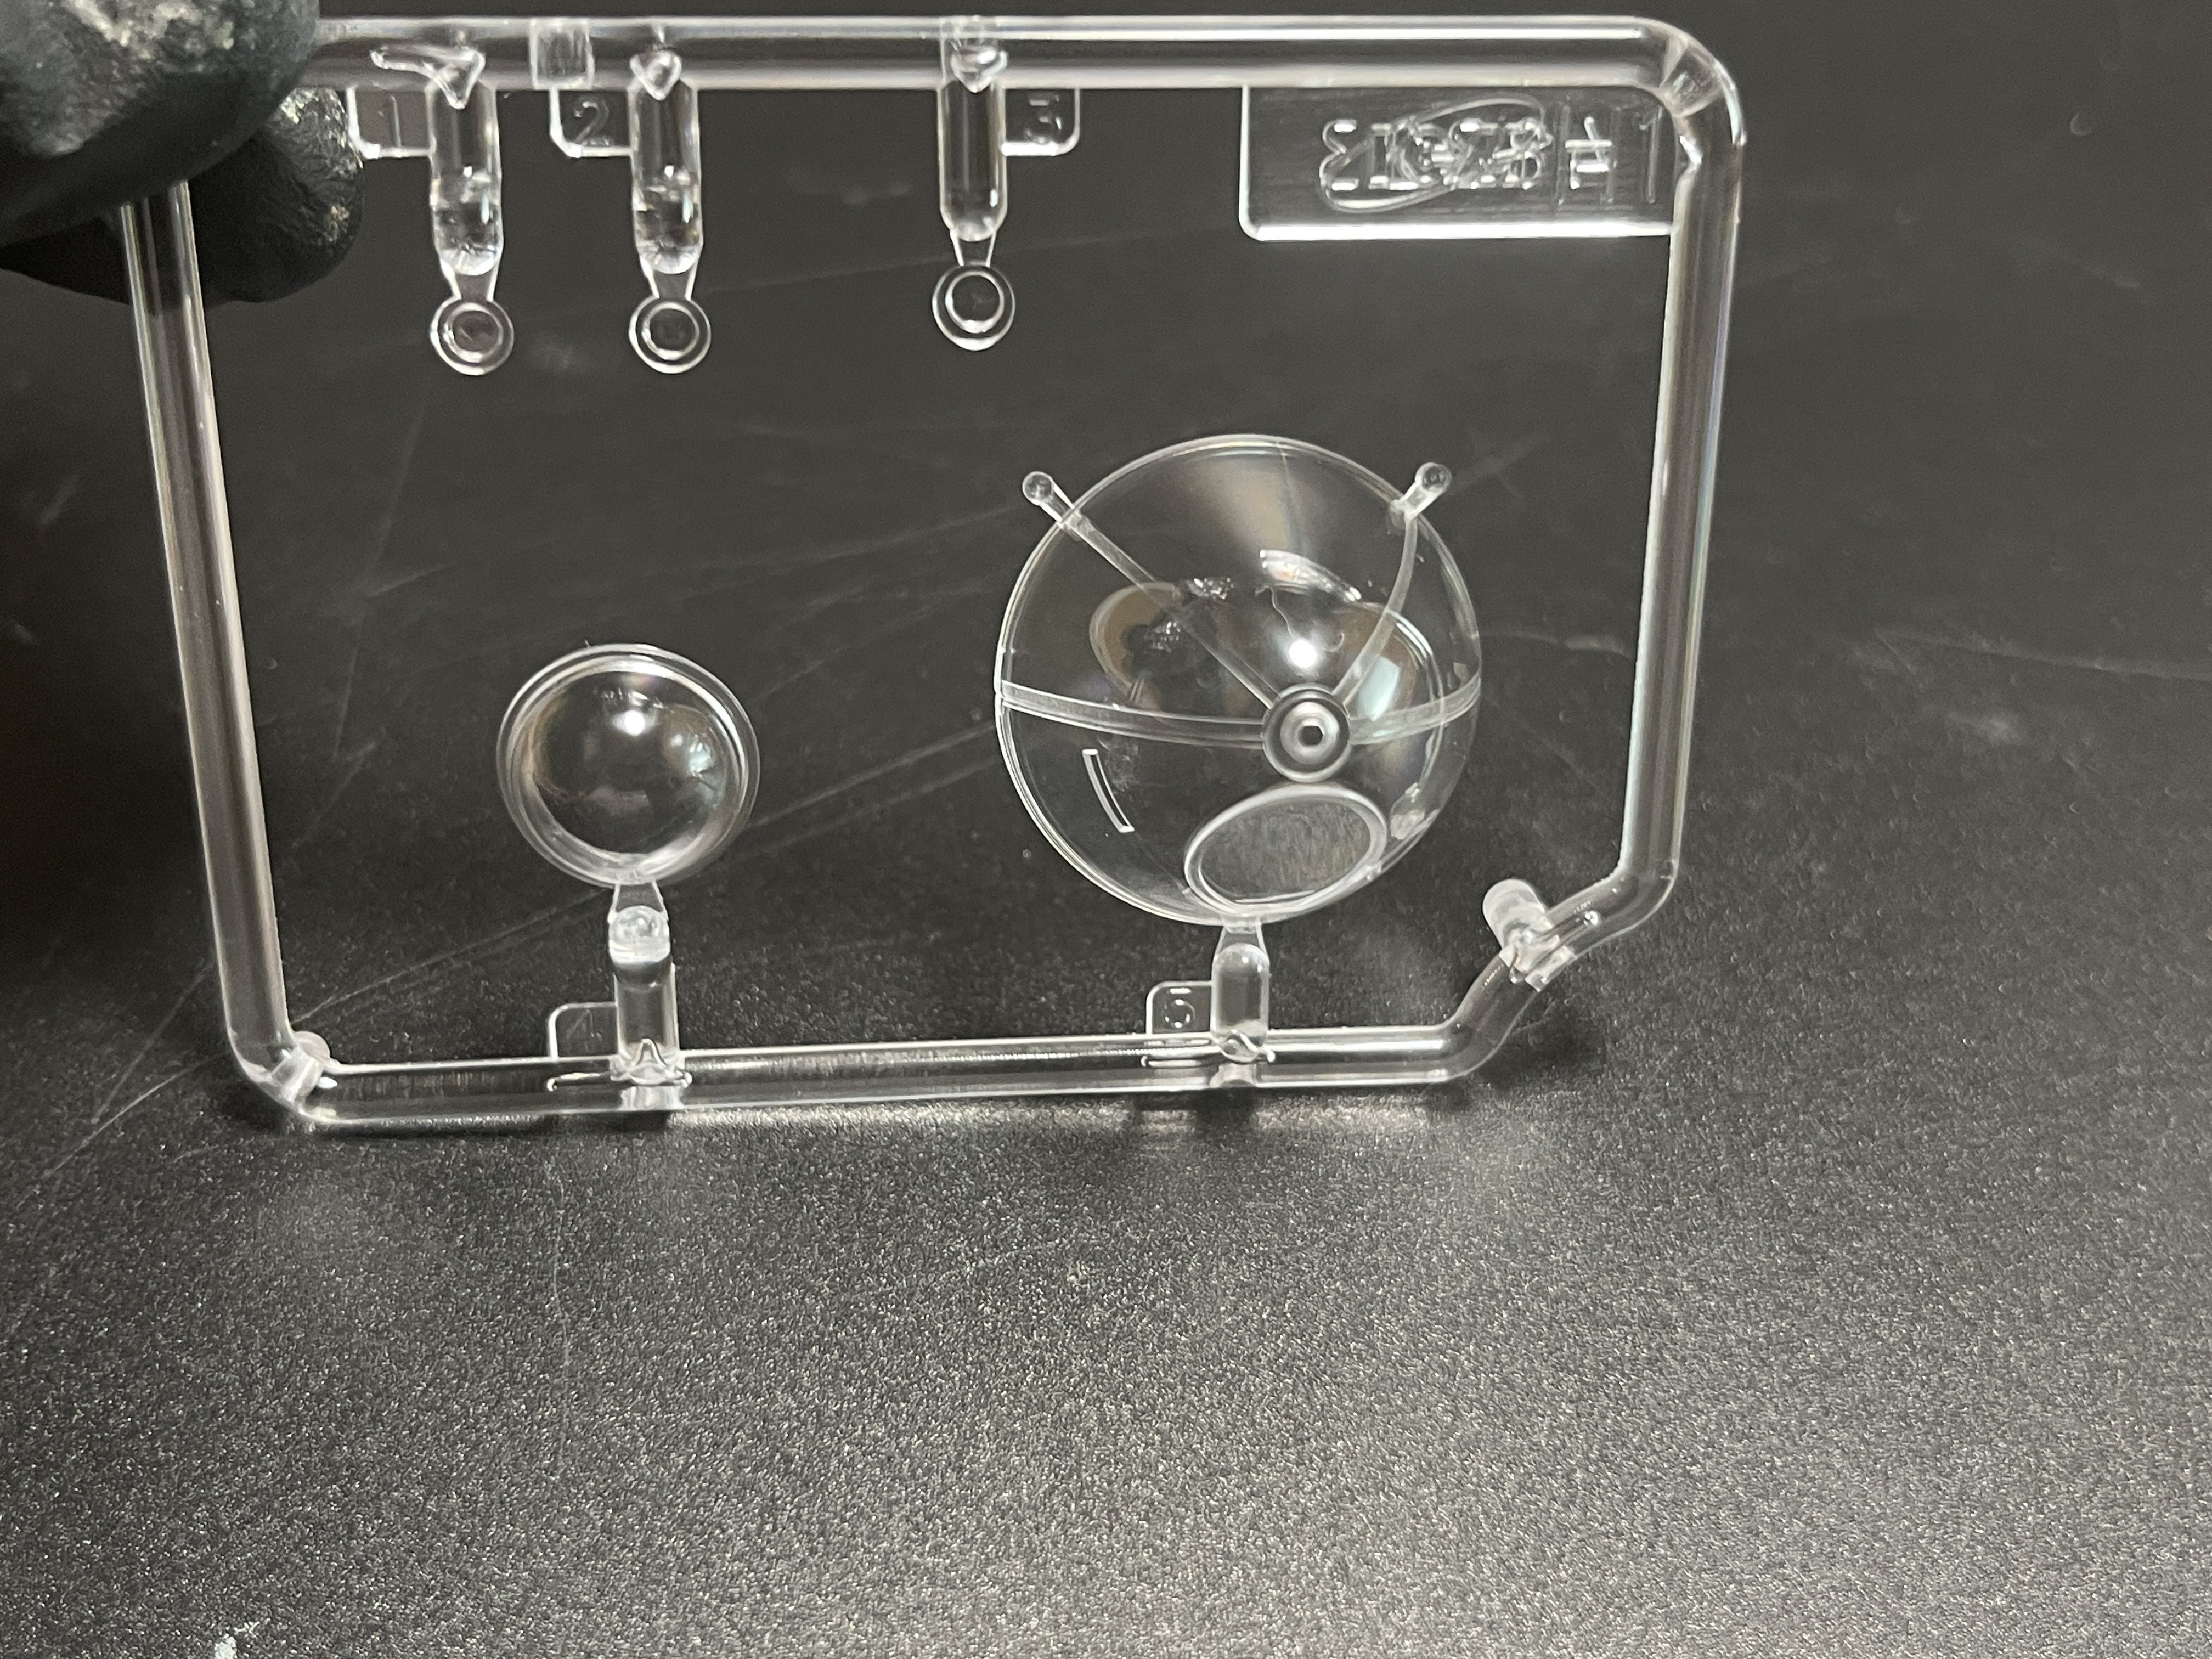
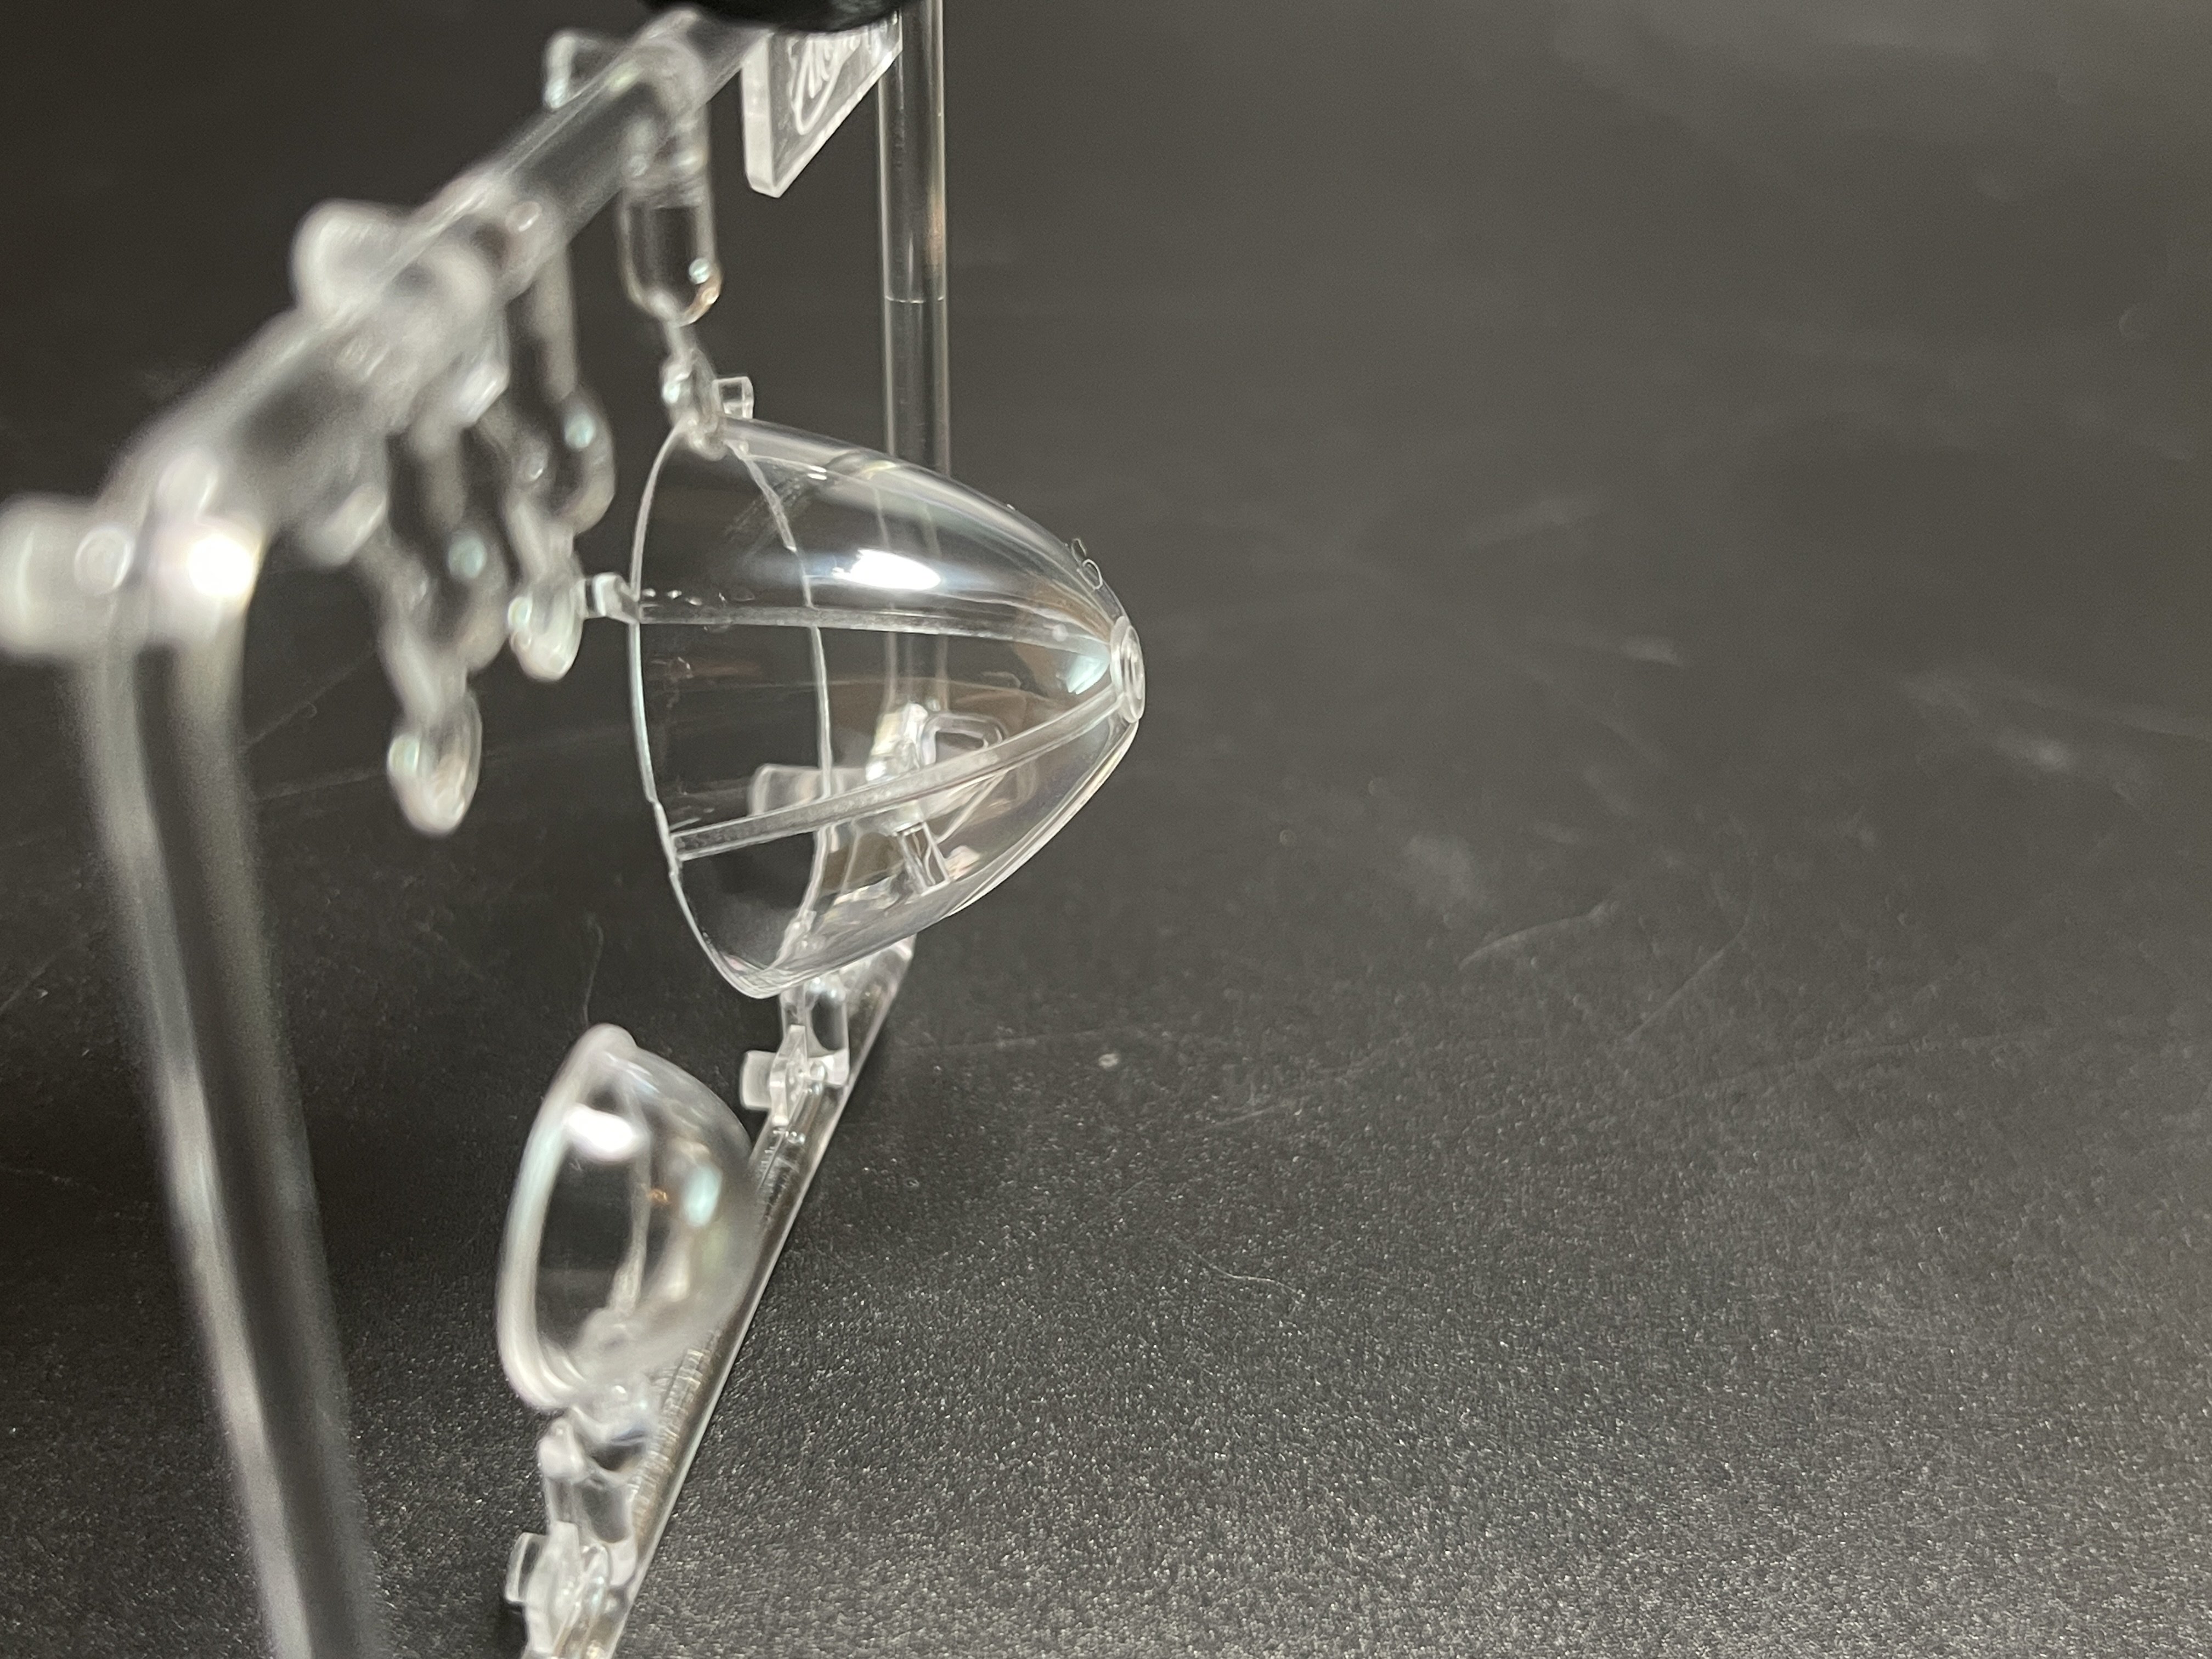
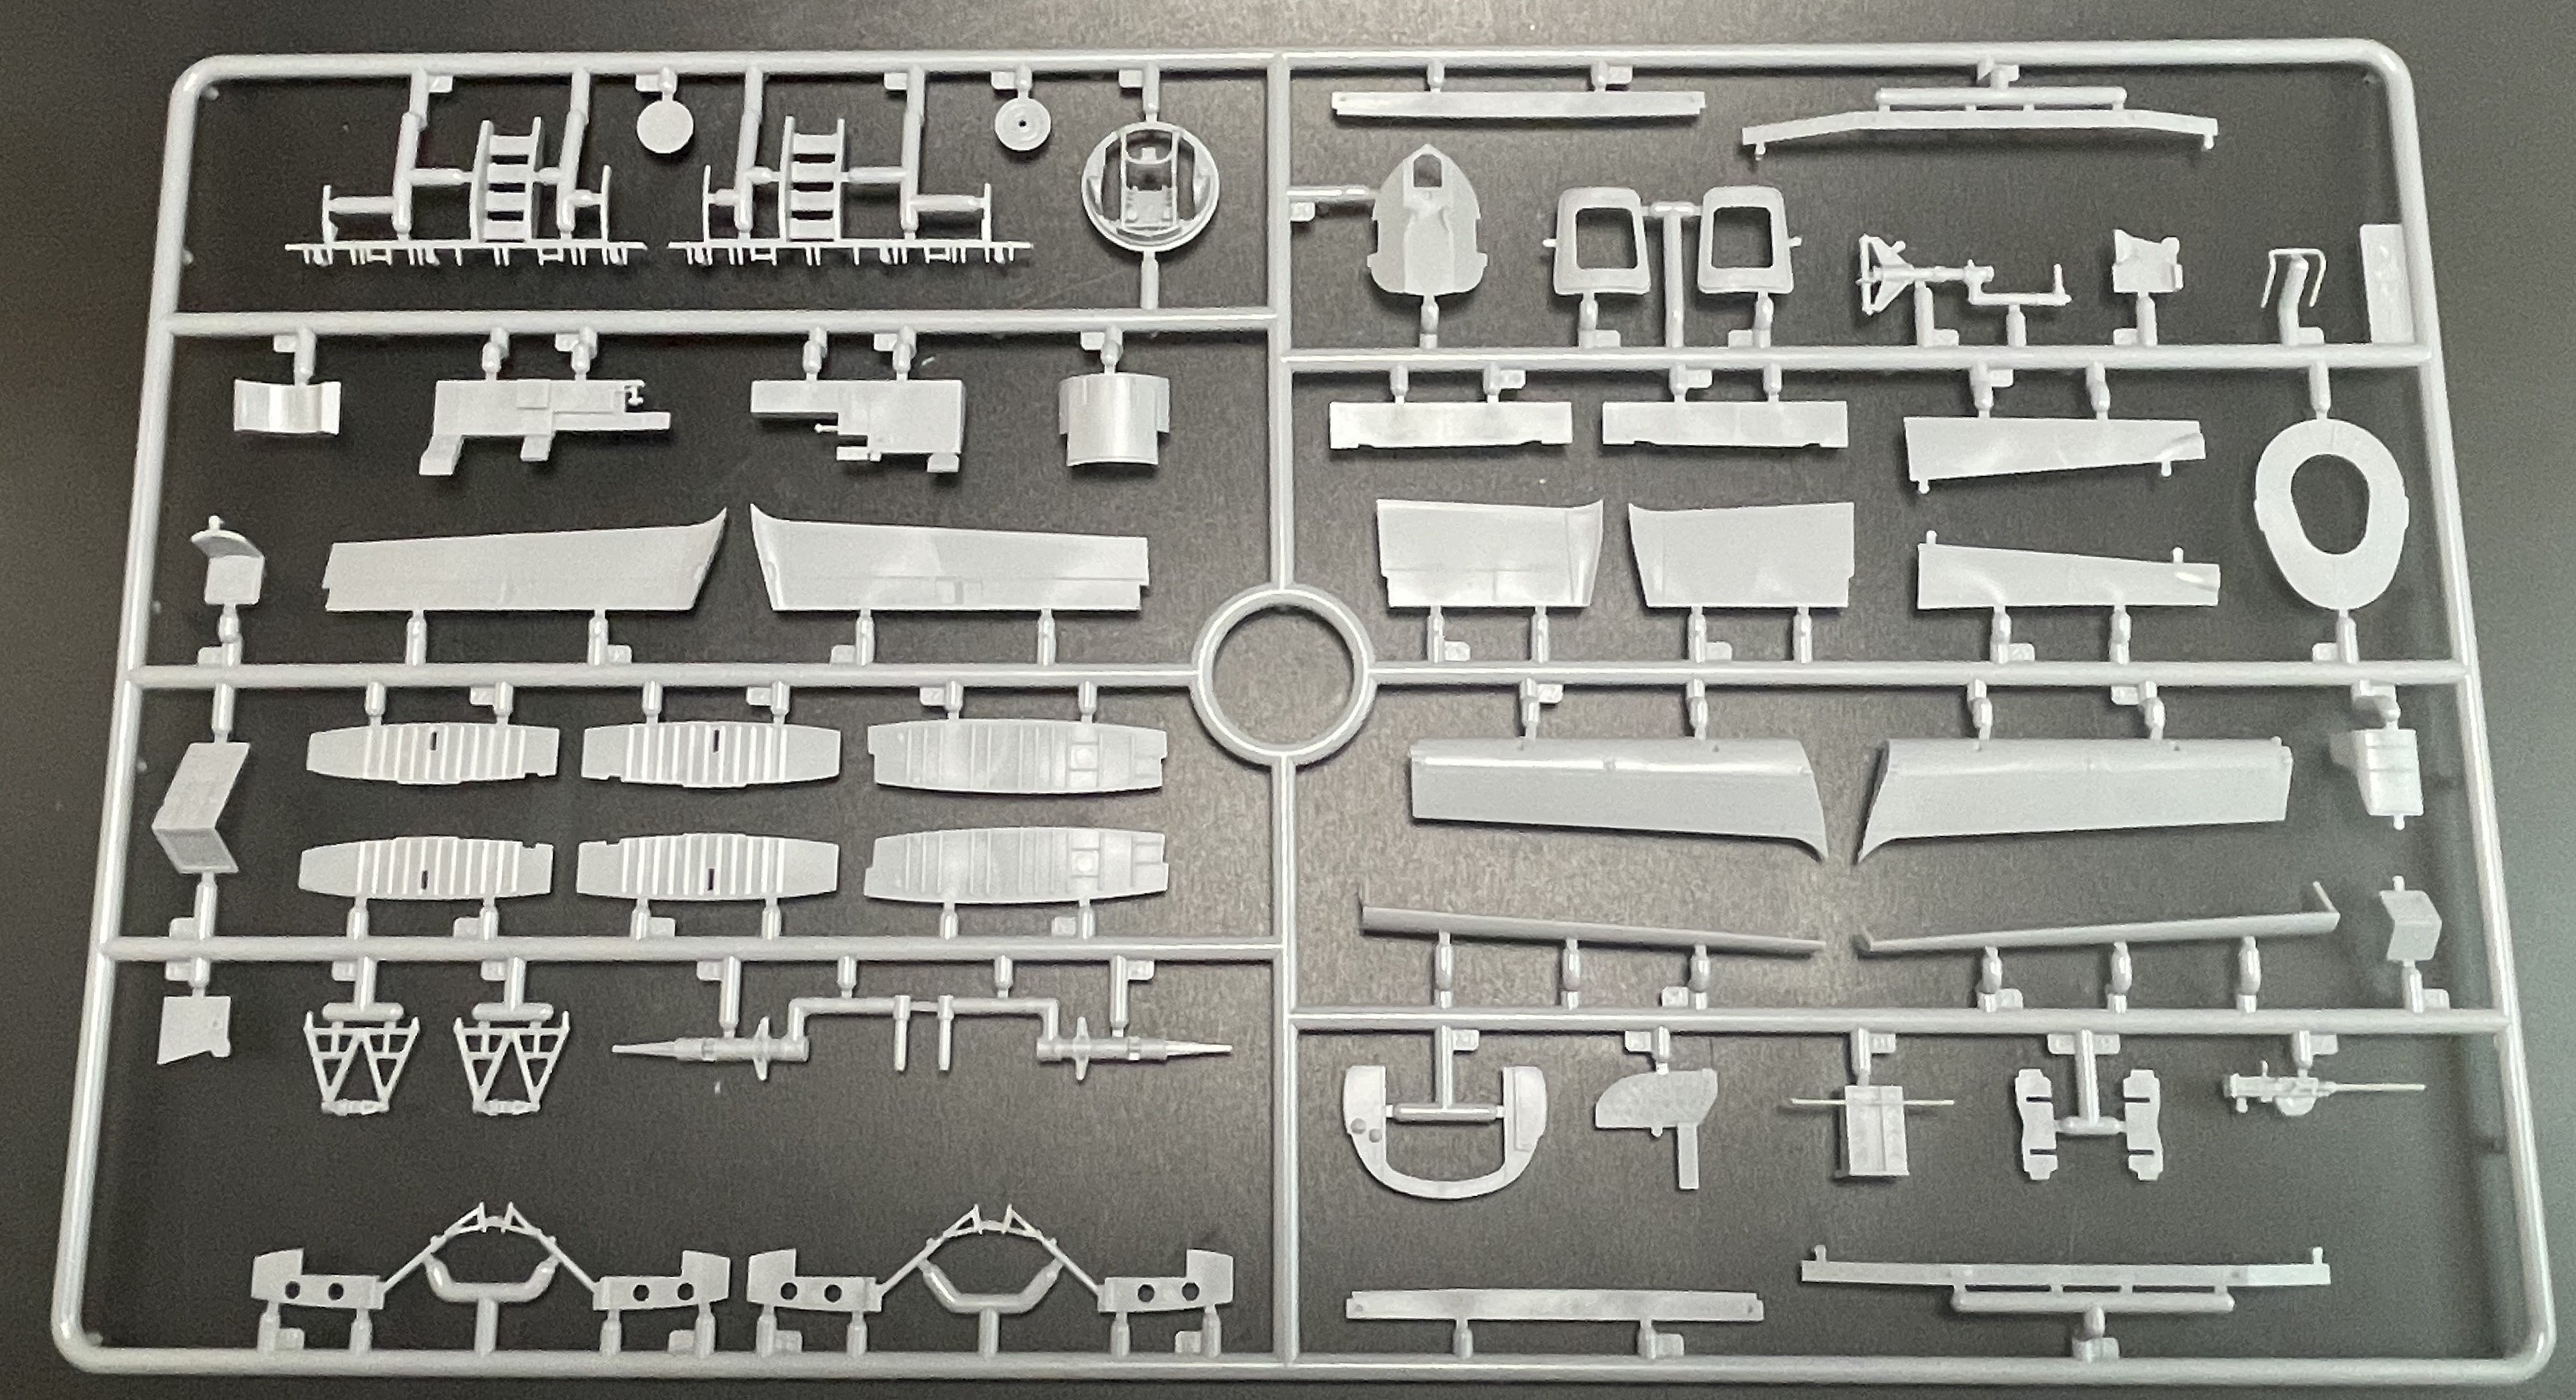
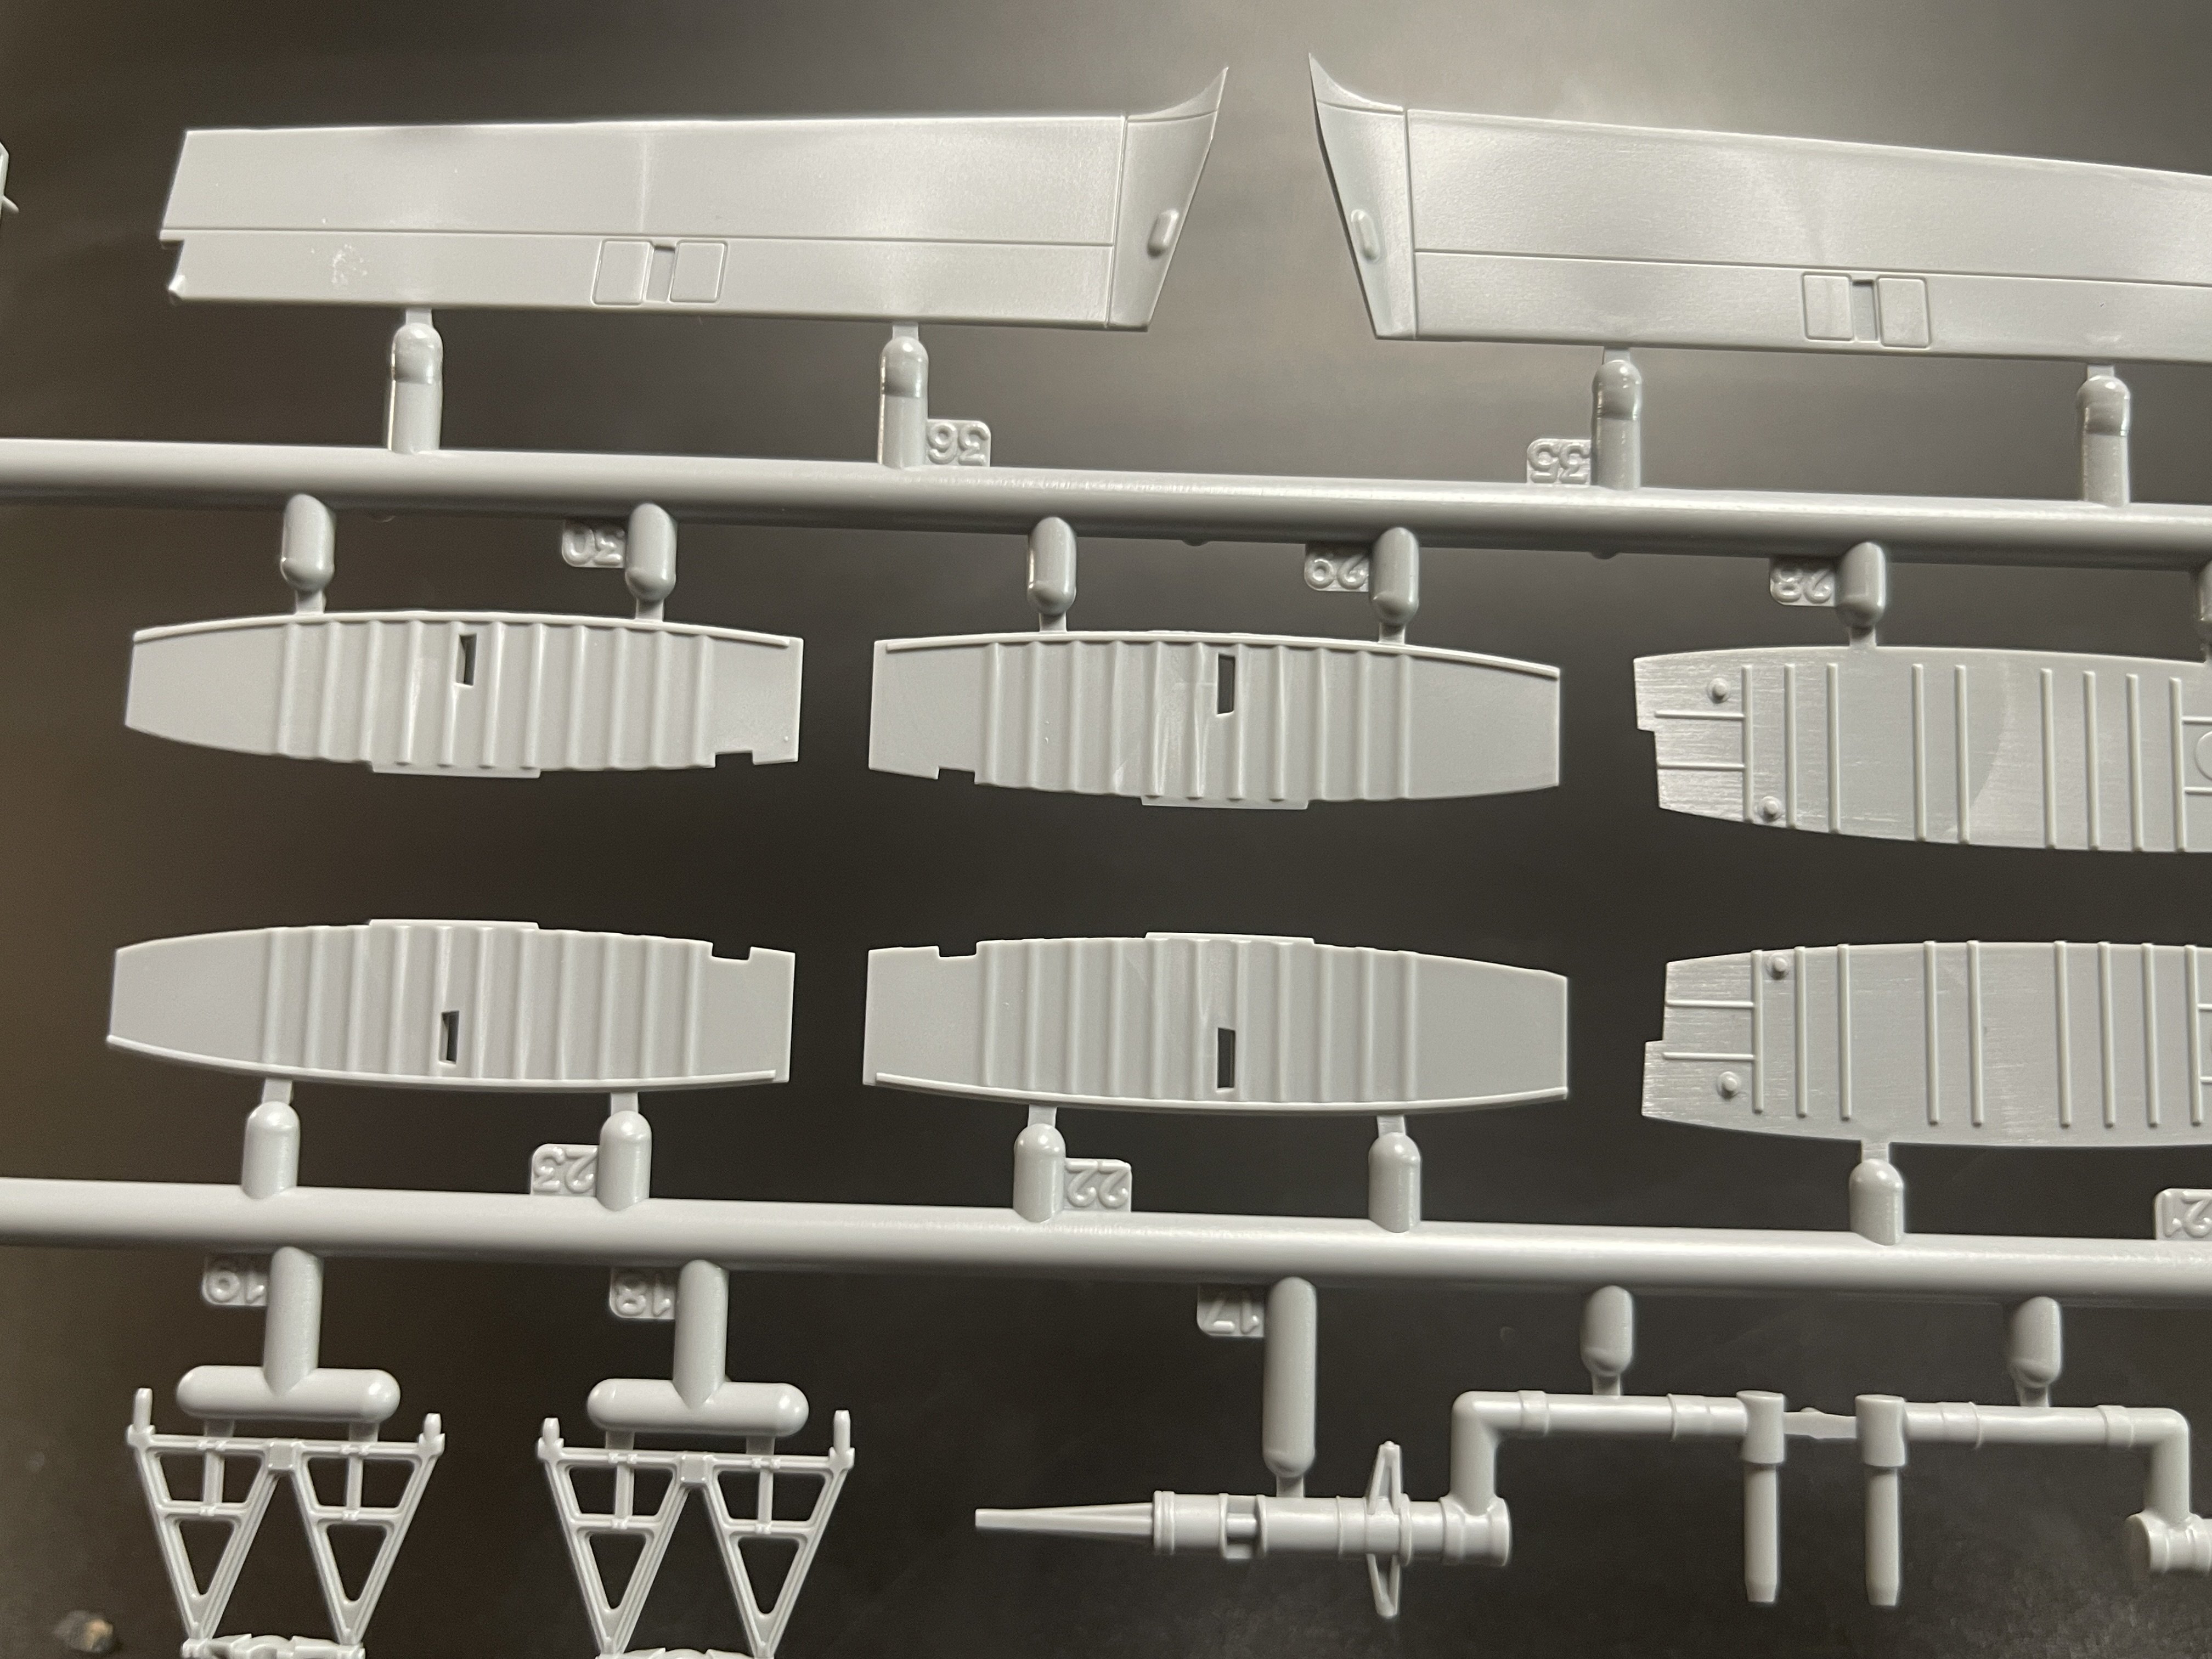
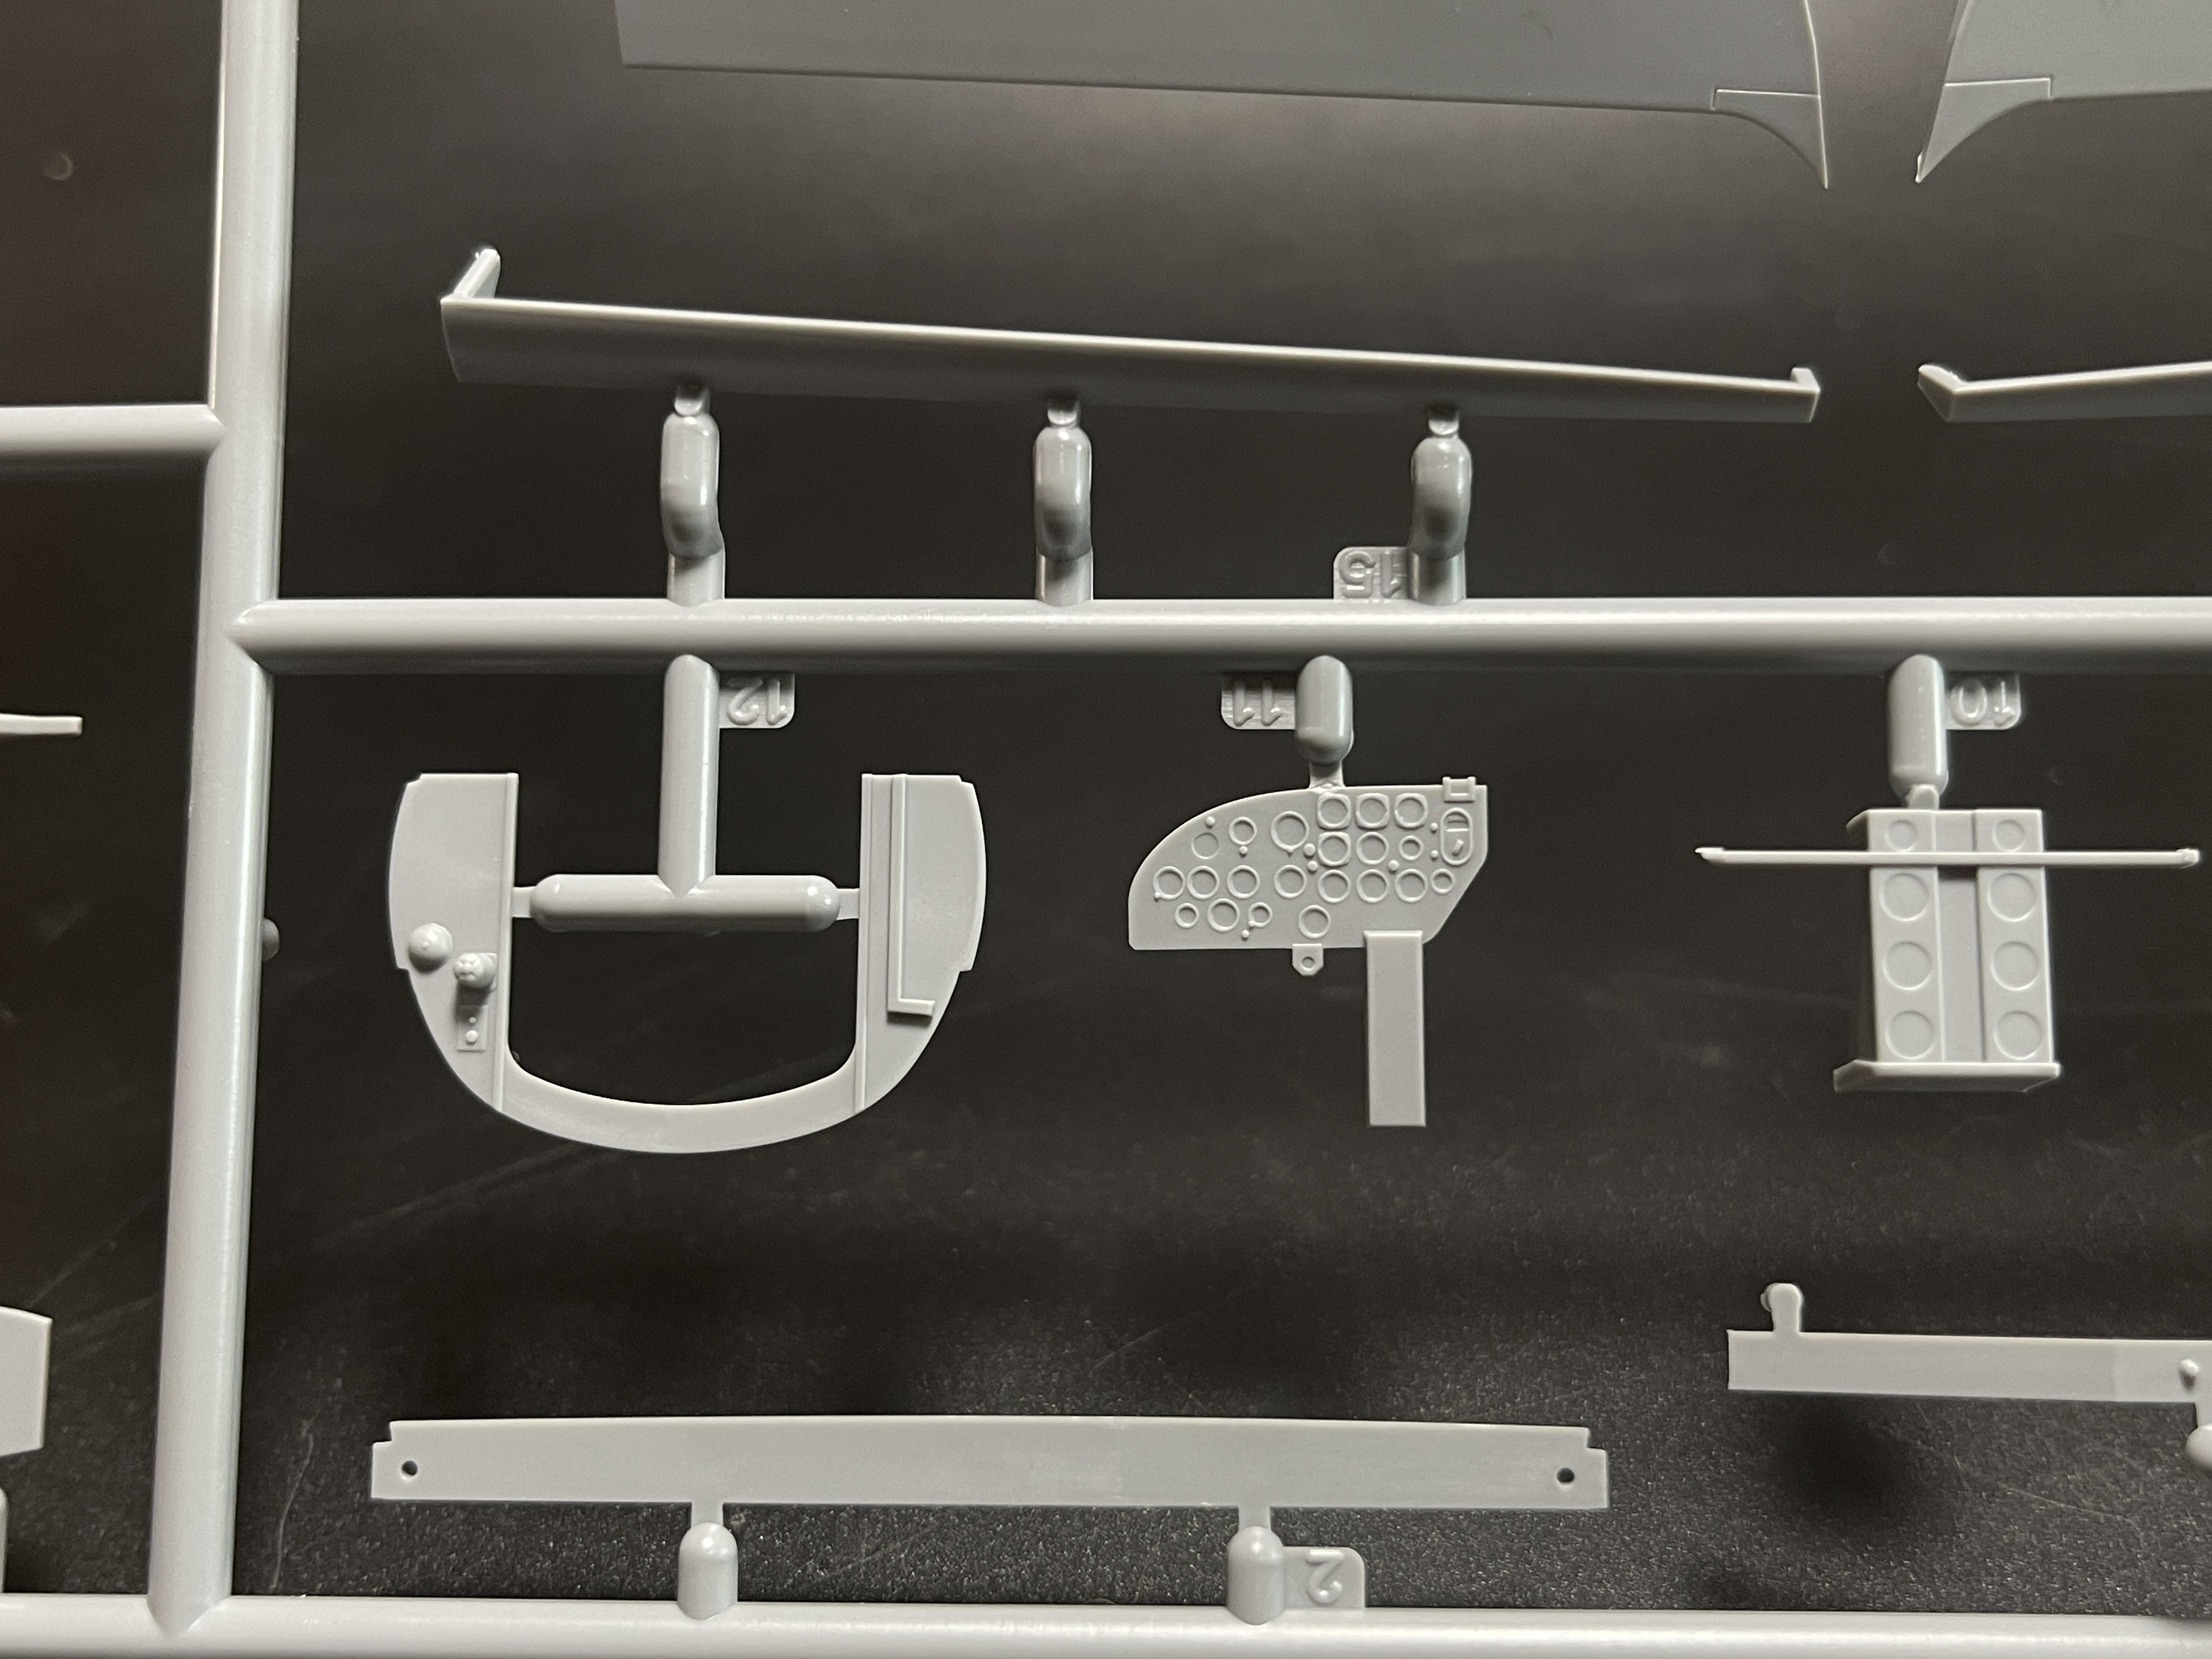
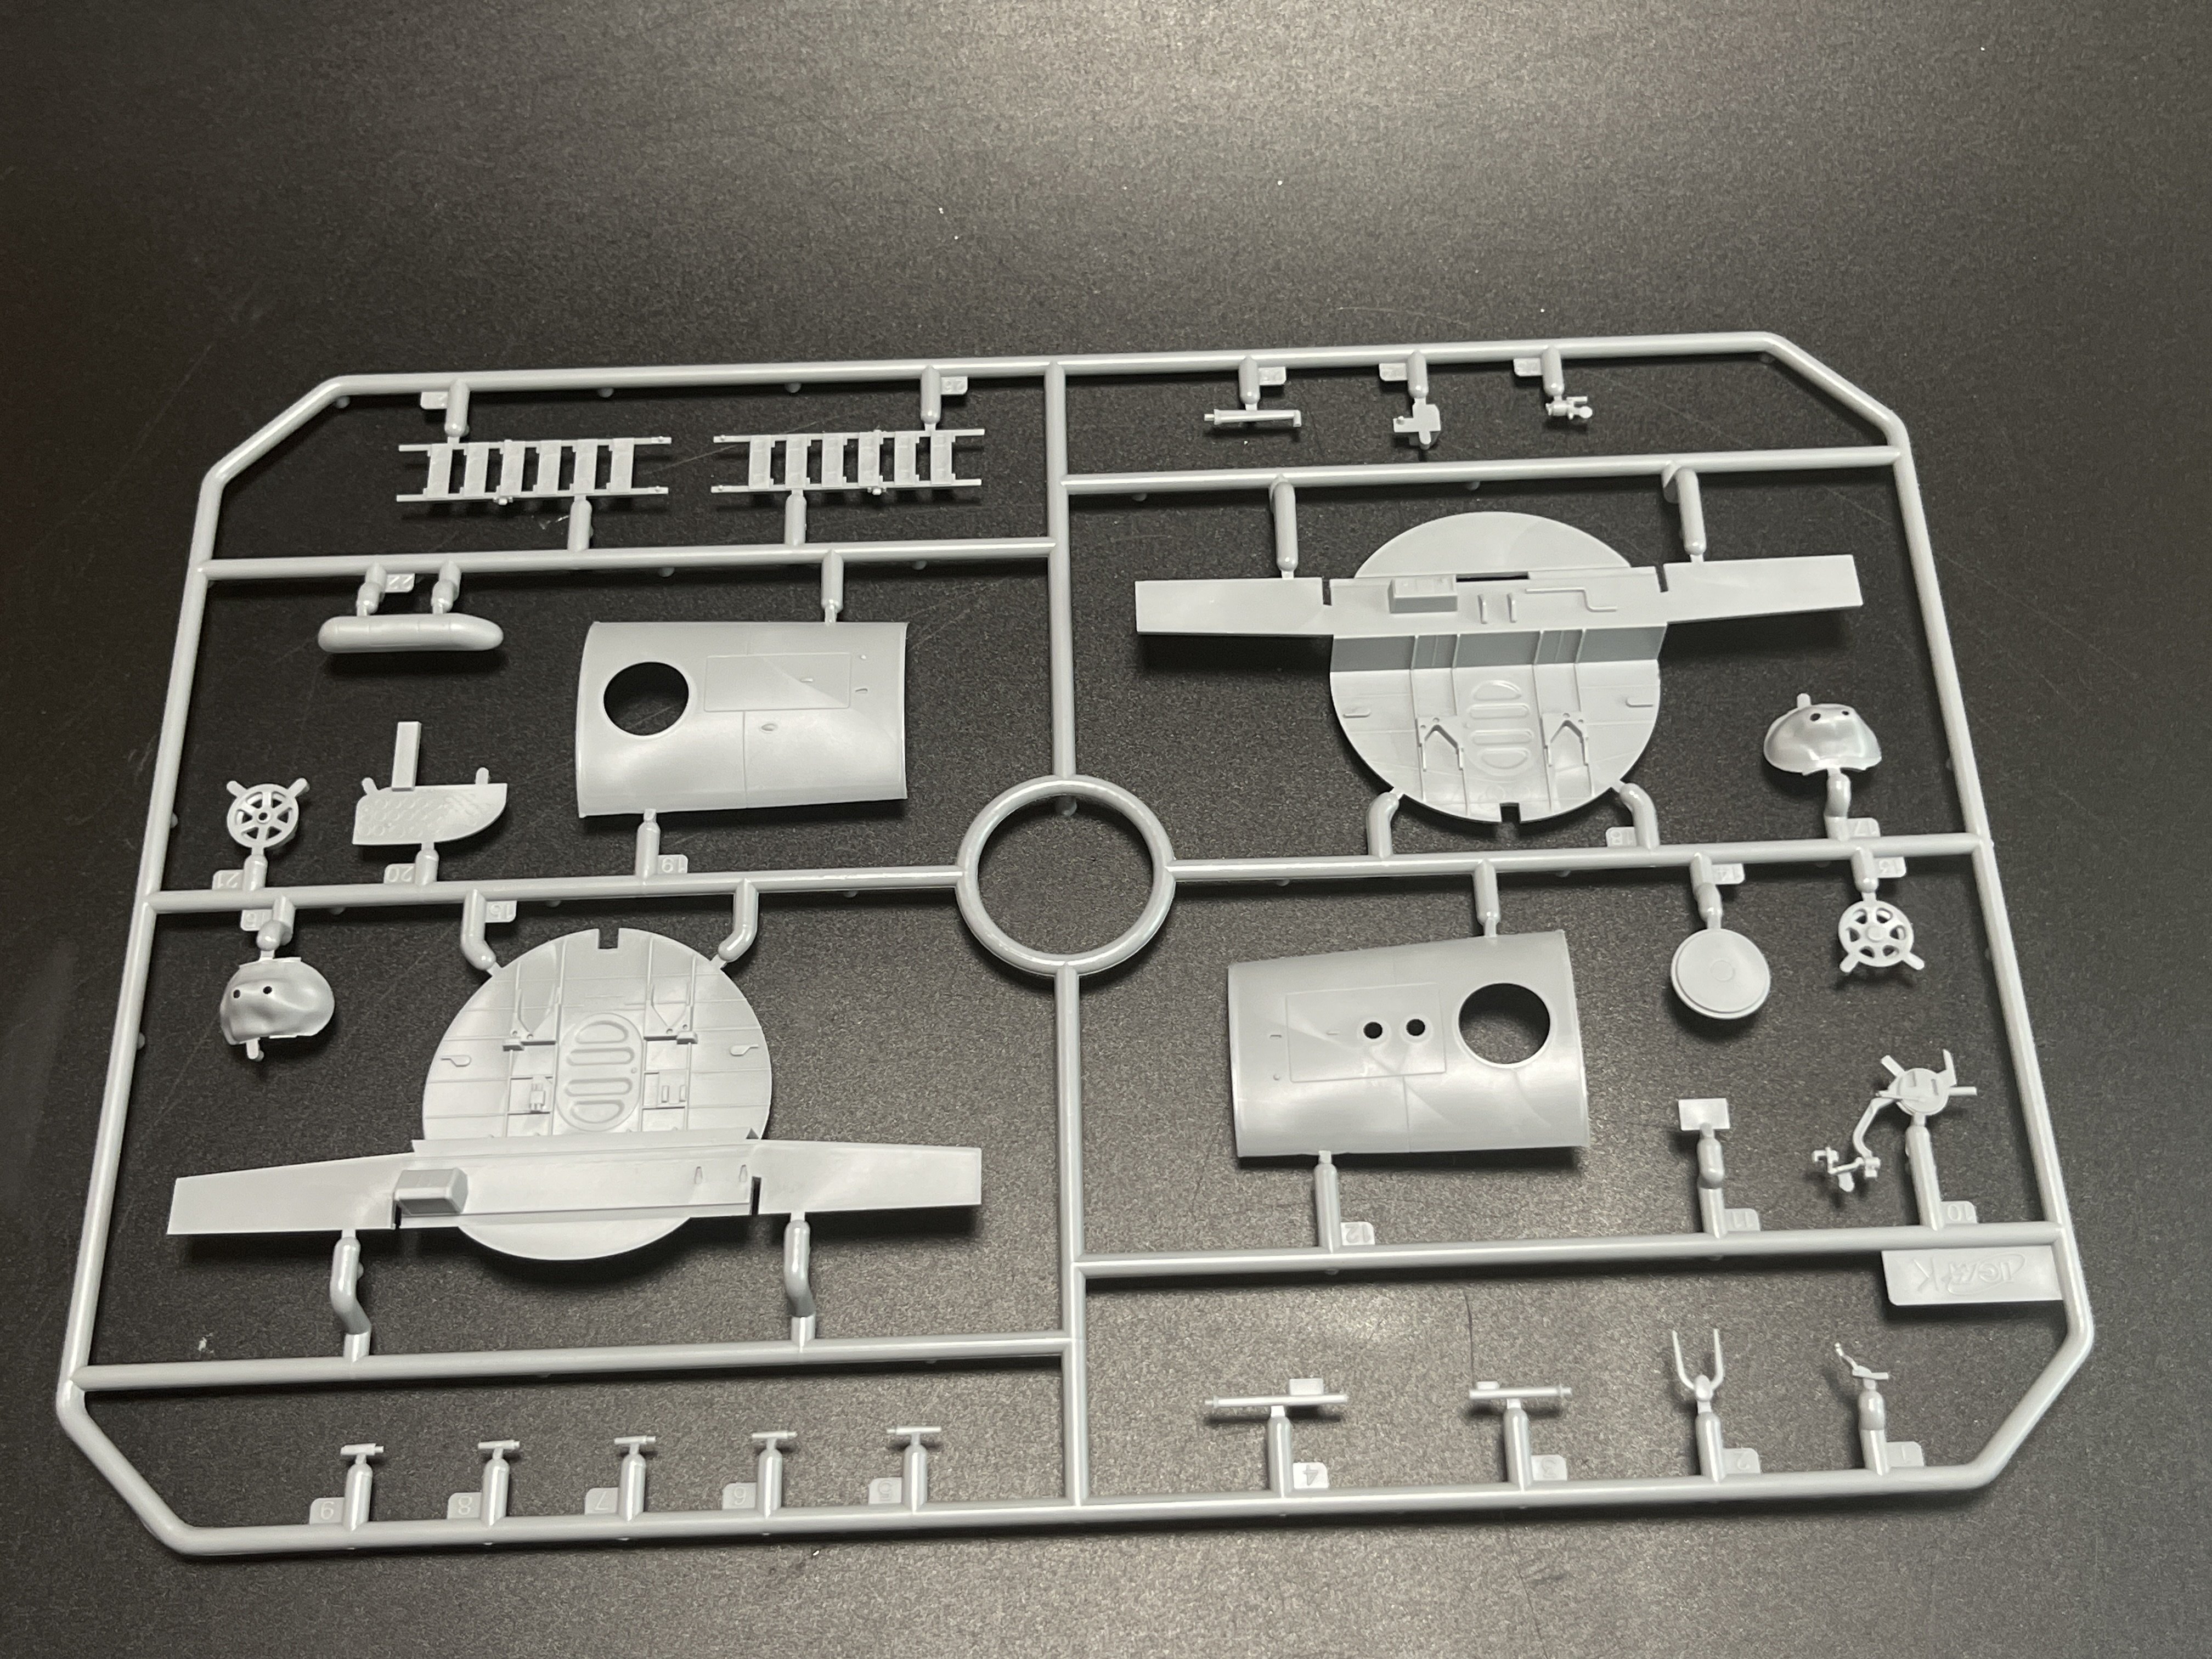
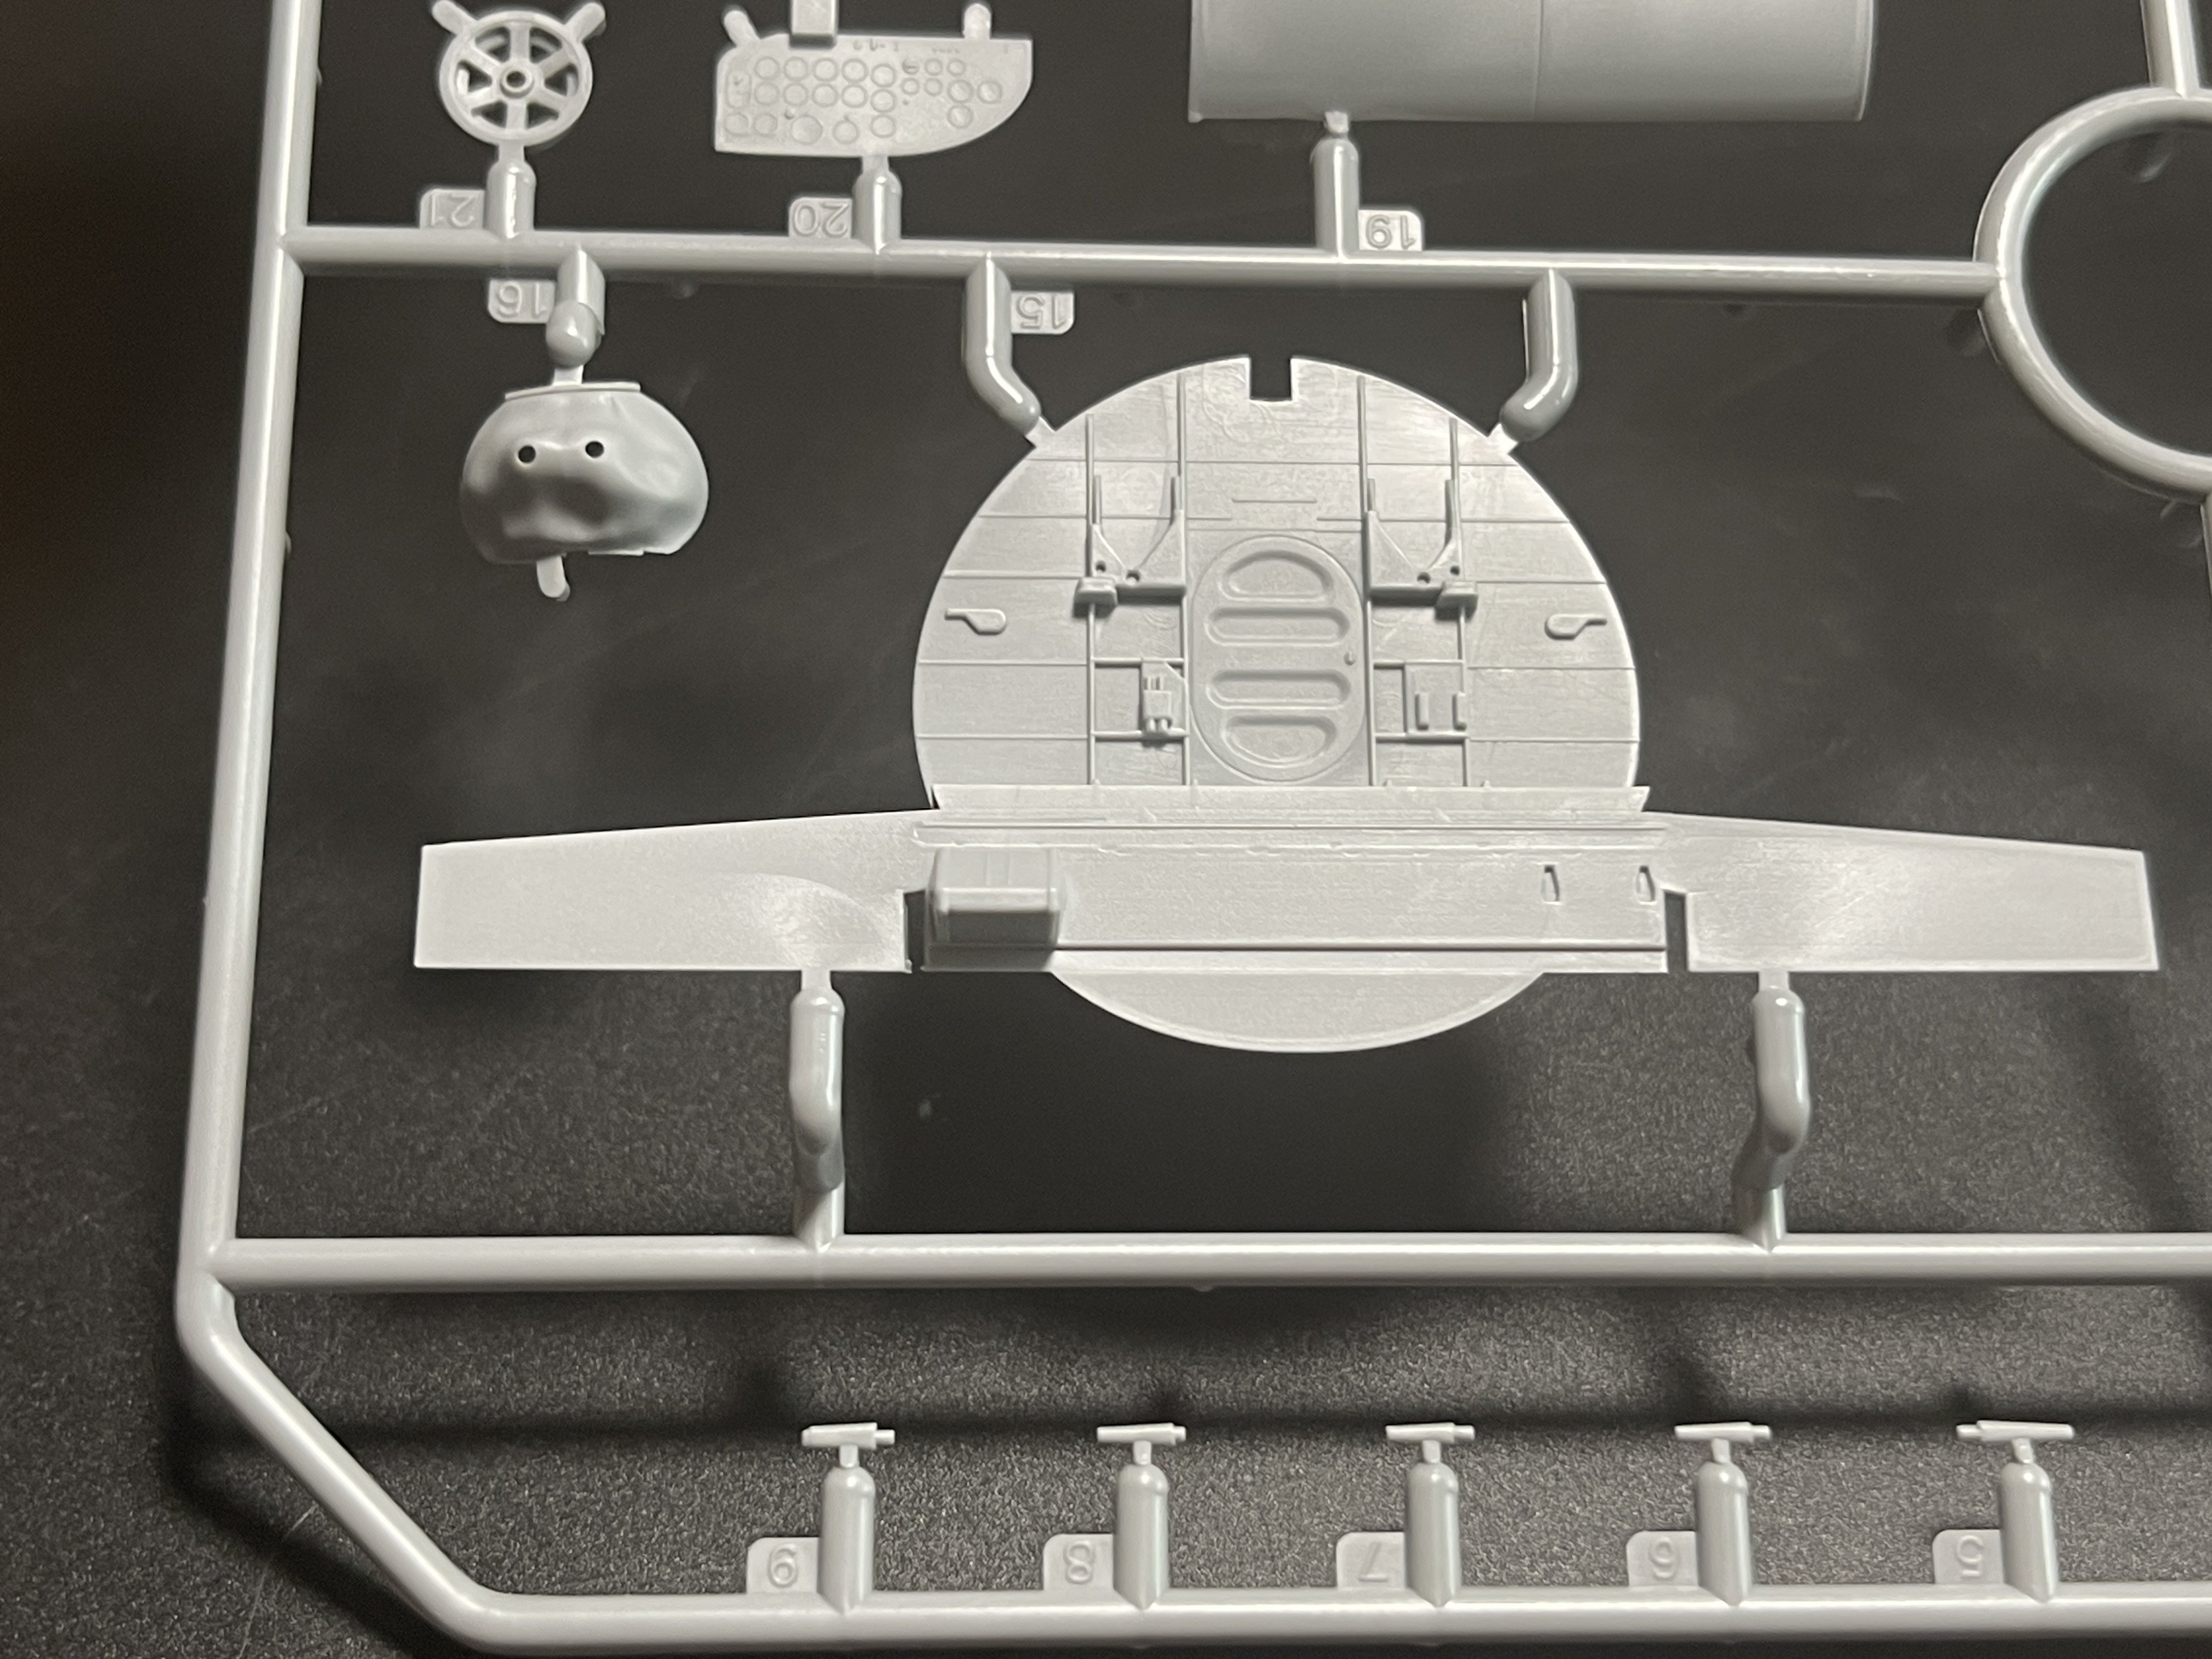
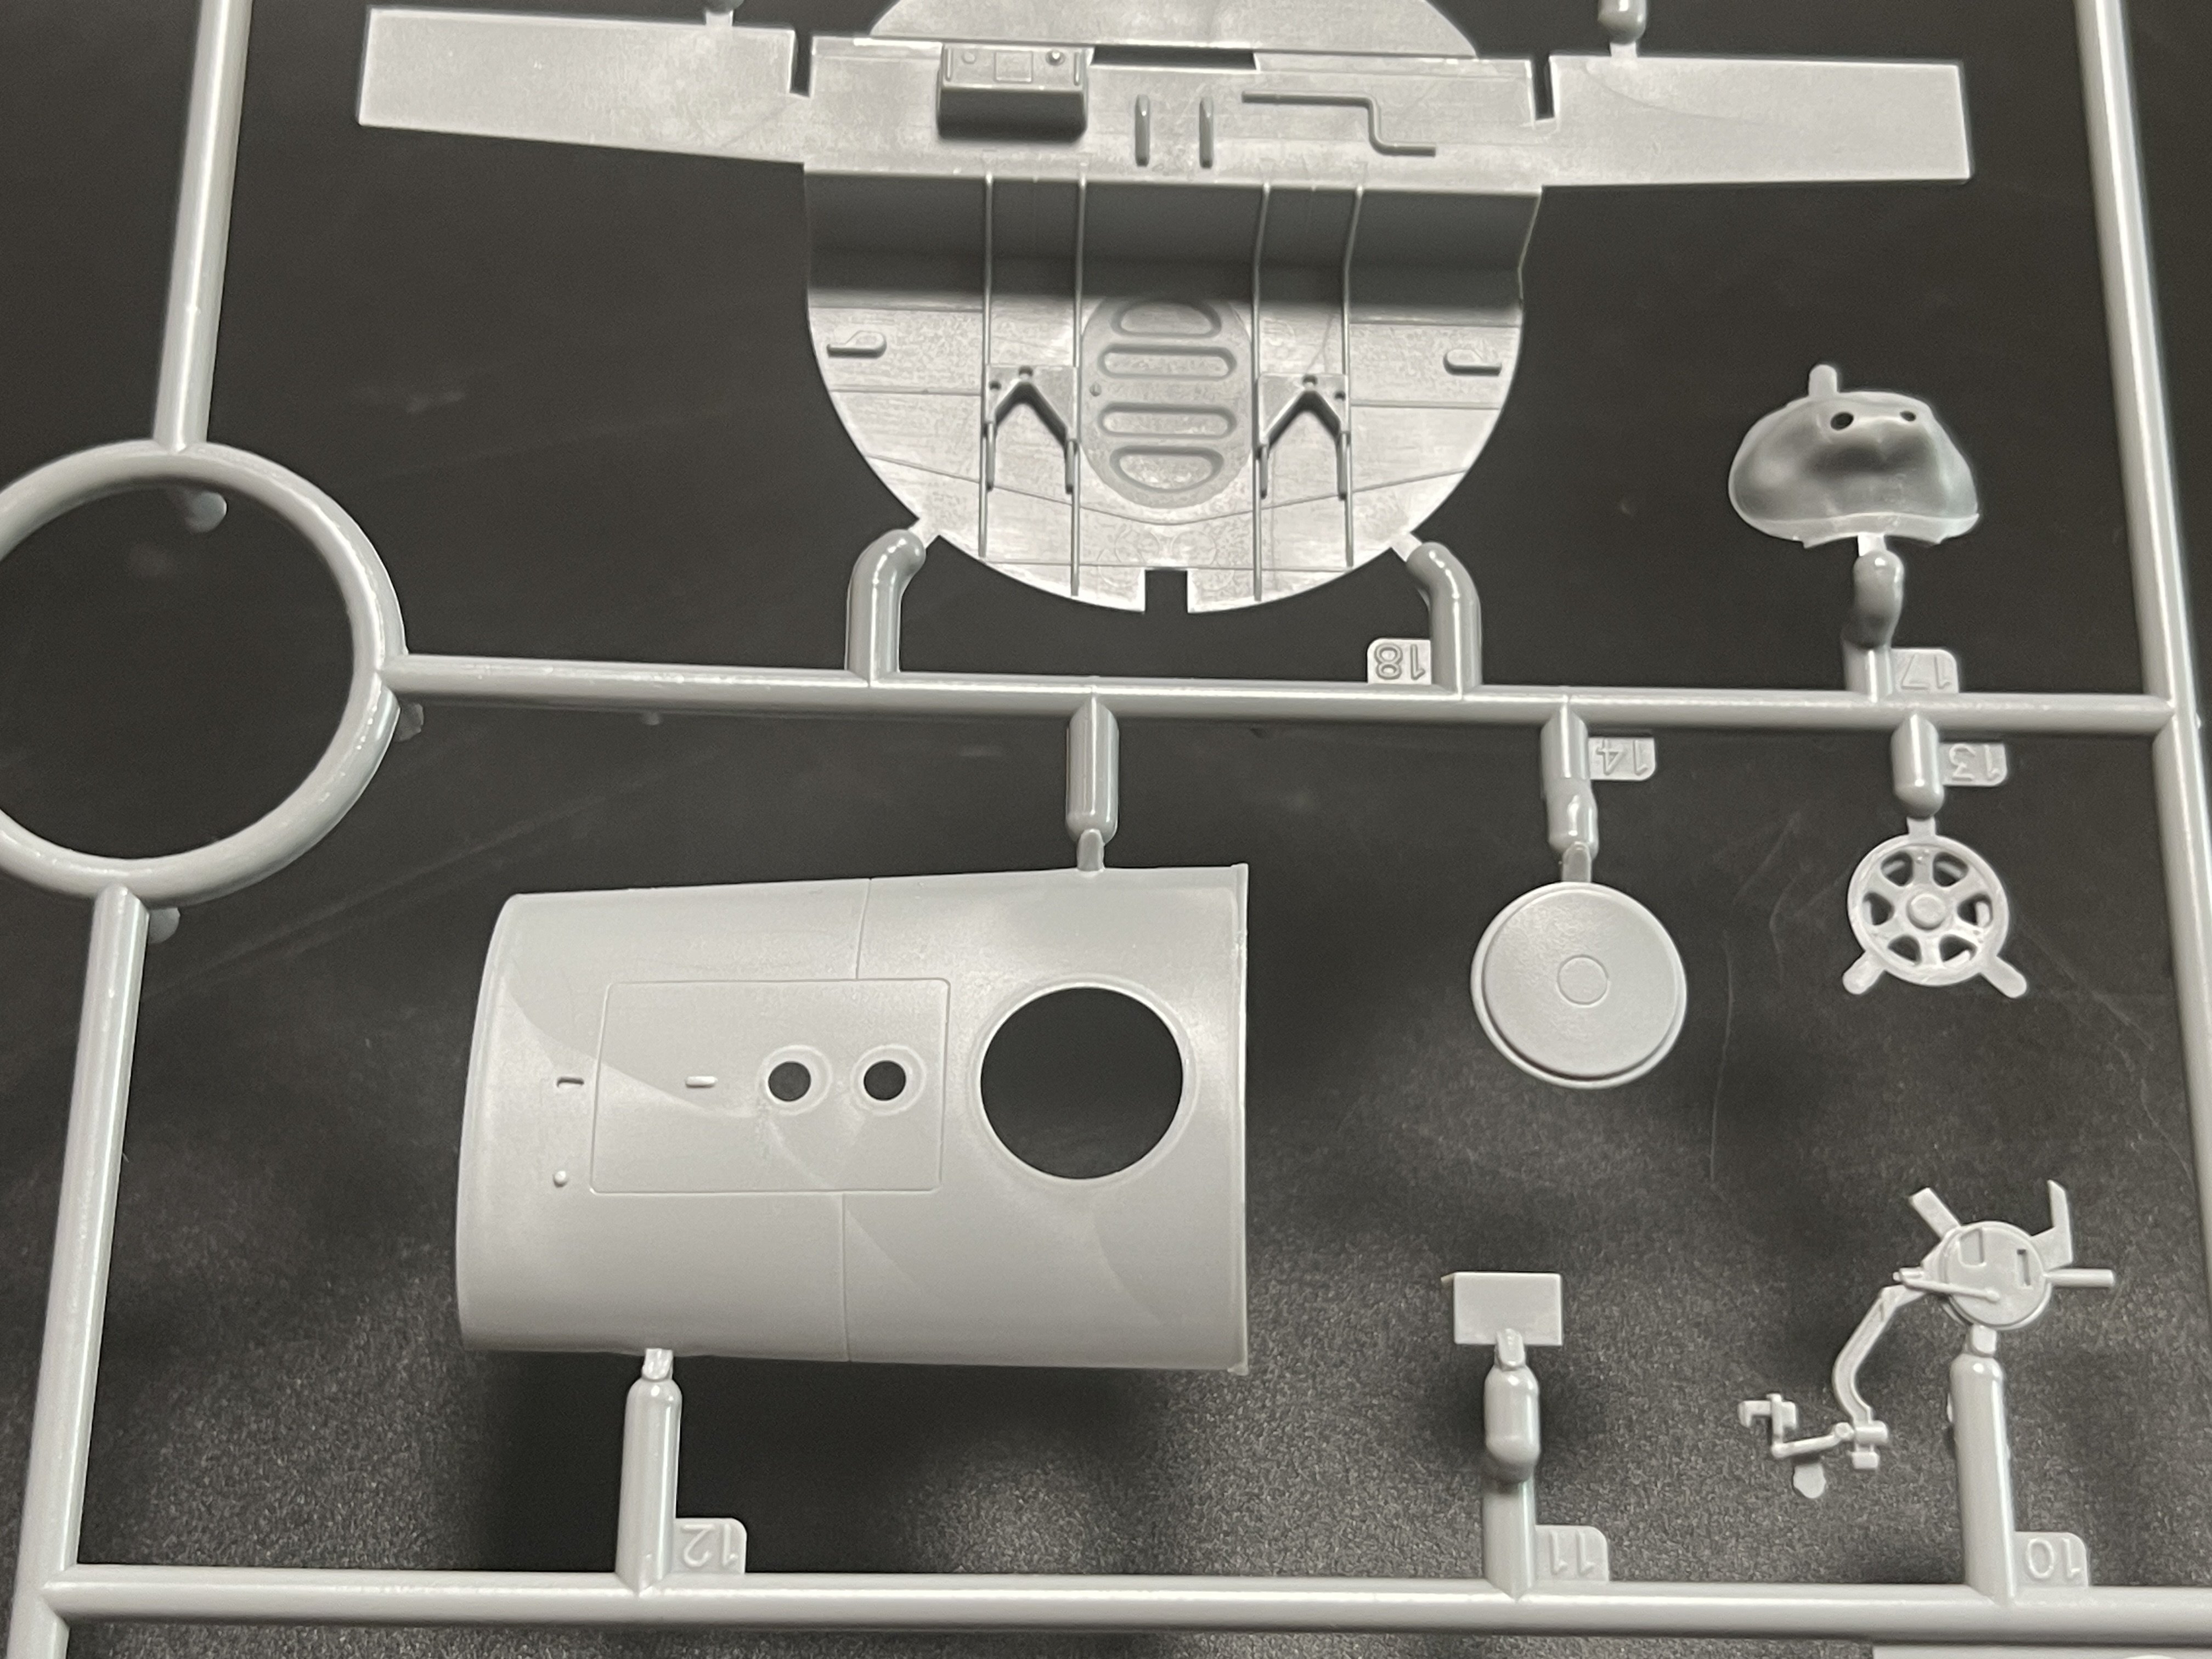
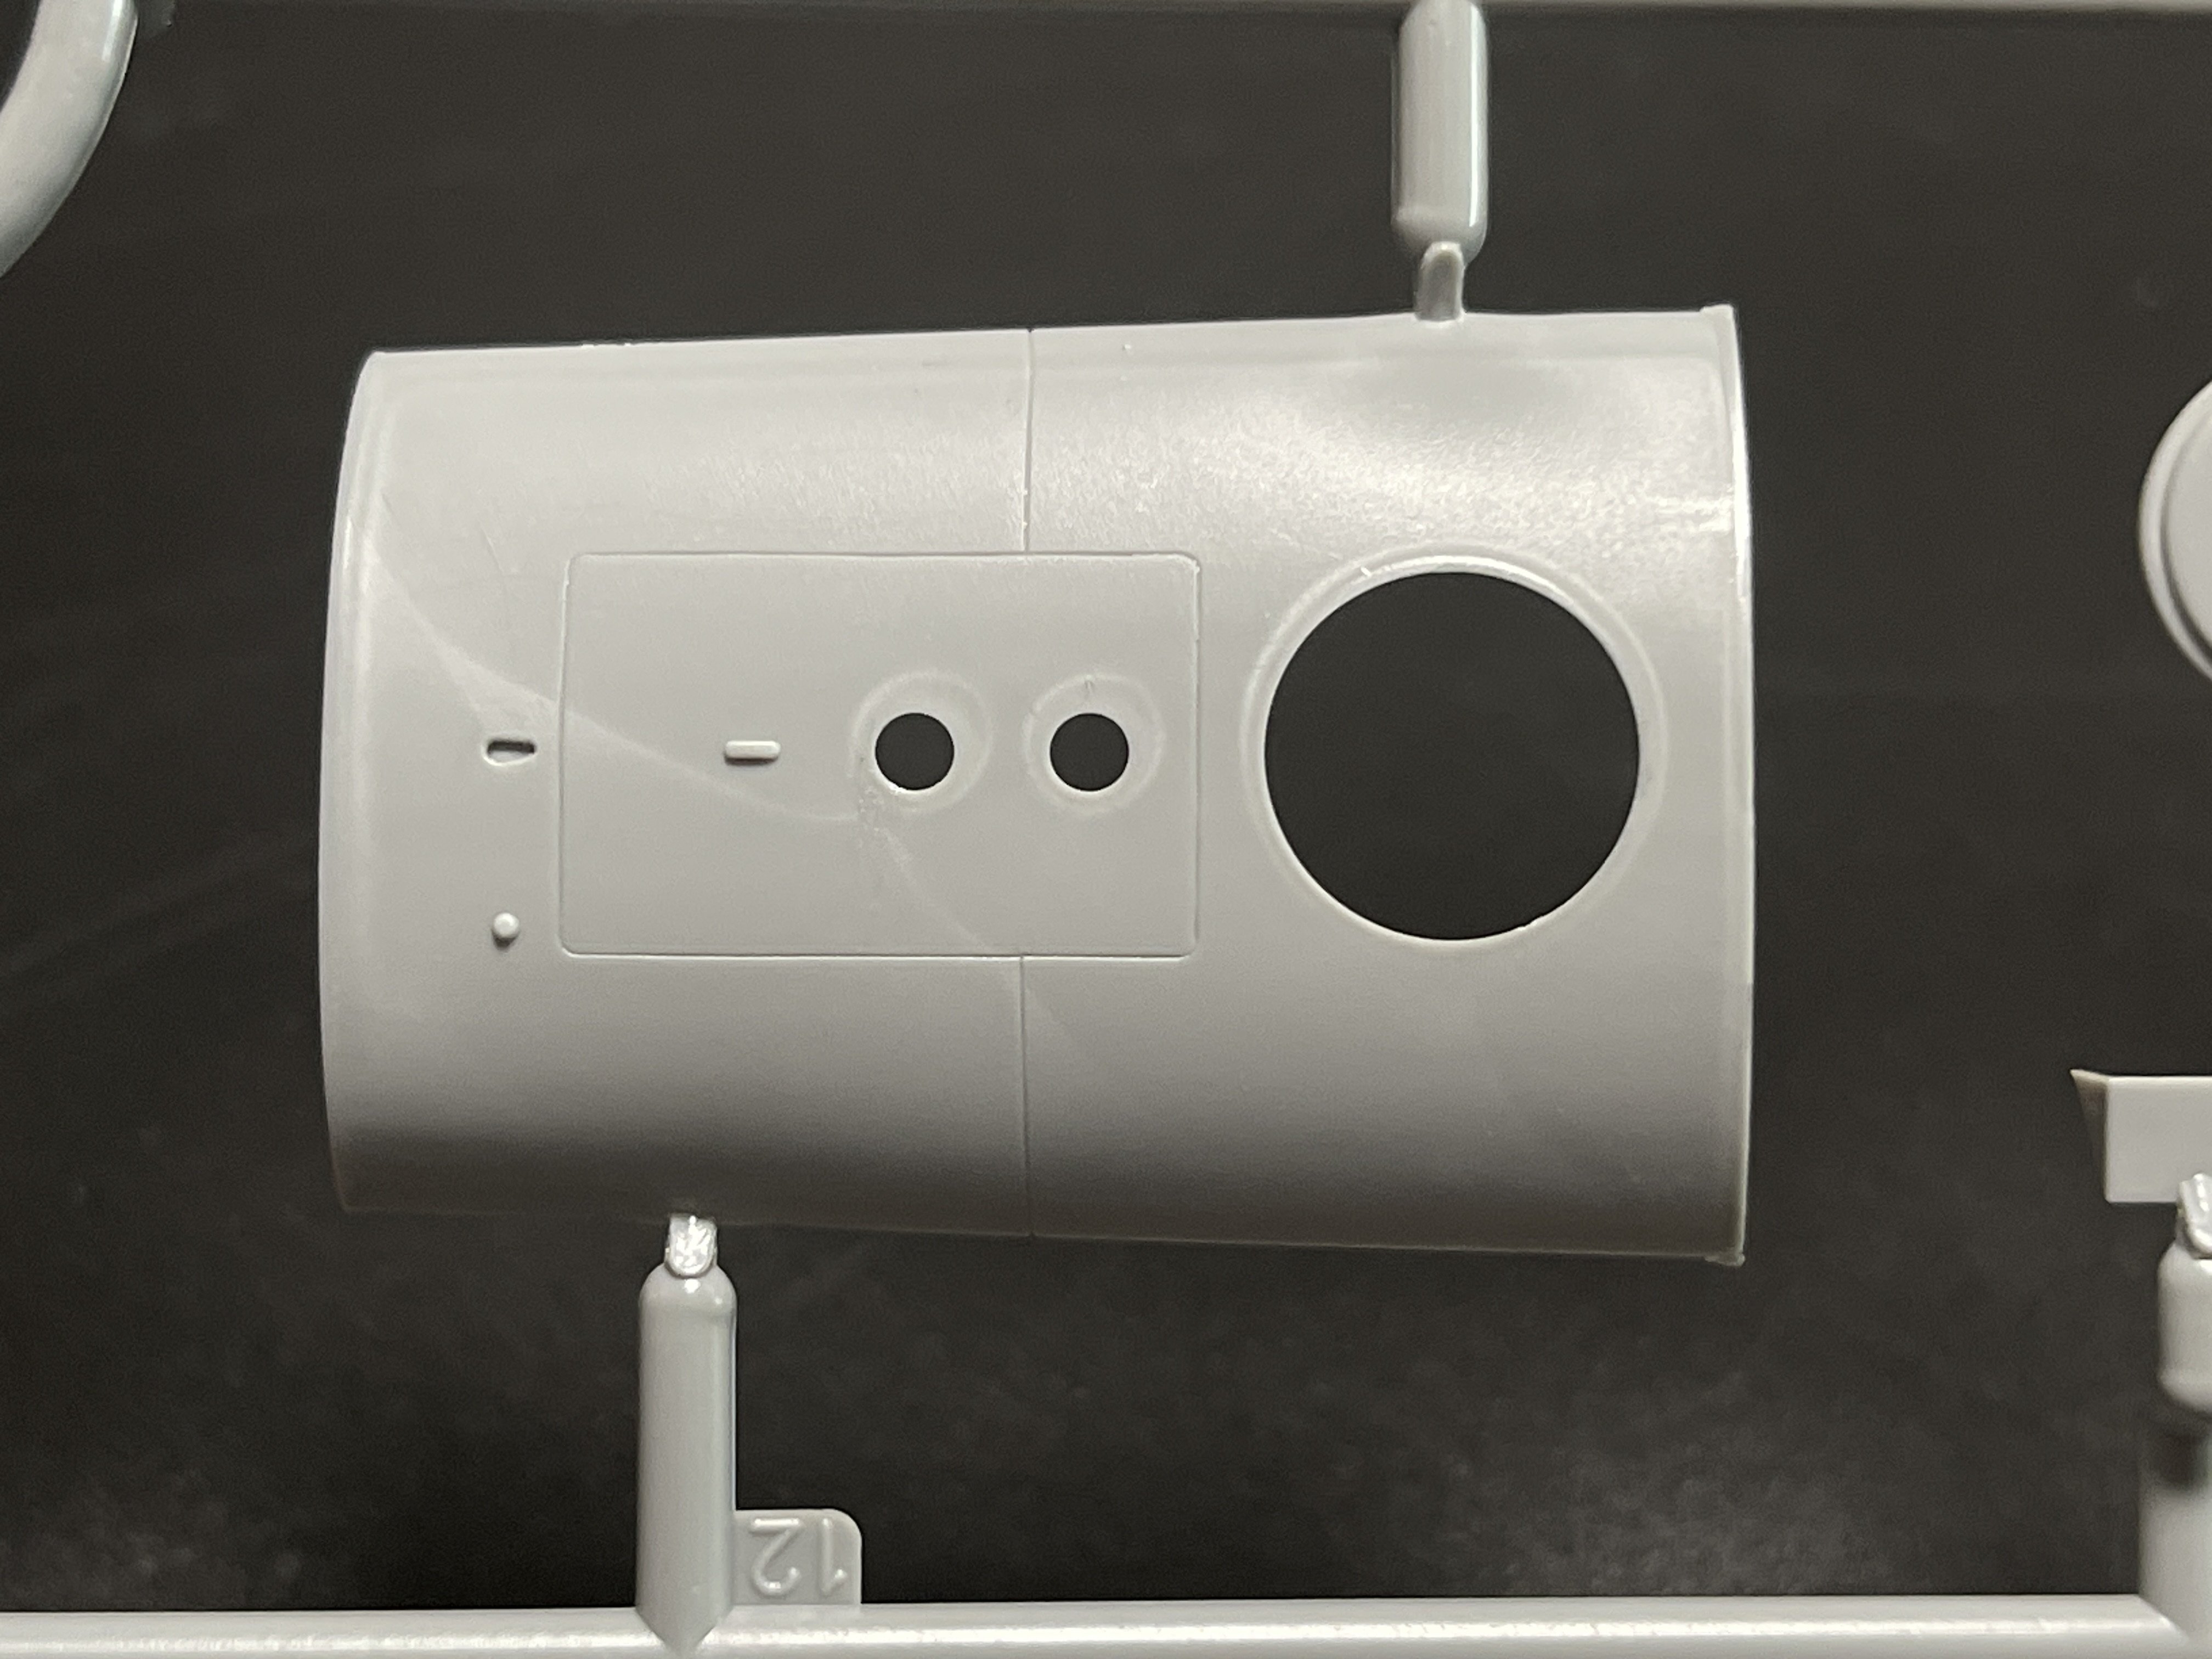
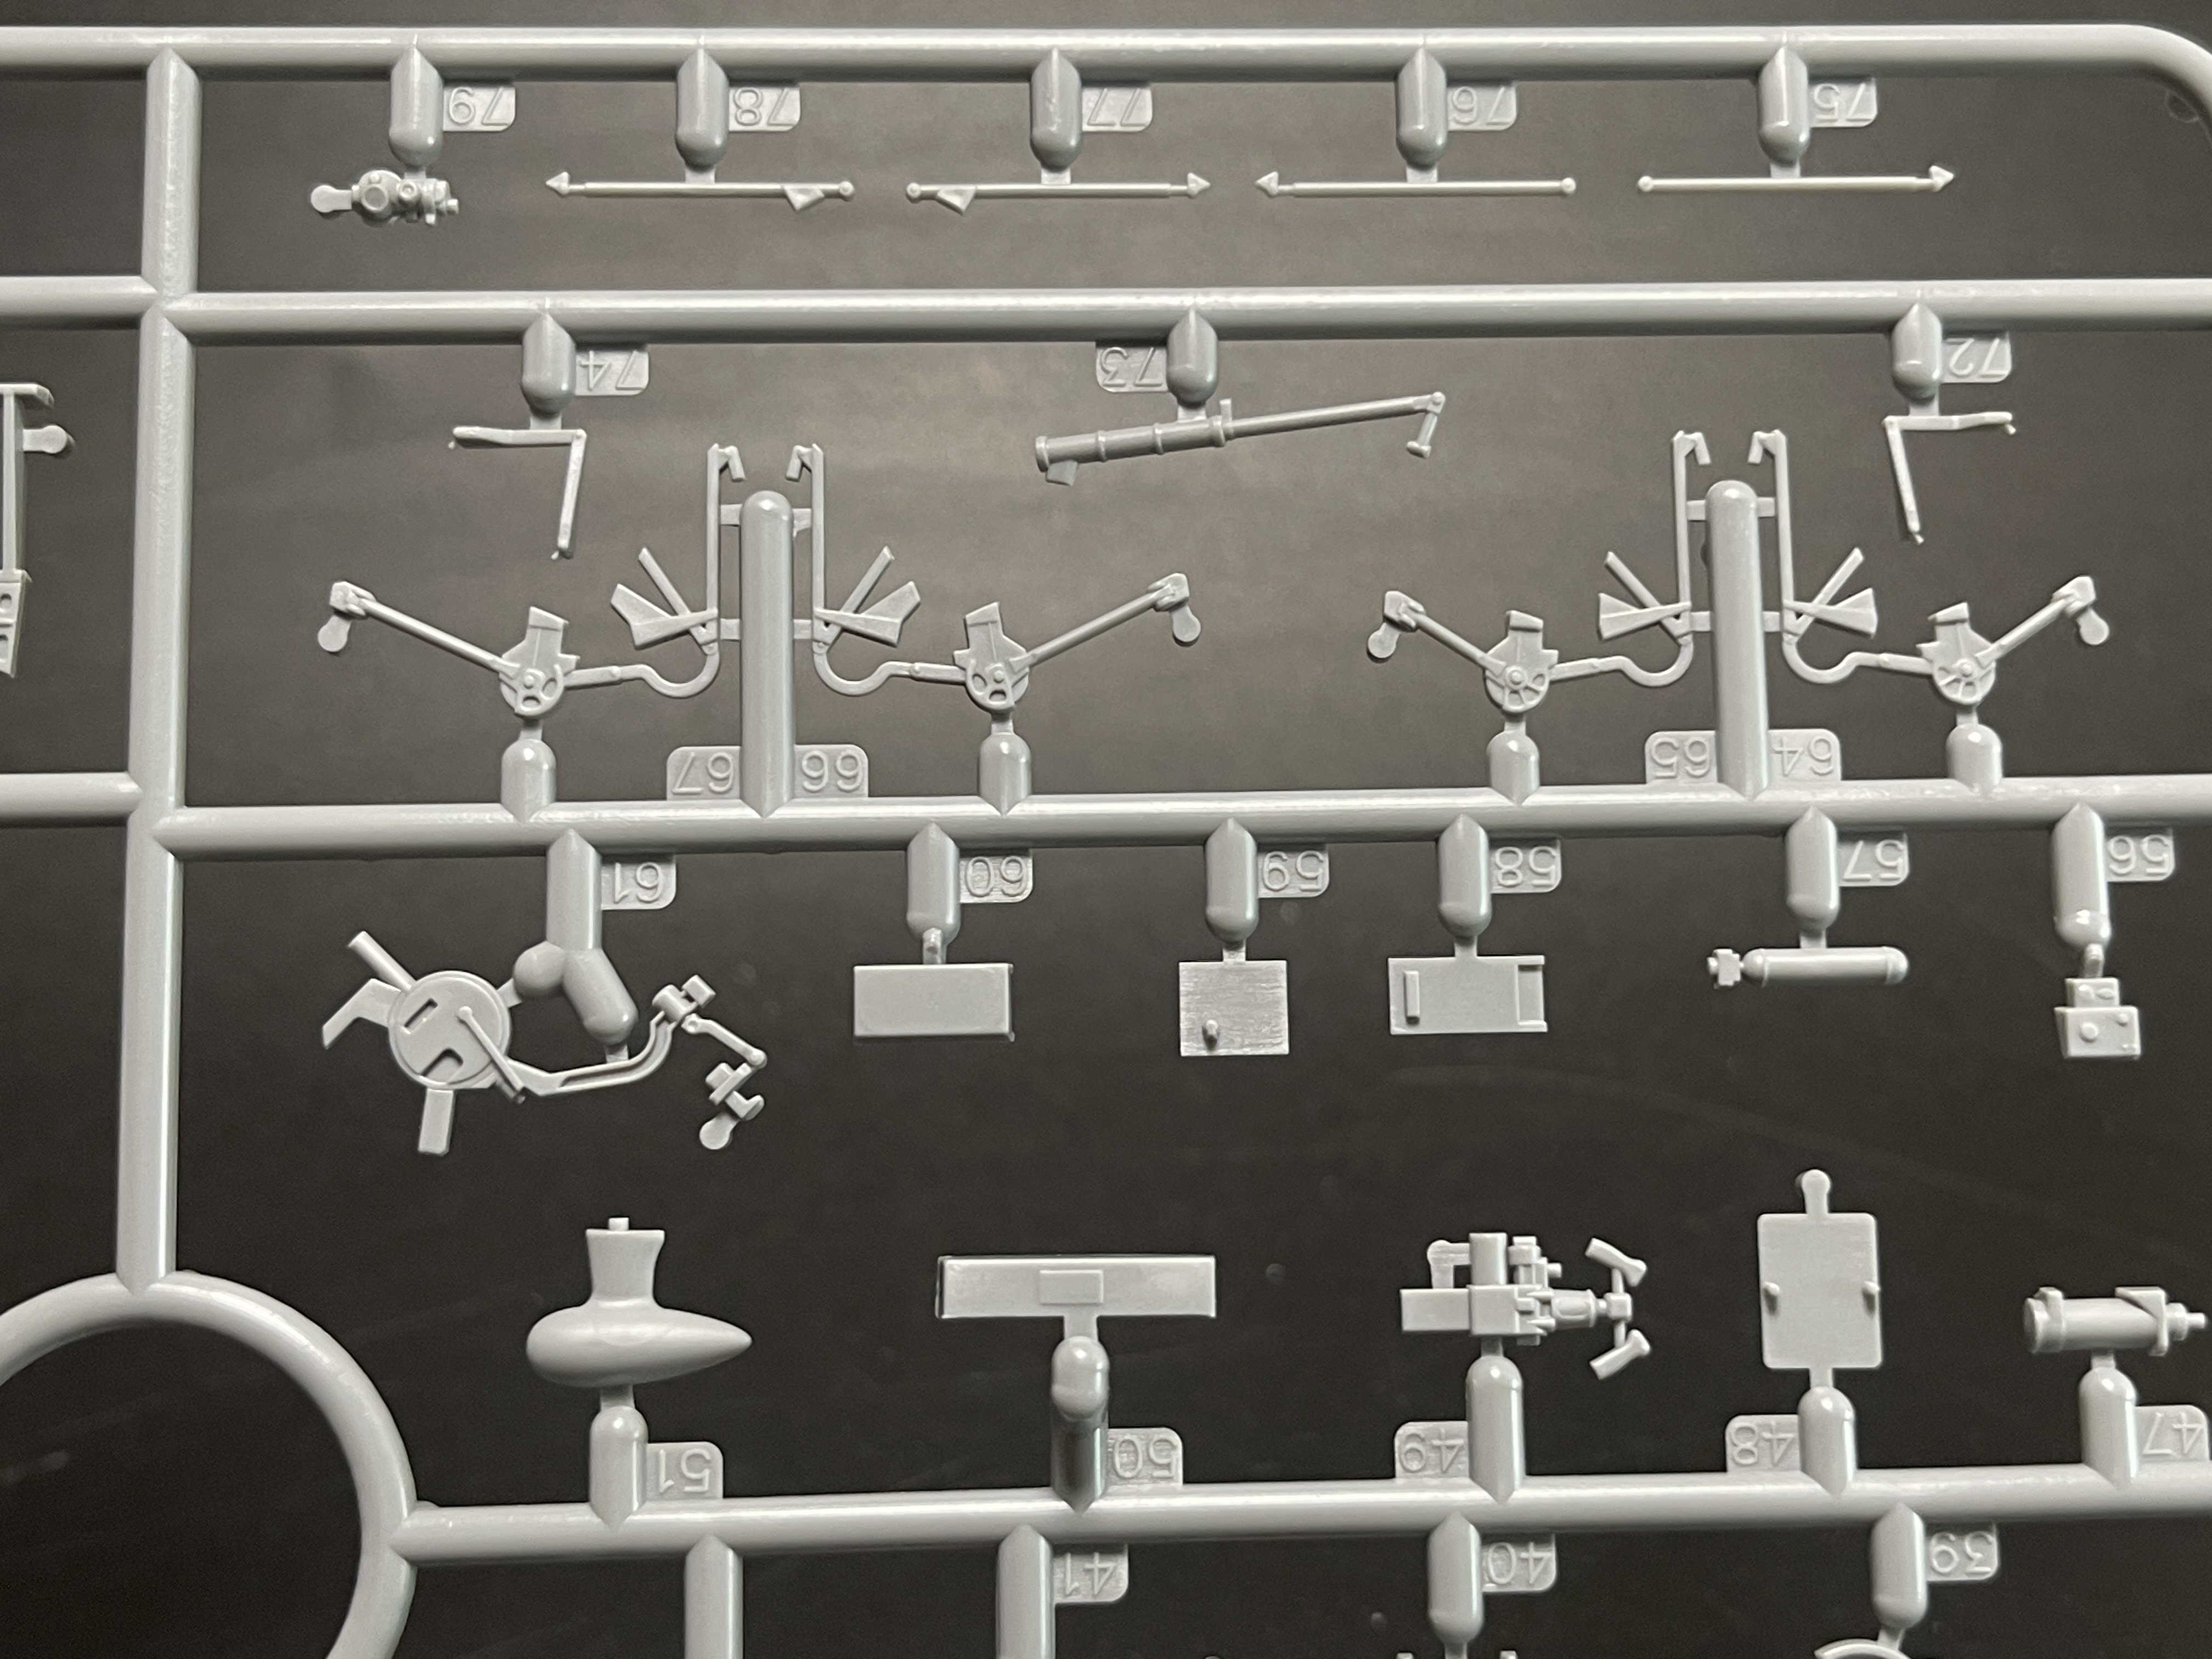
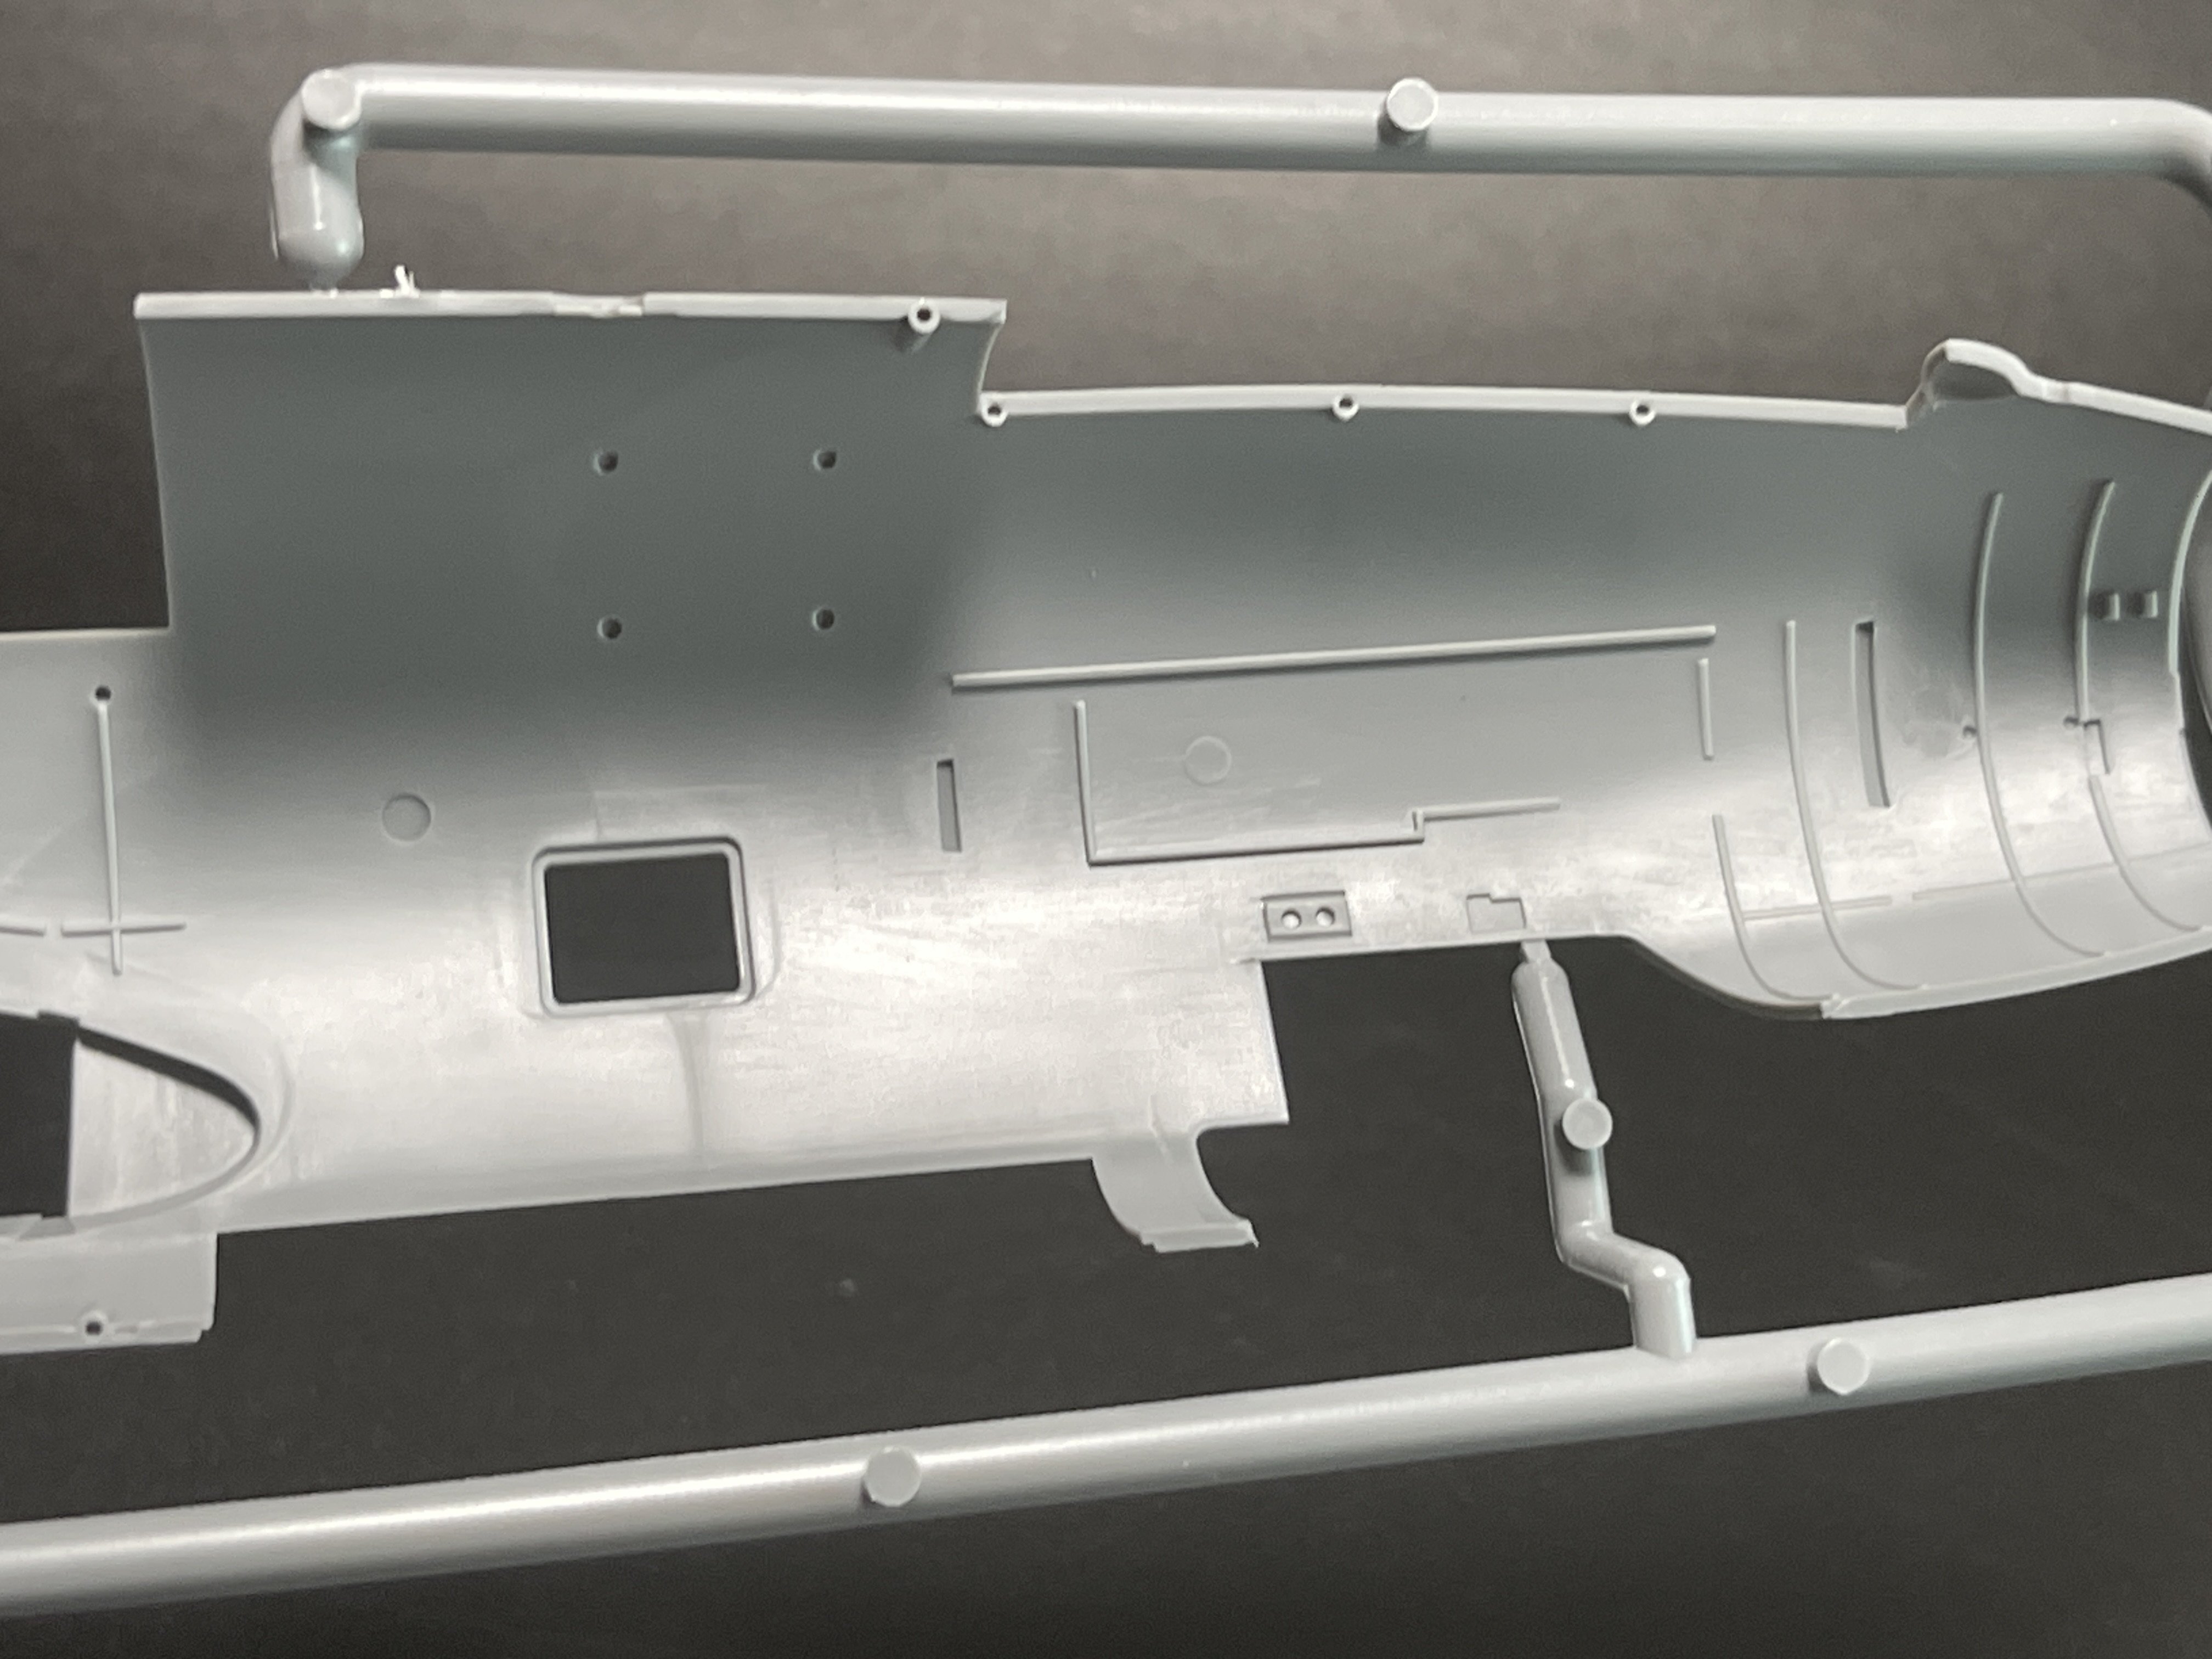
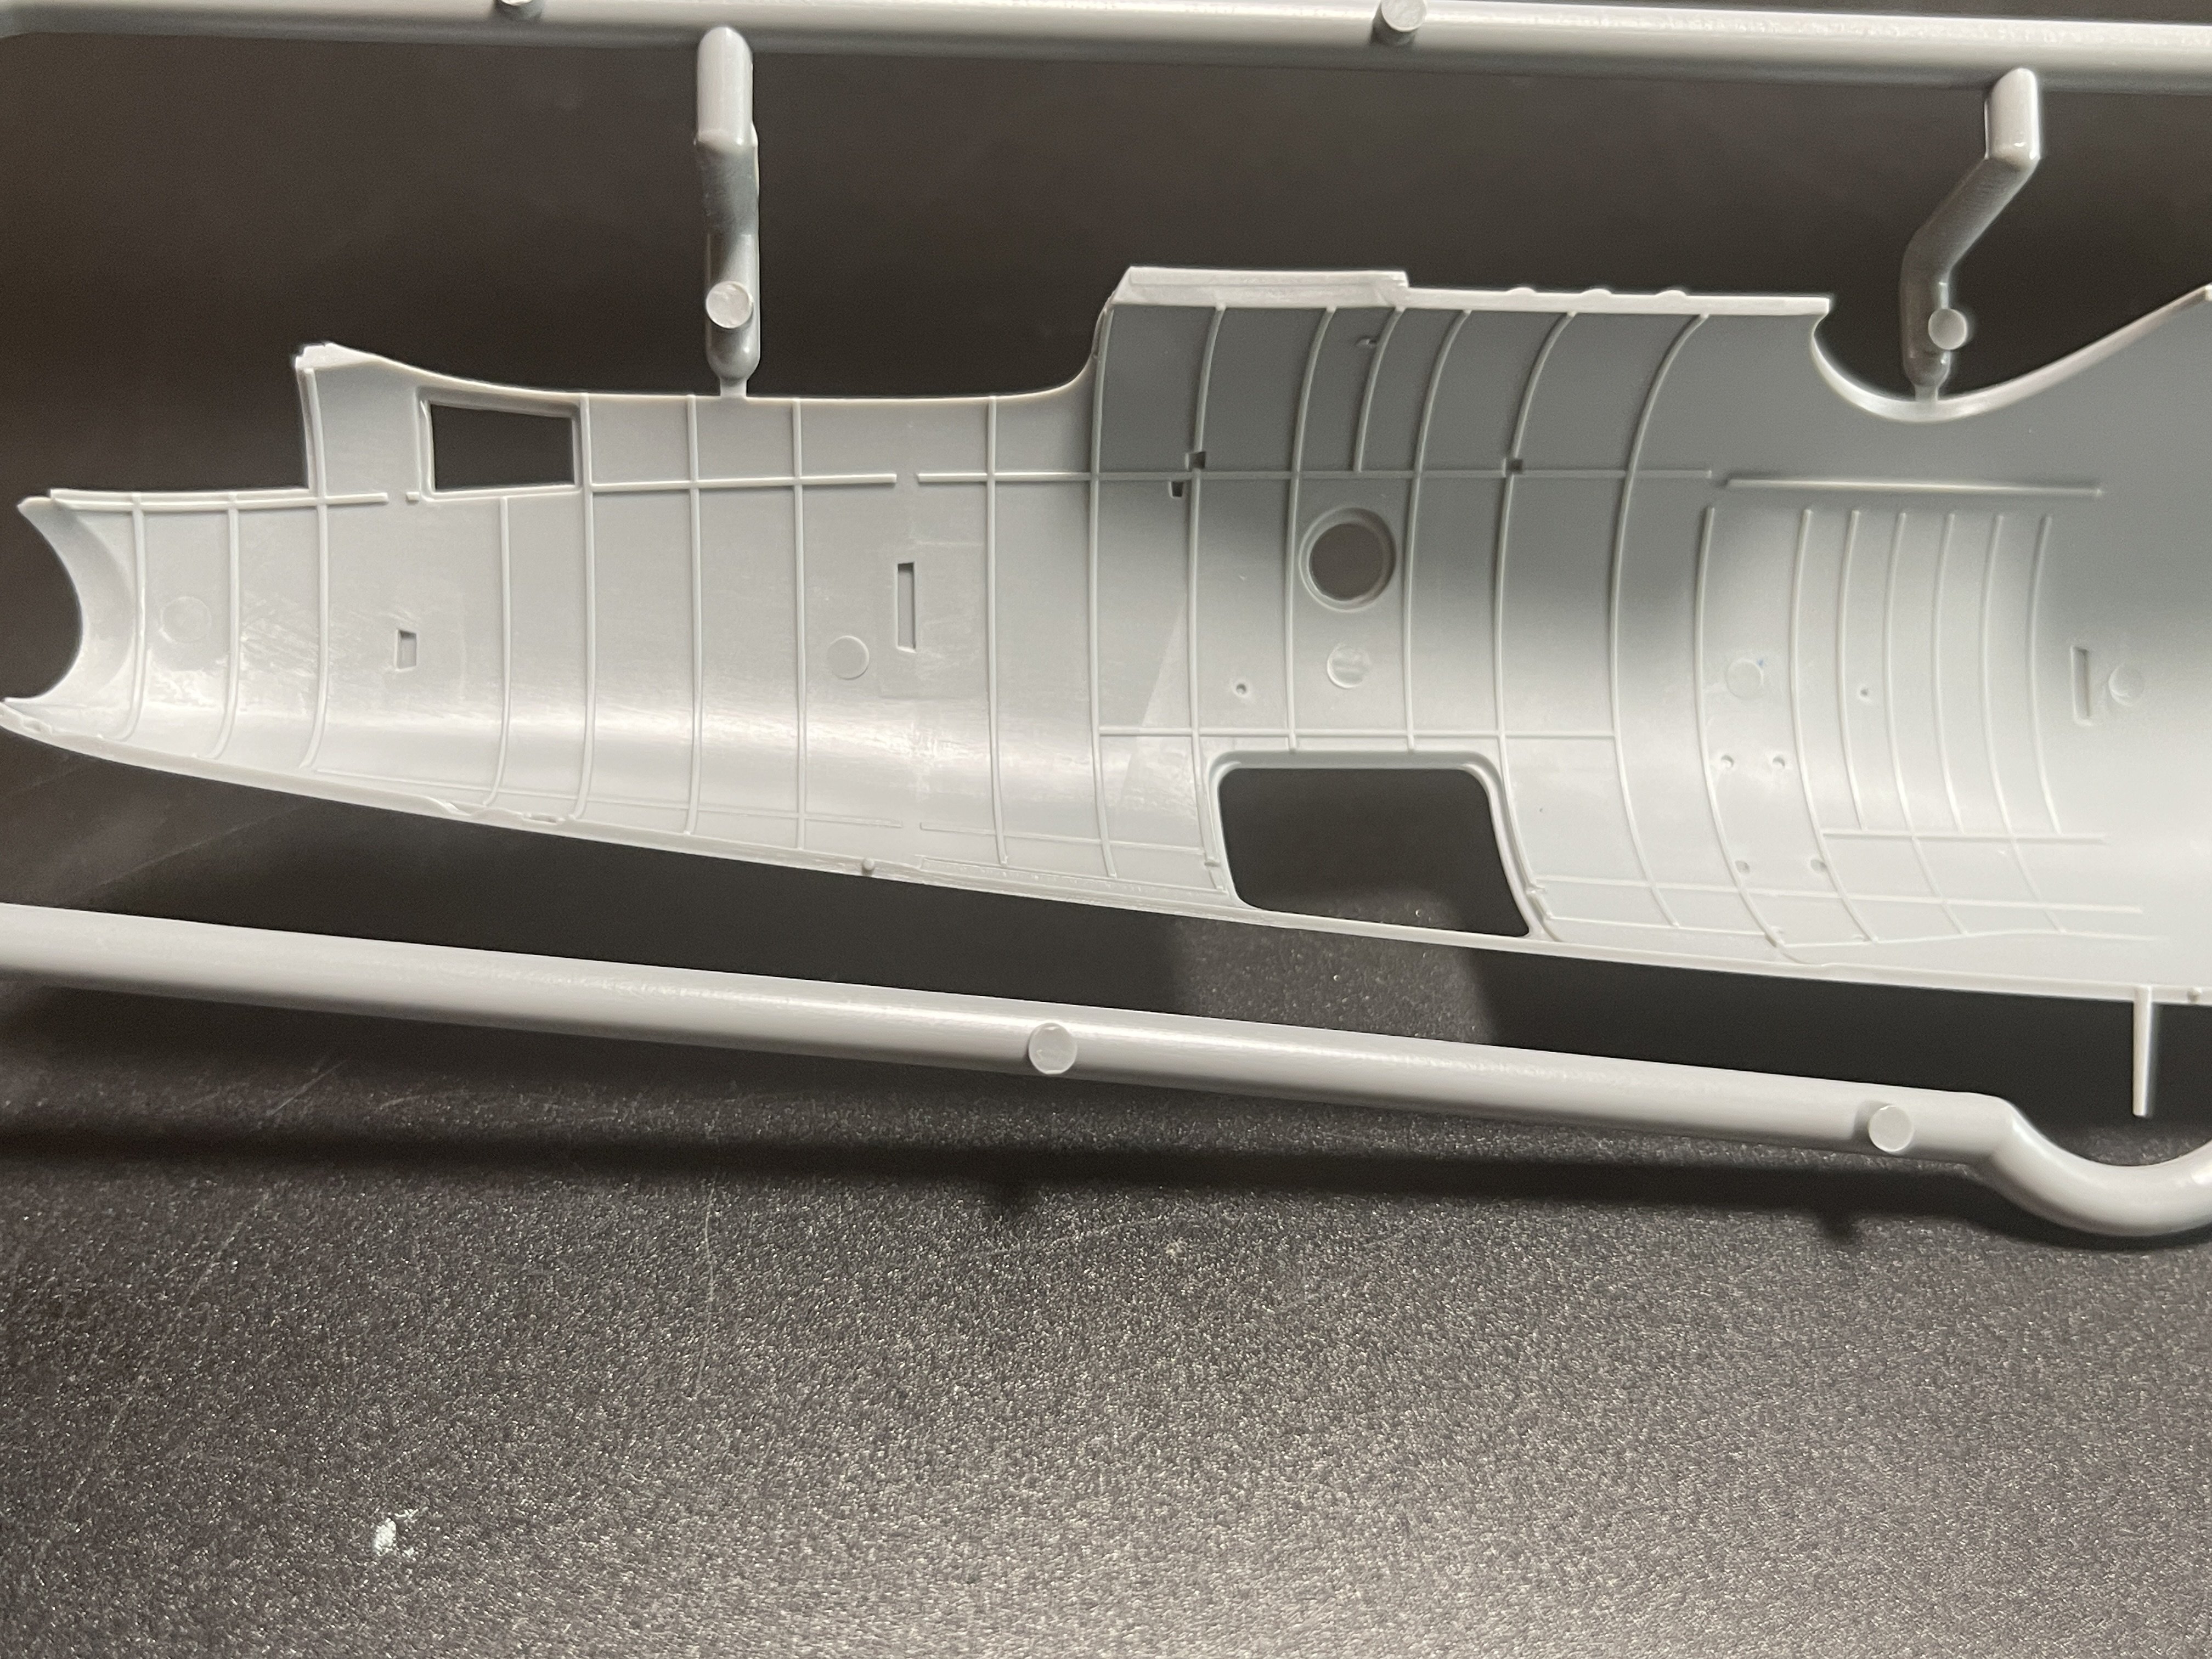
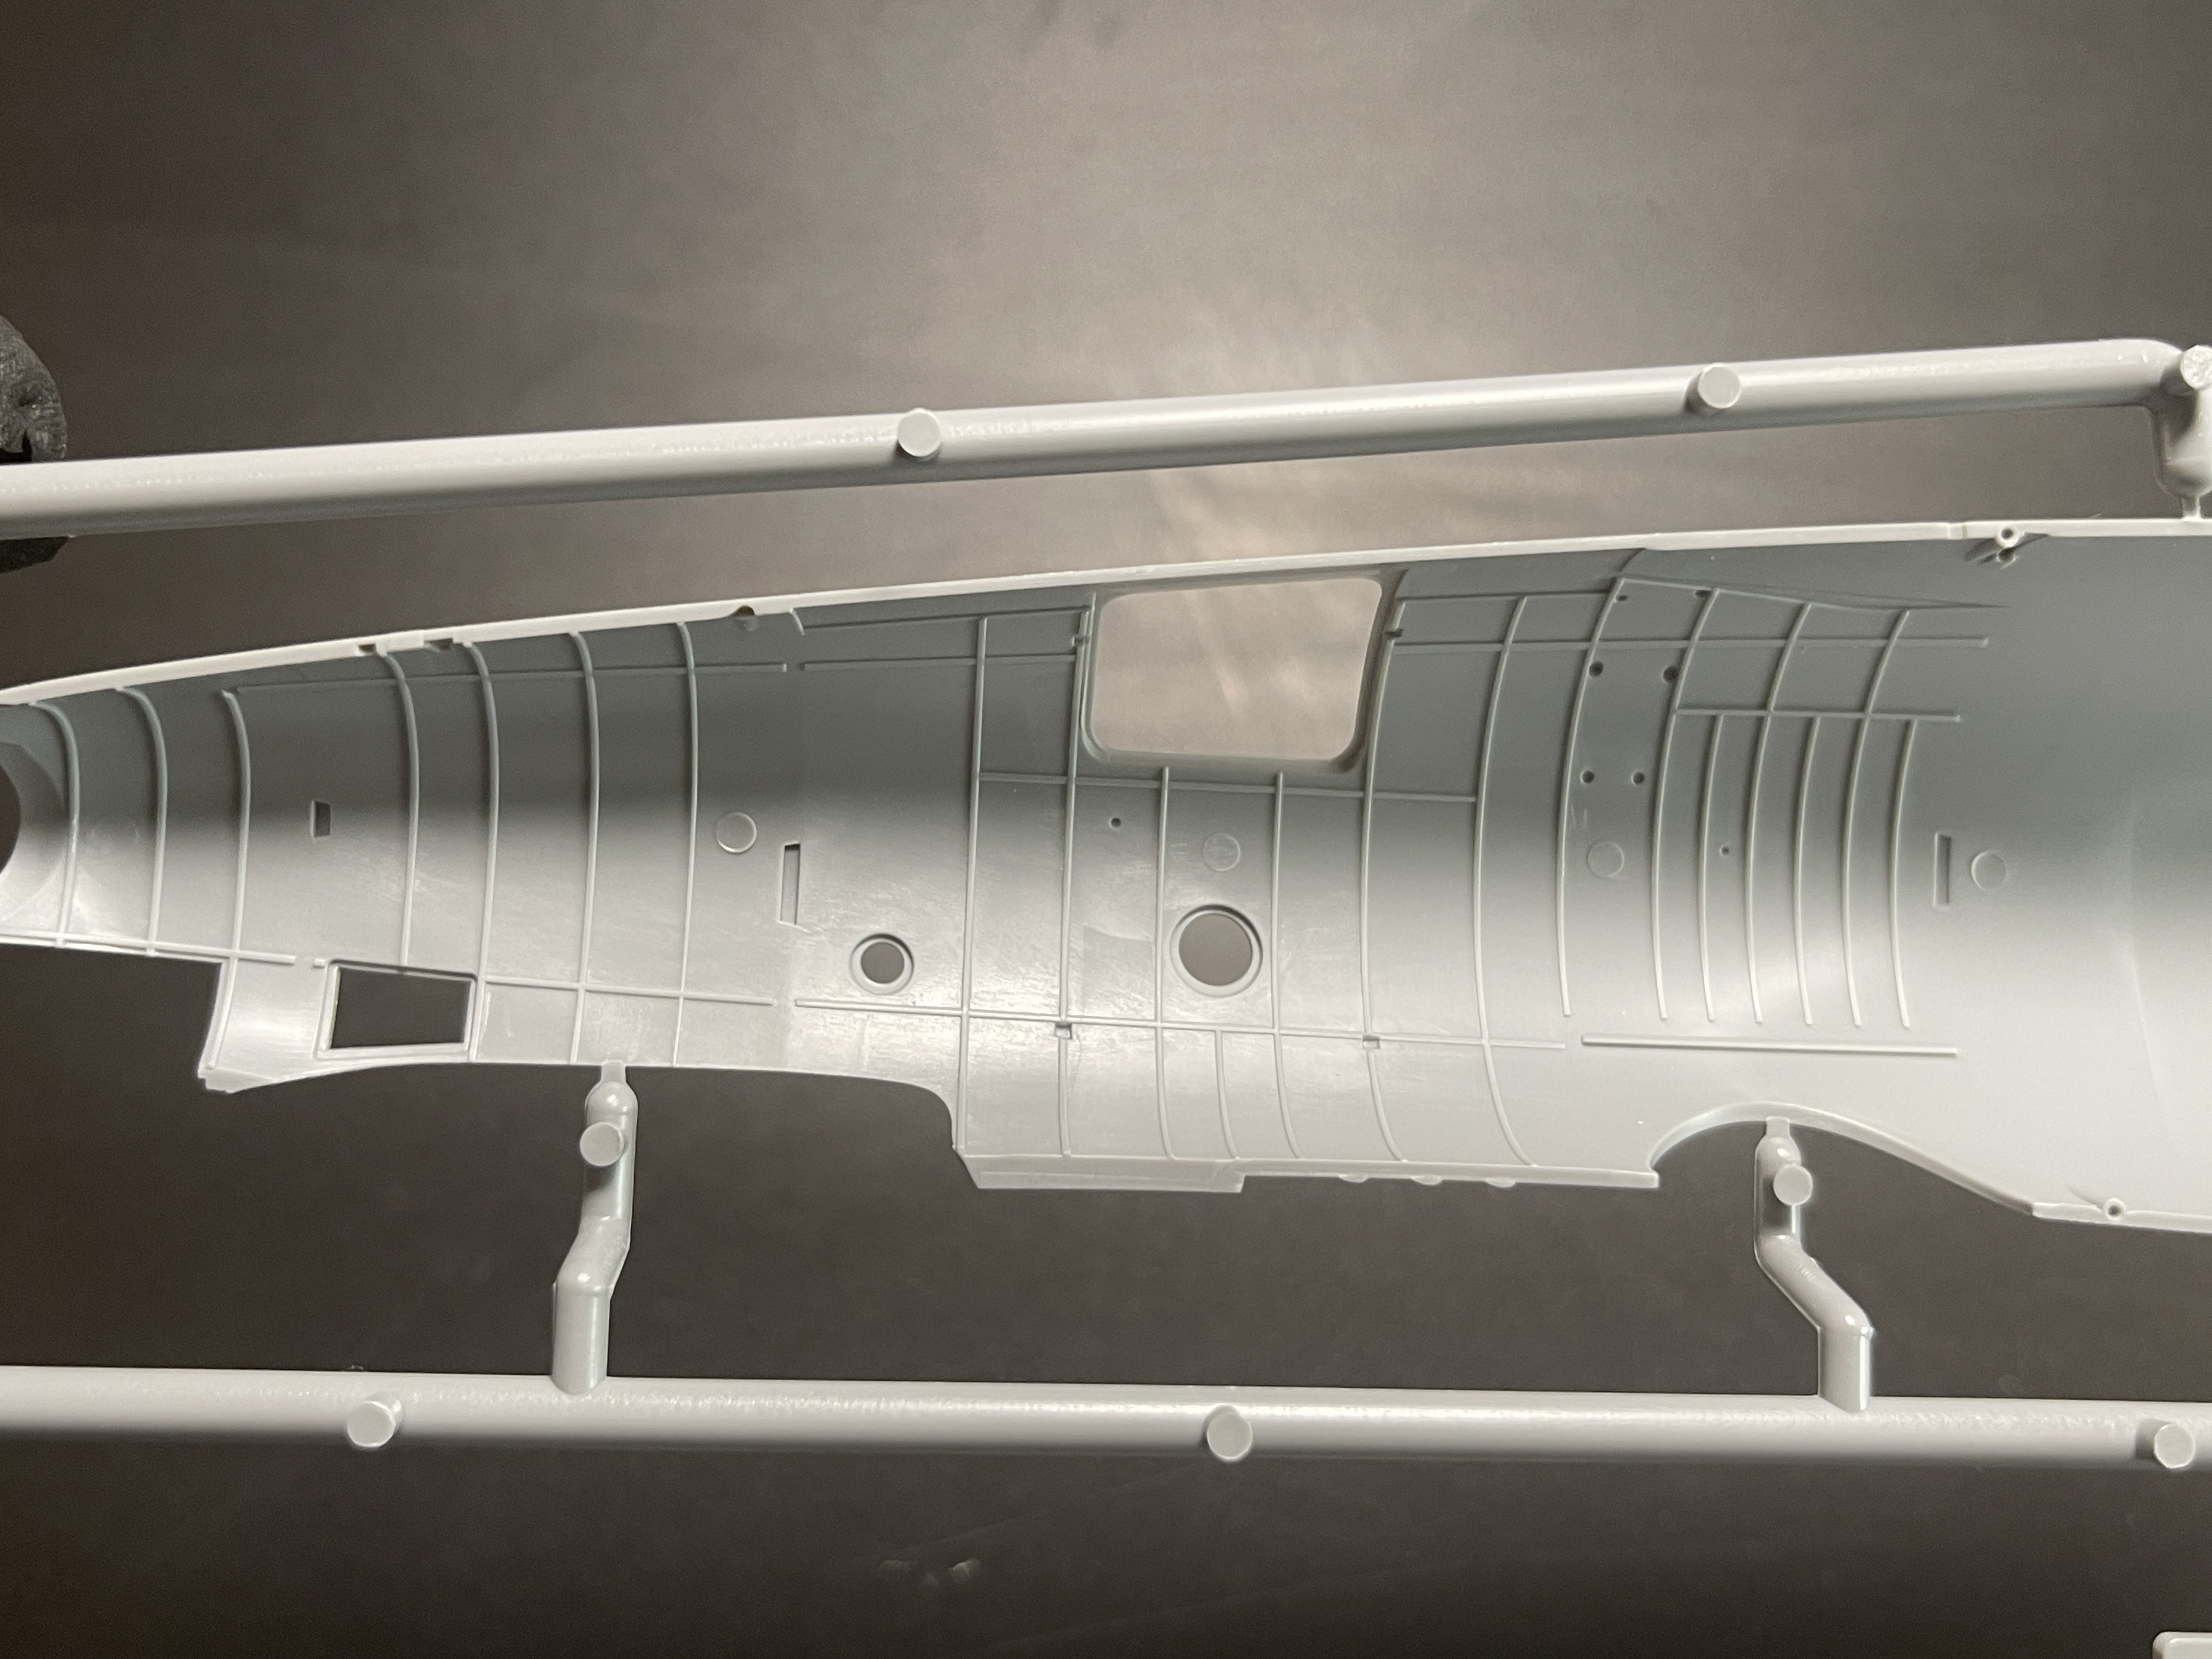
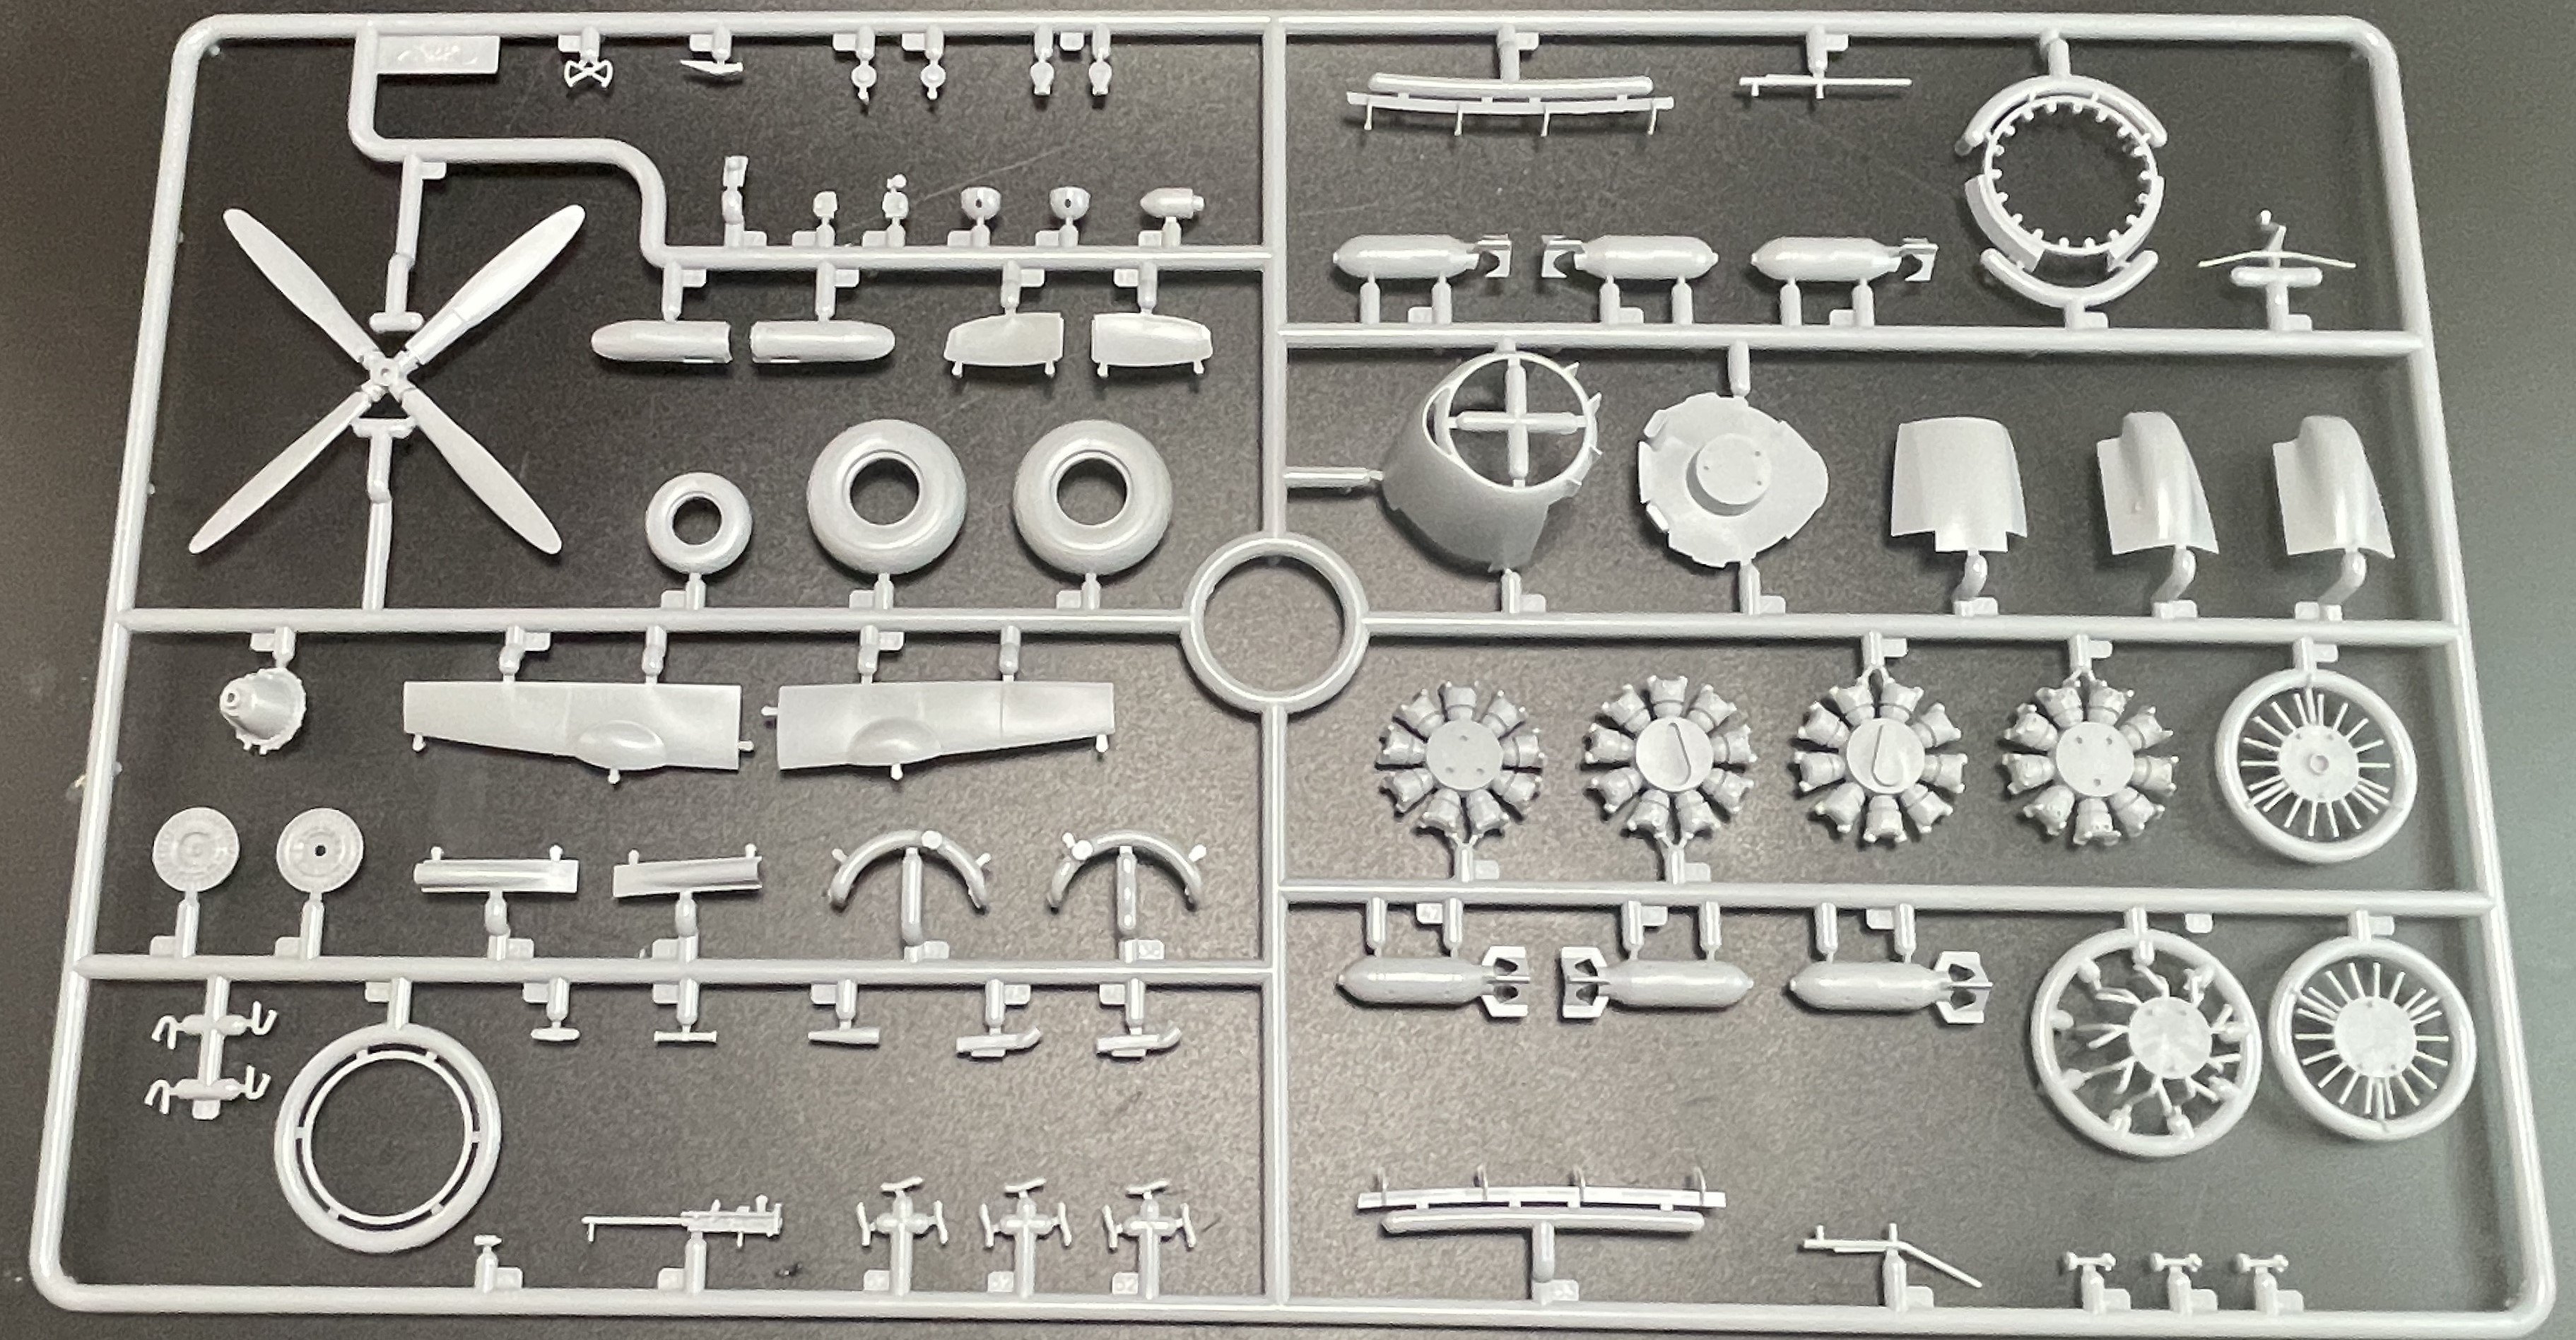
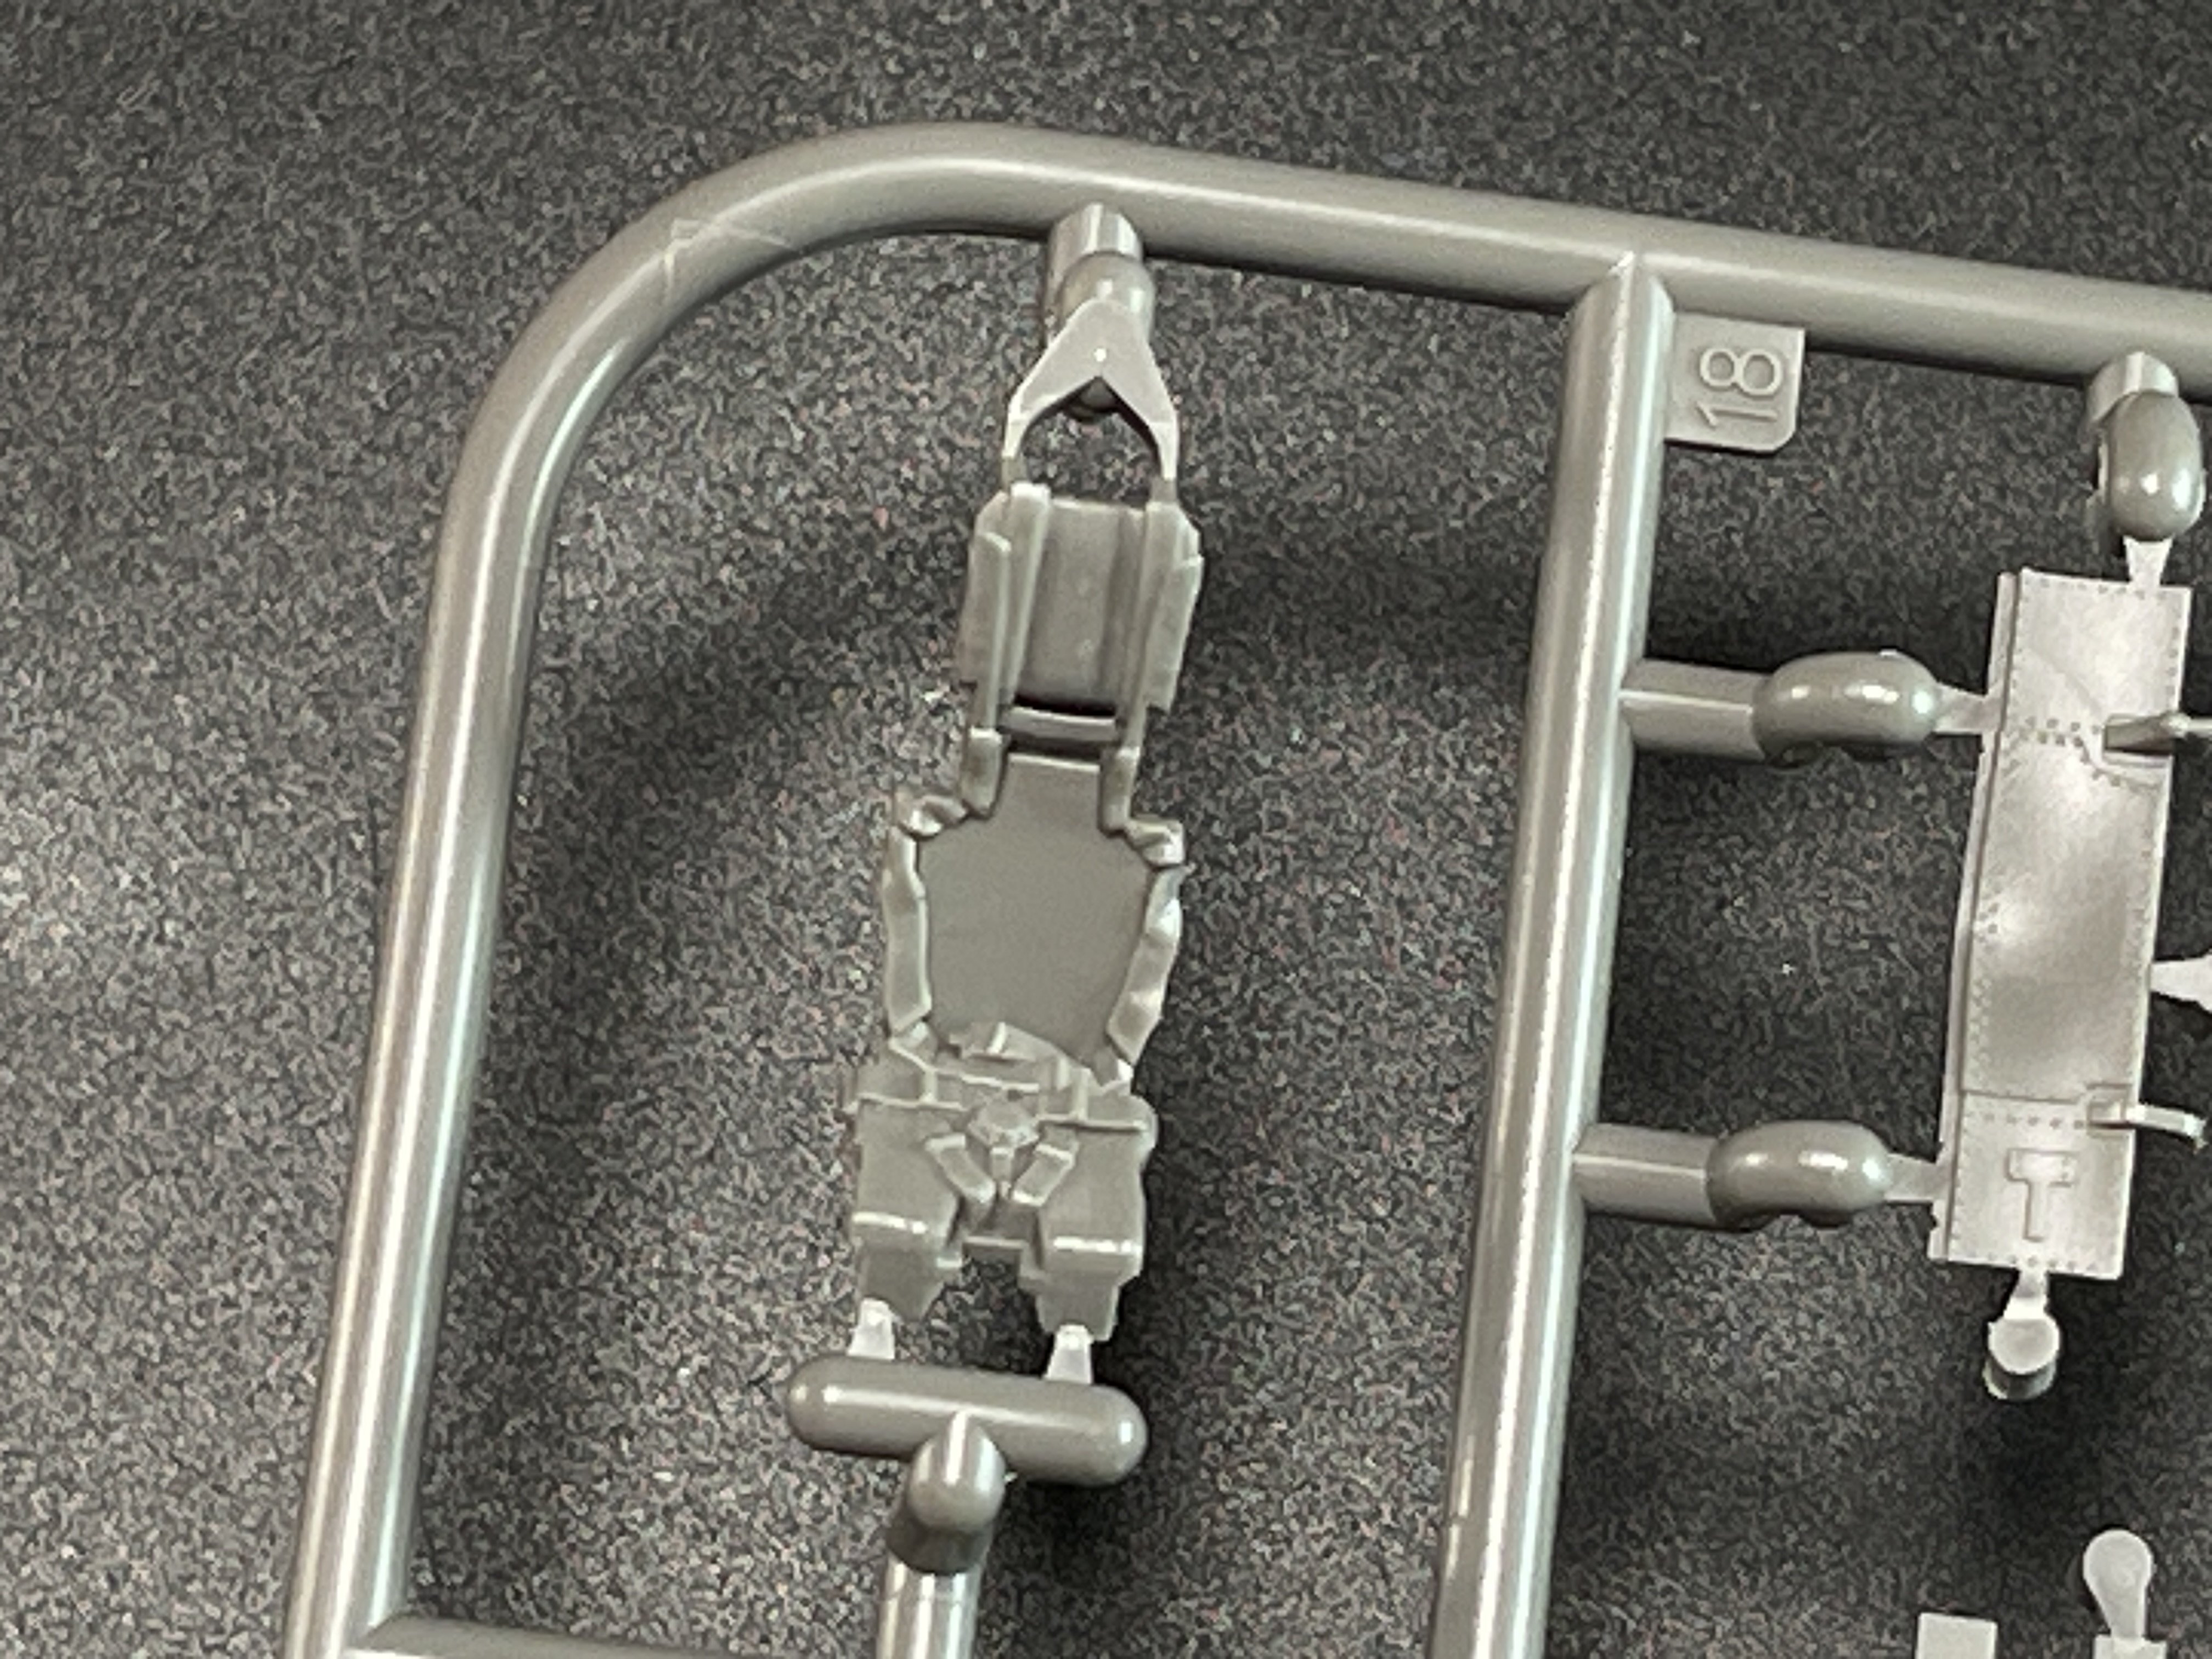
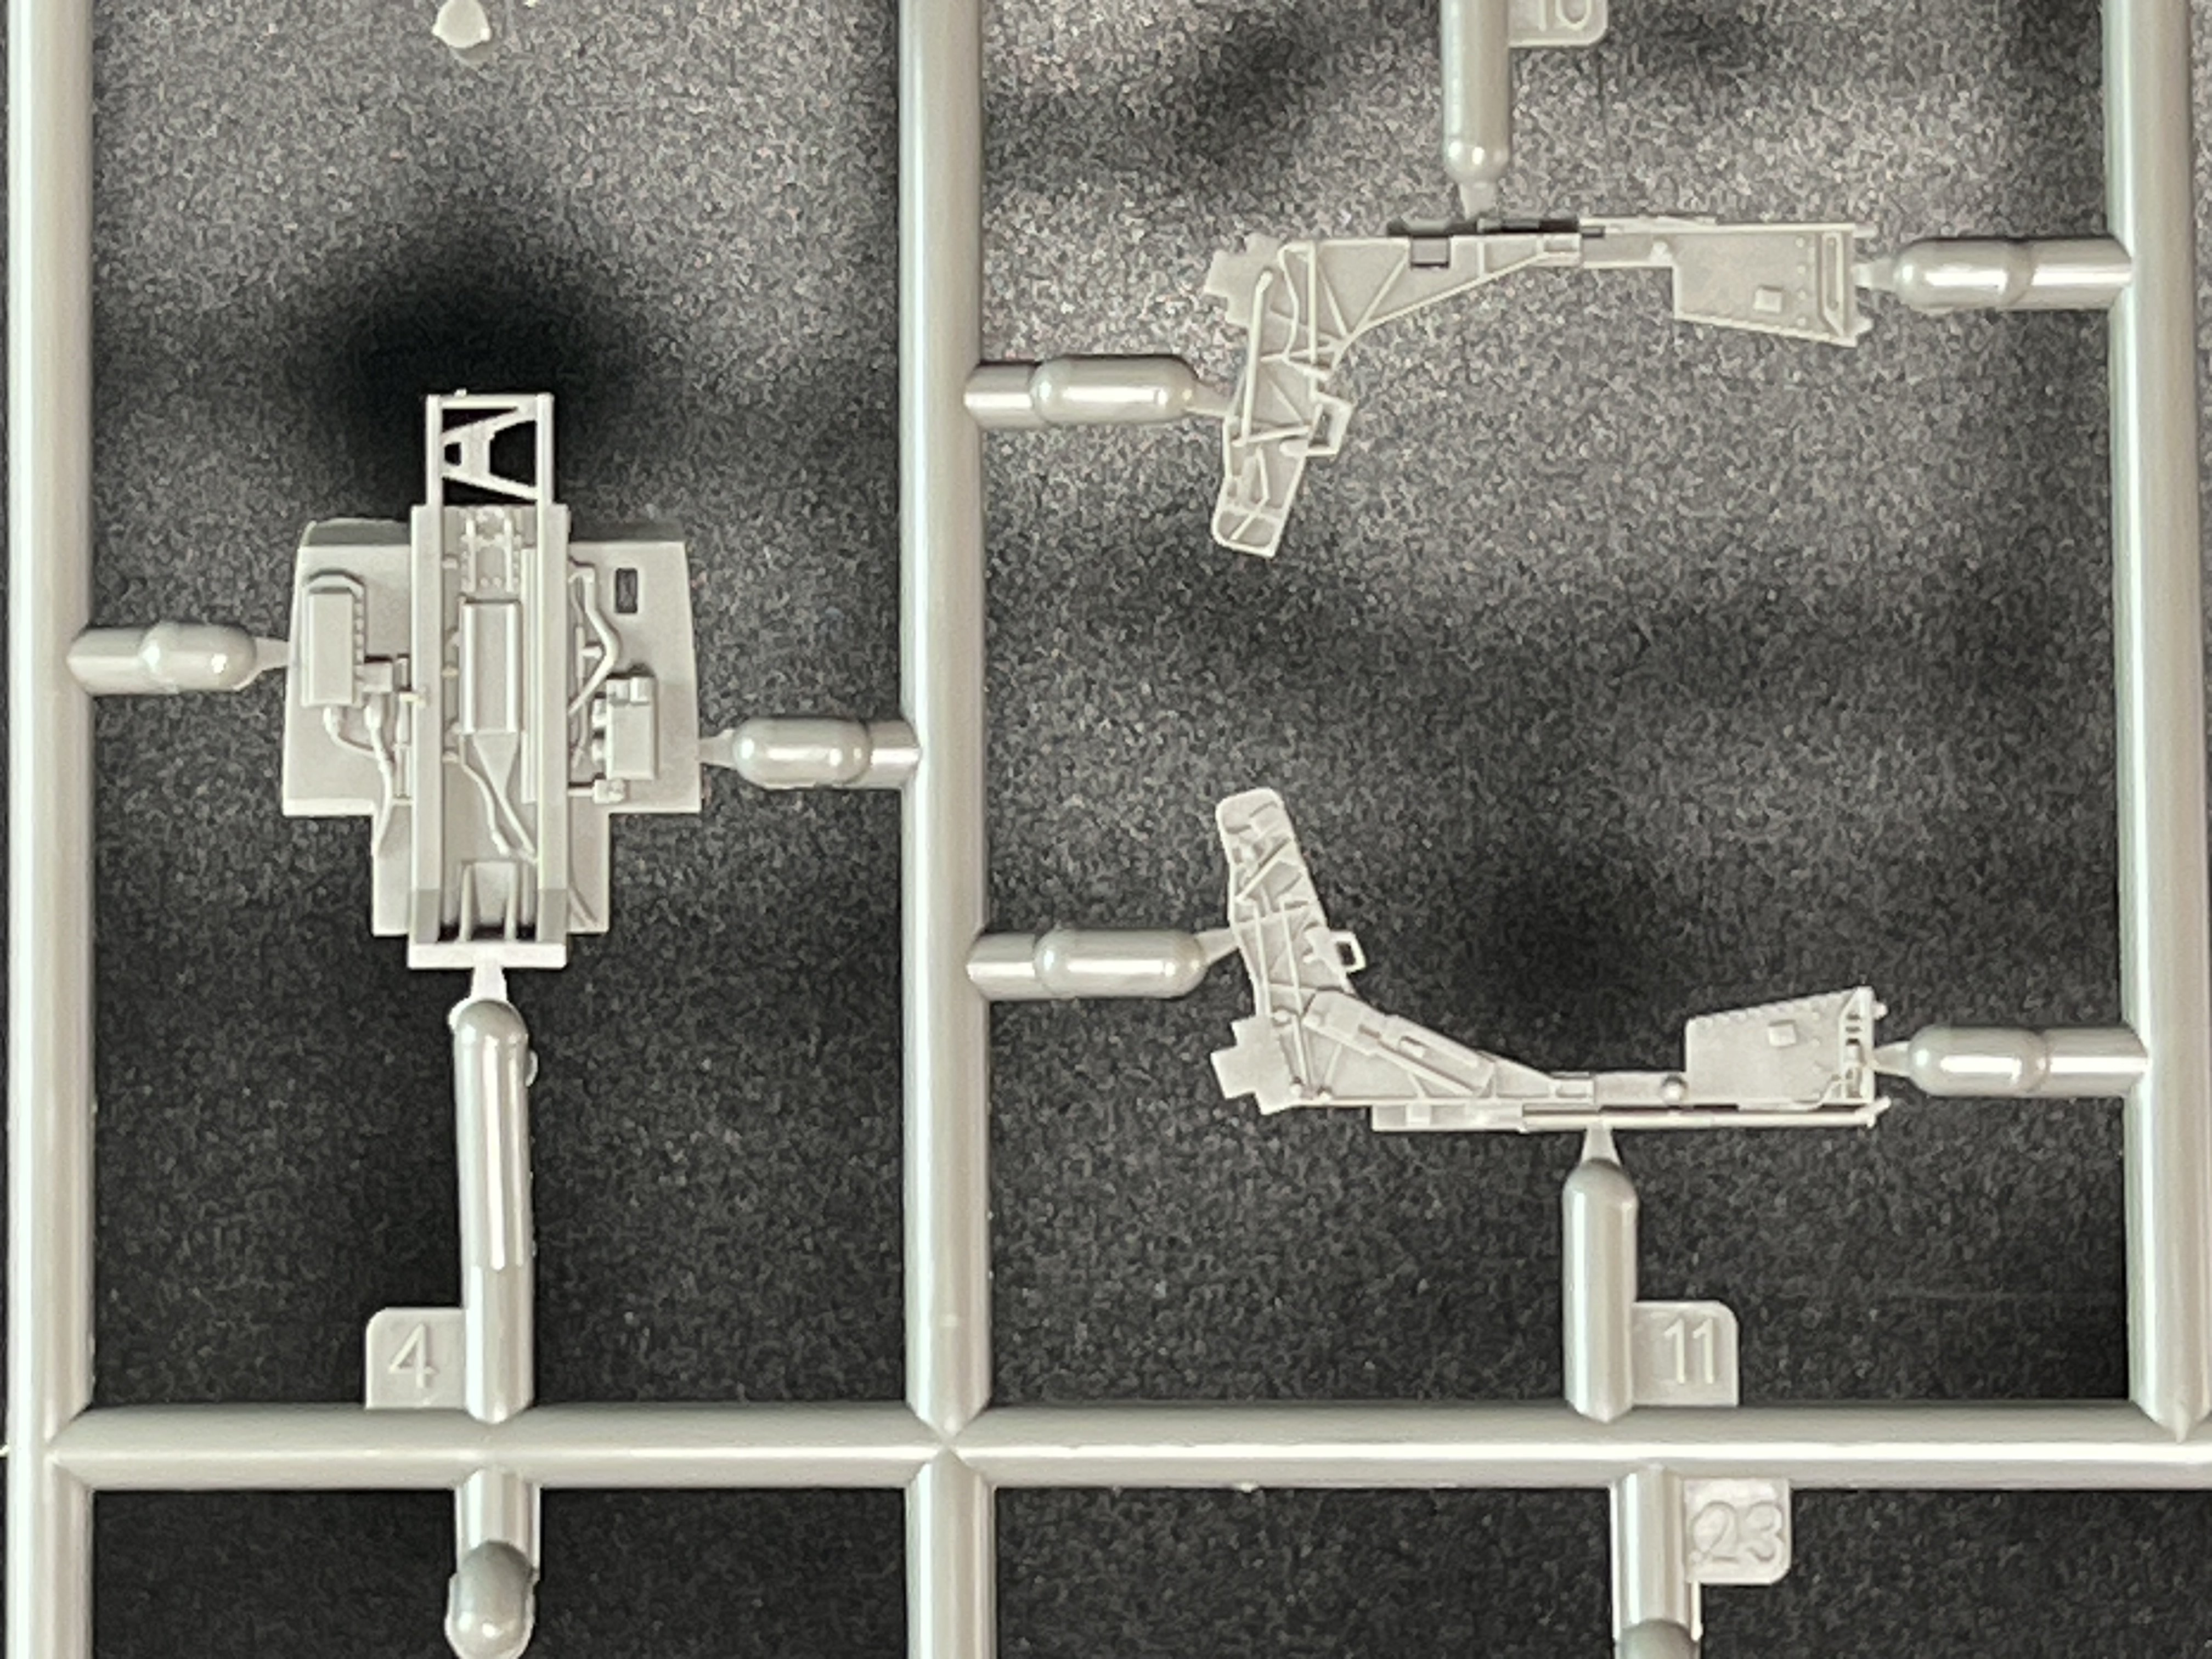
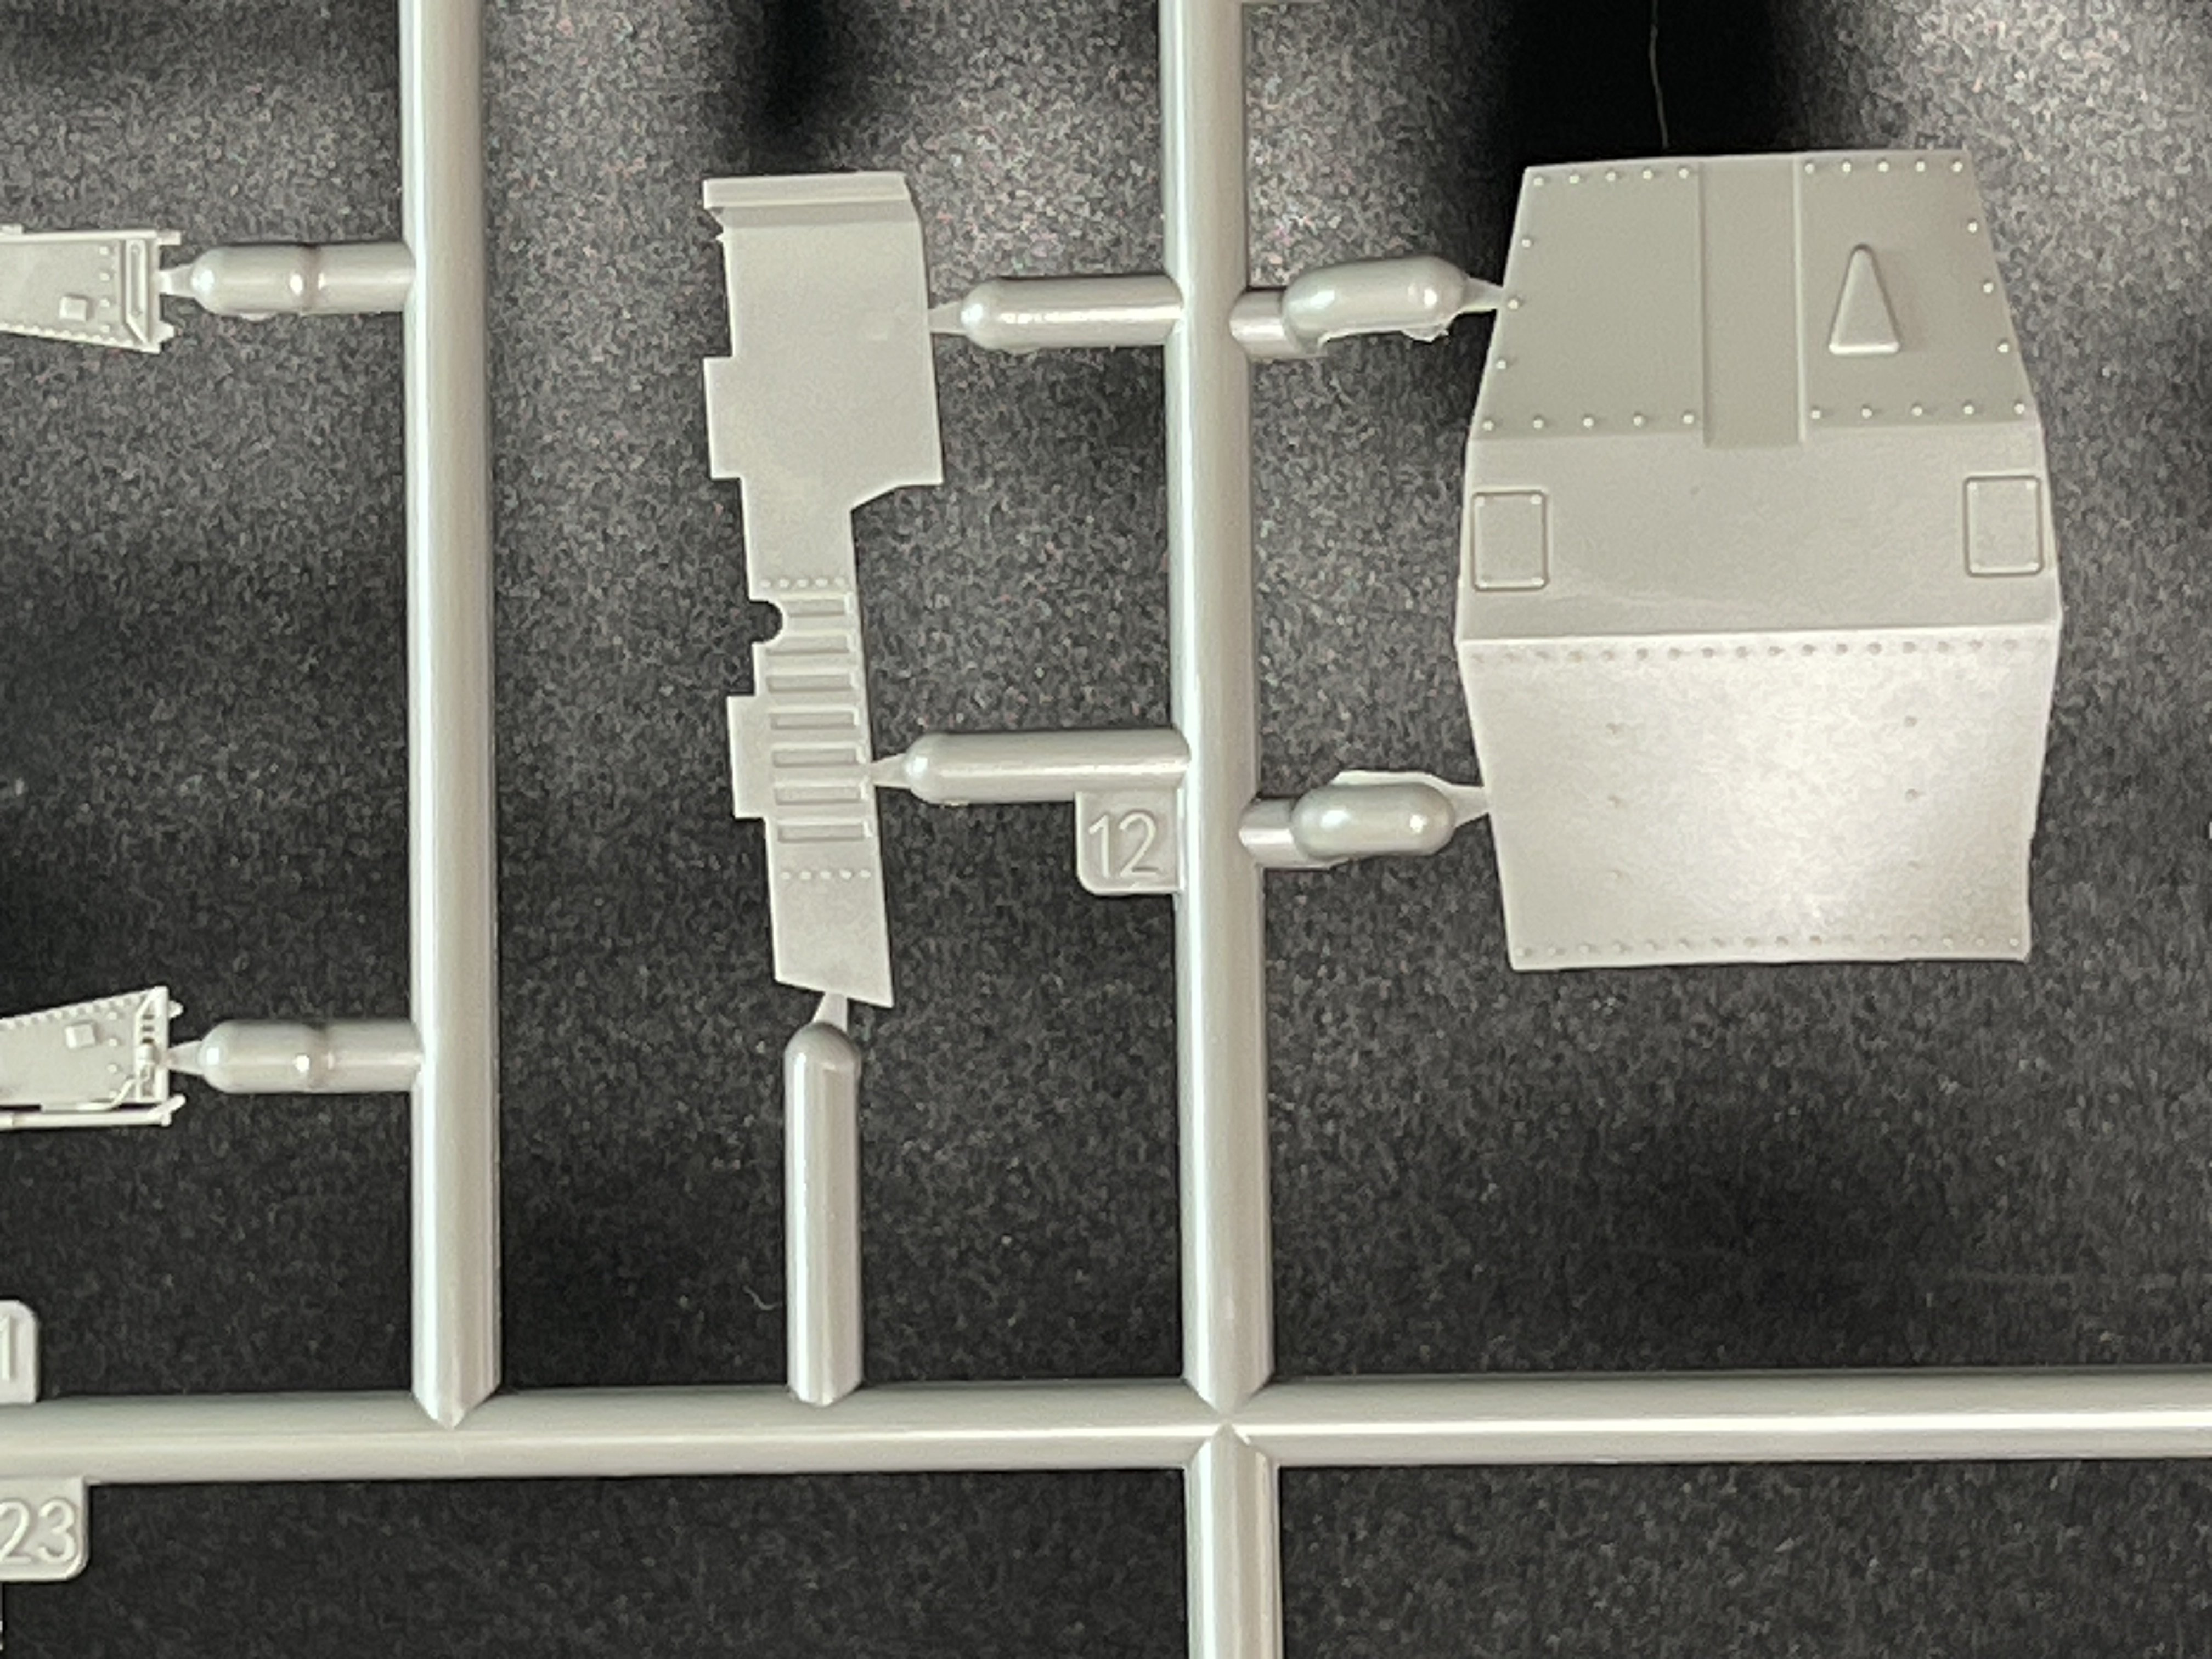
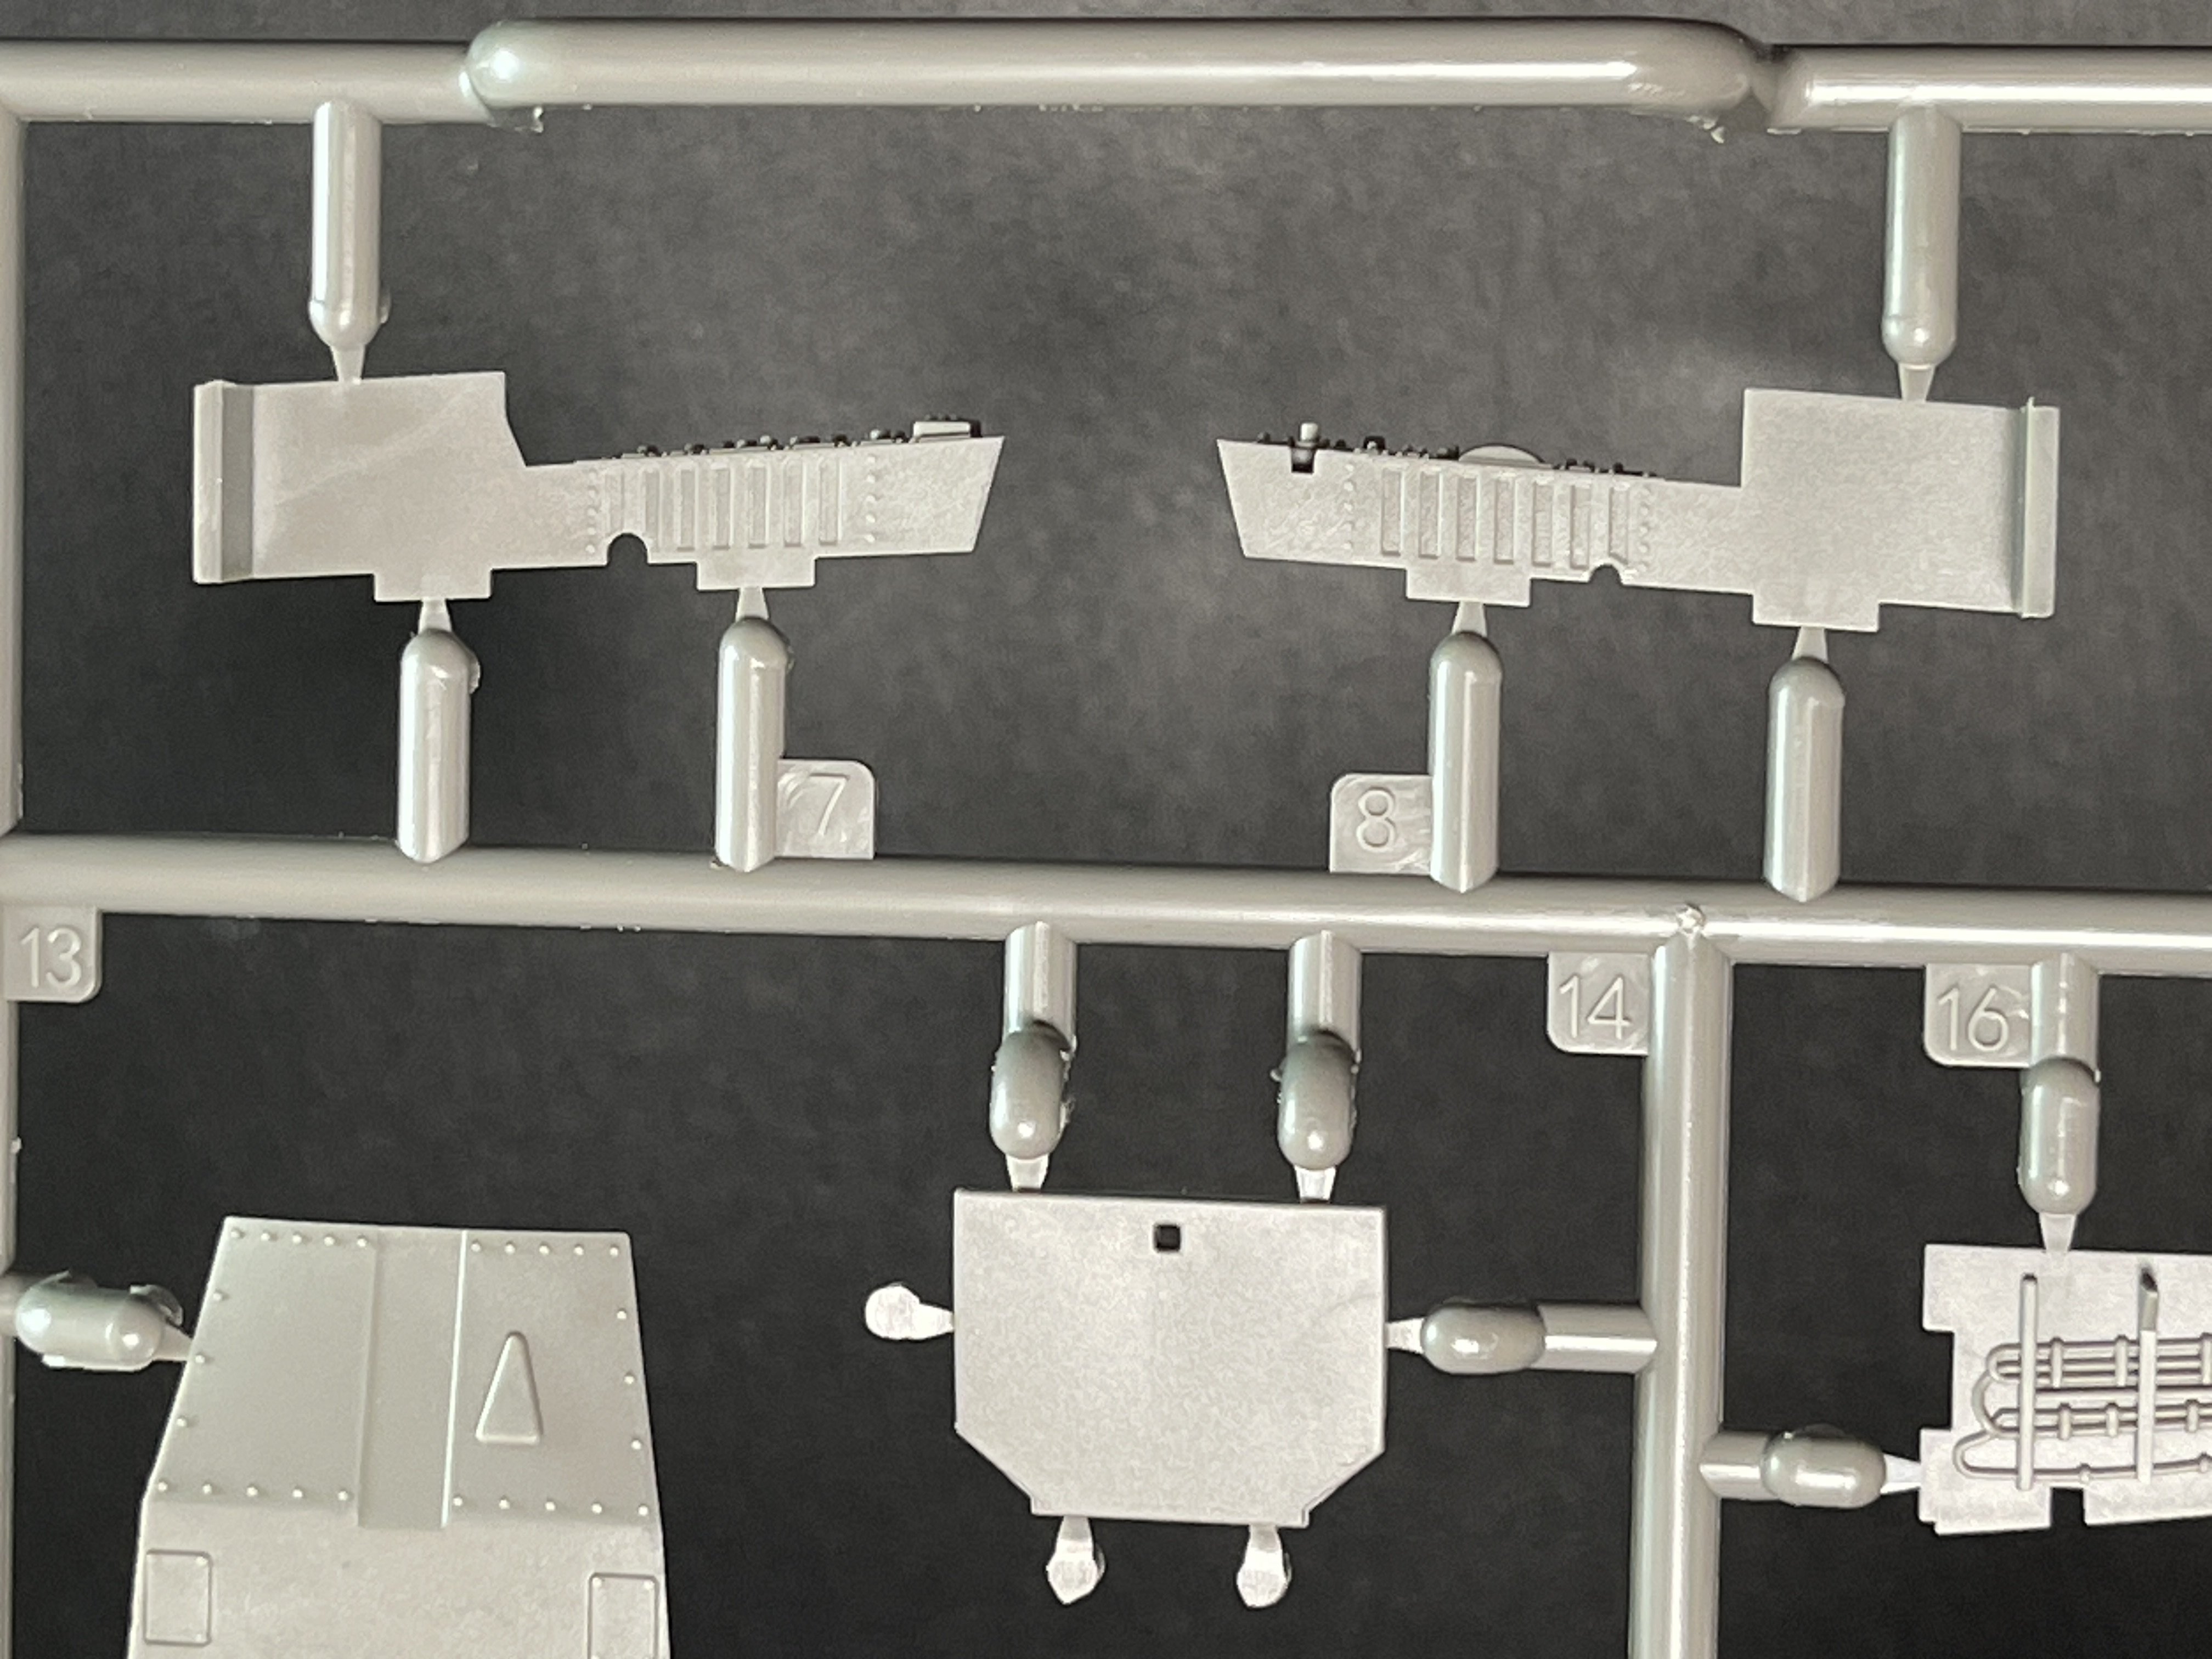
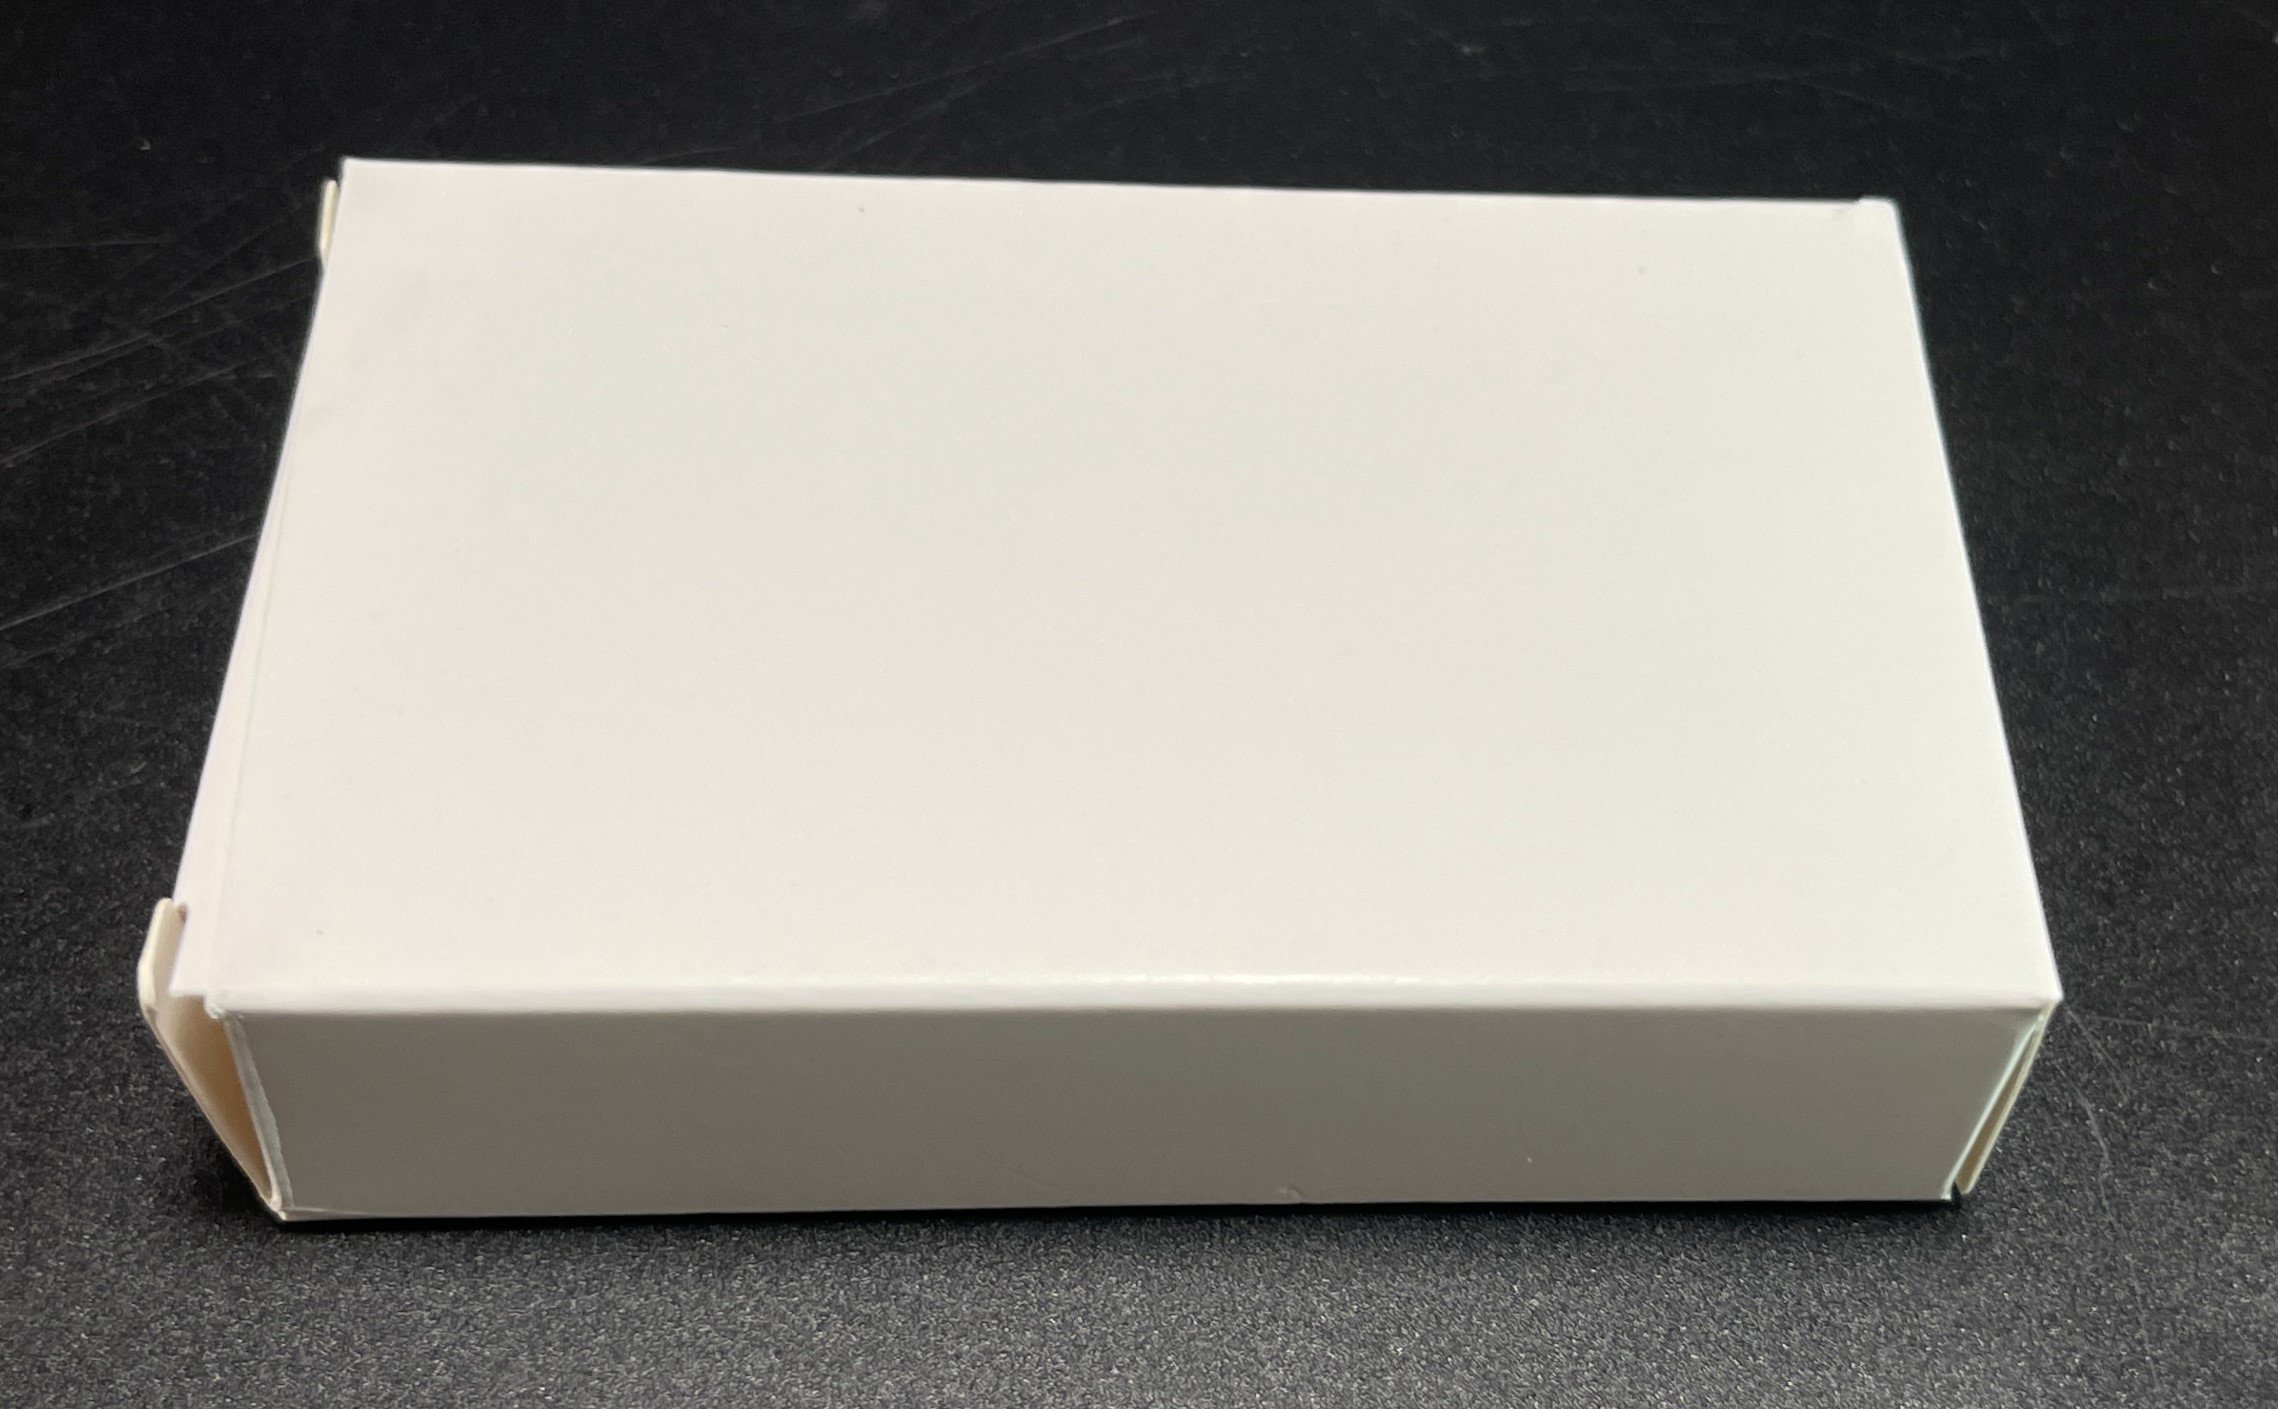
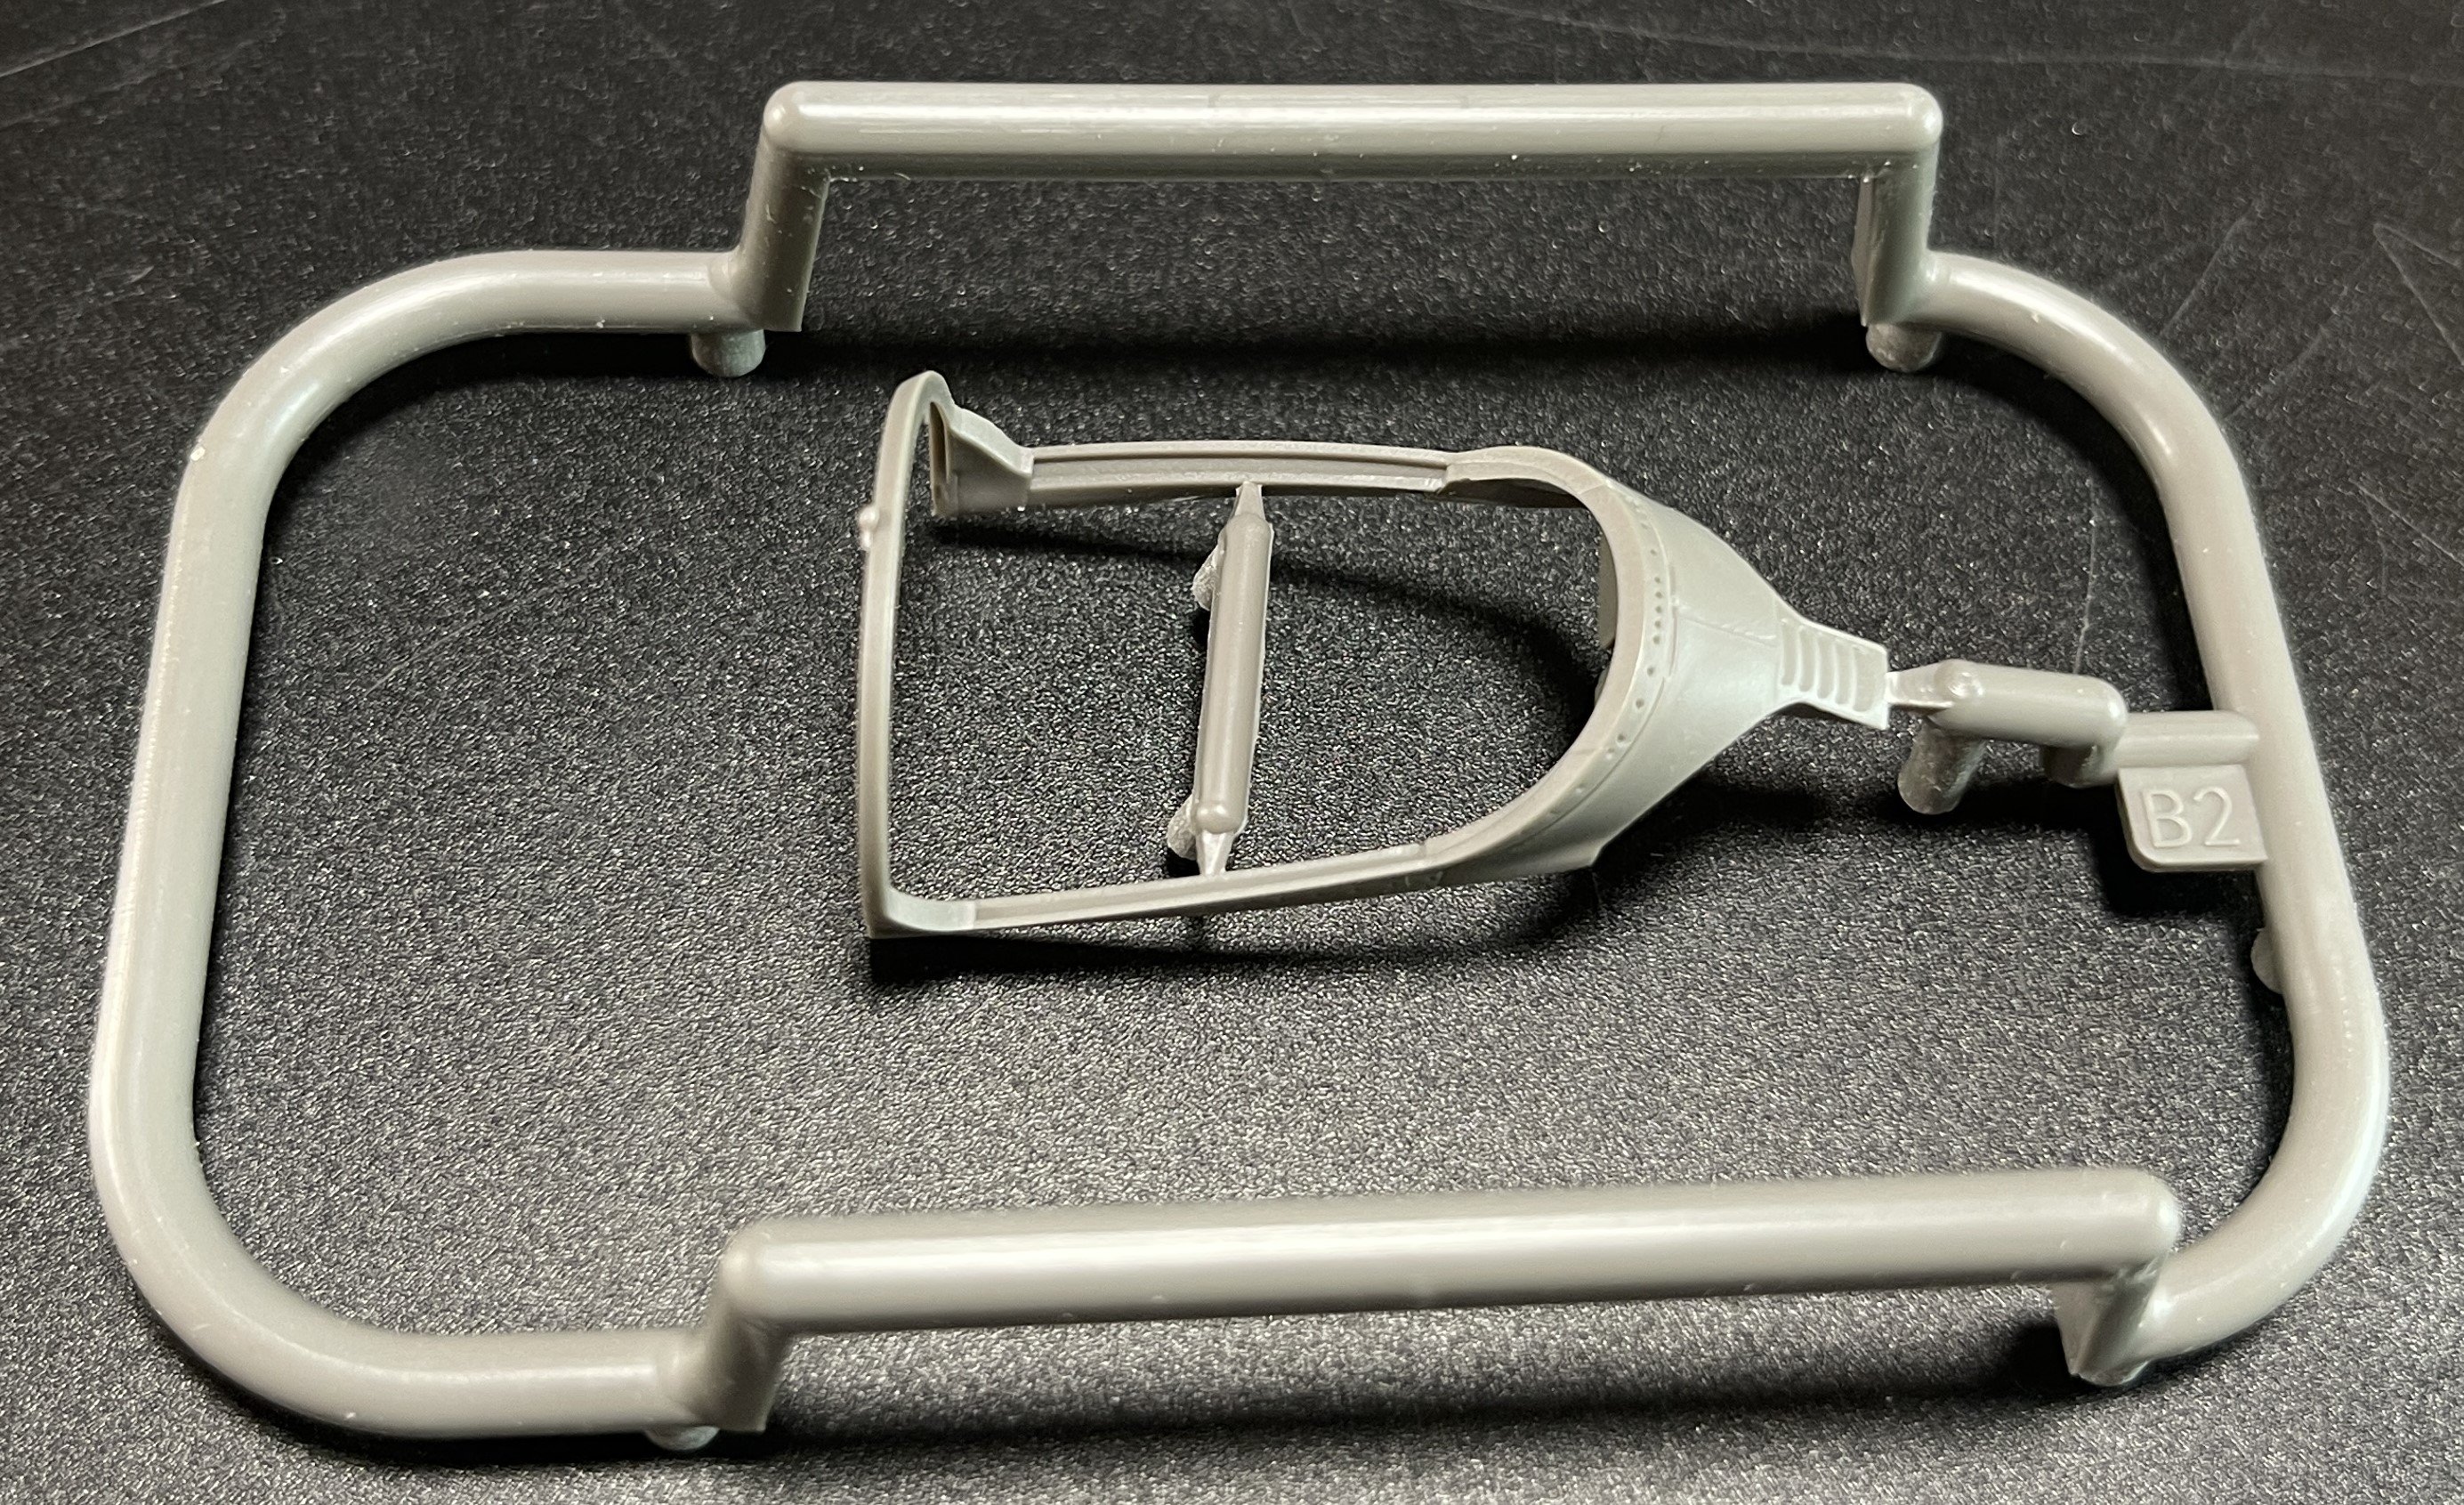
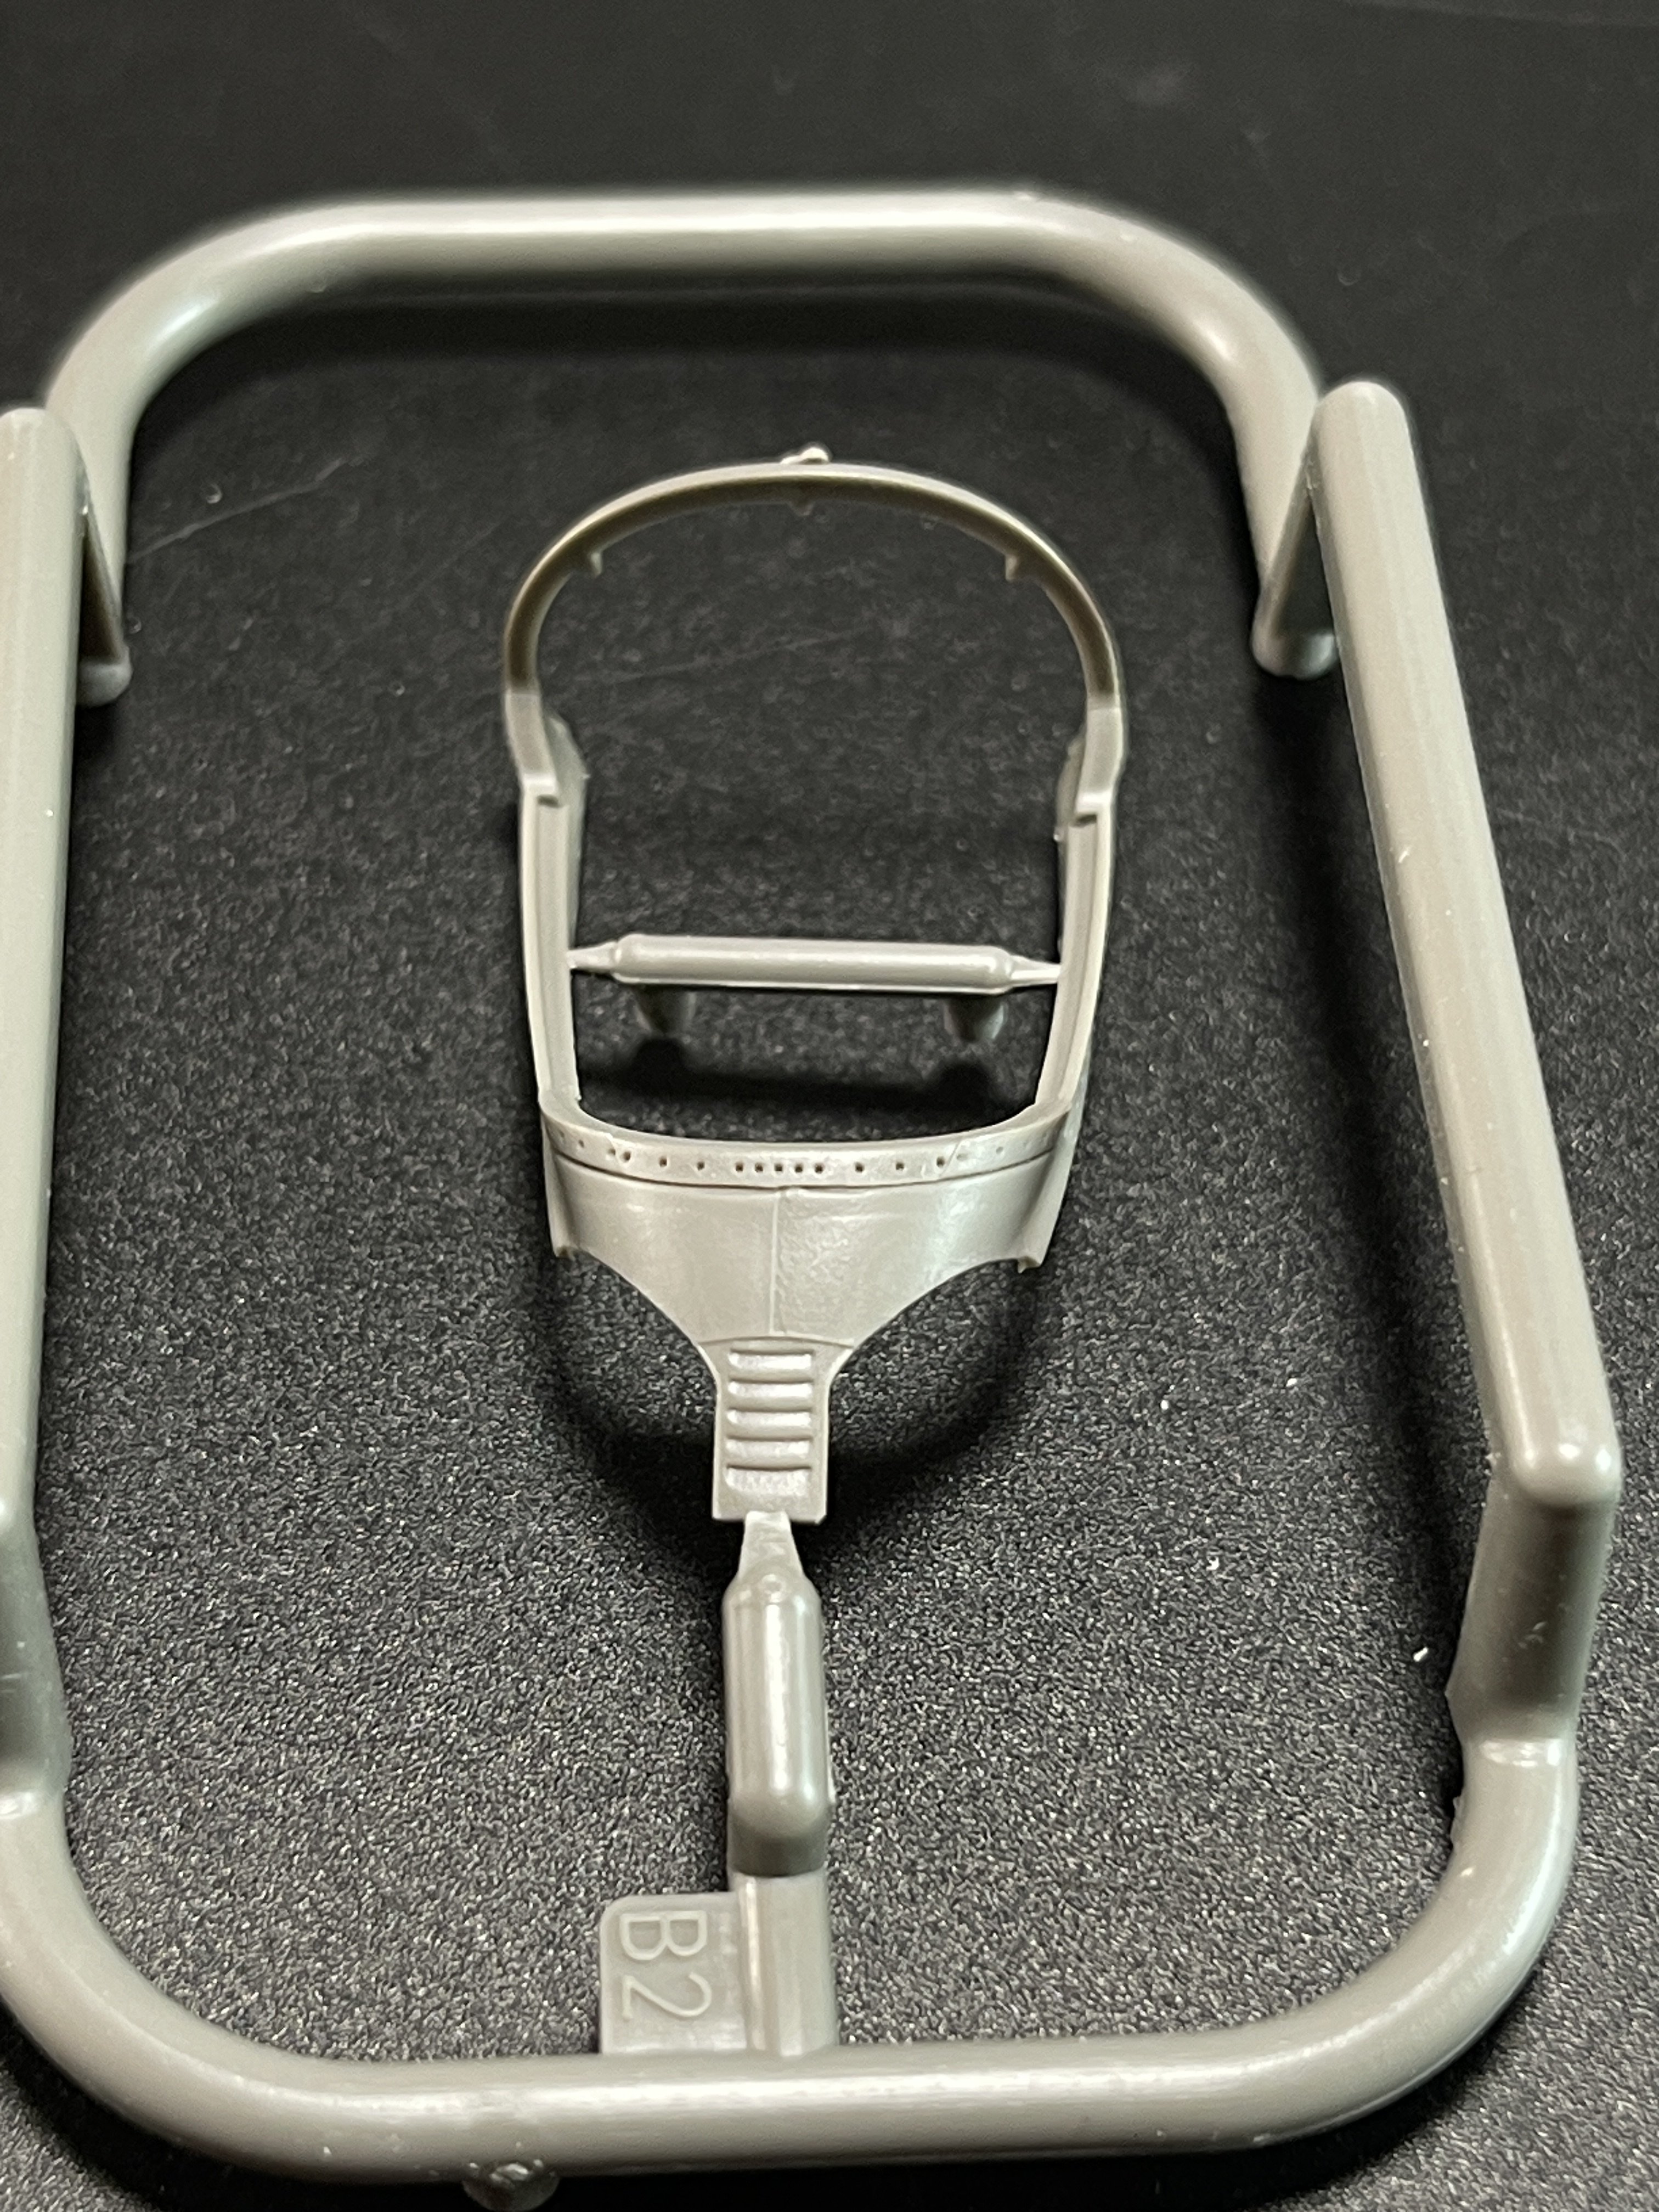
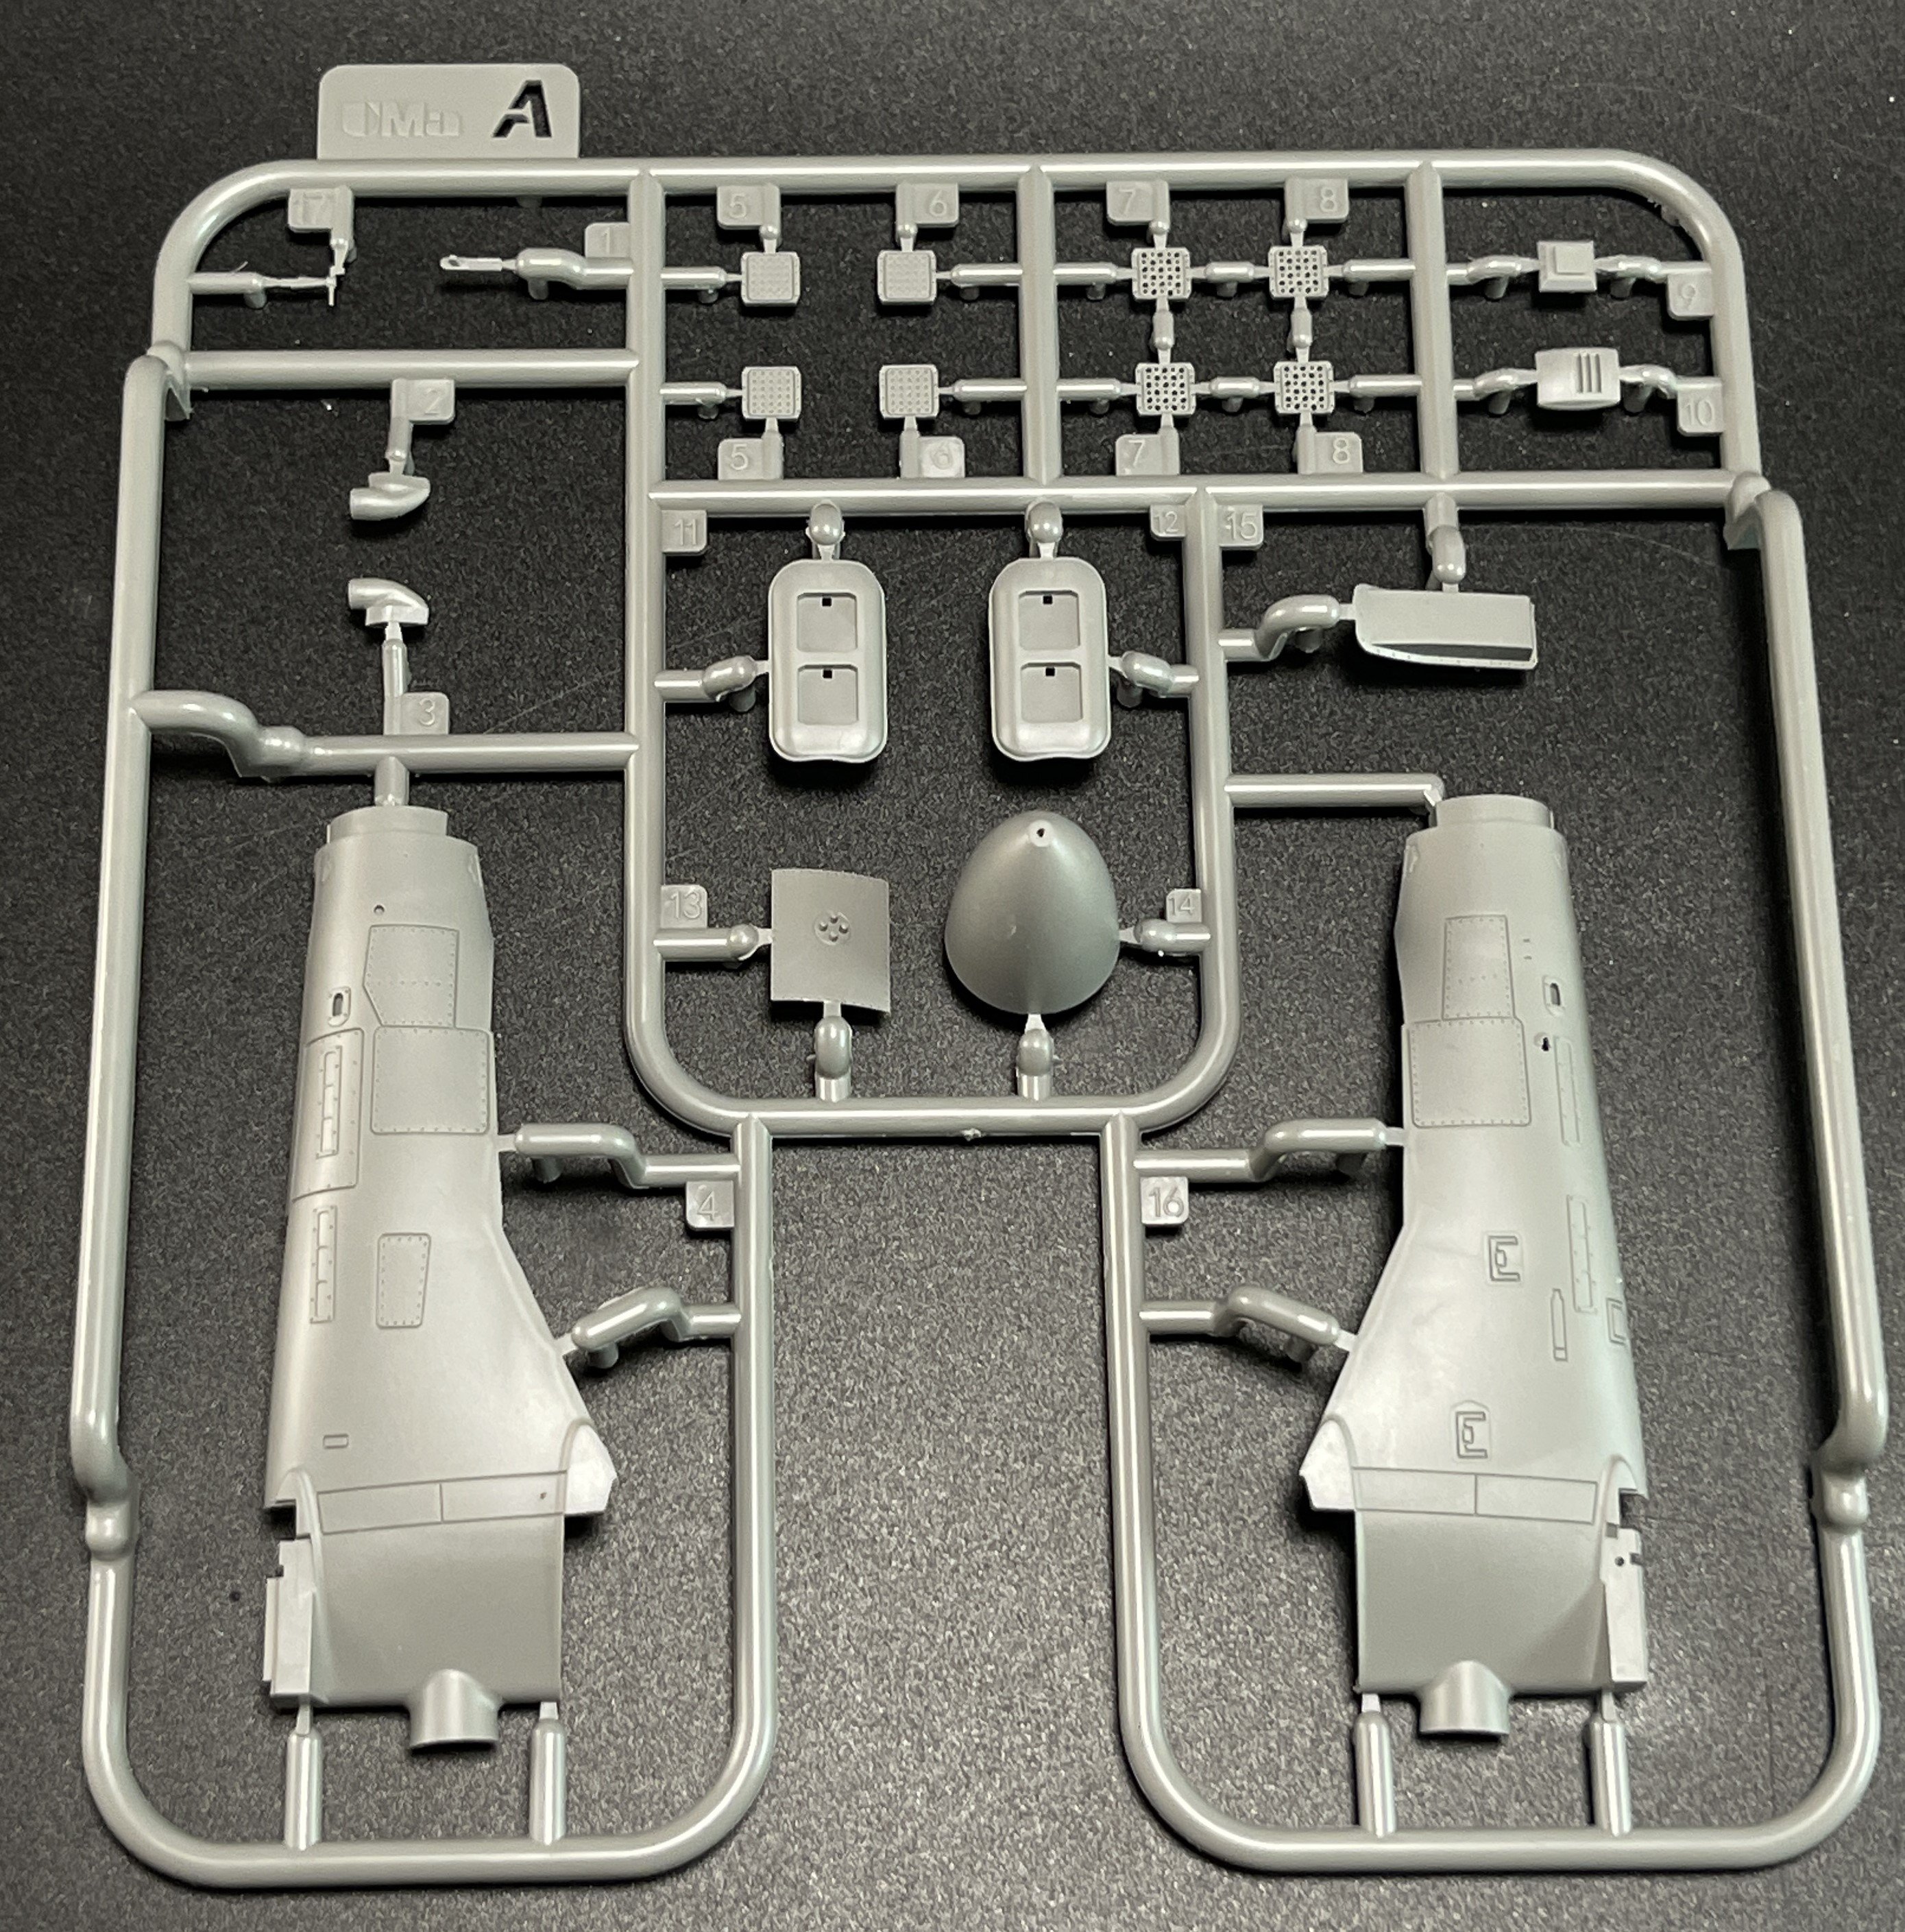
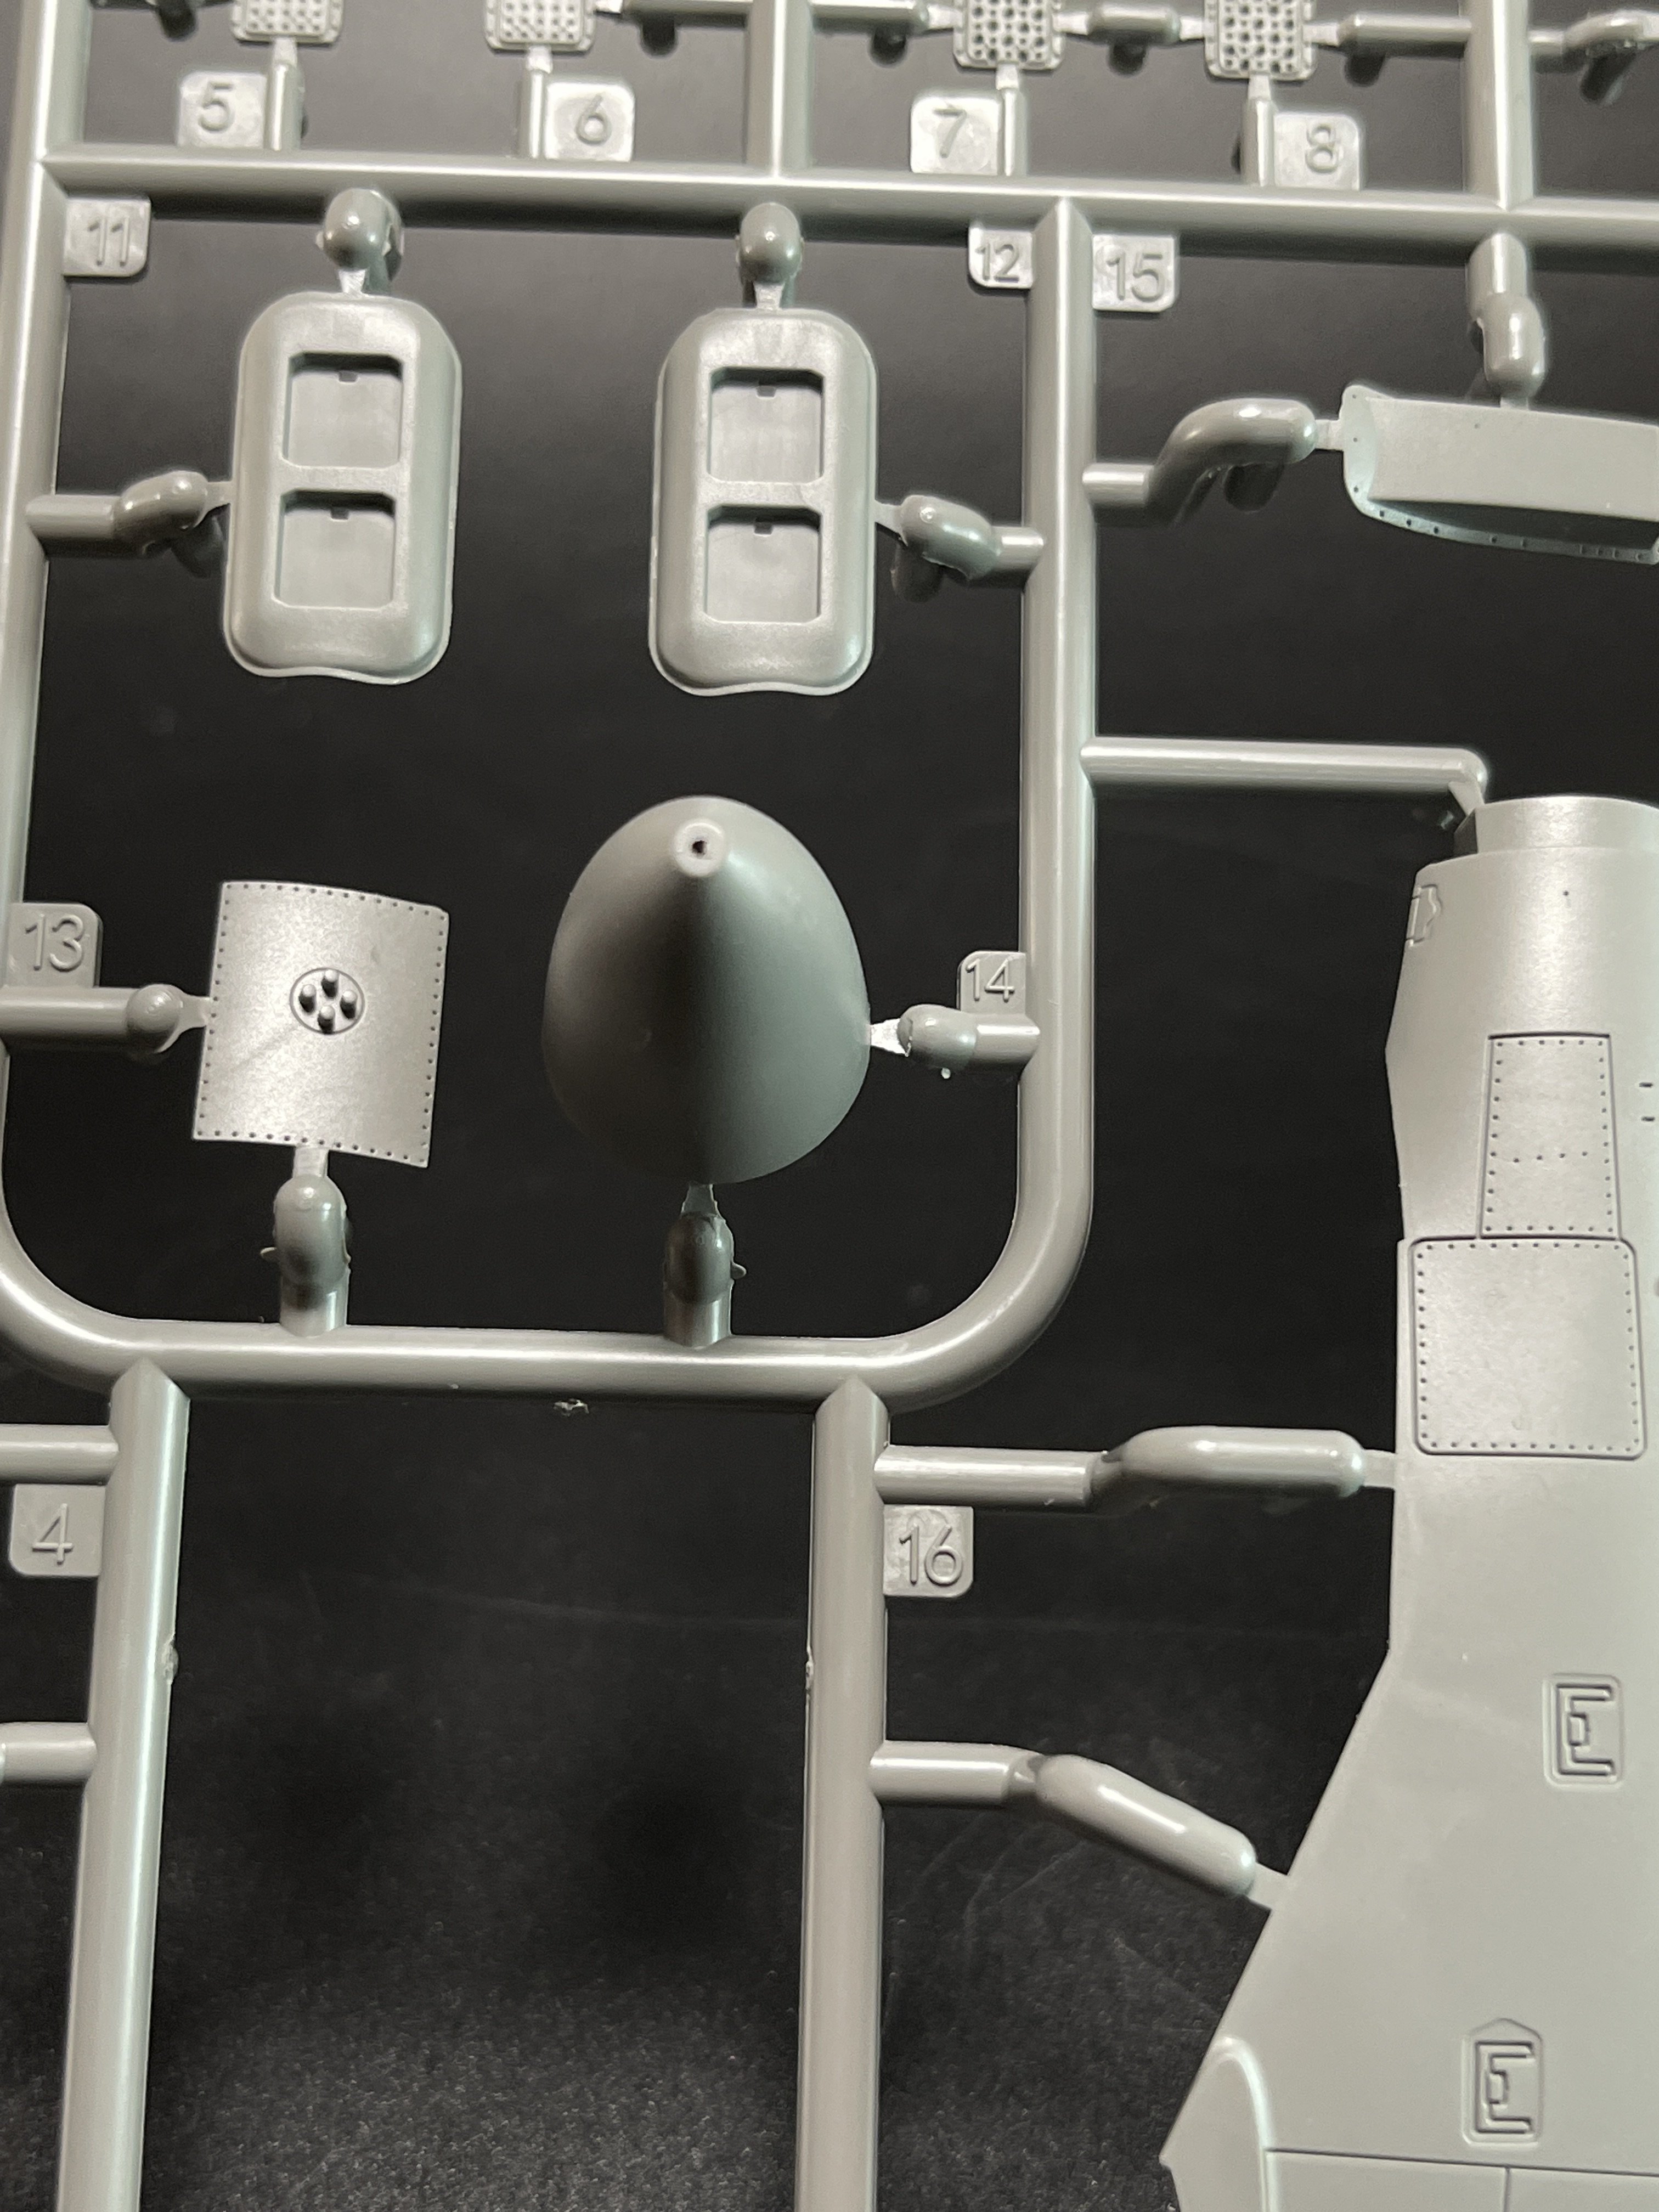
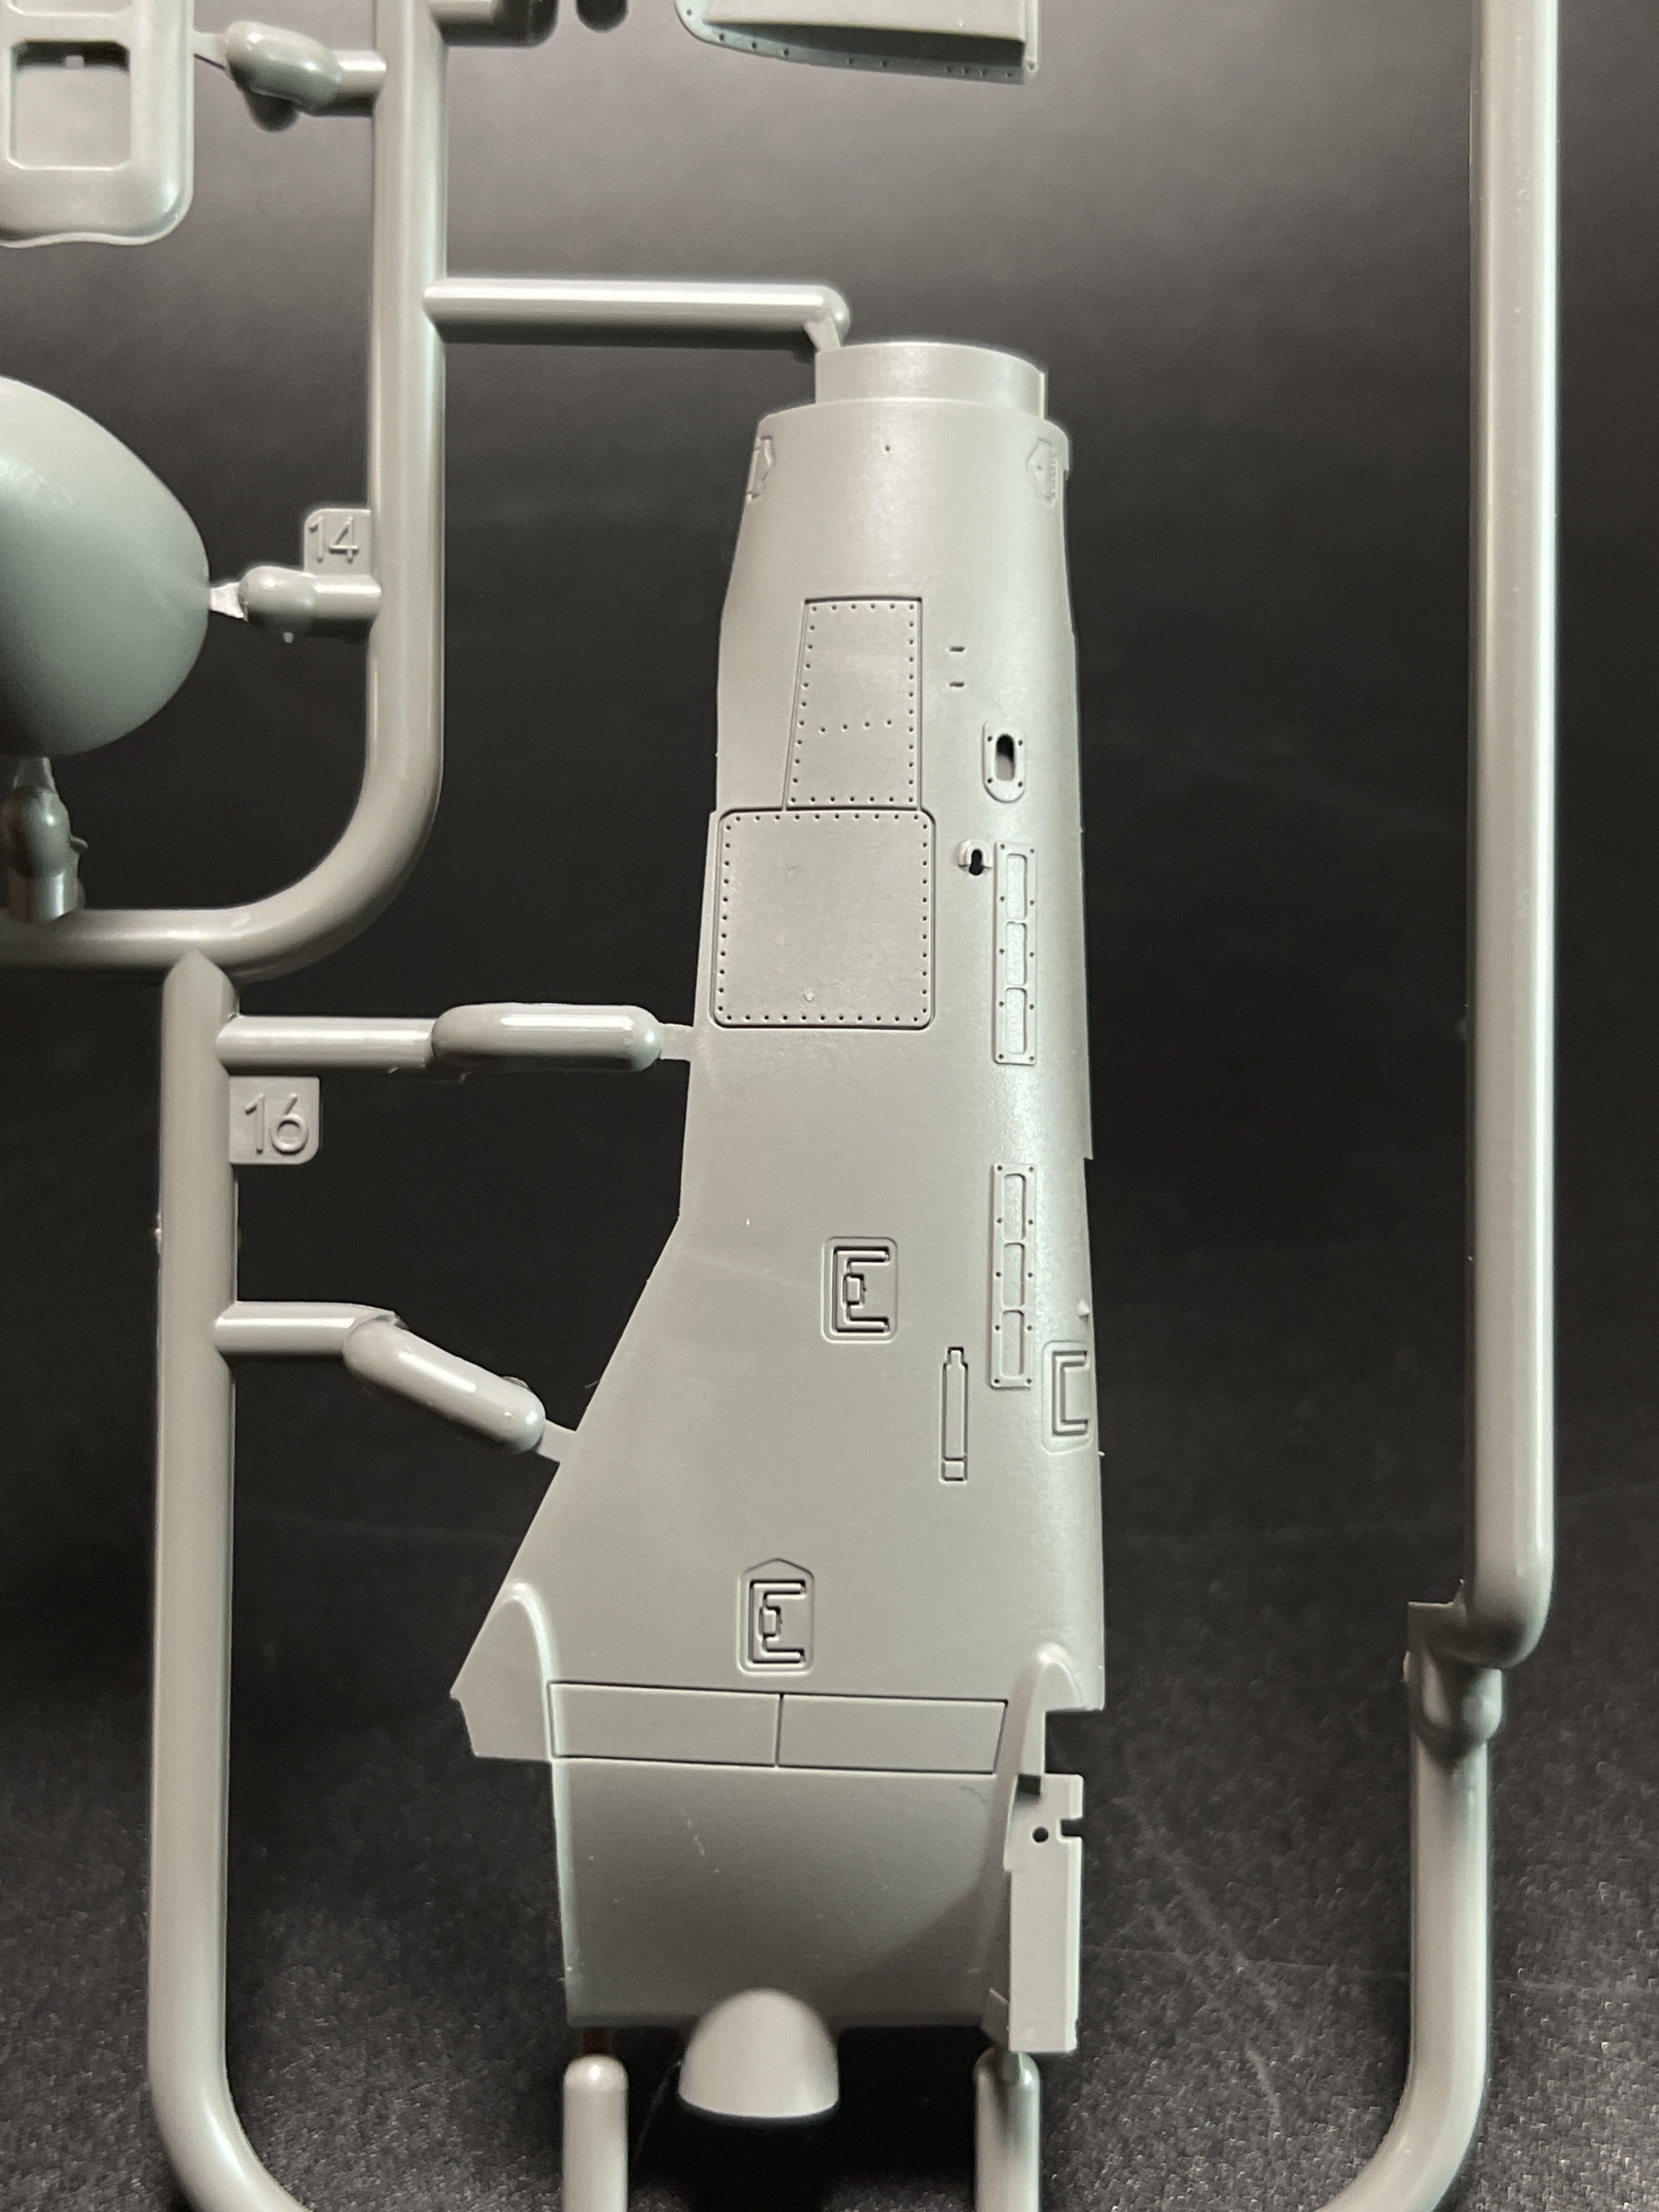
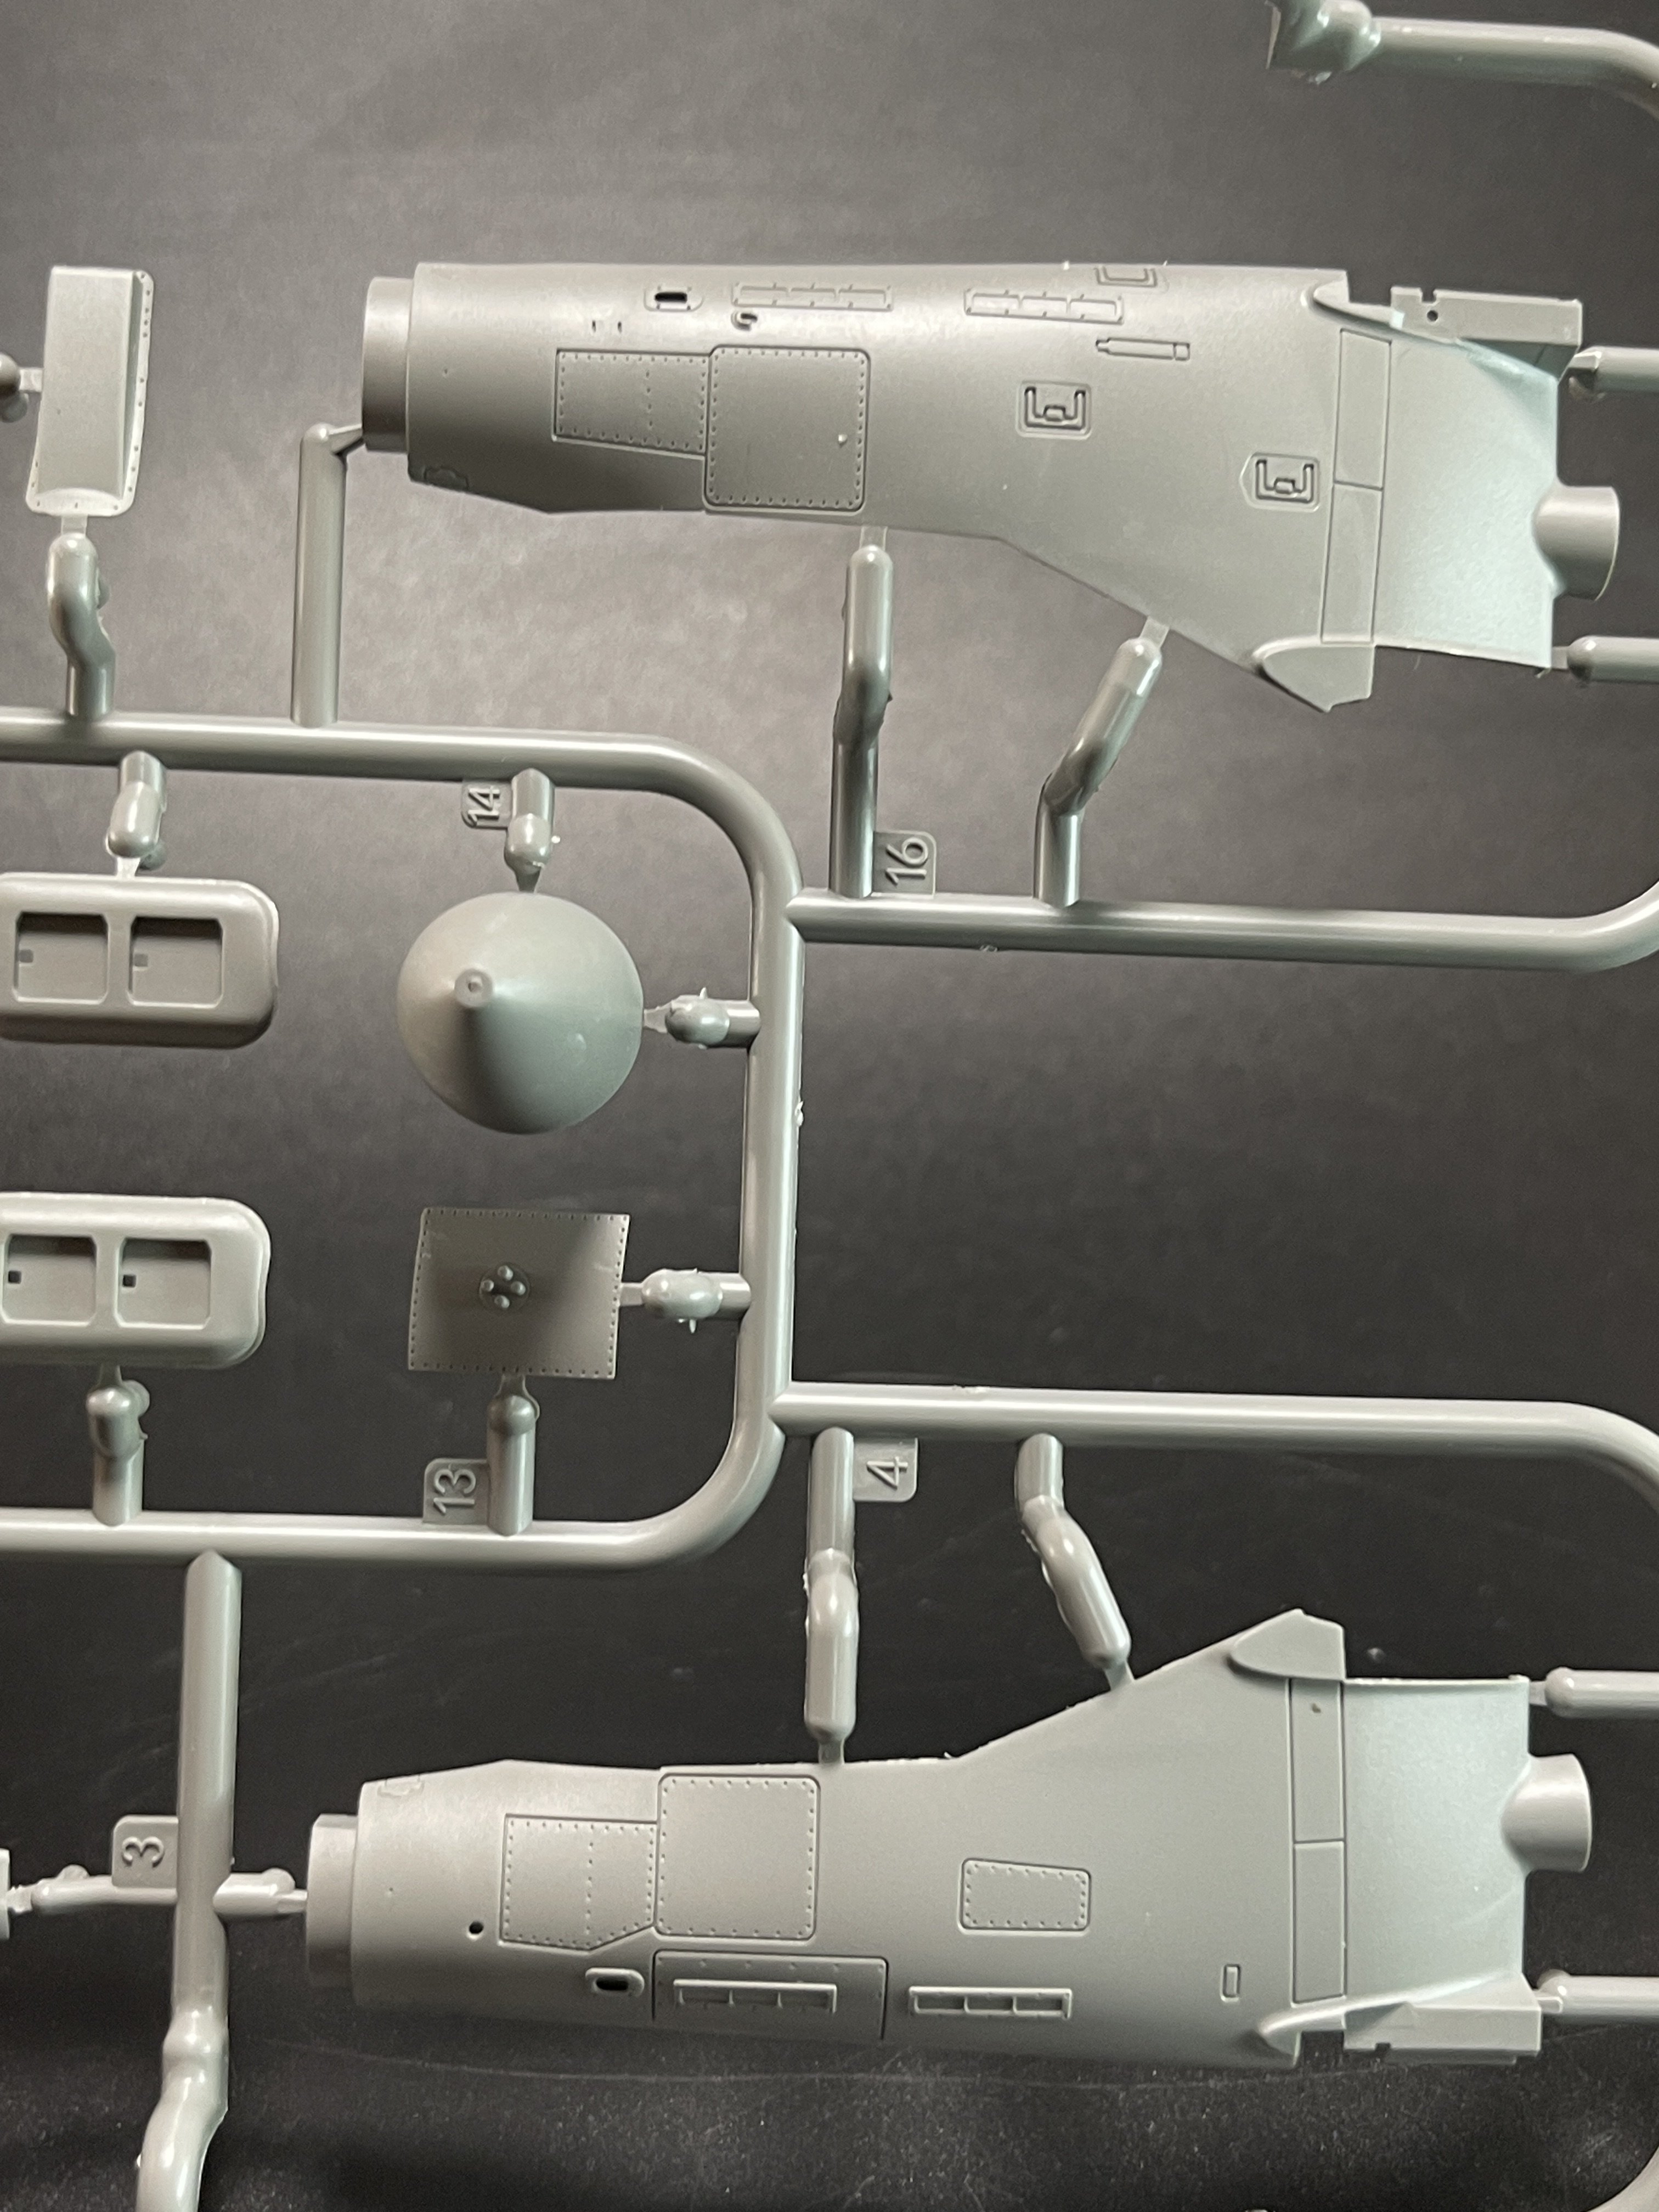
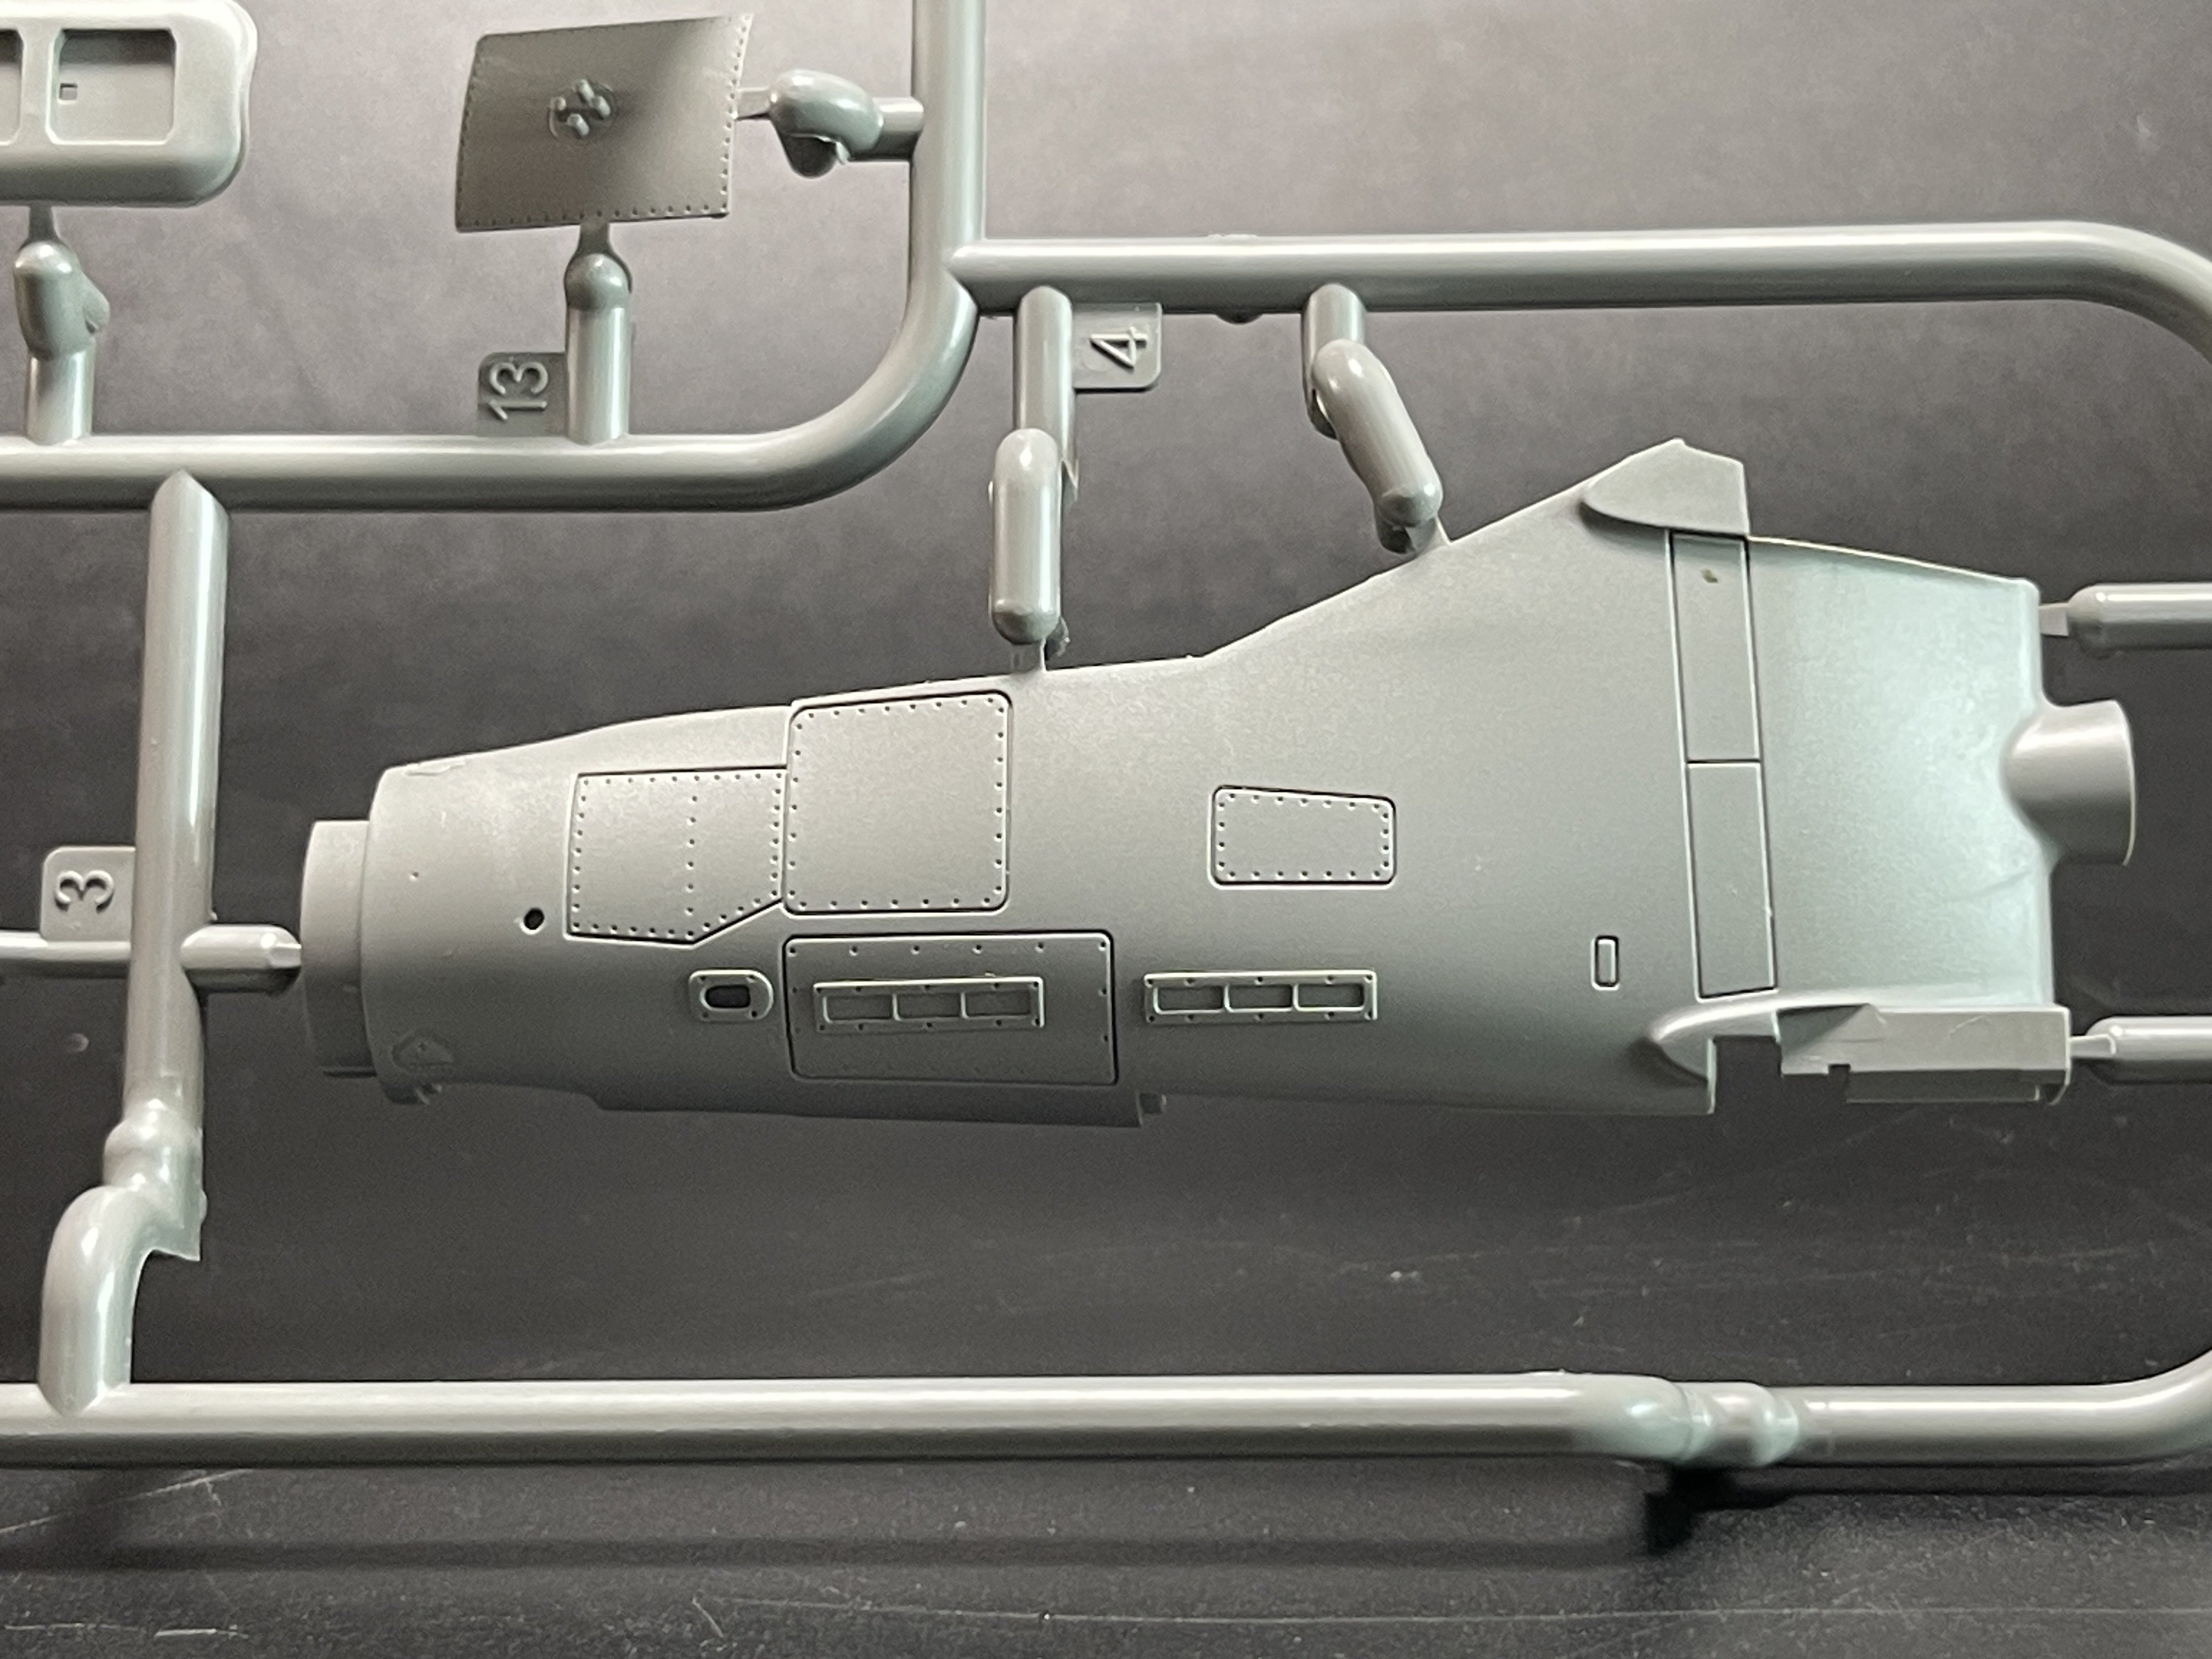
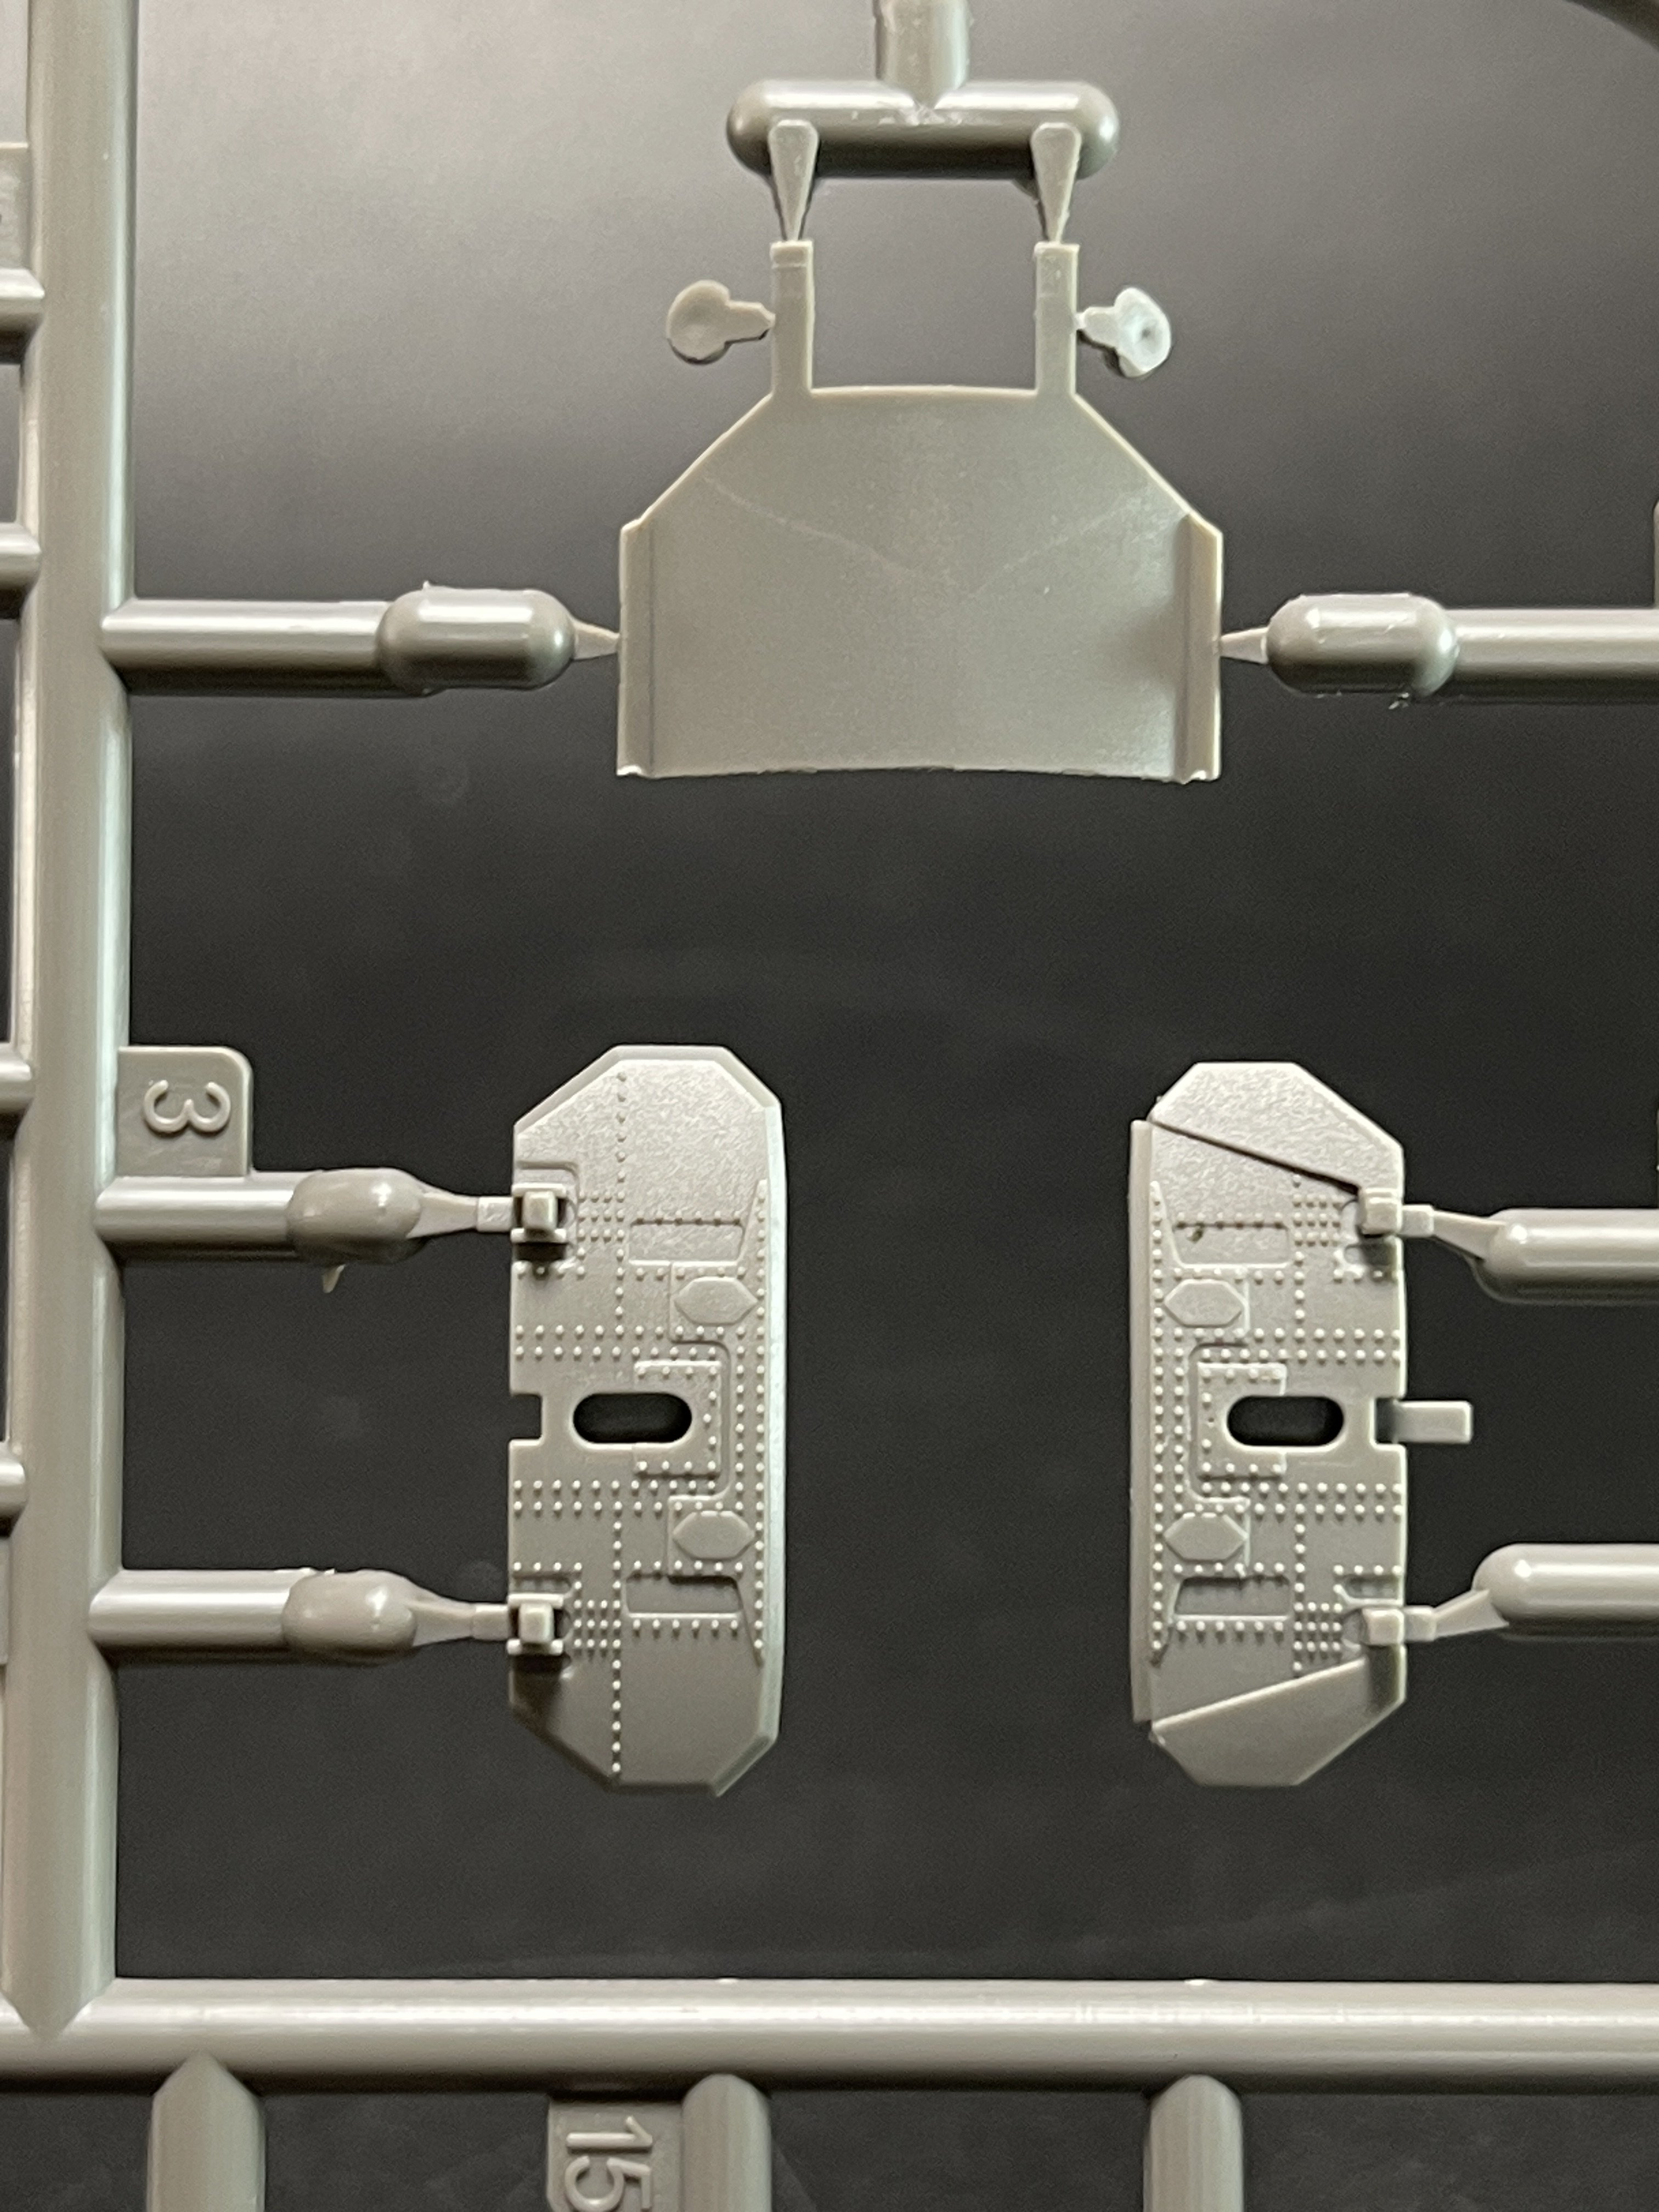
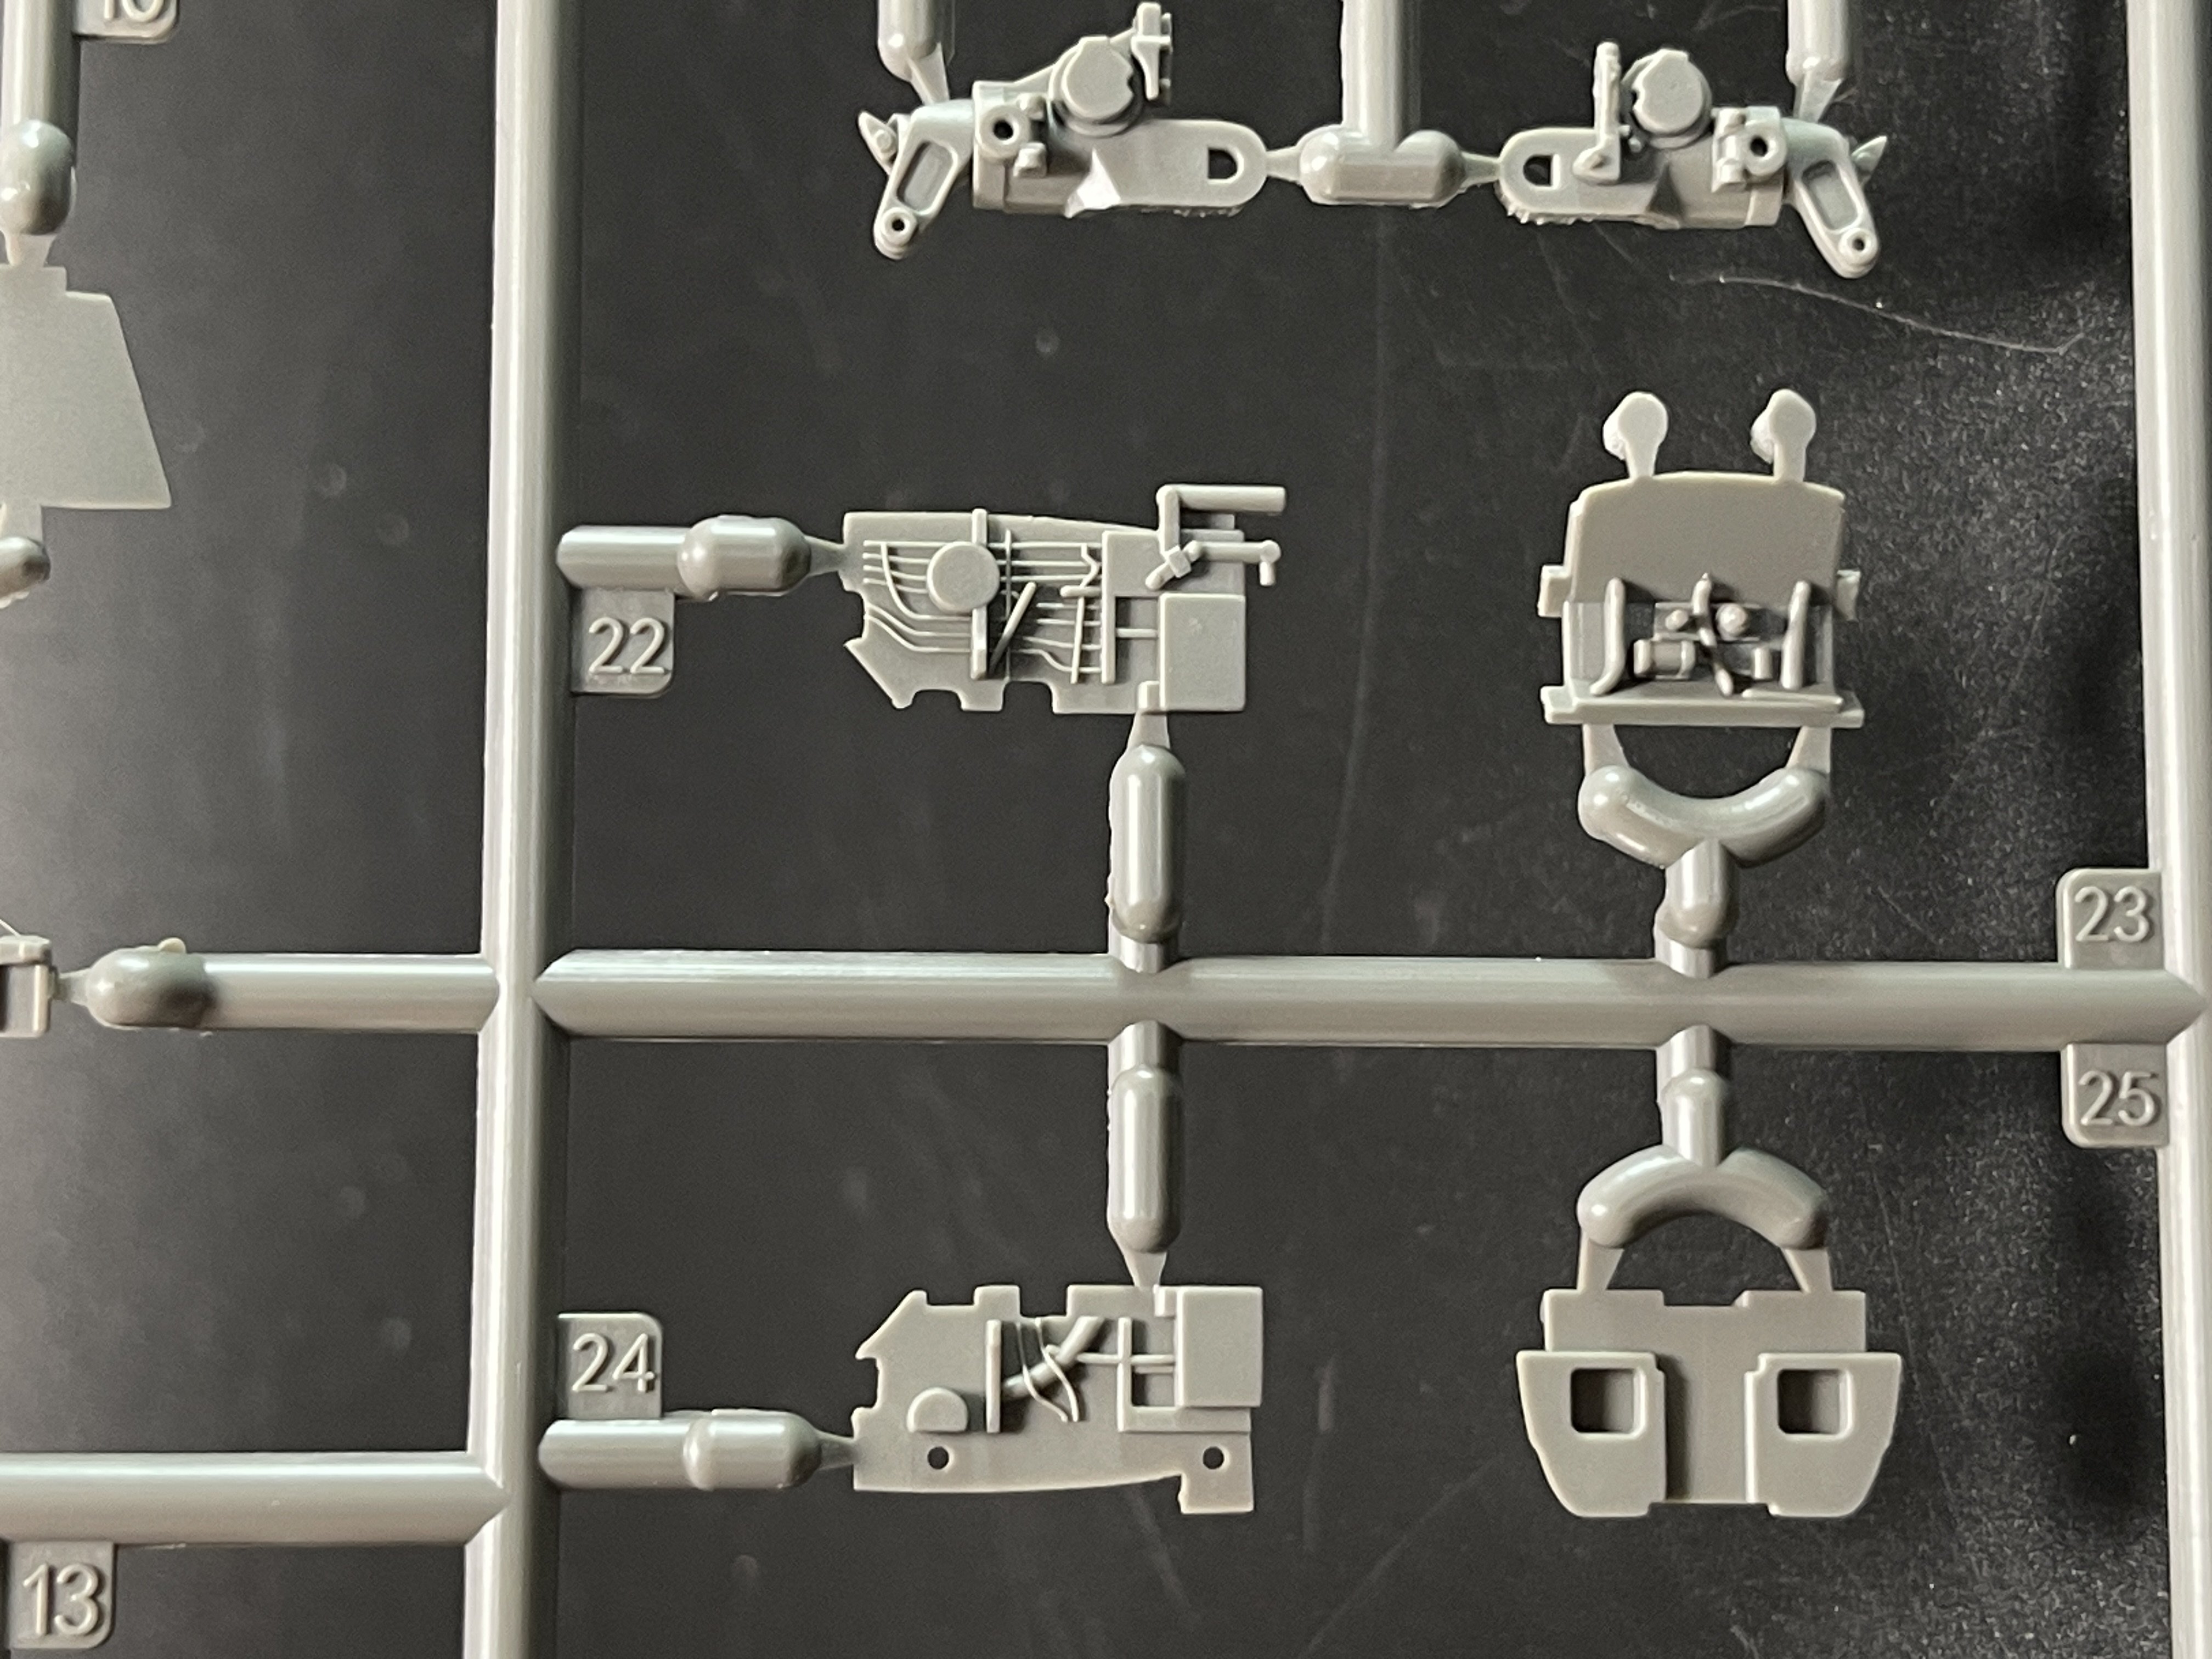
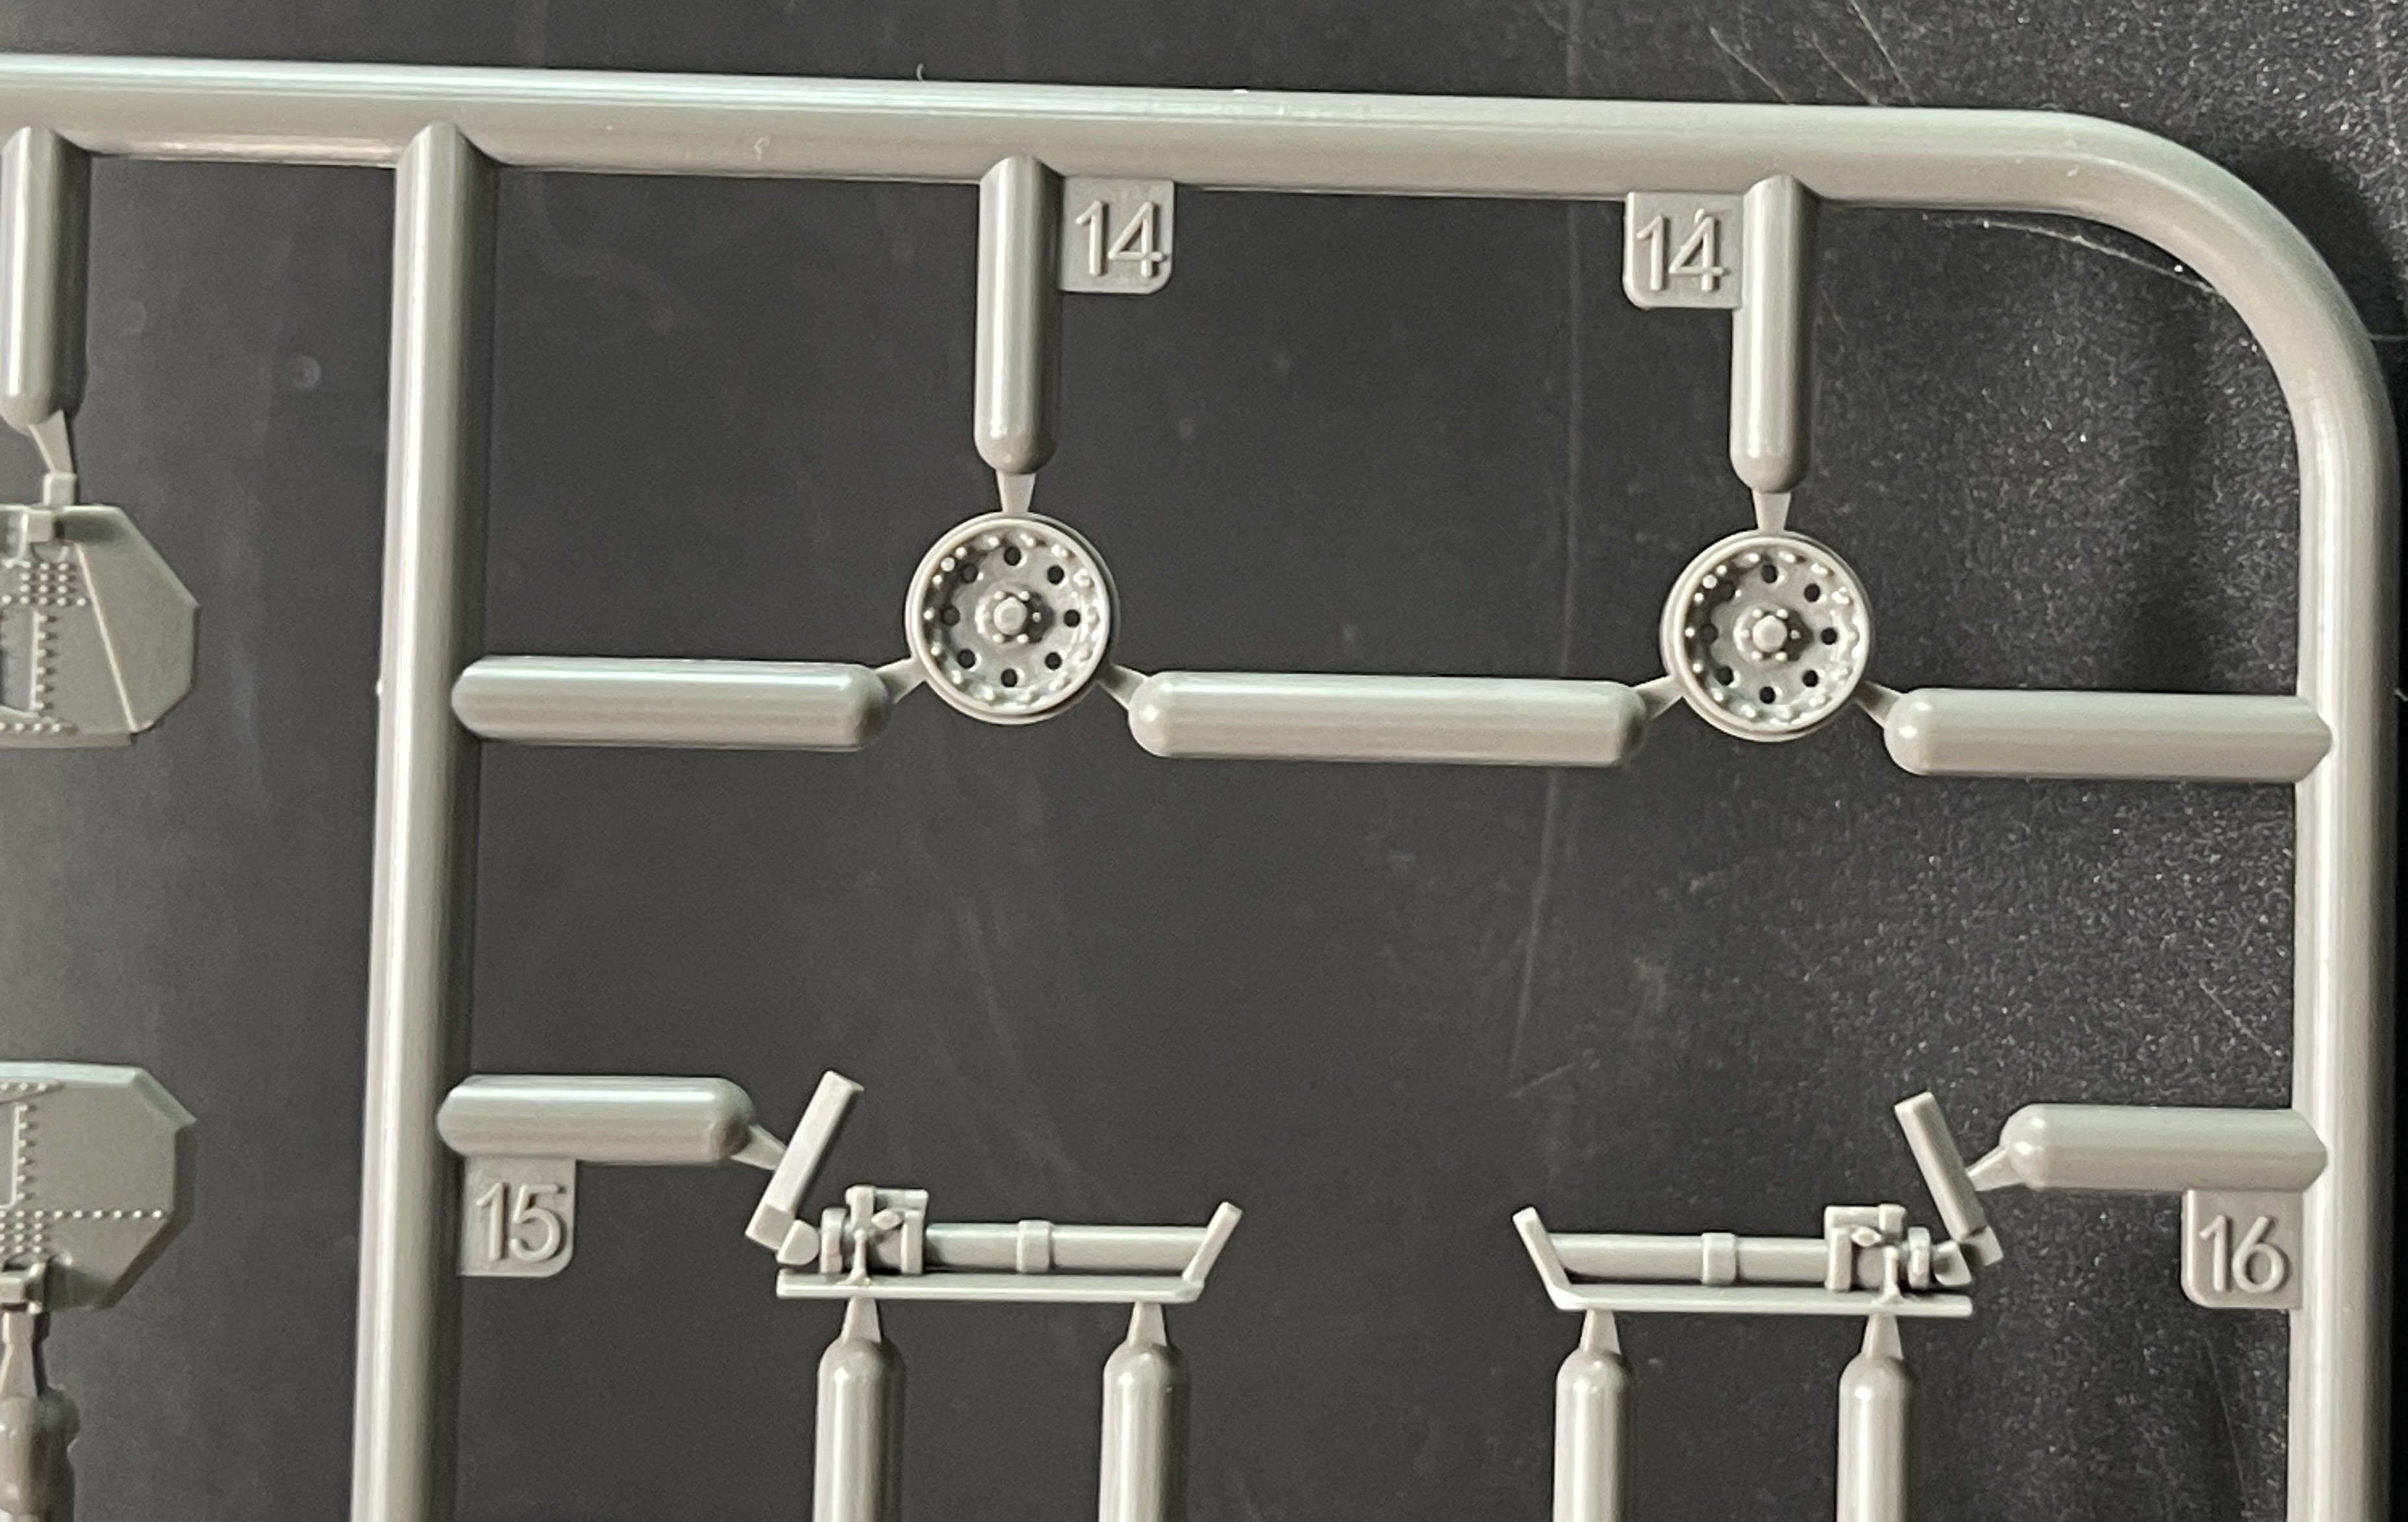
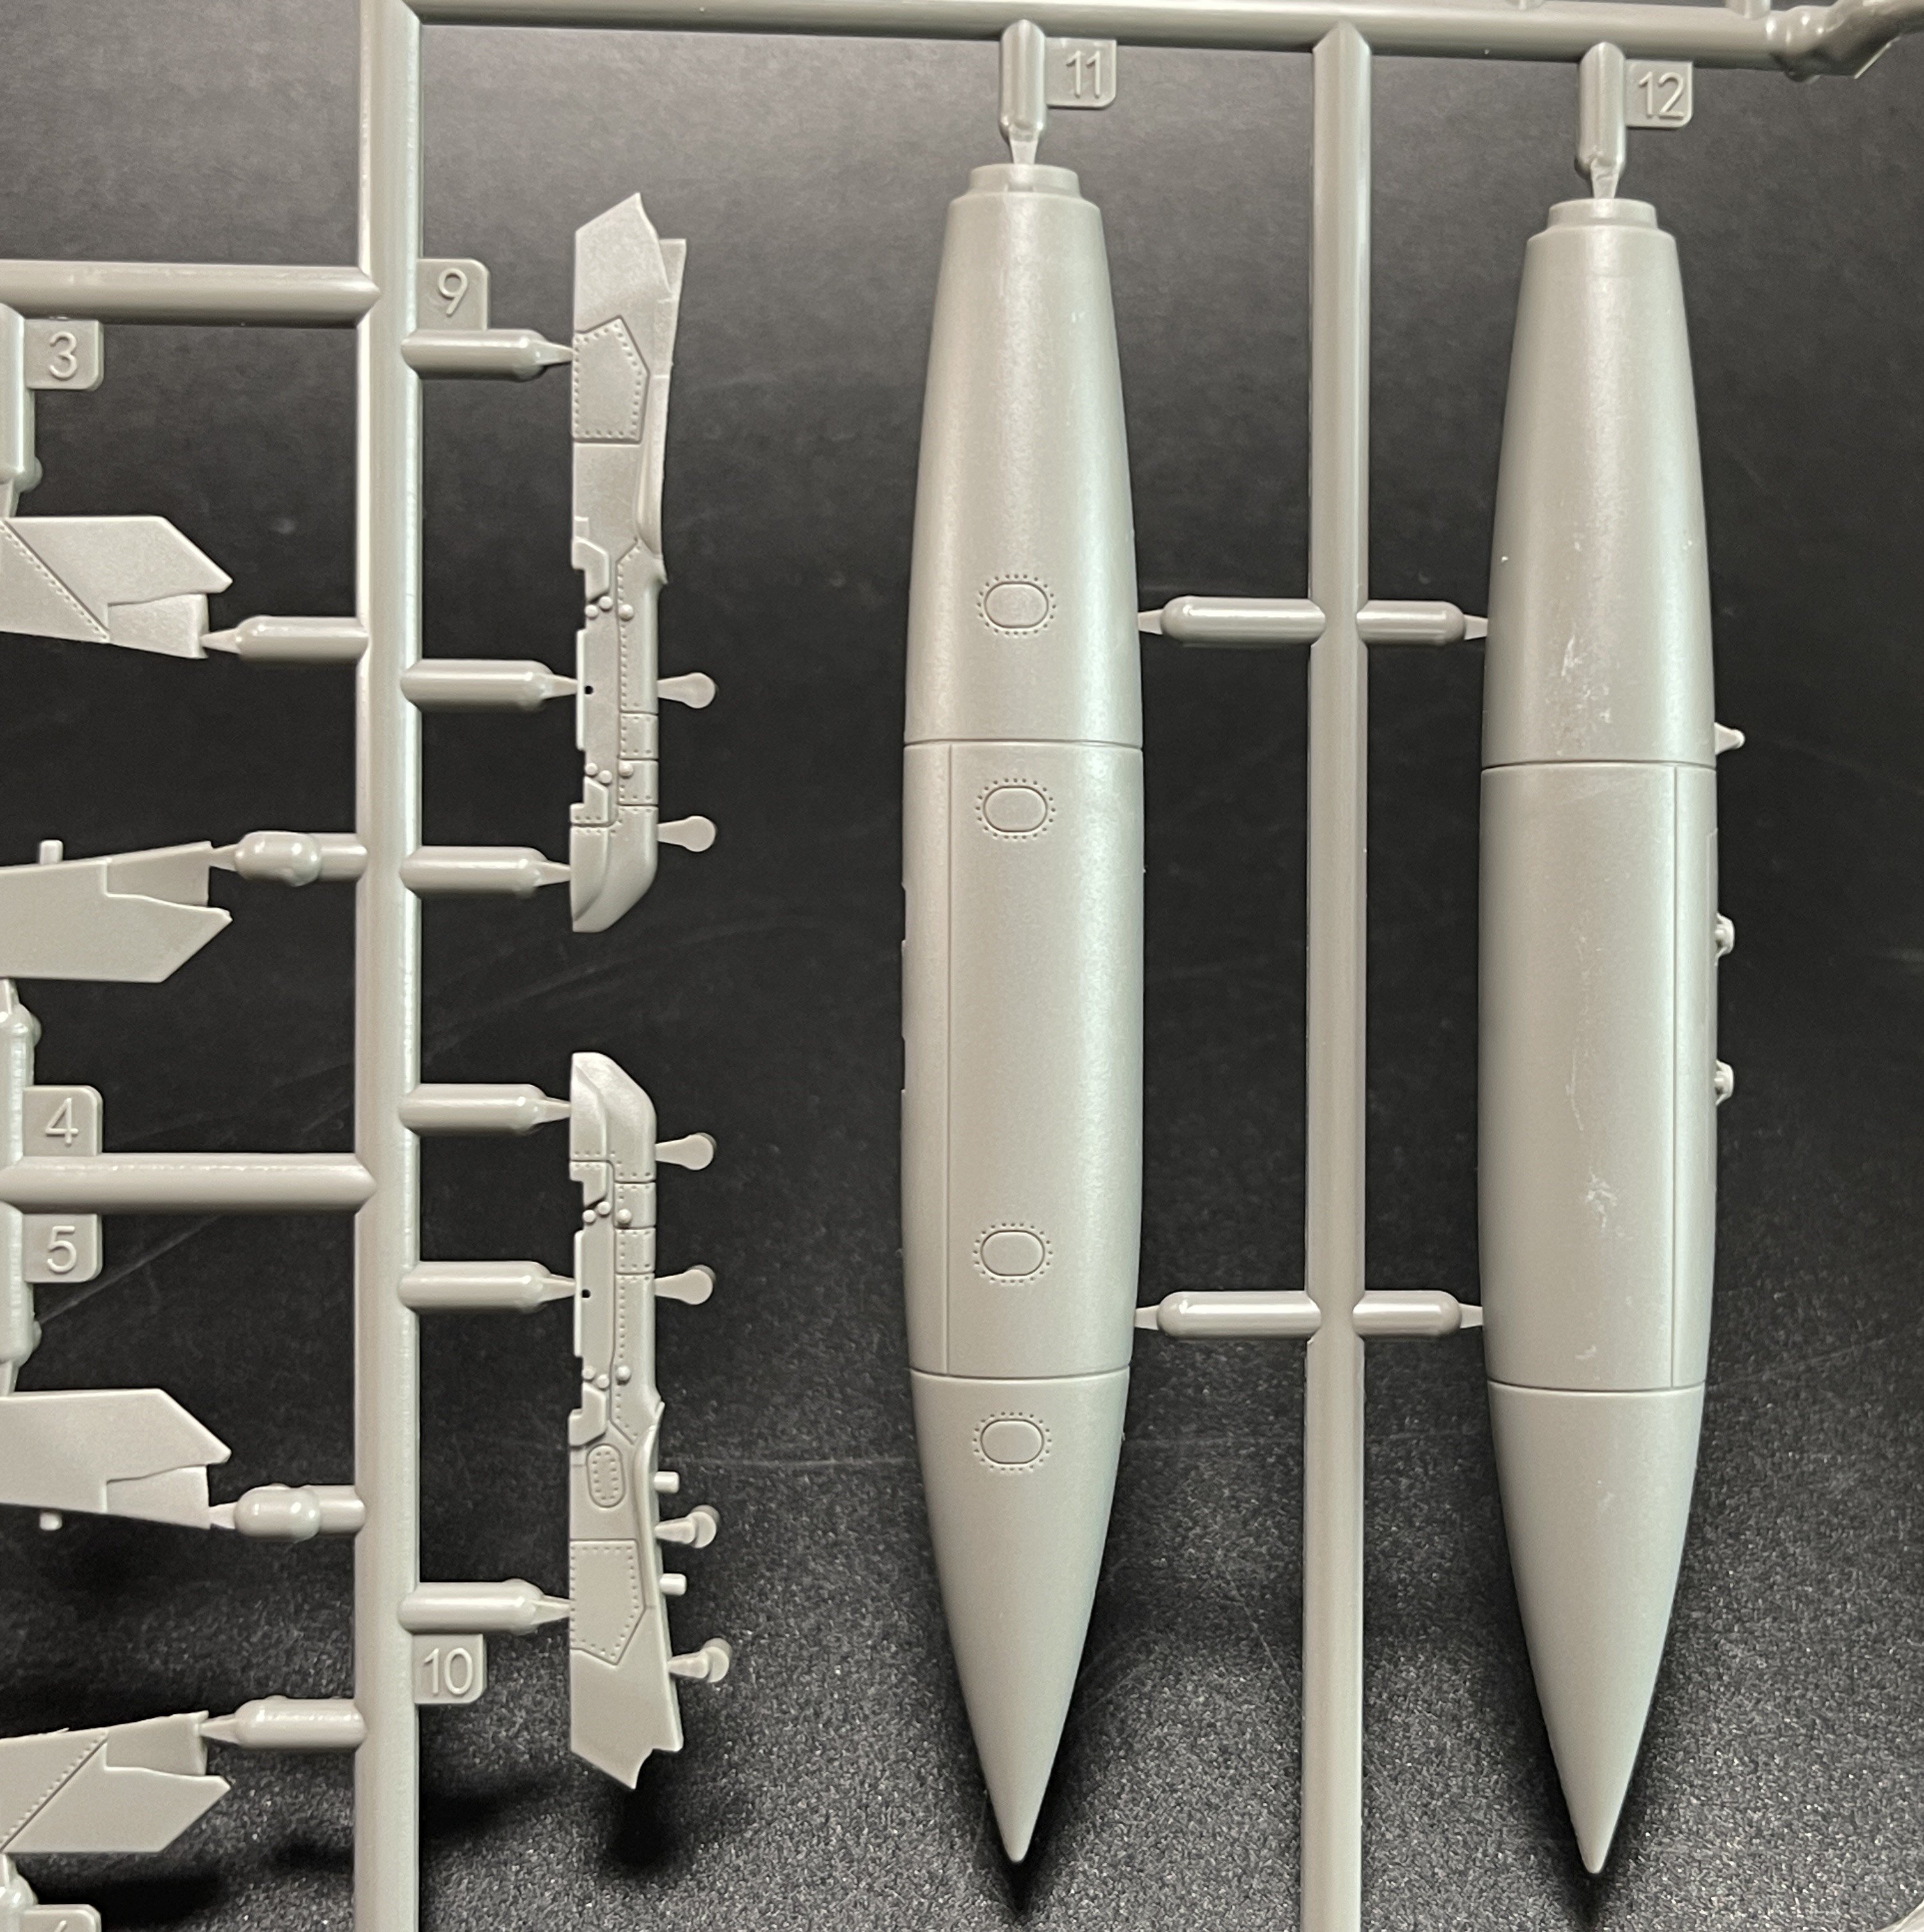
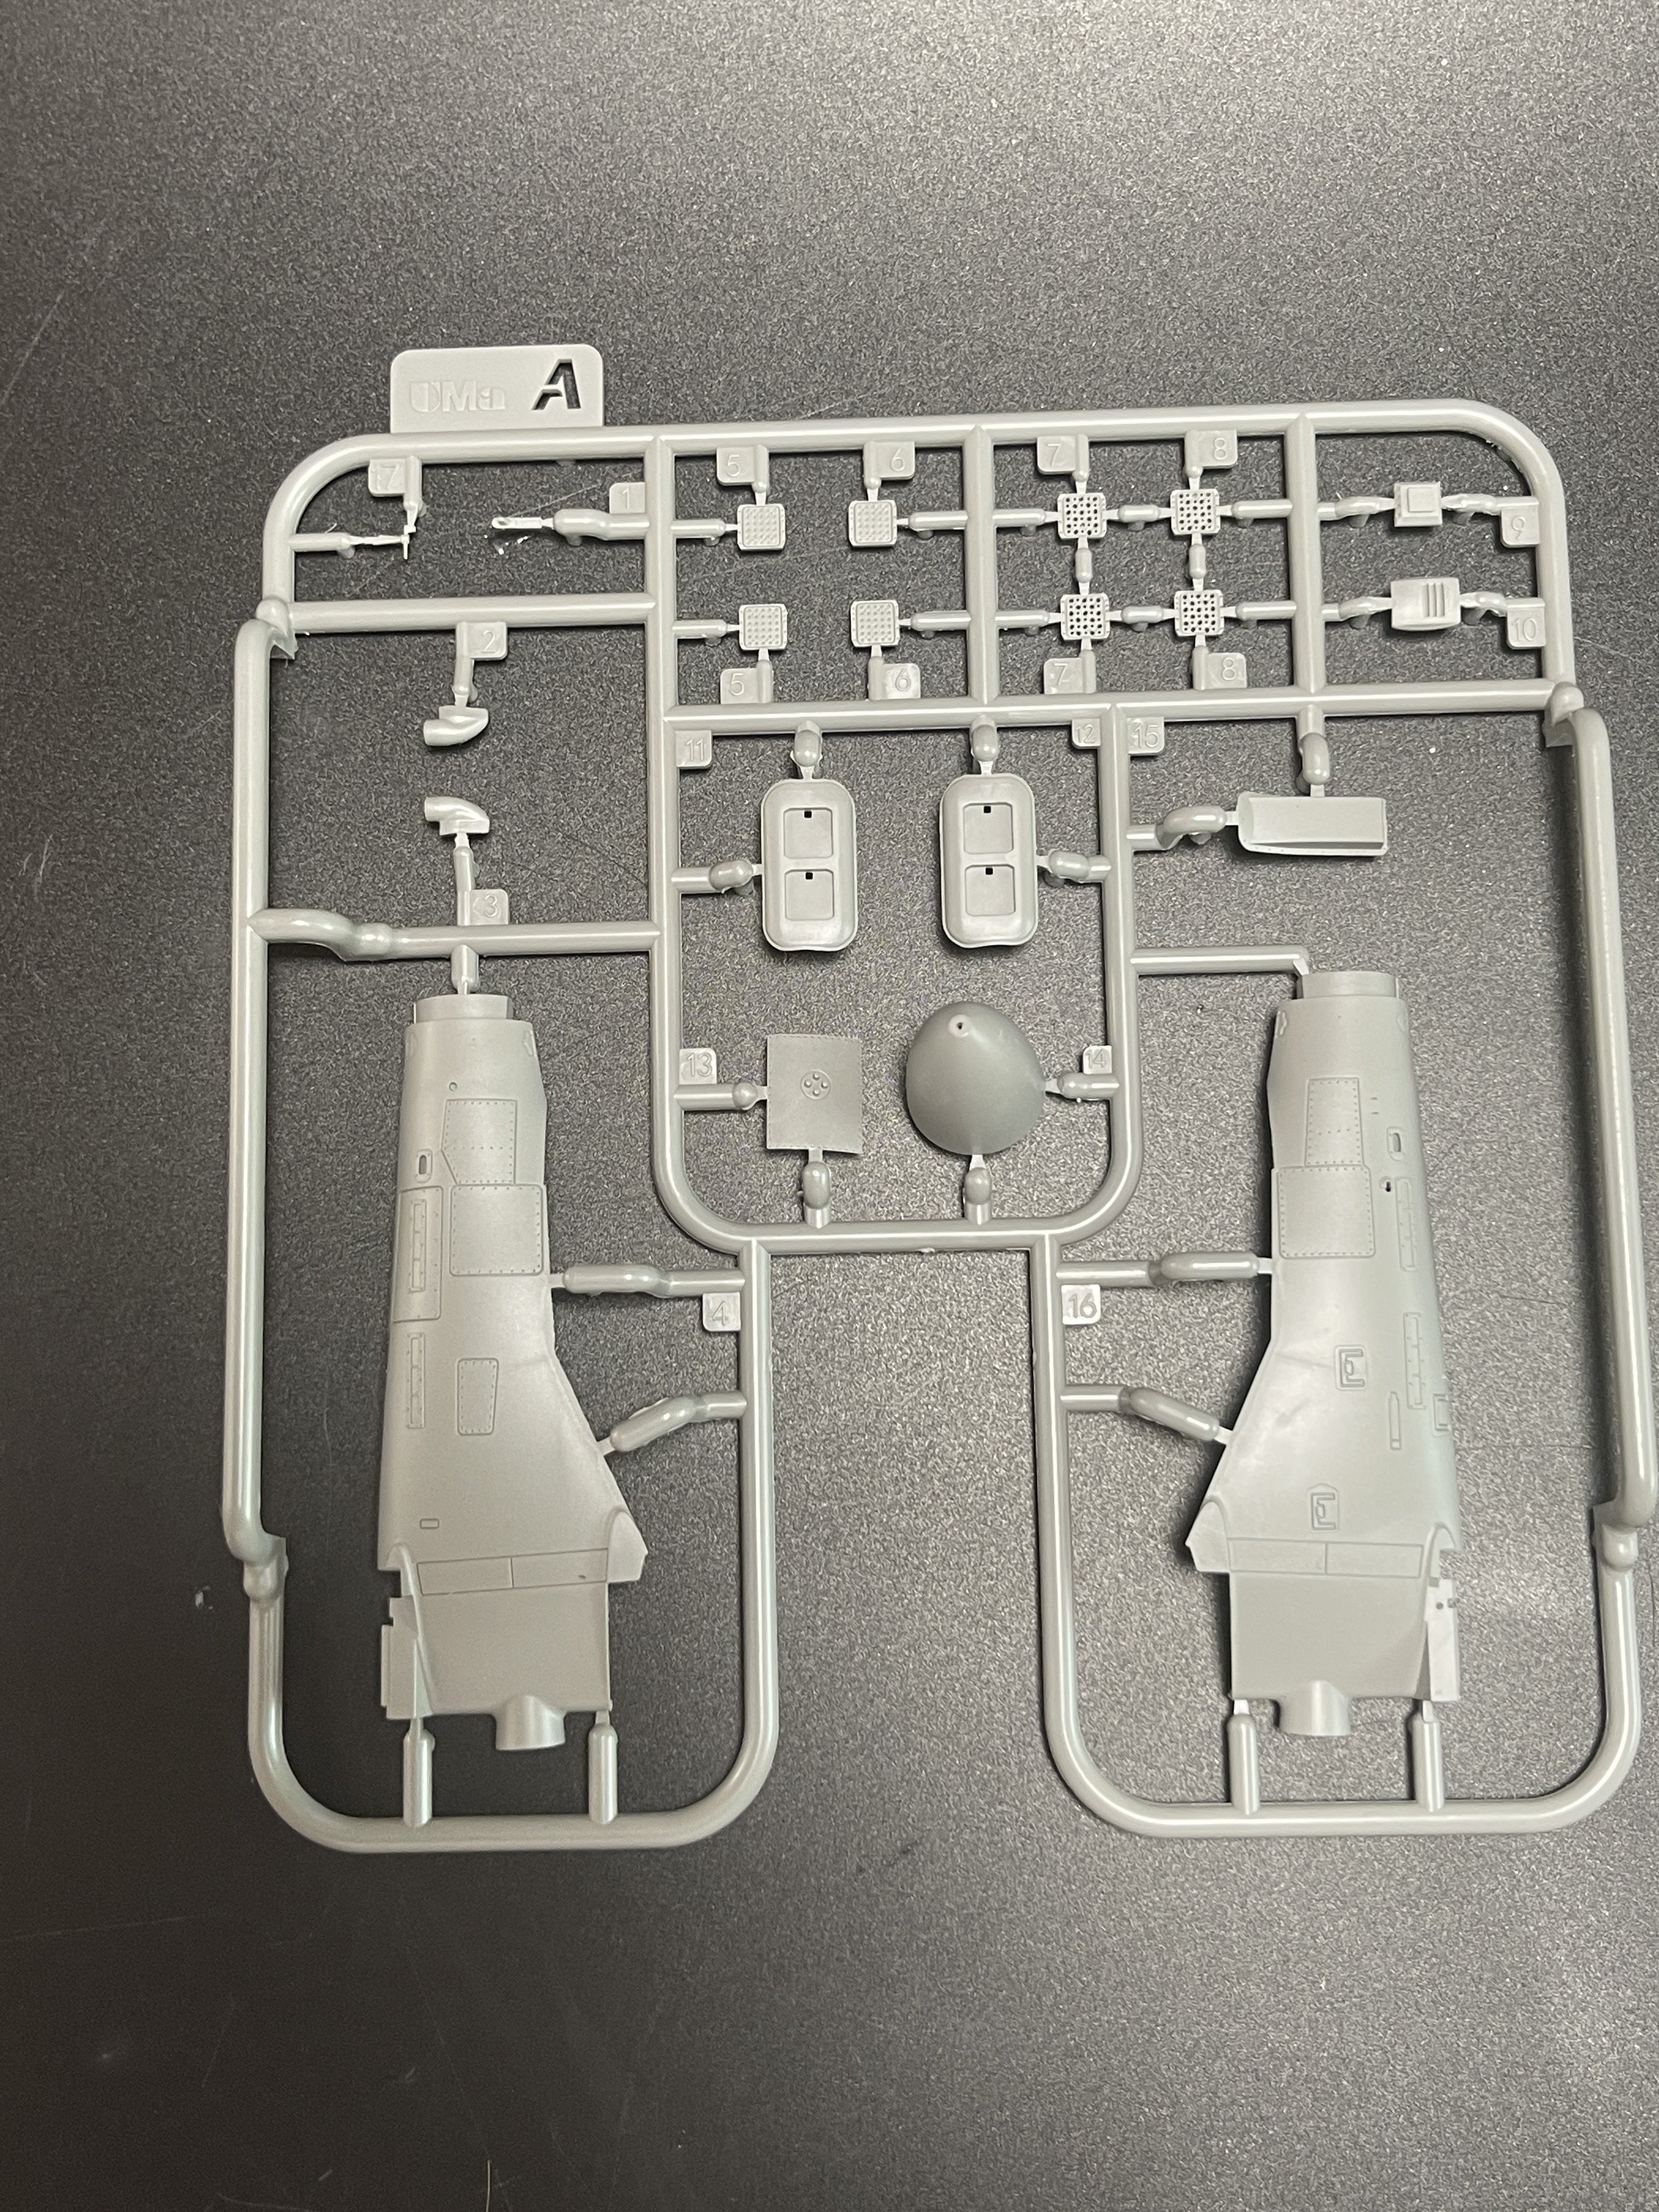
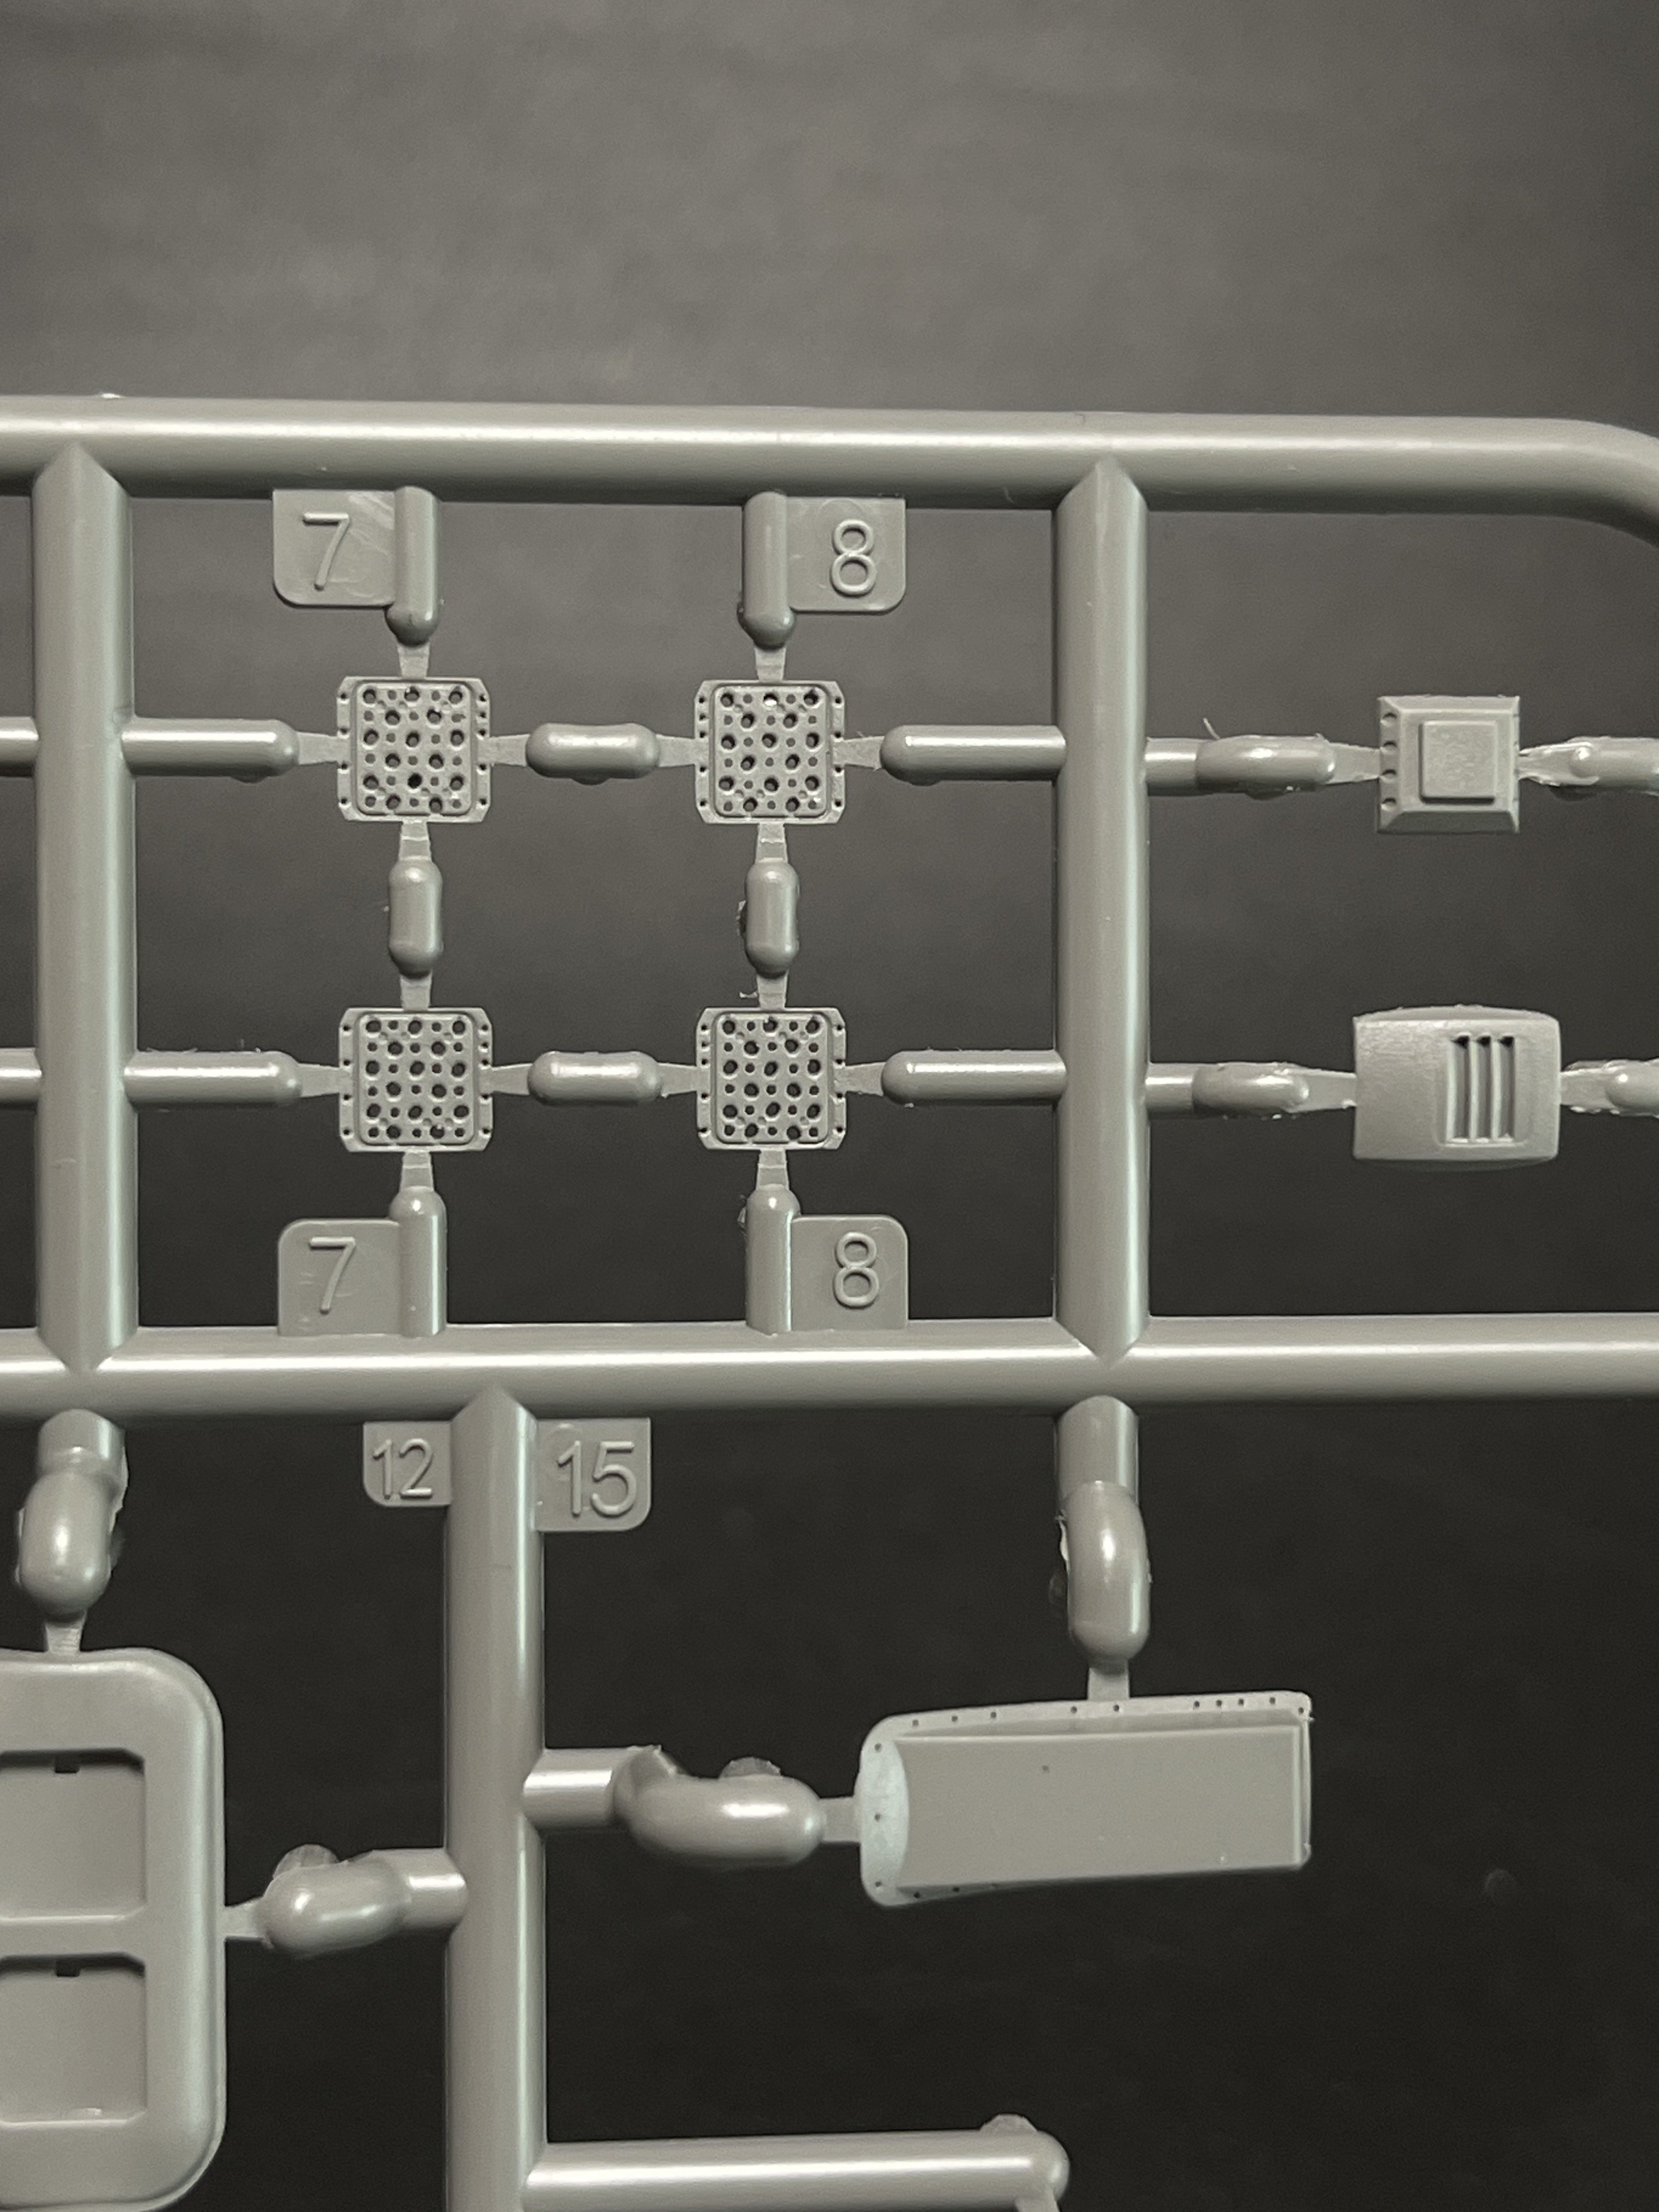
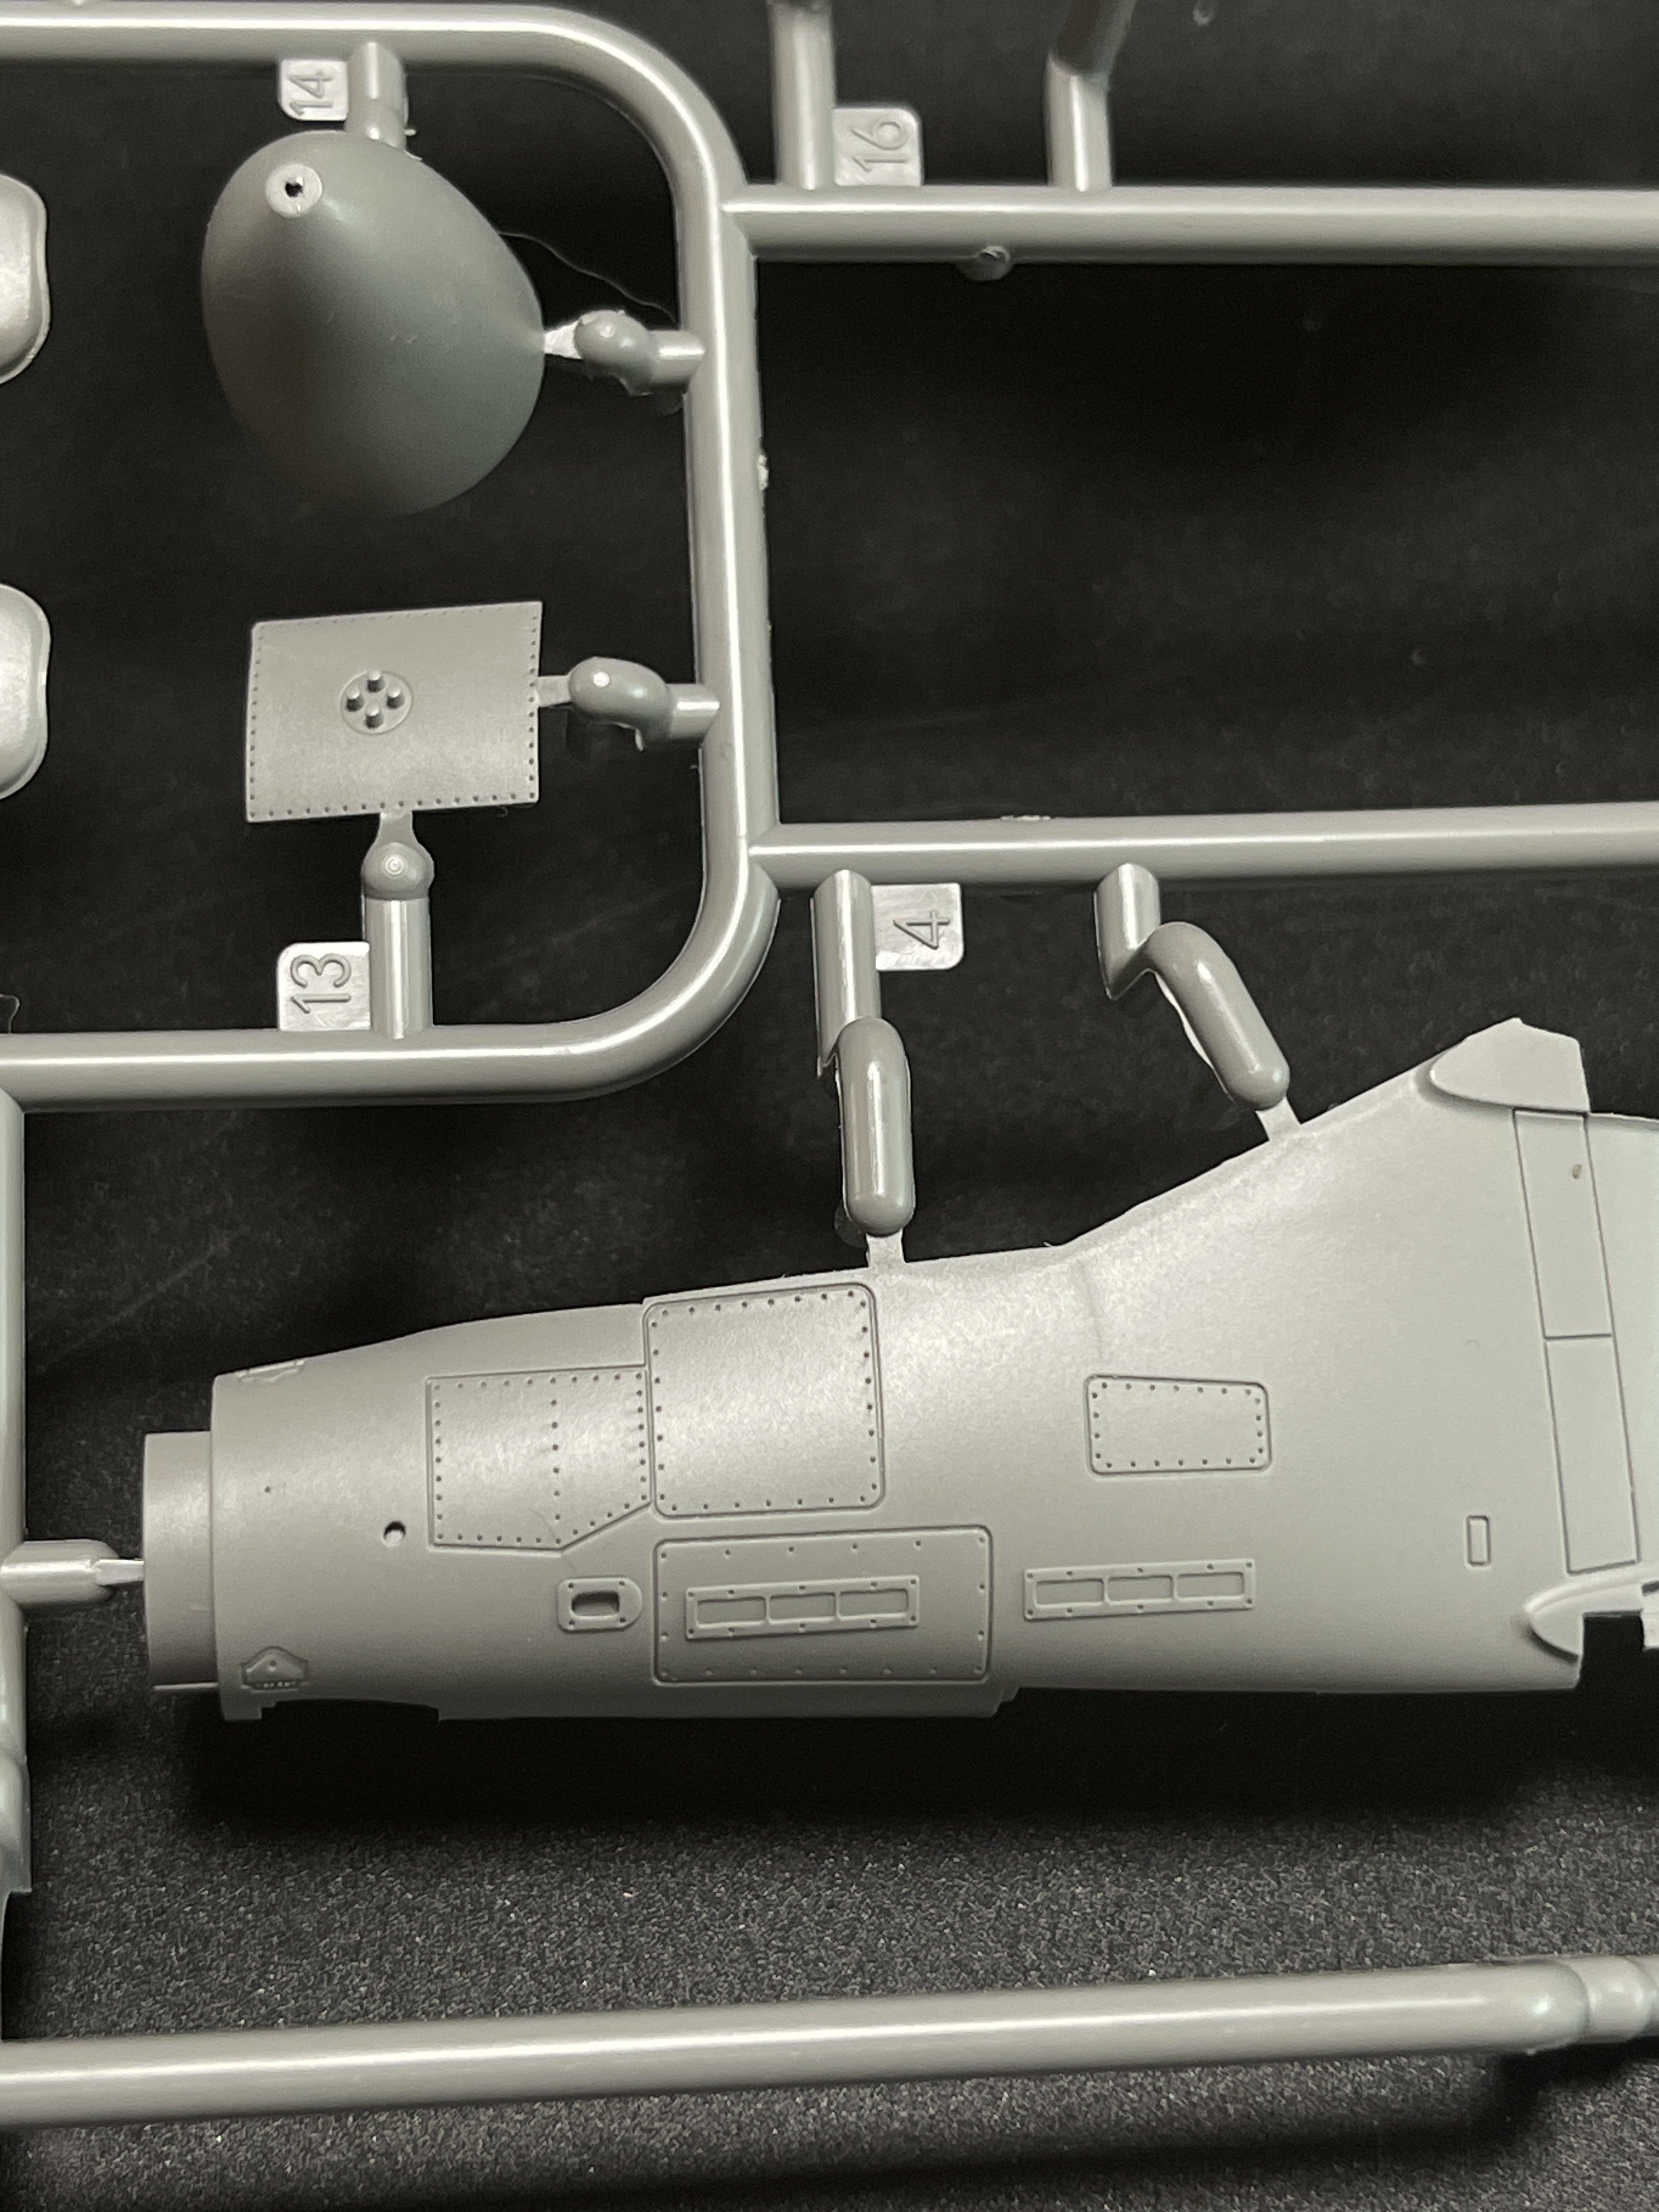
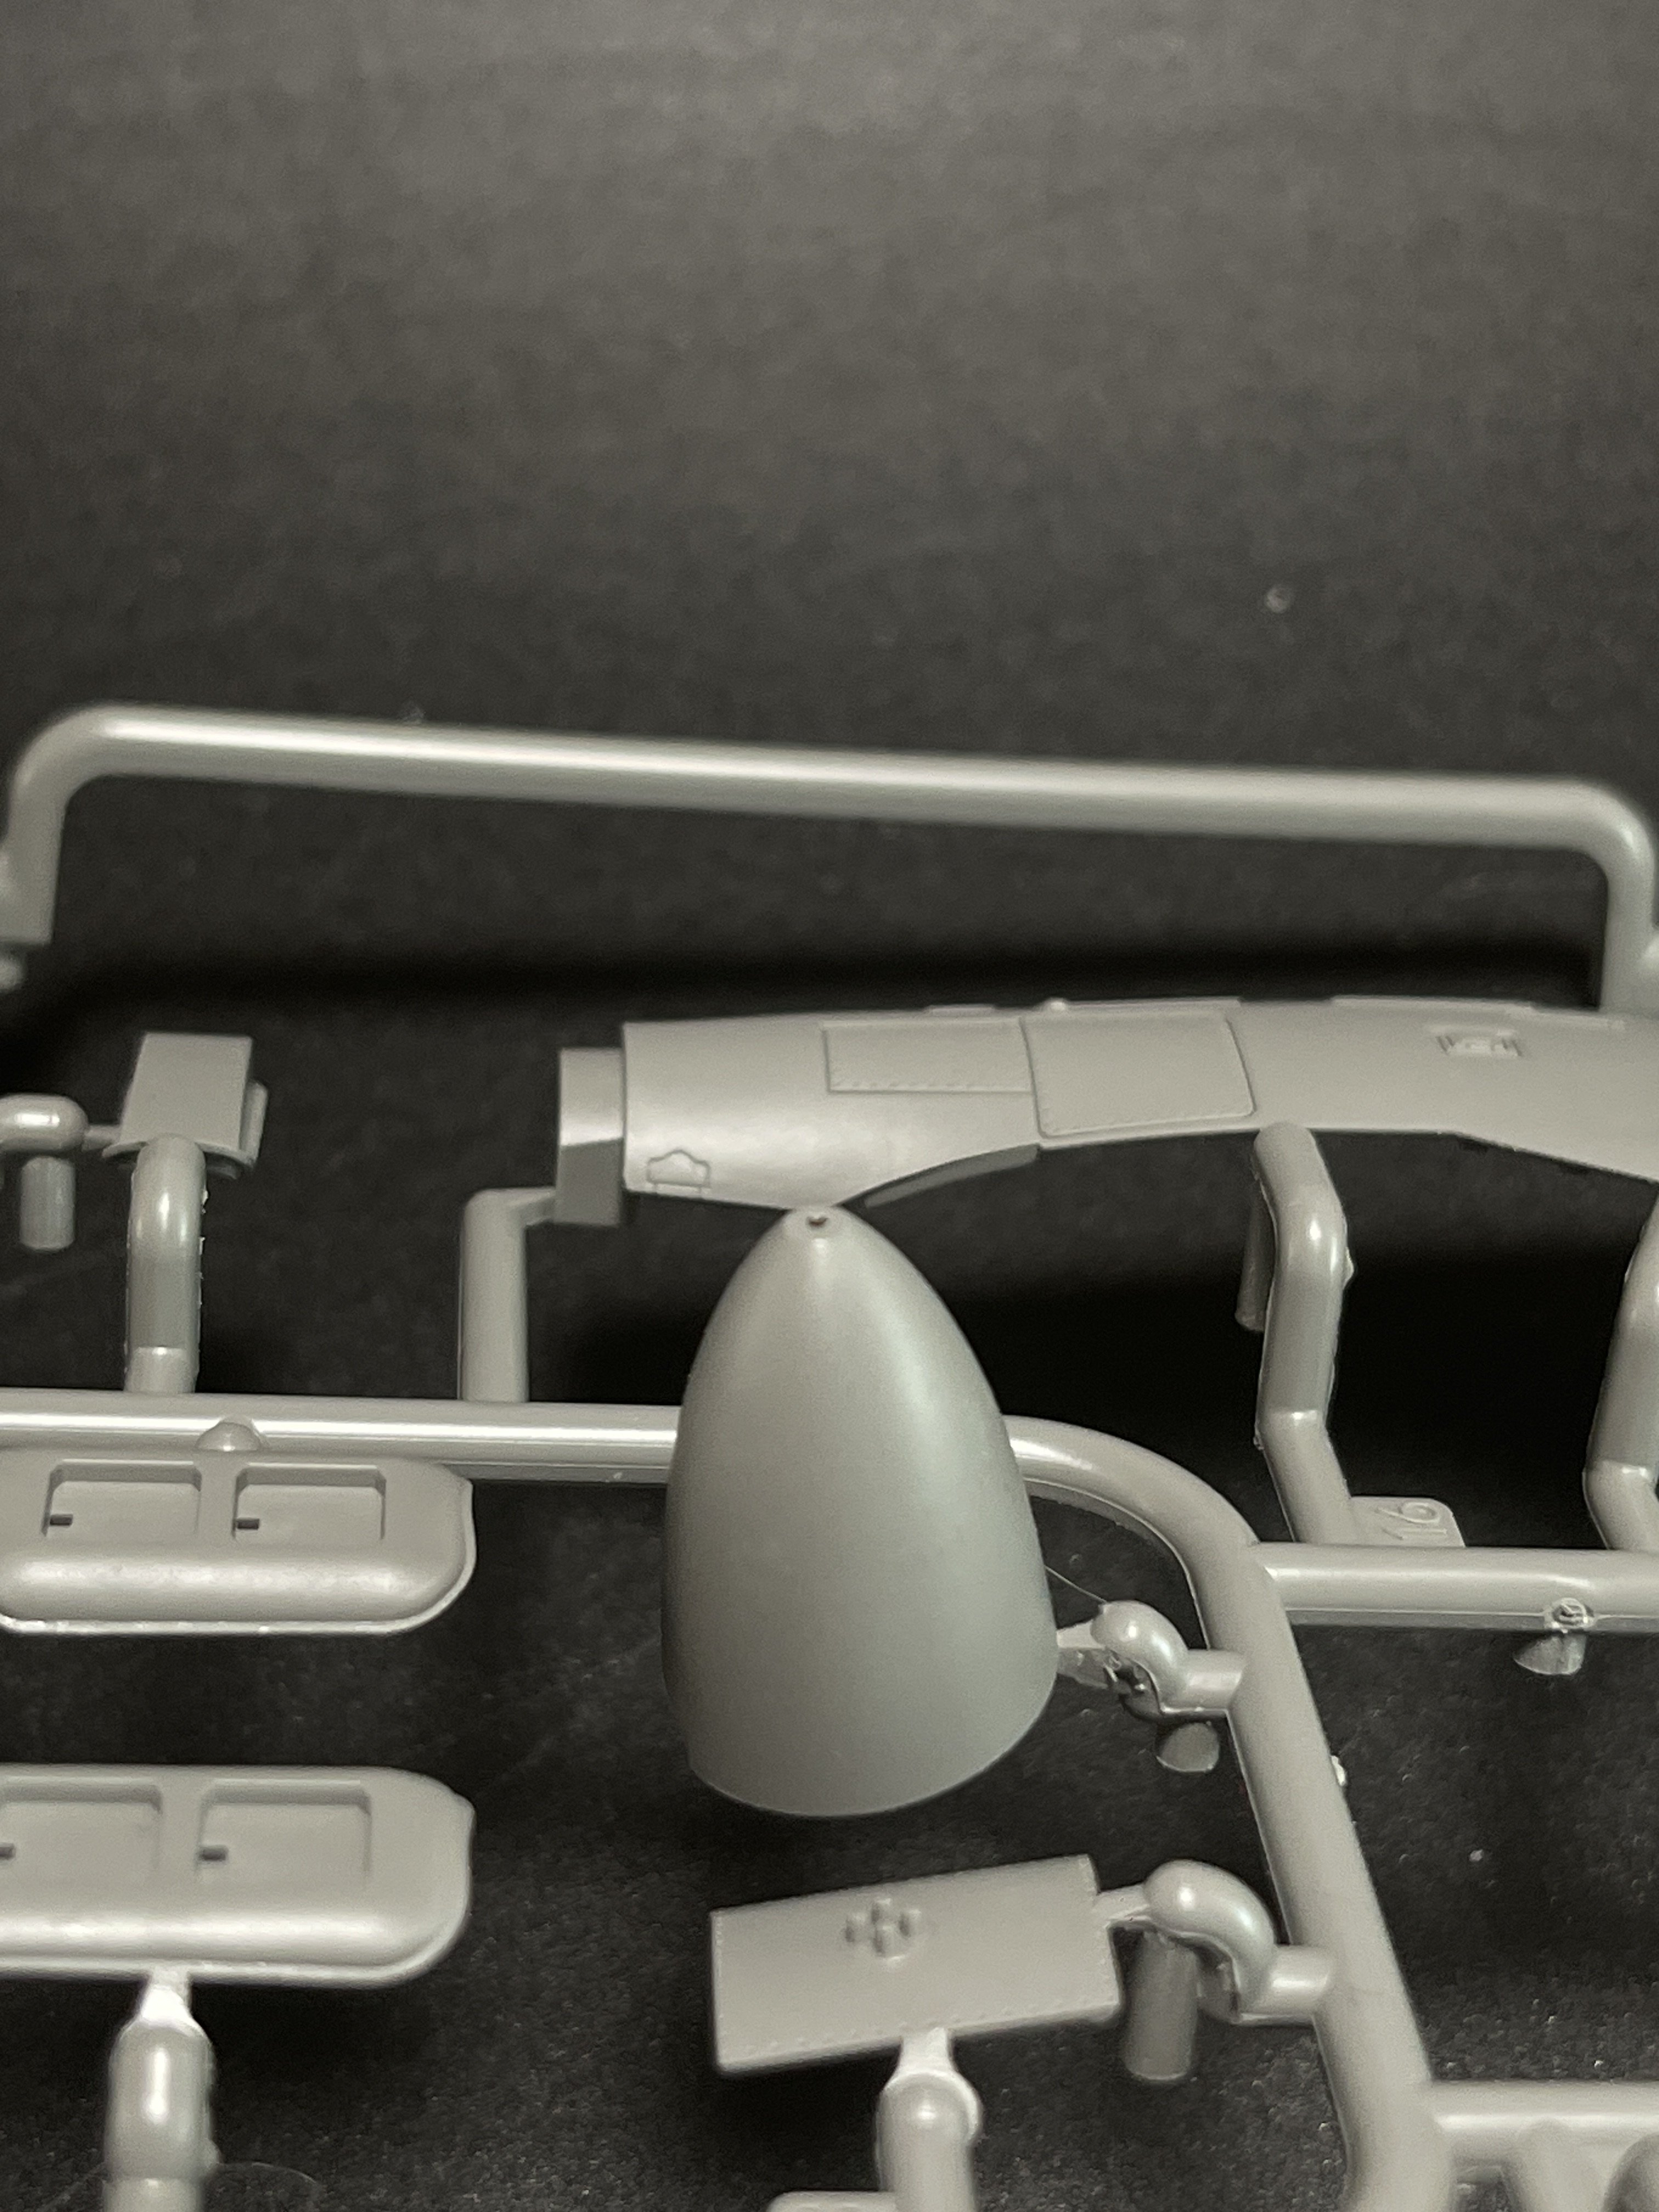
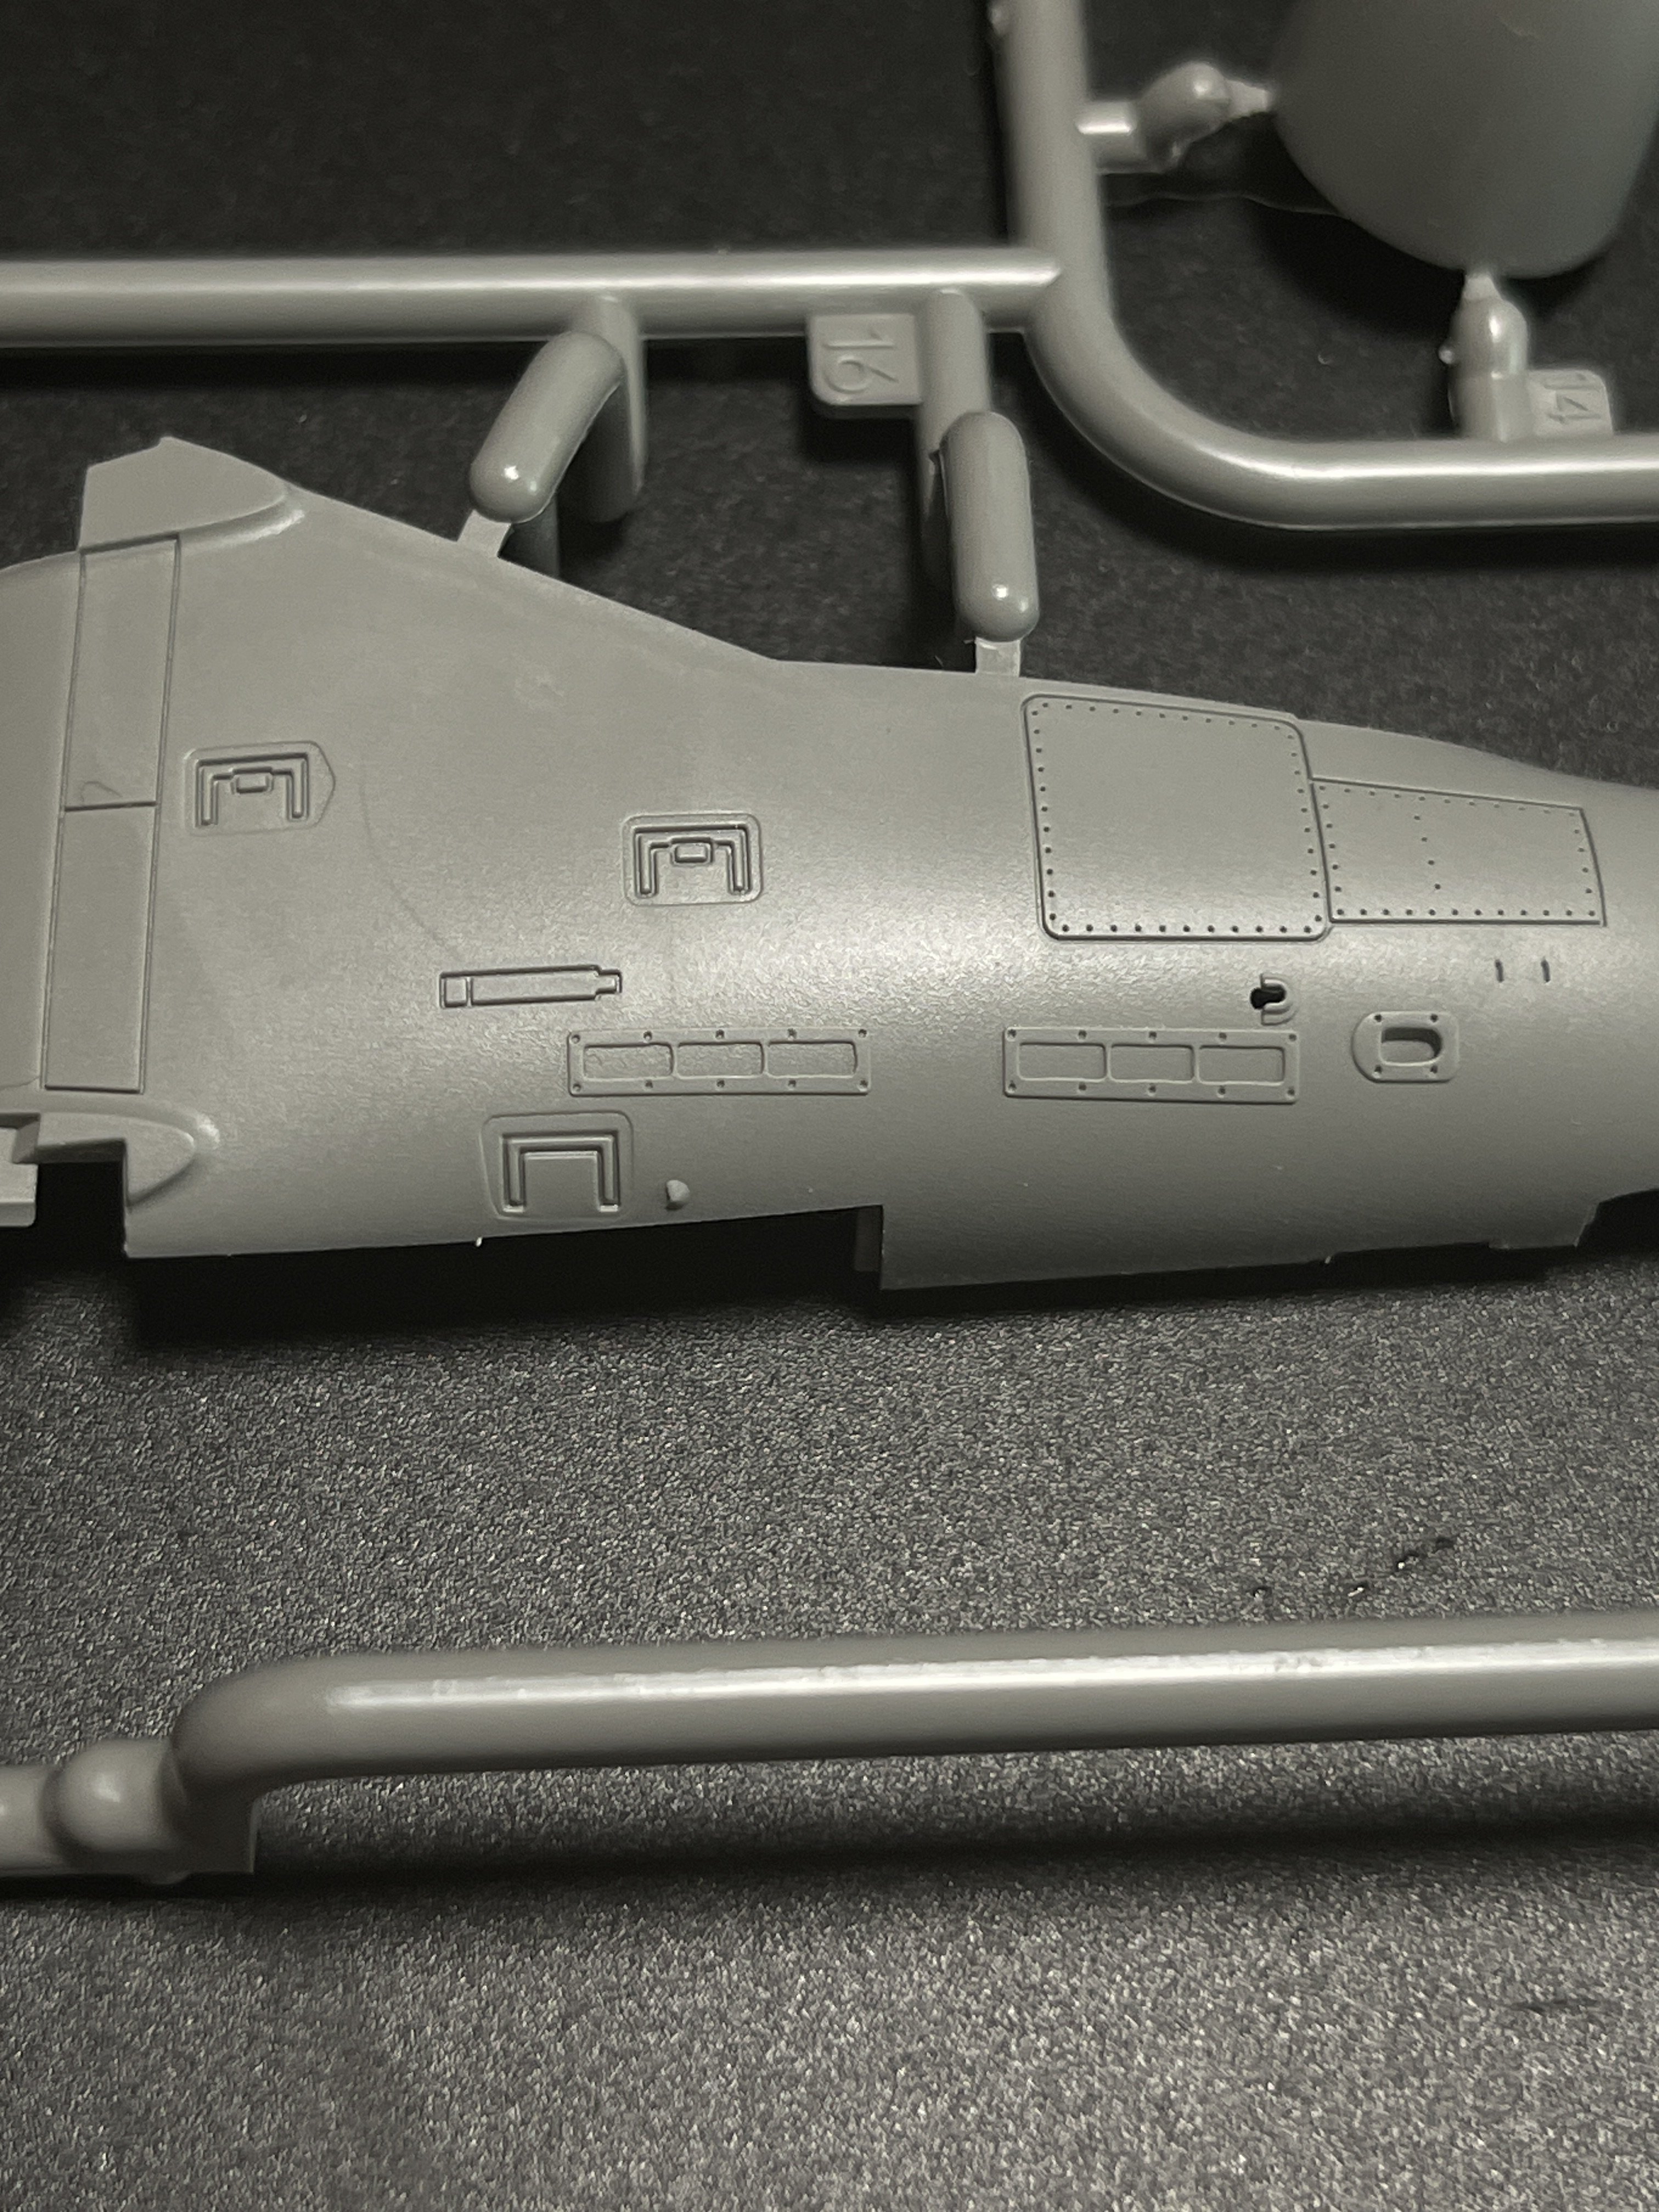
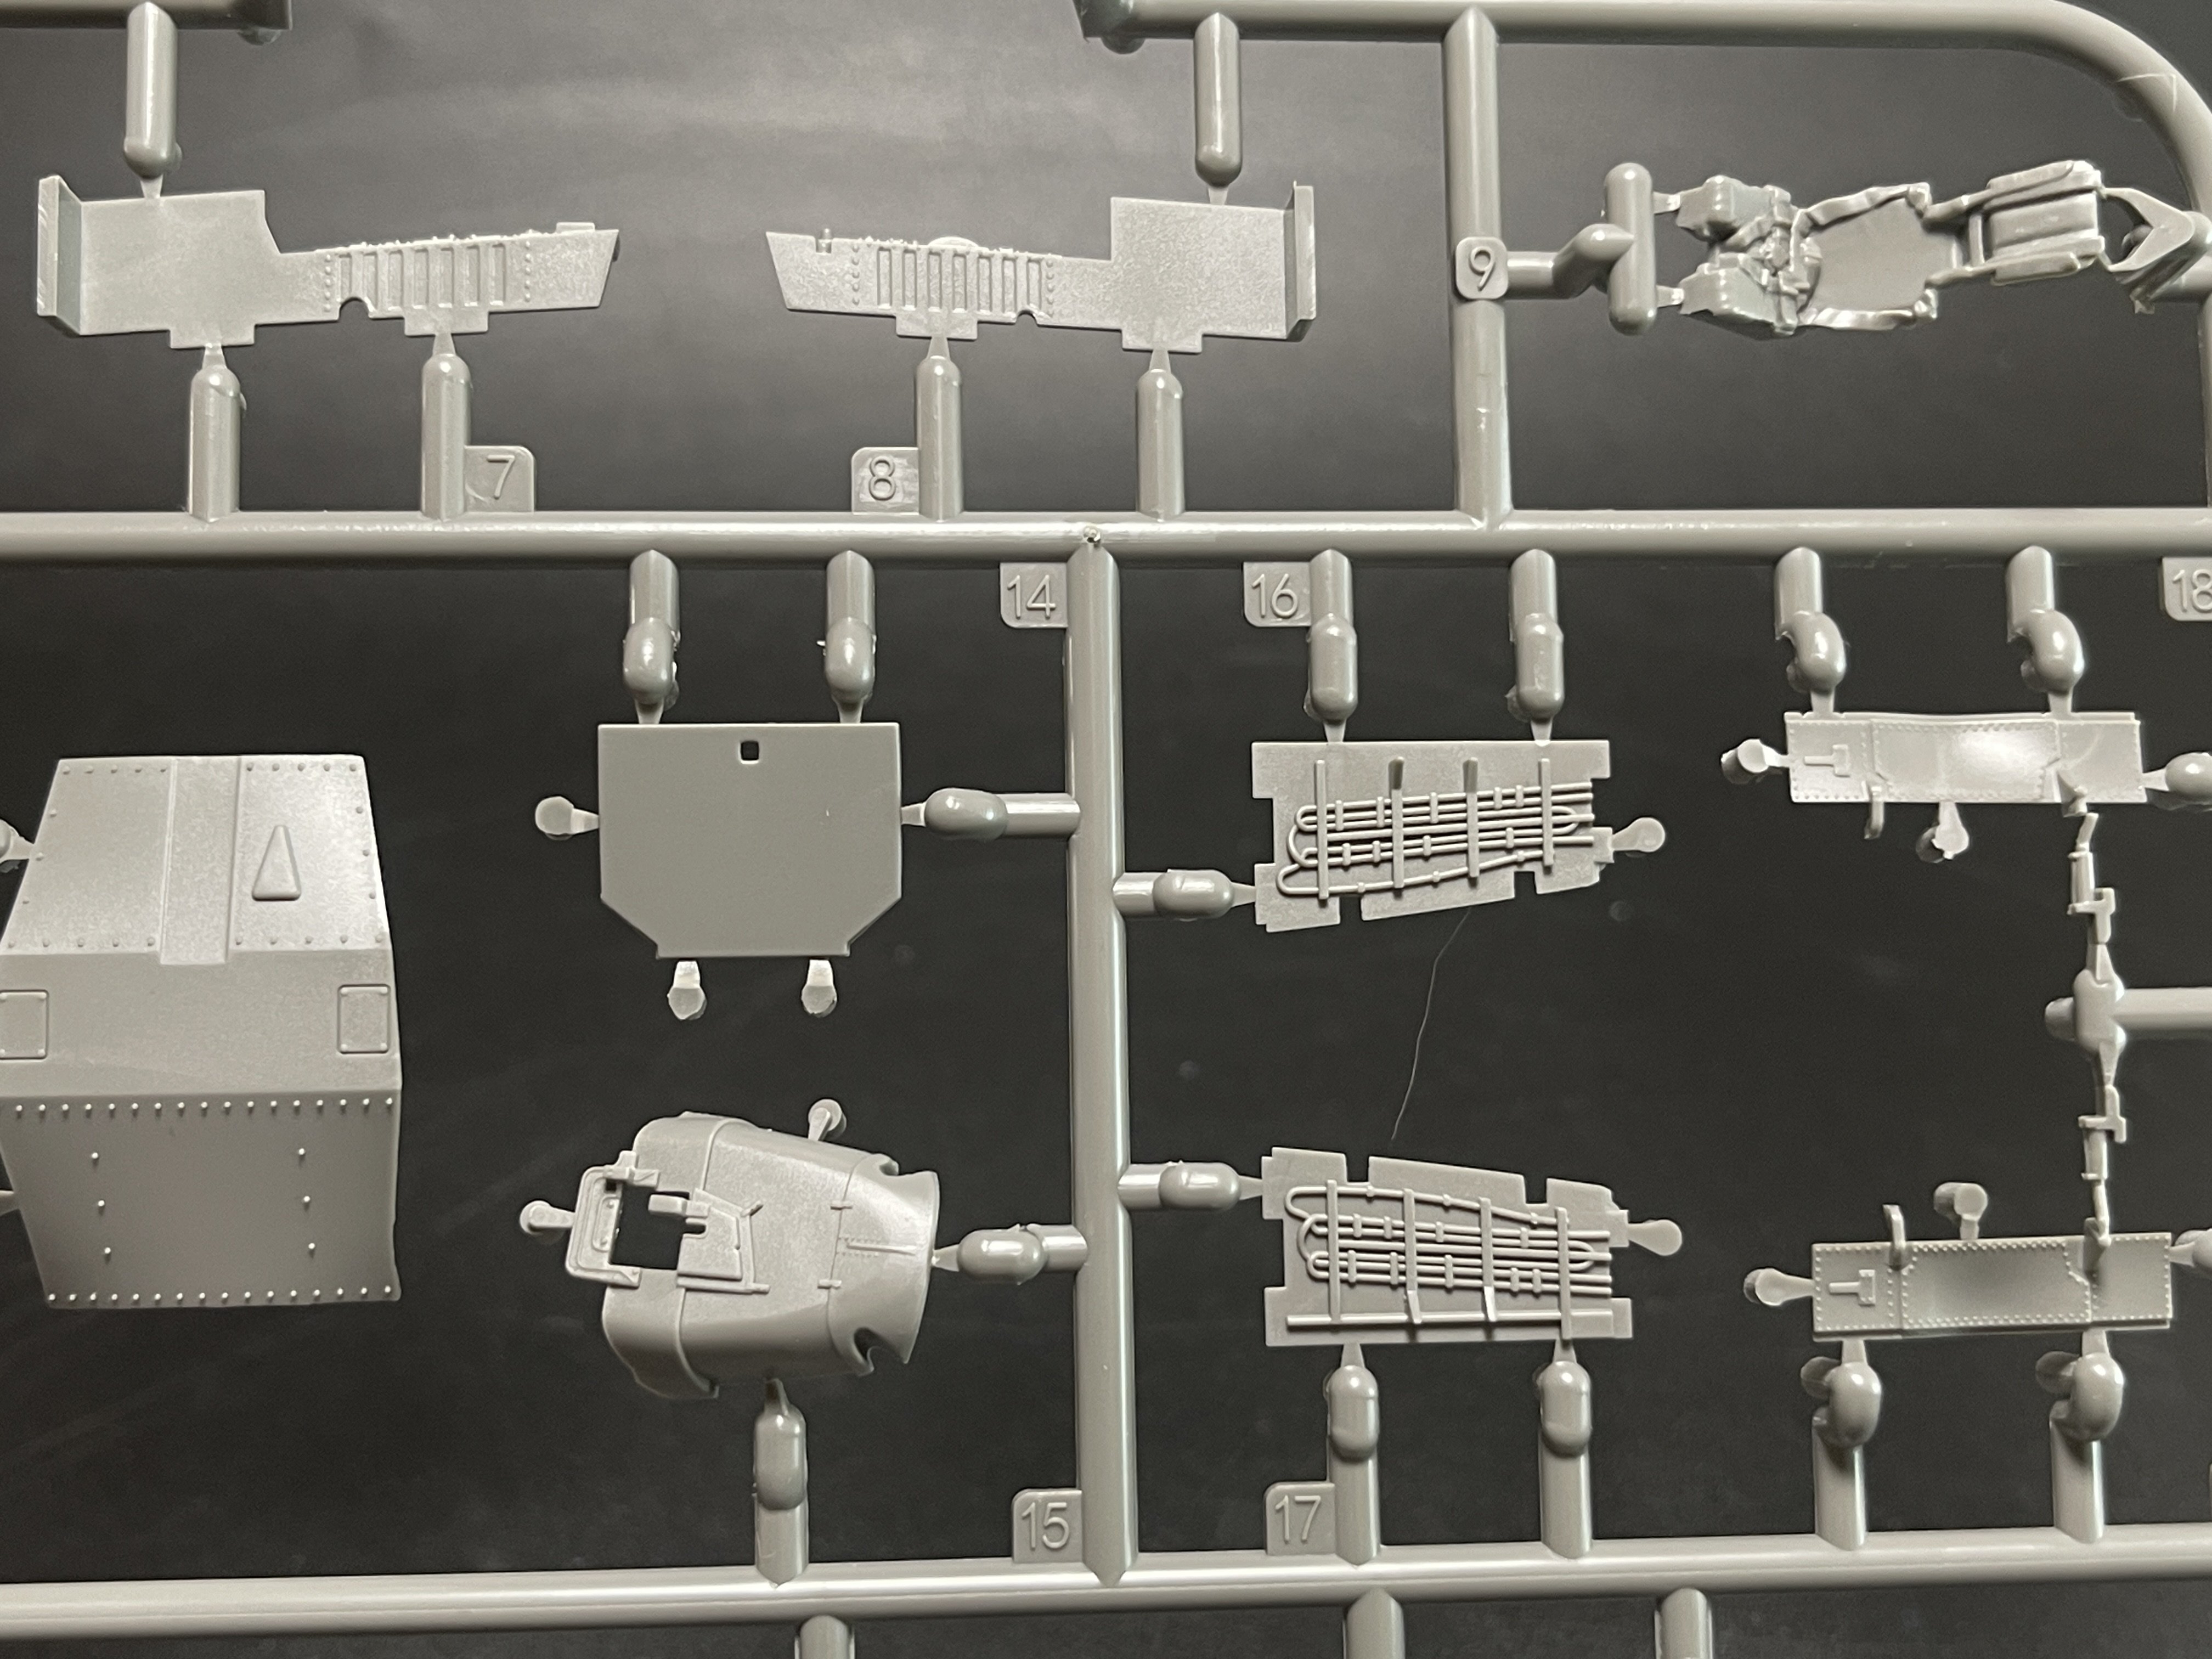
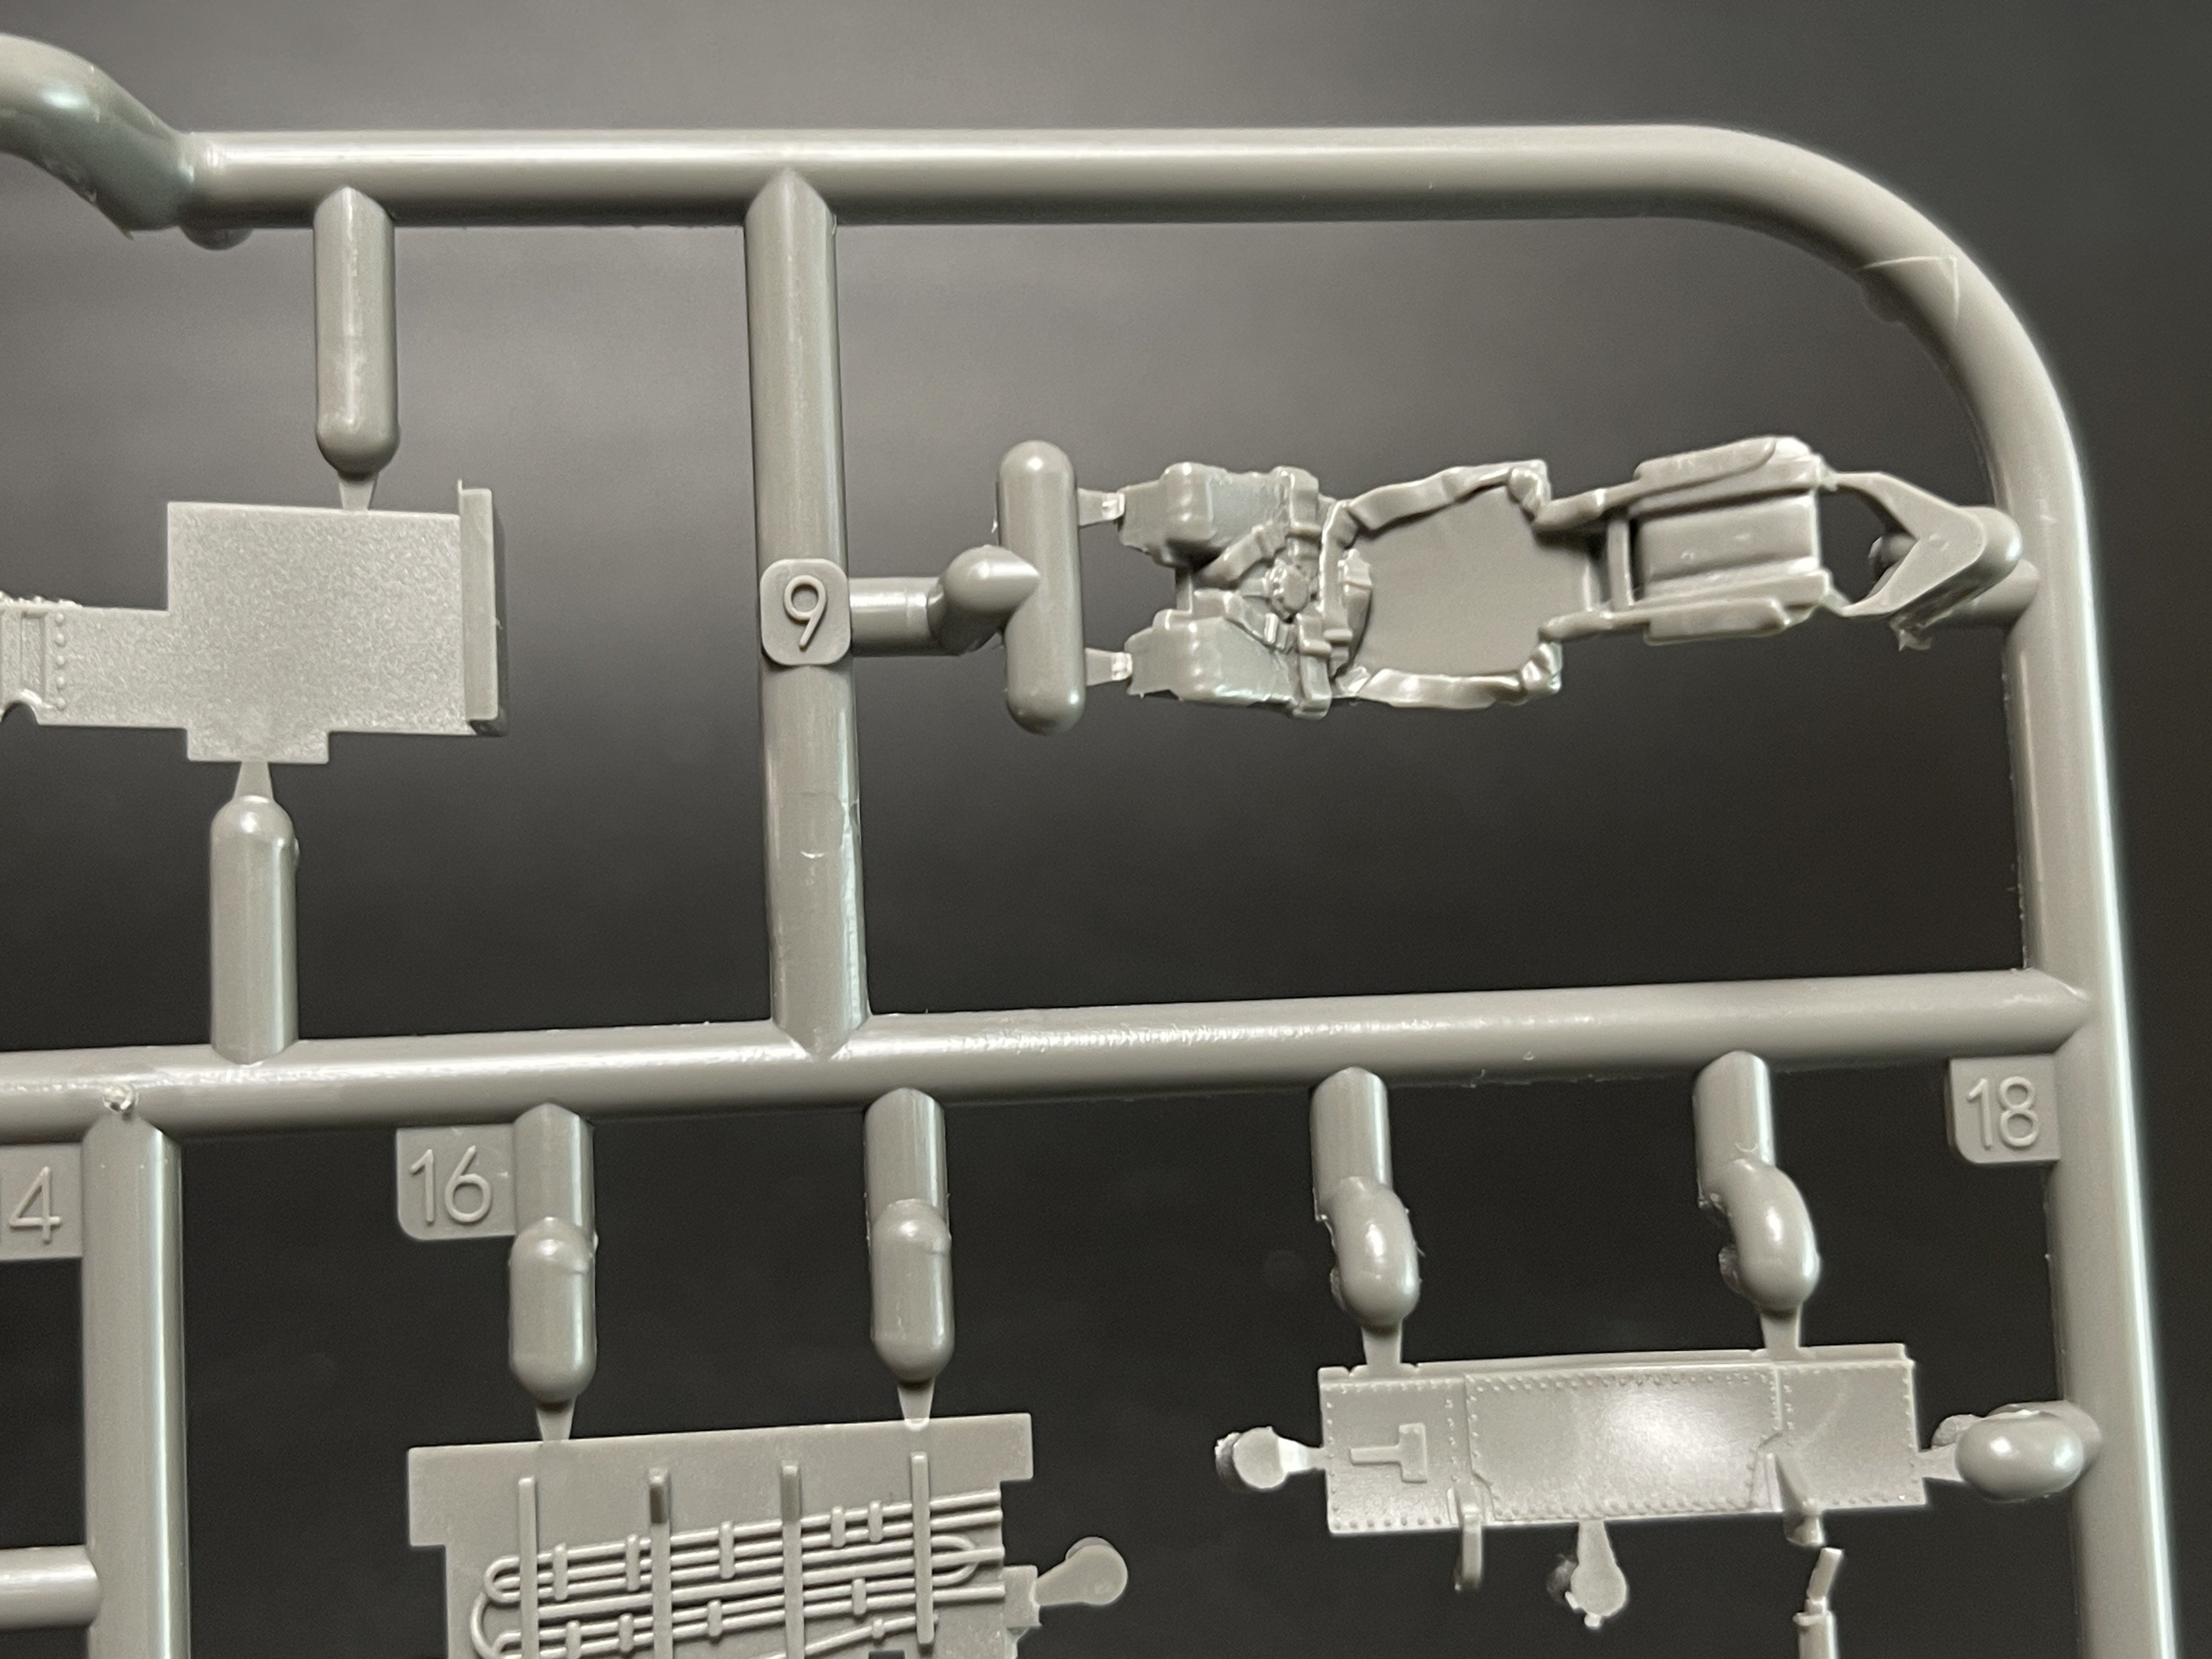
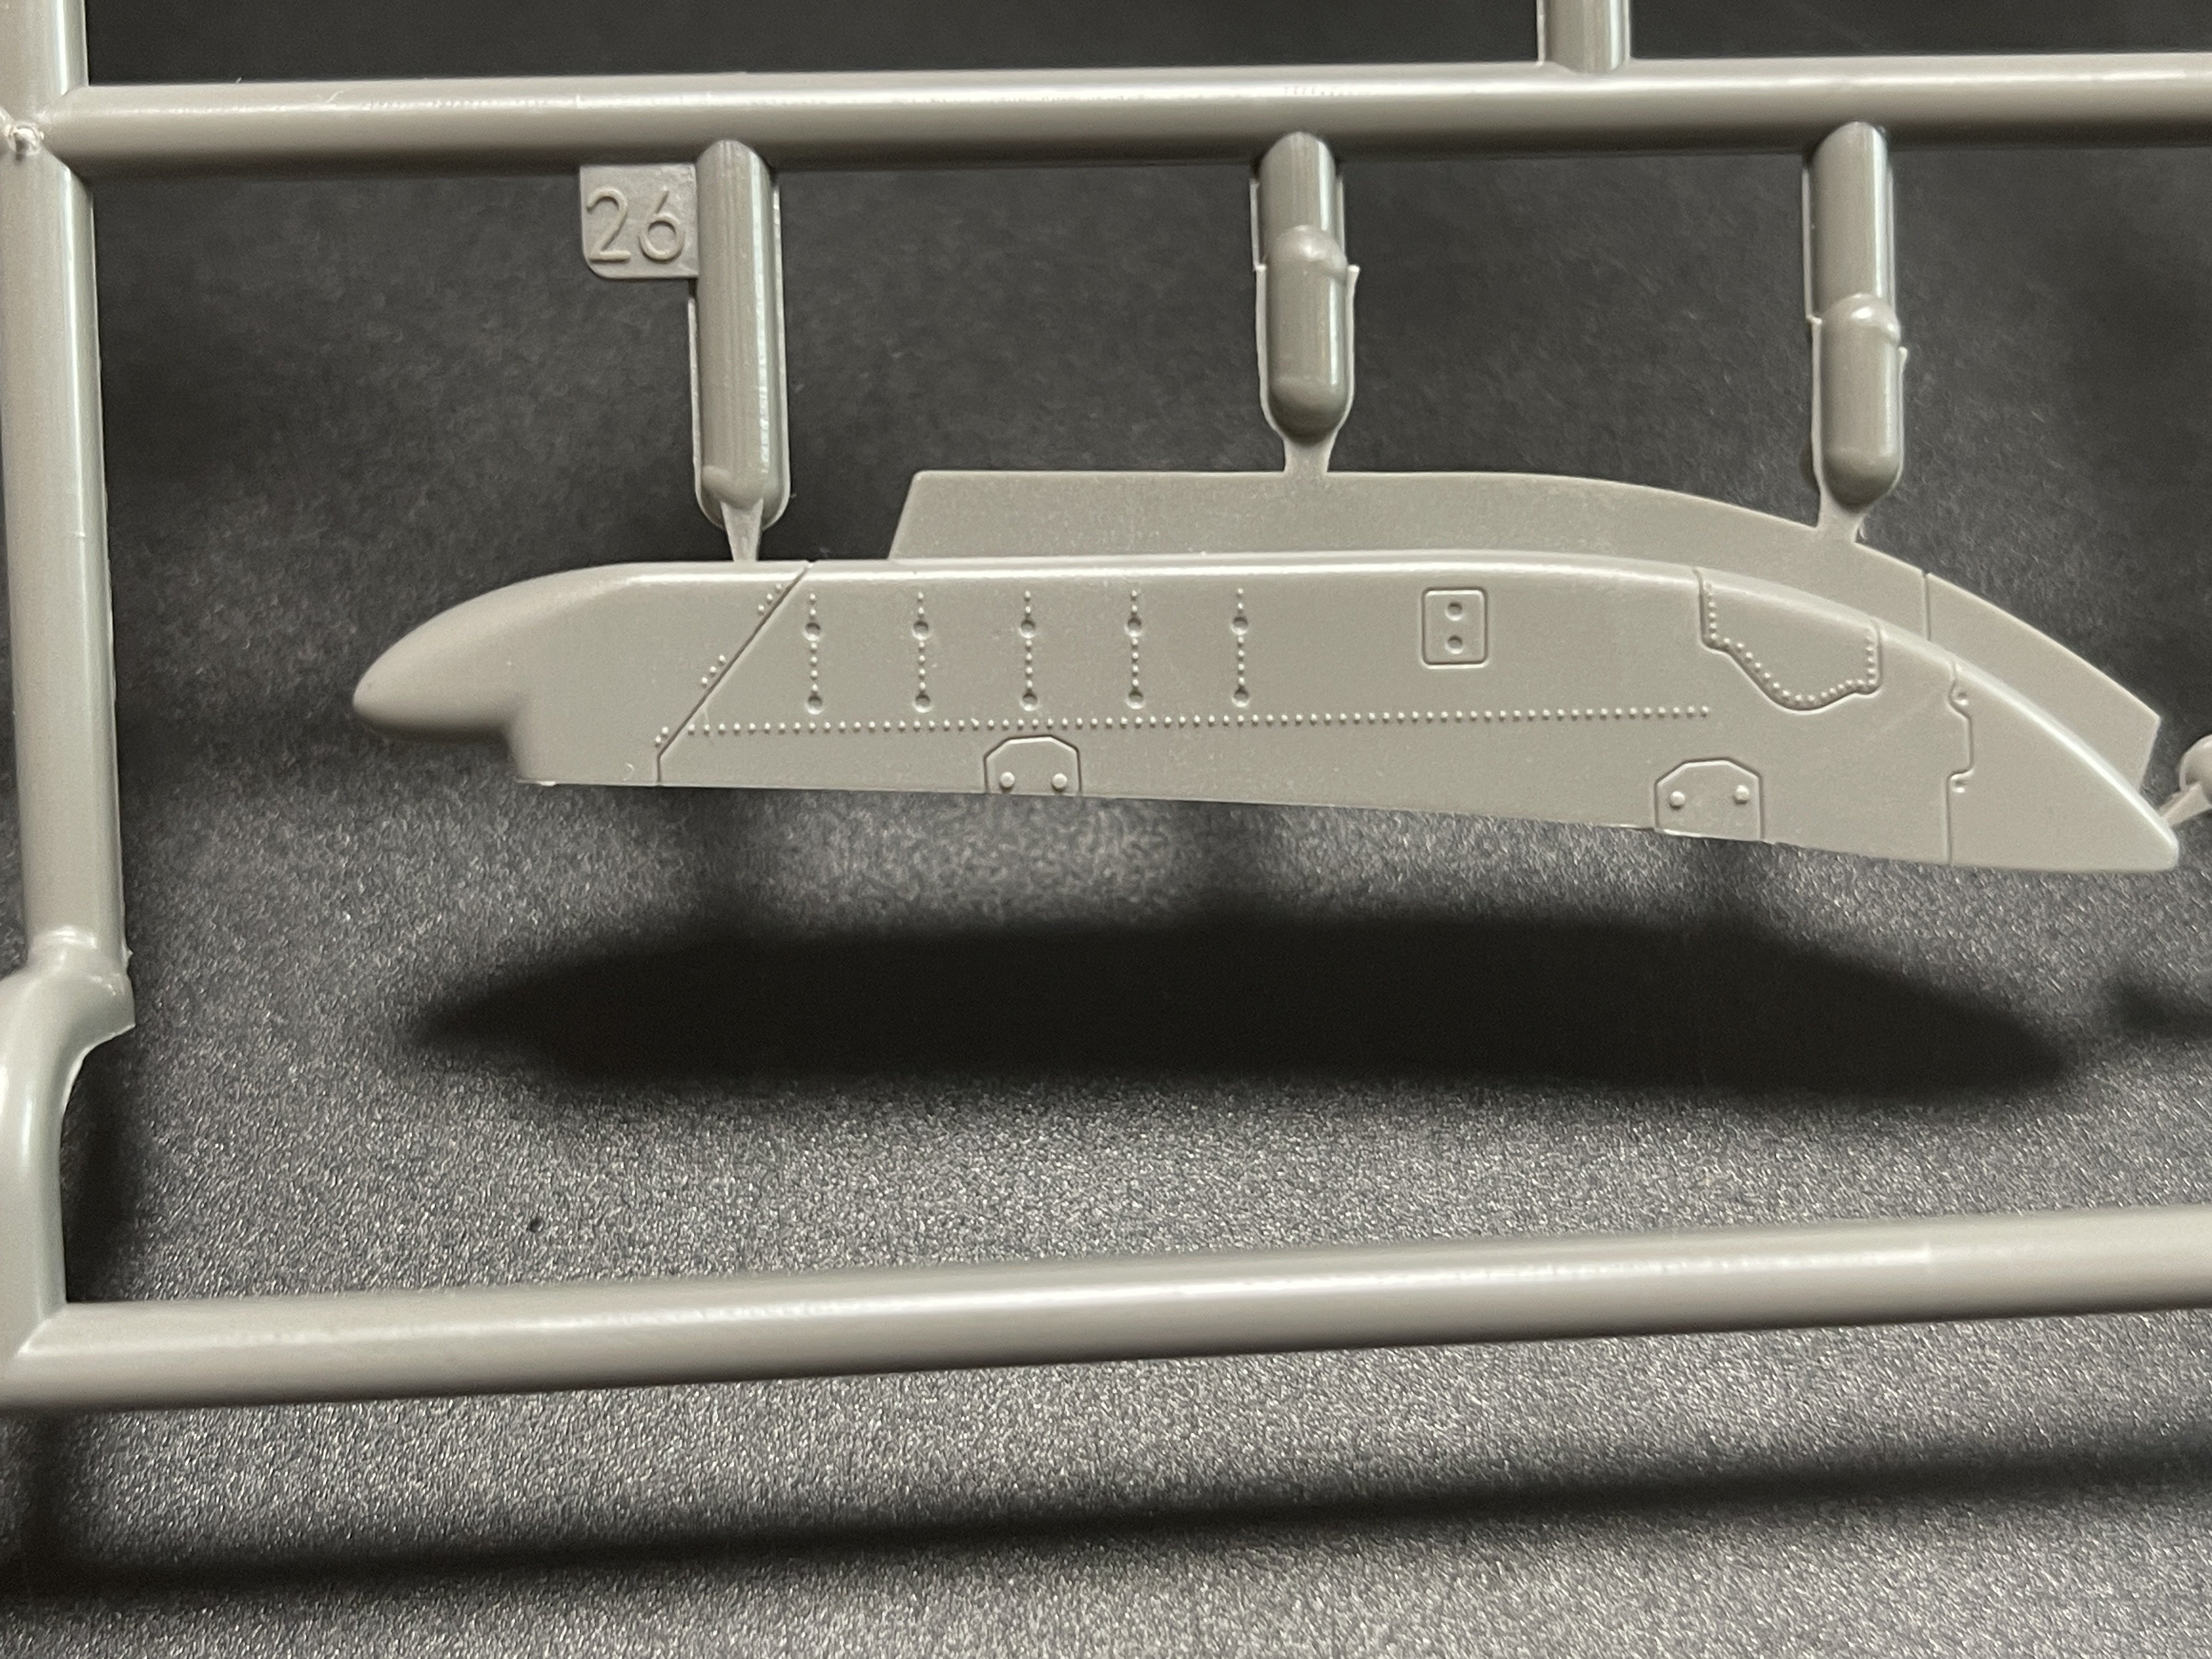
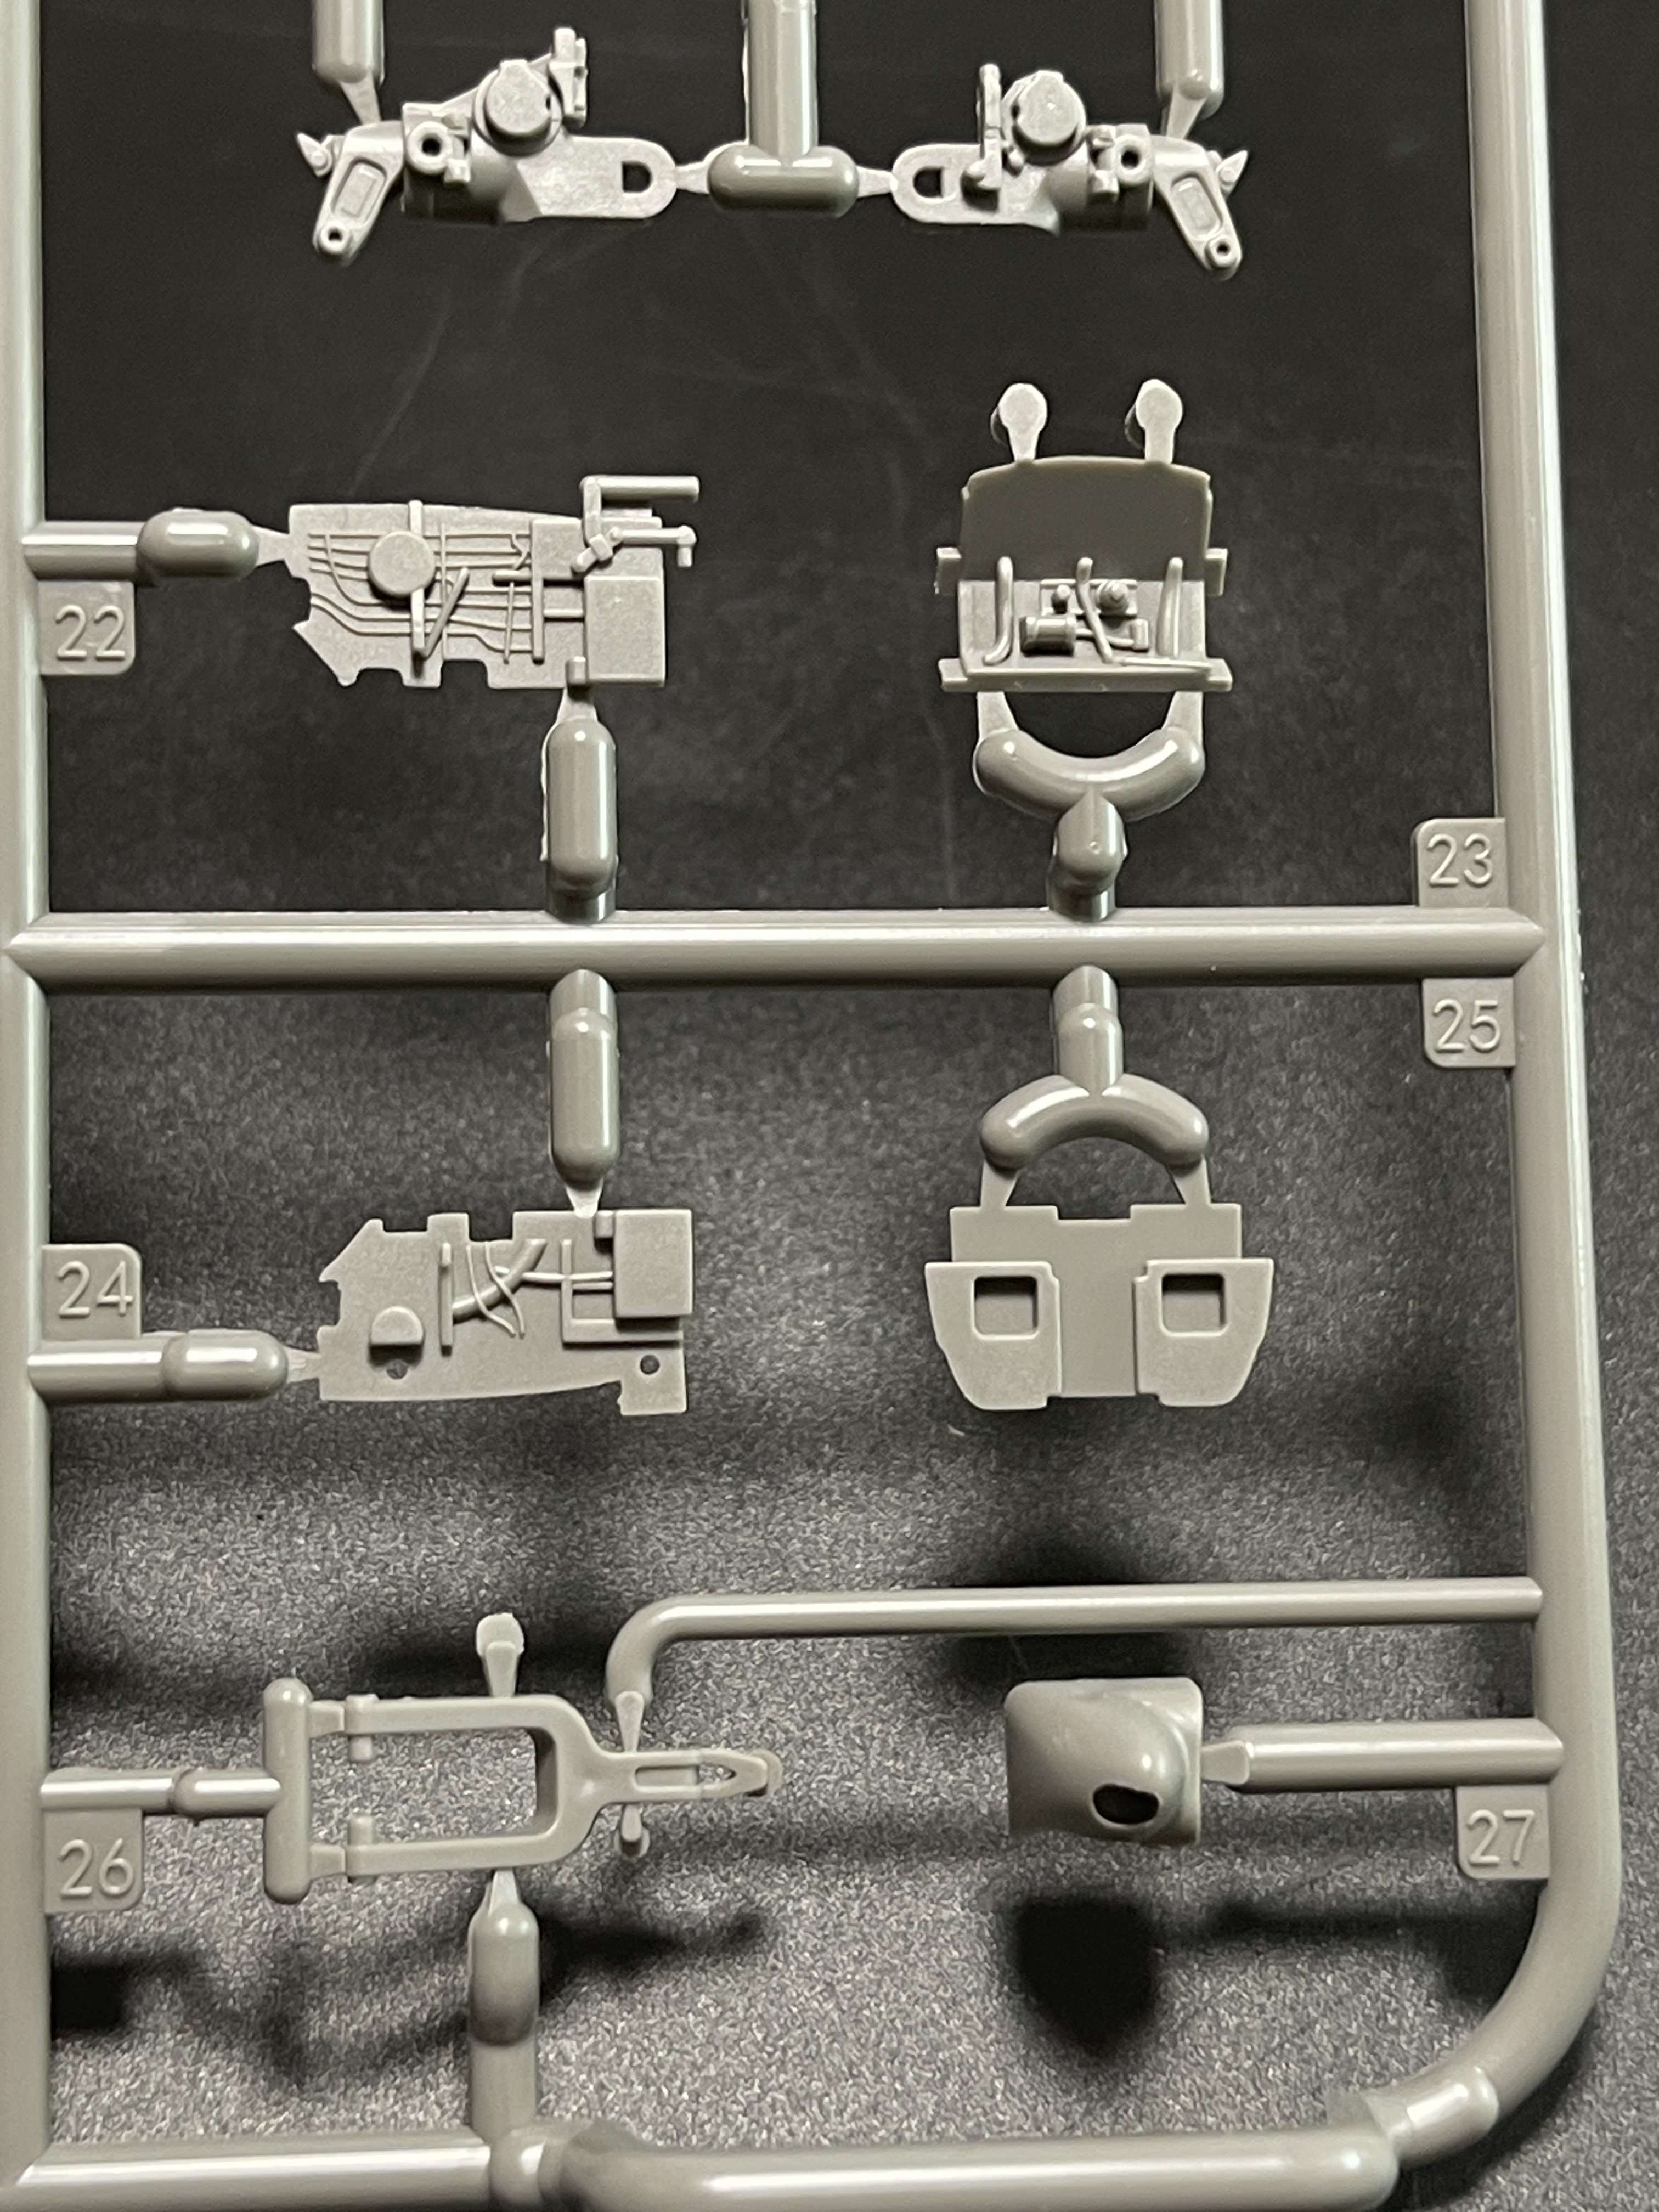
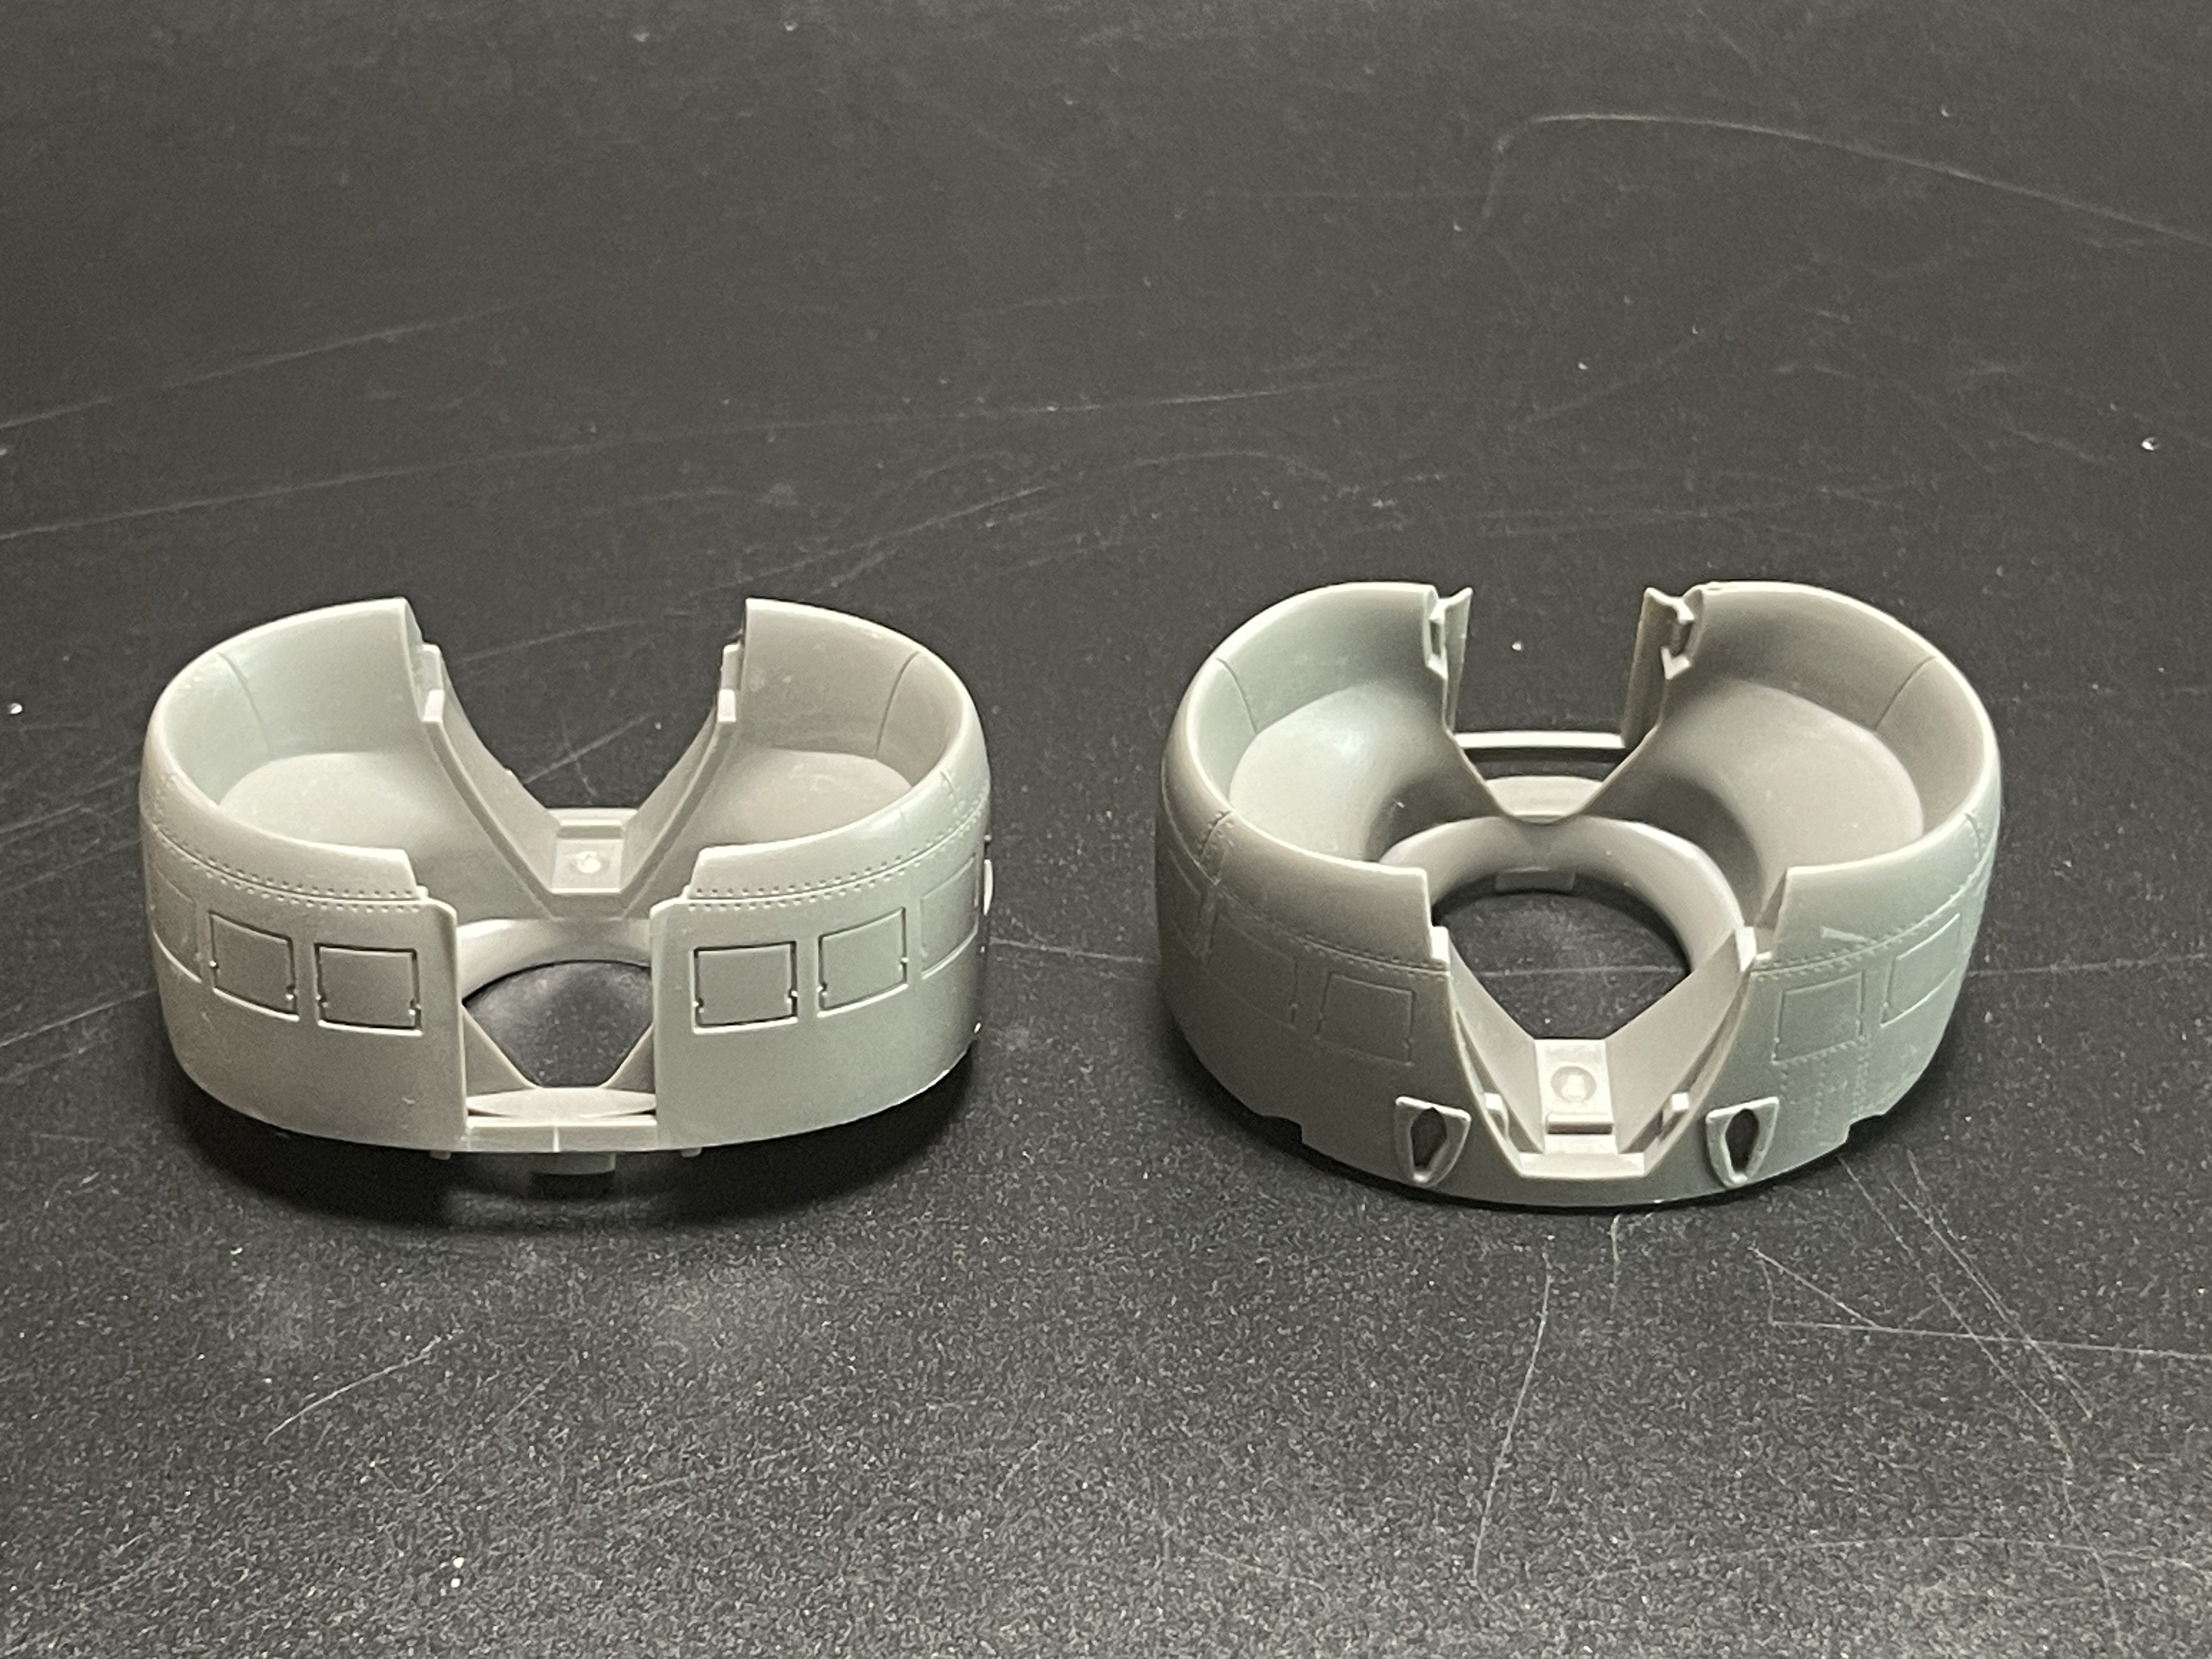
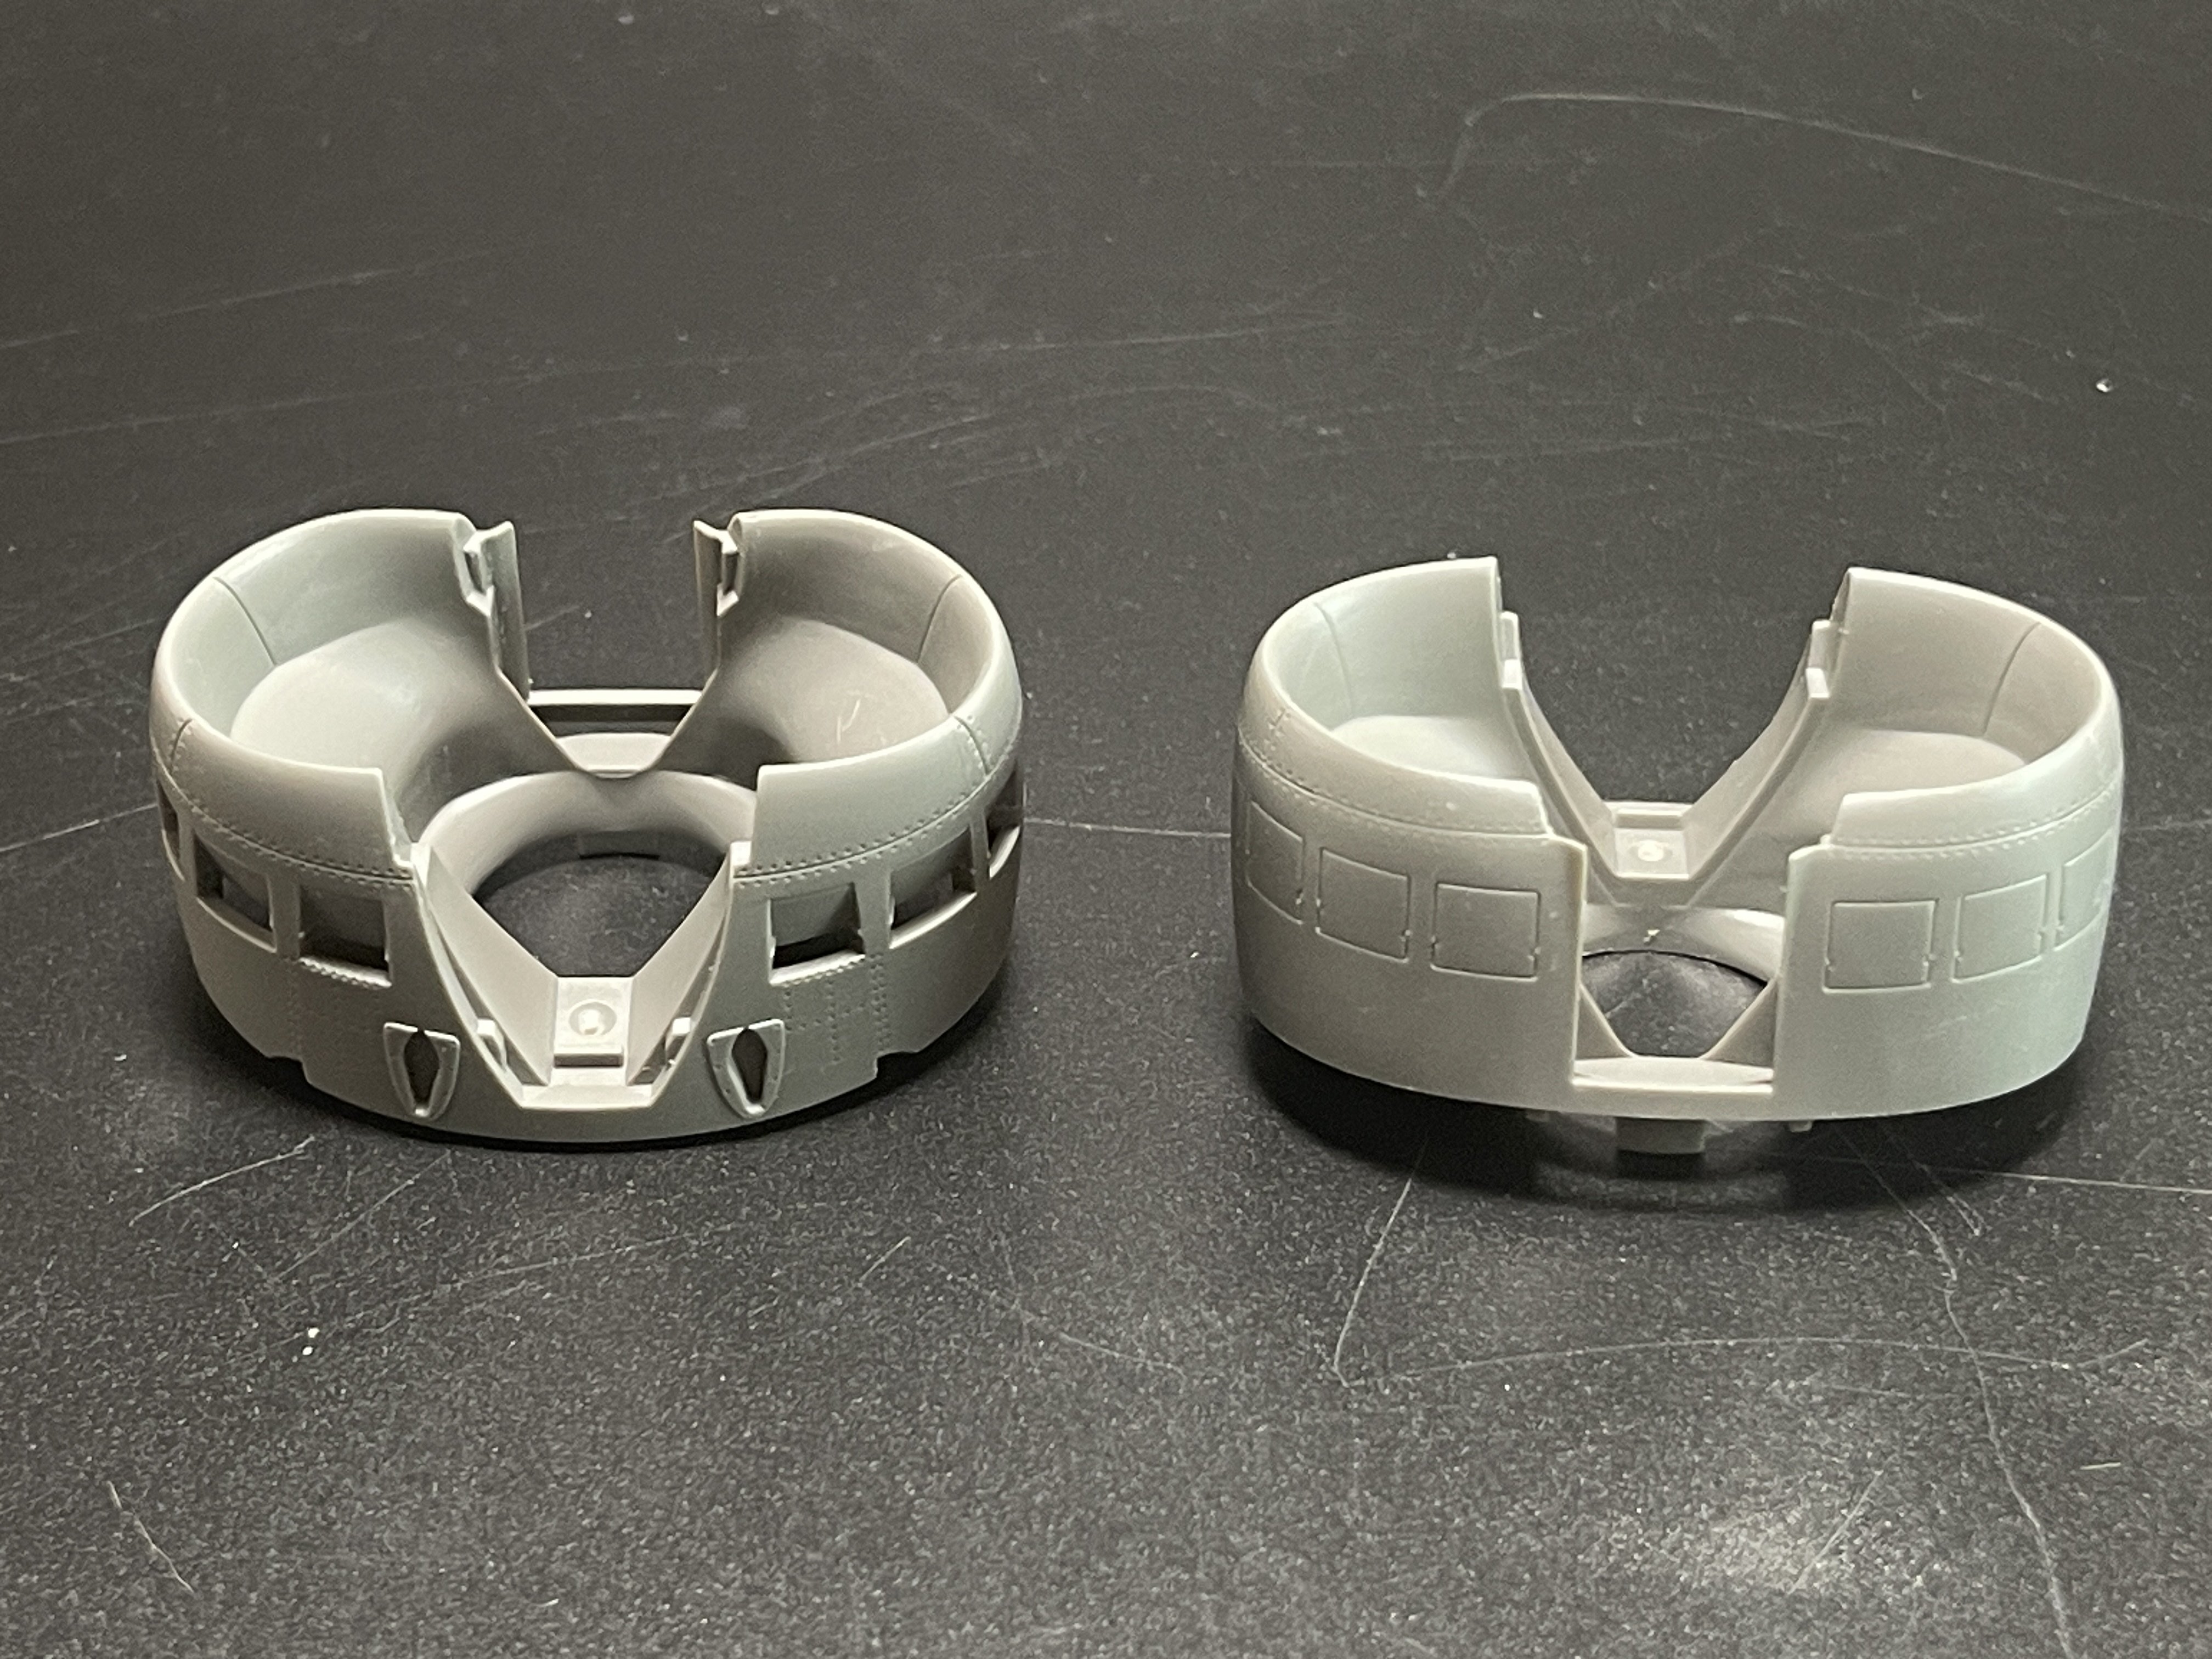
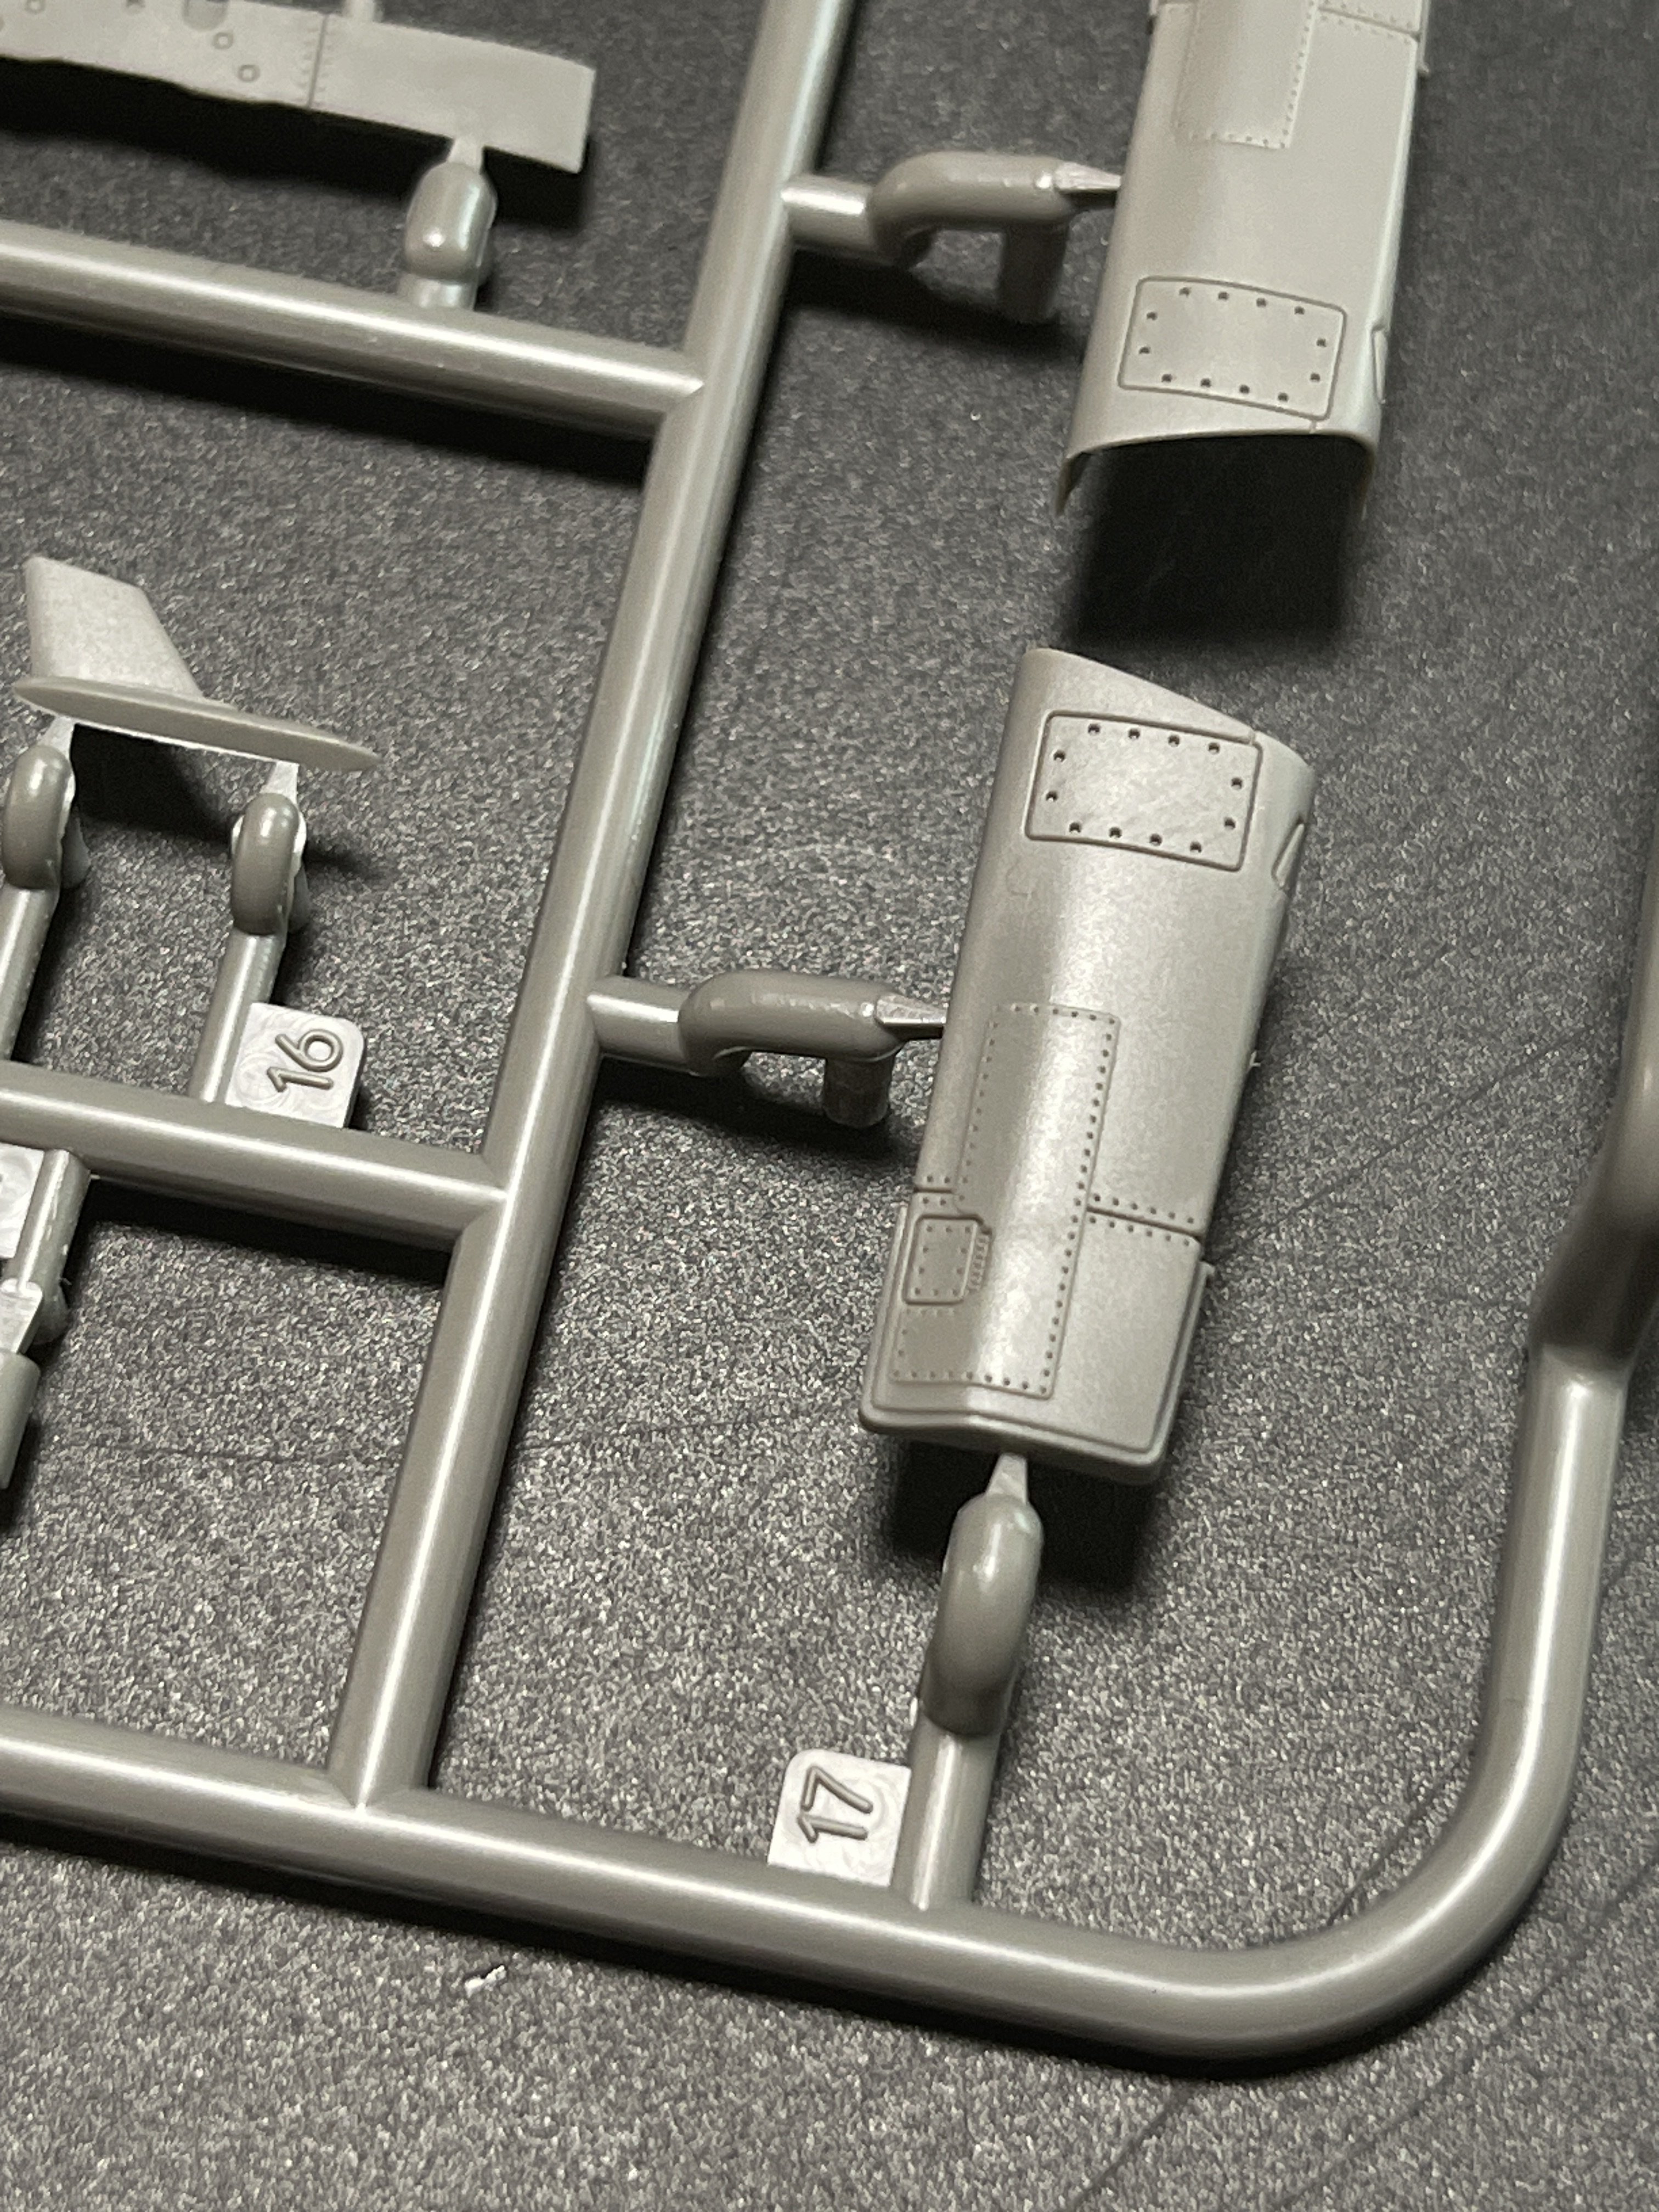
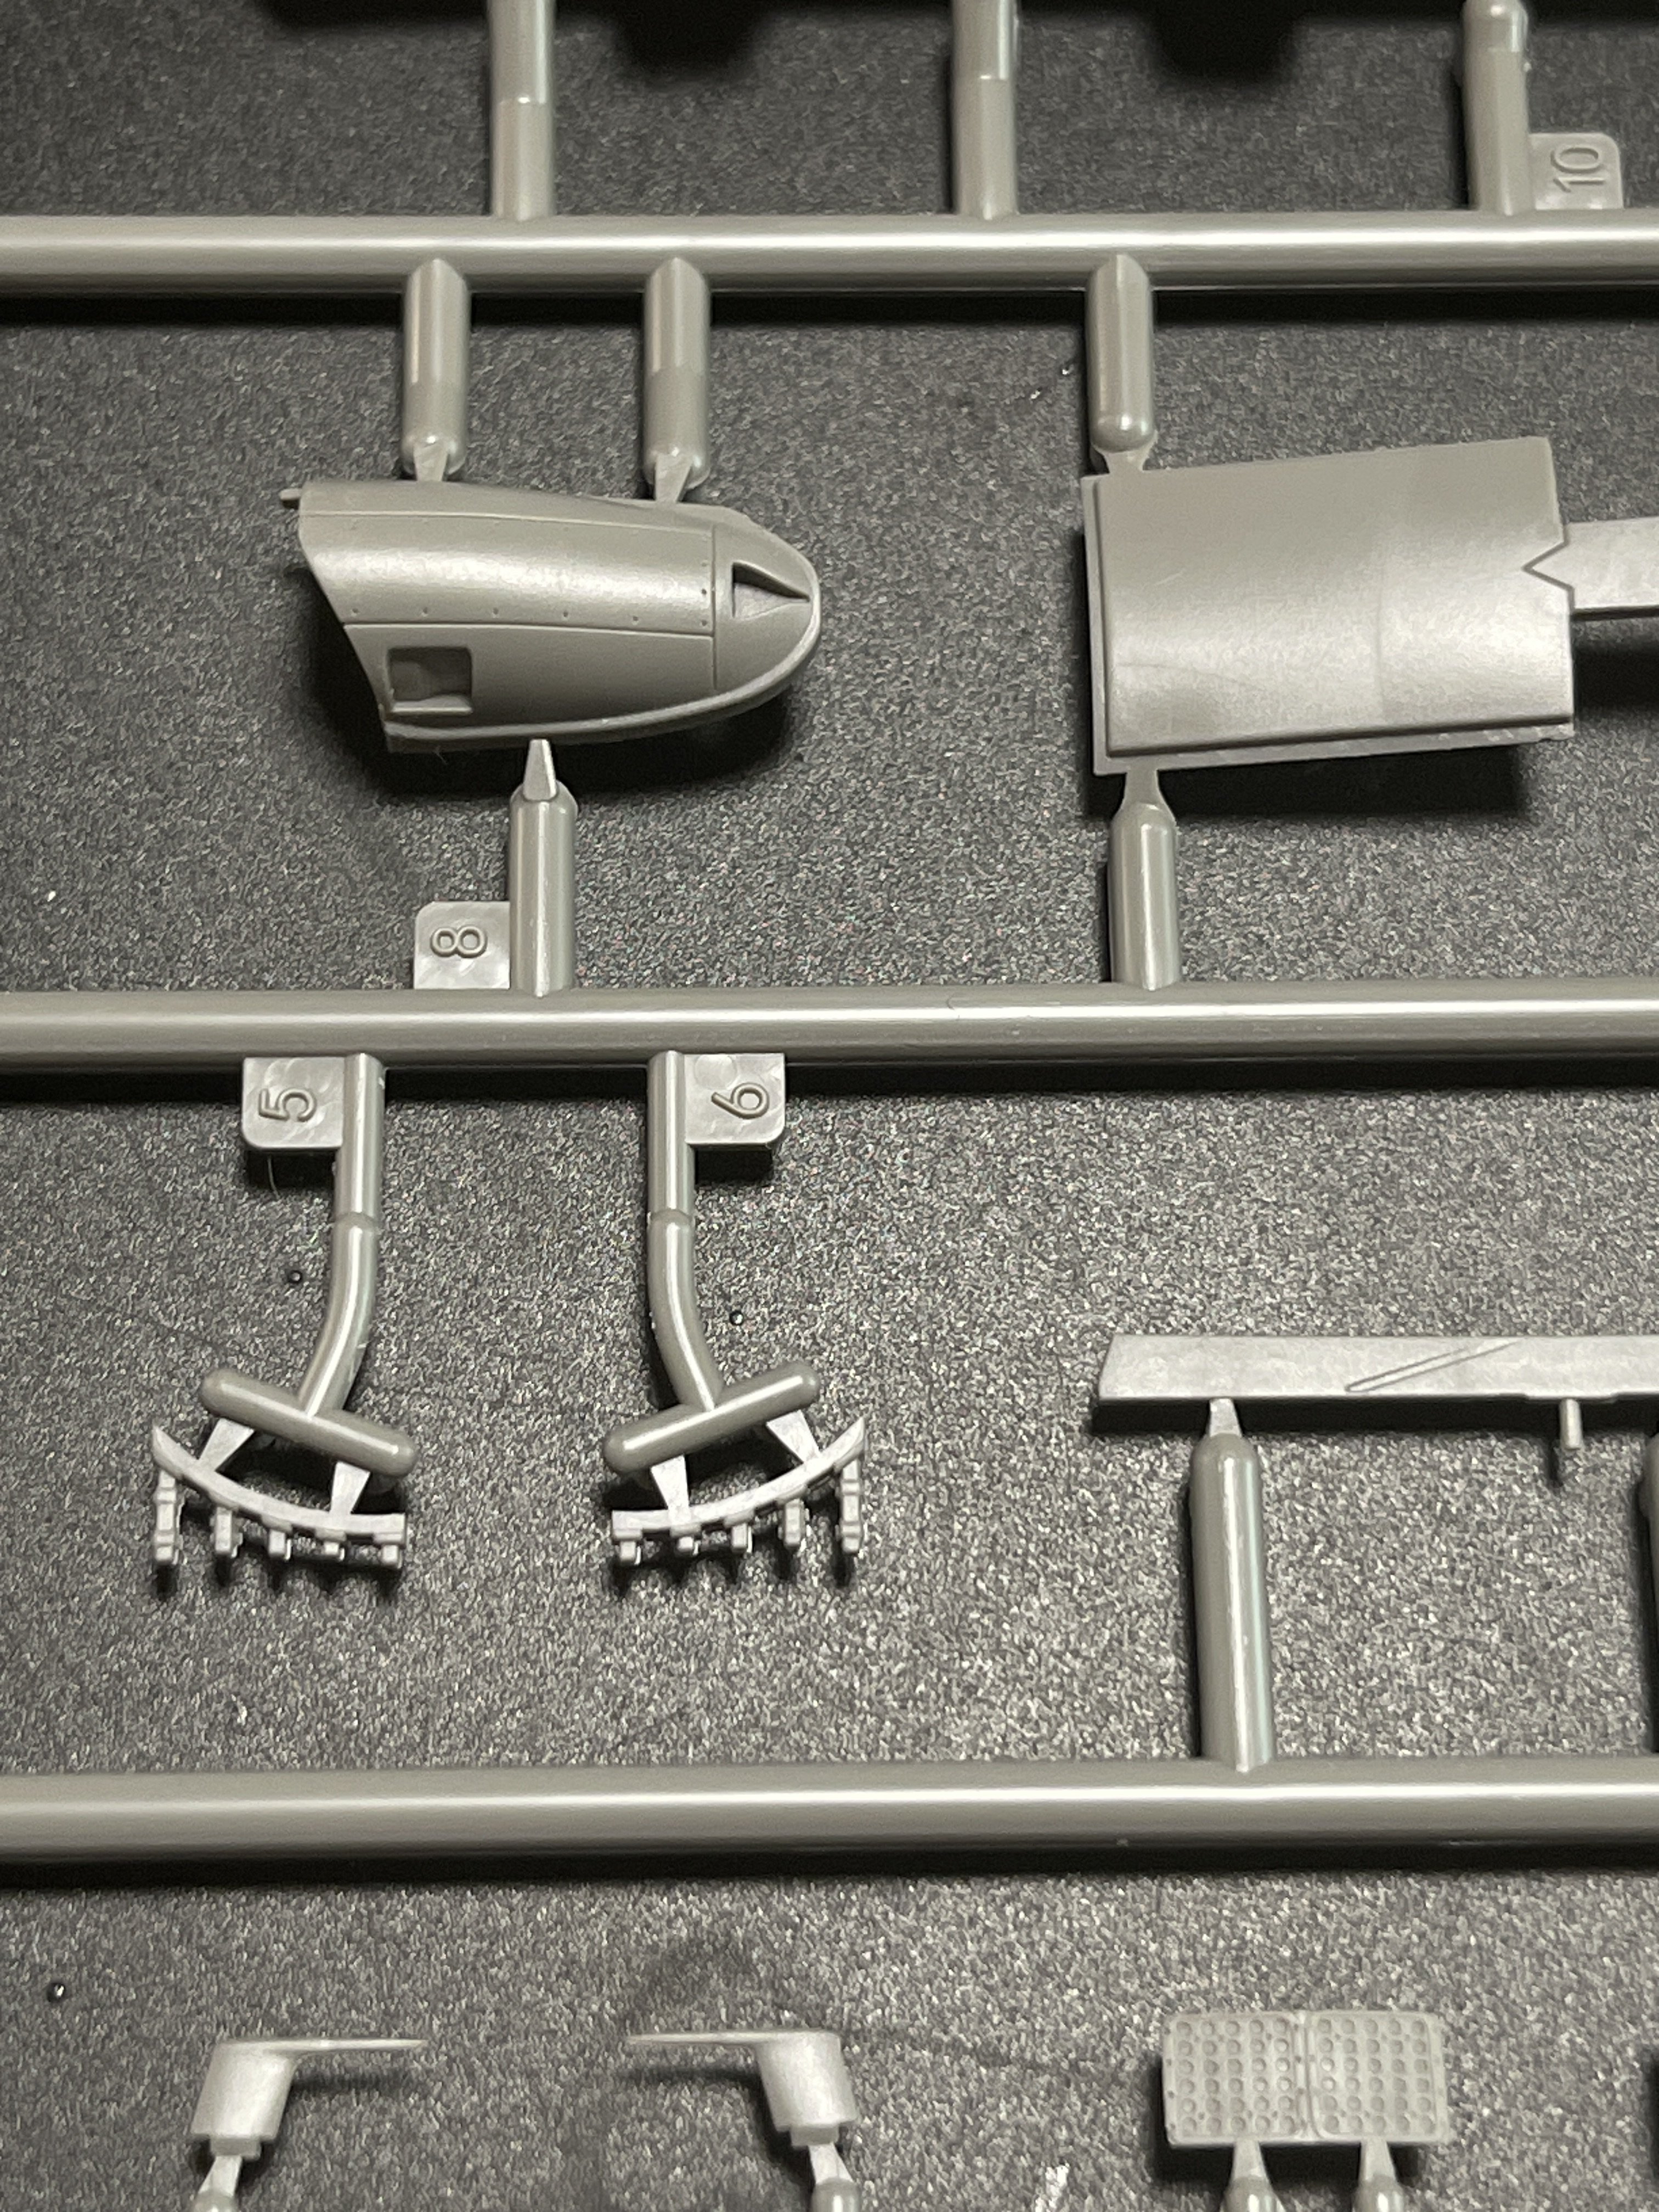
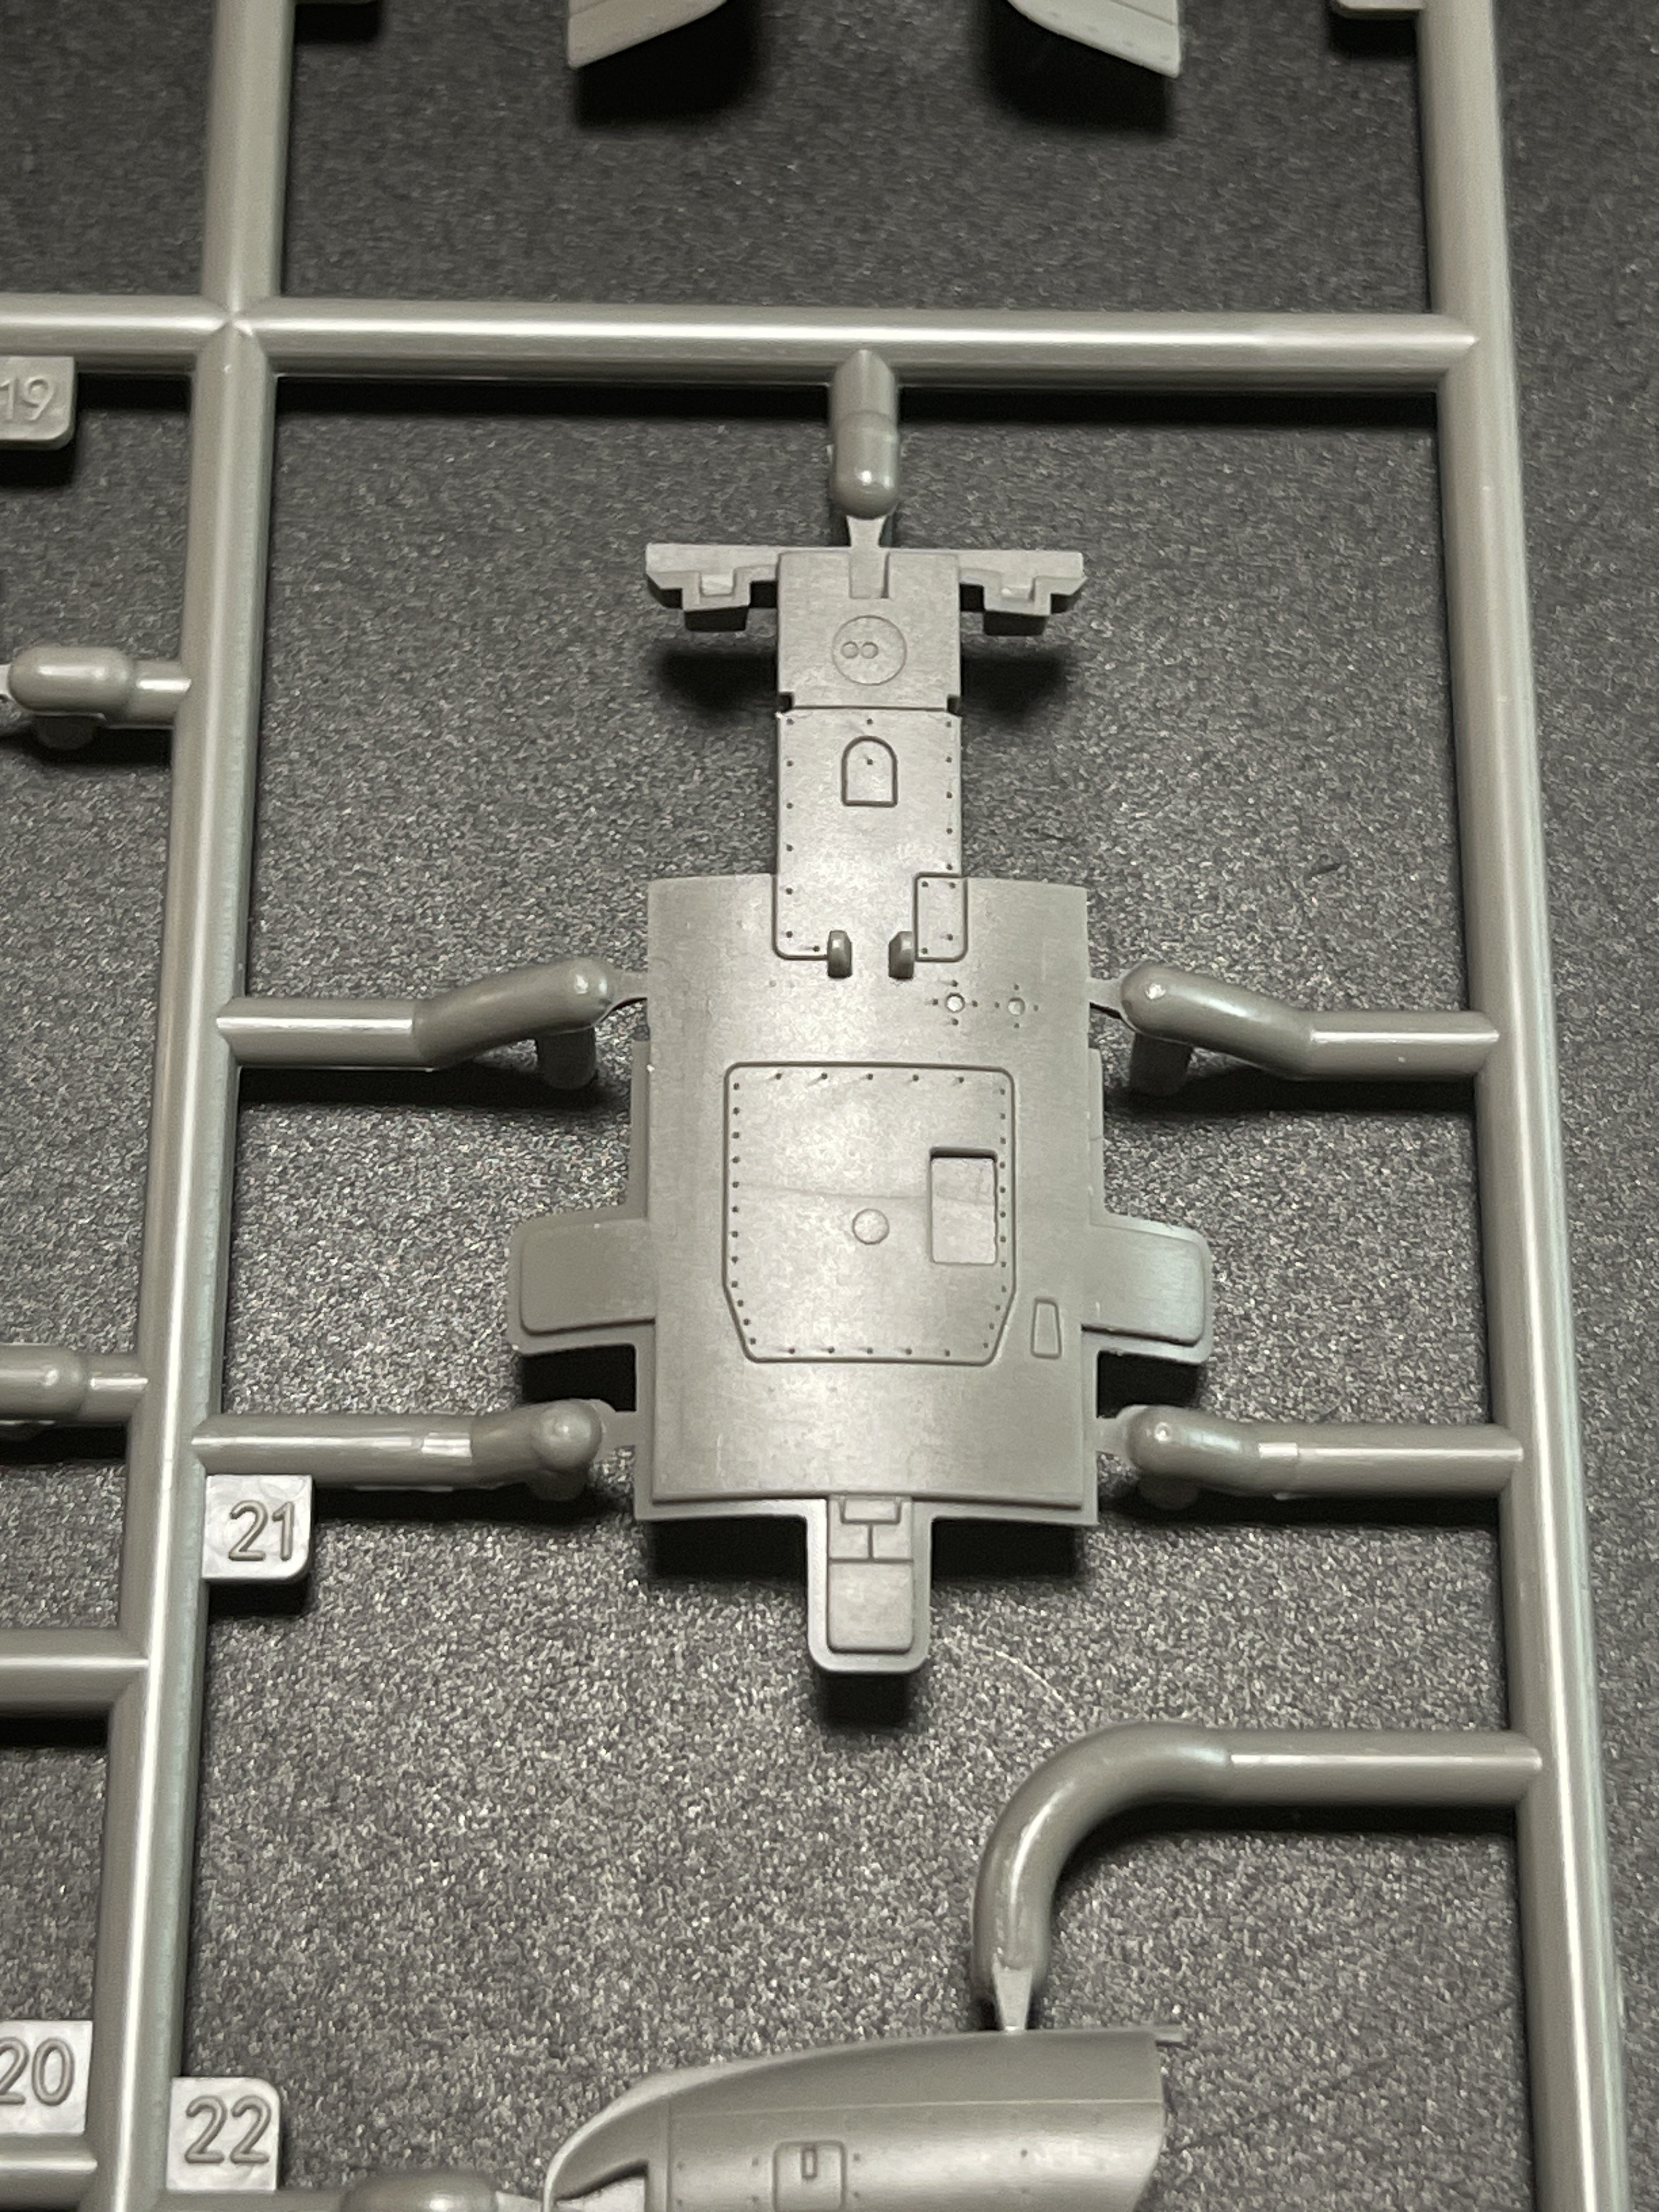
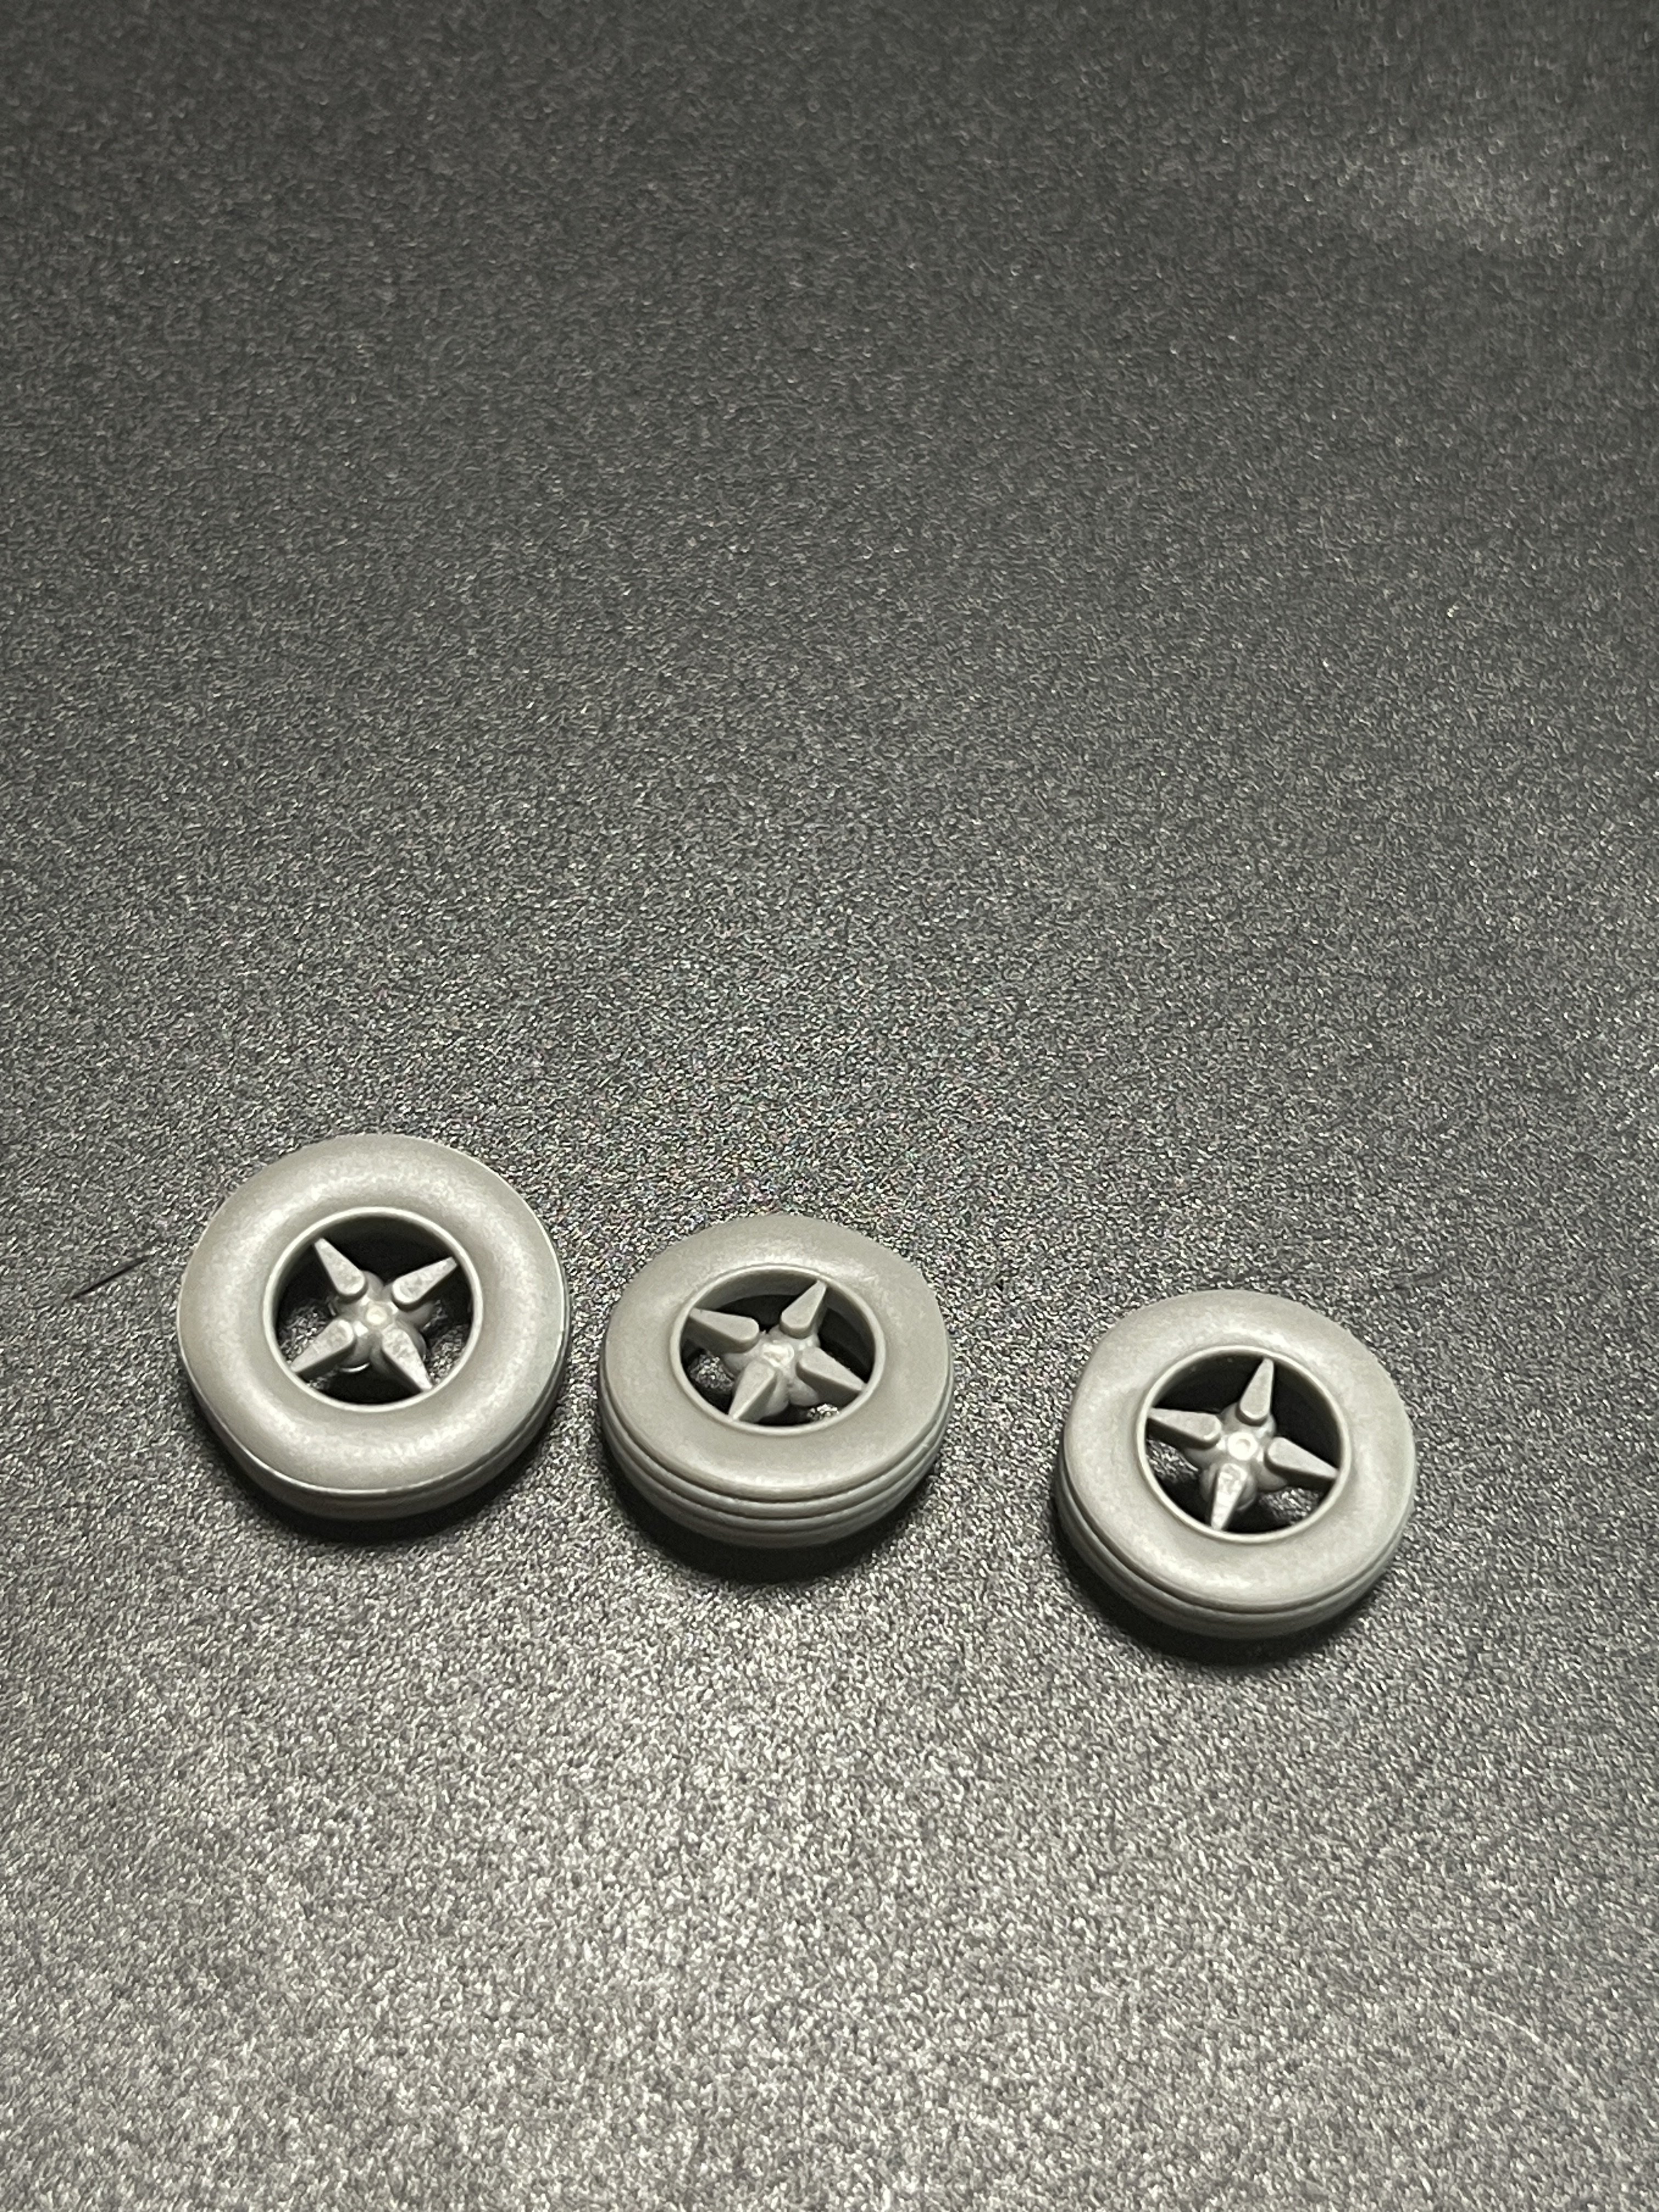
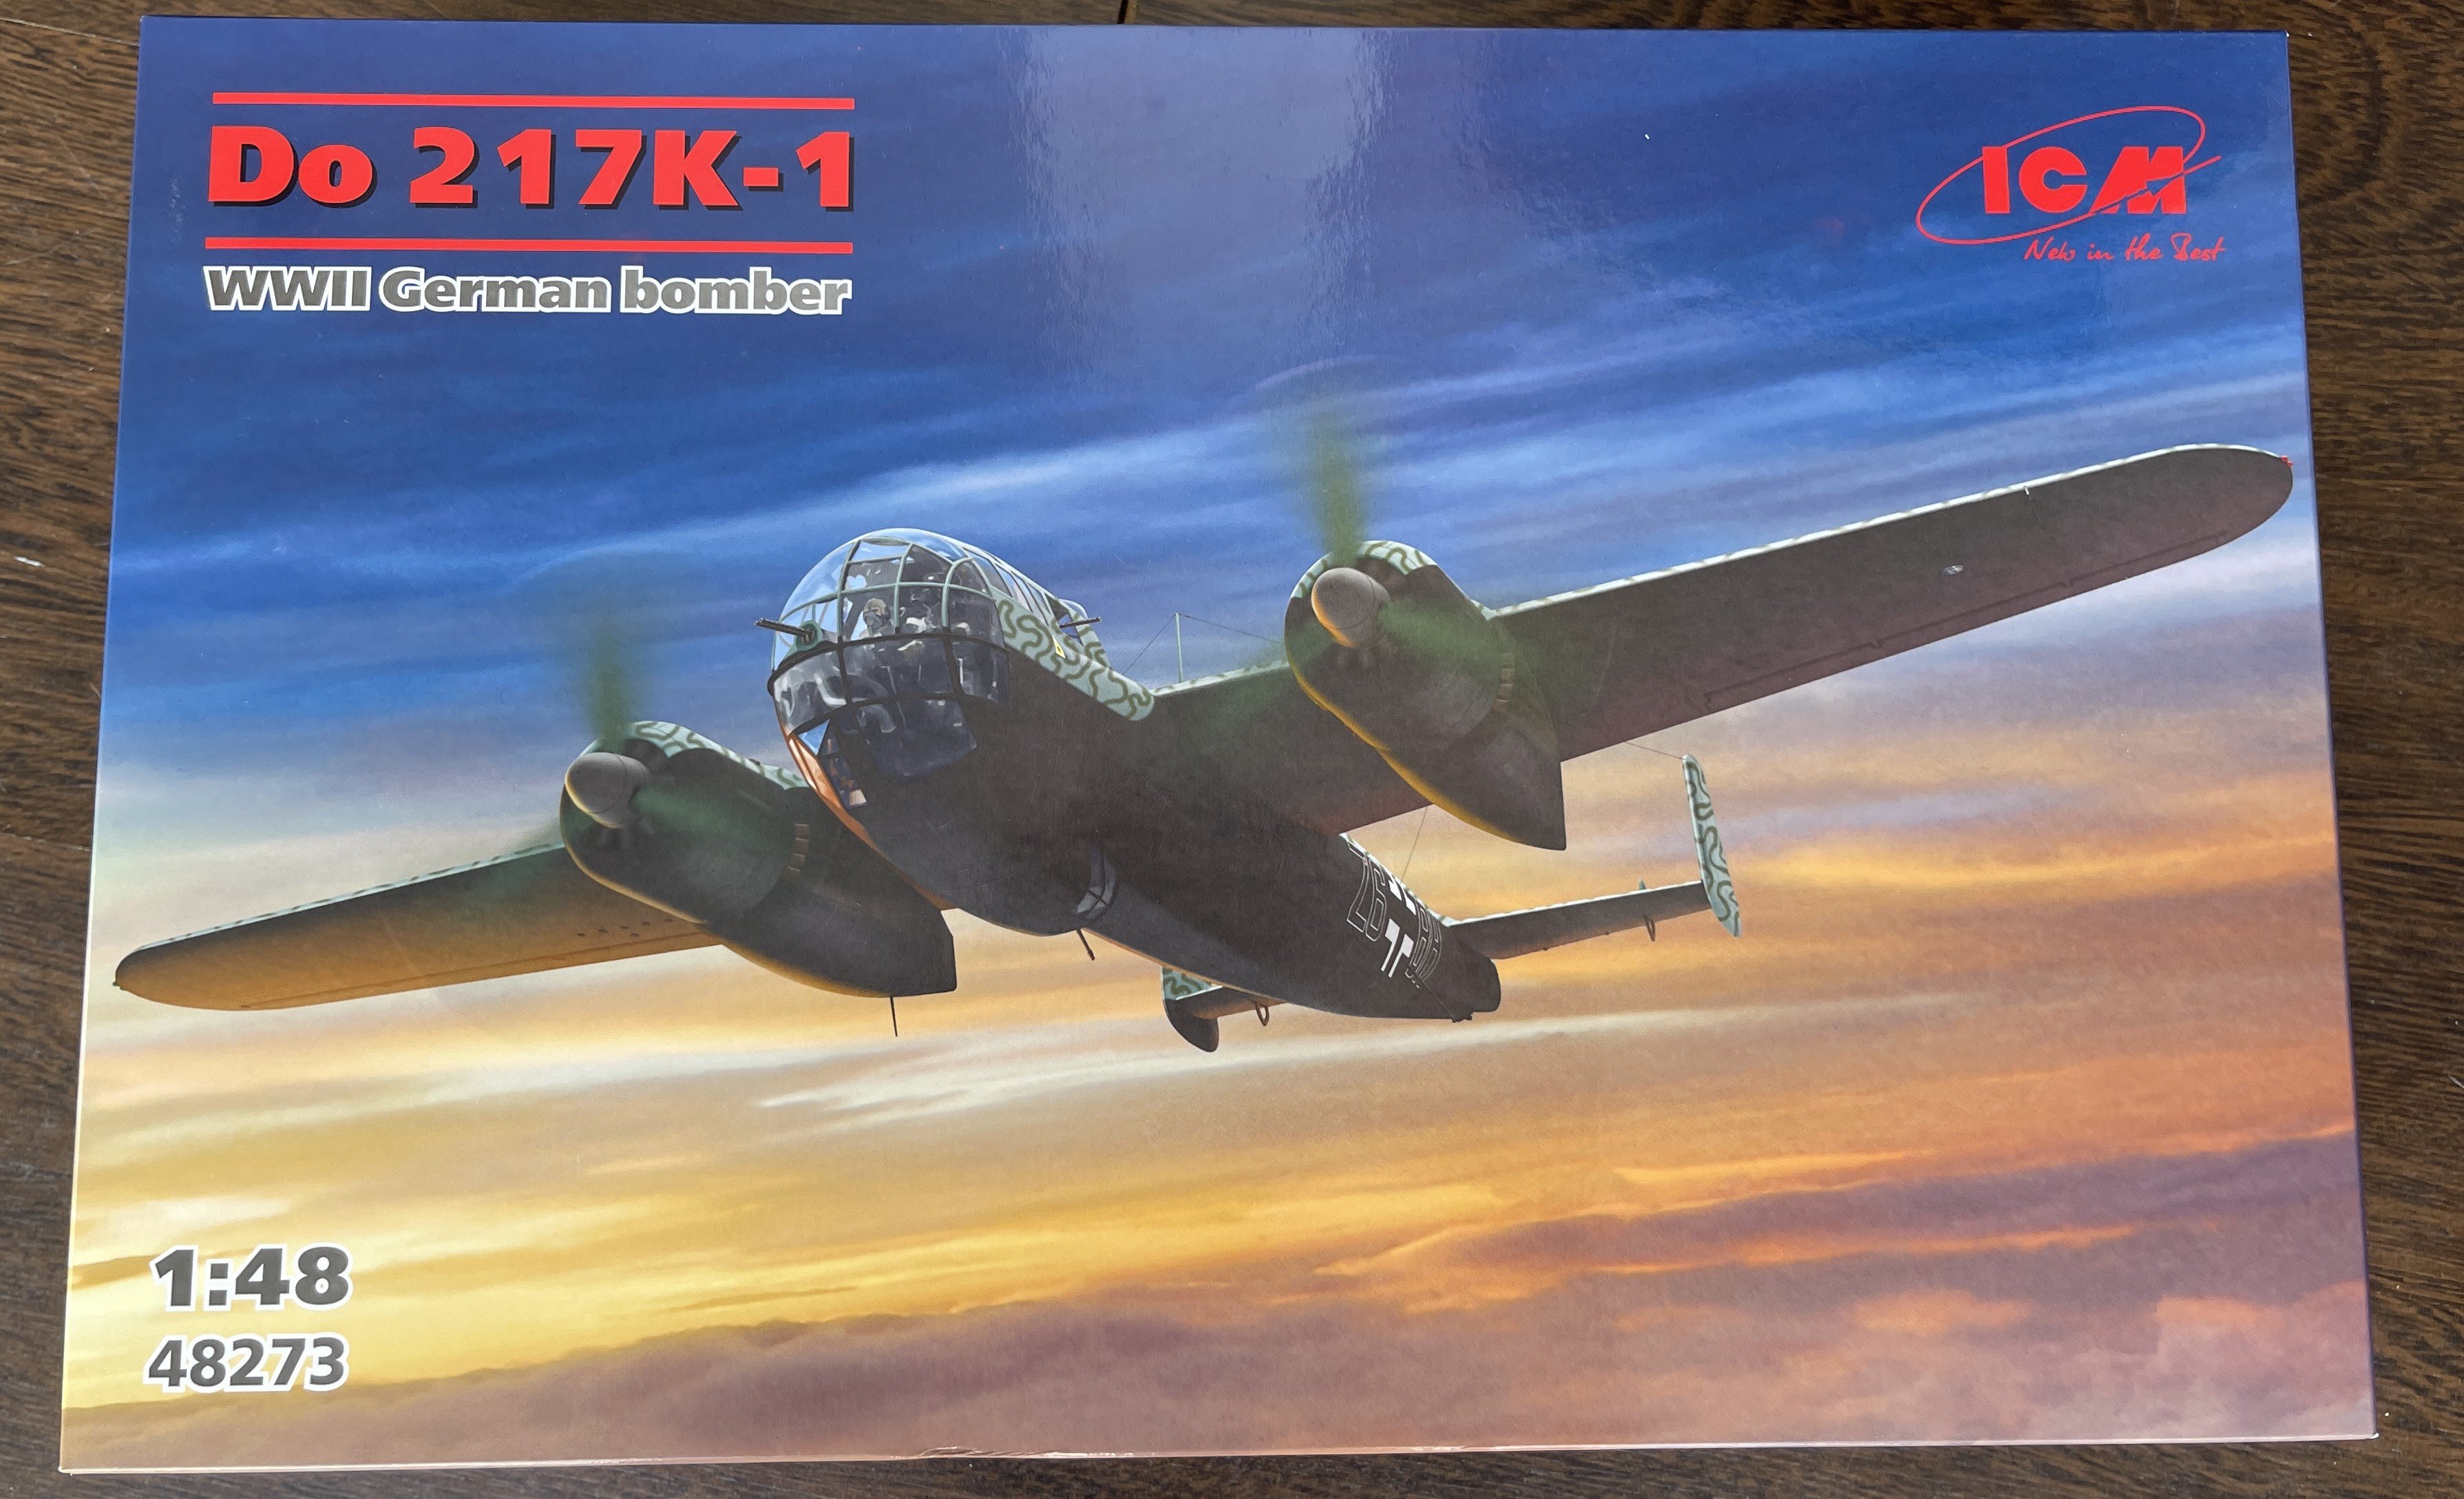
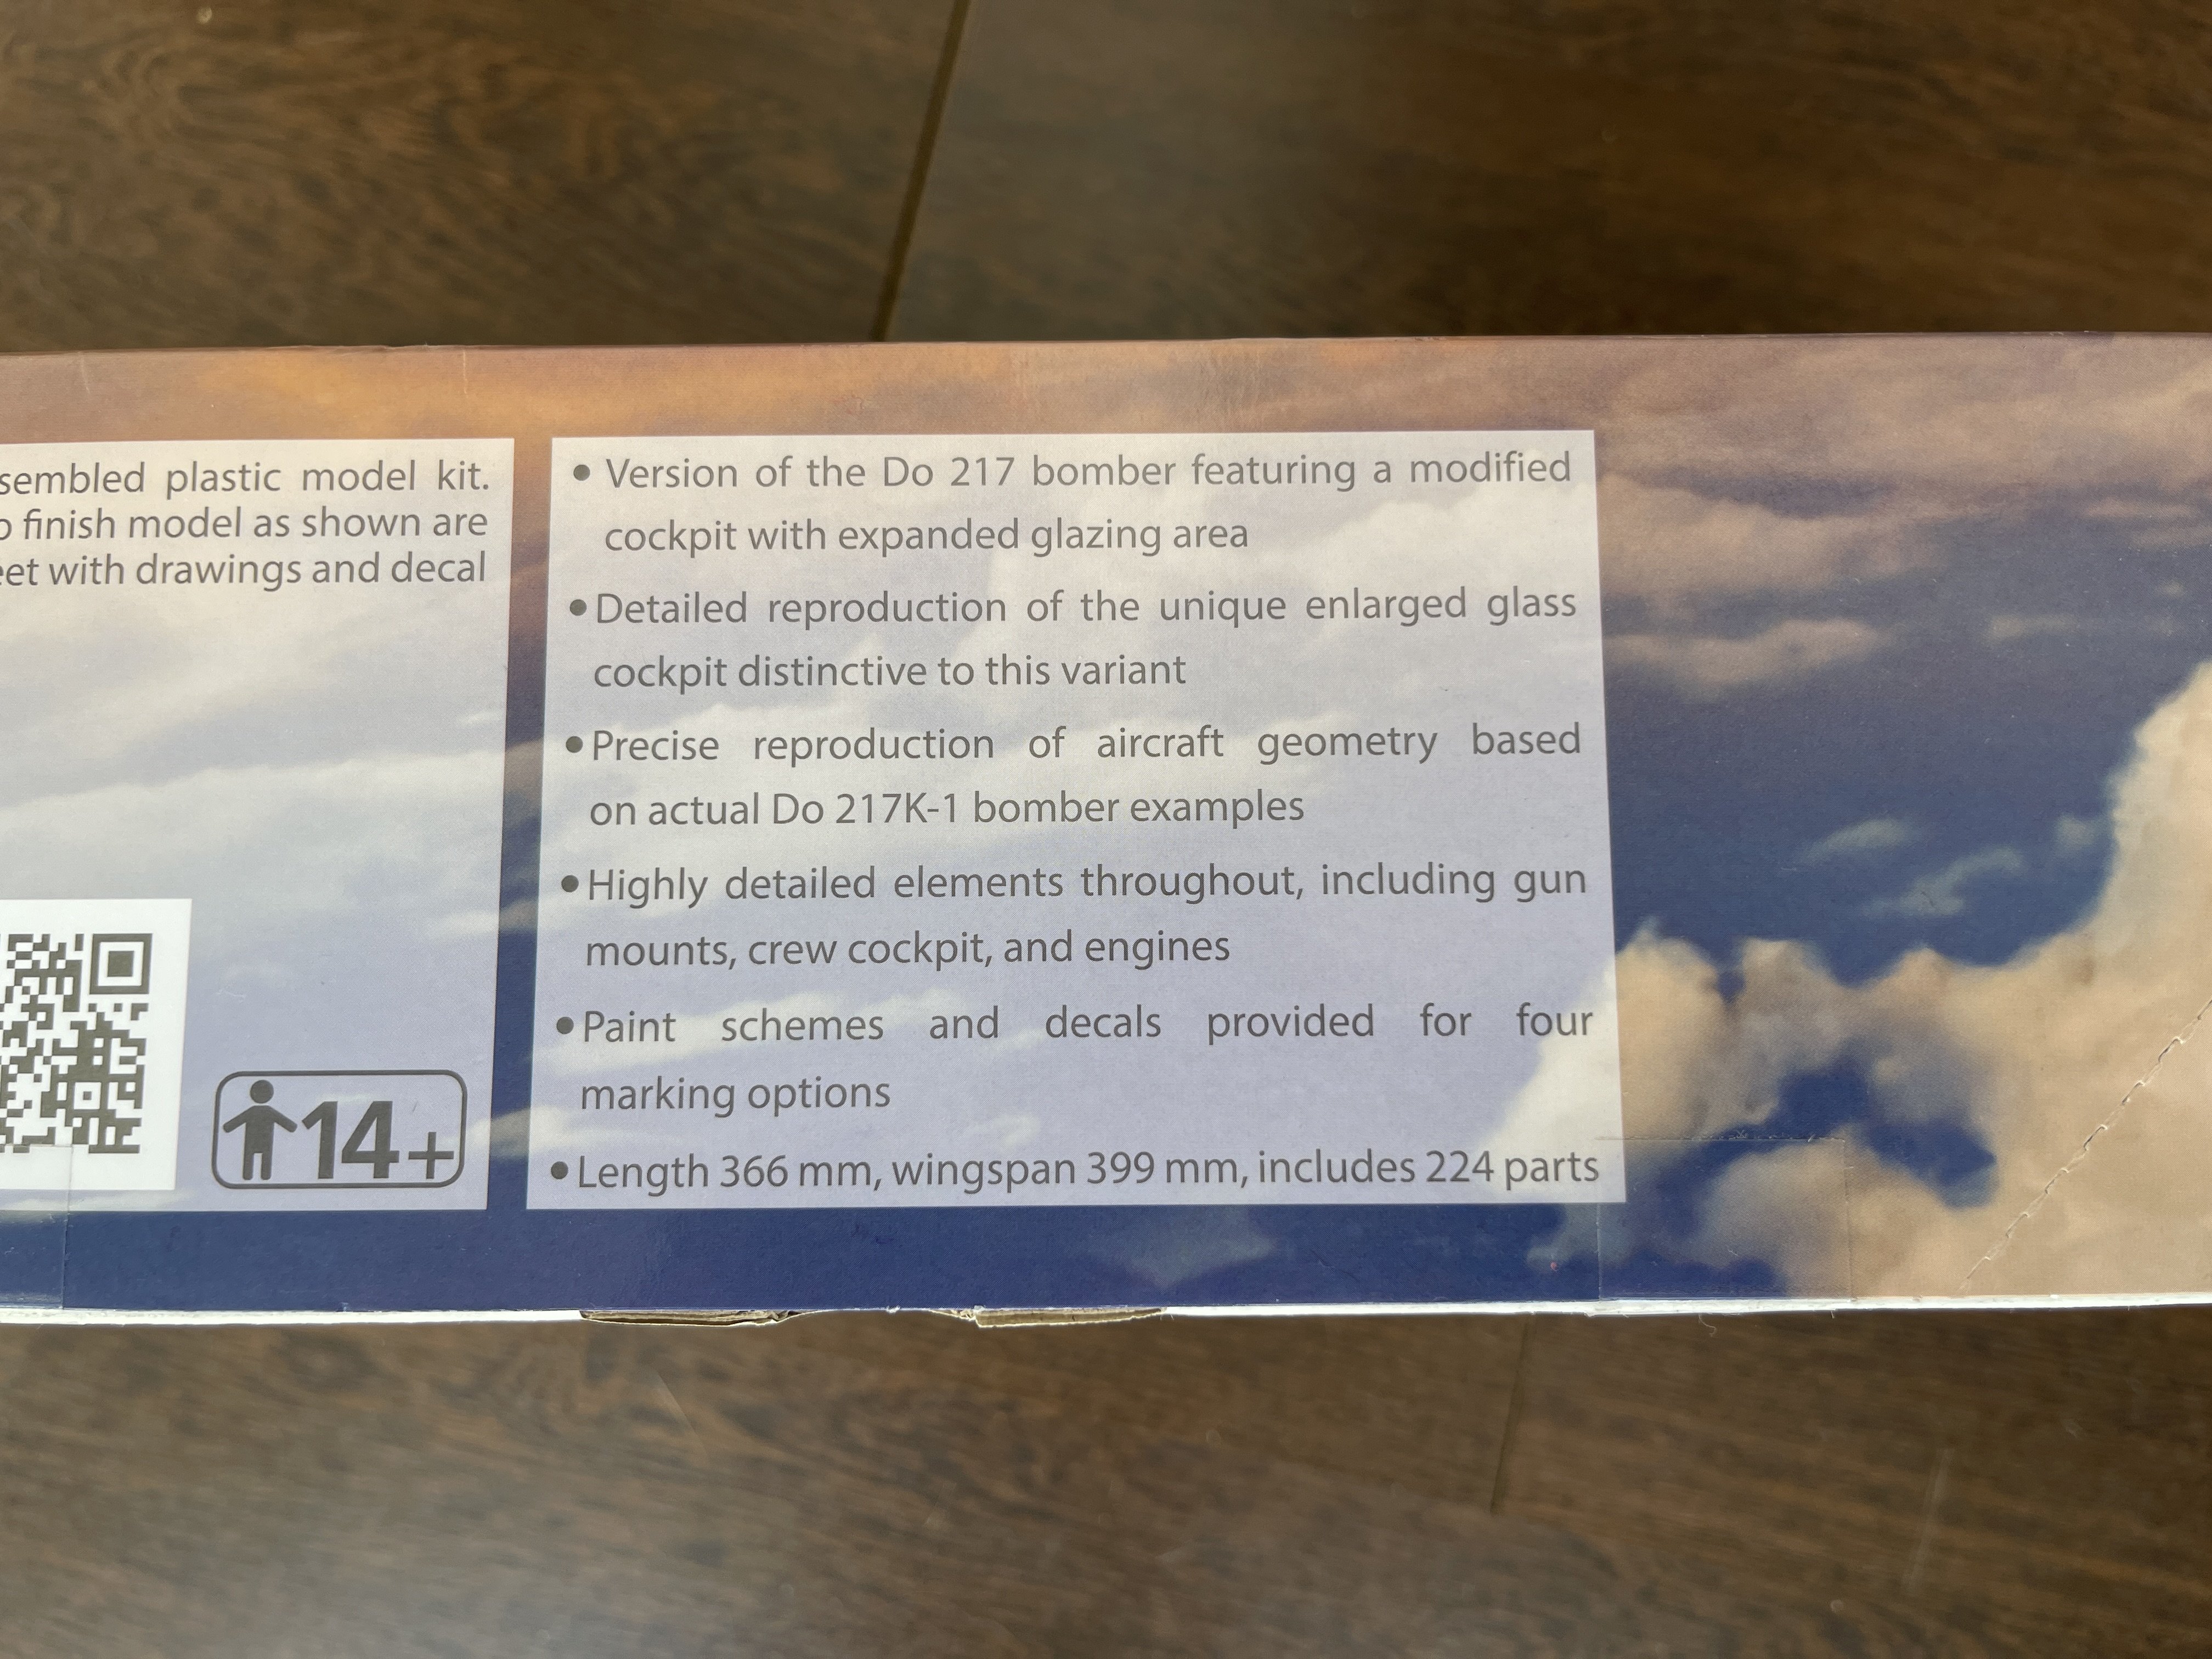
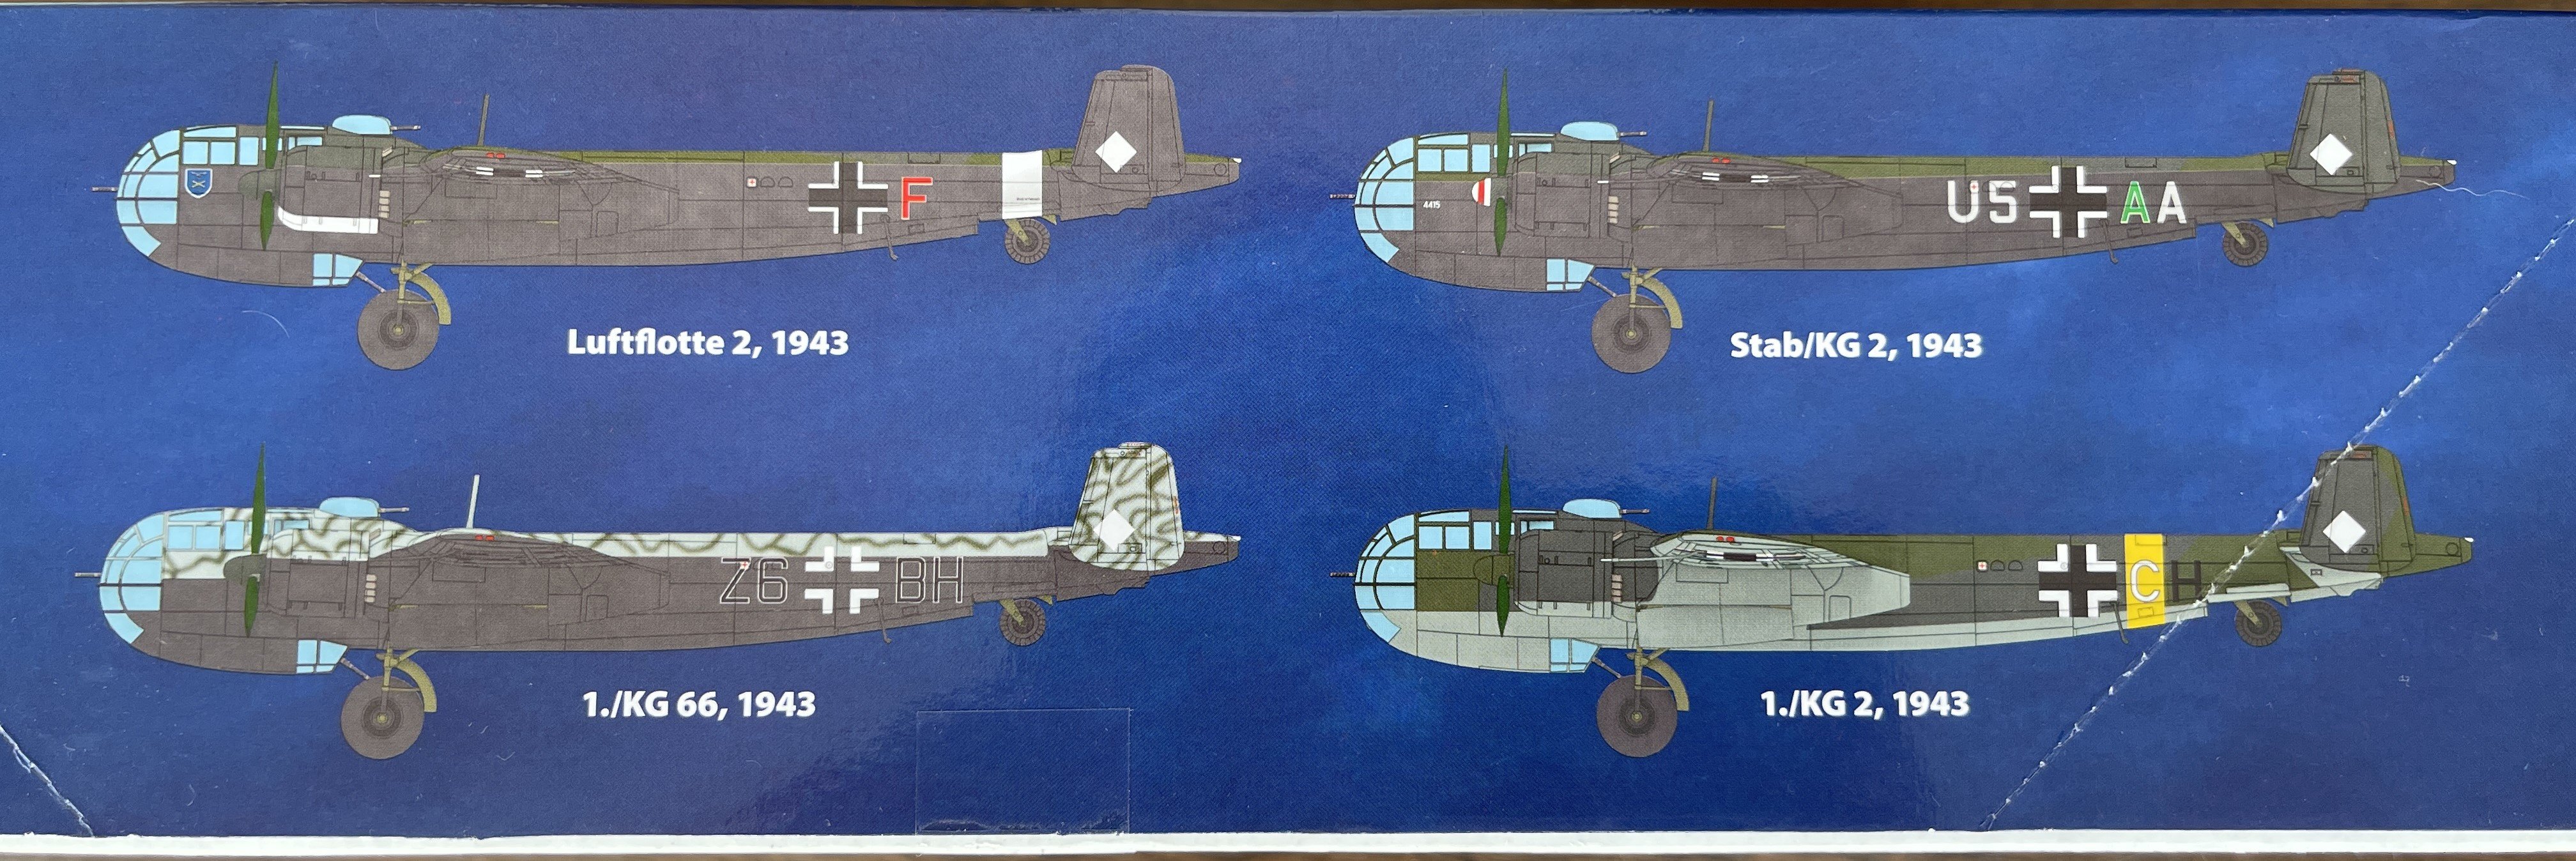
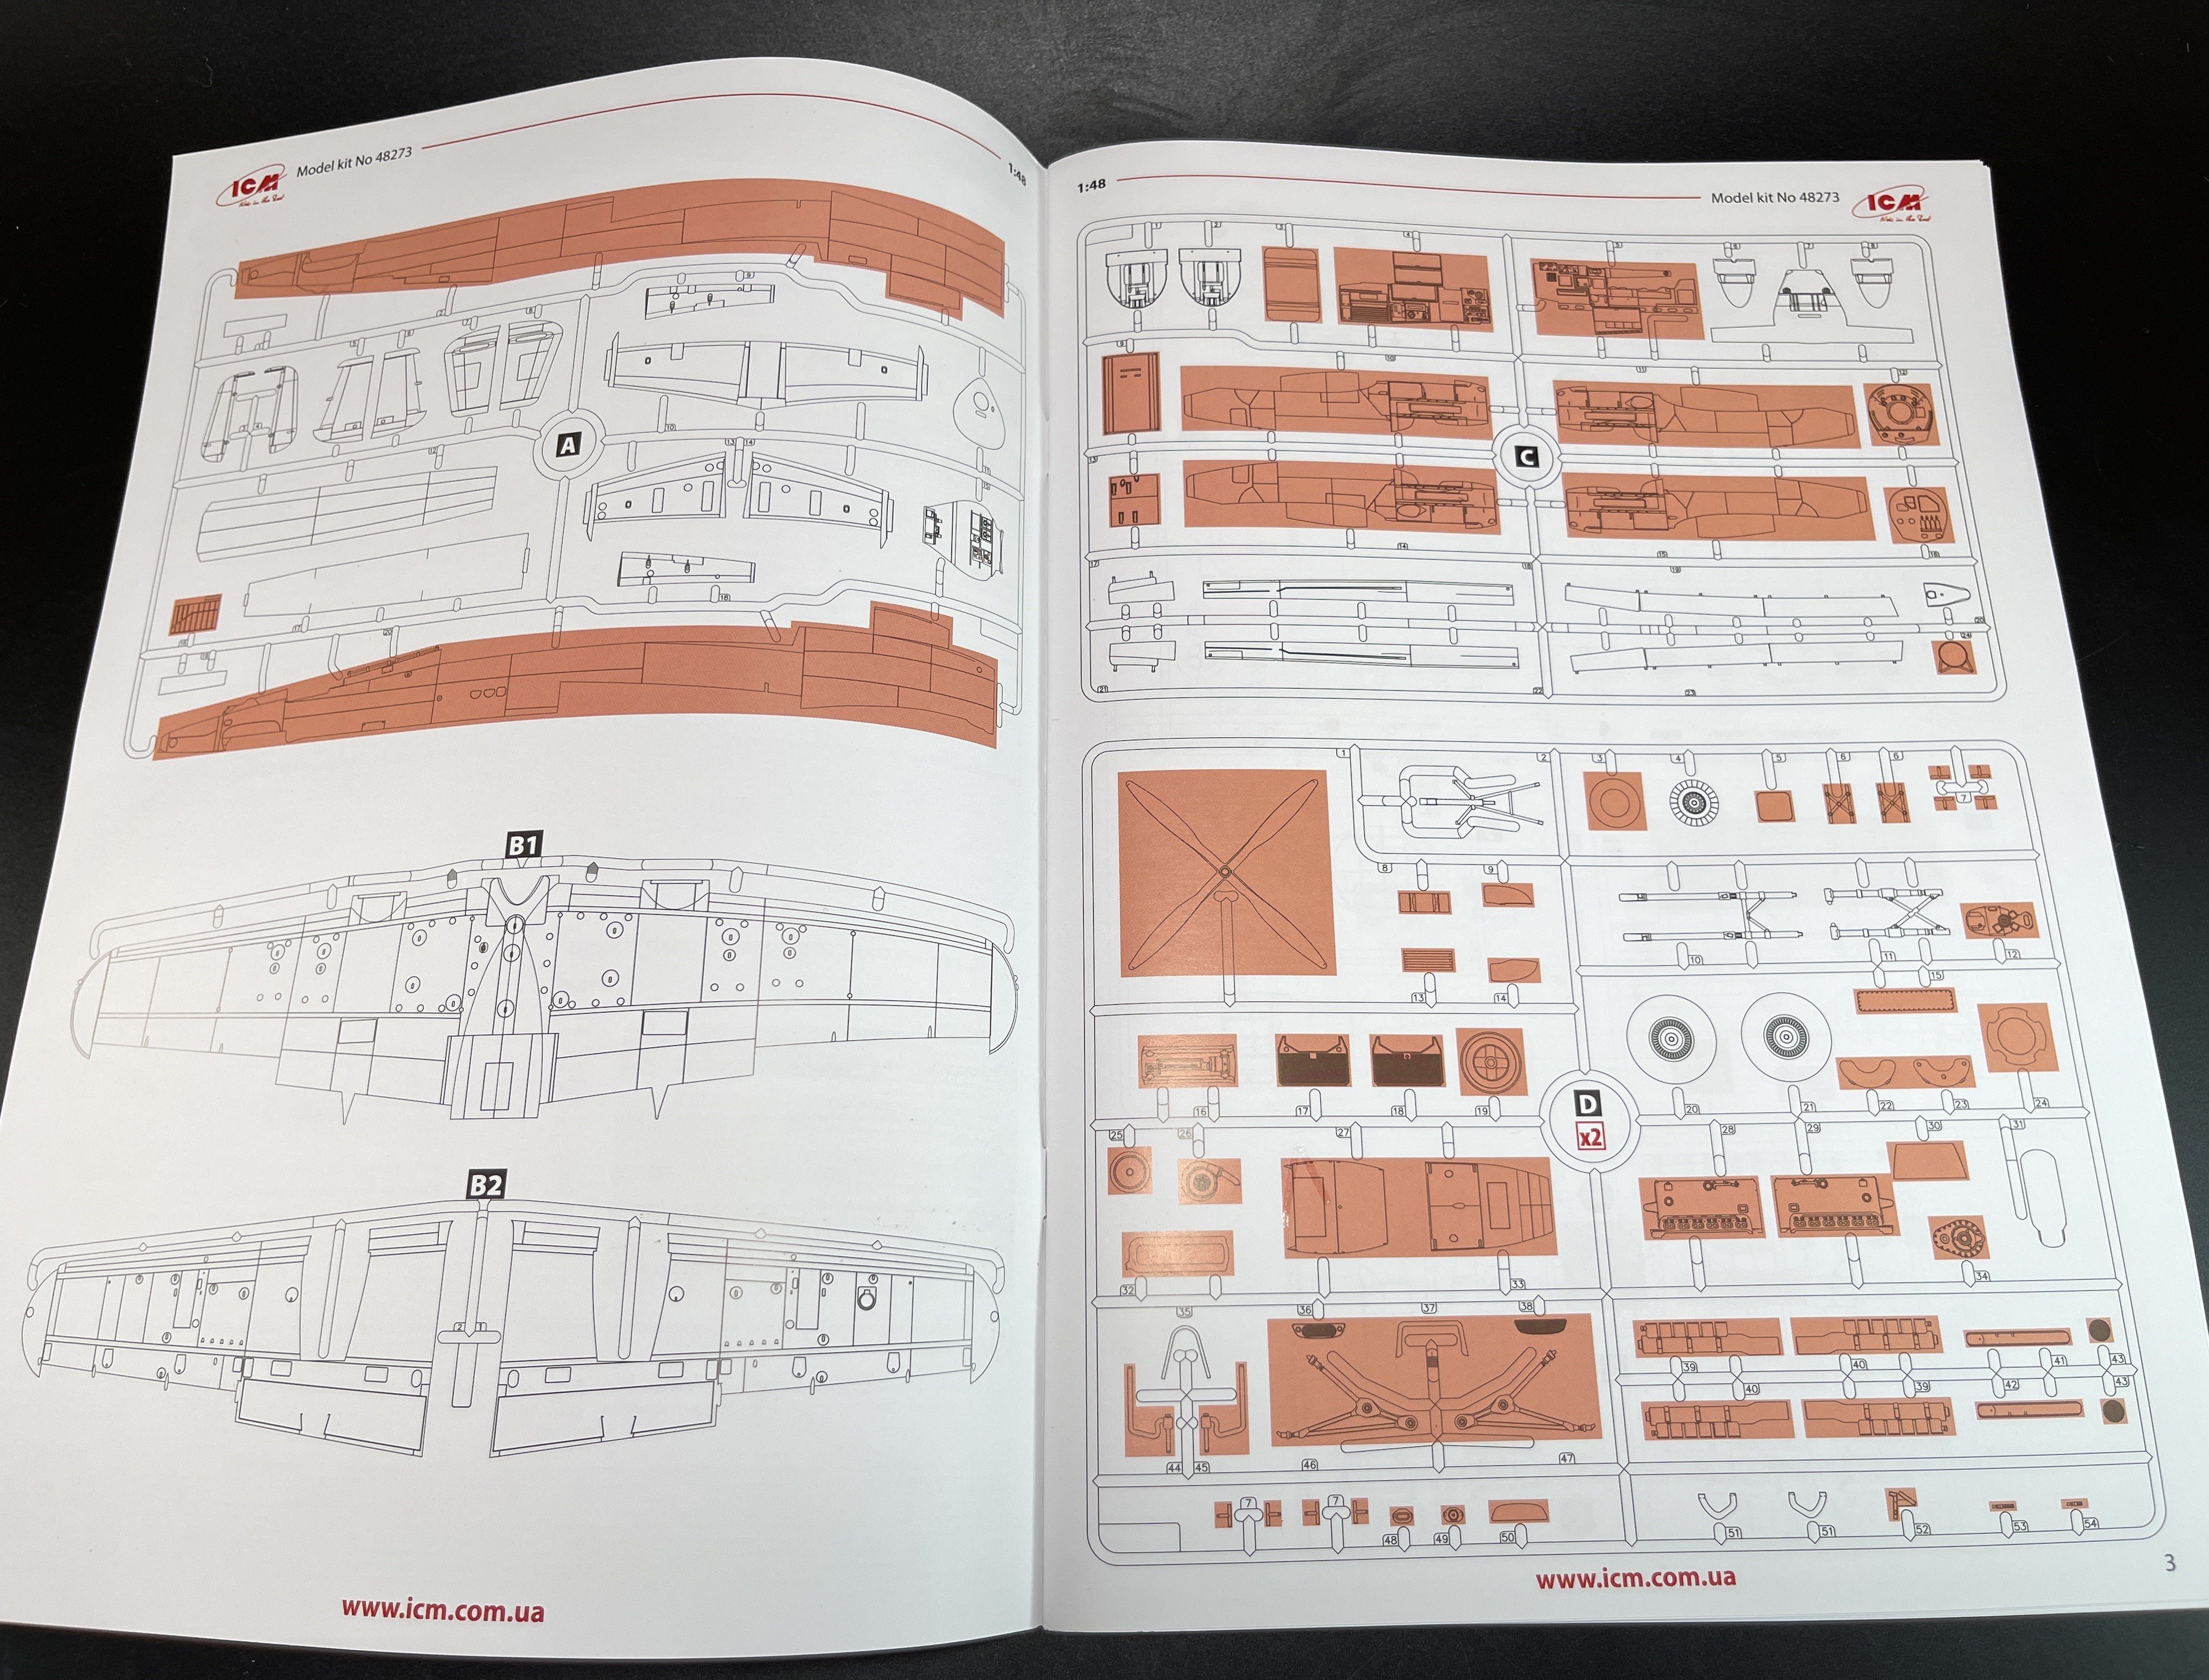
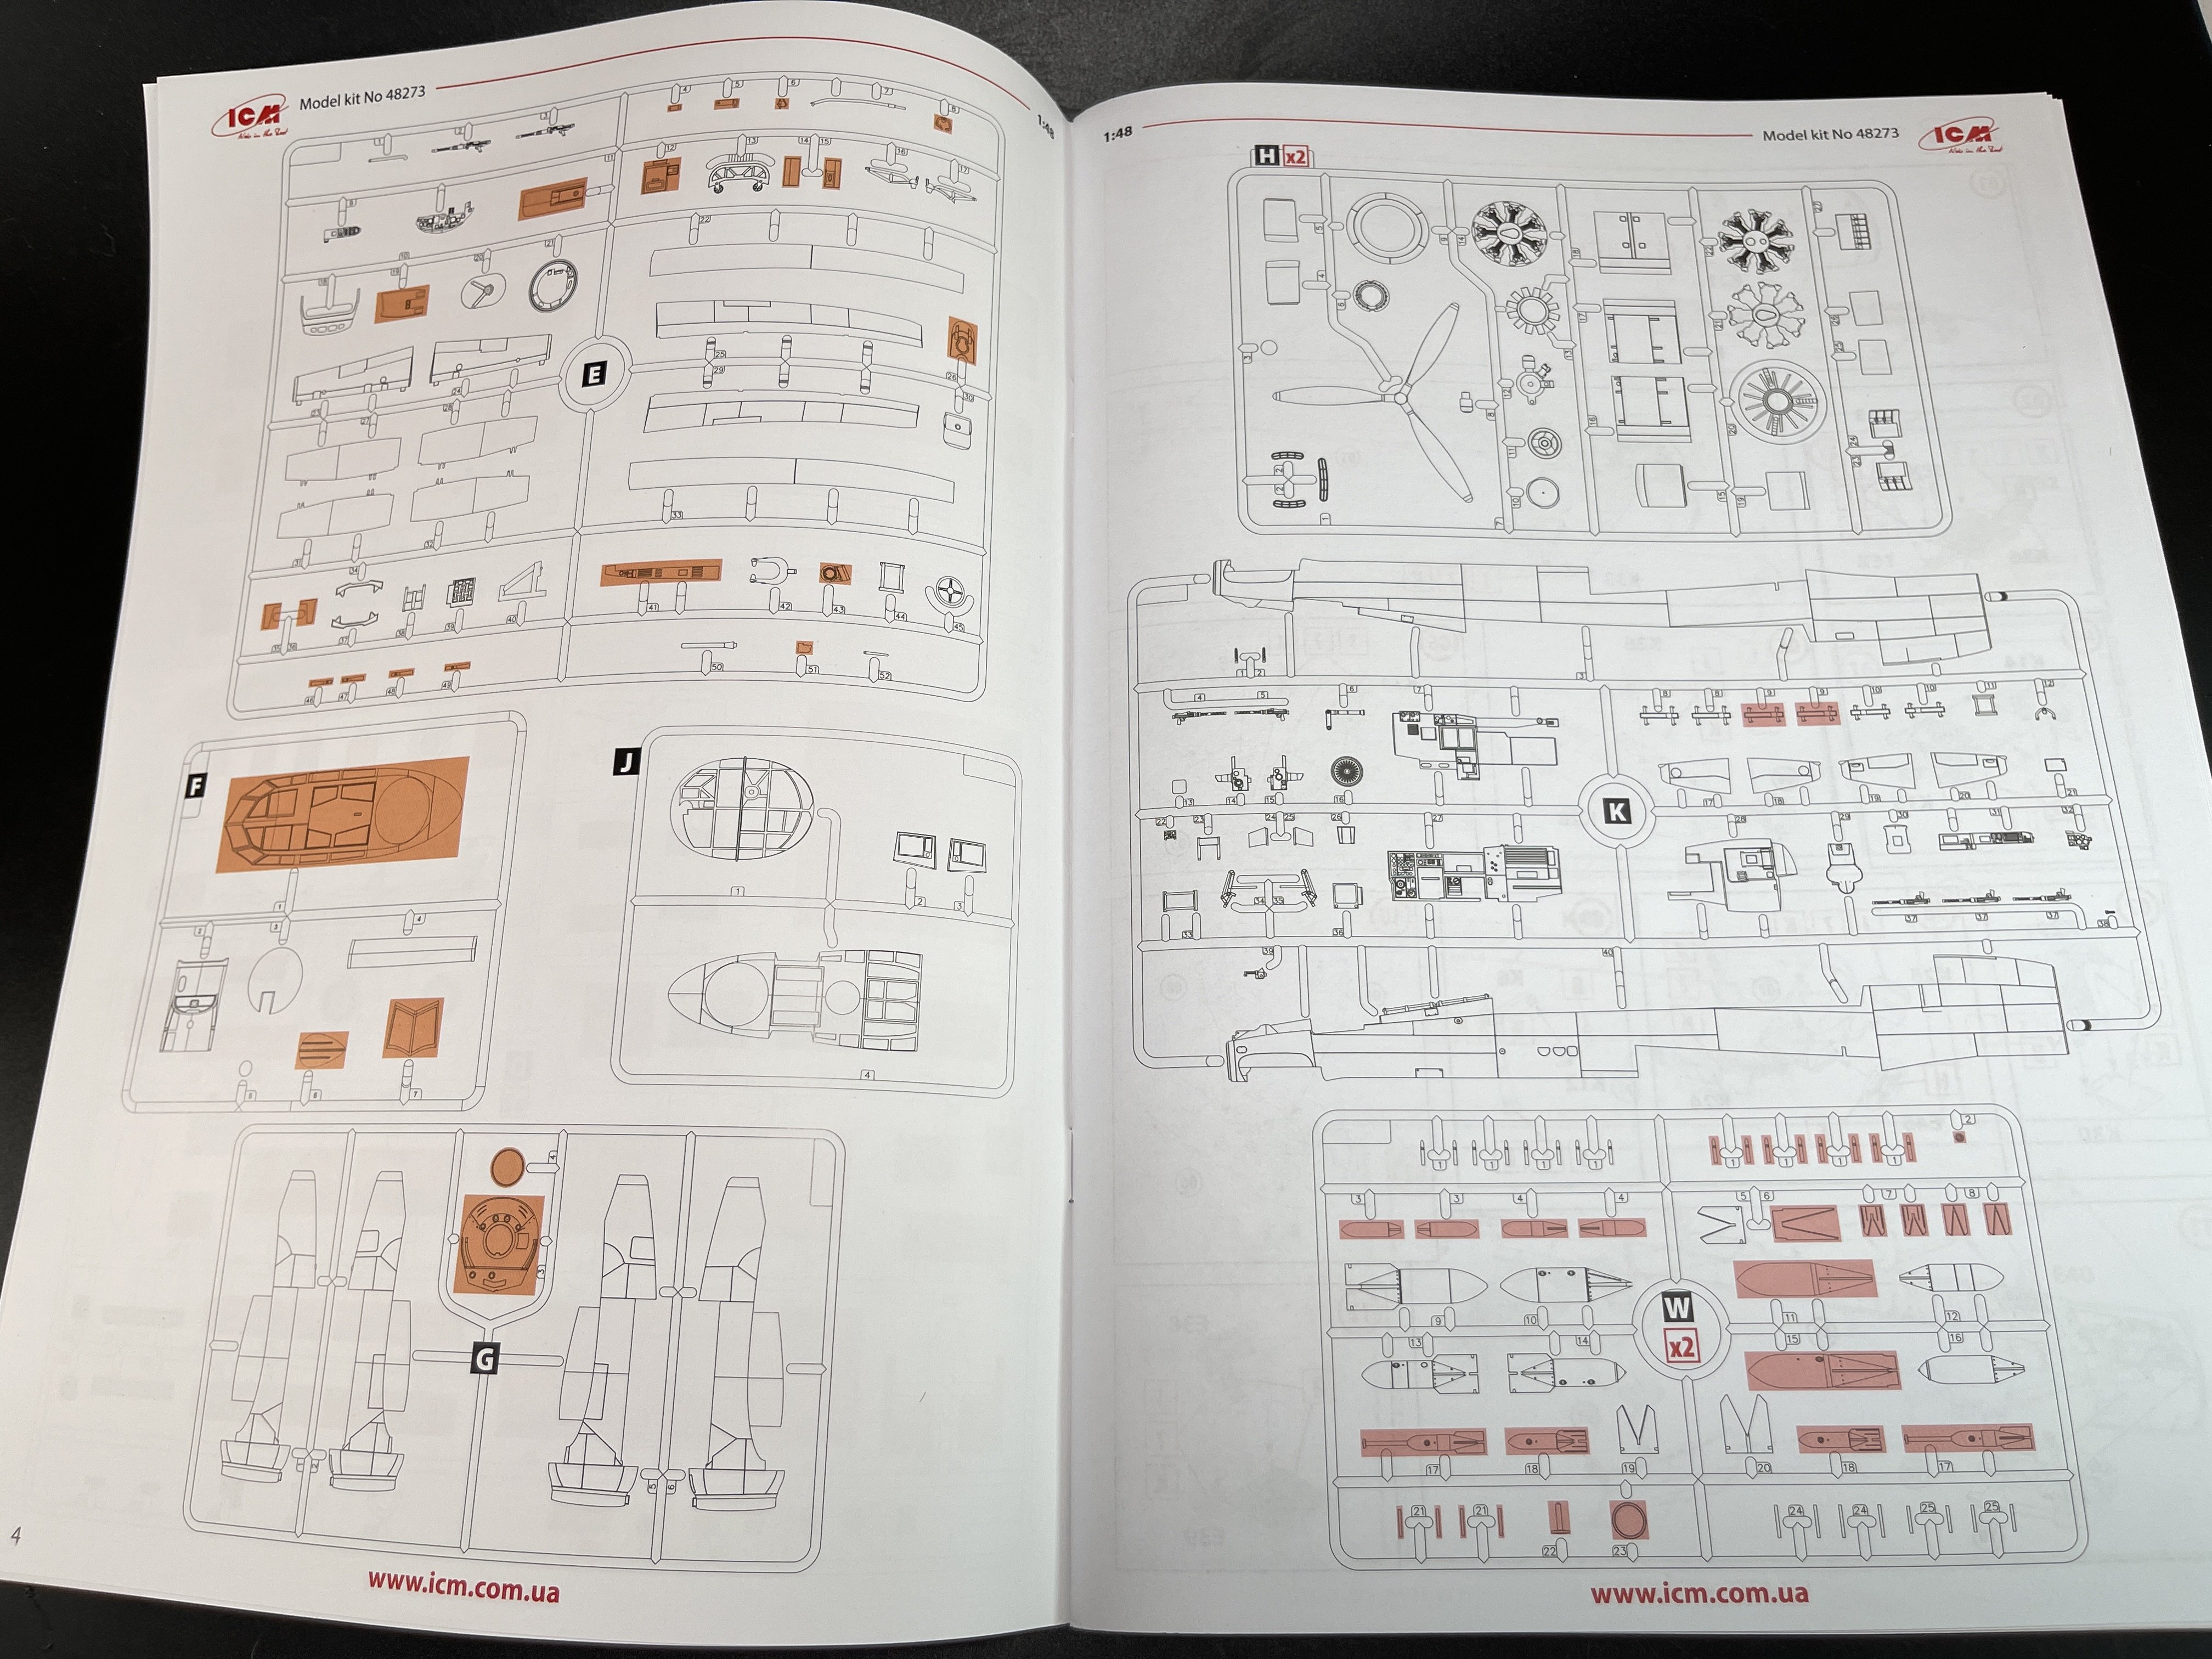
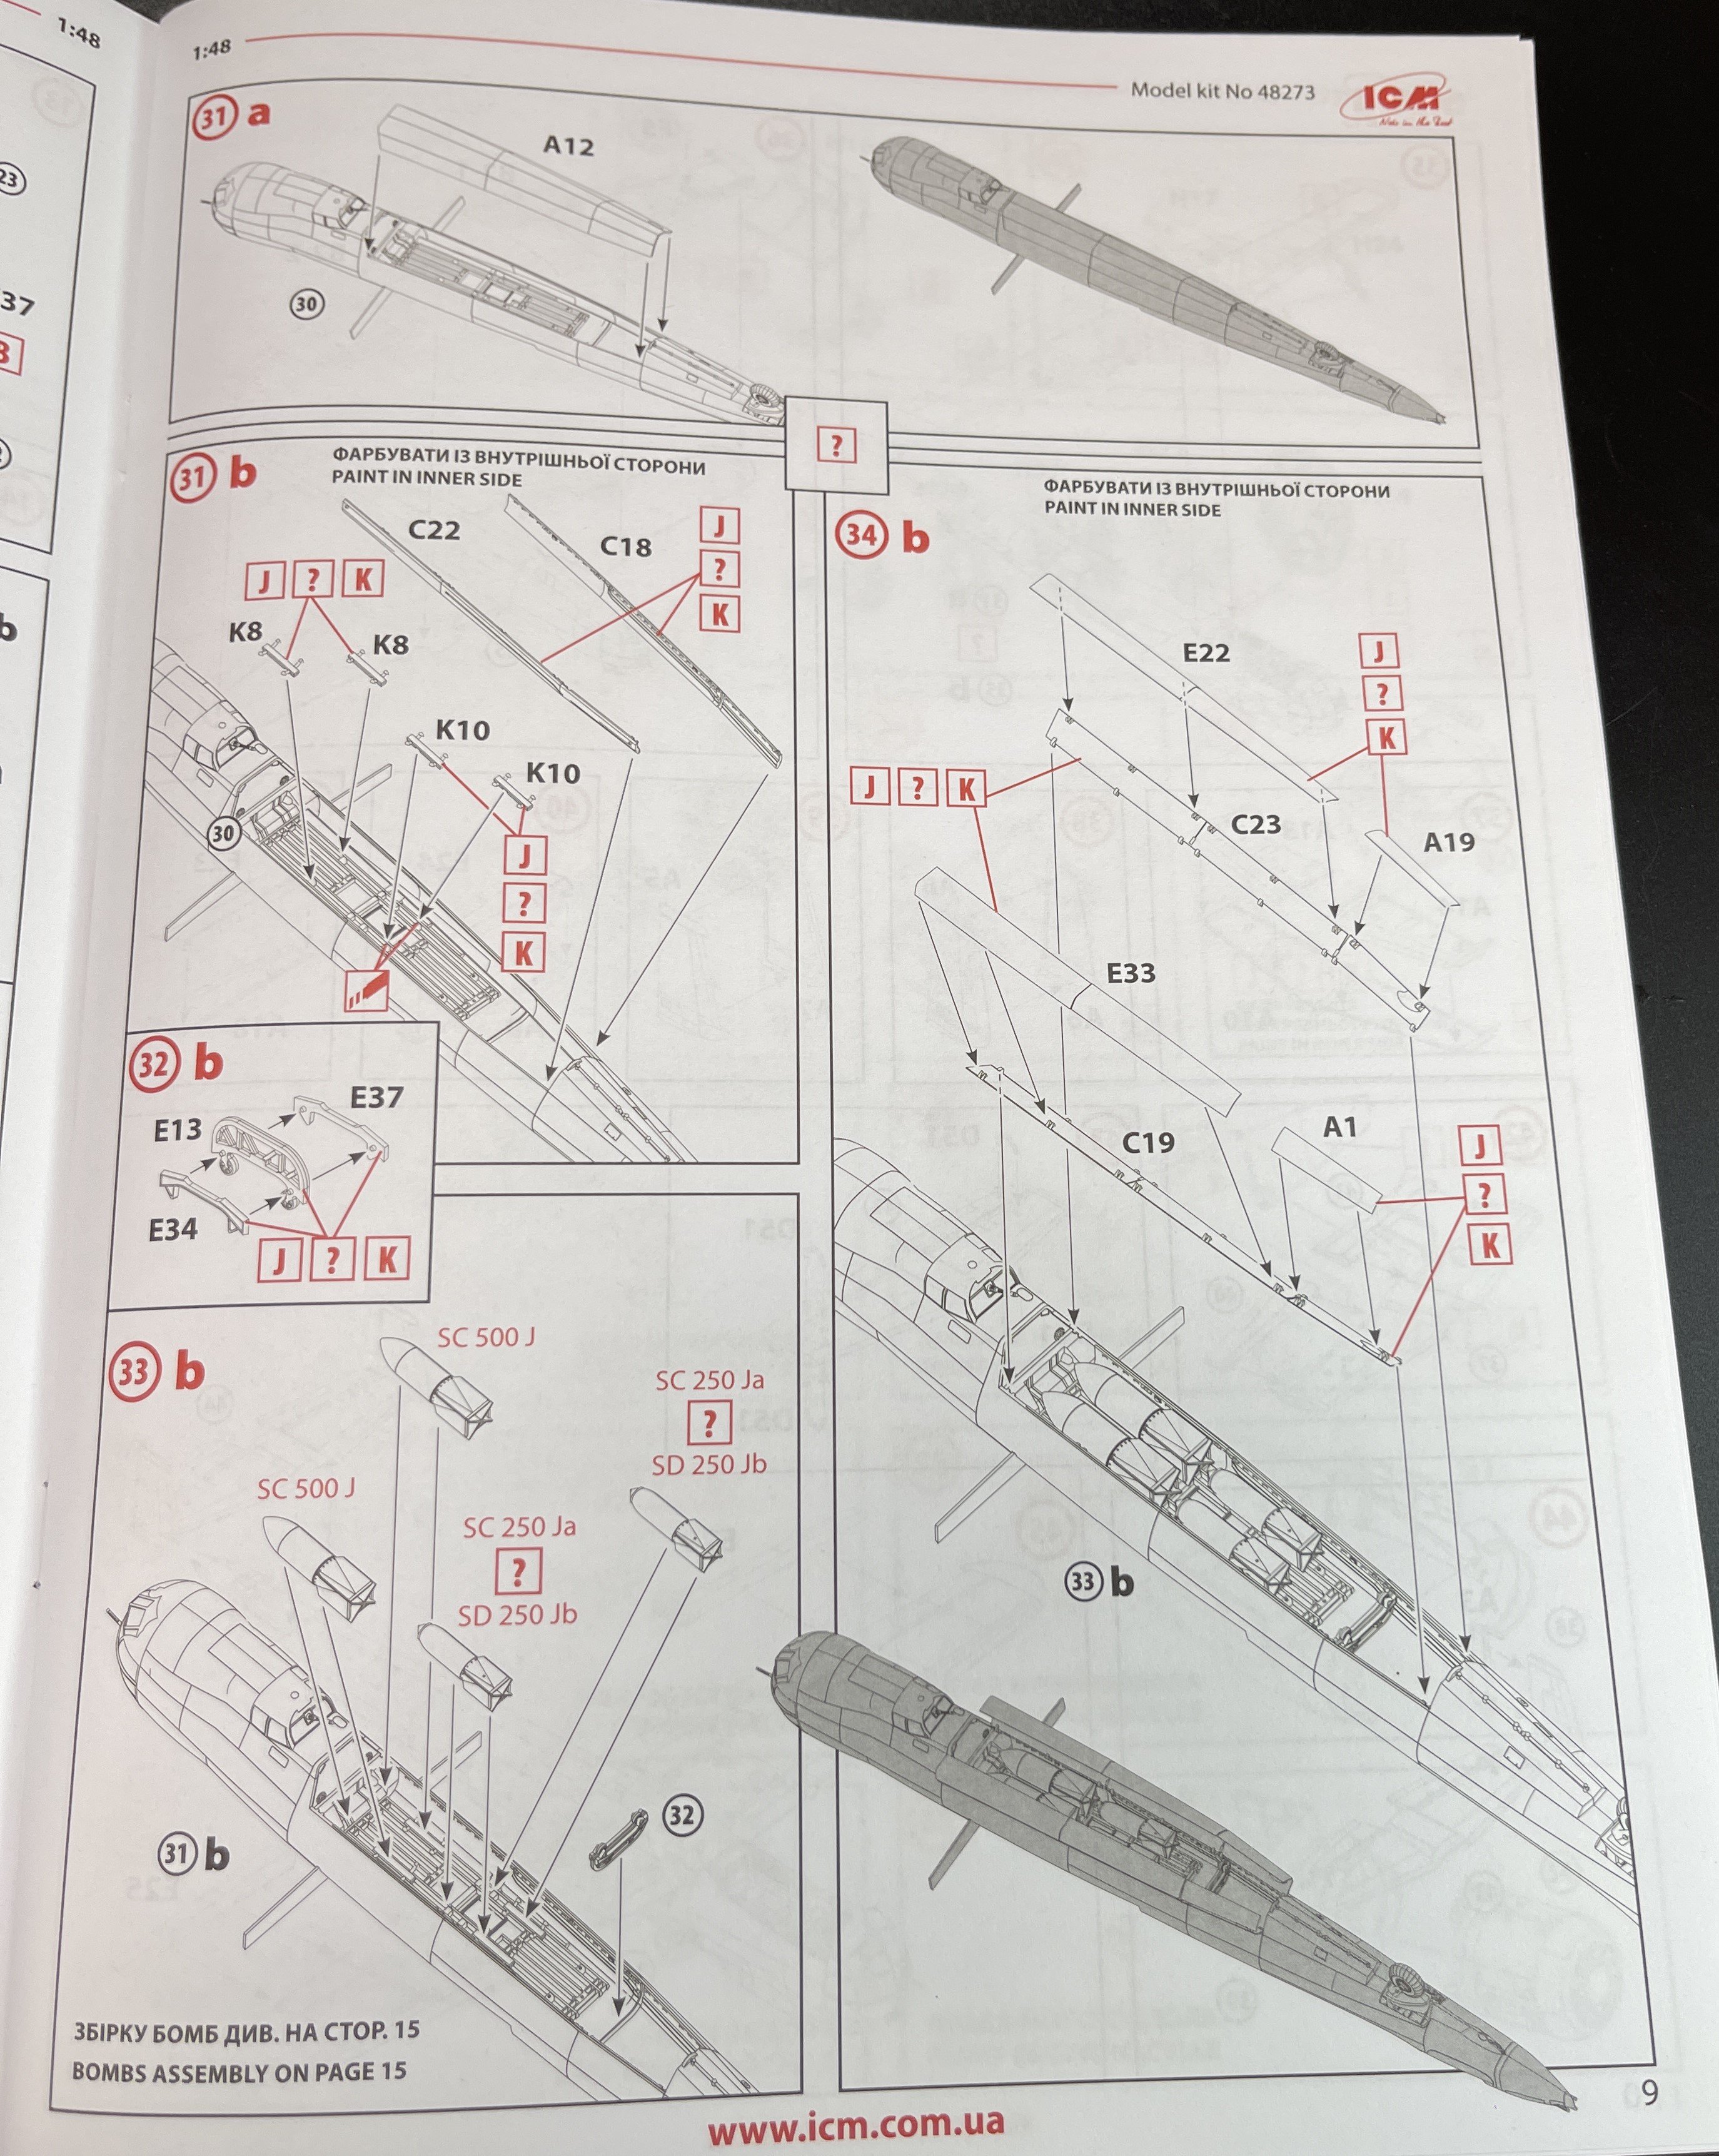
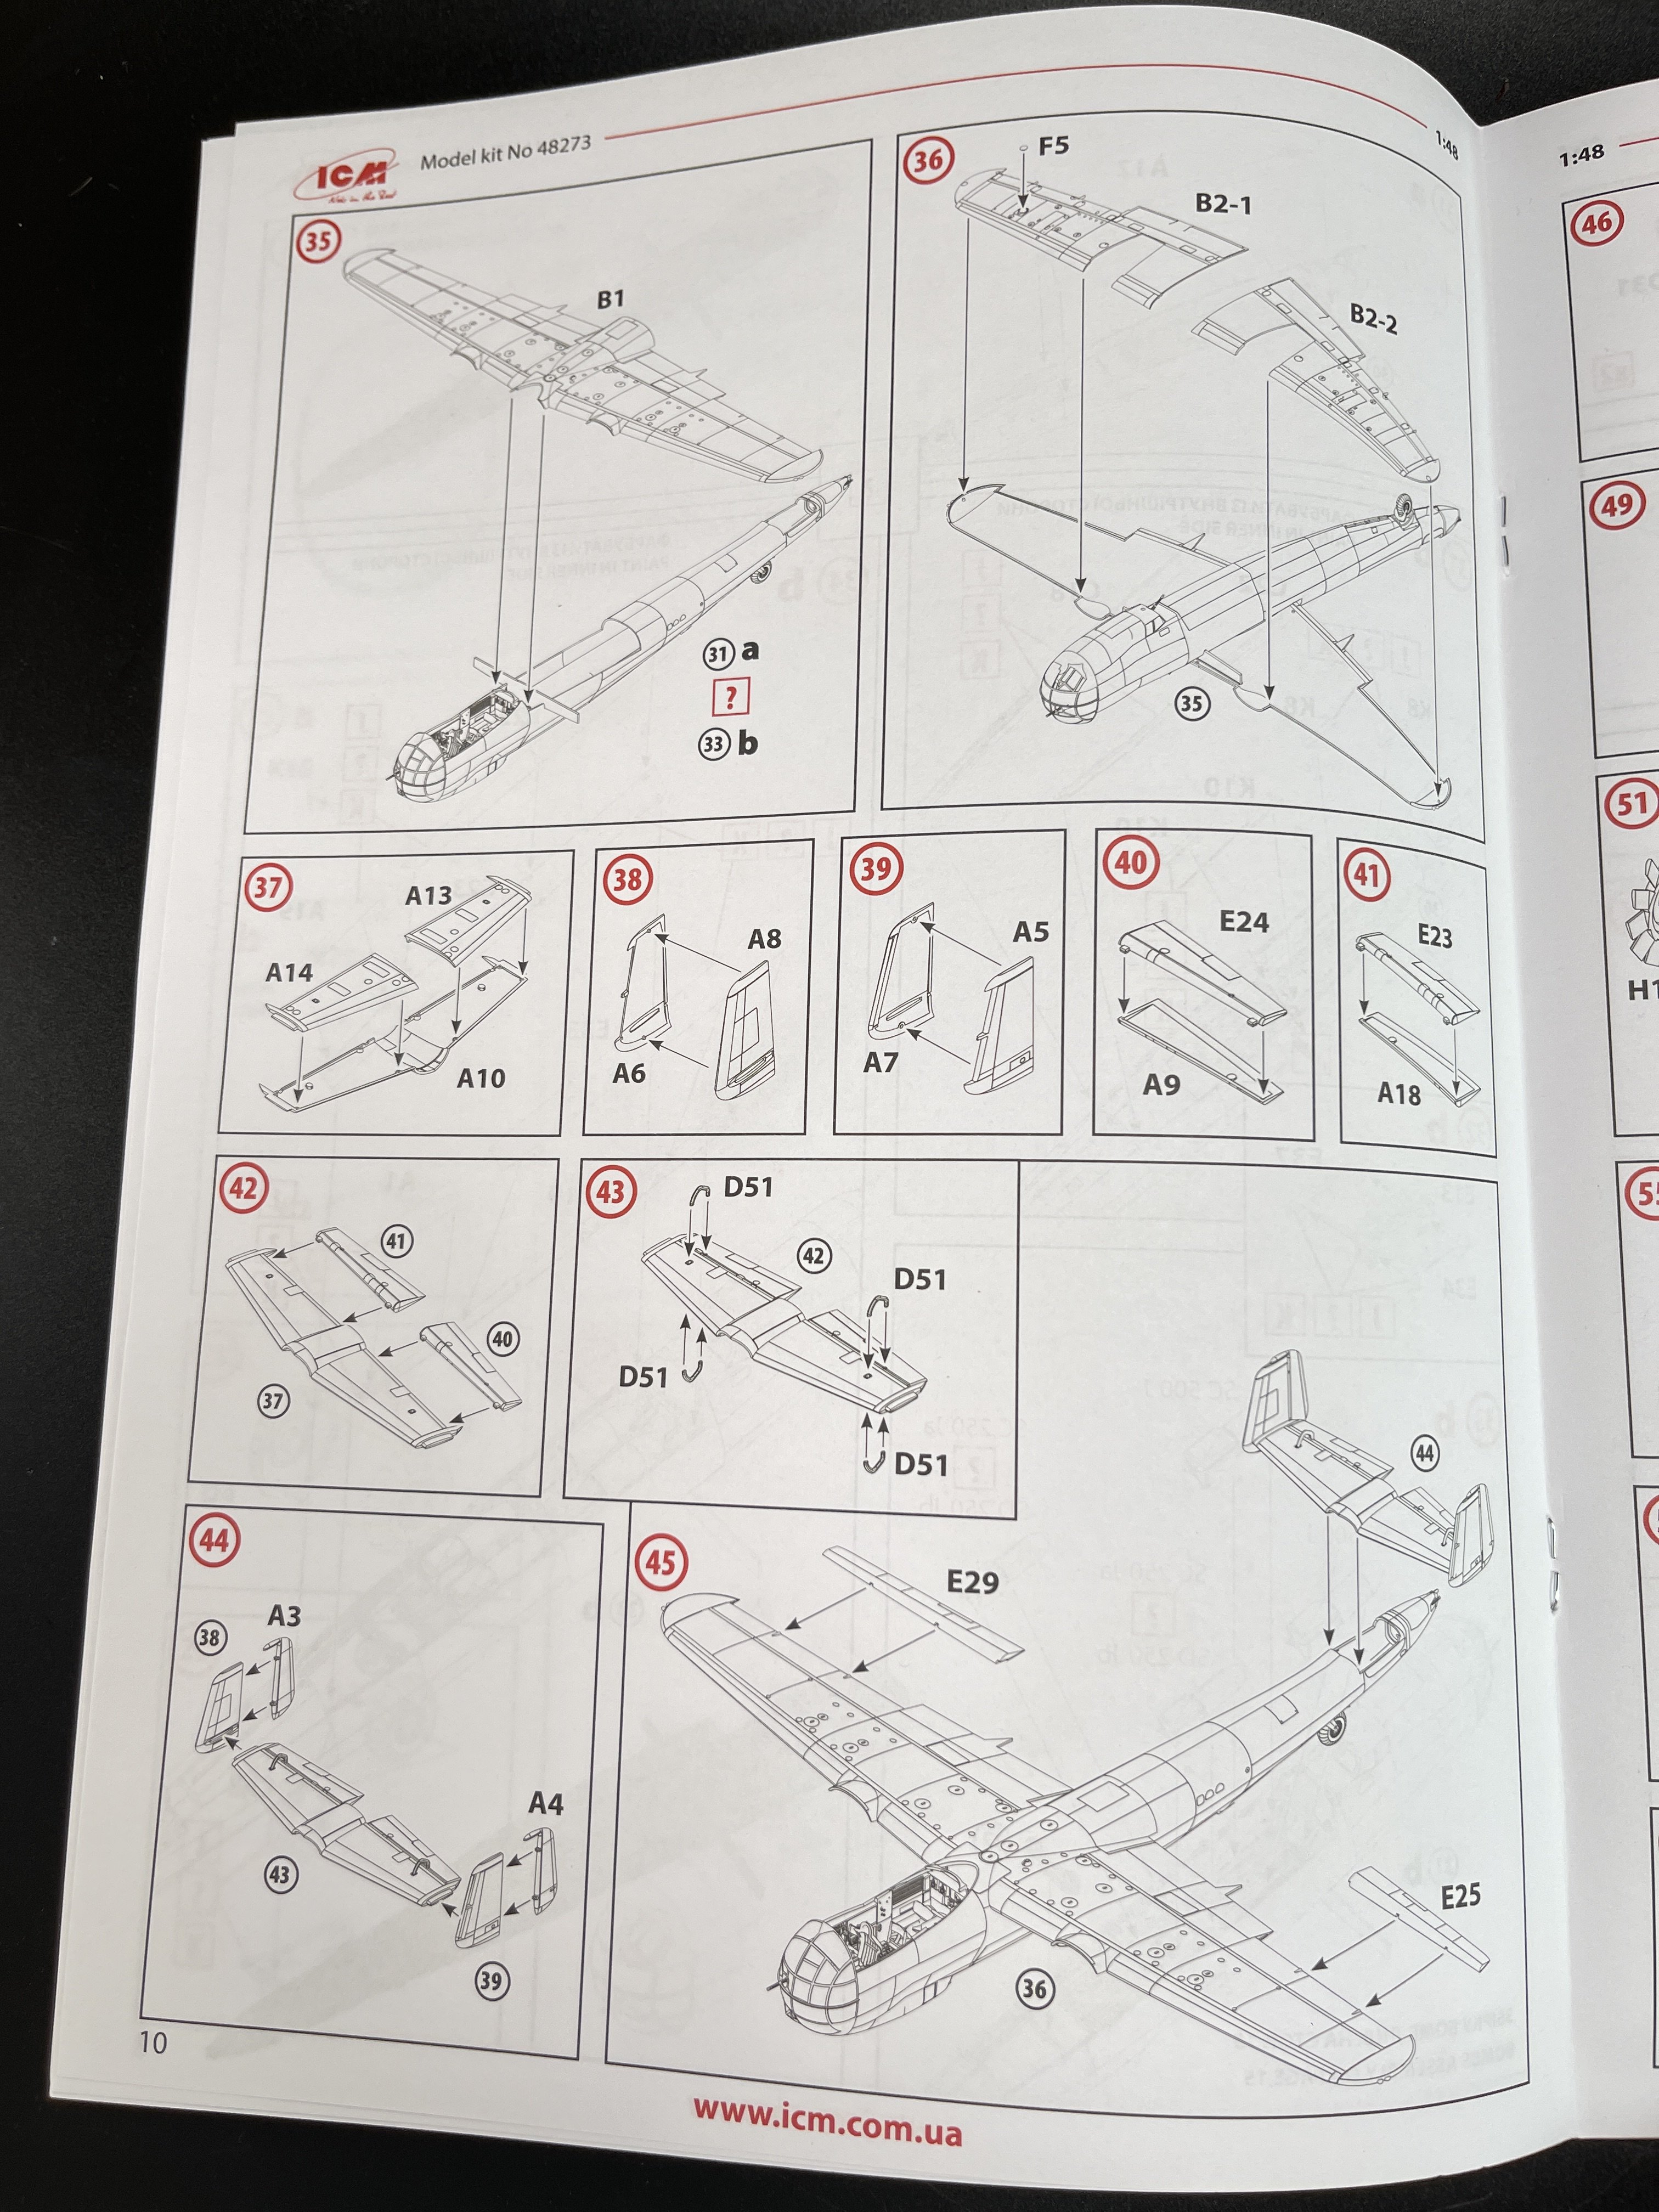
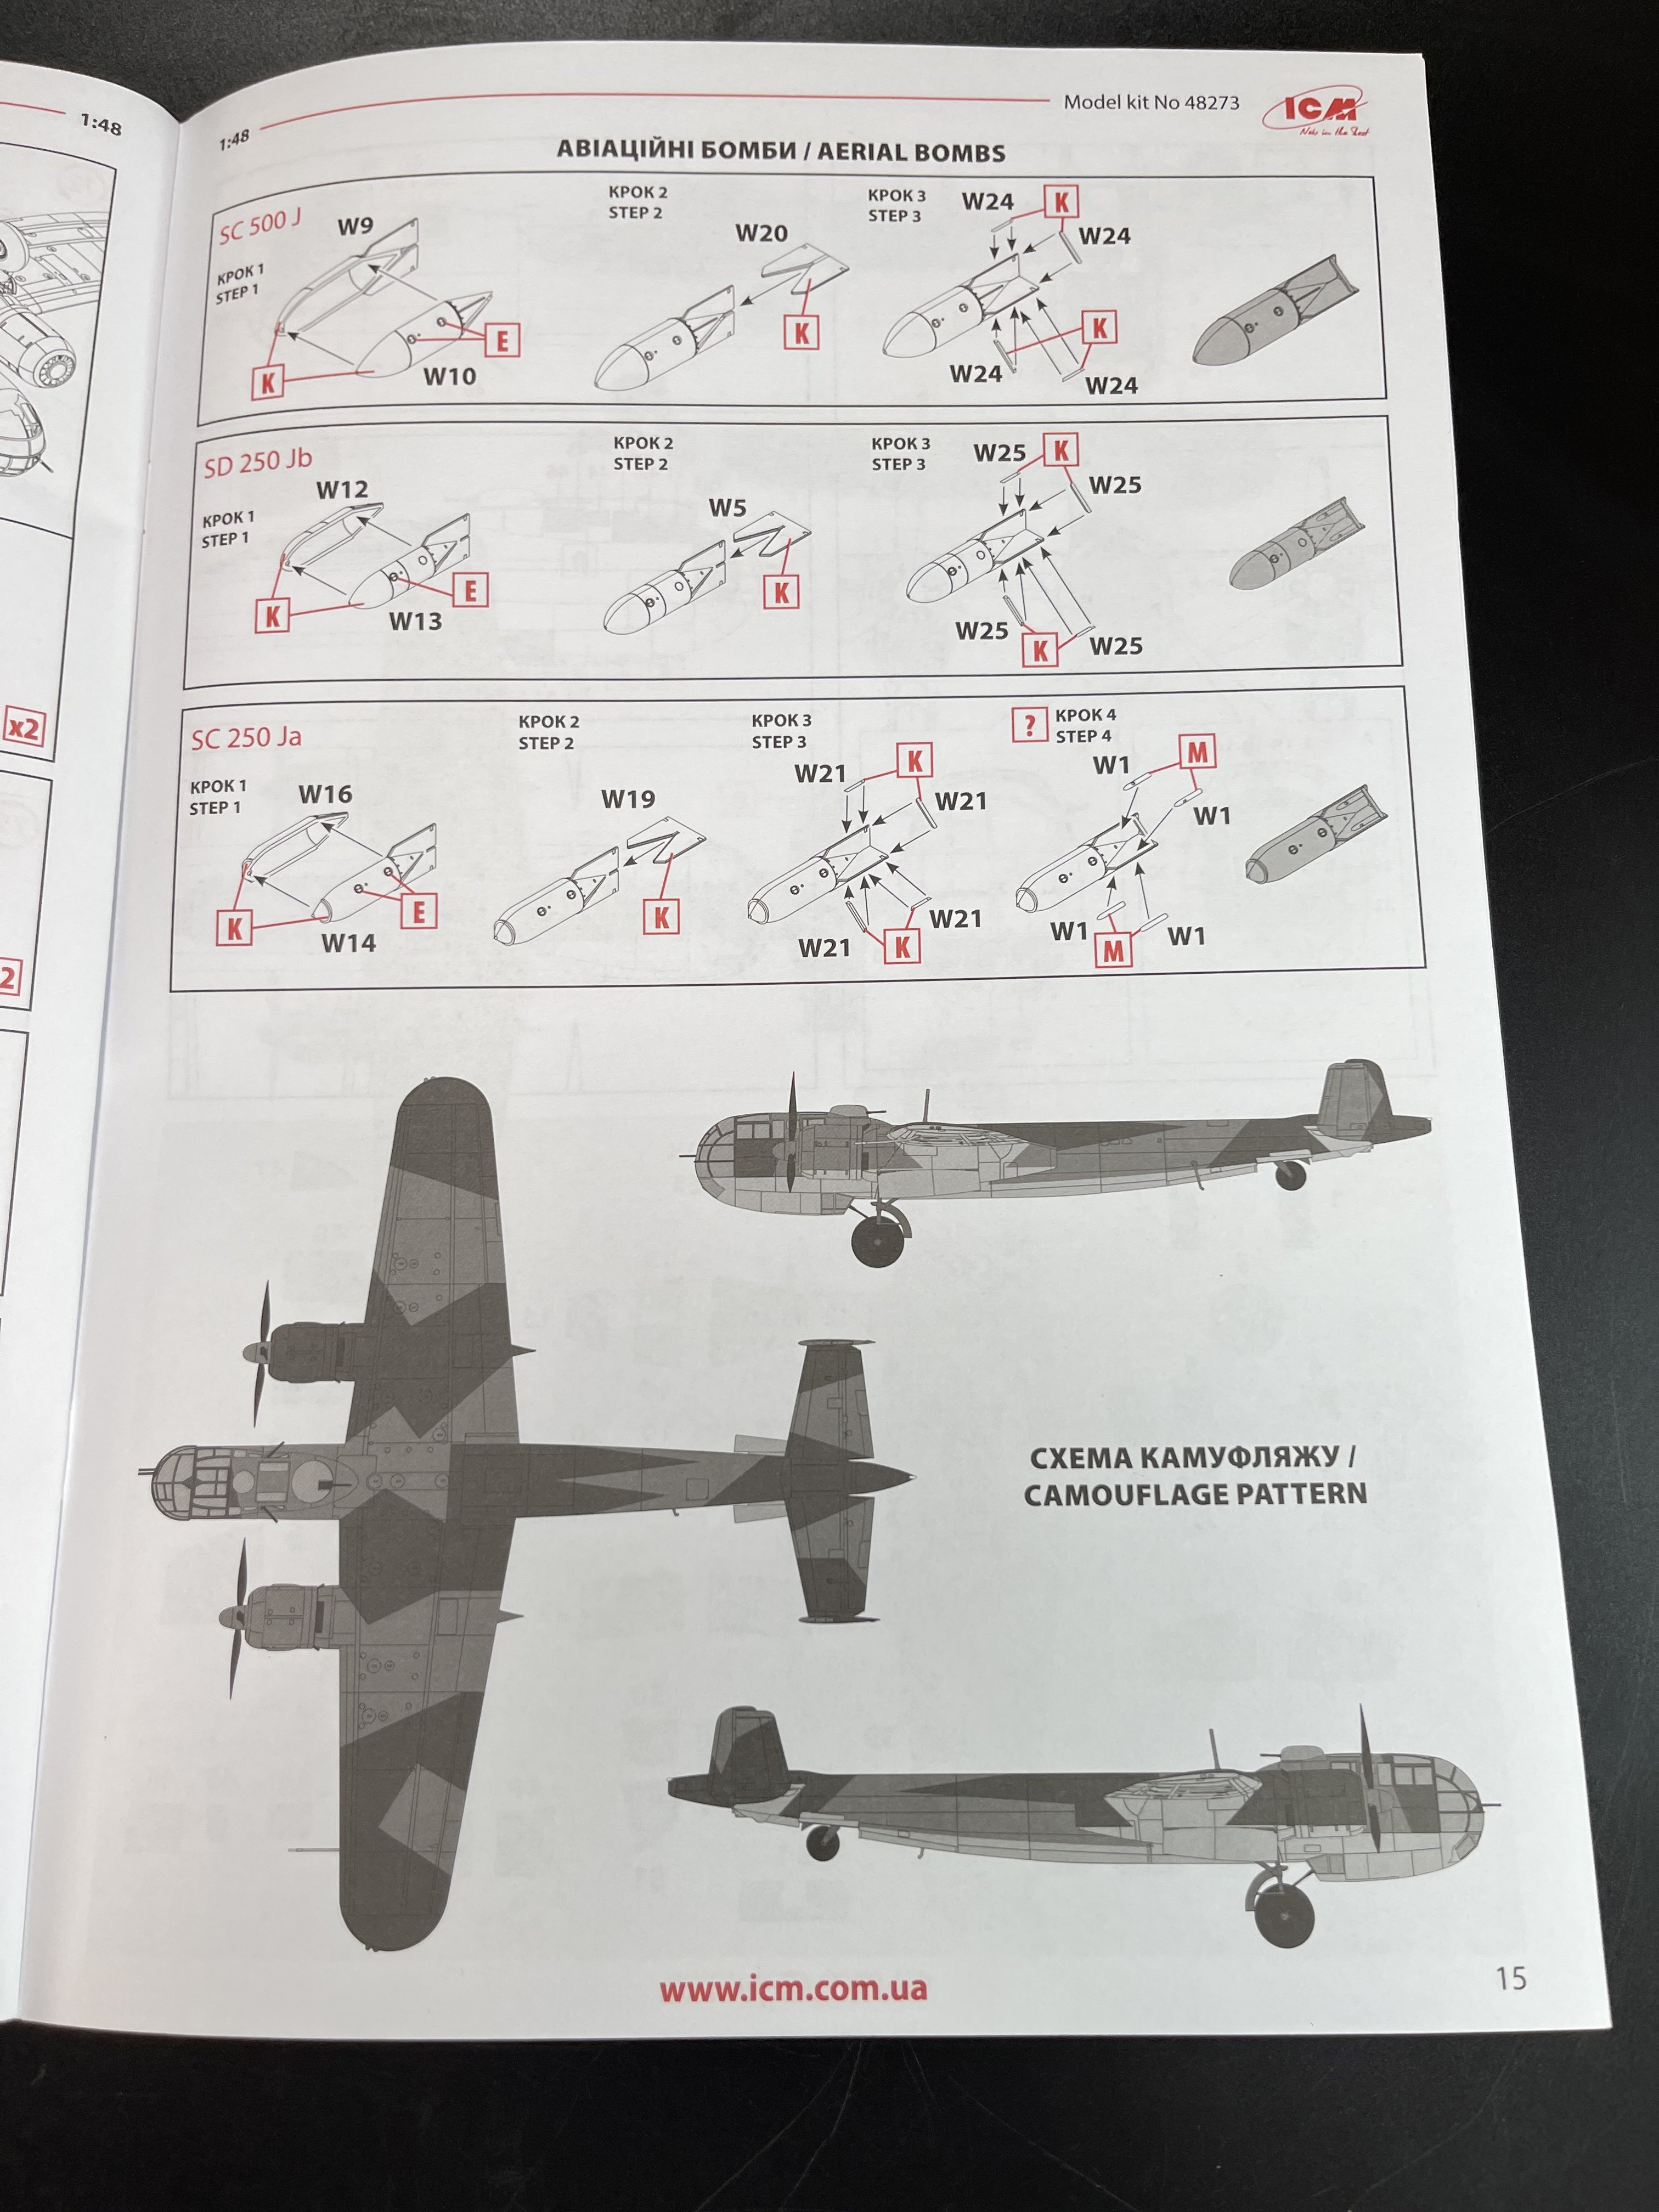
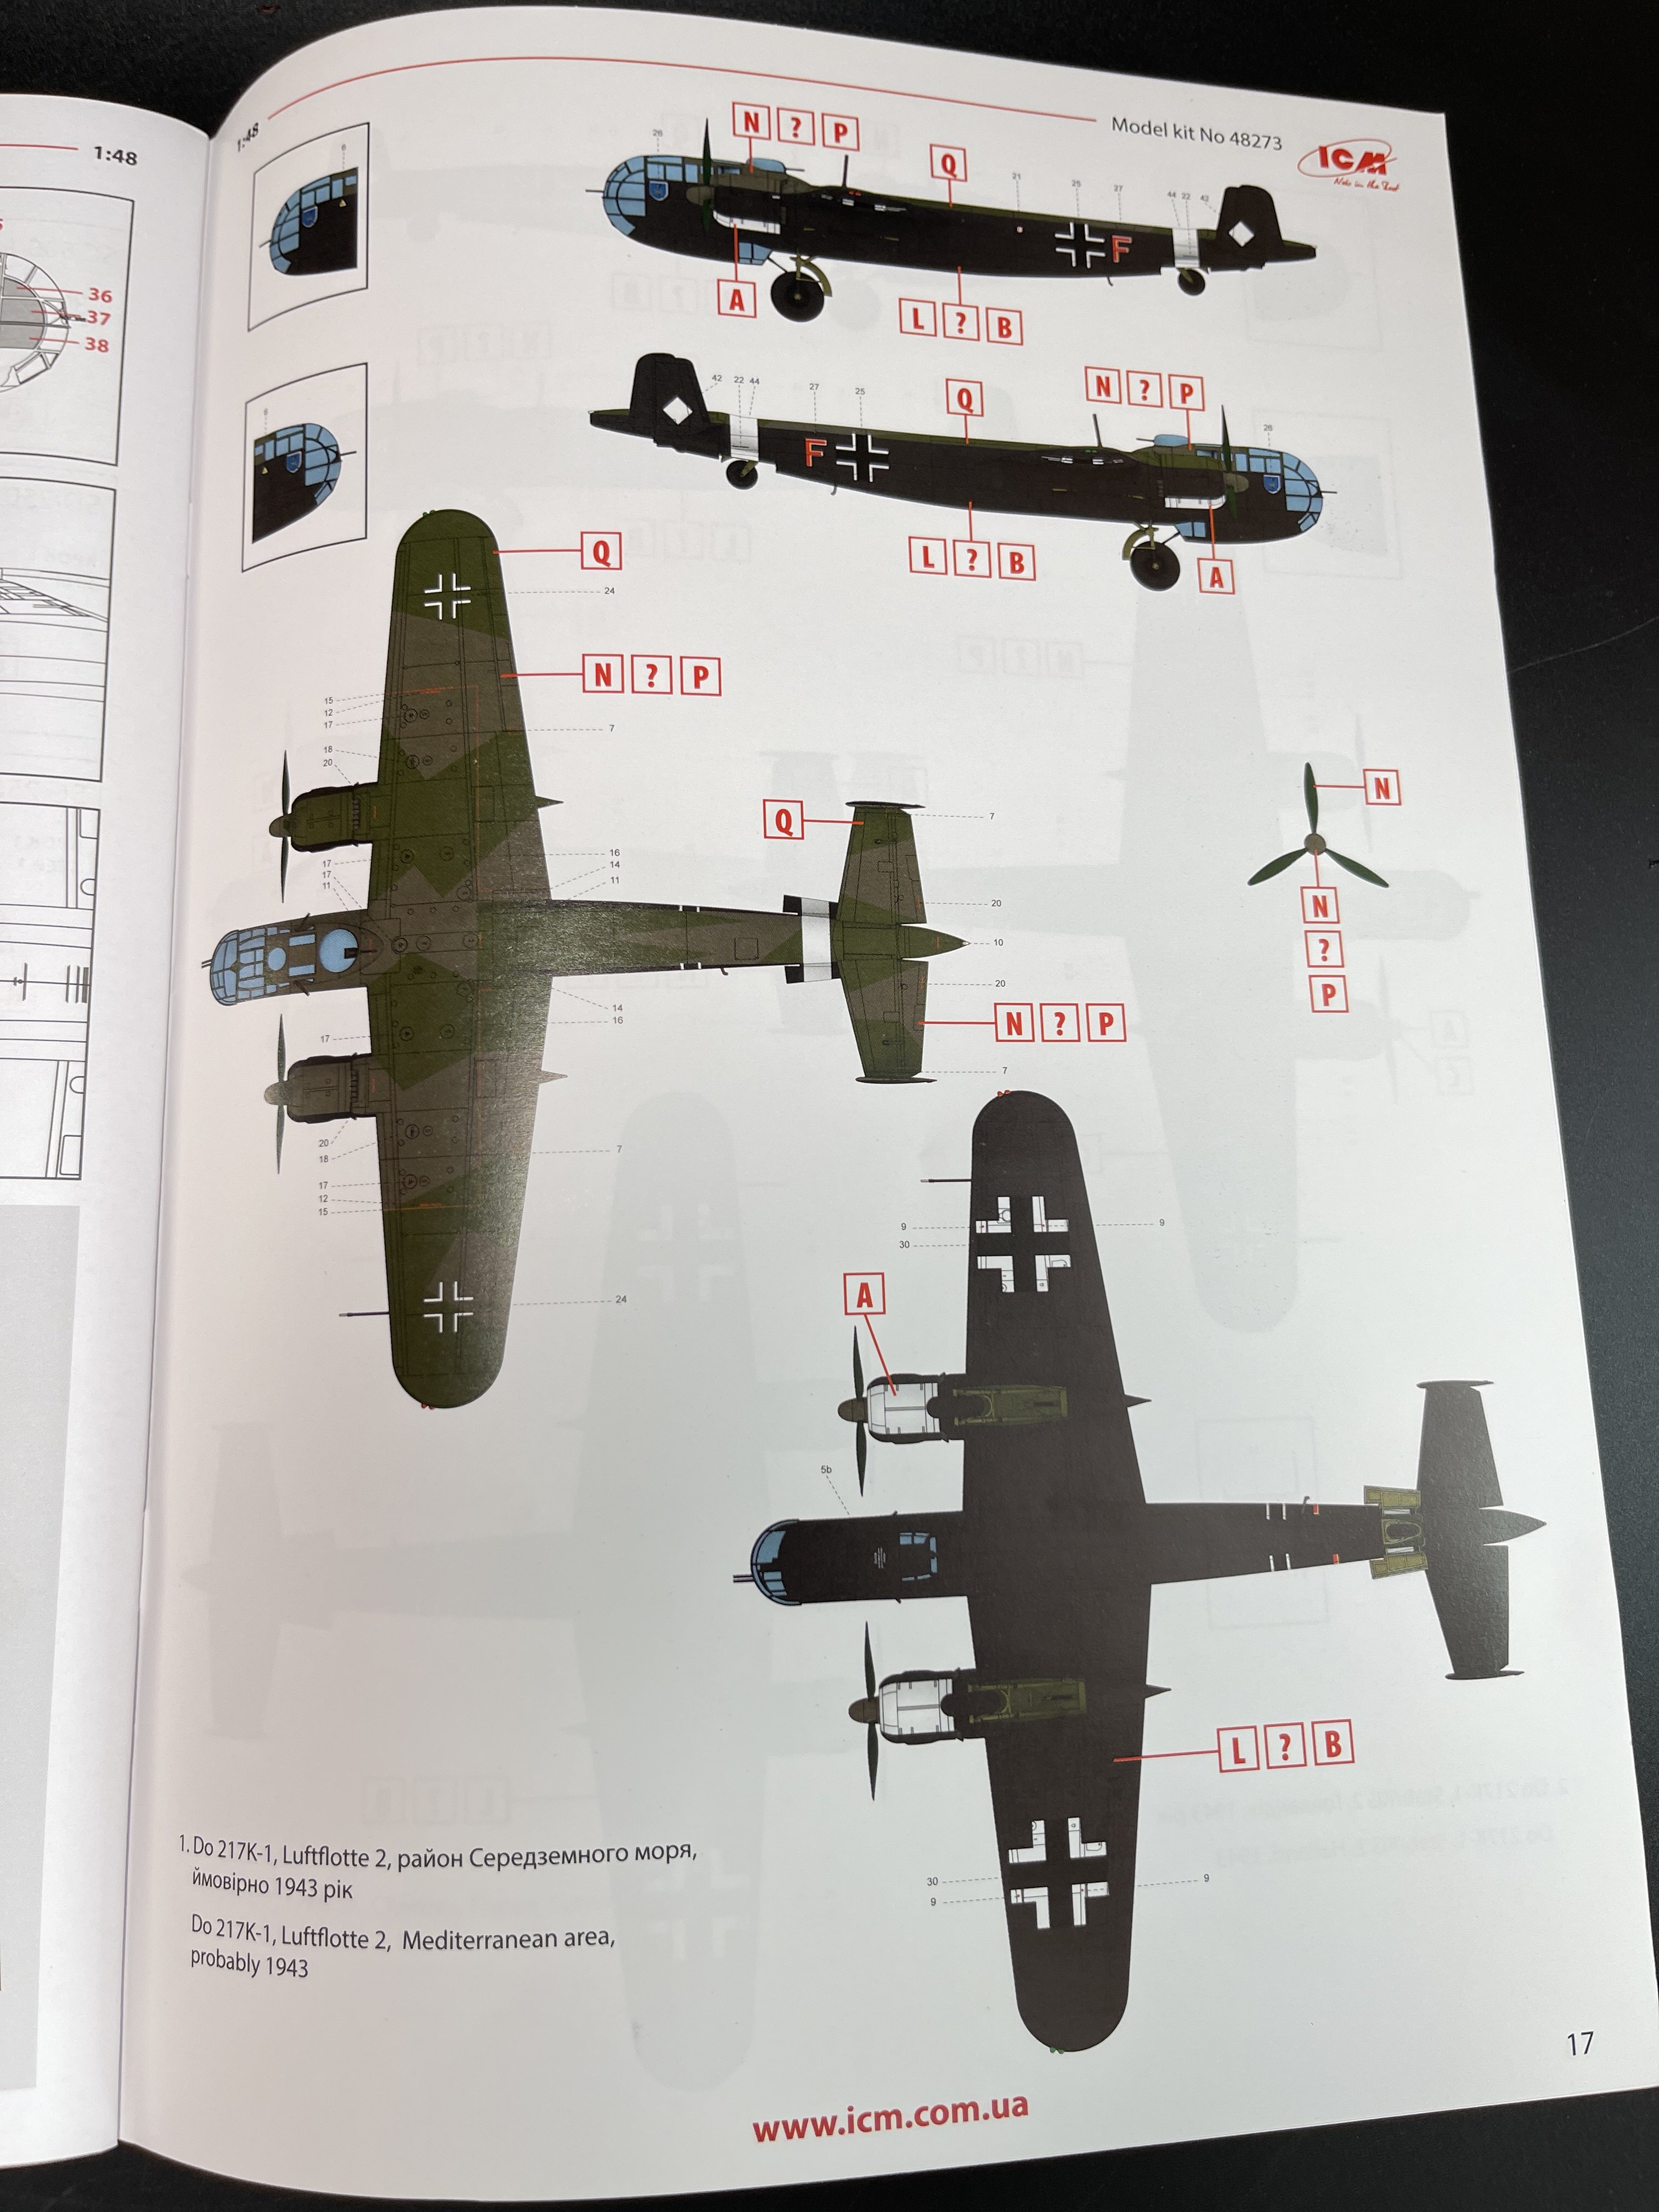
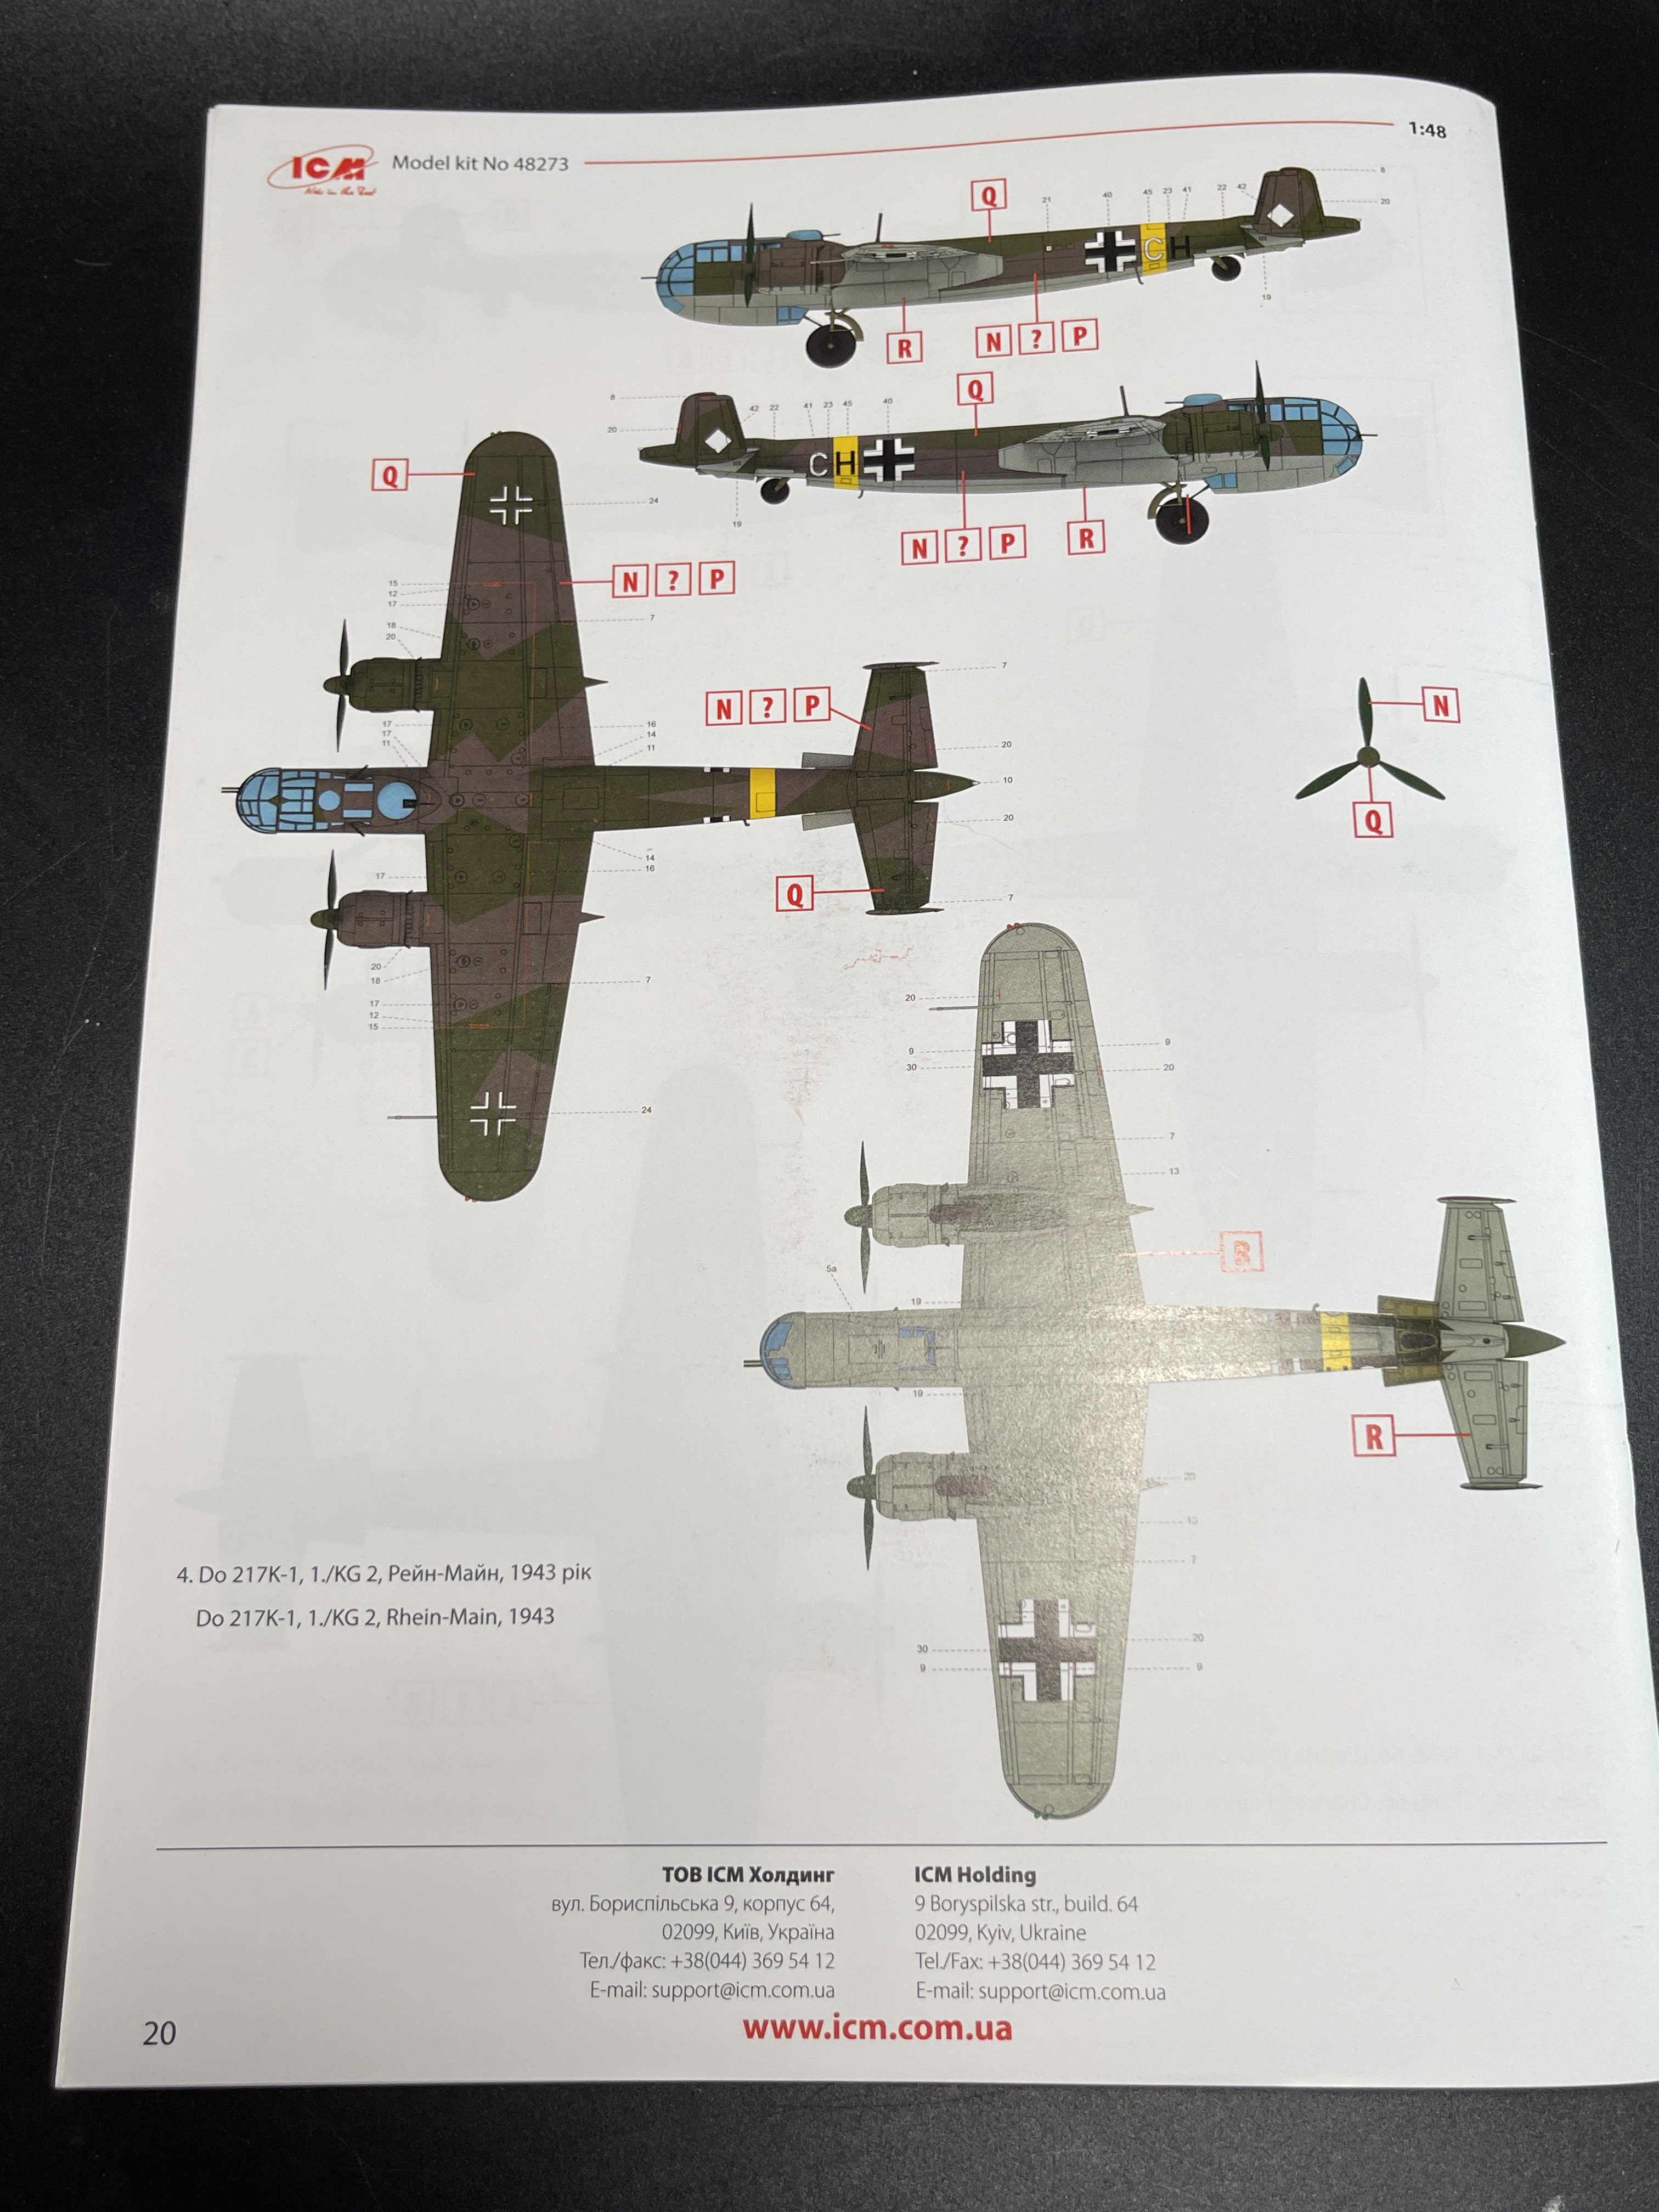
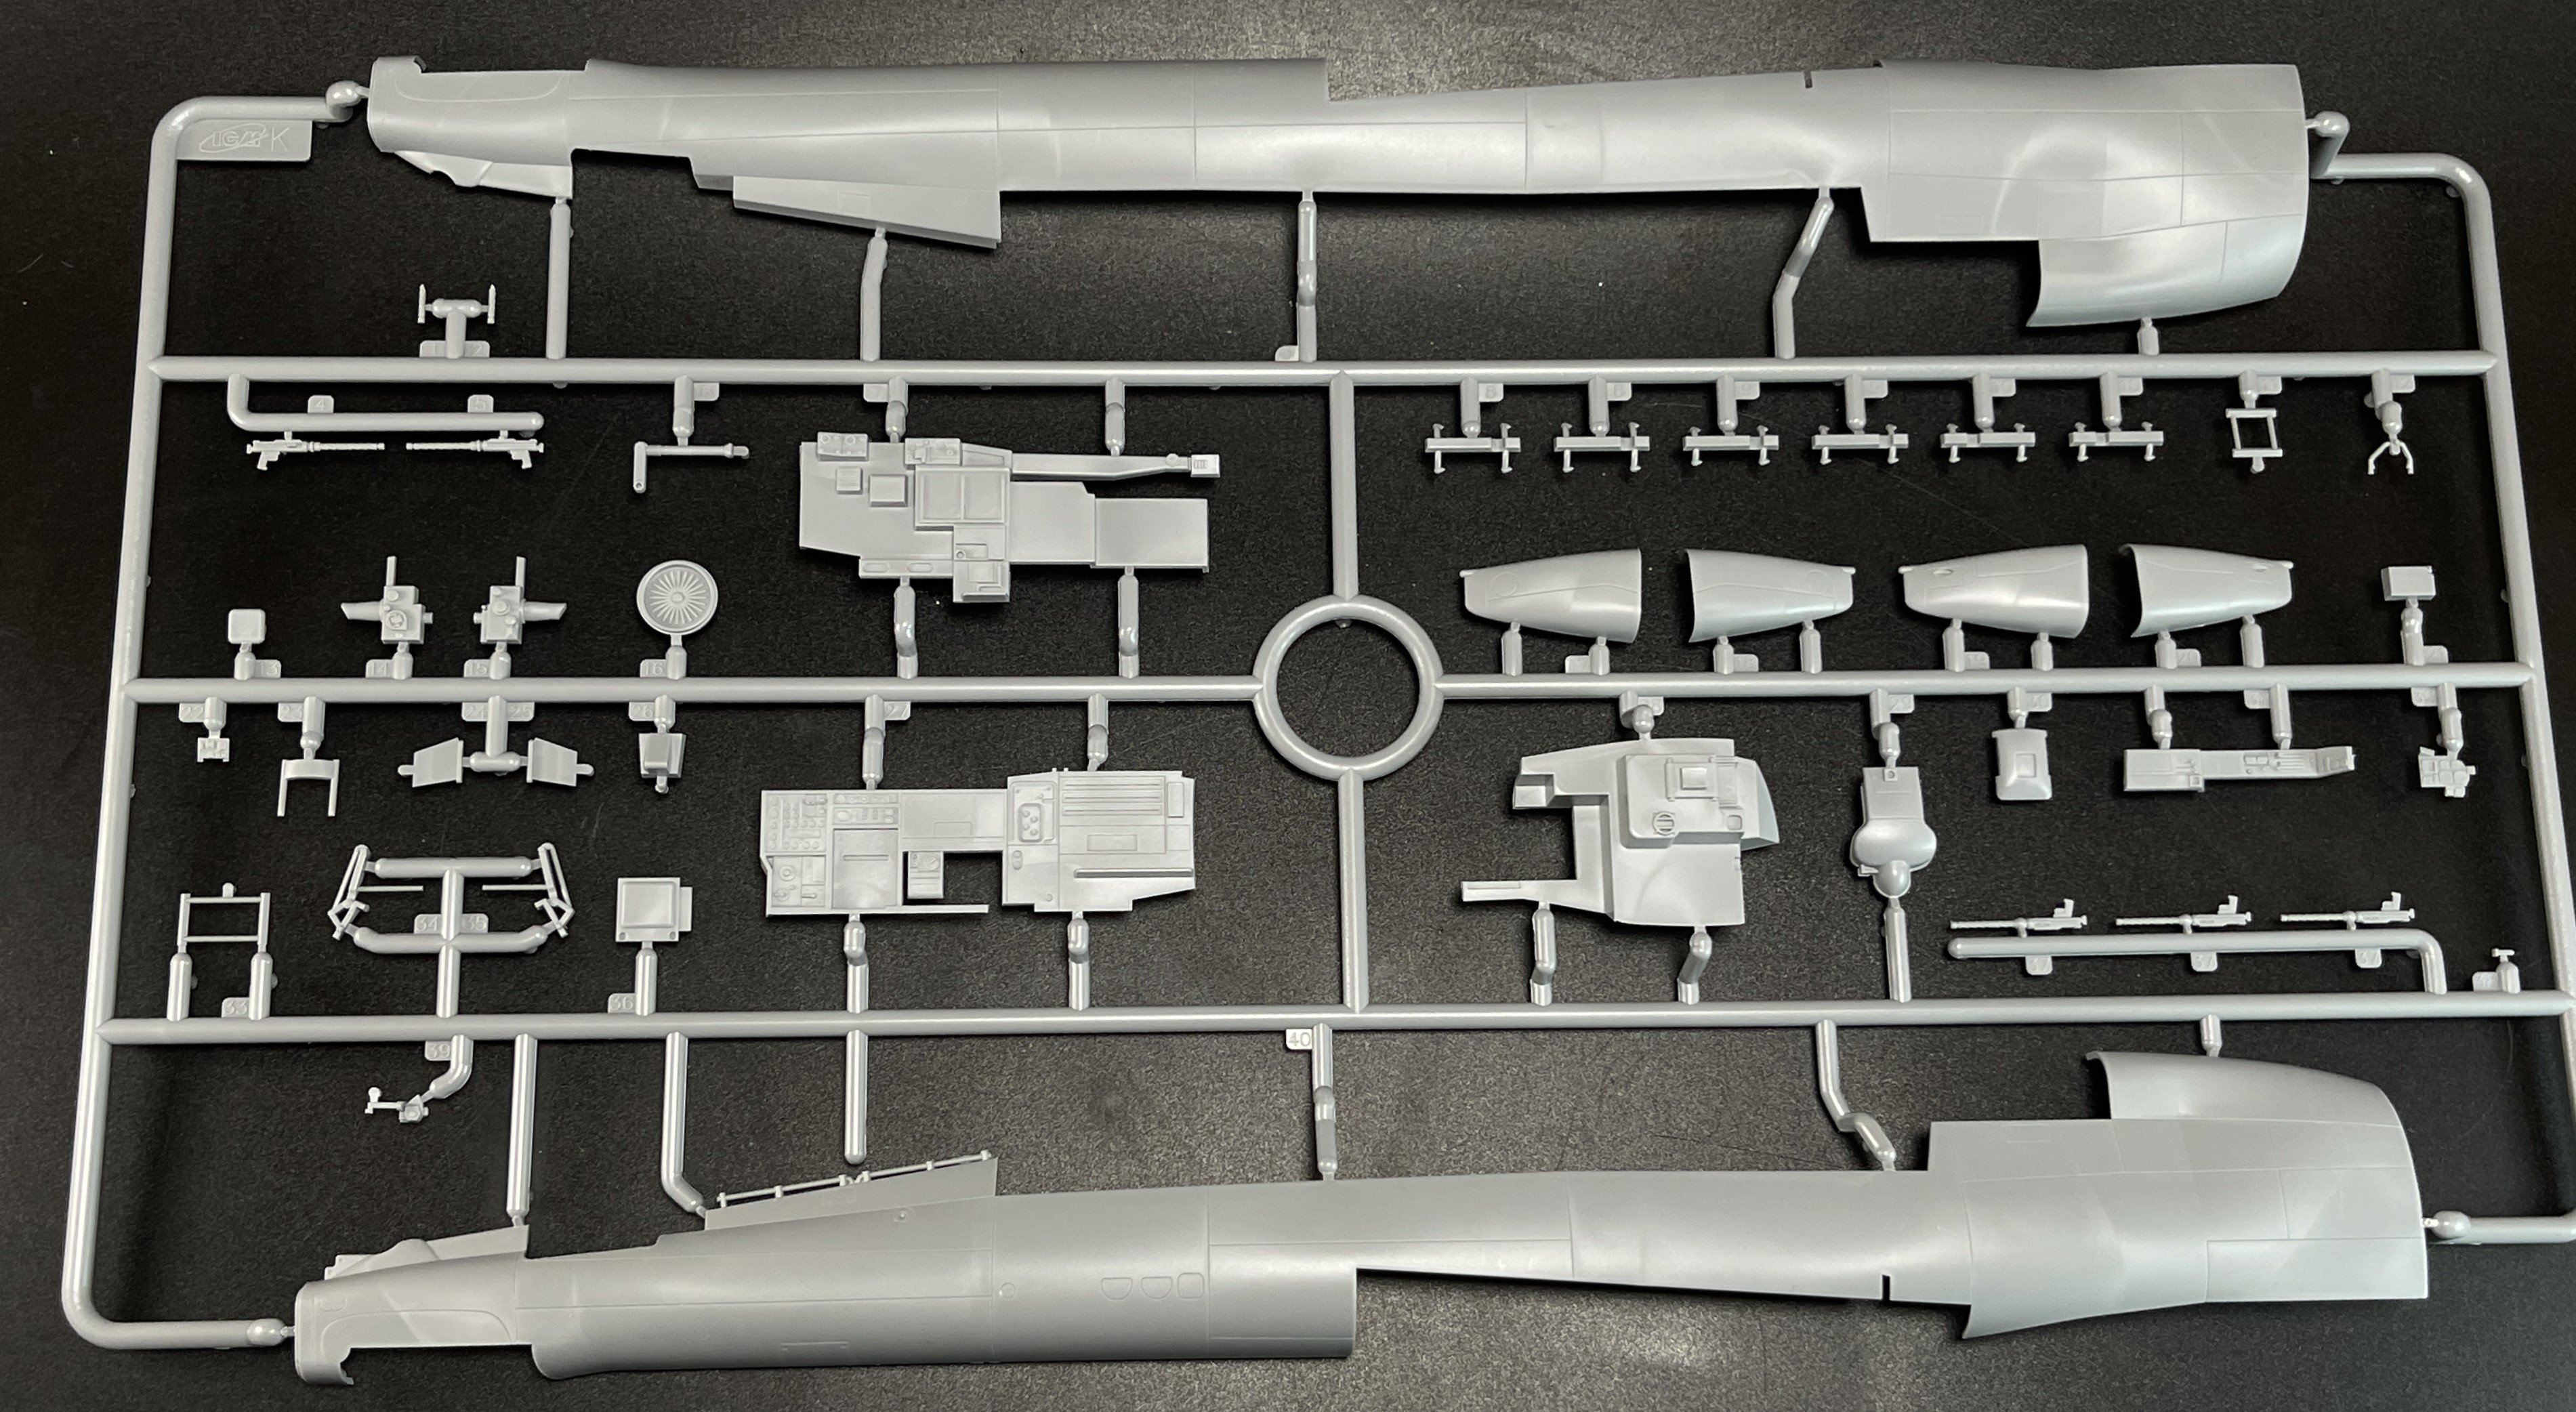
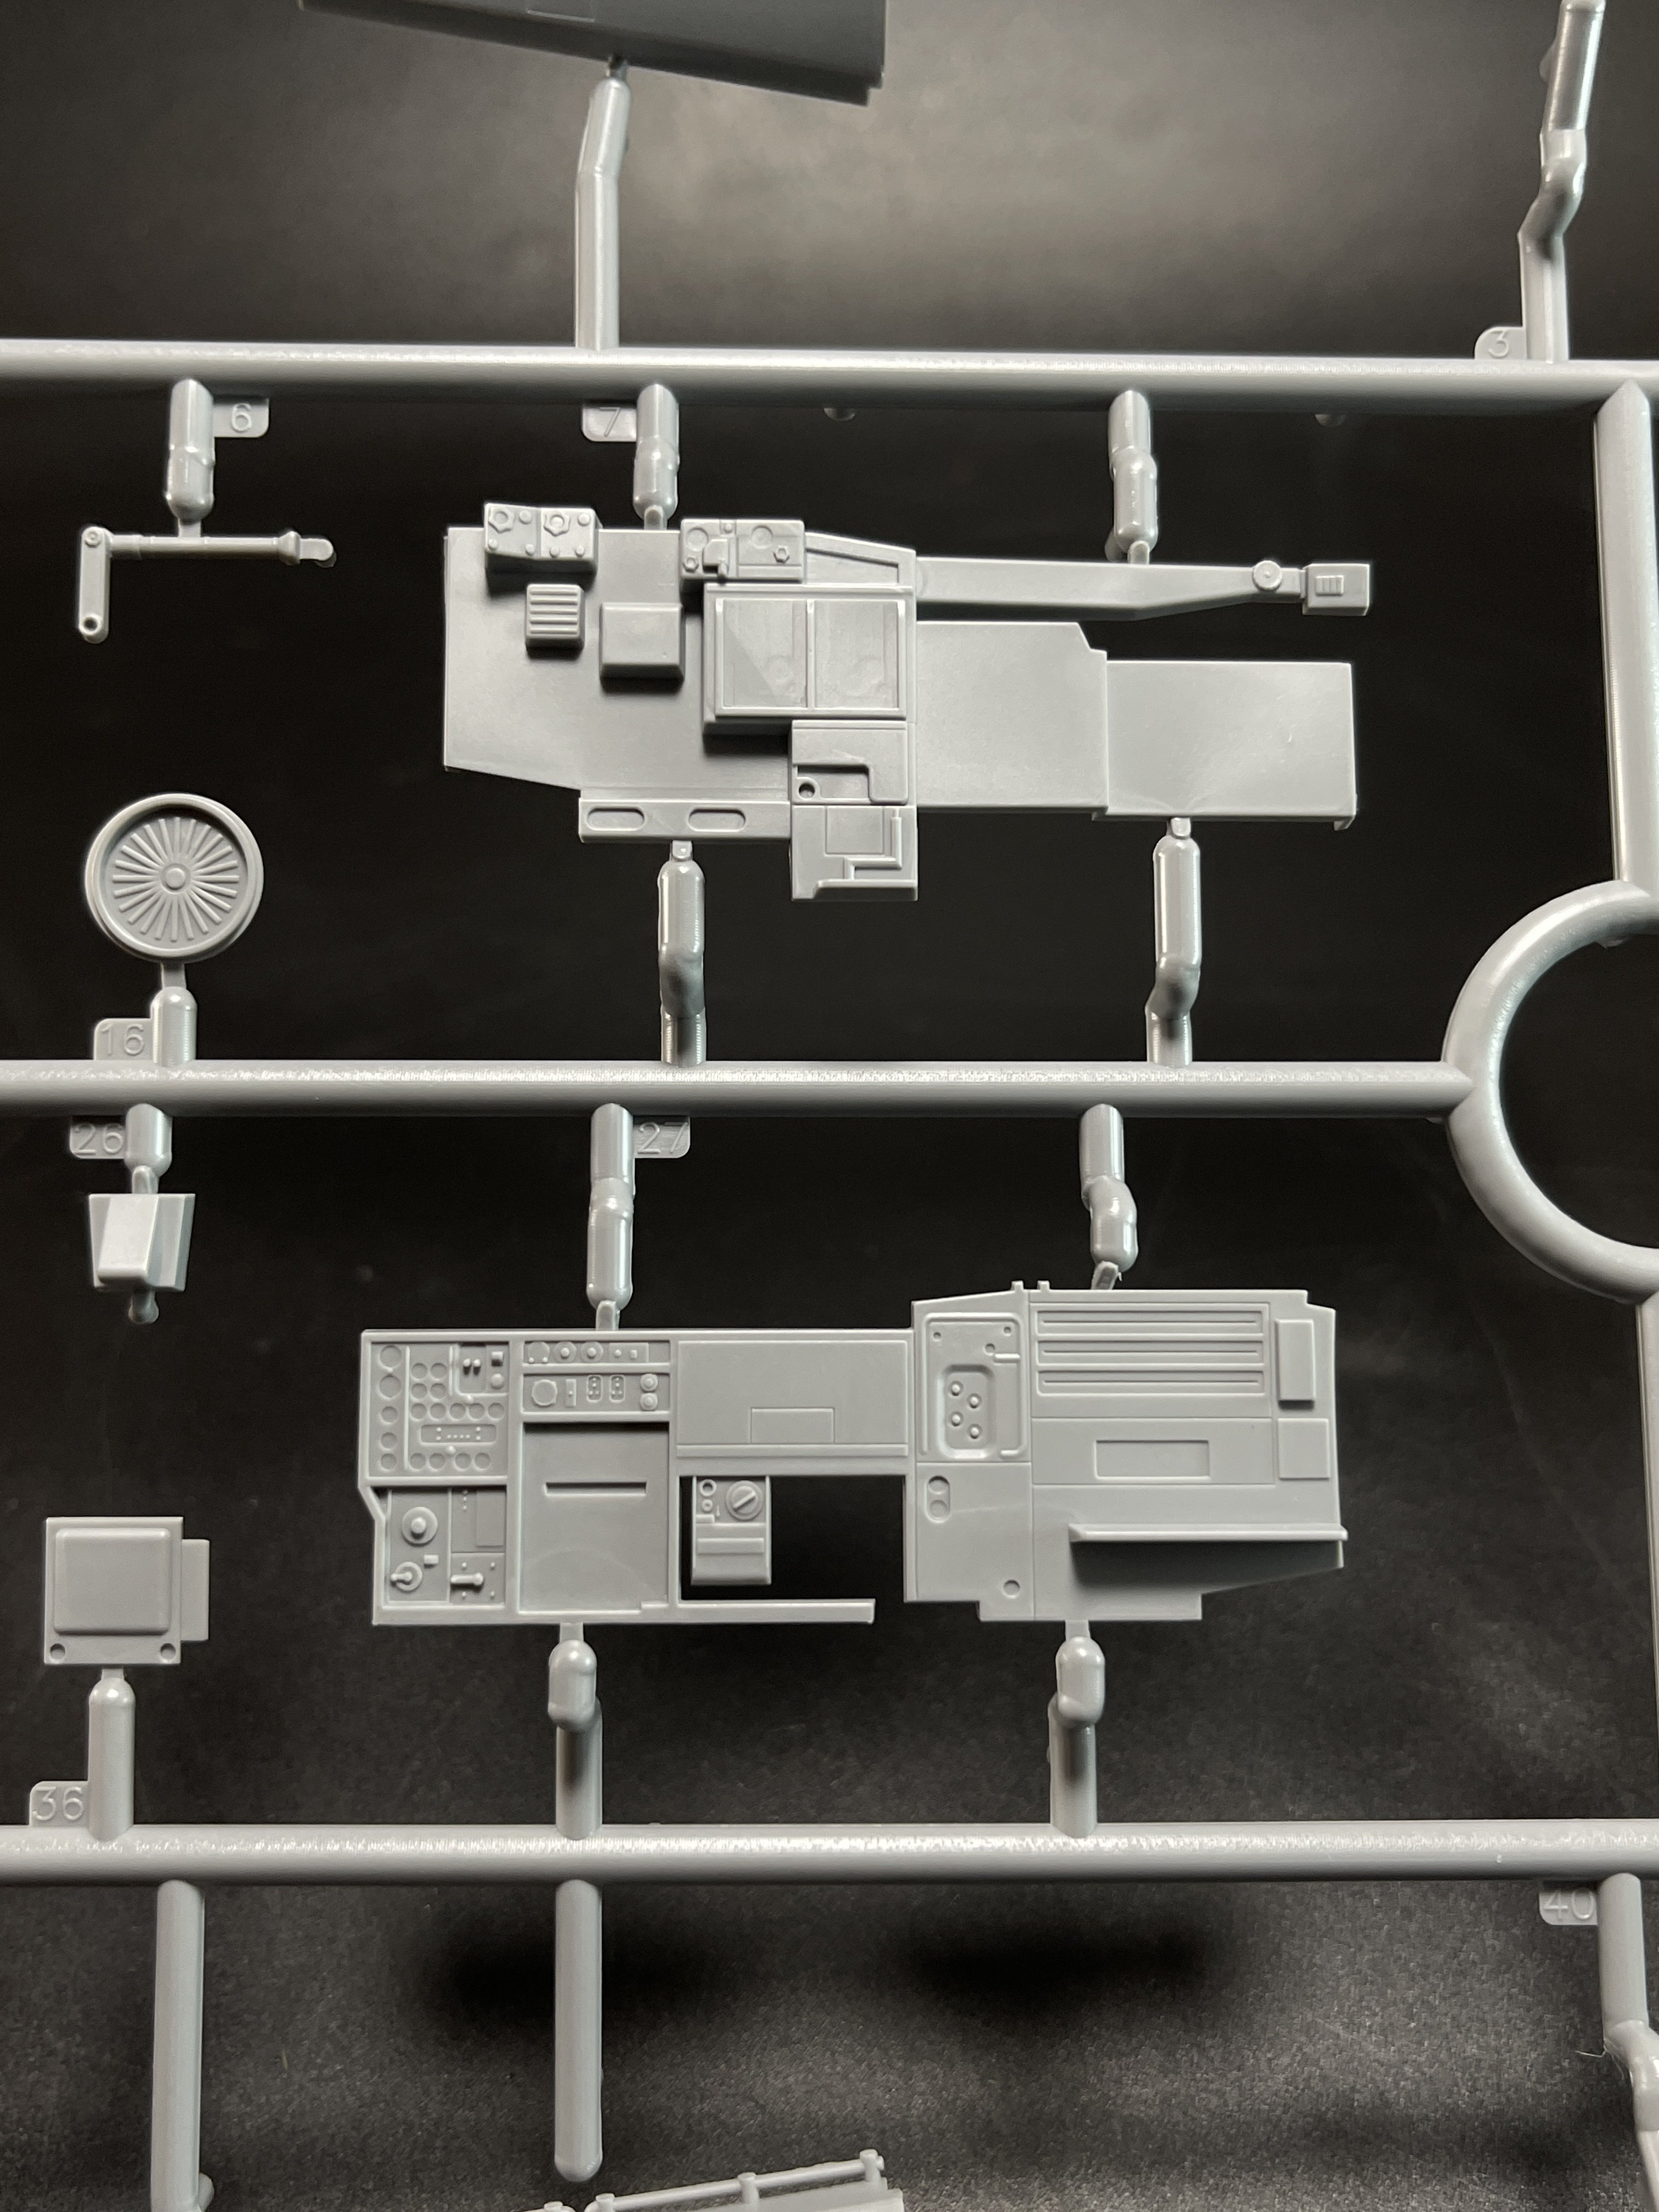
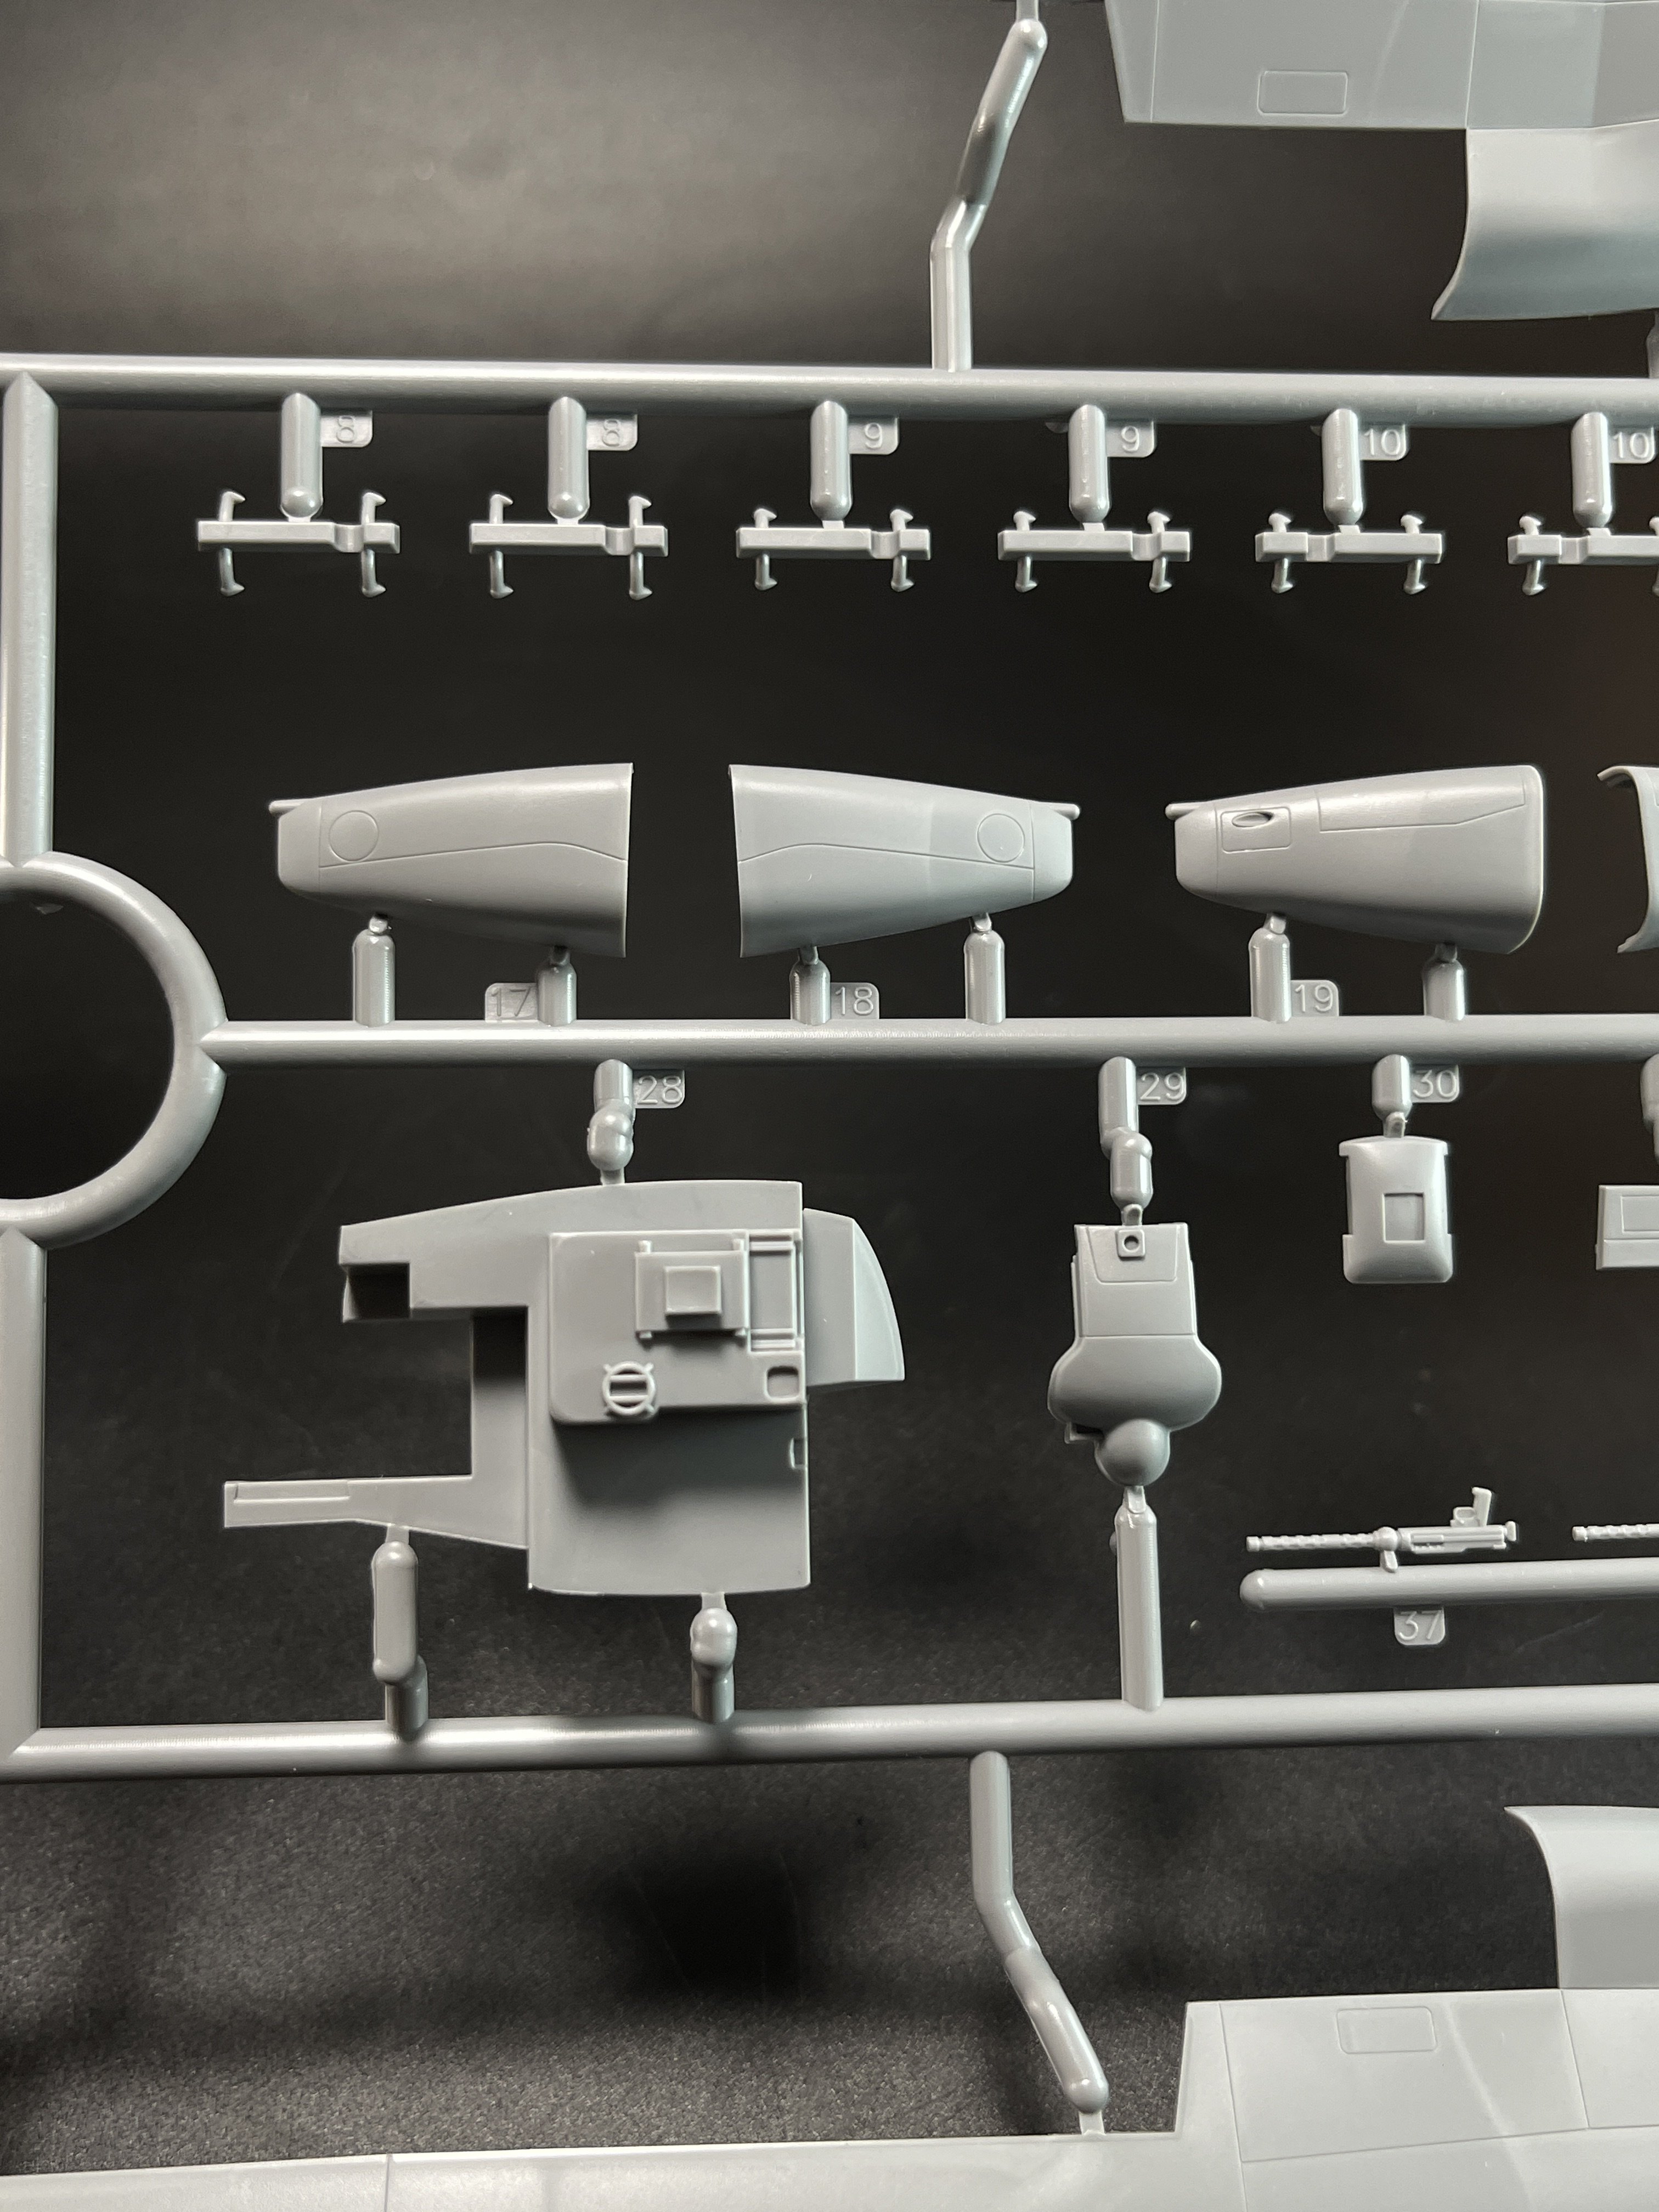
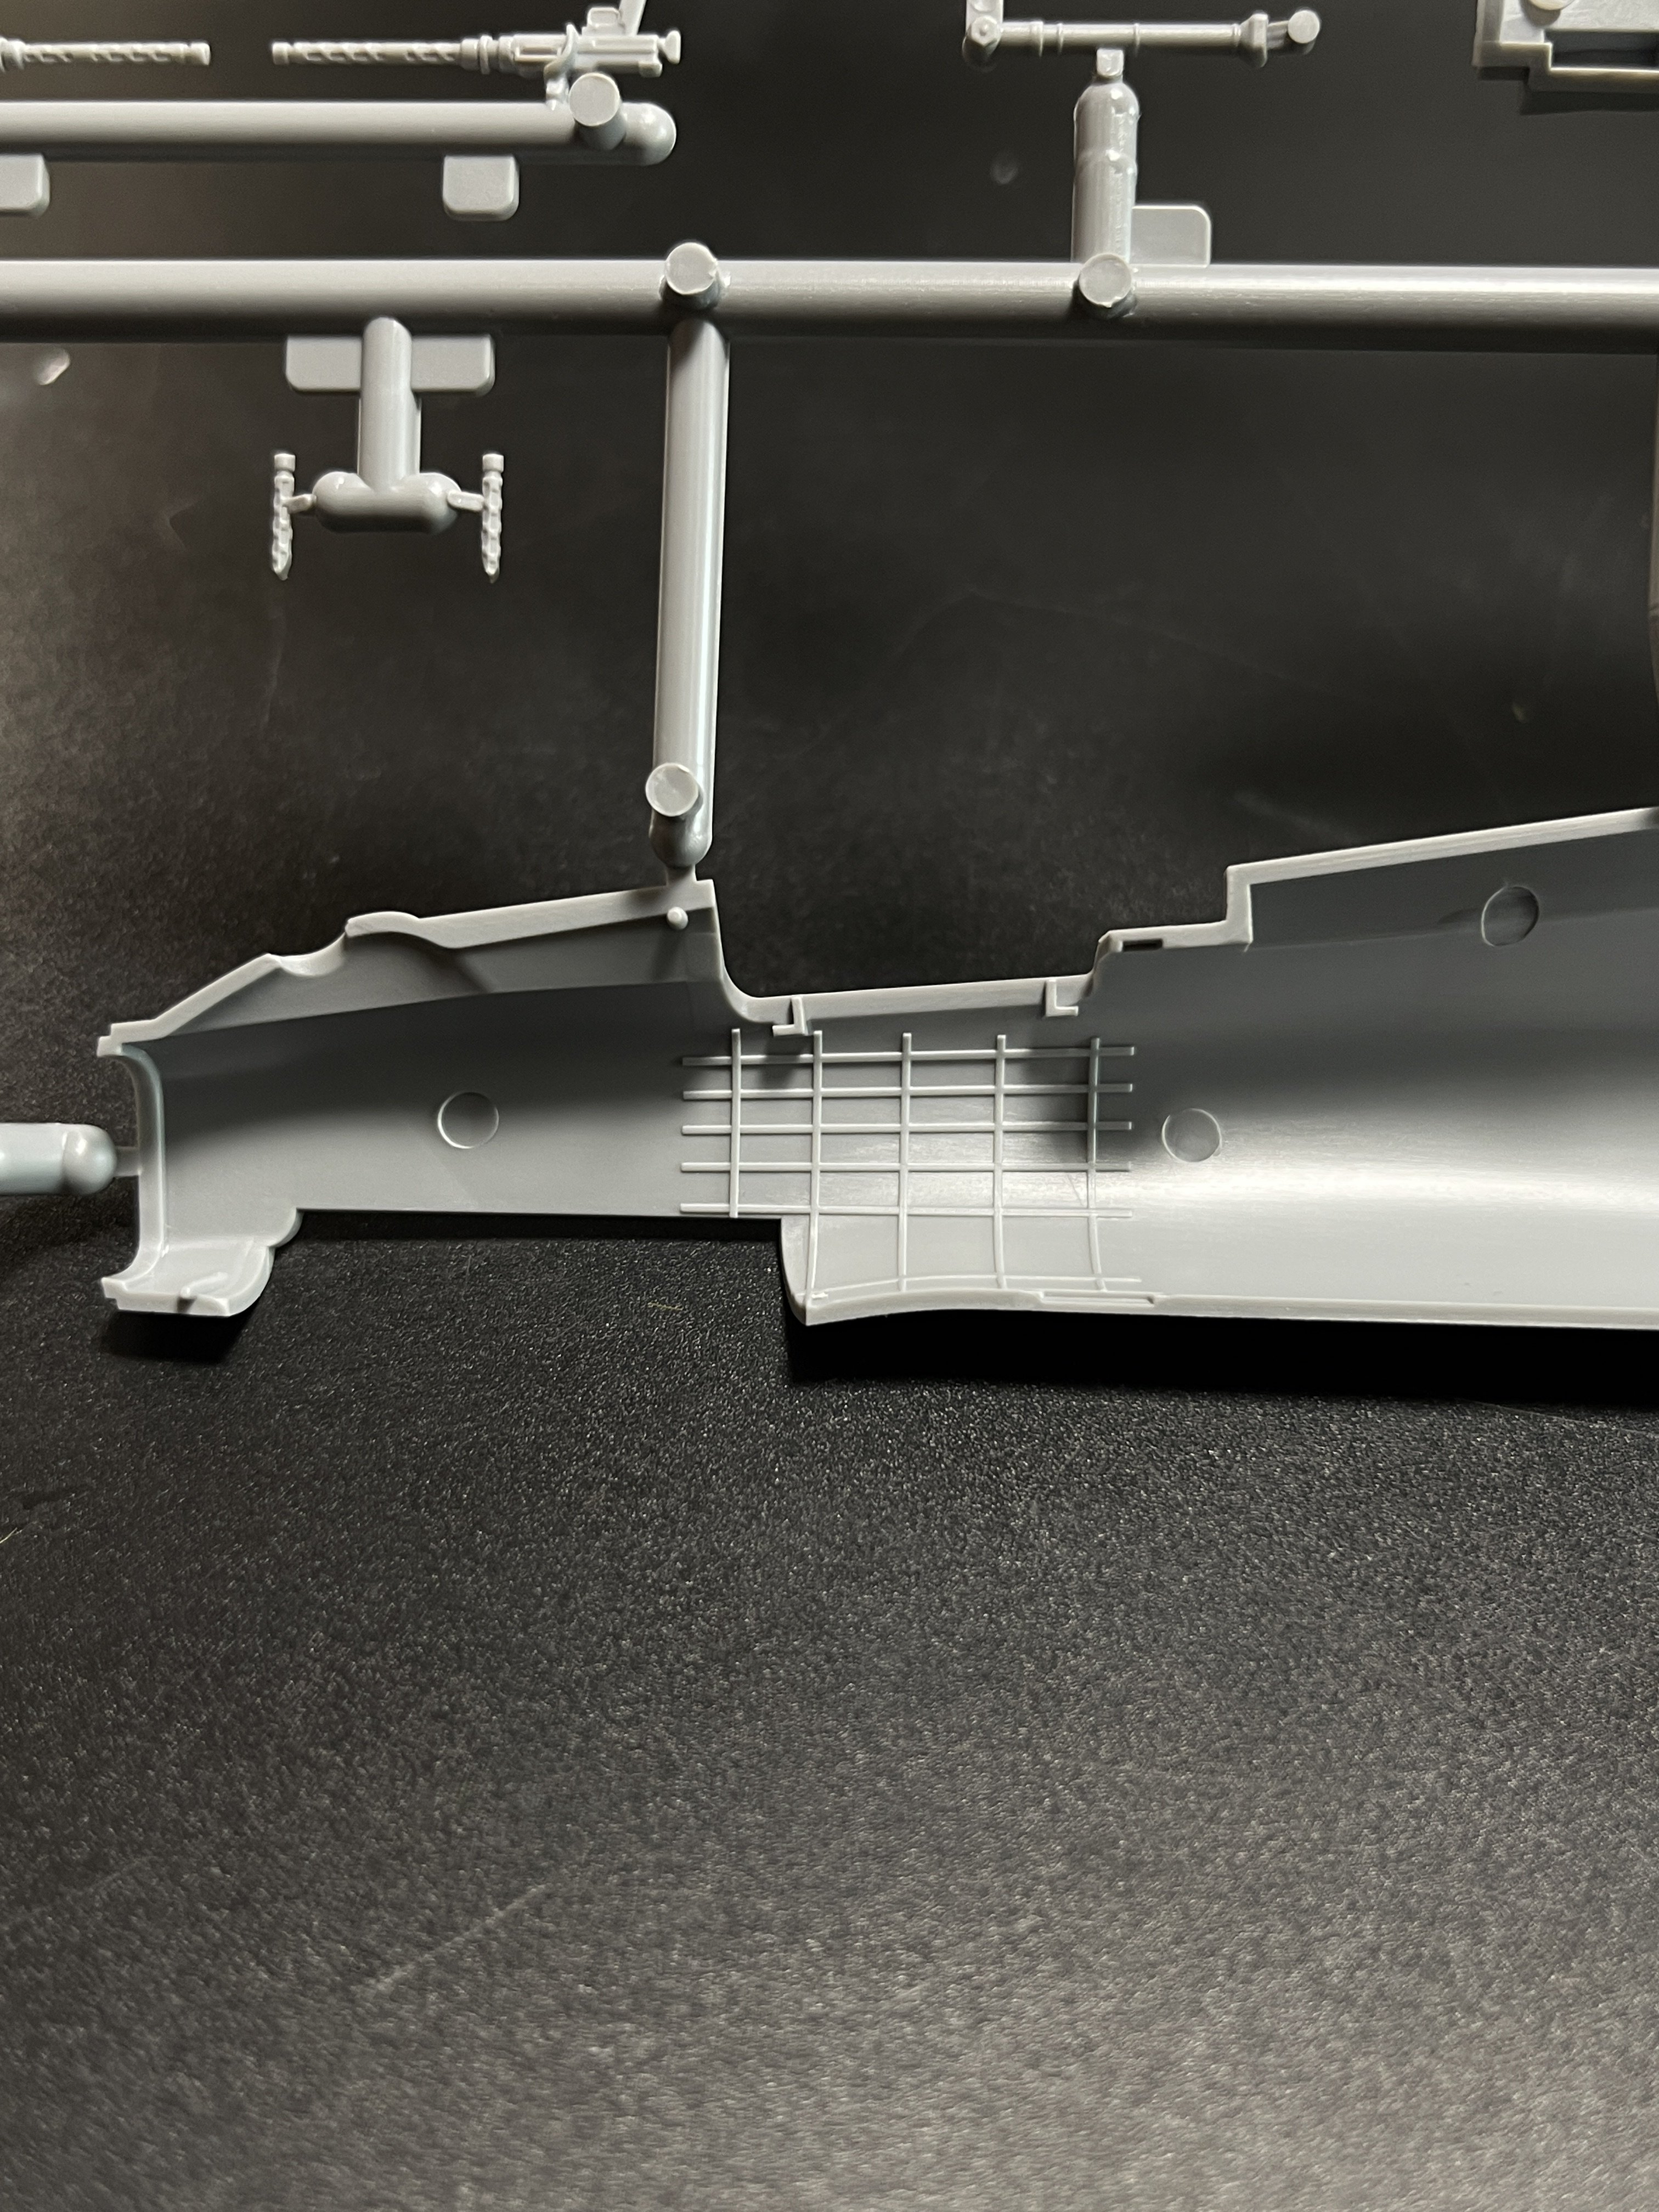
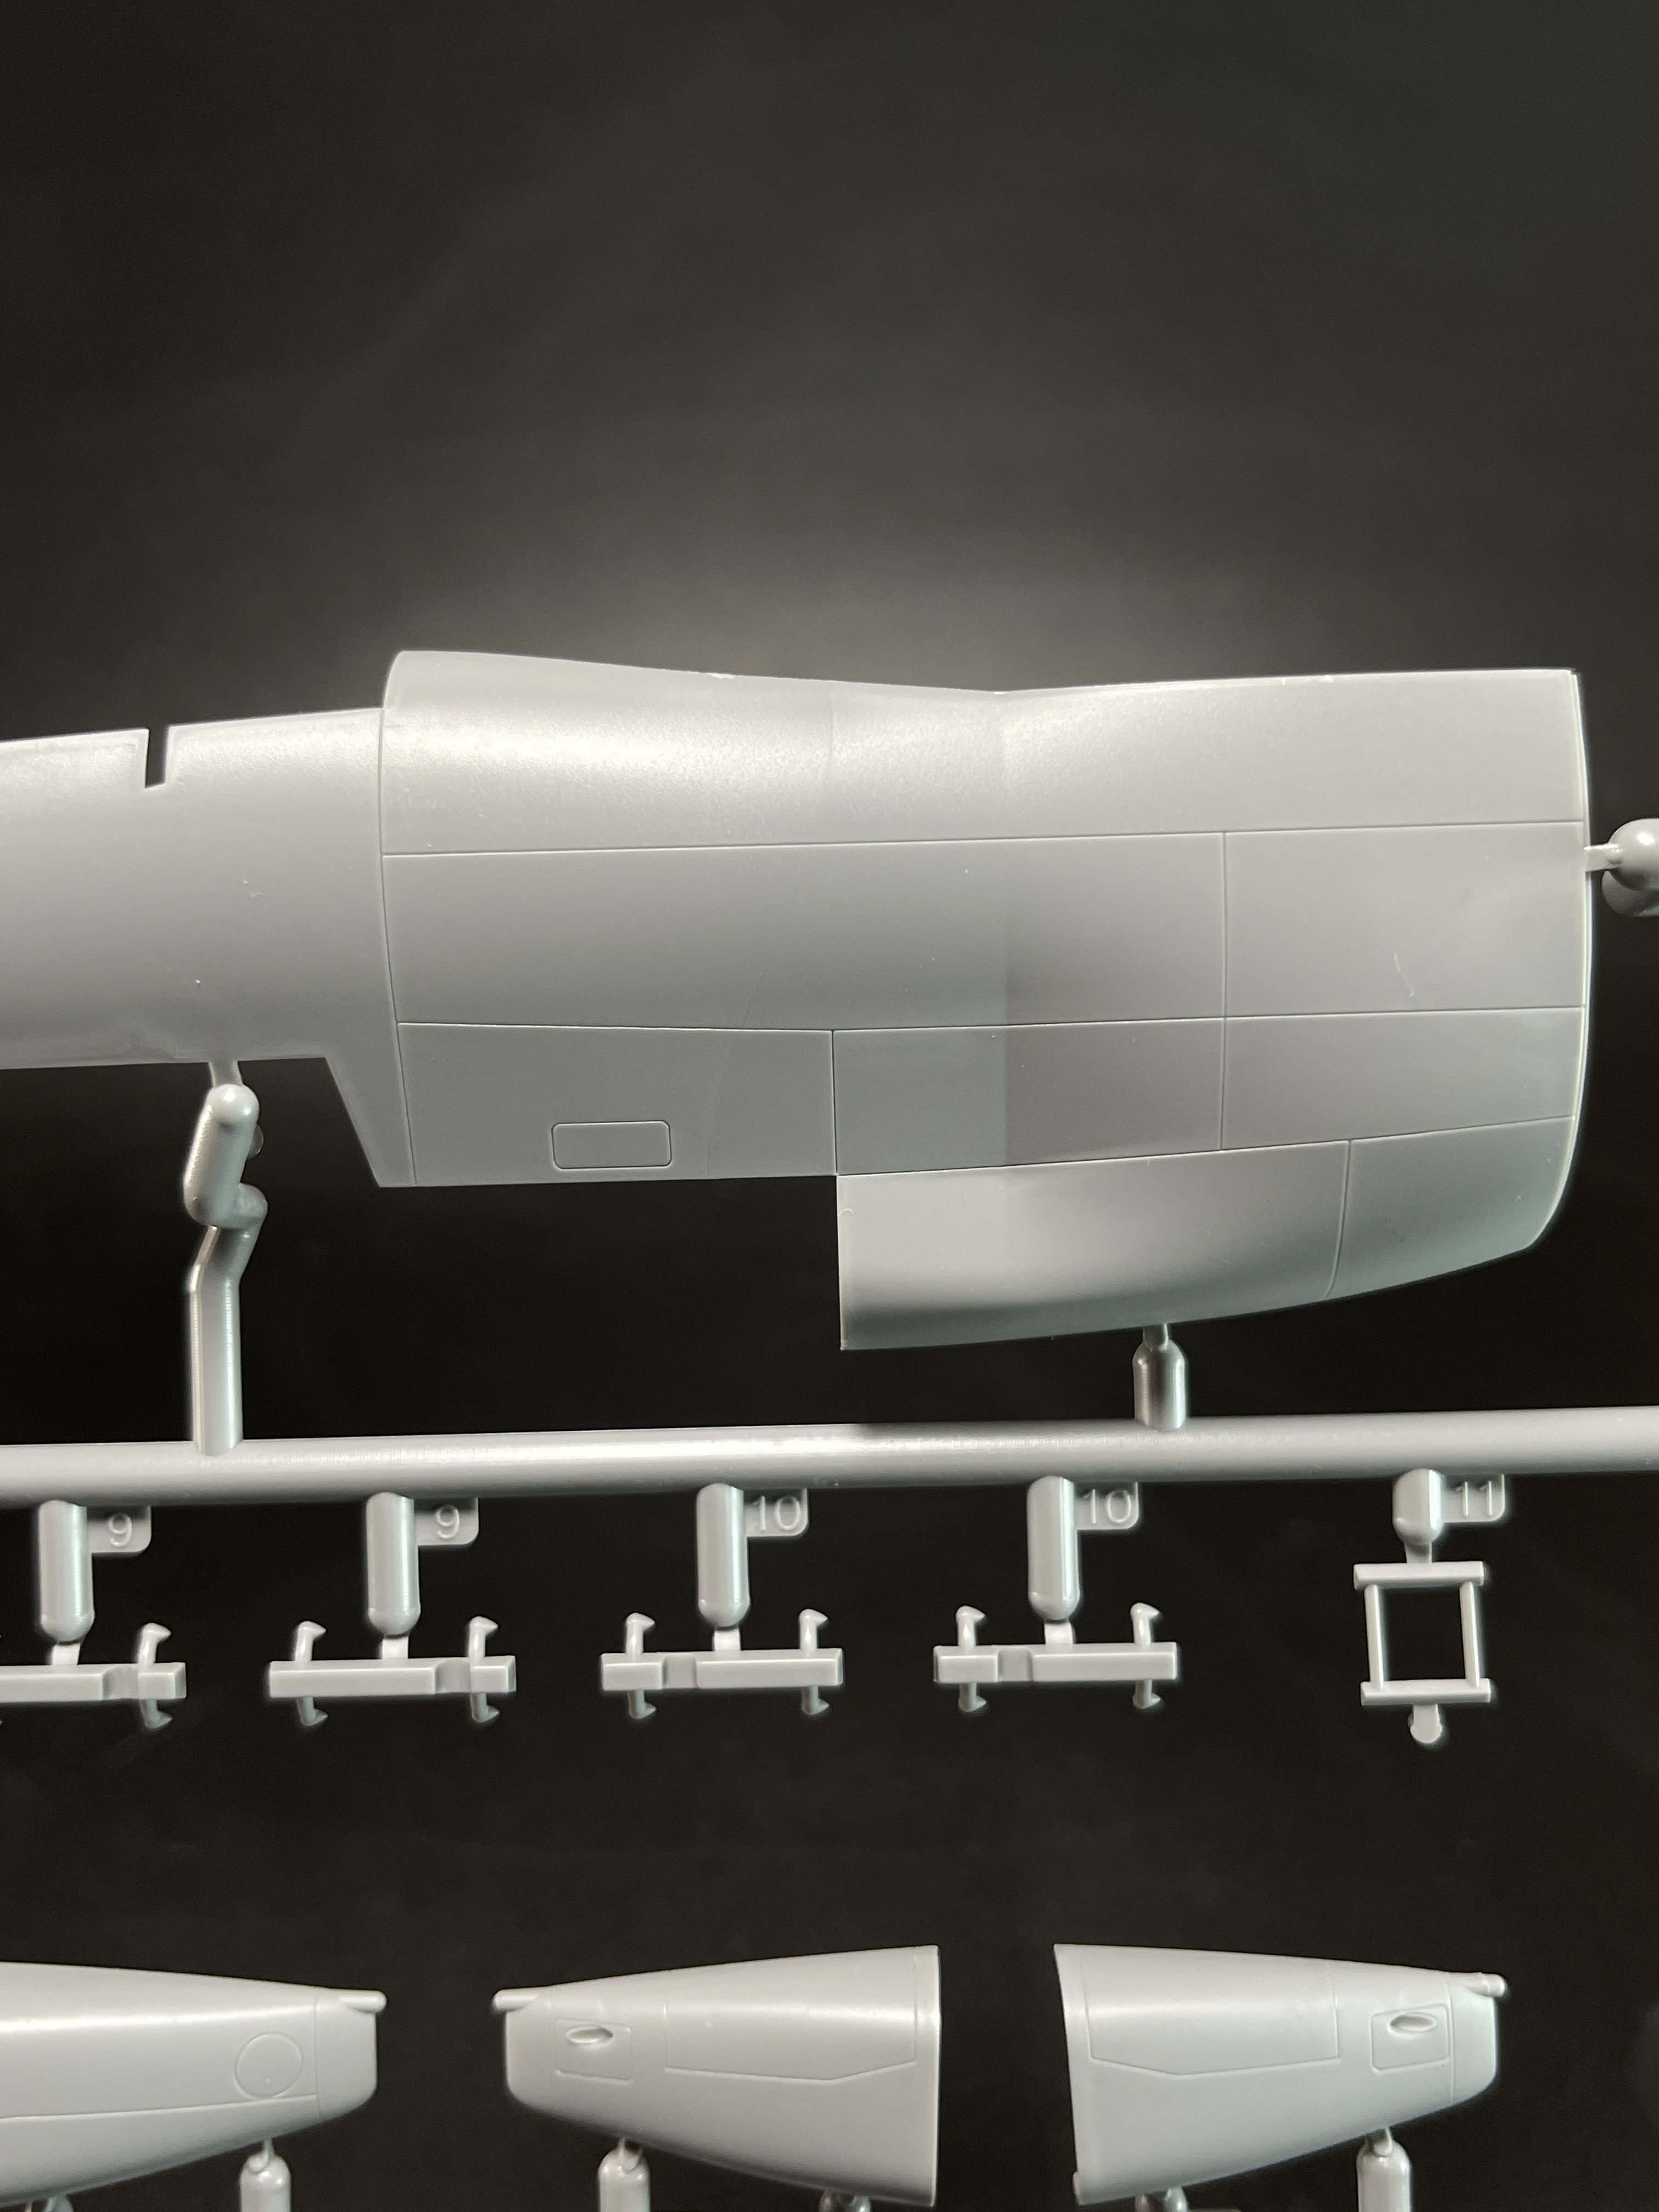
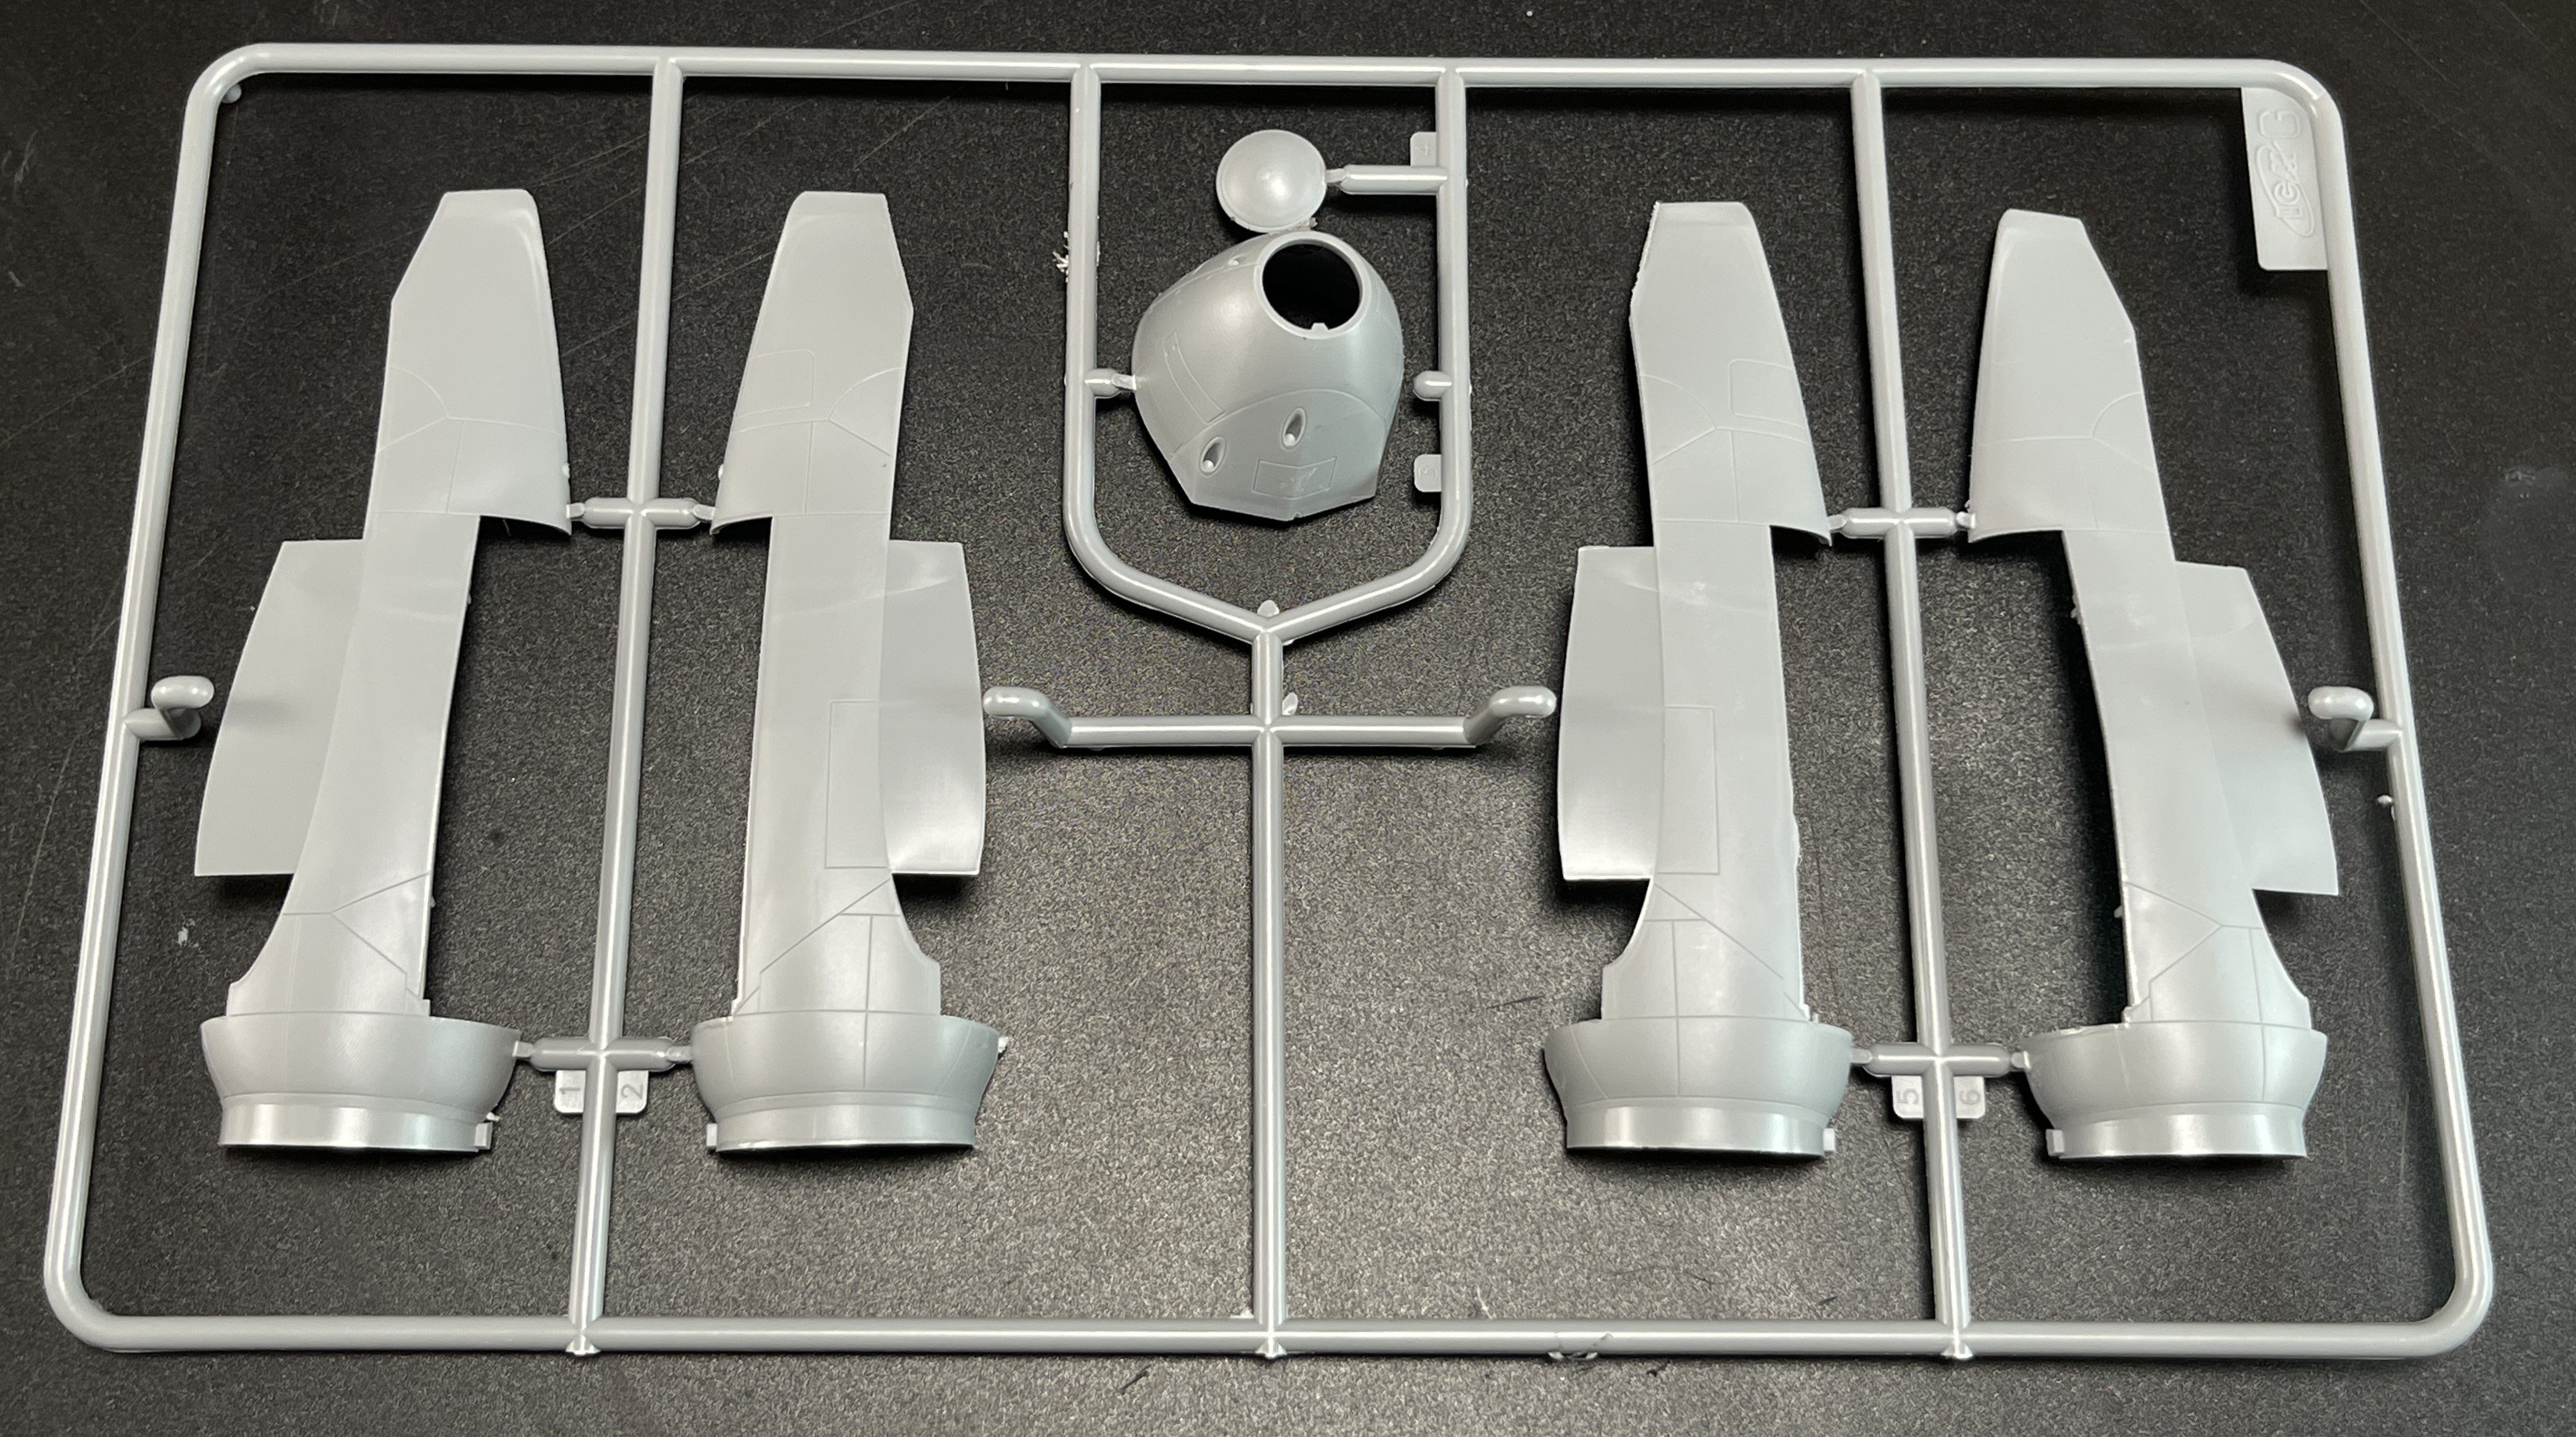
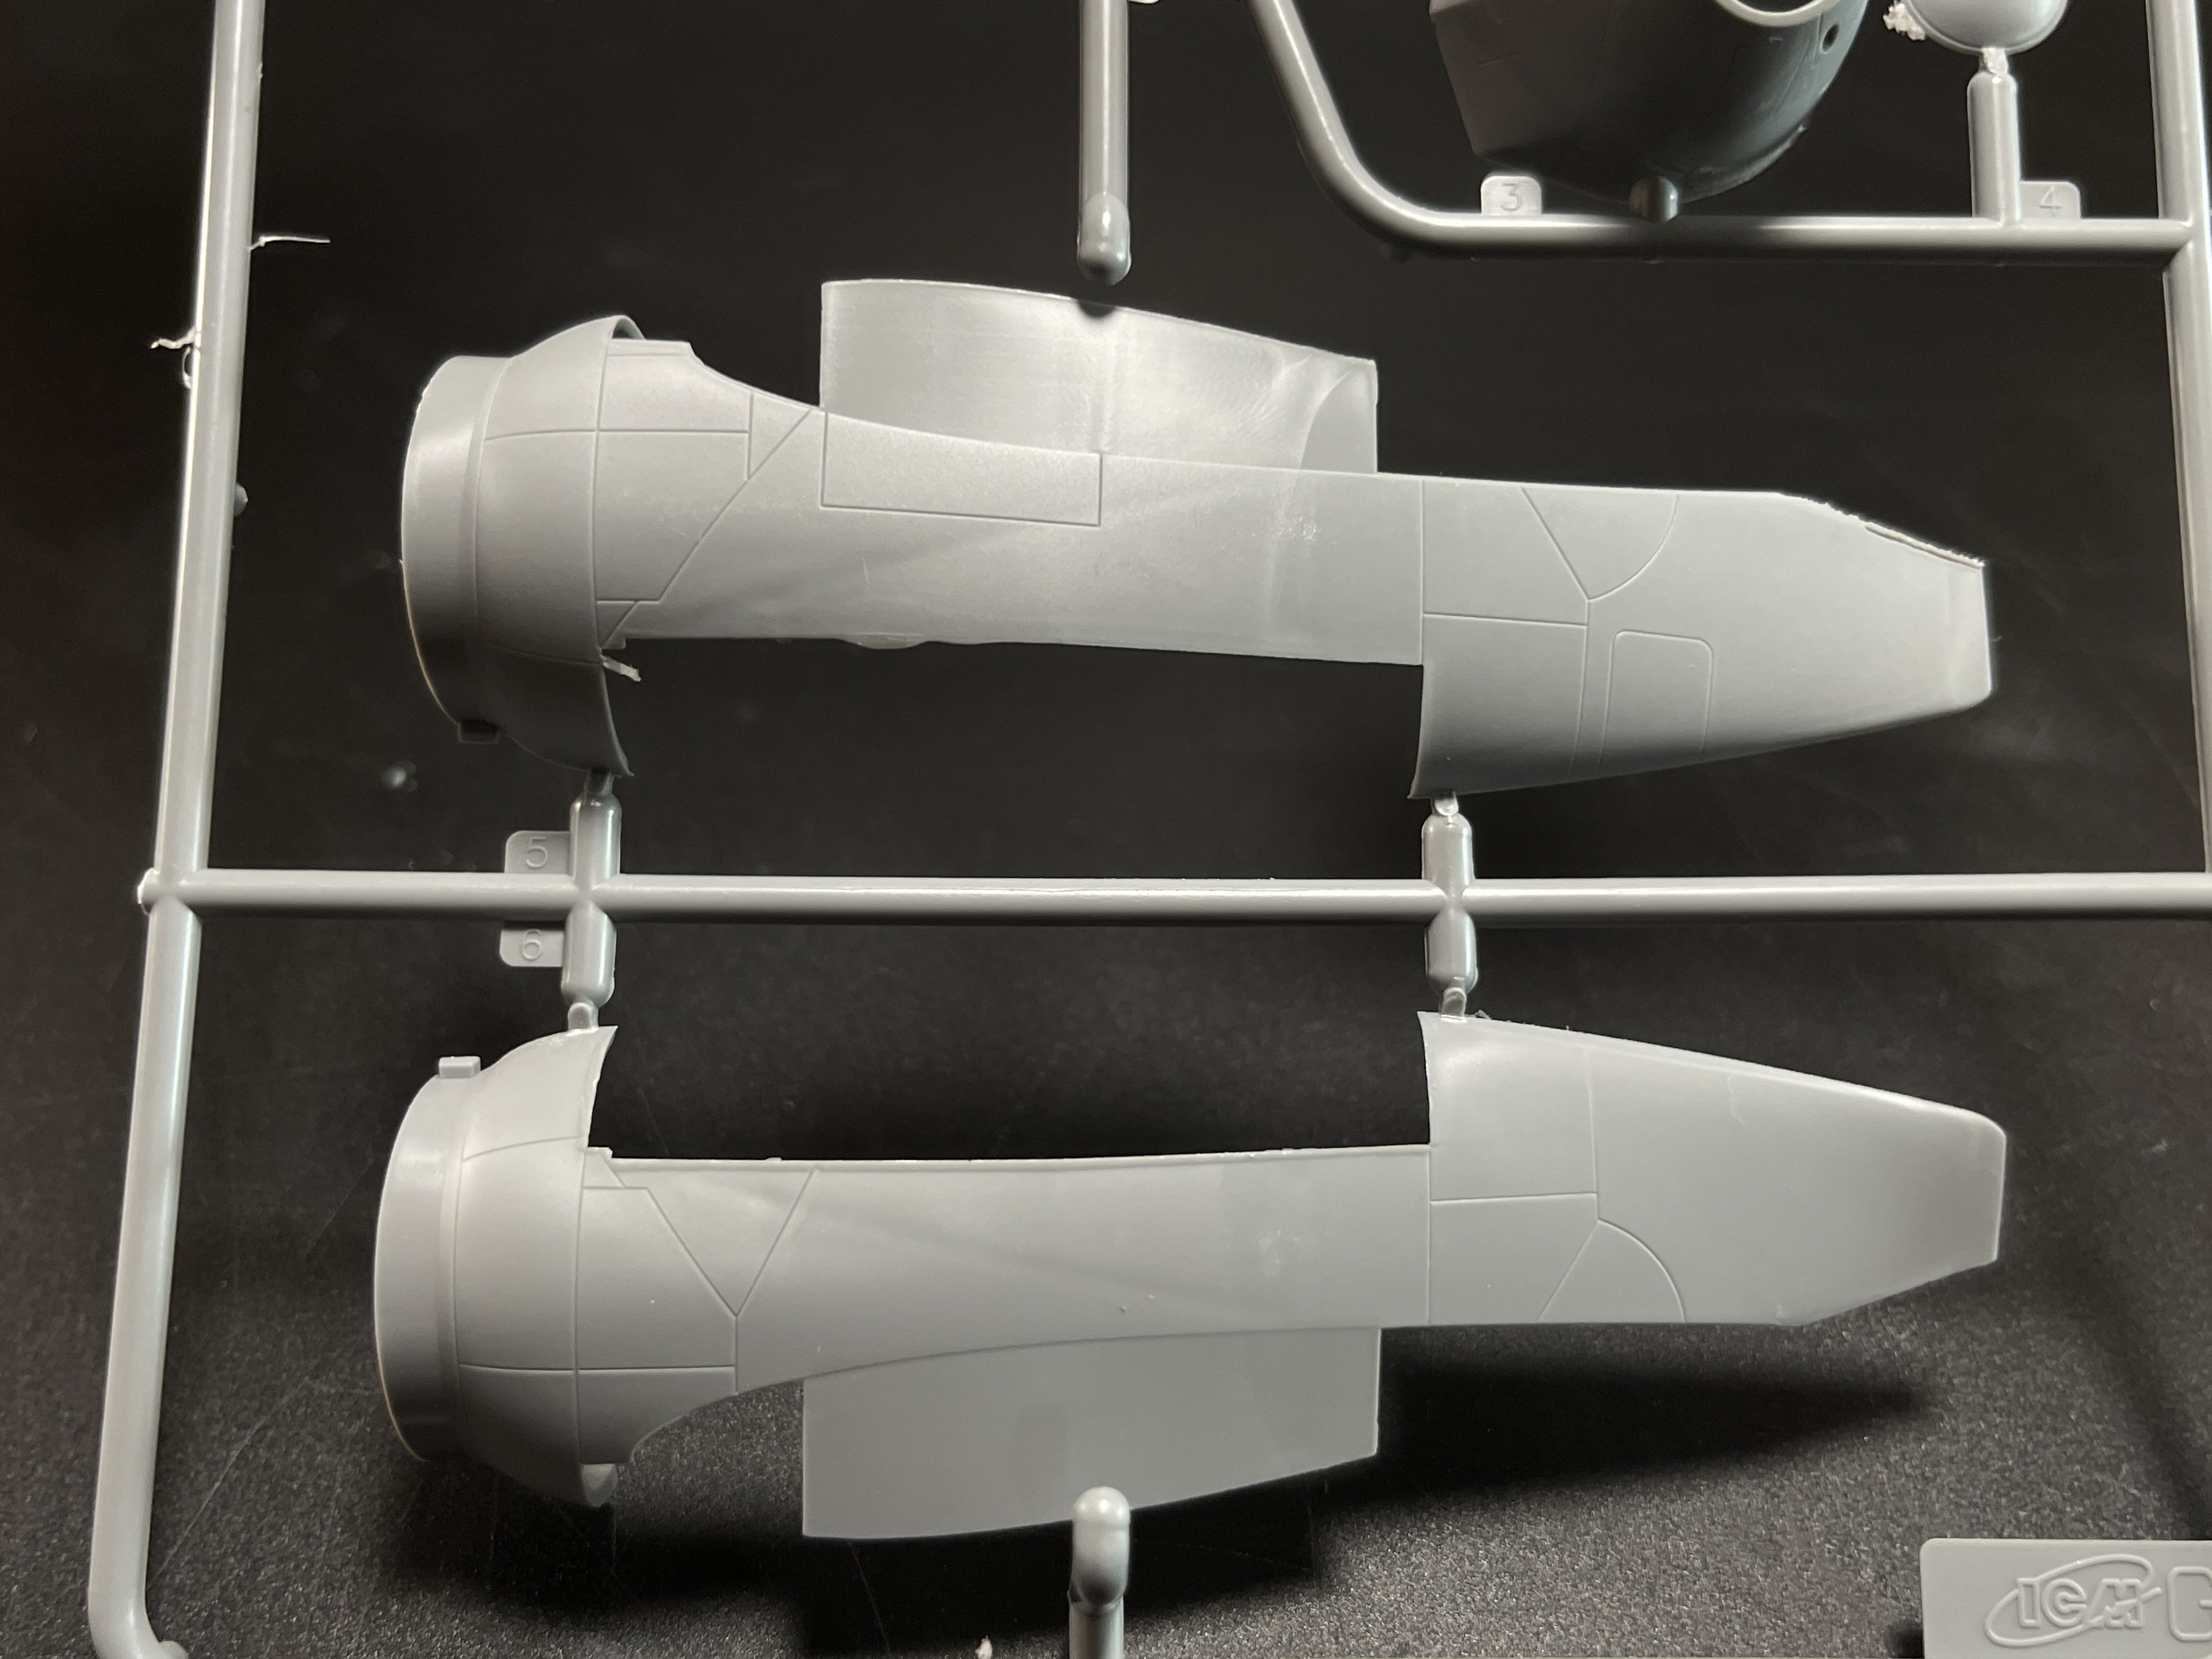
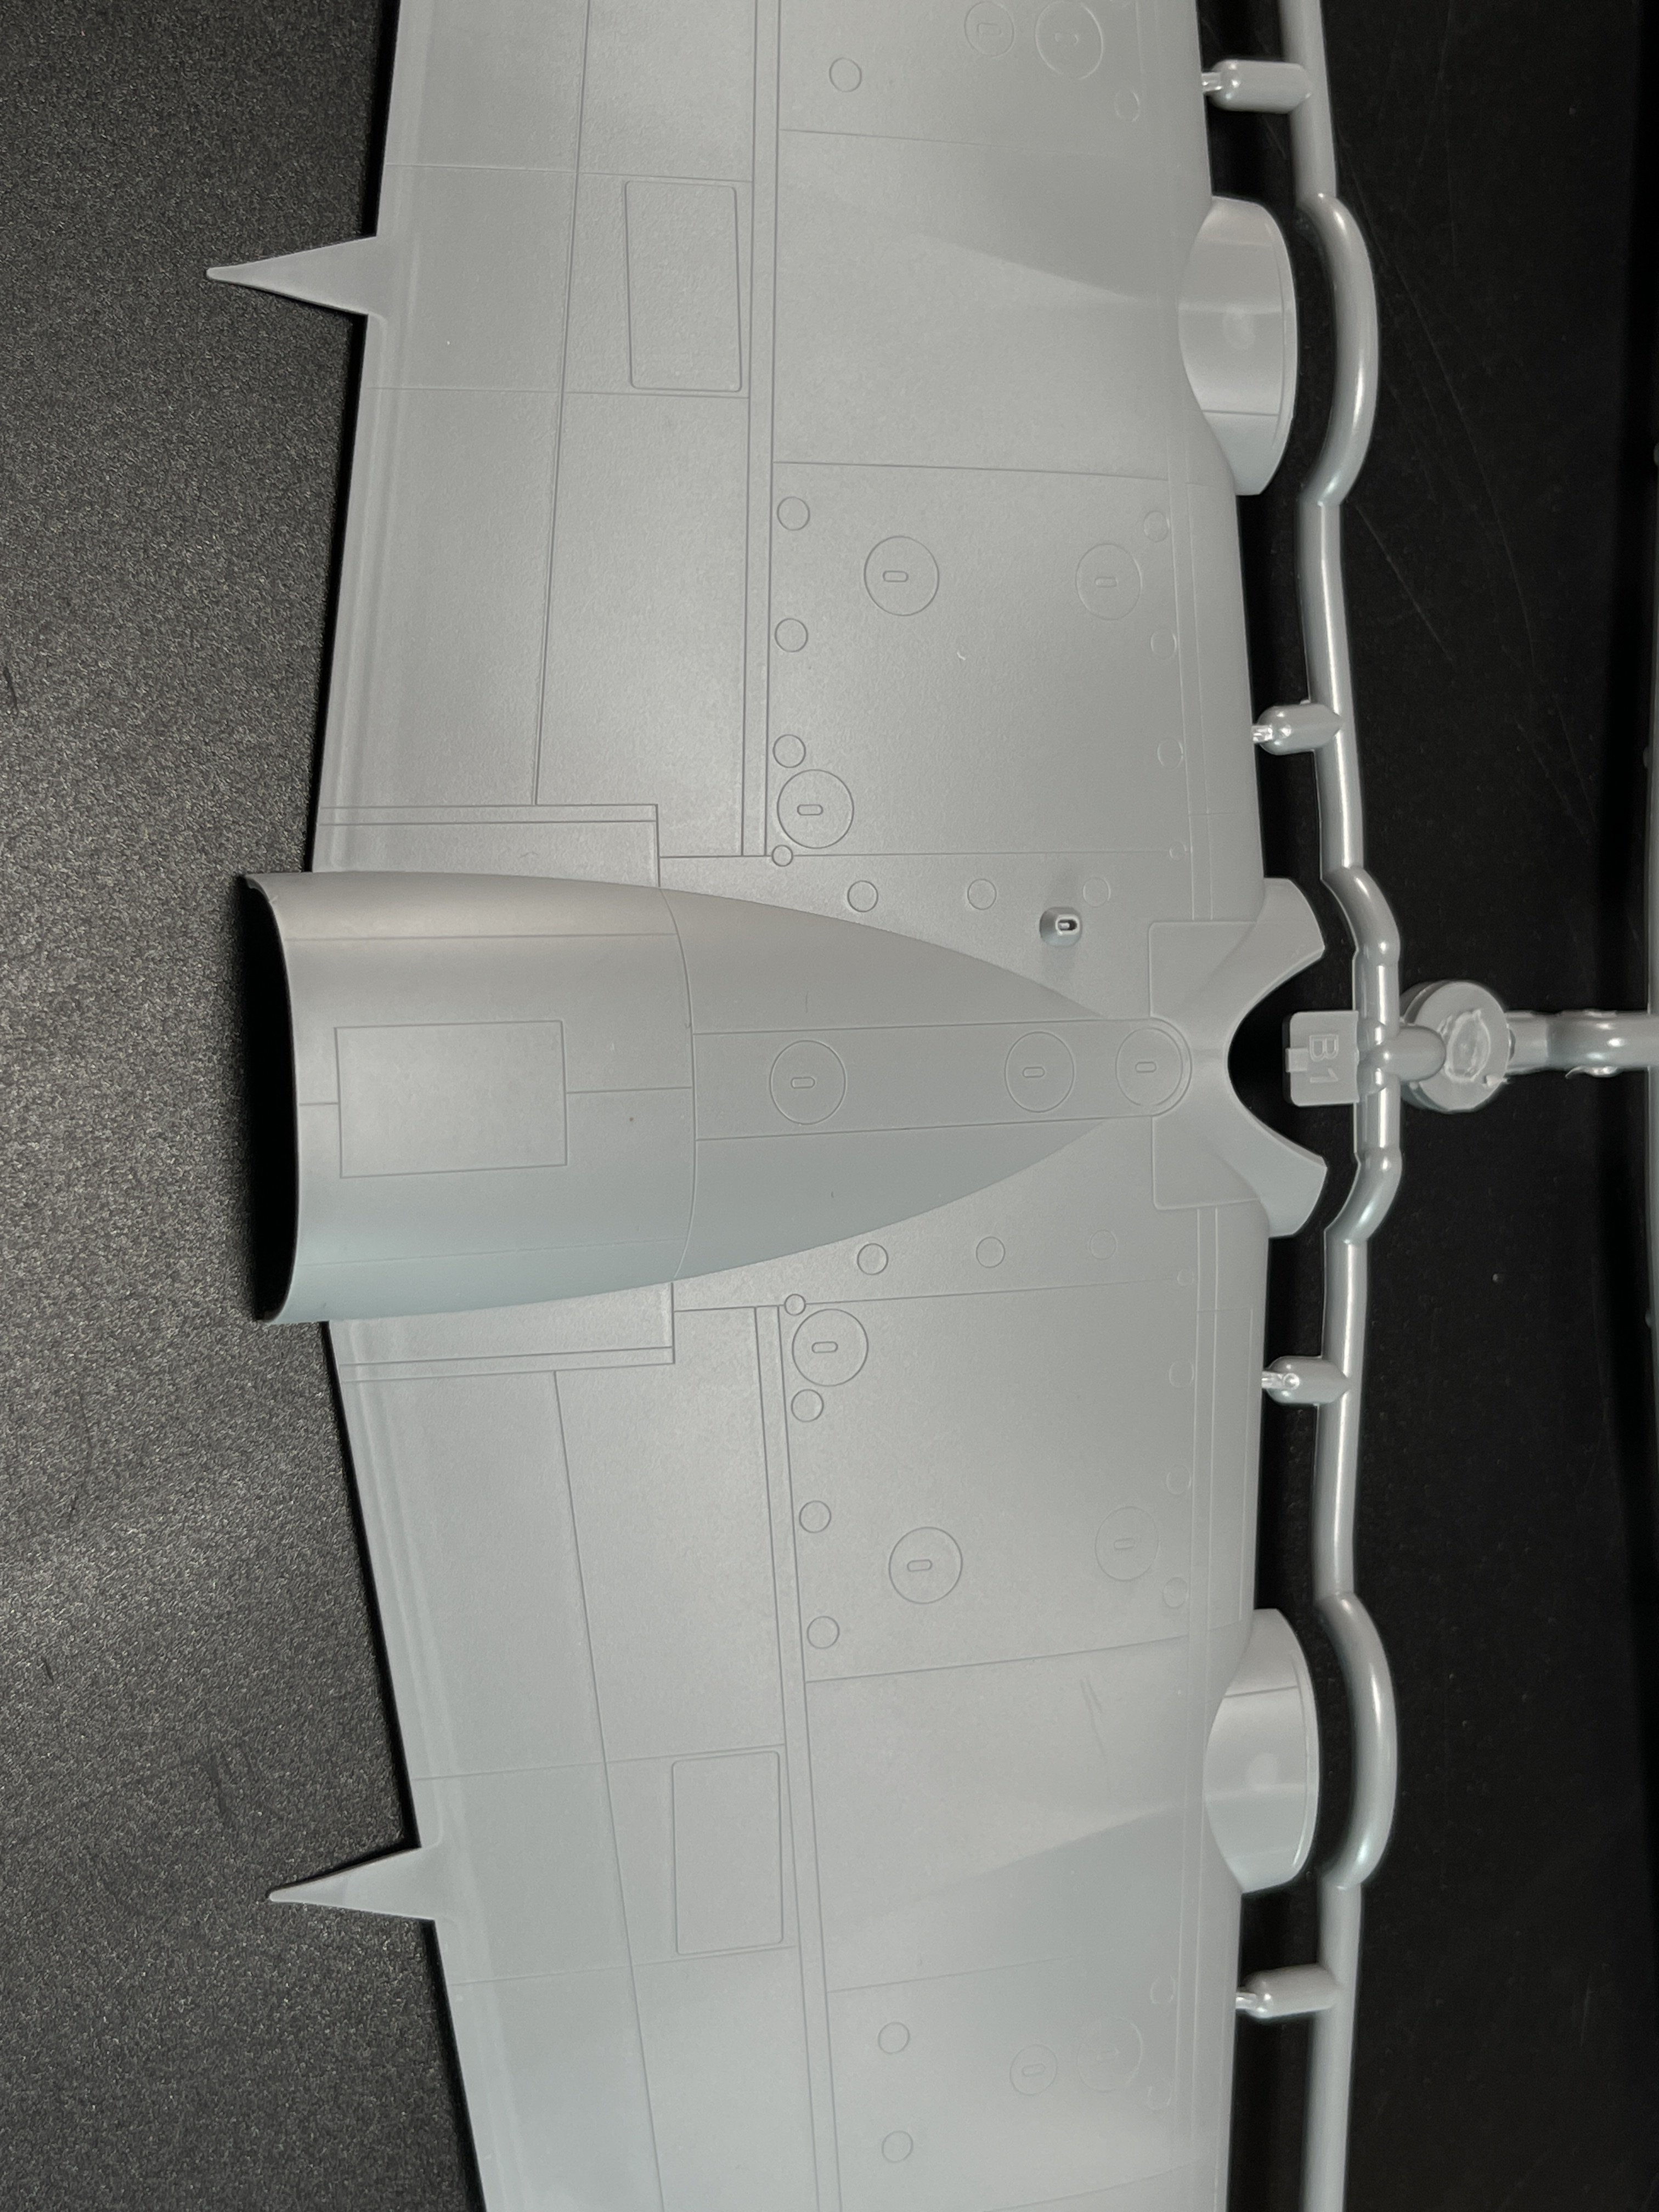
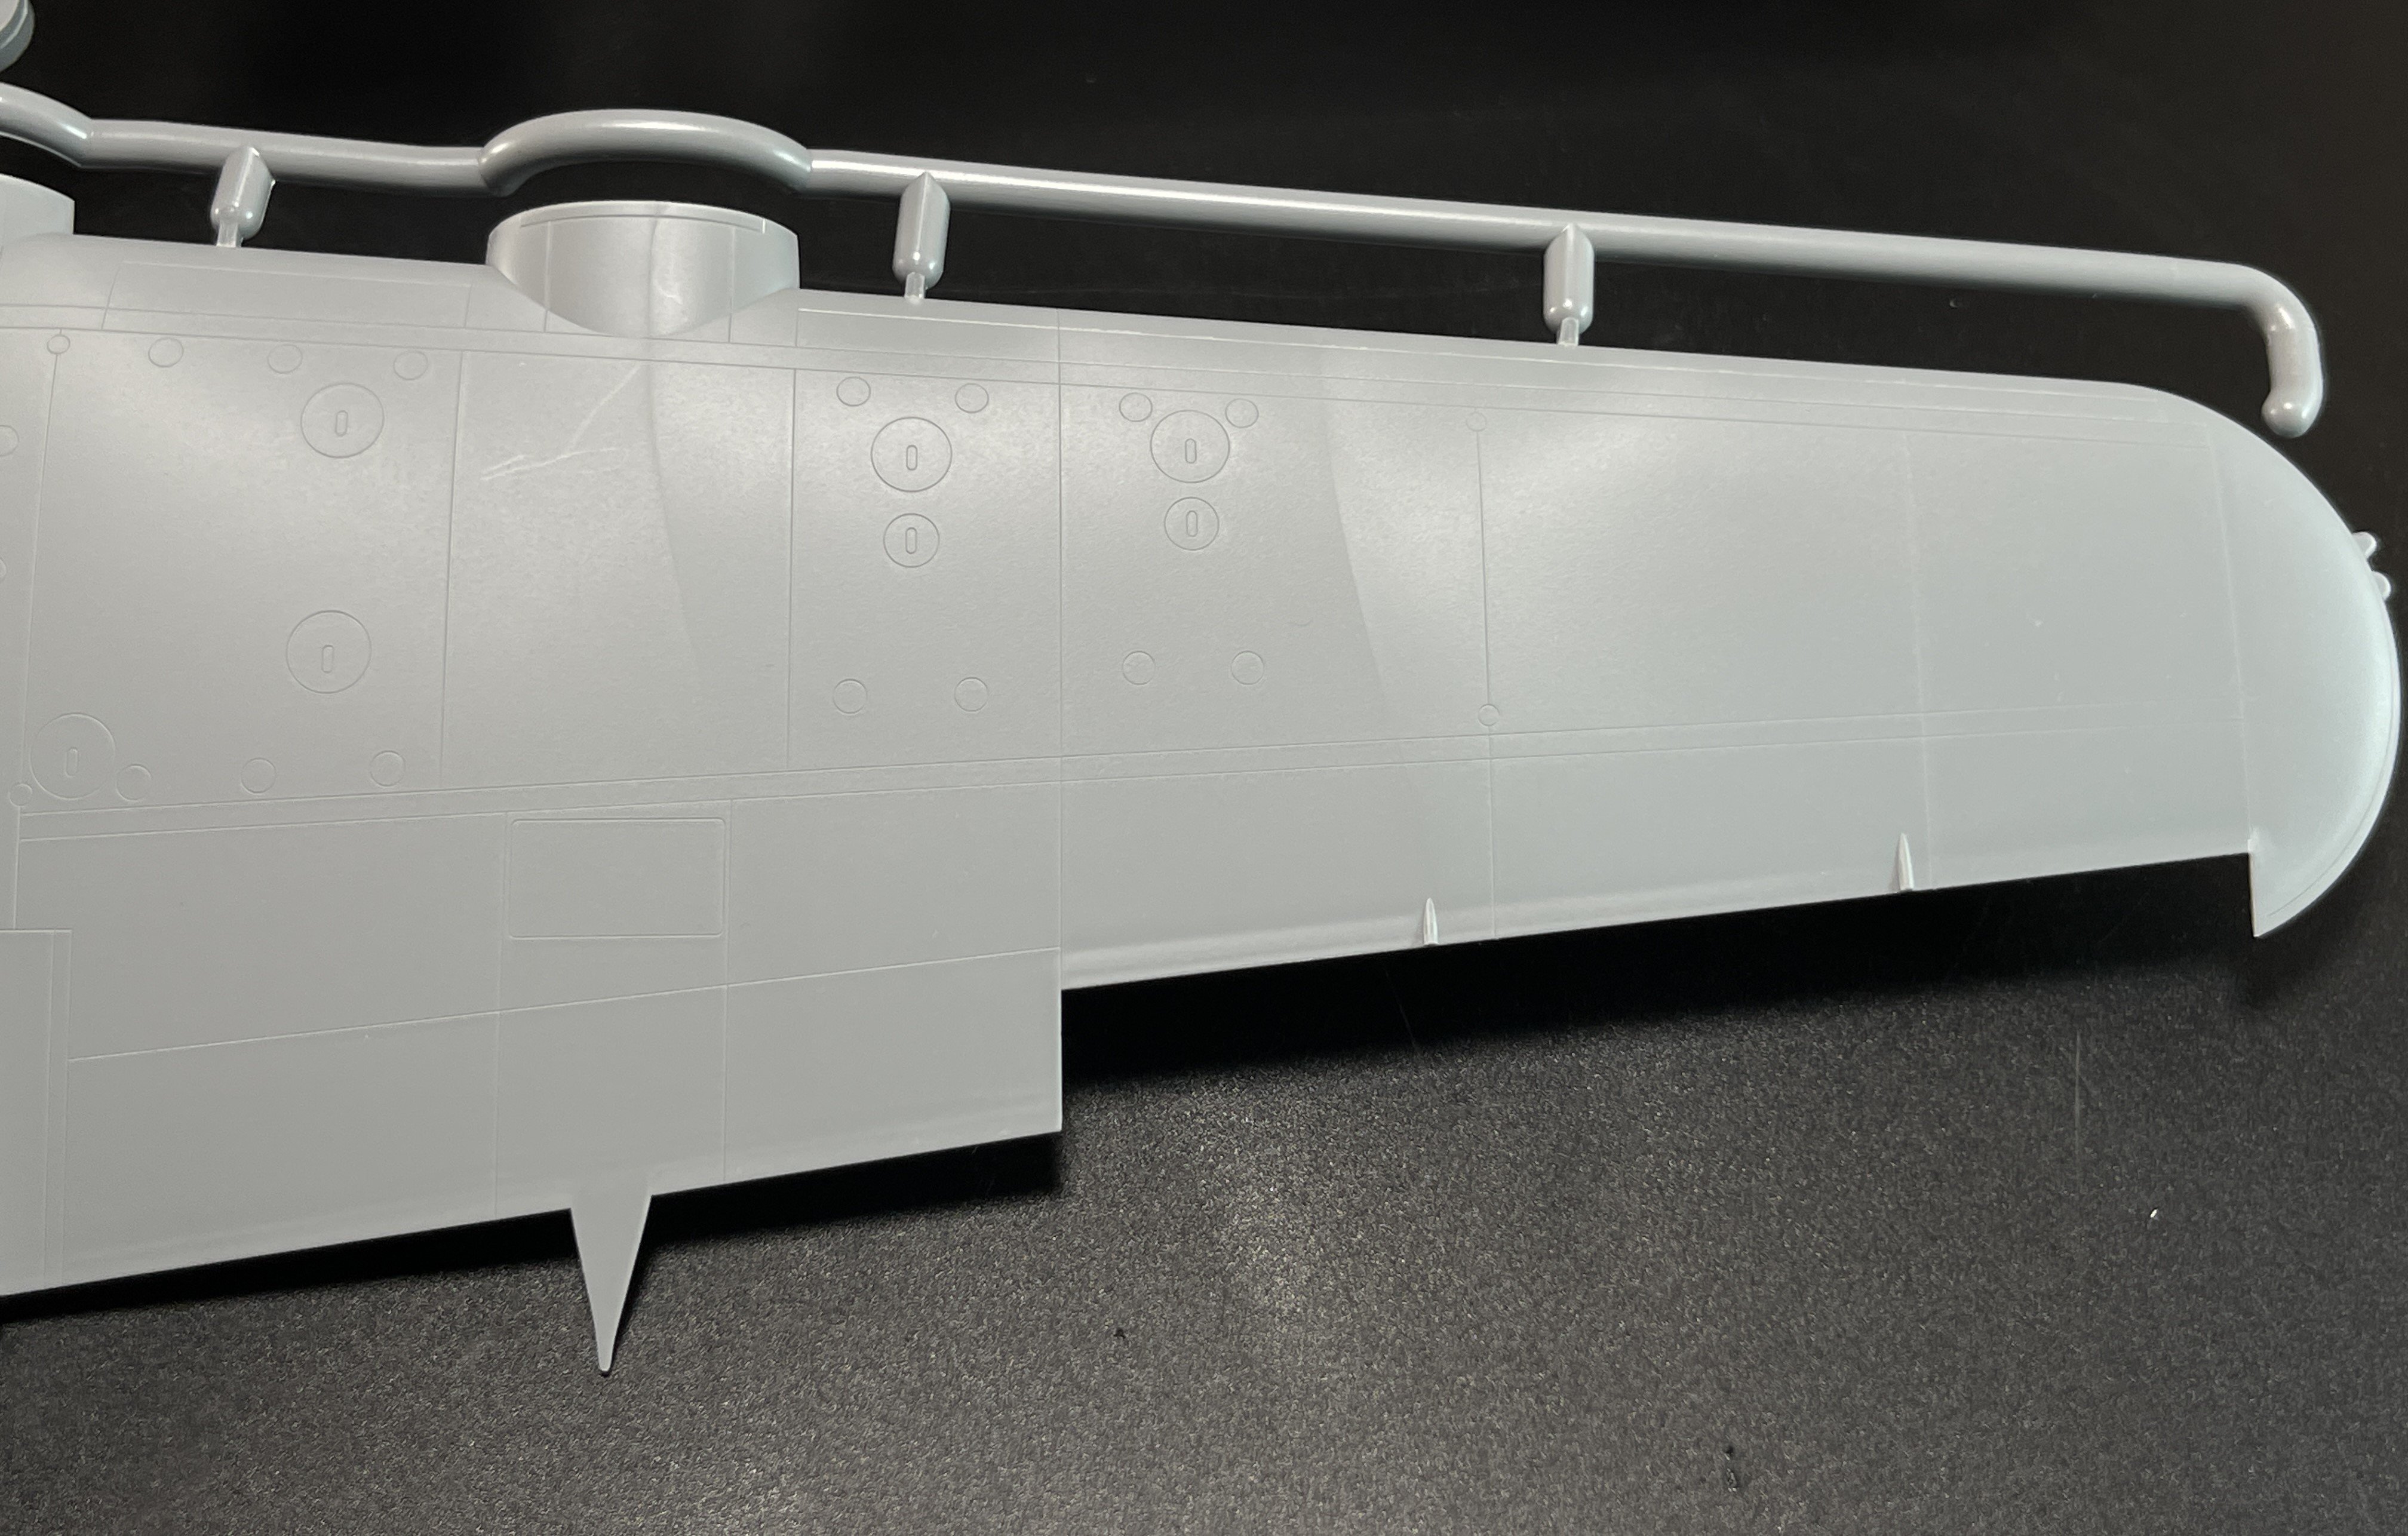
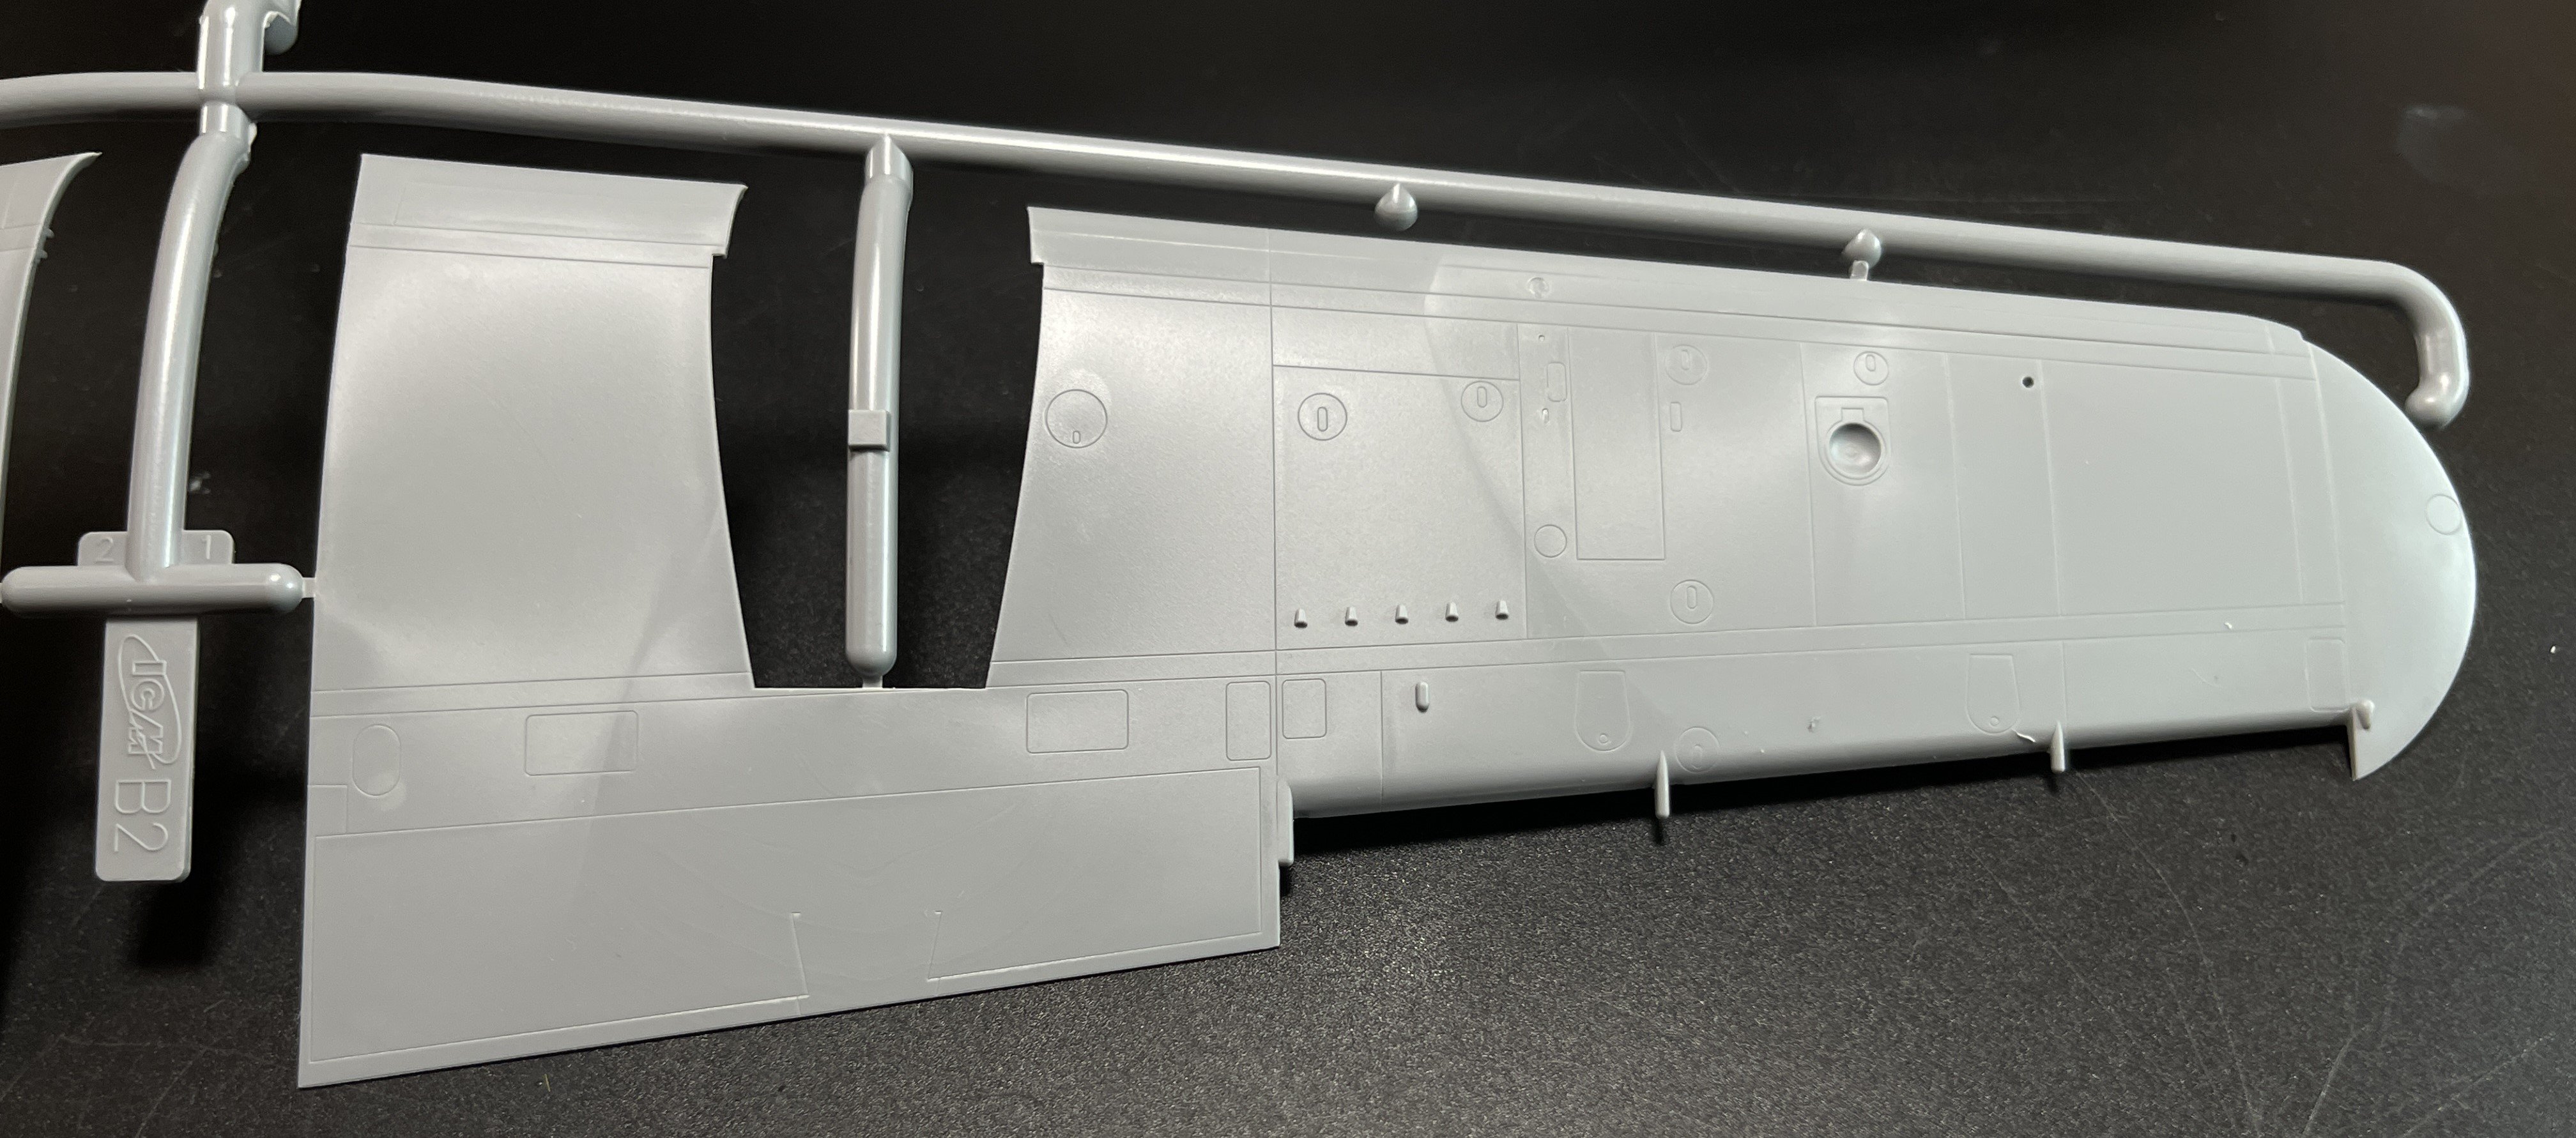
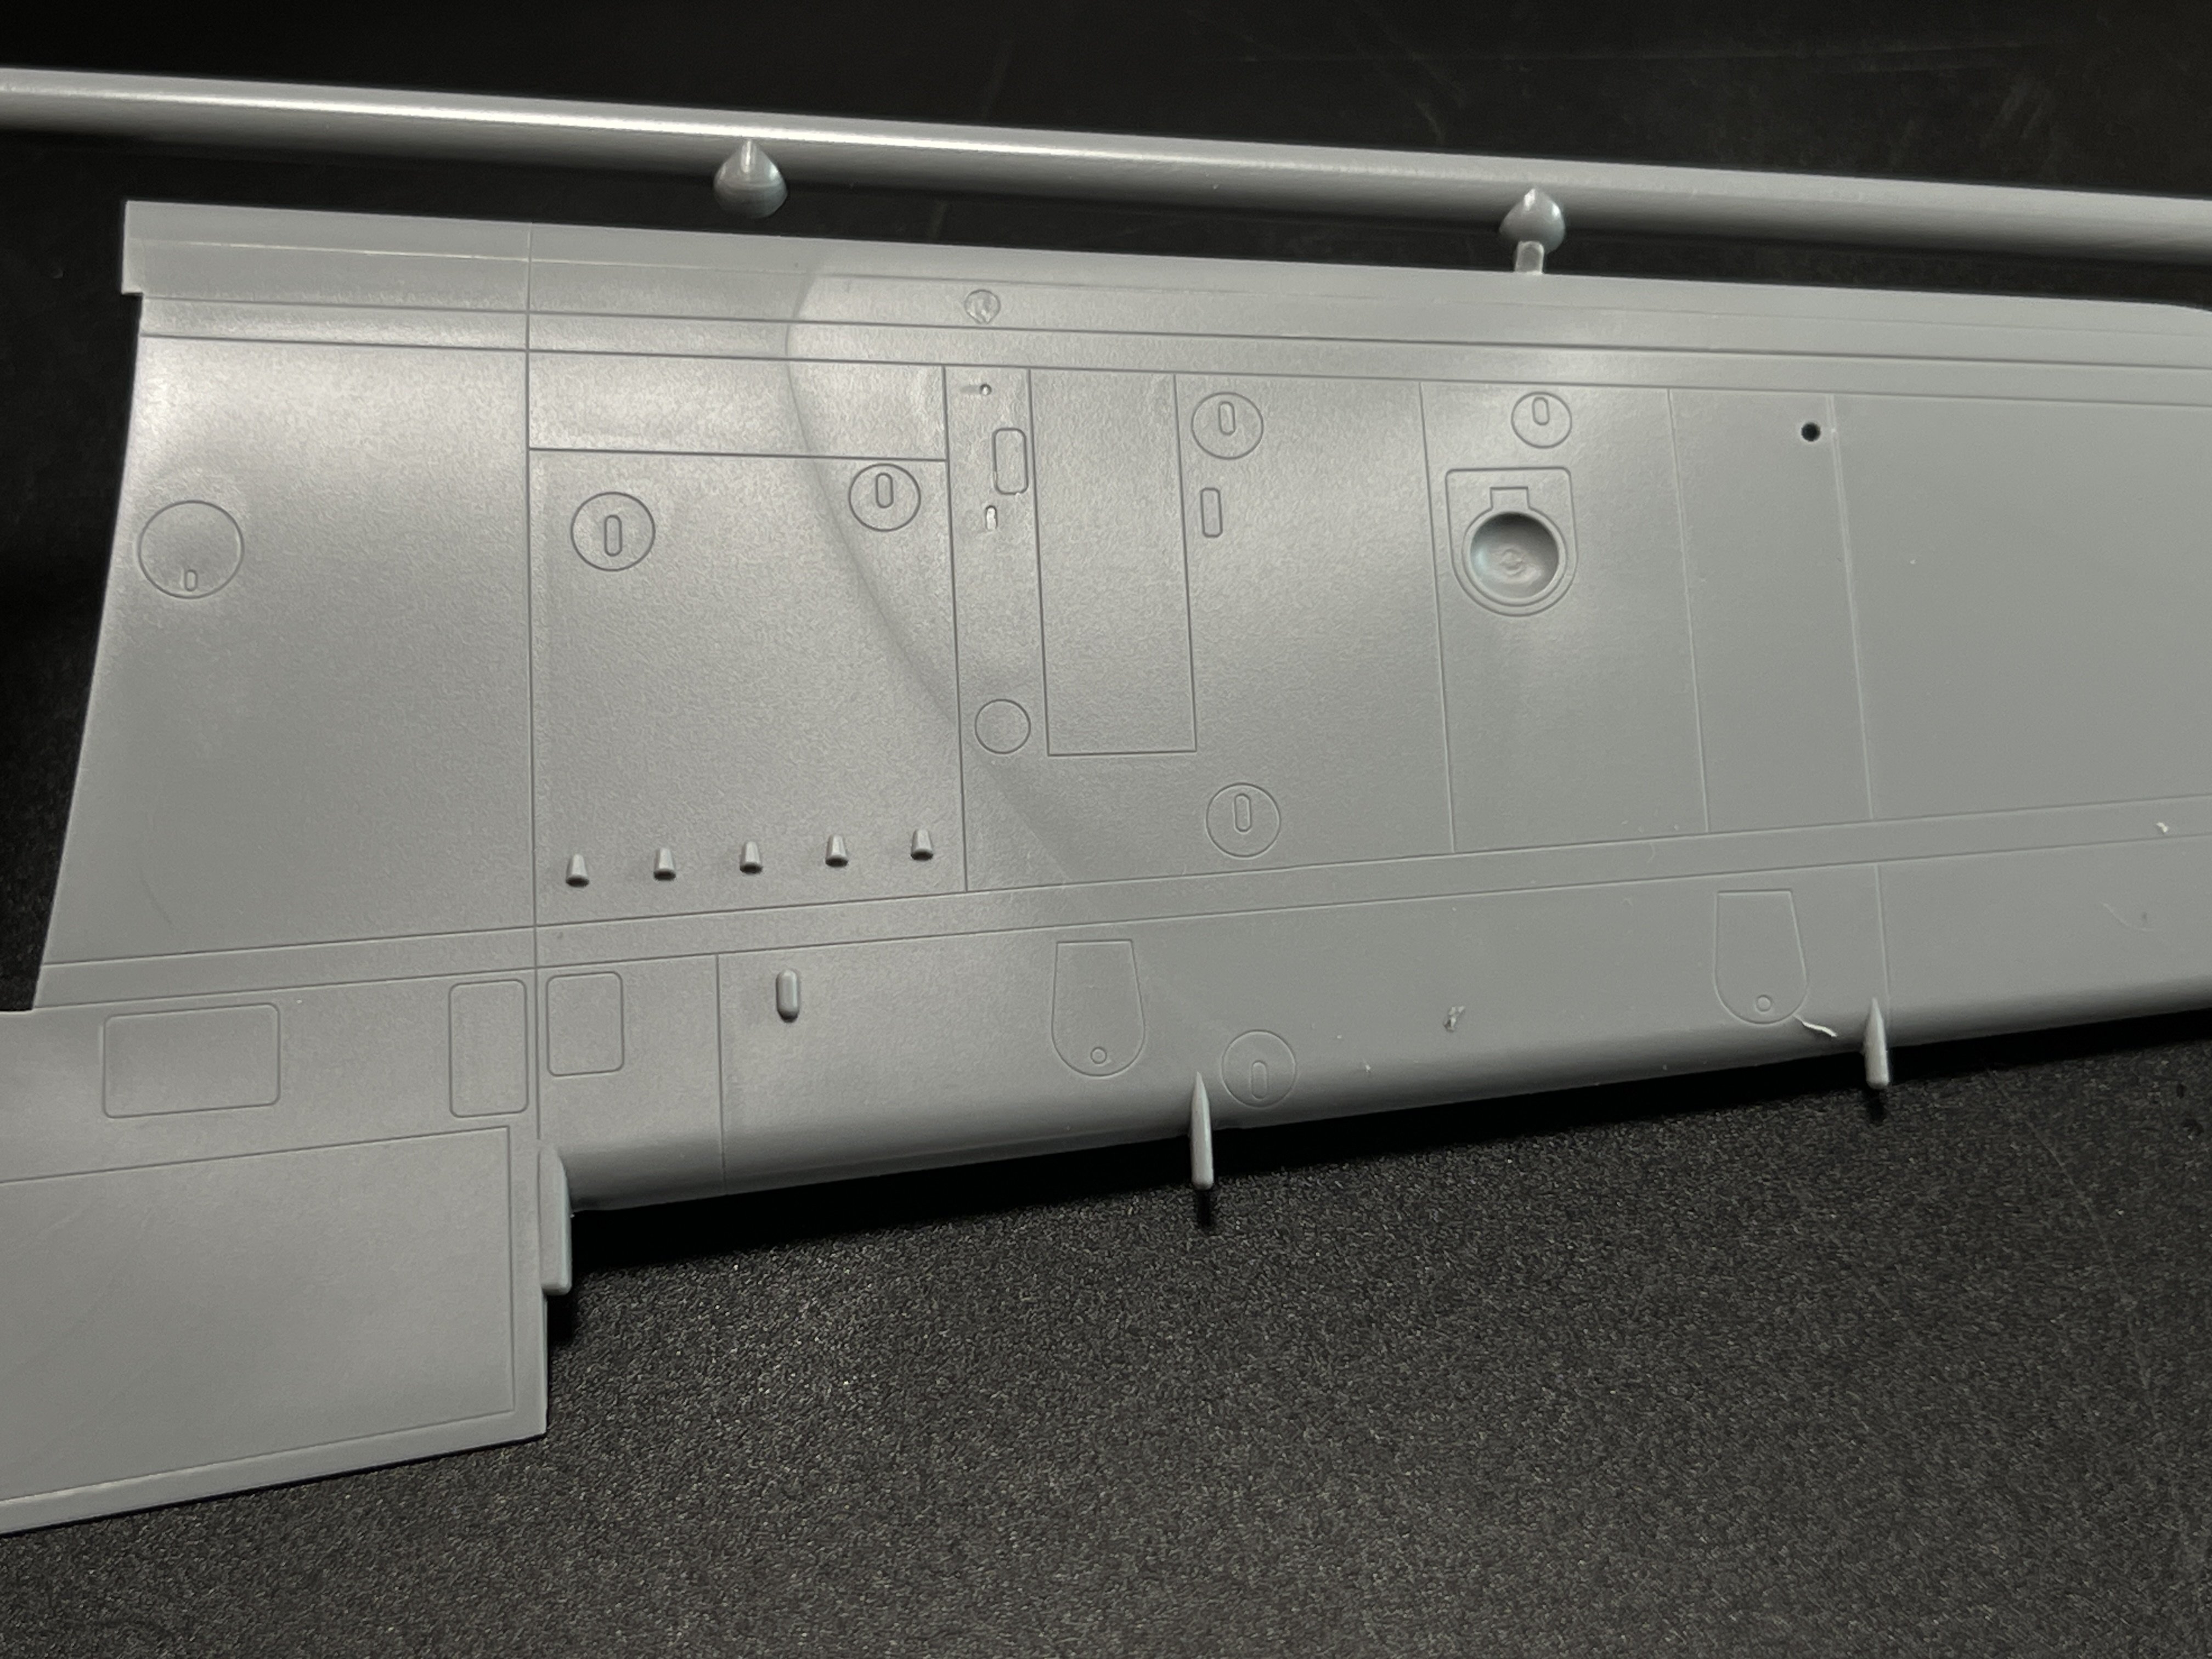
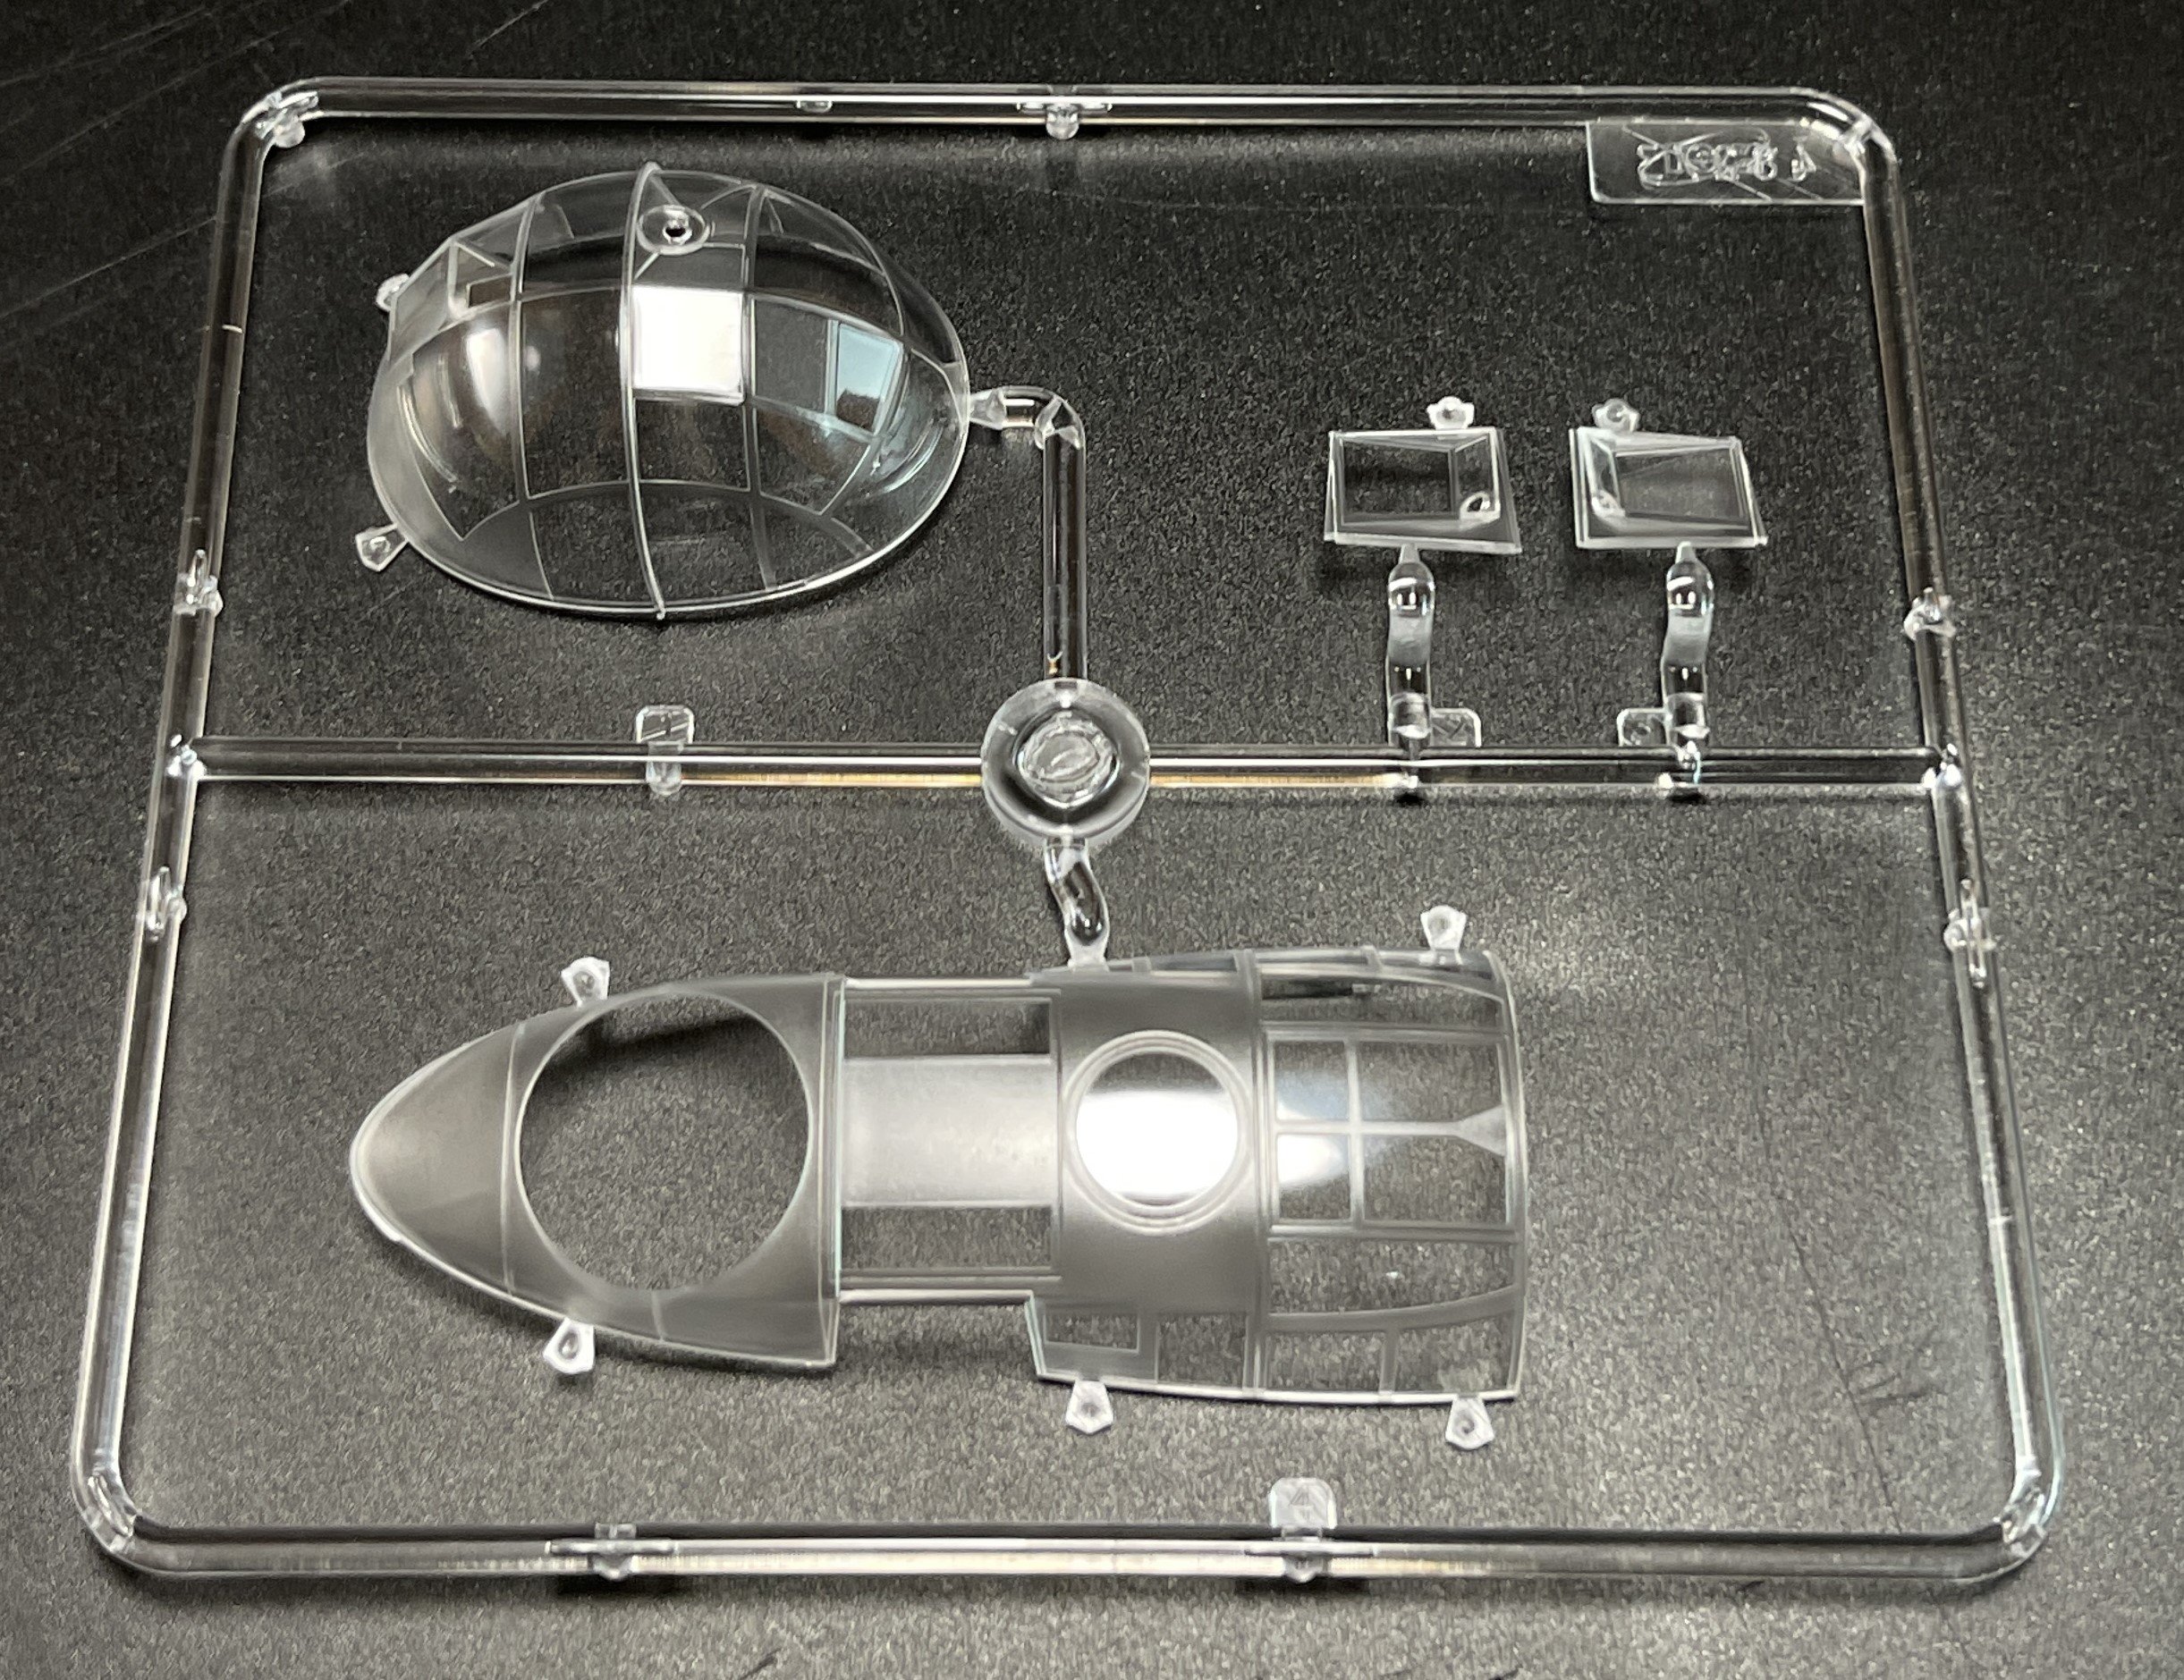
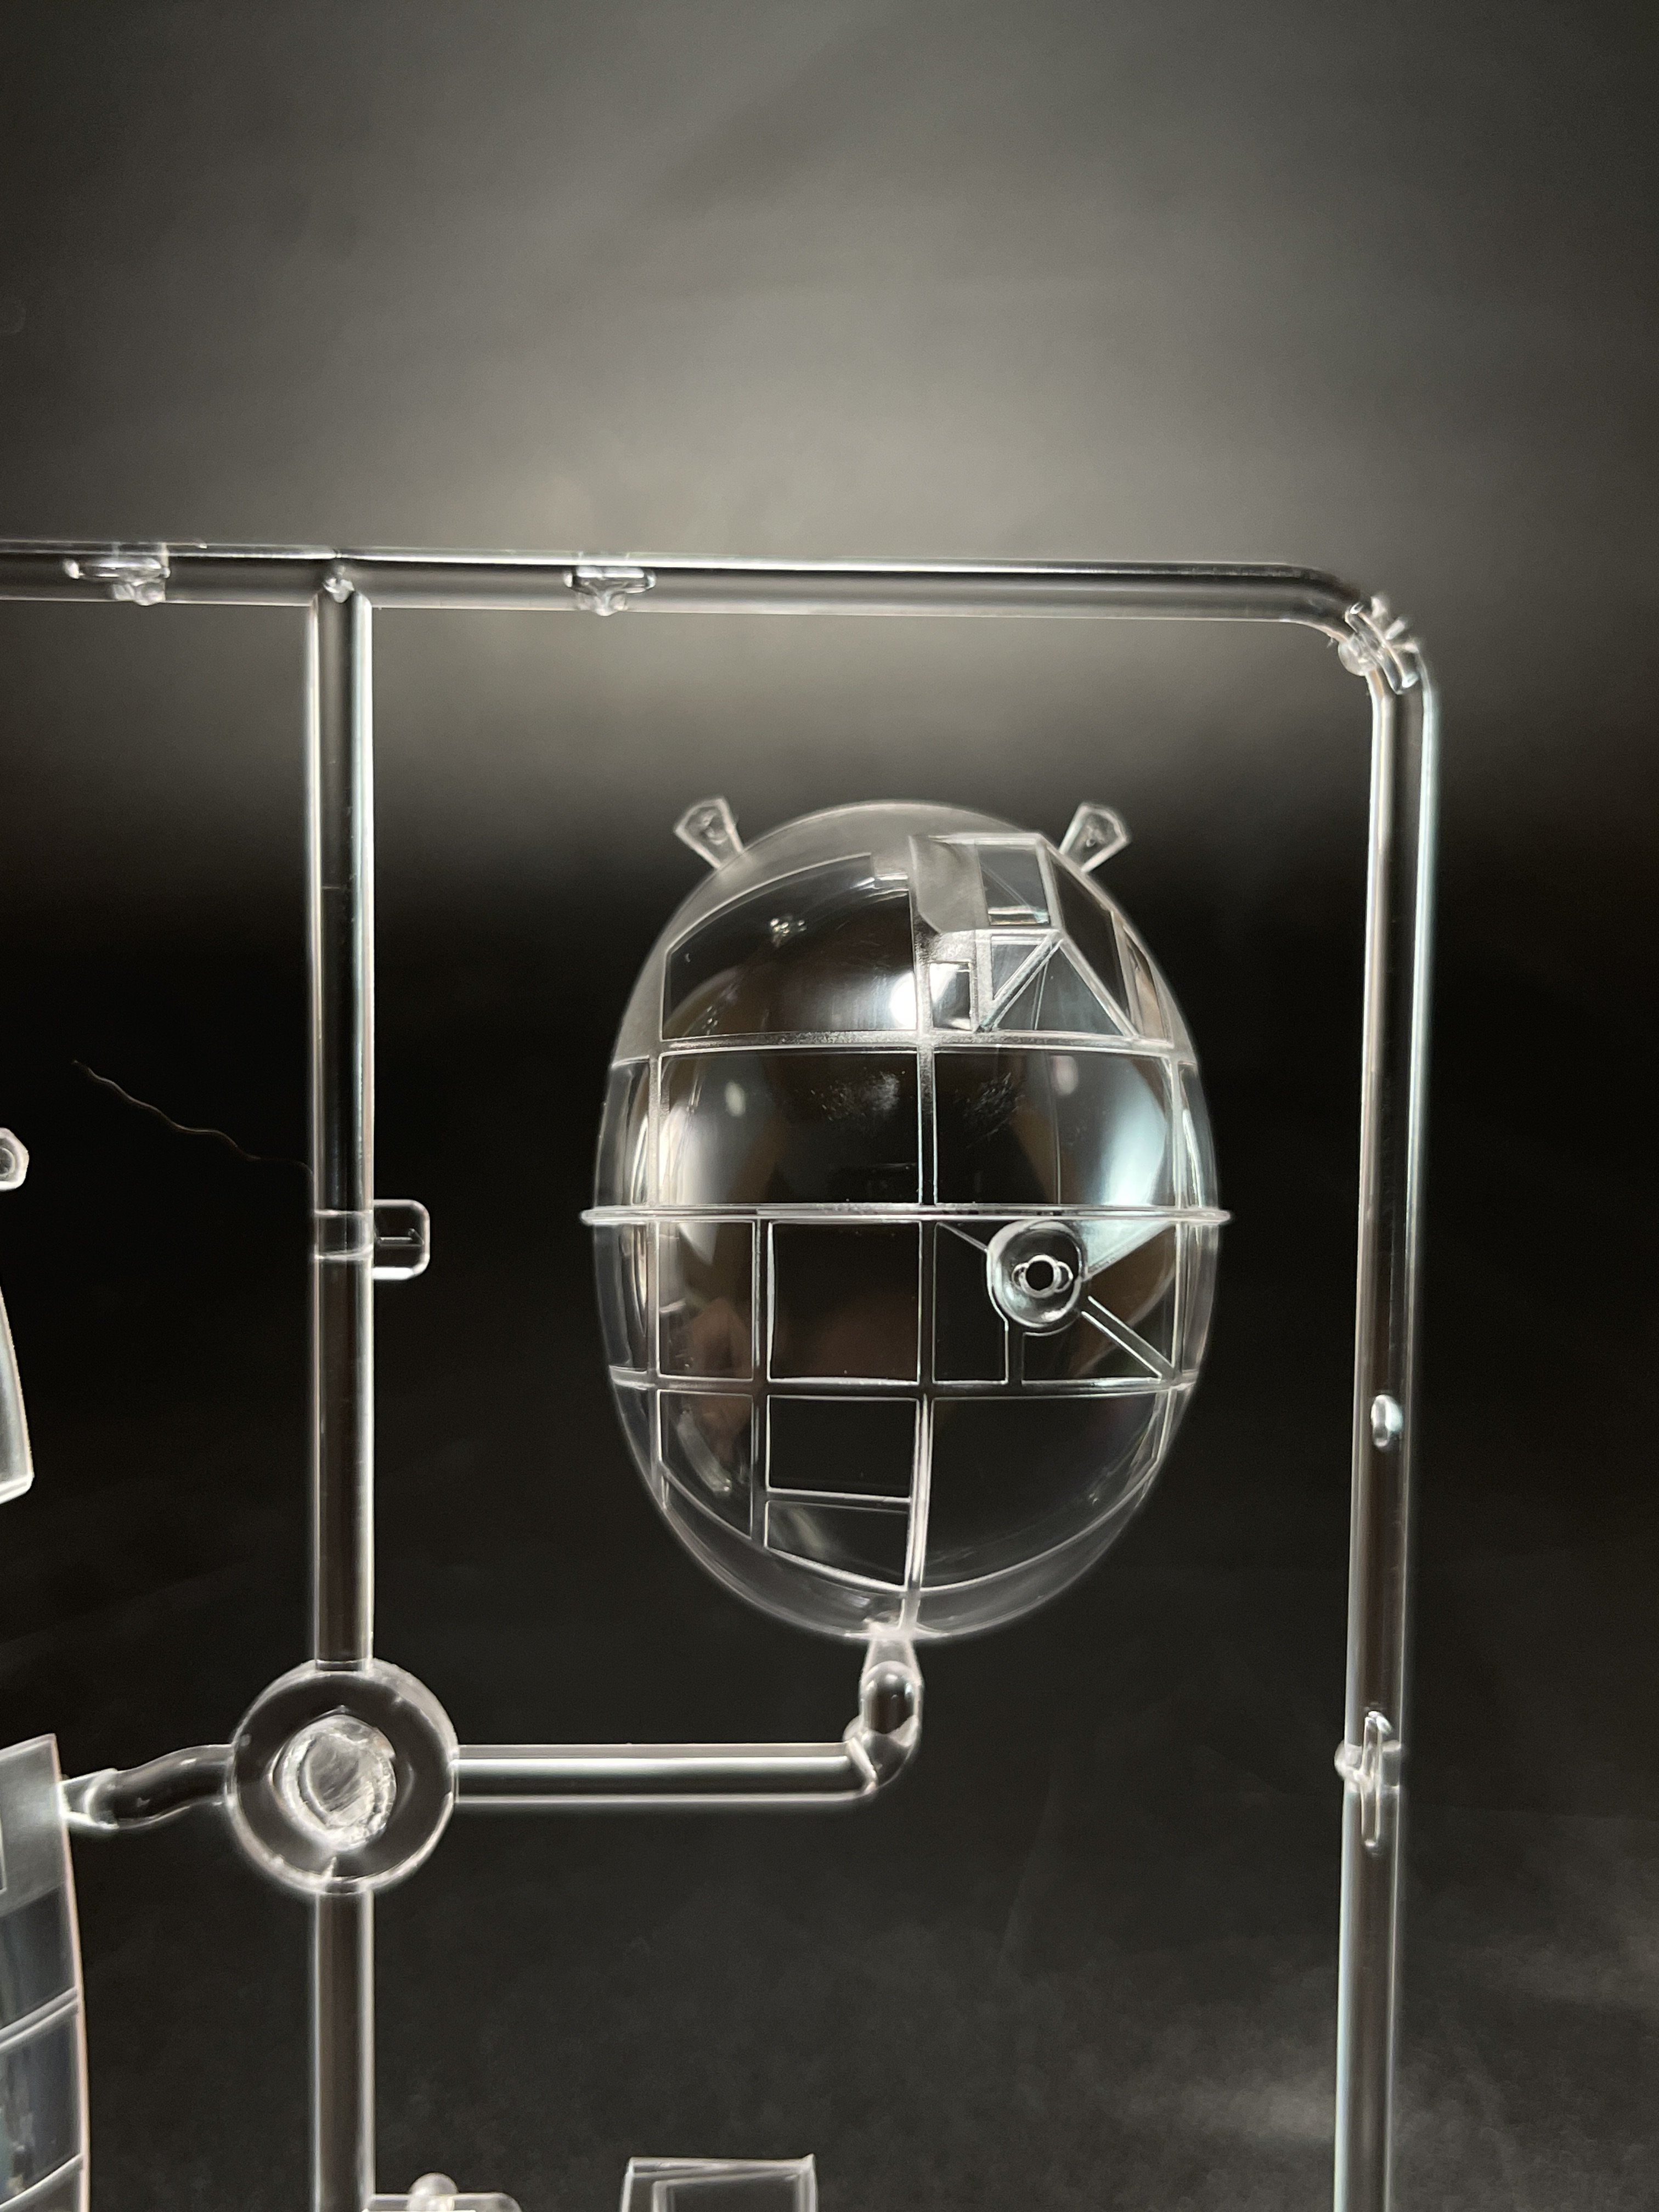
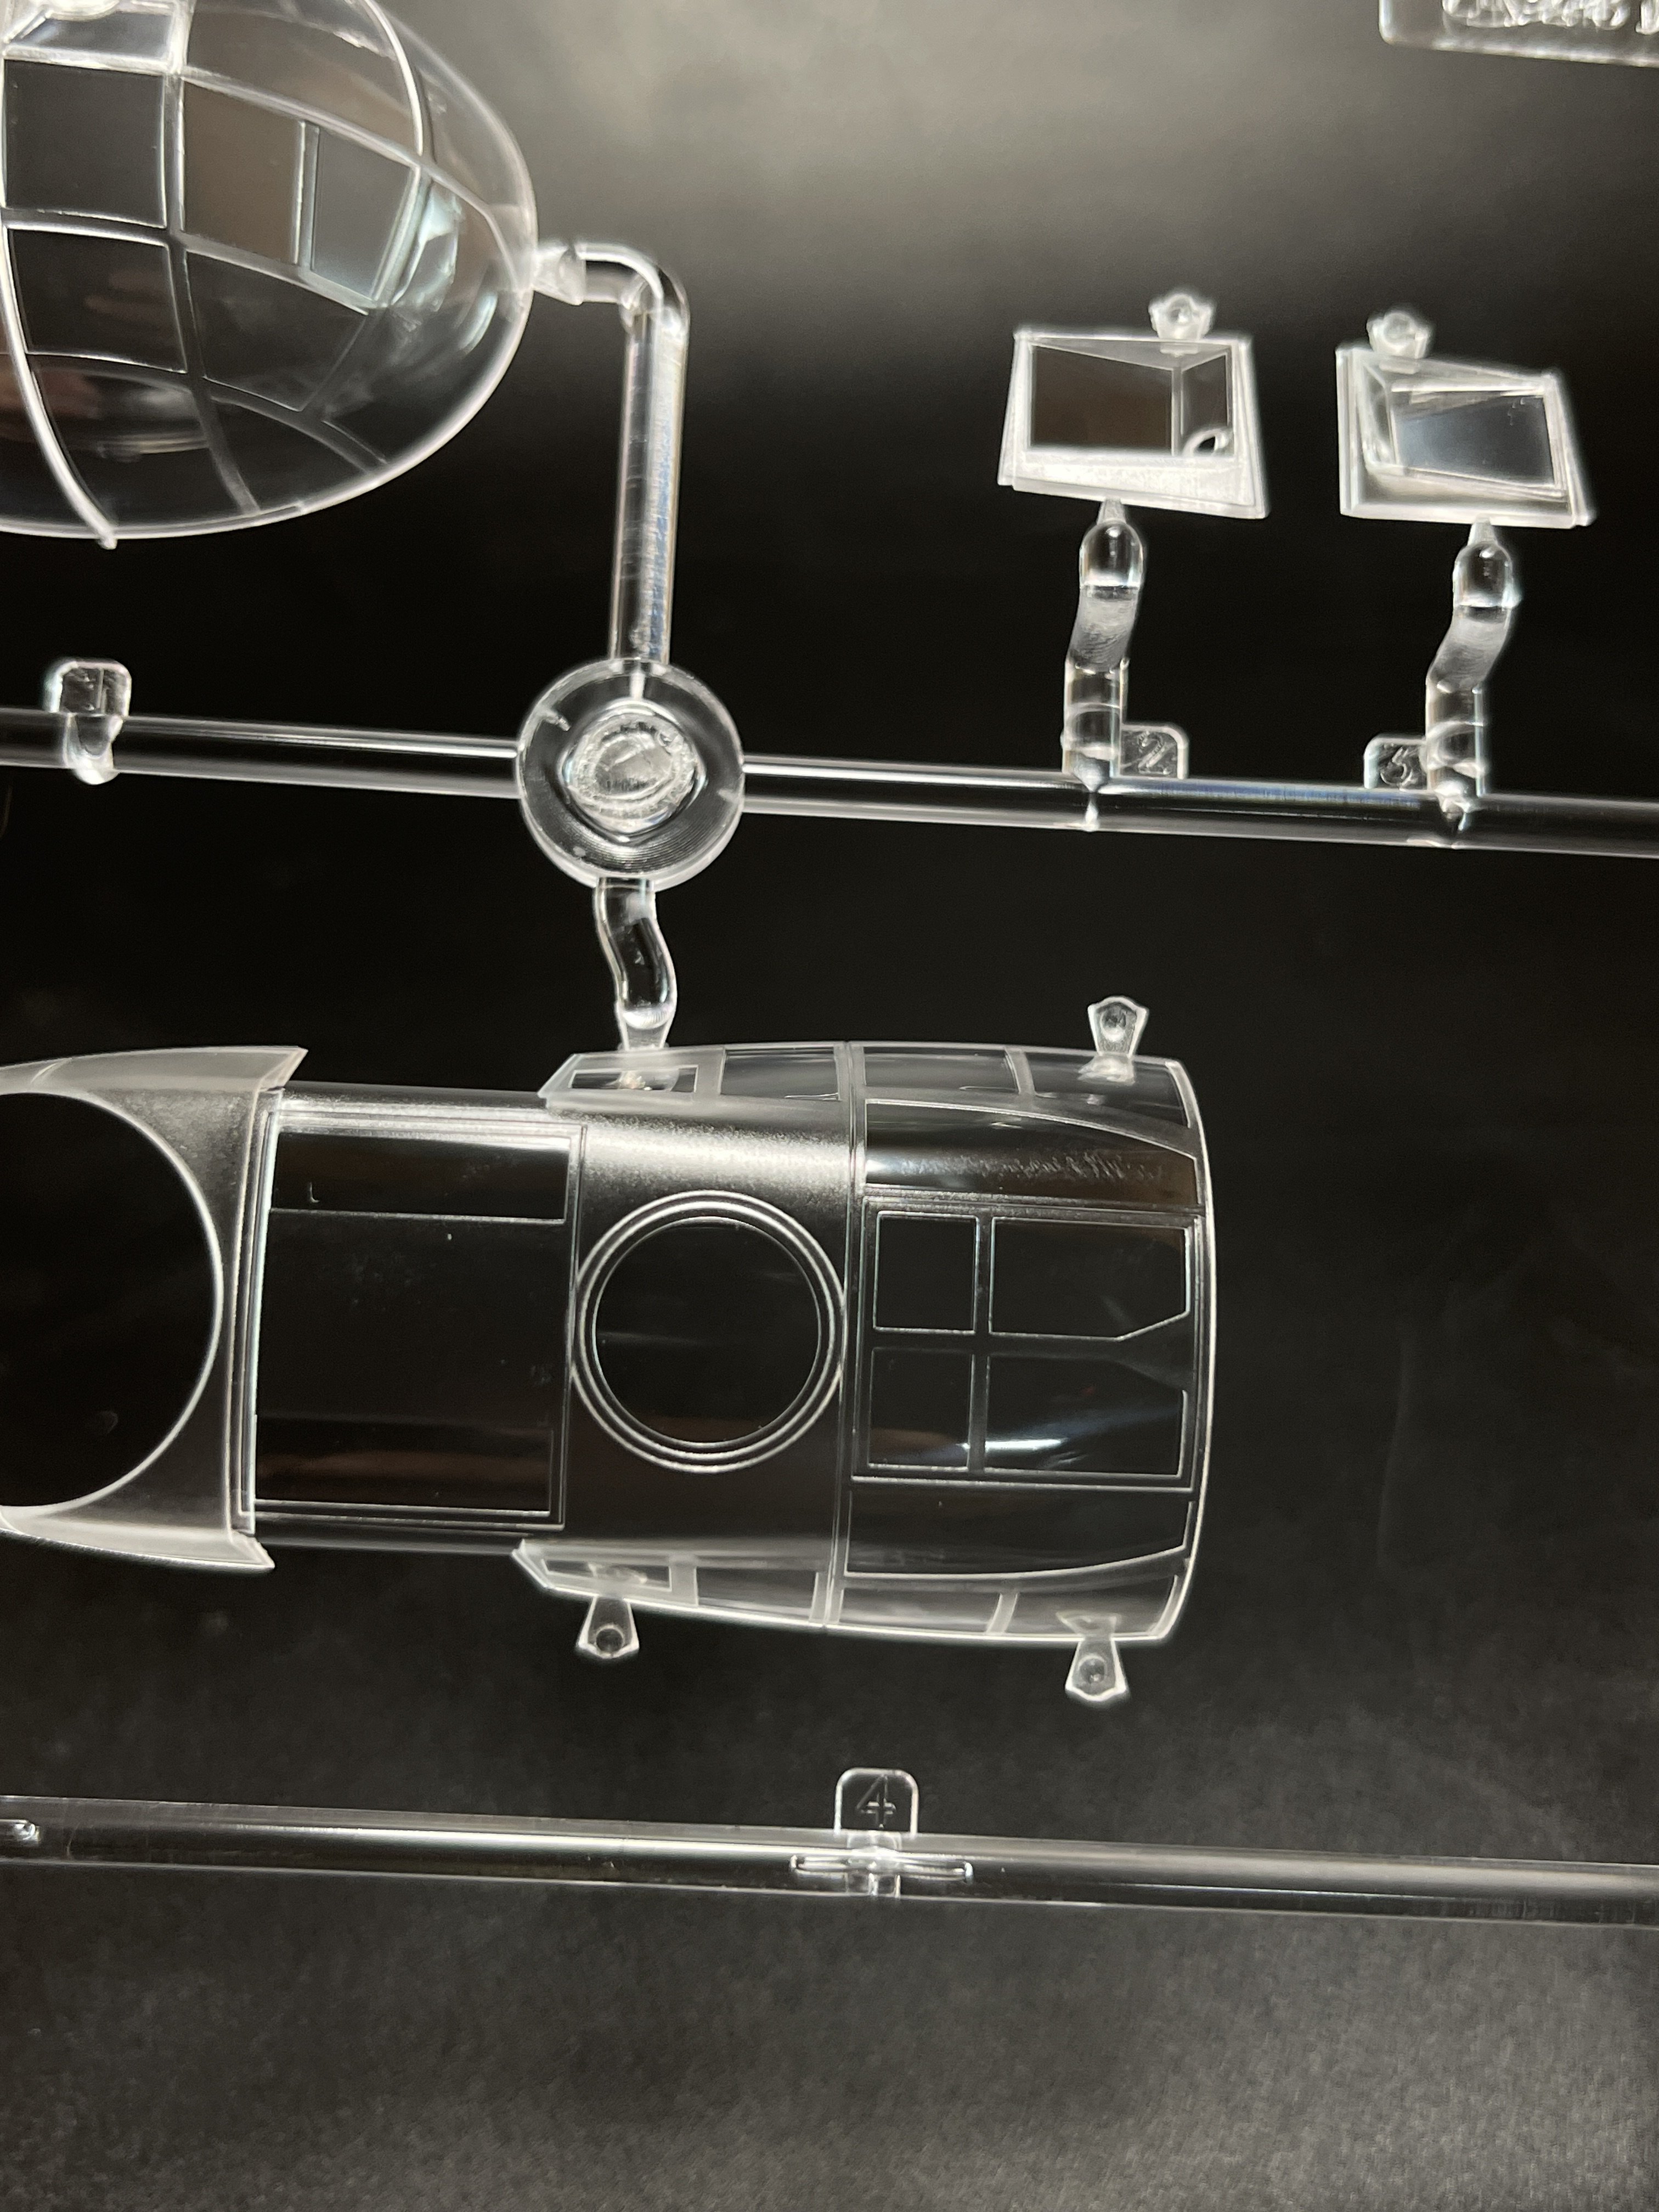
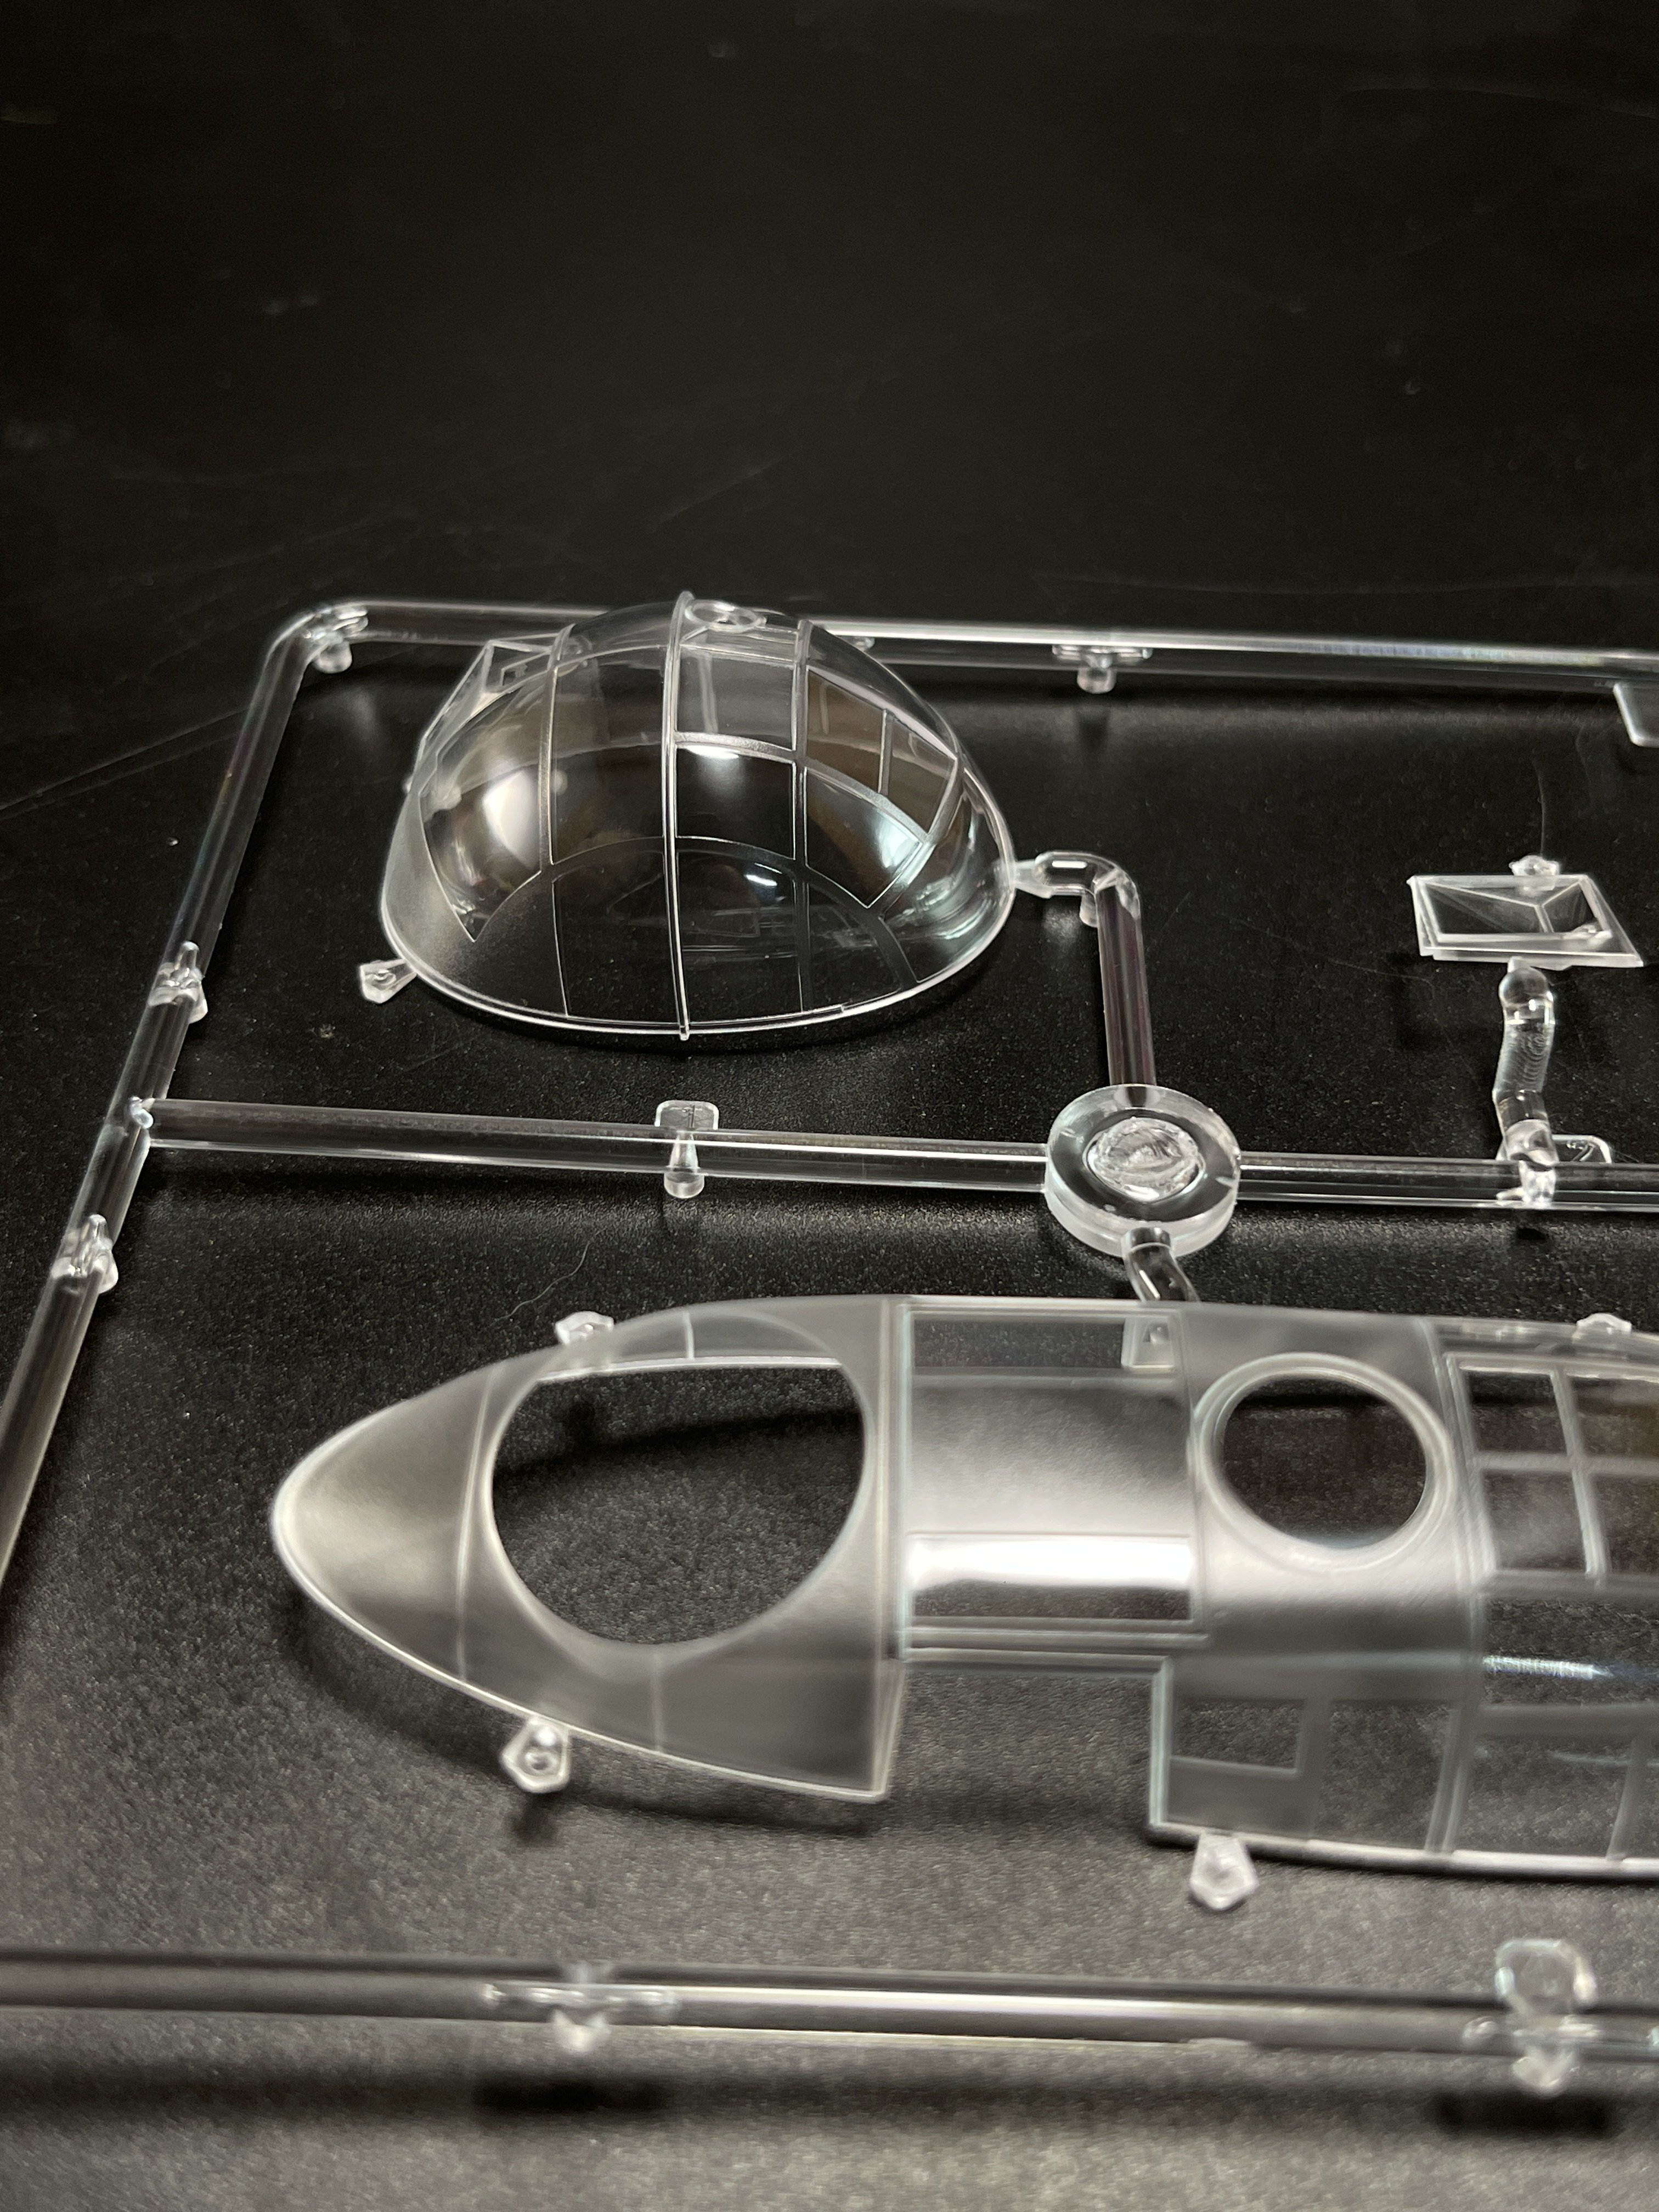
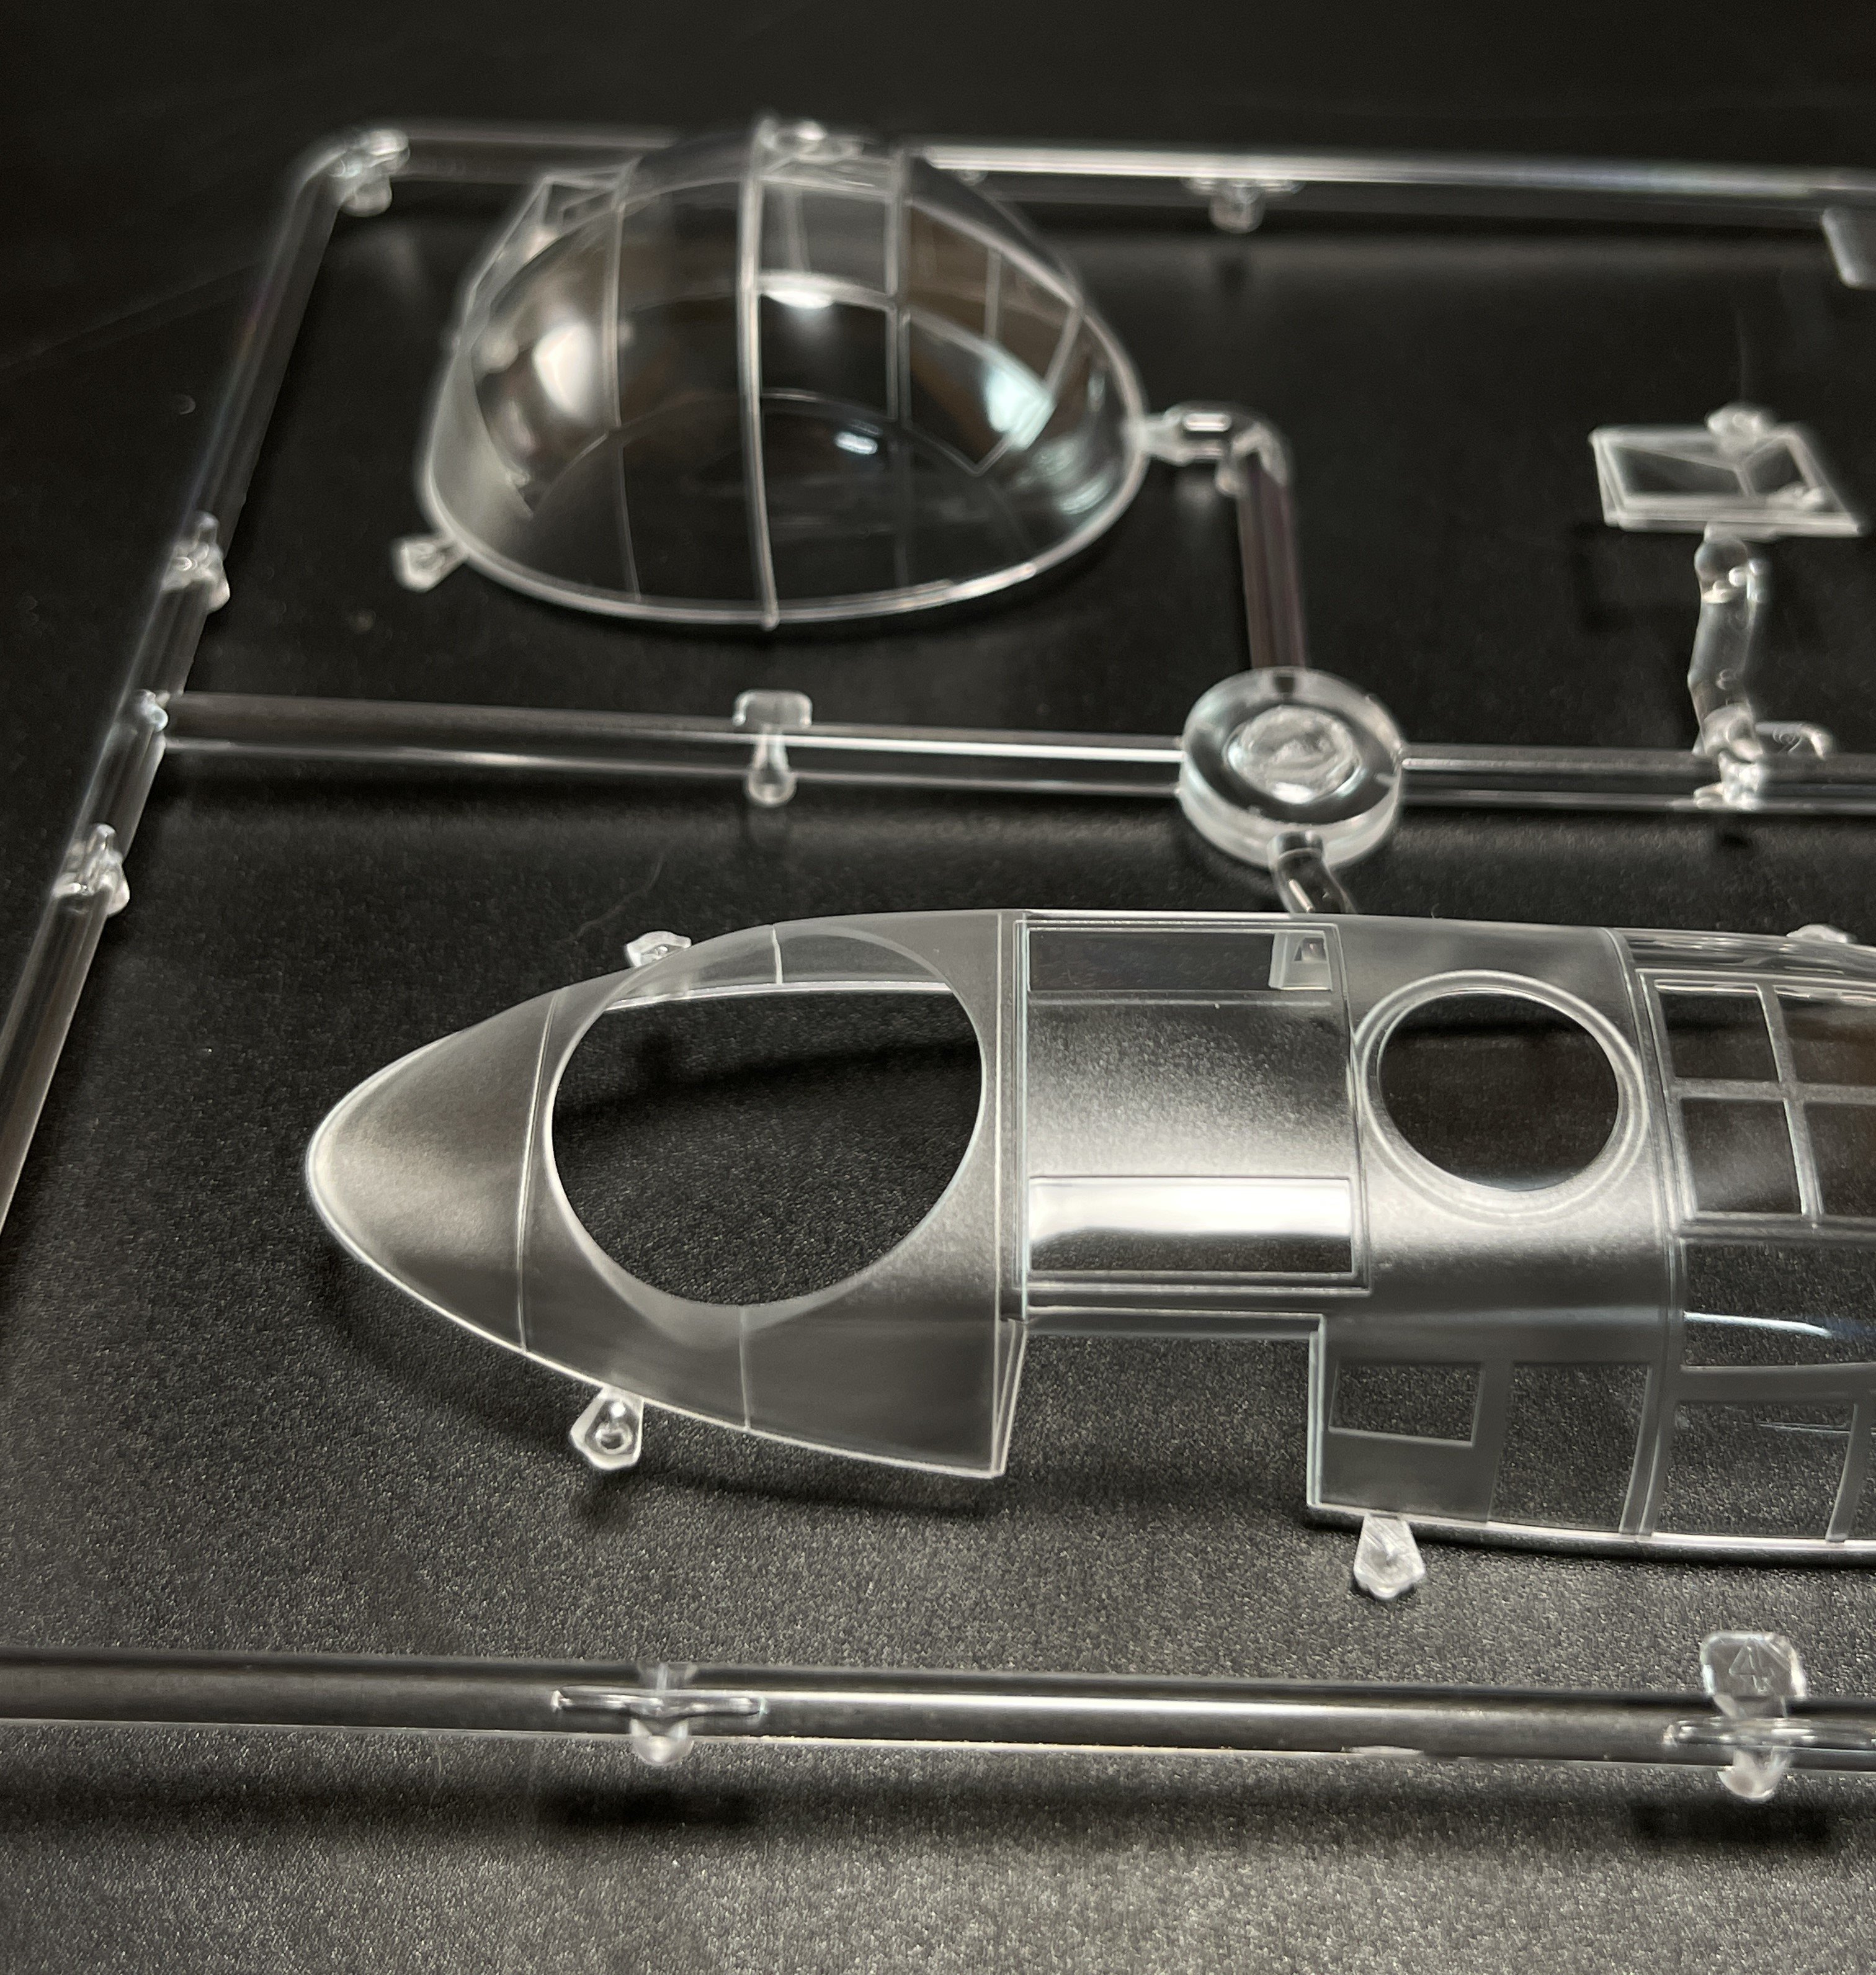
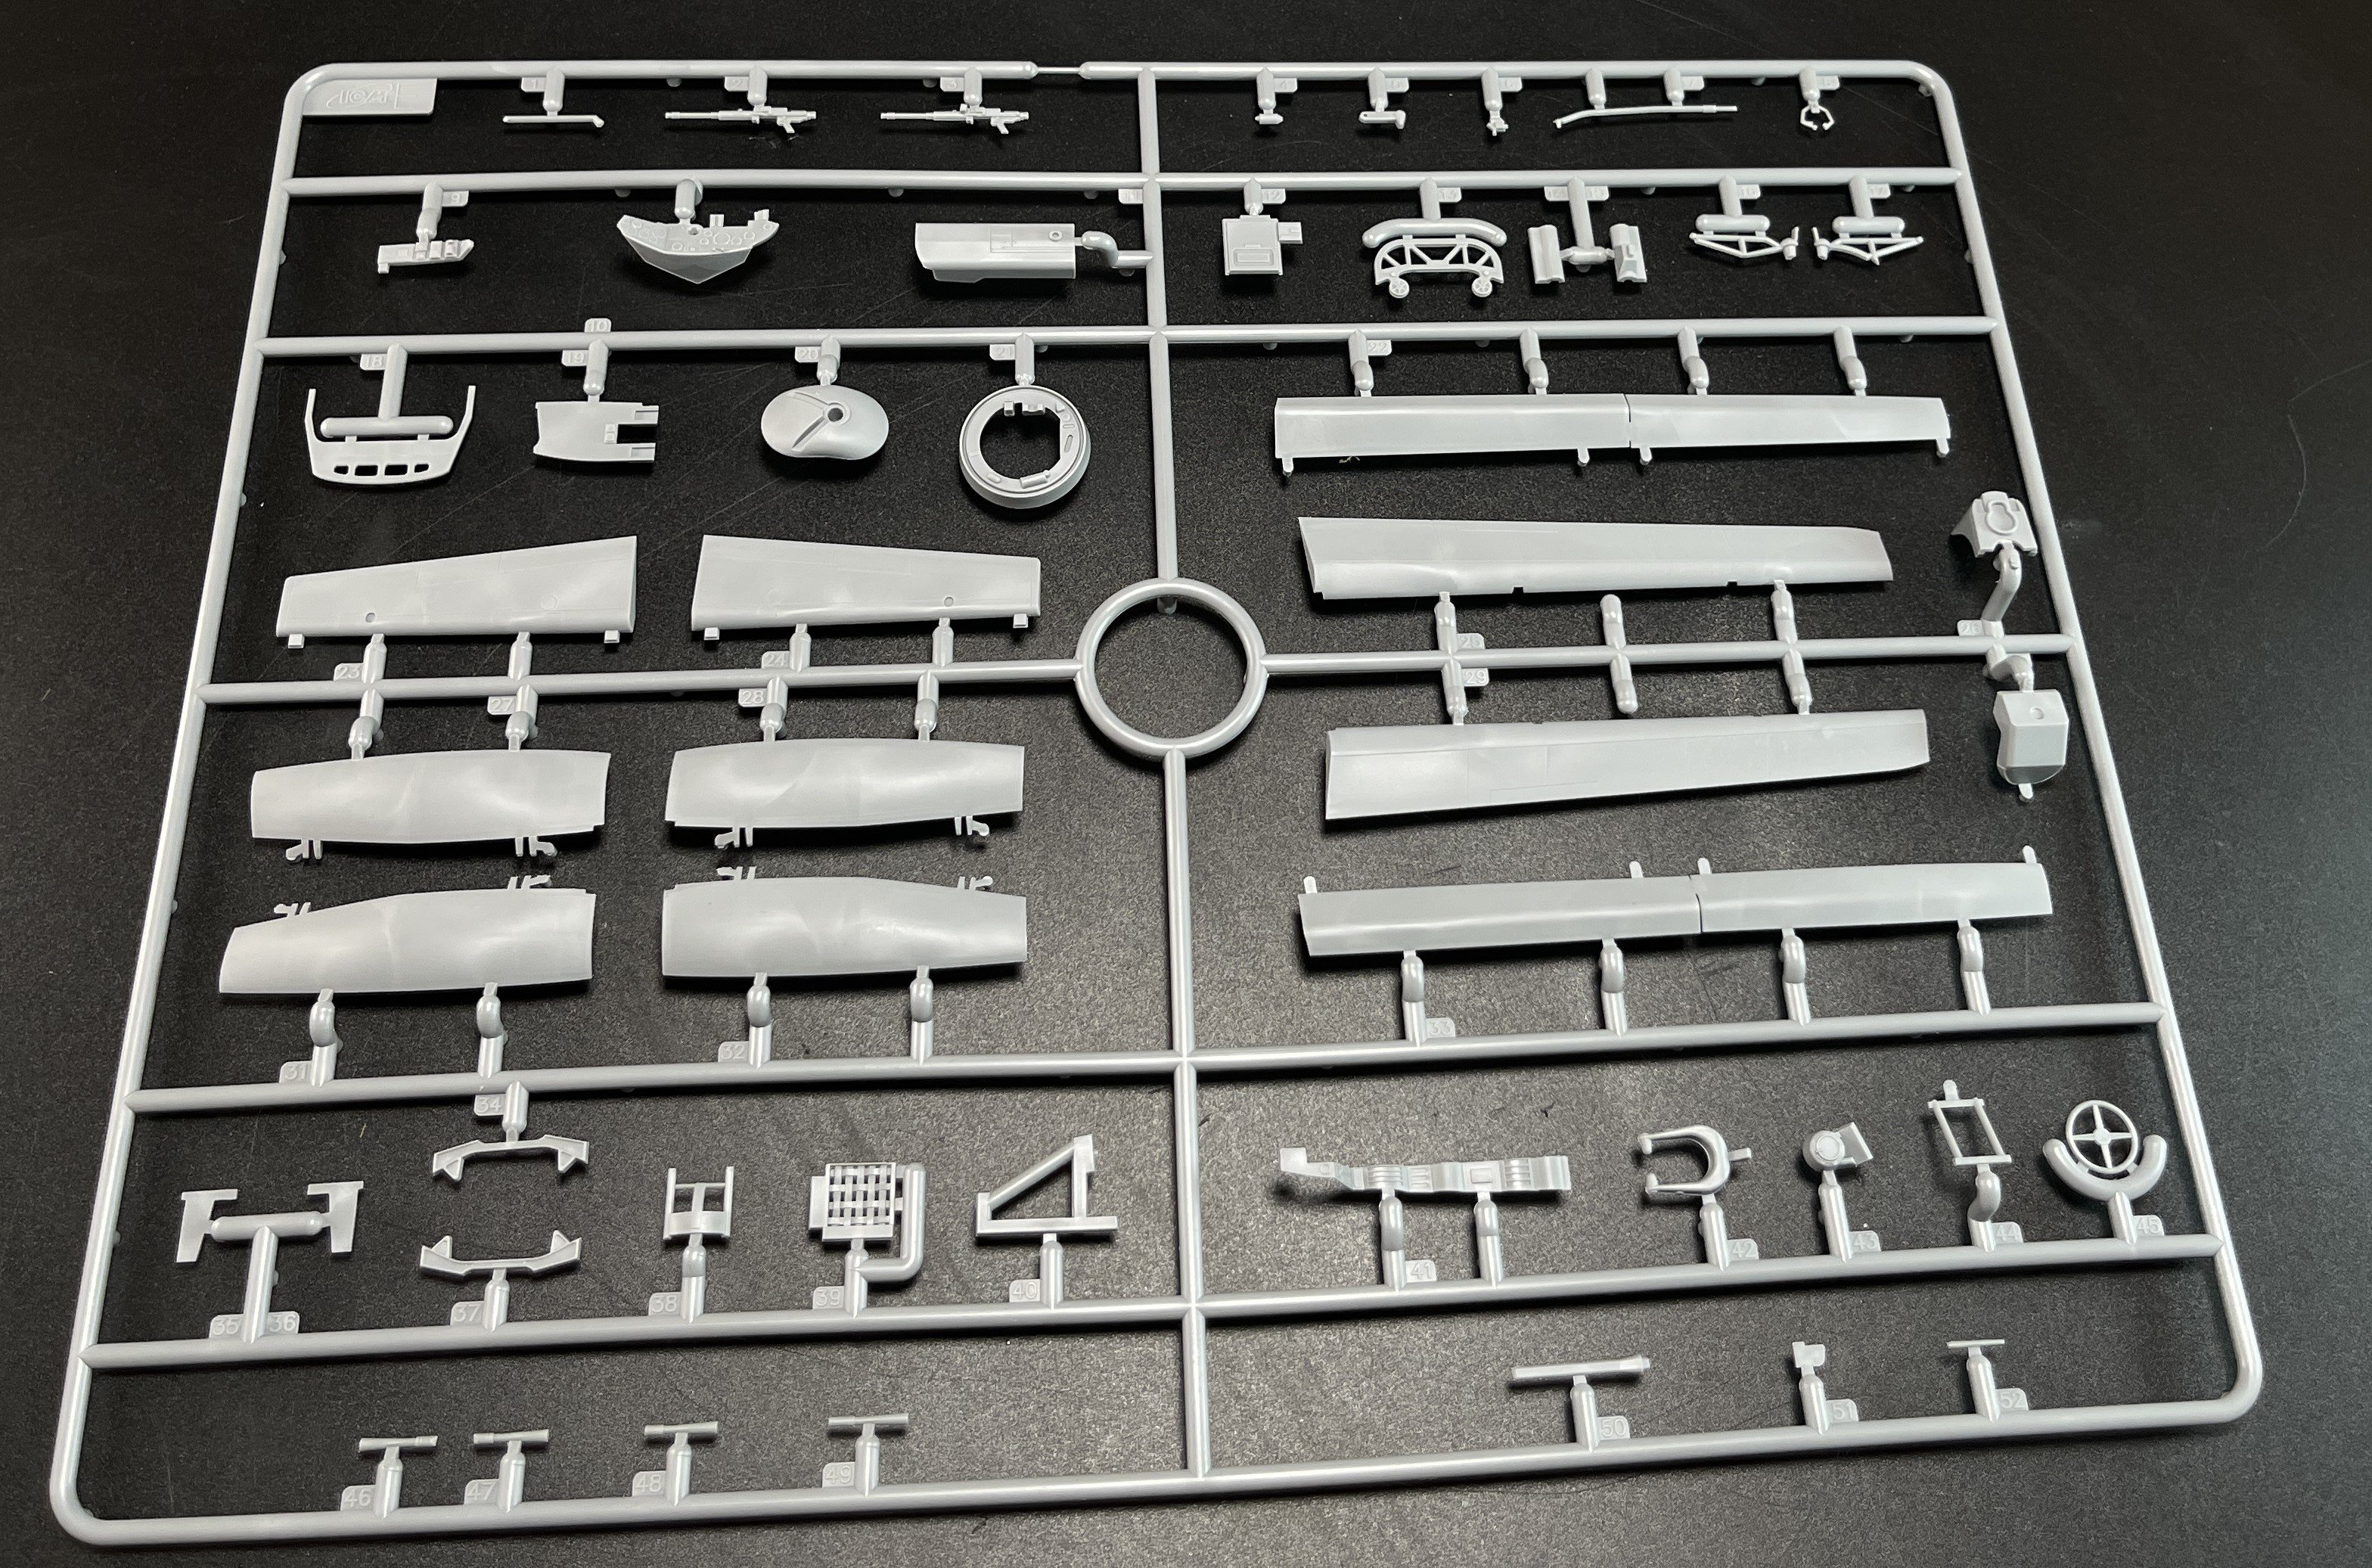
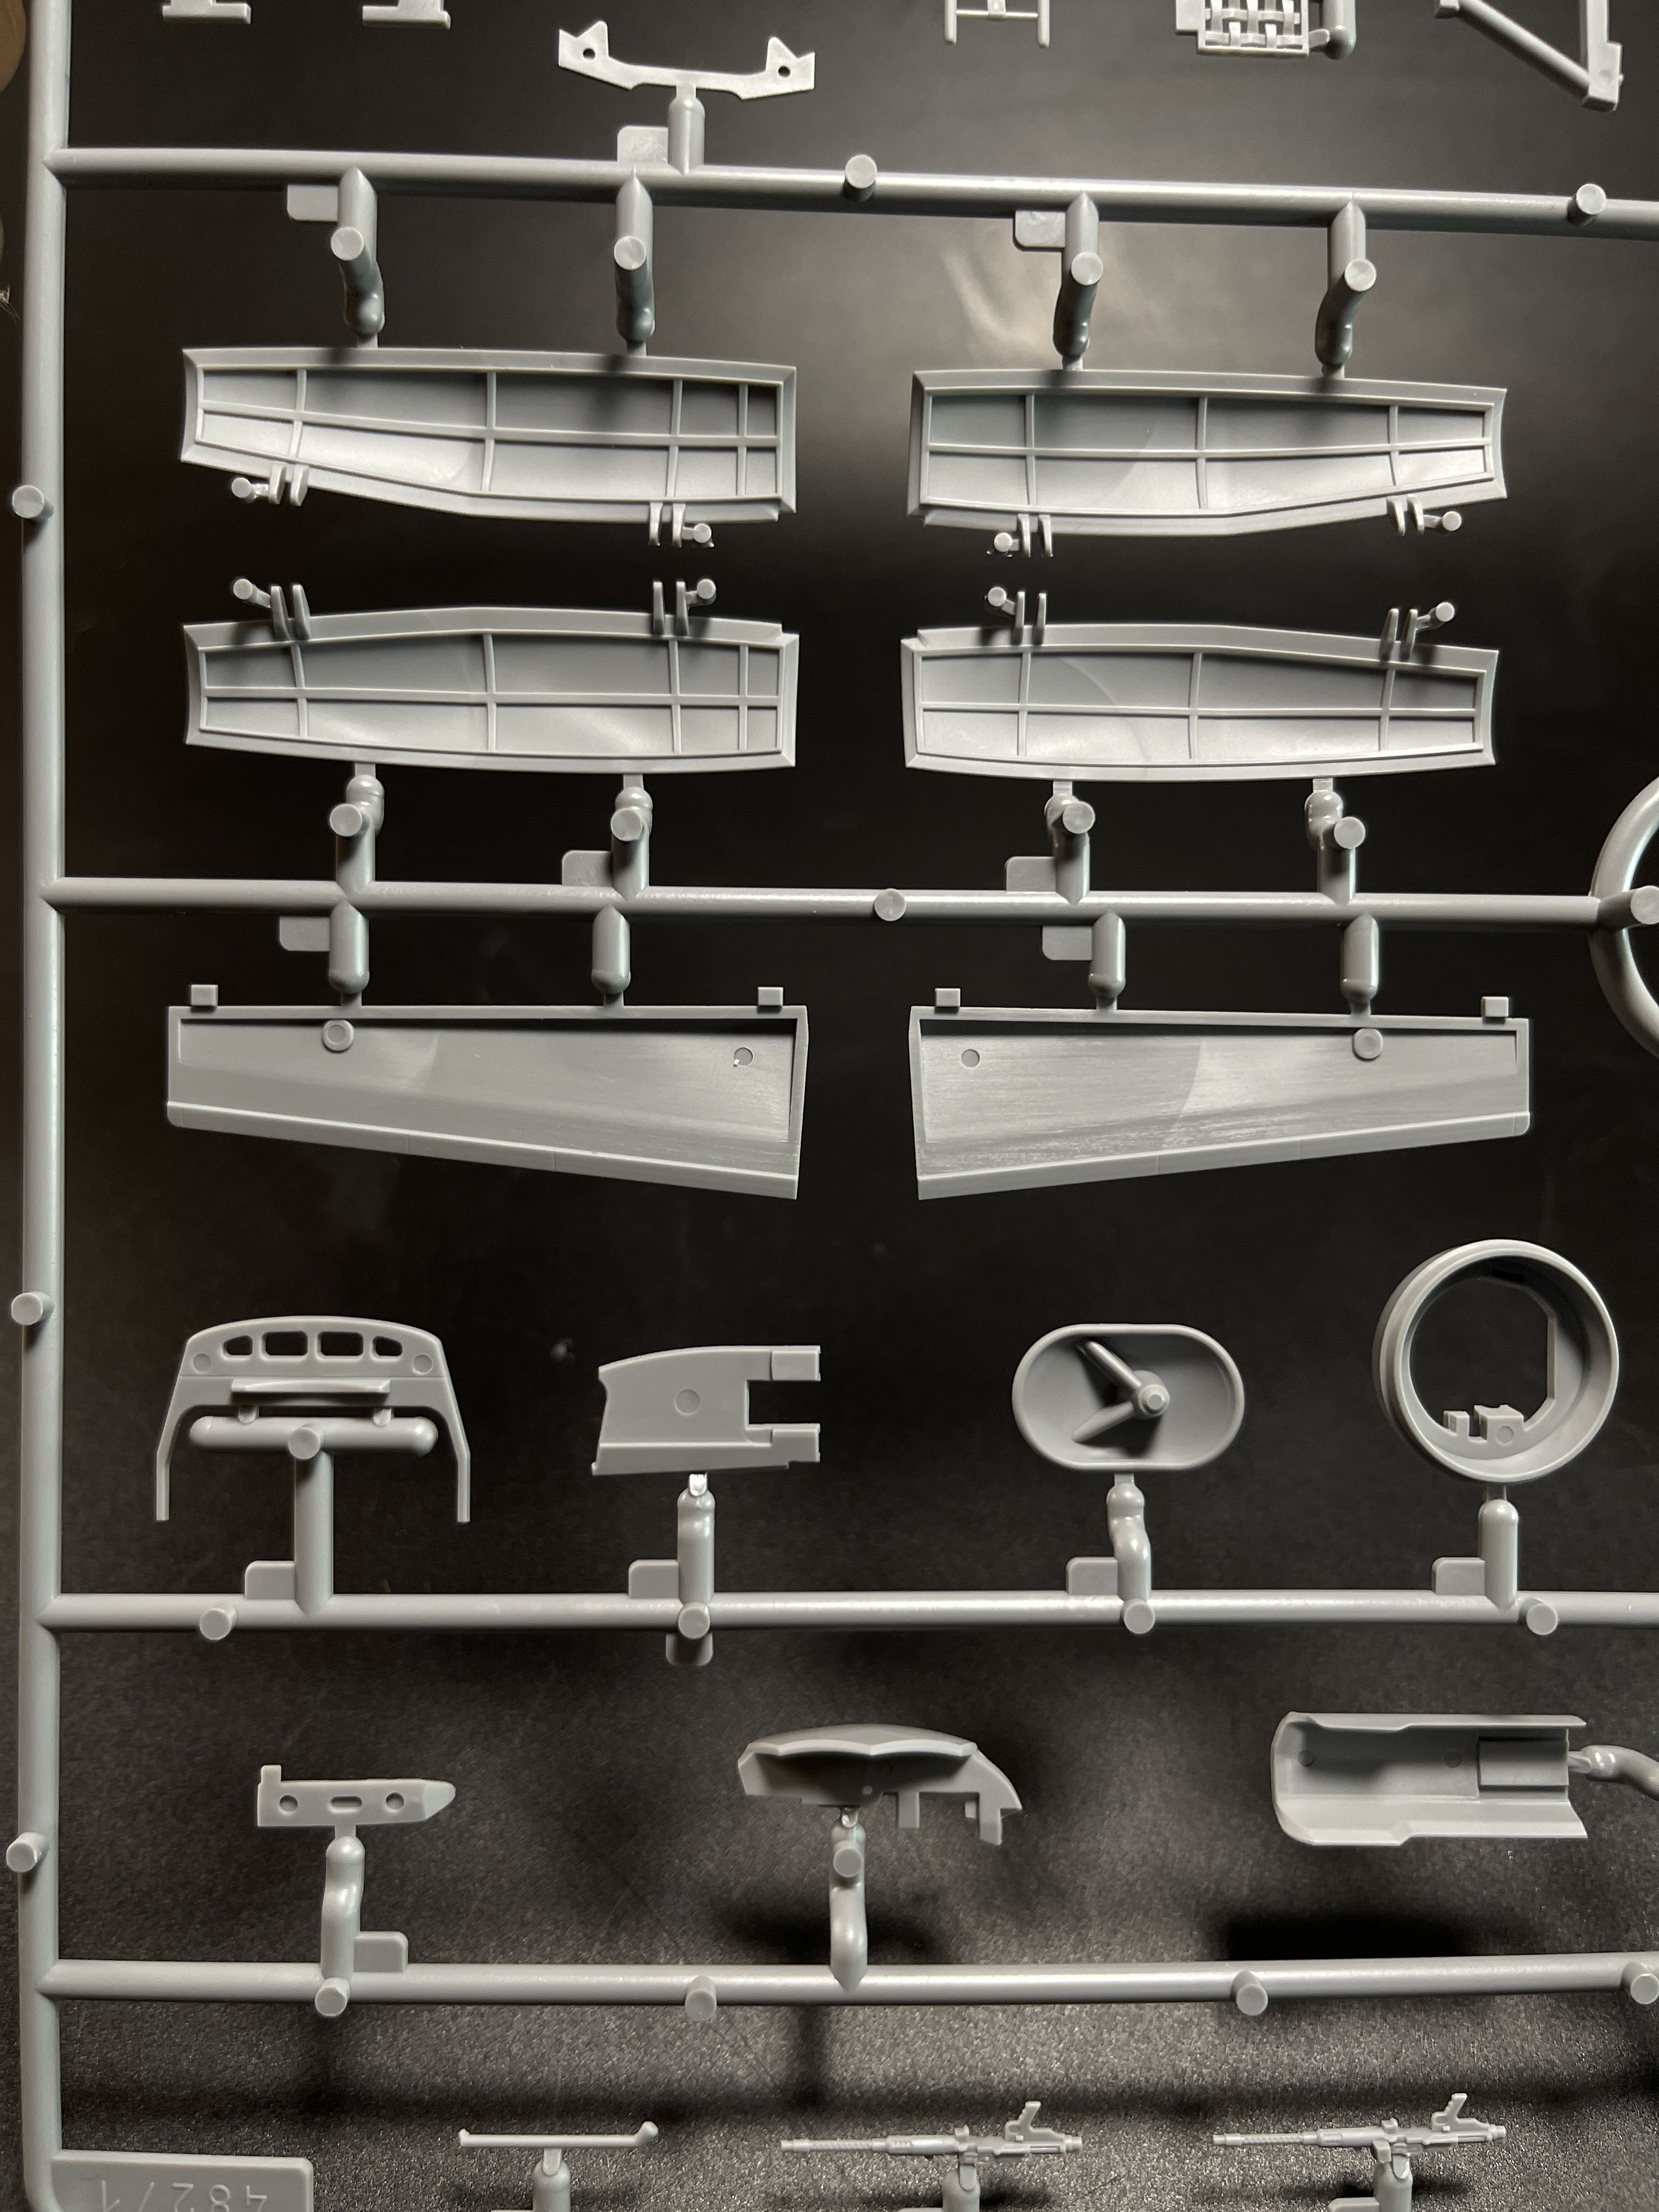
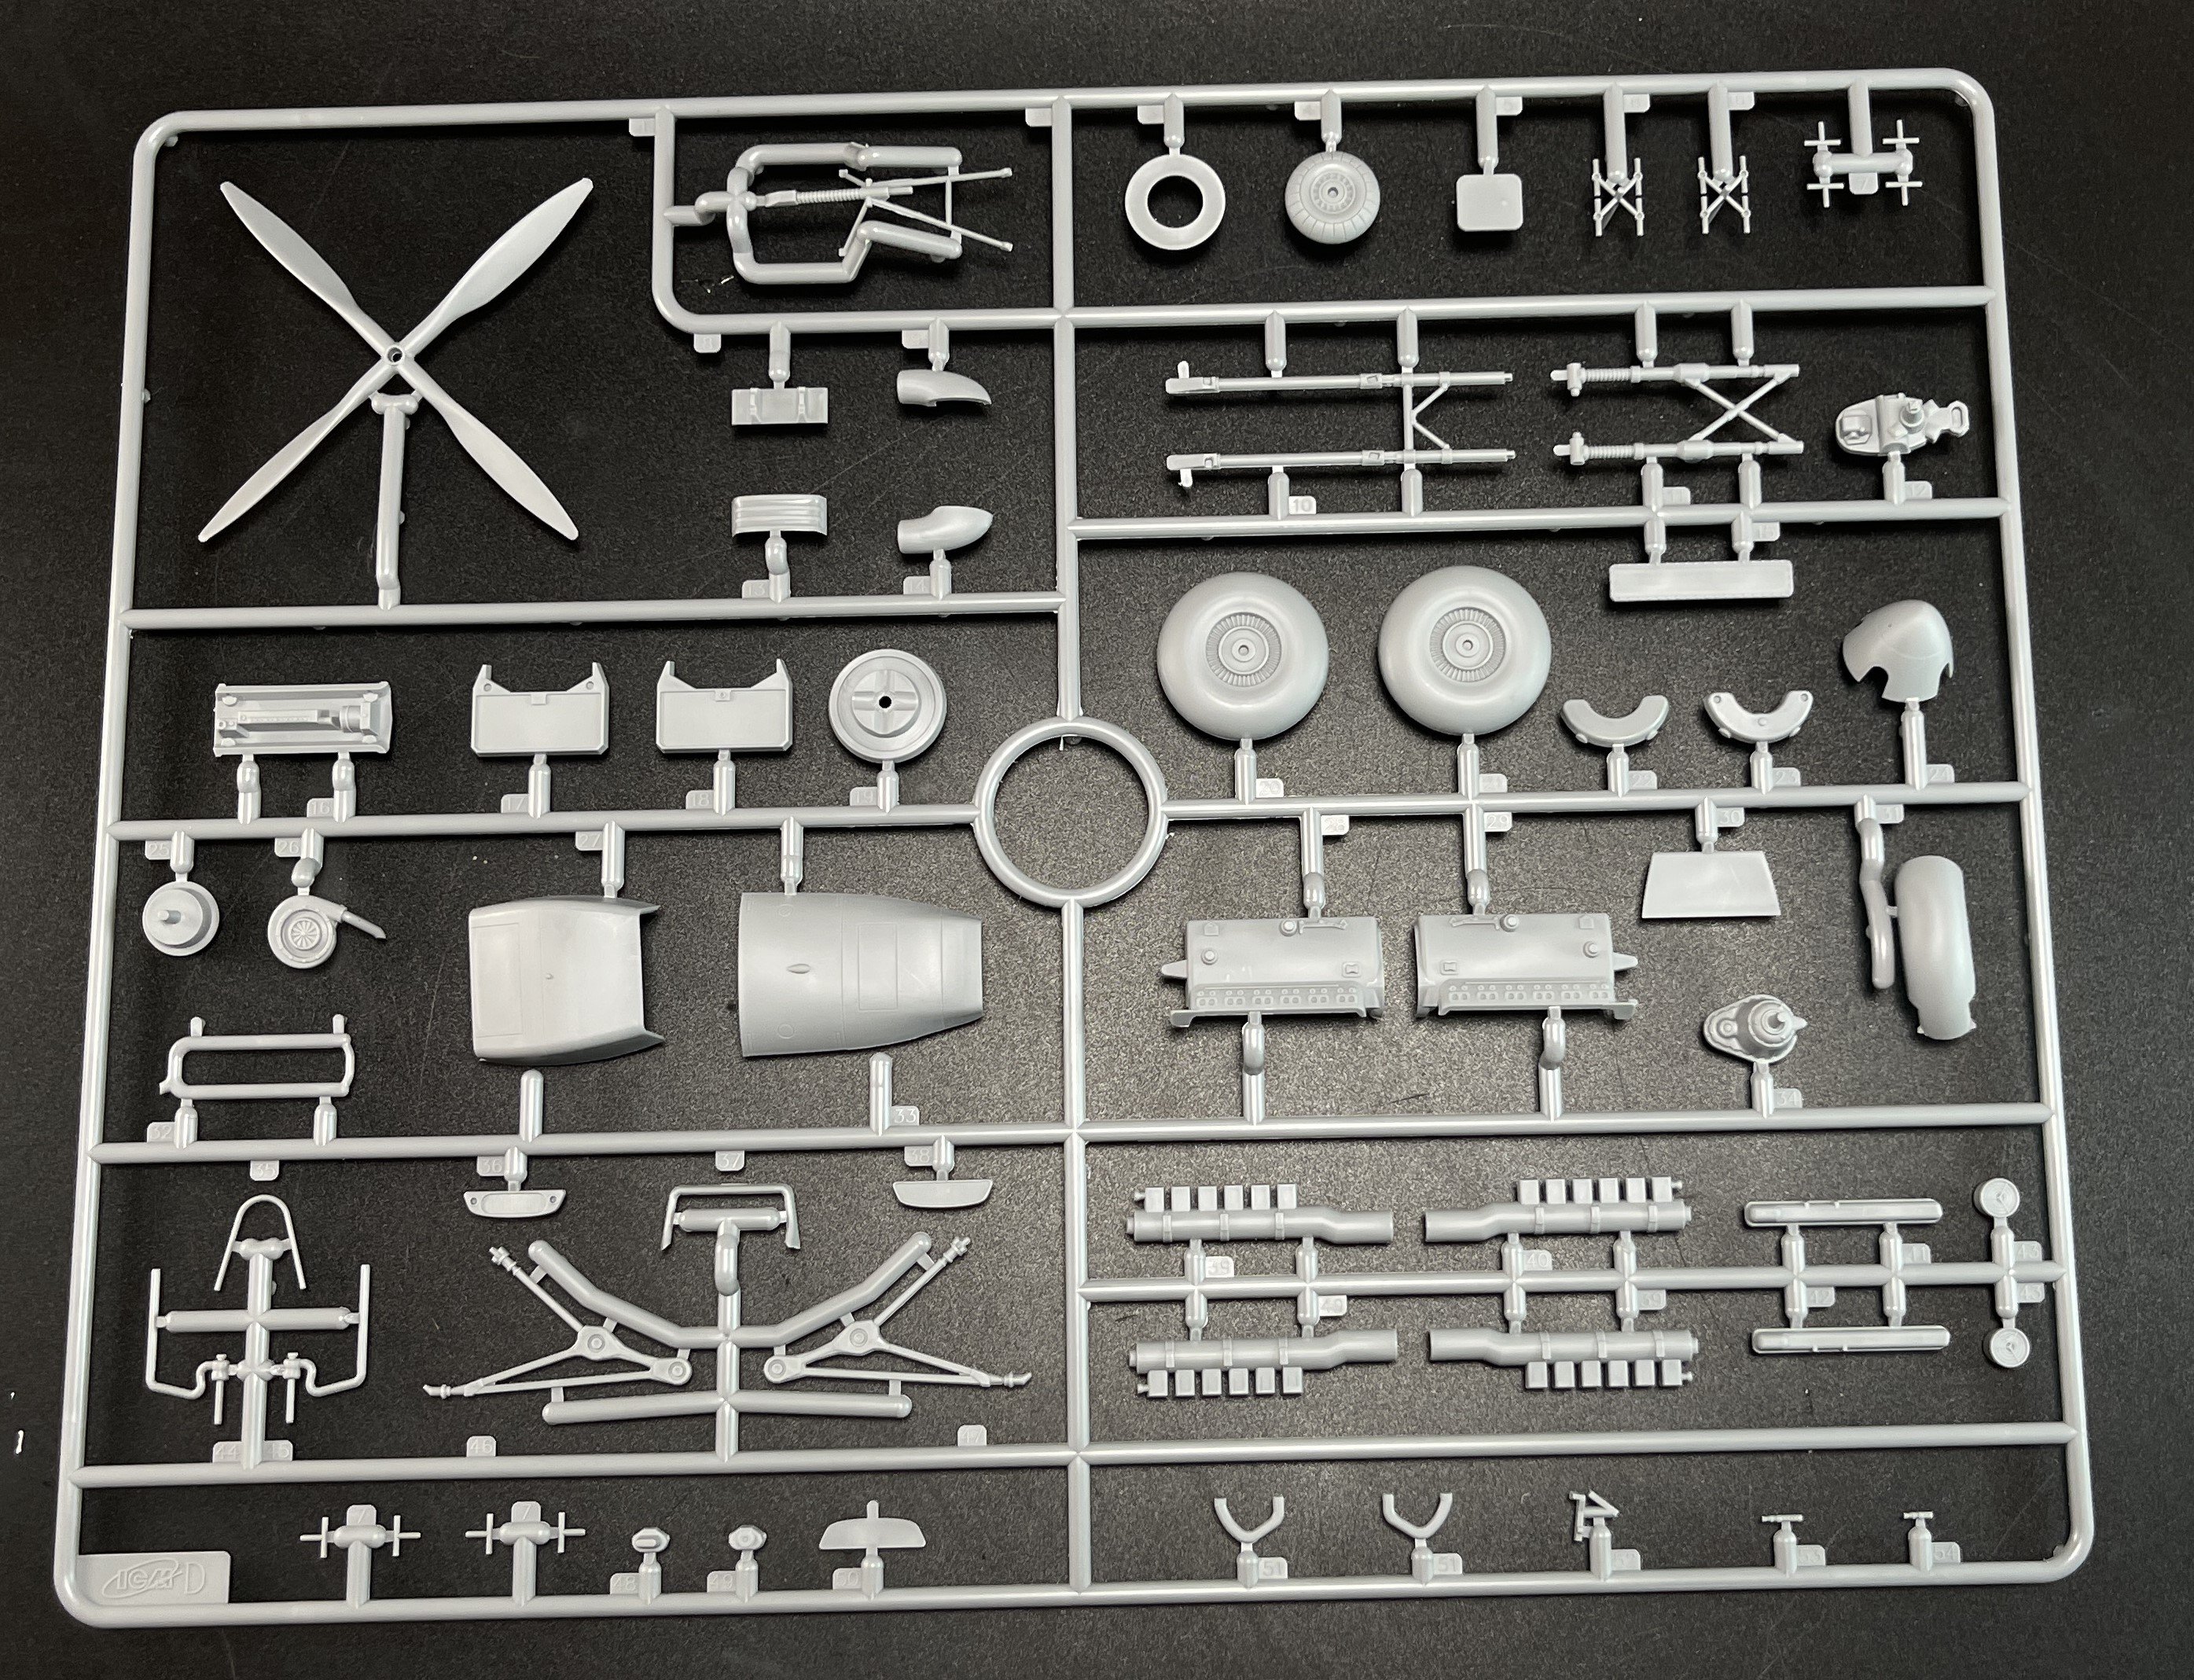
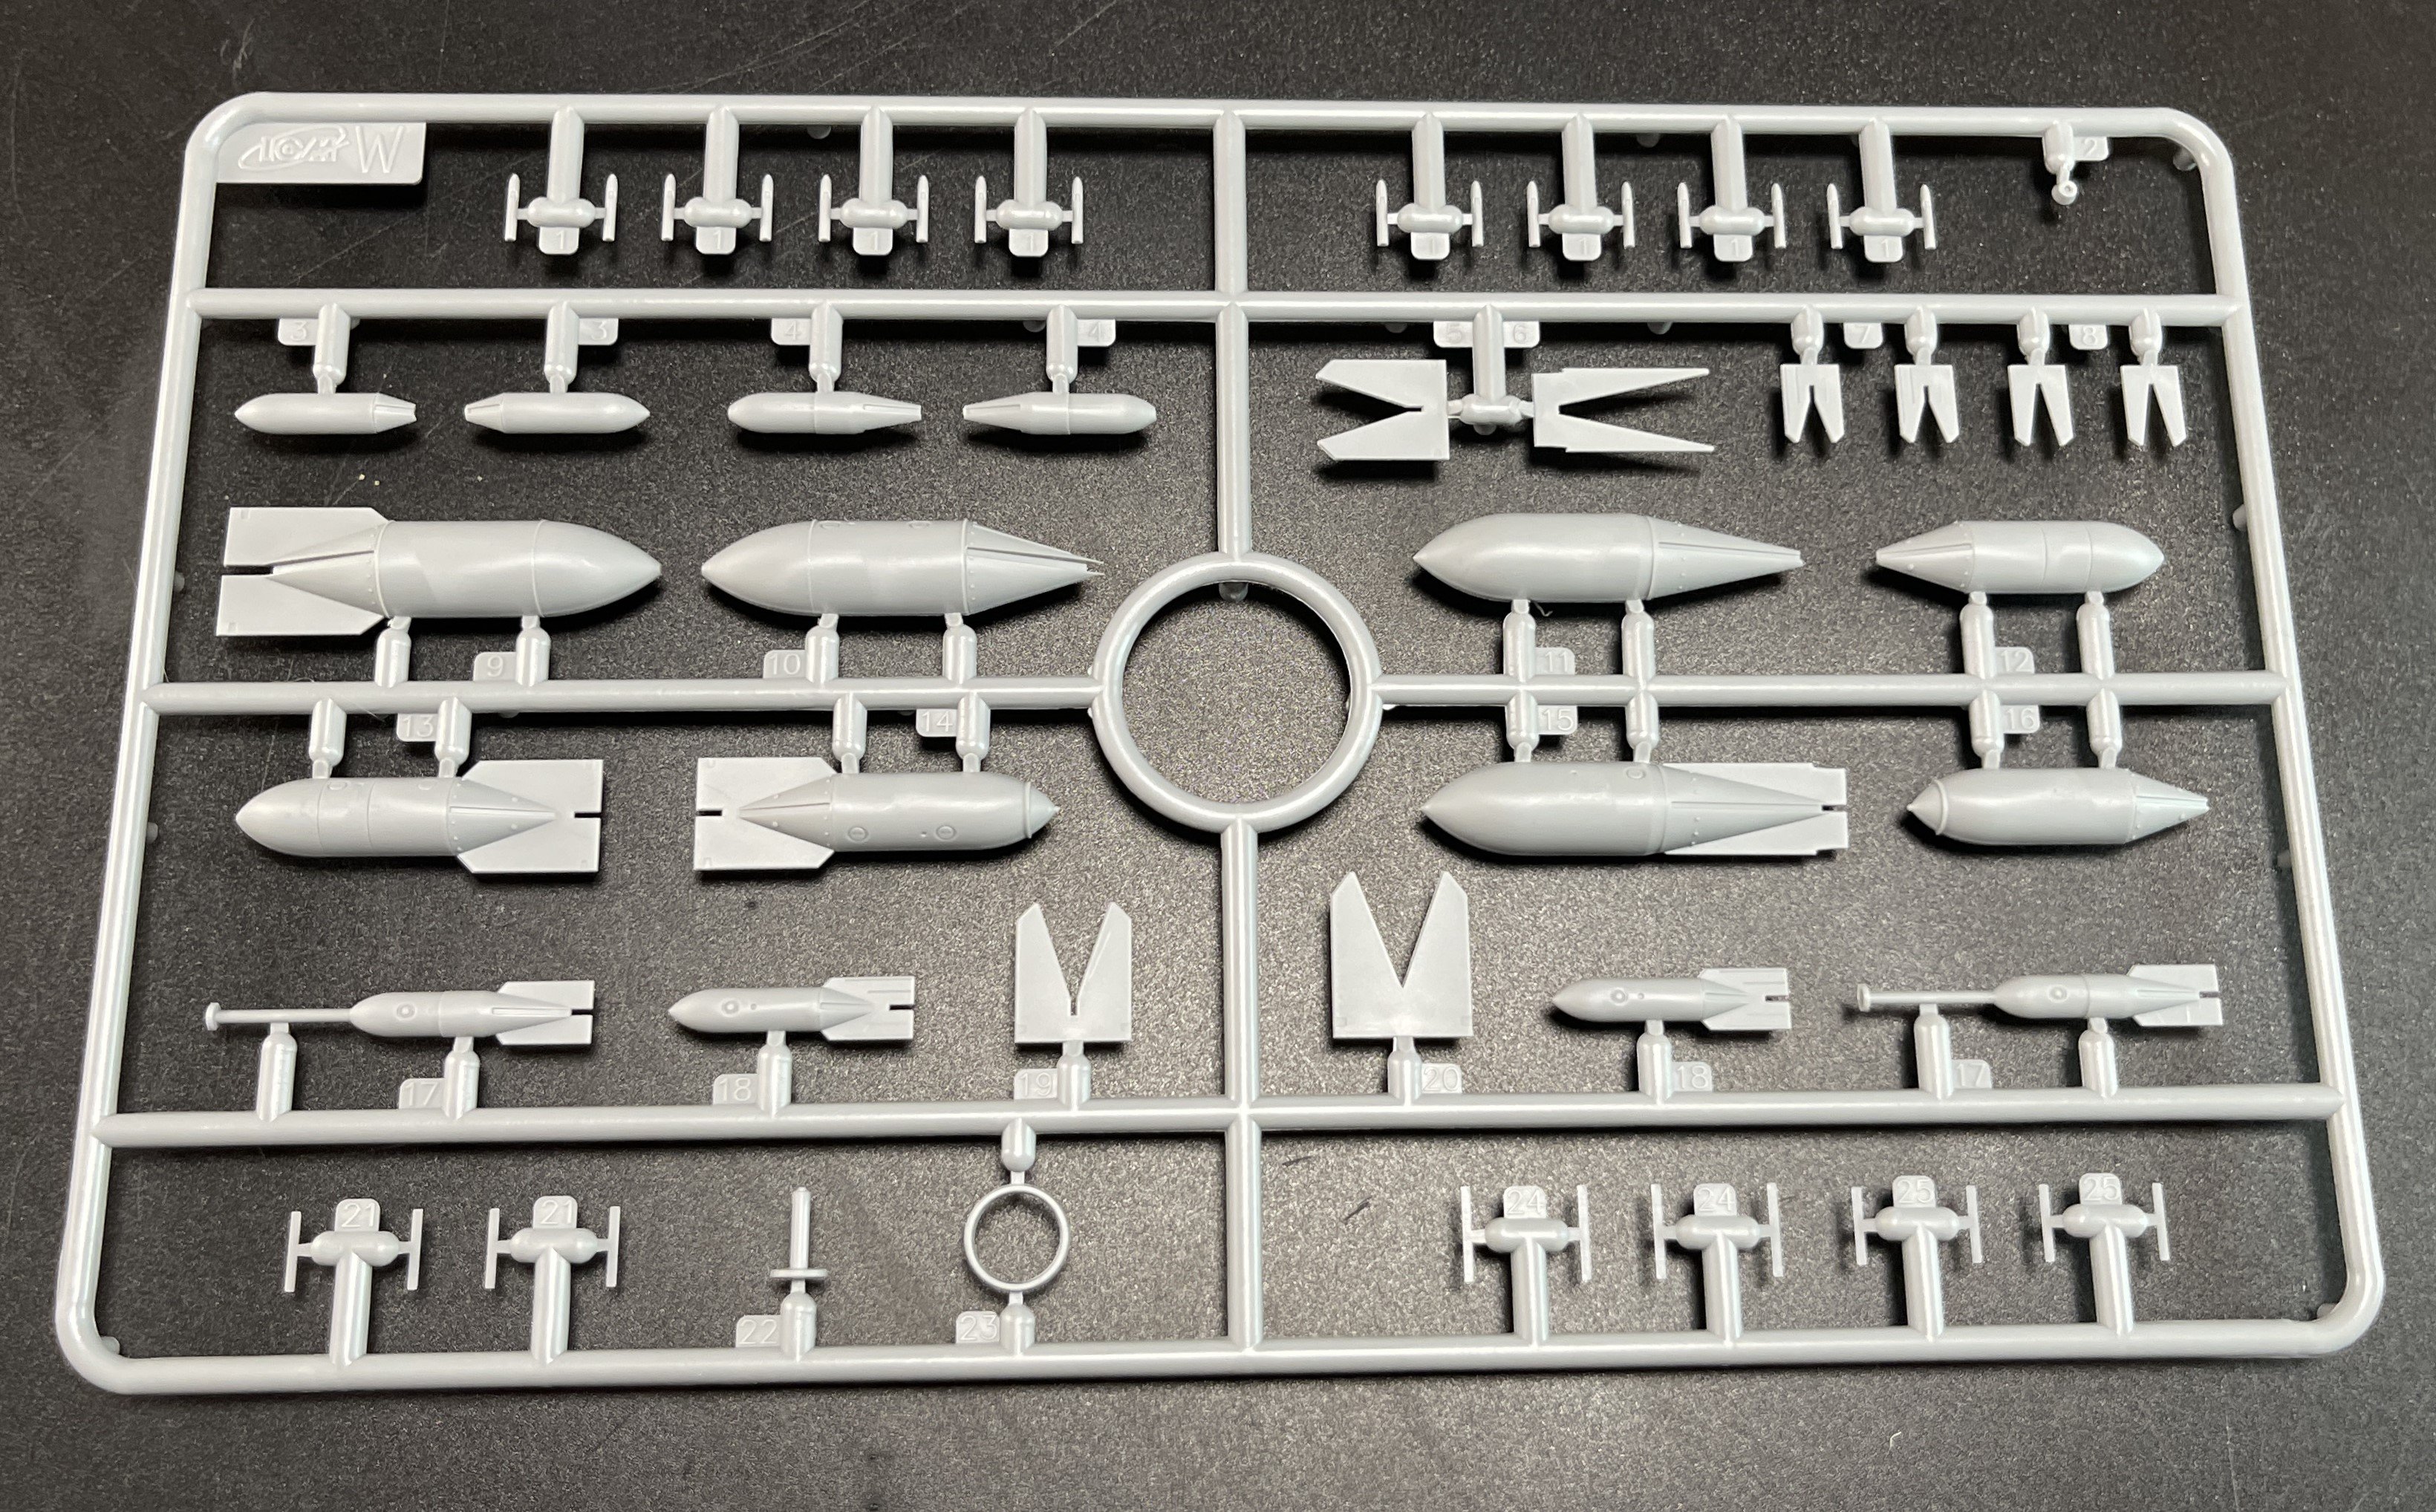
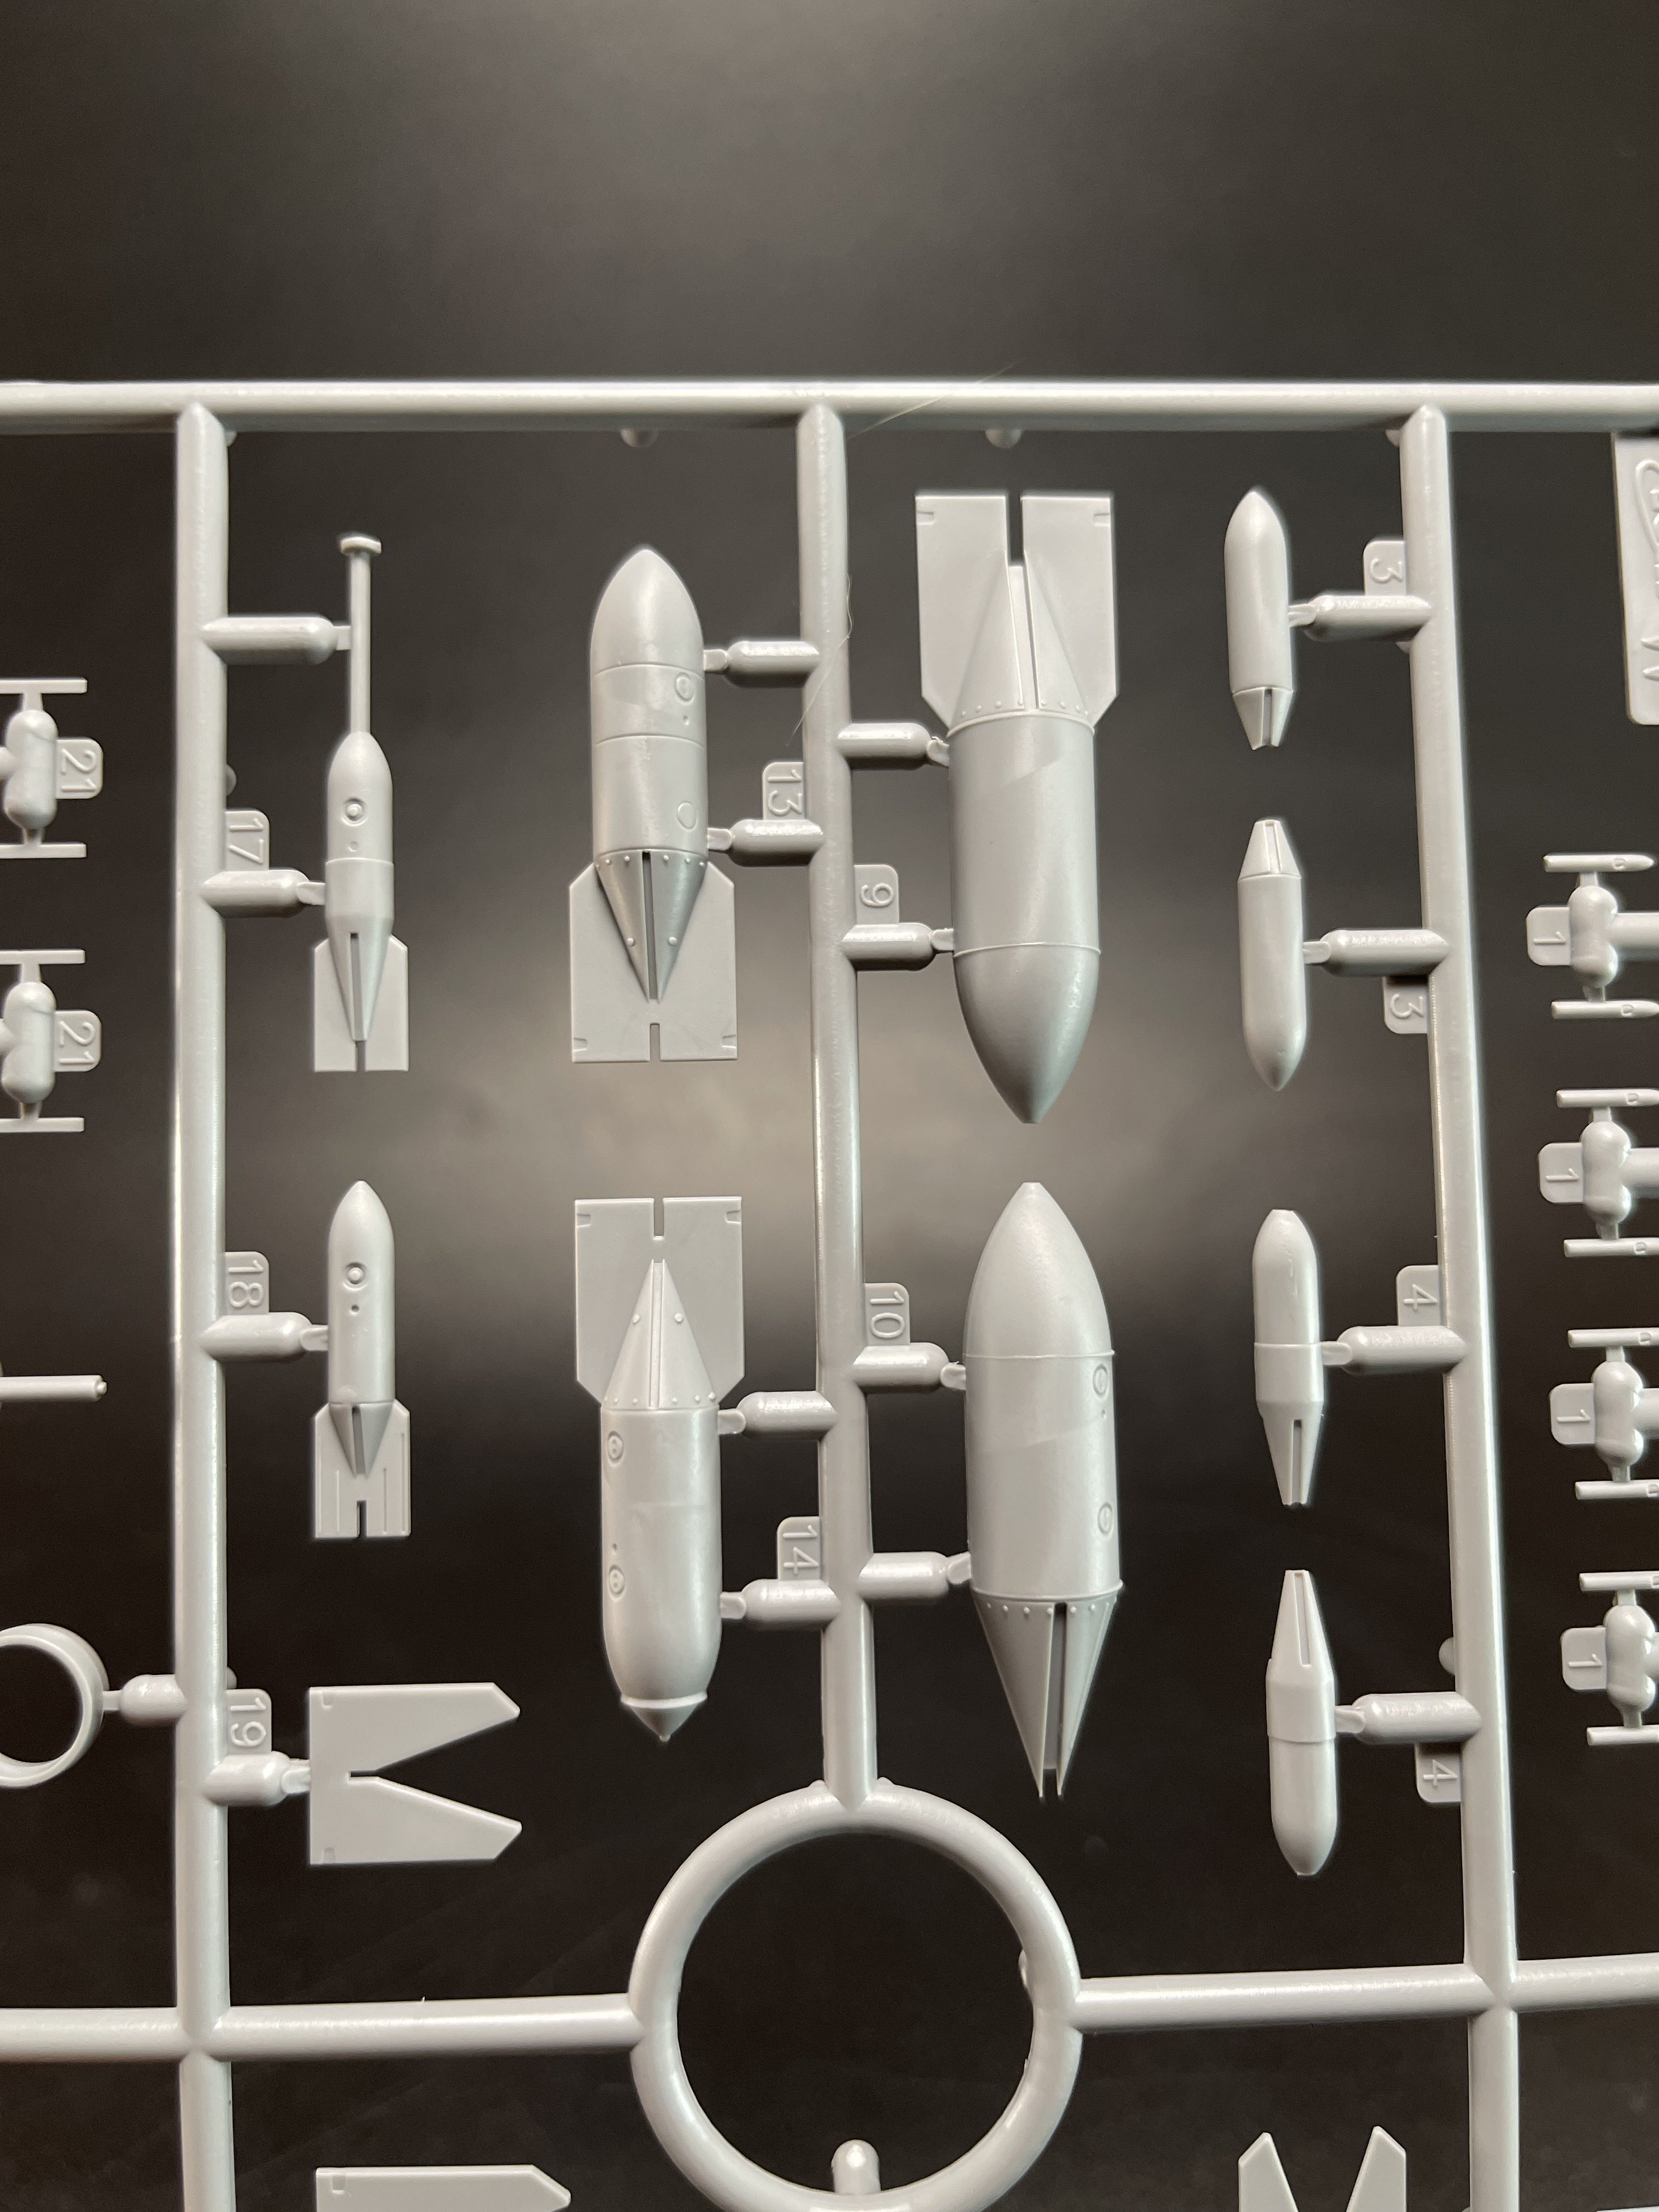
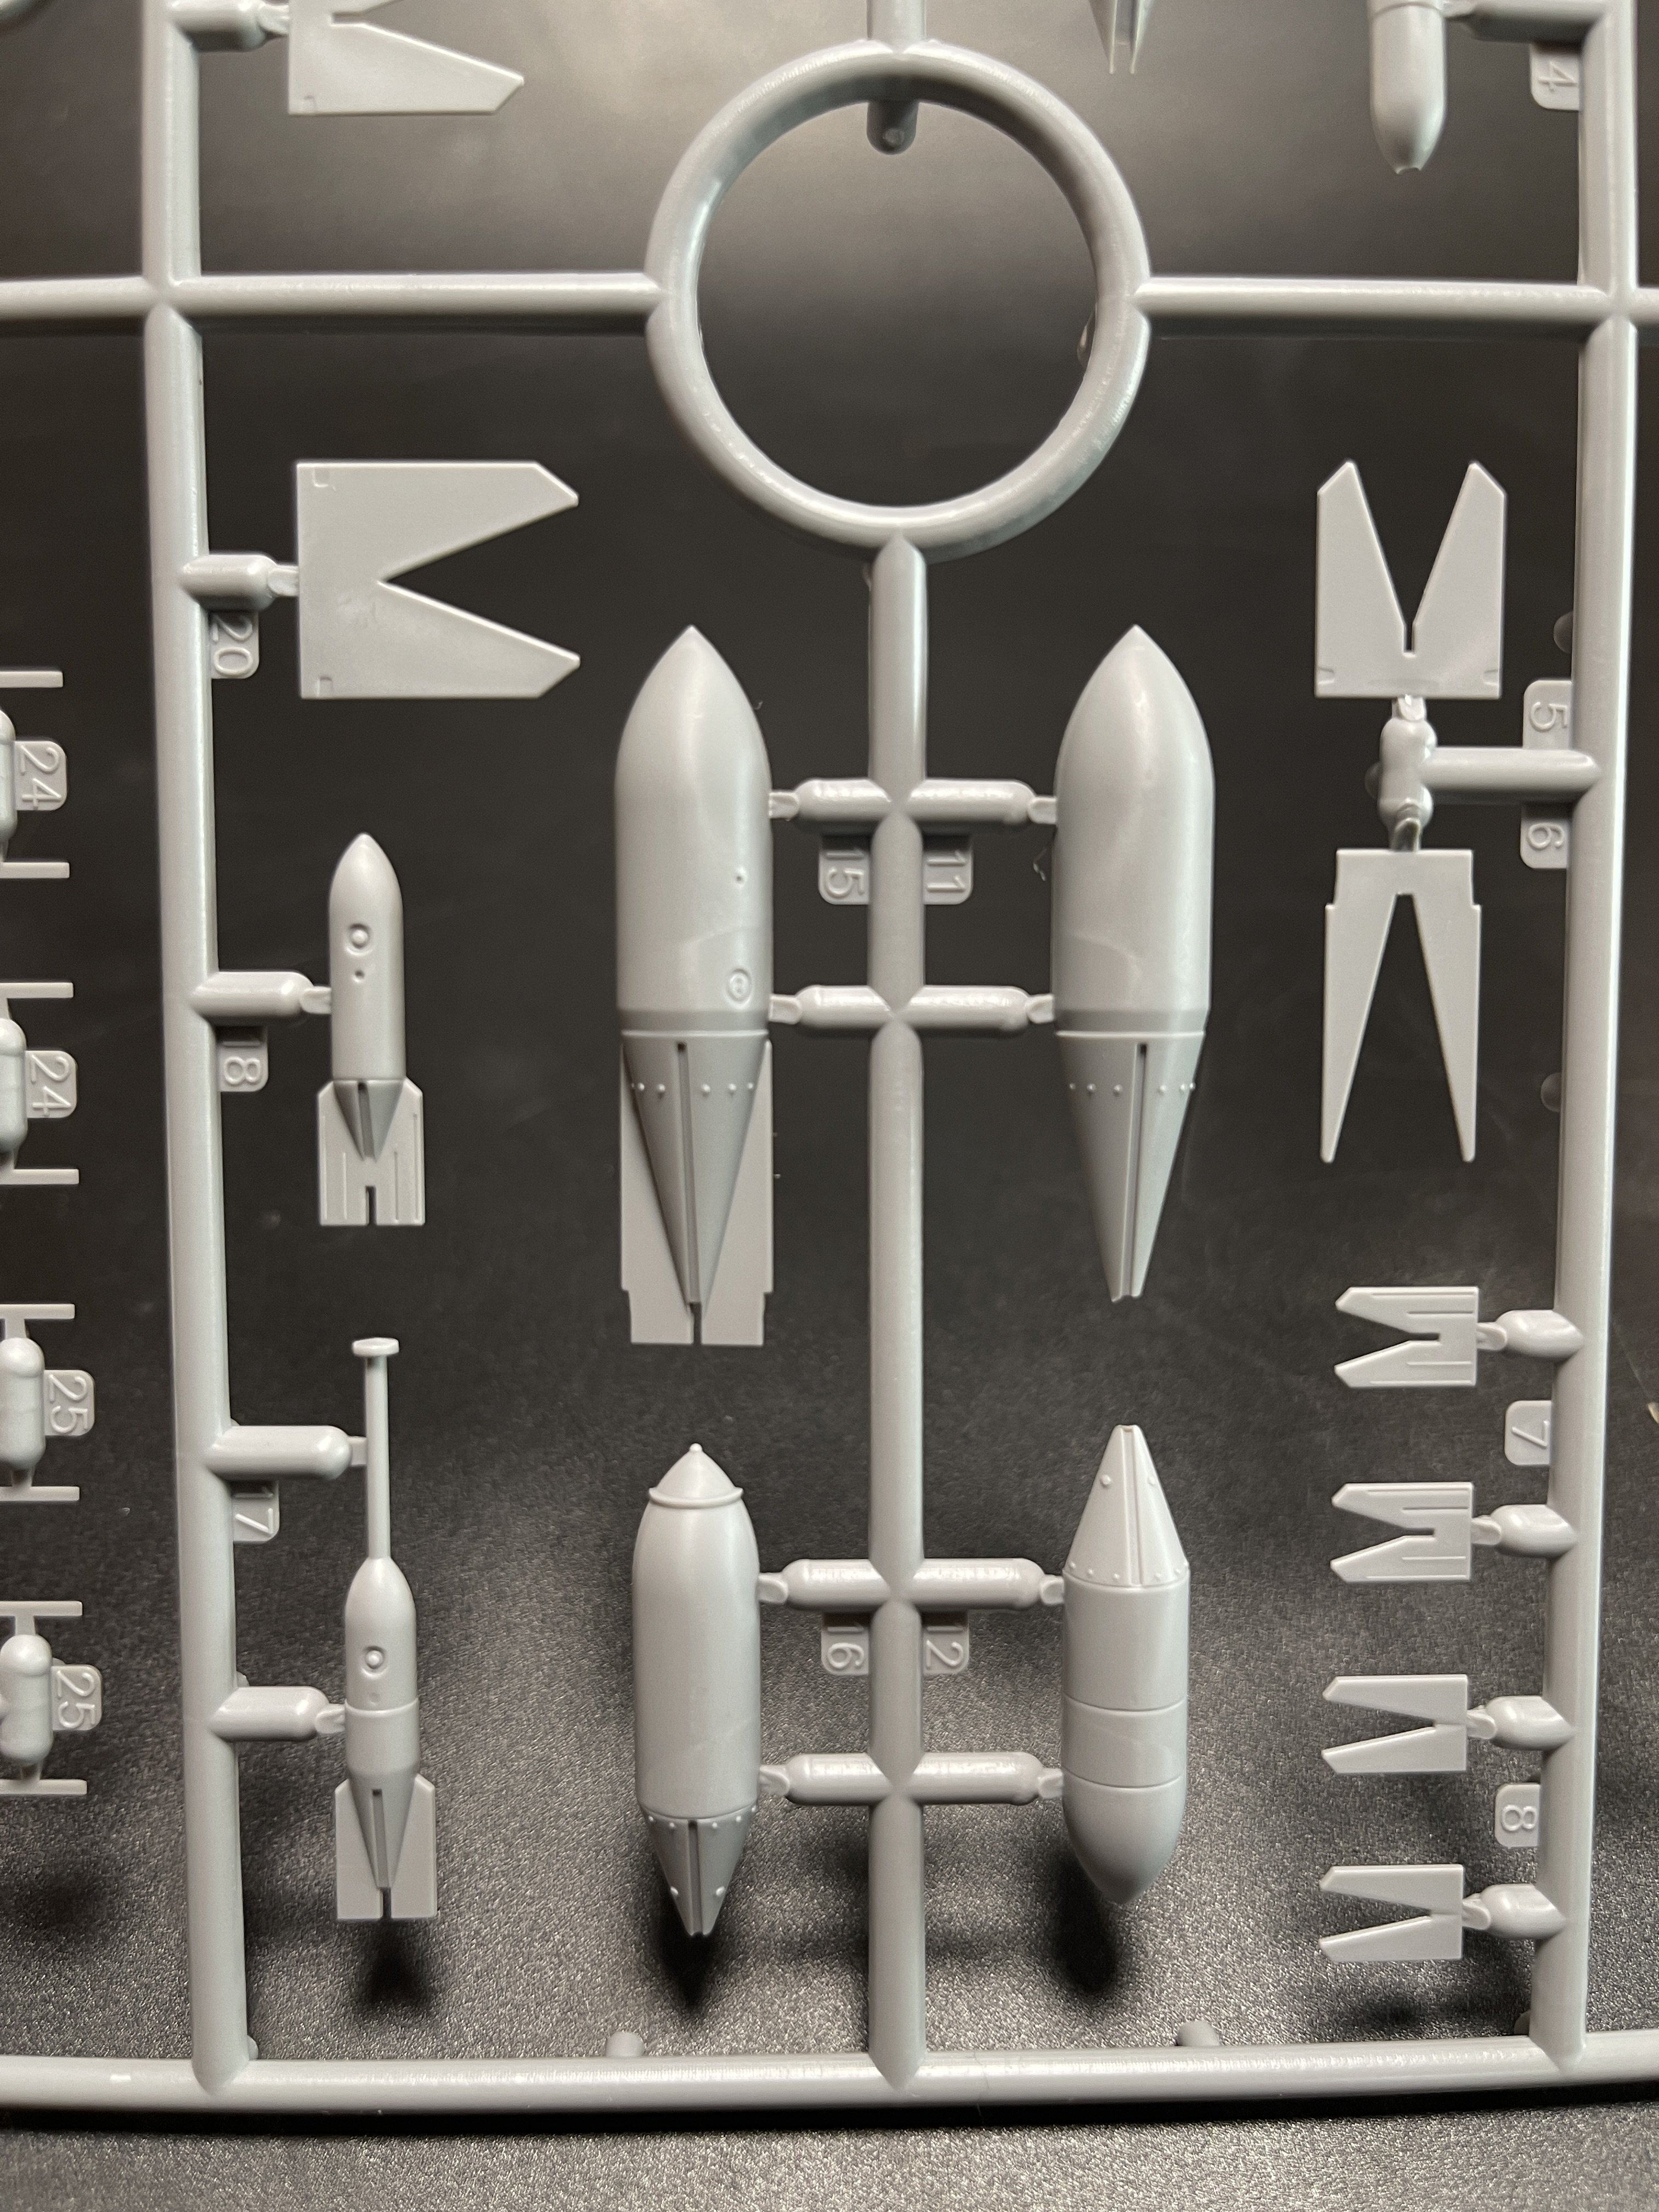
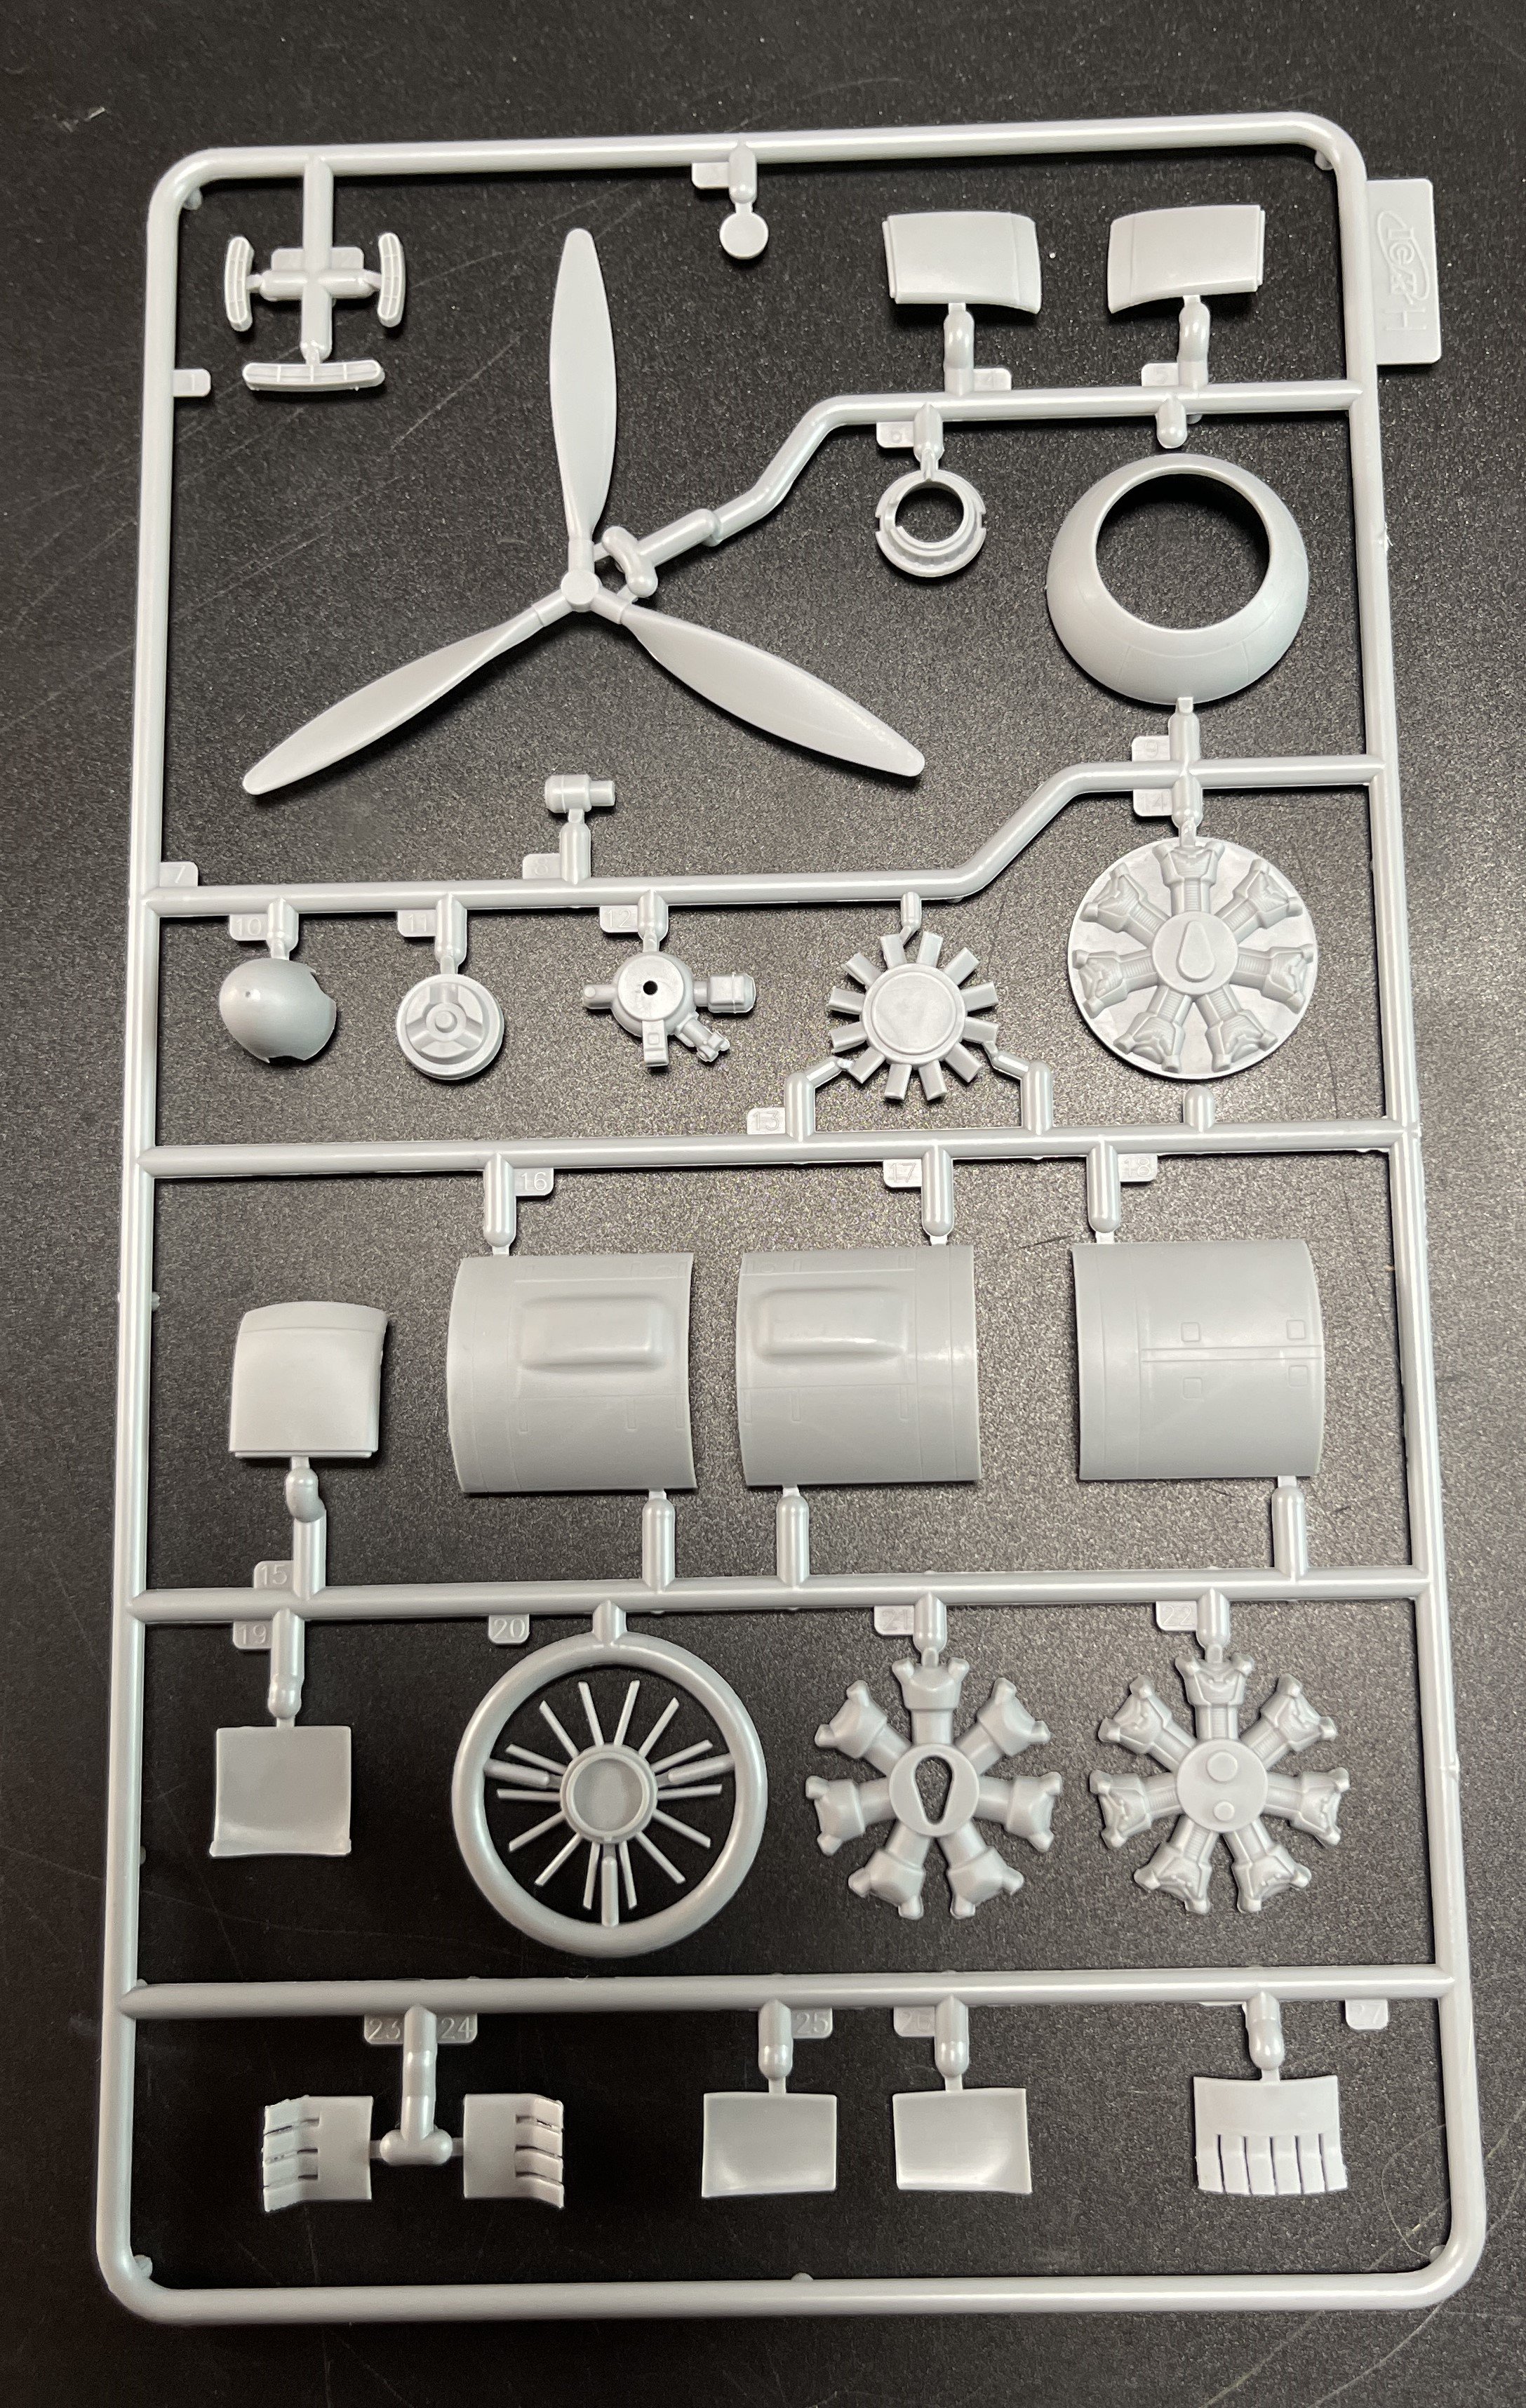
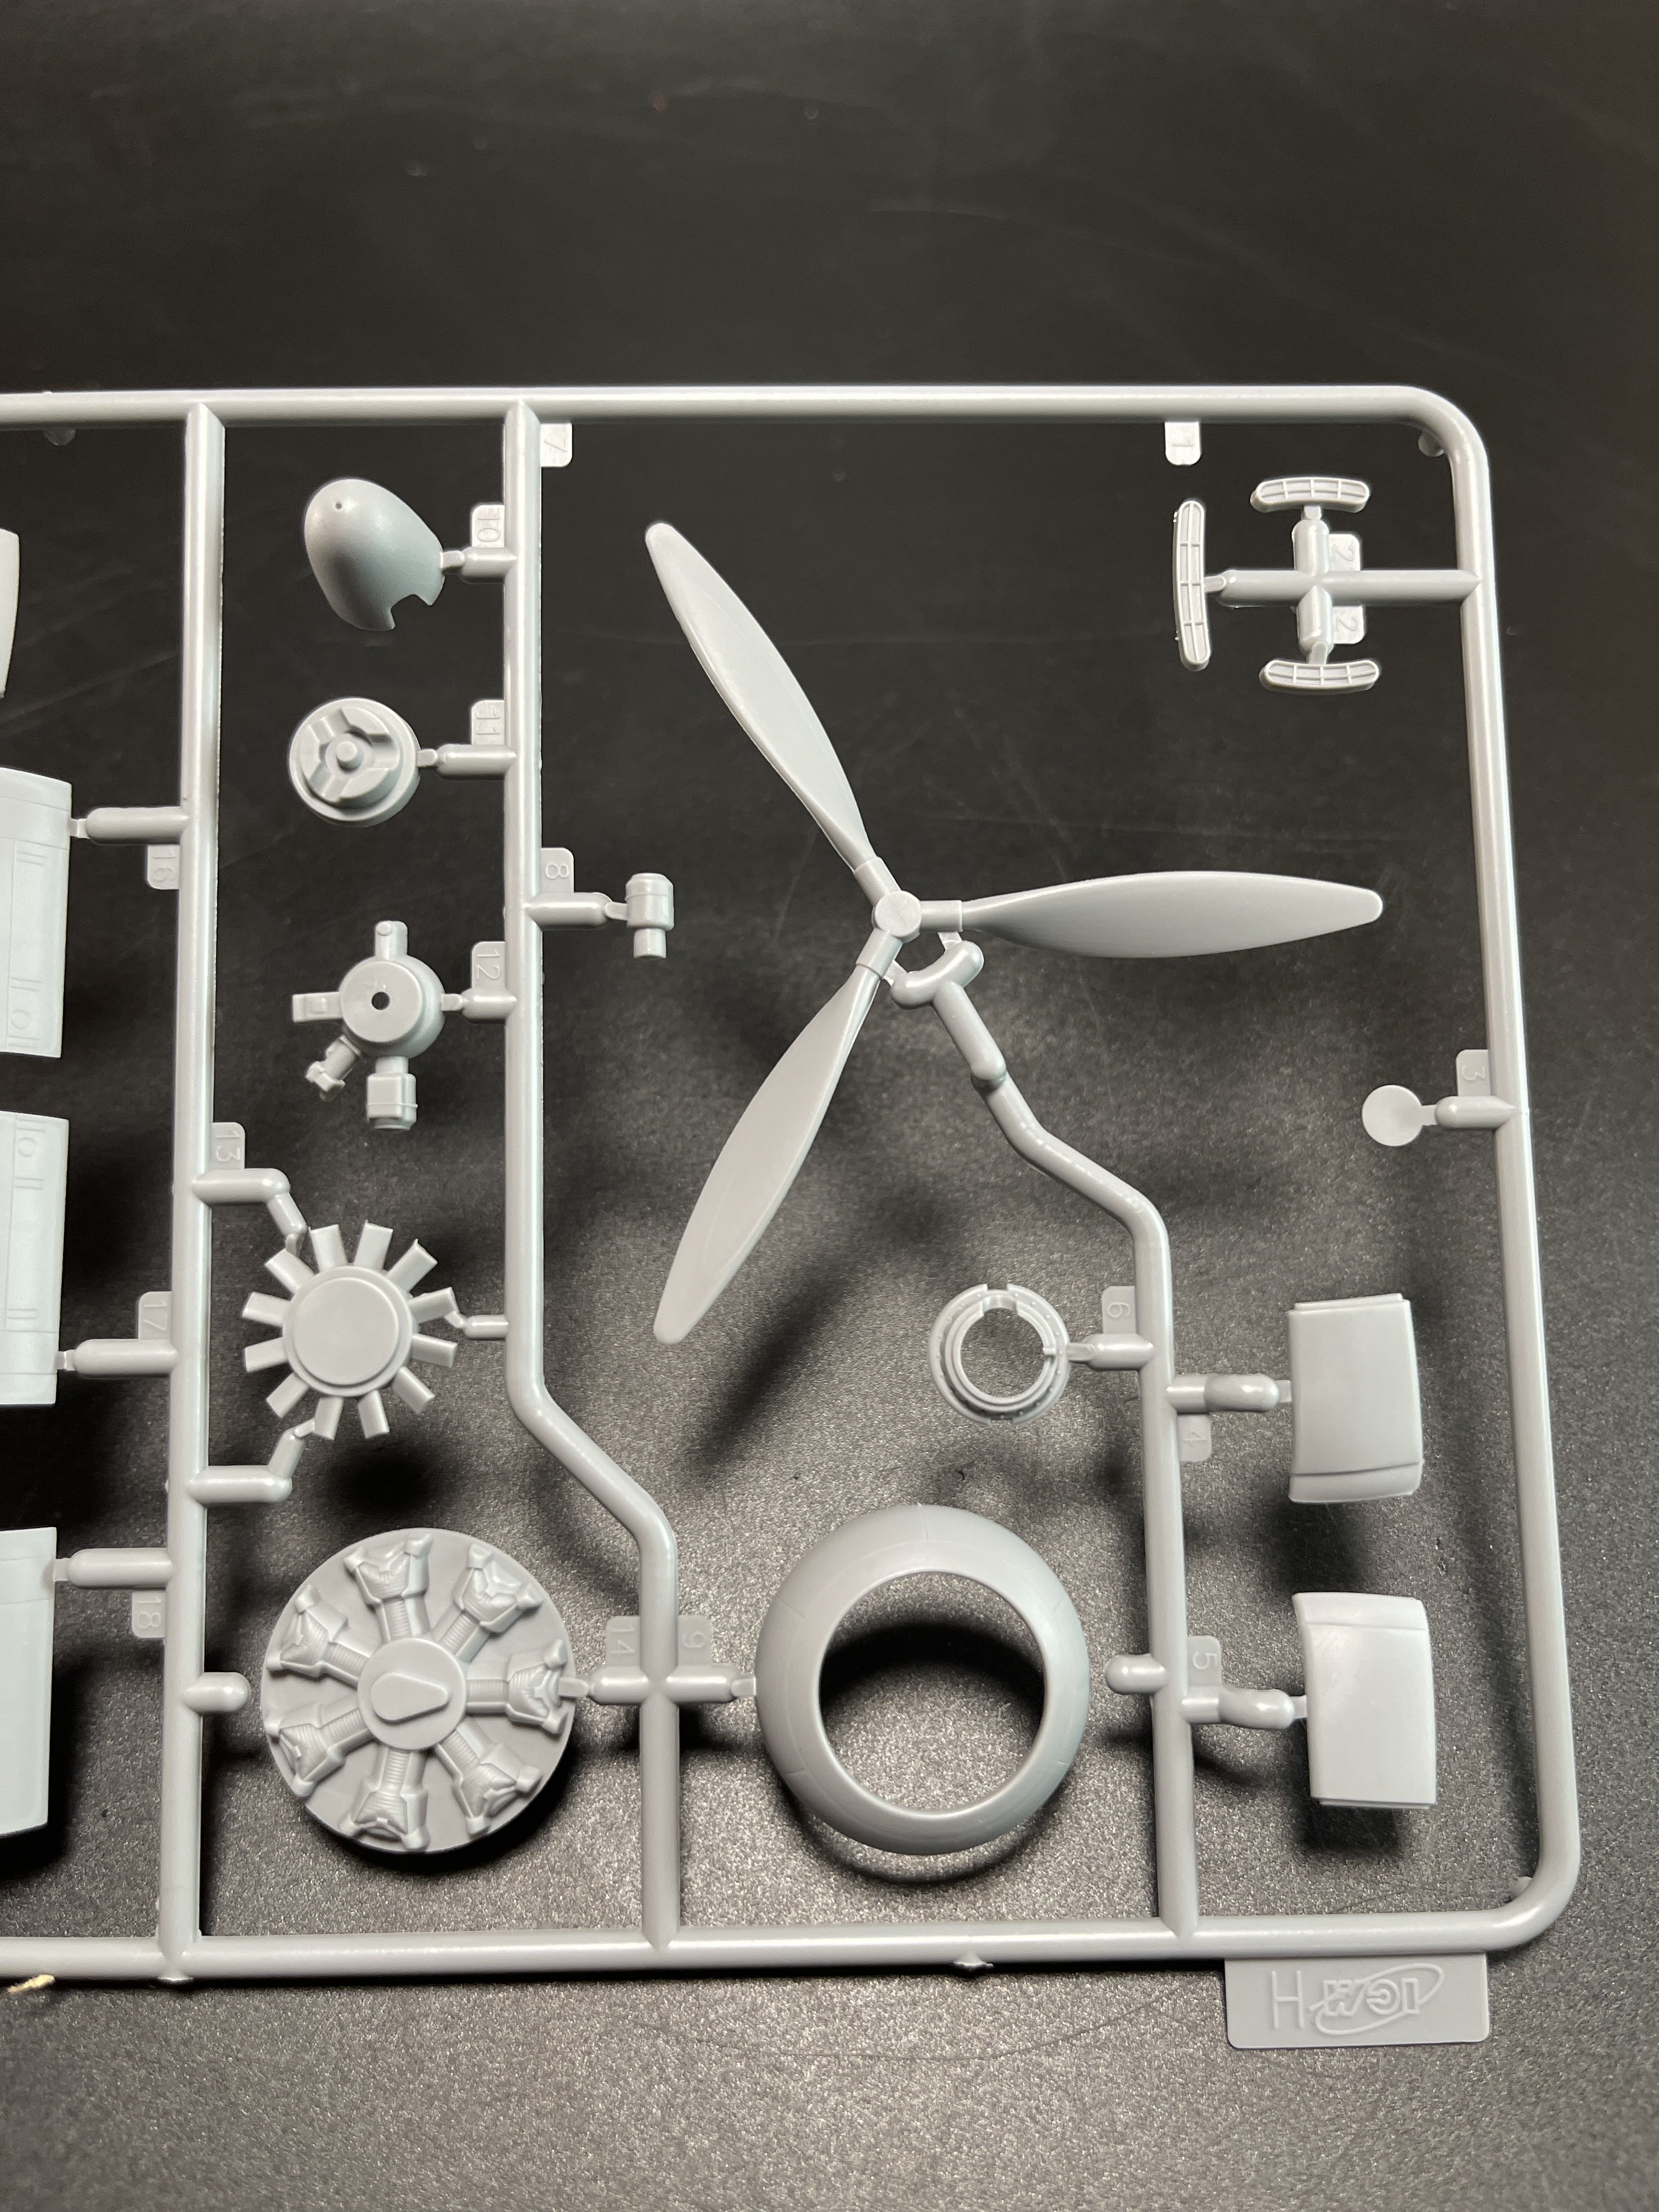
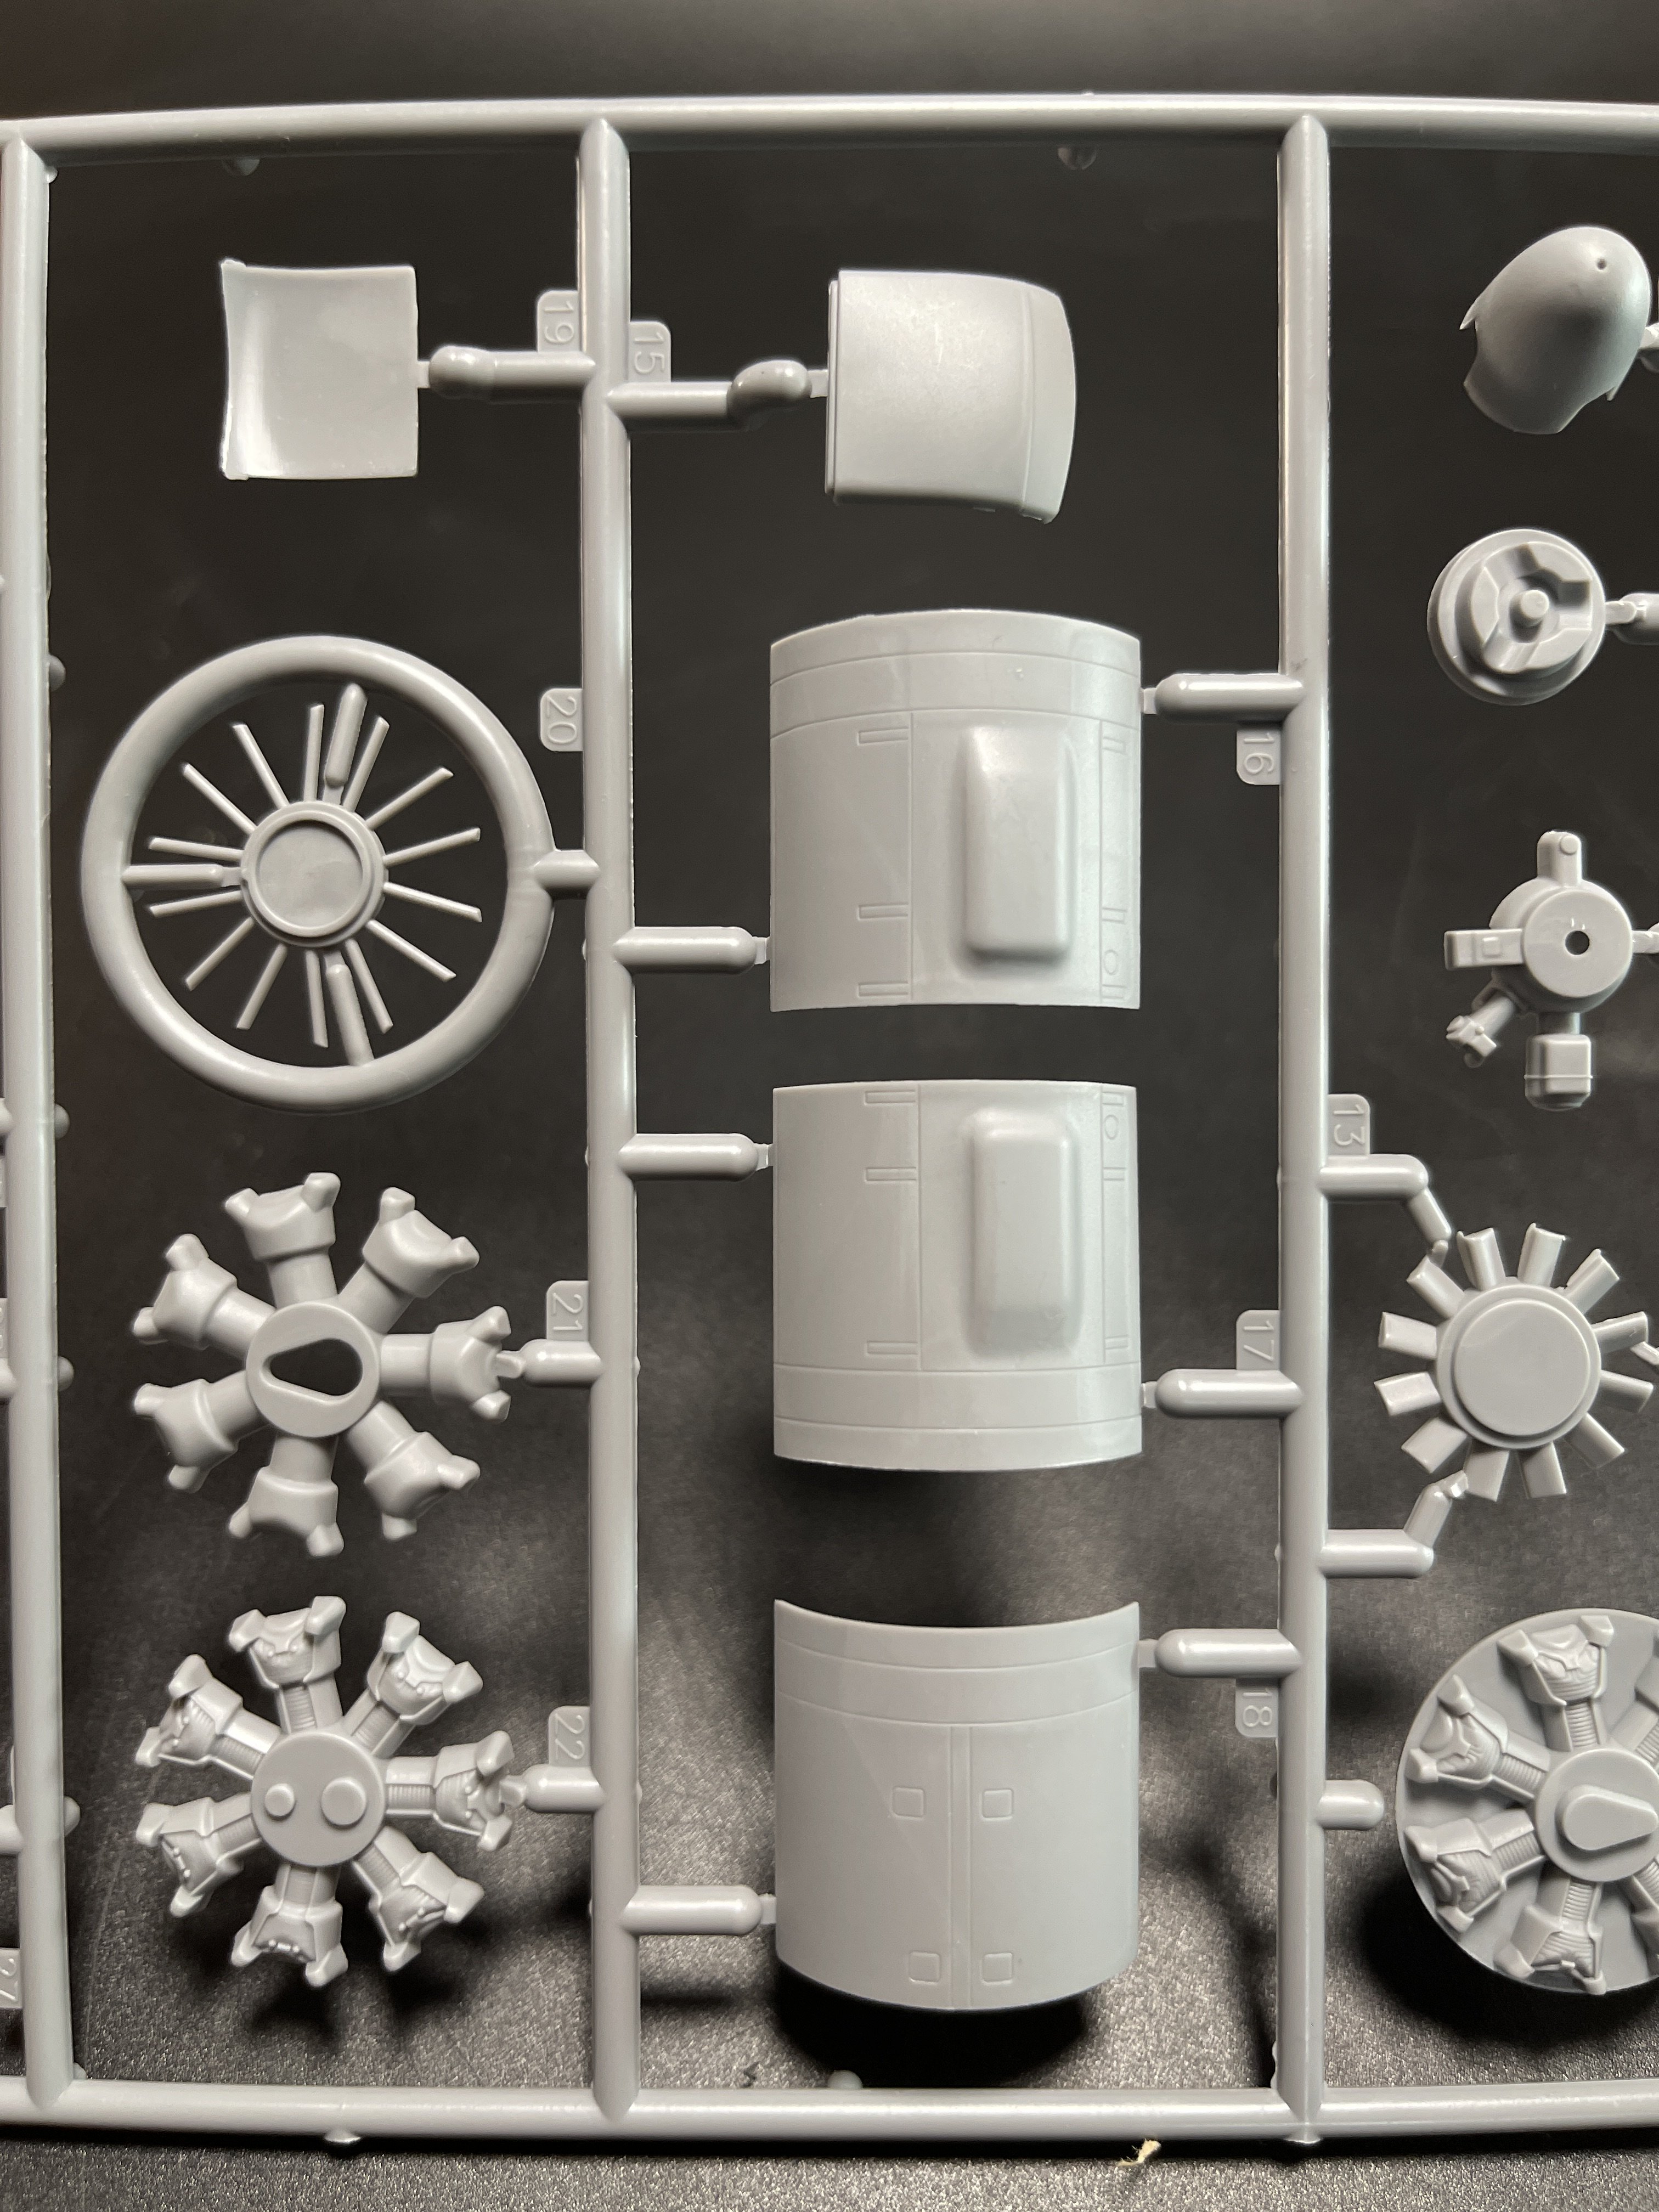
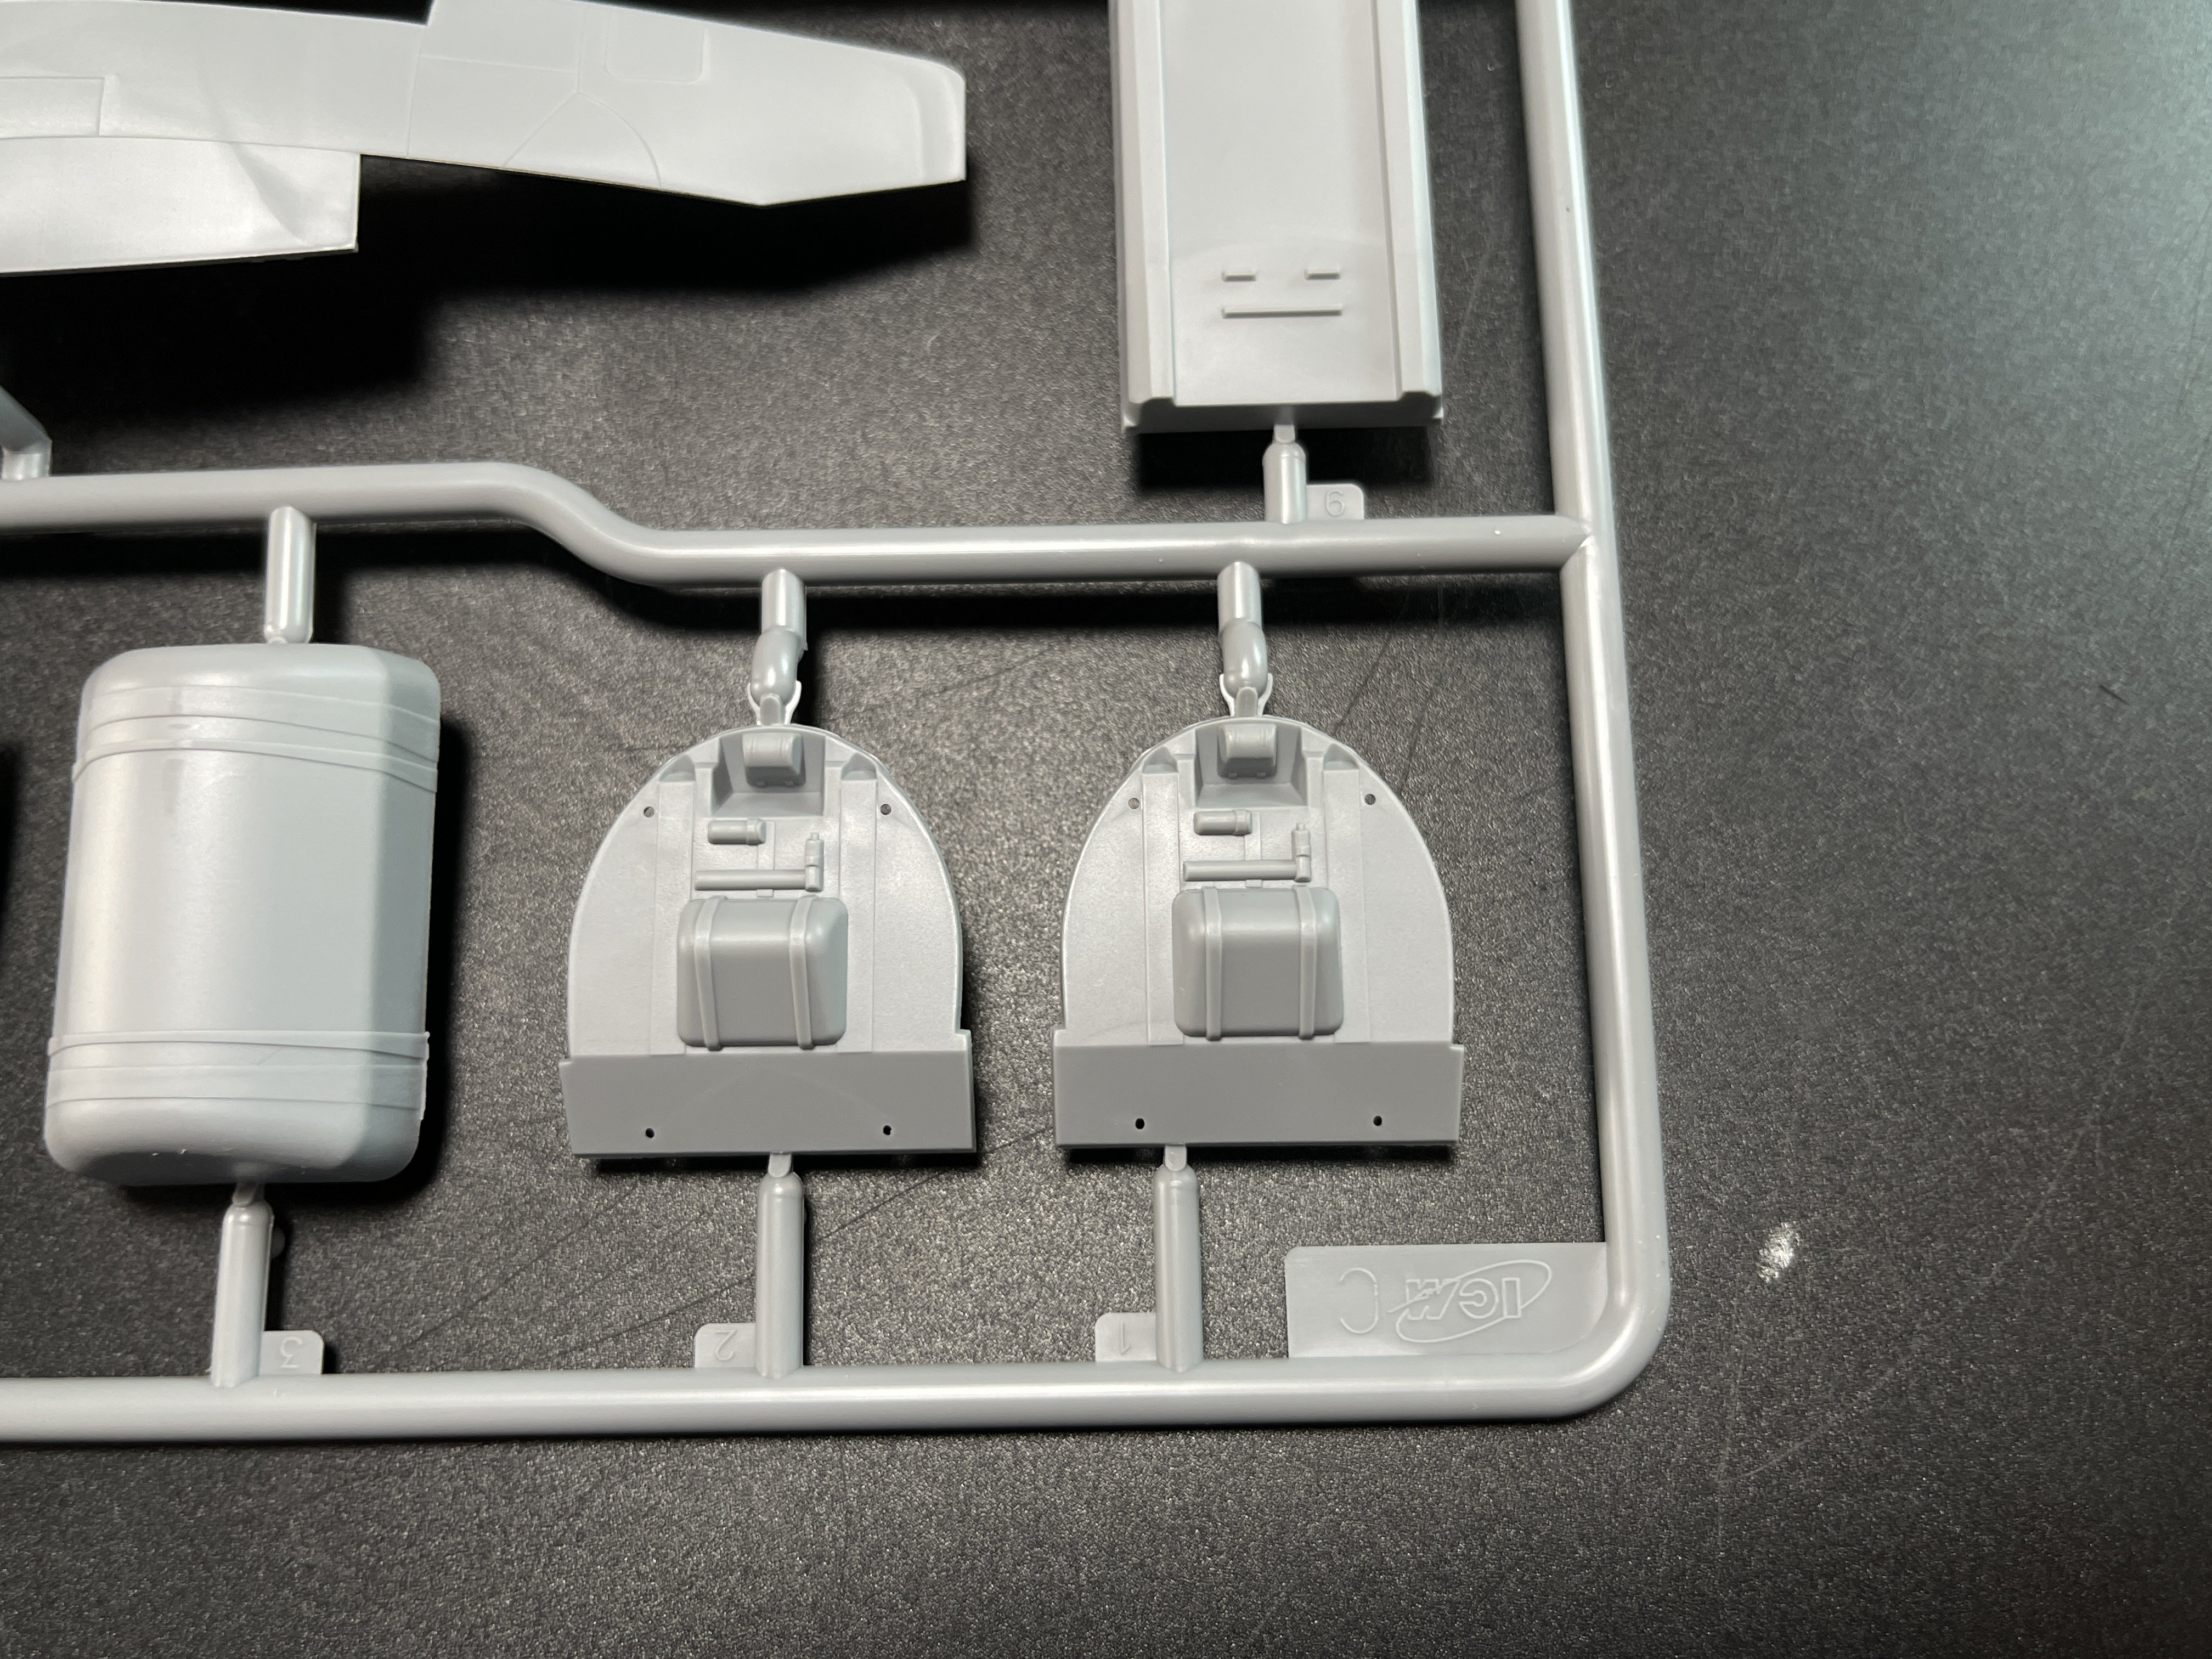
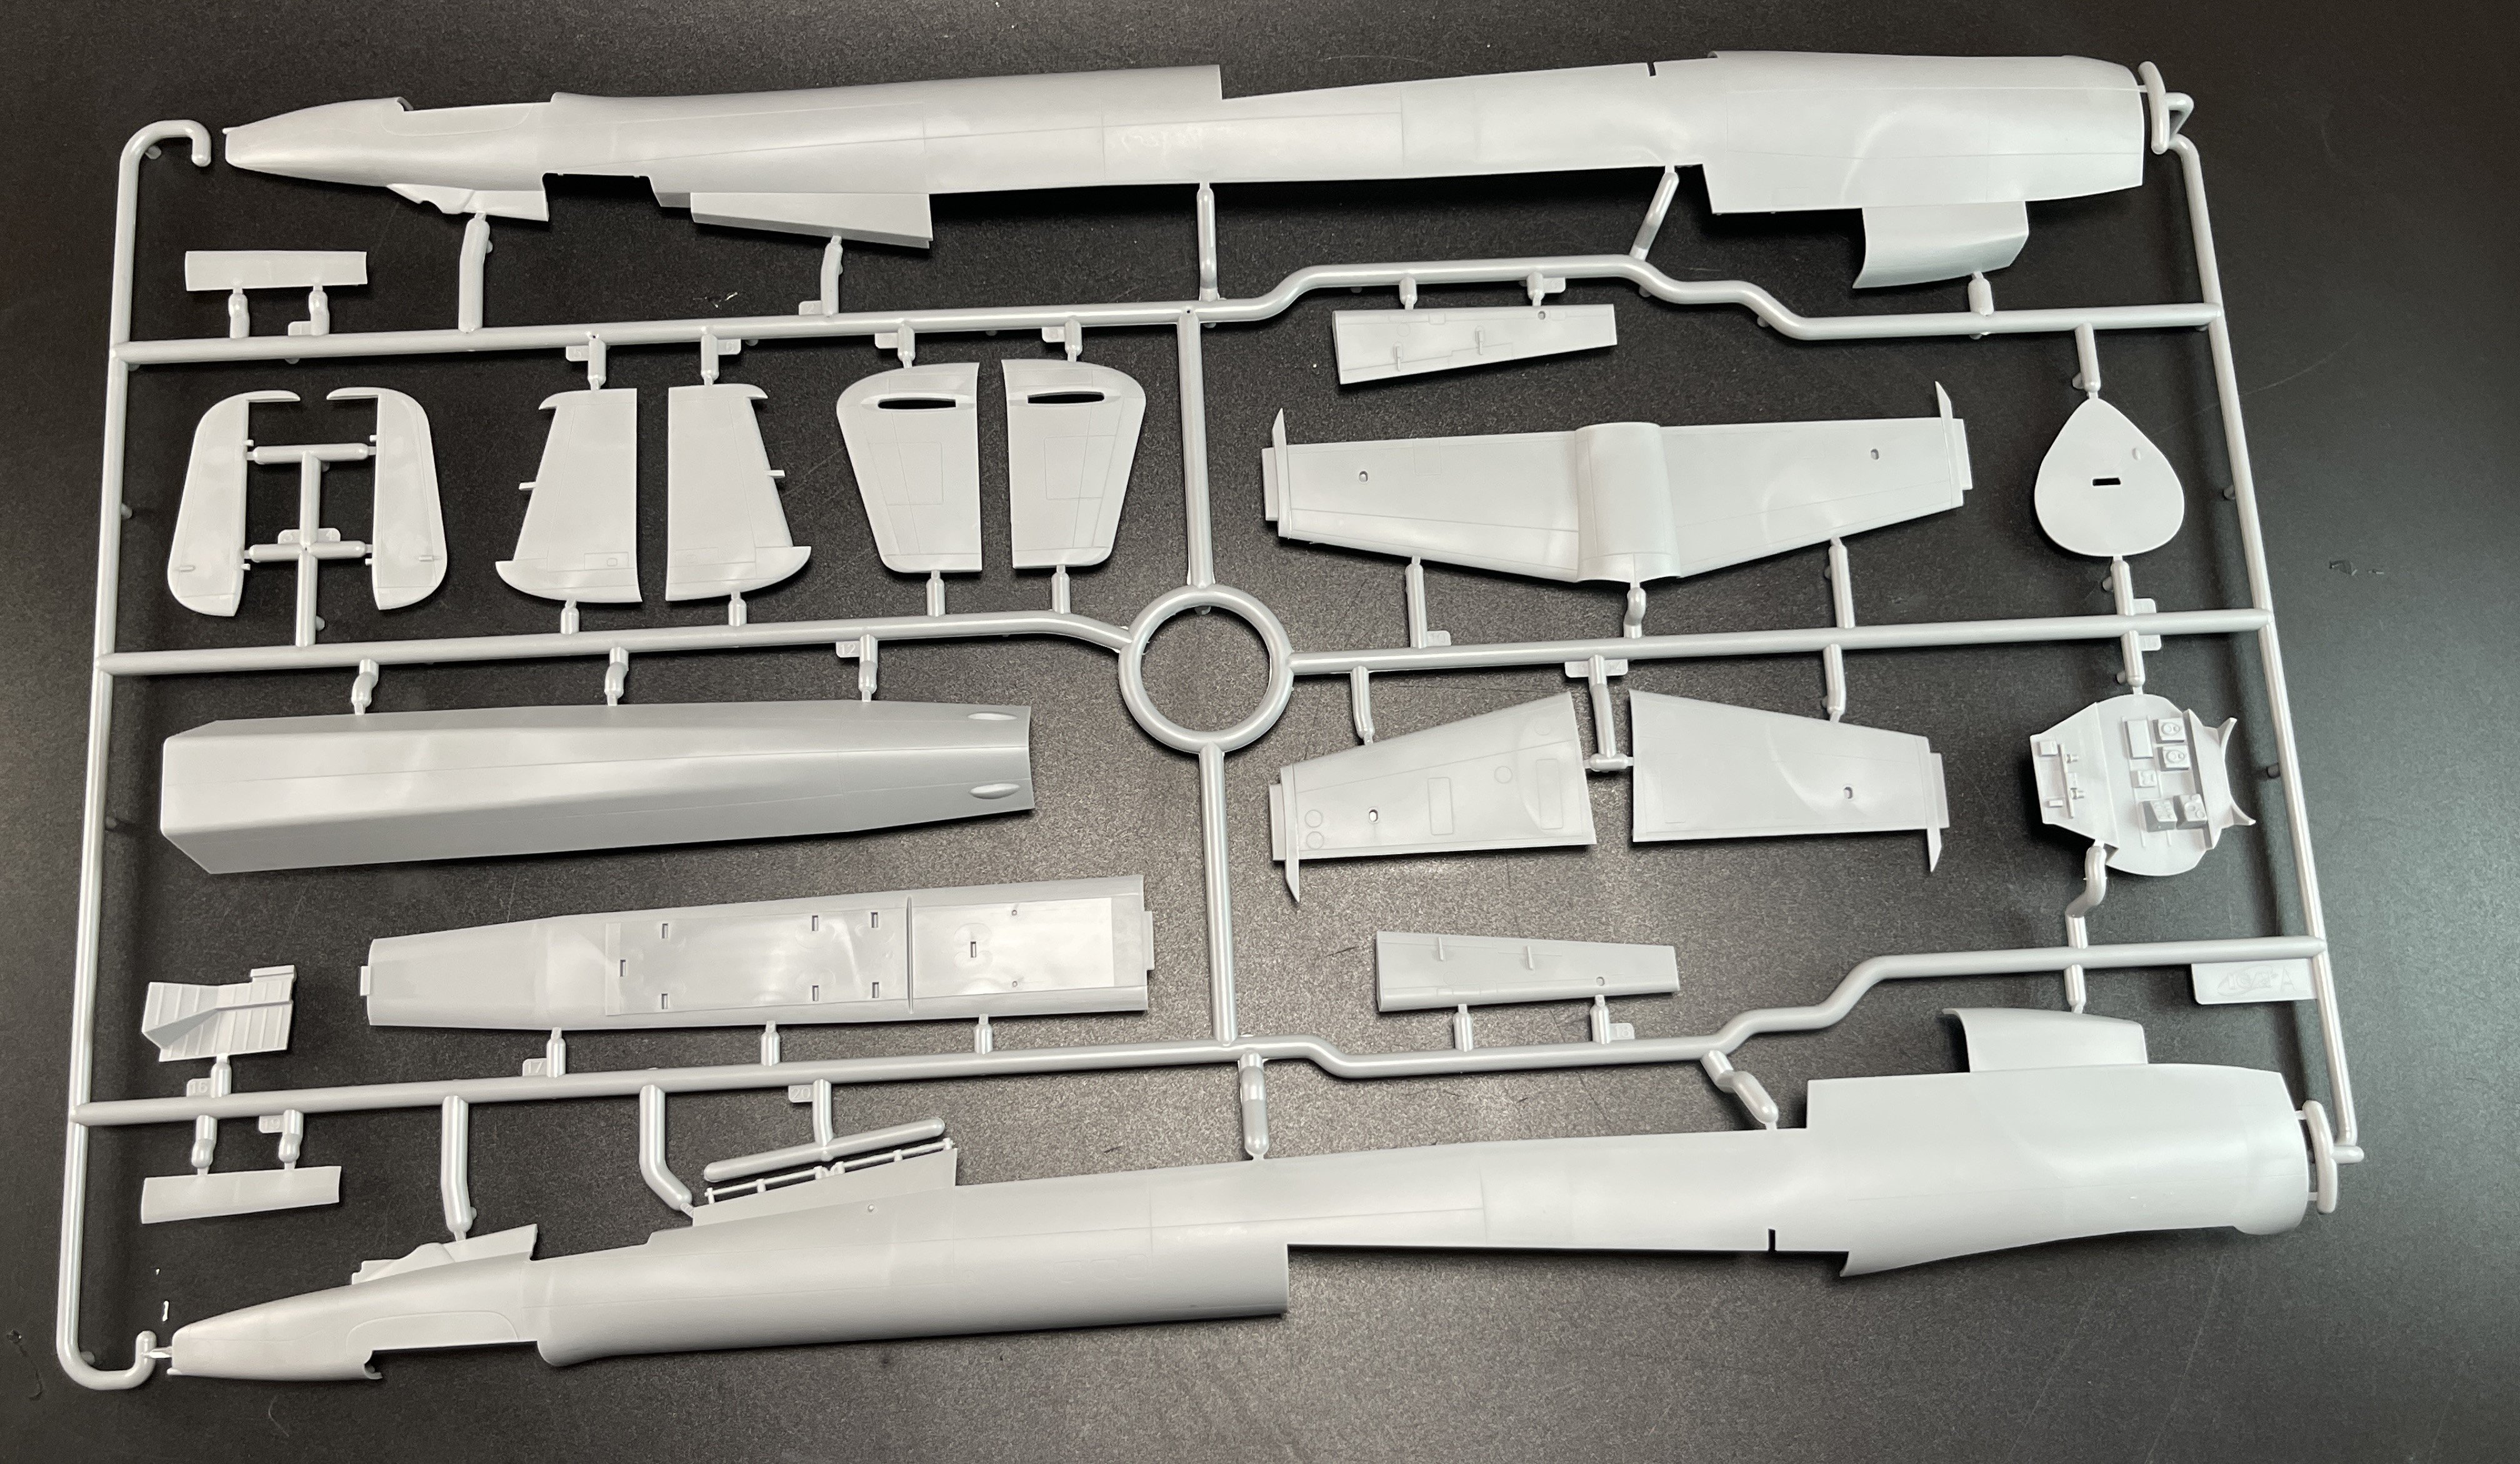
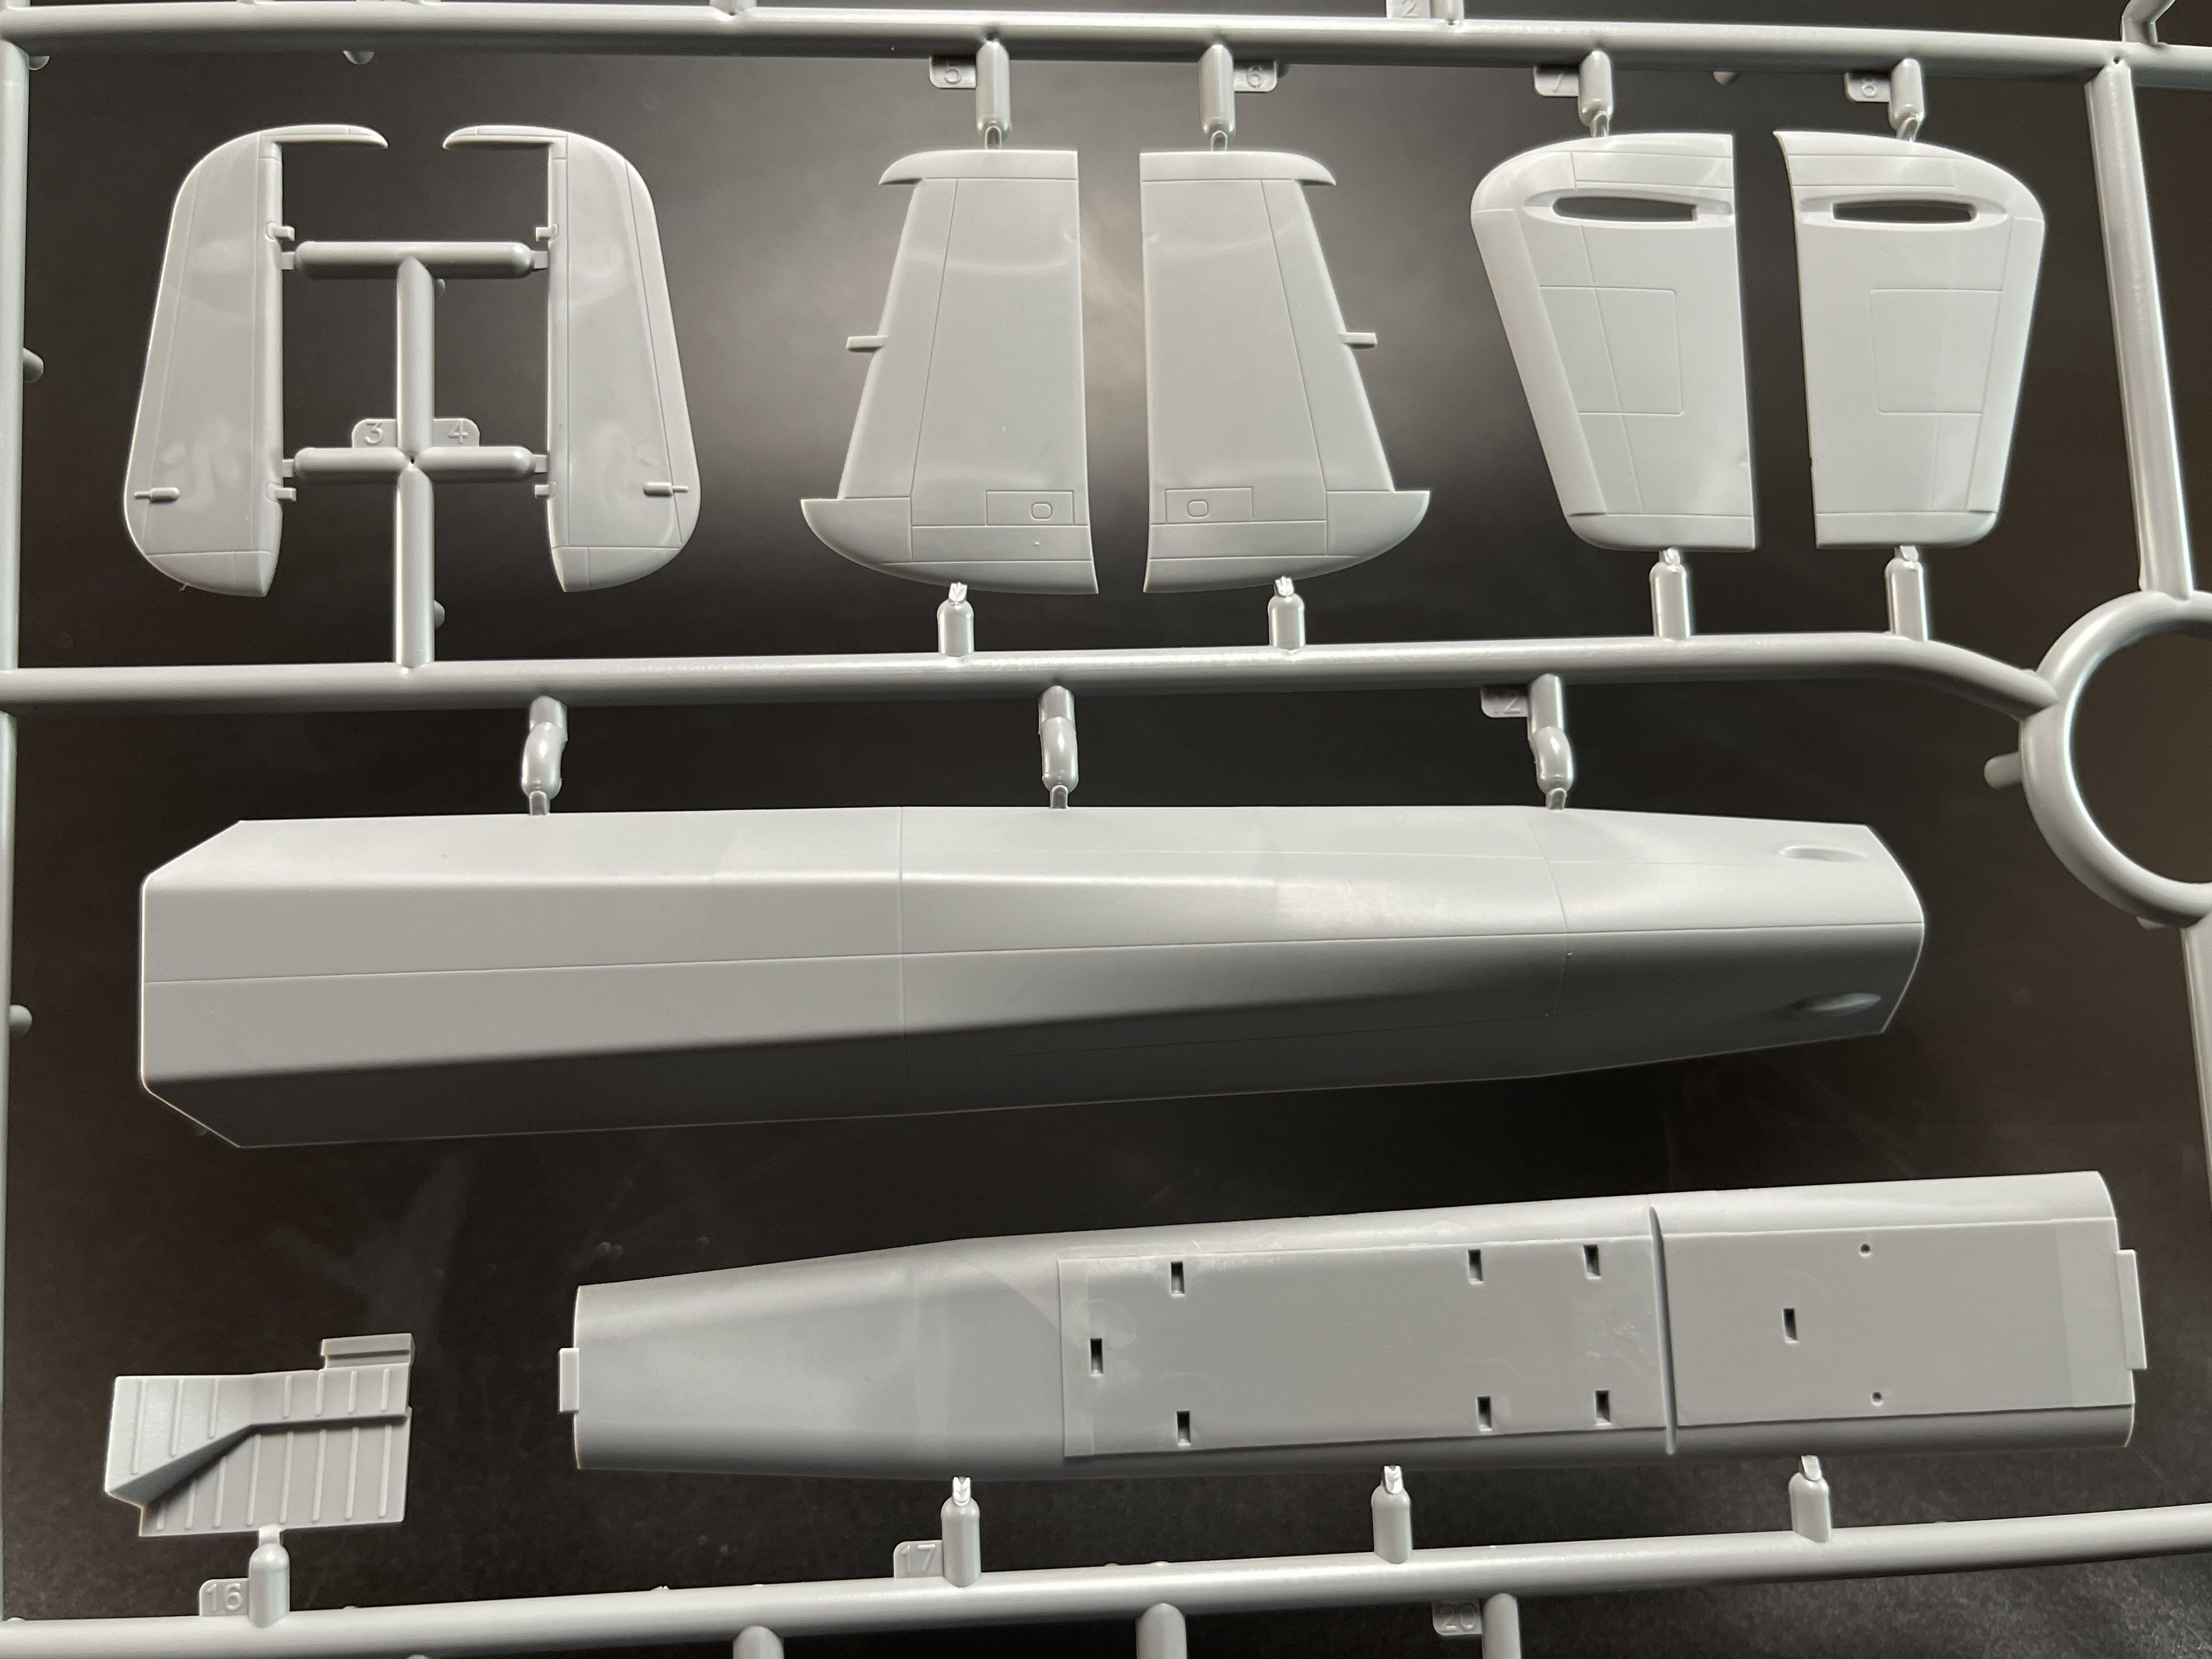
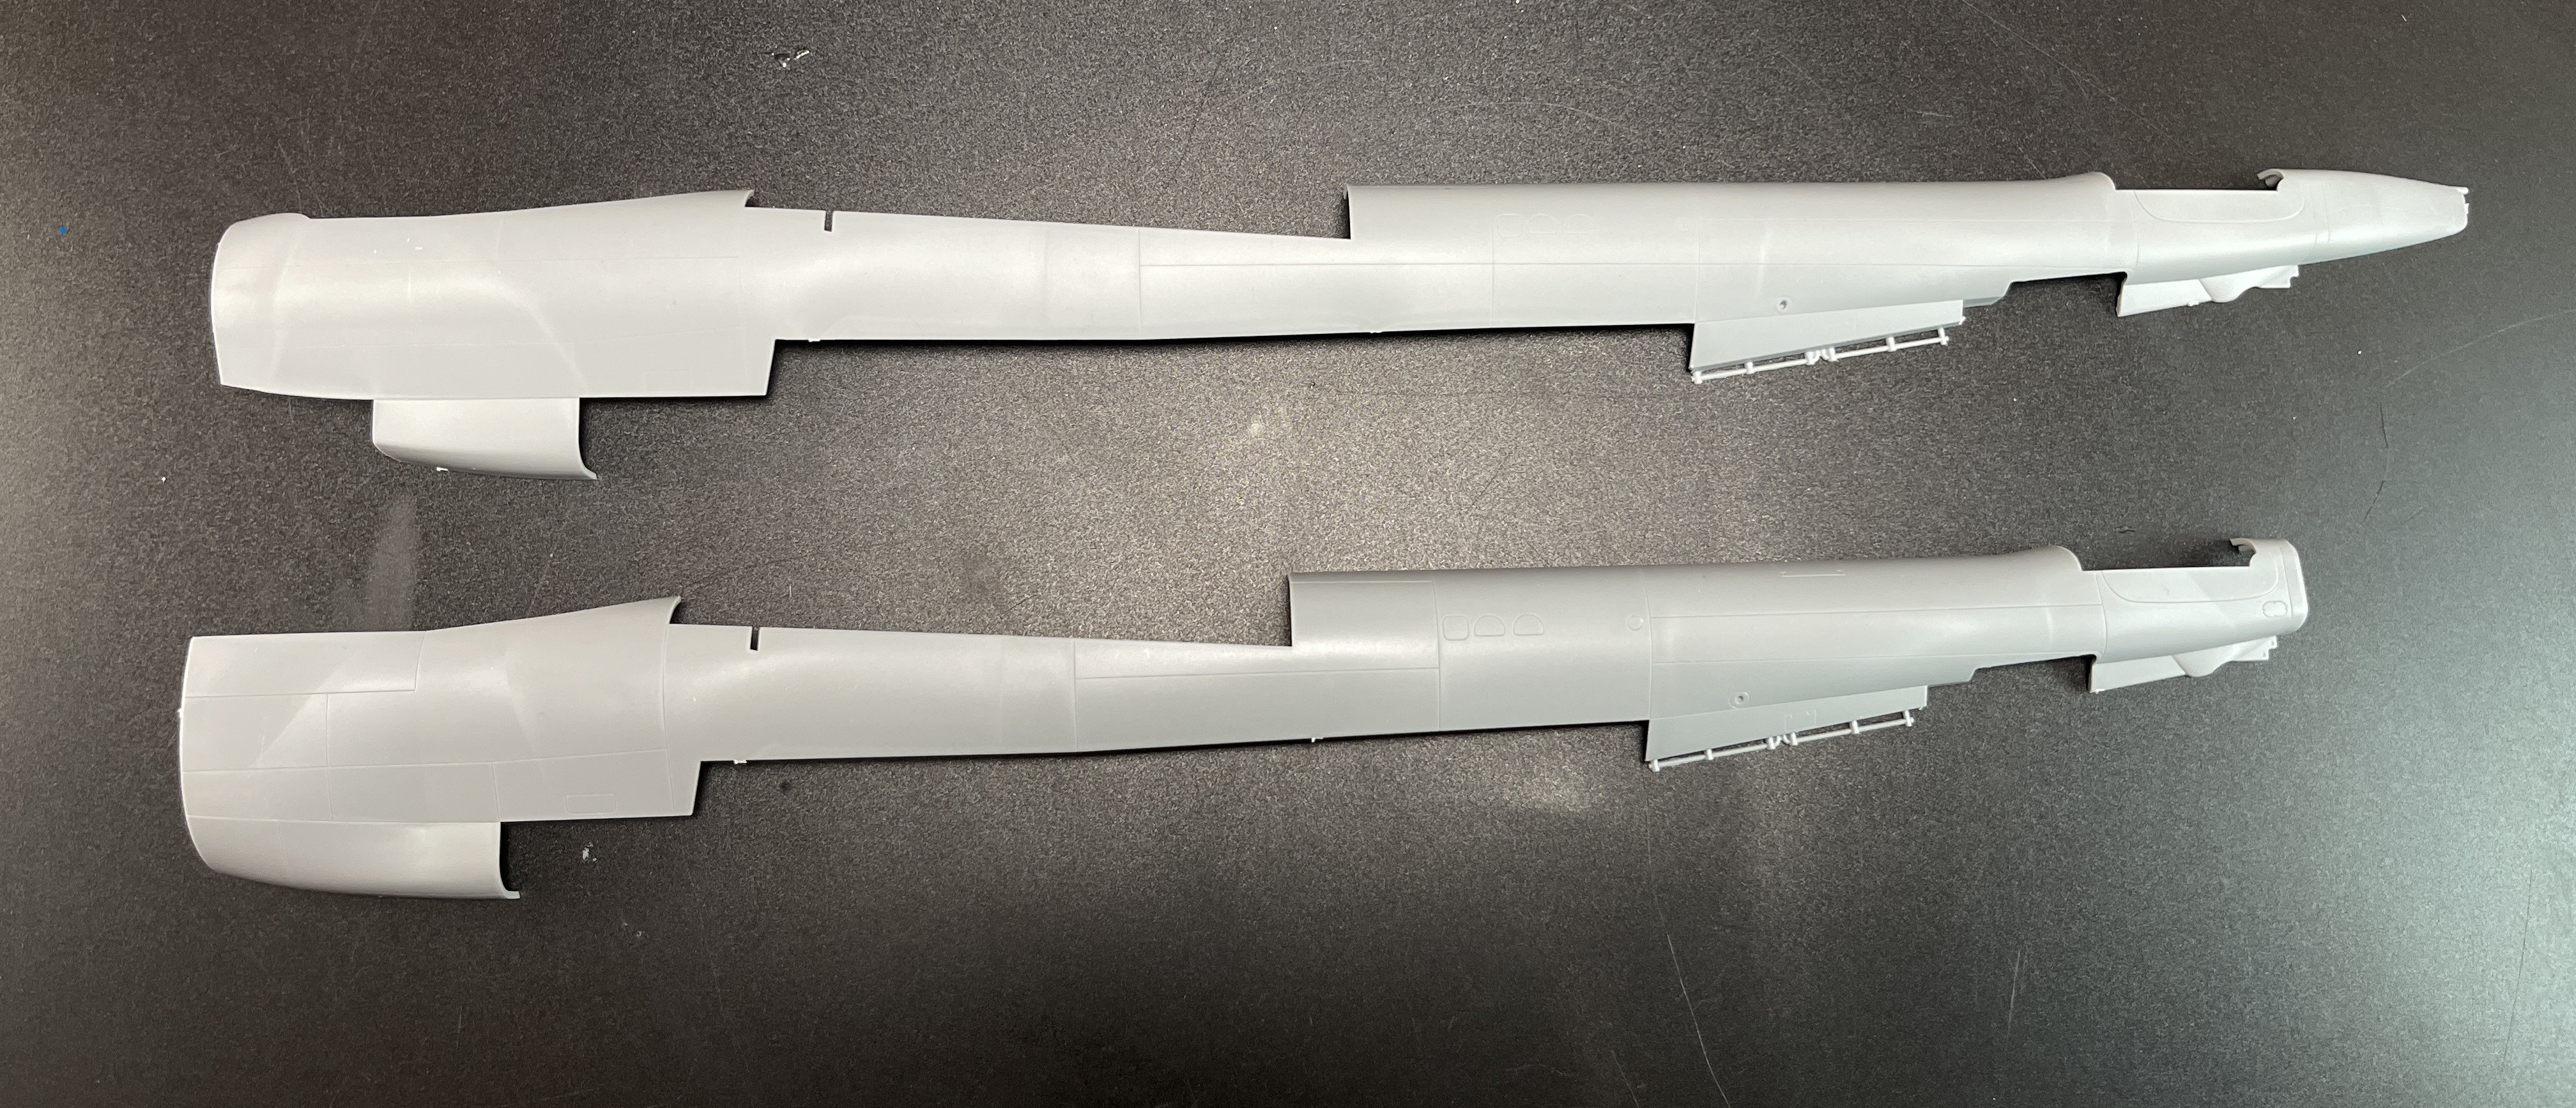
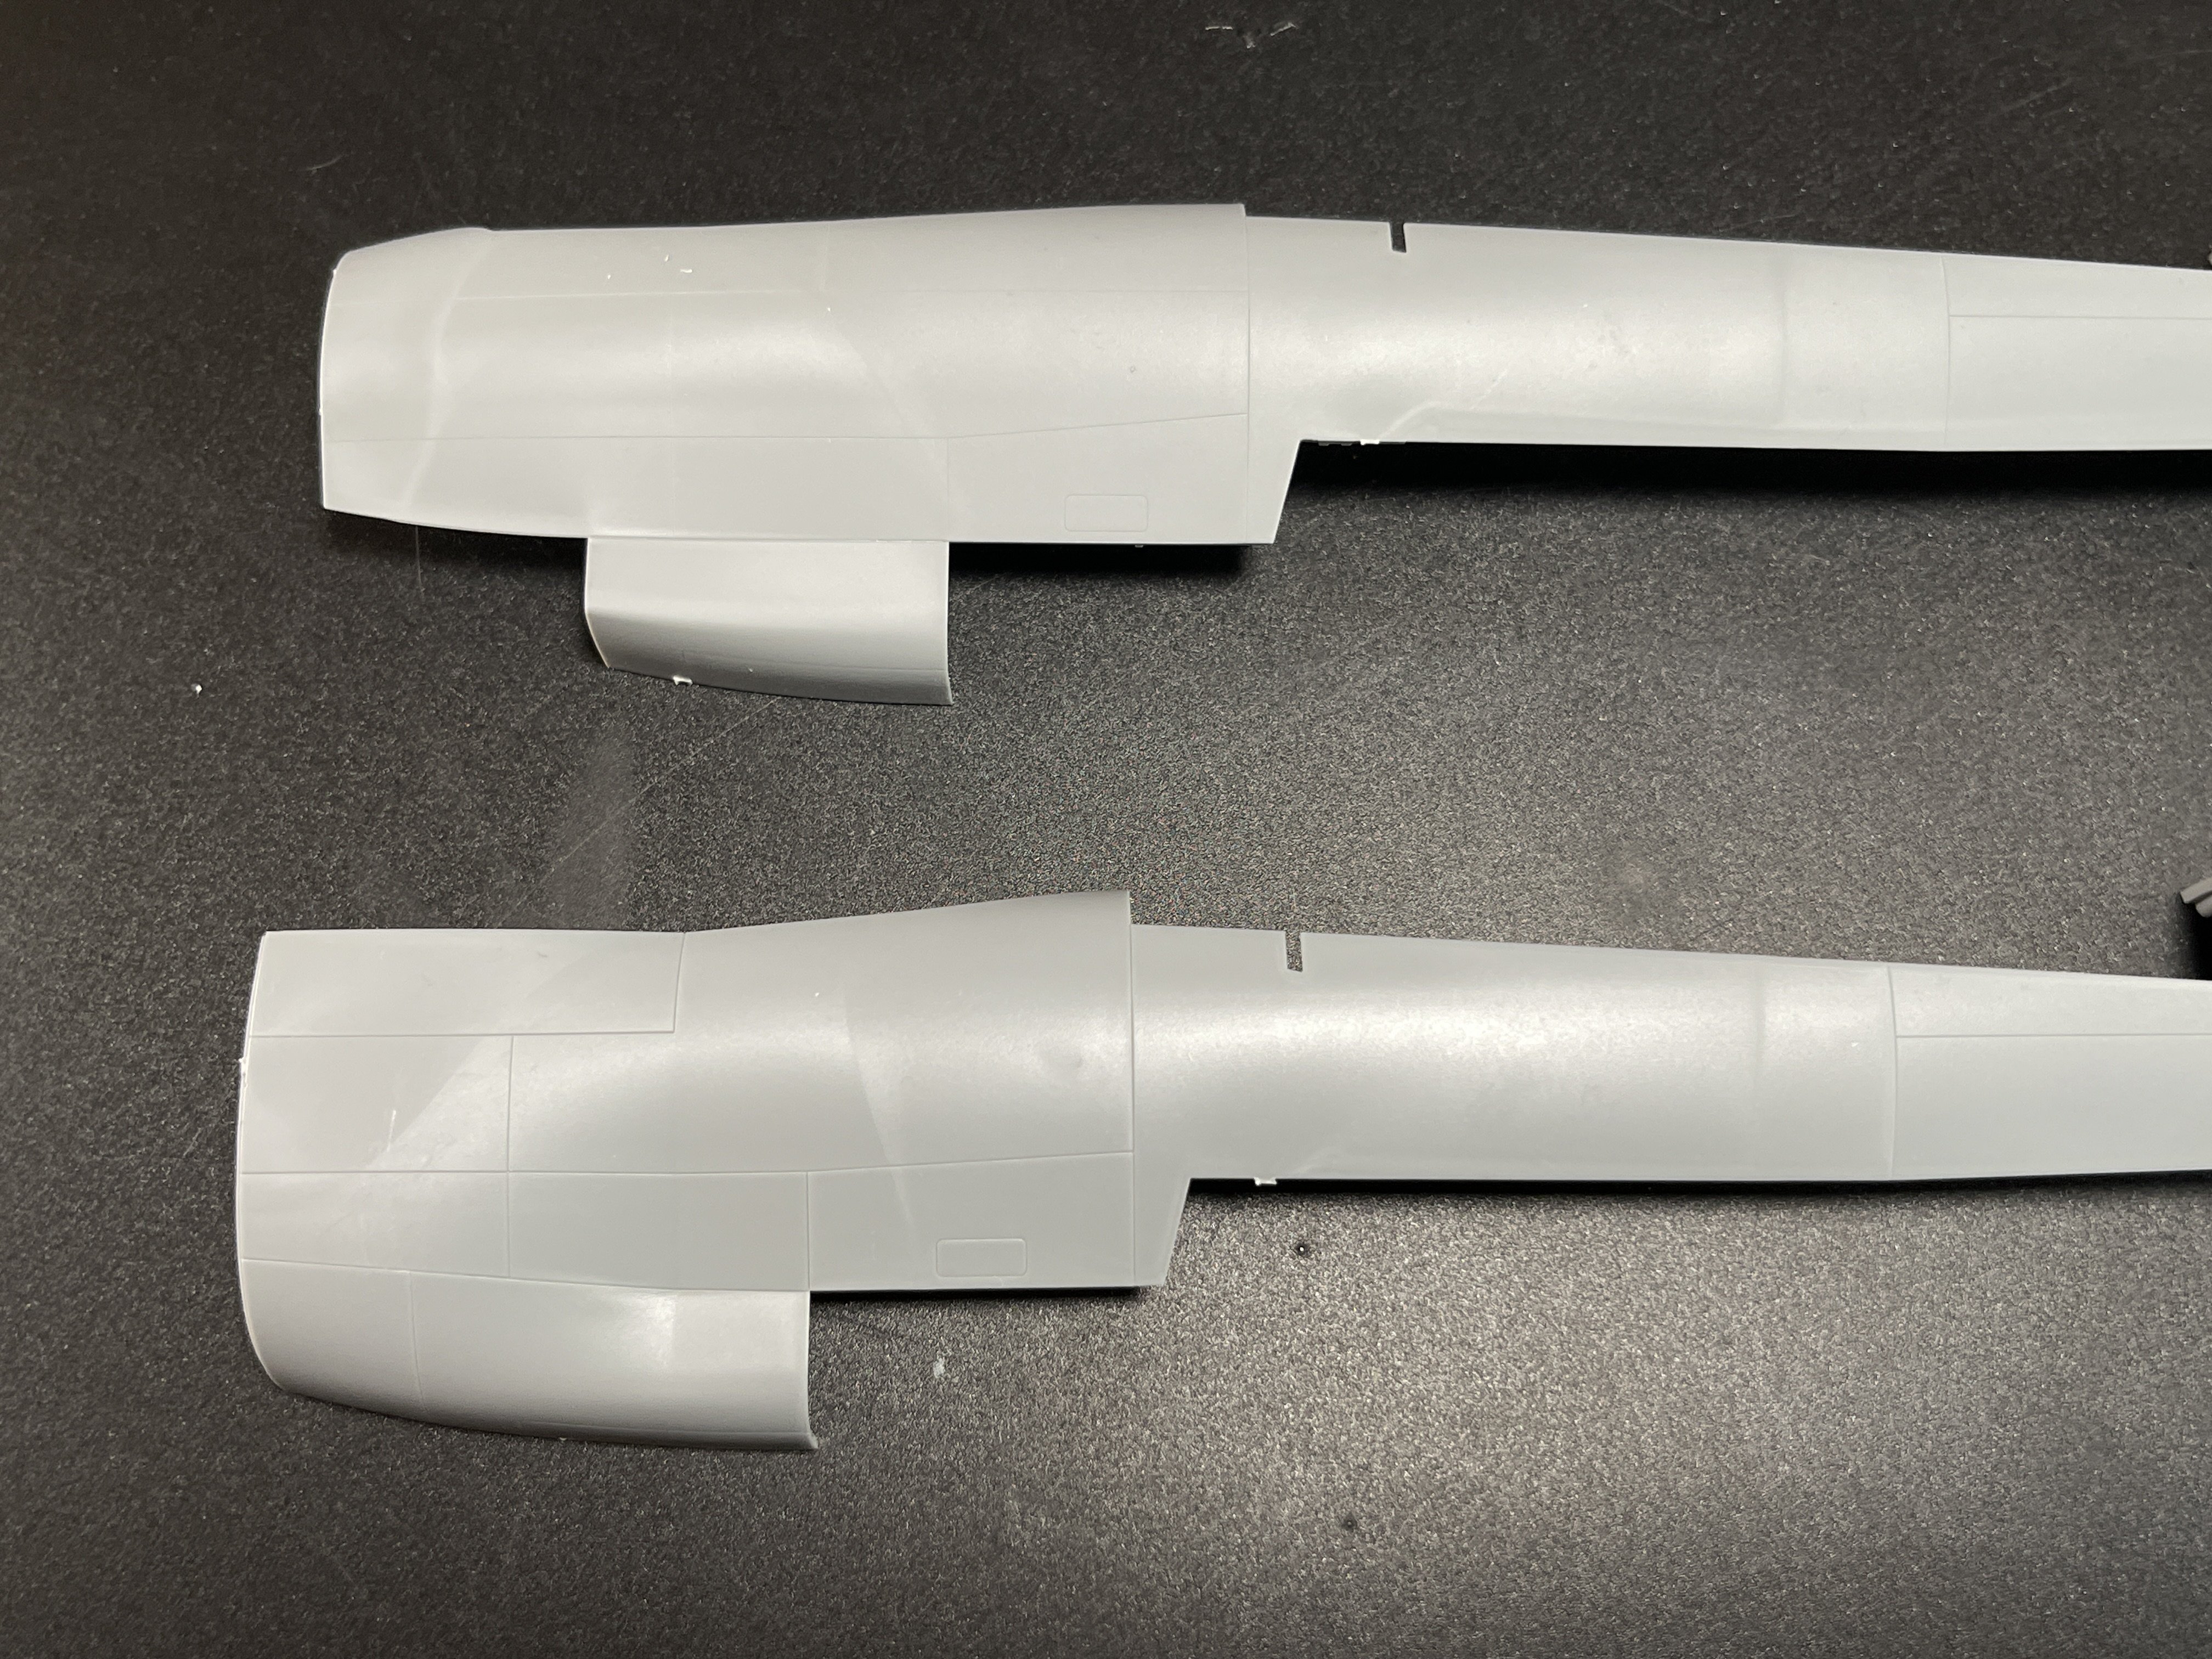
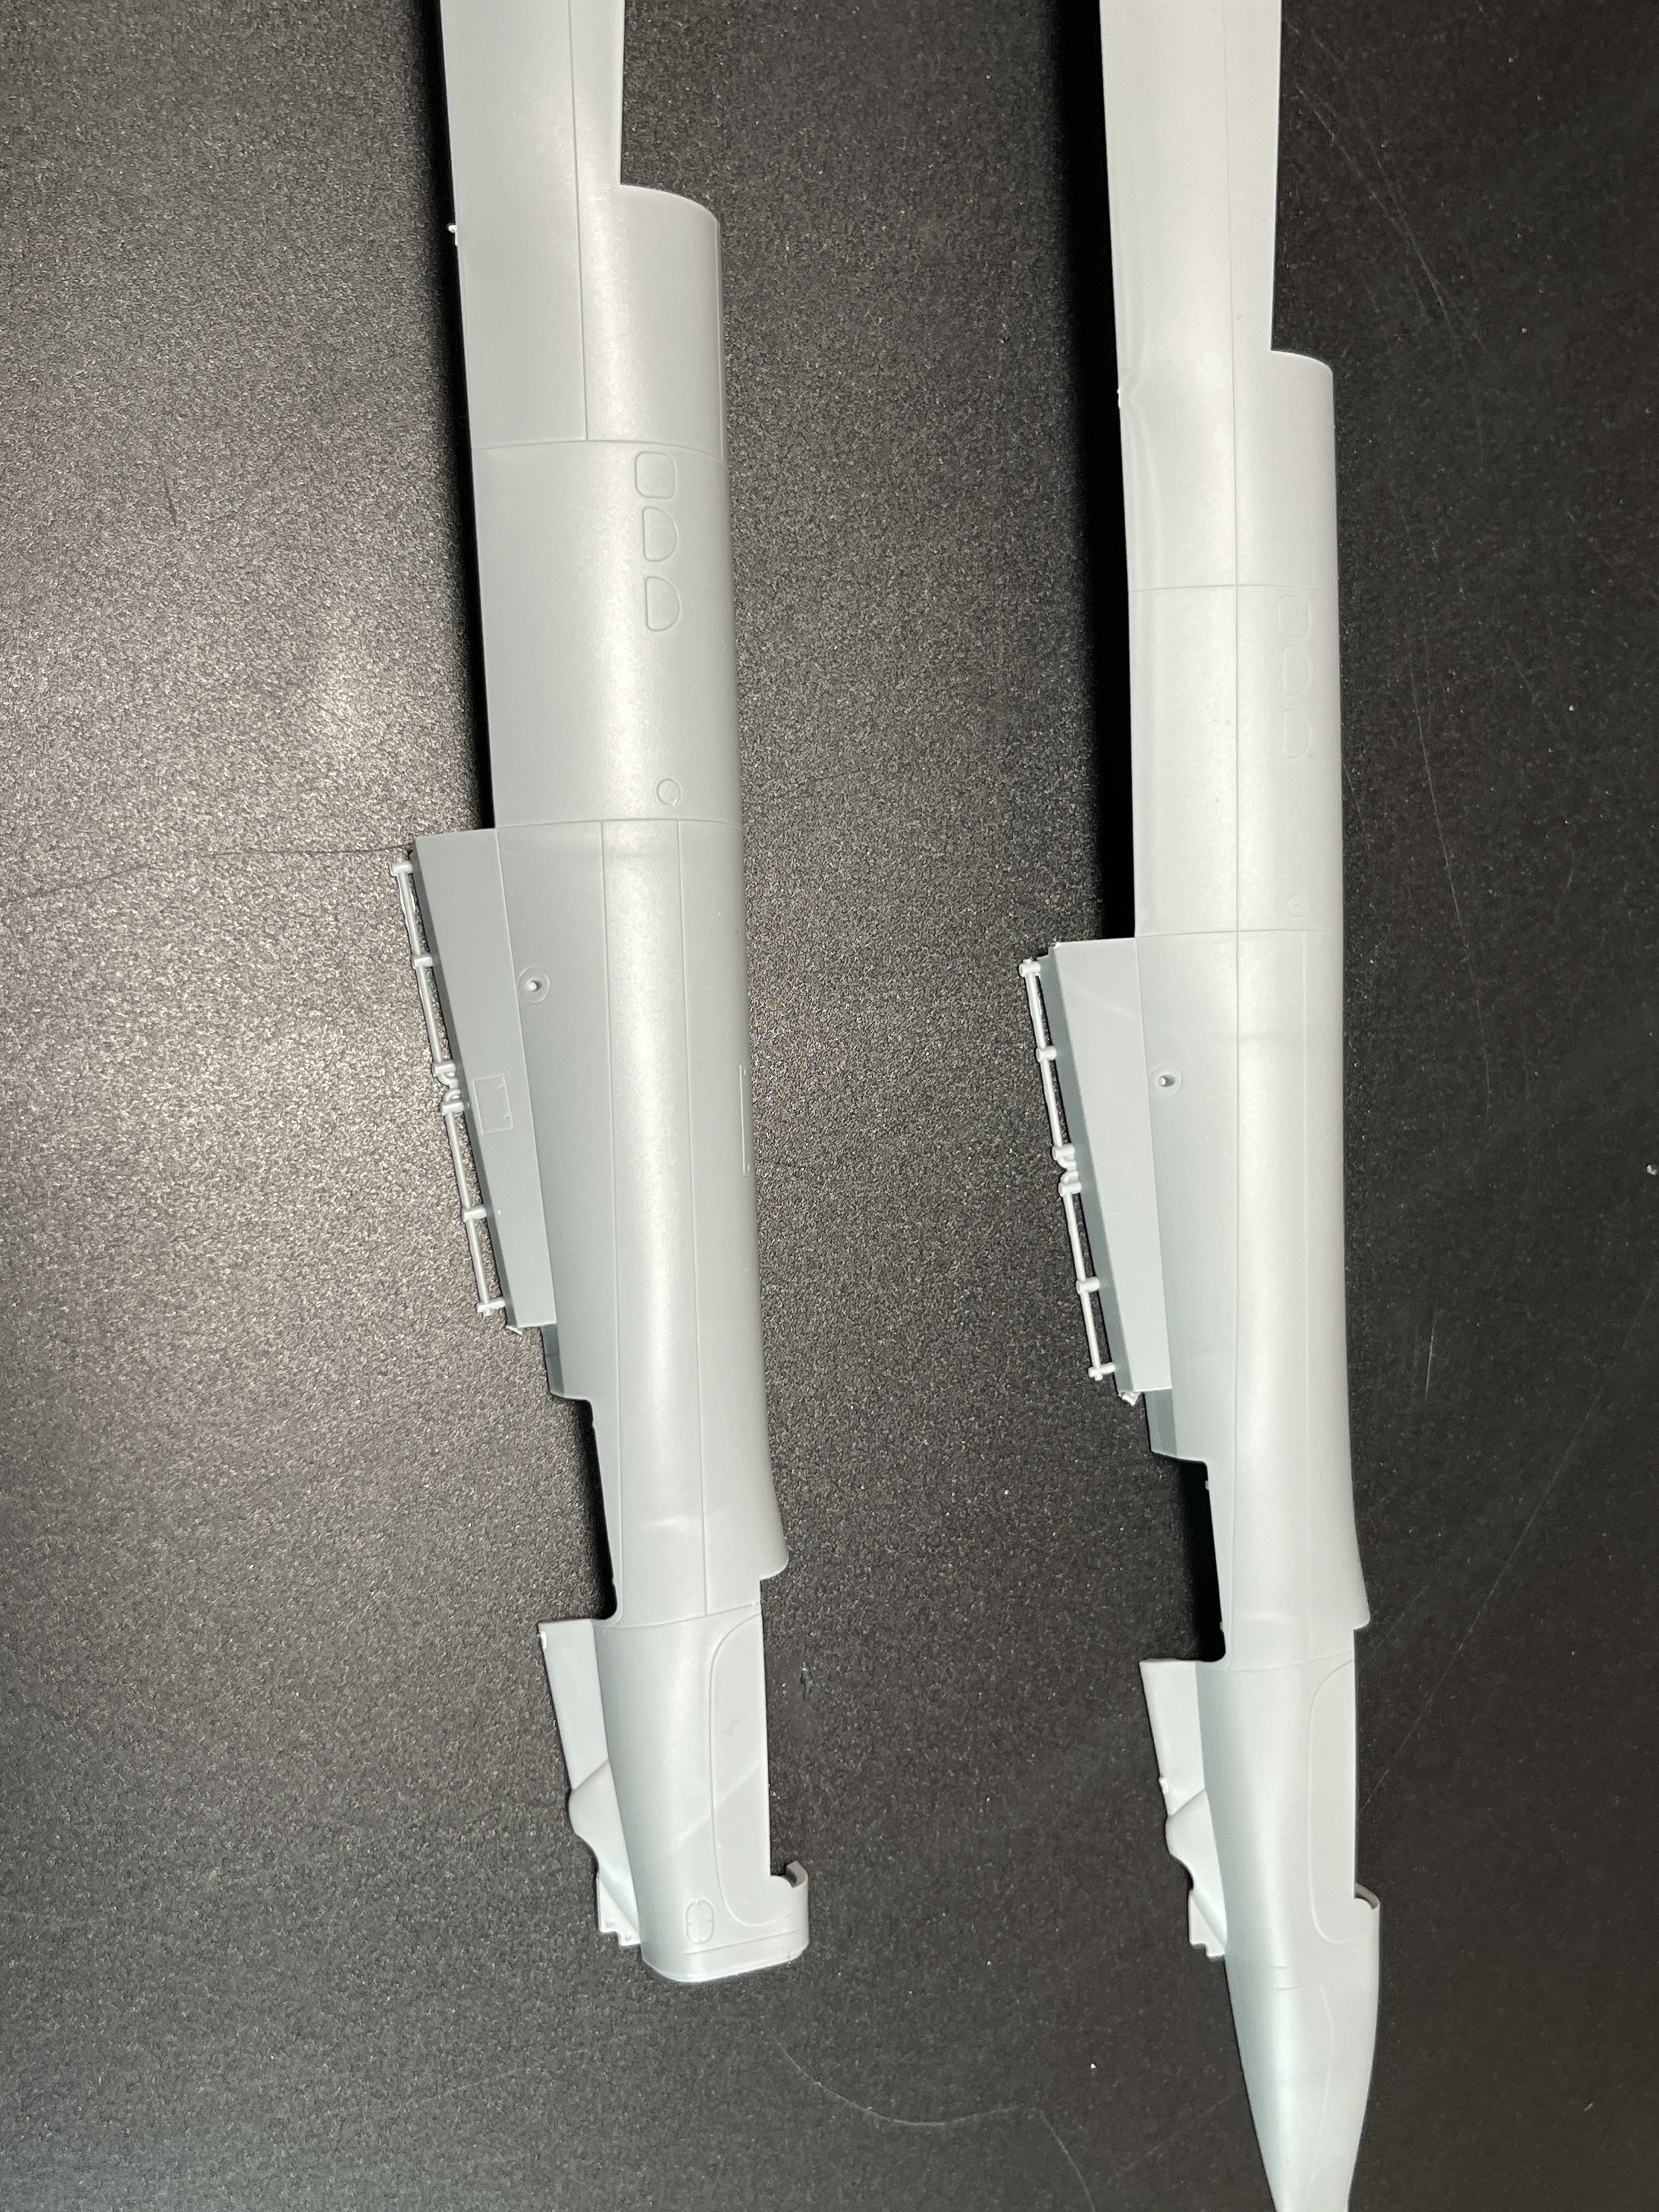
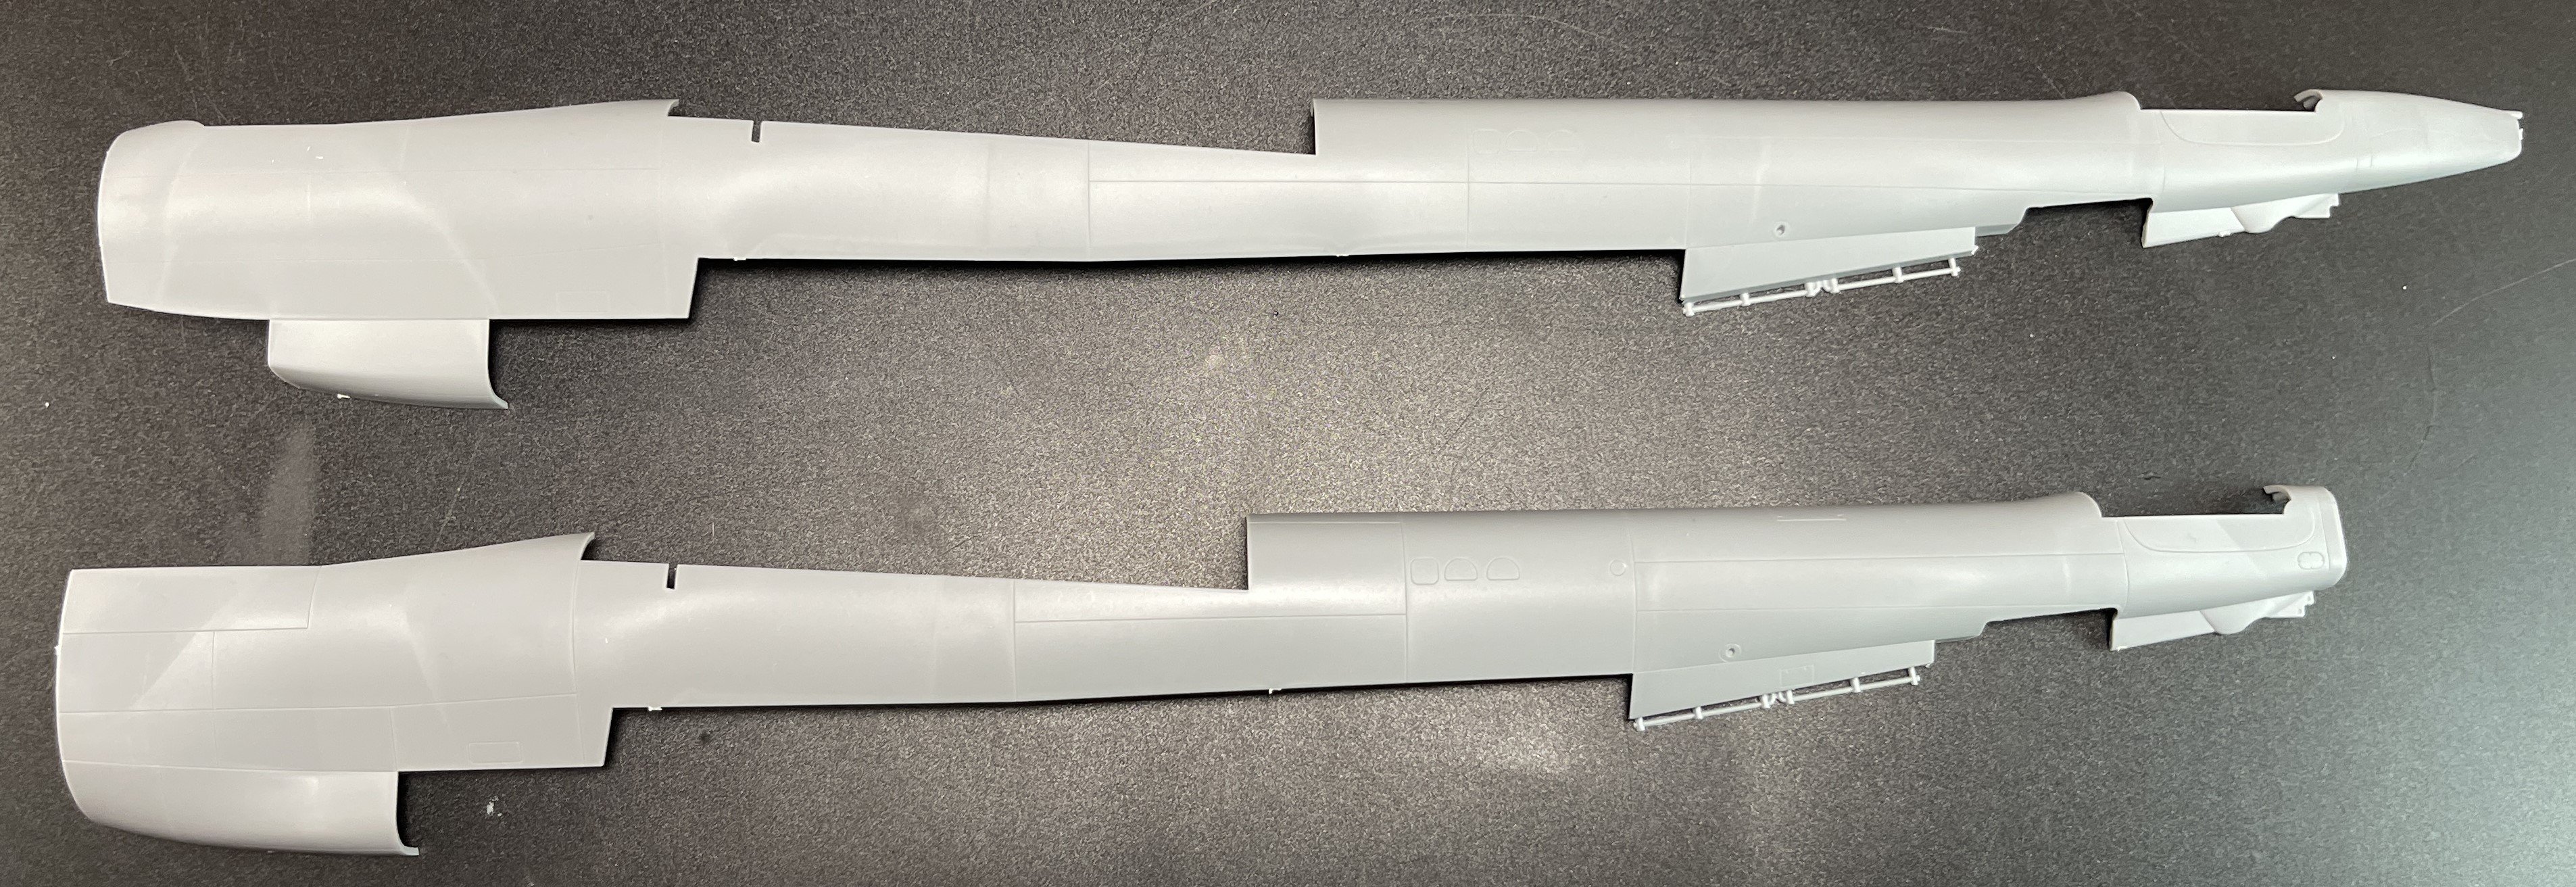
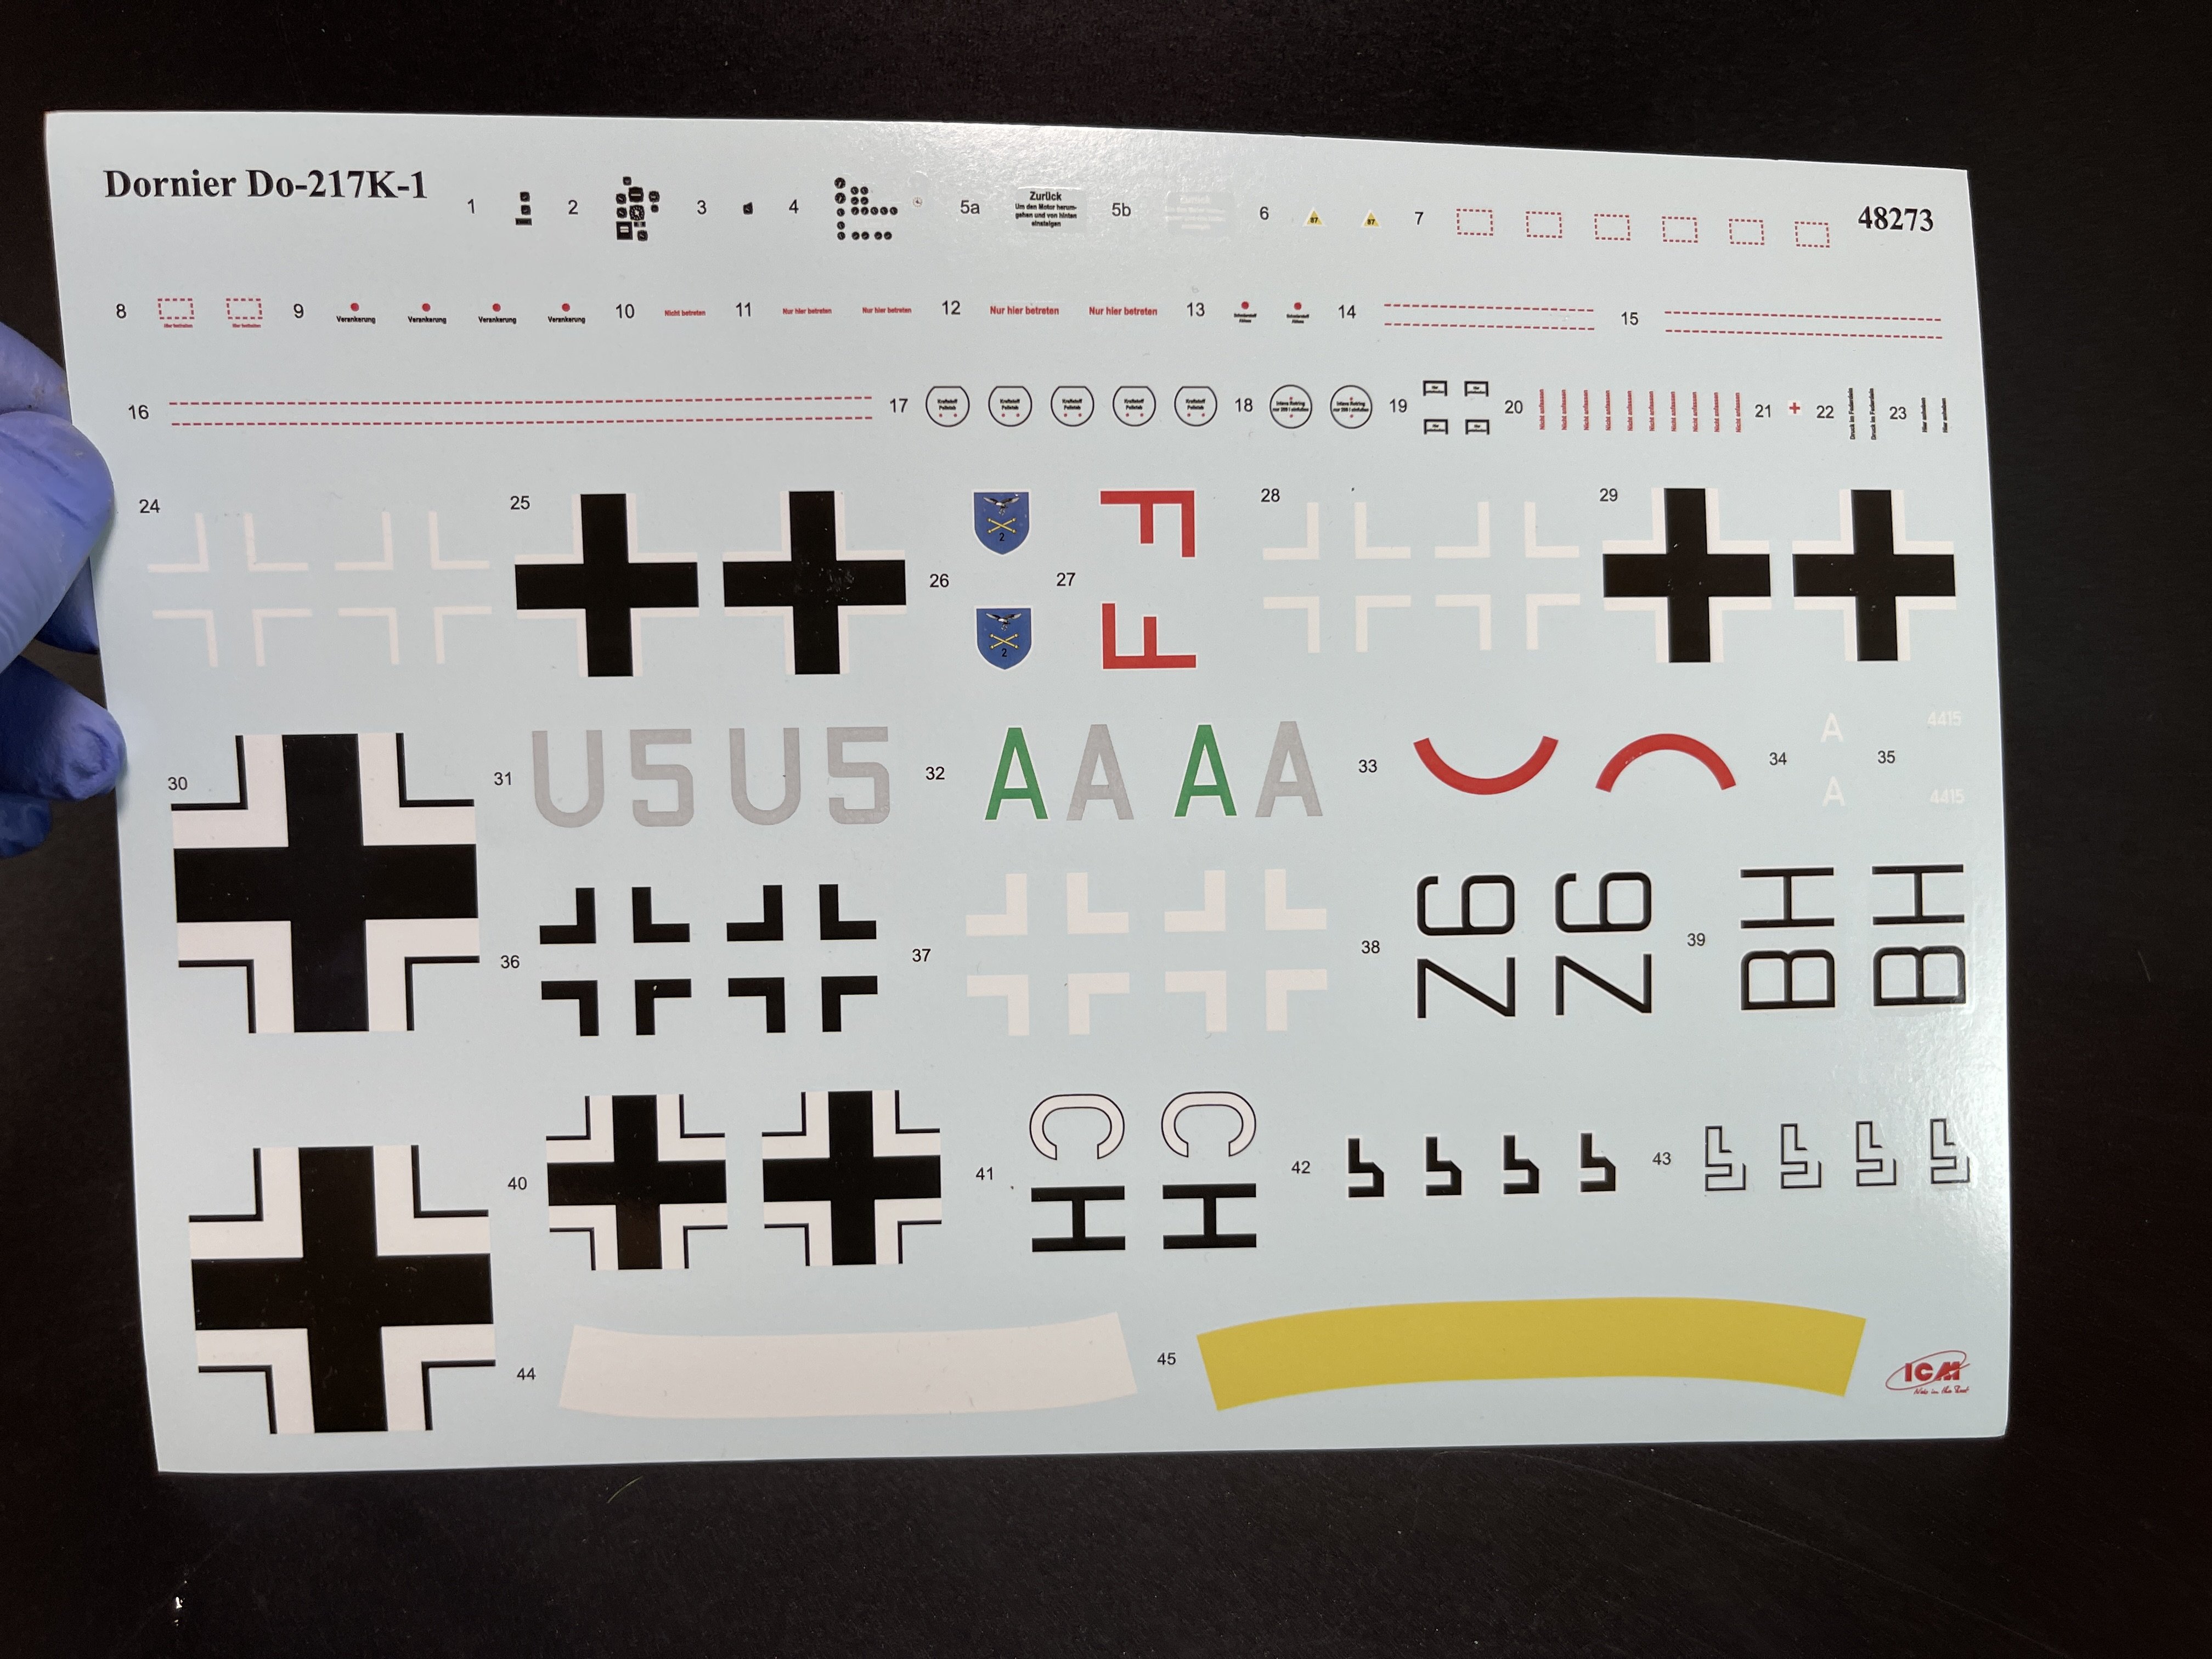
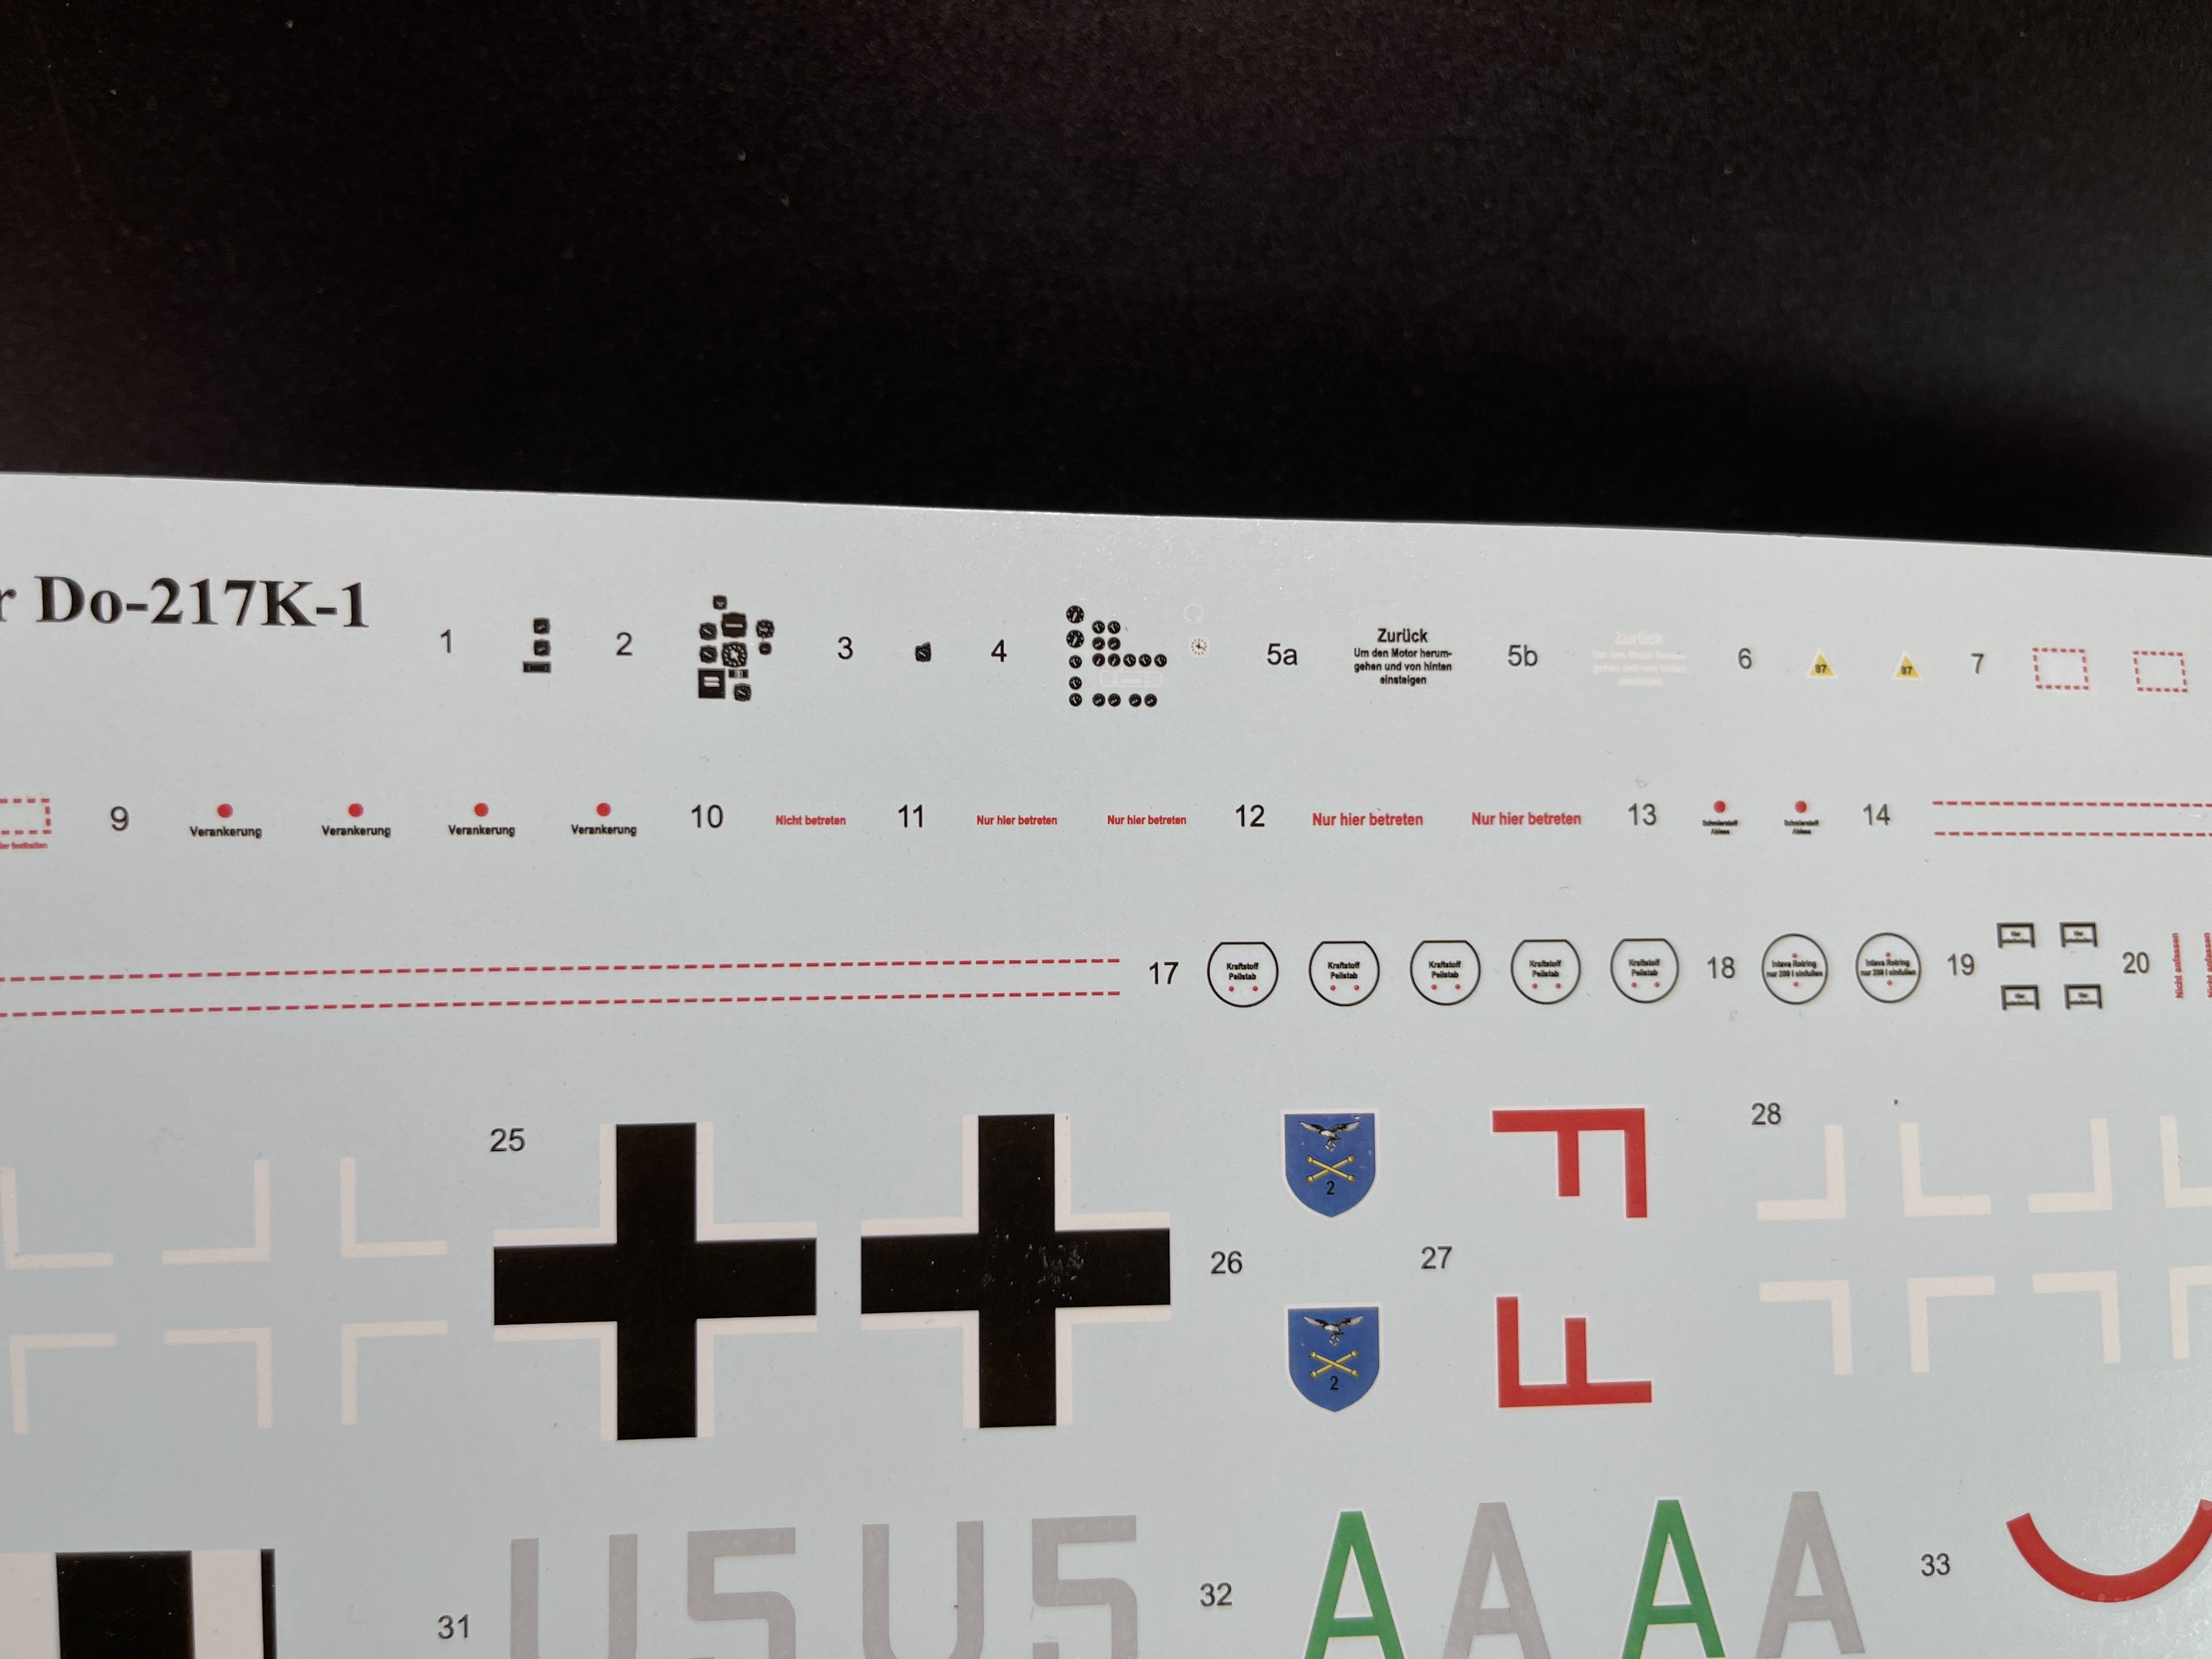
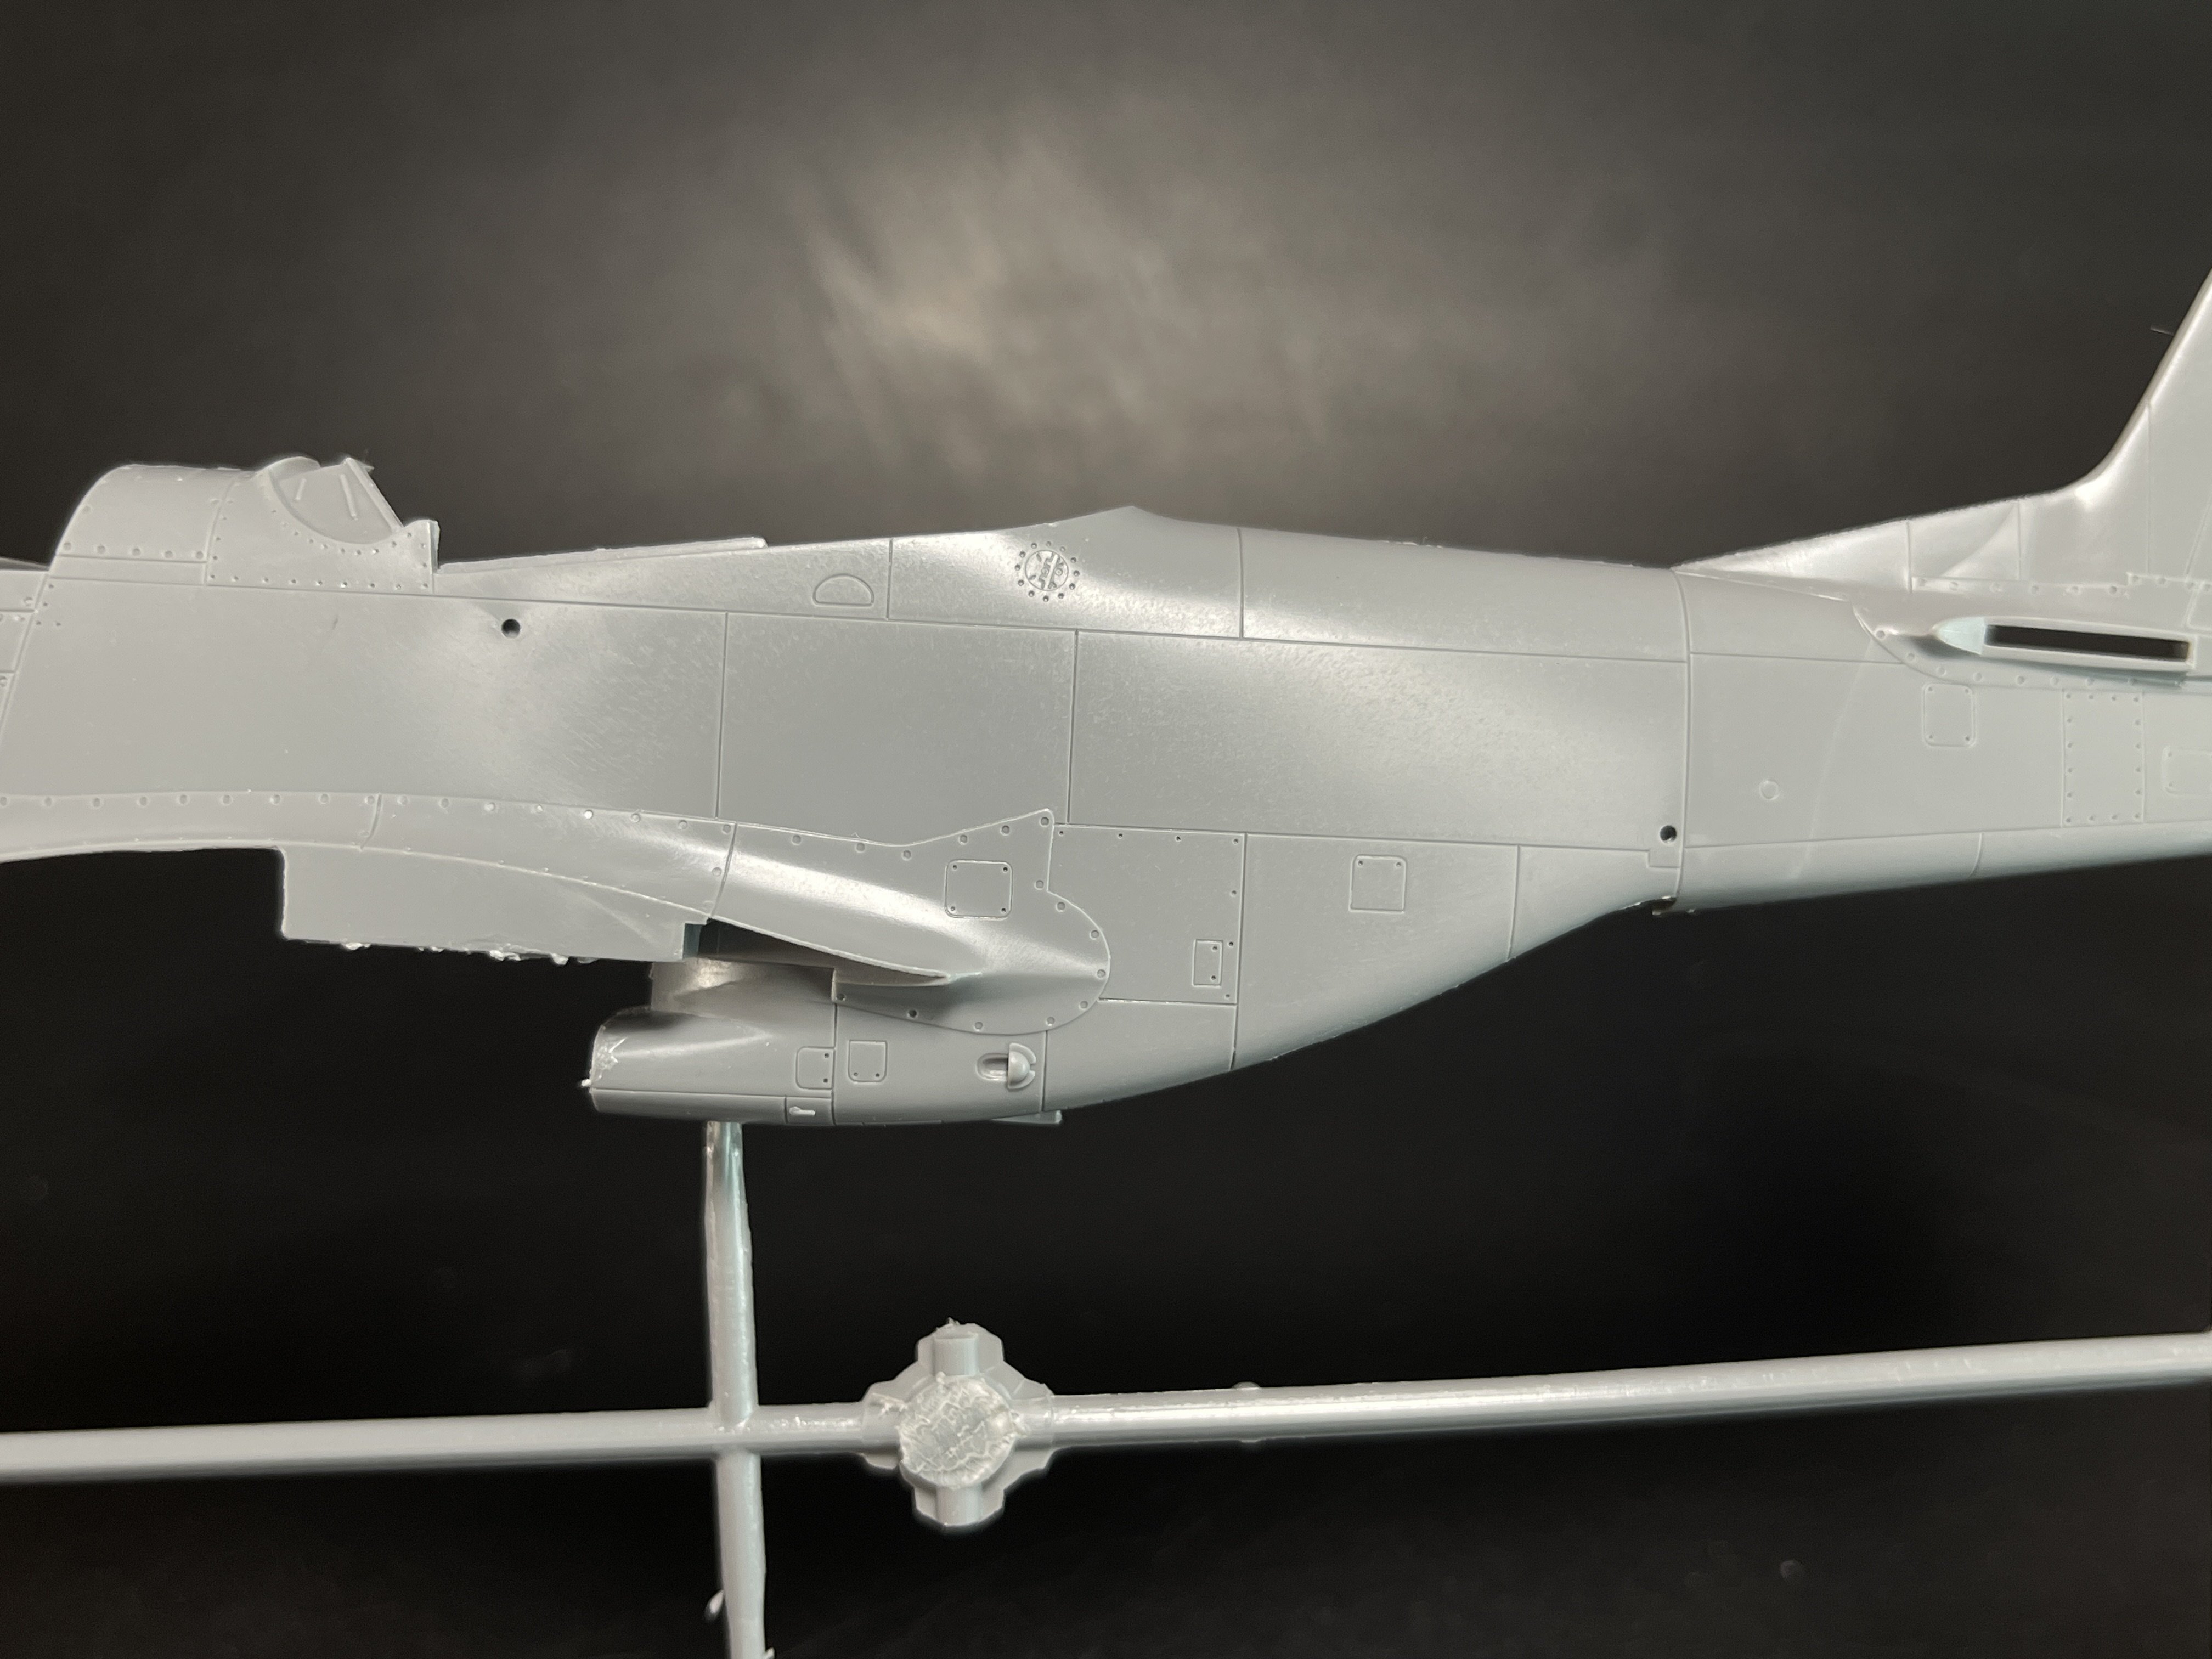
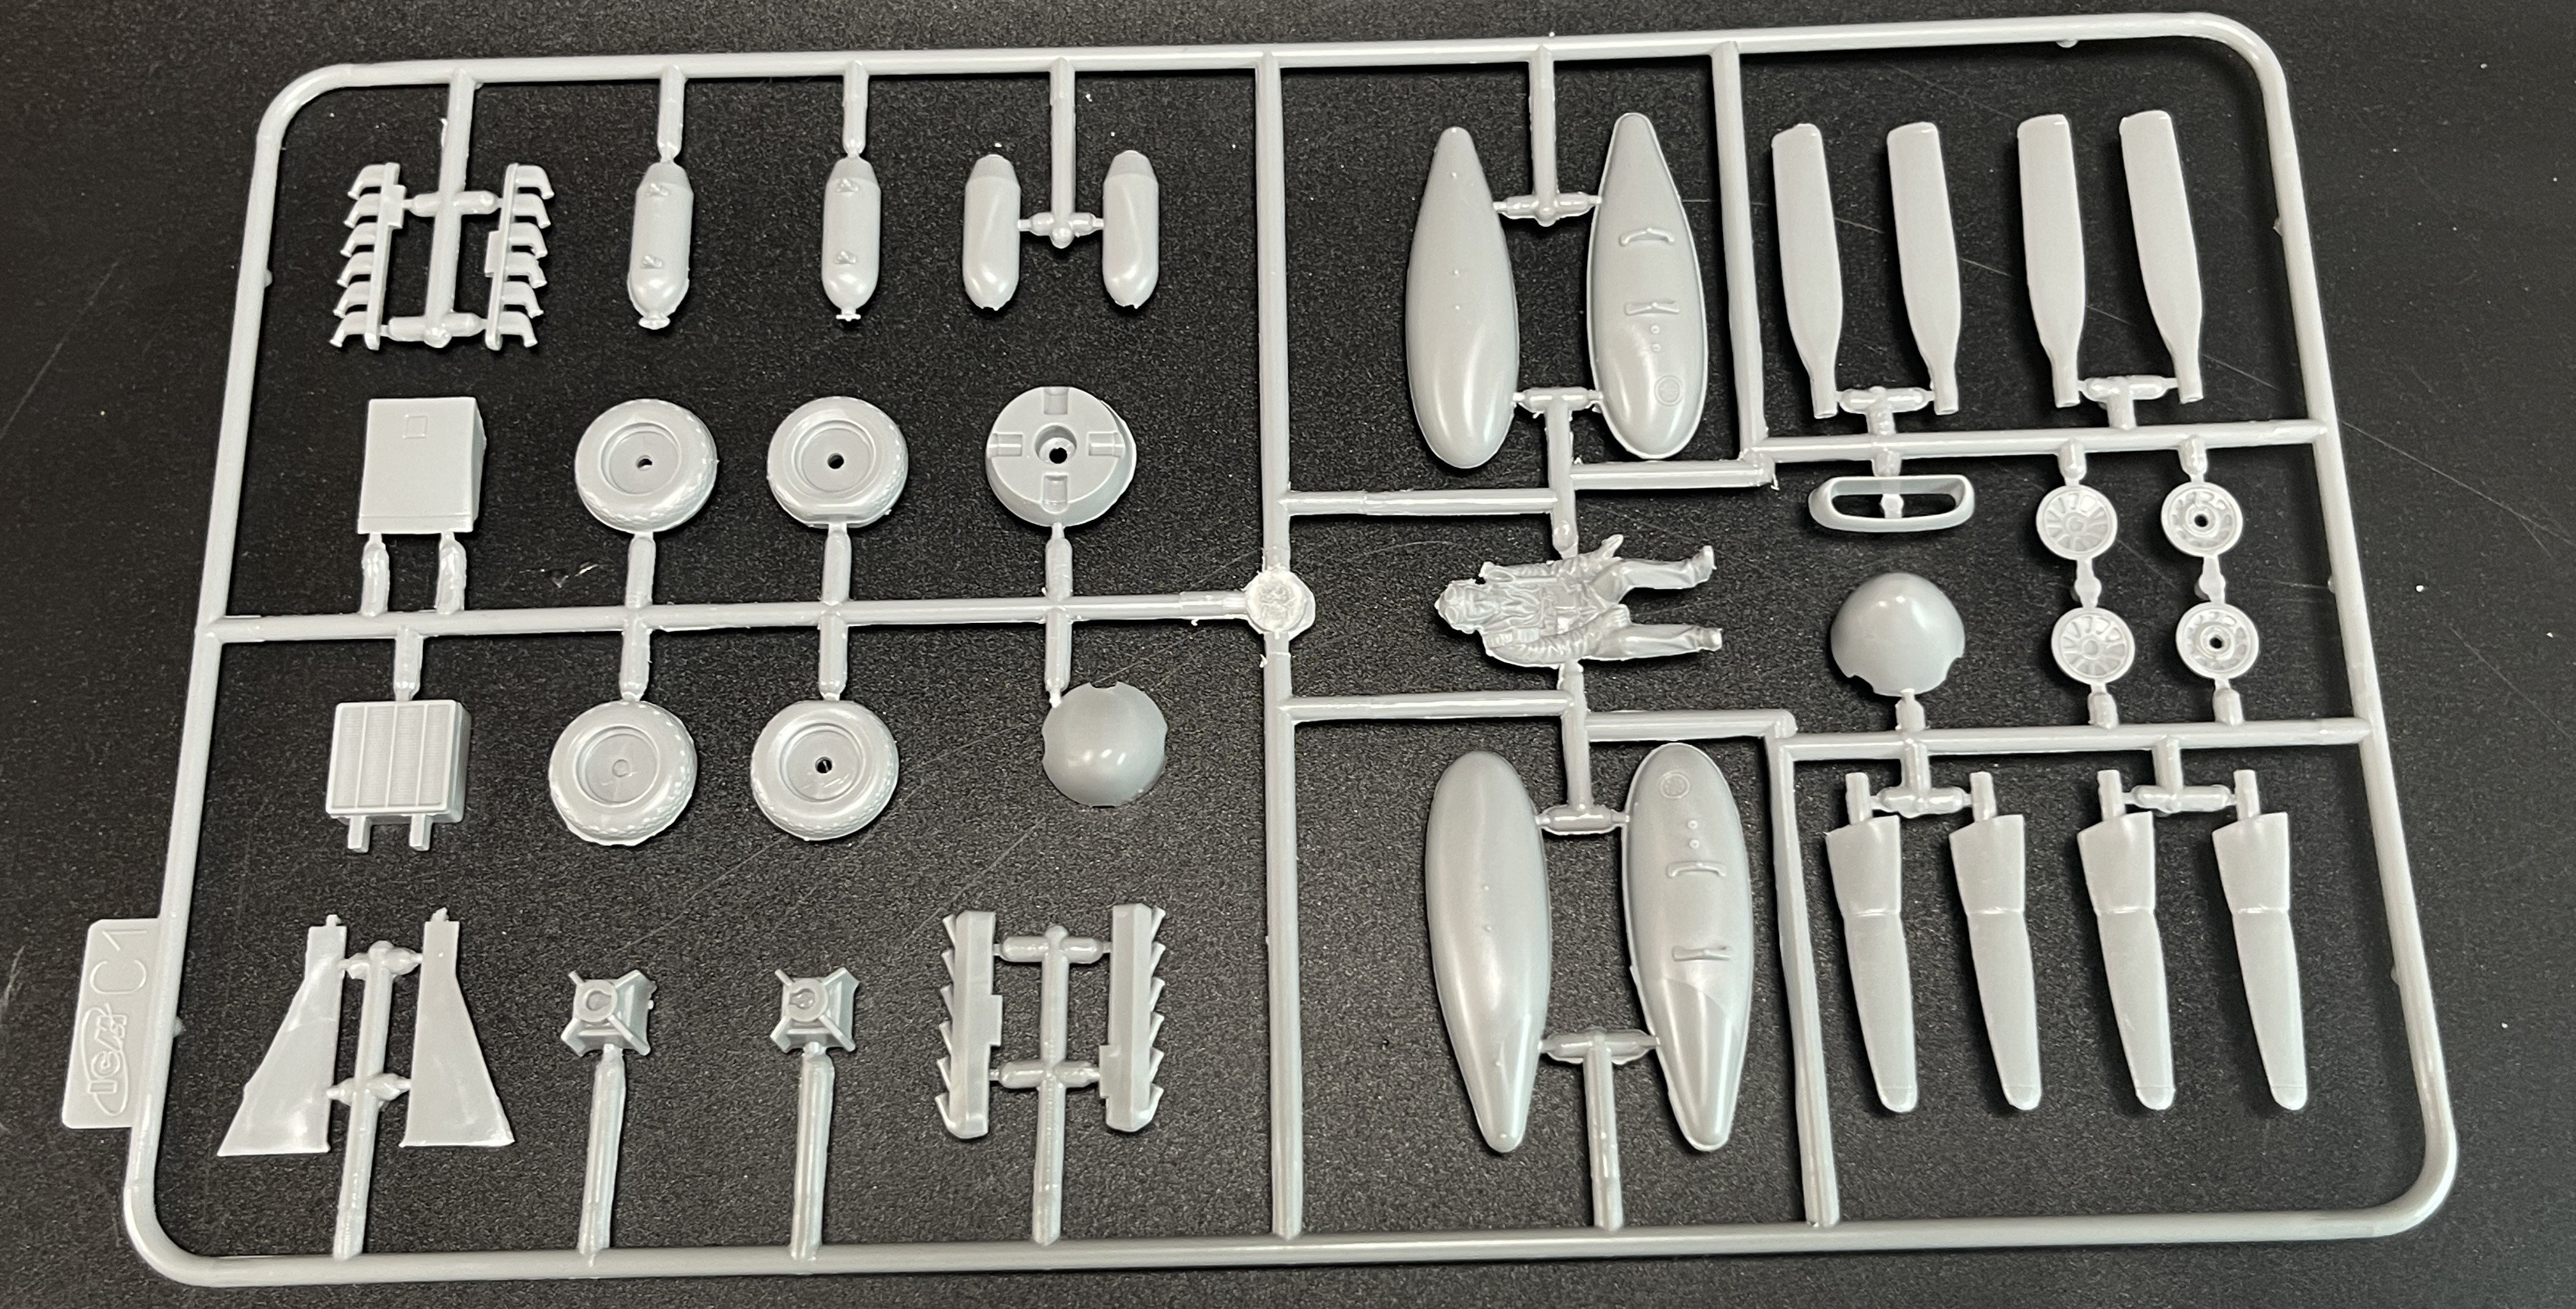
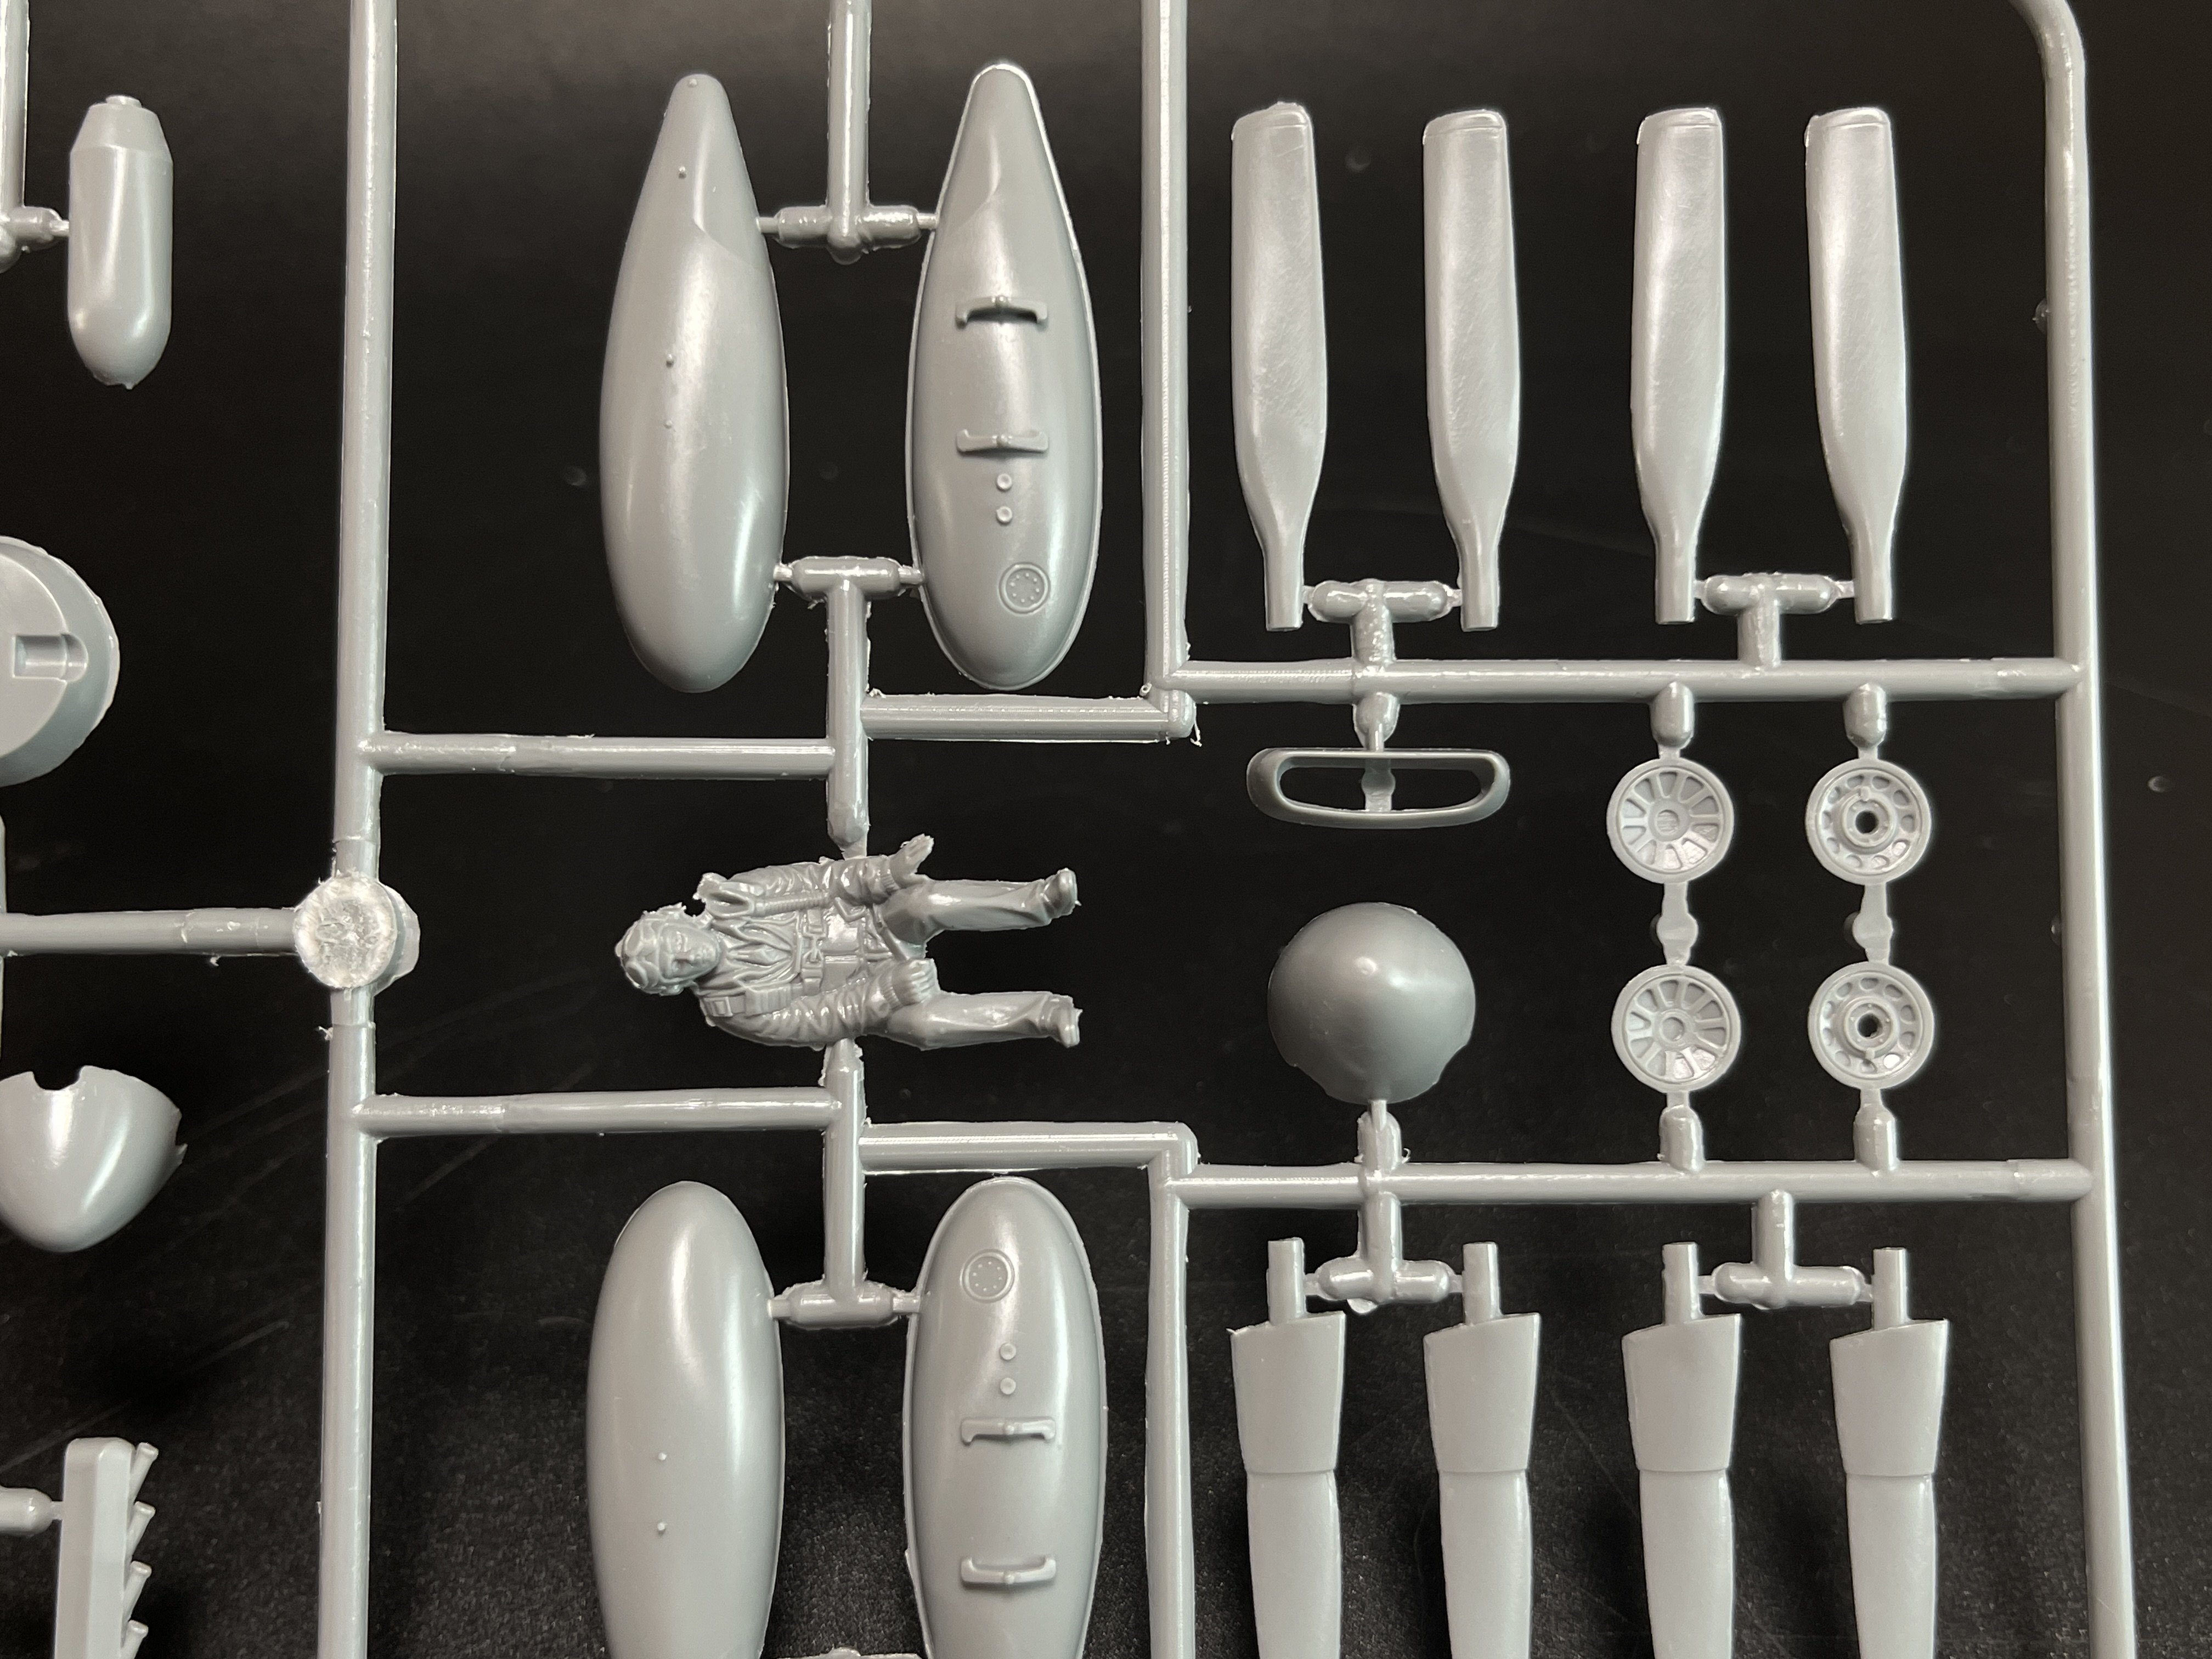
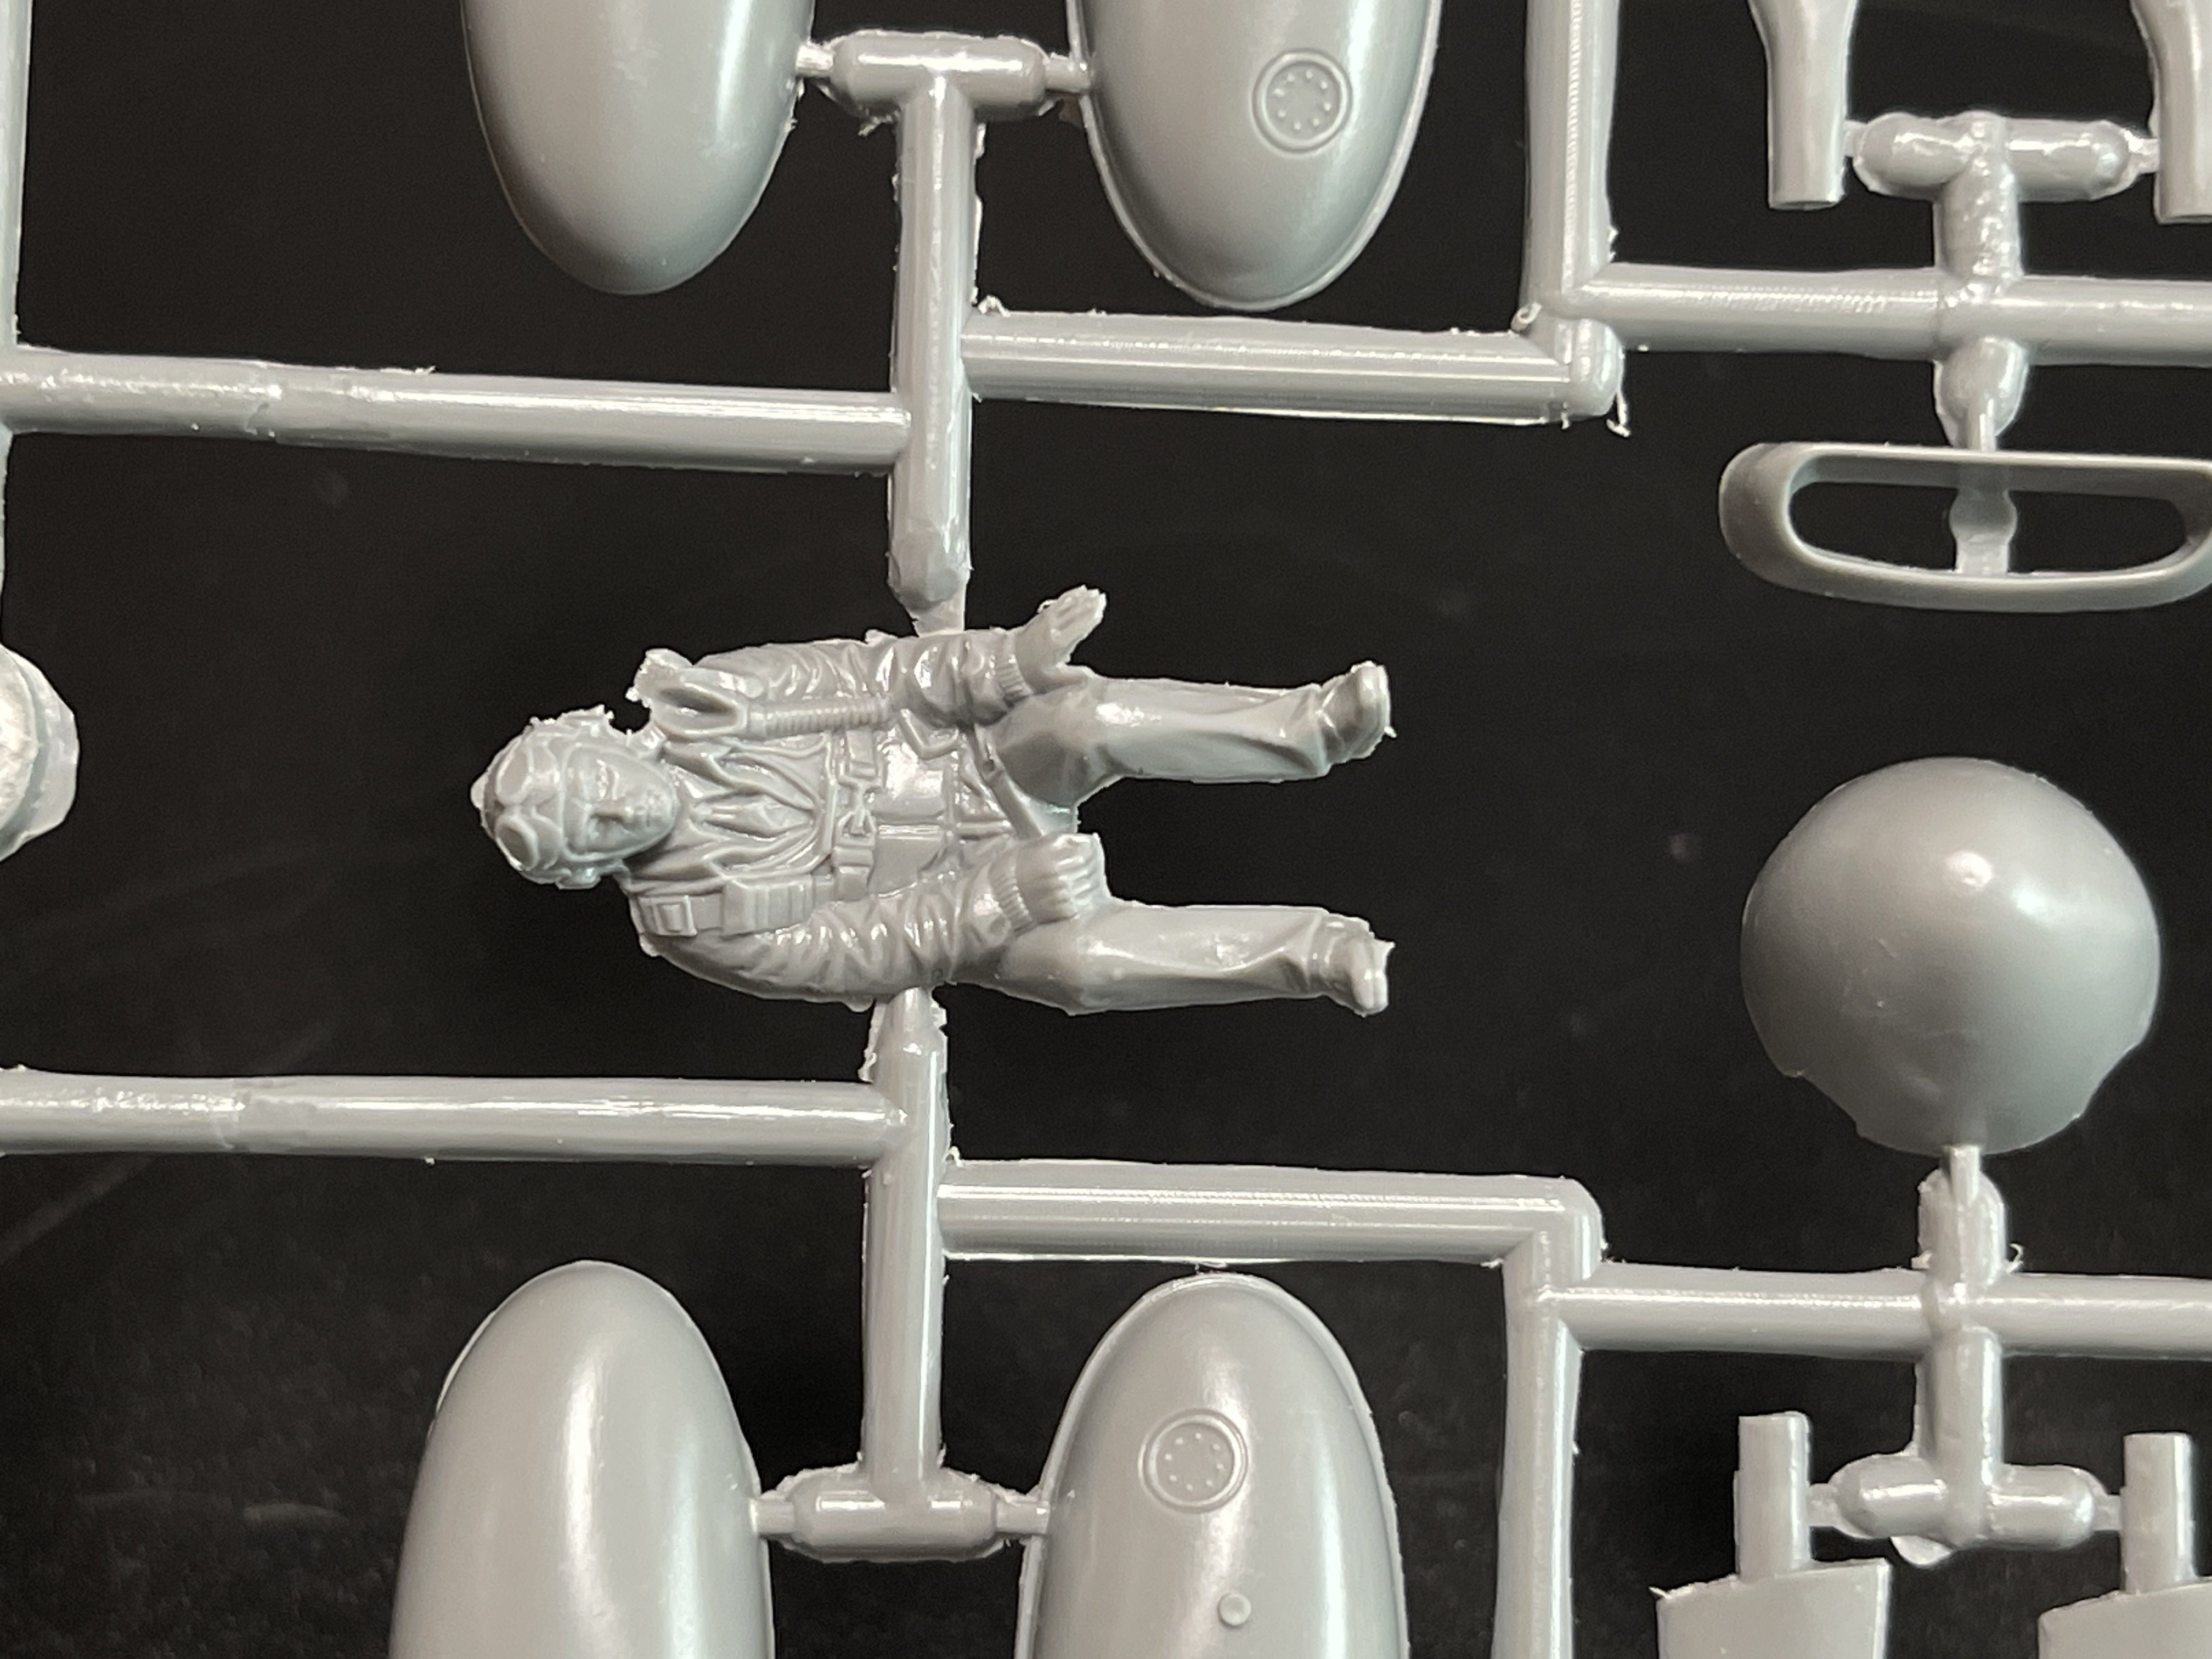
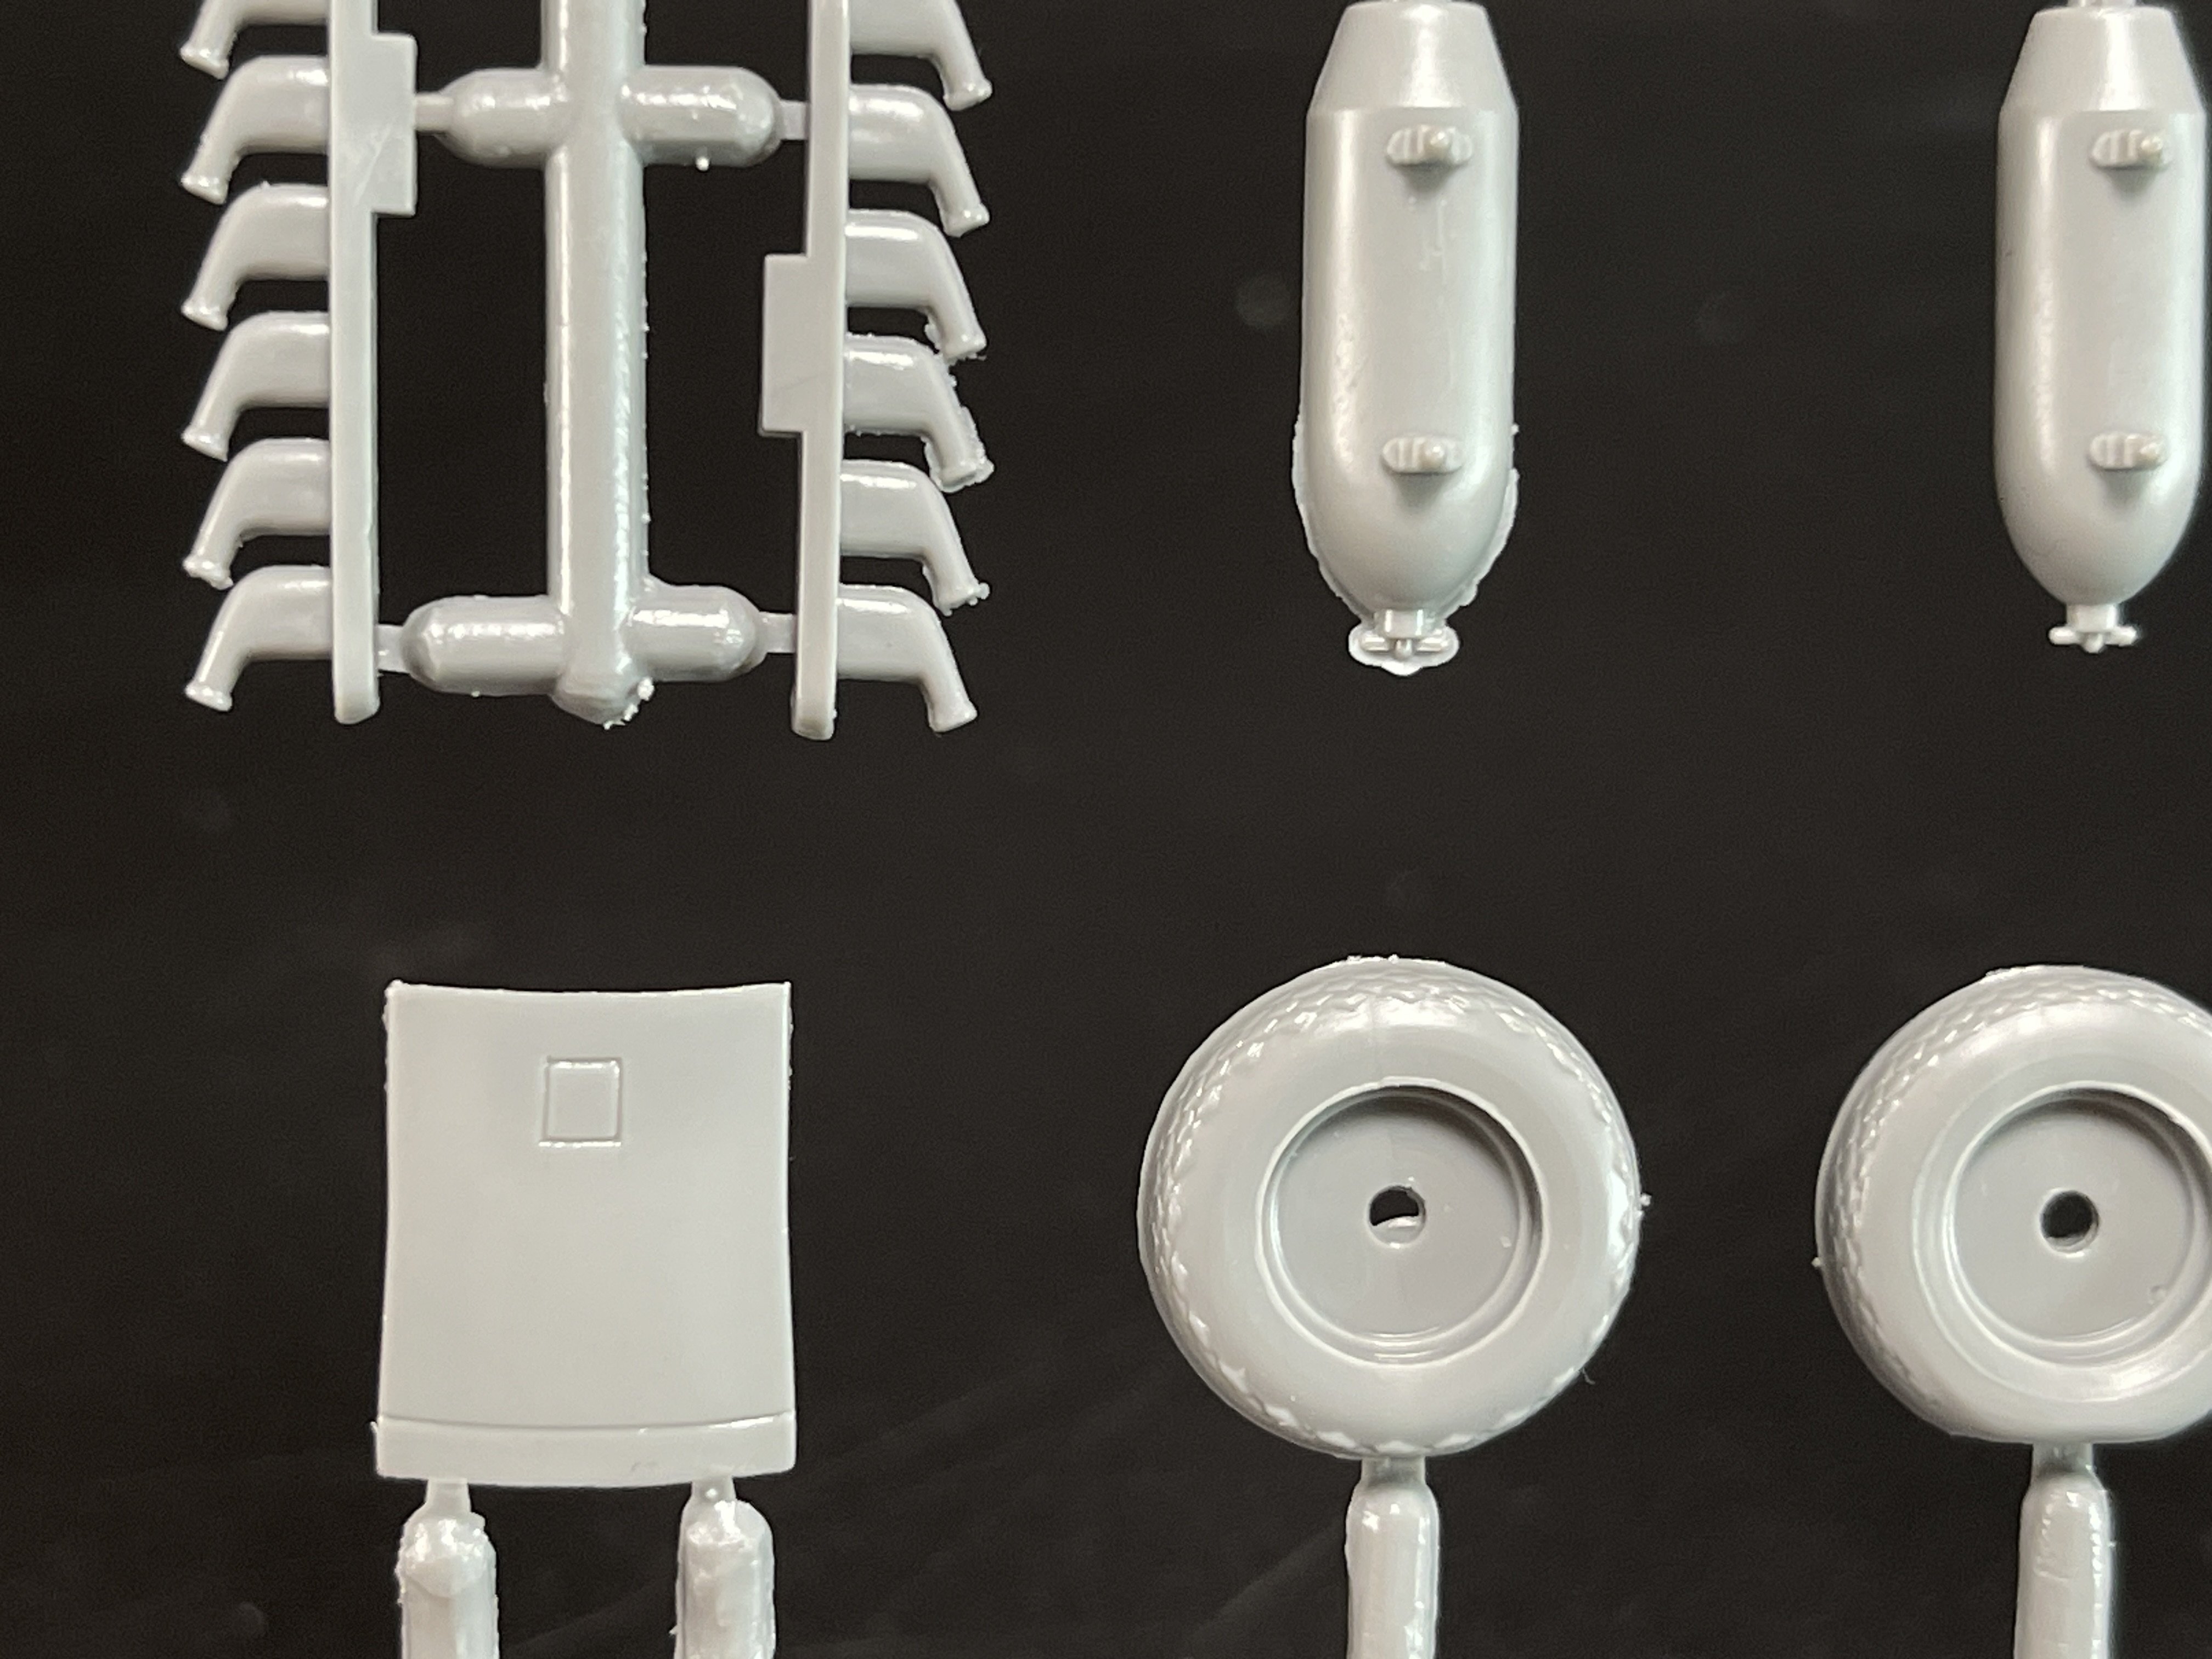
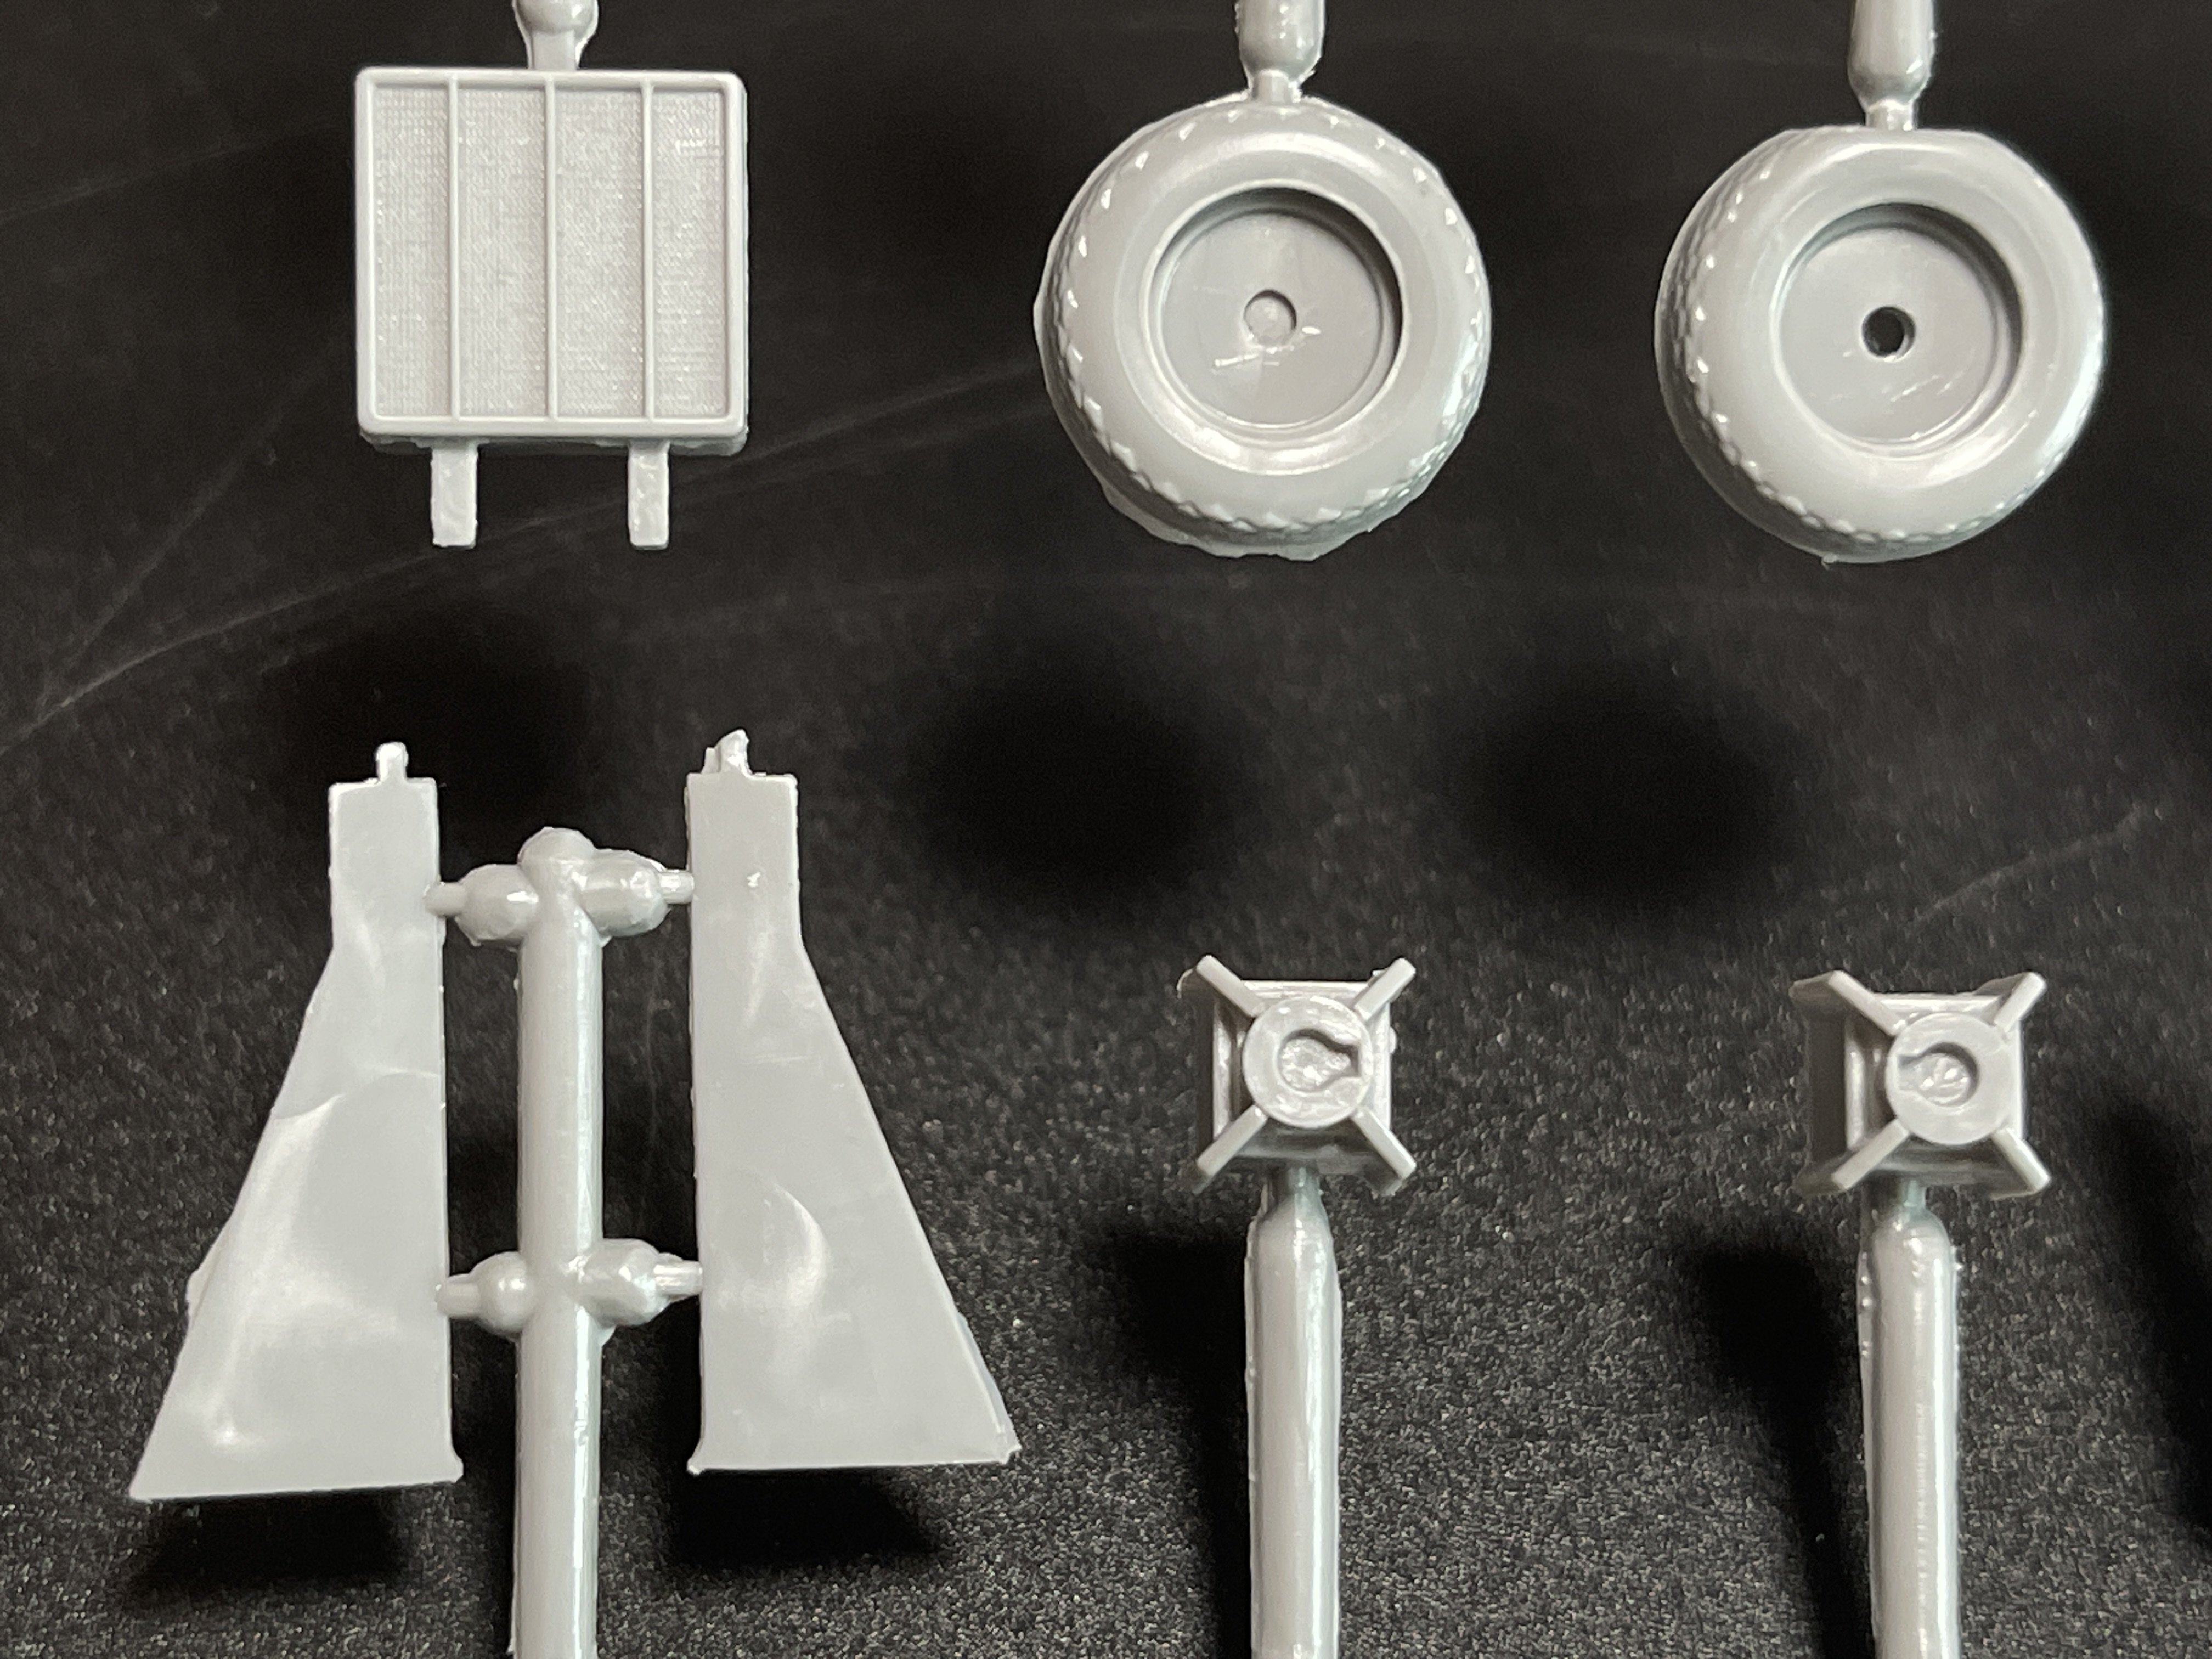
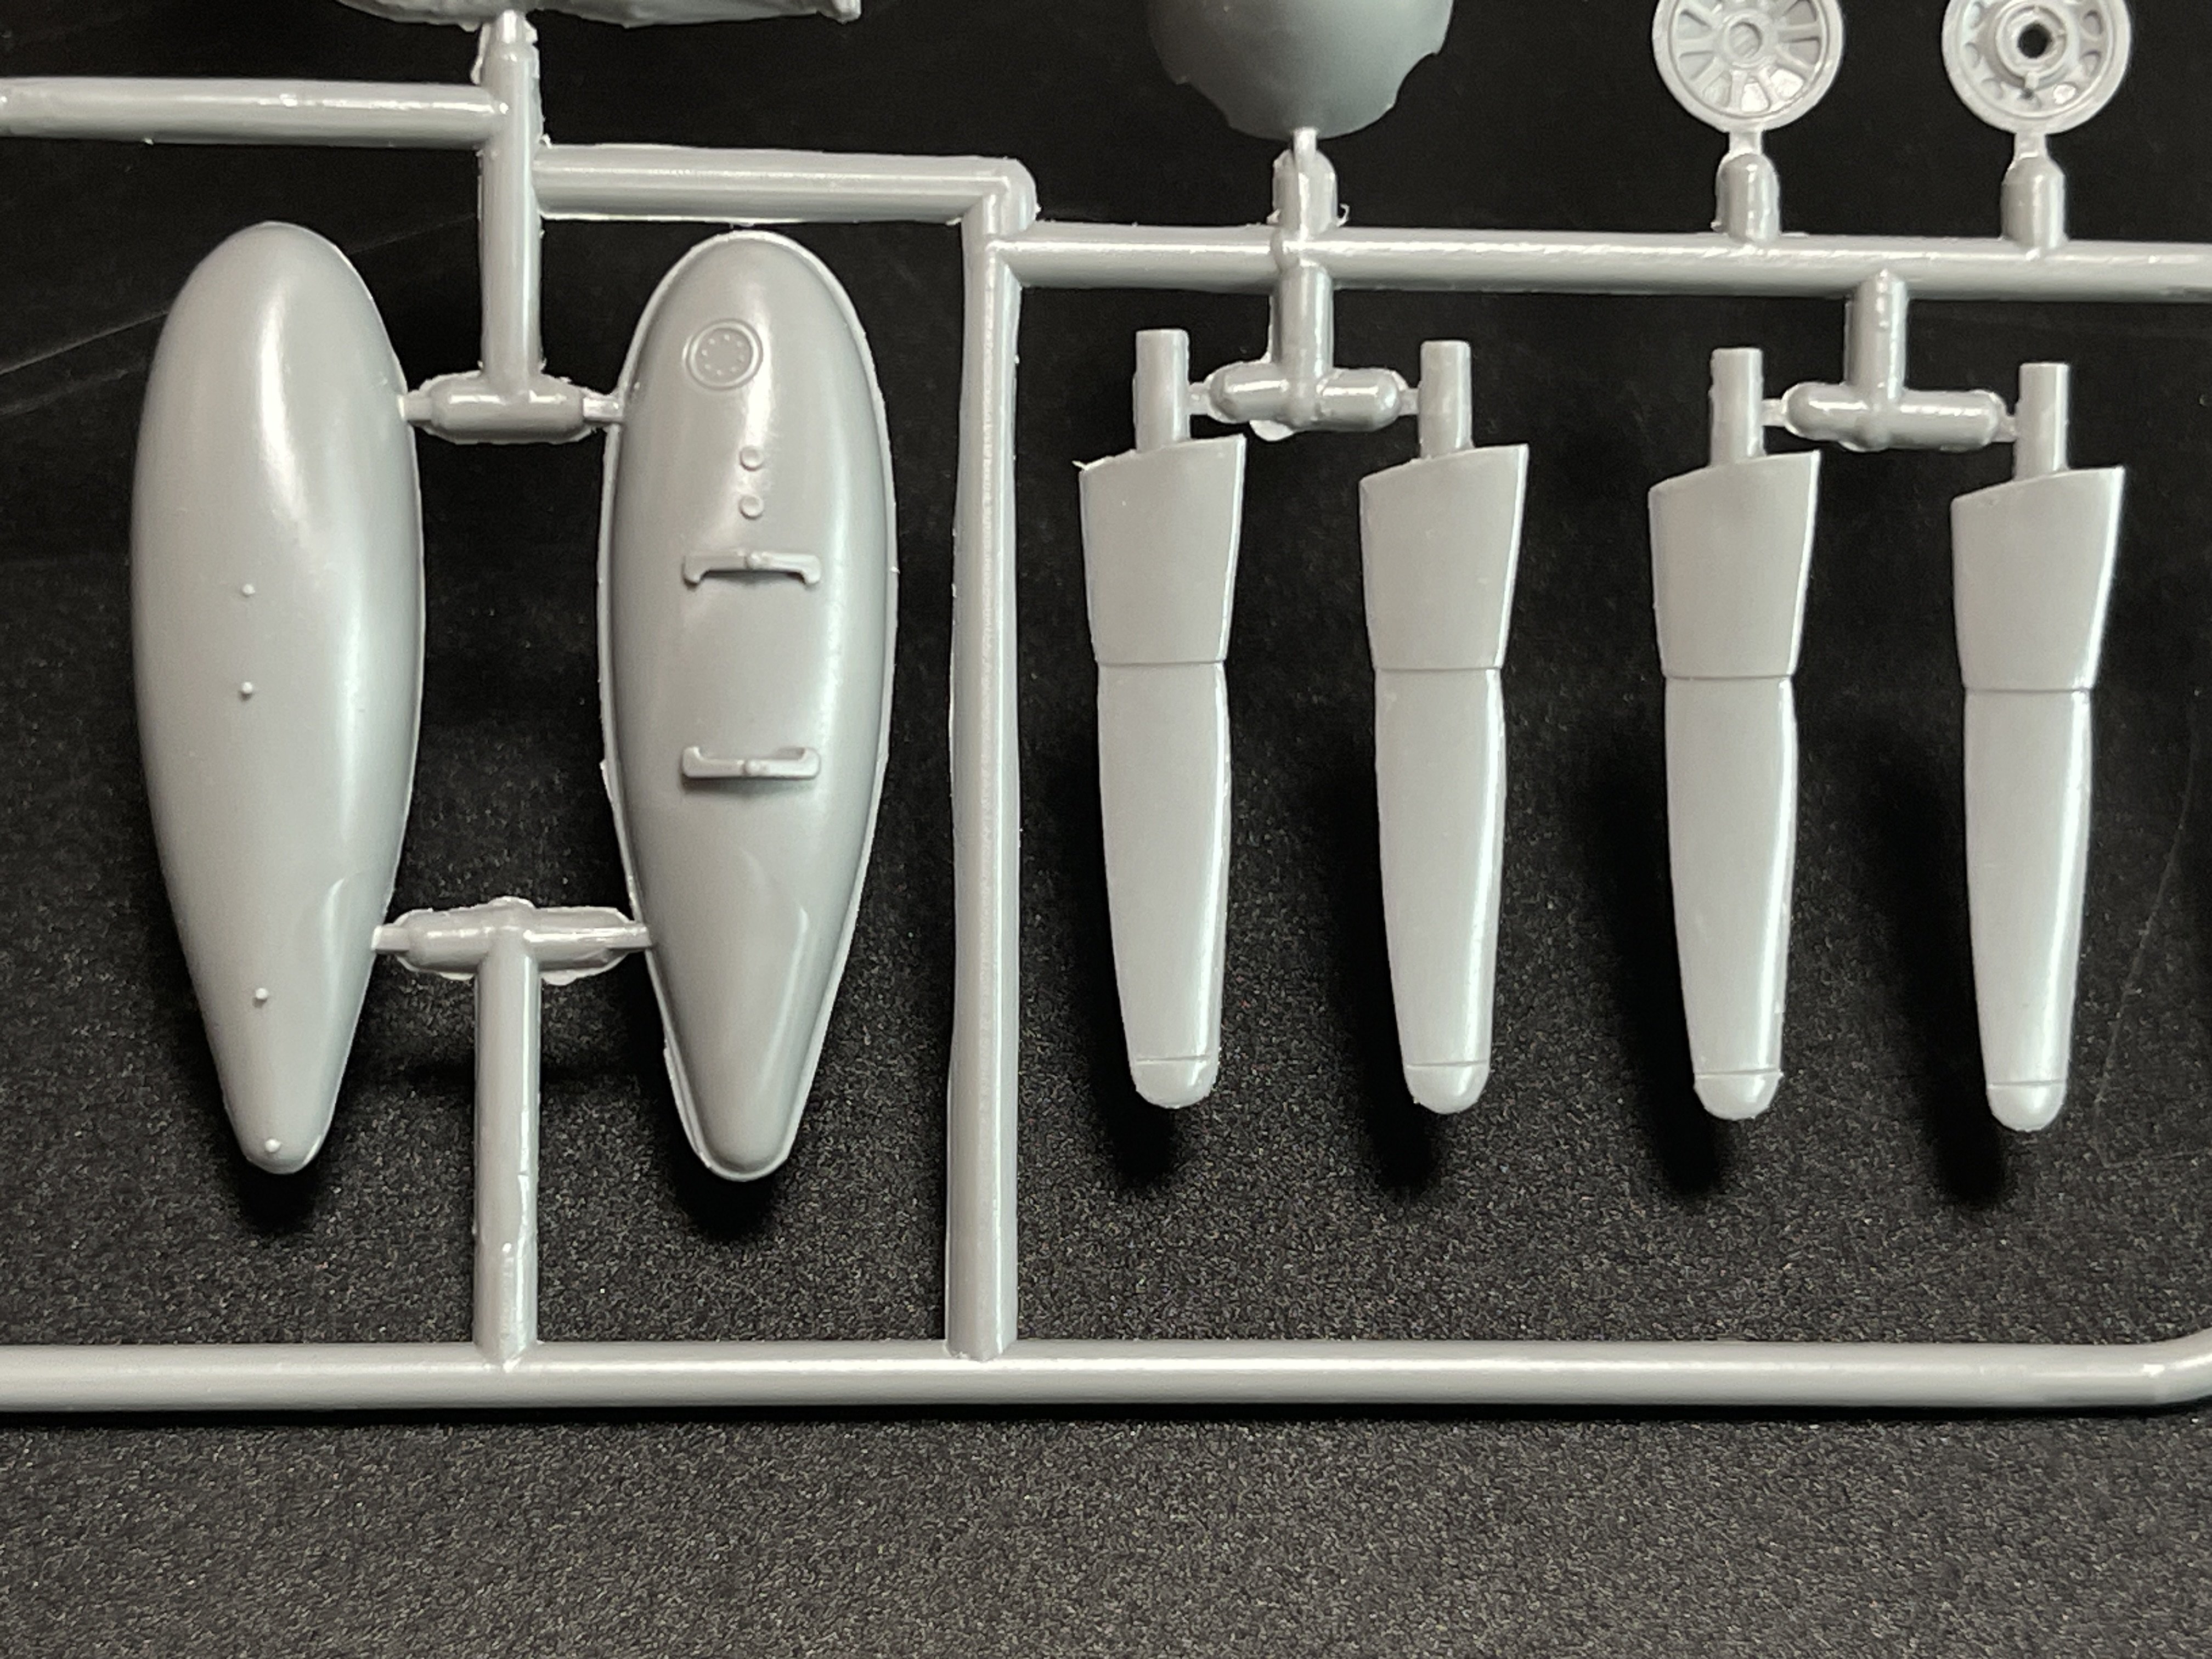
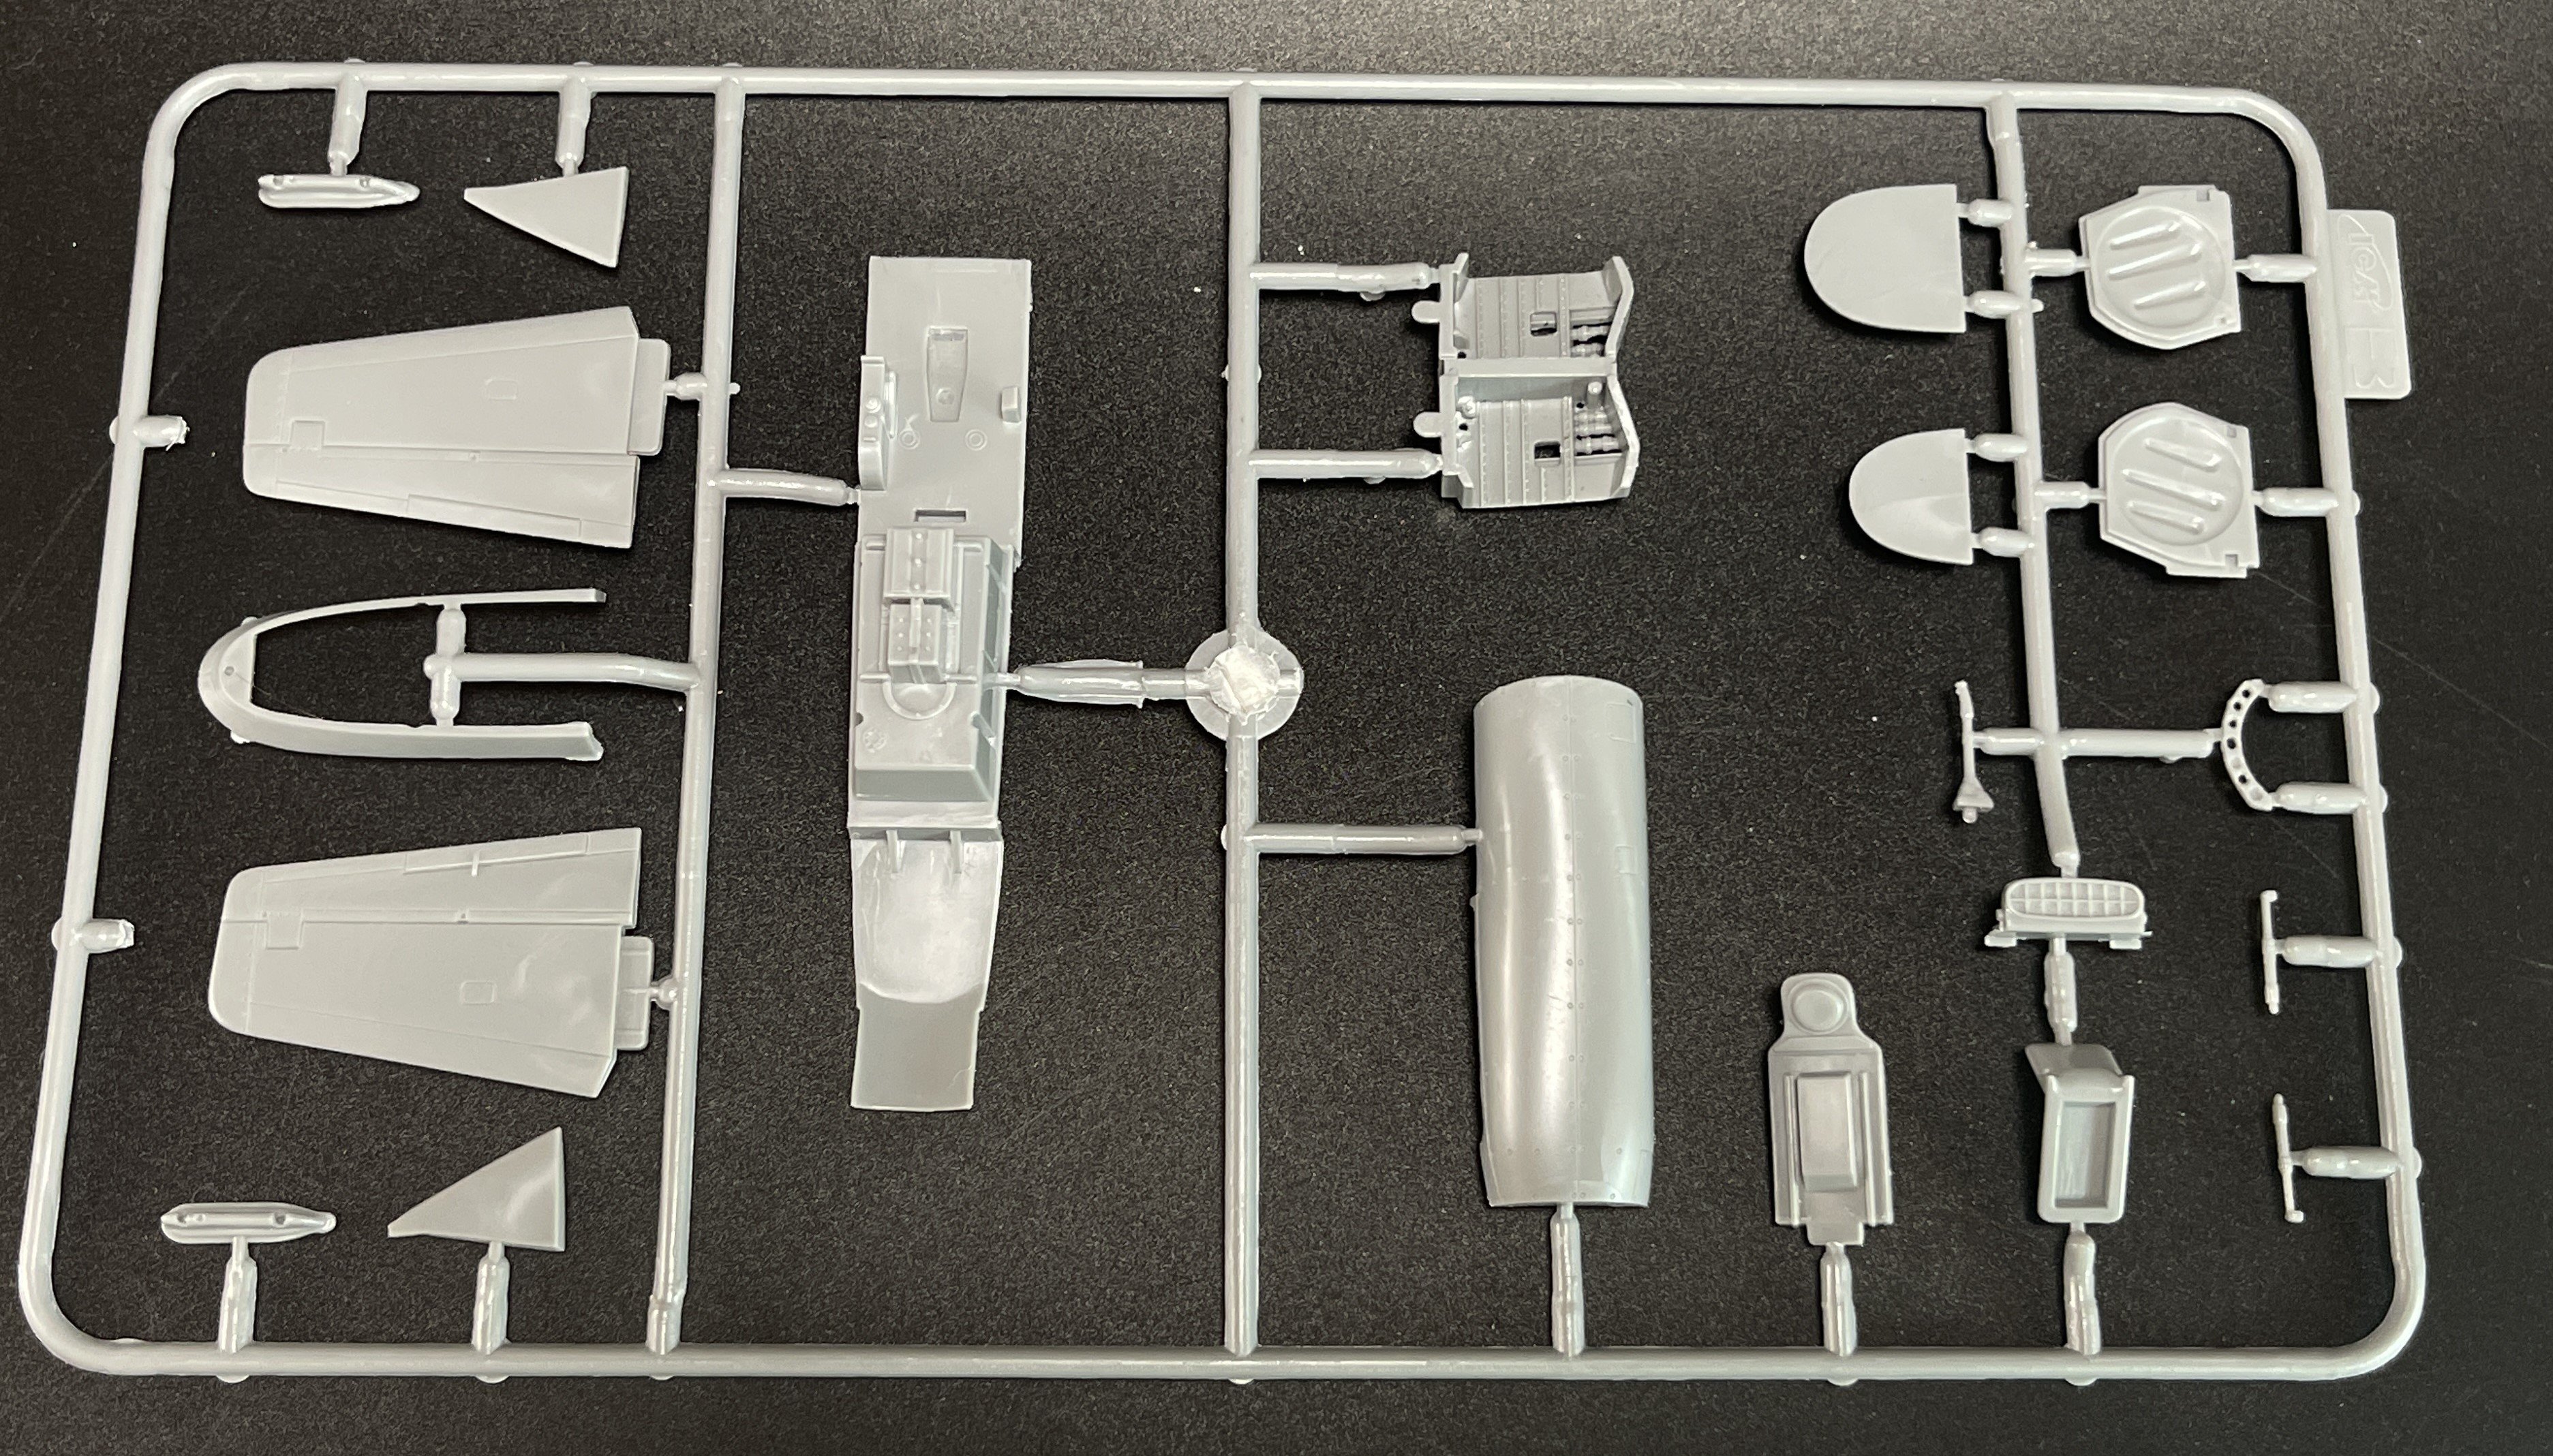
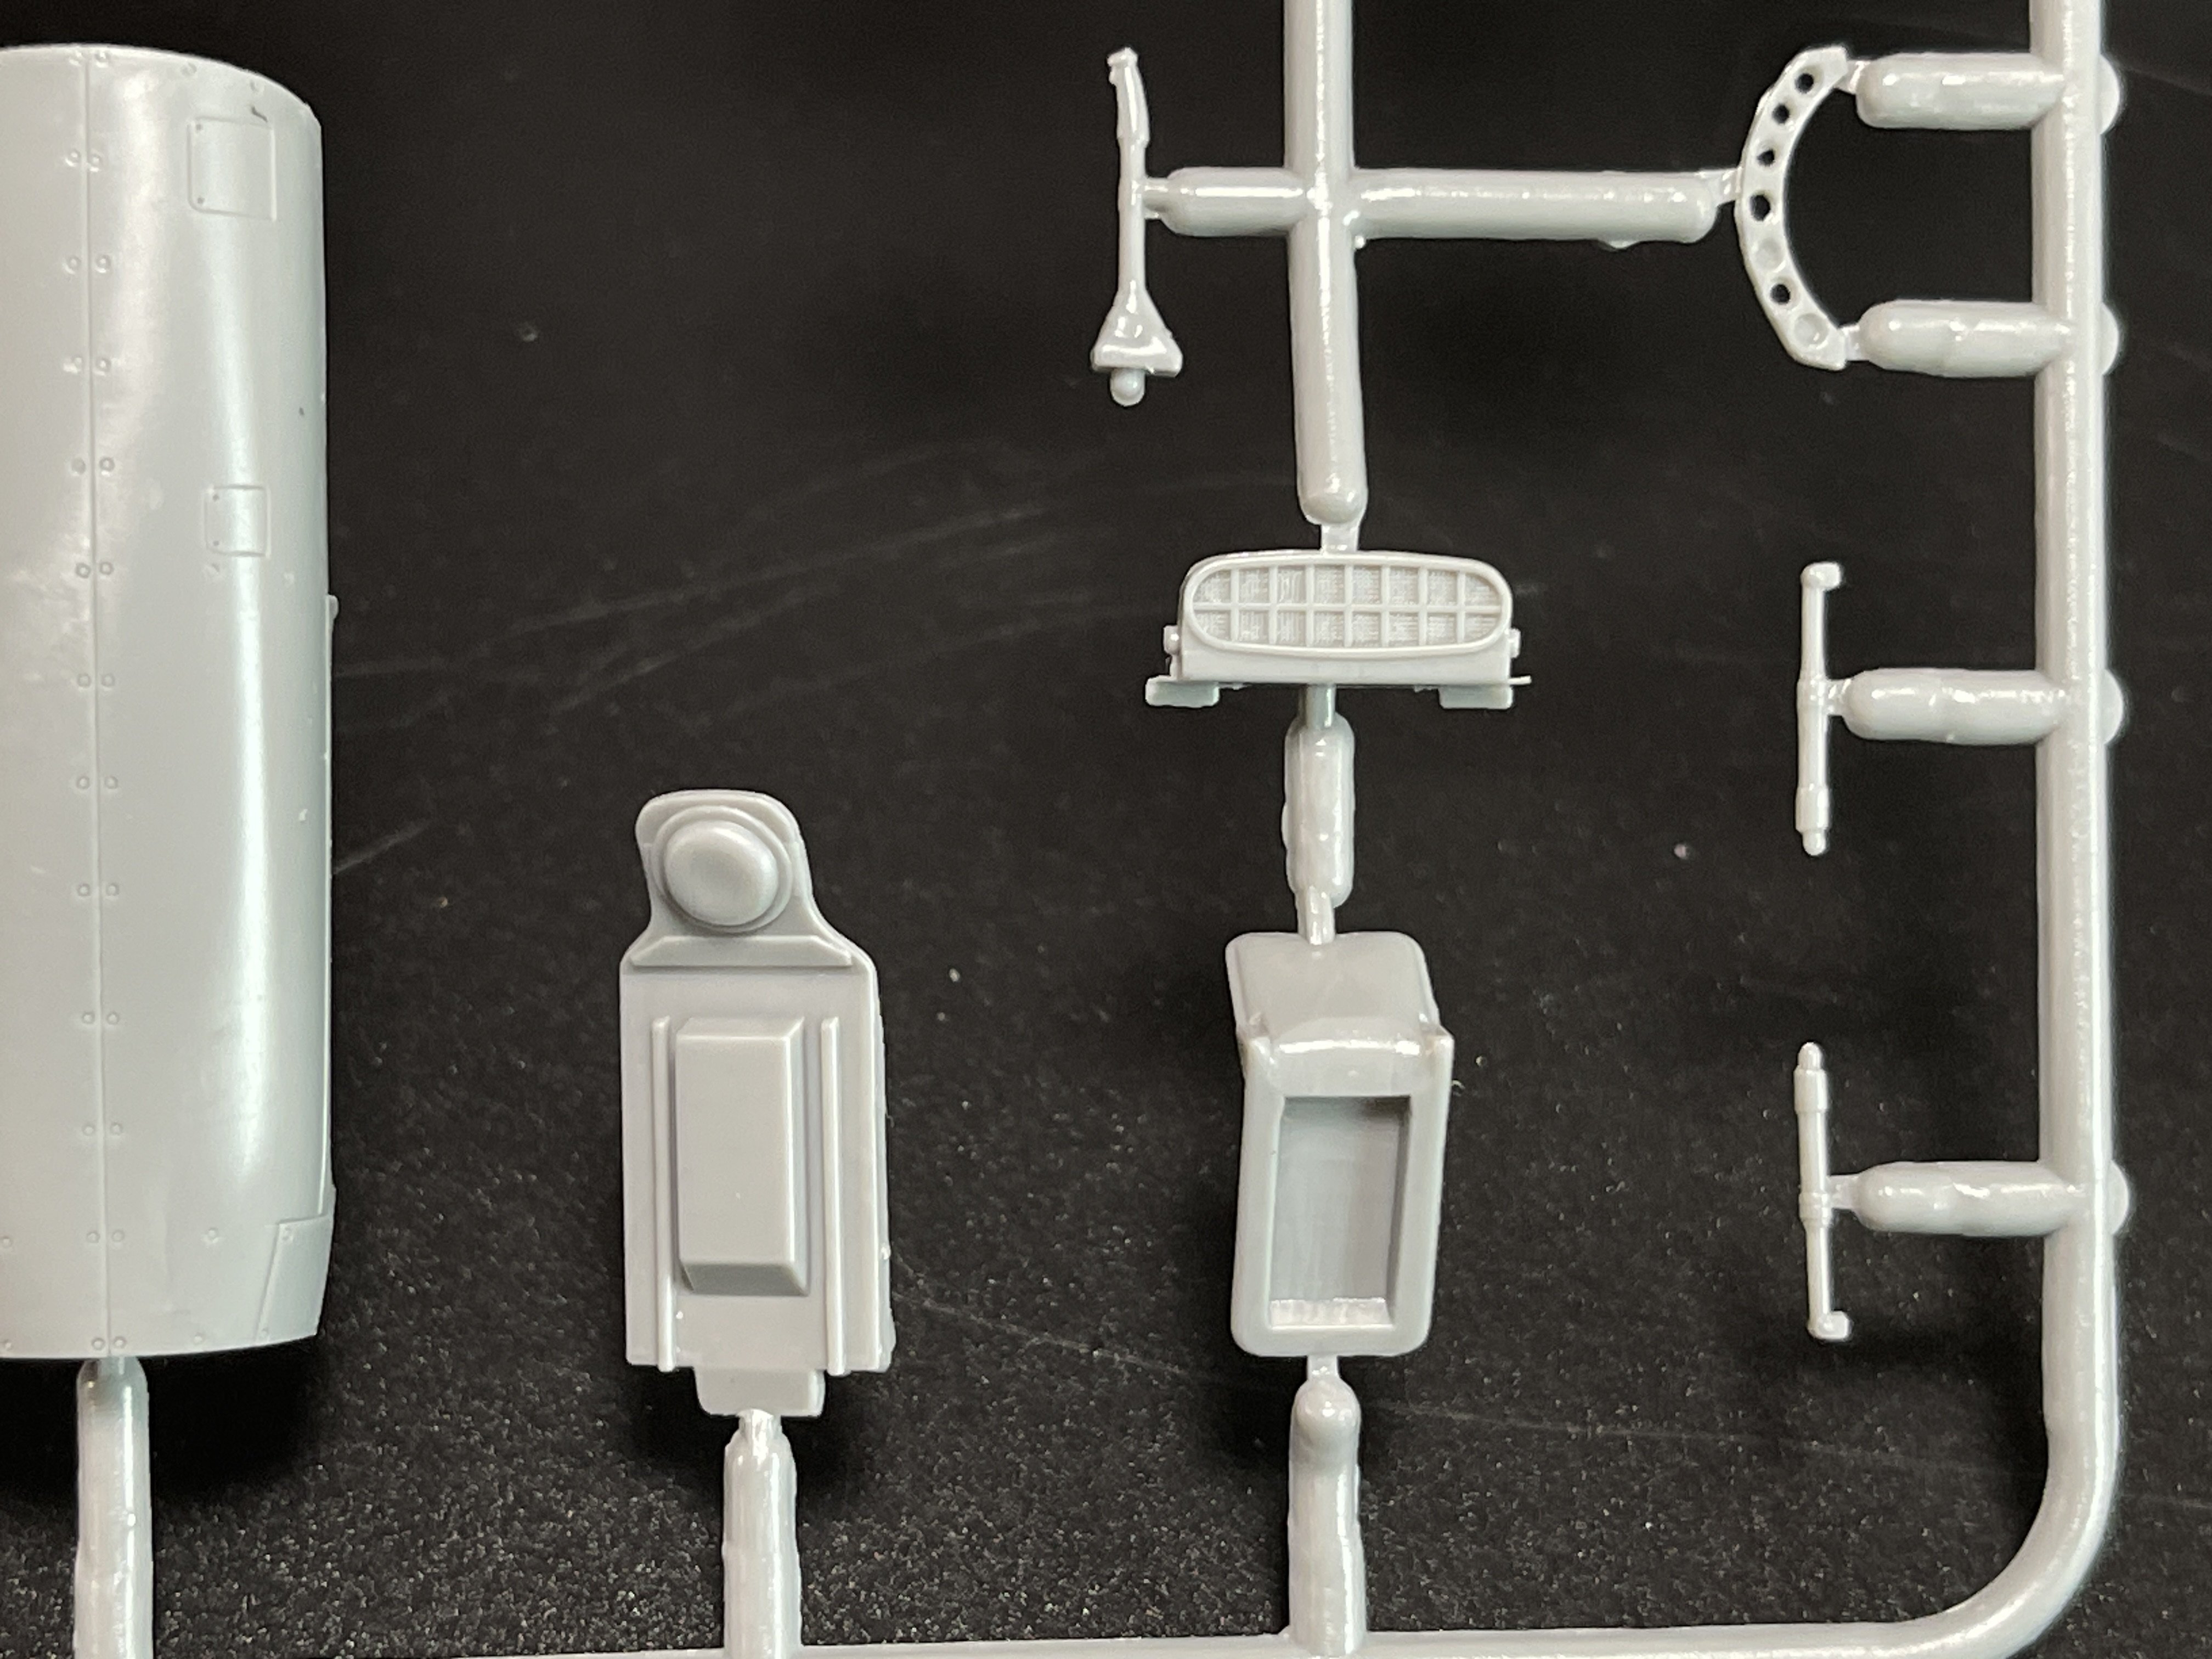
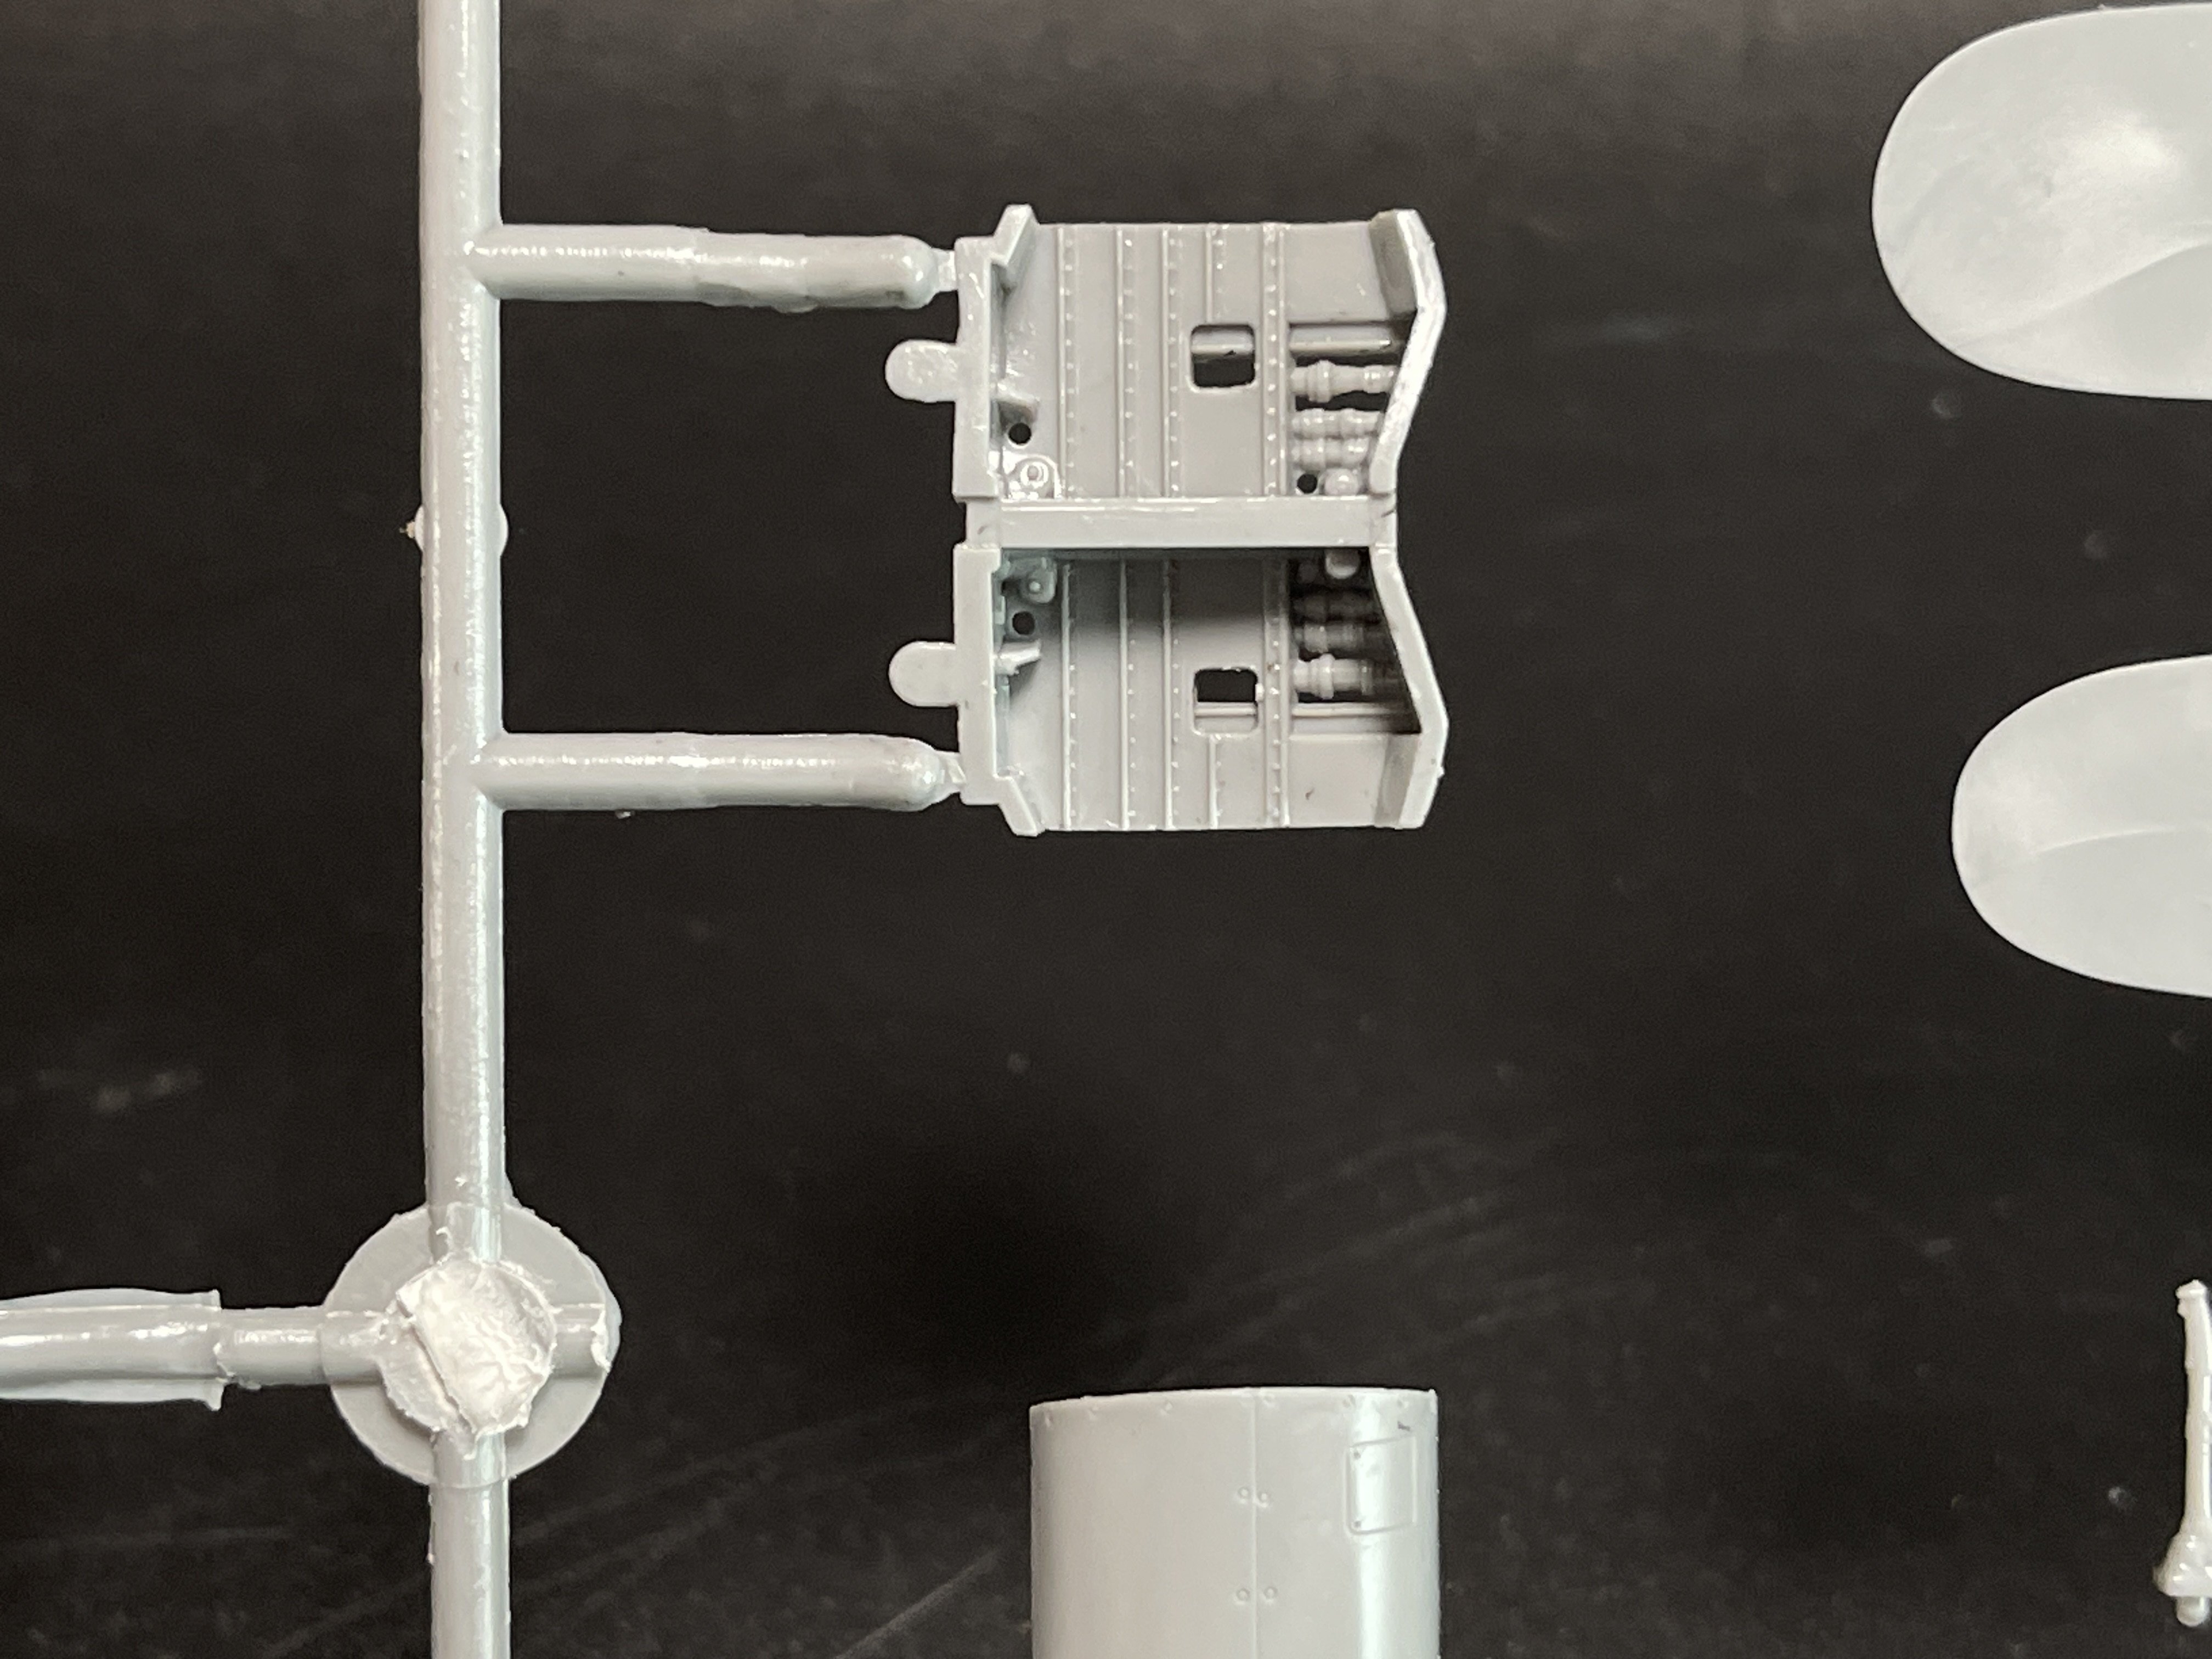
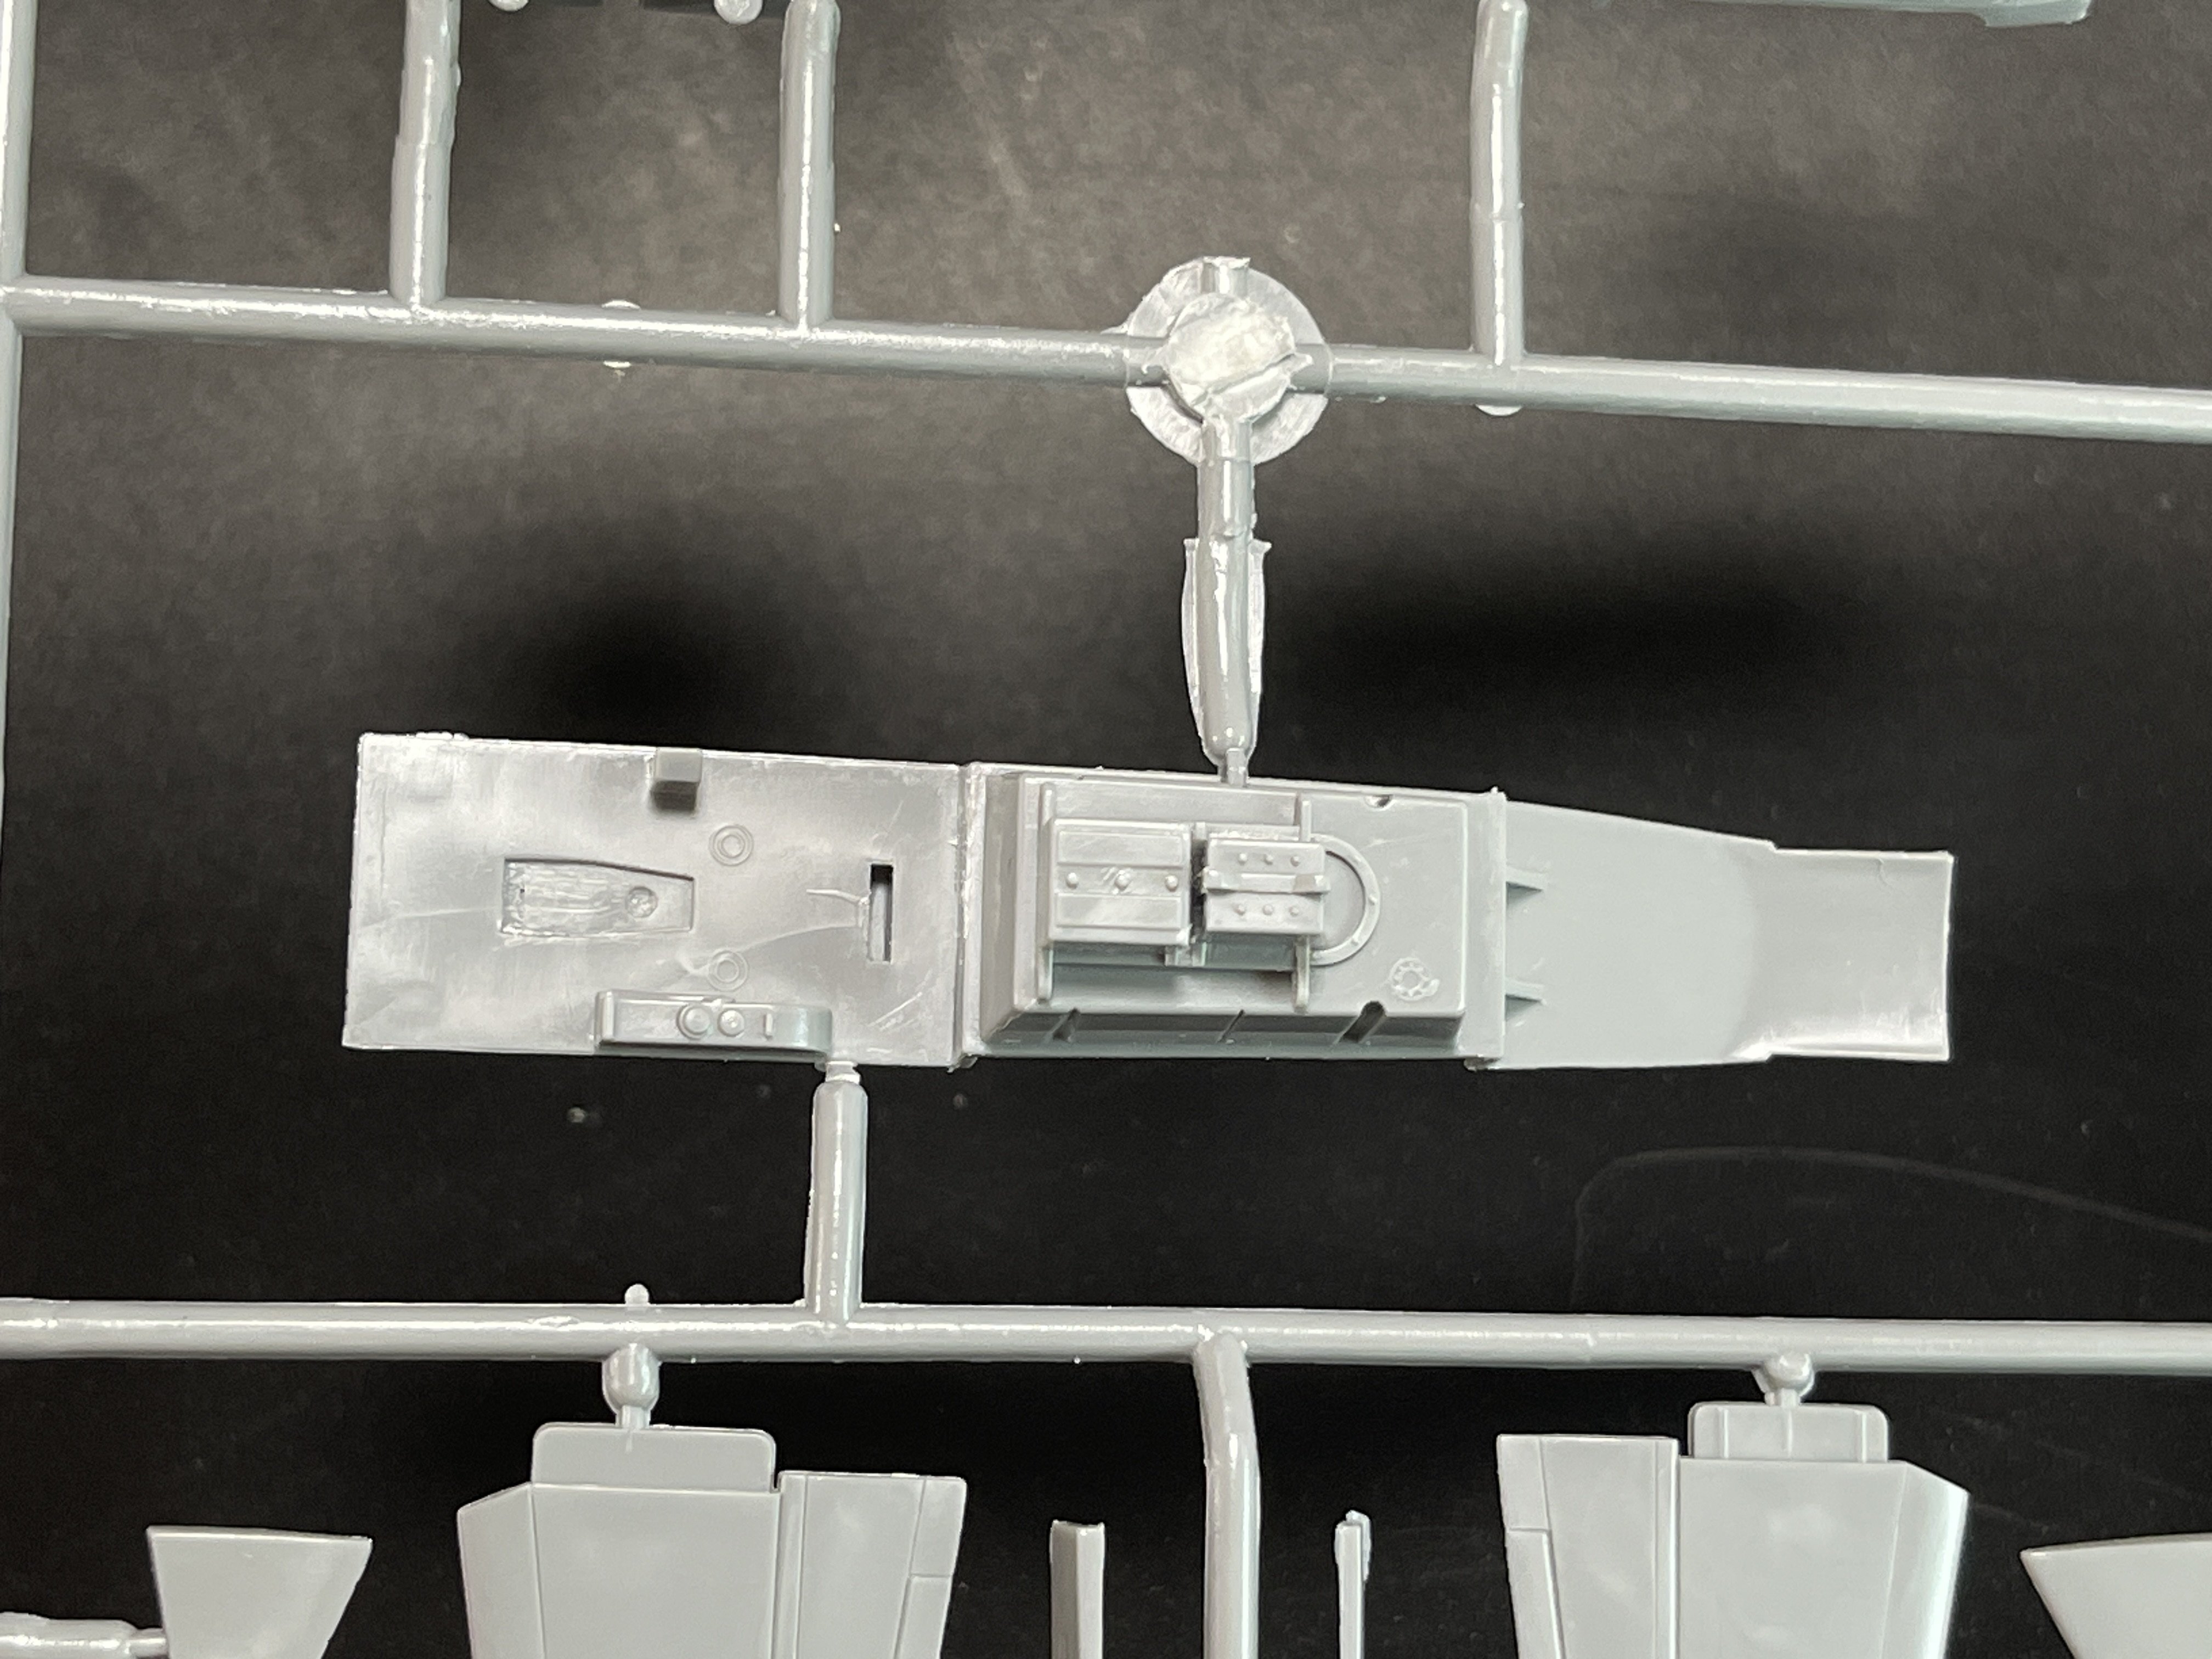
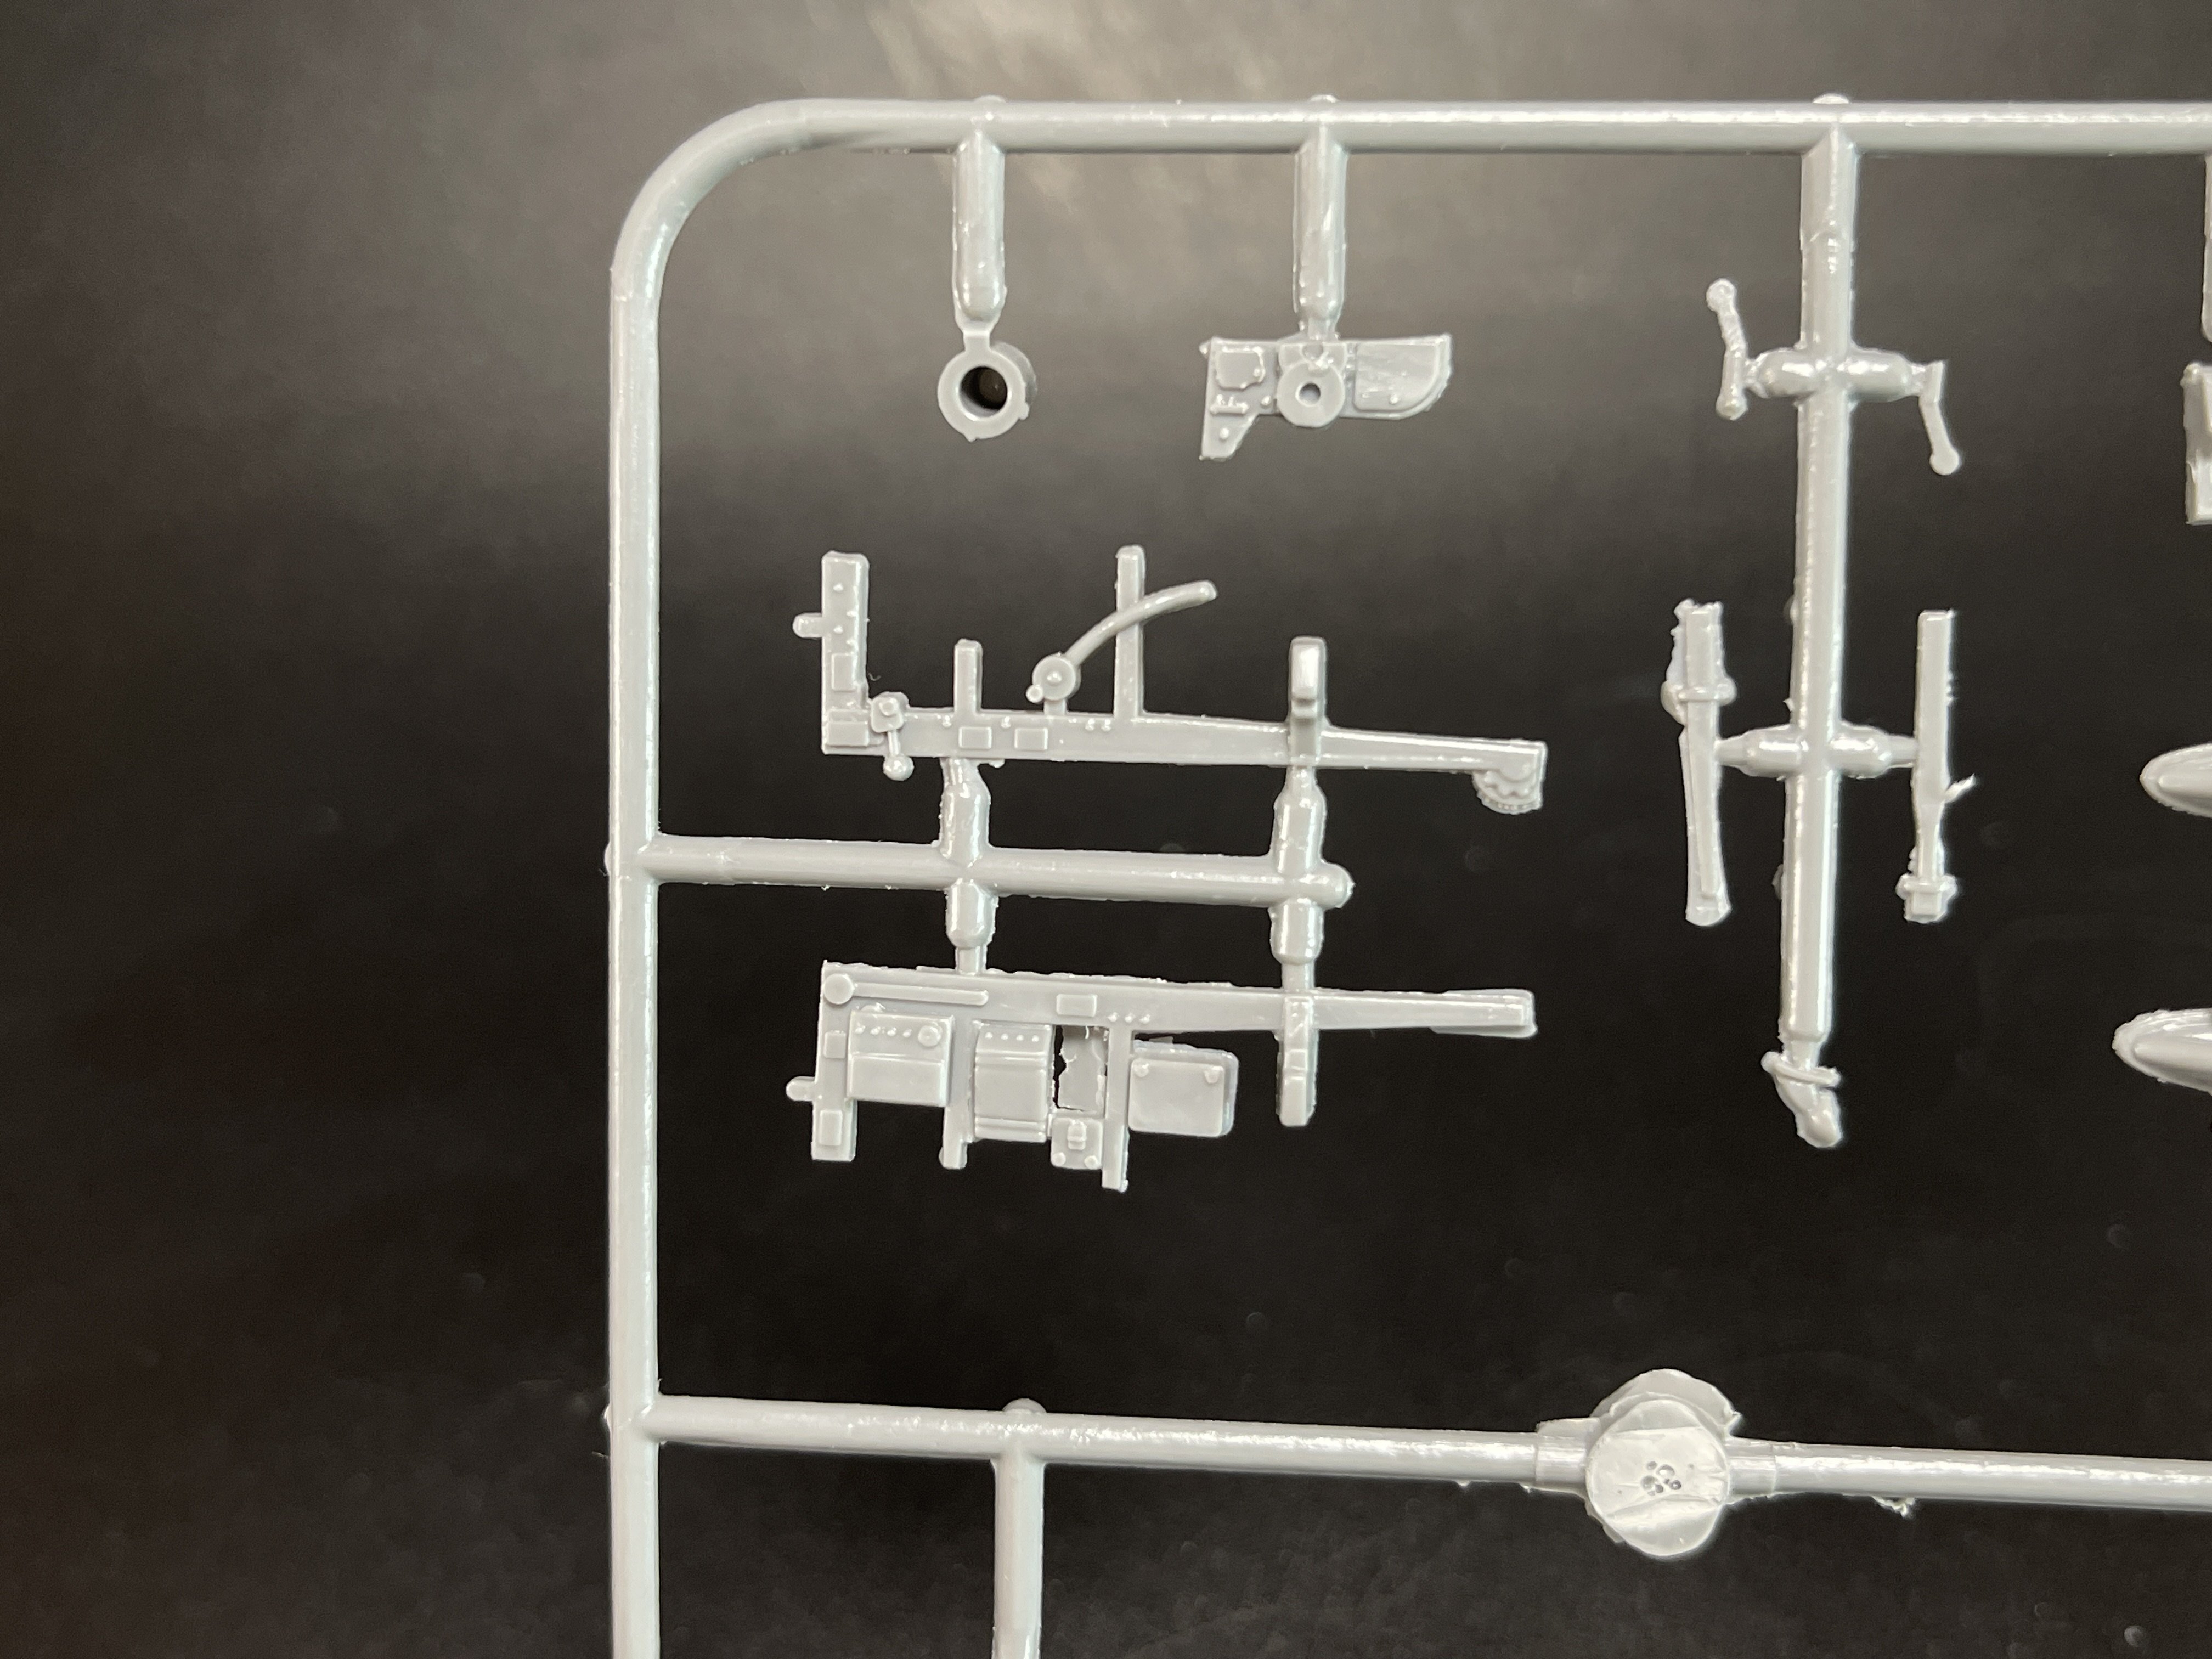
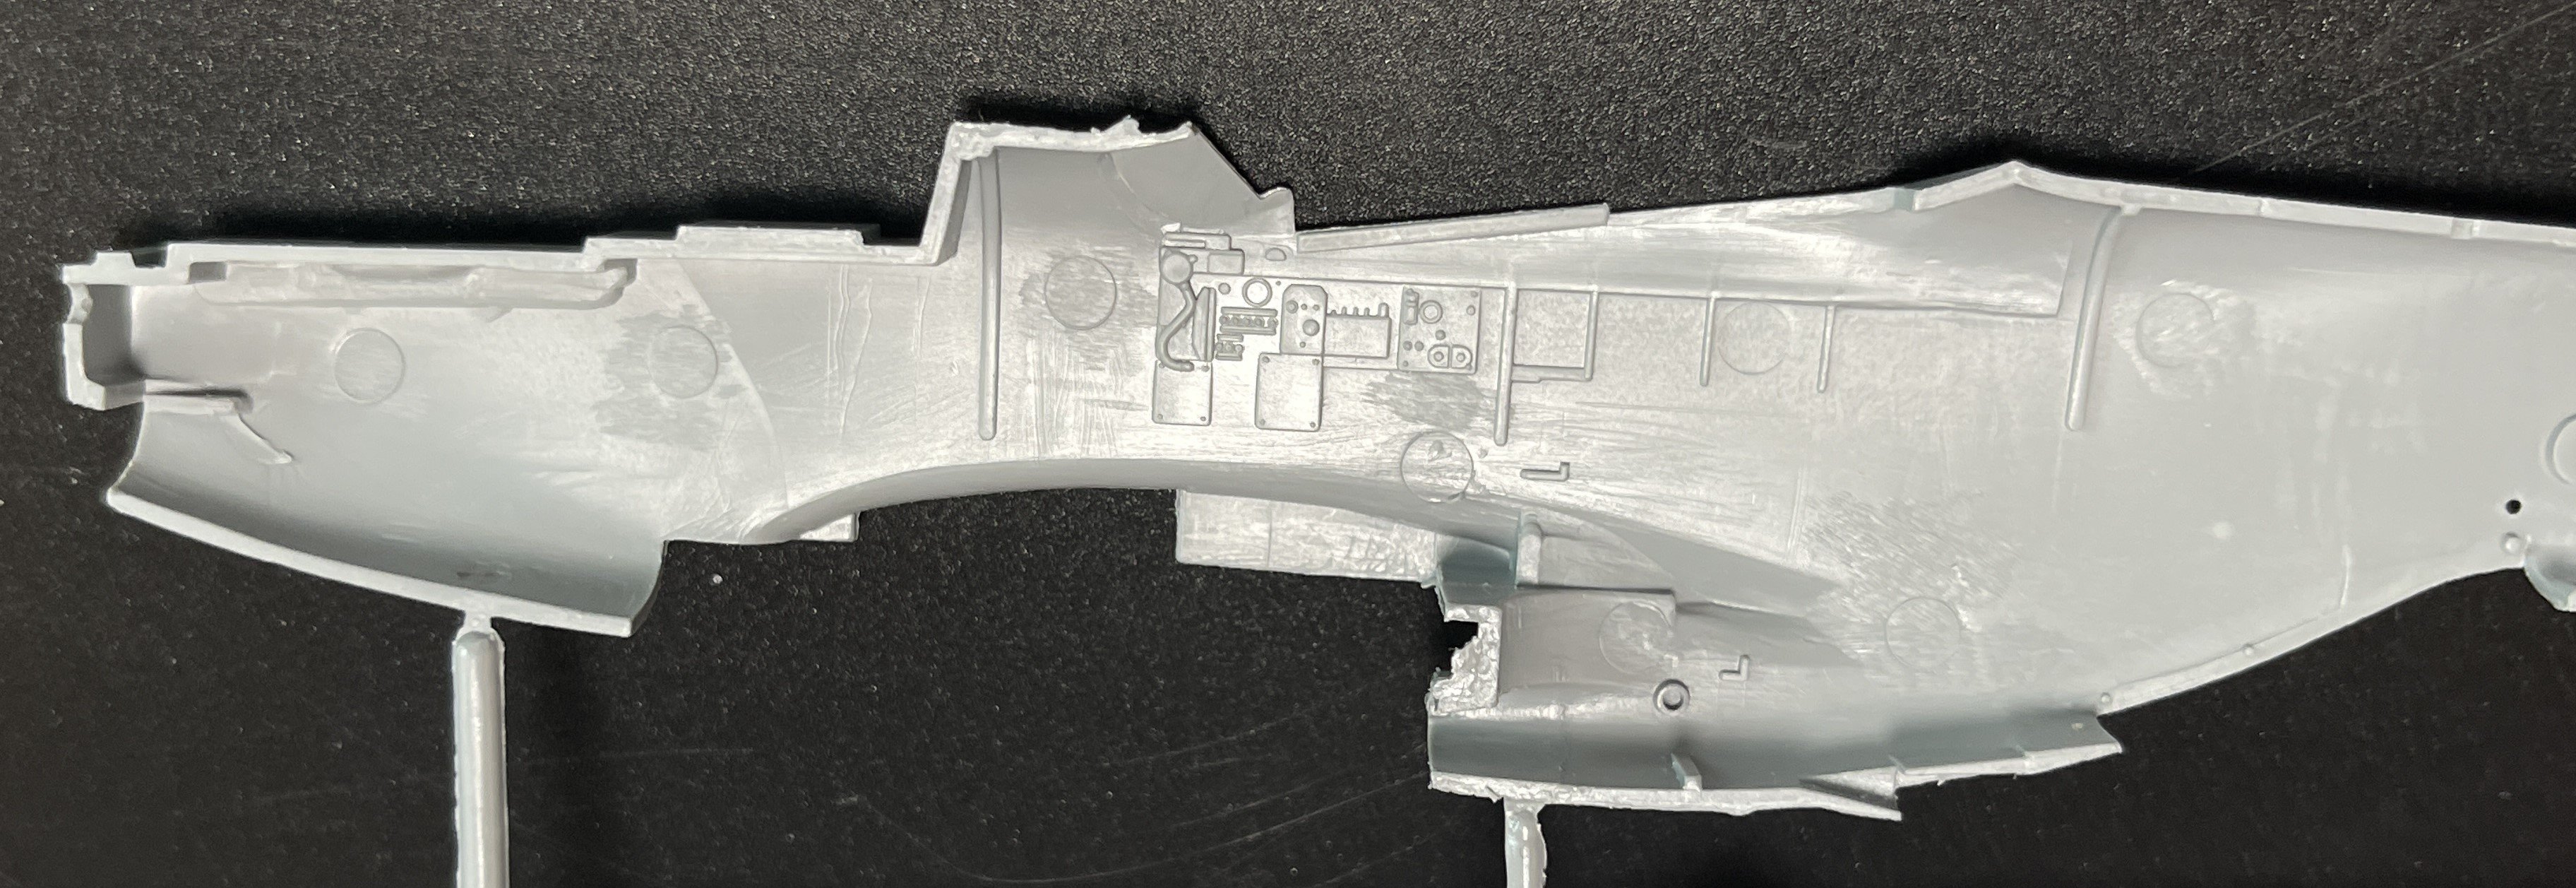
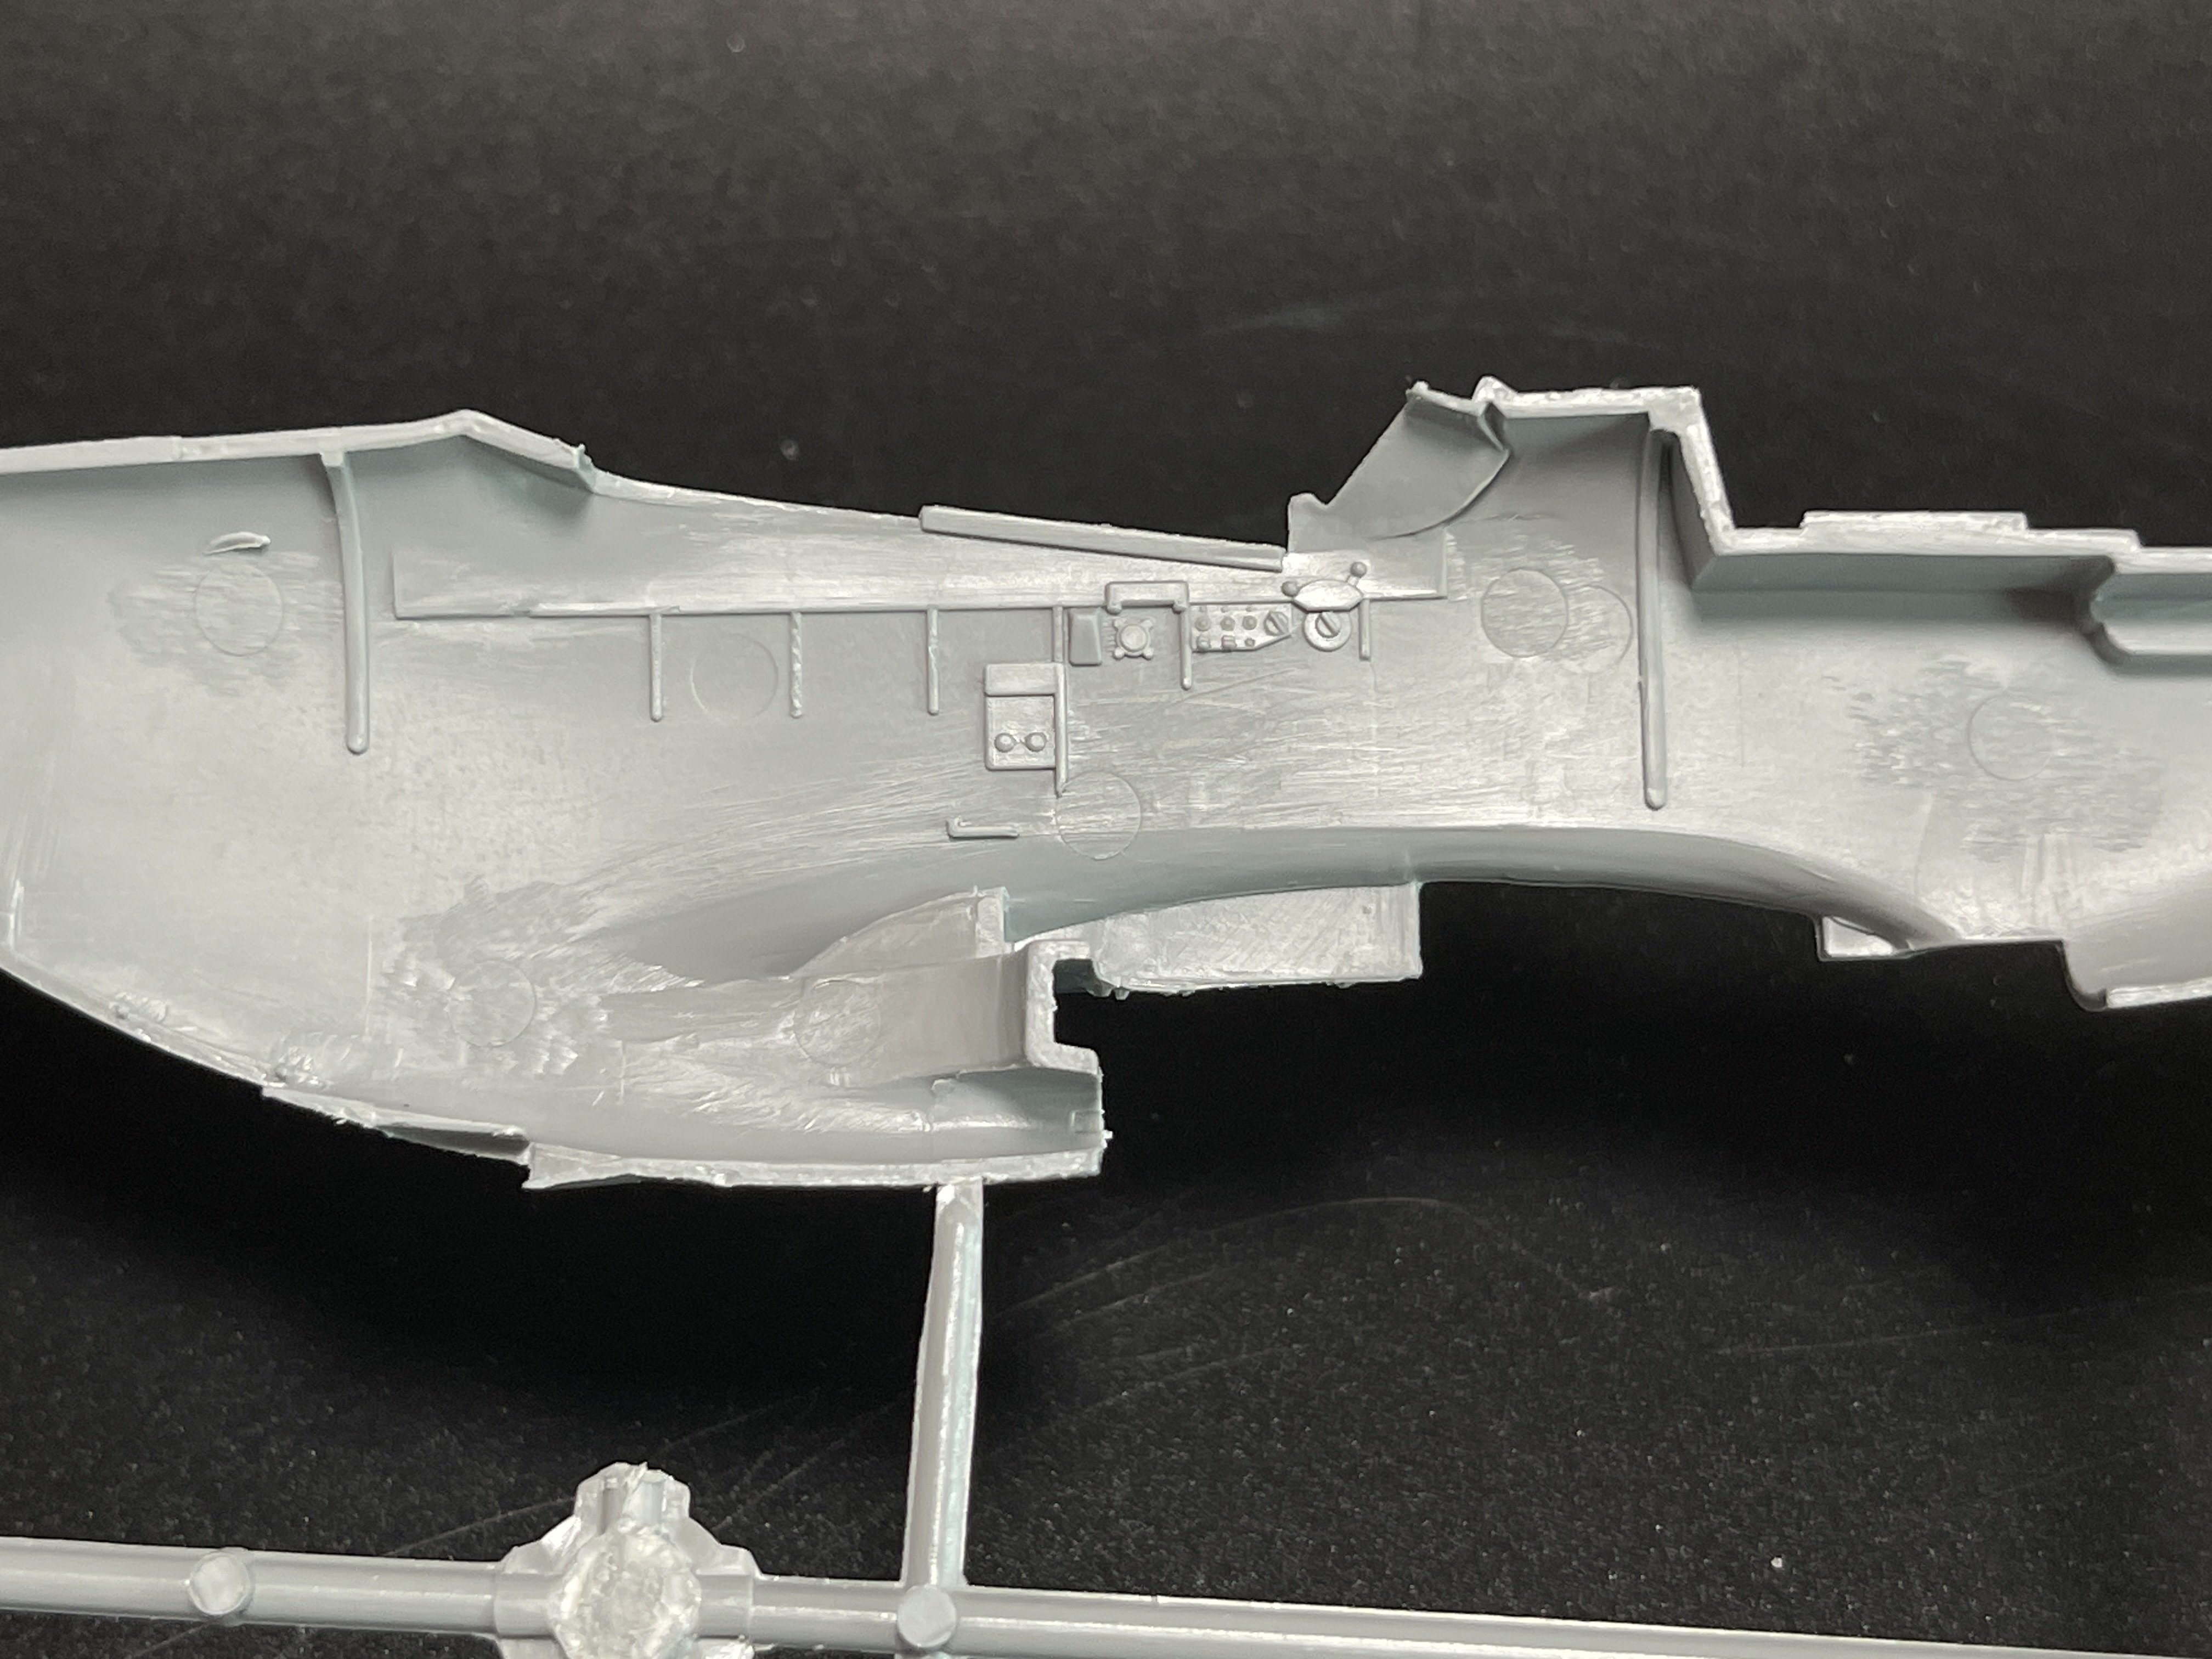
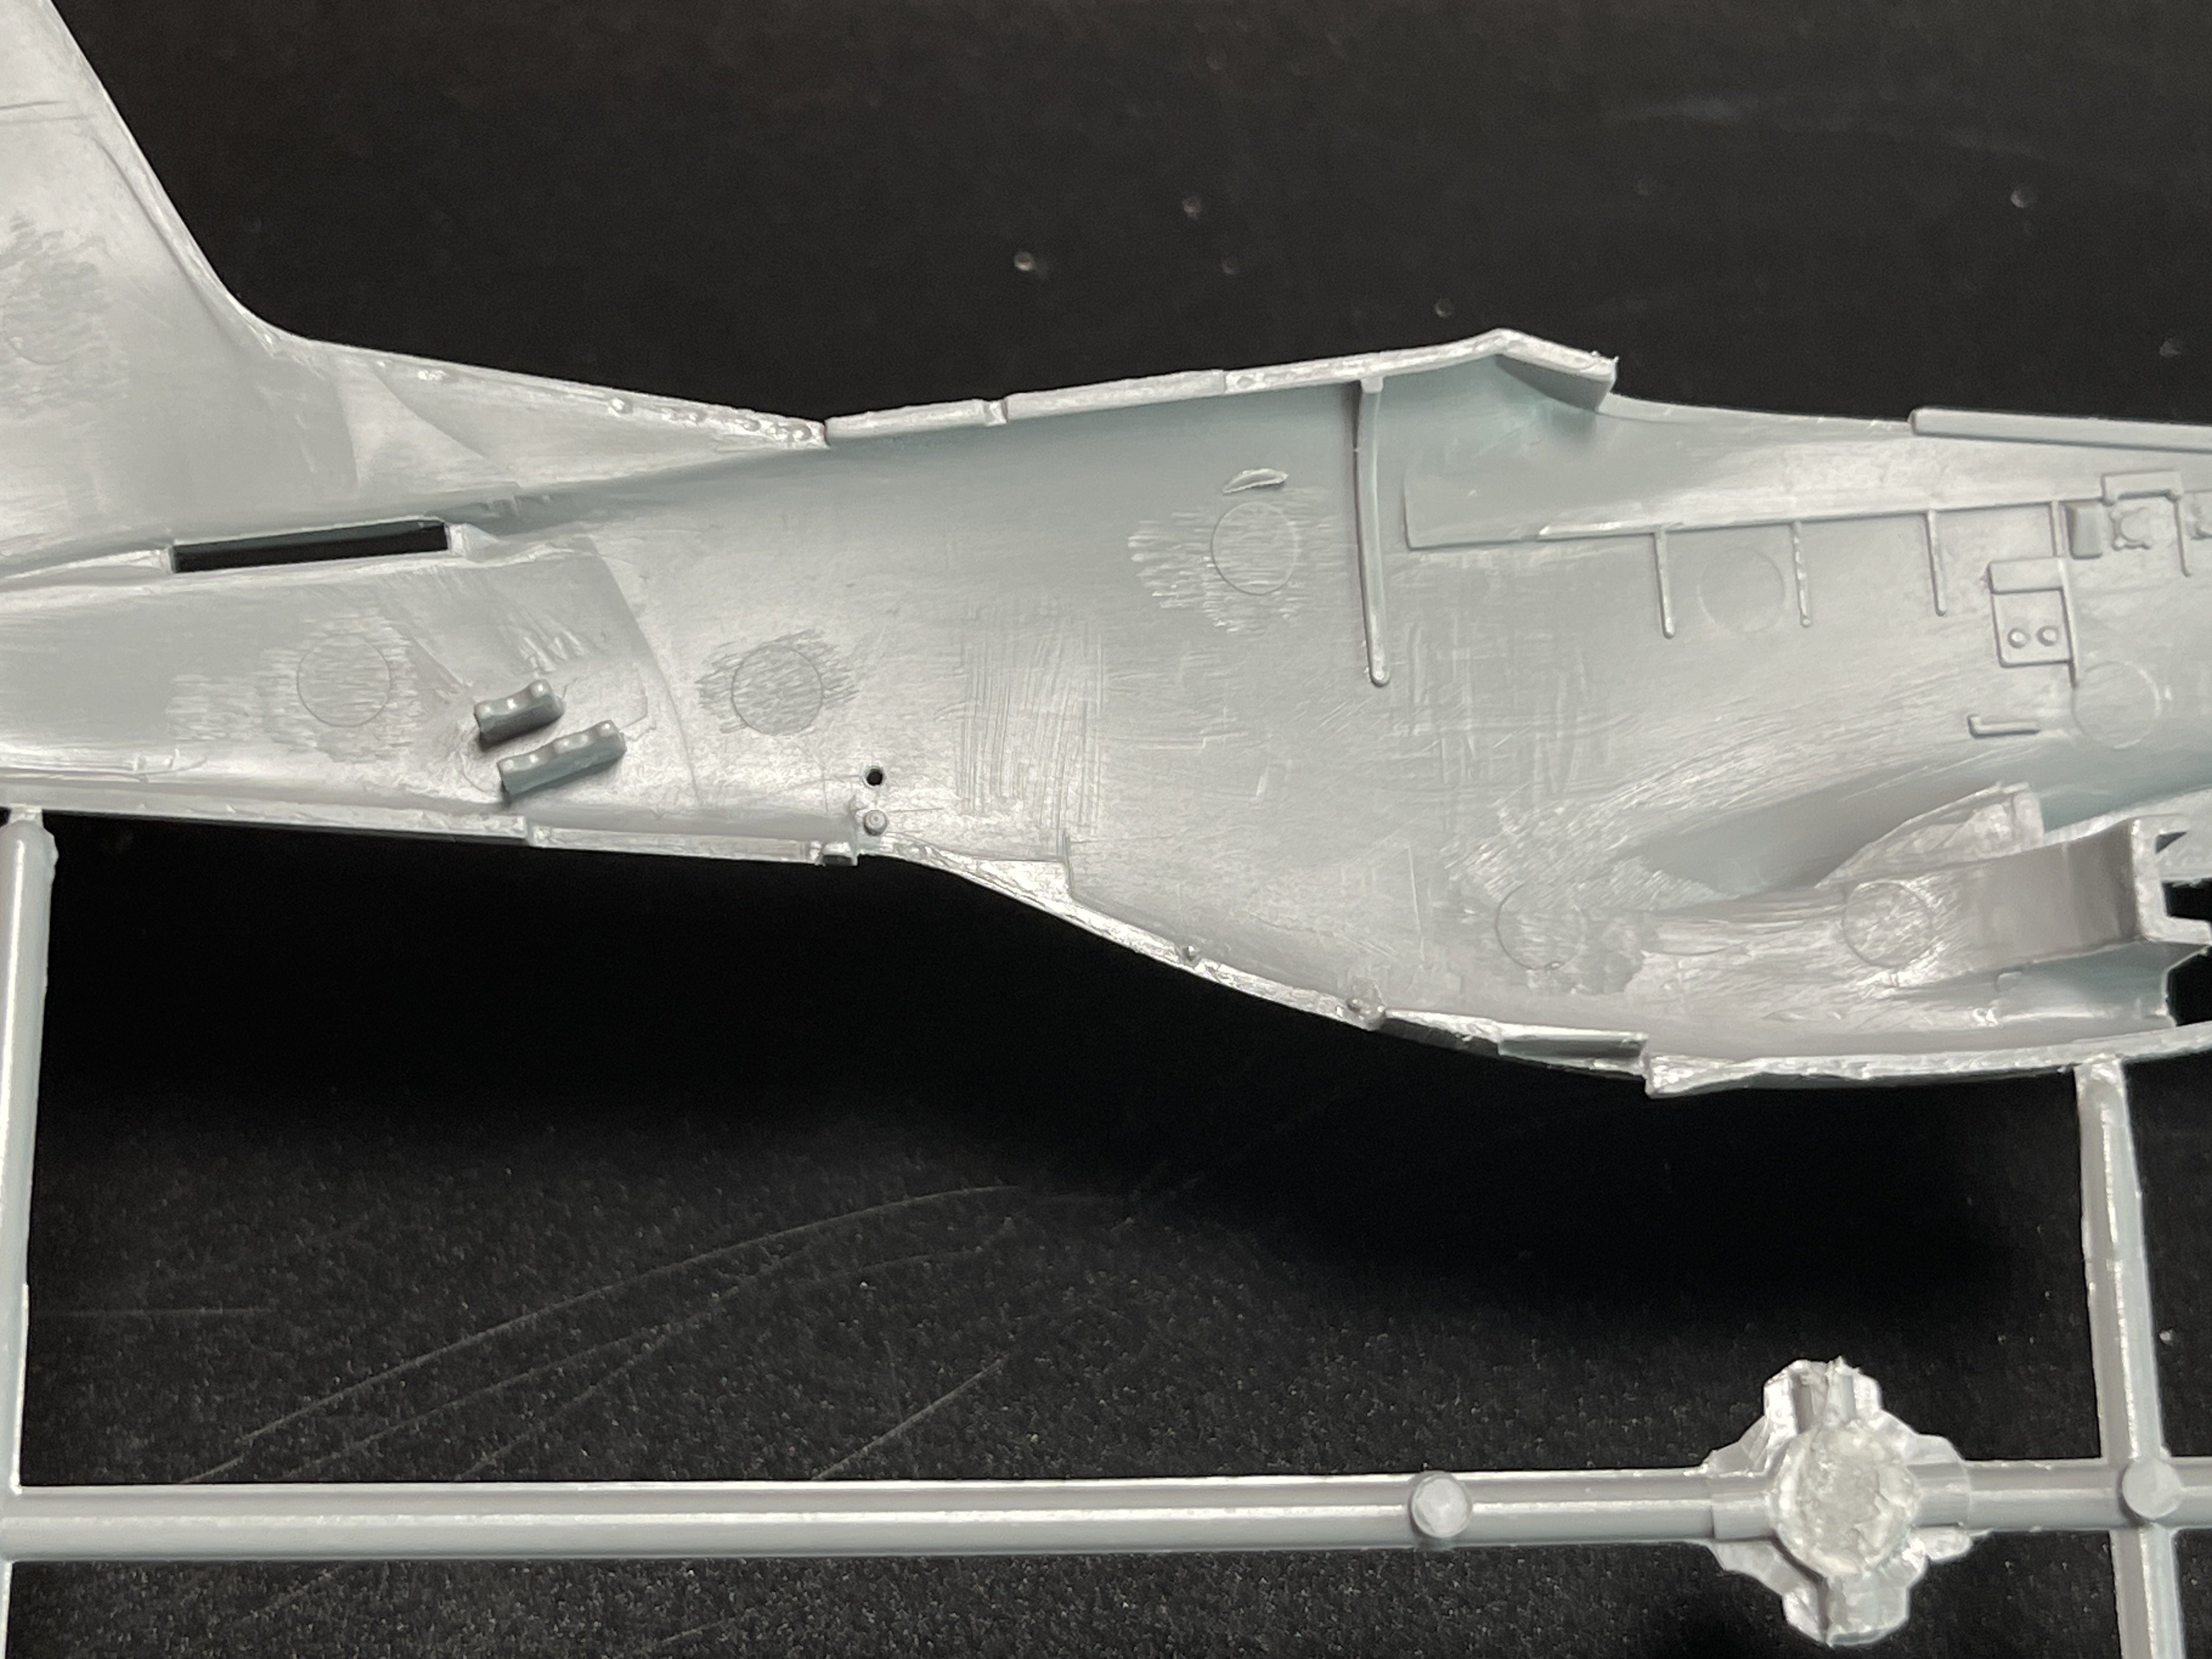
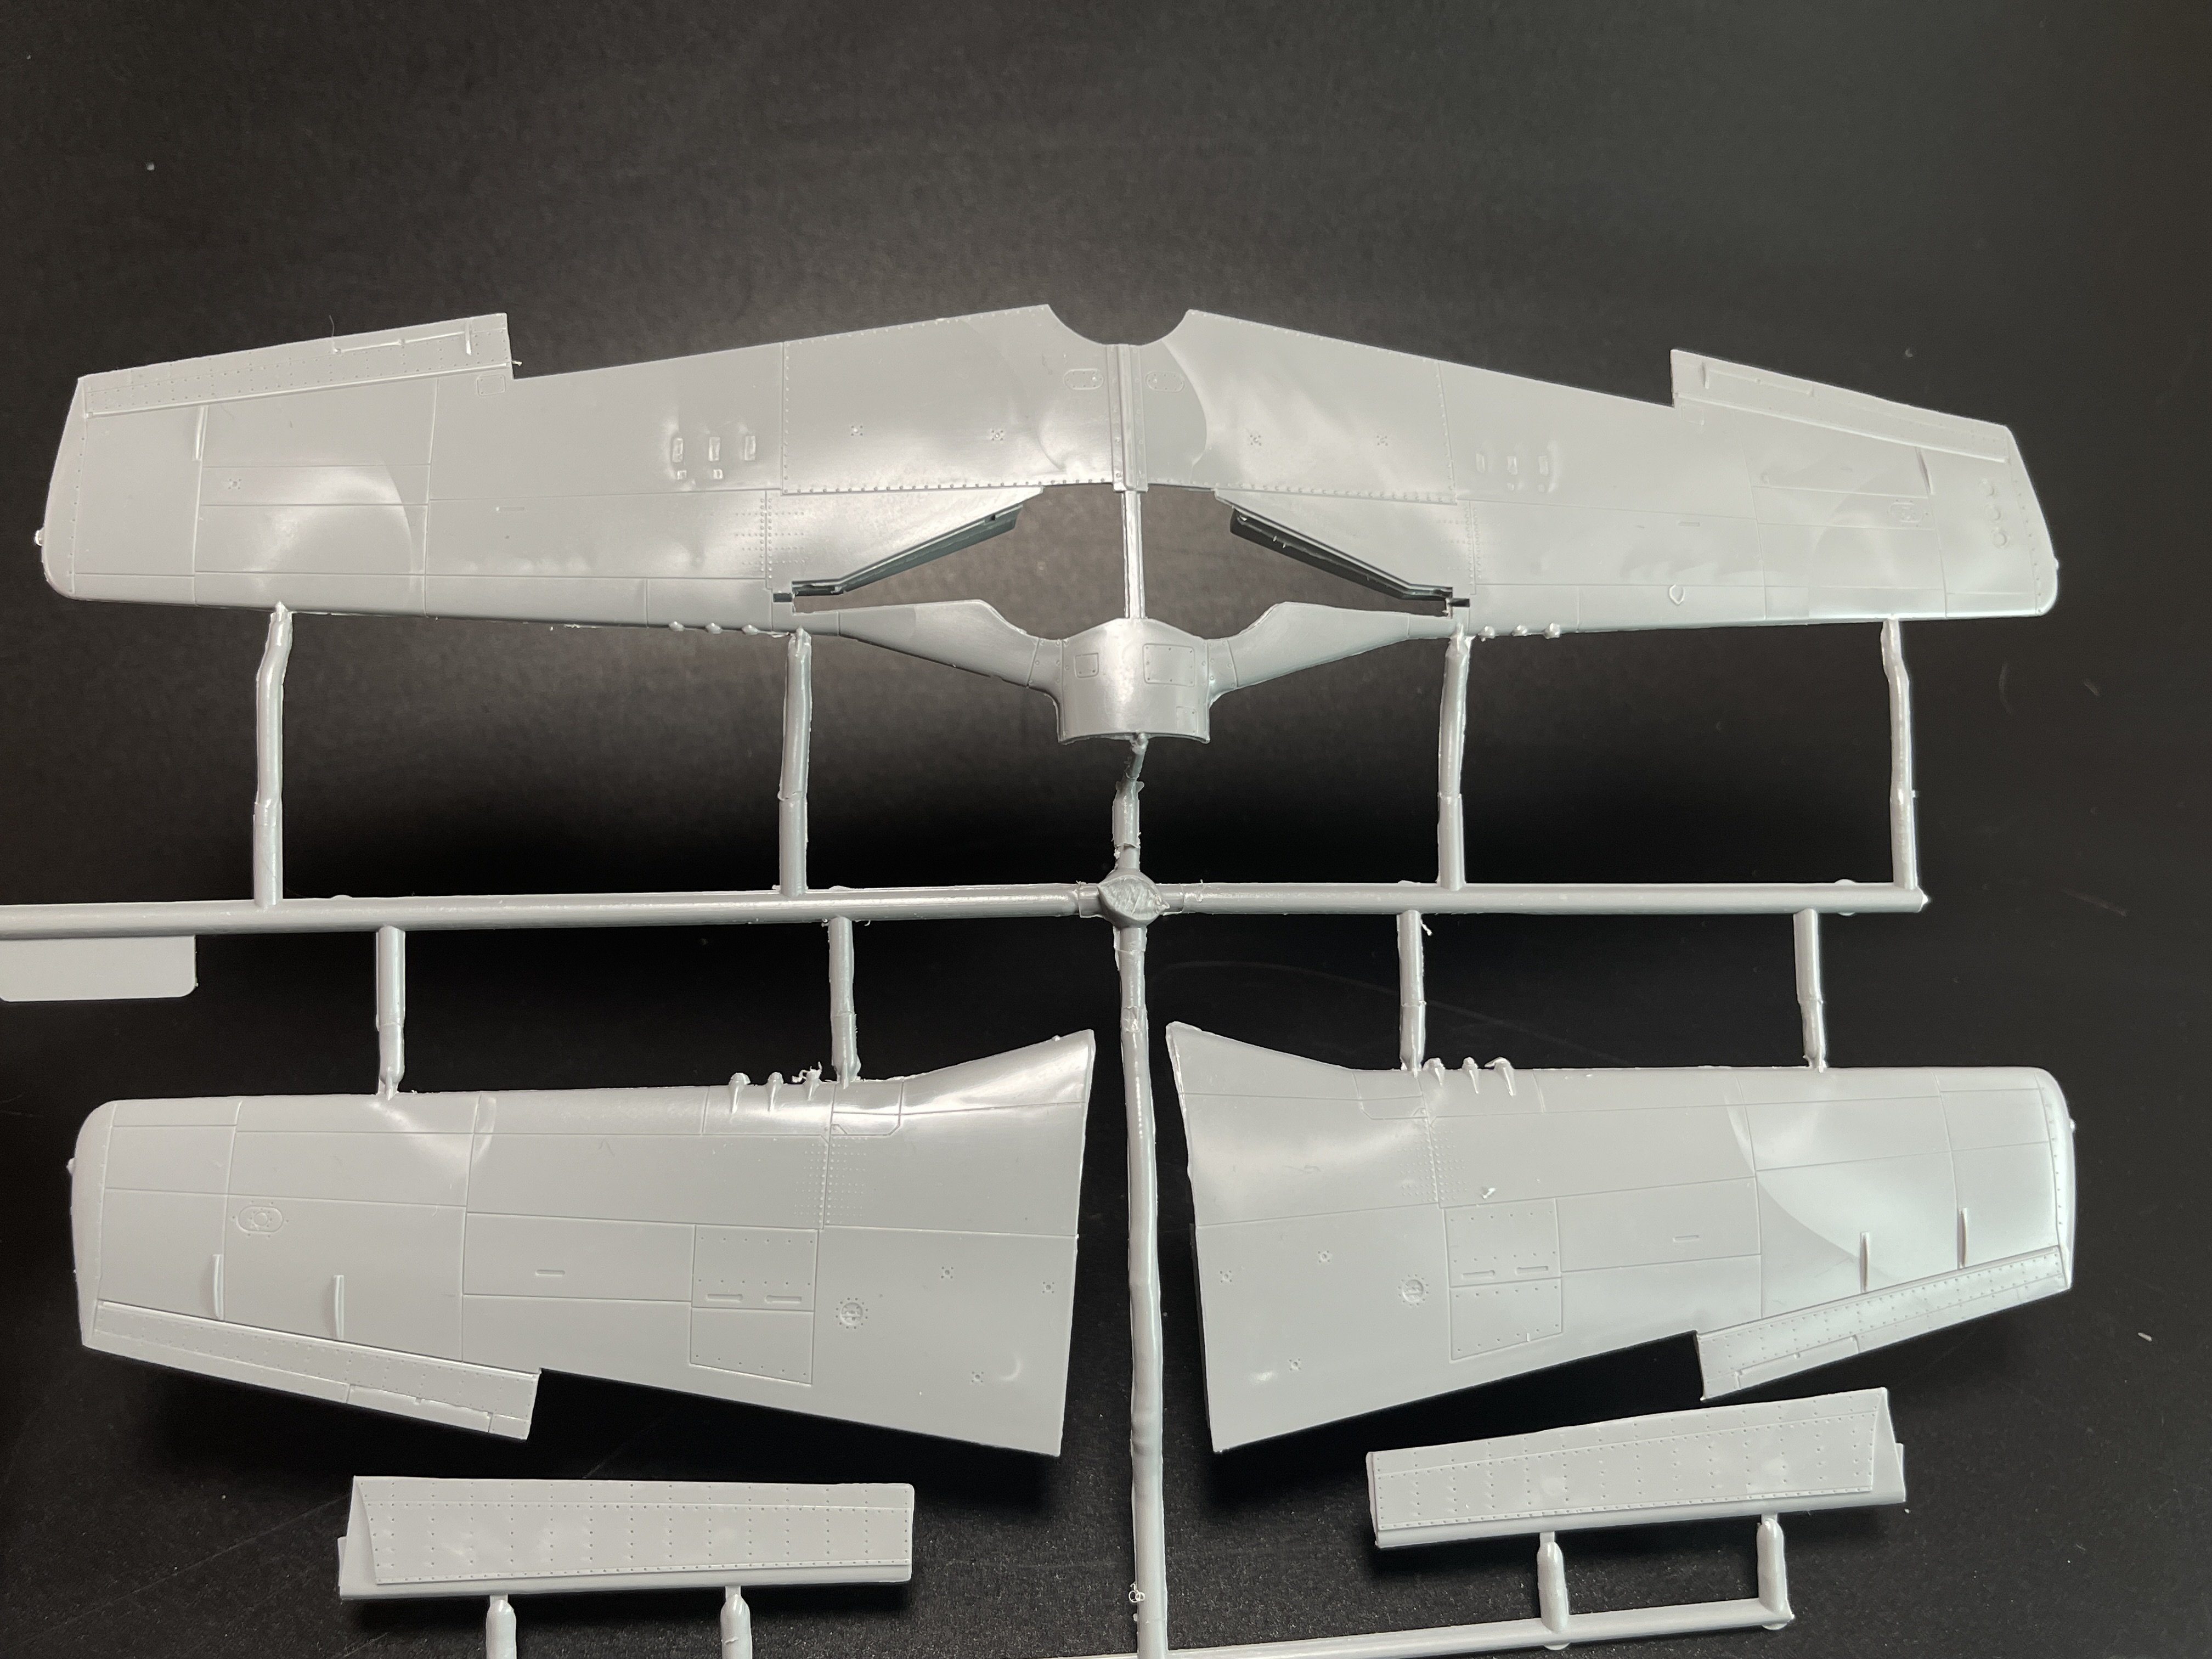
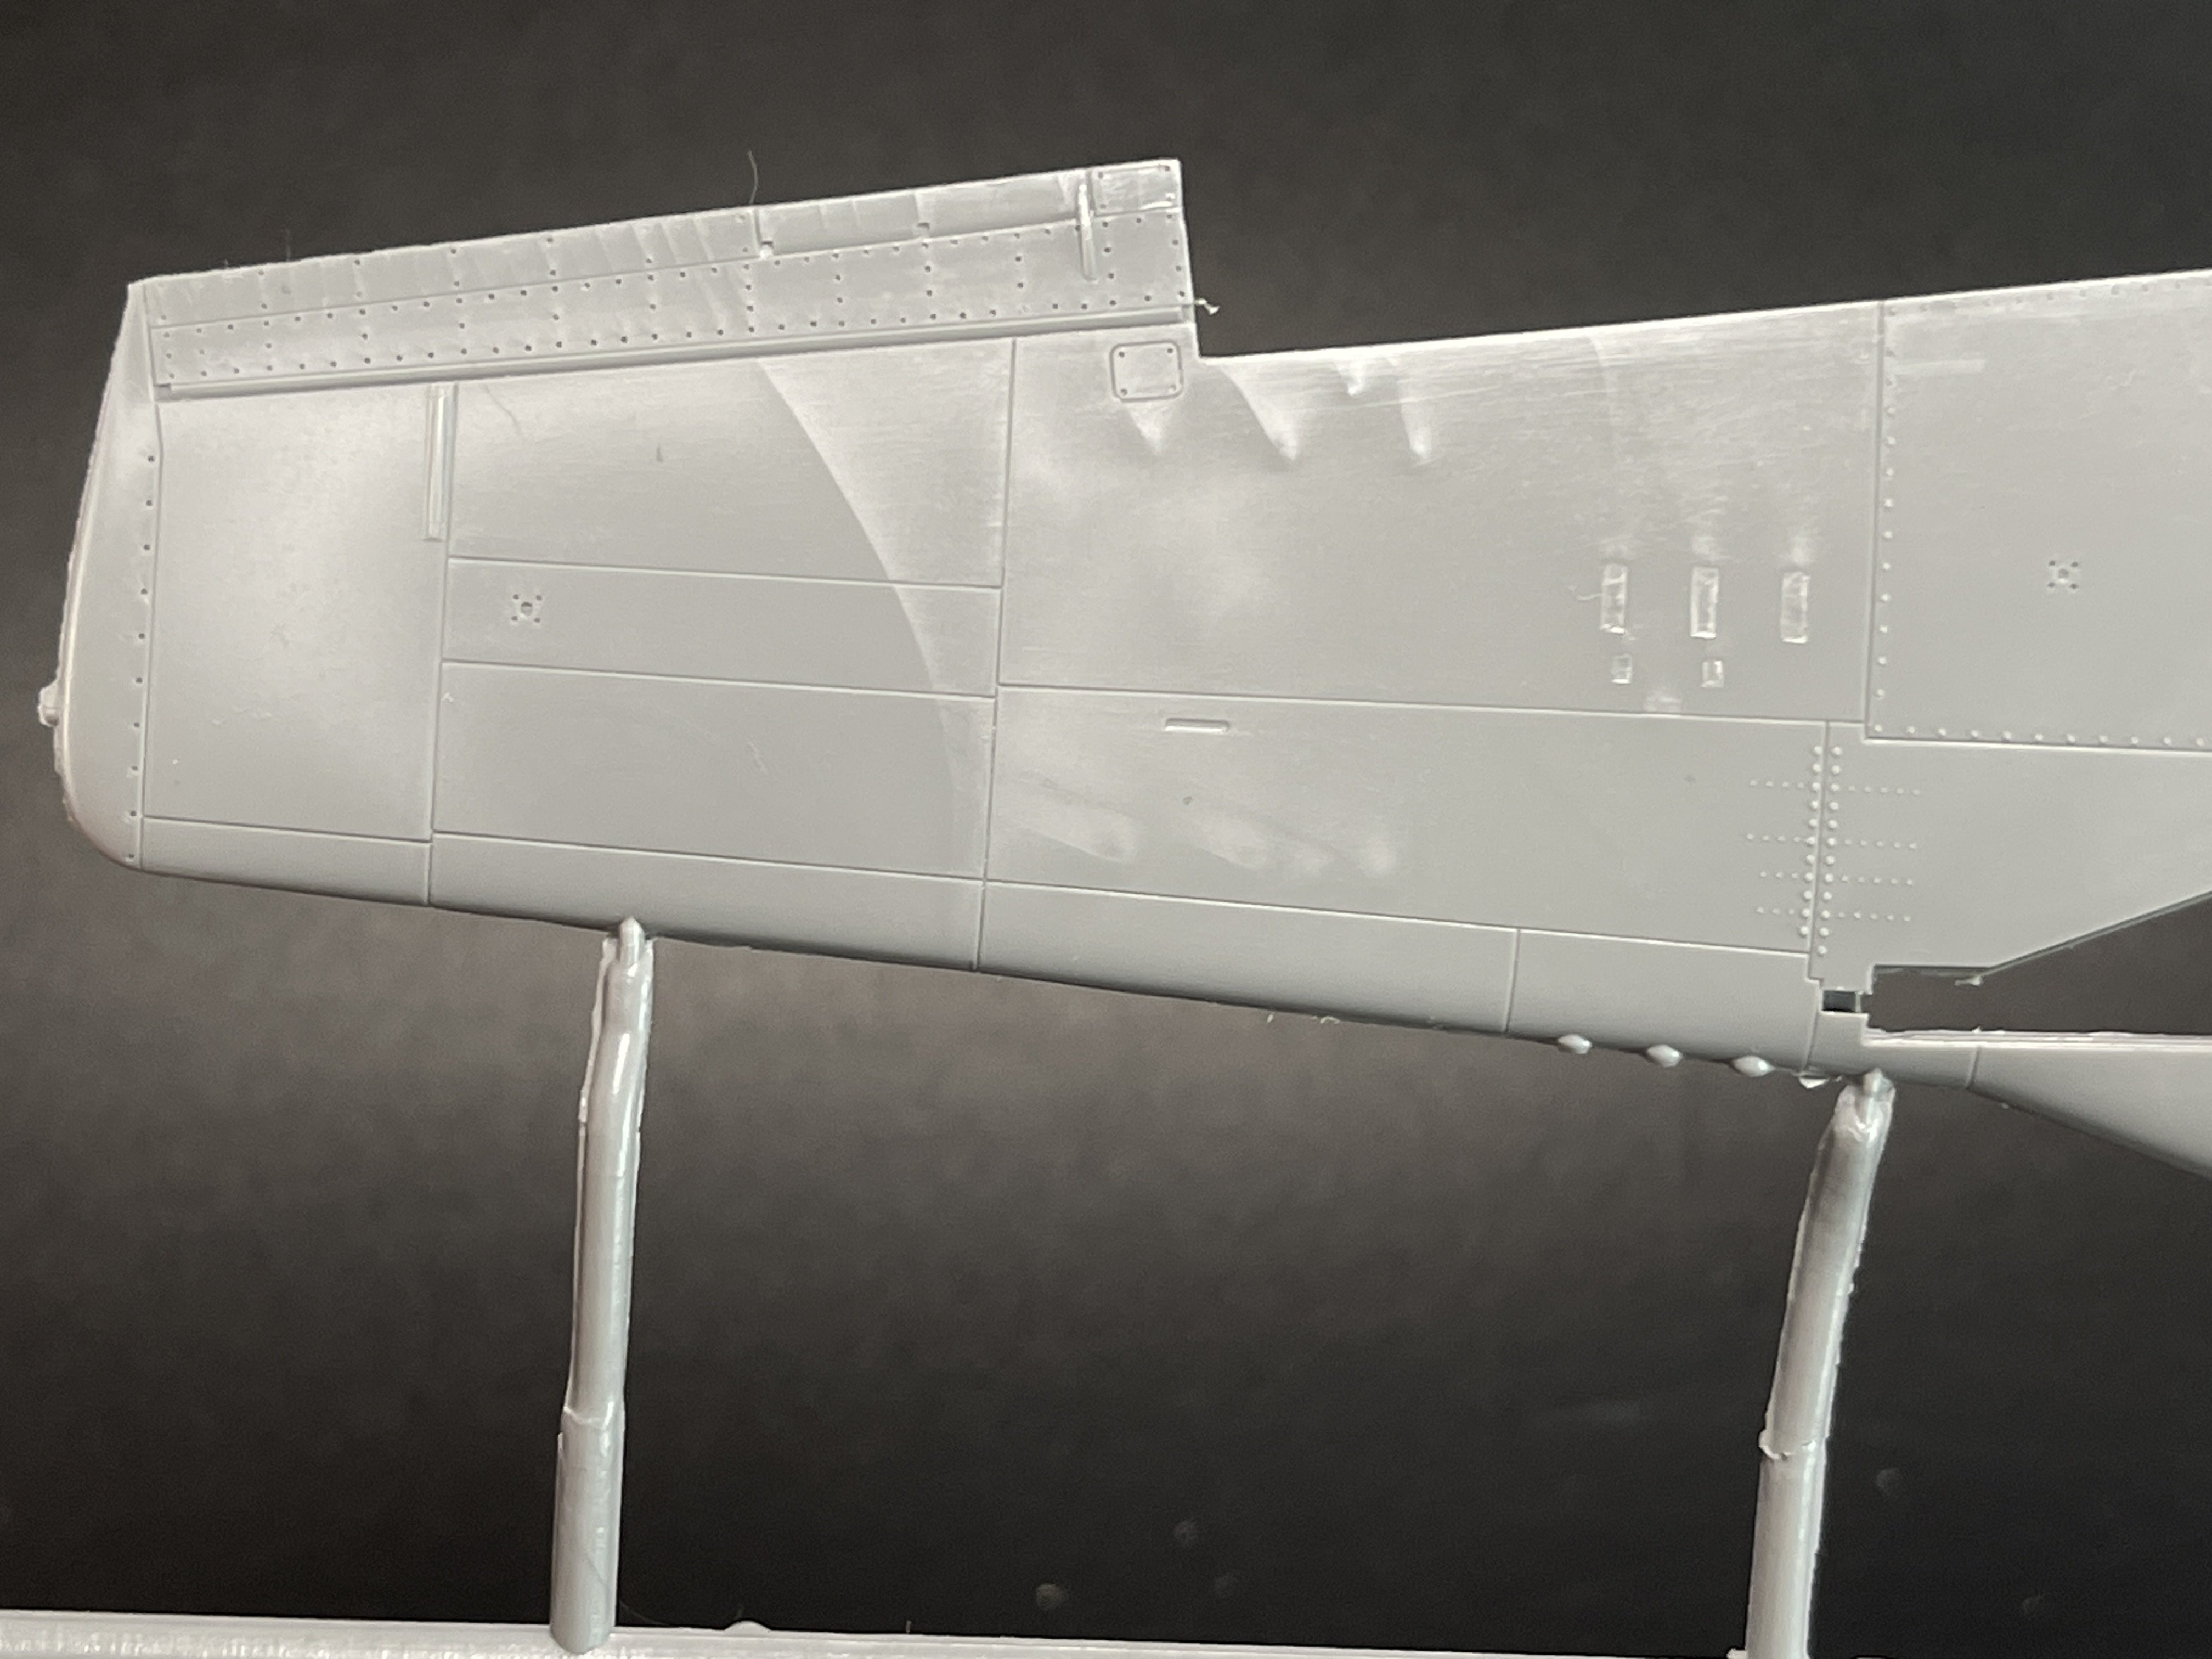
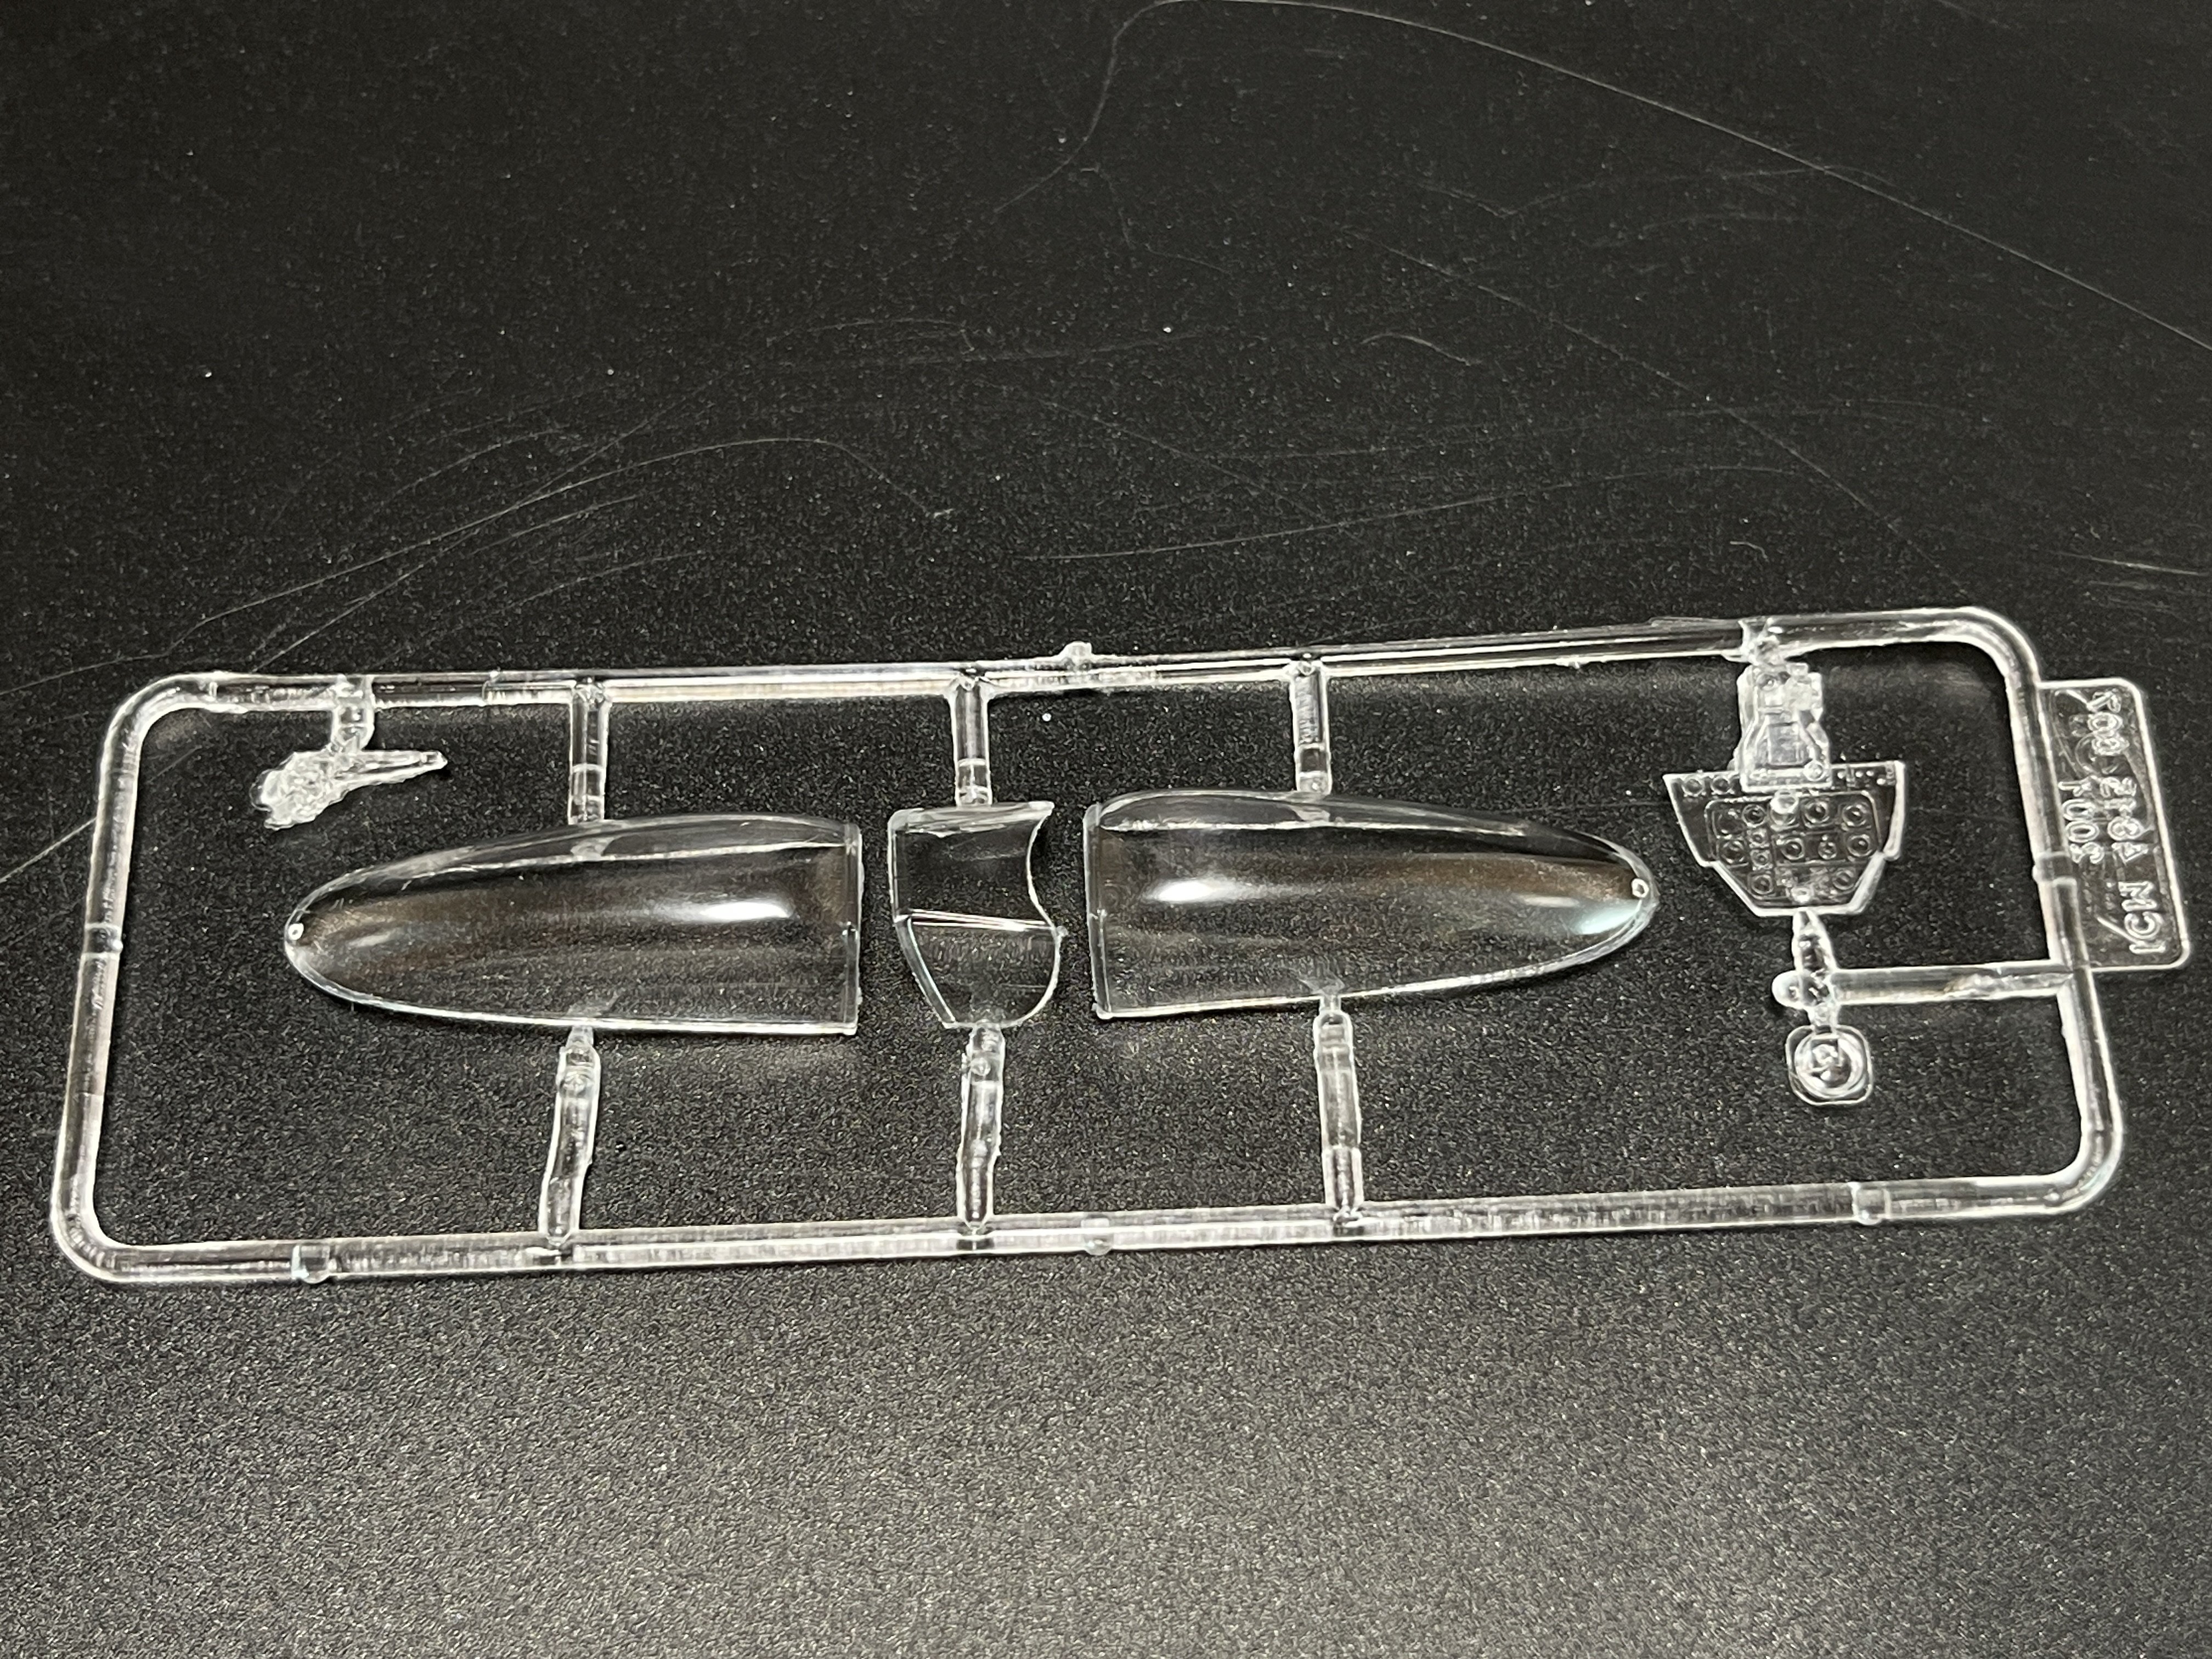
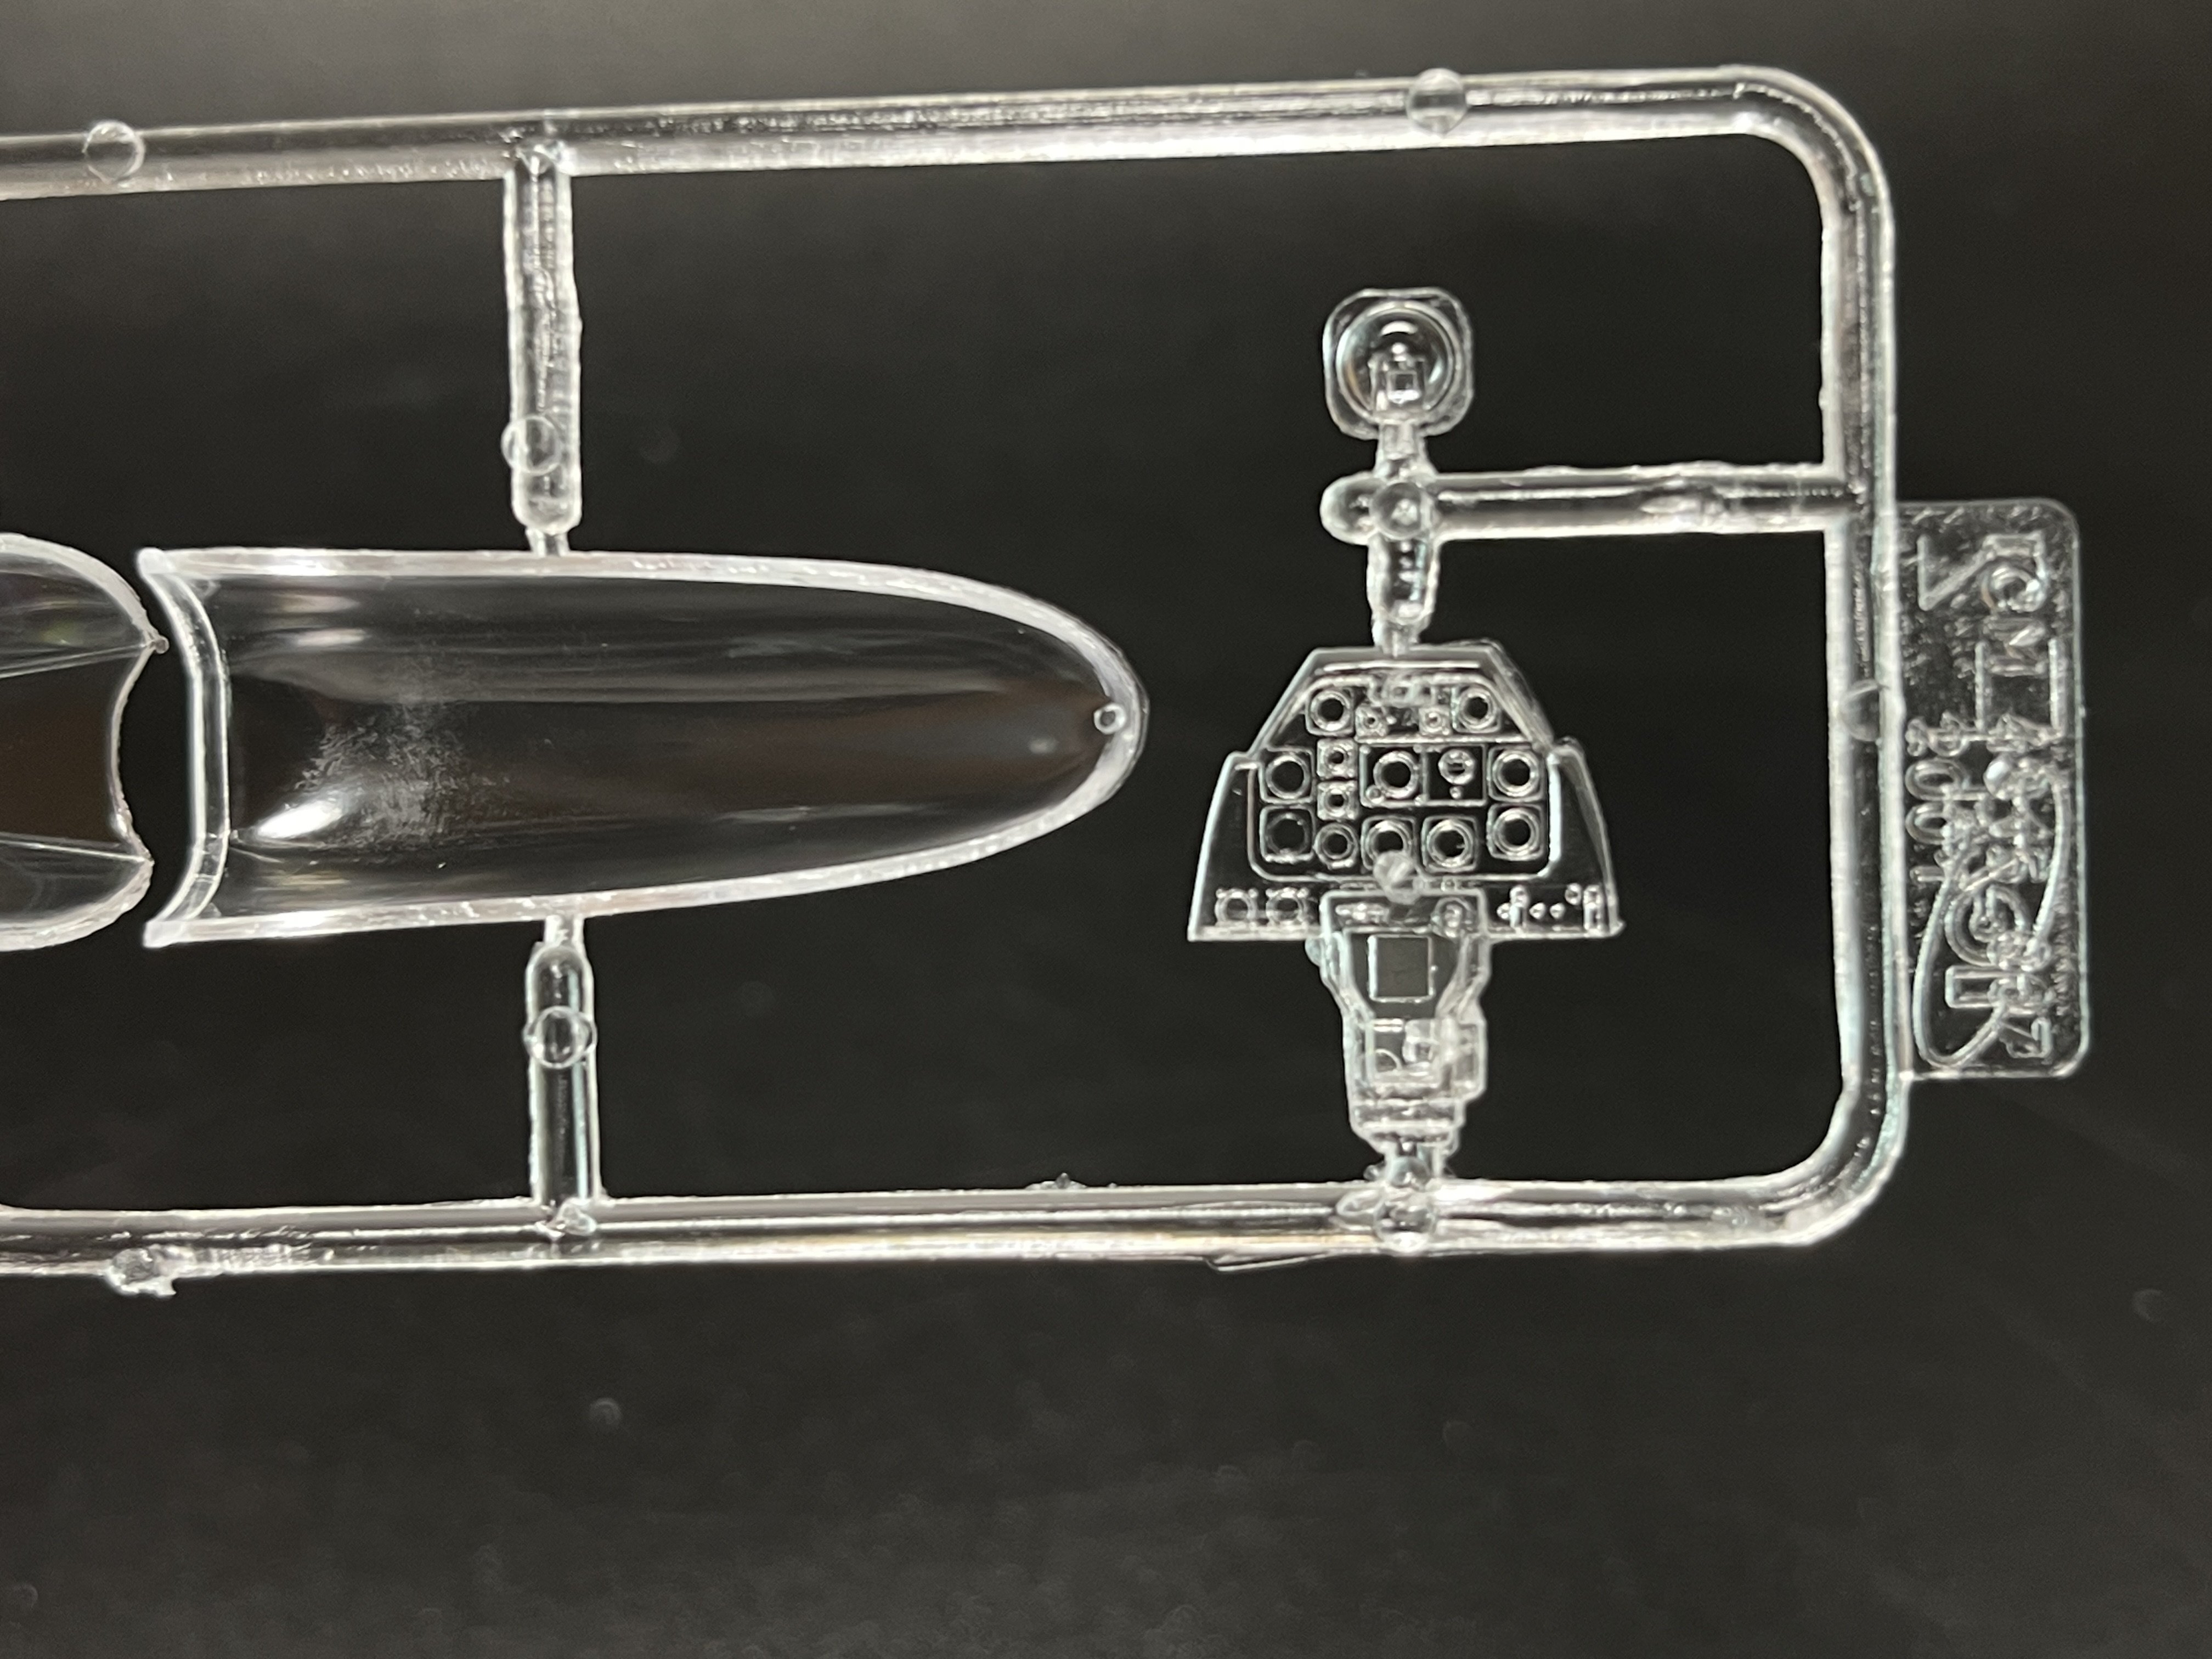
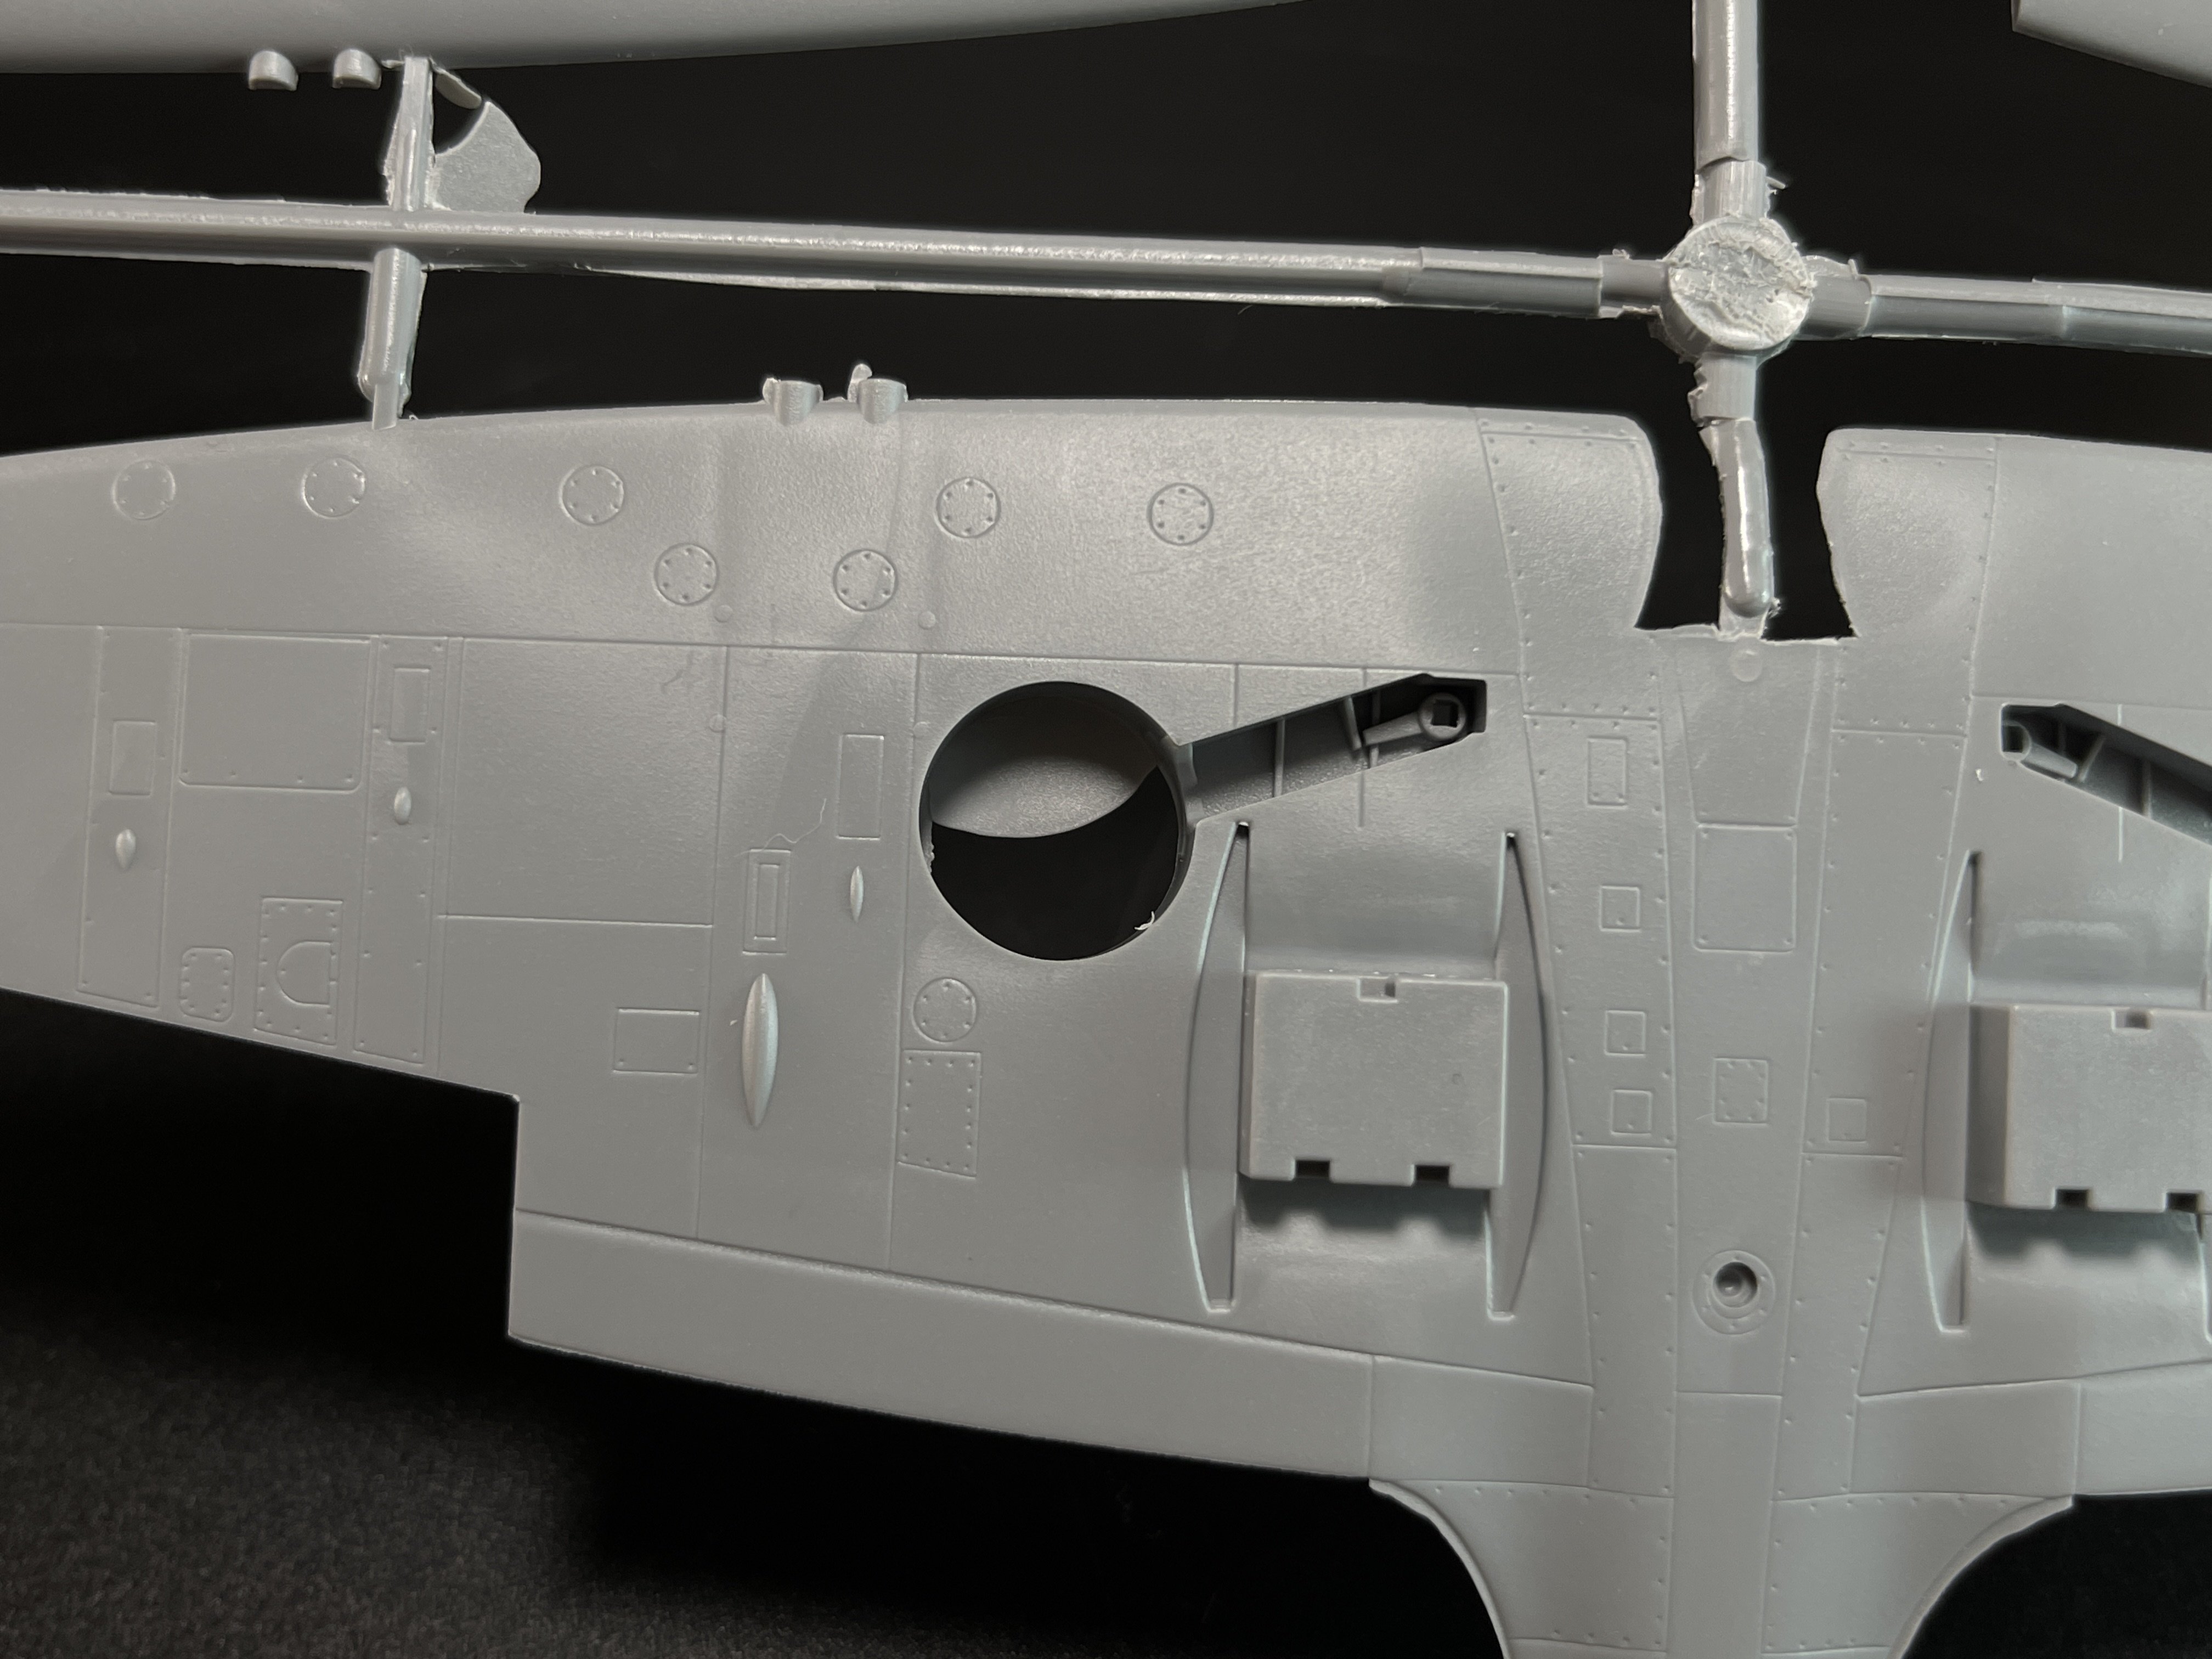
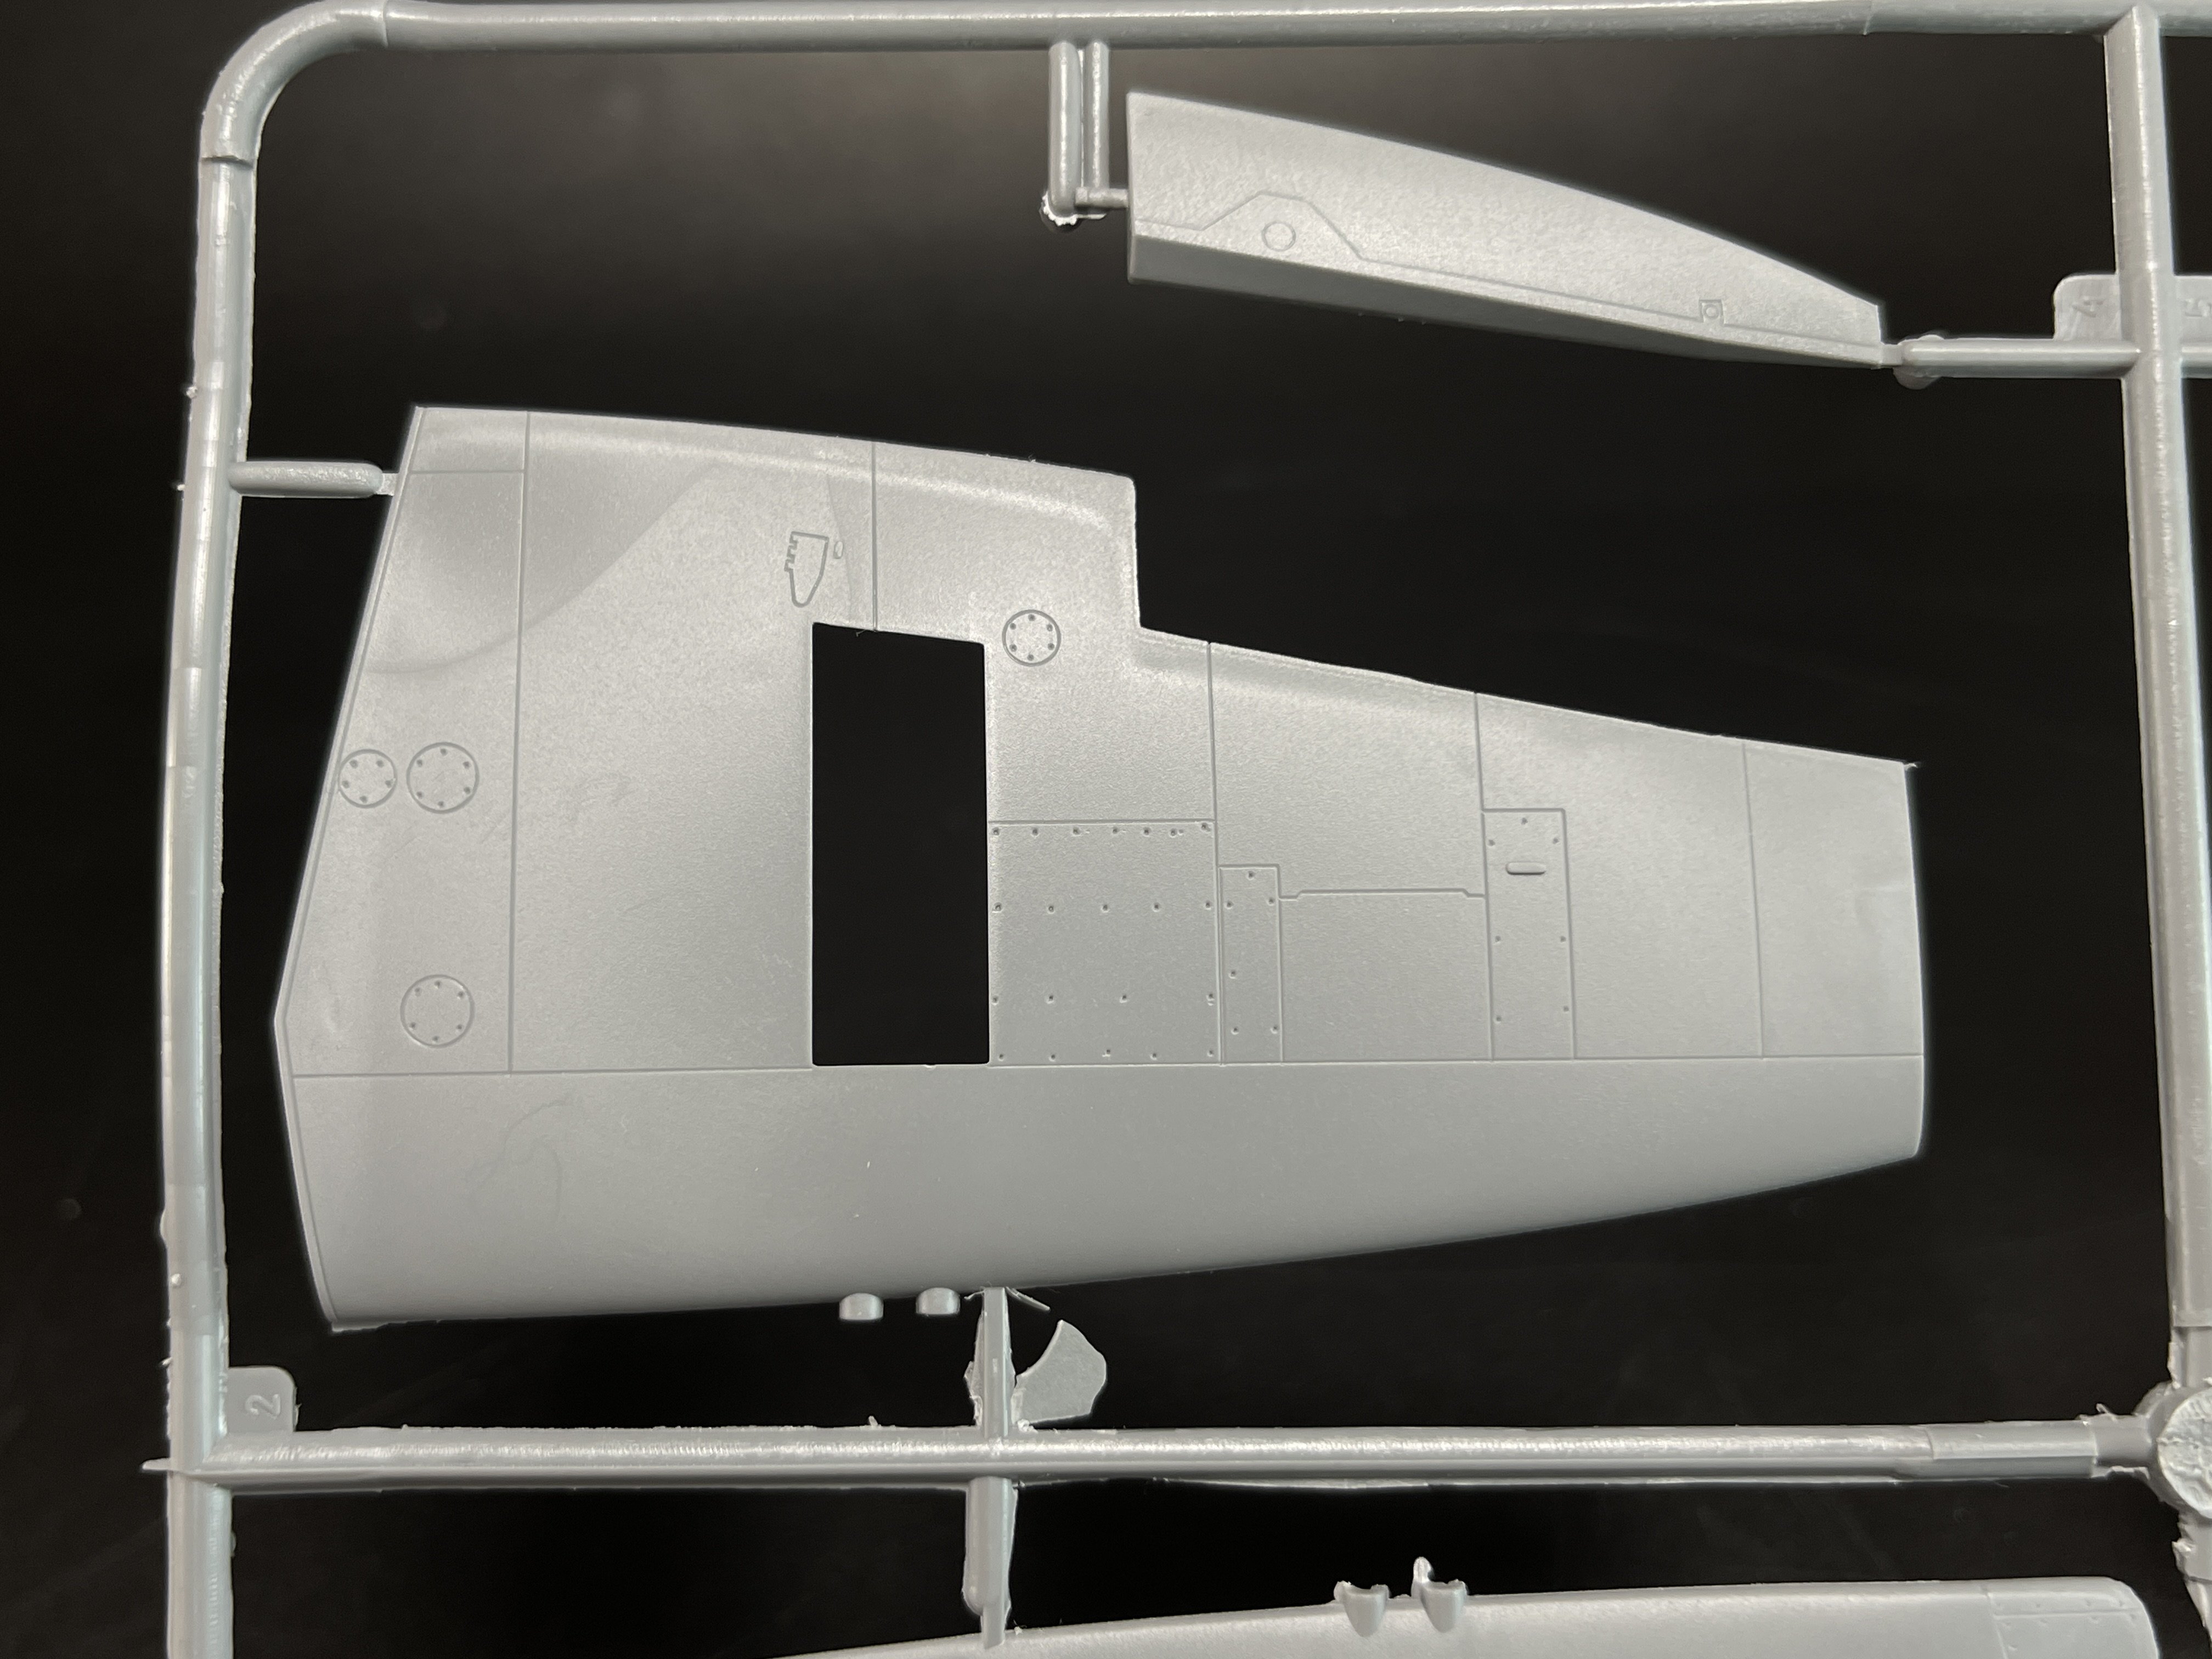
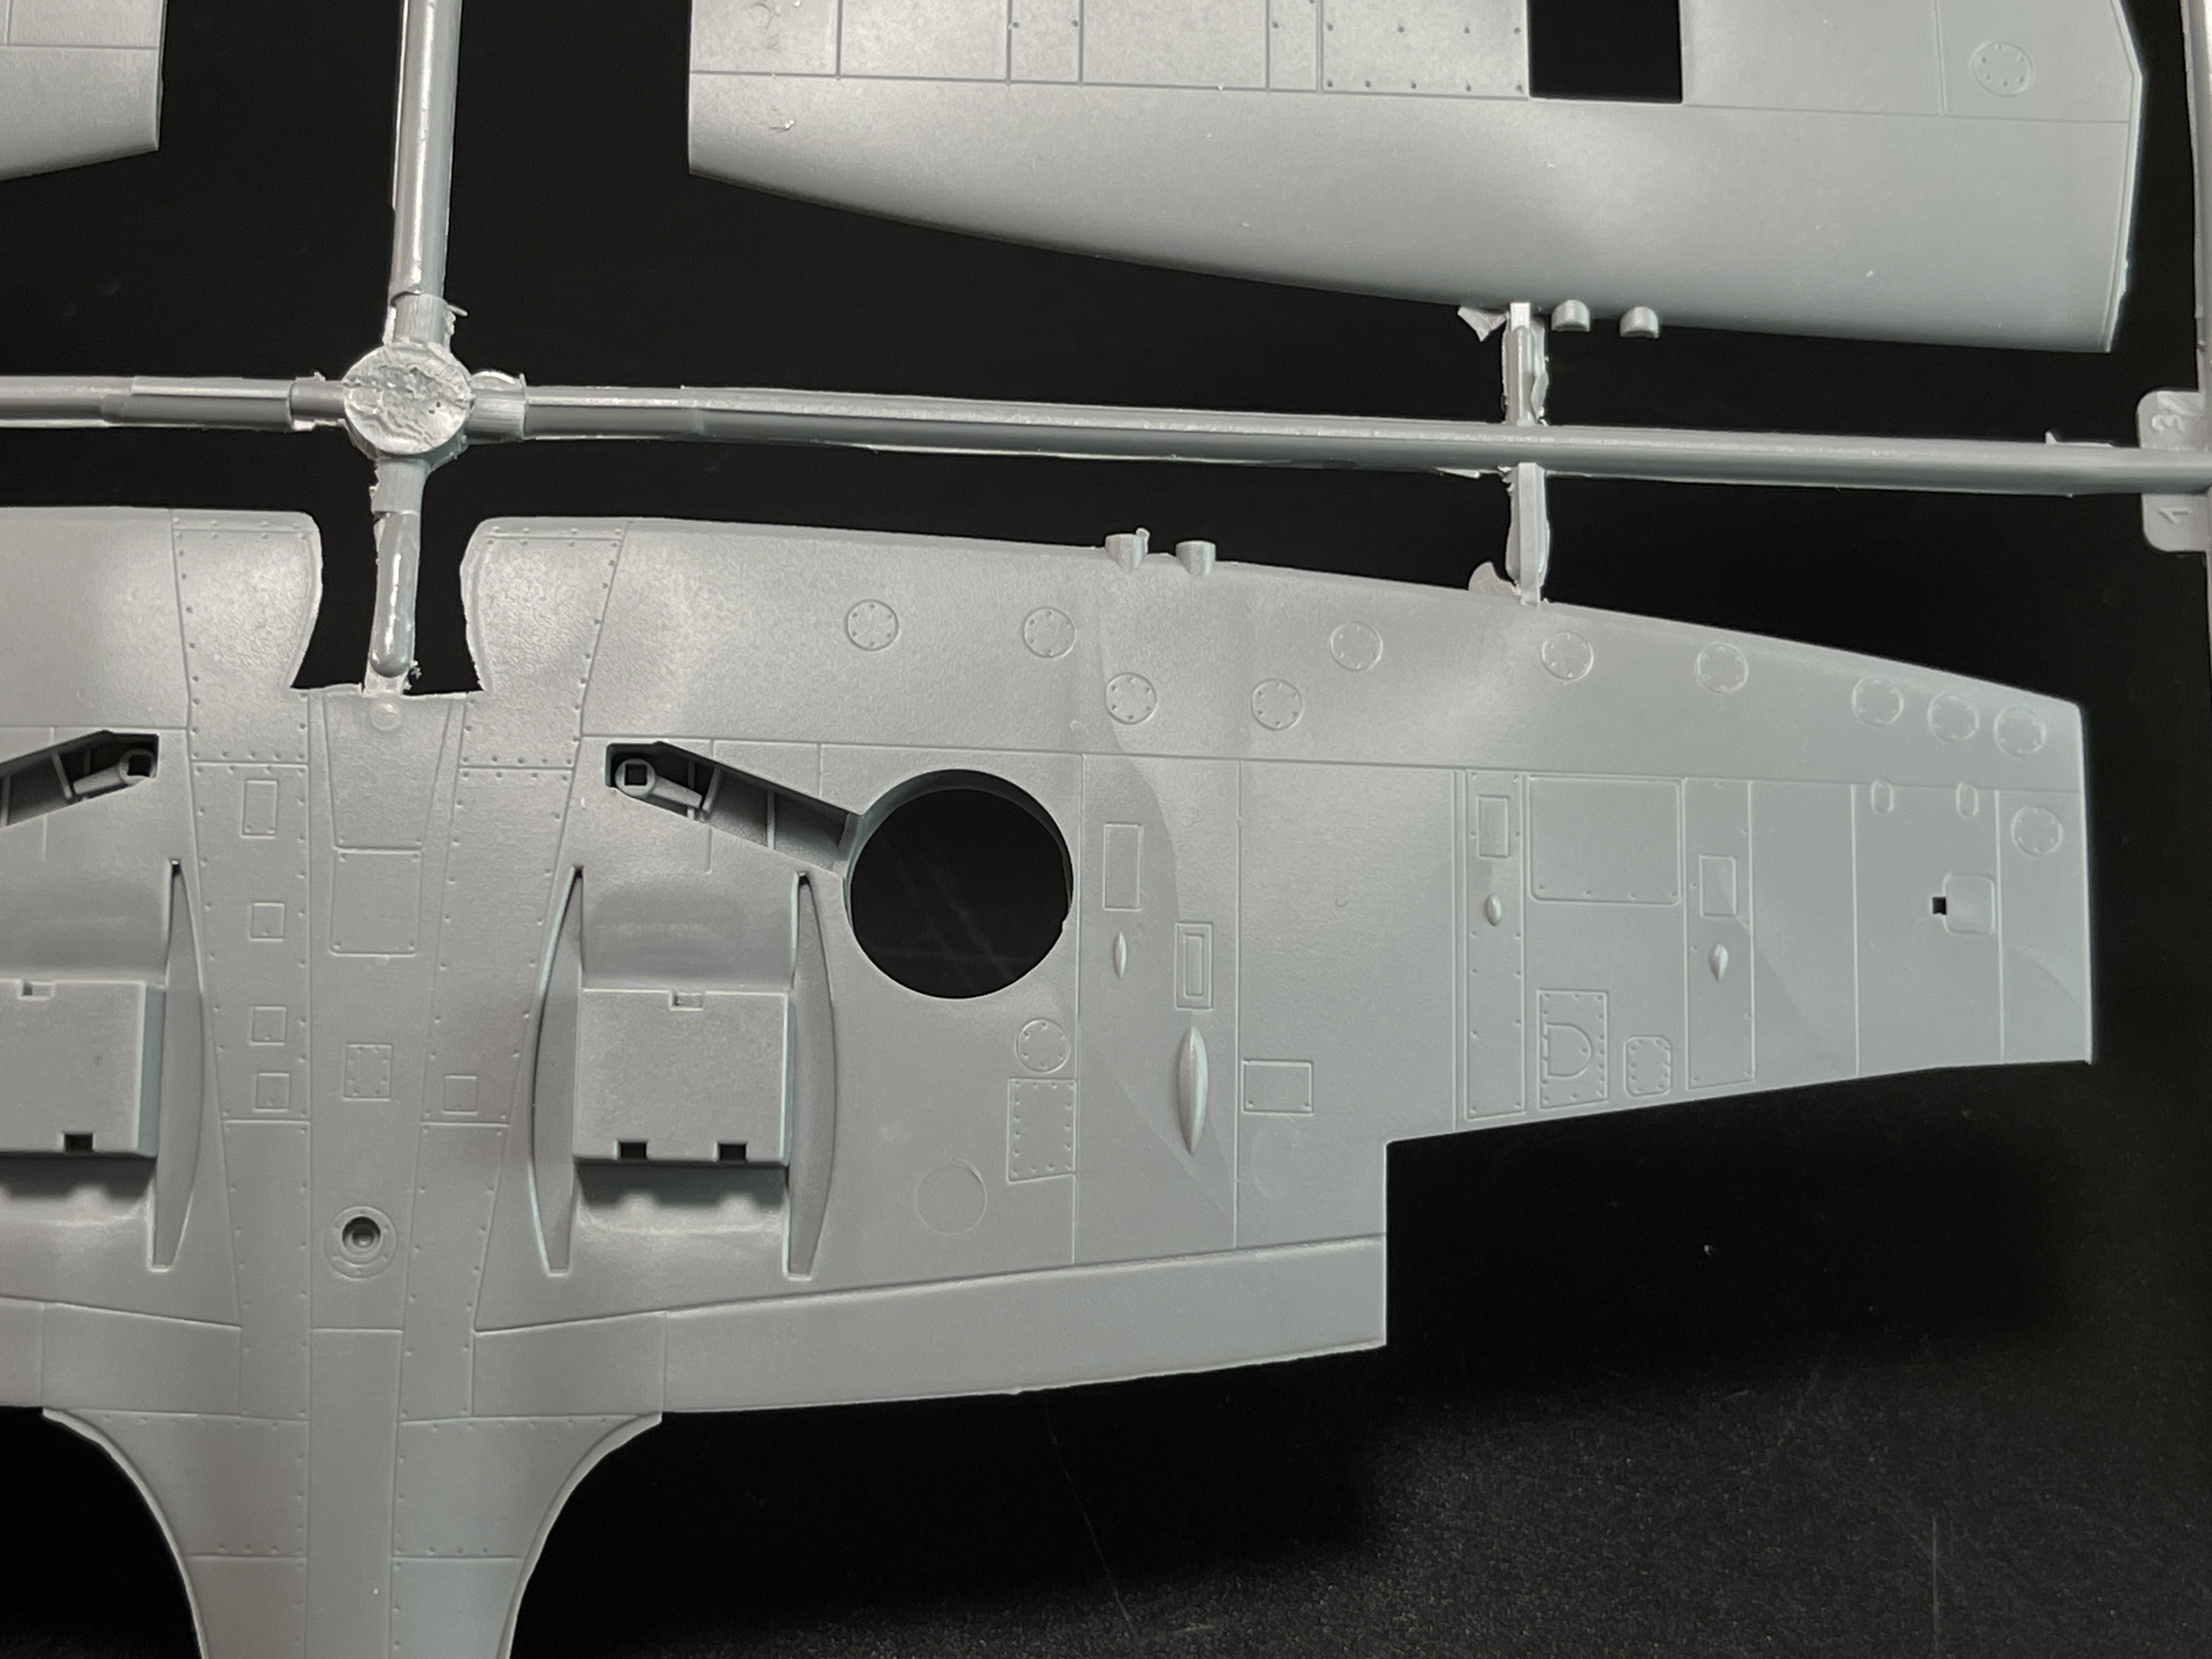
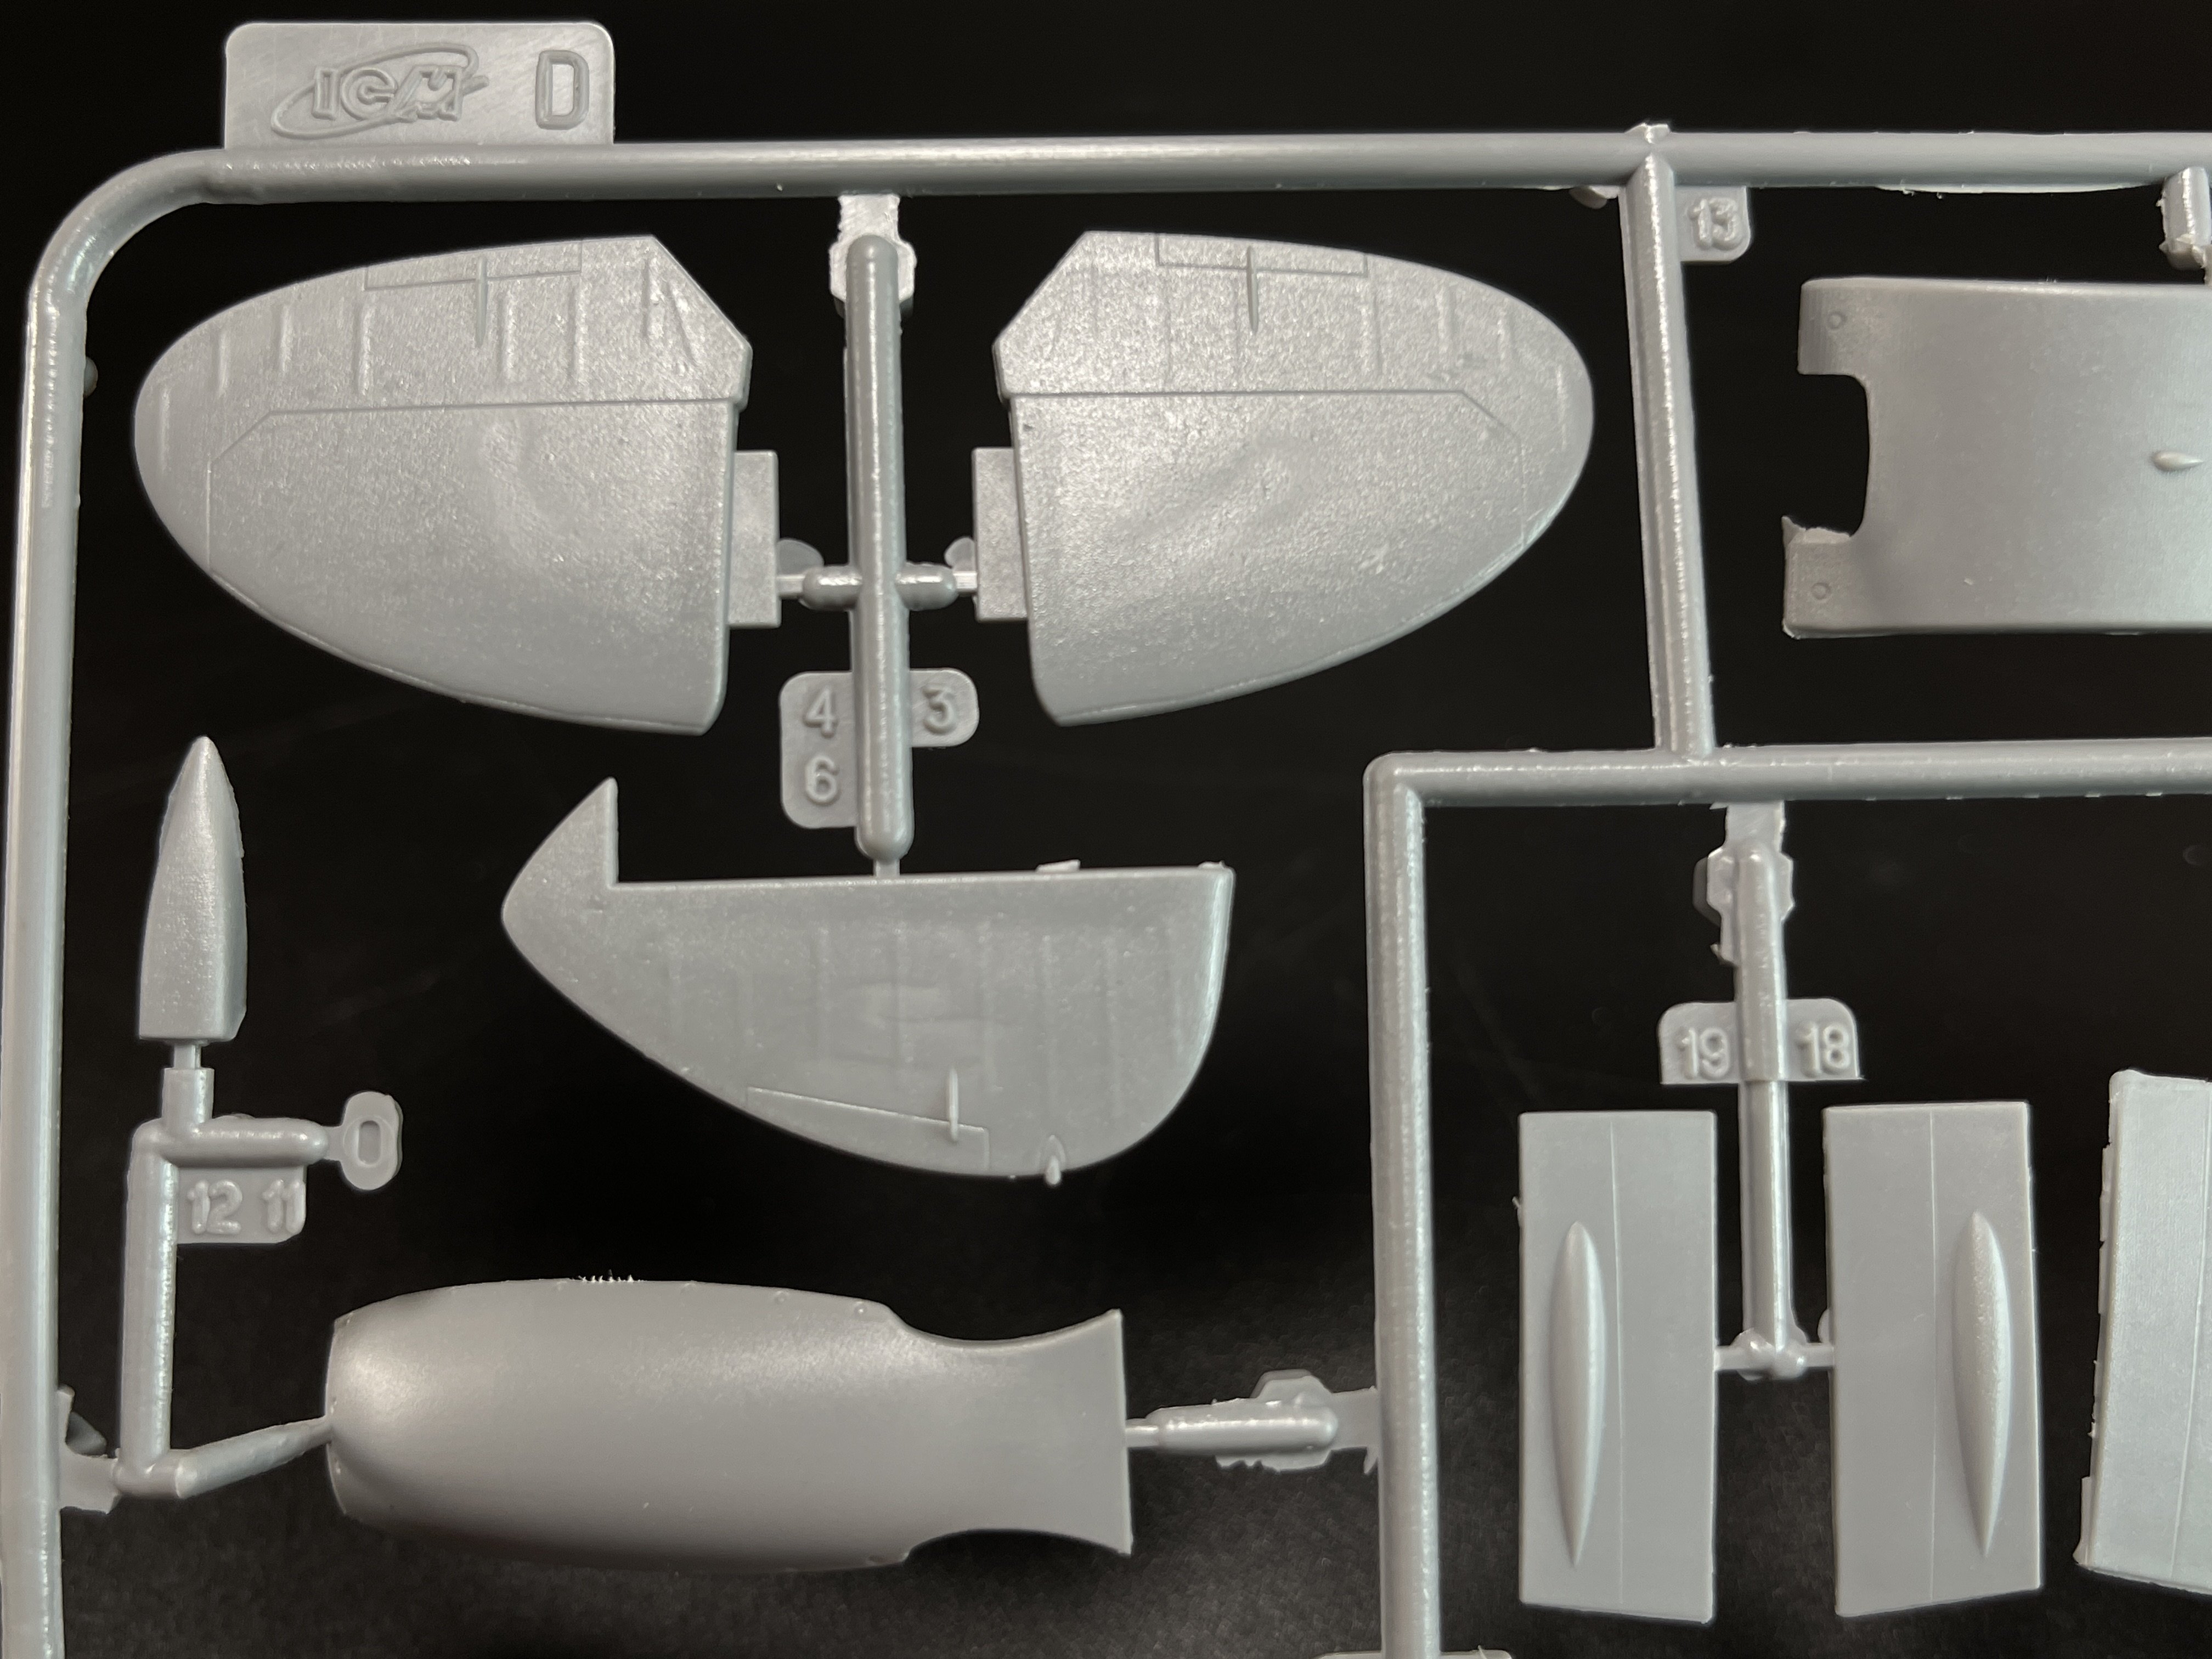
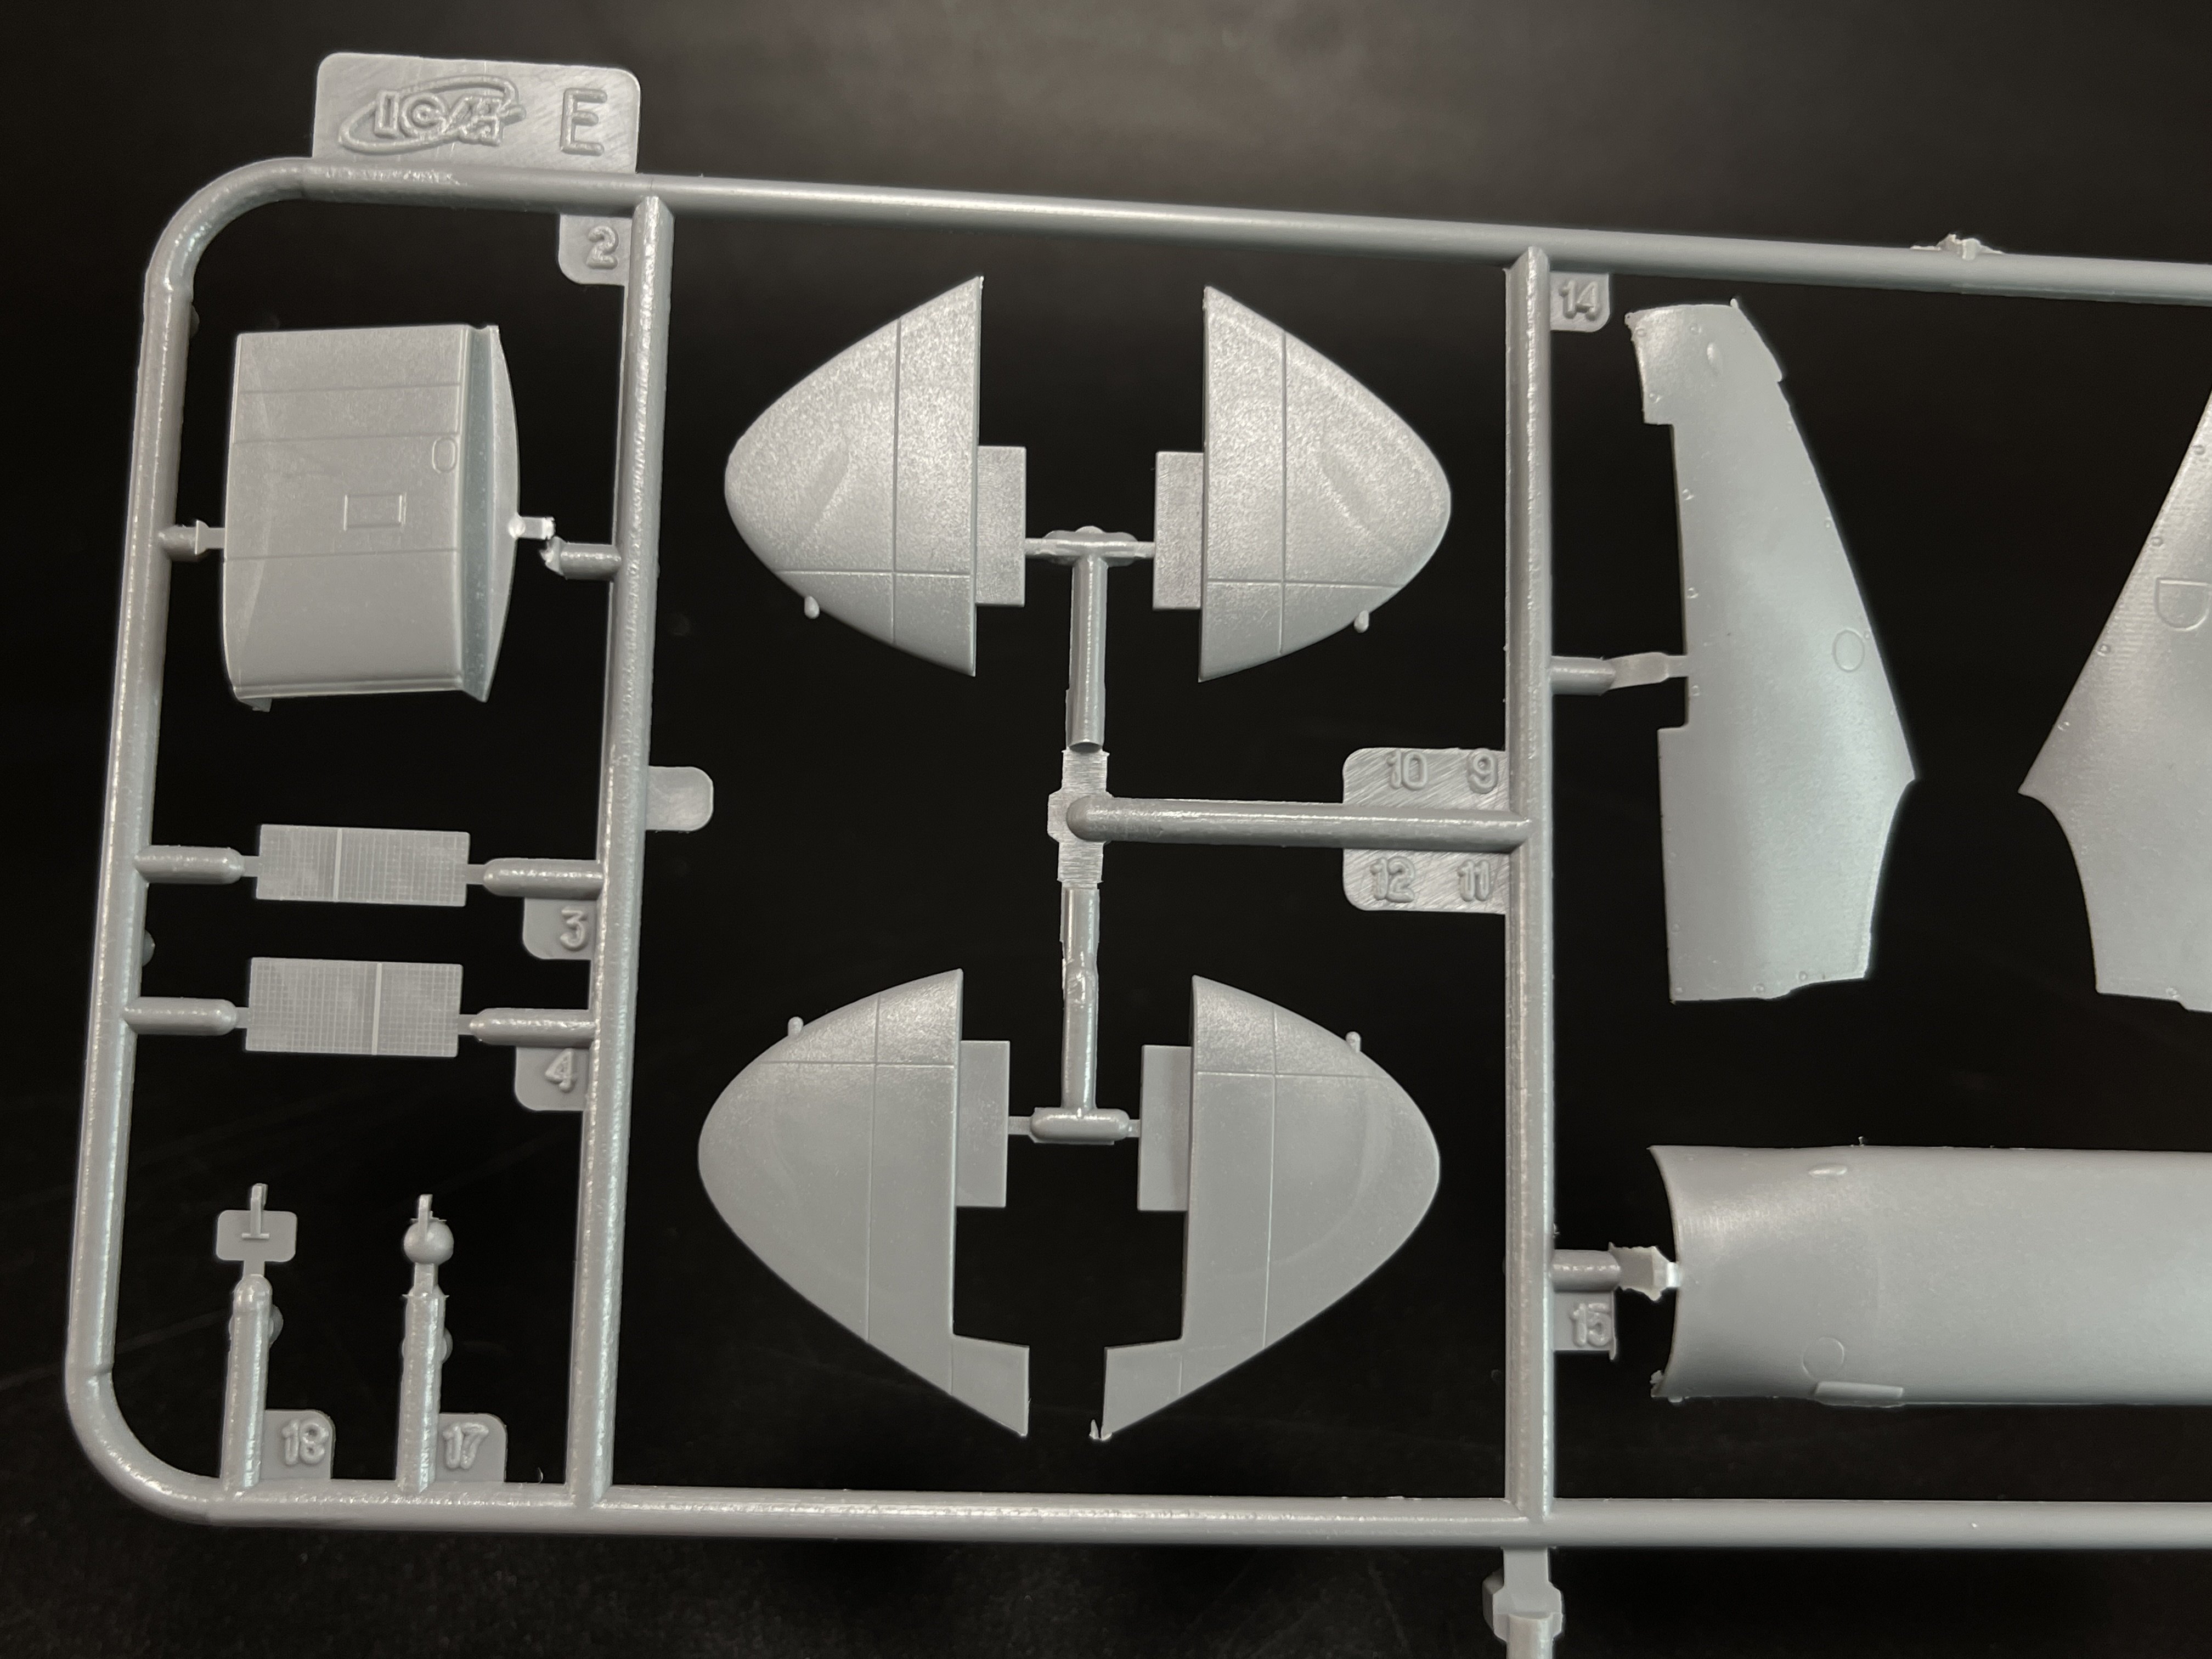
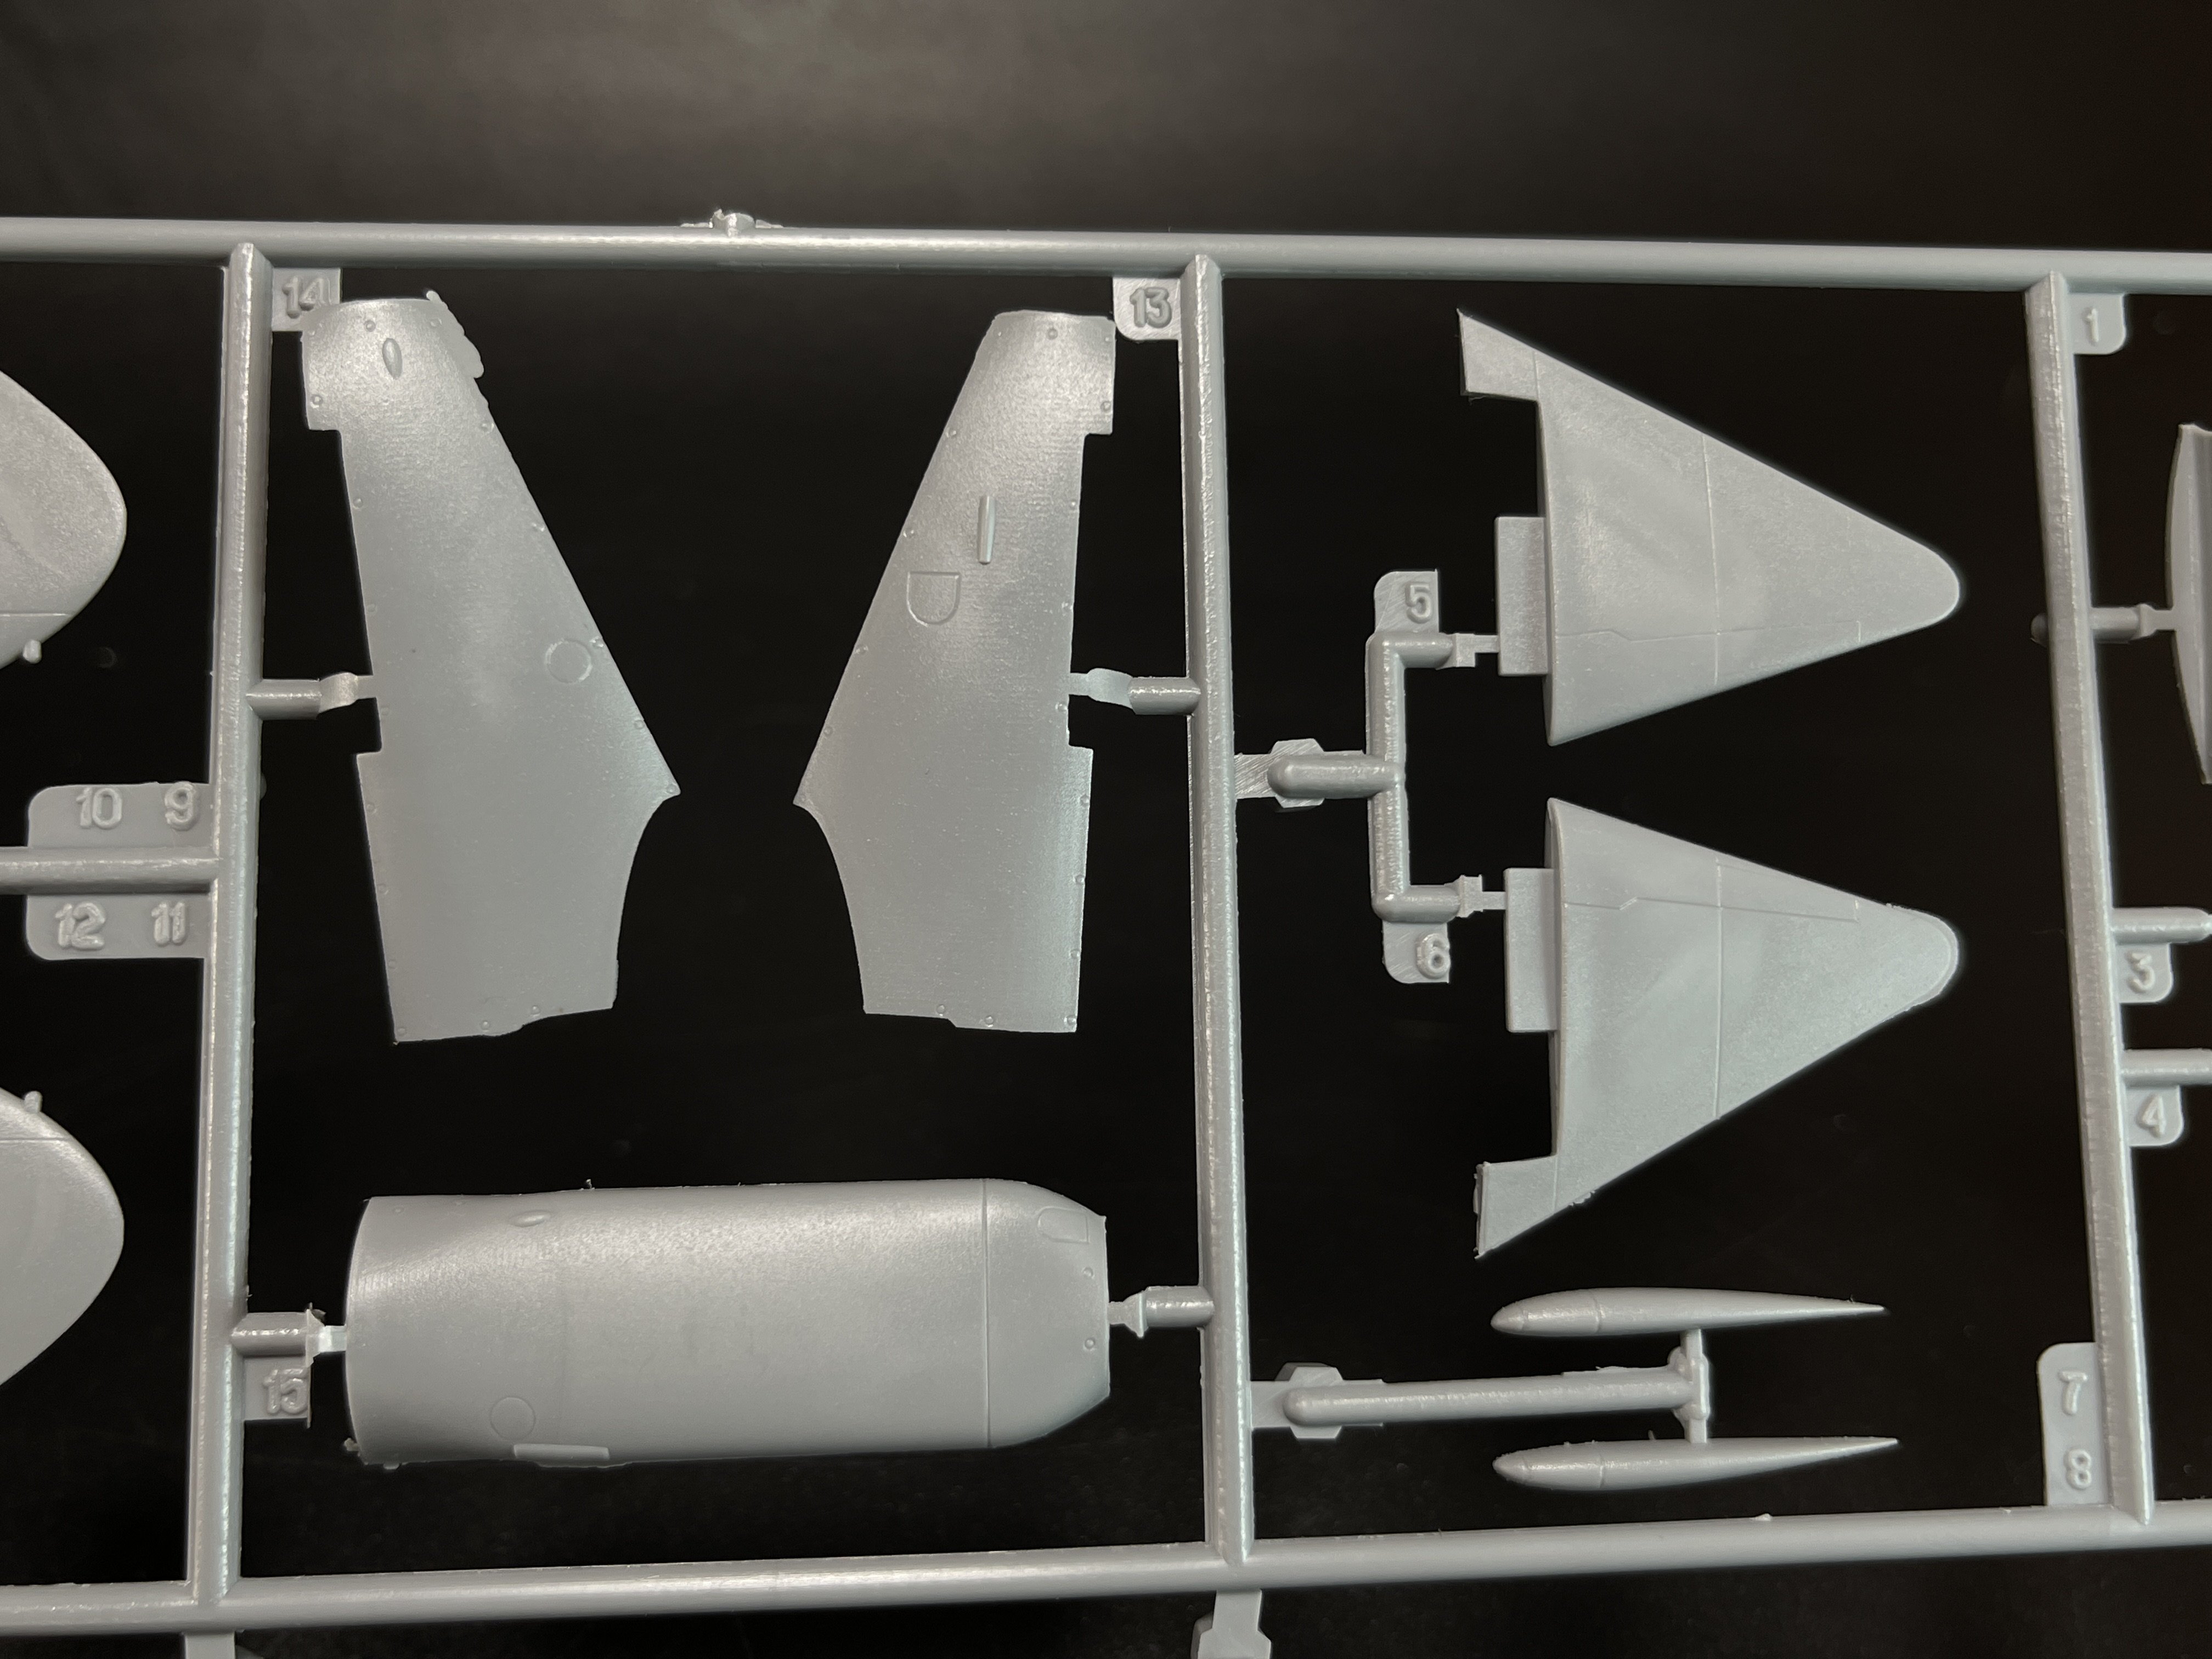
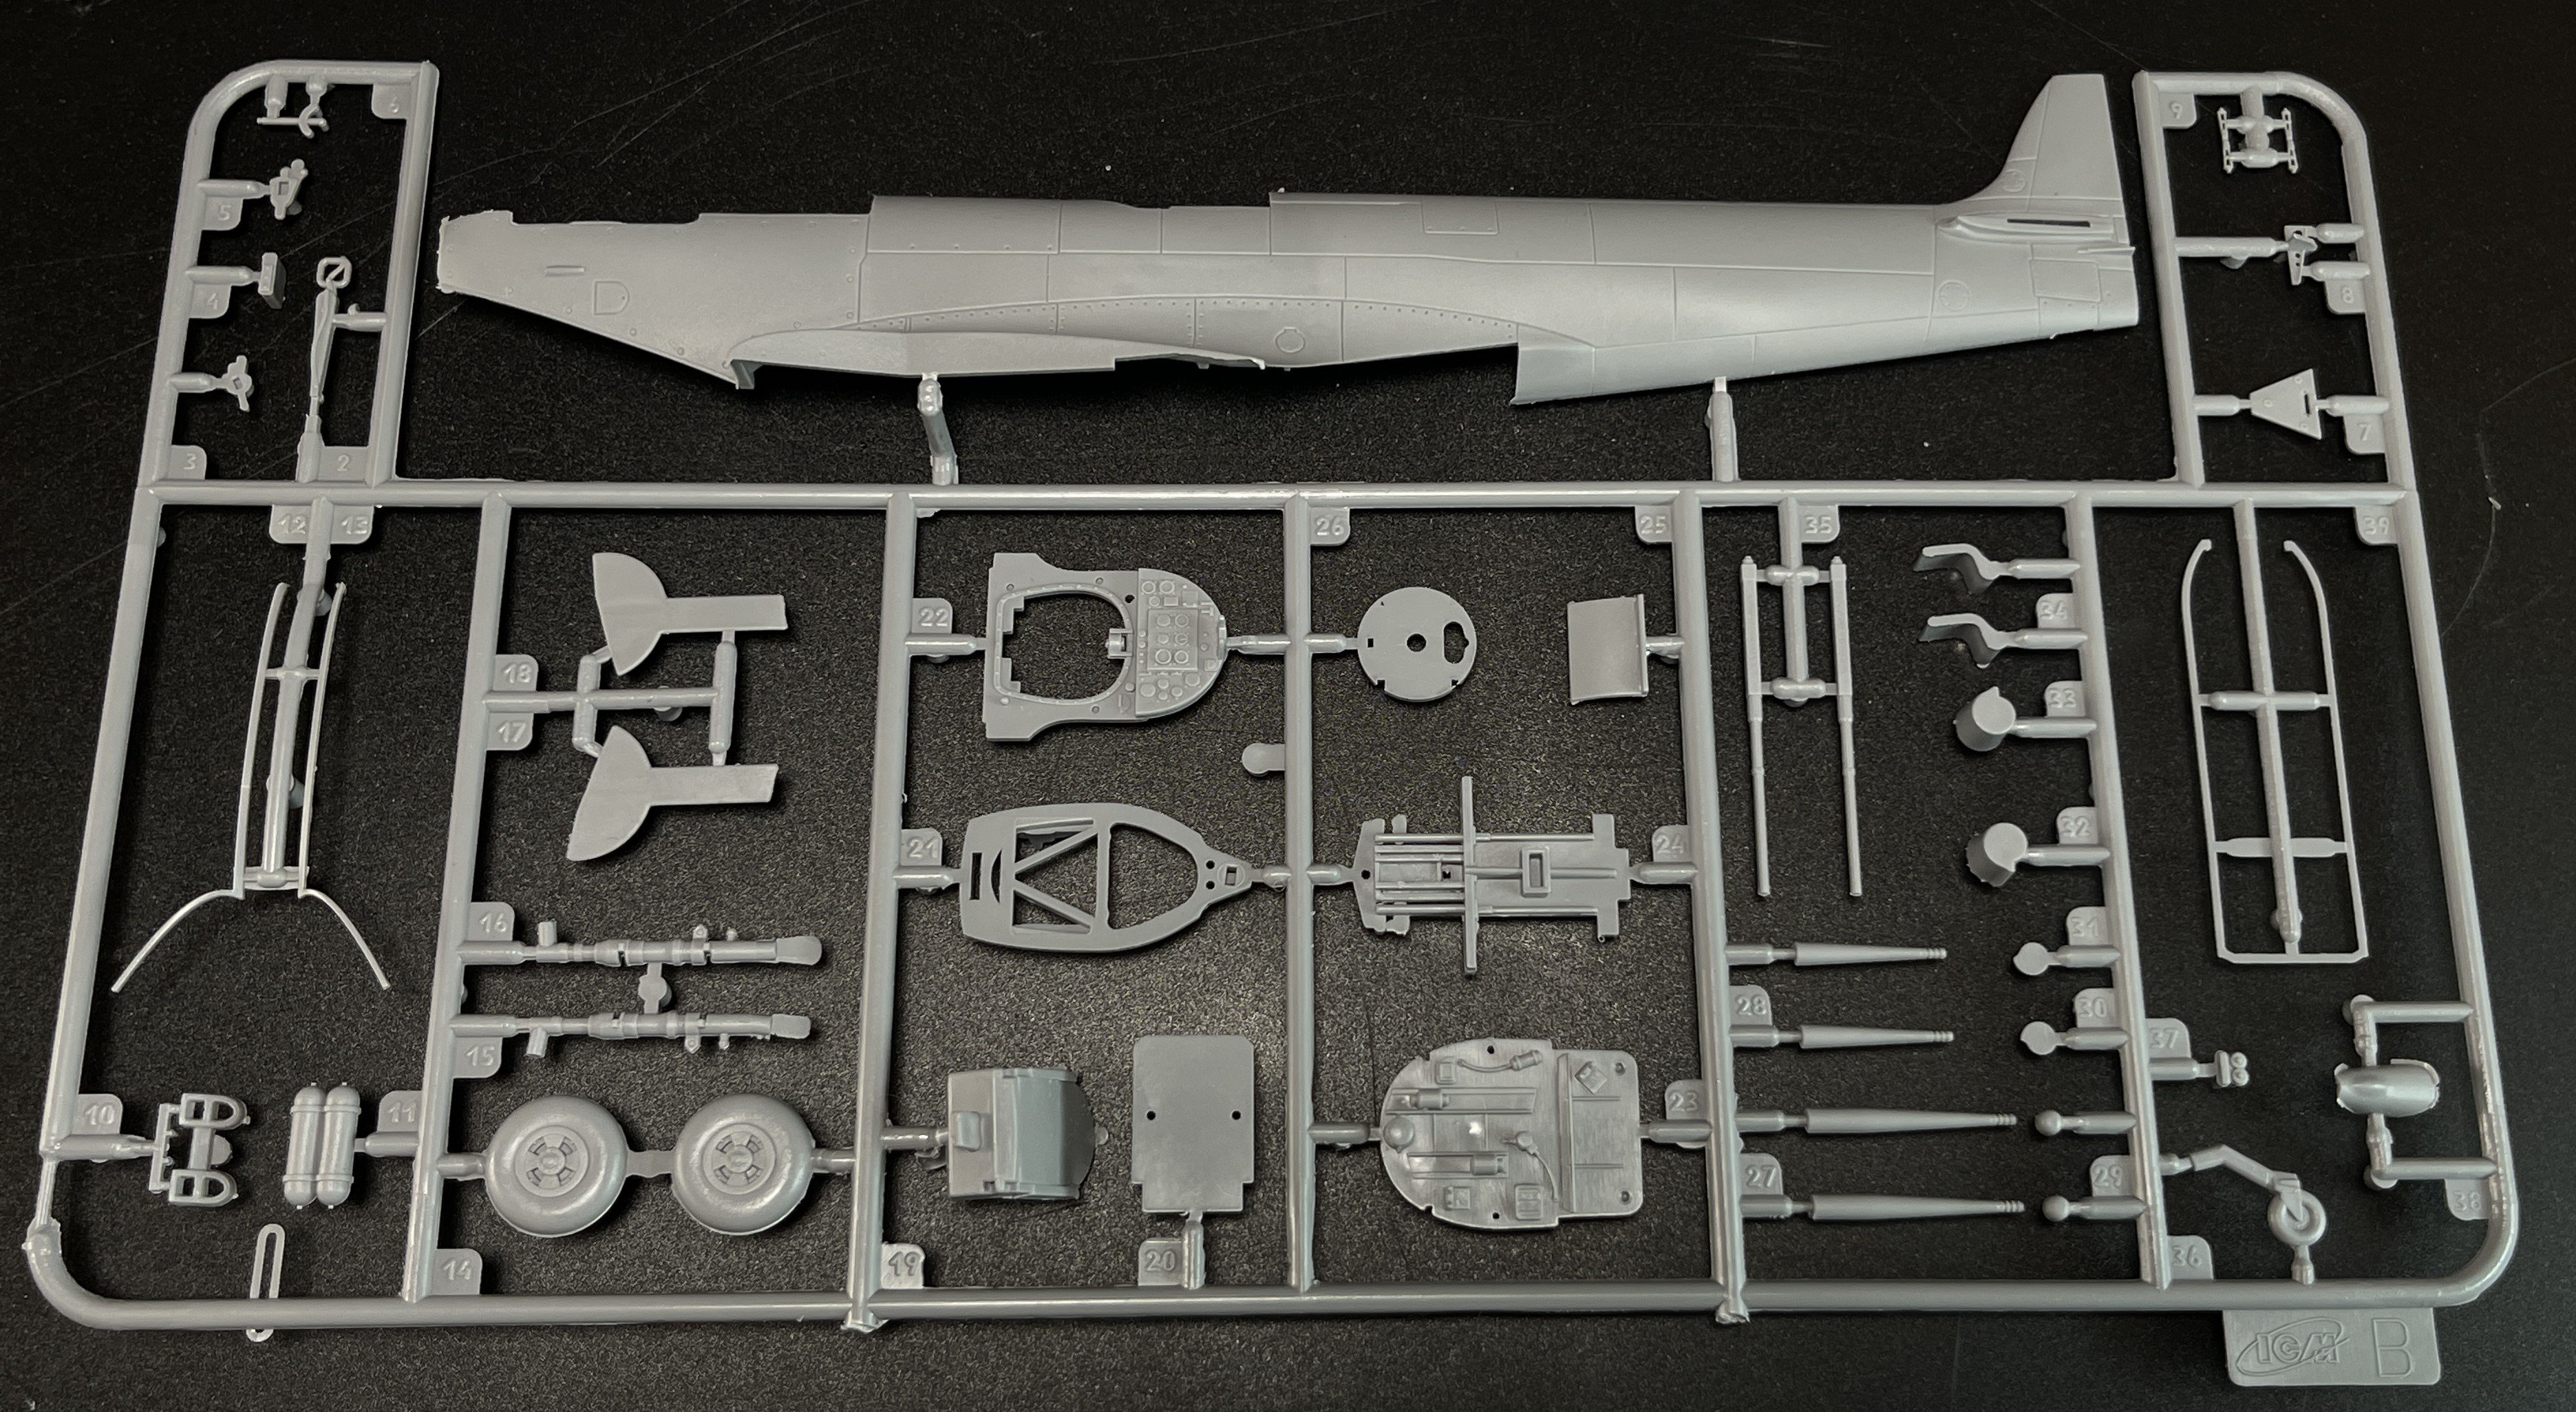
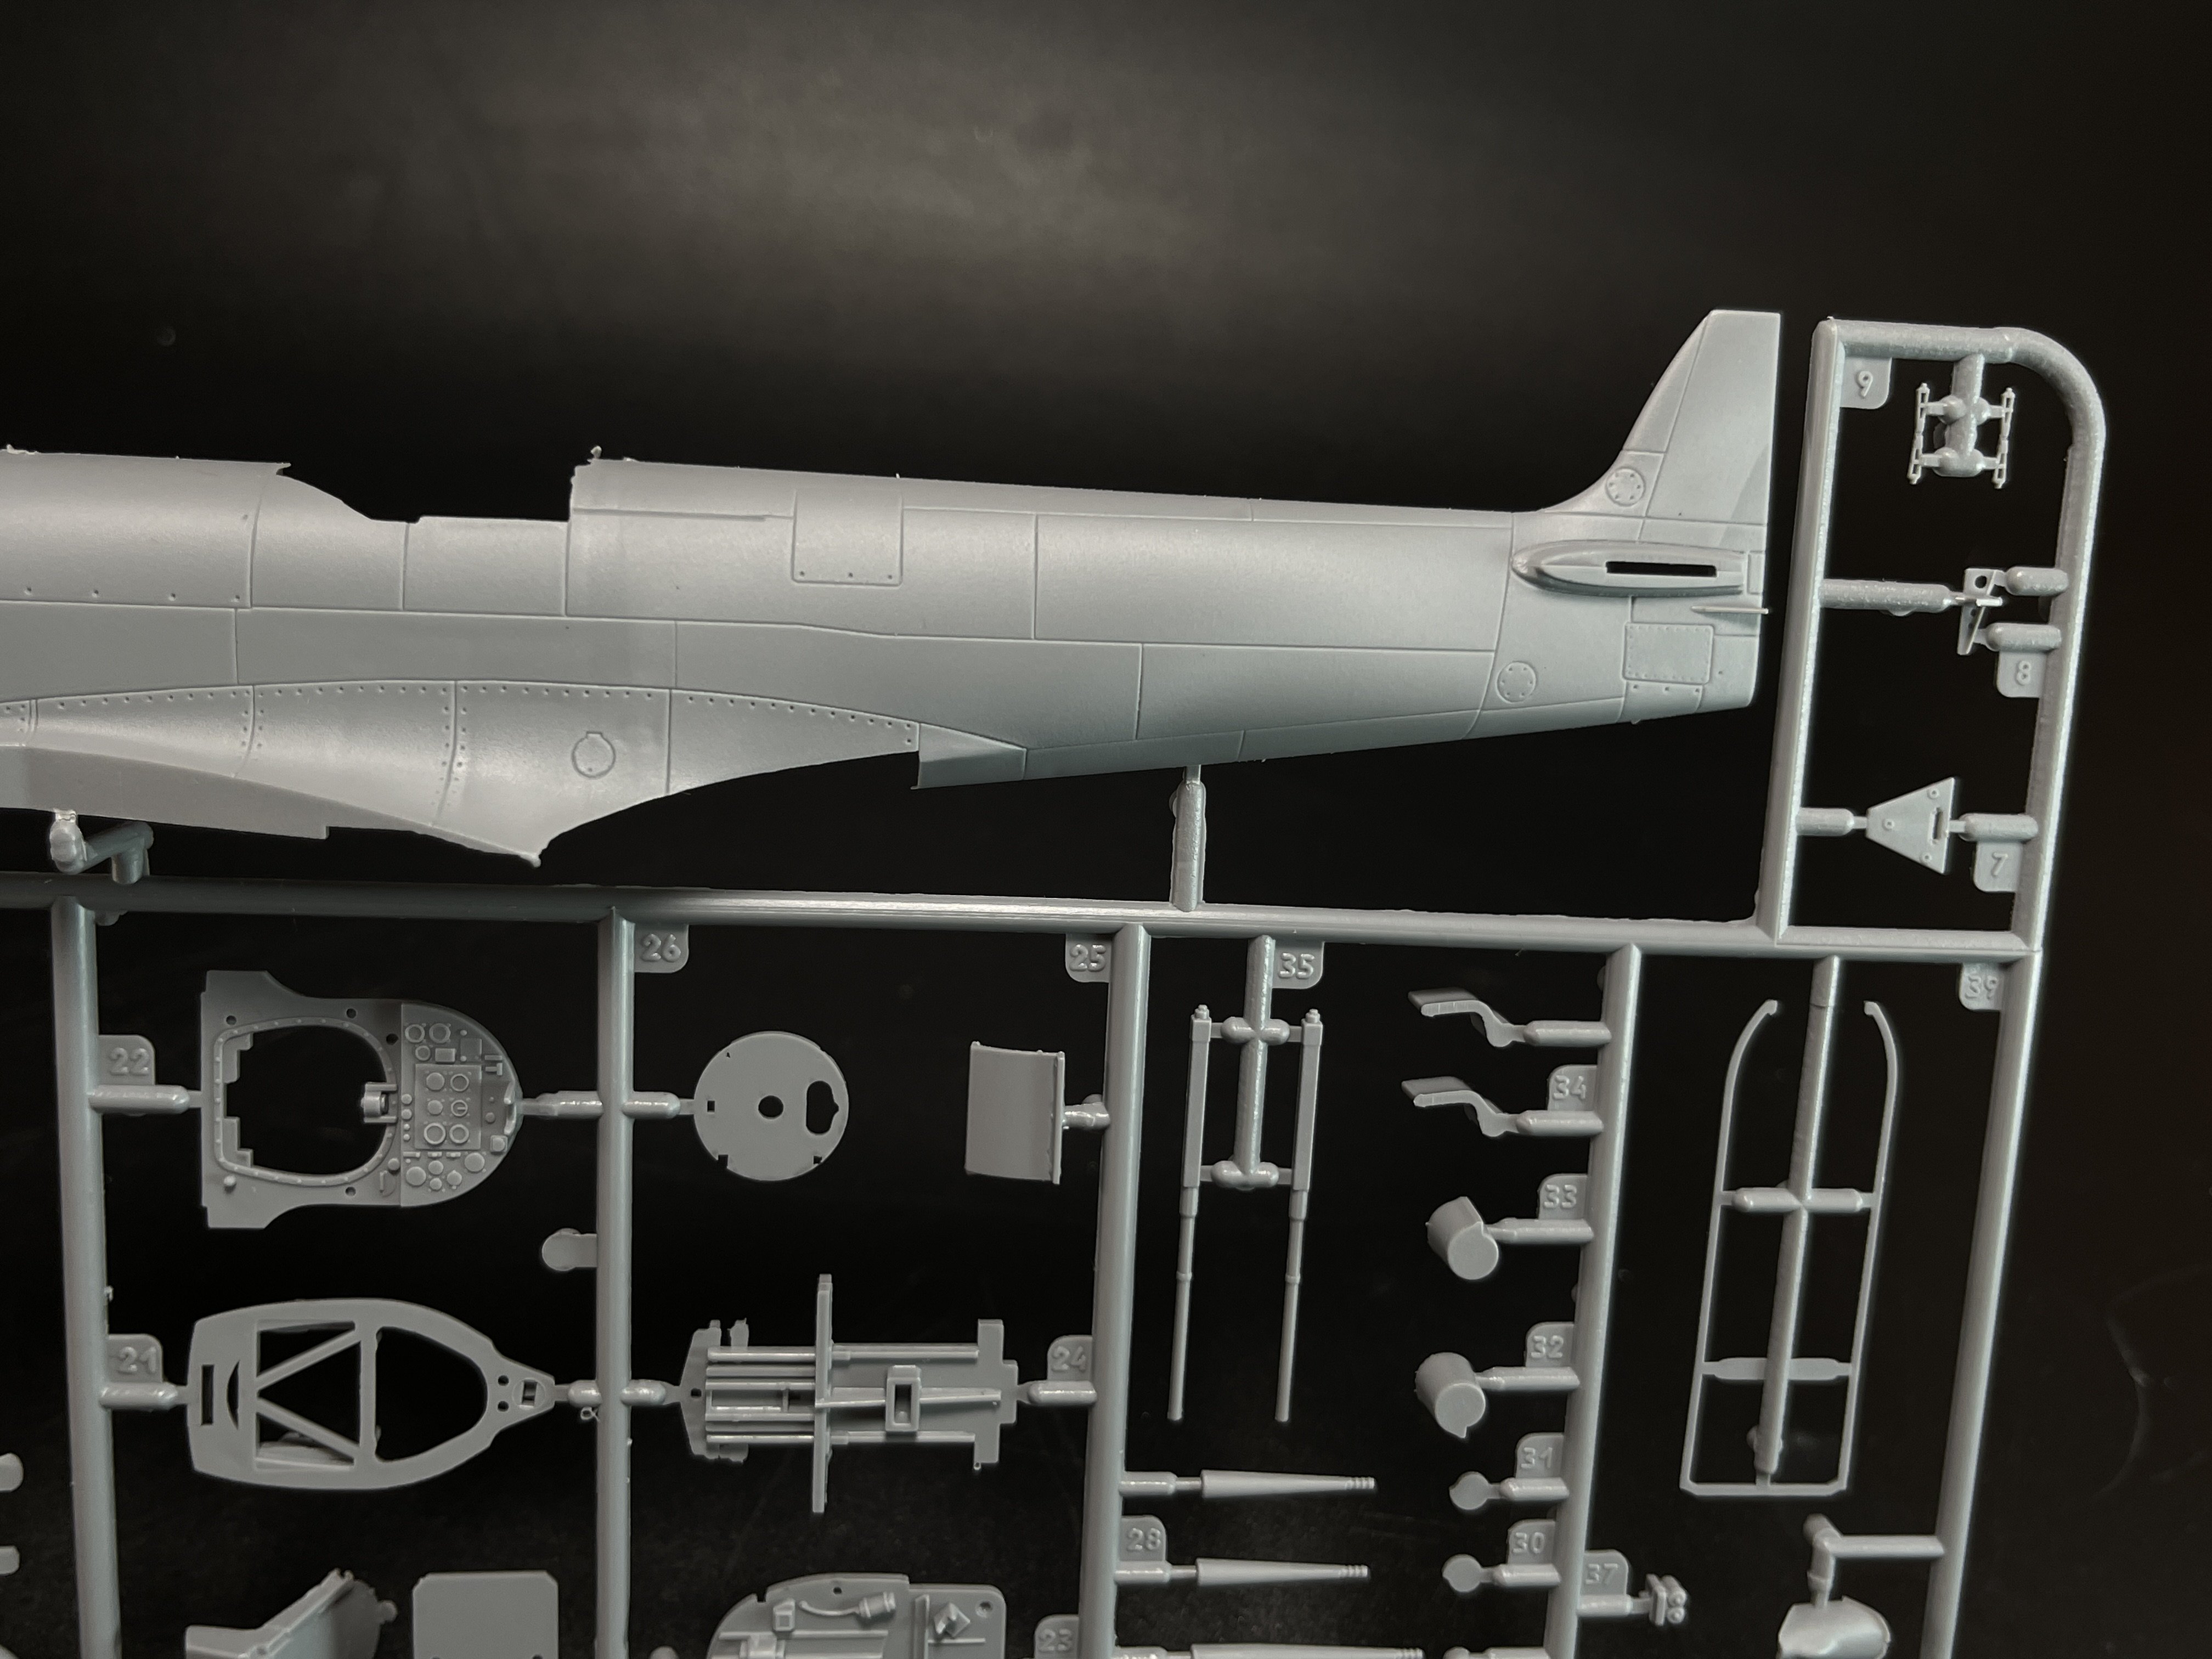
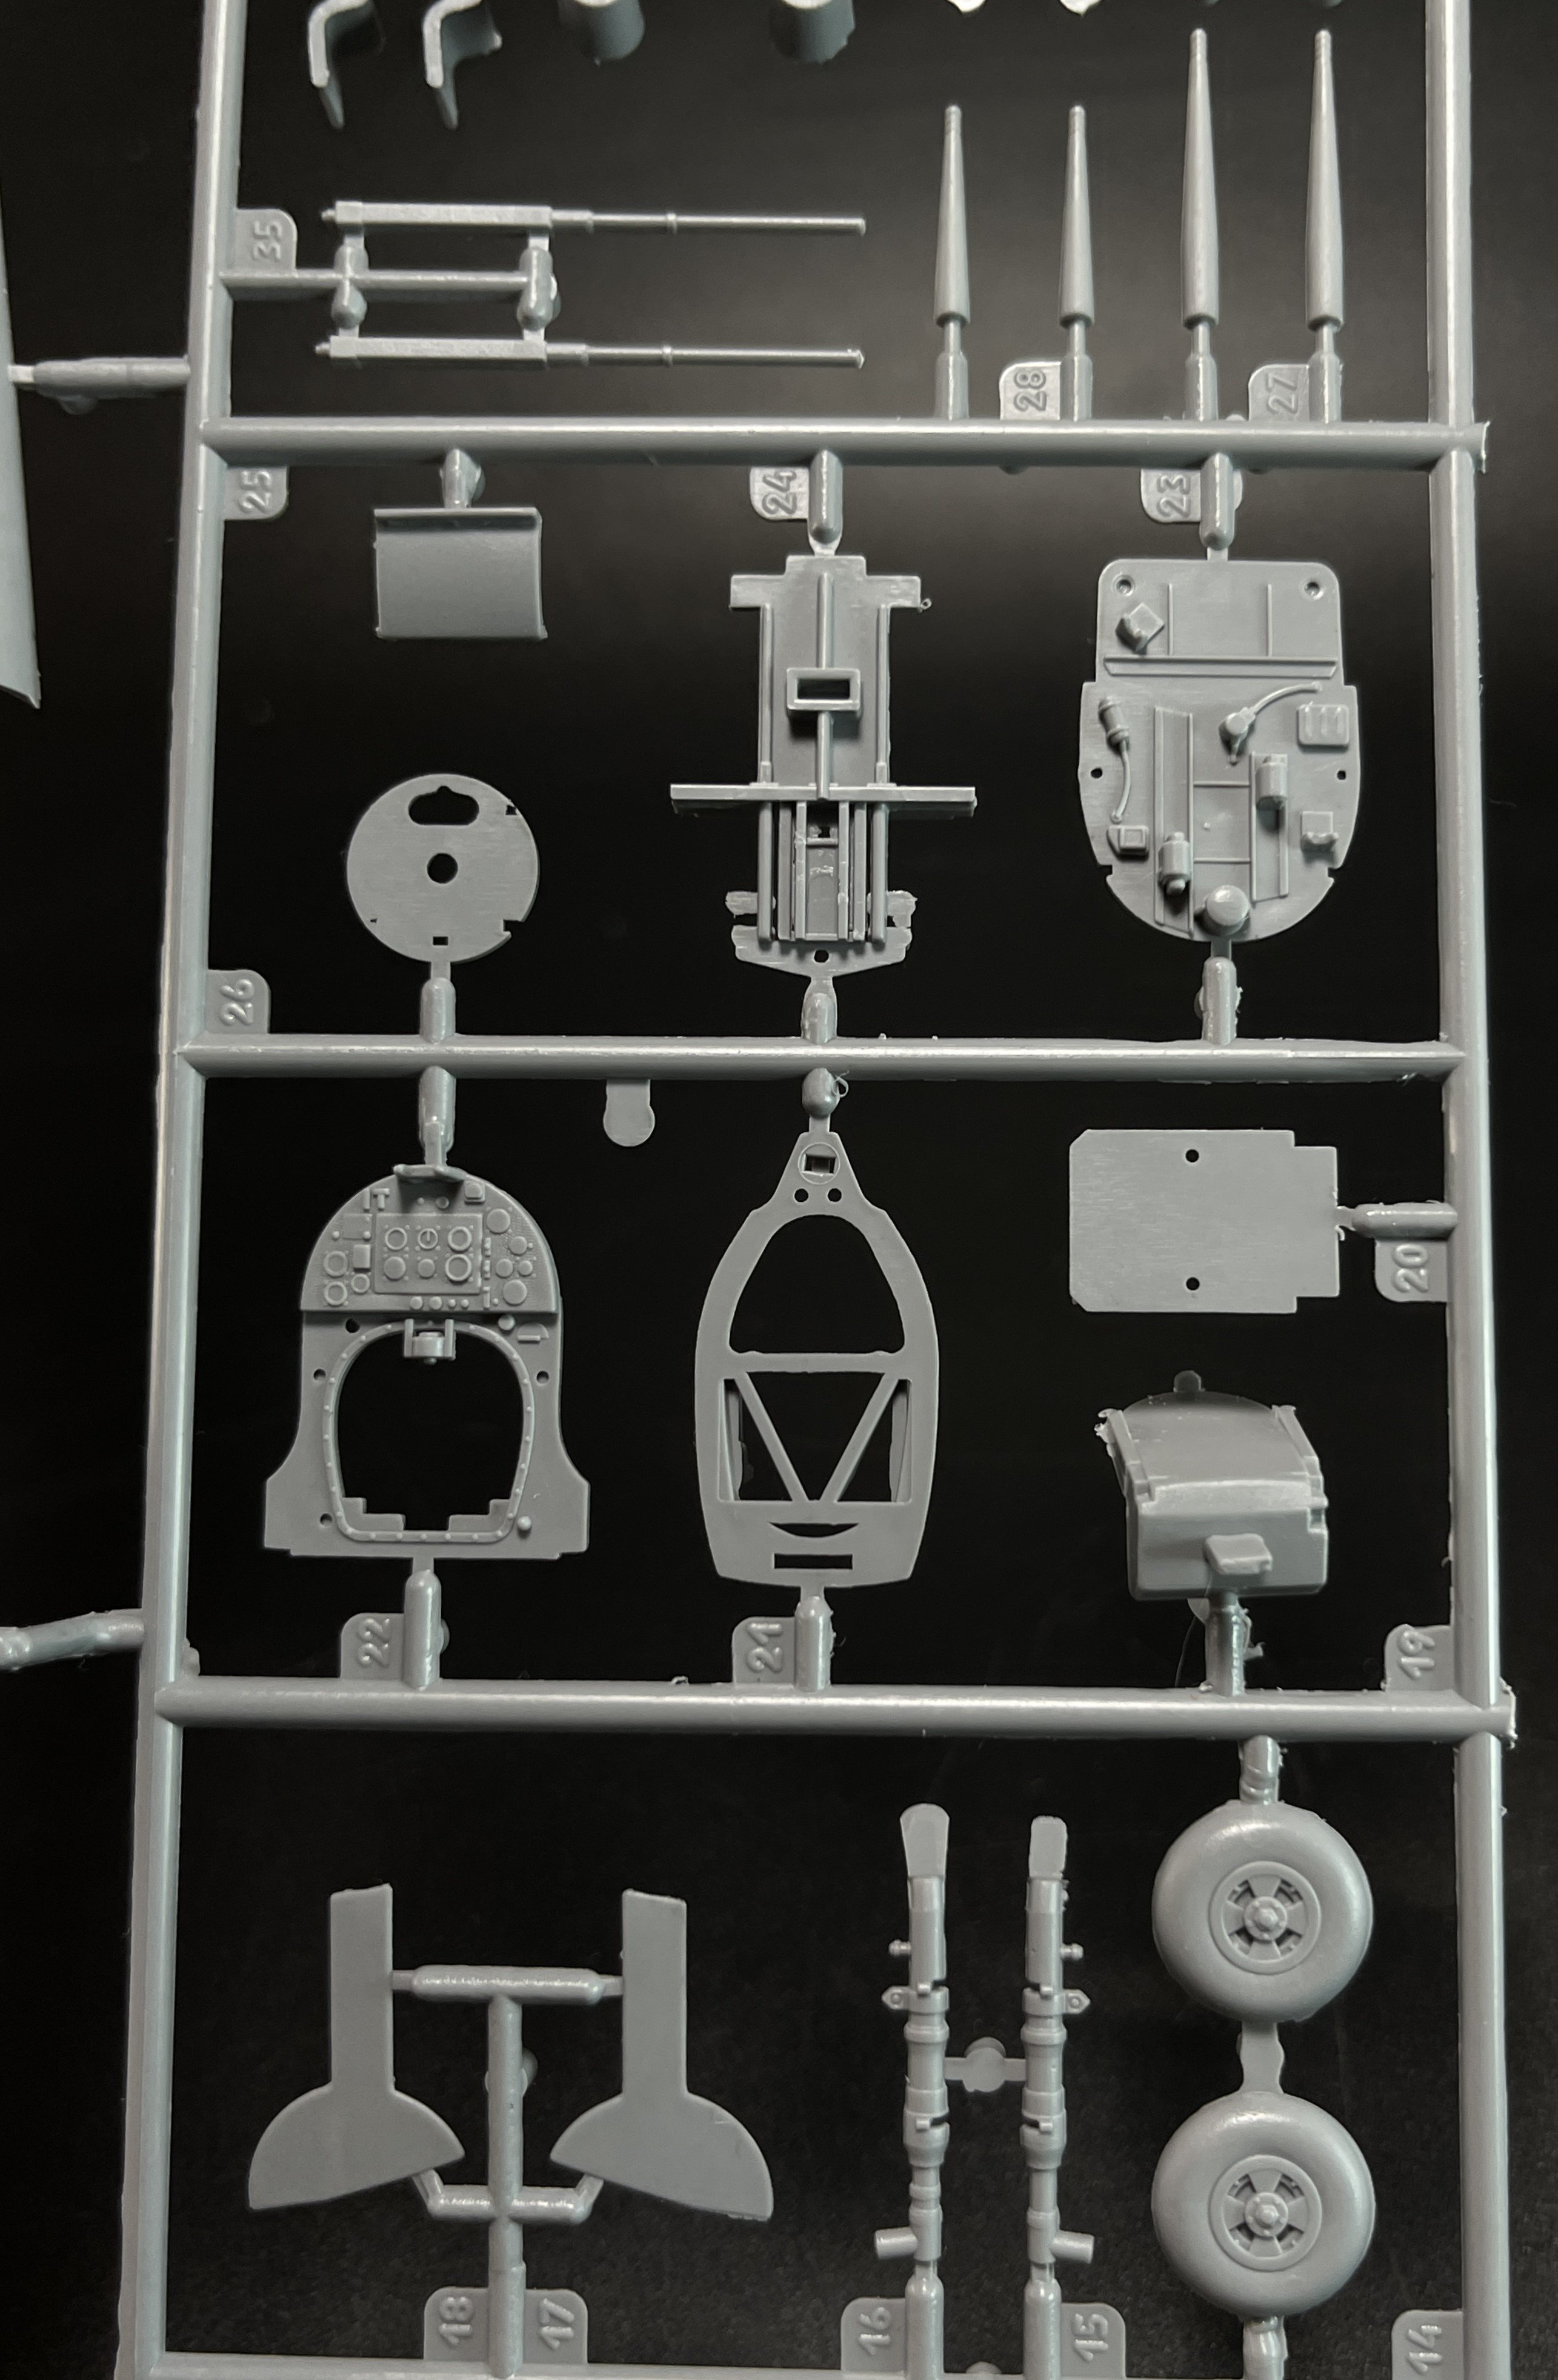
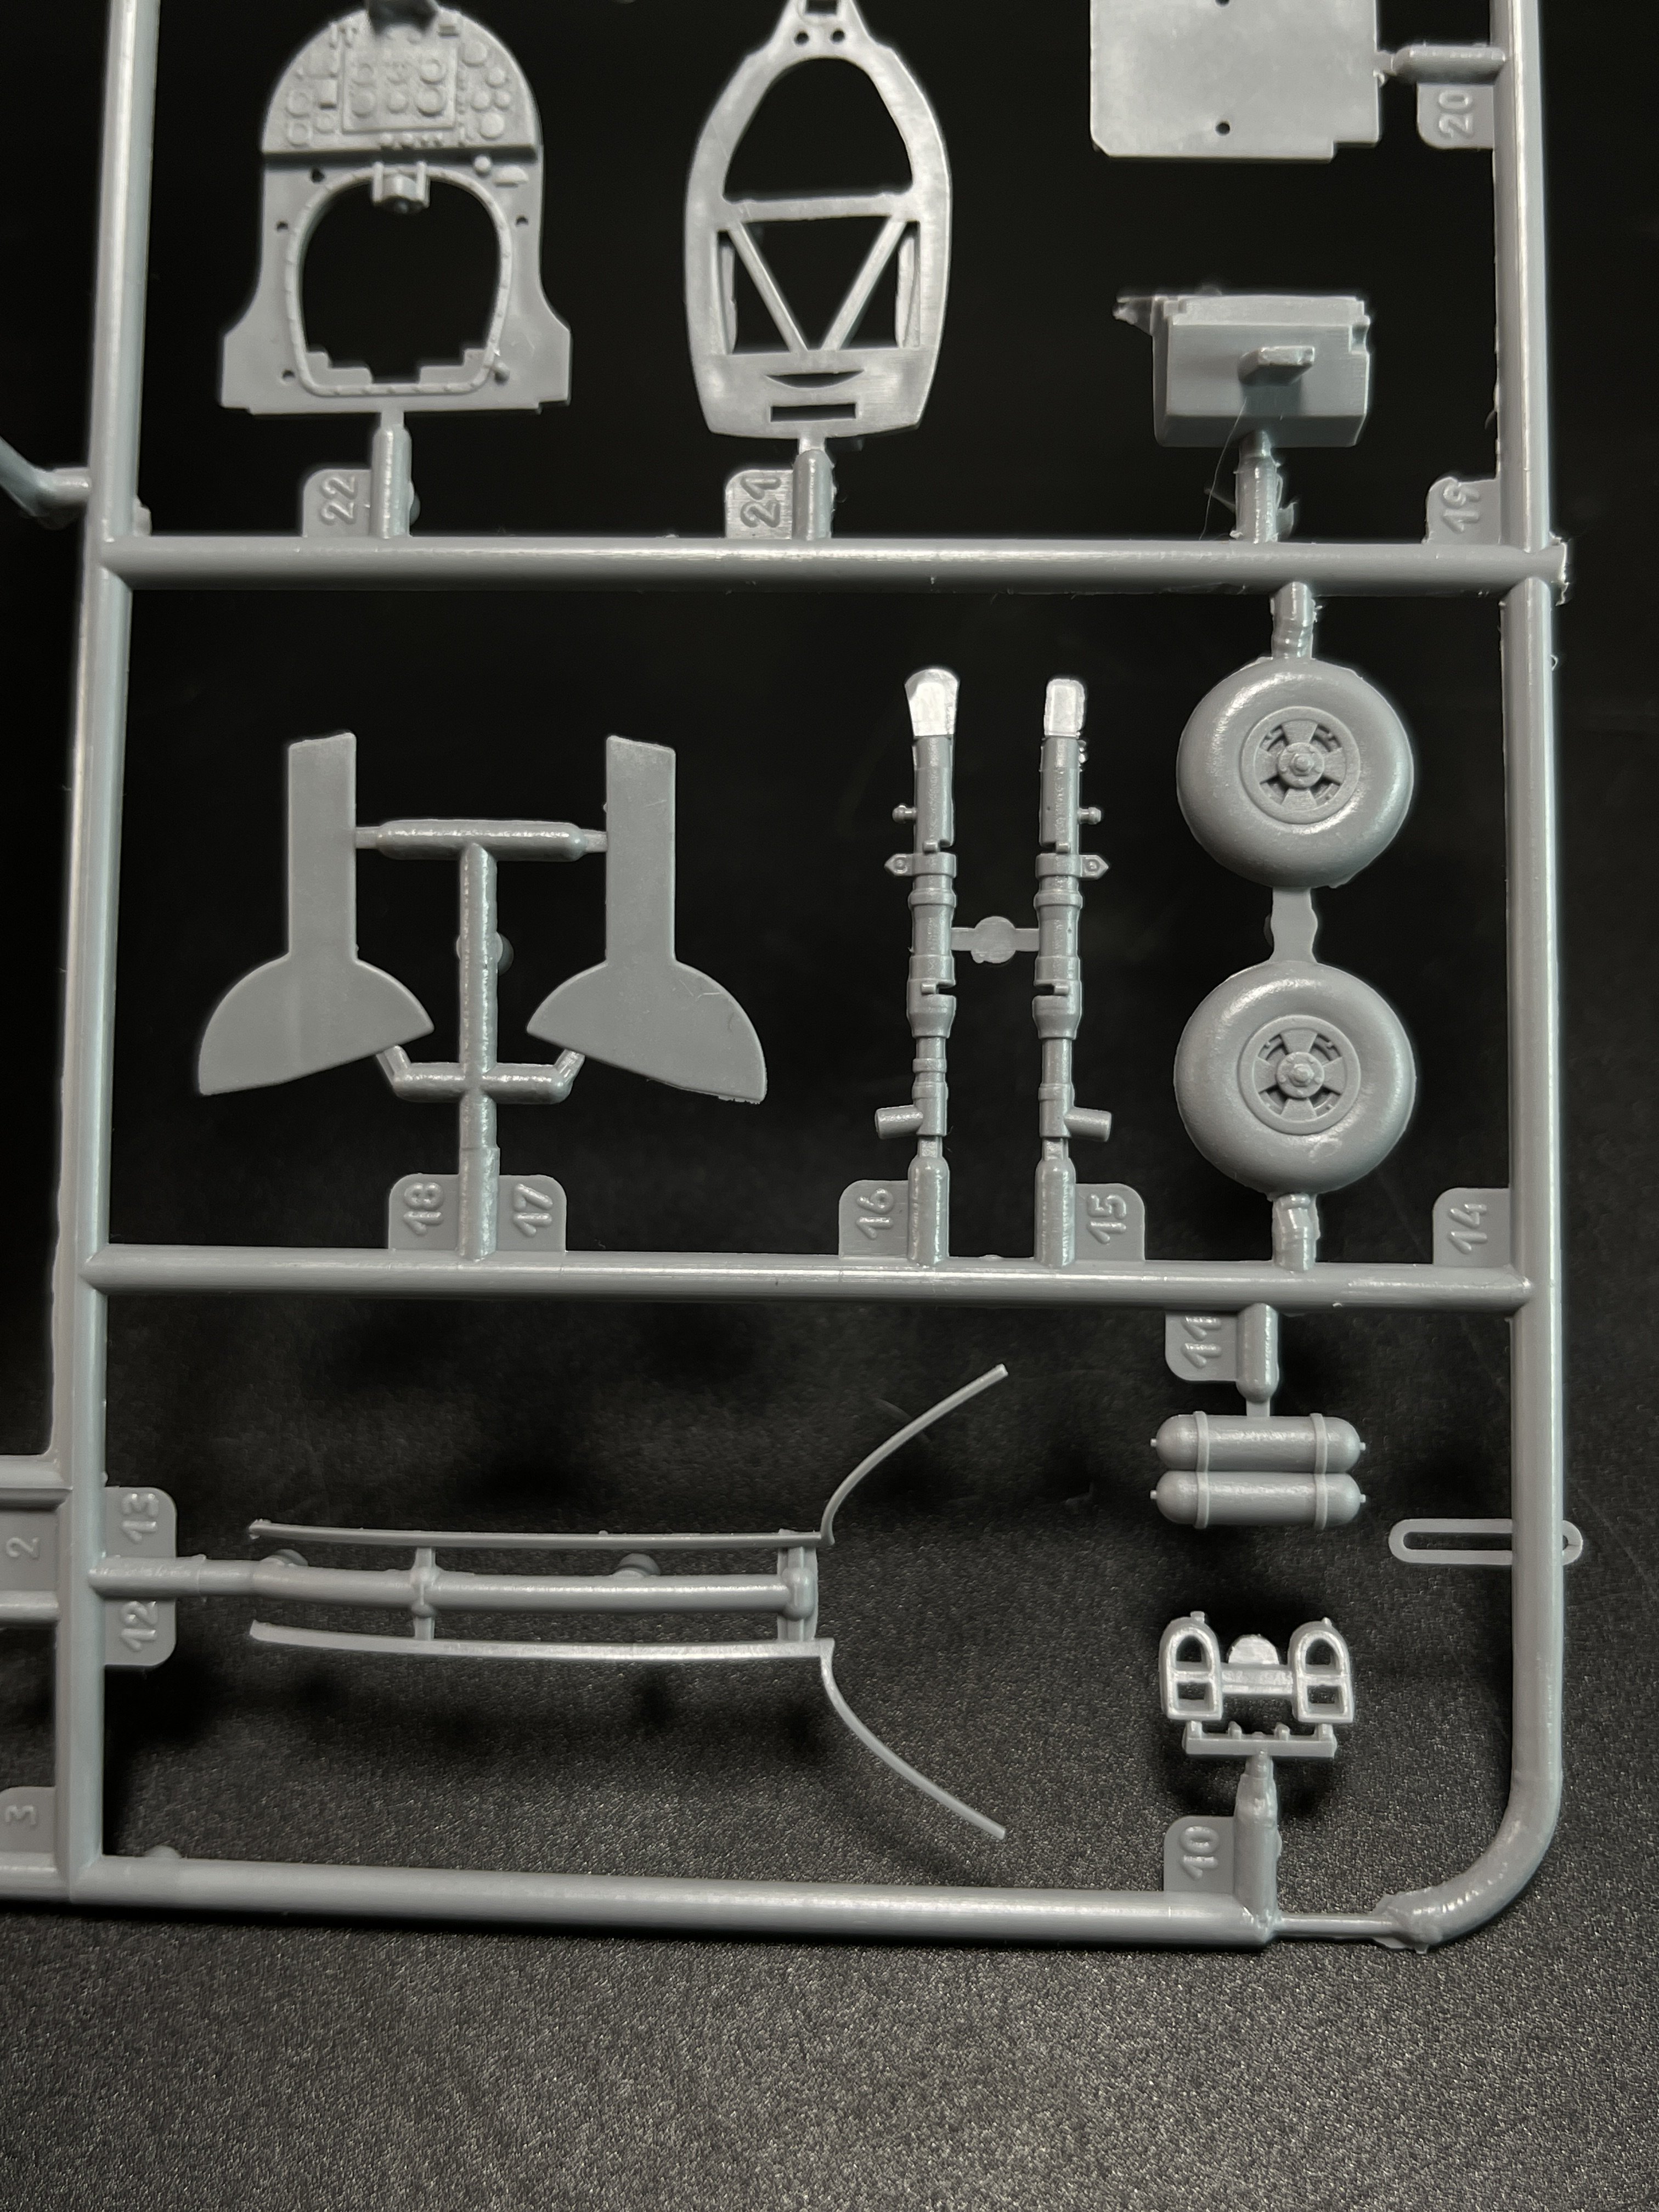
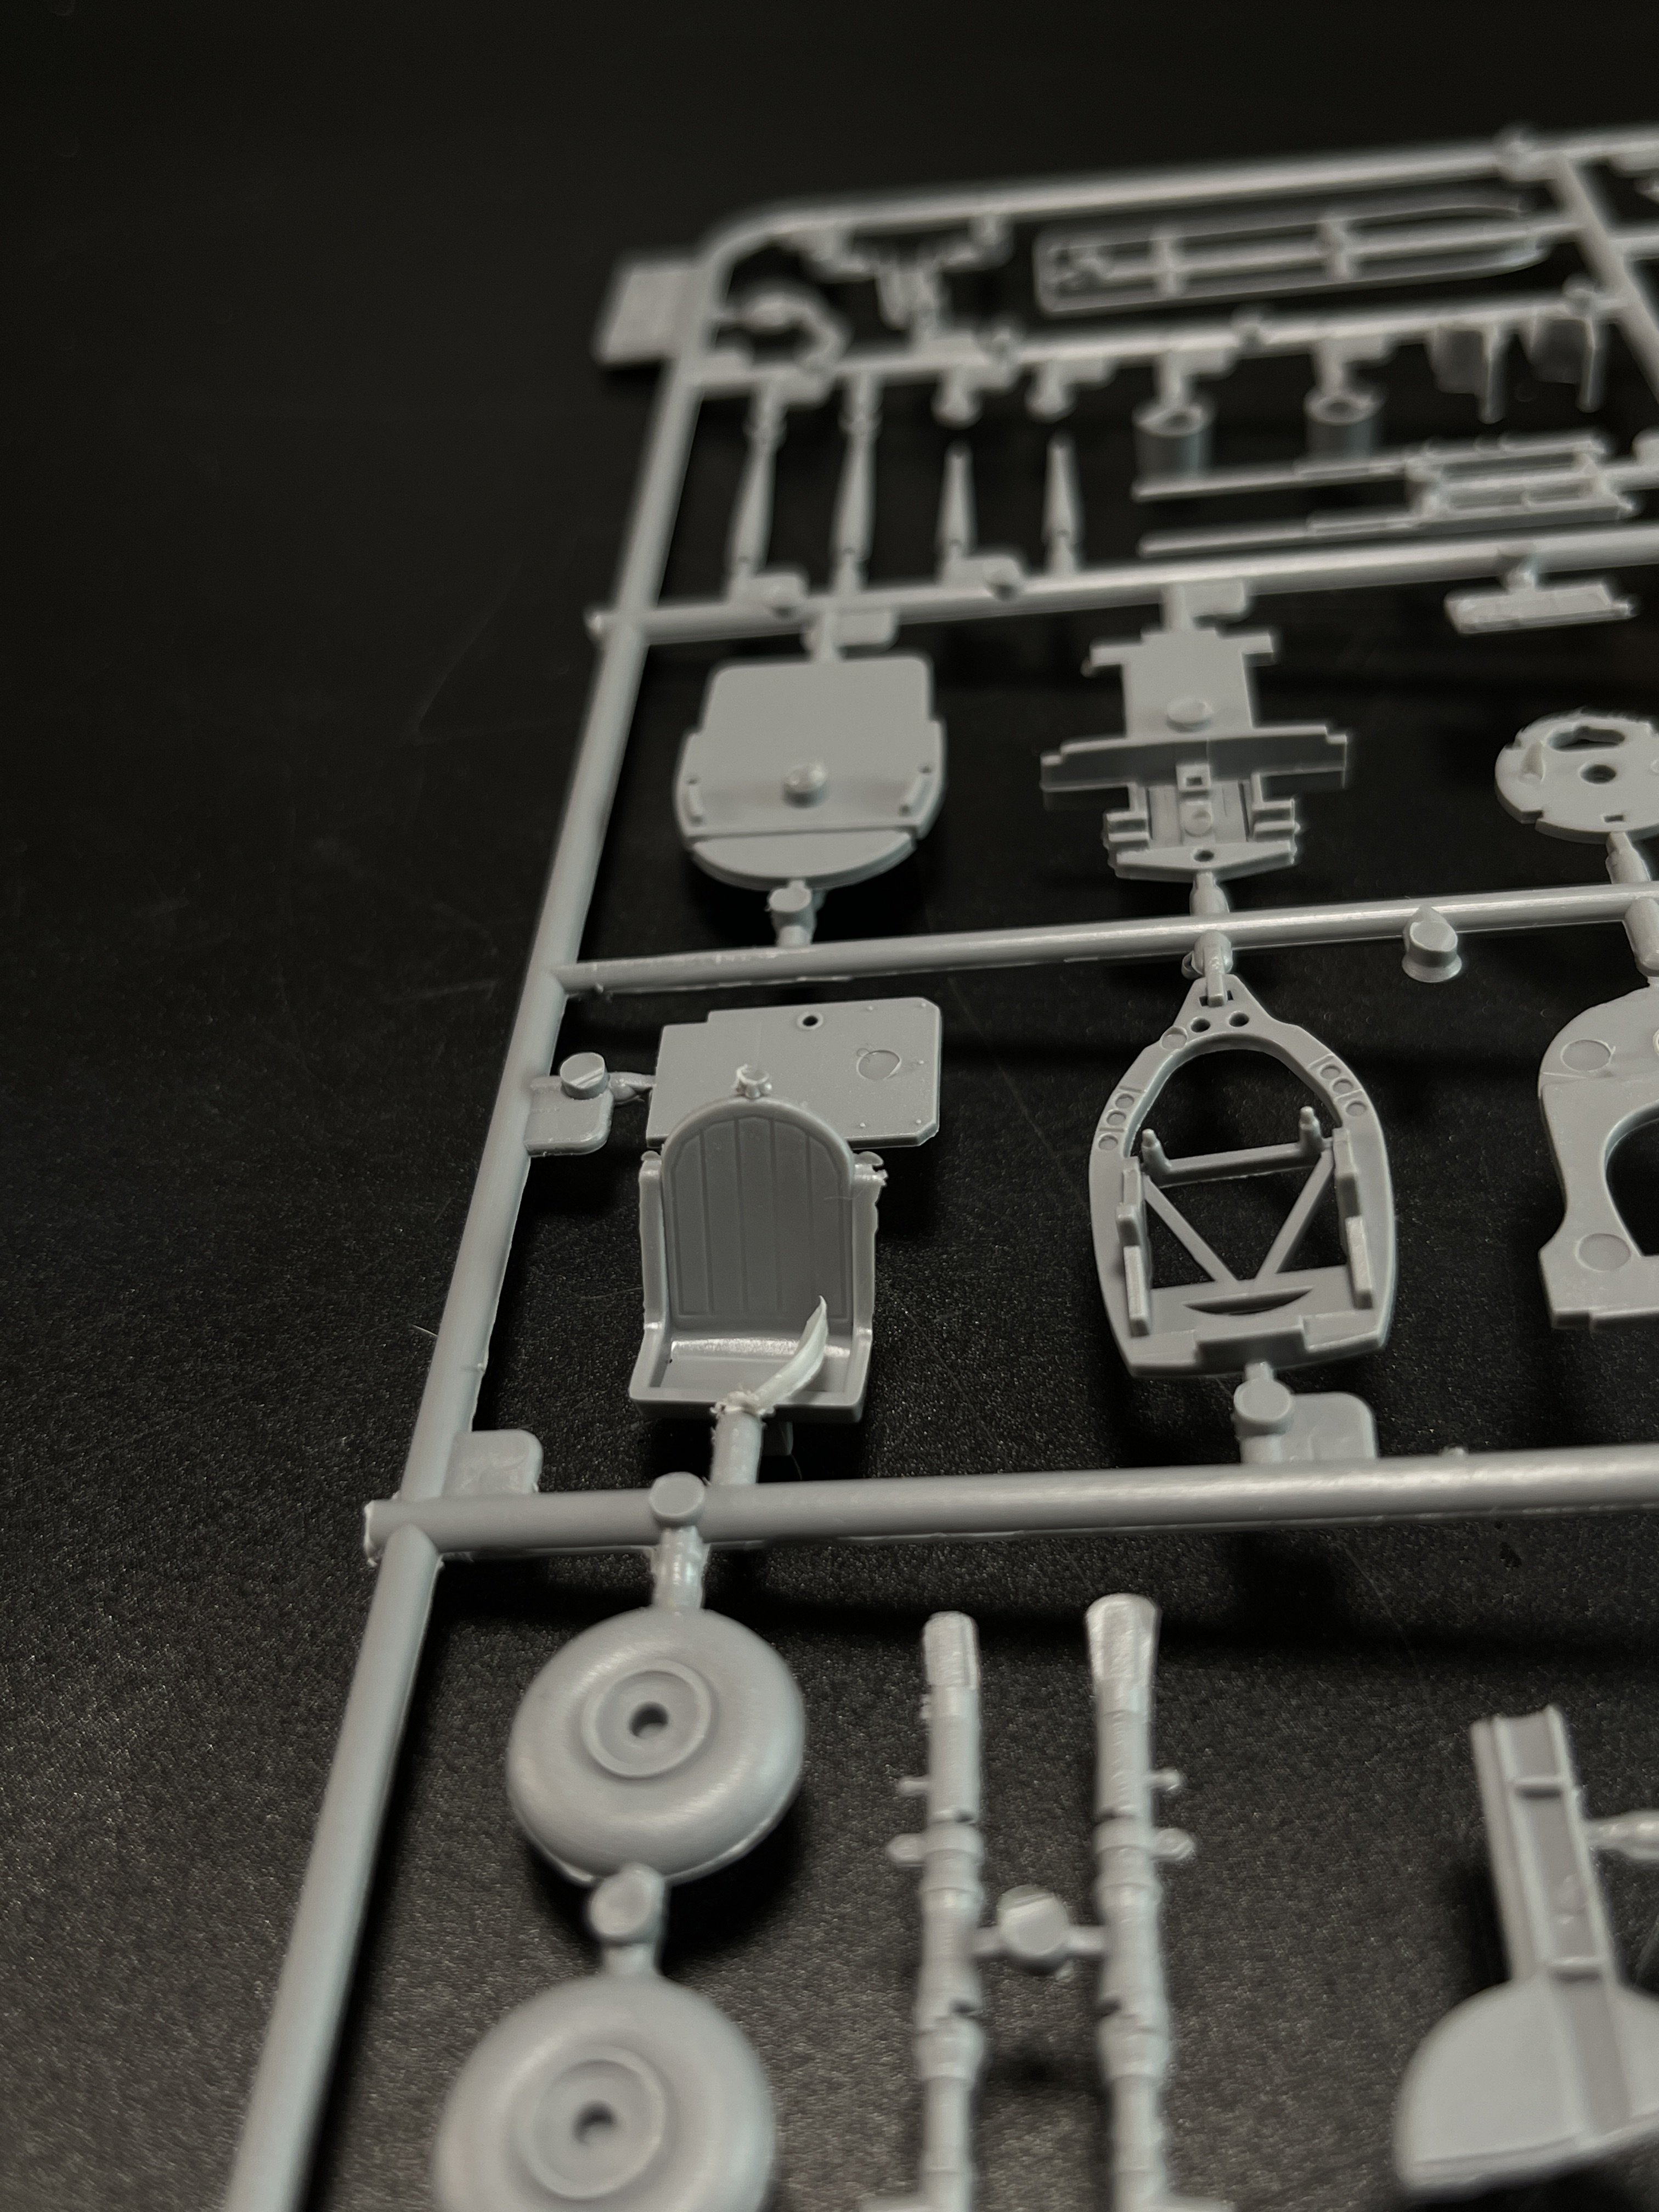
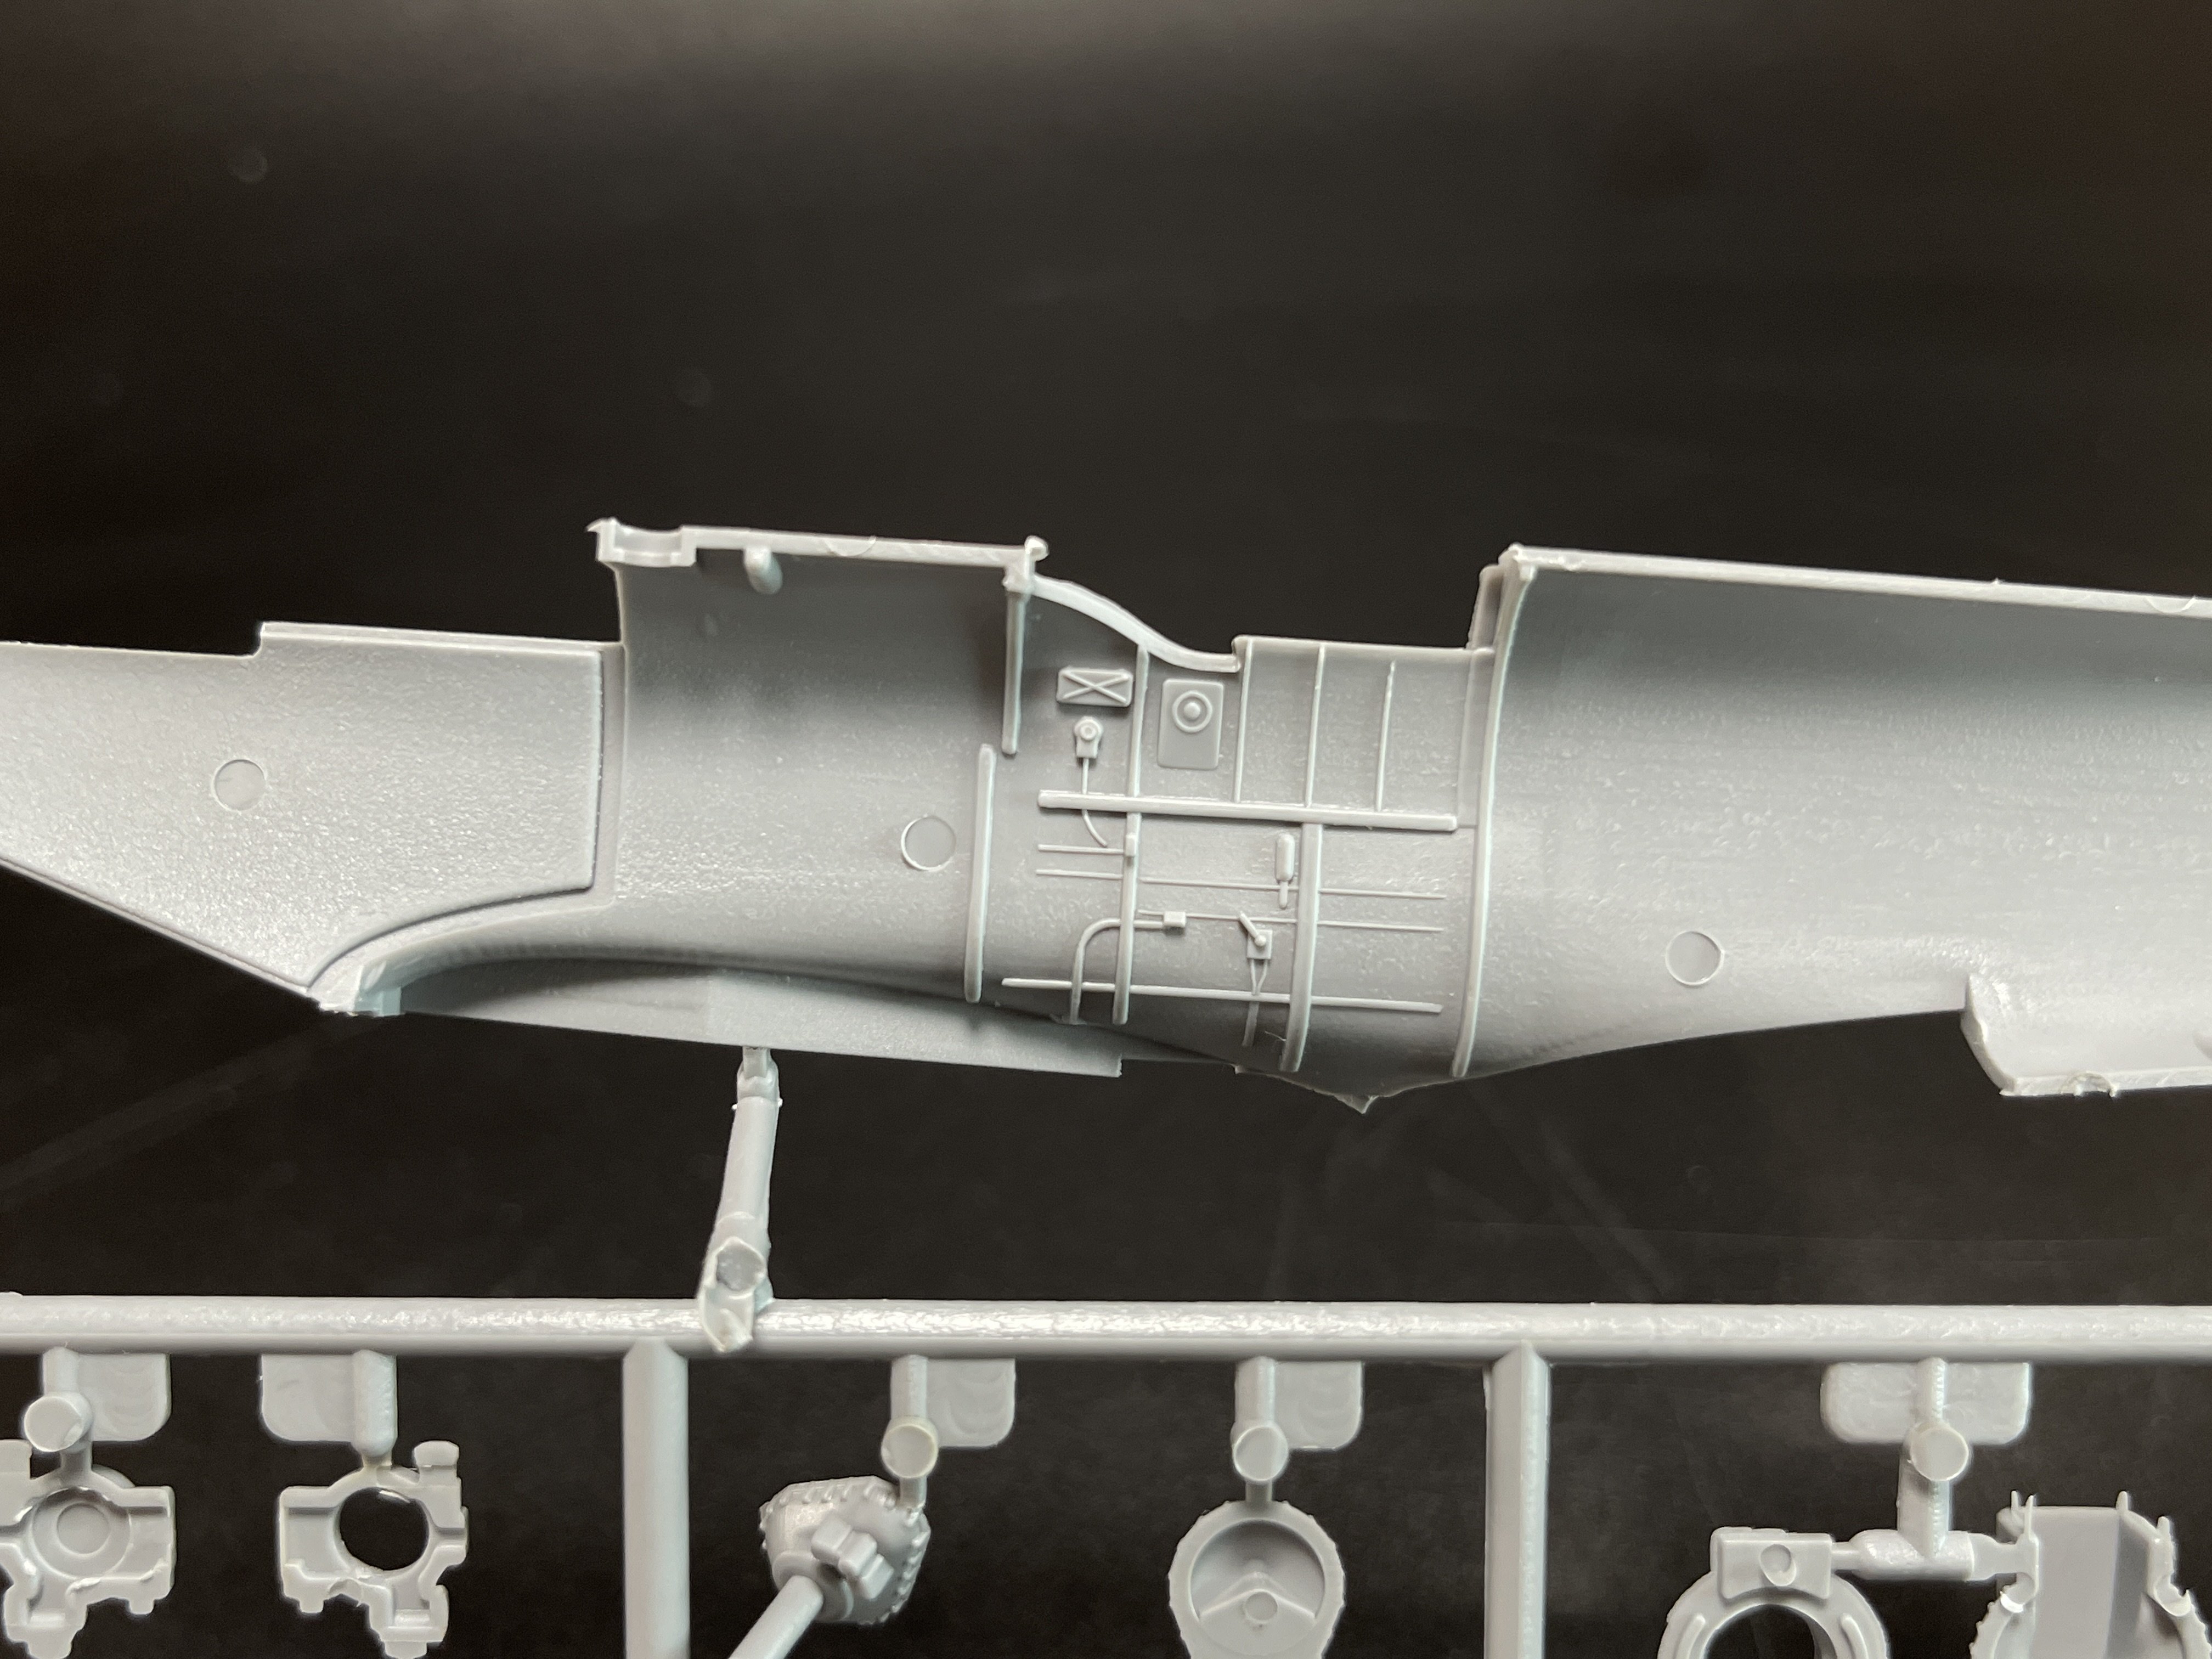
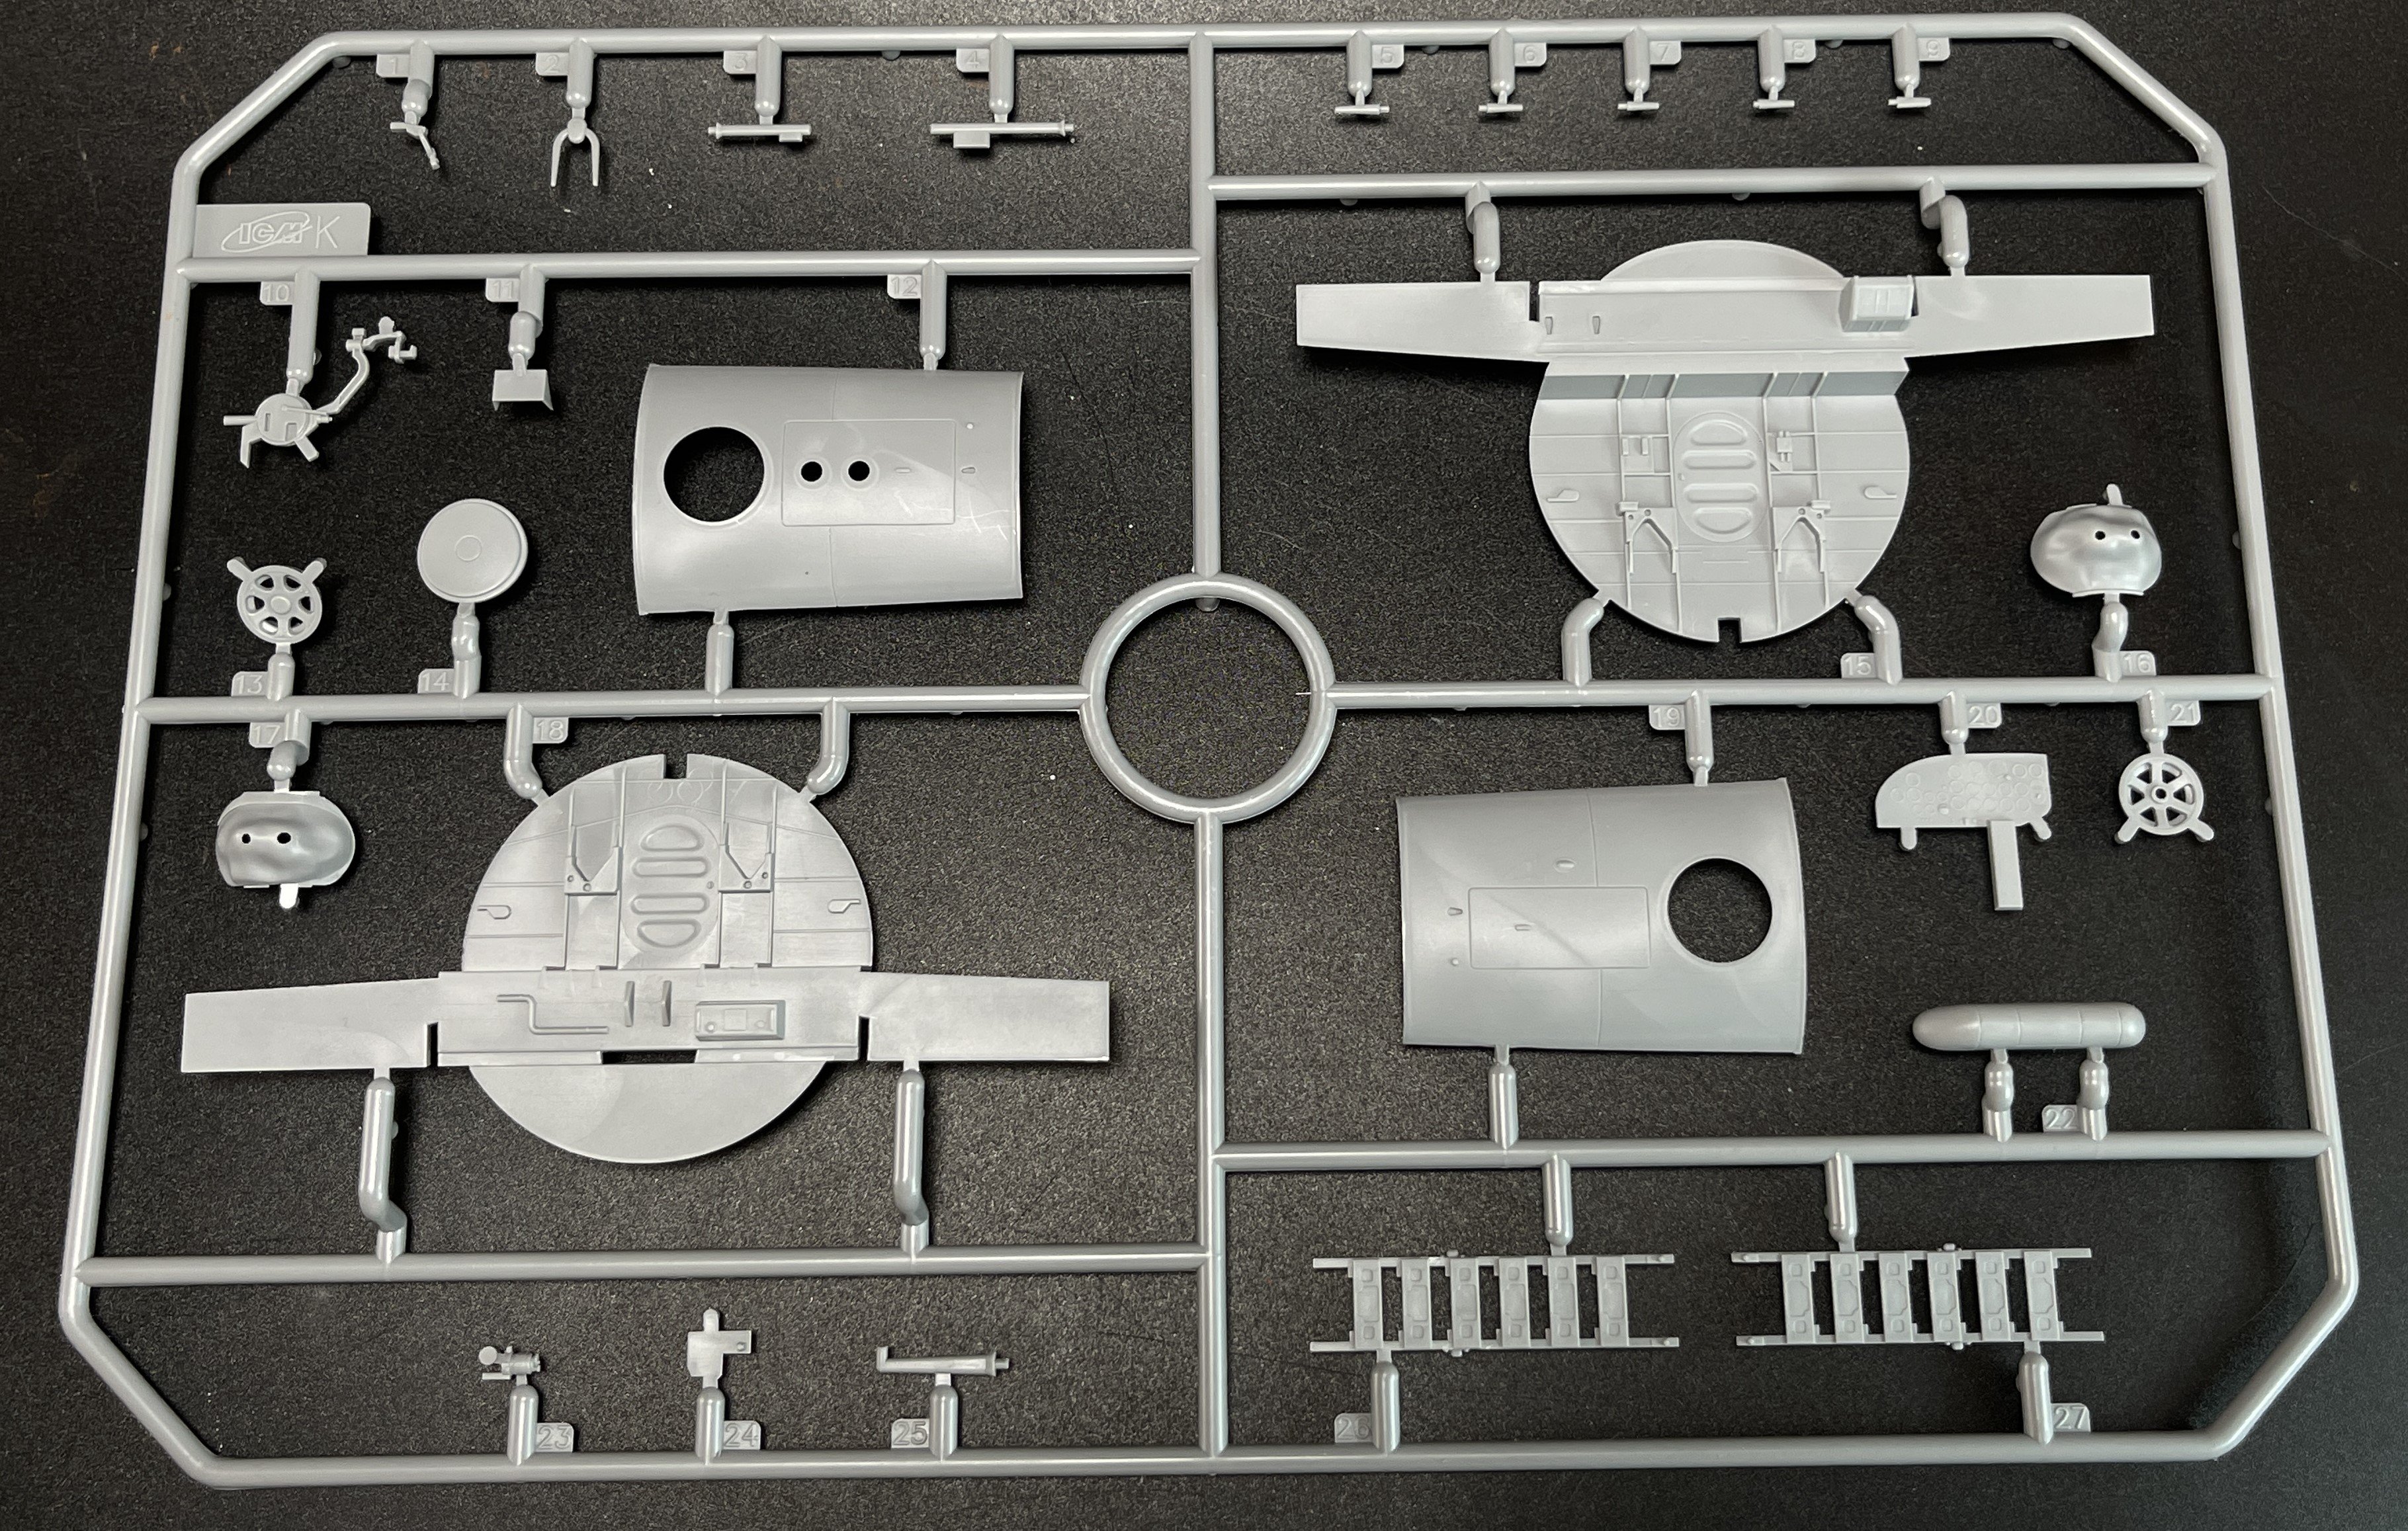
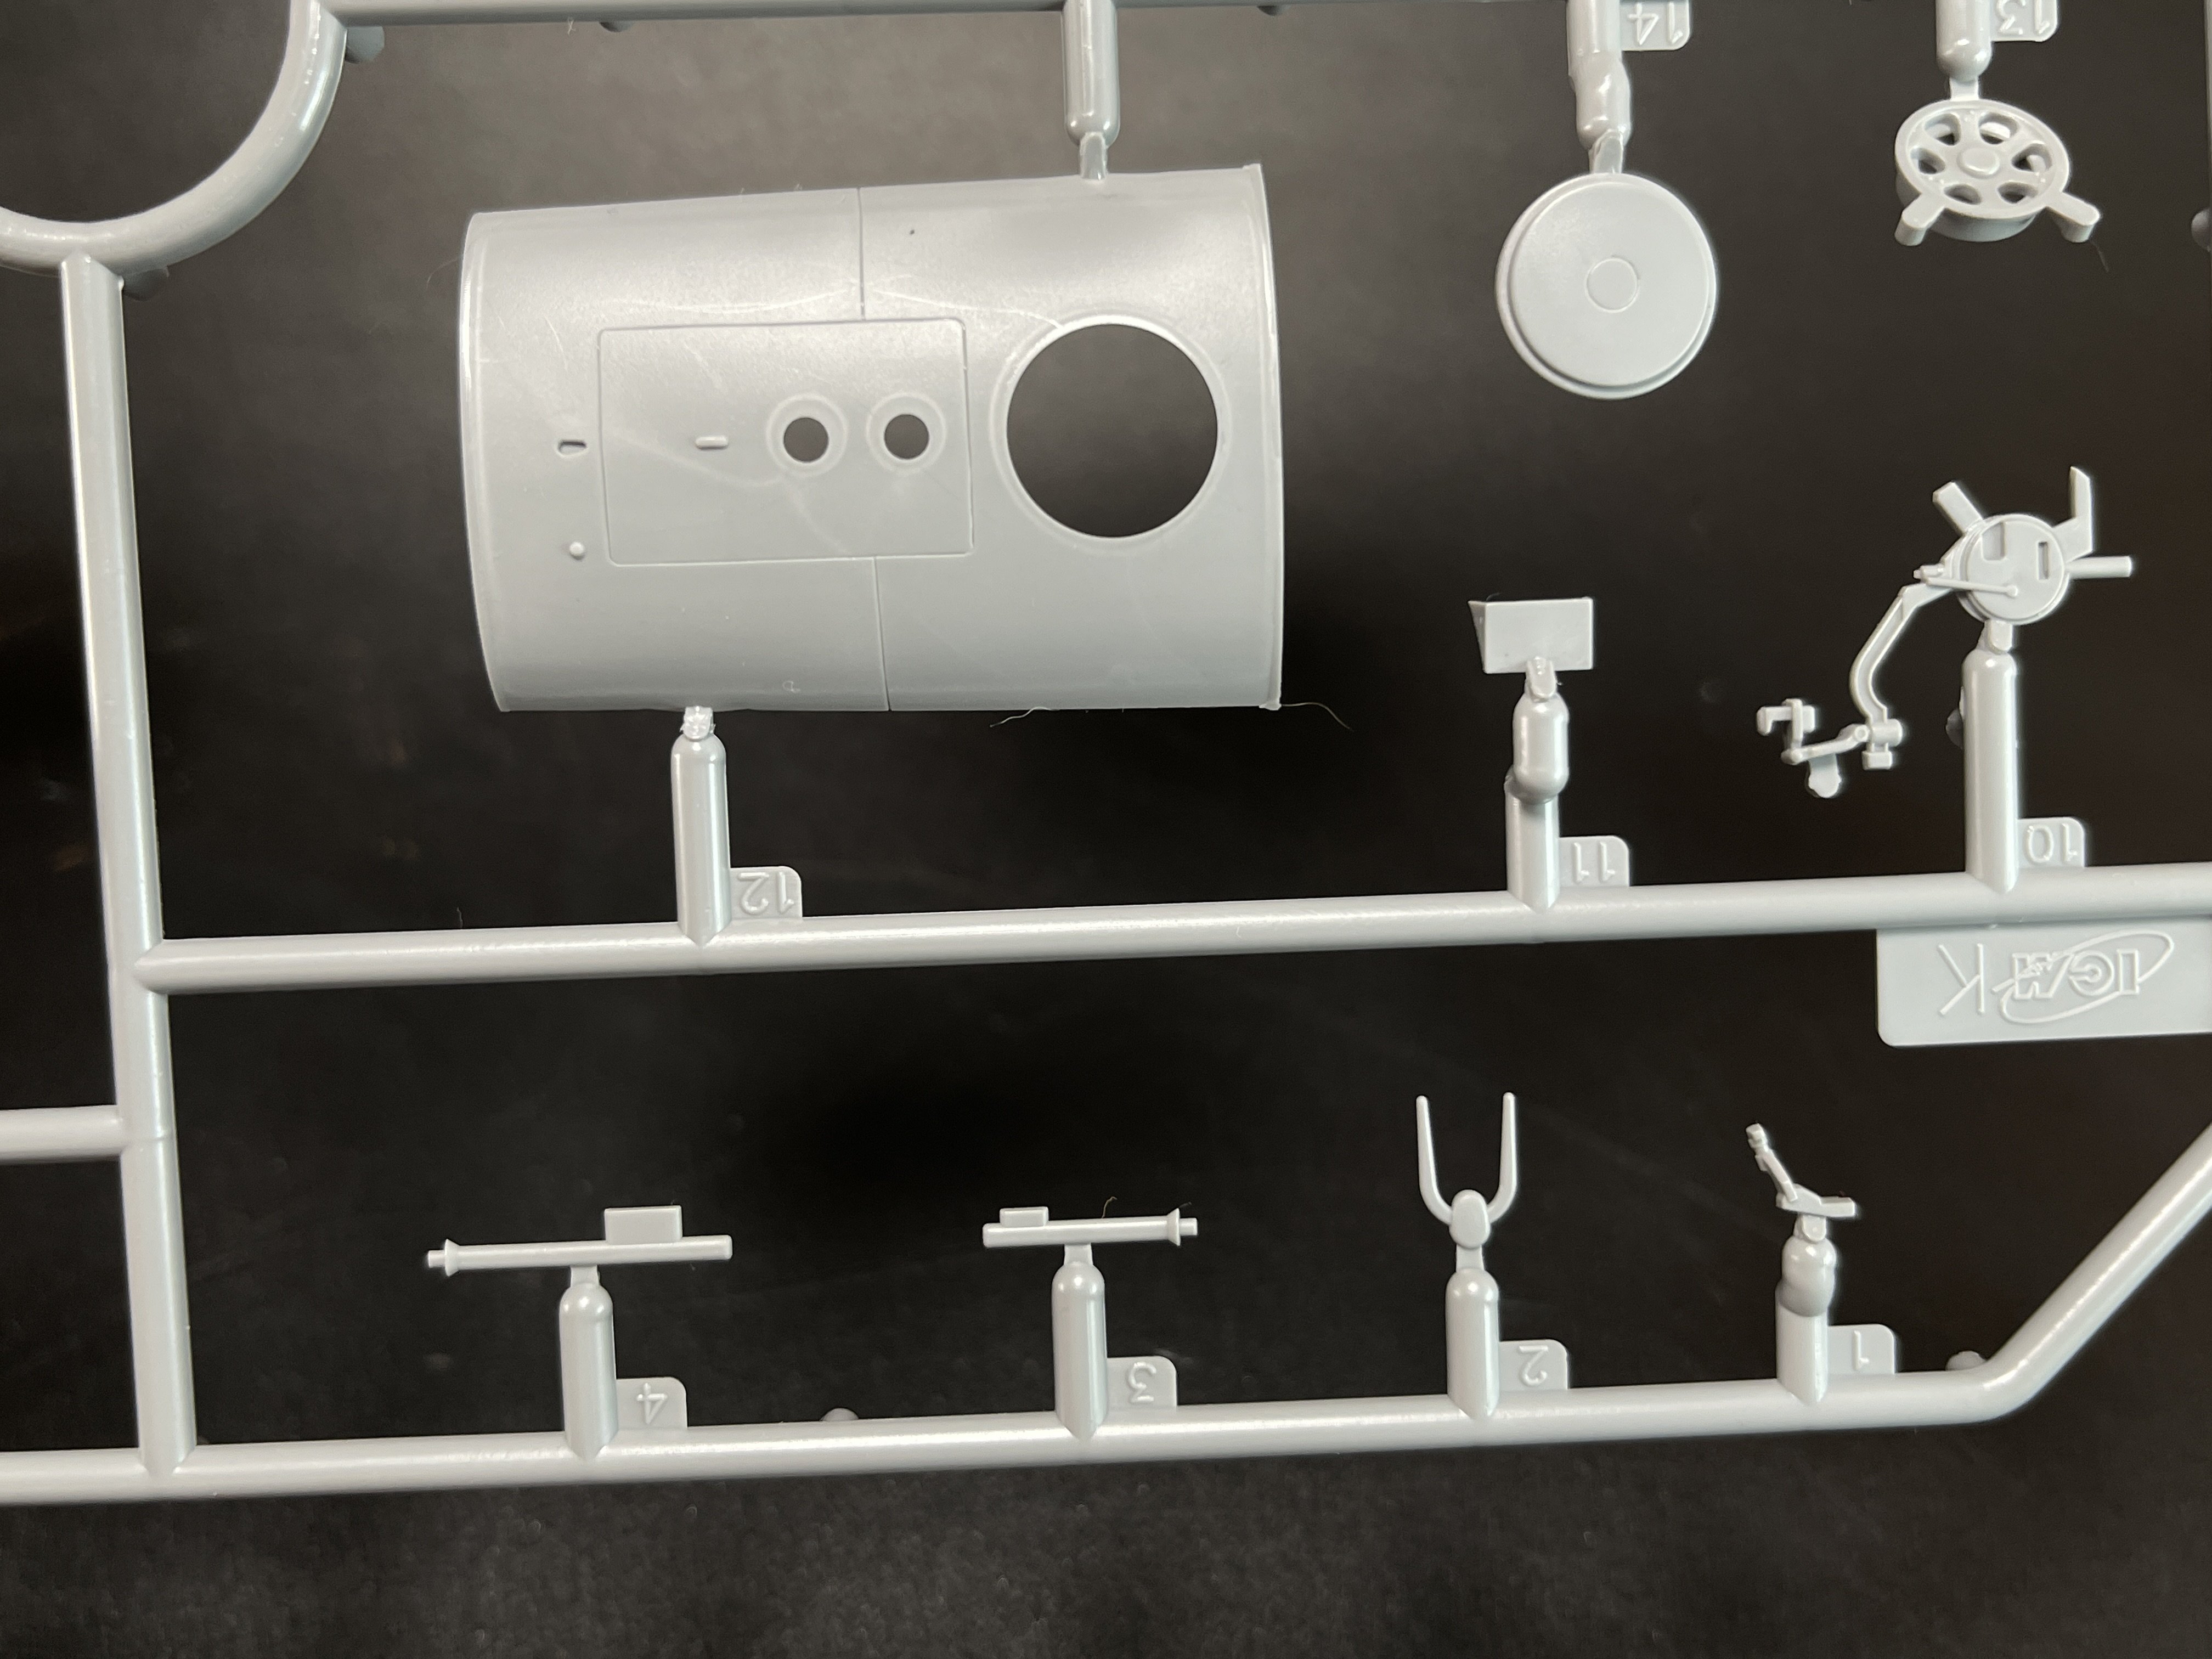
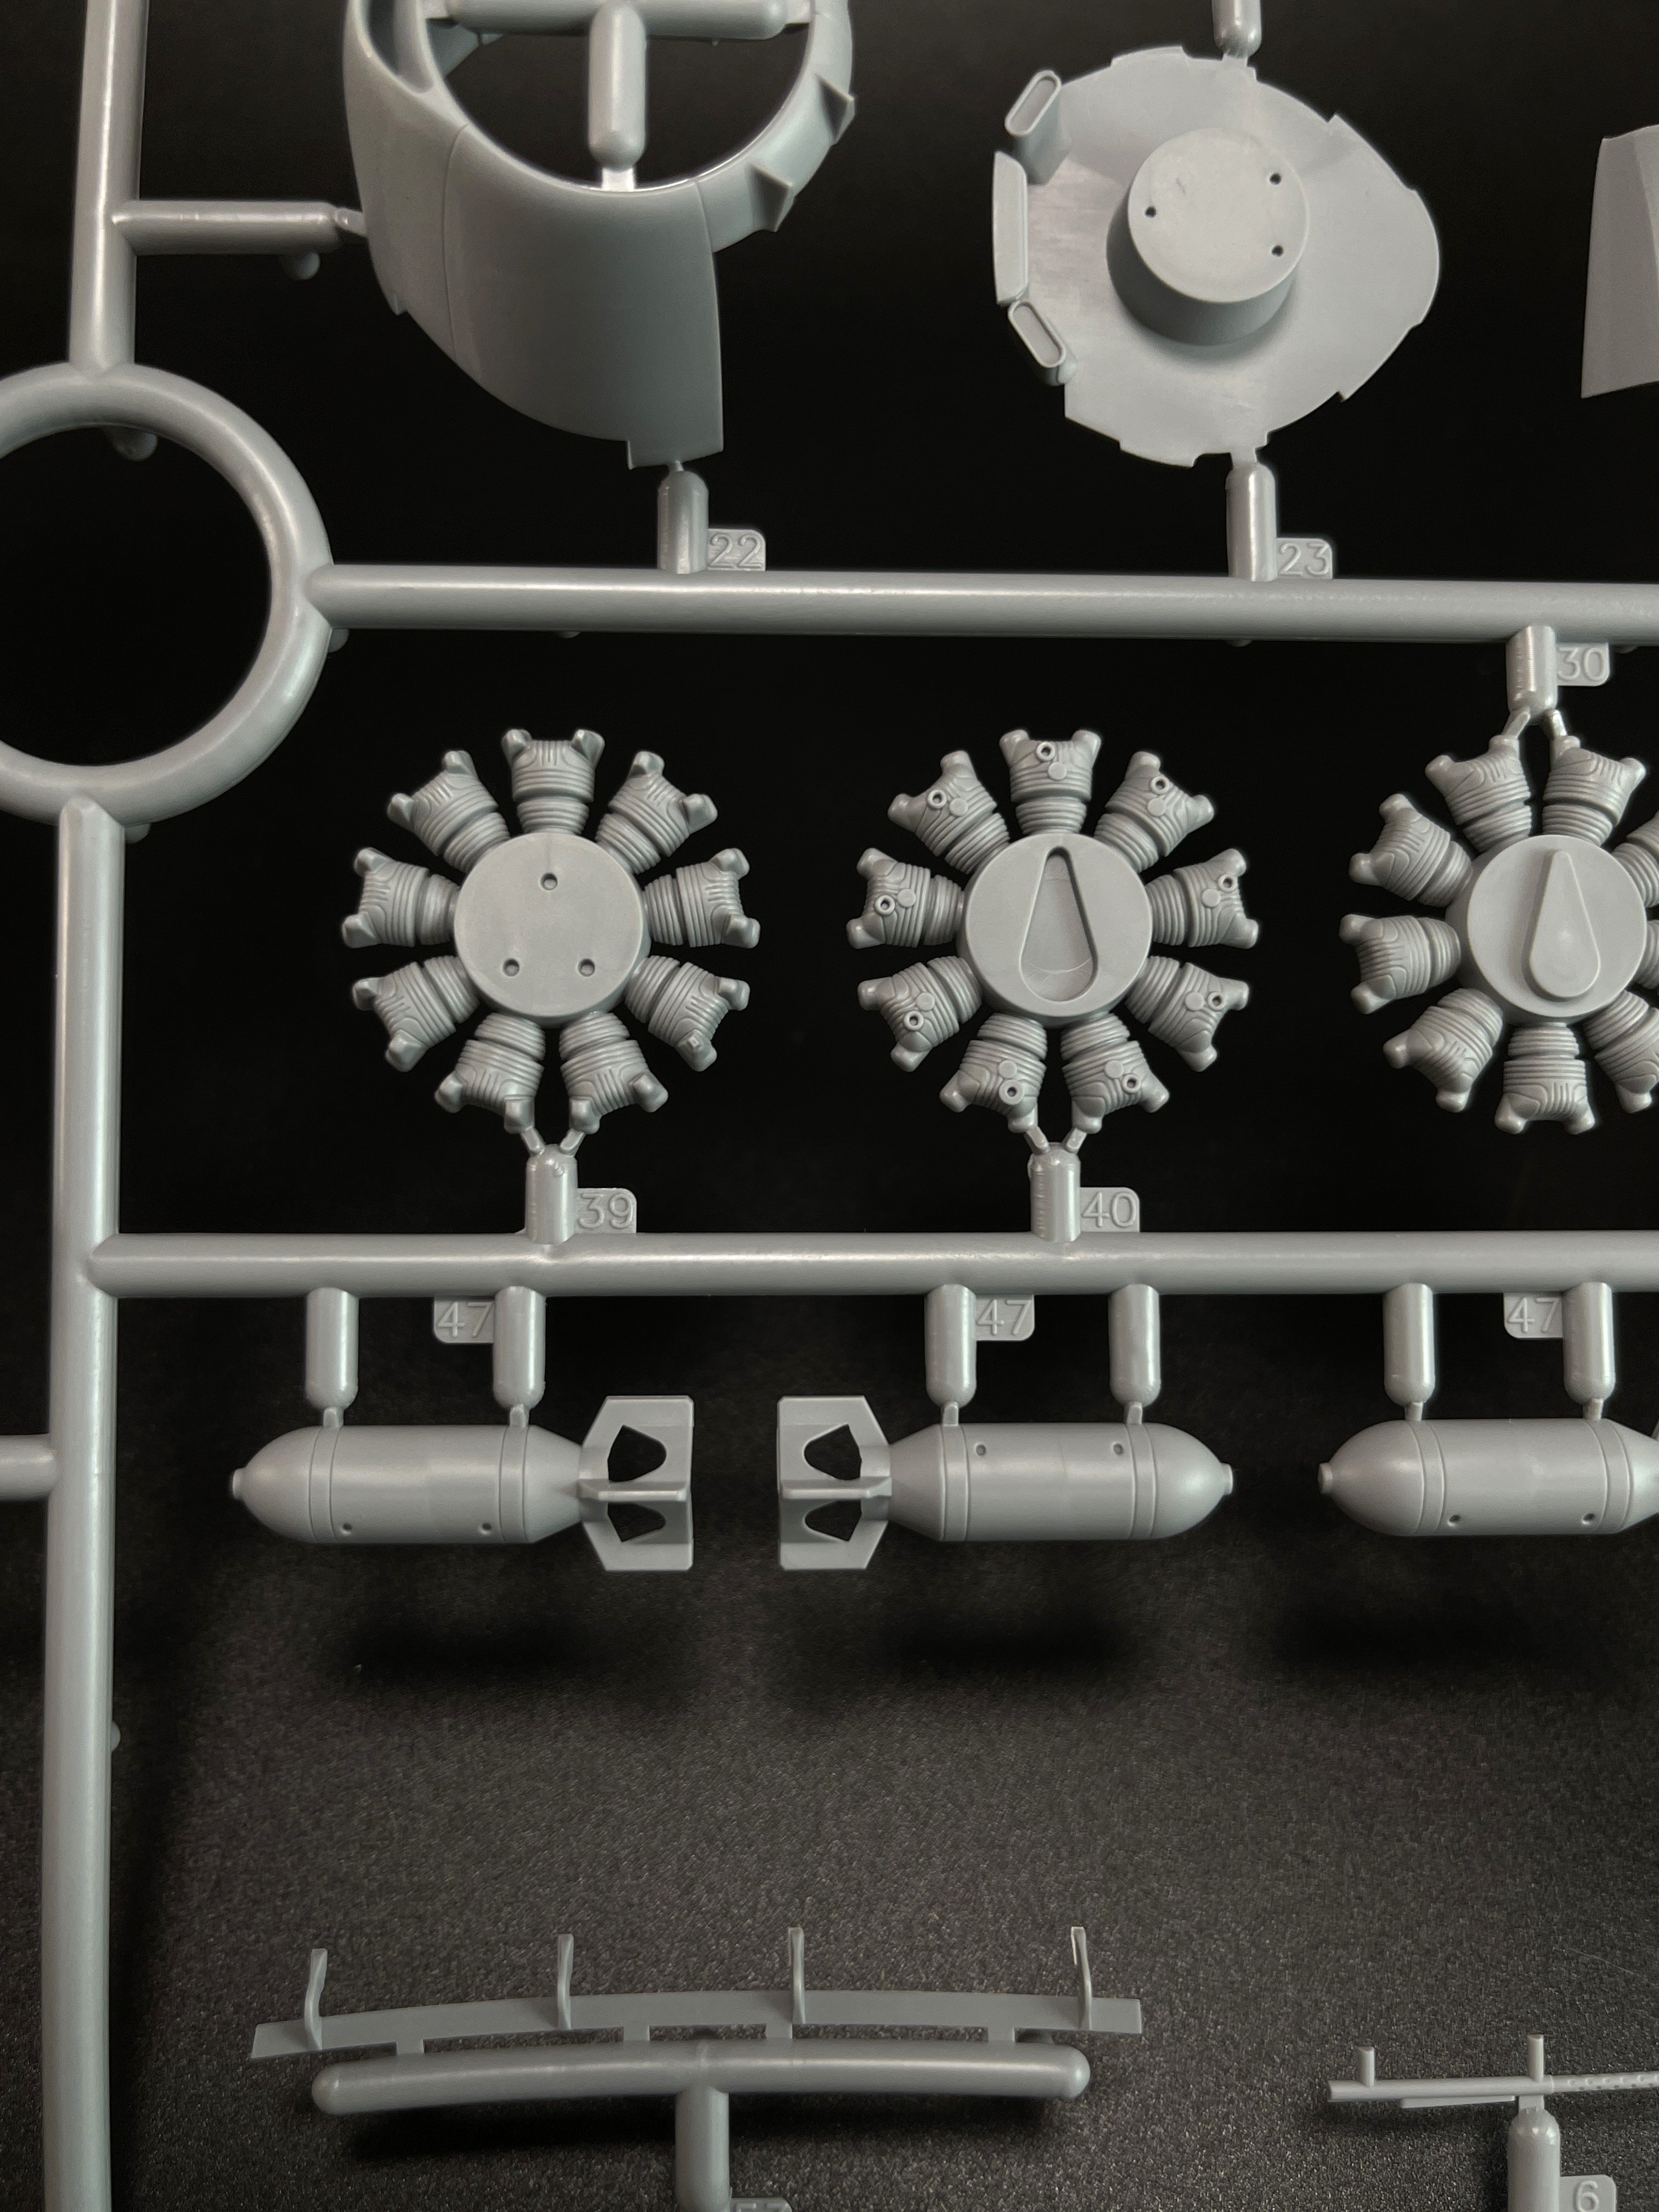
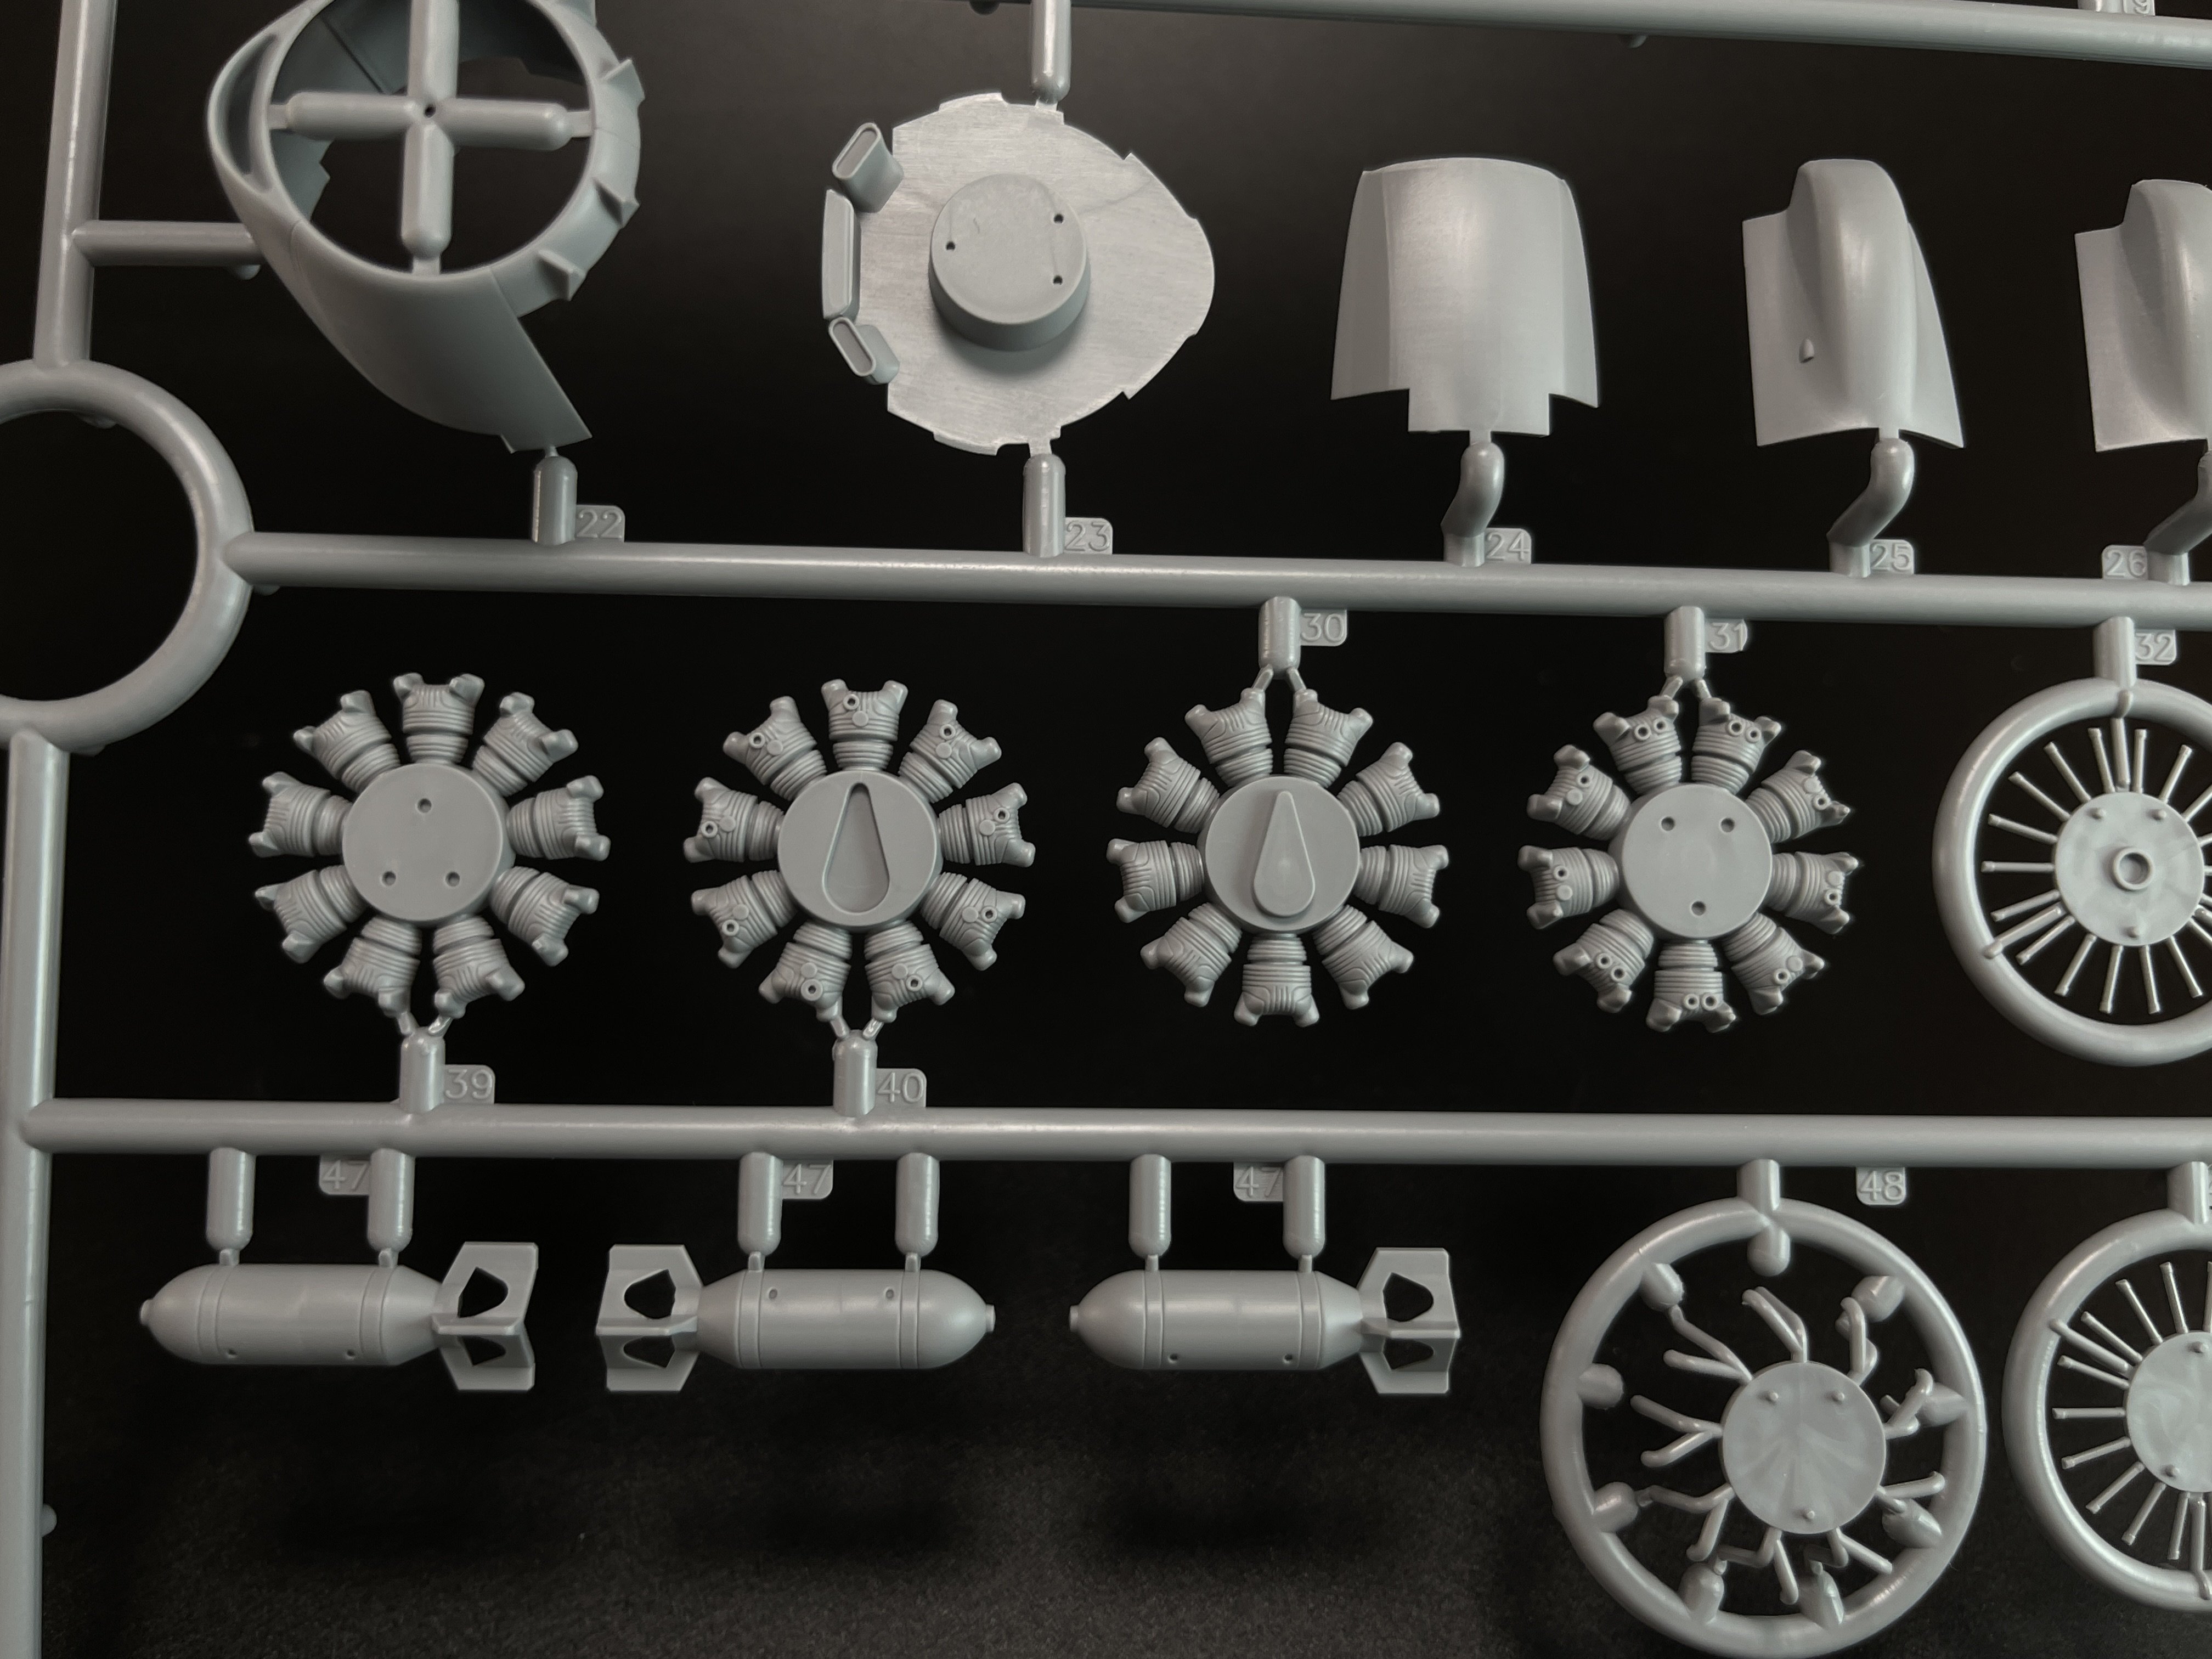
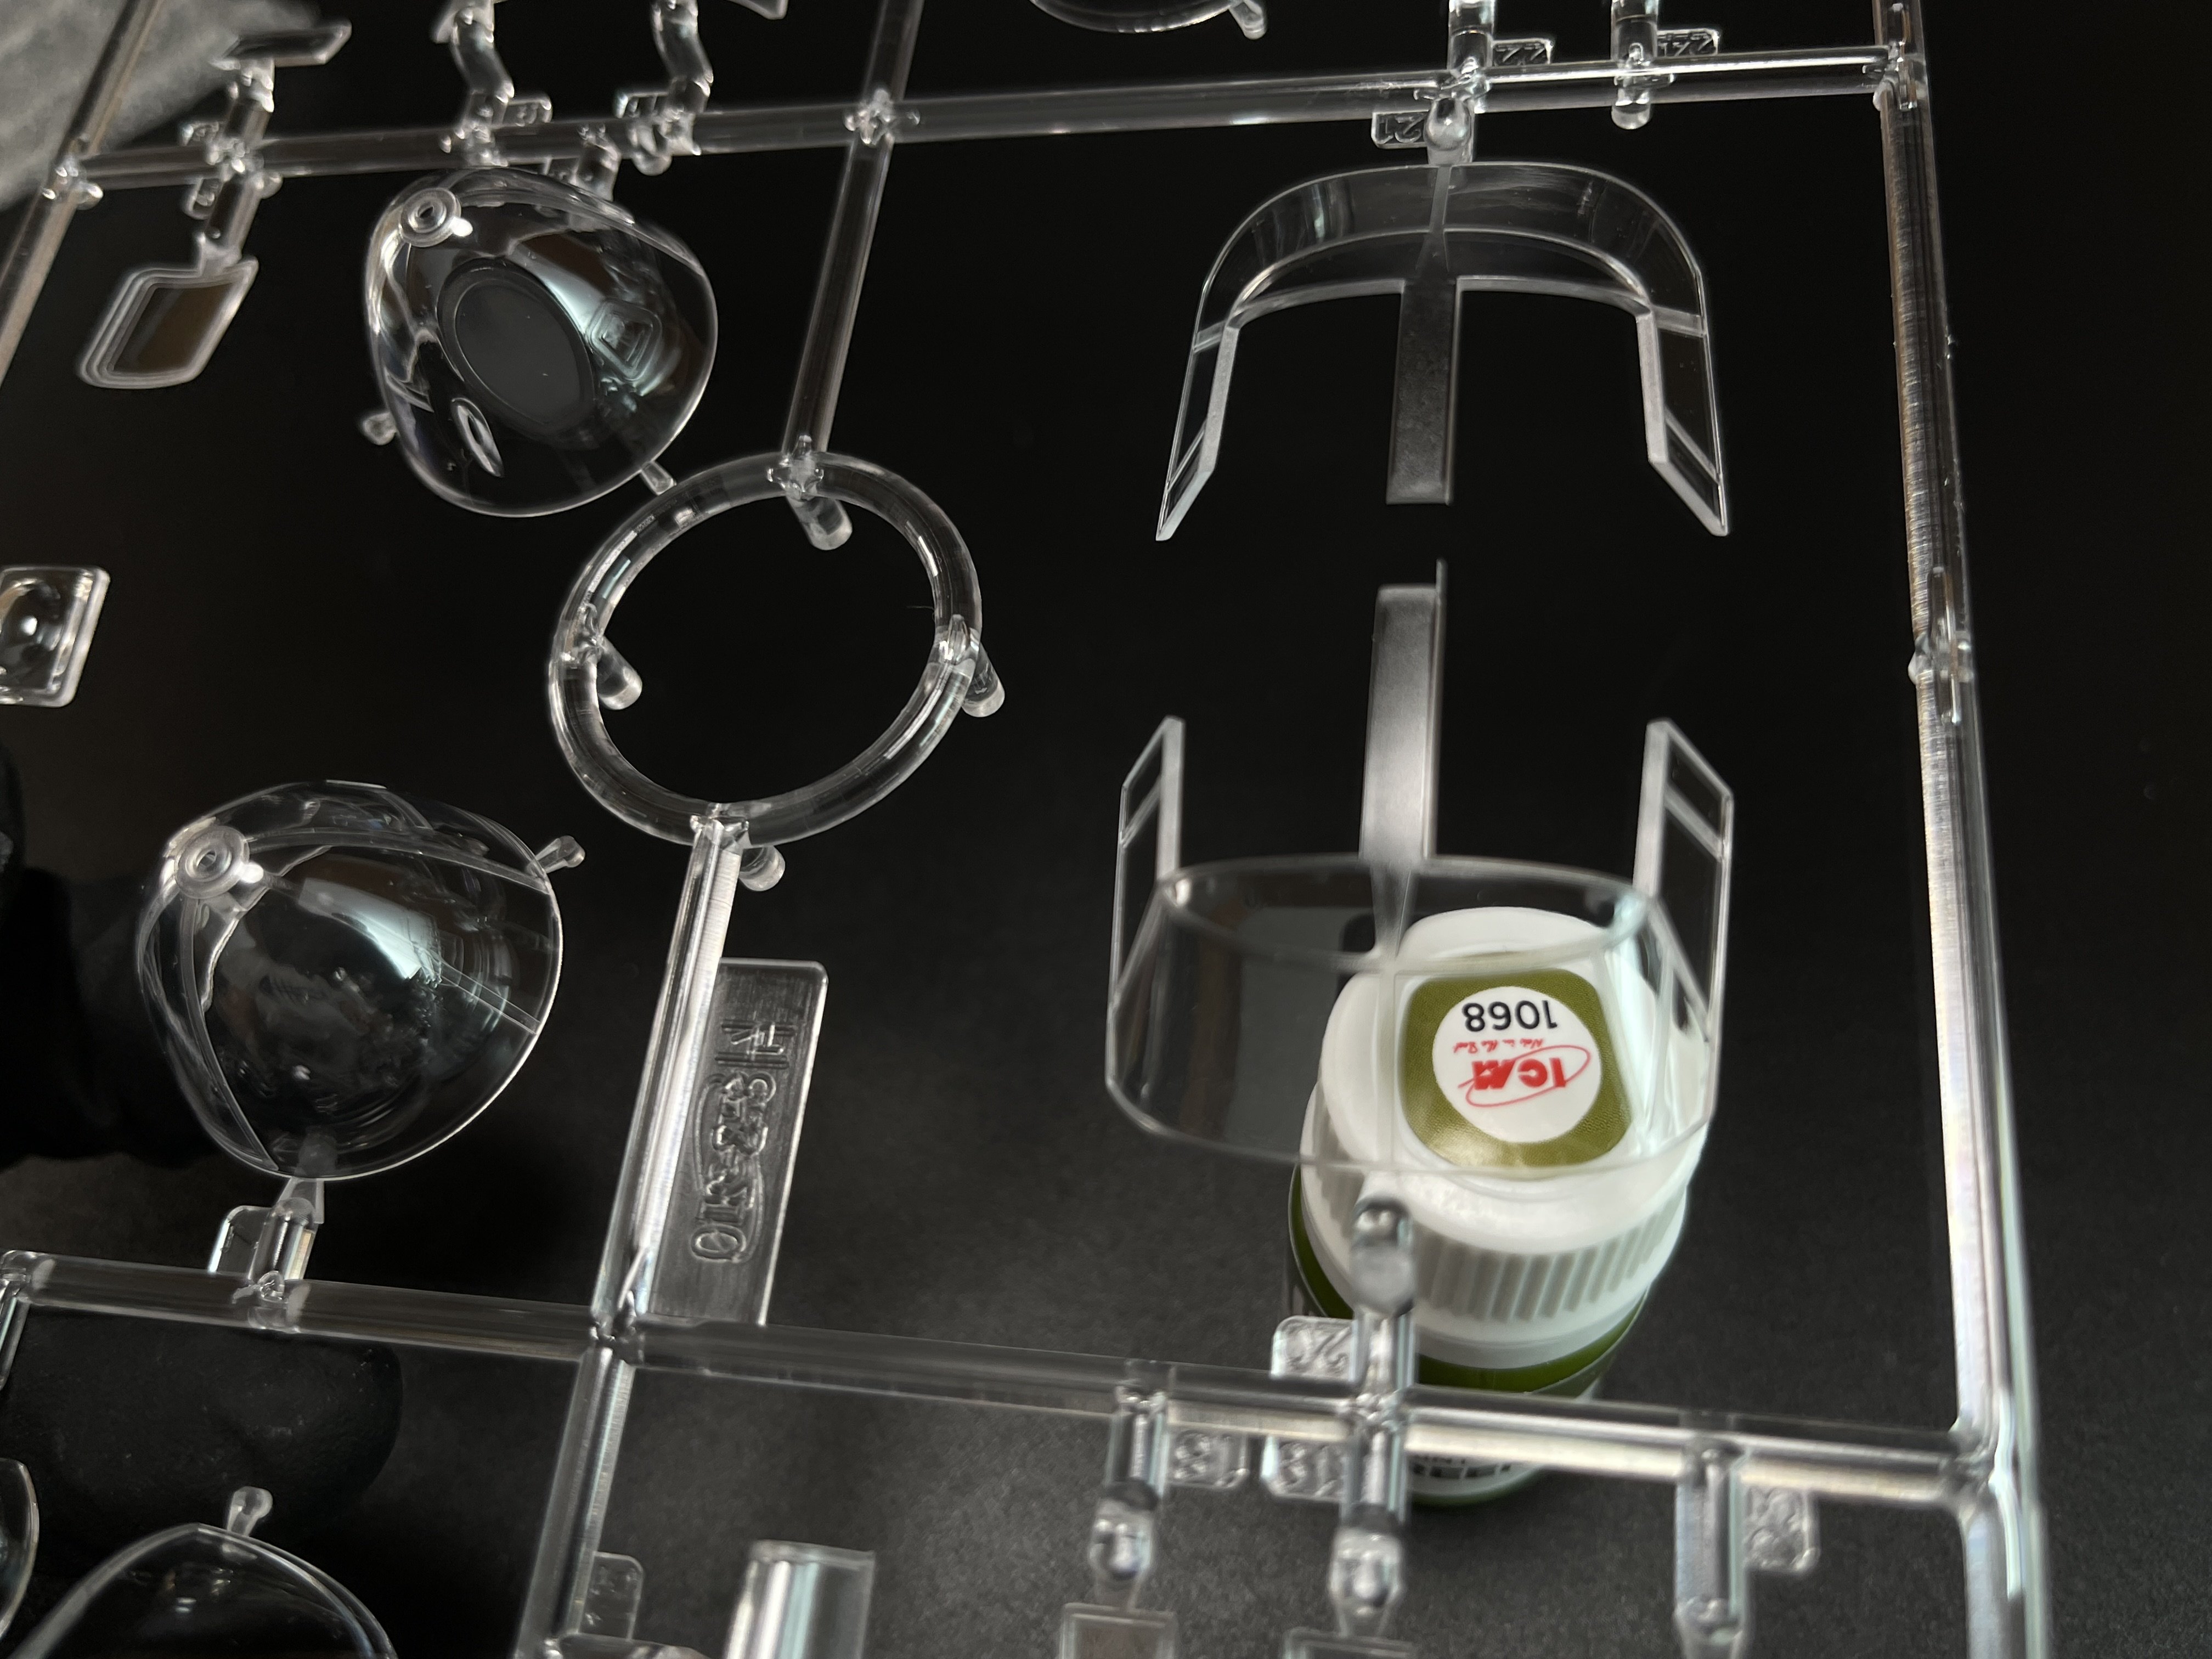
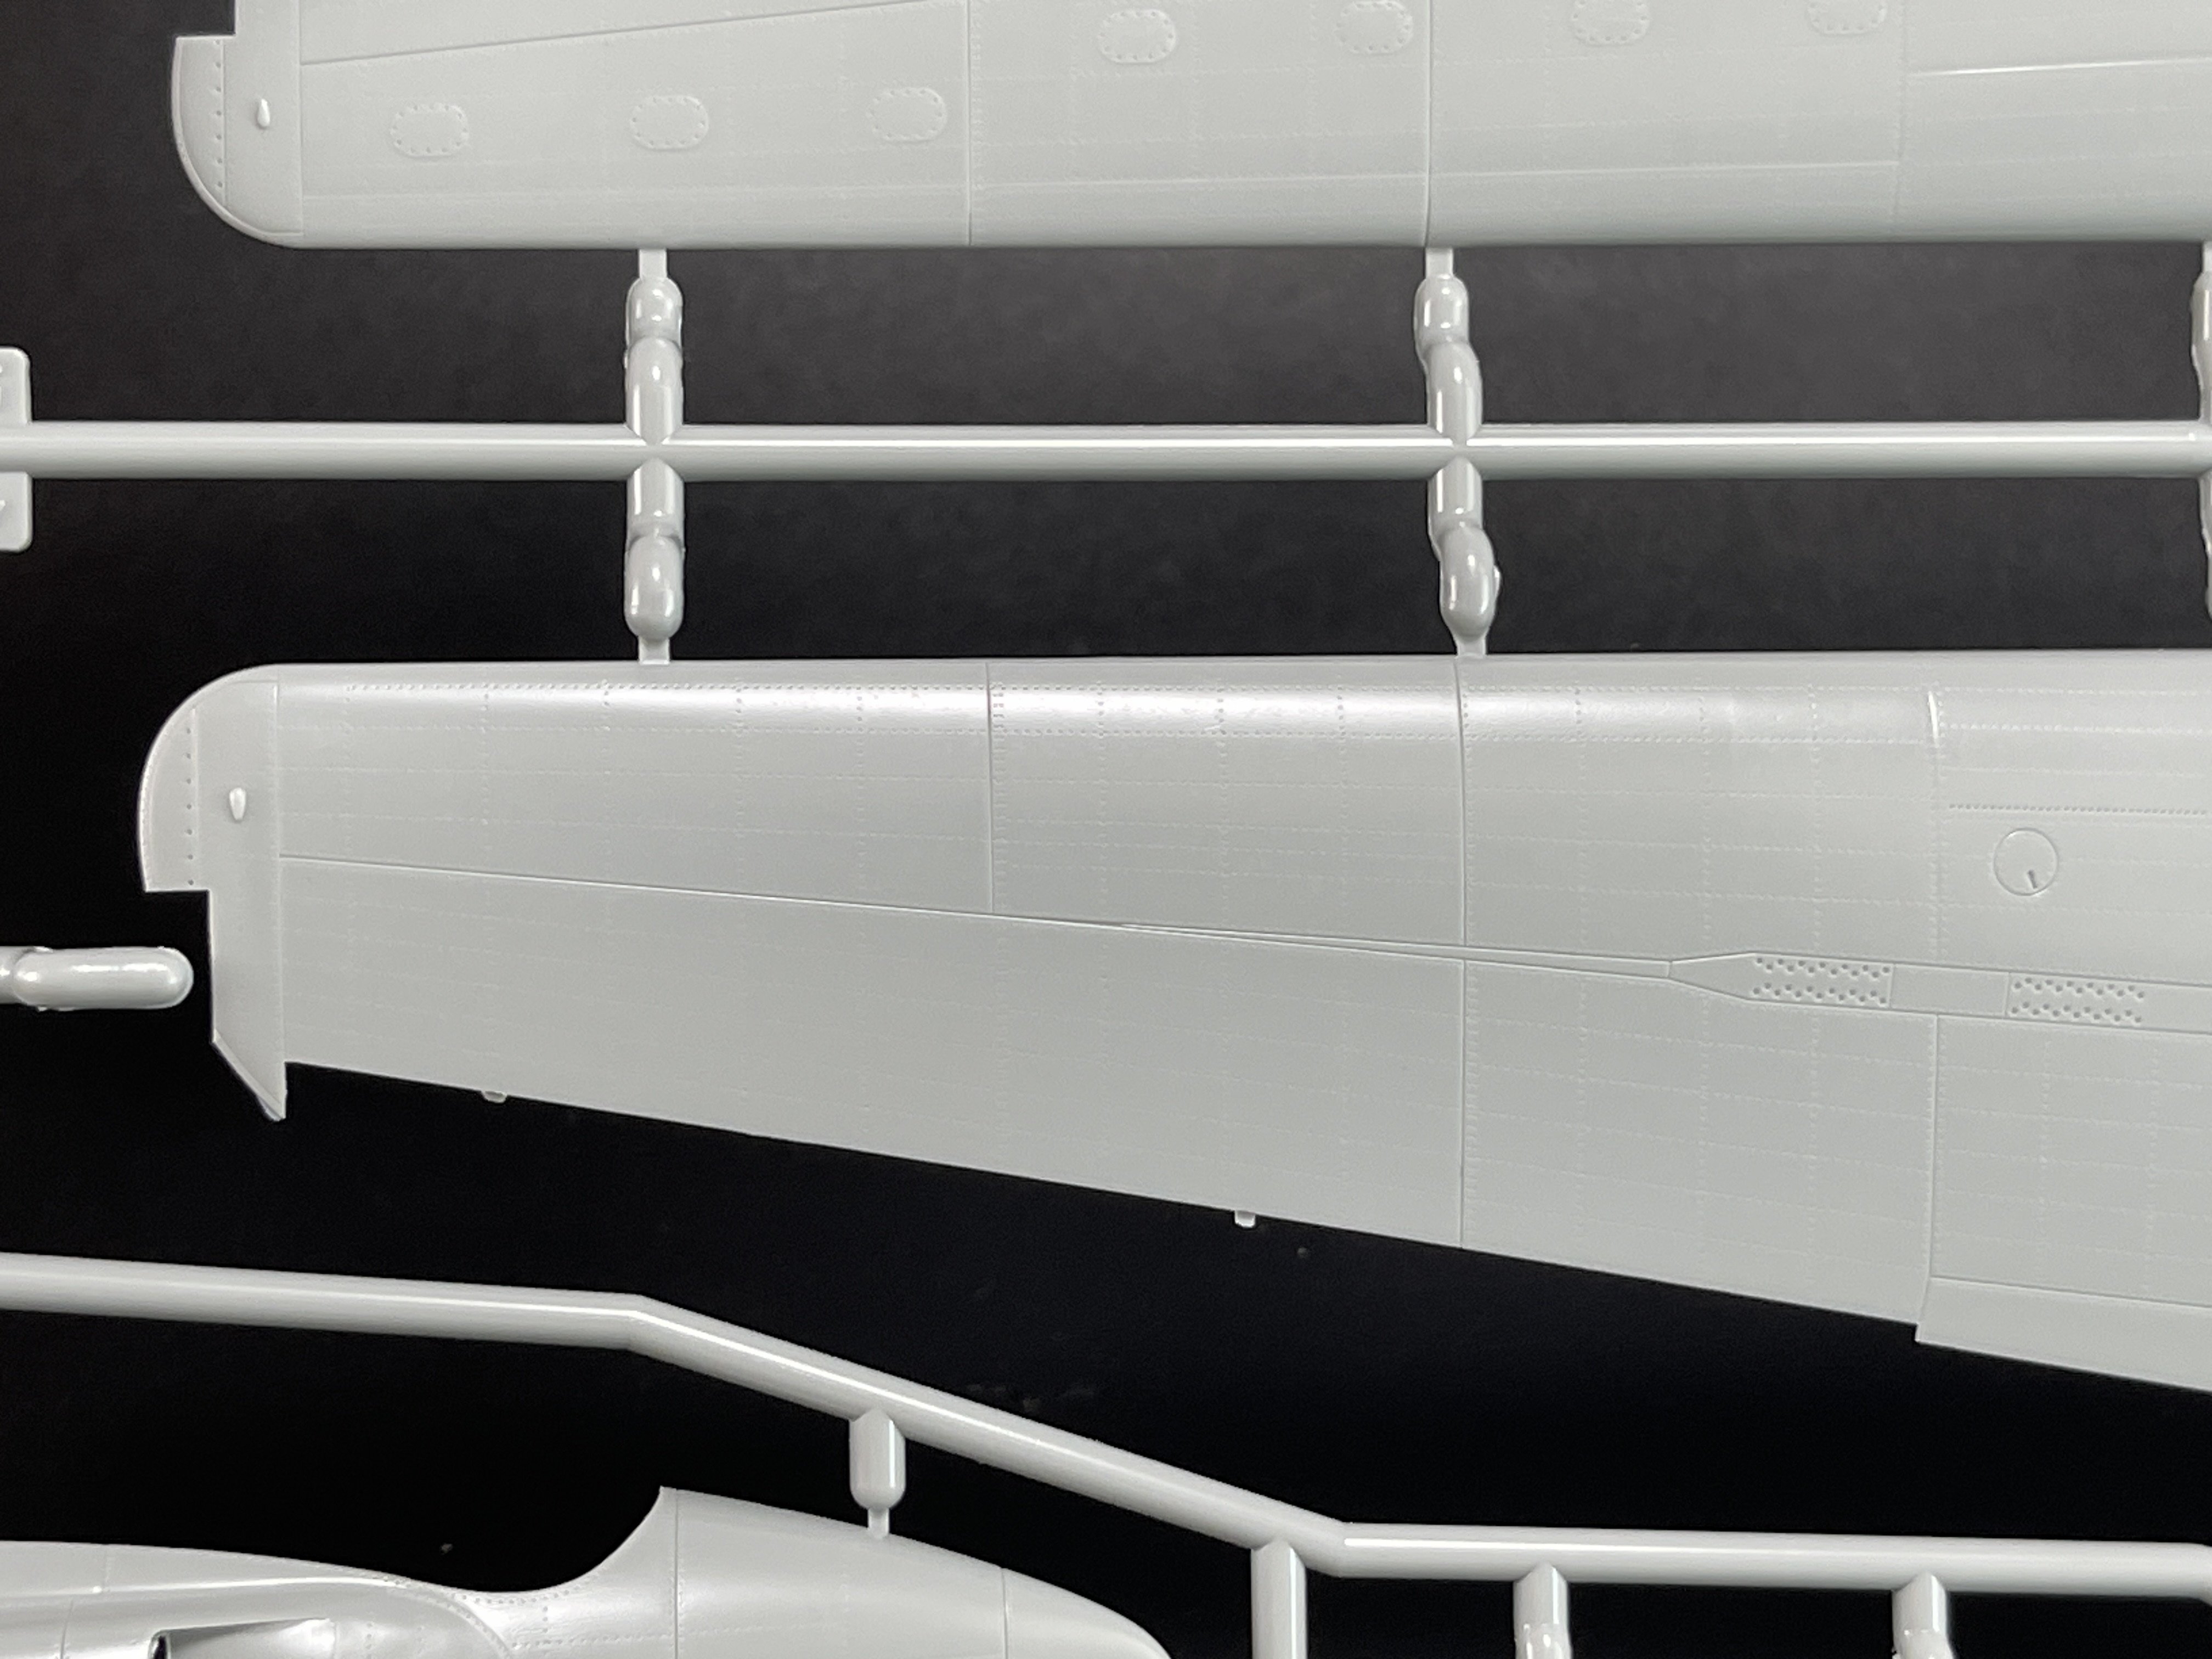
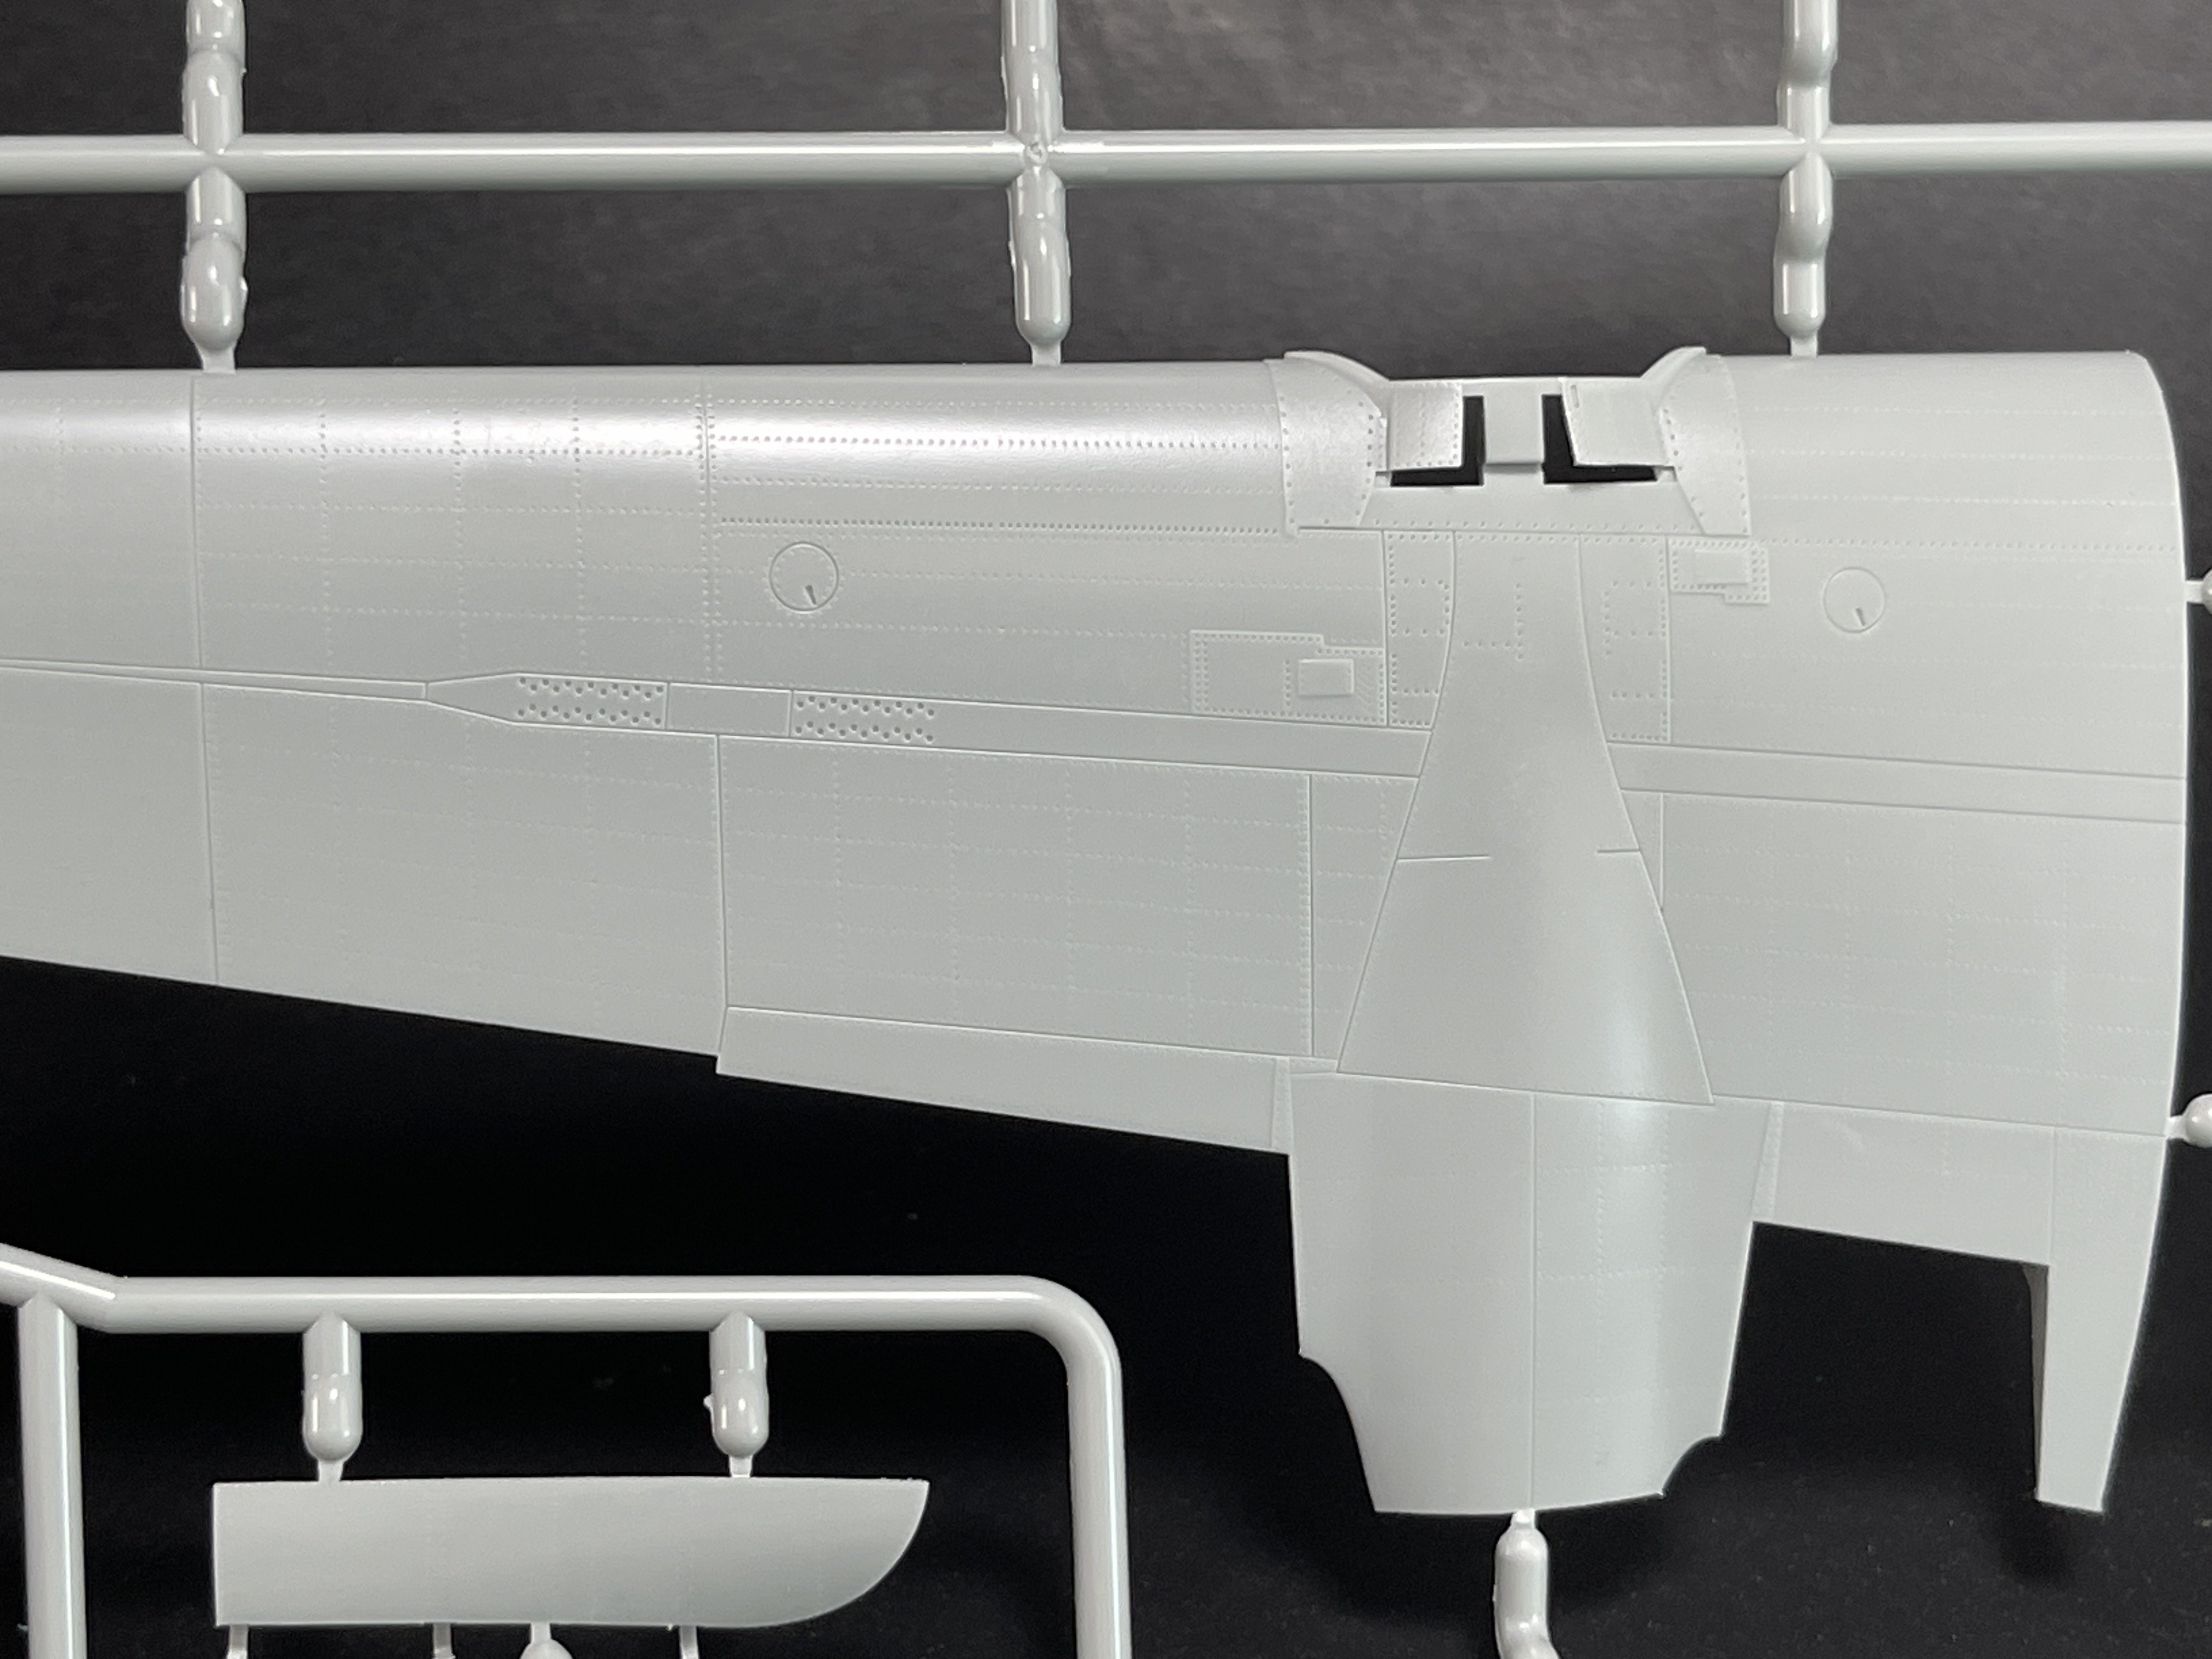
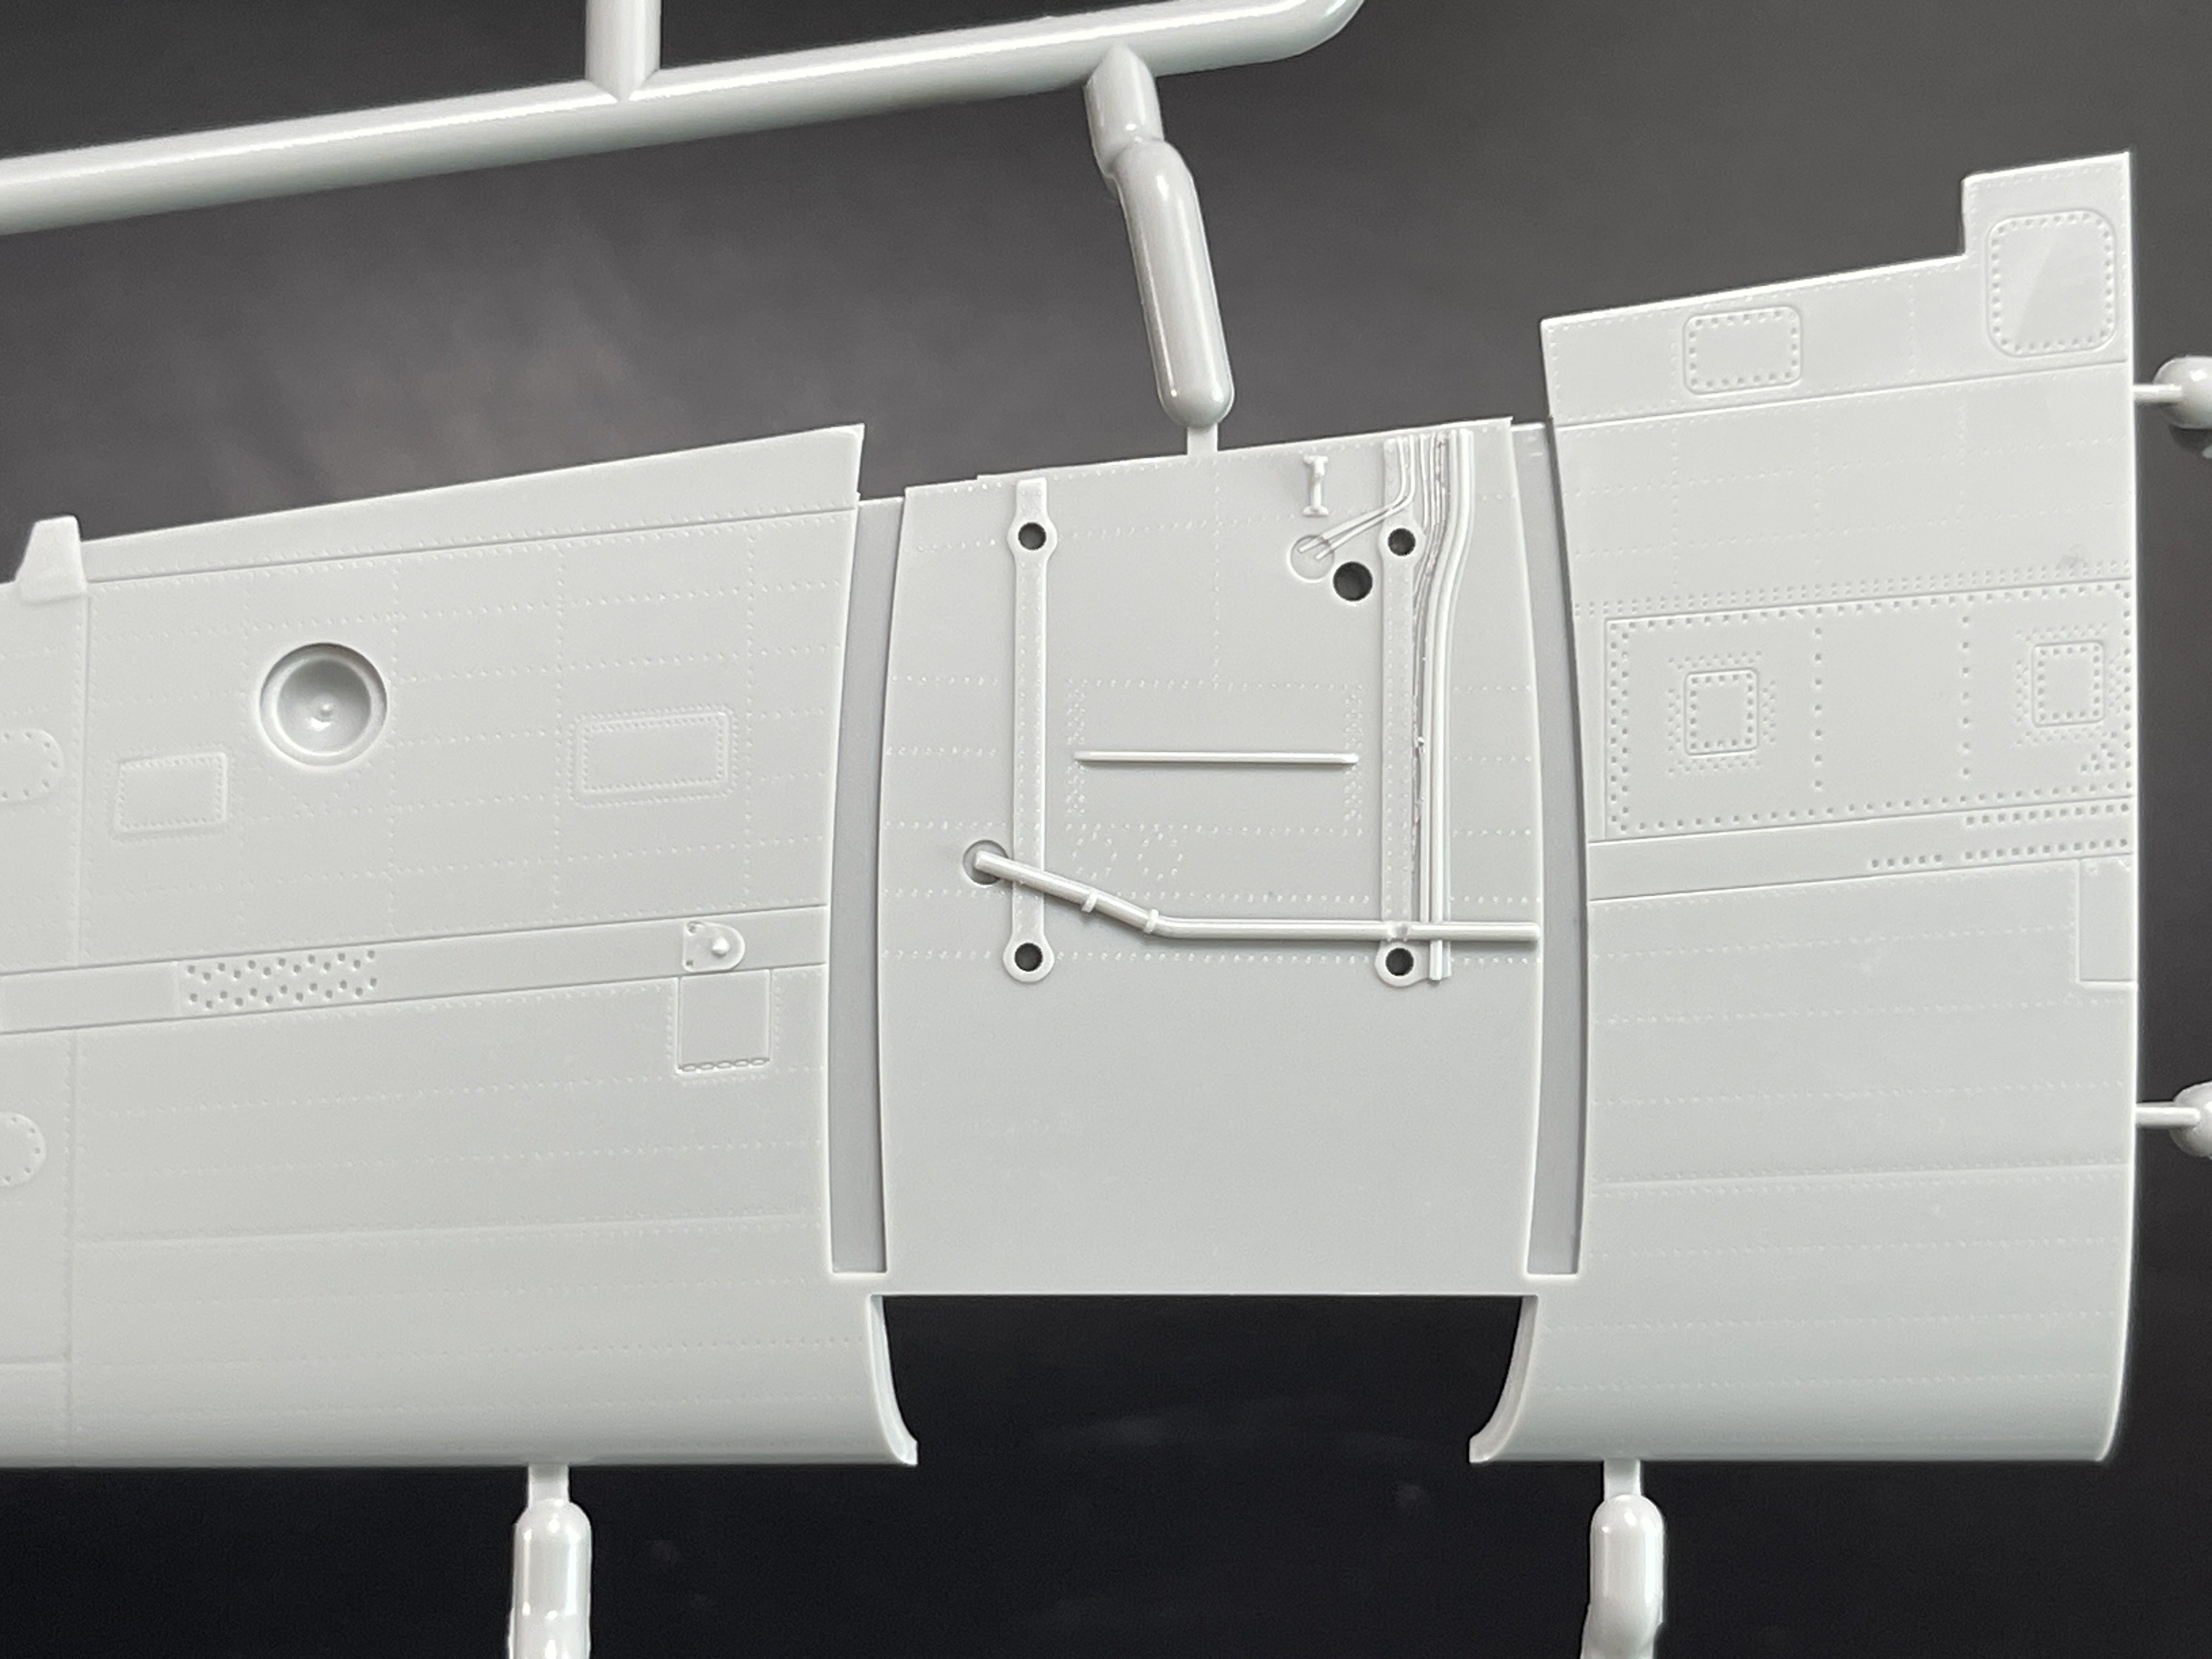
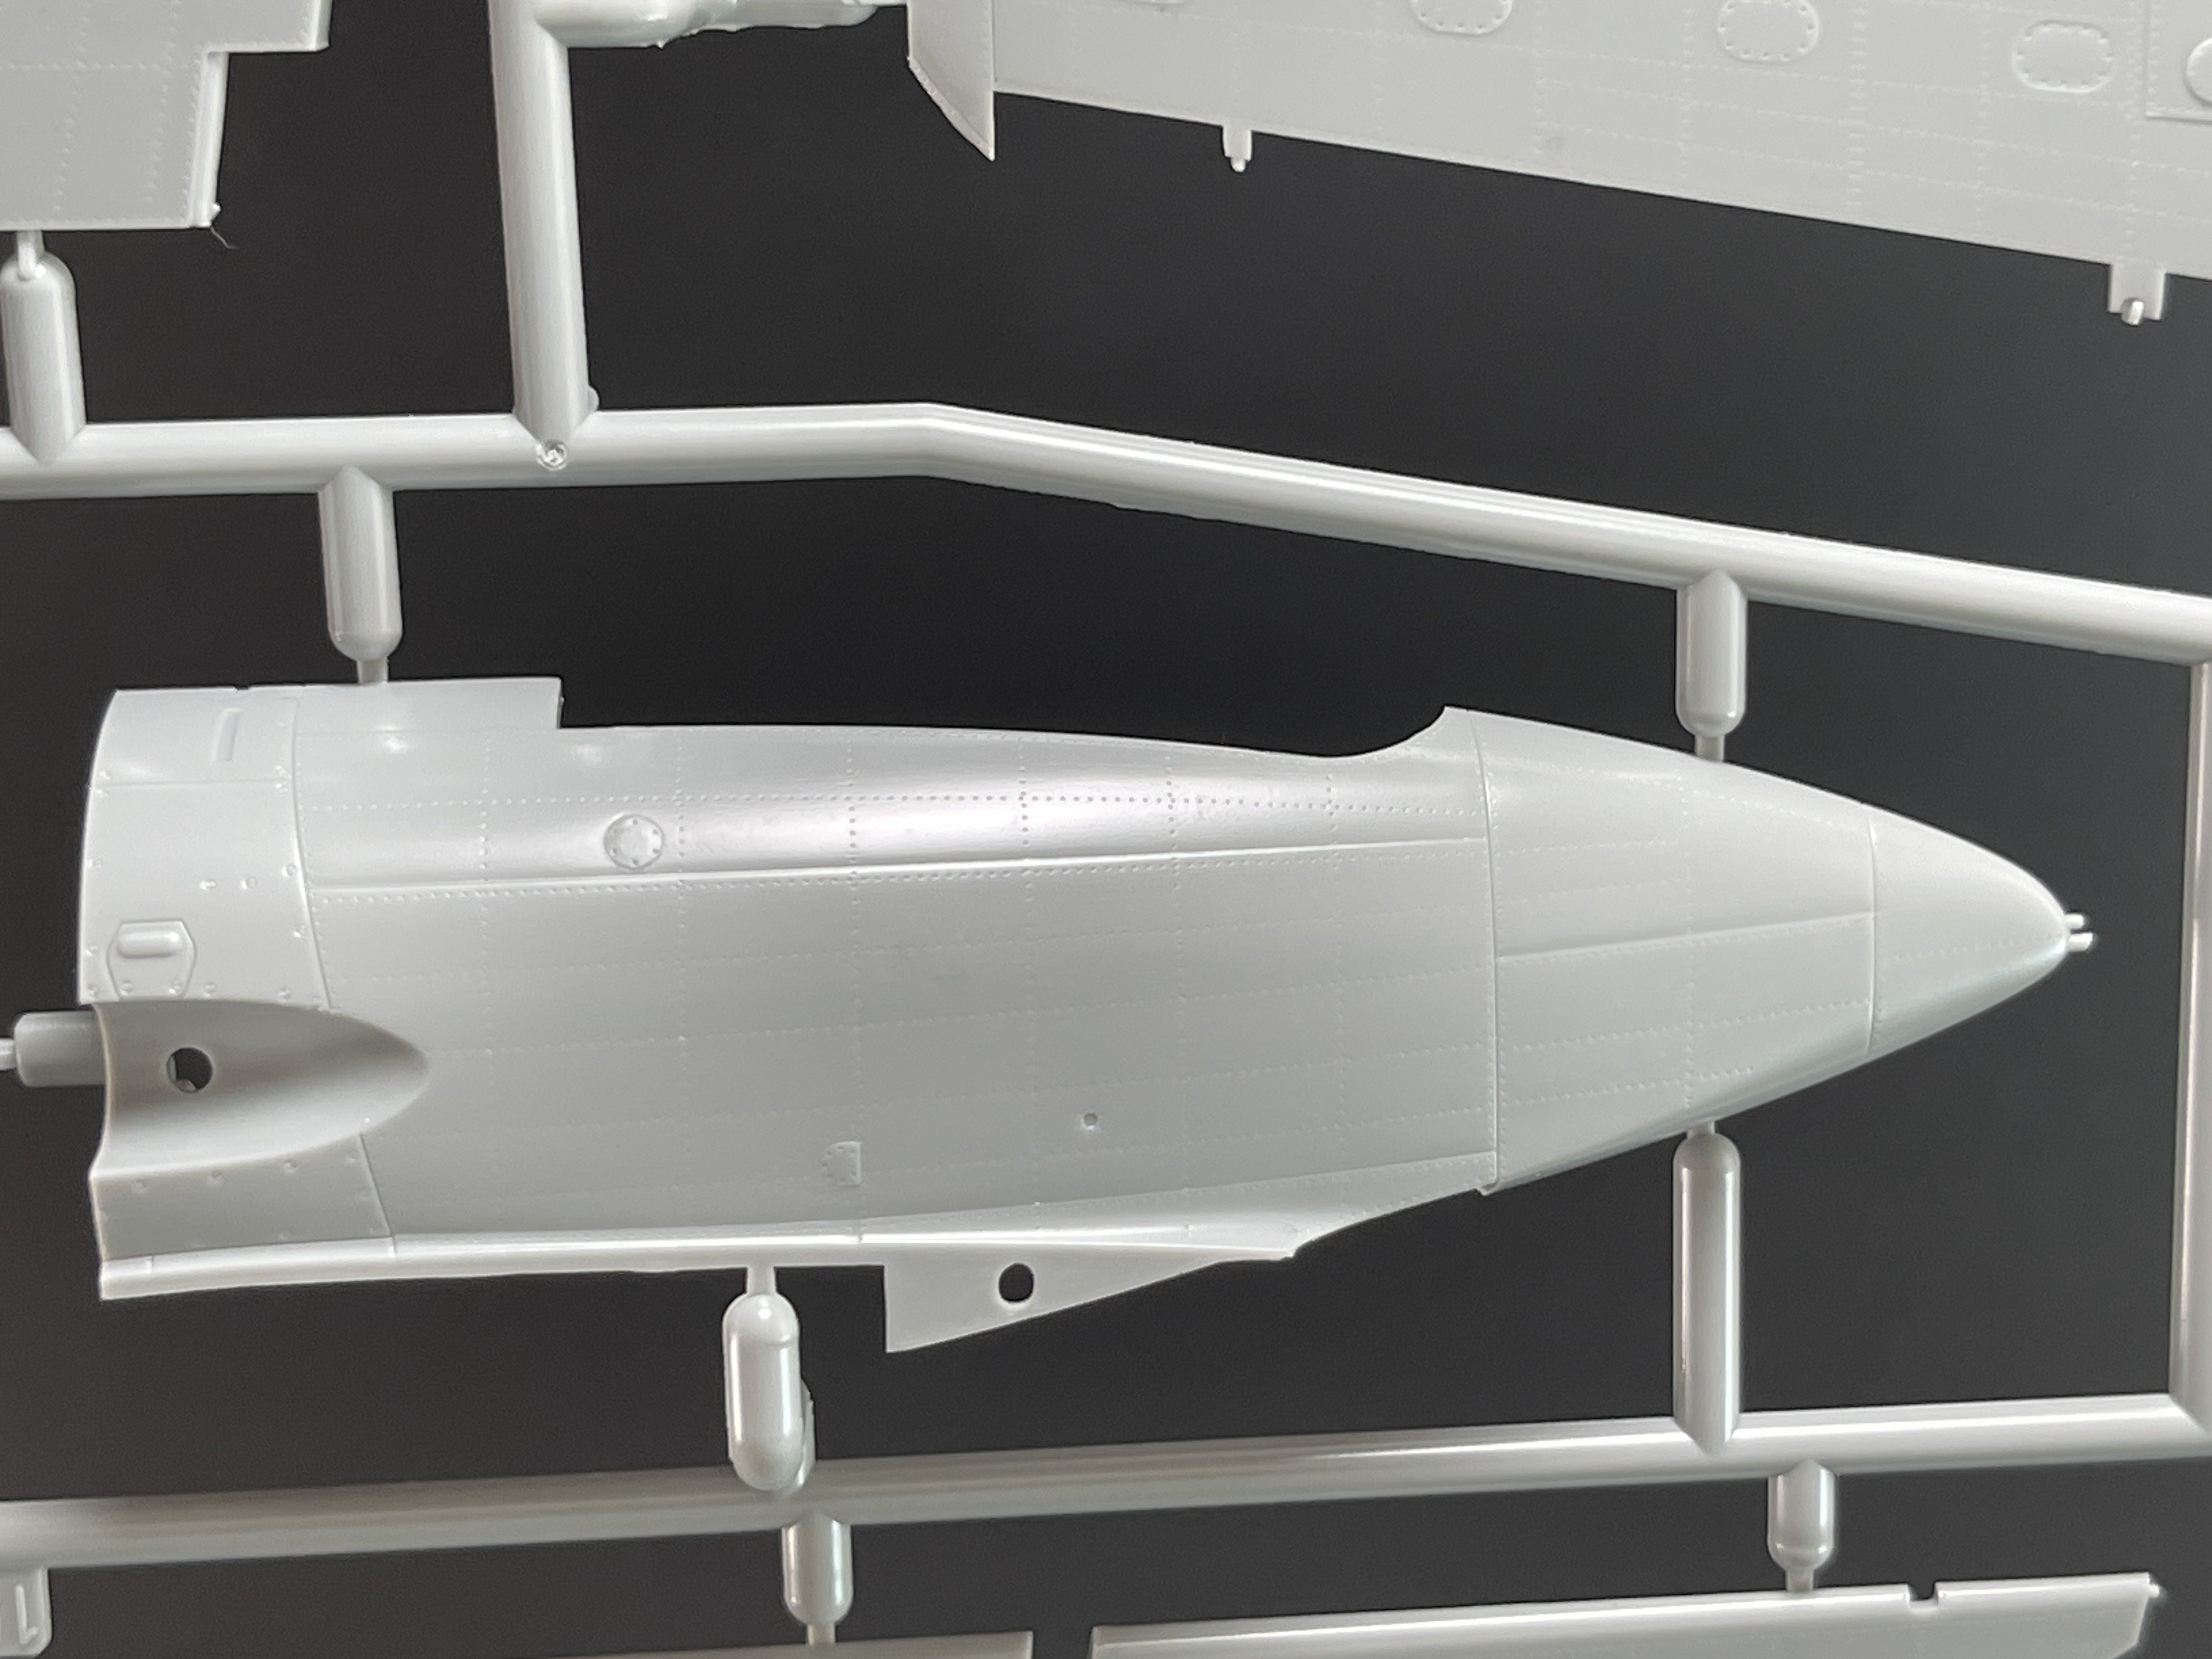
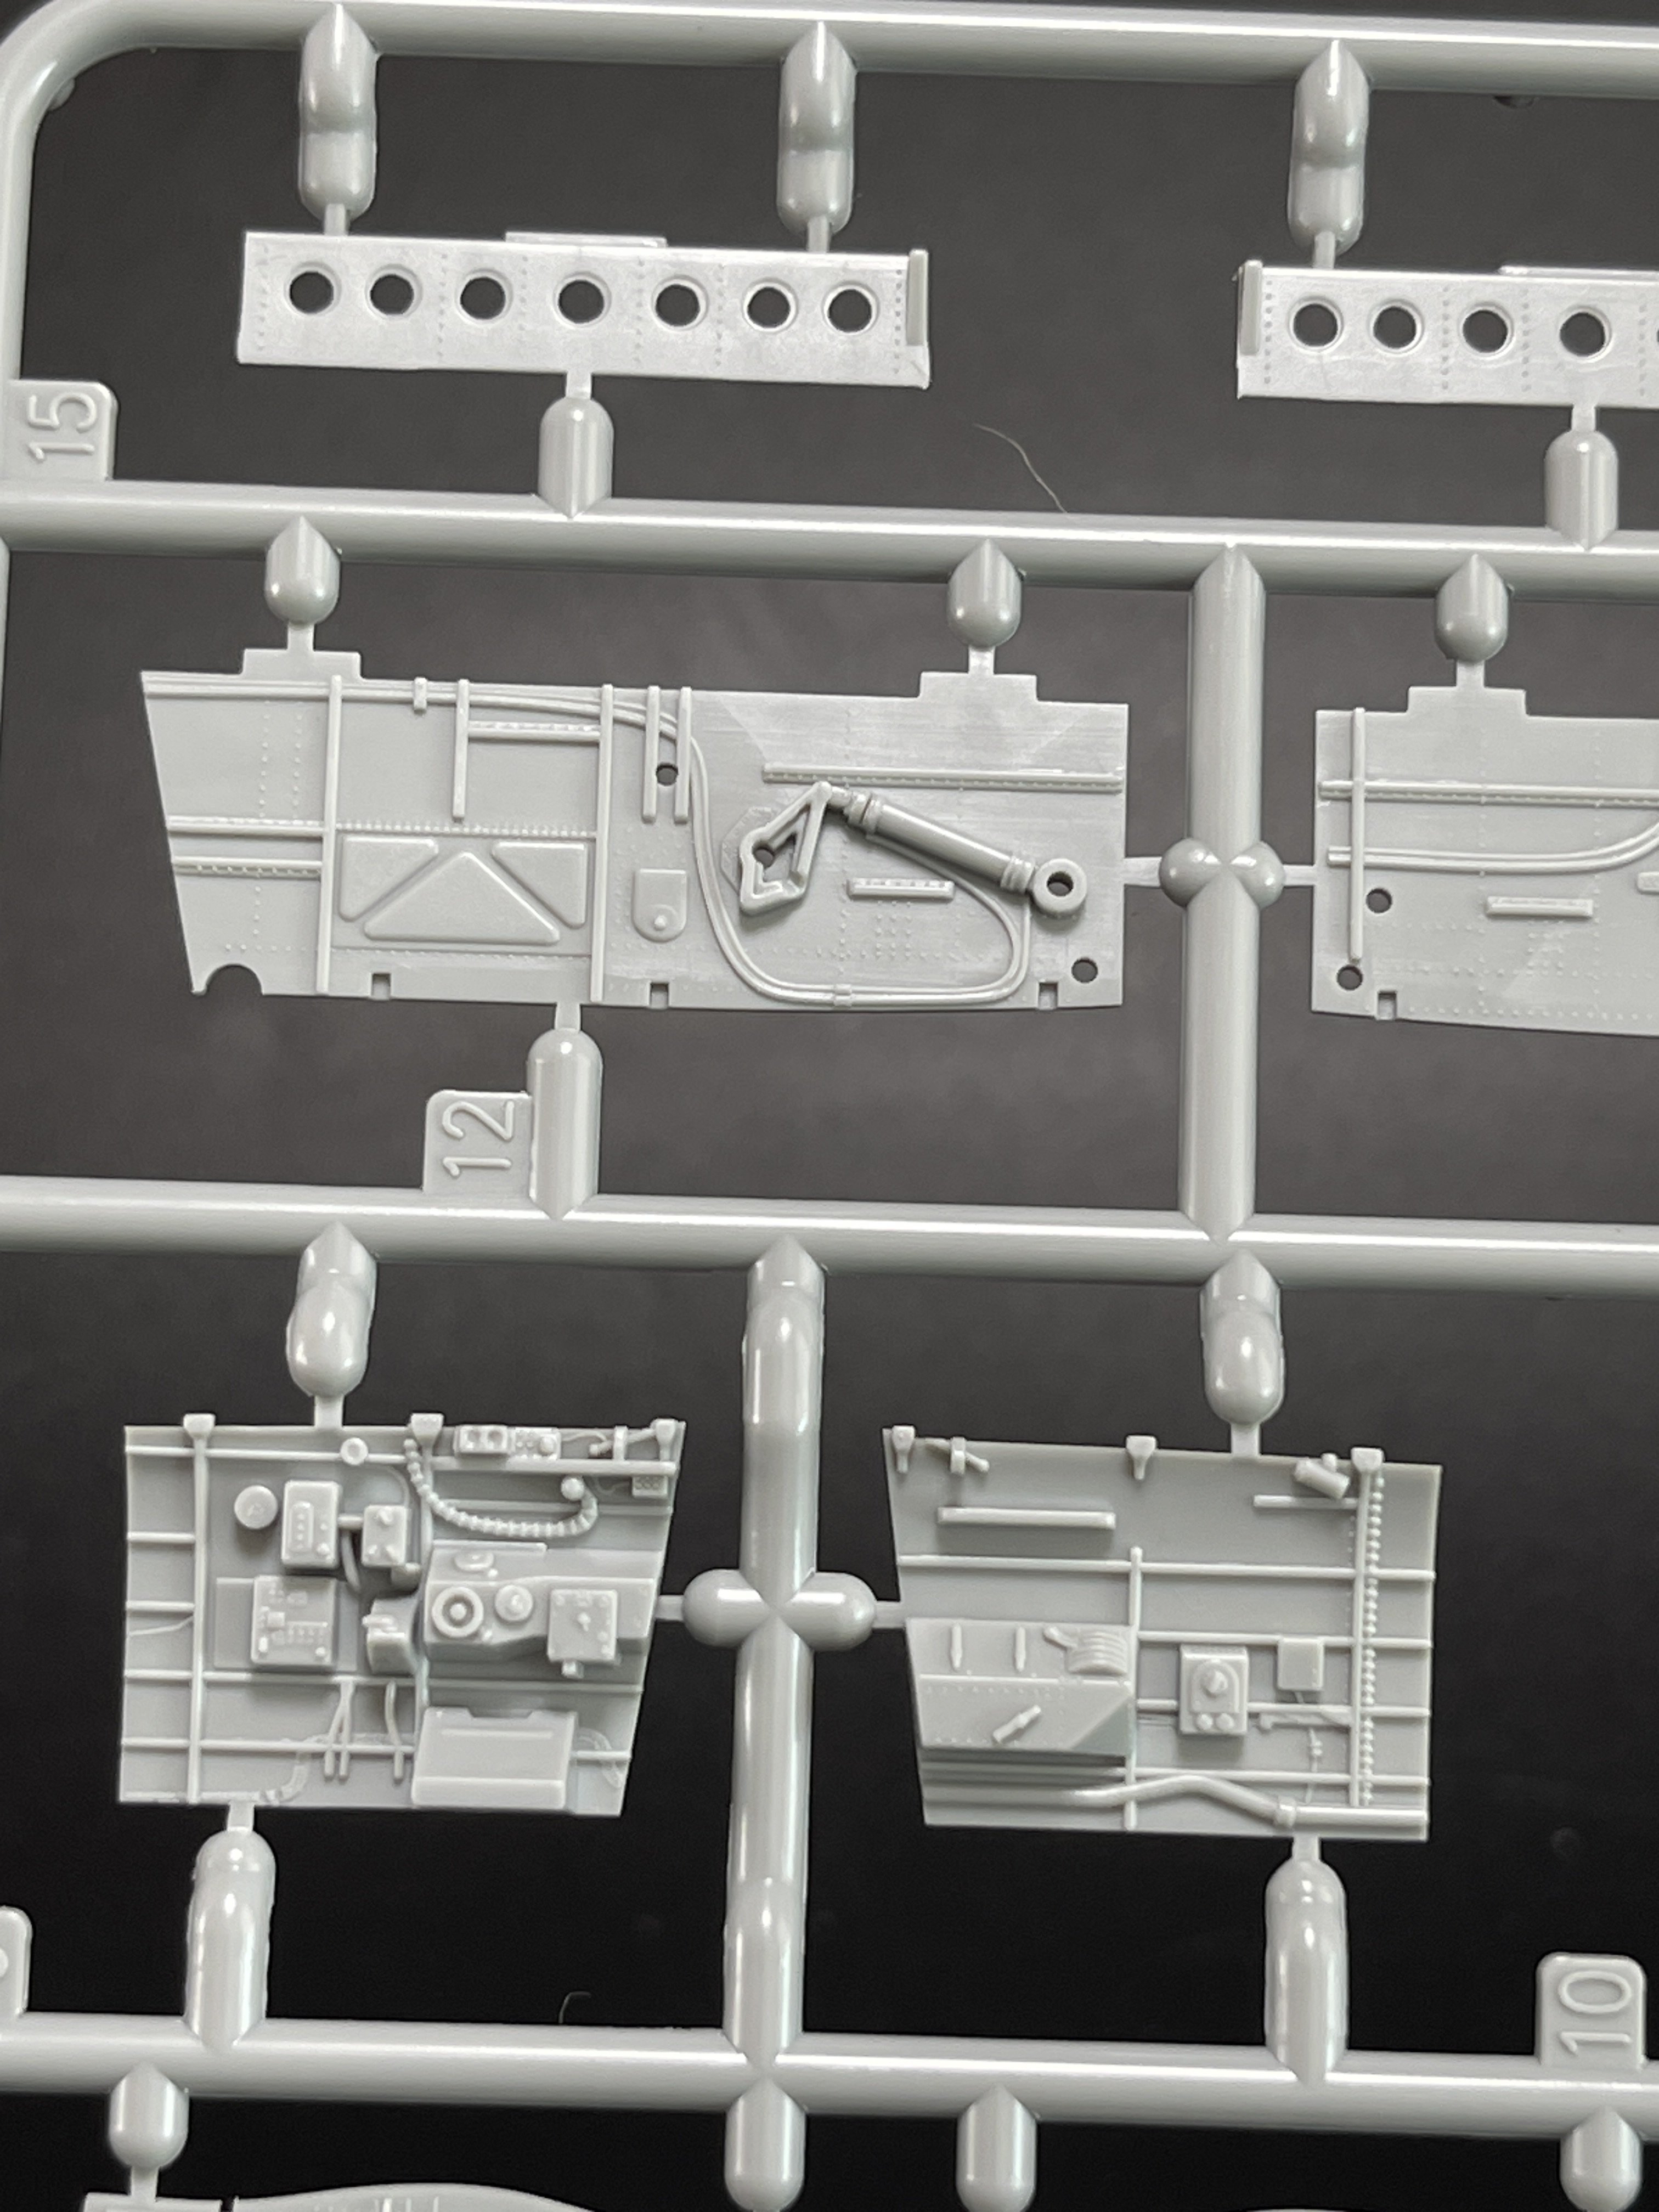
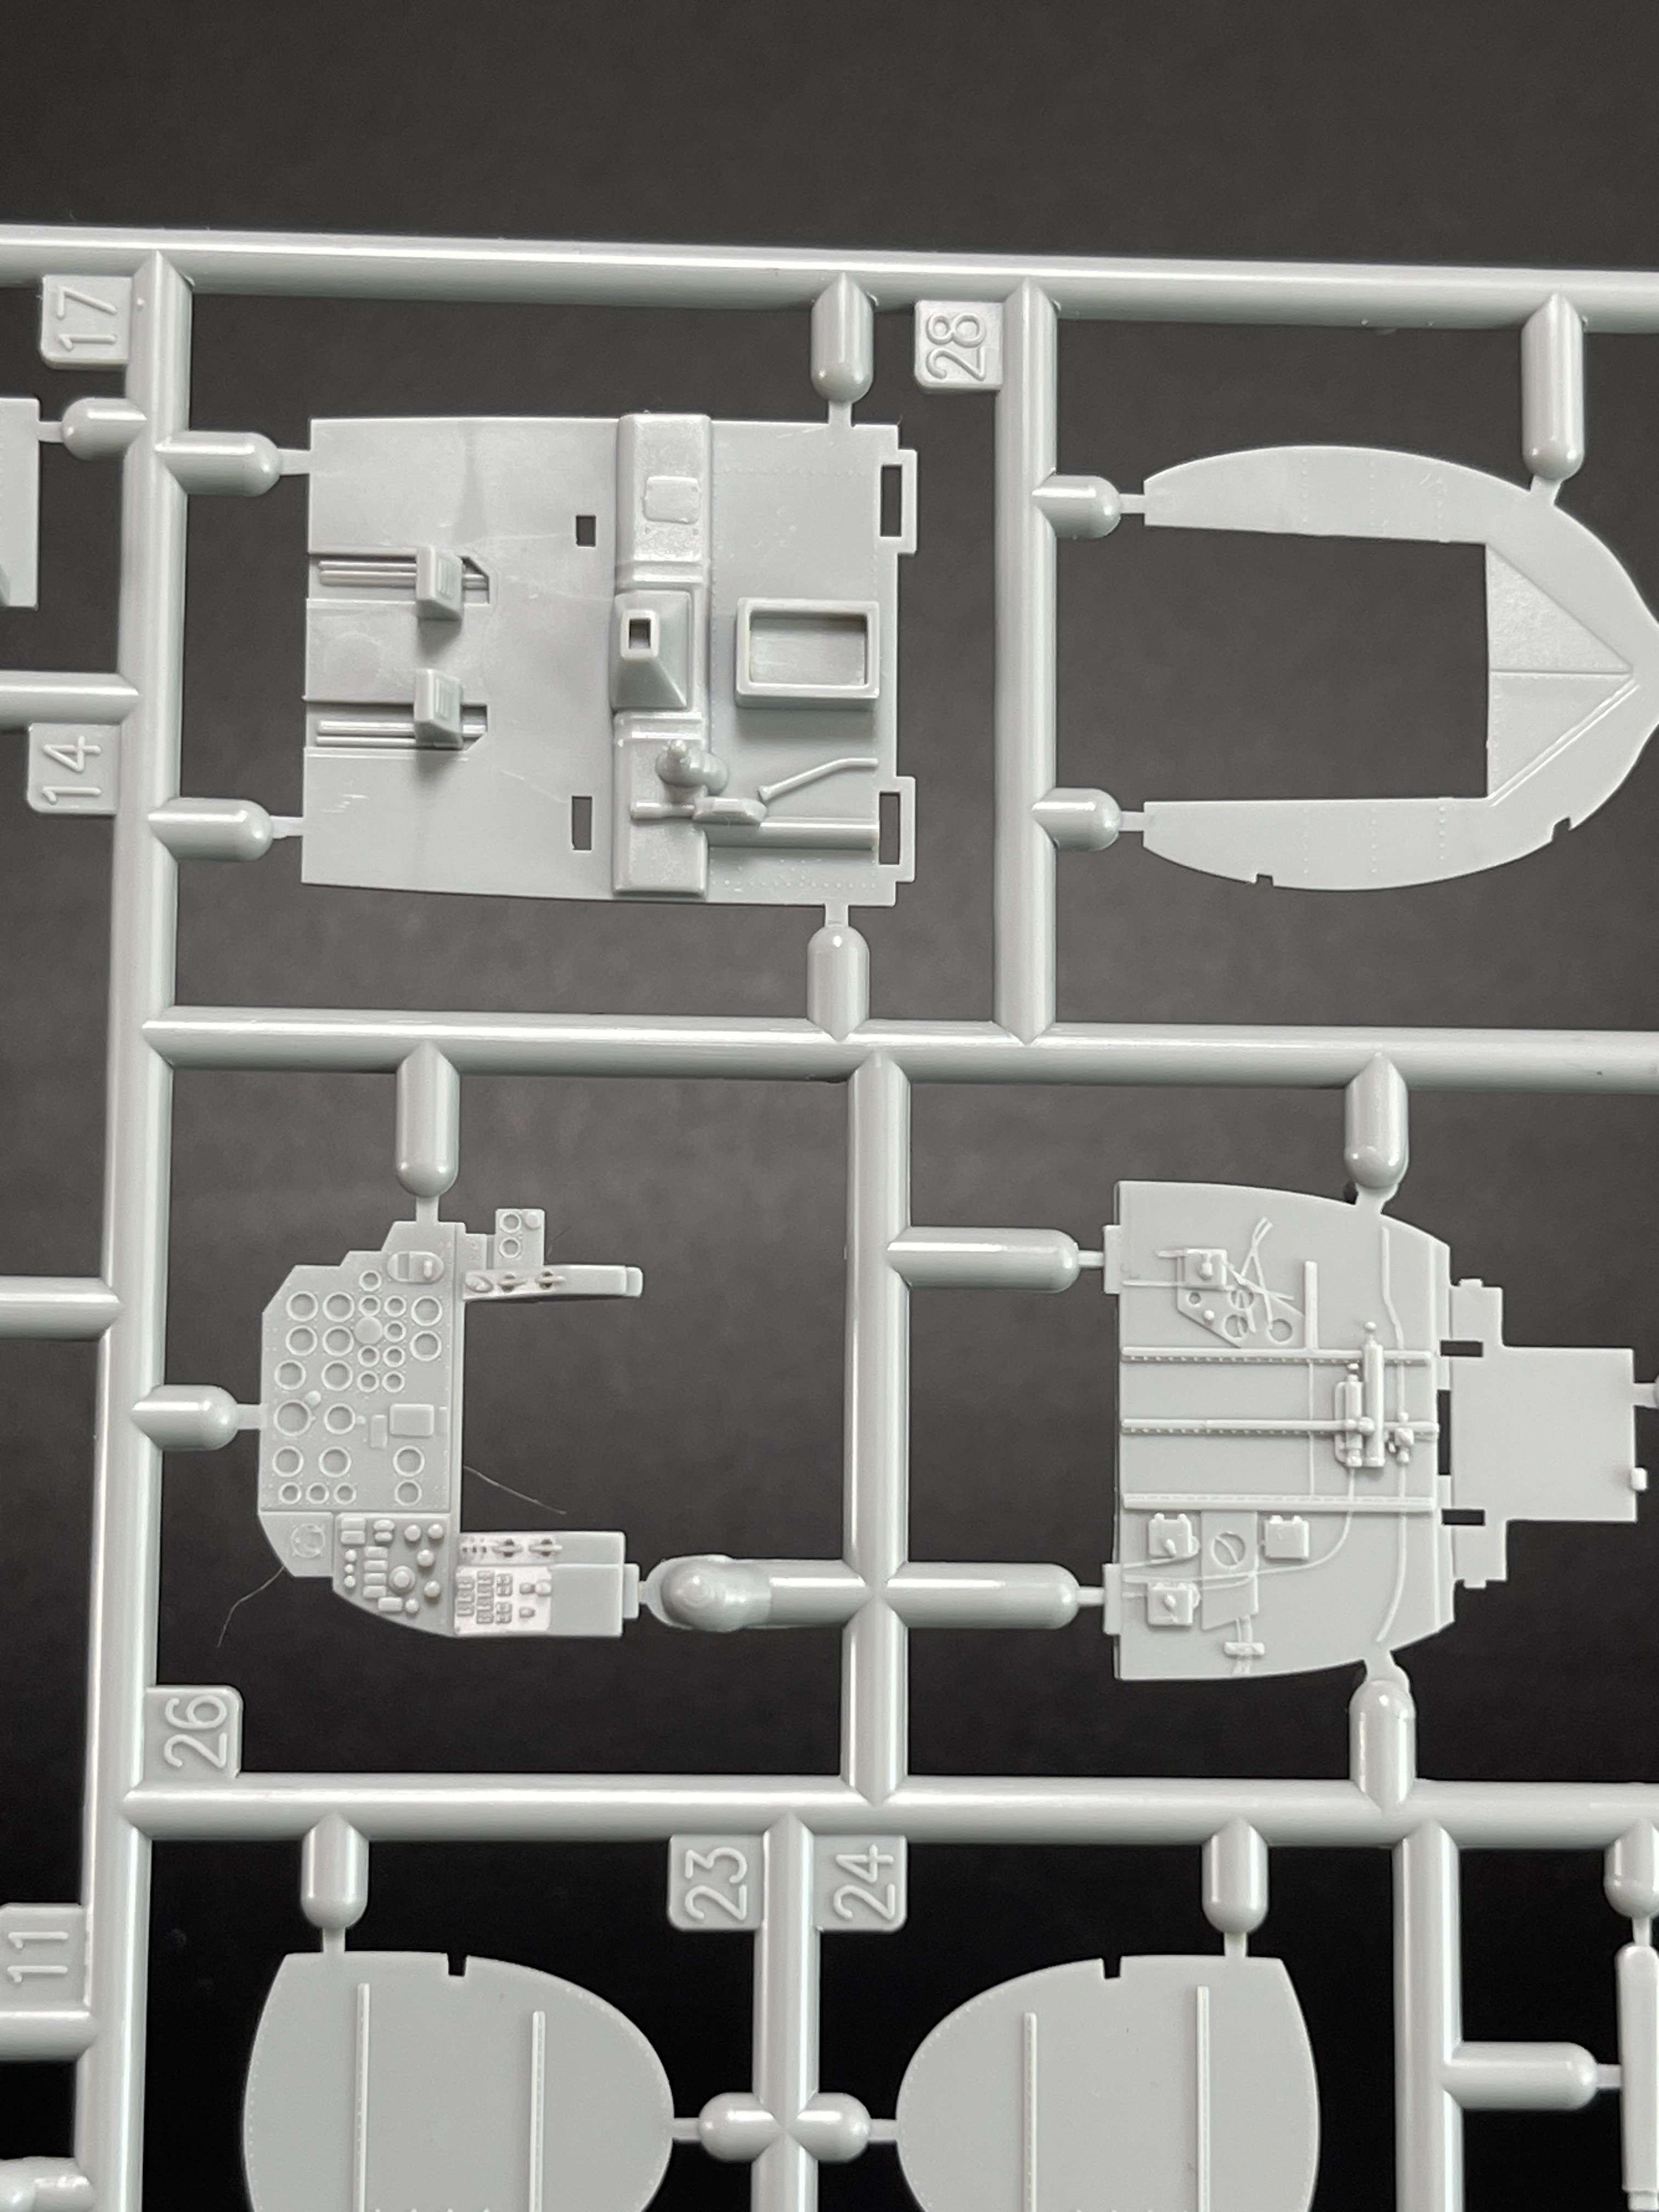
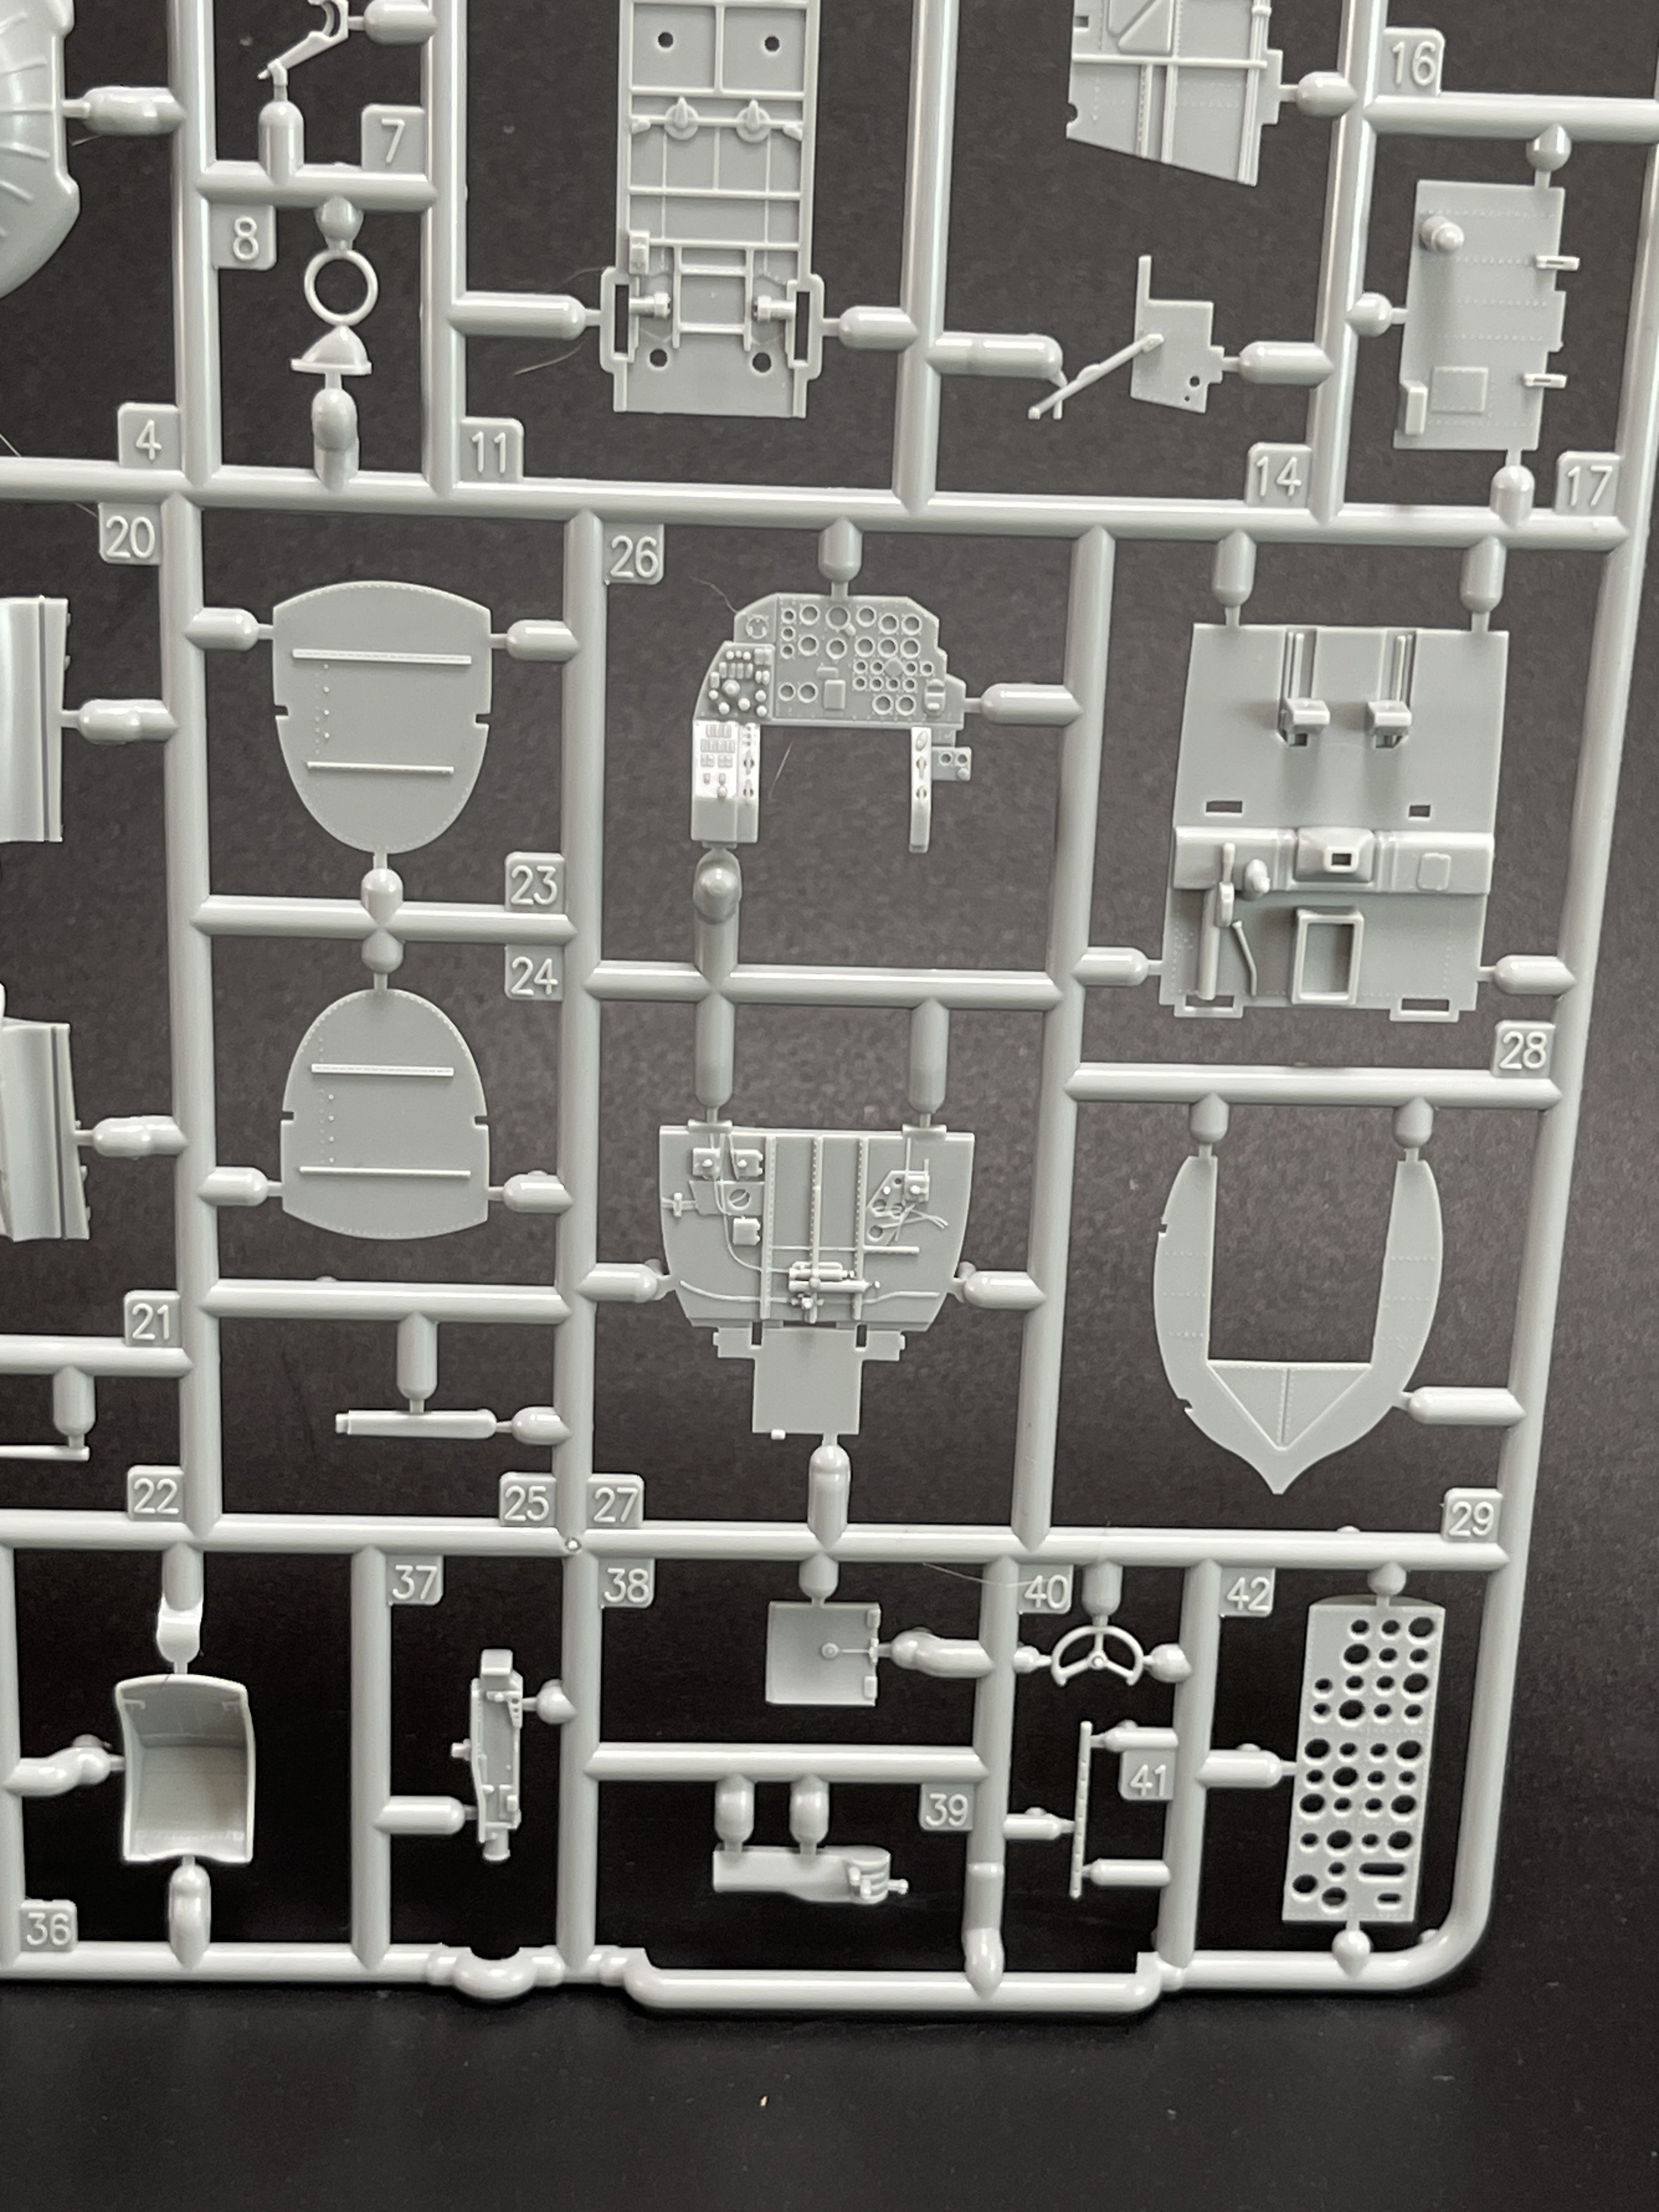
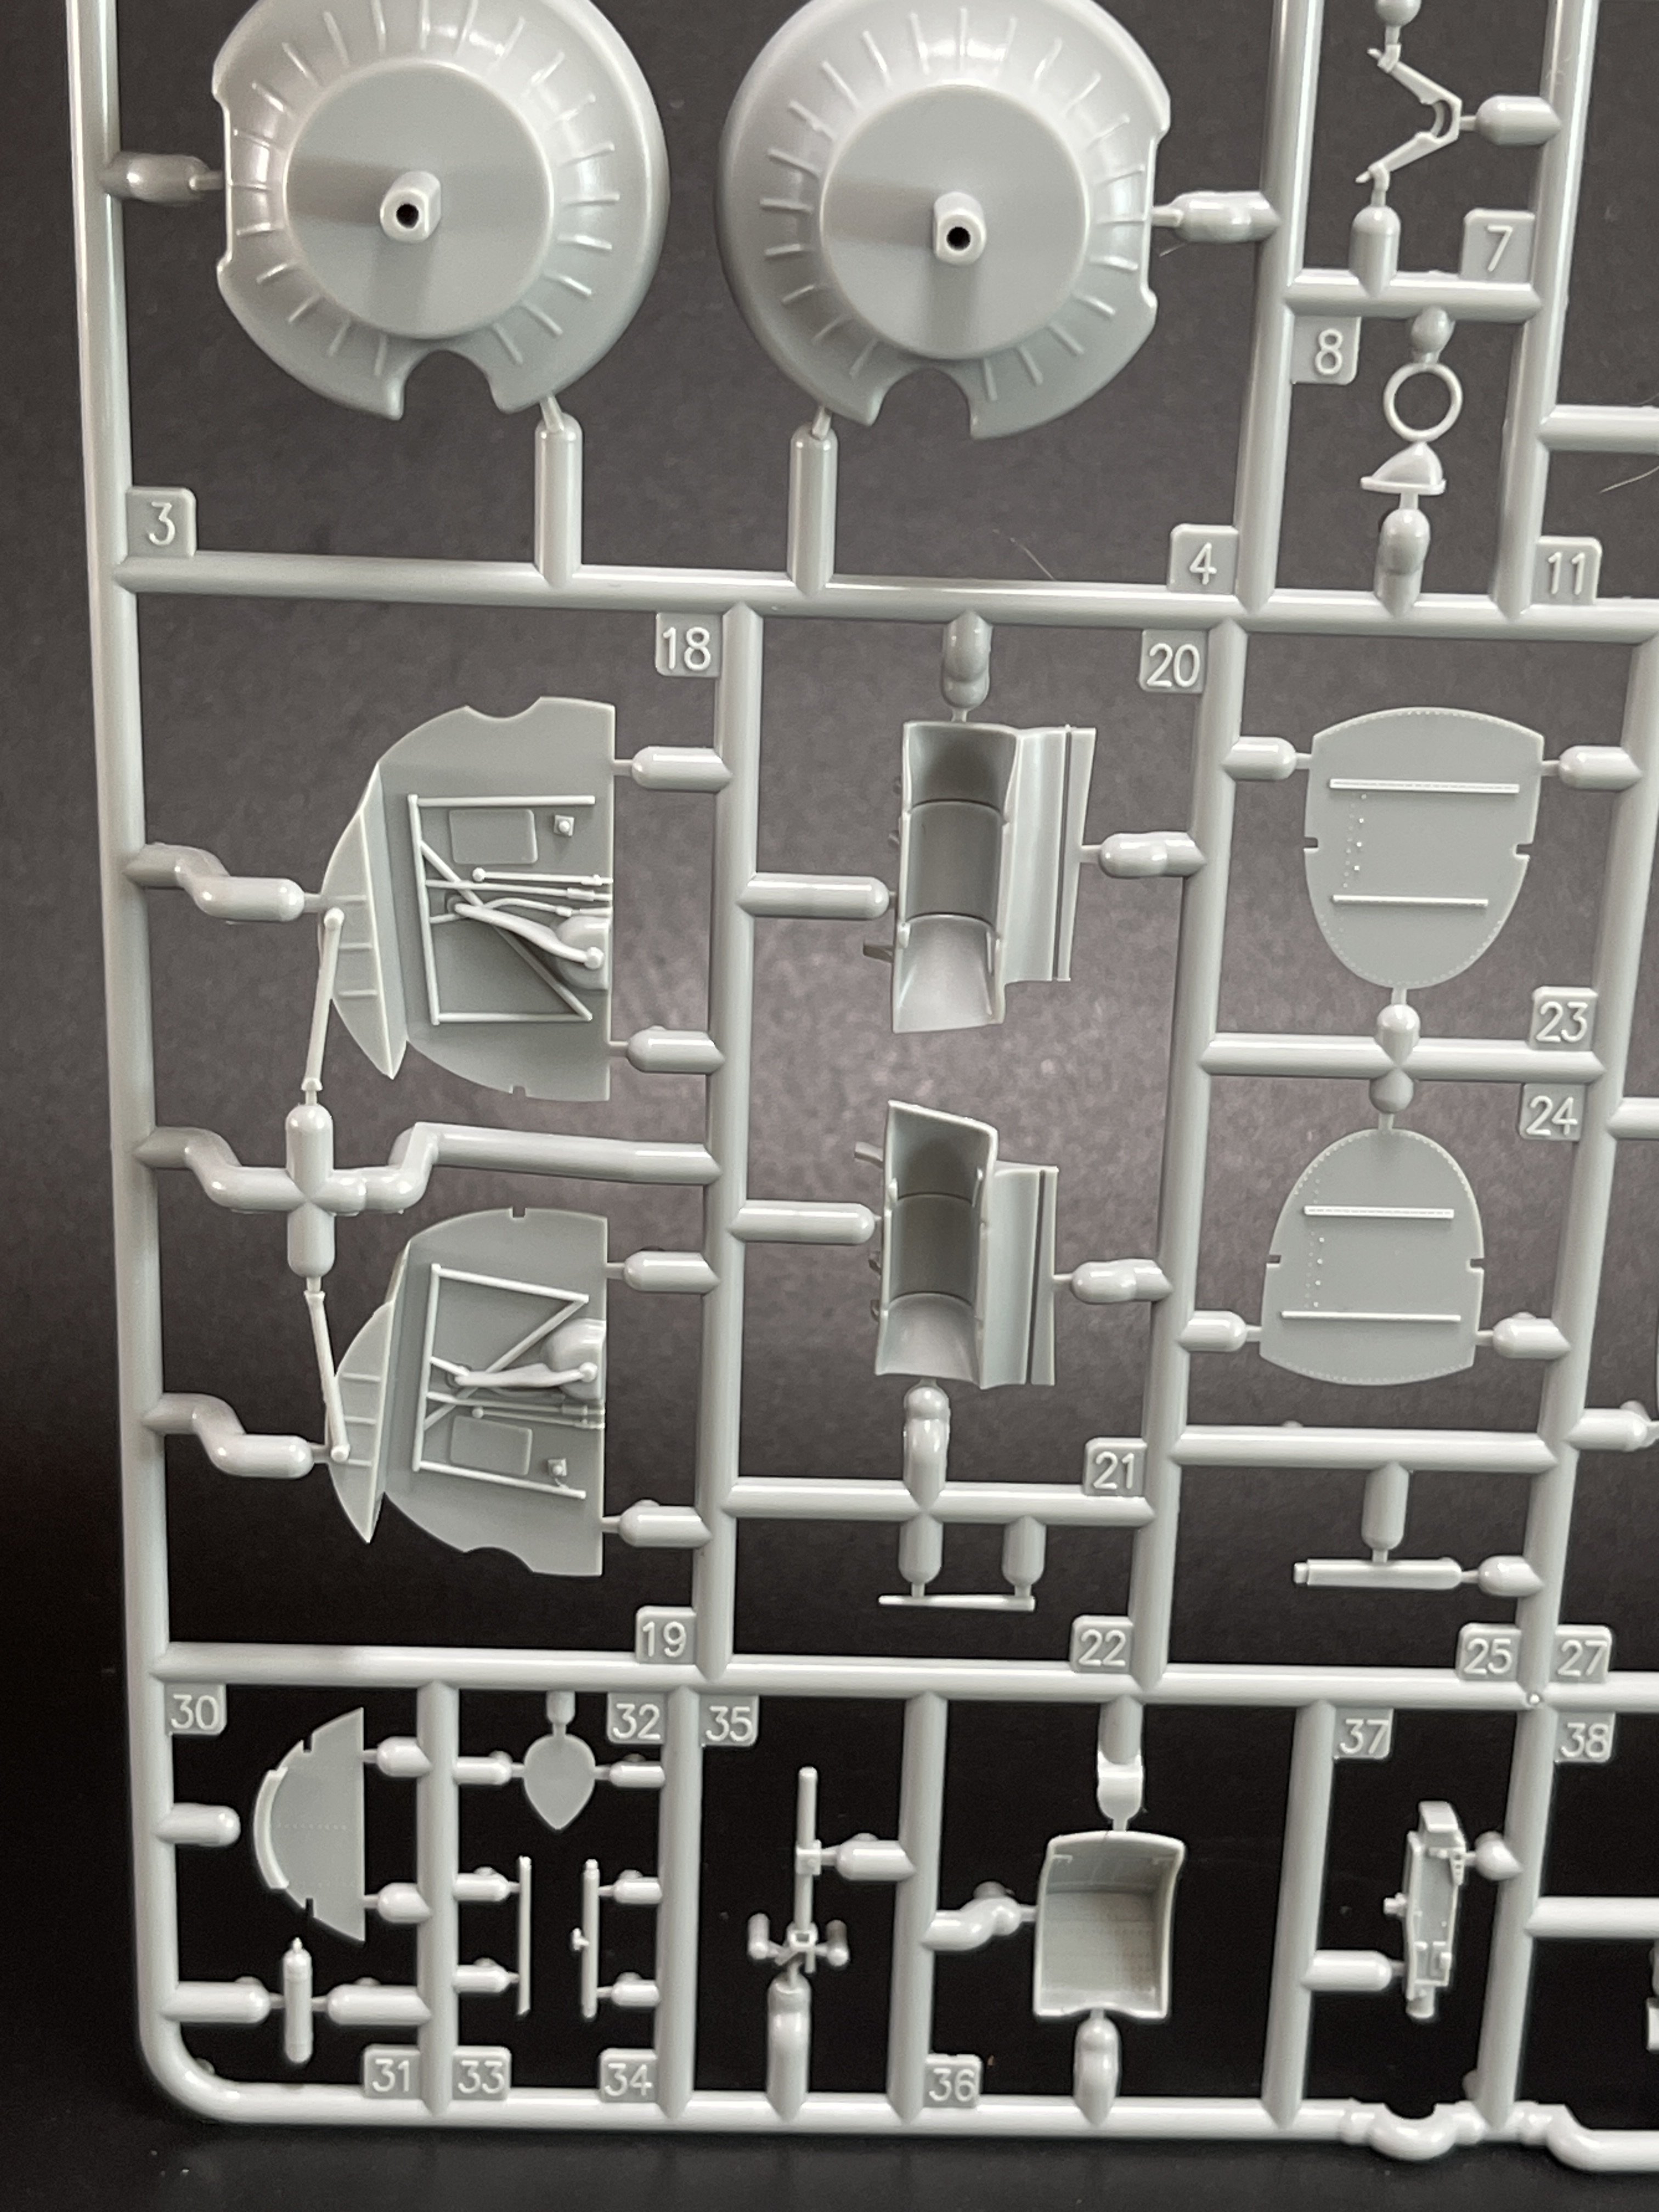
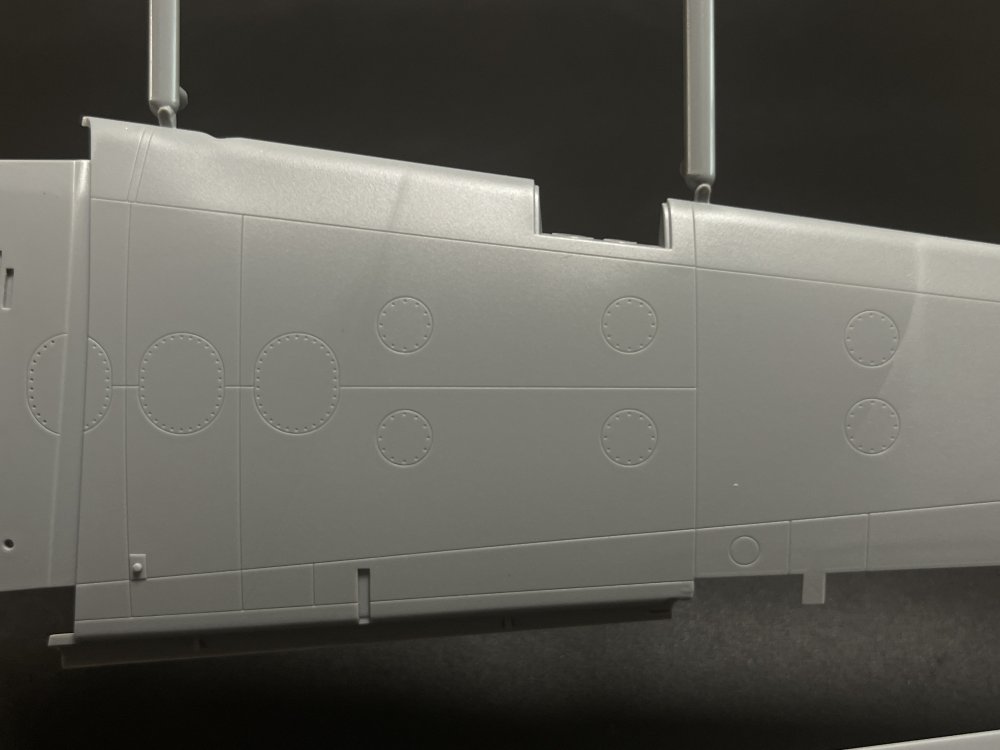
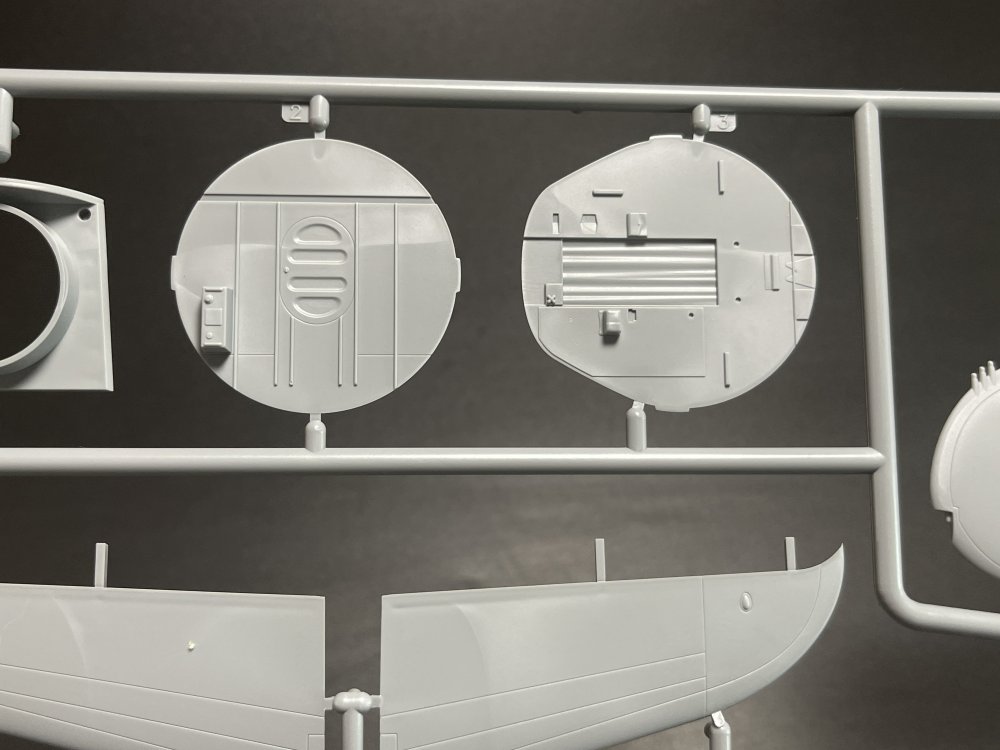
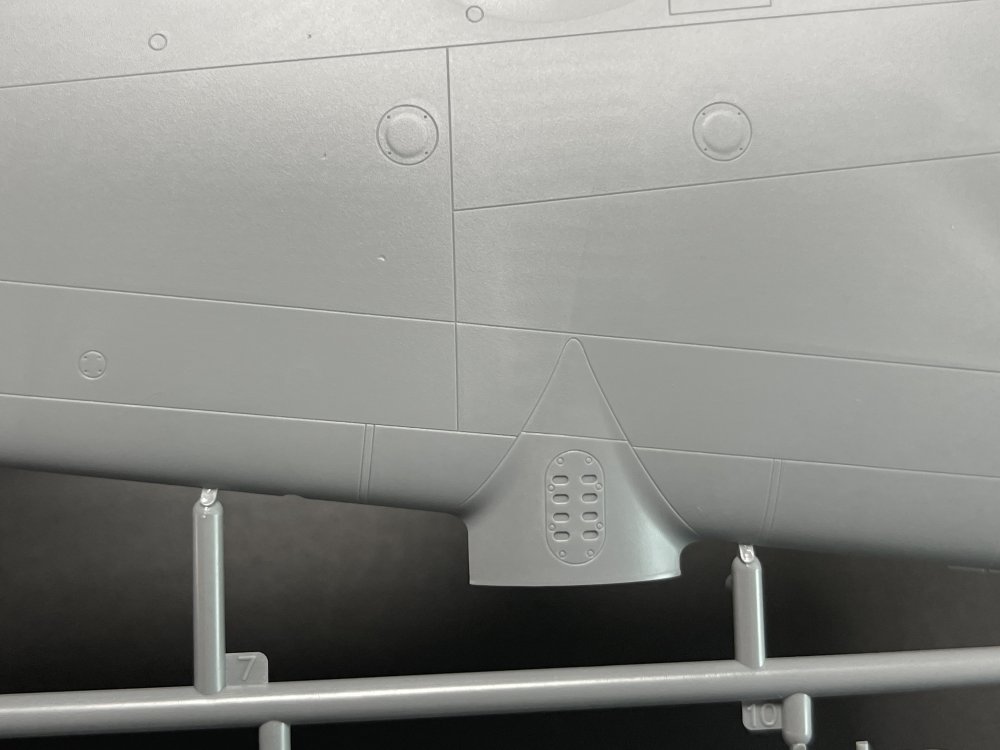
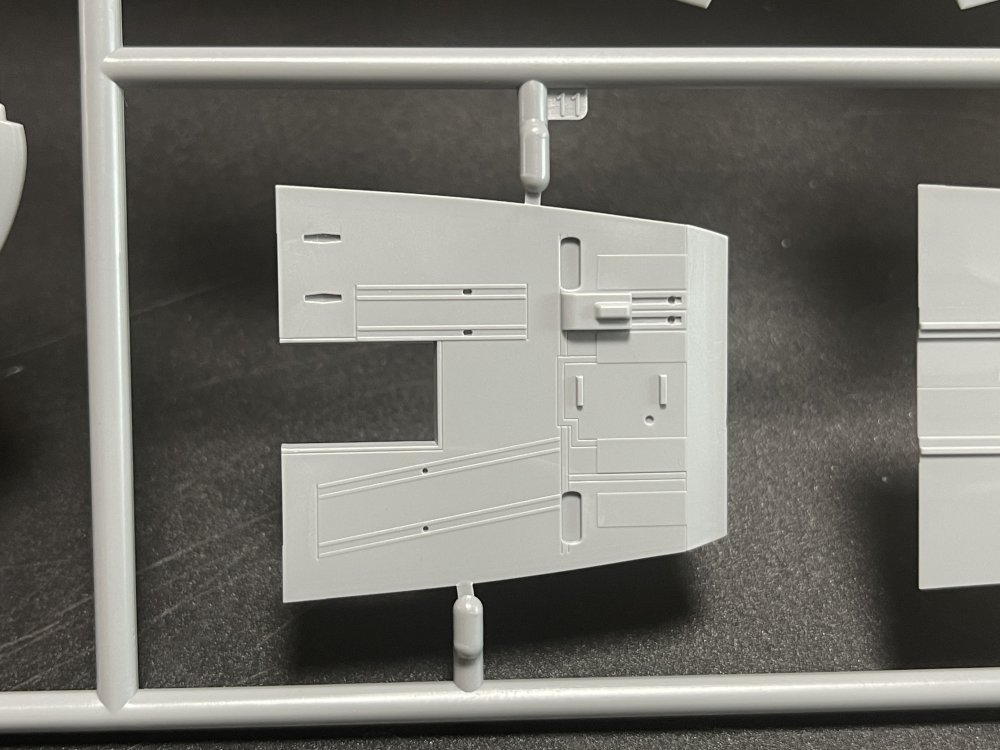
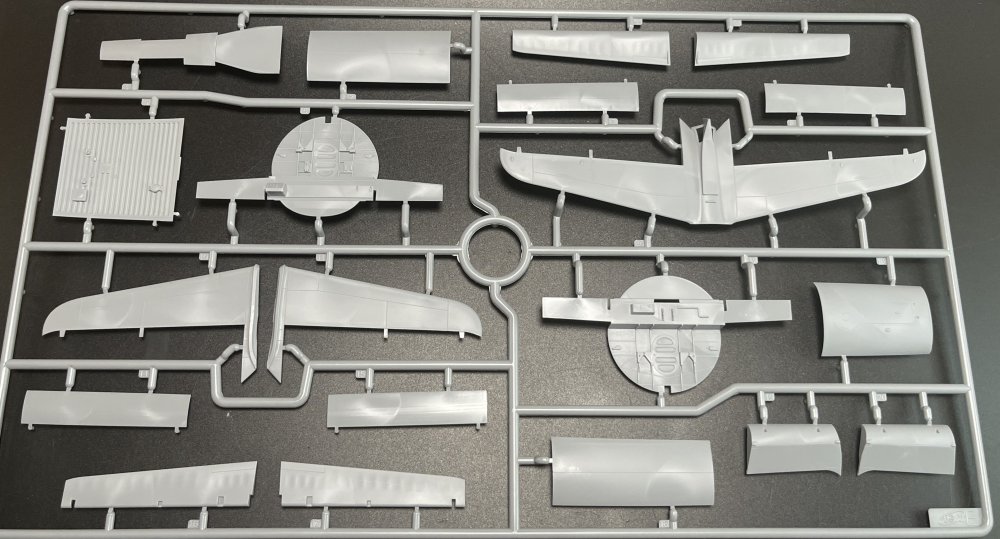
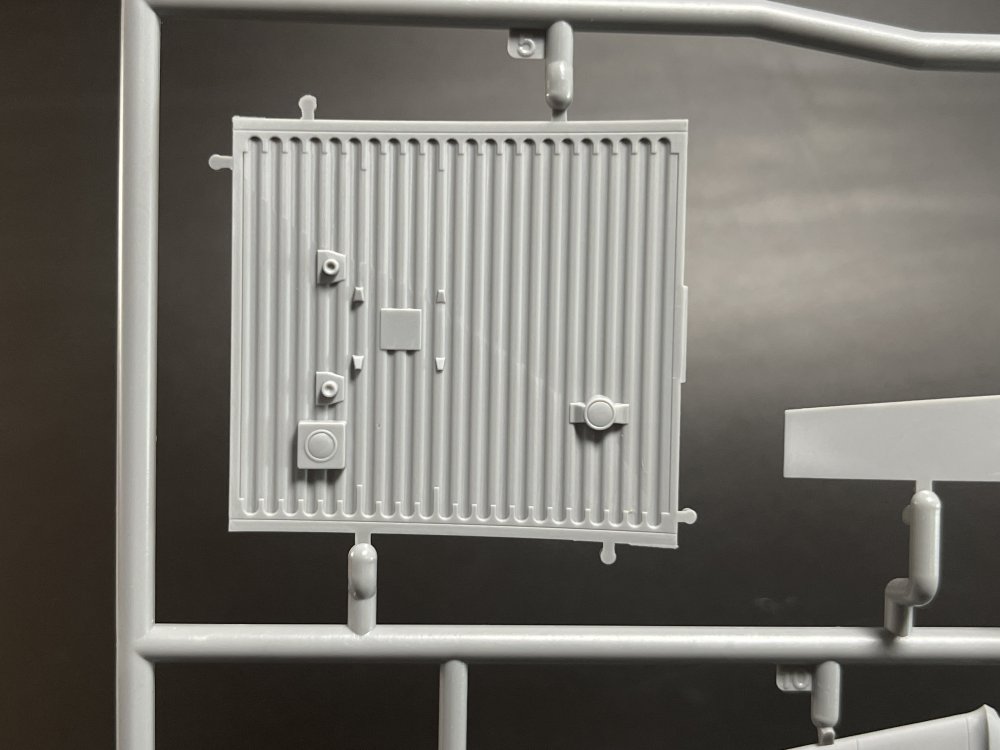
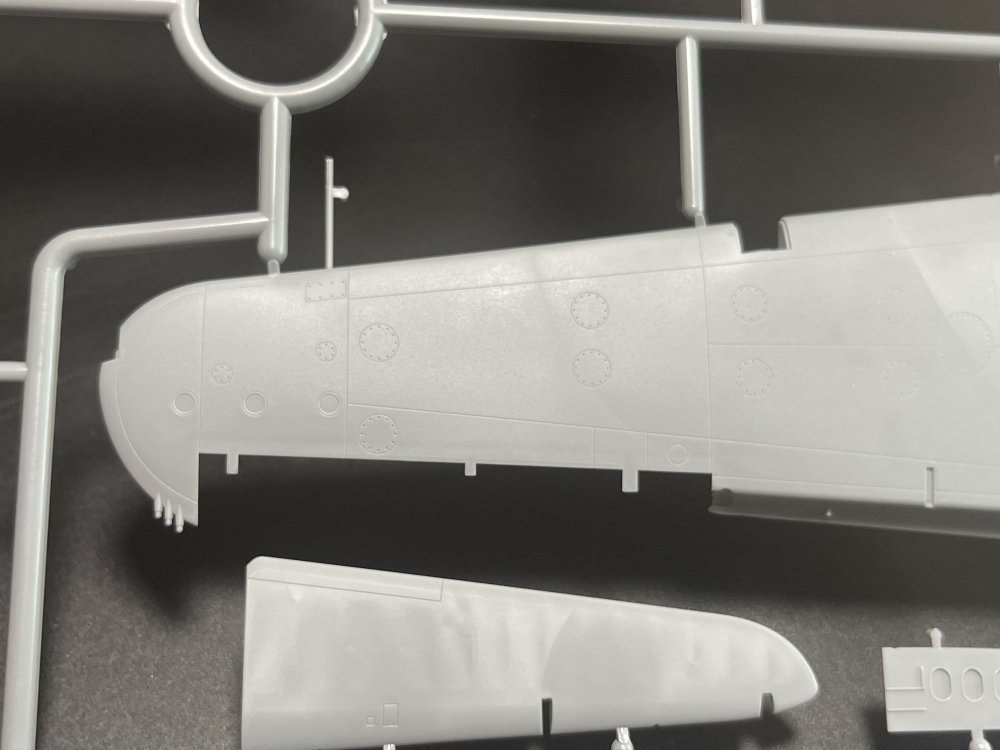
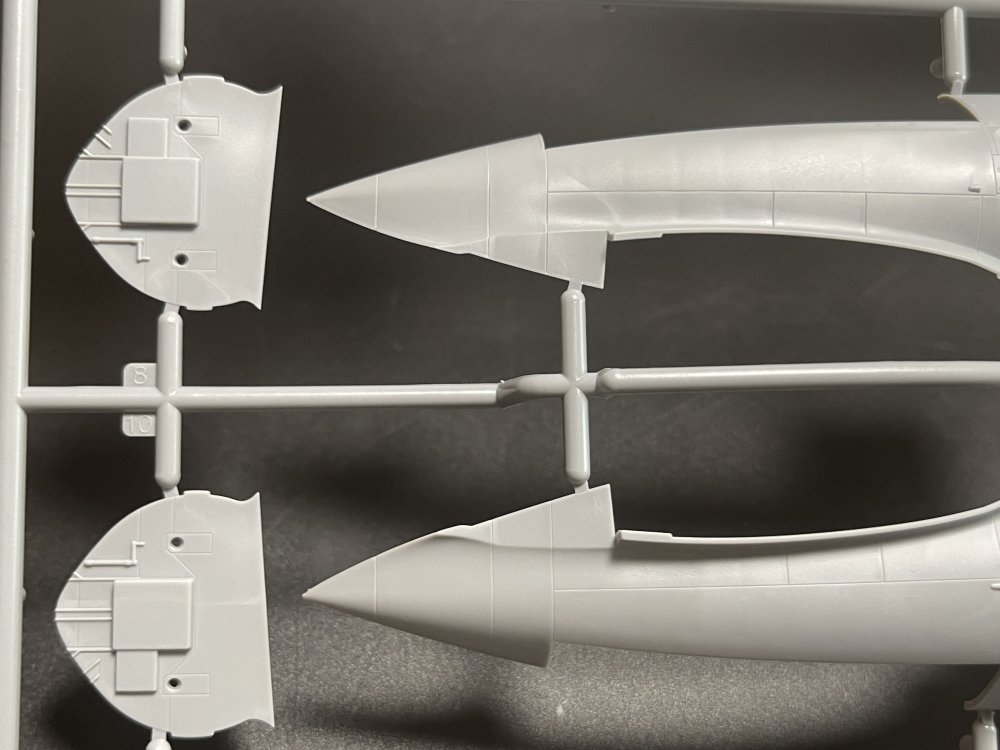
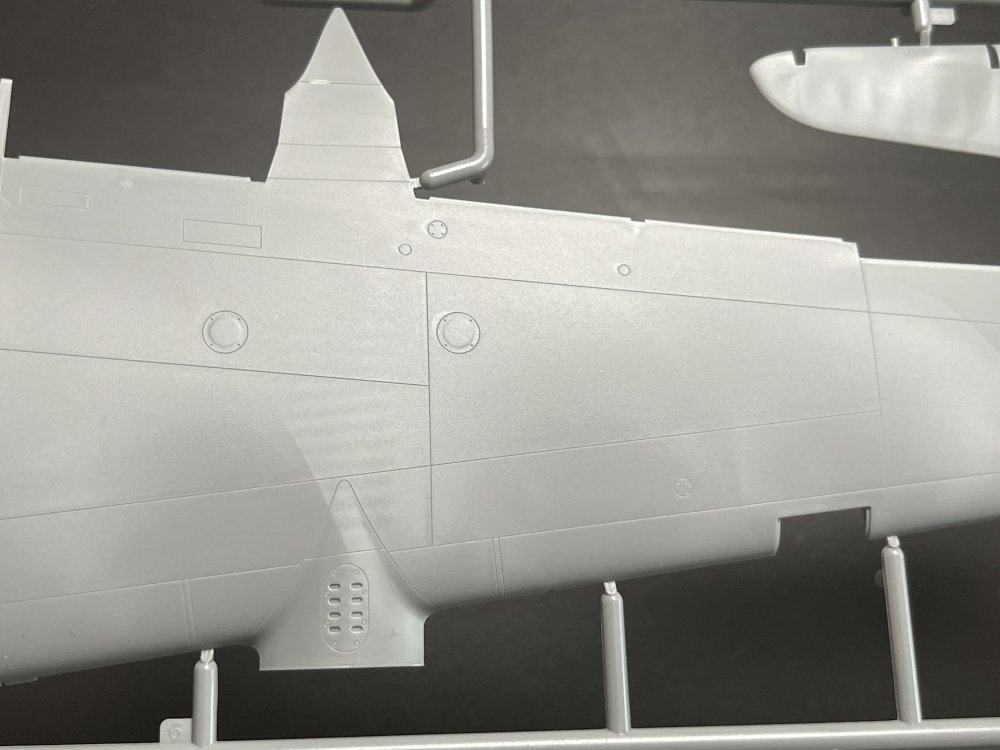
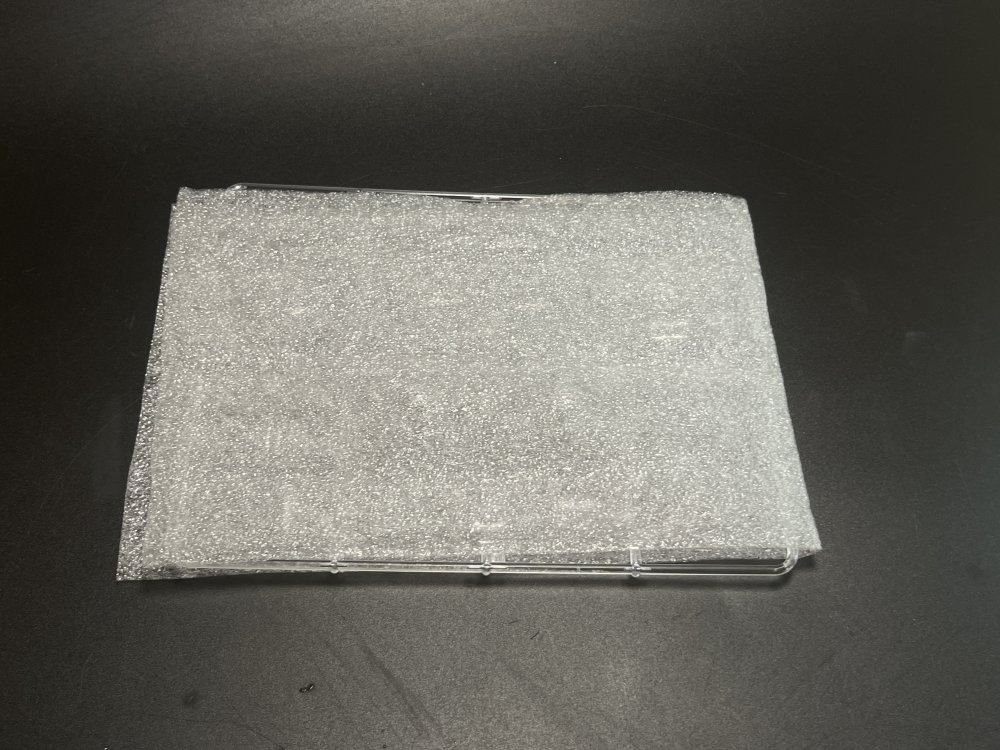
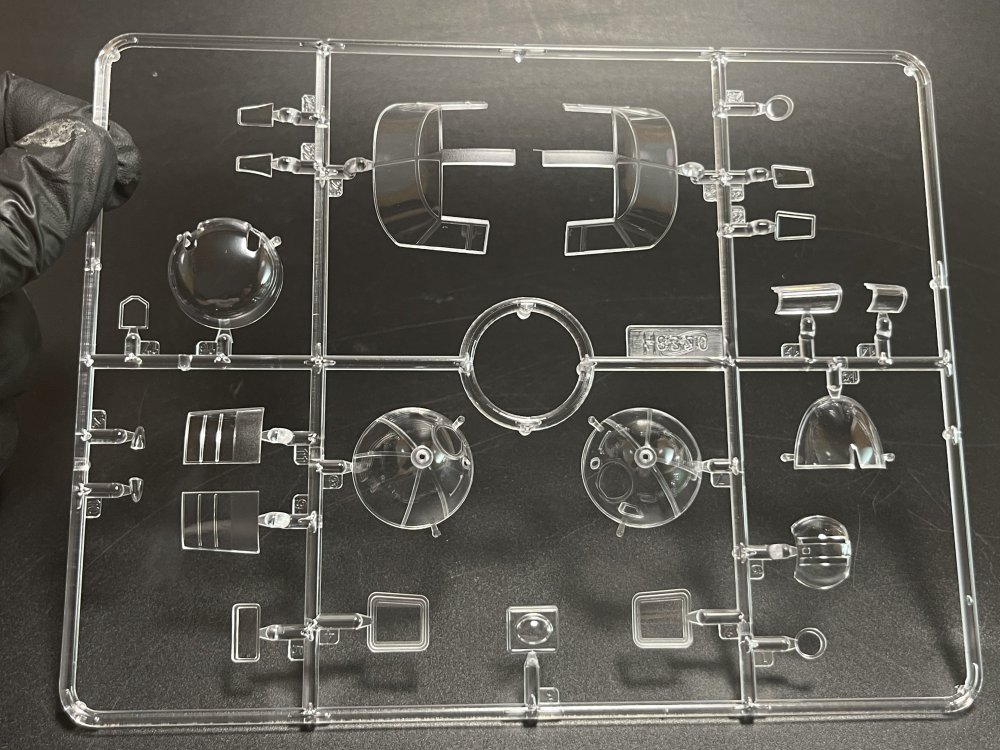
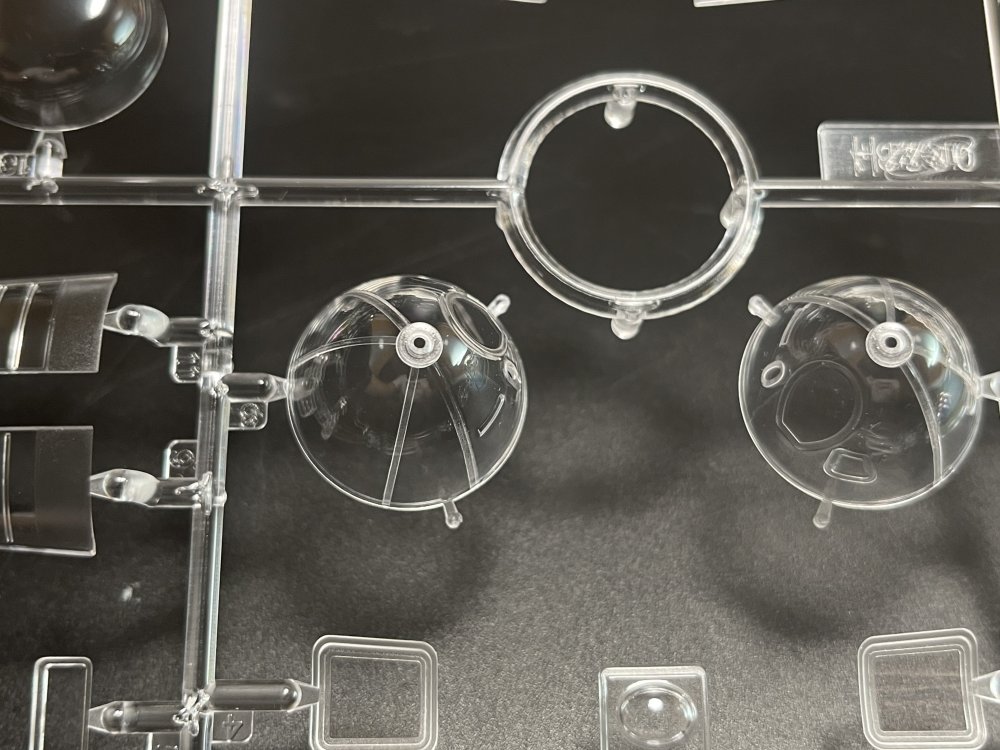
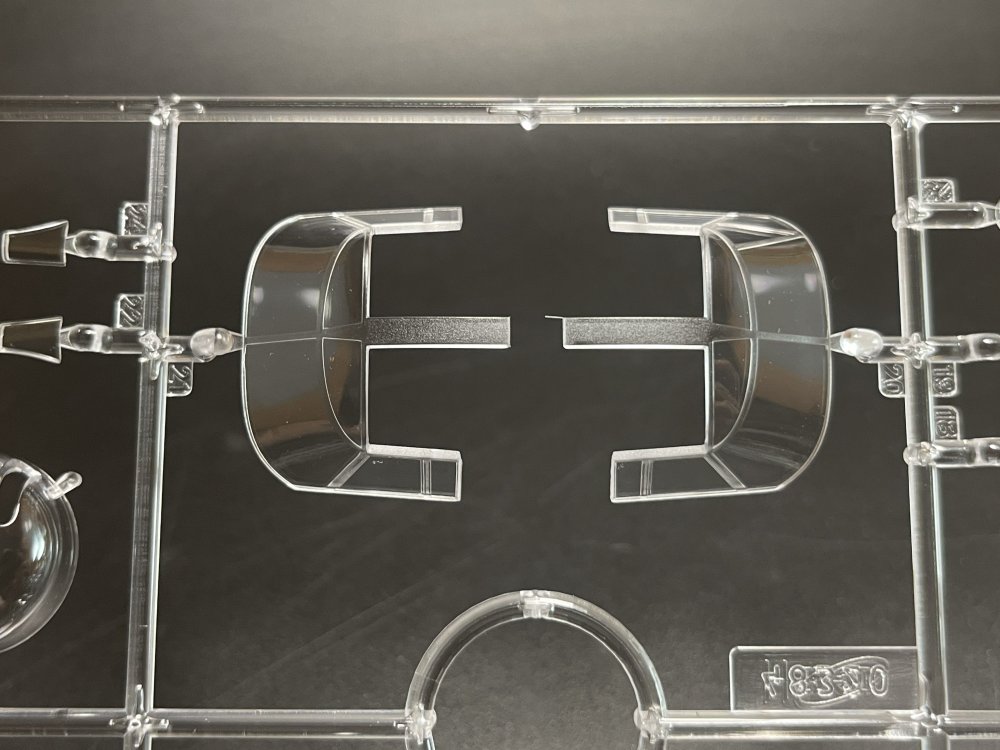
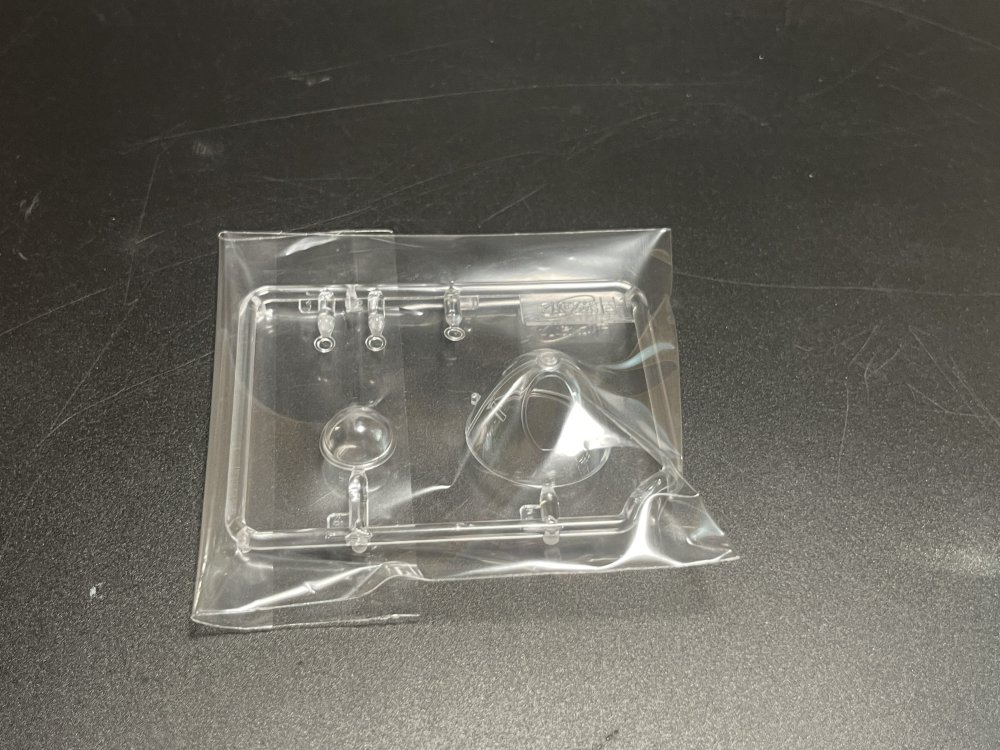
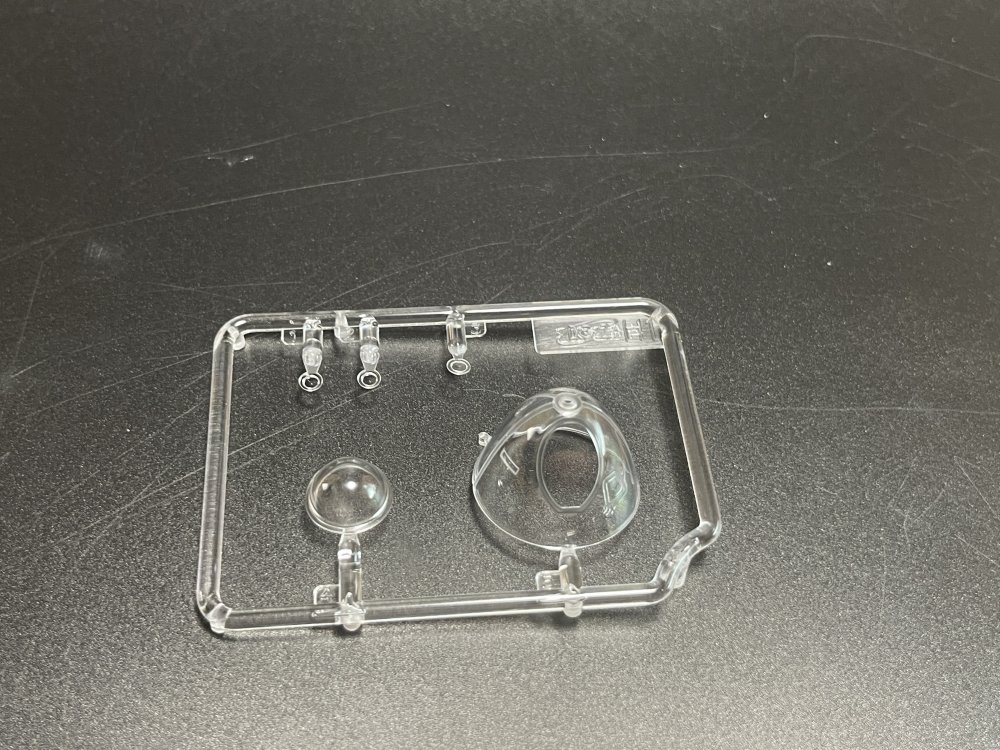
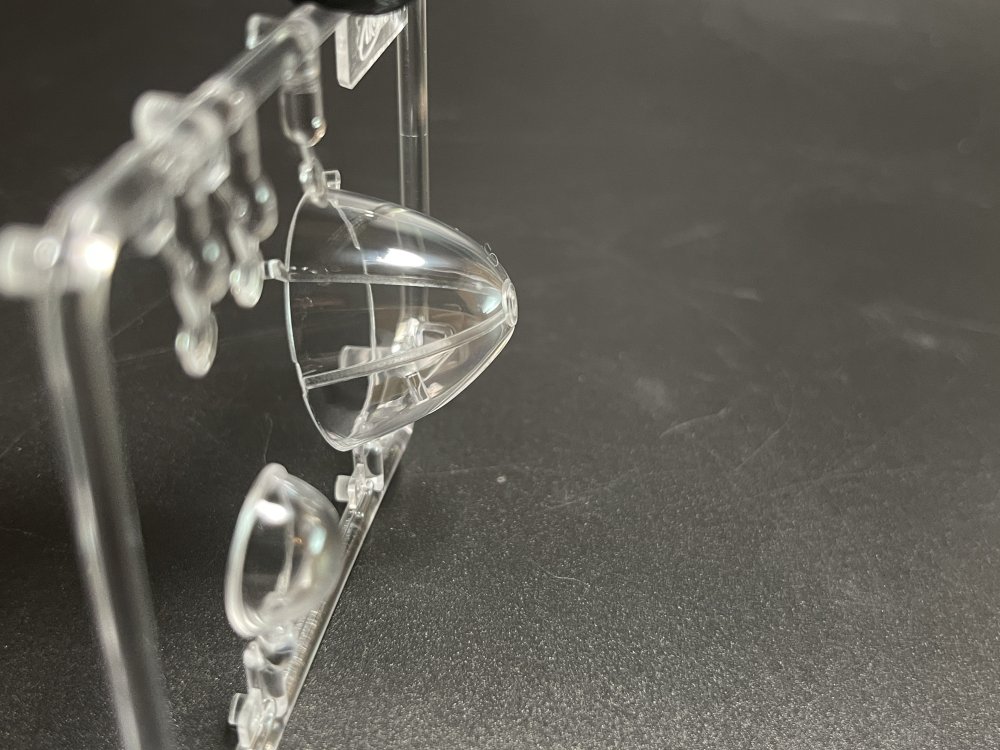
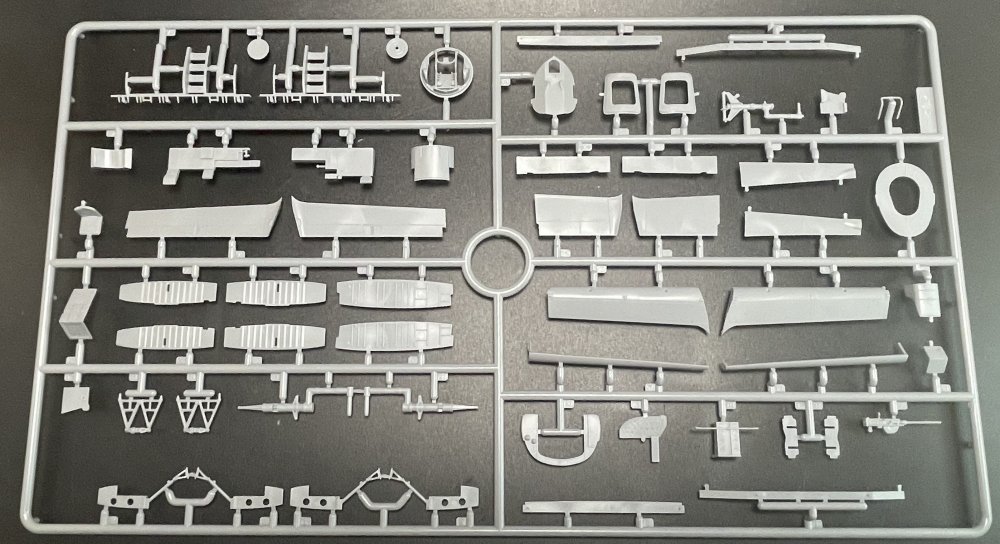
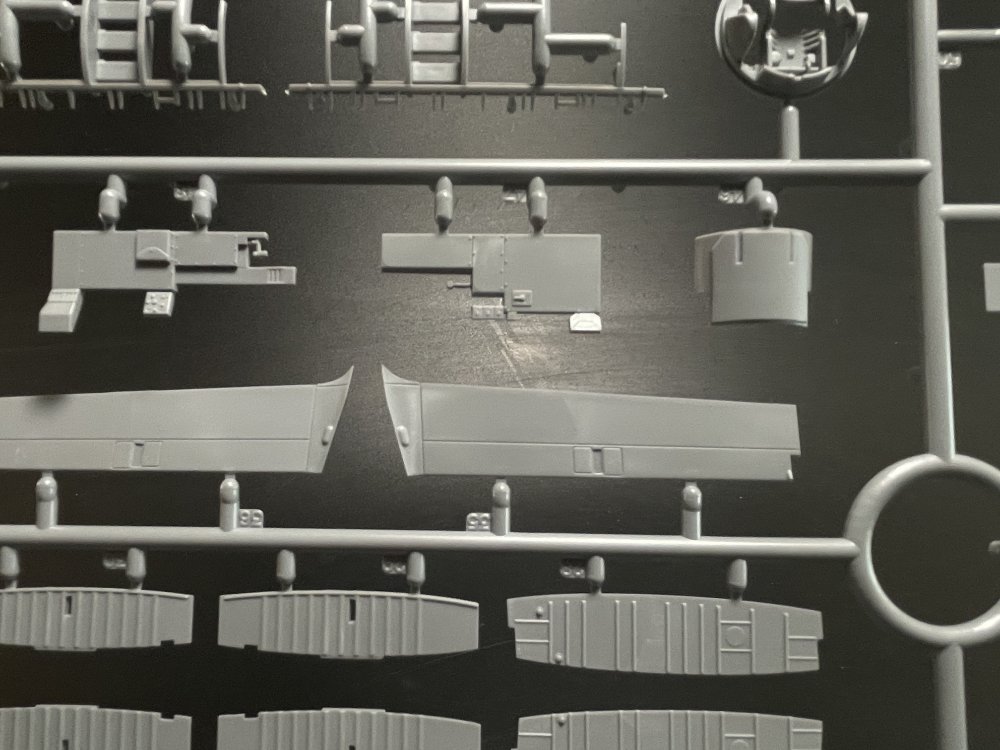
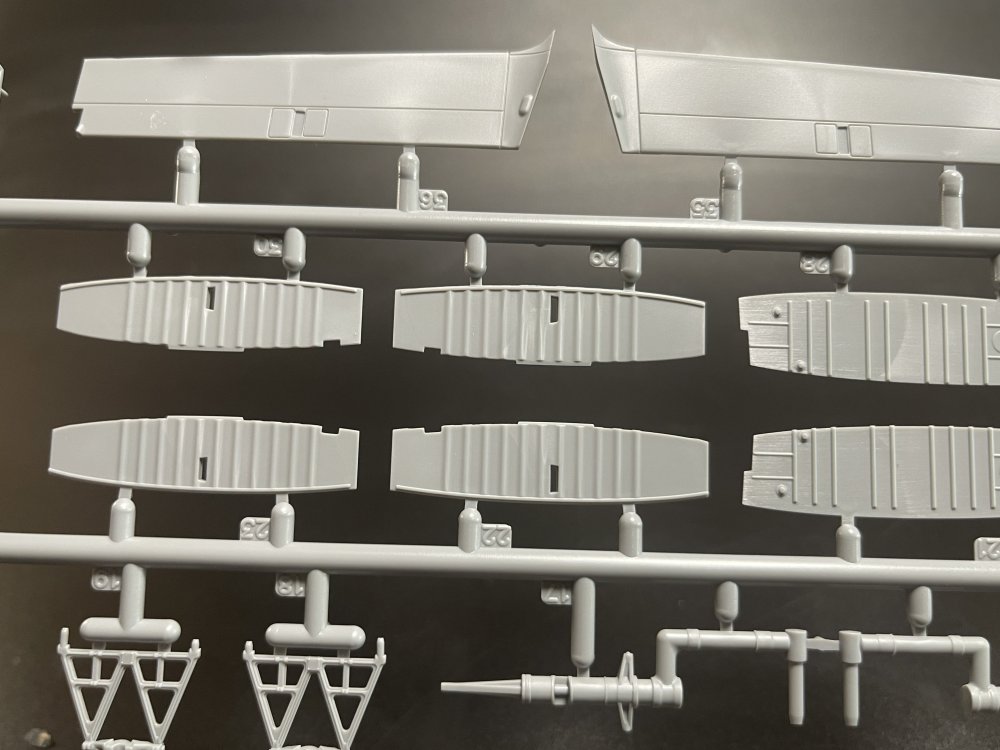
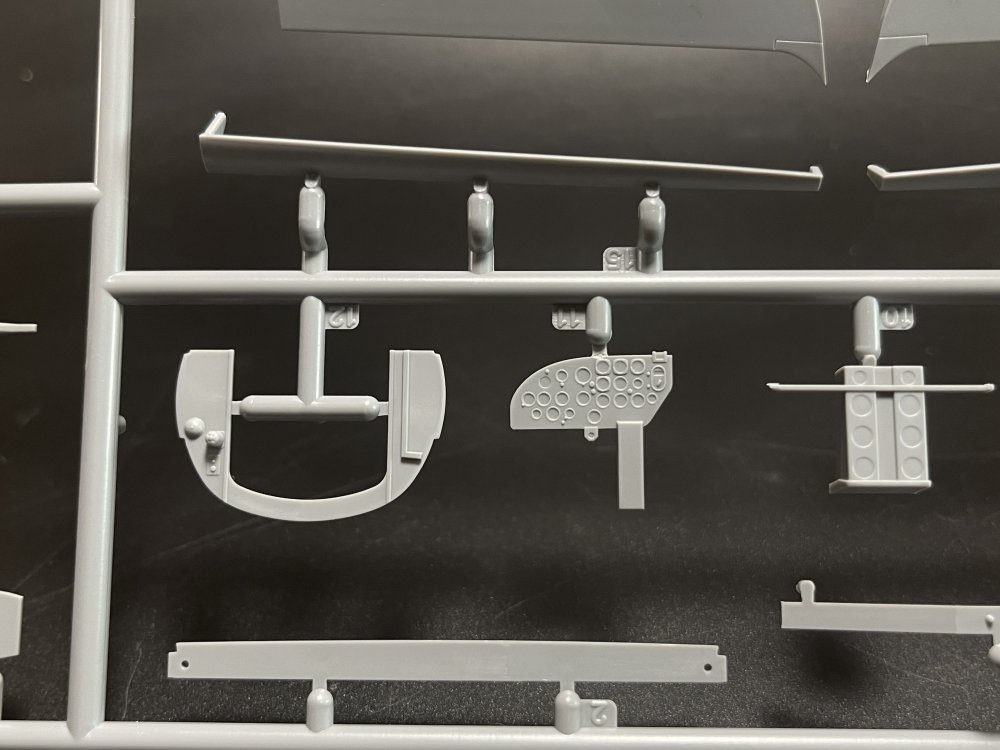
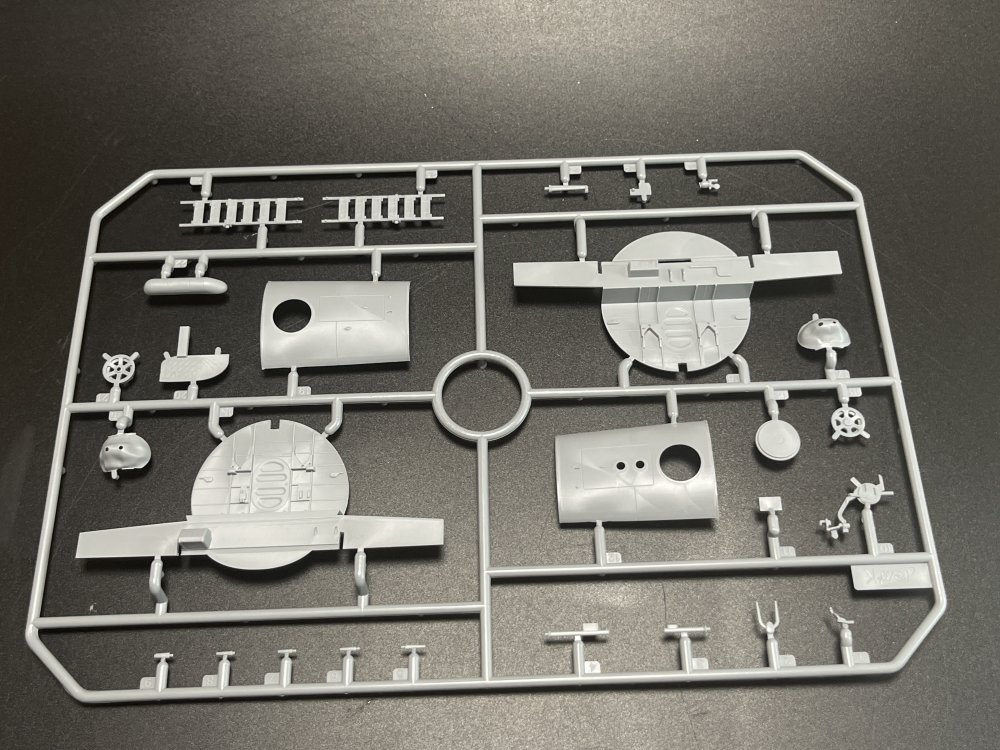
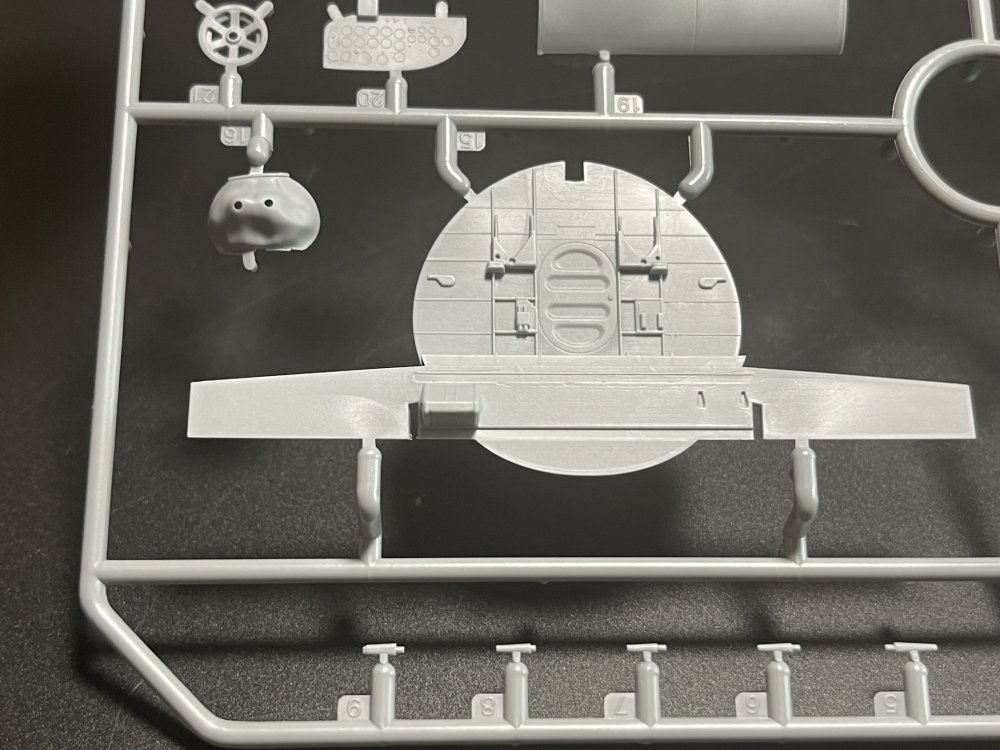
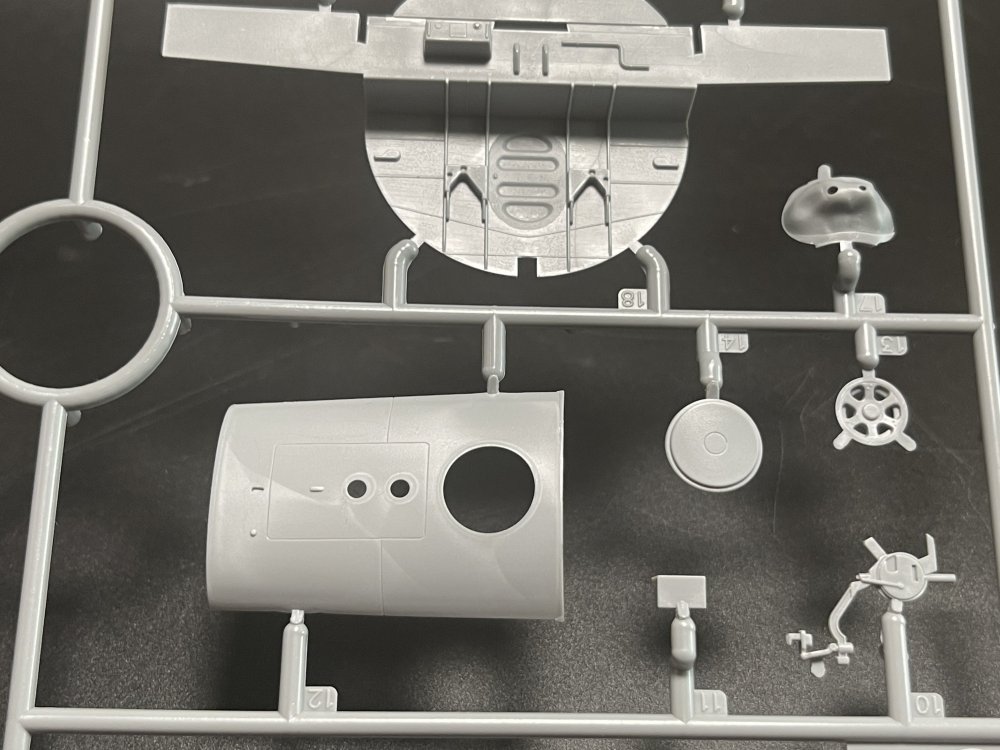
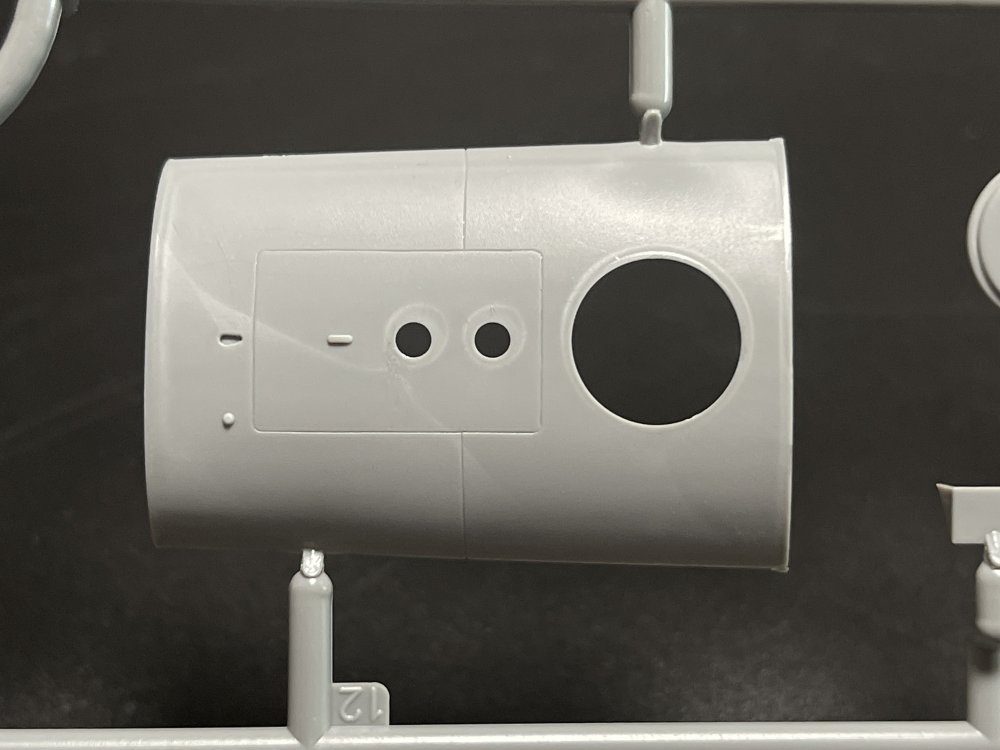
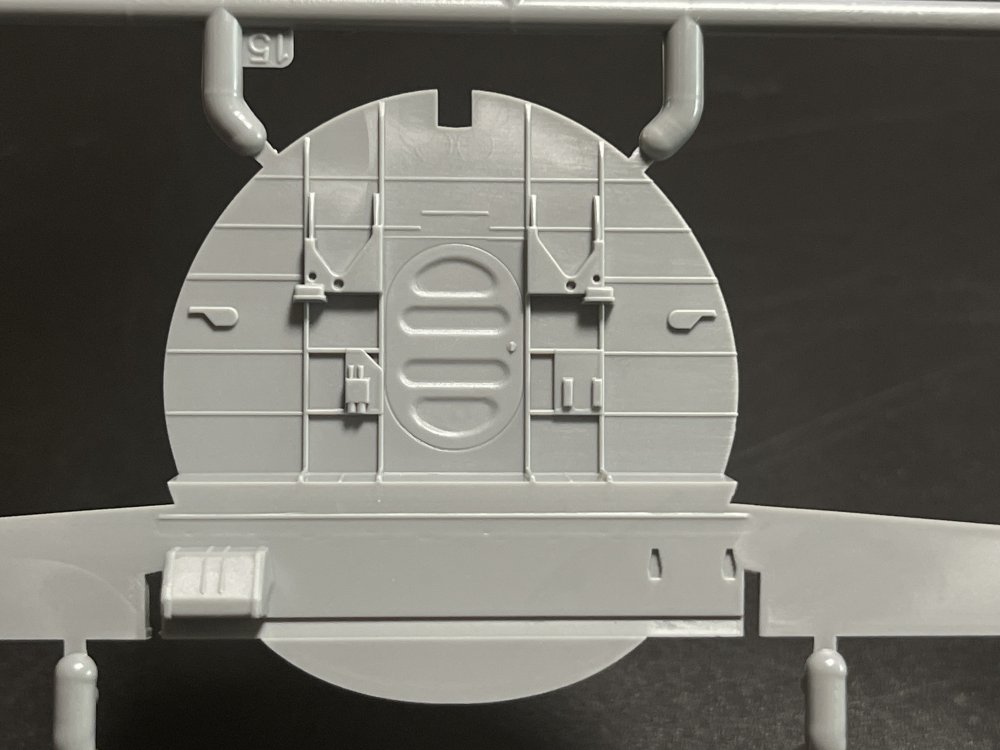
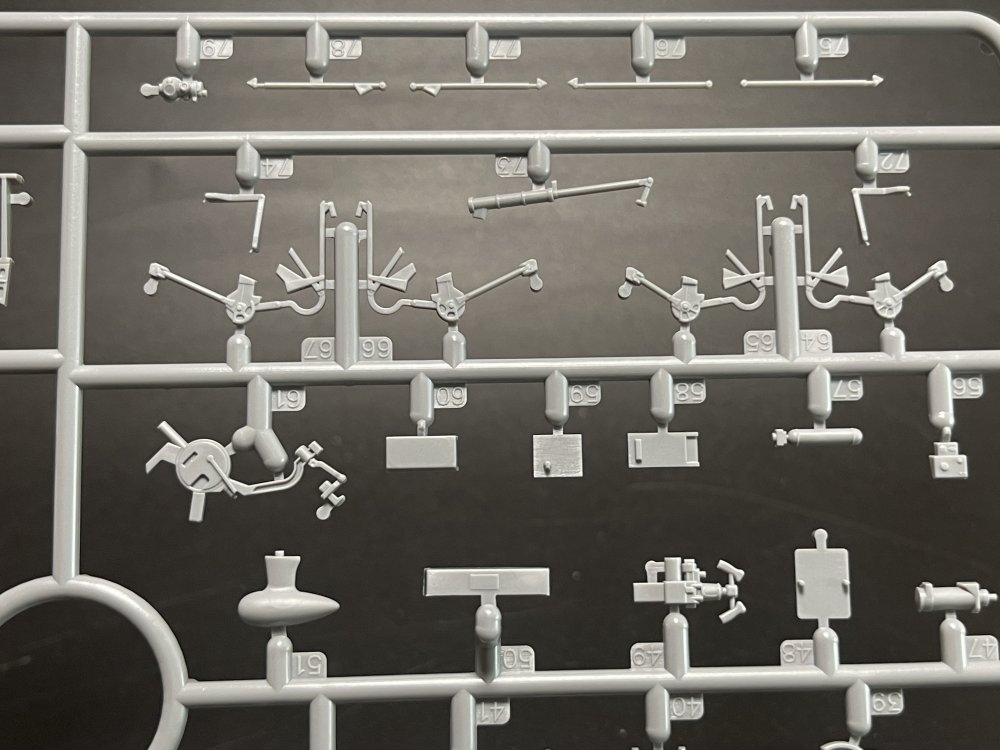
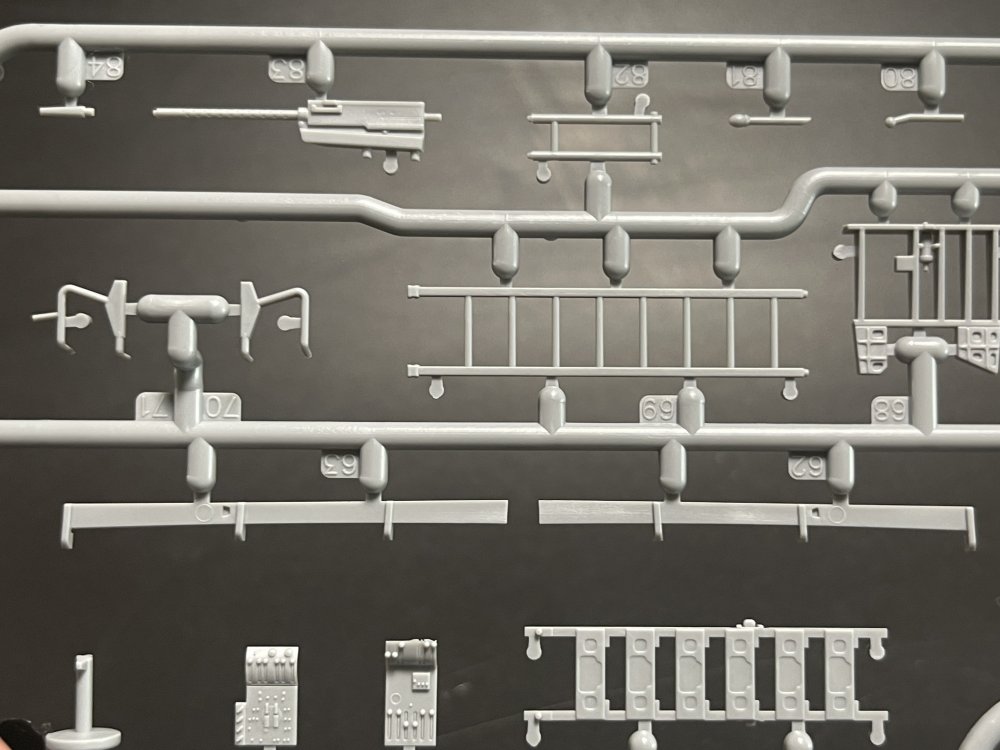
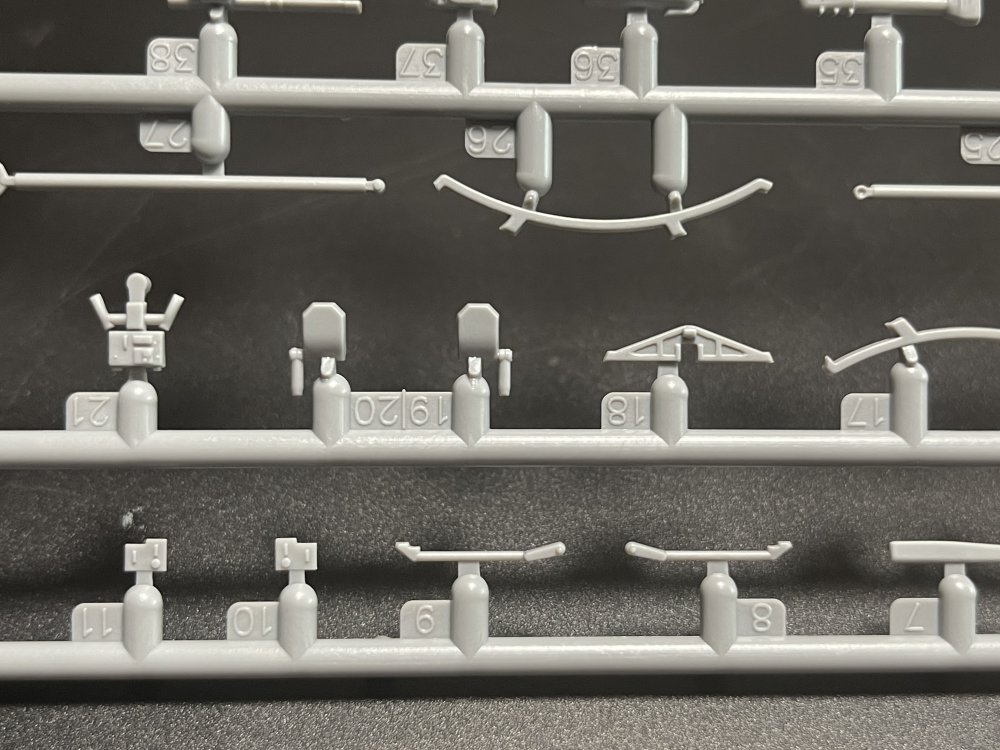
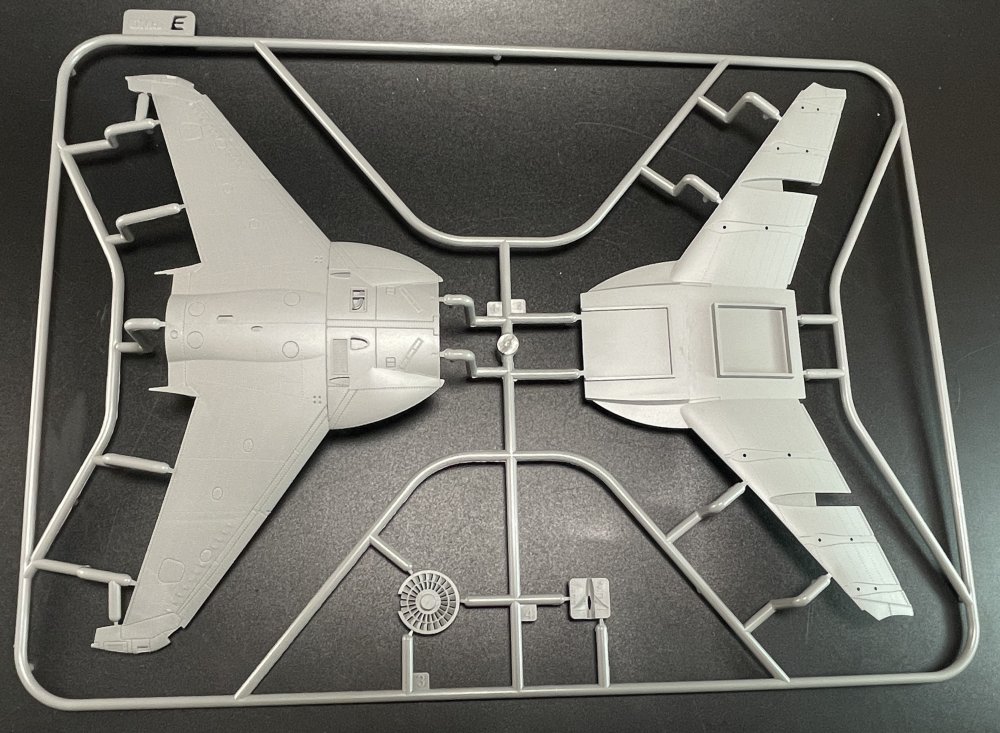
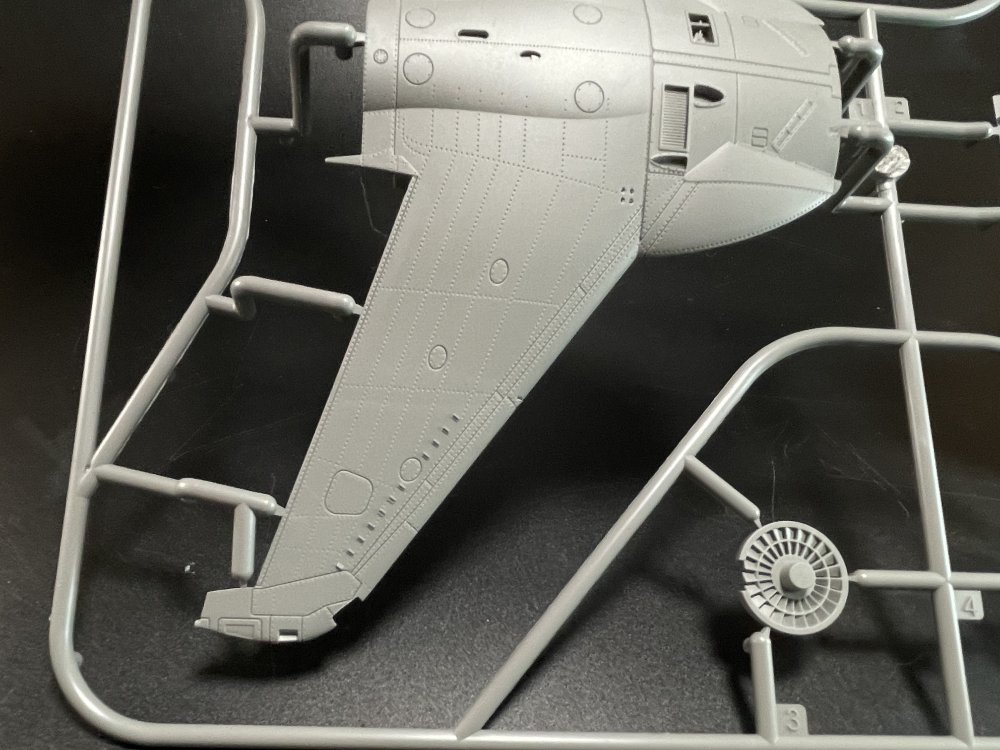
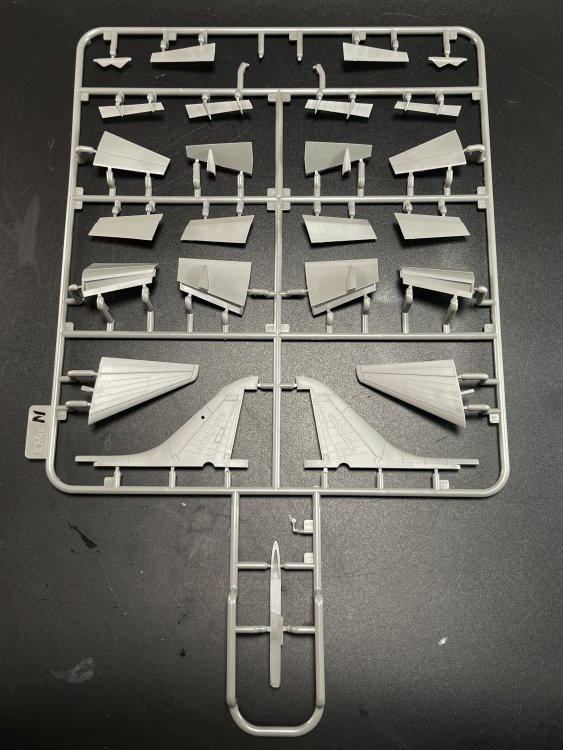
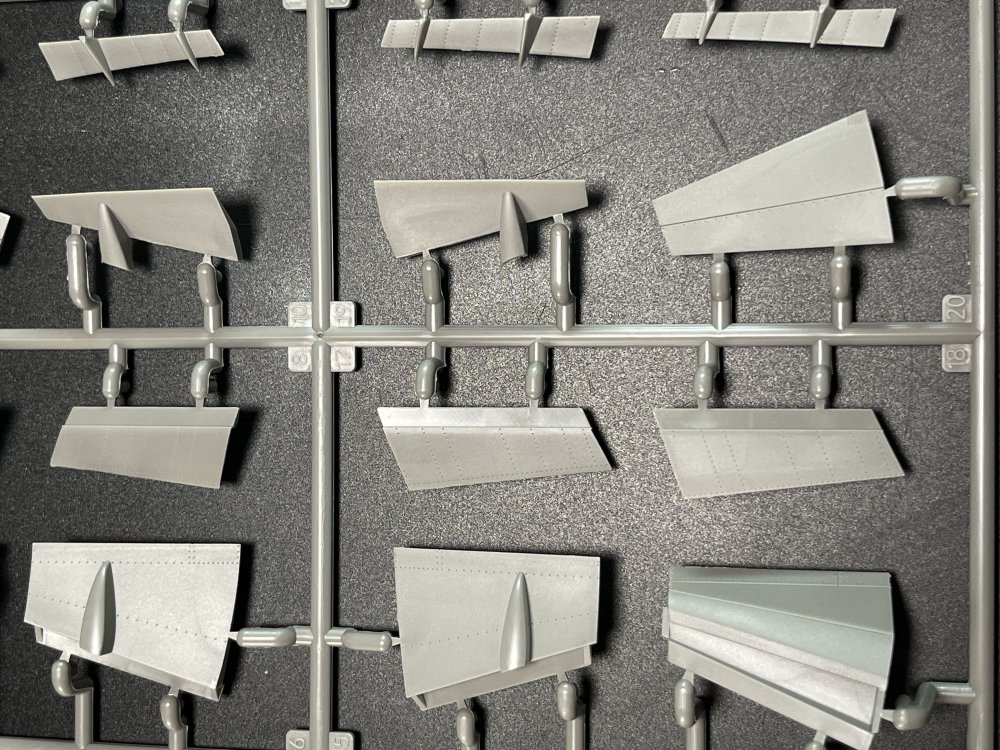
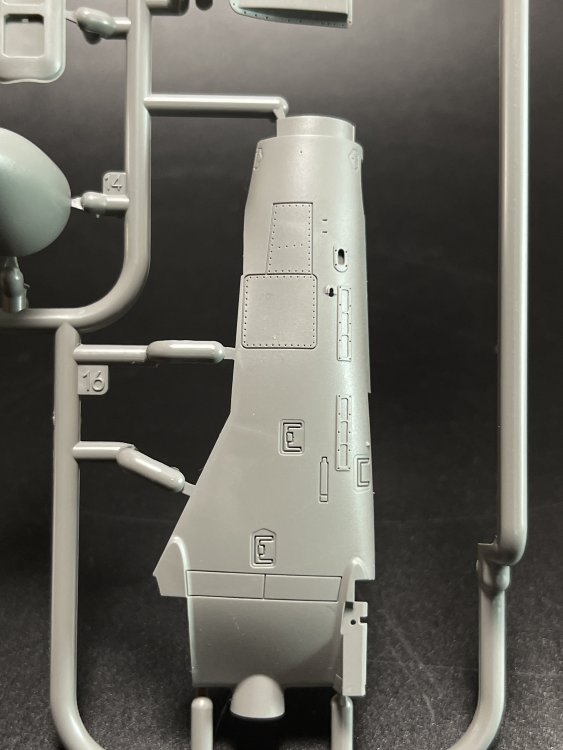
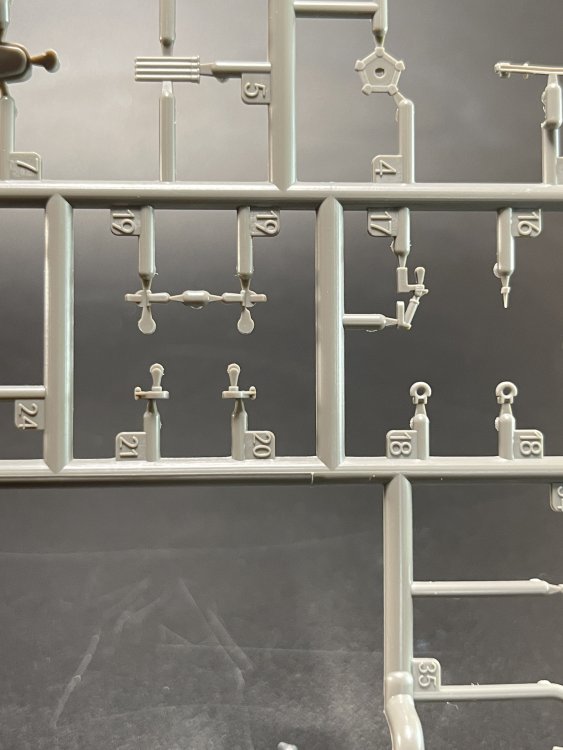
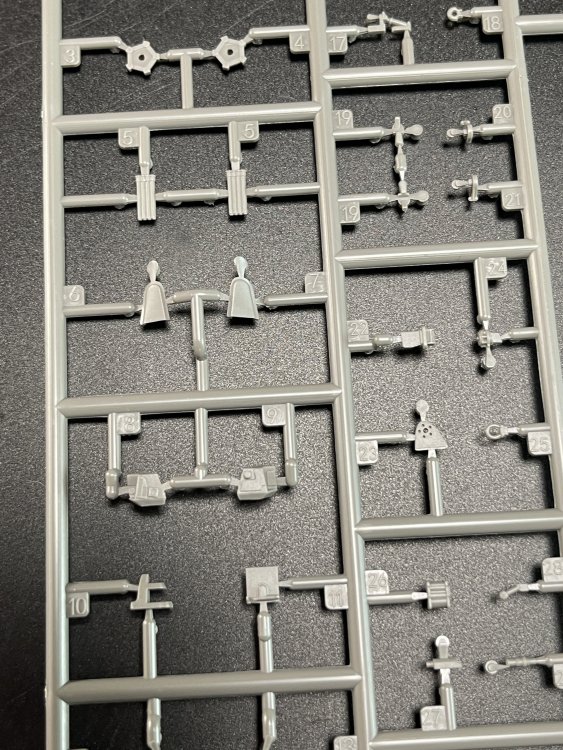
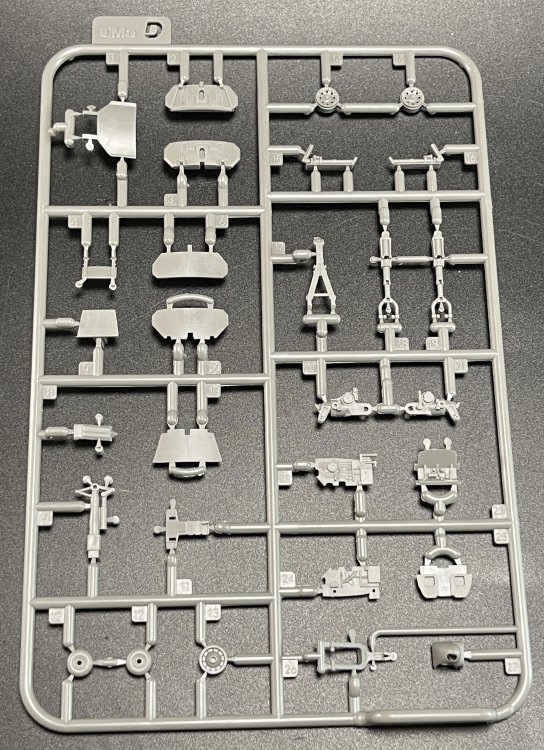
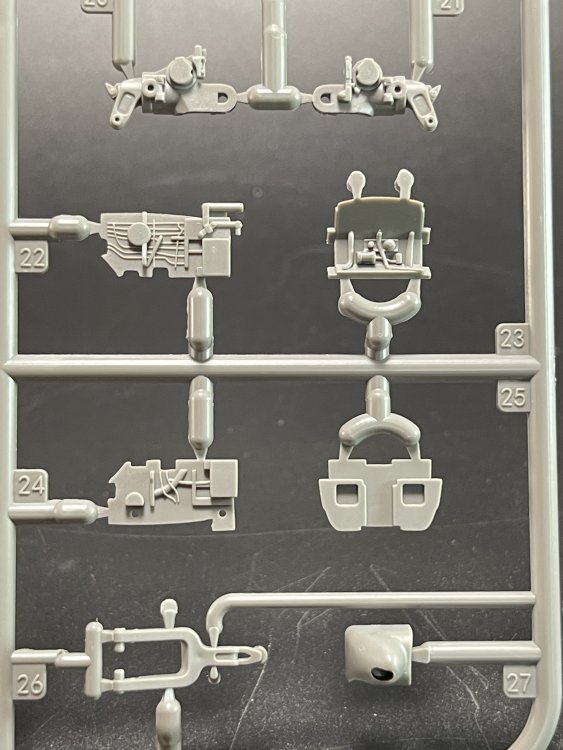
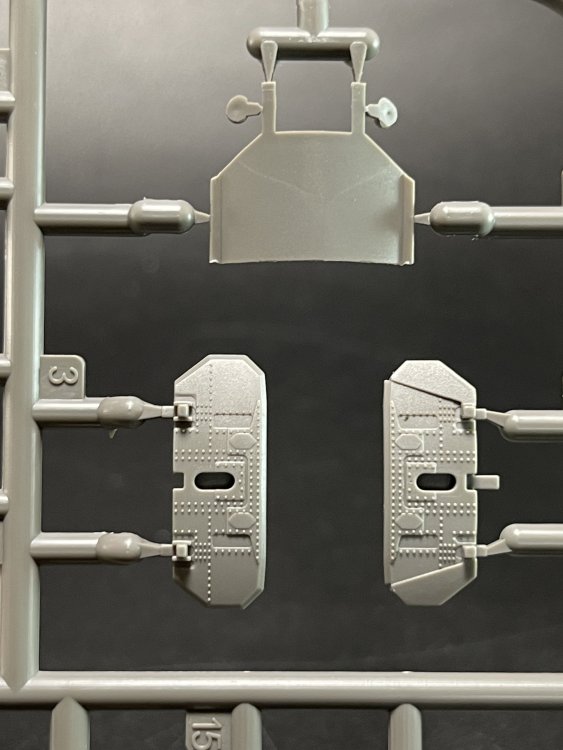
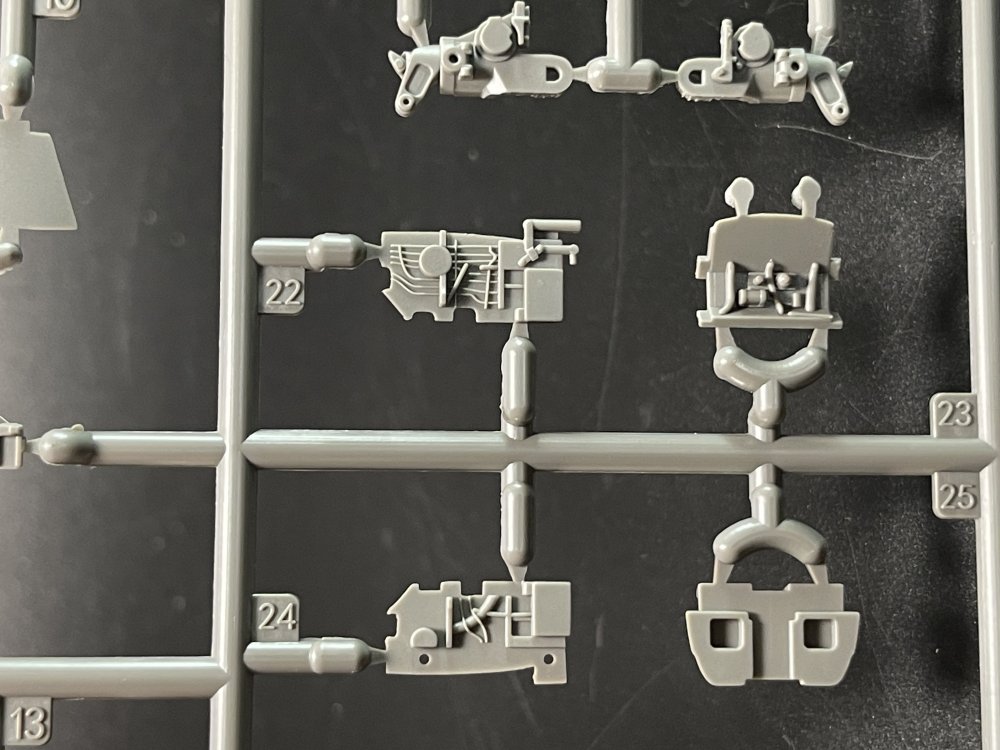
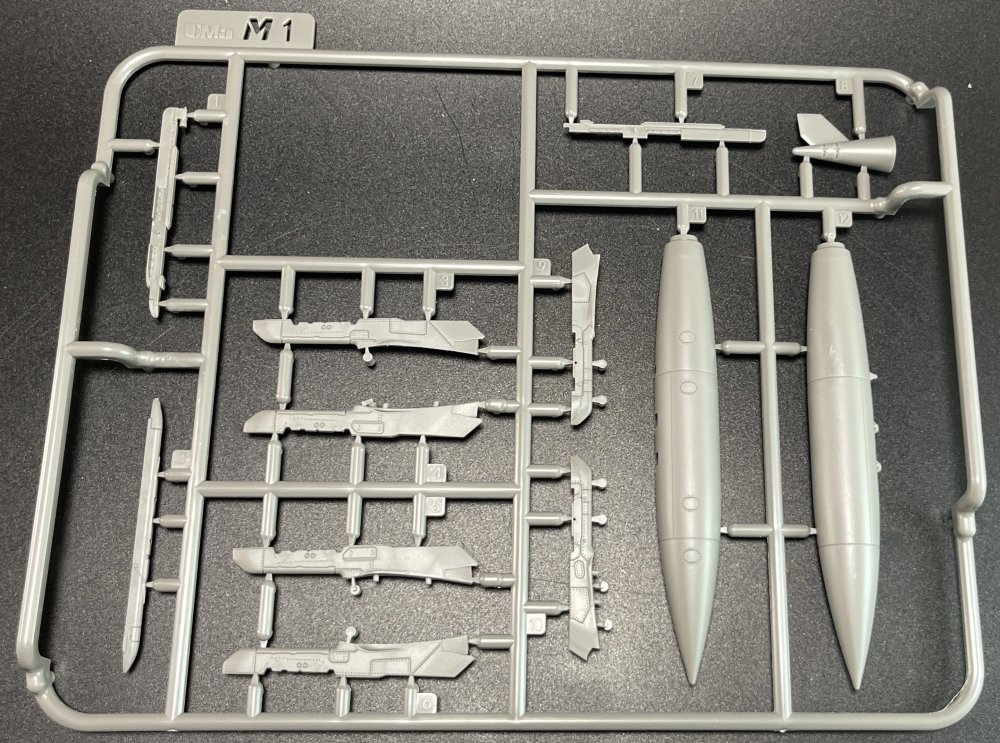
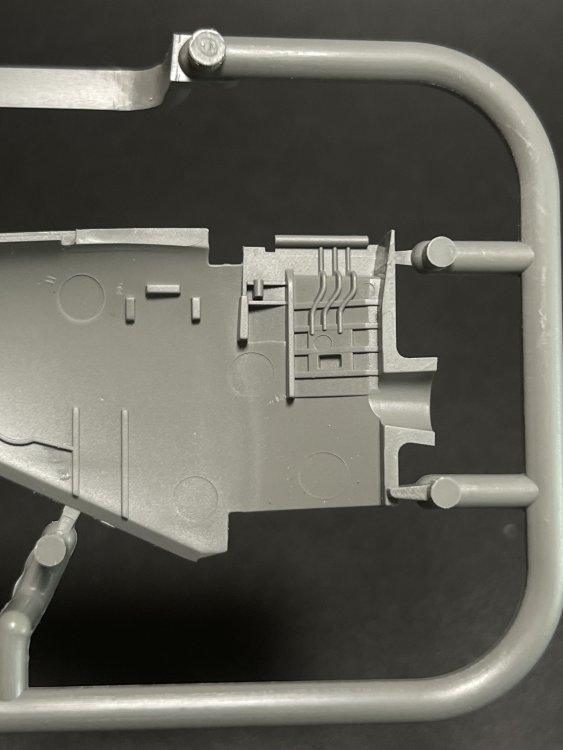
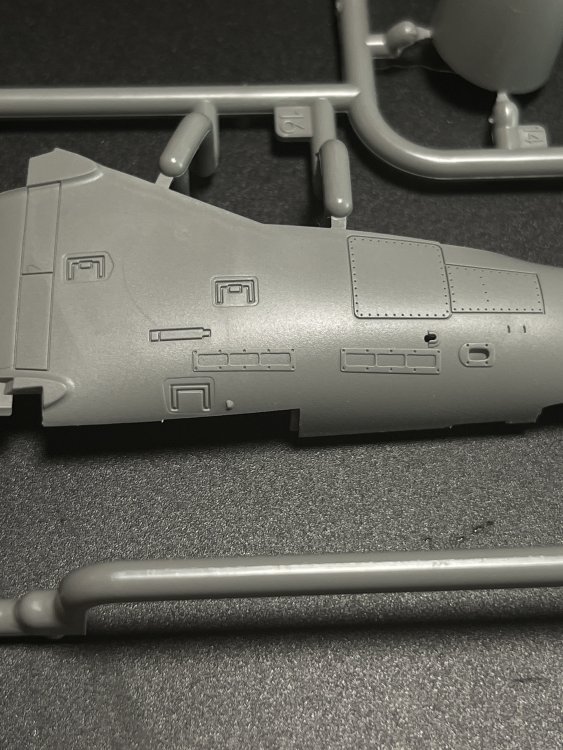
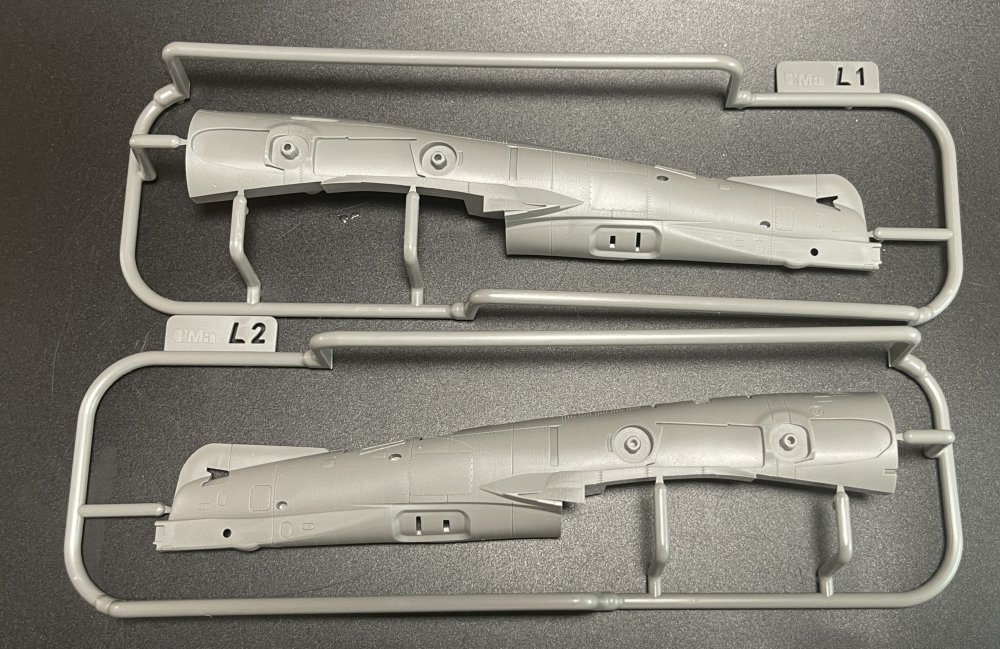
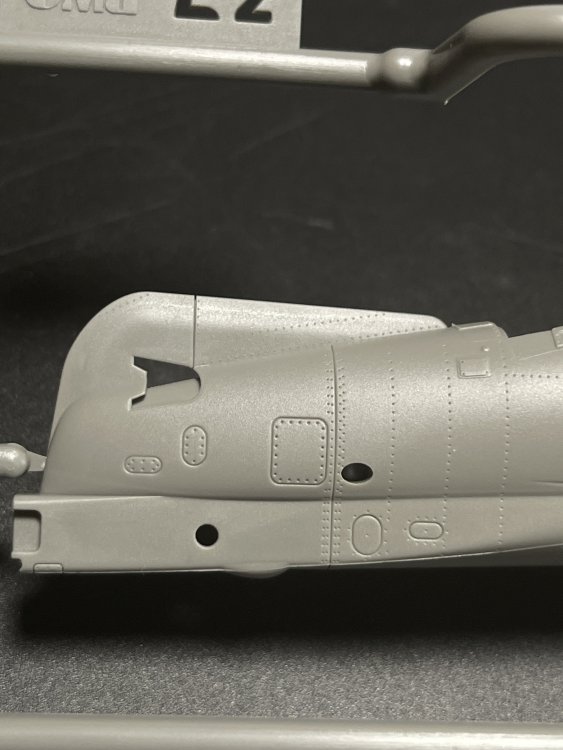
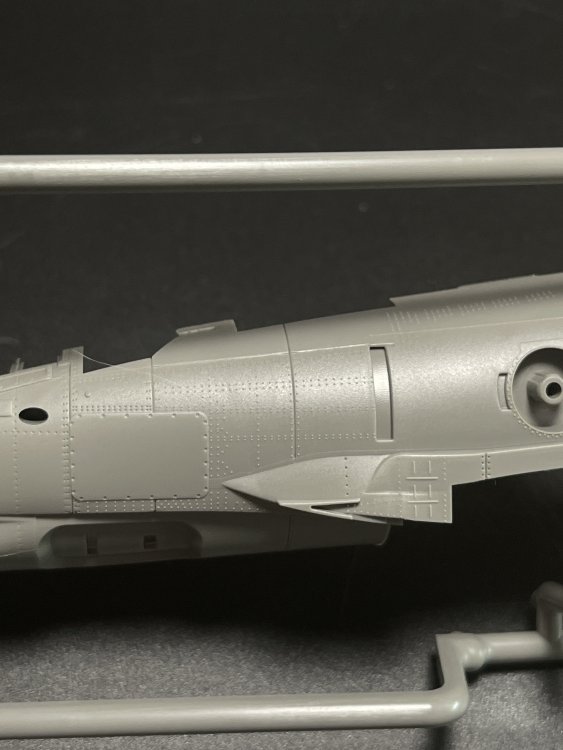
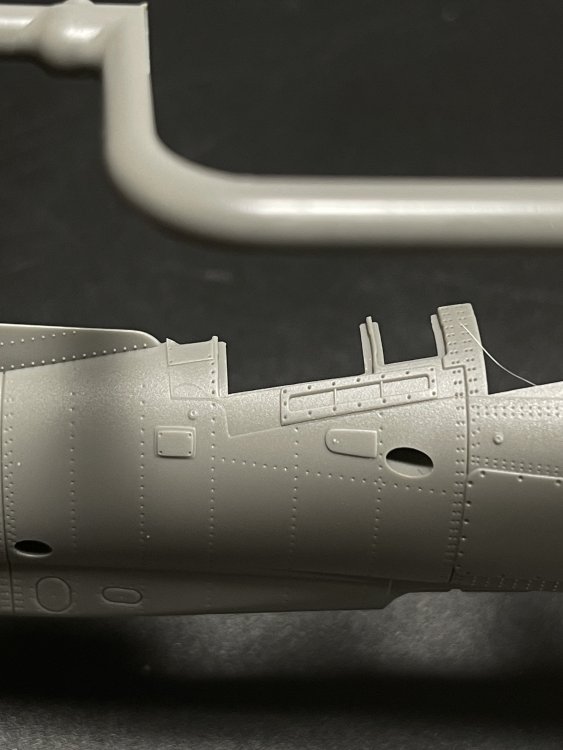
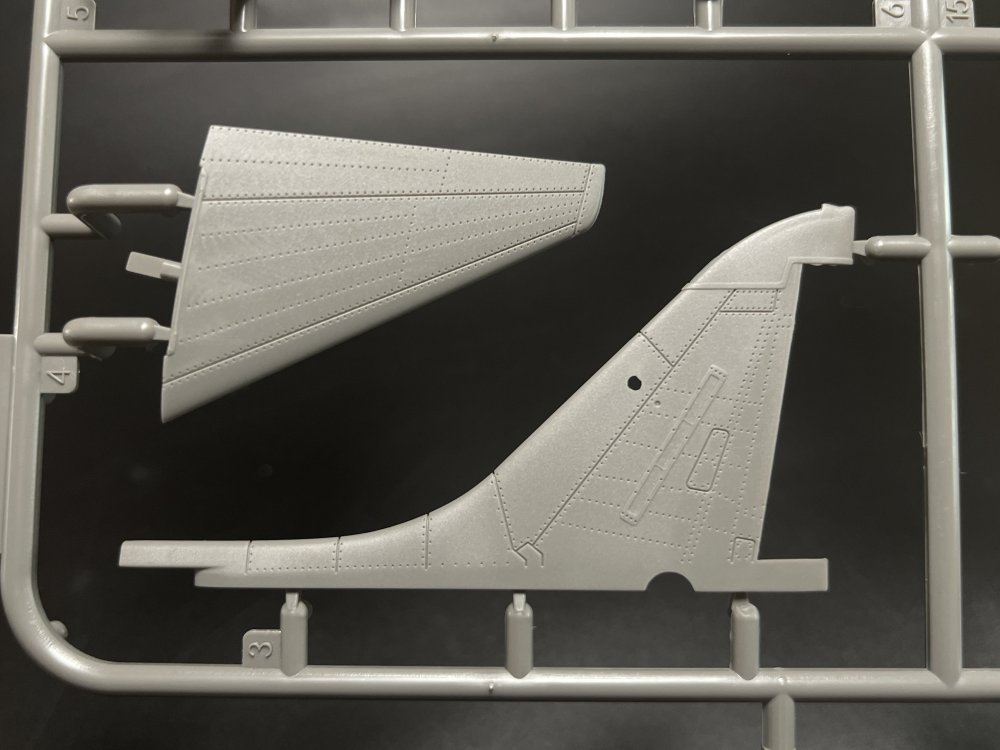
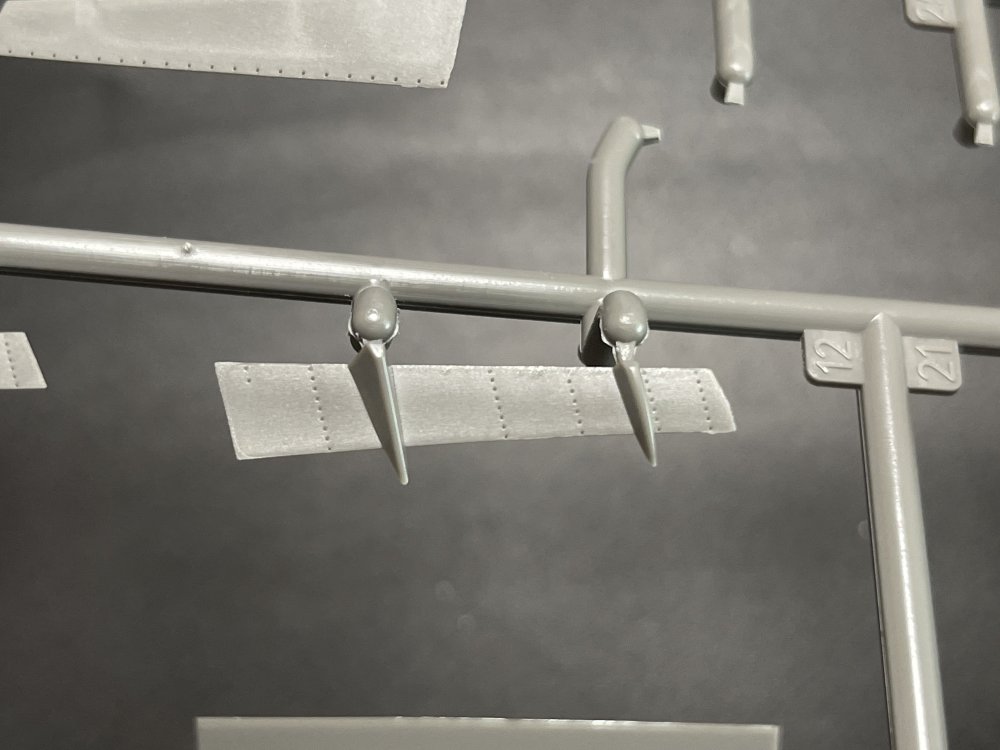
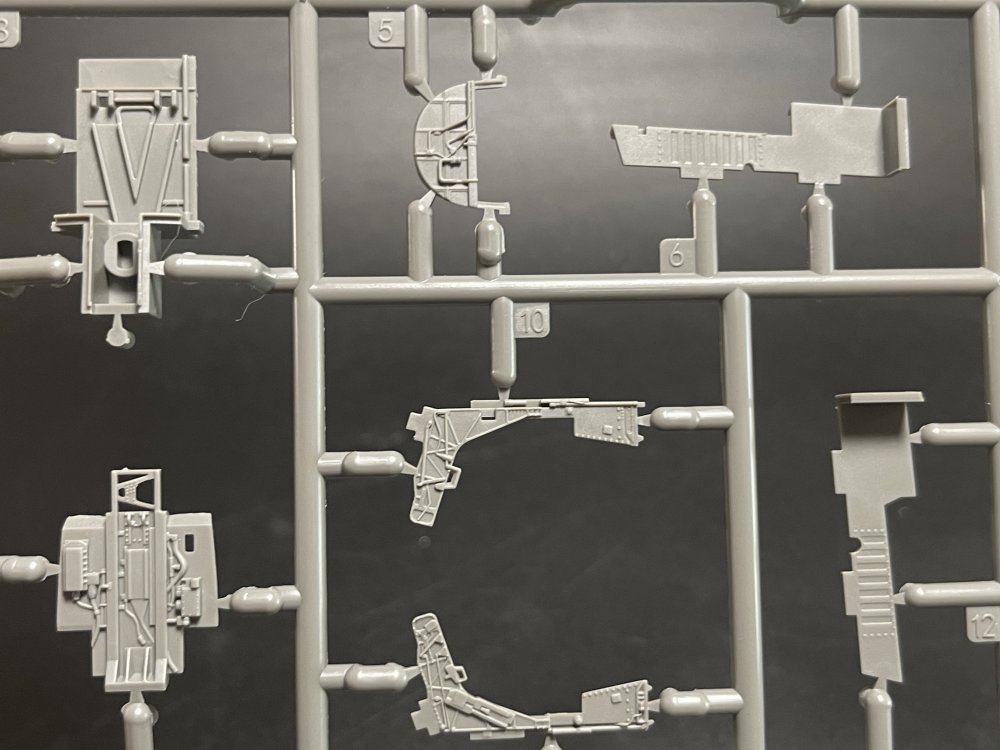
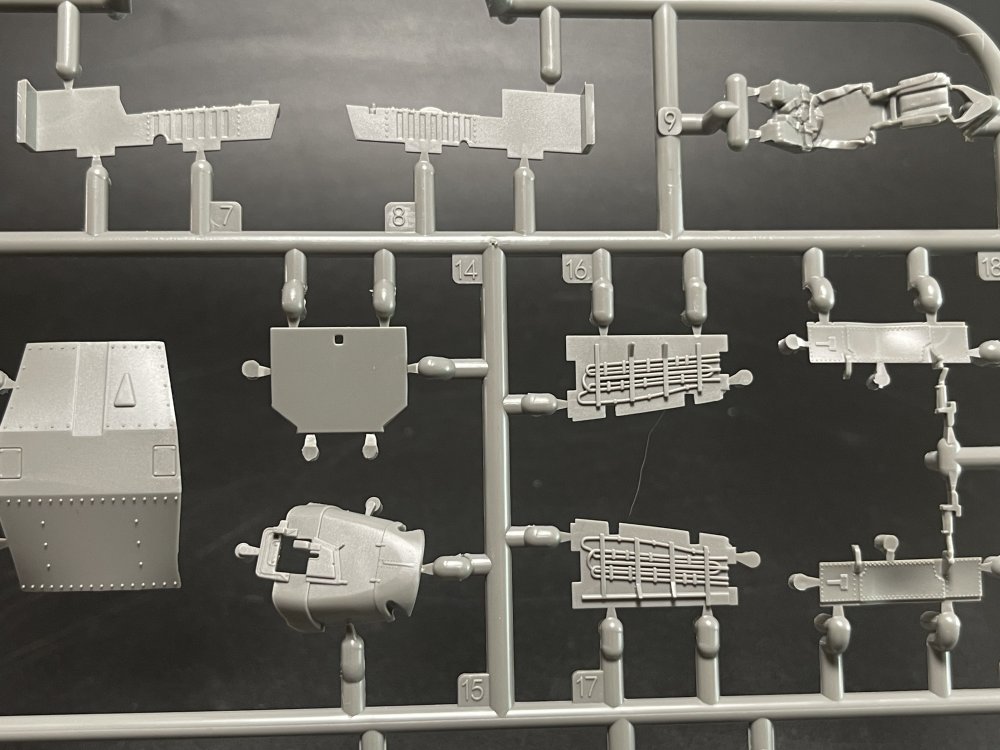
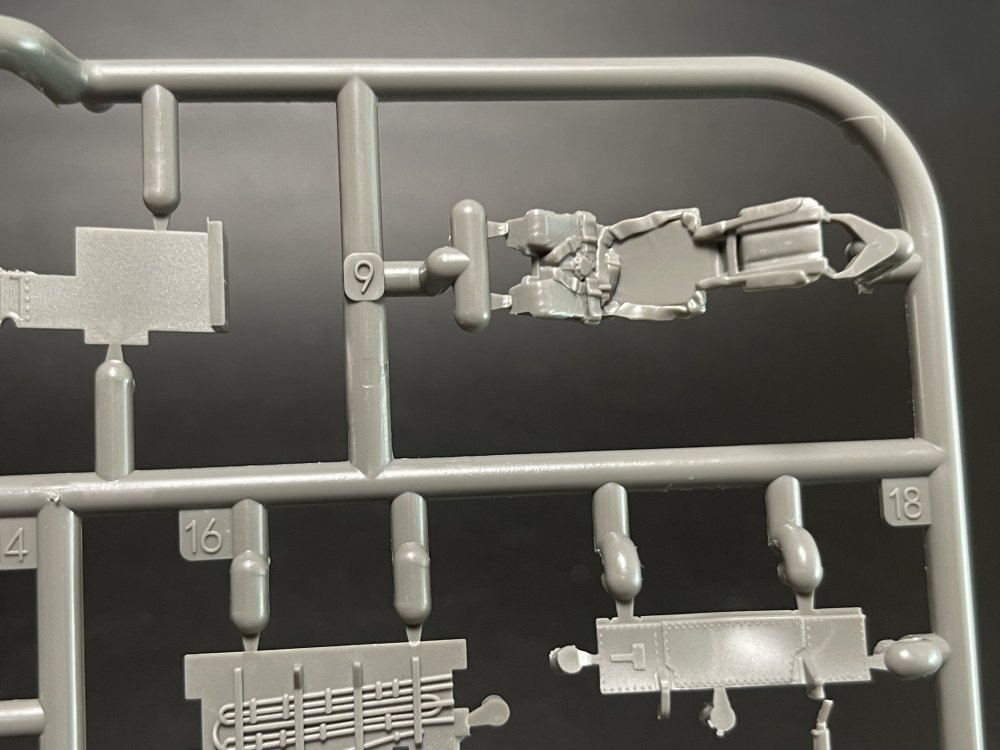
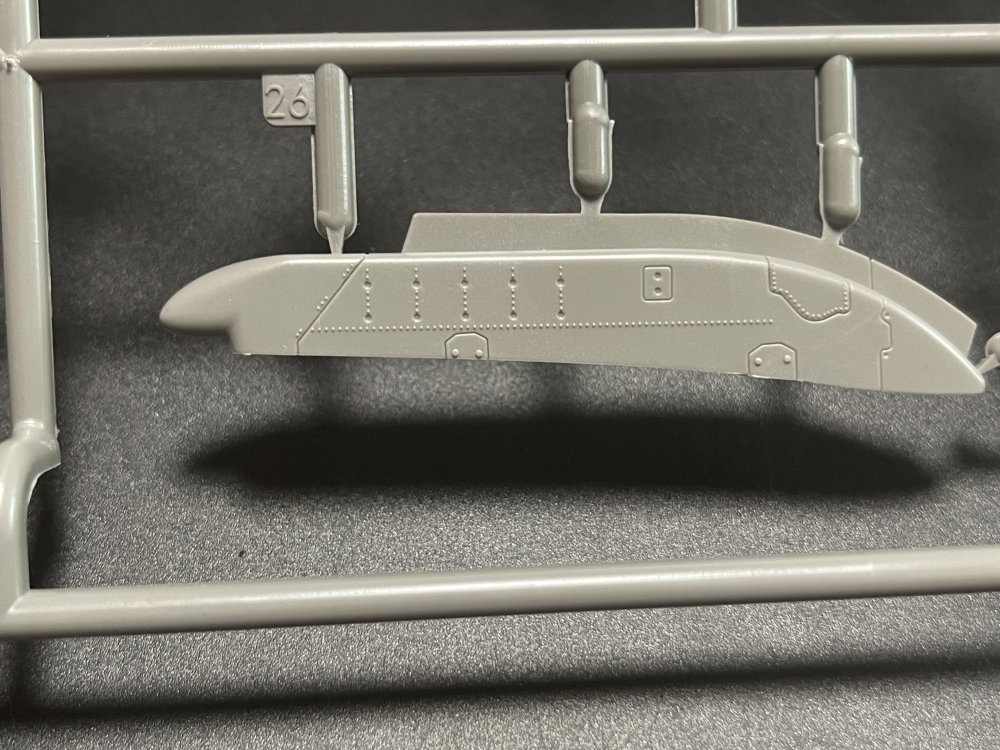
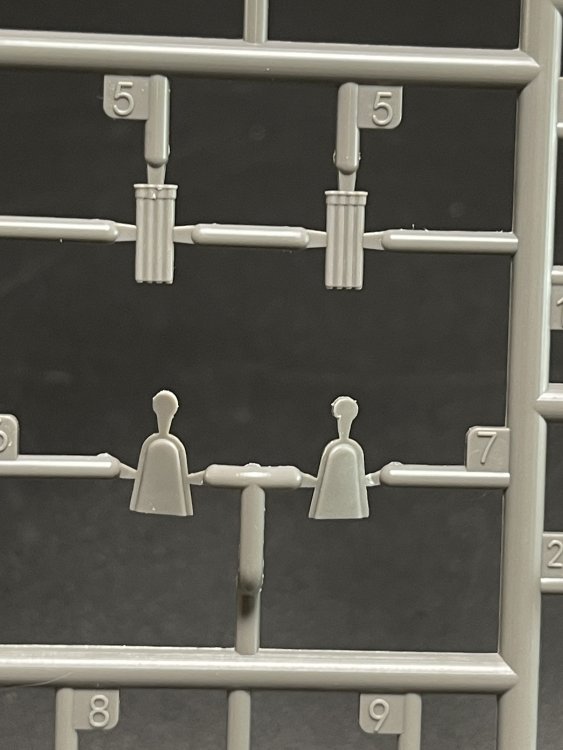
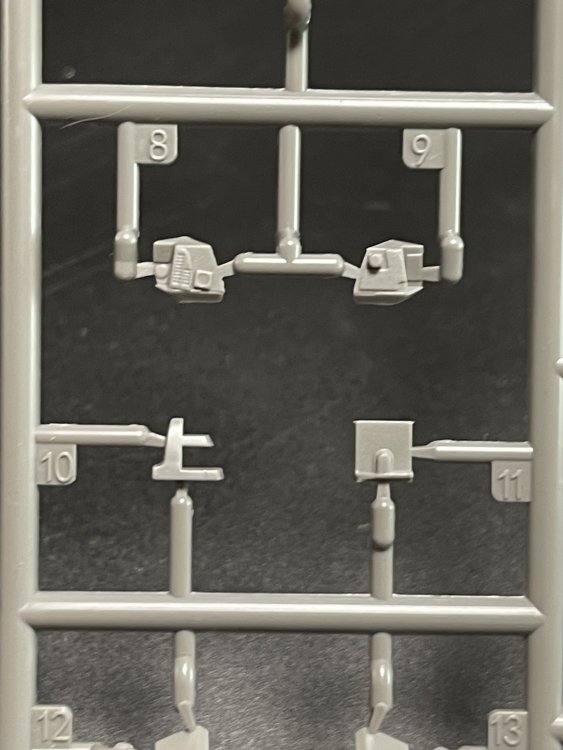
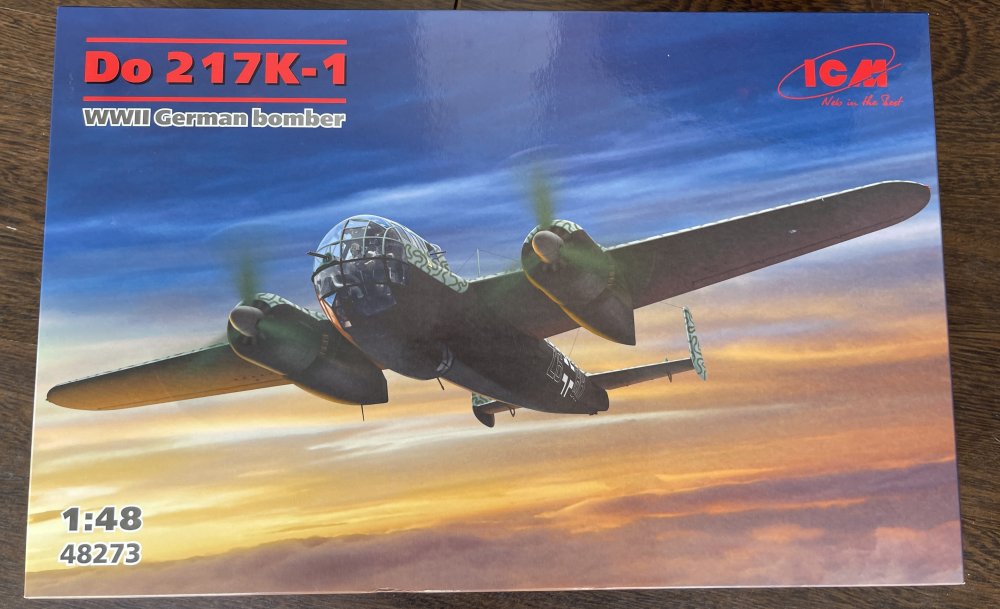
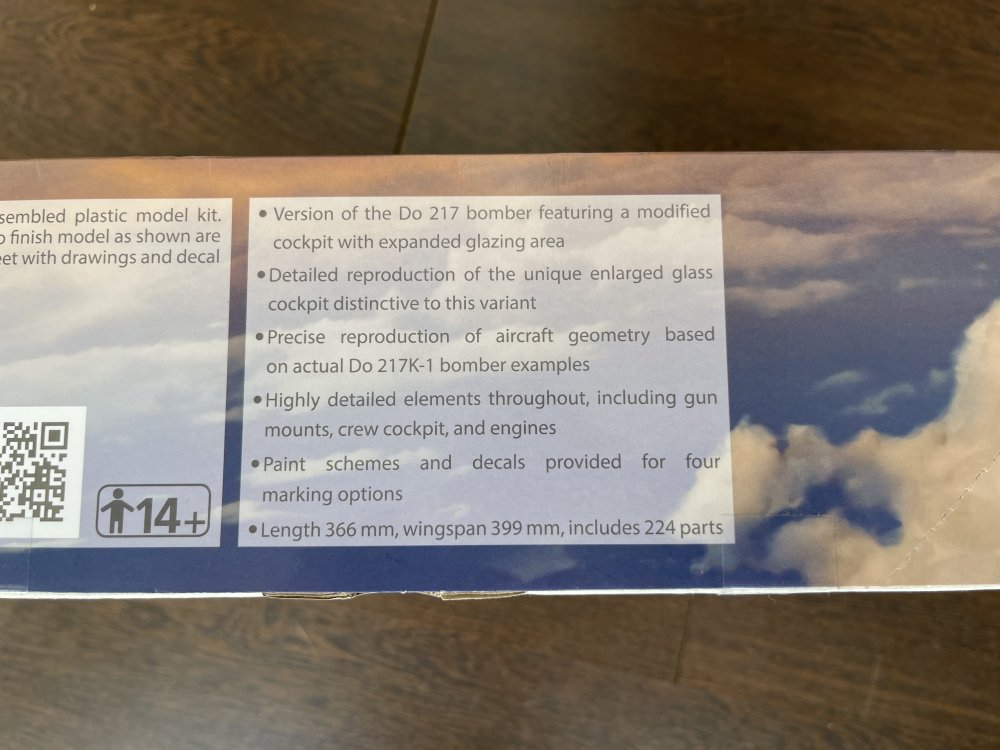
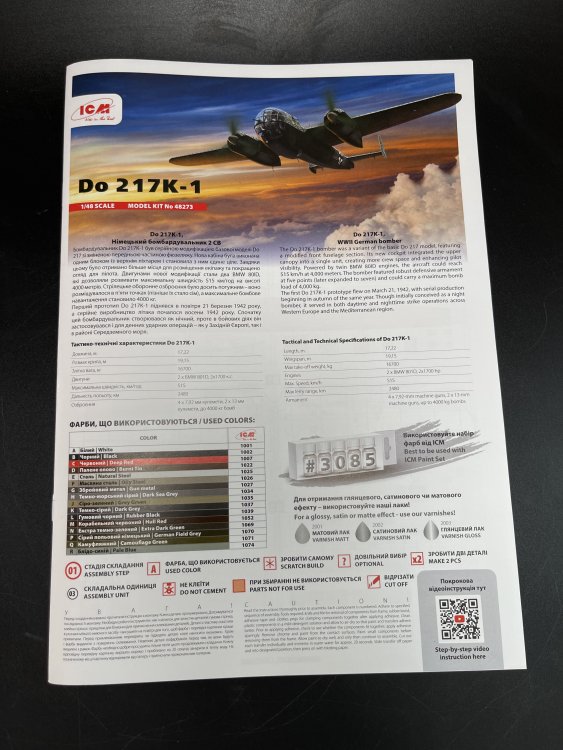
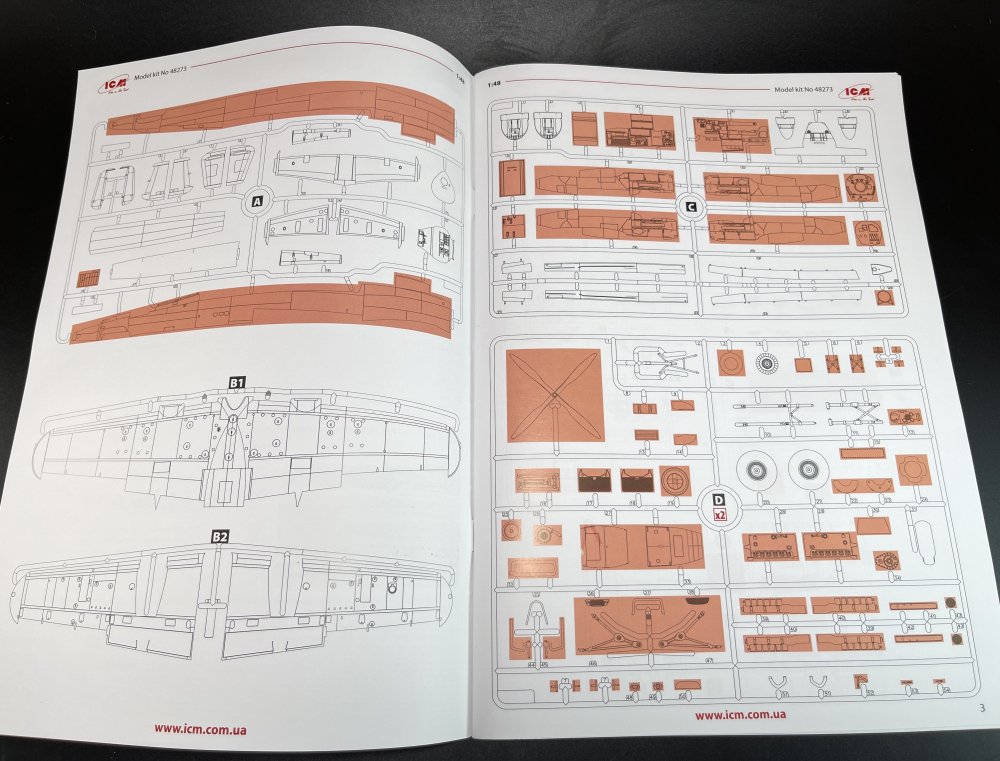
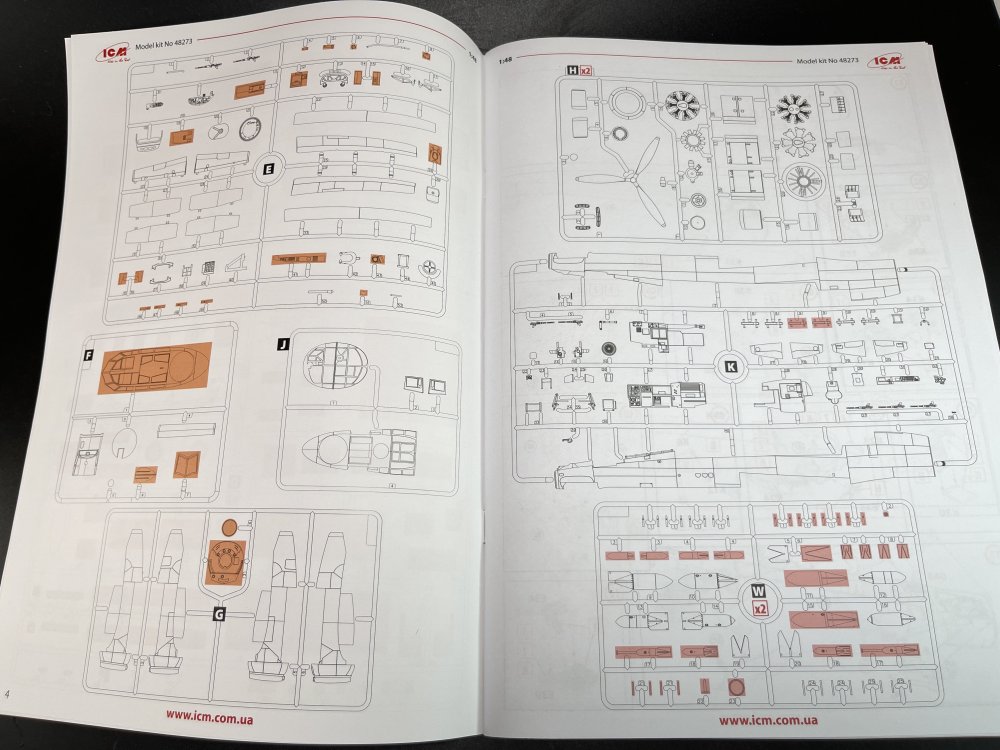
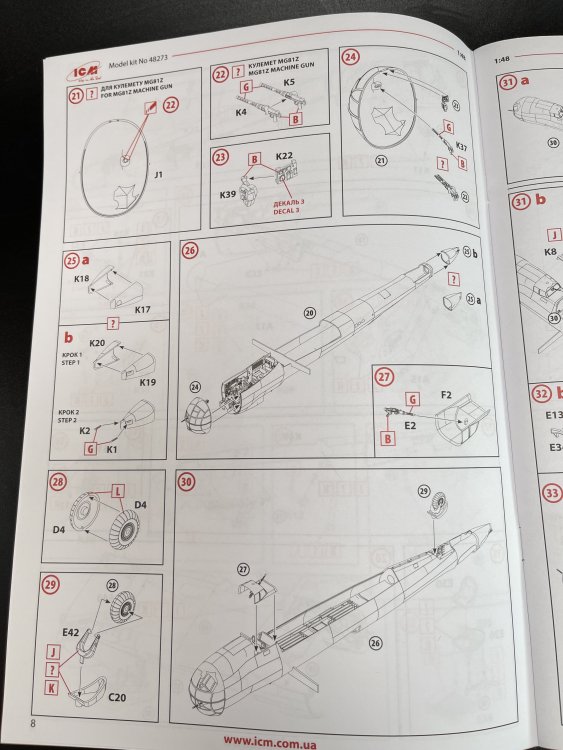
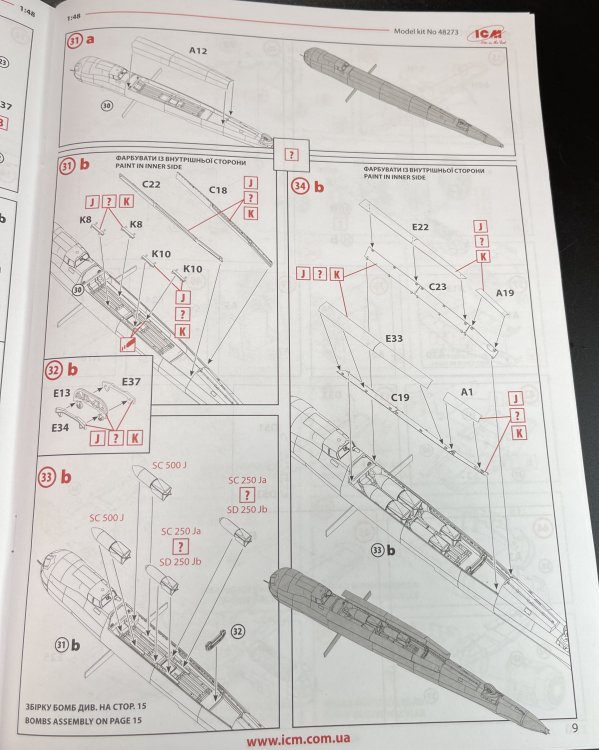
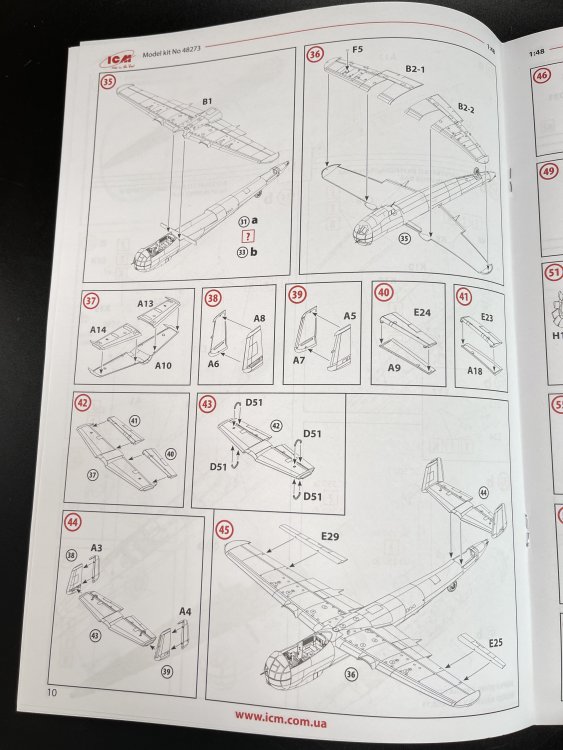
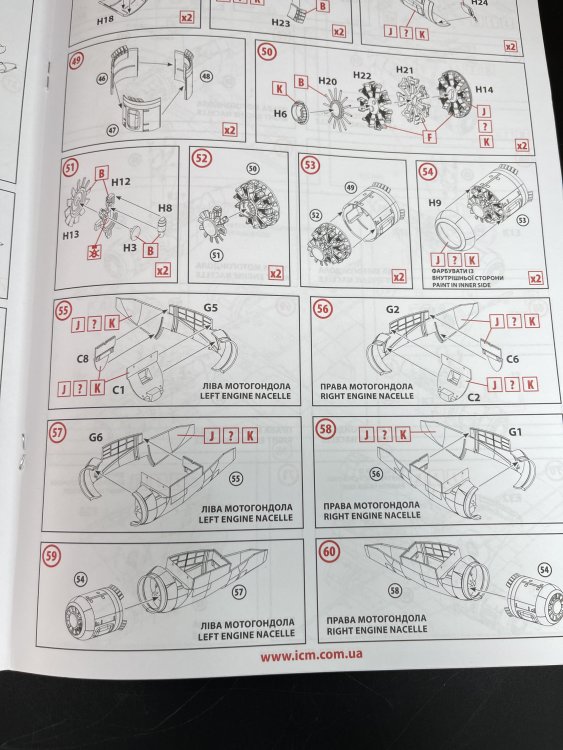
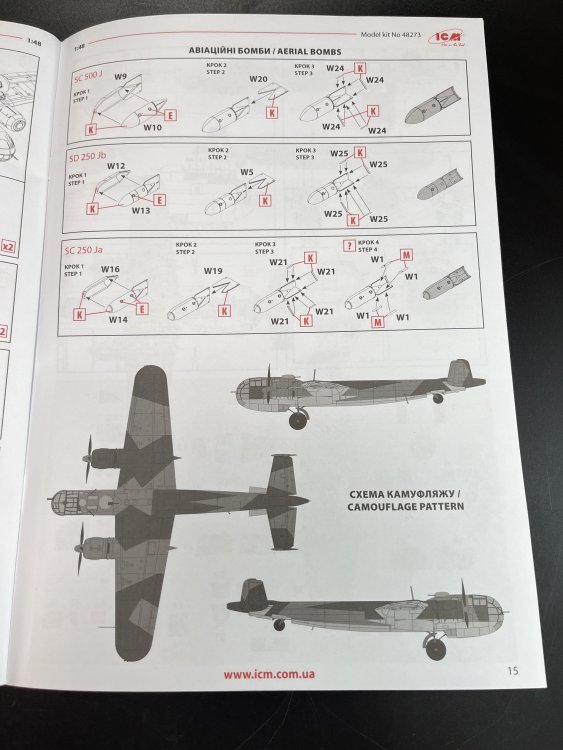
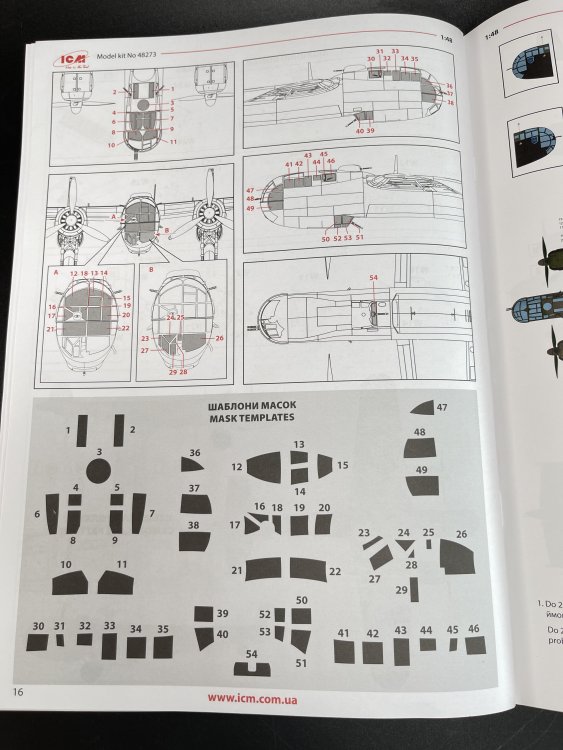
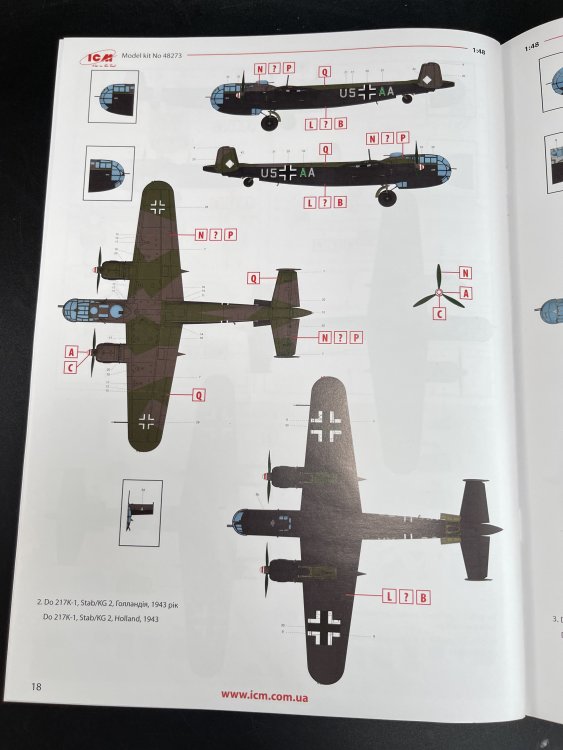
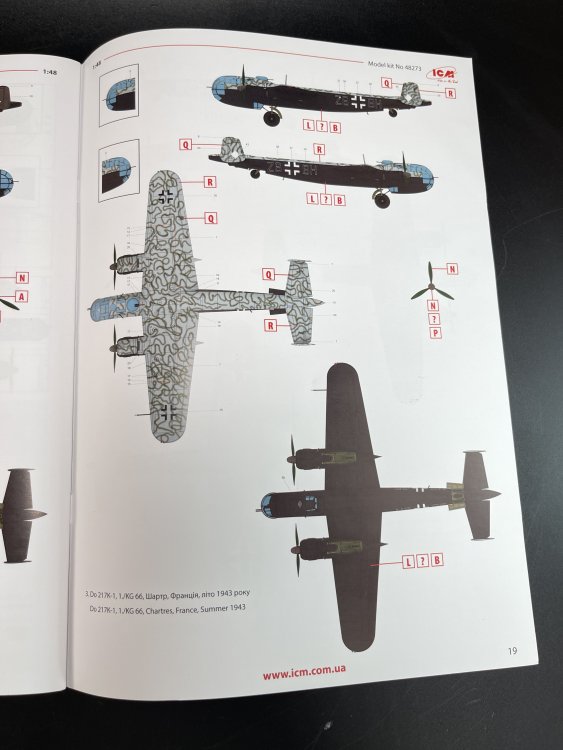
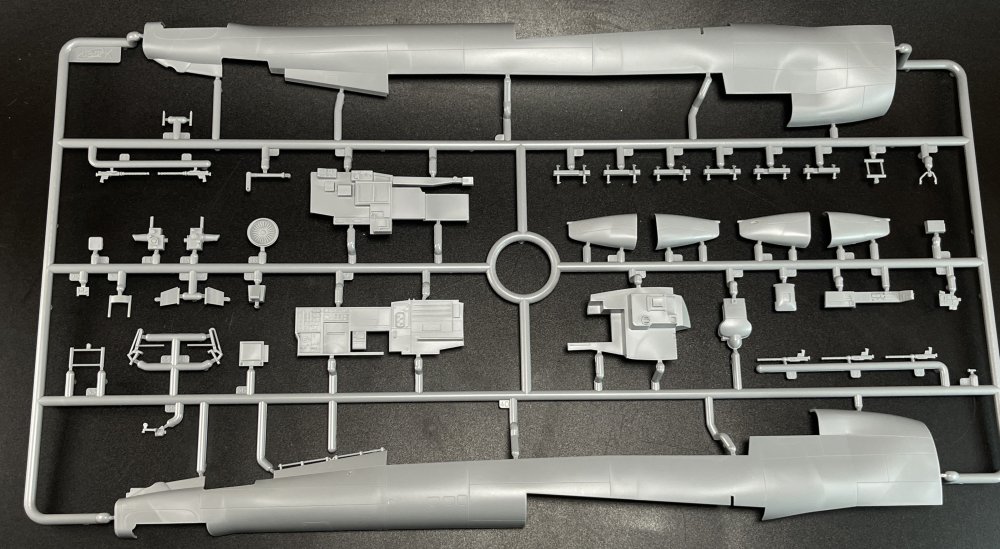
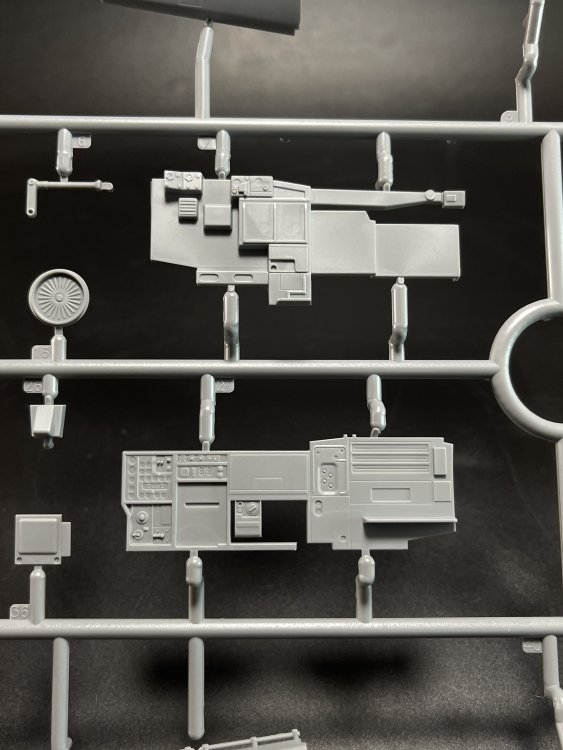
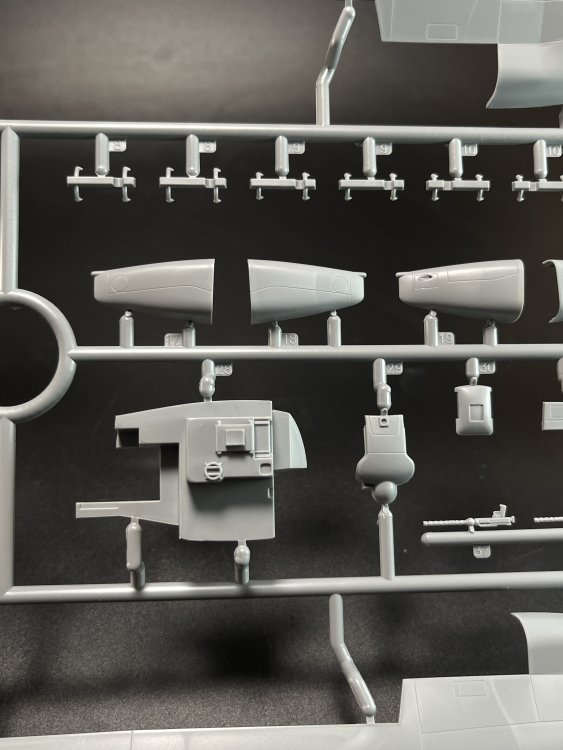
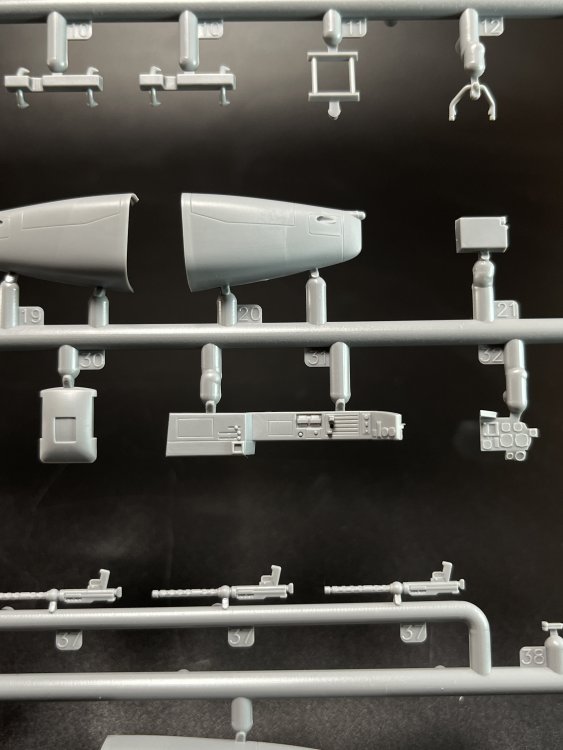
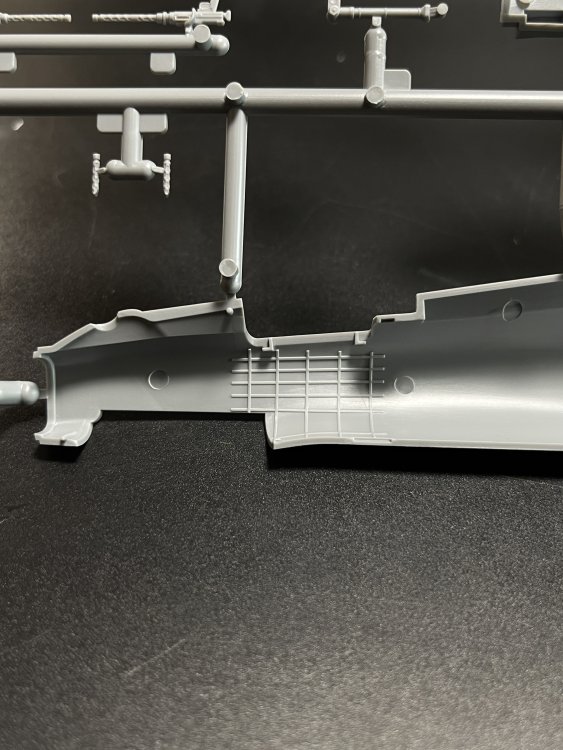
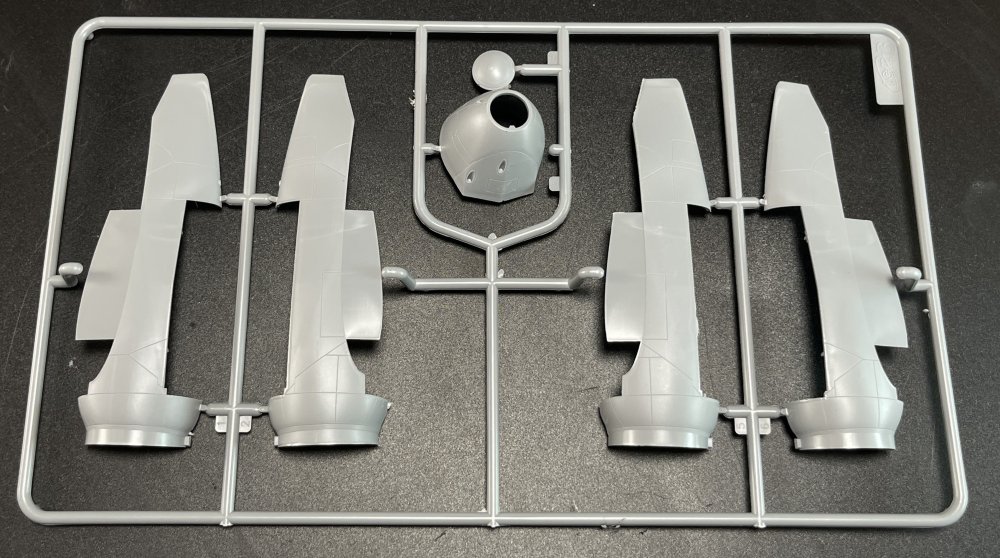
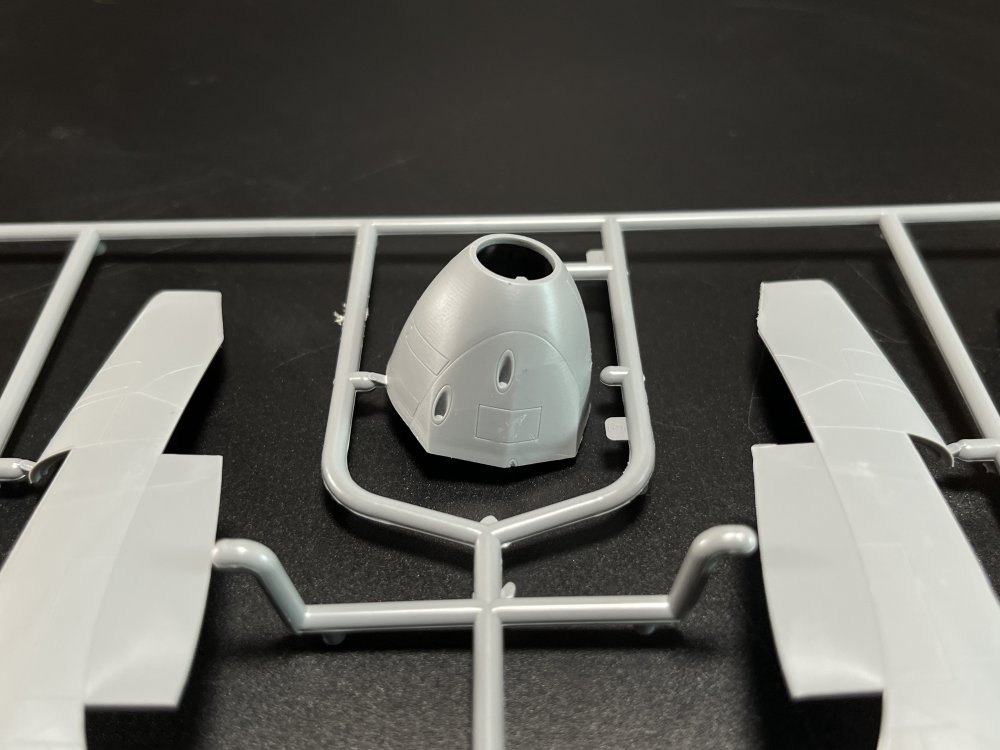
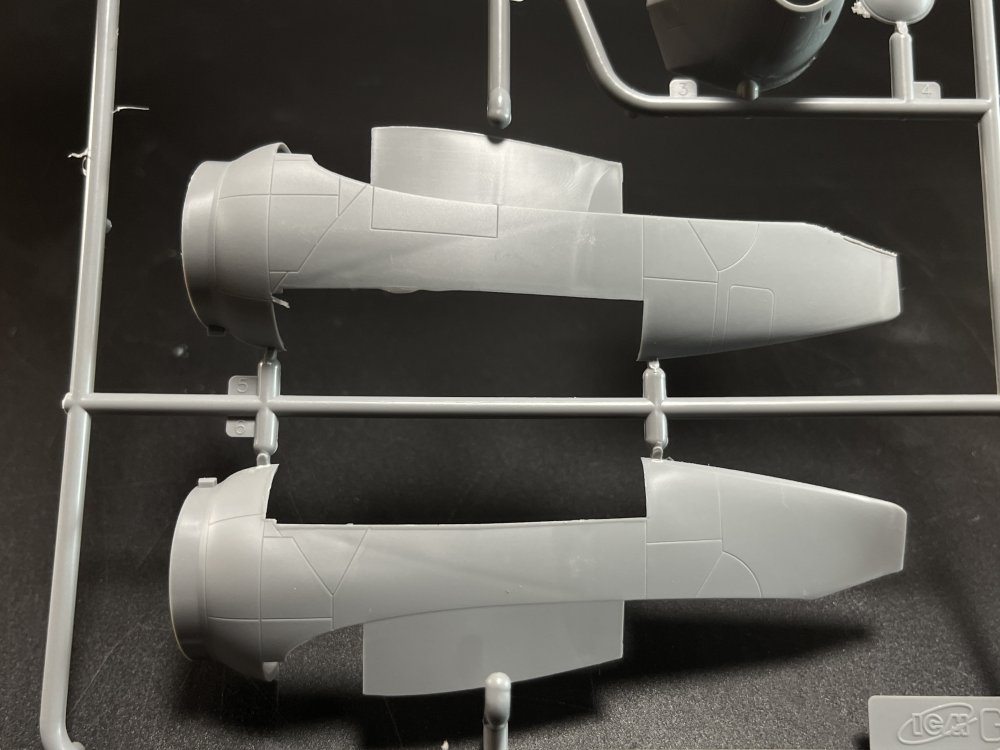
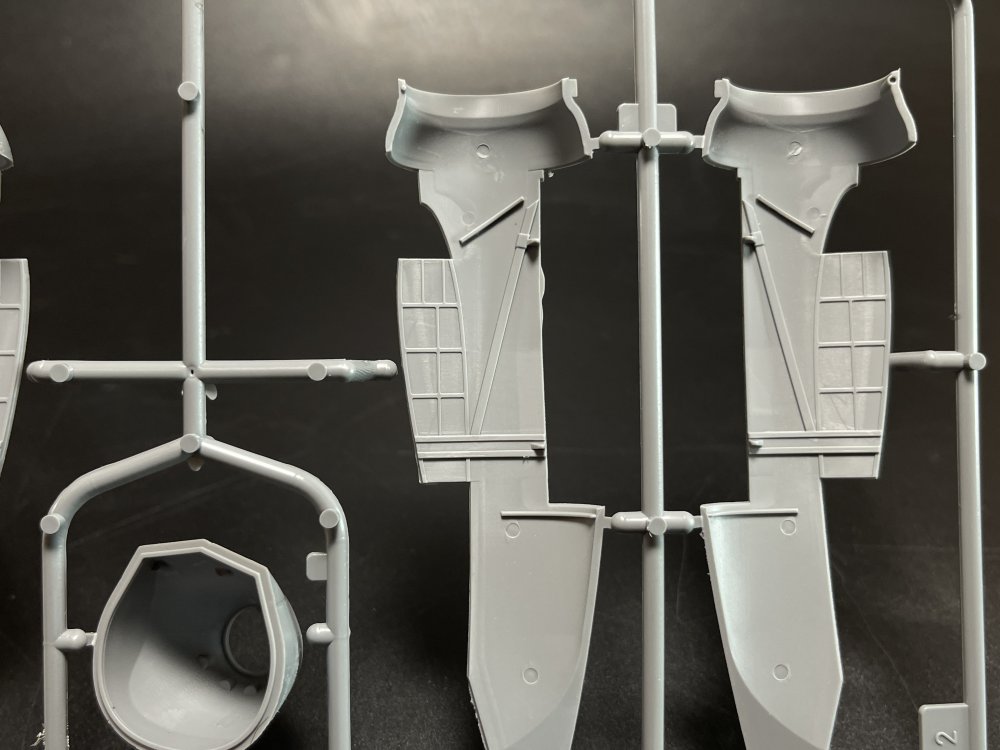
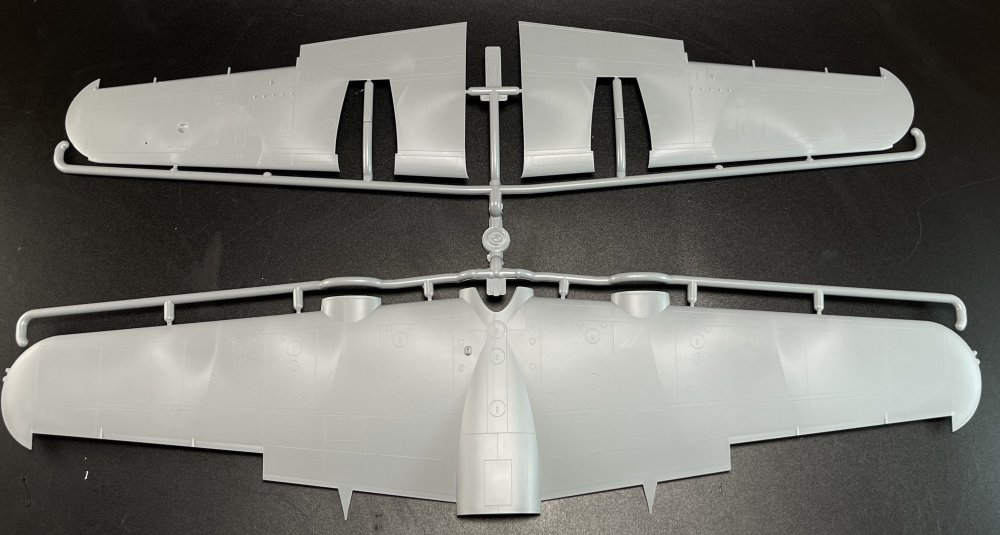
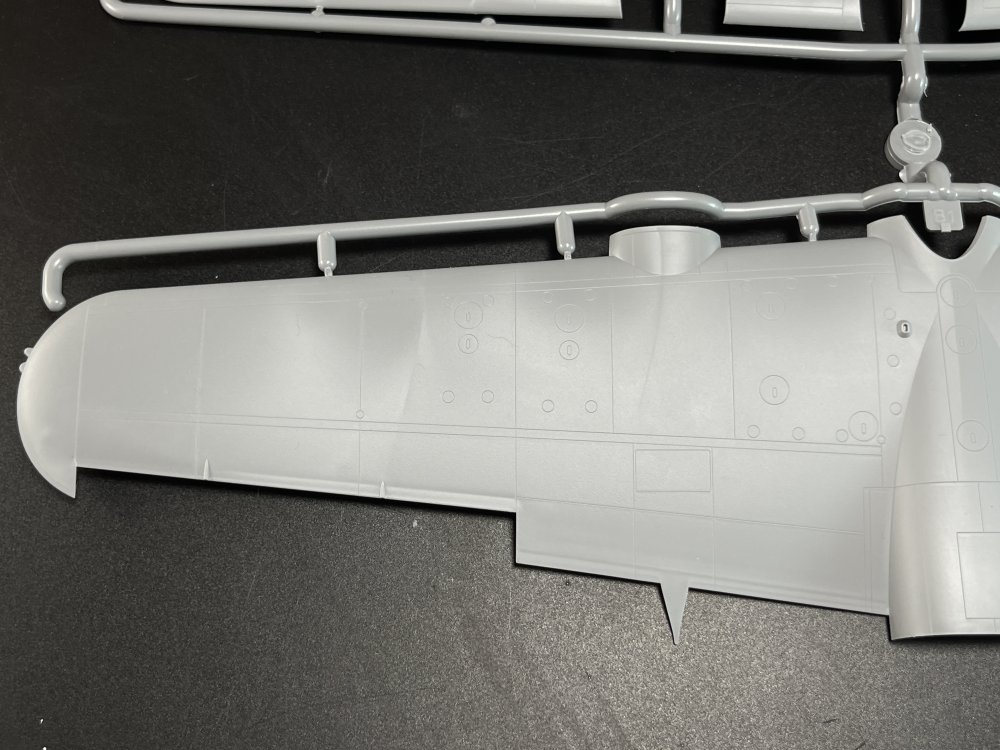
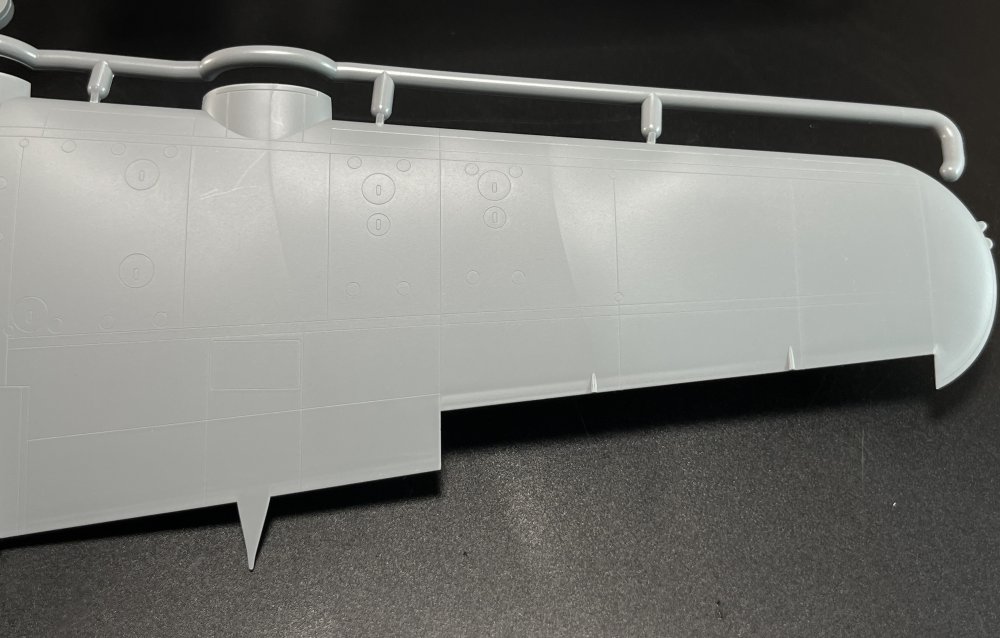
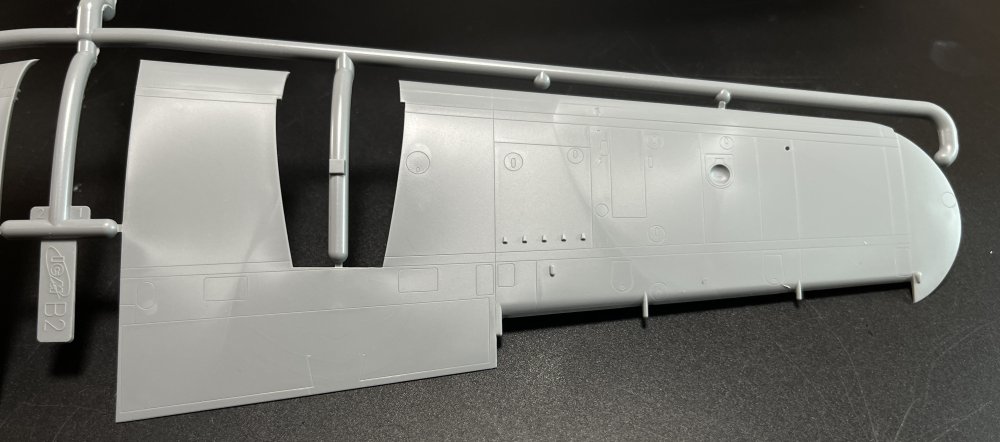
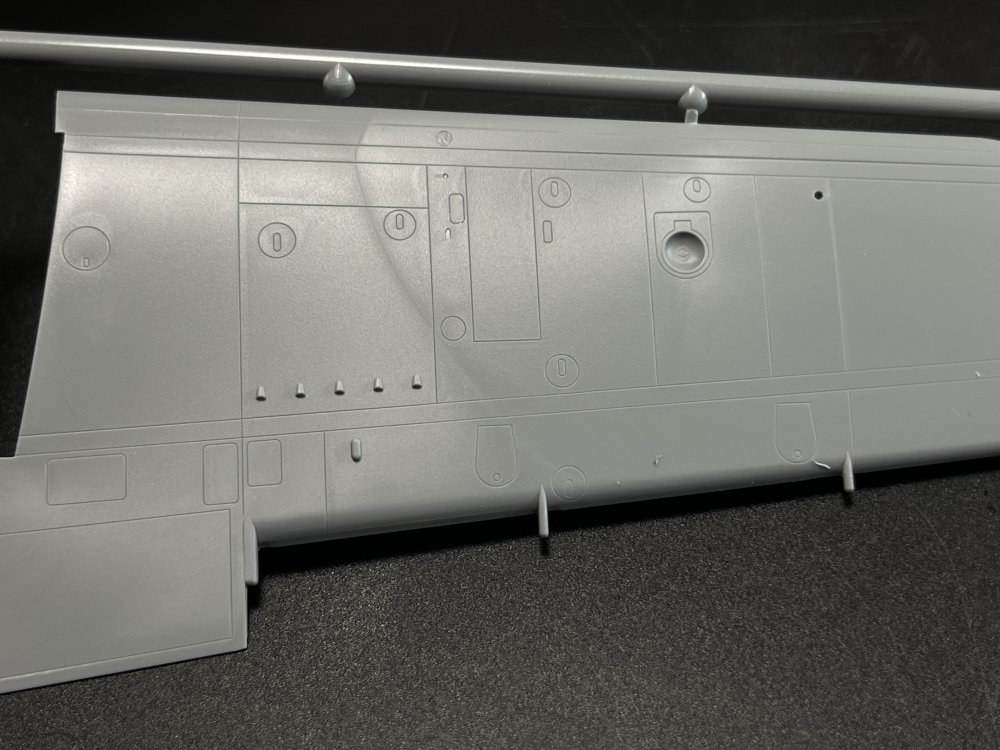
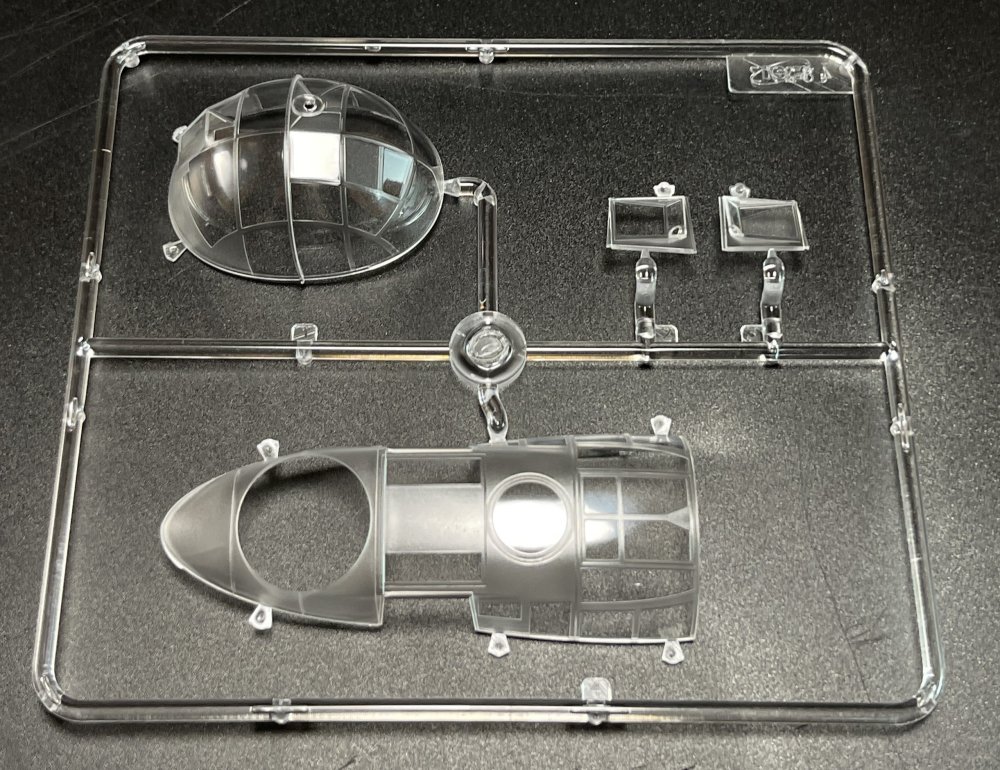
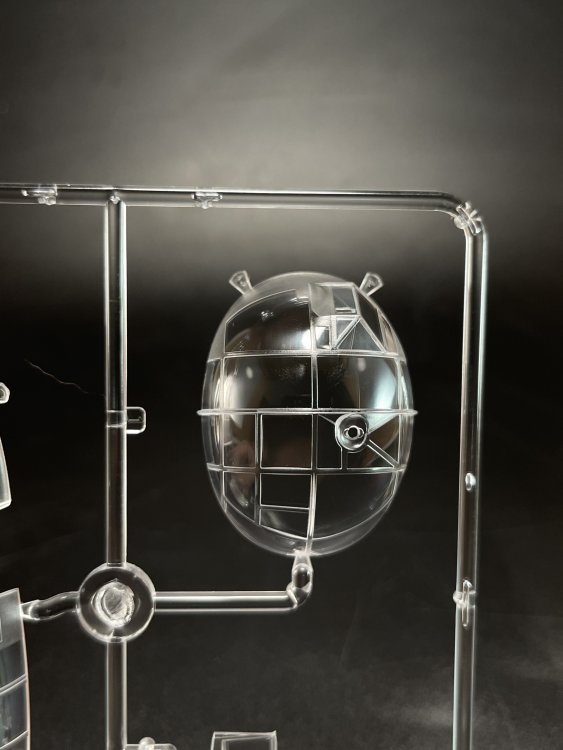
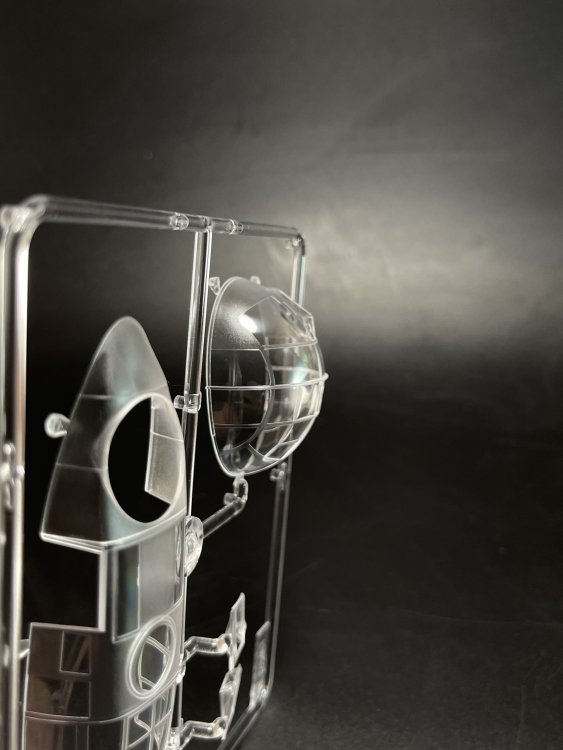
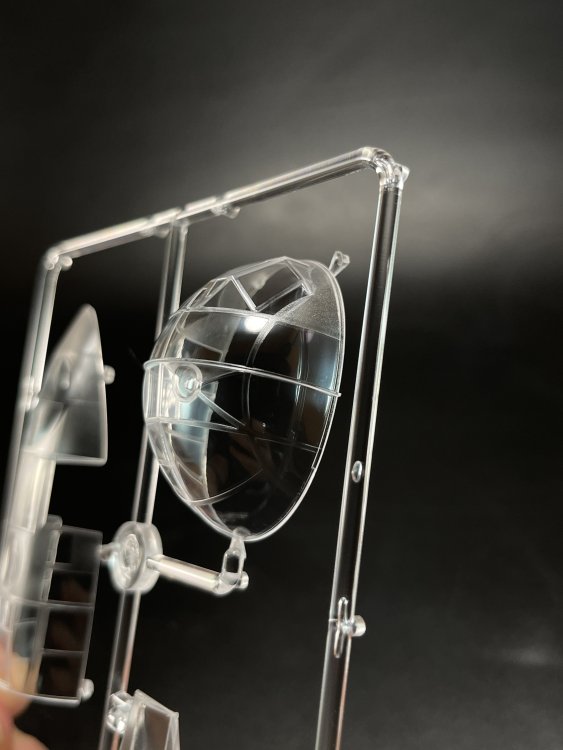
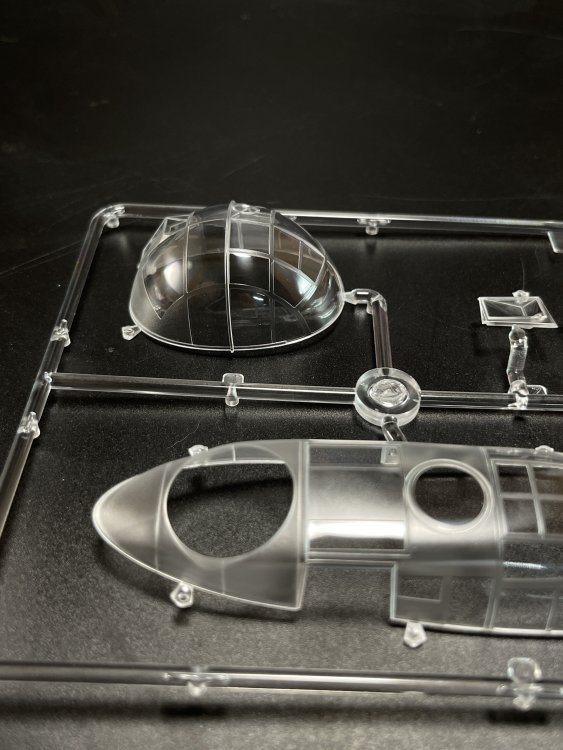
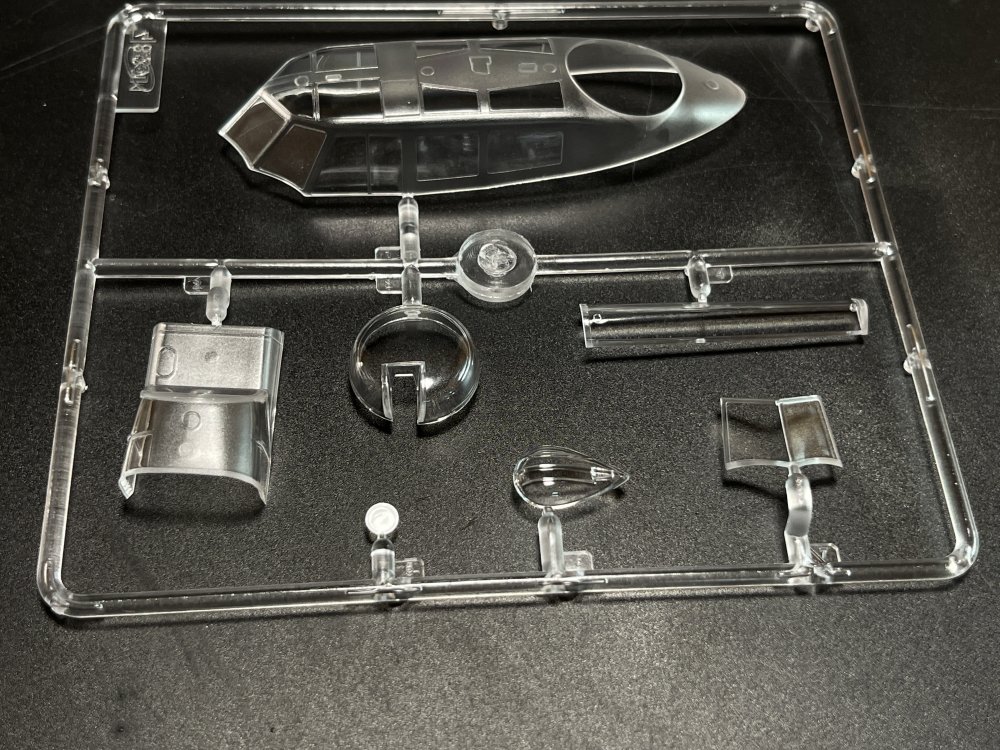
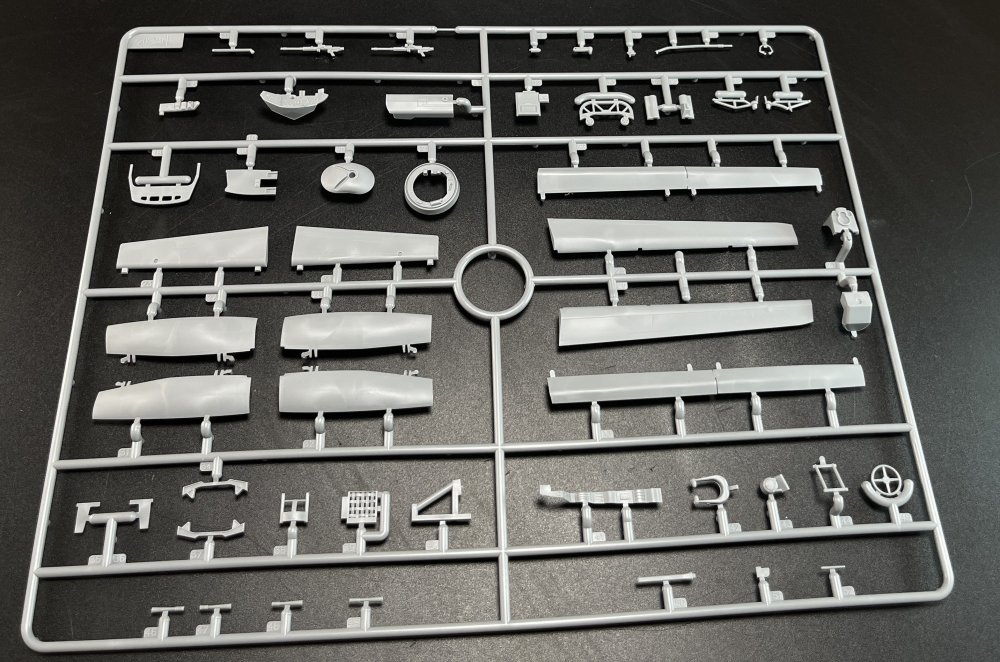
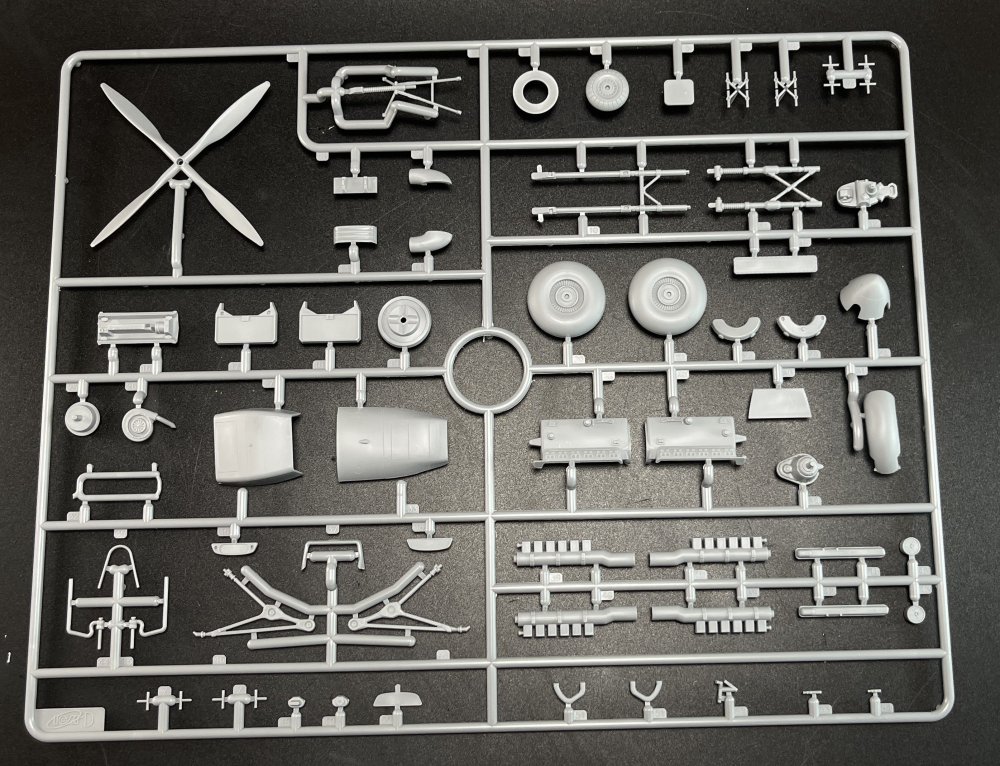
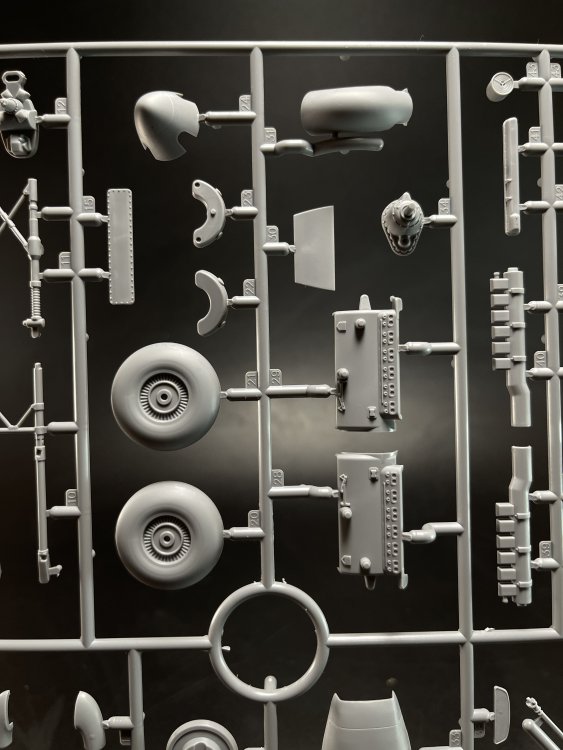
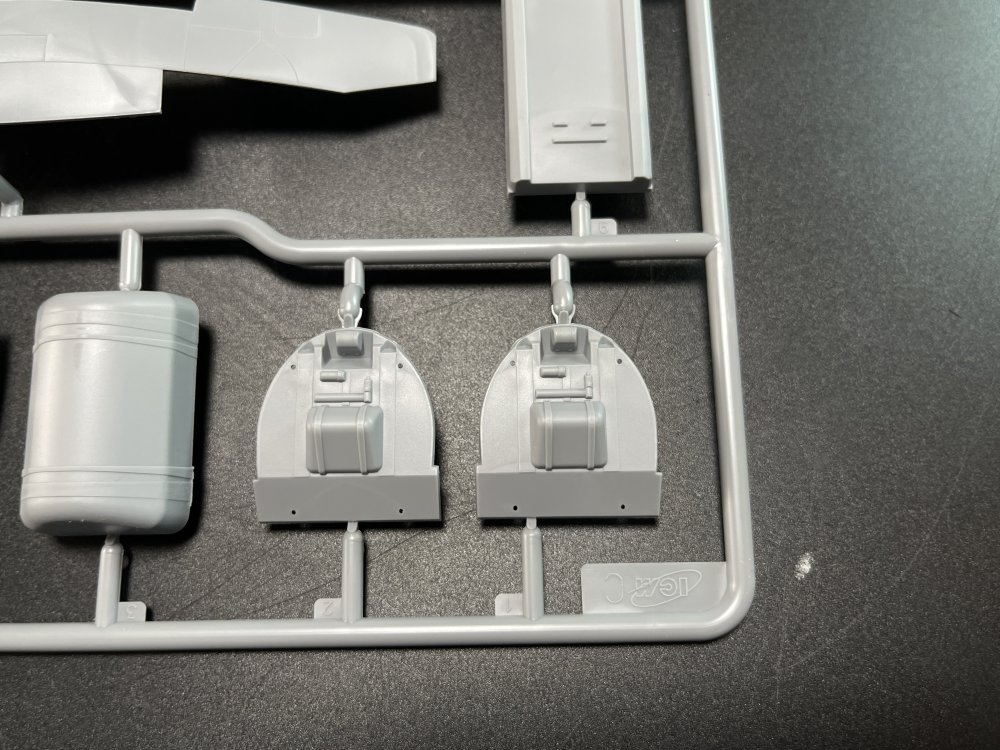
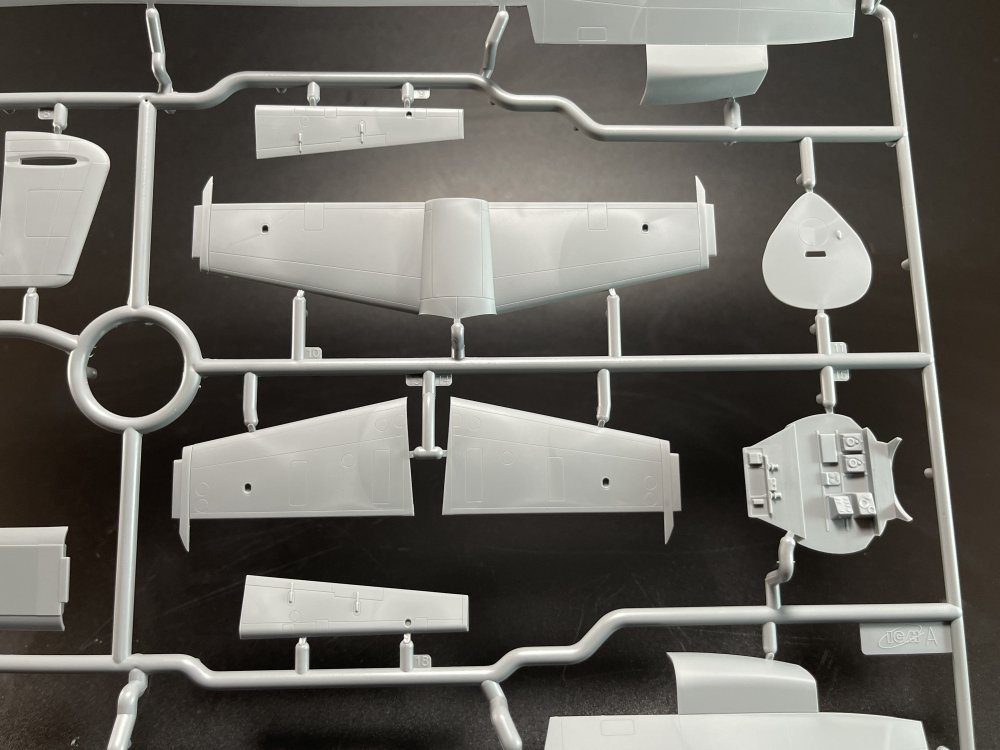
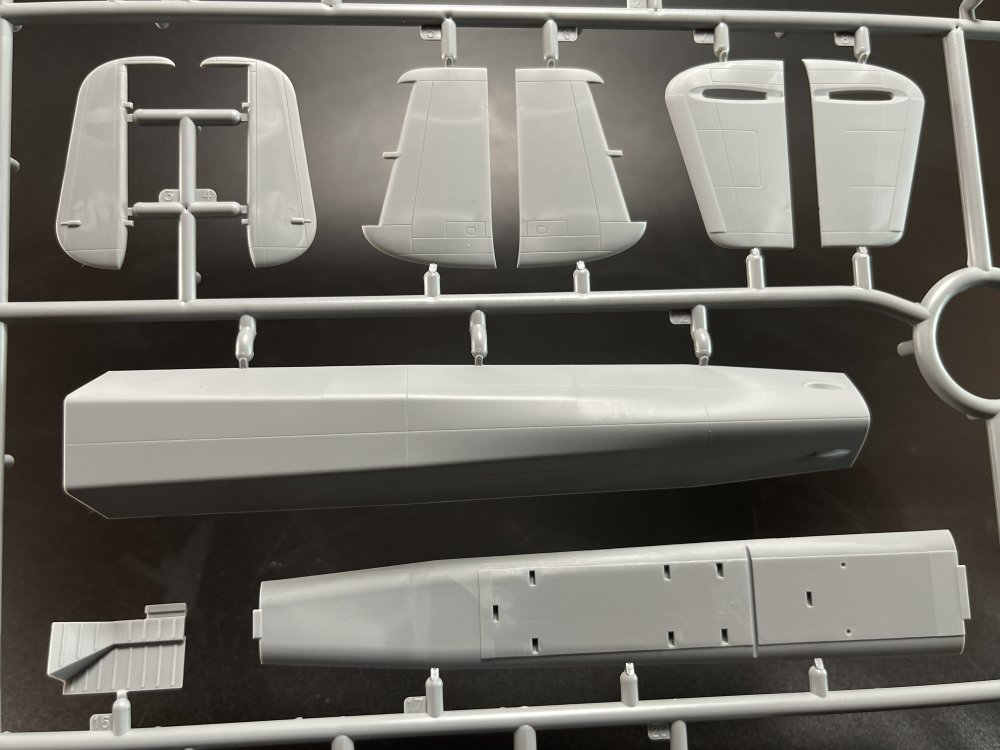
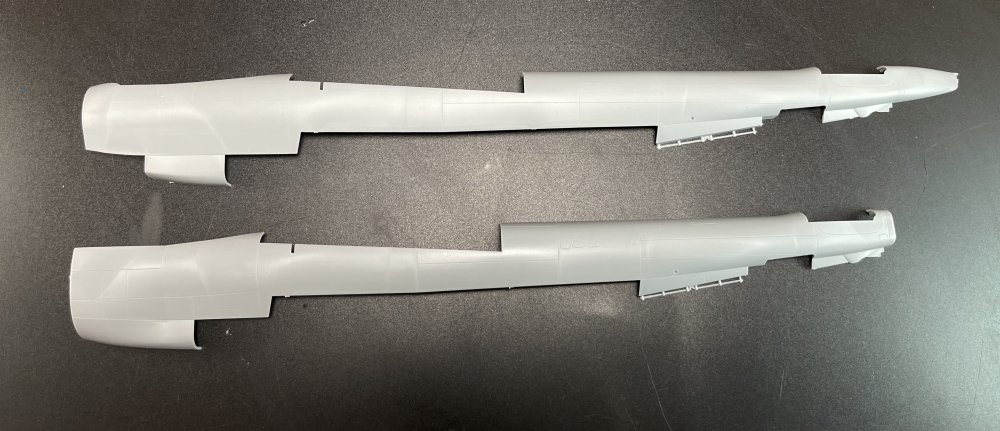
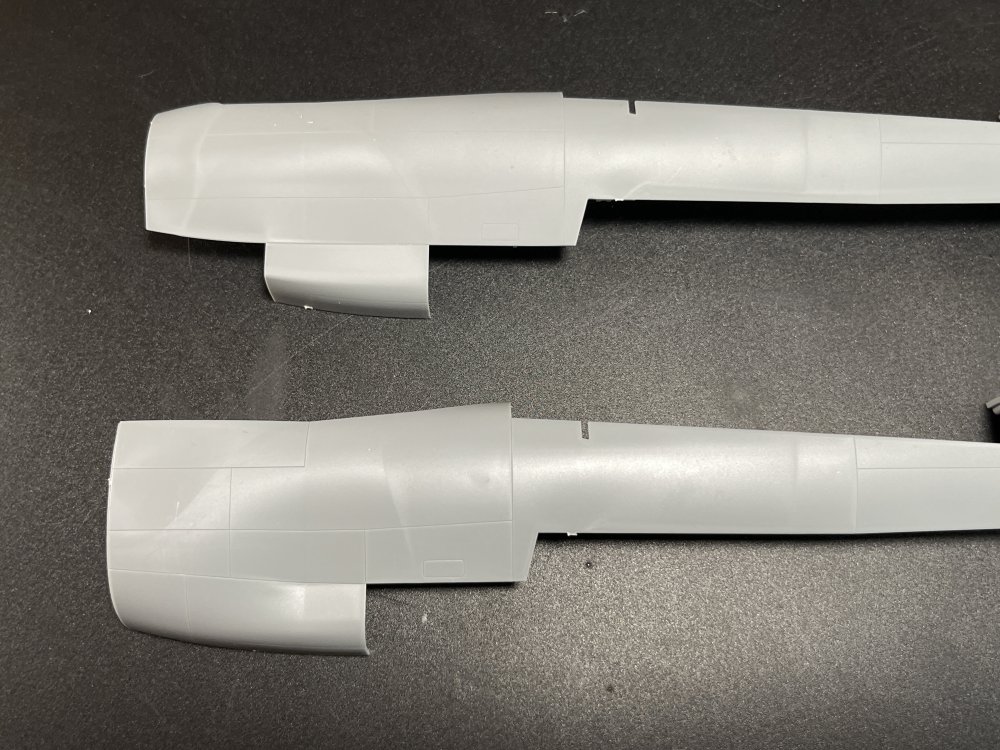
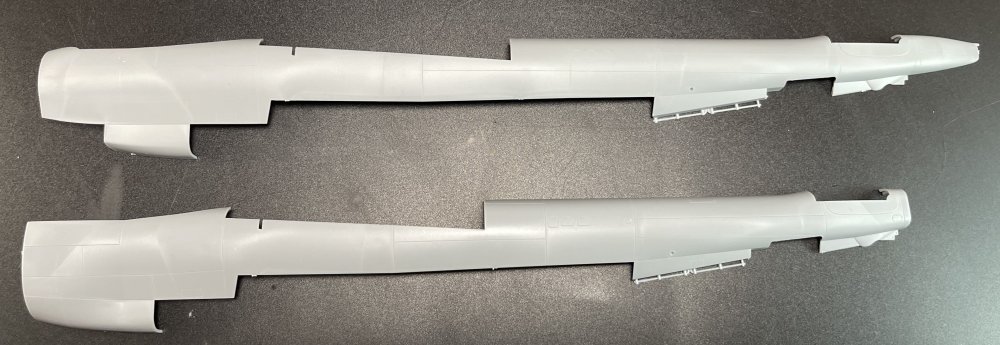
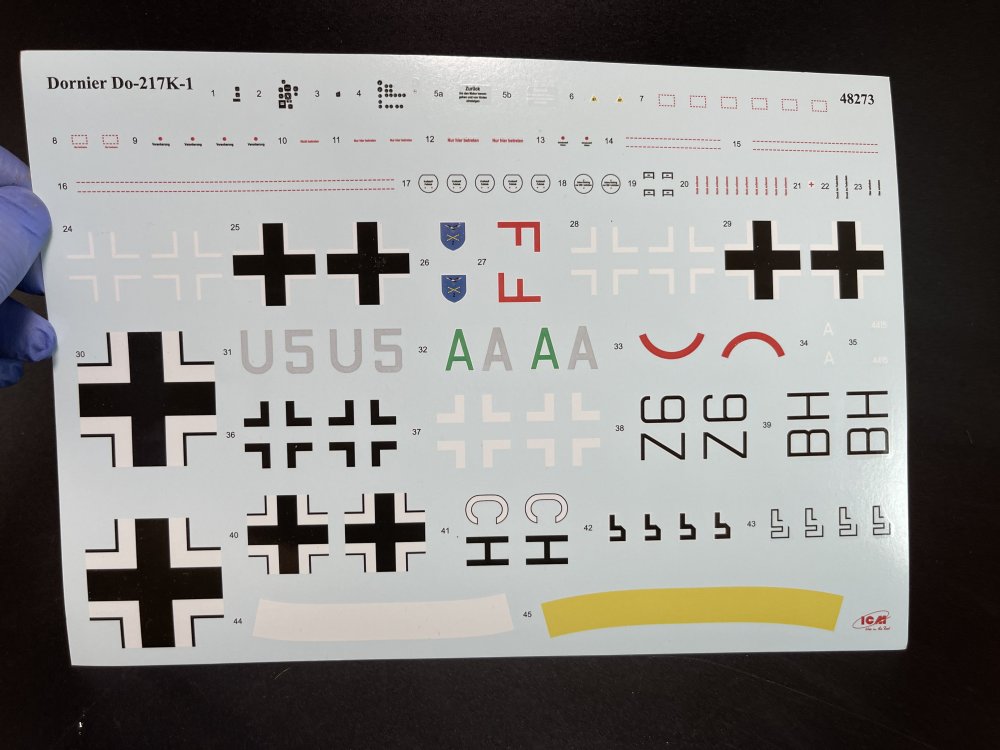
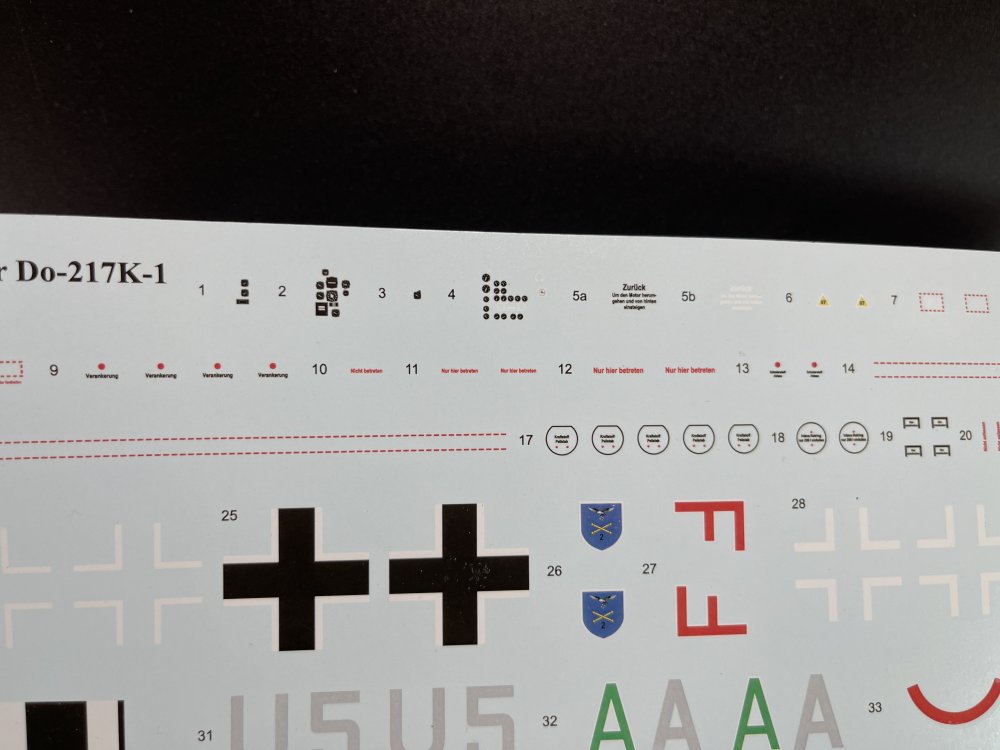
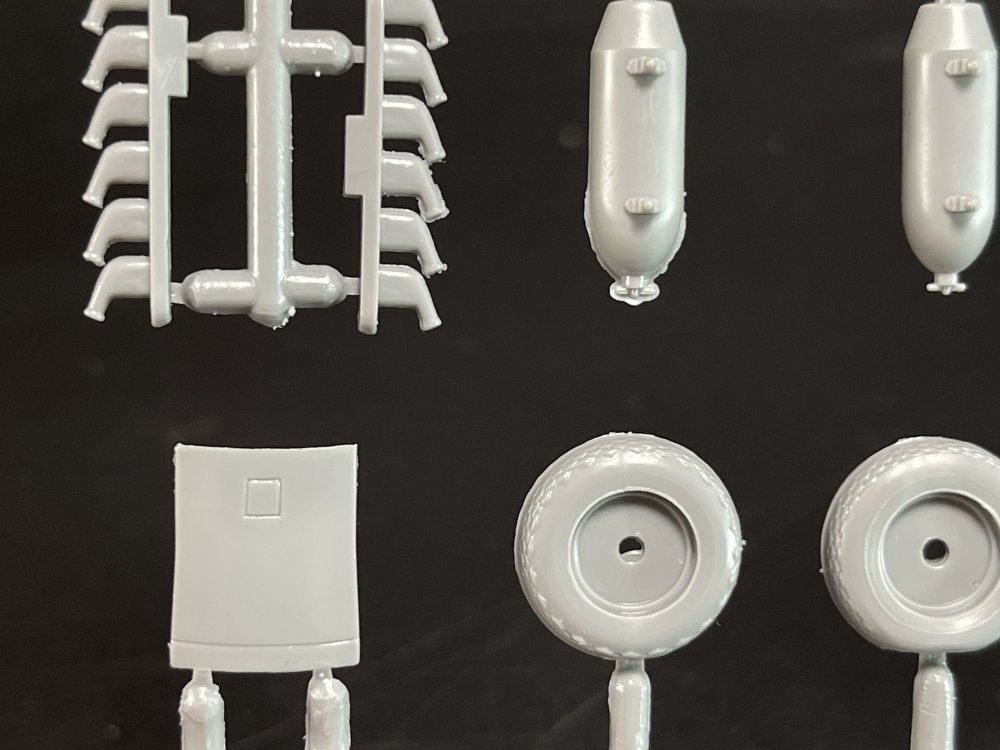
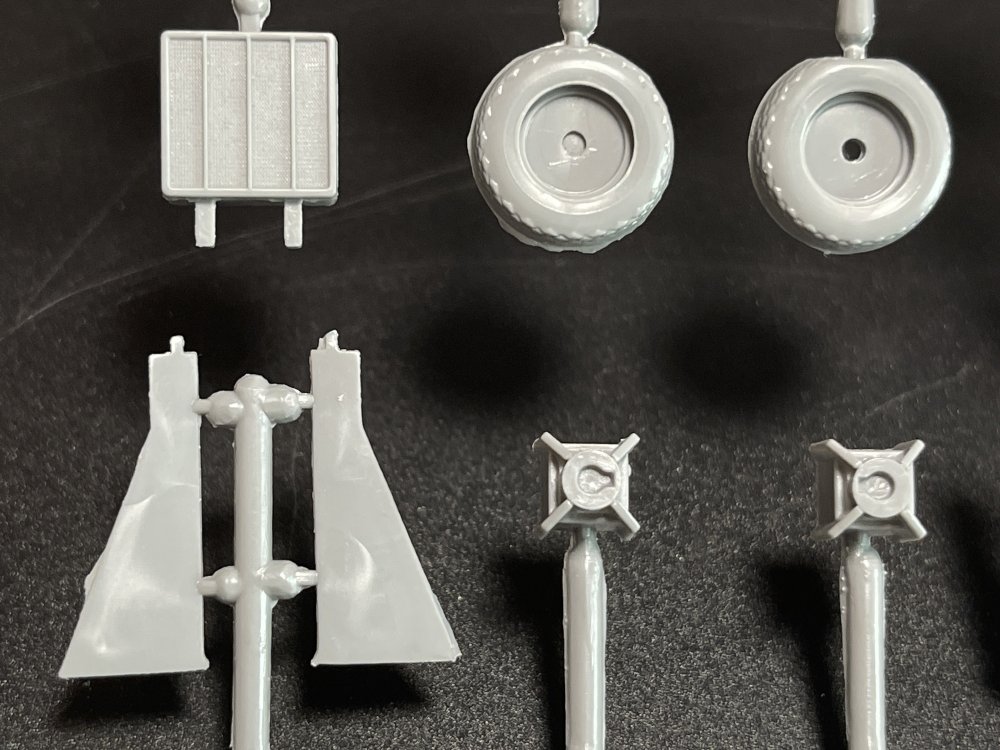
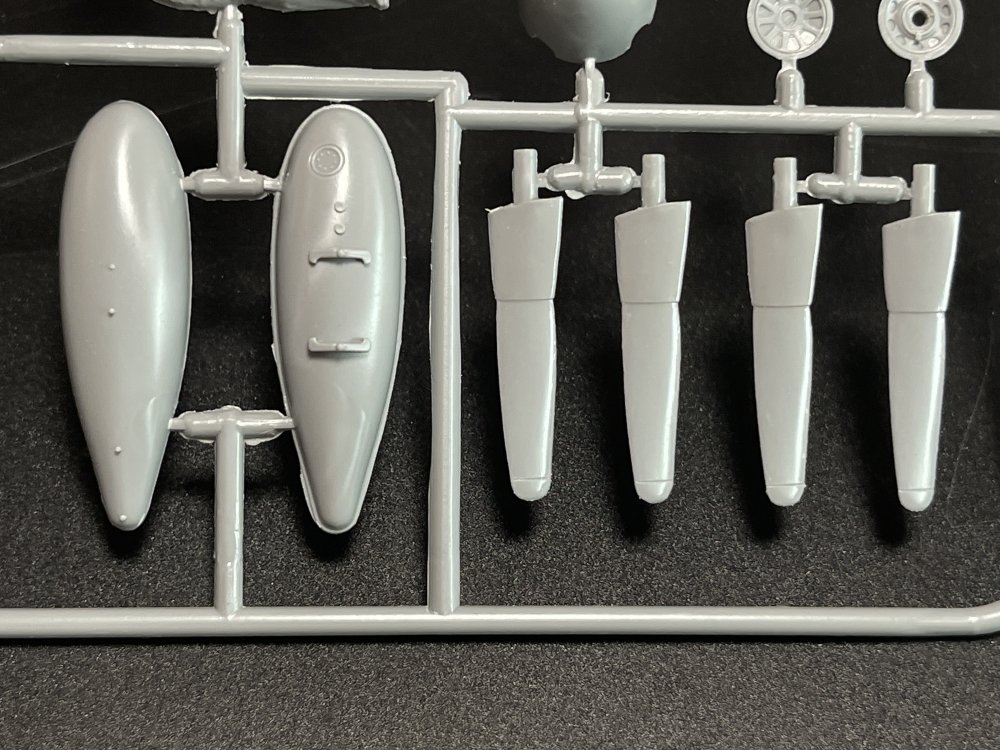
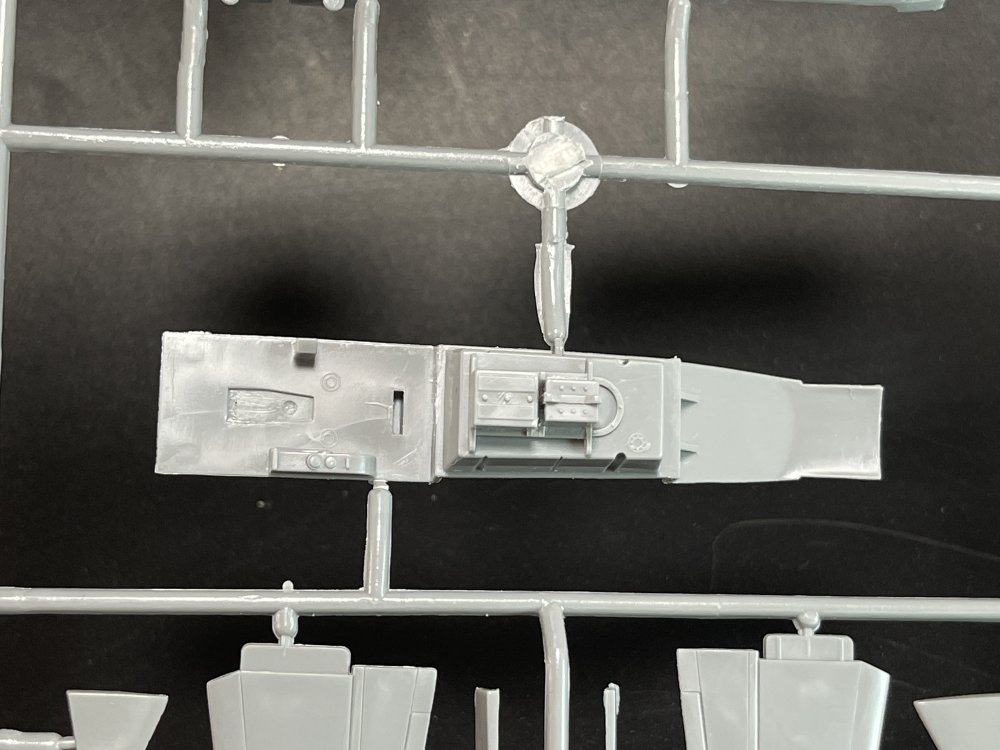
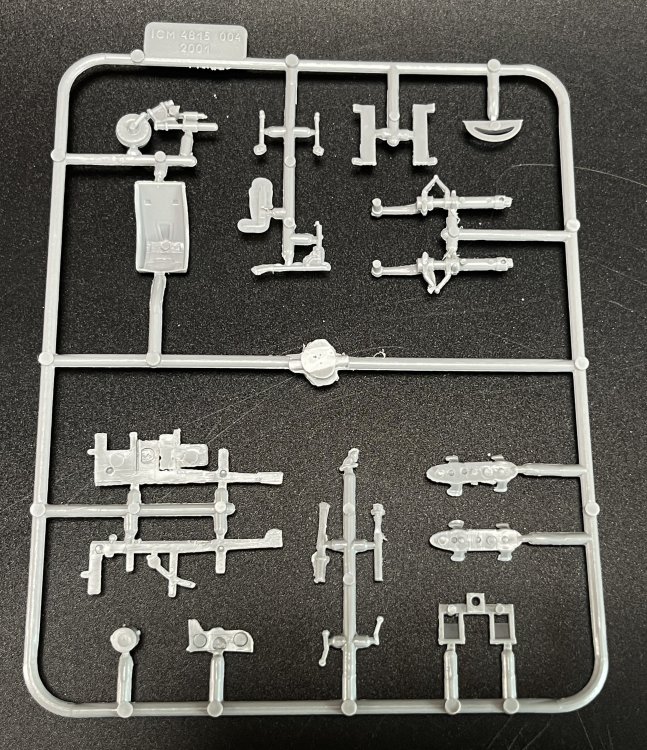
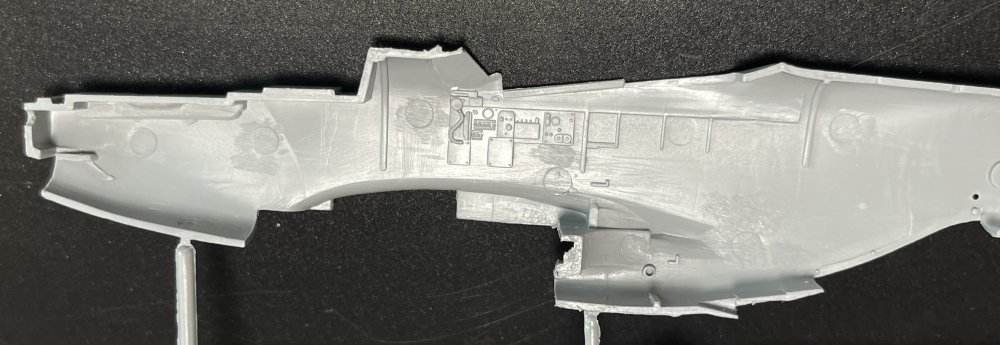
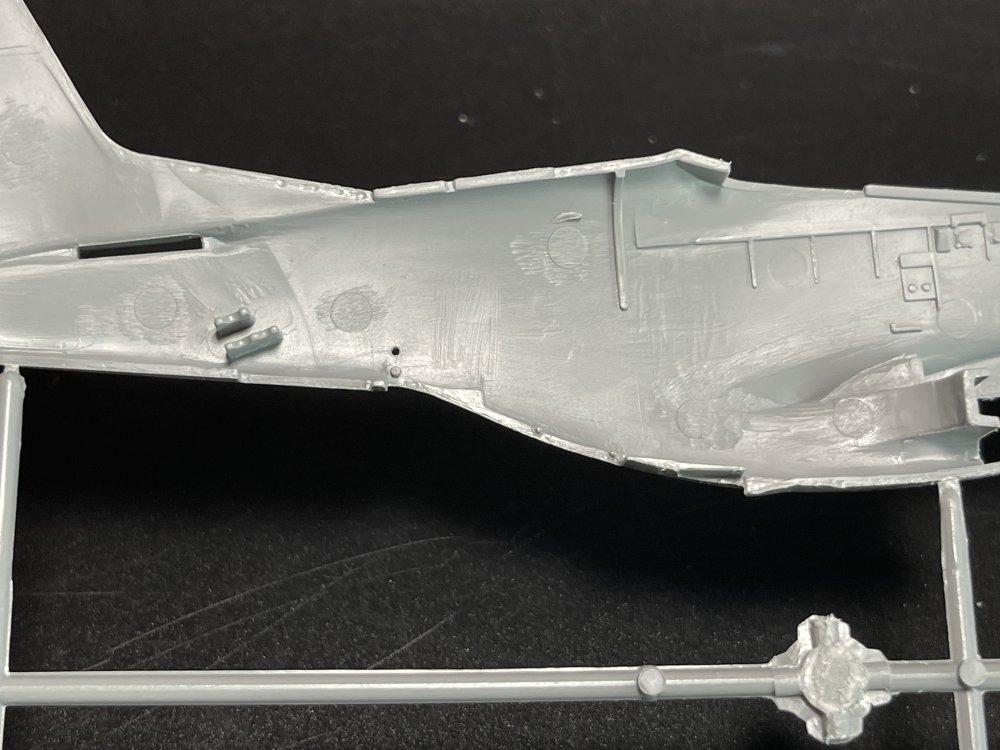
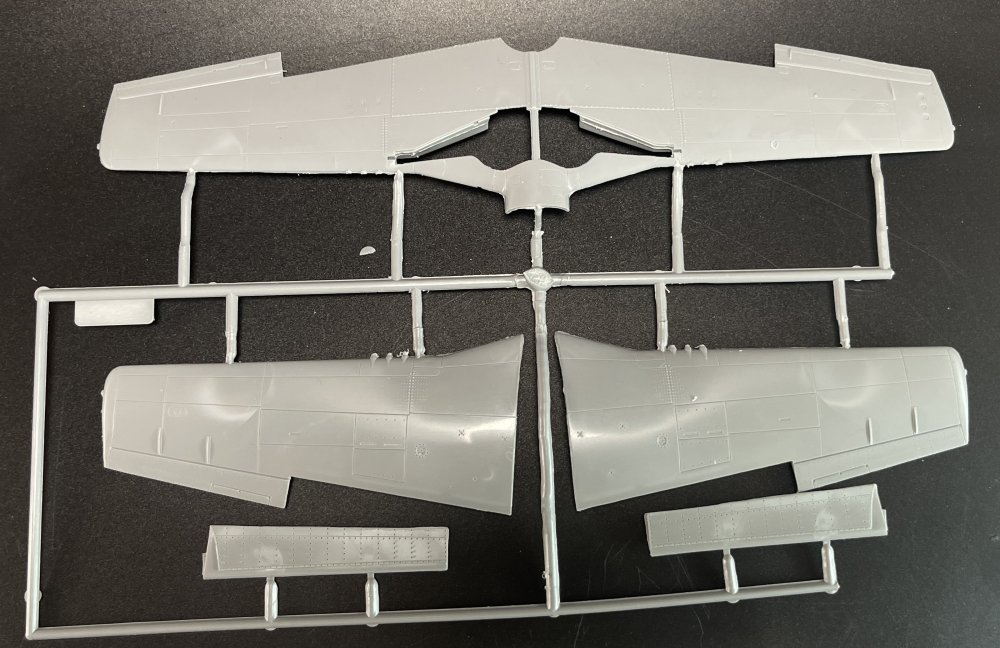
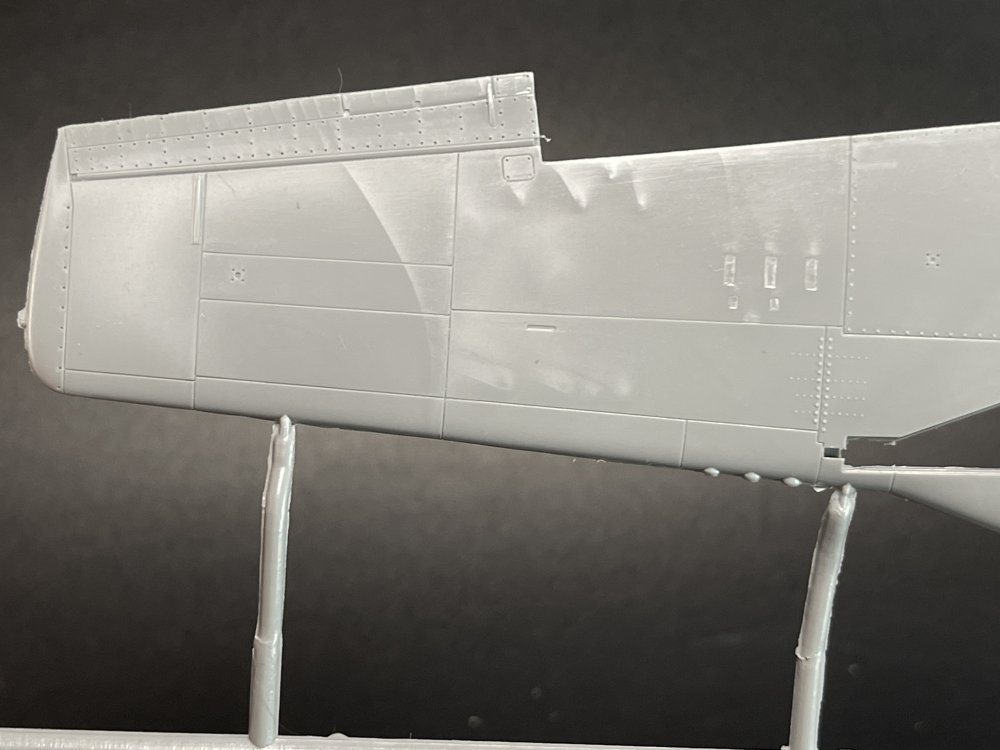
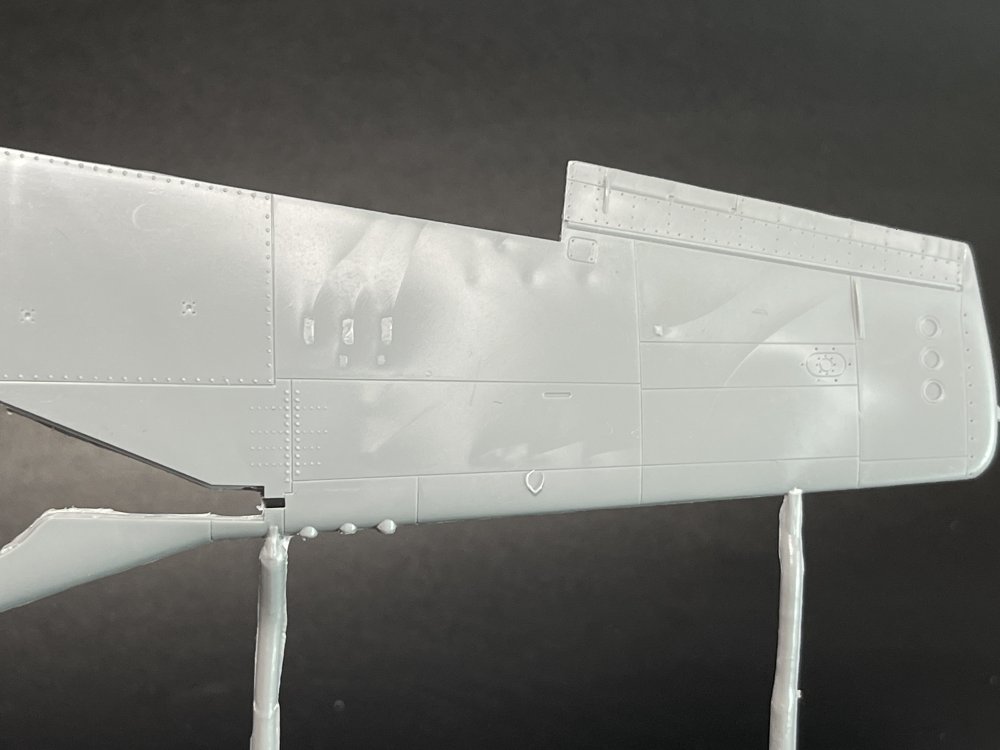
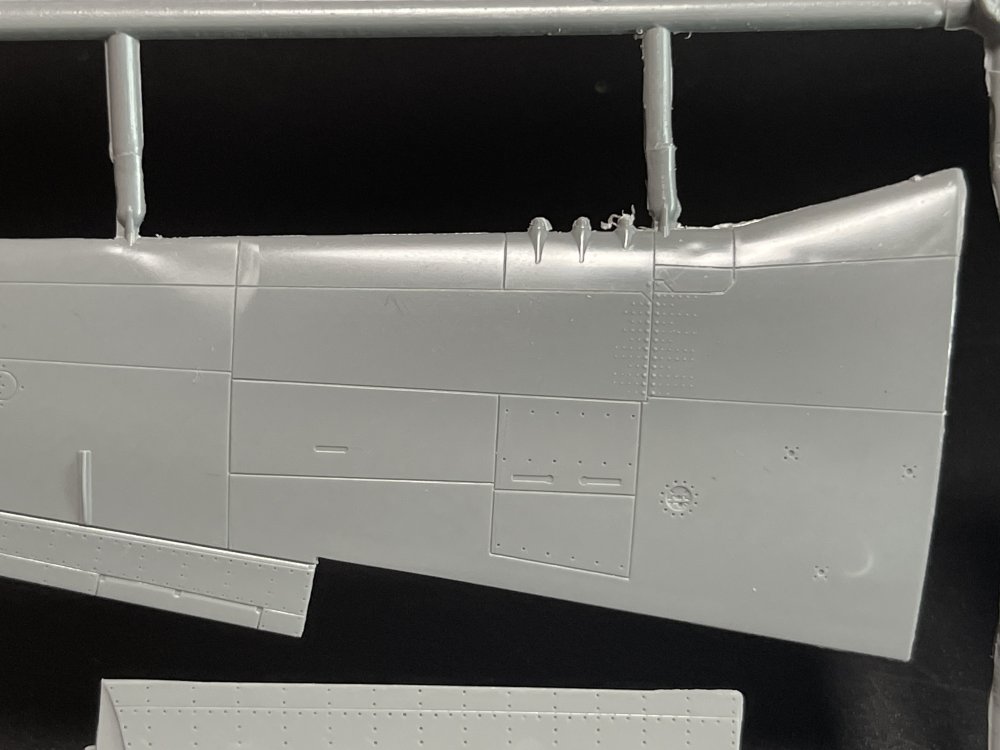
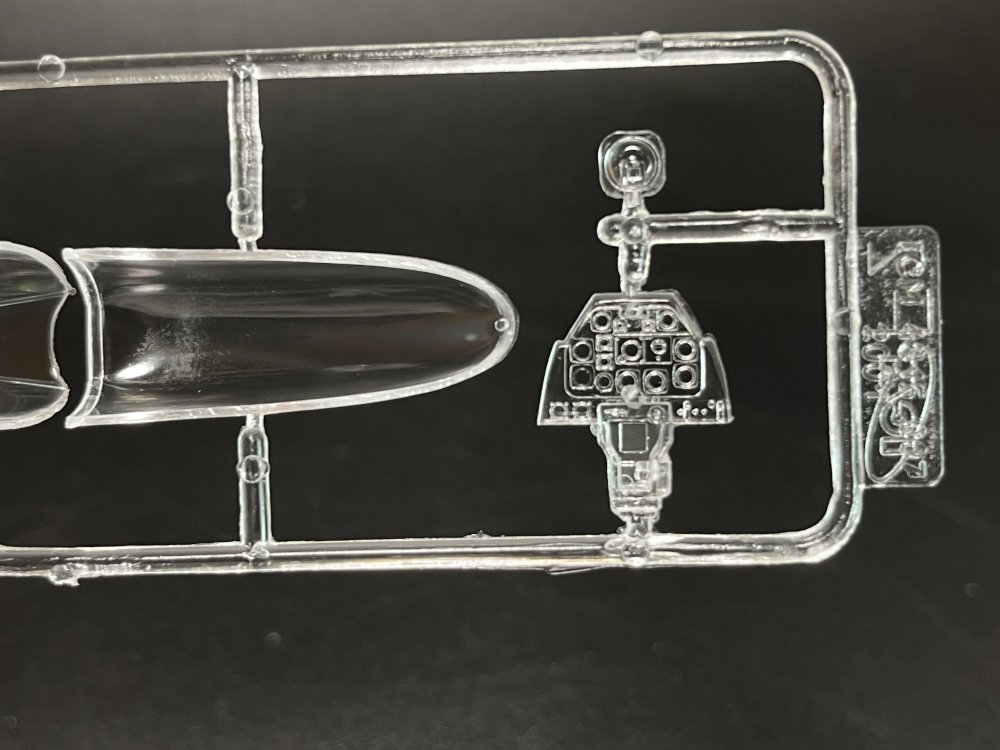
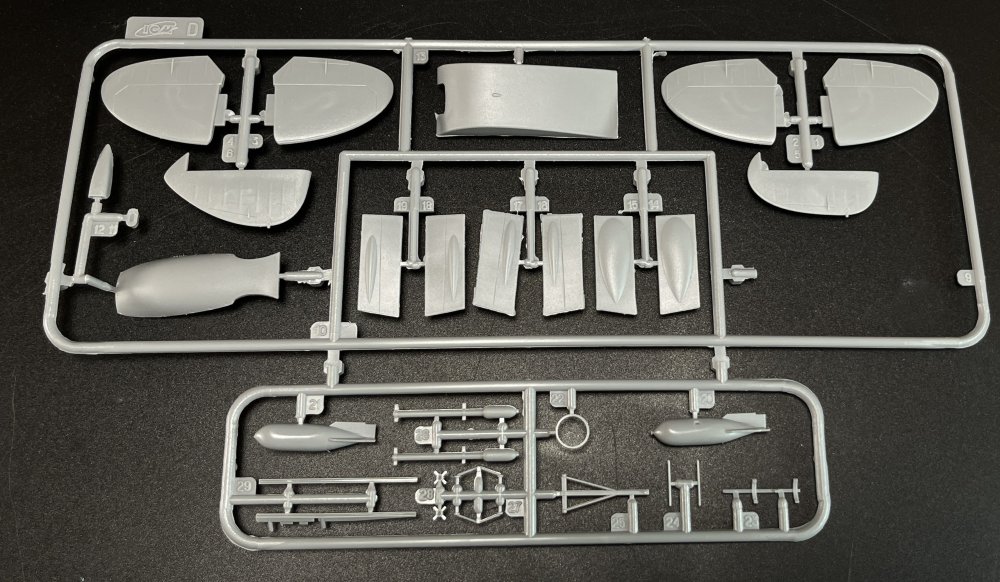
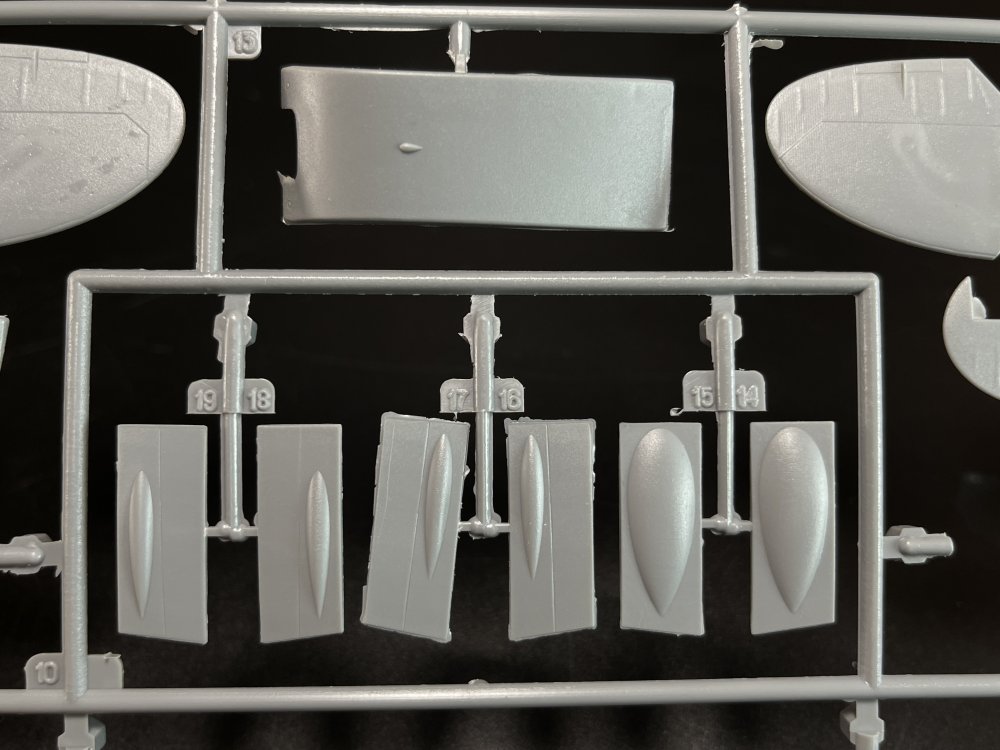
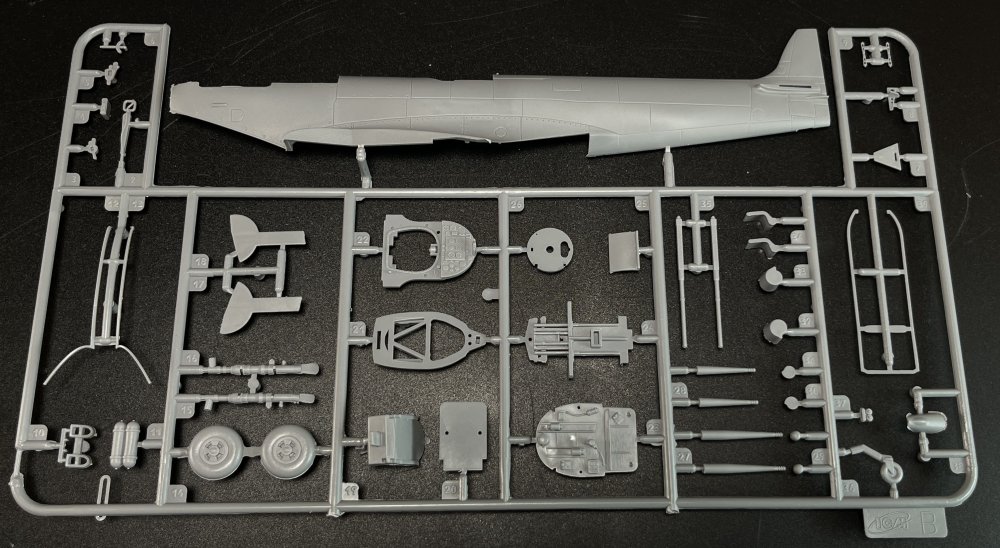
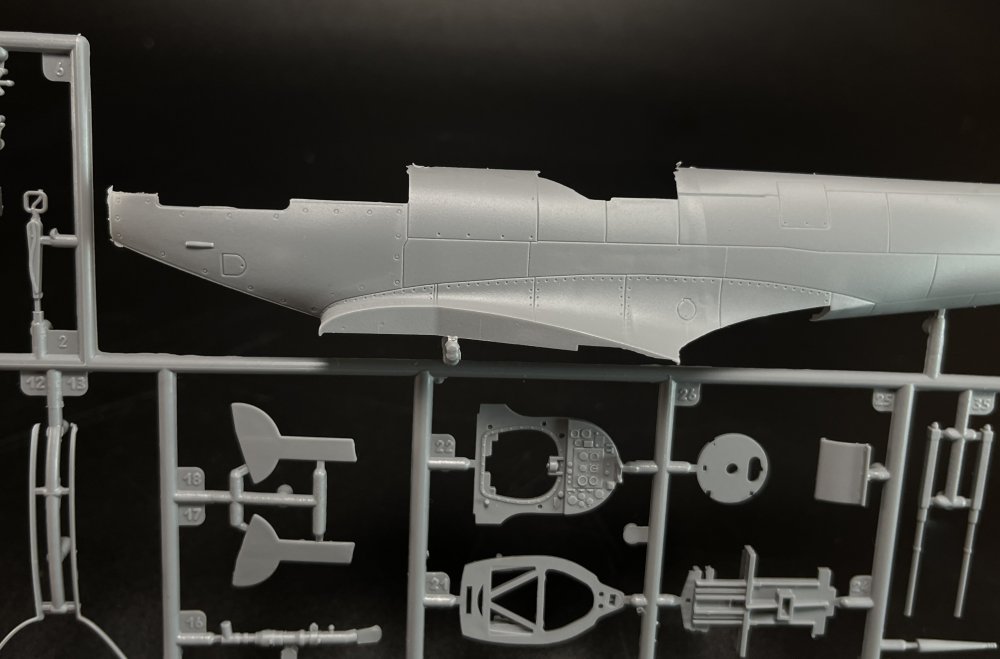
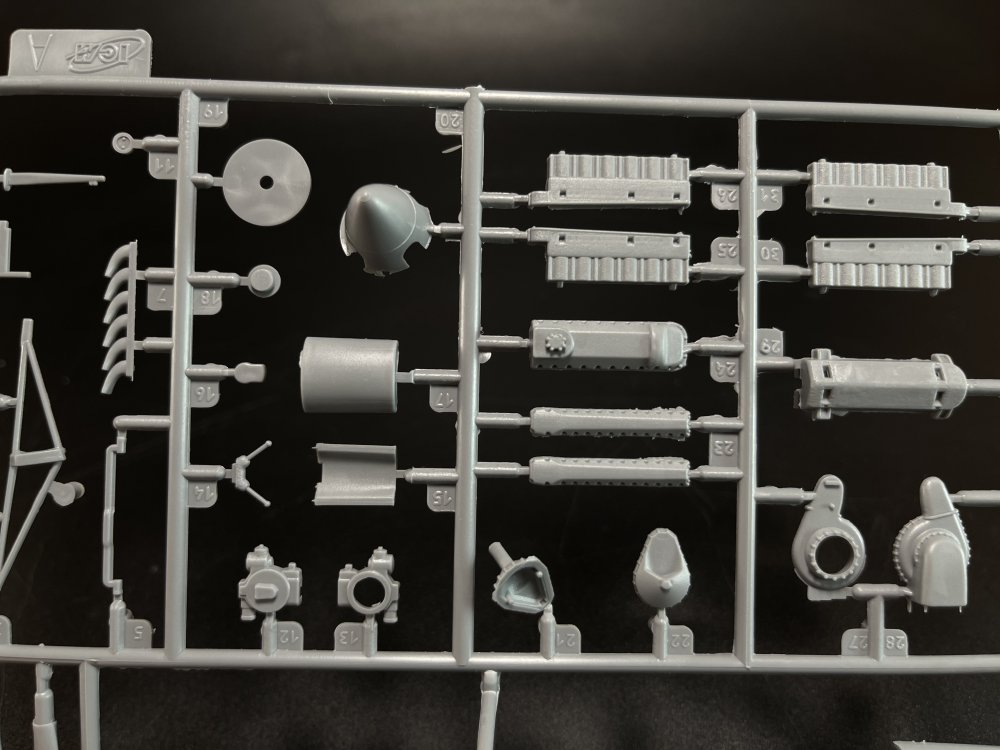
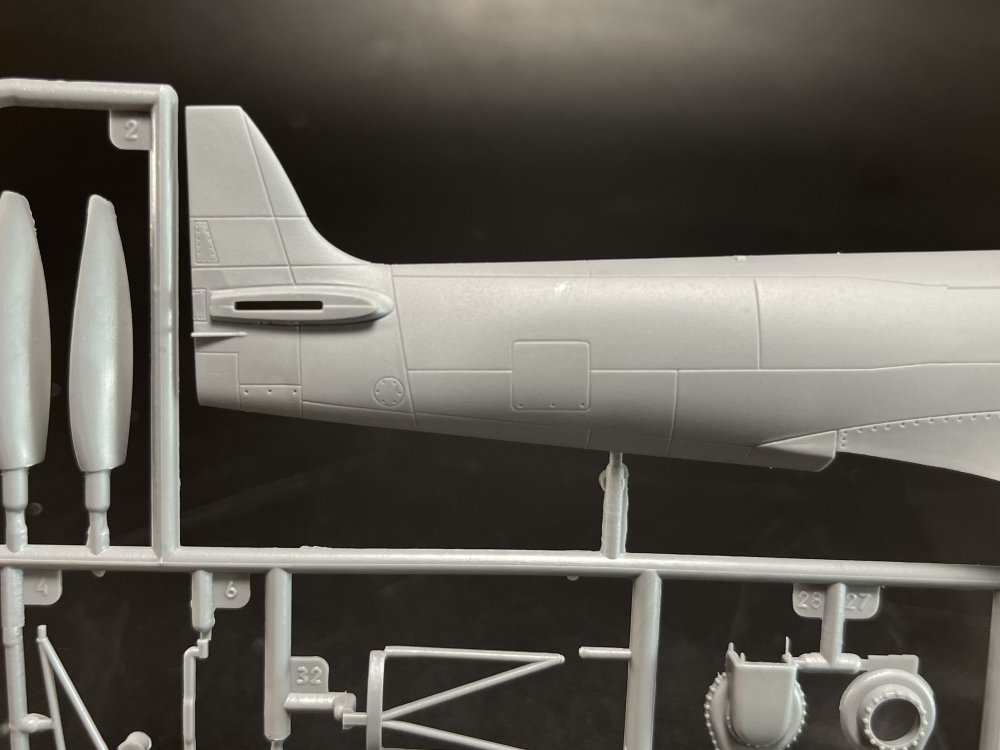
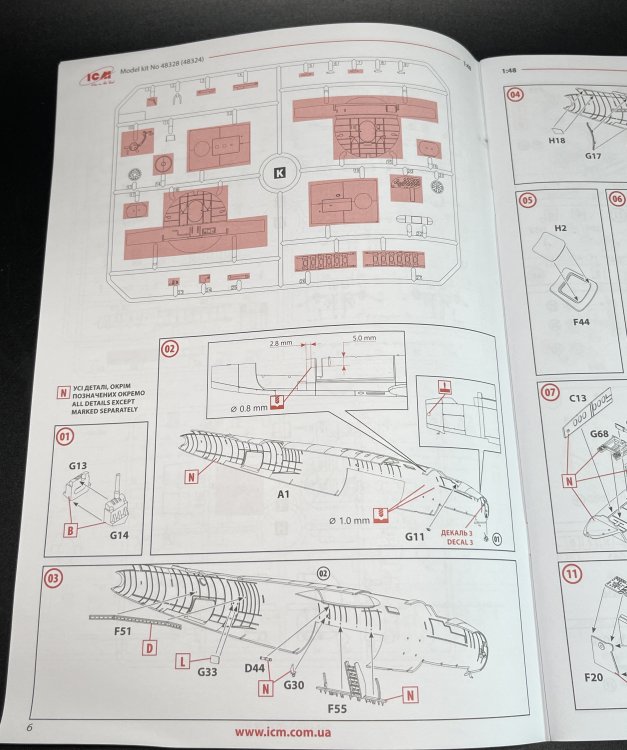
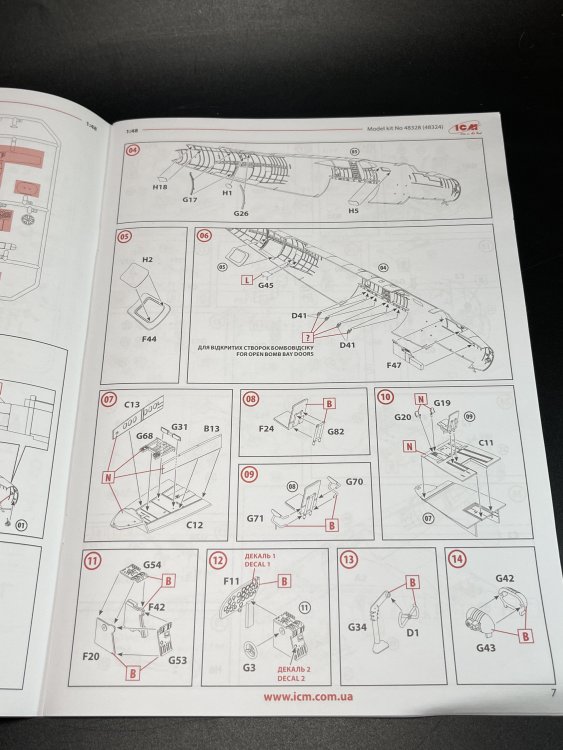
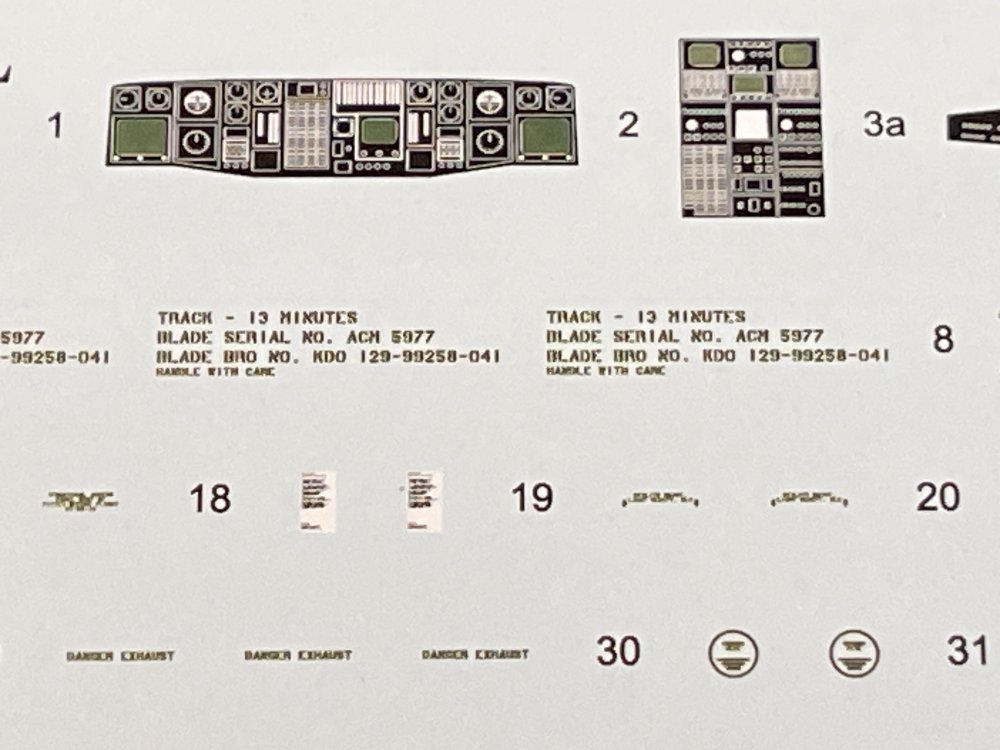
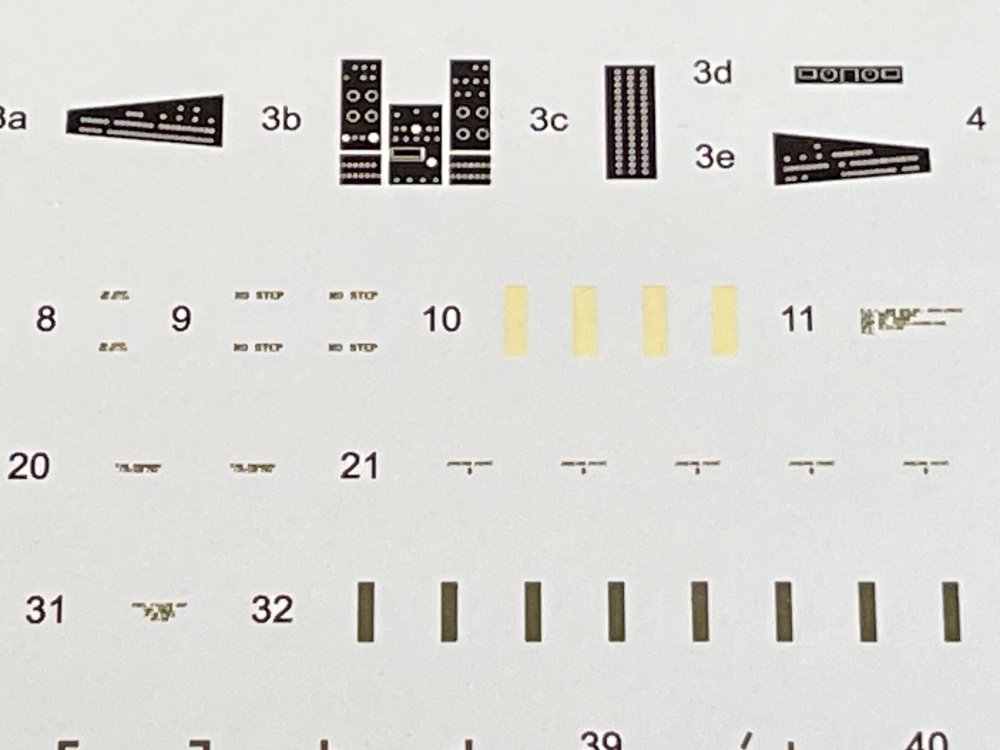
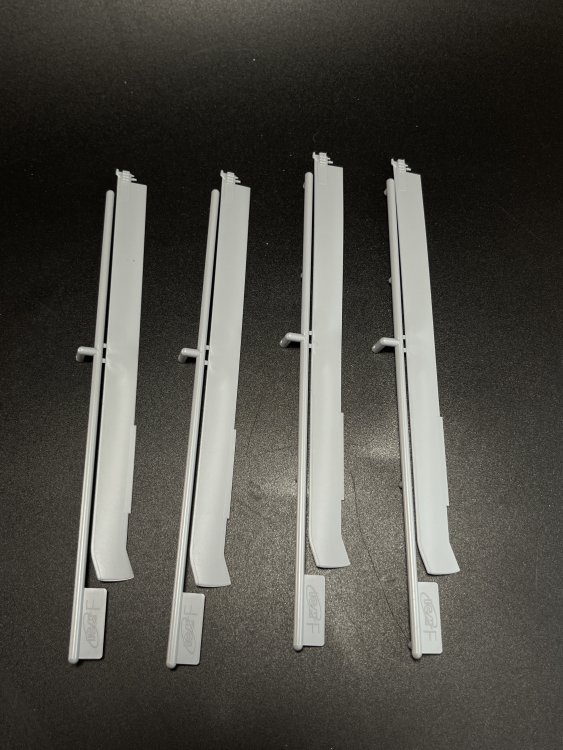
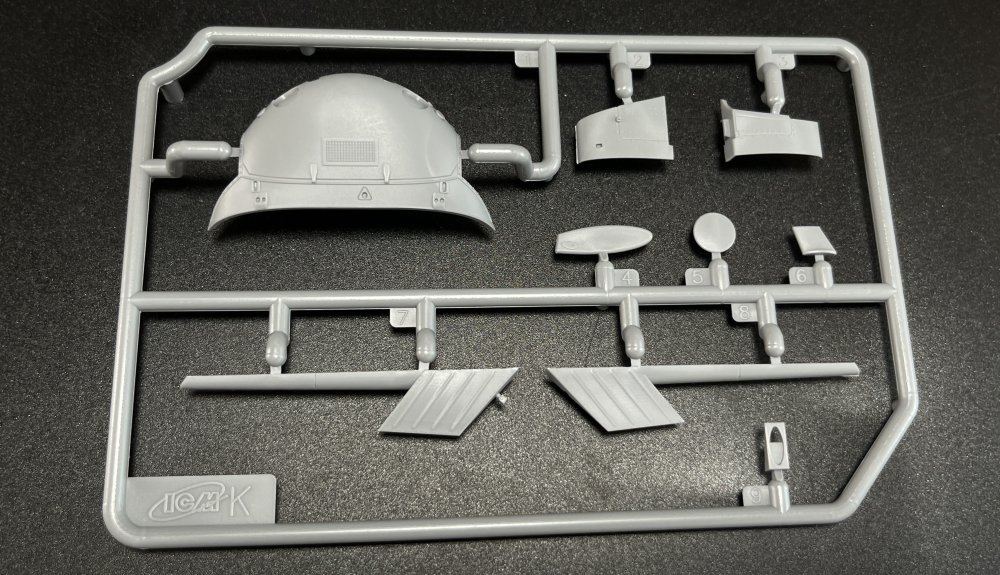
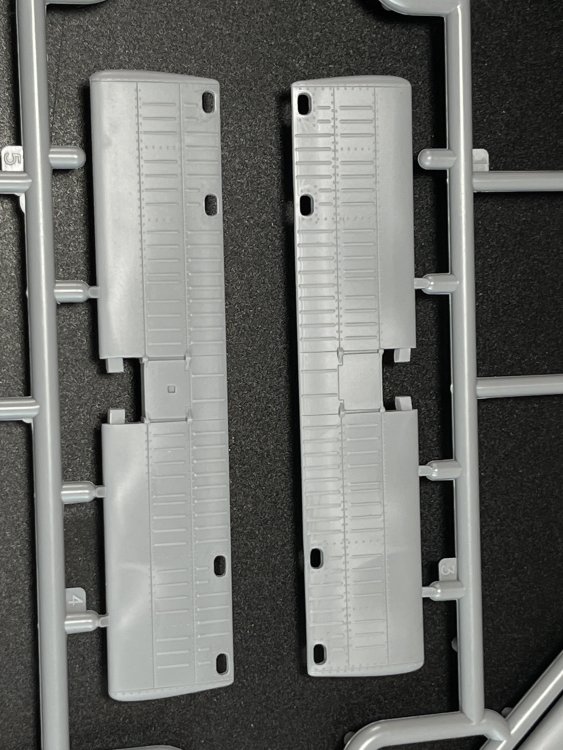
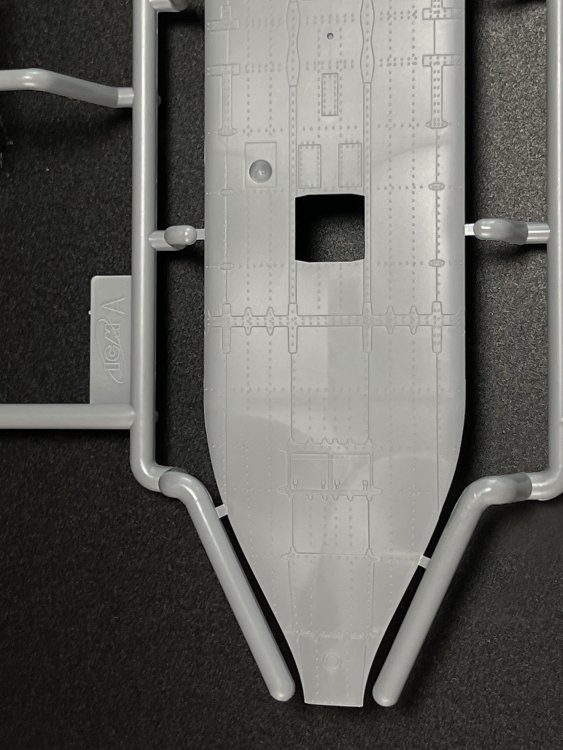
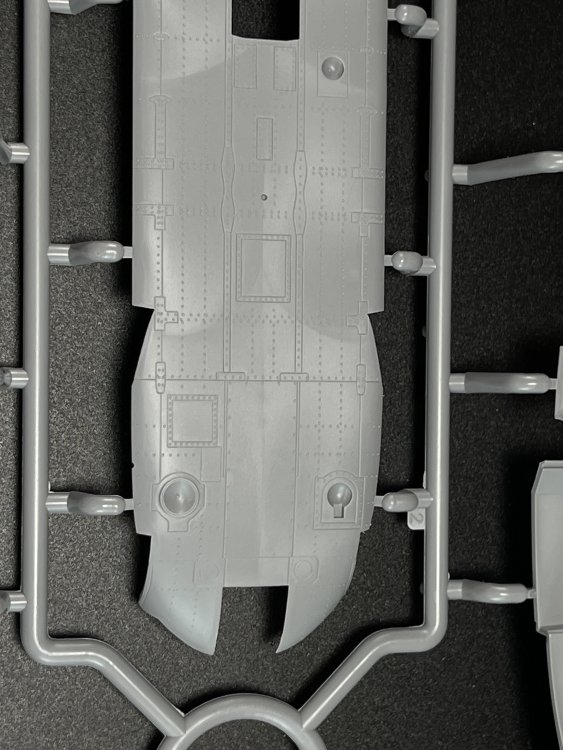
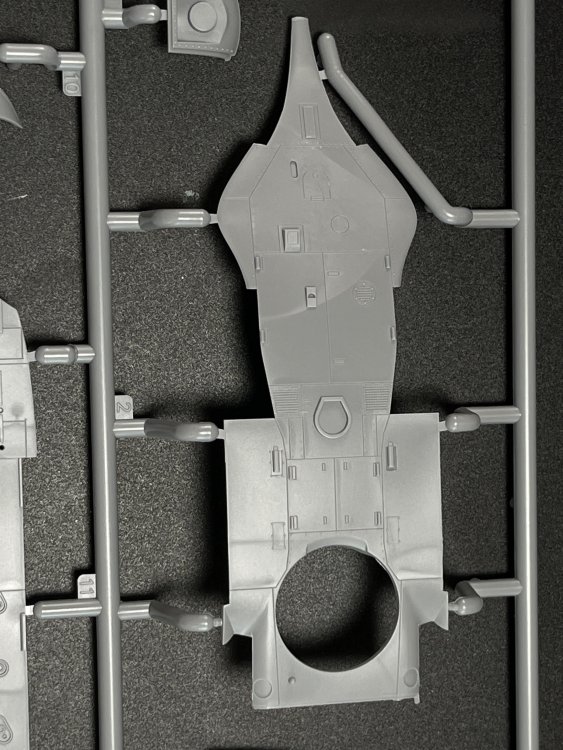
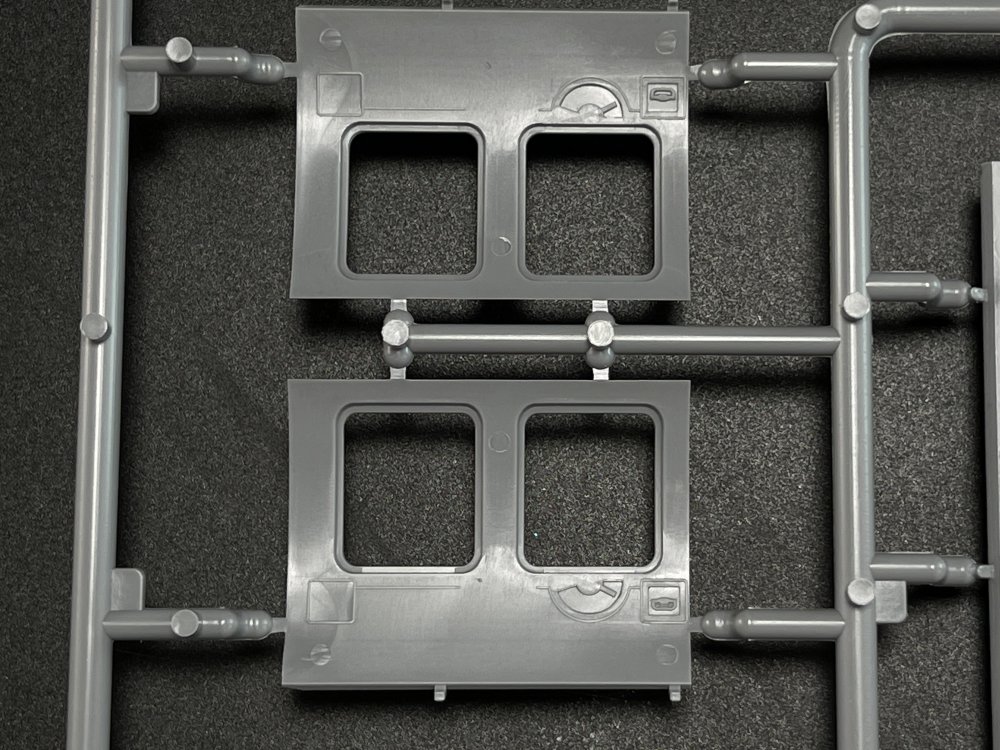
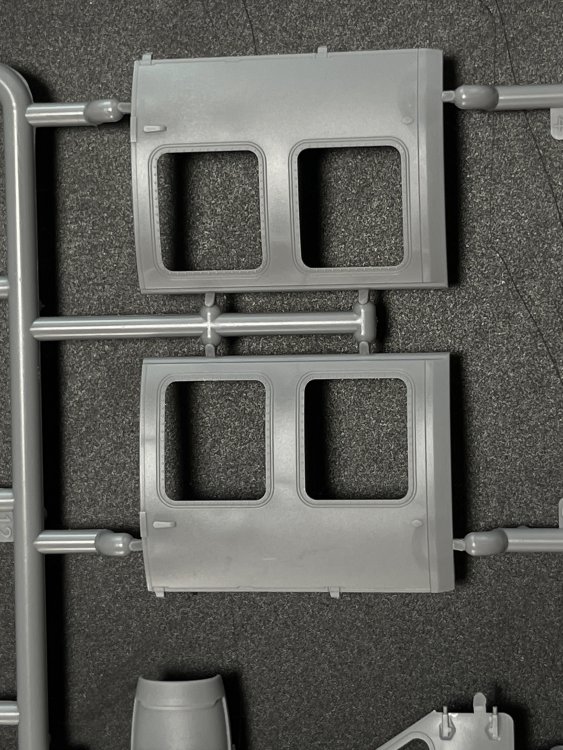
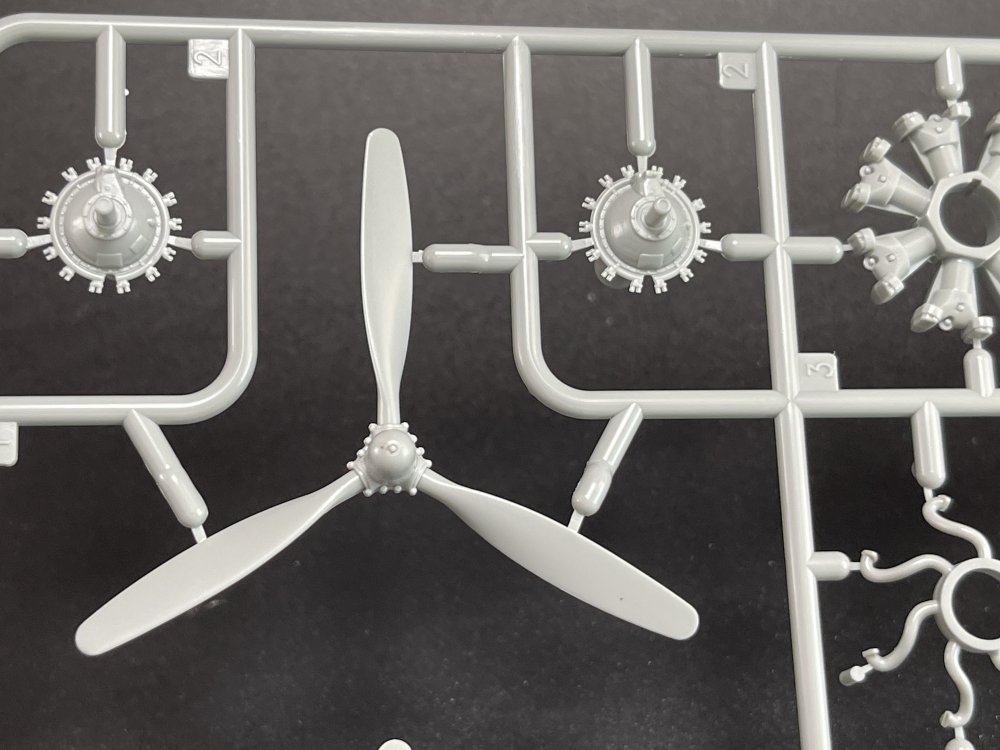
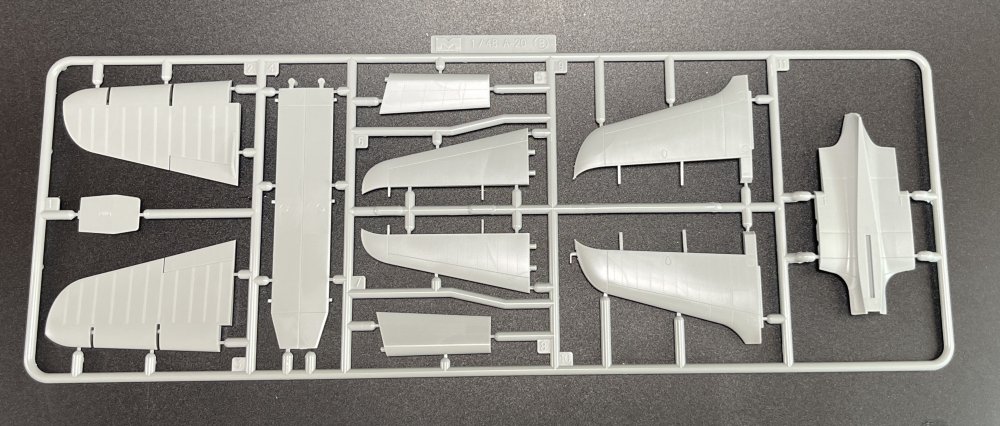
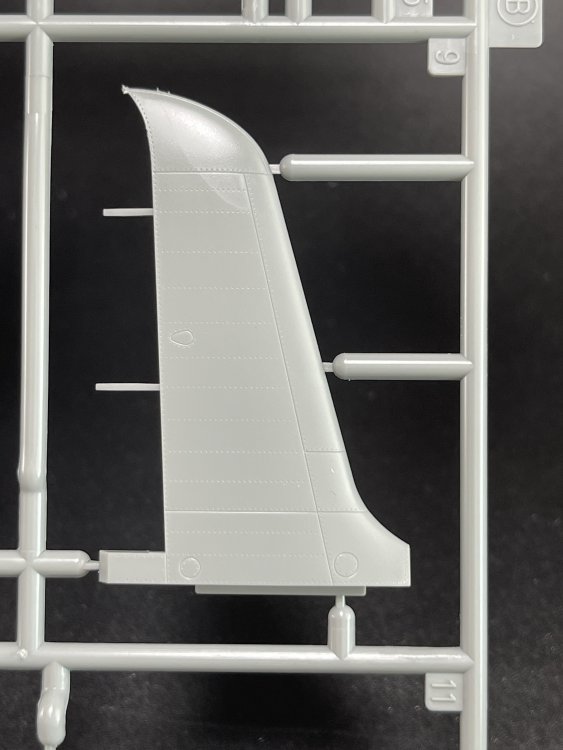
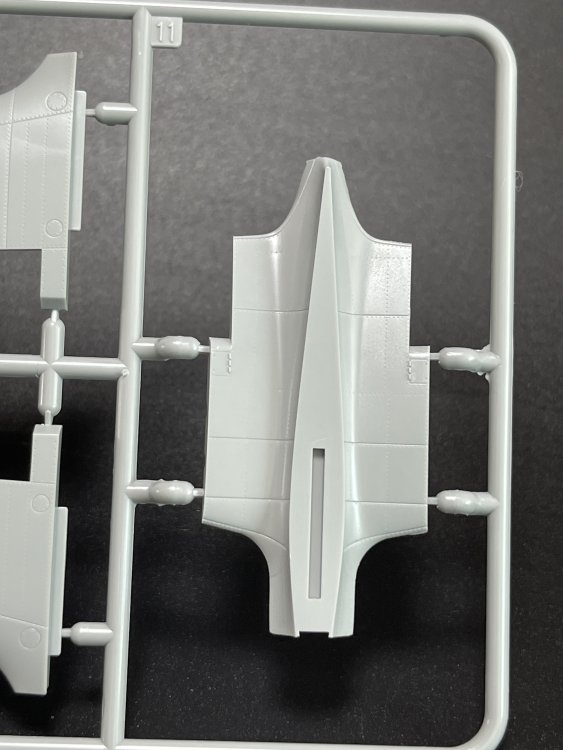
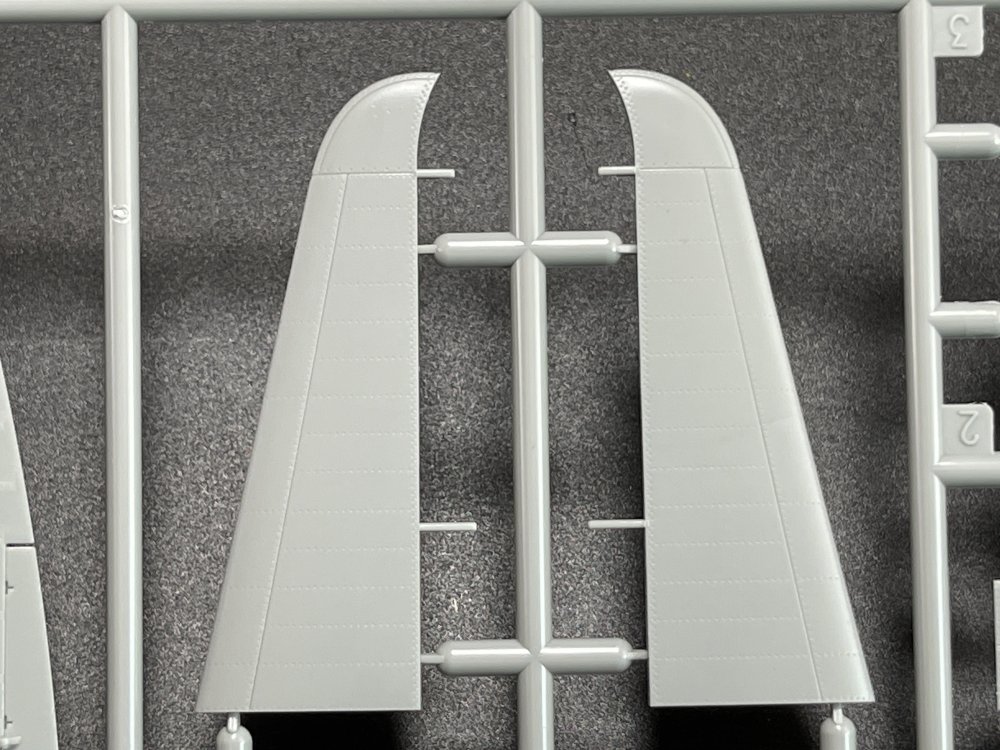
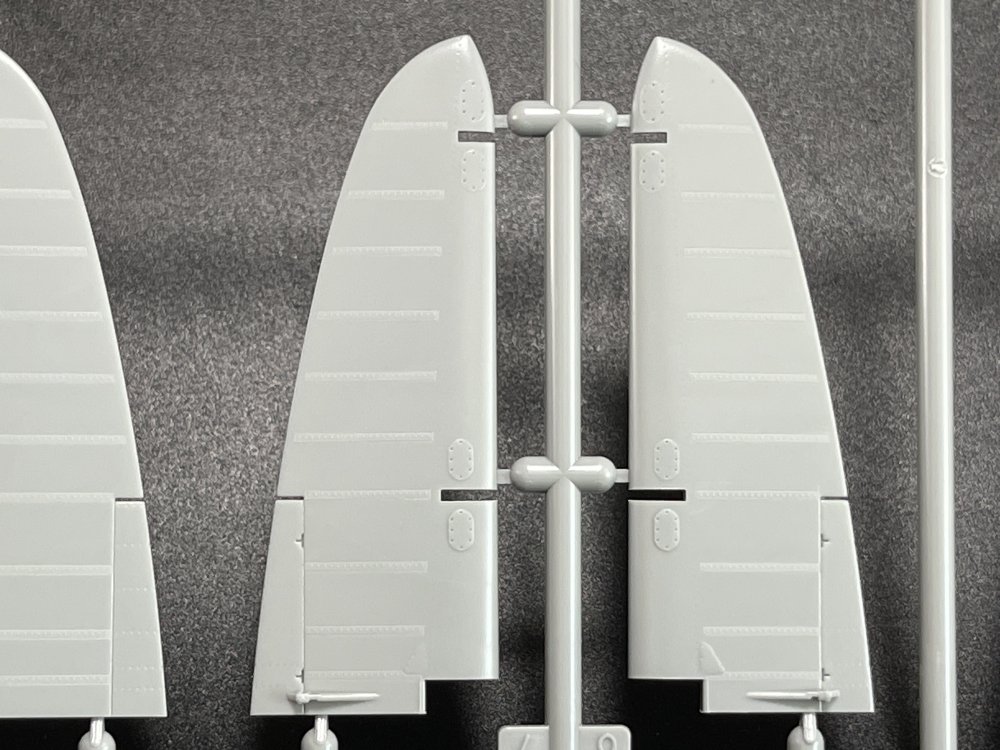
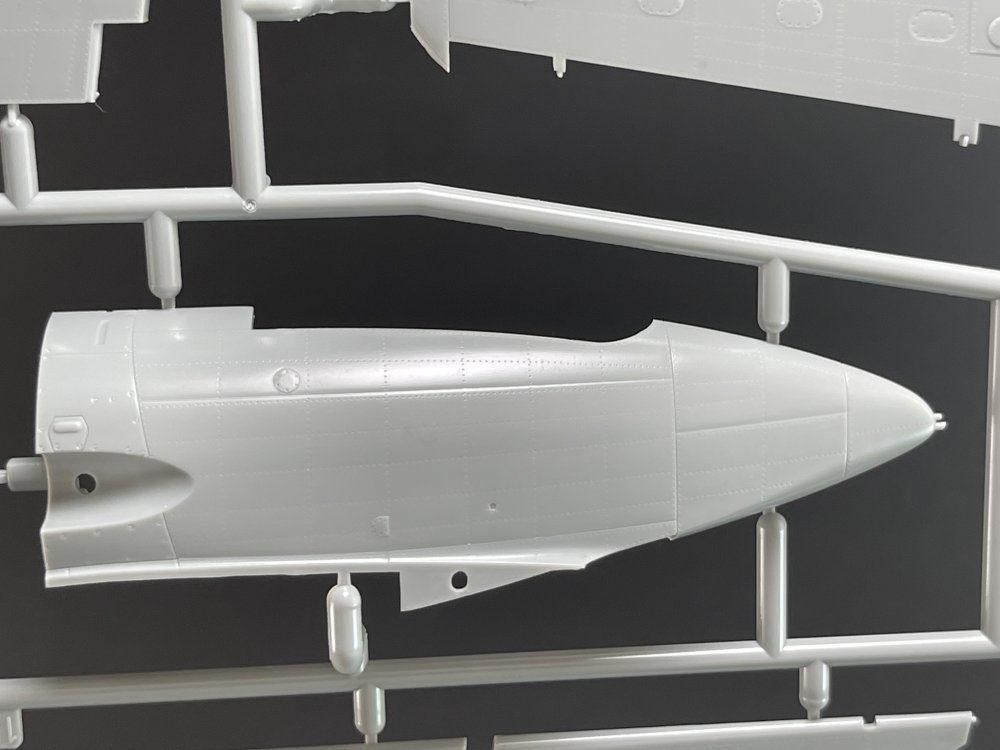
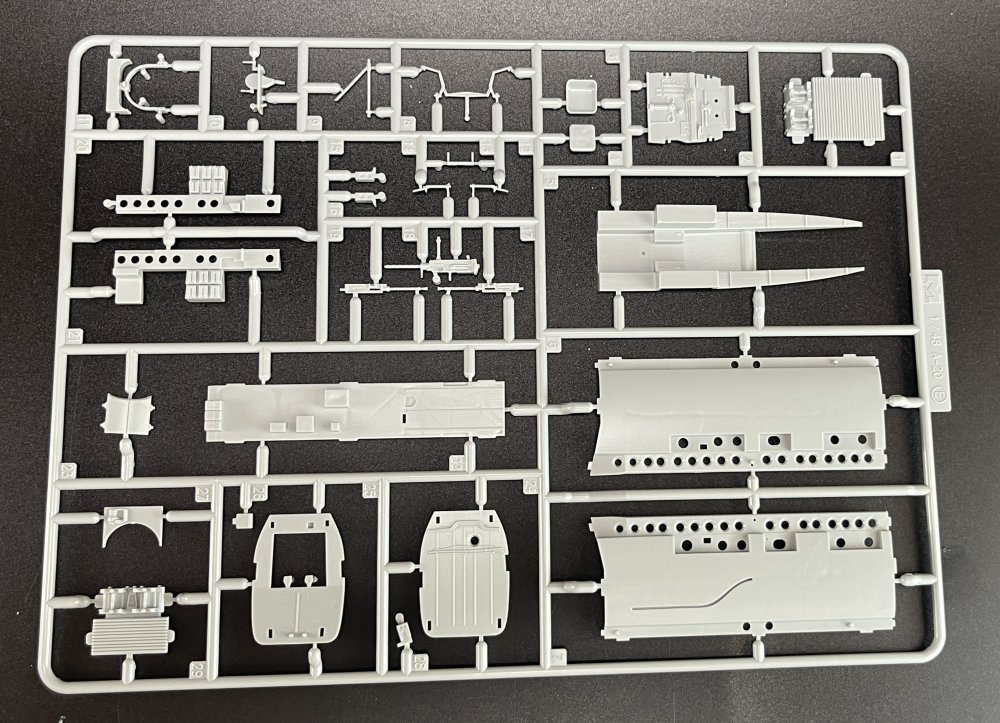
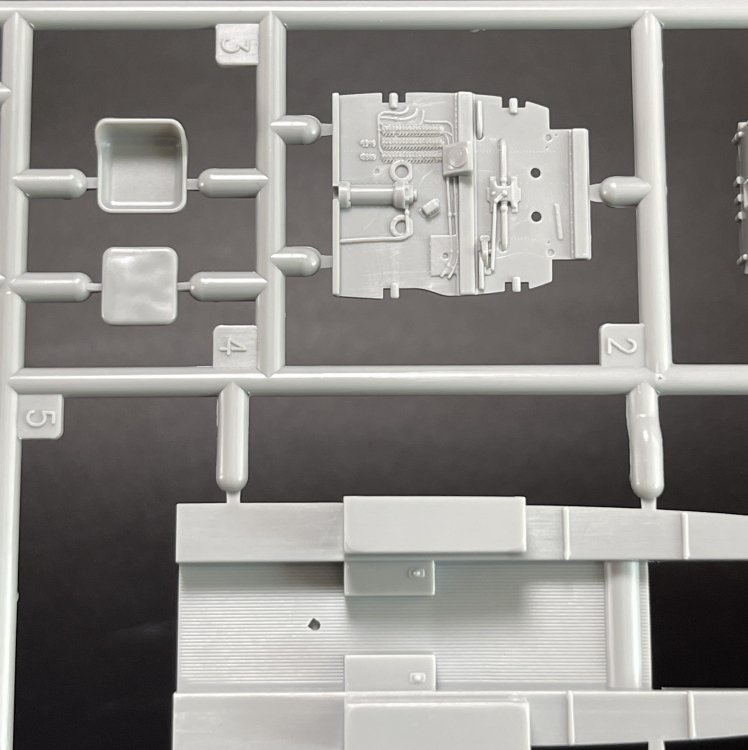
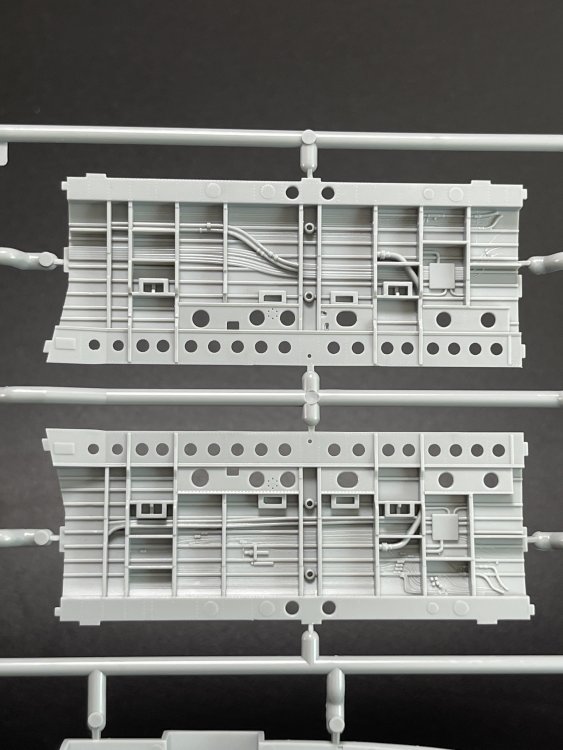
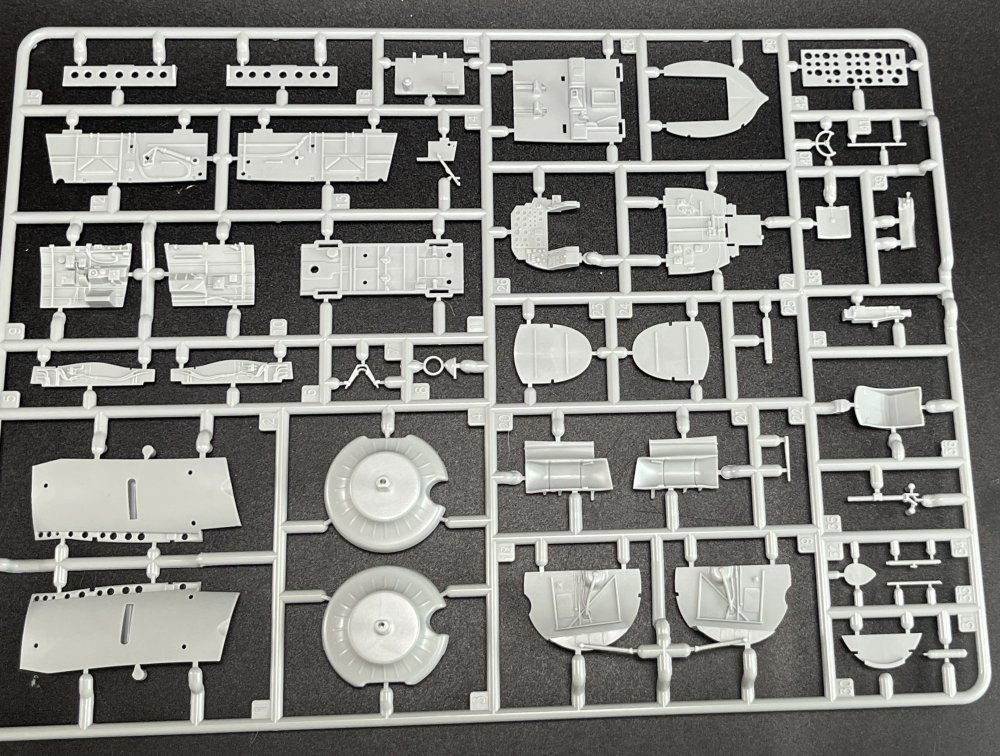
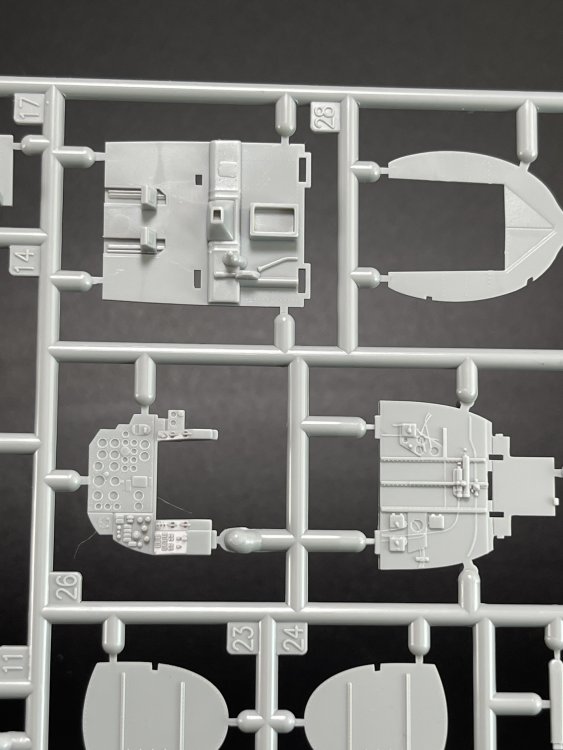
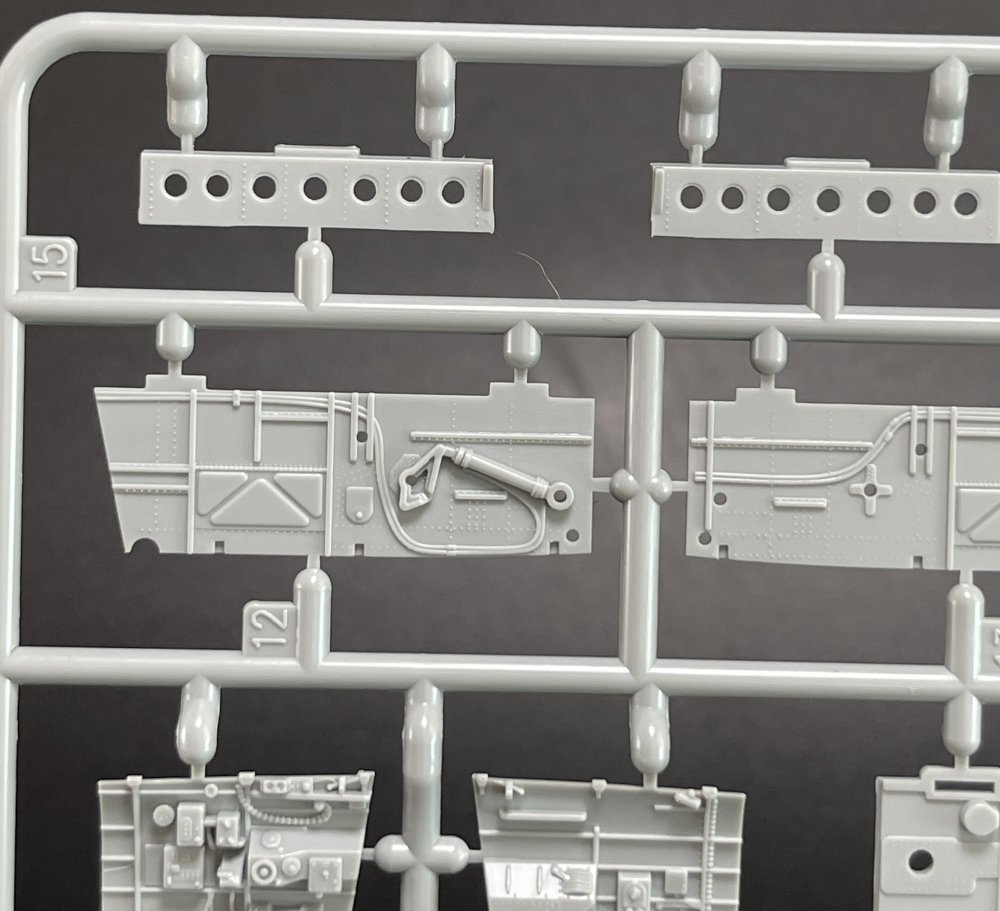
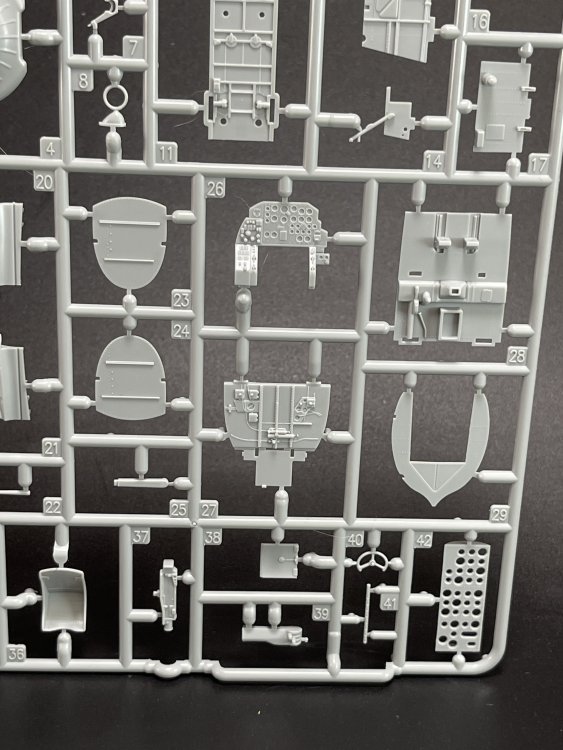
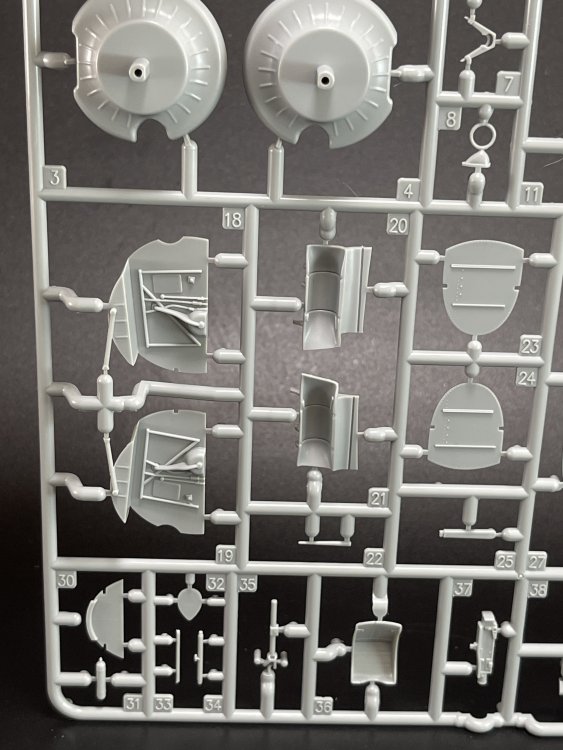
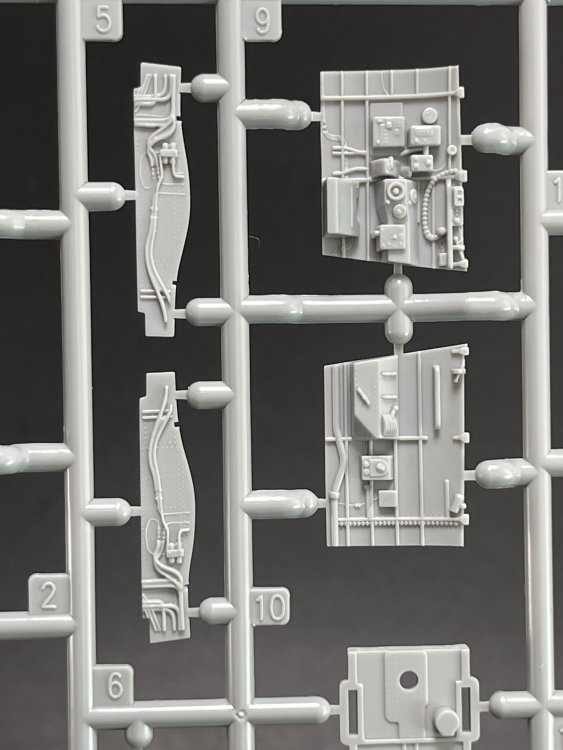
1:48 Dornier Do-217 K-1 ICM Catalogue number 48273 Price: around 64,95€ The Dornier Do 217 K-1 was a German medium bomber developed during World War II as part of the broader Do 217 series, which evolved from the earlier Dornier Do 17, known as the "Flying Pencil" for its slender fuselage. The Do 217 K-1, introduced in the autumn of 1942, represented a significant advancement over its predecessors, incorporating a redesigned, aerodynamically streamlined nose and cockpit to improve performance. The Dornier 217 K-1 was a German WWII era medium bomber, developed from the previous Do 217 E medium bomber series. Unlike the previous Do 217 E, the Do 217 K-1 nose and cockpit was redesigned and aerodynamically streamlined, resulting in lower drag and higher speed. The crew of five was sitting inside the new fully glazed canopy. Compared to the Do 217 E the defensive armament was redesigned as the forward firing 7,92 mm MG 15 machine gun was replaced by twin MG 81 7,92 mm machine gun and the rear facing MG 15s were replaced by a single mounted MG 81. The offensive armament was removed. Maximum bombload of 4000 kg of bombs either in bomb bay or on external racks under the wings remained unchanged, although a single SC 1800 bomb could now be carried inside the bomb bay. The first Do 217 K left the factory in September 1942 and served throught the war as night bombers and against enemy shipping. The Do 217 is faster than most of other bombers it will meet in battle, being capable of taking out up to four bombing points when utilizing the Flamm C250 incendiary bombs or up to four bases utilizing the four SC 1000 bombs, depending on the maximal battle rating of the said match. Do 217 K is also very capable due to its heavy bomb load and the powerful SC 1800 bomb containing 1000 kg of TNT eq. and 30 metres wide destruction radius. Do 217 can also be used in naval battles as it comes equipped with a pair of F5W torpedoes with 3 km range and 300 kg TNT eq. However these might prove hard to use as the Dornier have to slow down to sub 301 km/h making it an easy target for the naval gunners. Despite being a bomber, the Dornier is also quite maneuverable with maximal structural limit being 700 km/h.[1] Just a brief history for a very well know aircraft. So, let`s crack the box to check one of the most wanted and eagerly awaited model of the year of ICM catalogue. The usual ICM flip top cardboard with a separate card lid showing the artwork. I like ICM artbox, they are quite good. Not my favorites but I like them. Inside you have sprues separated in two plastic bags and the clear parts in another bag and full protected. Opening the box, you get a total of 13 gray branches and two clear branches. The clear parts are individually packaged in protective bags. There is a lot of parts in this box that you will not use. The C and D sprues you will use less the 30 % of it. There are also same parts for the night version, that I check the instructions of it (as I don’t have the J version). Is the sprue H for engines, cowlings, and propellers is exactly the same for their radial engines. But let’s check it all. The first big thing here is the clear parts. This version has its one clear parts (the sprue J) as that is obvious considering the huge front gondola and the upper canopy is also new. The clear parts are perfect! Even in this shape… As usual are pristine and very clear with no distortion at all. Sprue K is also completely new and brings the two new fuselage halves as the largest parts, including parts for the interior, the armament and the fuselage tail. As we have both fuselage for the night fighter and this version, we make a little comparation. As you can see, the new fuselage is shortened at the front to accommodate the new full glazing, and the rear can be equipped with two different versions. You get both fuselages. It’s a totally new mold for the fuselage. Kudos to ICM The cockpit is quite big and there’s a lot of glazing to see inside. So, straight from the box, you can get a good cockpit detail has you have in the box side consoles, small instrument panel with three-dimensional components. So, with some work, the decals and some carefully painting you can get a great cockpit straight from the box, excepted for the seatbelts. As usually, for the seatbelts you need to use some aftermarket seatbelts. The sprue W gives 500 and 250 kg bombs very well detail. Passing on a first general view, is a typical ICM quality plastic, with no distortion, no flash, with very good surface detail. On sprue A, the fuselage halves and tail. Well on this release, these fuselage halves are not used. Sprue B On this sprue, full span wings, with upper and lower halves. Really nice molding. A rivet counter could have some extra detail. Sprue C Mostly all parts on this sprue will not be used. This model will give a lot of extra parts to your spare box. So just a few parts of the undercarriage bay. Sprue D Two sprues in fact, with all the parts for the engine DB603A, propellers and engine nacelles, nothing used on this version that wear the BMW 801D (both with 1700hp each). Well, on this model kit, only the wheels, landing gear are the only parts to be use. Sprue E This sprue brings us the flaps, upper turret (and all its details) instrument panels, side cockpit consoles and undercarriage bay. As for the side cockpit consoles, will not be use as the cockpit detail for this one is on the new K sprue. The instrument panels are quite good in raised detail and you have a decal set for the instruments bazels. Sprue G It supplies the engine mounts and undercarriage fairings. The night fighter nose cone is no needed for the build. The instructions. The usual standard from ICM with a booklet with the first and last page in satin paper and the rest in normal paper. The color table chart only have ICM paint range and it start to make some sense (at least in Europe) as you start to have some online store that sell them as Art Scale Kit. Anyway, the instruction manual is detailed and easy to follow. It includes step-by-step assembly diagrams, color callouts, and decal placement guides. The decal sheet has a good color registration and supply 4 finishing options: Do-217K-1, Luftflotte 2, Mediterrenean area, probably 1943 Do-217K-1, Stab/KG2, Holland, 1943 Do-217K-1, 1./KG 66, Chartres, France, Summer, 1943 Do-217K-1, 1./KG 2, Rhein-Main, 1943 The decals are design by ICM and made for the third party but I have no idea who. Conclusion Well, ICM continues to bring excellent kit to the modelling world and some, like this one, at least for me, was quite wanted. Just love the lines of this aircraft. Cleverly, ICM is delivering all Do-17 and Do-217 series in 1:48, getting all sorted out with common parts and new sprues for the totally new parts and they announced M-1 variant with inline engines A must eager (probably one of the most ones) model that we have been waiting as a 2025 release. The wait as worth it, no doubt about it!! The detail out of the box is very good and it will make a very good replica. For the expert and keen modeler some AM will make some extra detail to make this beauty into a total masterpiece. That big clear gondola is begging for it. VERY Highly recommend this to intermediate modeler My thanks to ICM for making this fantastic model. [1] https://wiki.warthunder.com/unit/do_217k_1


-

1/32 Lippisch P.13a / 3d printed
Fran replied to JeroenPeters's topic in LSM 1/35 and Larger Work In Progress
woooow!! love it!! -
I would love one day to be at IPMS Nats in US! I hope that it will be a fantastic show to all! Please share the pics with us!
-
wow!! love it! great paintjob and weathering!!
-
Welcome back my friend!!!
-
That`s a great start my friend!! Cant wait to see more!!
-
Great review! Thanks!
-
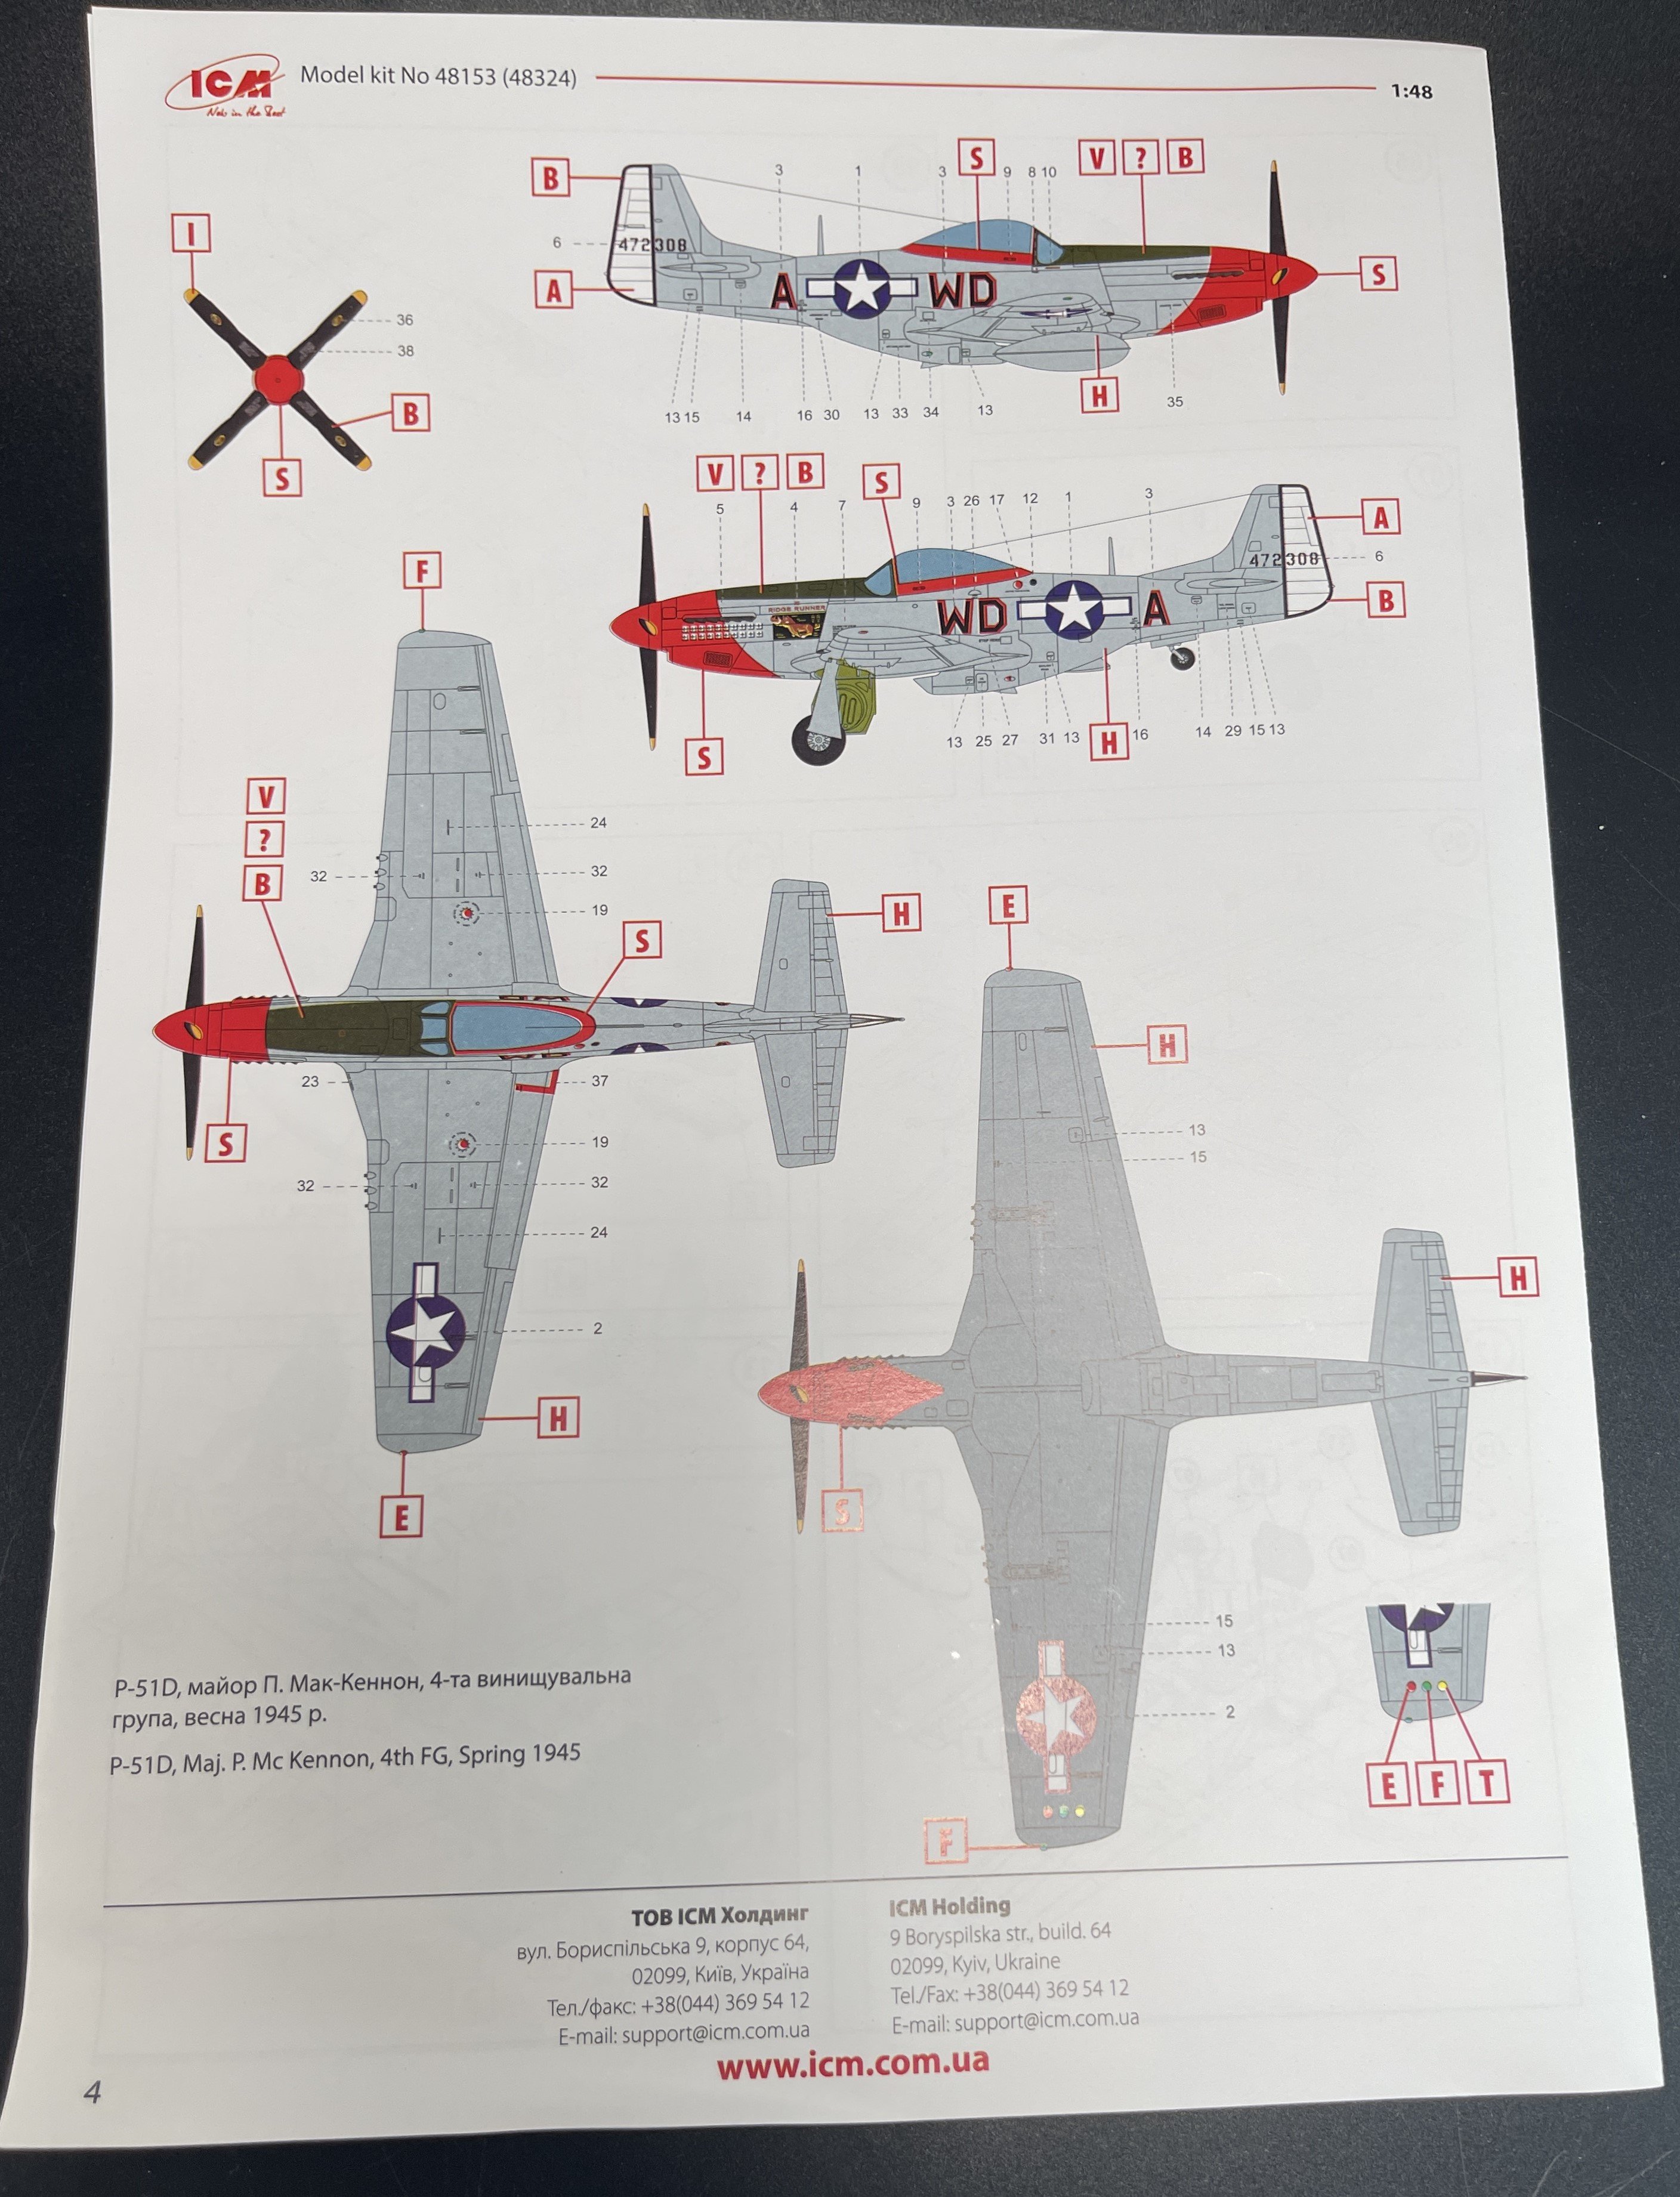
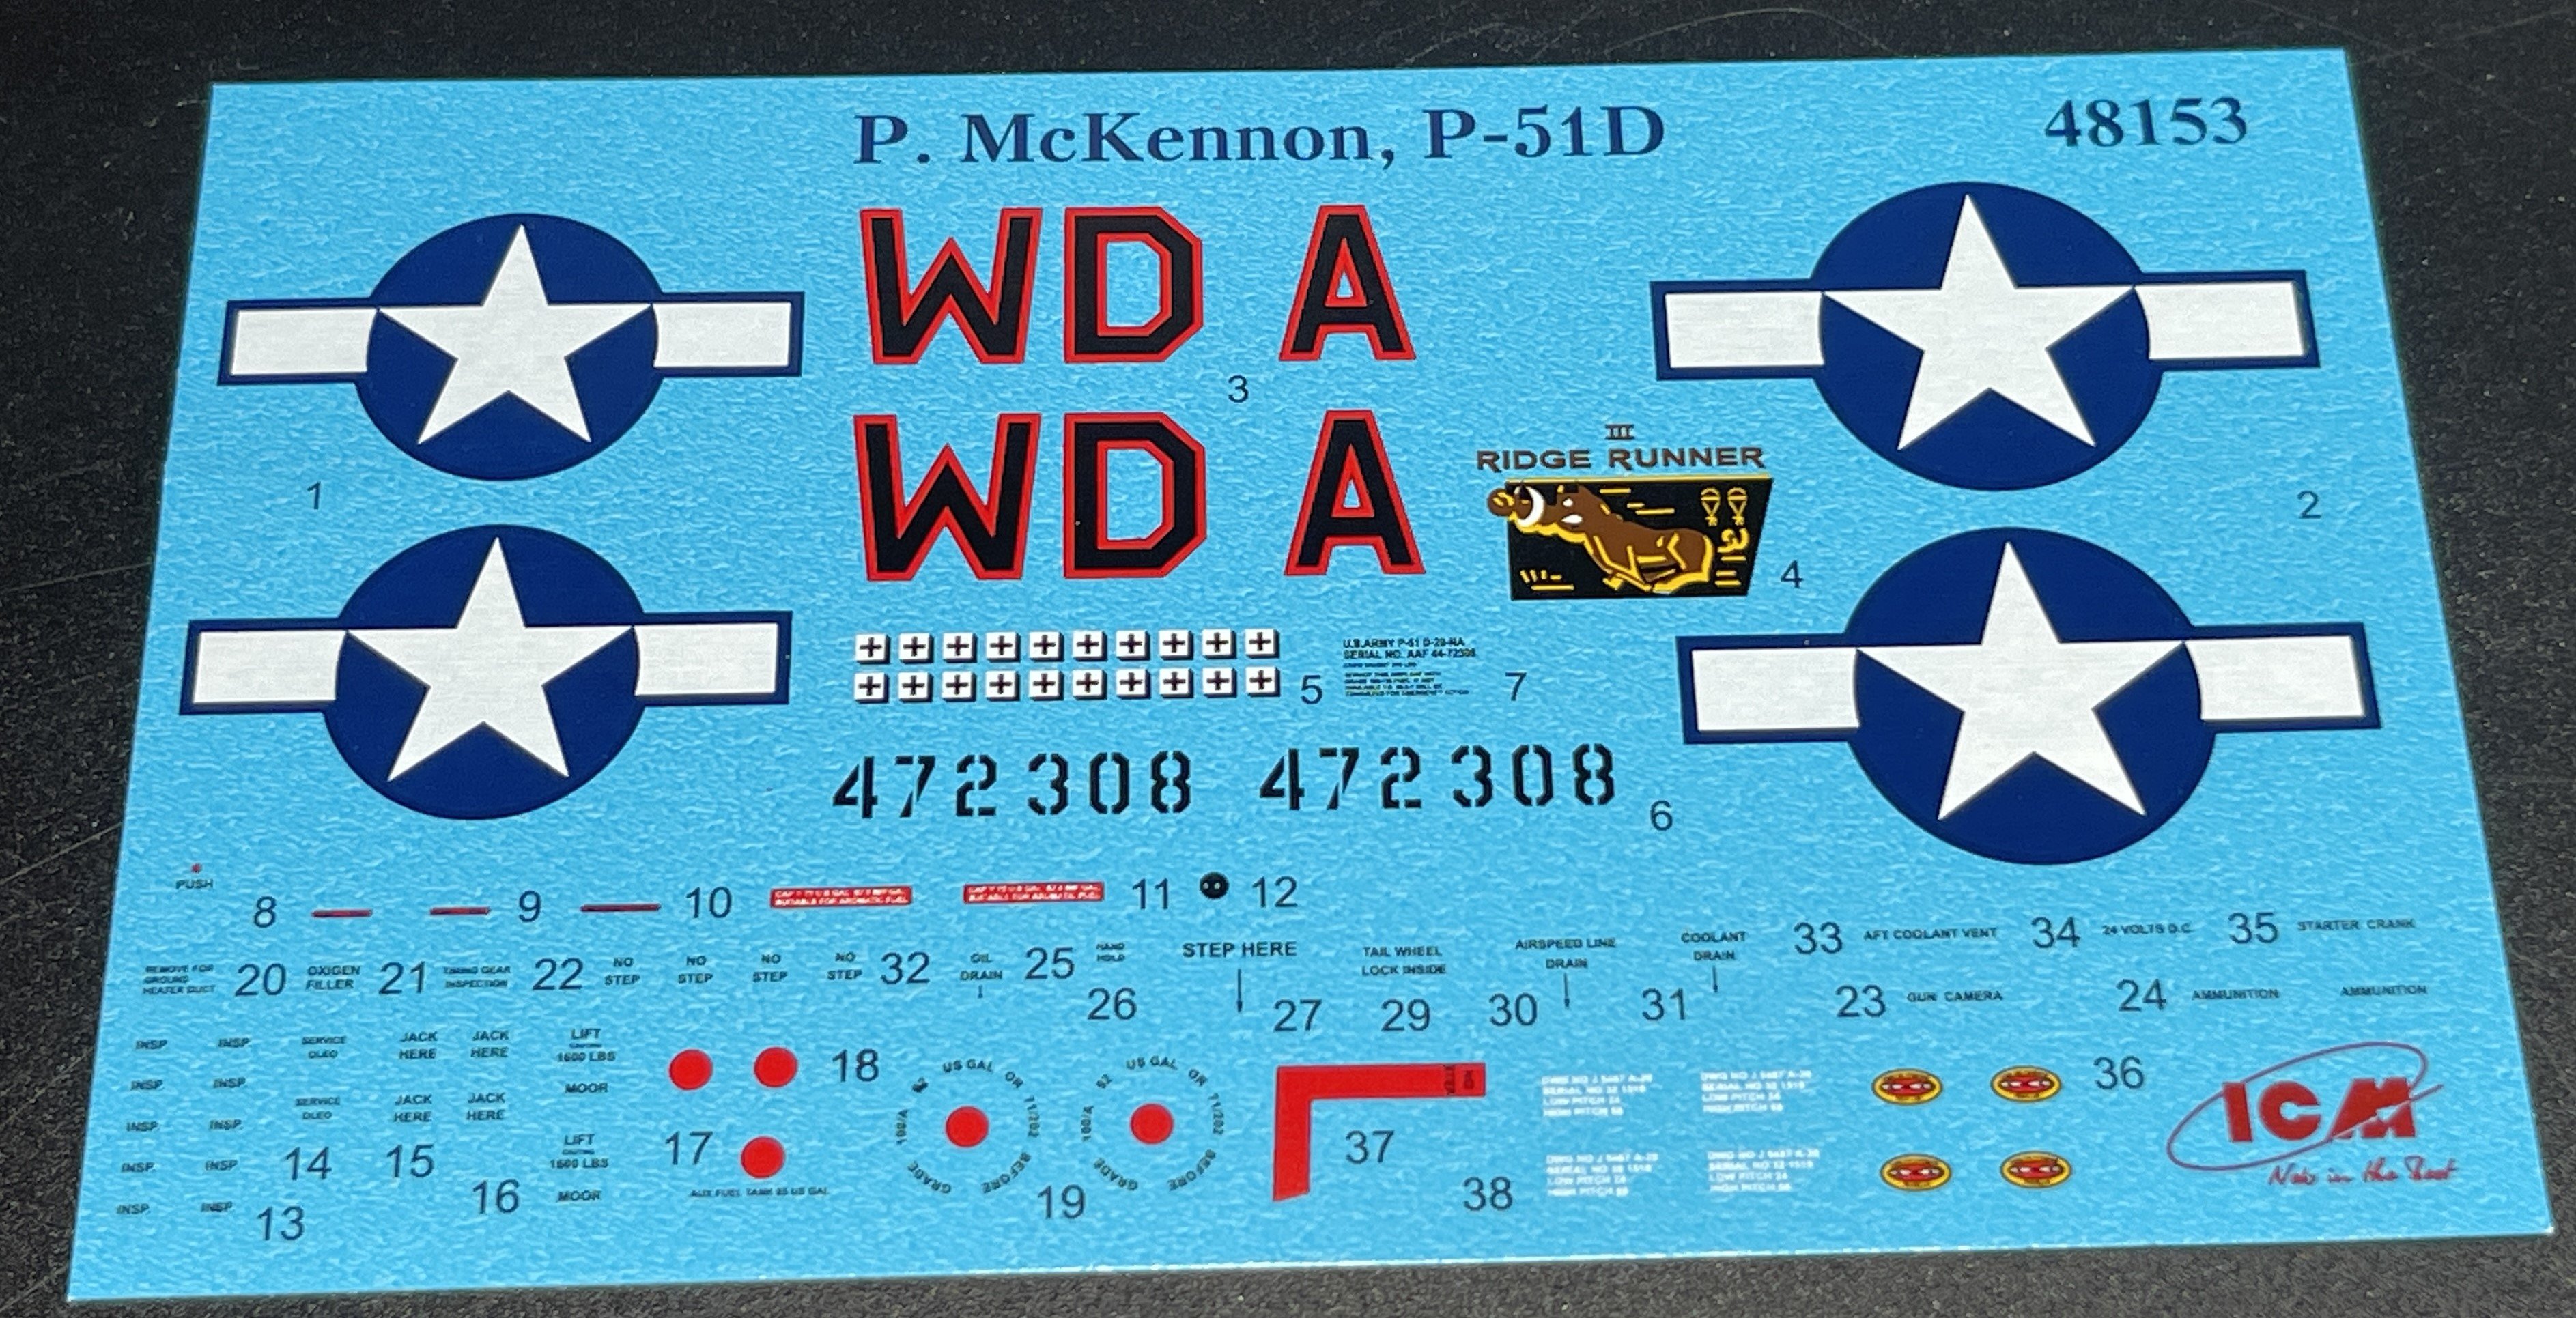
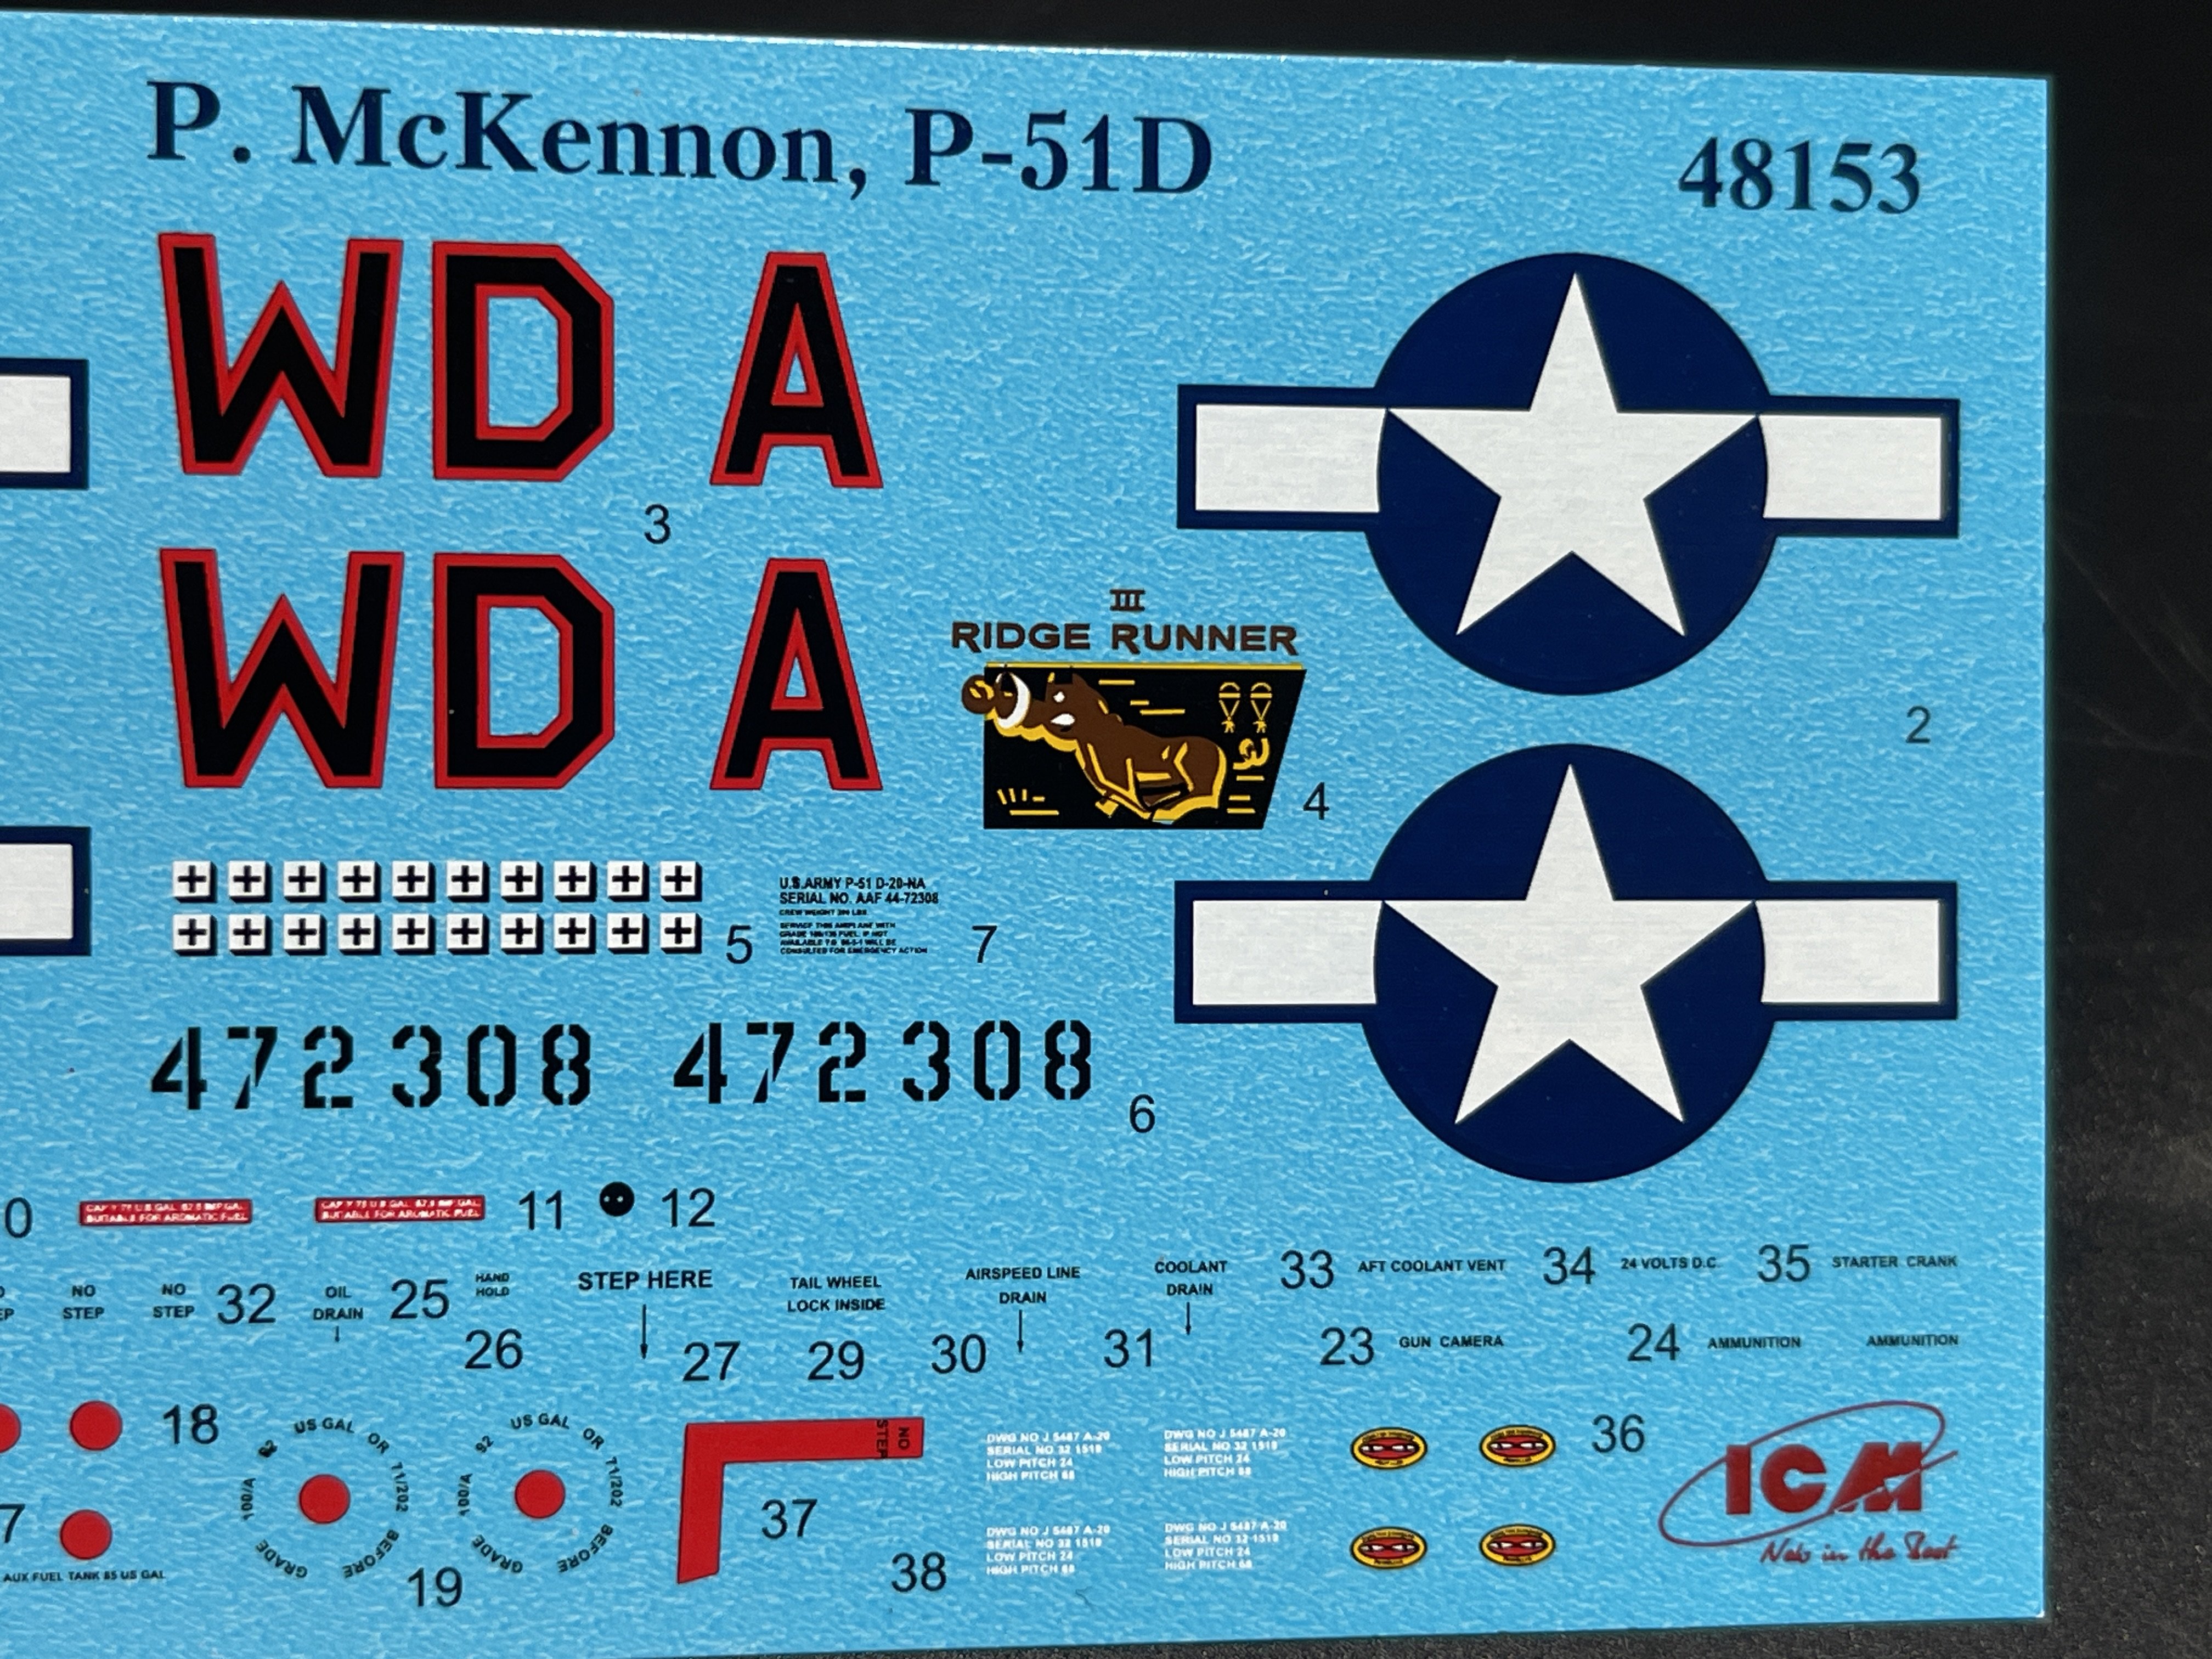
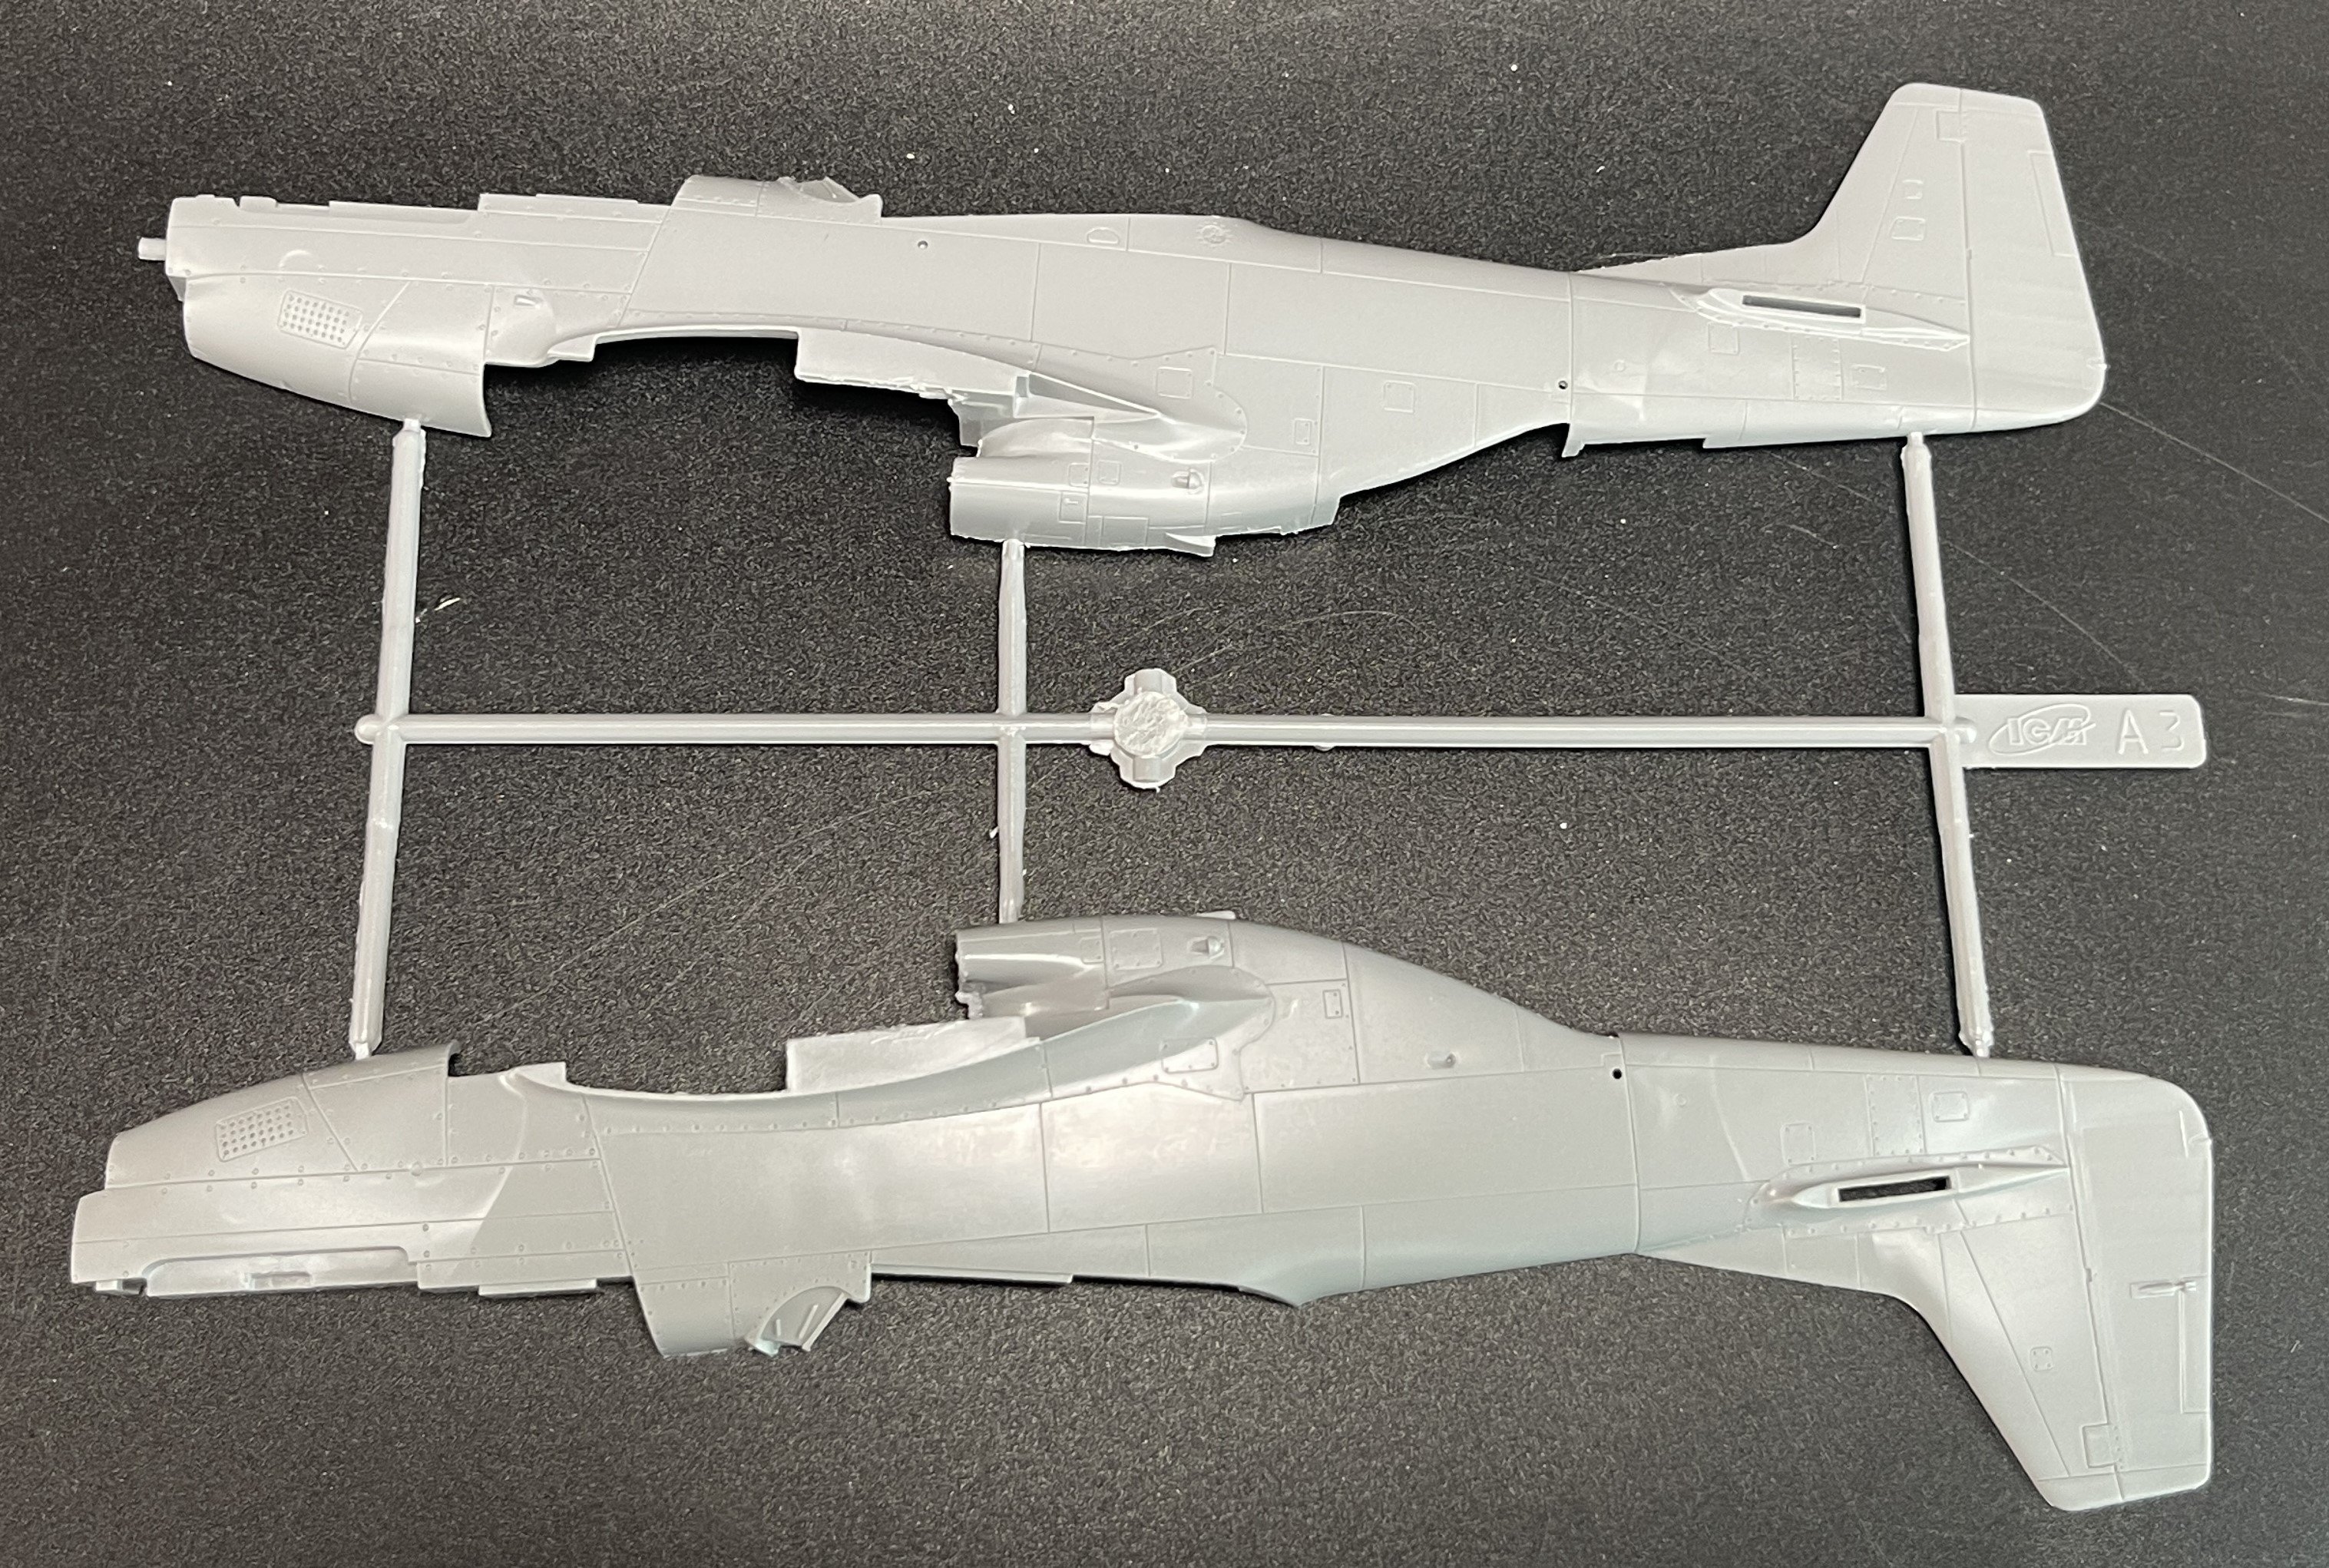
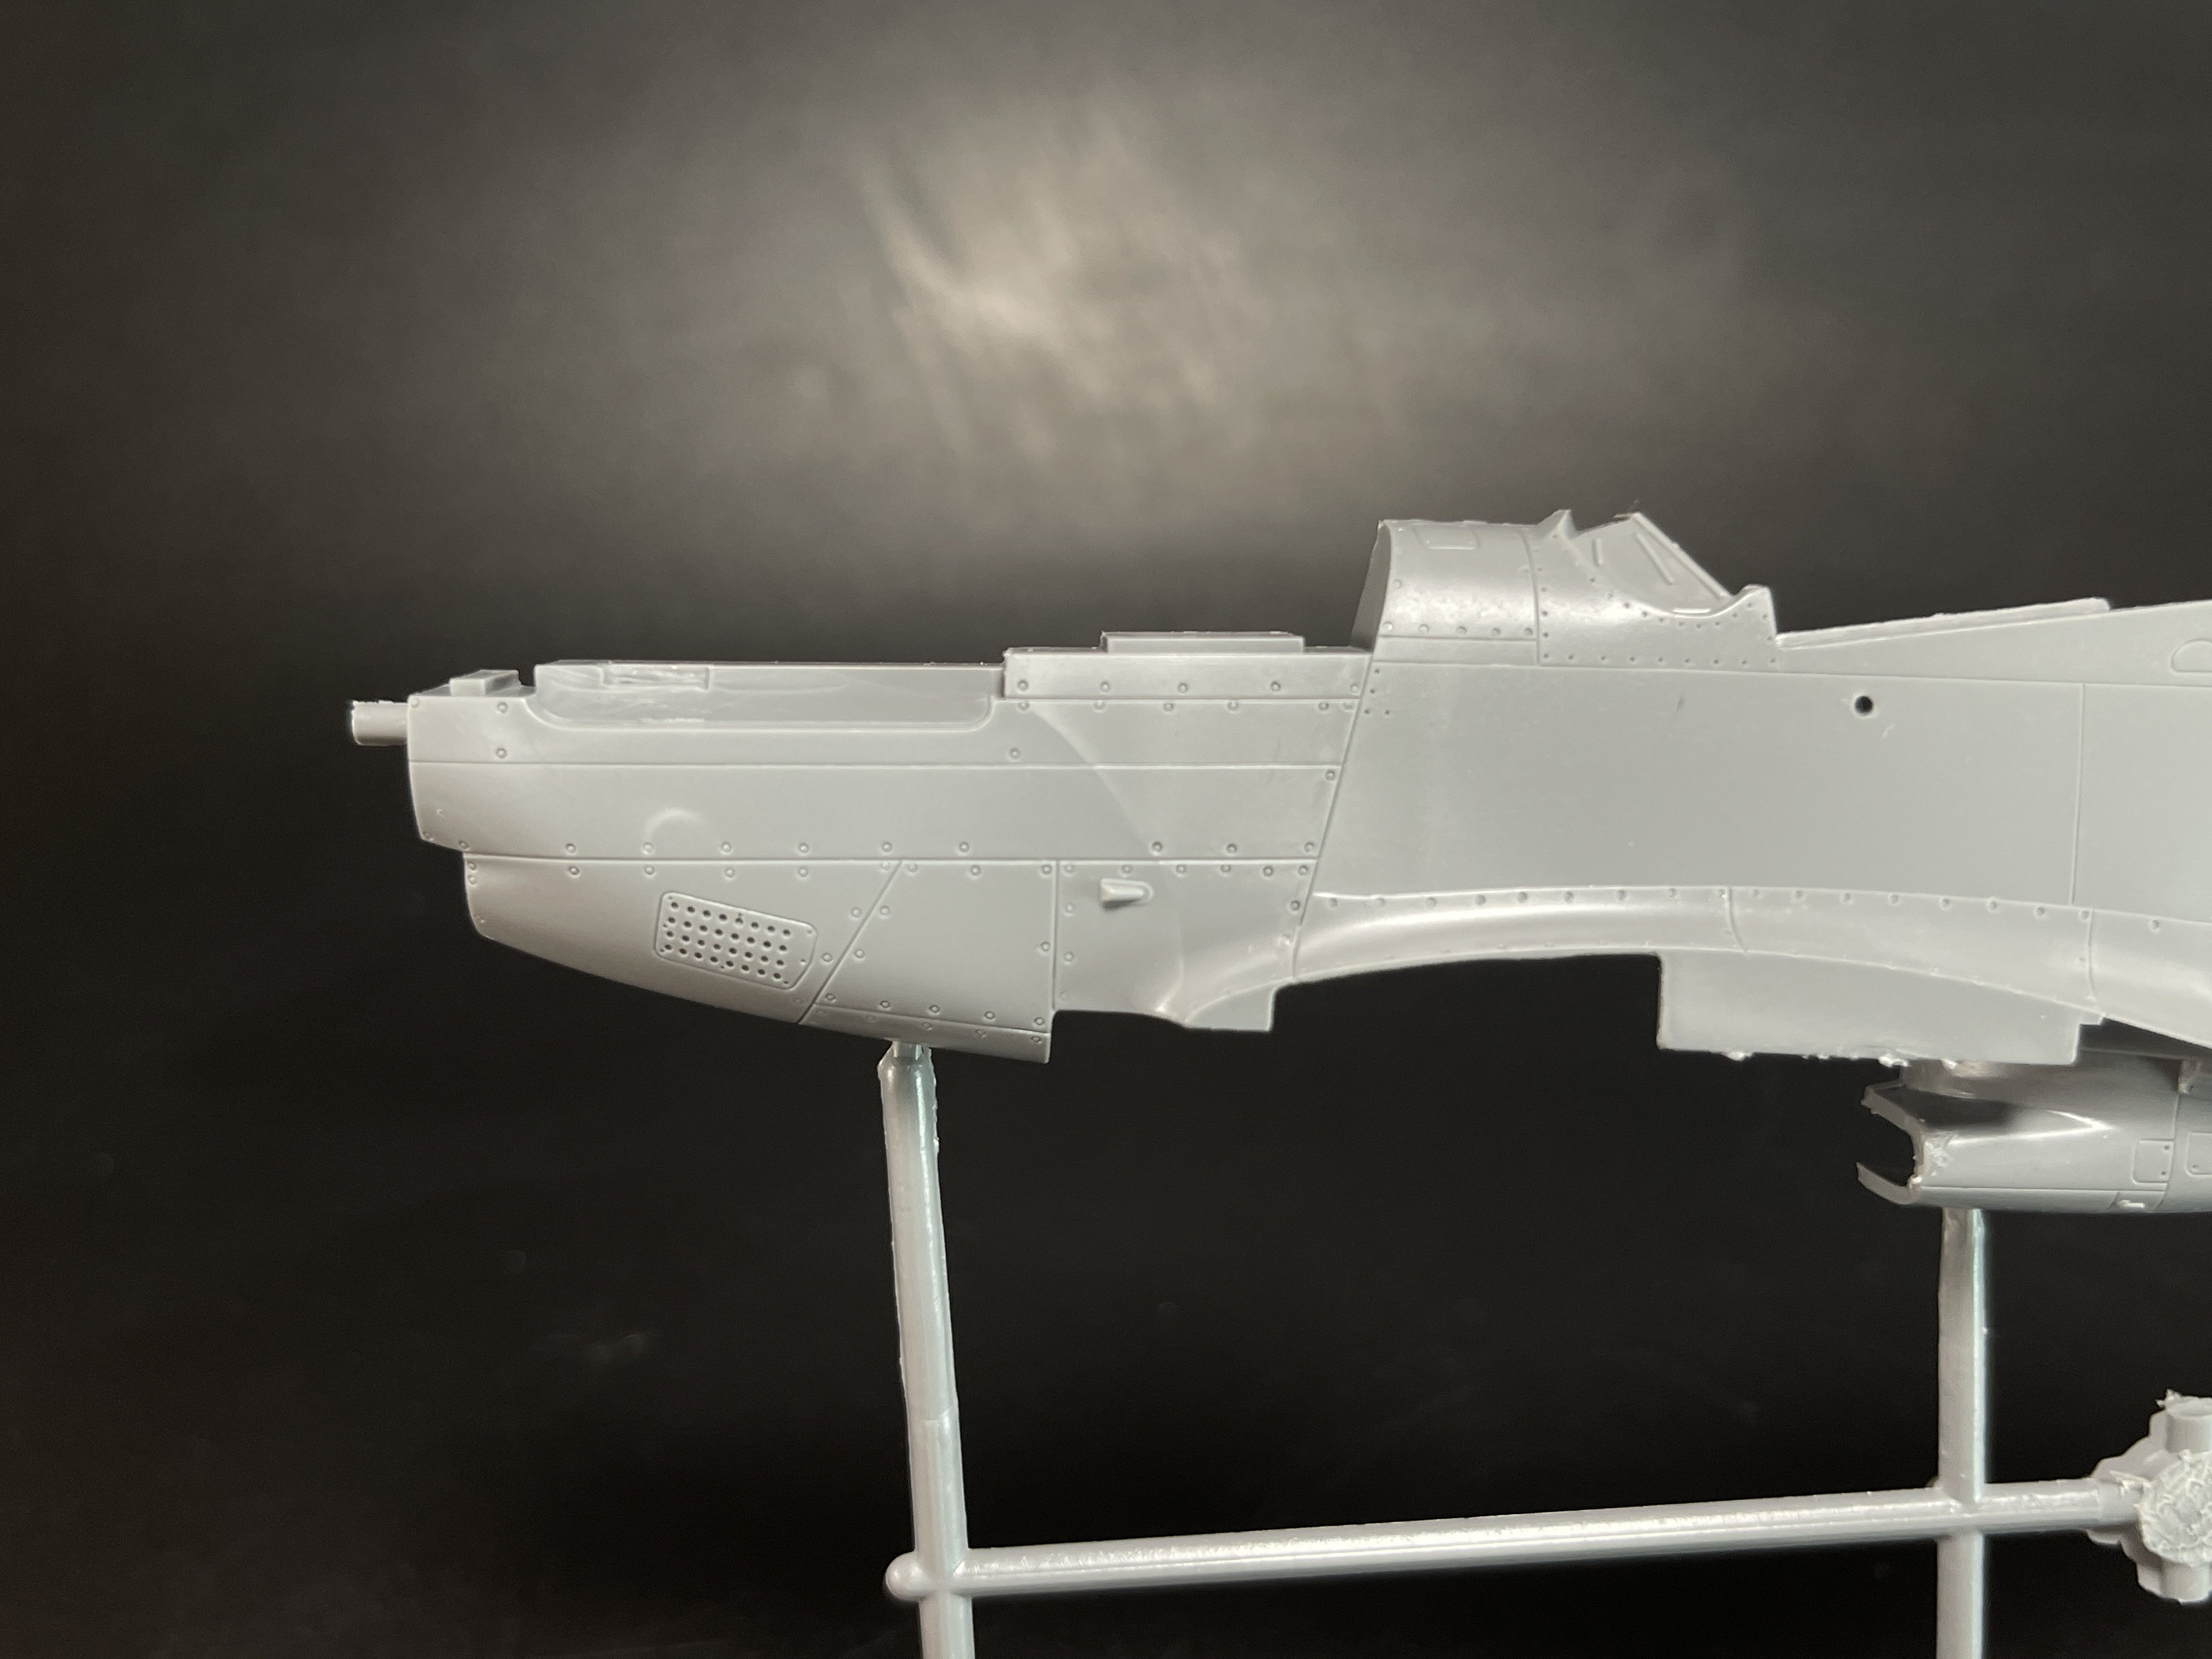
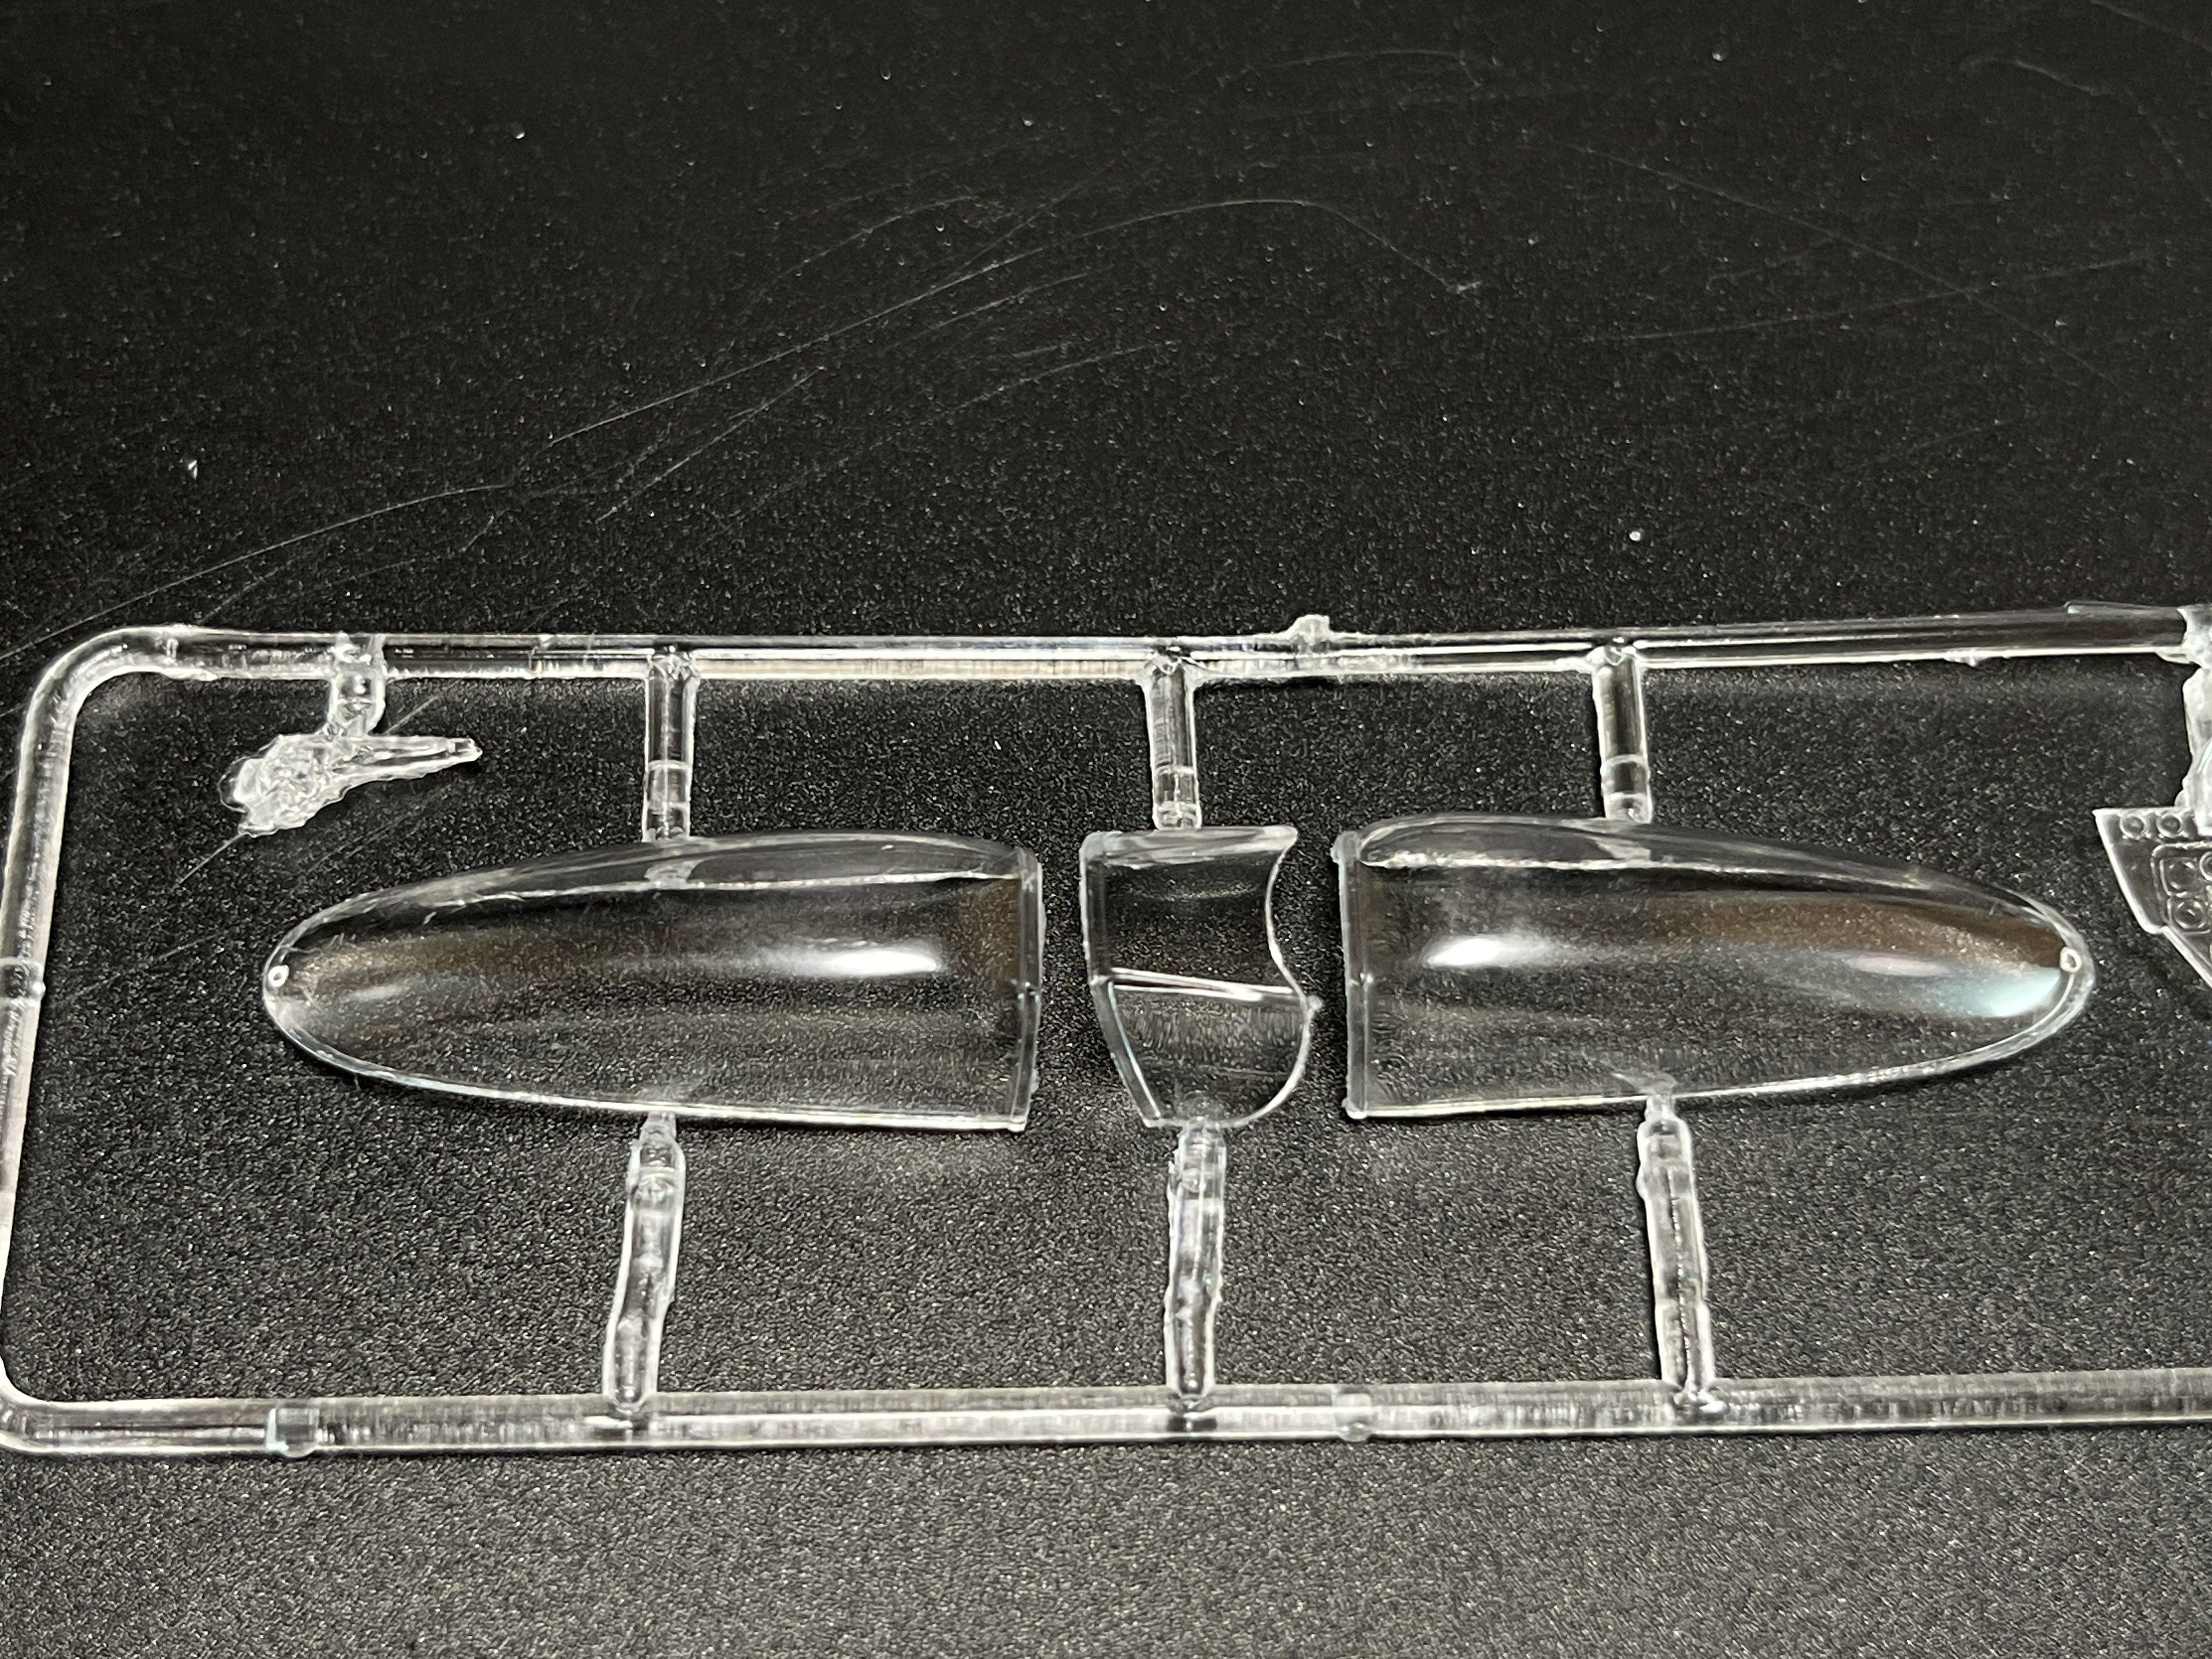
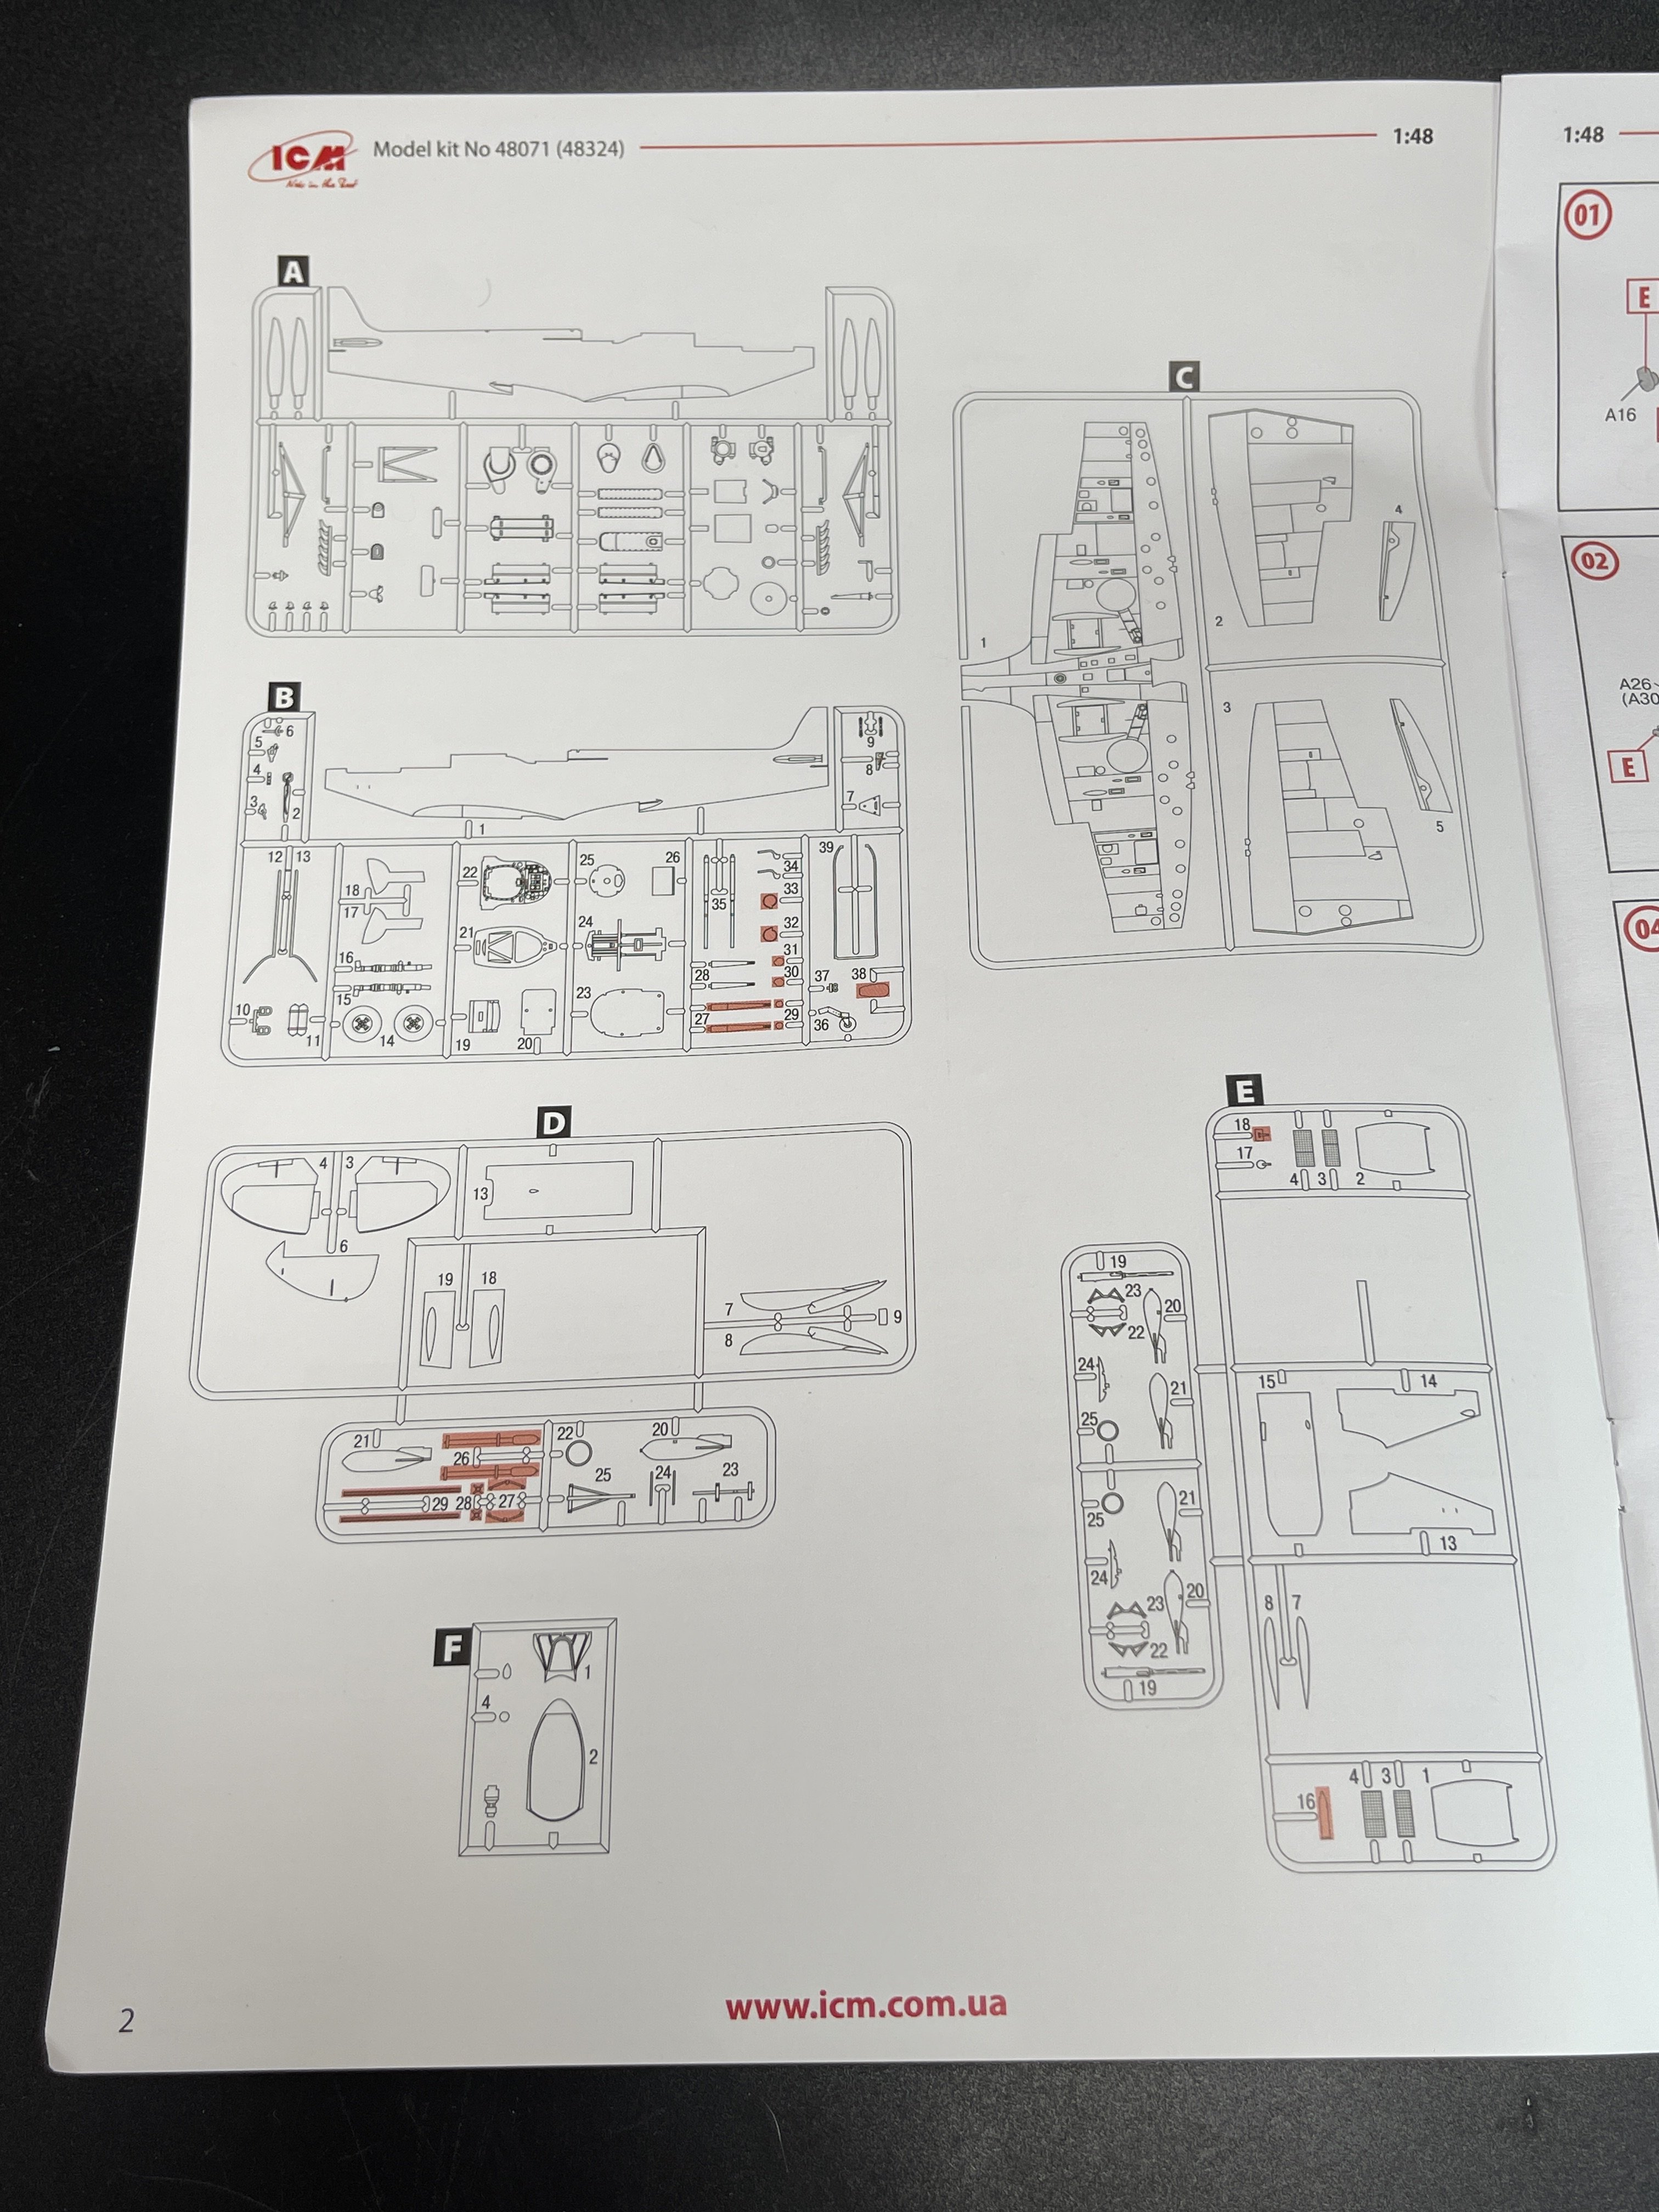
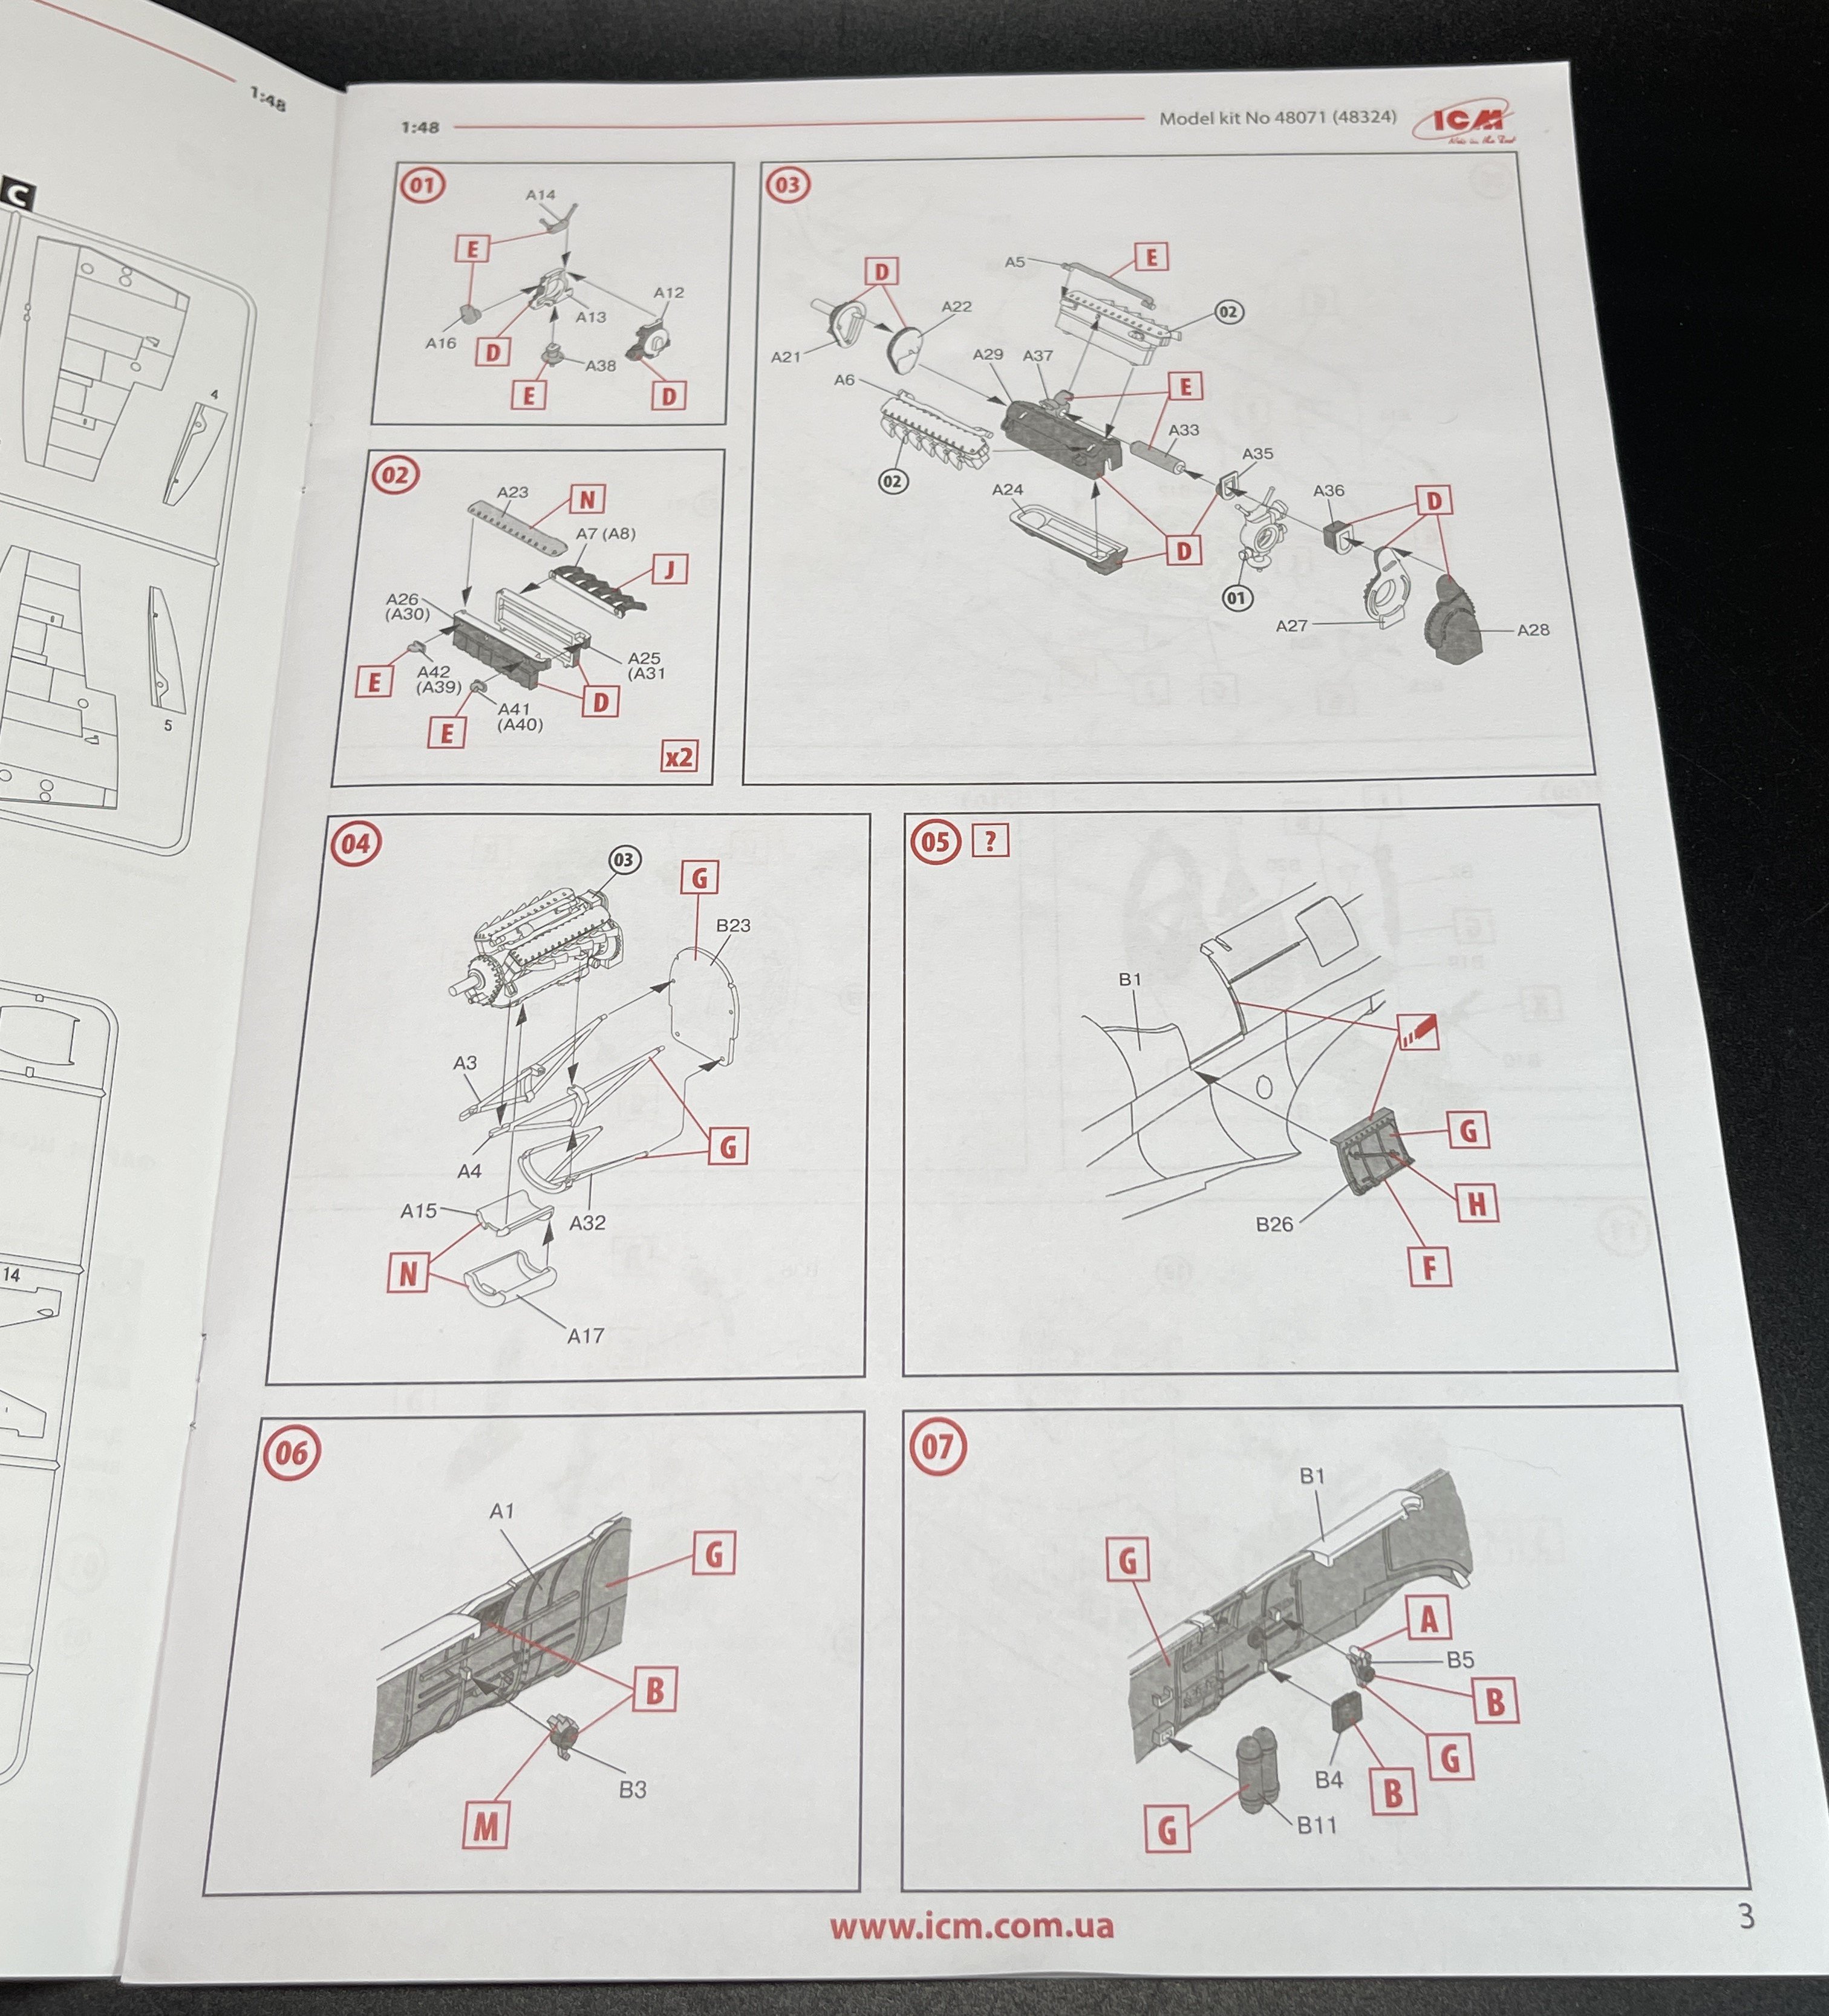
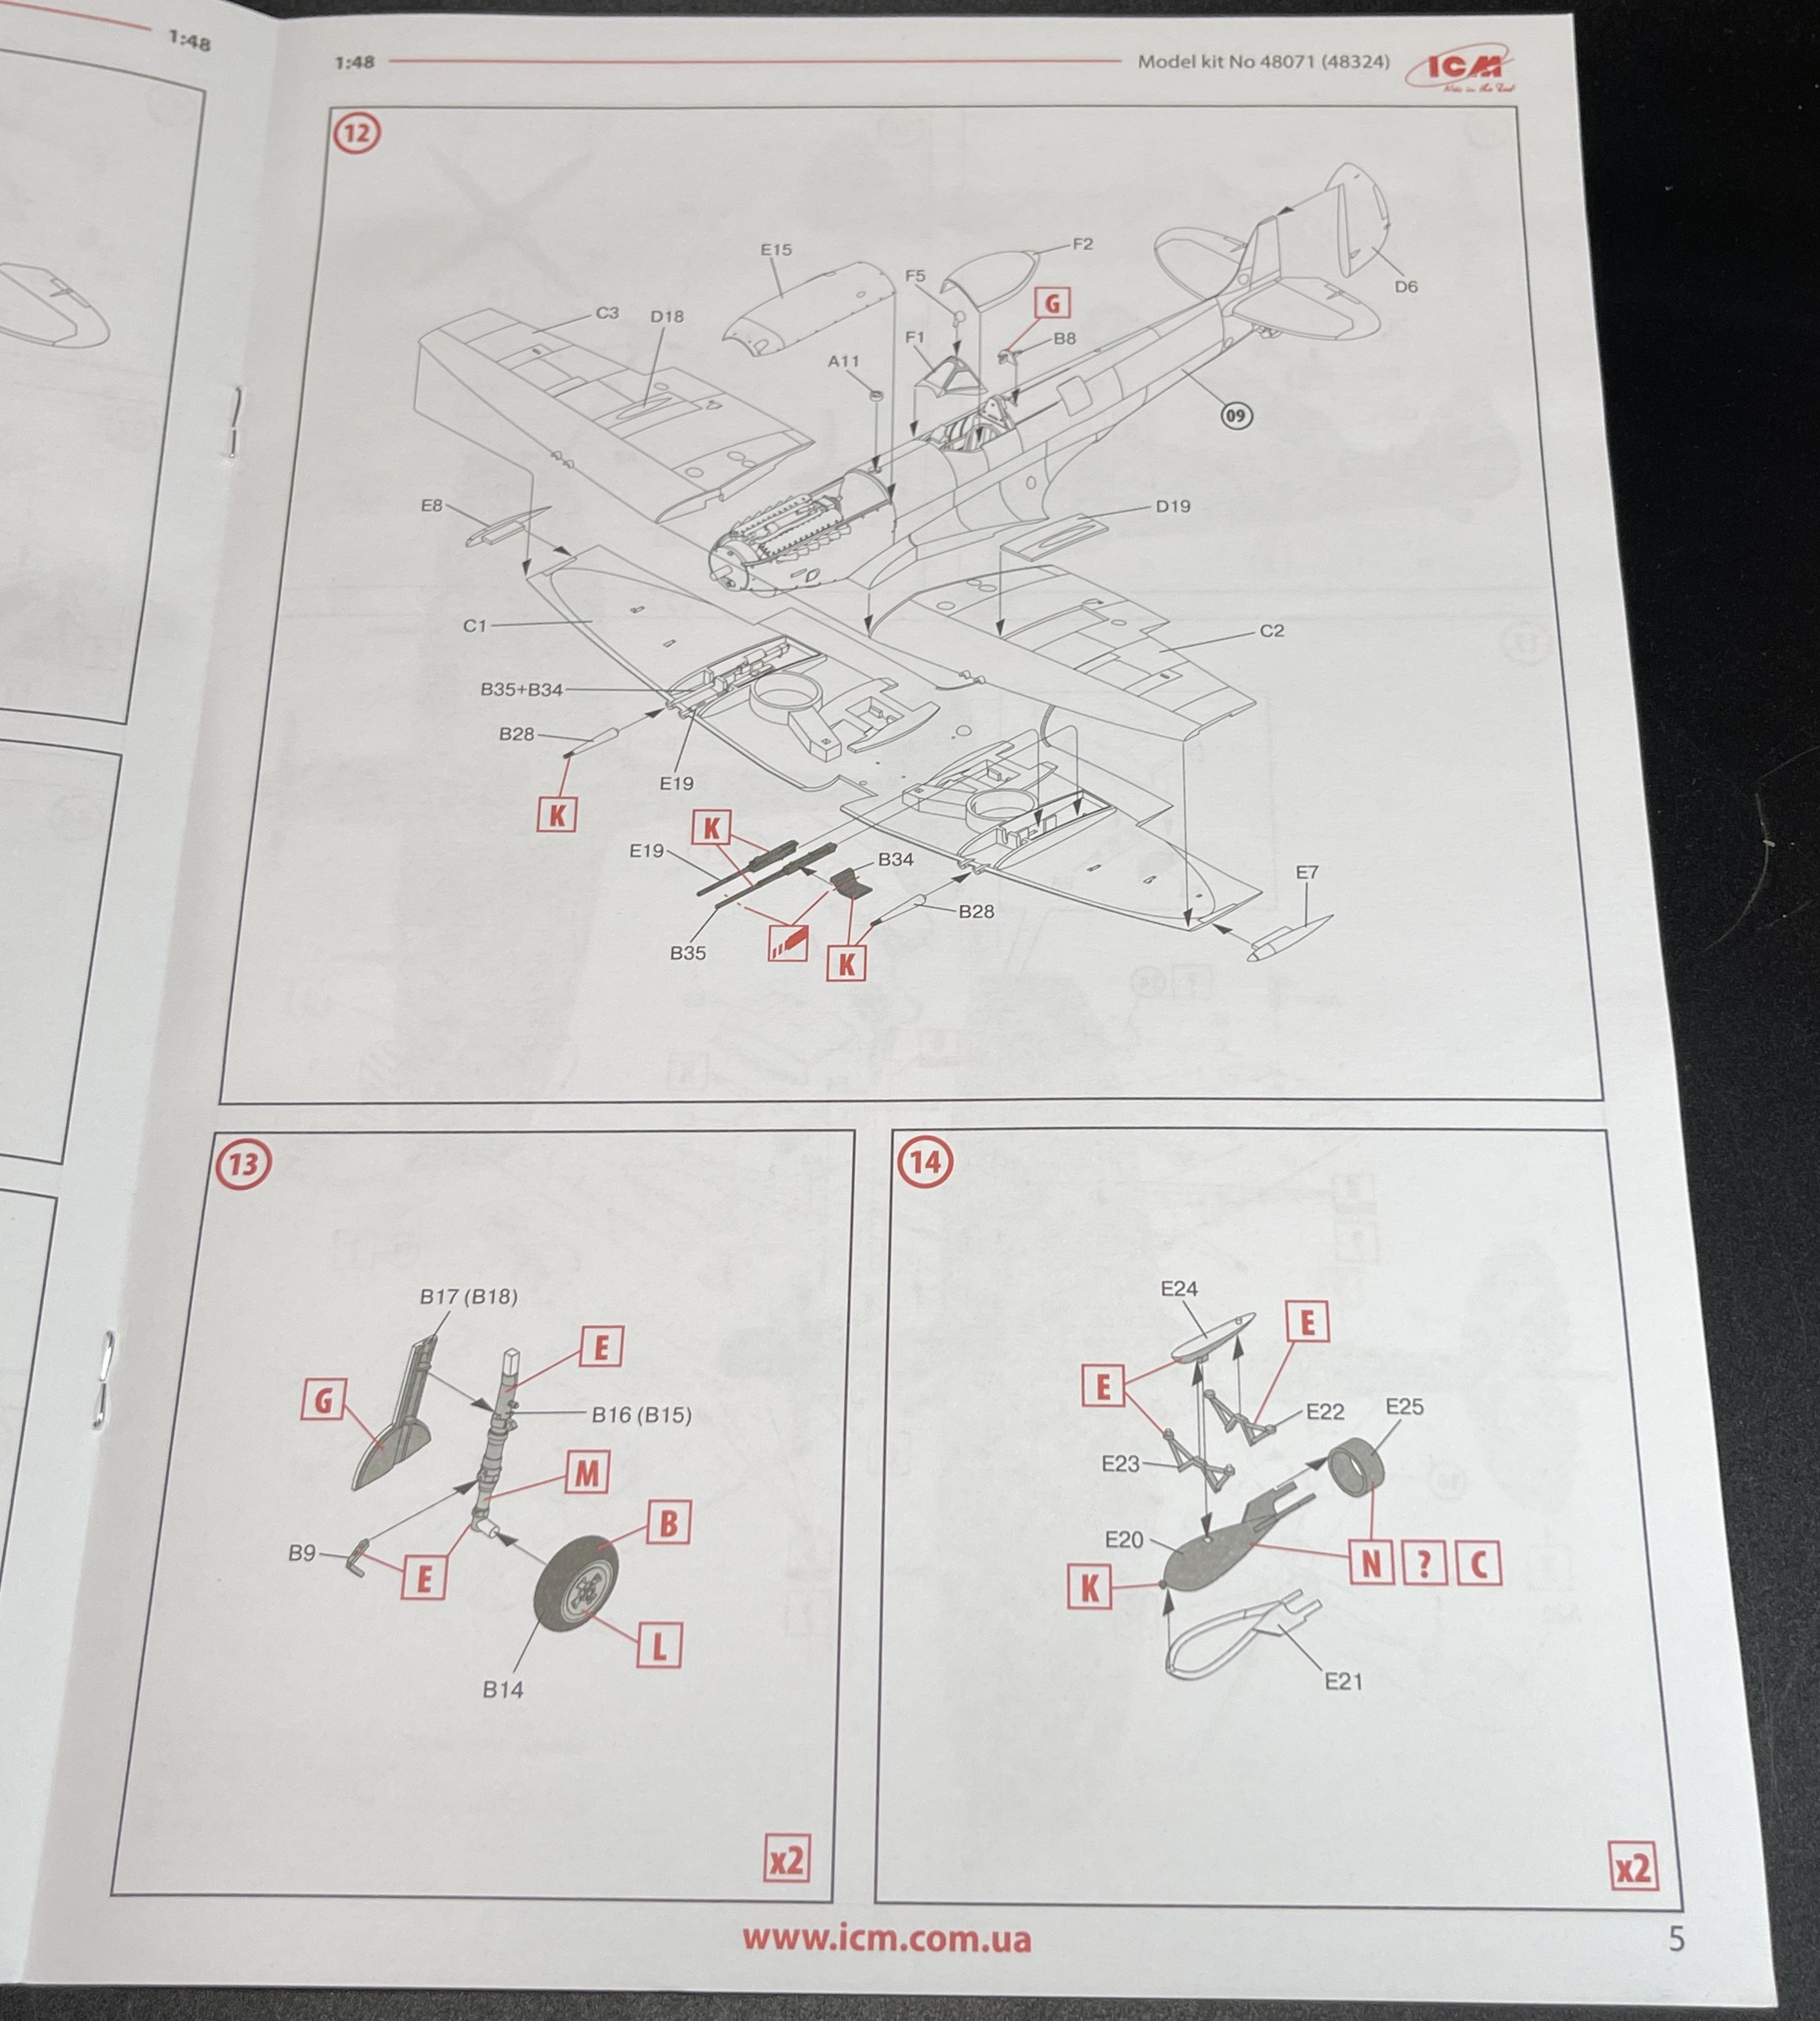
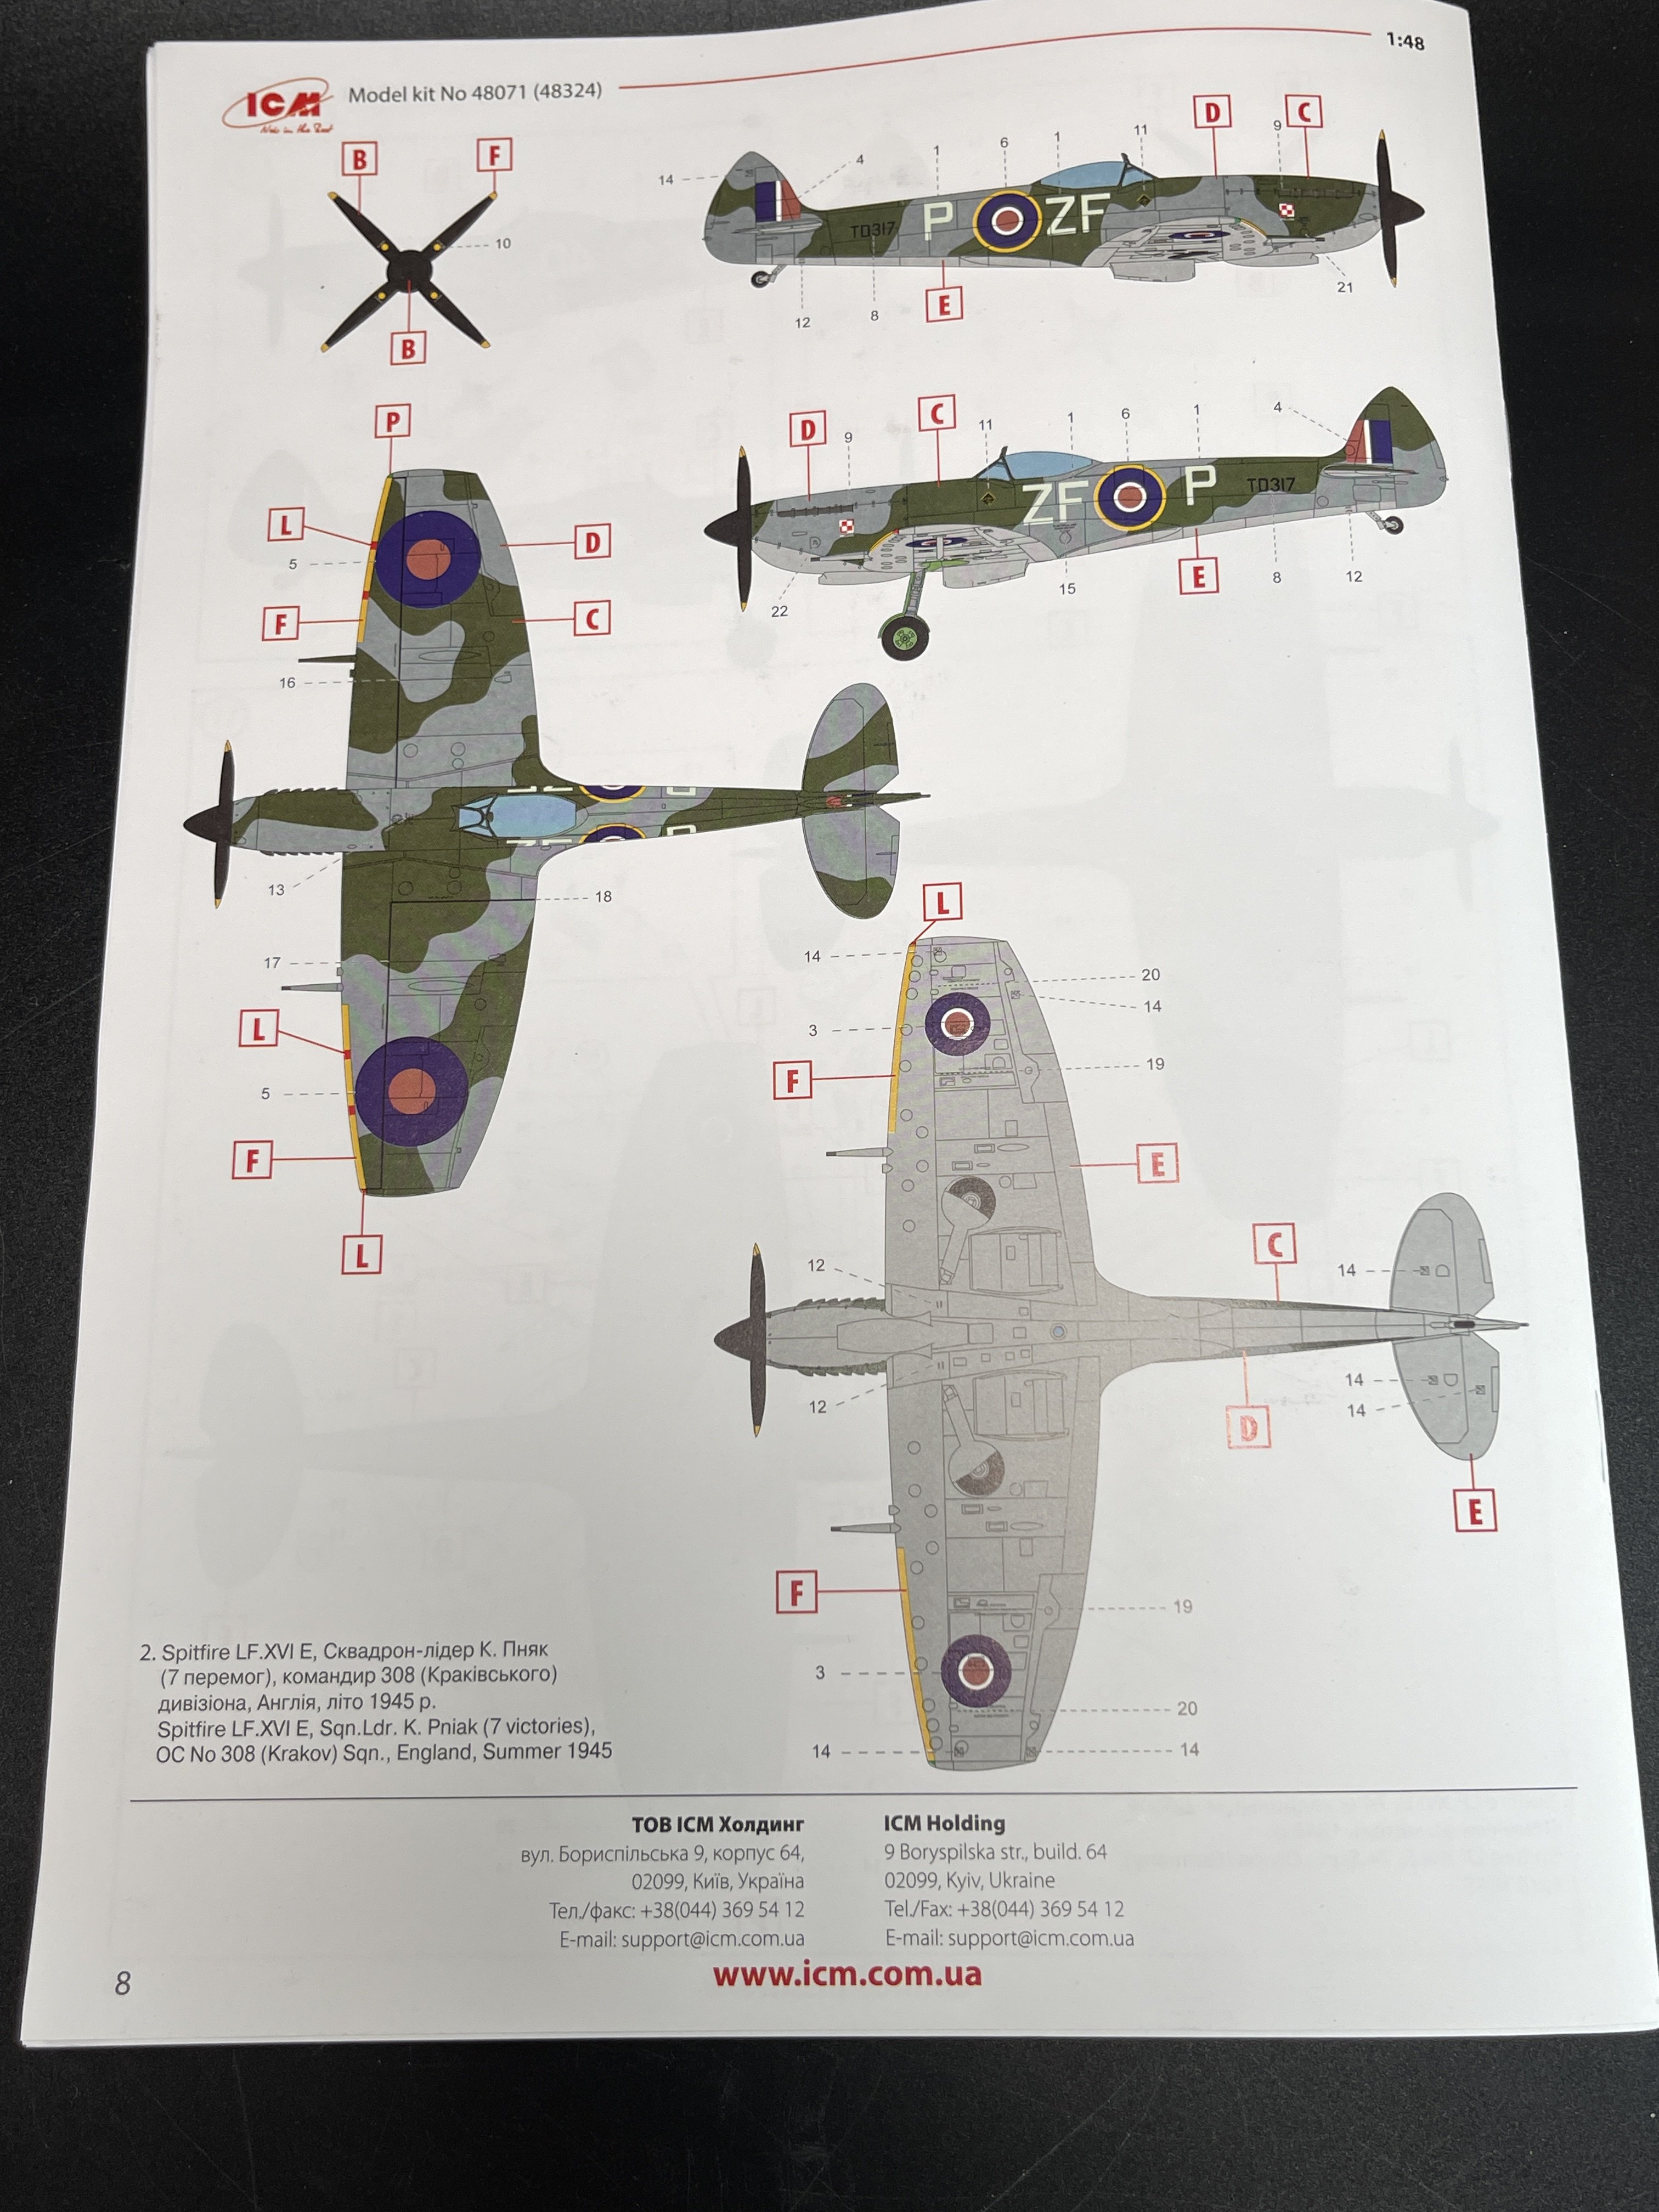
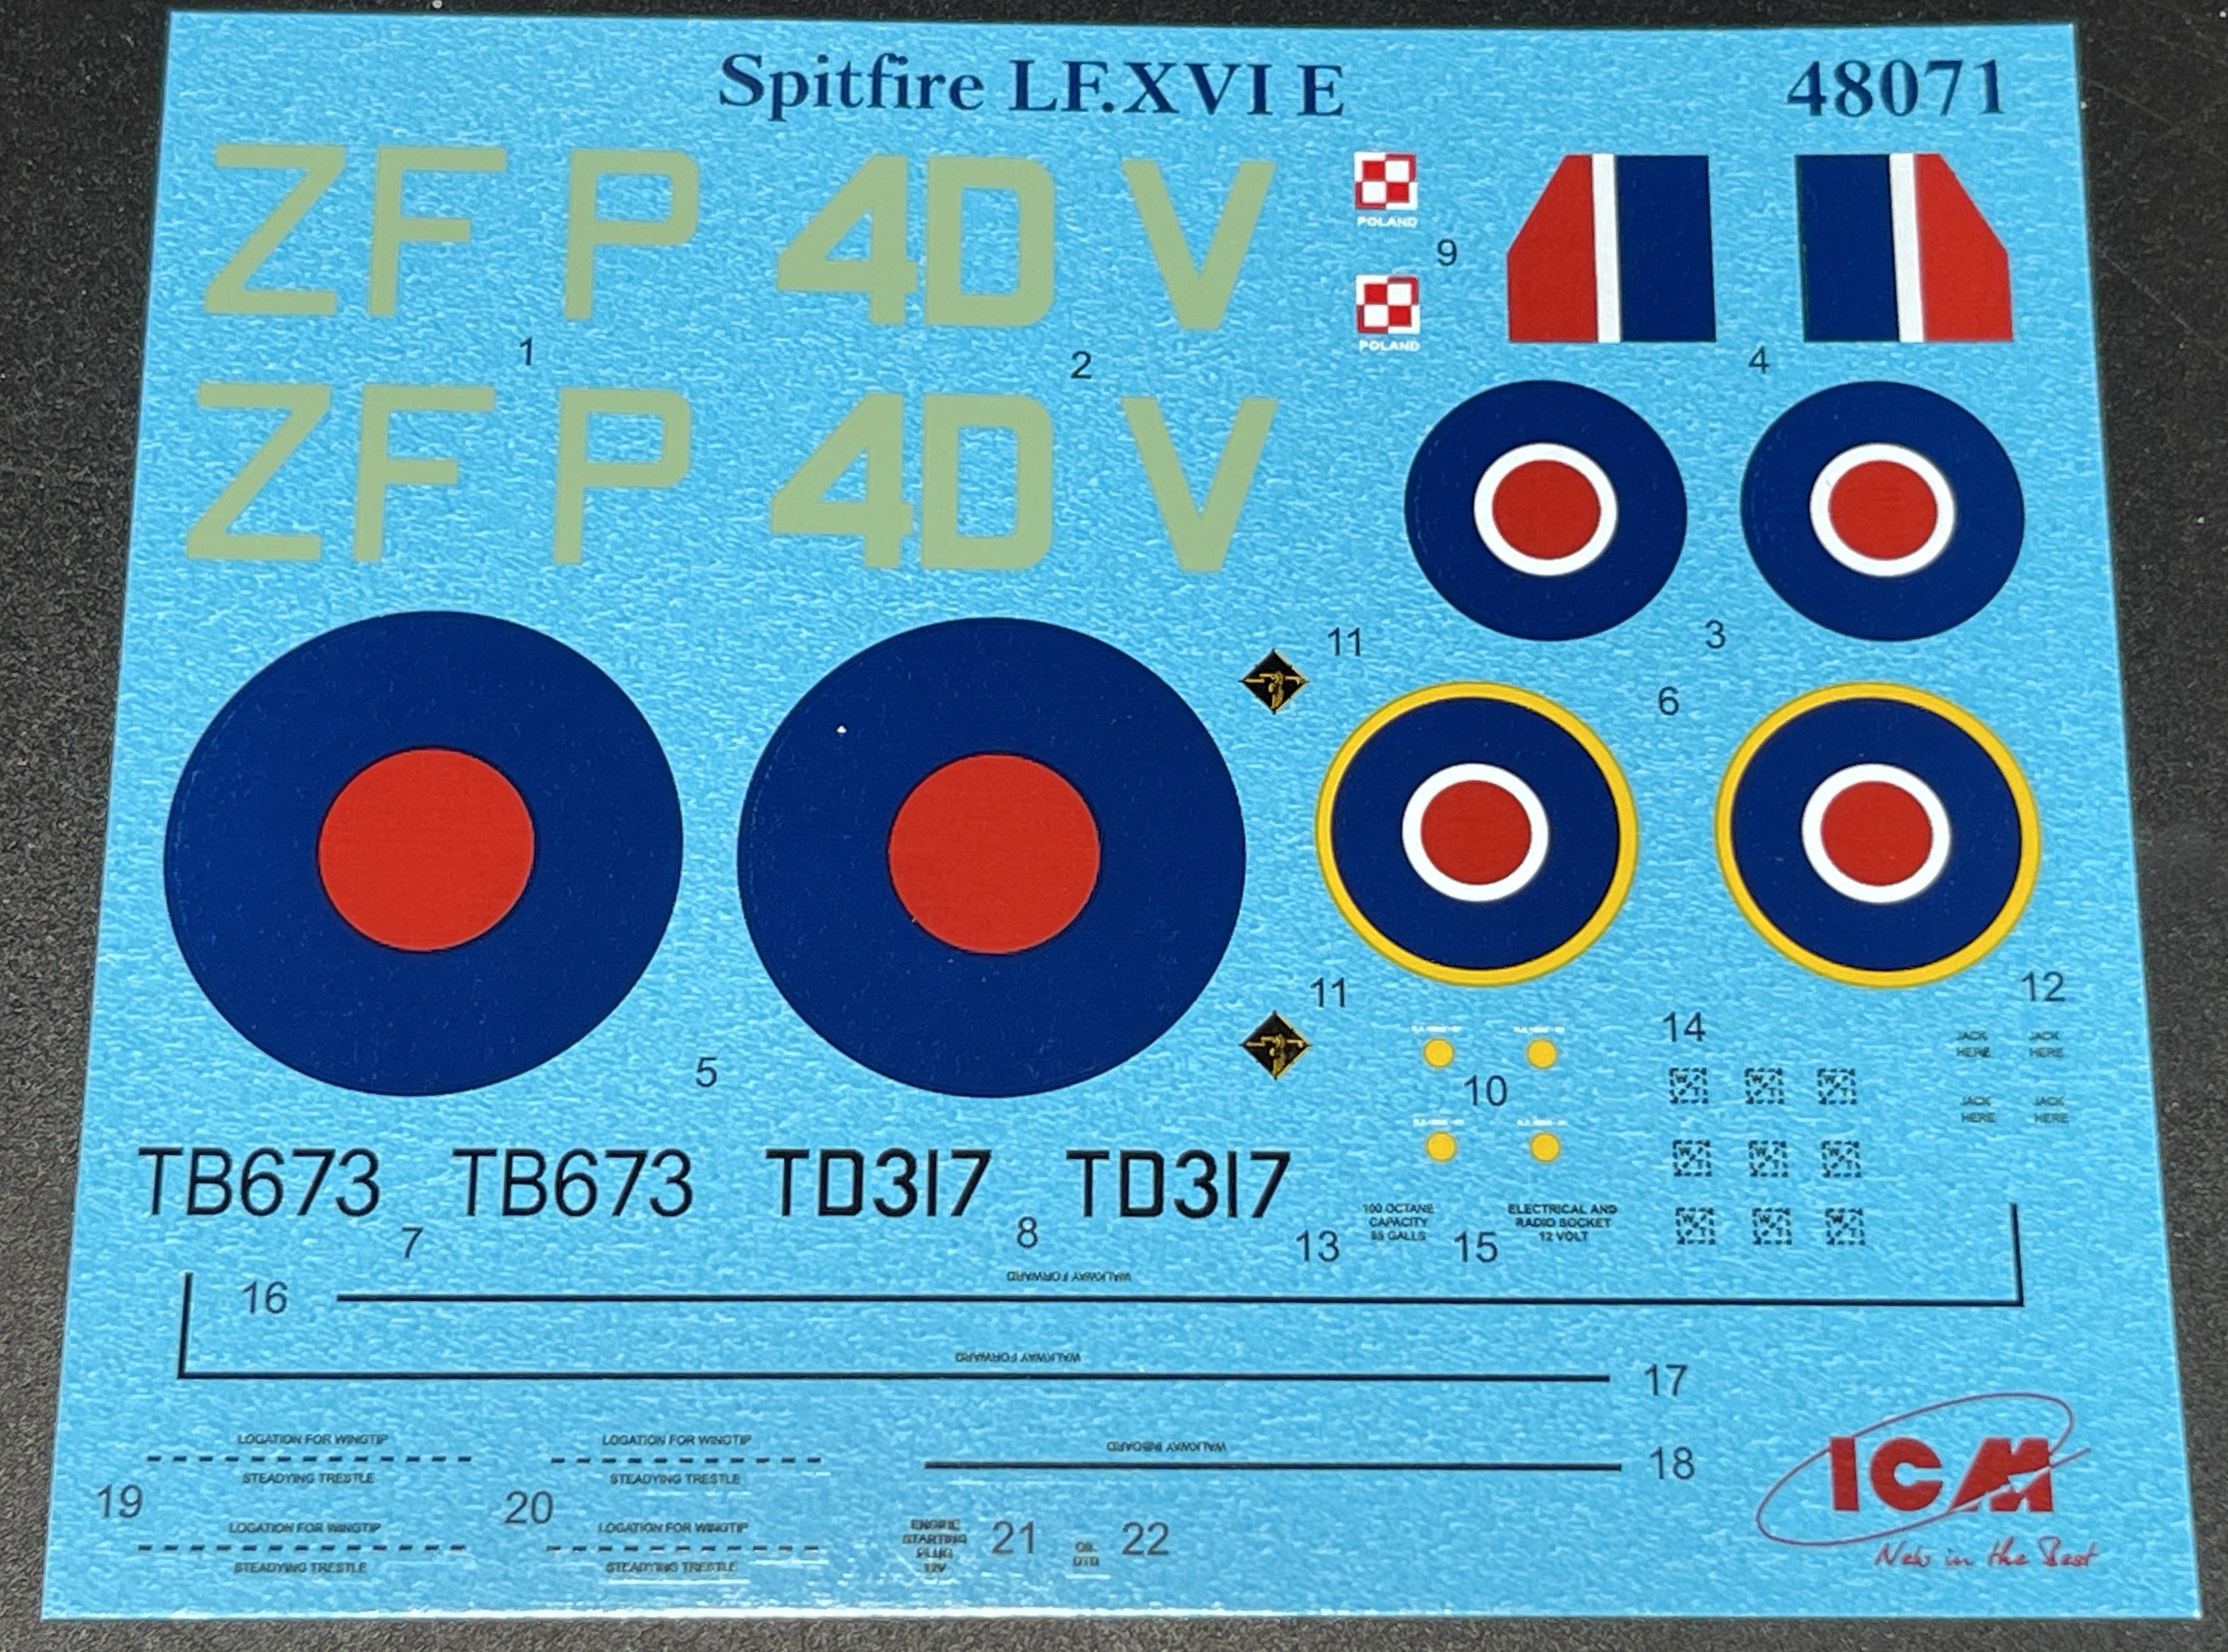
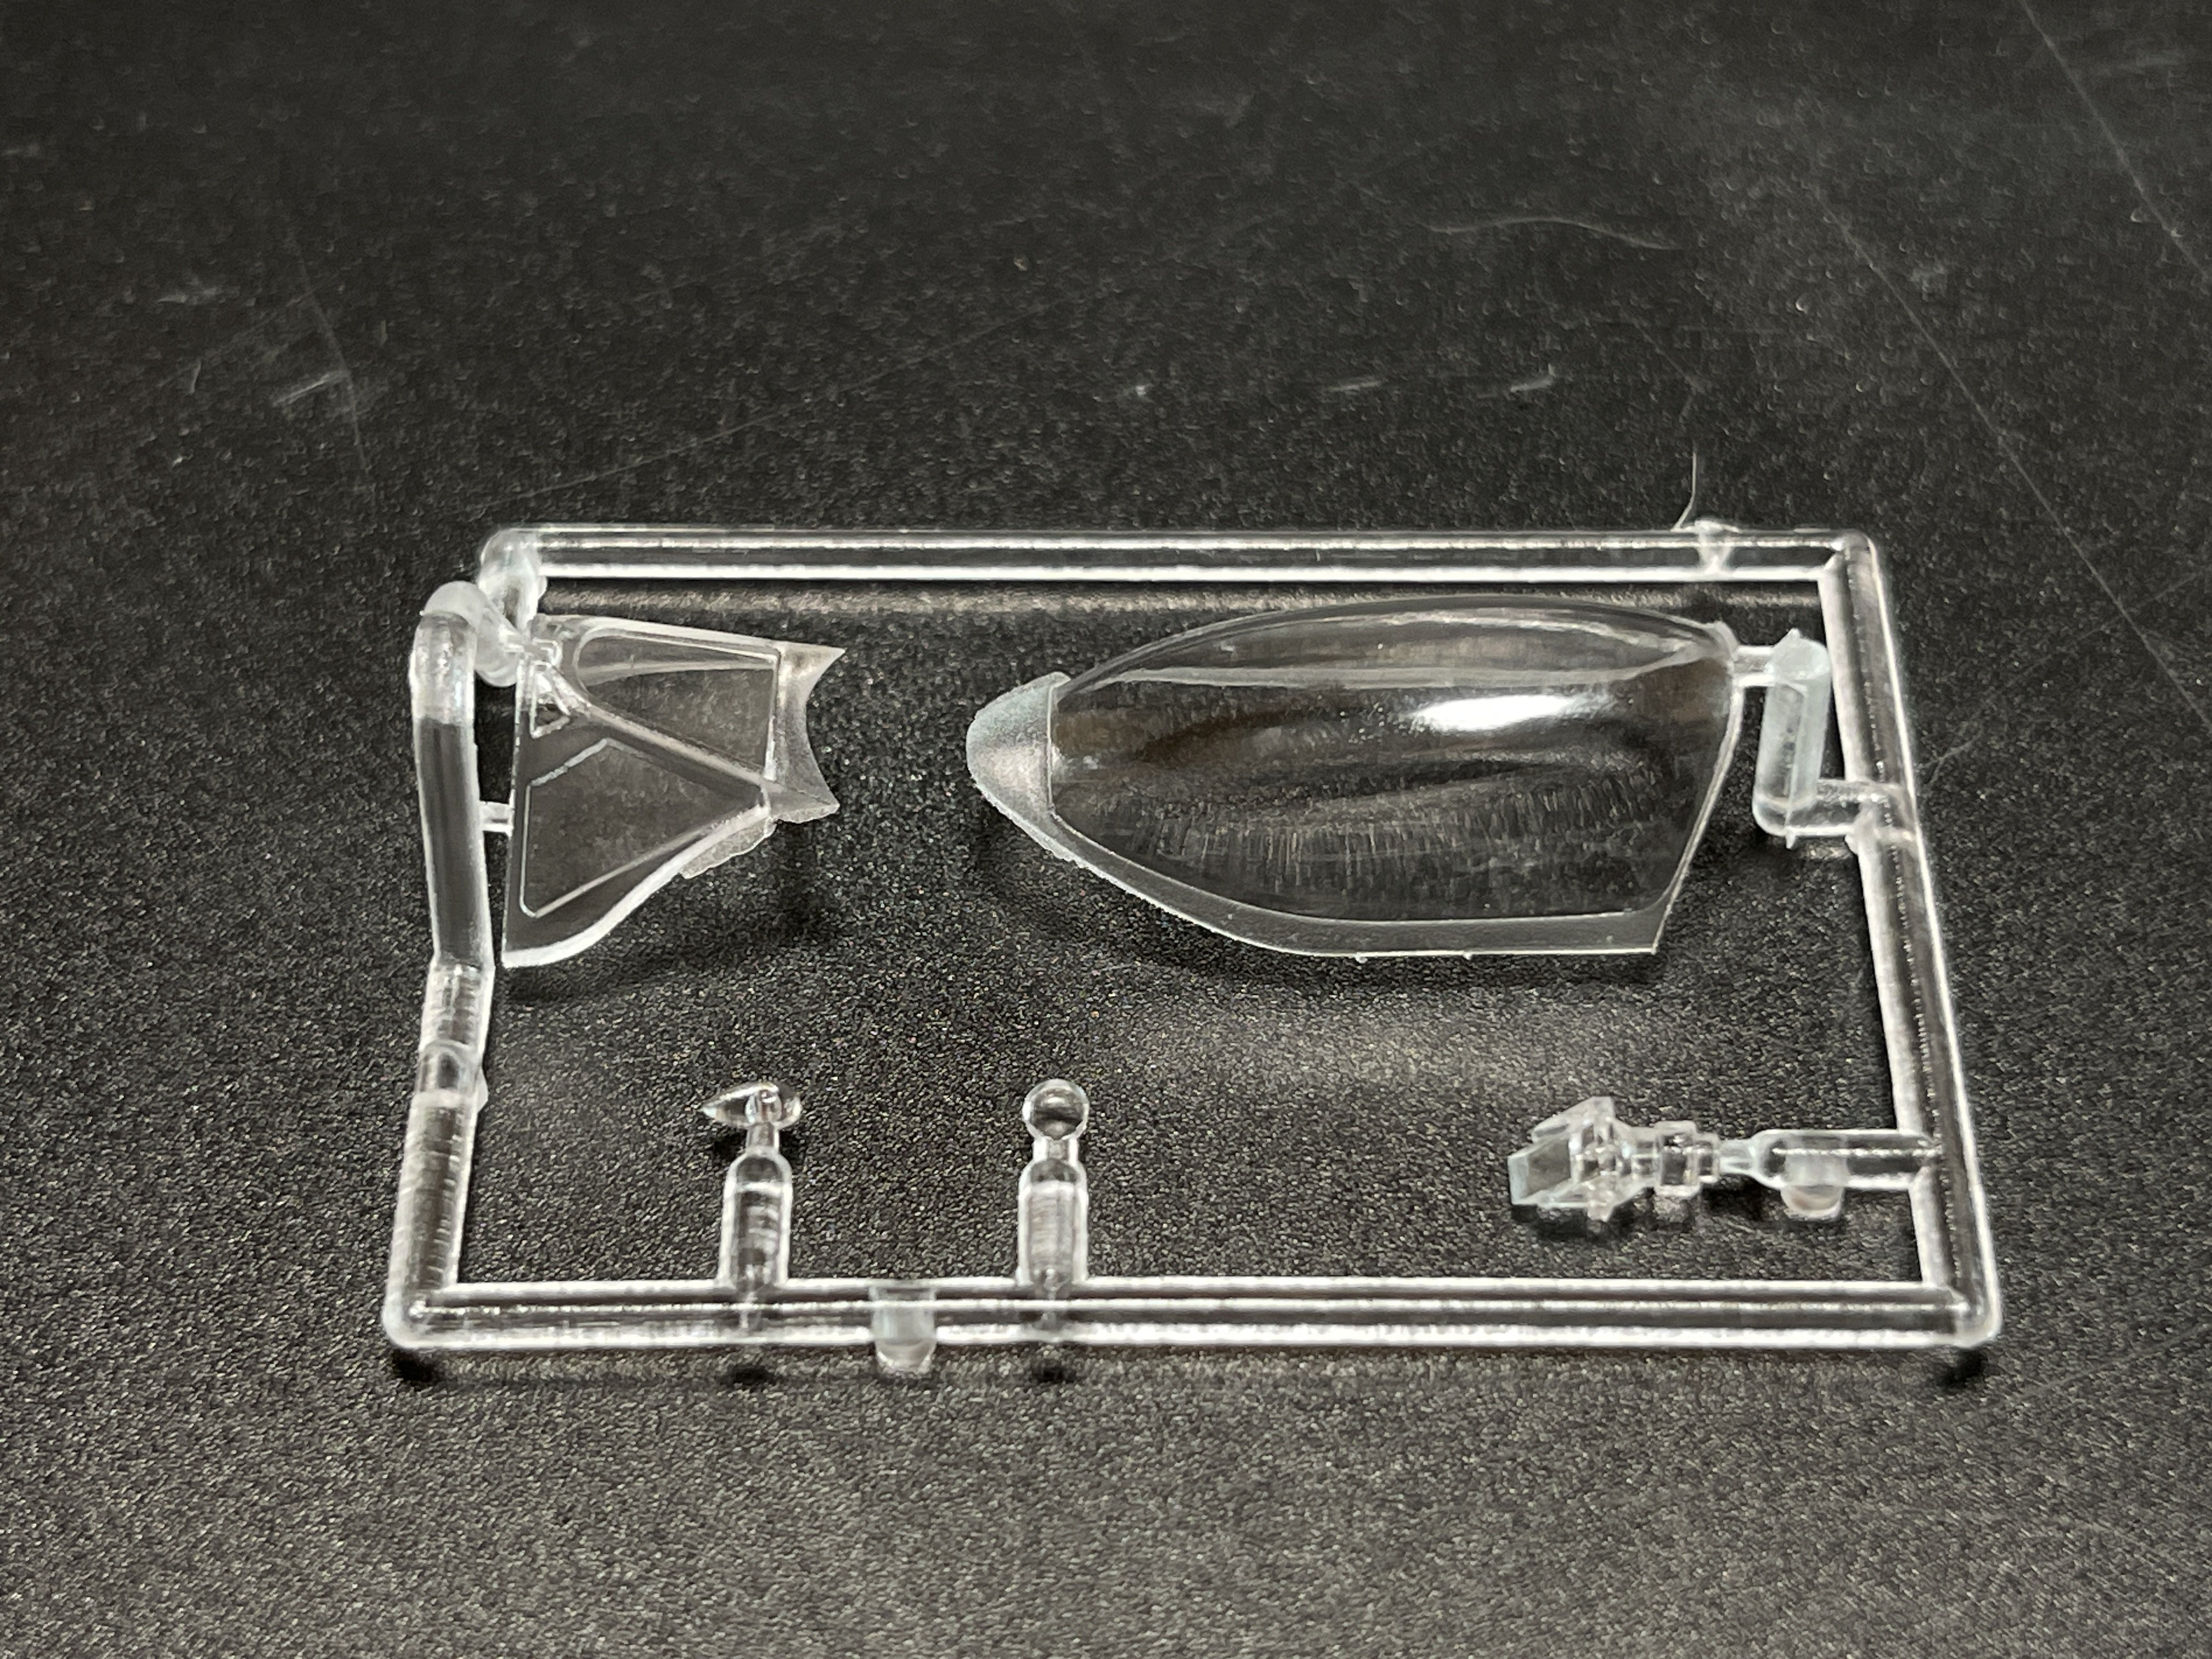
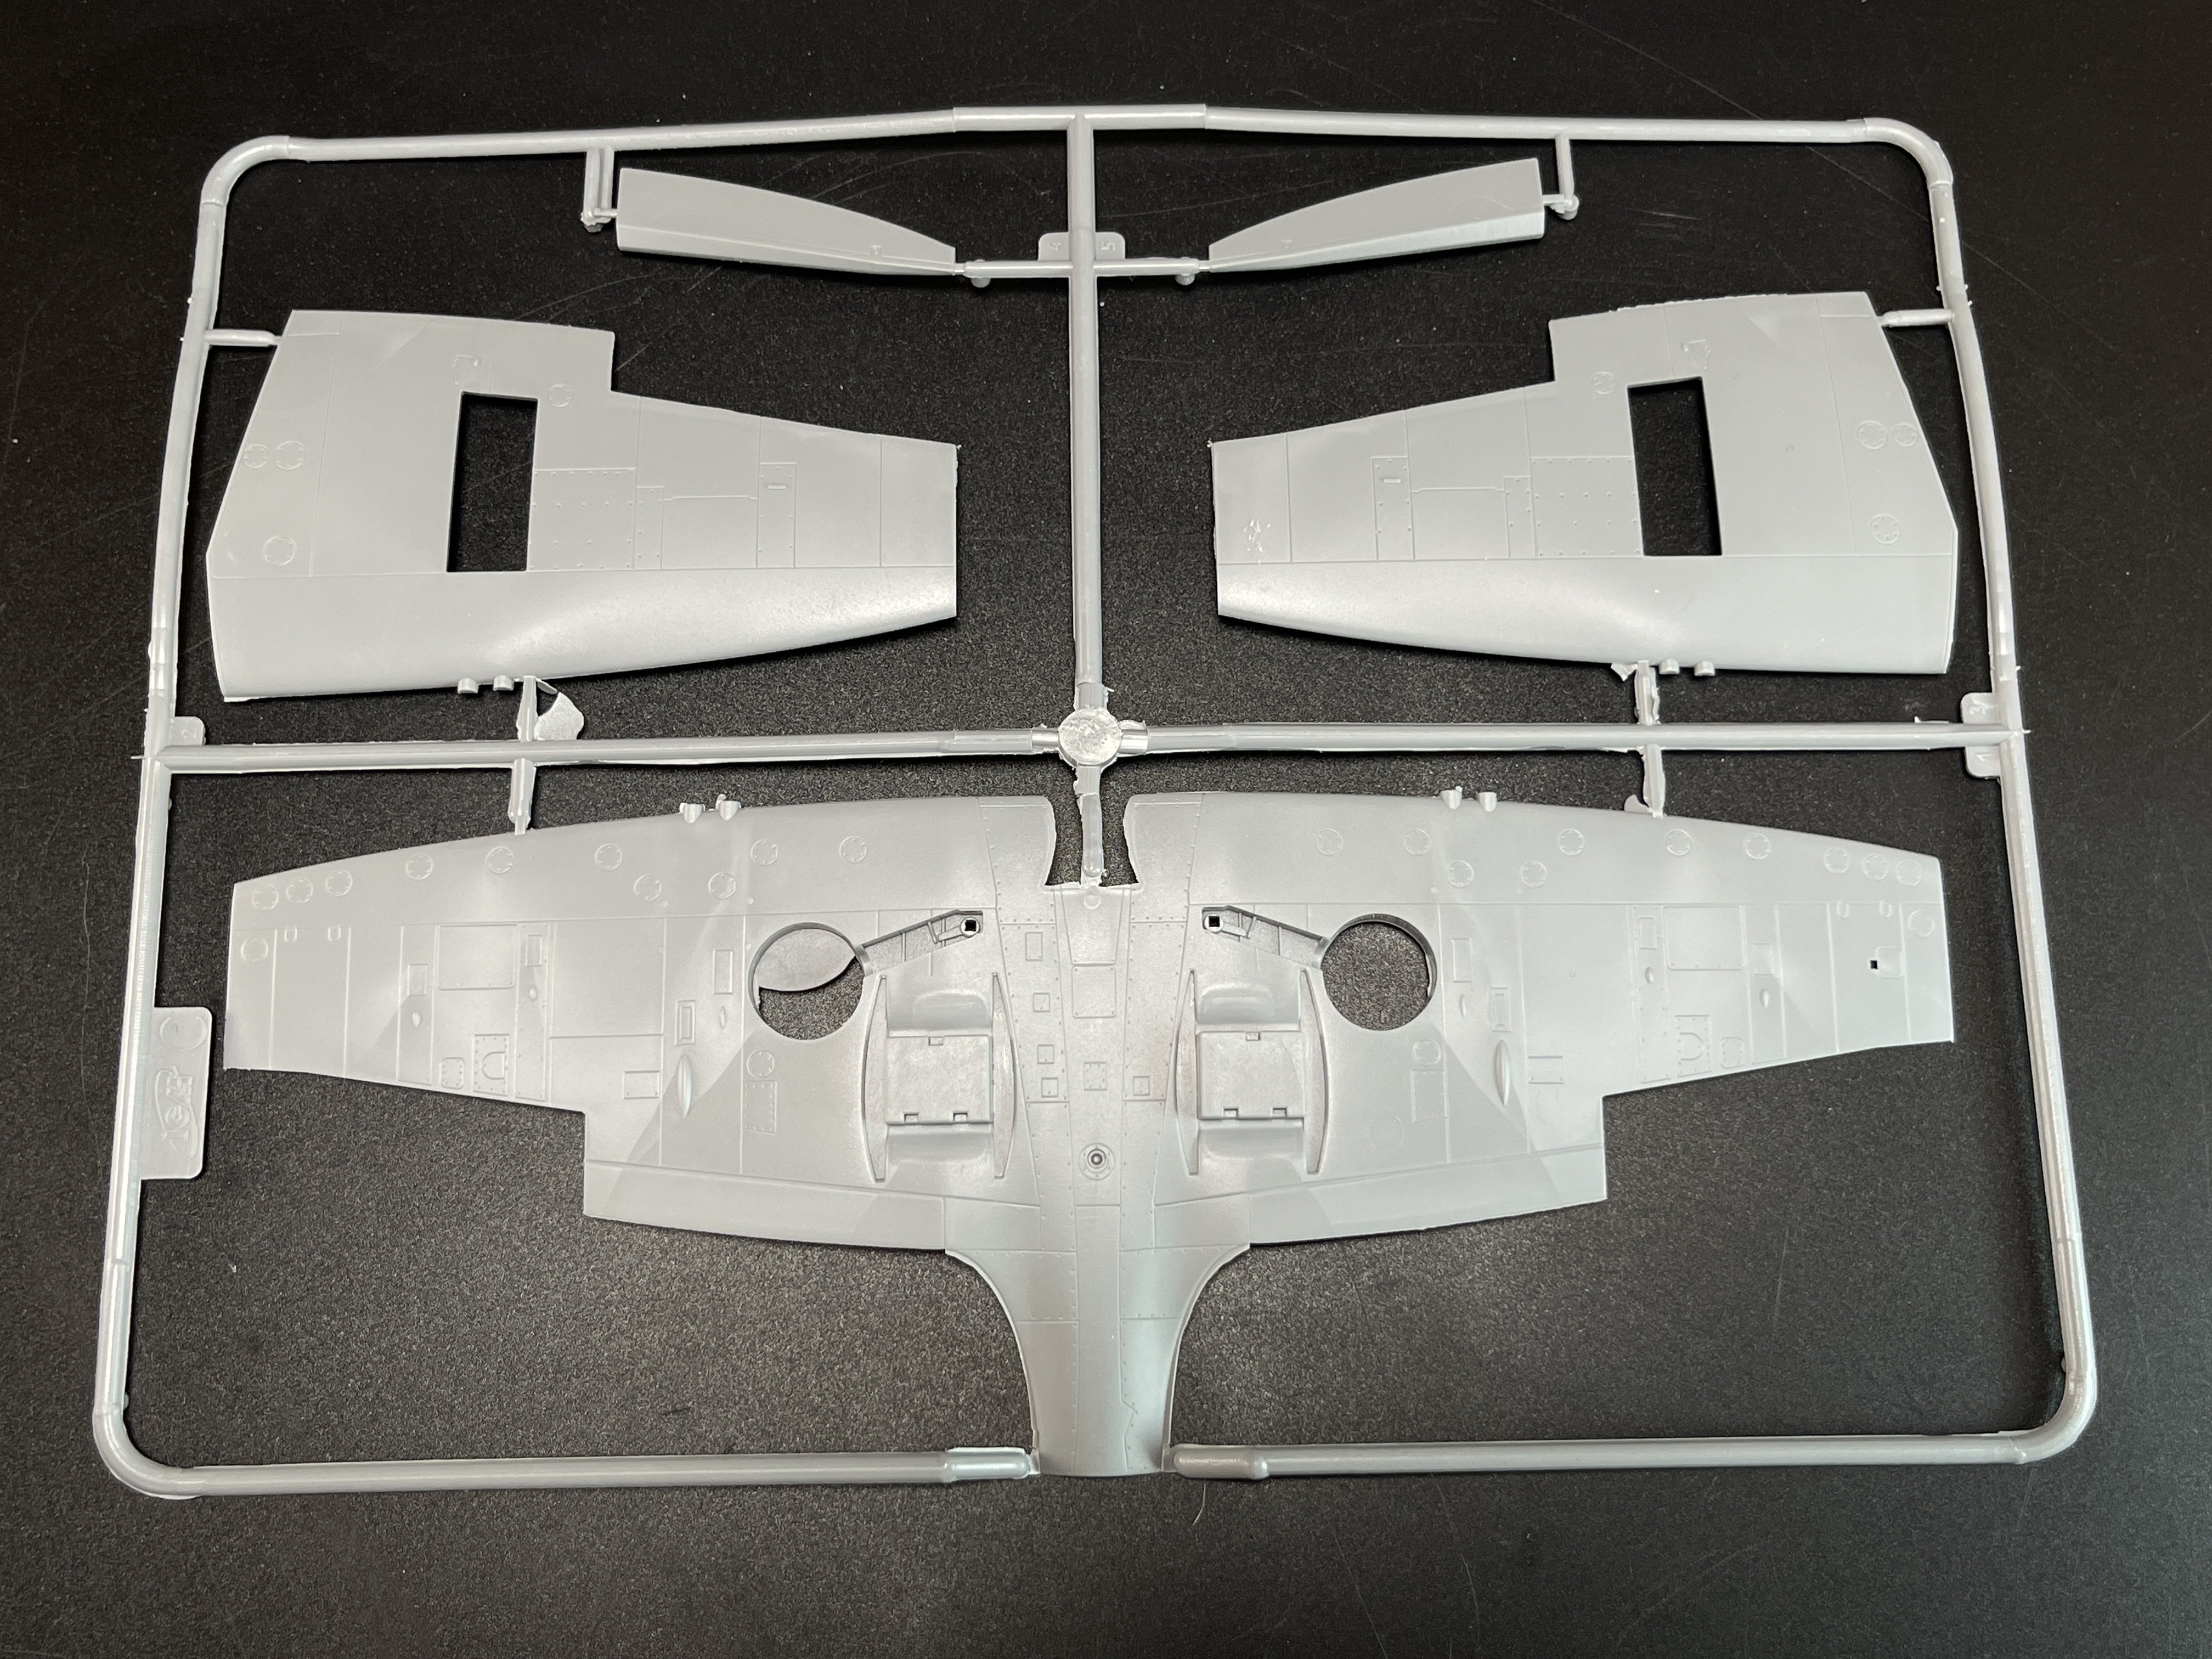
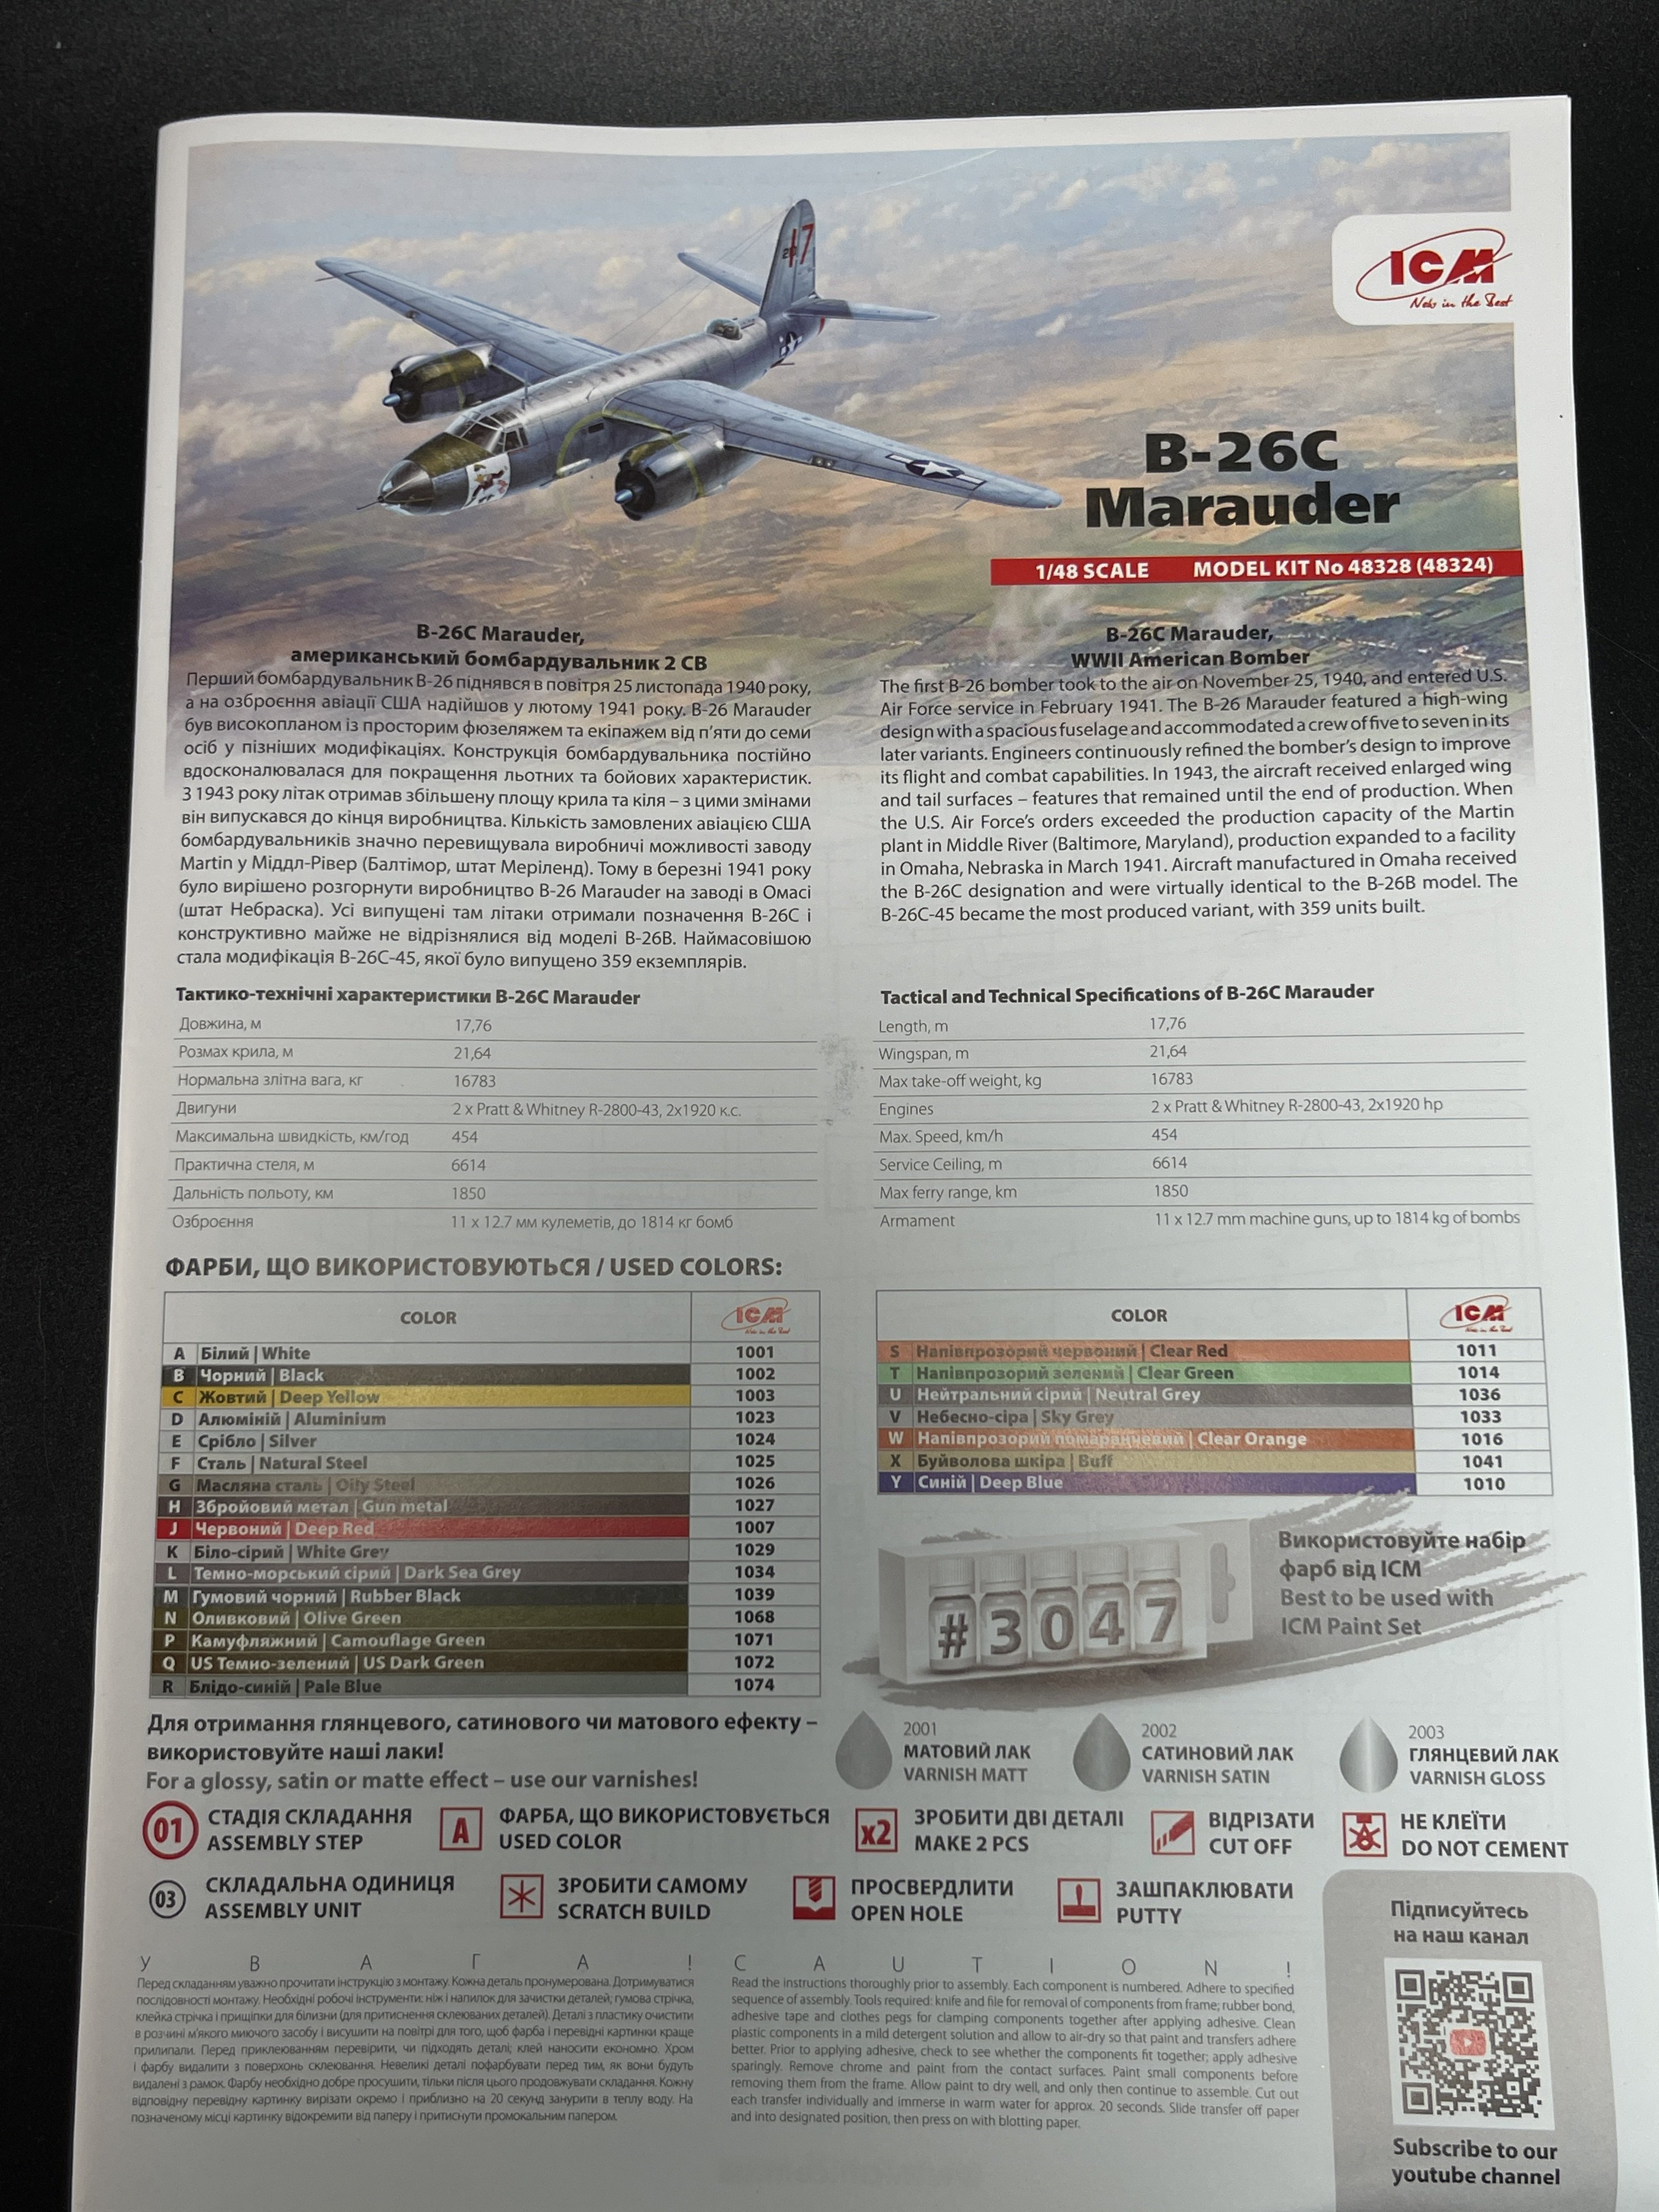
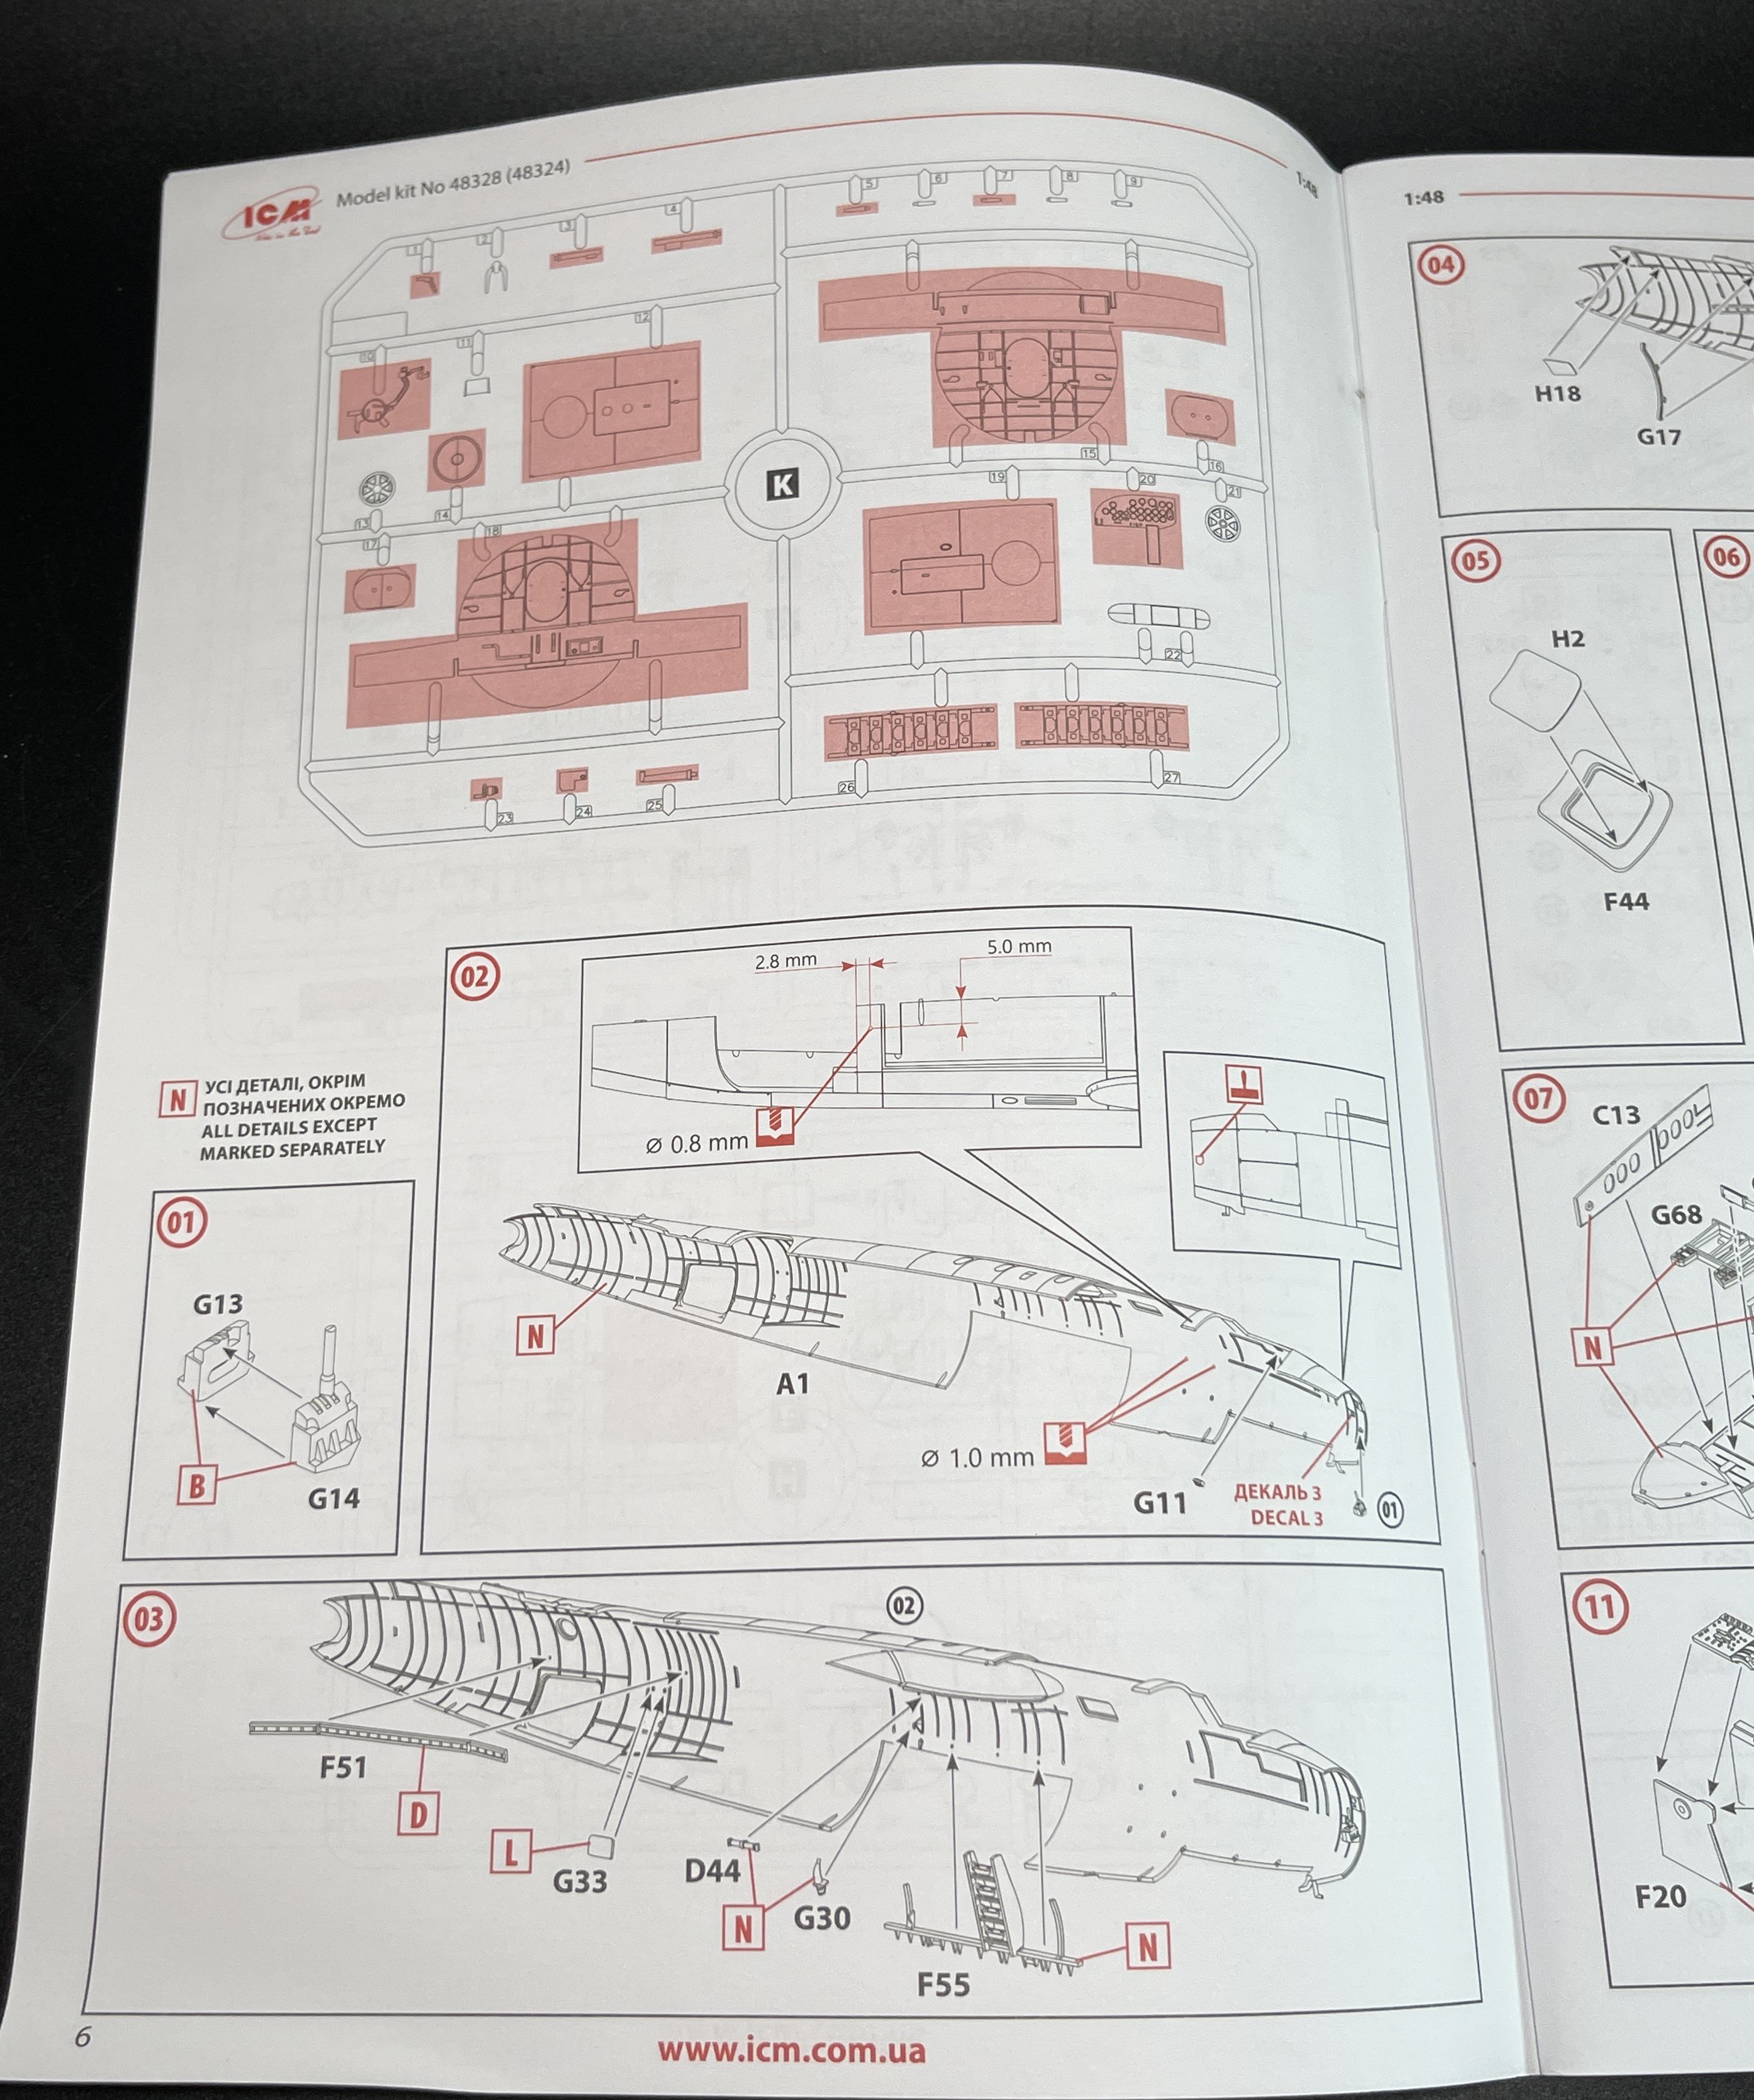
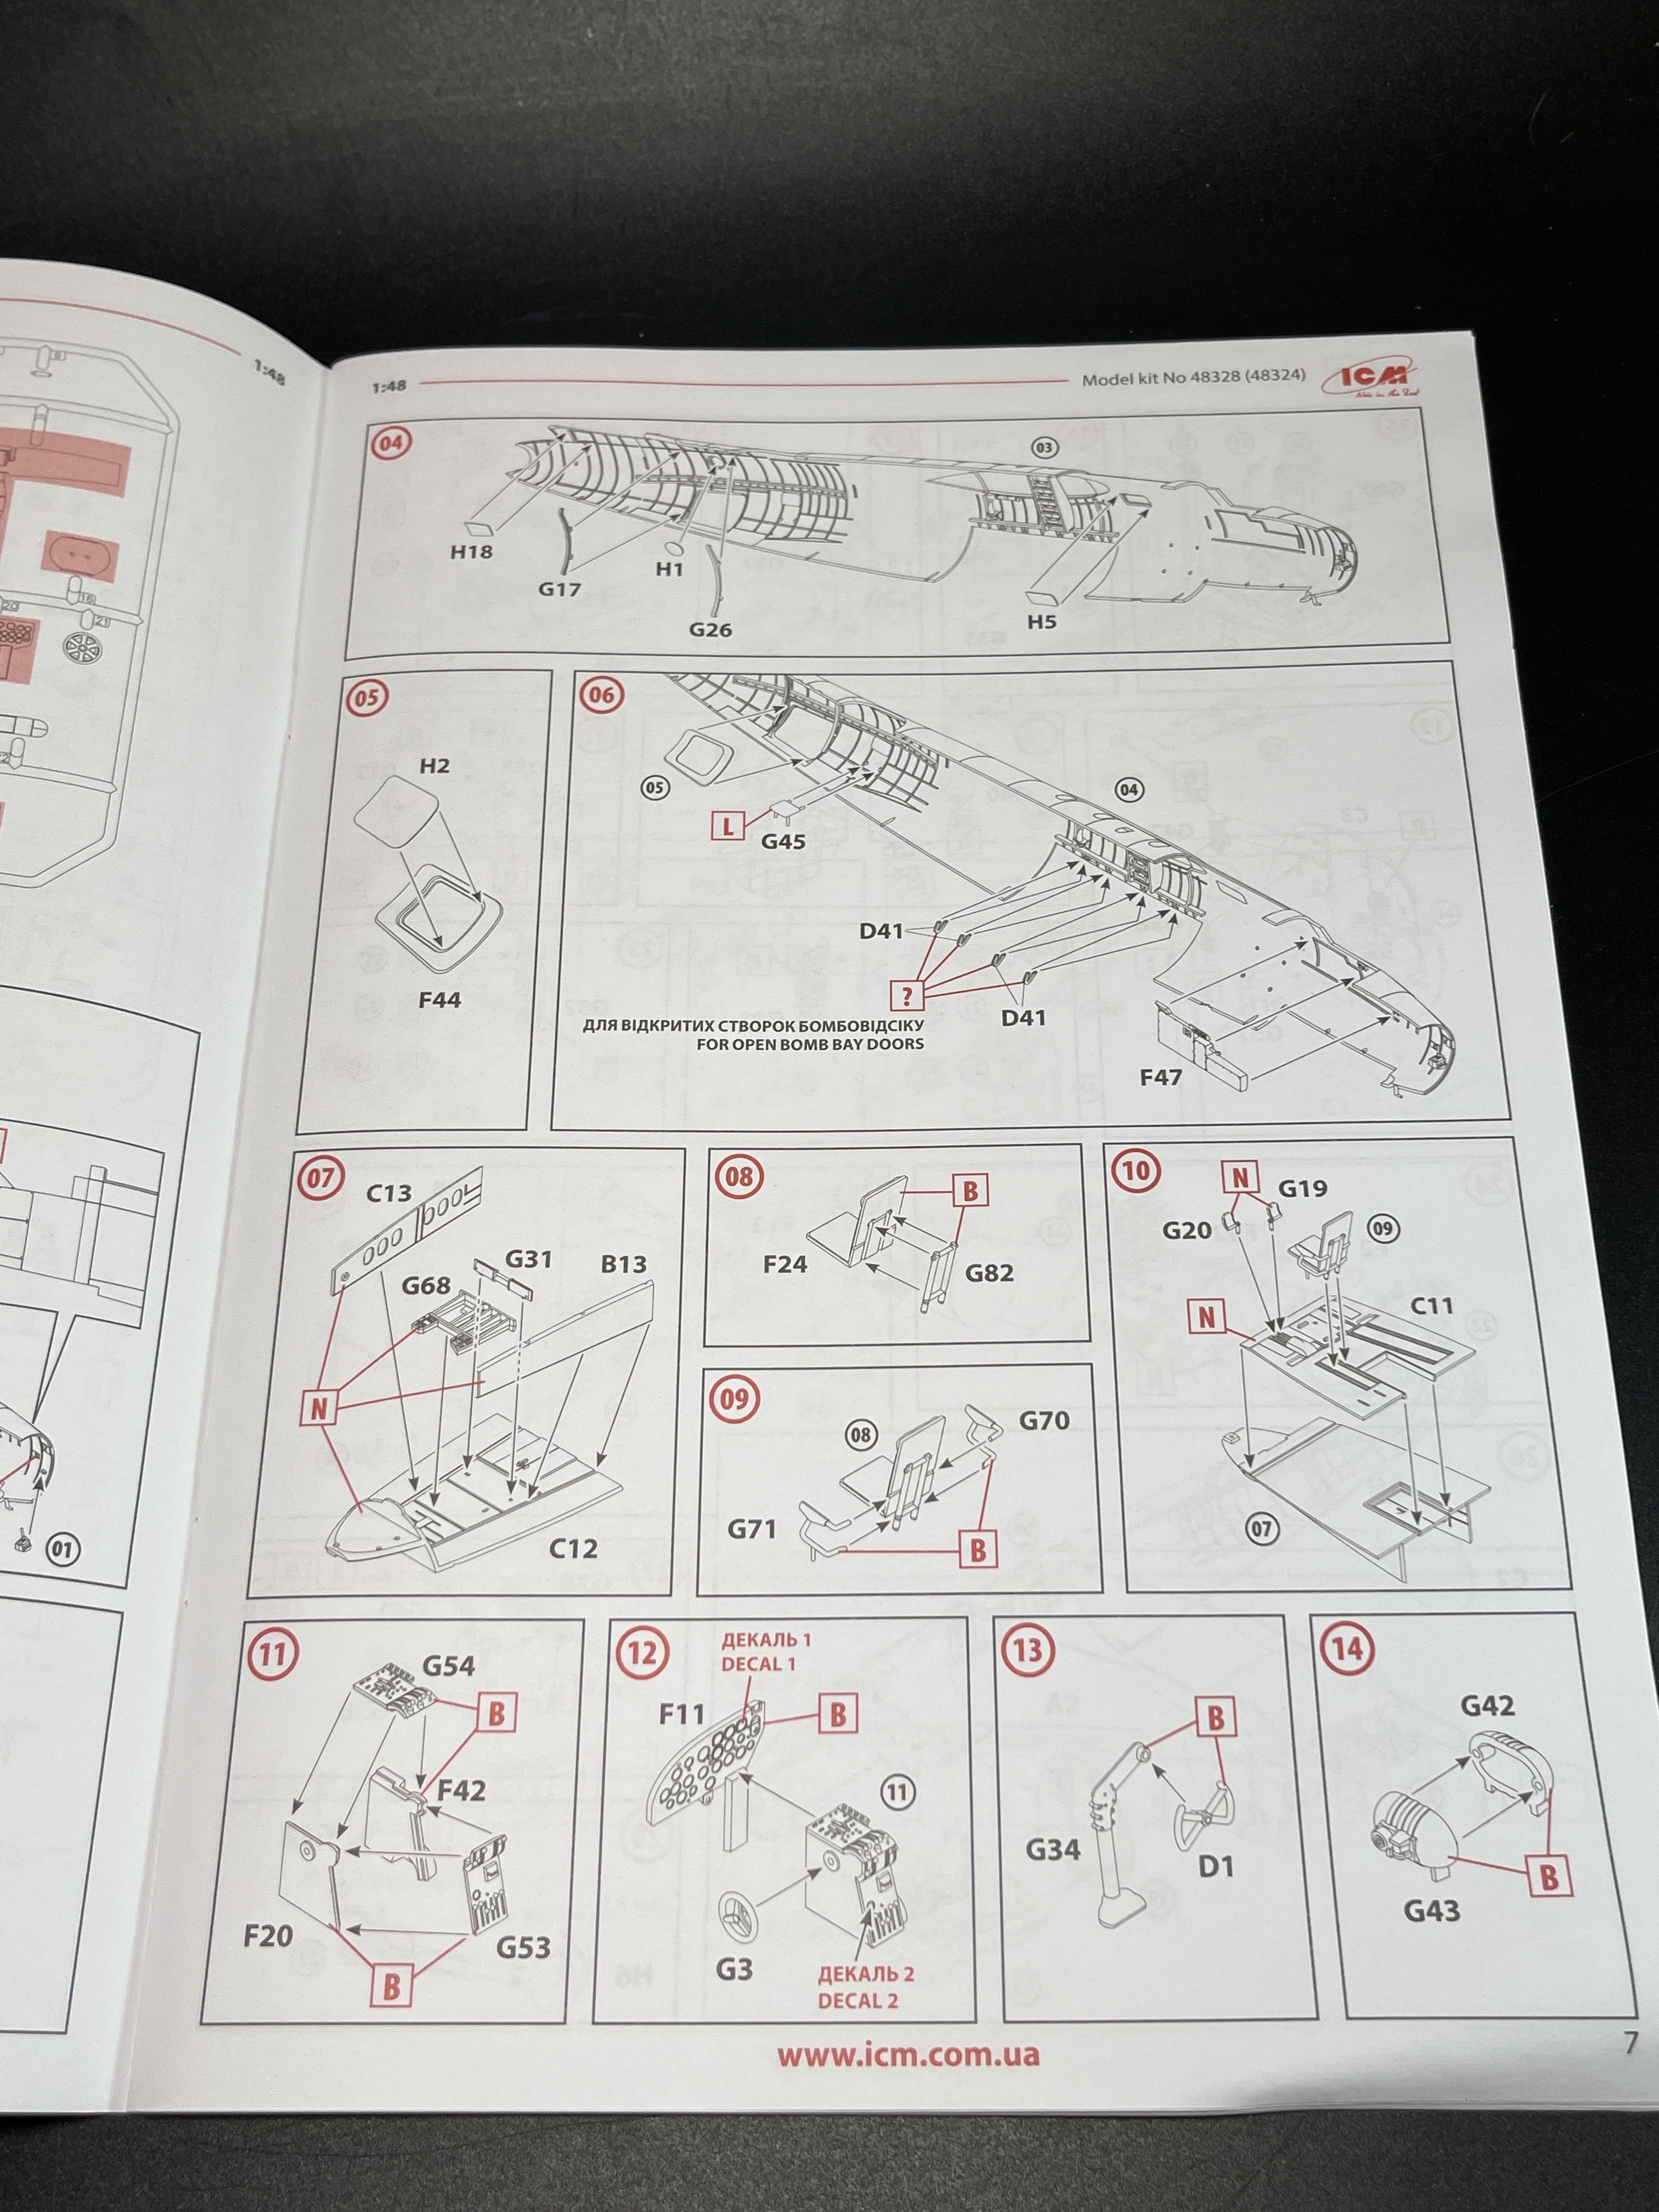
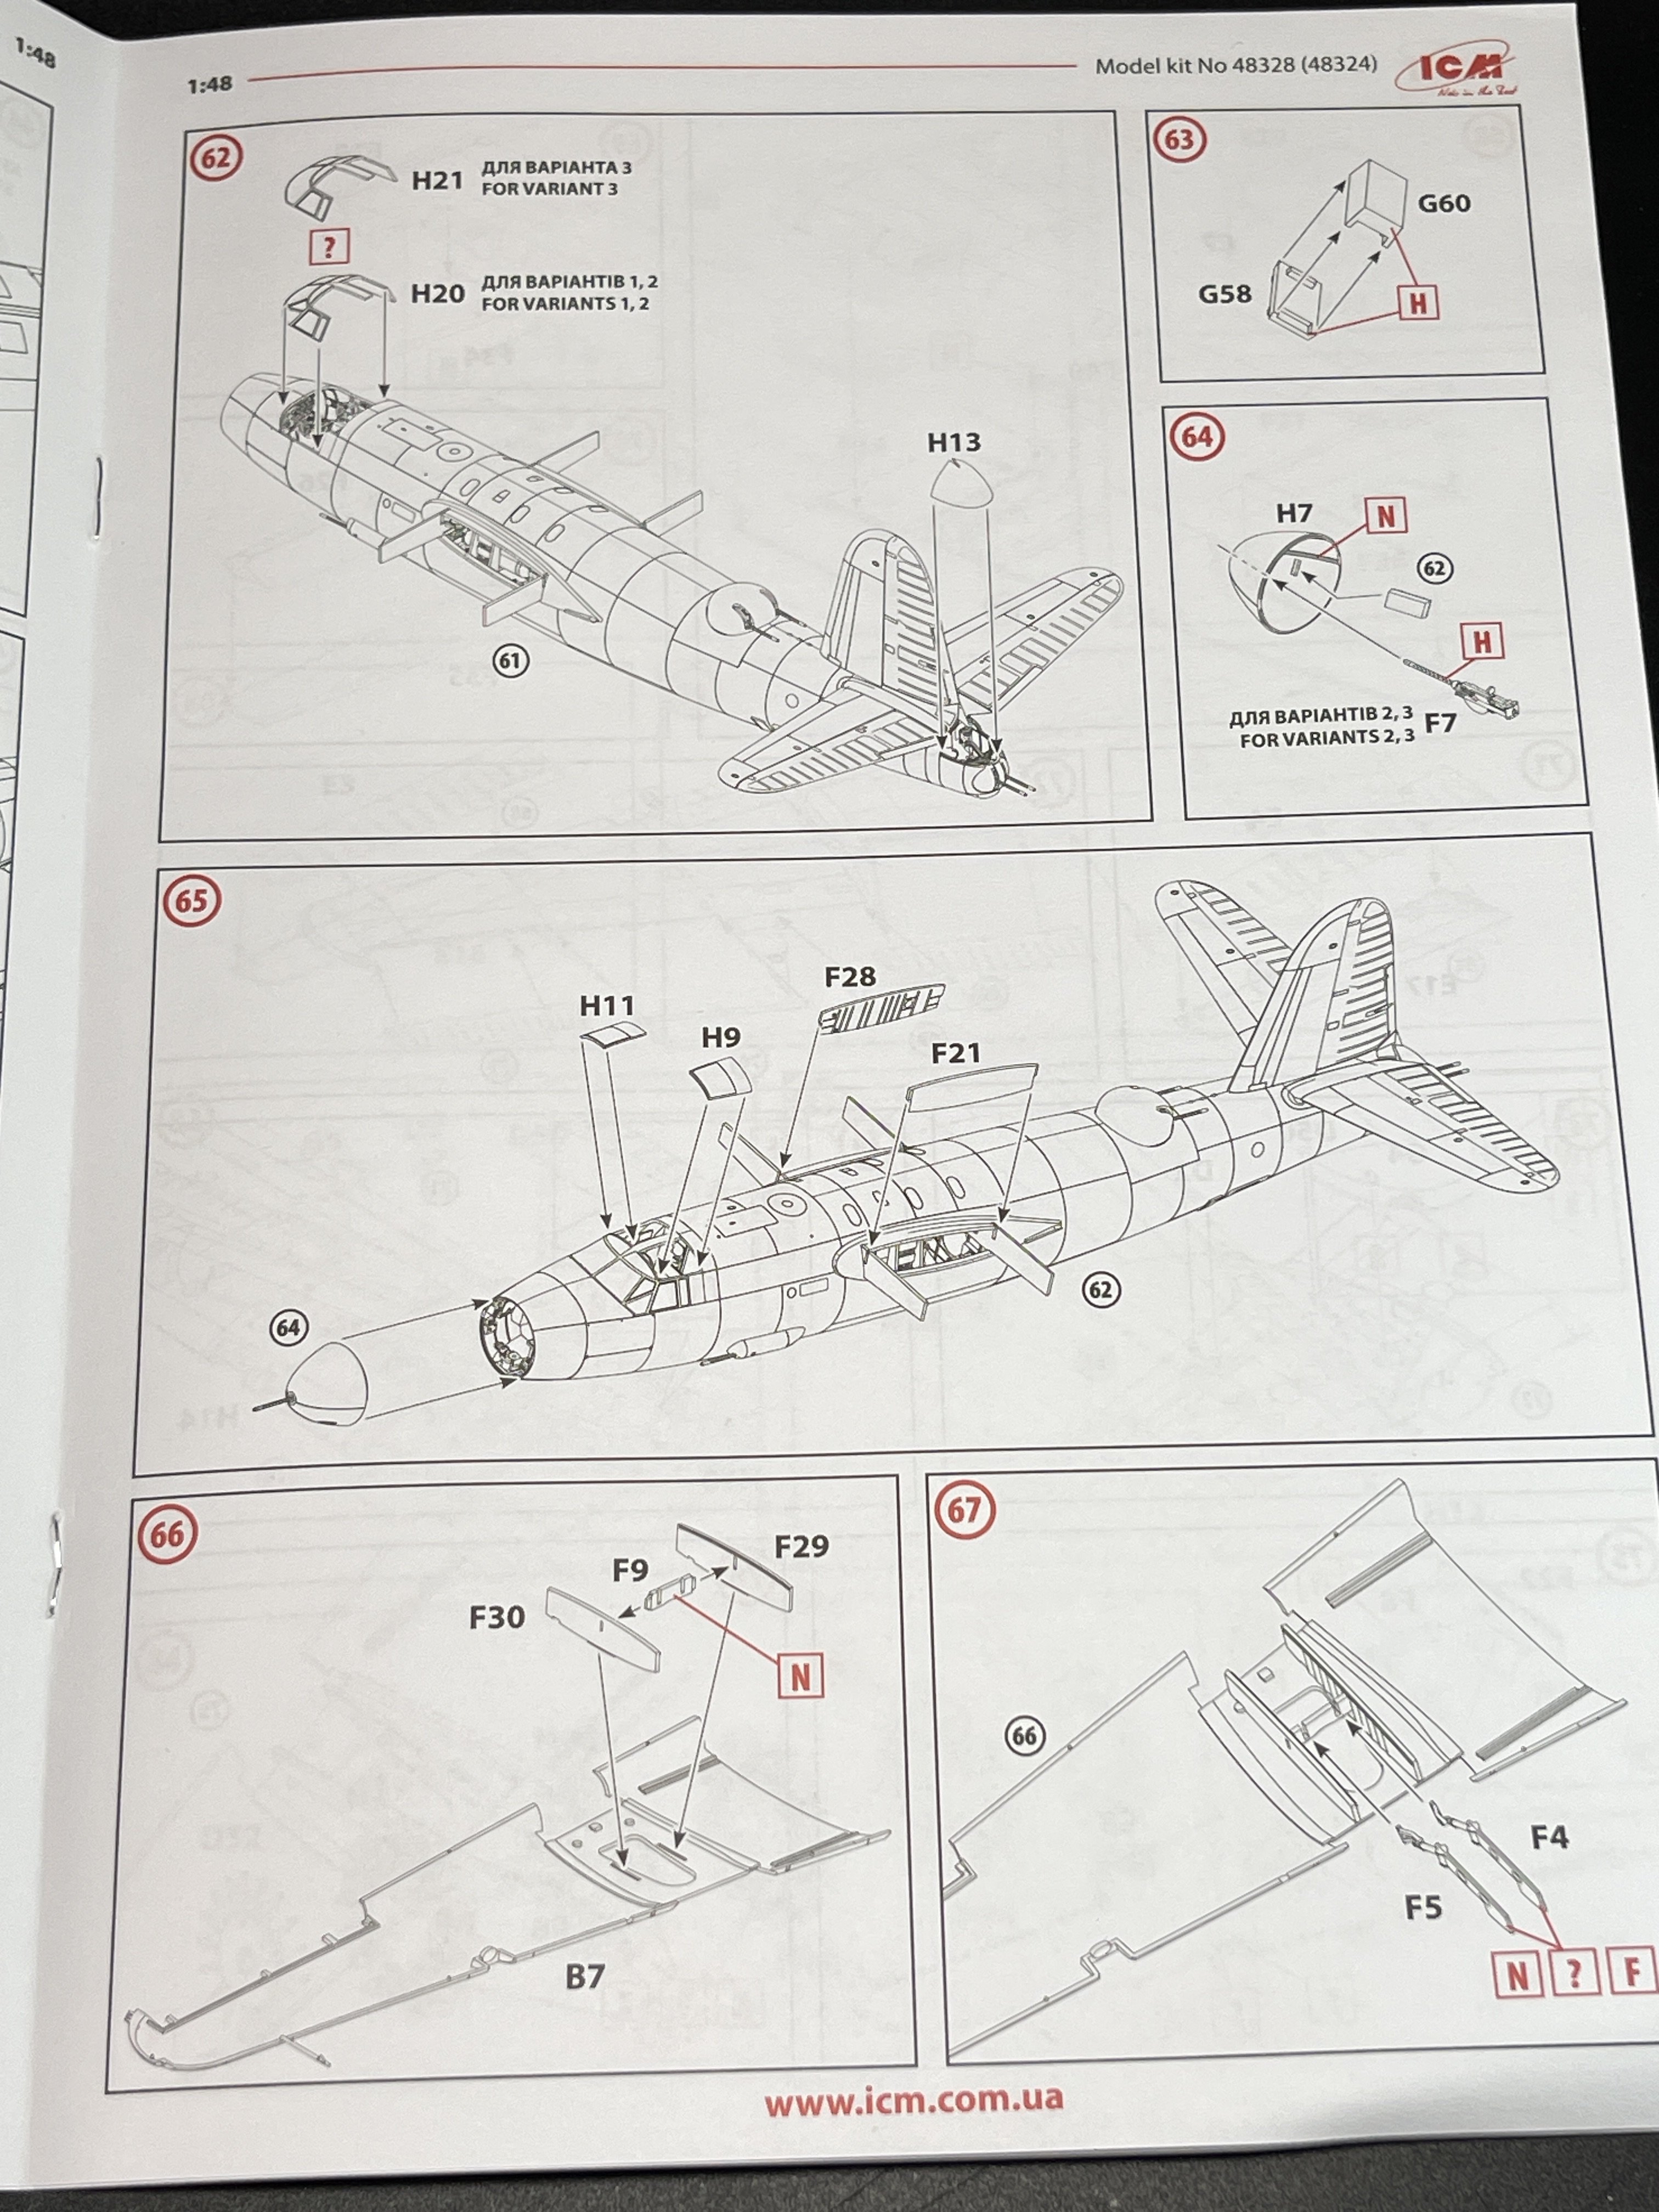
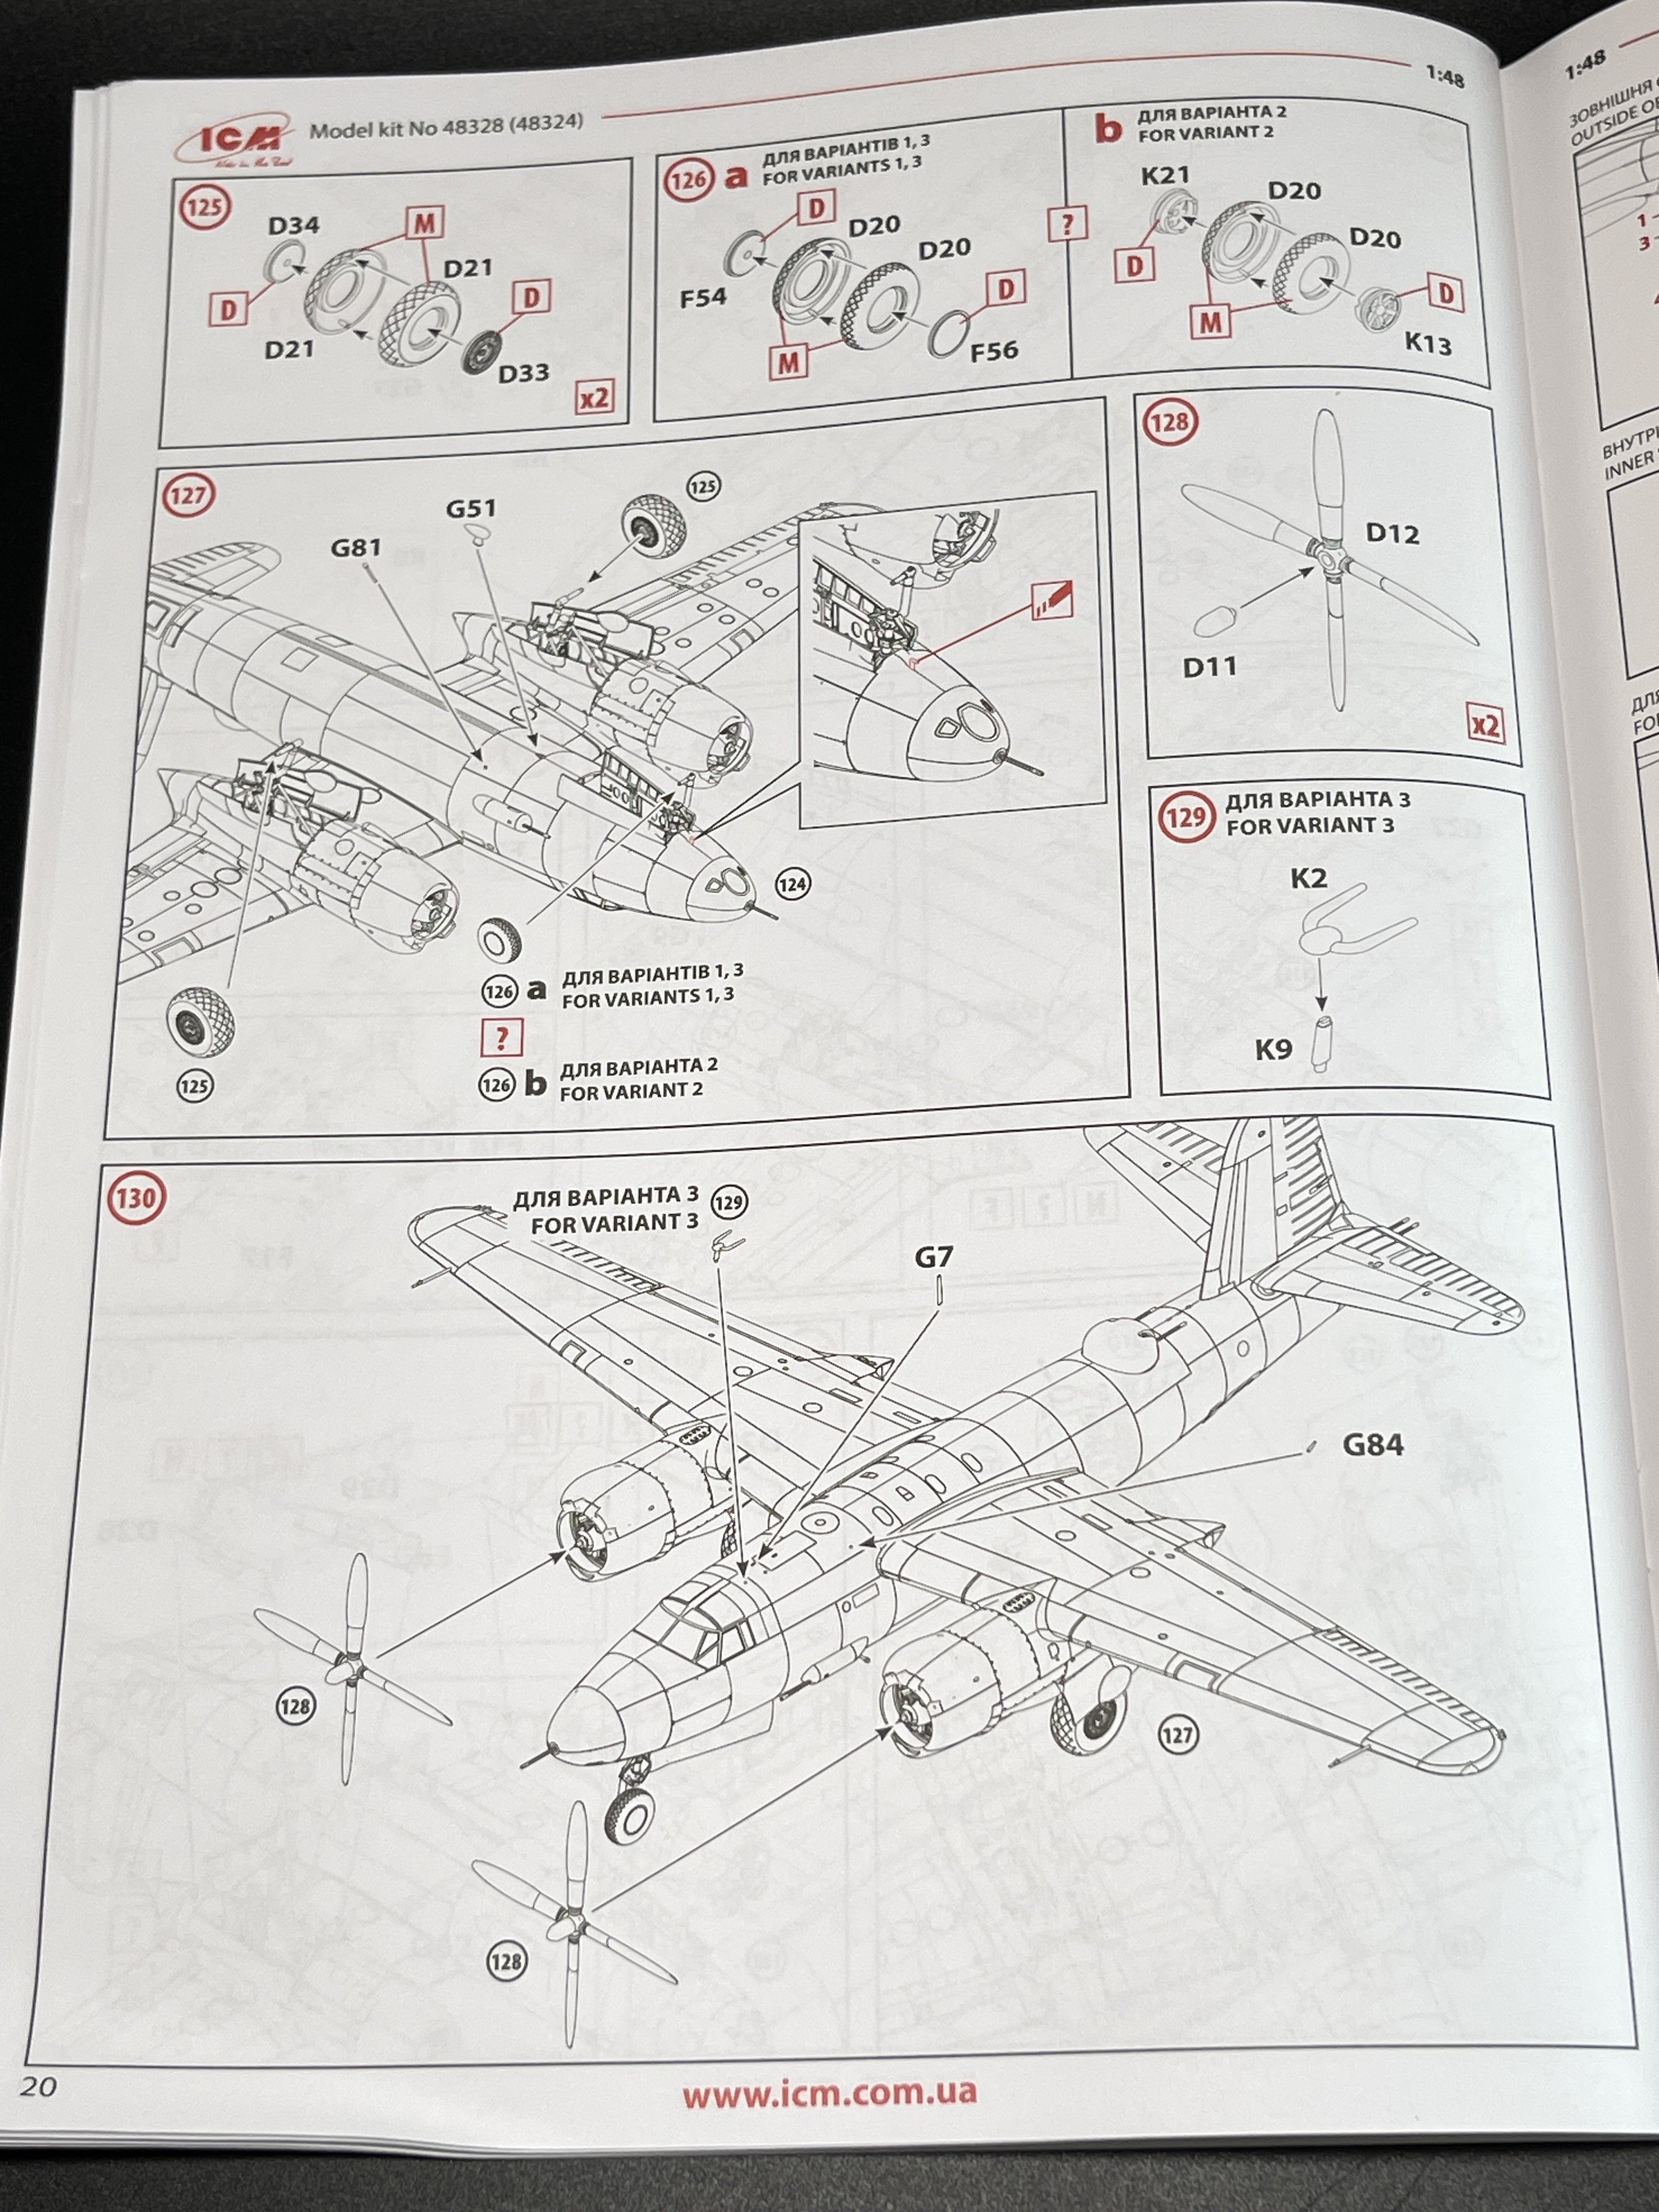
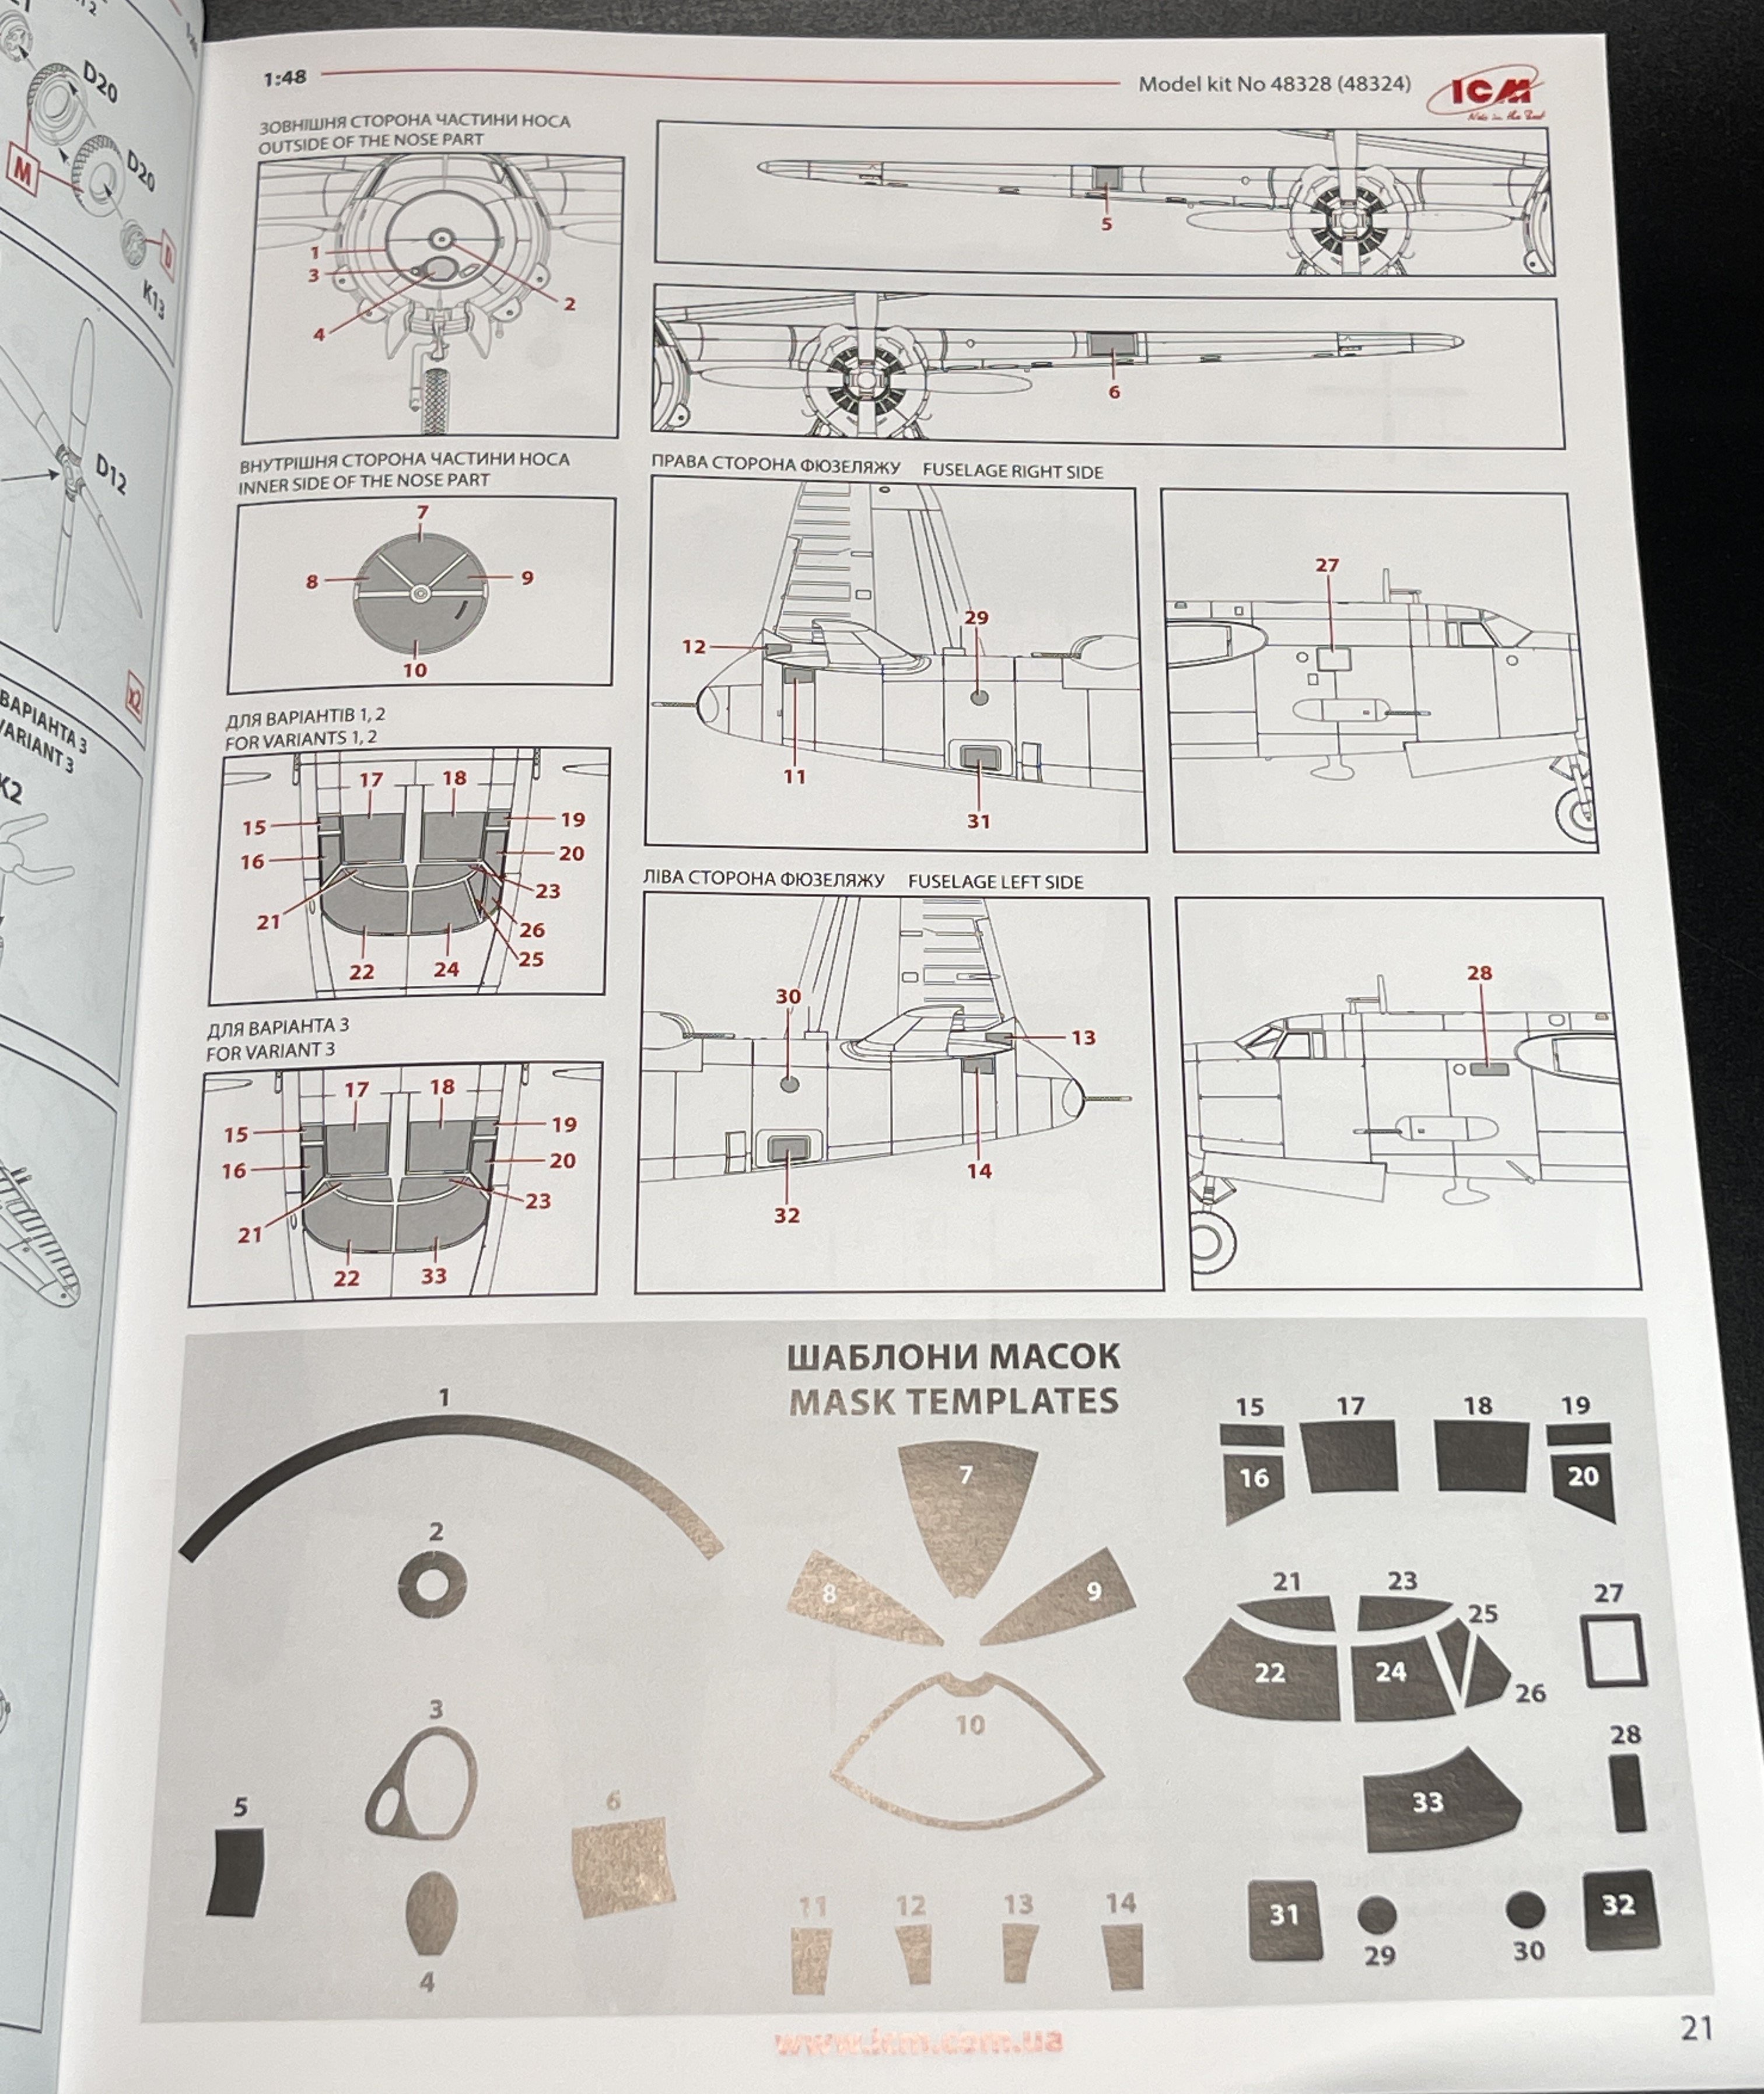
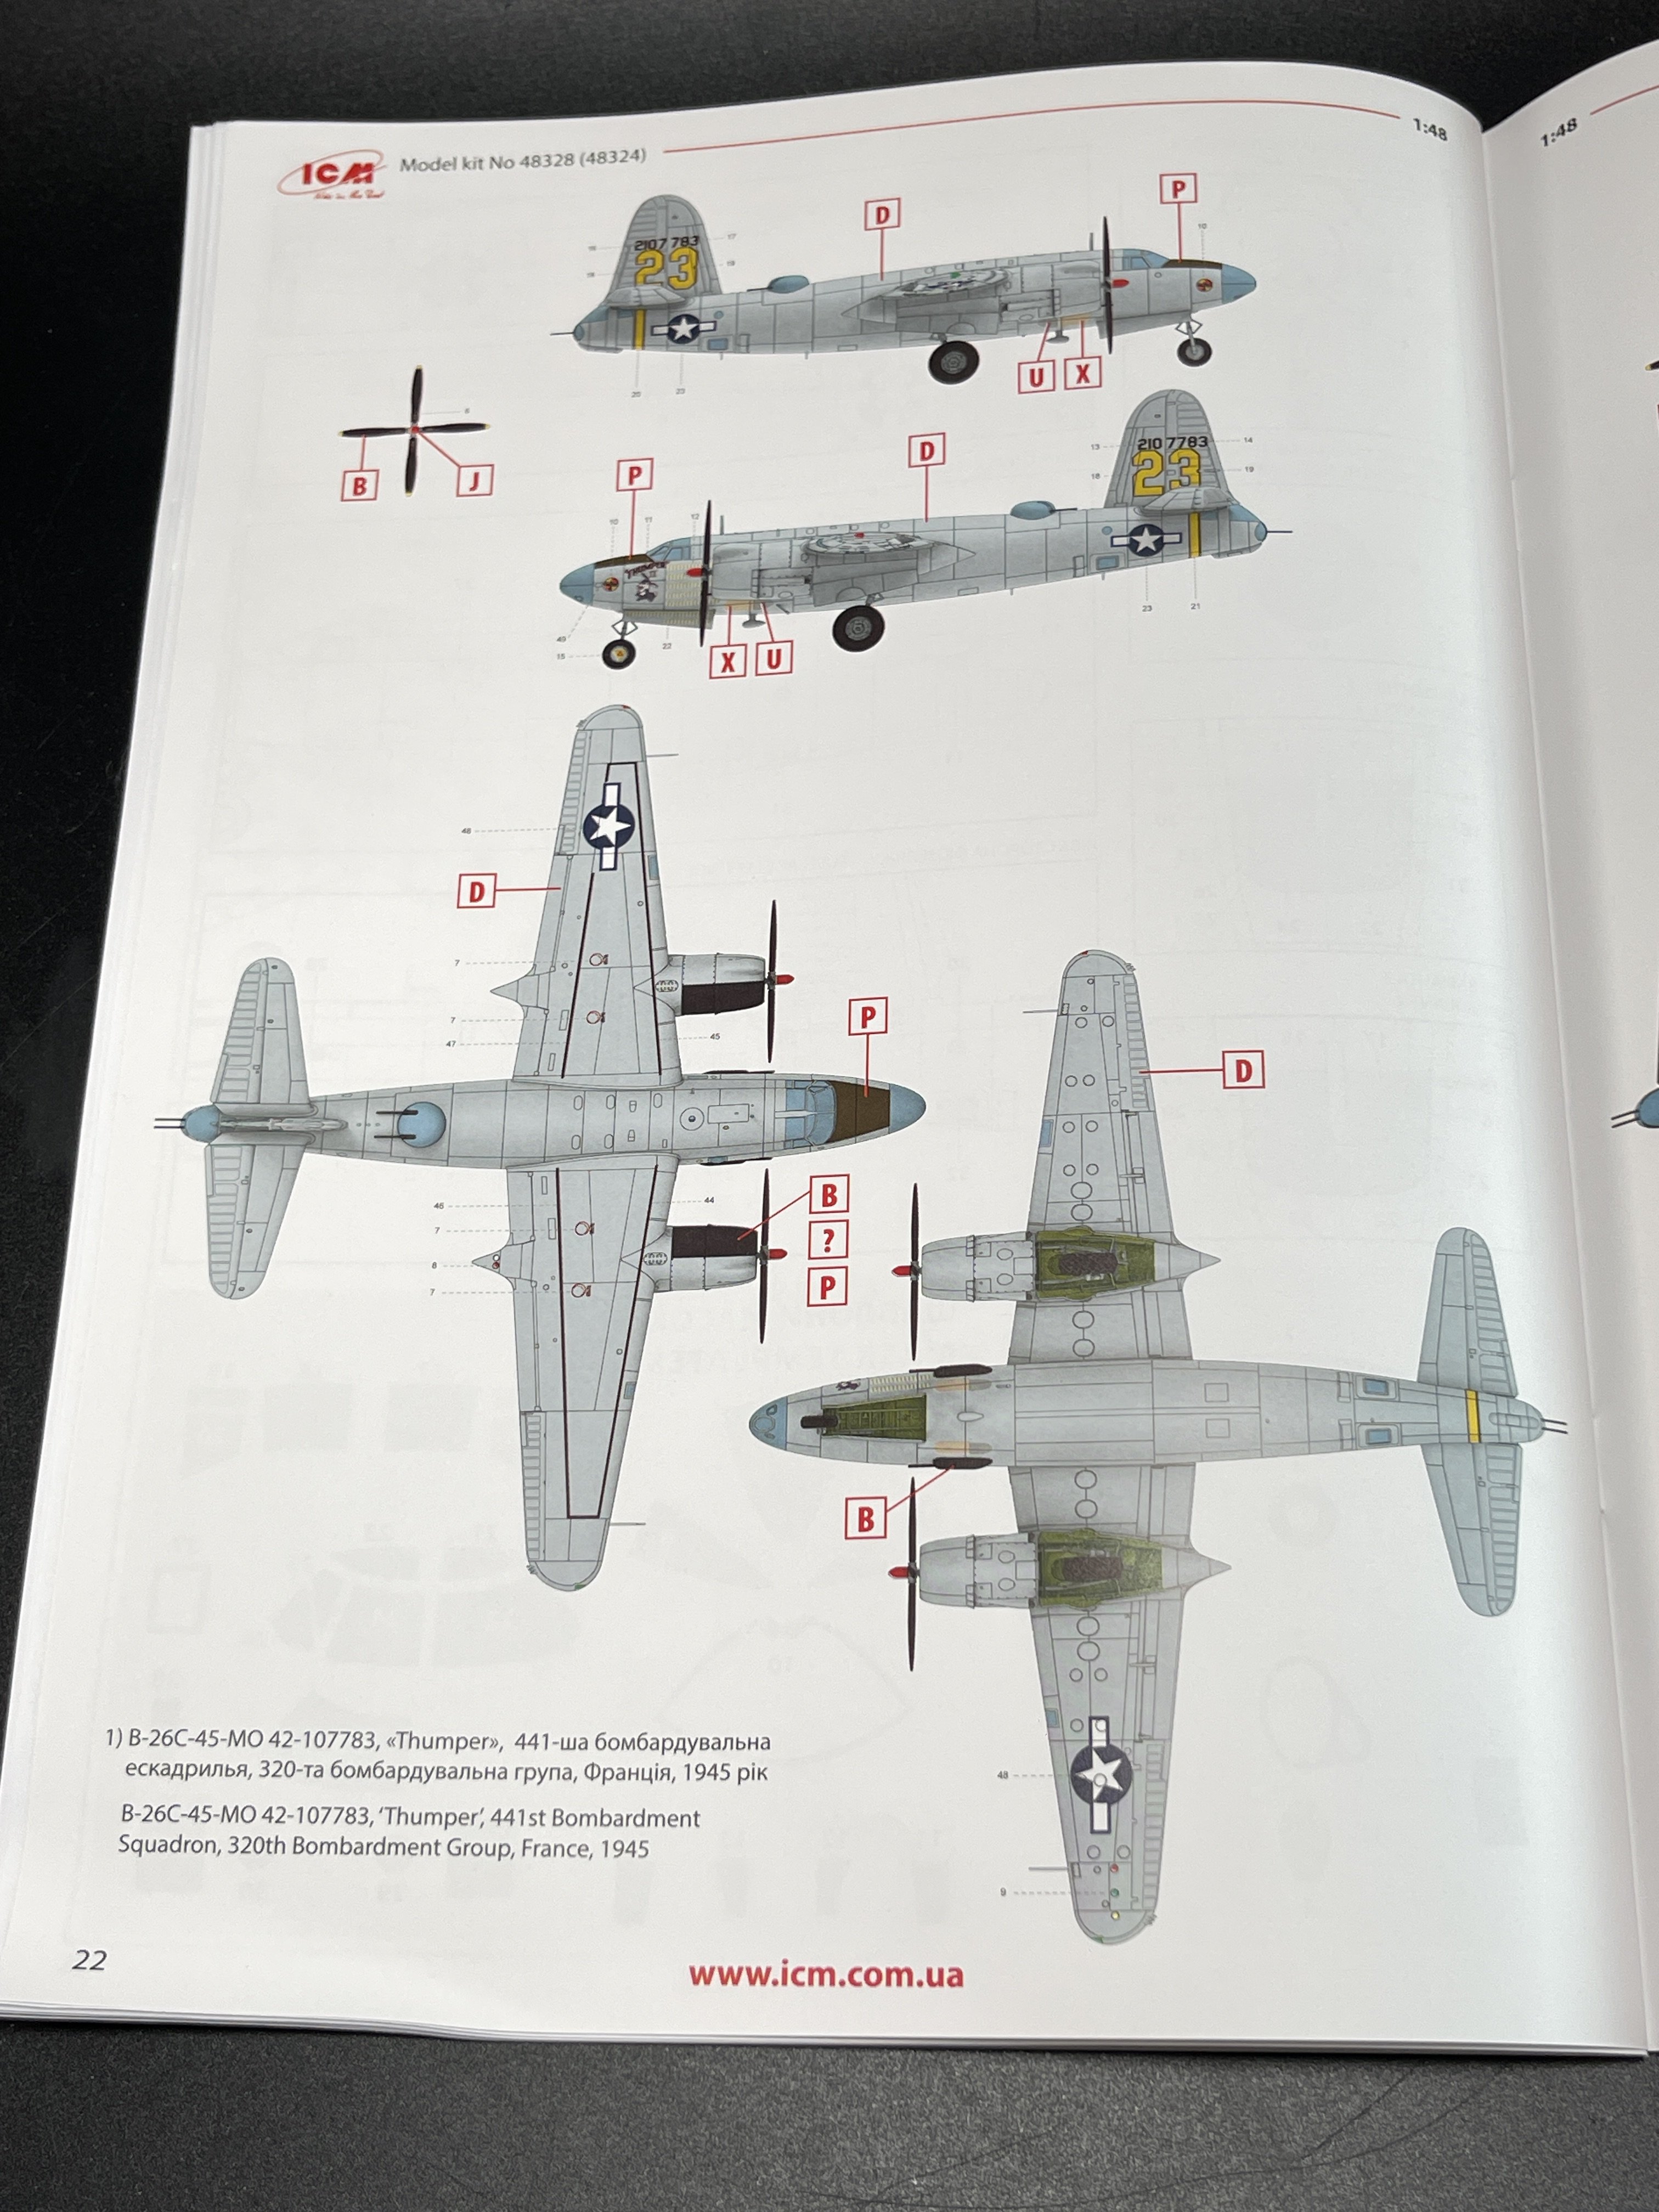
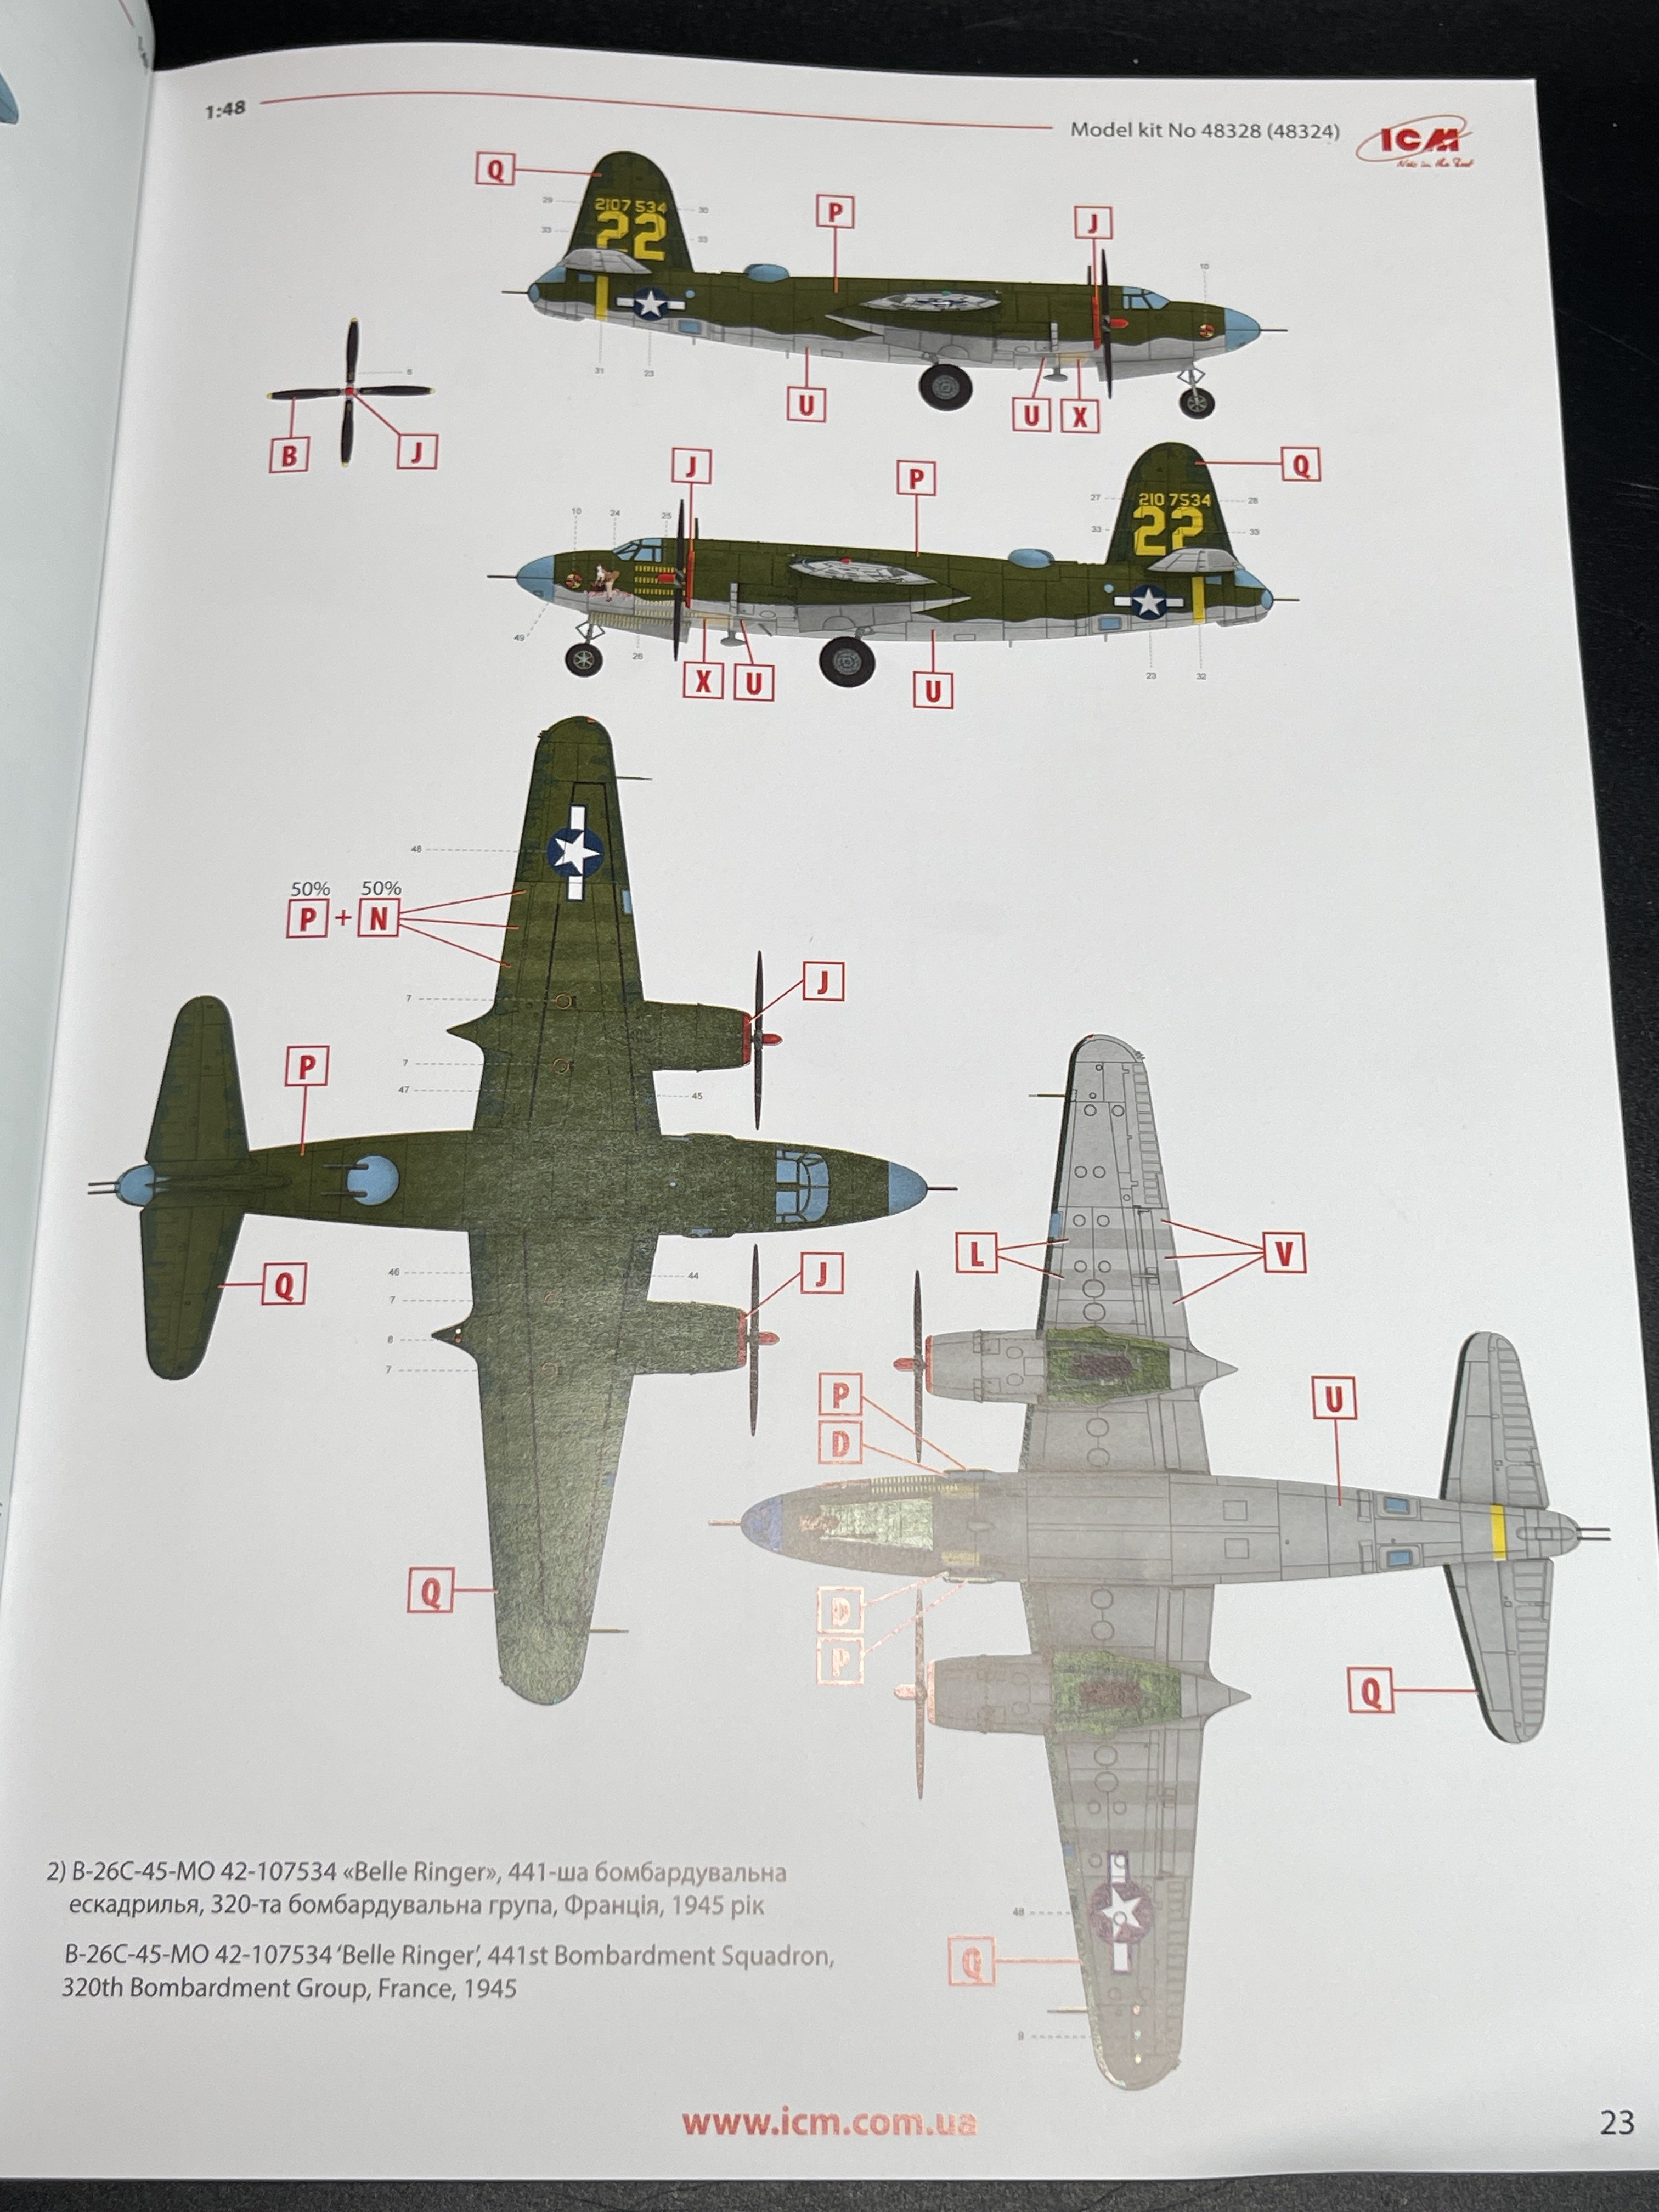
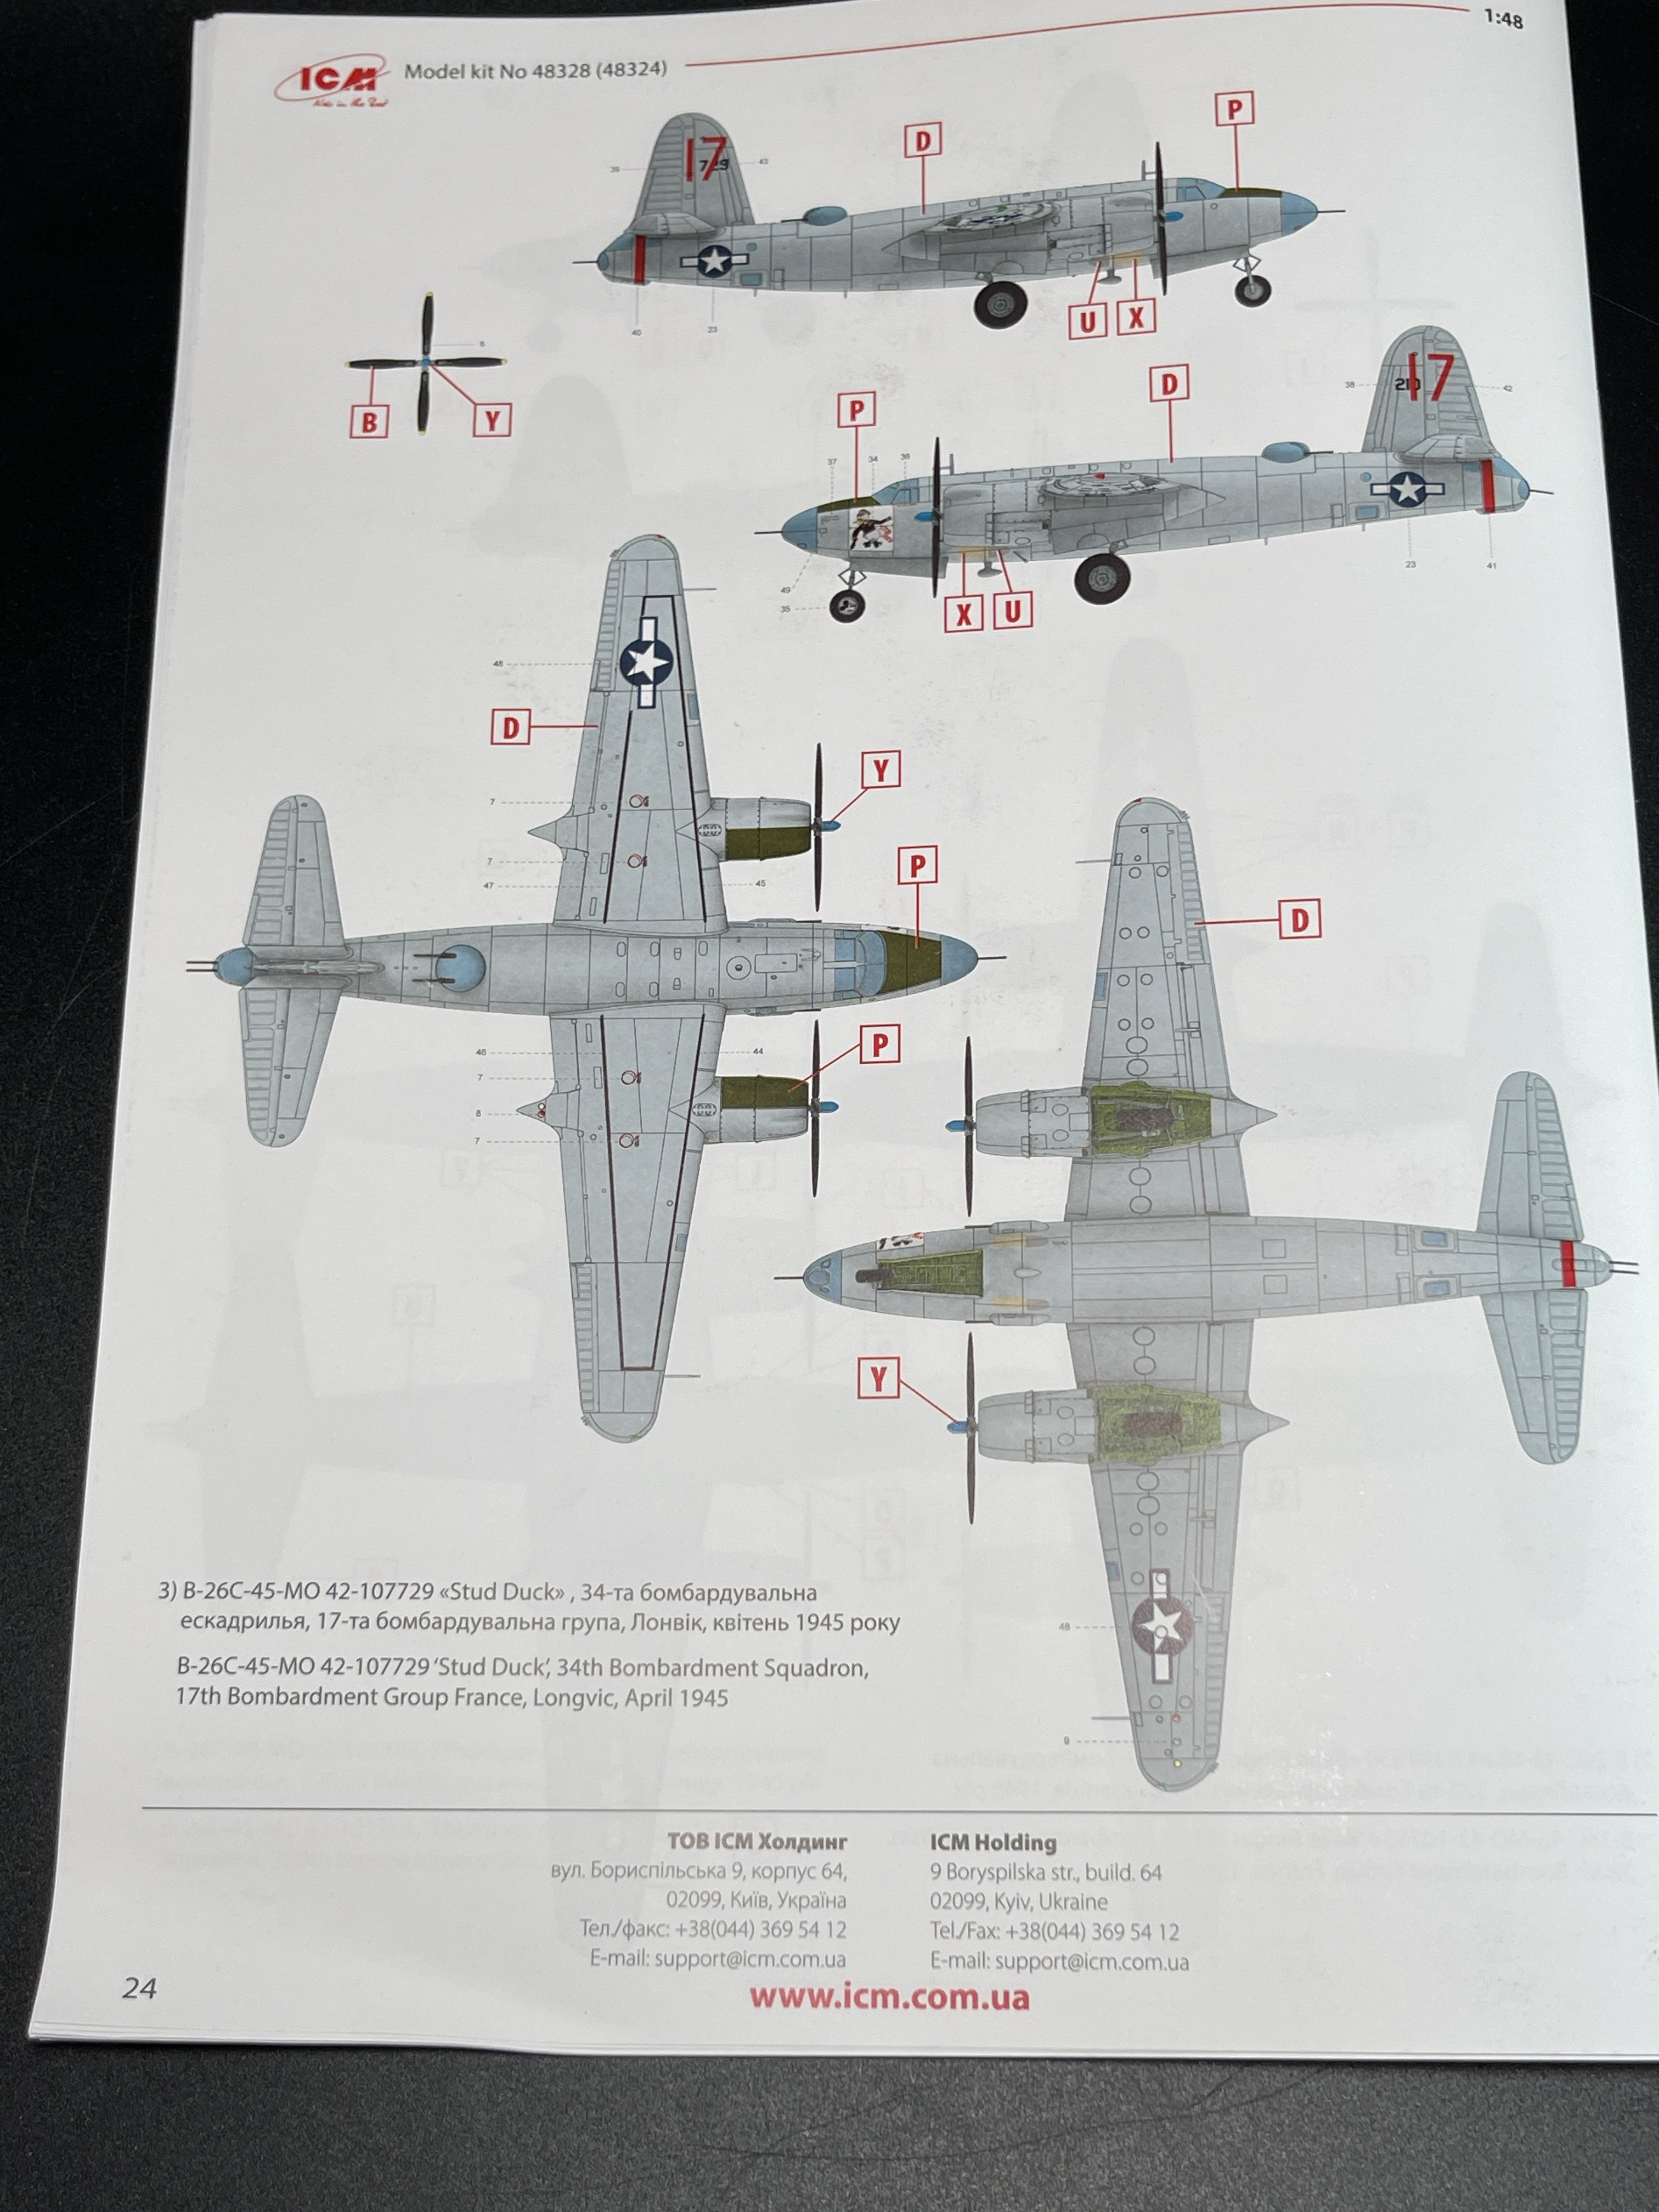
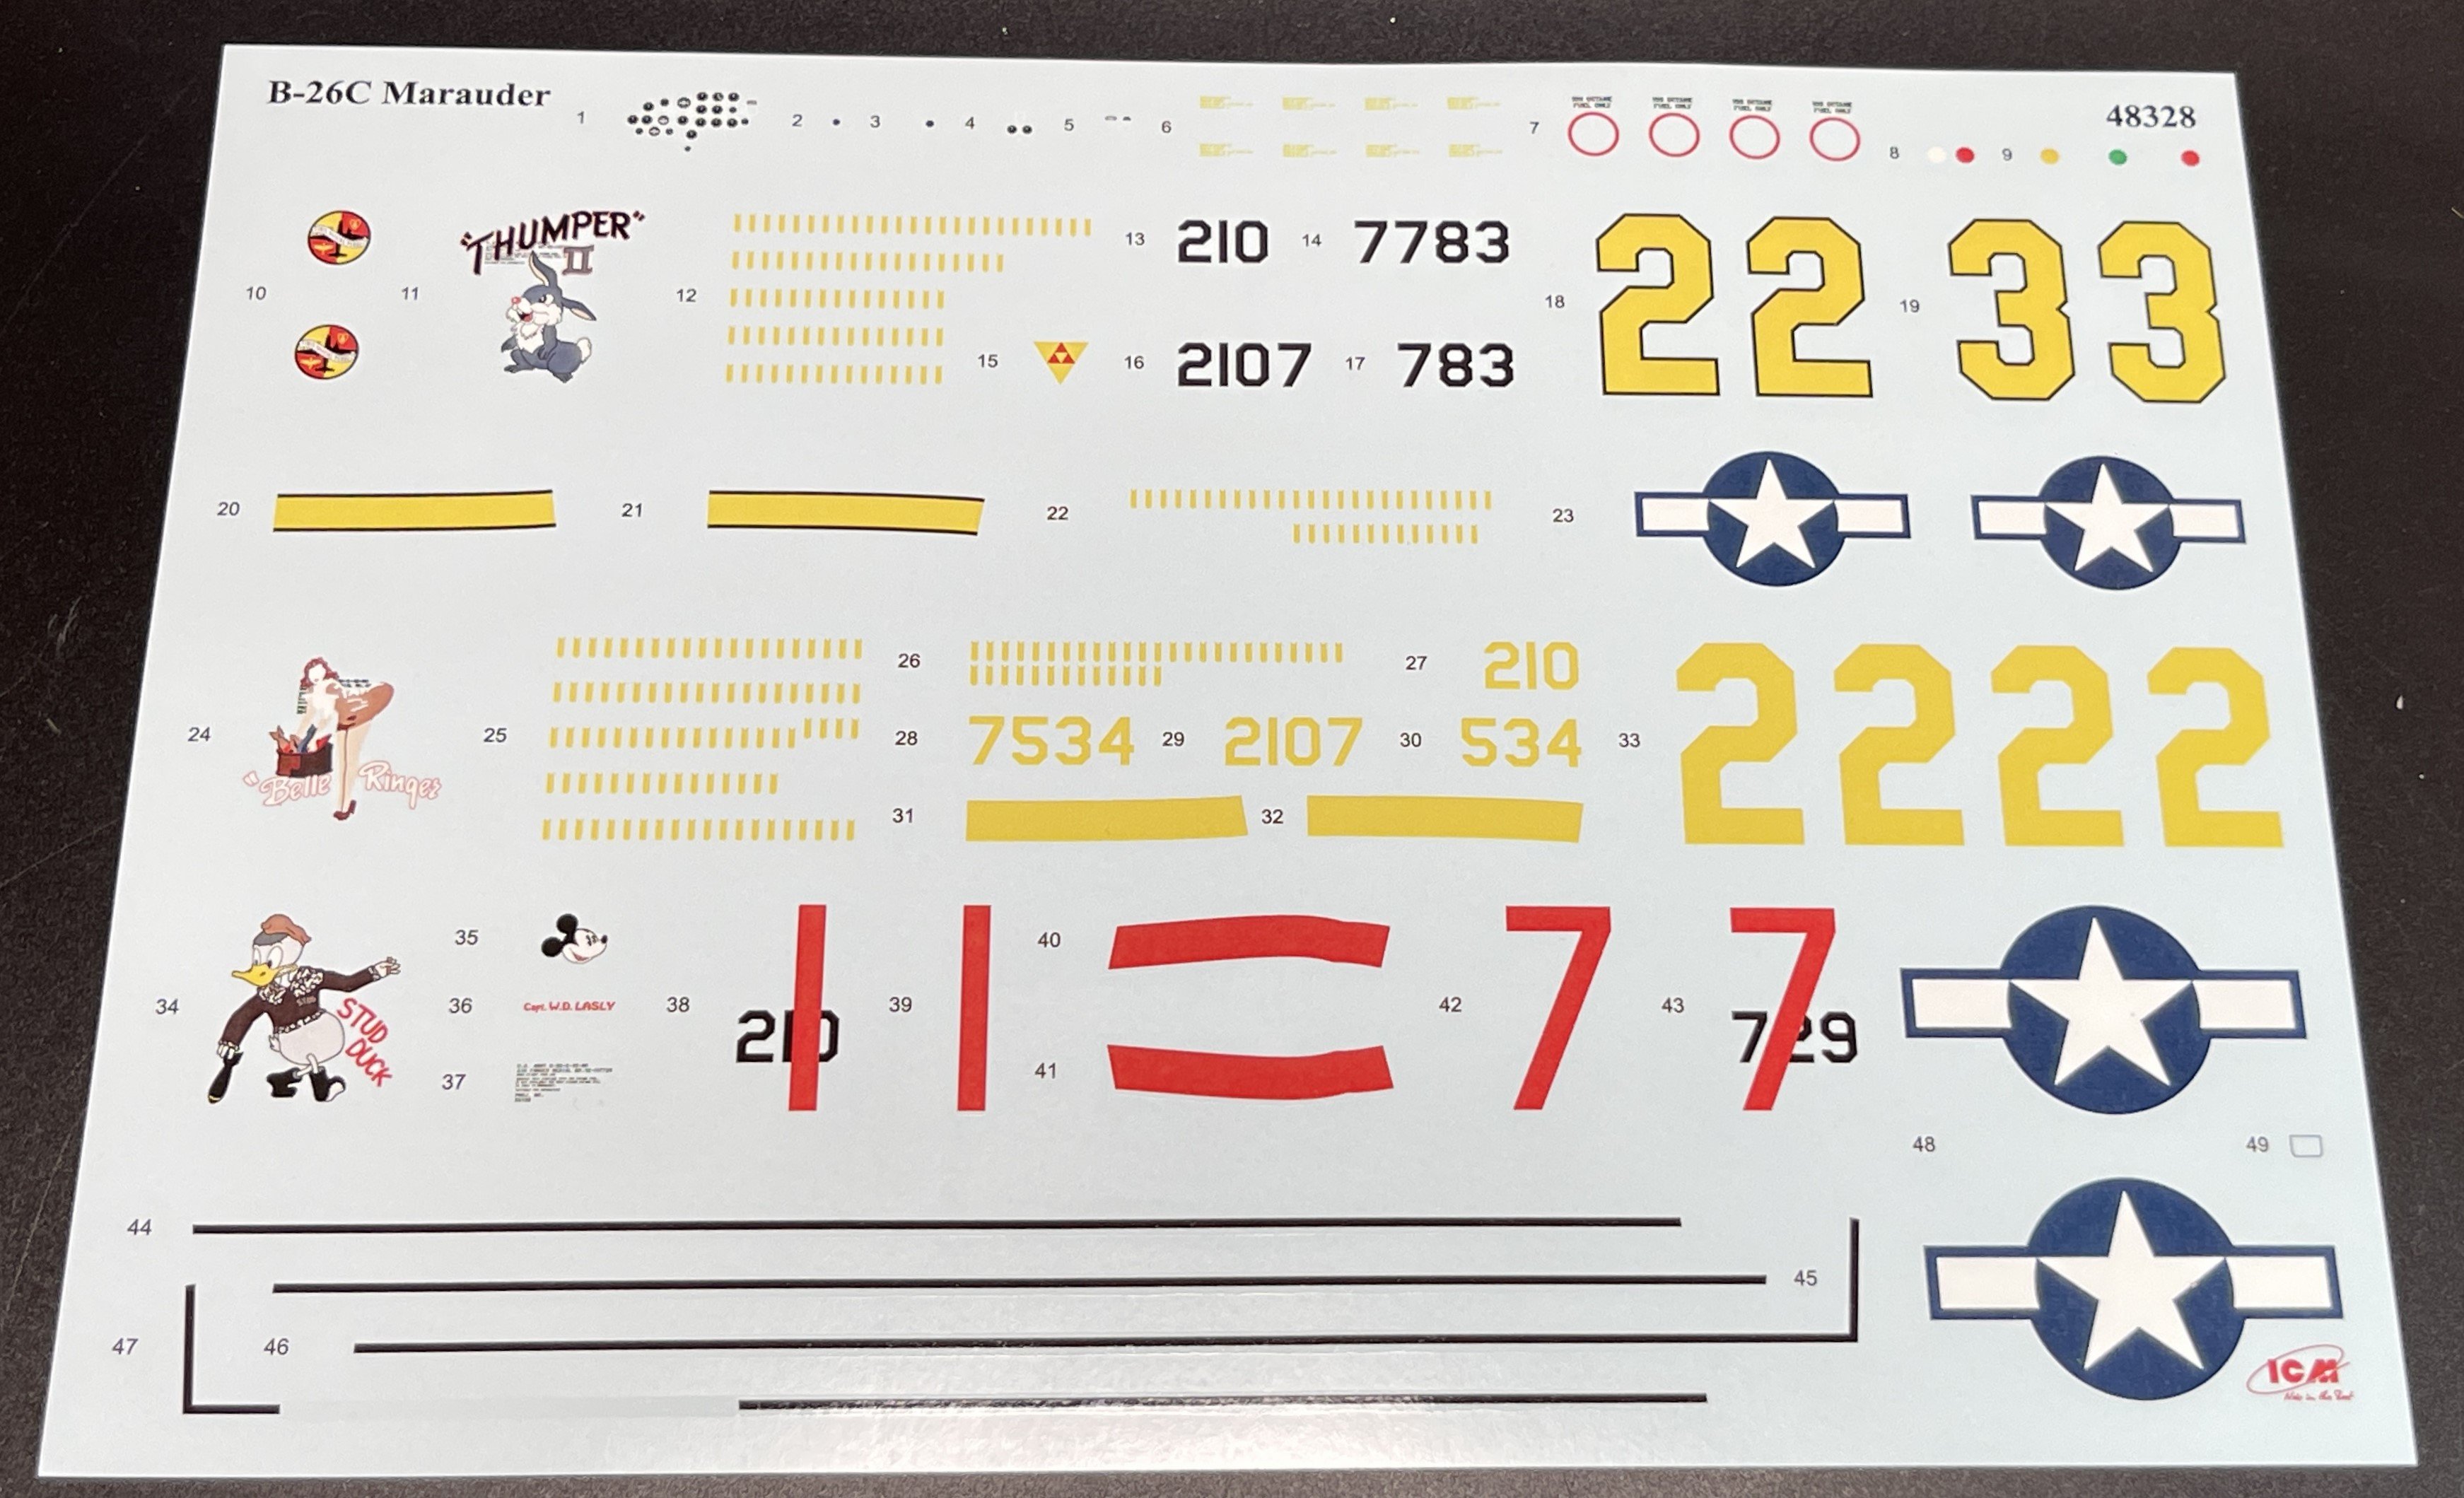
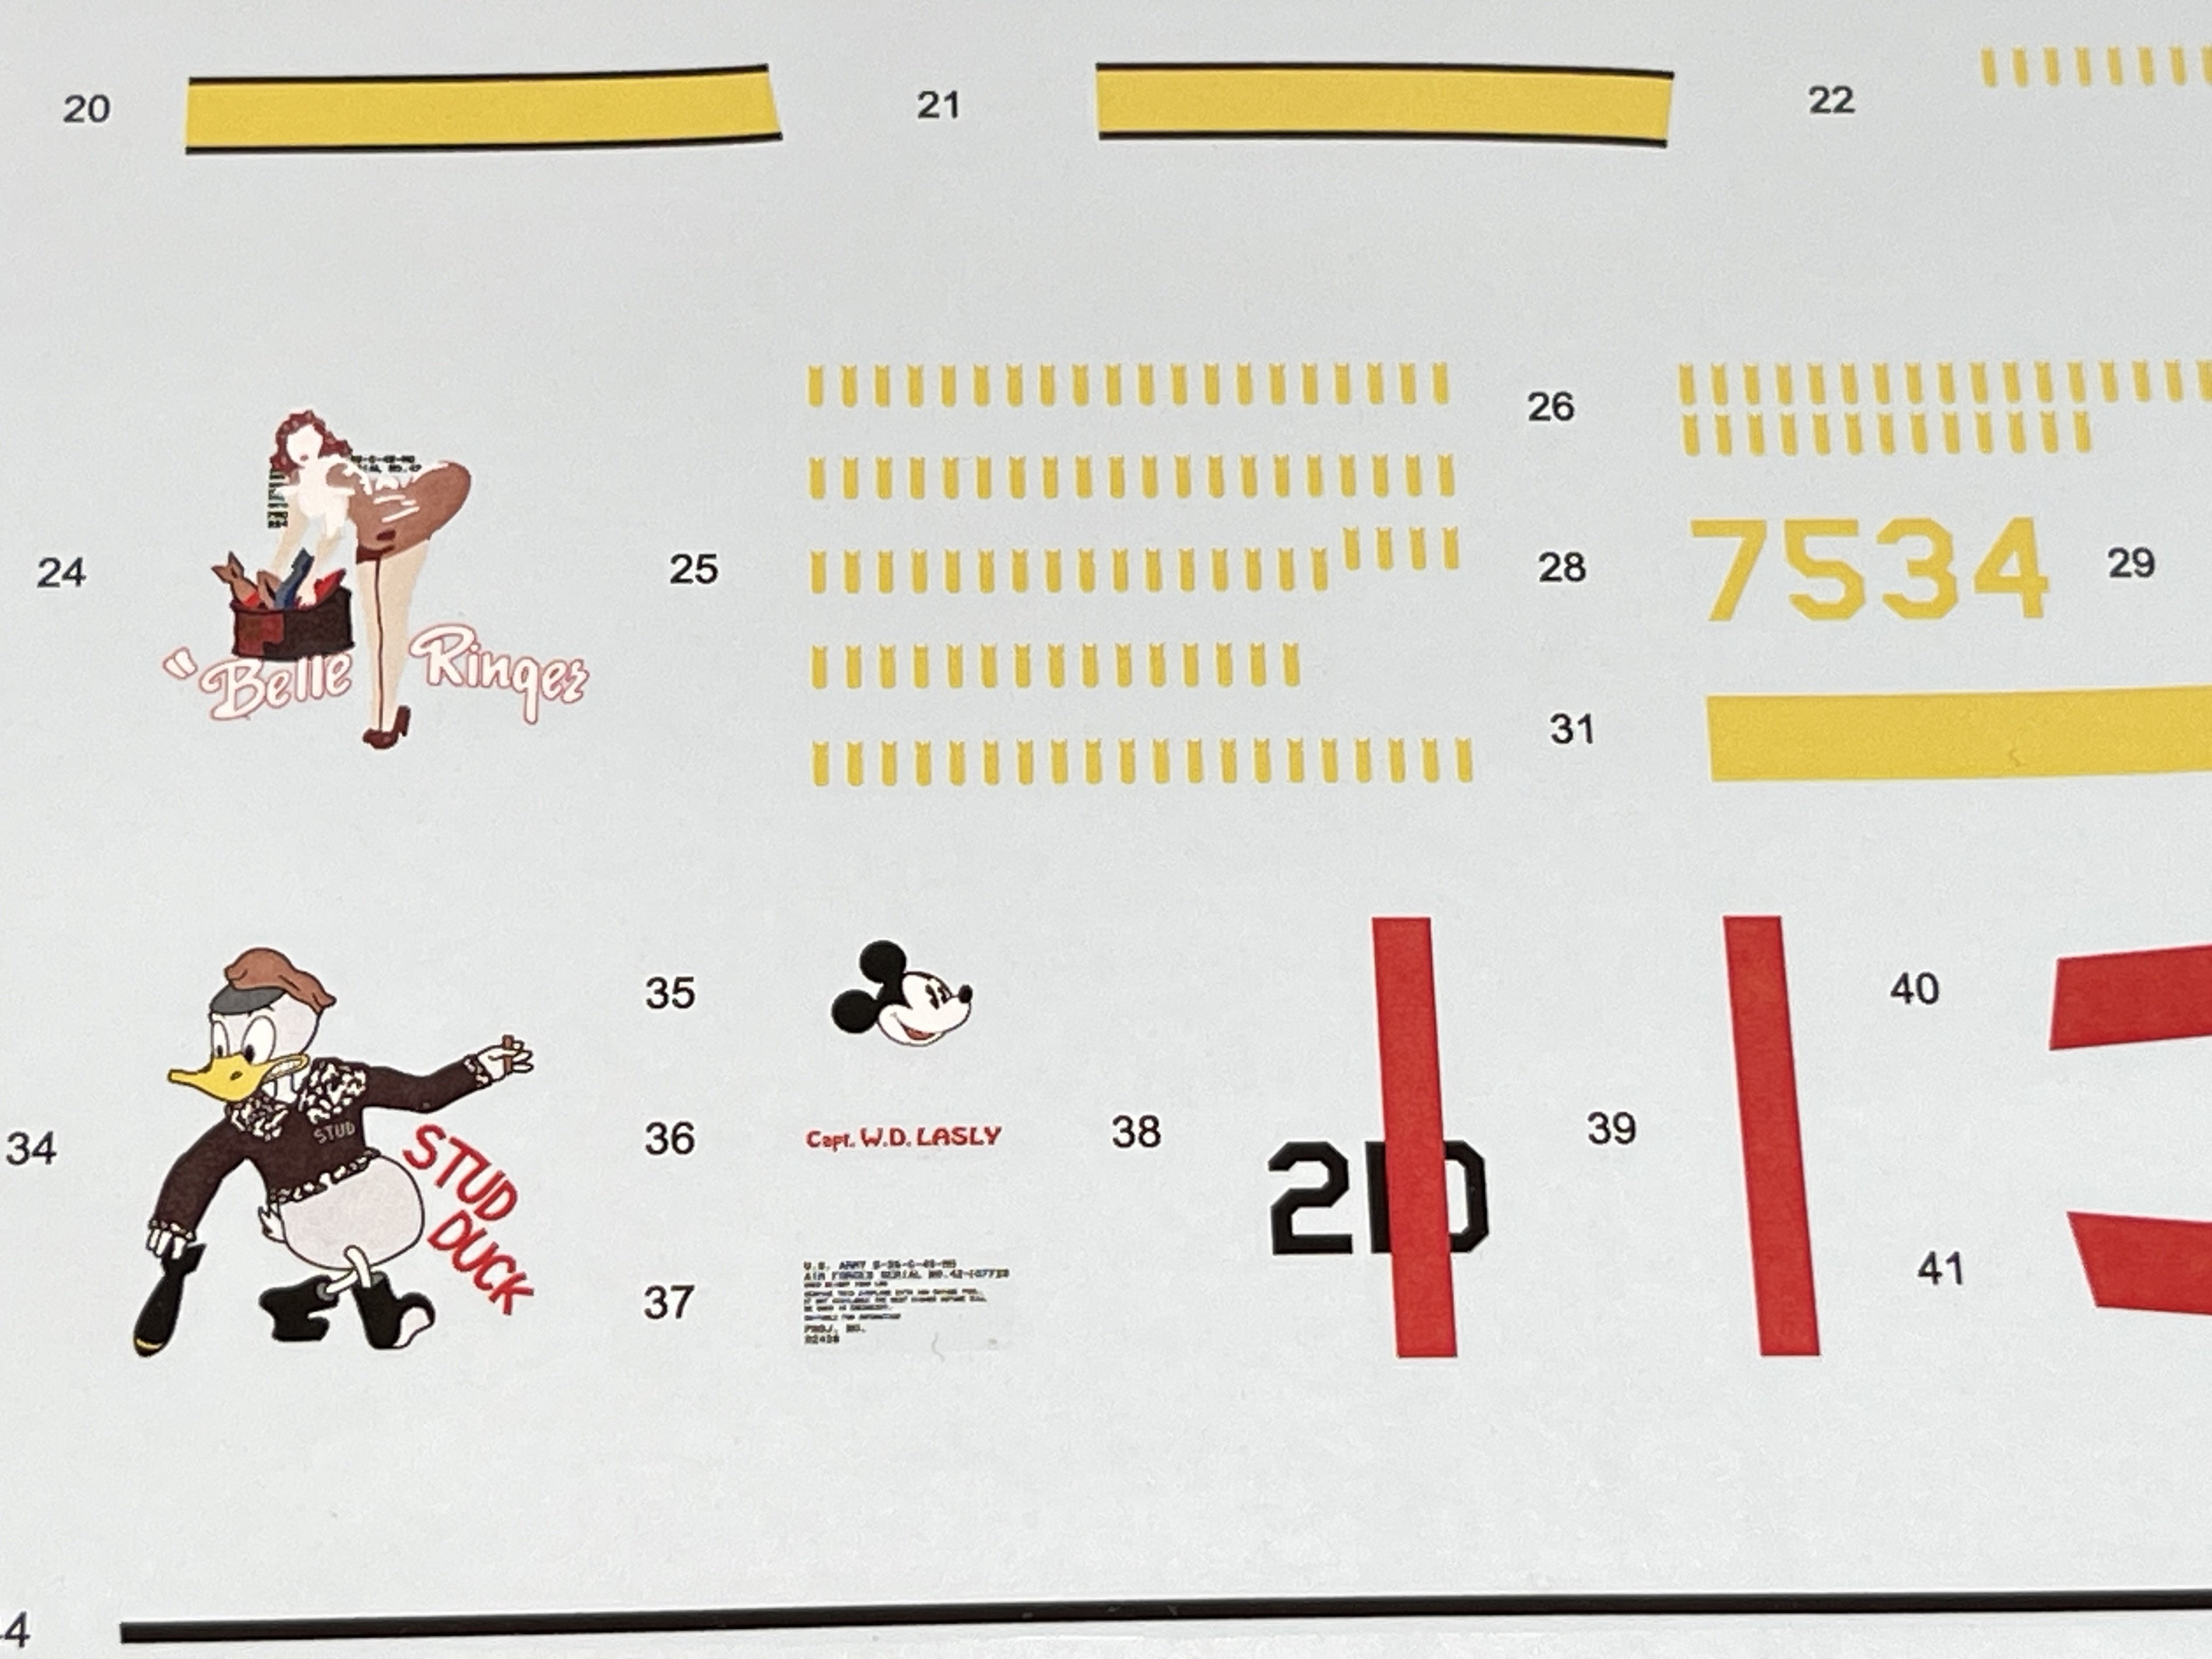
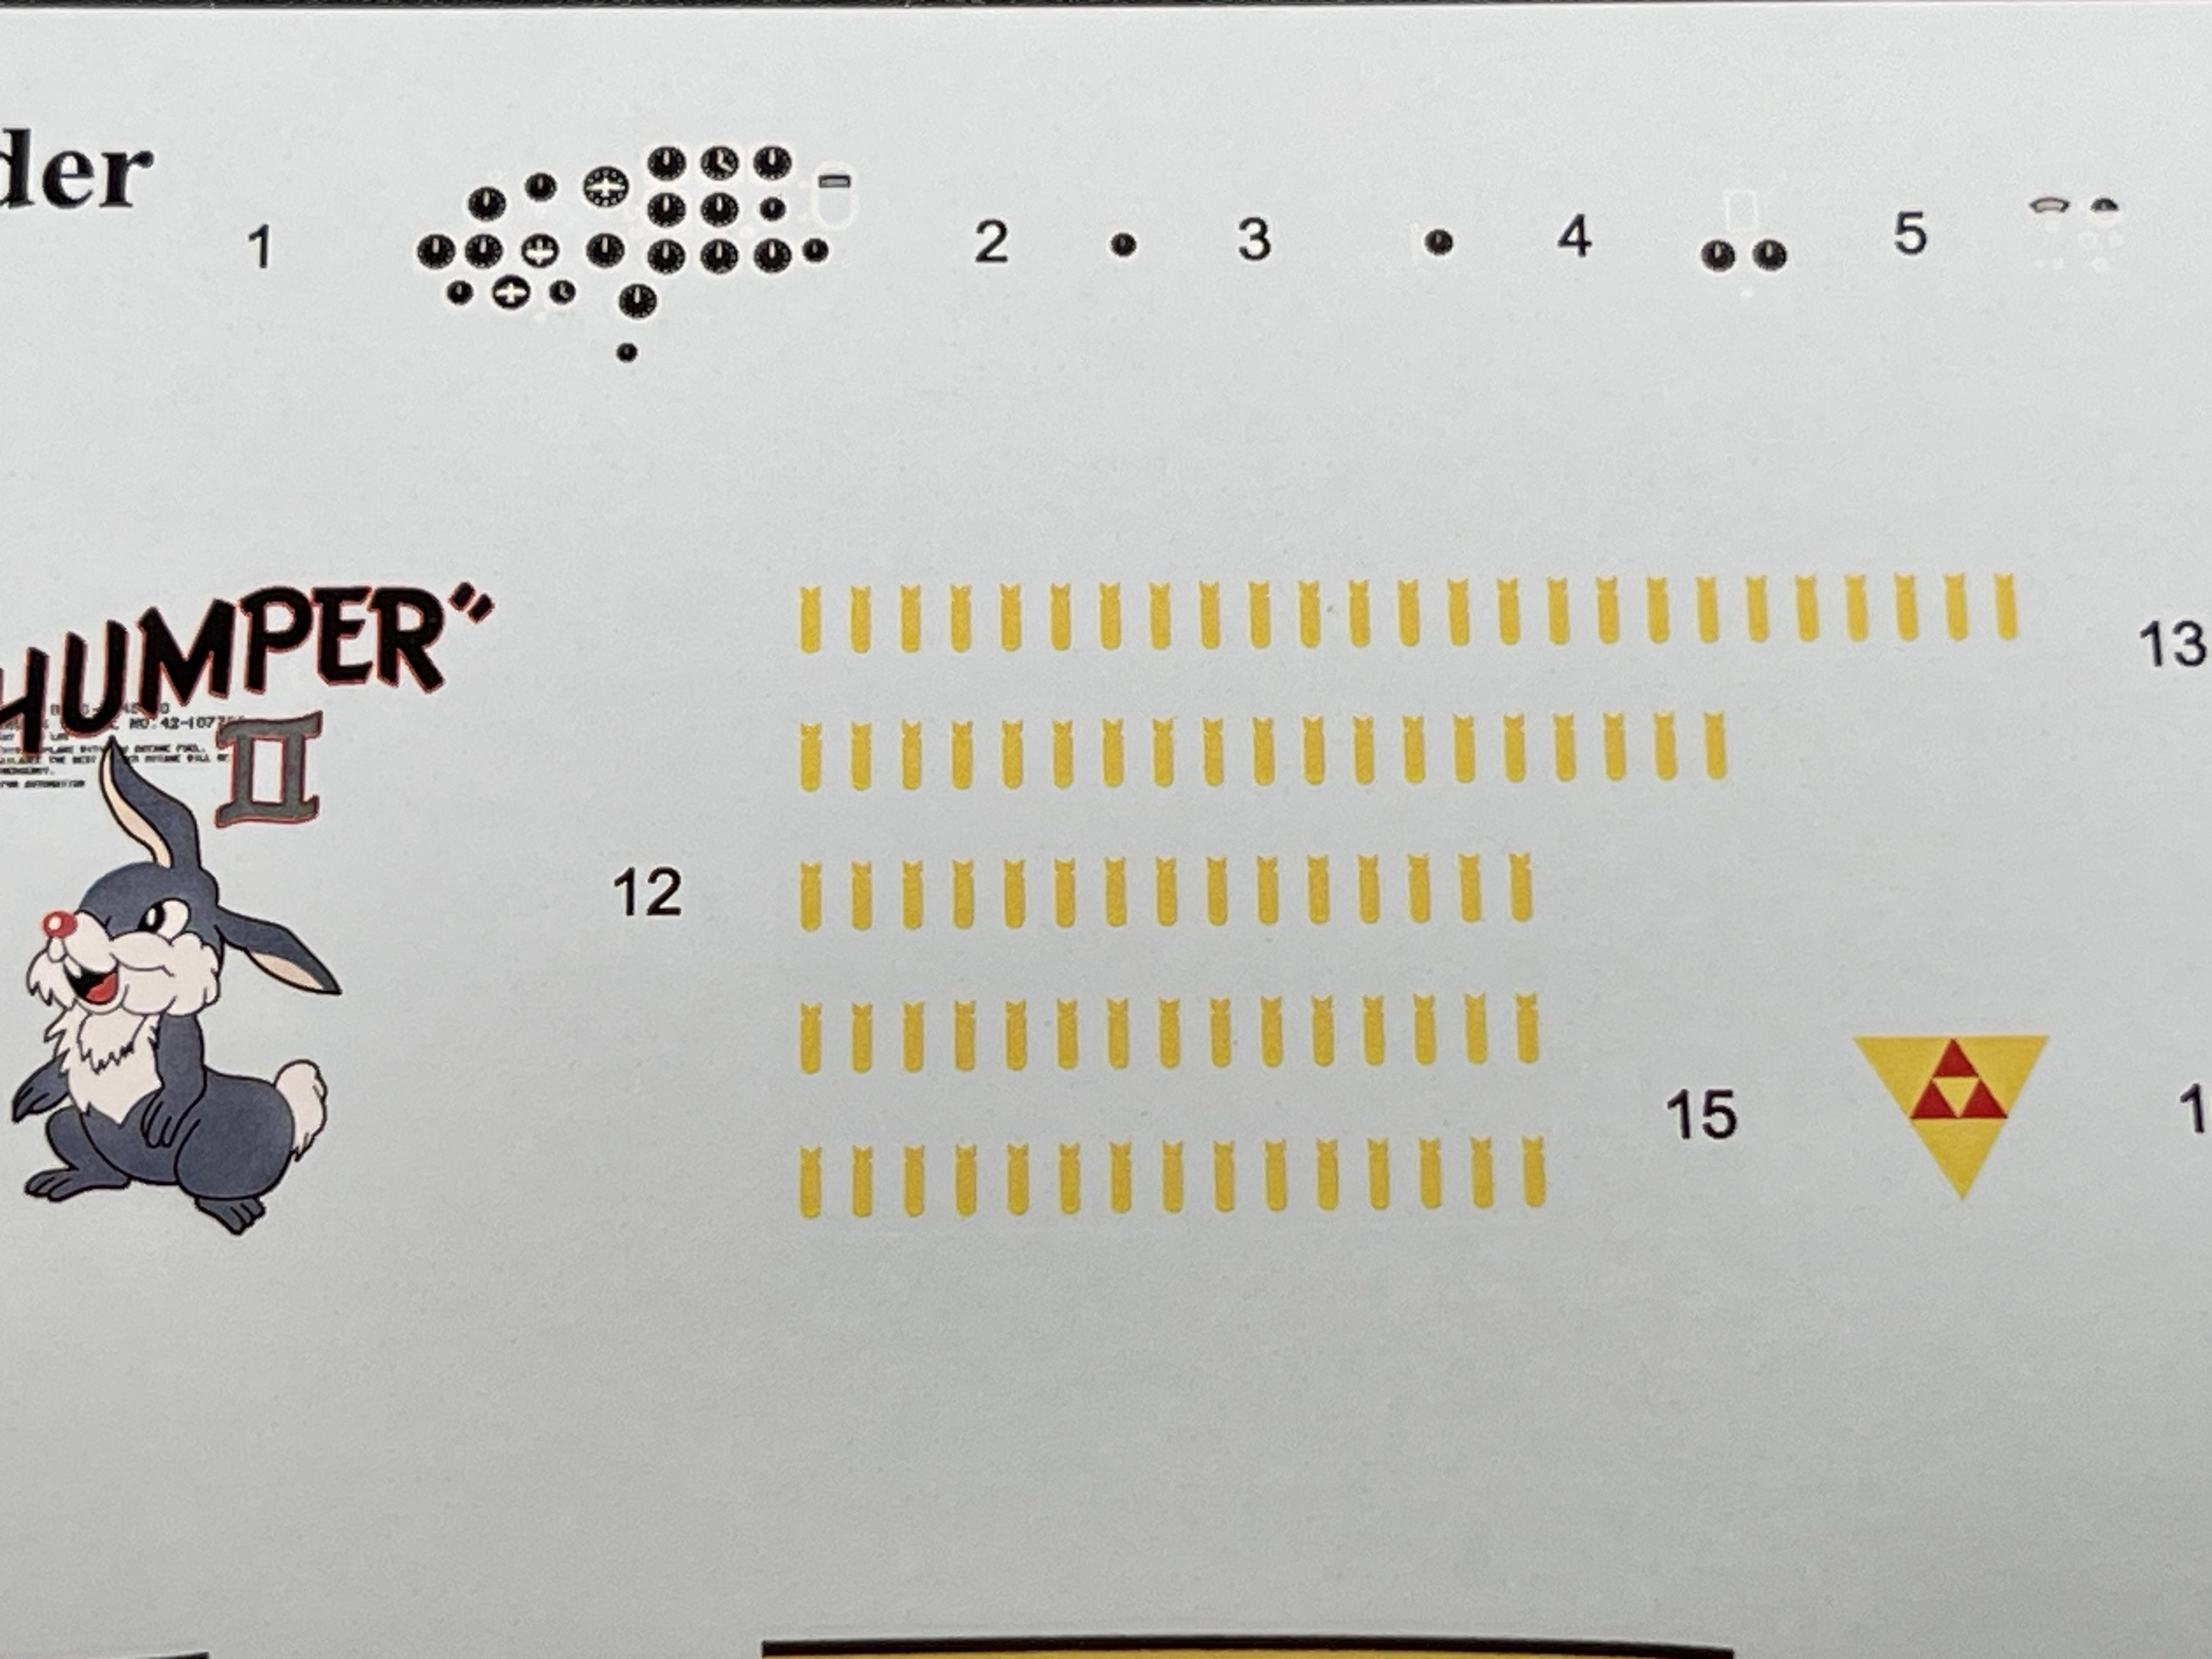
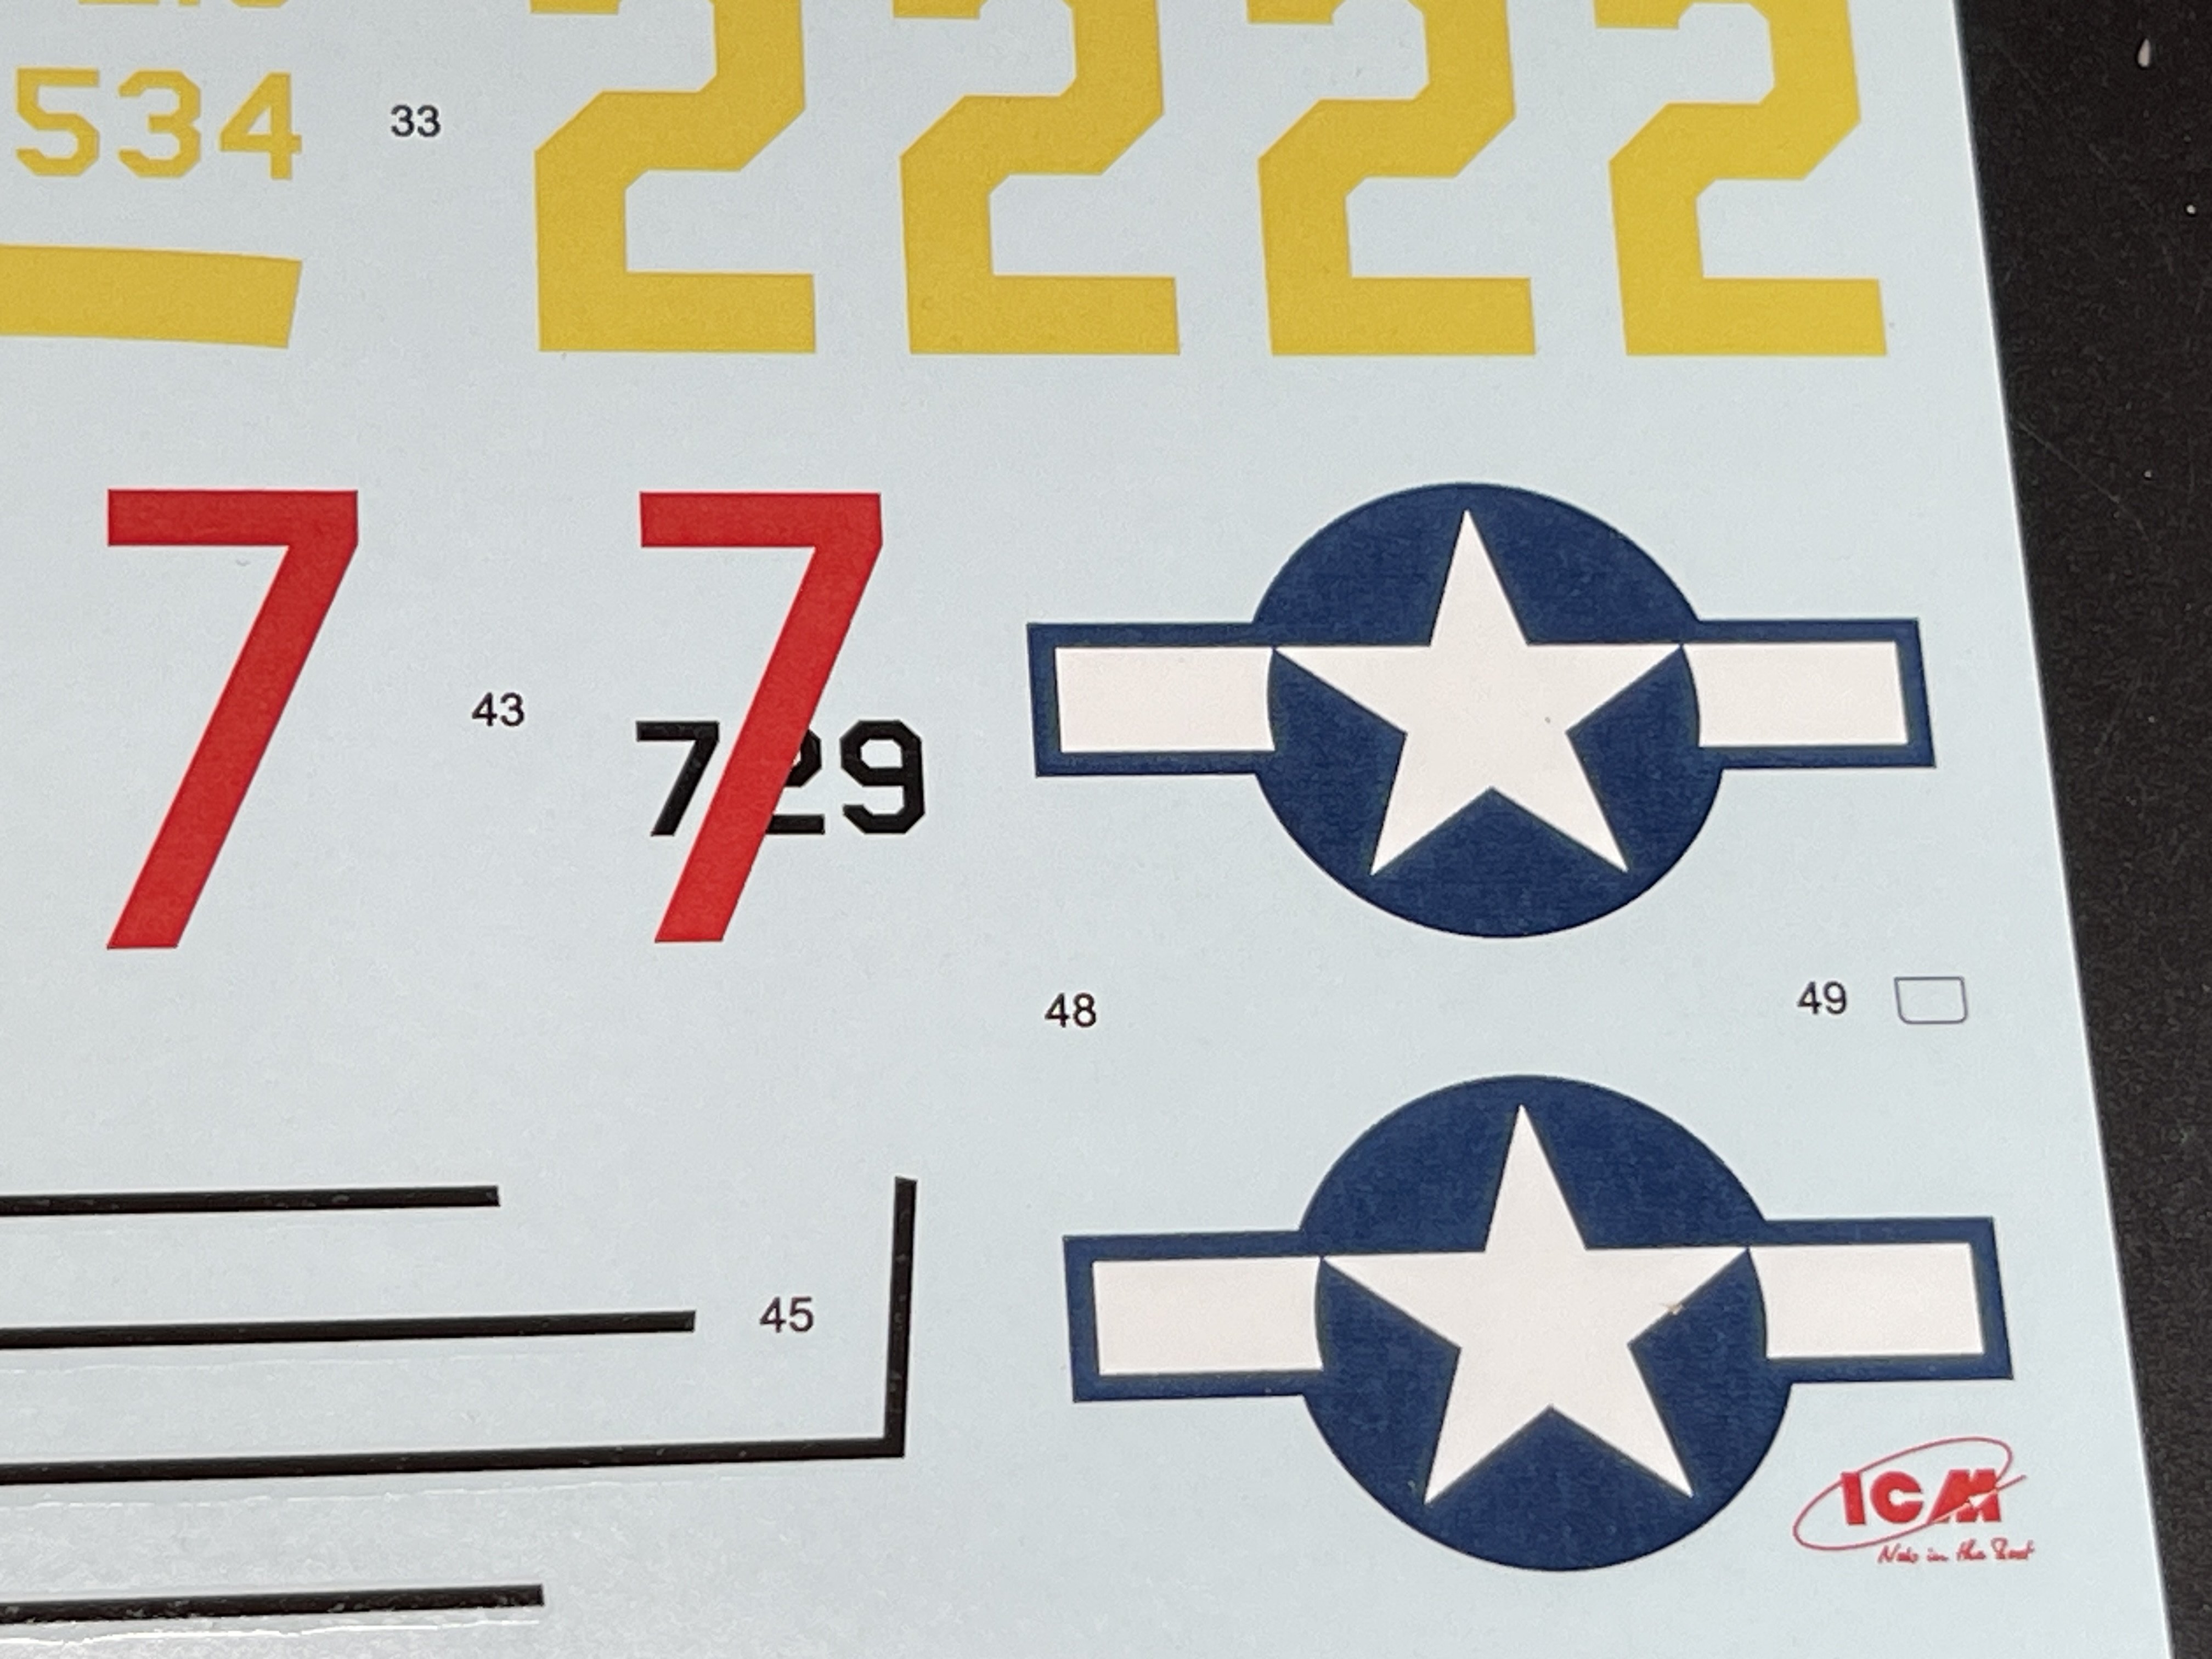
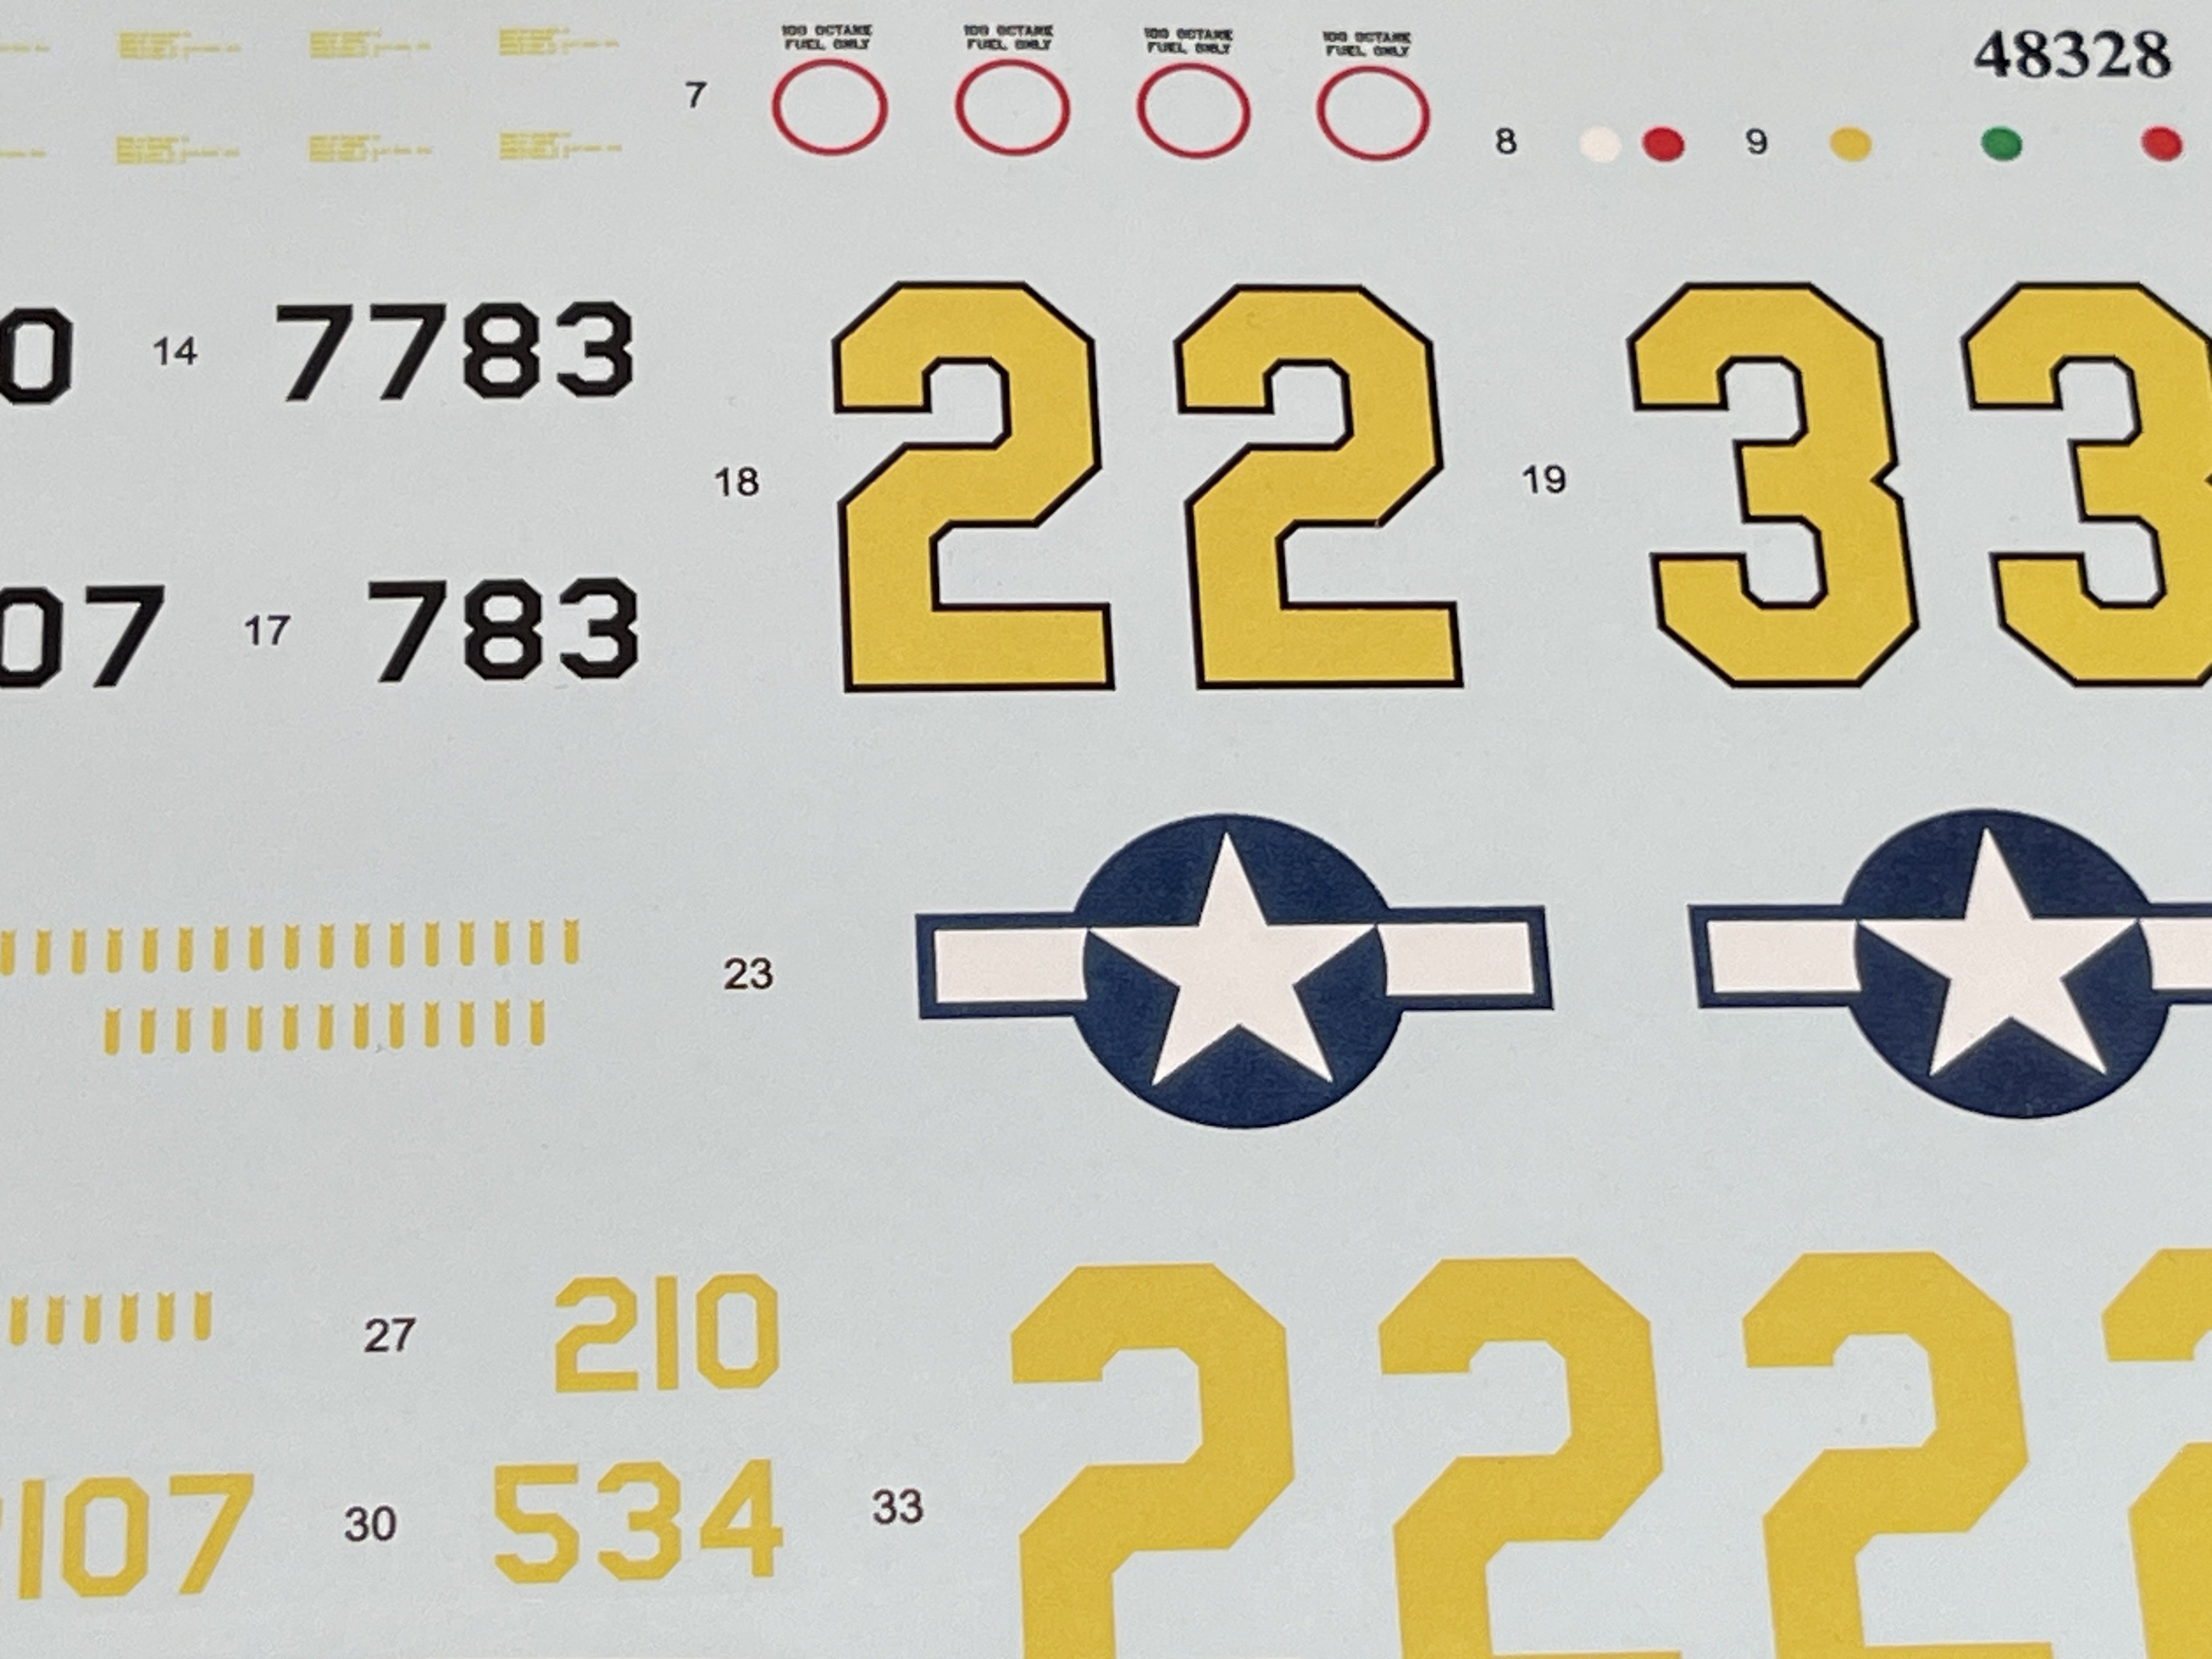
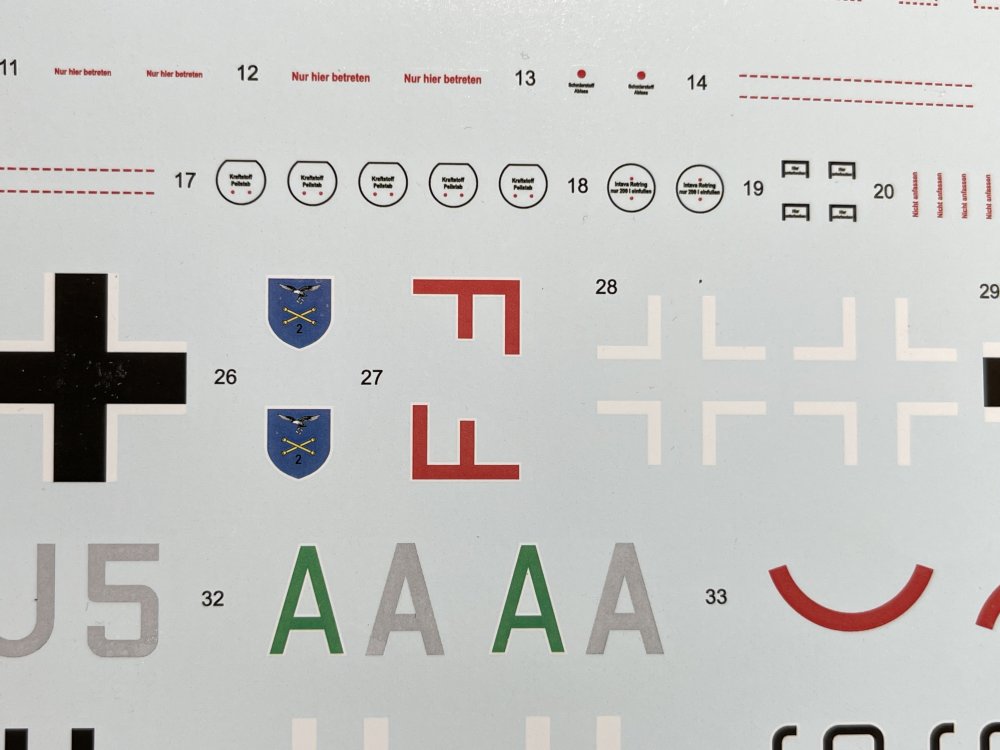
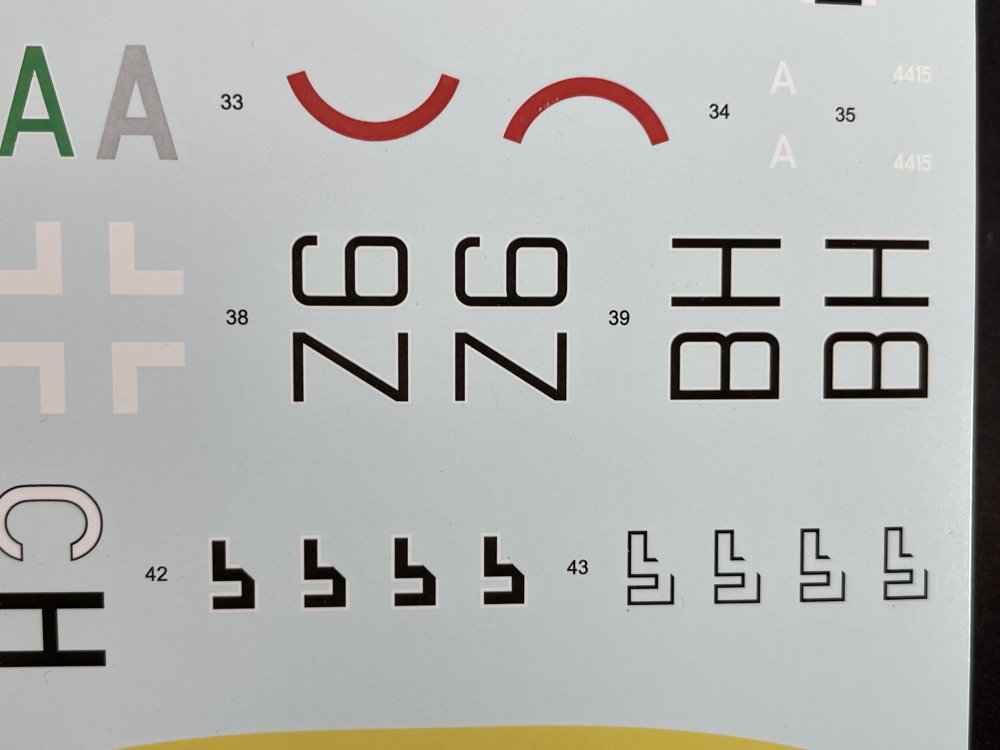
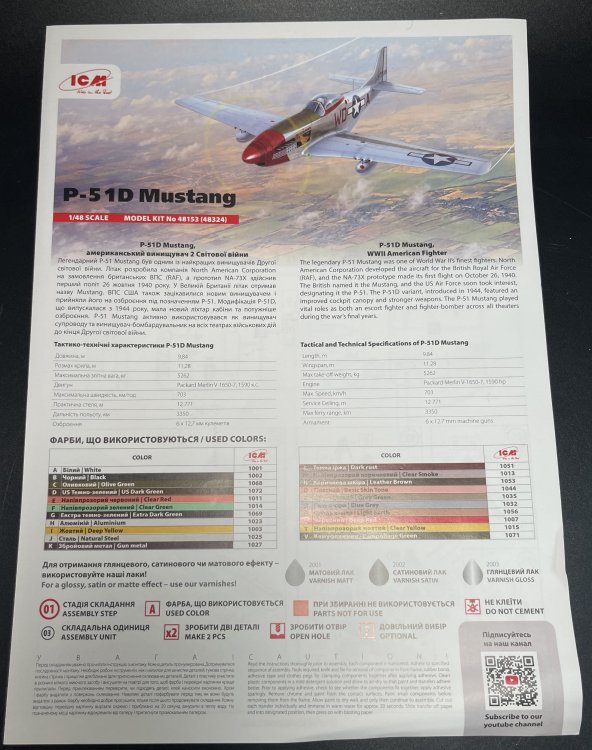
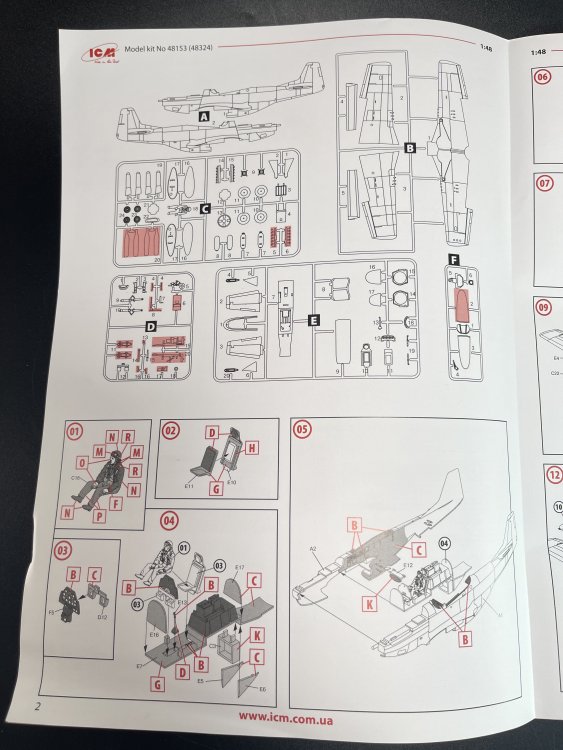
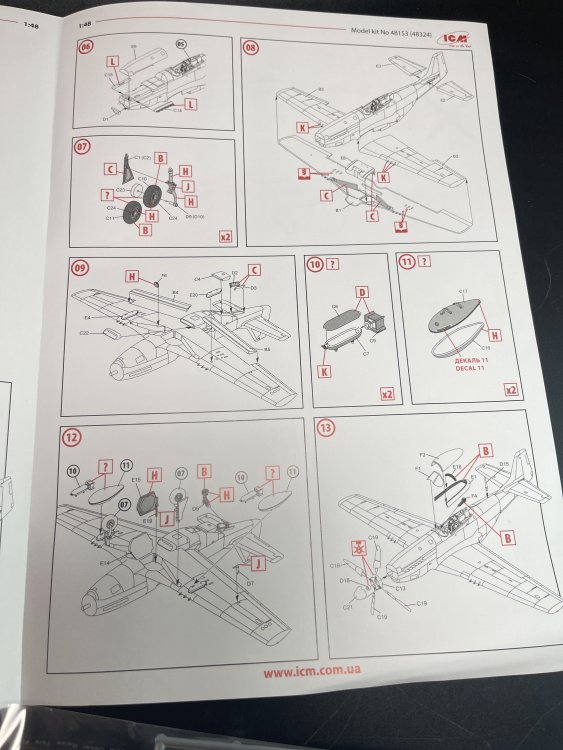
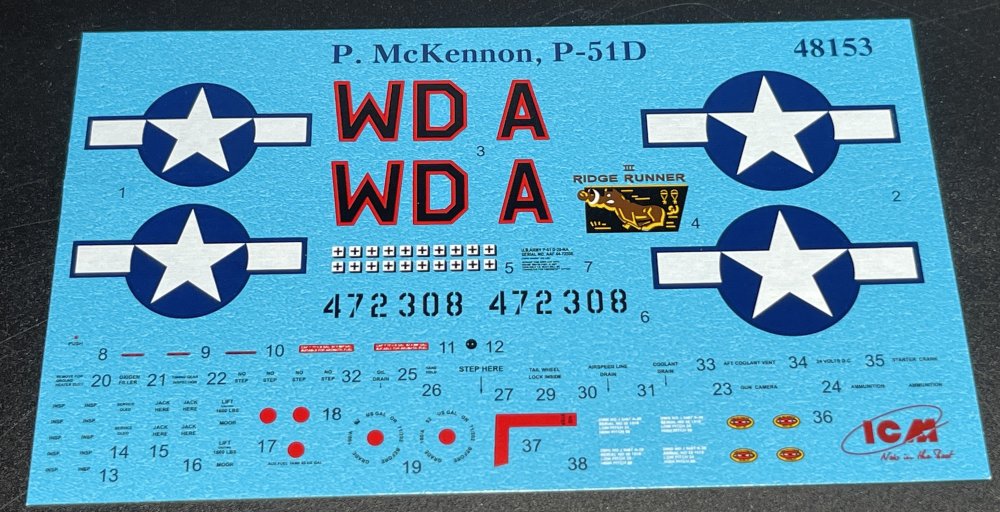
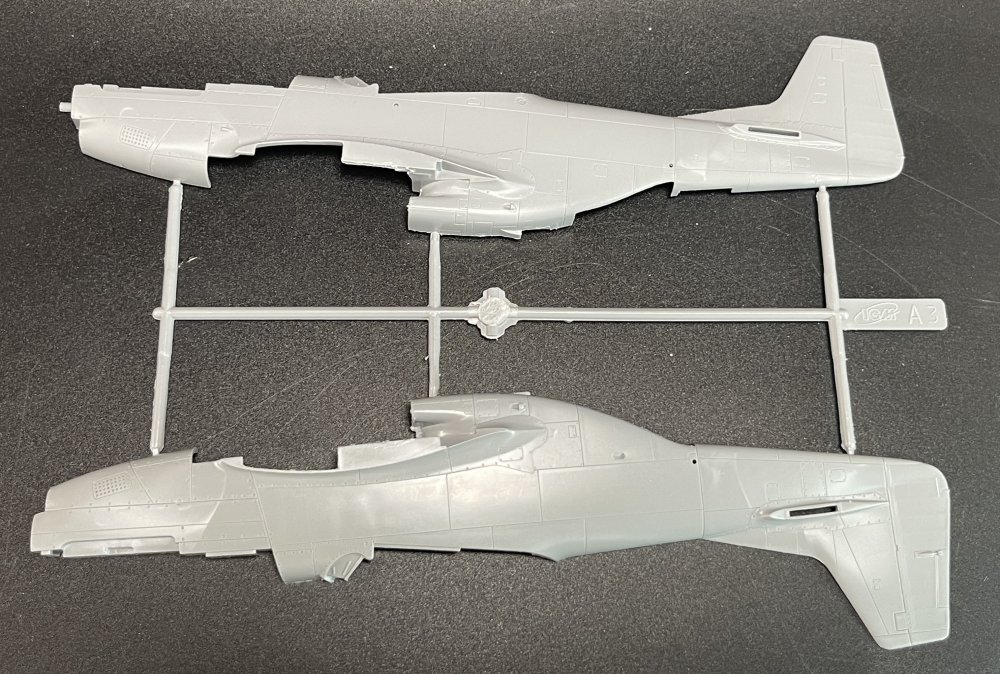
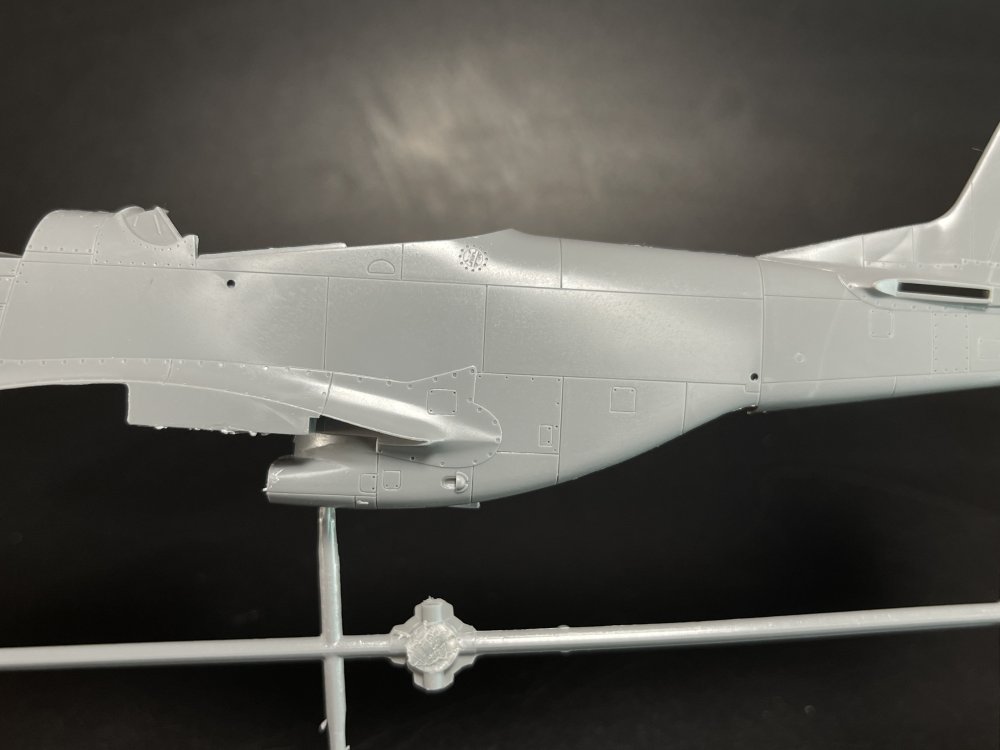
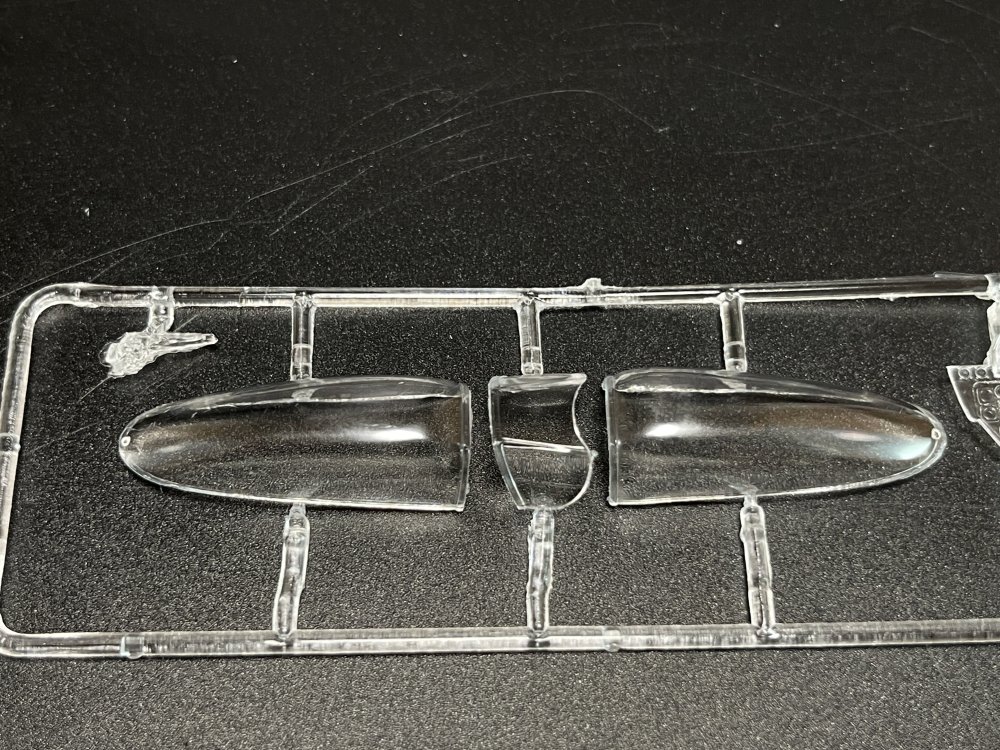
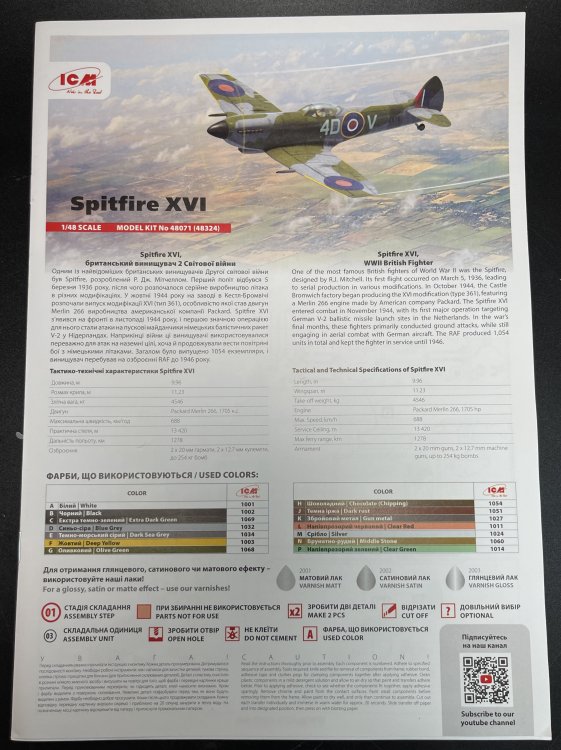
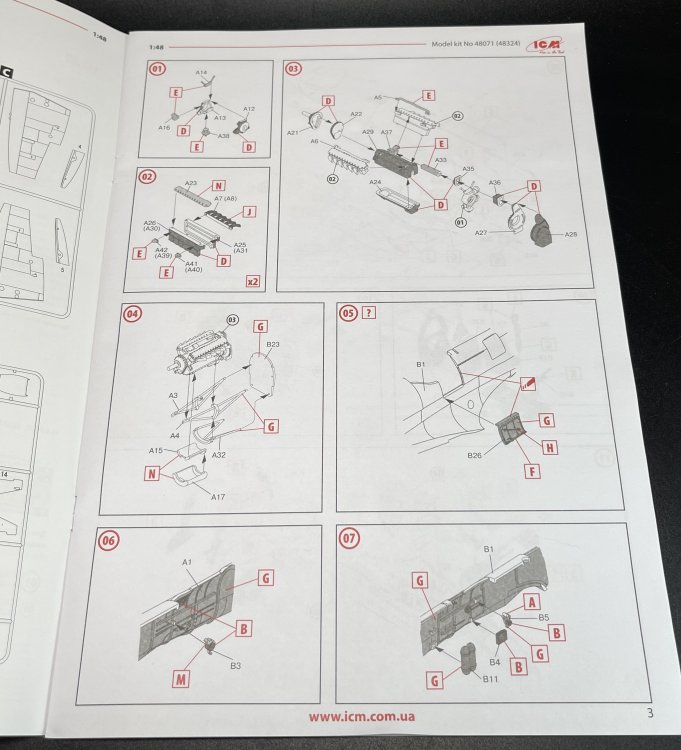
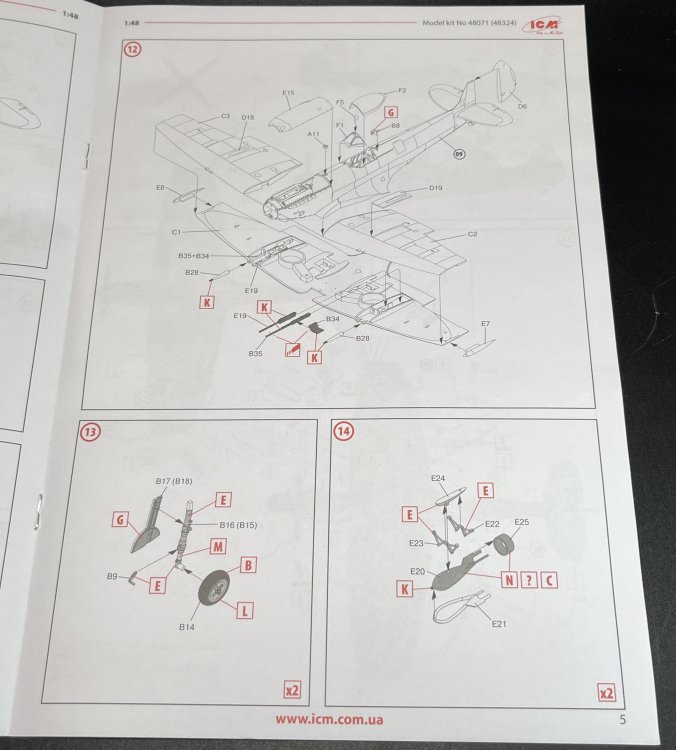
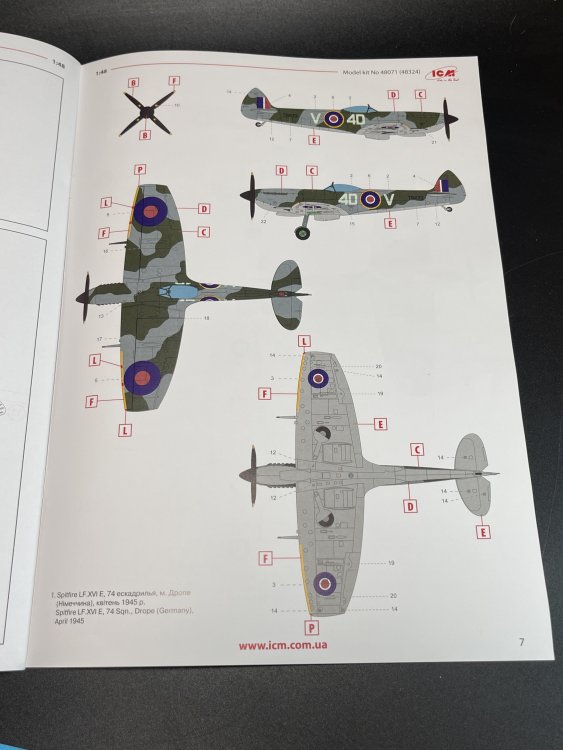
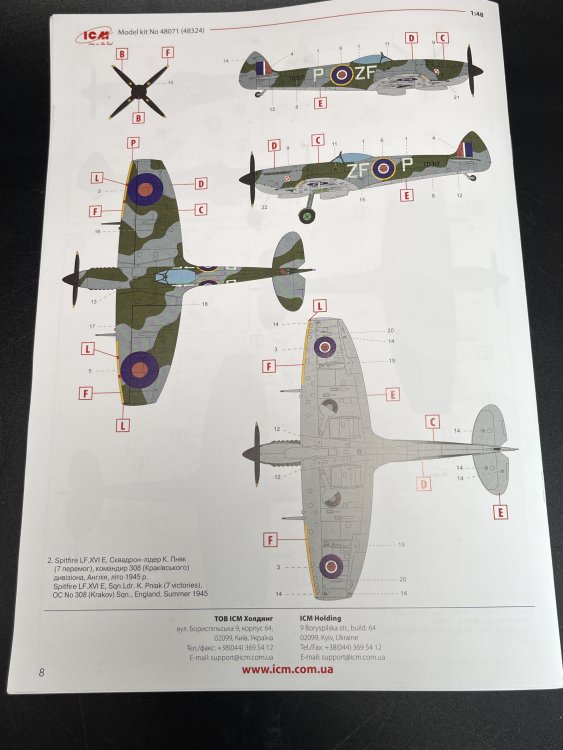
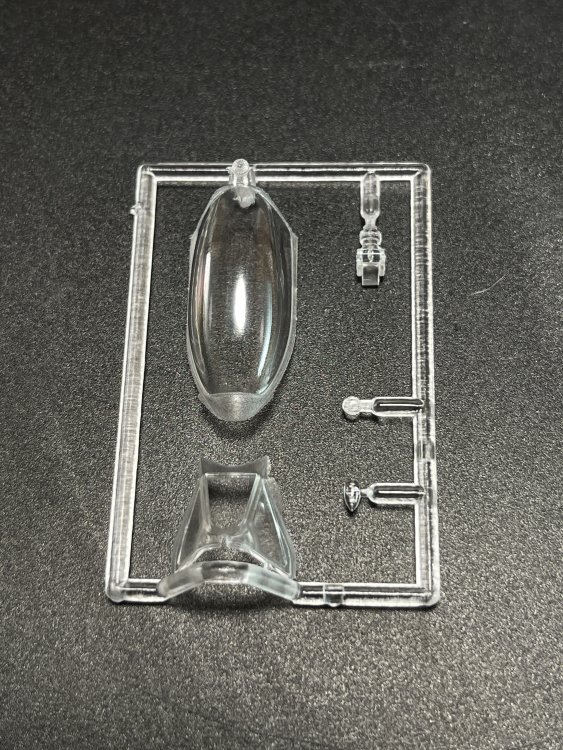
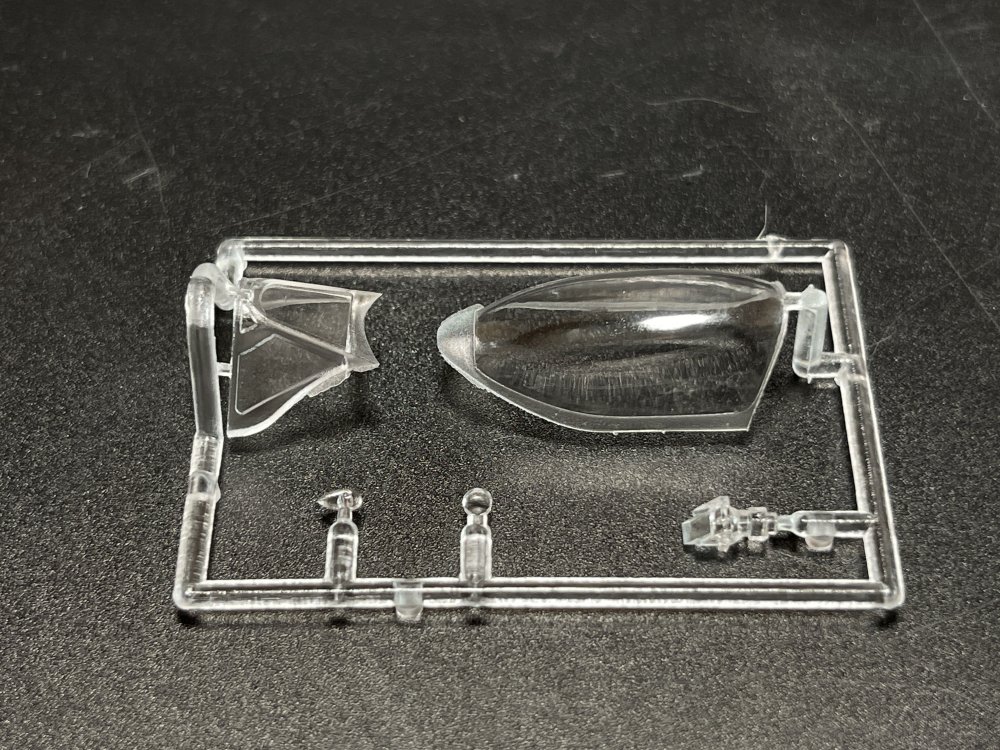
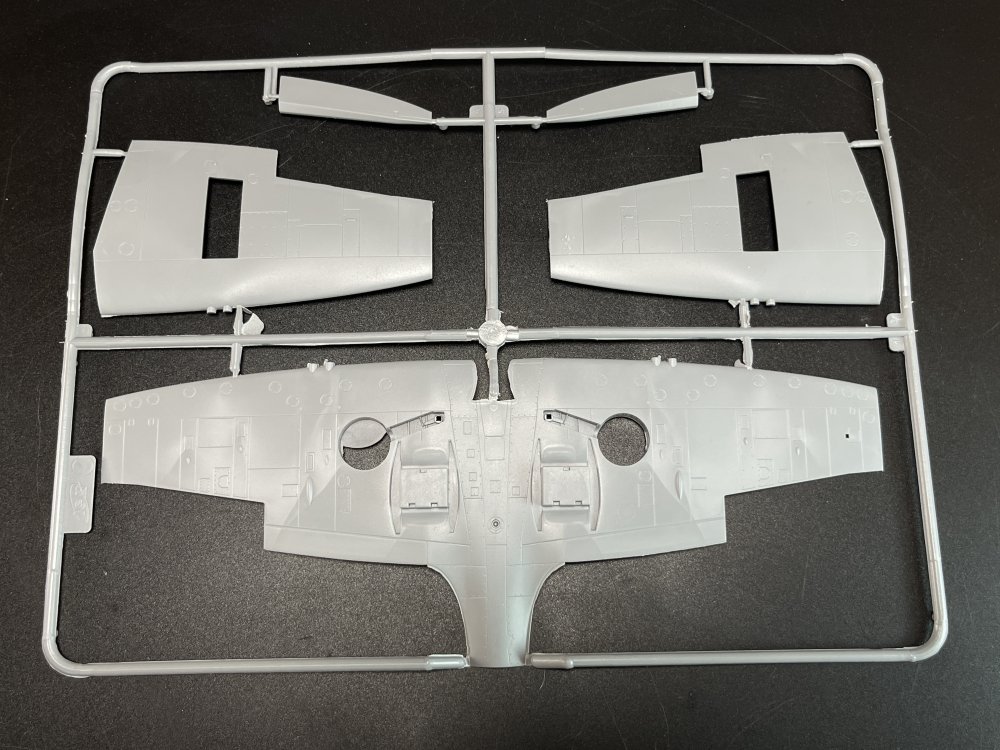
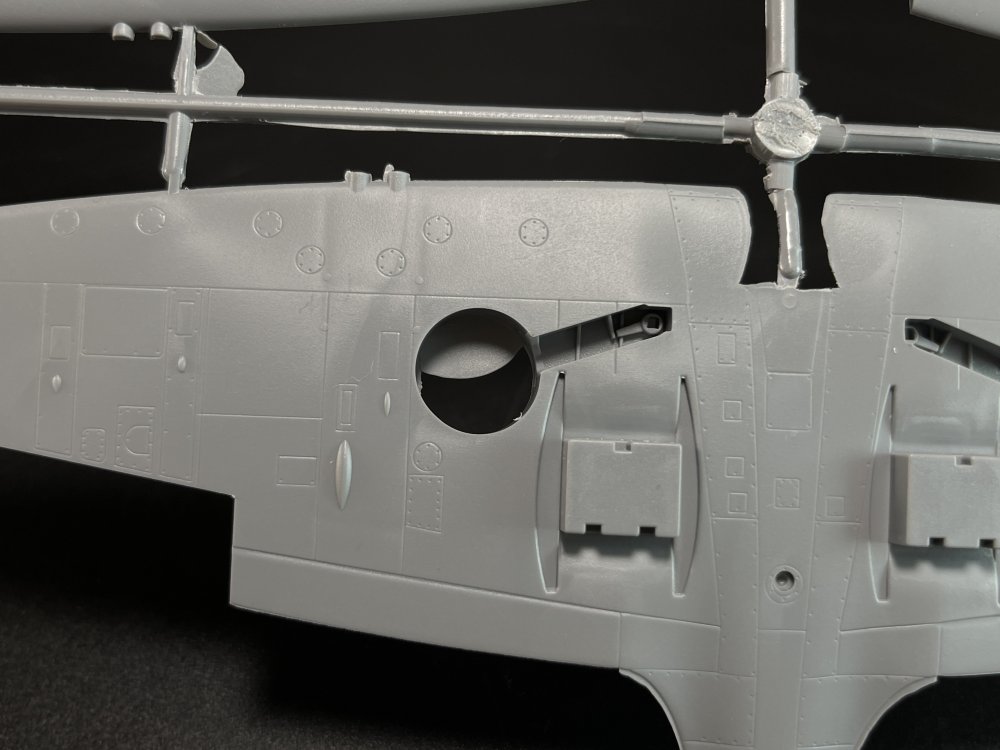
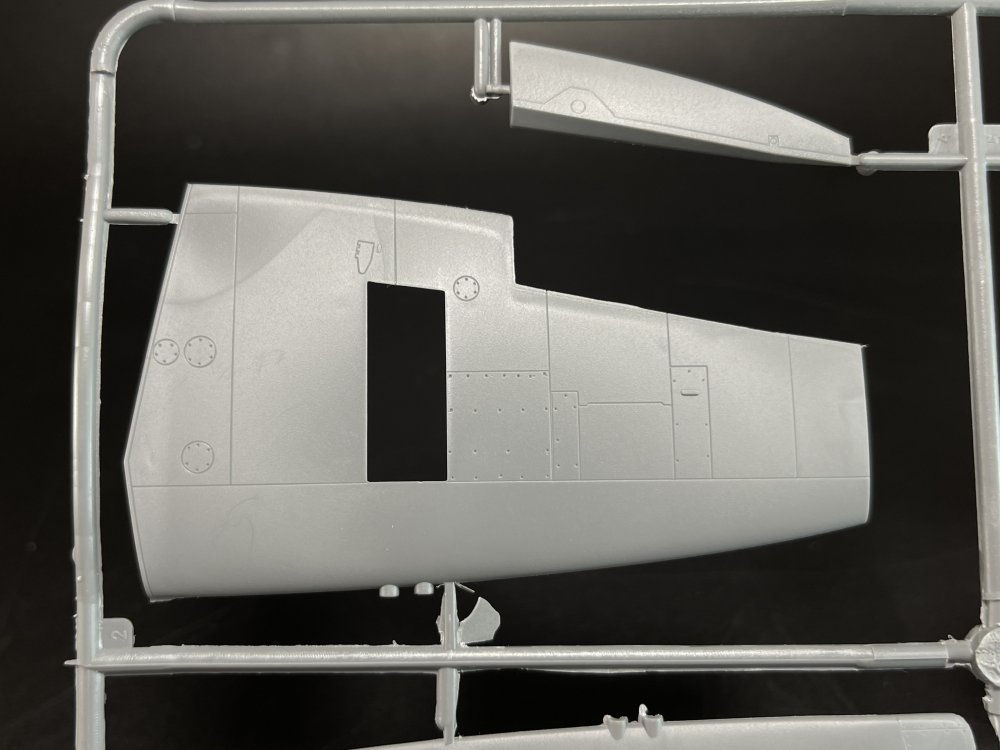
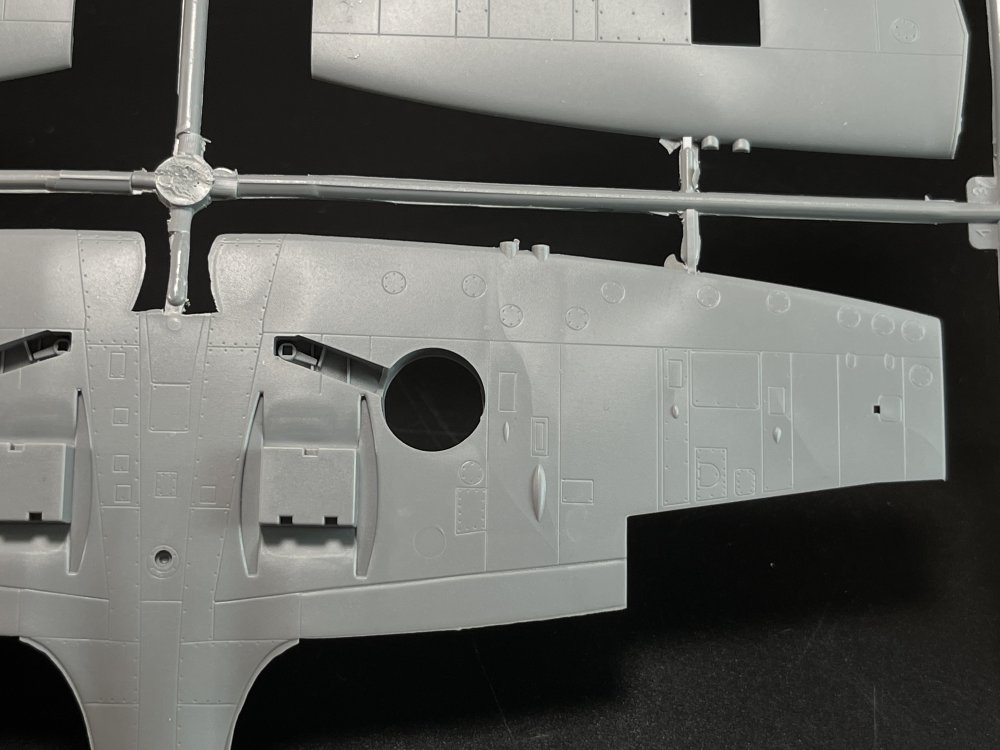
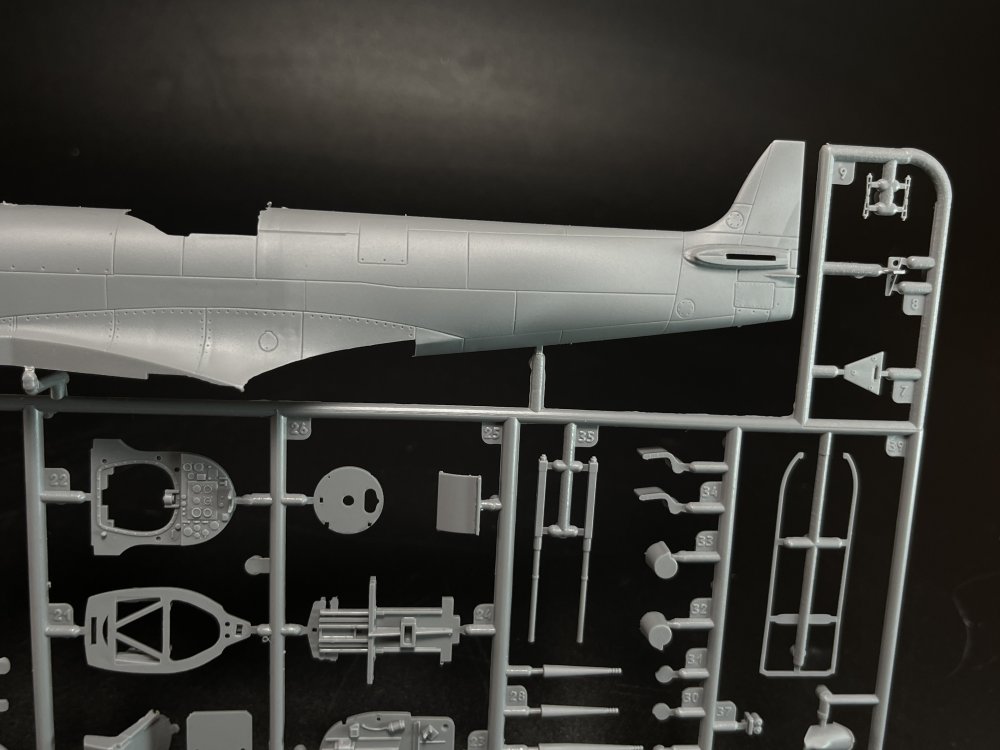
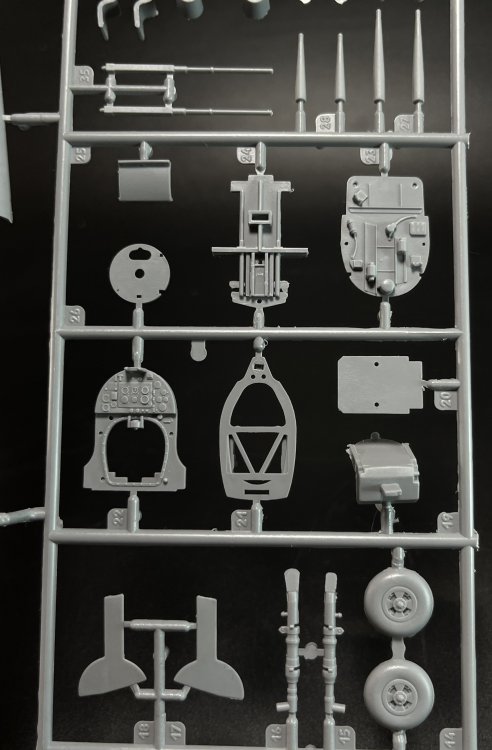
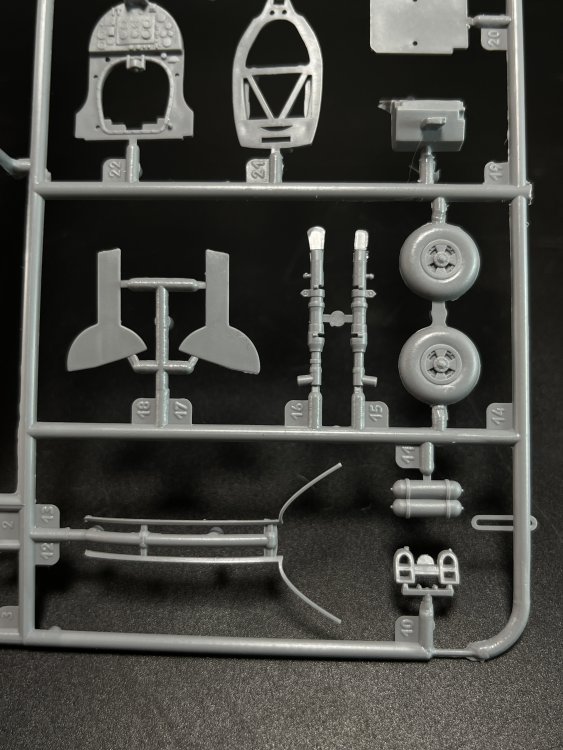
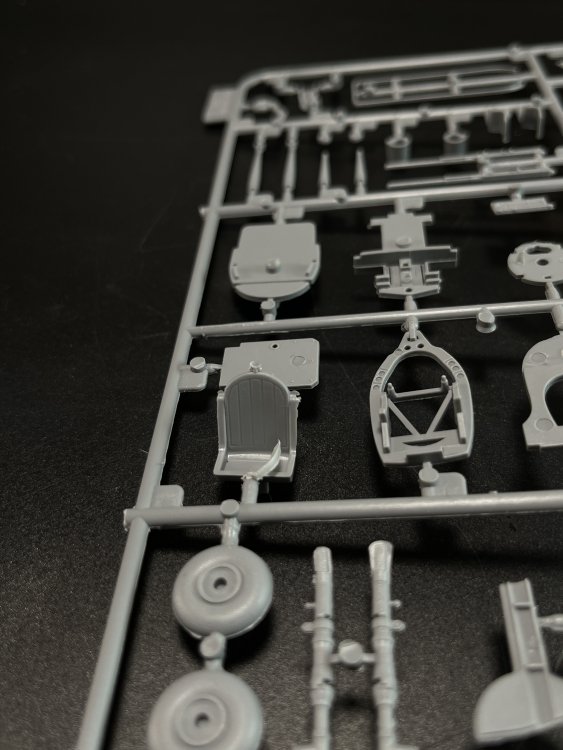
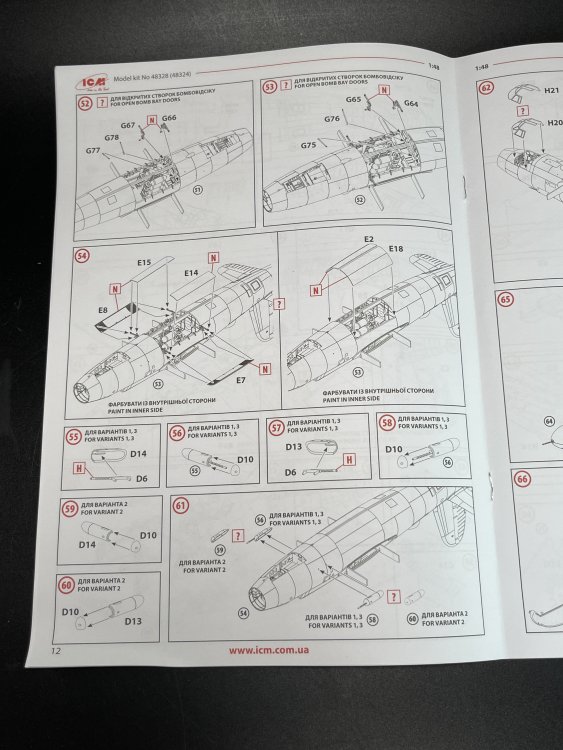
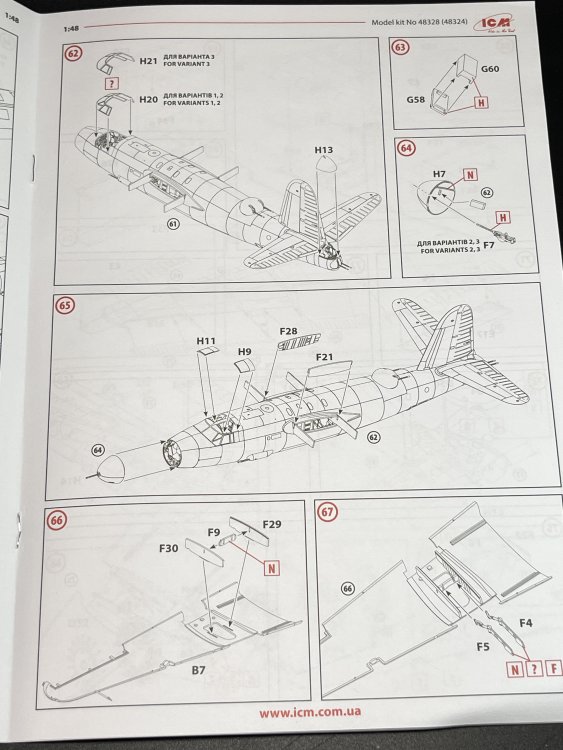
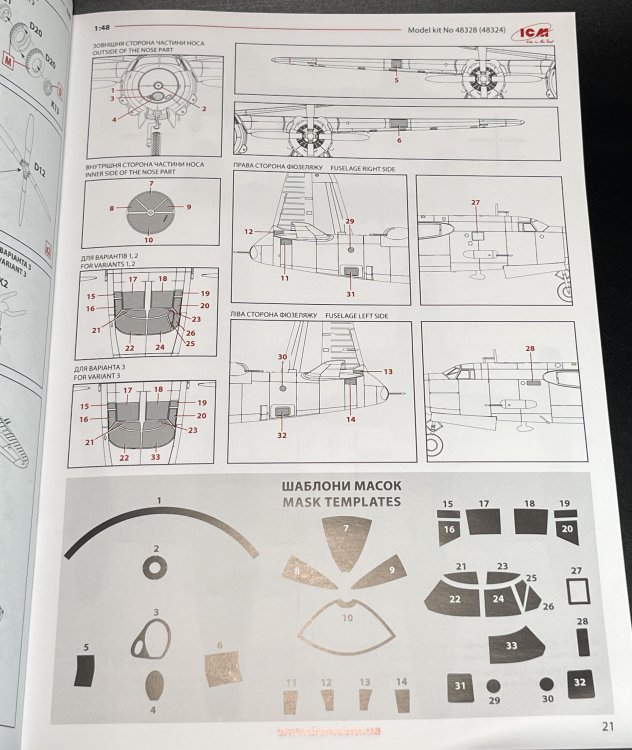
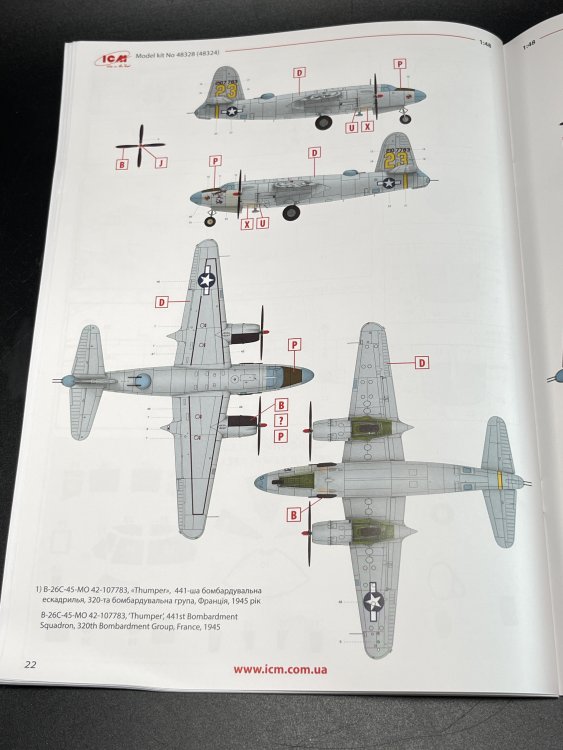
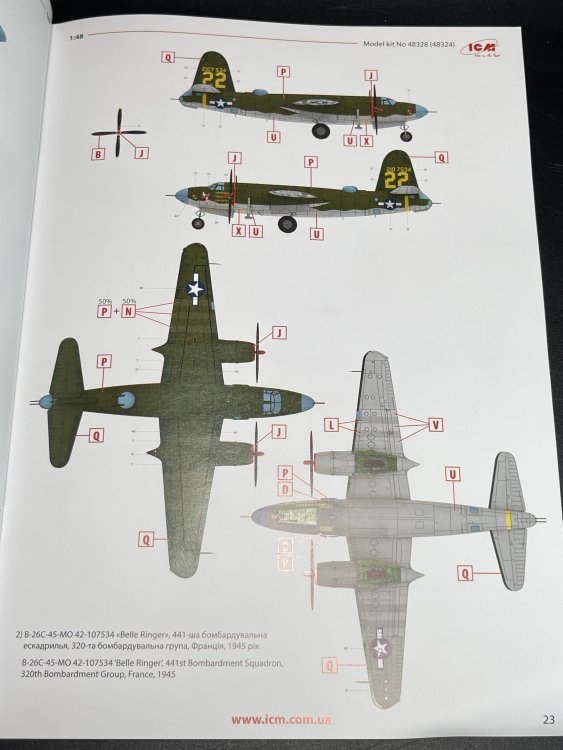
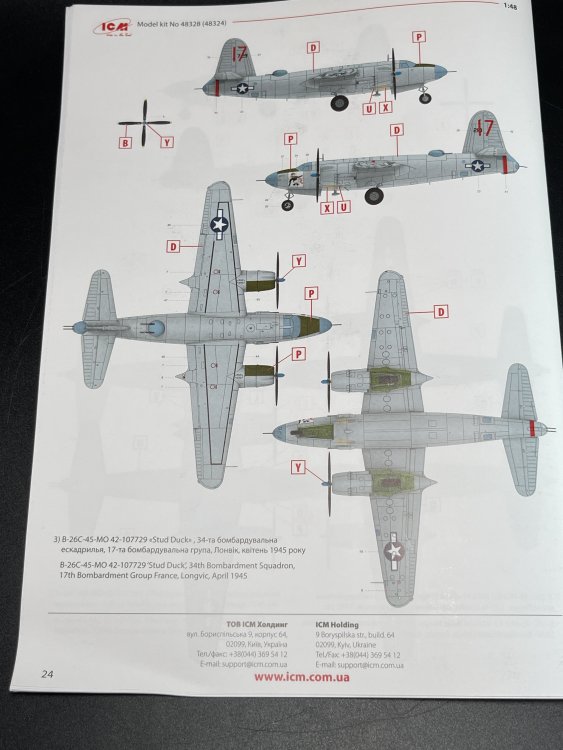
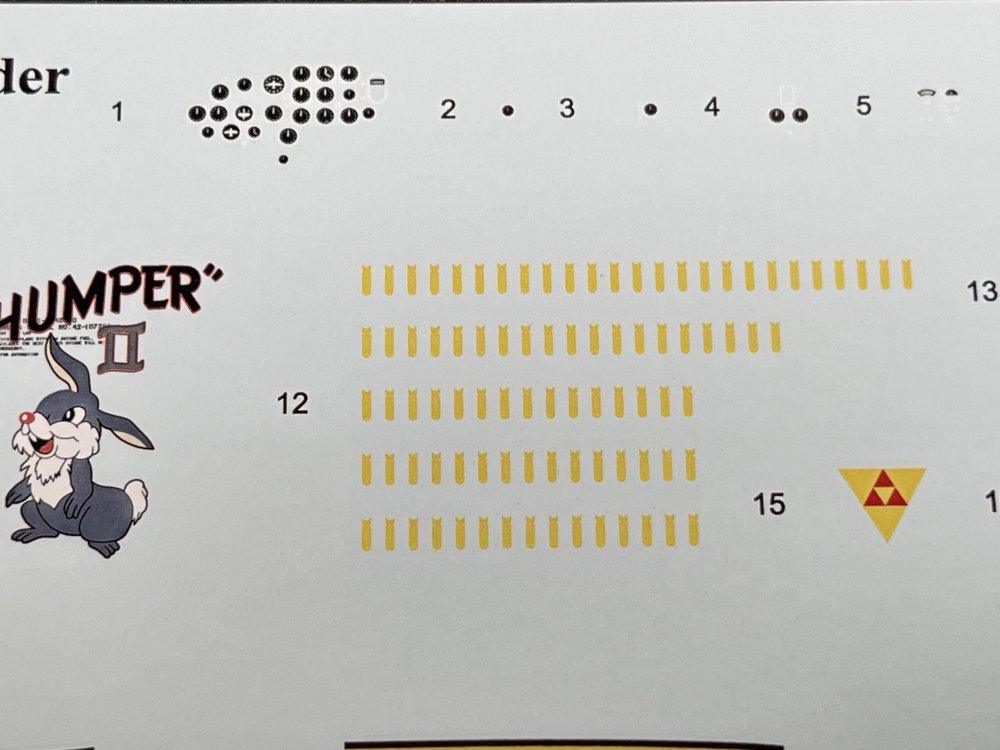
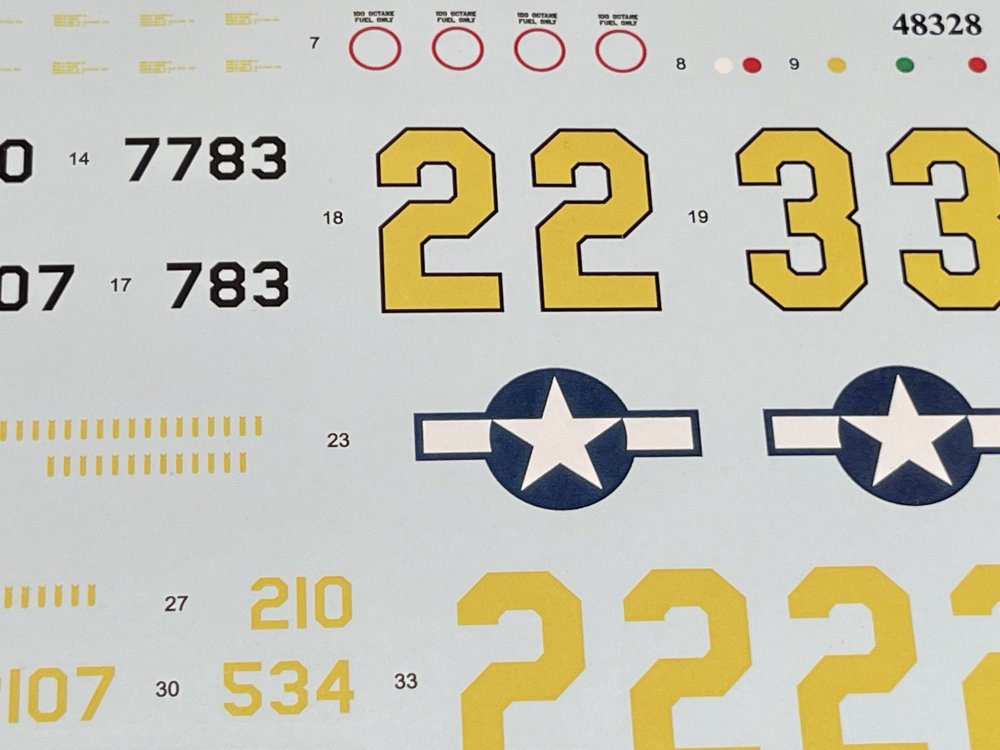
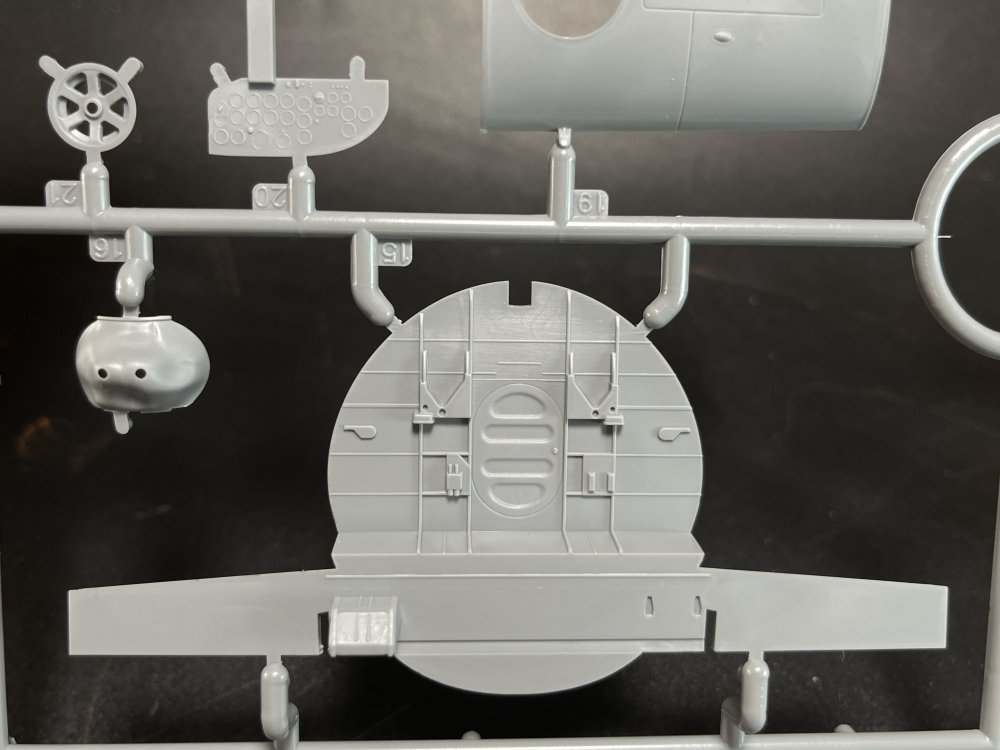
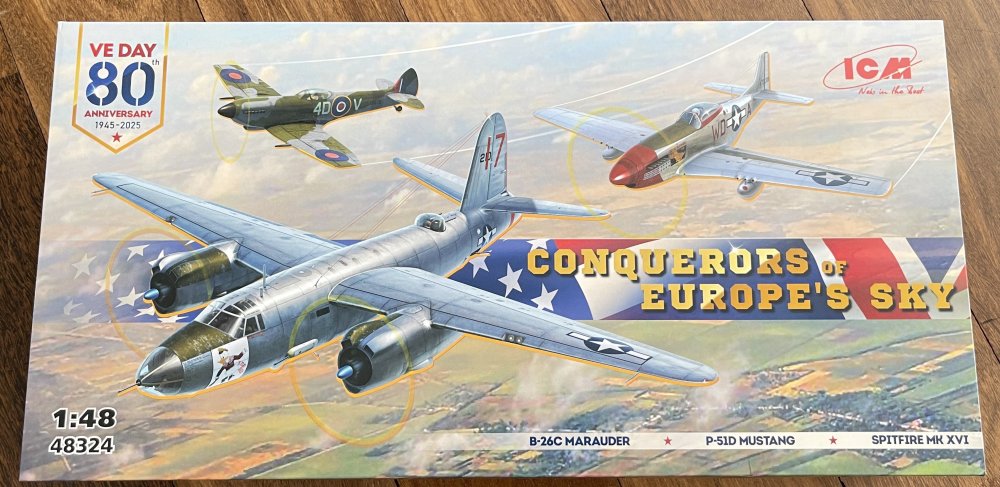
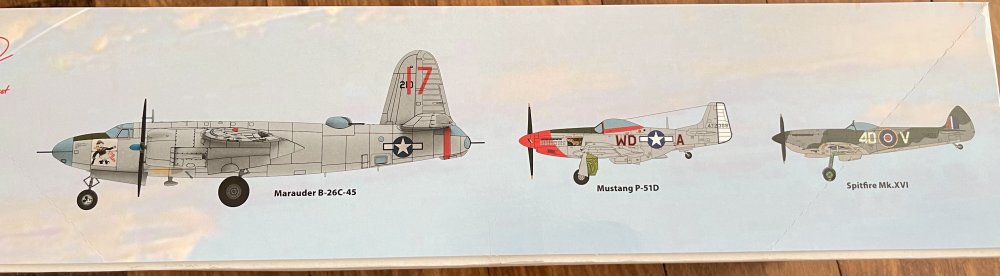
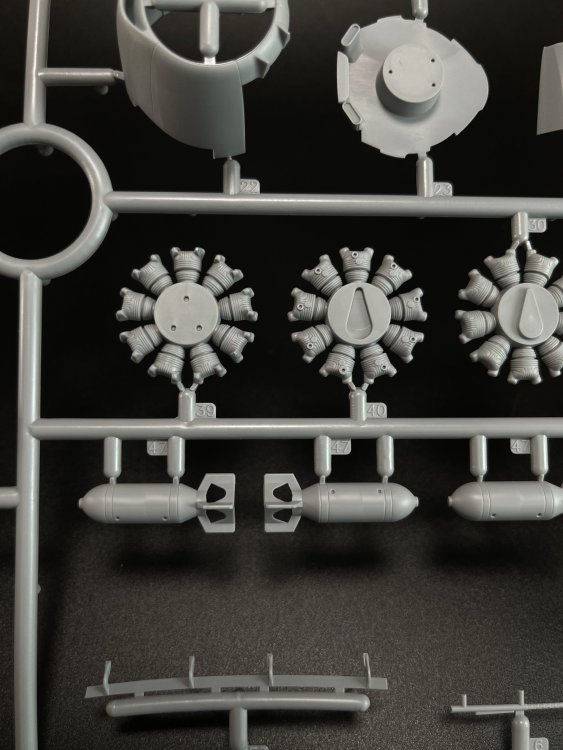
1:48 Conquerors of Europe`s Sky ICM Catalogue number 48324 Price: around 81,95€ ICM continues to launch combo kit set that are a very good option to the modeler. Today we are checking the 1/48 “Conquerors of Europe’s Sky” combo set (catalog number 48324) that includes three iconic World War II aircraft: the B-26C Marauder, P-51D Mustang, and Spitfire Mk.XVI. So, three models in one box and its quite bix box. Packaging is typical ICM latest, each kit is served in the separate plastic bag. There are 454mm and 362 parts for big twin-engine B-26C Marauder, 207mm wingspan and 136 parts for Sptifire Mk.XVI and 235mm wingspan with 80 parts for P-51D Mustang. Let's crack the box!! One thing curious about this set…. It’s the first time that ICM release a C version… This B-26 contains an extra sprue that doesn`t exist in the B version. As for the Spitfire and the Mustang, these are older kits. ICM has made significant strides in improving the quality of their kits and as we going to show the new release feature crisp molding. The ICM 1/48 scale B-26B and B-26C model kits are very closely related, as they represent variants of the same aircraft family — the Martin B-26 Marauder — with minor but important differences. In real life, the B-26B and B-26C were mechanically and structurally identical, with the only real-world difference being the location of manufacture: · B-26B: Built at Baltimore, Maryland · B-26C: Built at Omaha, Nebraska As for the B-26 B click here For the G version click here Now as for the C version, a new sprue. The K sprue. The sprue K provides the specific parts for this version, featuring spars for attaching the wing root, a new instrument panel, and the wheels' rims for the landing gear. This sprue is also available in the G version but not on the B version box. But for this sprue to make the C version you only need the wheels hubs a vent, a small gondola and boomerang antenna. There`s a different between these two and the B-26C as they are from older moldes when ICM was still growing to the actual quality and finesse. First up is the P-51D Mustang It comprising around 80 parts, this model is more straightforward to assemble of all three. It offers a detailed cockpit and well-molded surfaces, making it a favorable choice for those looking to enhance their modeling skills. Considering that the kit was released in 2001 as the P-51C and in 2003 https://www.scalemates.com/kits/icm-48153-north-american-p-51d-15--1080729 with parts for the D variant, the kit has held up surprisingly well and is very easy to build. Of course, the kit can't compete with newer Czech kits in terms of detail, but it can be assembled quickly: So The P-51D the parts have good surface detail but not as good as the B-26C. Also the sprues have a few flash that will take a bit more time to clean up. Now the Spitfire. The kit dates back to 2001 and has held up relatively well for its age - https://www.scalemates.com/kits/icm-48061-spitfire-mkix--211640 The spitfire has more in-box detail with a full engine. The cockpit detail is quite good from the box. As I said with the P-51, the Spitfire is much older than the B26C, Its not the new ICM detail level. Although it comprising around 136 parts, the build is quite straight forward and building the engine will take some time and I suspect that if you put the engine you will not close down the engine panels. You can see the age on the molds as you have some flash to clean. And there’s no location tip, as it’s a limited run mold, back when ICM use them So the B-26 C comes with Two Pratt & Whitney R‑2800 engines (27 parts each), offering impressive realism comparable to high-end kits. However the engine gondola panels are not removal. ) In the Spitfire you can put the Merlin full exposed. As for the instructions of all models despite Spitfire and Mustang are older models kits, the instrucions are in the ICM modern state with only ICM color chart and clear parts indication. On the B-26 instruction is provide a canopy mask templates. The clear parts, are much better in the B-26 than thety are in the Spitfire and the Mustang, so you can see ICM evolution along the years also in the clear parts. However, all the clear parts have no distortion or bubble but the B-26 ones are more refine and clear. While the P-51 model kit does not bring any engine, the Spitfire and the B-26 C gives the modeler that option, but only the spit you can put it in sight. The B-26 C also have a pitot issue on the wing and fuselage, that I mention before when I review the B-26B. For the B-26 C, you got a large decal sheet with very good color and definition. Despite being a combo box, ICM don’t leave the modeler with a single option in the B-26 C but all 3 options: 1. B-26 C-45-MO 42-107783 “Thumper”, 441st Bombardment Squadron, 320th Bombardment Group, France, 1945; 2. B-26 C-45-MO 42-17534 “Belle Ringer”, 441st Bombardment Squadron, 320th Bombardment Group, France, 1945; 3. B-26 C-45-Mo 42-107729 “Stud Duck”, 34th Bombardment Squadron, 17th Bombardment Group, France, Longvic, April 1945; As for the instructions, typical modern ones from ICM with good location parts indication and color references only by ICM colors. Moving for the little friends, The P-51D and the Spitfire Mk XIV. The P-51 only have a small decal sheet with a single scheme. P. McKennon famous “Ridge Runner” P-51 D , Maj. P. McKennon, 4th FG, Spring 1945 As for the Spitfire, a bigger decal sheet means that you have two schemes: - Spitfire LF. XVI E, 74 Sqn., Drope, Germany, April 1945. - Spitfire LF. XVI E, Sqn. Ldr, K. Pniak (7 victories) OC n.º 308 (Krakov) Sqn. England, Summer 1945 Conclusion Priced around €80–€90, the “Conquerors of Europe’s Sky” set offers a substantial value, especially considering the inclusion of three aircraft models being the new B-26 with 3 decals options. A single B-26 cost almost the same thing. This set, consisting of two older models (Spitfire/Mustang) and a brand-new kit (Marauder), is a beautiful tribute to all those pilots who risked their lives in WWII. Lest we forget! Highly recommend My truly thanks to ICM for making this combo box!!!


-
- 2
-

-
Ohhhh, we could have some beer or lunch!!! But Its very good to know that you loved my home city!!!
-
Great review and well explain the differences between the B and G version.
-
For me, the best! I have mine a few years now, and its the only airbrush I have for all work and works like charm!
-
Woooow... fantastic build and display.
-
Lukgraph J2F-5 Grumman Duck
Fran replied to ScottsGT's topic in LSM 1/35 and Larger Work In Progress
-
1:32nd scale Caudron G.3 (Anzani engine)
Fran replied to sandbagger's topic in LSM 1/35 and Larger Work In Progress
Lovely work!!! Pelase keep posting!! -
Nice to see you back!!
-
Some time as passed... Any news on this big bird?
-
Yes.... probably lets goes my chance of getting one Fw-189!!!
-
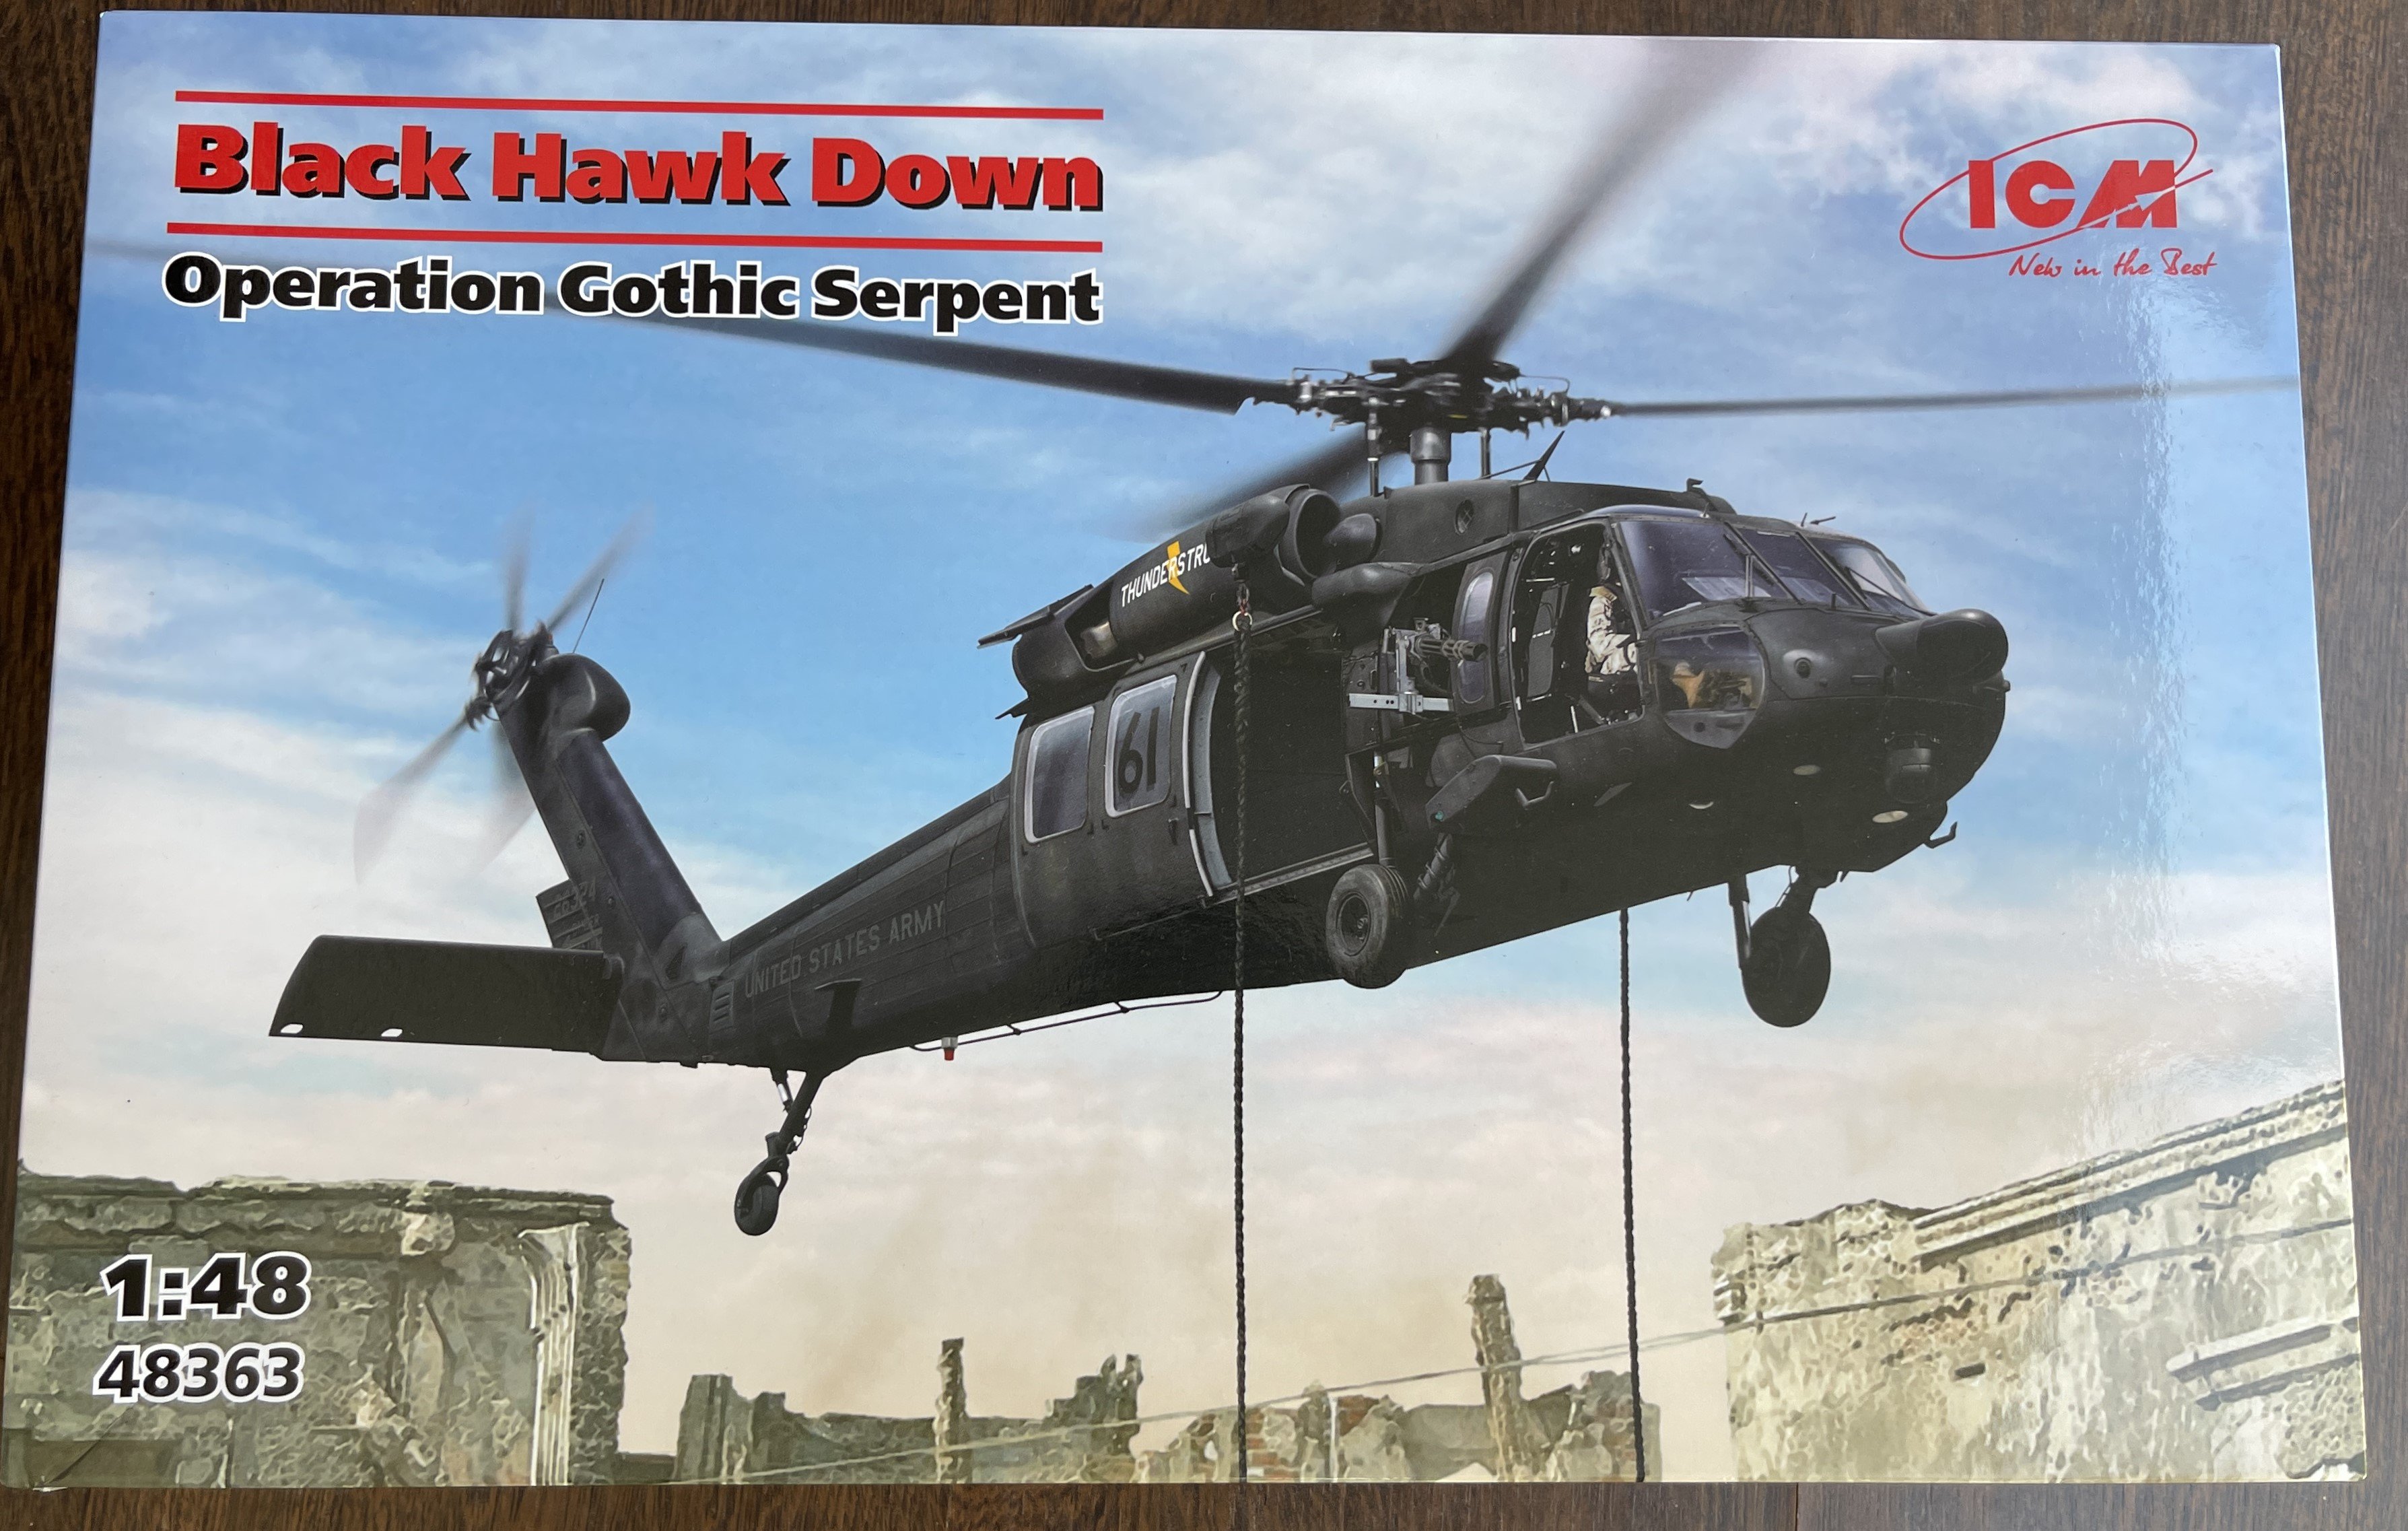
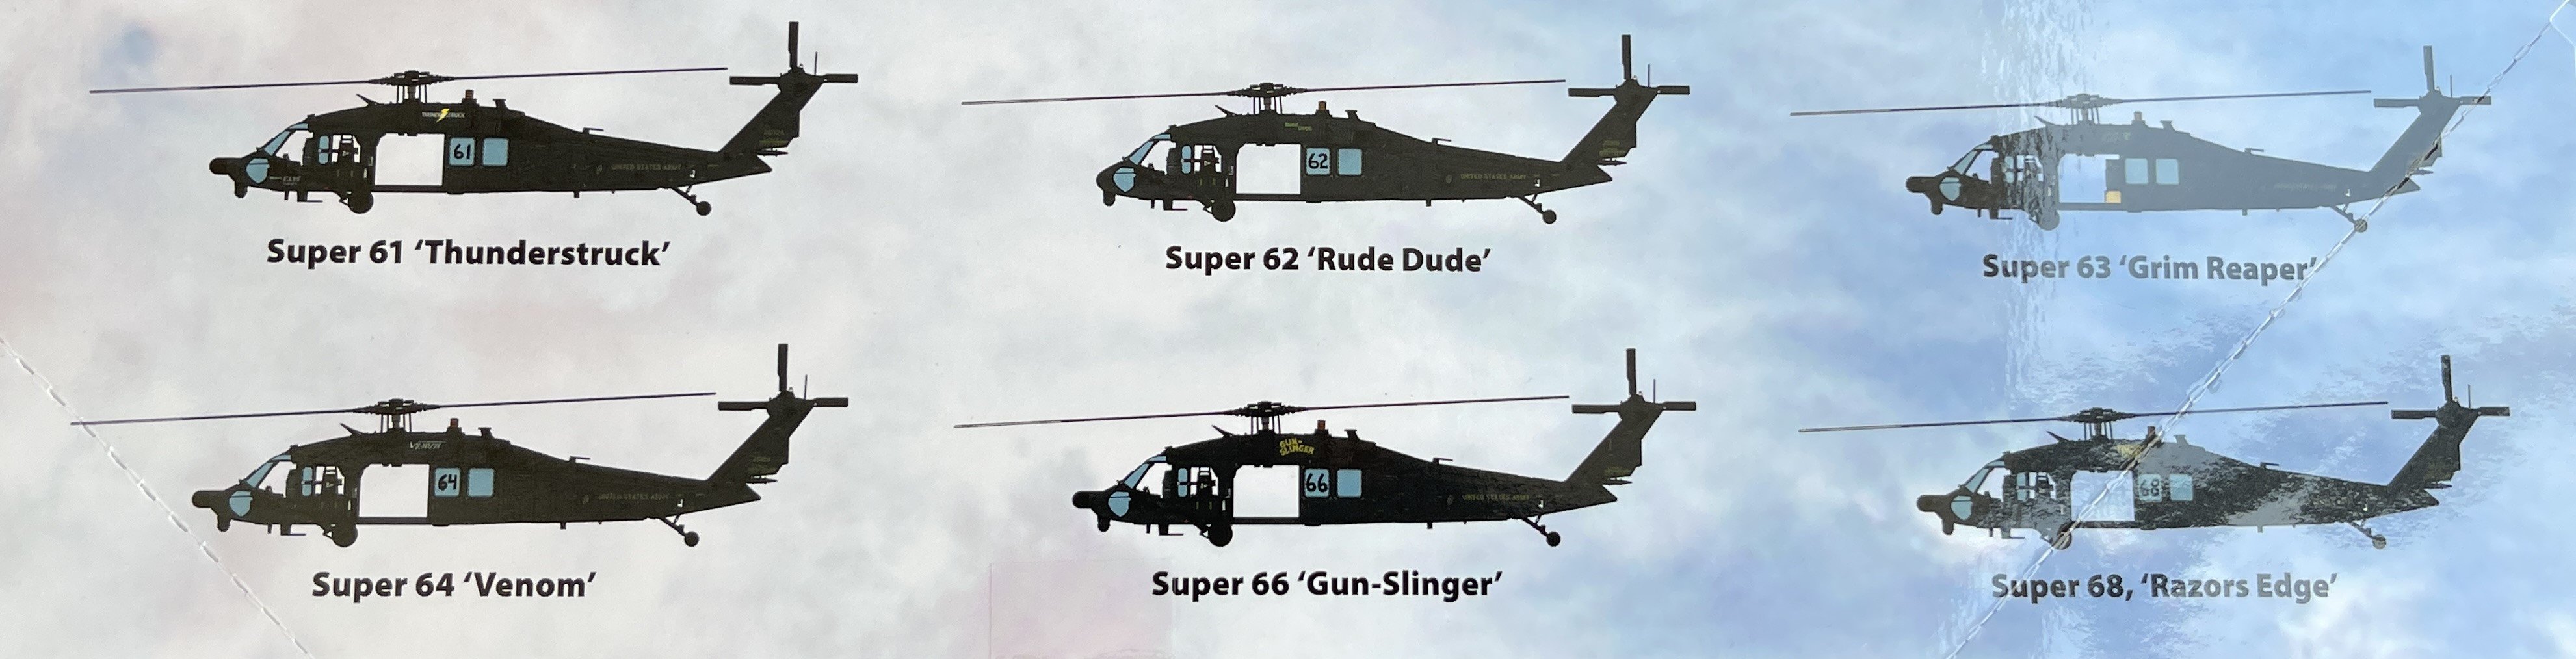
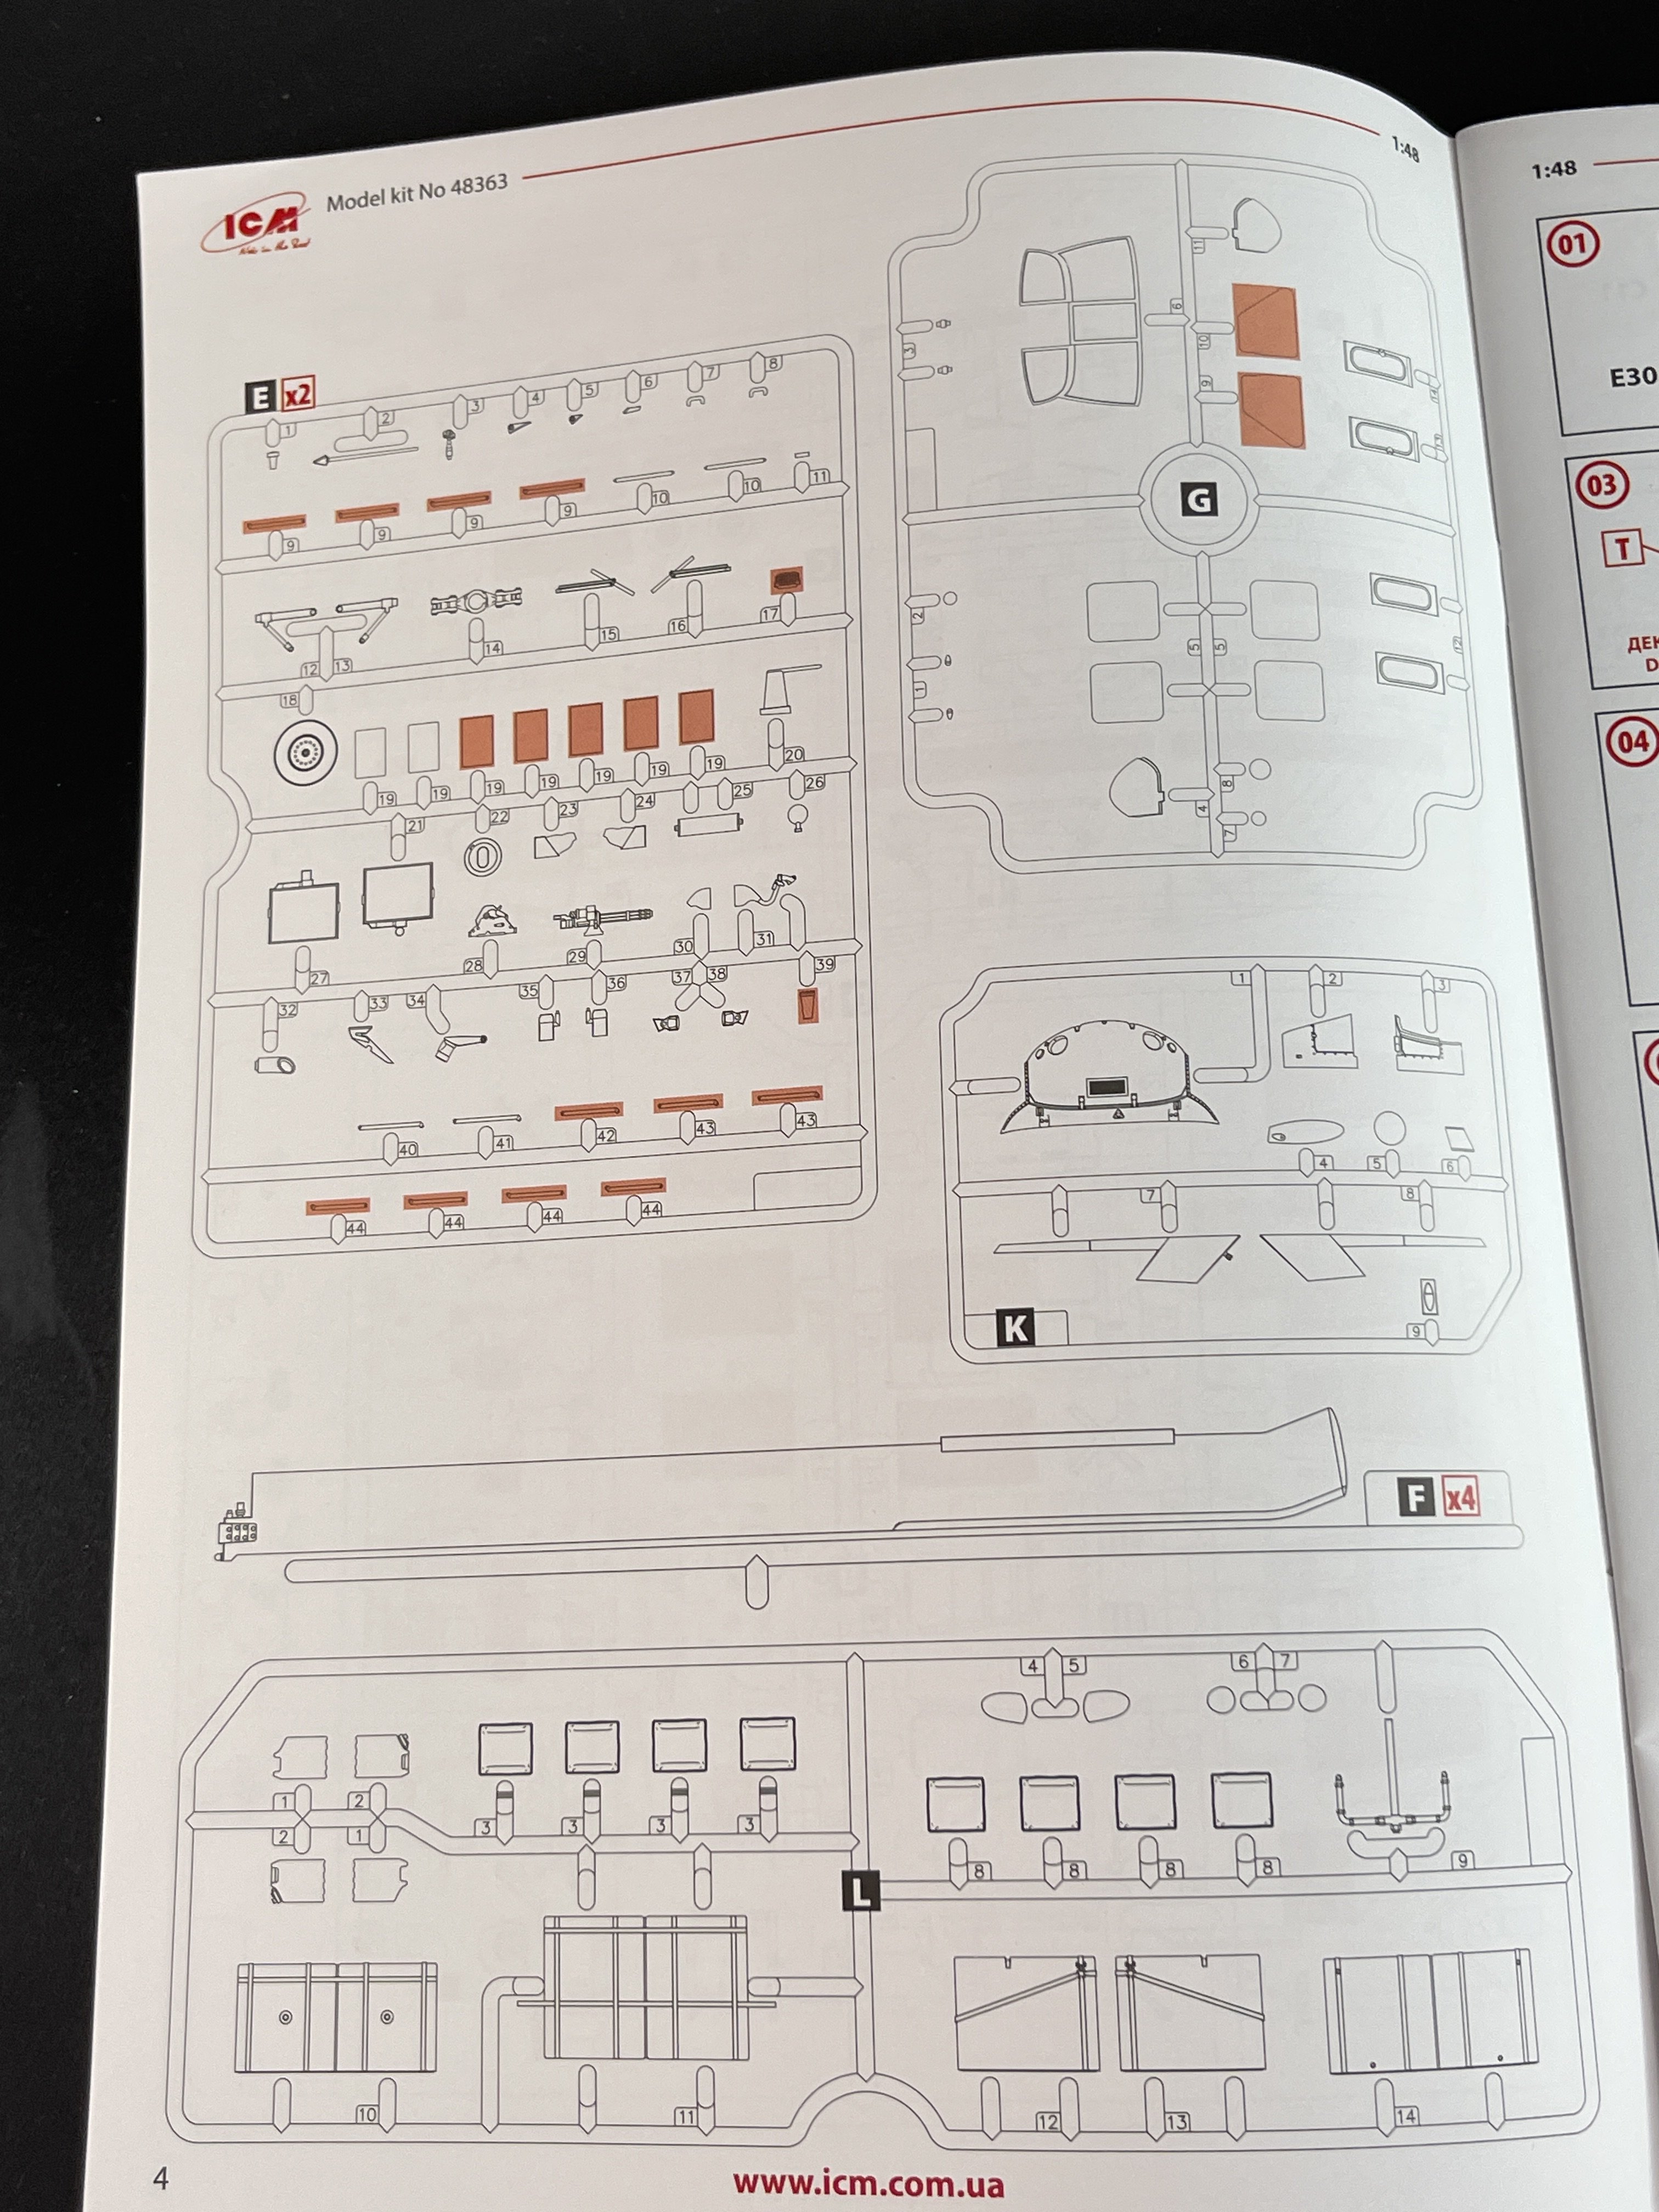
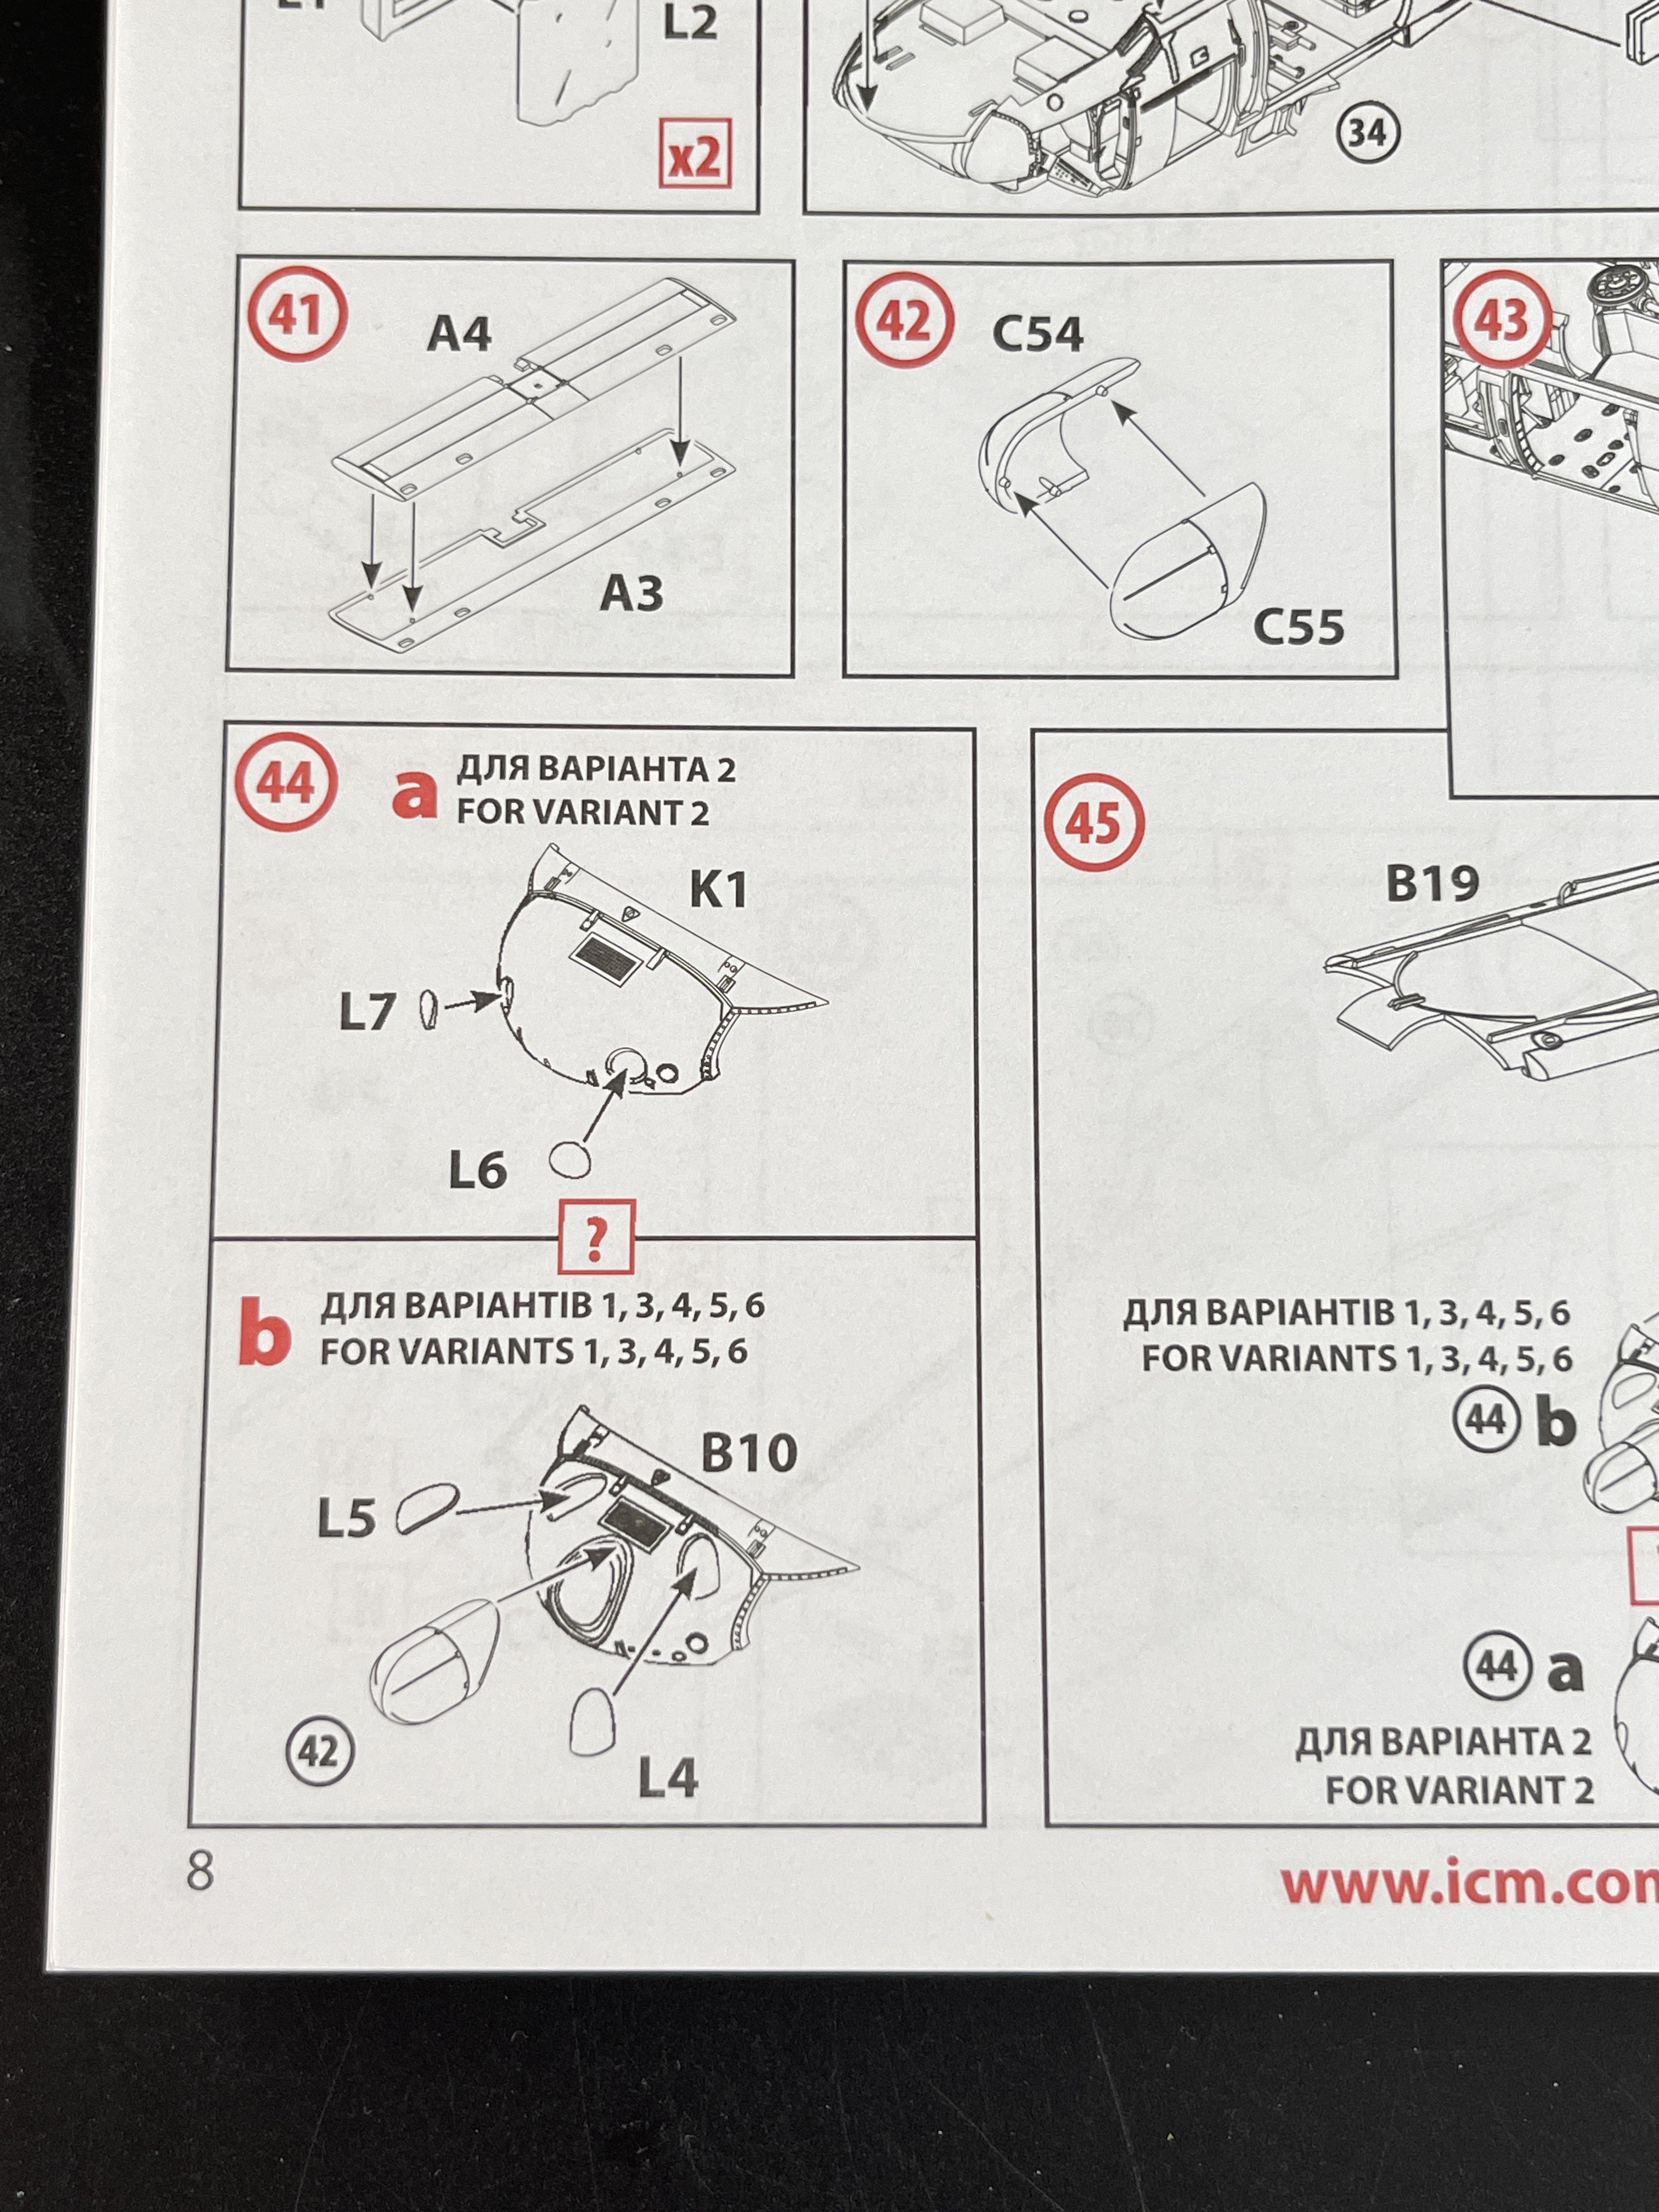
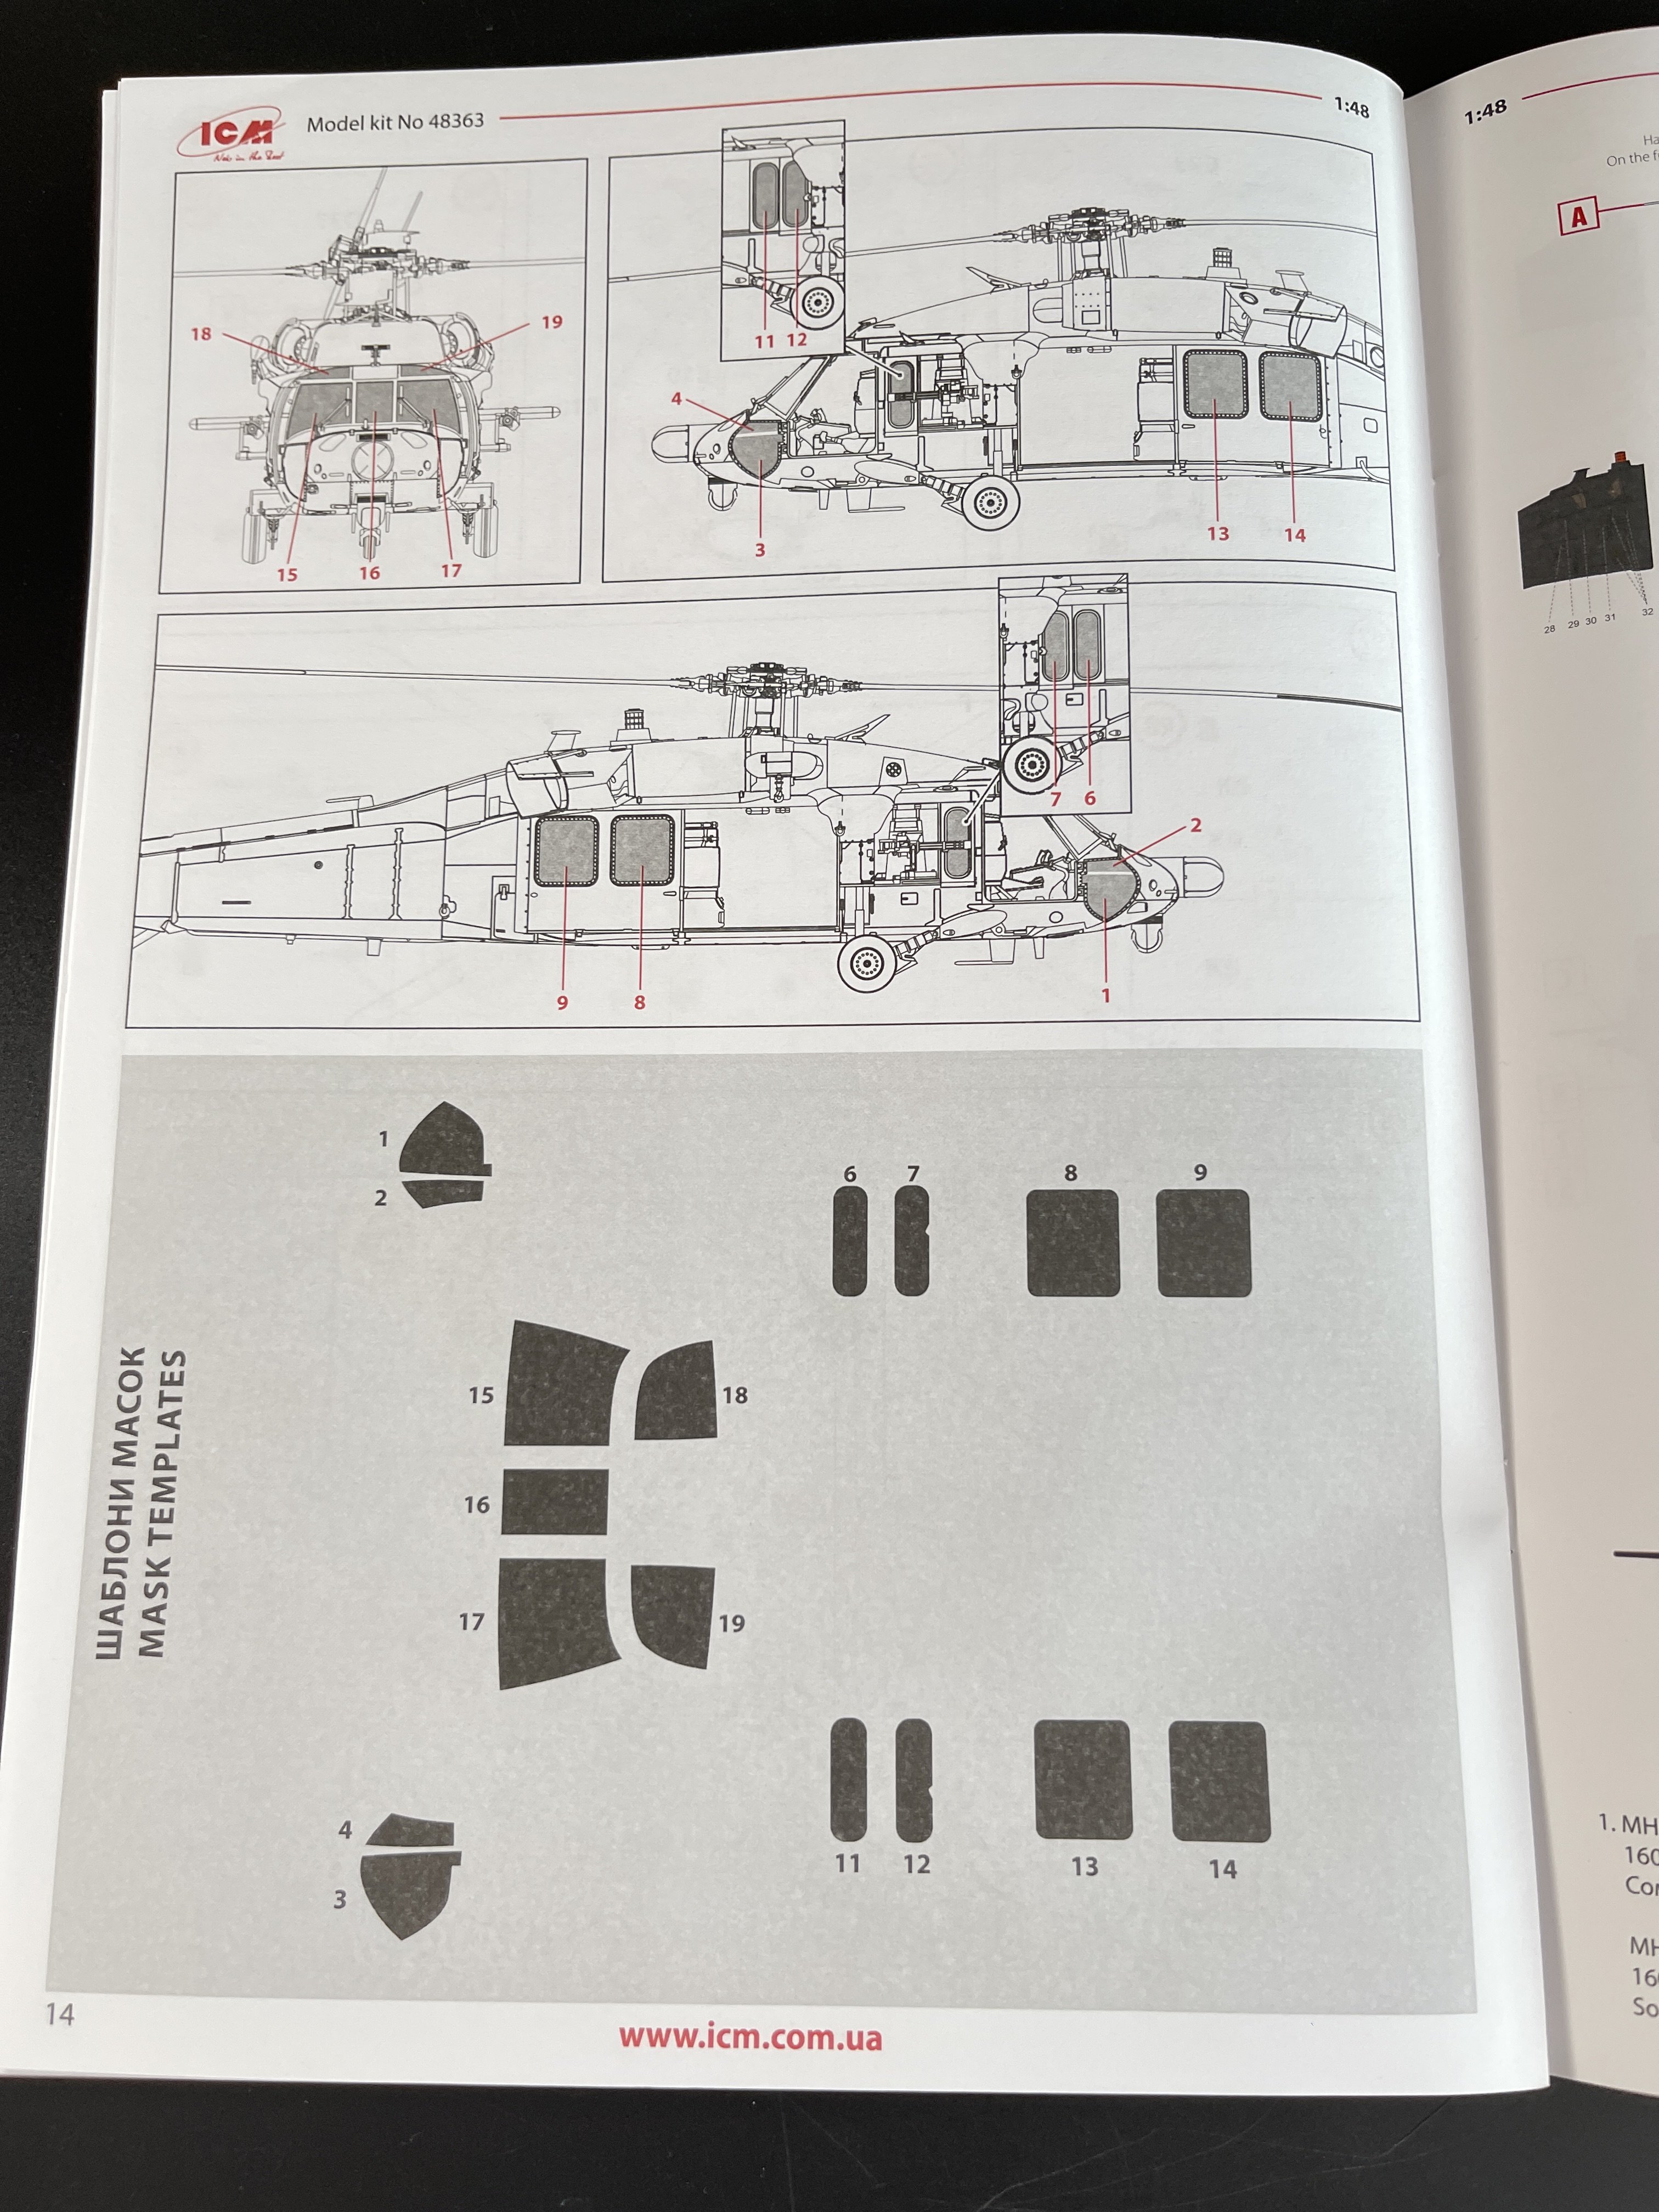
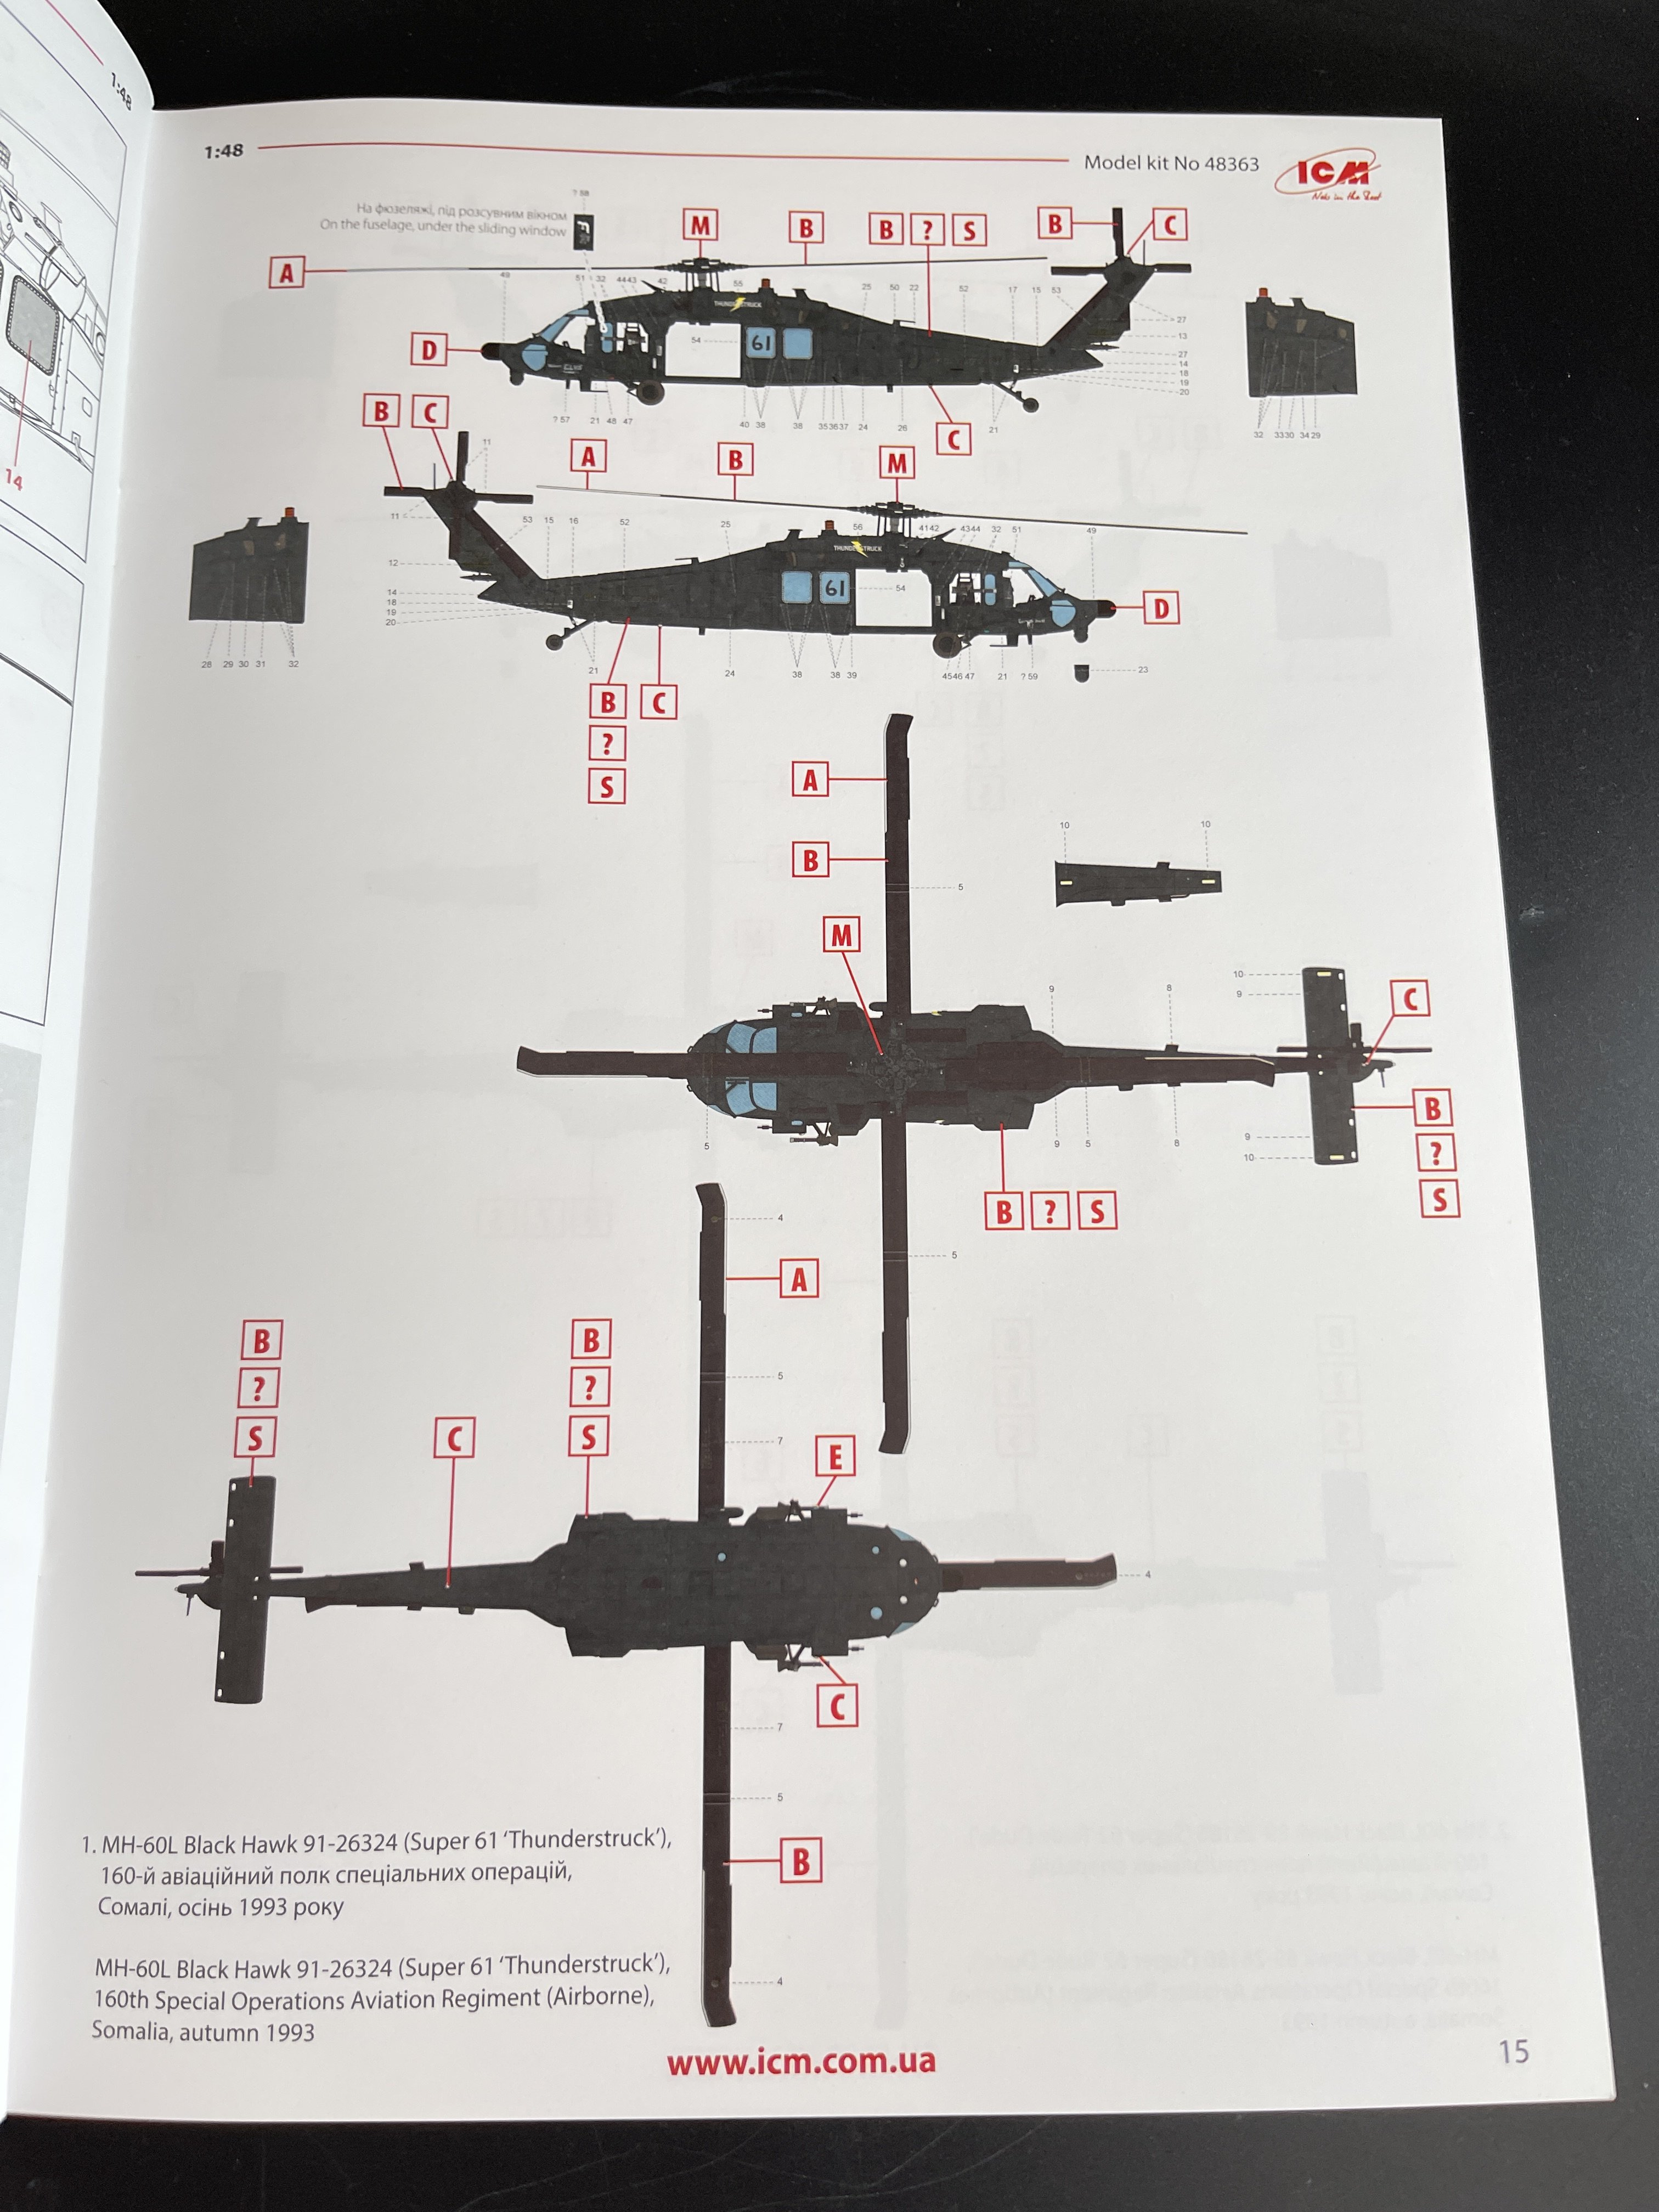
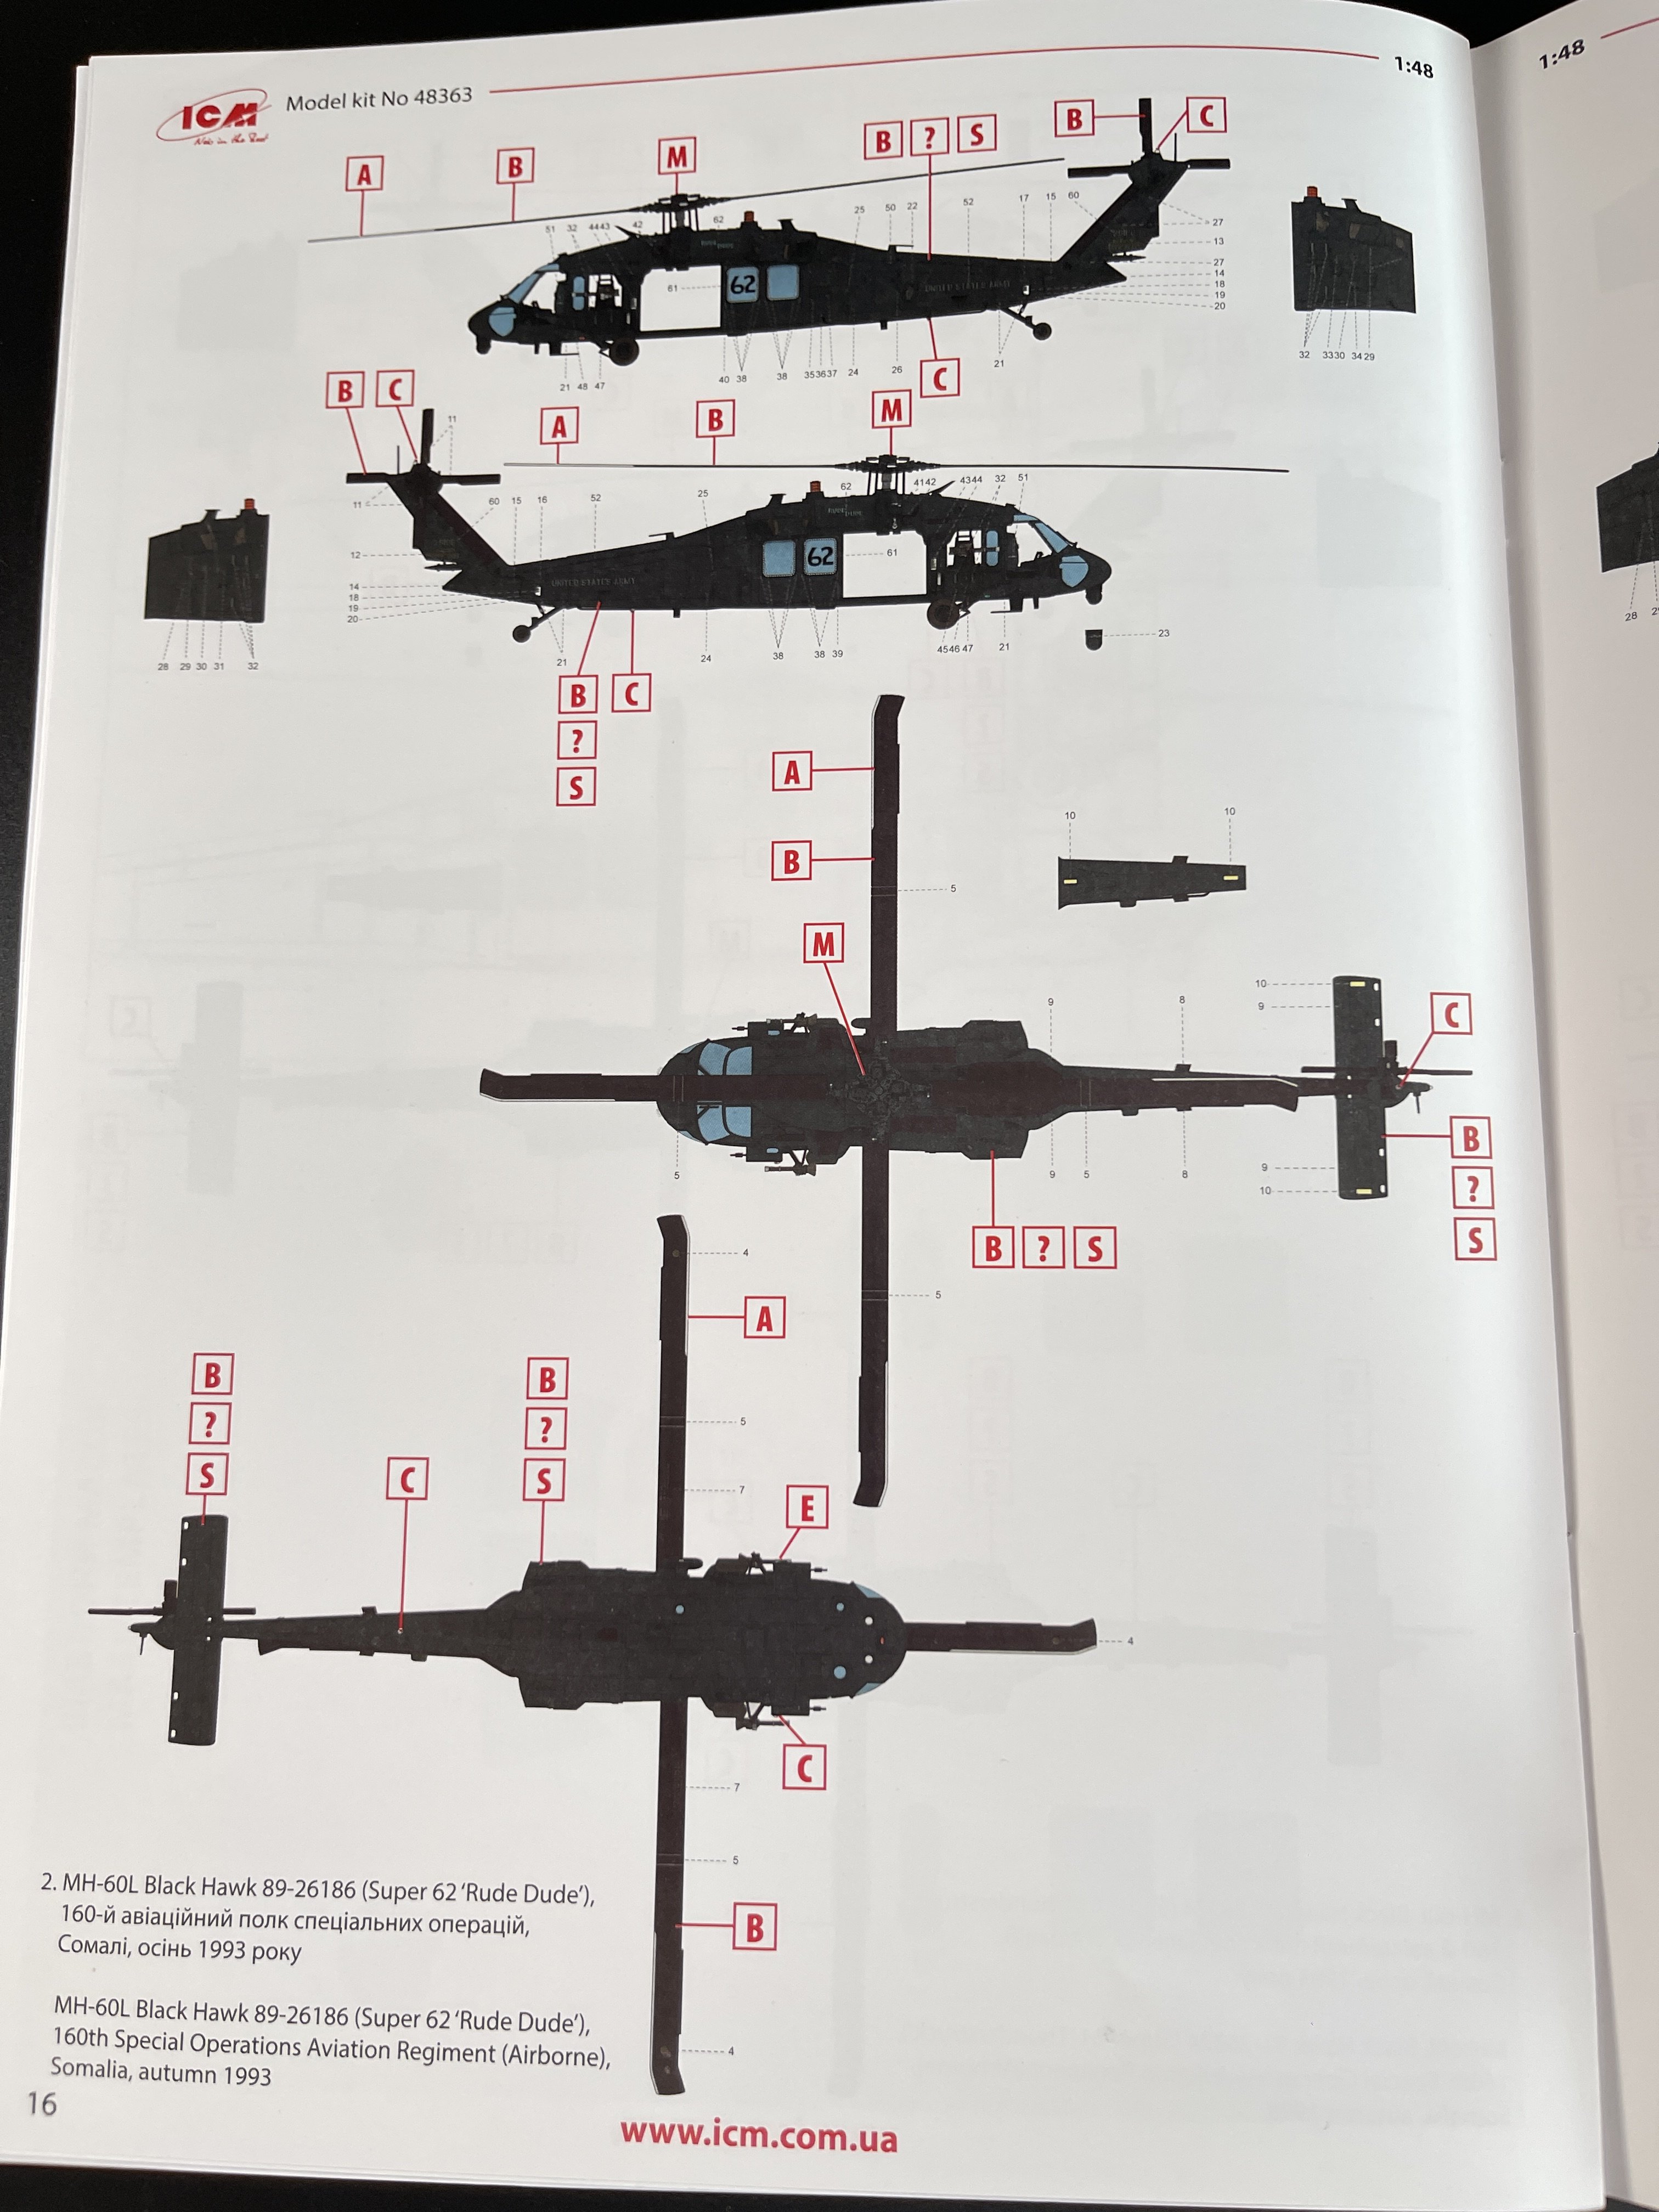
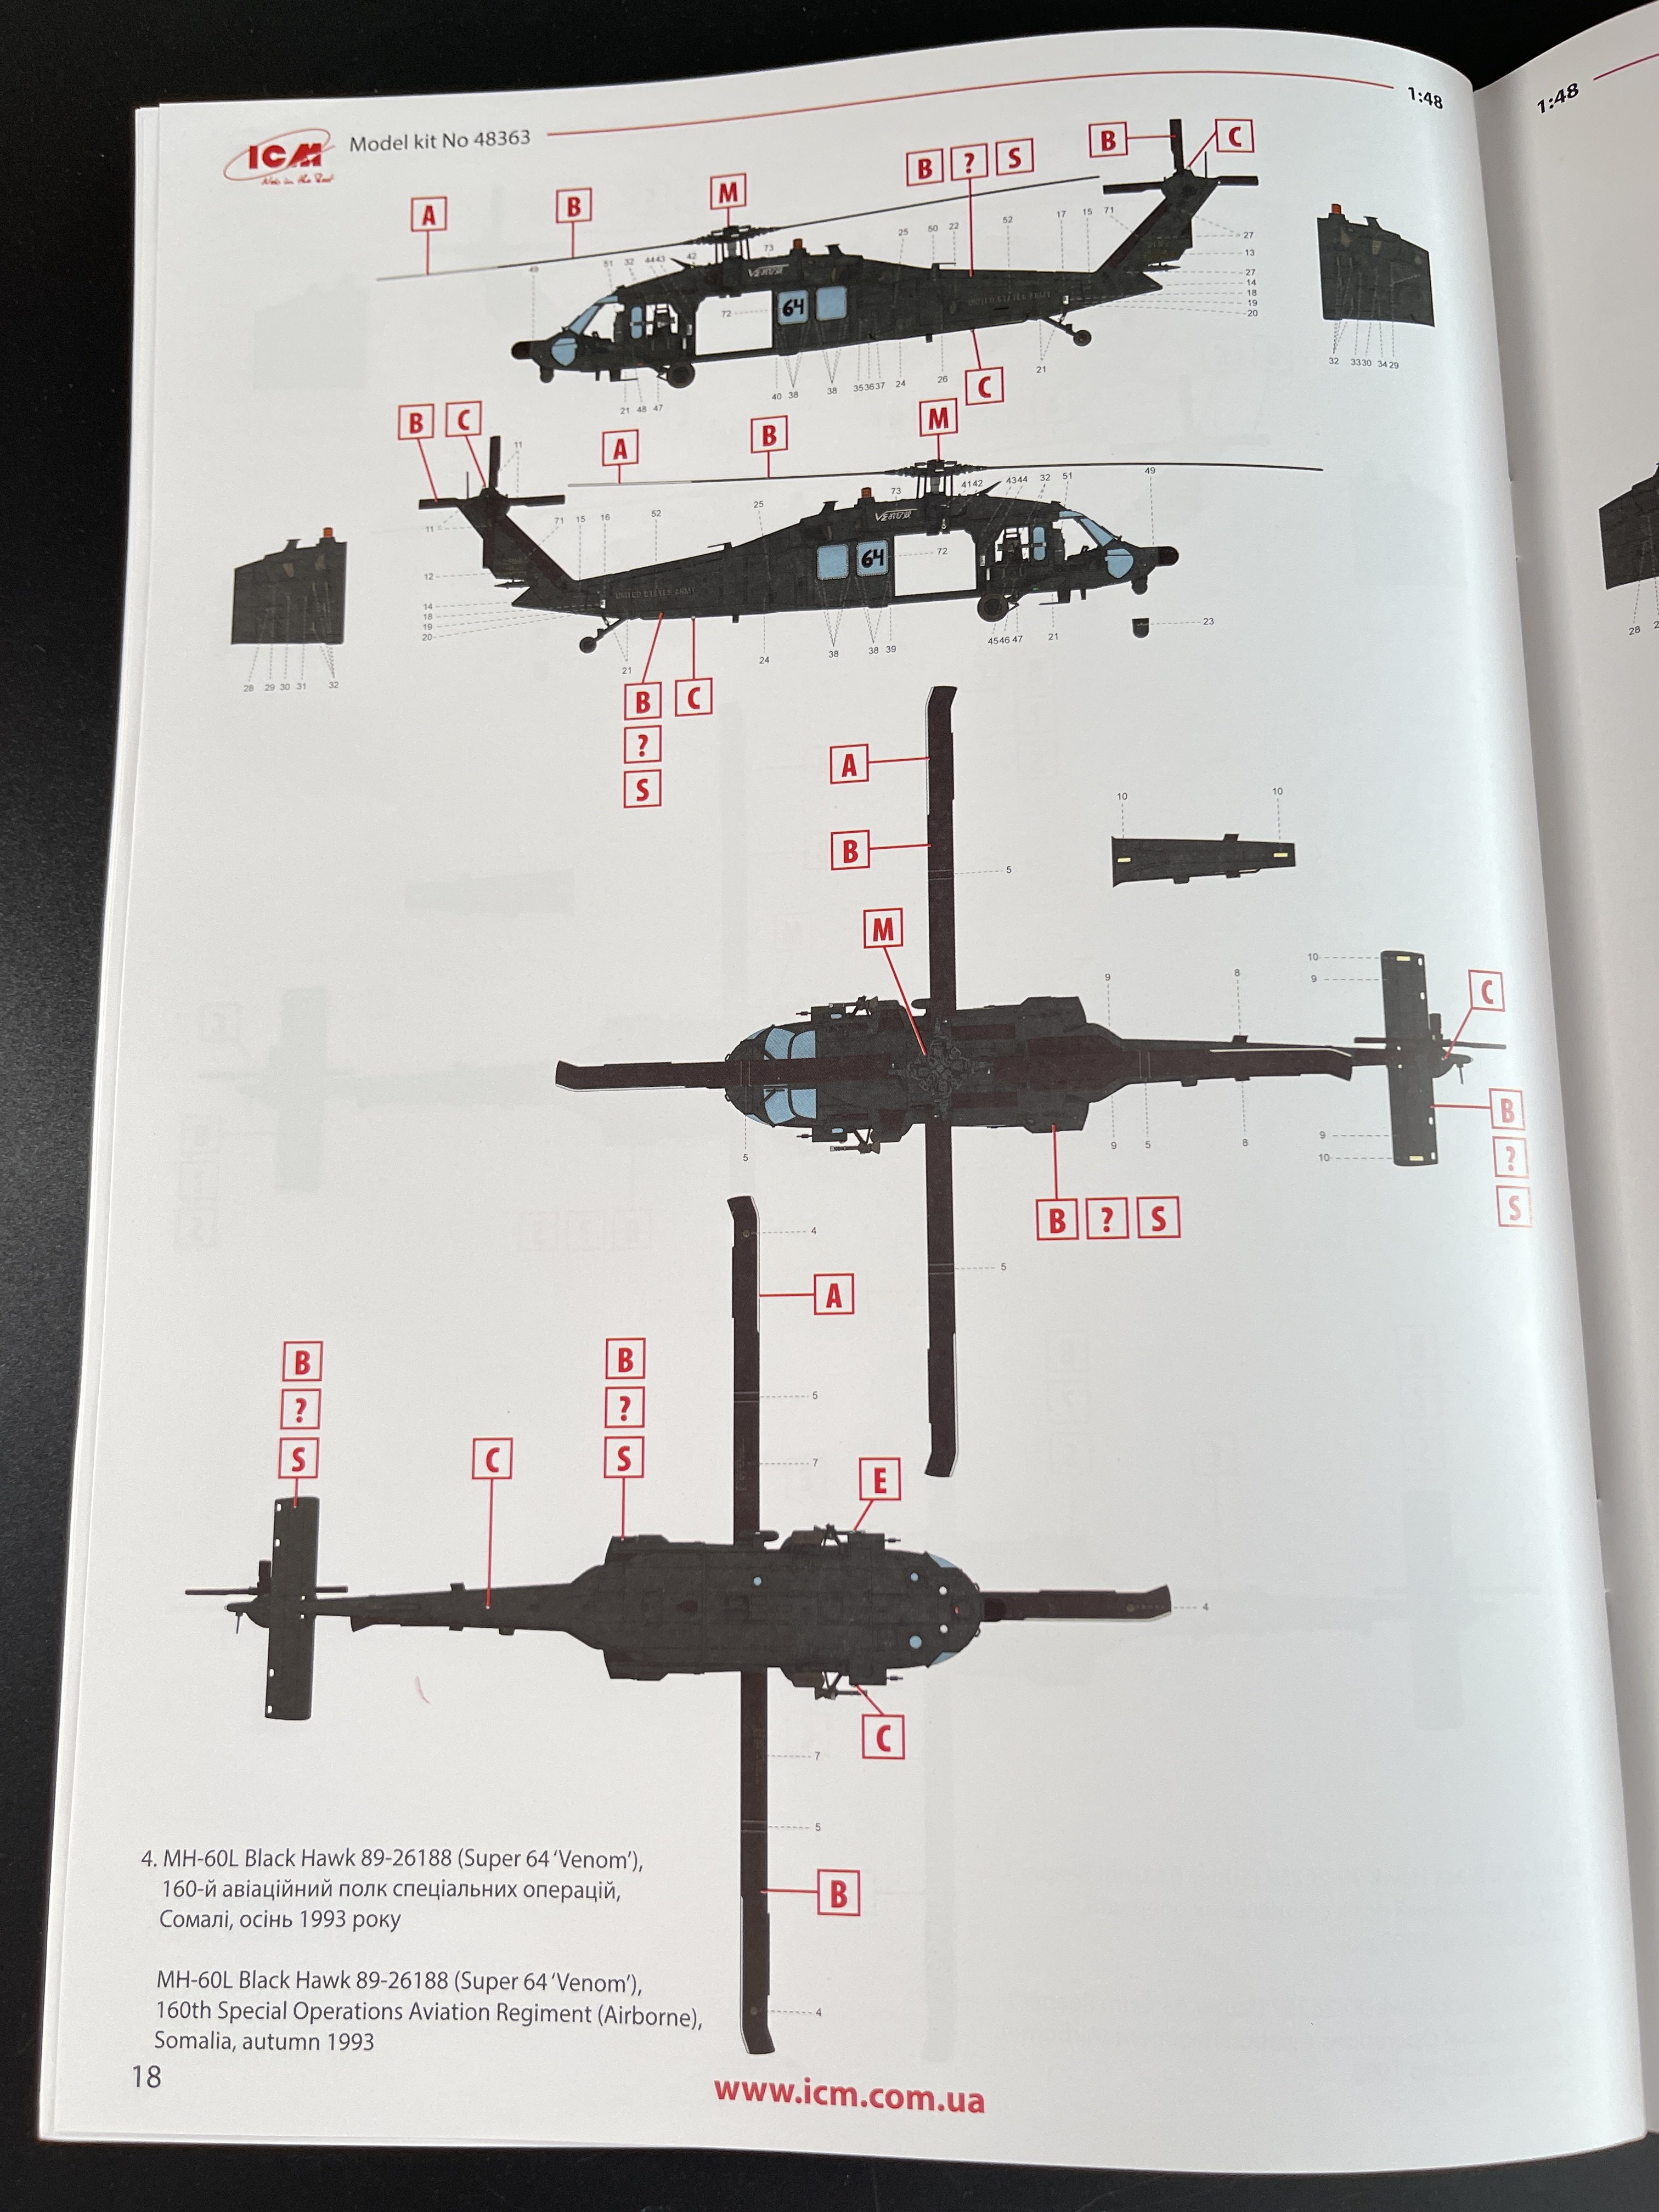
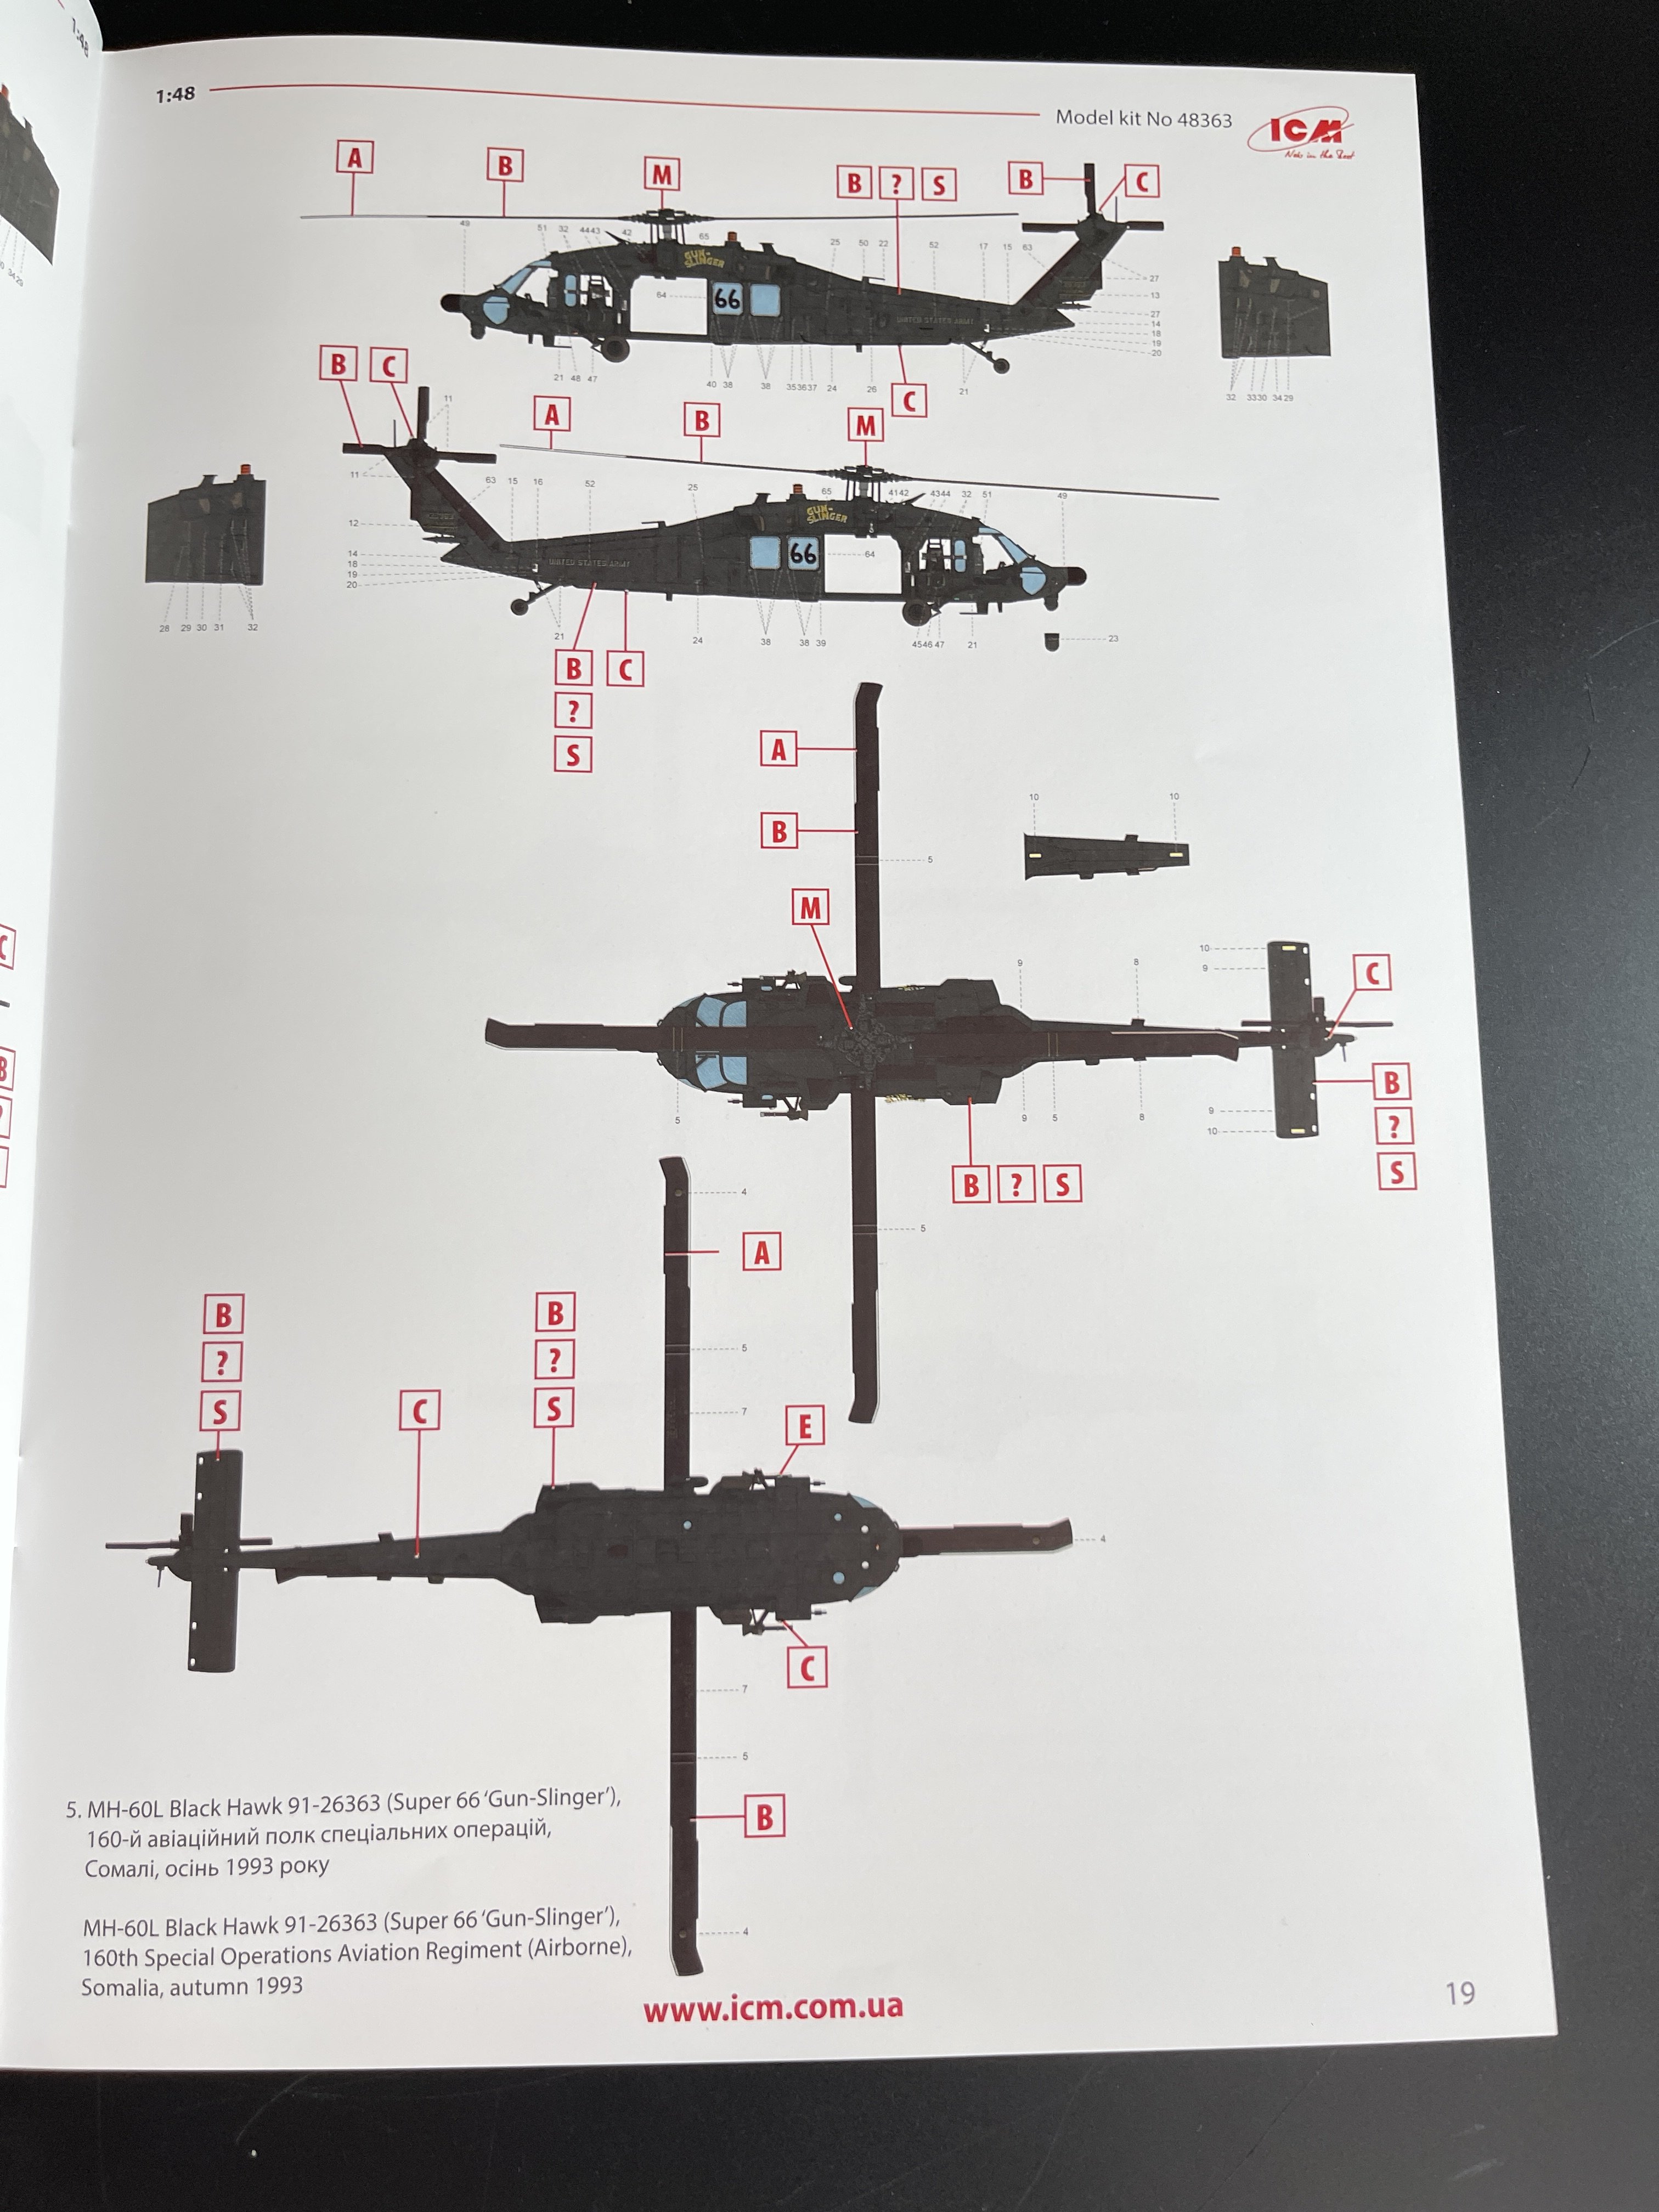
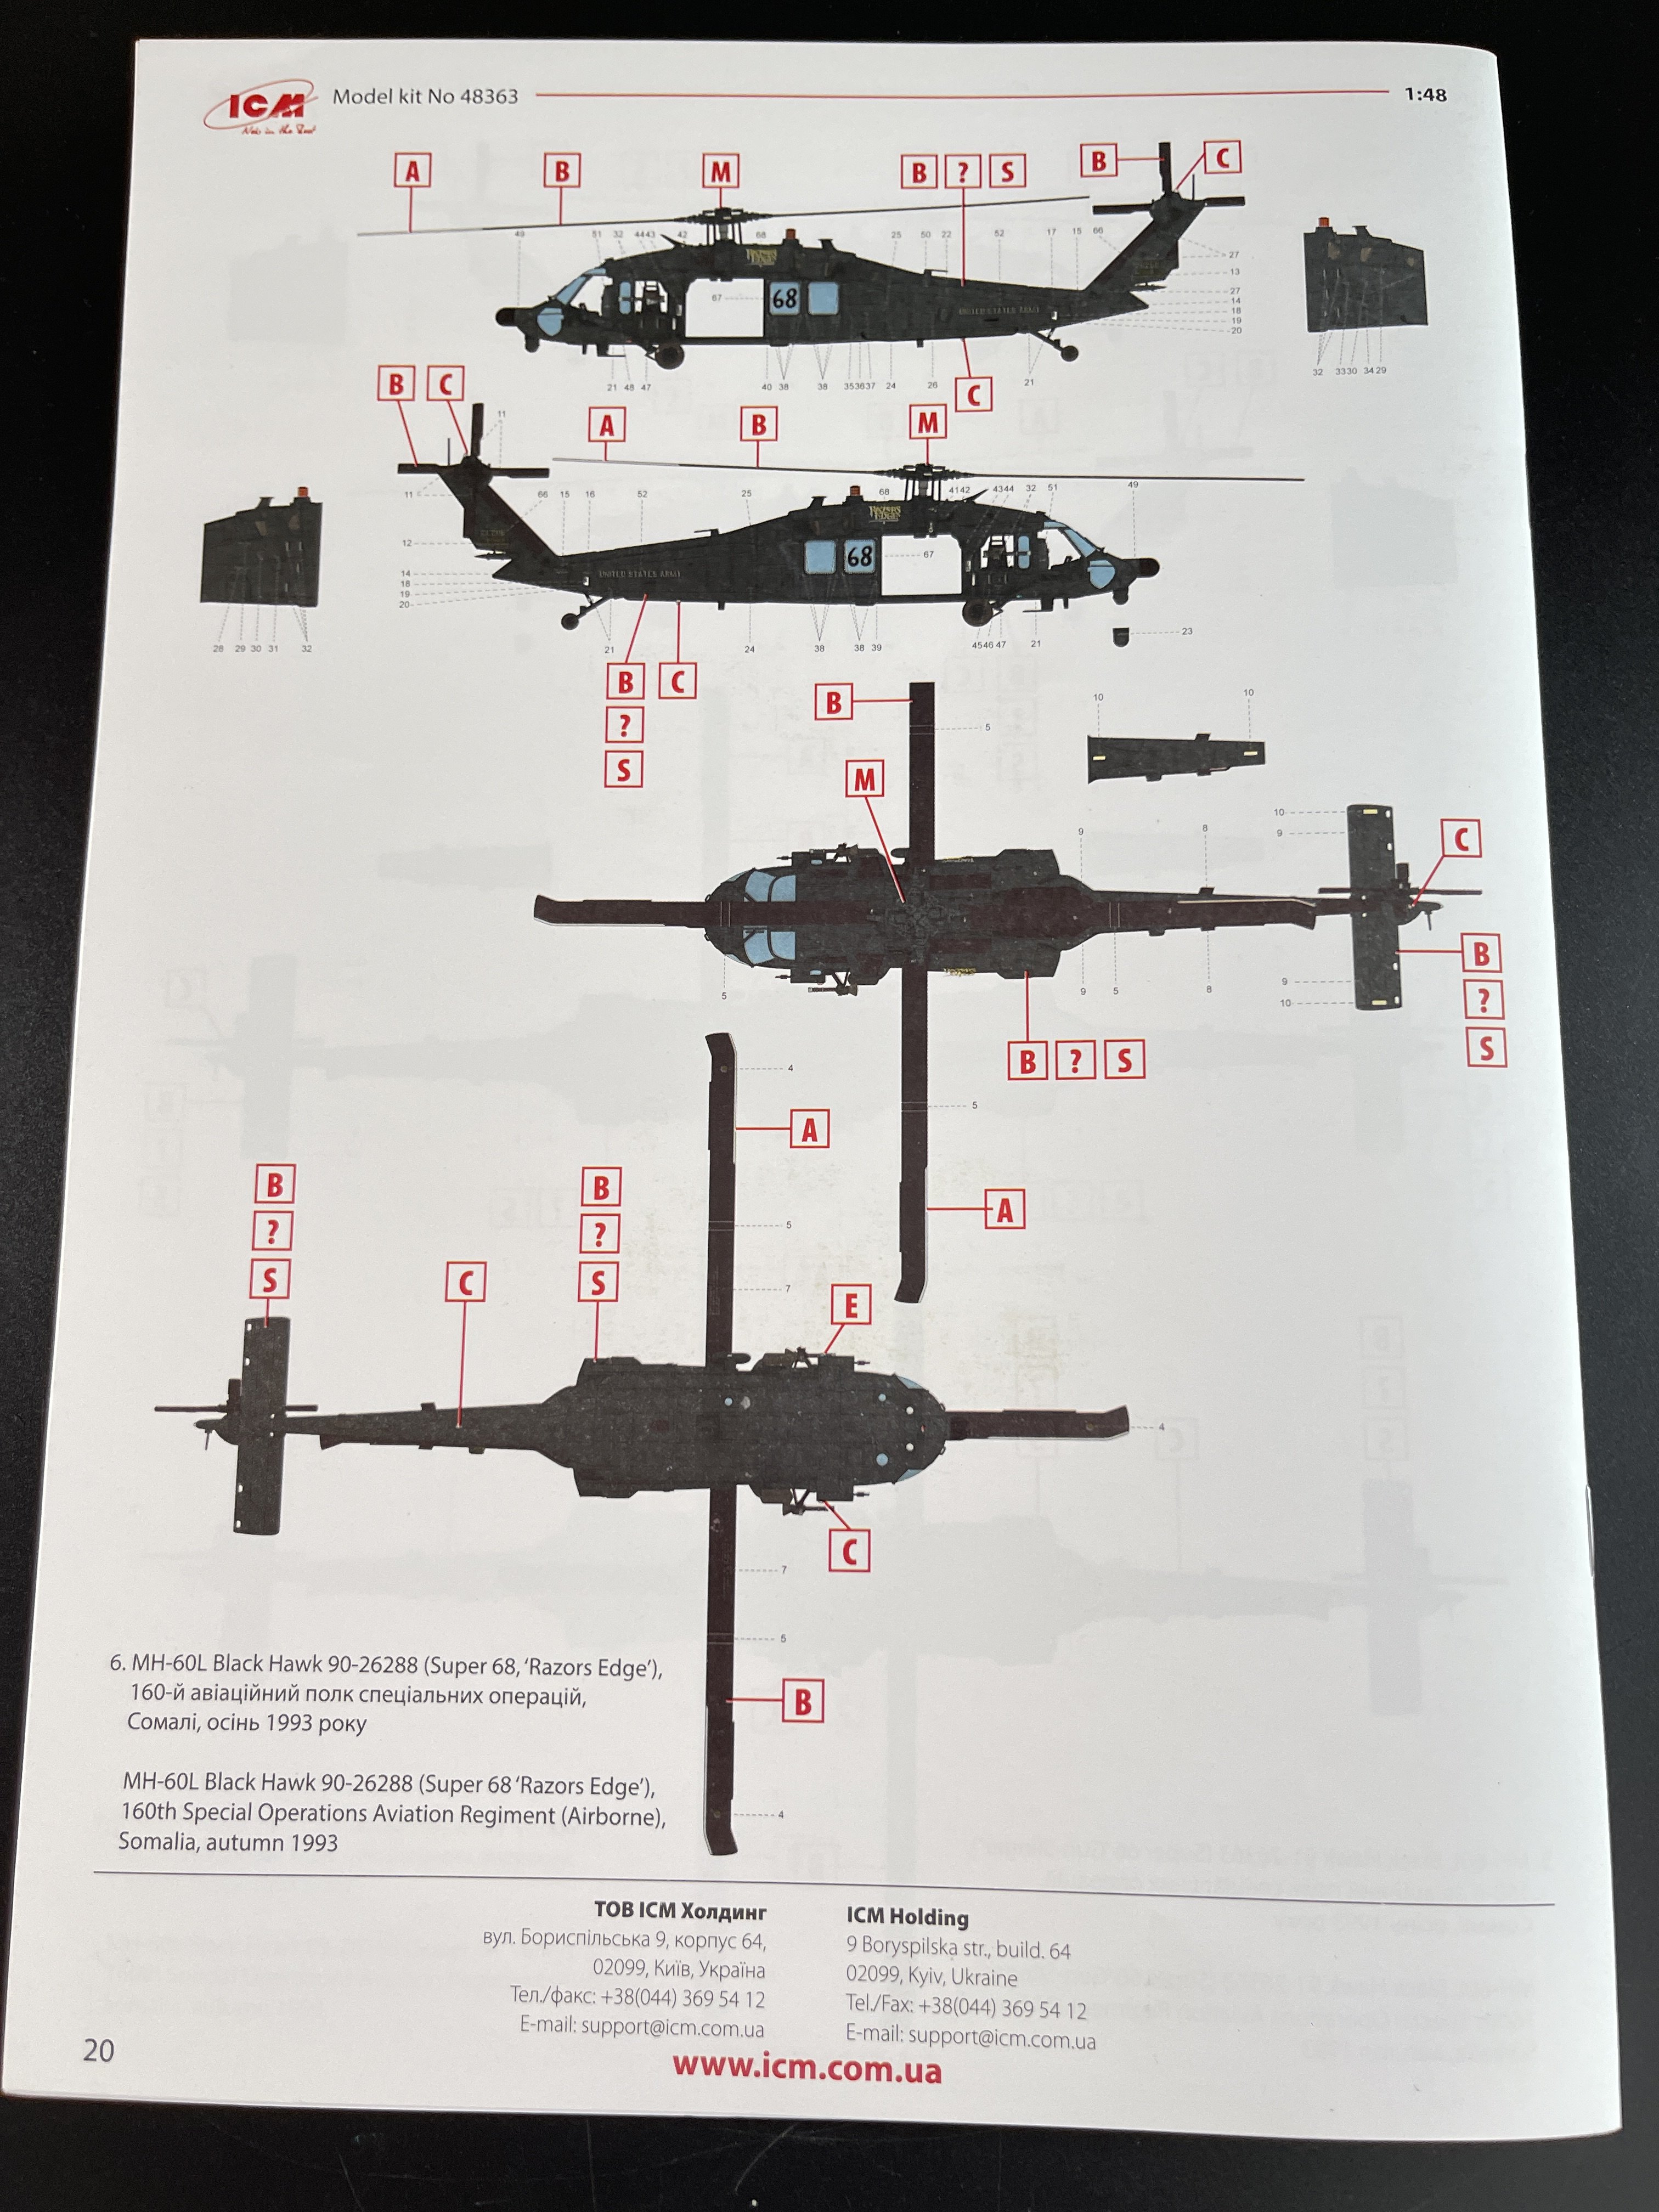
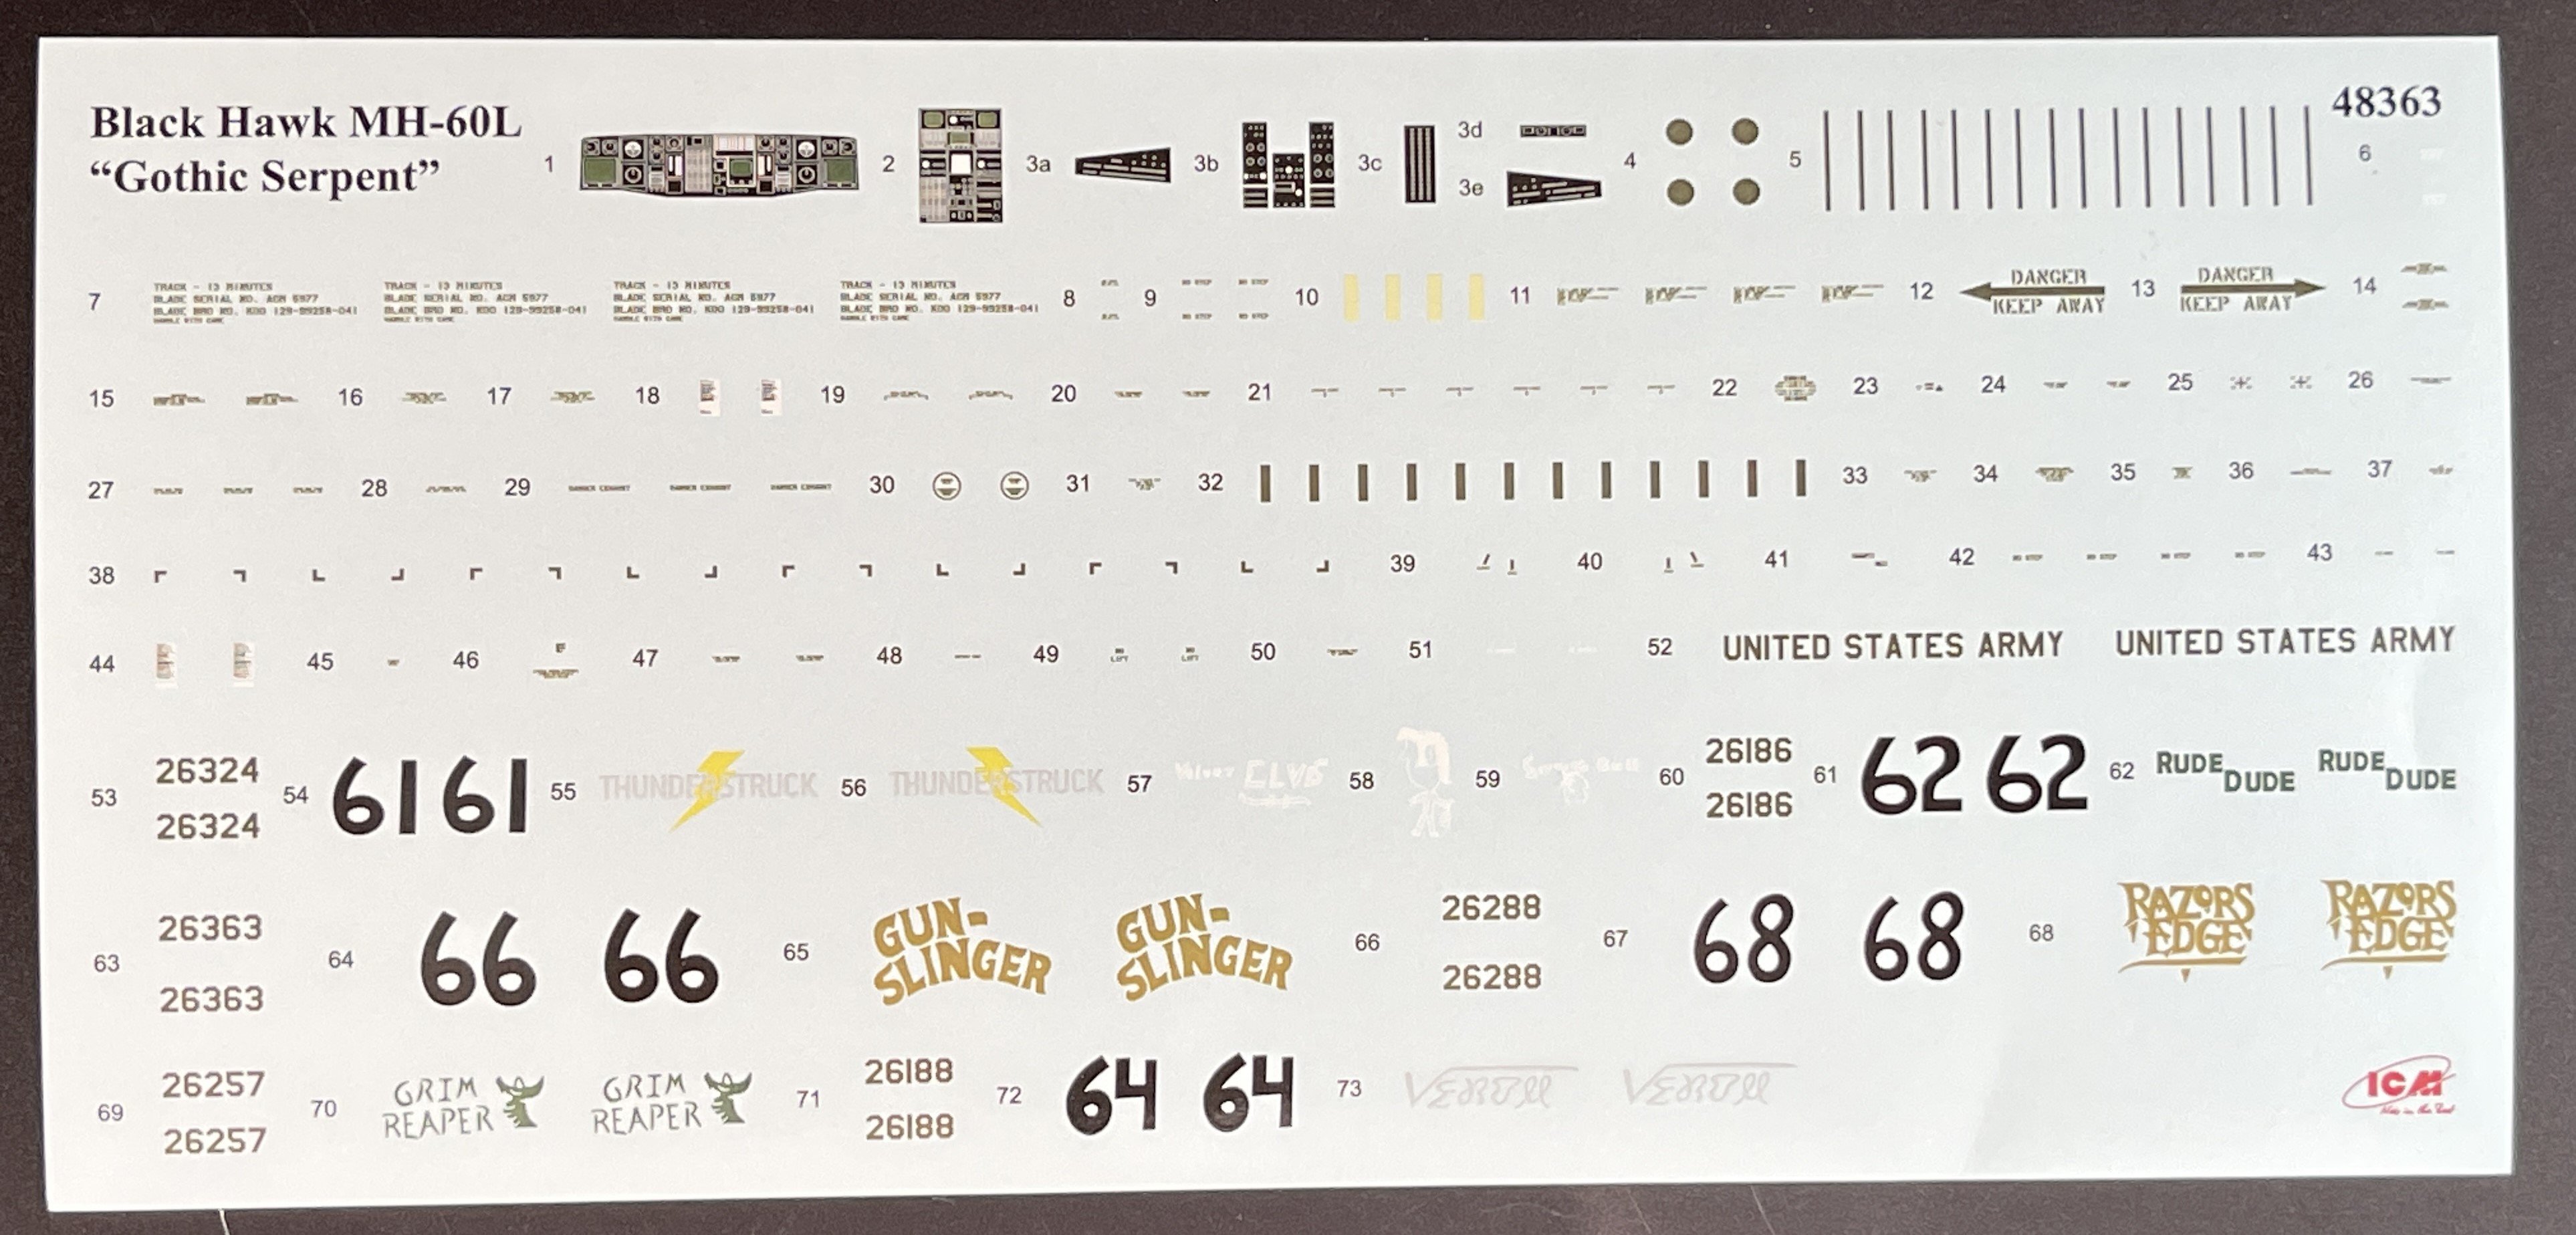
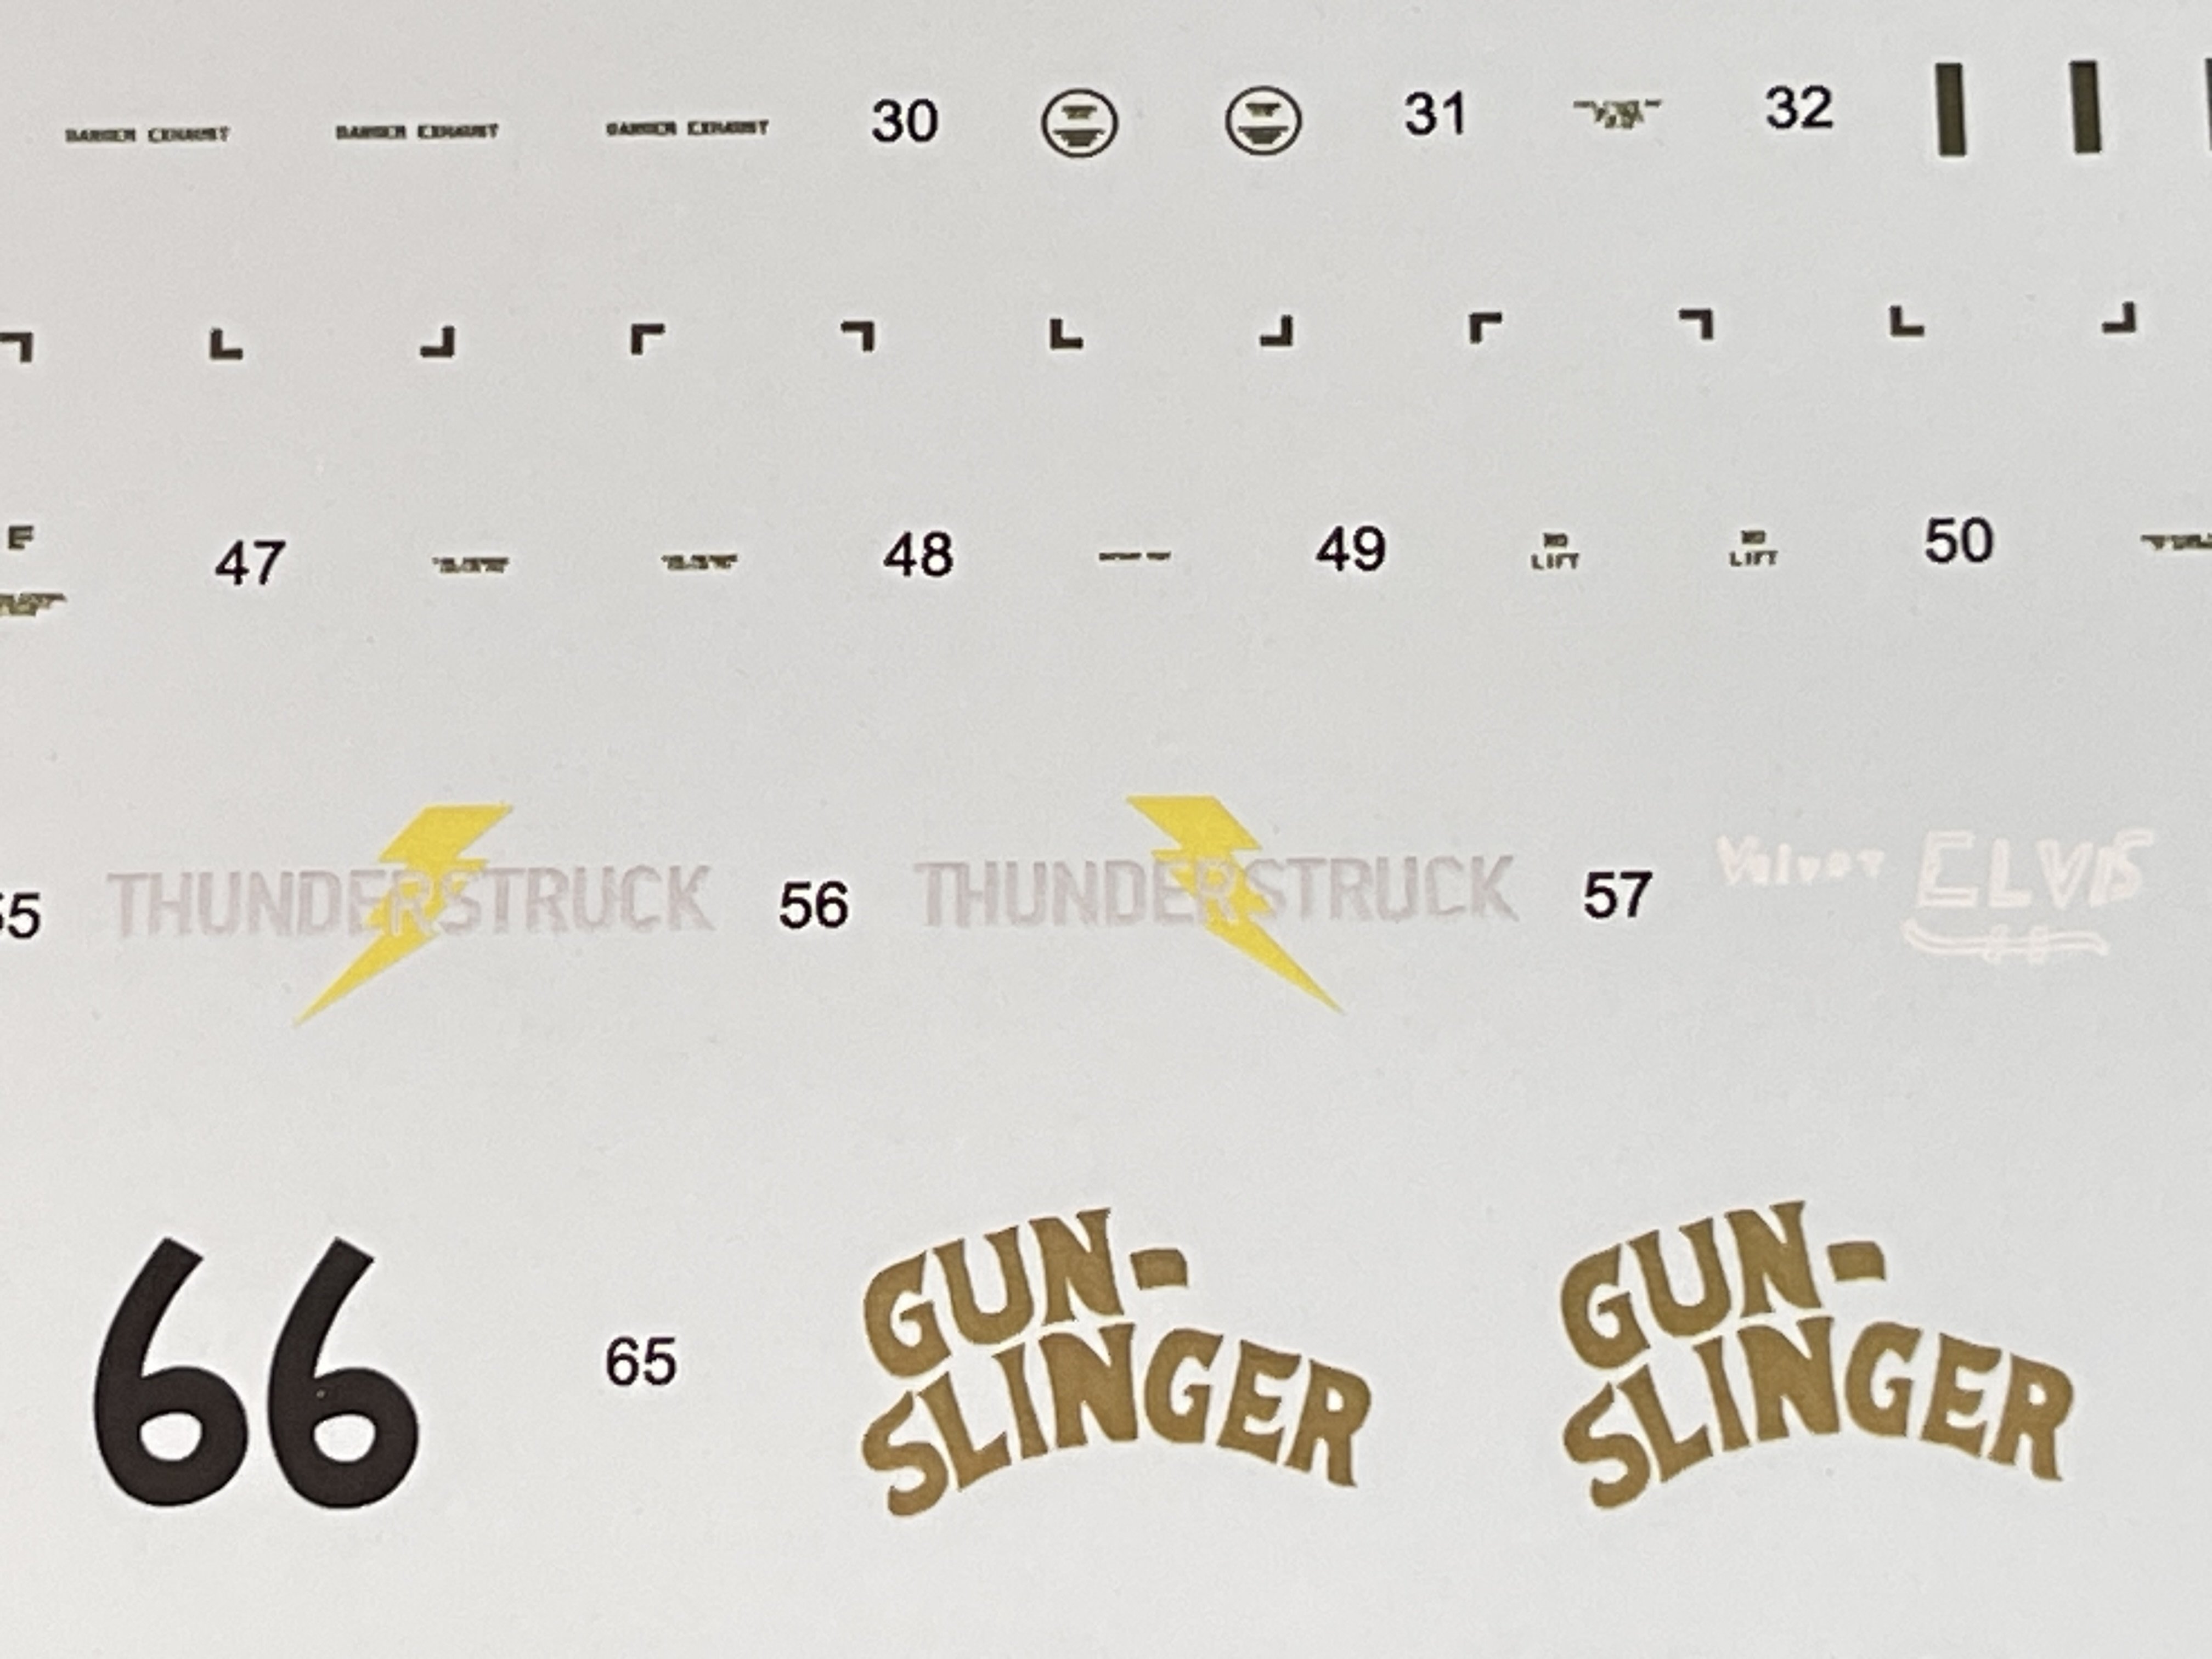
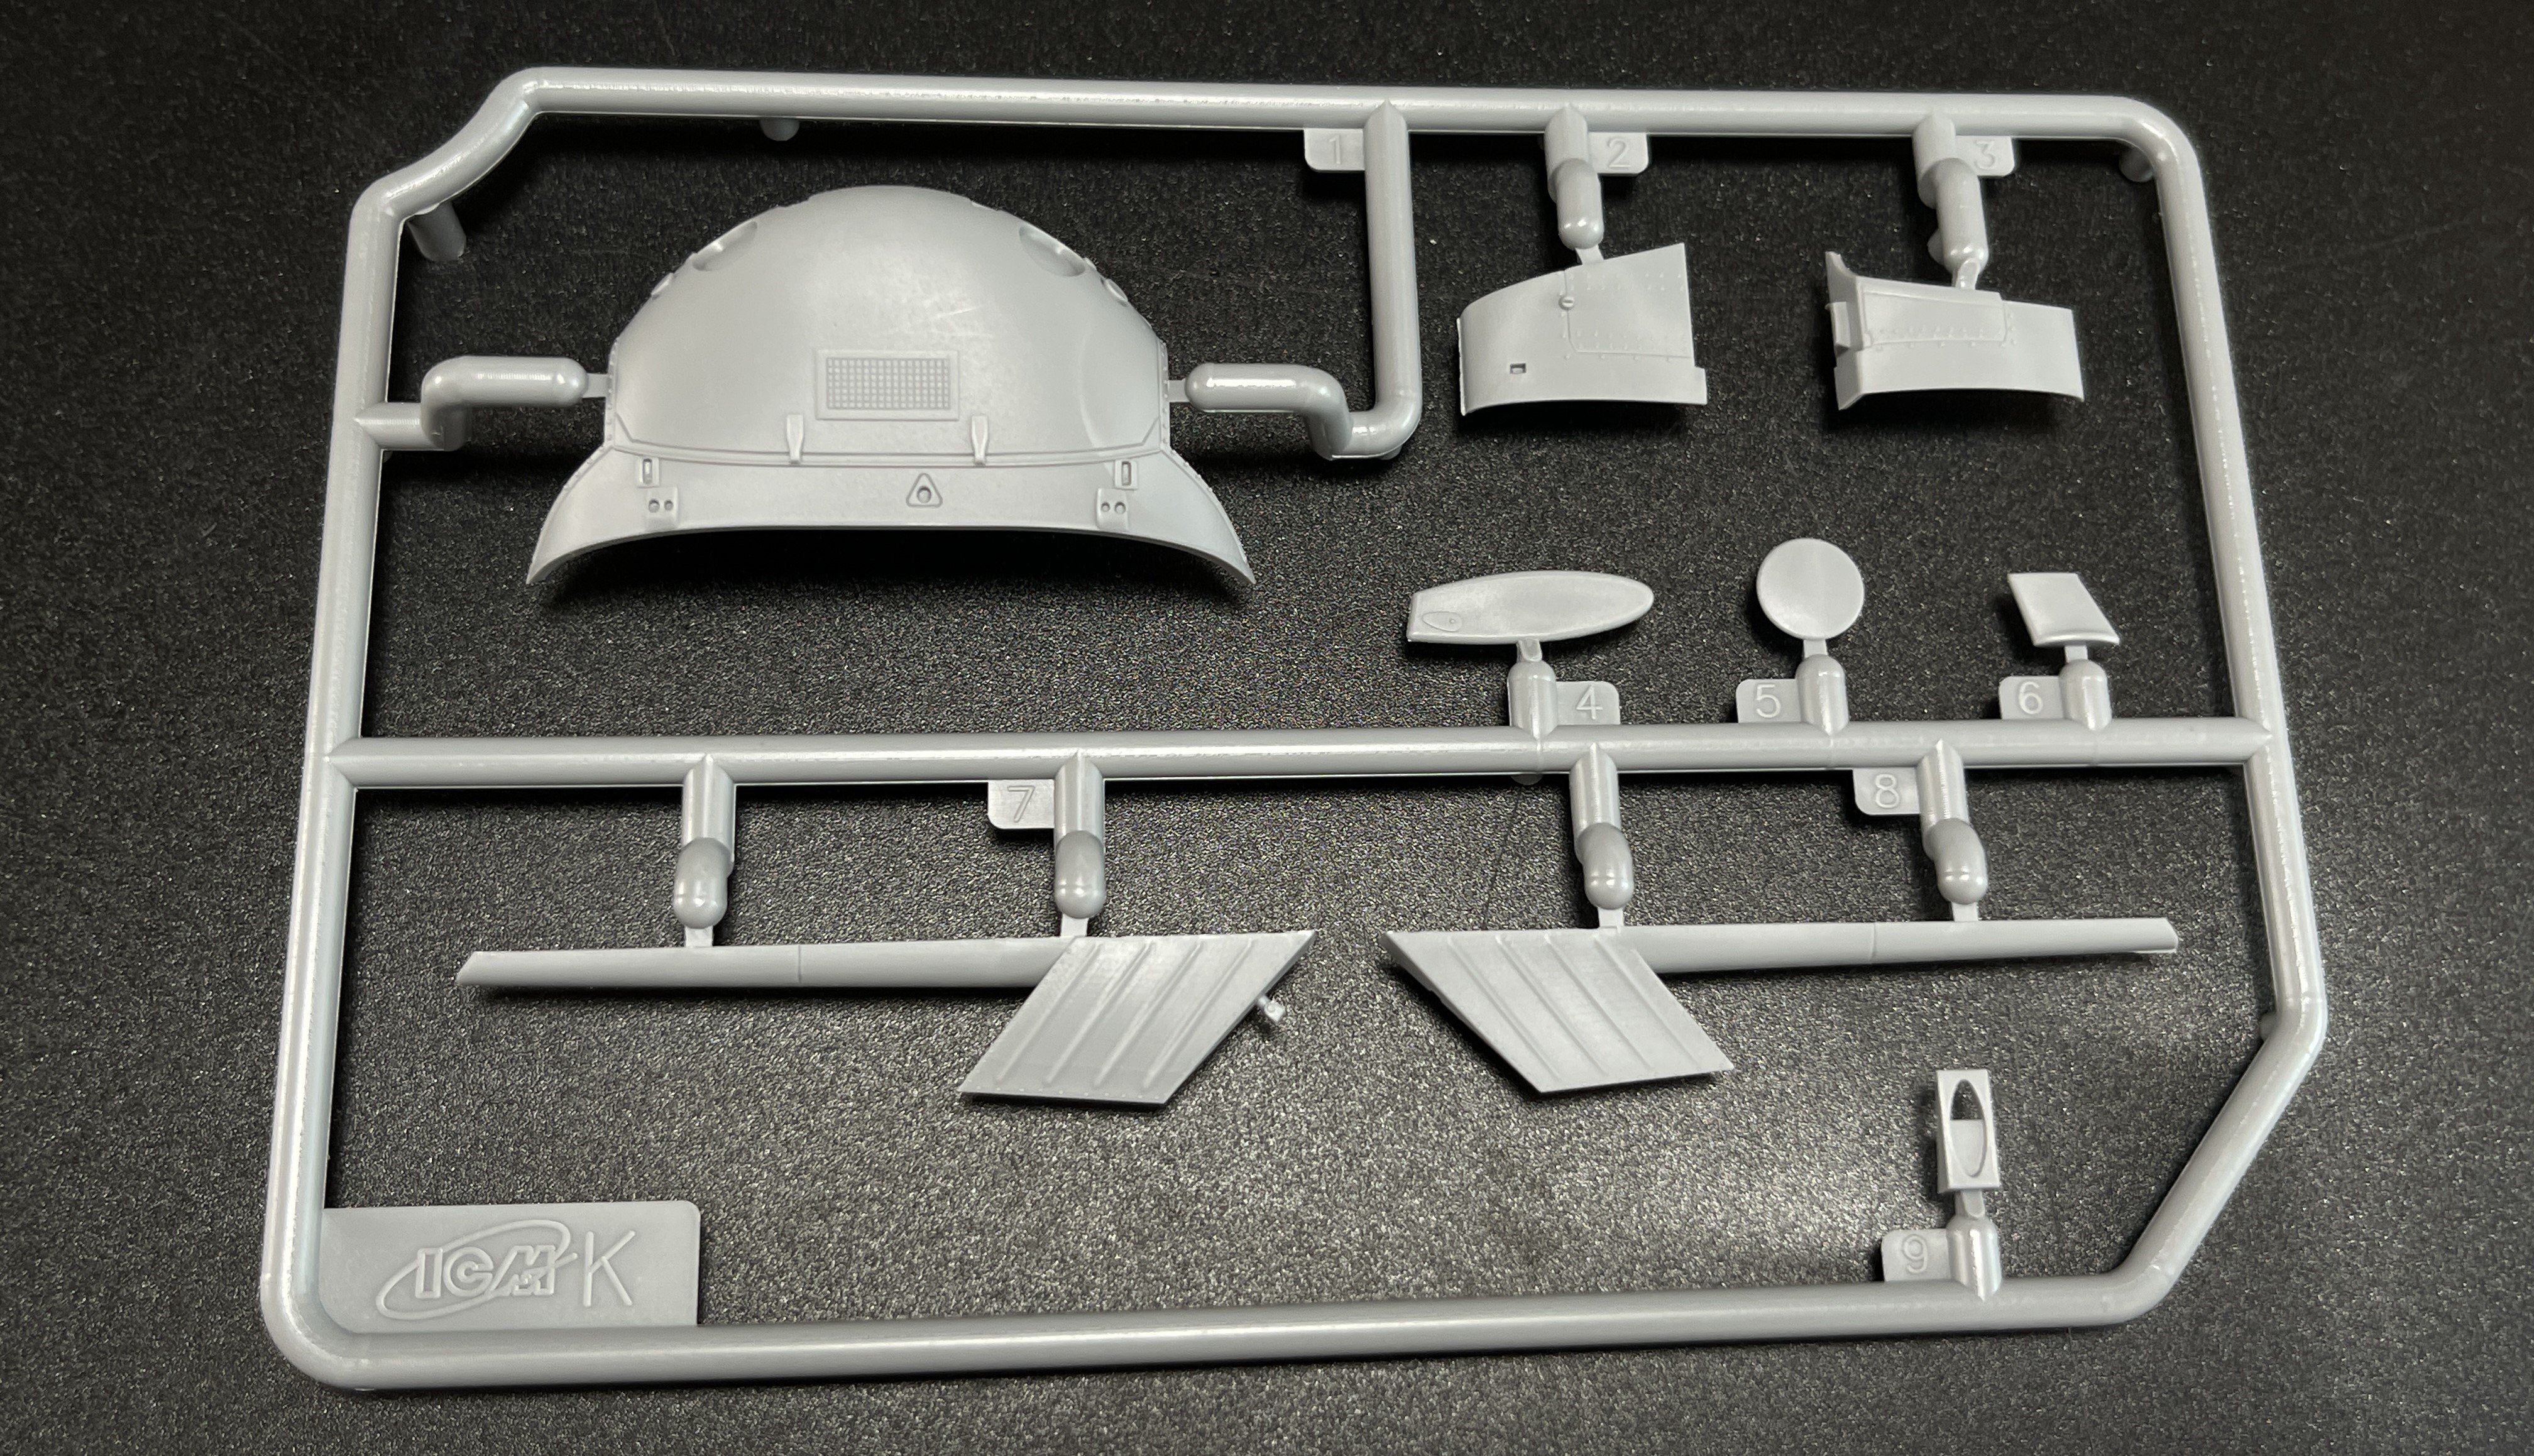
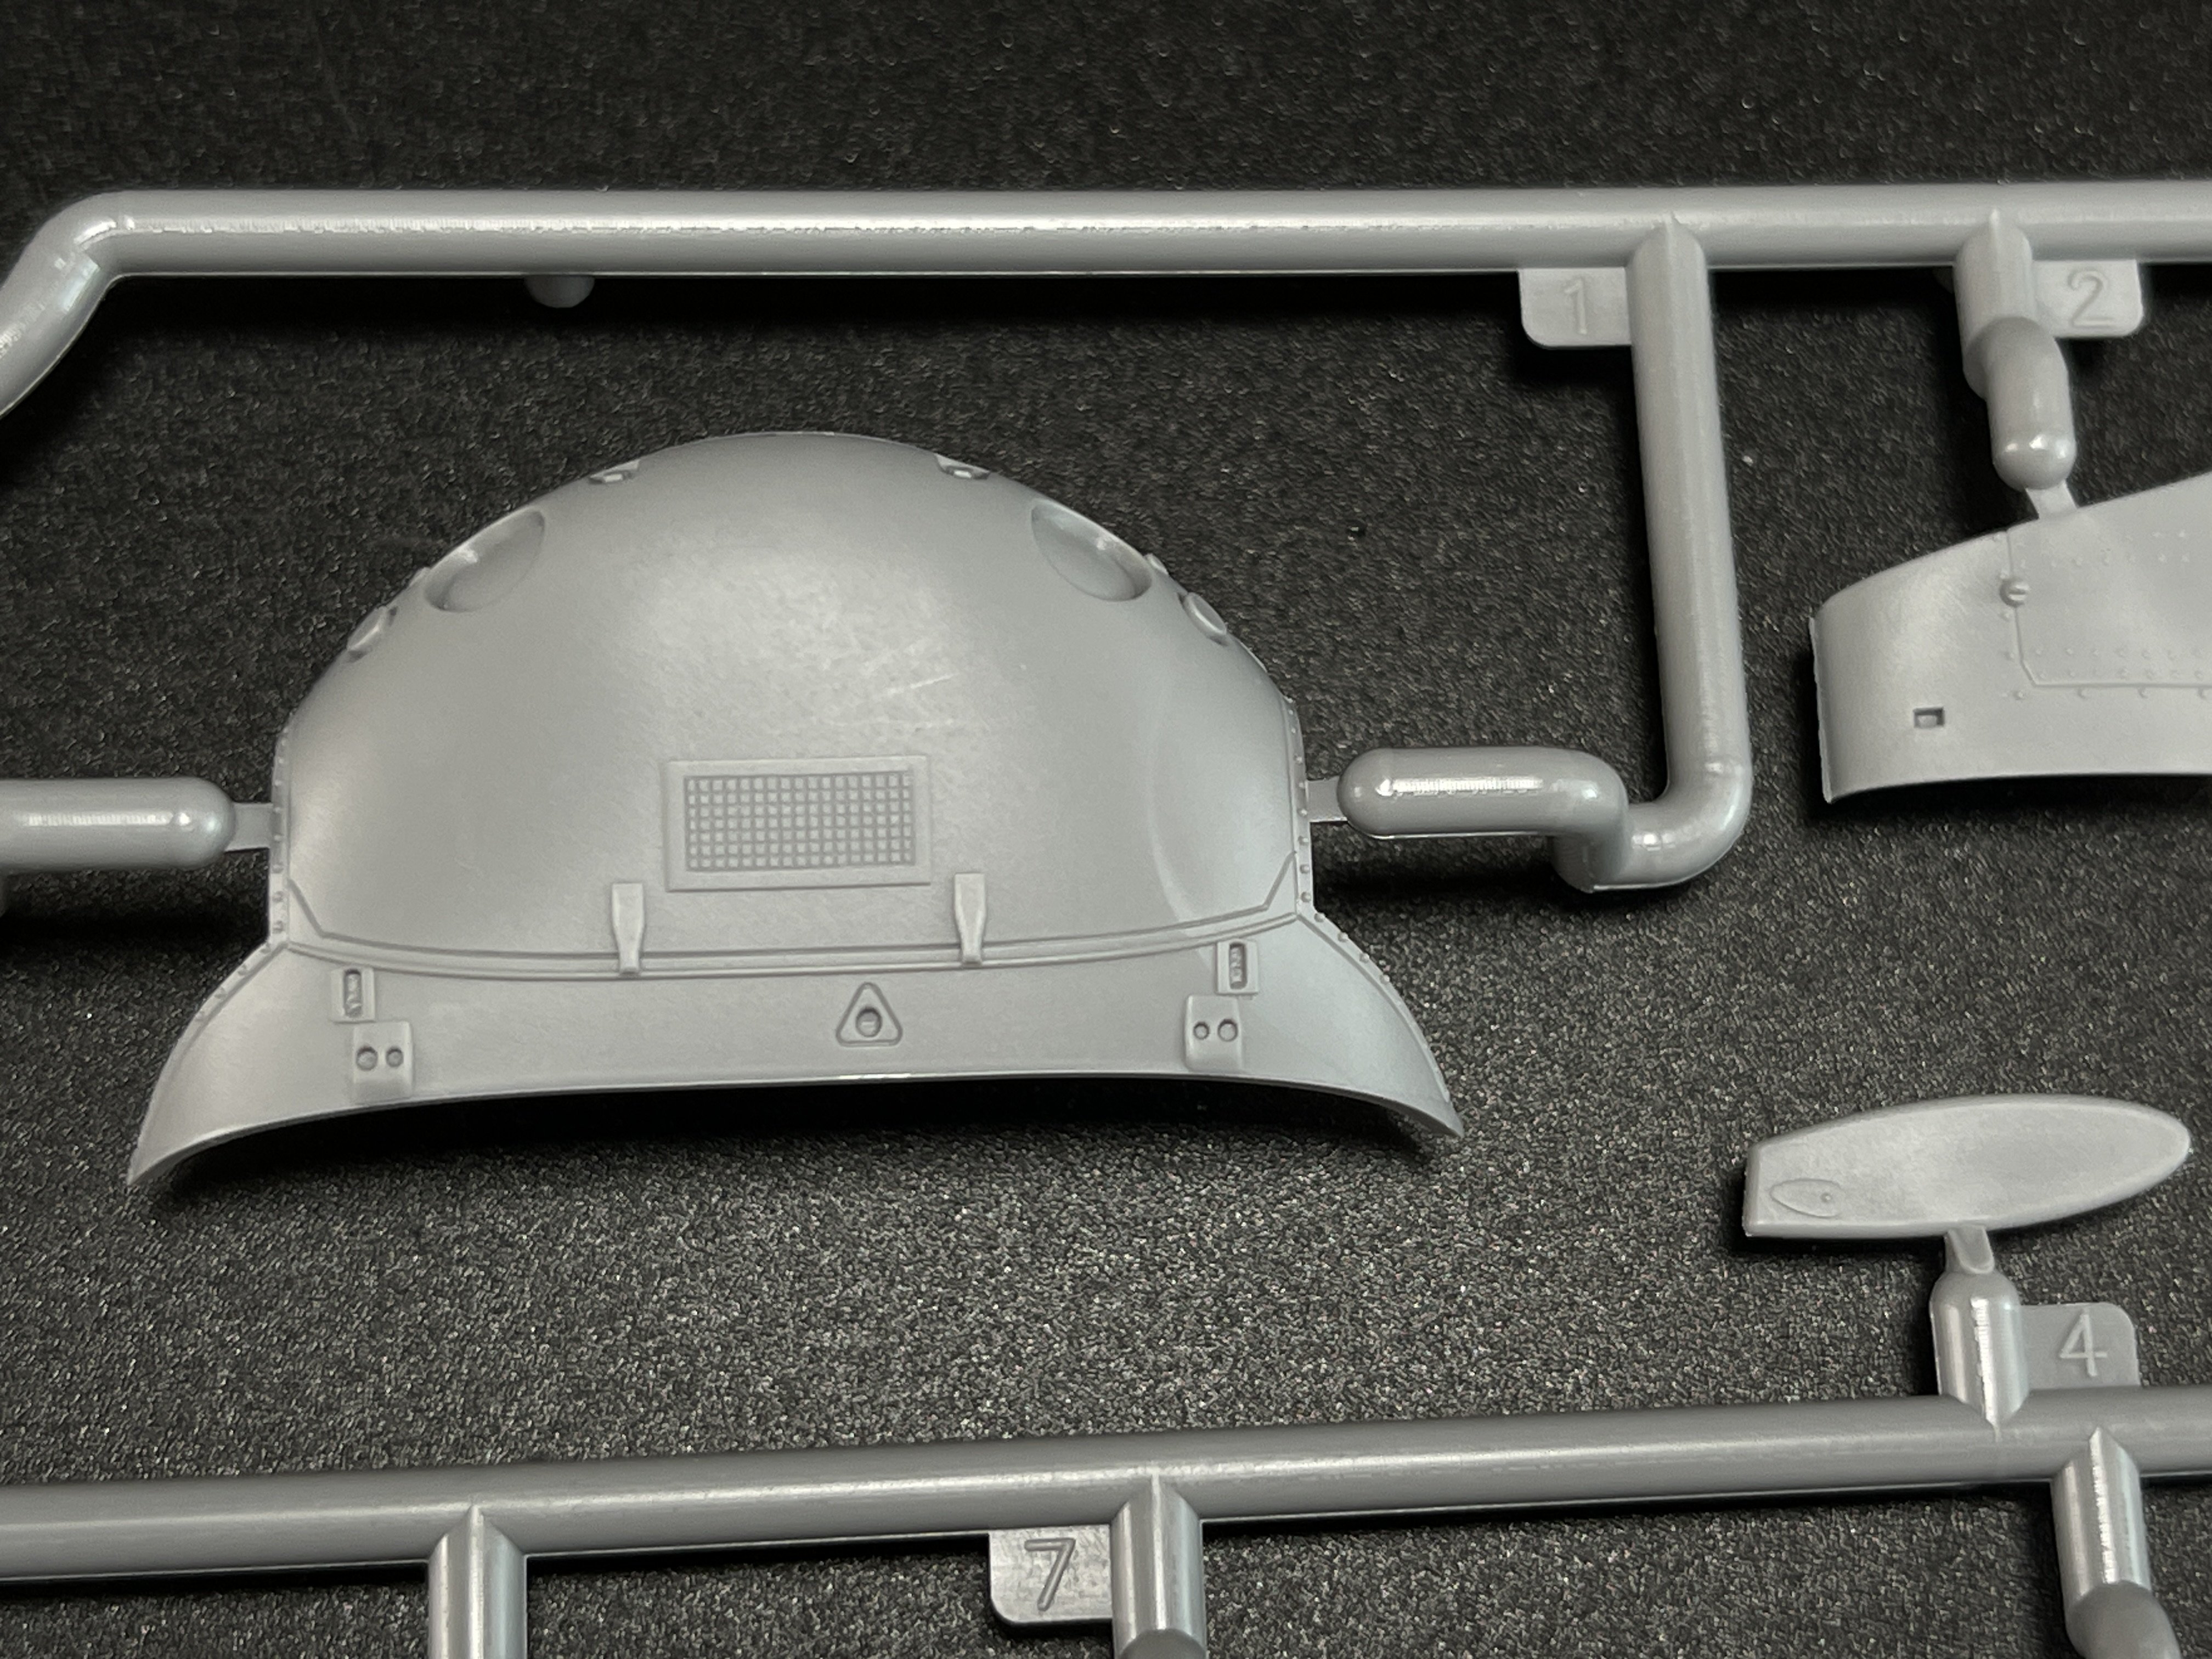
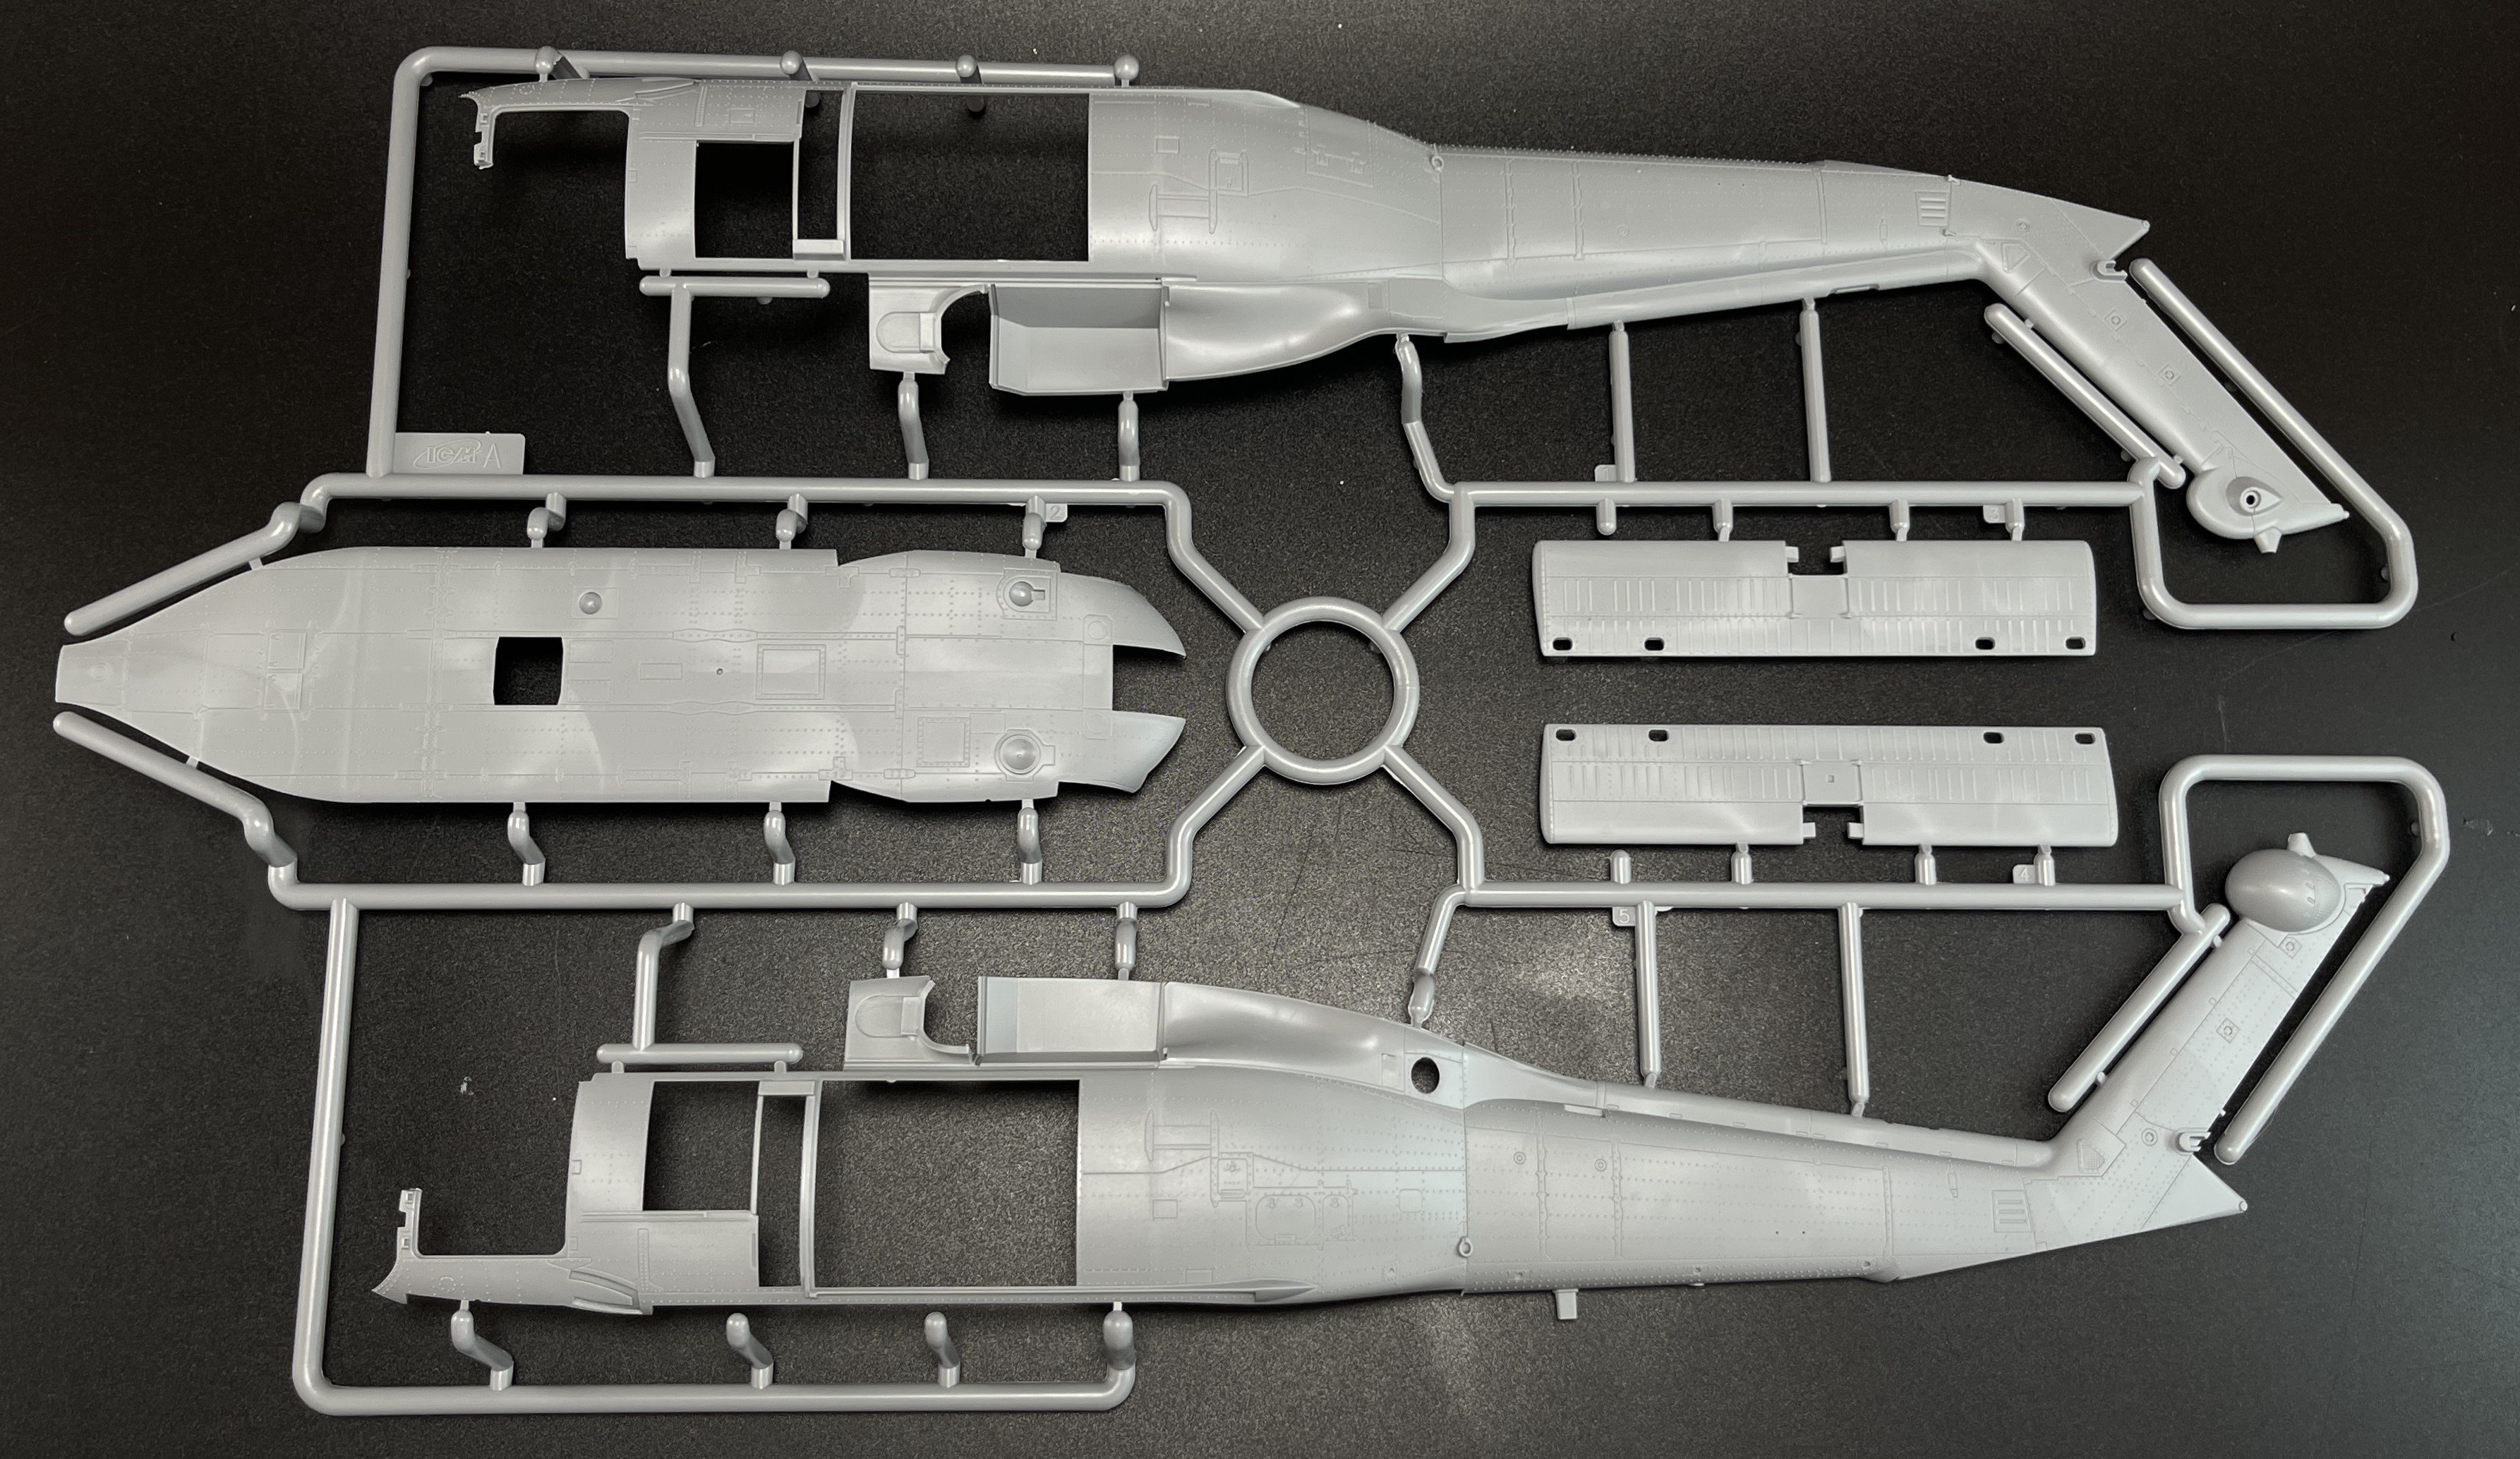
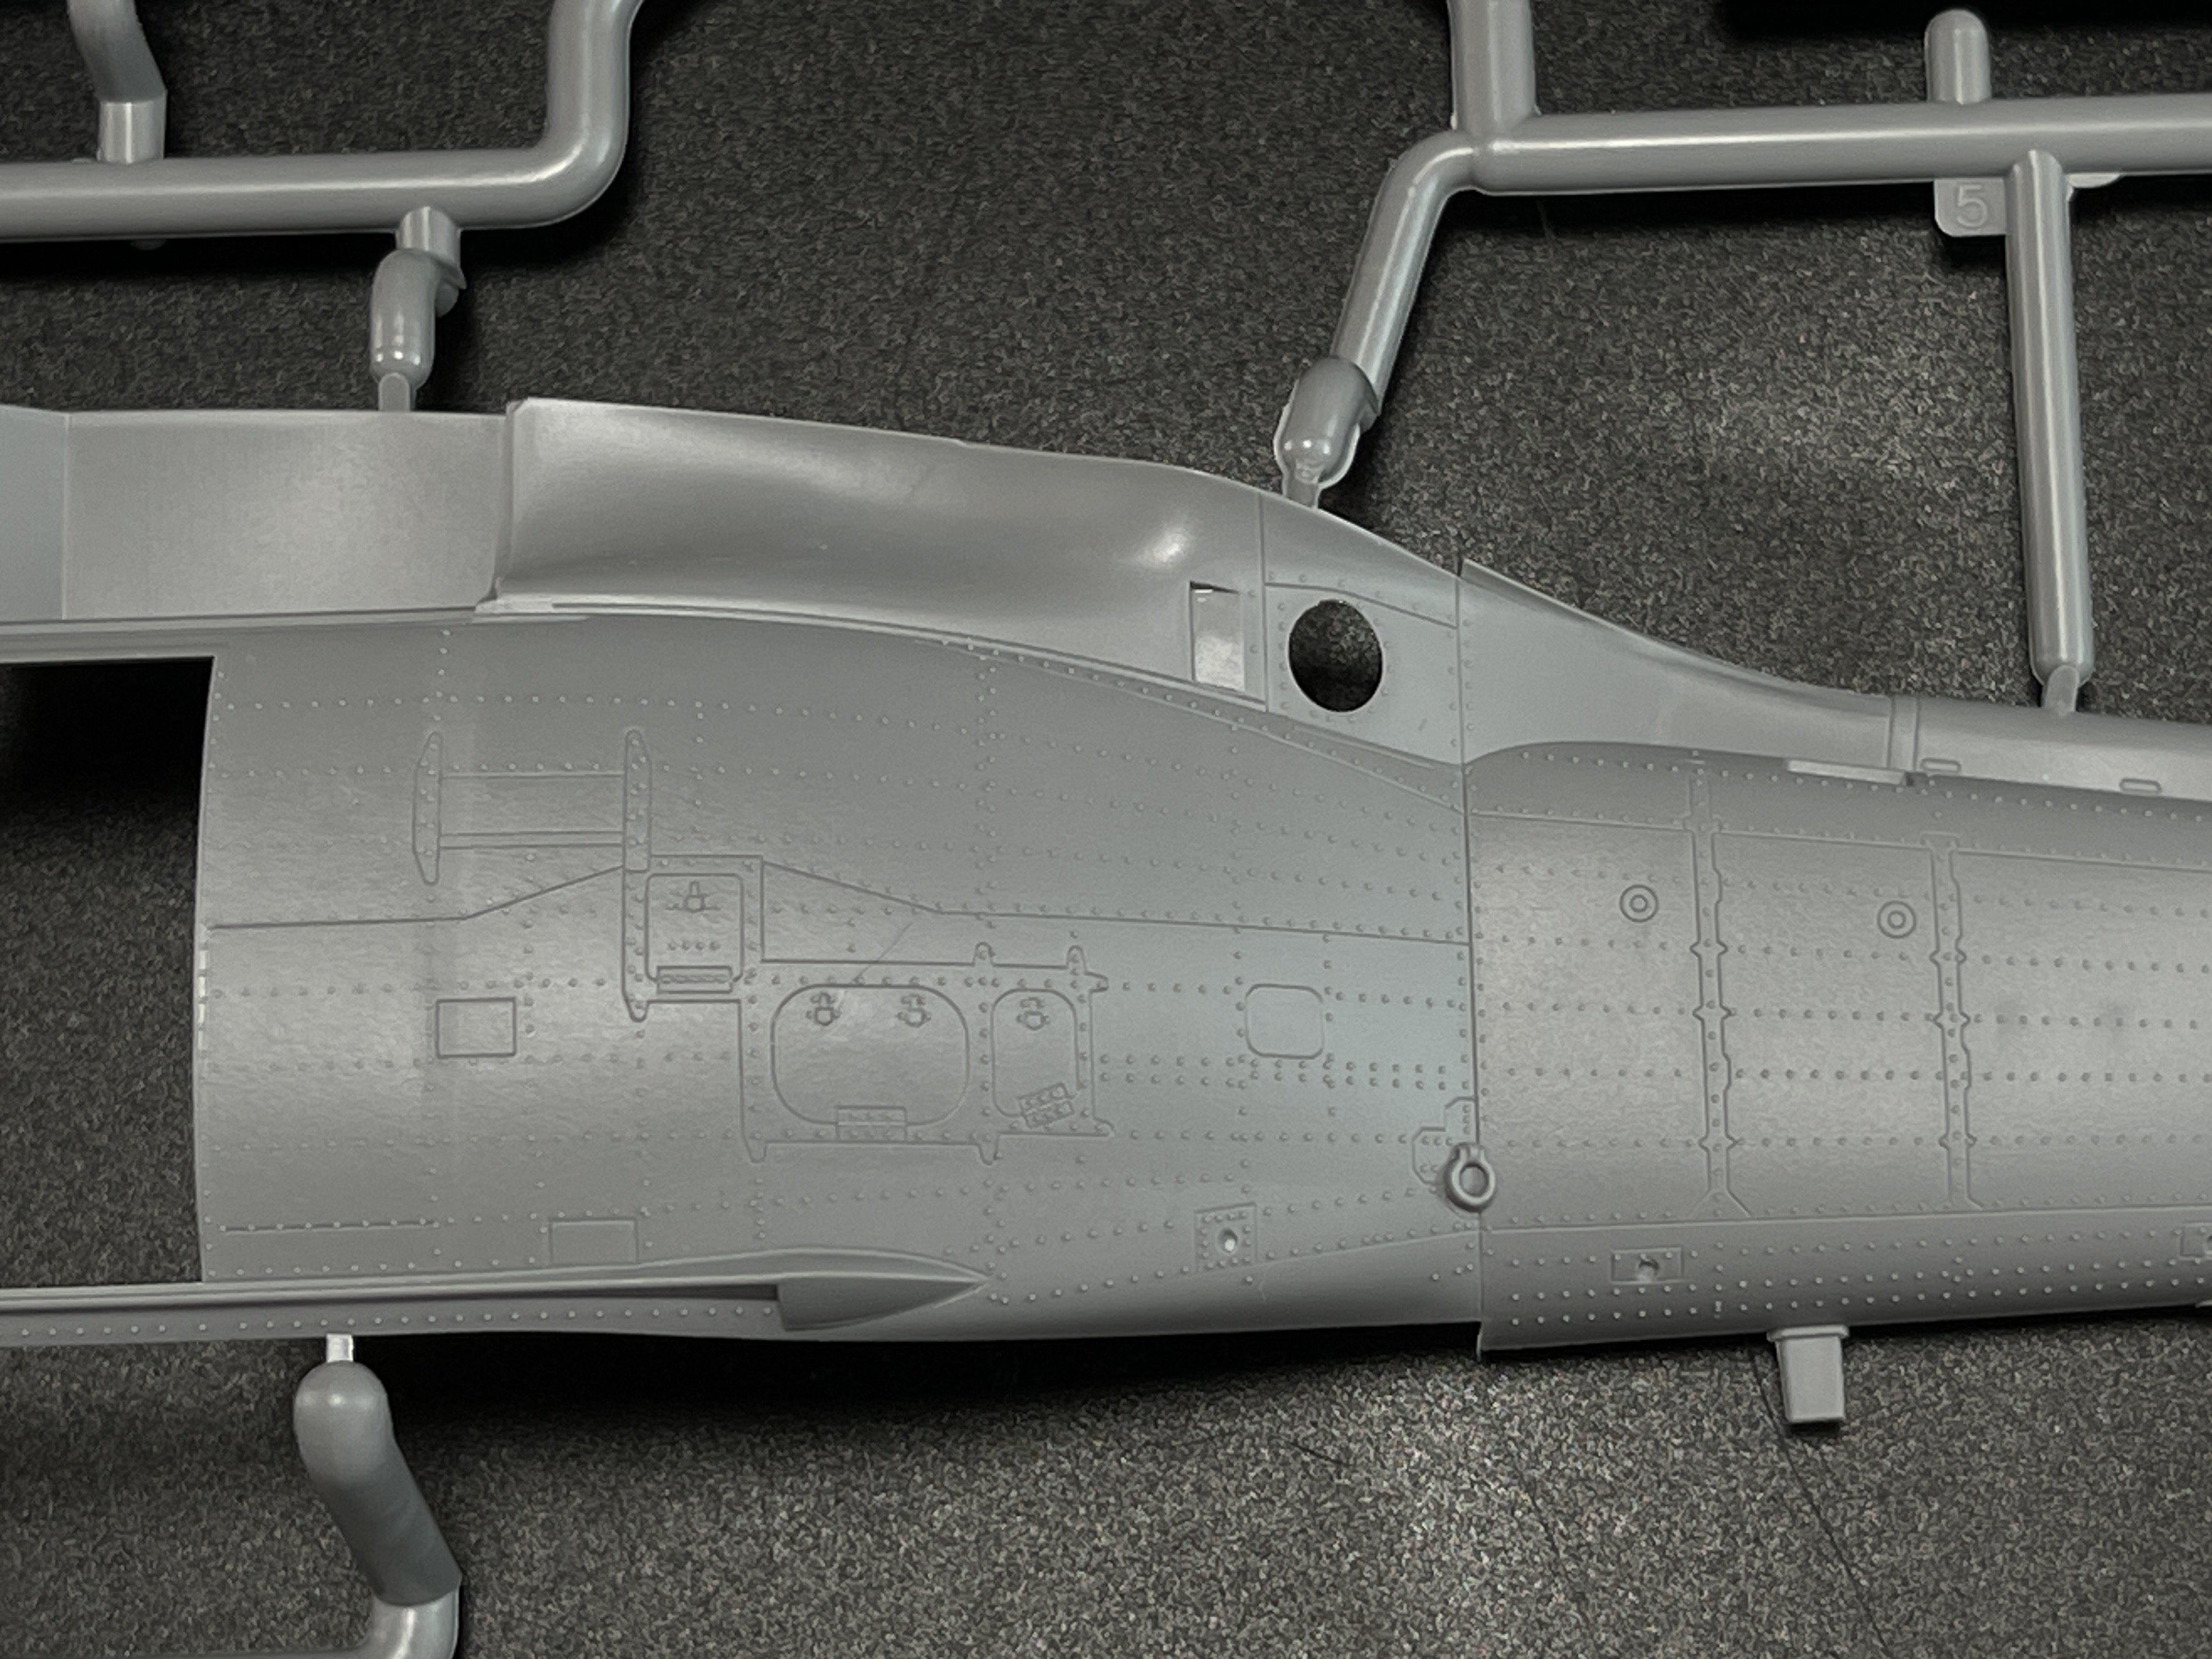
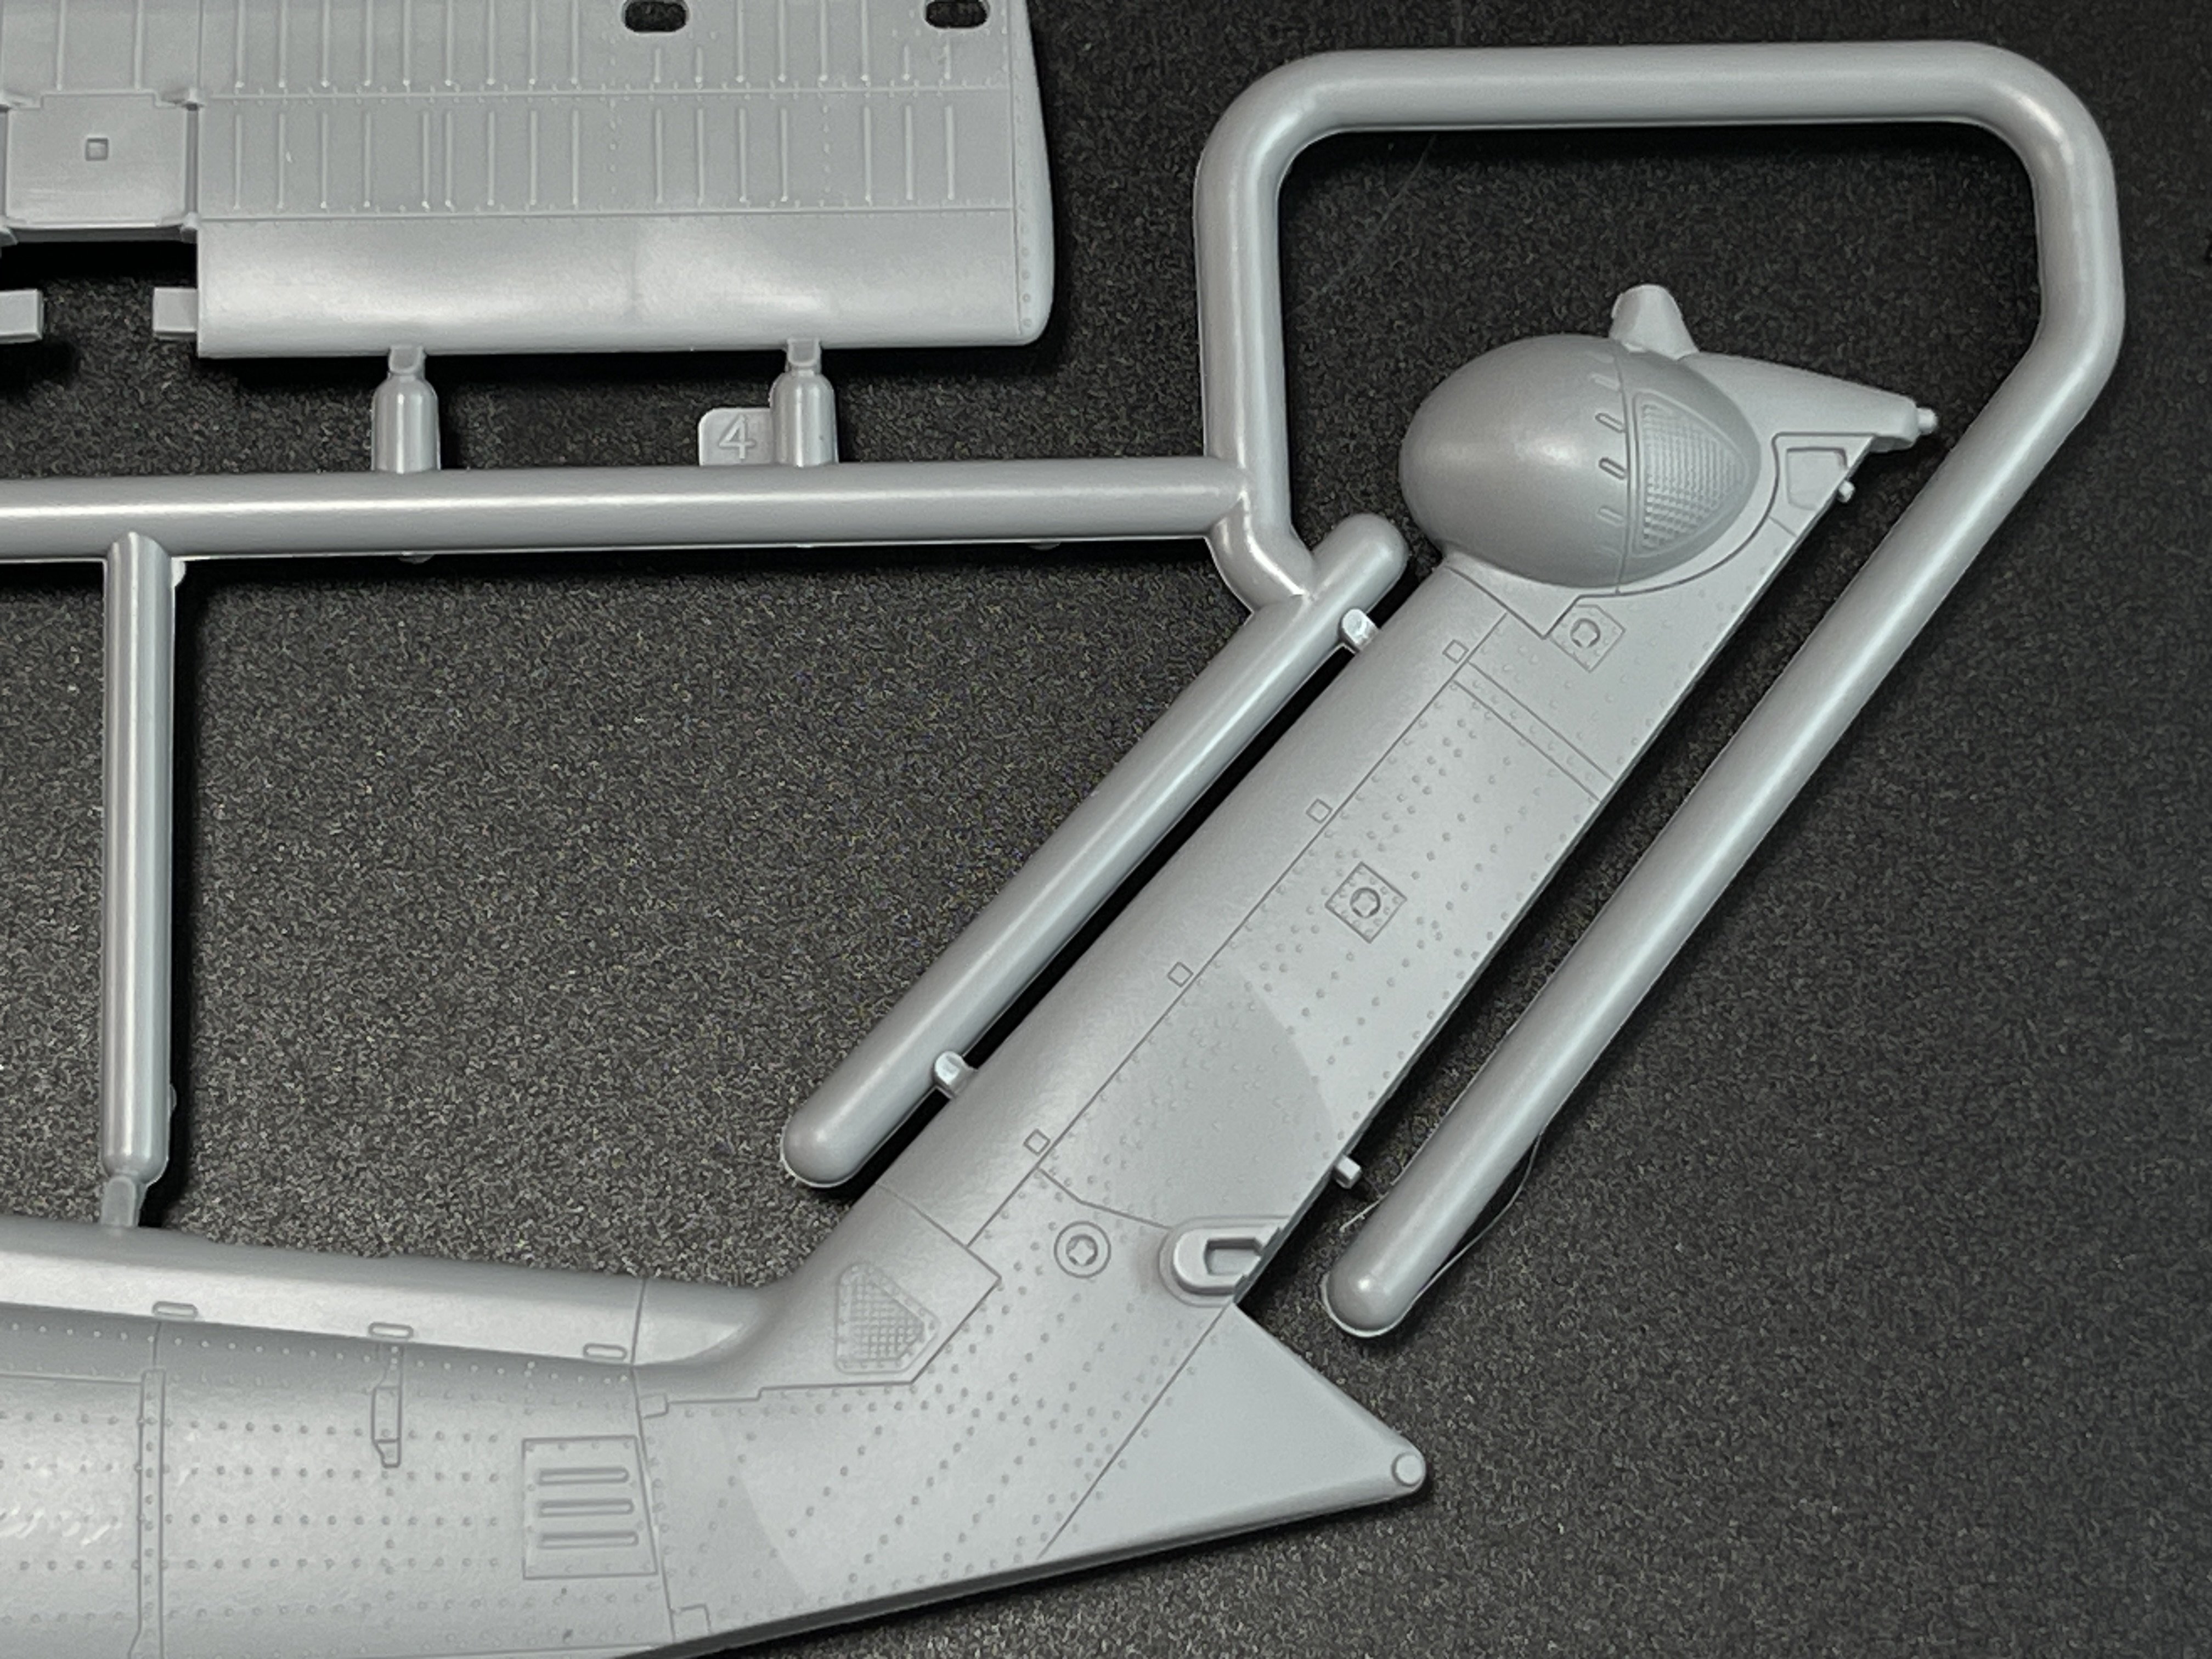
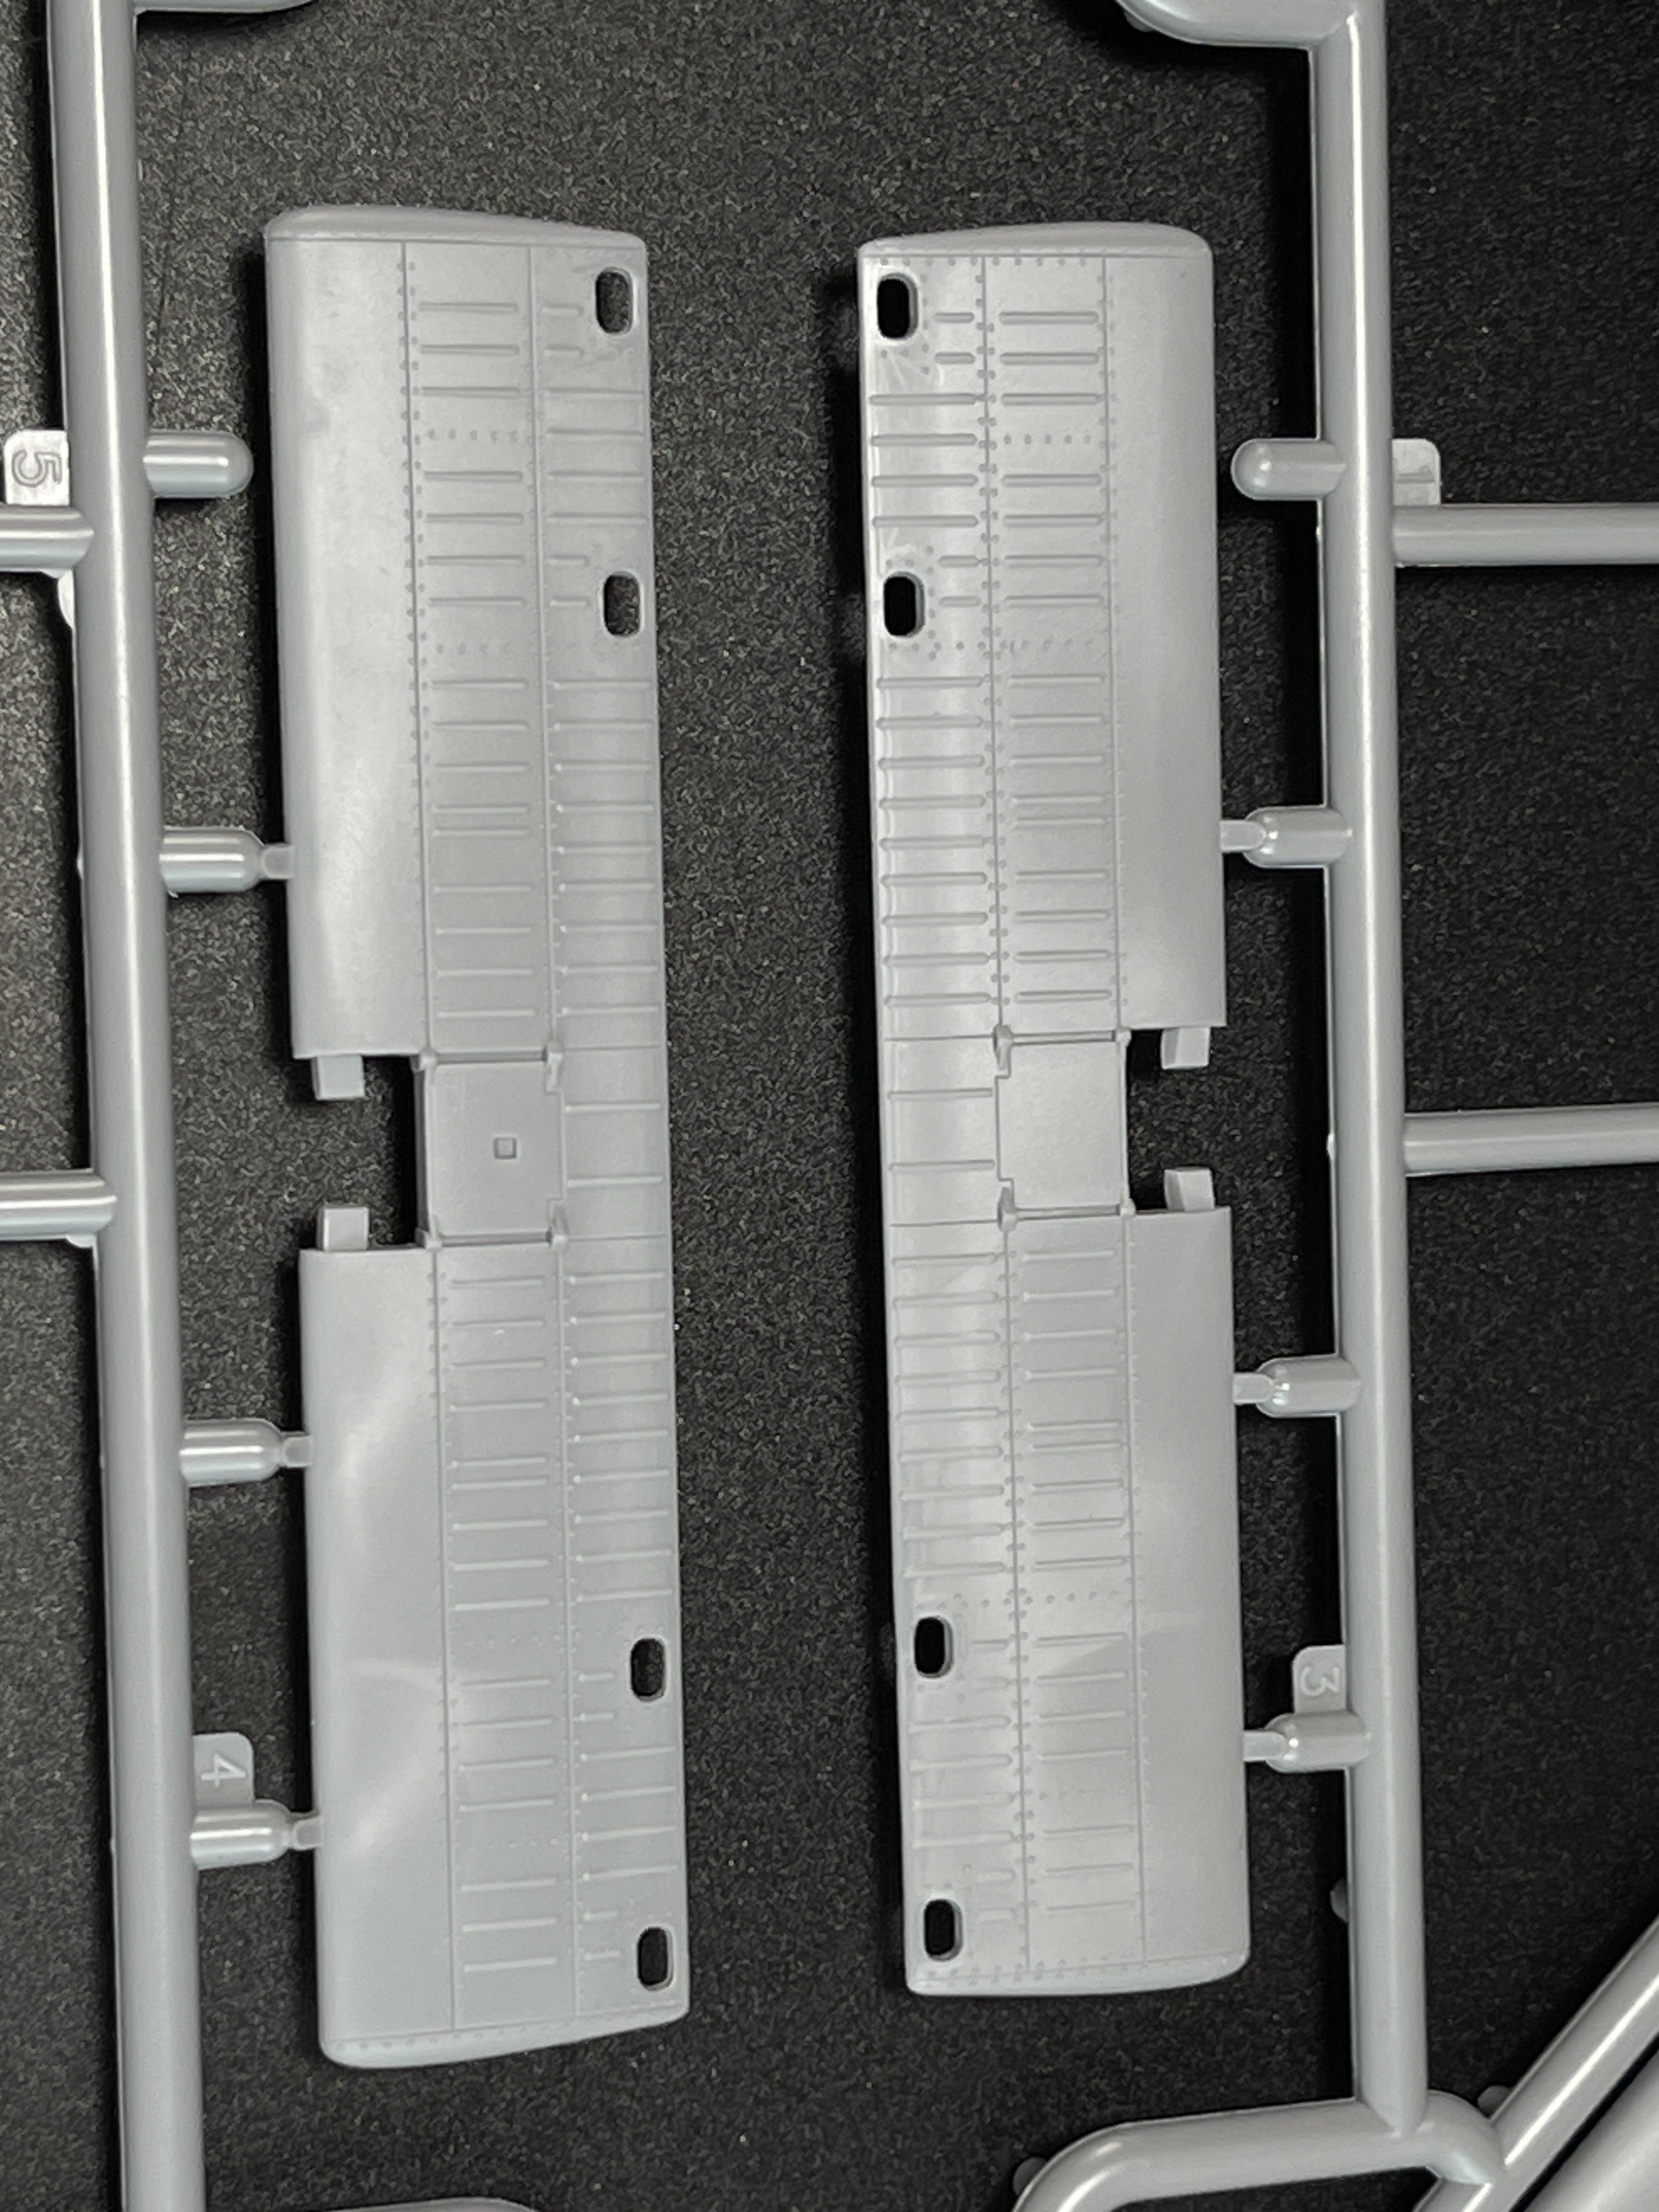
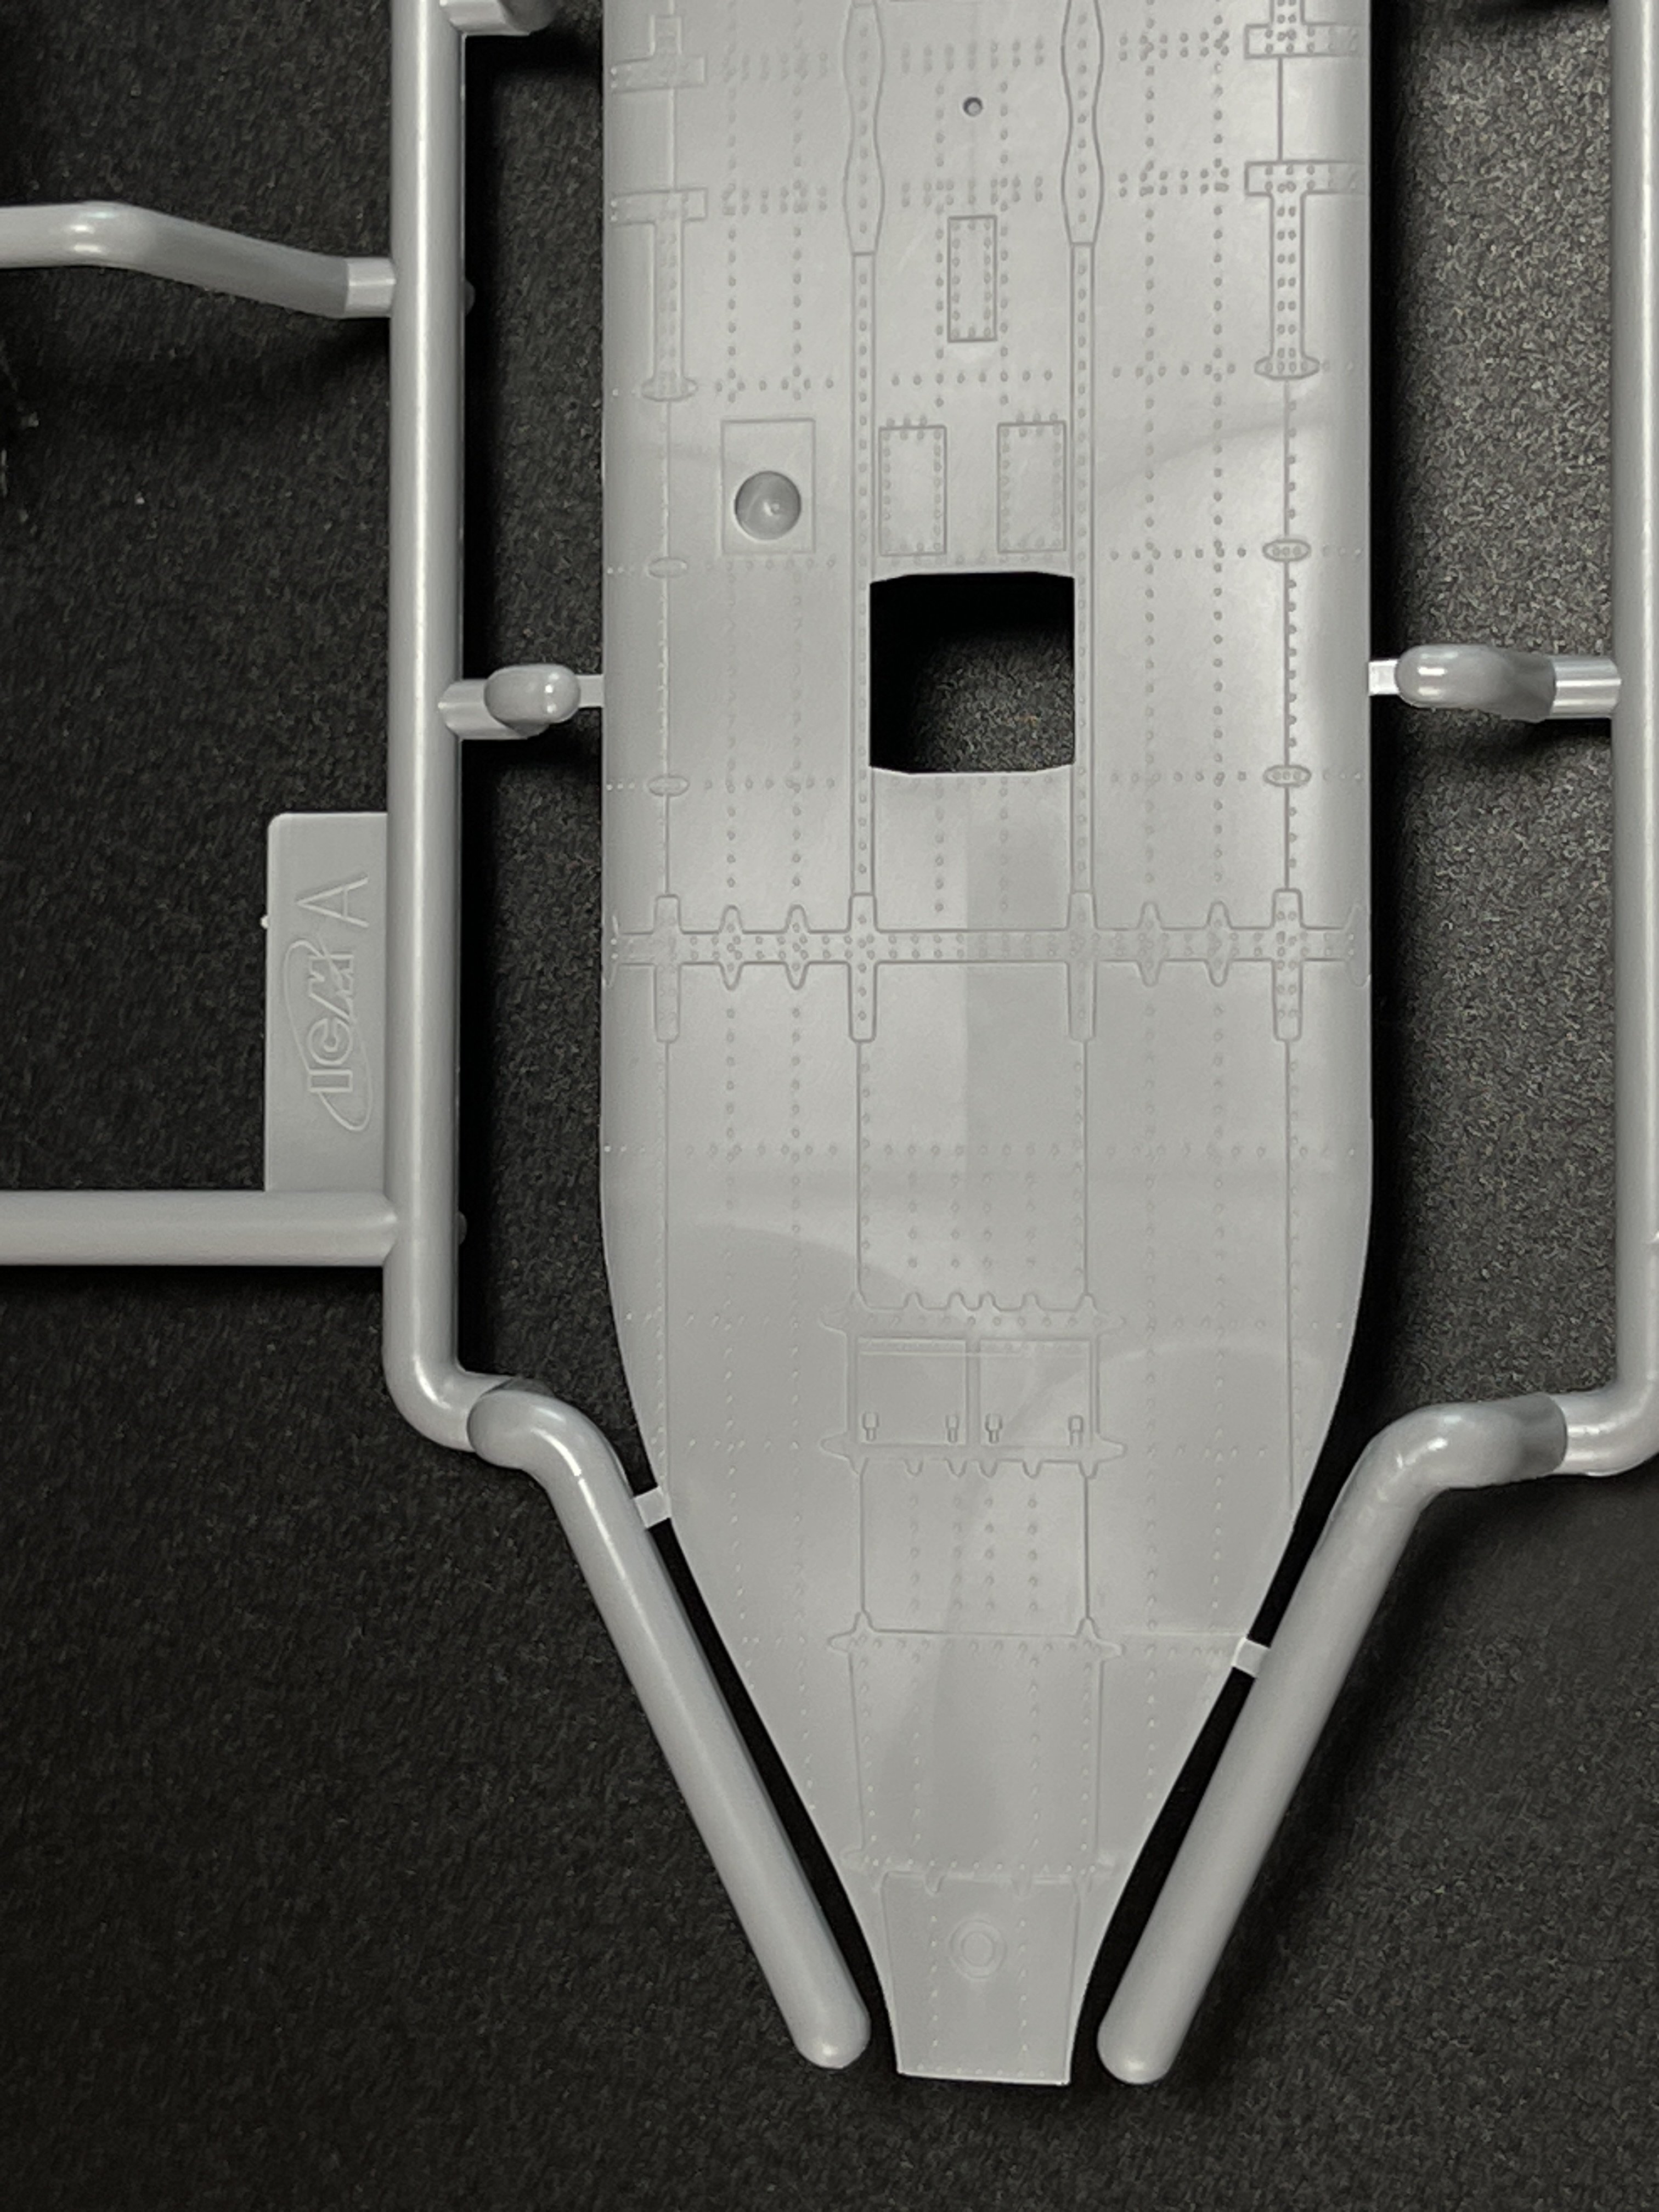
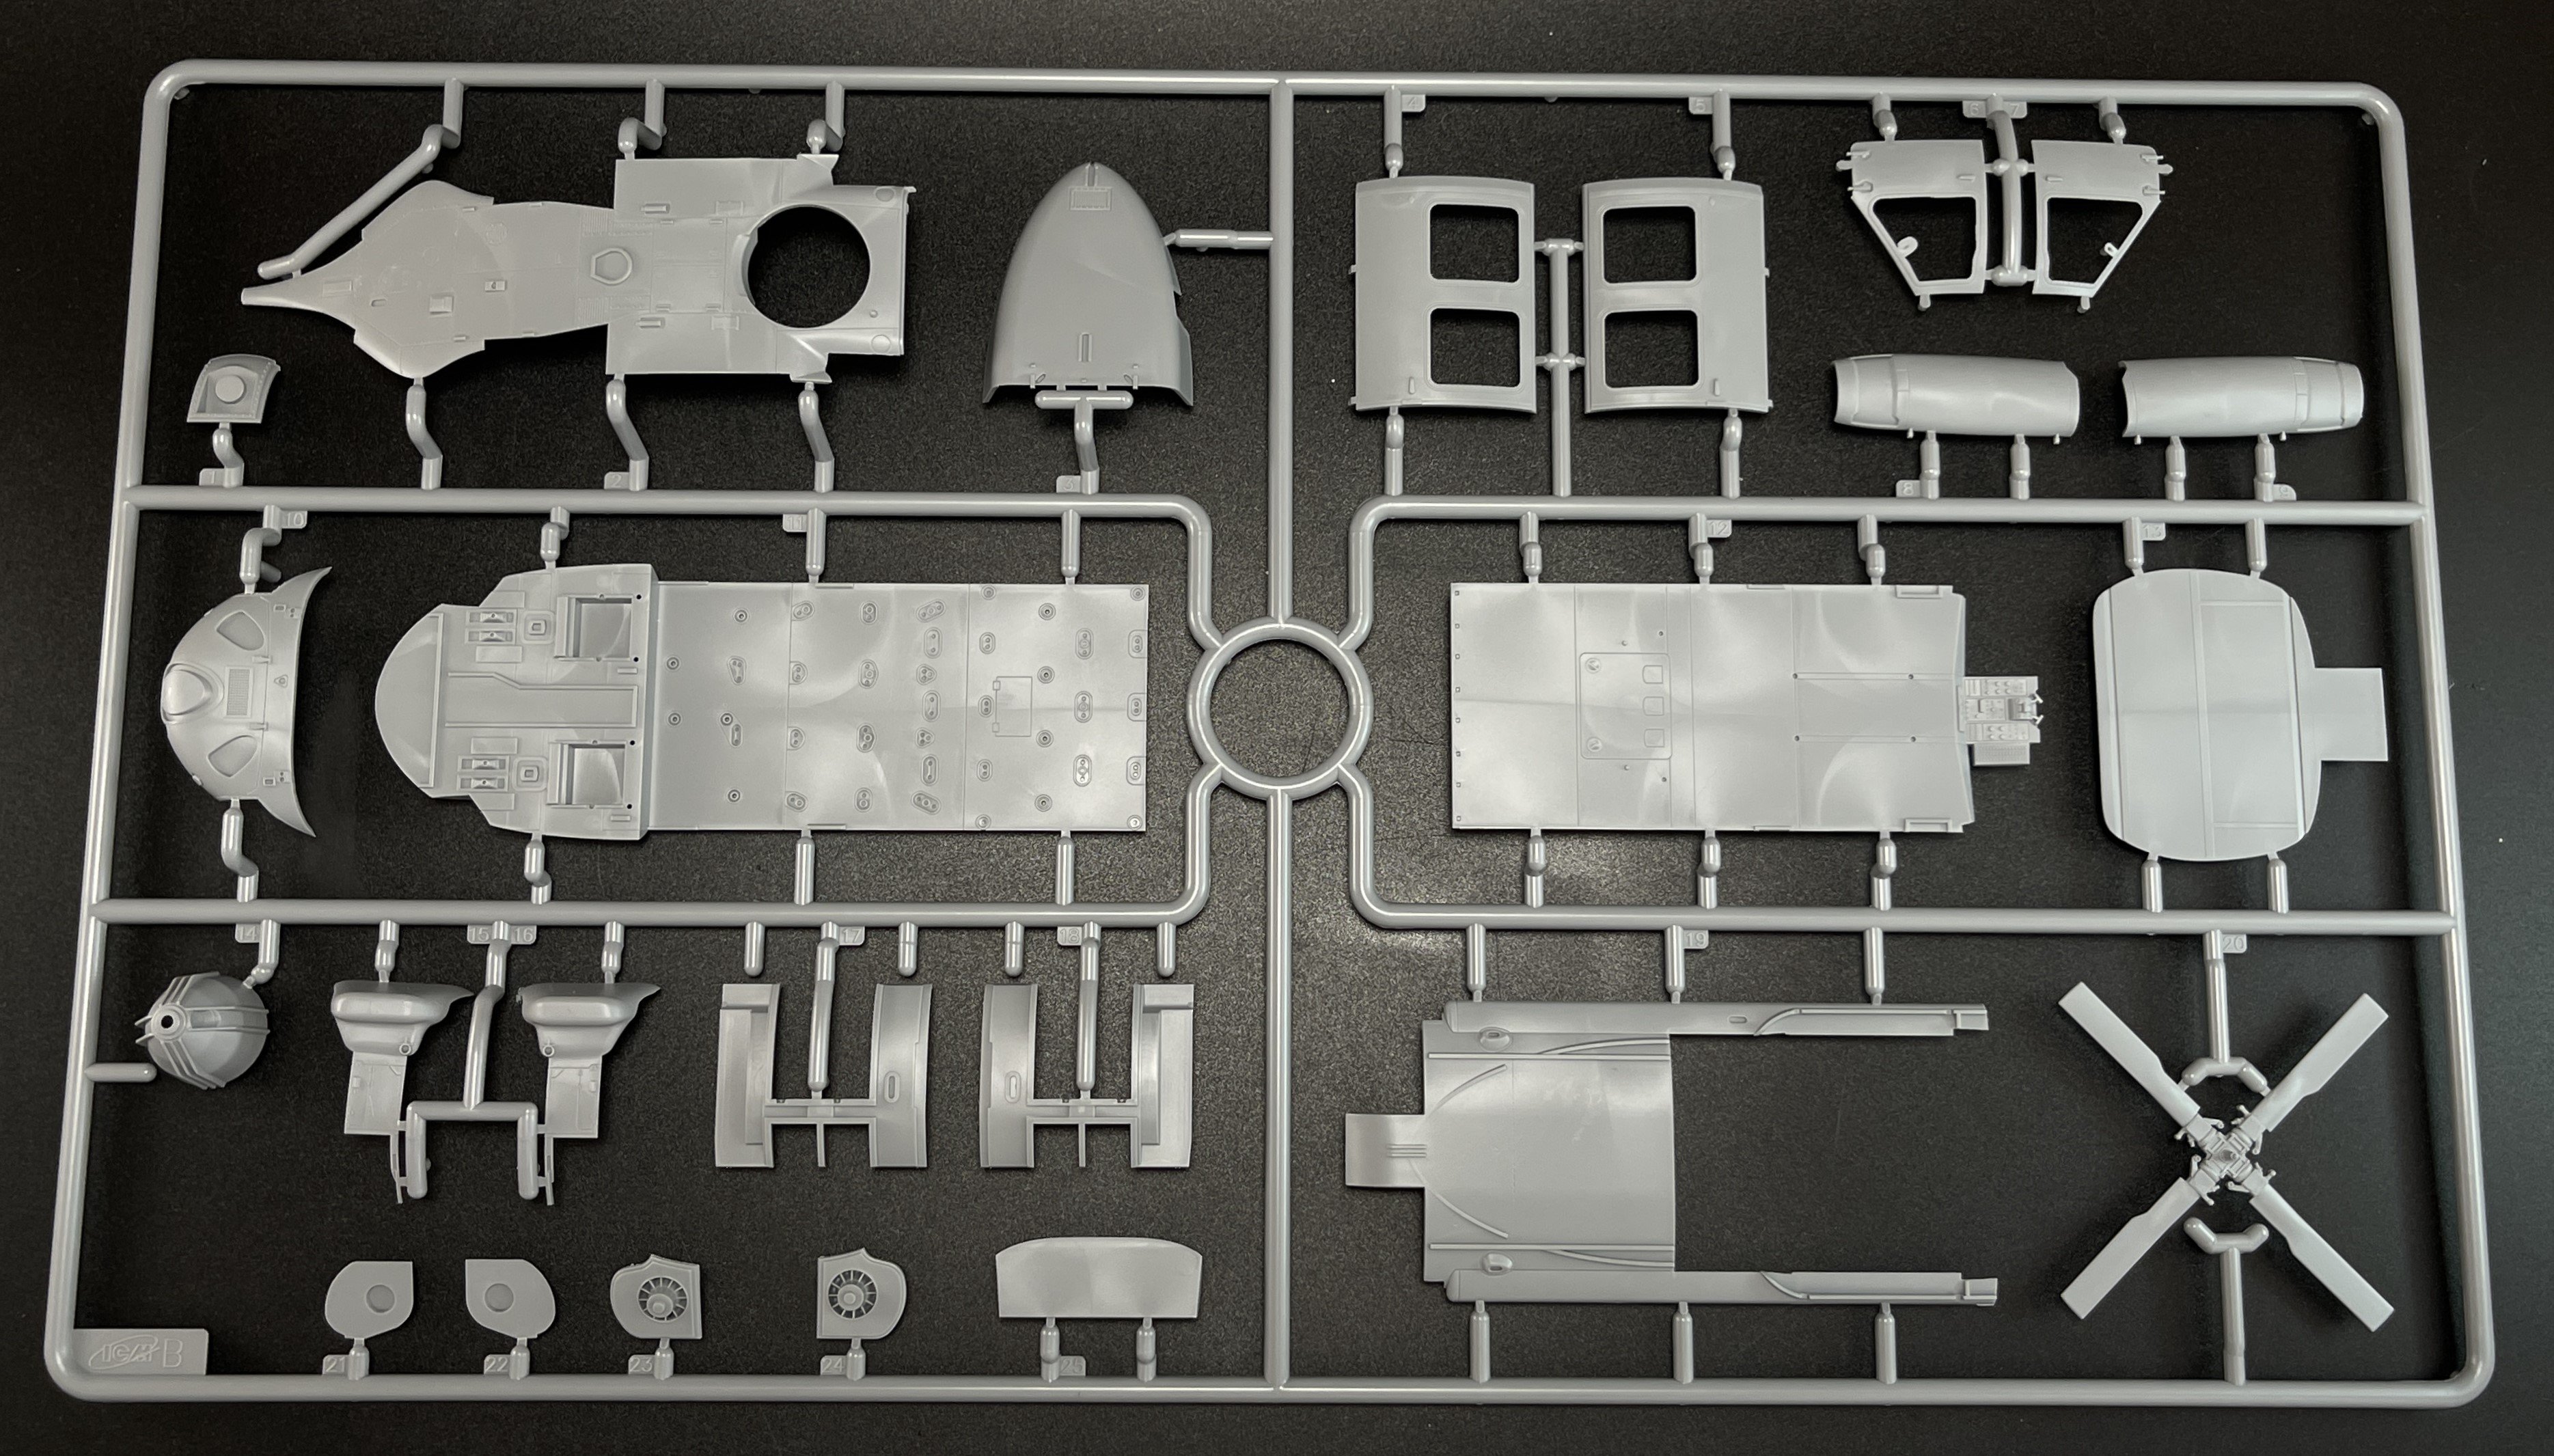
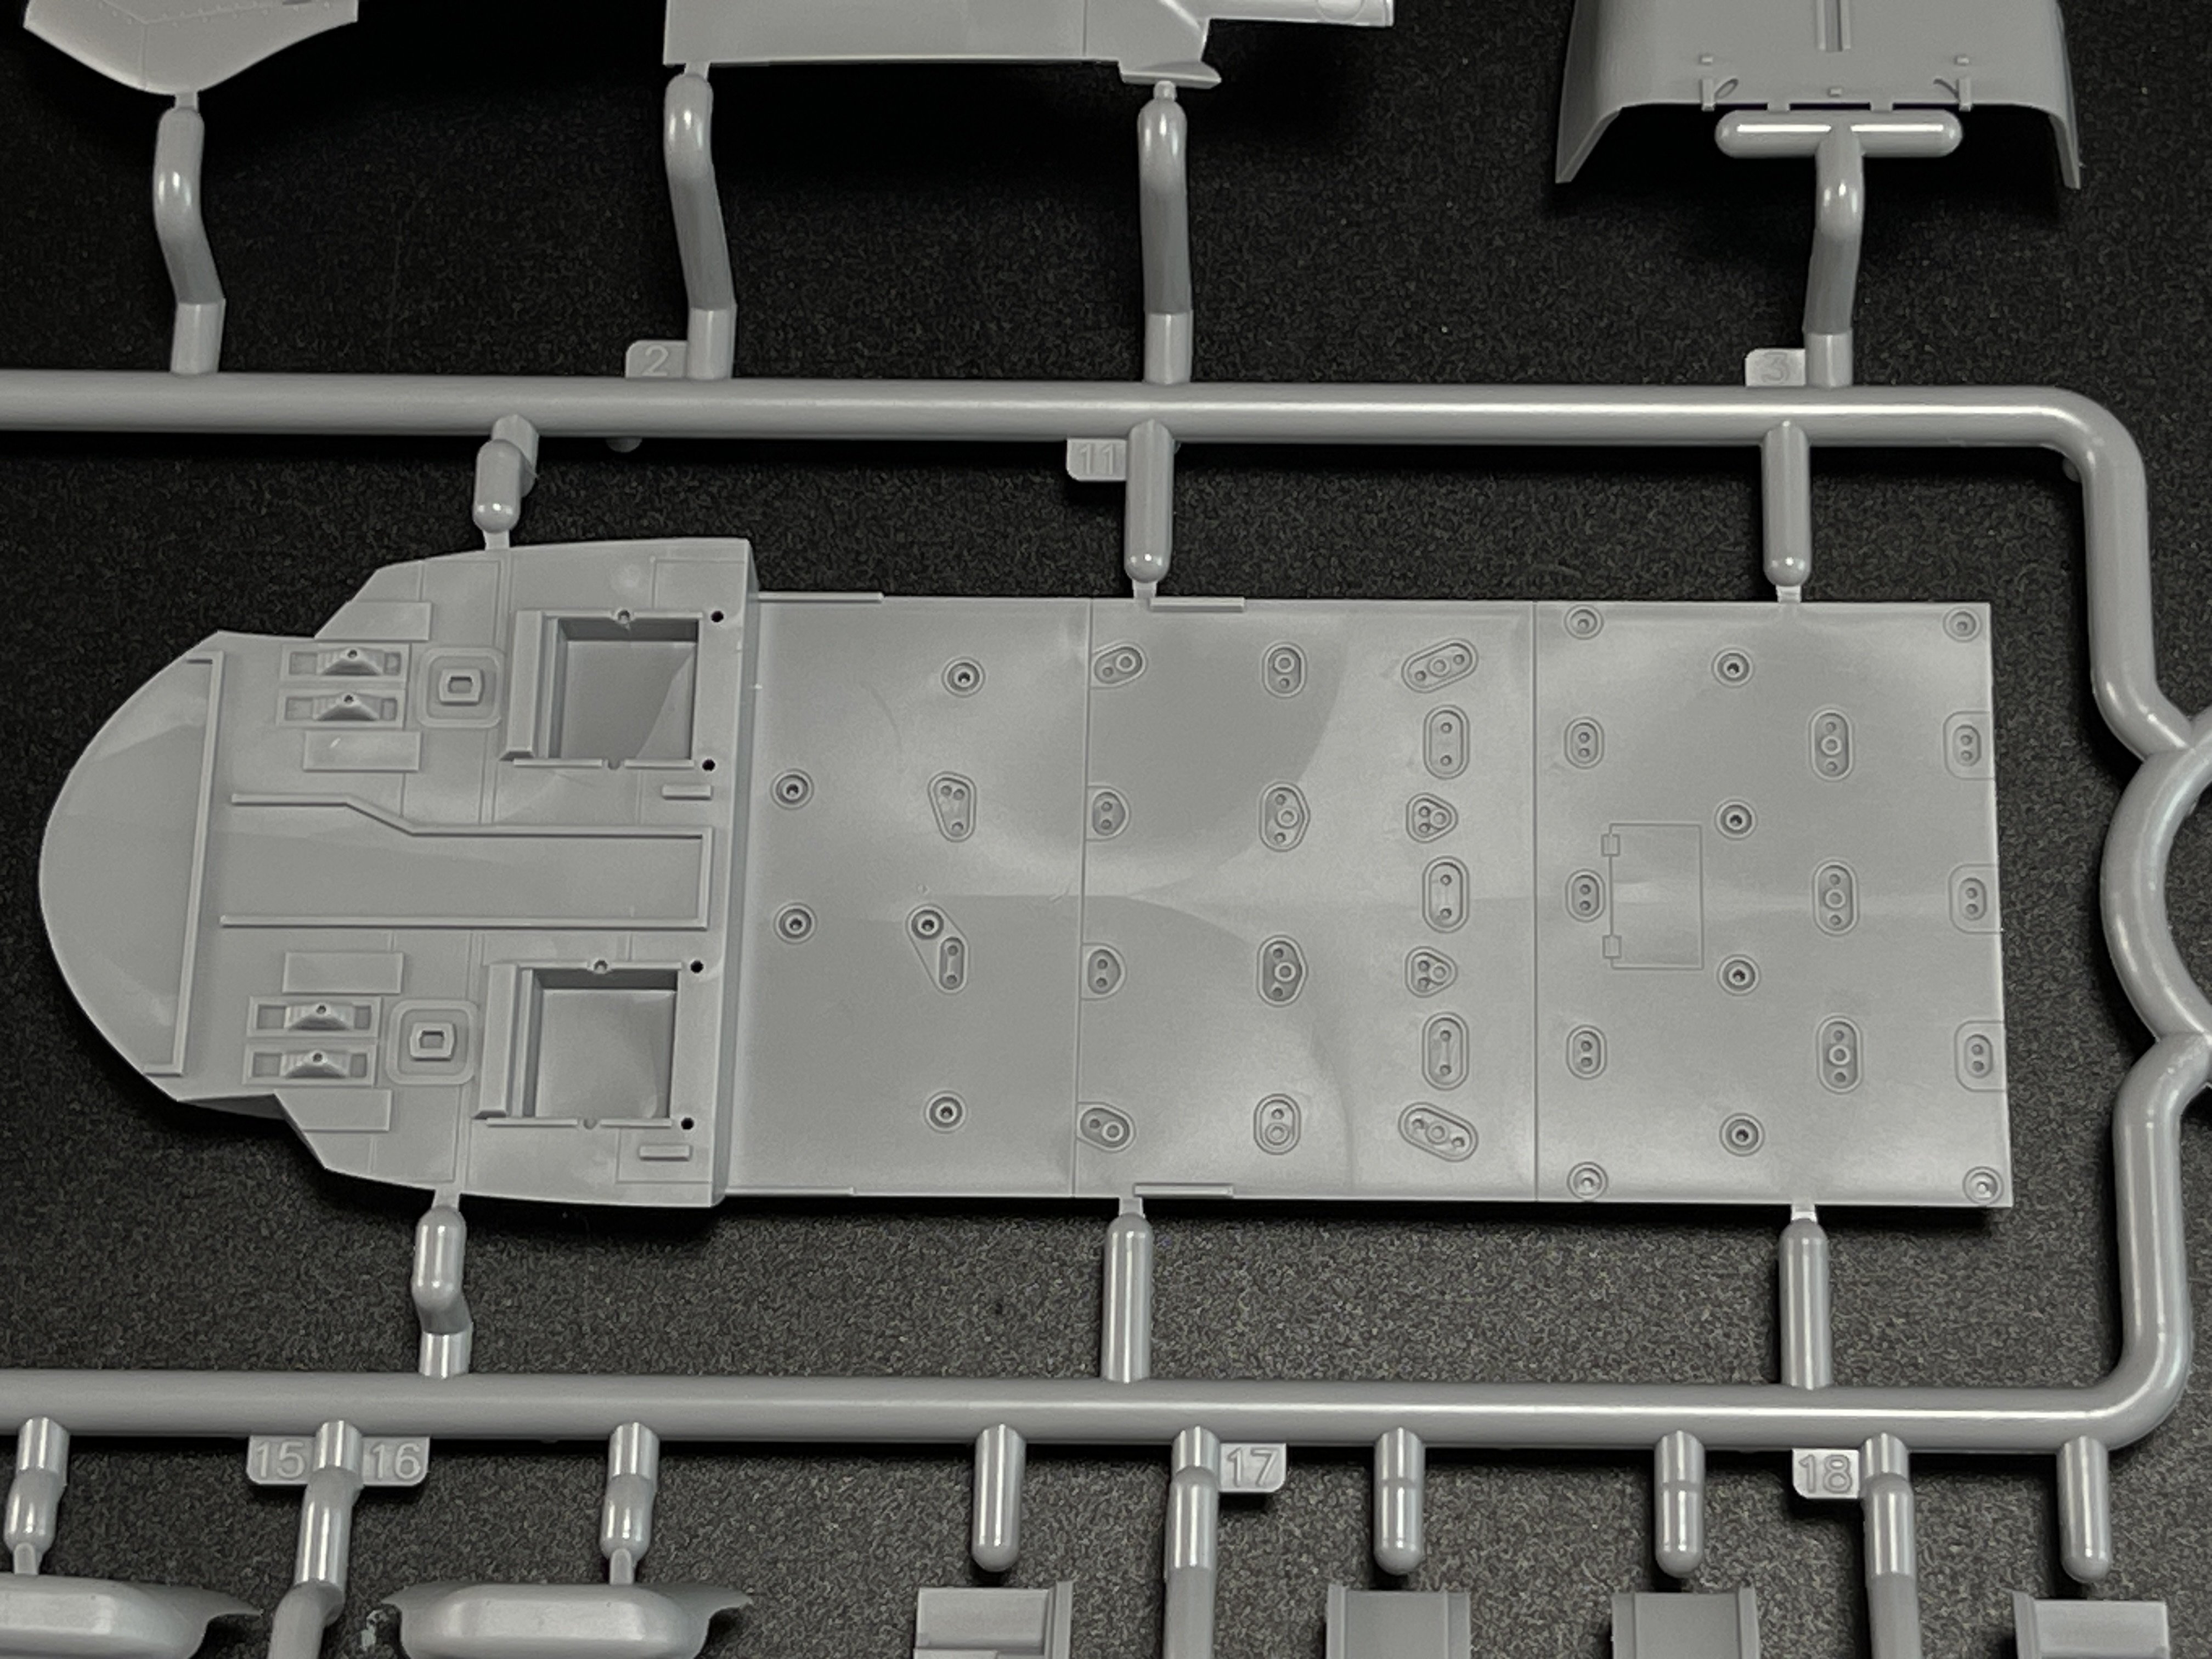
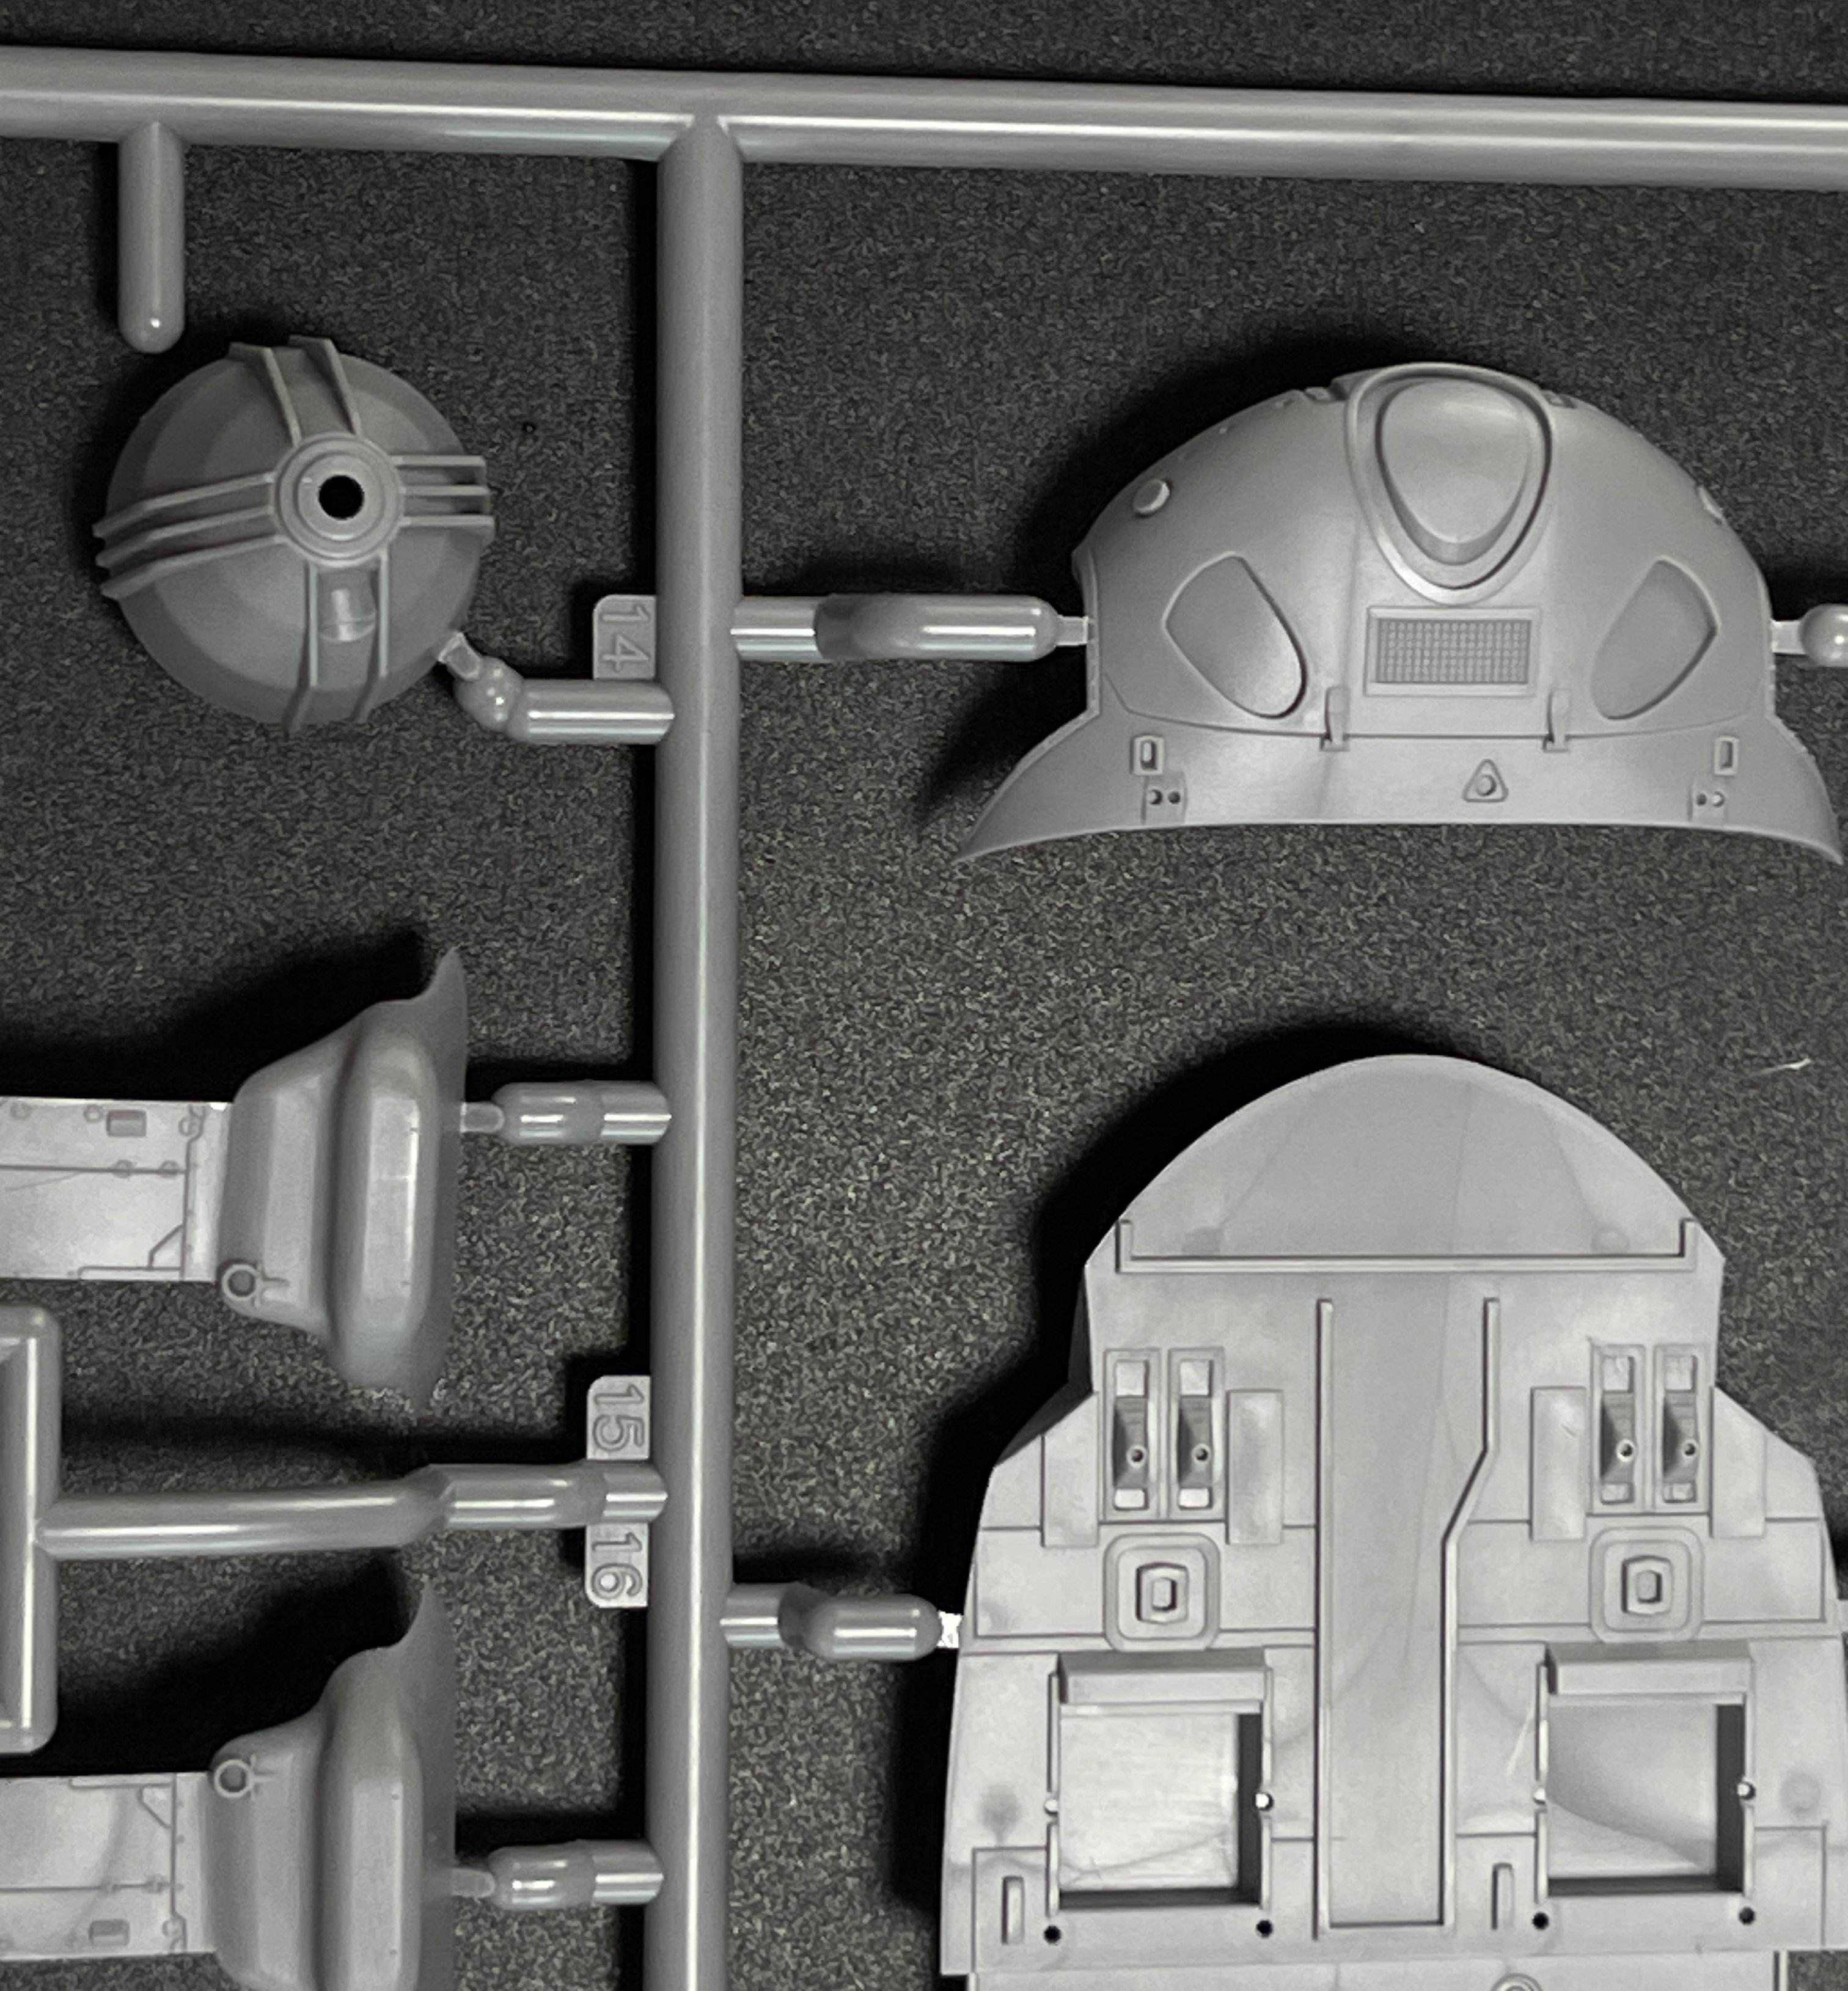
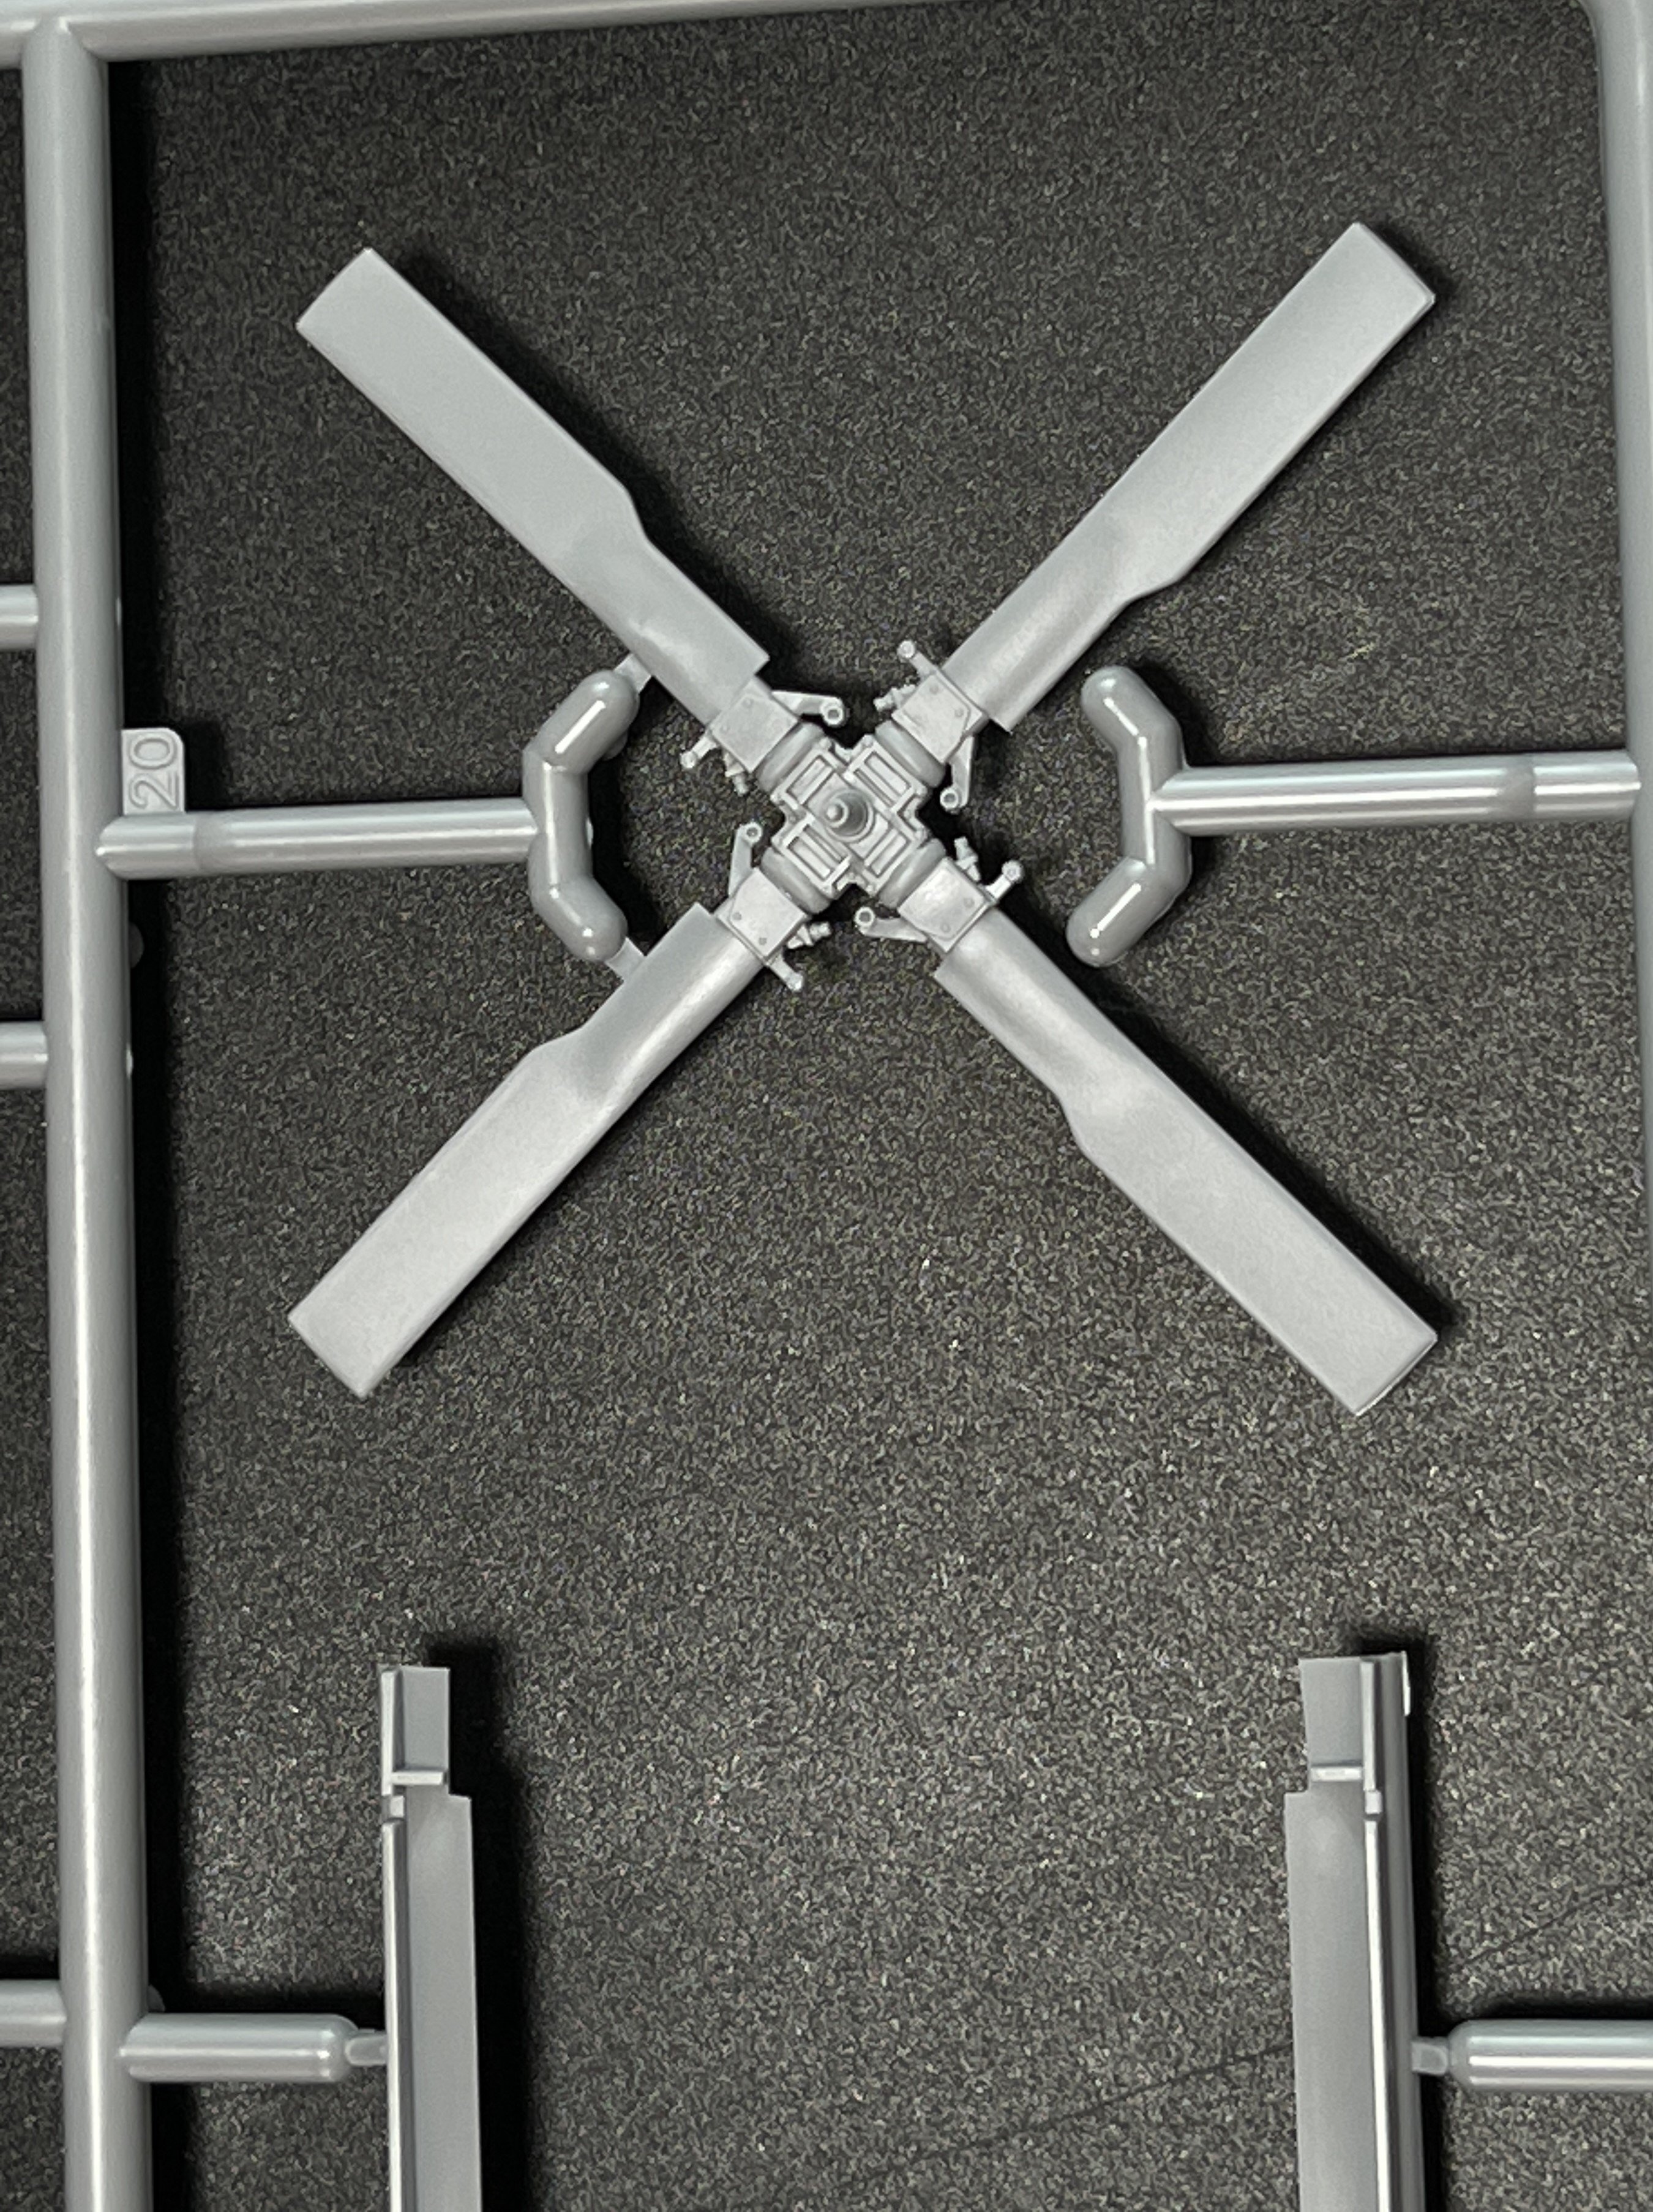
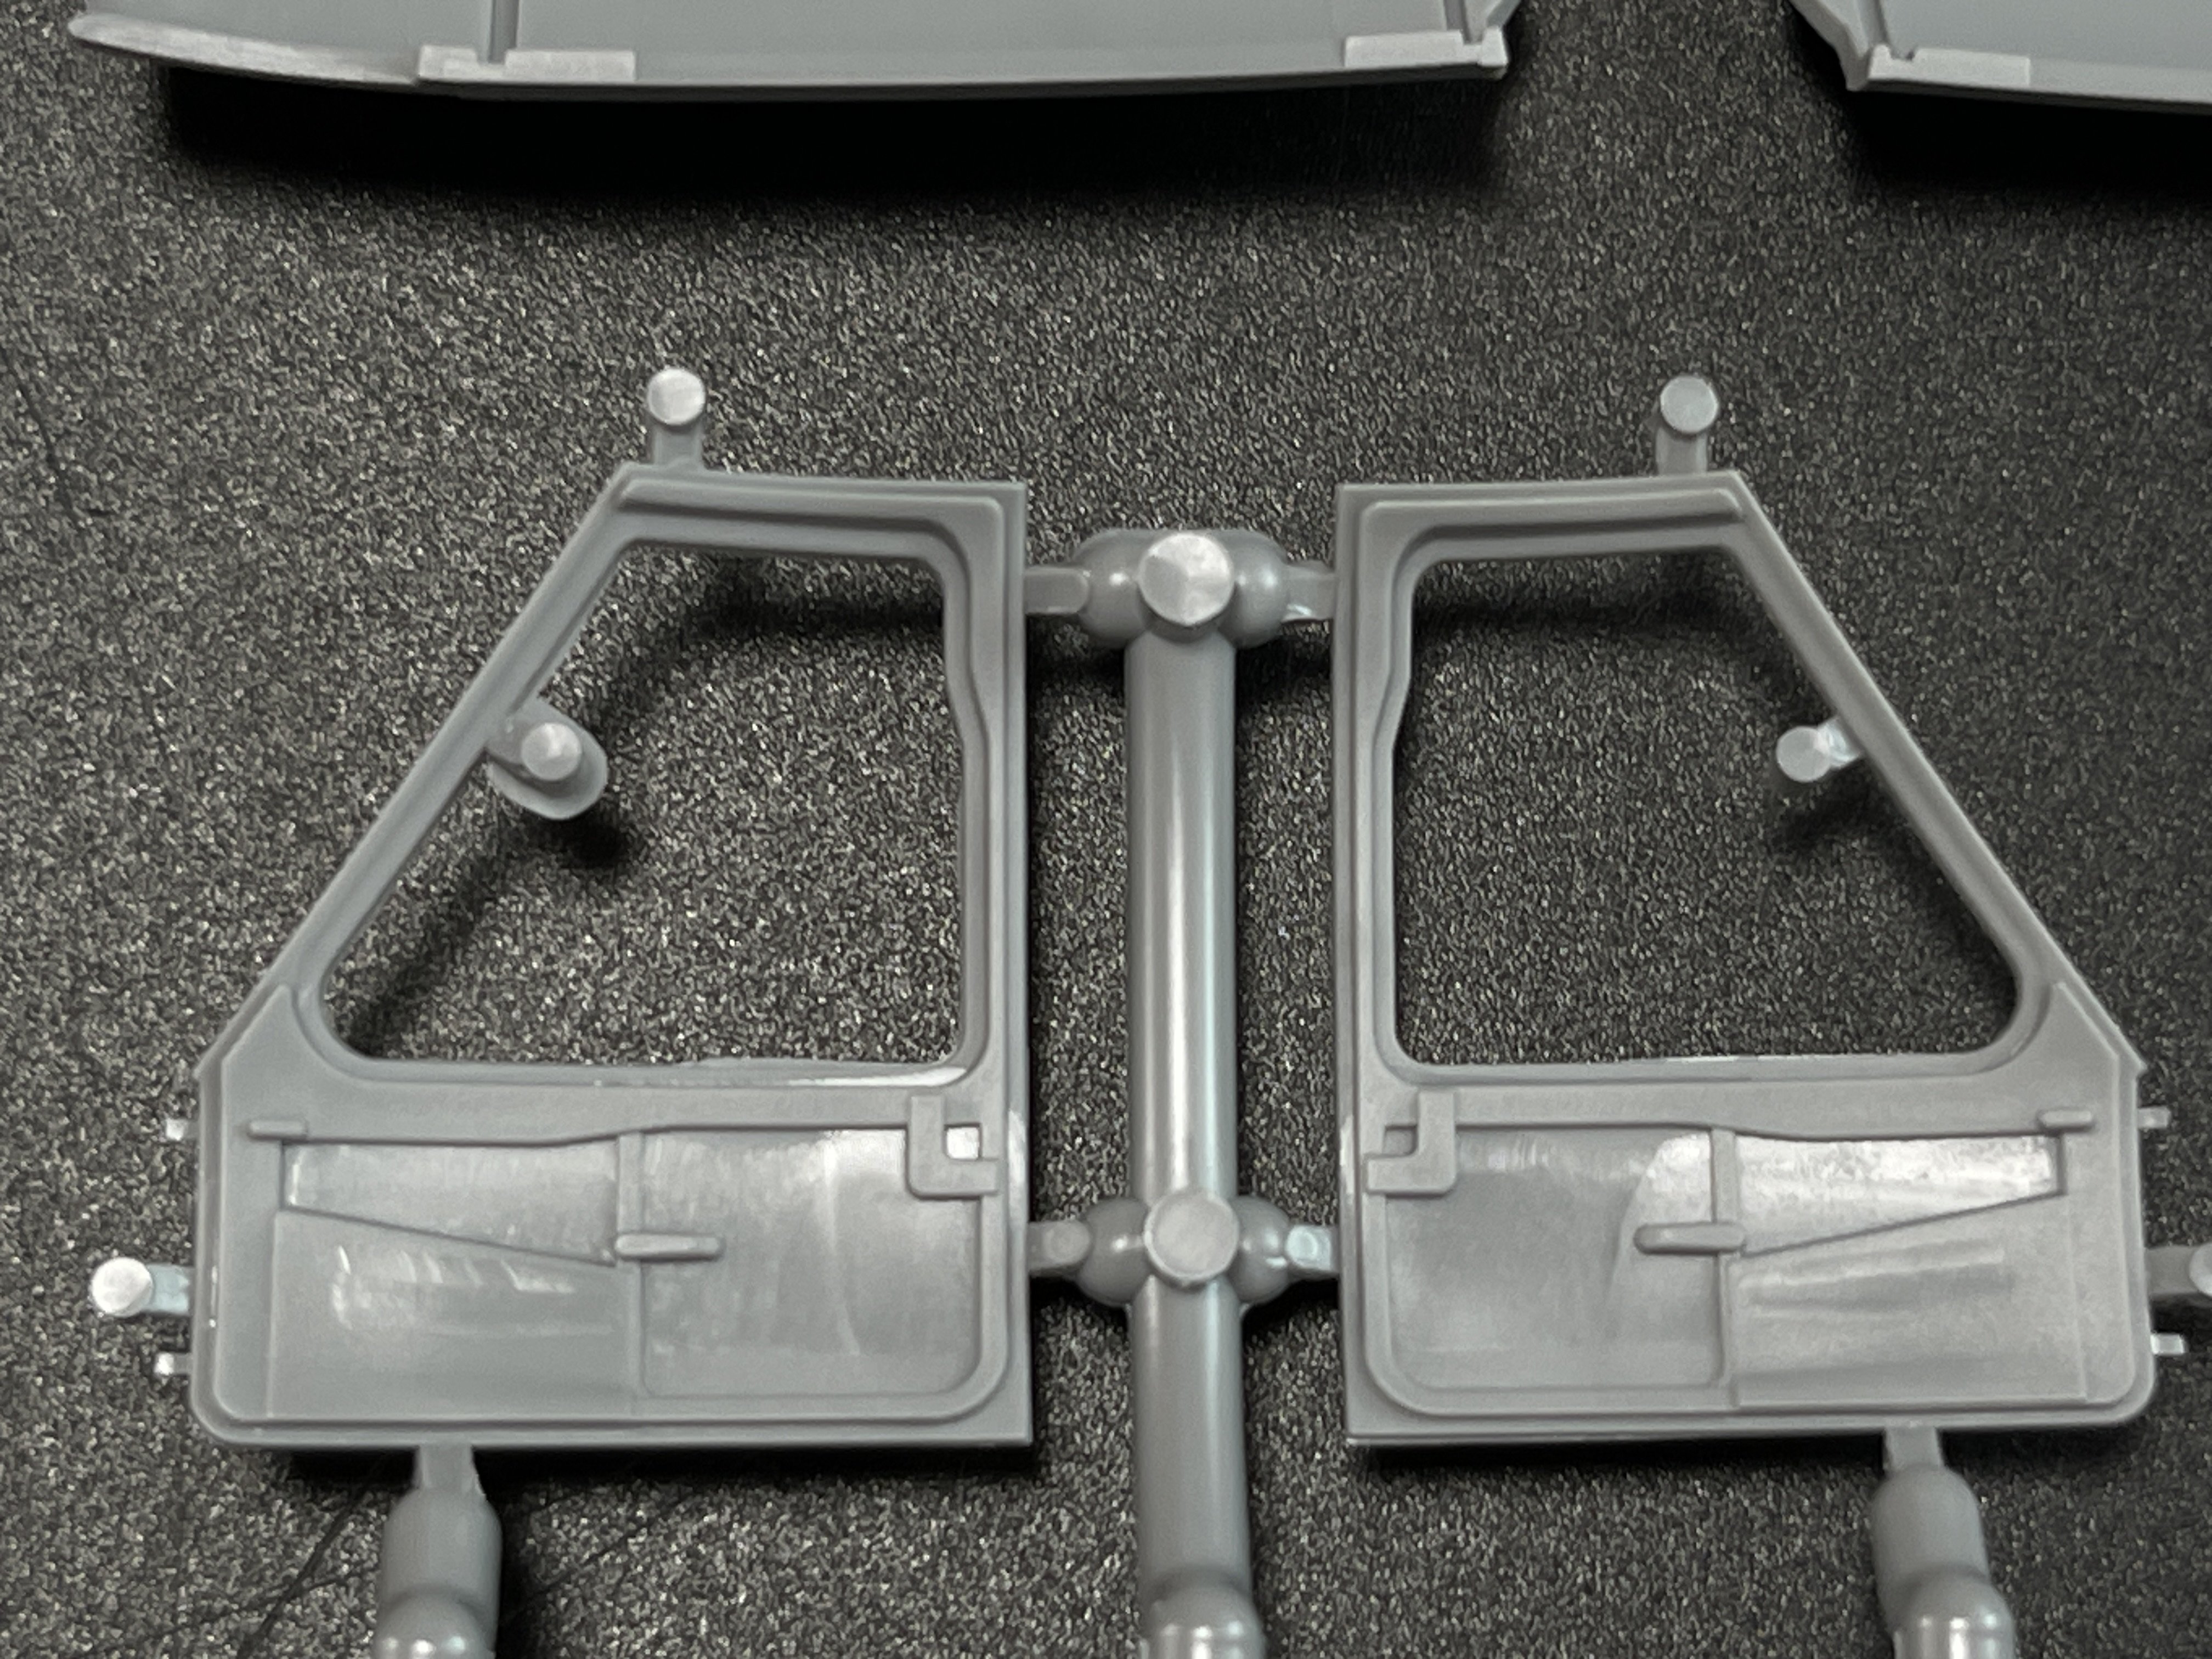
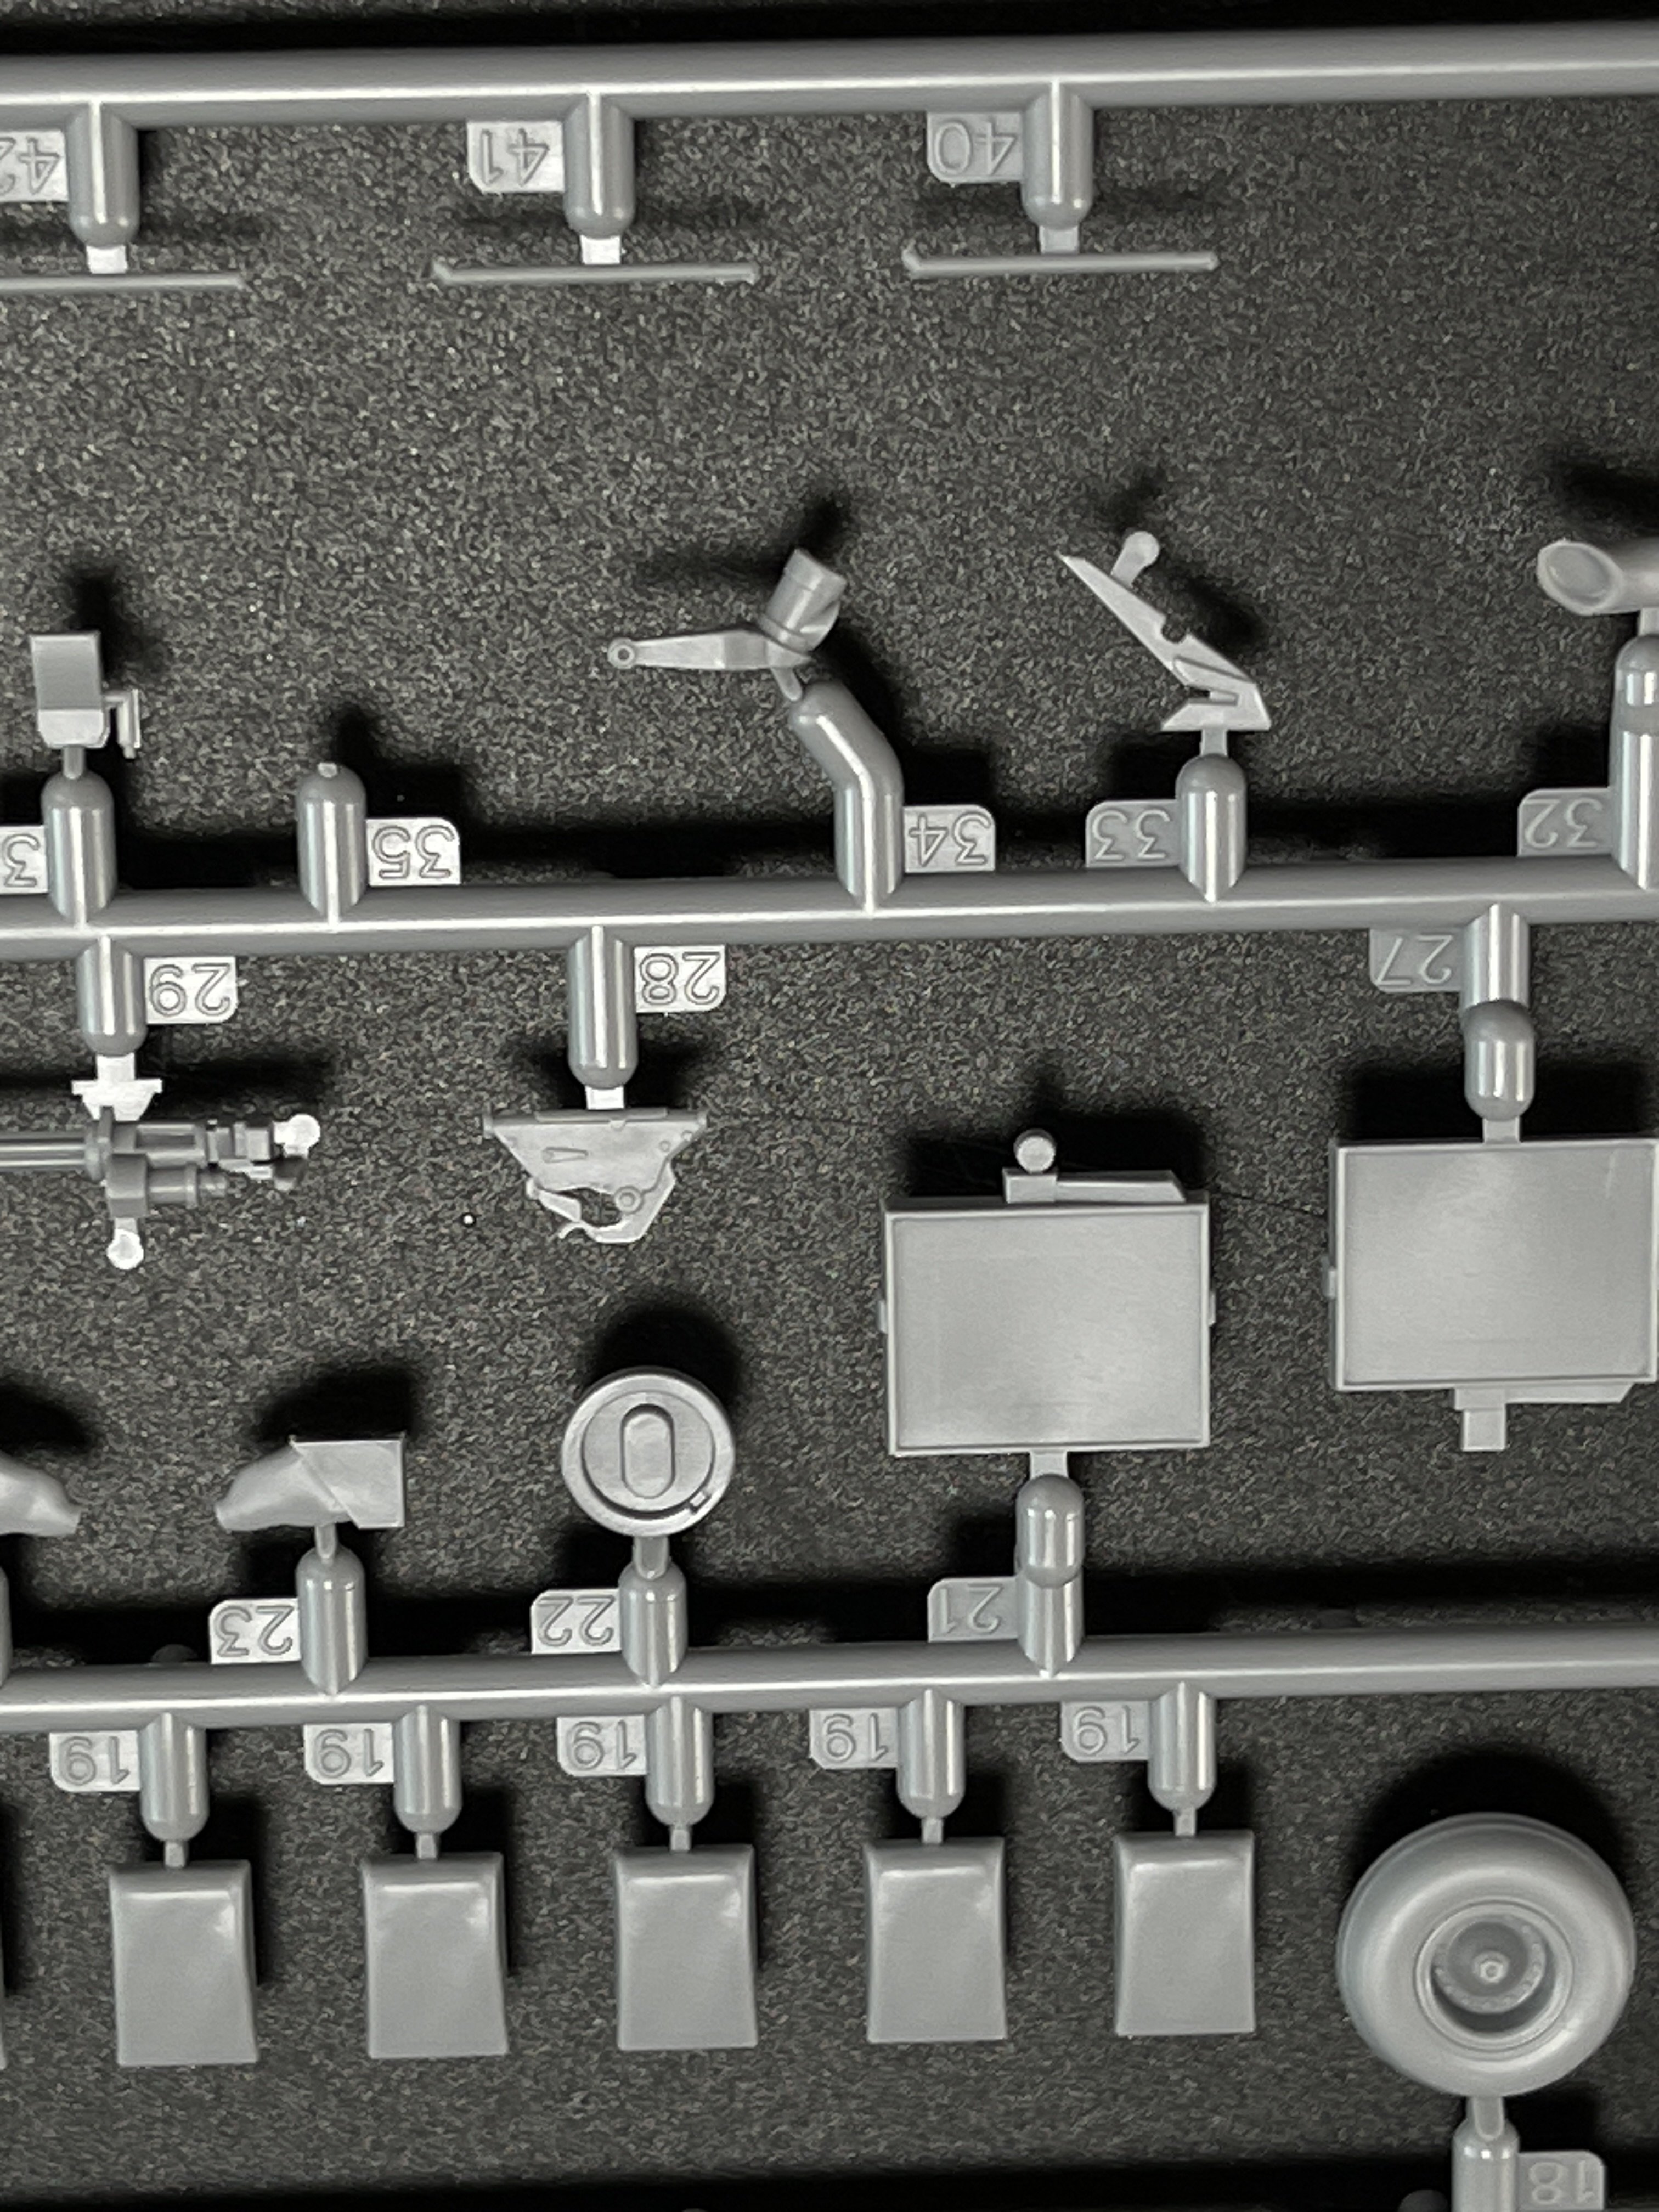
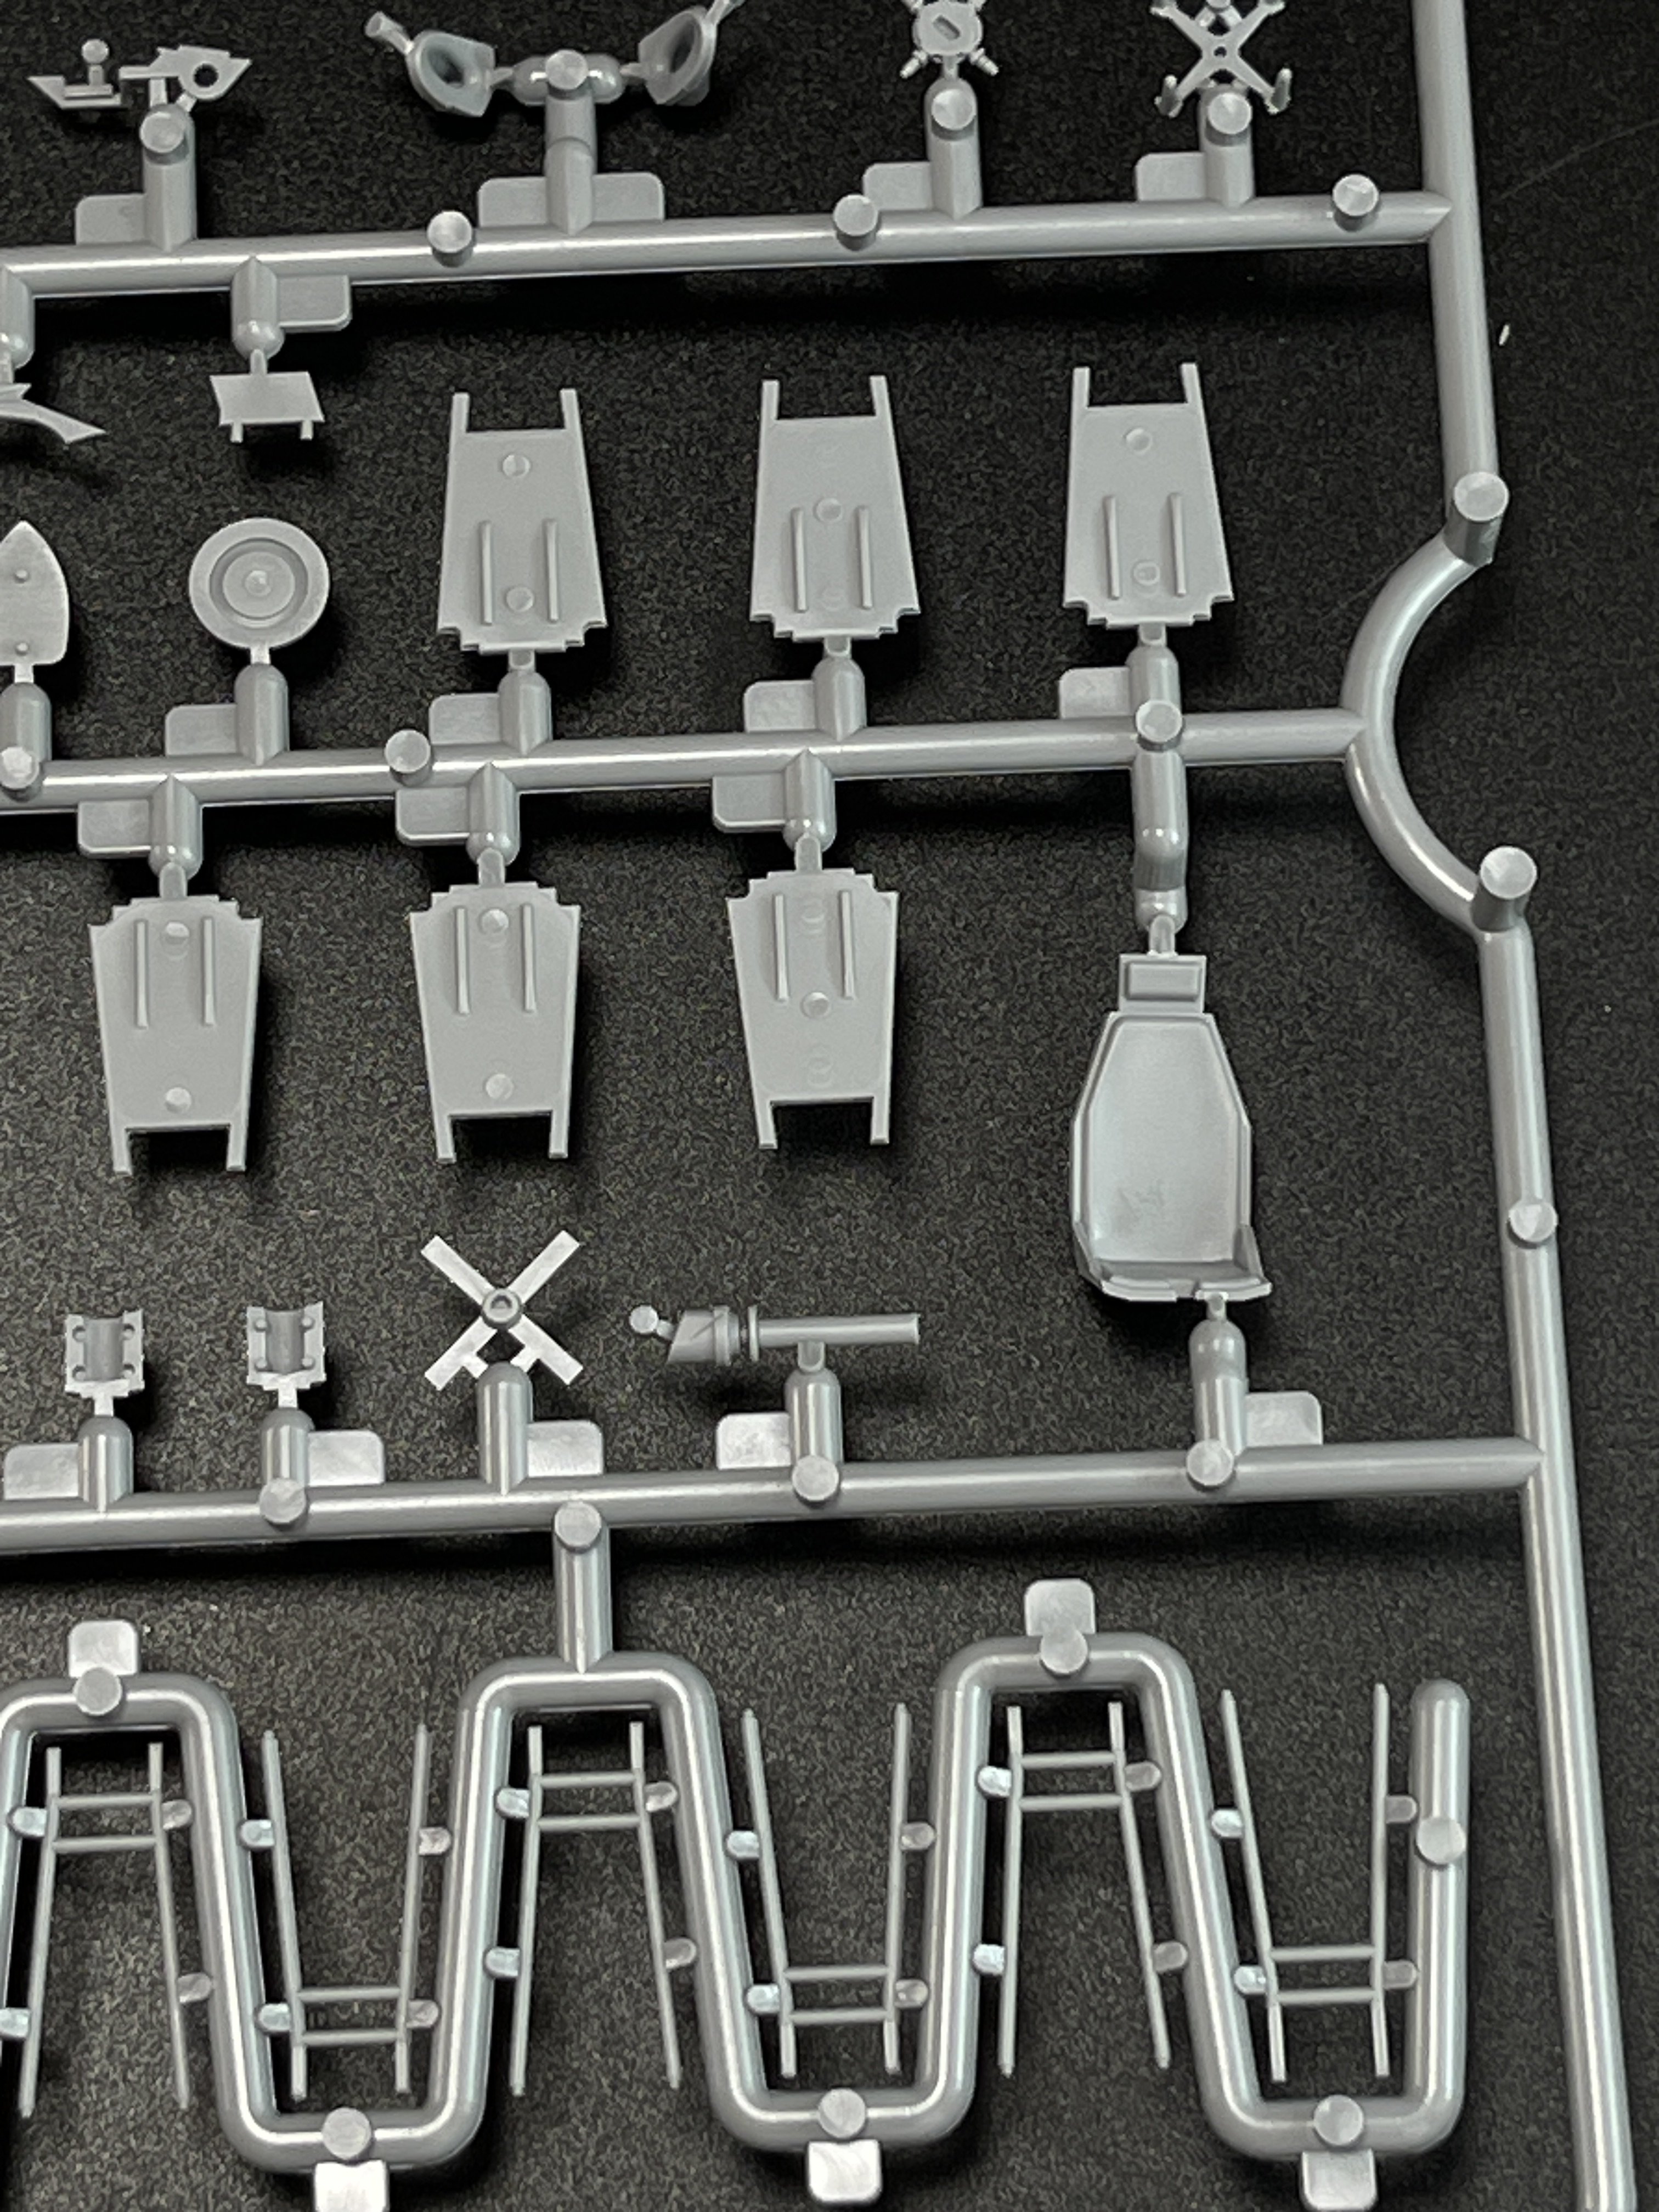
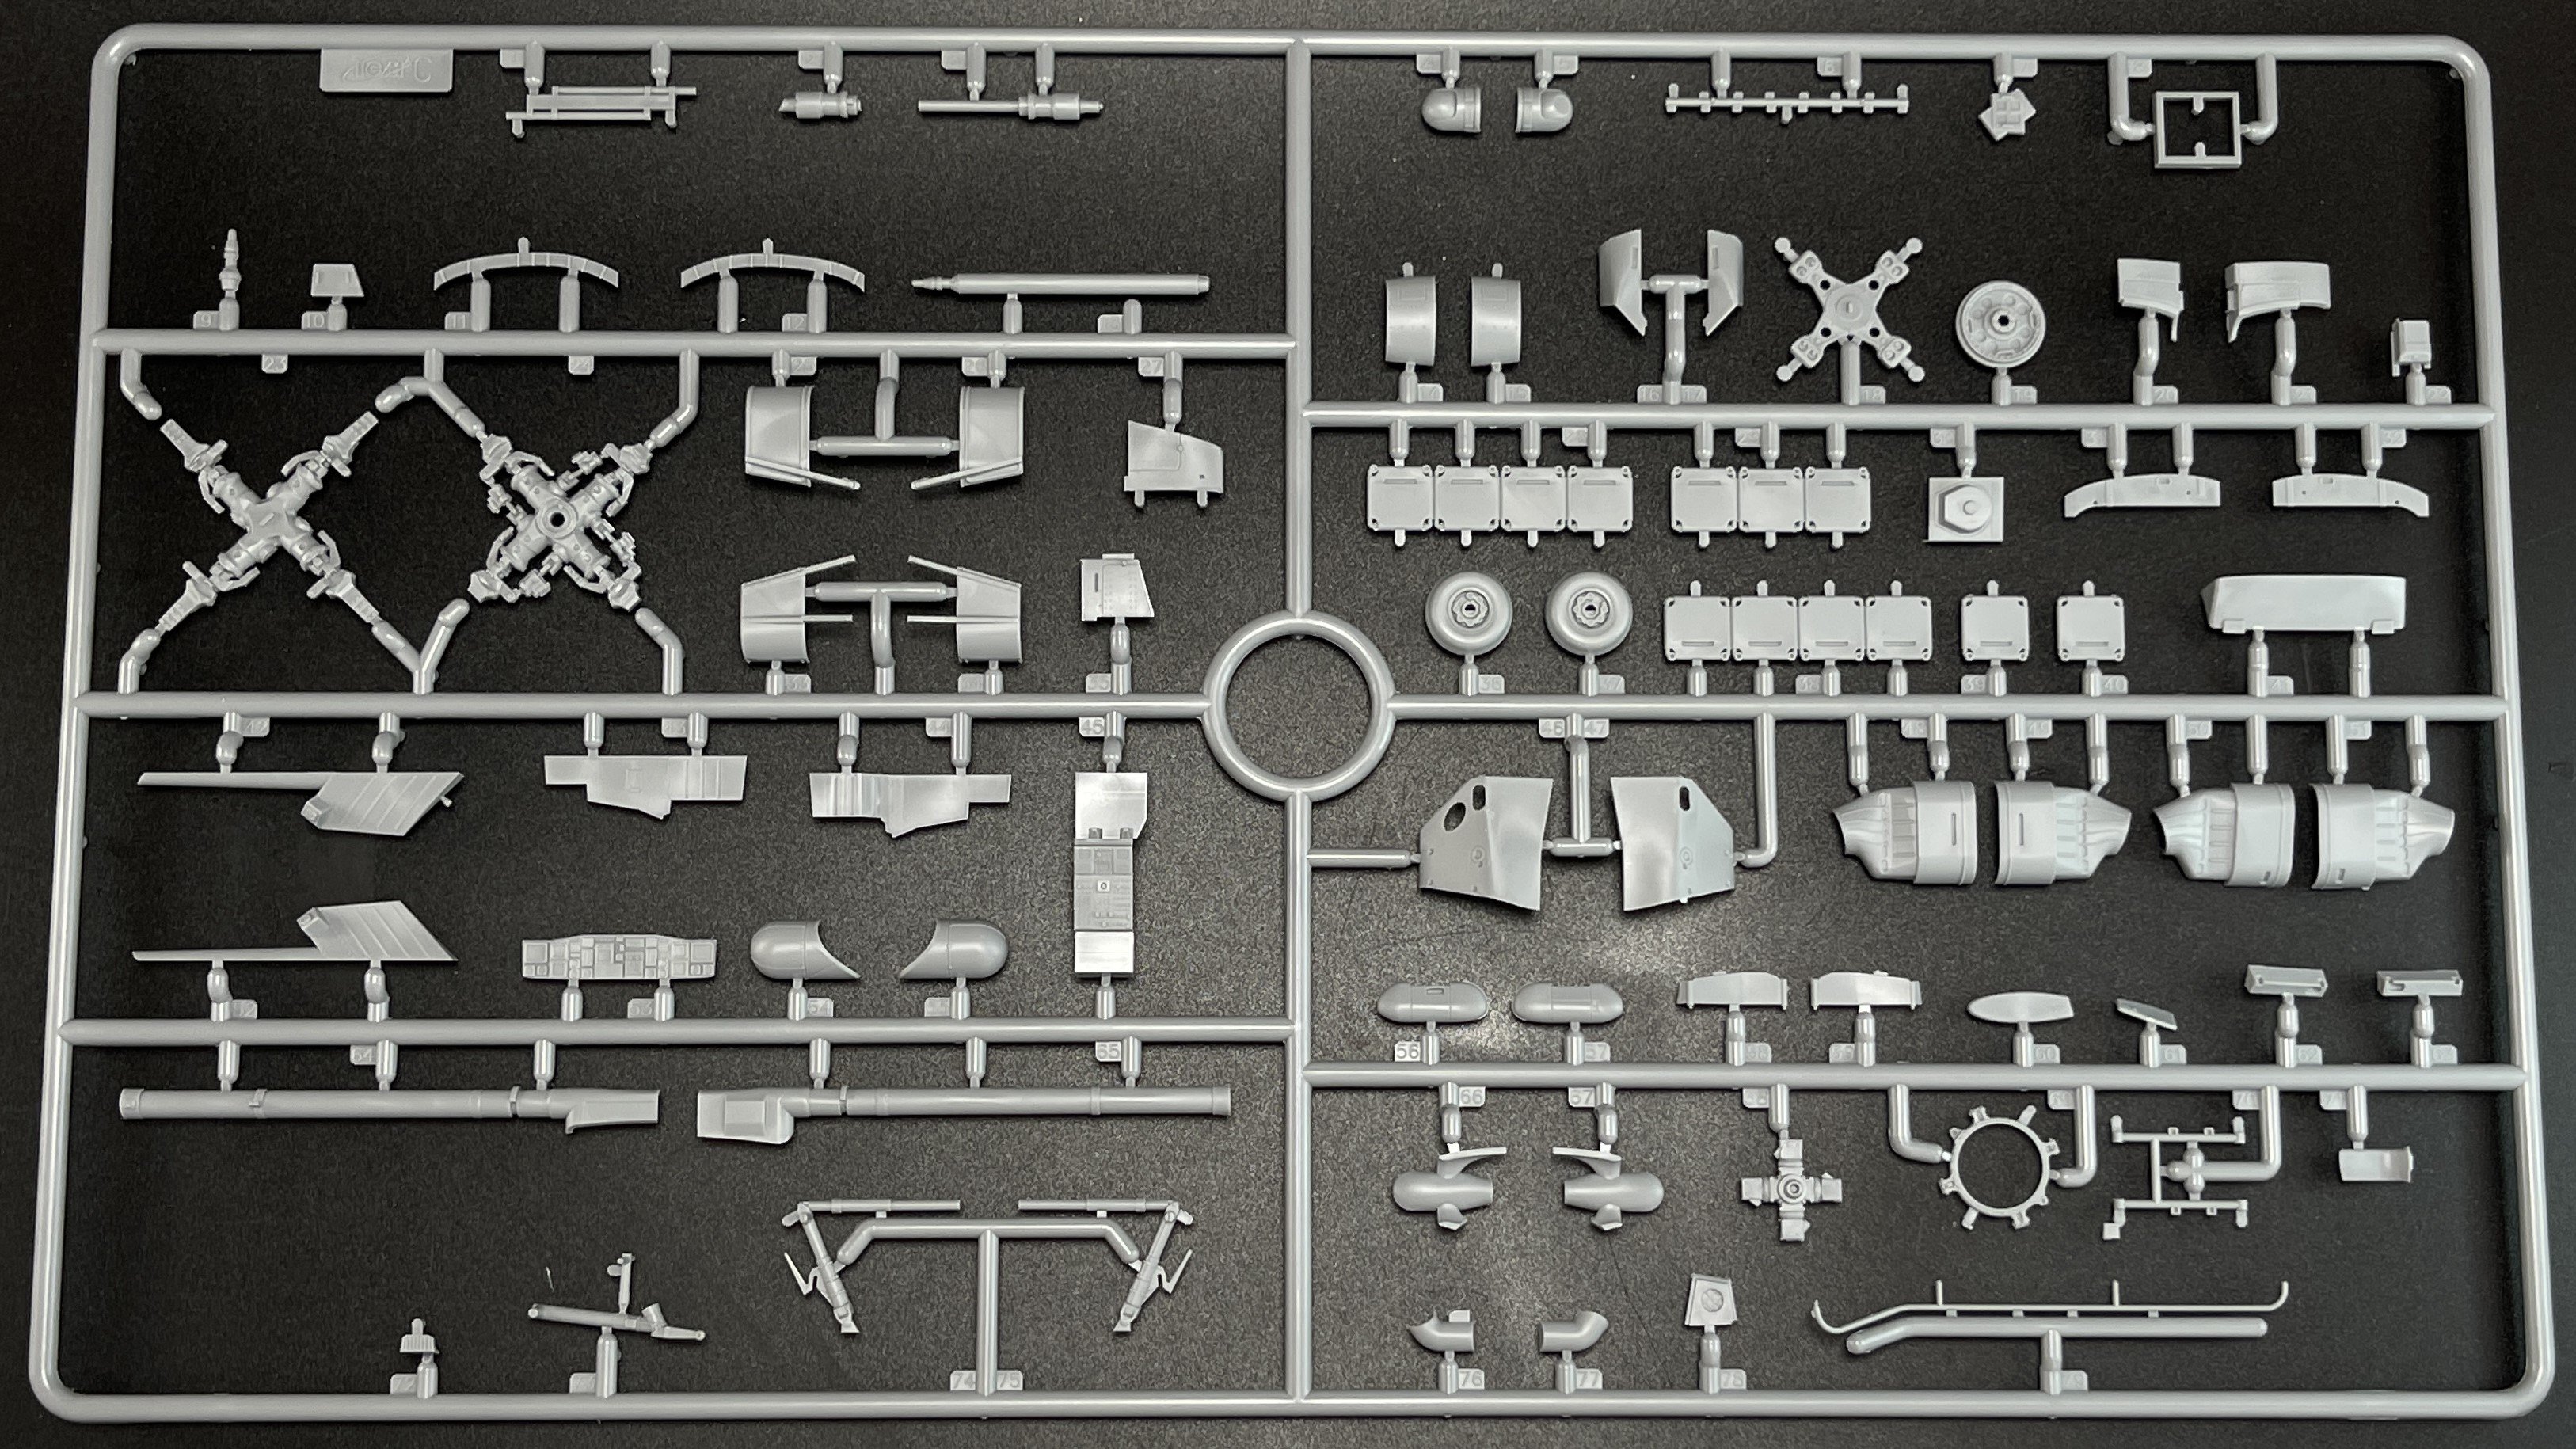
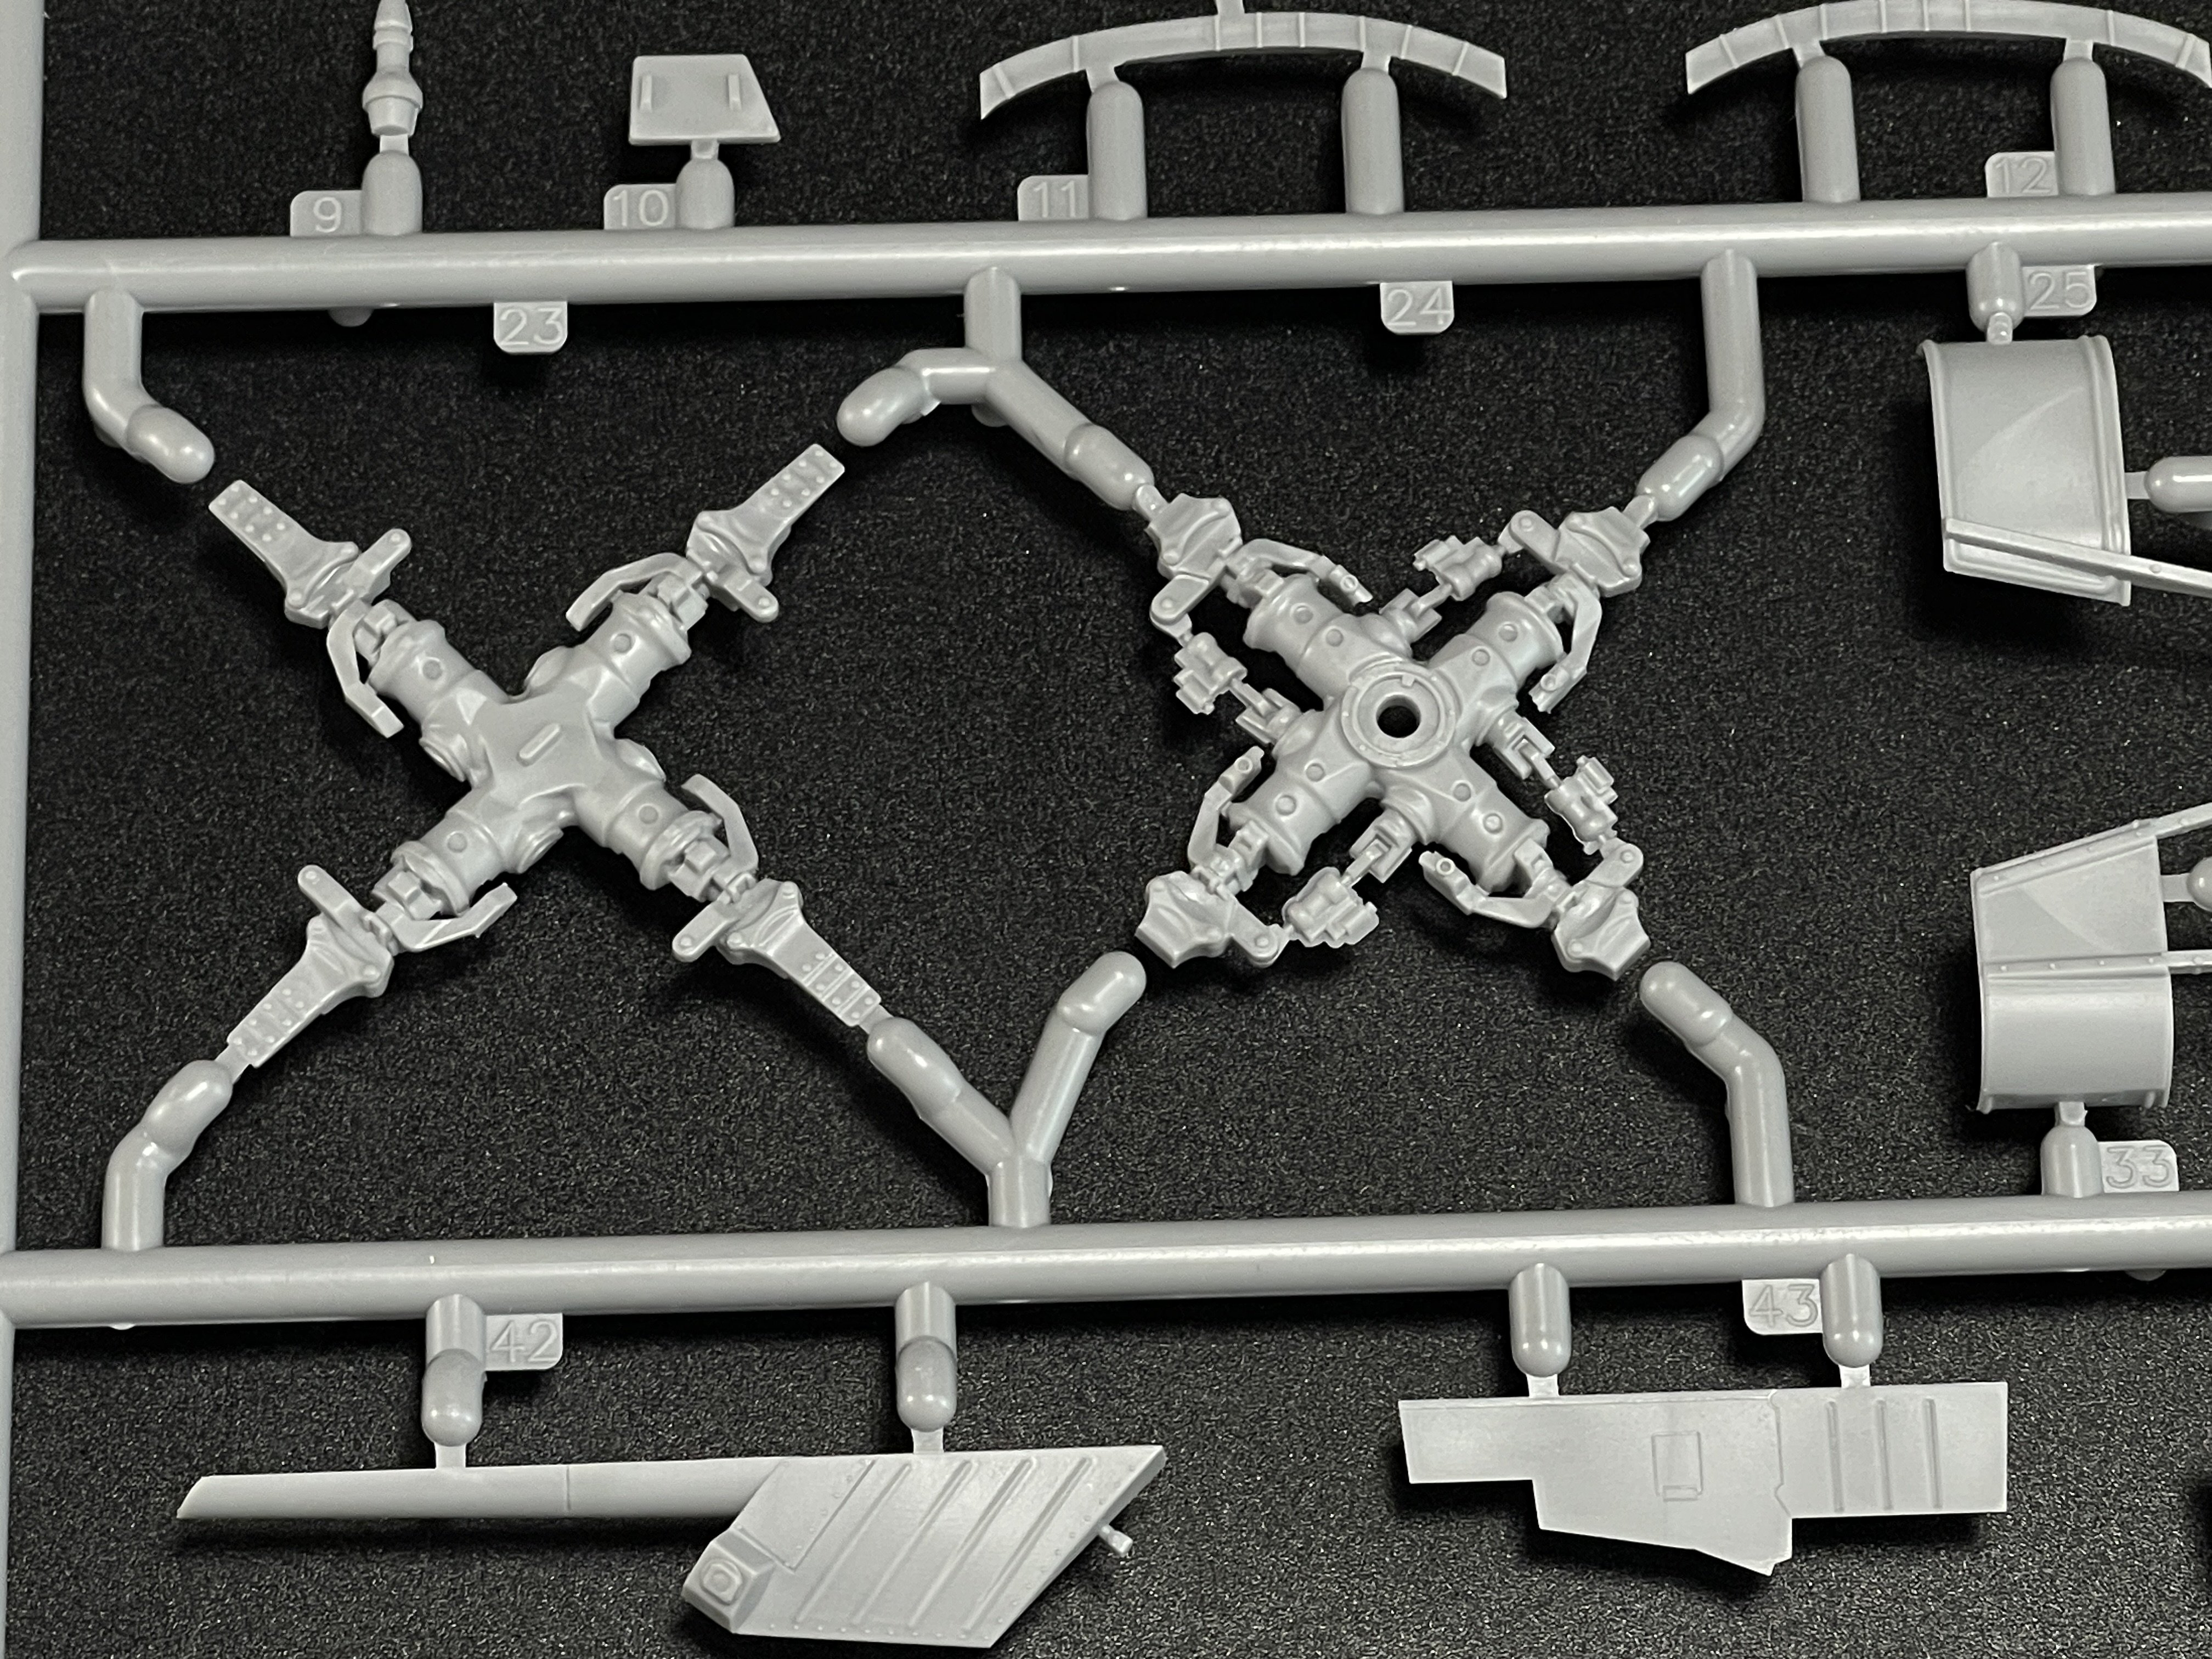
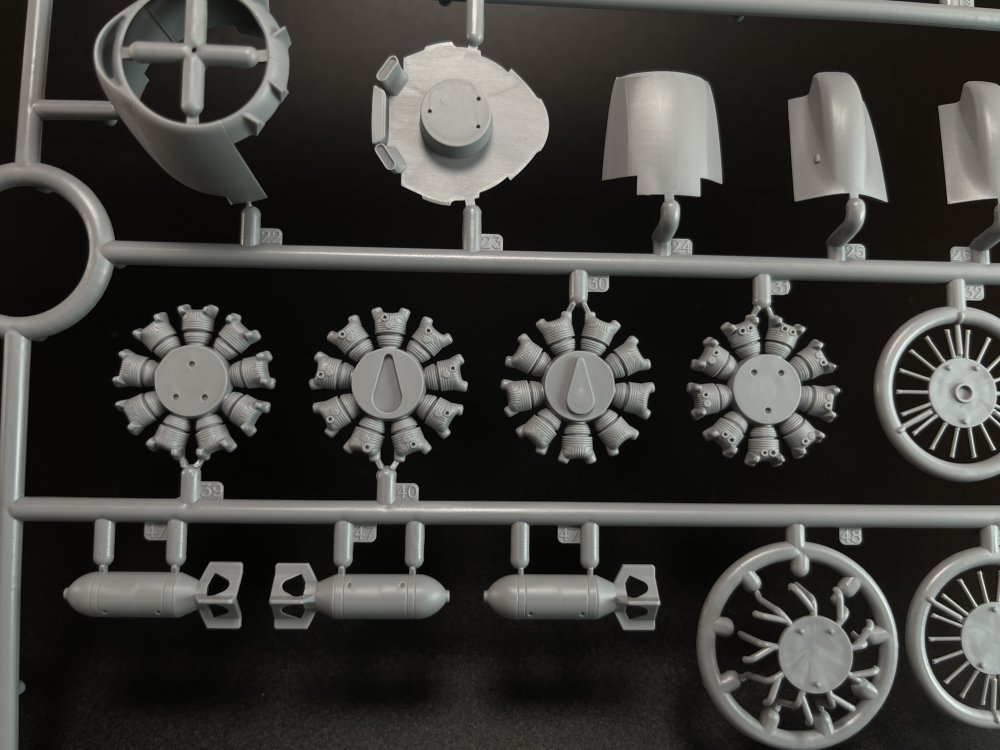
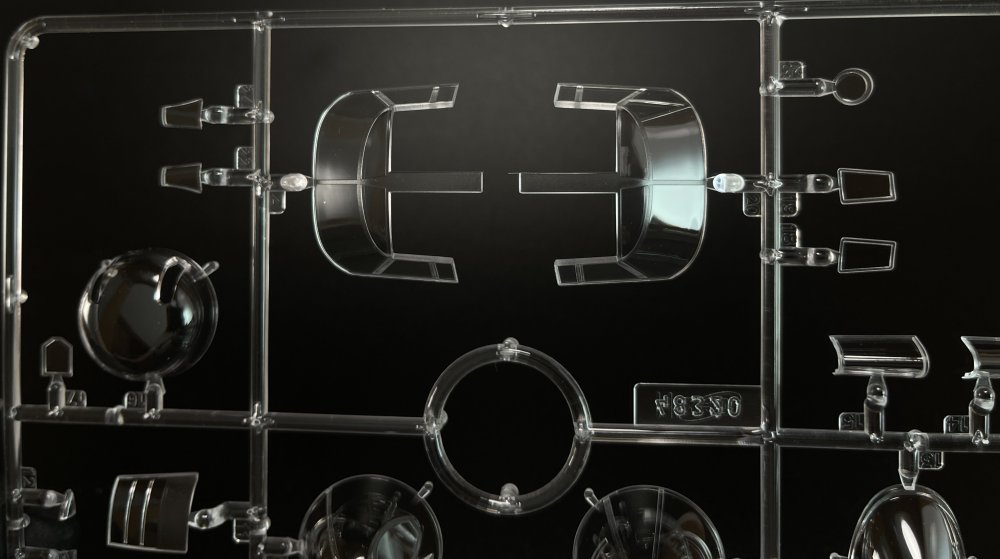
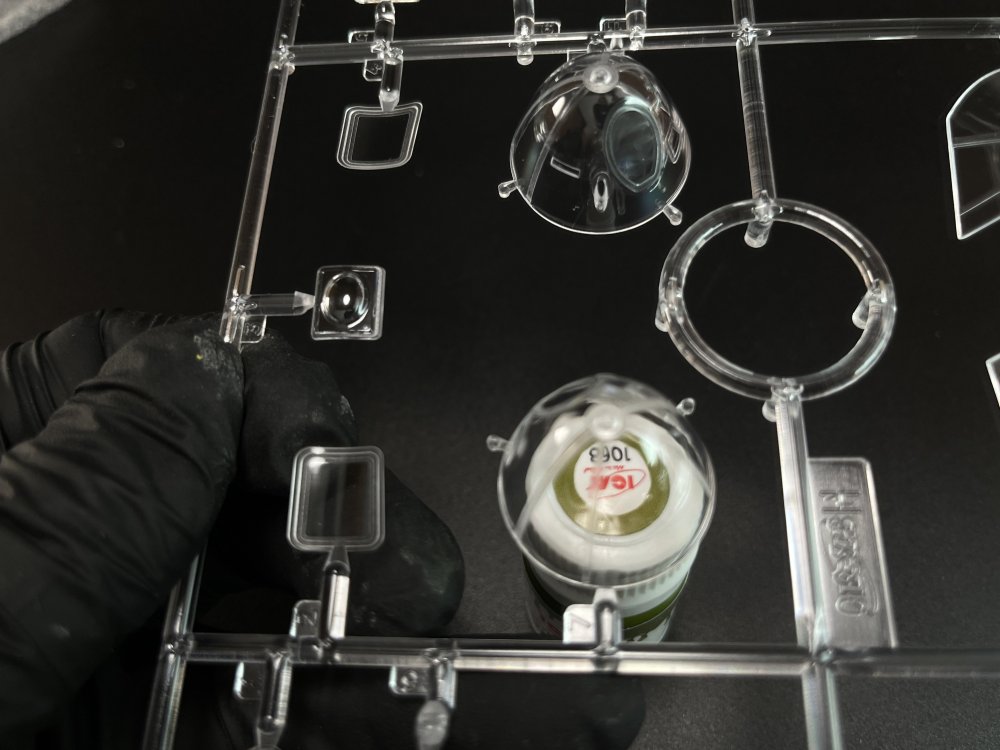
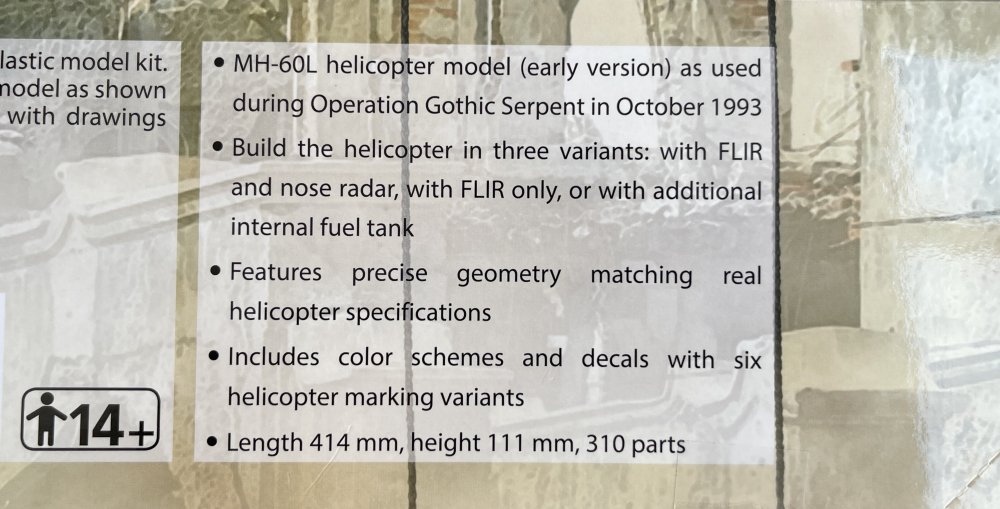
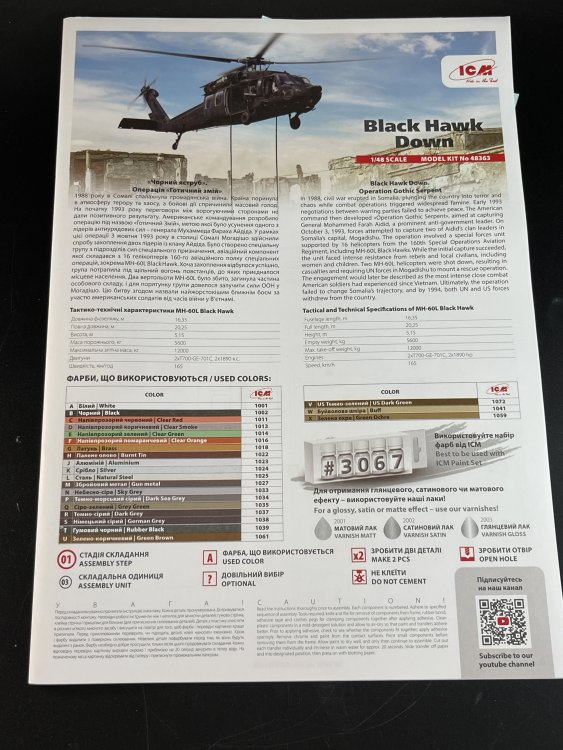
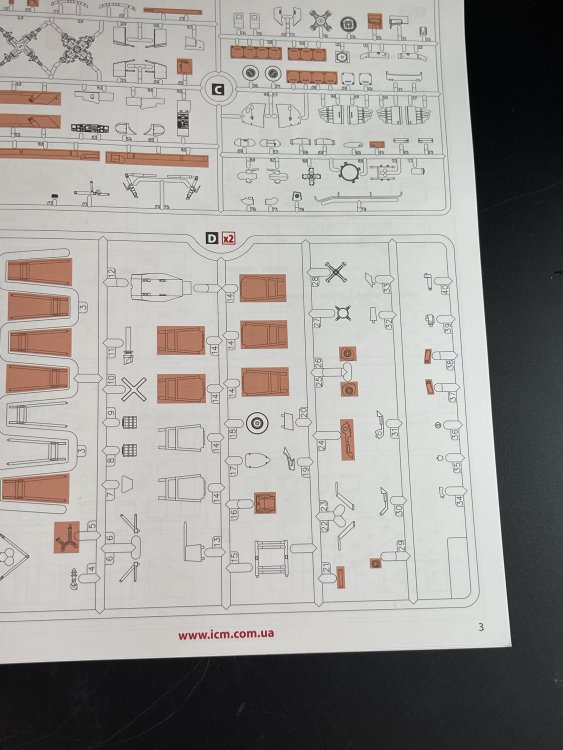
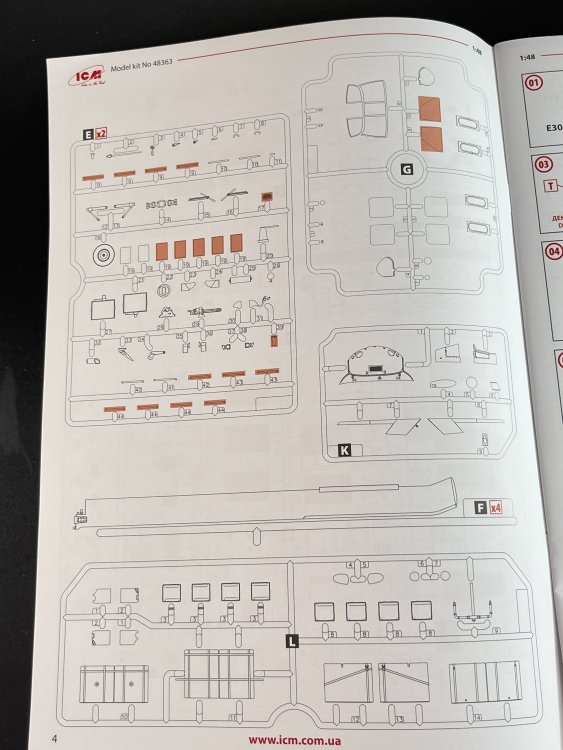
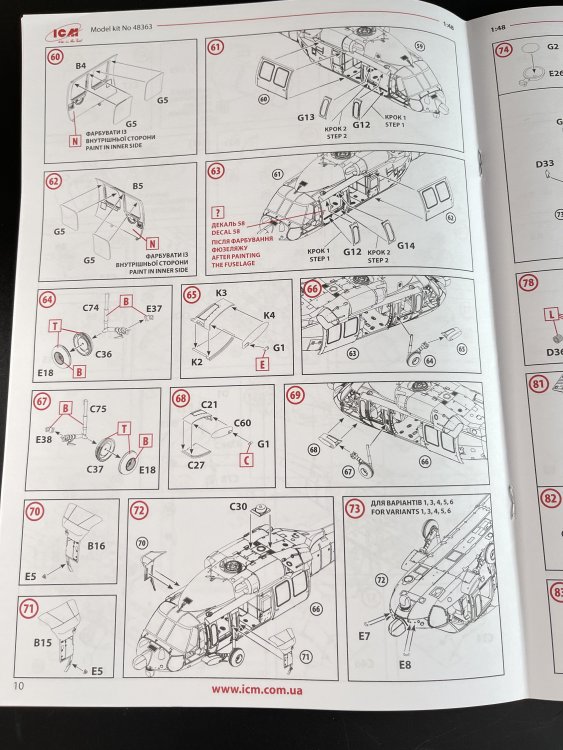
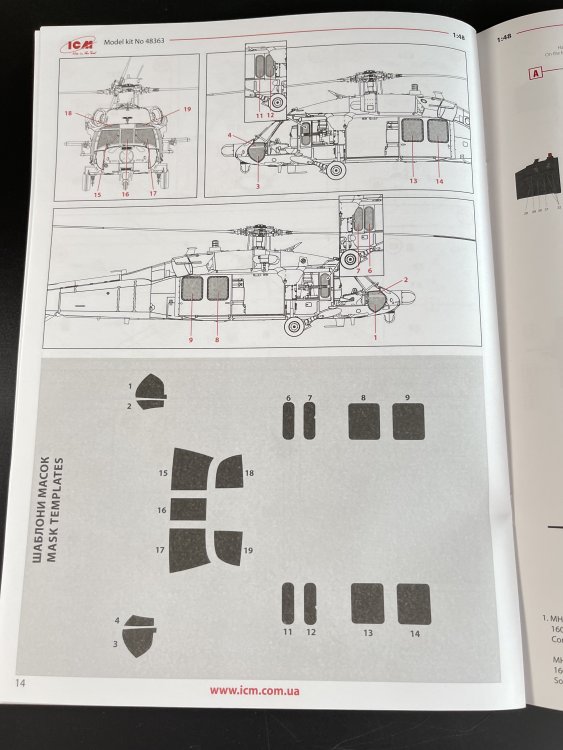
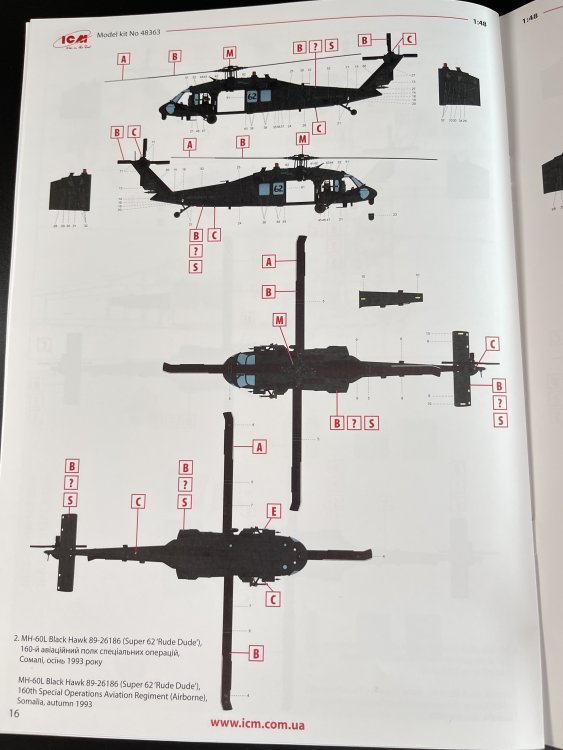
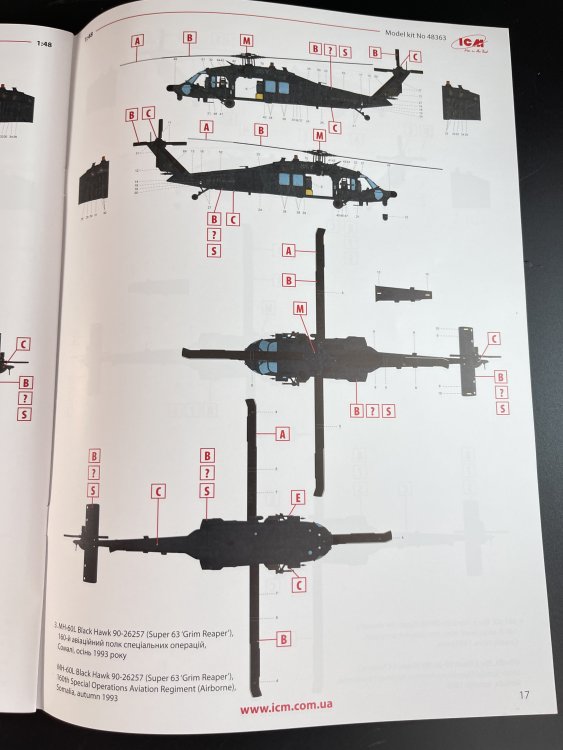
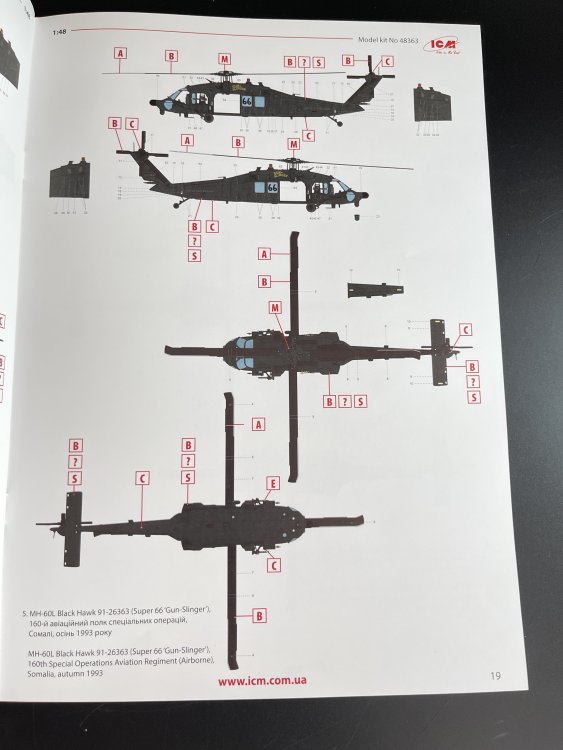
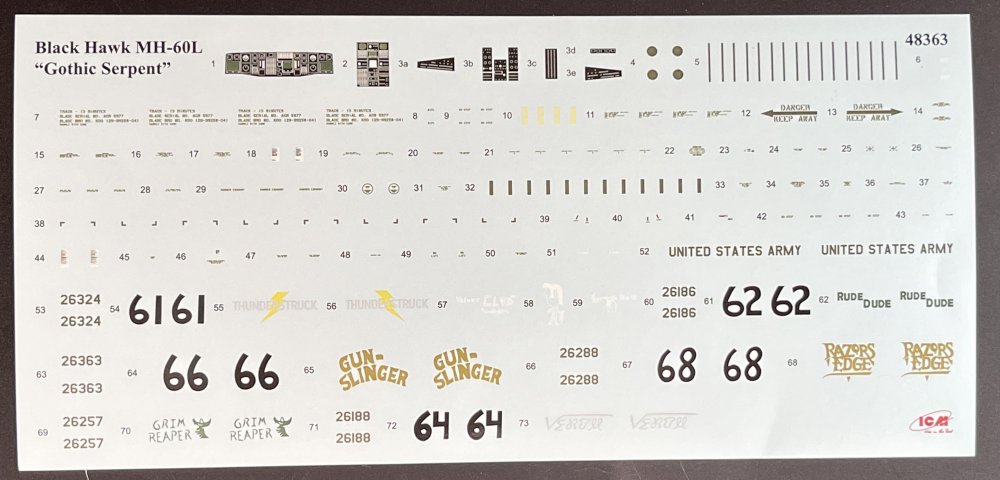
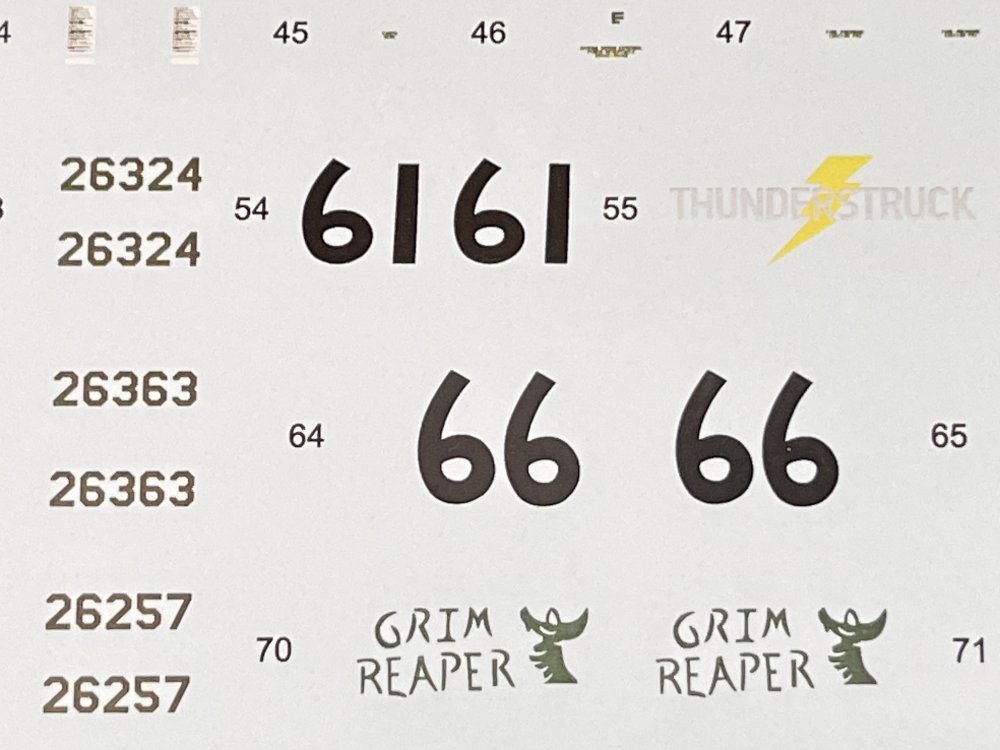
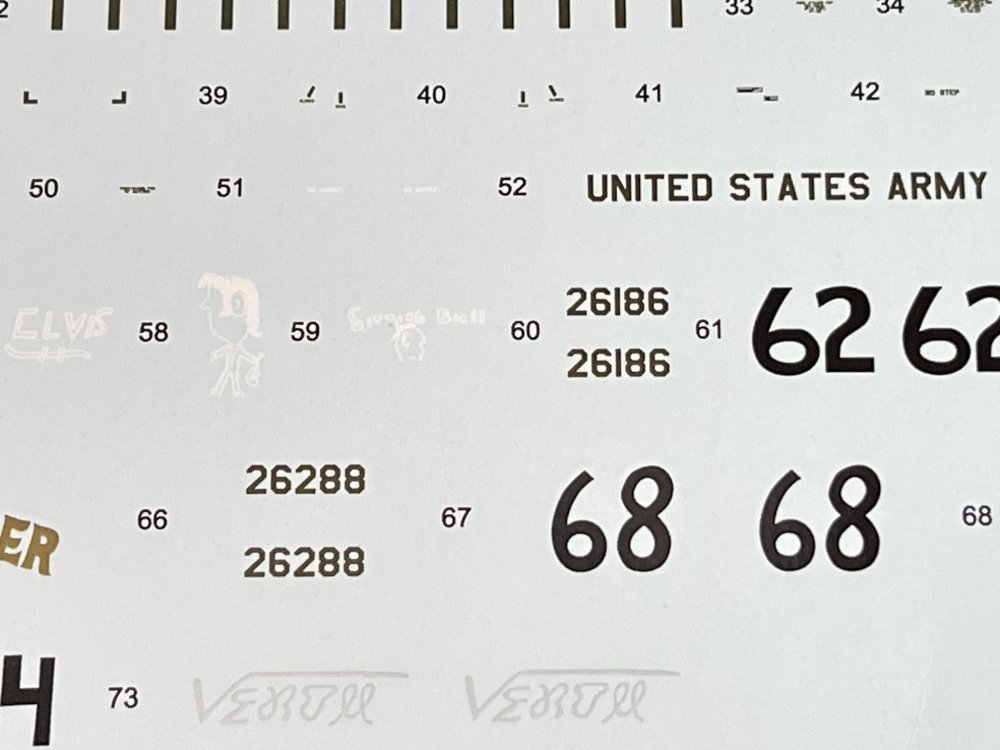
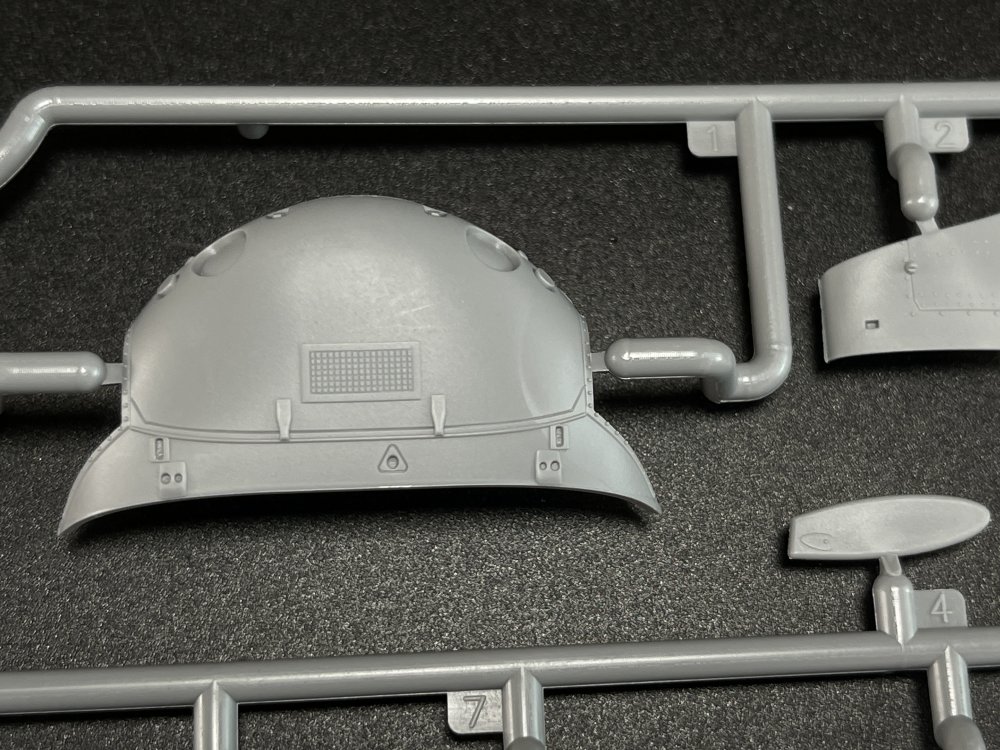
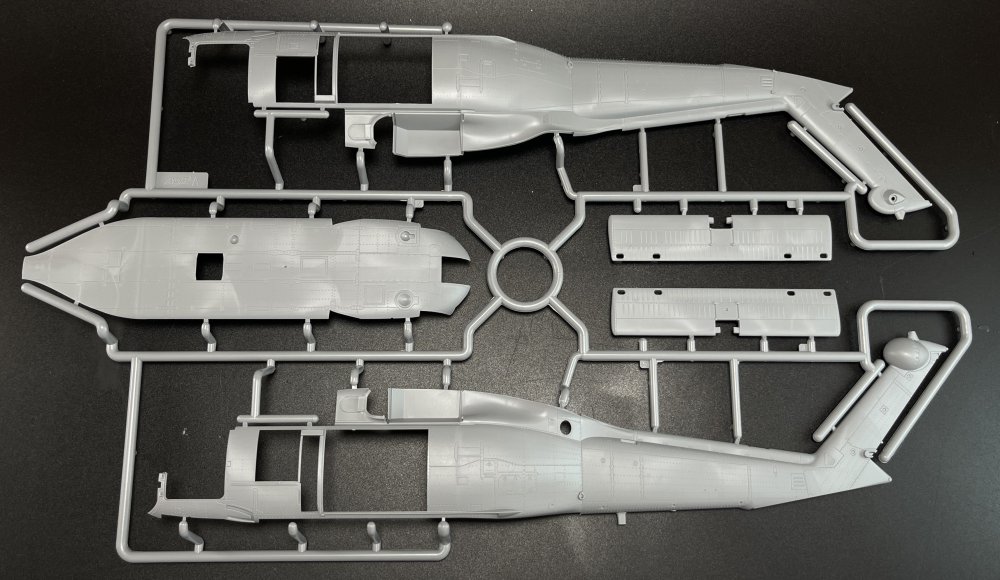
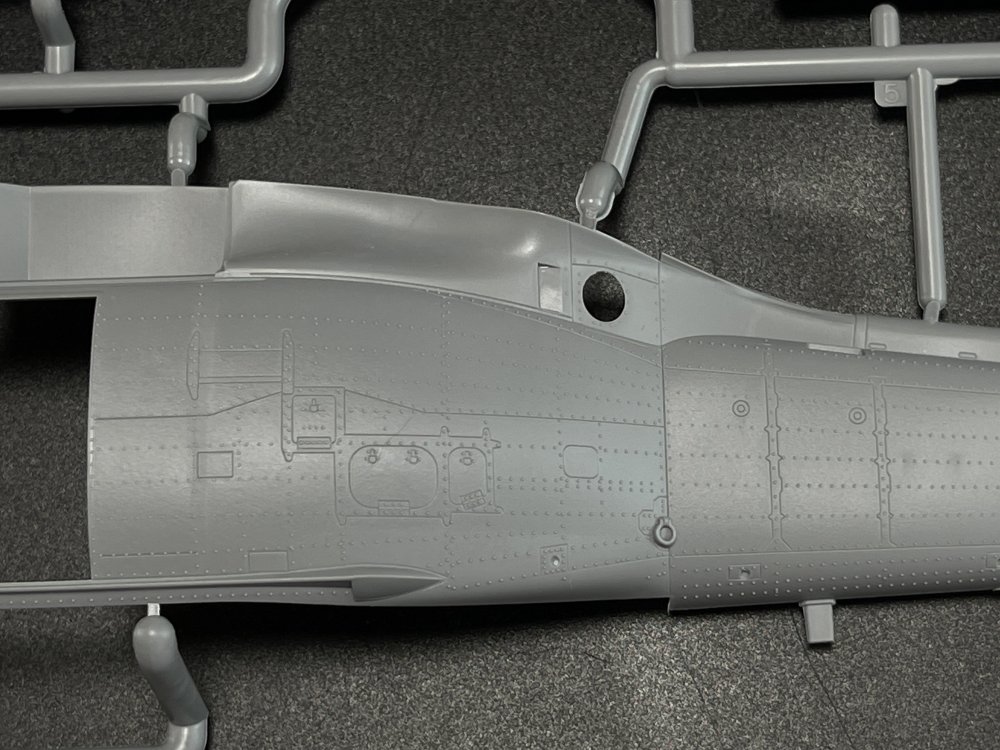
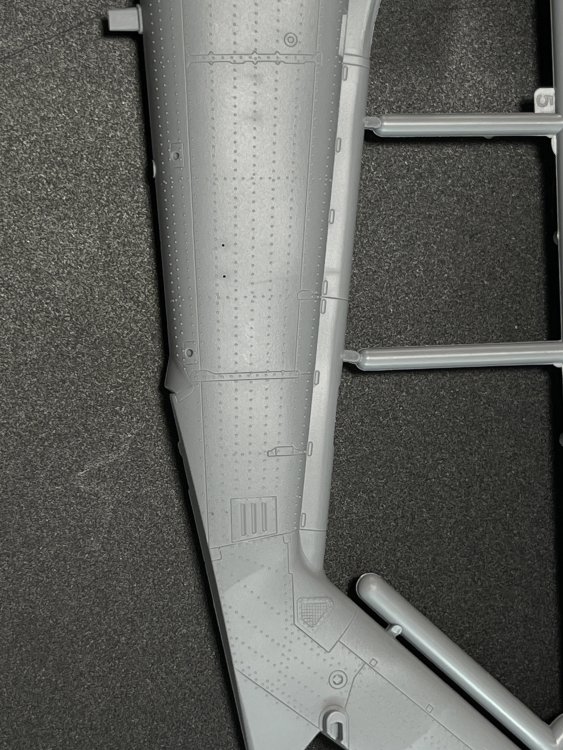
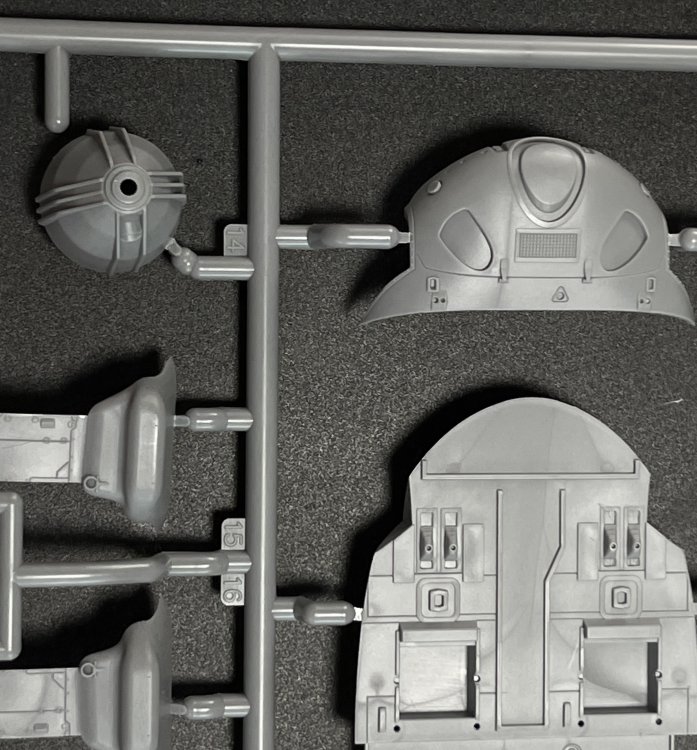
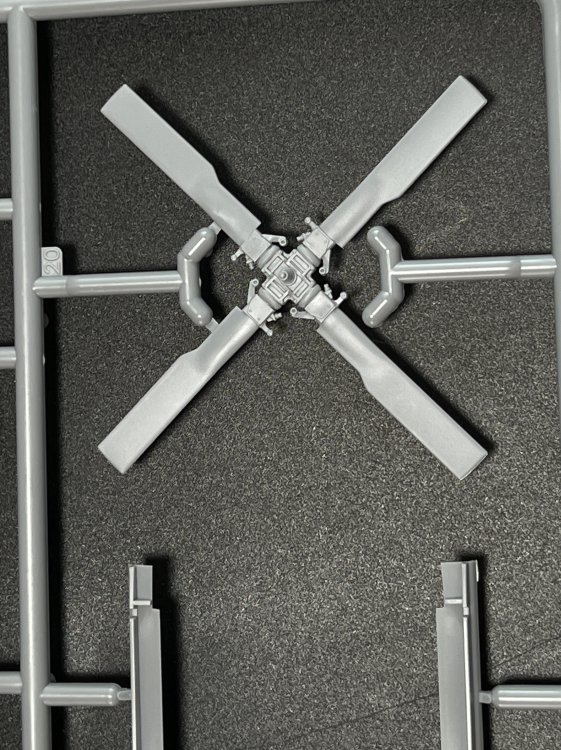
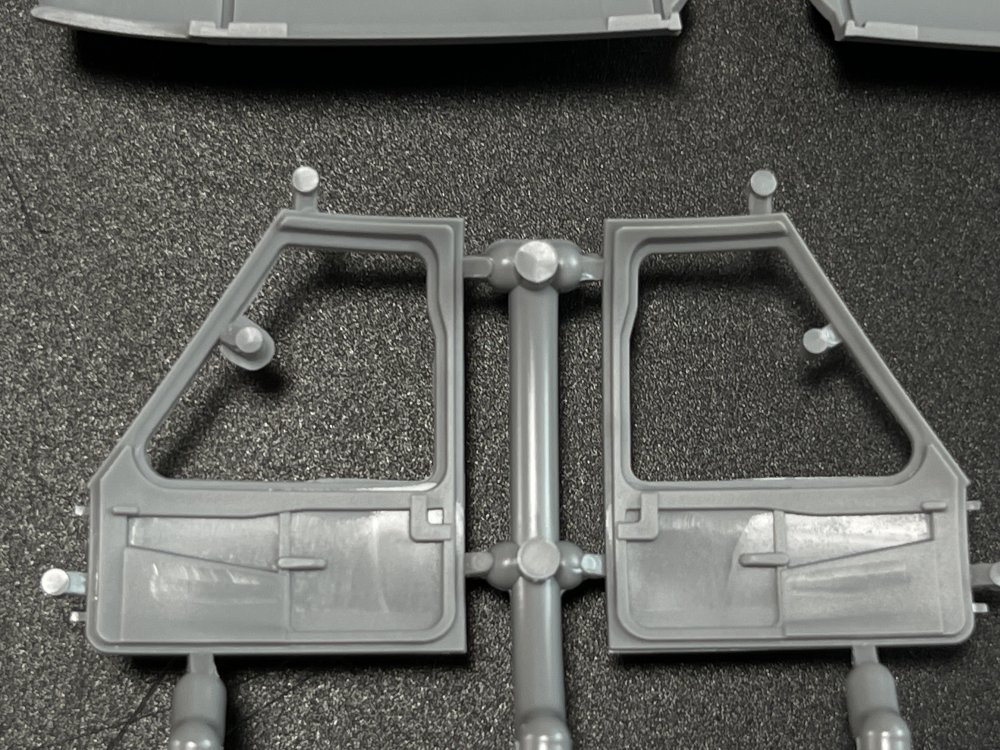
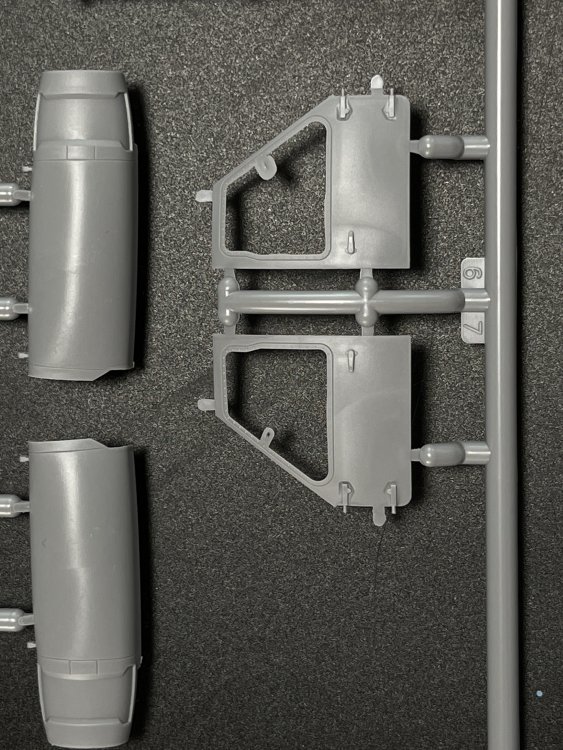
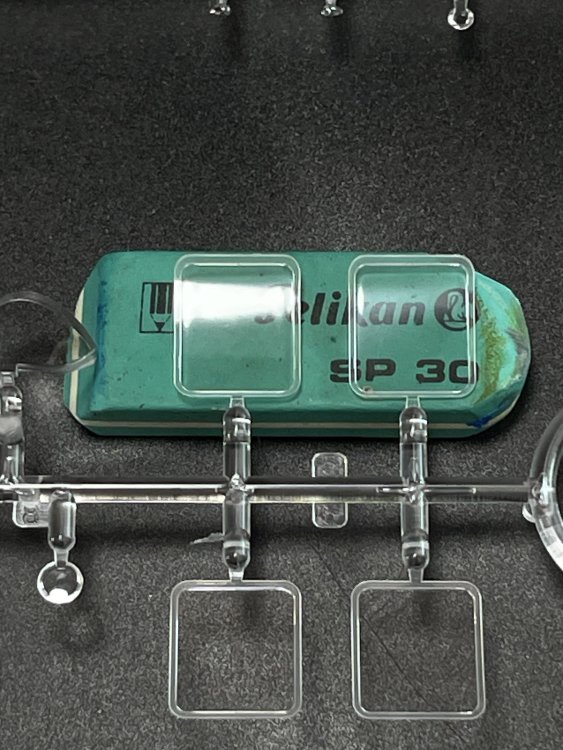
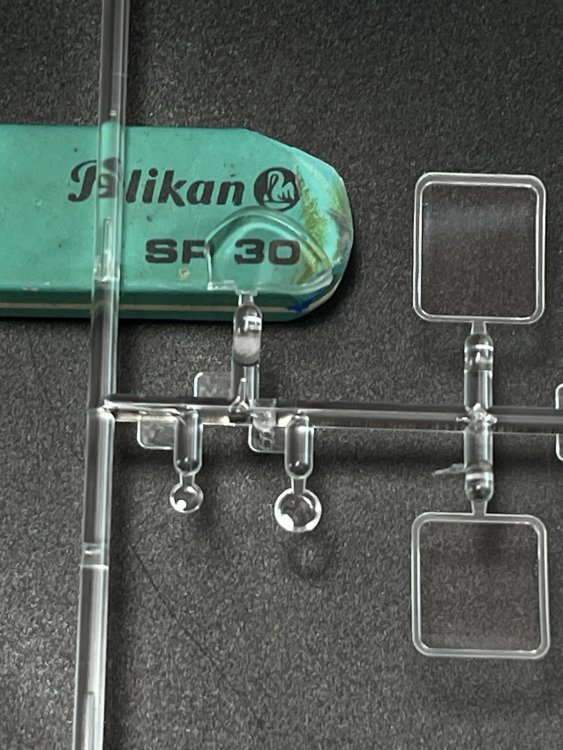
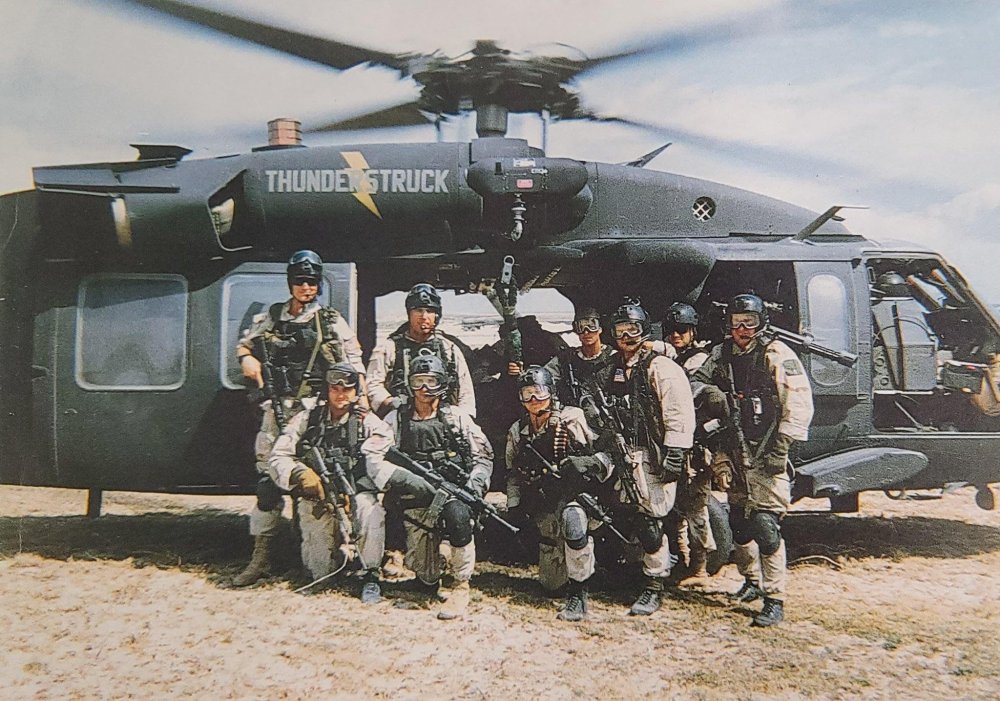
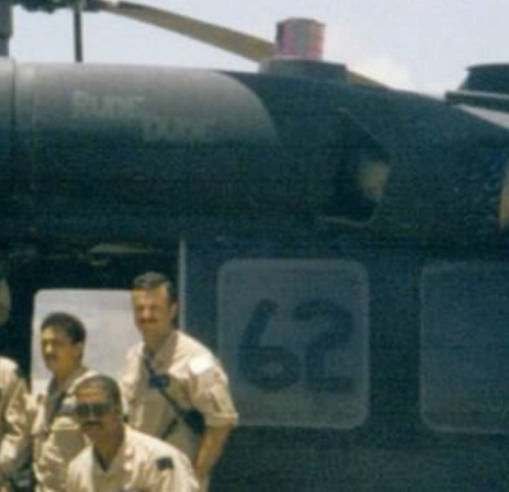
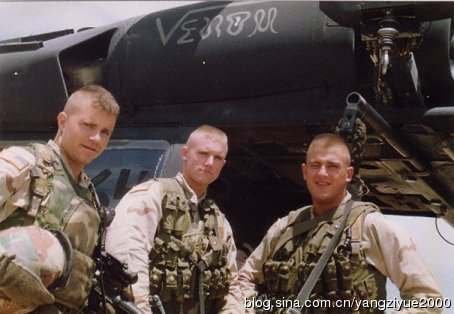
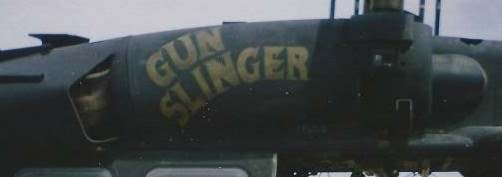
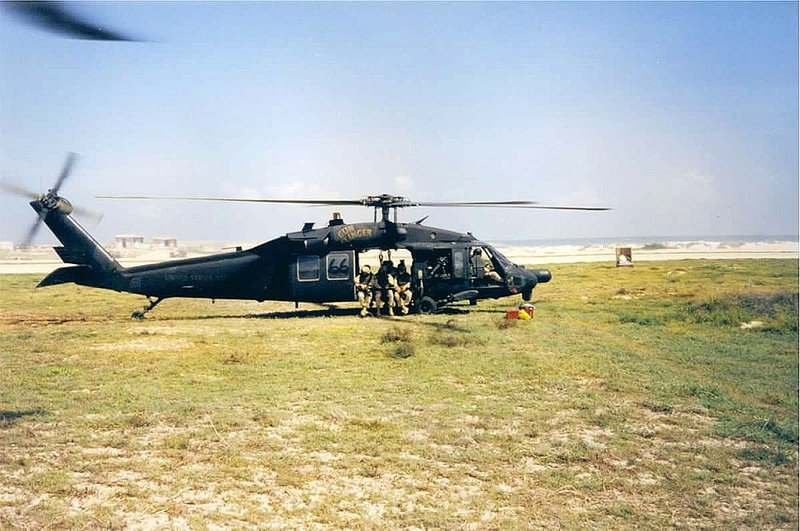
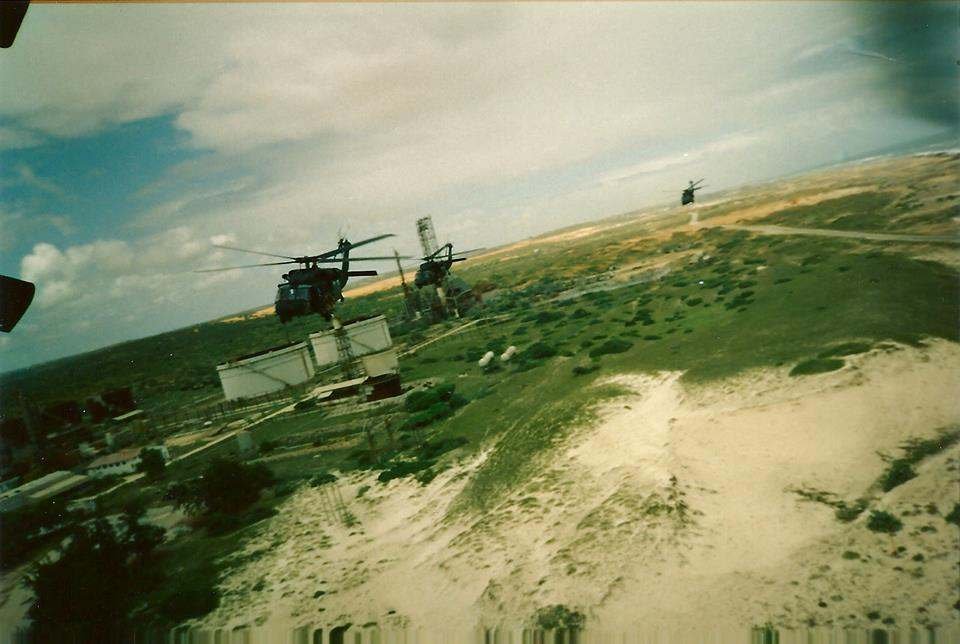
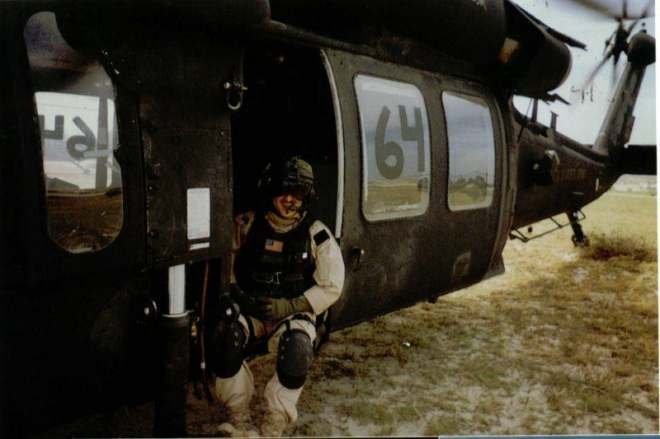
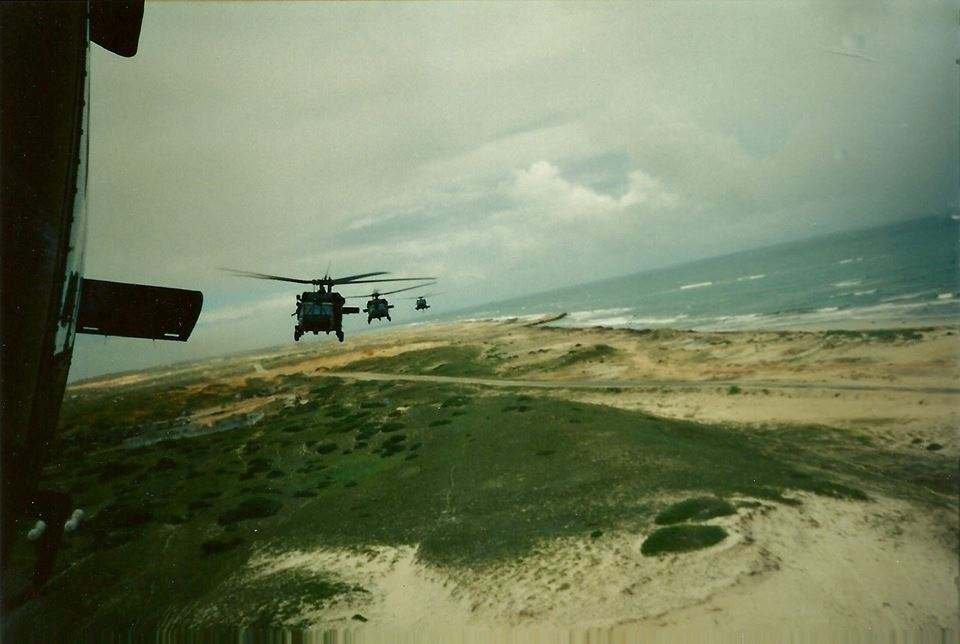
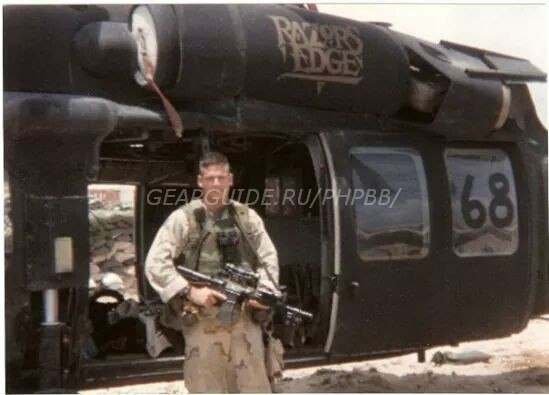
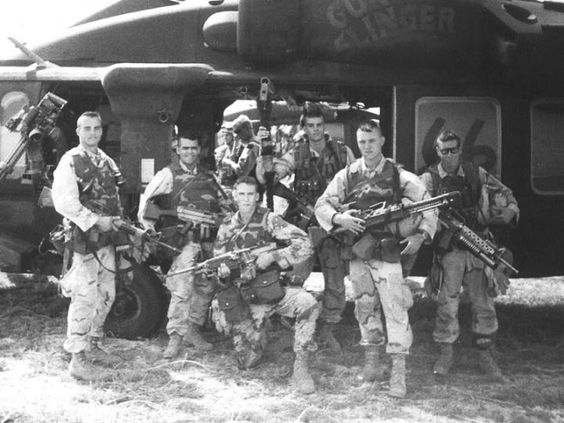
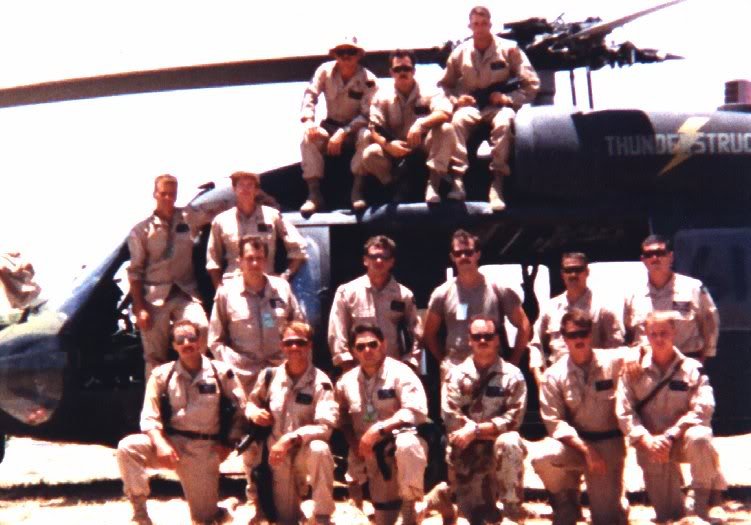
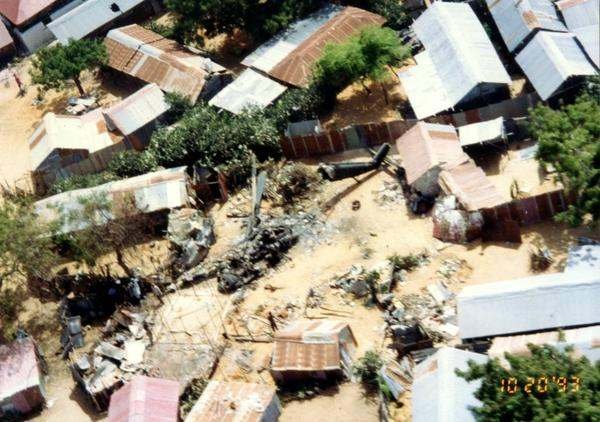
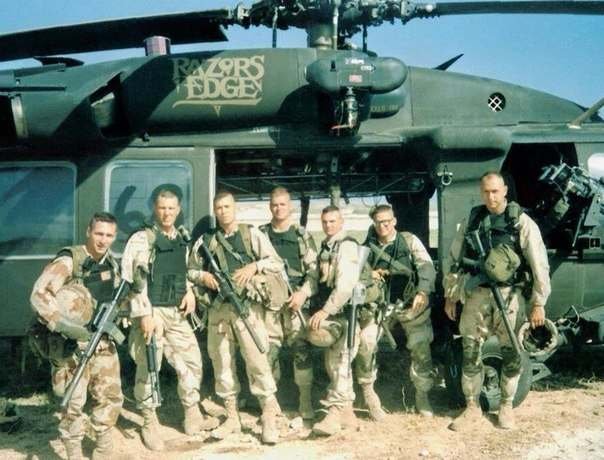
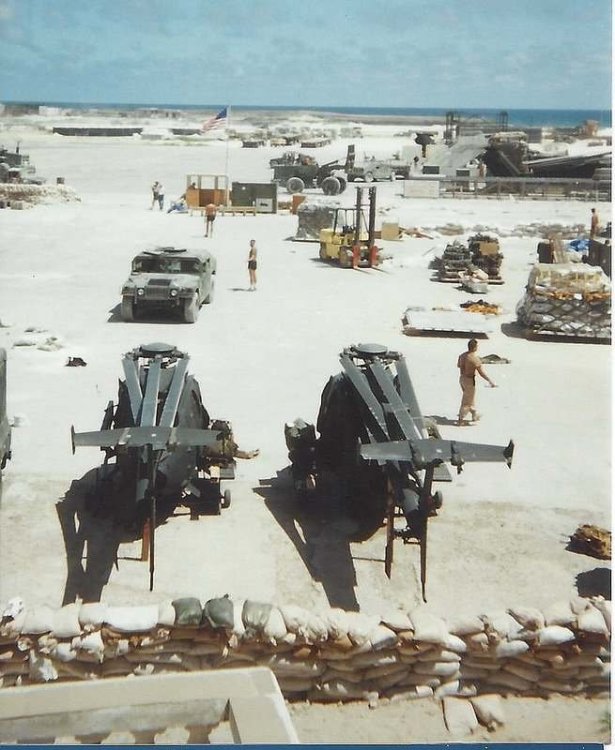
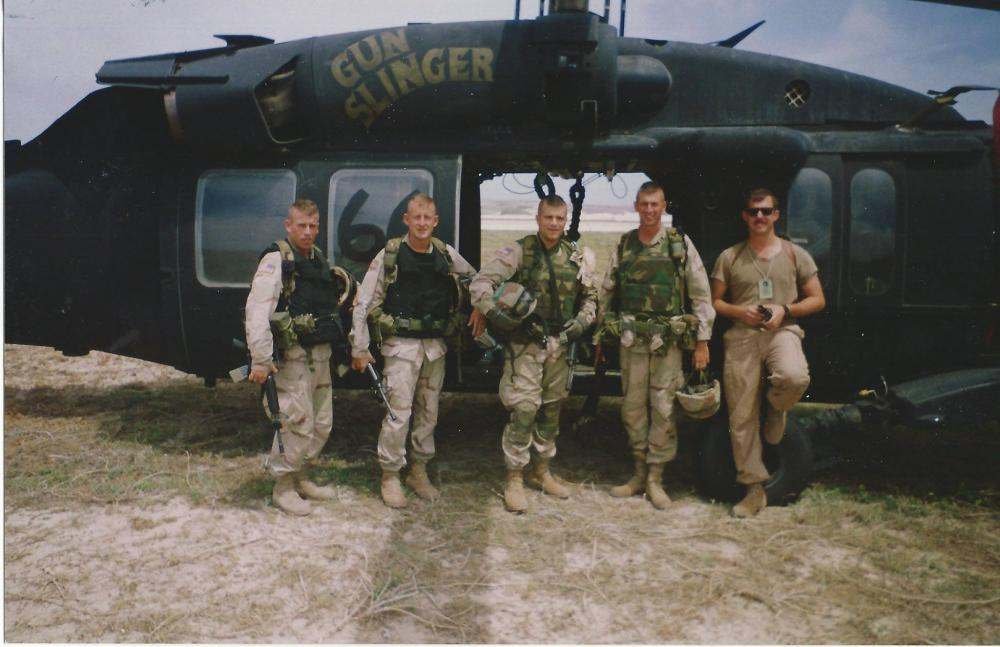
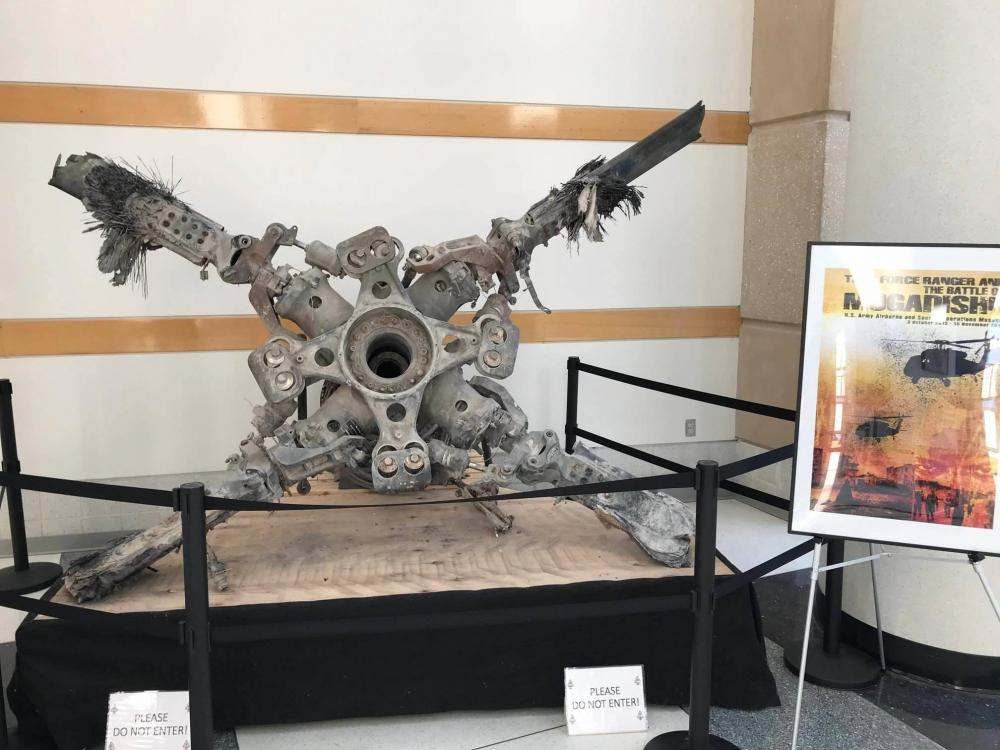
1:48 MH-60L Black Hawk ICM Catalogue n.º No. 48363 Available around 50€ at Art Scale. The ICM 1:48 MH-60L Black Hawk (No. 48360) and the ICM 1:48 Black Hawk Down, Operation Gothic Serpent are two model kits representing the iconic Sikorsky MH-60L Black Hawk helicopter used by U.S. Special Forces. Today we will be looking ICM 1:48 Black Hawk Down, Operation Gothic Serpent As happens before, this release is a is a rebox of the earlier MH-60L Black Hawk kit (No. 48360) with specific additions tailored to represent the helicopters involved in the 1993 Battle of Mogadishu. This release is invoking the Battle of Mogadishu (that has happen as US Special forces undertake the “Operation Gothic Serpent” that took place in 3th October of 1993. In the Battle of Mogadishu, US Special Forces lost two Black Hawks, One was hit at 16:20 and the other at 16:40. Specifically, Black Hawk Super 61 (Thunderstruck) and Super 64 (Venom) were shot down, and Super 62 (Rude dude) and Super 68 (Razors Edge) were also hit with RPGs, though they survived the initial impact. The violence of the Battle caused several casualties in both side with 18 KIA for in Ranger and Deltas forces and more than 80 injuries. This battle was represented by Hollywood, as in 2001, its was release the movie *Black Hawk Down*. So this release is designed to capture the MH-60L Black Hawk used by the 160th Special Operations Aviation Regiment (SOAR), also known as the "Night Stalkers," during Operation Gothic Serpent in Somalia. For that, ICM includes new parts and decals to reflect the specific configurations and markings of that historic mission. This release gives the modeler two new sprues: K and L. Also will give you a lots of spares parts comparing with the original release where all parts were used in construction, on this box, a lot of parts are not to be use, starting for all the chairs on the compartment and other specific details or the absence of that detail. So in the end you get approximately 302 parts that is based on the base MH-60L kit, with additional parts for the Operation Gothic Serpent configuration, like FLIR, nose radar and internal fuel tank. The kit is designed to represent the MH-60L Black Hawk as used in the 1993 Battle of Mogadishu, a pivotal event where the helicopter’s versatility and resilience were showcased. The decals and additional parts aim to replicate the specific helicopters involved, including their weathered appearance and mission-specific modifications. No much to say more about the gray plastic recessed and raised detail, the kit features accurate panel lines, rivet details, and surface textures that replicate the MH-60L’s rugged design. The rotor blades are well-molded and the landing gear is qute detail directly from the box, which is quite good. As for the interior, straight from the box, this model kit, as actual usual in ICM model kits are very good with instrument panels, control sticks, aand others small details. As for the instruments, also decals are given. The only negative parts is no seatbelts. AS for the clear parts, these are just perfect as all clear parts I have seen from Miniart. You also can be see here, in our review of the first ICM release of the MH-60L. https://forum.largescalemodeller.com/topic/20566-148-icm-mh-60l-black-hawk/ And also this one: https://forum.largescalemodeller.com/topic/20592-148-icm-uh-60a-black-hawk-defense-intelligence-of-ukraine/ So lets check the two new sprues. So the sprue K brings a new lower nose cone for marking option B (without nose radar, but with the FLIR turret), that meaning thati s for the Super 62 “Rude Dude”. Here on this sprue also have a modified left suspension for the landing gear, narrow parts for the early tail, and finally a different antenna for the roof behind the "disco light". So if you want a black Hawk from Mogadishu 1993, you neeed to pick up this release not only for the decals but also for the small and essencial details. As for the sprue L and checking the instructions, it´s some canisters and bags and also an additional internal fuel tank placed in the compartiment (which is only intended for Super 63 “Grim Reaper”). The decal sheet on this one is big one, with markings only for MH-60L Black Hawks involved in the 1993 Battle of Mogadishu featuring accurate unit insignias and numbers relevant to the operation. So, this first one is MH-60L Black Hawk 91-26324 (Super 61 “Thunderstruck”) – 160th Special Operations Aviation Regiment (Airborne), Somalia, autumn 1993. The second one is MH-60L Black Hawk 89-26186 (Super 62 “Rude Dude”) – 160th Special Operations Aviation Regiment (Airborne), Somalia, autumn 1993. The third is the MH-60L Black Hawk 90-26257 (Super 63 “Grim Reaper”) – 160th Special Operations Aviation Regiment (Airborne), Somalia, autumn 1993. The fourth is the MH-60L Black Hawk 89-26188 (Super 64 “Venom”) – 160th Special Operations Aviation Regiment (Airborne), Somalia, autumn 1993. The fifth option is the MH-60L Black Hawk 91-26363 (Super 66 “Gun-Slinger”) – 160th Special Operations Aviation Regiment (Airborne), Somalia, autumn 1993. The last but not the least, the MH-60L Black Hawk 90-26288 (Super 68 “Razor Edge”) – 160th Special Operations Aviation Regiment (Airborne), Somalia, autumn 1993. The manual isntructions is a booklet of 20 pages with a small history about the Gothic Serpent operation on Mogadishu and step by step constructions with good locations parts and color indications. QR code is always a nice touch. CONCLUSION: Well, making this review made me watch the “Black Hawk Down” movie again. And also a great documentary on Netflix about Mogadishu battle that I strongly recommend to all even if this model is not for you. The model itself is fantastic in all terms (just seatbelts in PE, please ICM) to be build straight from the box. If you are a bit of suckers fro aftermarkets they are showing up several new goodies to make this beauty in a total showstopper. I confess I really love this one, and I going to dive to it asap to make a homage to the fallen in Mogadishu, Somália, in 1993. Thanks so much ICM for the piece of History. TOTALLY RECOMMEND!!!!!


-
- 2
-
-

-
- icm
- gothic serpent
- (and 1 more)
-
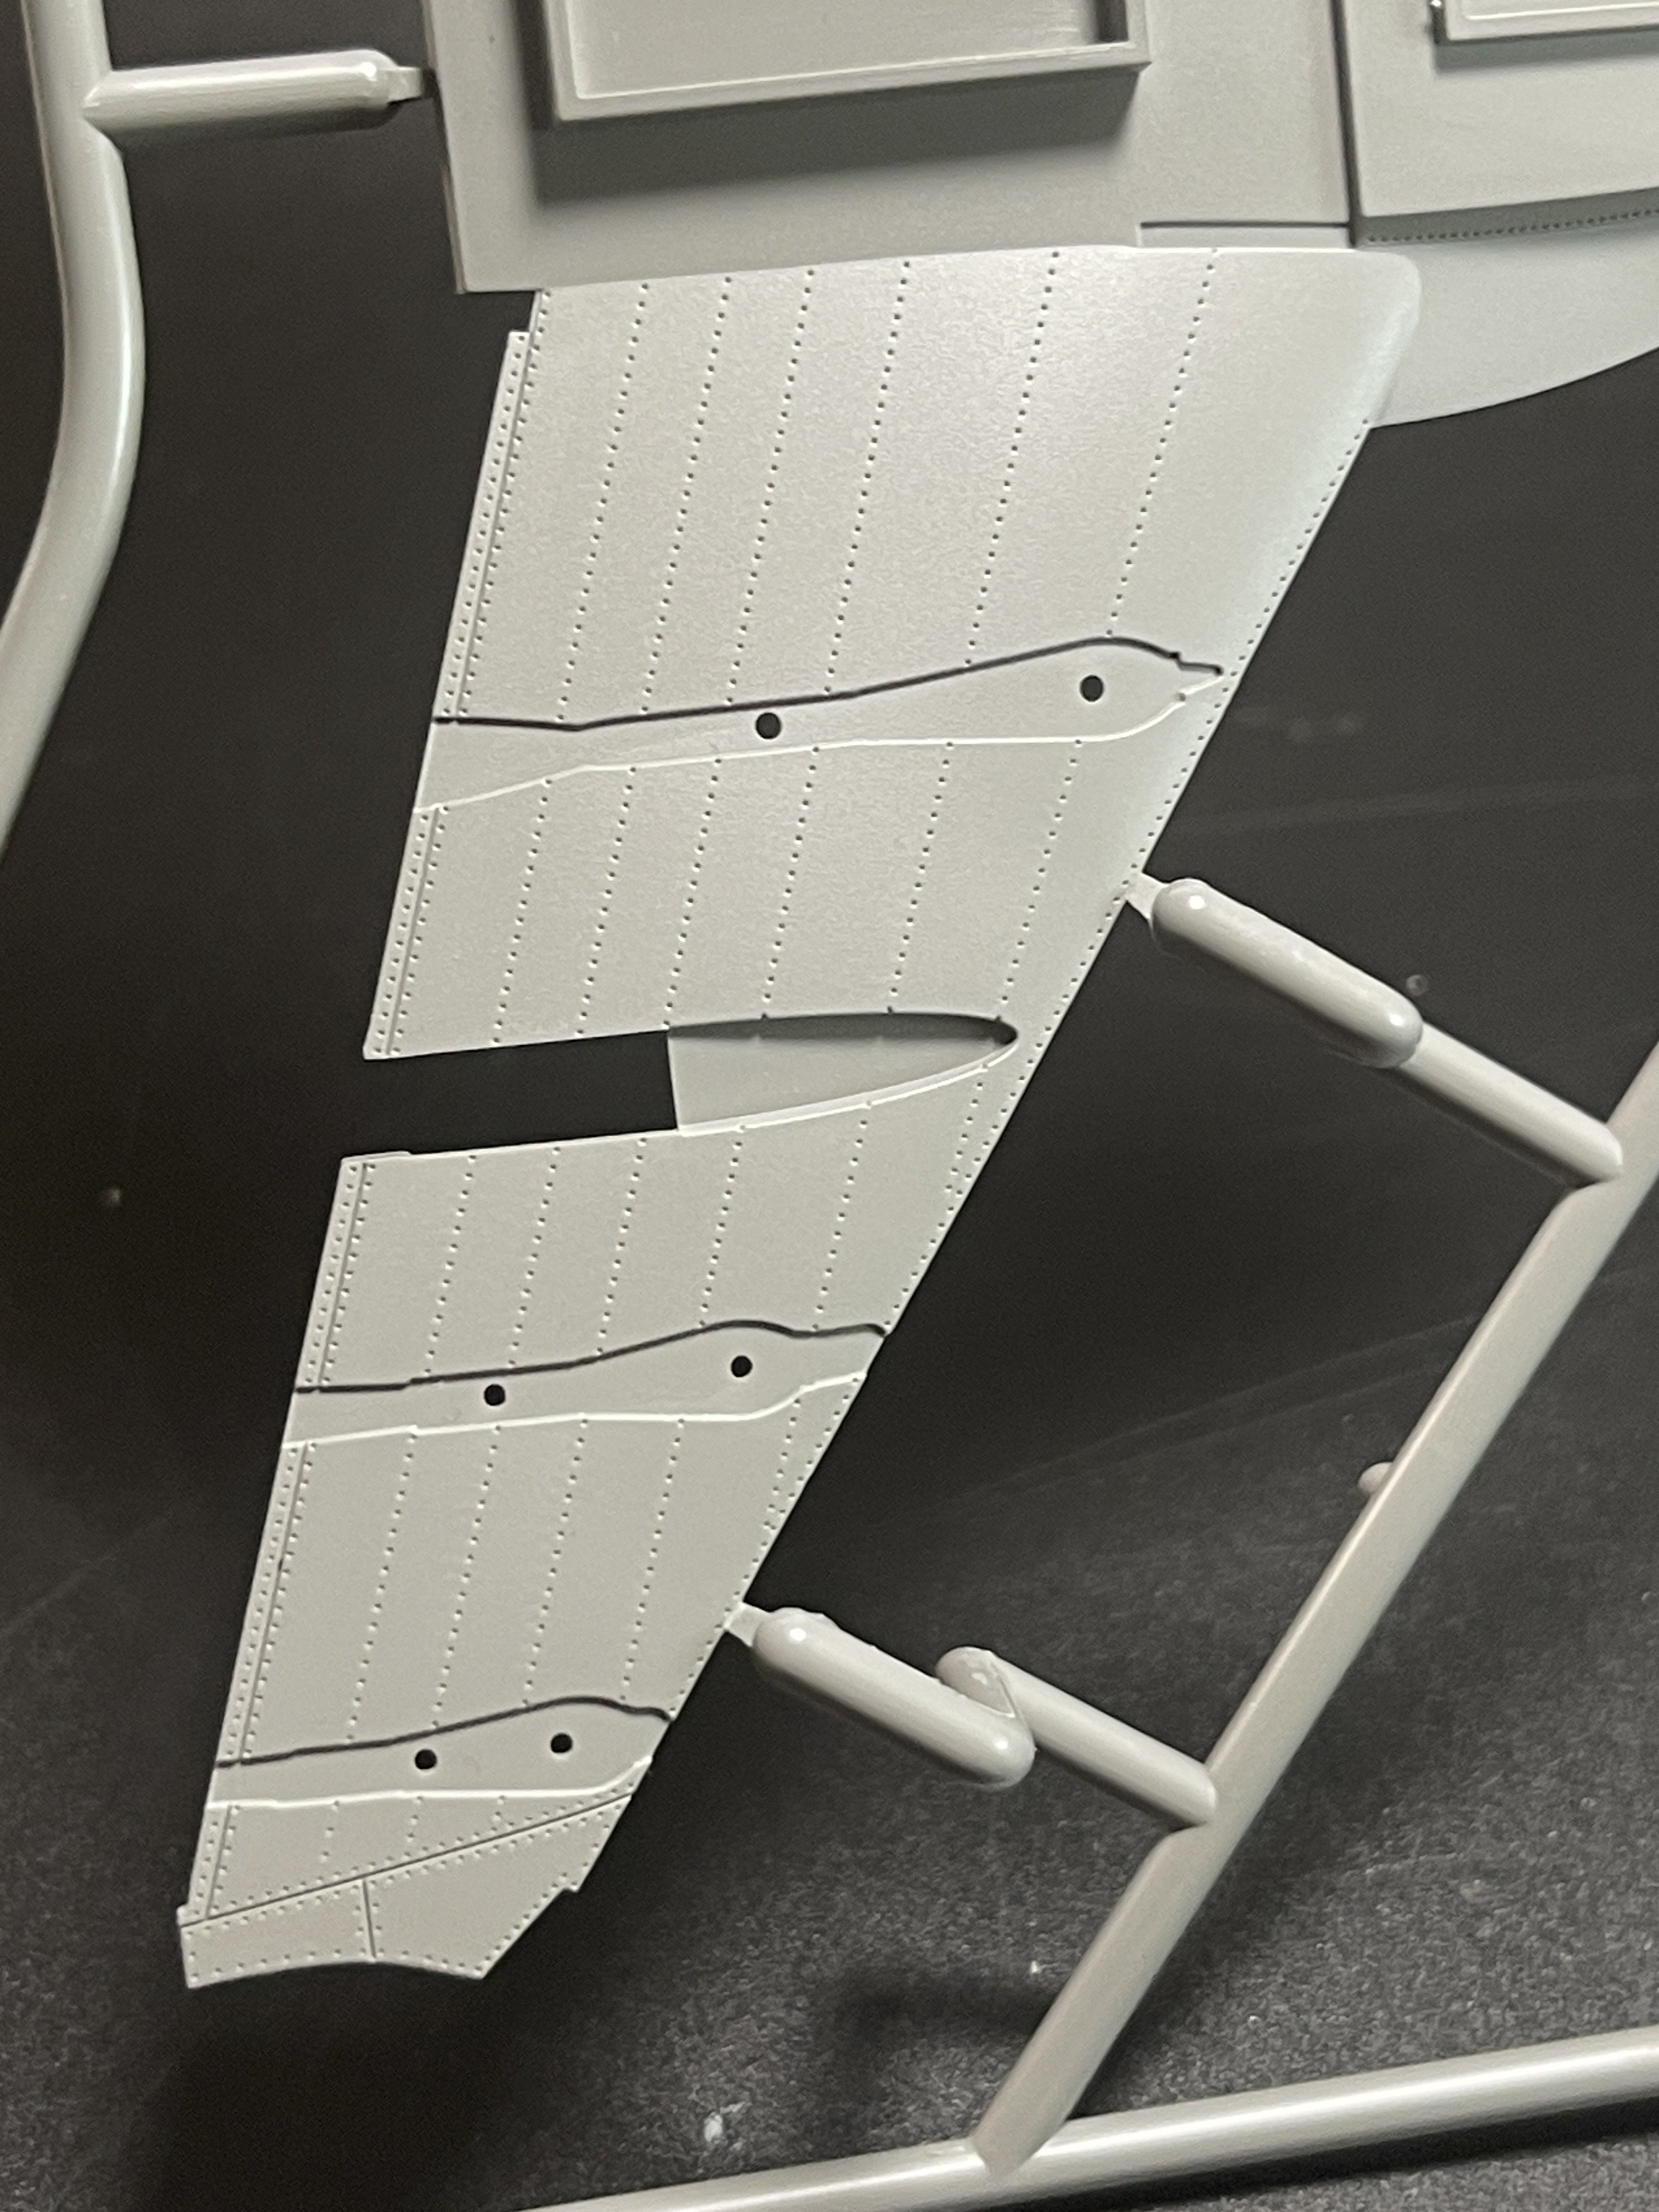
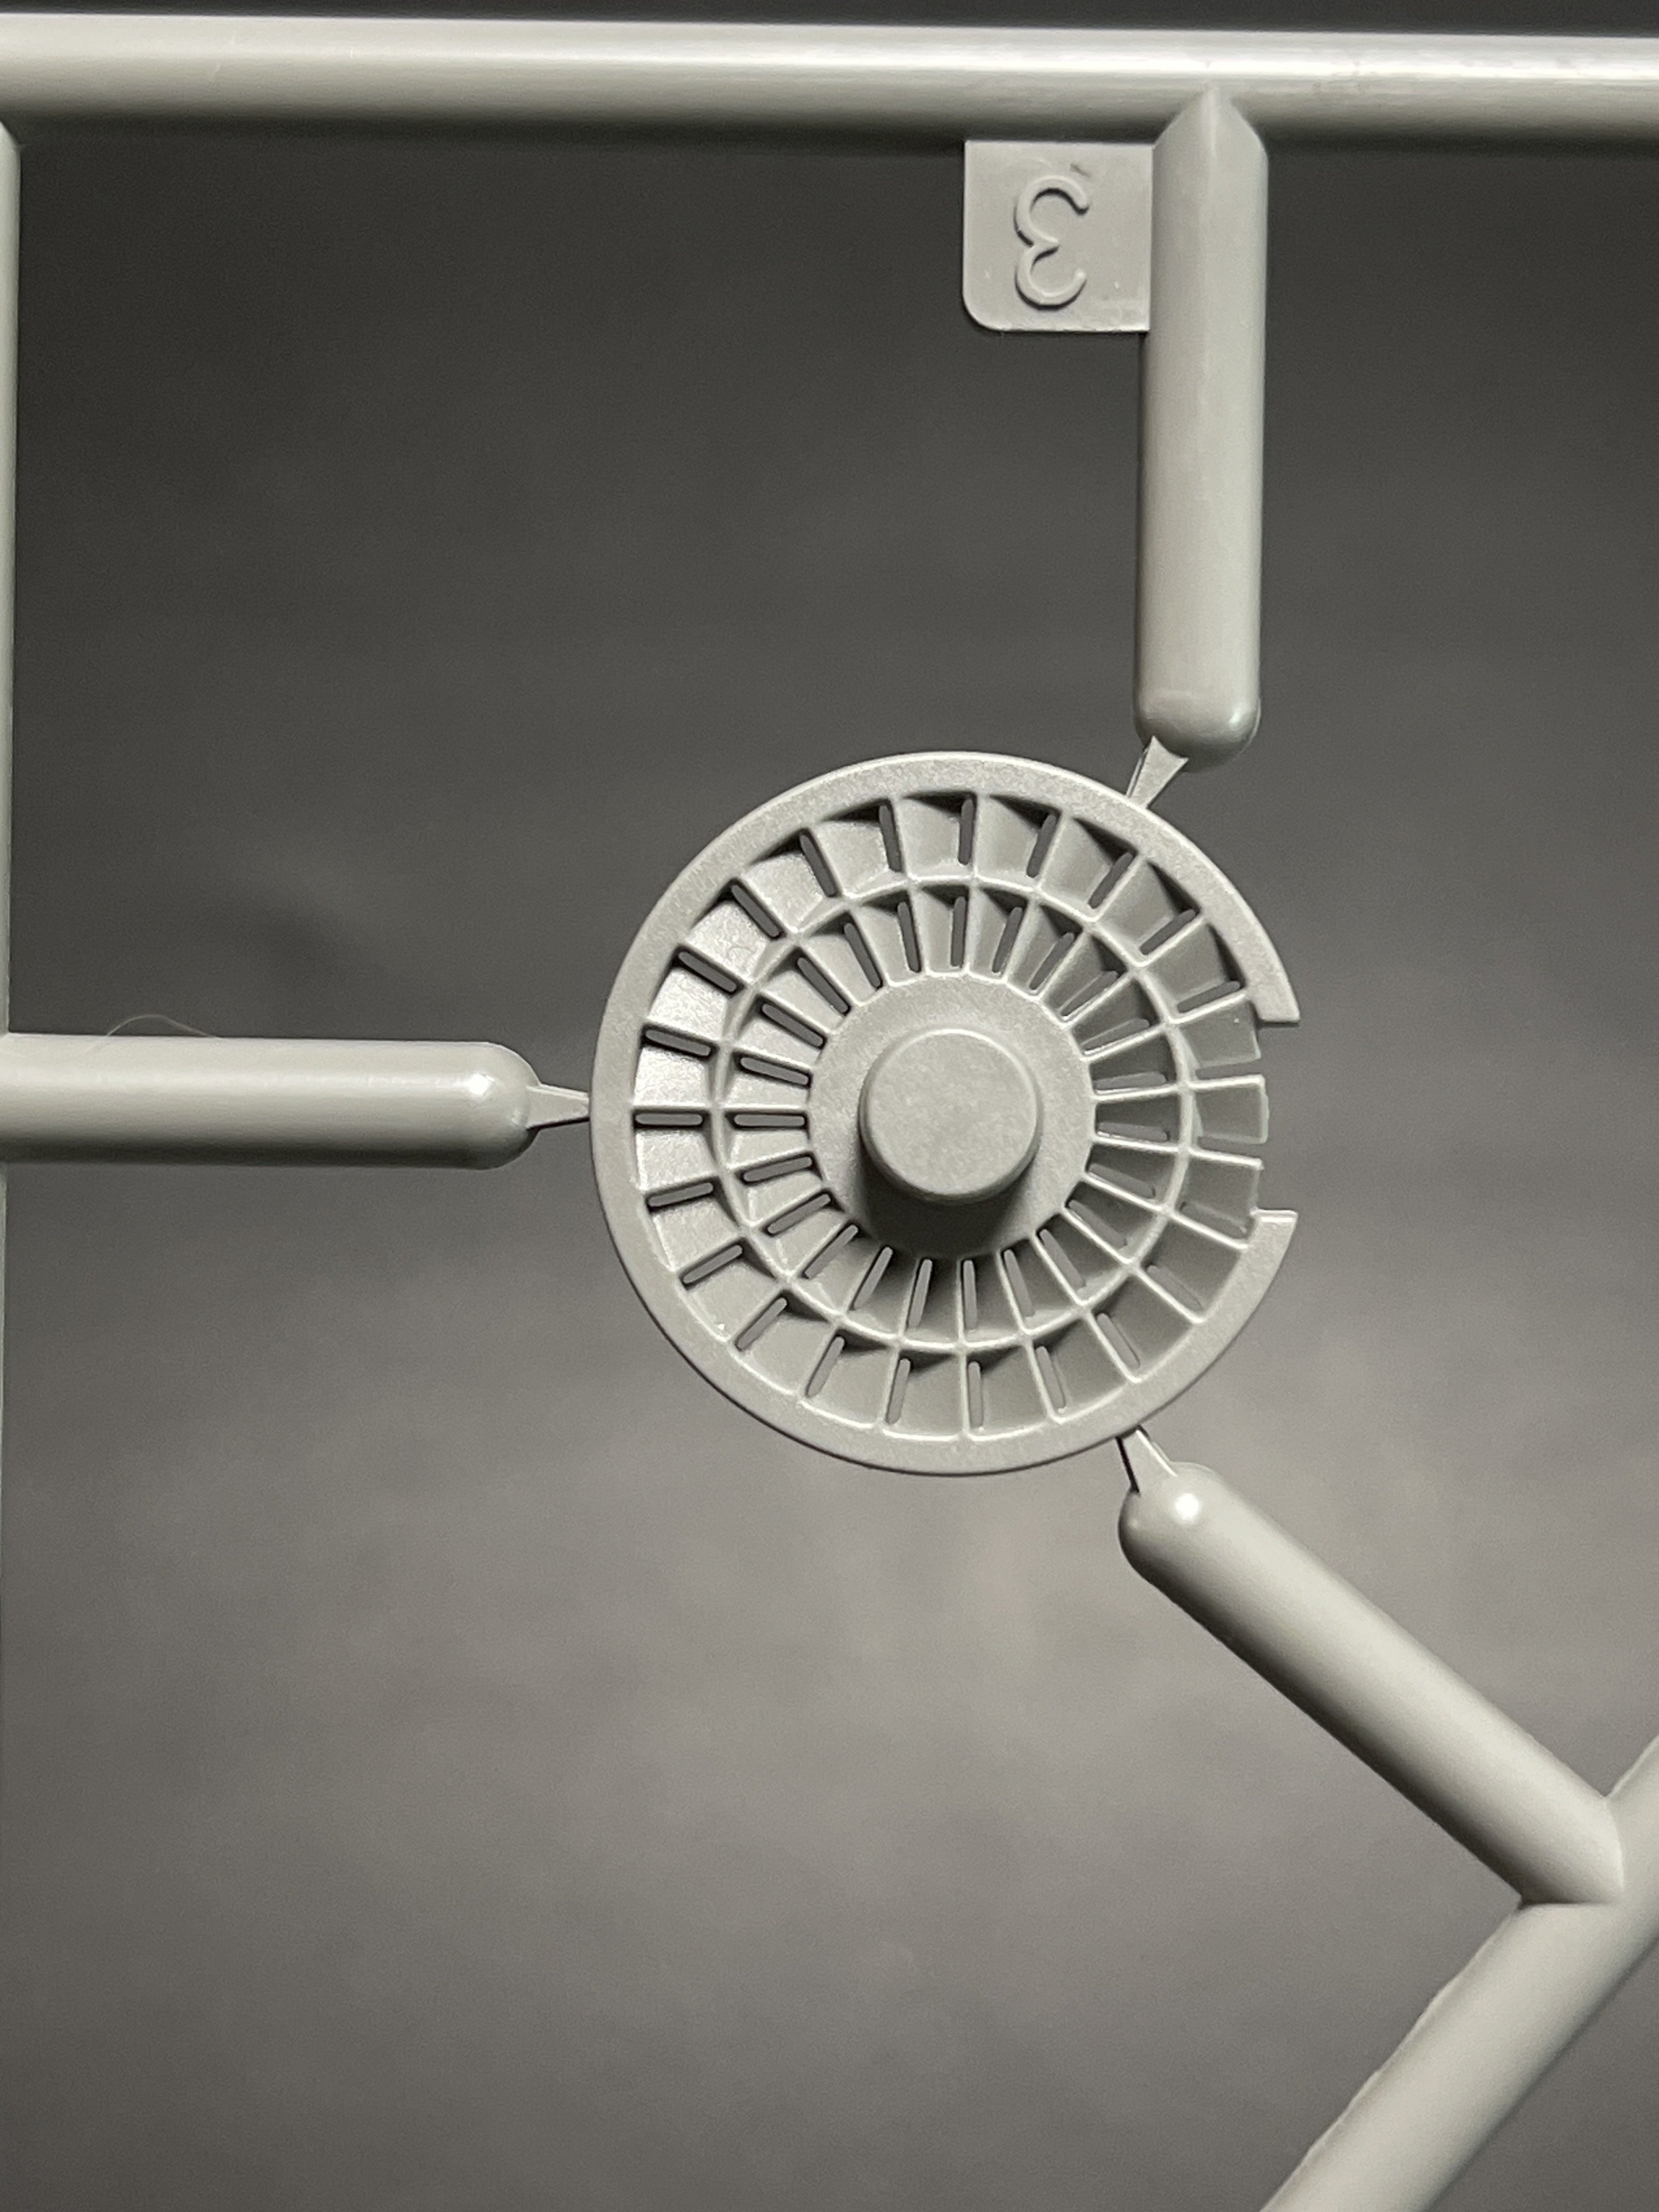
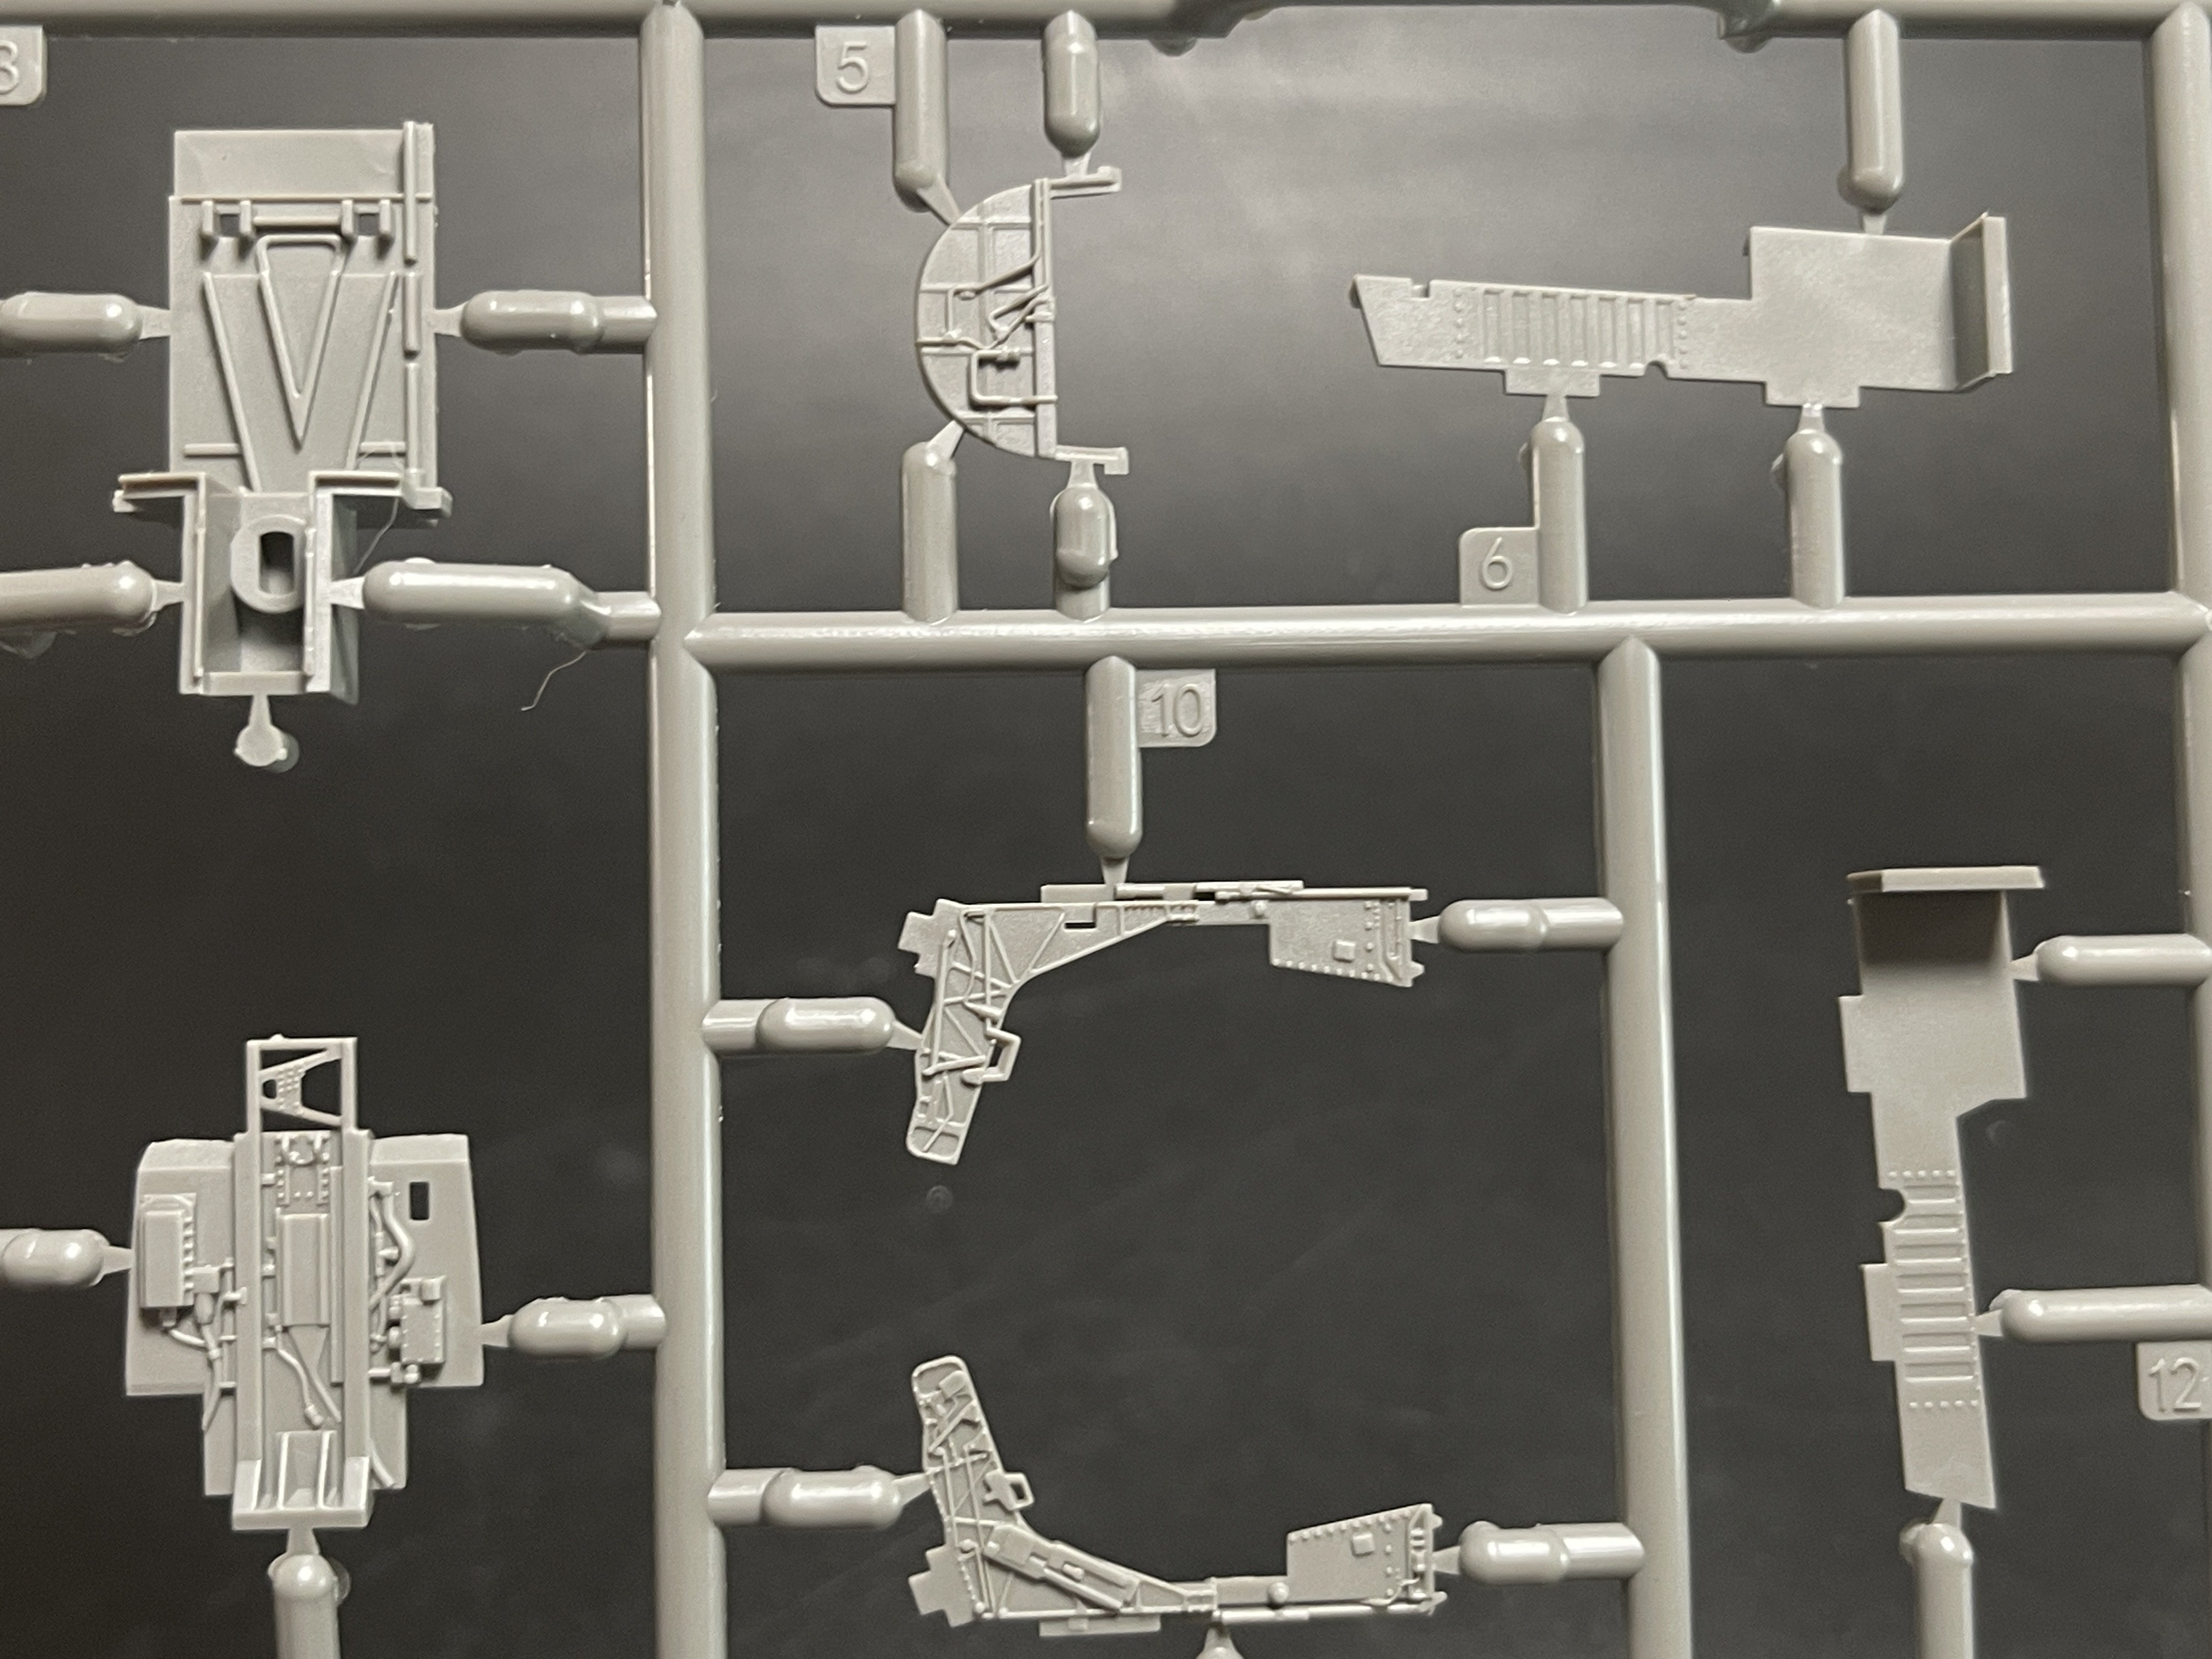
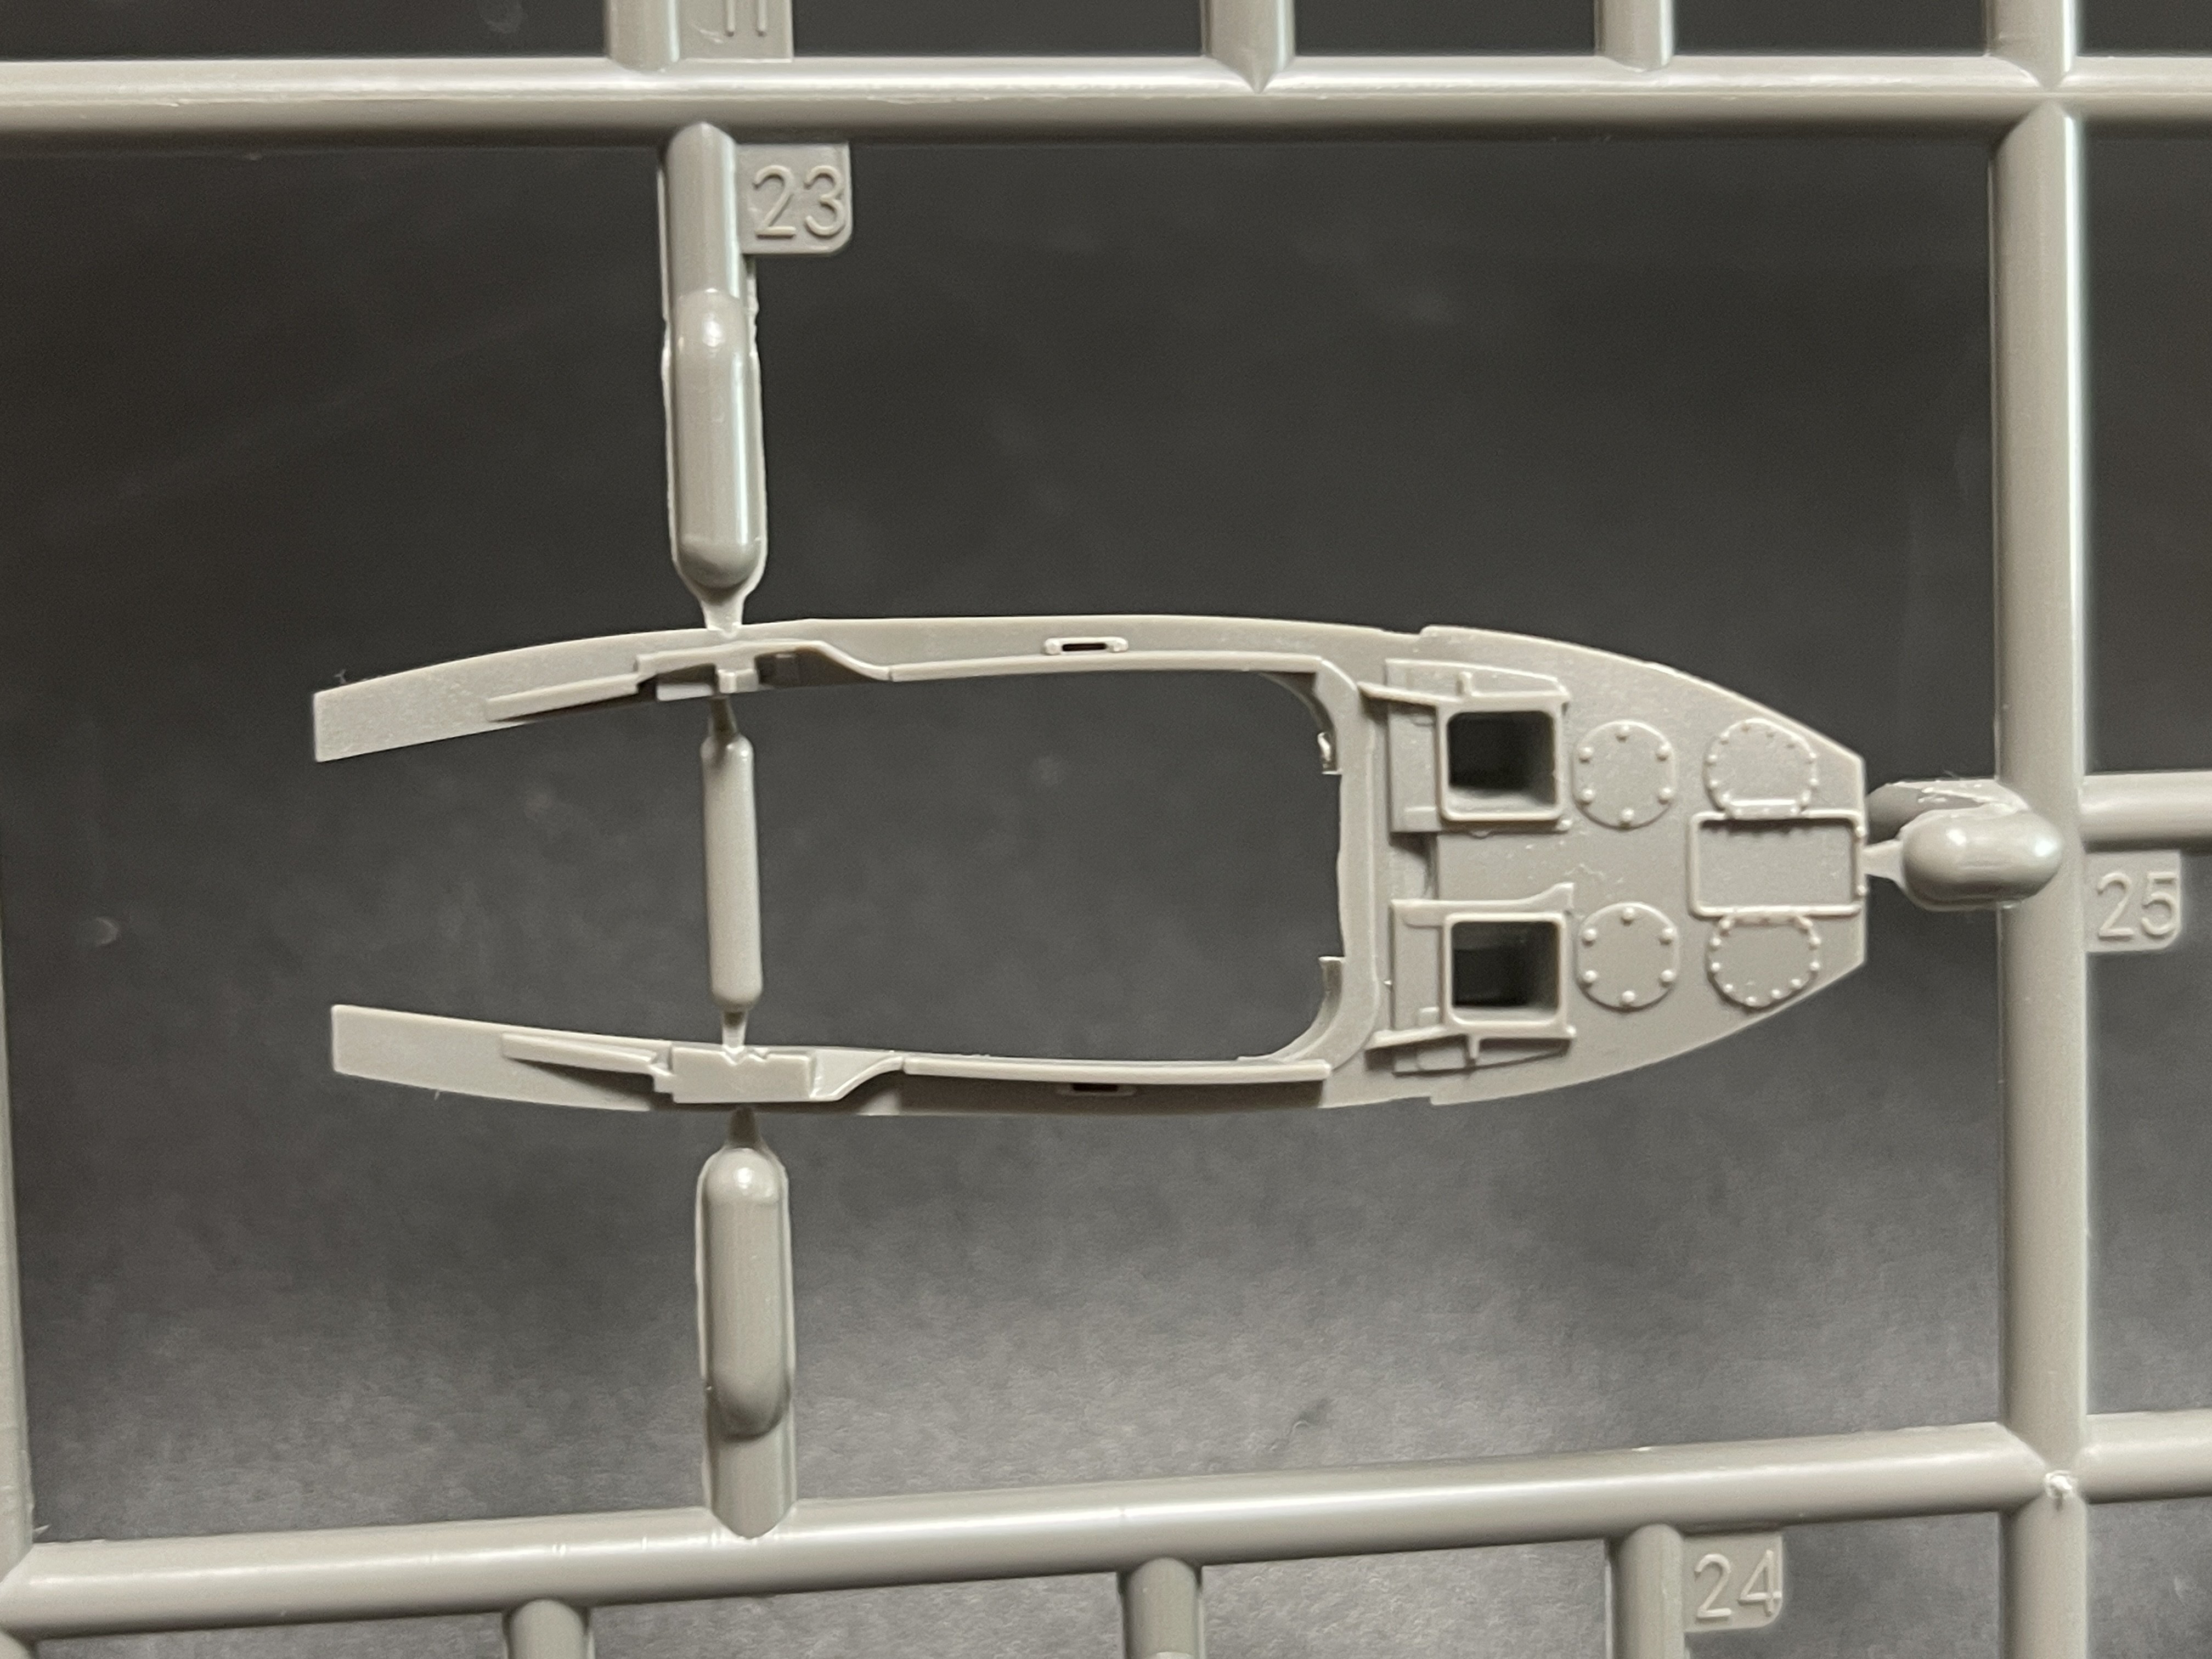
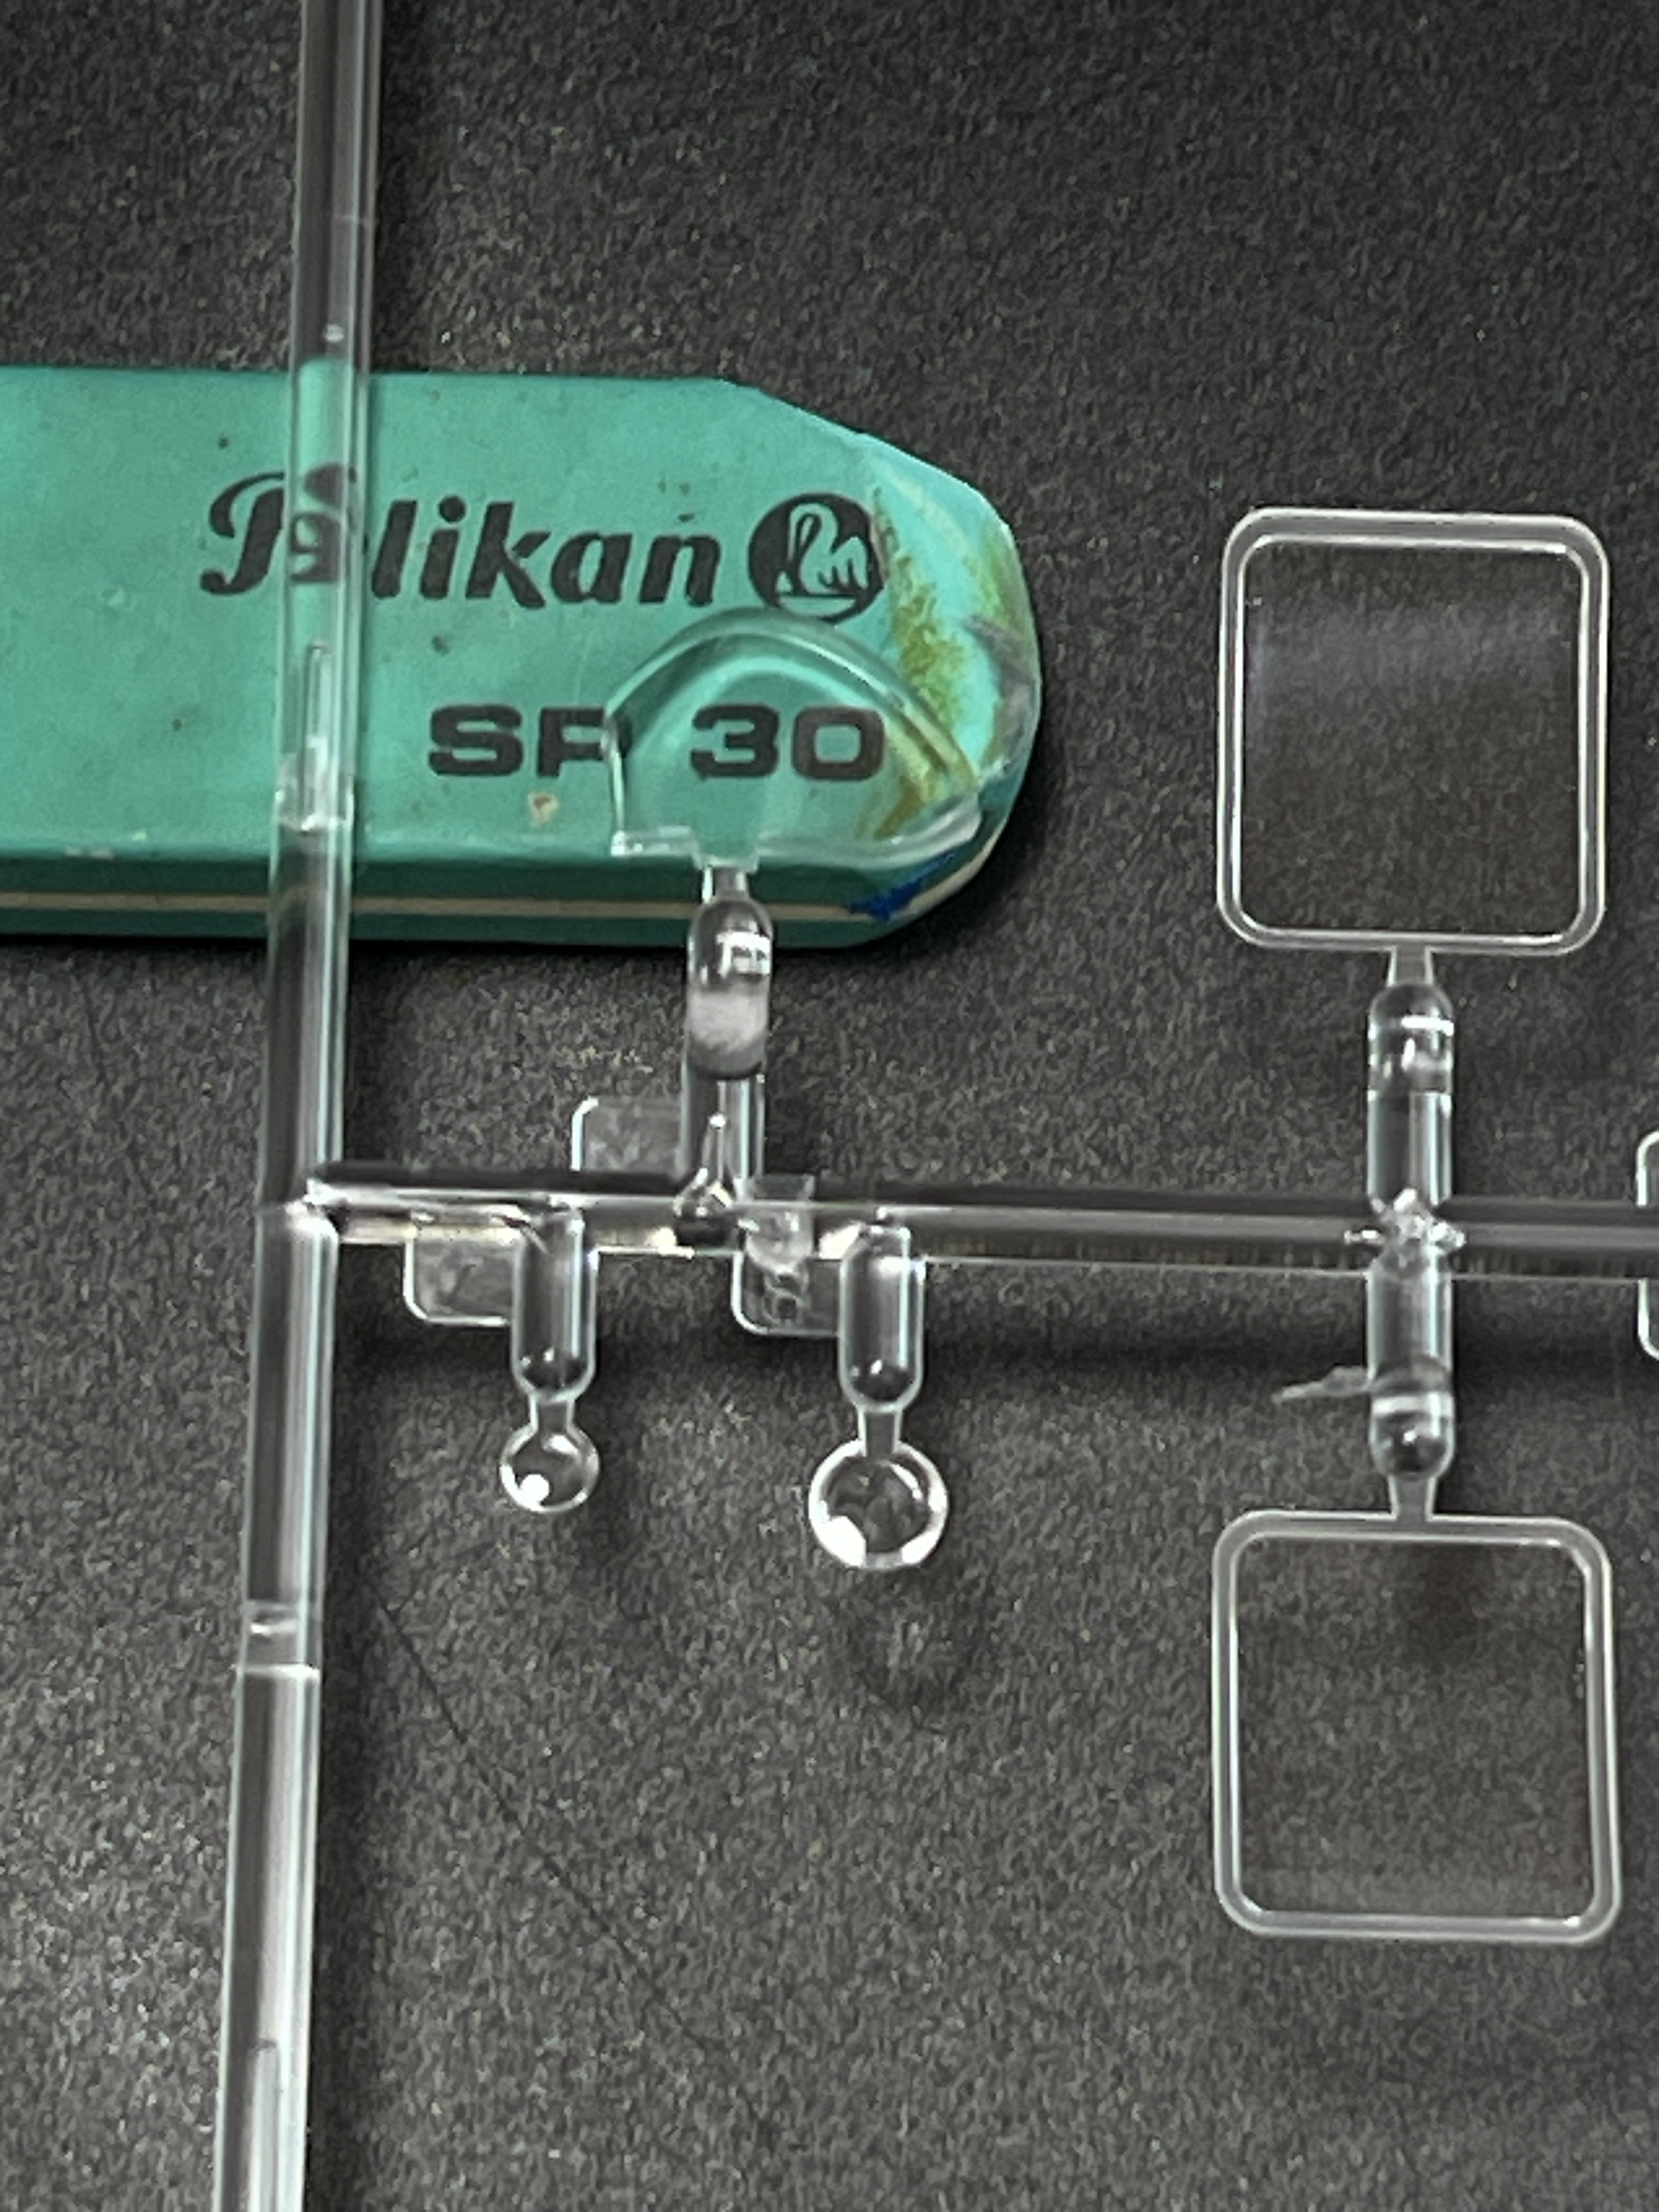
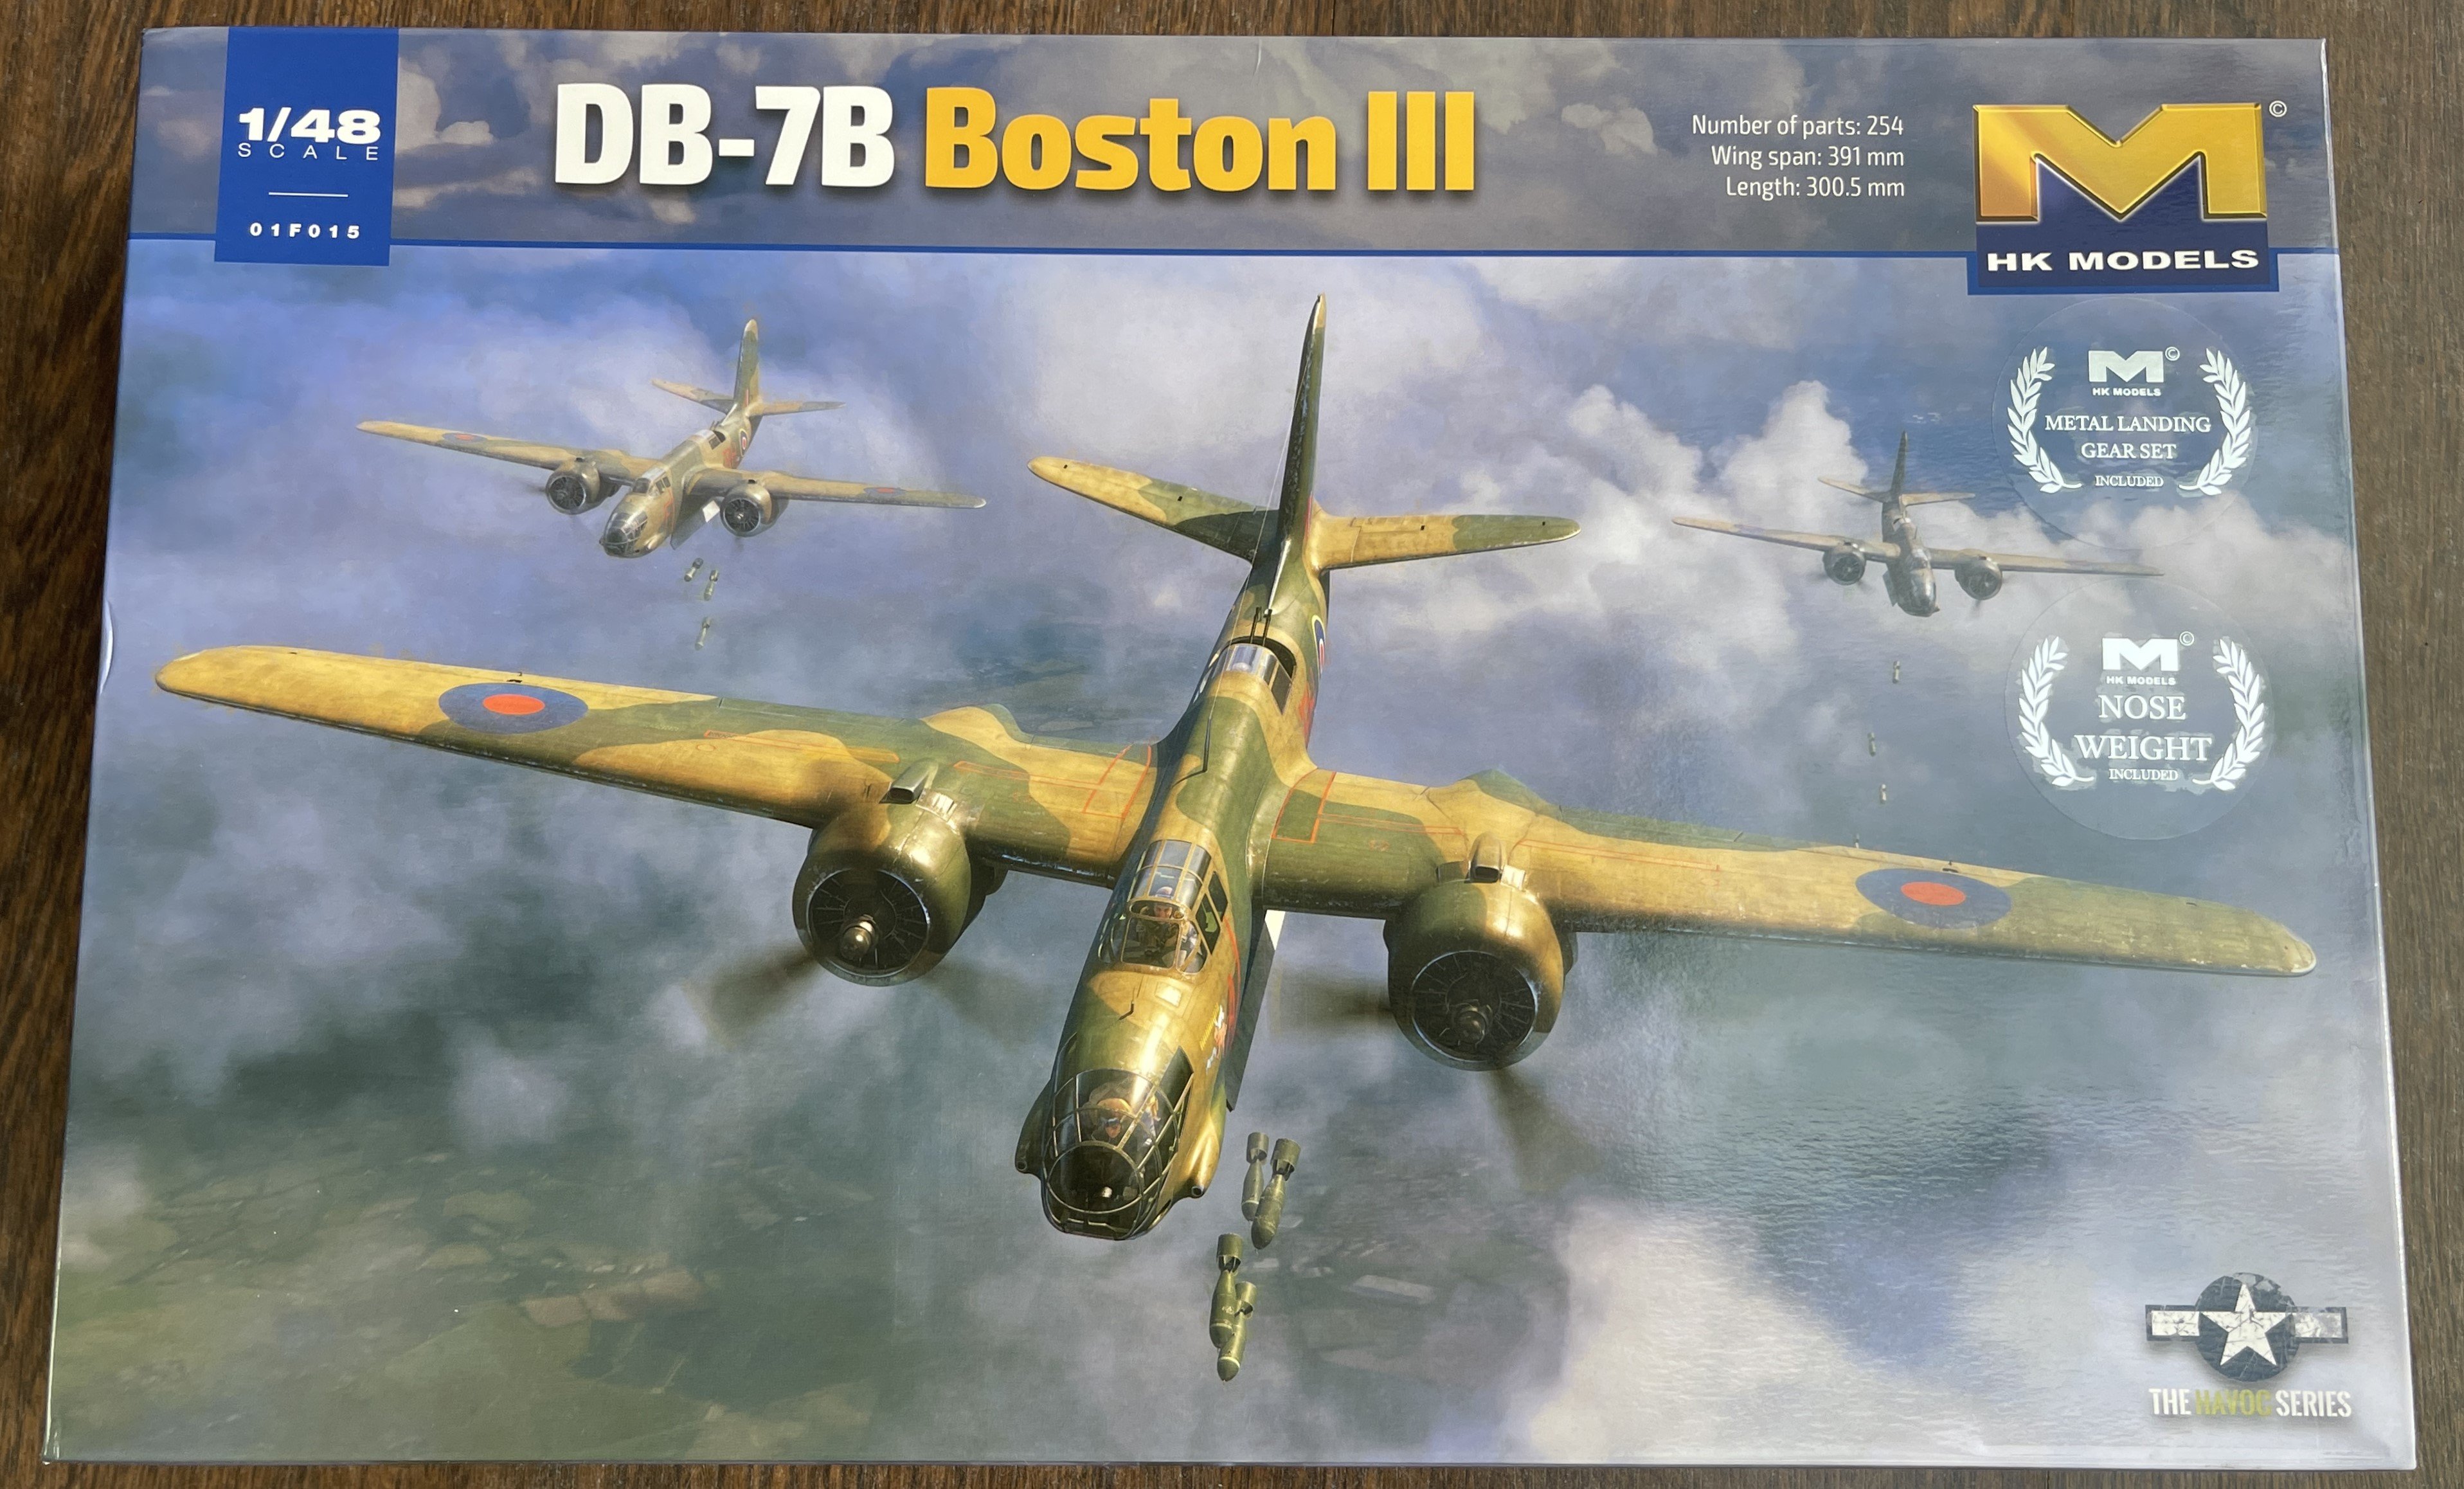
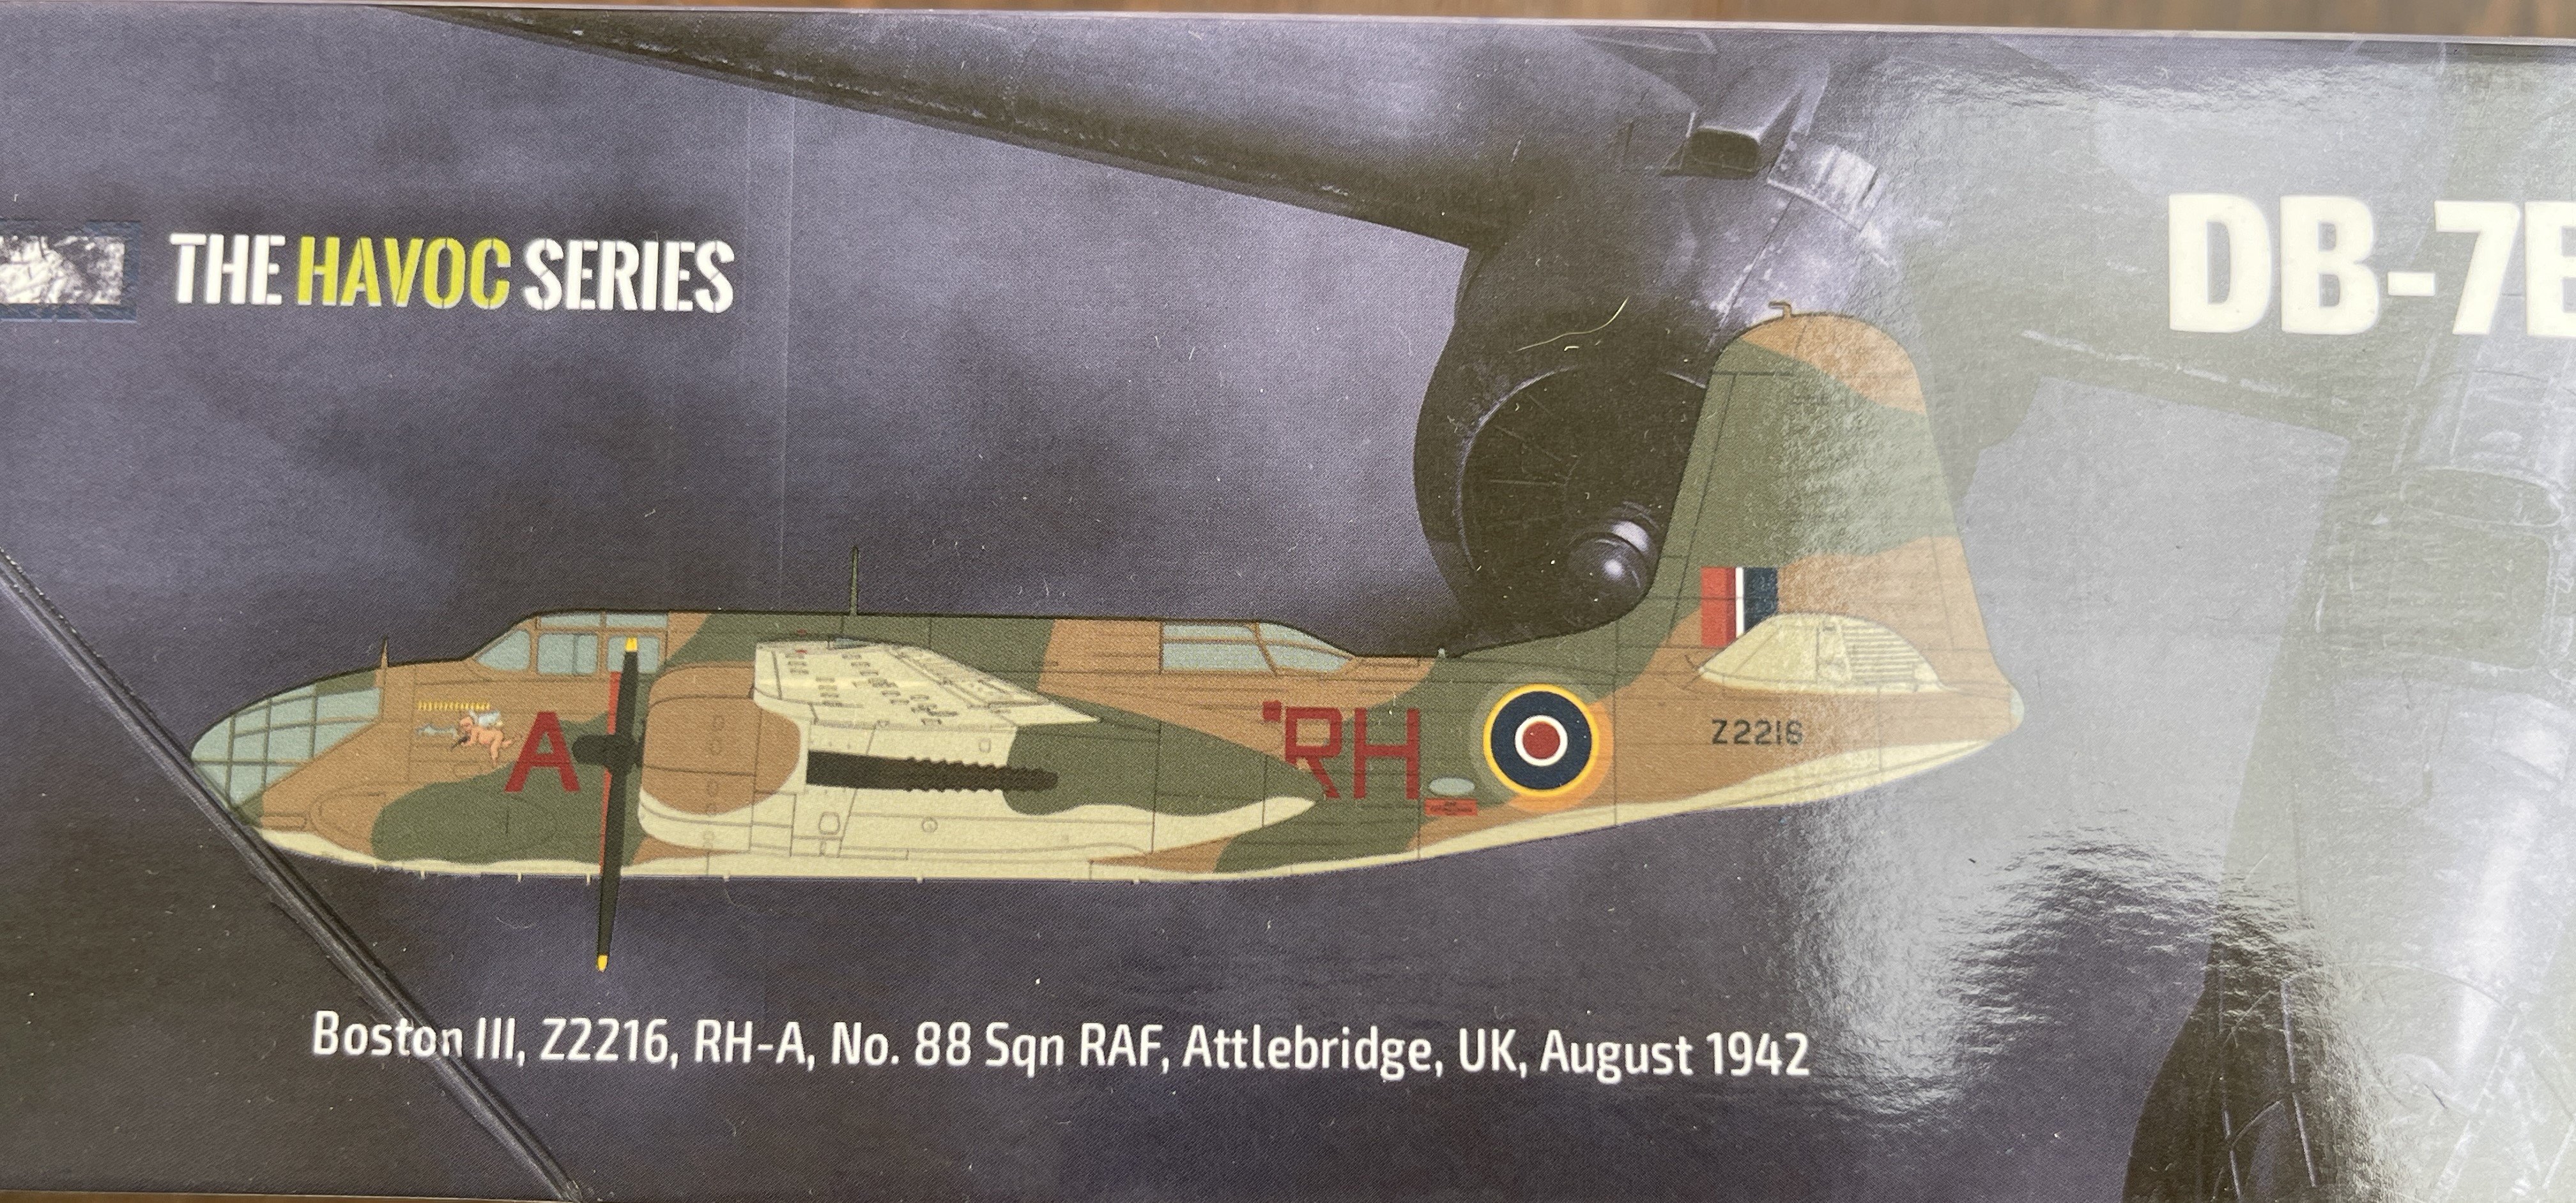
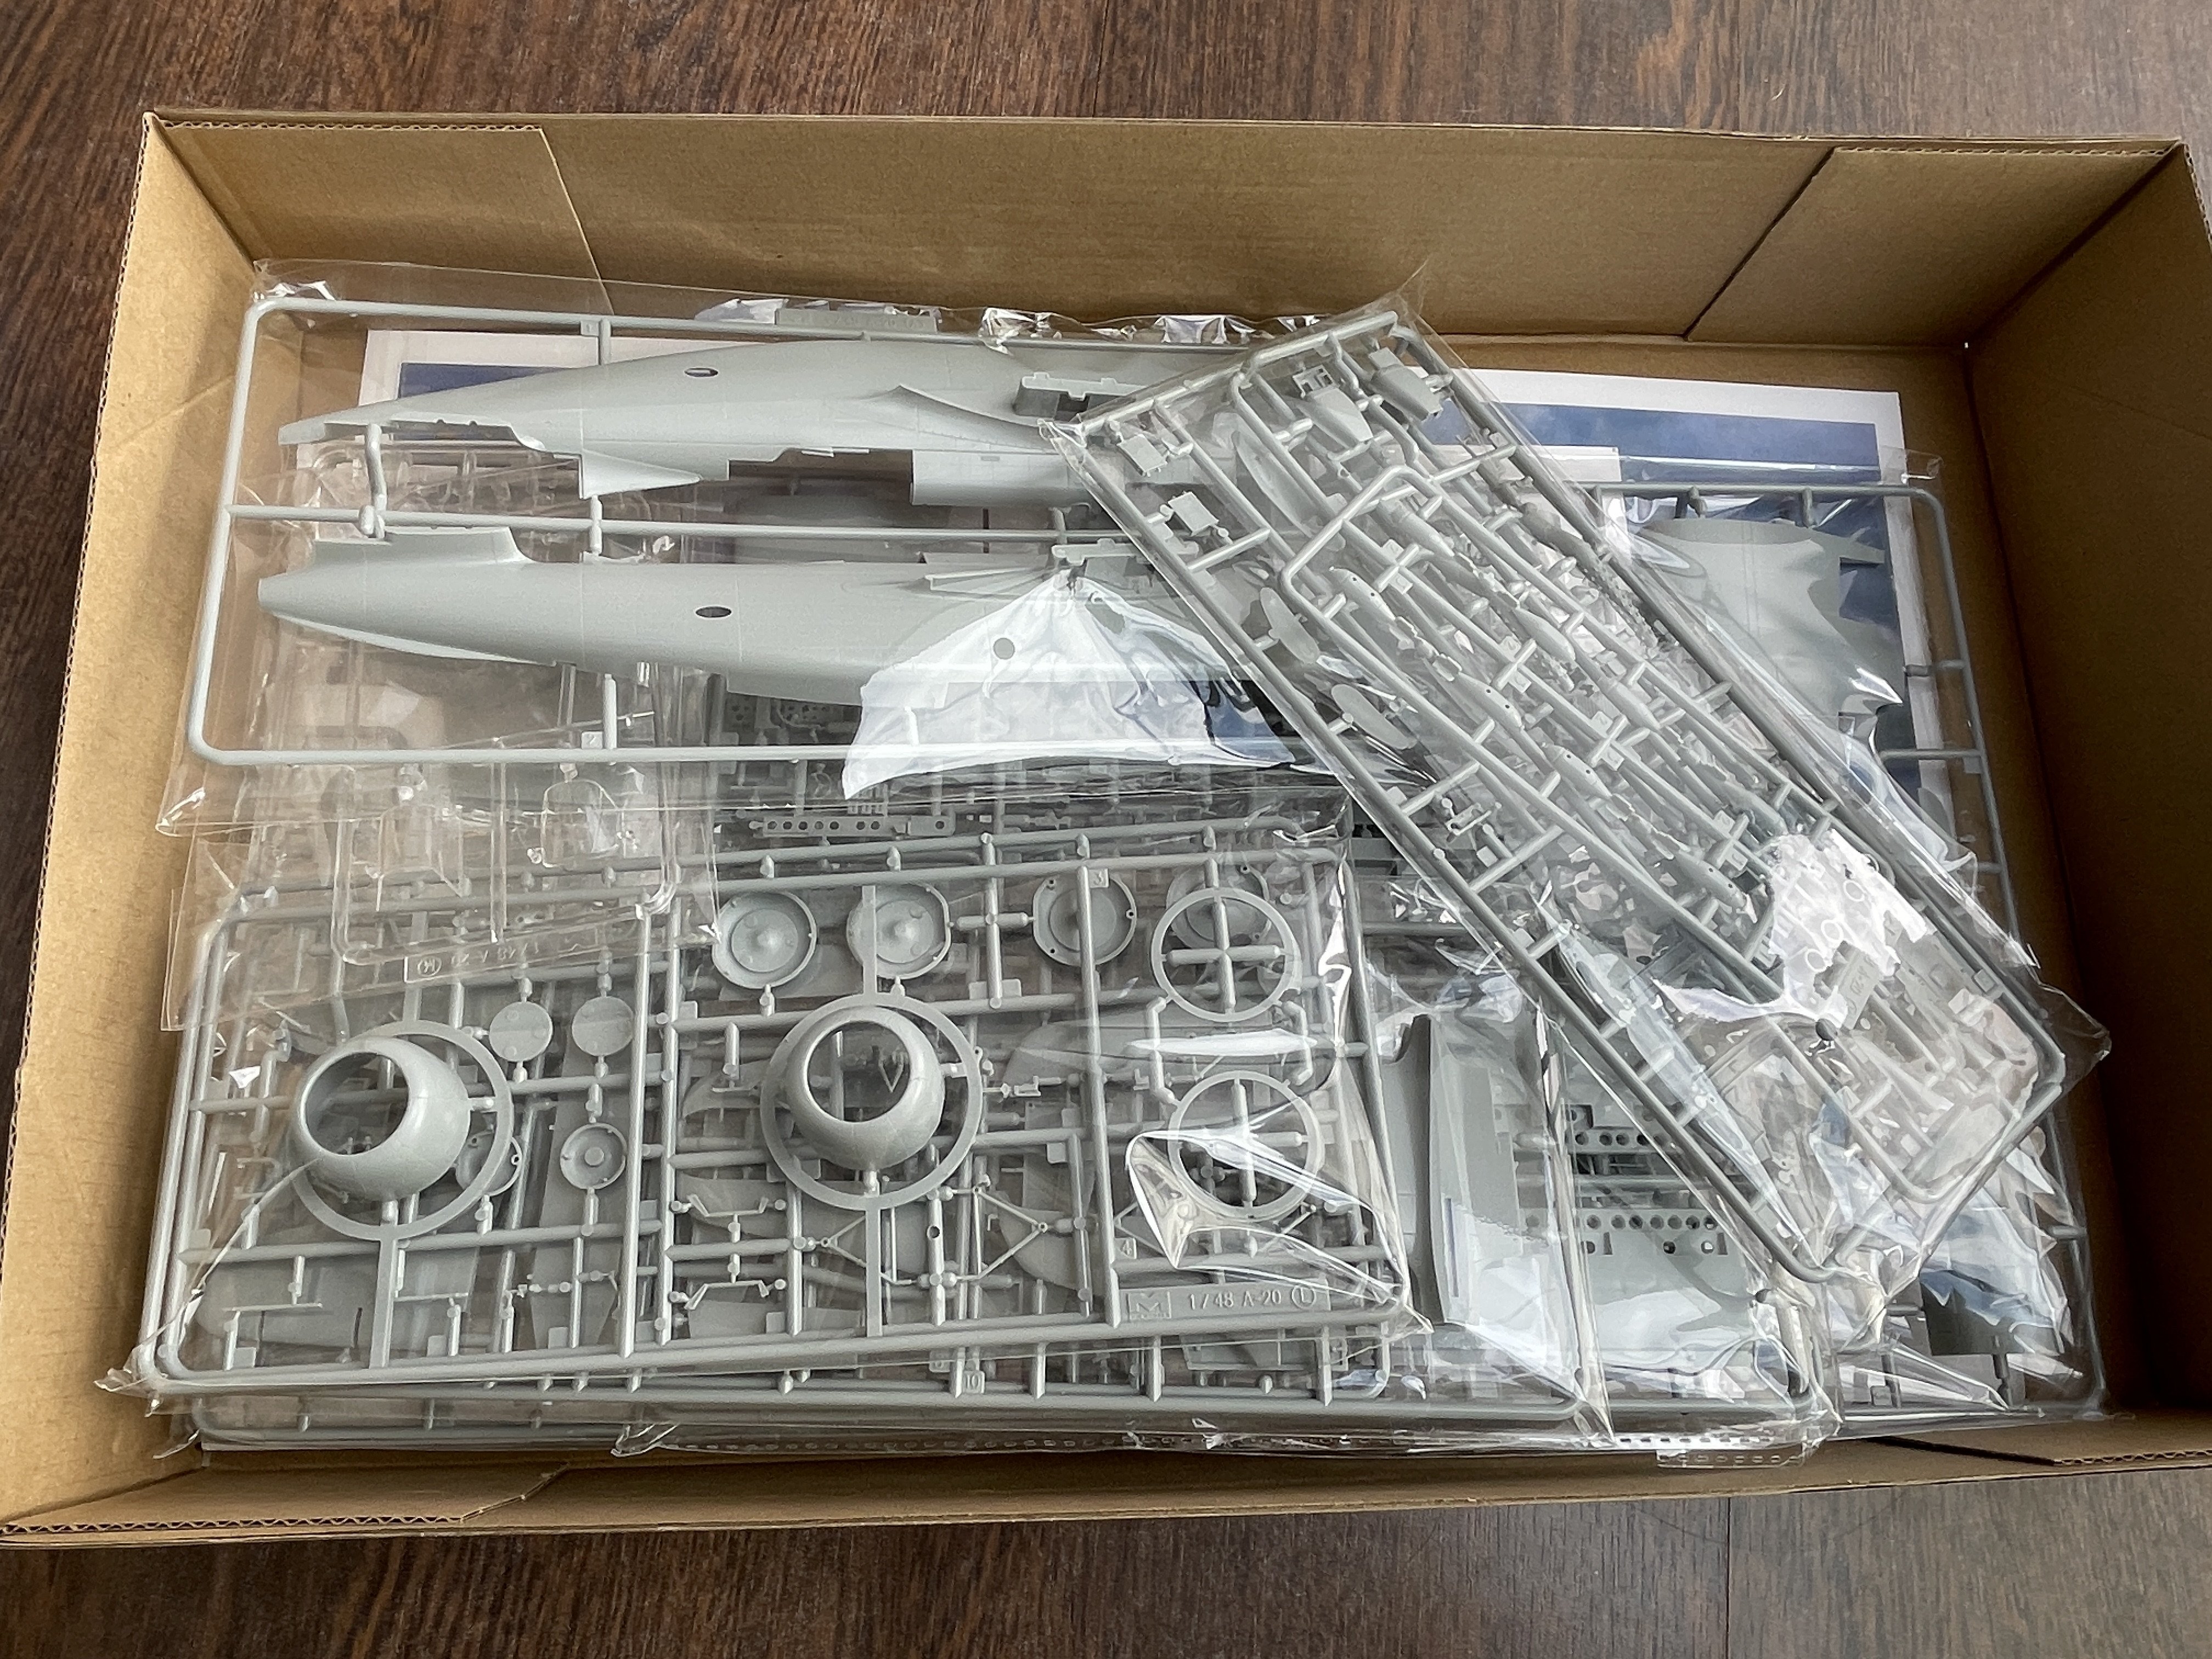
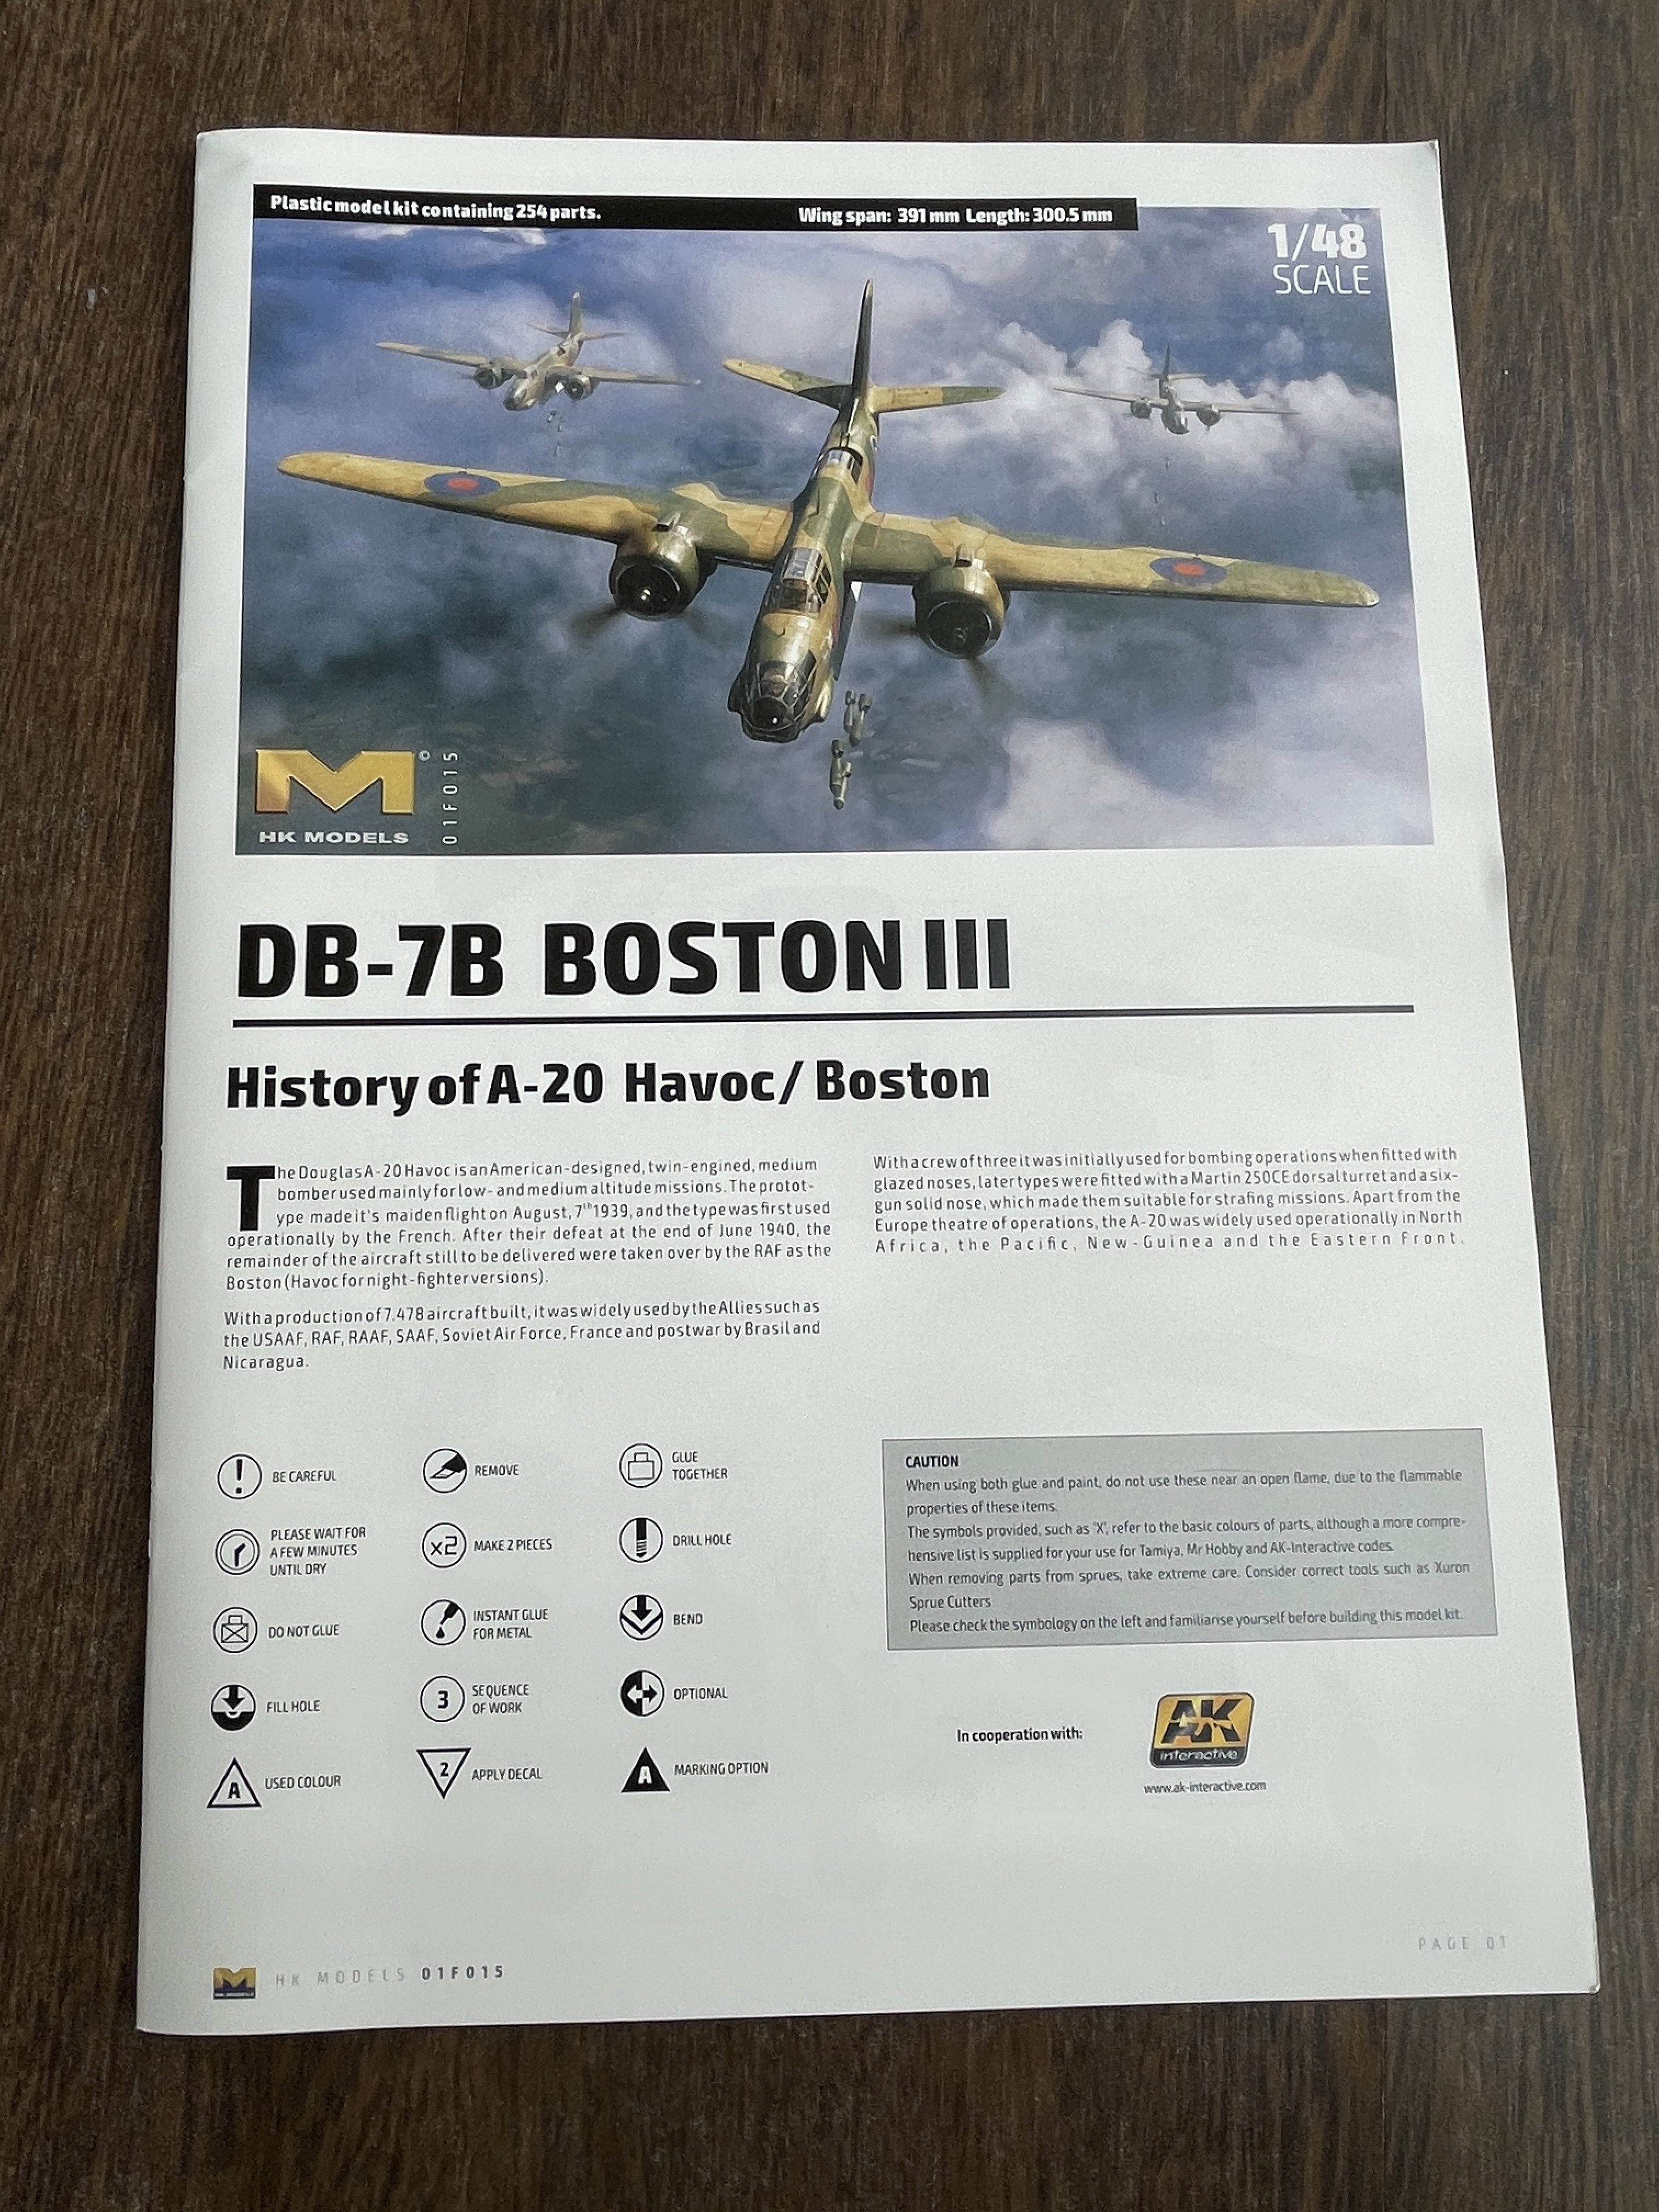
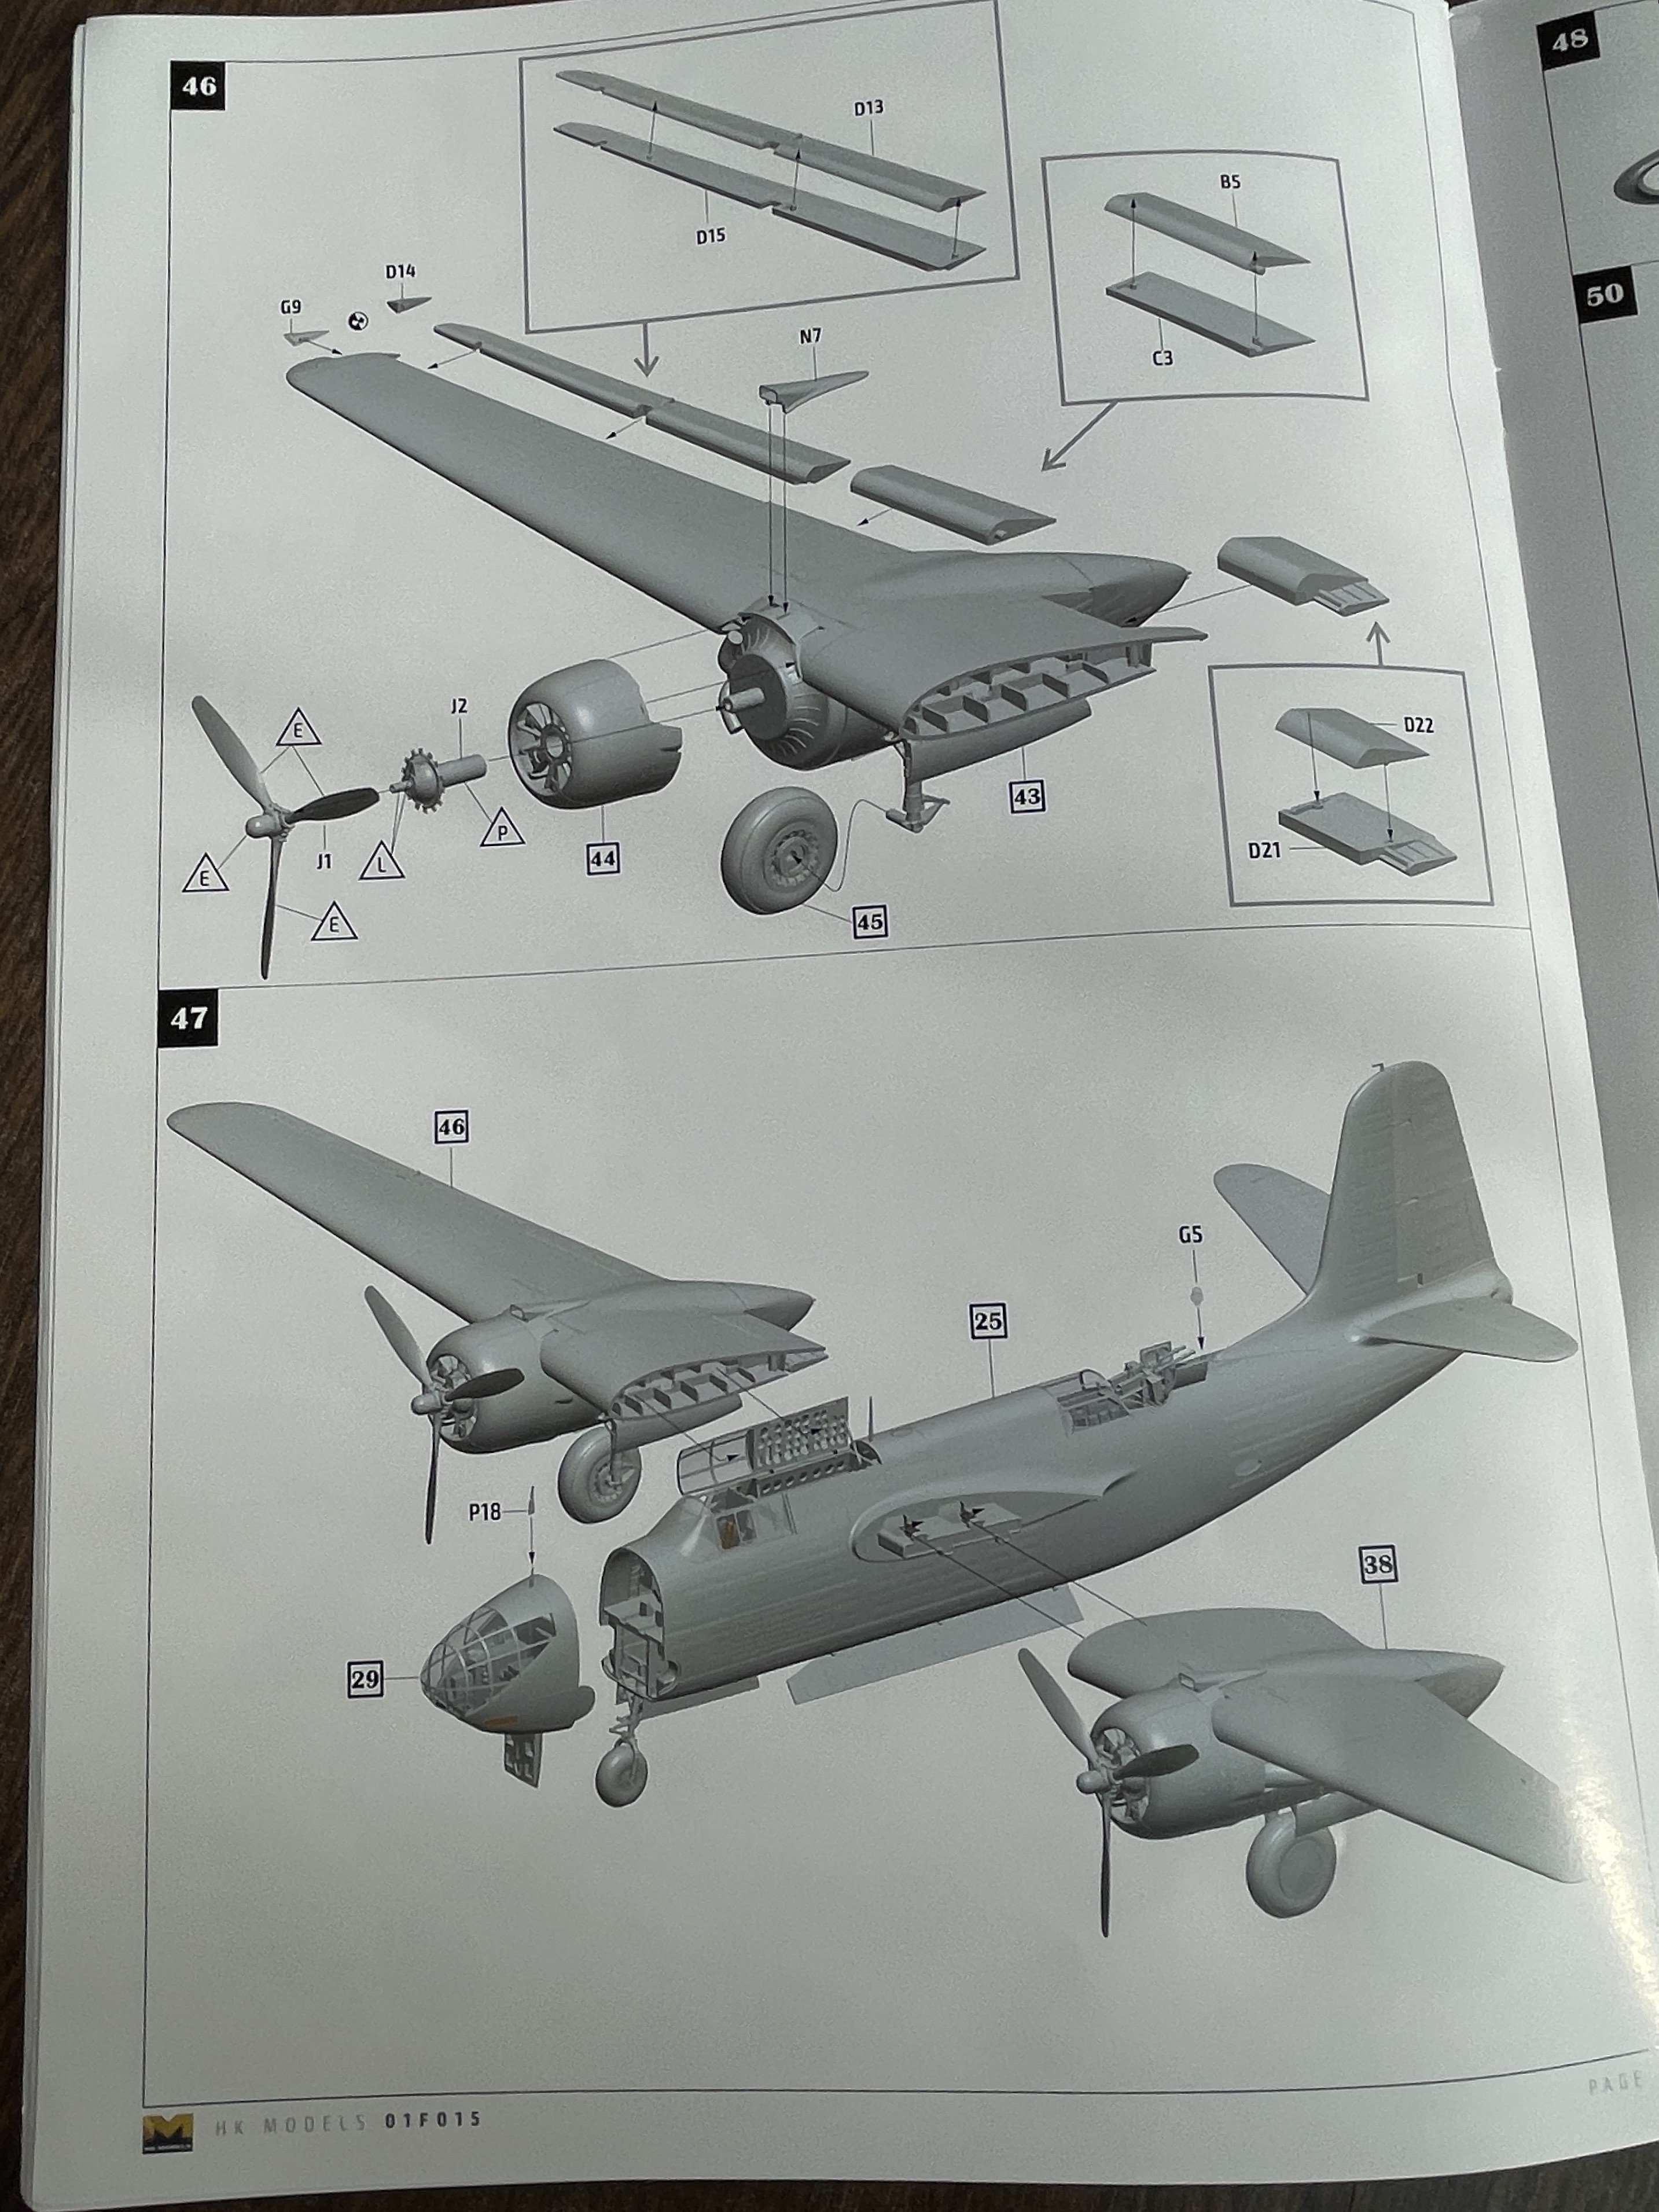
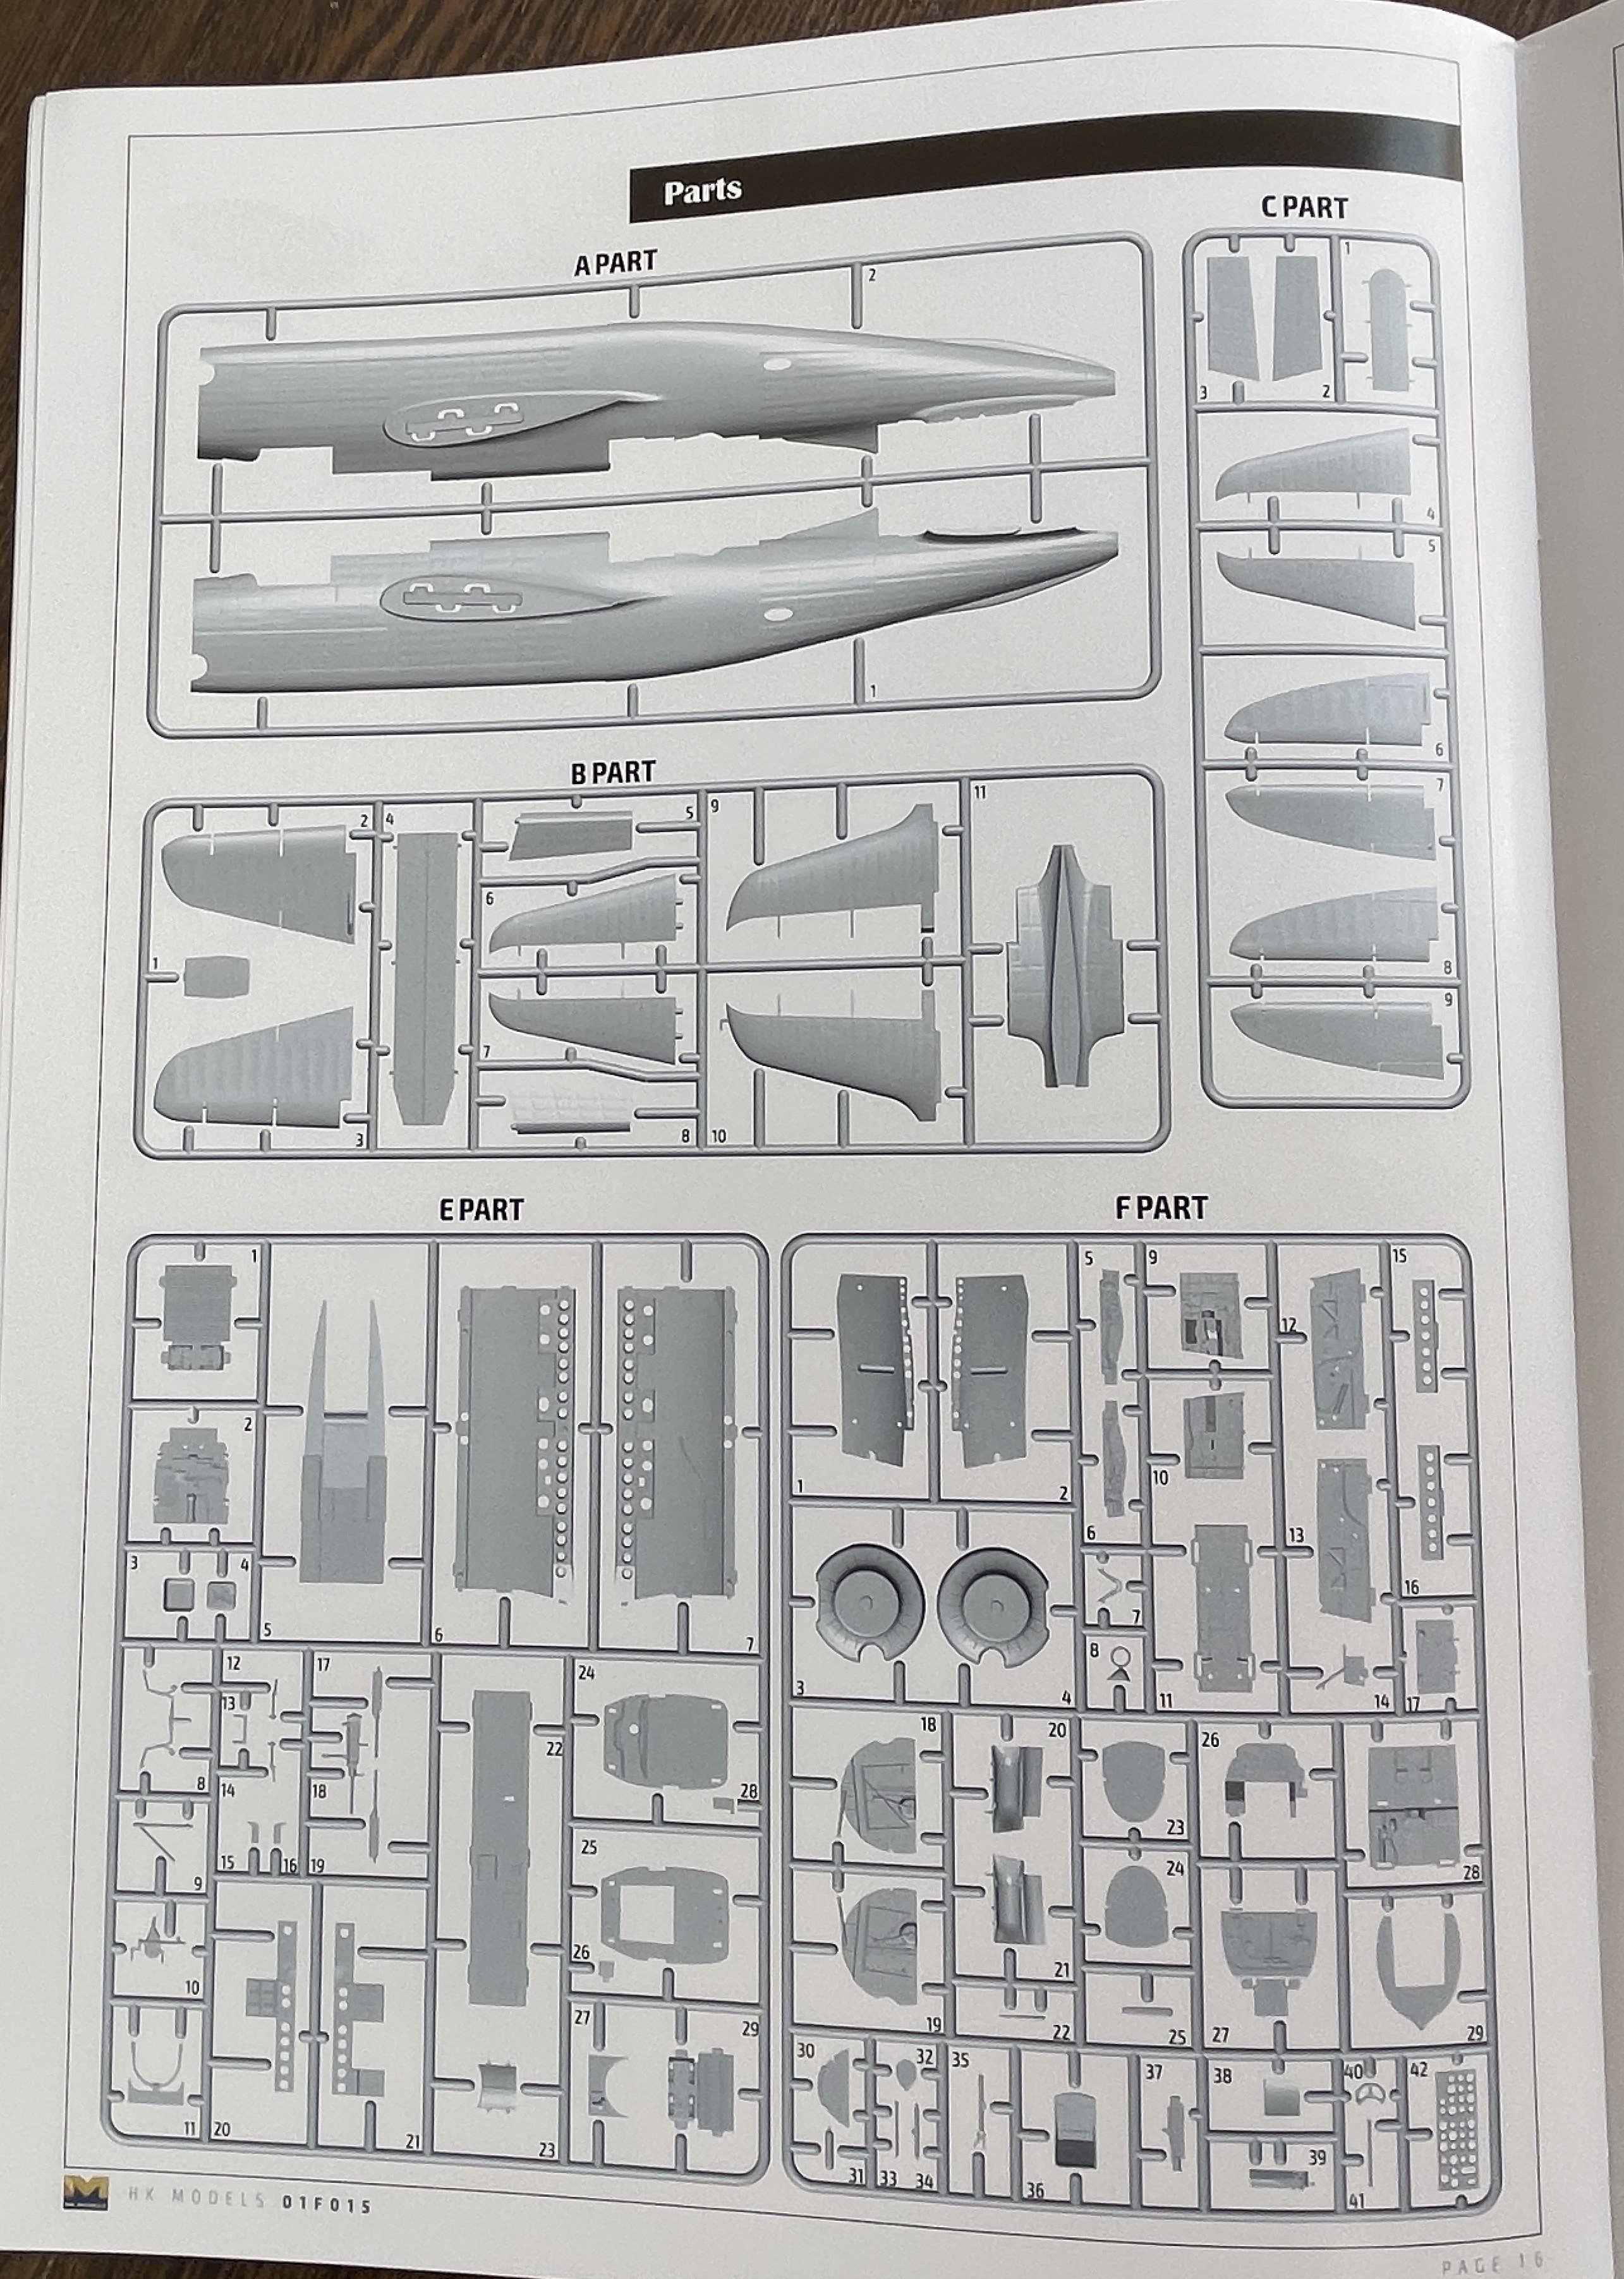
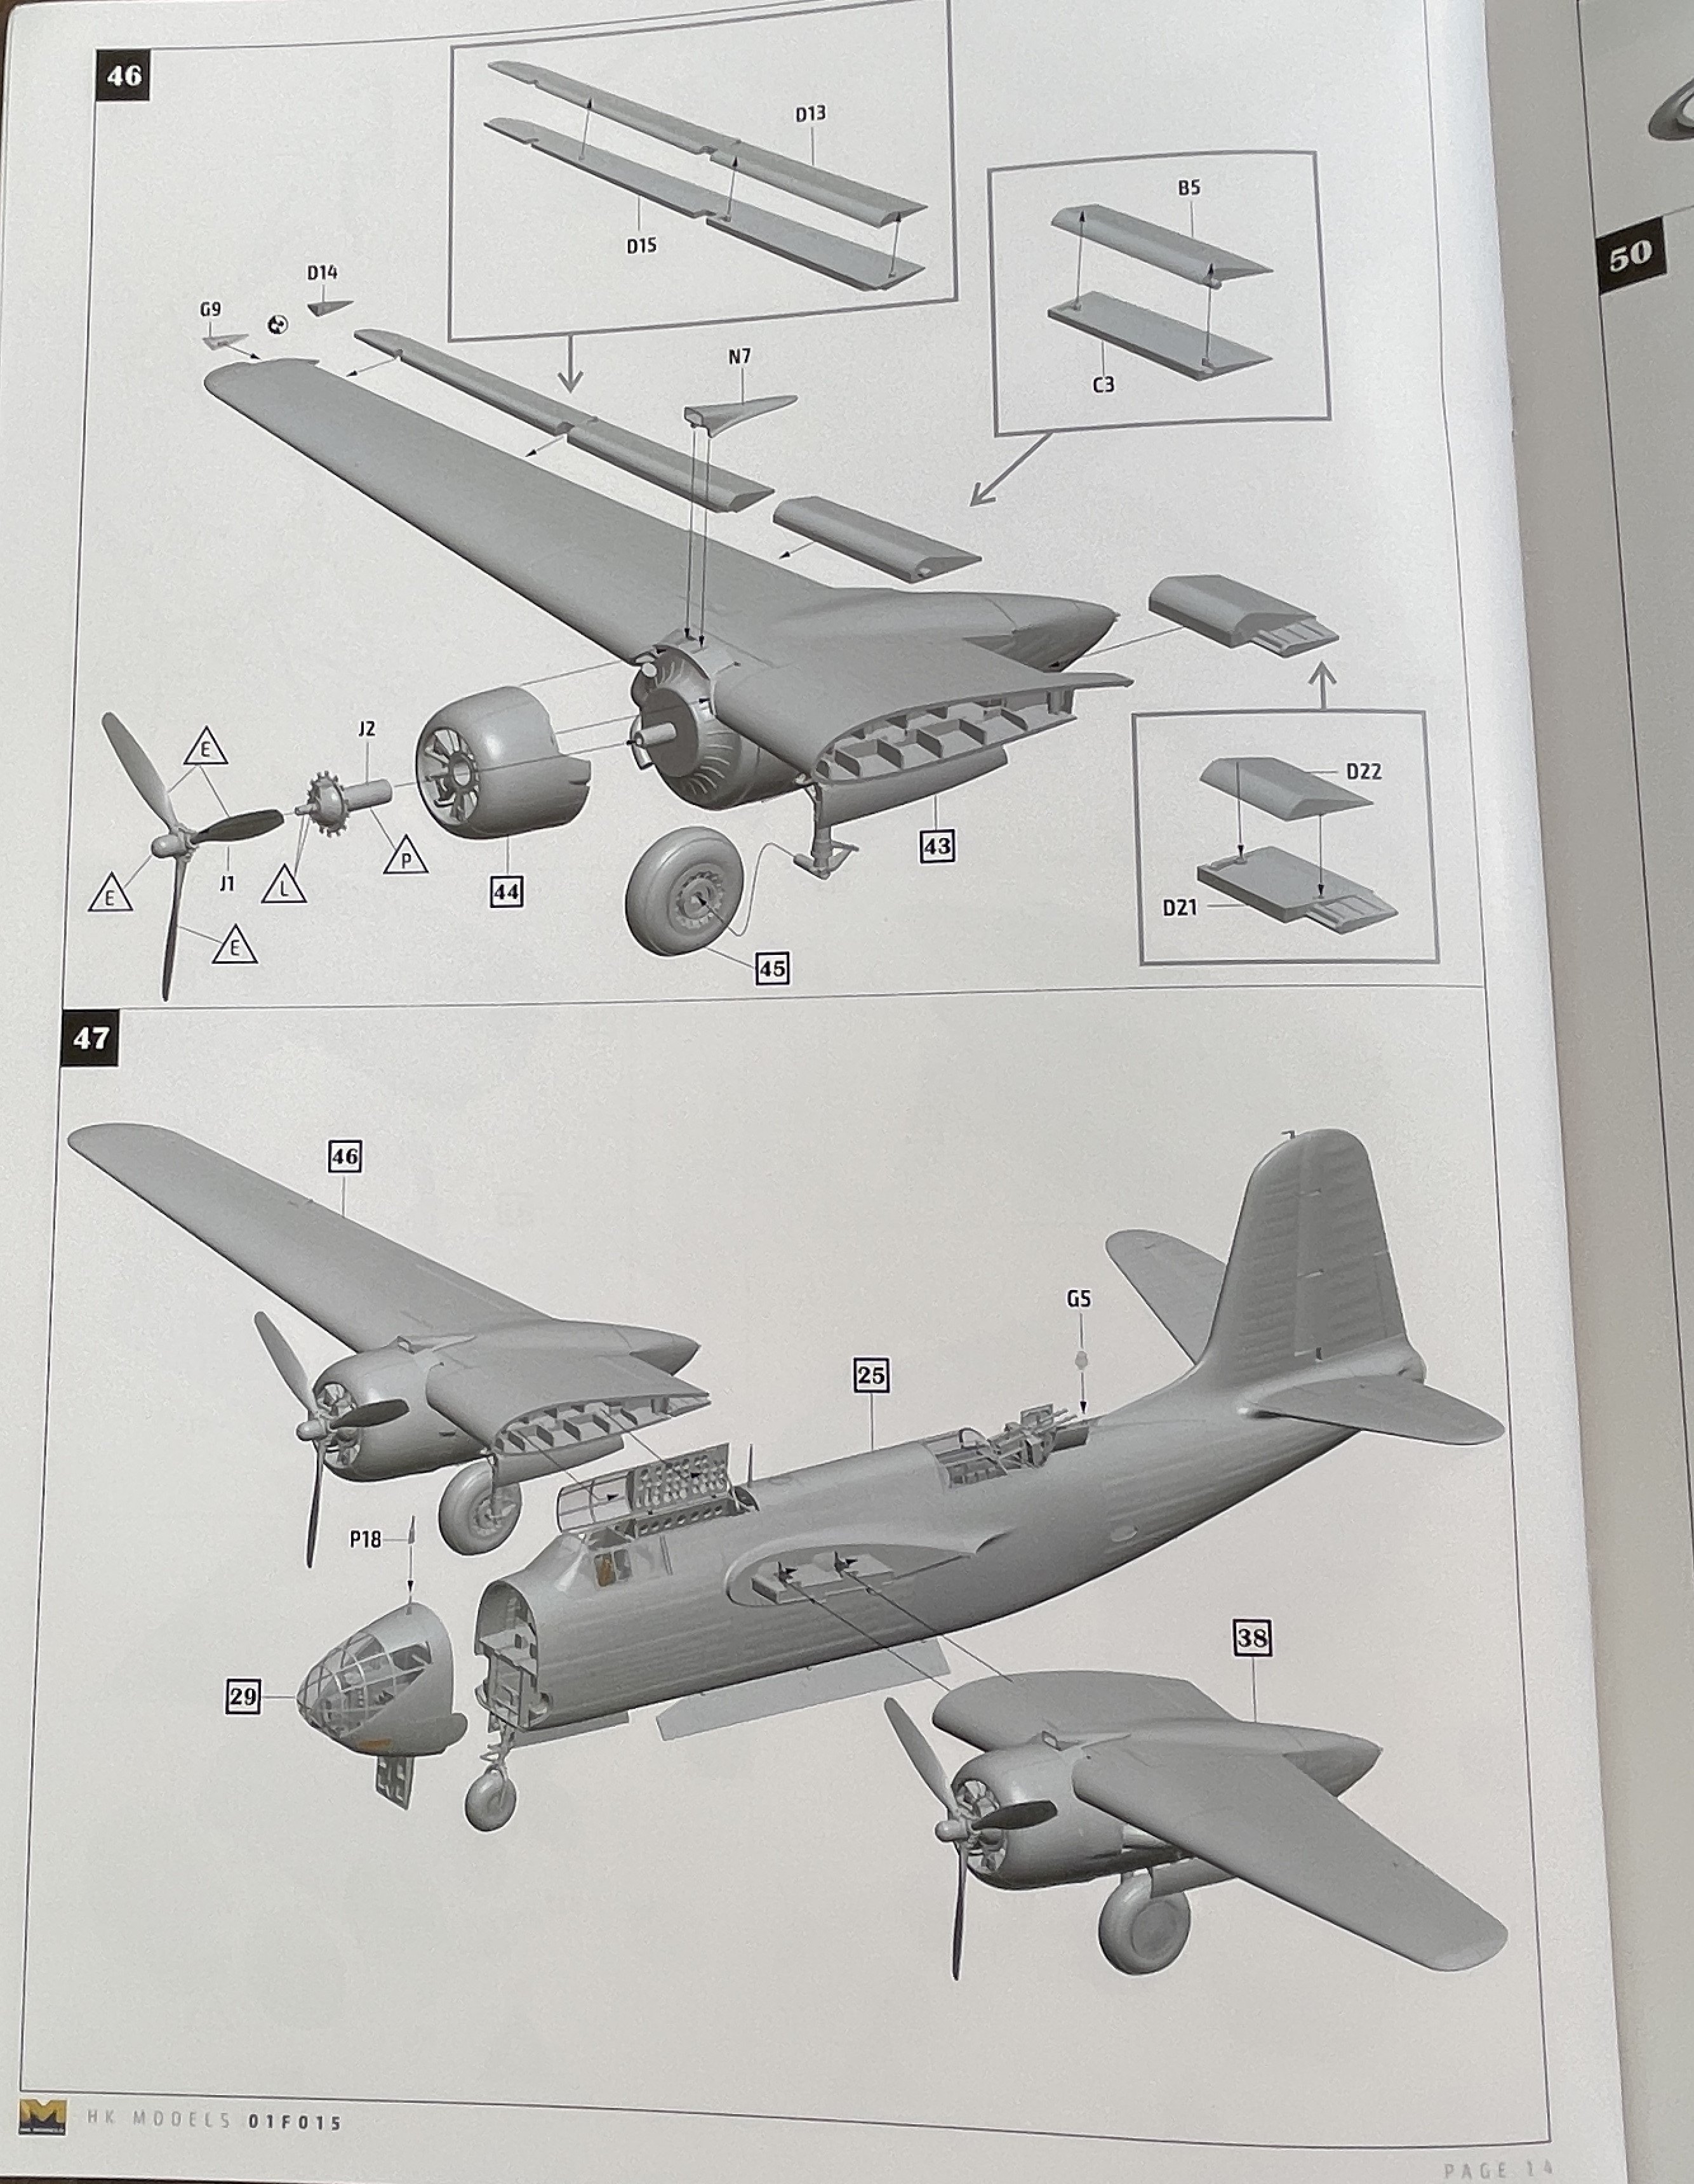
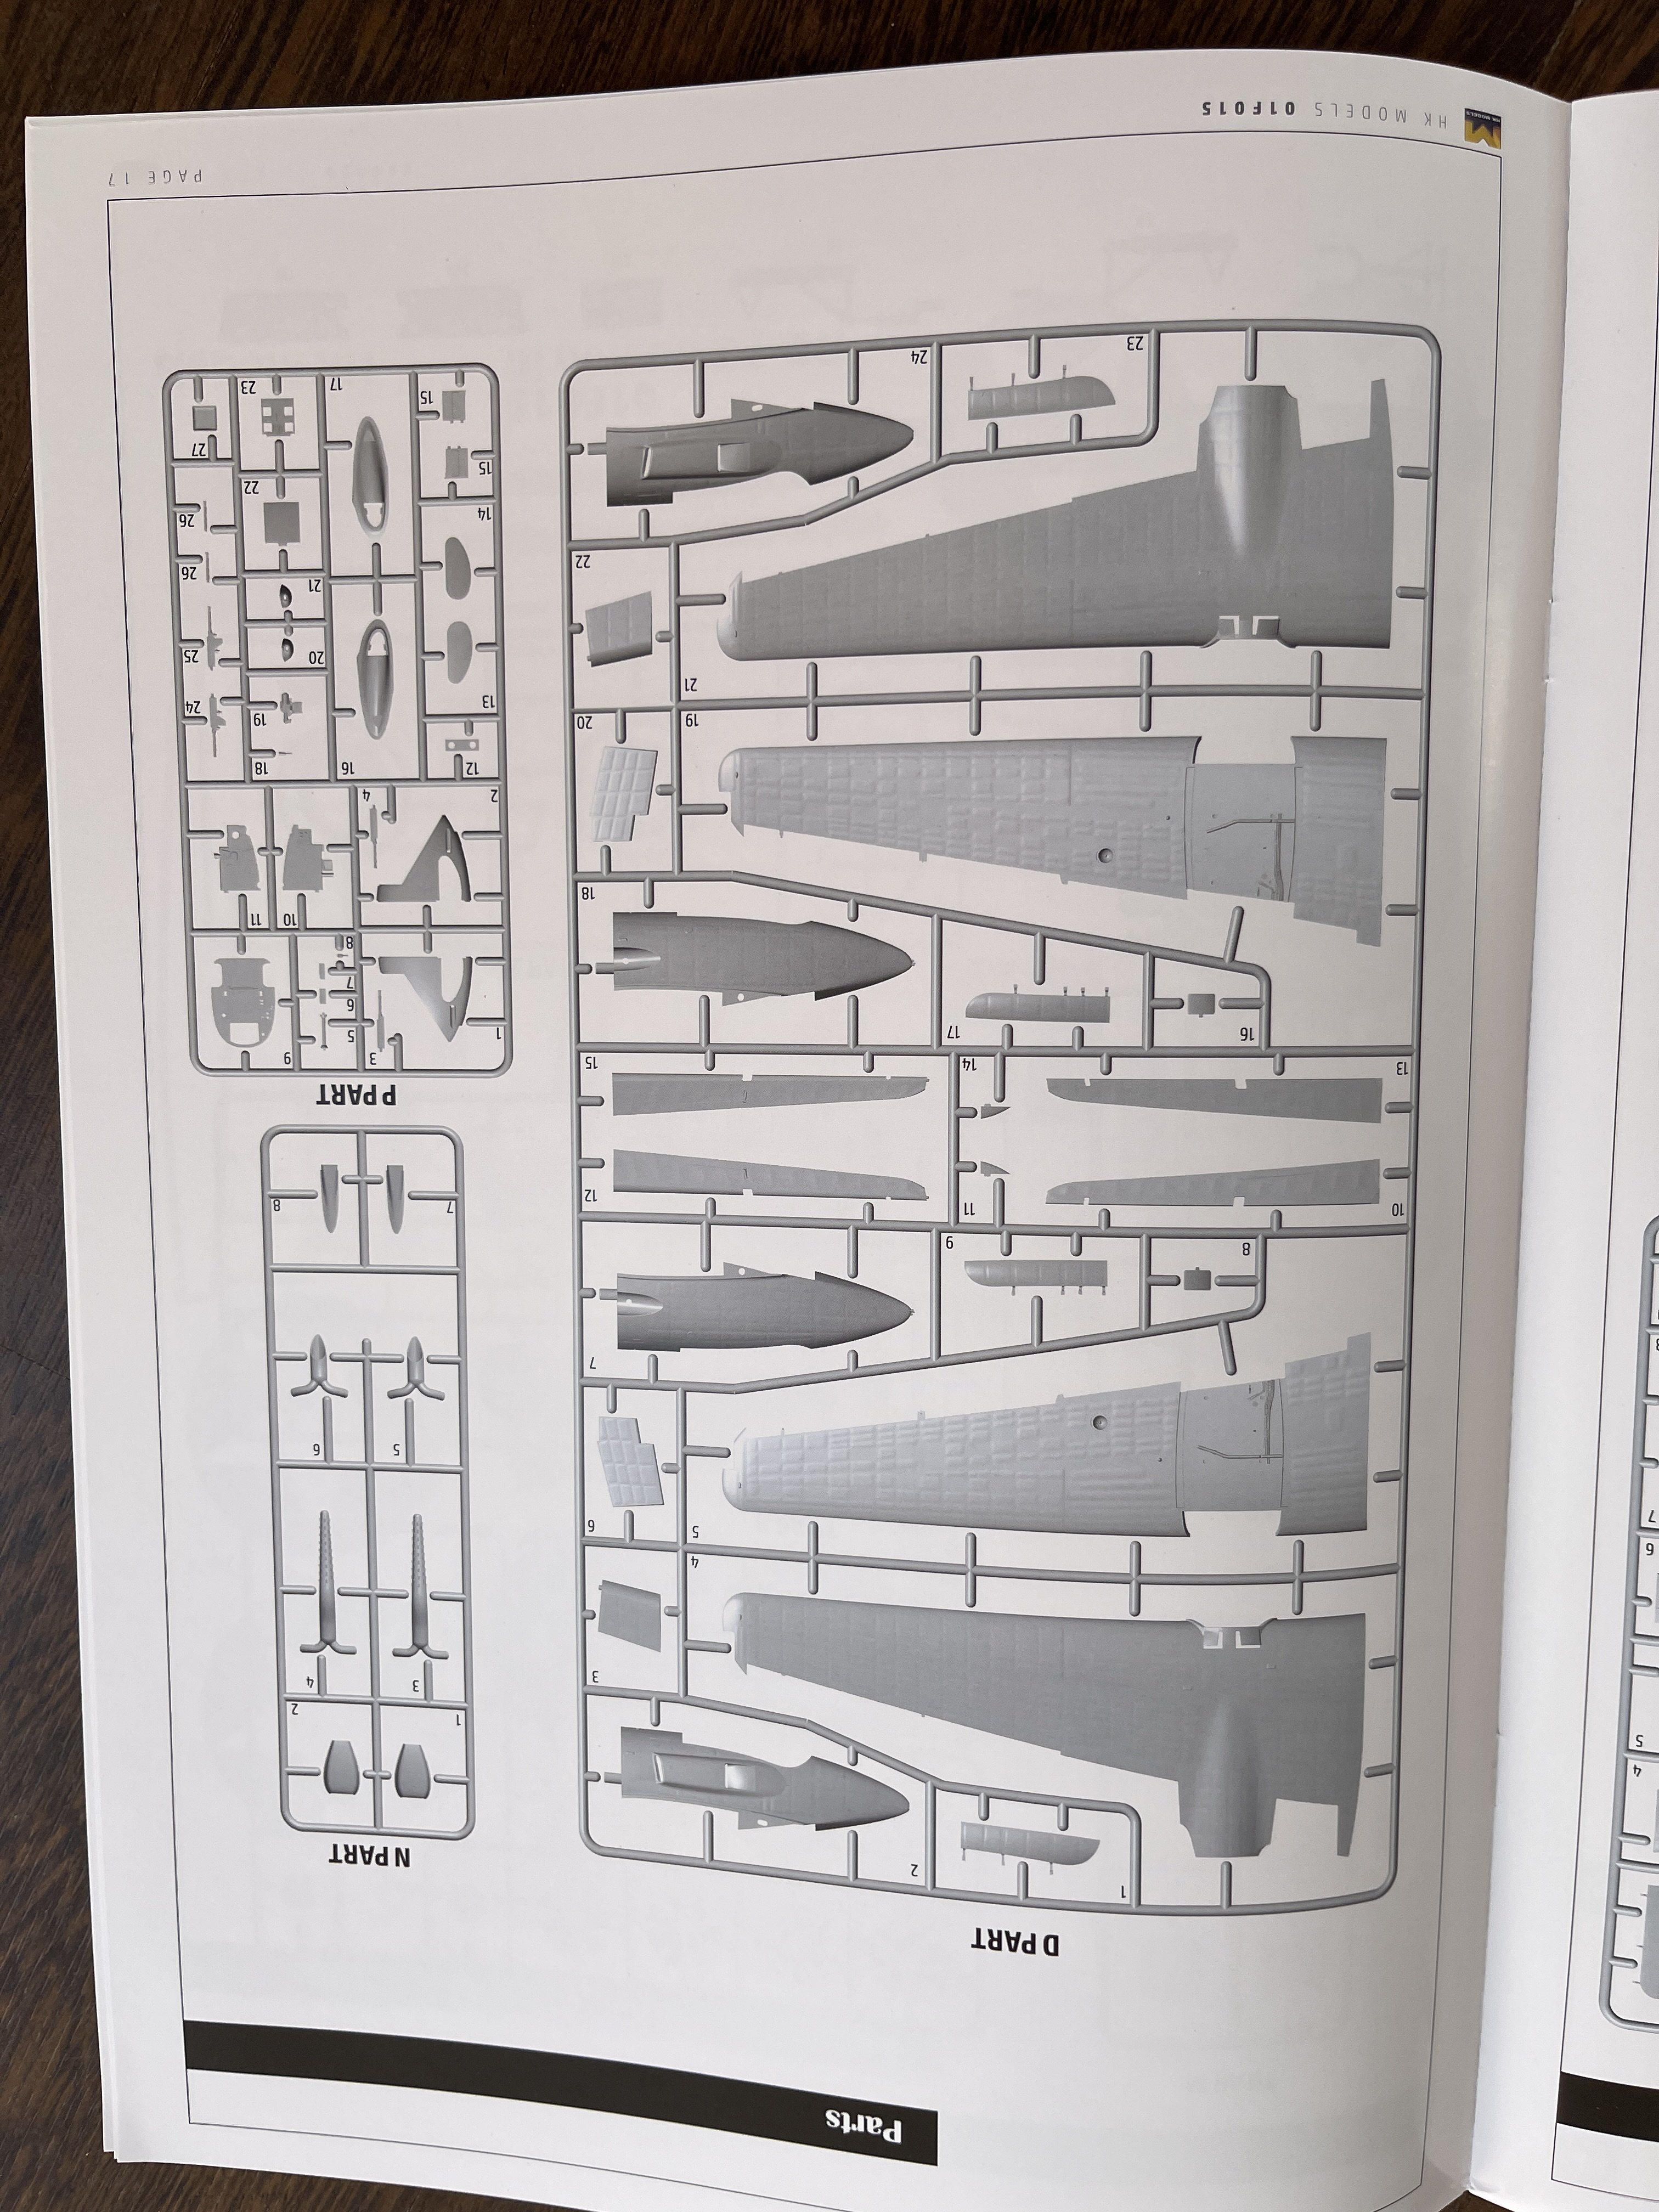
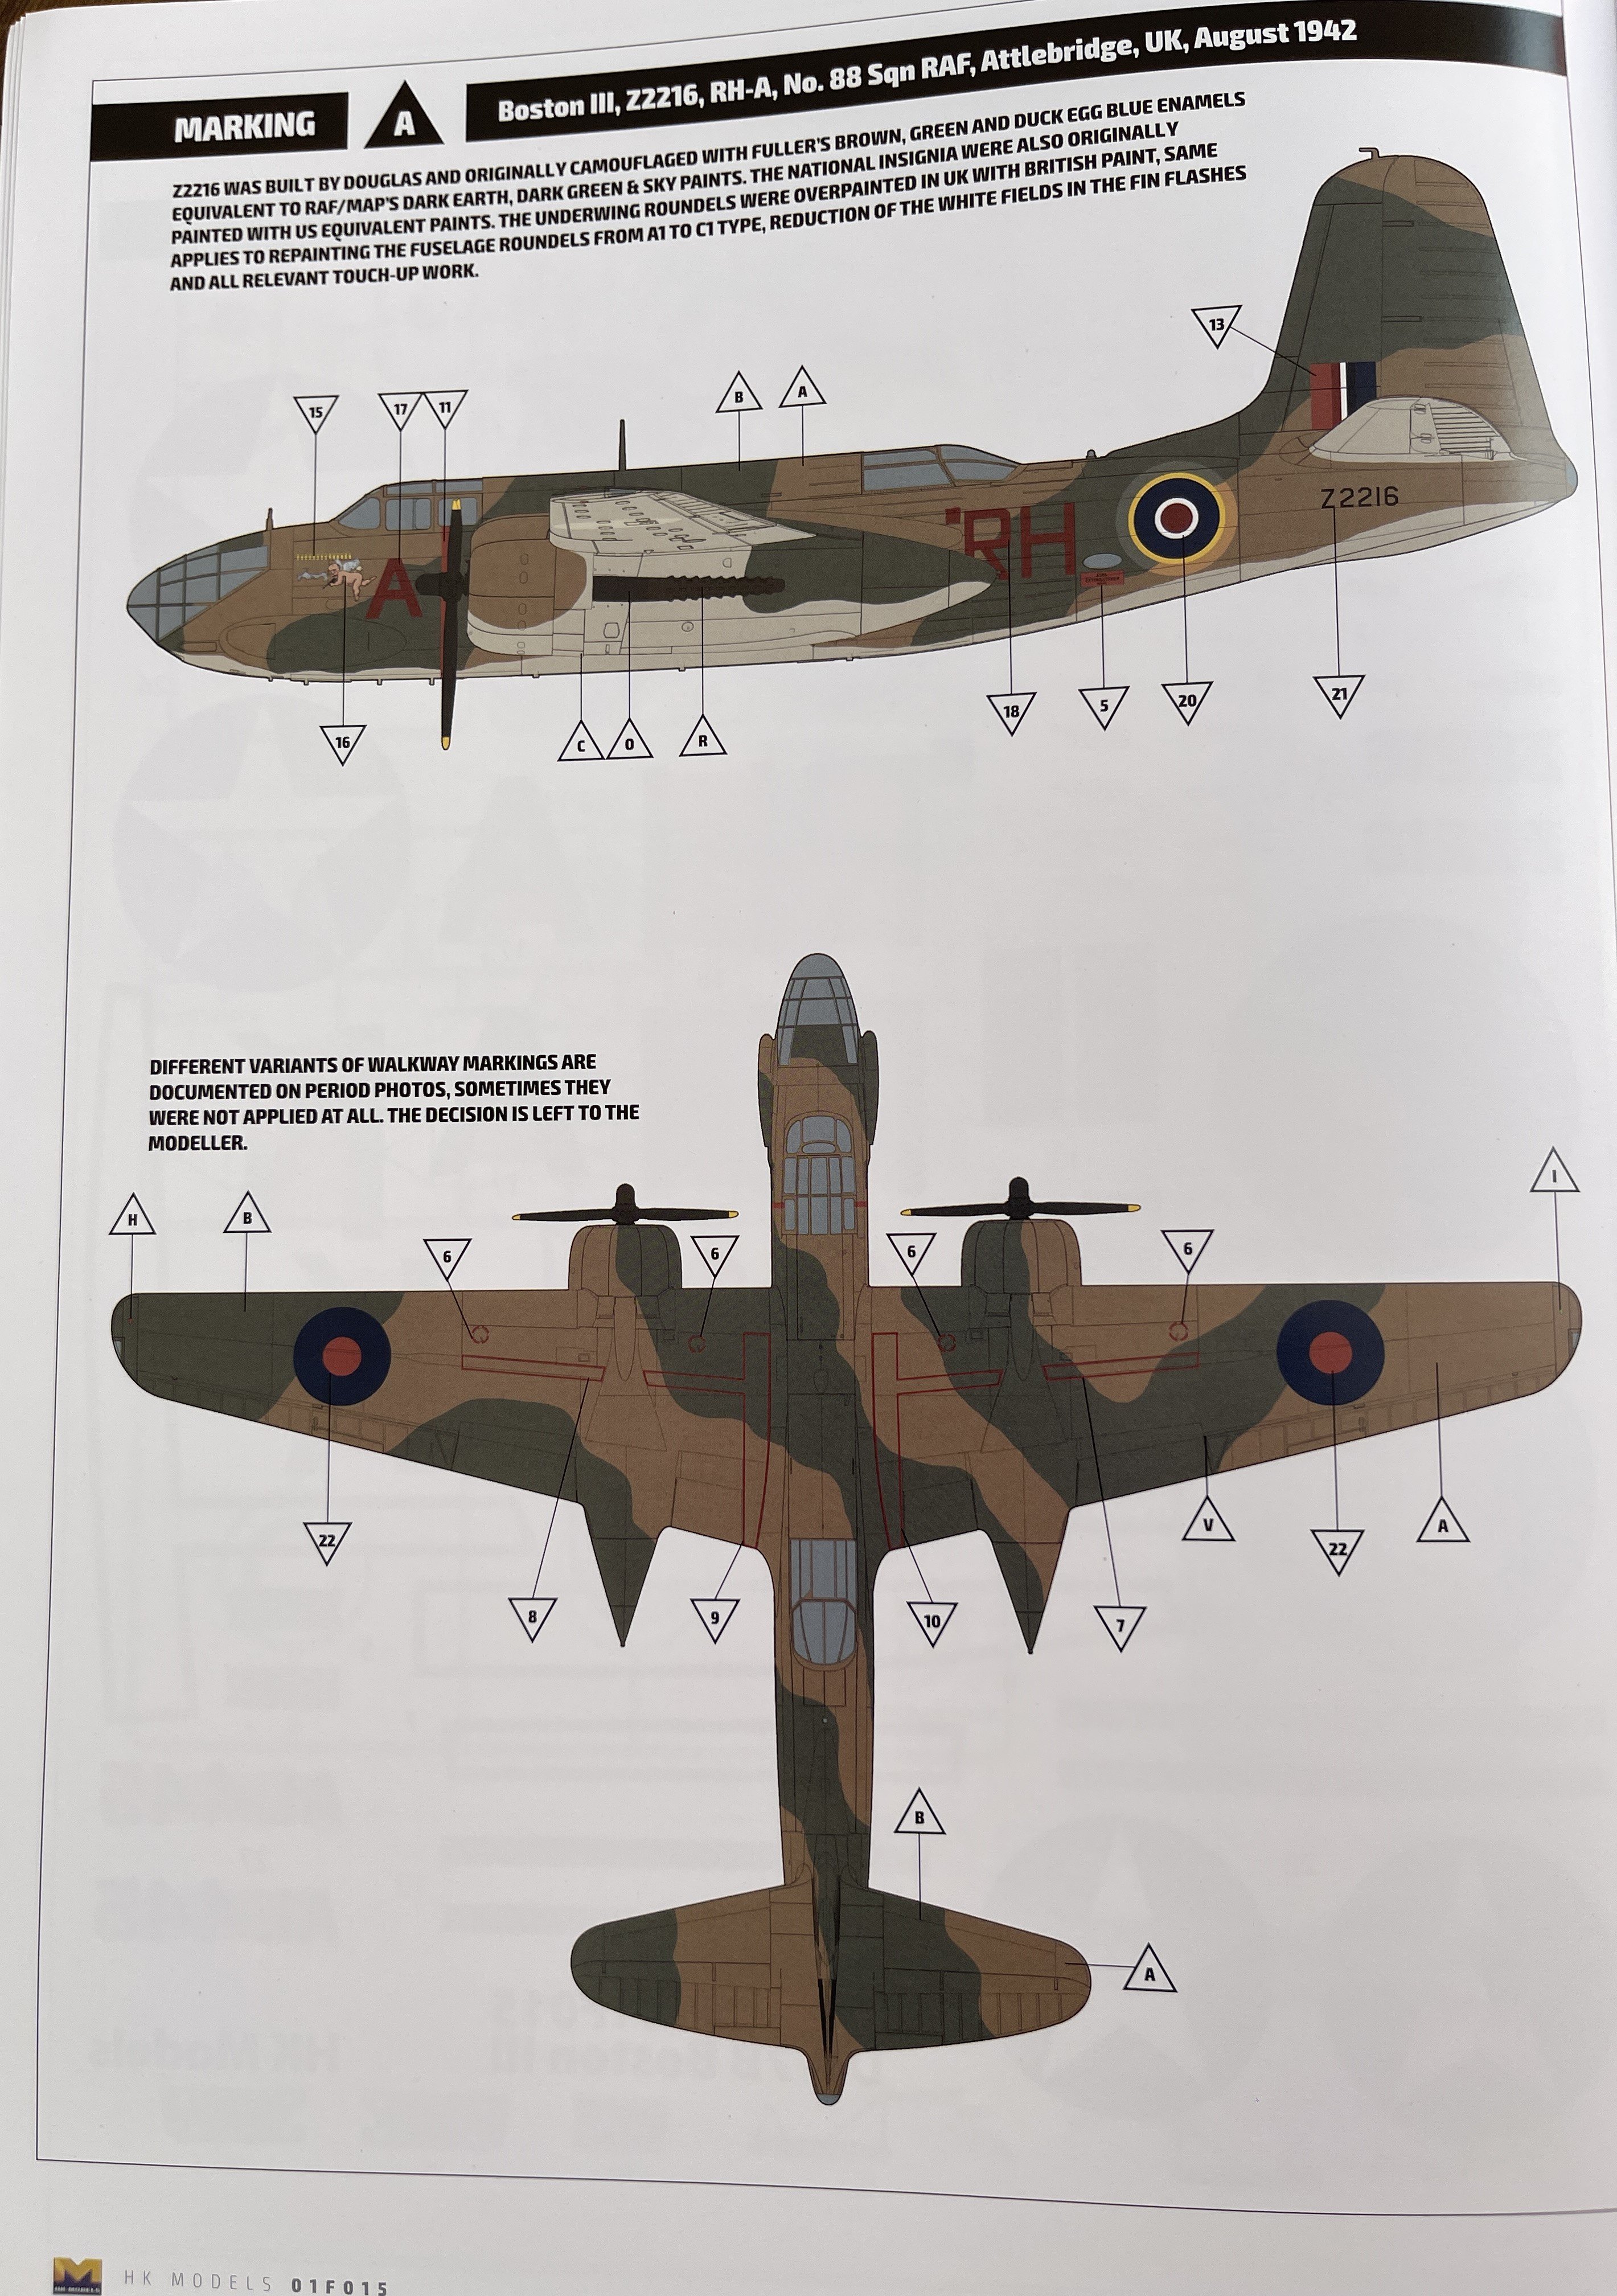
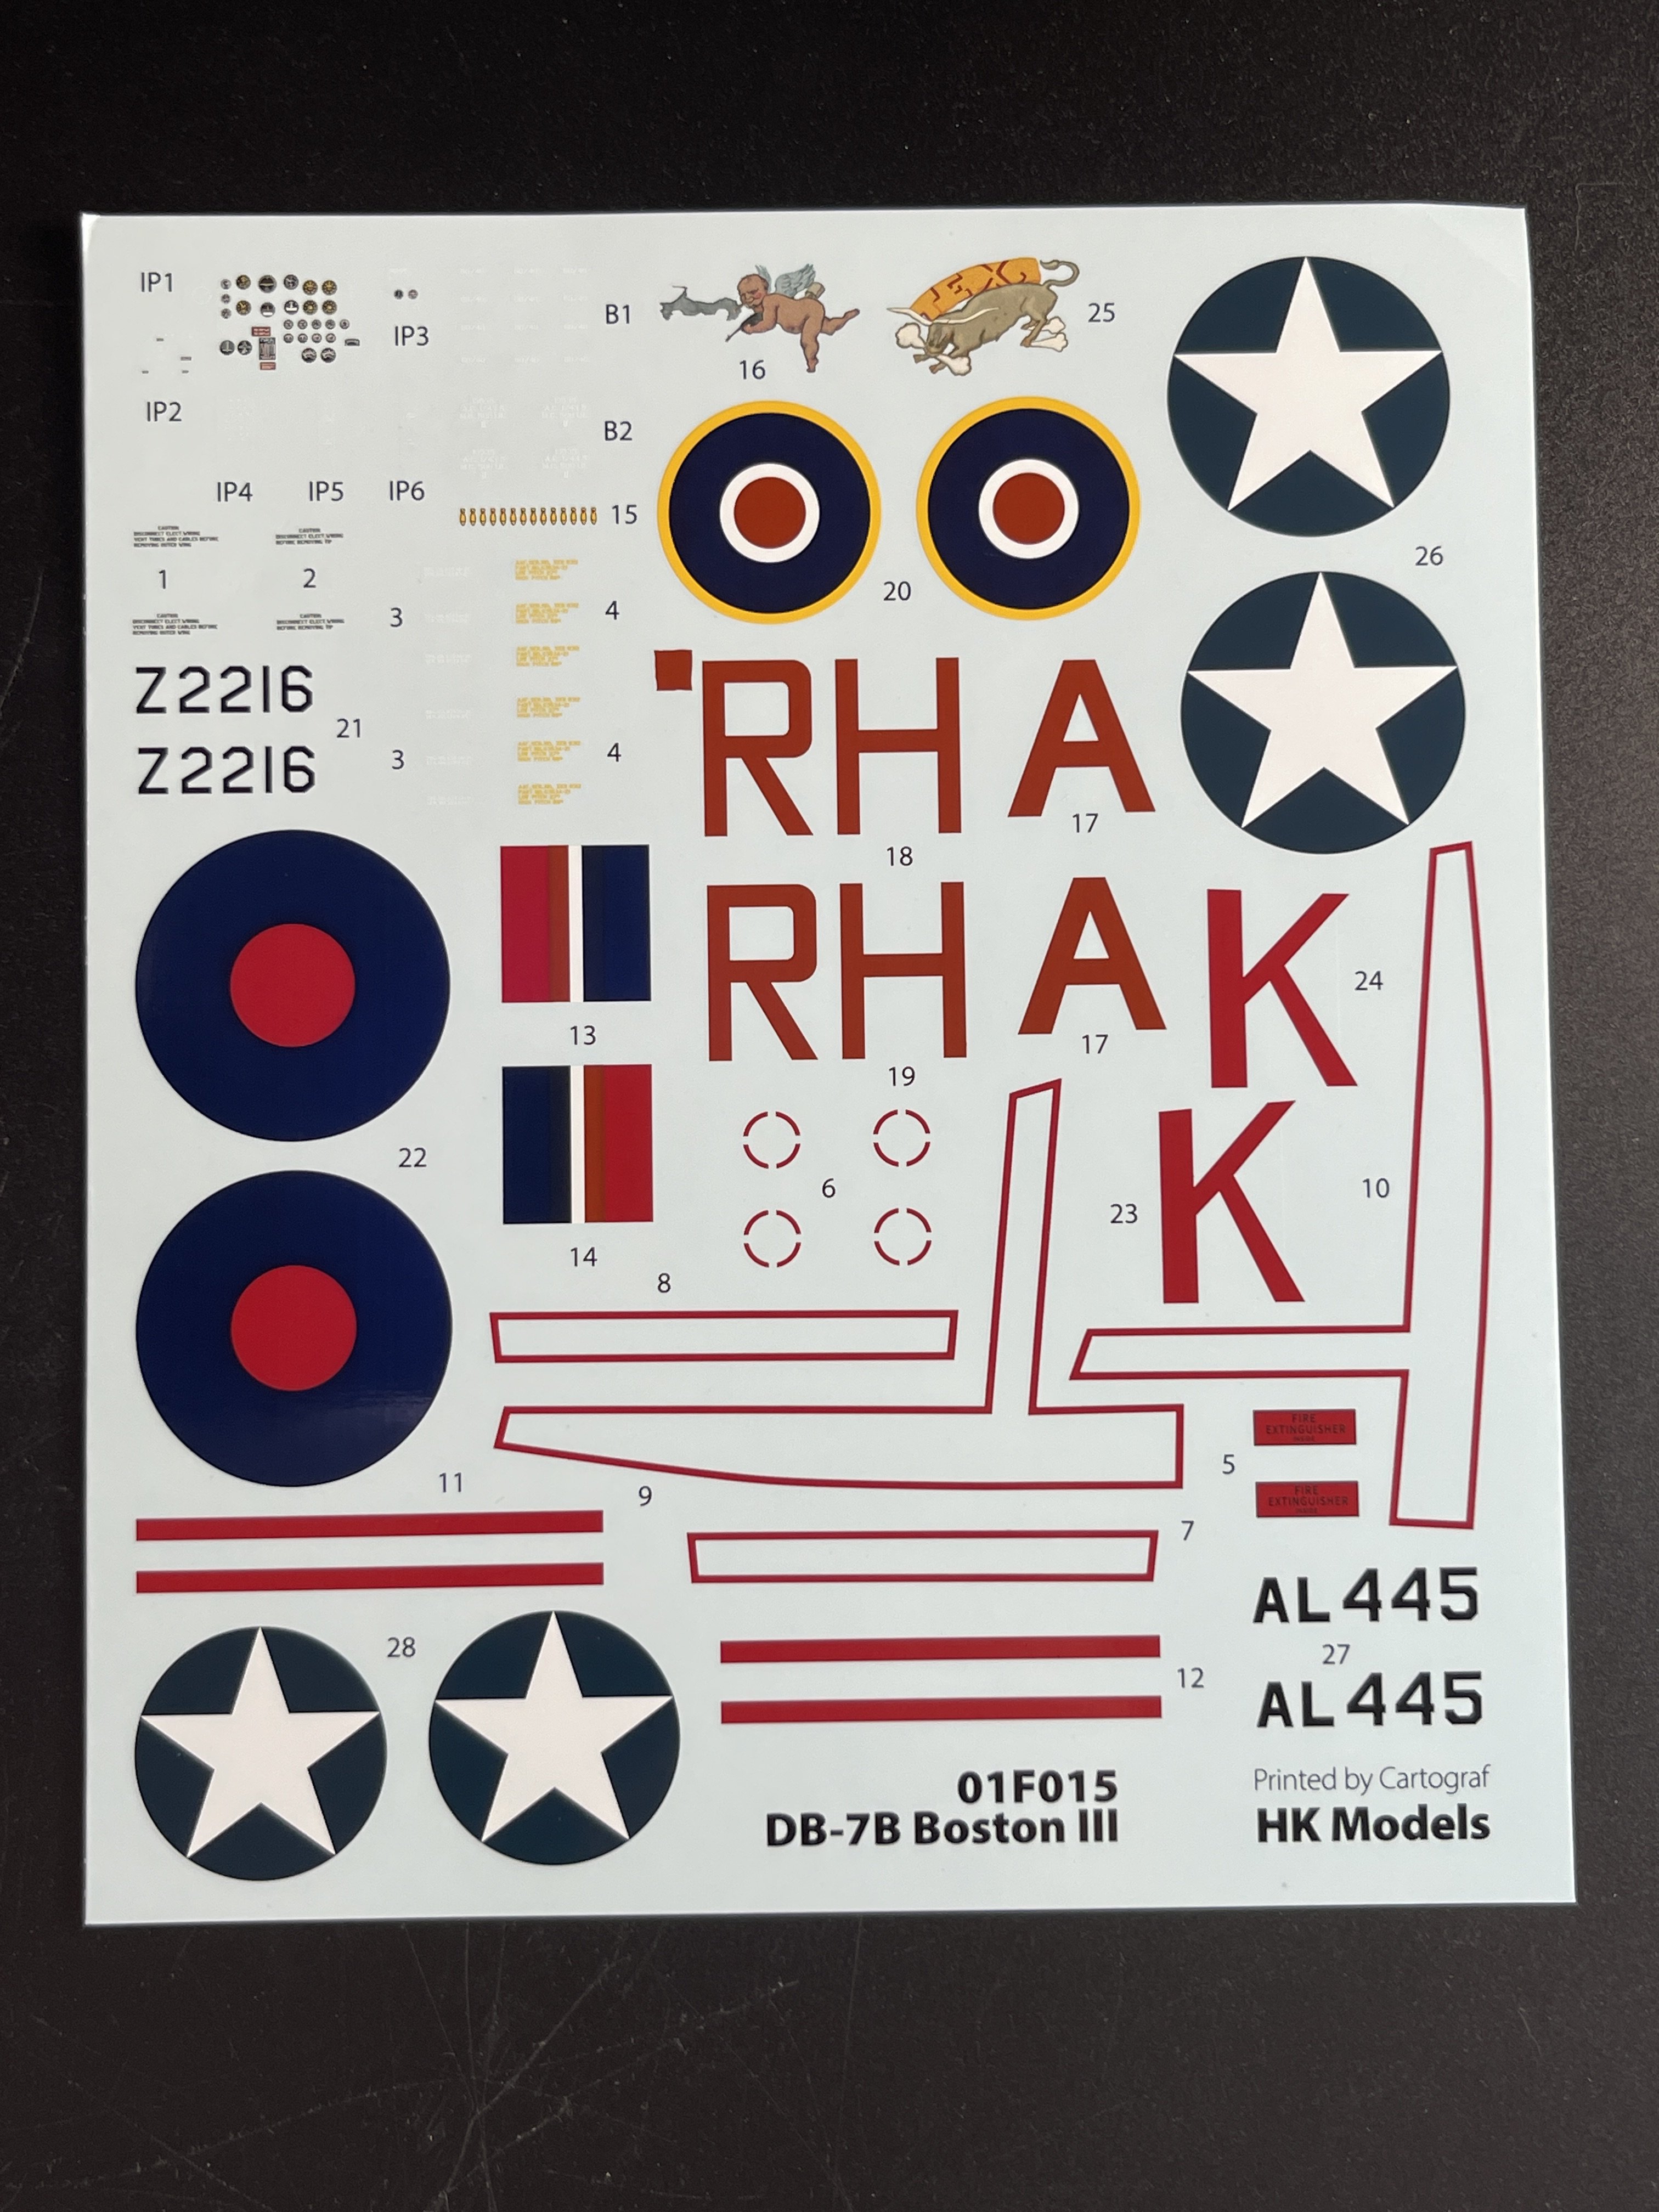
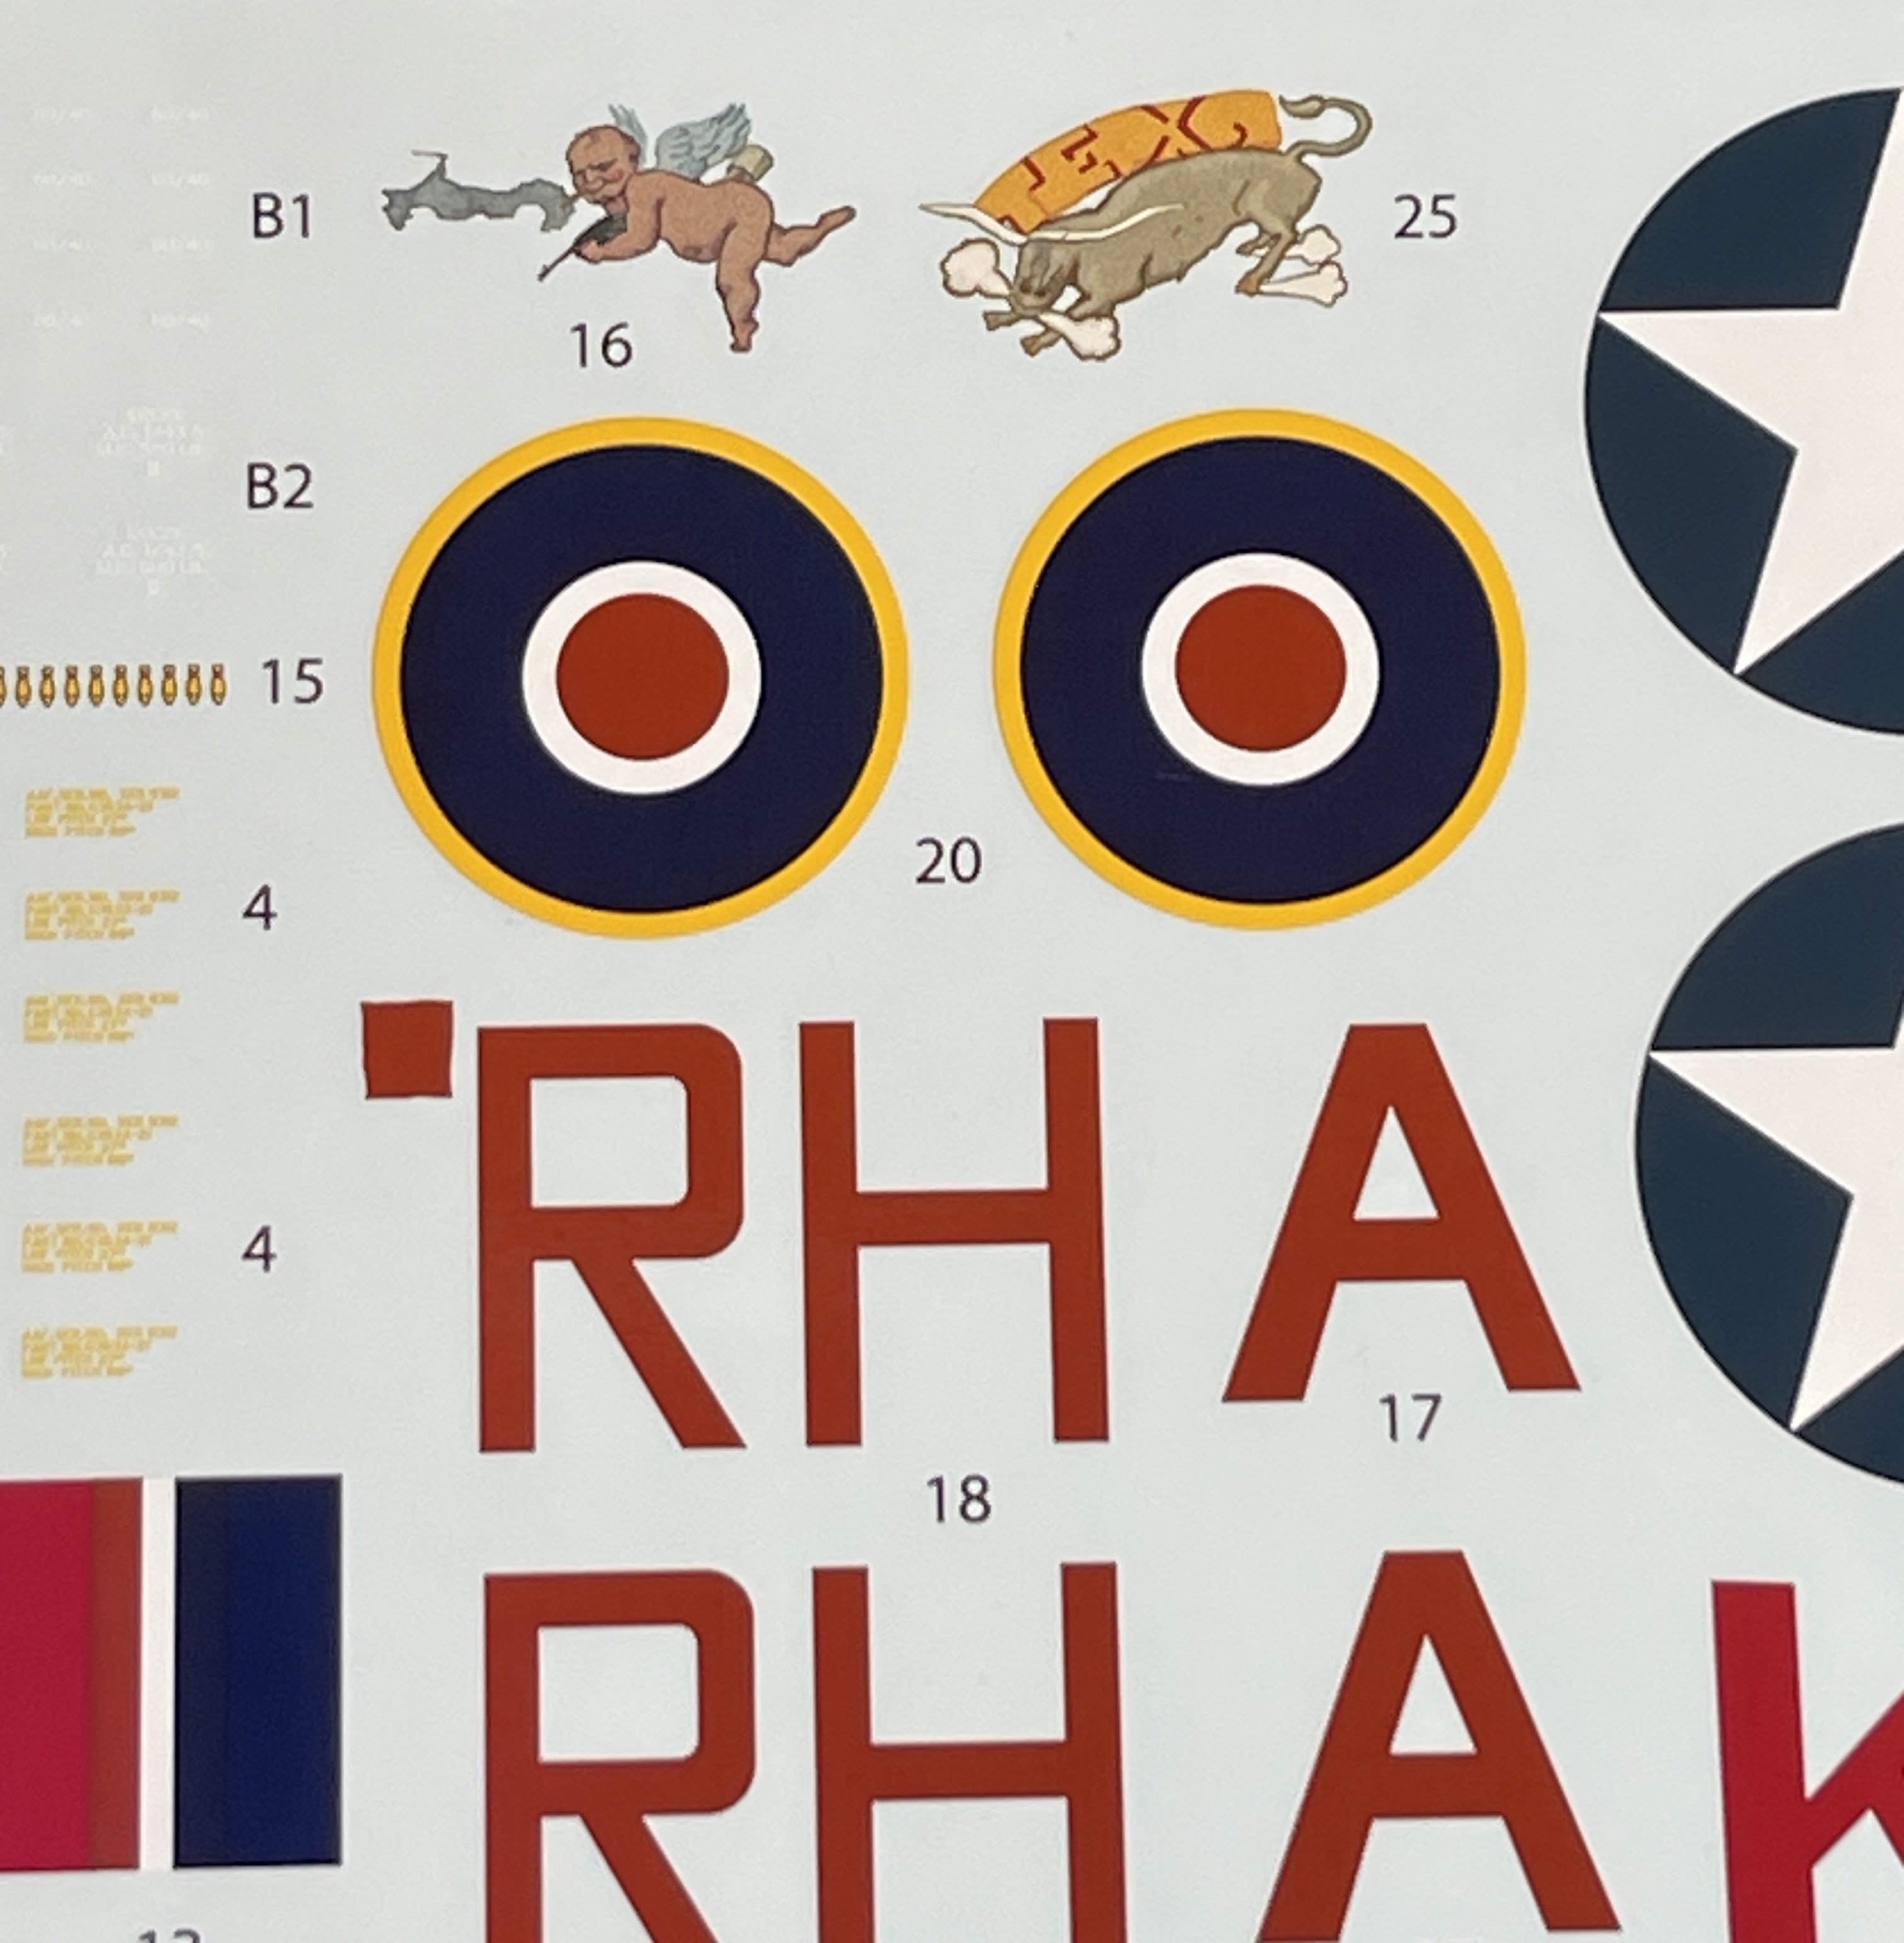
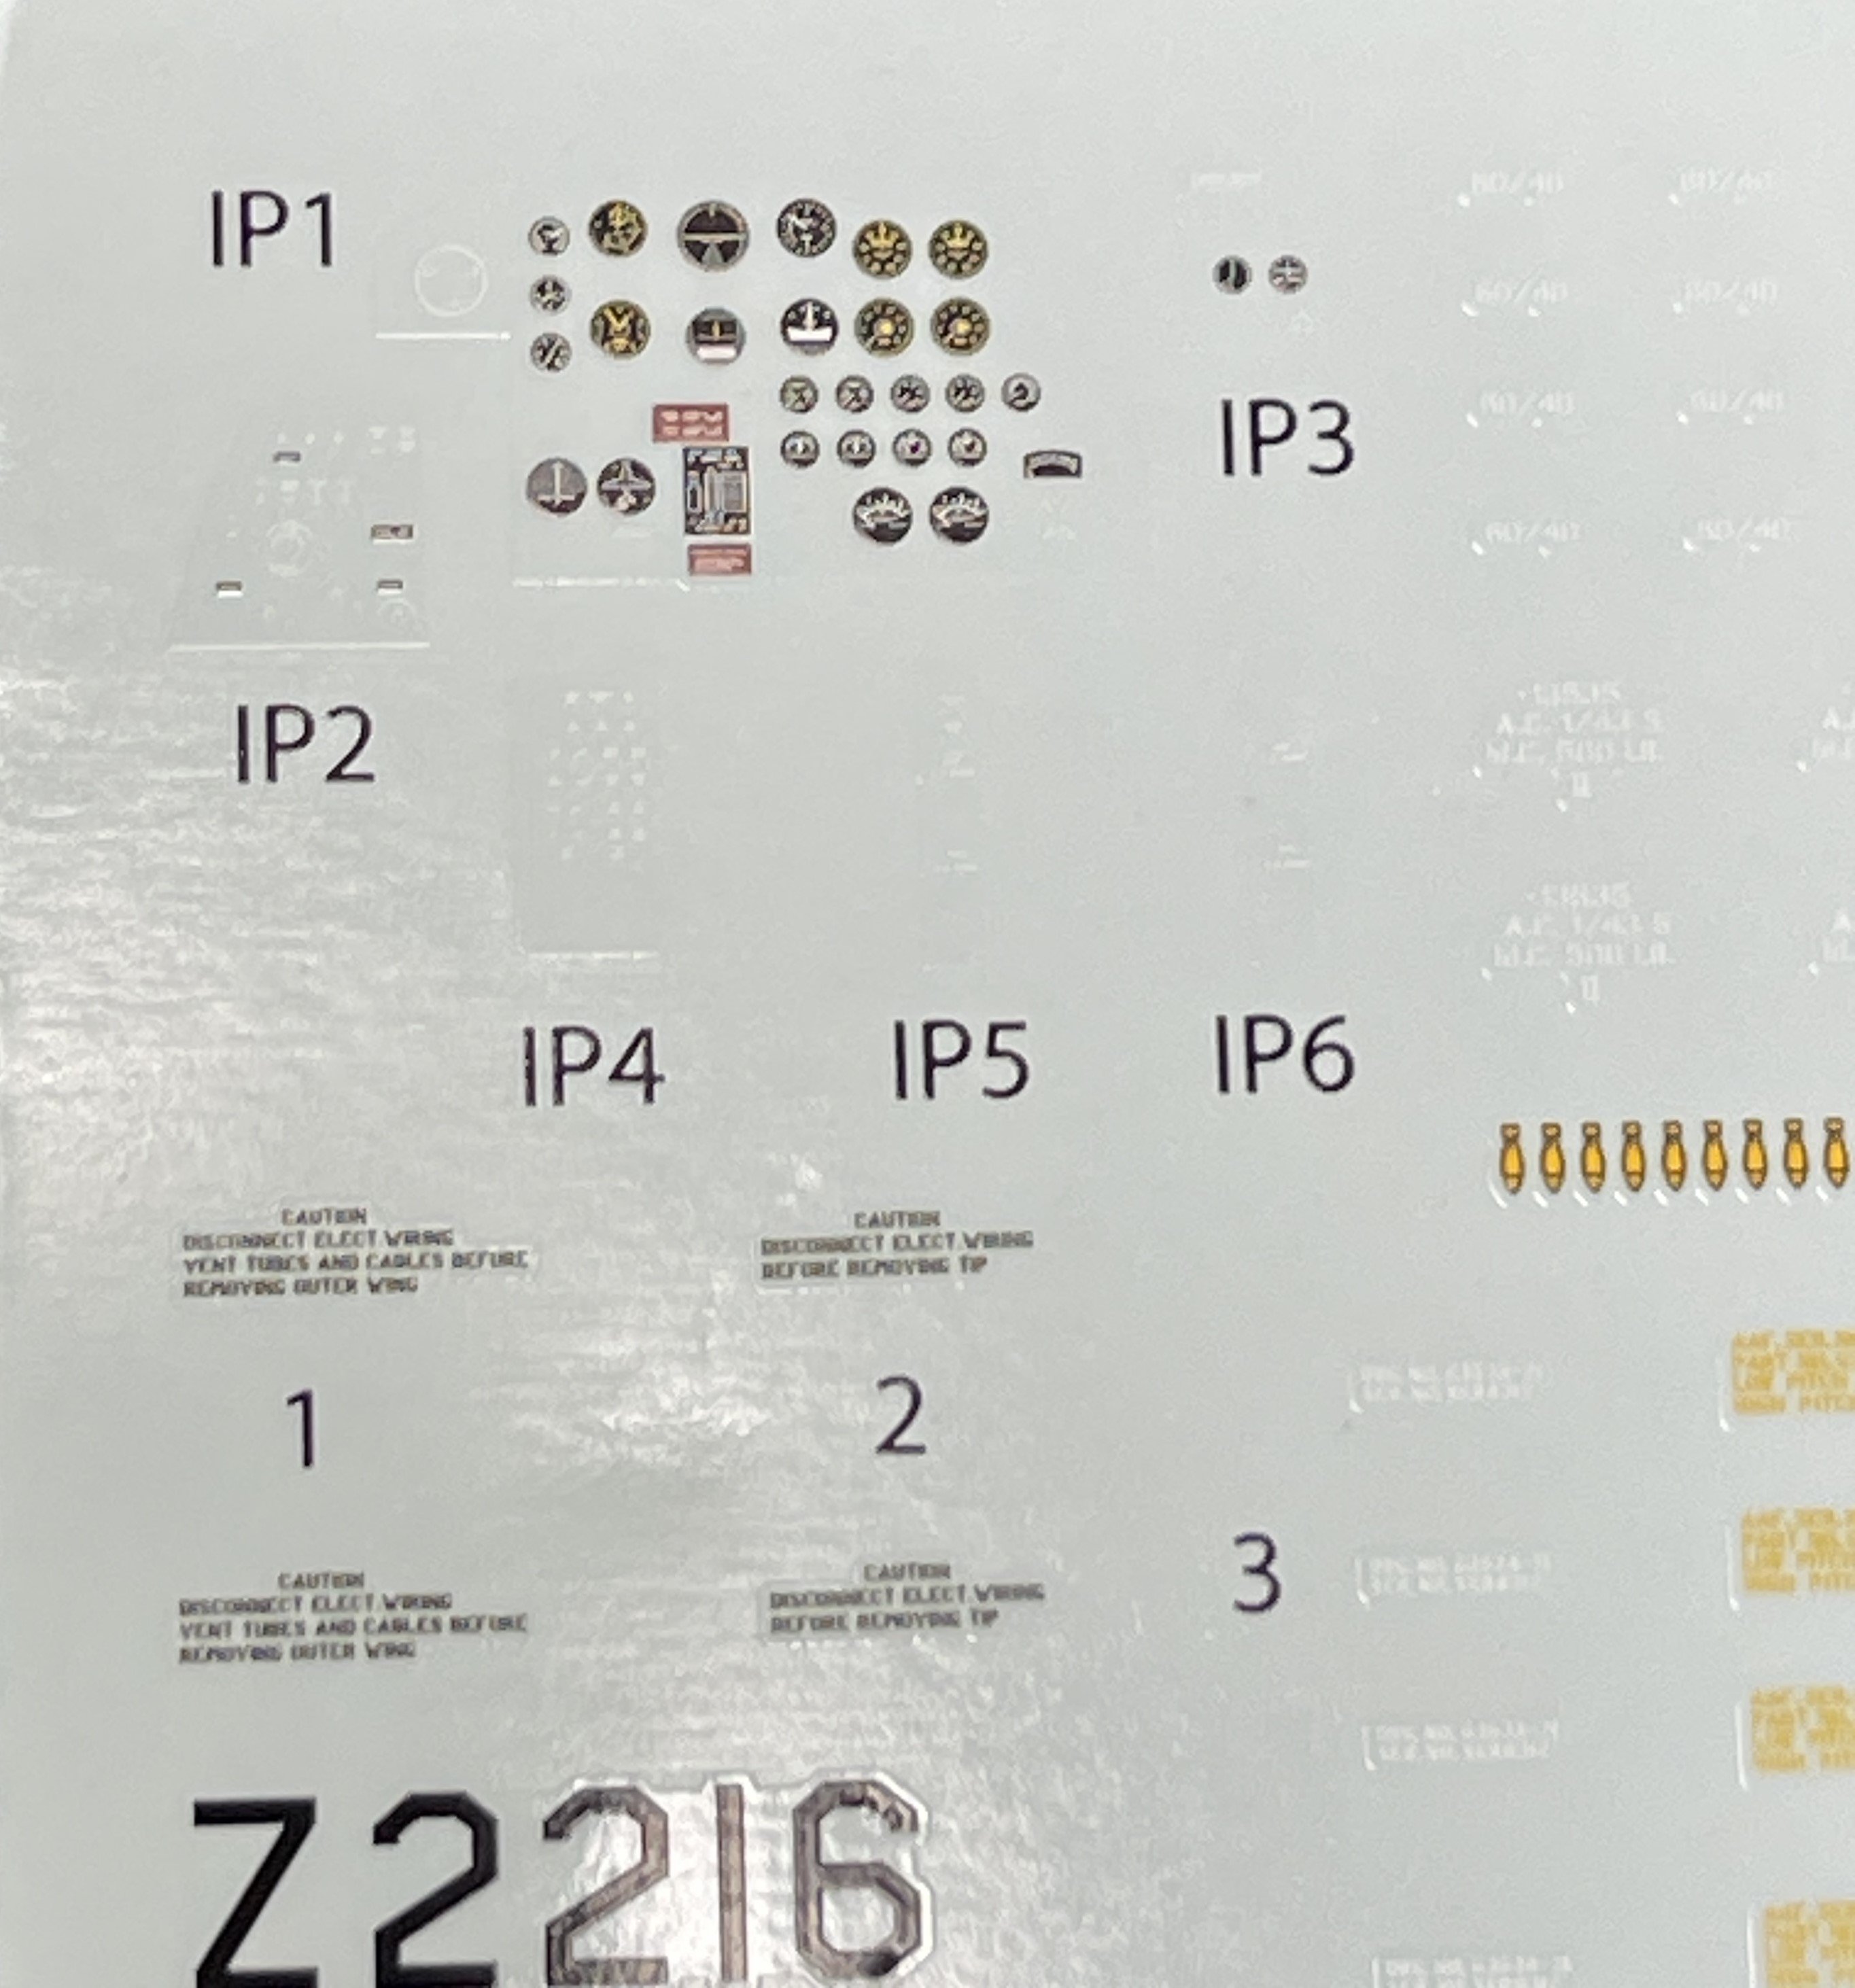
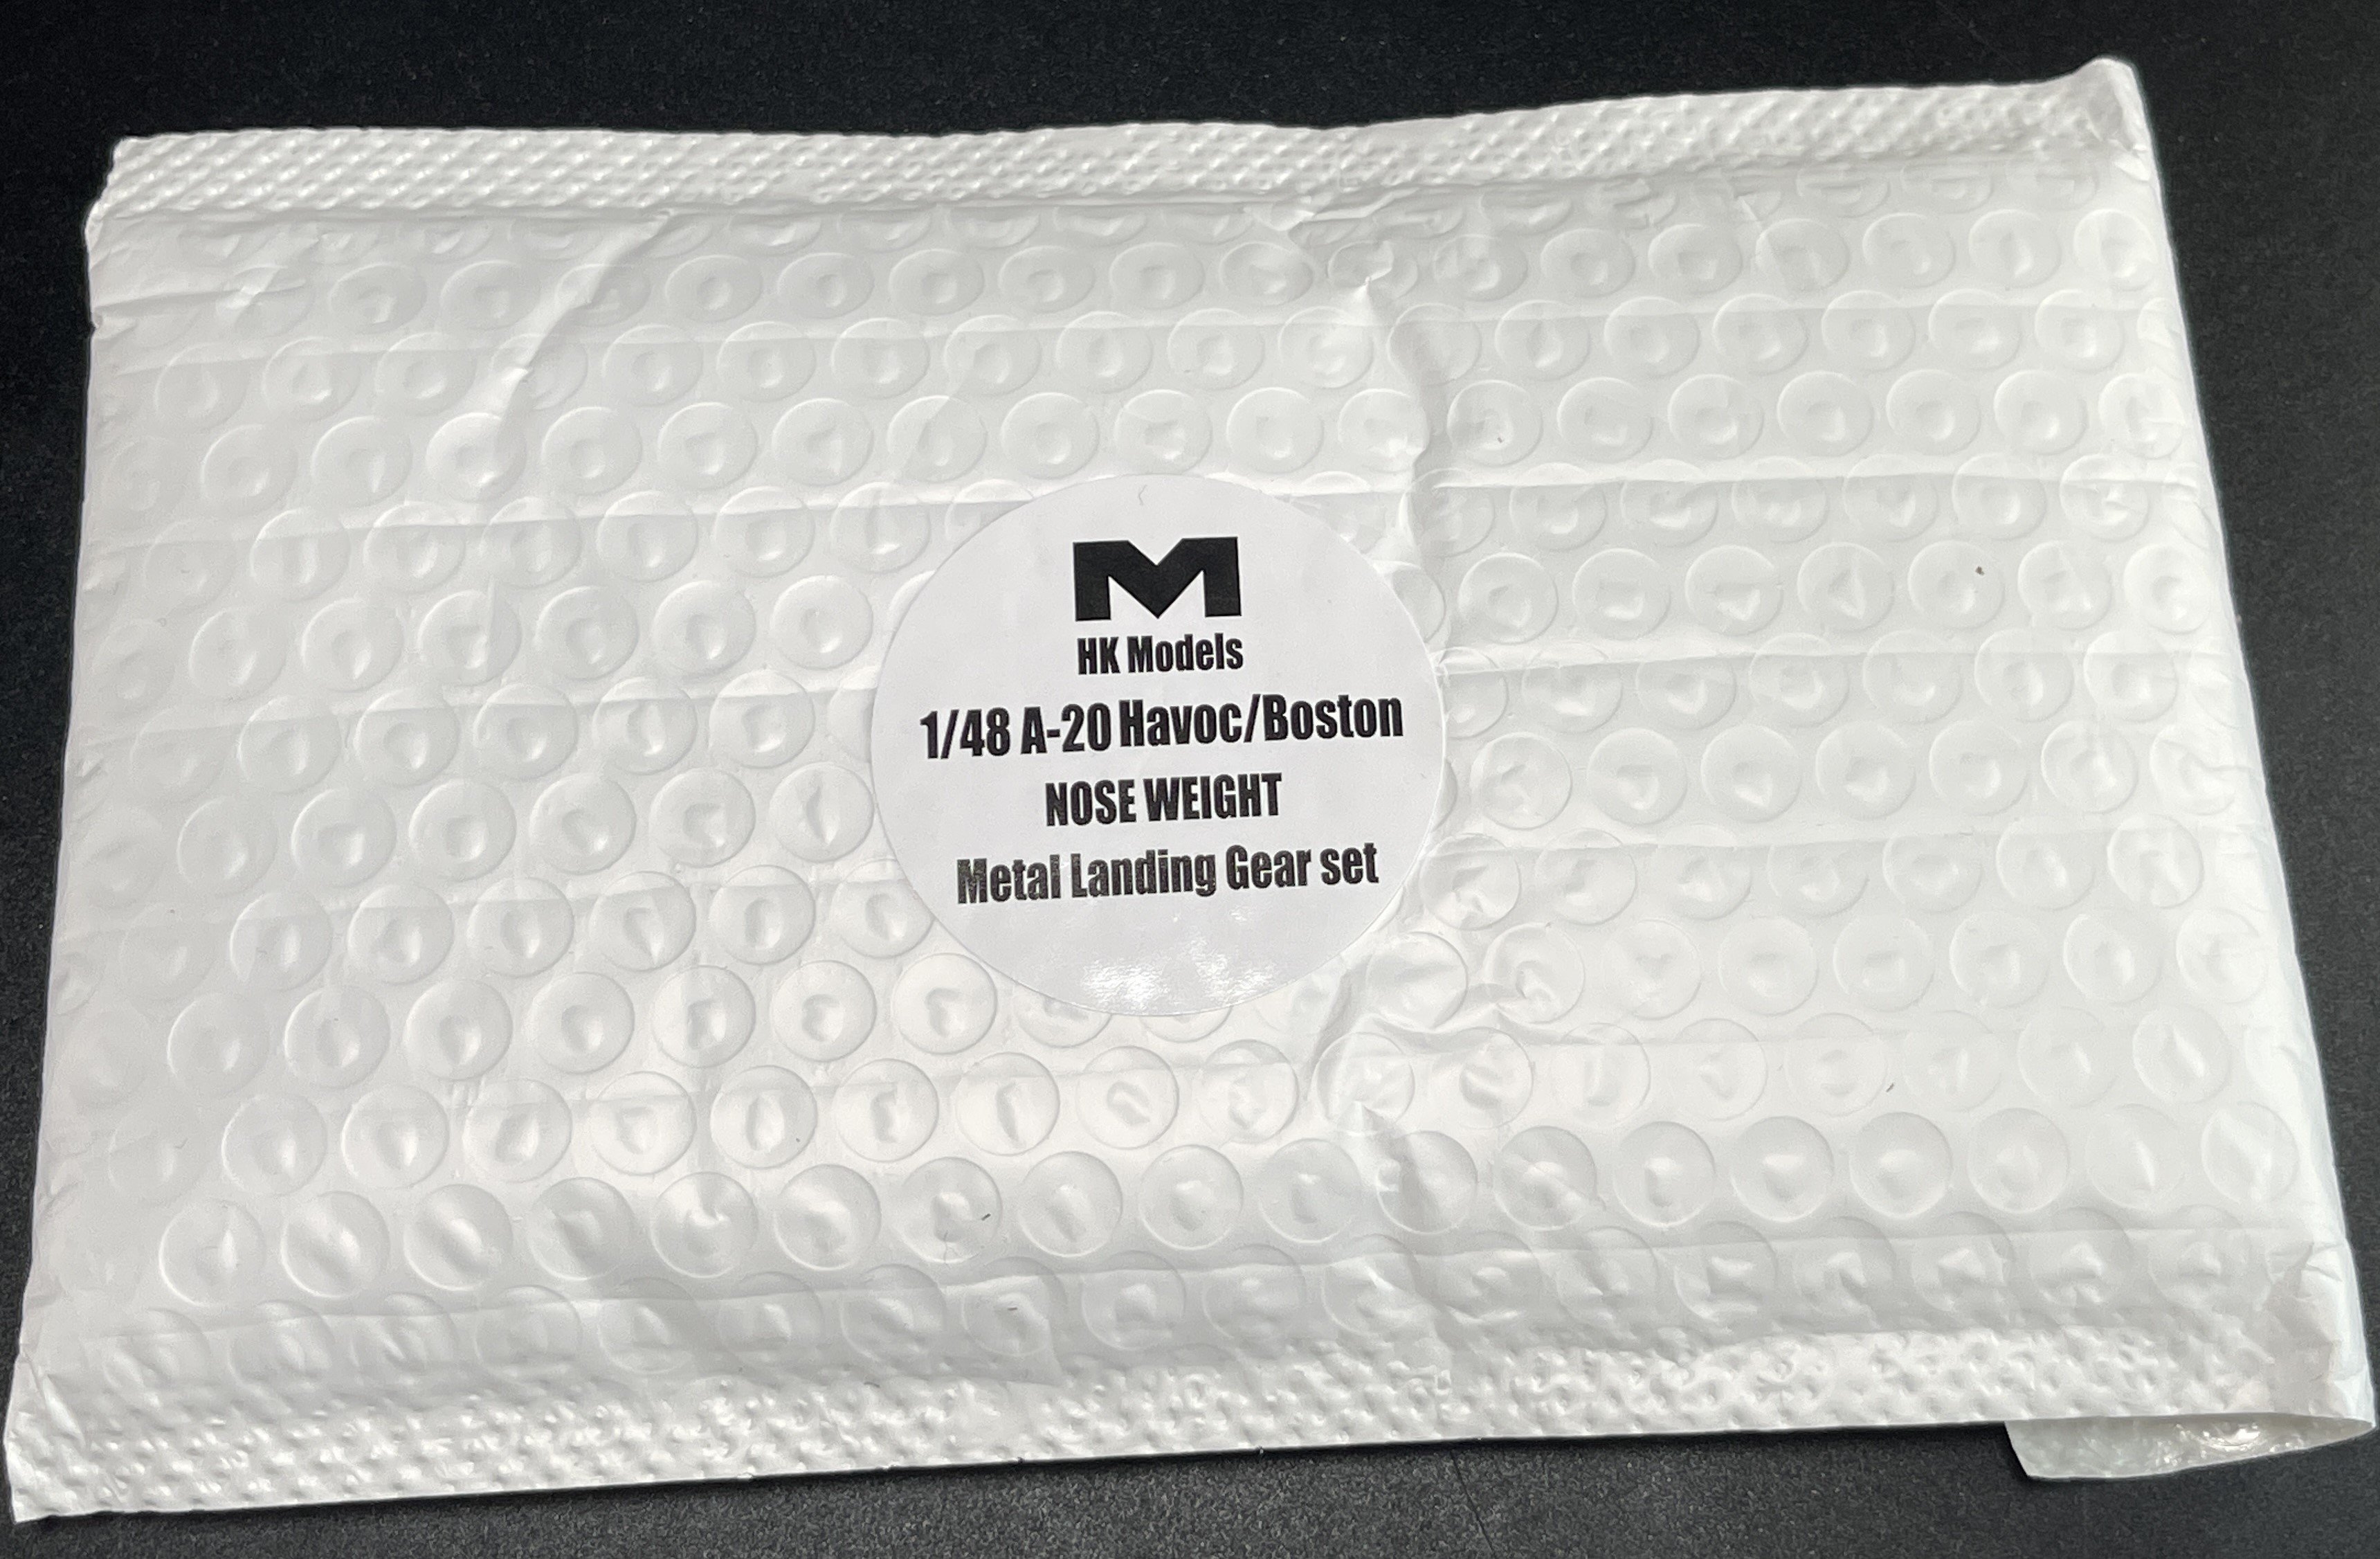
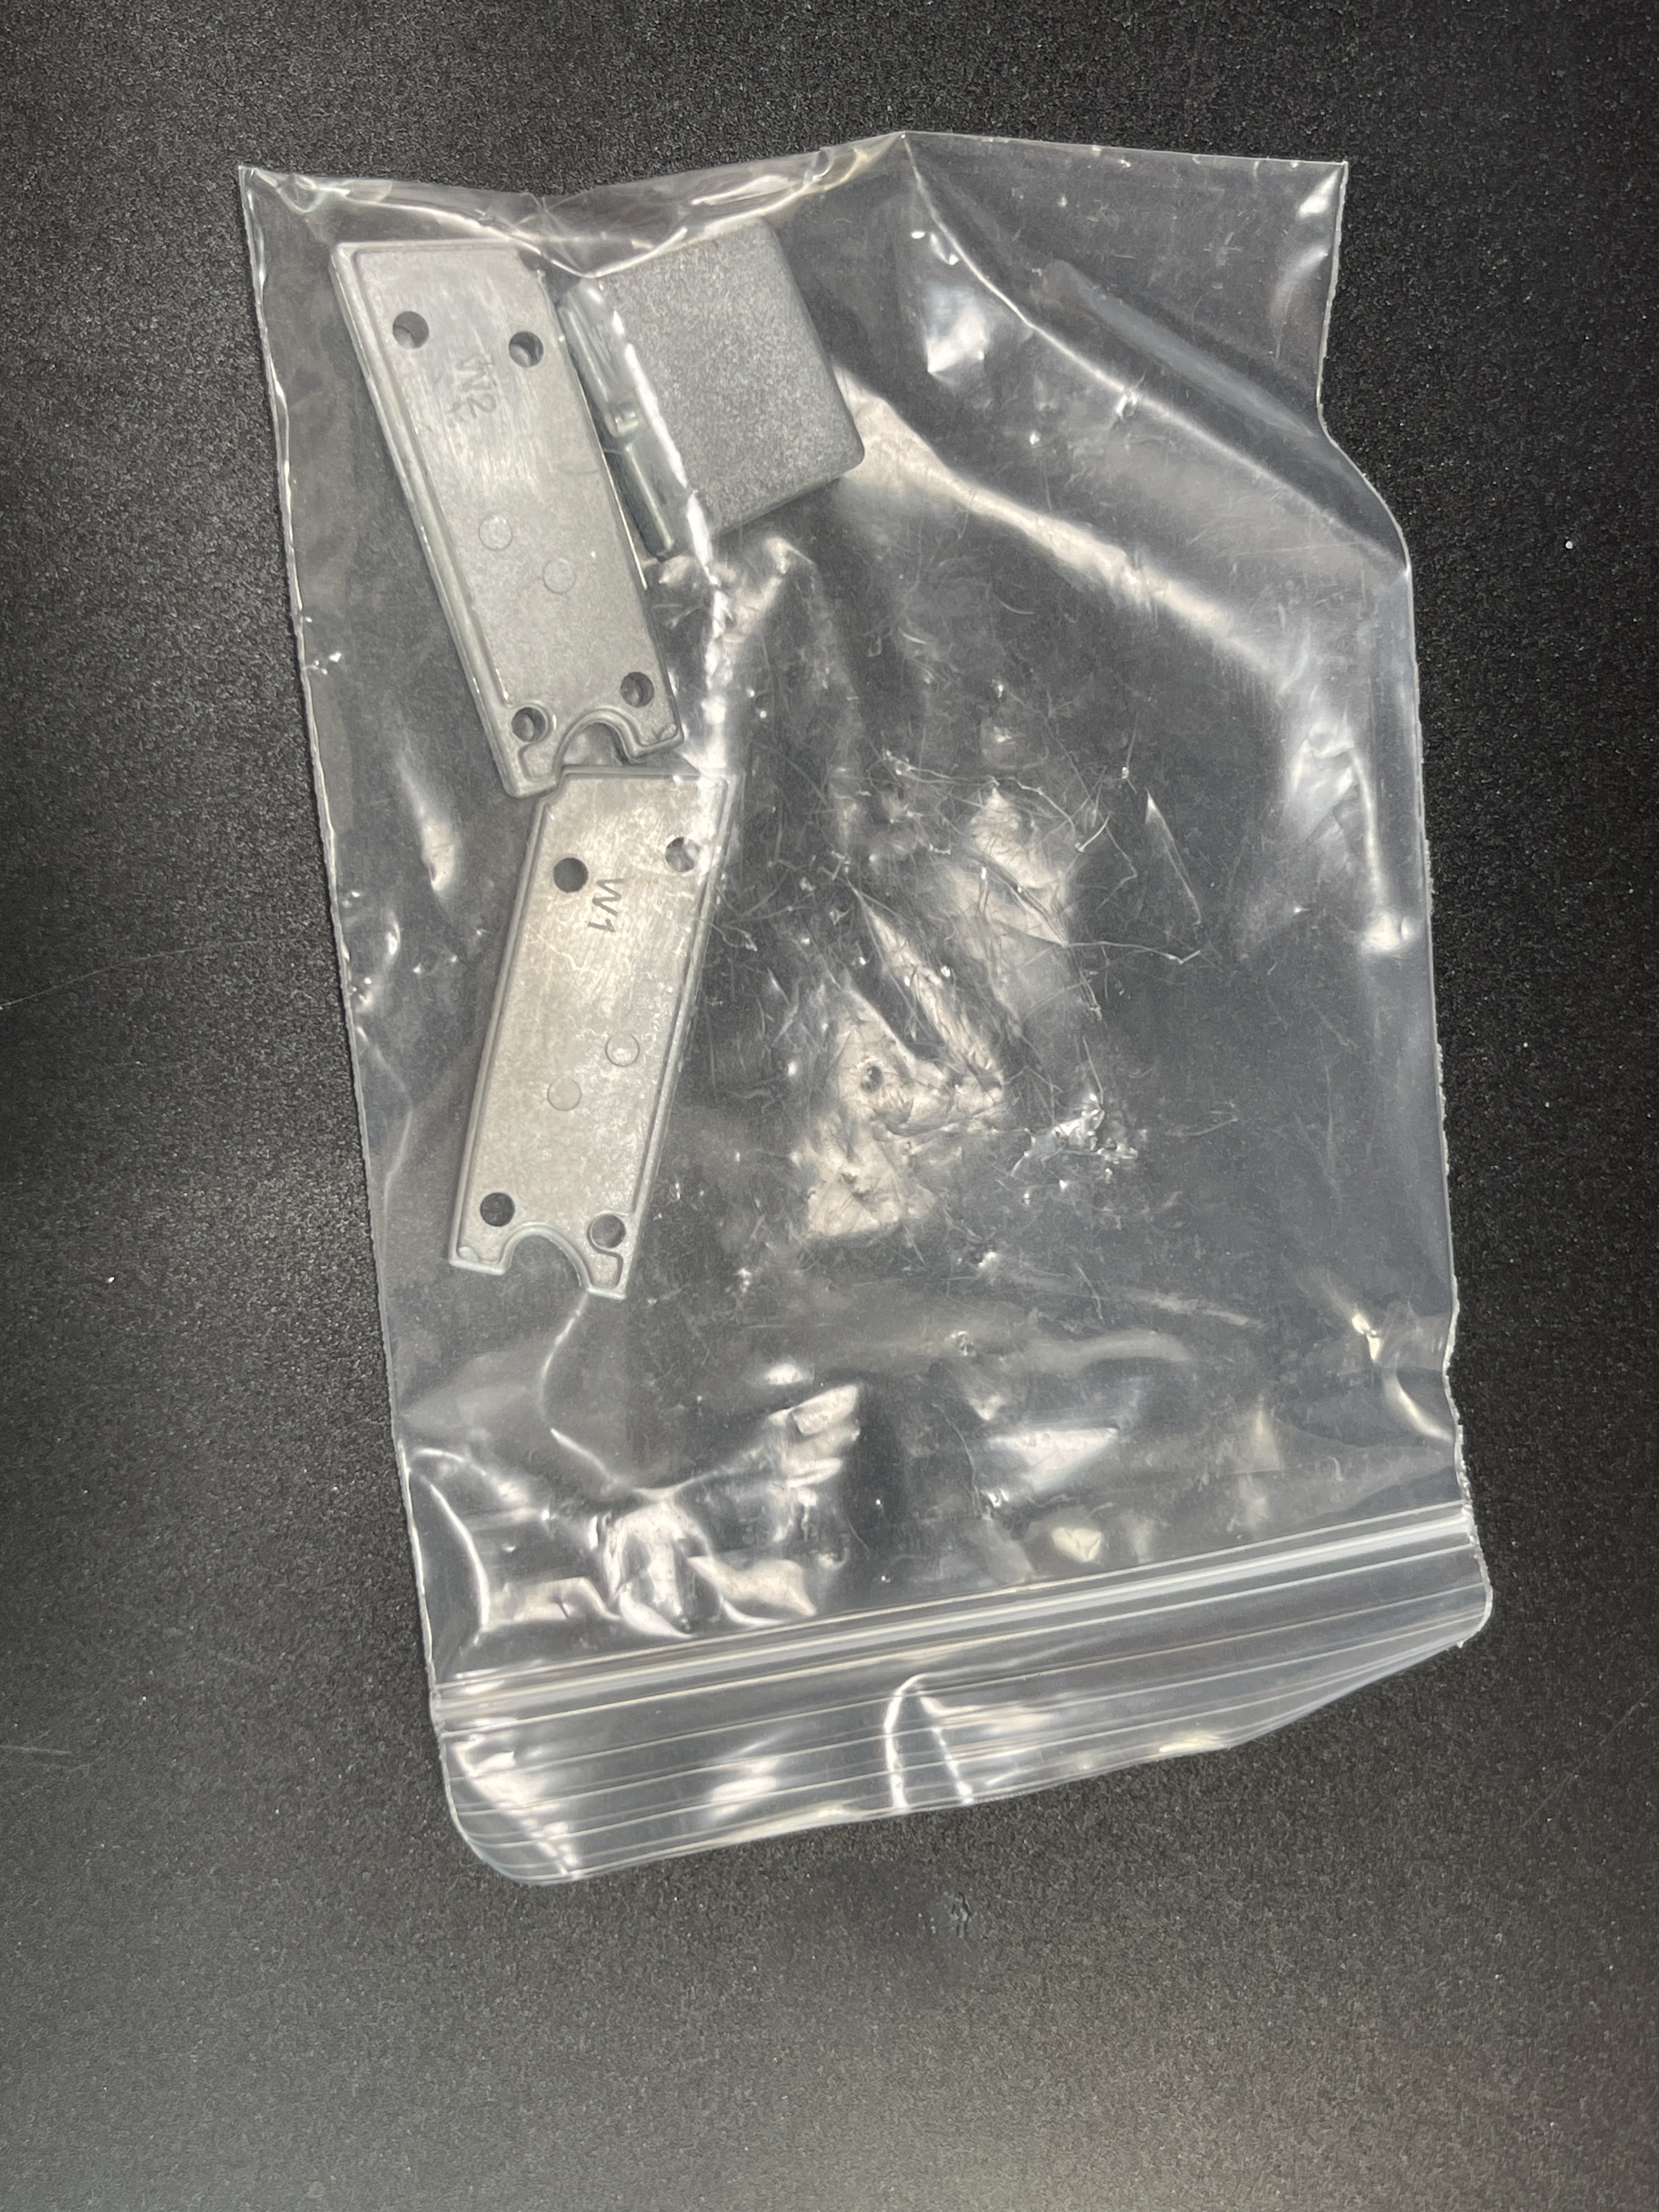
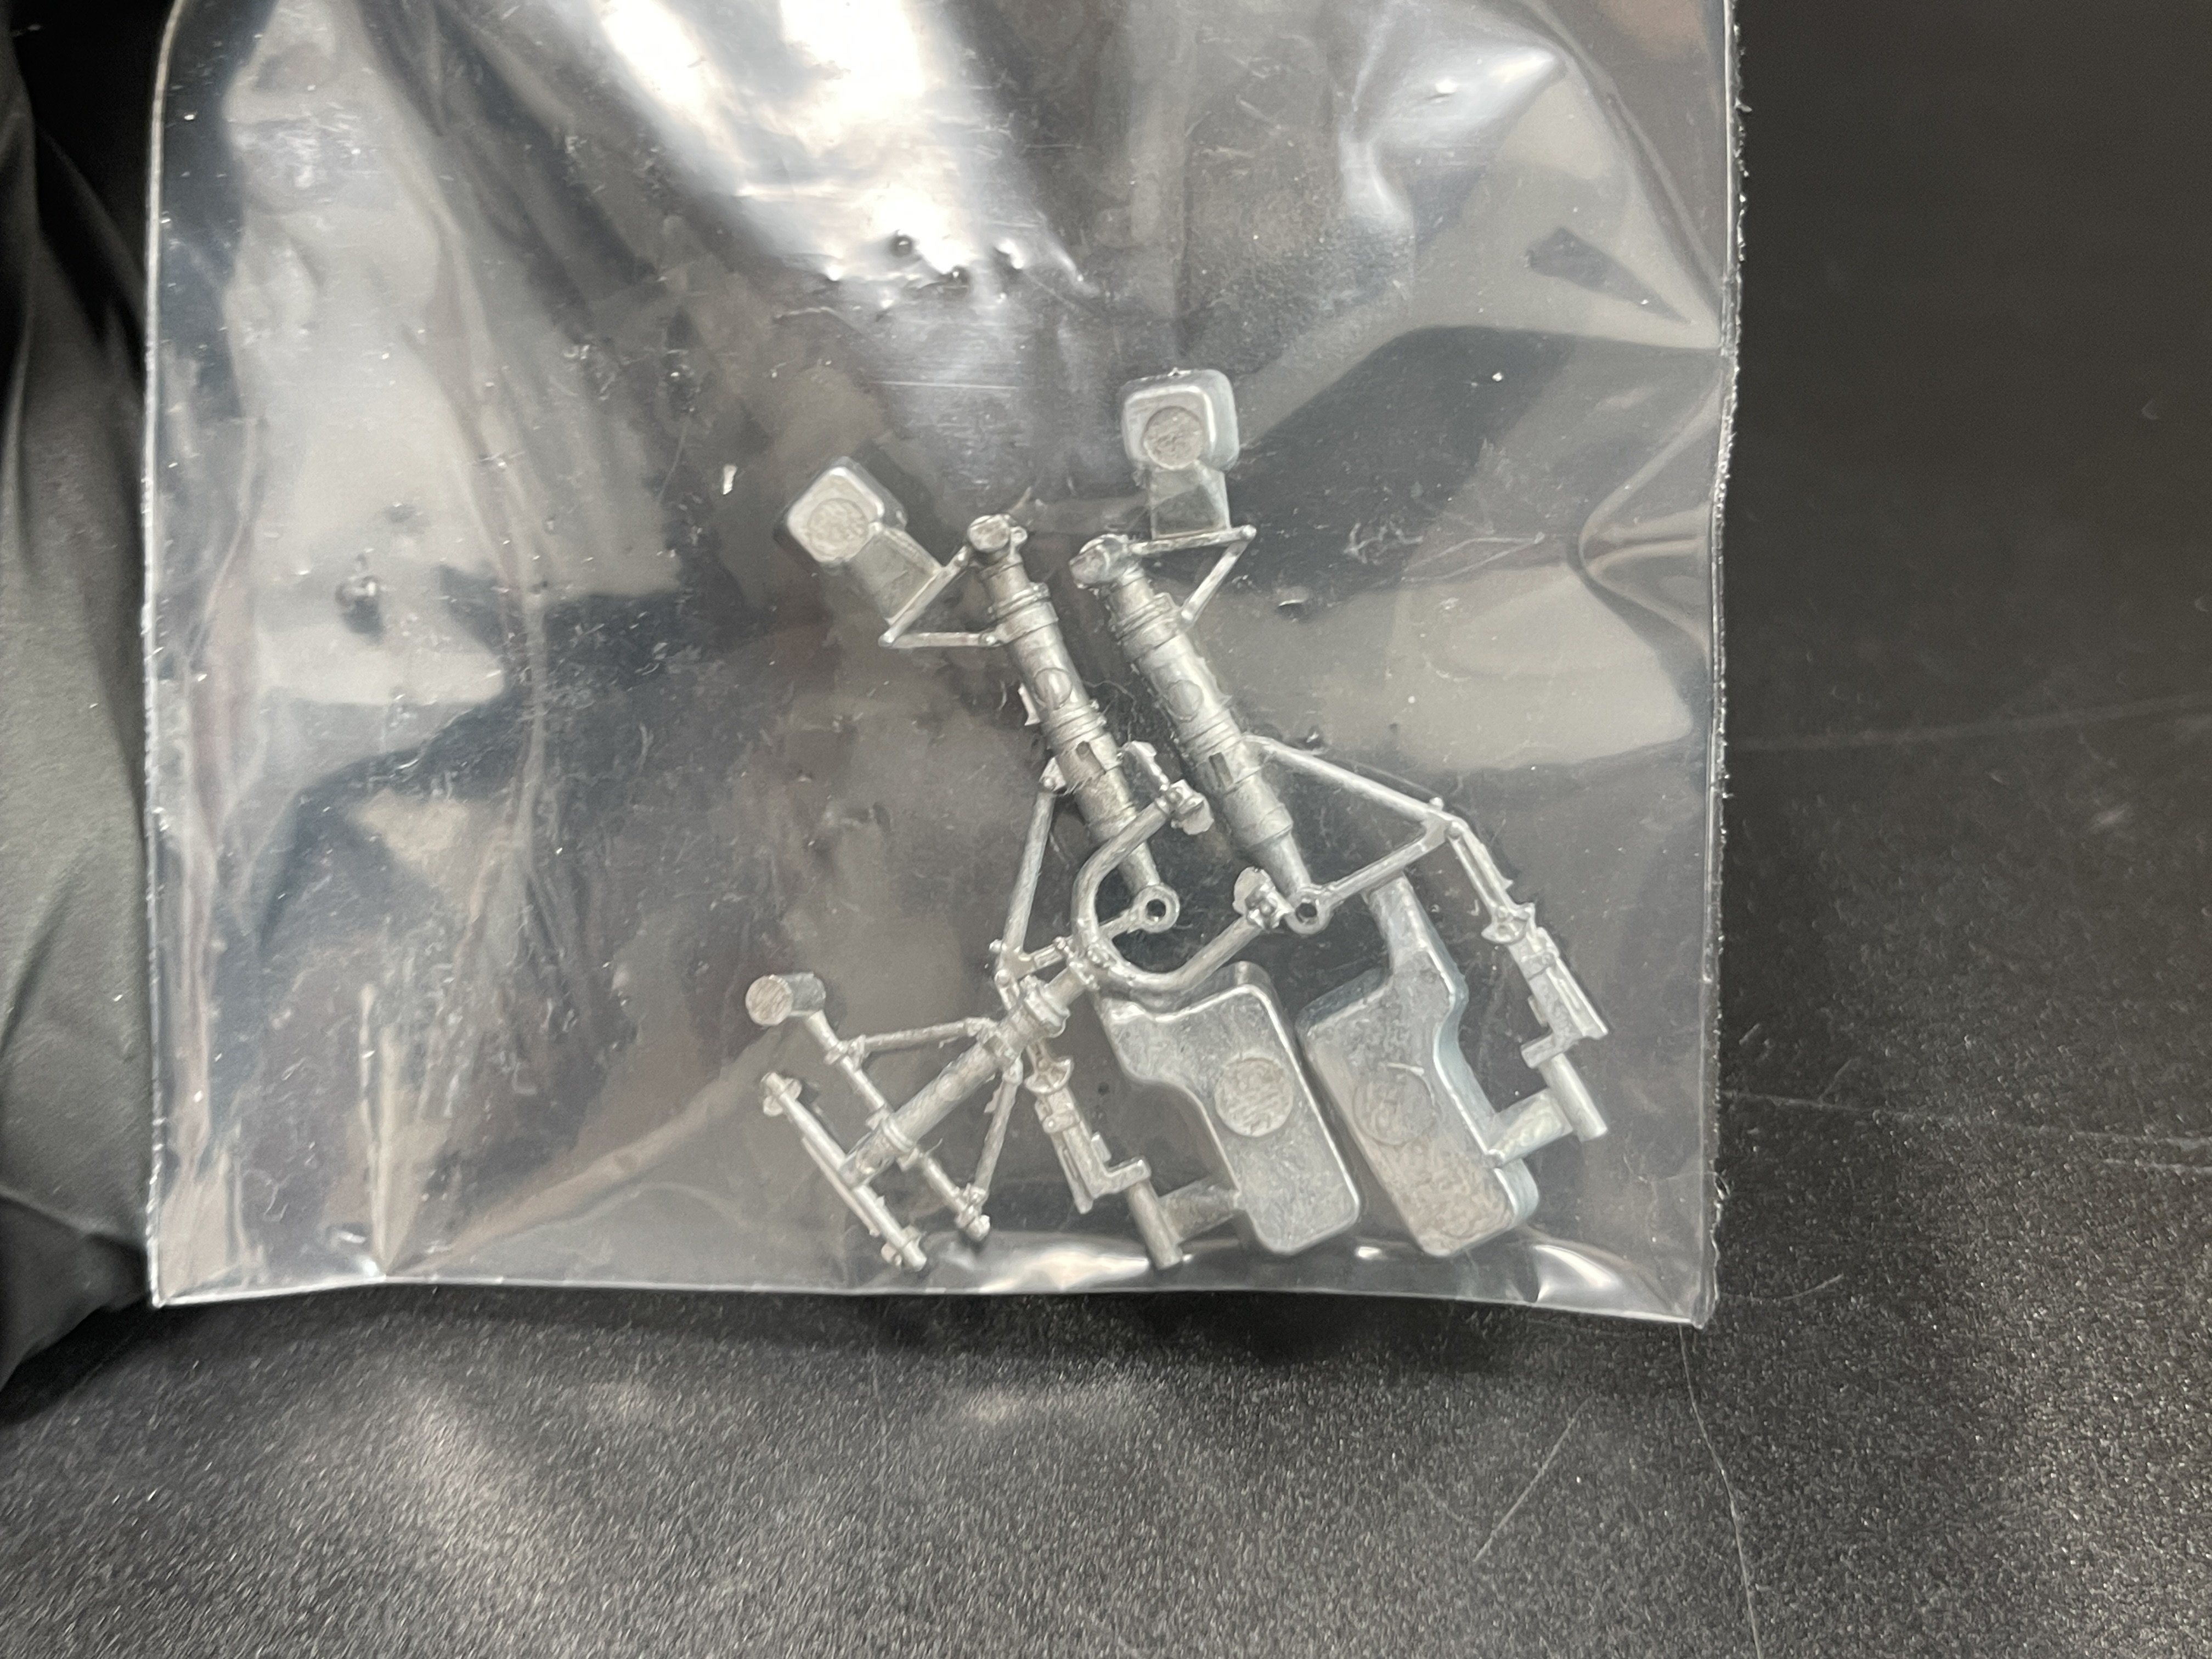
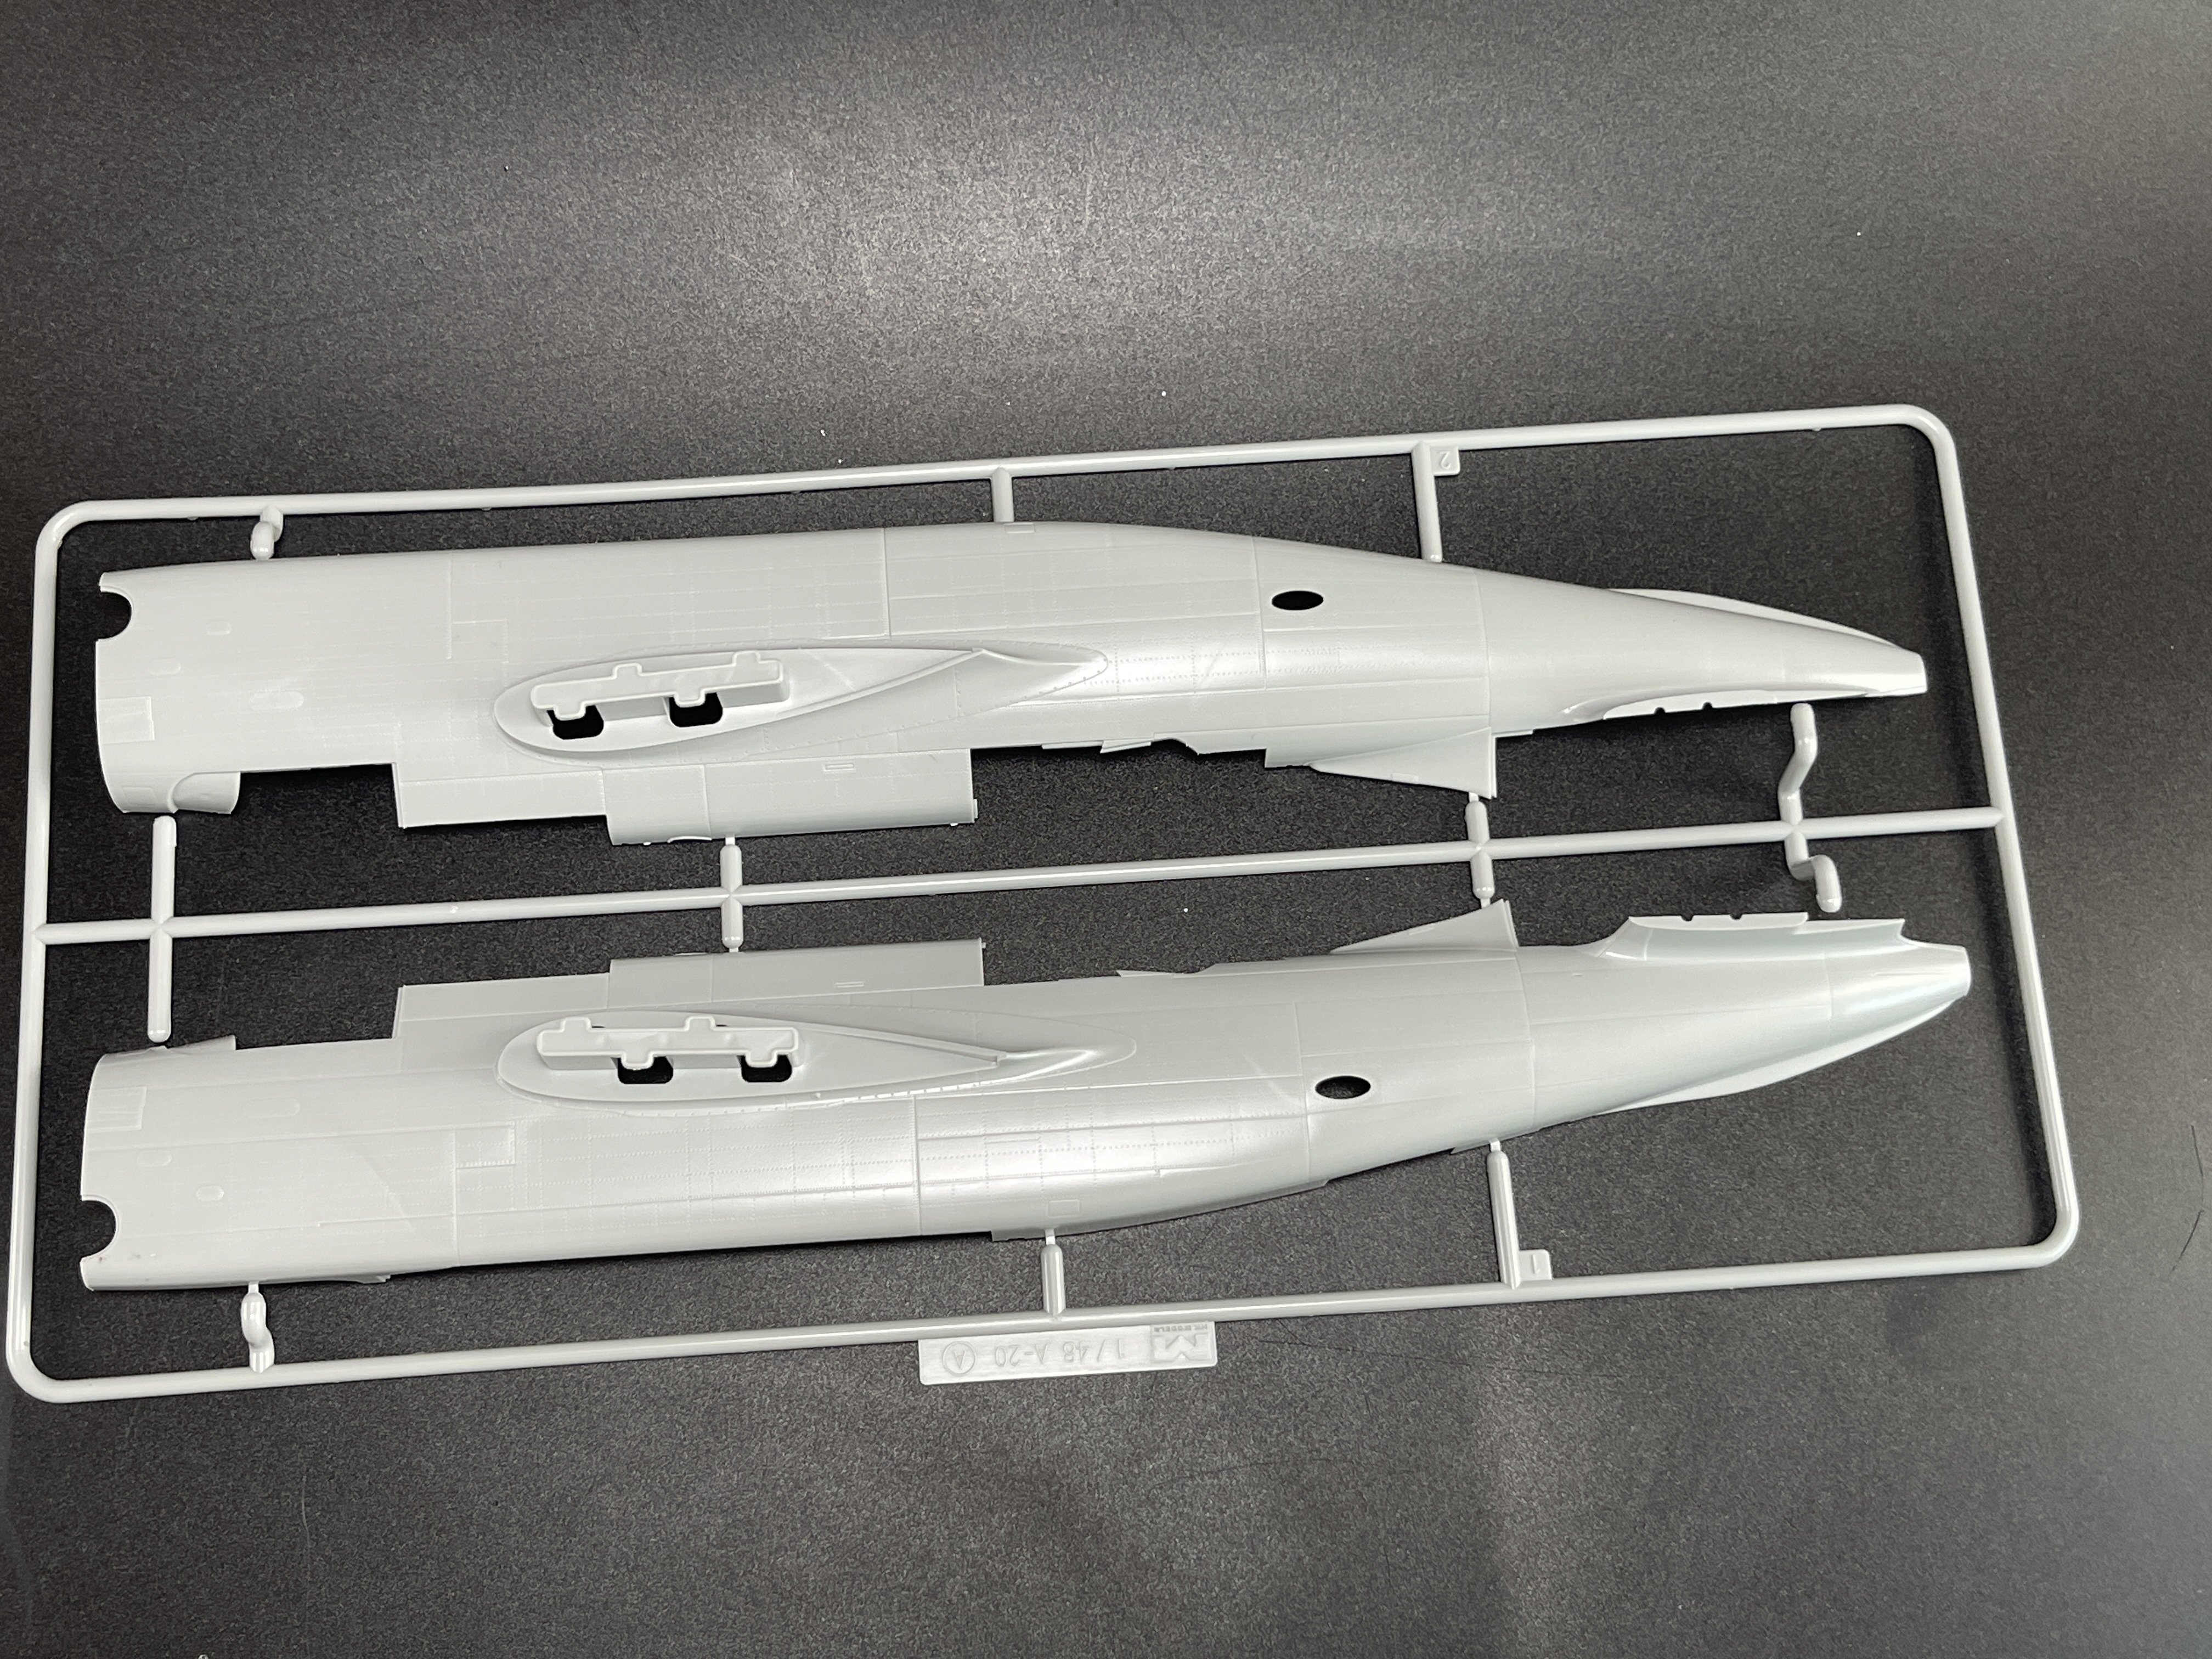
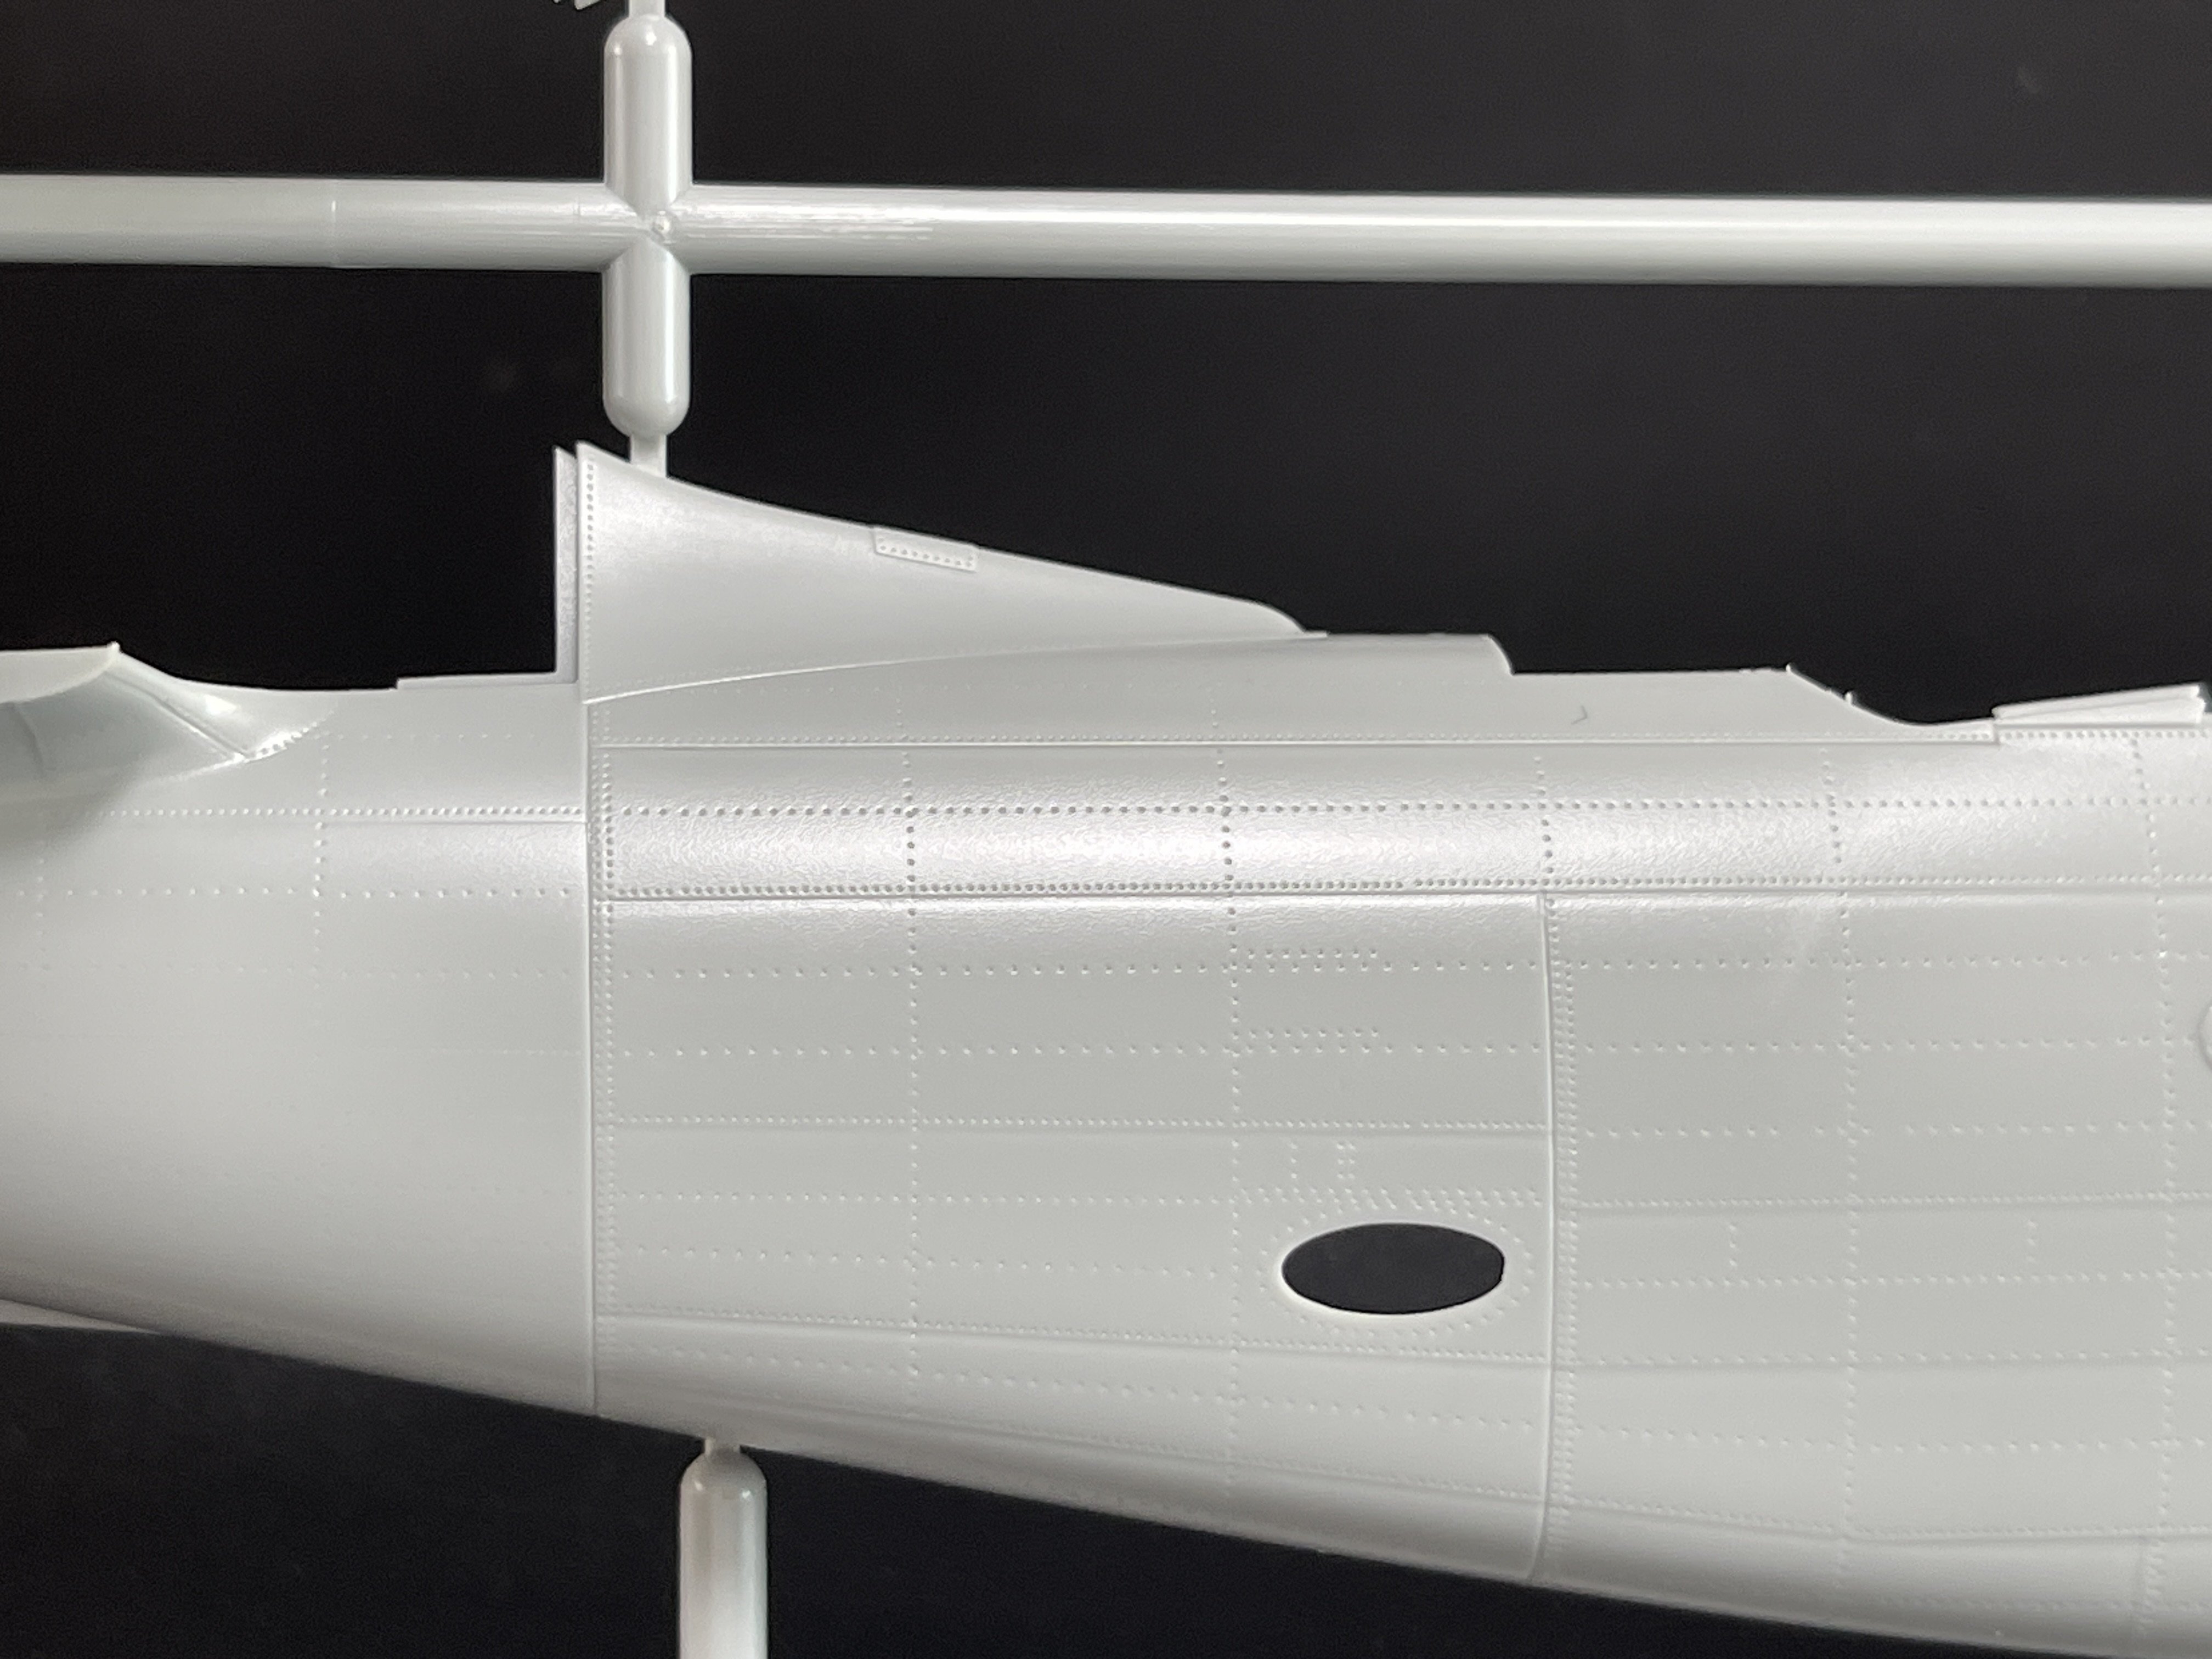
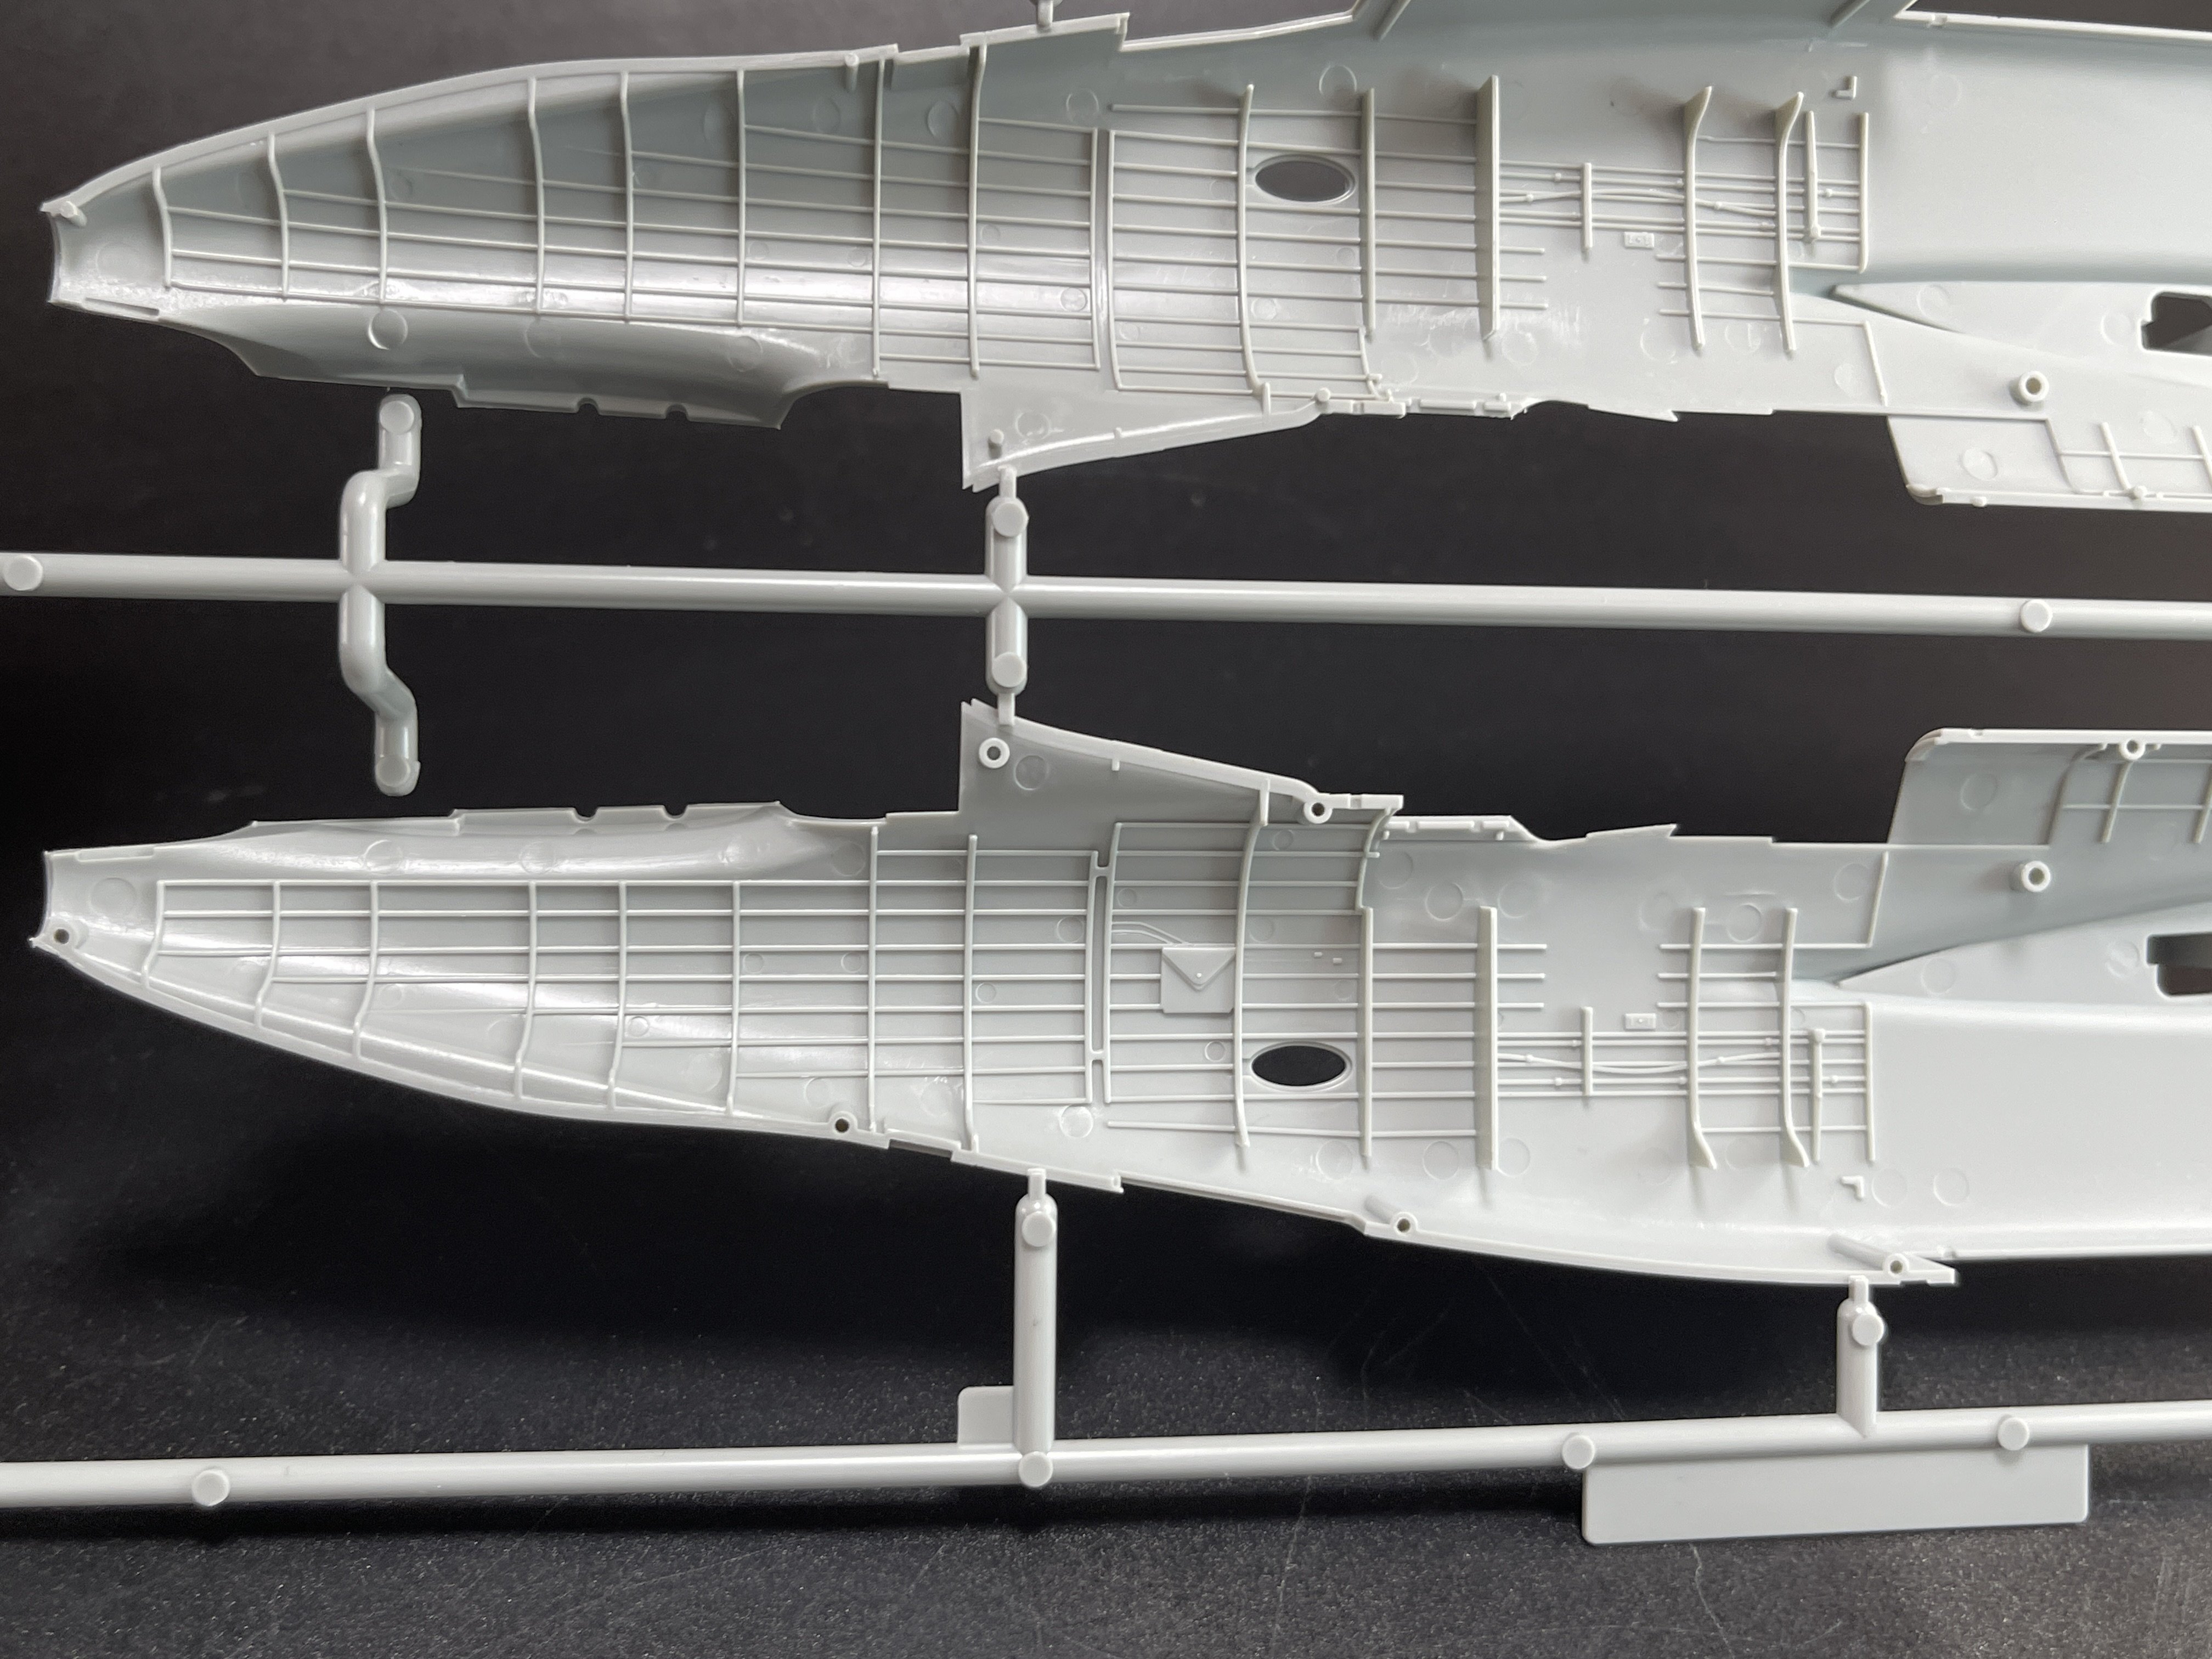
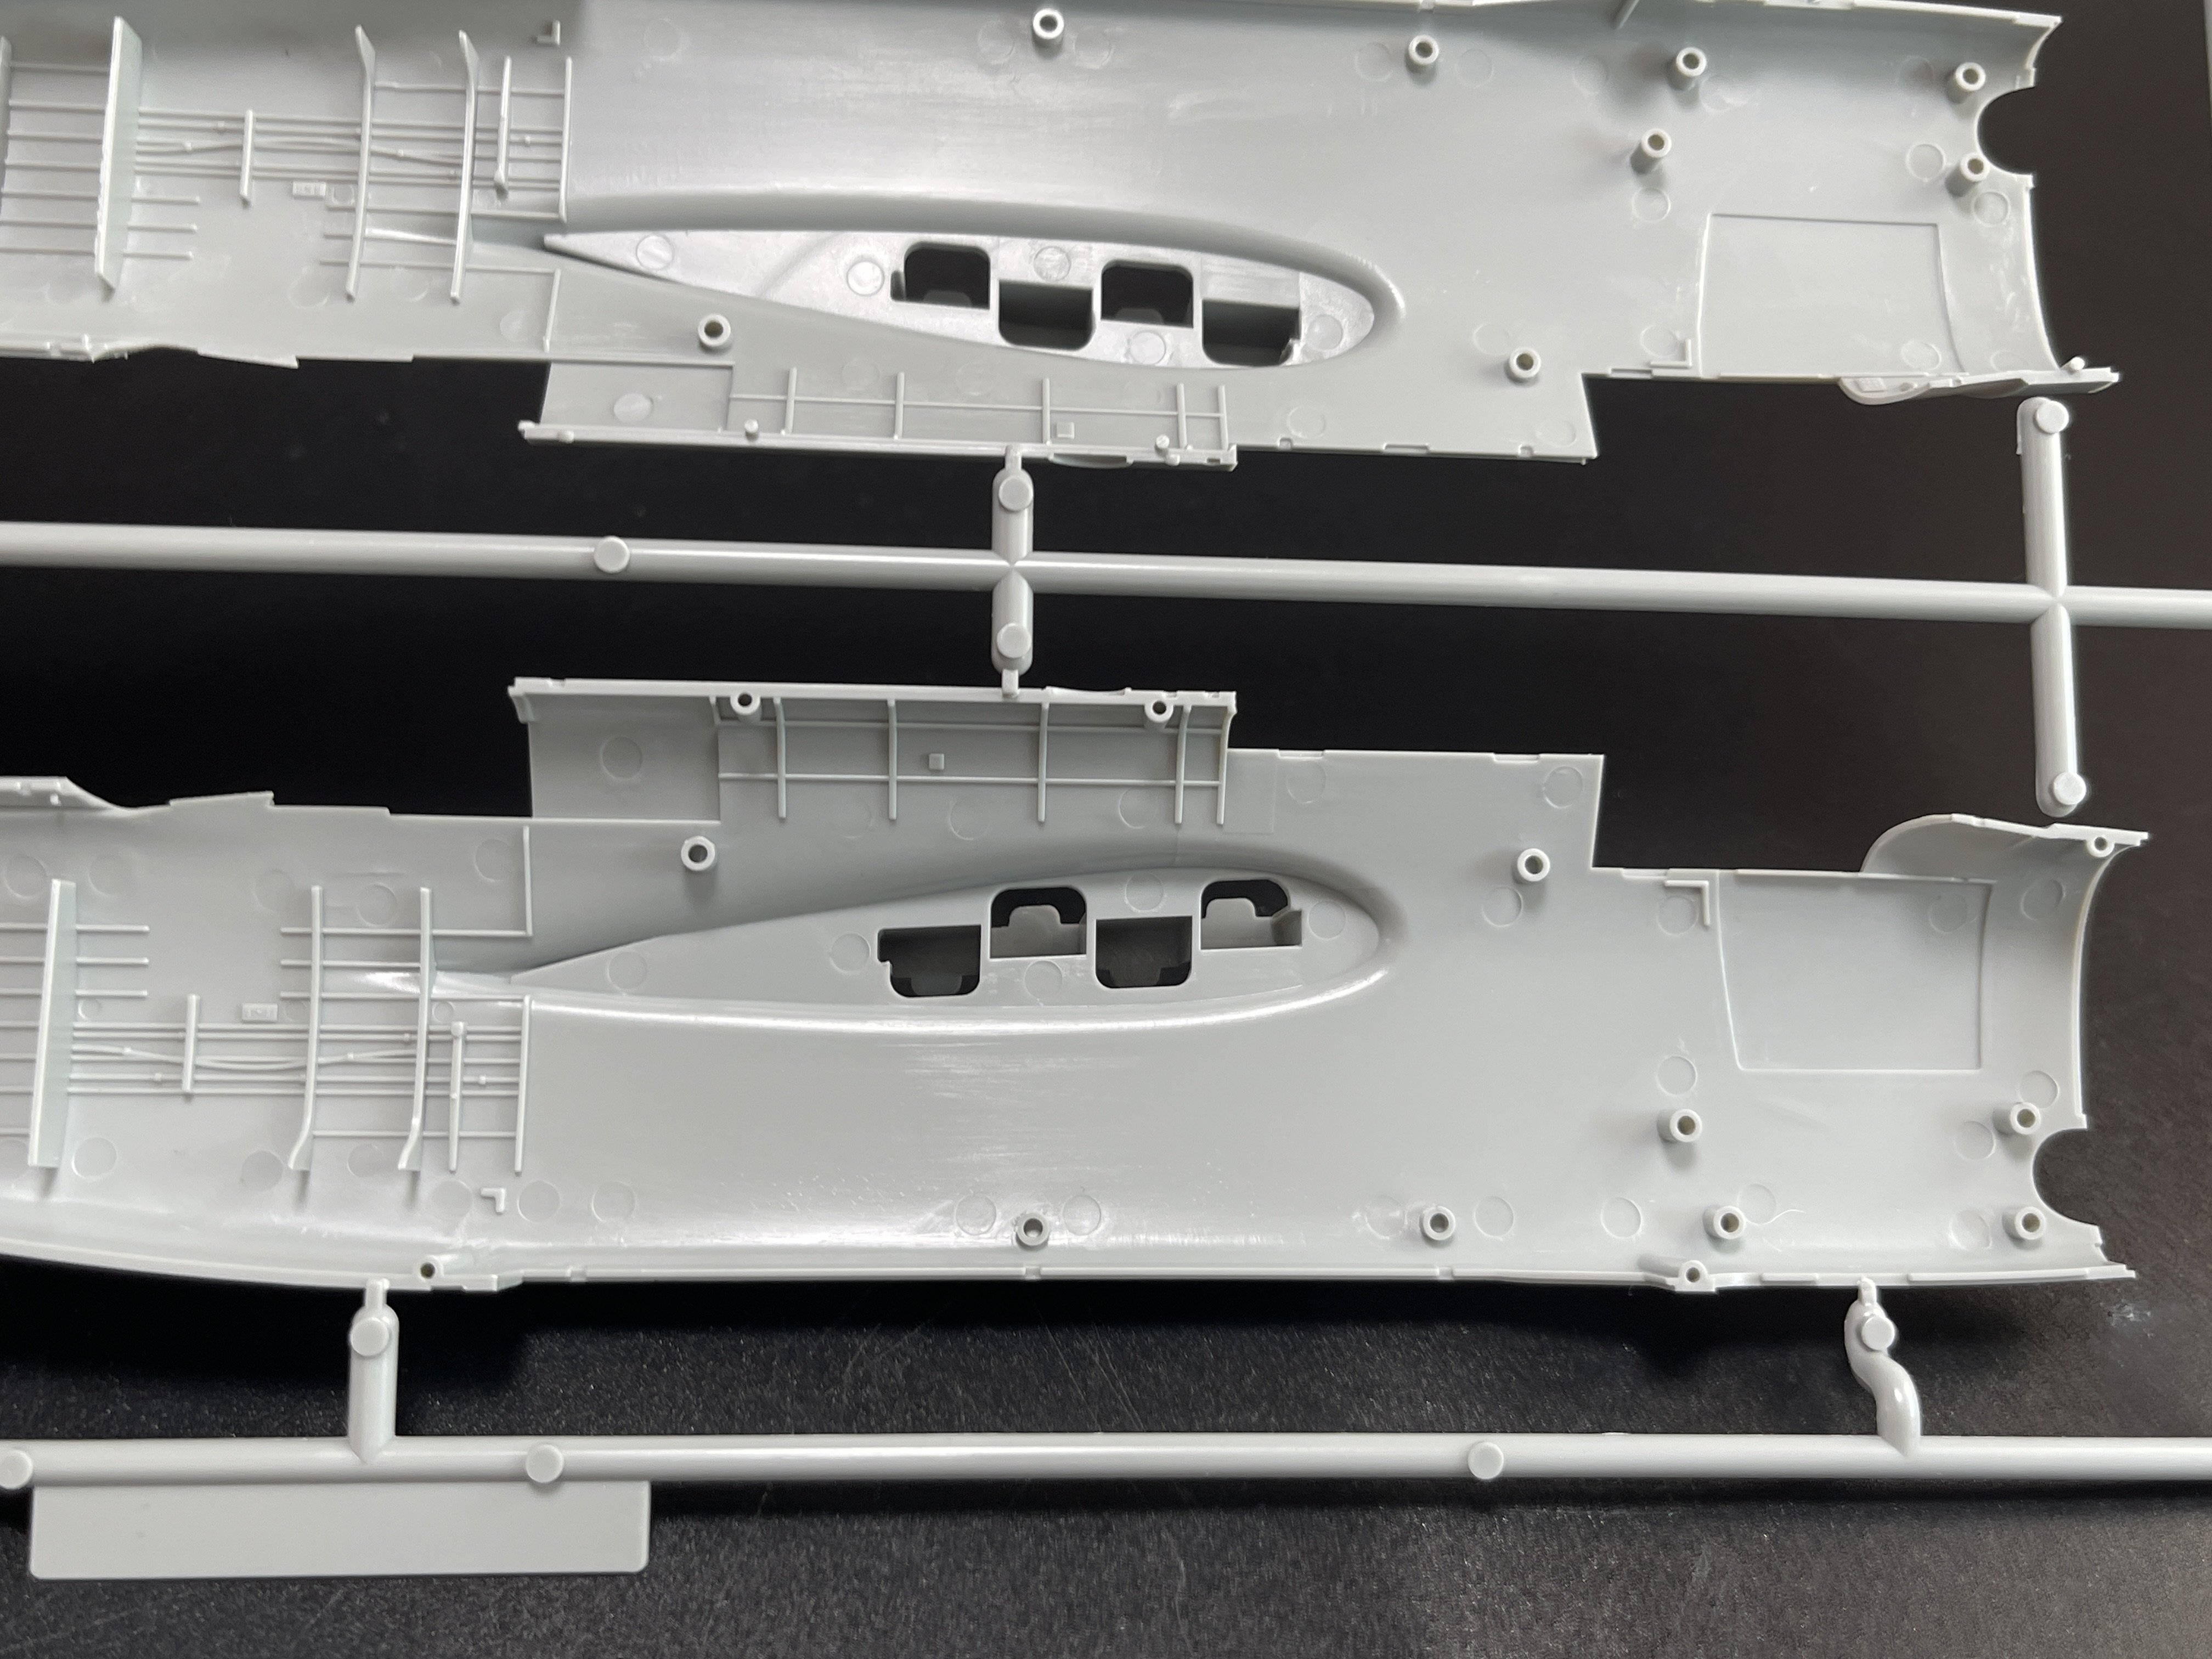
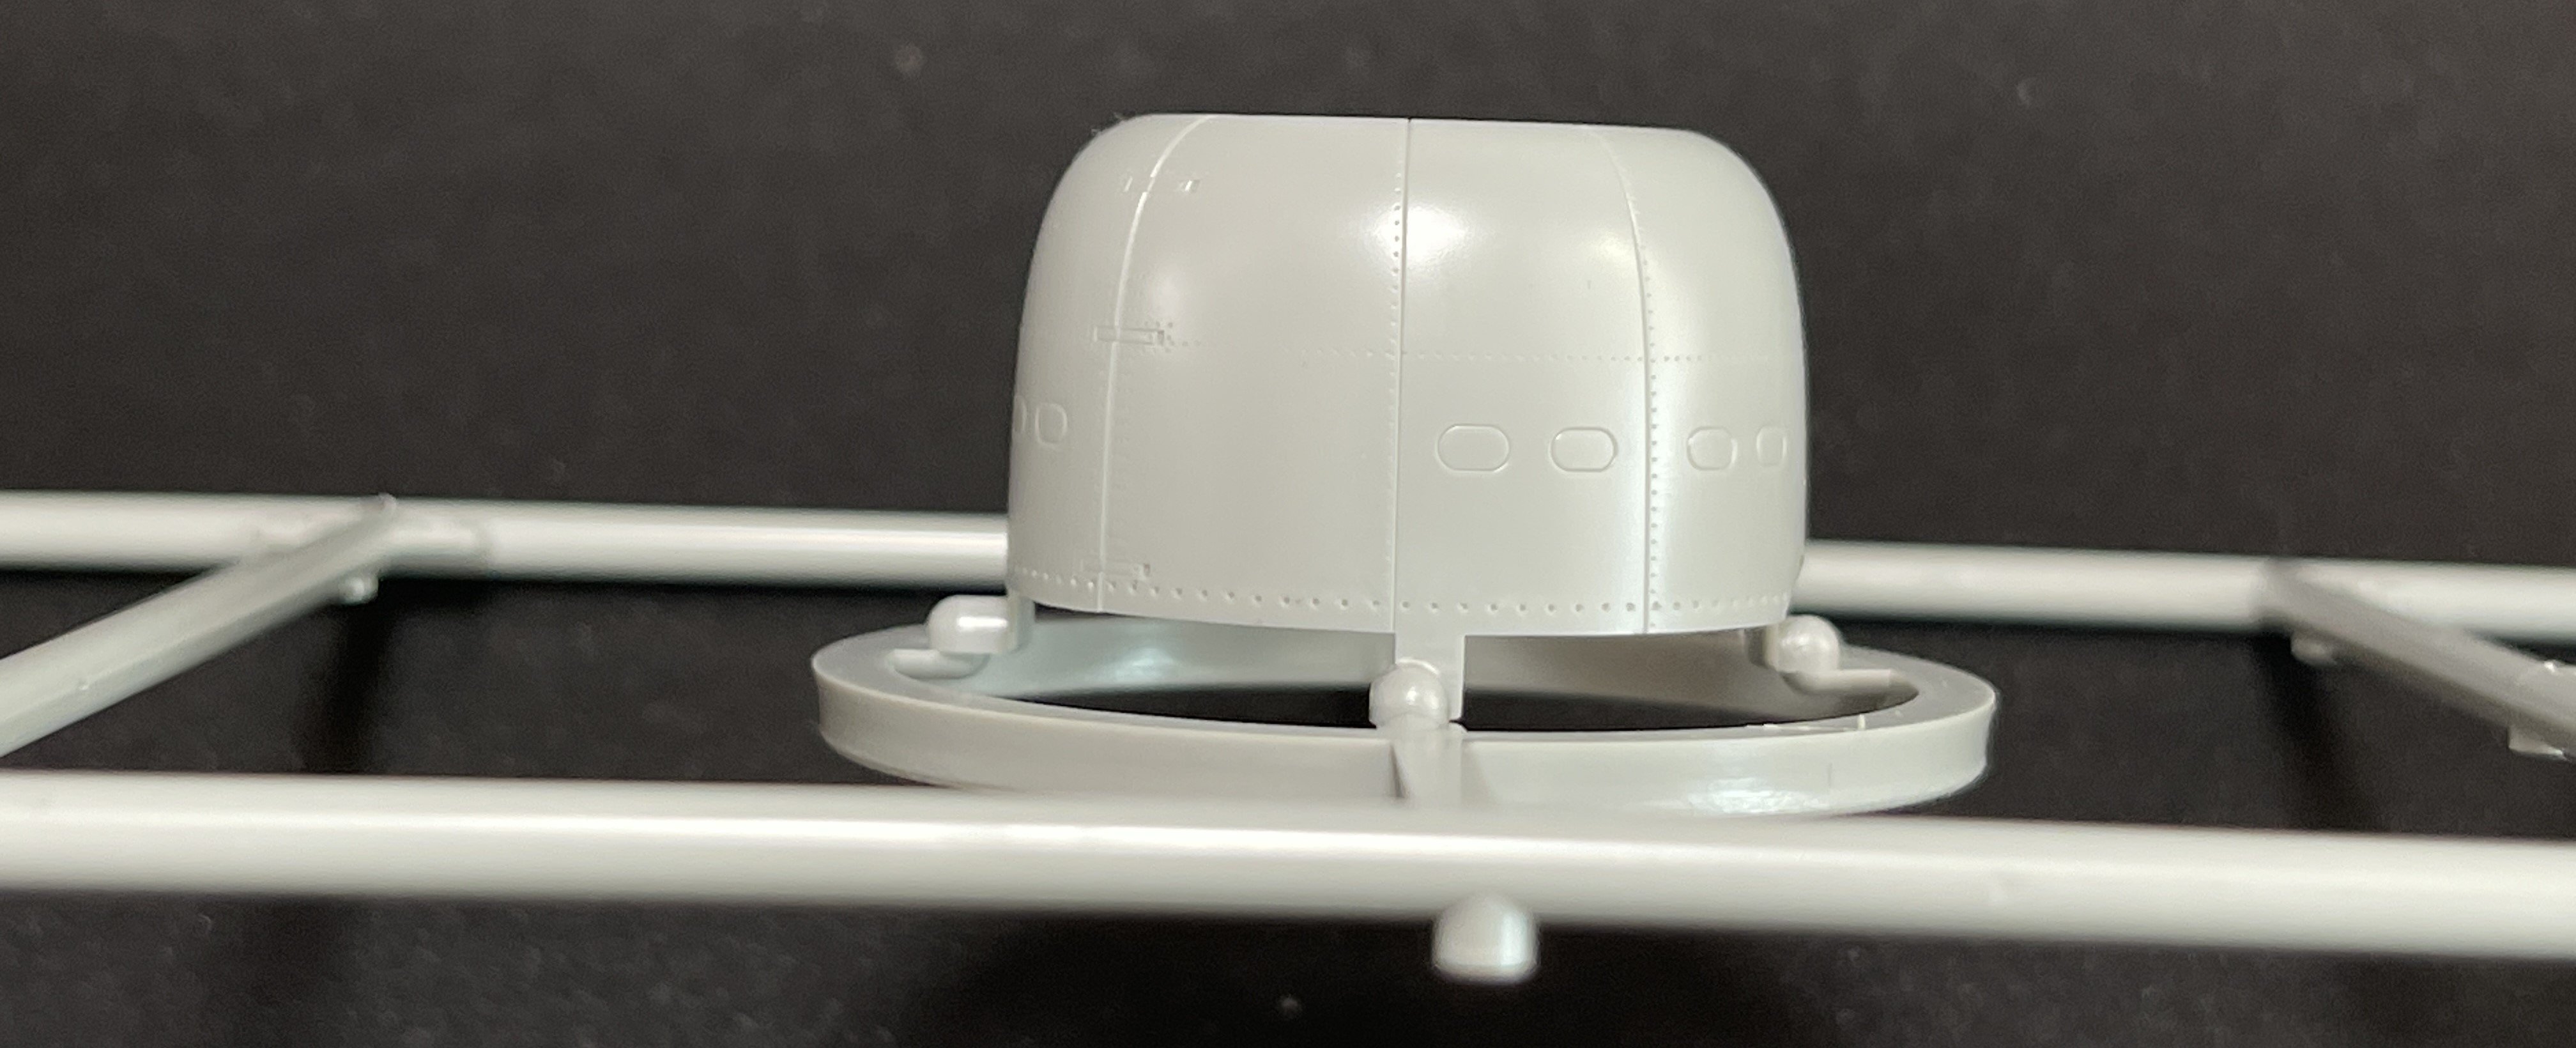
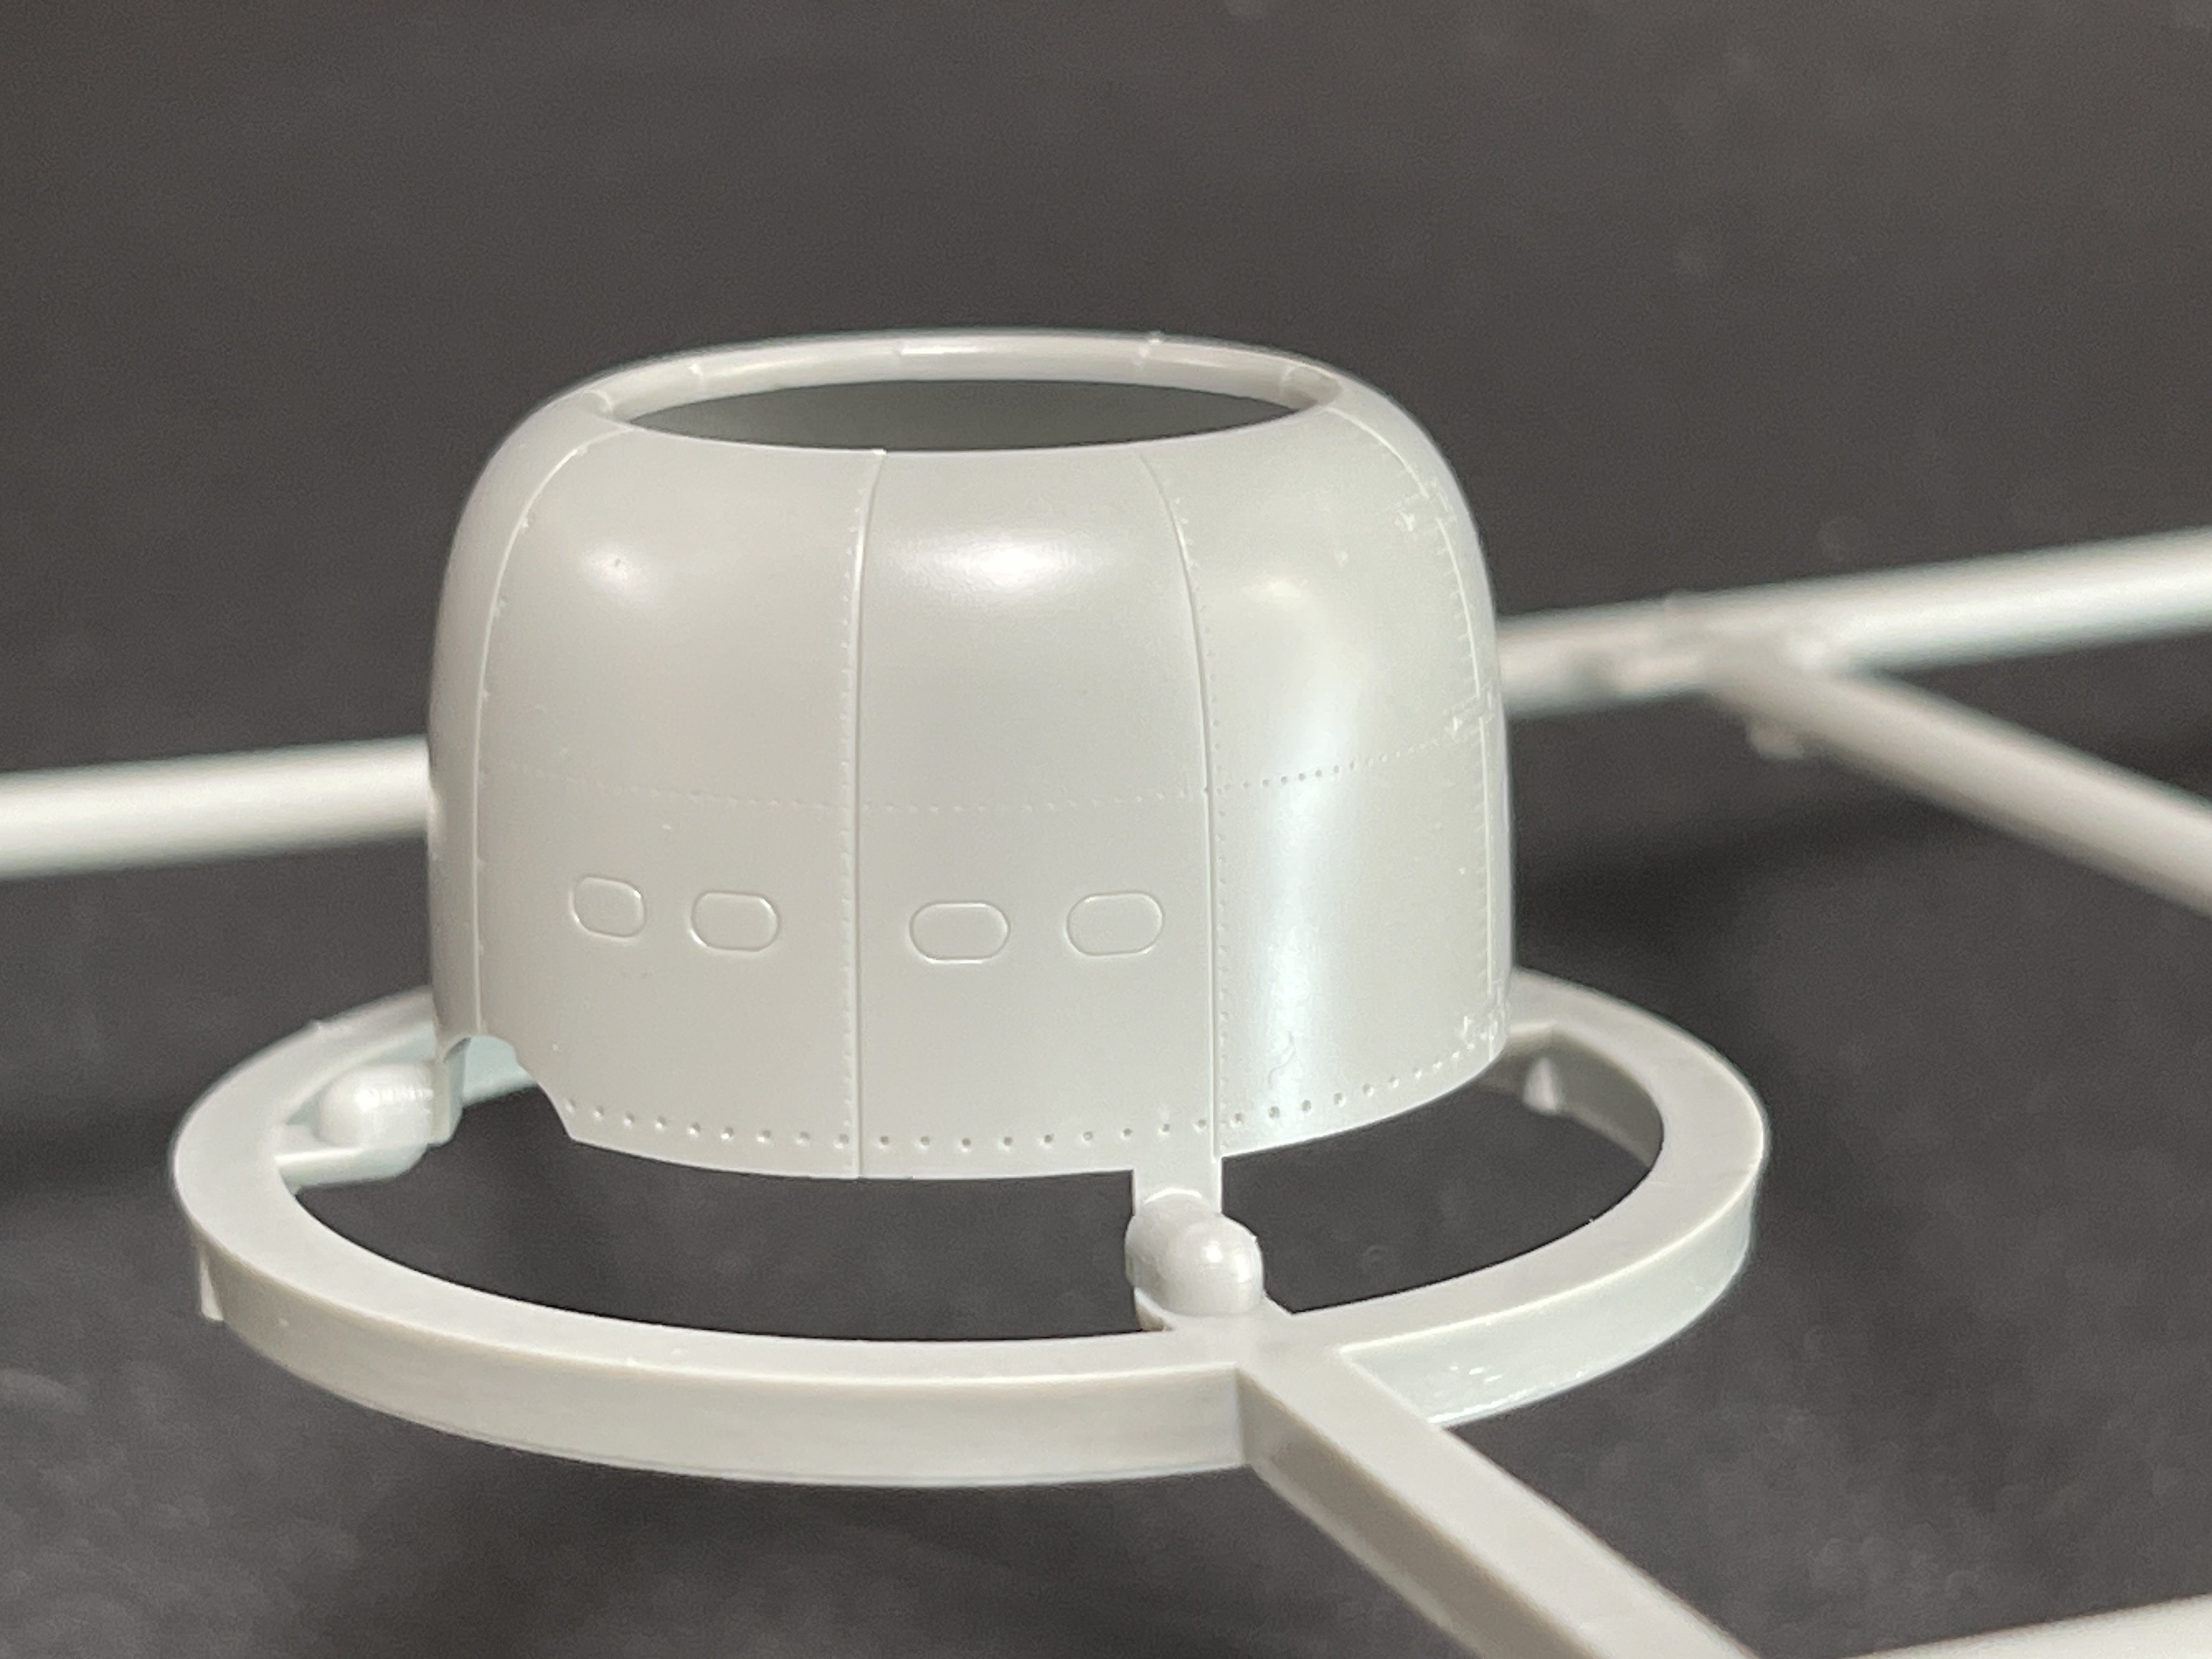
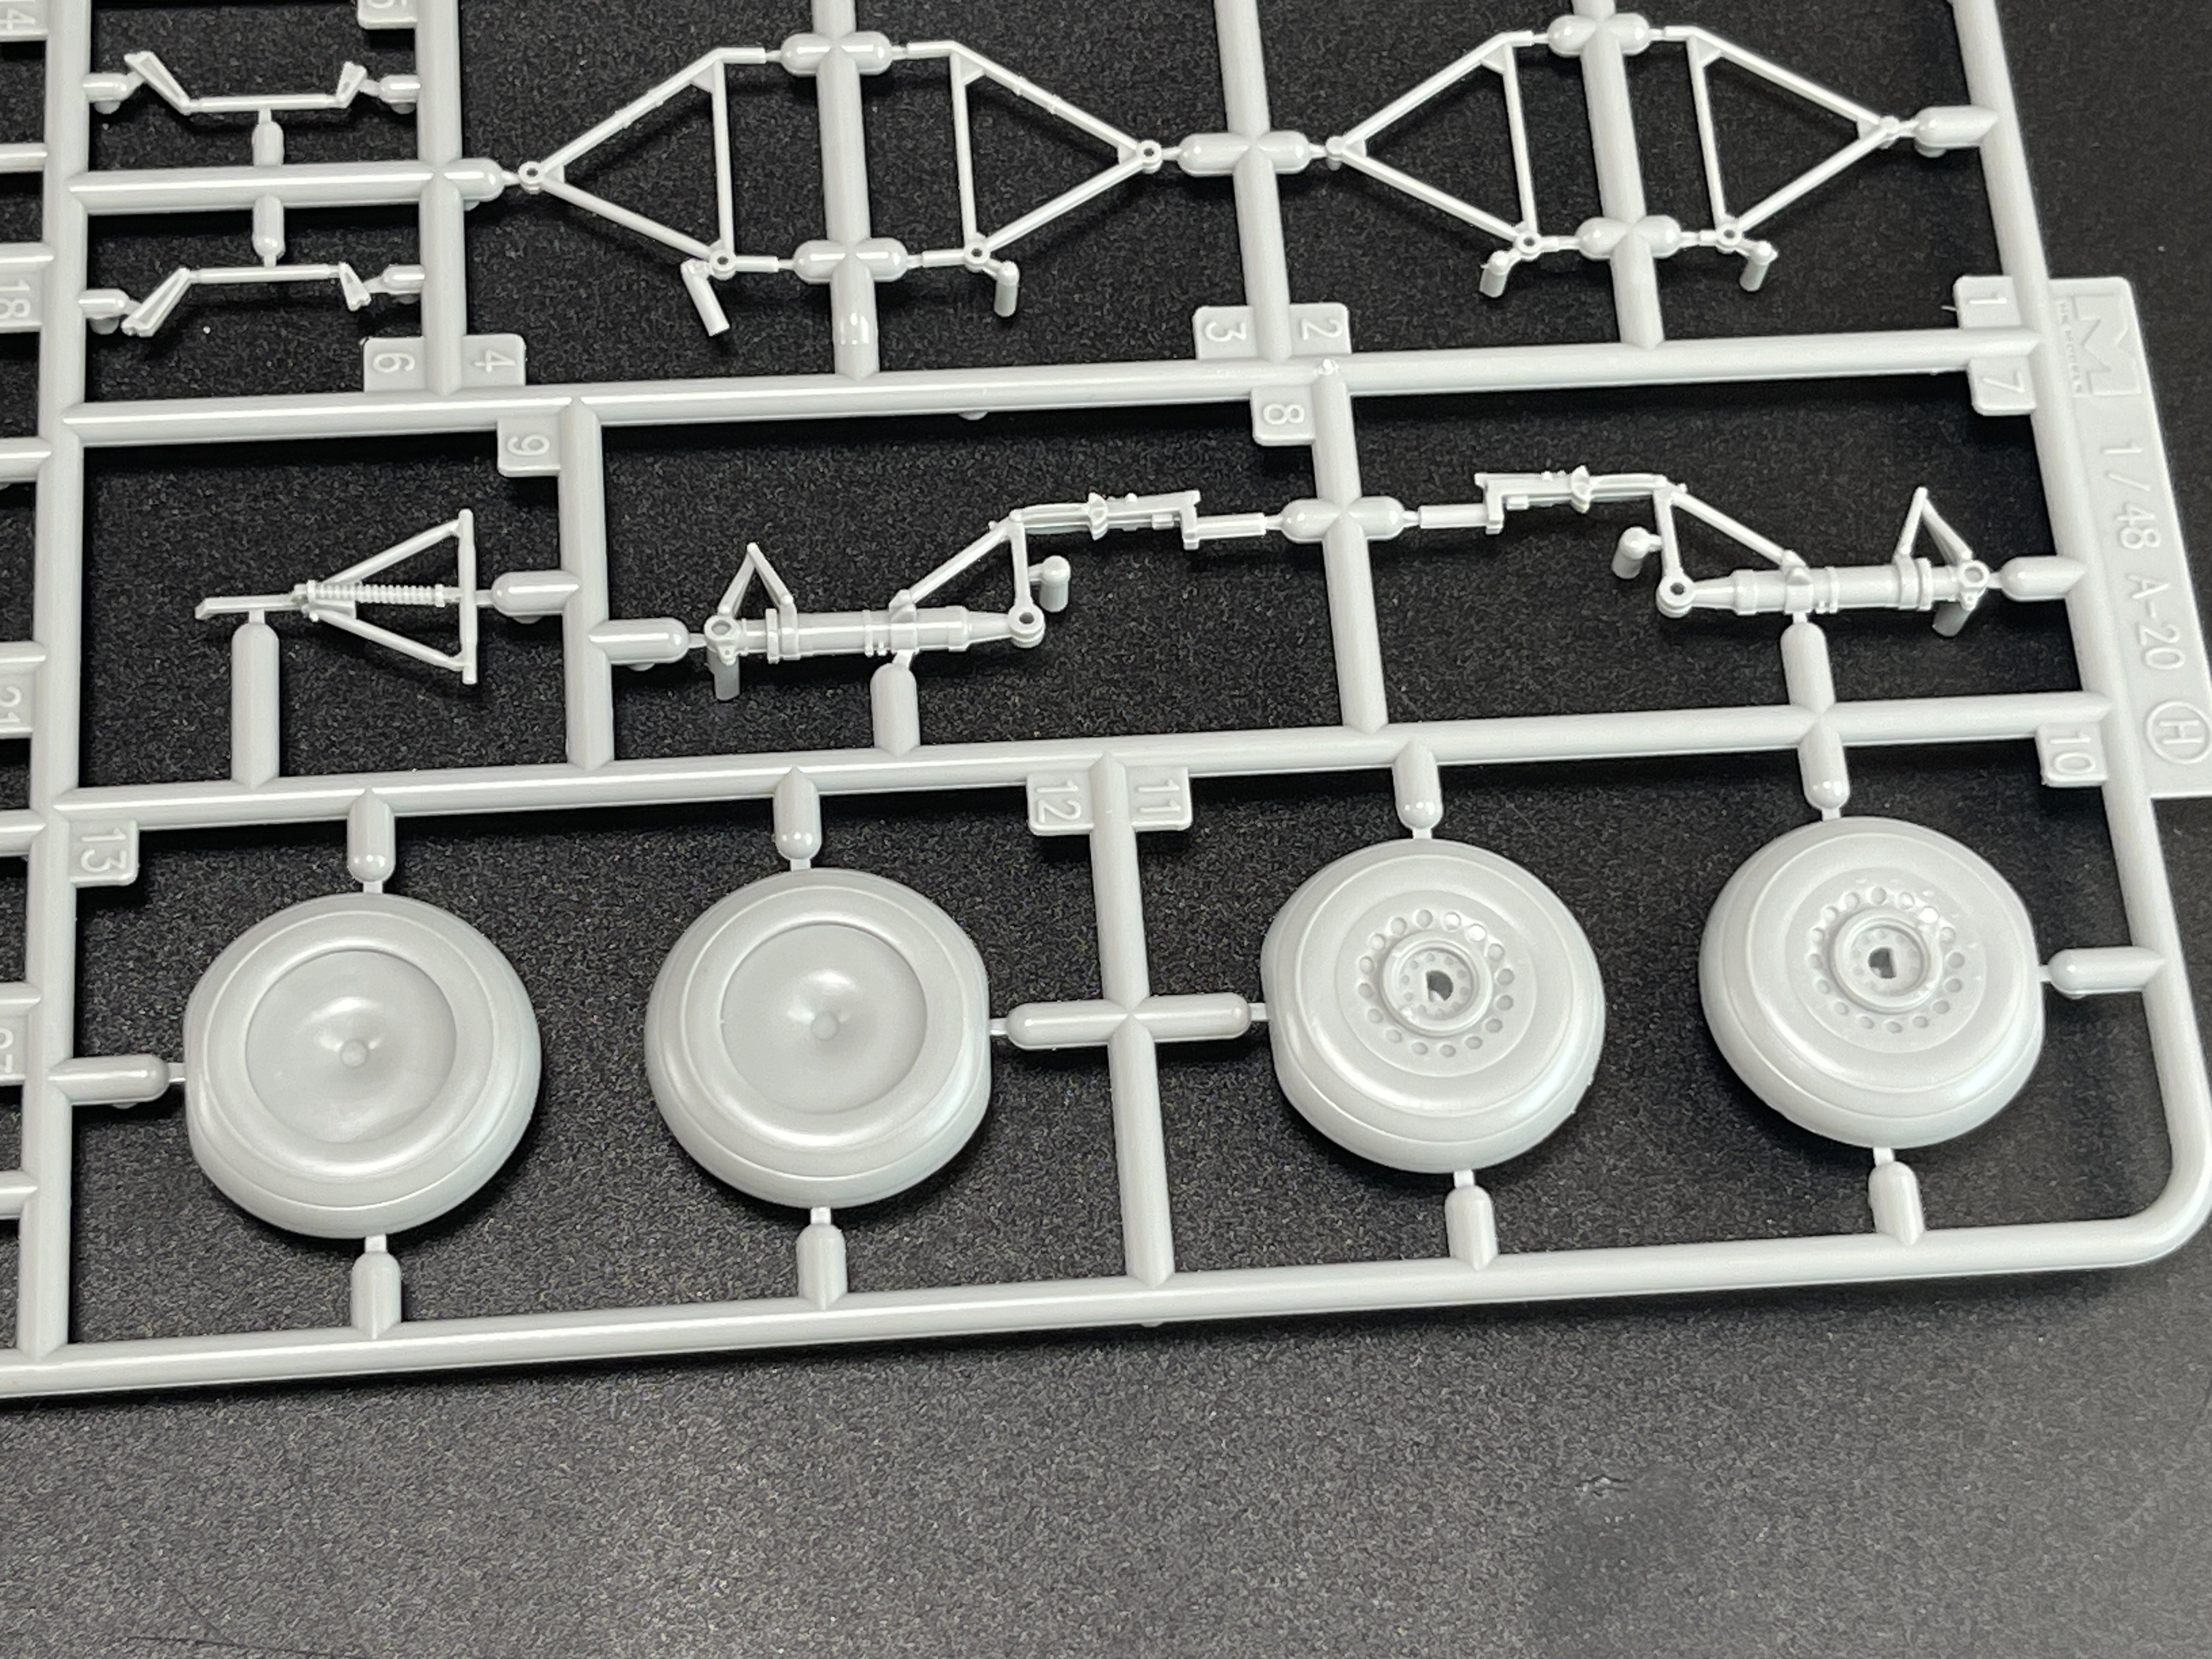
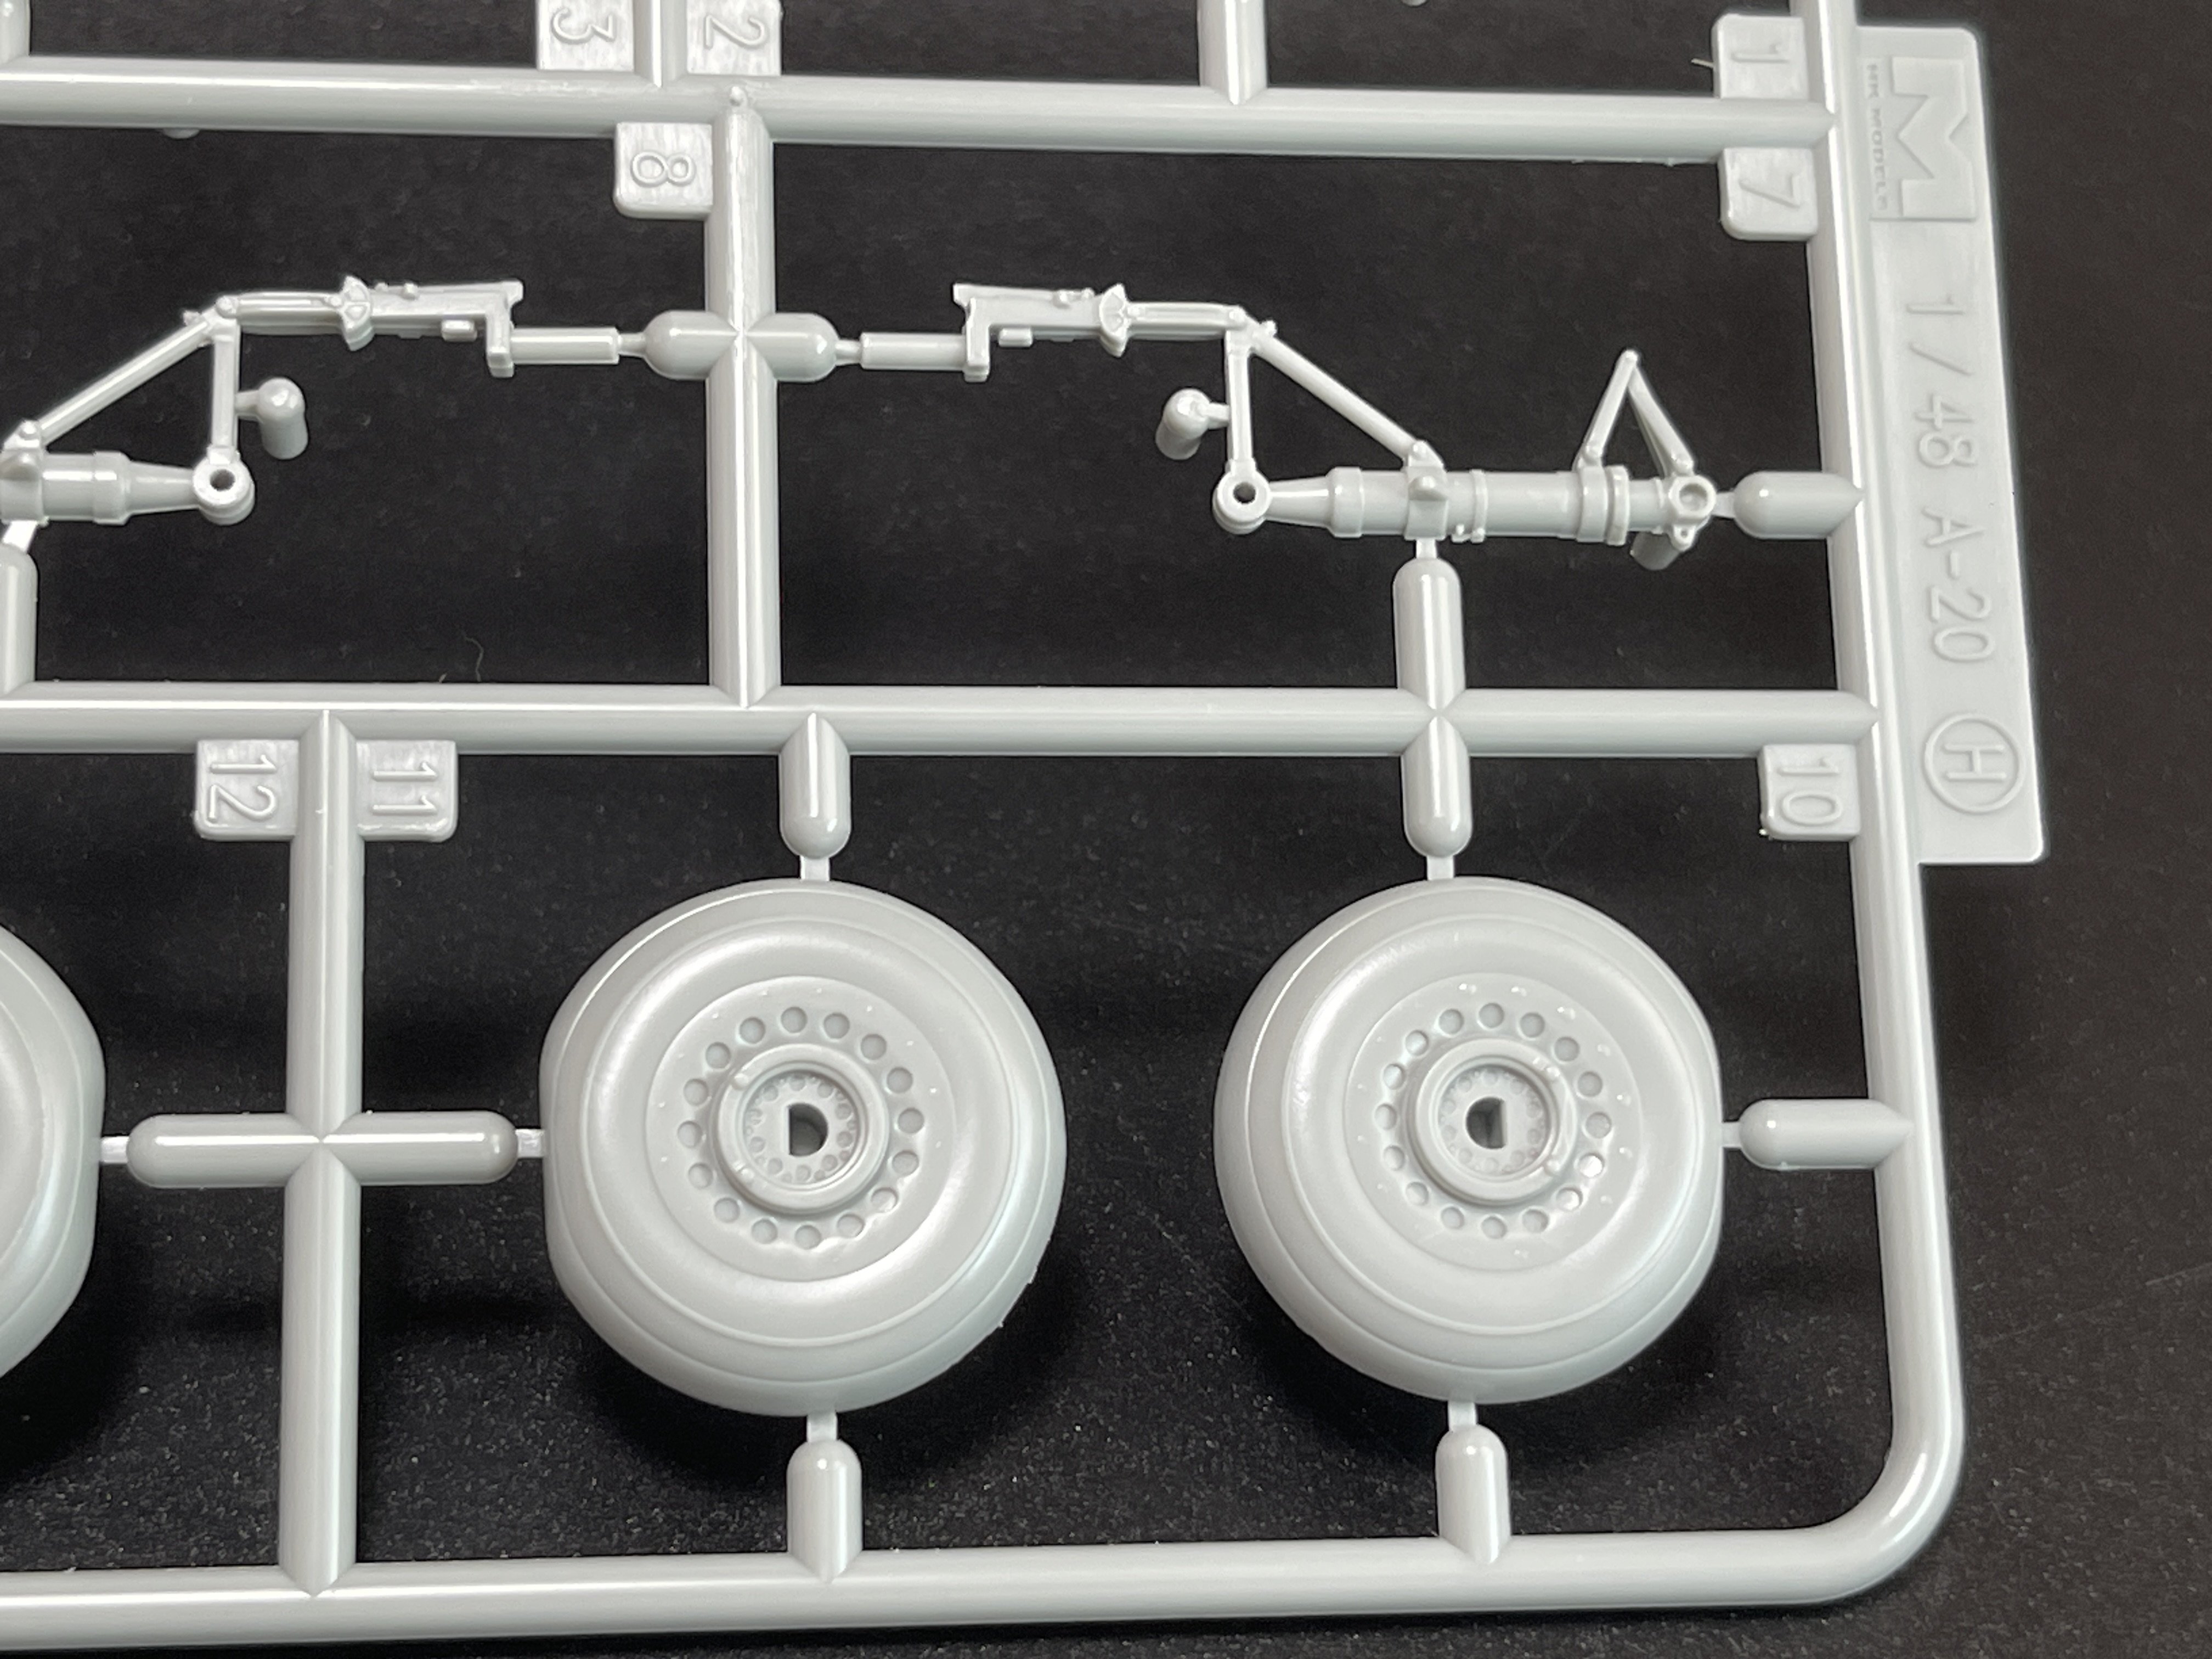
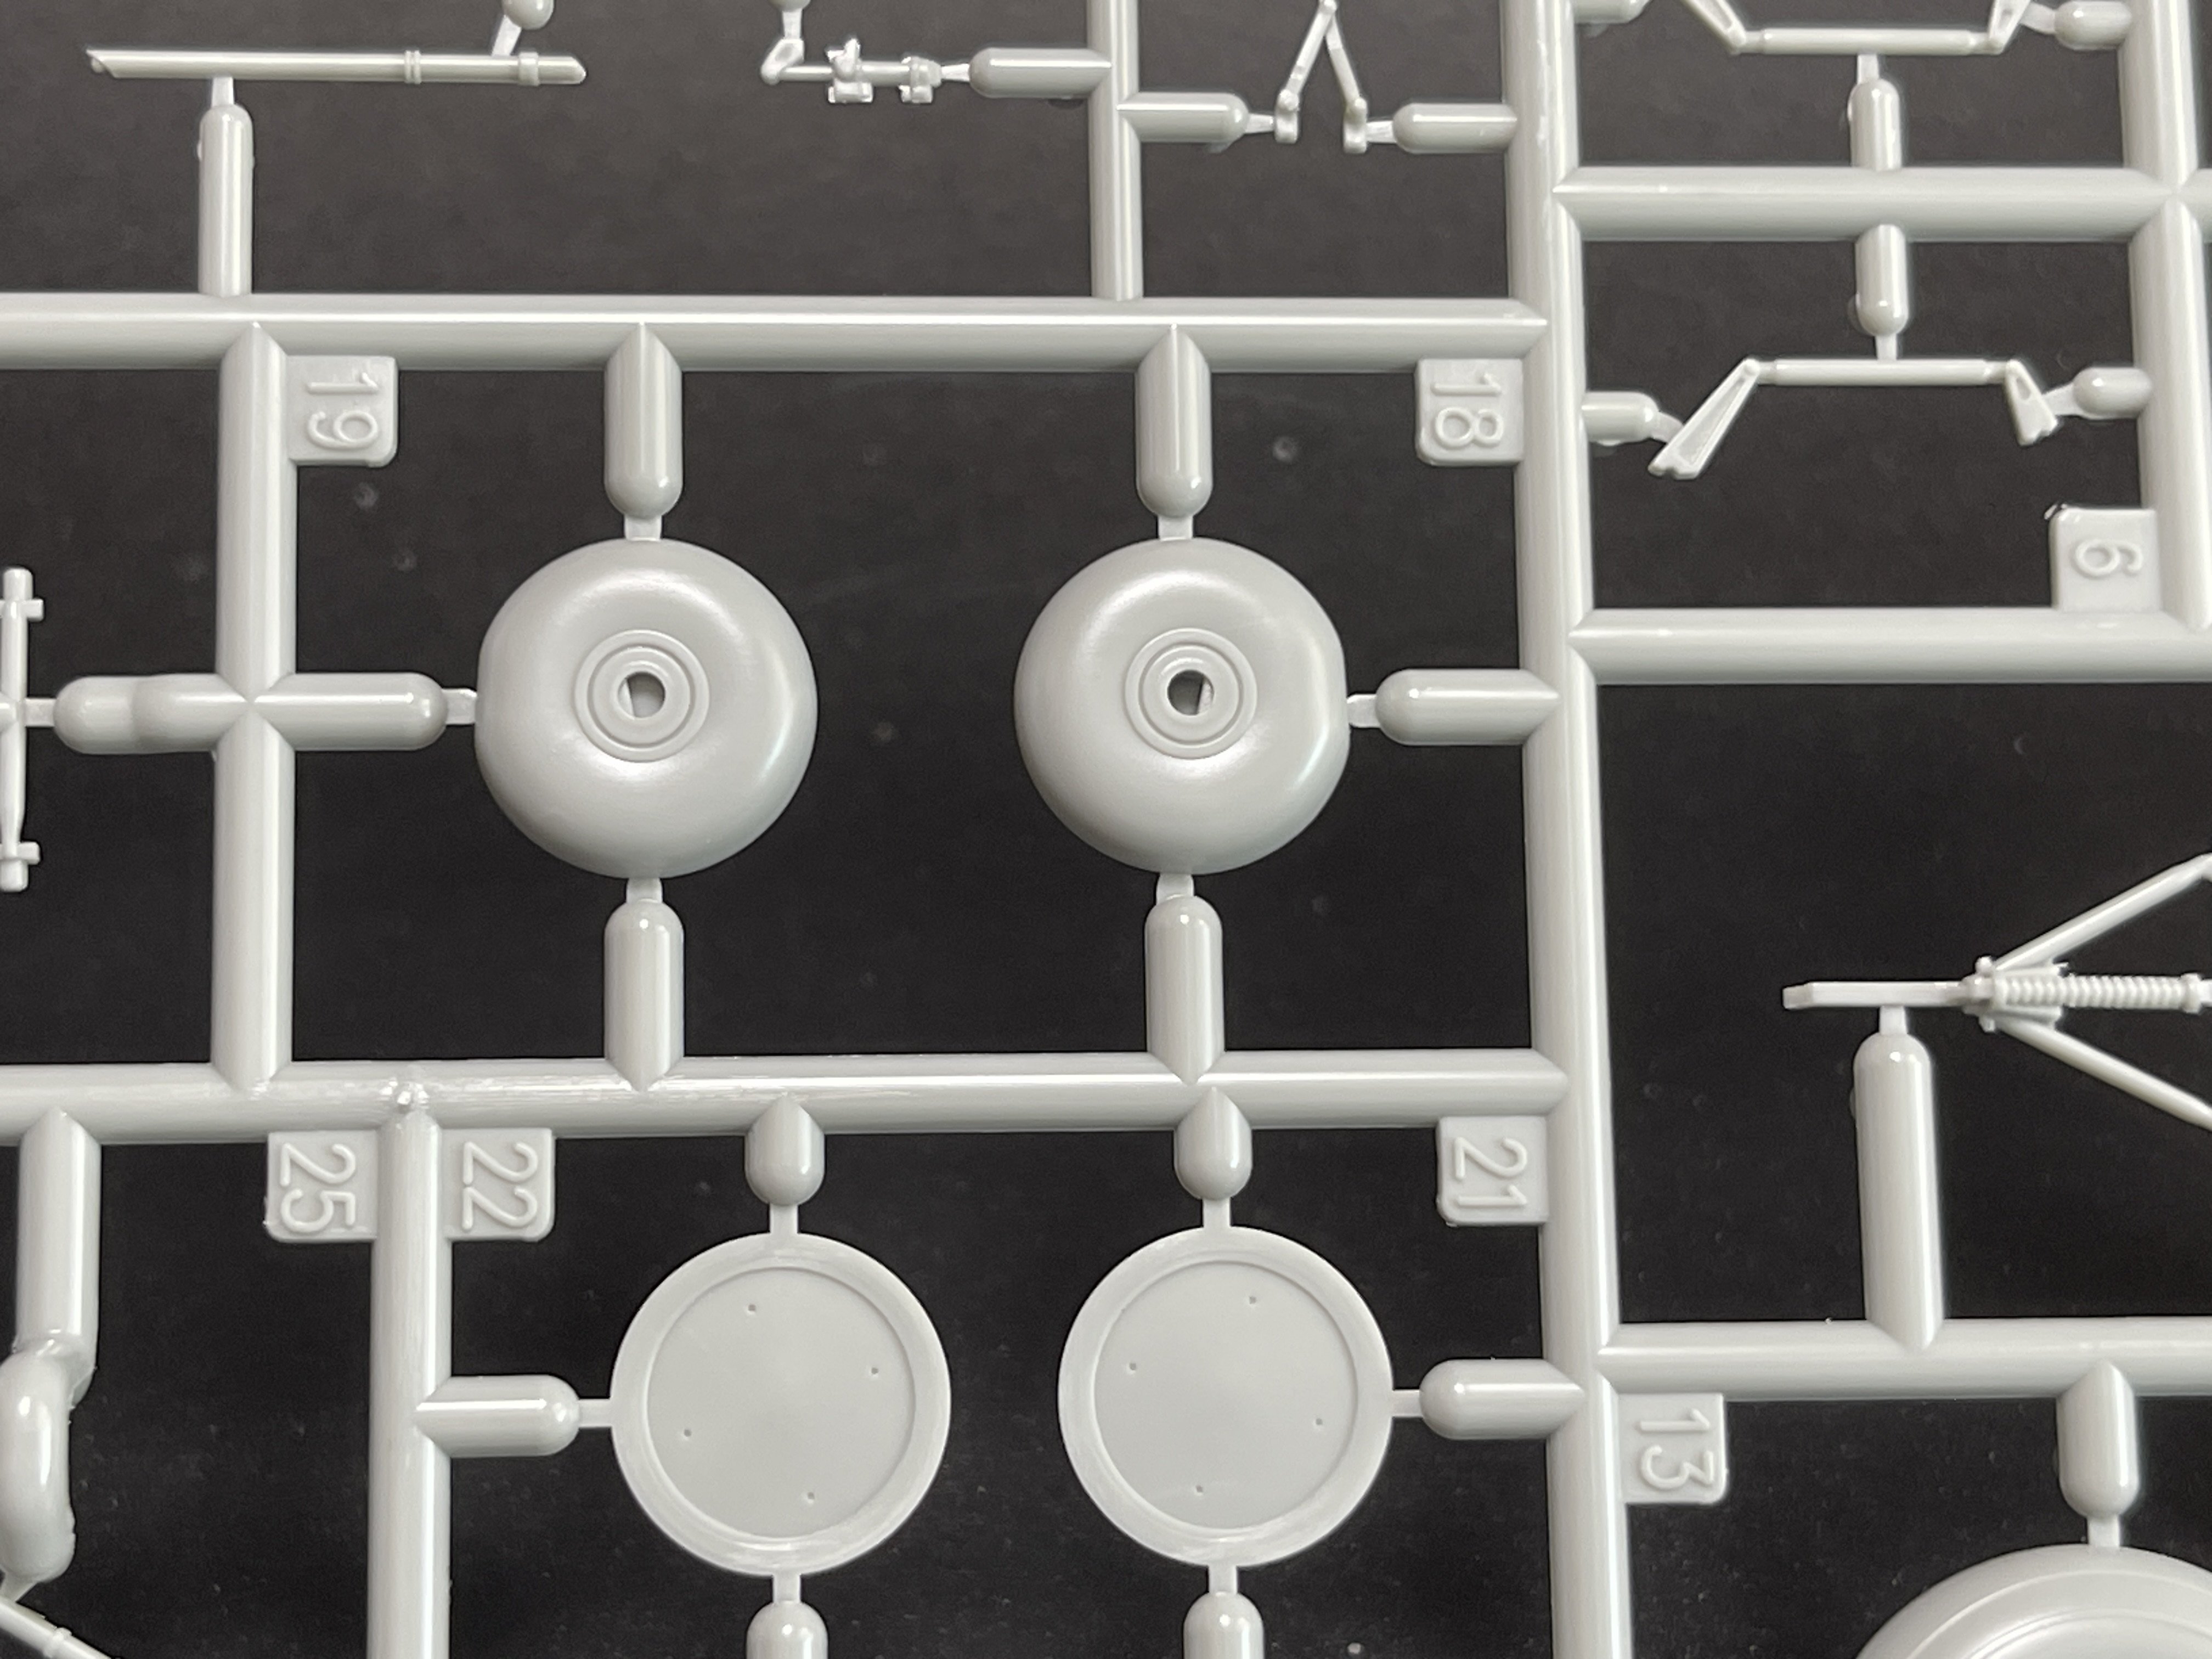
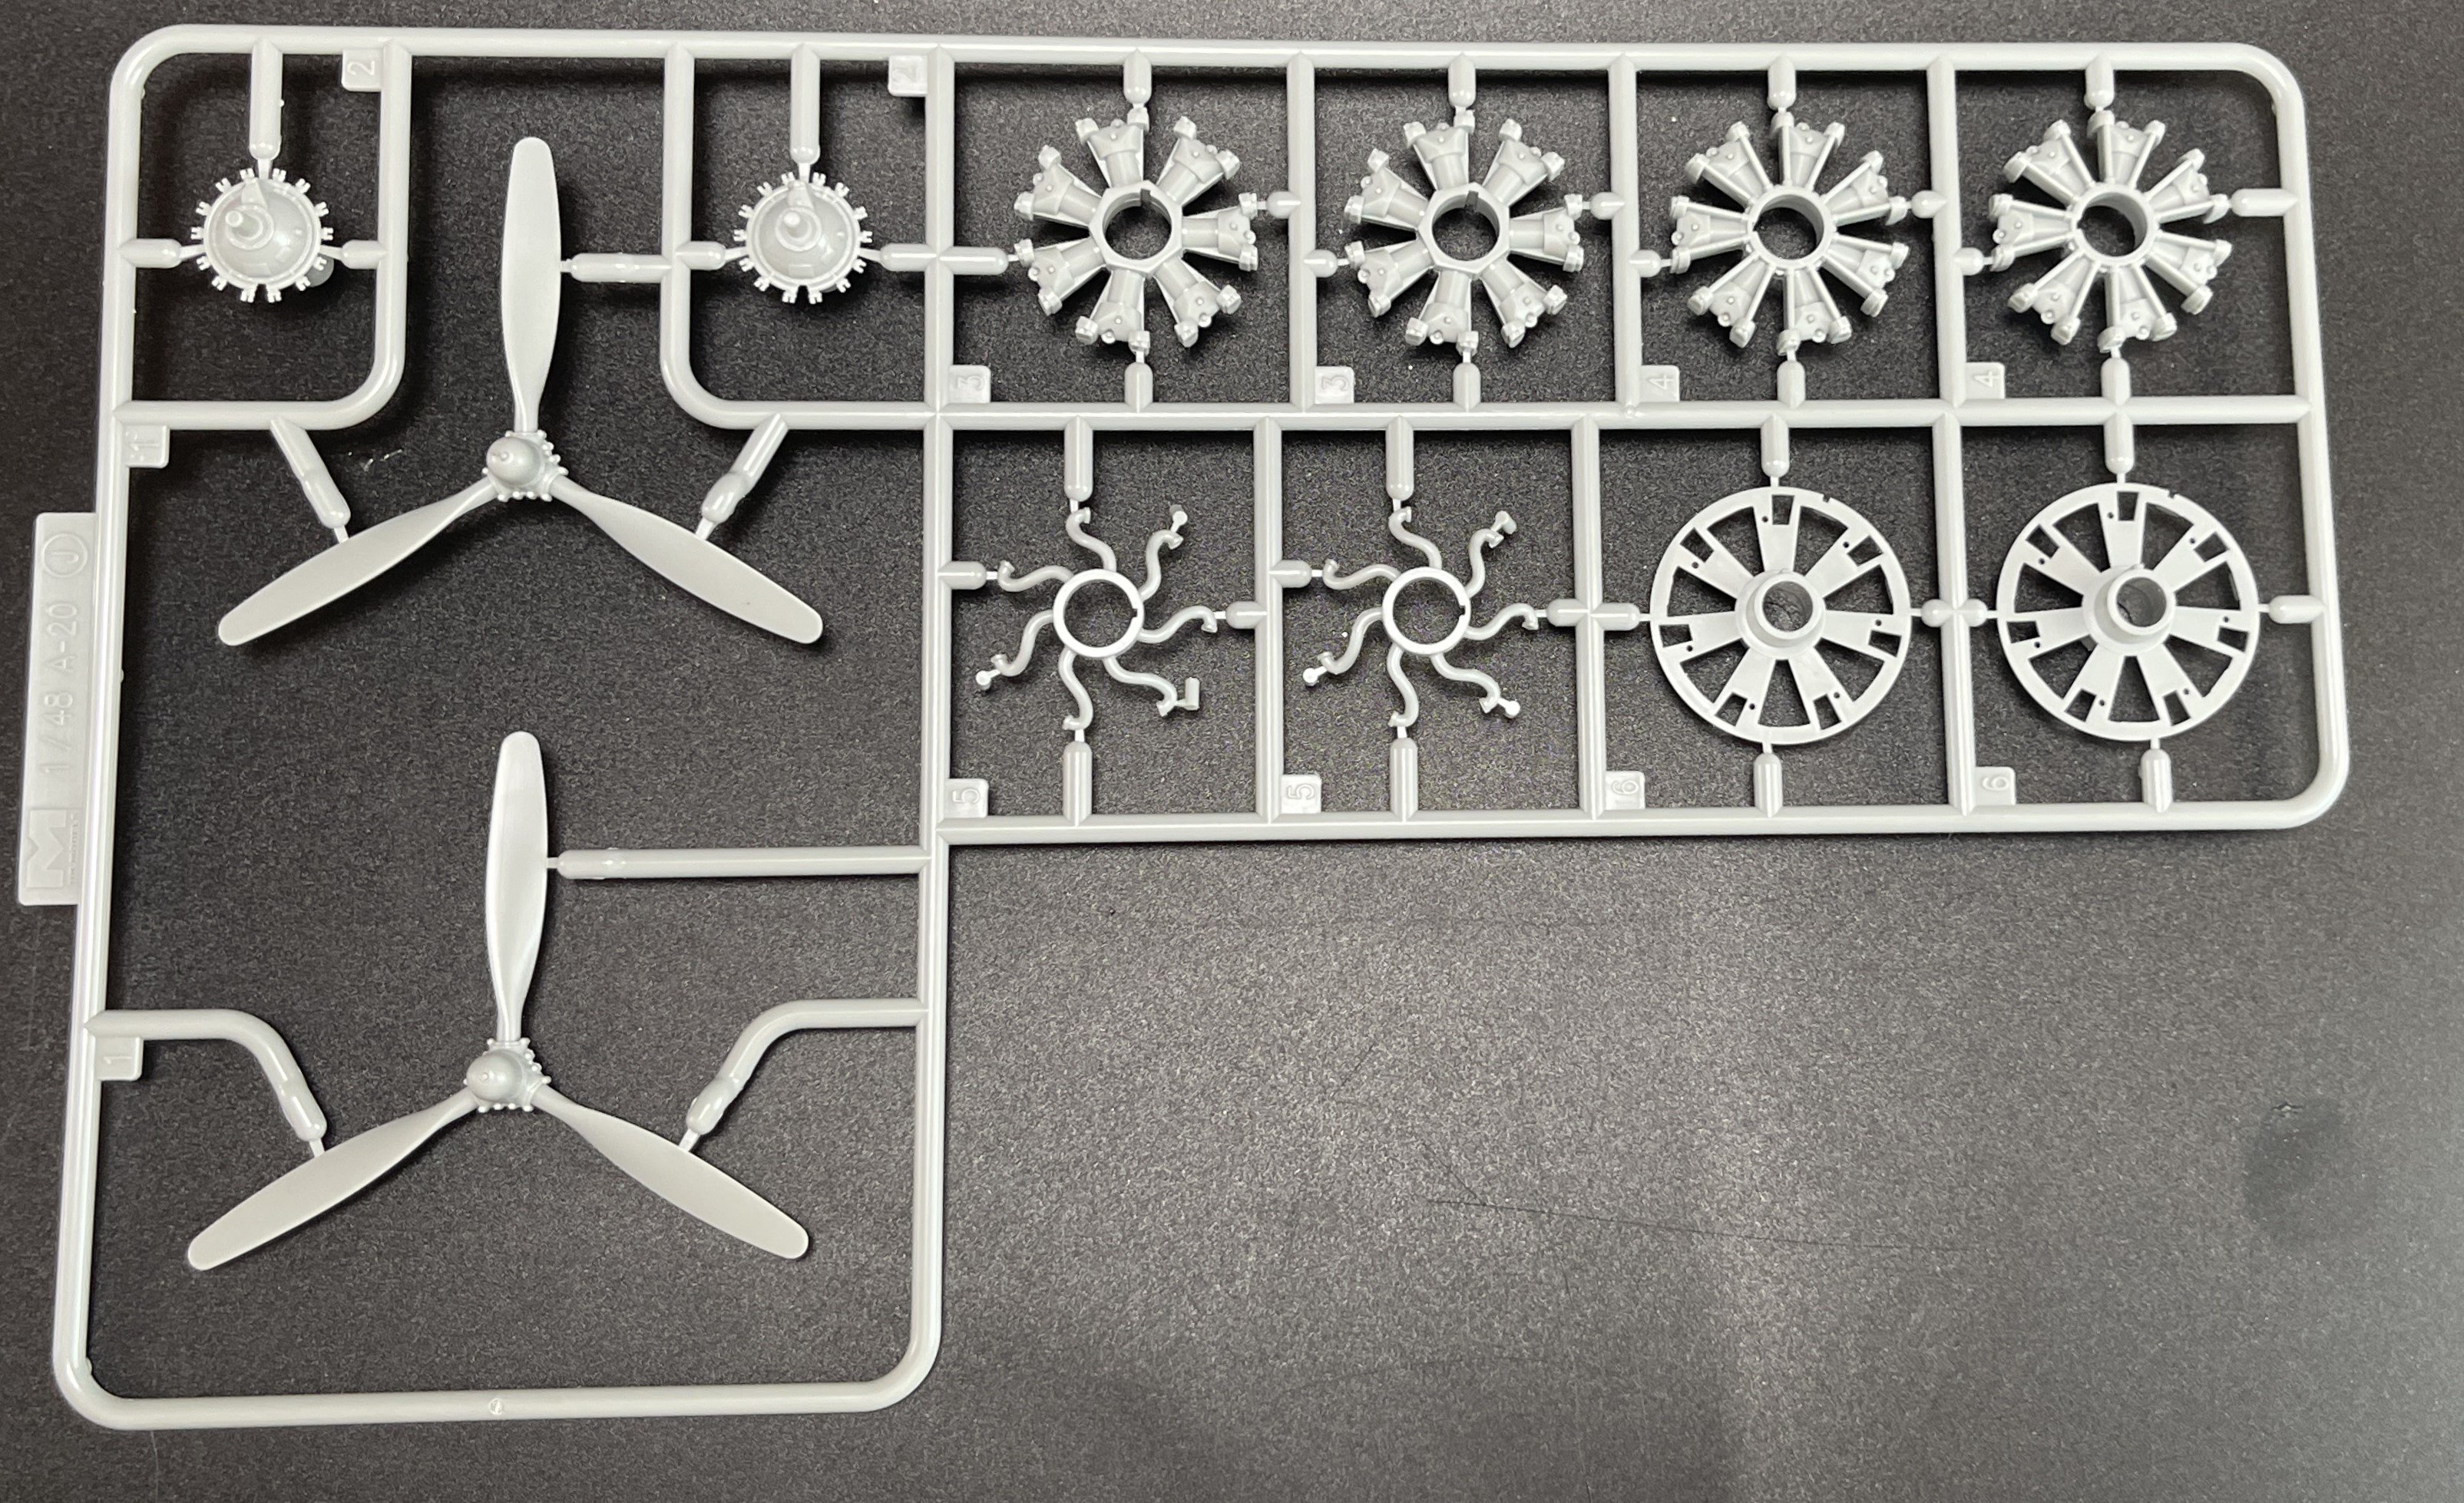
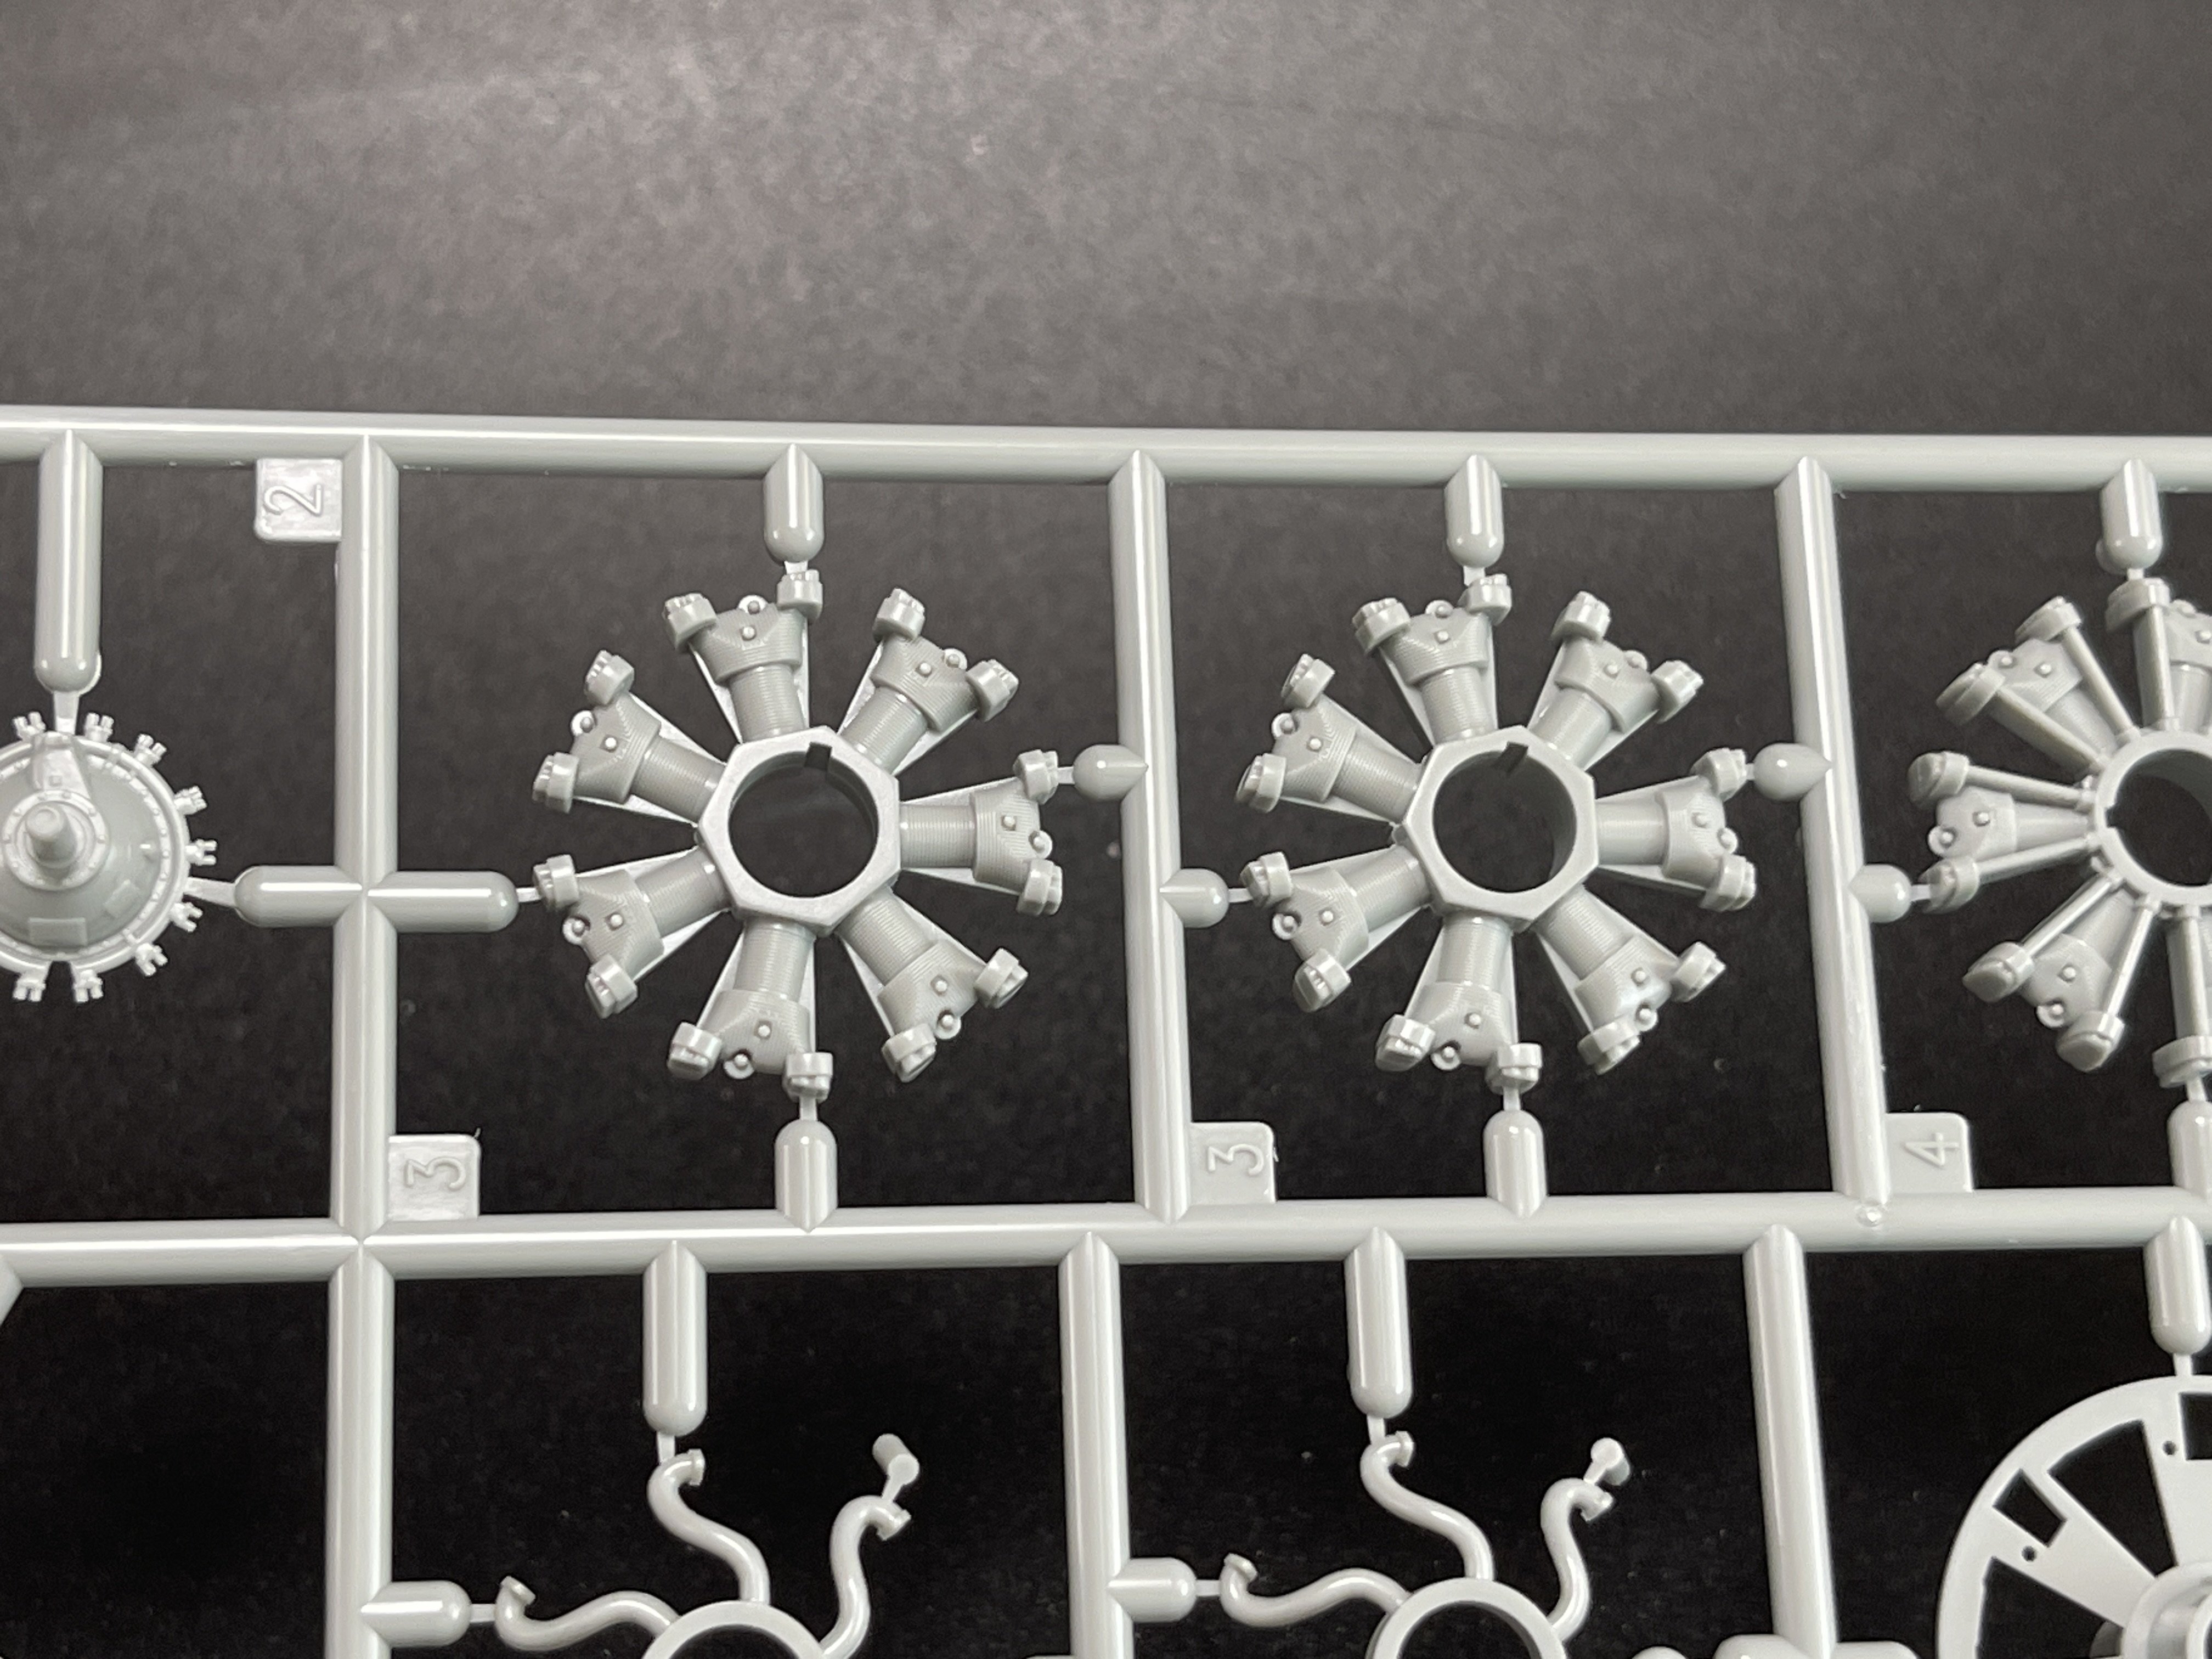
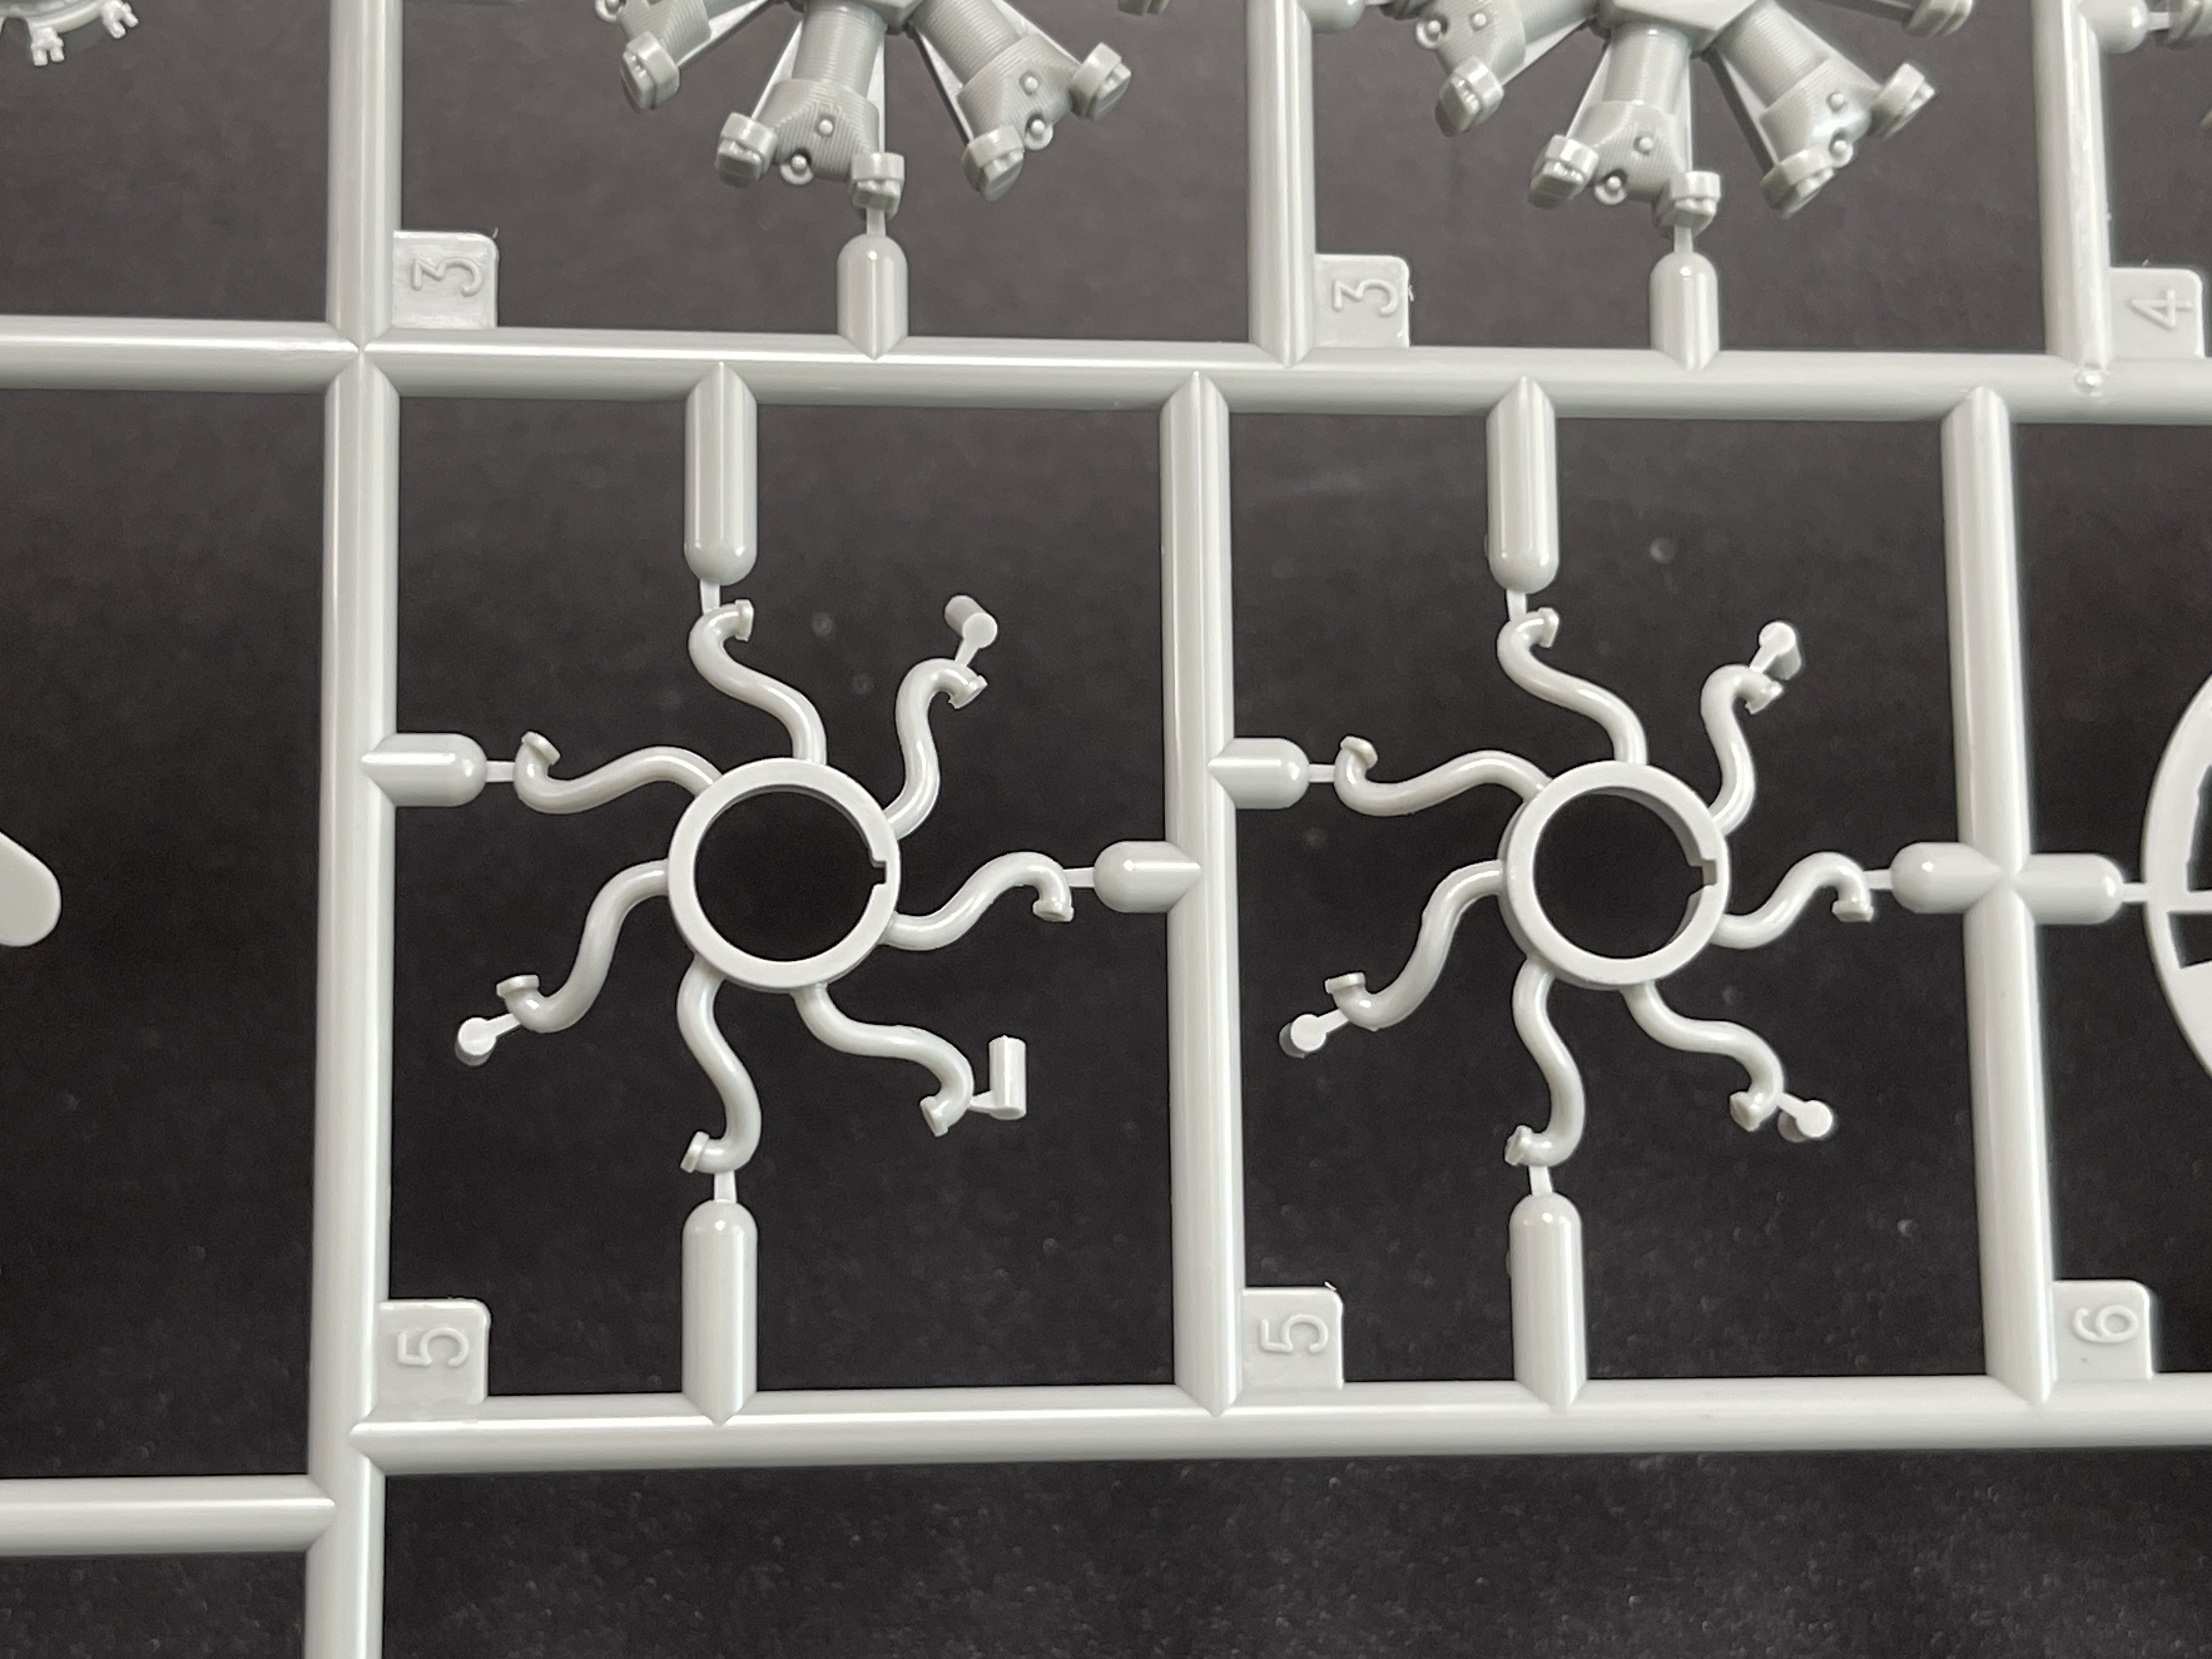
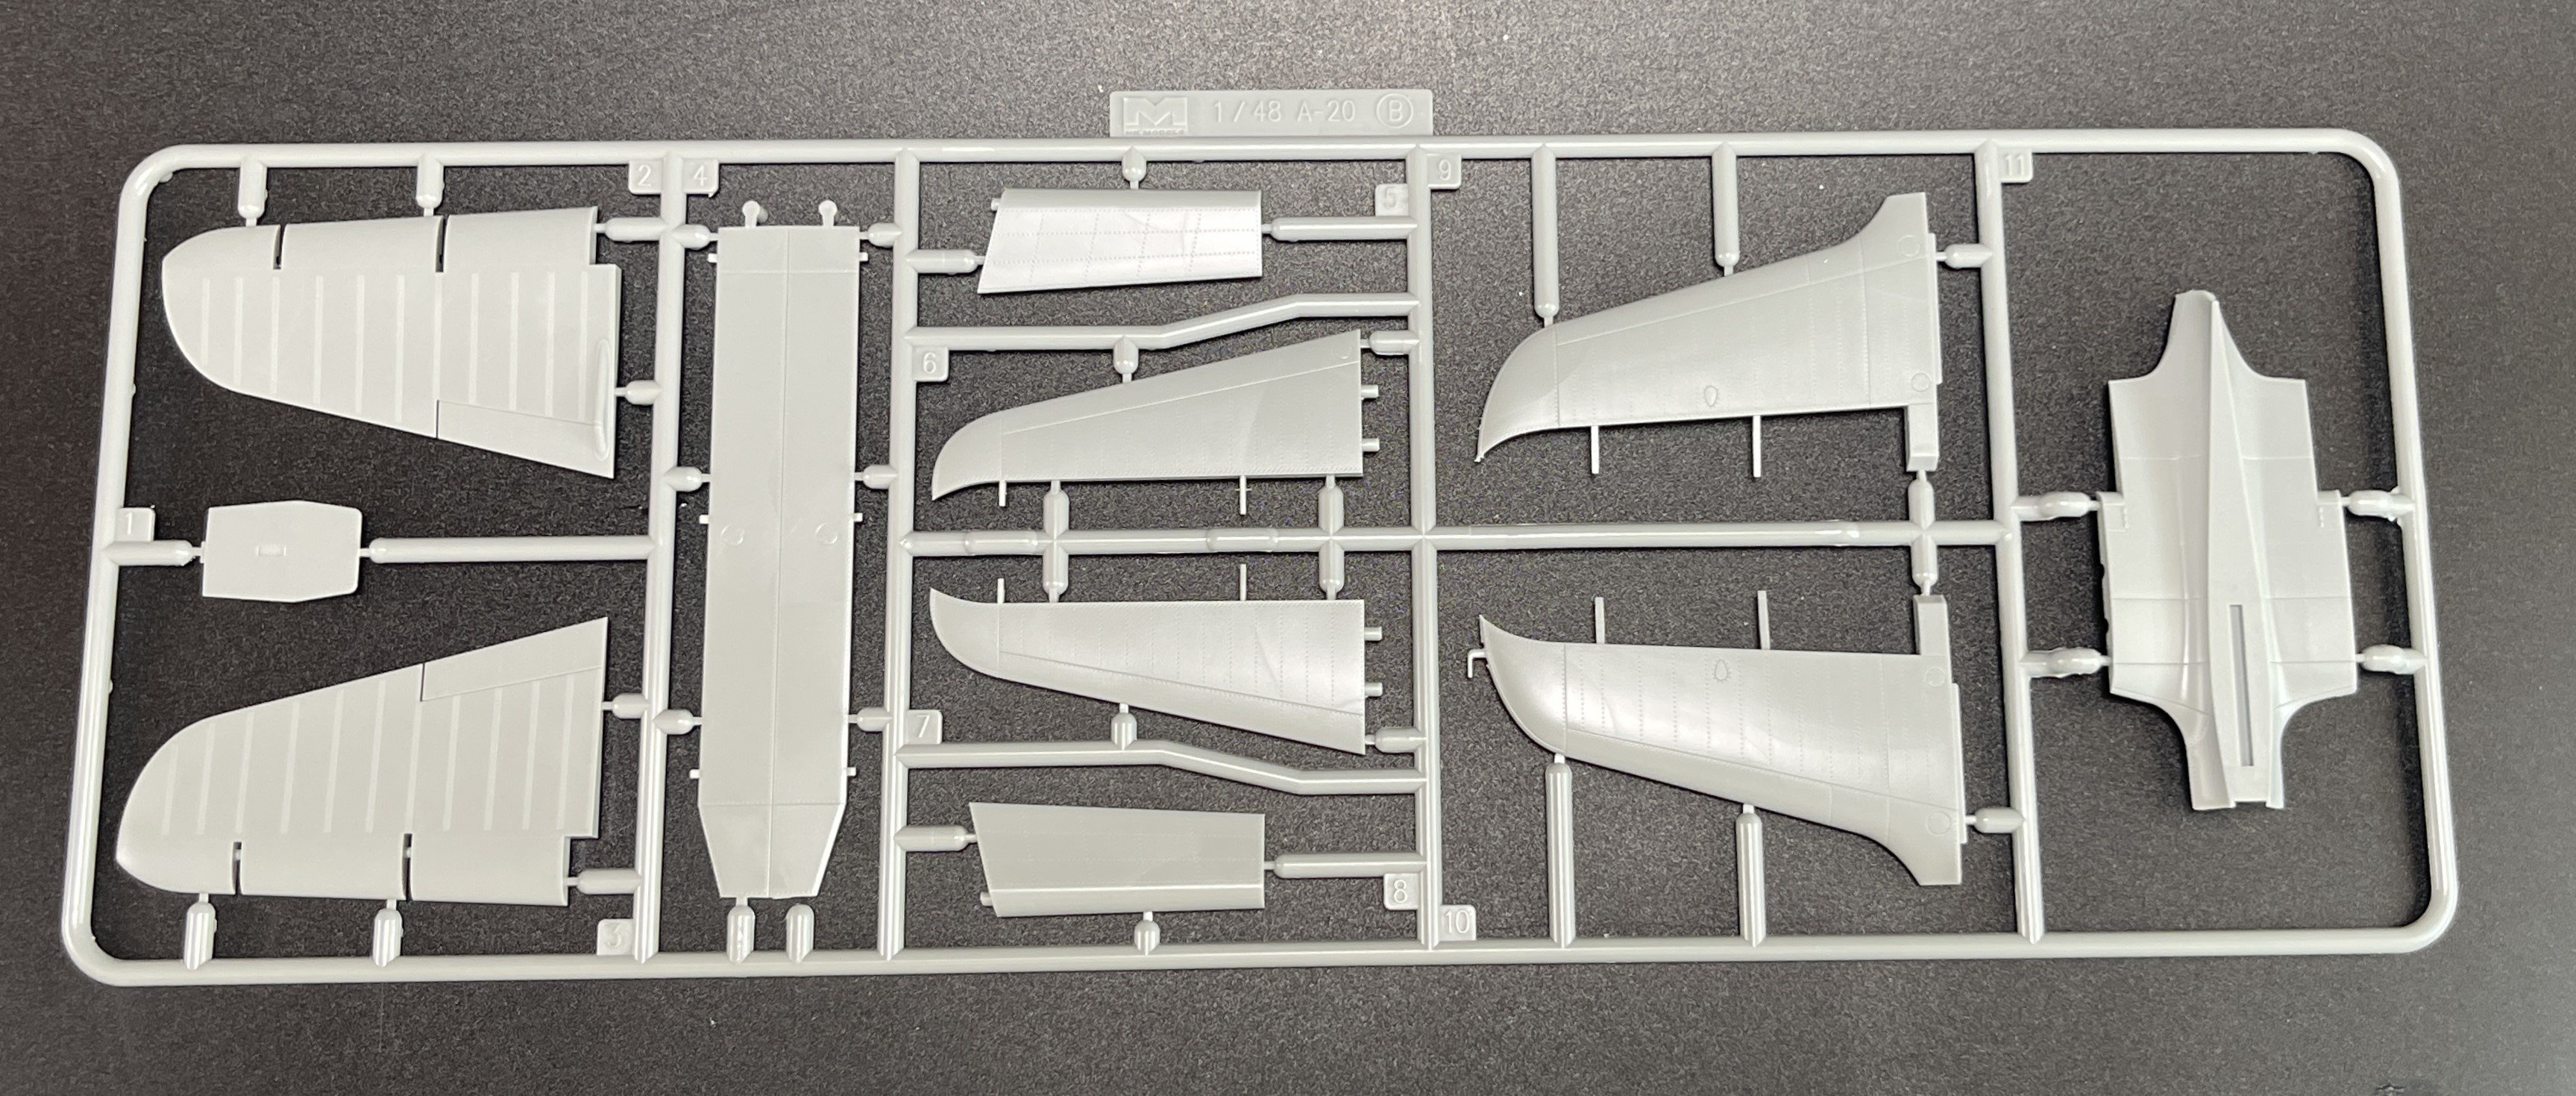
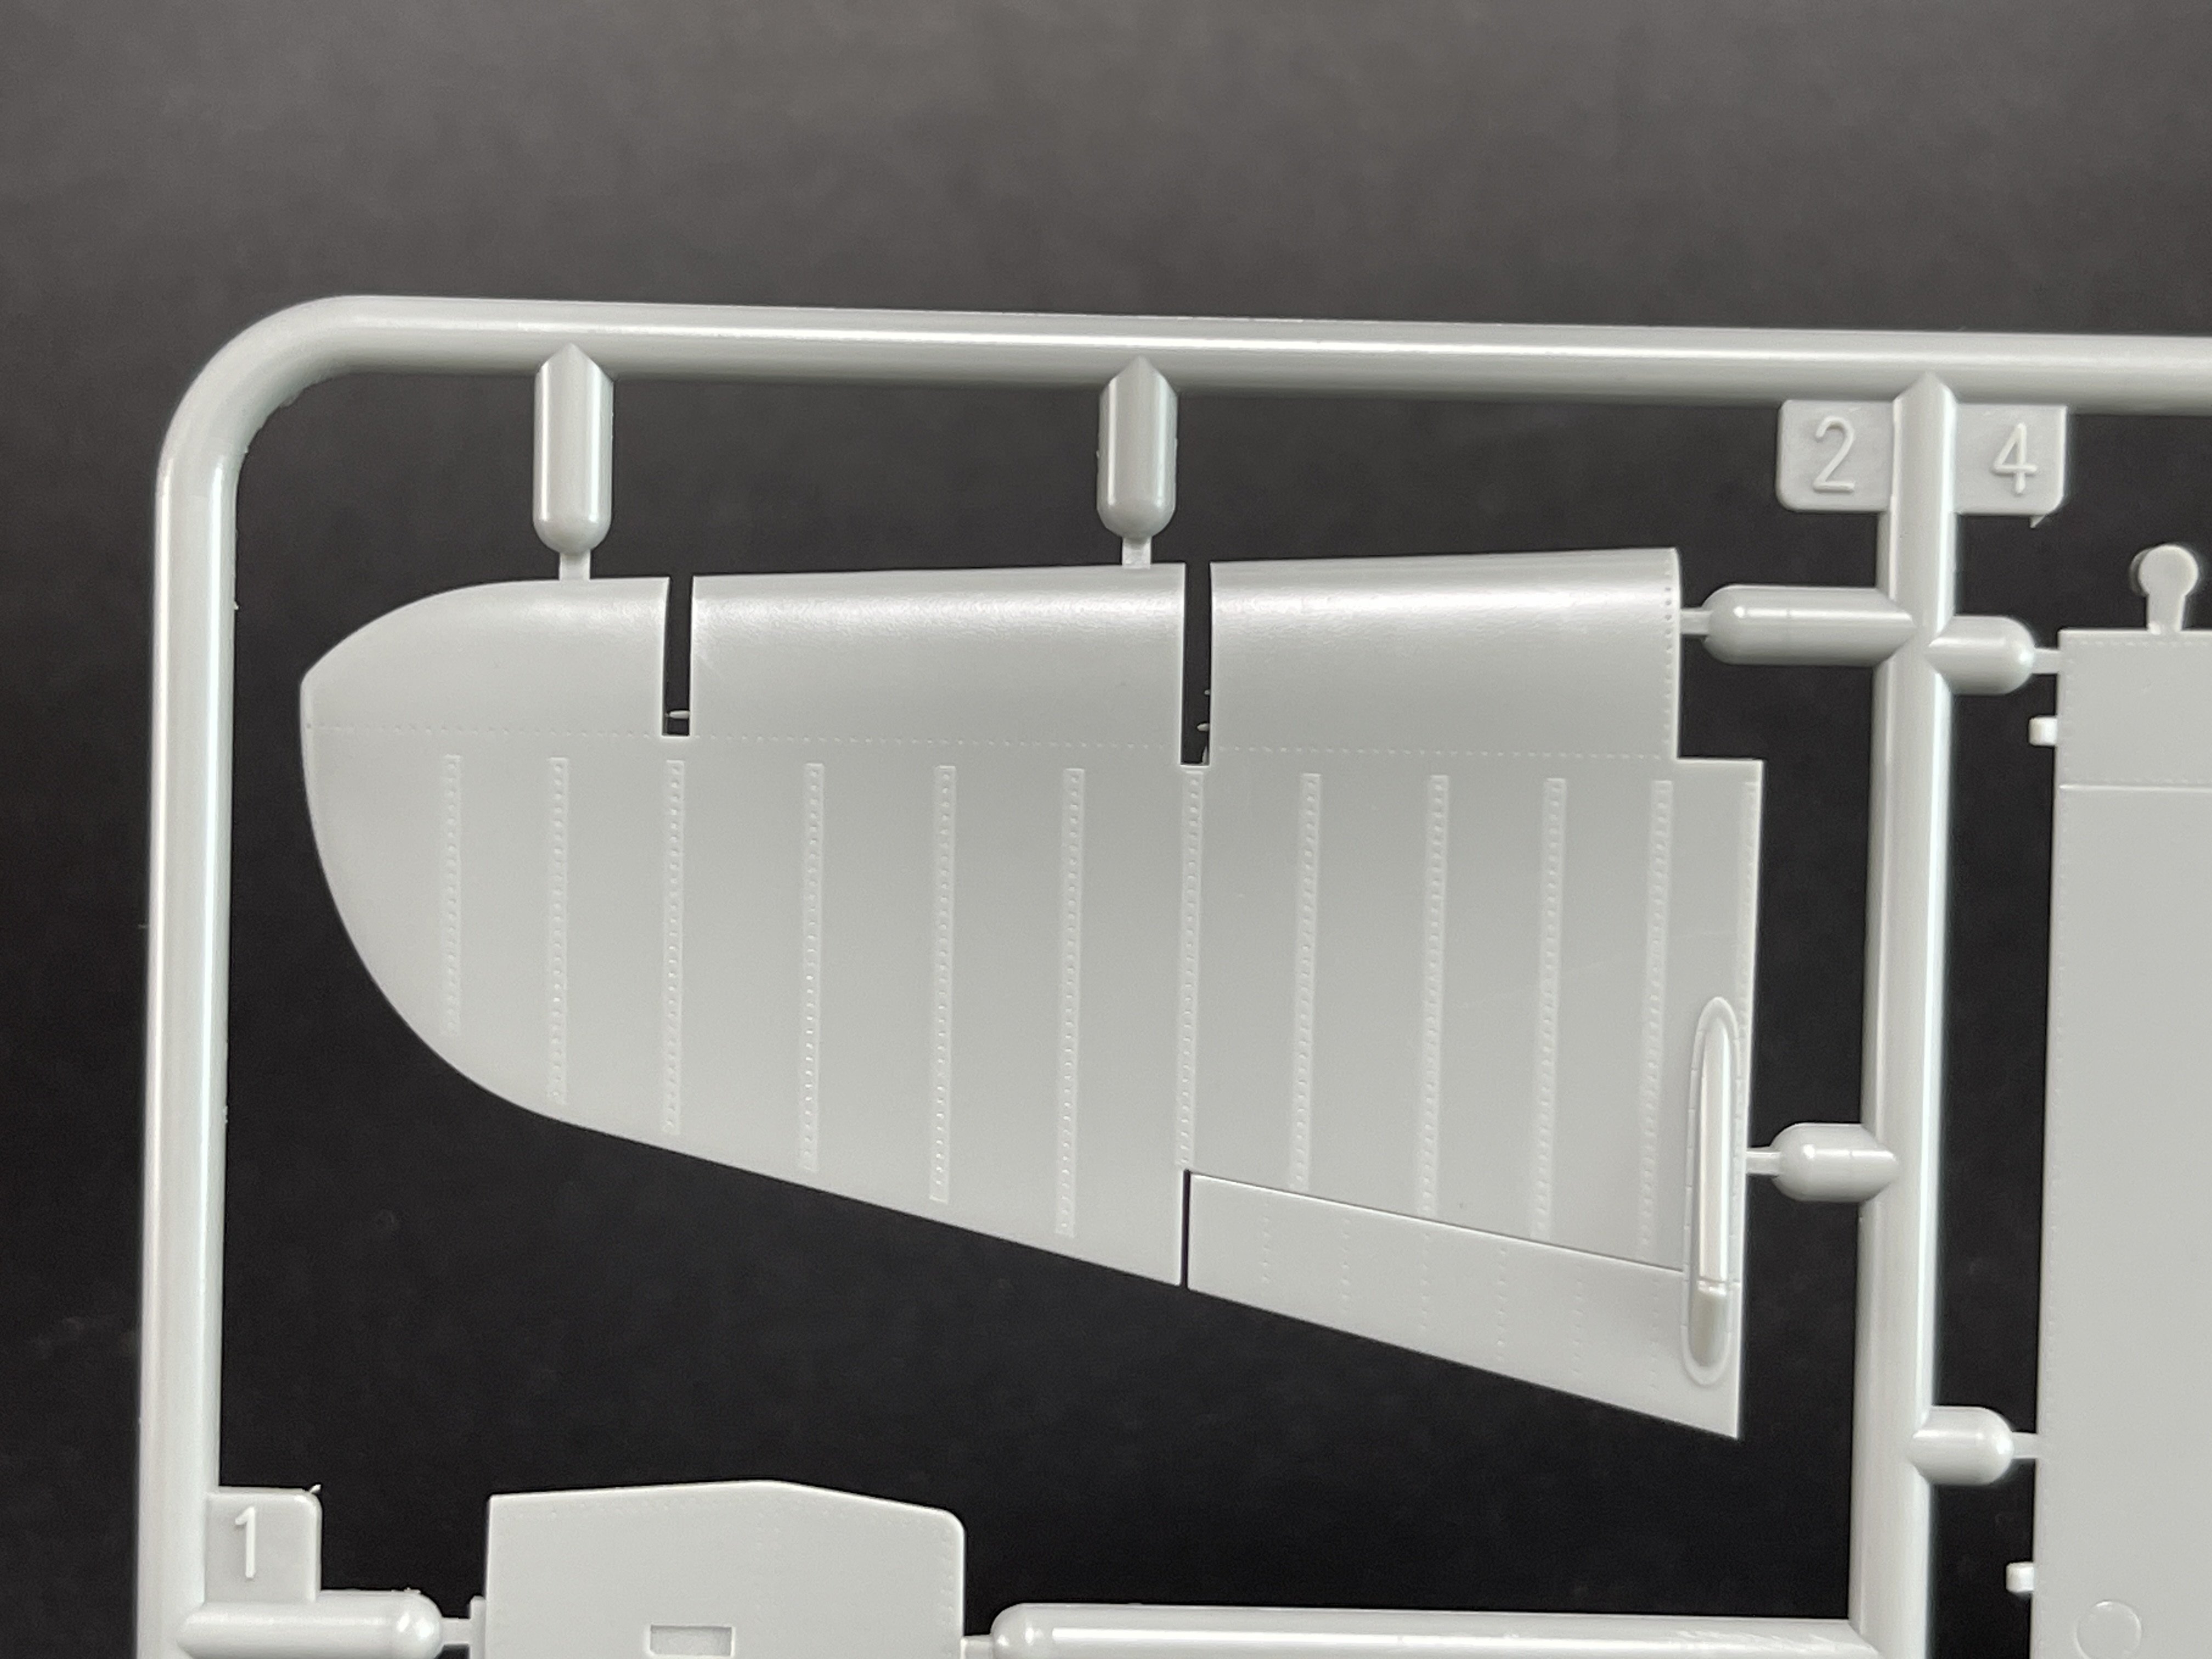
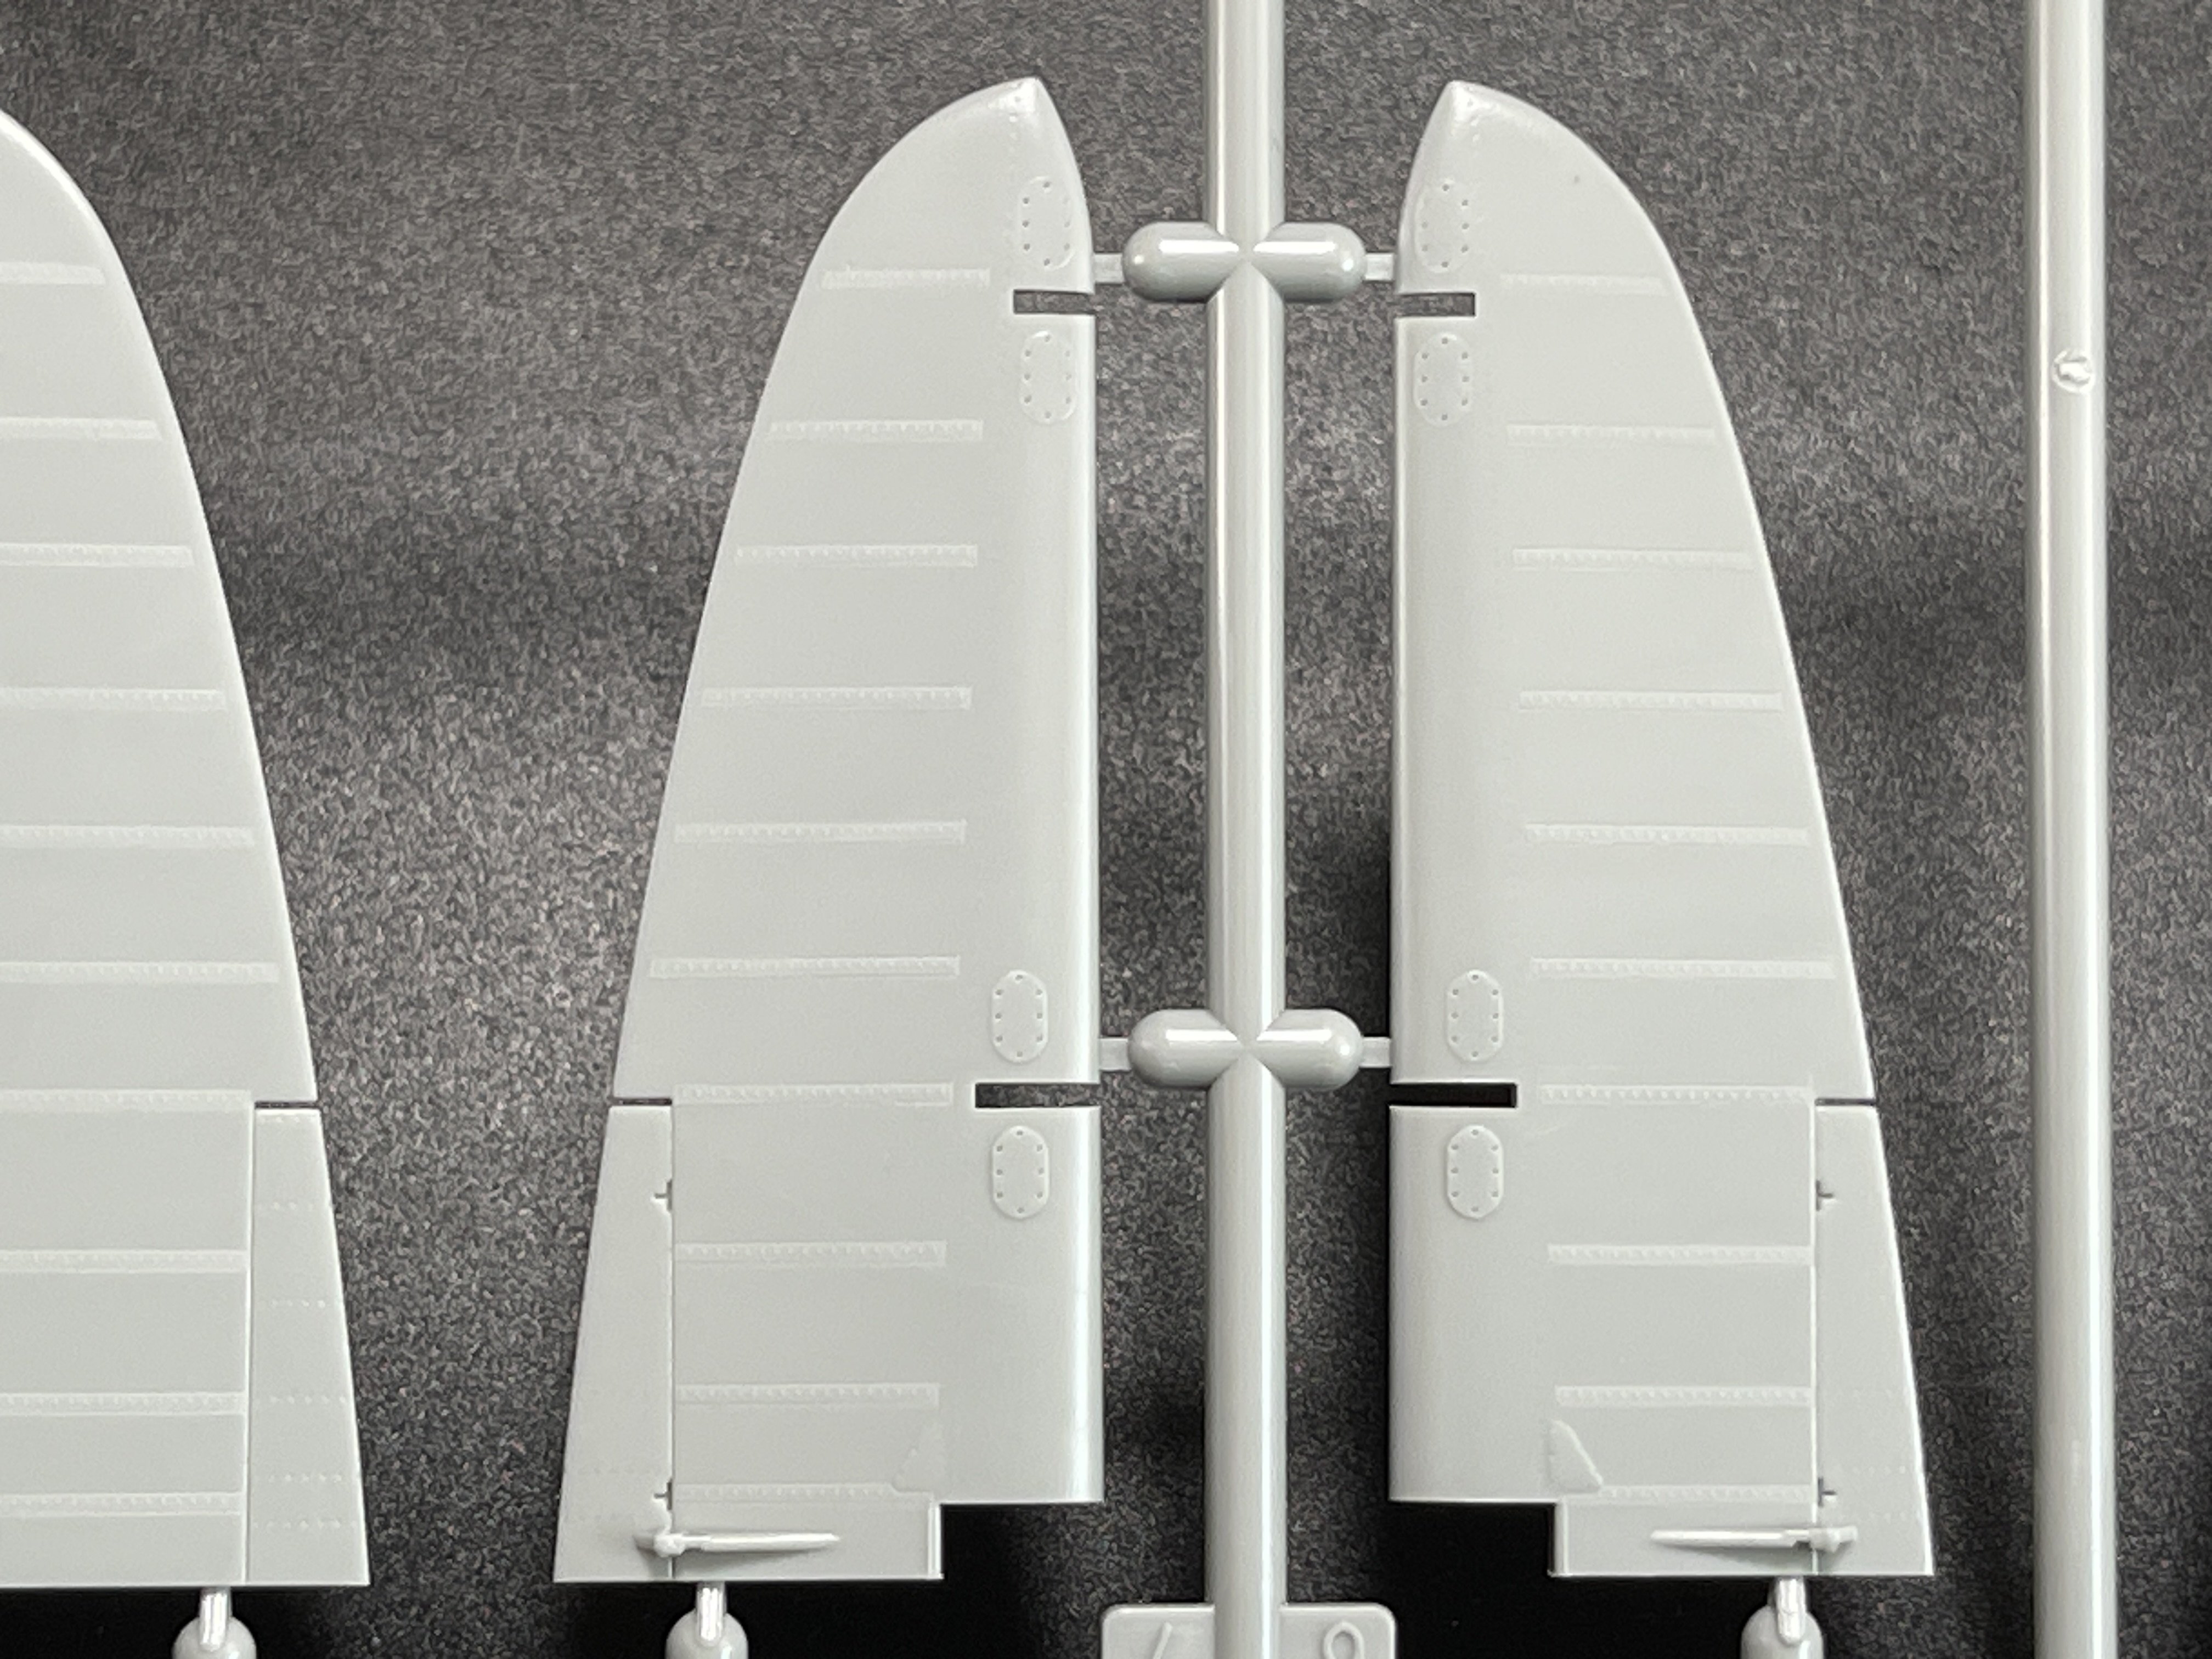
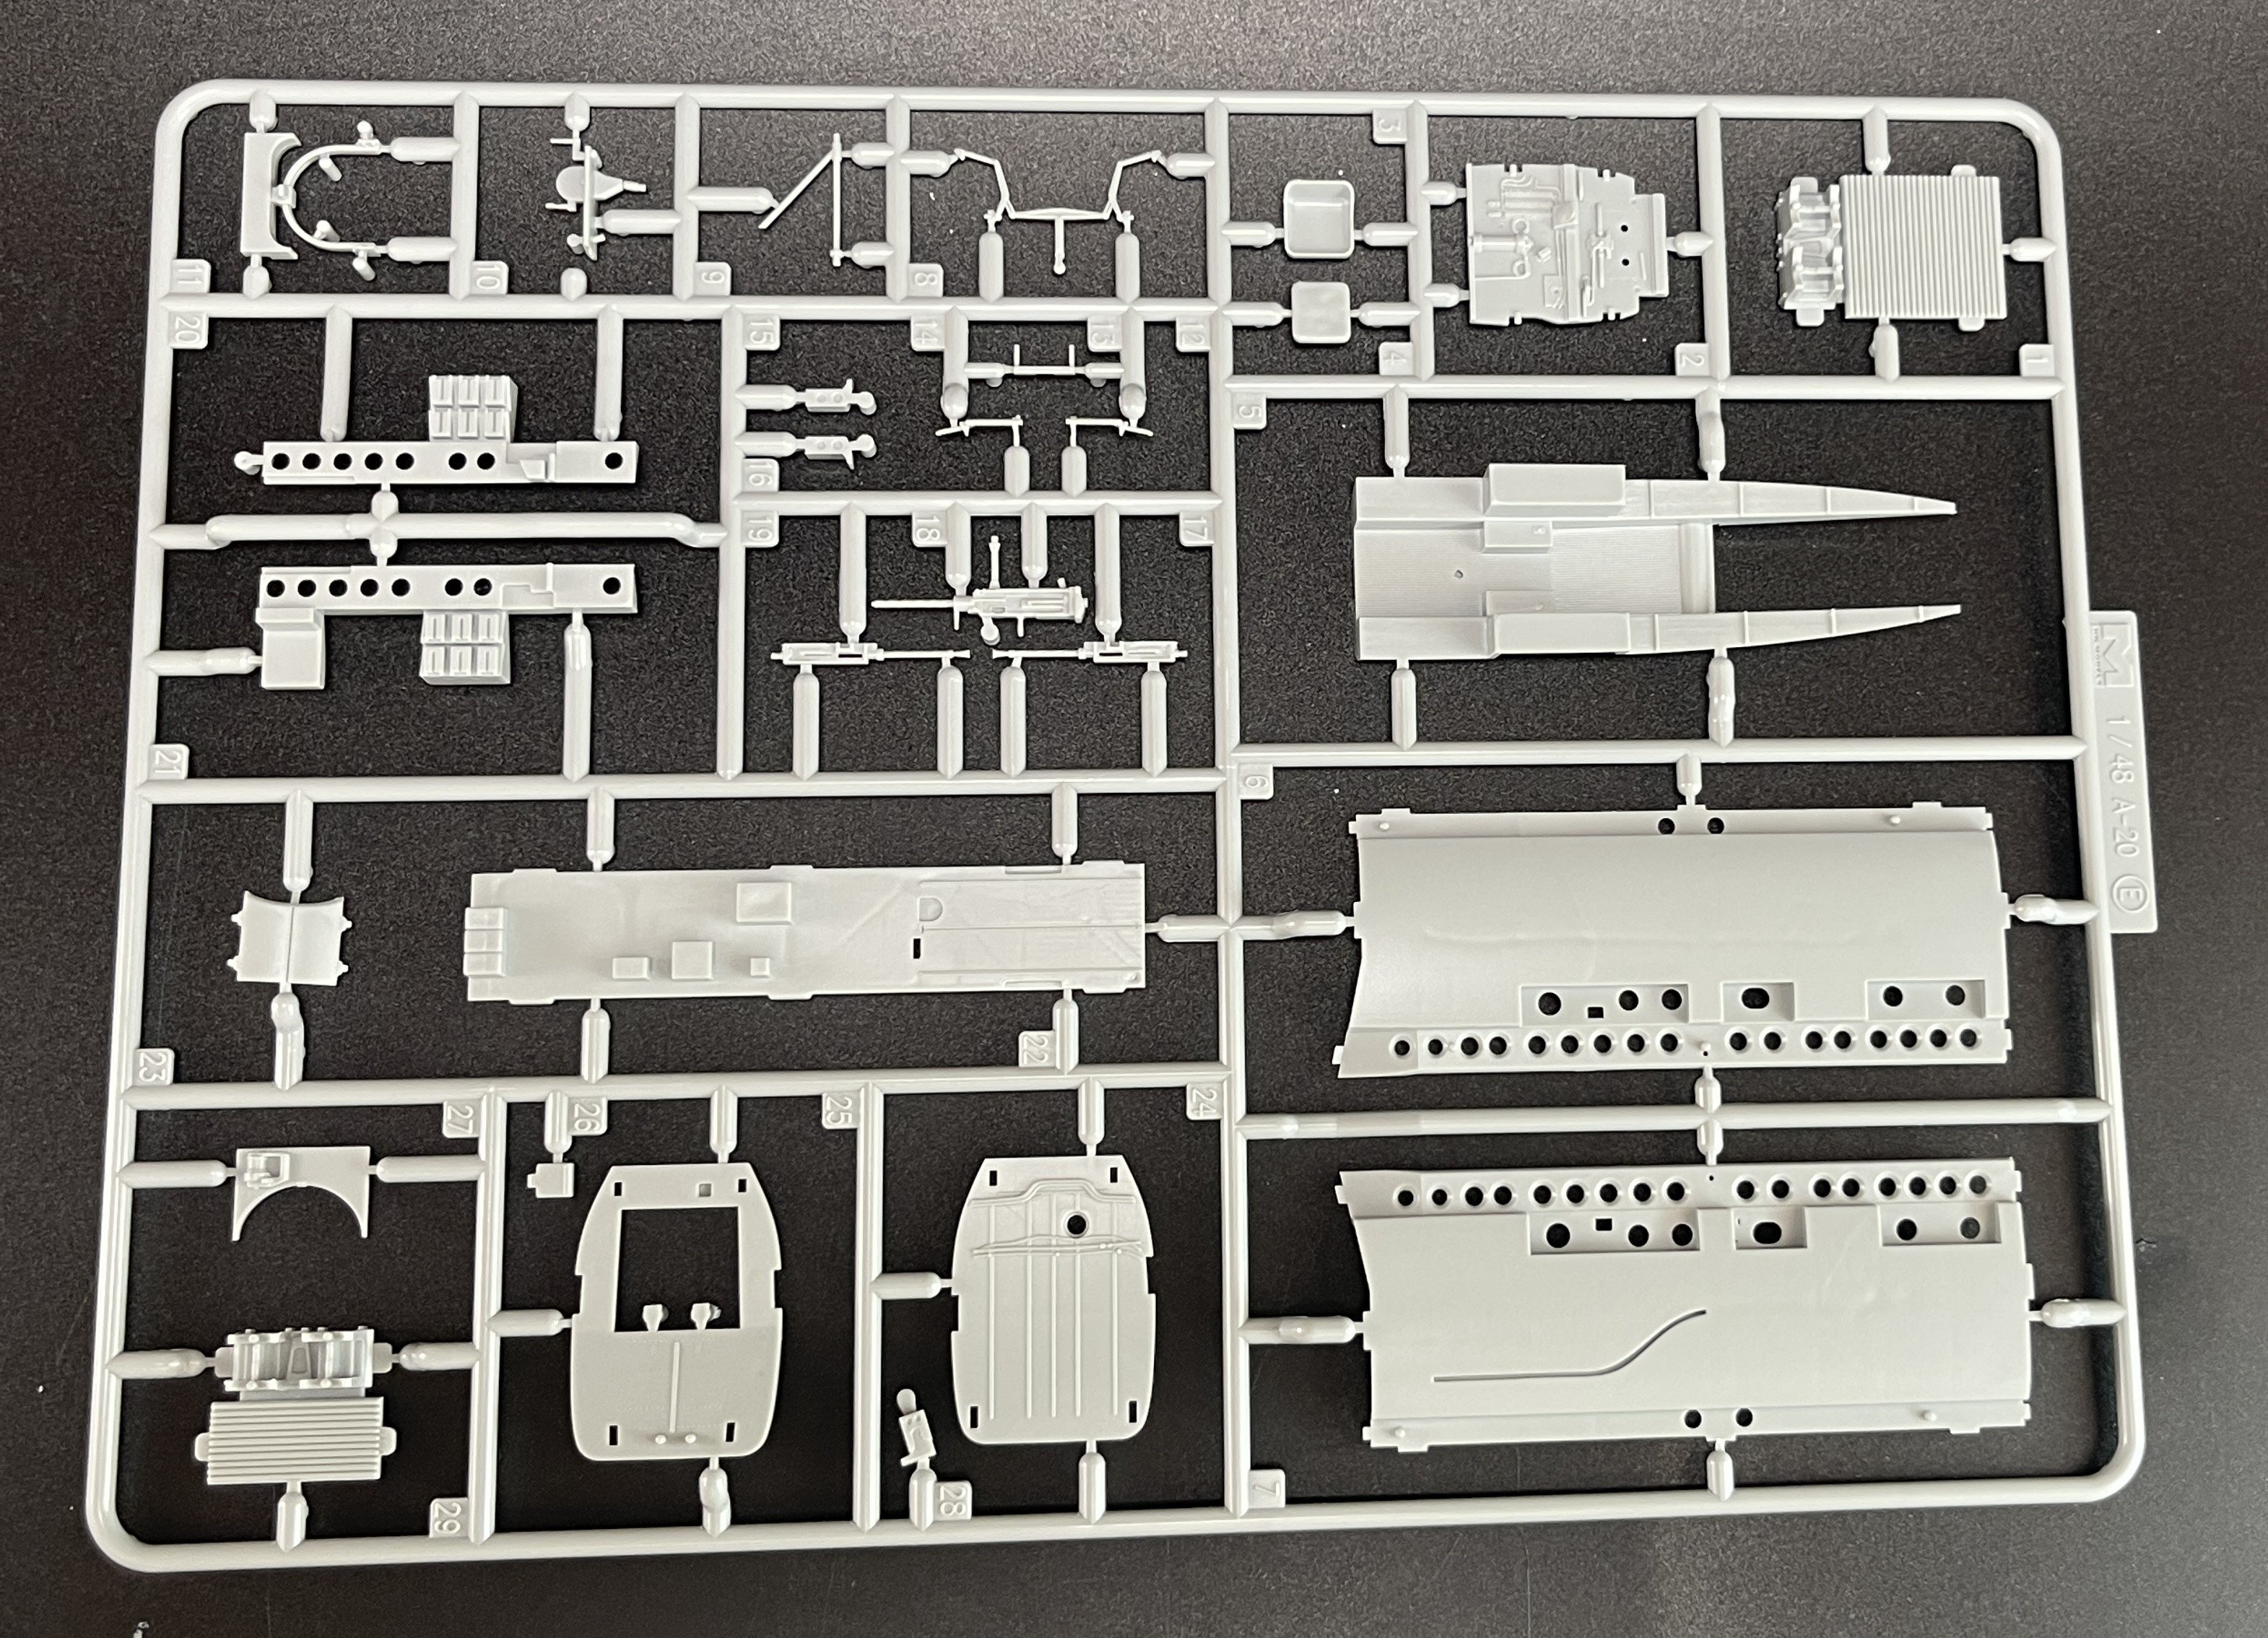
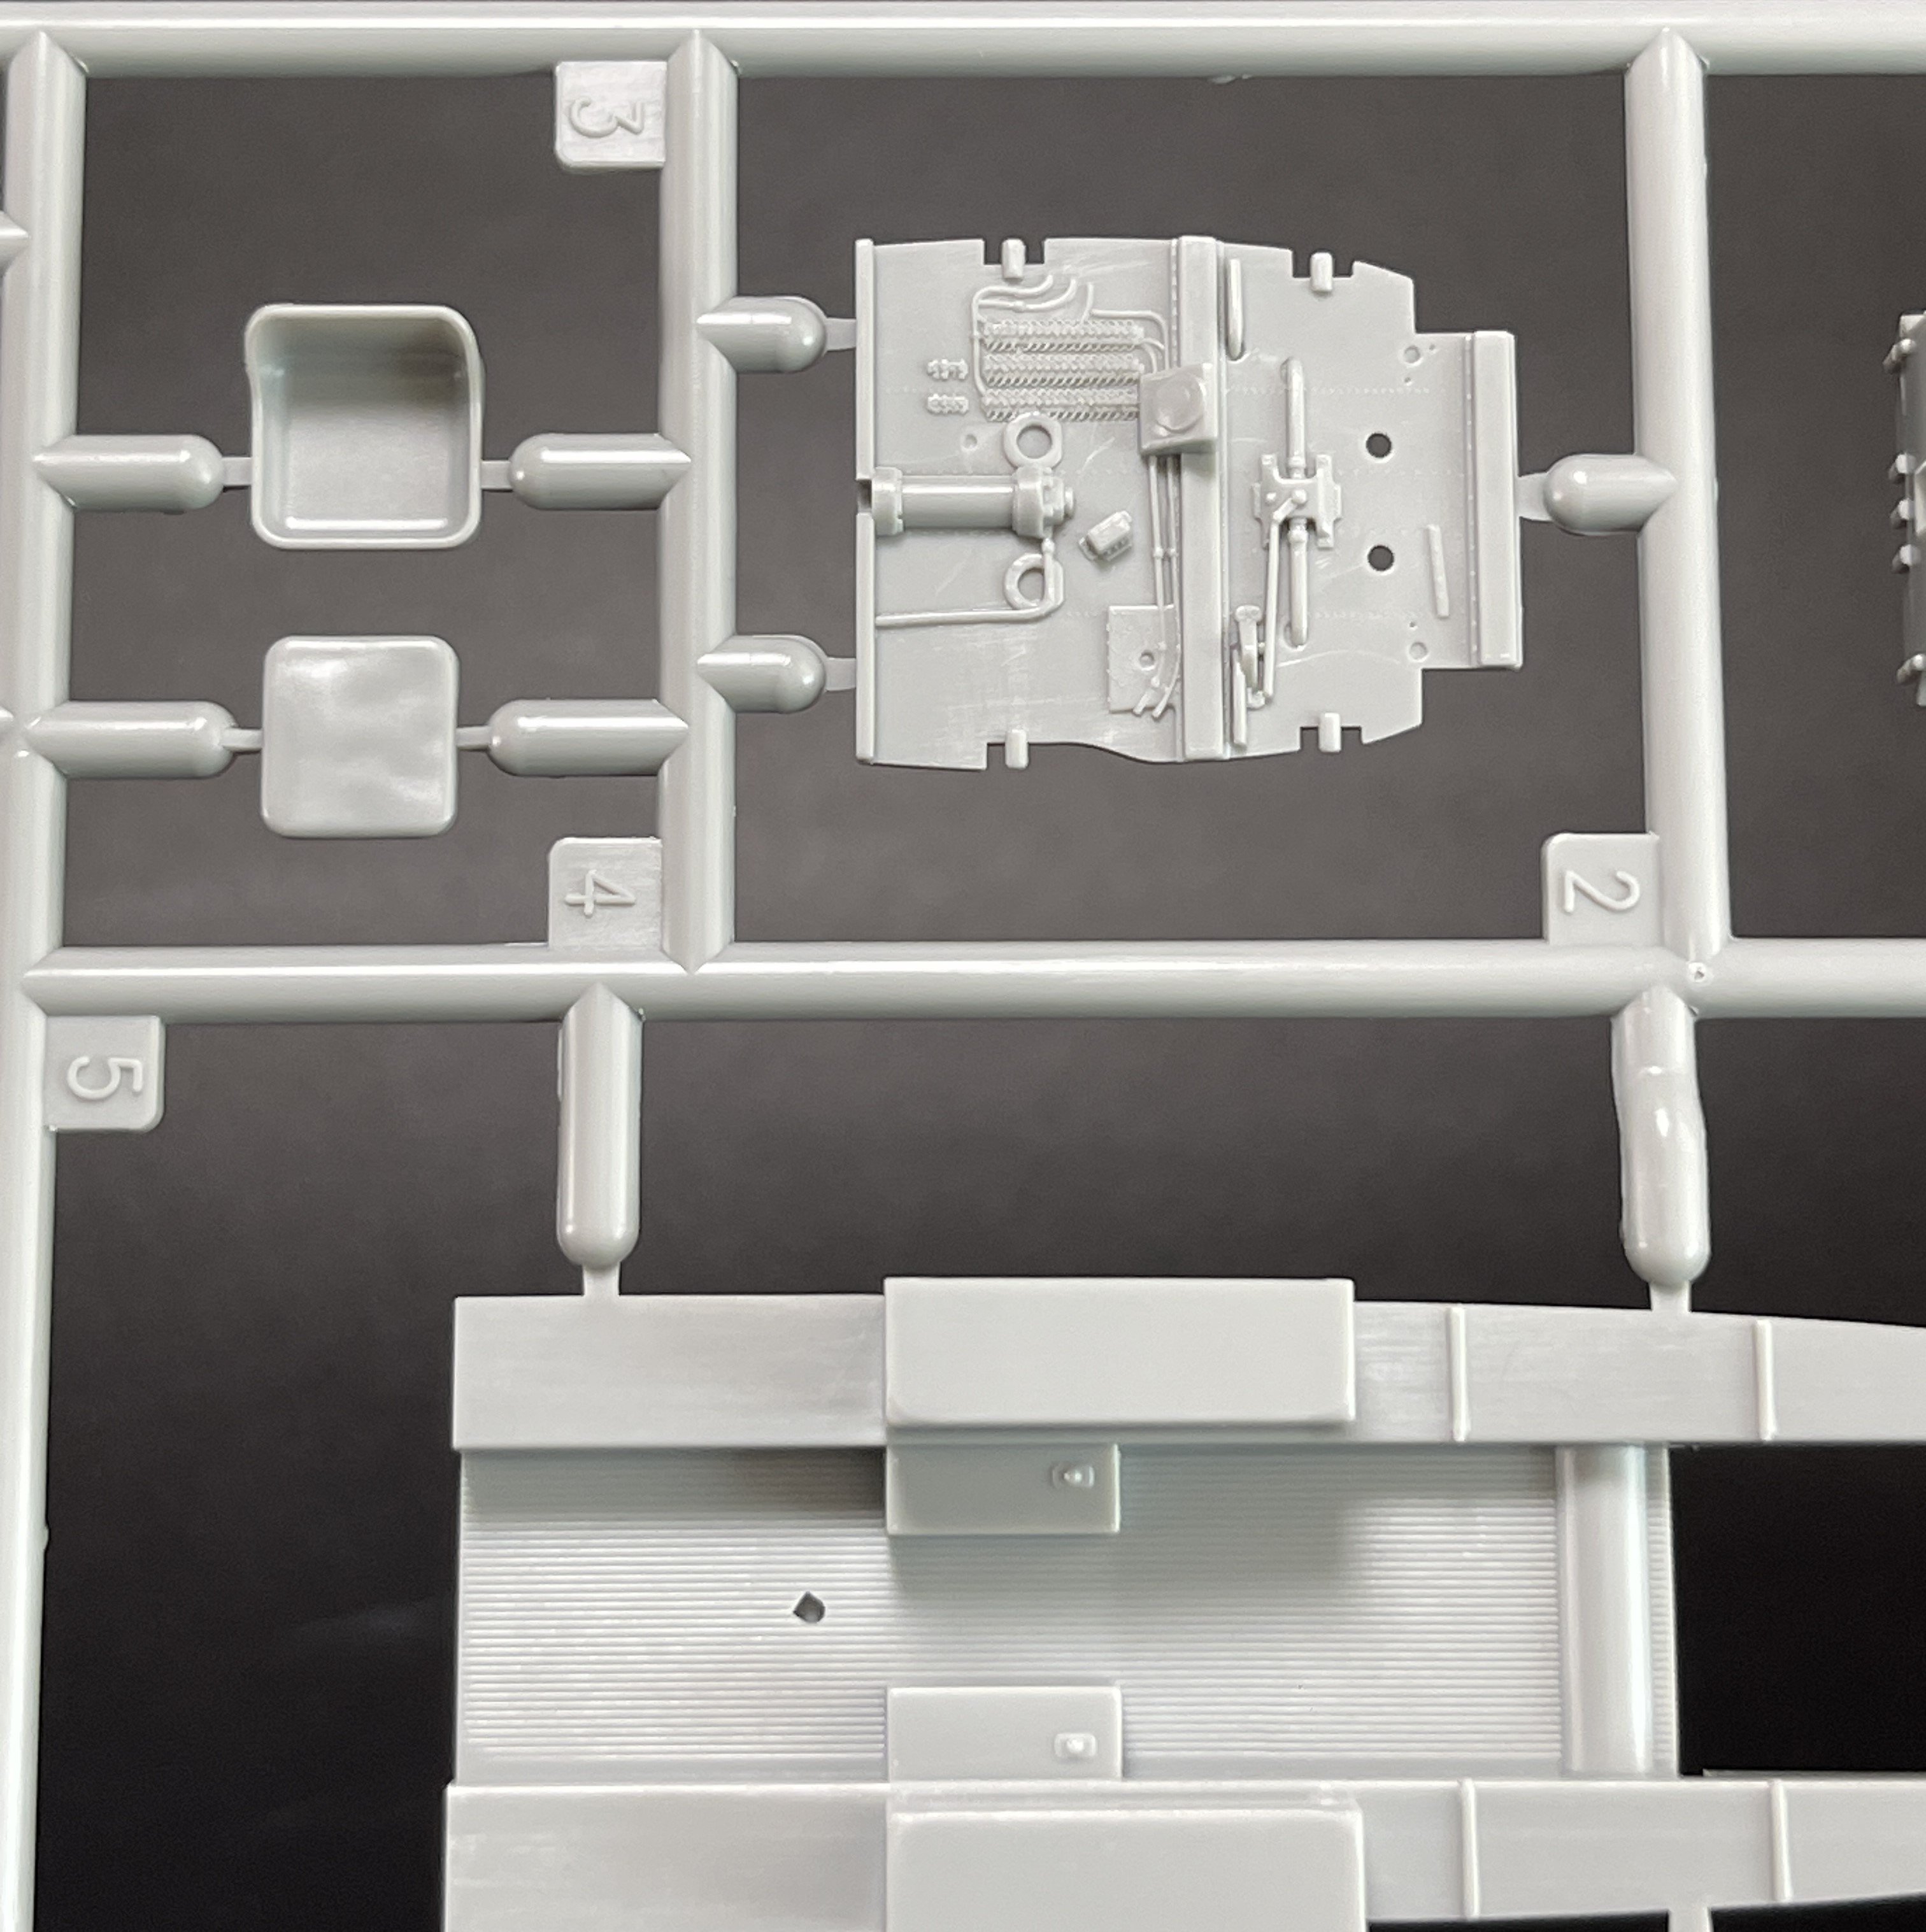
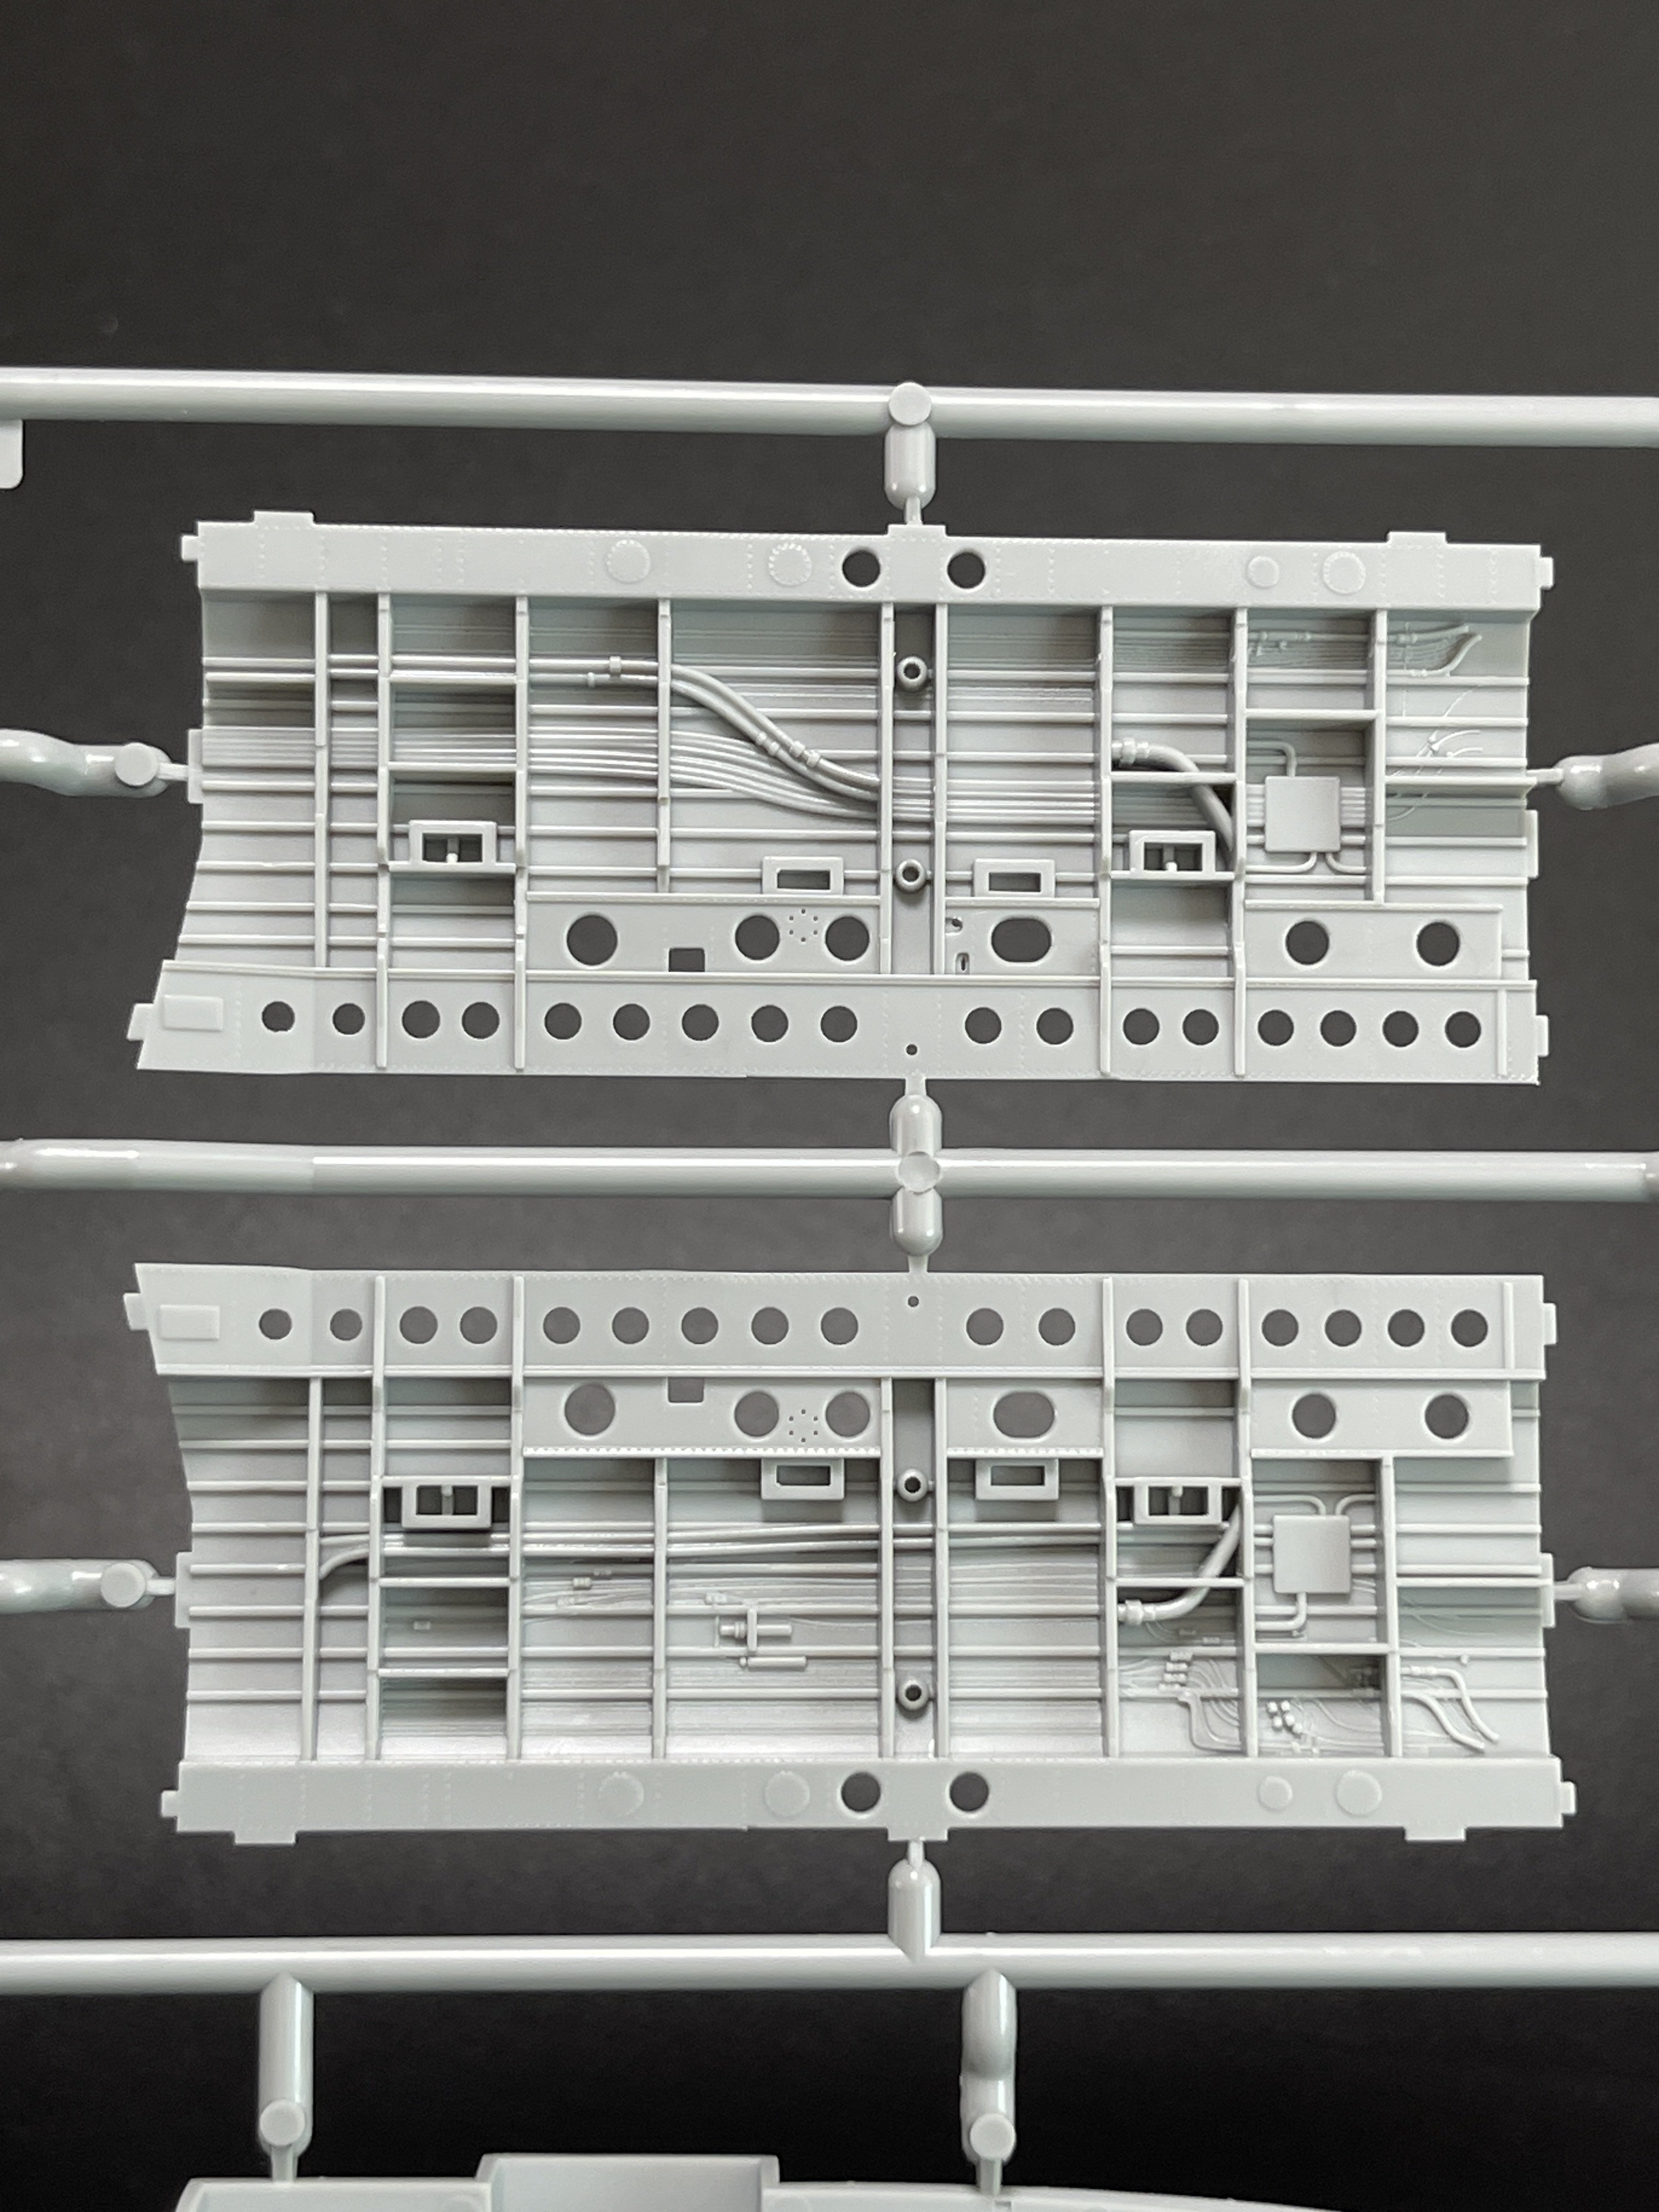
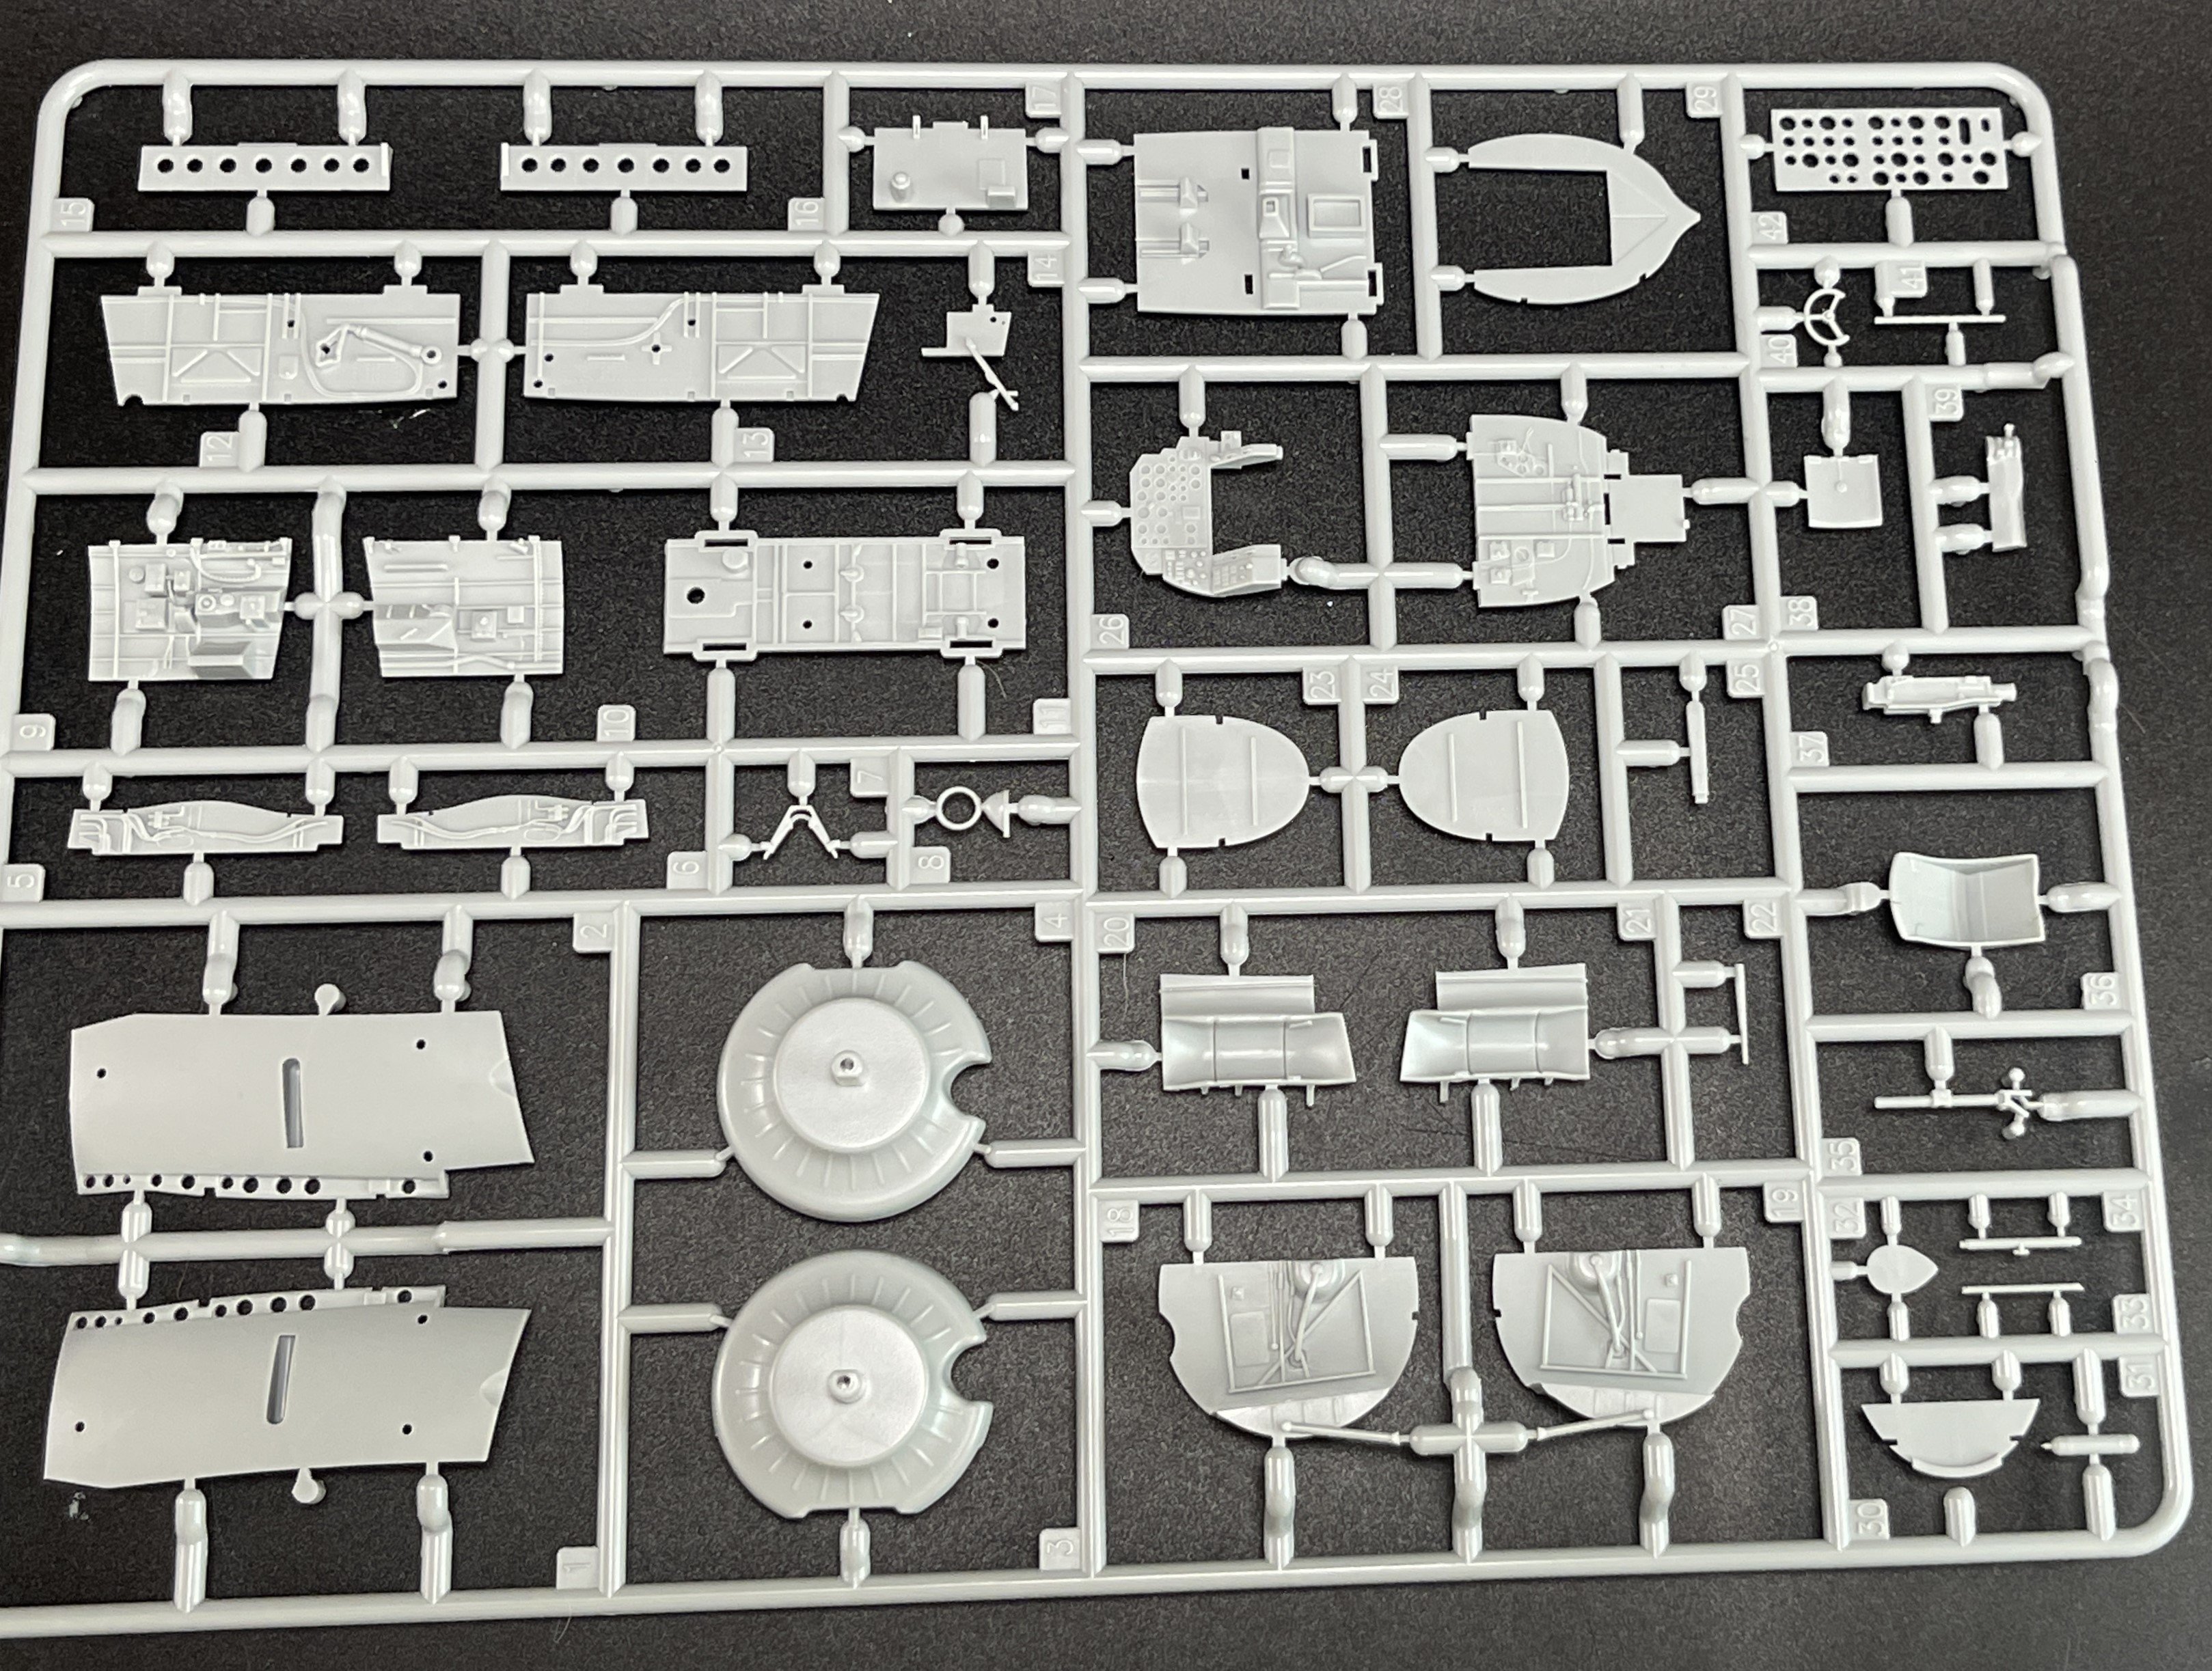
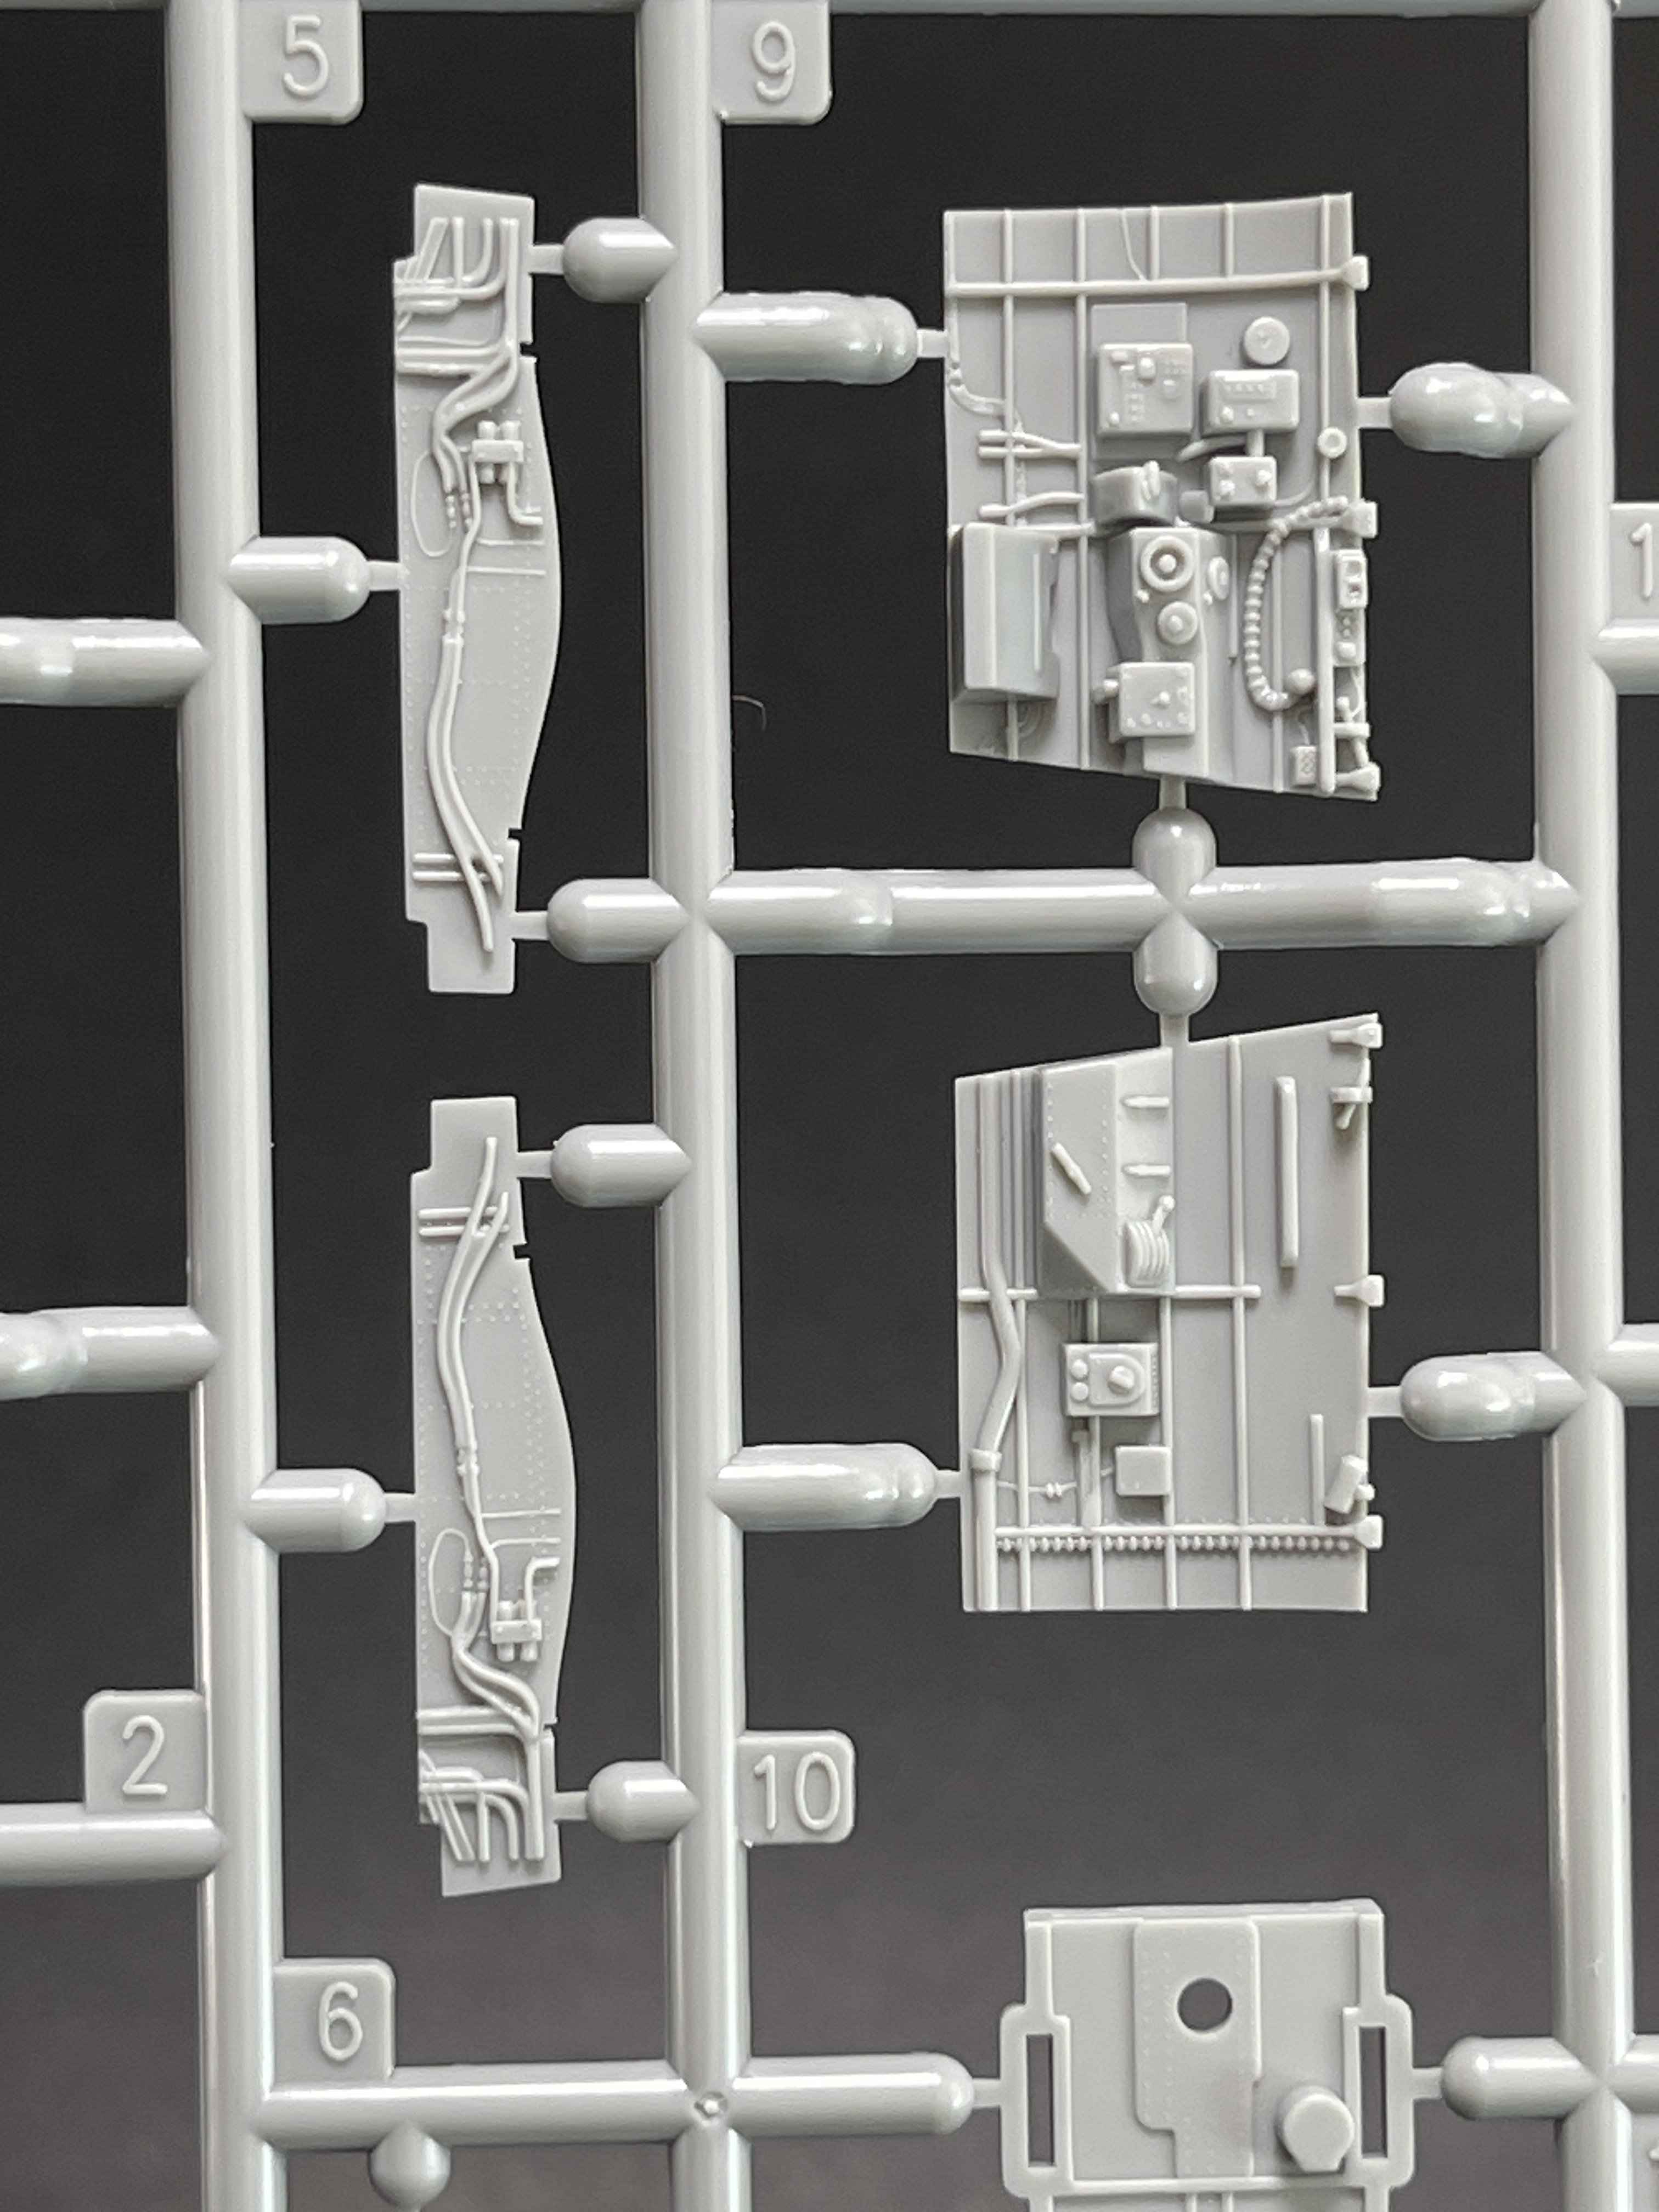
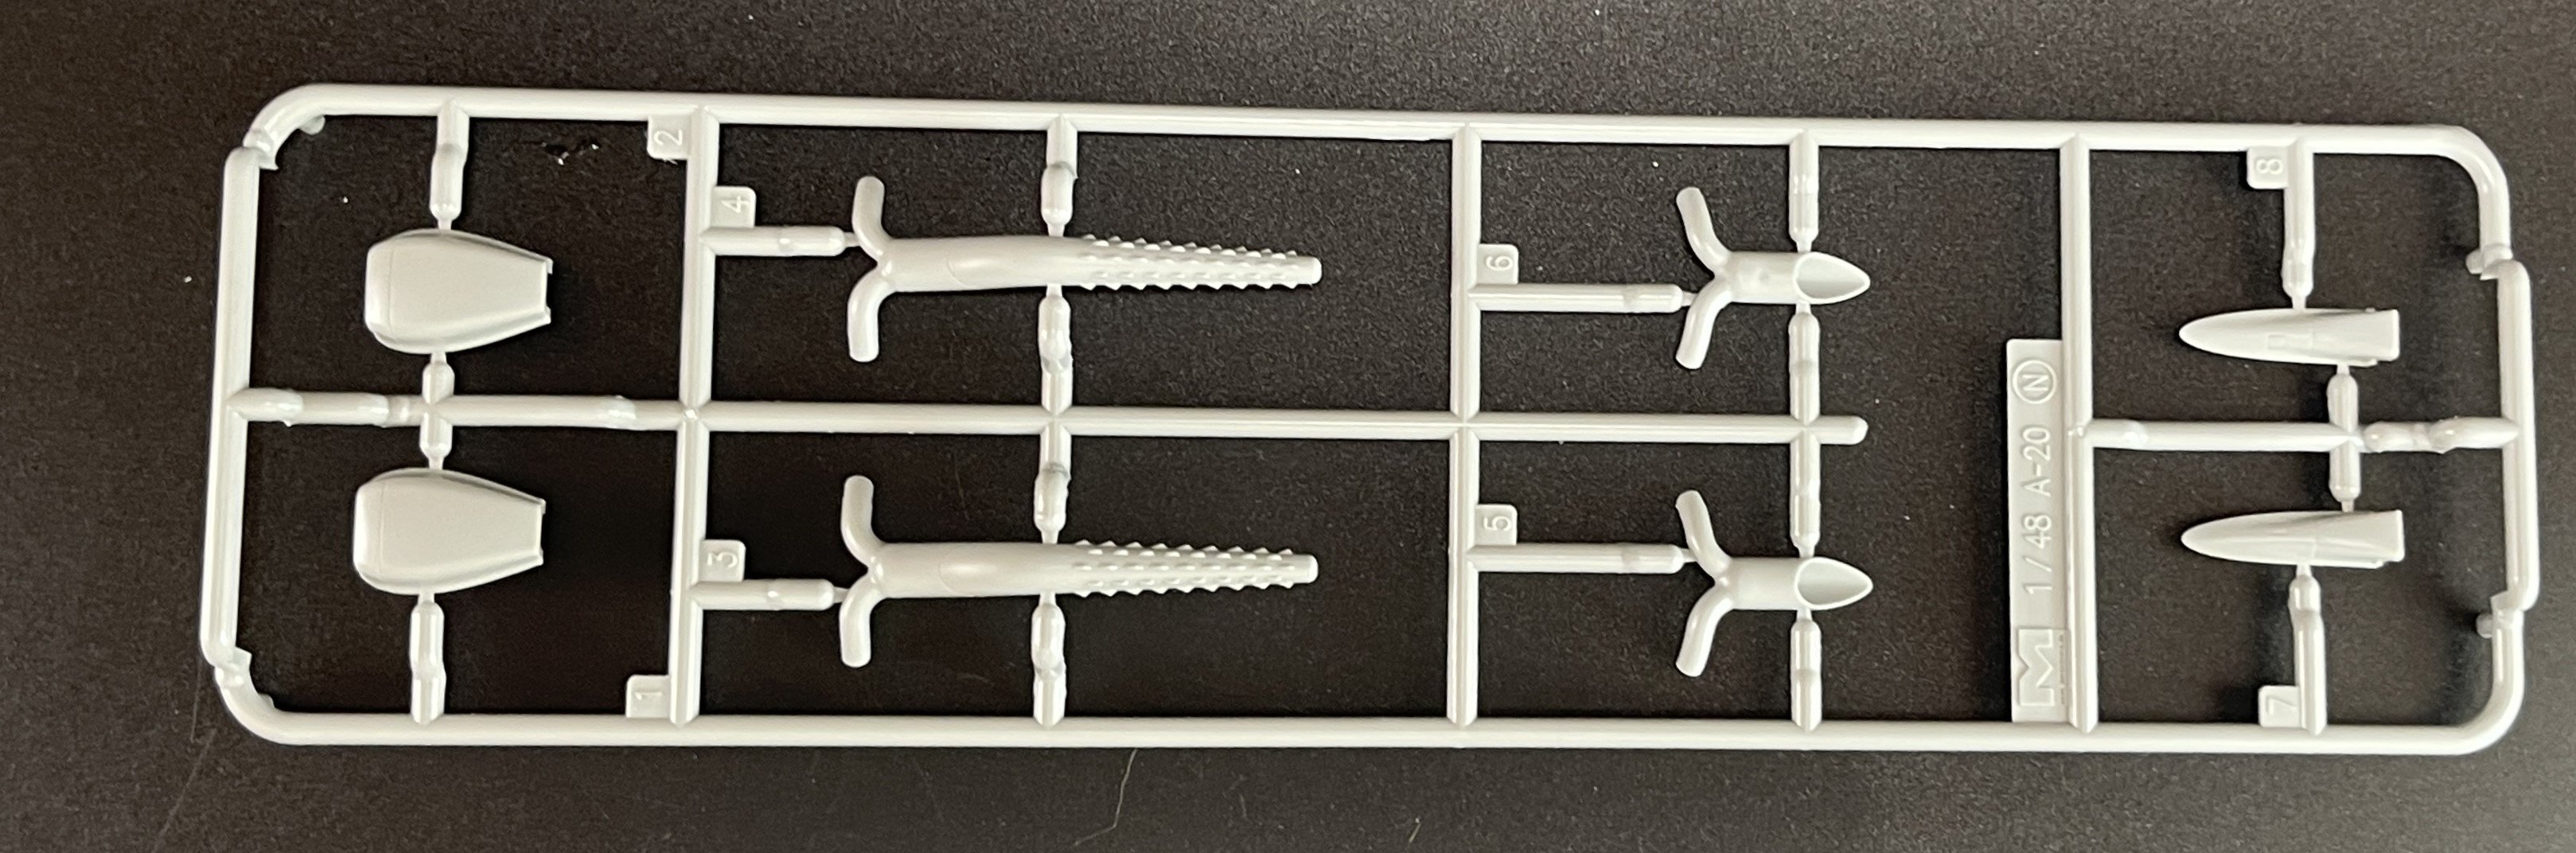
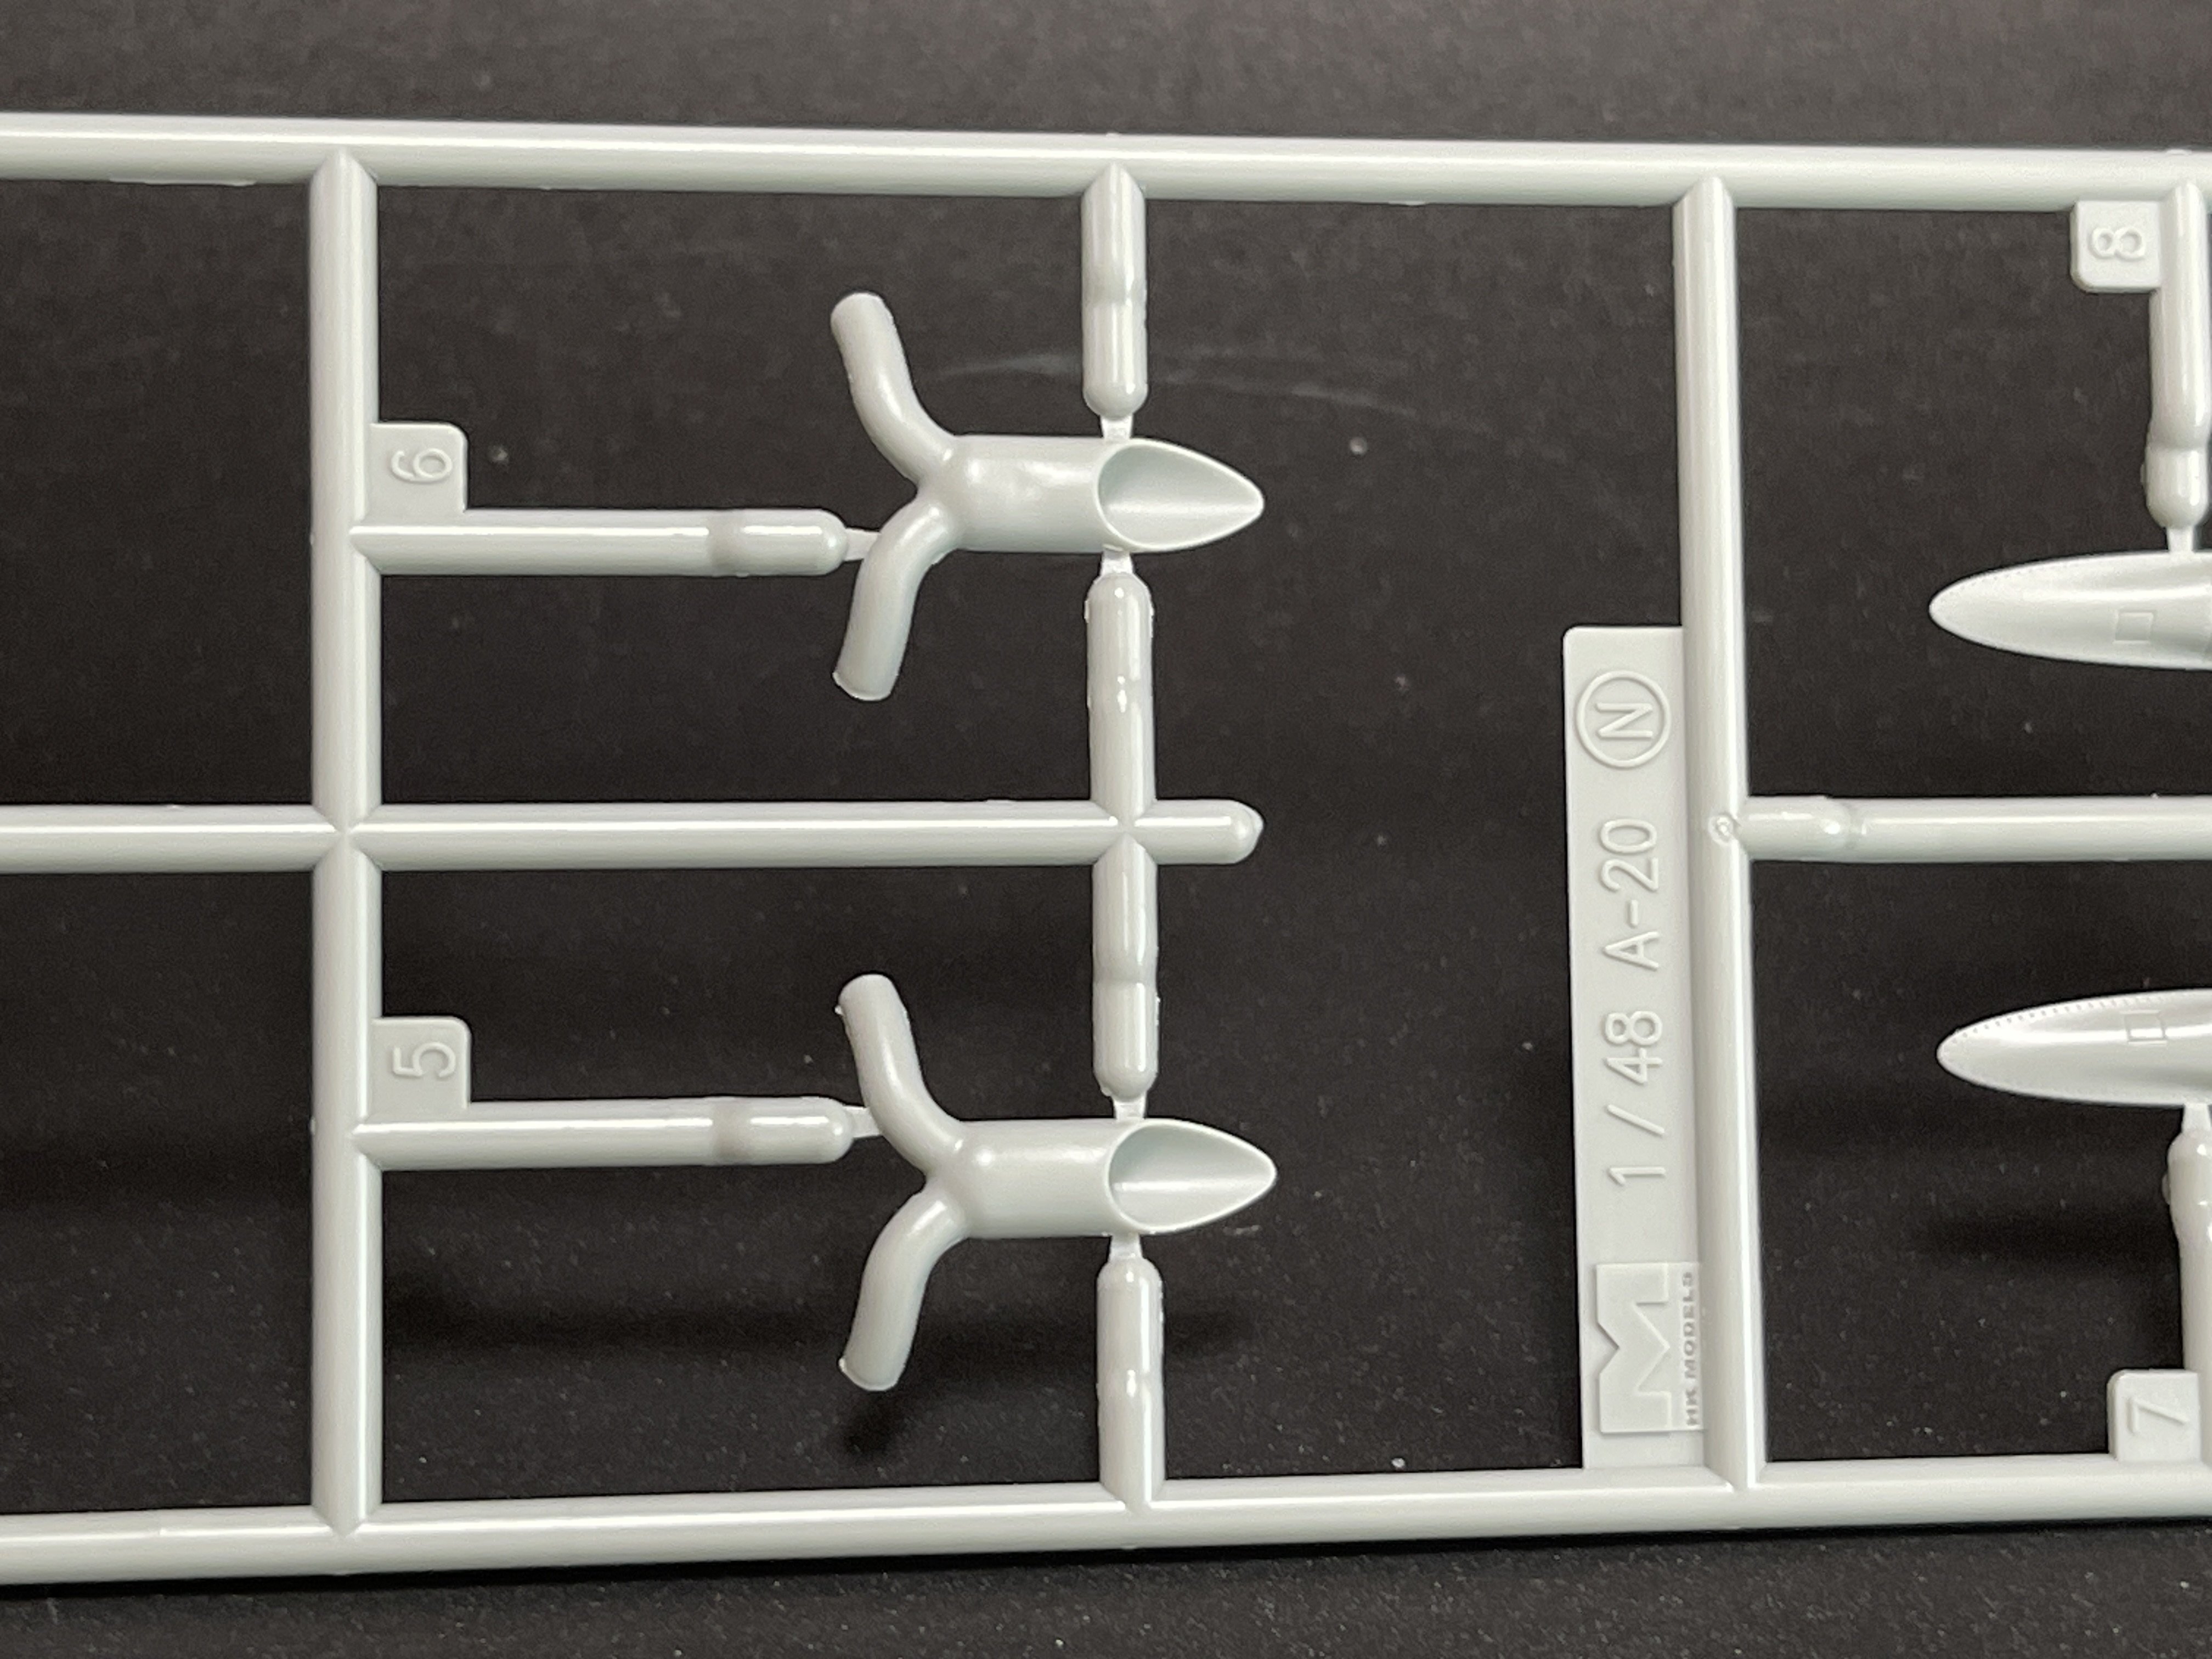
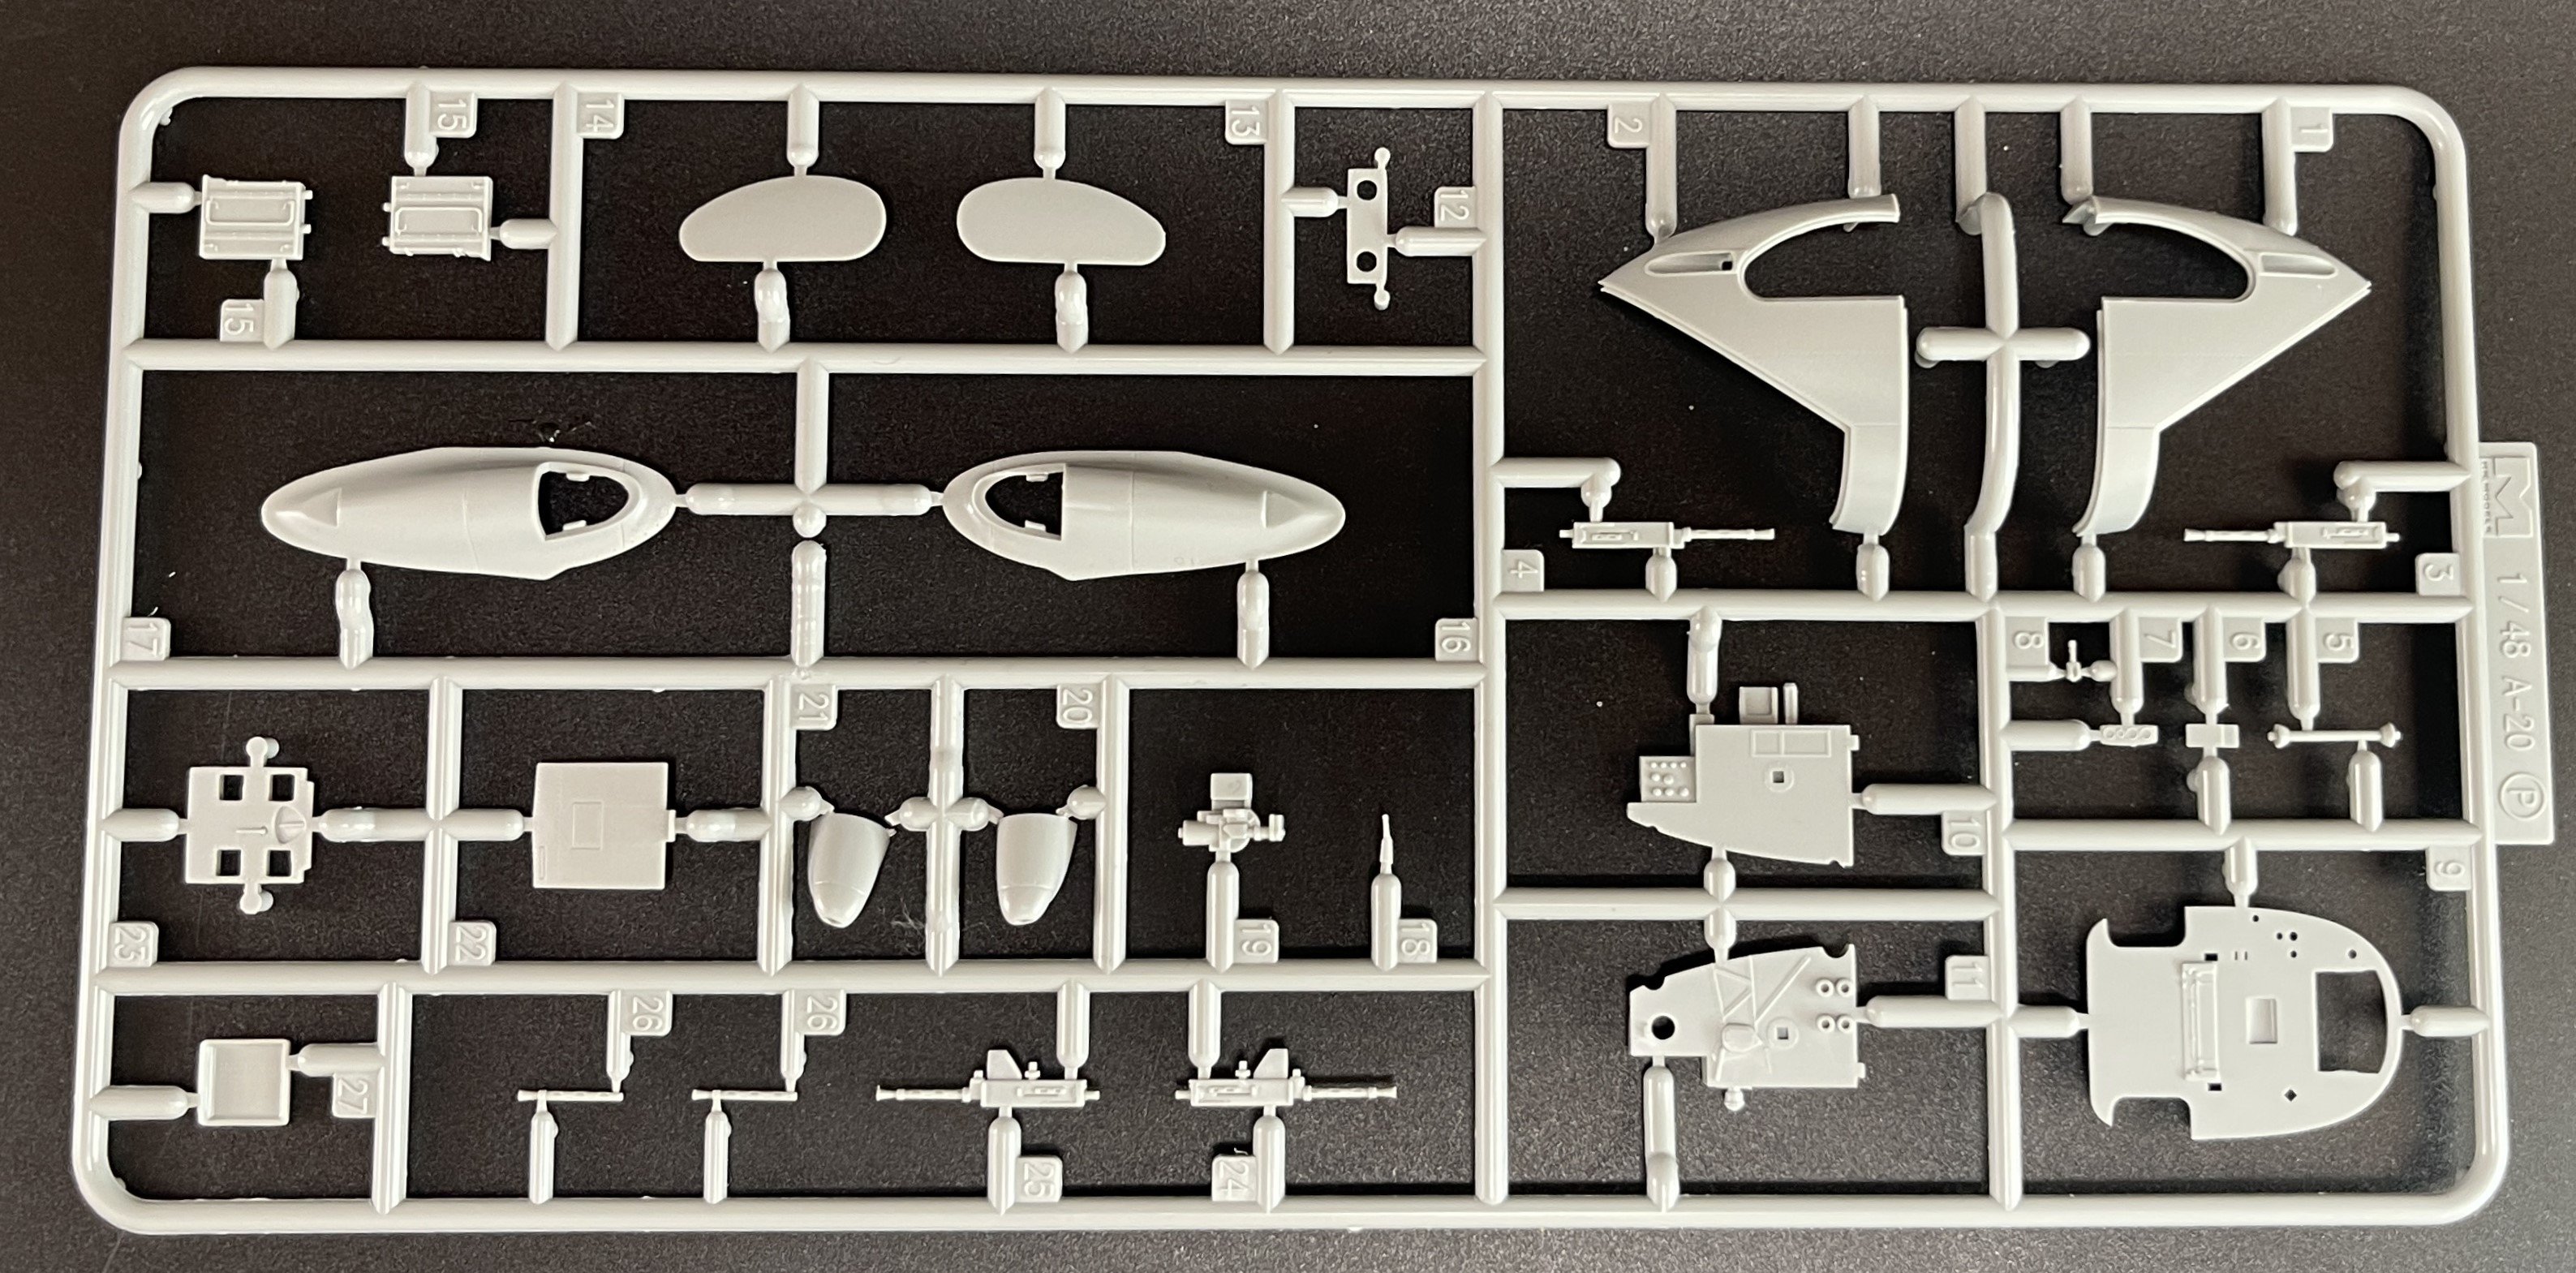
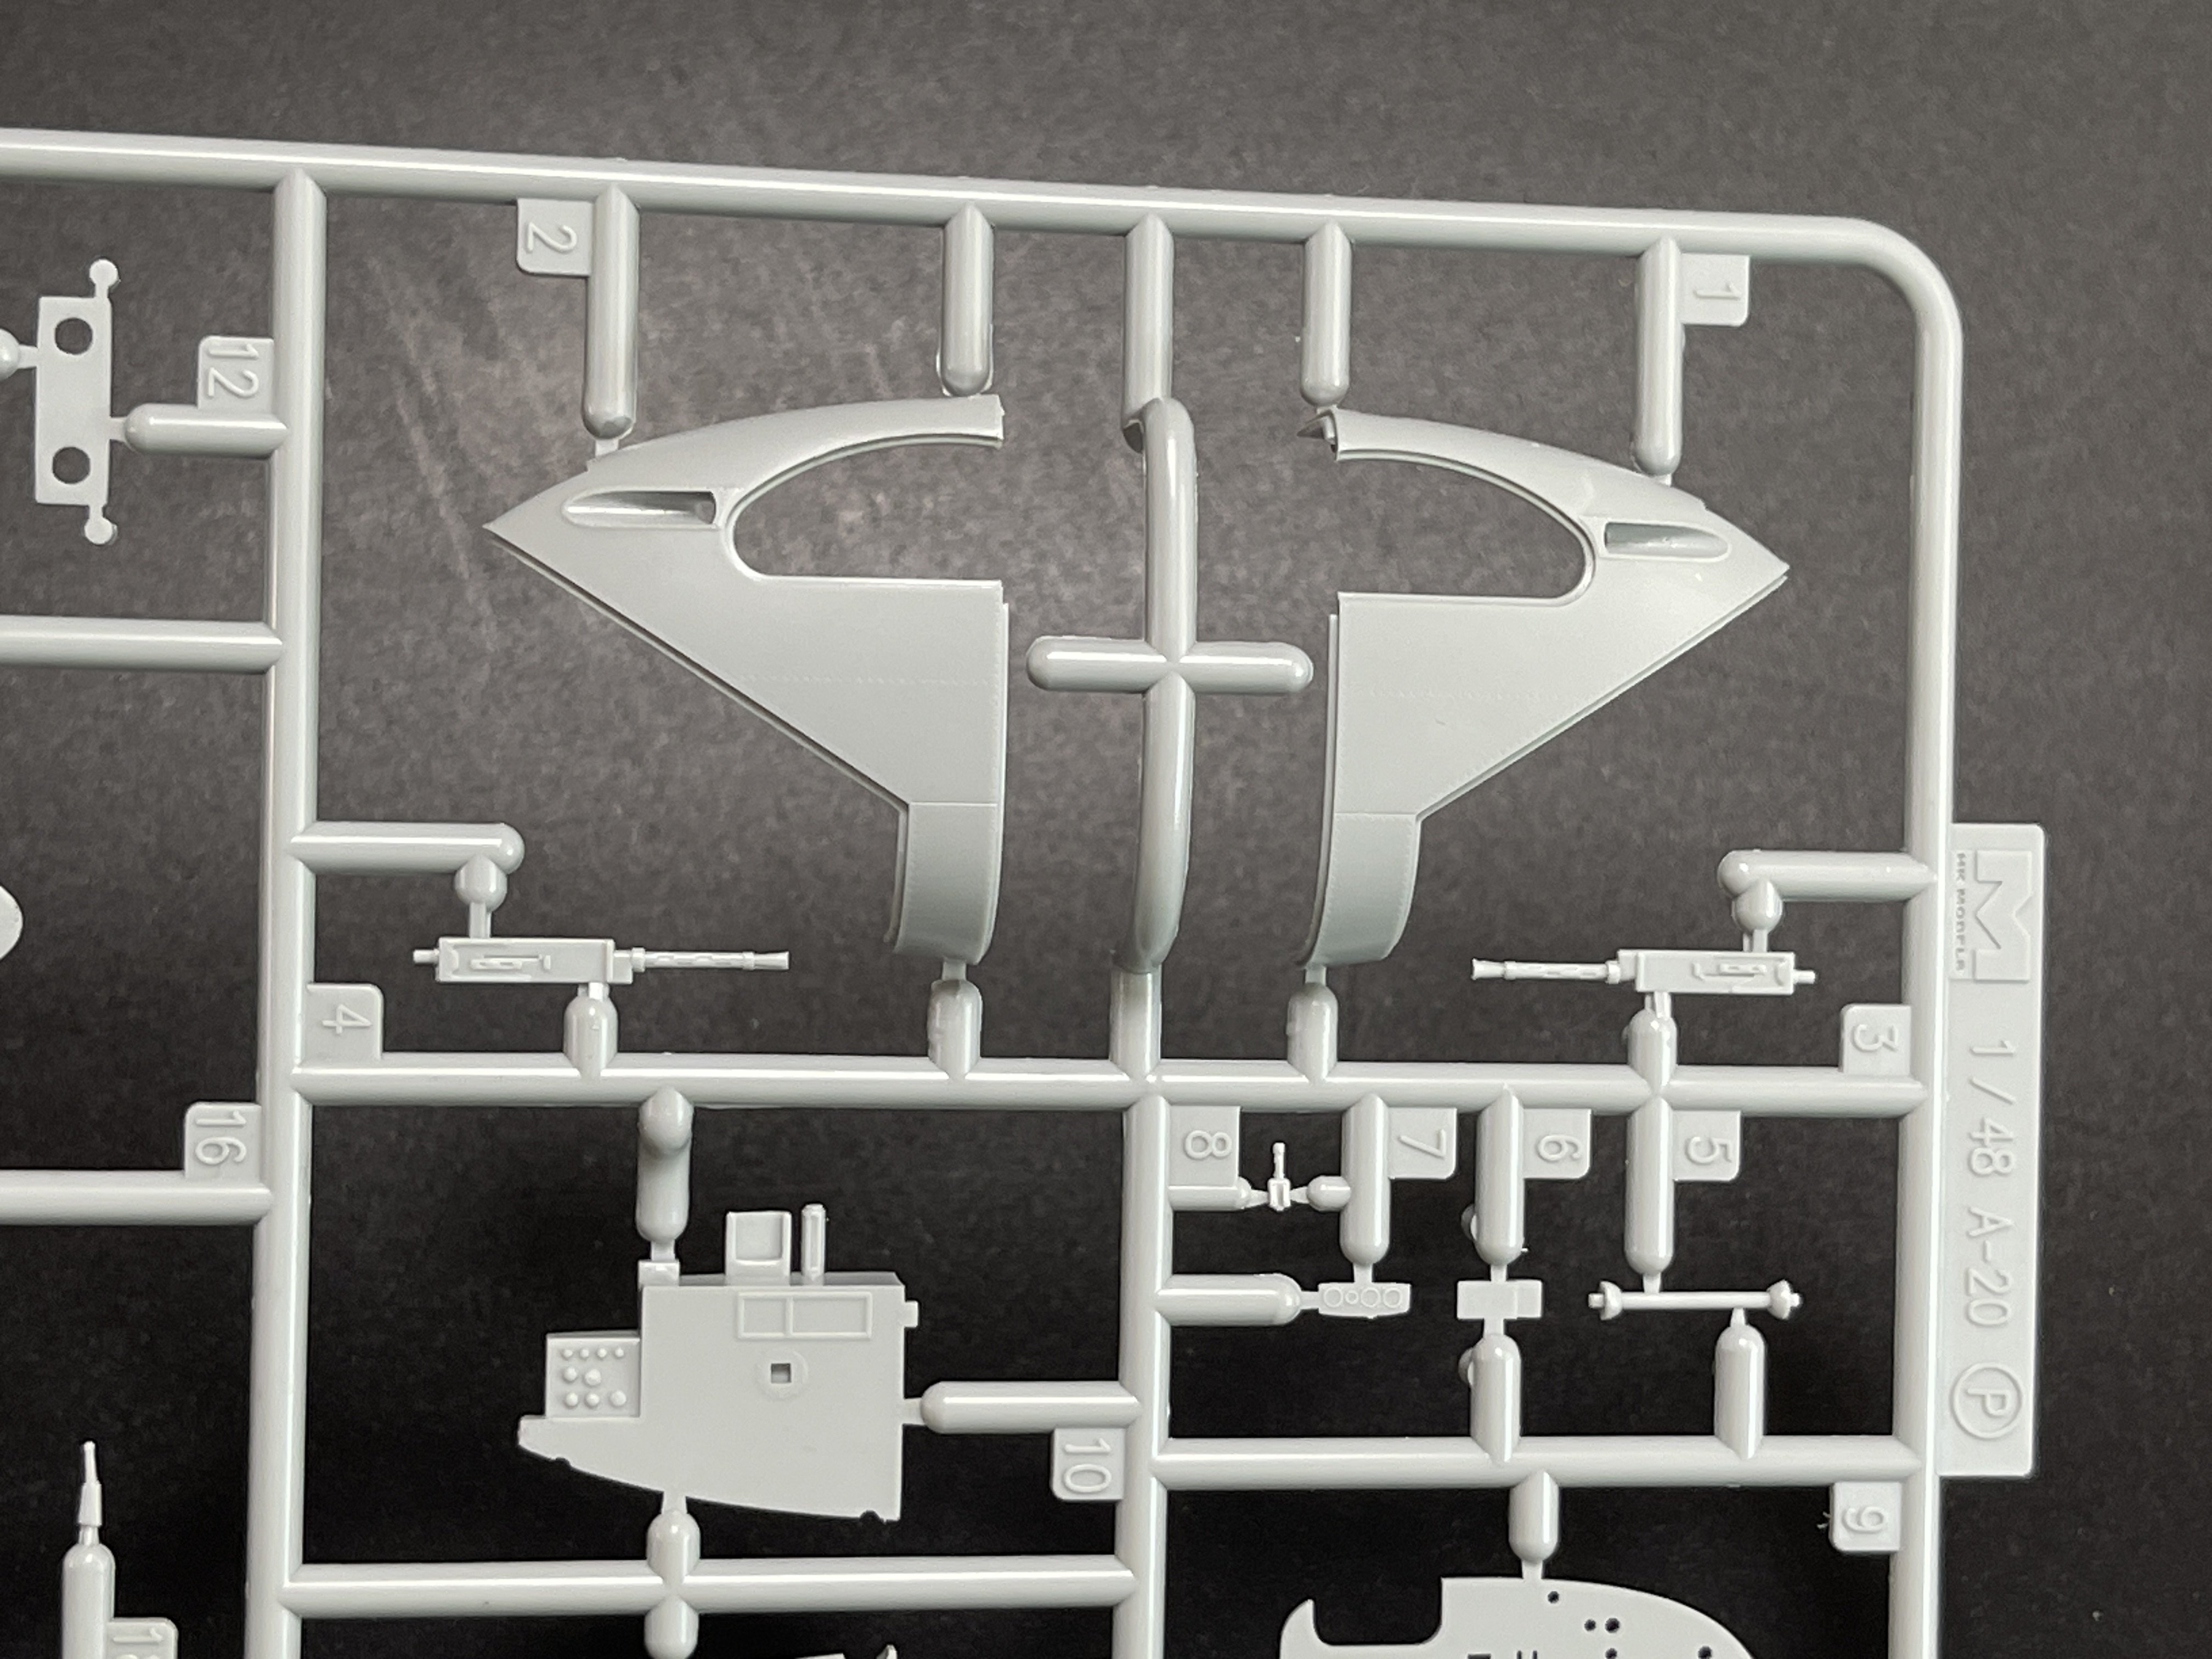
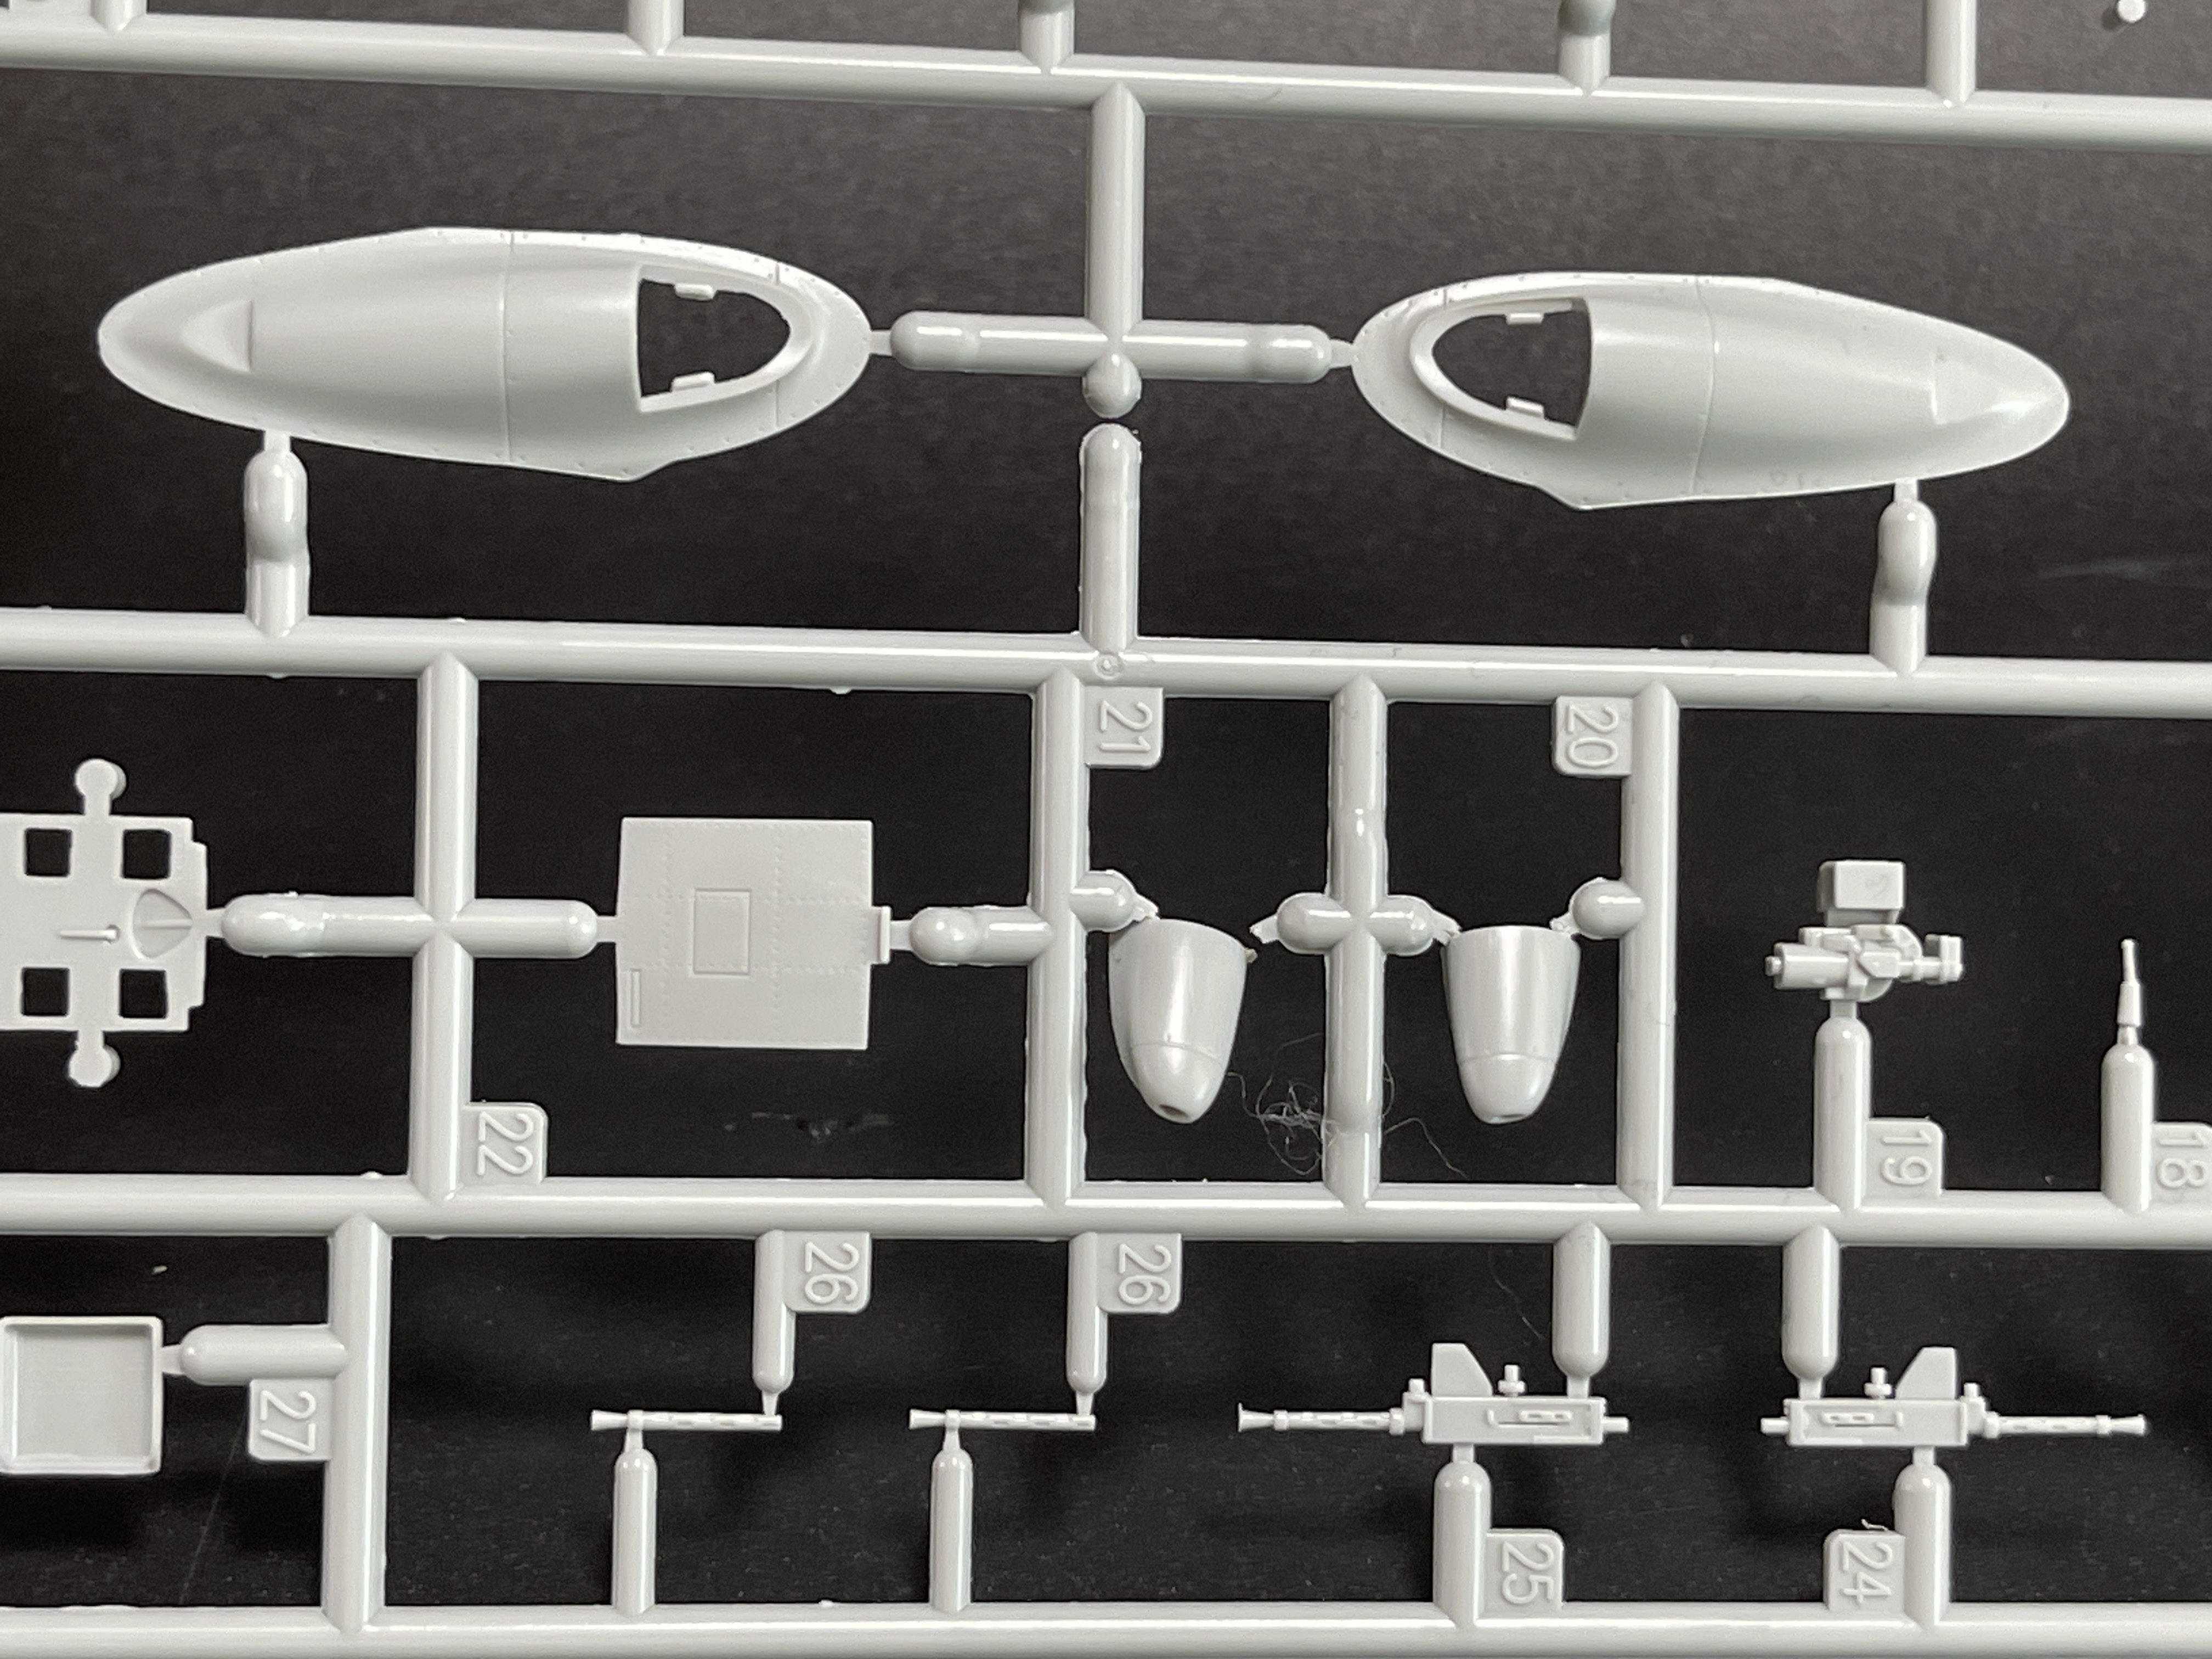
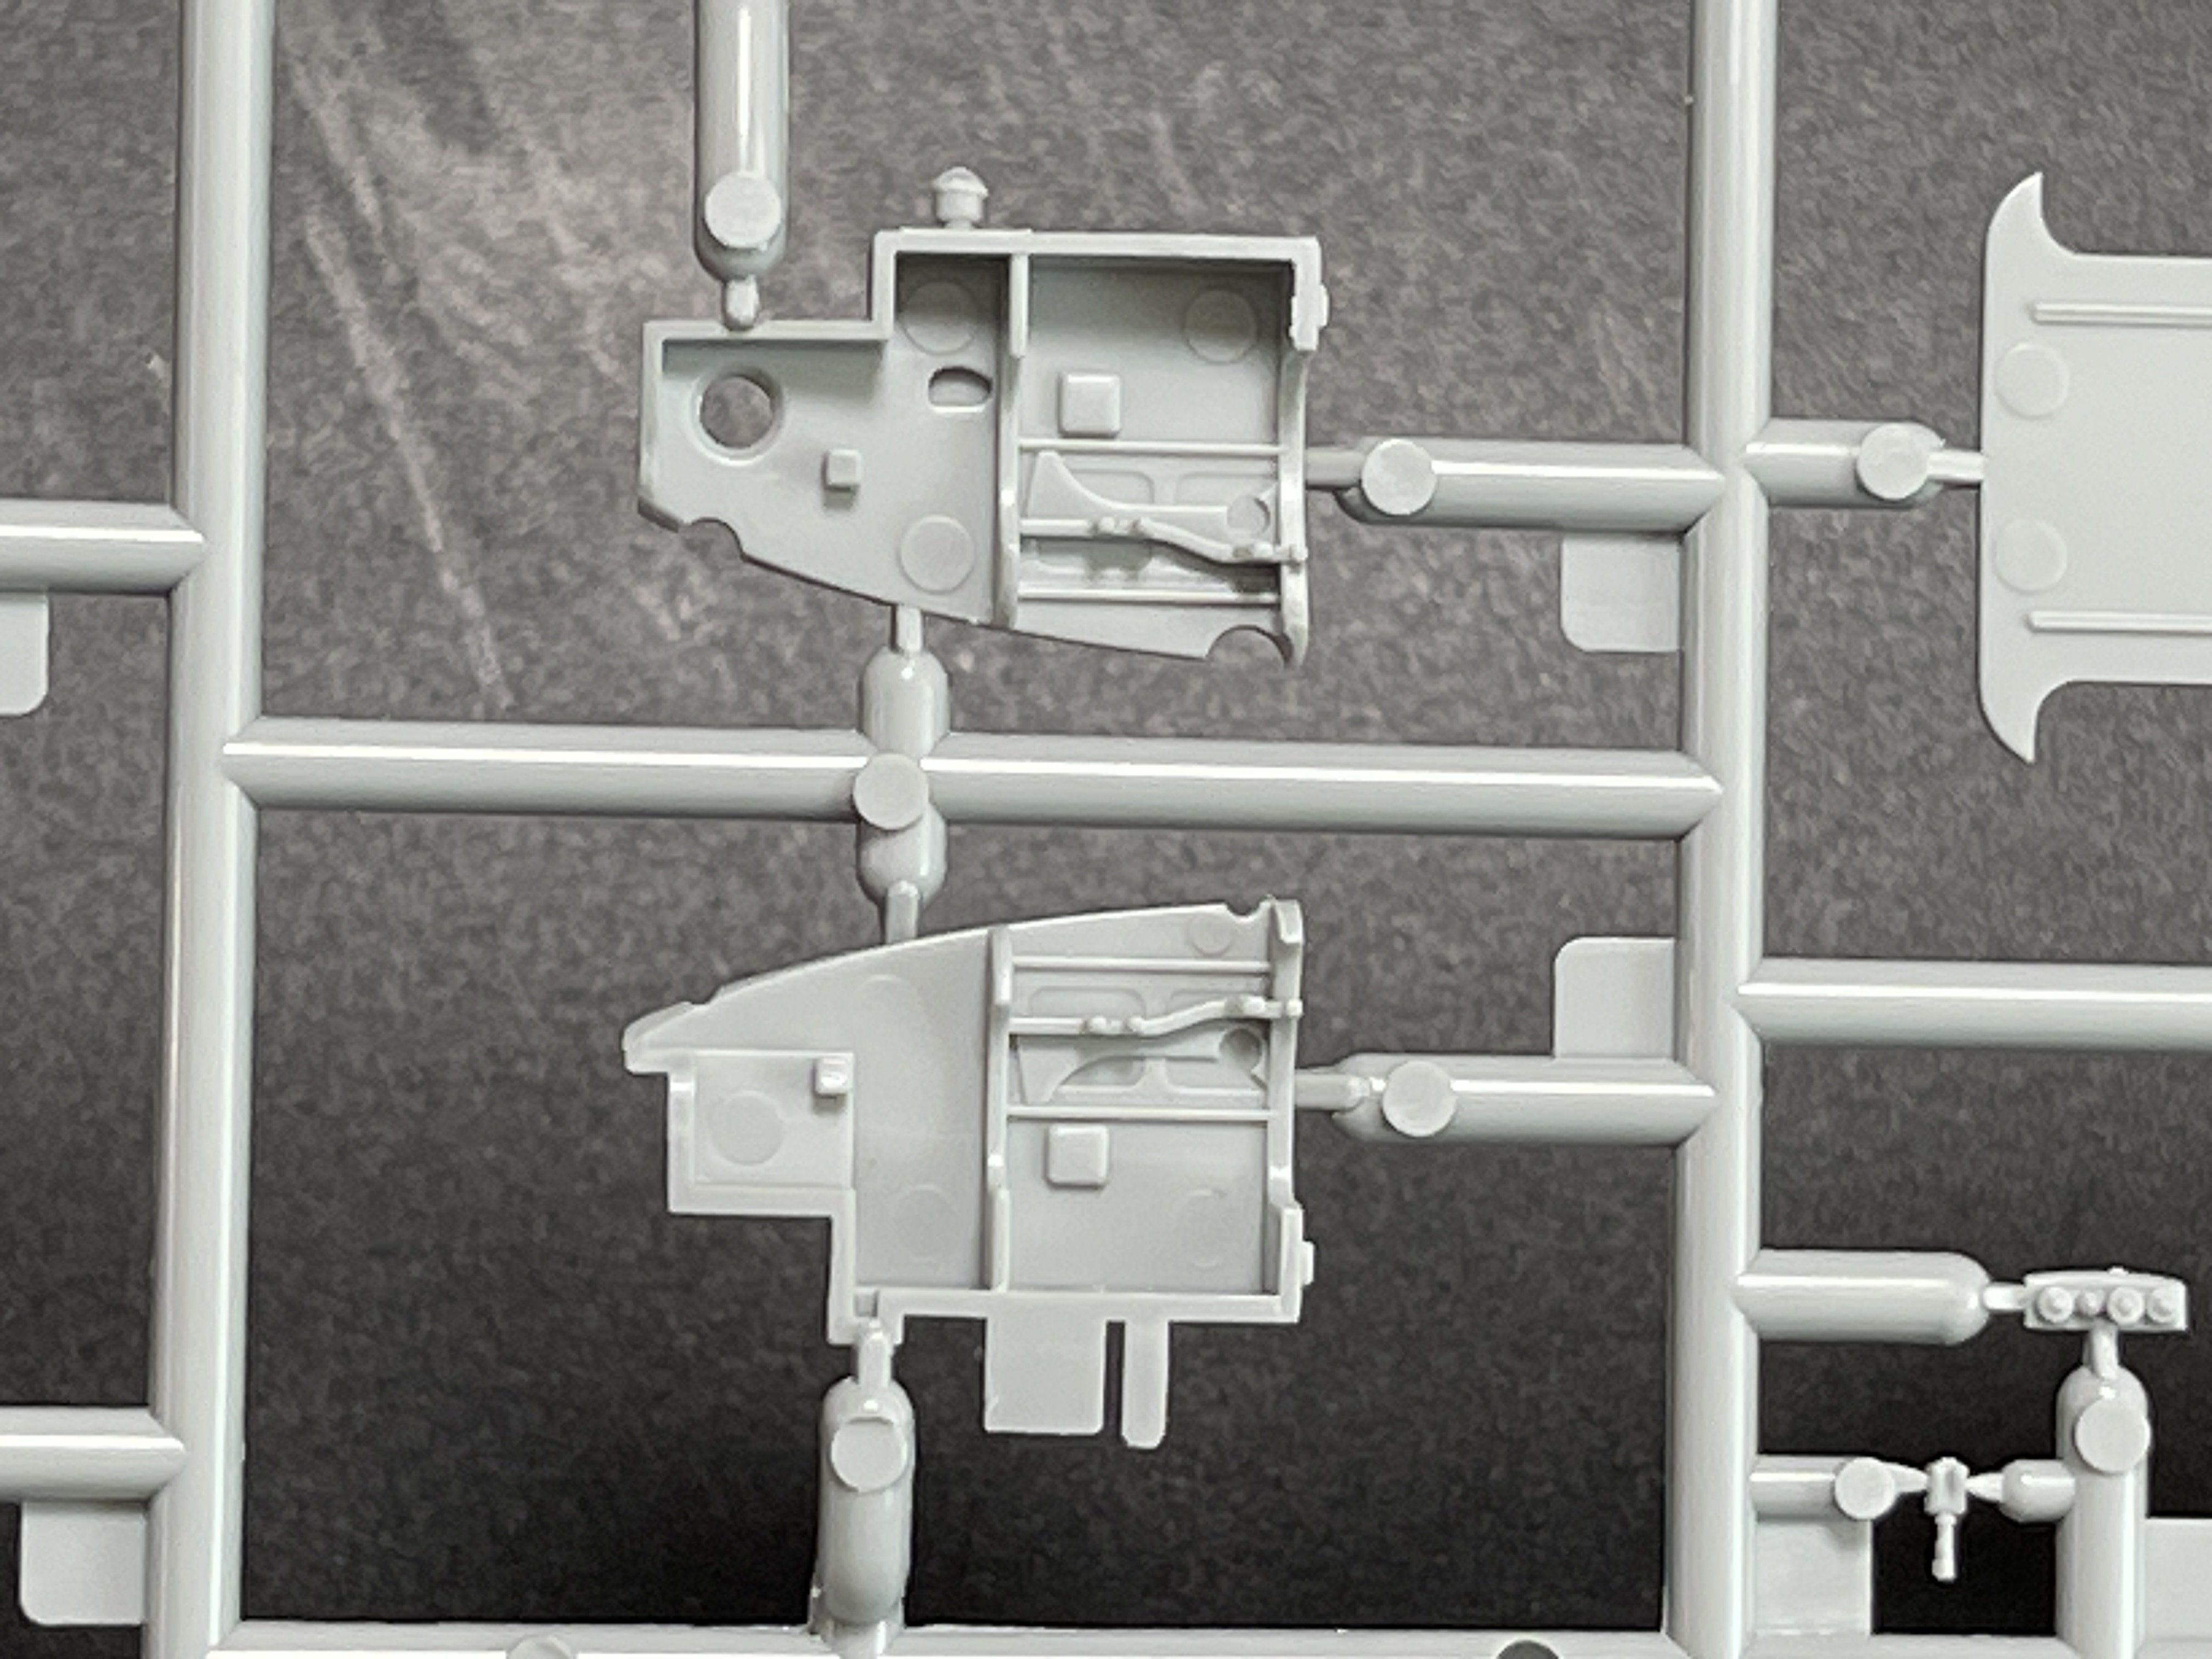
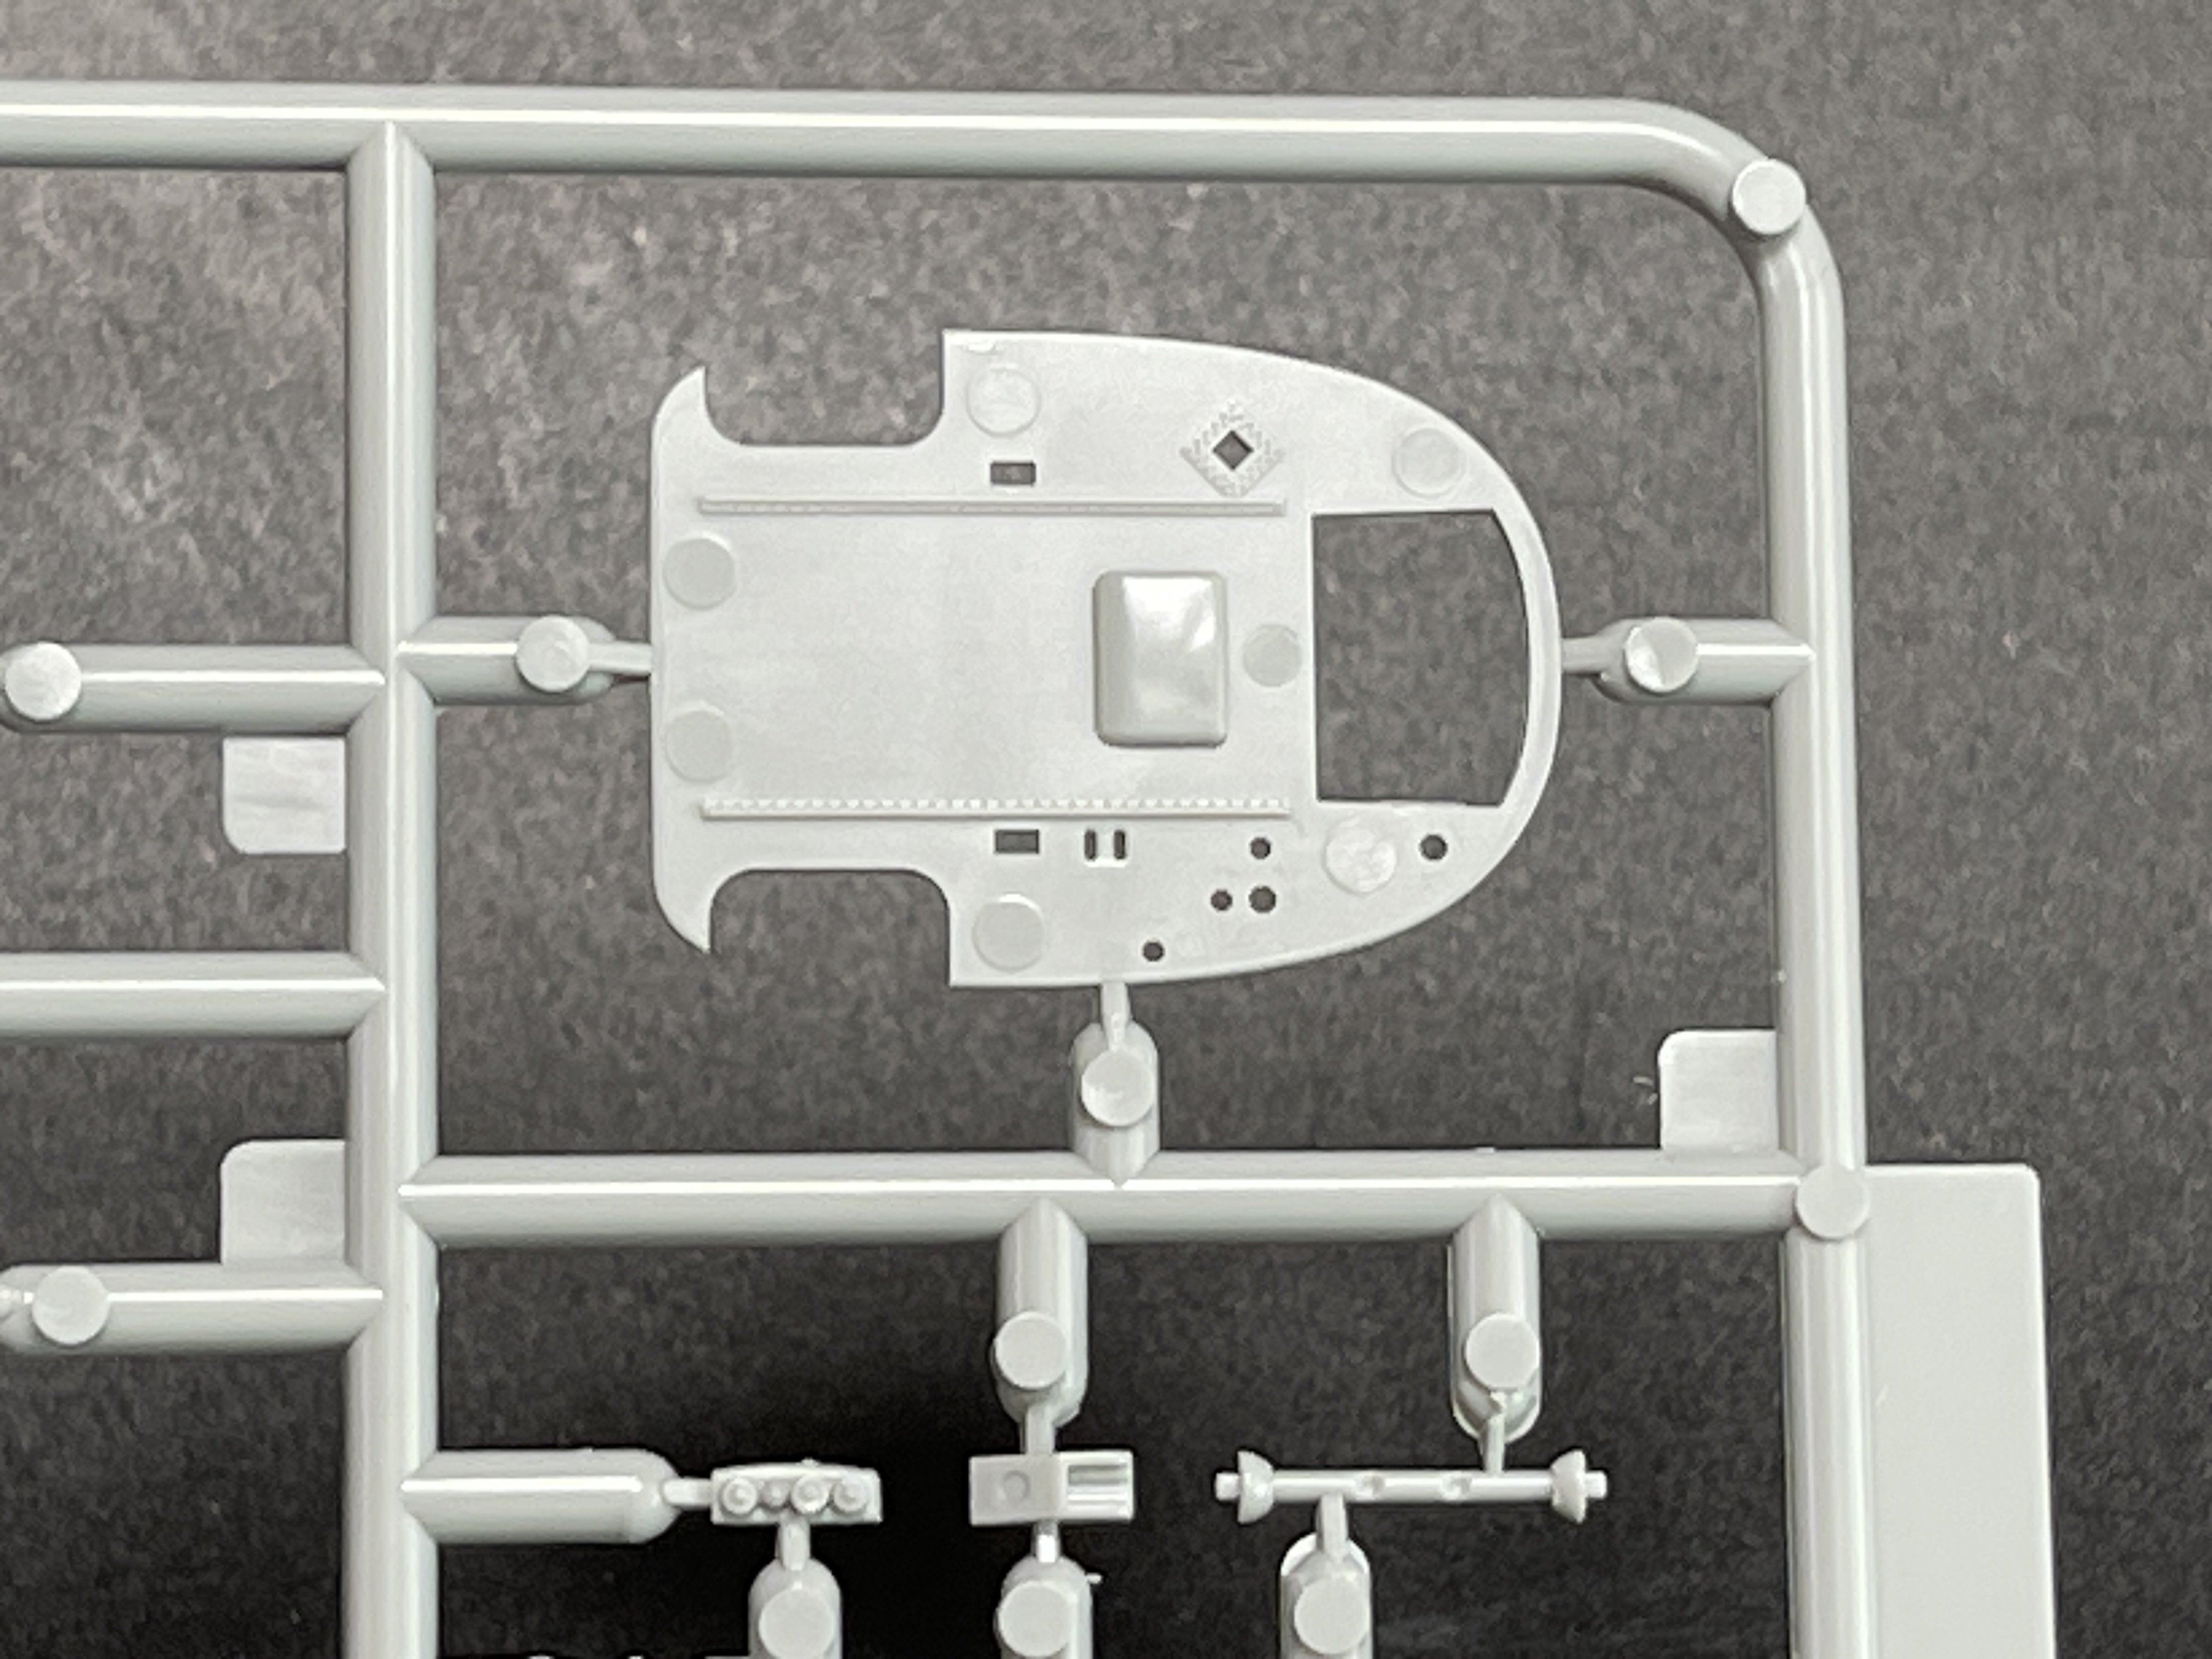
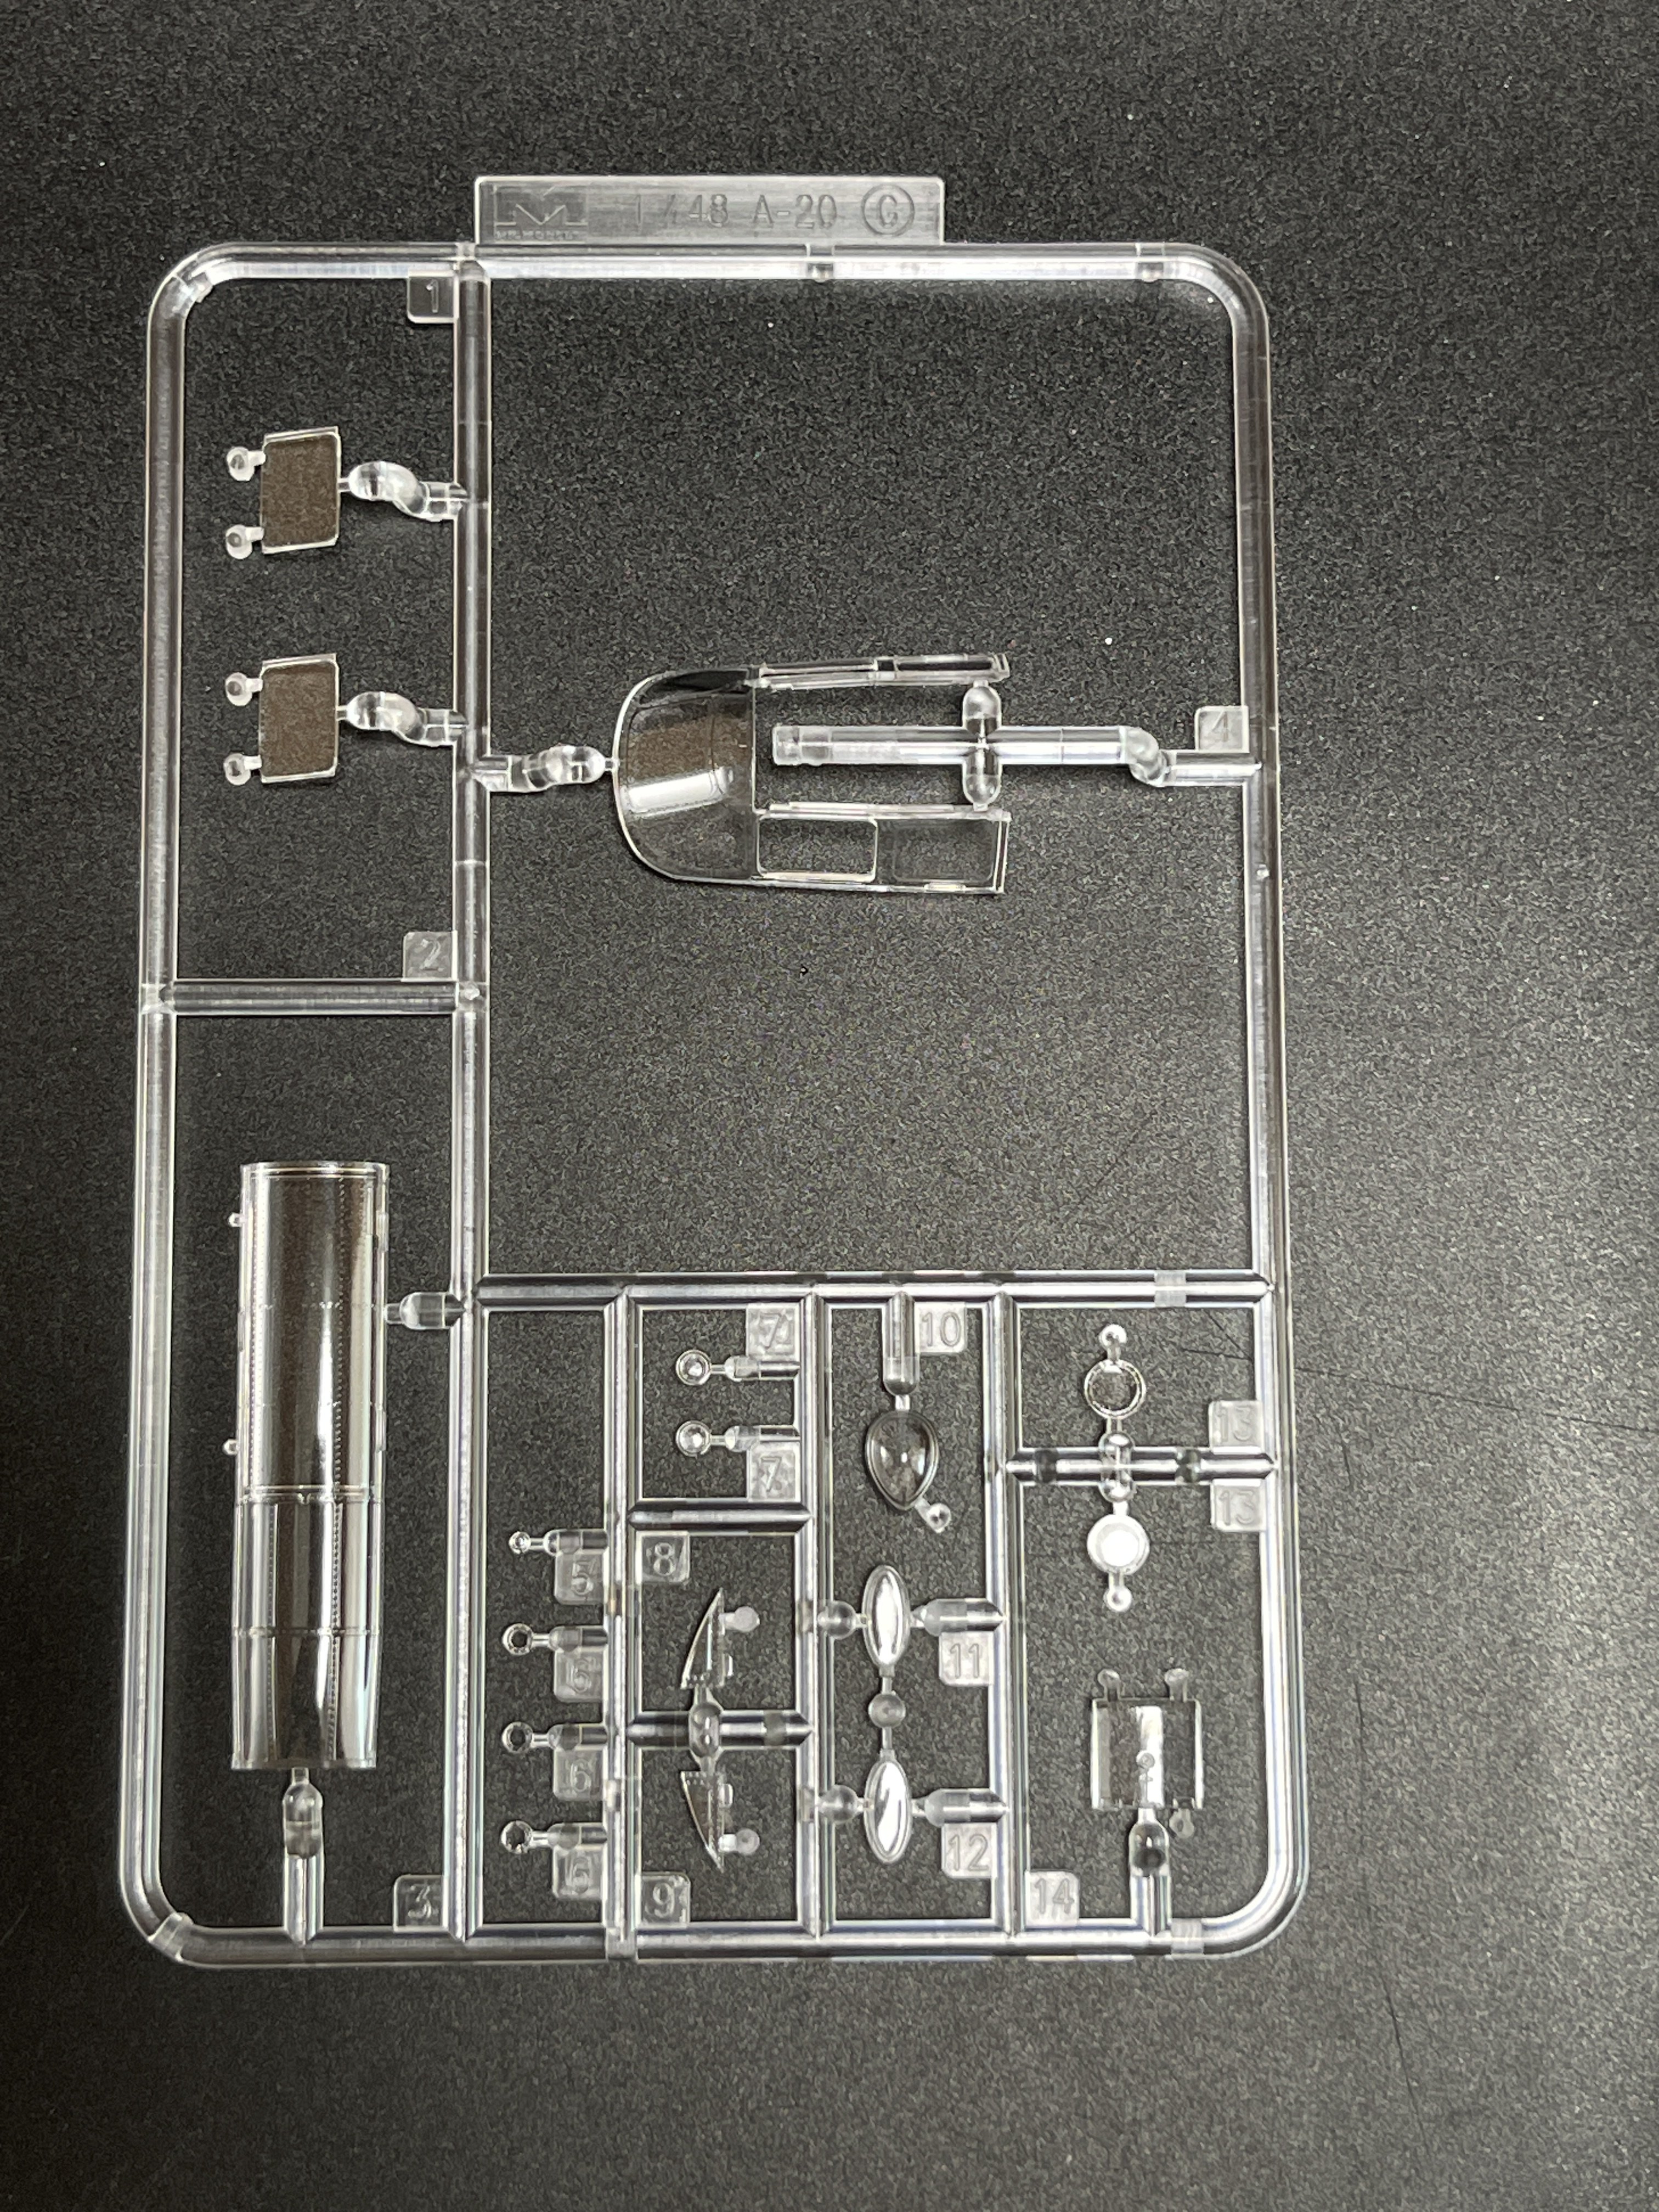
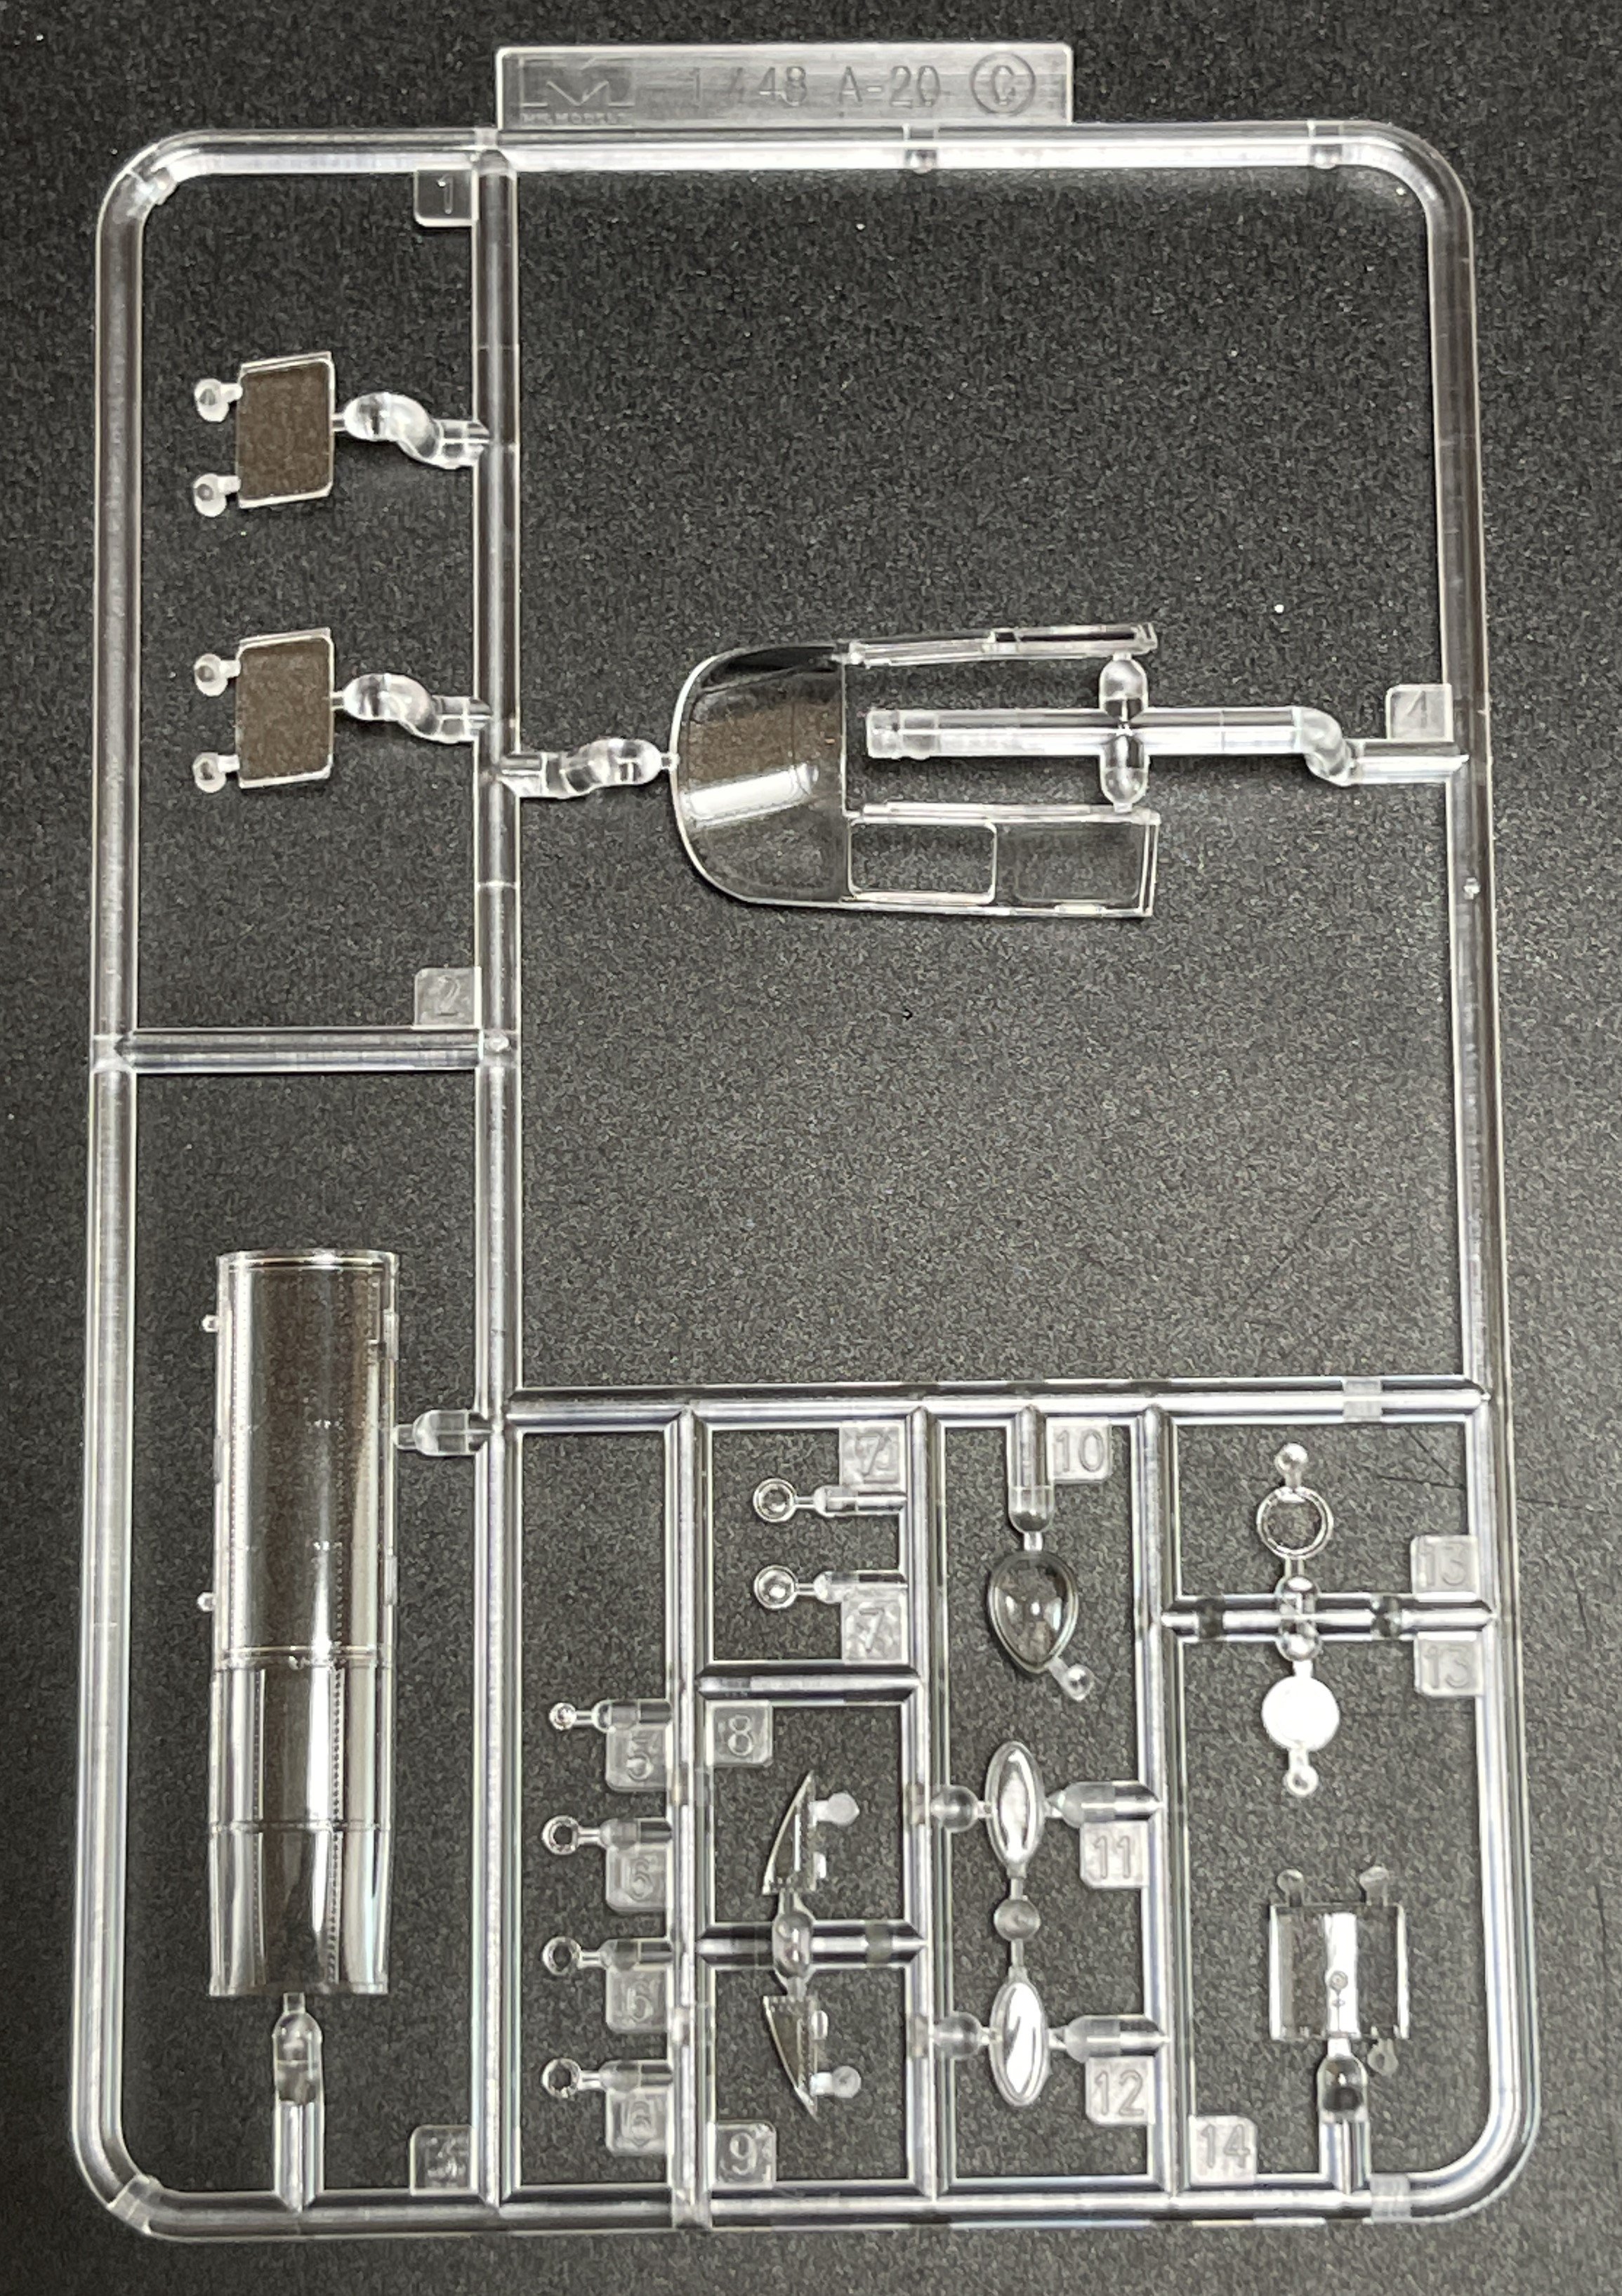
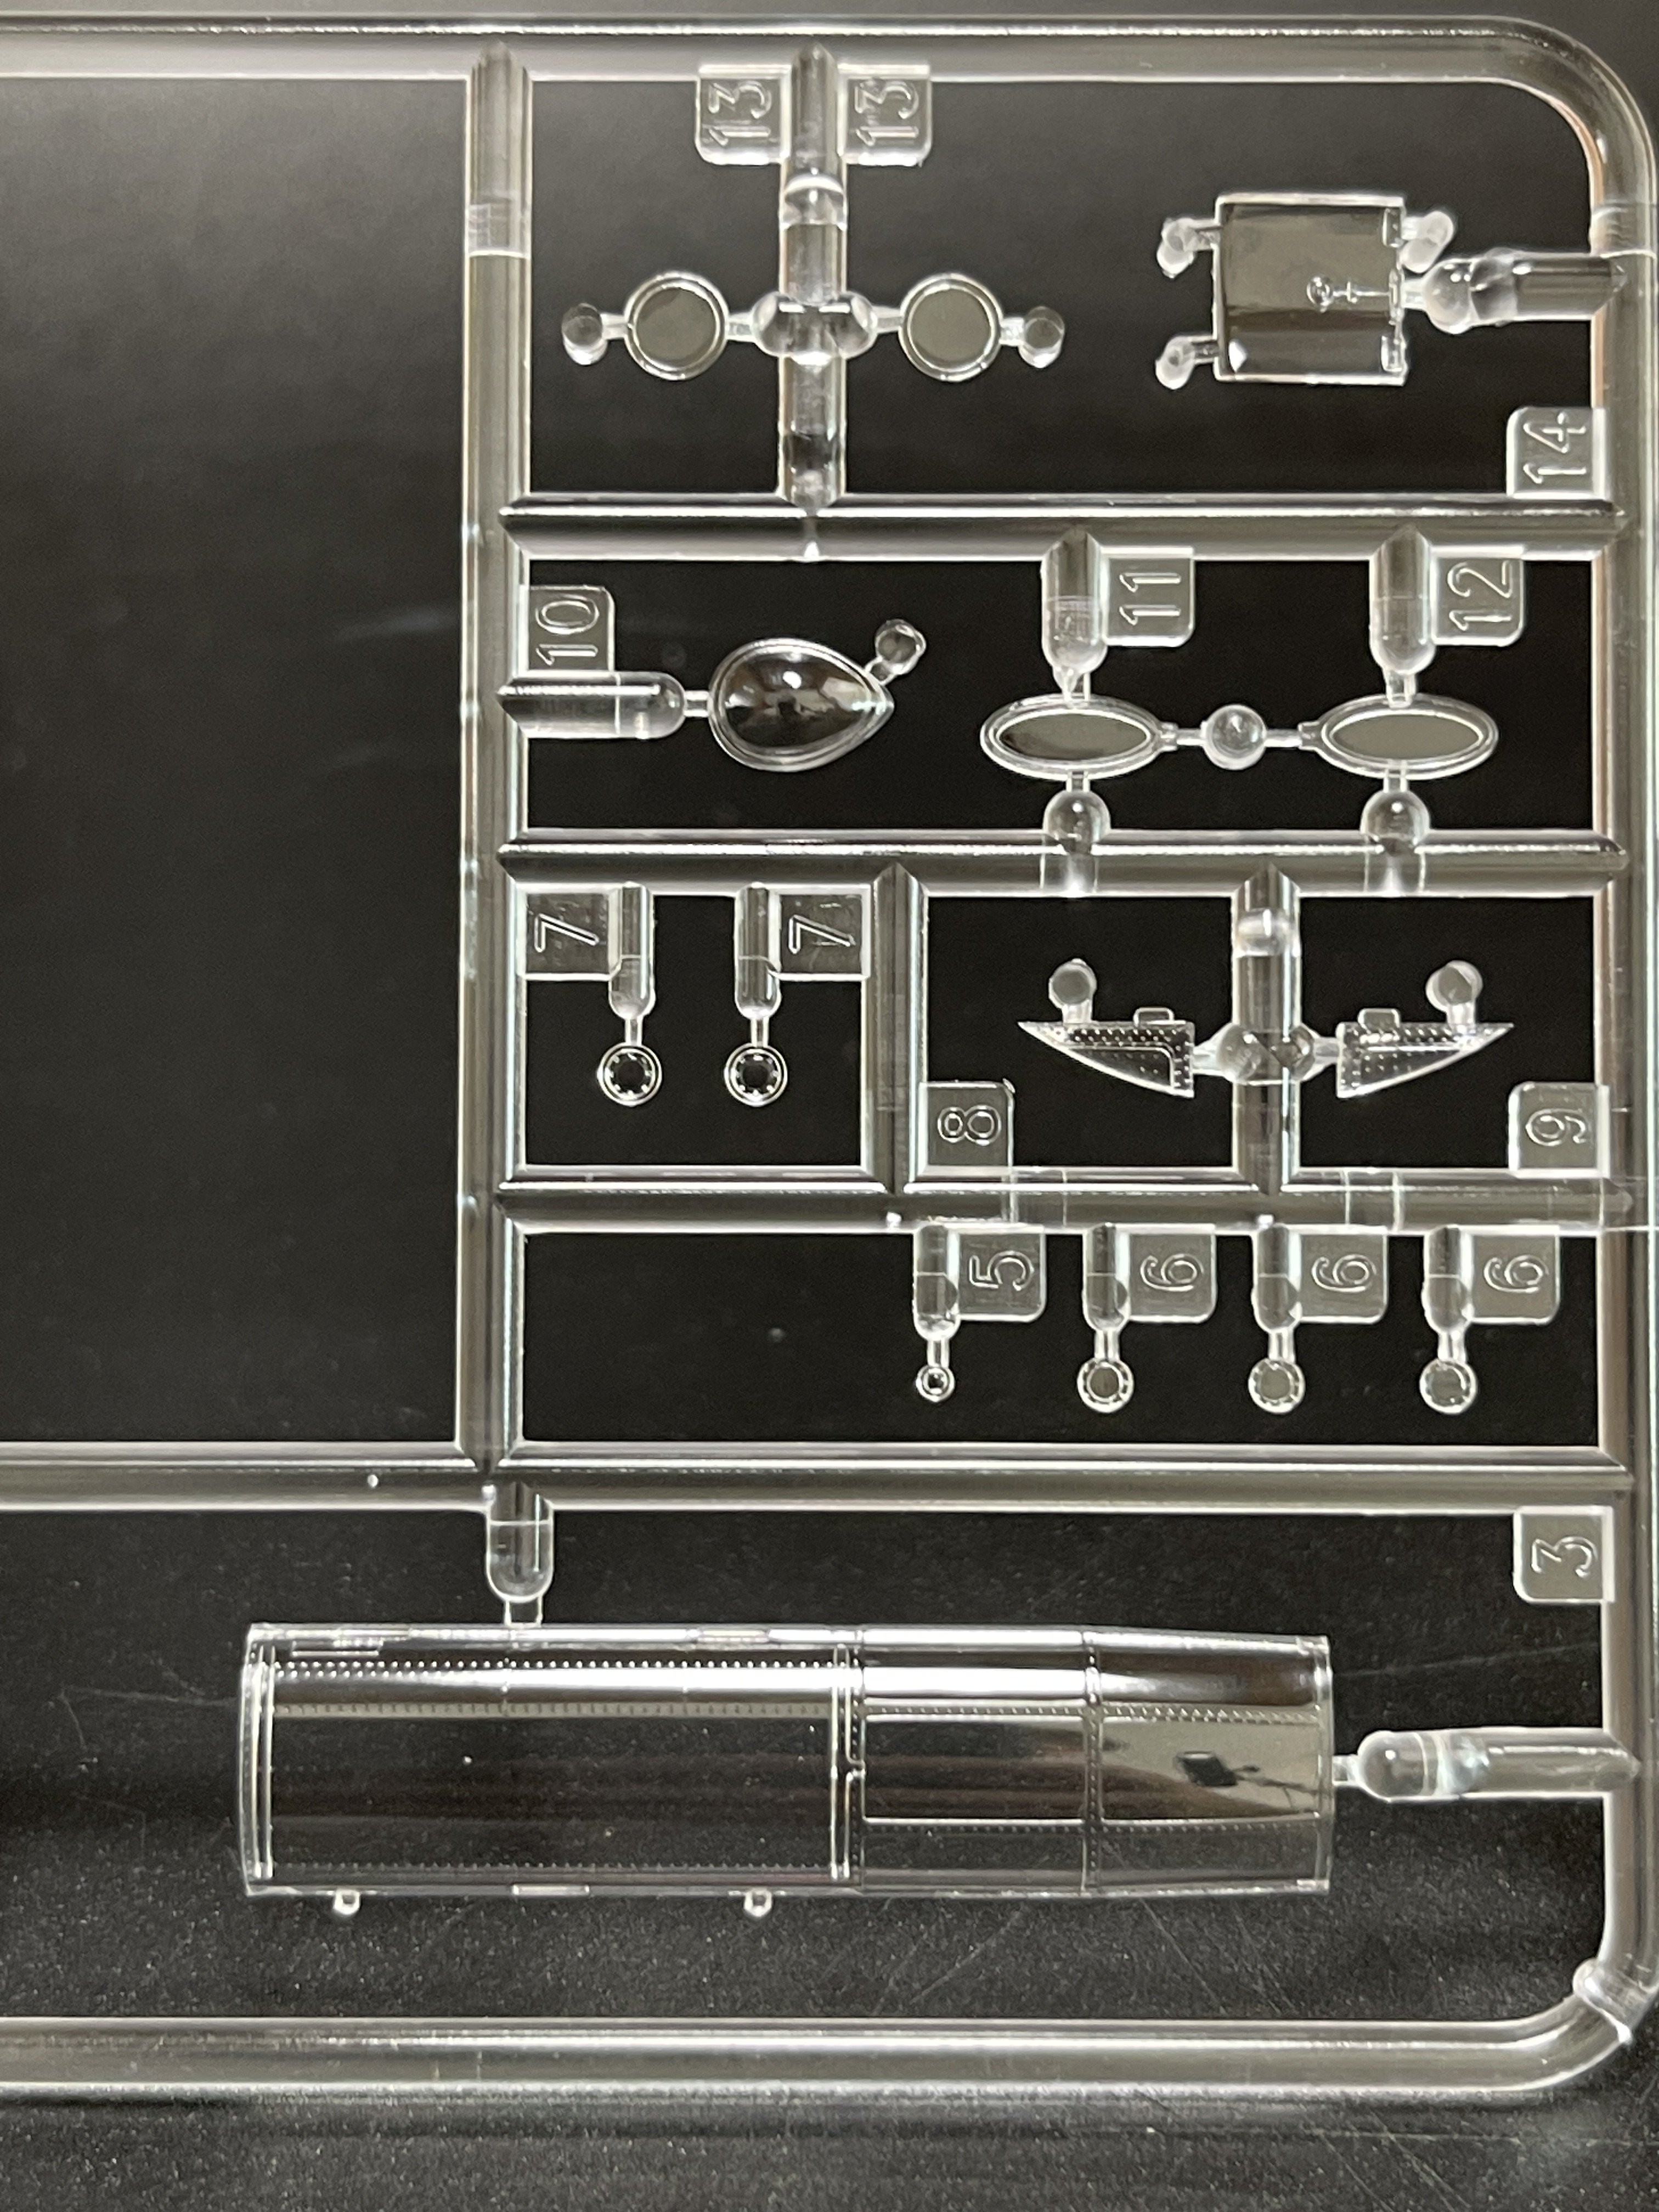
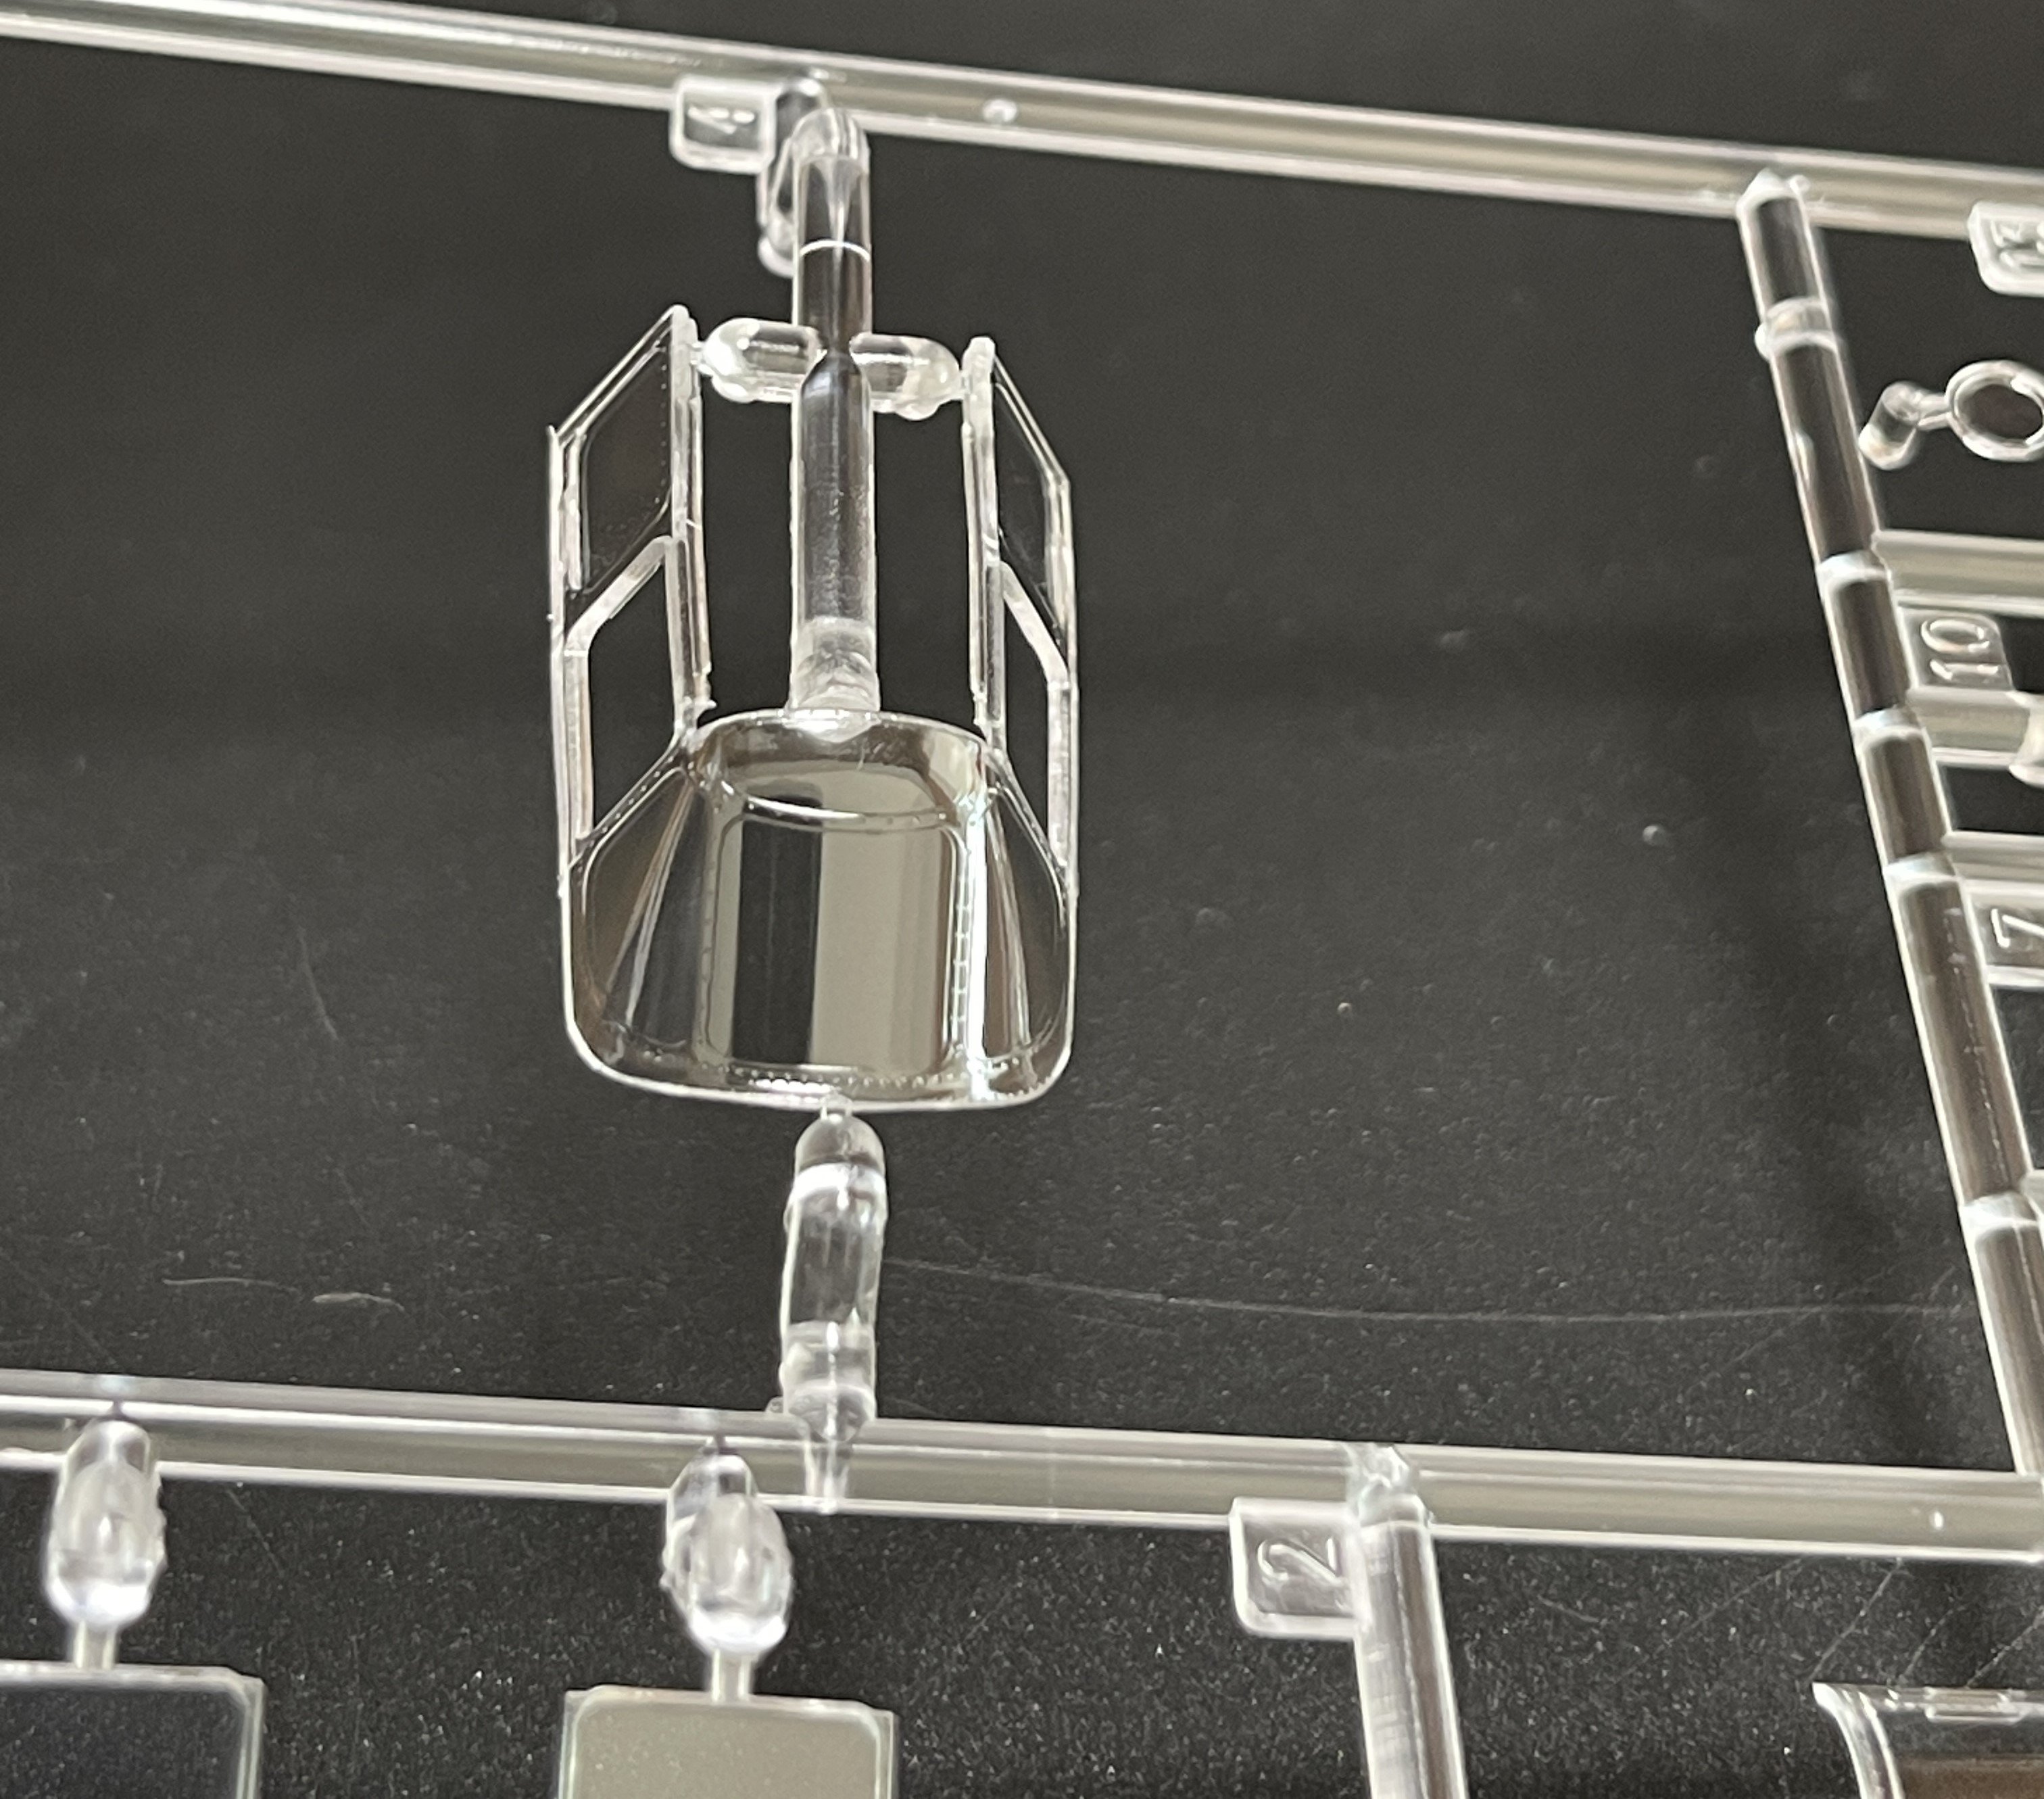
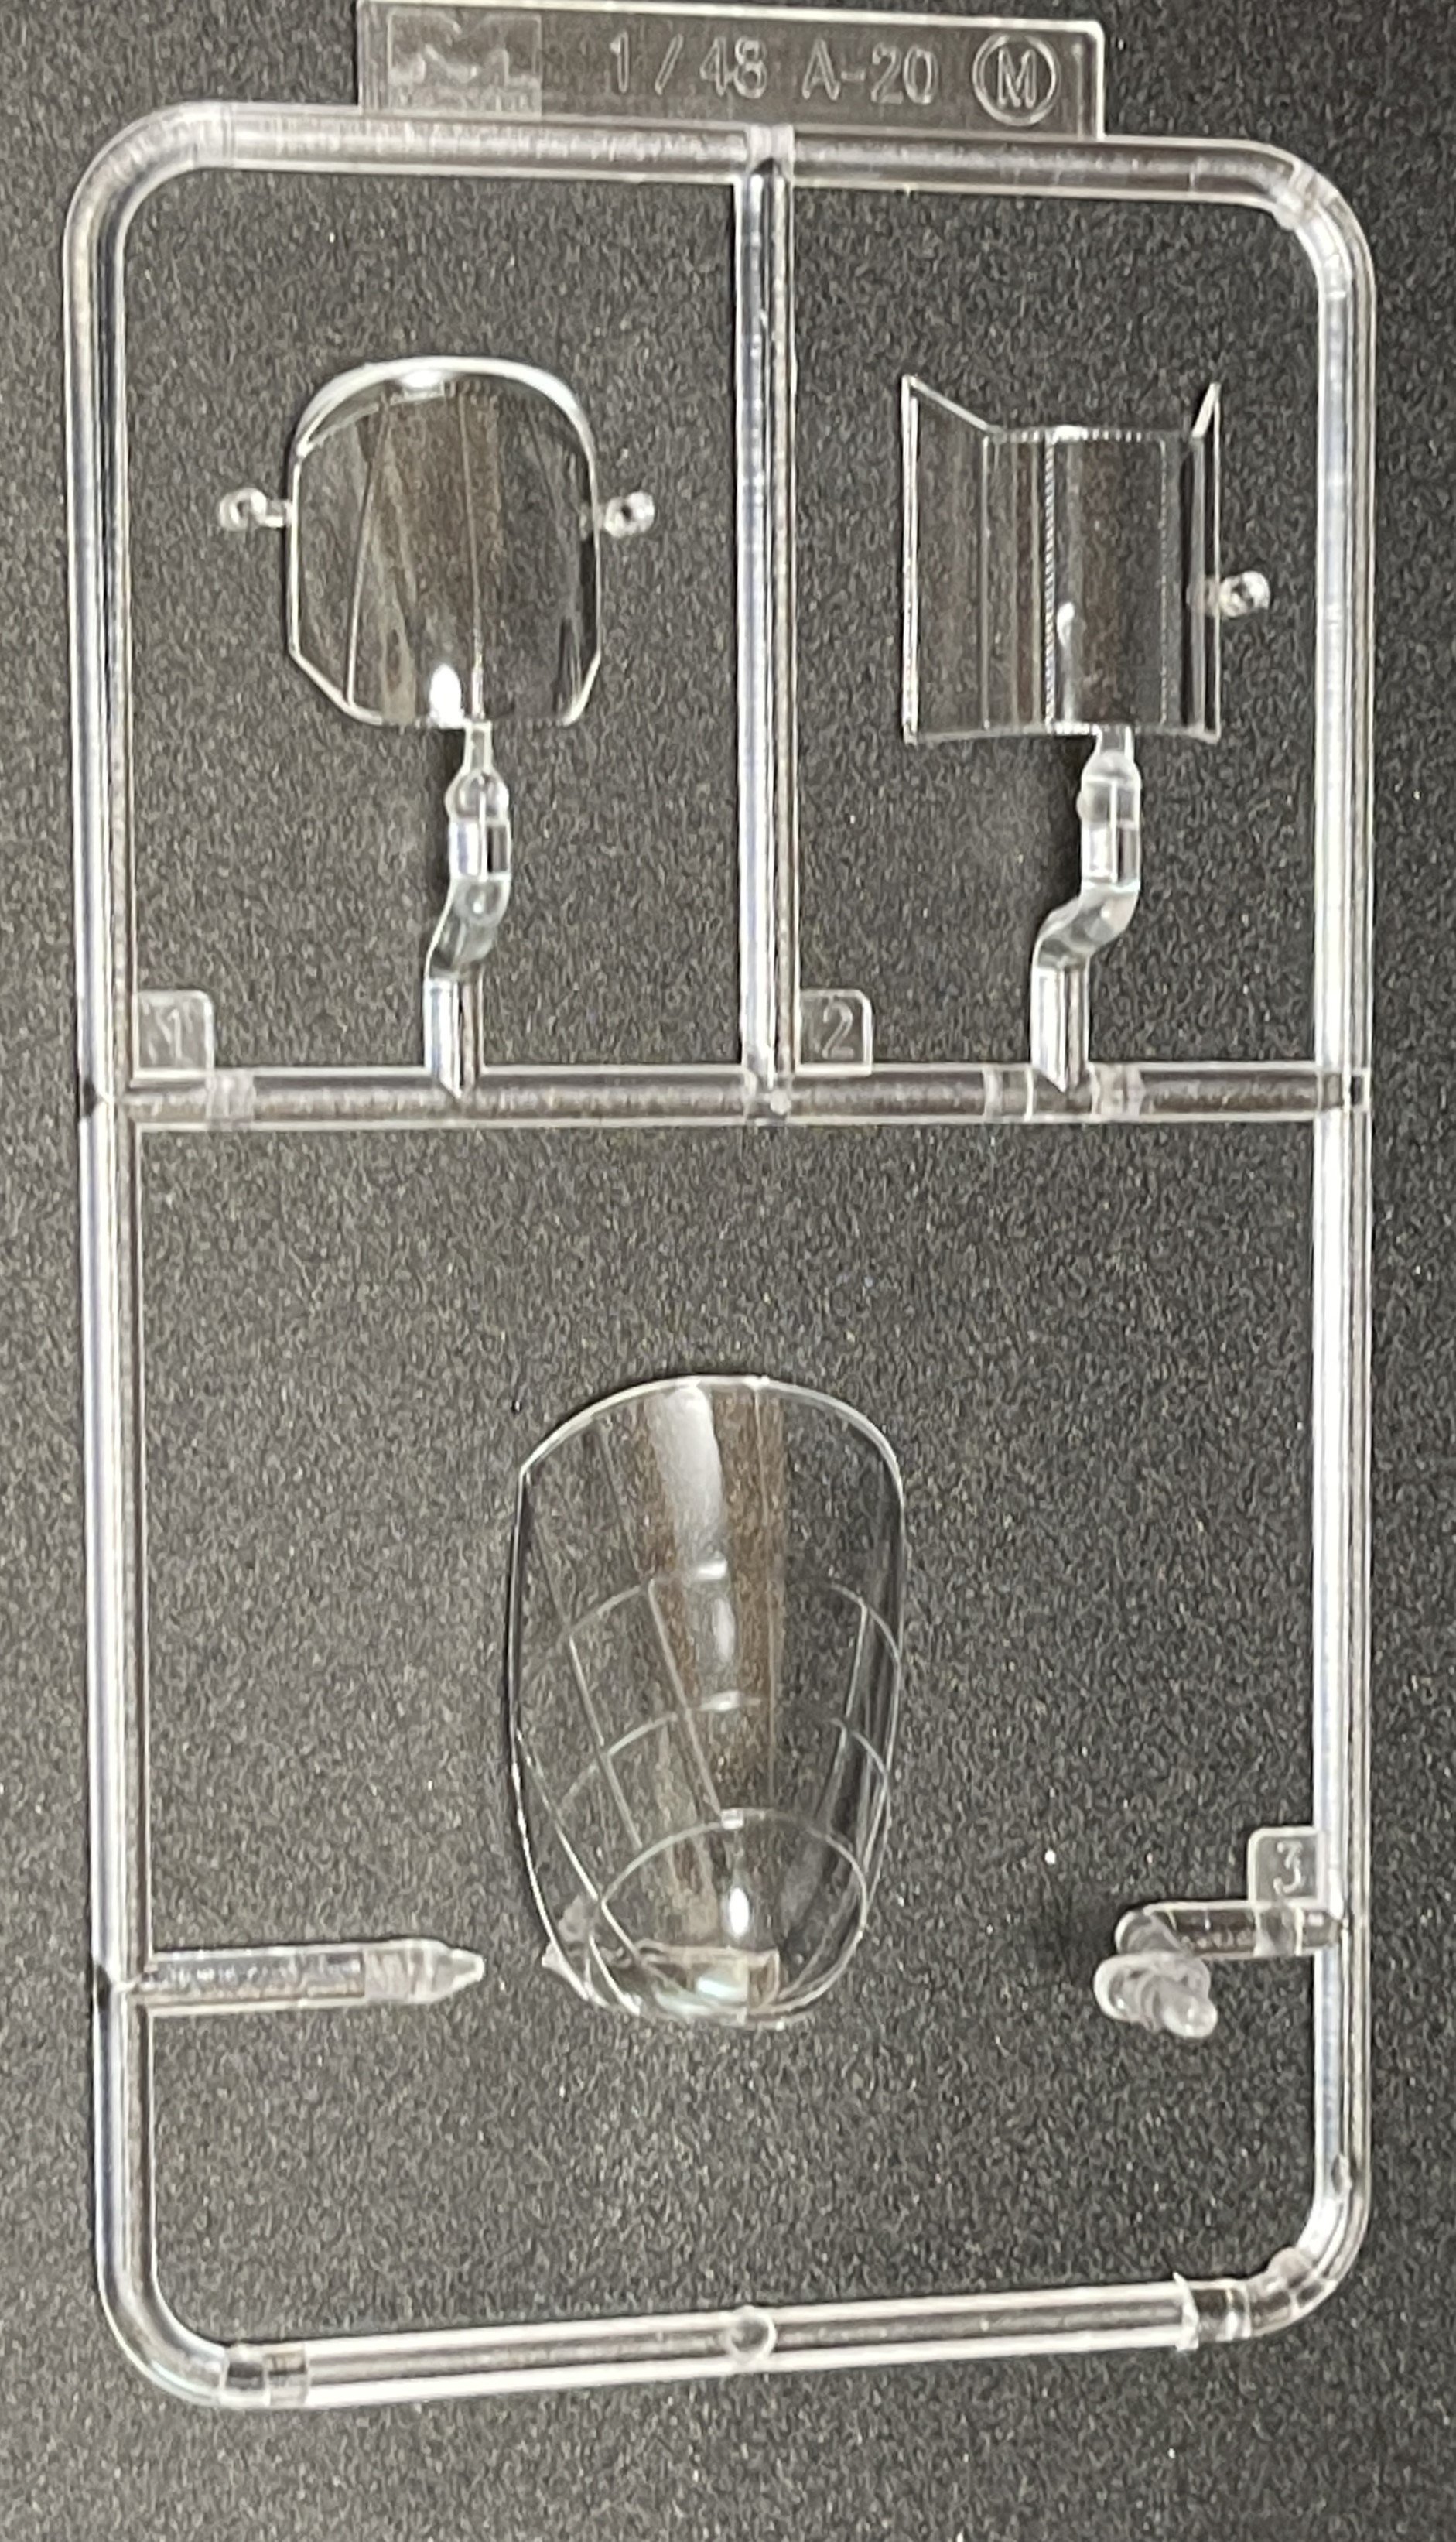
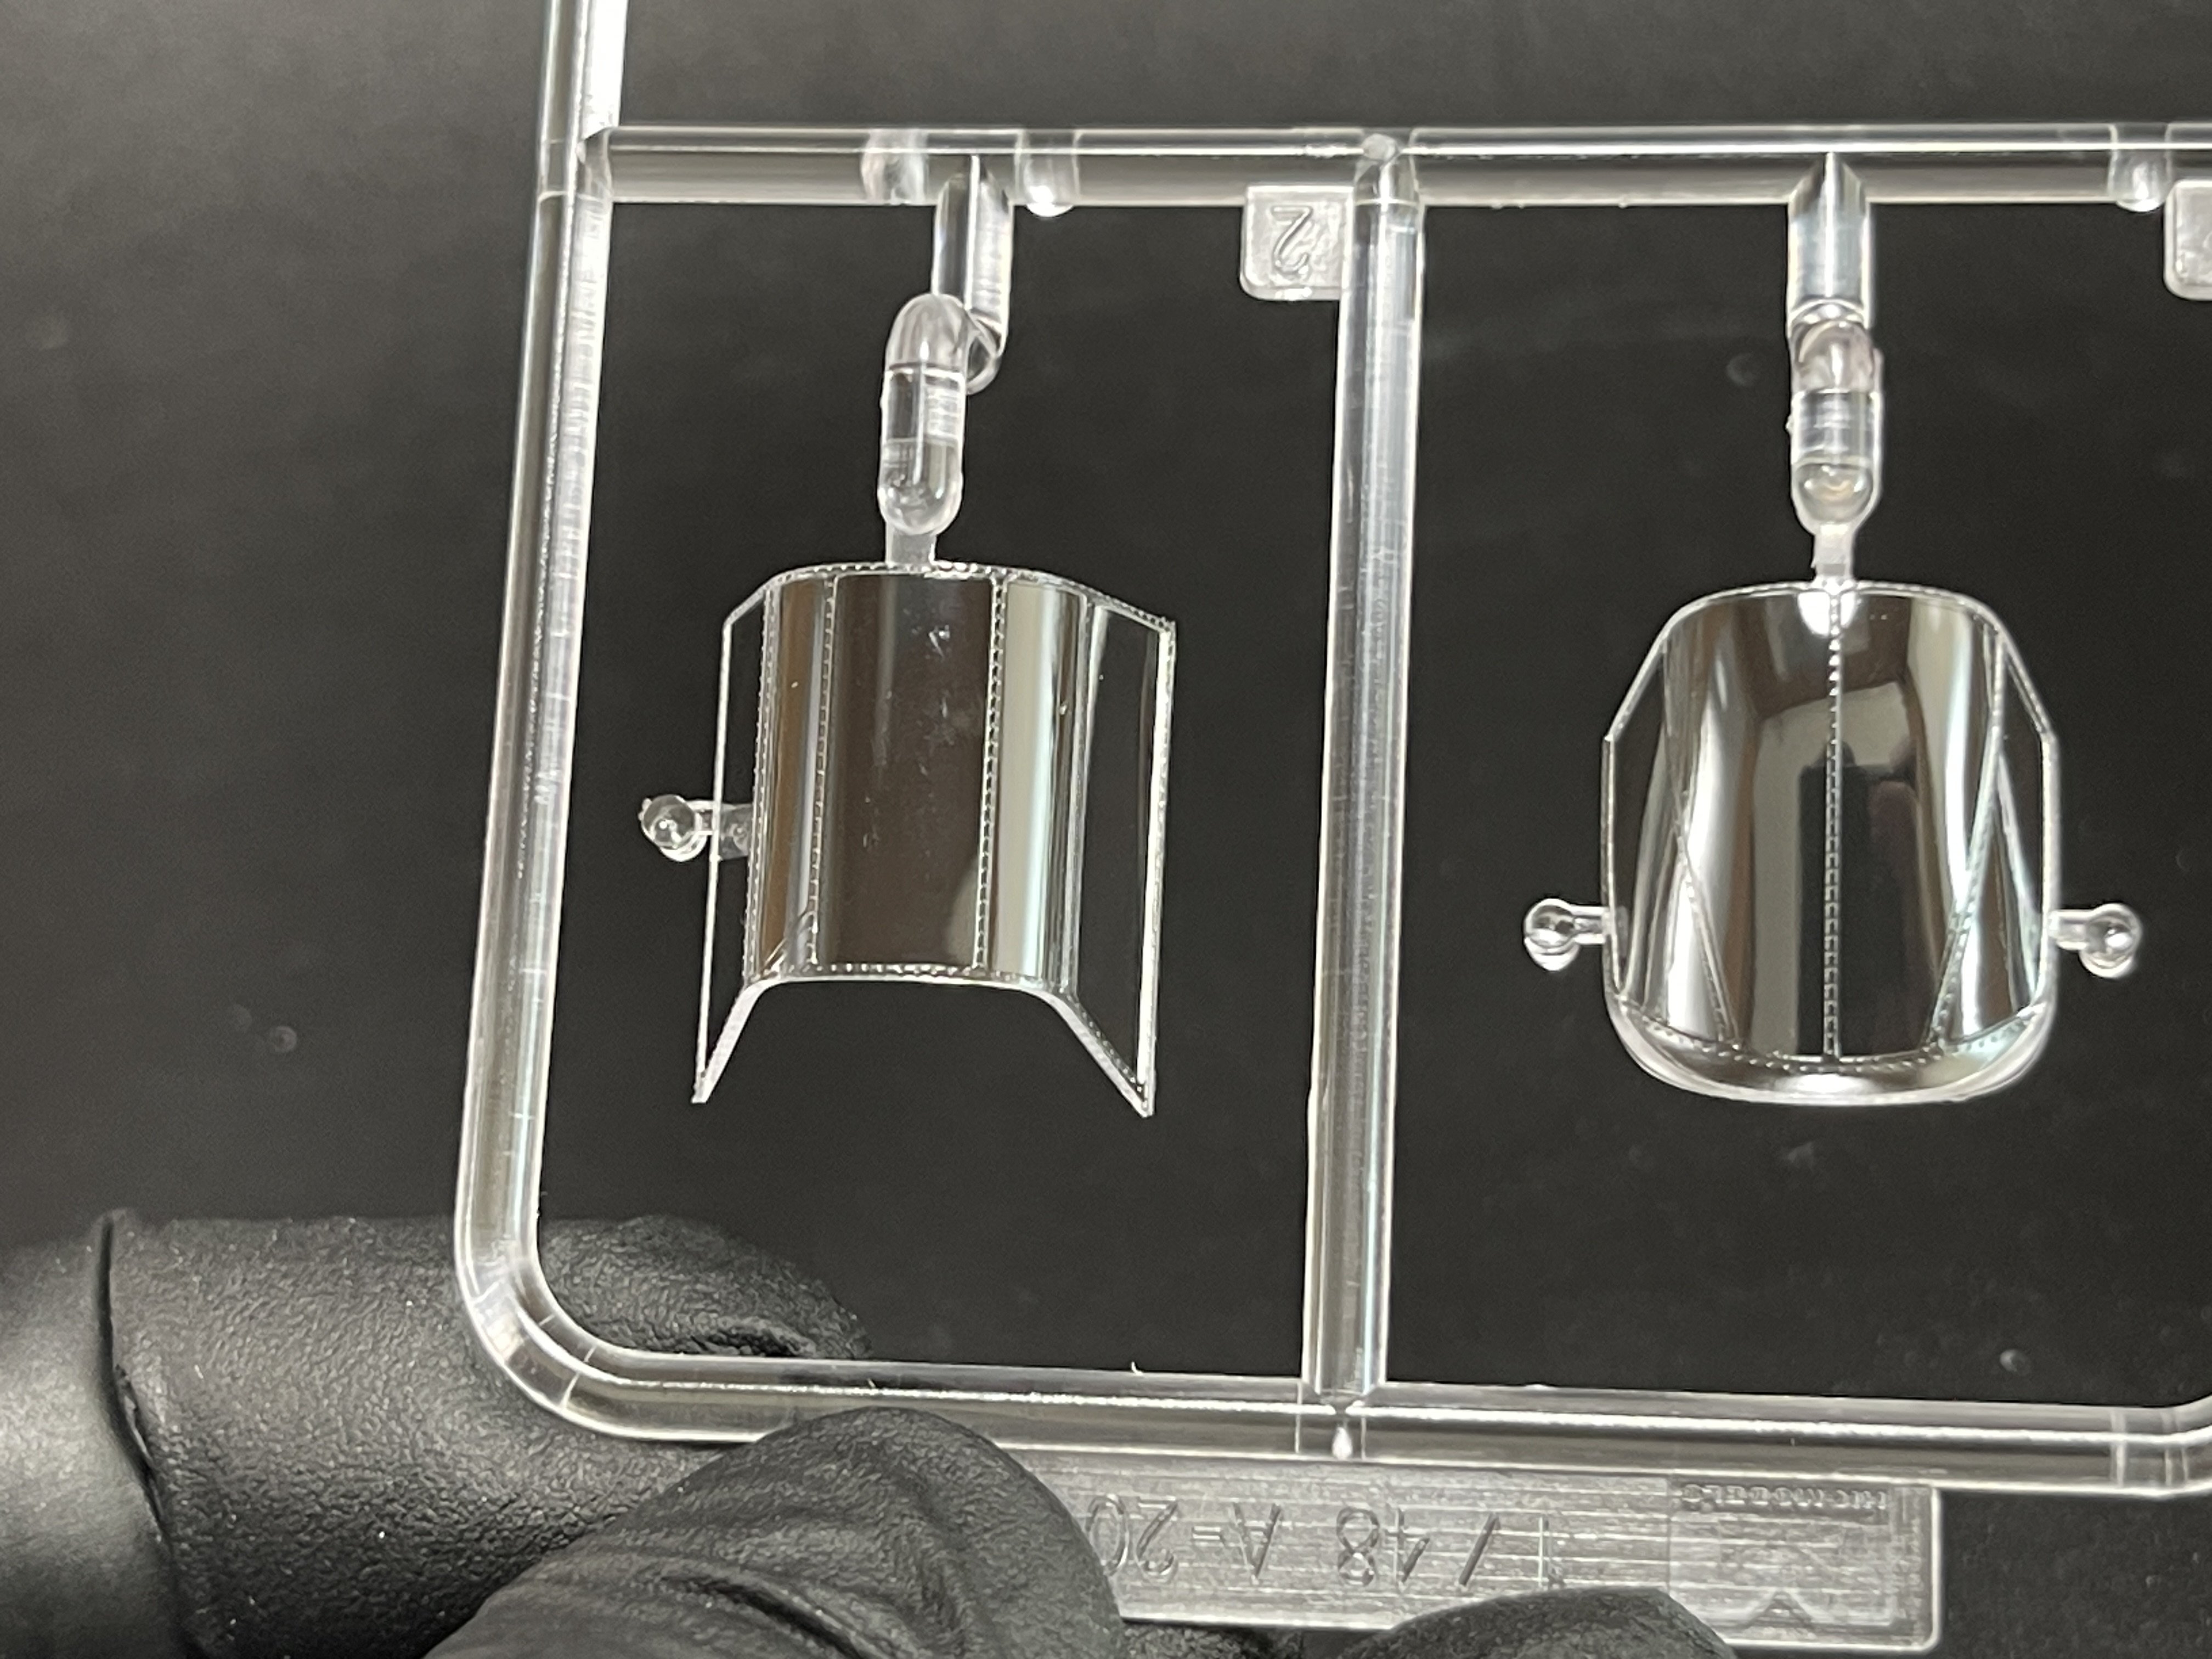
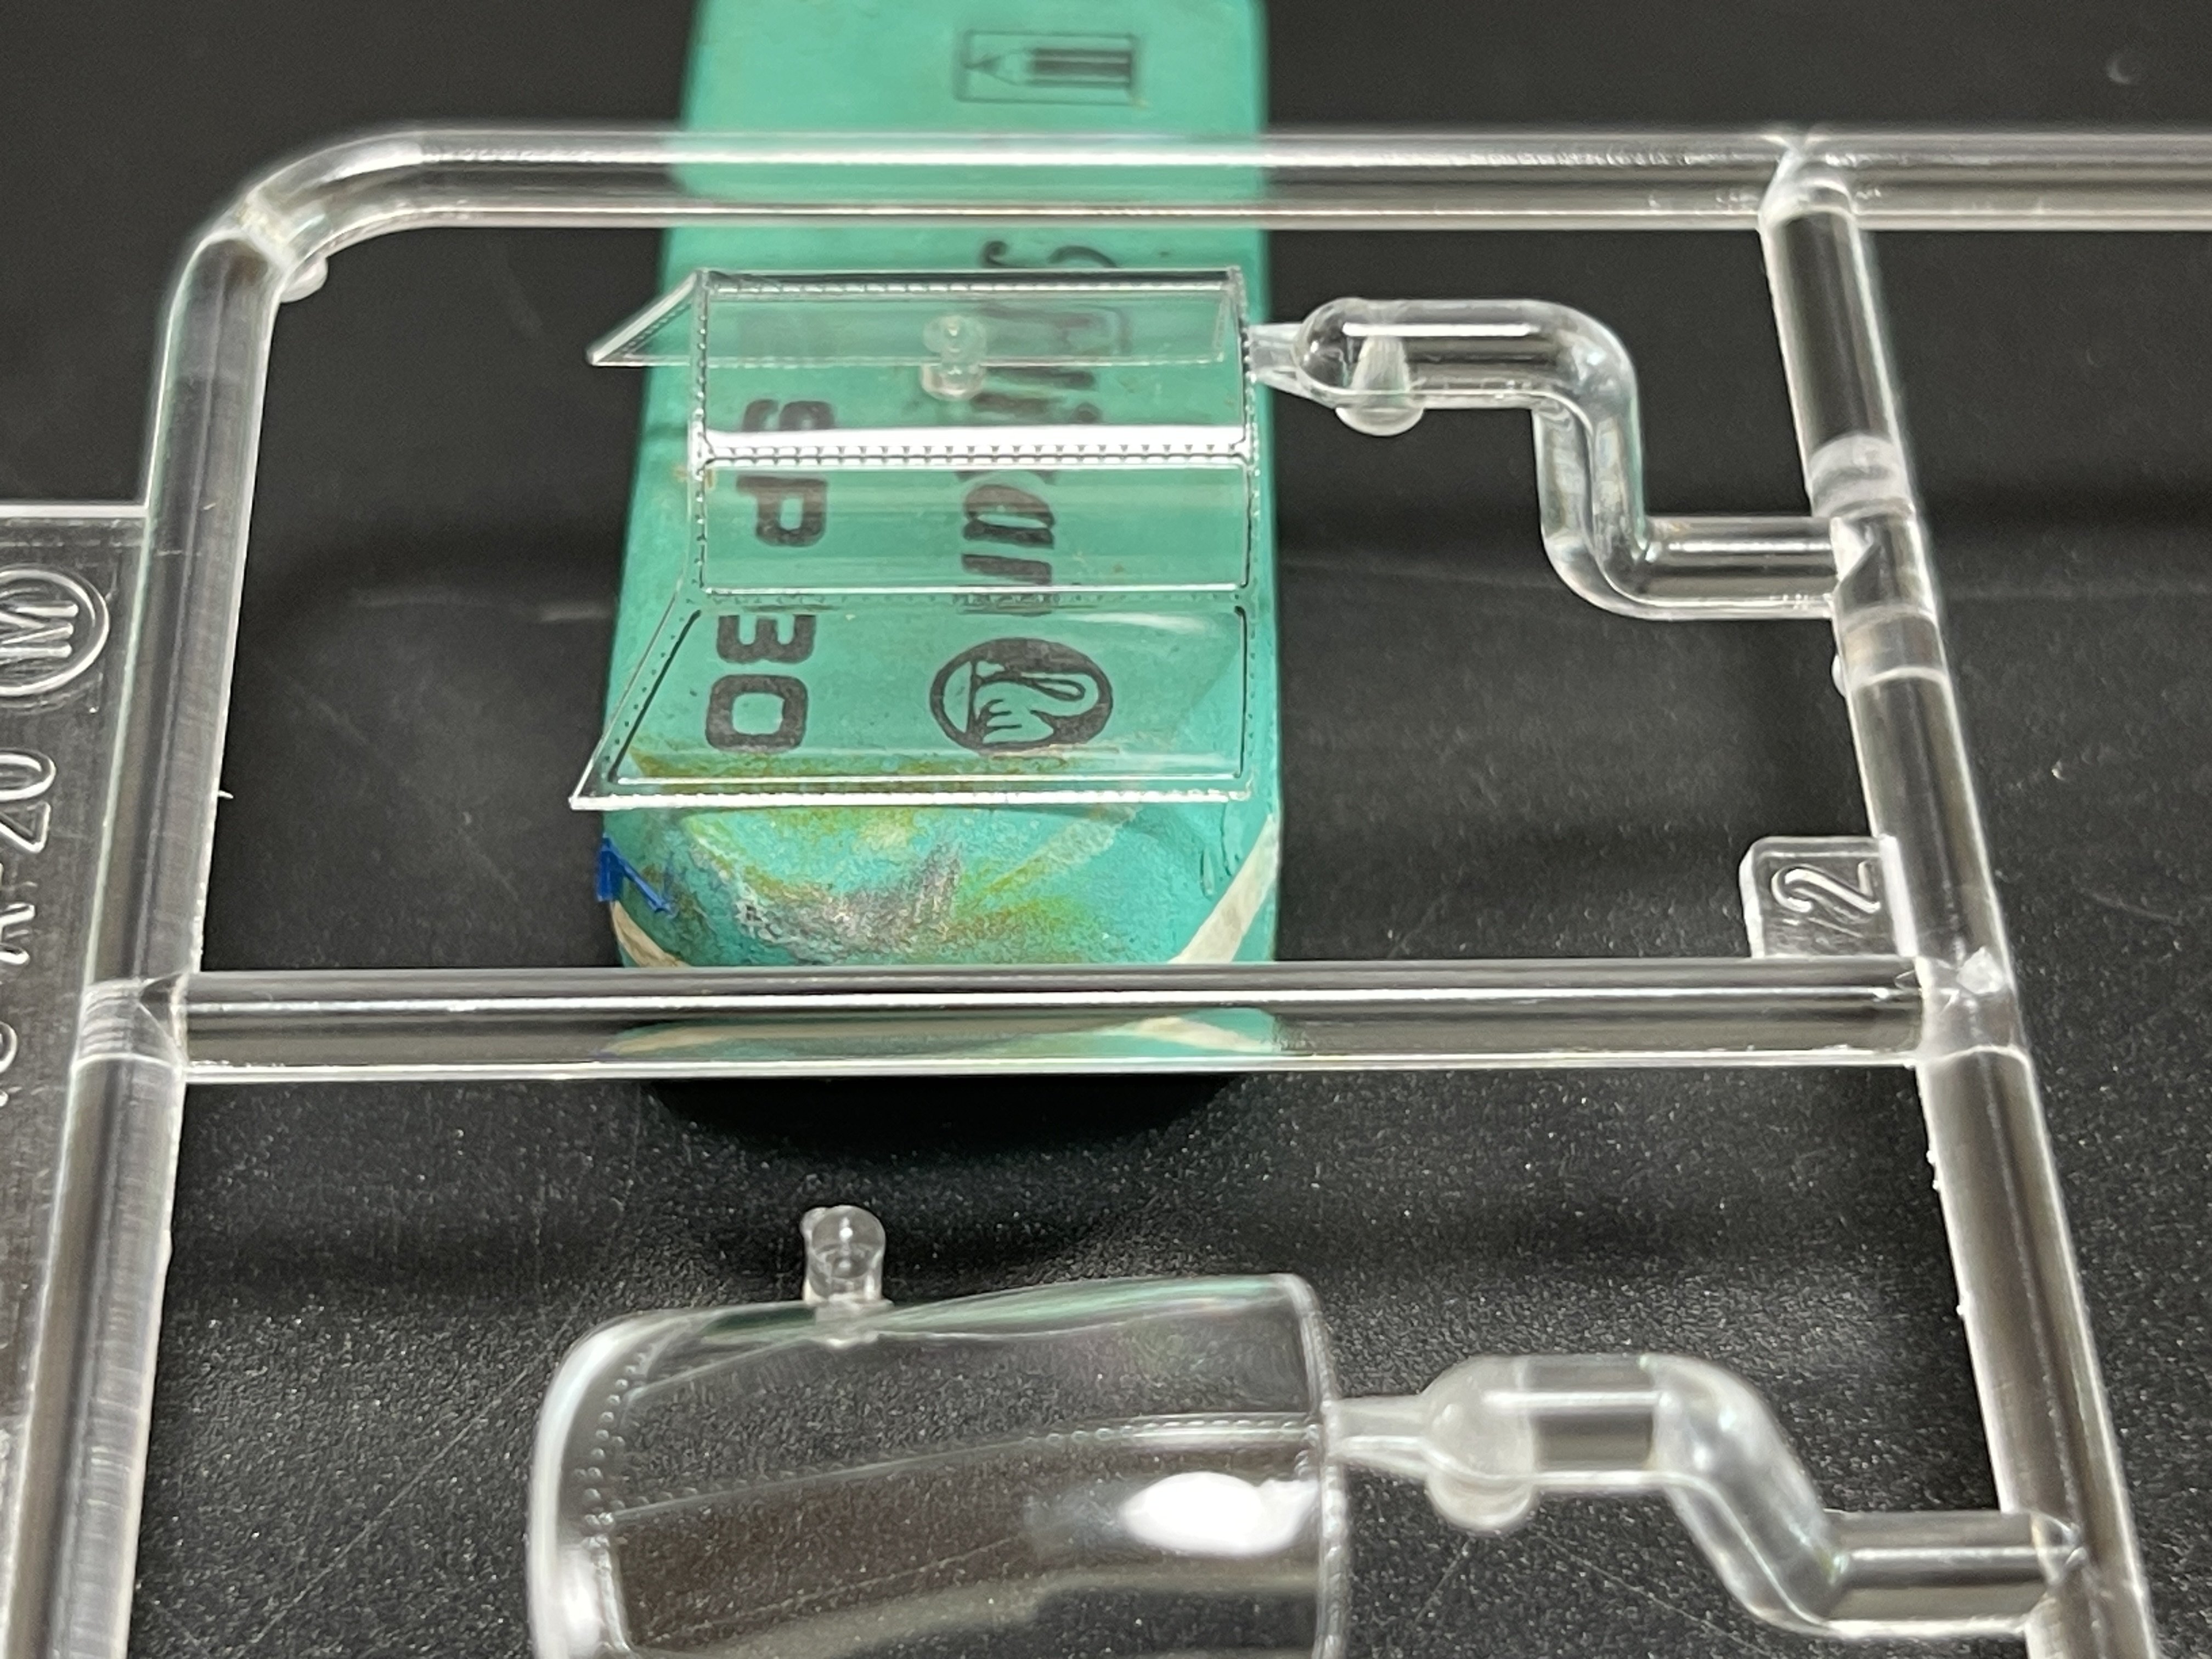
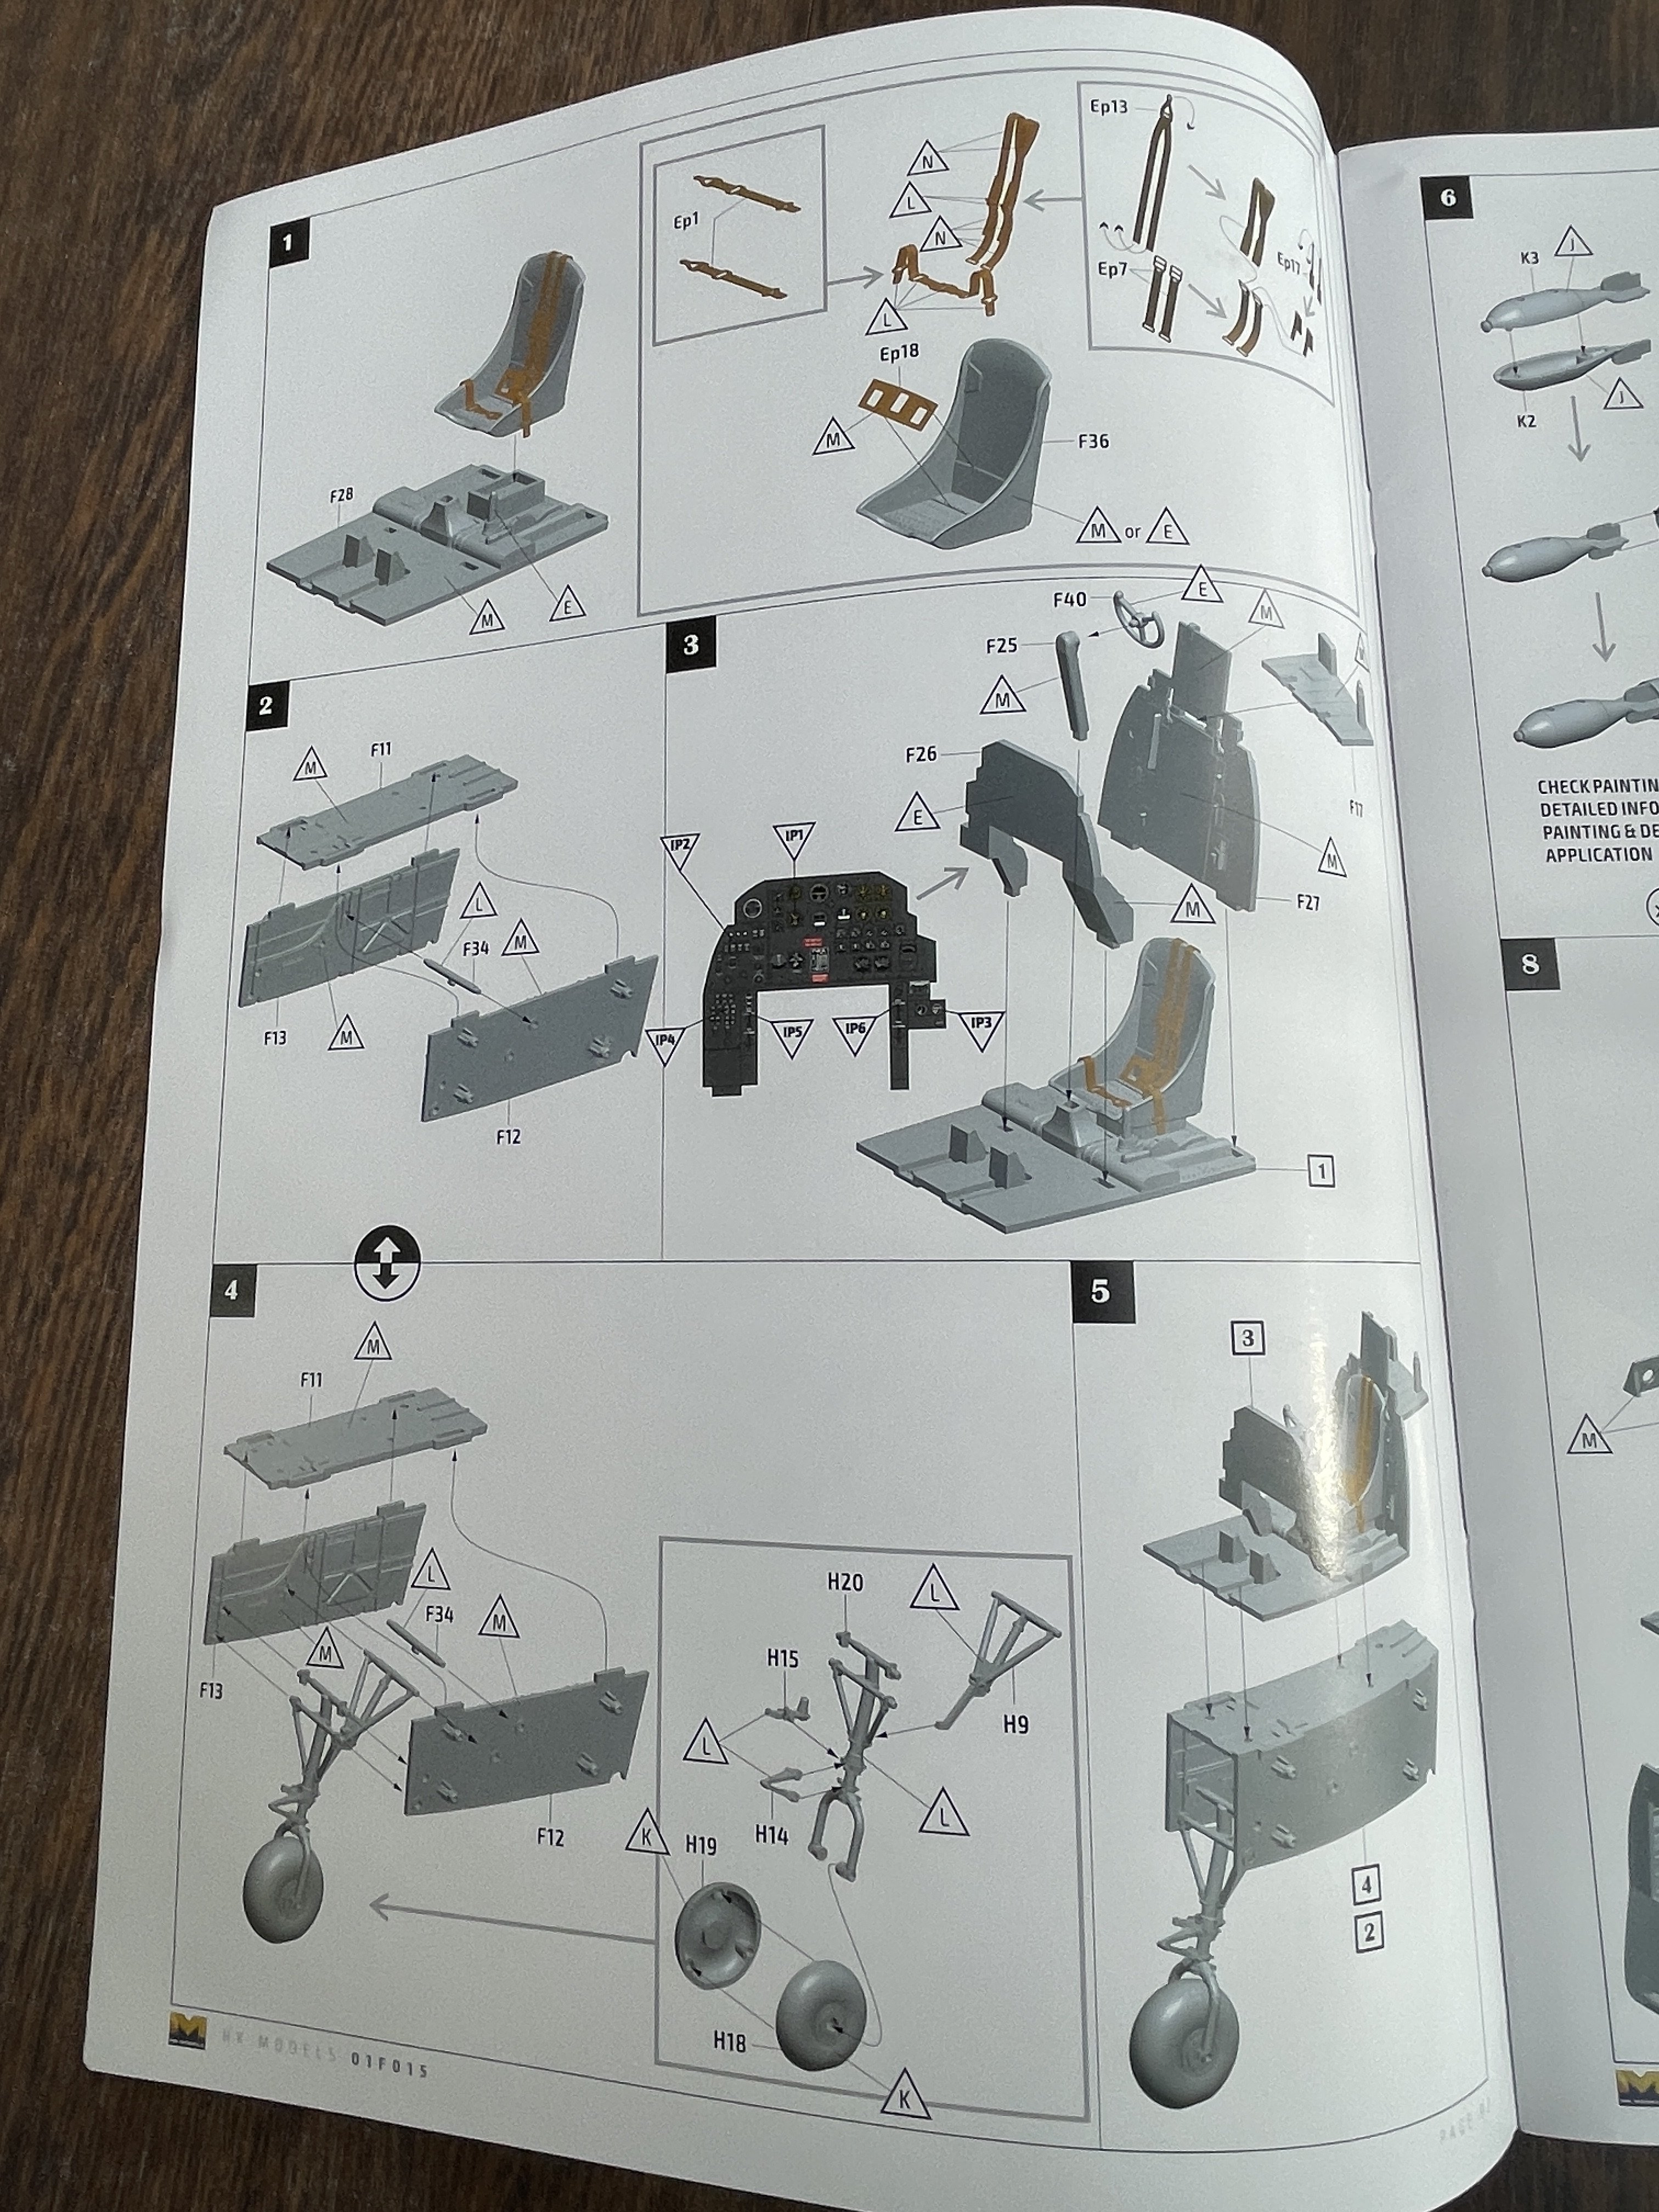
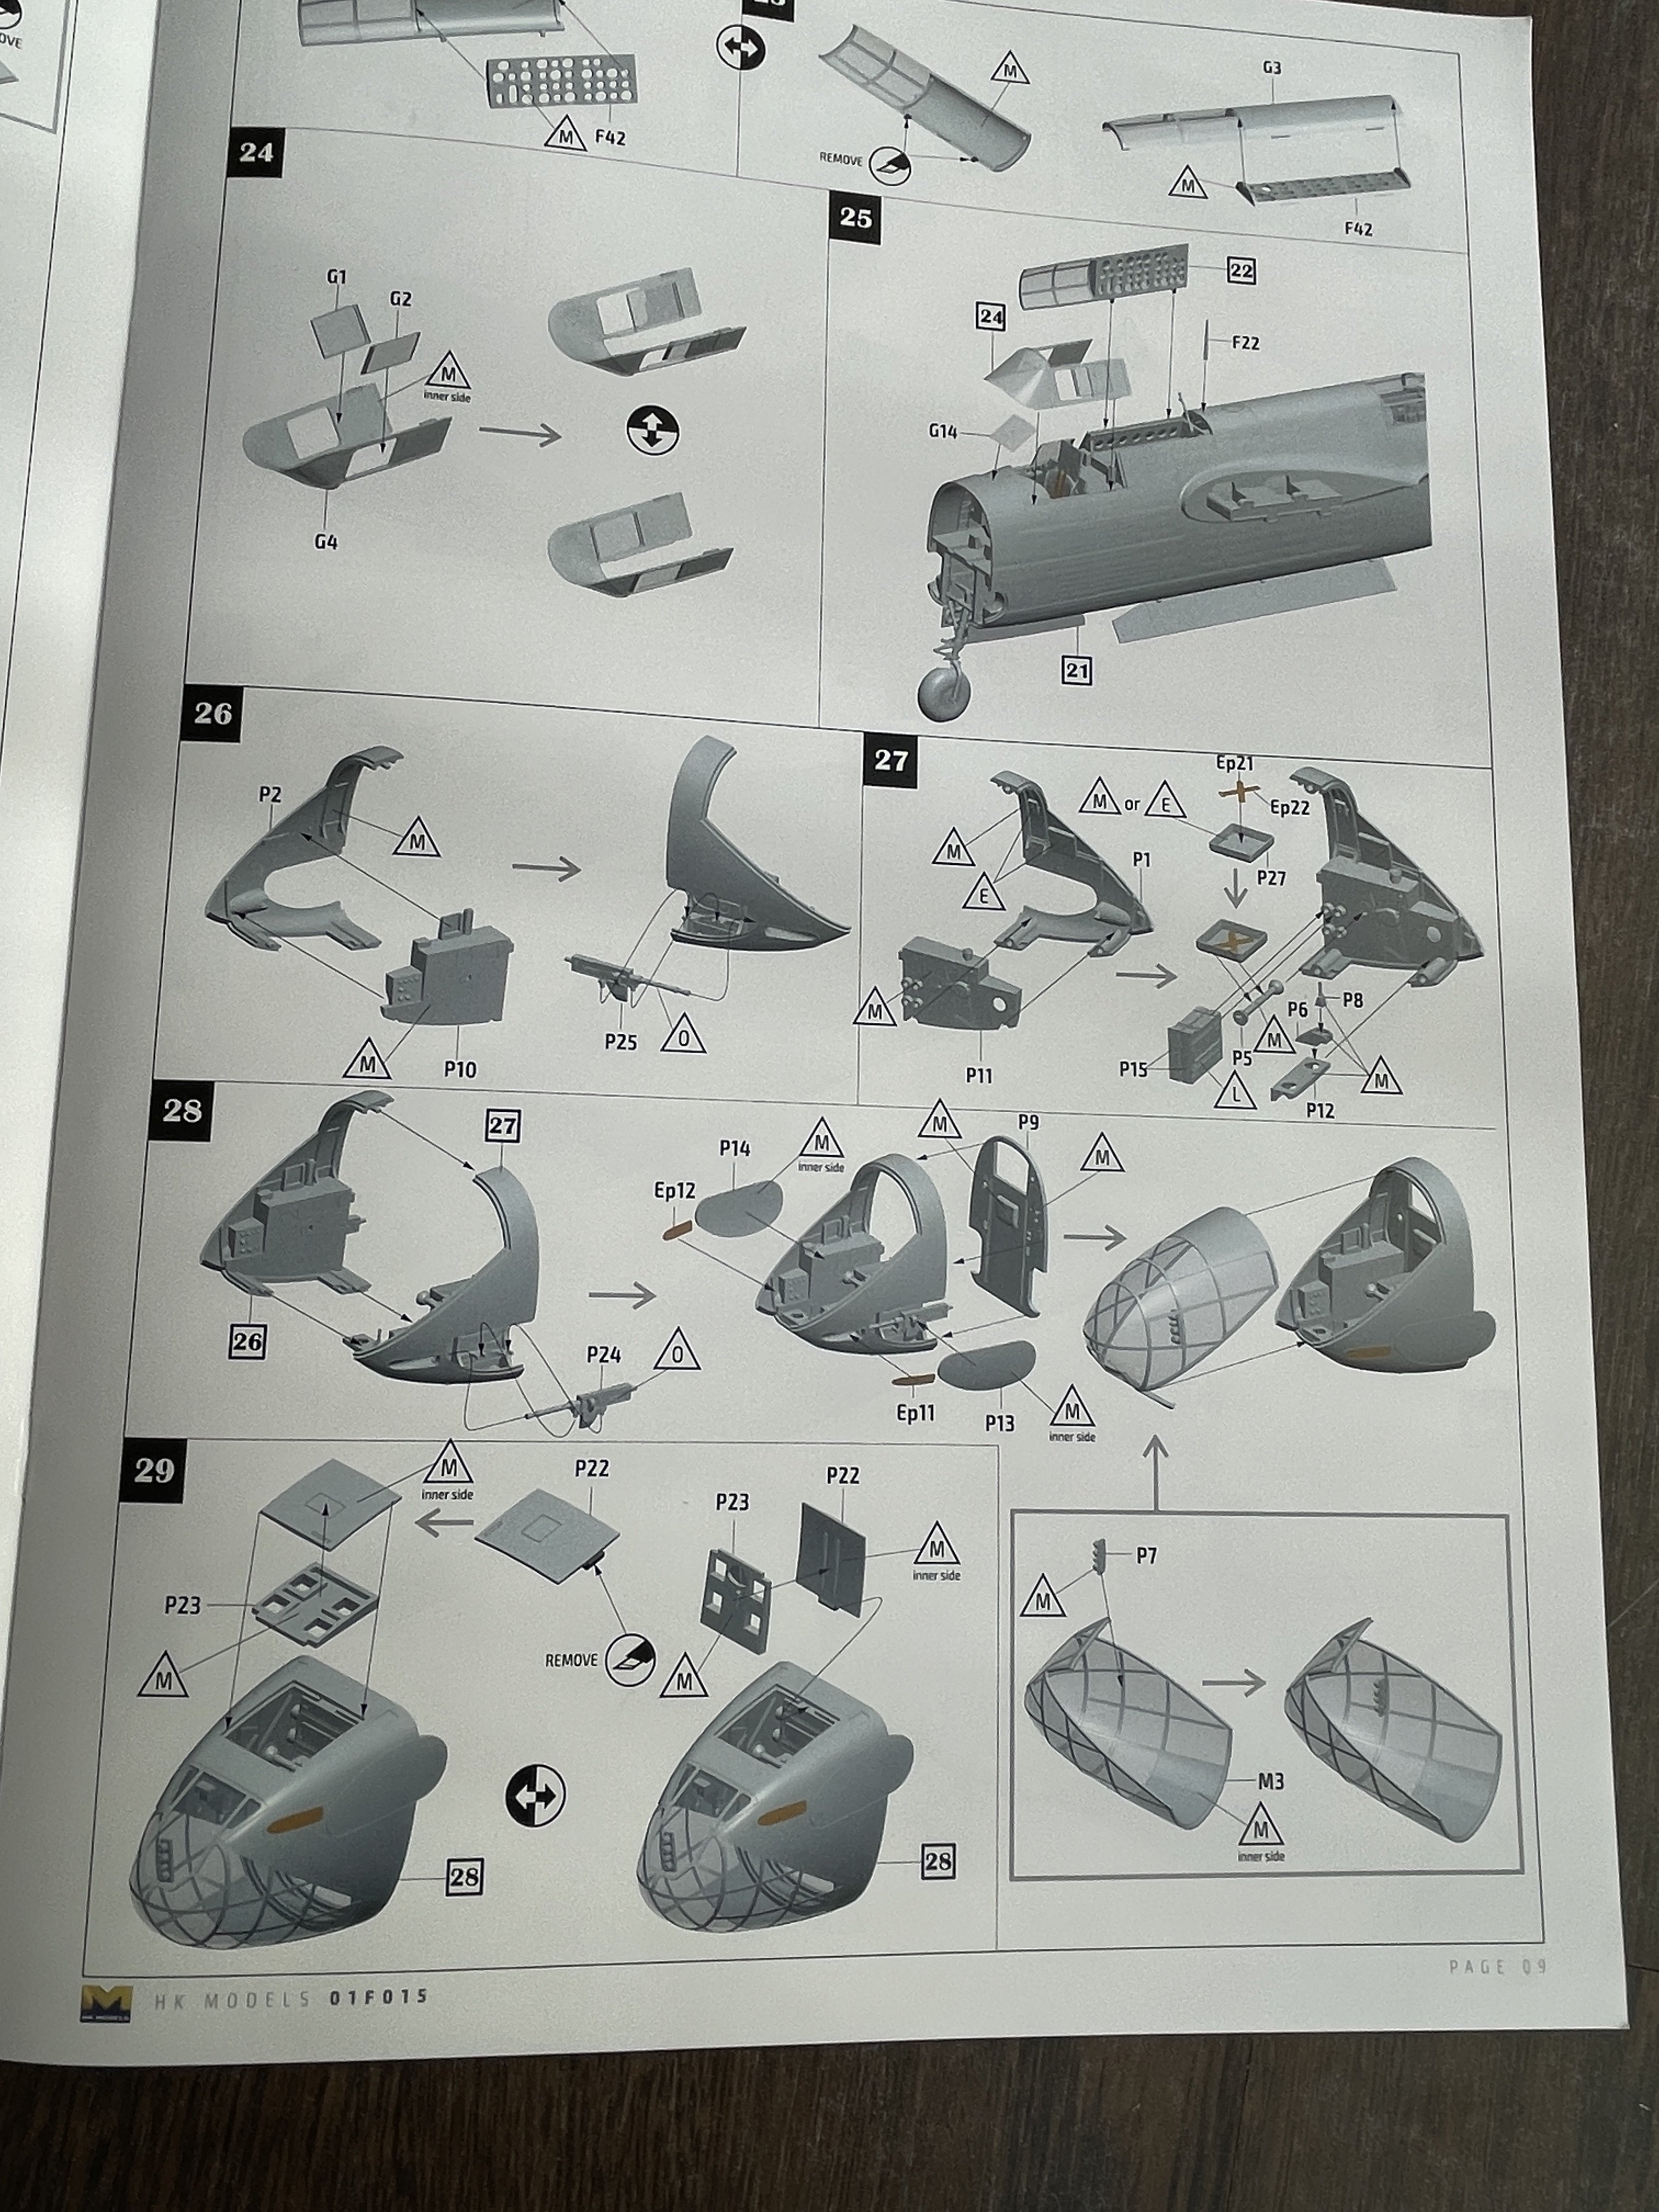
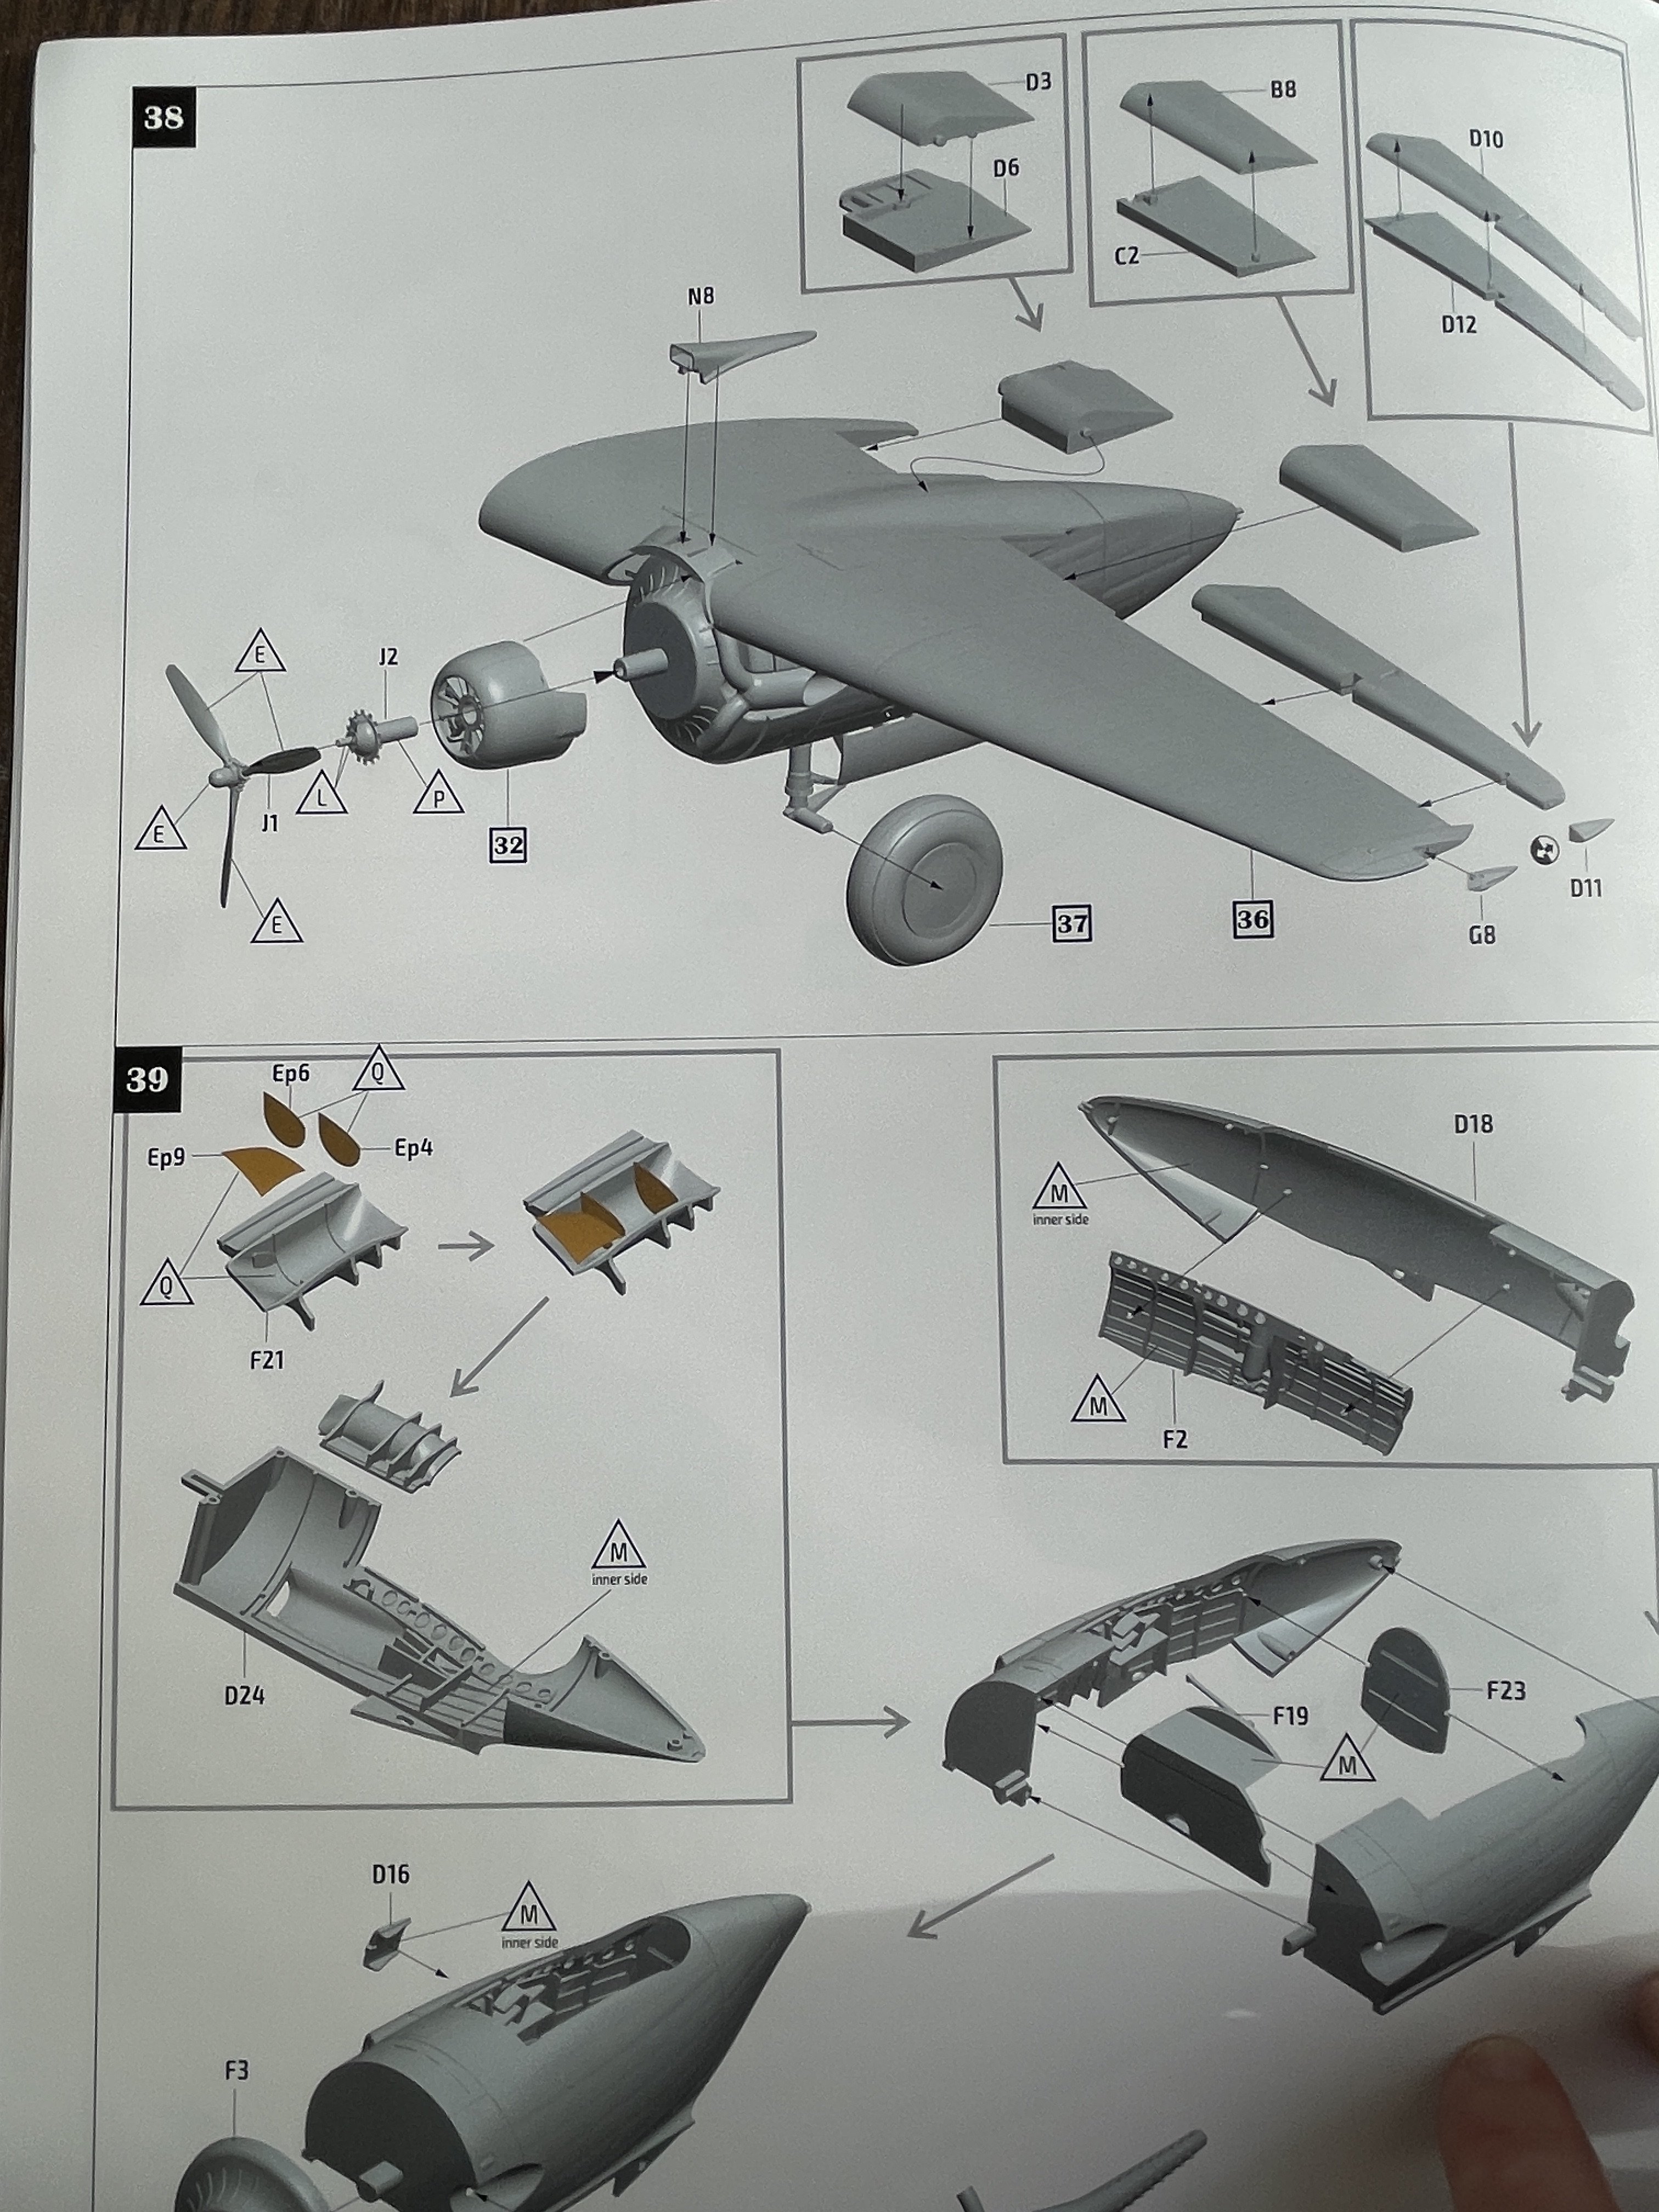
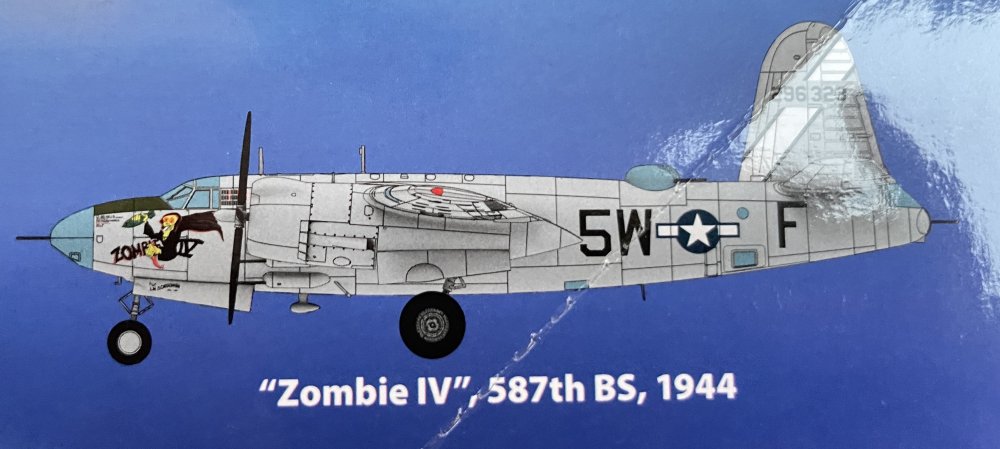
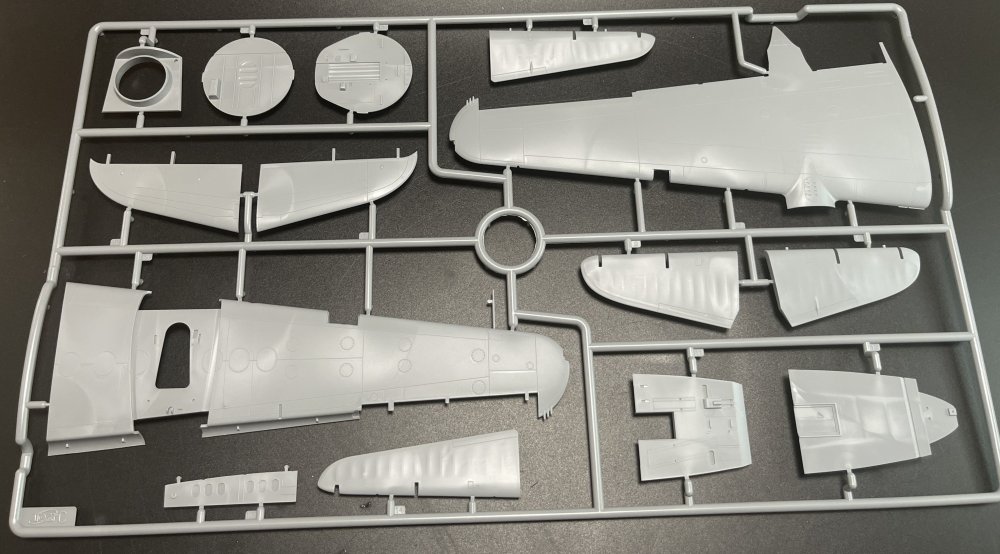
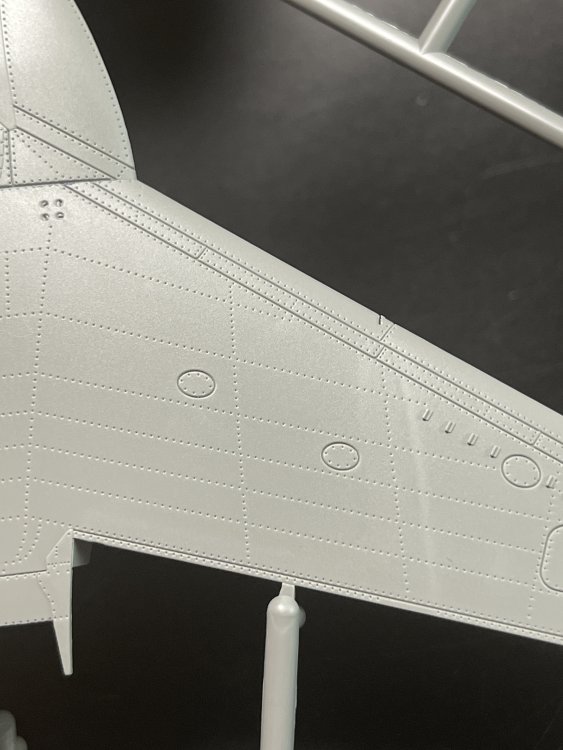
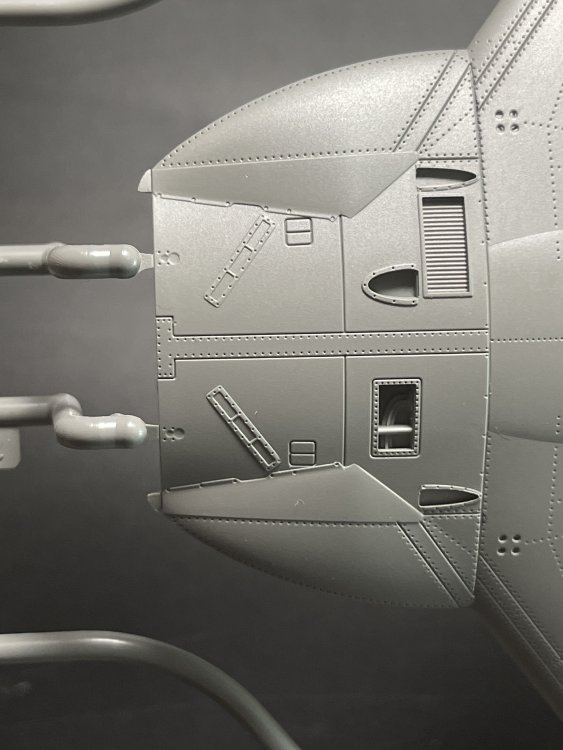
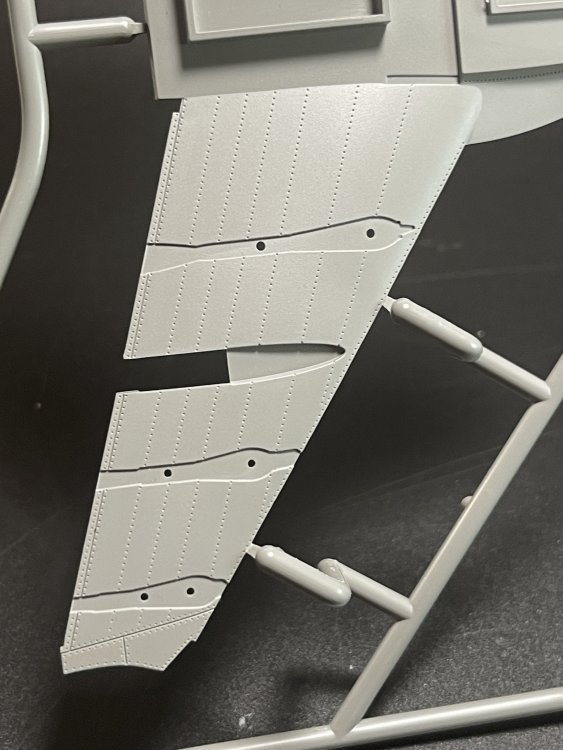
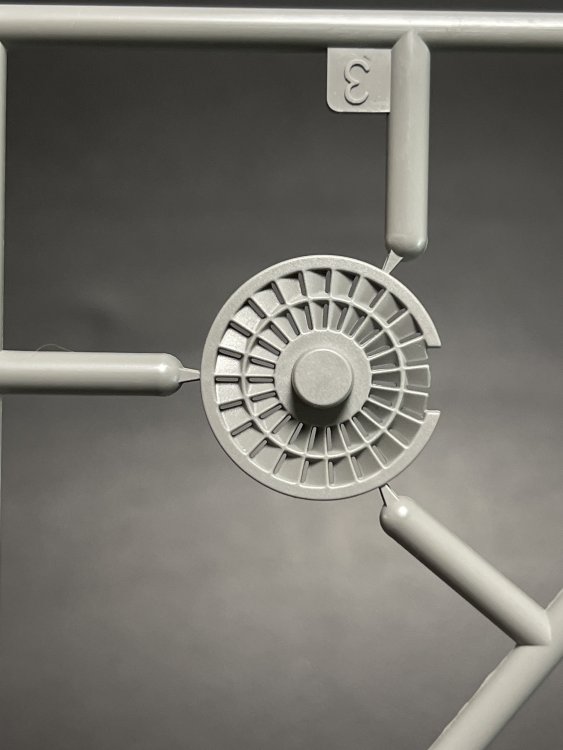
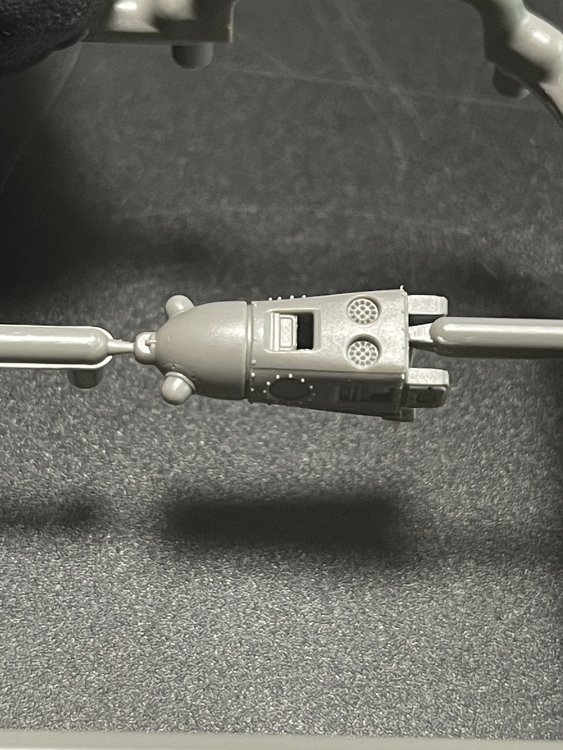
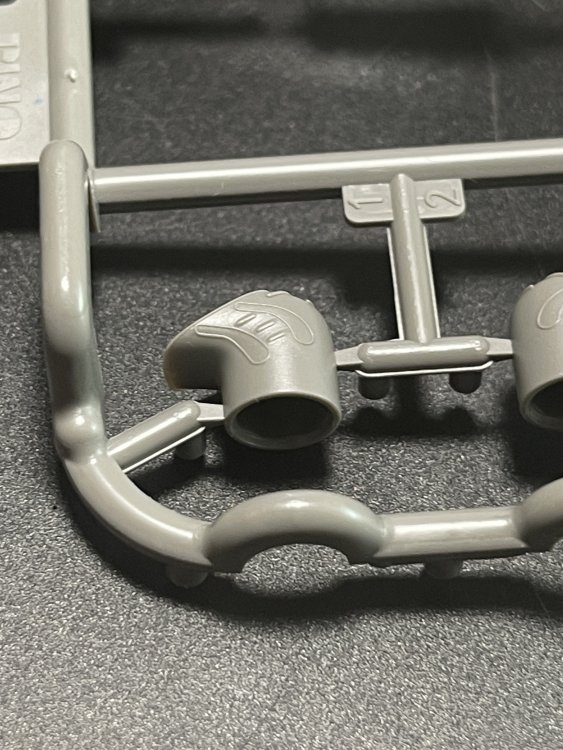
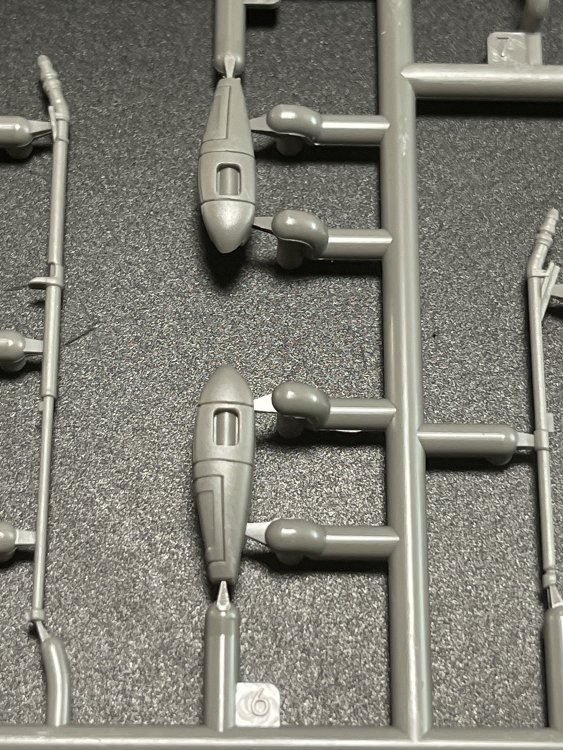
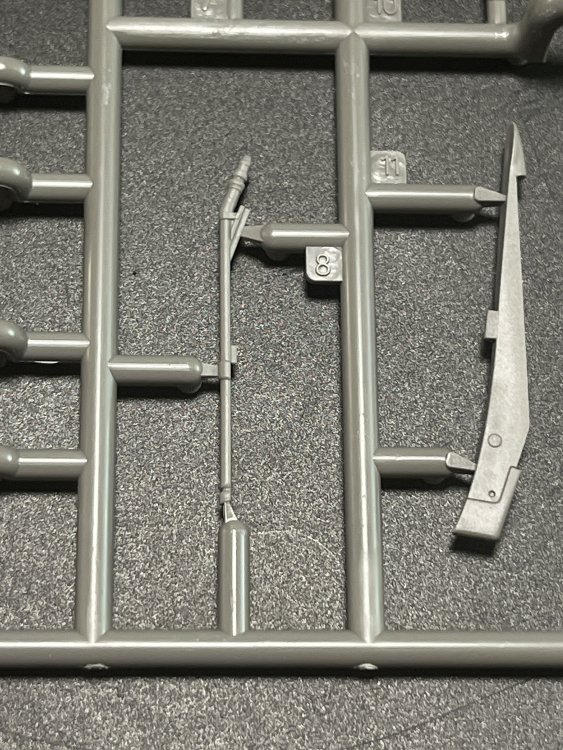
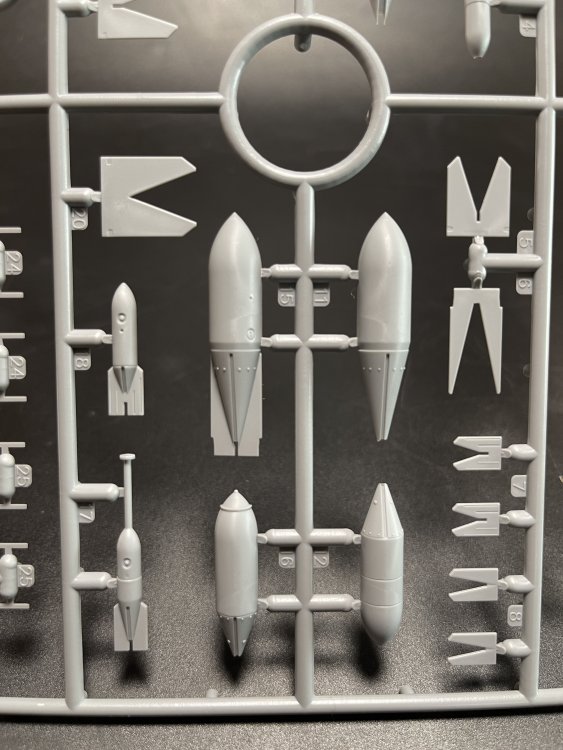
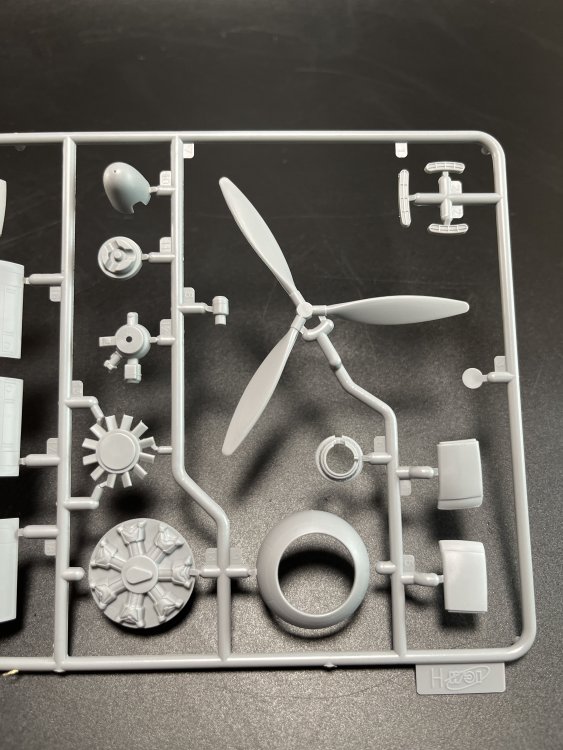
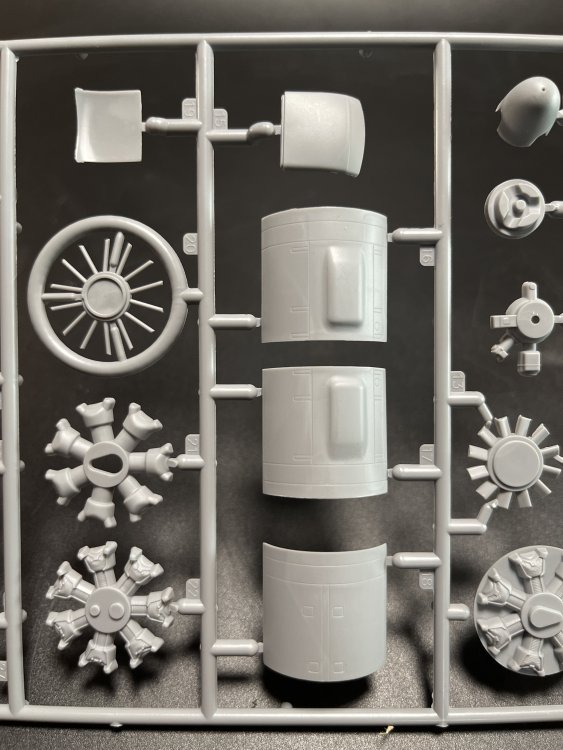
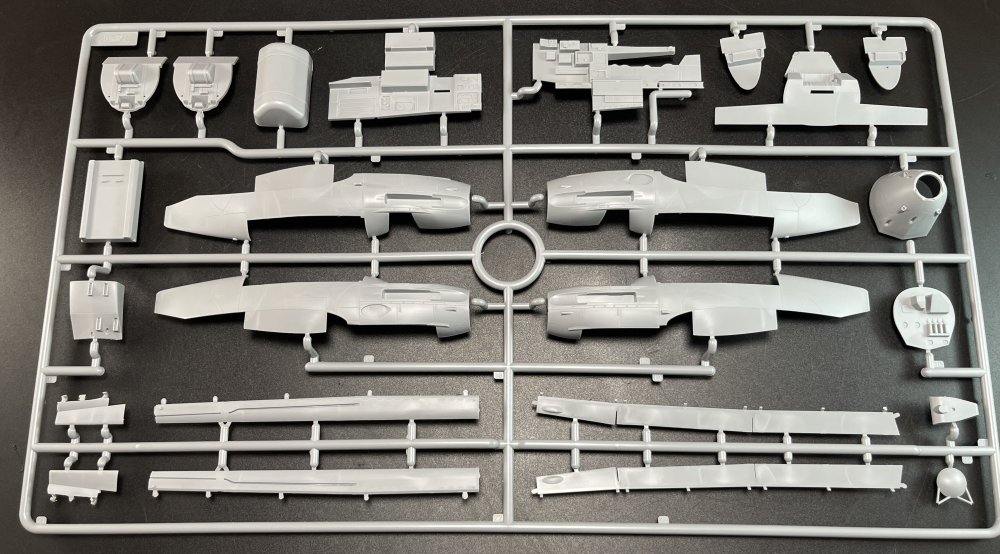
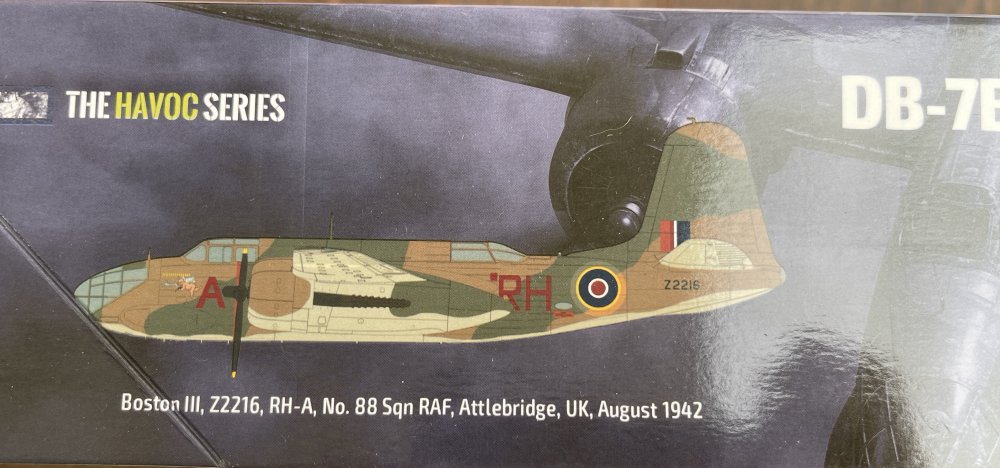
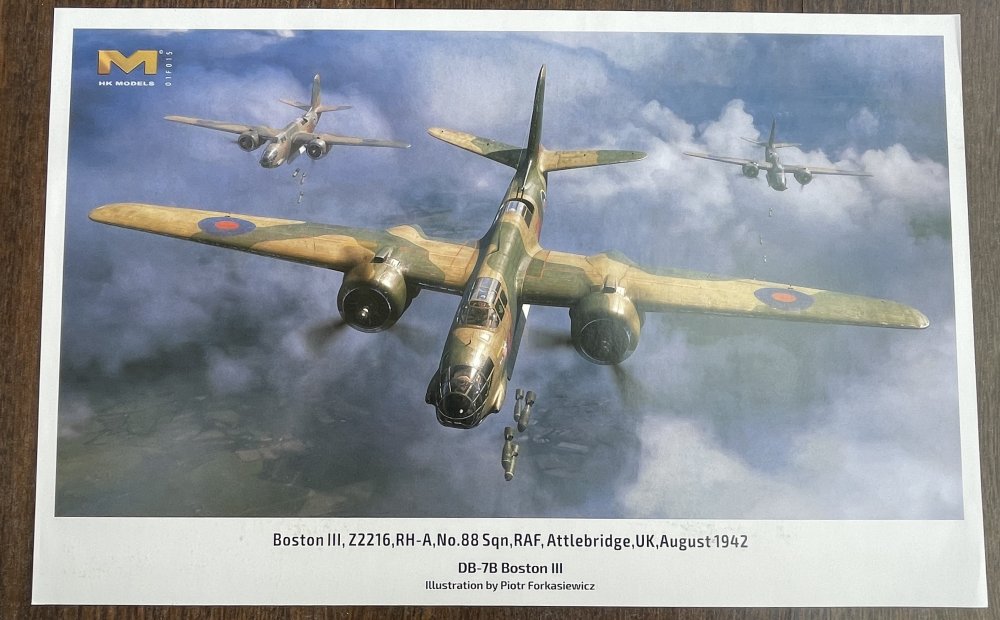
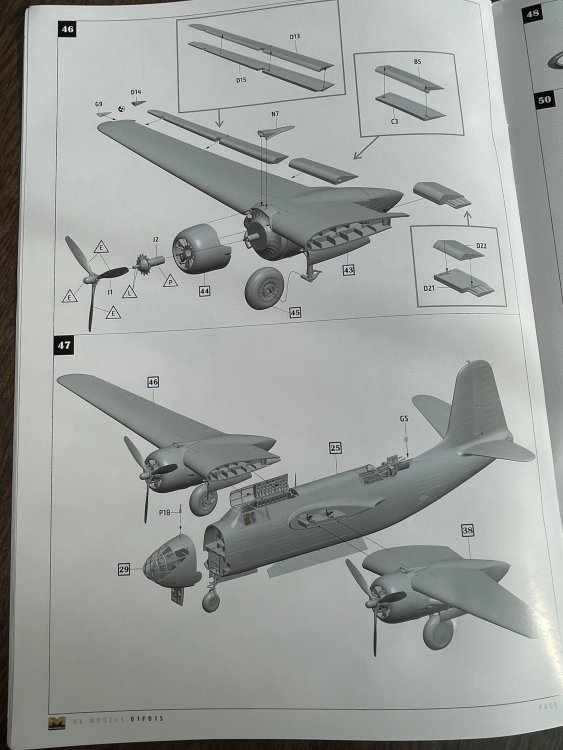
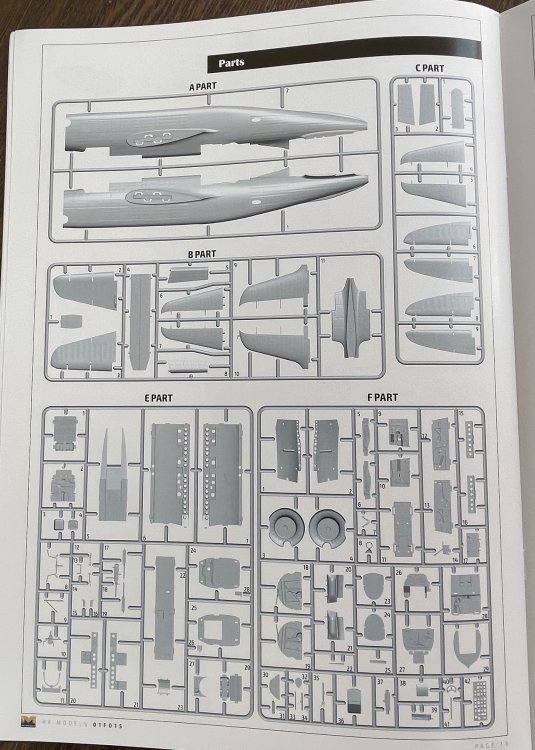
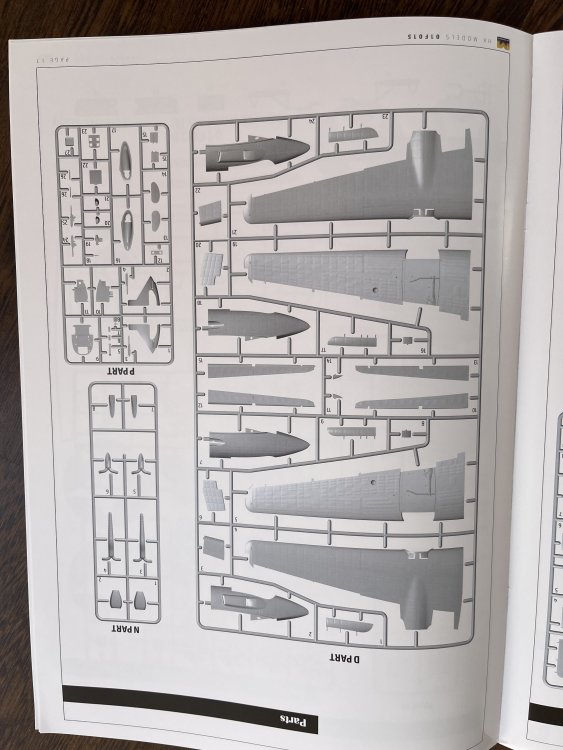
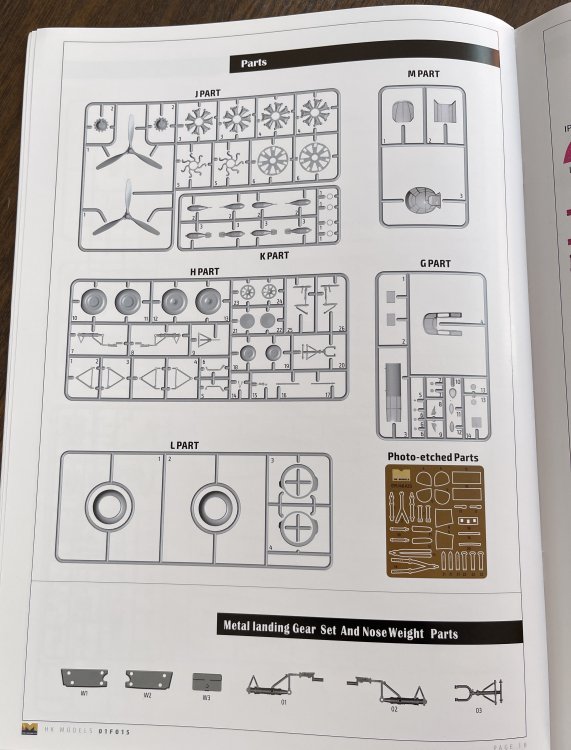
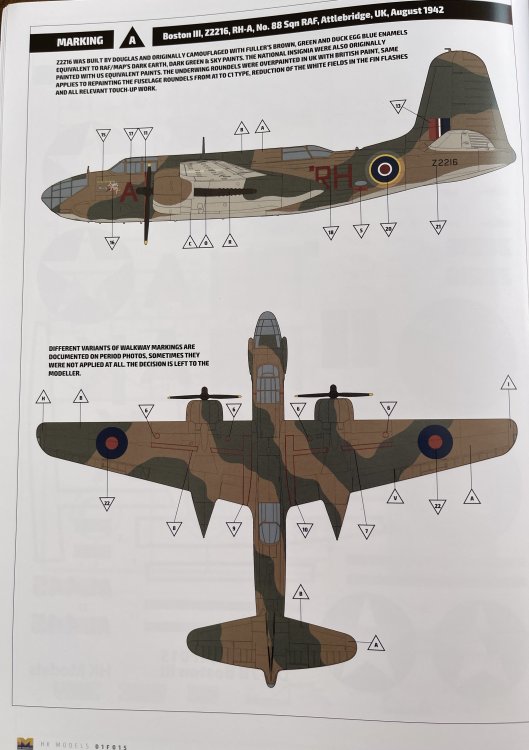
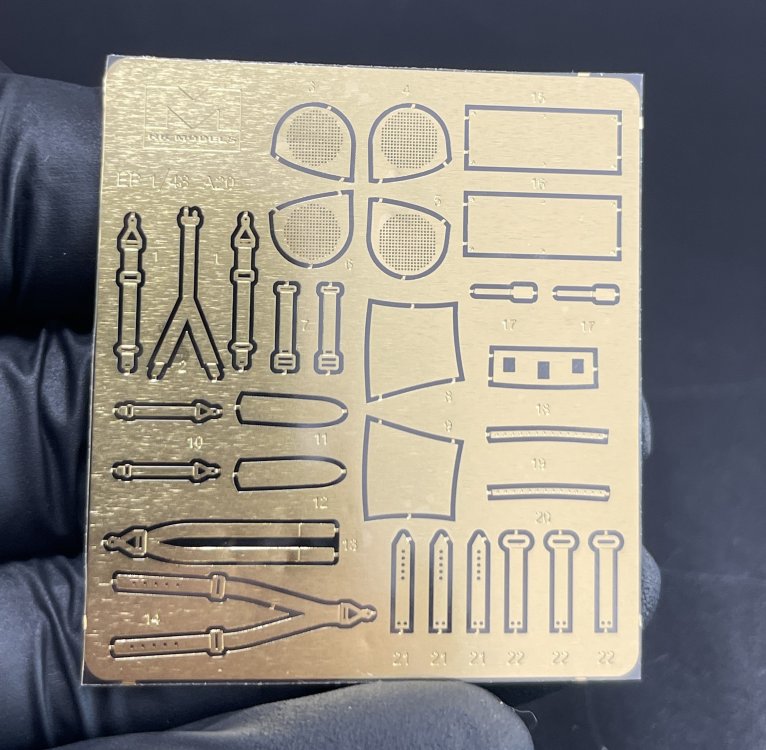
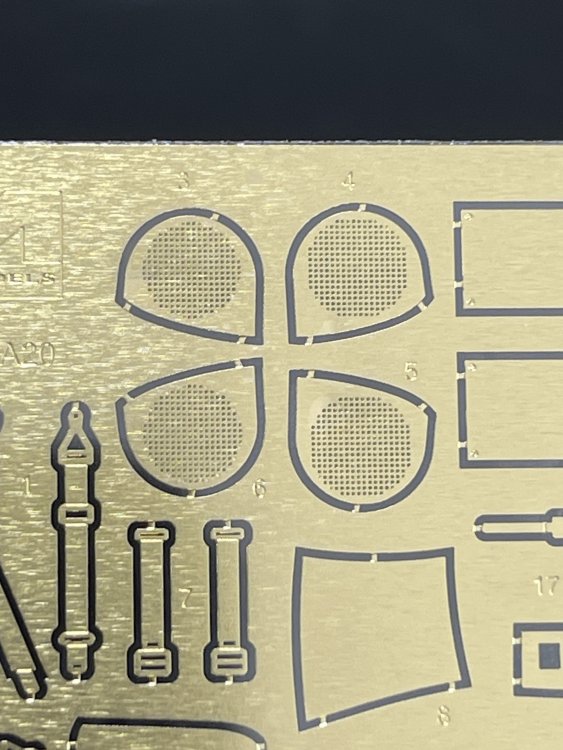
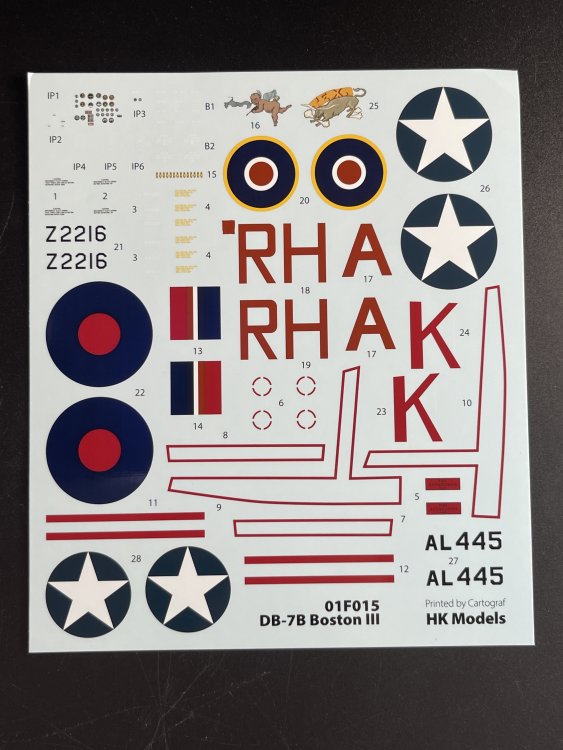
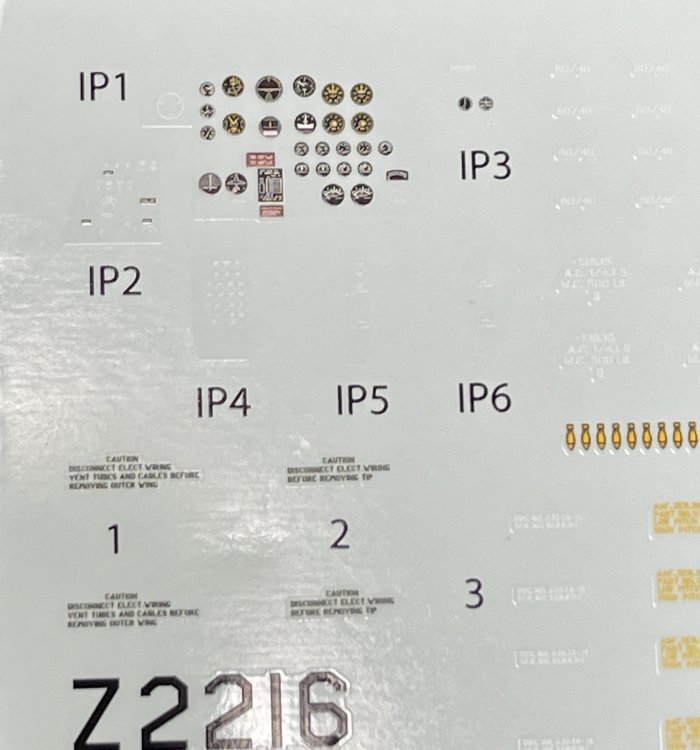
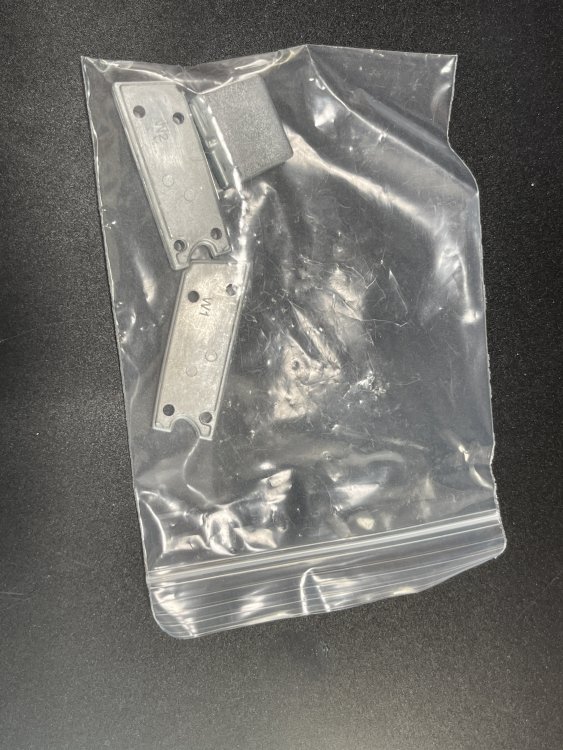
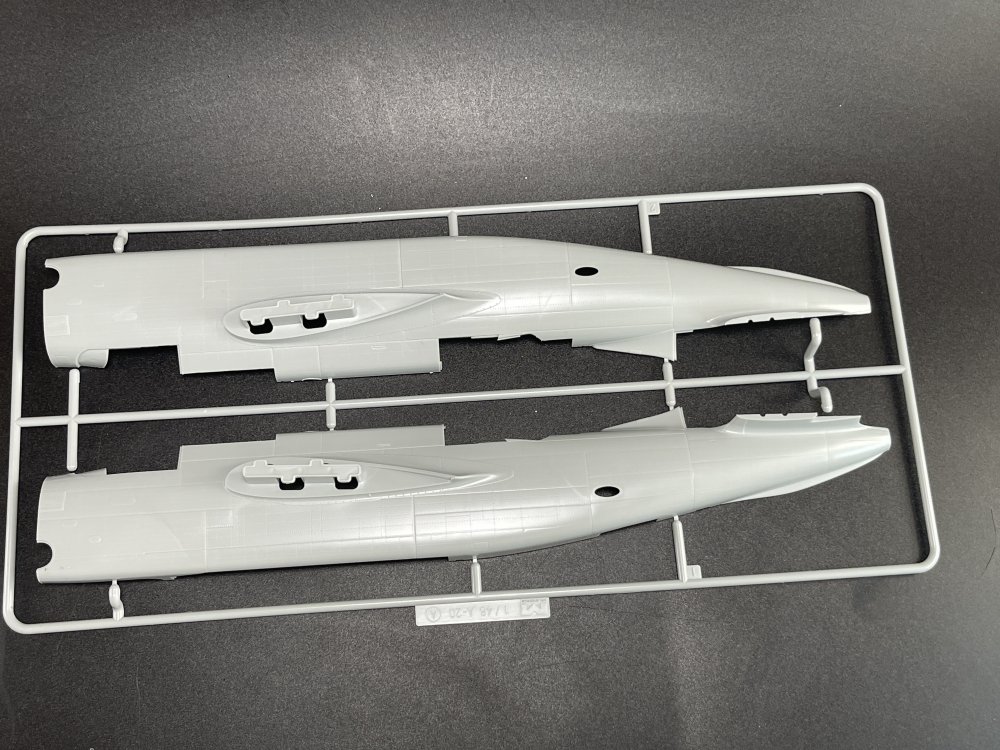
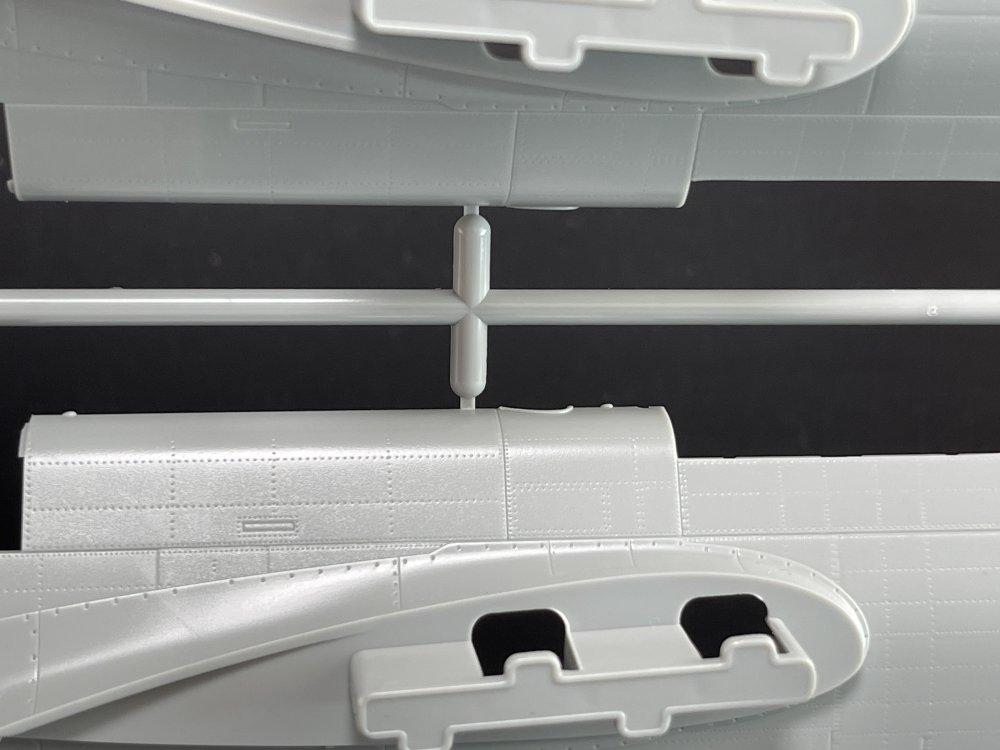
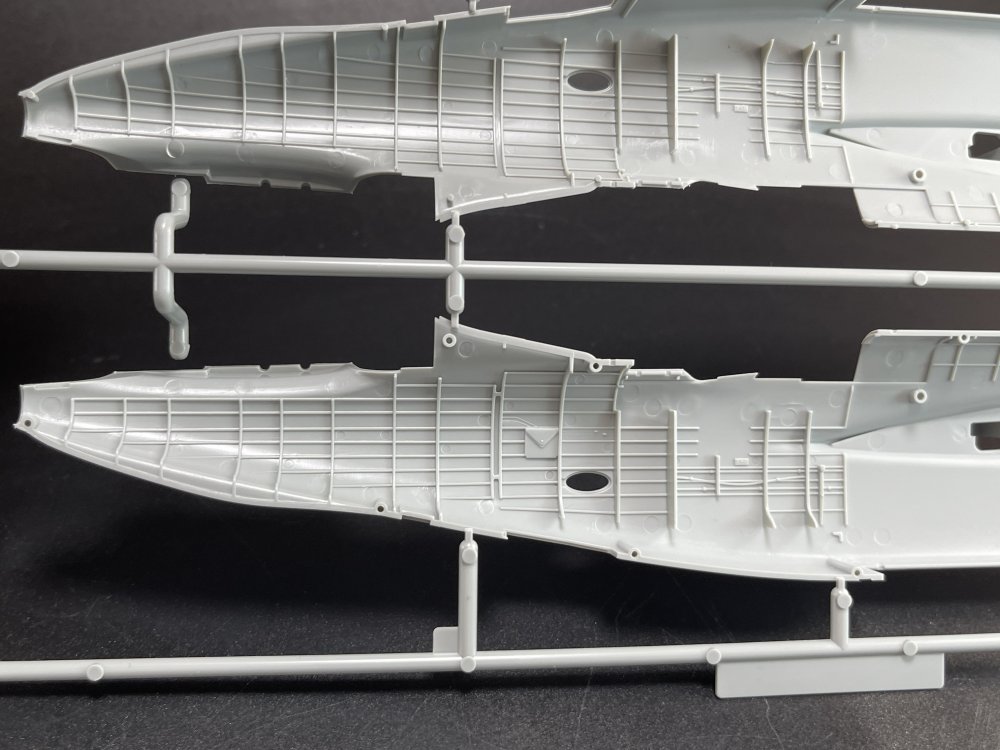
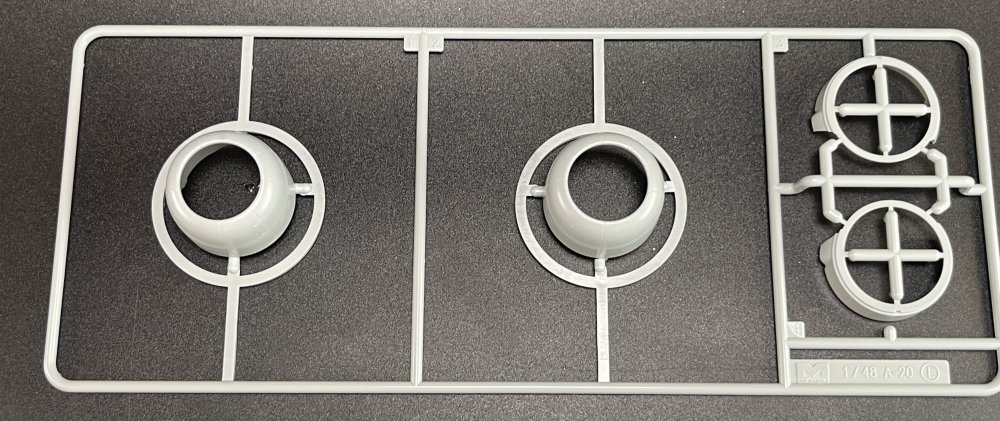
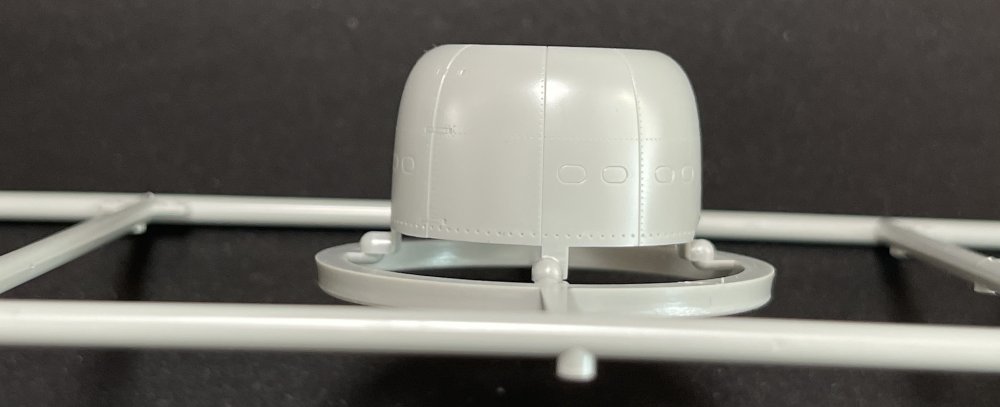
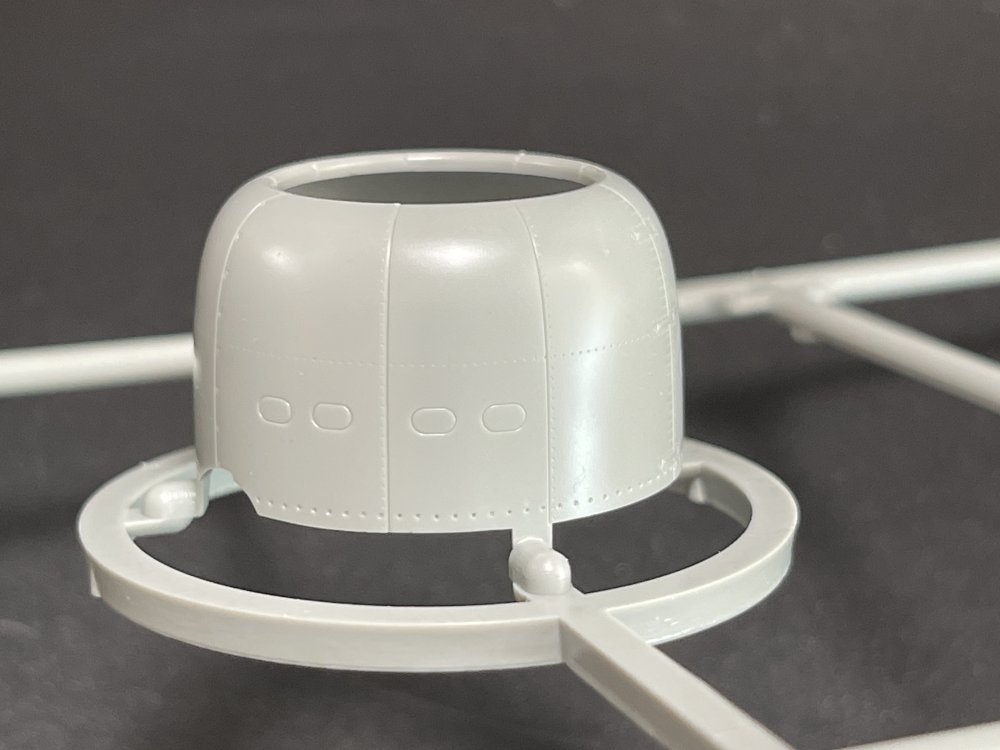
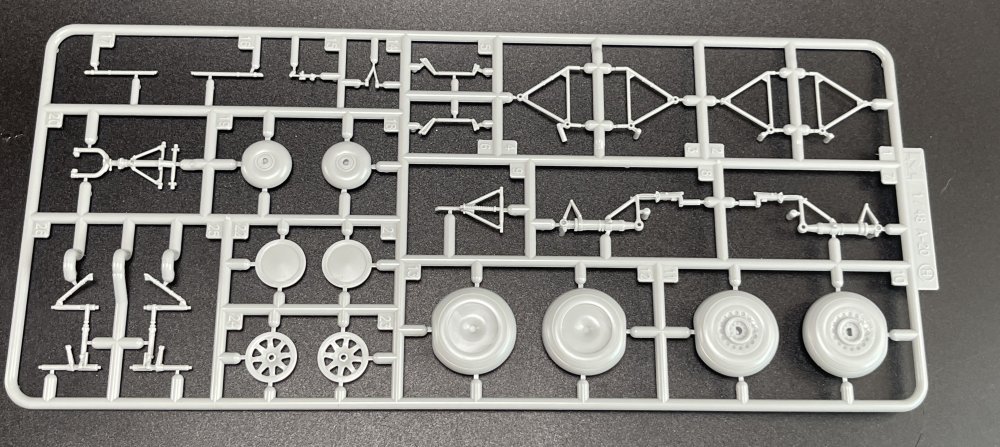
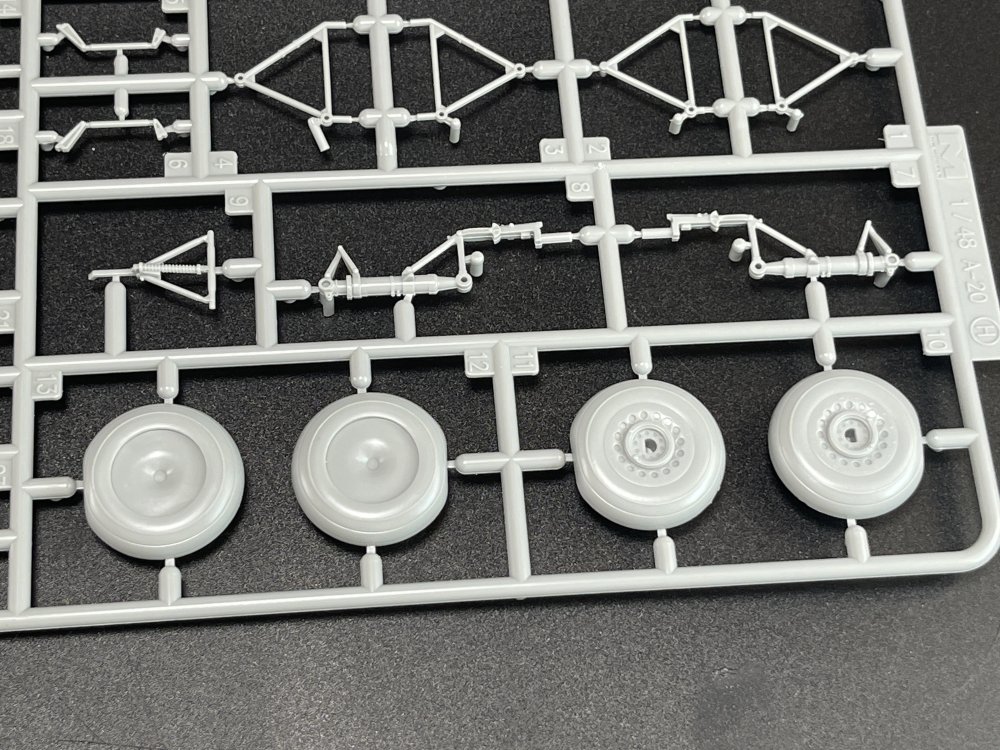
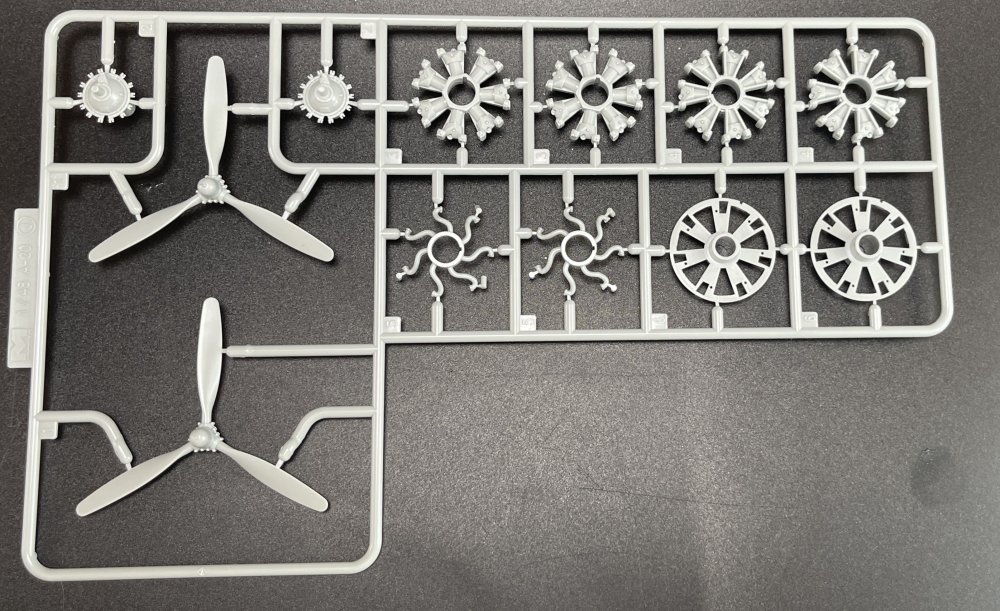
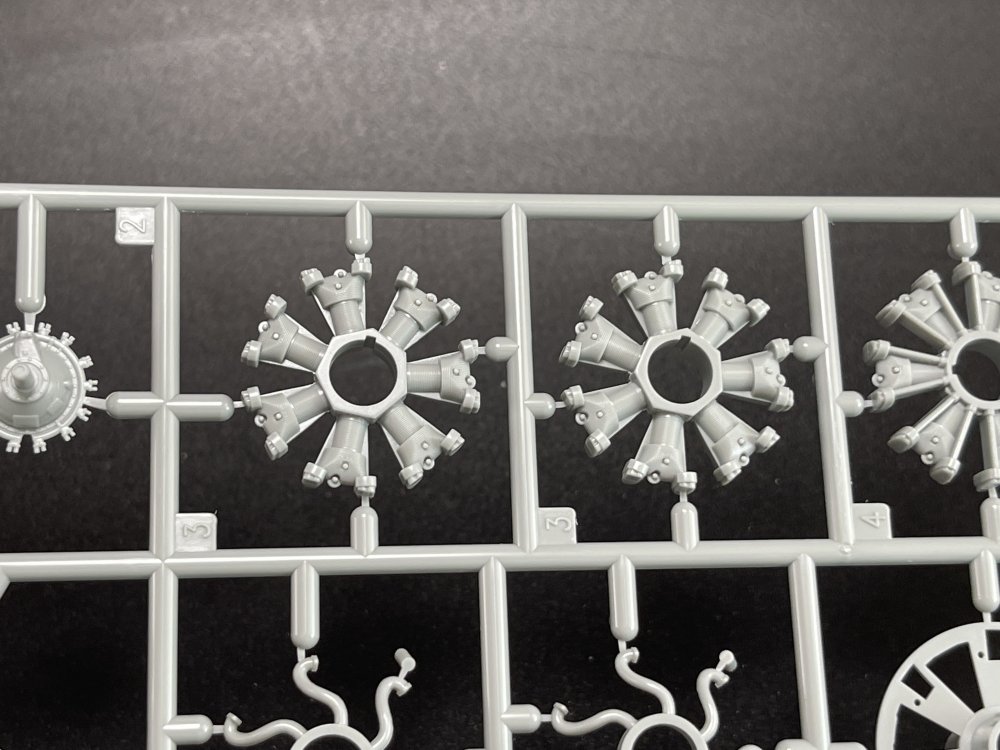
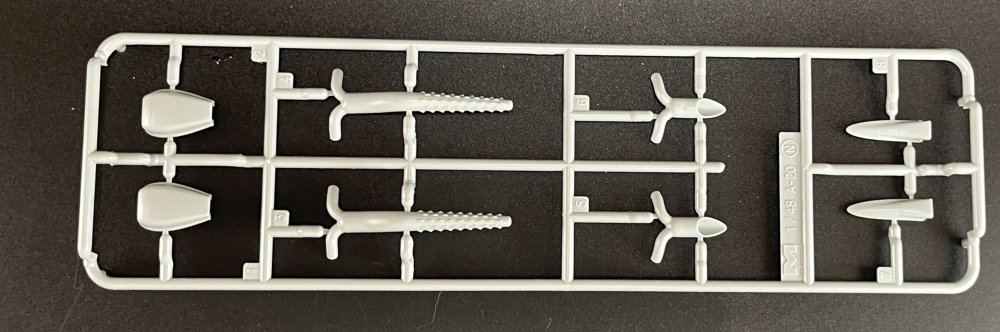
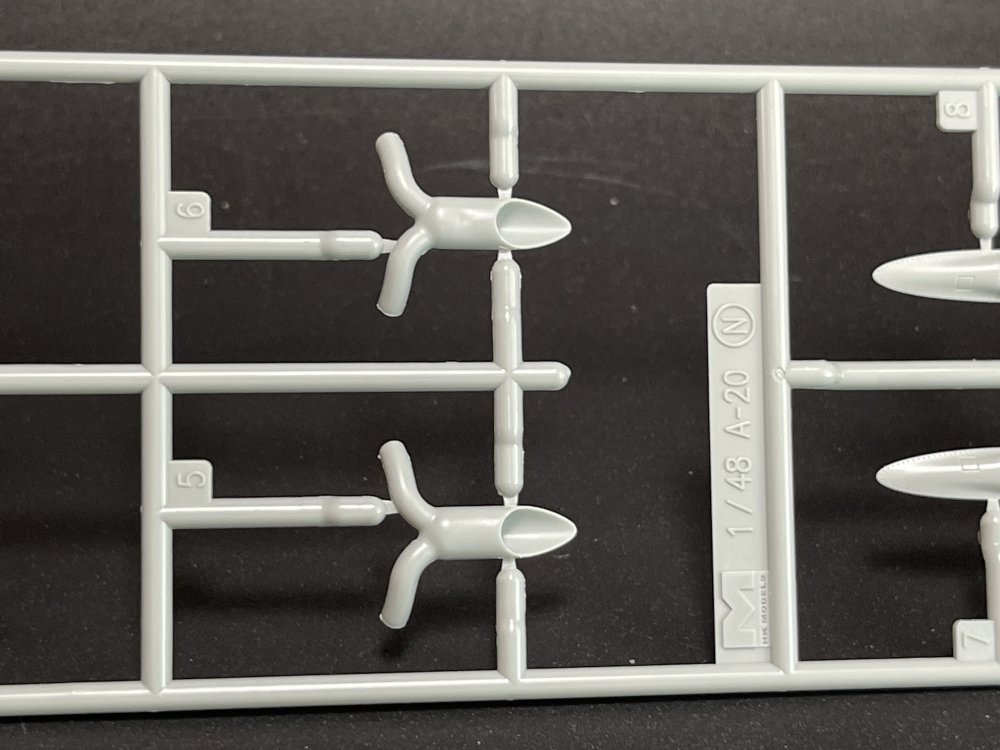
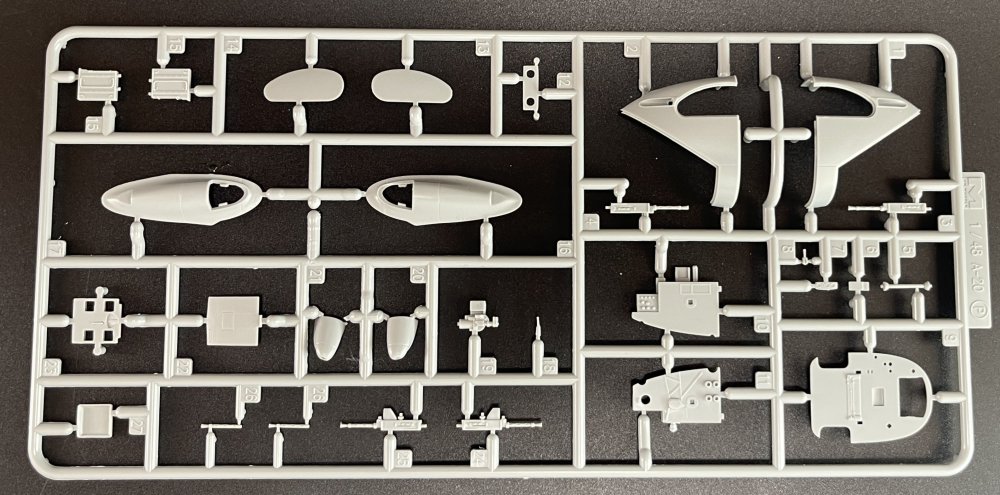
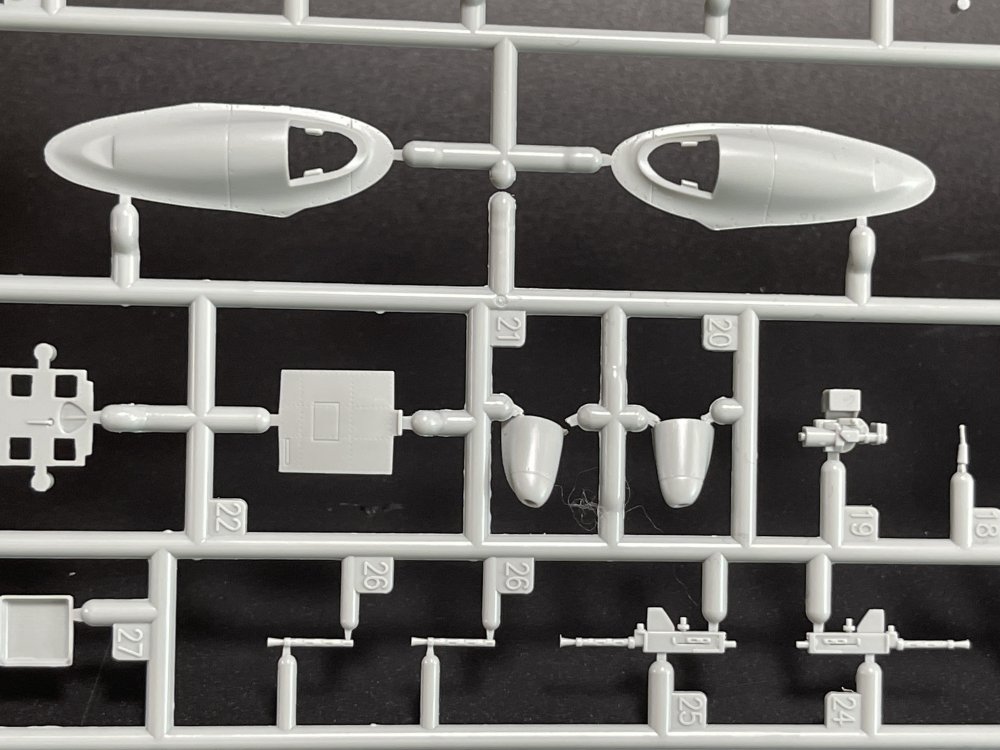
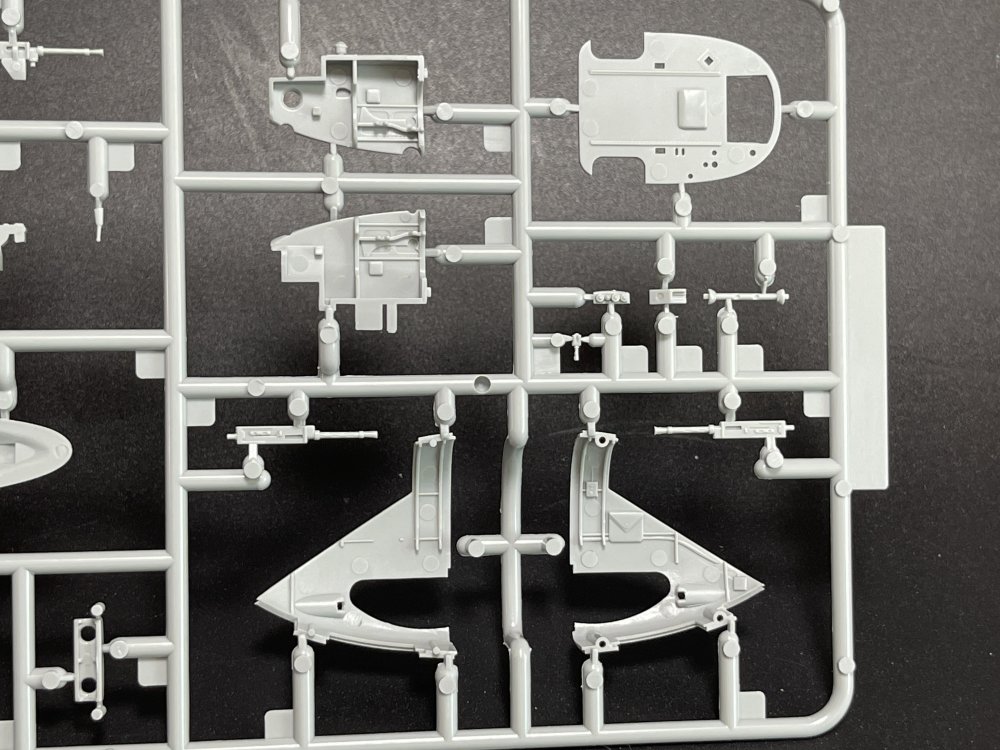
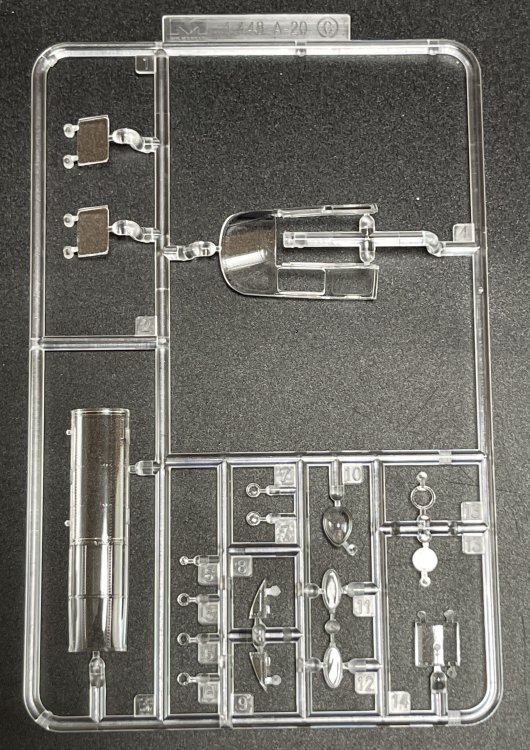
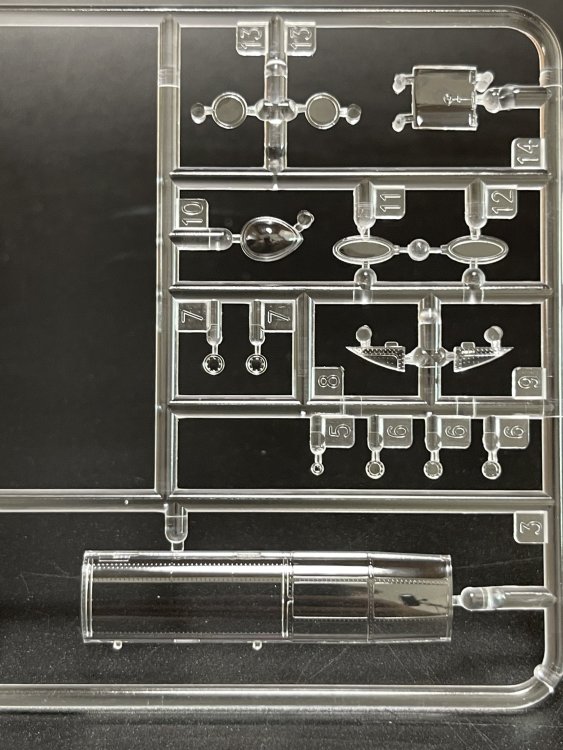
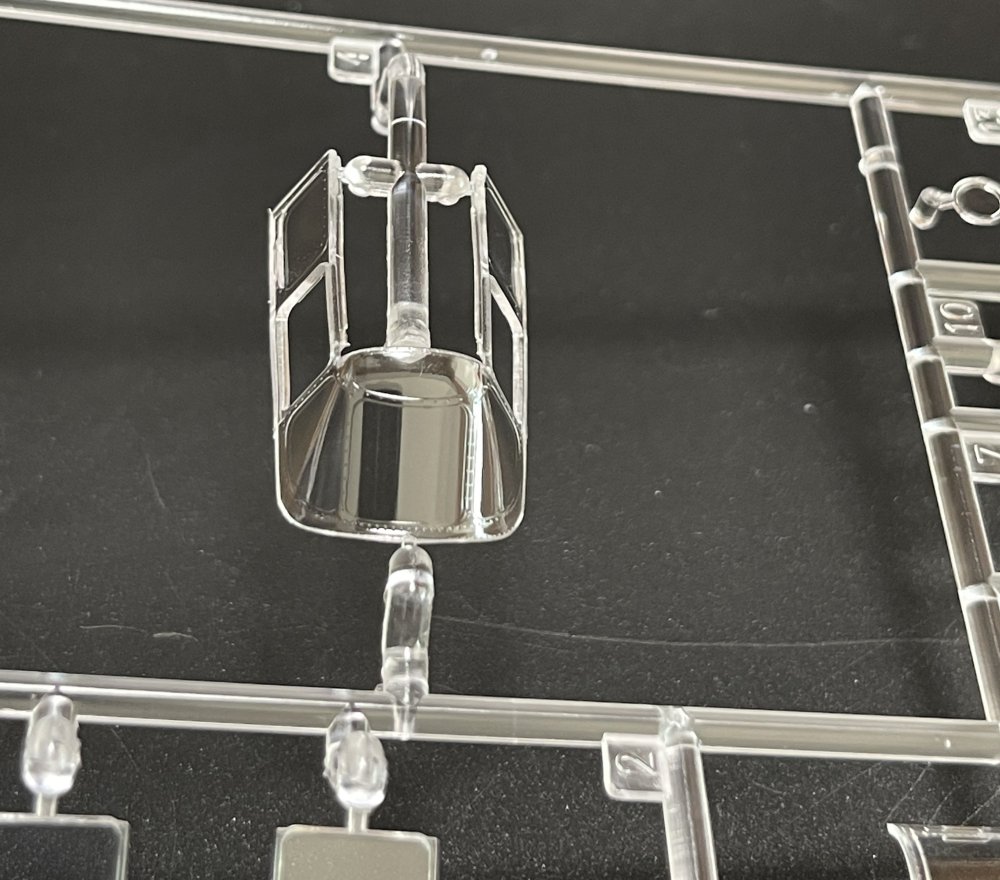
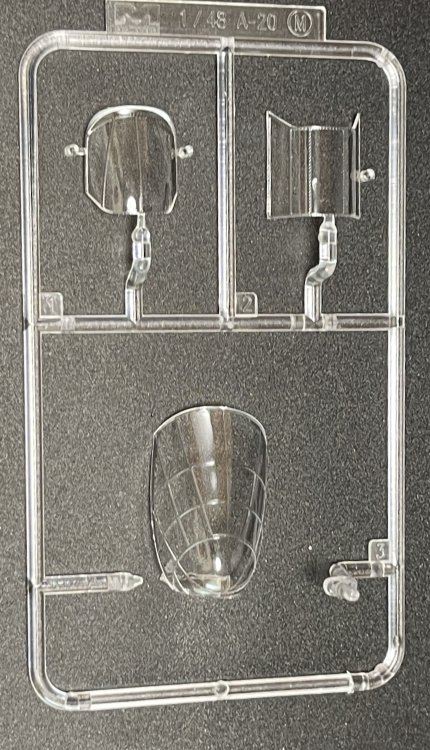
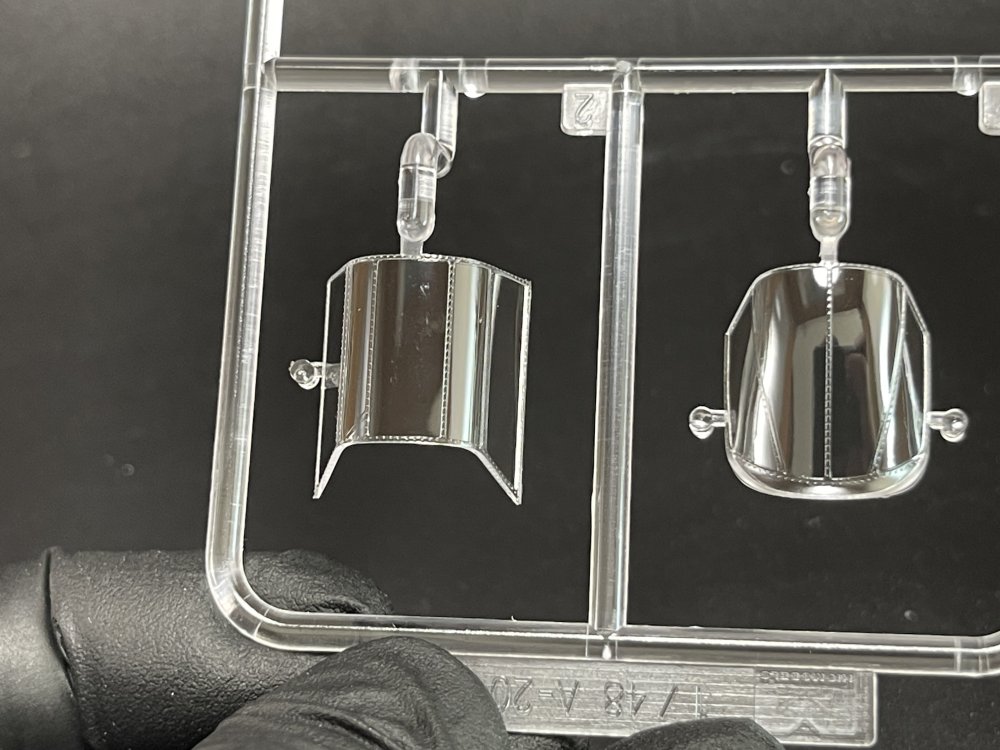
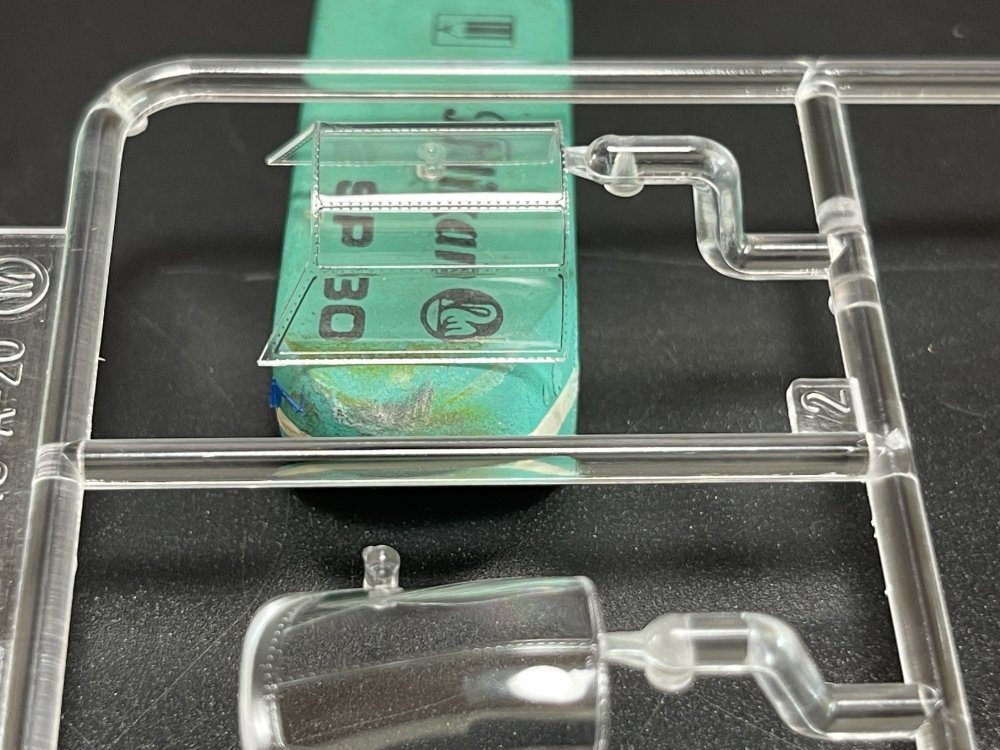
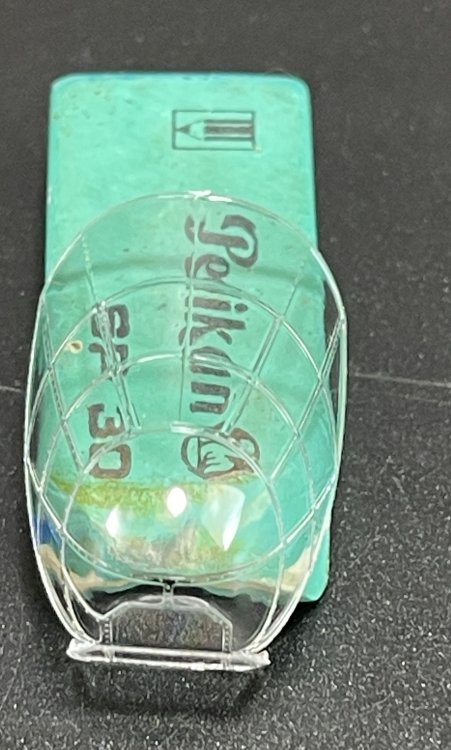
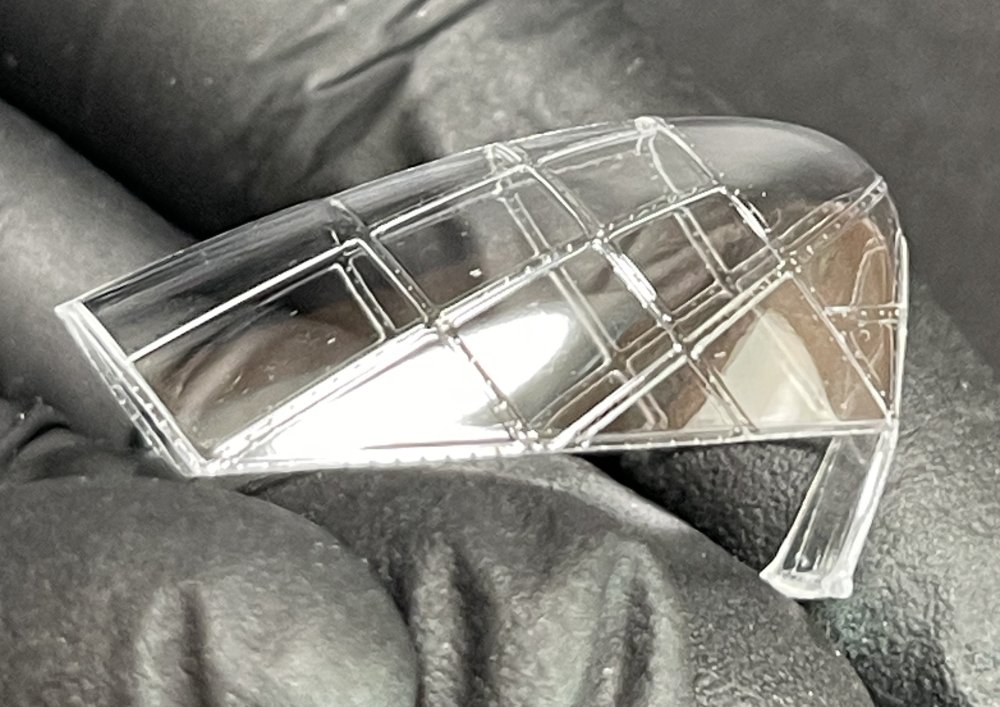
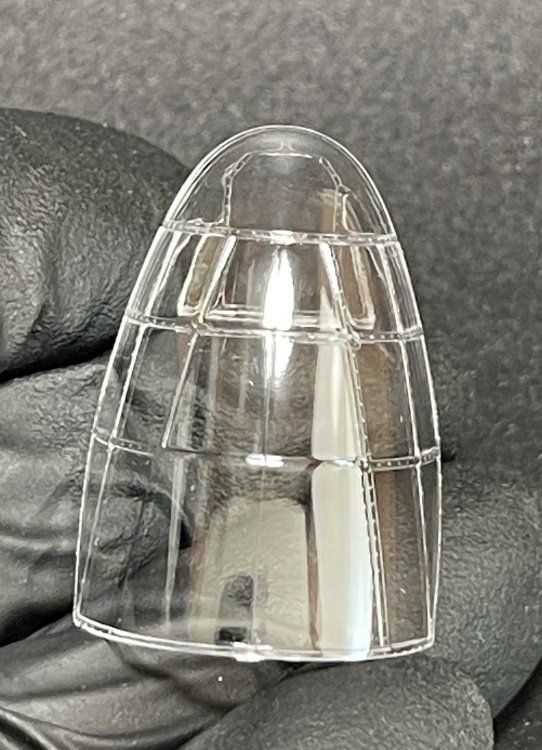
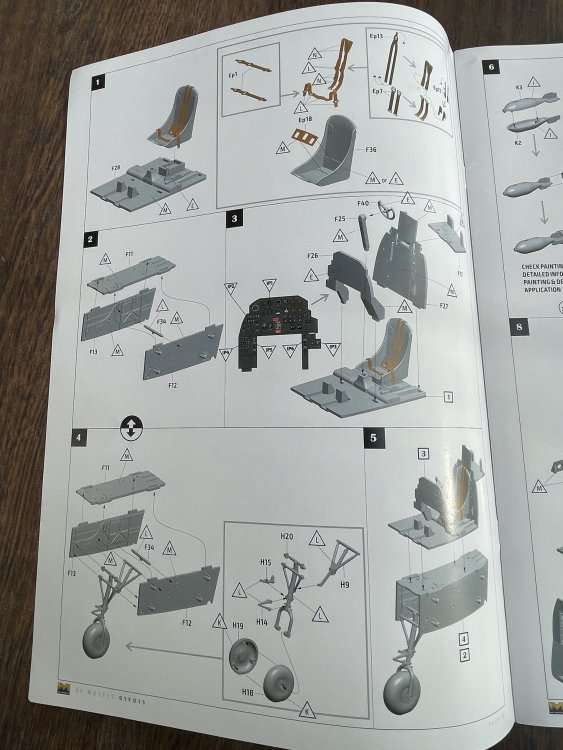
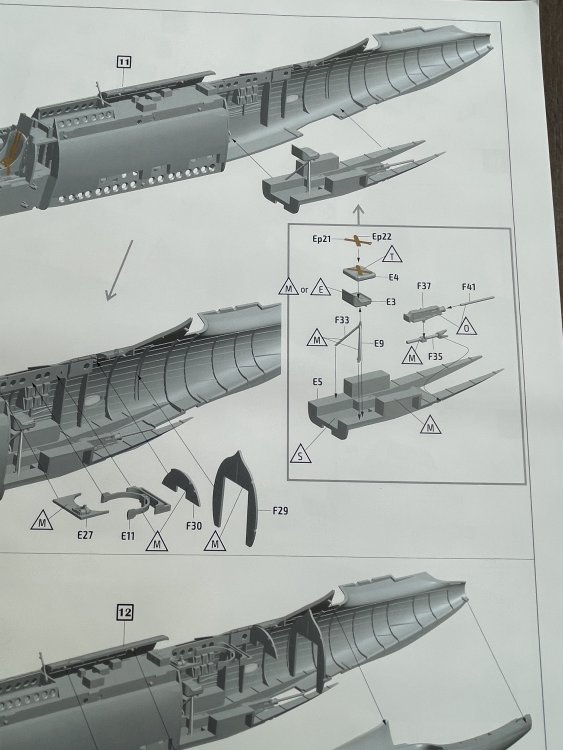
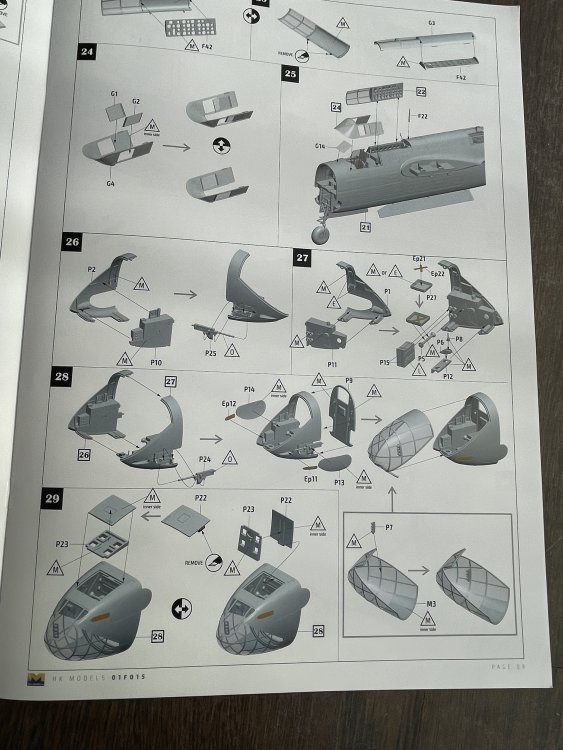
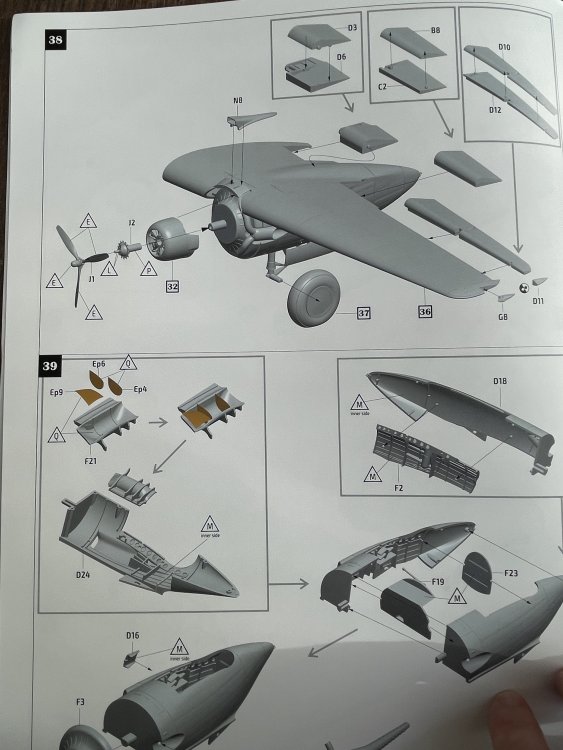
1:48 DB-7B Boston III Hong Kong Models Catalogue number 01F015 Price: around 106€ I was very curious about this release from Hong Kong Models as I had the chance to build one of the first test shot of the 1:32 A-20 solid nose For me the A-20 is the best 1:32 model from Hong Kong with their surface detail and stressed fuselage so I was eager to see the little bother in 1:48. I didn`t saw live the 1:#2 HK Models A-20J but for sure the all the surface detail and stressed fuselage effect are present. Lets check out the box. My review sample is the special edition with the weight nose and metal landing gear. These two items are well worth it so you can have no problem with the tail sitter syndrome and also no problems in handling the plane with the landing gear on and be afraid in breaking it. And a fantastic paintjob in a A4 sheets This release is most welcome to all 1:48 modeller aircraft and to the modelling aircraft world in general because finally we have a state of art and modern technologic A-20 Boston. There`s a lot of sites with hundreds of histories of the A-20 Boston/Havoc so lets me skip that. Starting for the extra metal parts. As I already said, get this version as the landing gear in metal is precious as the construction steps are quite dangerous to the integrity of the landing gear. As it made , the landing gear goes to his place before the painting so it’s quite hard no to break at some point (I know I did in 1:32). The detail gear is quite complex in the construction and because of that it’s a bit fragile. With this, you are safe. The rest of the landing gear detail is great straight from the box, even the wheels are quite good oob. As for the metal weights, it’s a simply and effective solution without thinking too much to avoid a tail sitter. The kit comprises multiple sprues of mid-grey injection-molded plastic, featuring detailed surfaces with fine molded recessed panel lines and rivet details. In fuselage and wings. While the surface details are very good and the best one in any A-20 in 1:48, are not as good as in 1:32… Naturally I shall say because making stressed skin fuselage in 1:48 is probably, nowadays, not possible. That said, by all mean, the surface wings and fuselage detail are bad. Not at all. As I already said, are the best in 1:48 for any A-20 As for the bombay, if in 1:32 was the best bombay I ever saw stright from the box, in 1:48 is no different. The only problem: it´s a too narrow view of all the beautifull detail. The cockpit details are quite good straight from the box as for the bombardier compartment in the front of the nose. The cockpit and bombardier’s compartment are well-detailed, with accurate representations of the pilot’s controls, seats, and instrumentation. The inclusion of photo-etched seat belts enhances realism, though some modelers may opt for aftermarket or some scratch for super-detailing. One thing that will give modeler some work is removing all the injection pin marks. They are quite a few (probably I think HK models could have done a little more to void these ones) but they are simple to remove as there are all raised injections marks (much better to remove than the recessed ones) The engines… The exhausts system in 1:32 was a difficult and tedious task to complete… I was curious to see if HK Model would keep the same system in 1:48… and the answer is …. No. HK models simplified a lot, making into a single part! Thank you! I personally grateful for that as it was the most non rewards task in the 1:32 model And the exhauts on this release are also great The clear parts have no distortion and quite clear in fact. Specially in this release as the all nose is in glass. Also is given a small photo-etched fret that provides seat belts and internal structural components like a mesh to the engines gondolas. As for schemes options, a decal sheets if given with to option and a few stencils: 1. Boston III Z2216 RH-A, 88 Squadron, RAF Attlebridge, Norfolk, UK, August 1942. 2. DB-7B AL445 K, 15th Bomb Squadron, USAAF, RAF Molesworth, Cambridgeshire, UK, Summer 1942. The decals are printed with good color density and registration with two lovely nose arts. Decals are made by Cartograf so quality is guaranteed. , As for the instruction, and already made three Hong Kong Models, they are quite comprehensive with references color chart with Mr. Color, Tamiya paints. Conclusion Compared to HK Models’ own 1:32 A-20 Havoc that I already made, the 1:48 Boston III is smaller and less complex but retains similar attention to surface detail and engineering. No the same detail specialty concerning the stressed skin on the fuselage and wings, so the surface details is very good but no as good as in 1:32. Still is a fantastic kit with all the details in box is more than enough to be build a fantastic replica. It is the best Boston in 1:48, hands down… but also the most expensive one, hands down. This model is going to the top of to do pile! The detail out of the box is very good and it will make a very good replica. Highly recommend this to intermediate/expert modeler


- 4 replies
-
- 5
-
-
-
- hong kong models
- 1:48
- (and 2 more)