
Fran
-
Posts
2,289 -
Joined
-
Last visited
Content Type
Profiles
Forums
Events
Gallery
Everything posted by Fran
-

LSM Modelling News 2023 merged Fran and Artful69’s threads
Fran replied to Fran's topic in Modelling Discussion
An He-111 in 1:35!!! Wow! That some news entering 2024! 1:35 is very good to add tons of accessories for future dioramas! -
Howdy! what is the model kit of the year 2023??? For me, probably the HK Models A-20G! it’s a fantastic kit making a new benchmark for HK Models.
-
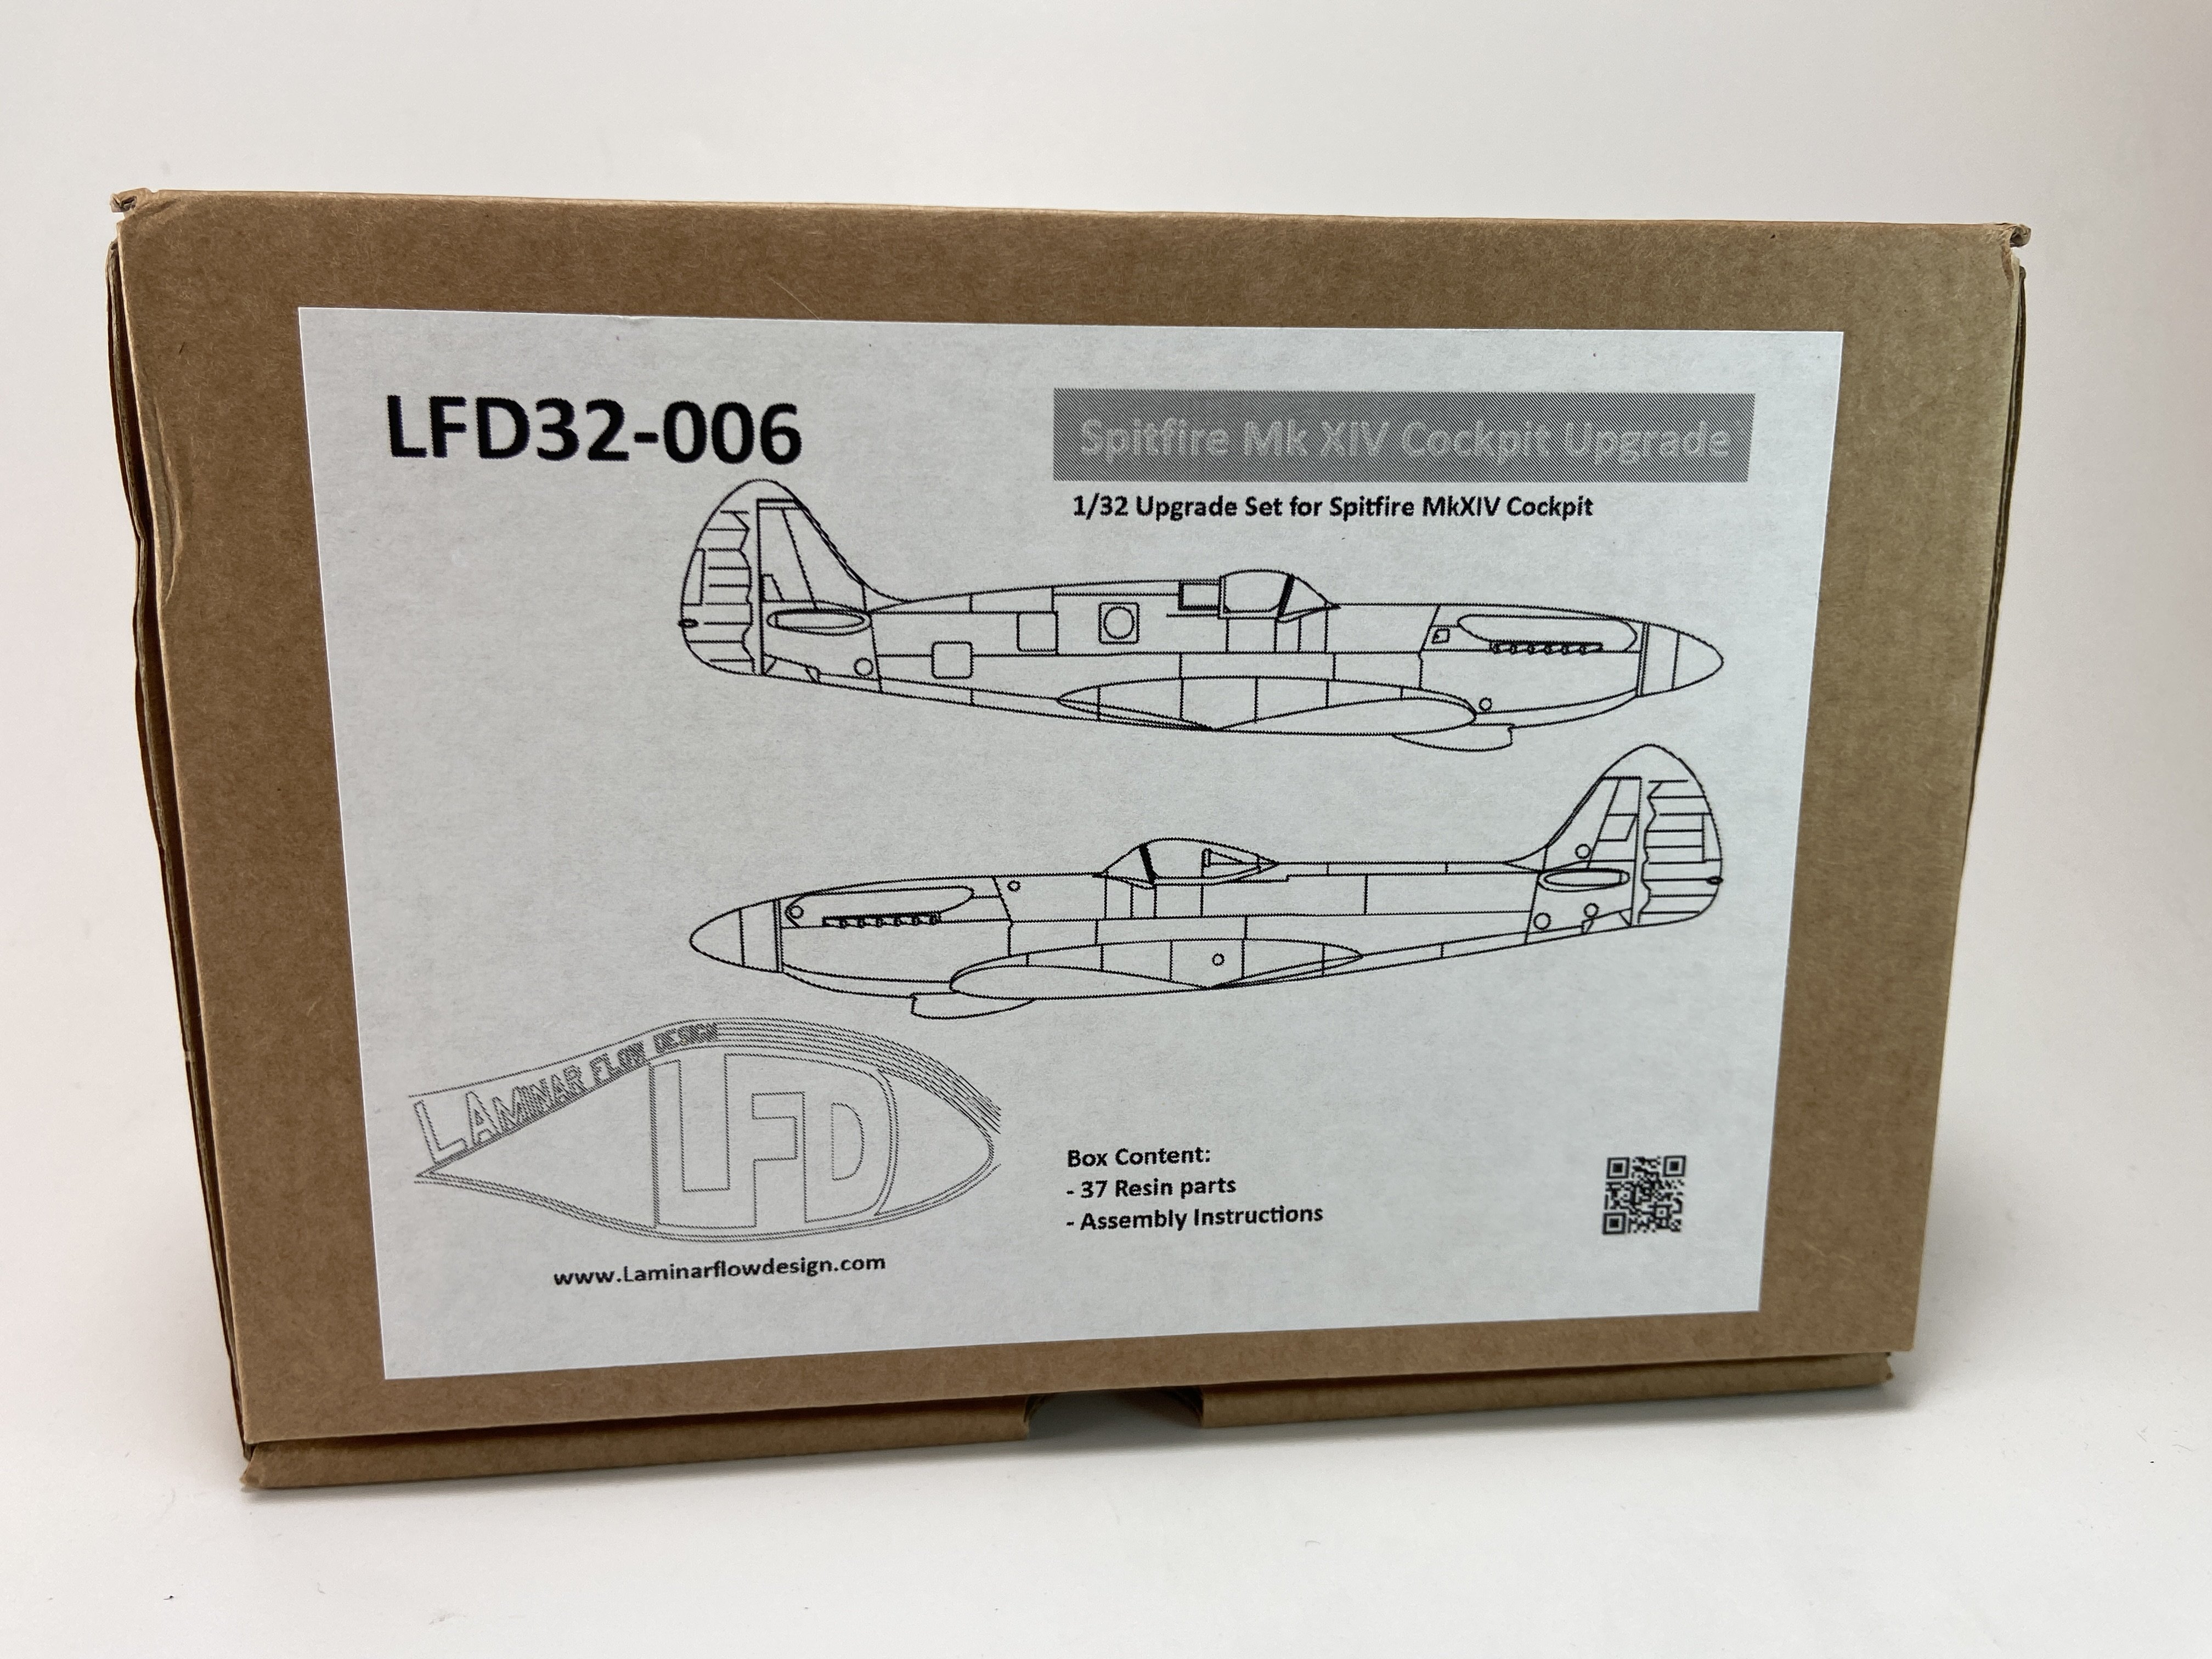
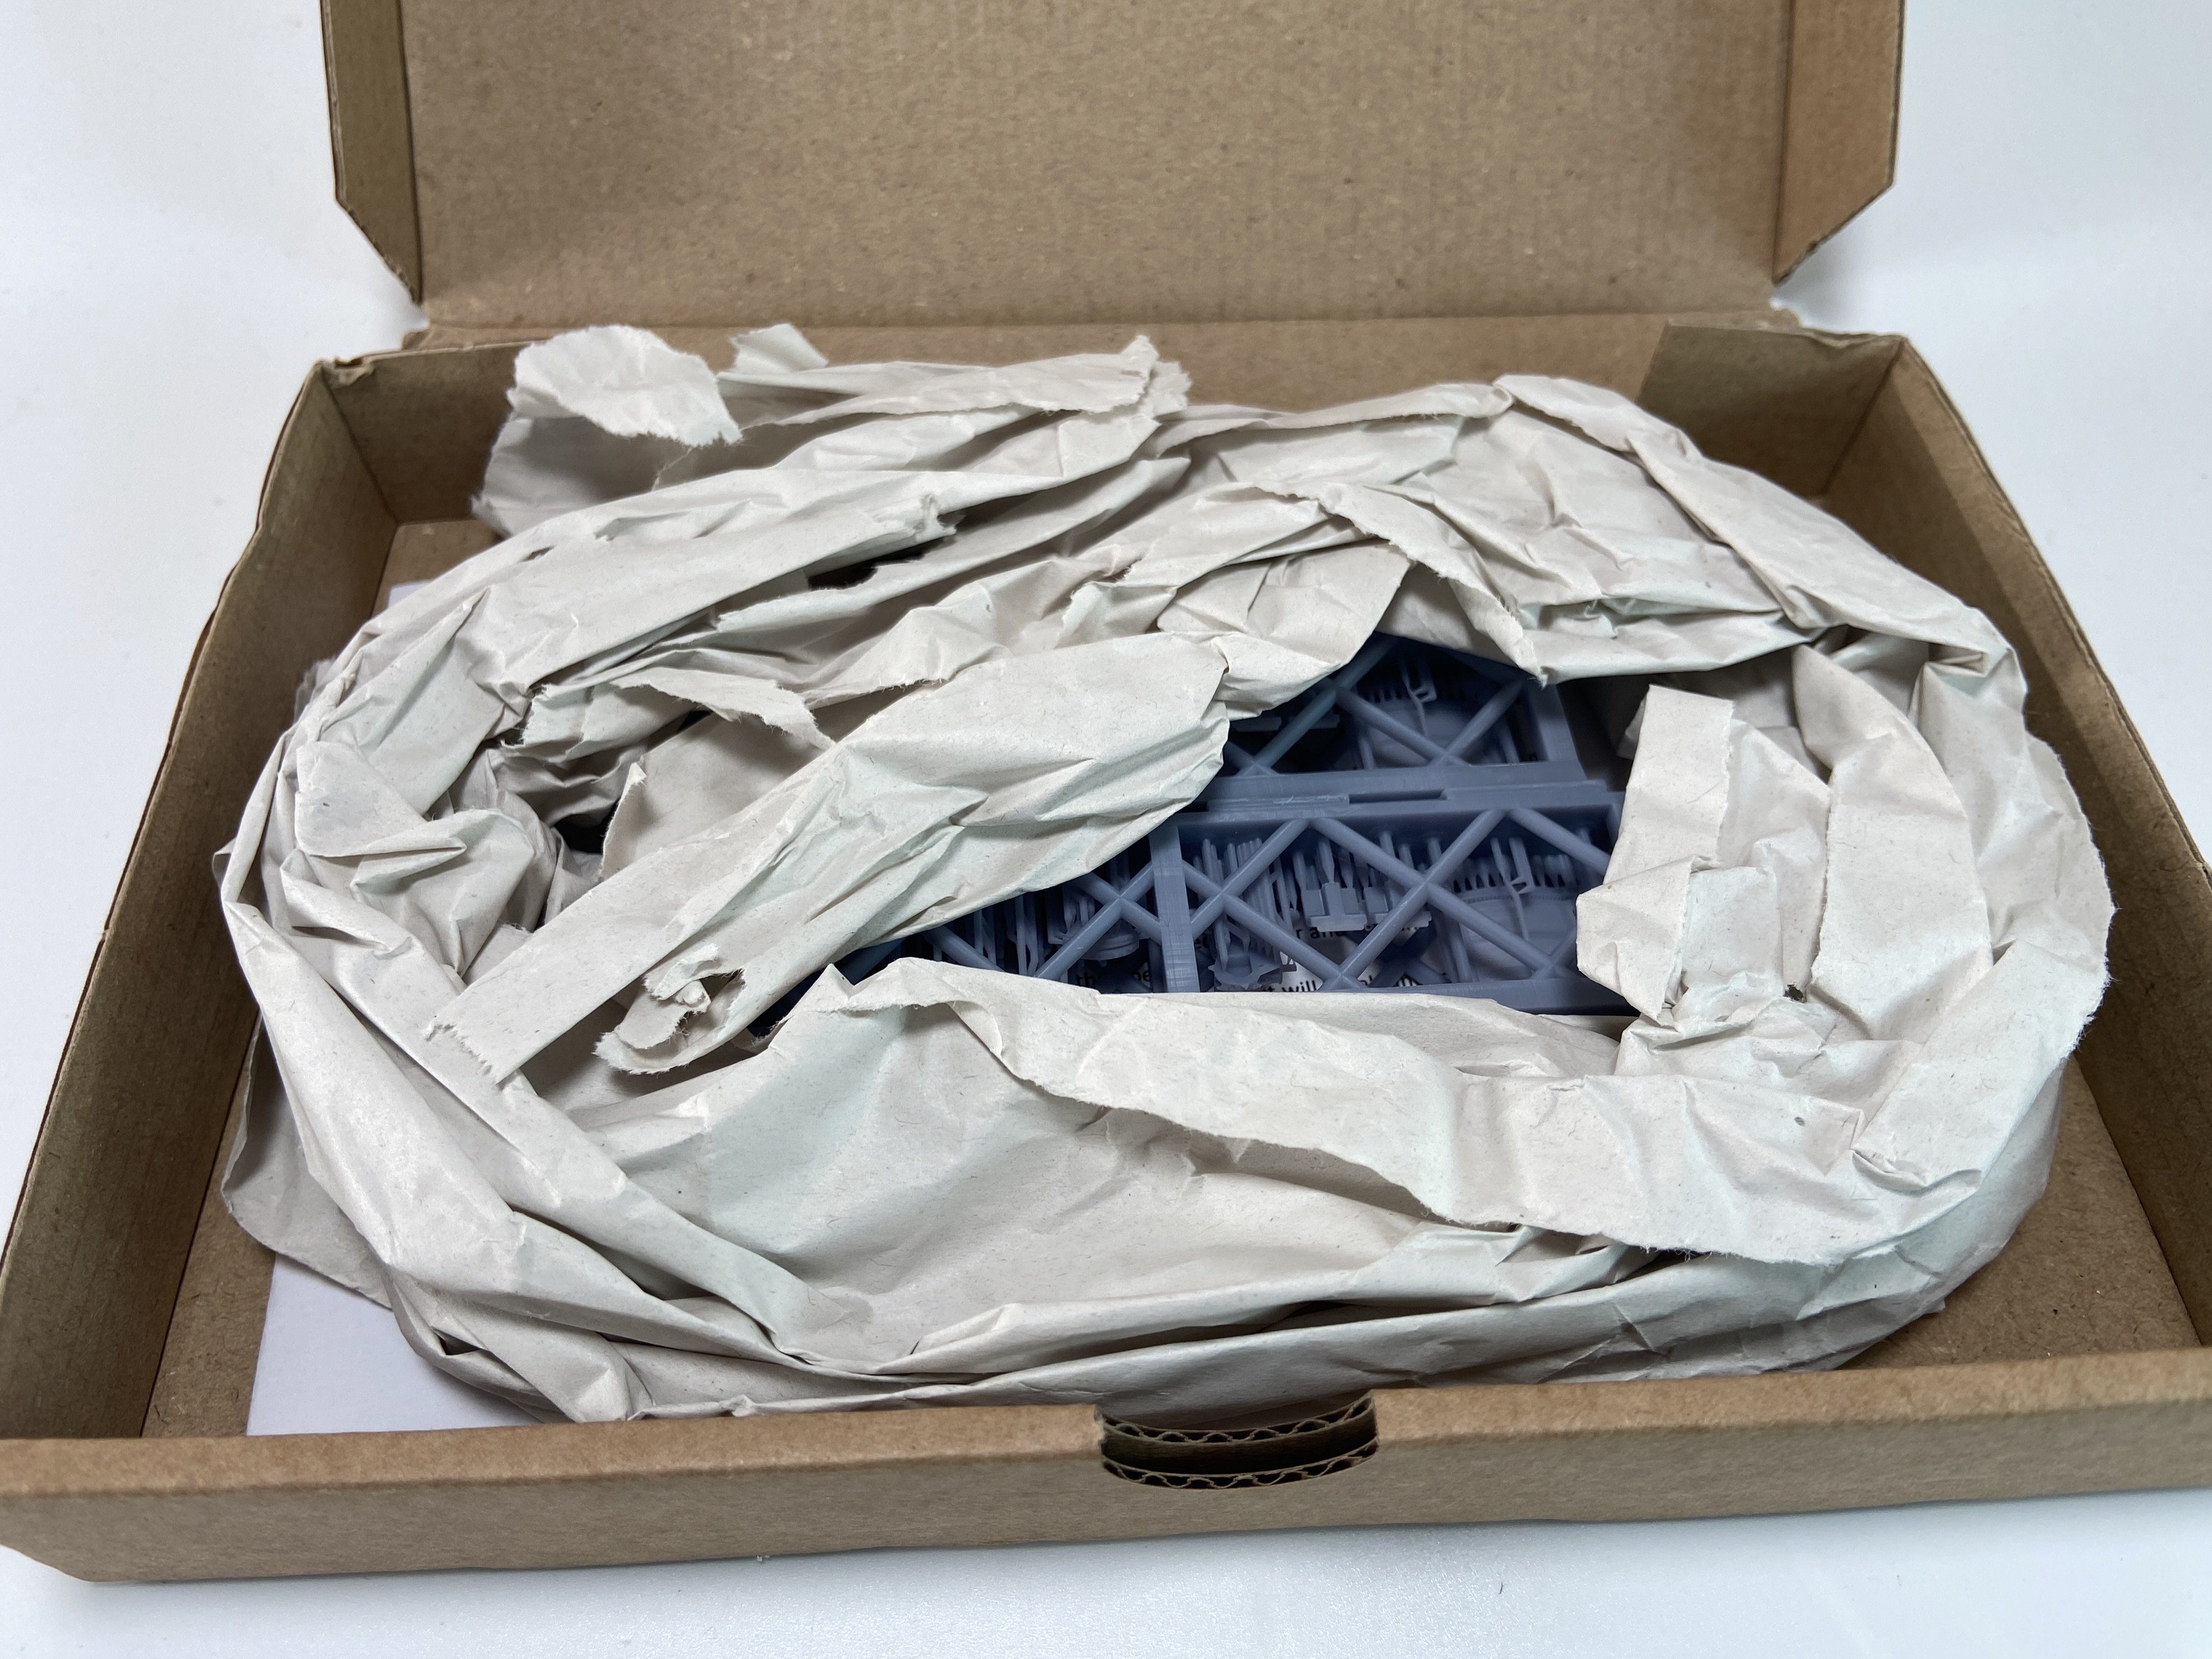
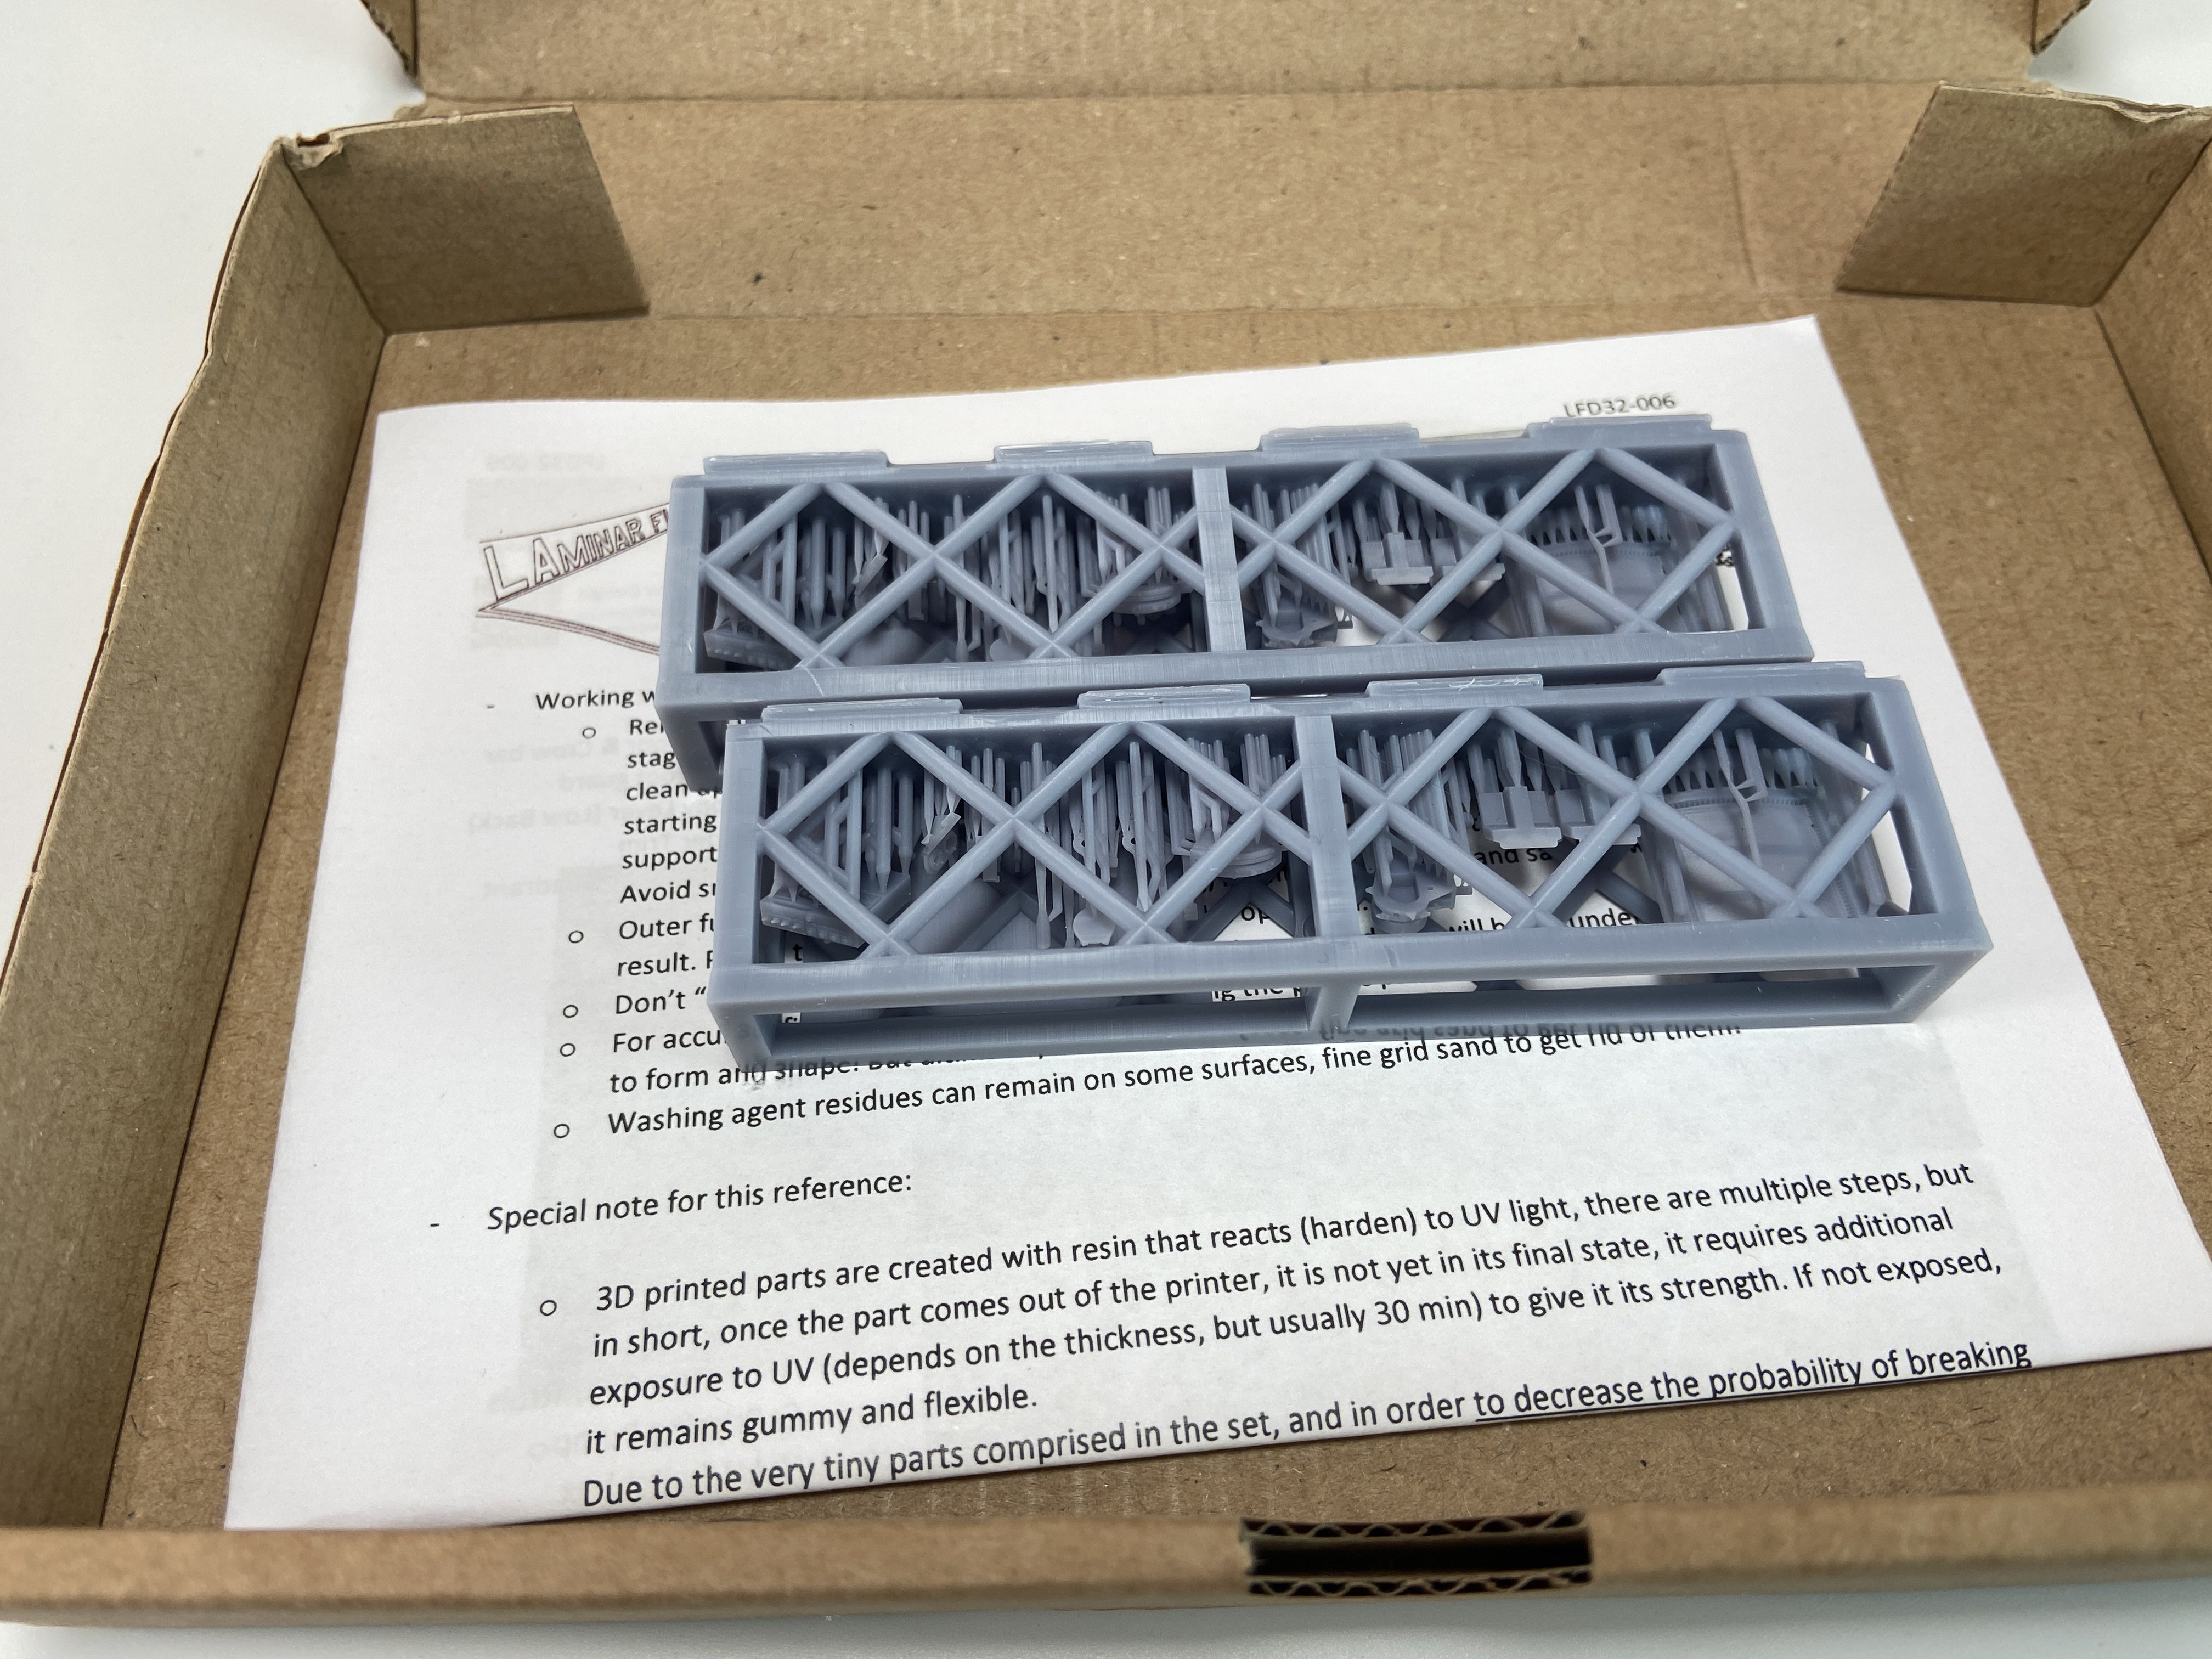
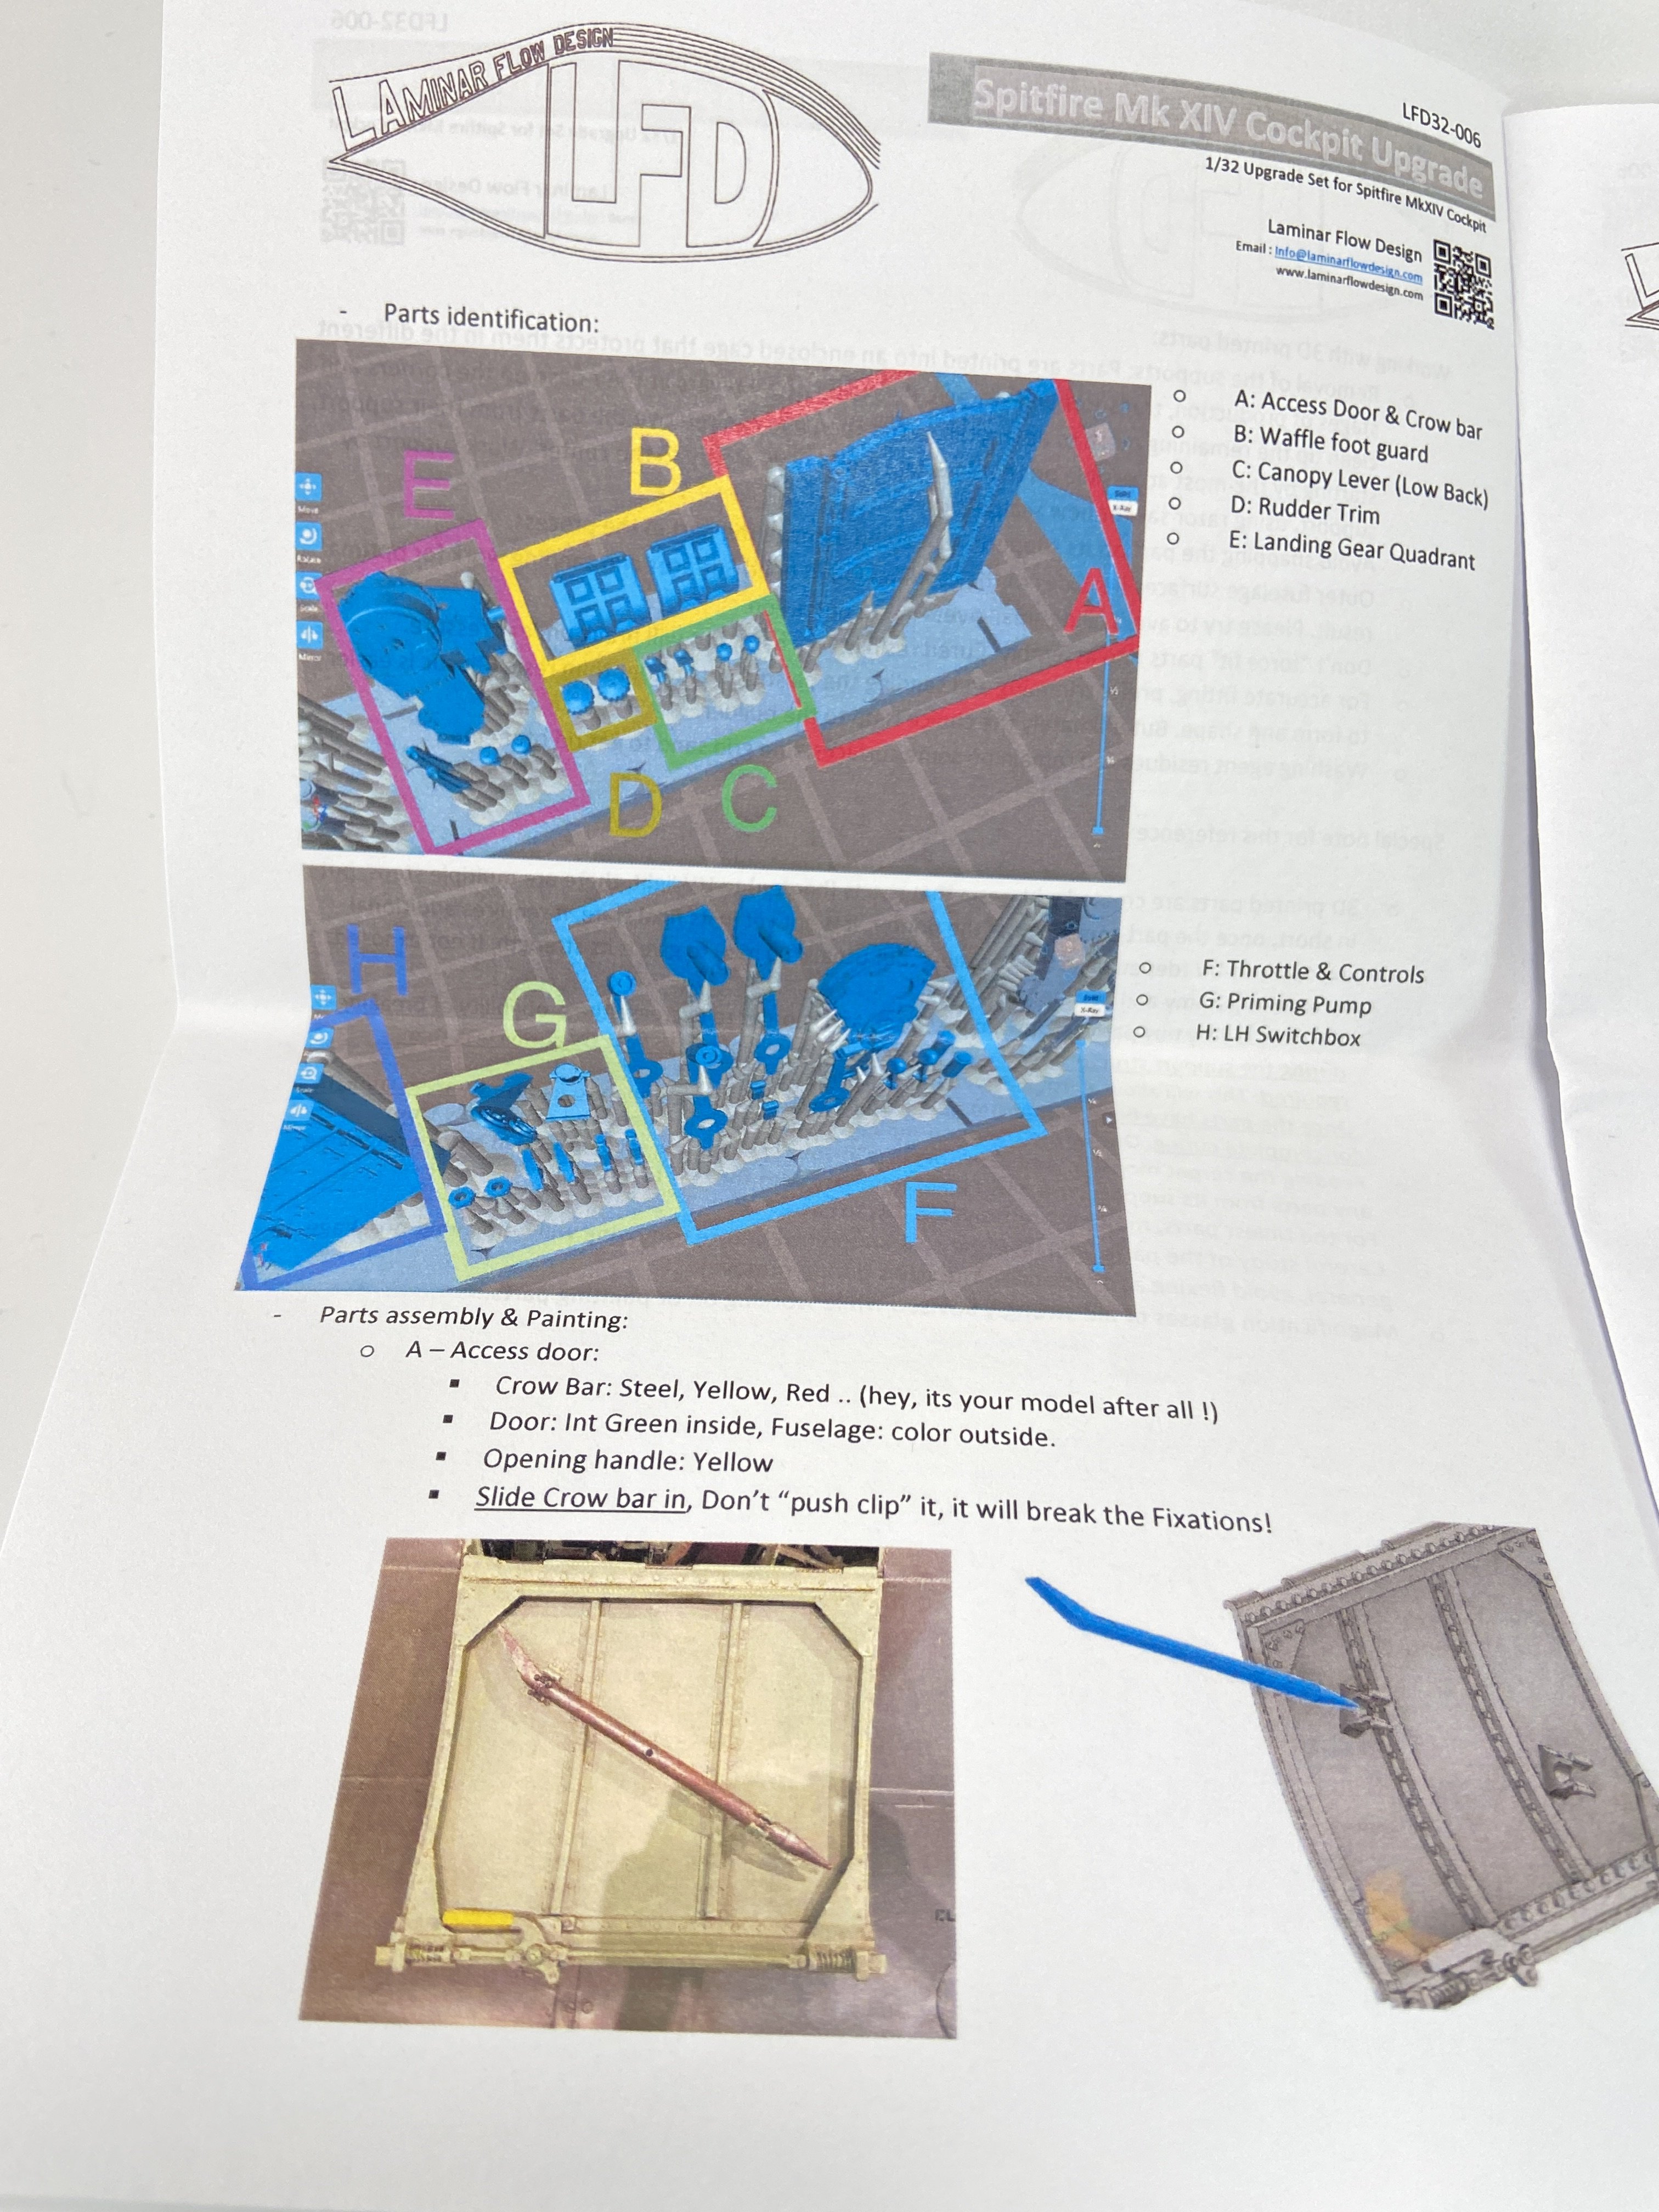
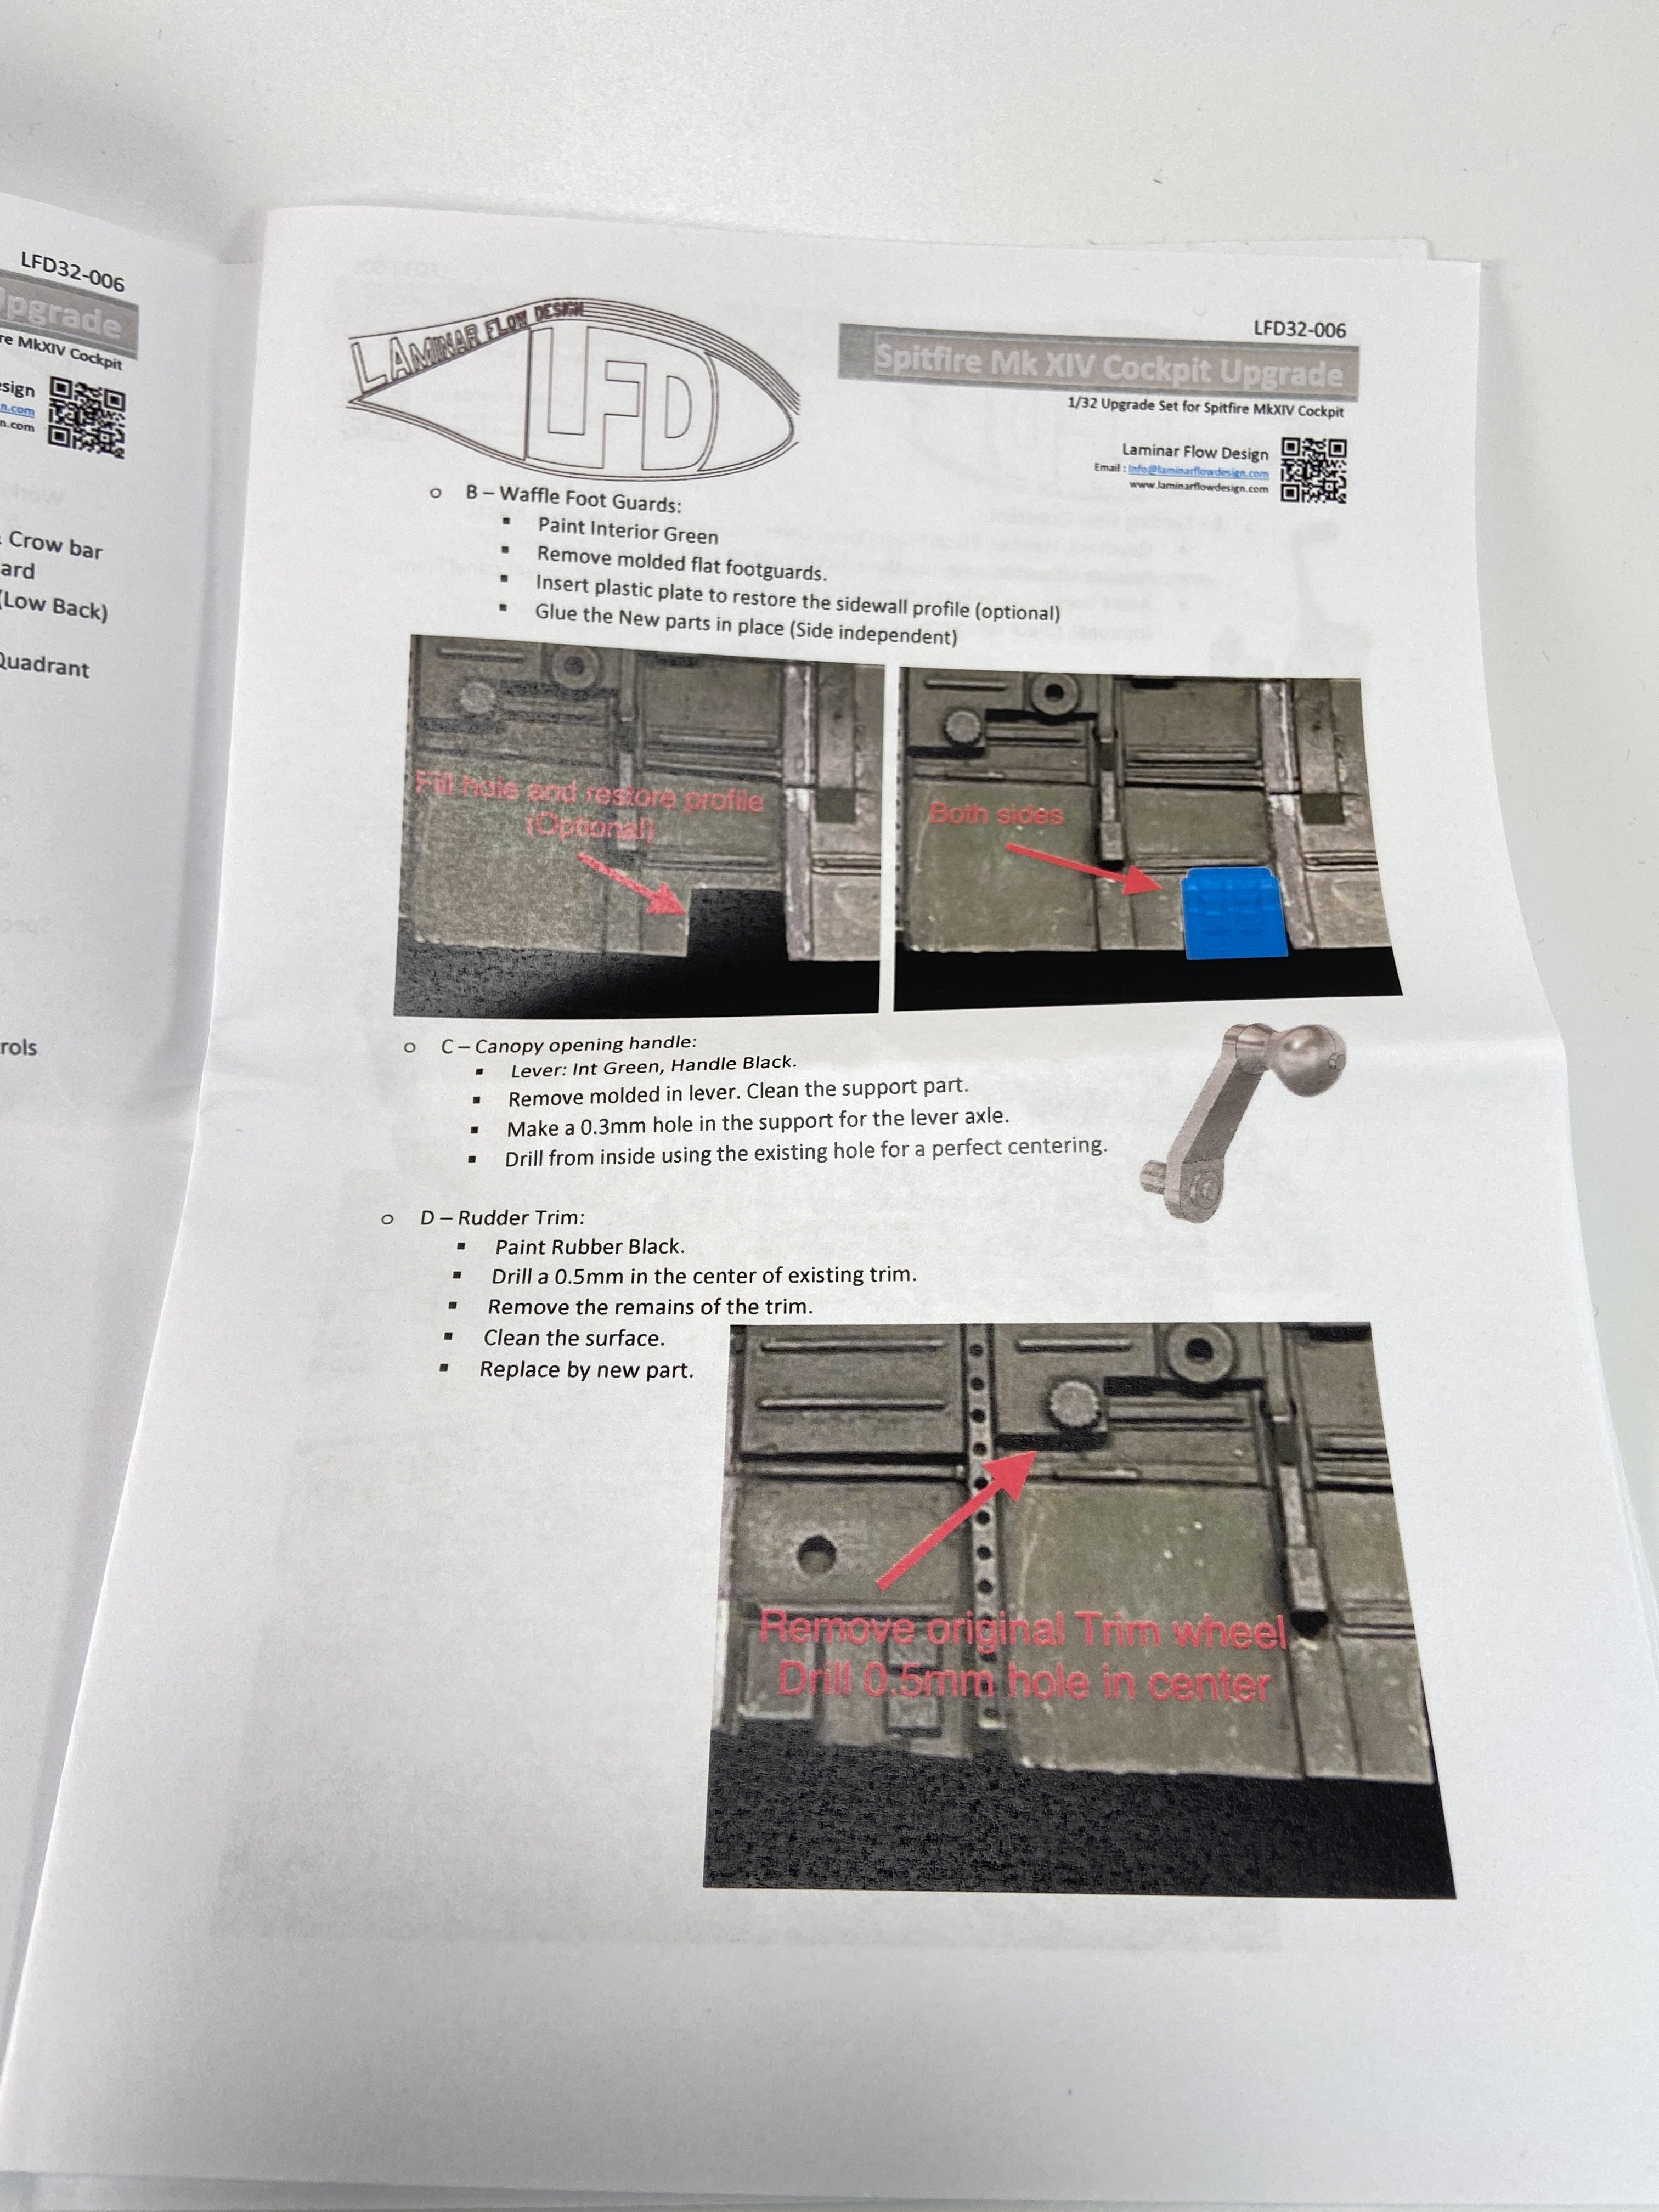
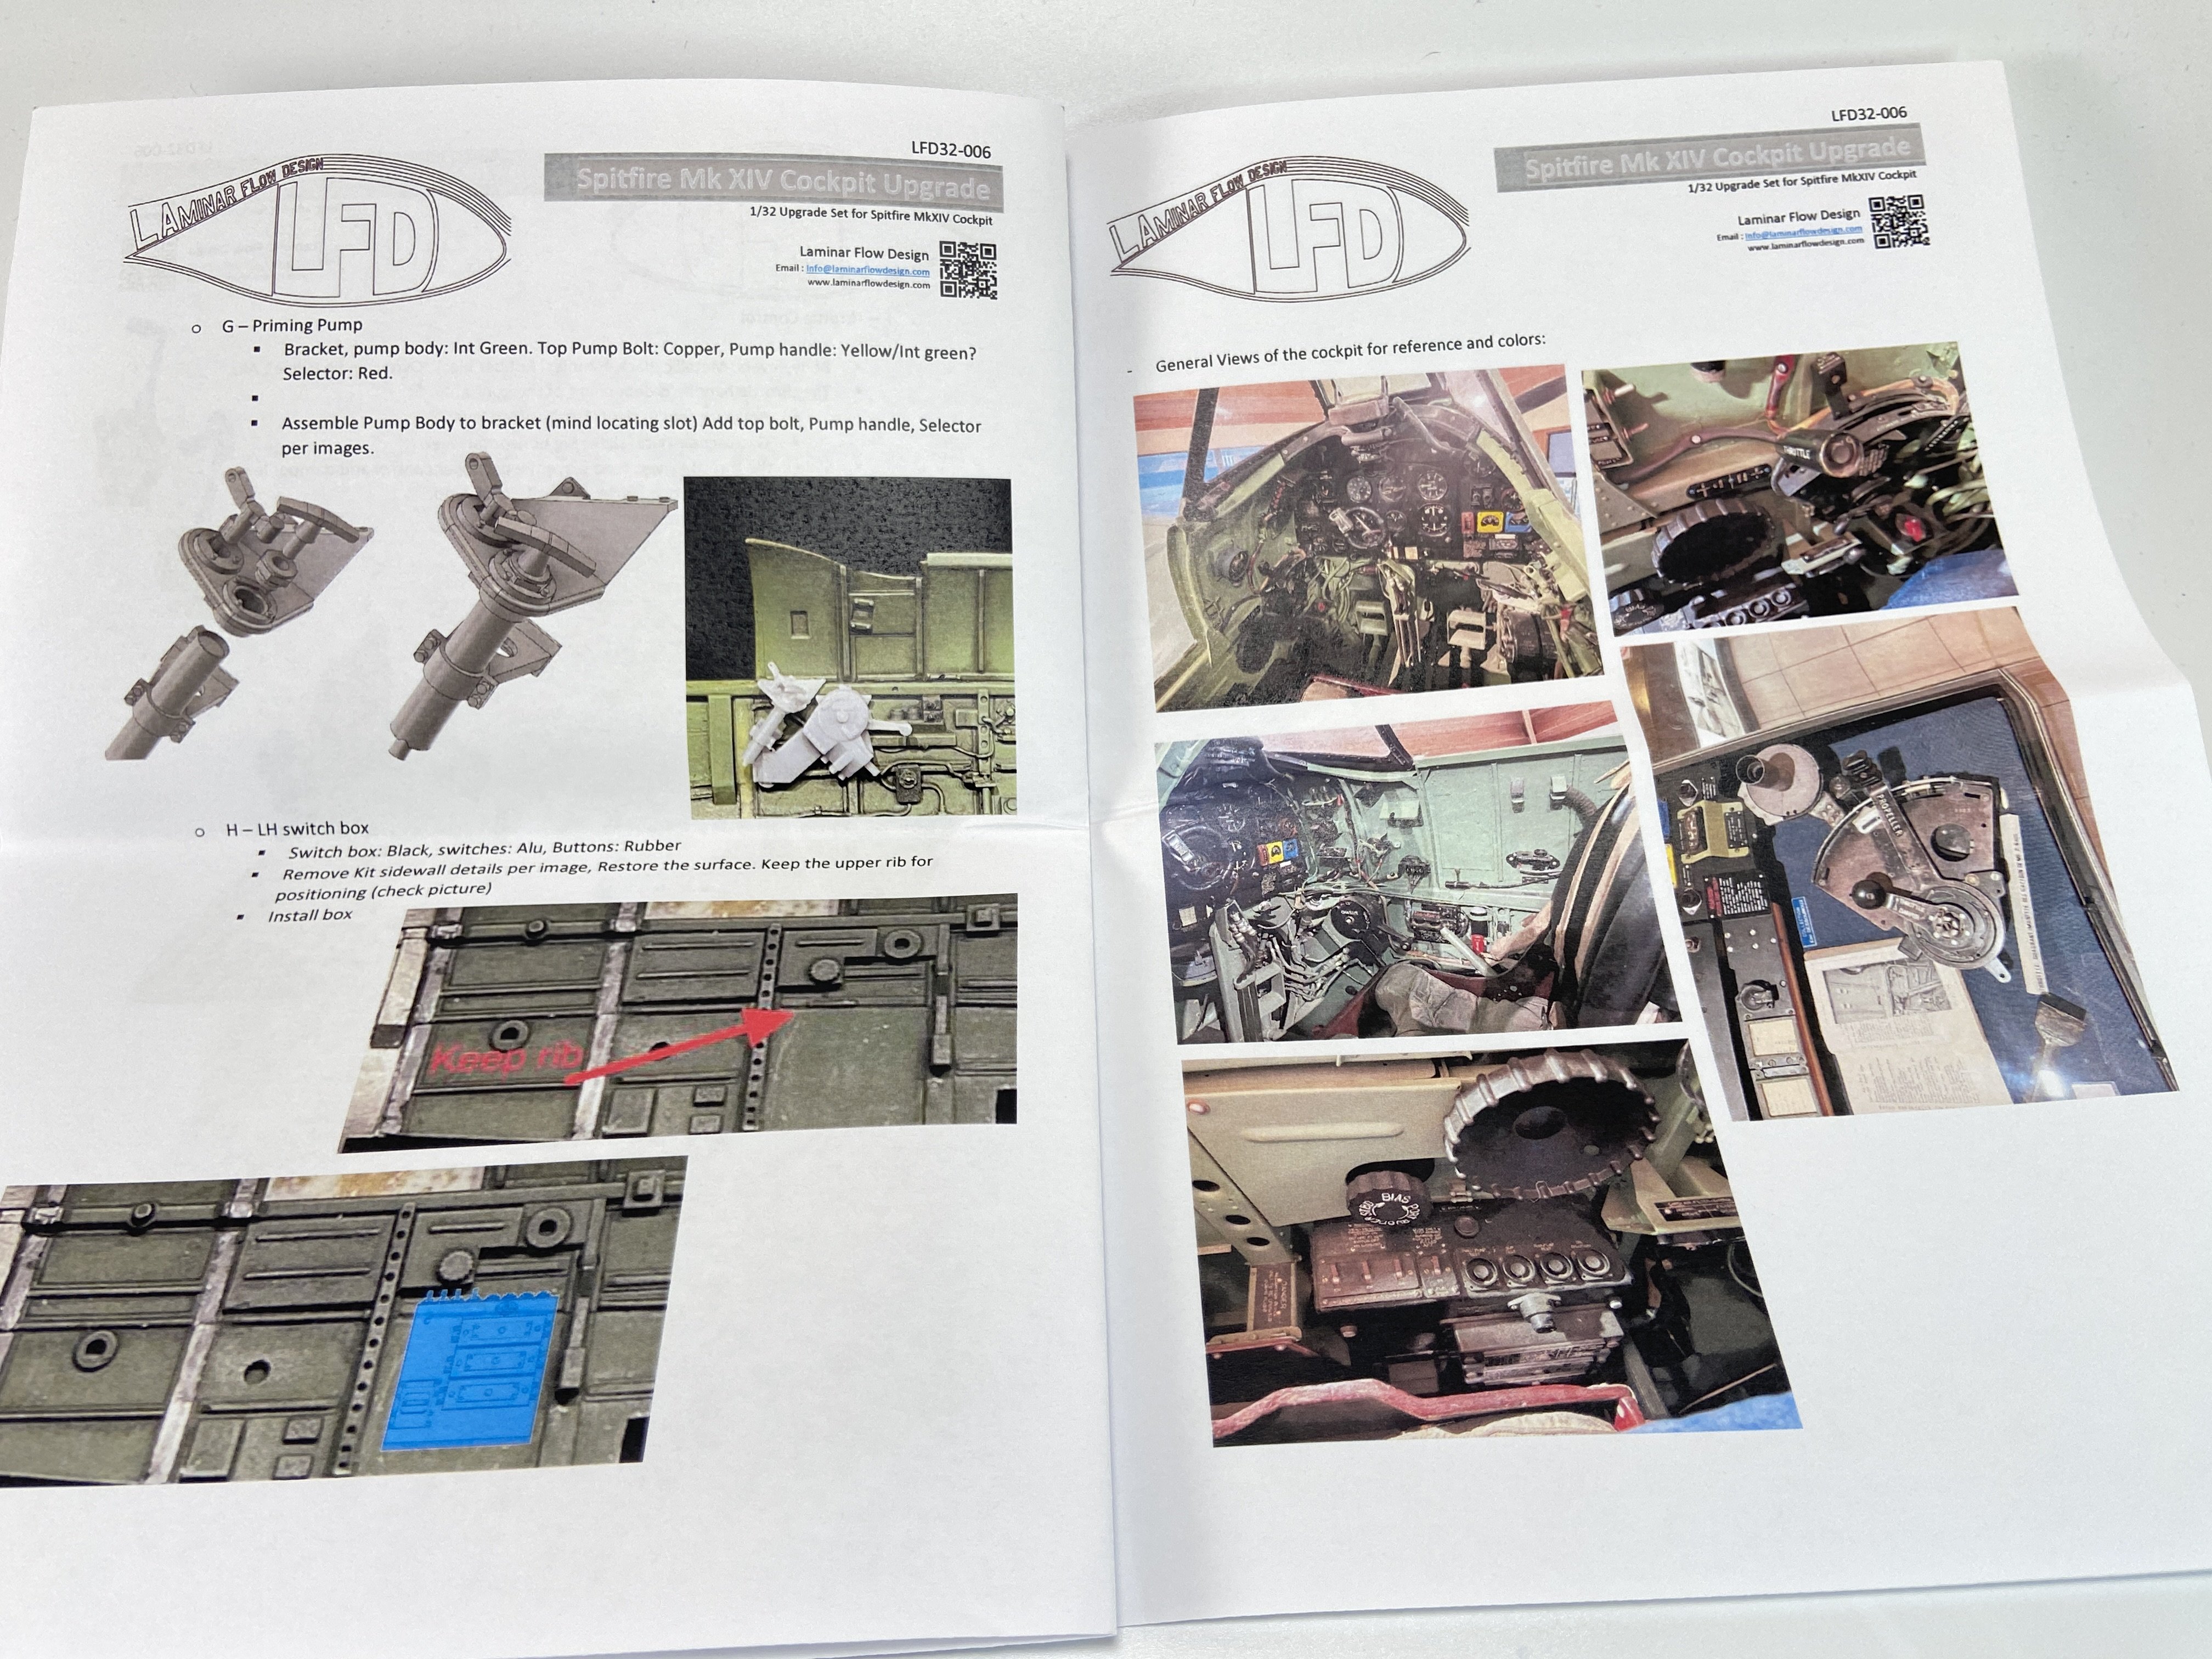
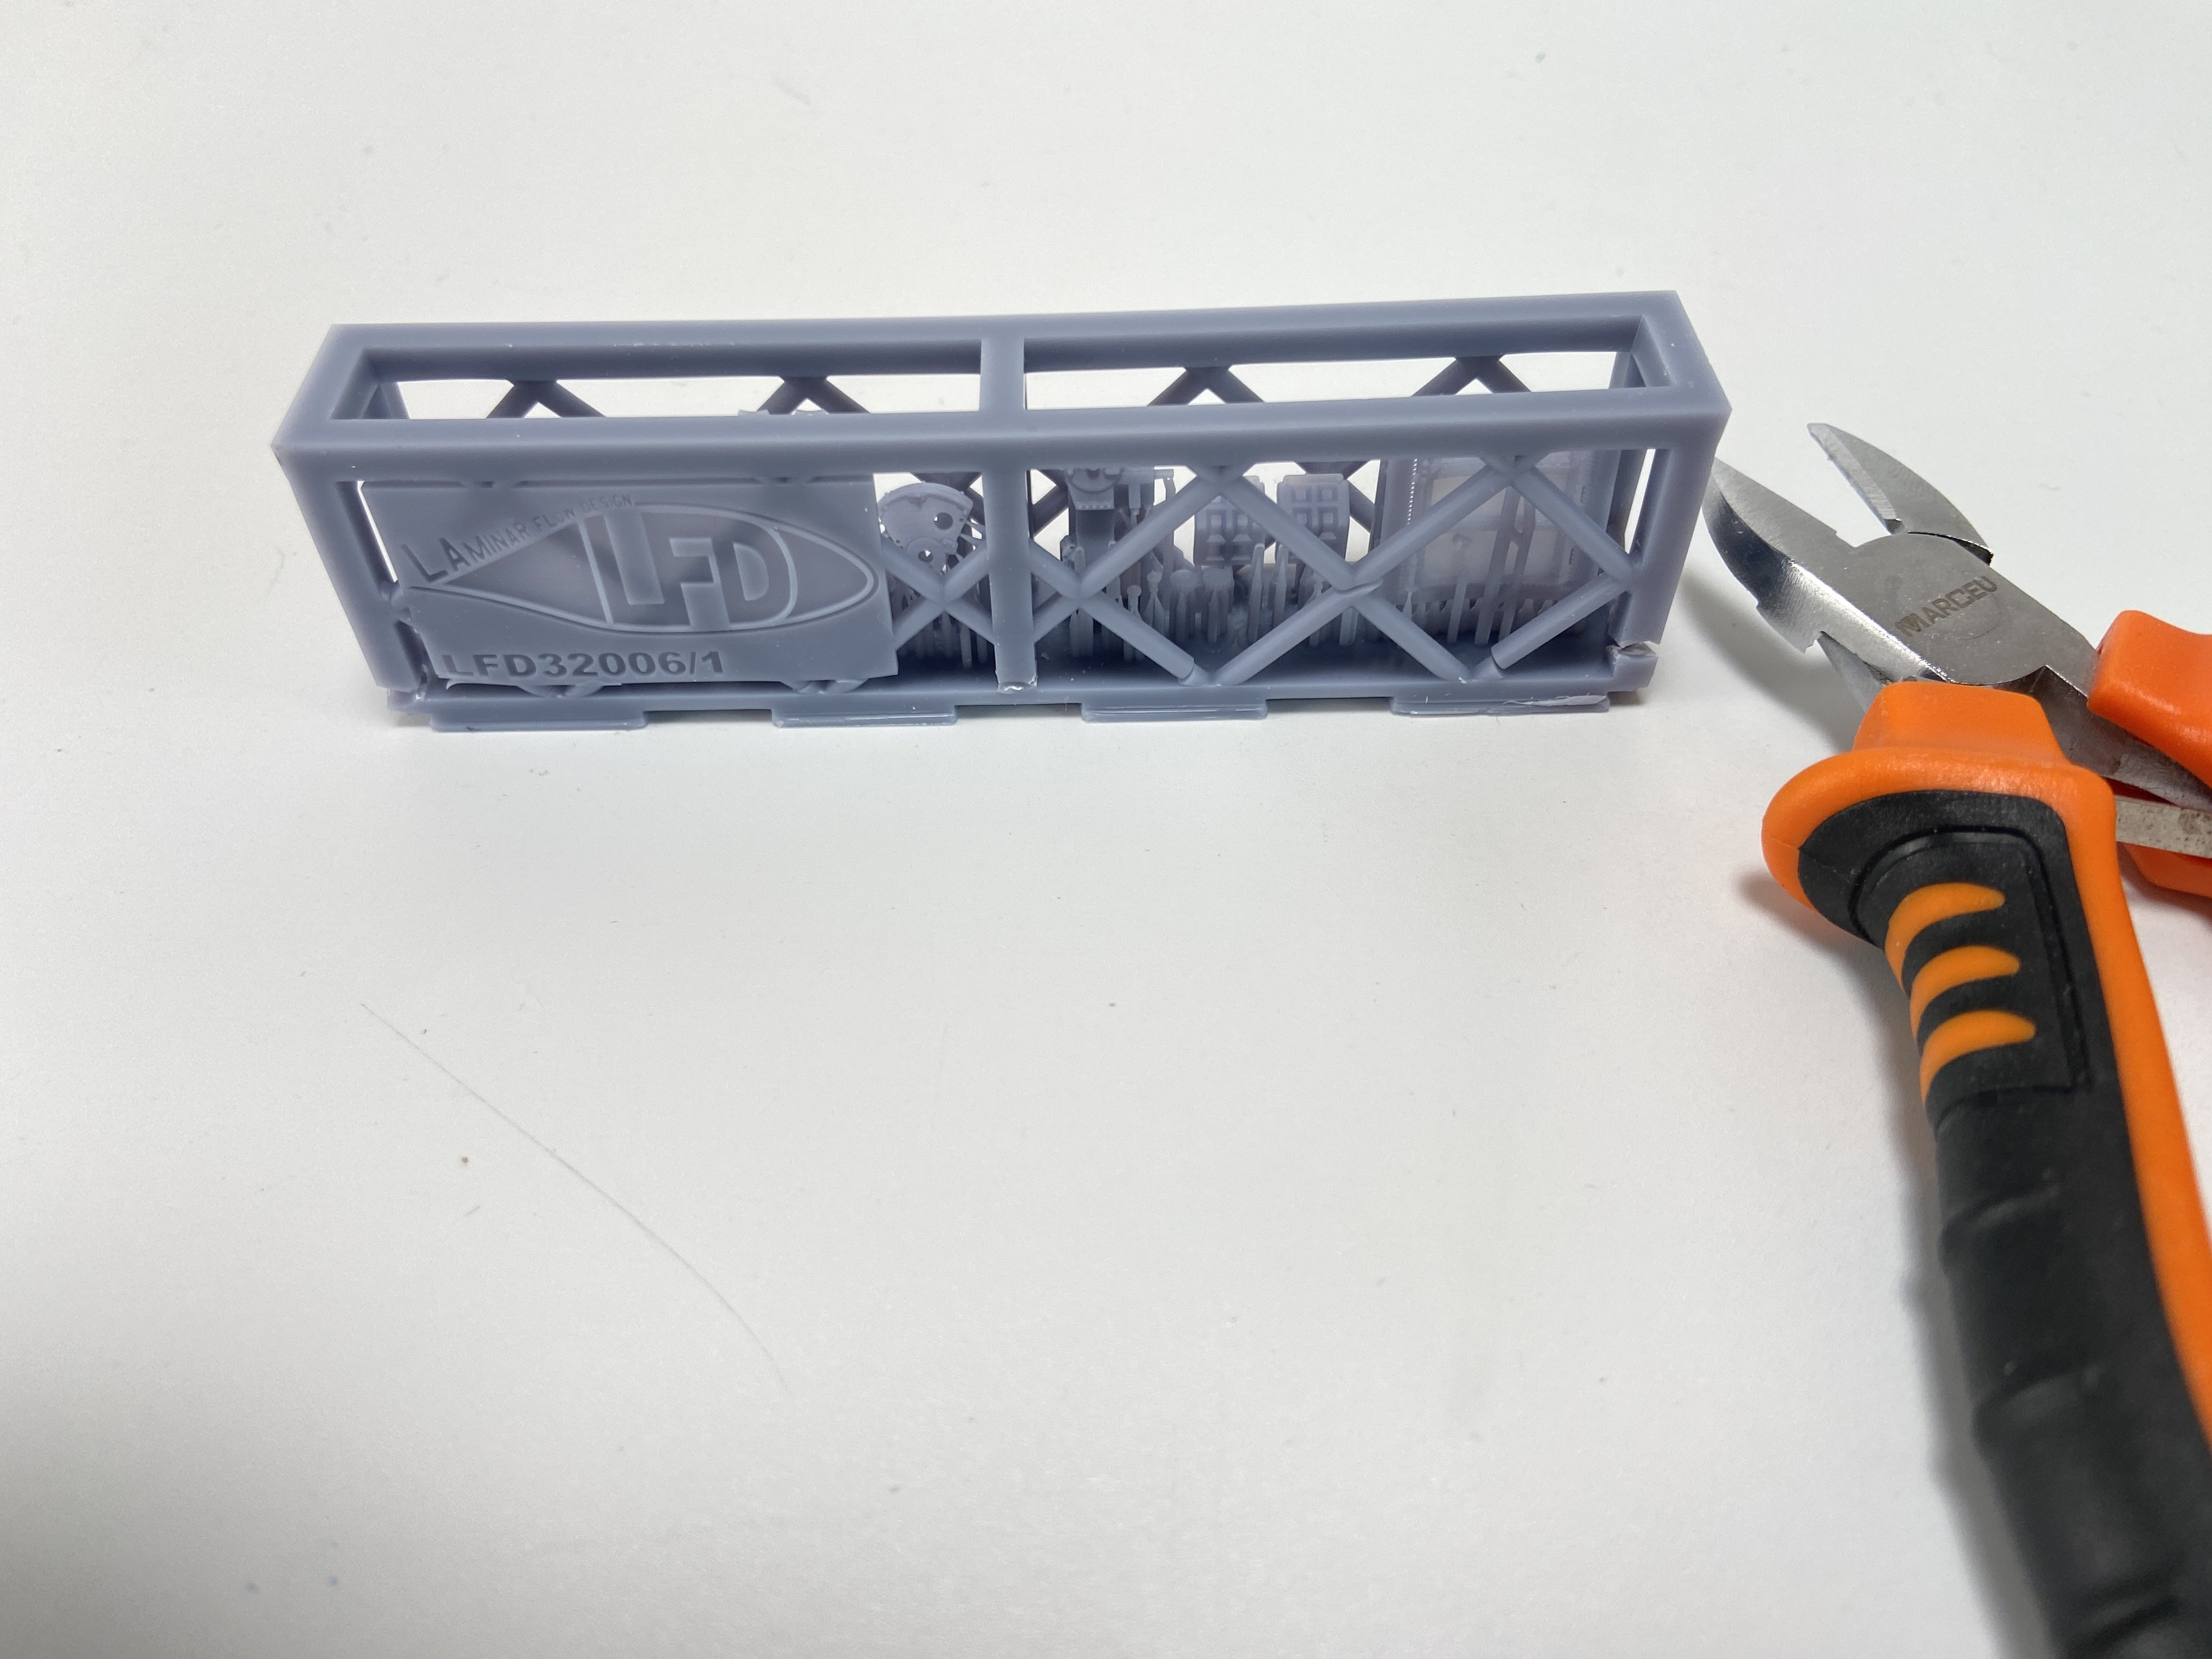
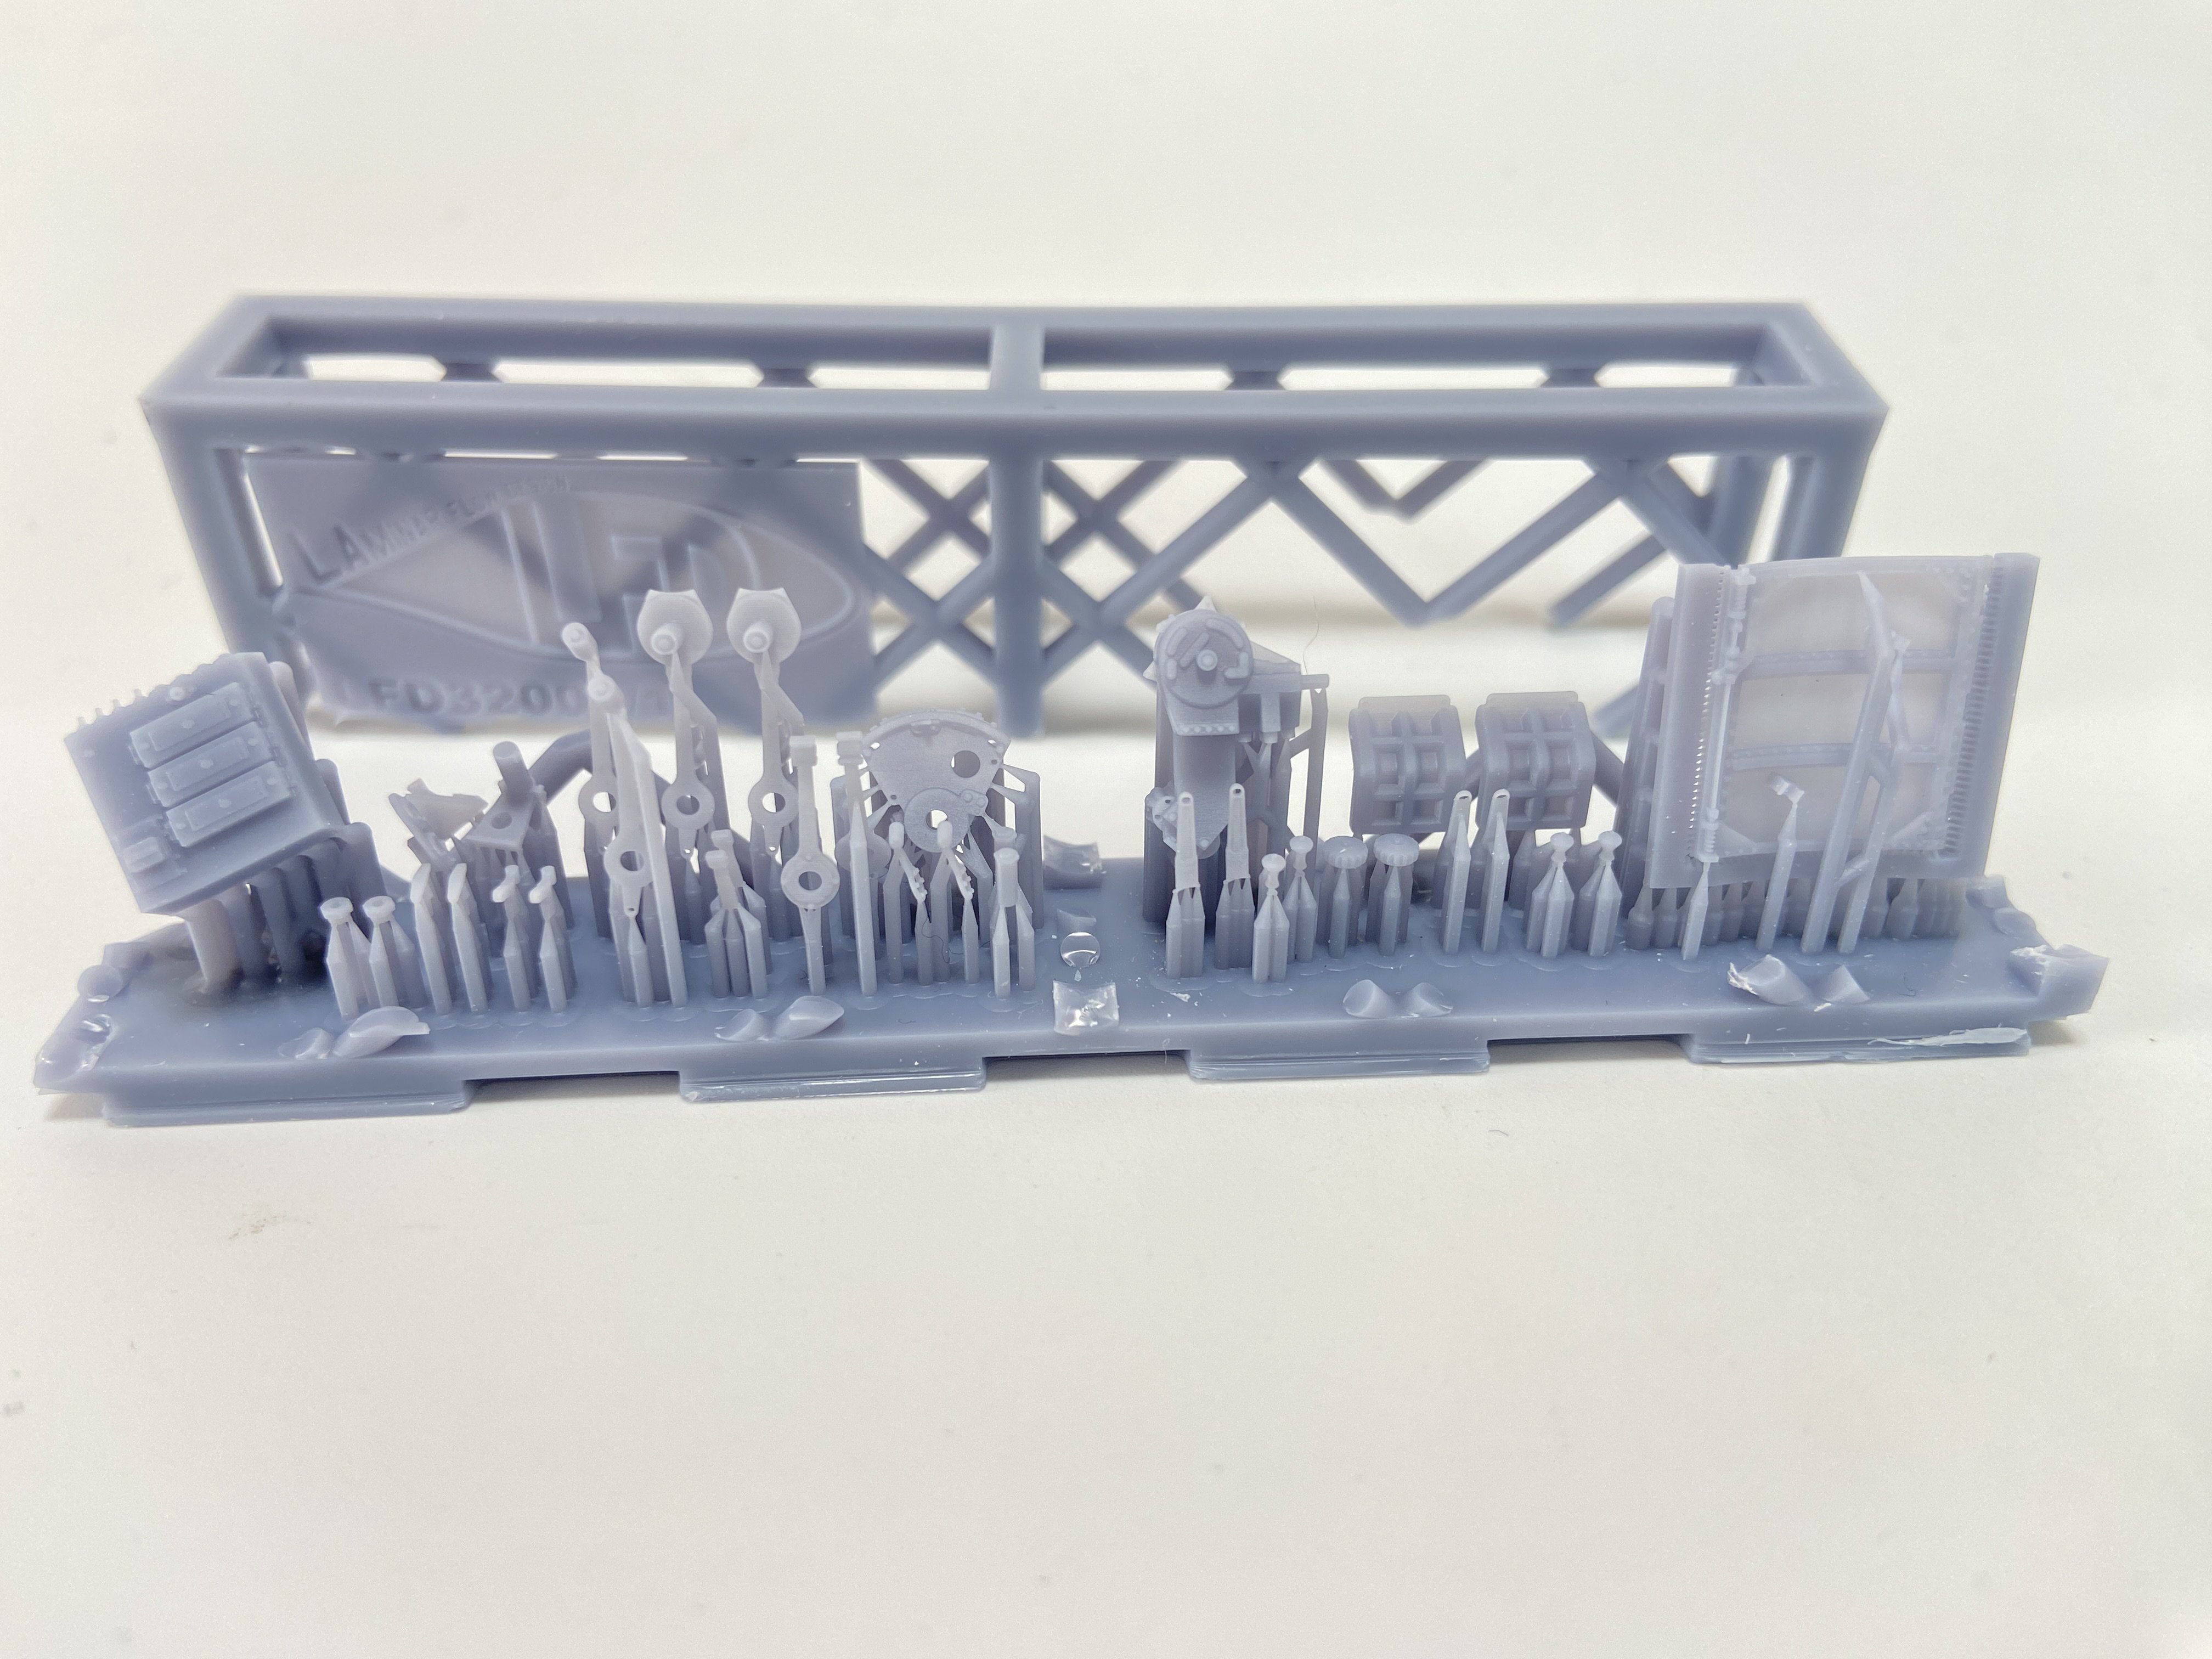
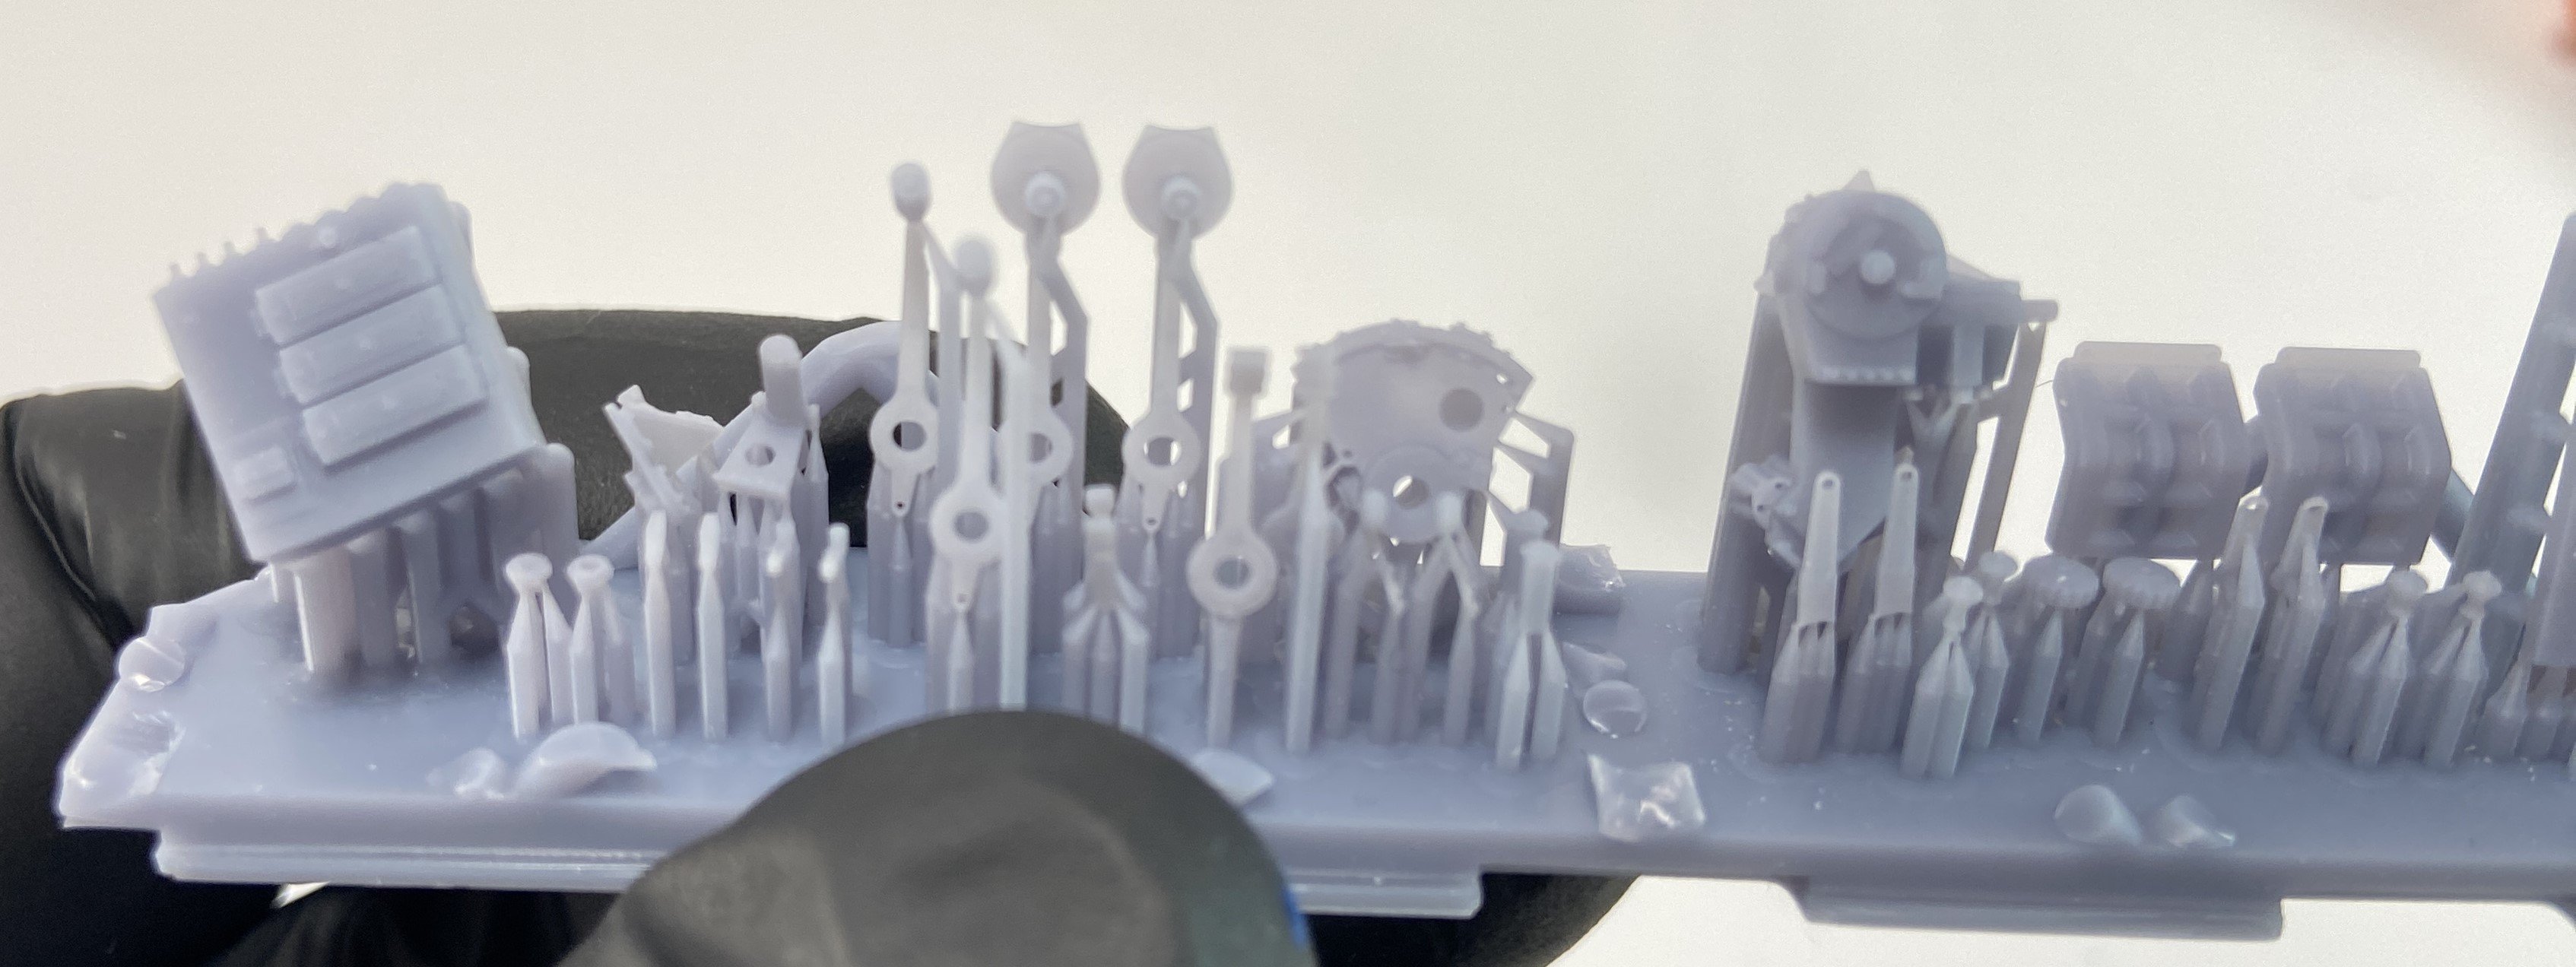
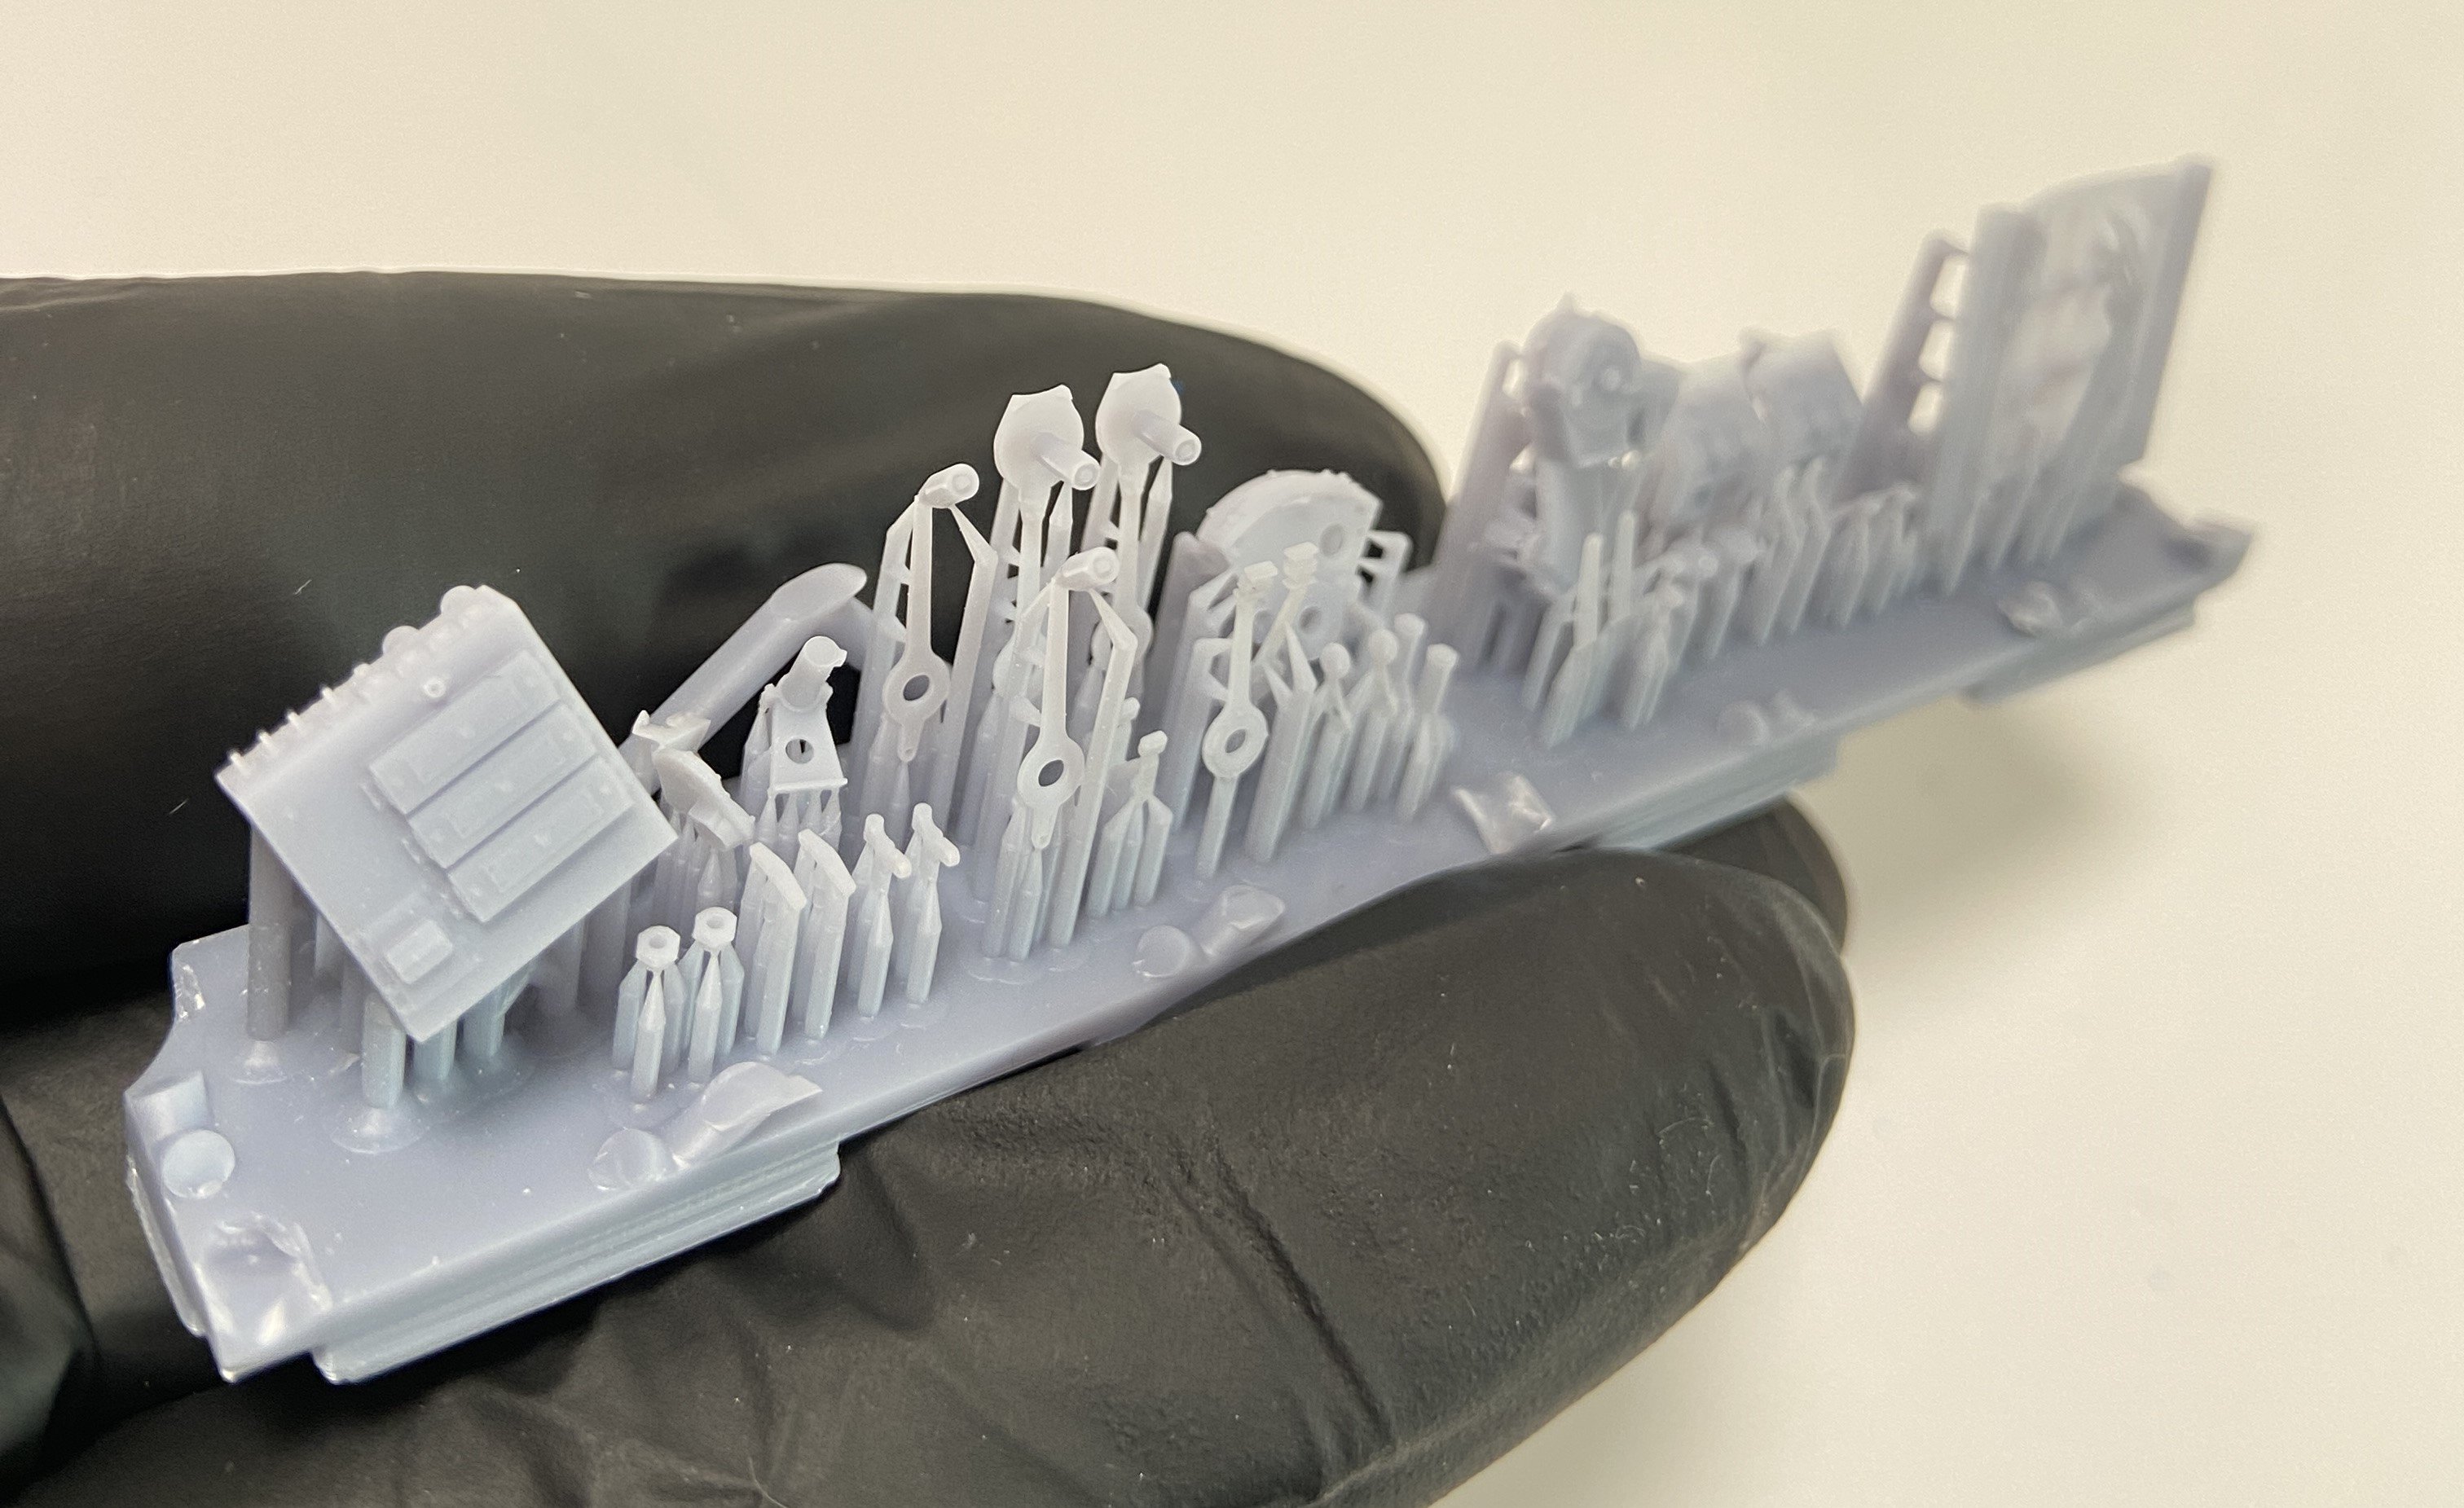
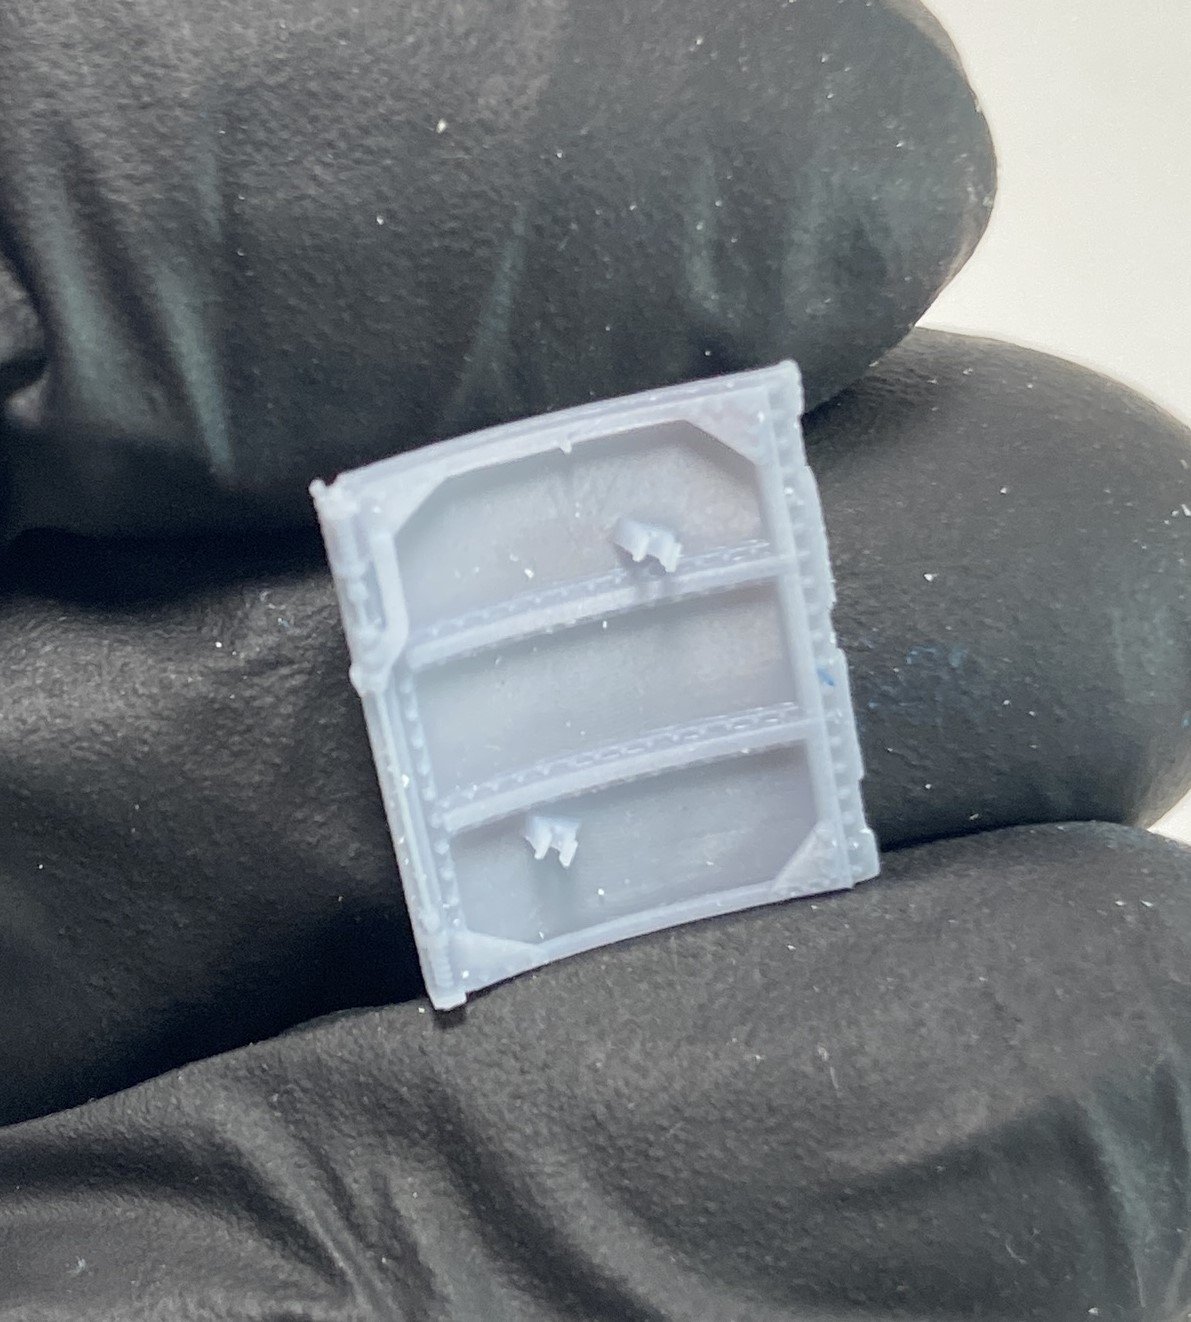
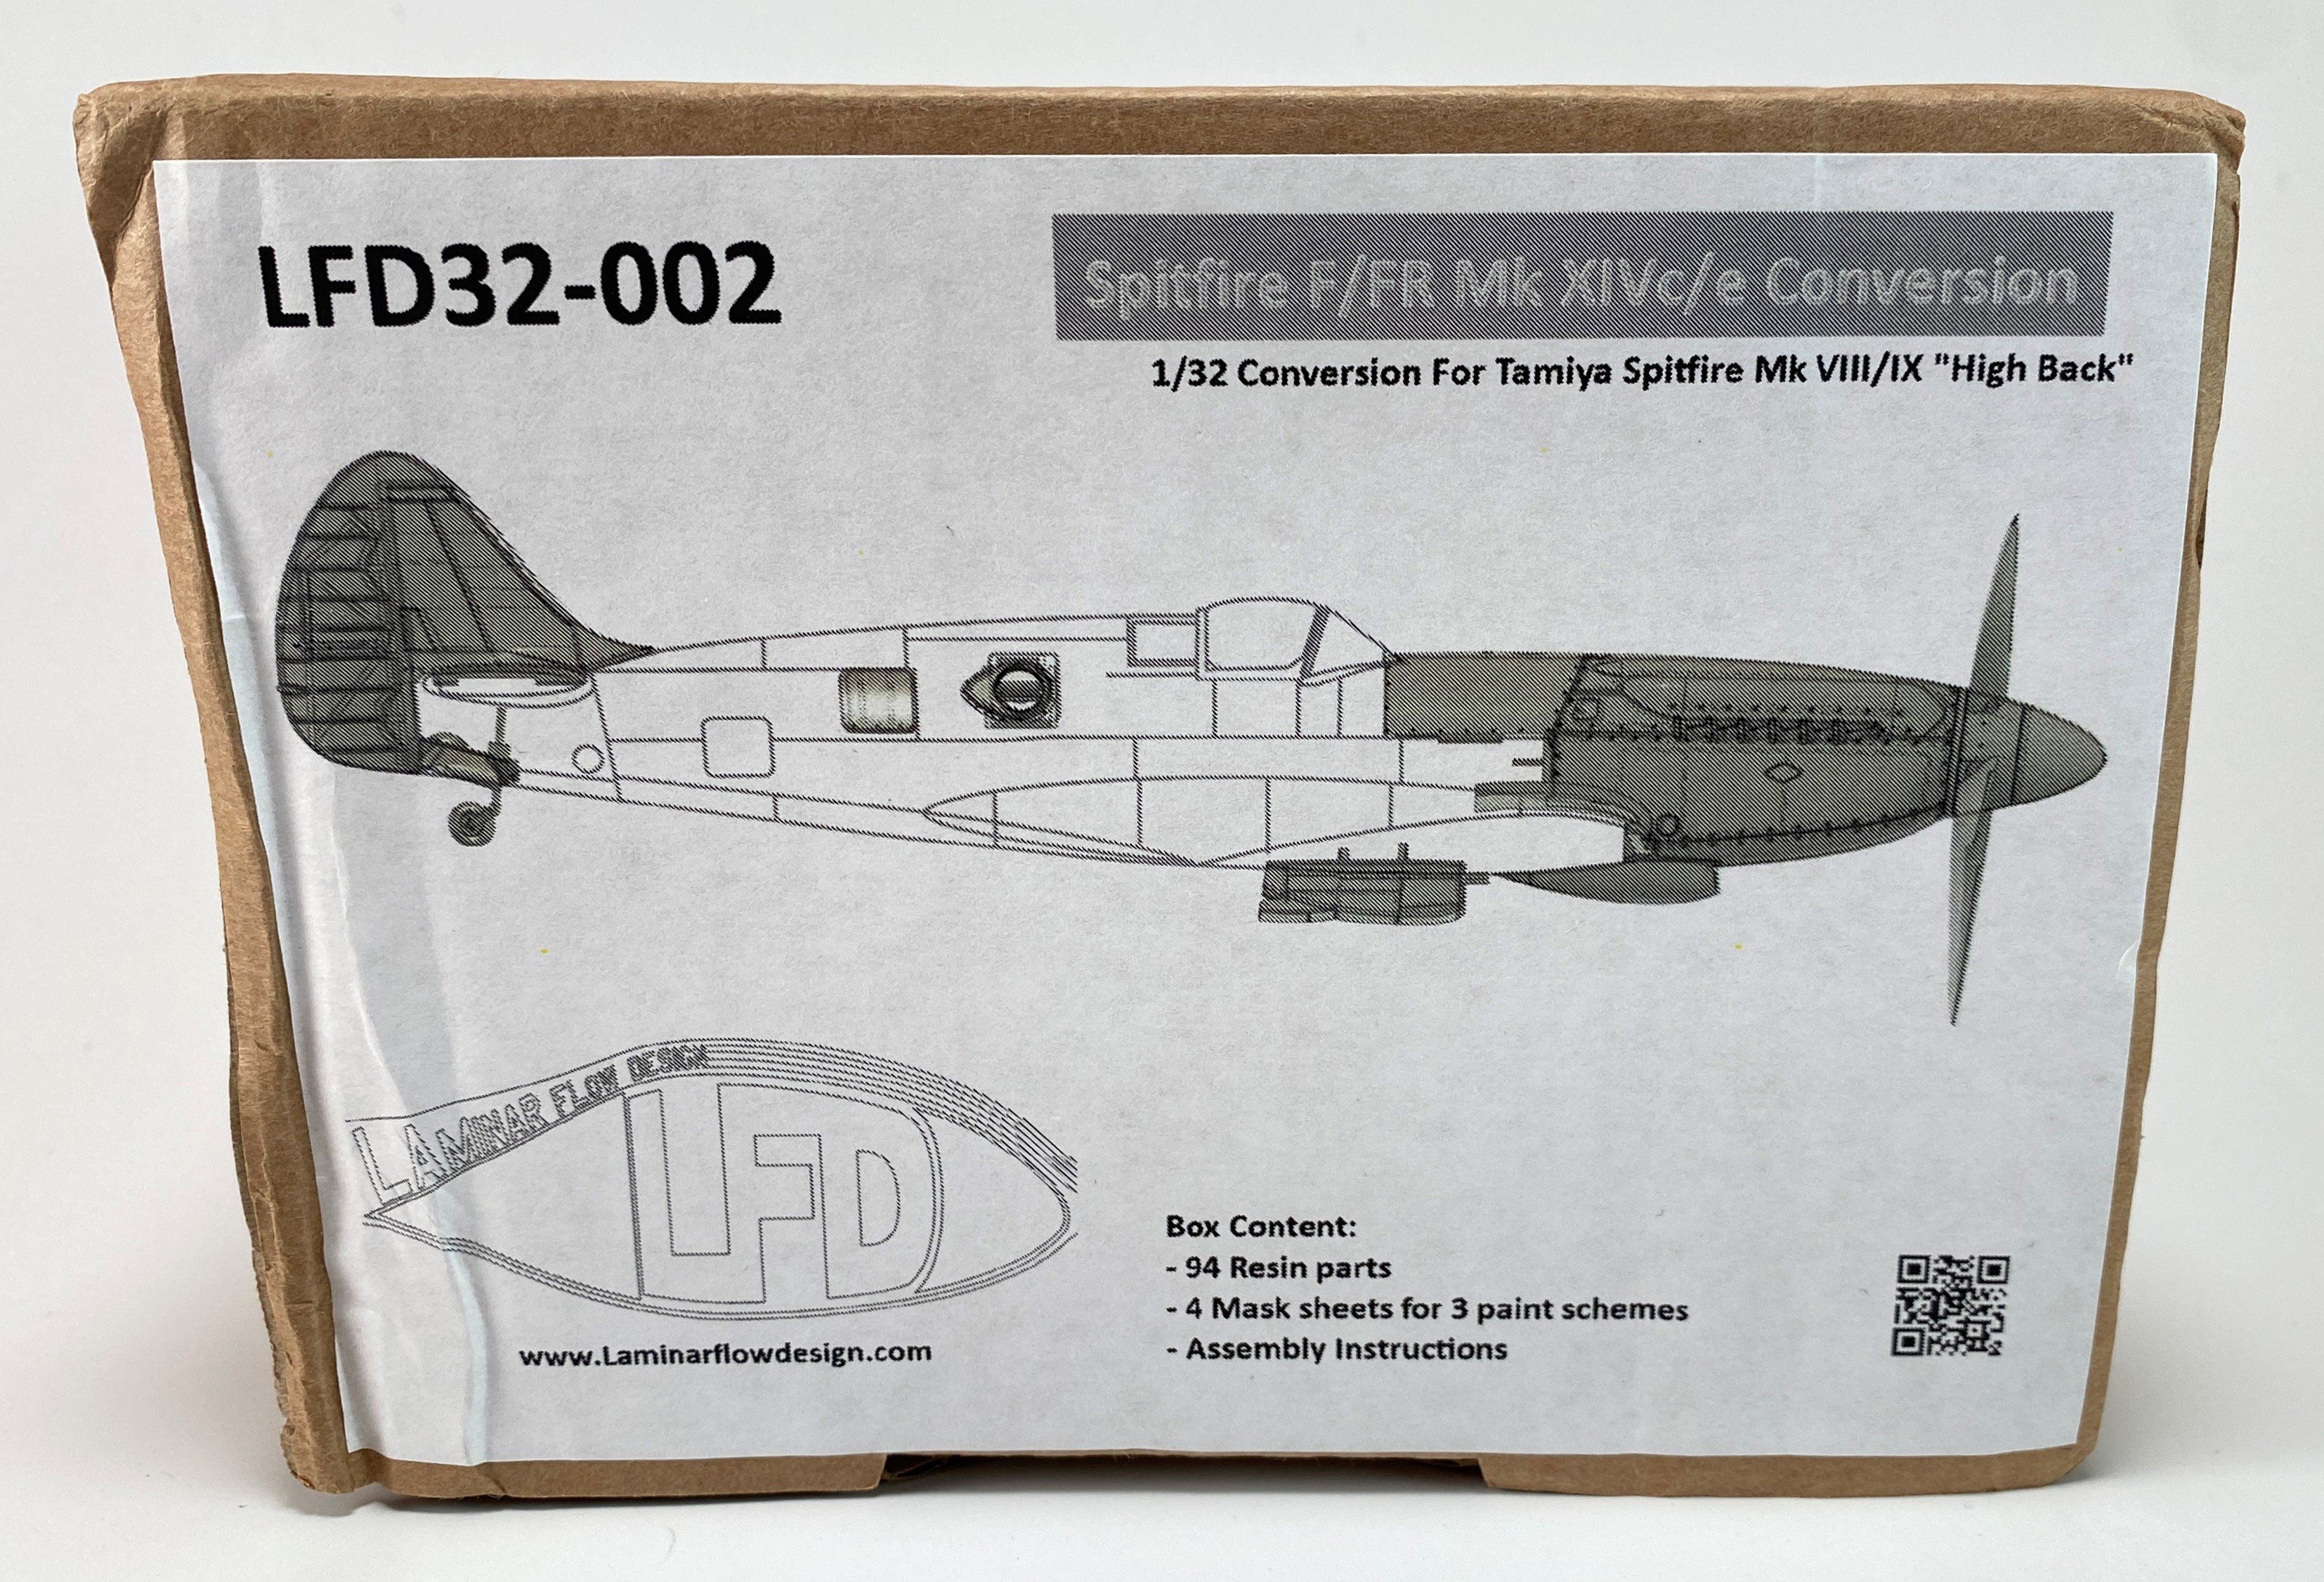
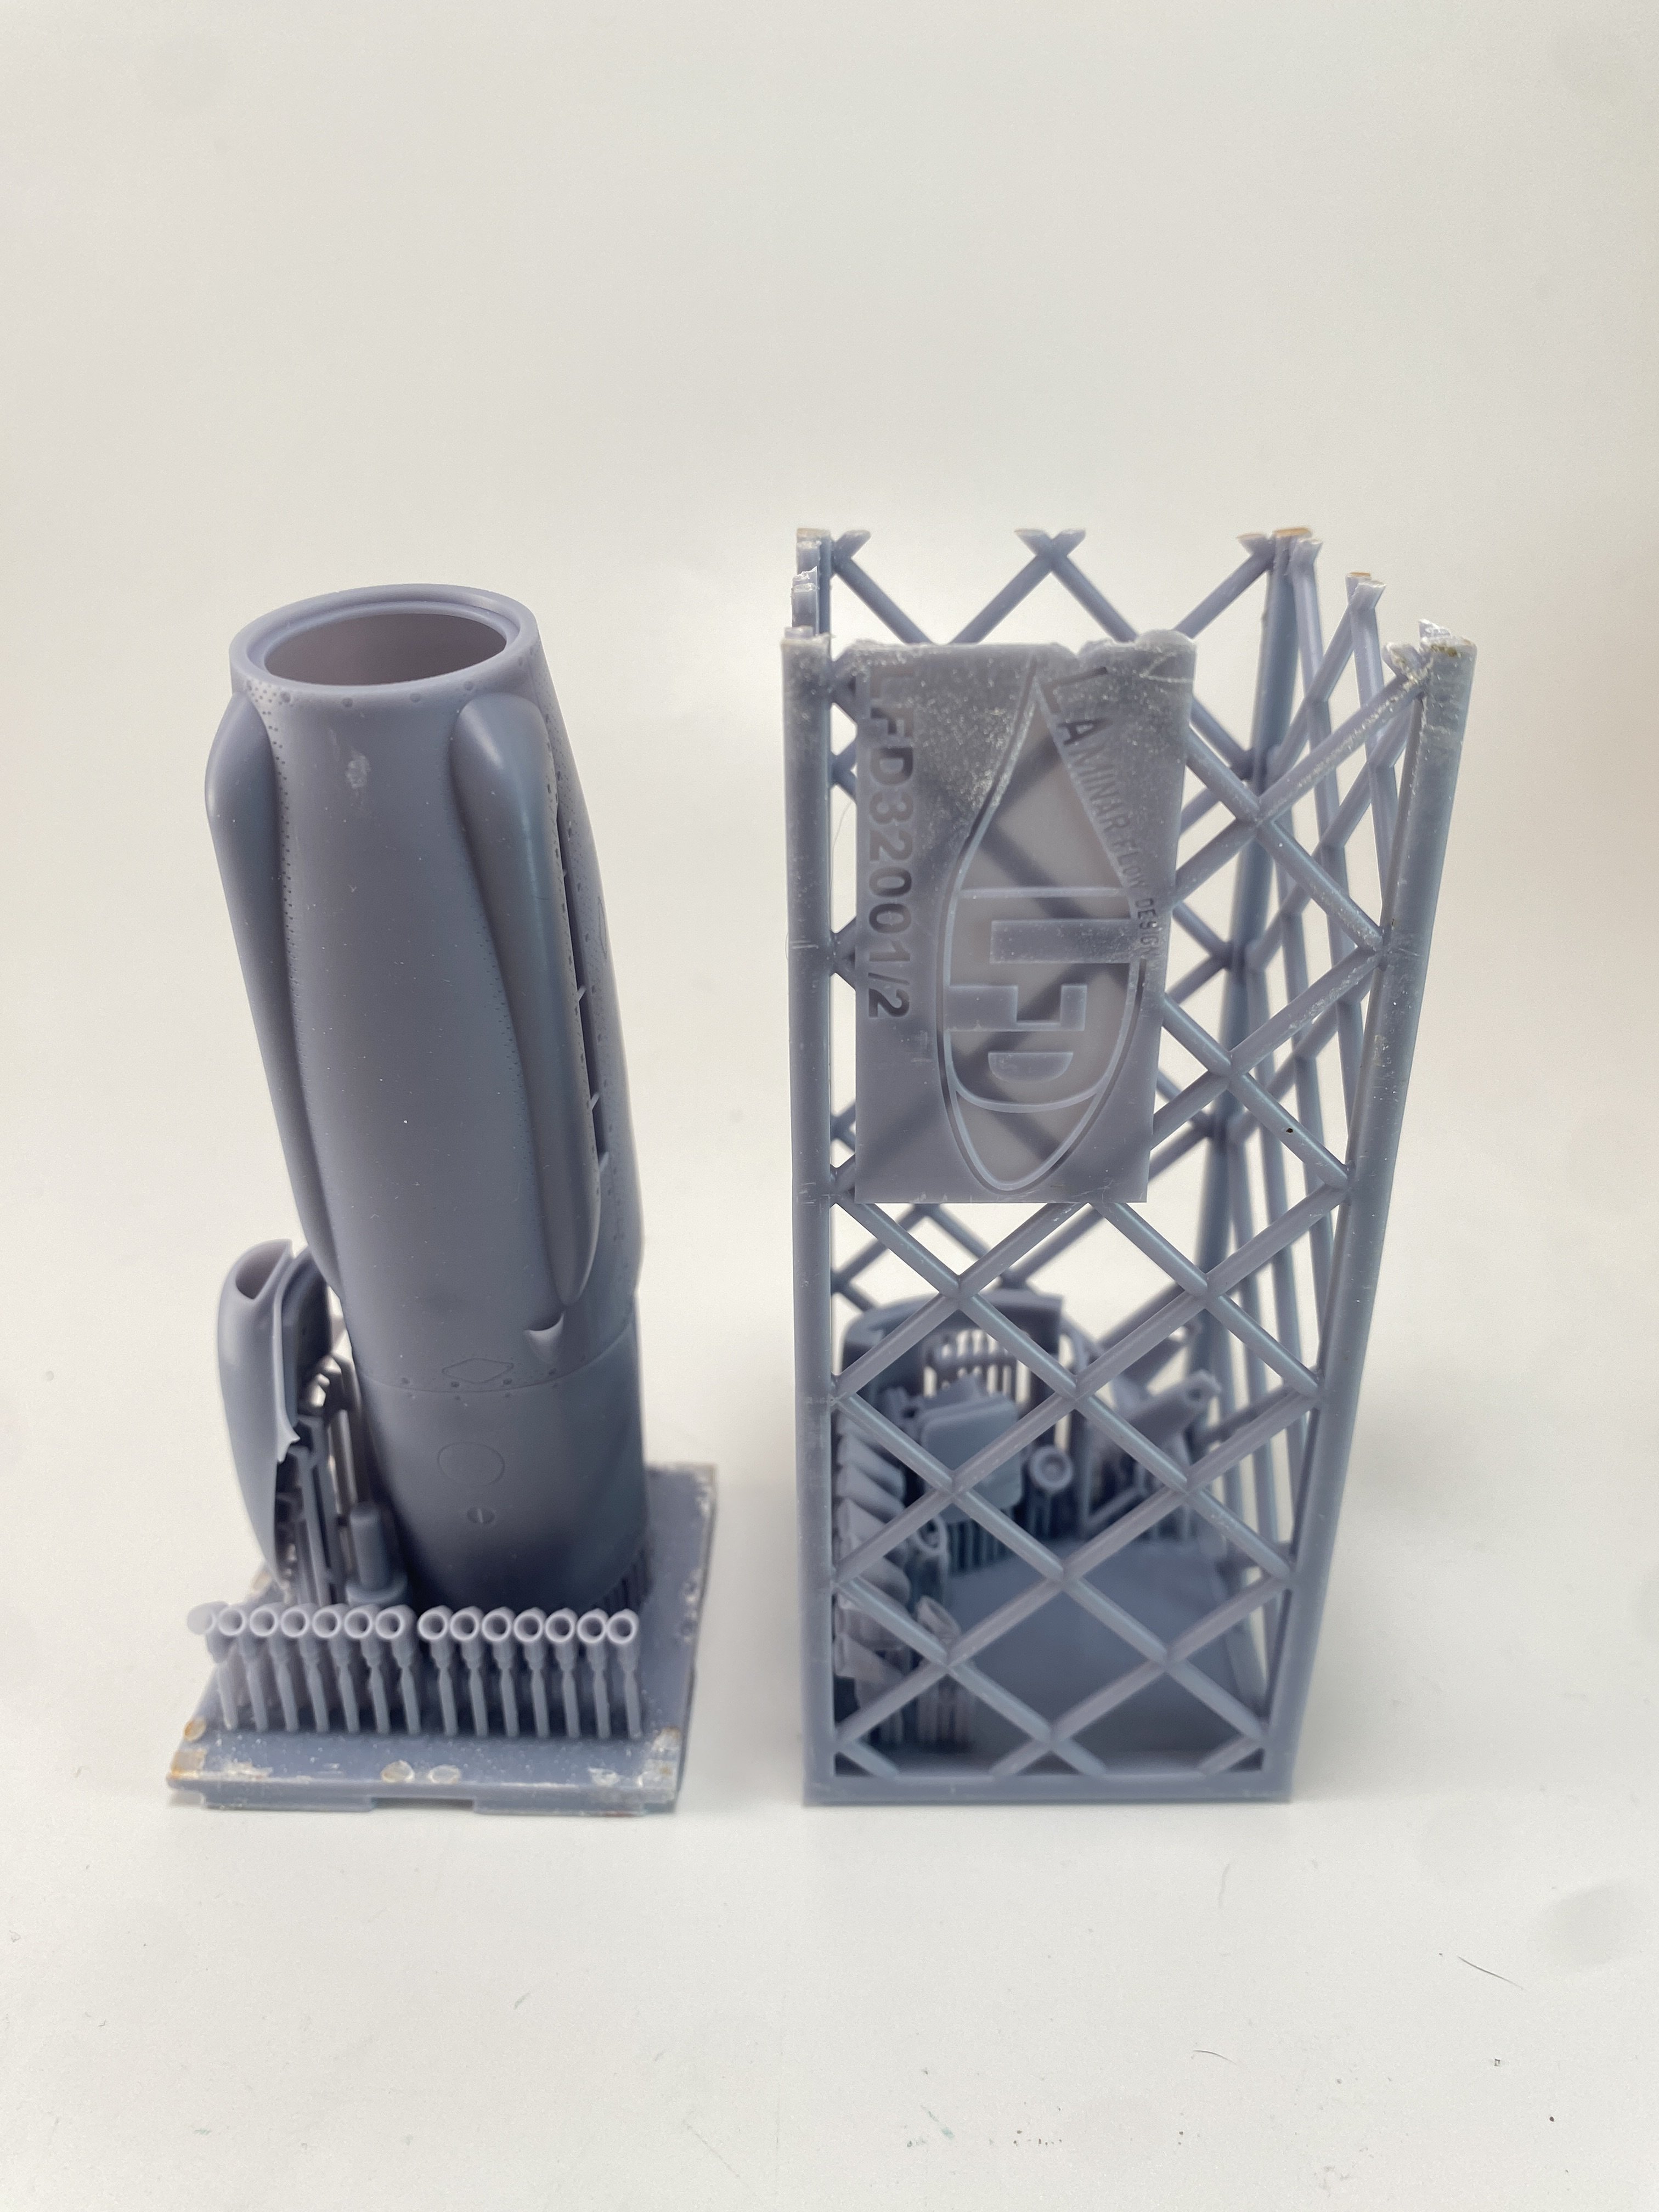
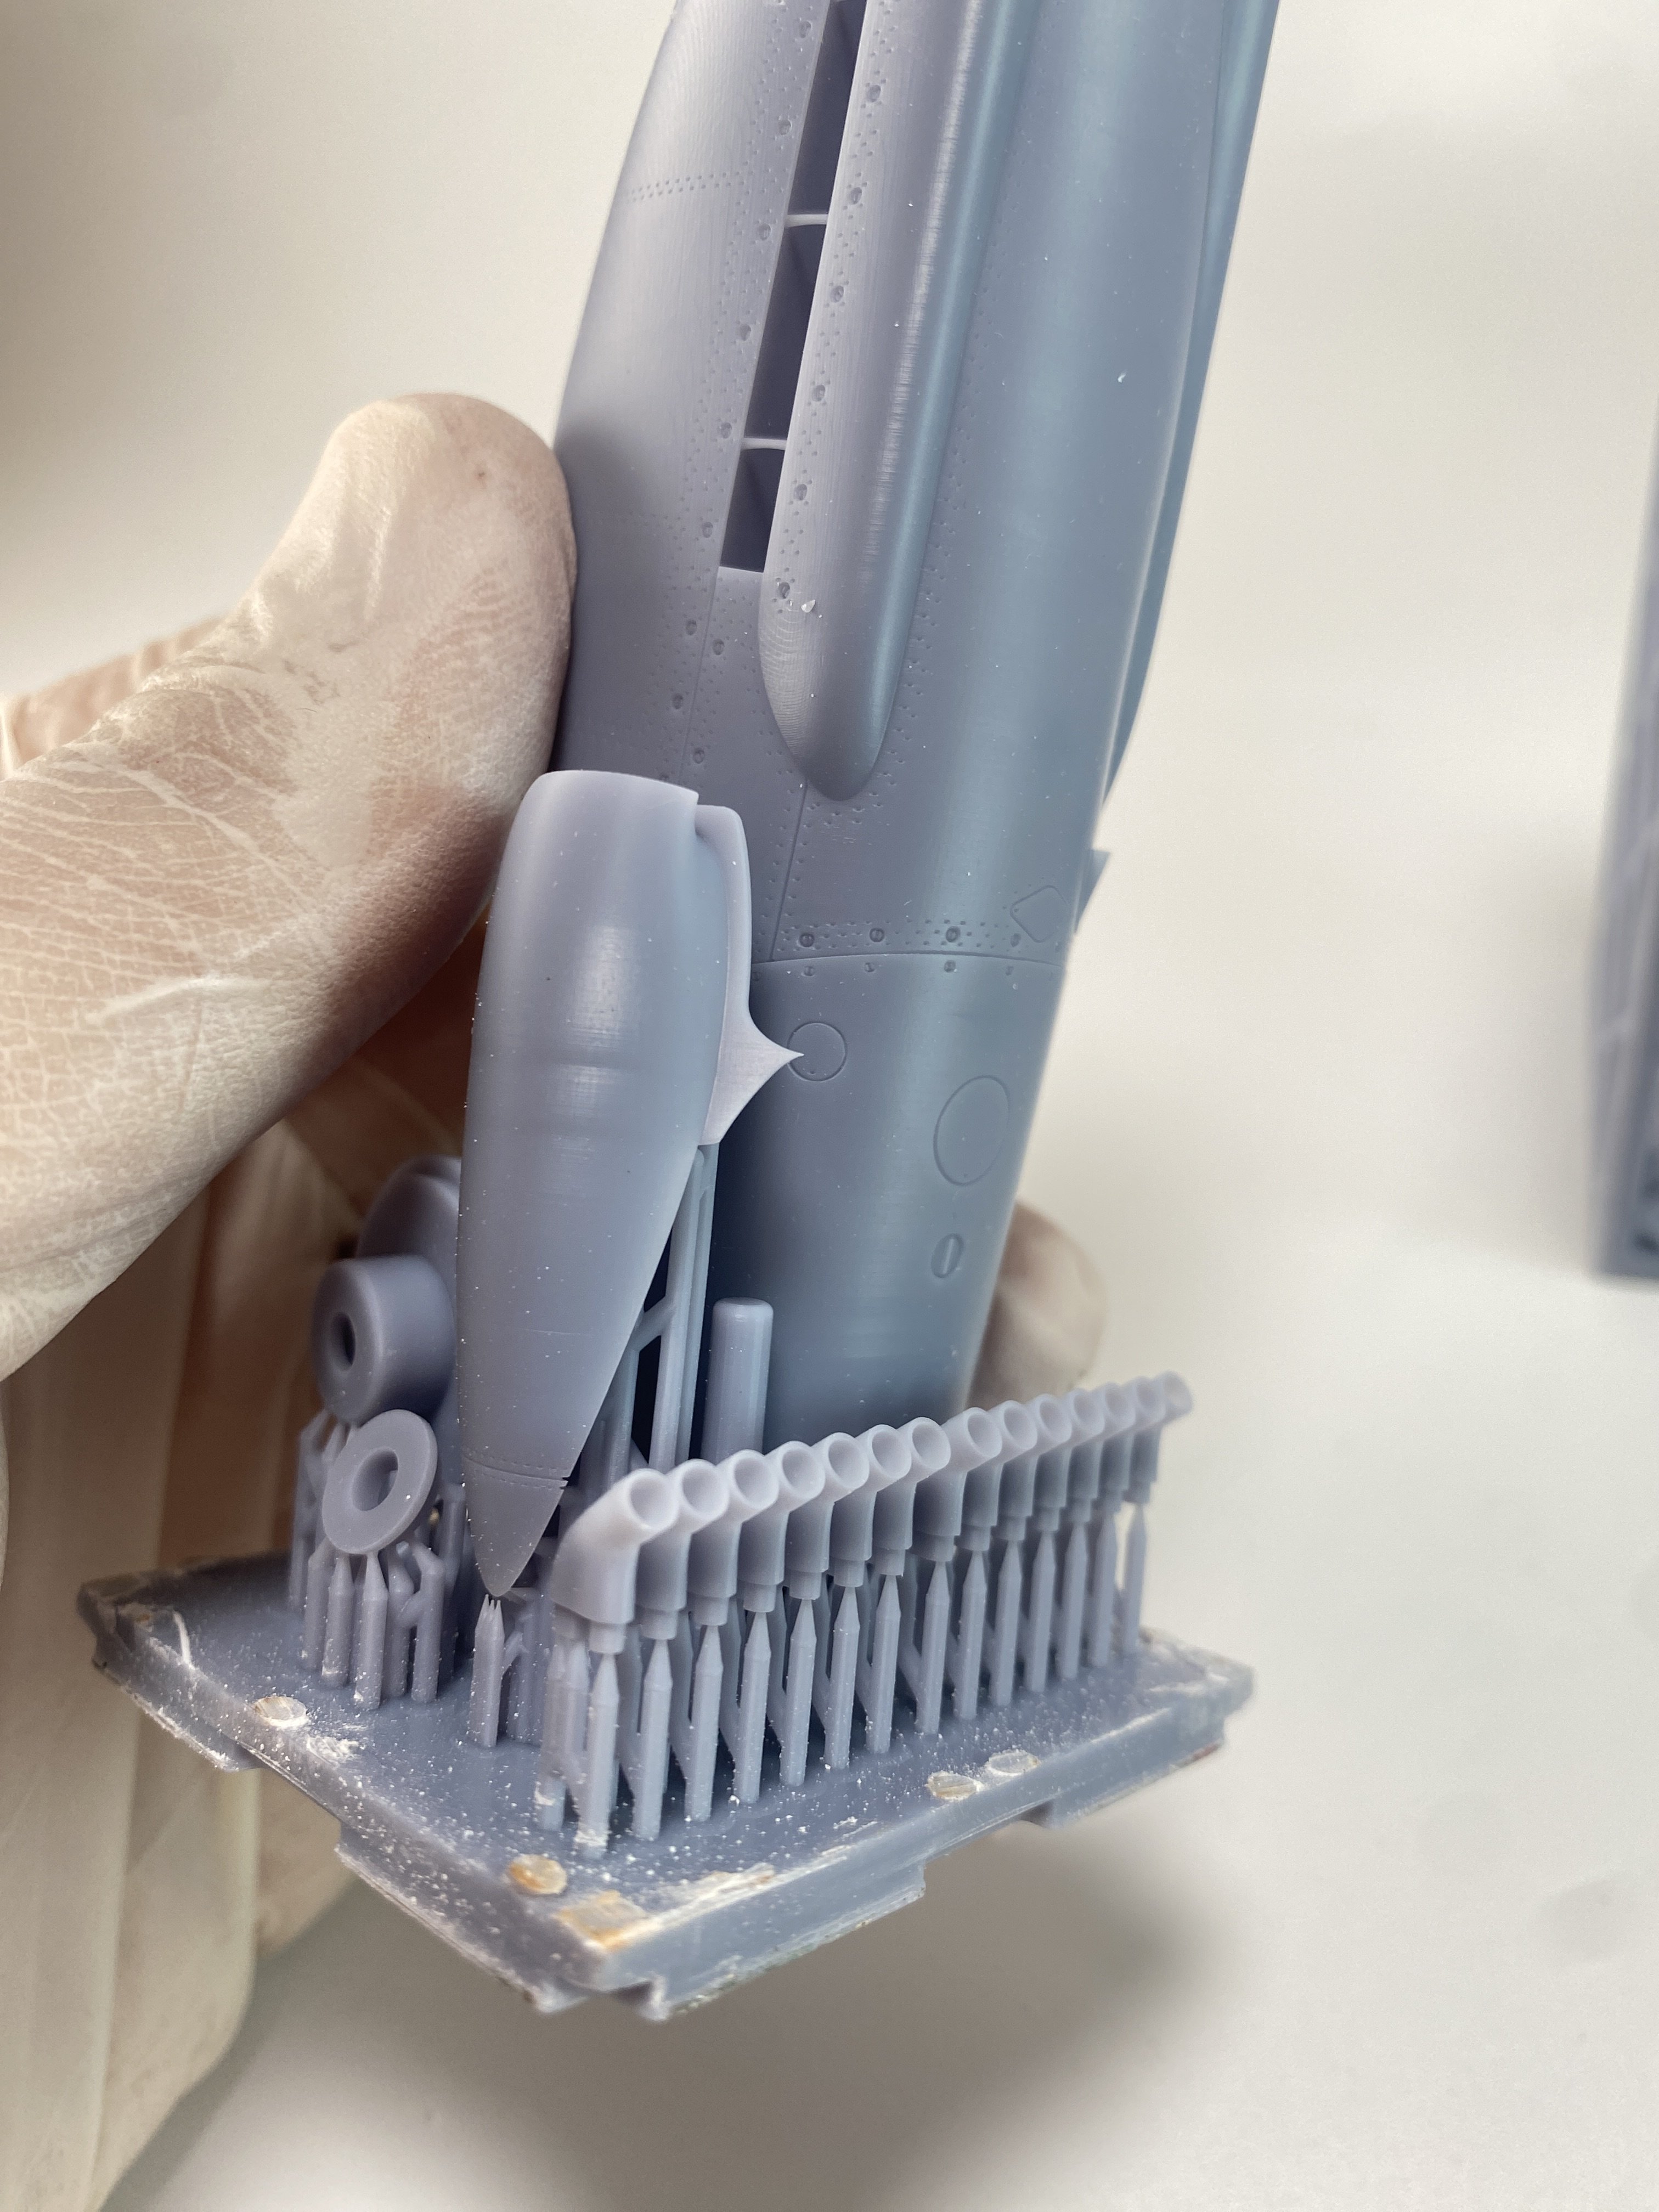
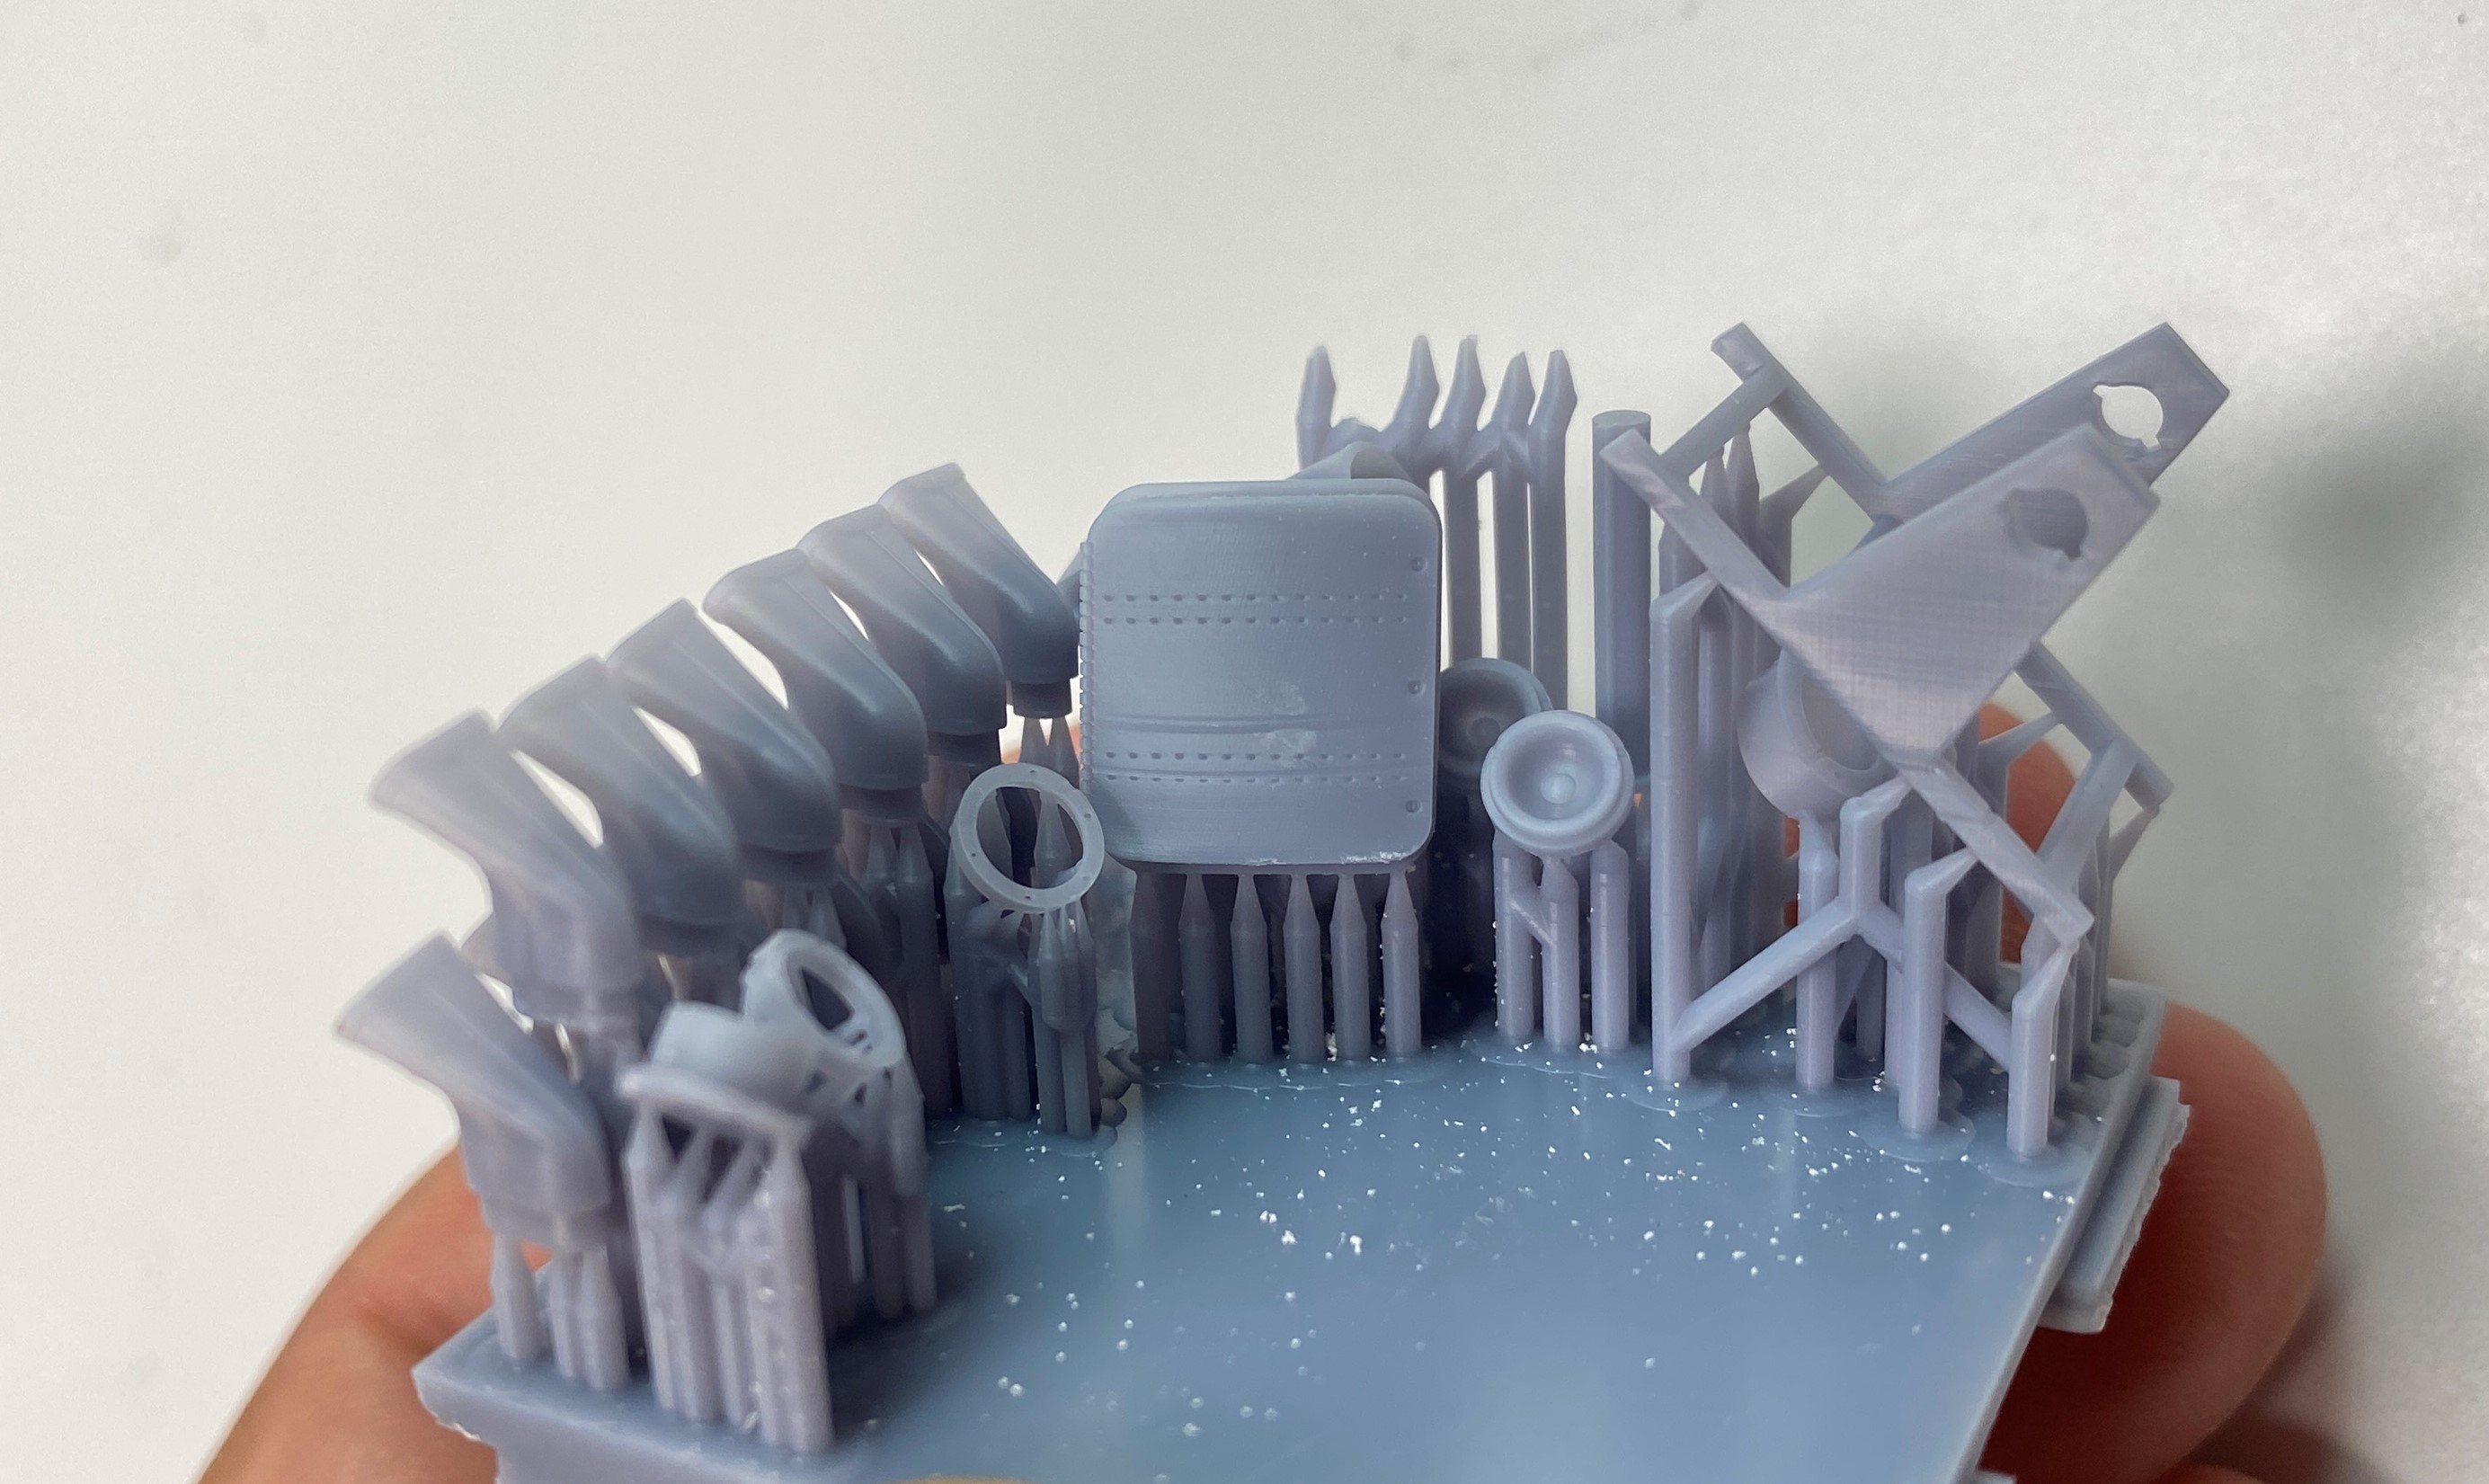
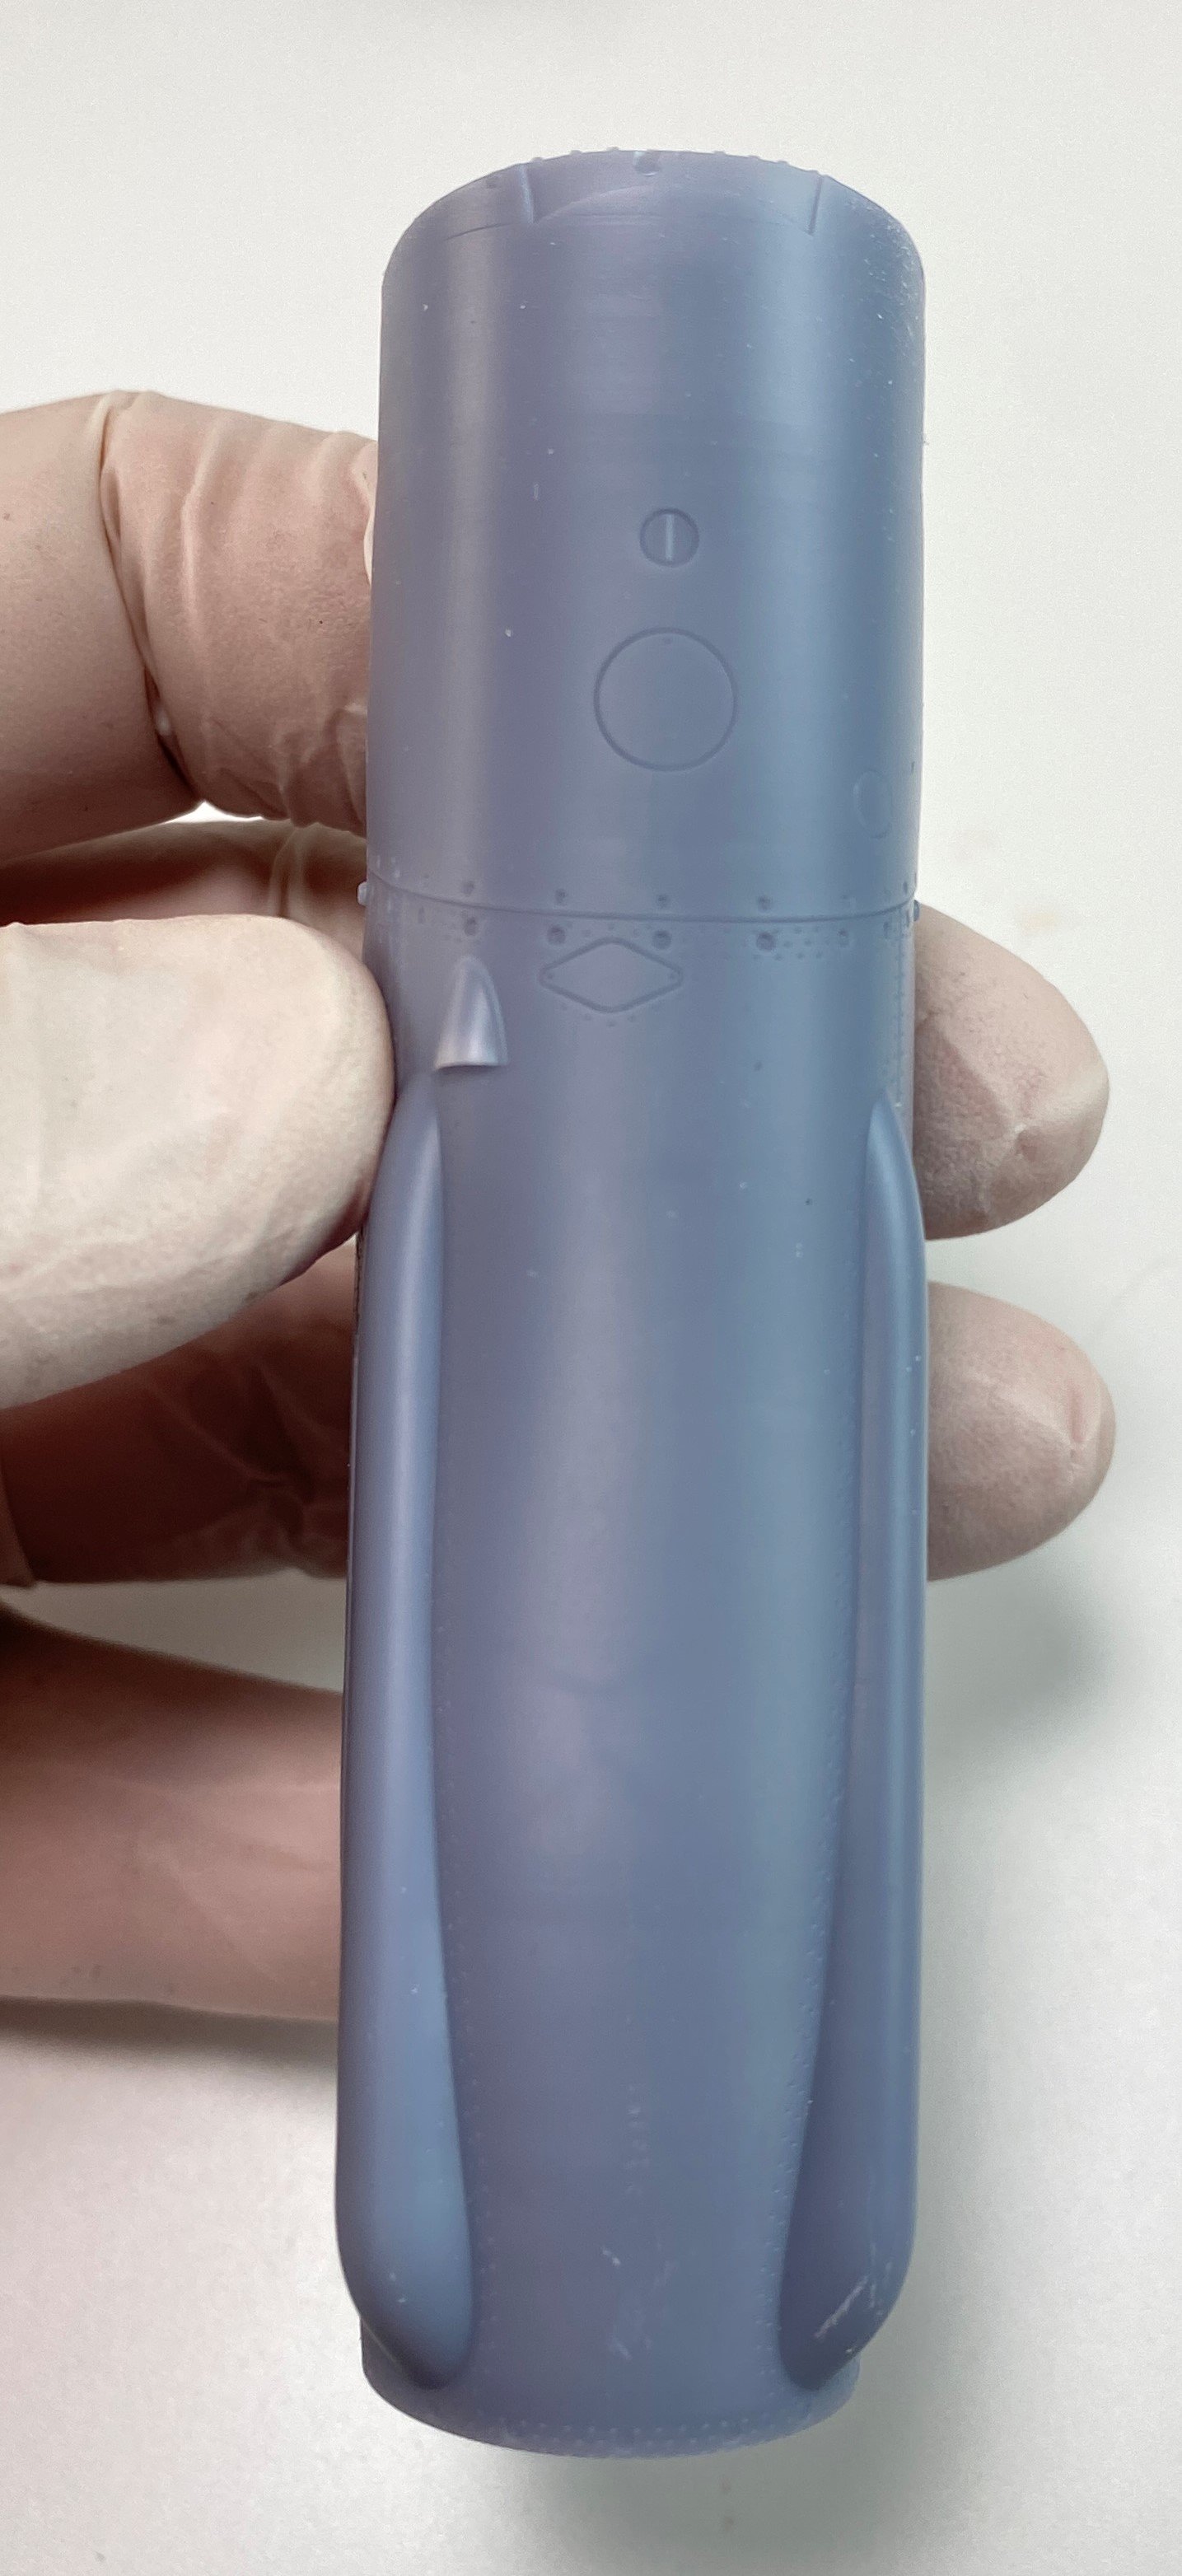
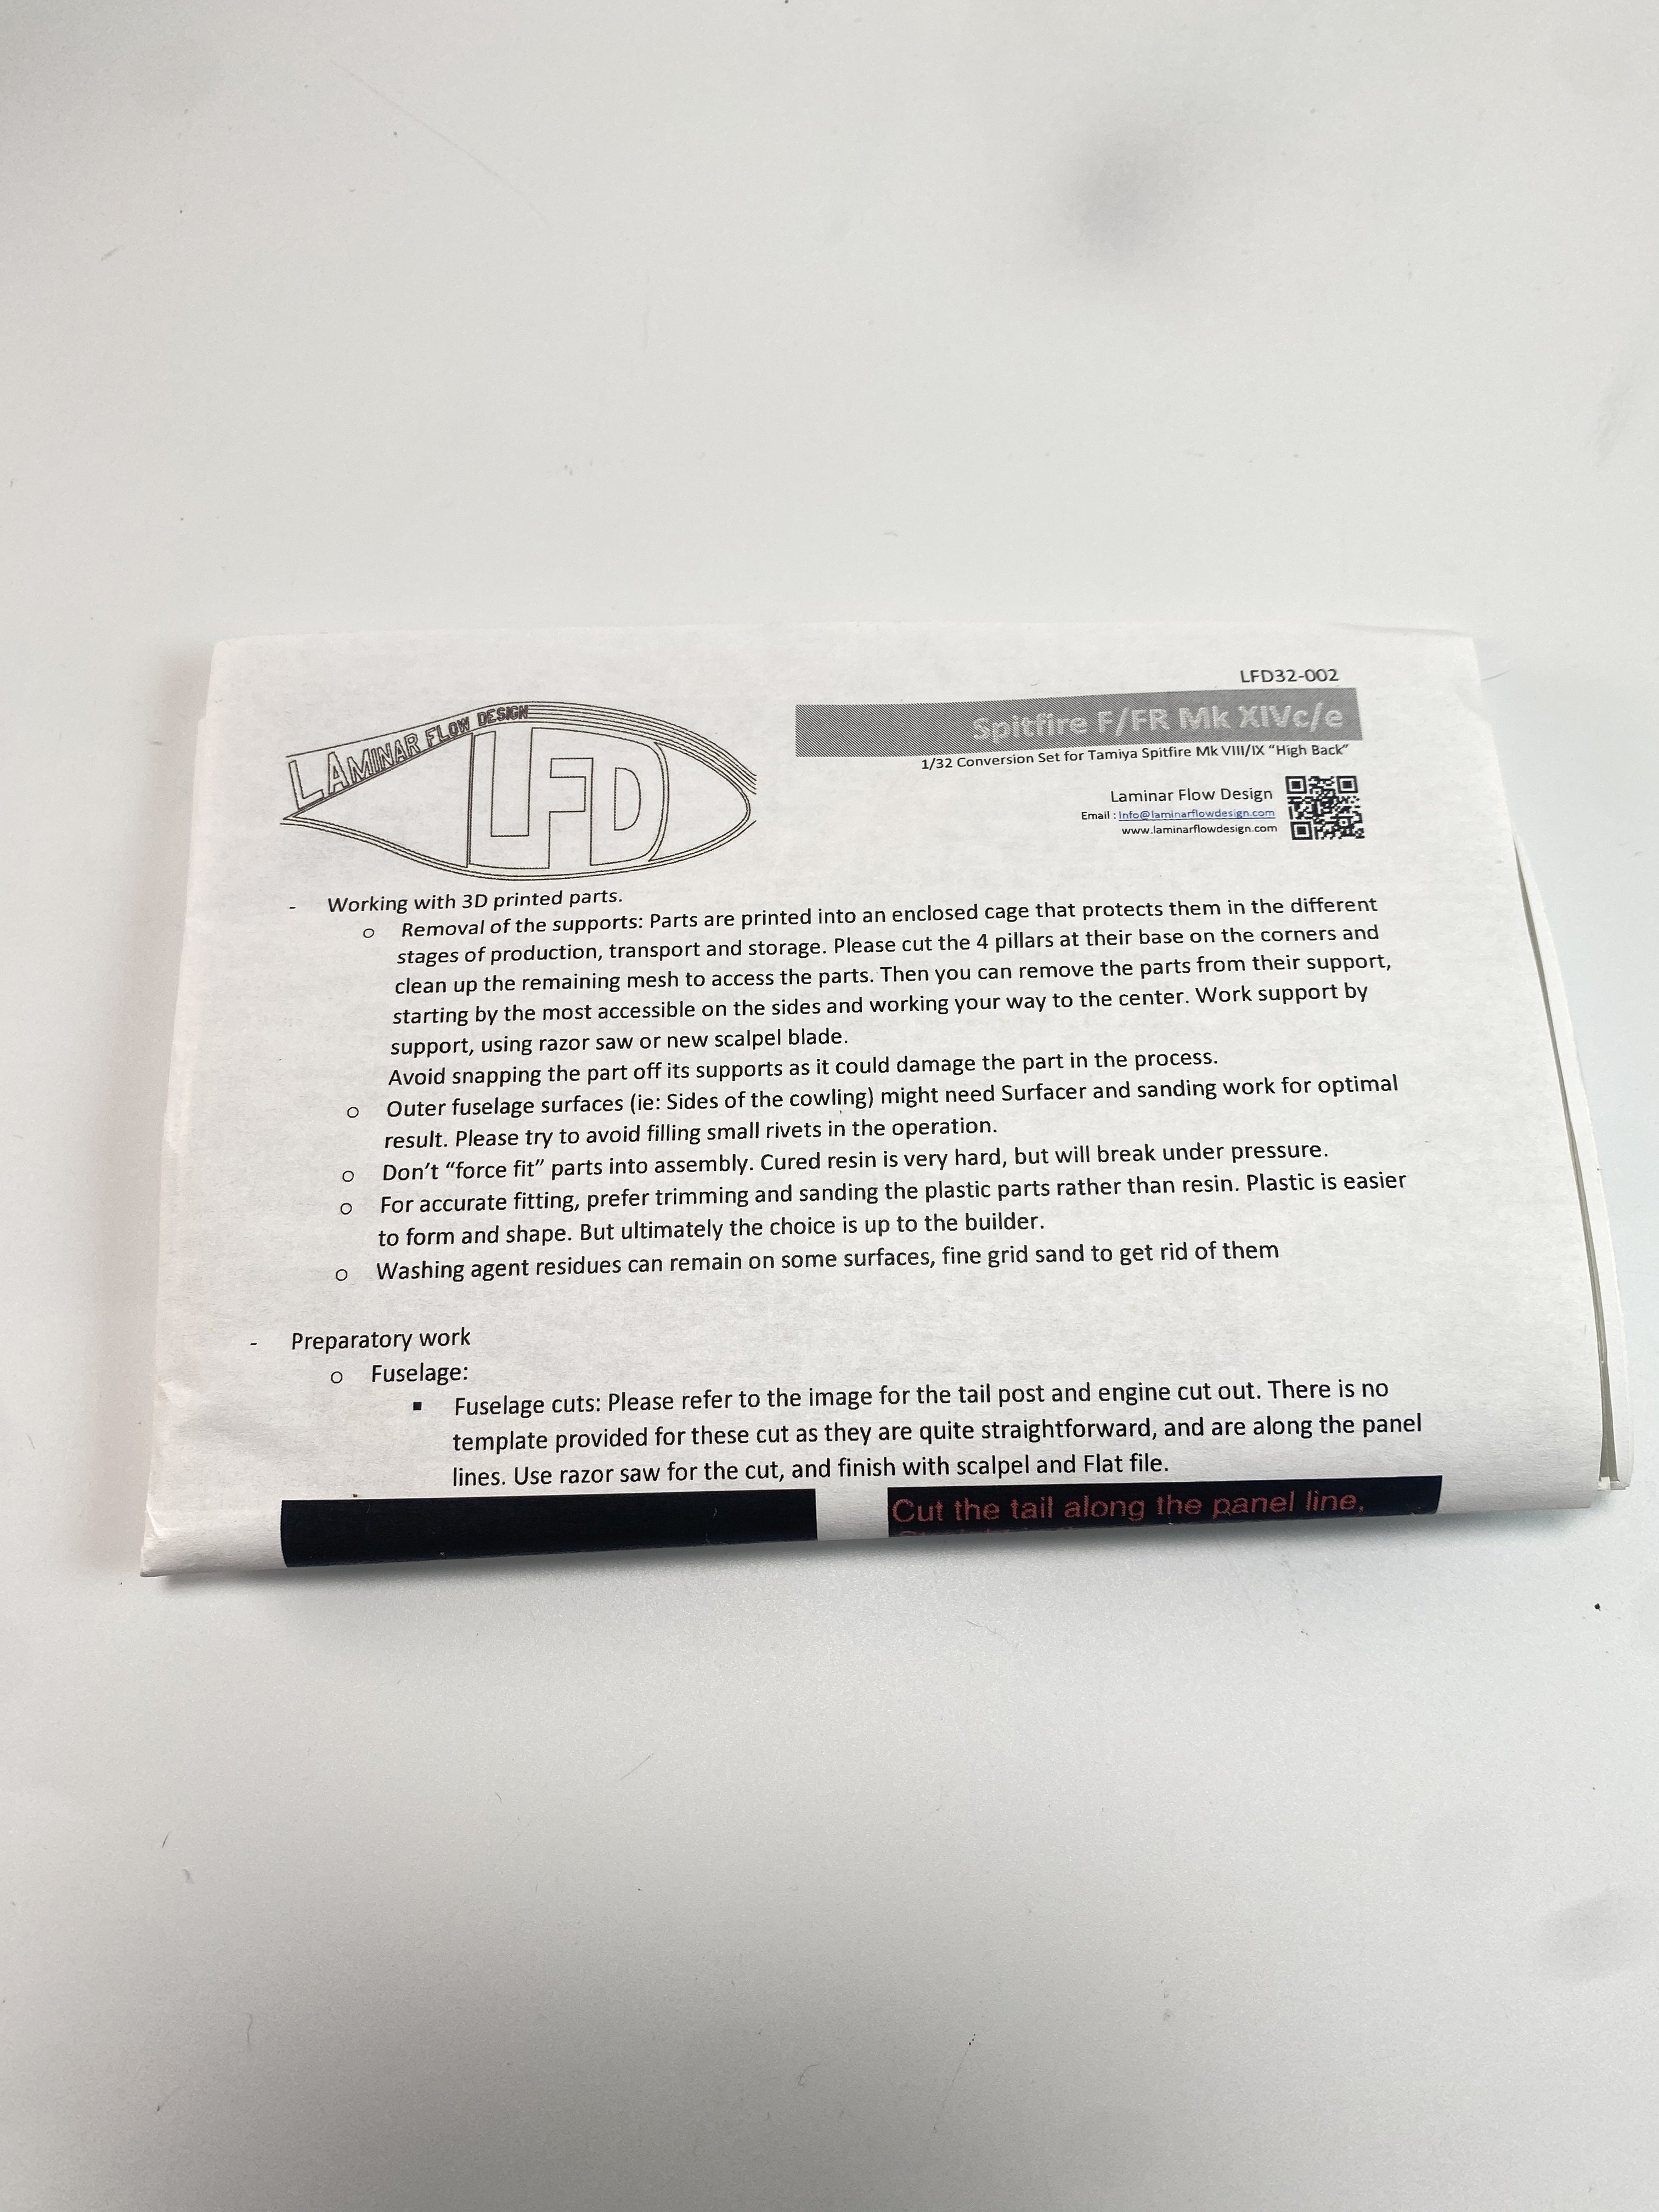
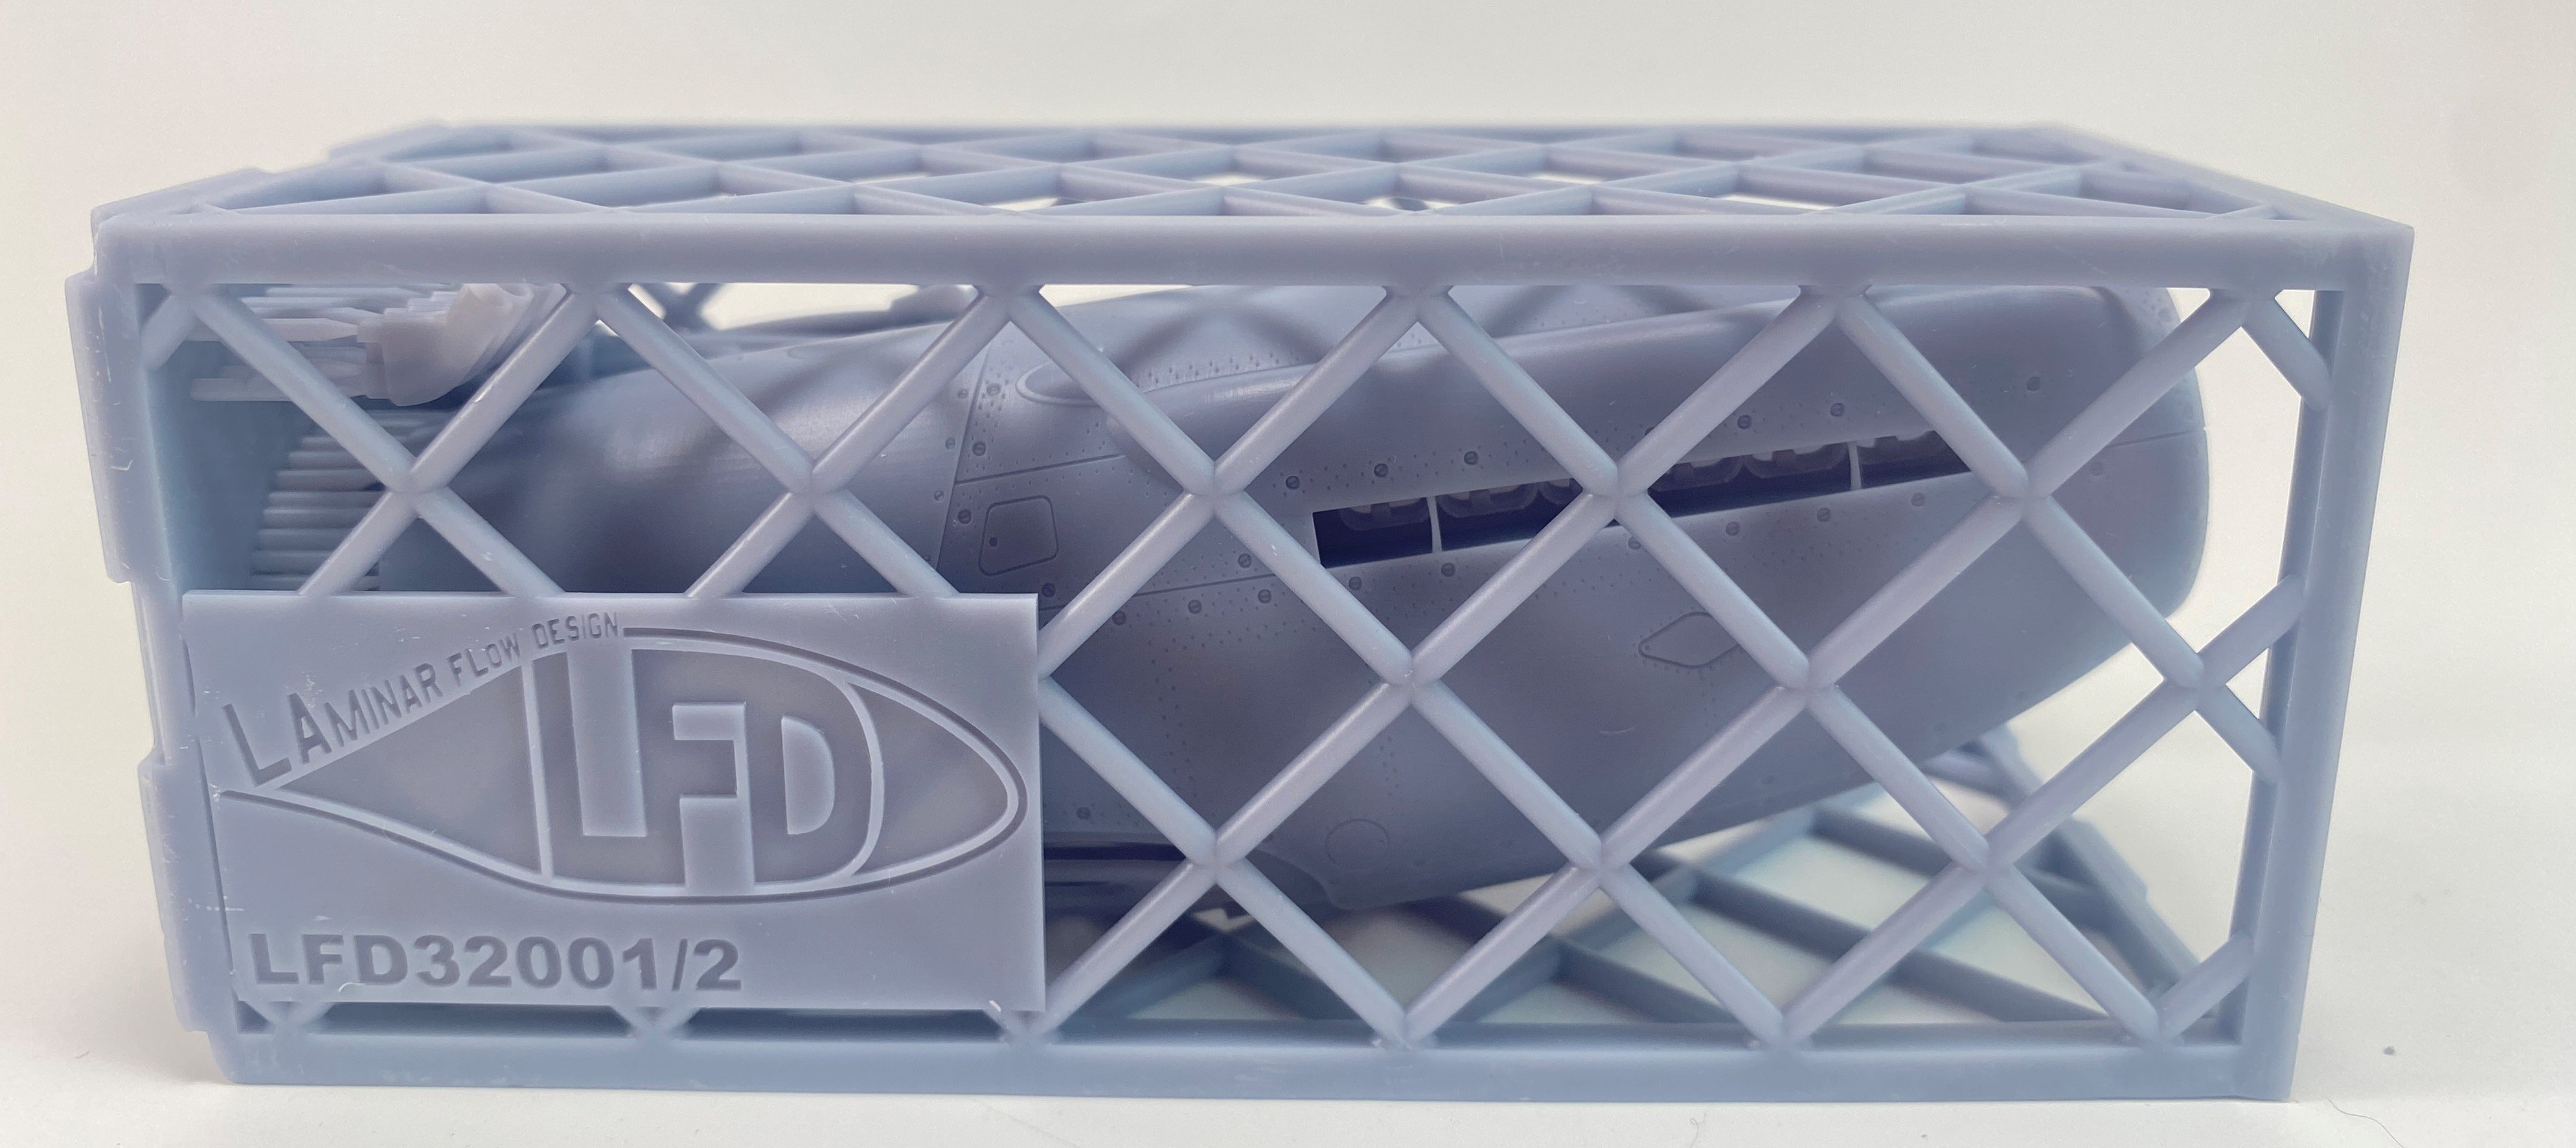
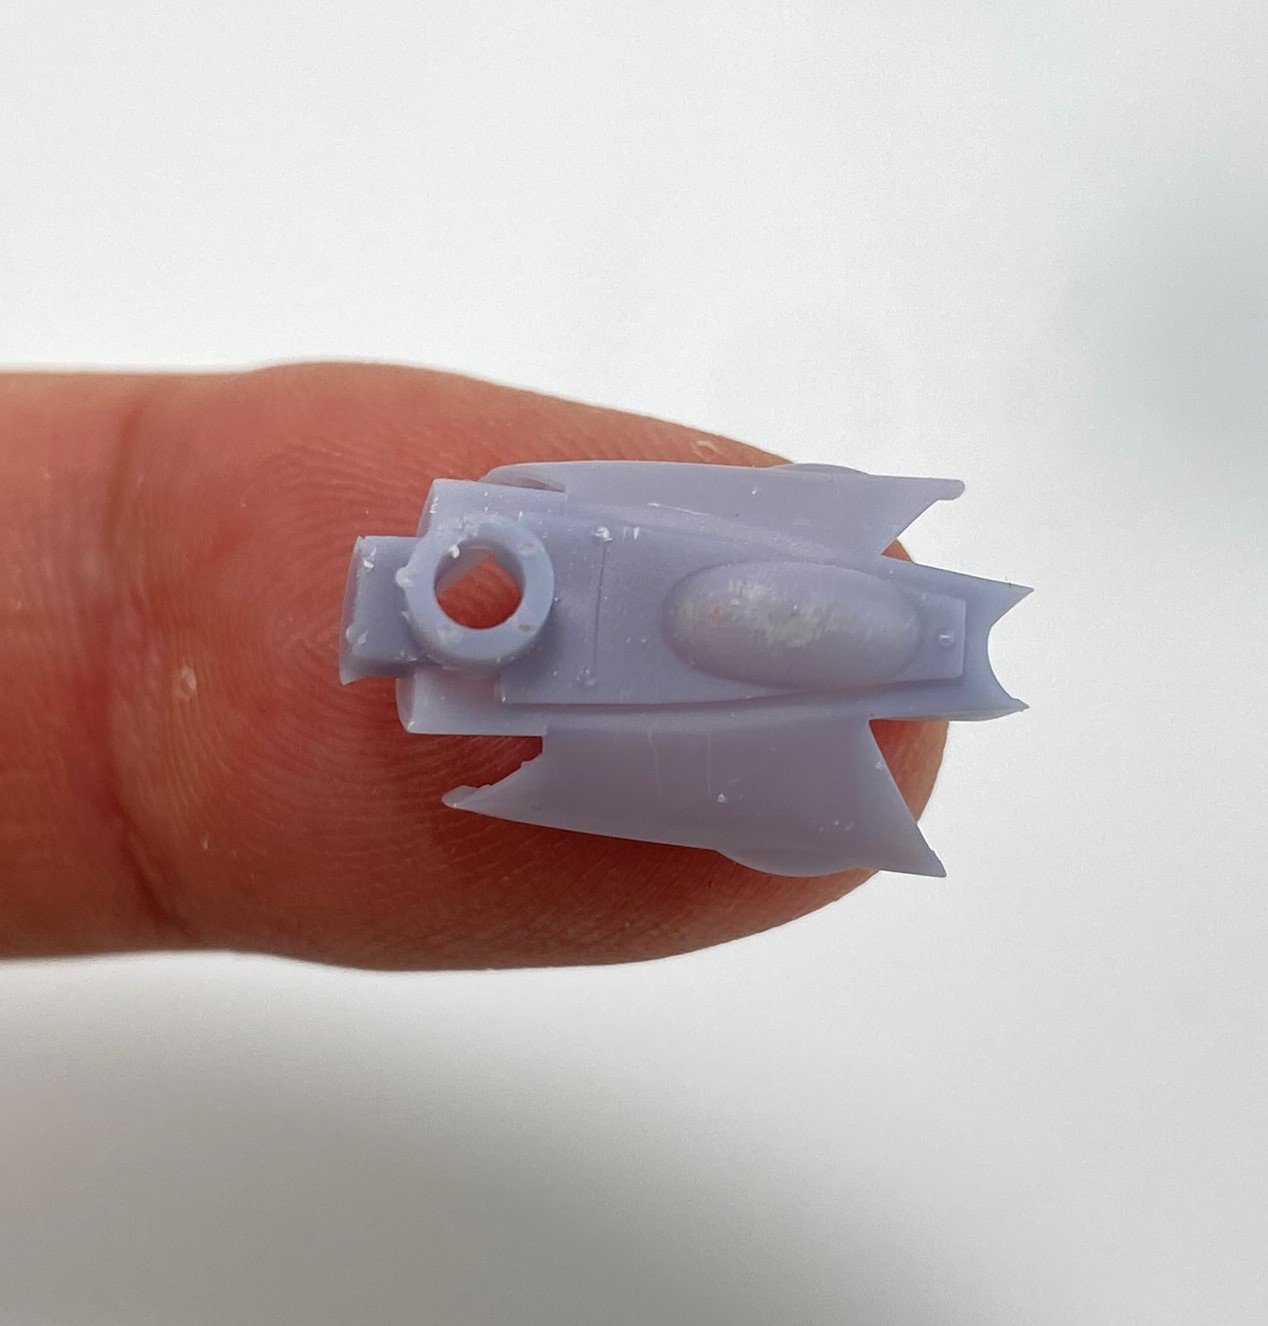
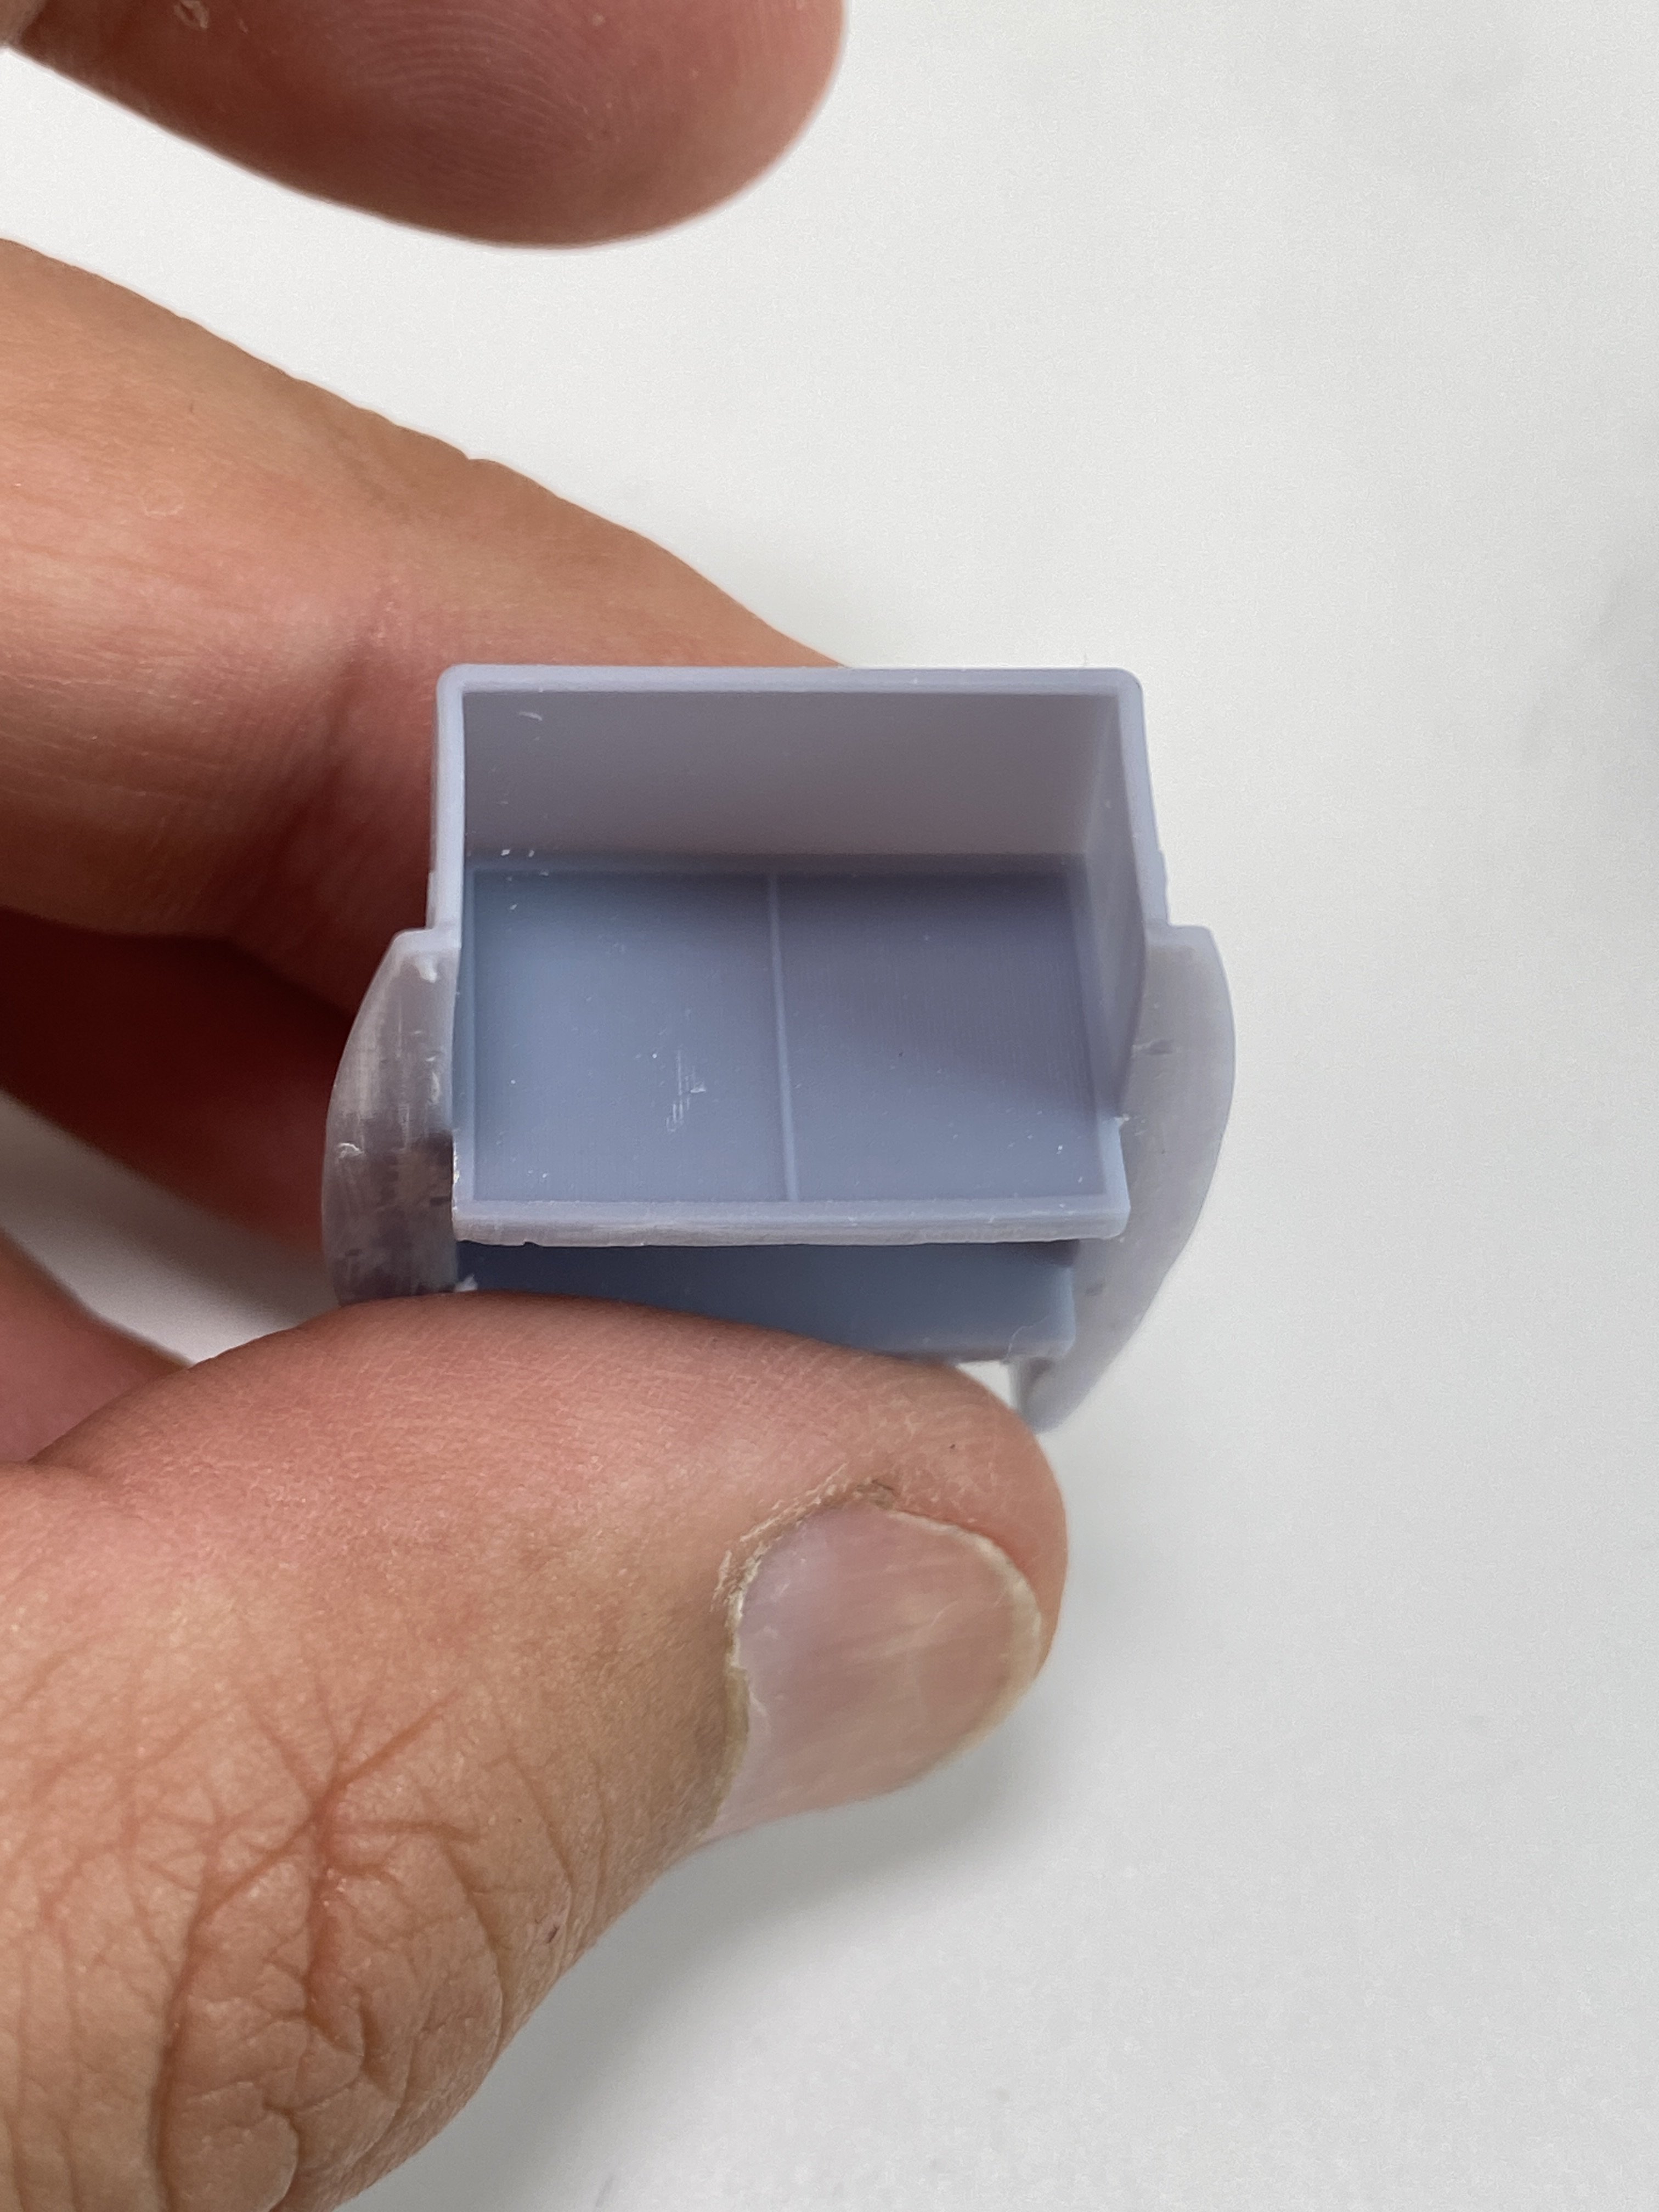
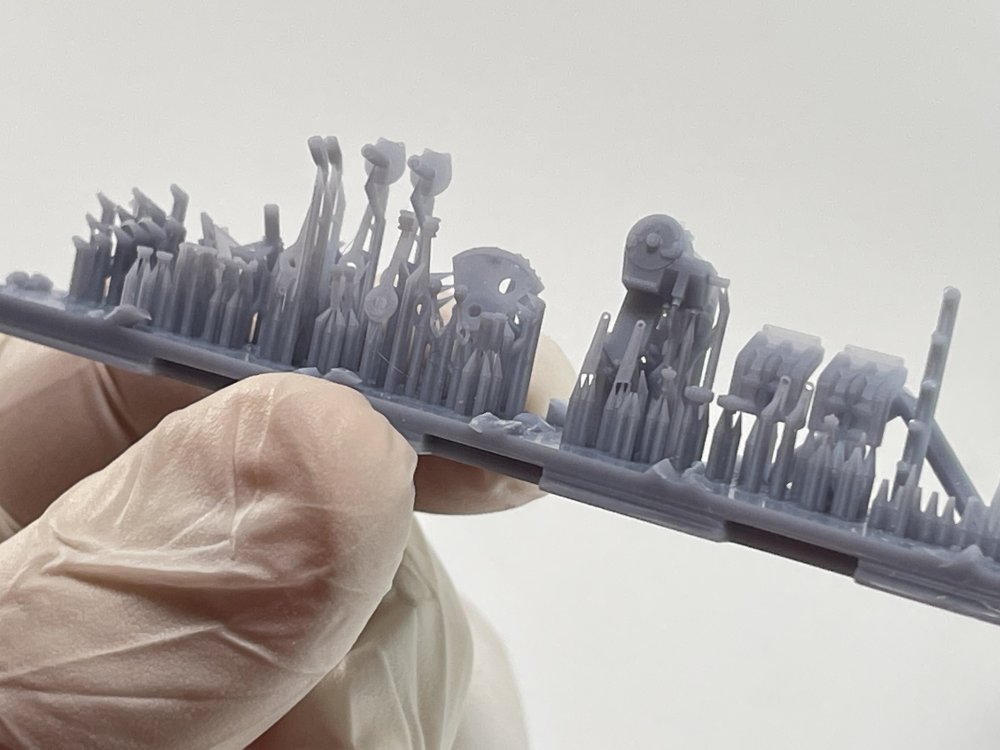
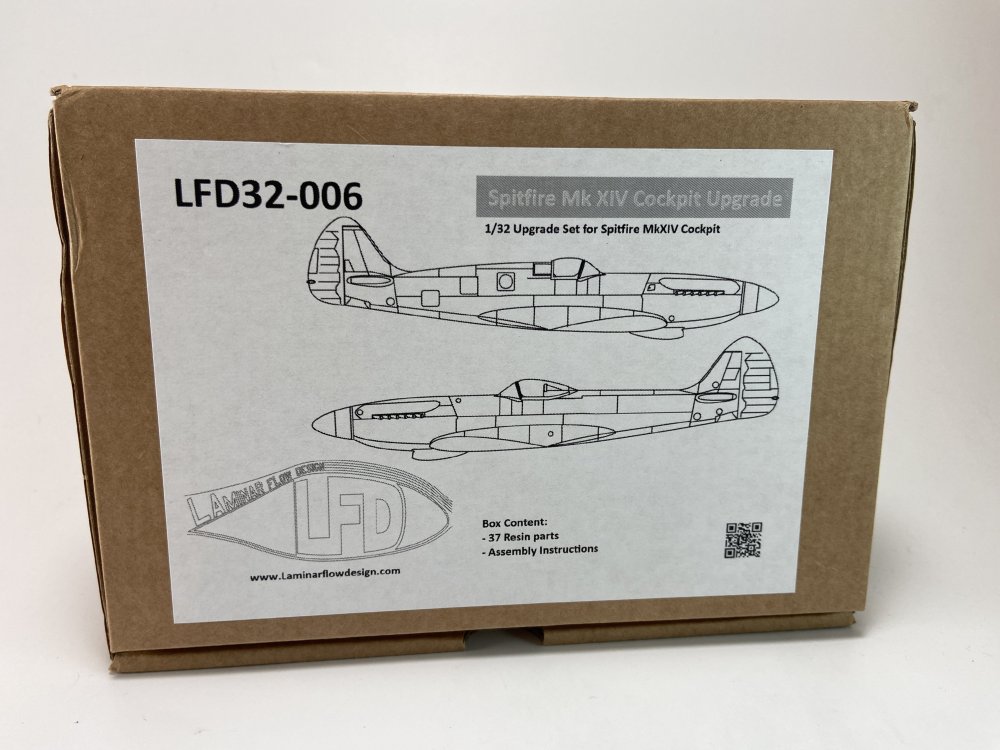
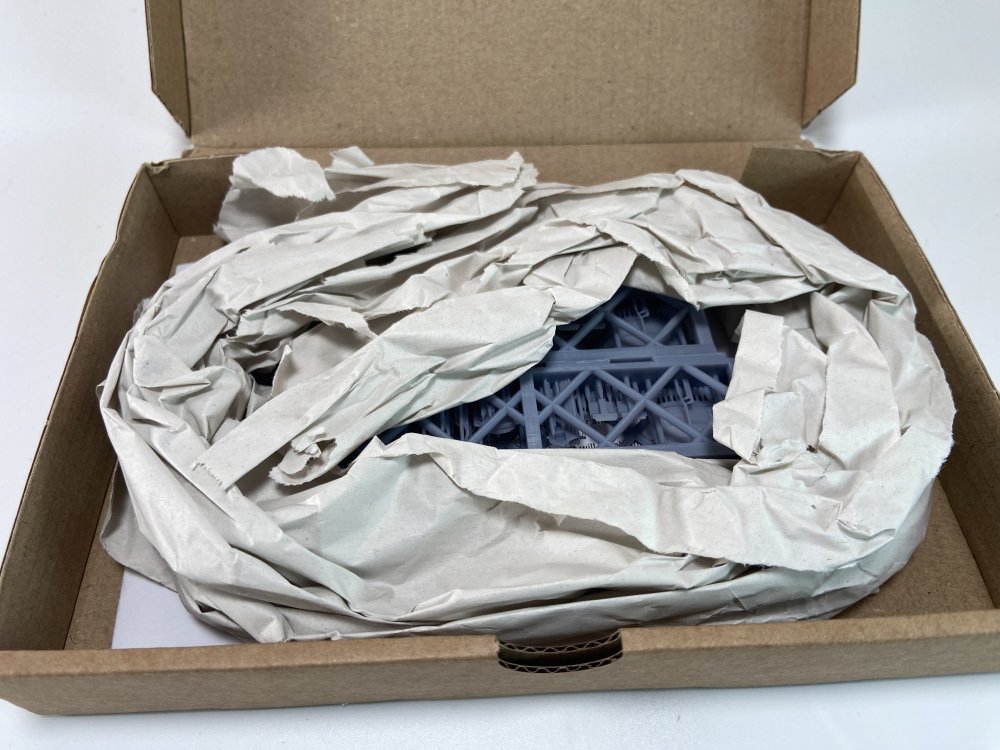
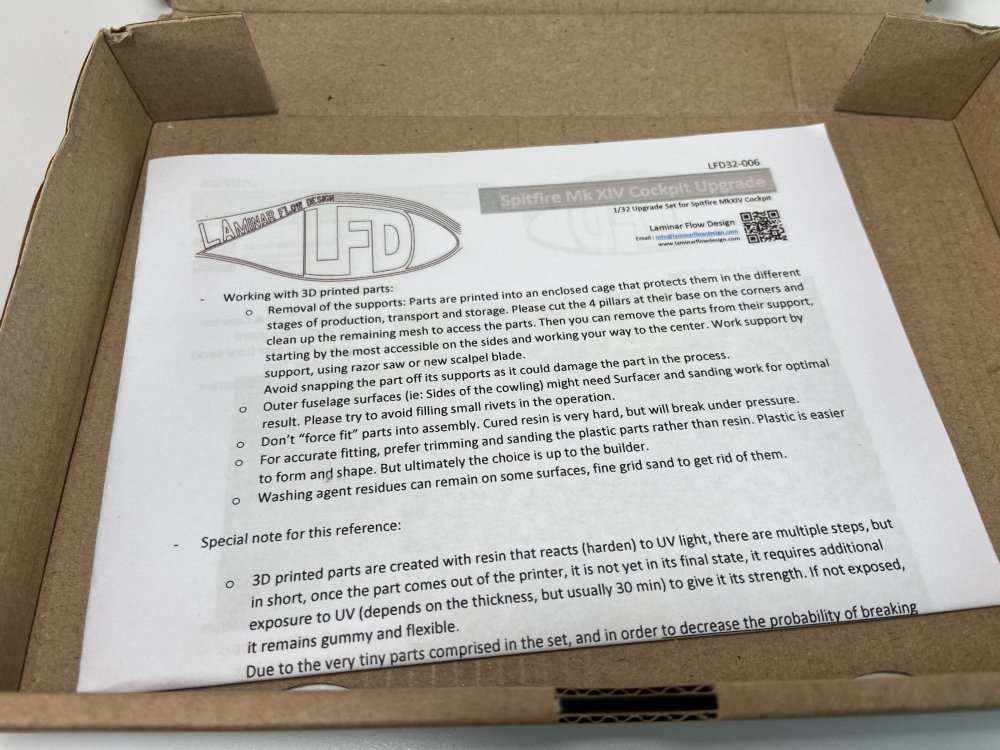
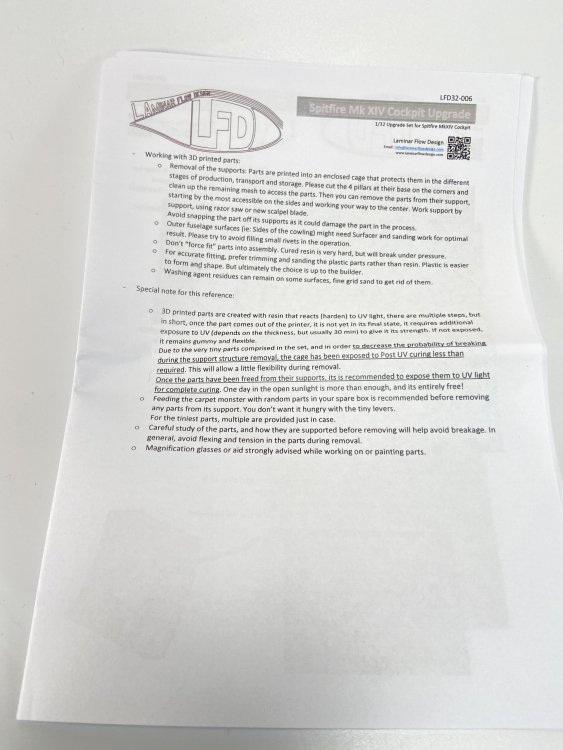
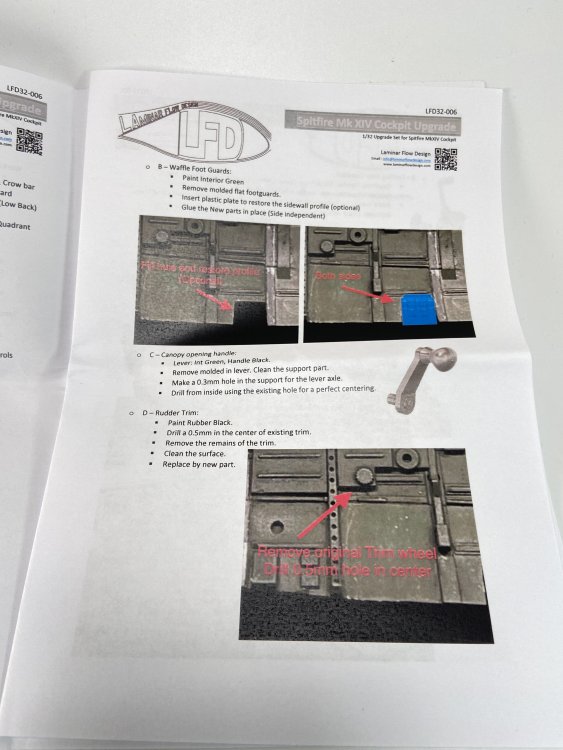
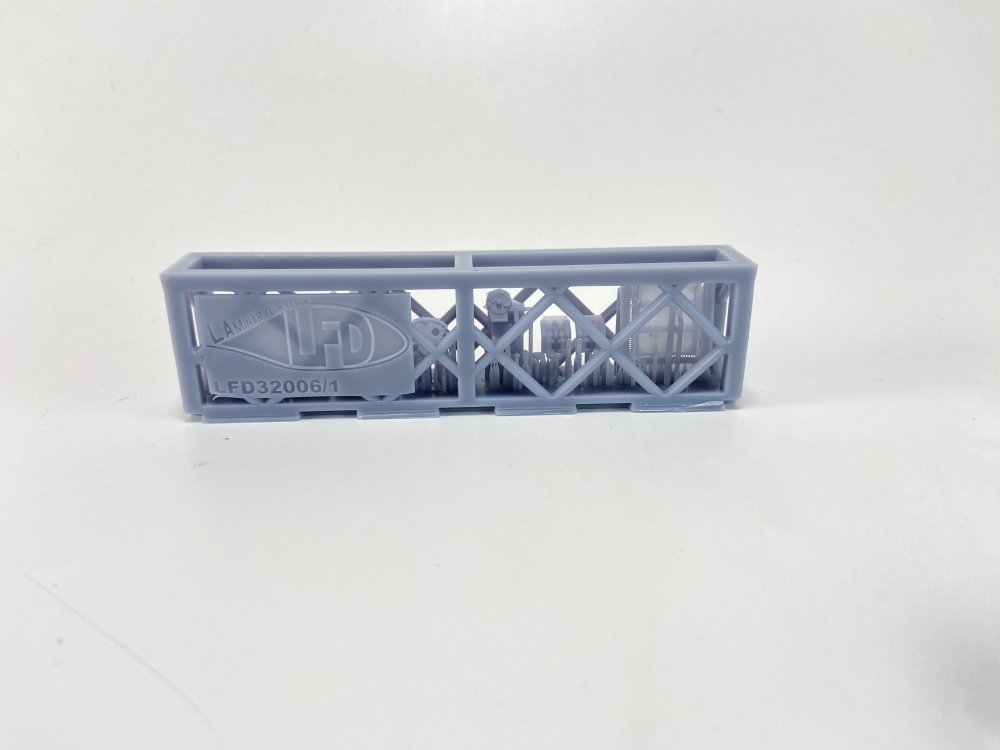
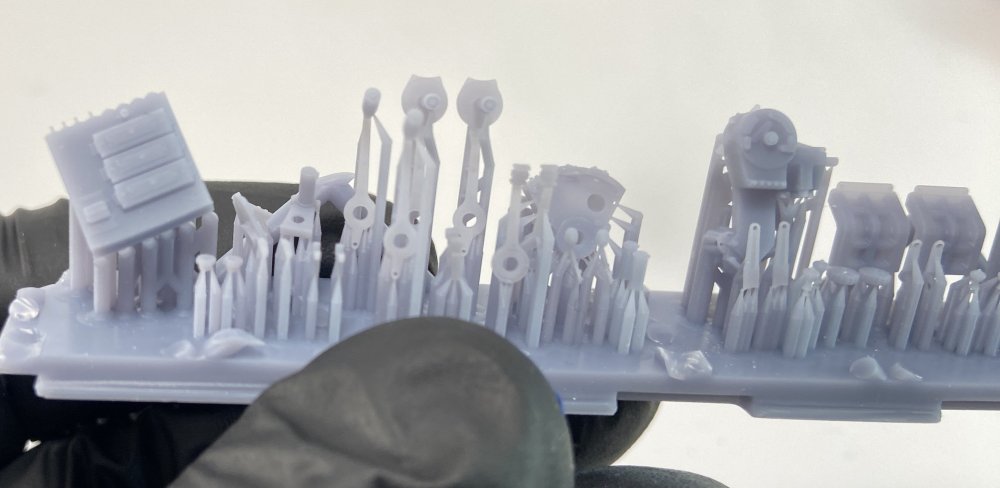
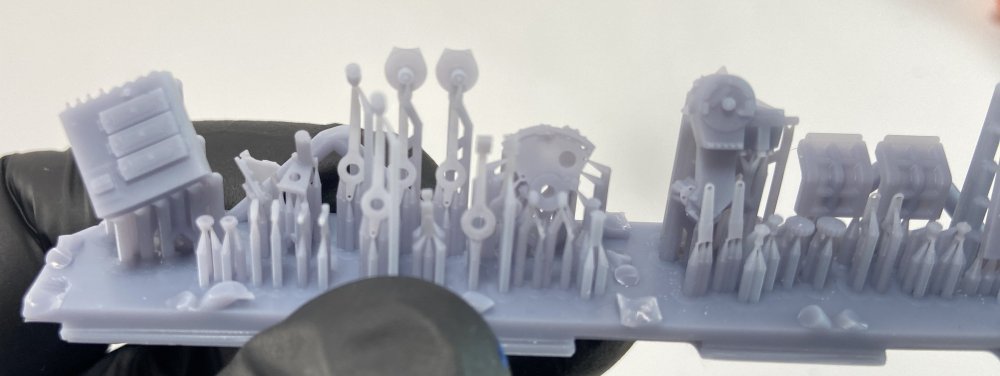
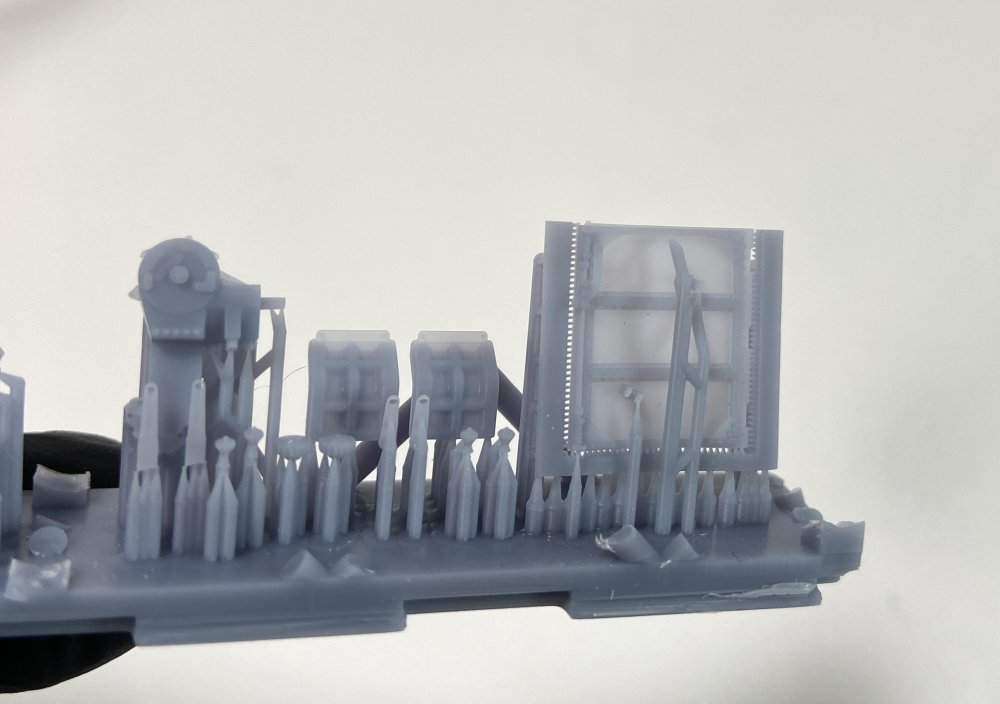
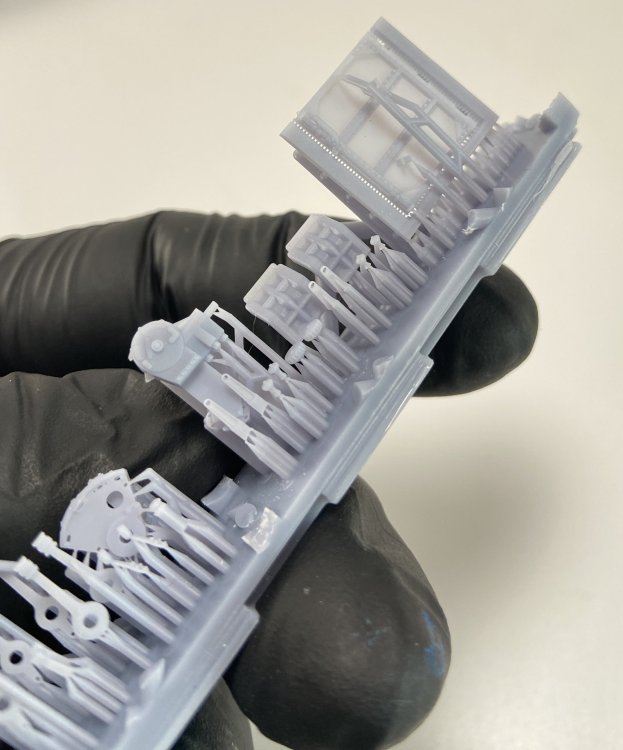
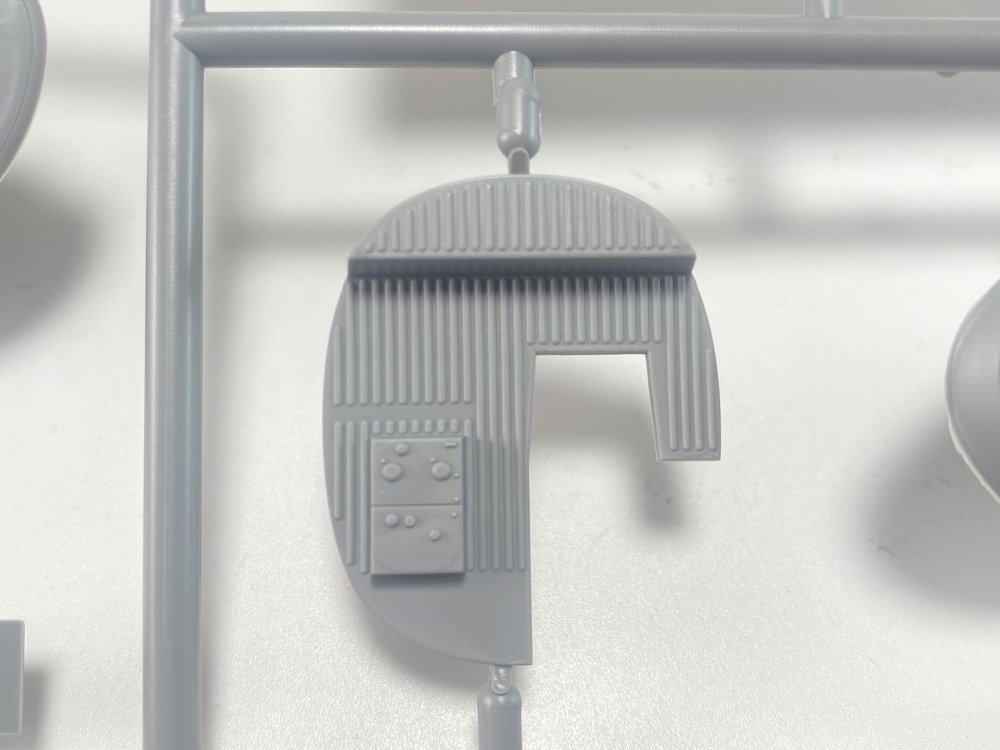
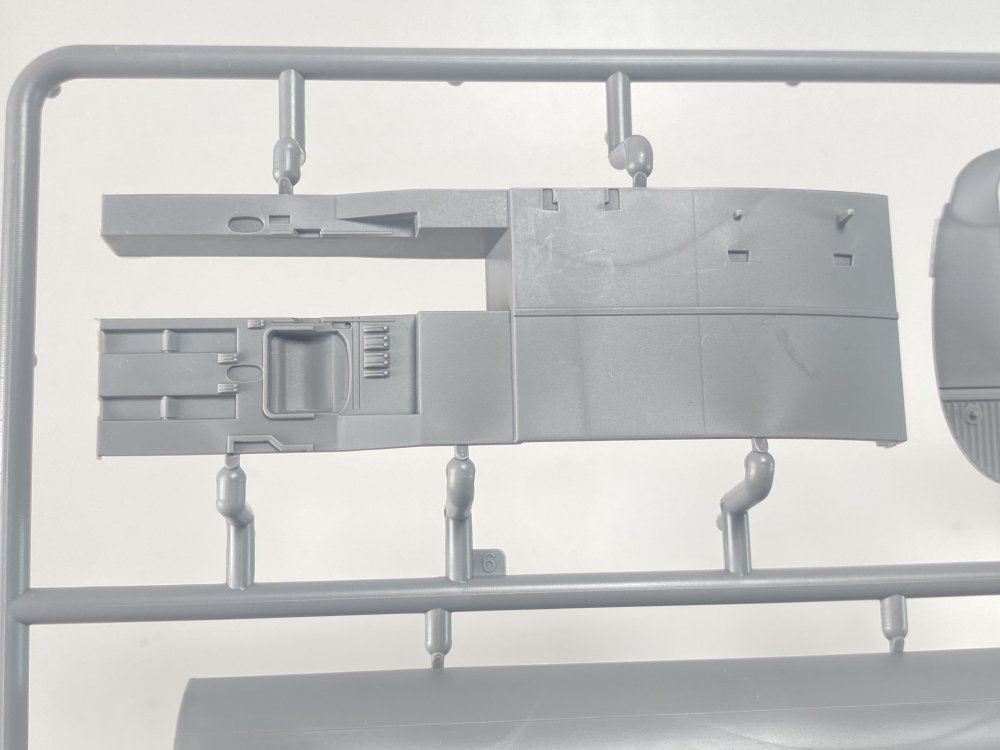
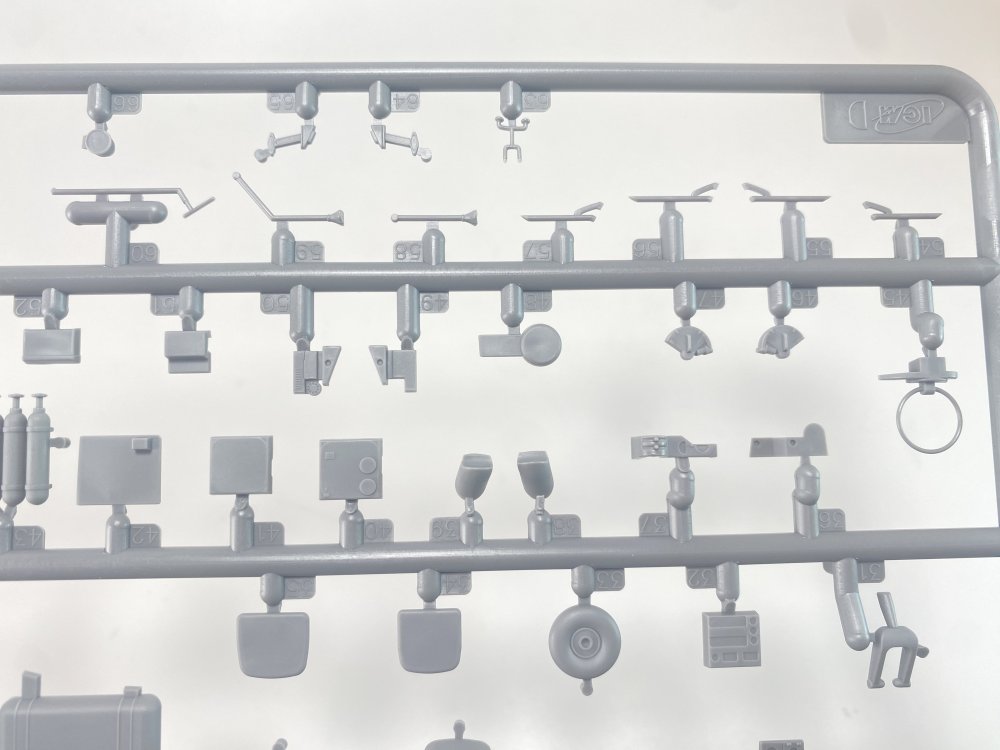
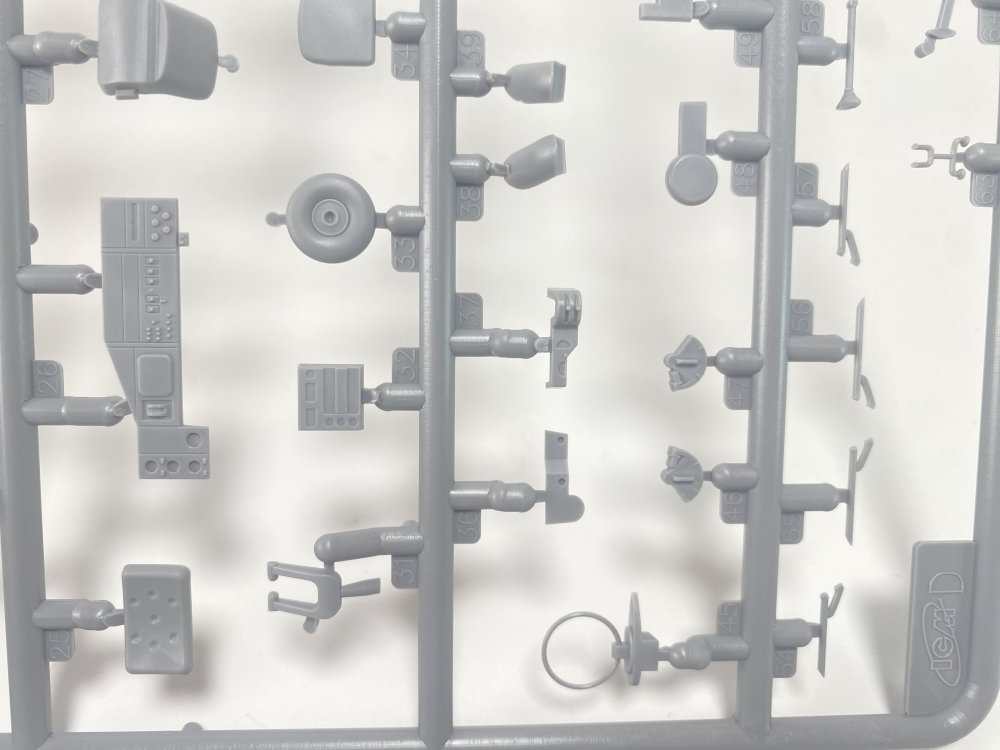
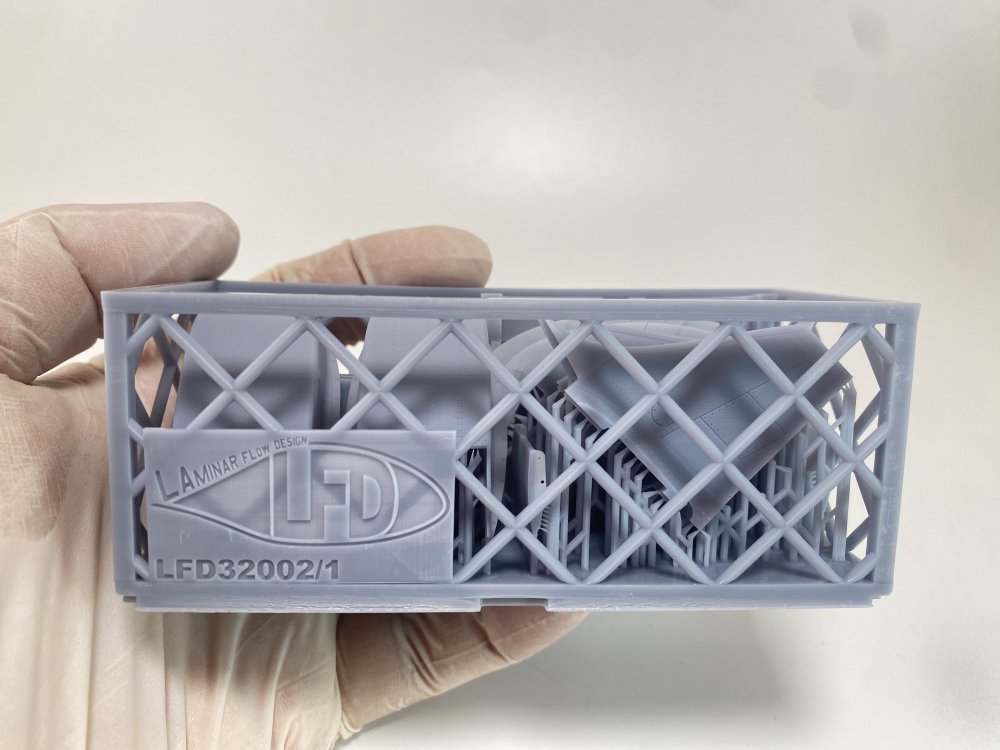
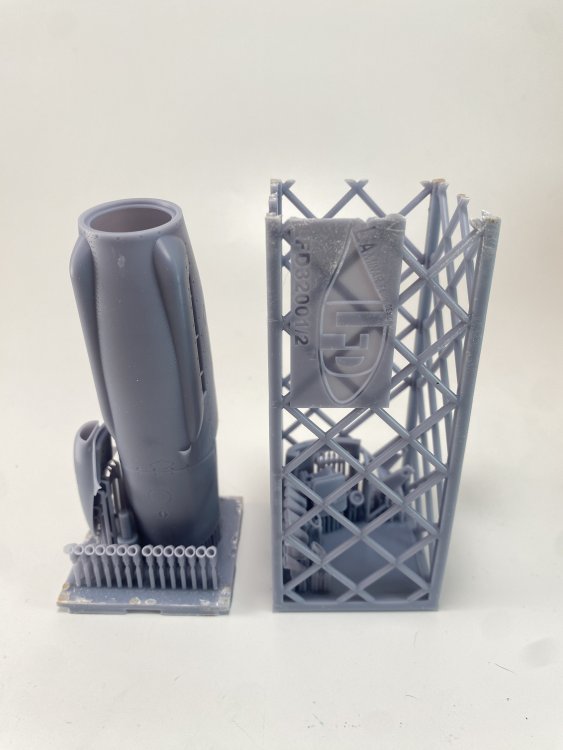
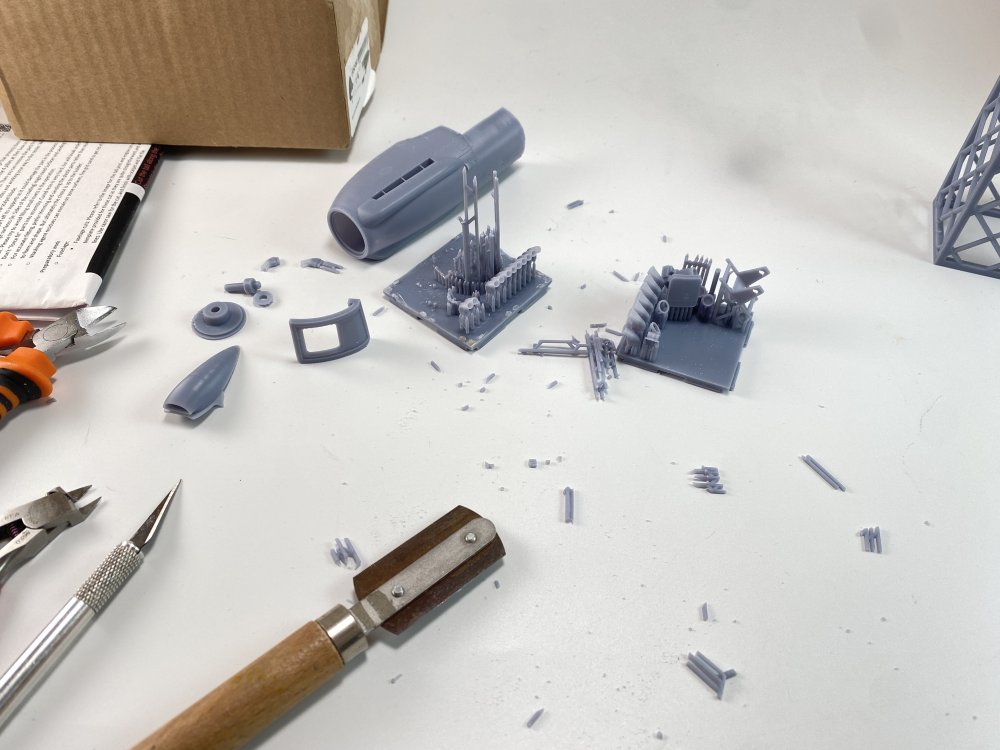
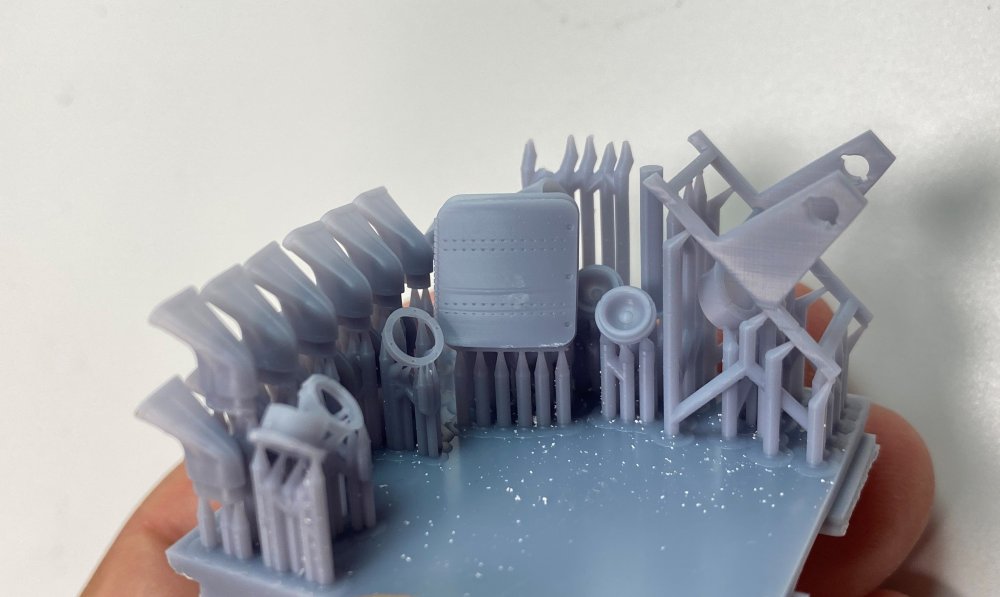
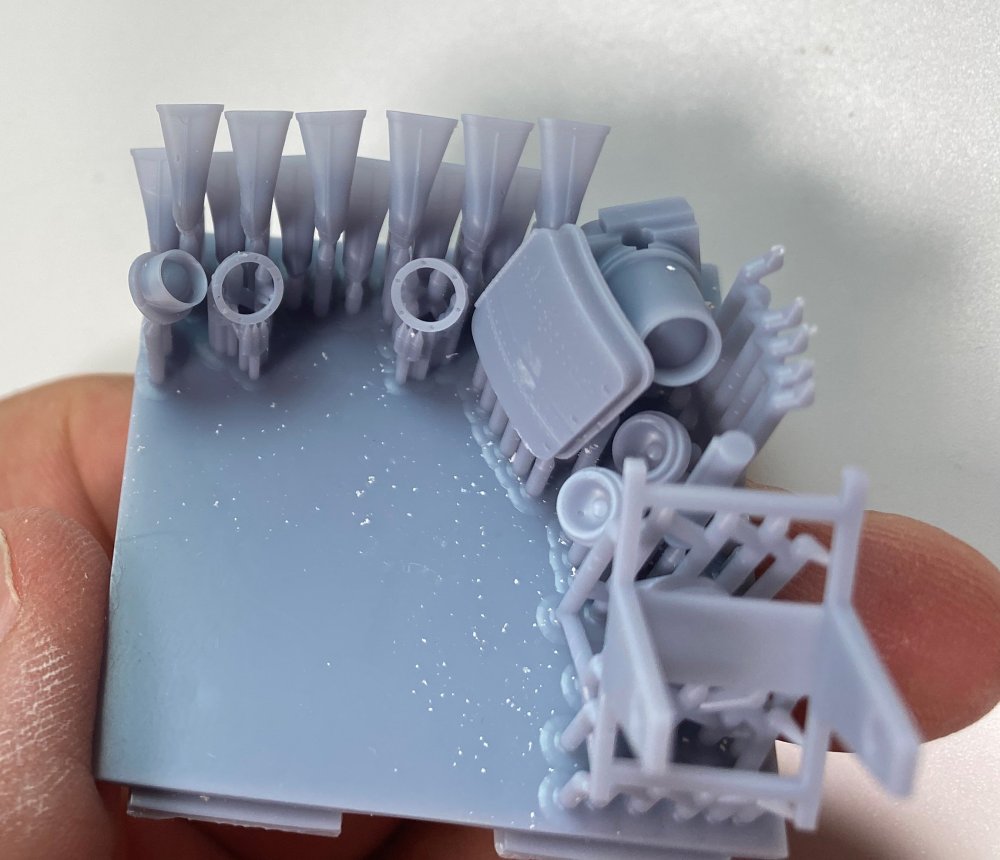
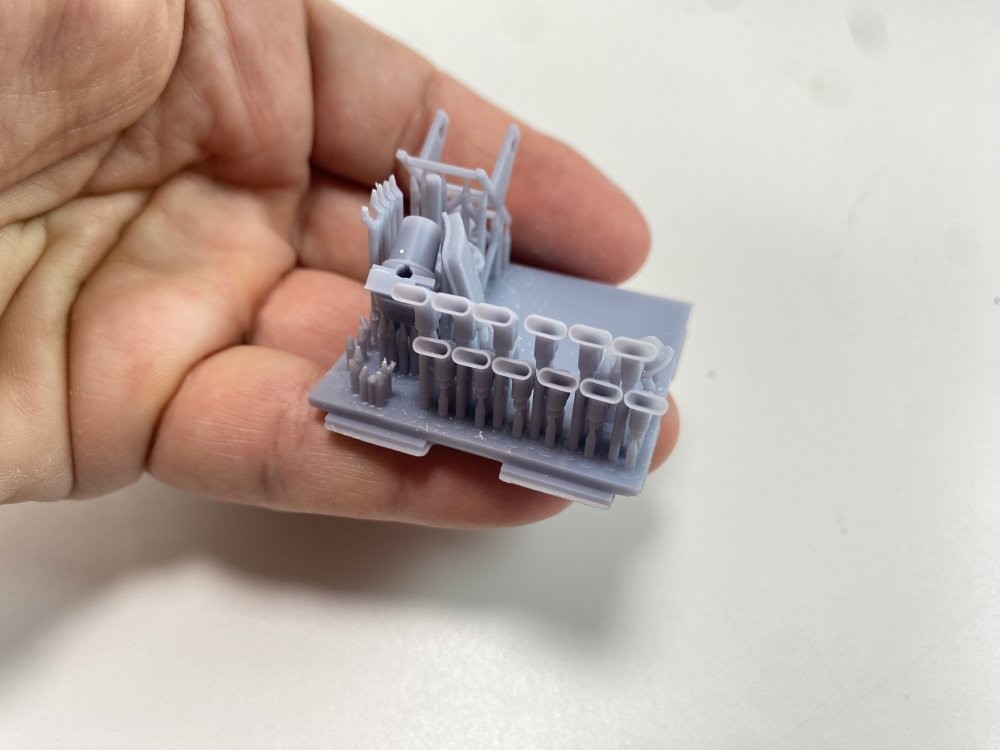
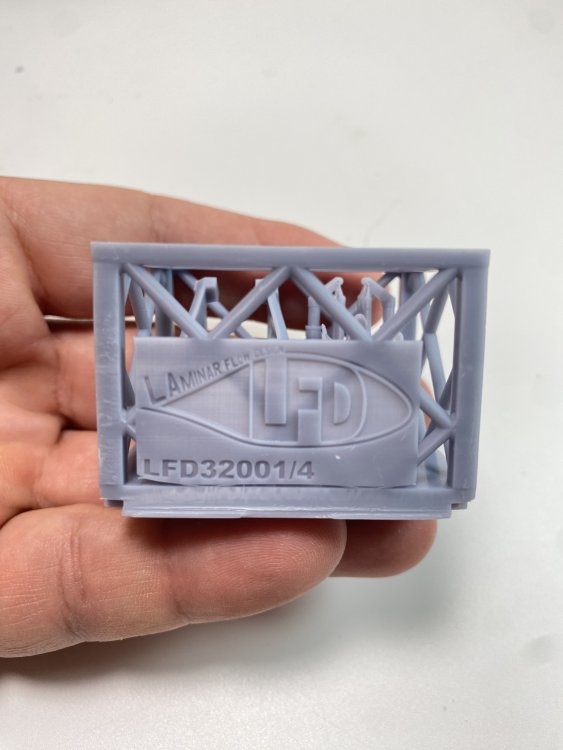
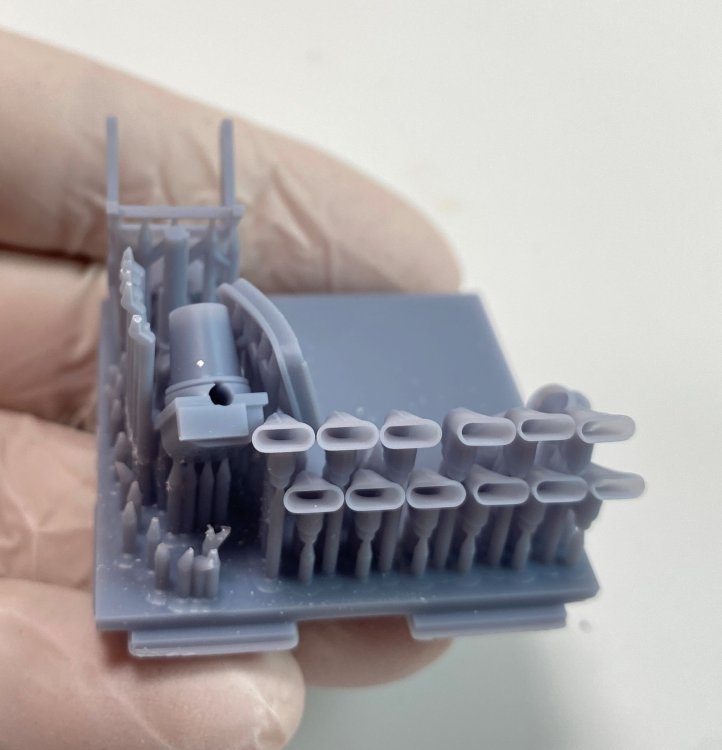
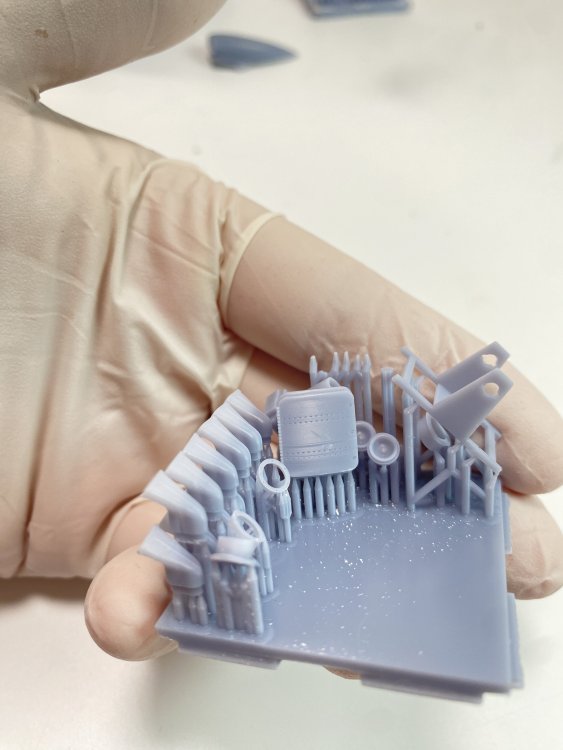
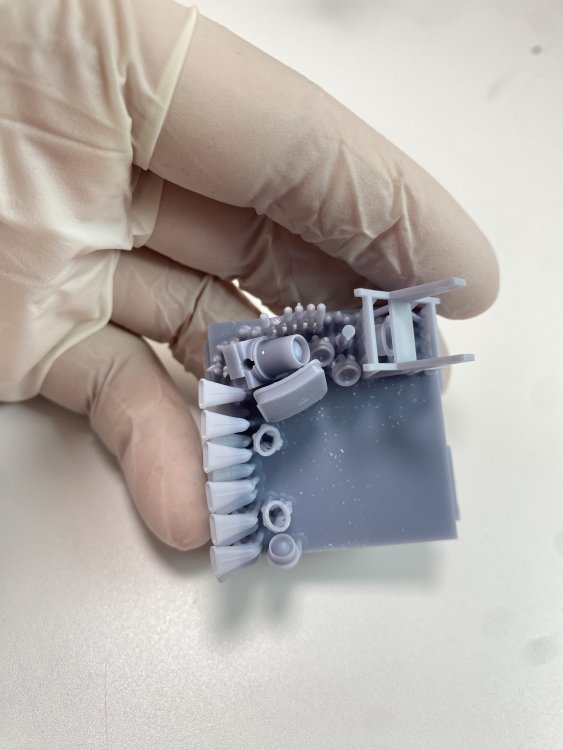
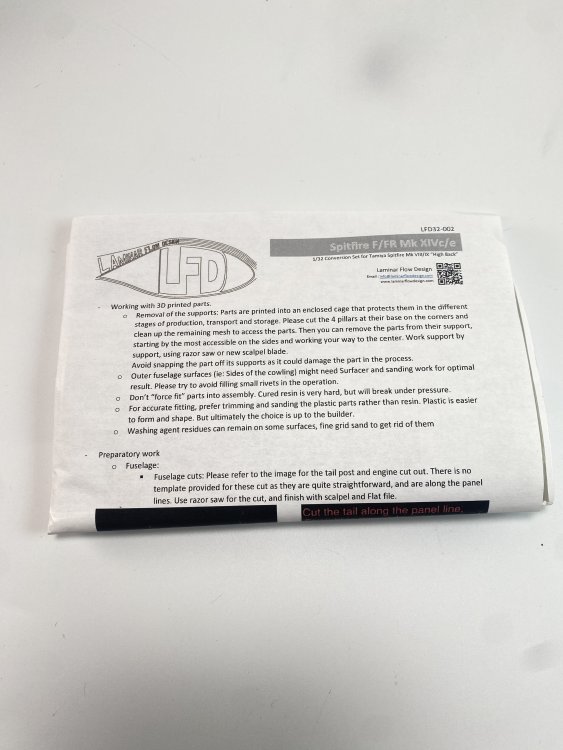
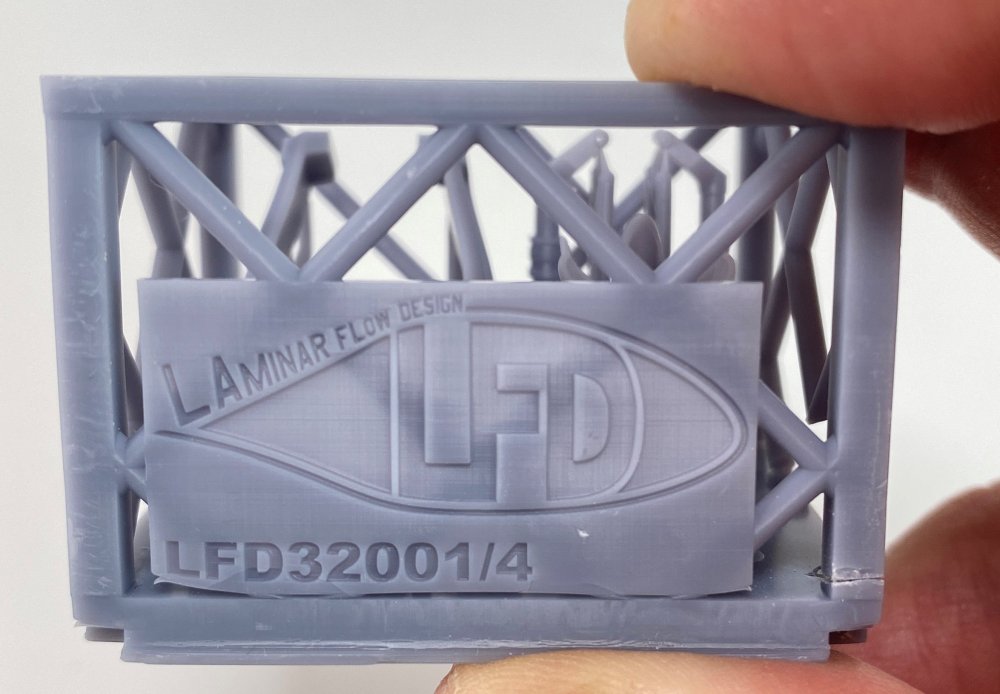
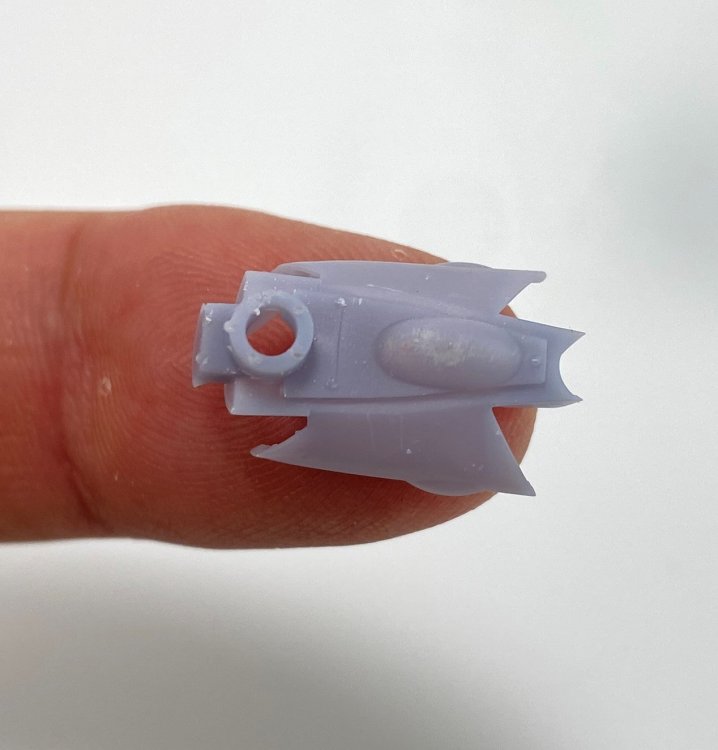
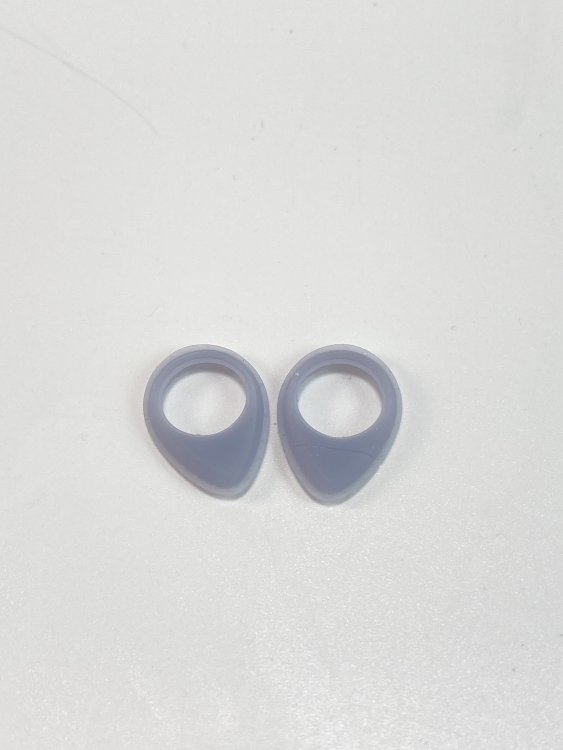
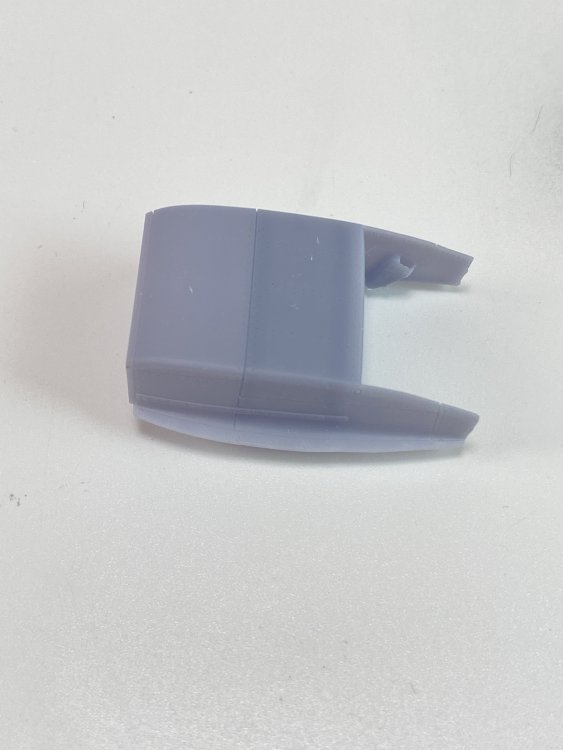
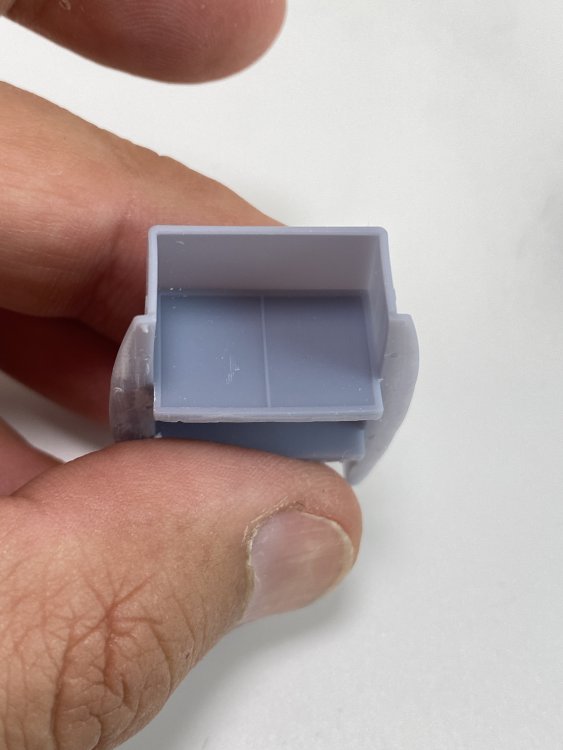
1:32 Spitfire F/FR XIVe Cockpit parts Hi-back/Low-Back for Tamiya's Spitfire Mk.VIII and IX kit Laminar Flow Design, 1/32 scale Catalogue n.º 32006 Price Tag - €22,99 Purchase directly at Laminar Flow Design website – here- Laminar Flow Design is a new company from Belgium for sure but it just shaked the modelling world with some fabulous 3D printed conversion with Spitfire F/FR XIVe conversions! Top notch ones, that I have had the please to review the Spitfire F/FR XIVe high-back conversion for Tamiya's Spitfire Mk.VIII/IX kit. Those conversions are perfec! They are indeed but I felt that something was missing because the Mk. XIV cockpit is not the same of the Mk. VIII, Mk. IX or the Mk. XVI. So Laminar Flow Design decided to give us a full treatment for those conversion, adding a new item to their catalogue, a detailed 1/32 scale Spitfire Mk.XIV cockpit upgrade/conversion for Tamiya kit. So I was lucky enough to got one of those cockpit conversion (in fact, I got two, as I have both conversion). As the conversion, this cockpit upgrade parts upgrade is delivered in a compact cardboard box packed securely. The set comes in the same way of the big conversion – in a resin printing cage to protect all the 37 3d printed resin parts. In the box, you will also find detailed instructions. So, as the others Laminar Flow Design products, the protective cage is essential to protect all the fragile parts. So, to free from the cage is very simple: just cut the four pillars at the base of the cage and the two centre pillars and everything parts will be accessible. To remove the parts, just use a razor and a brand new scapel. I already separate several parts of the conversion and some parts of this set, and never had a problem with broken pieces with this method. So, what do you get as upgraded cockpit: Hood control Lever & handle (low back) Throttle Quadrant Assembly (Gyro or reflector type handles) Landing Gear Quadrant Priming Pump & Bracket Access Door & Crowbar Port Side switchbox Separate Rudder Trim Waffle Foot guards You will also get multiple handles and levers. They are very small but very well printed. The instructions are, once again, very intuitive and clever. The parts identification is very helpful dividing the parts by colour and letters. To help to identify the parts and their location, LFD gives several colour pictures of the real cockpit. Really nice! Conclusion: Well, it’s the end of 2023, and for me, the Oscar for the best “Model Maker Revelation 2023” is obviously, Laminar Flow Design. The design of parts of the conversion is outstading. The same goes for this set. The detail of all parts in 3D printing are flawless! And the printing itself is one of the best in modelling market (probably the best in aircraft modelling until now, for what I have seen). This detail set is essential to all of those who got the LFD conversions (32001 and 32002) as gives a truly accurate cockpit of the Spitfire Mk XIV, giving the modeller everything he needs to get a truly fantastic model of an accurate Mk XIV. Thanks to Laminar Flow Design for producting this beautiful set.


- 1 reply
-
- 6
-

-

-
- laminar flow design
- 1:32
- (and 1 more)
-
Merry Christmas to all LSM modellers!!!
-
TOTAL JEALOUS !! I would love to be with you guys!!
-
leave it mate!
-
All right then I´m in with SBD-1/2 Dauntless Trumpter 1:32. https://www.scalemates.com/kits/trumpeter-02241-usnavy-sbd-1-2-dauntless--104366
-
LSM Modelling News 2023 merged Fran and Artful69’s threads
Fran replied to Fran's topic in Modelling Discussion
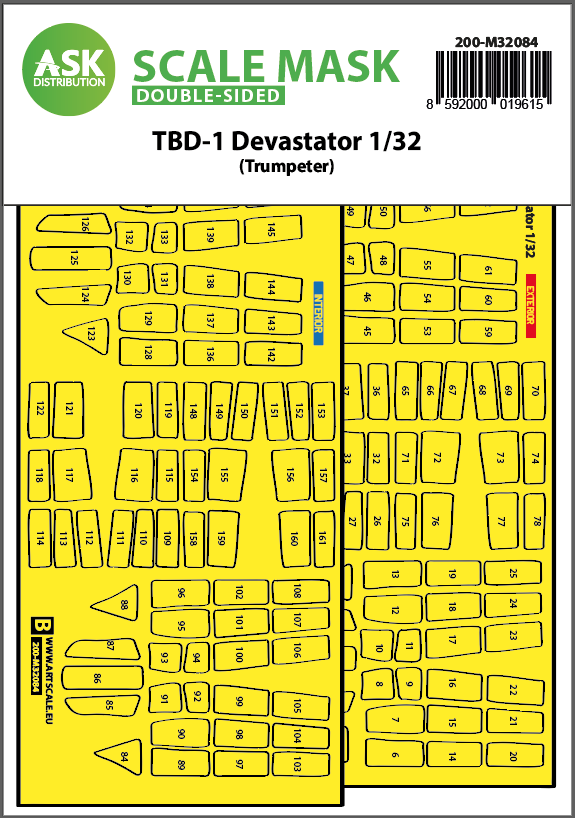
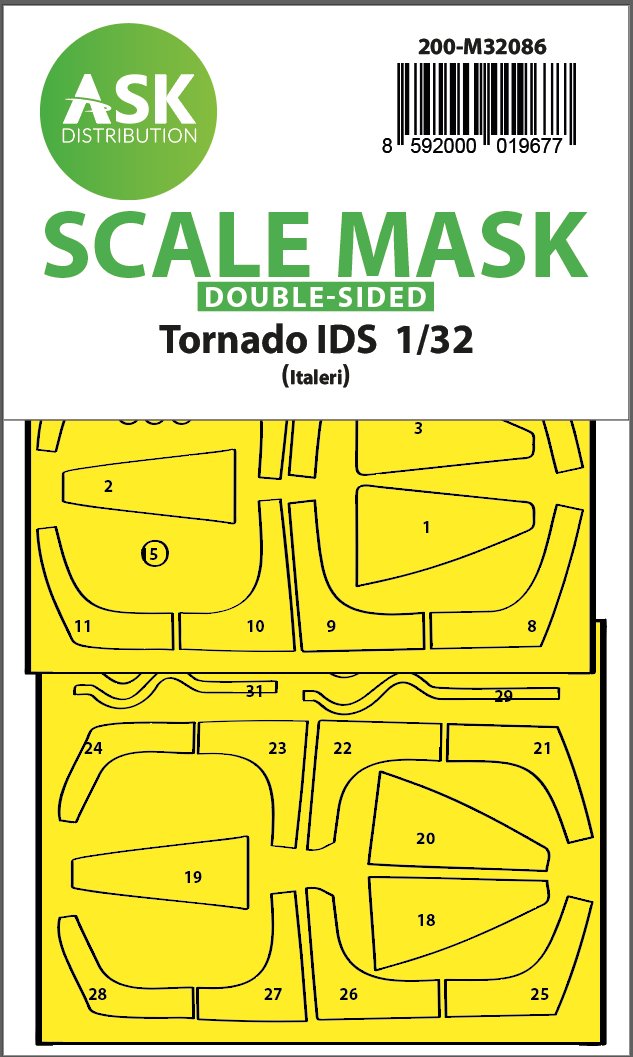
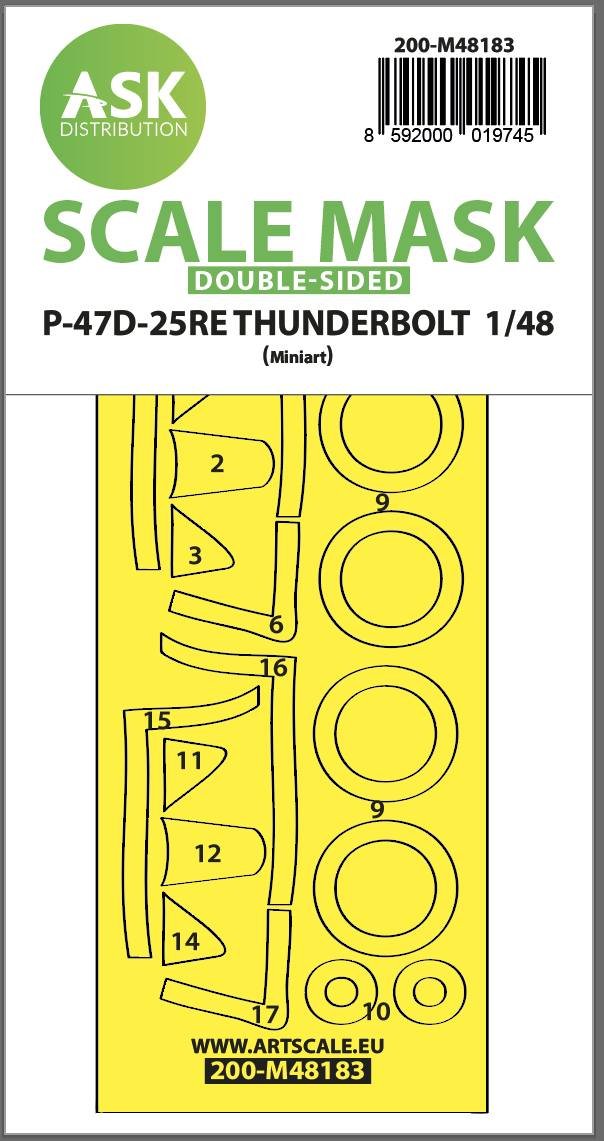
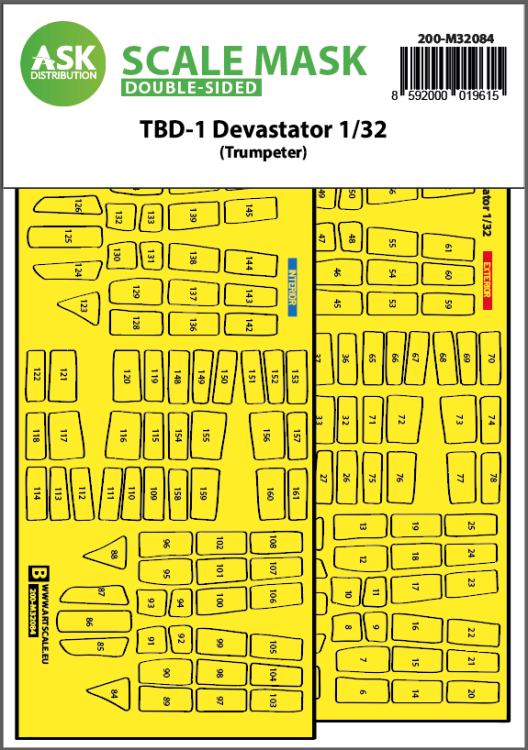
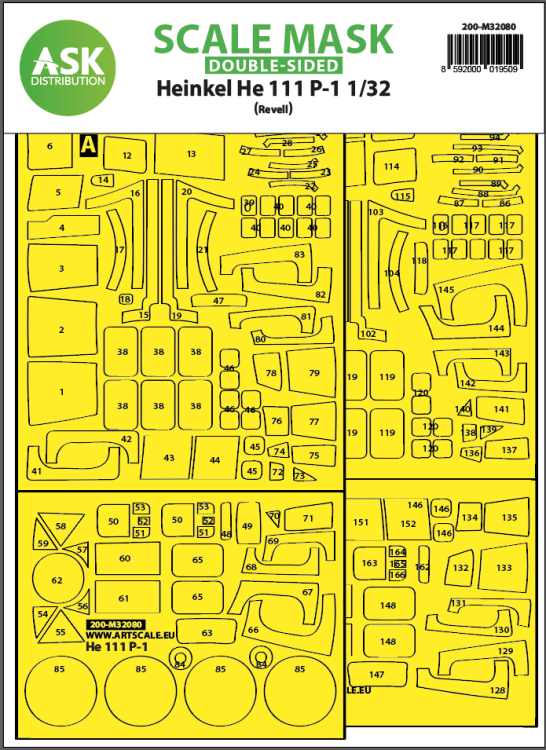
News from Art Scale! A few new decals for the 1:32 Hurricane, Mig-21 and Devastator! Check the PdFs. And also several new masks and some 1:48 turnbuckles 200-D32030-Hawker-Hurricane-Mk.IIc-part-4-Albions-Falcons-Royal-Air-Force-final.pdf 200-D32031-Hawker-Hurricane-IIb-part-5-USAAF-sevice-final.pdf 200-D32032-Hawker-Hurricane-Mk.IIb_Mk.X-part-6-US-Eagles-final.pdf 200-D32077-MiG-21-F-part-2-US-AF-4477-TES-TAC-unit-final.pdf 200-D32078-MiG-21F-13-Fishbed-part-4-Izrael-Air-Force-final.pdf 200-D32083-Douglas-TBD-1-Devastator-part-1-final-Verze-02.pdf 200-D32084-Douglas-TBD-1-Devastator-part-2-Kwajalein-and-Wake-Island-attack-February-1942-final-verze-01.pdf 200-D32085-Douglas-TBD-1-Devastator-part-3-final-1.pdf 200-D32086-Douglas-TBD-1-Devastator-part-4-final-1.pdf


-
rose of york Hong Kong Model 1:32 B-17 G “Rose of York” Limited Edition
Fran replied to Fran's topic in Aircraft Reviews
Thank you for the warning and Ernie to crrect it. Was probably the auto-correct as in Portuguese, Elizabeth is with a S... Sorry once again. -
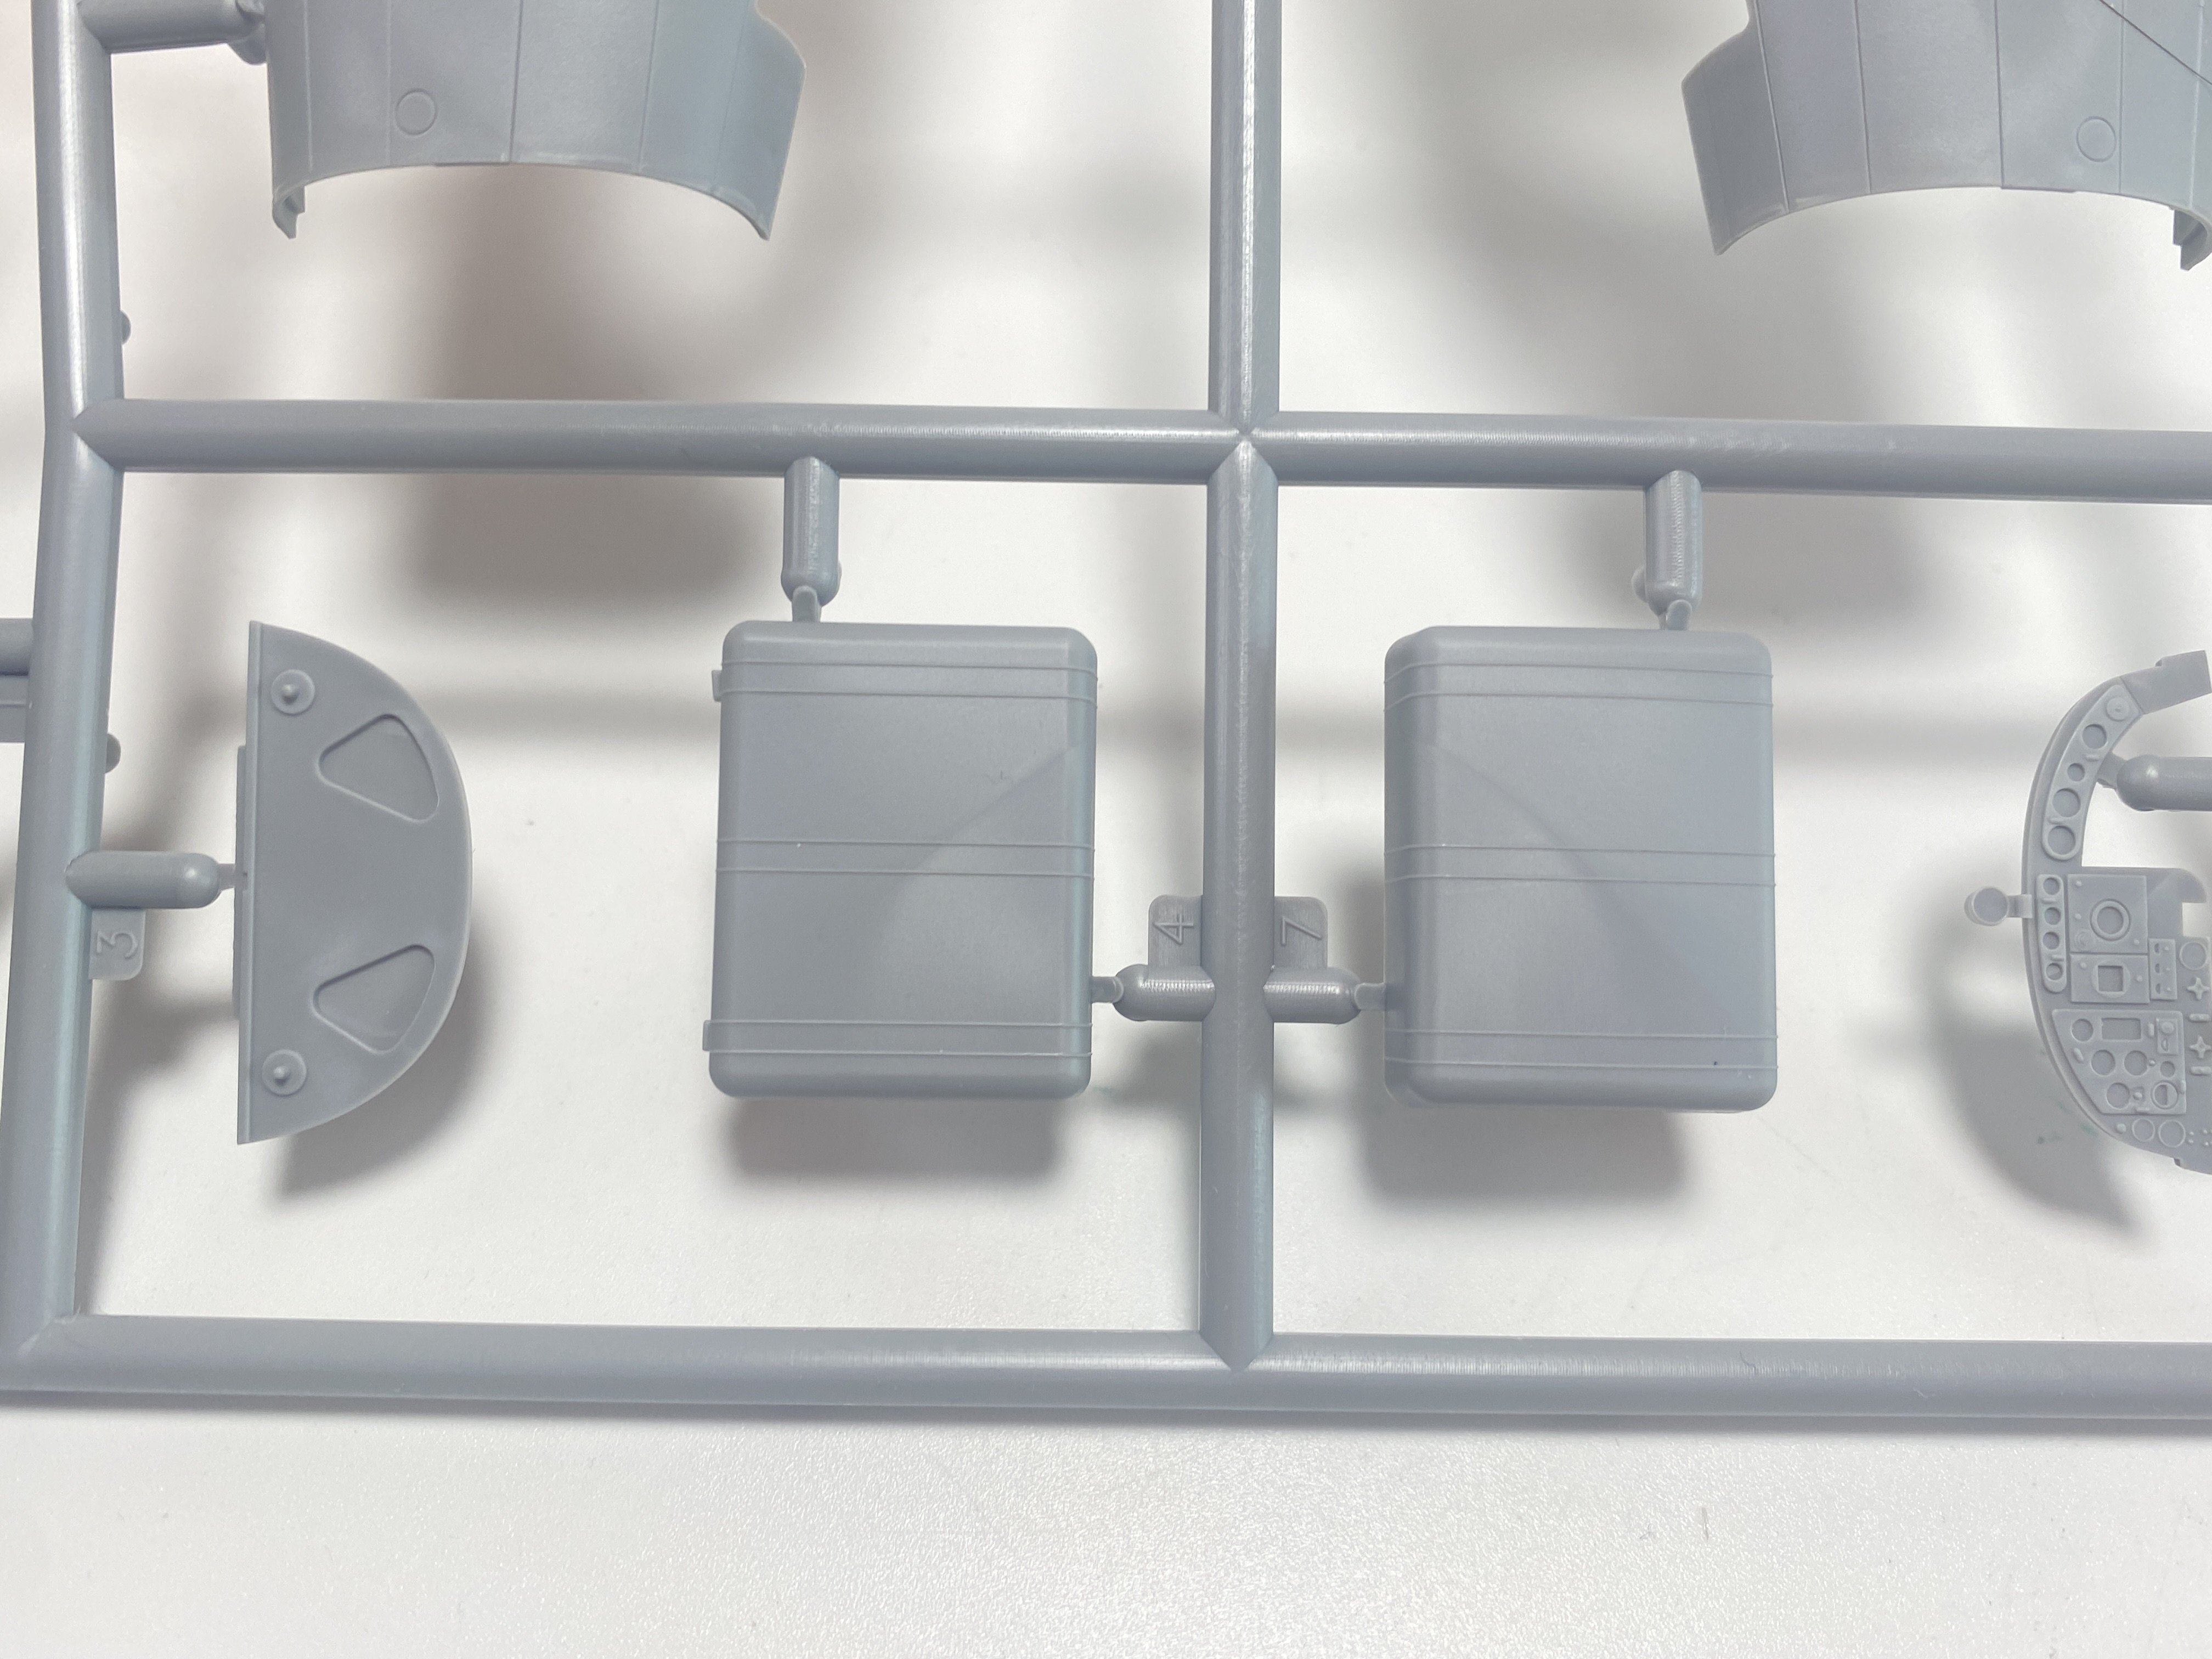
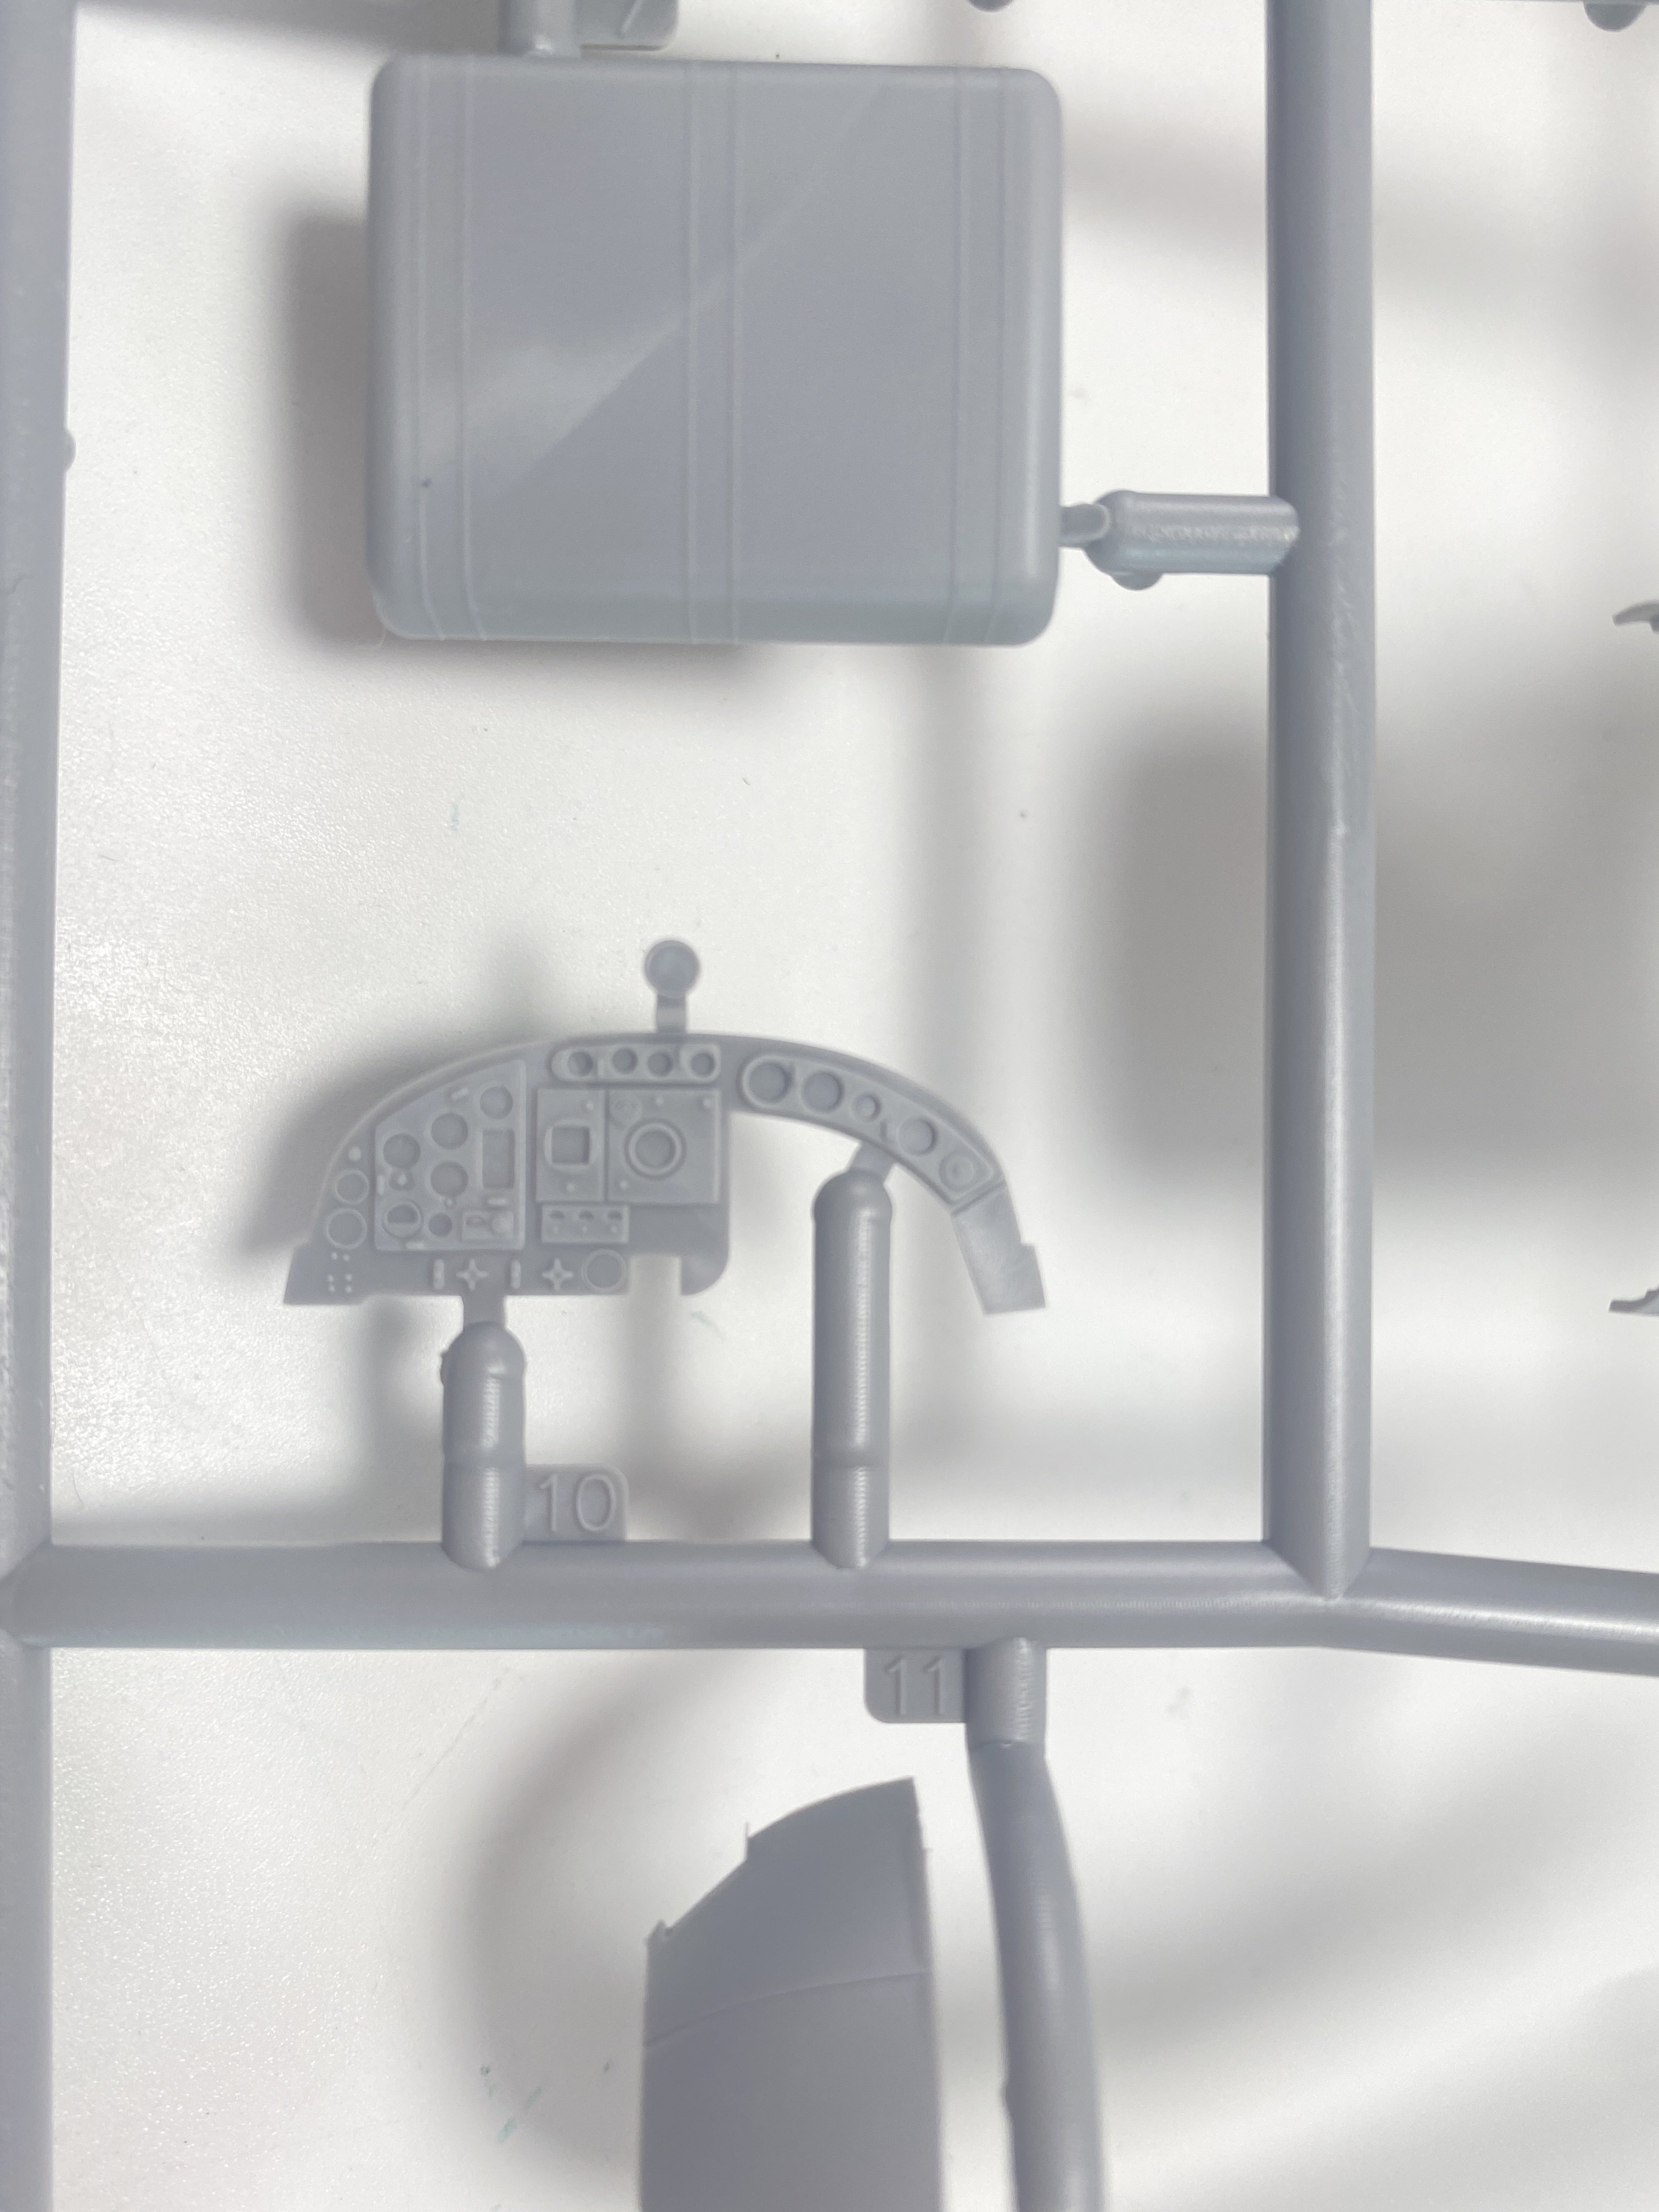
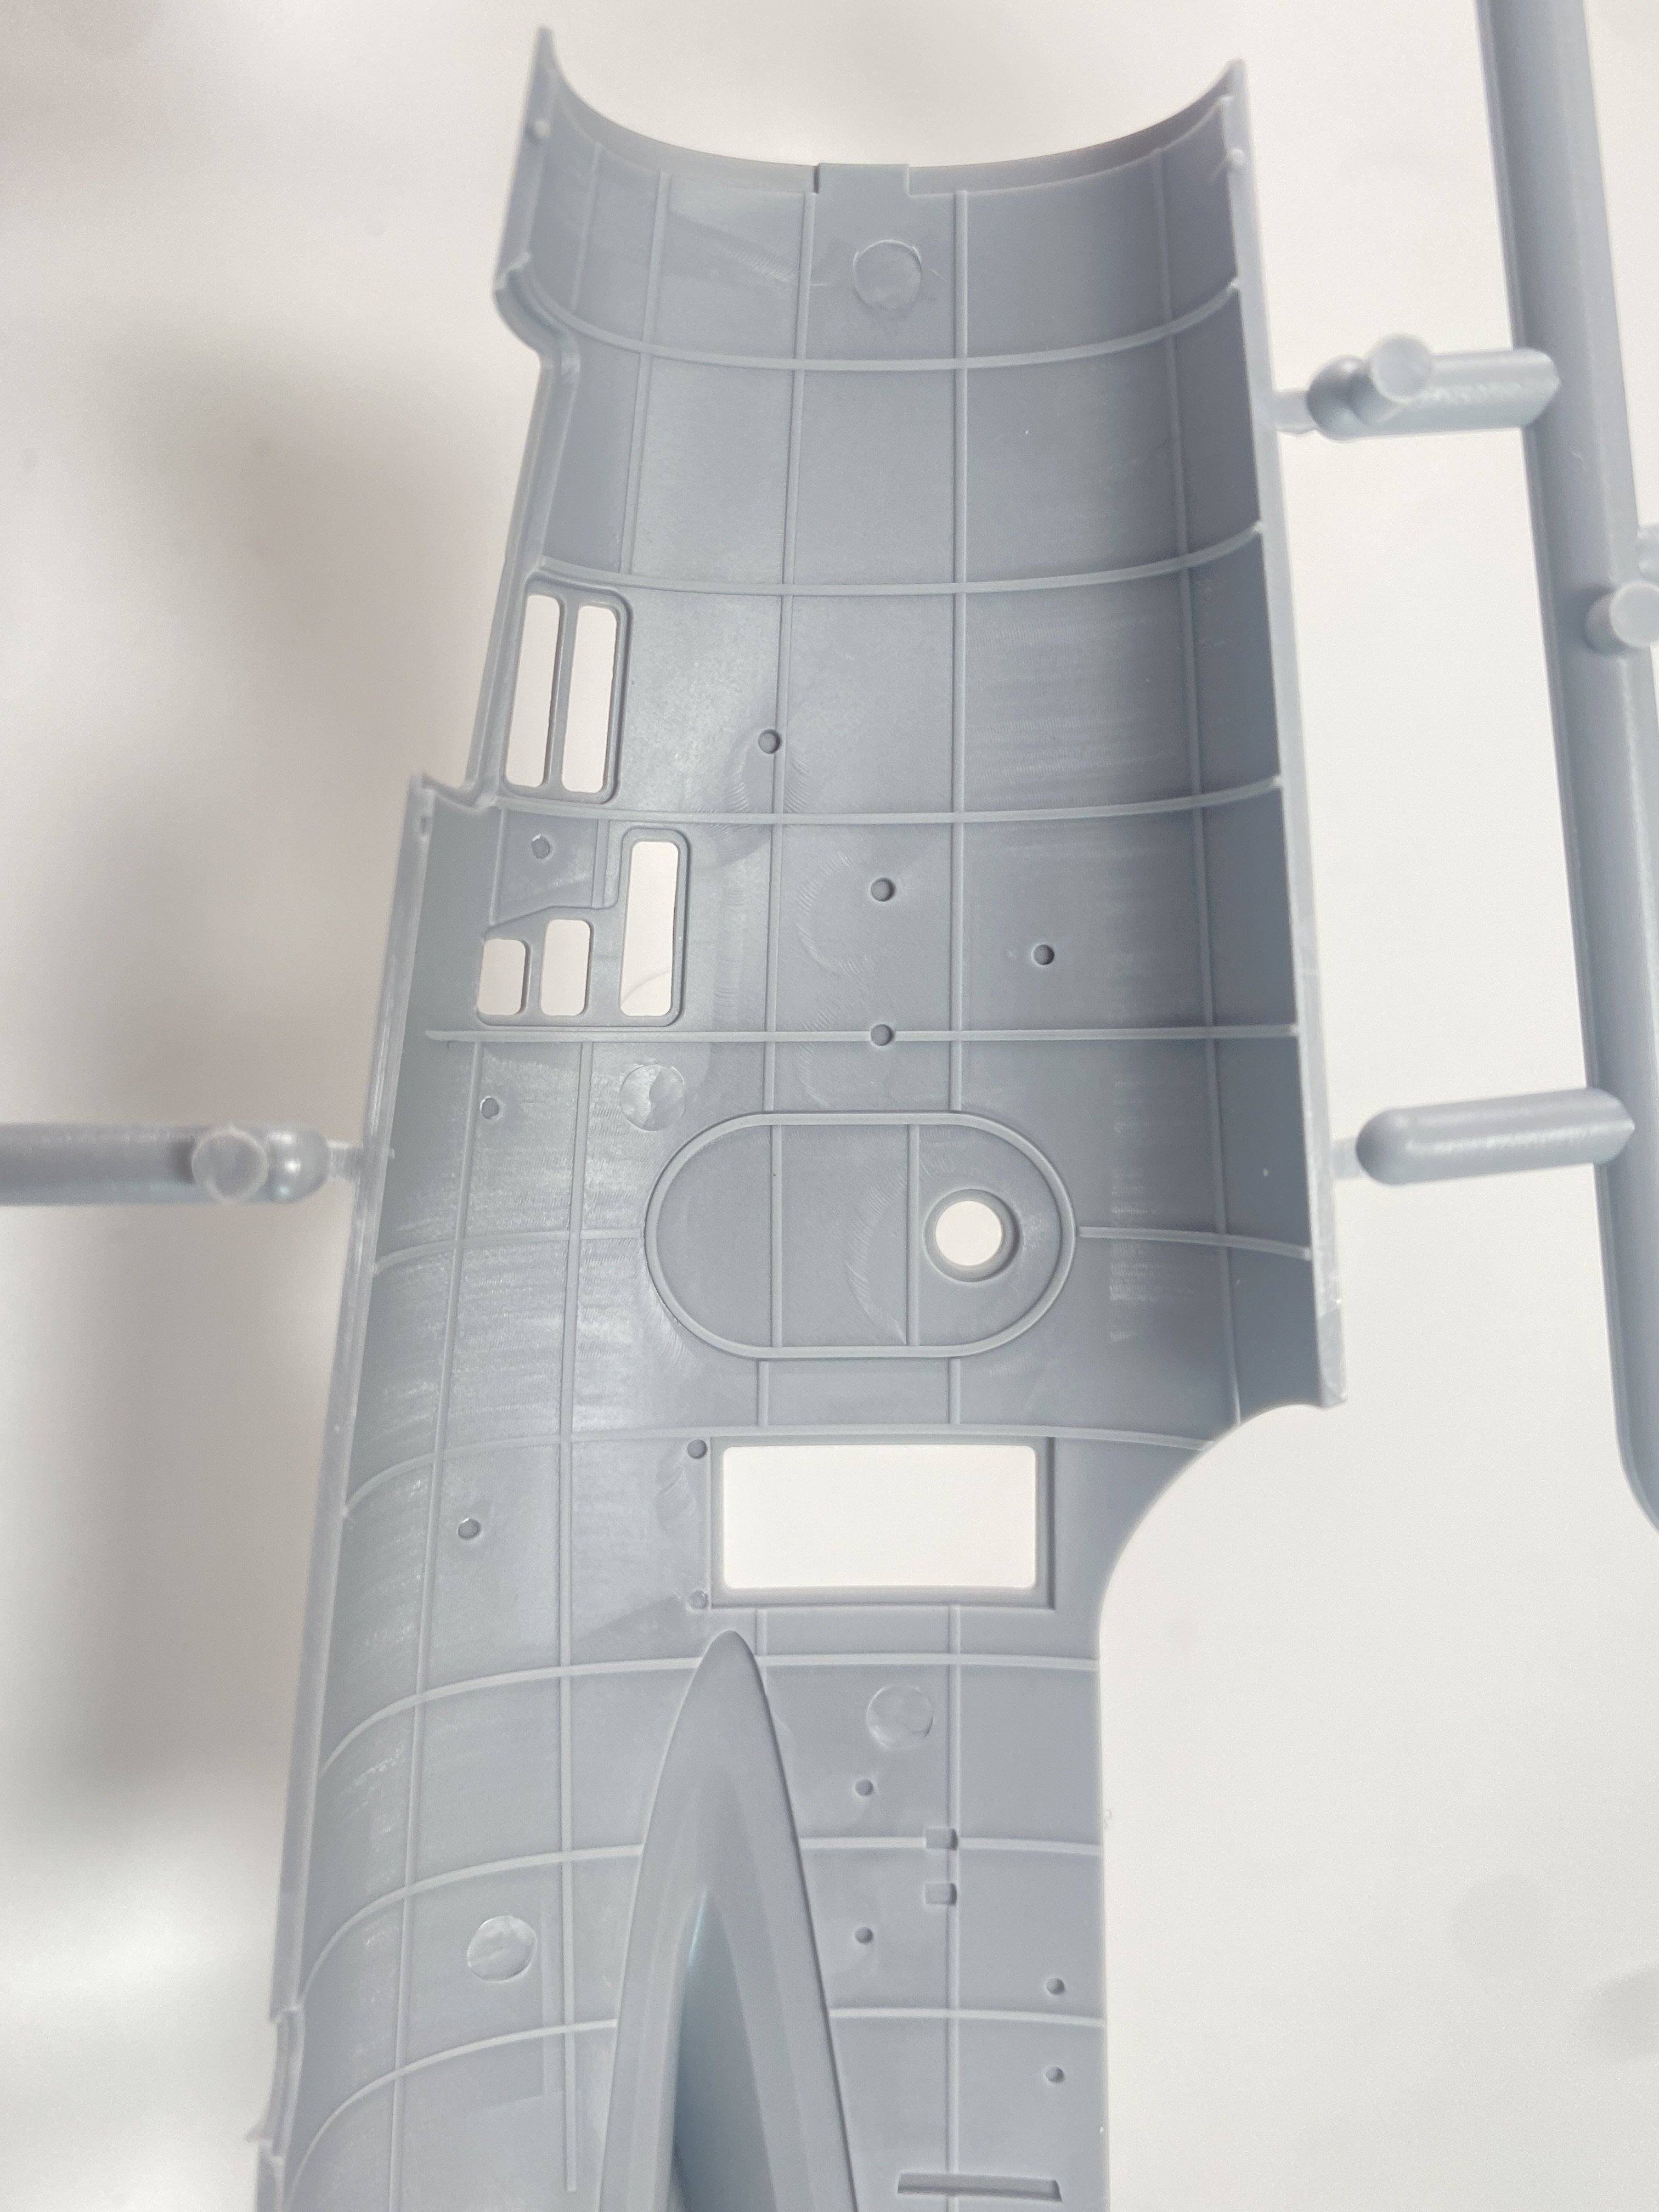
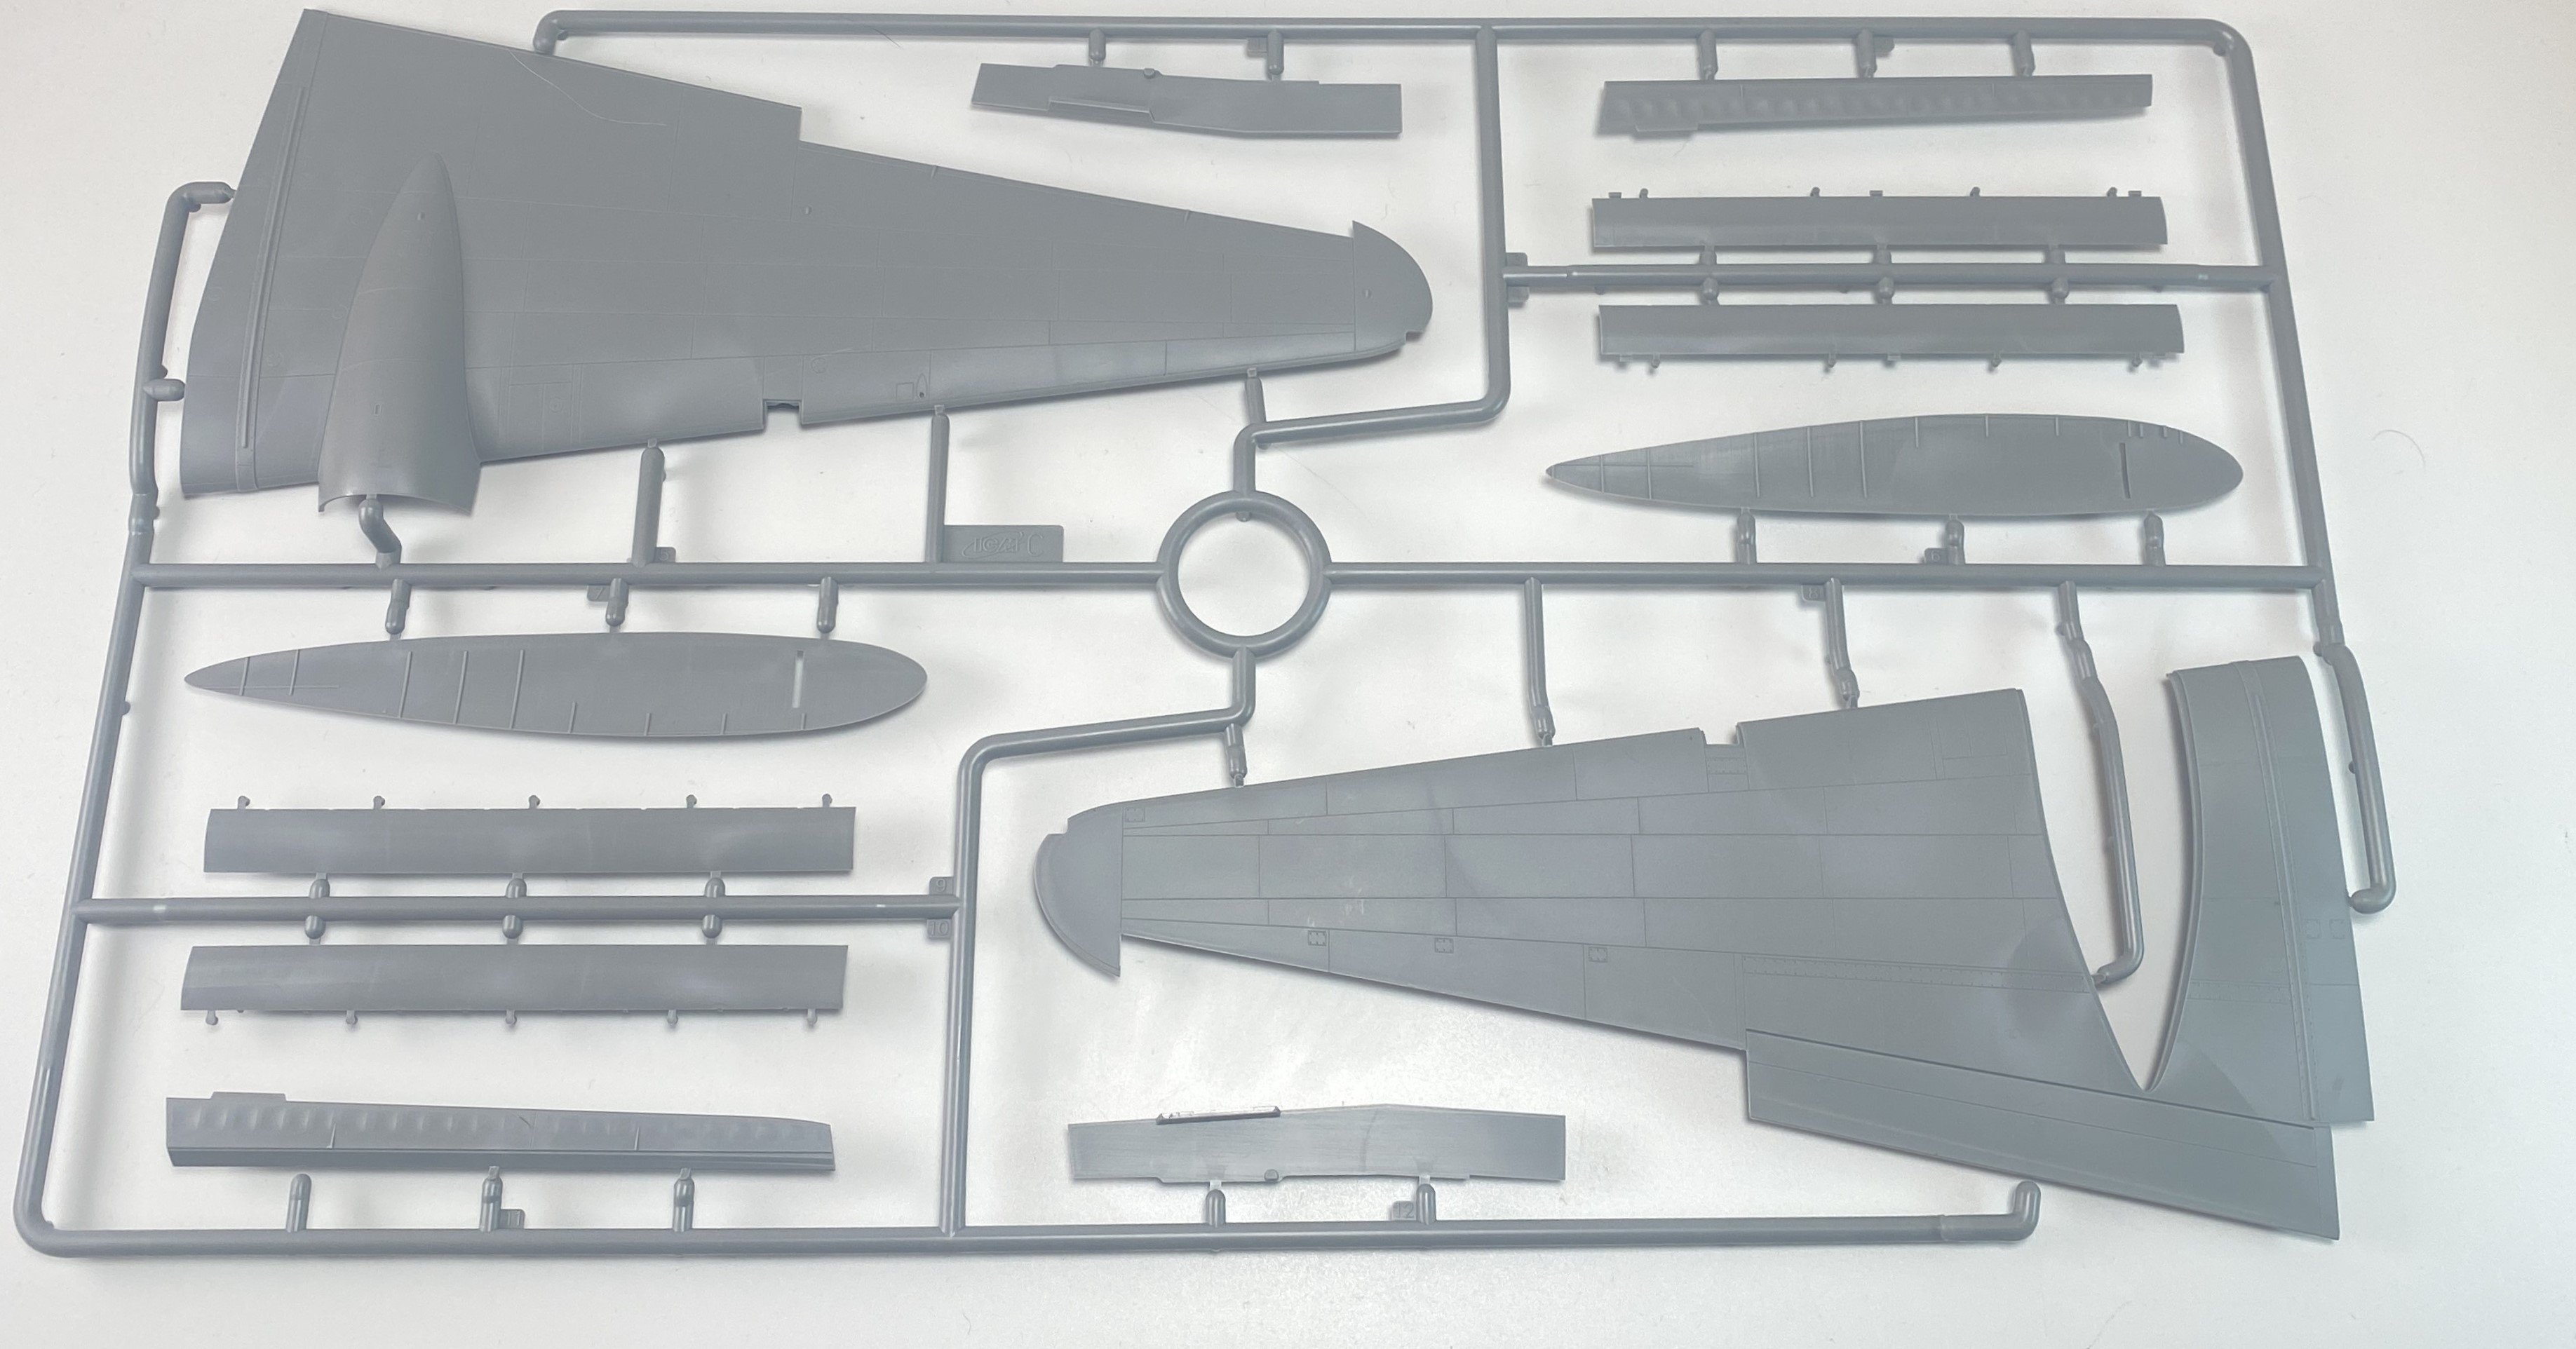
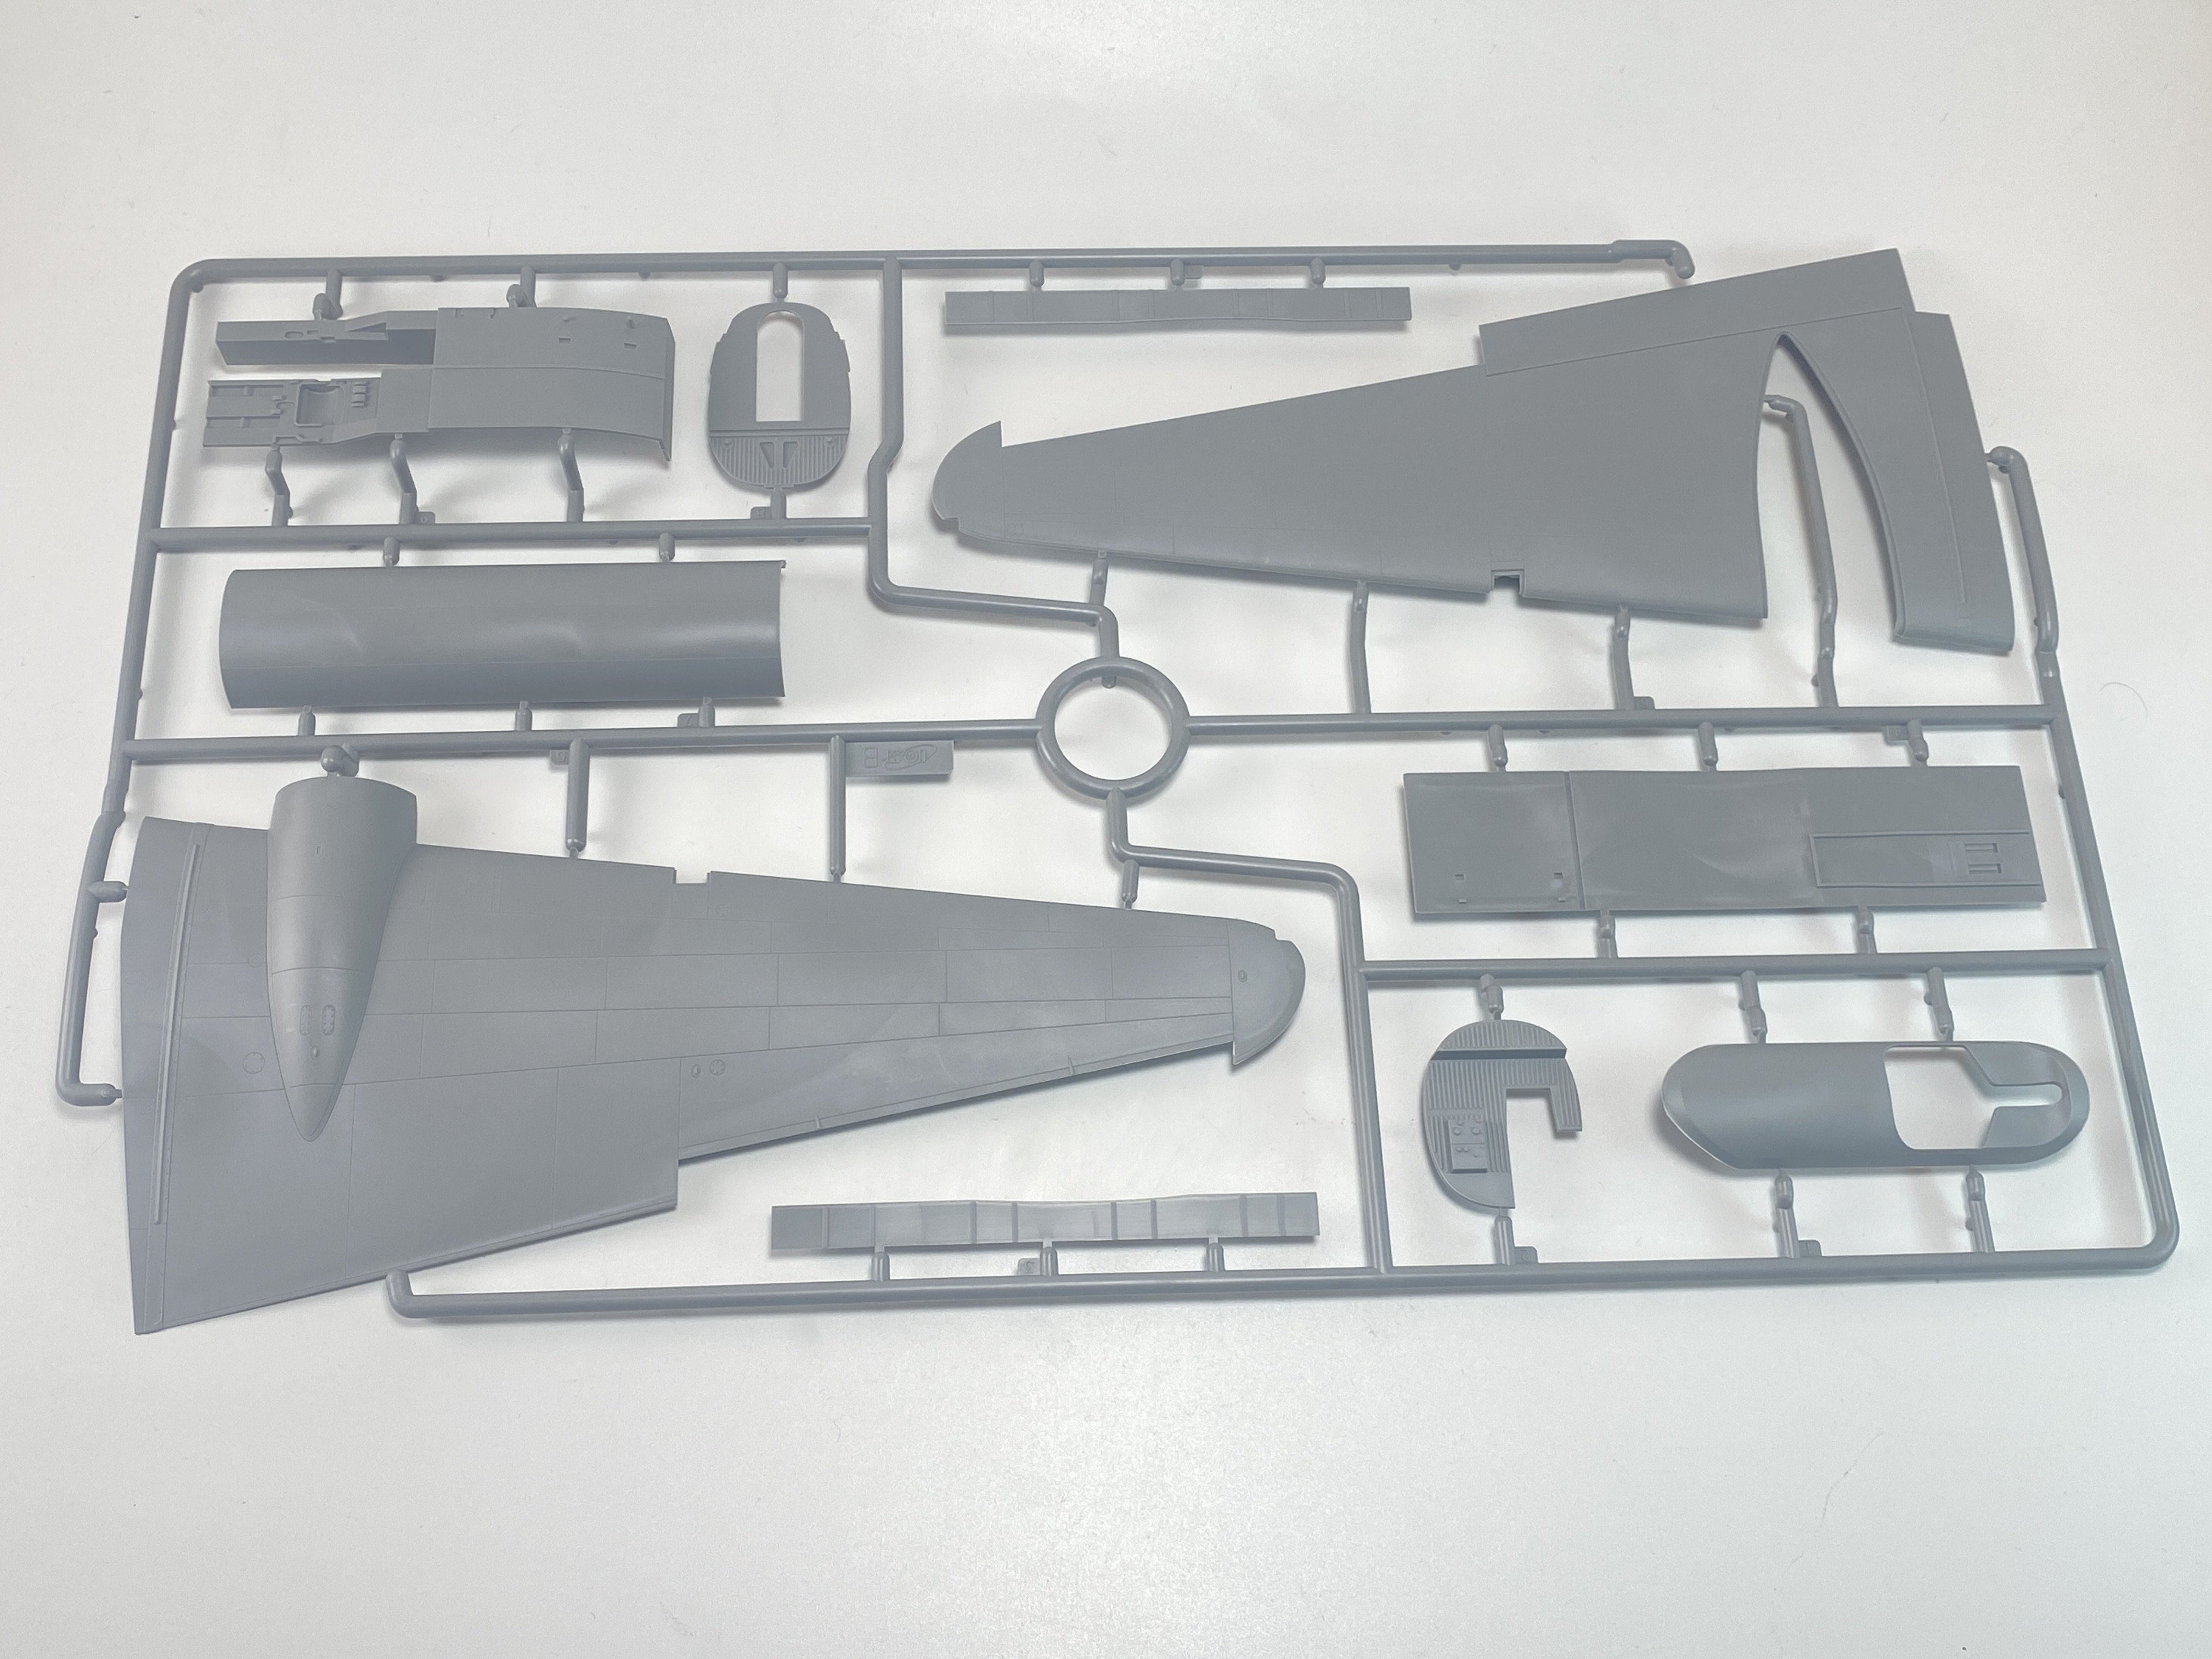
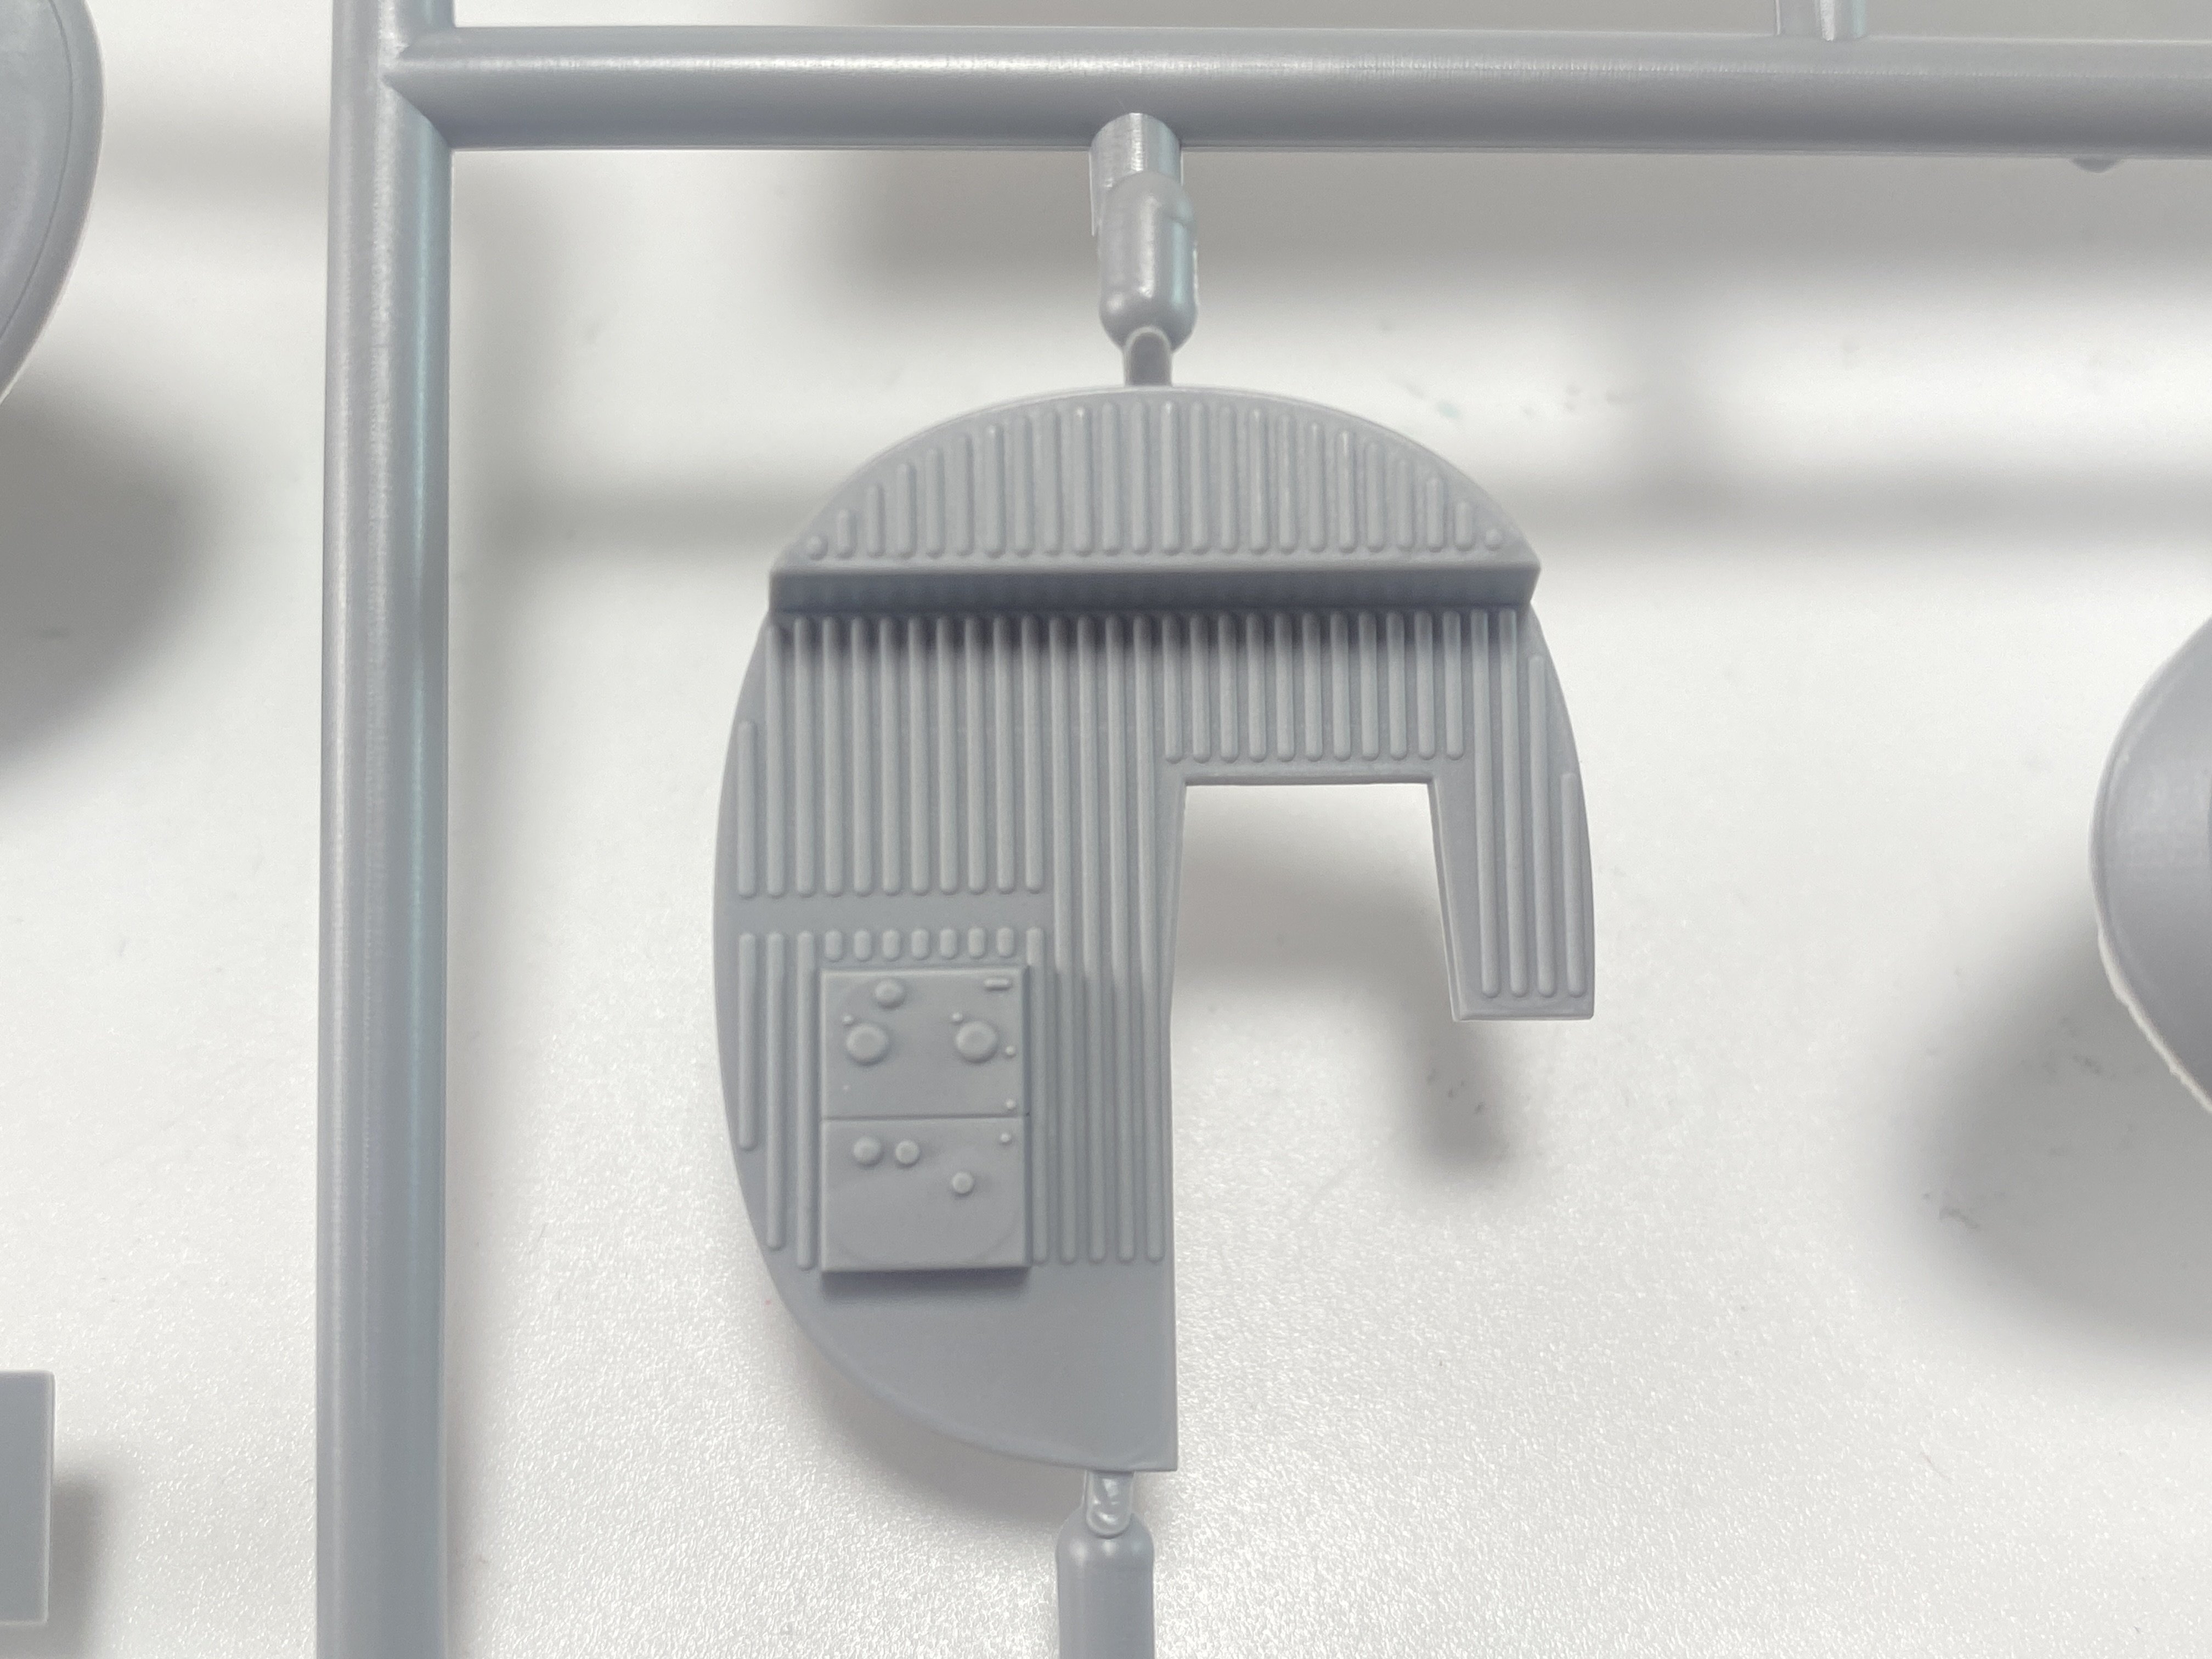
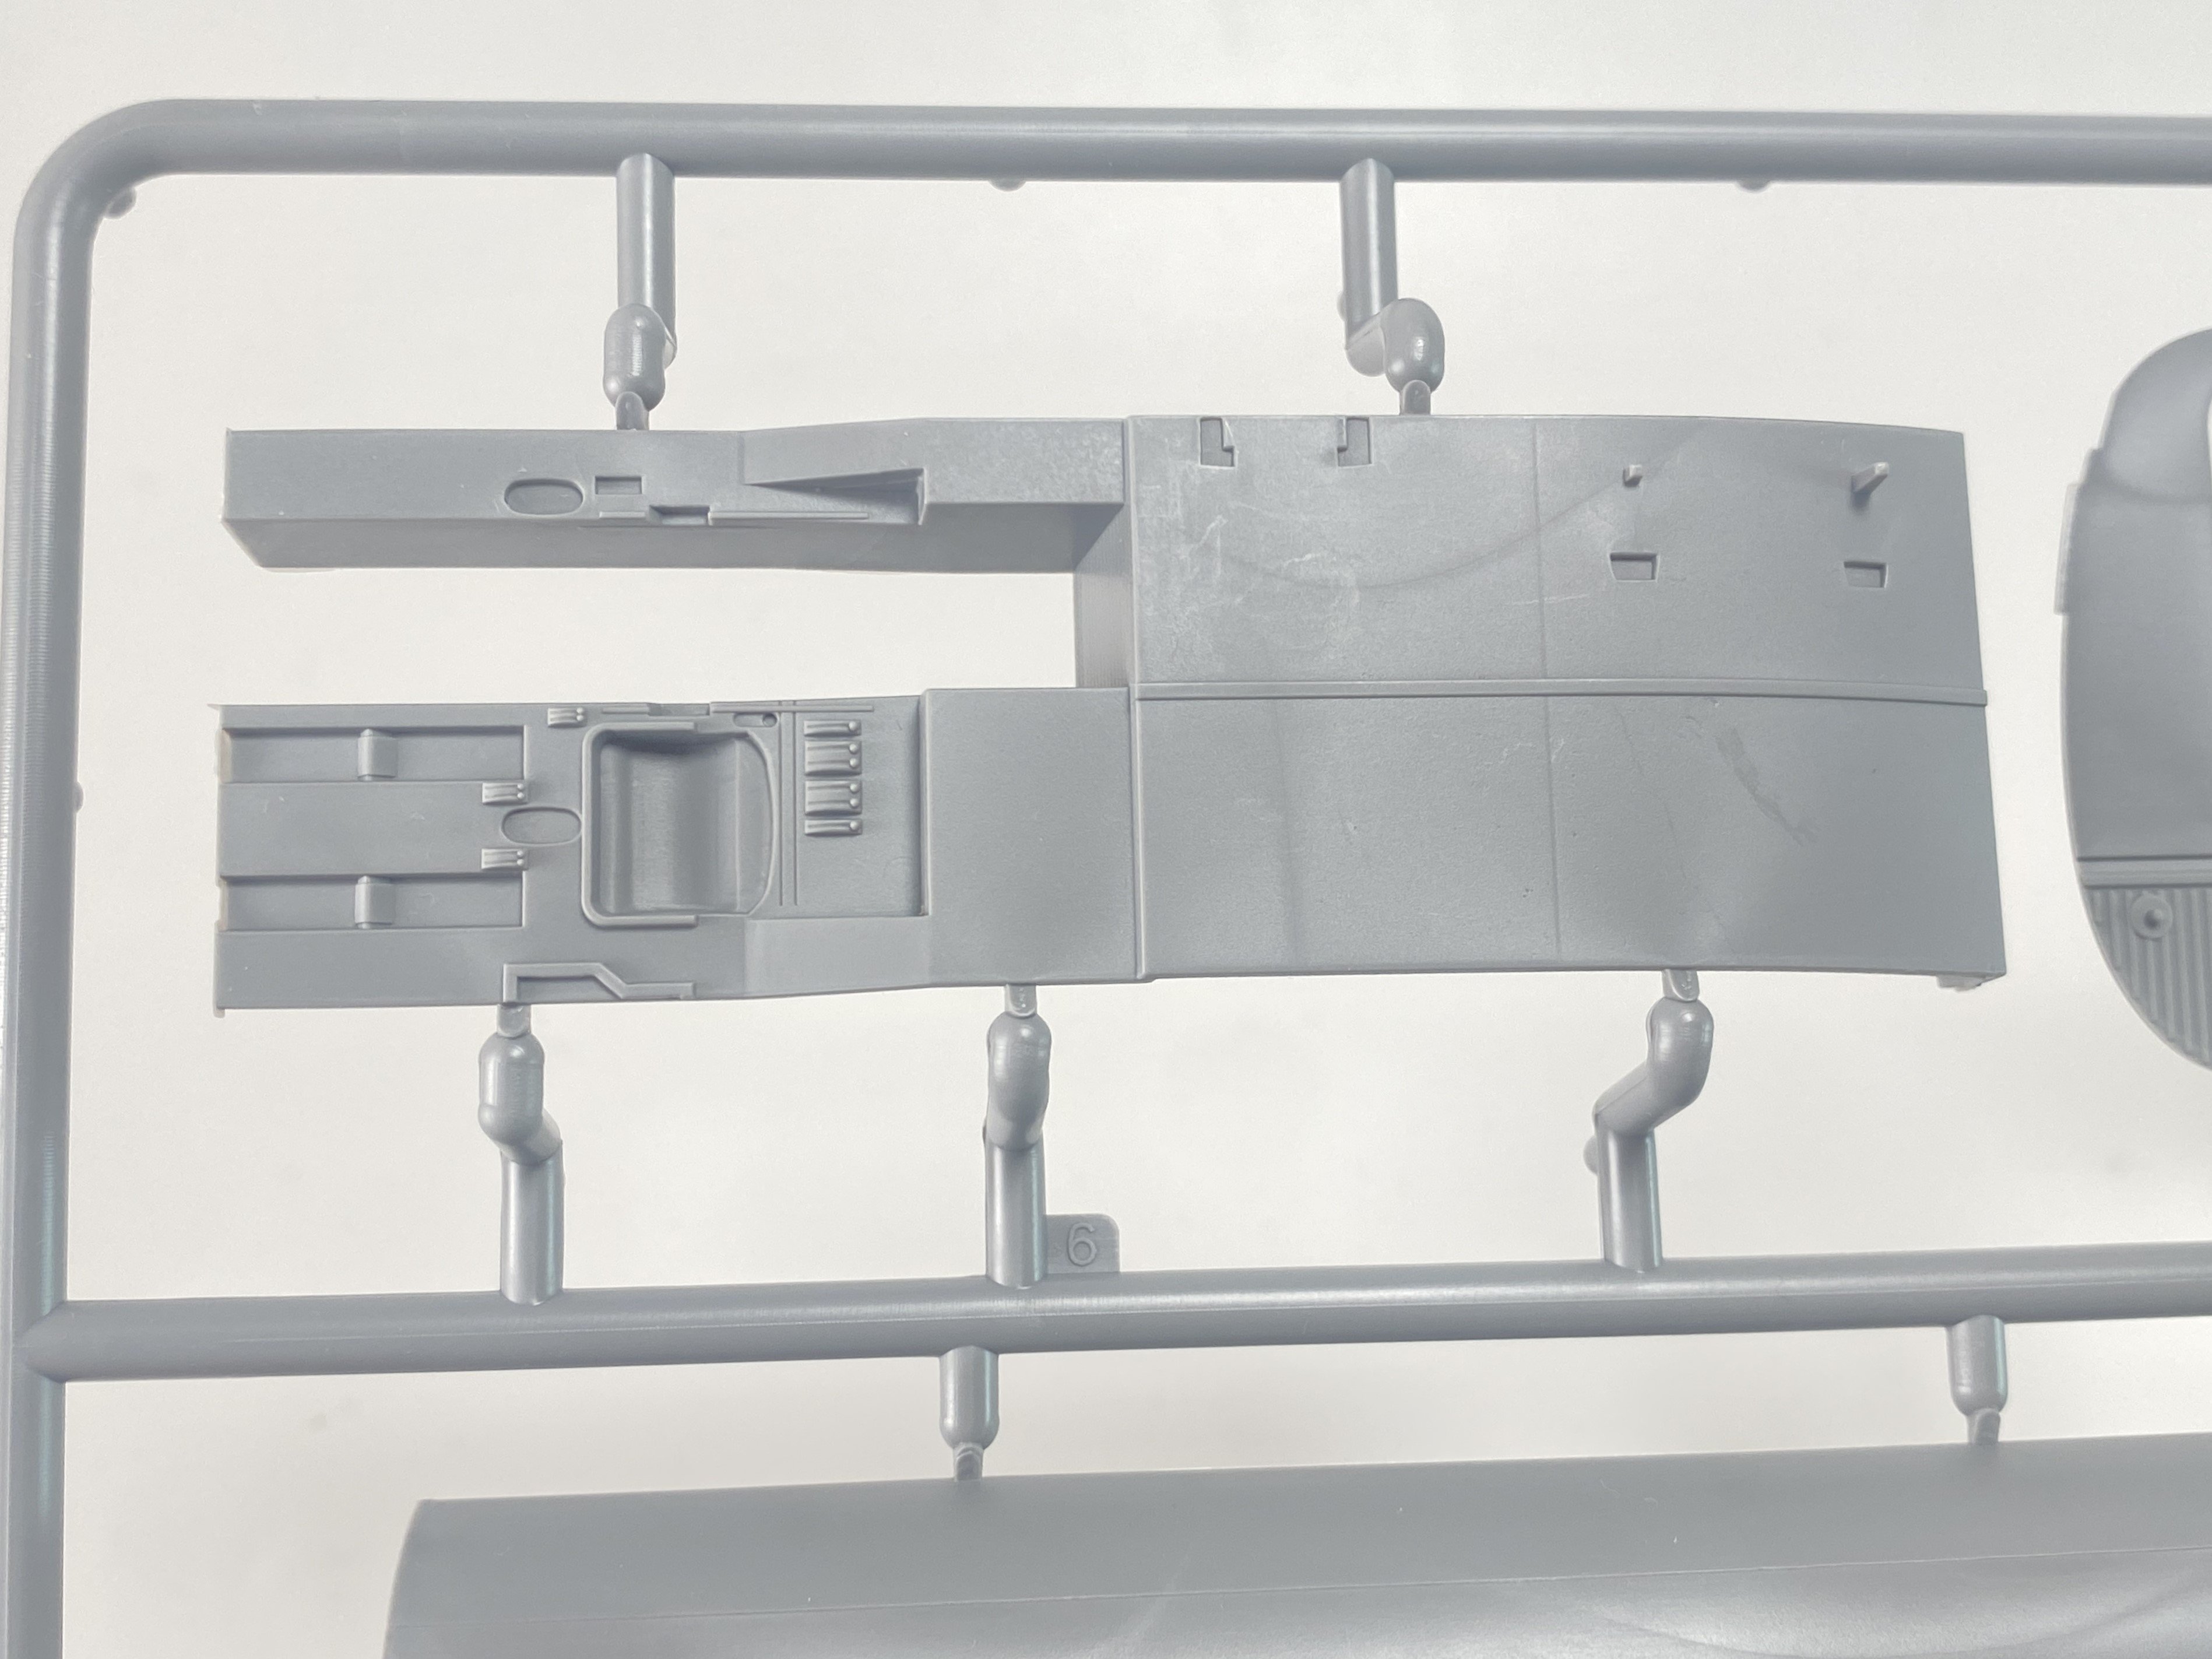
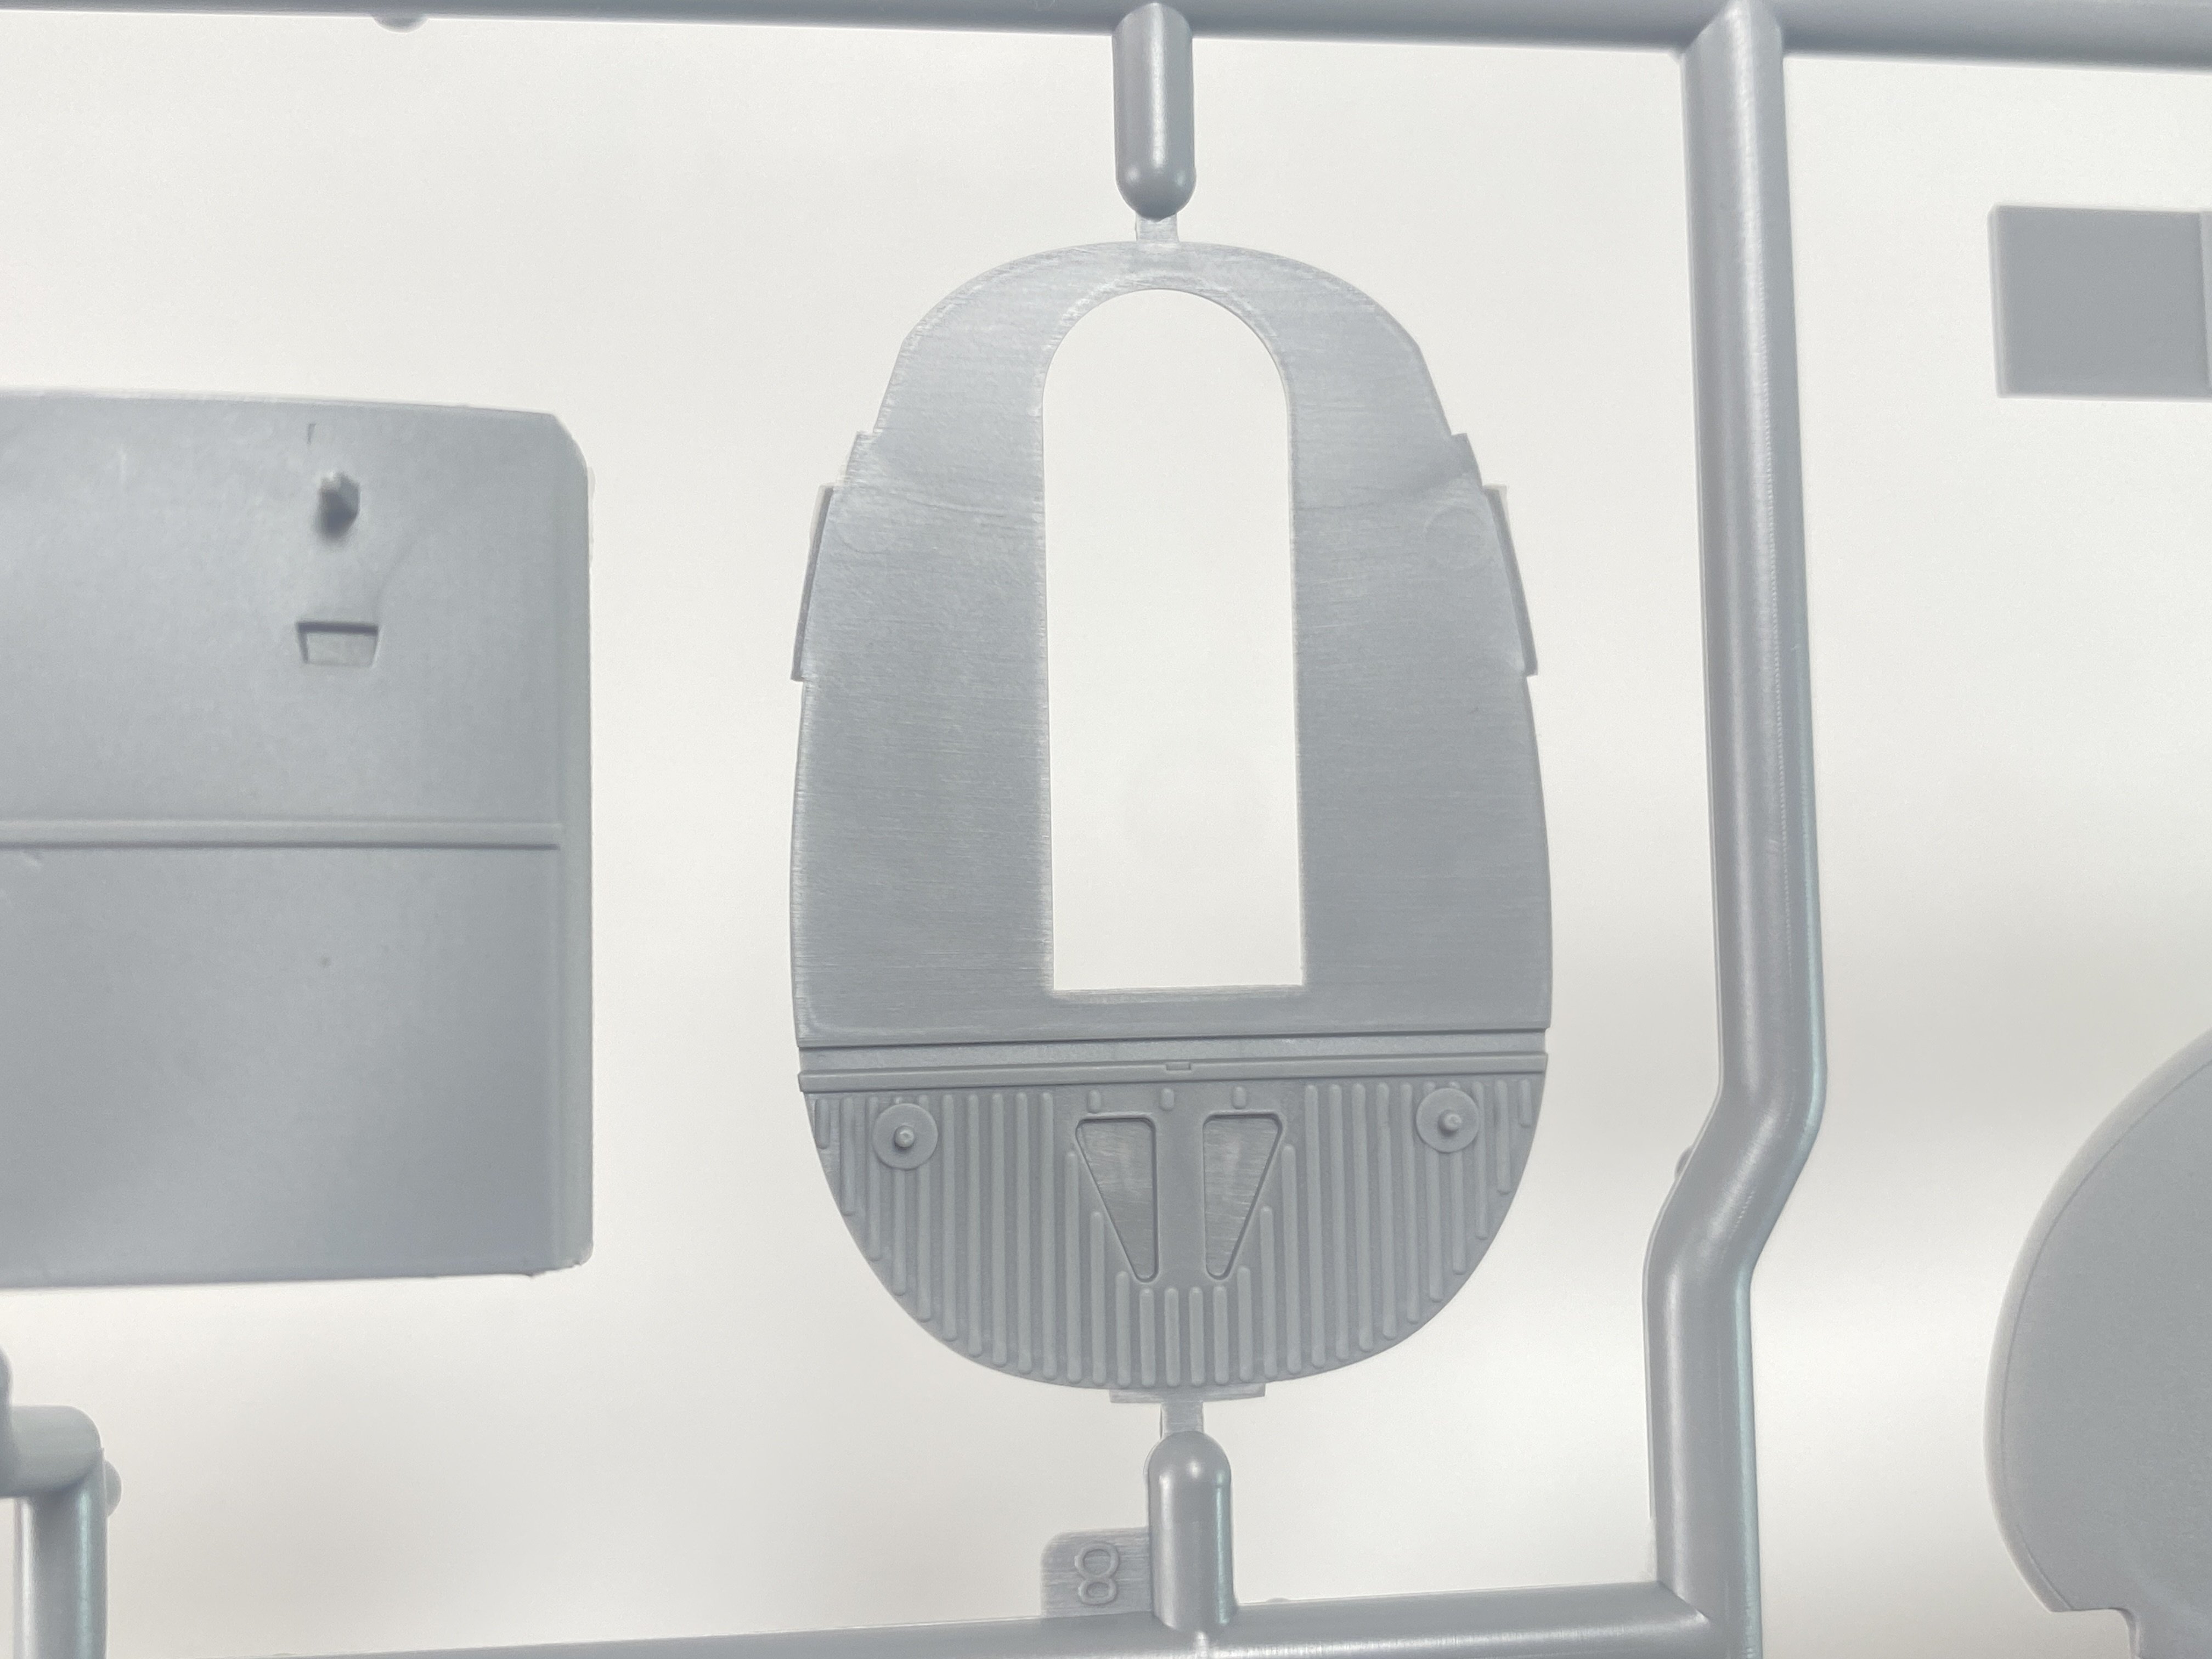
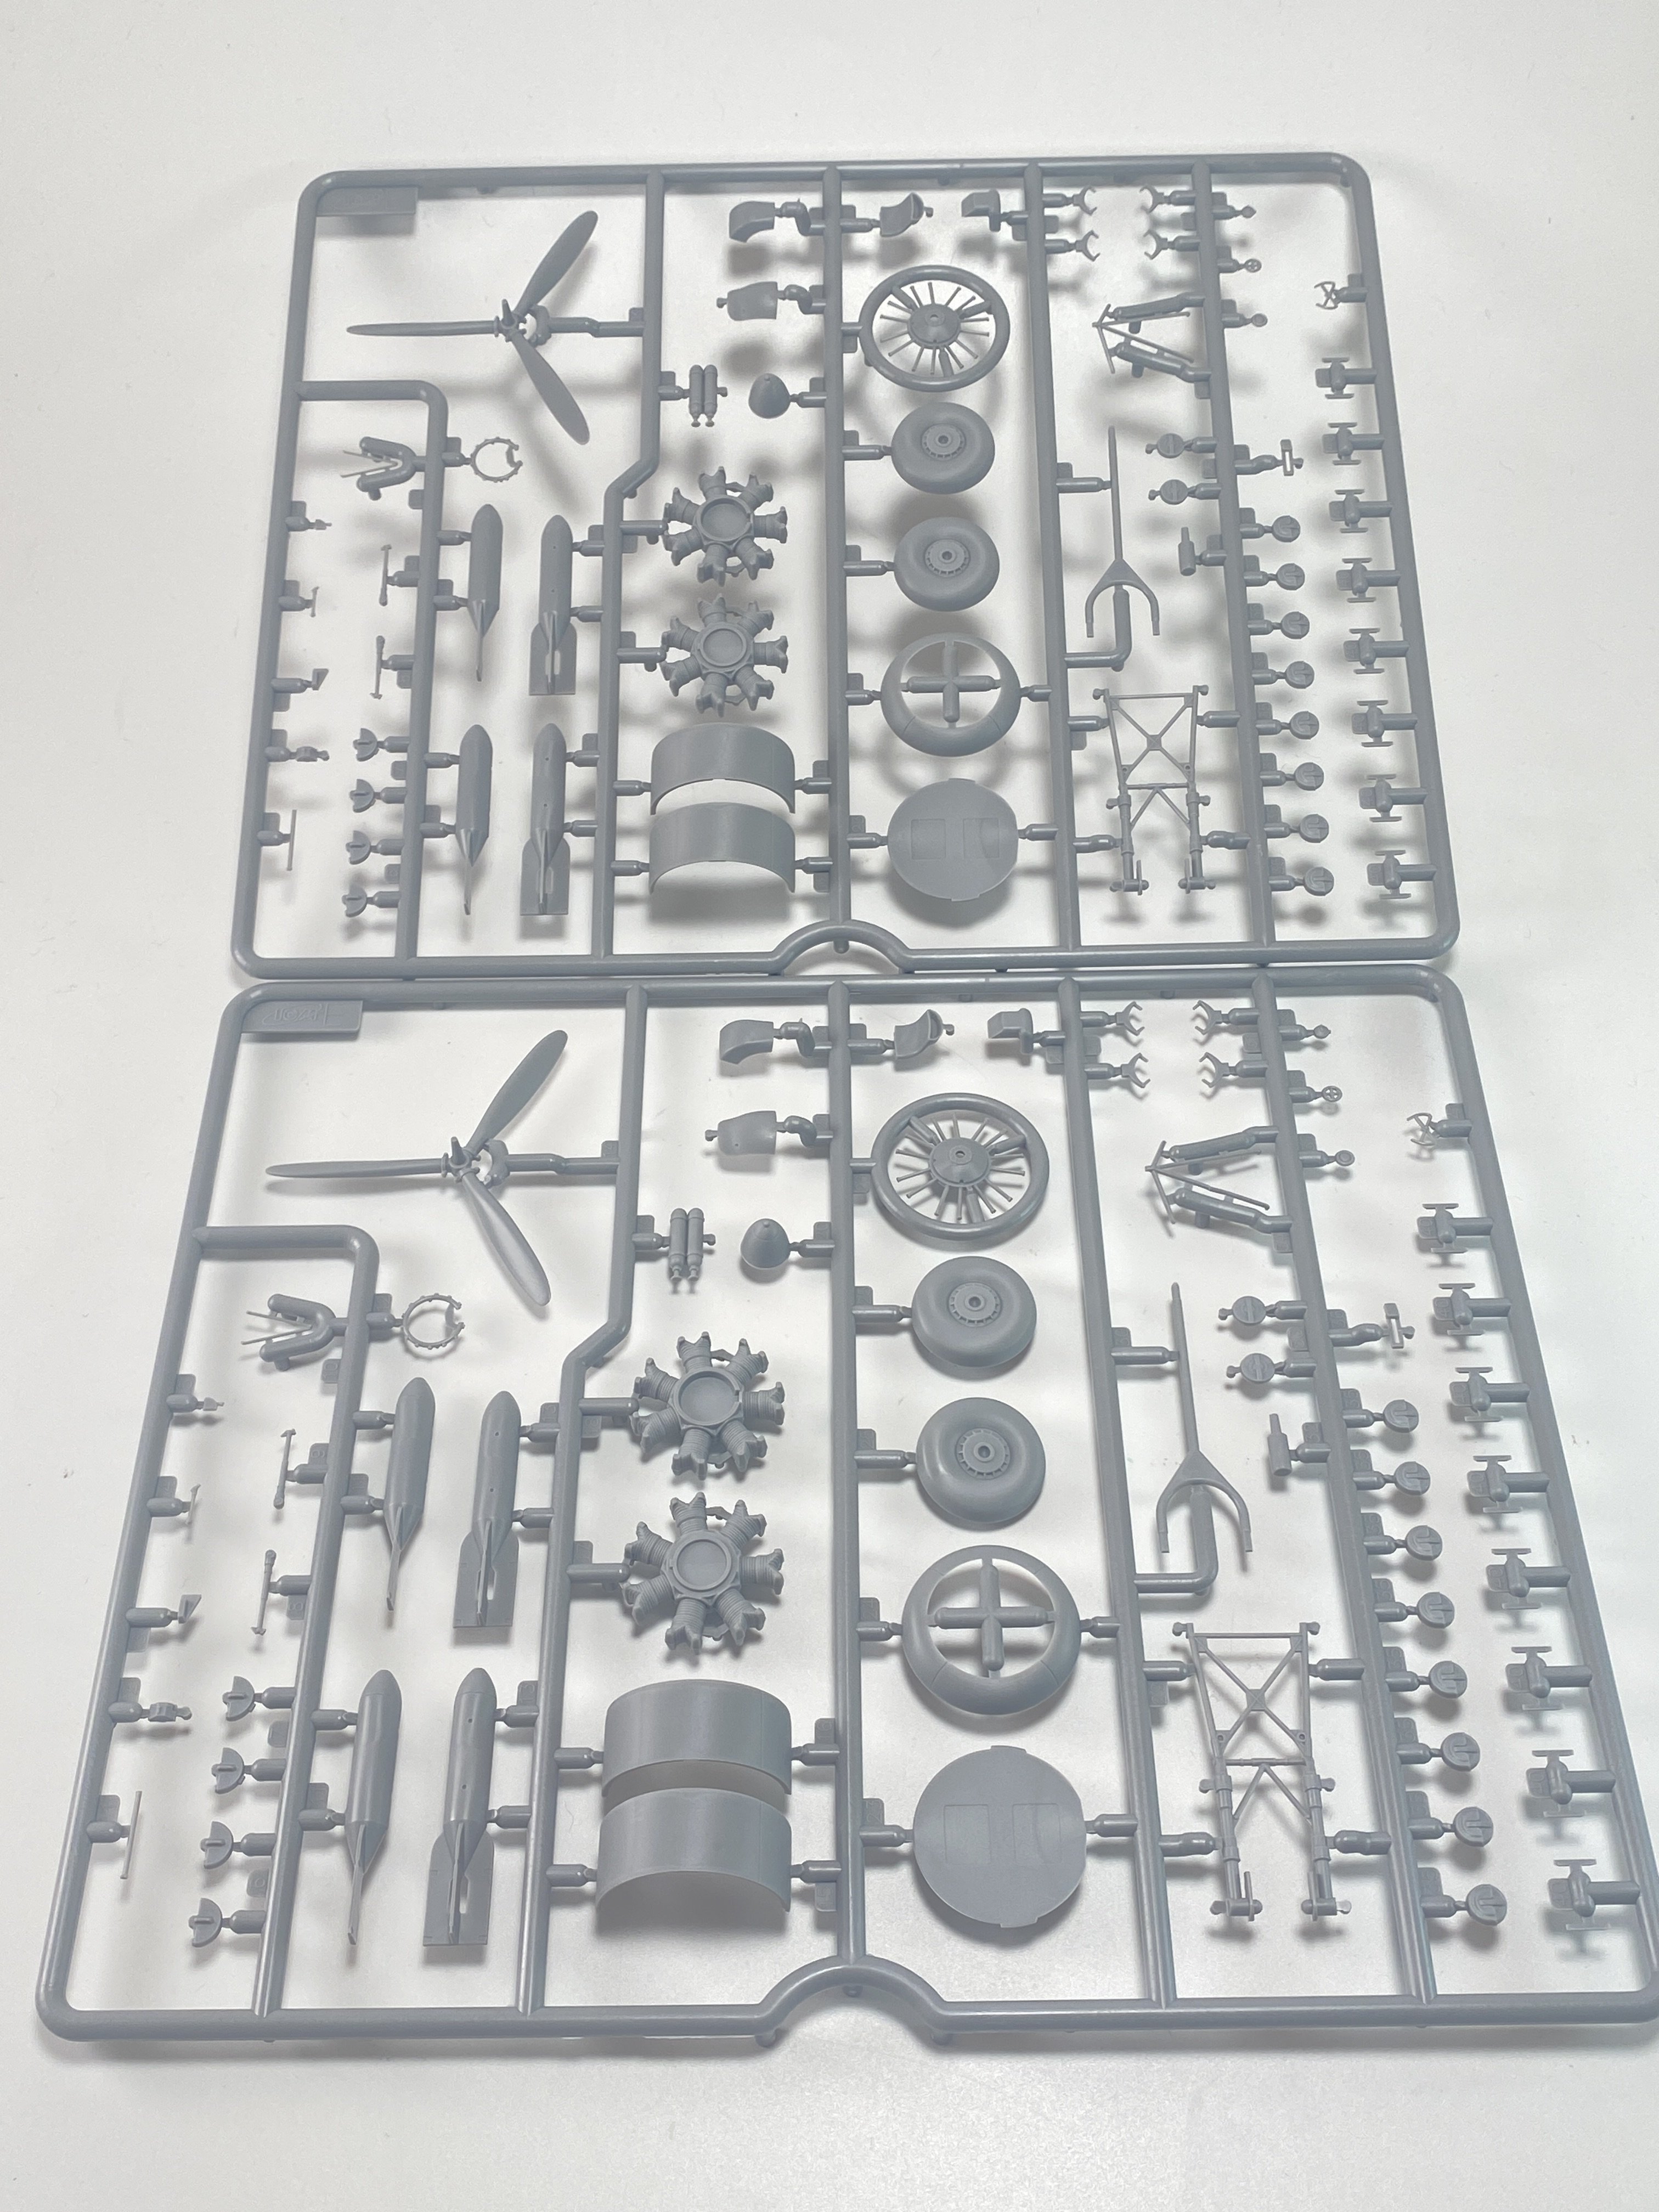
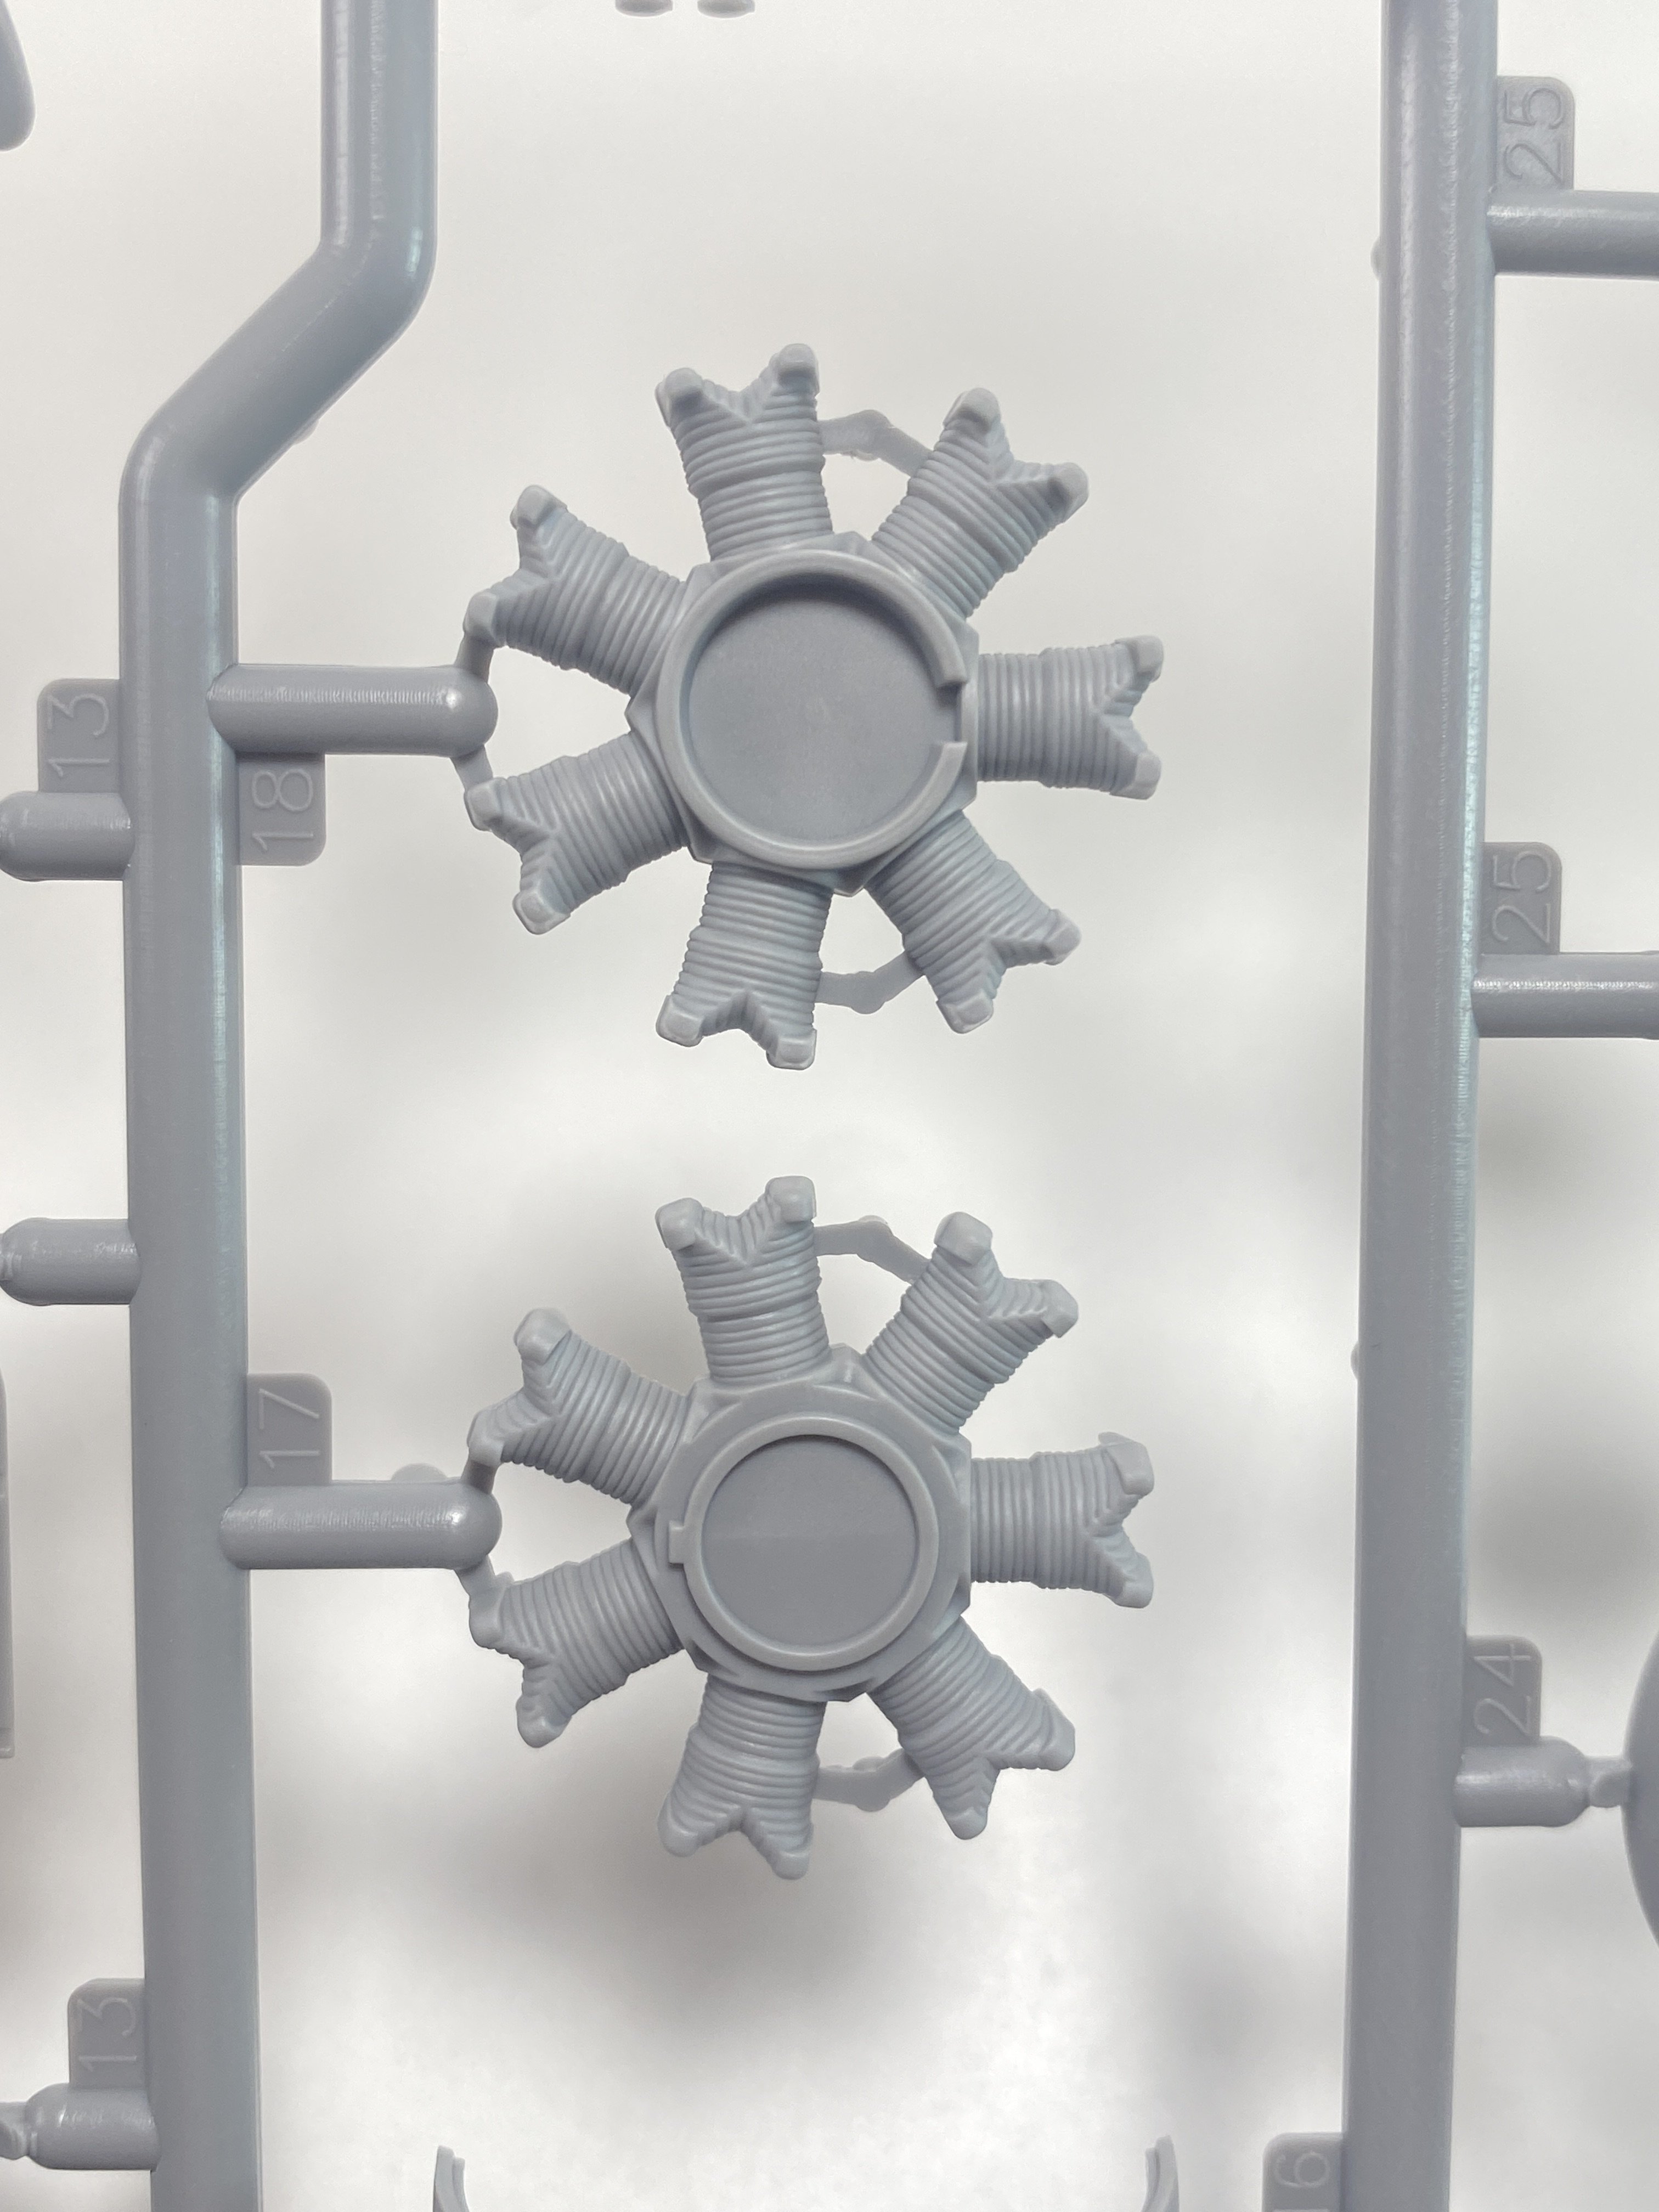
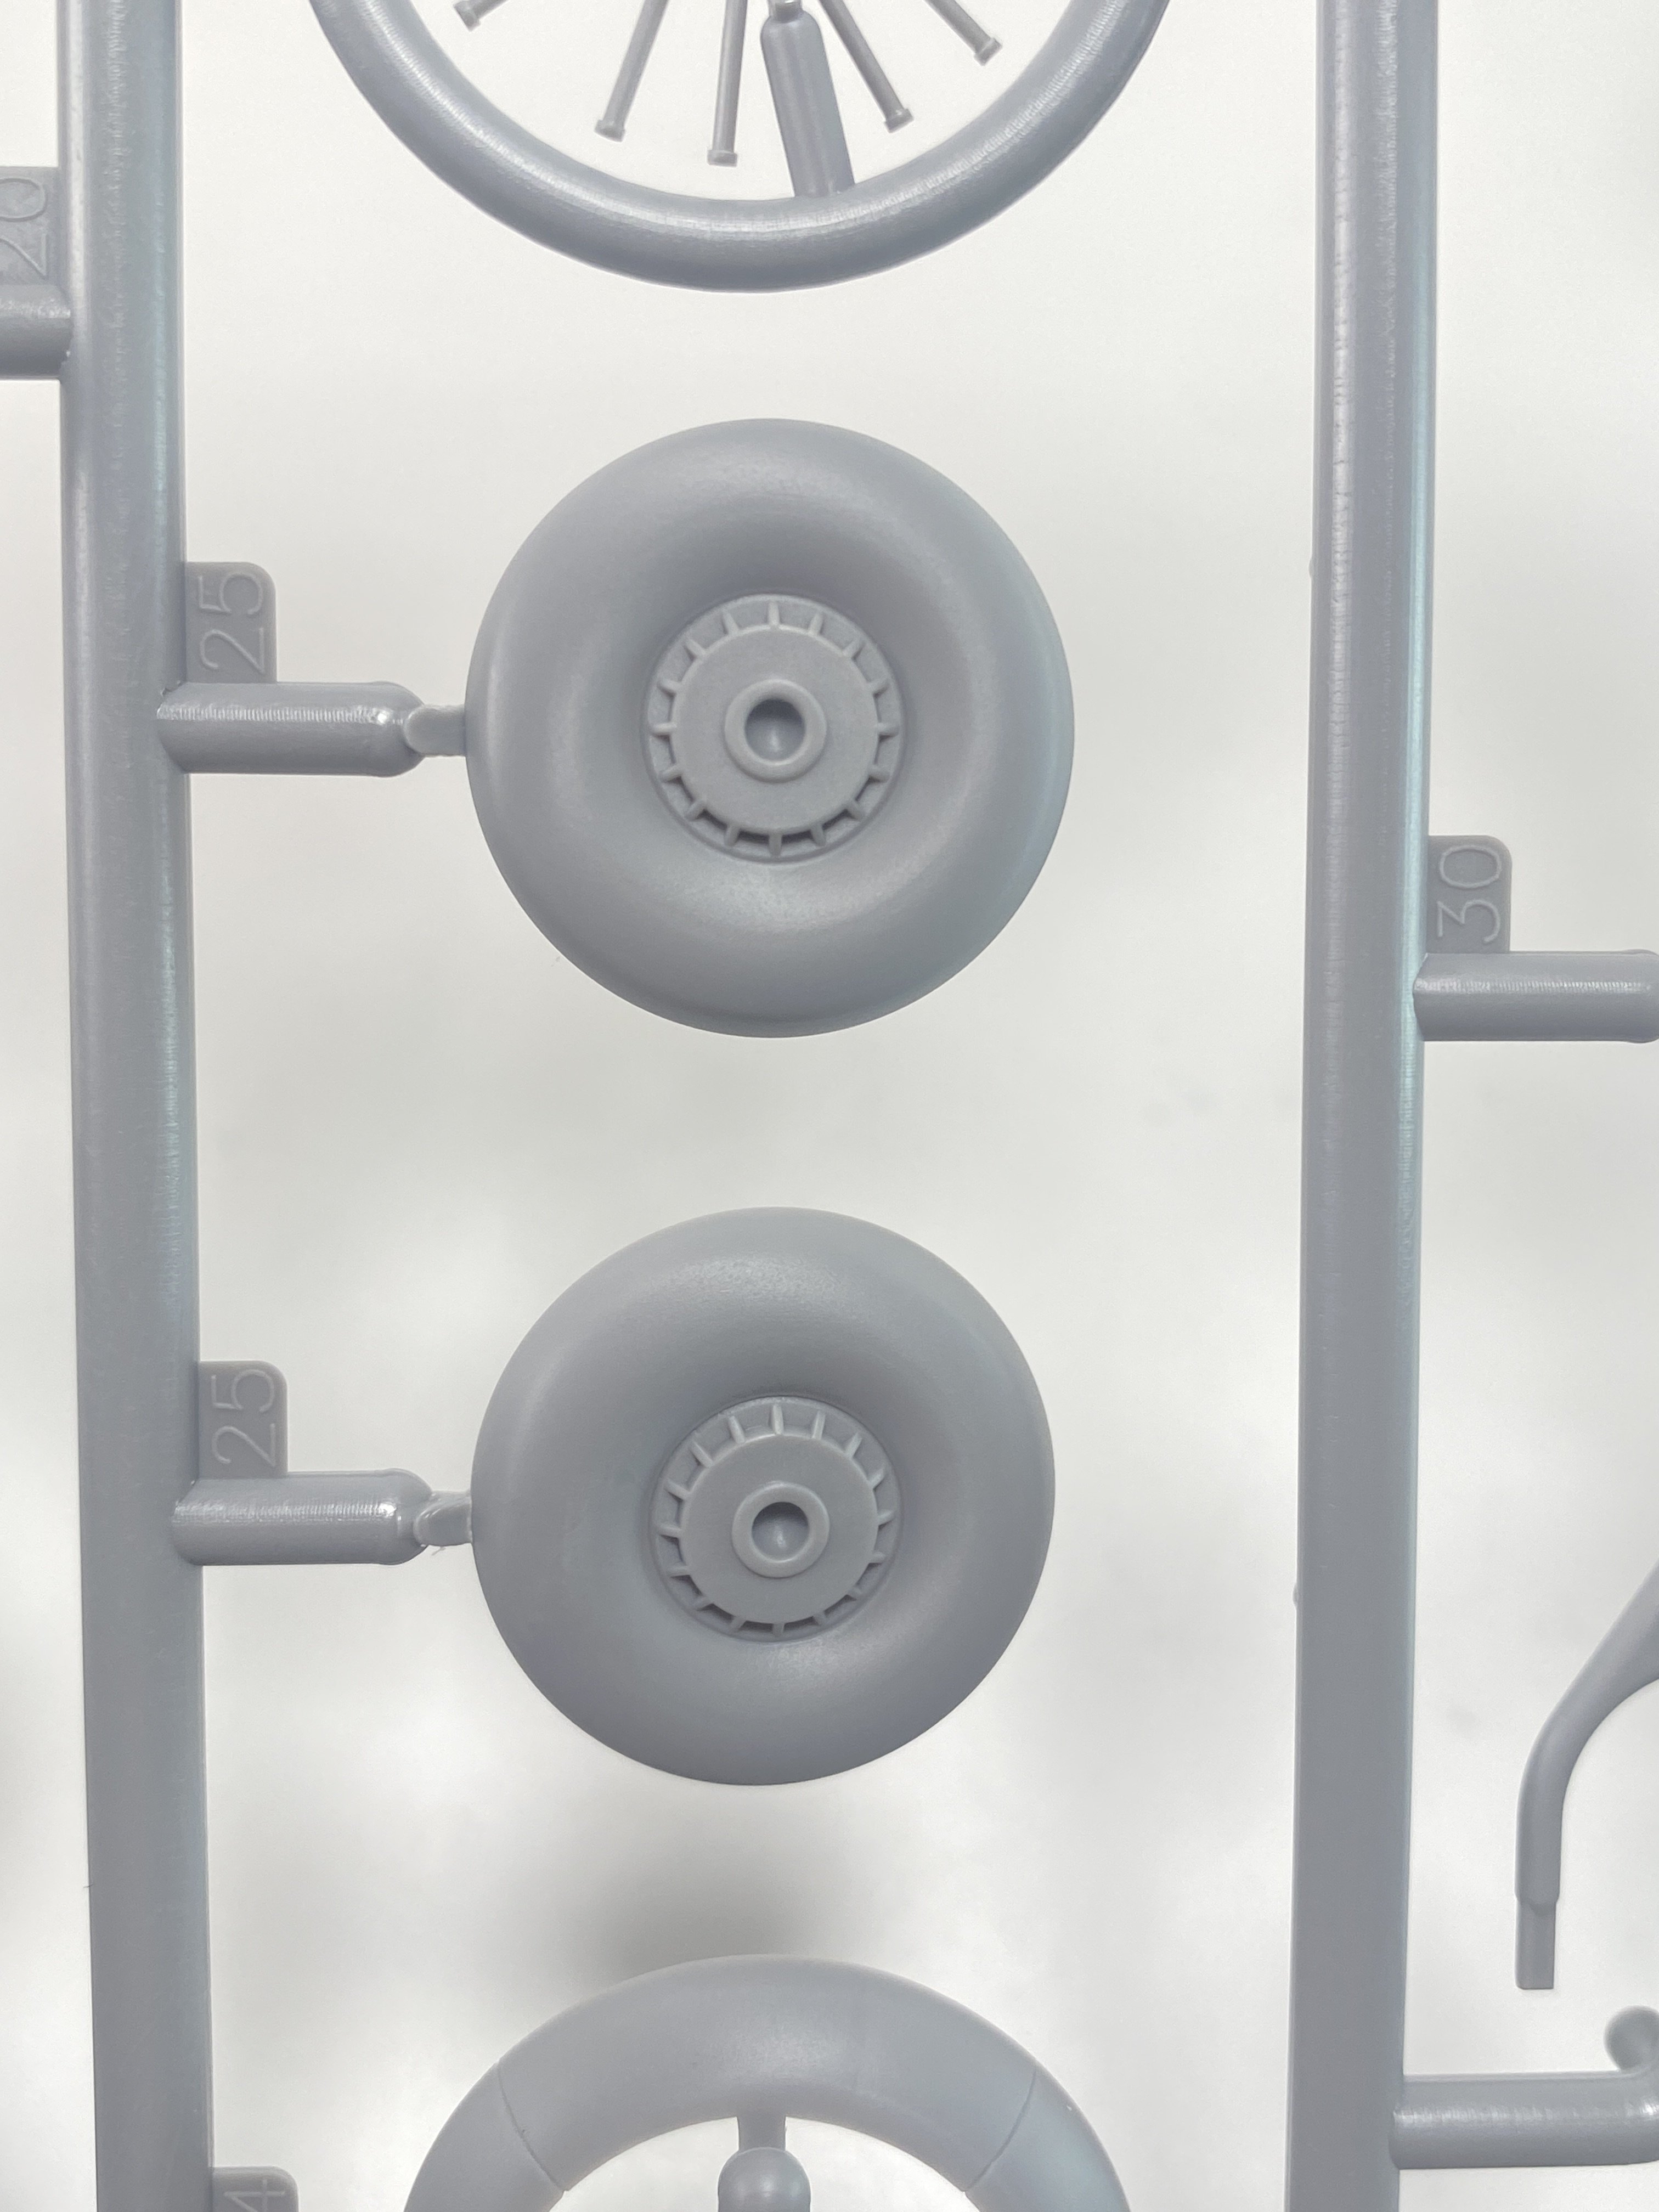
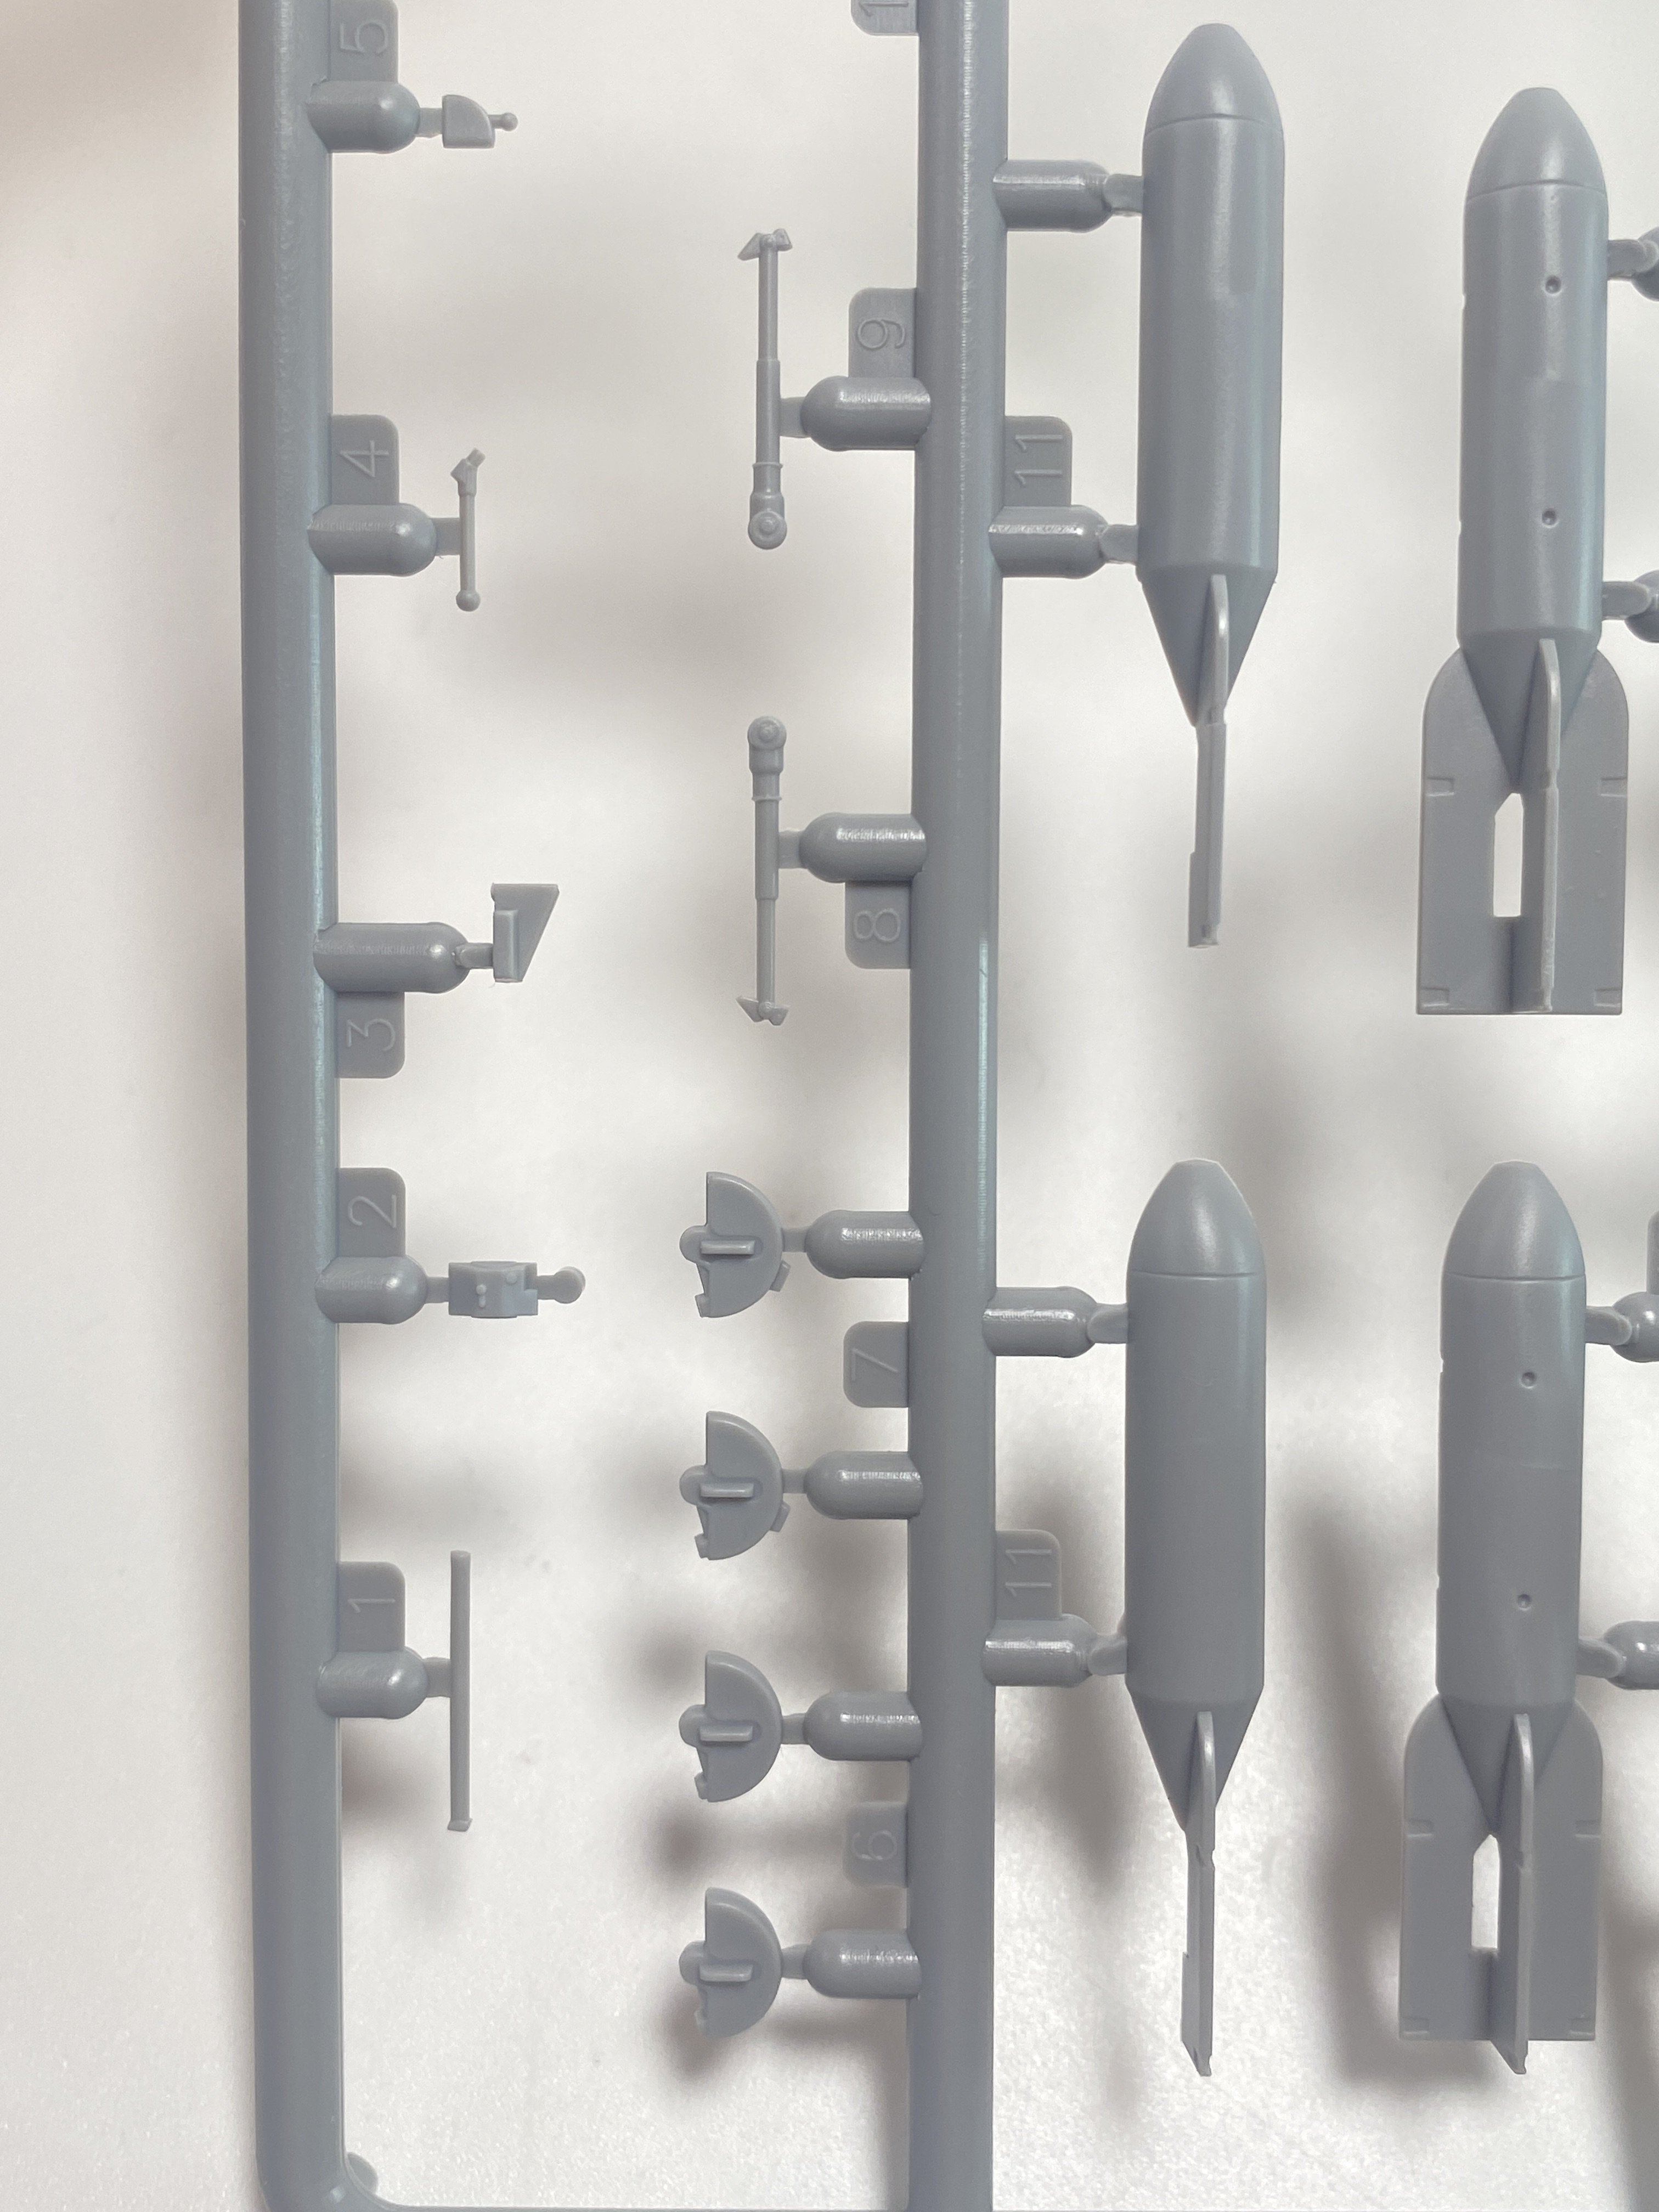
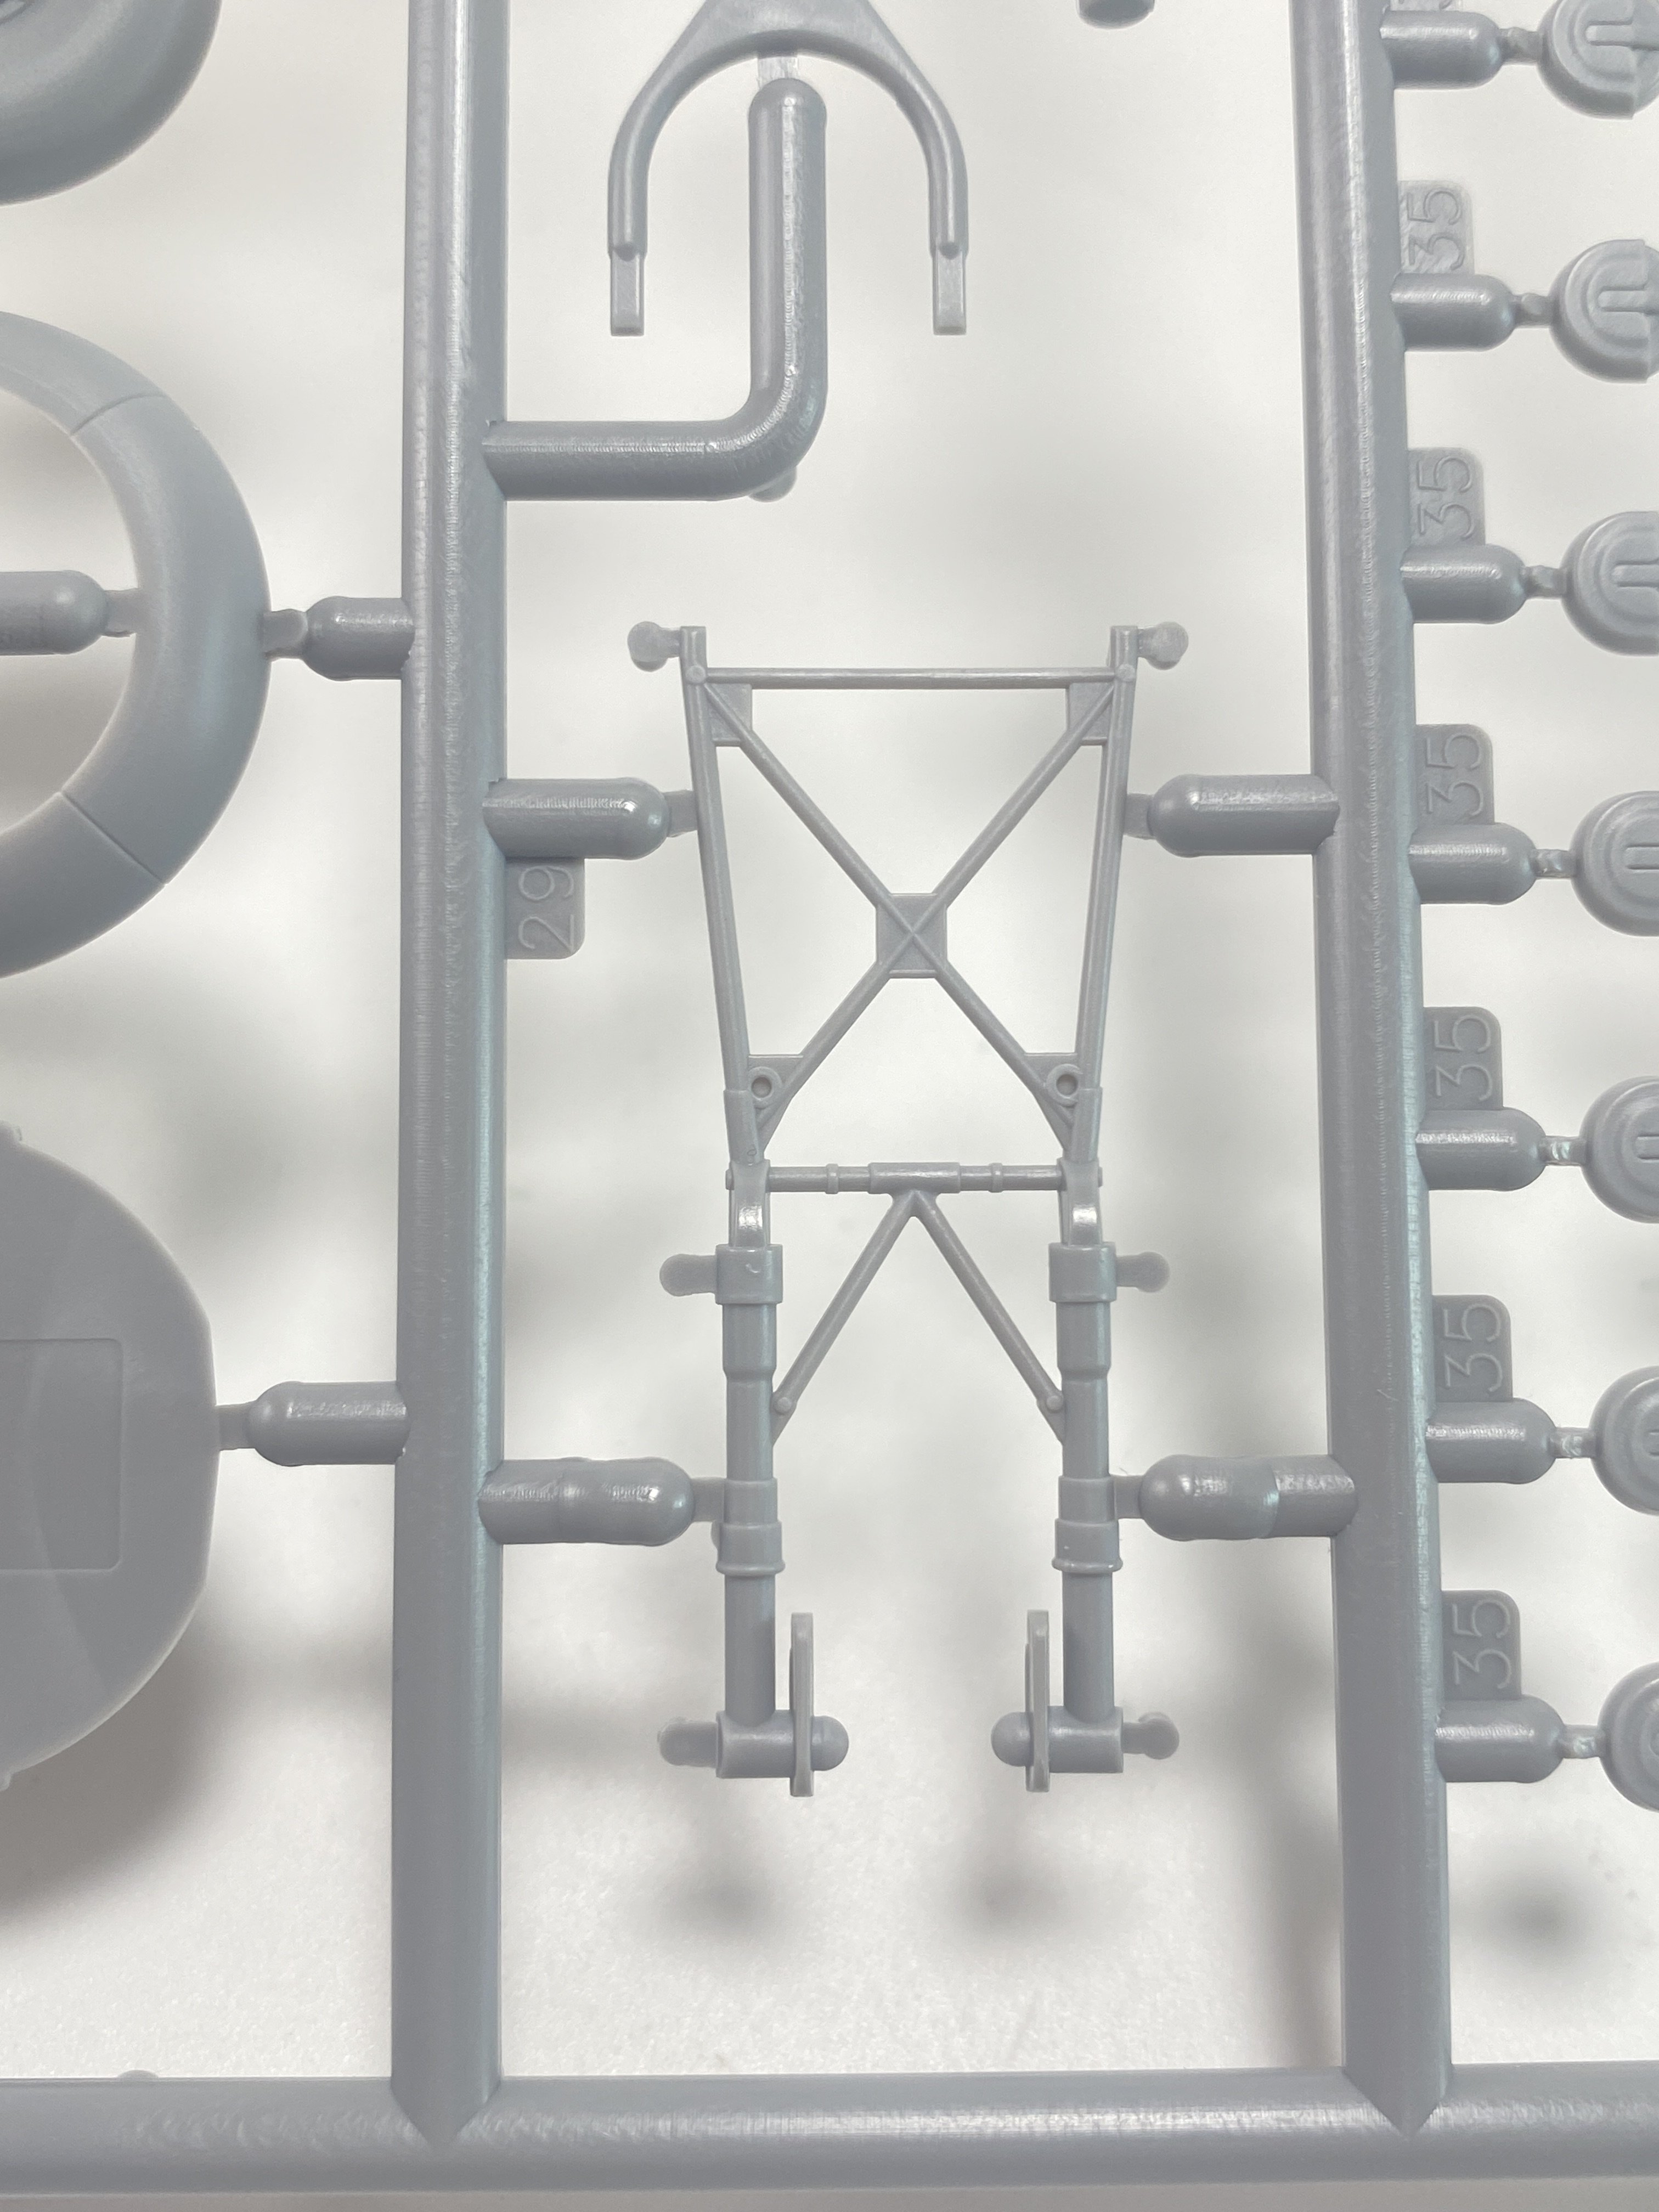
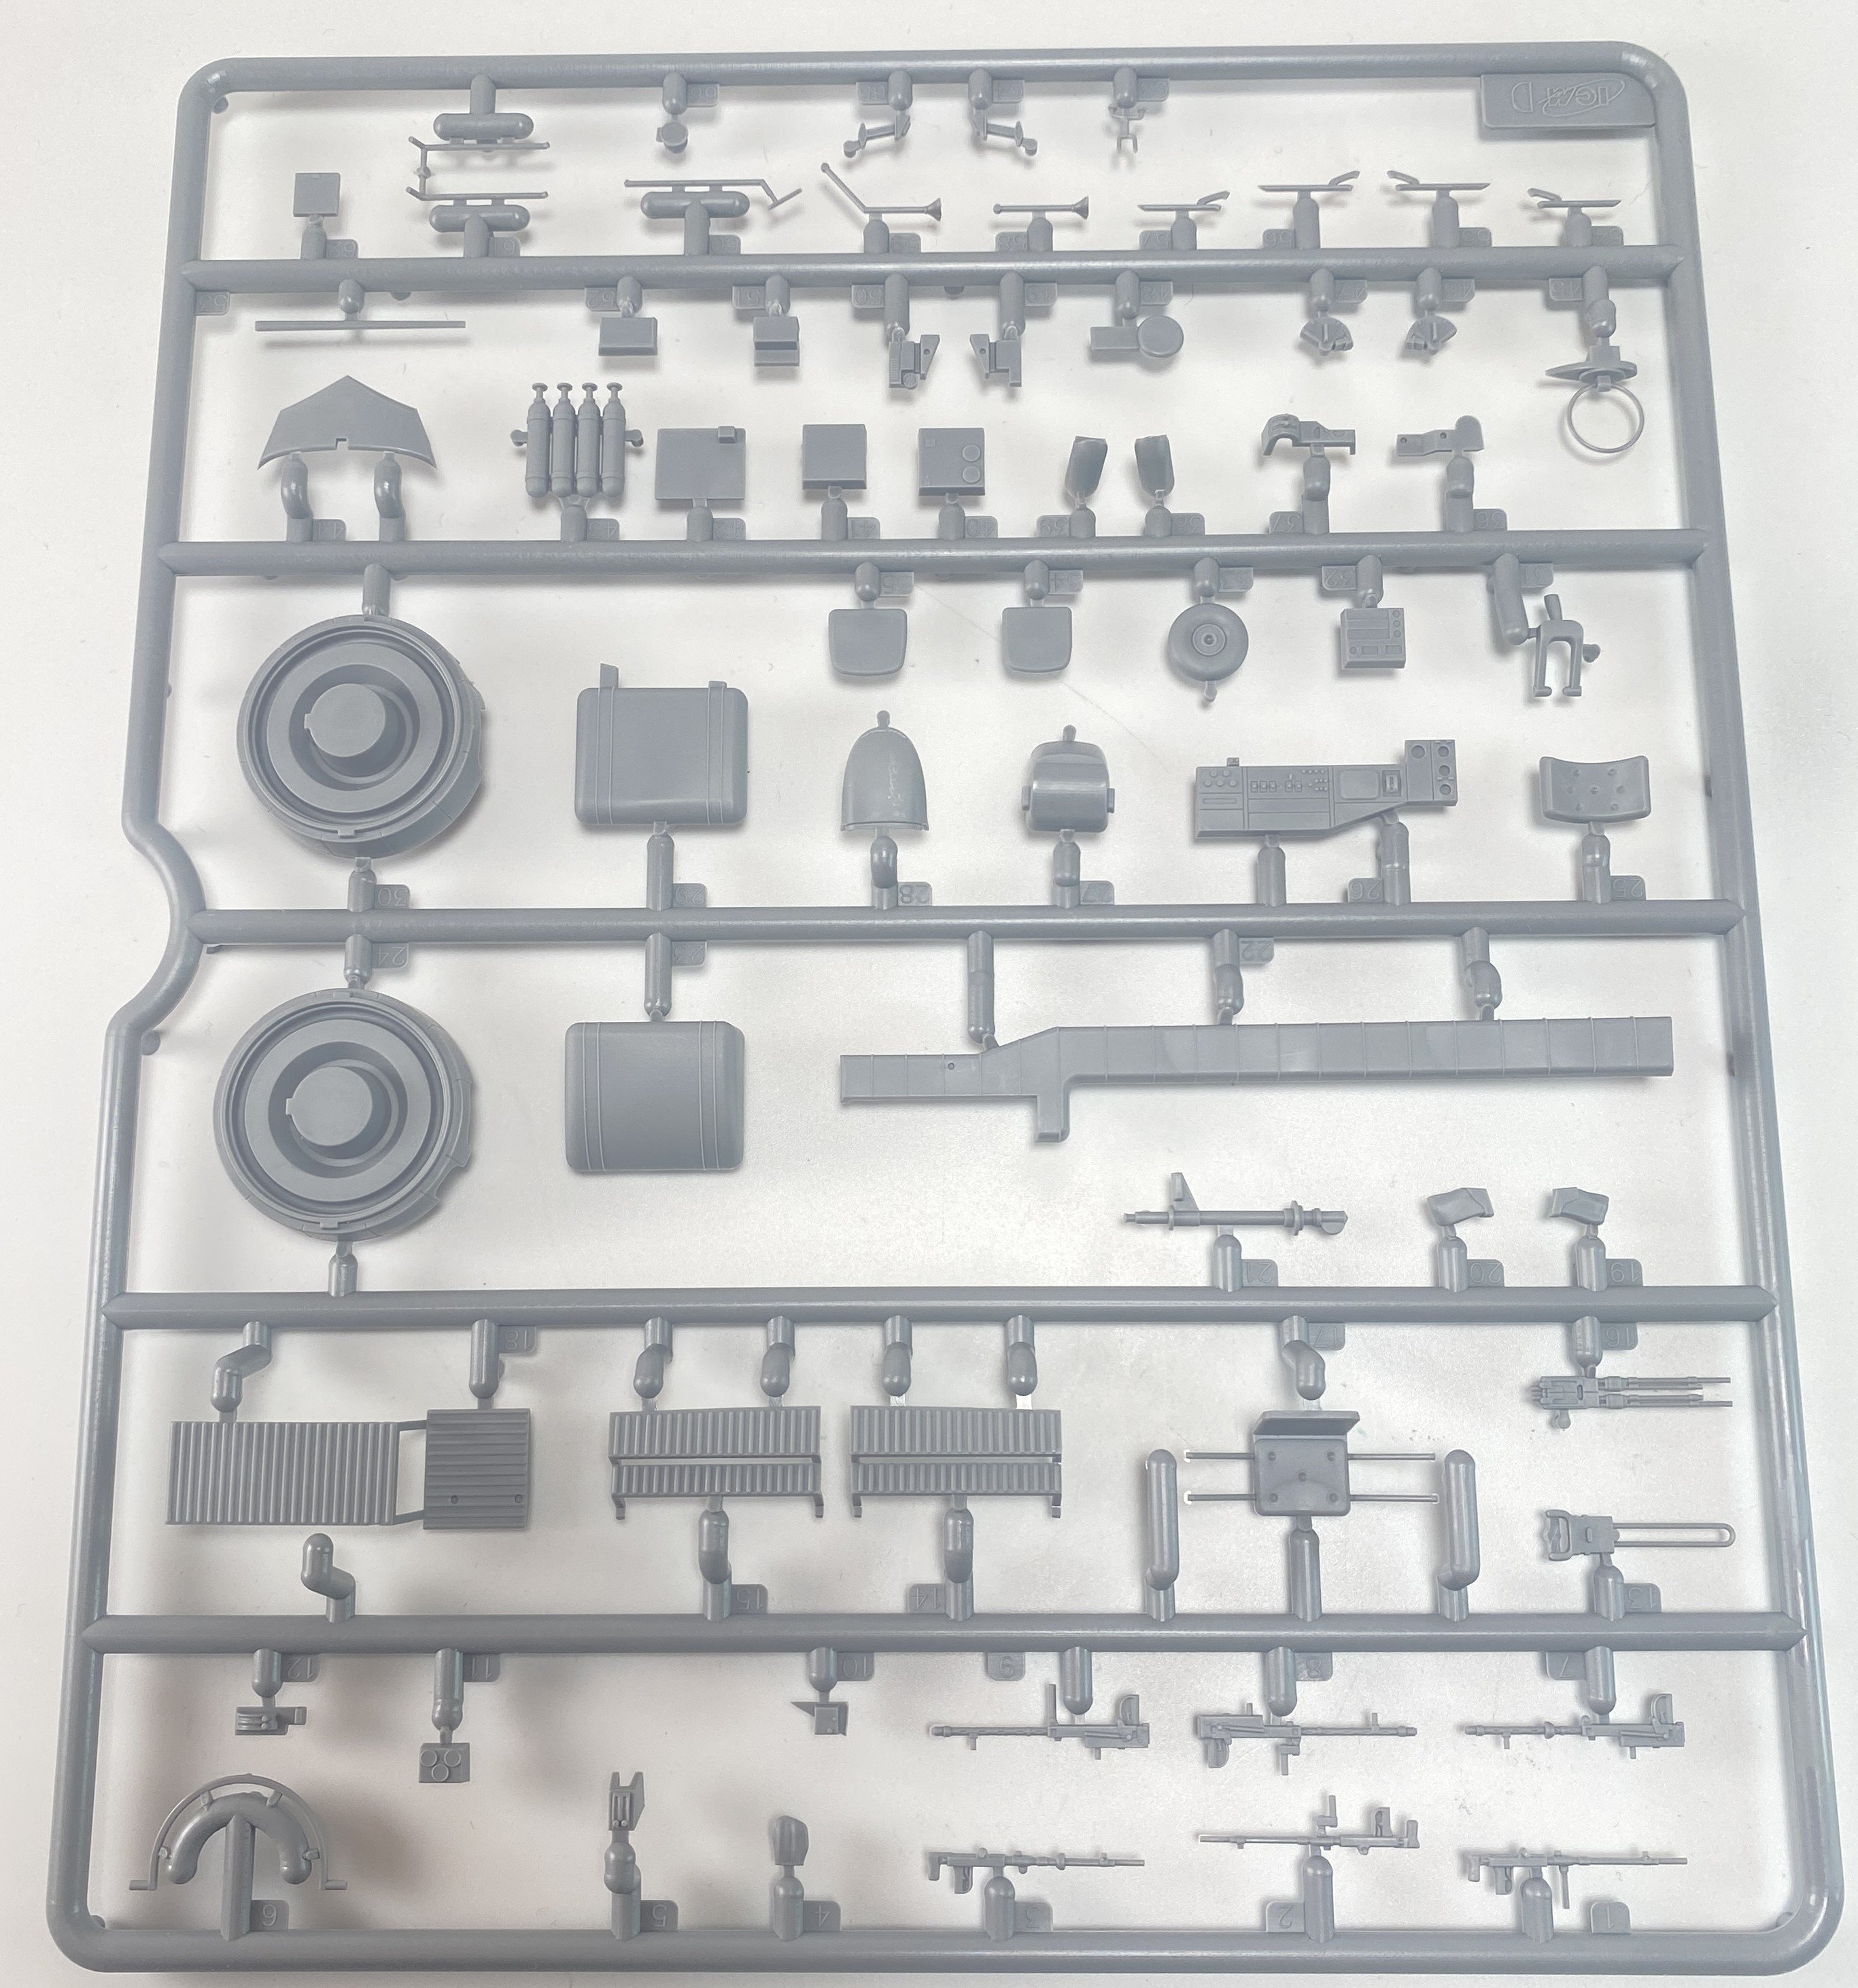
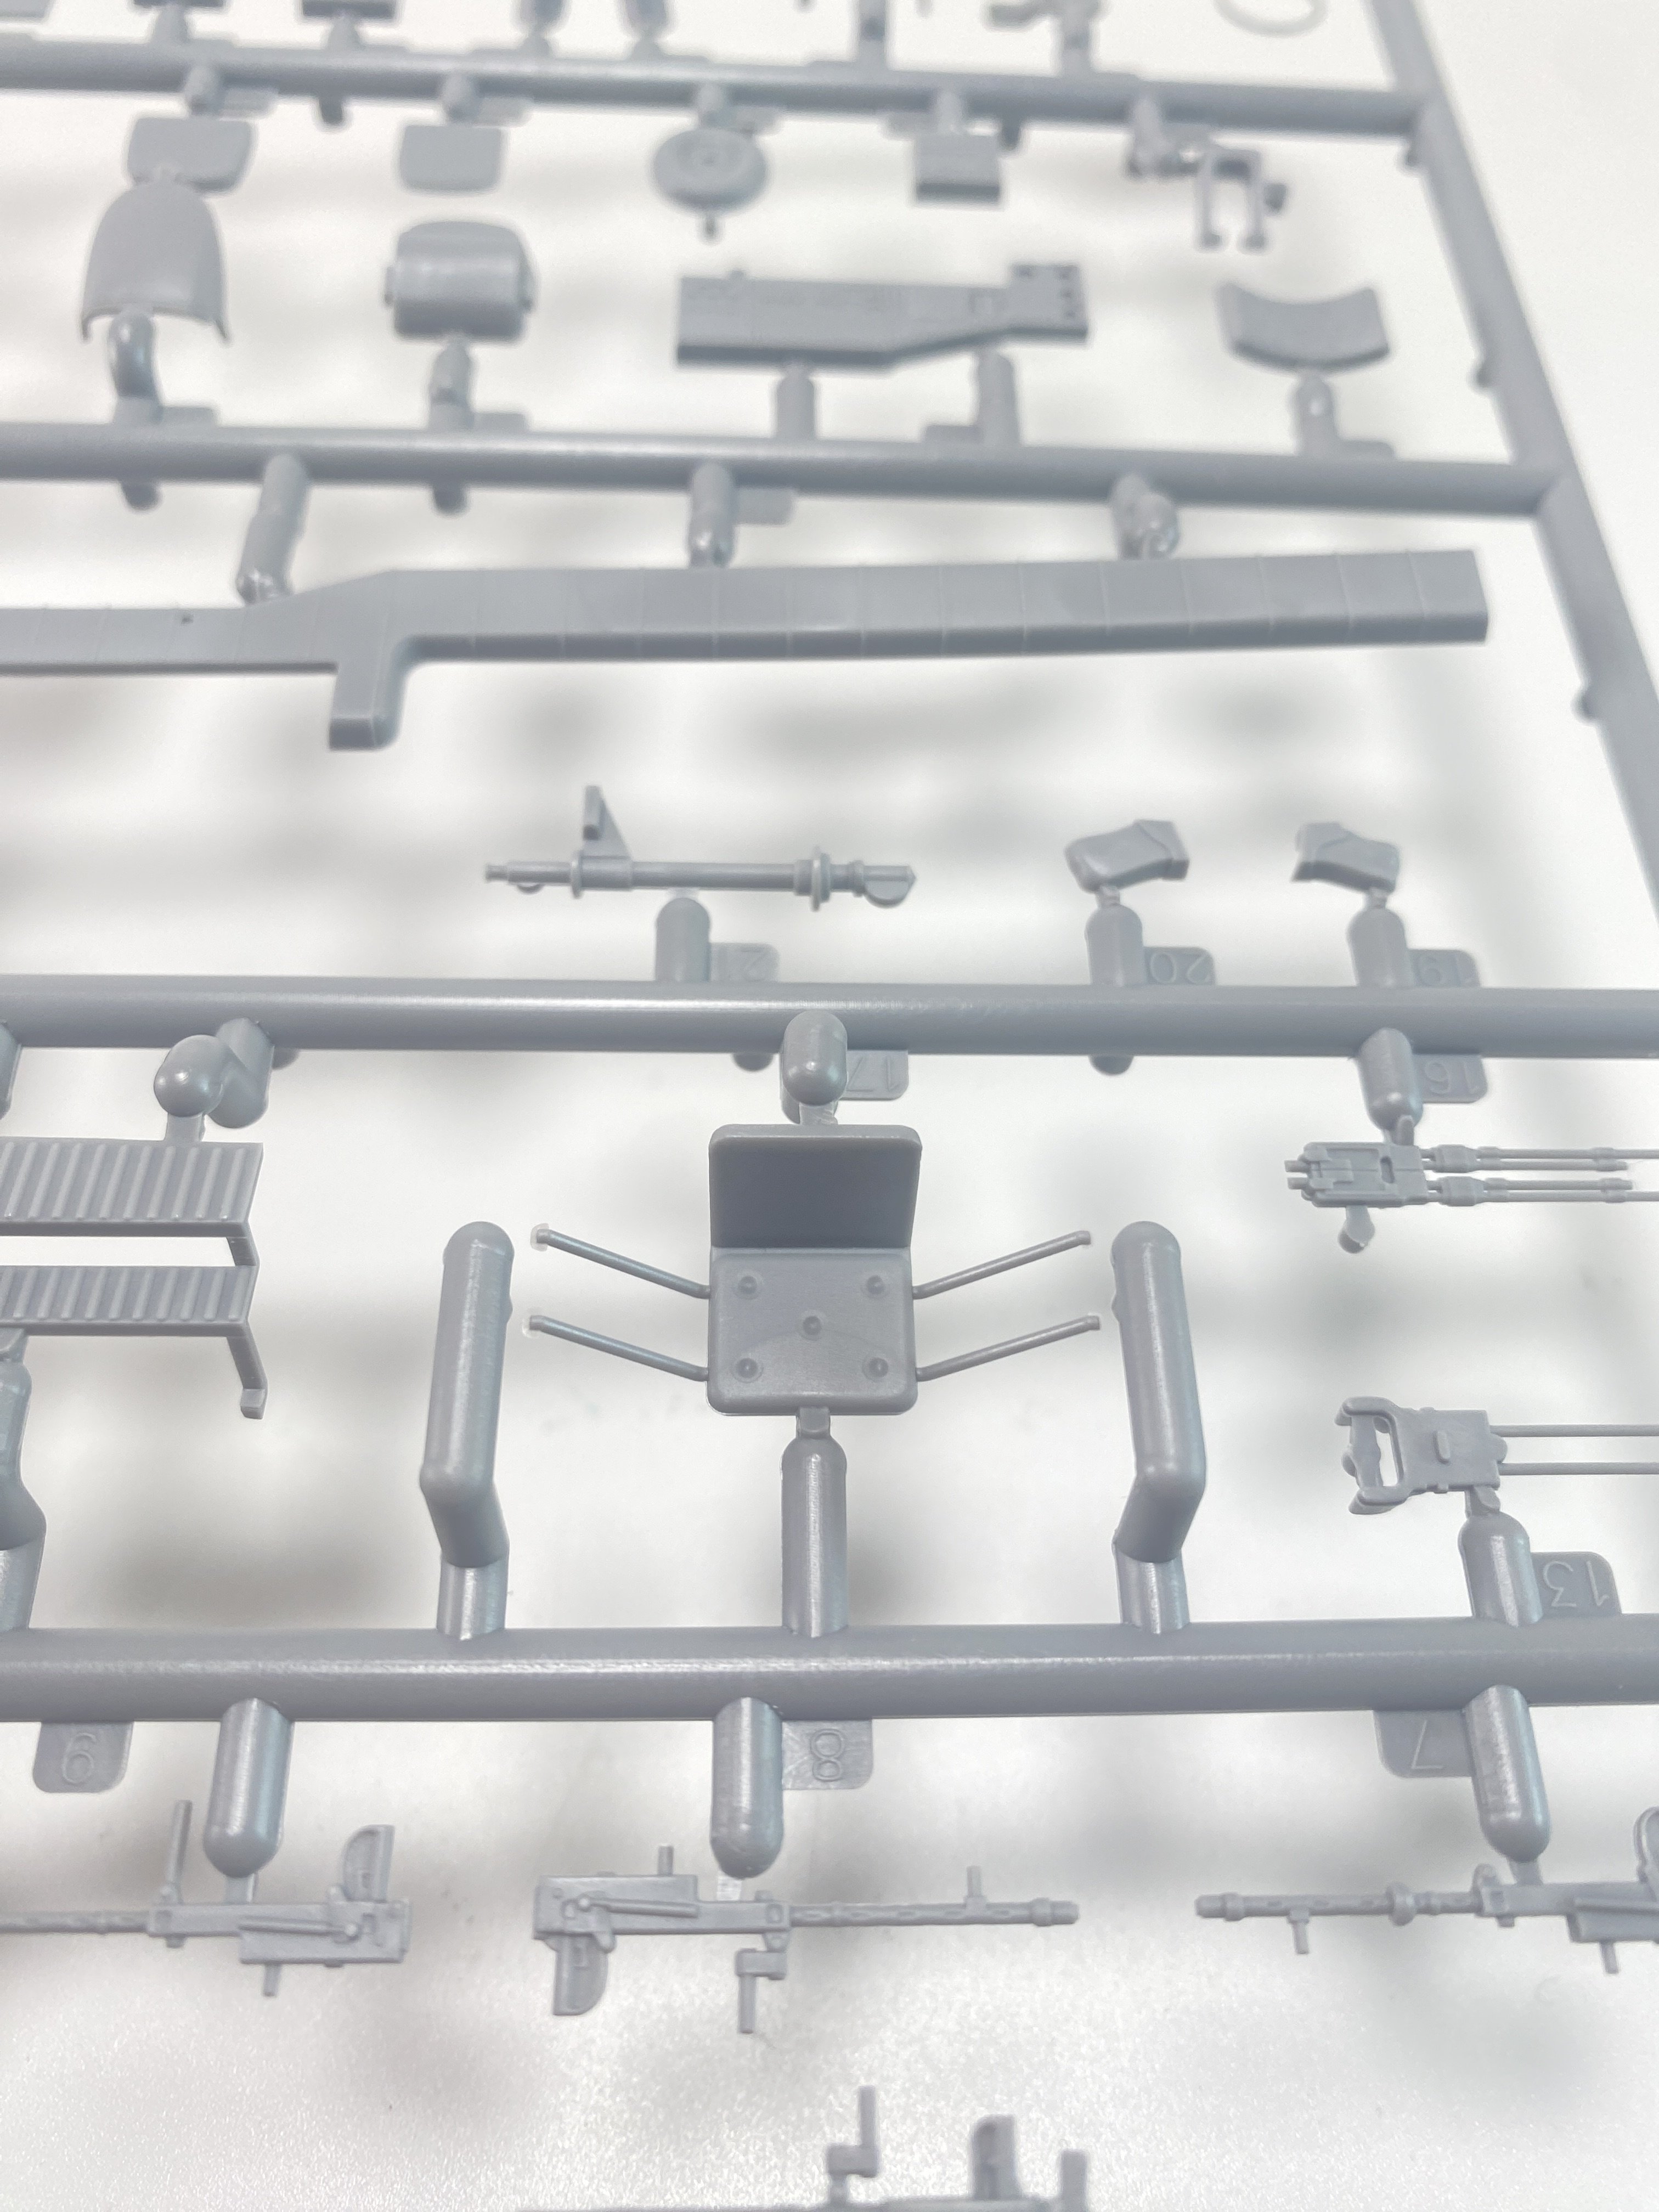
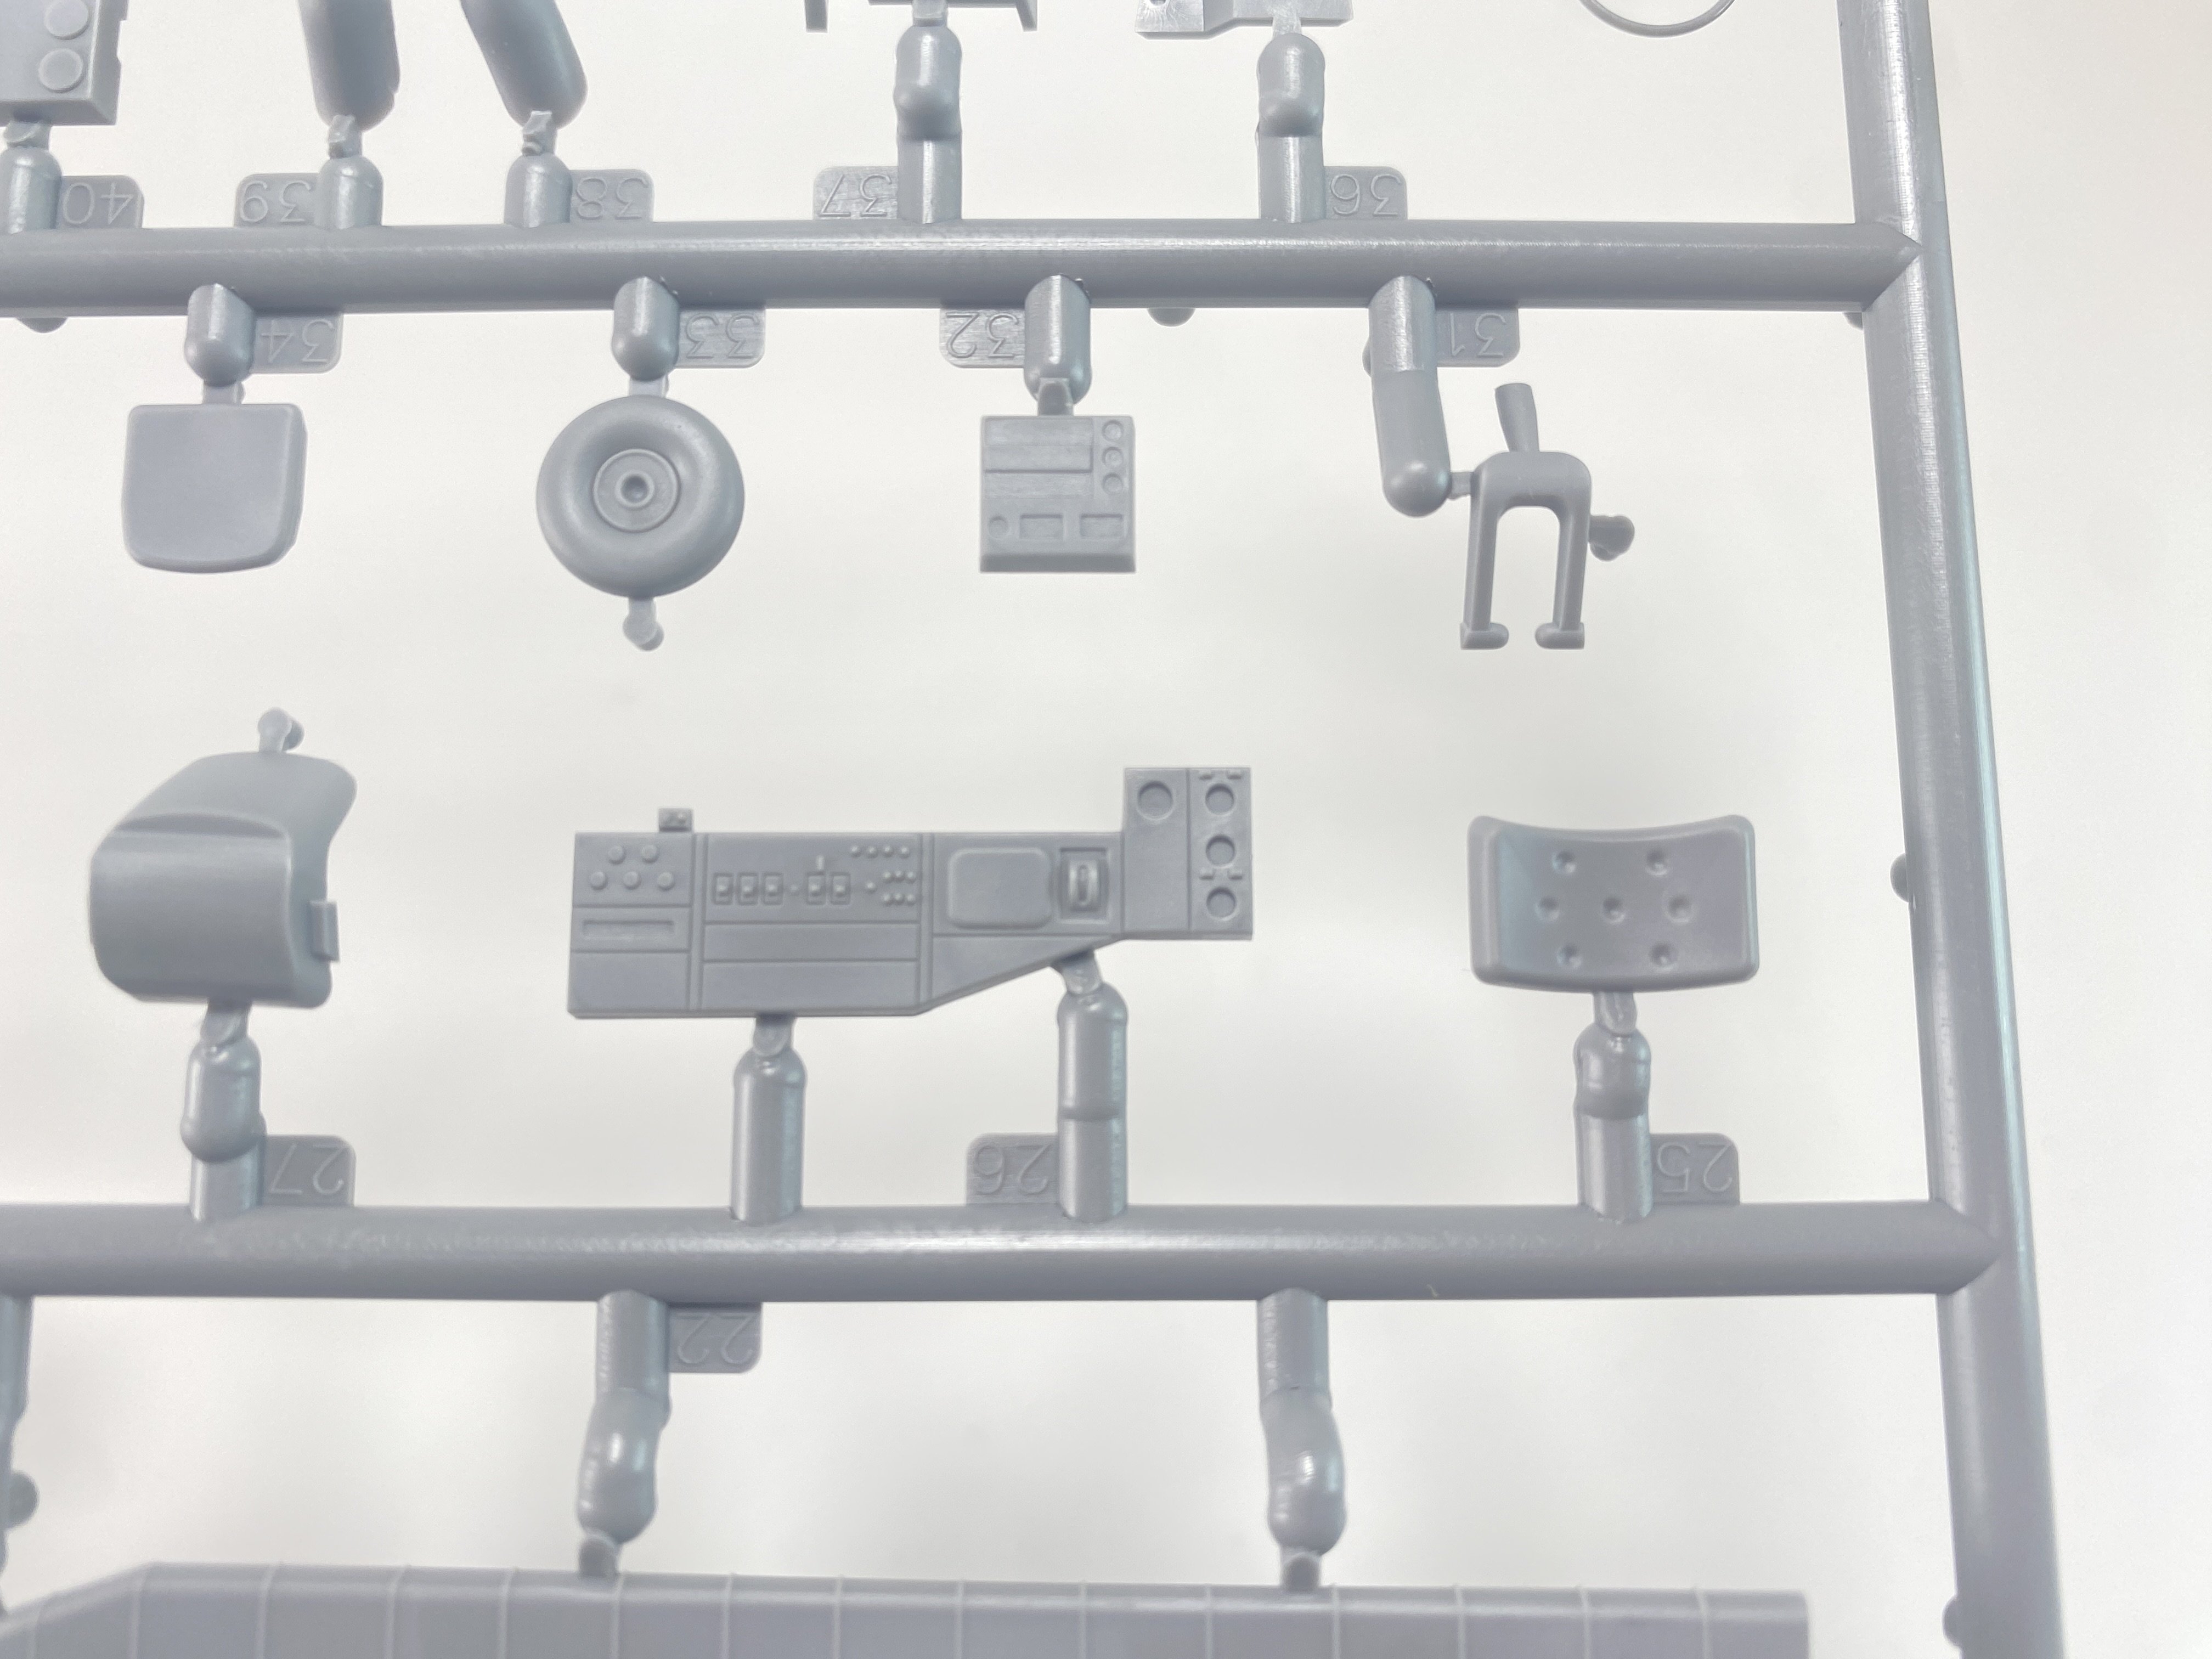
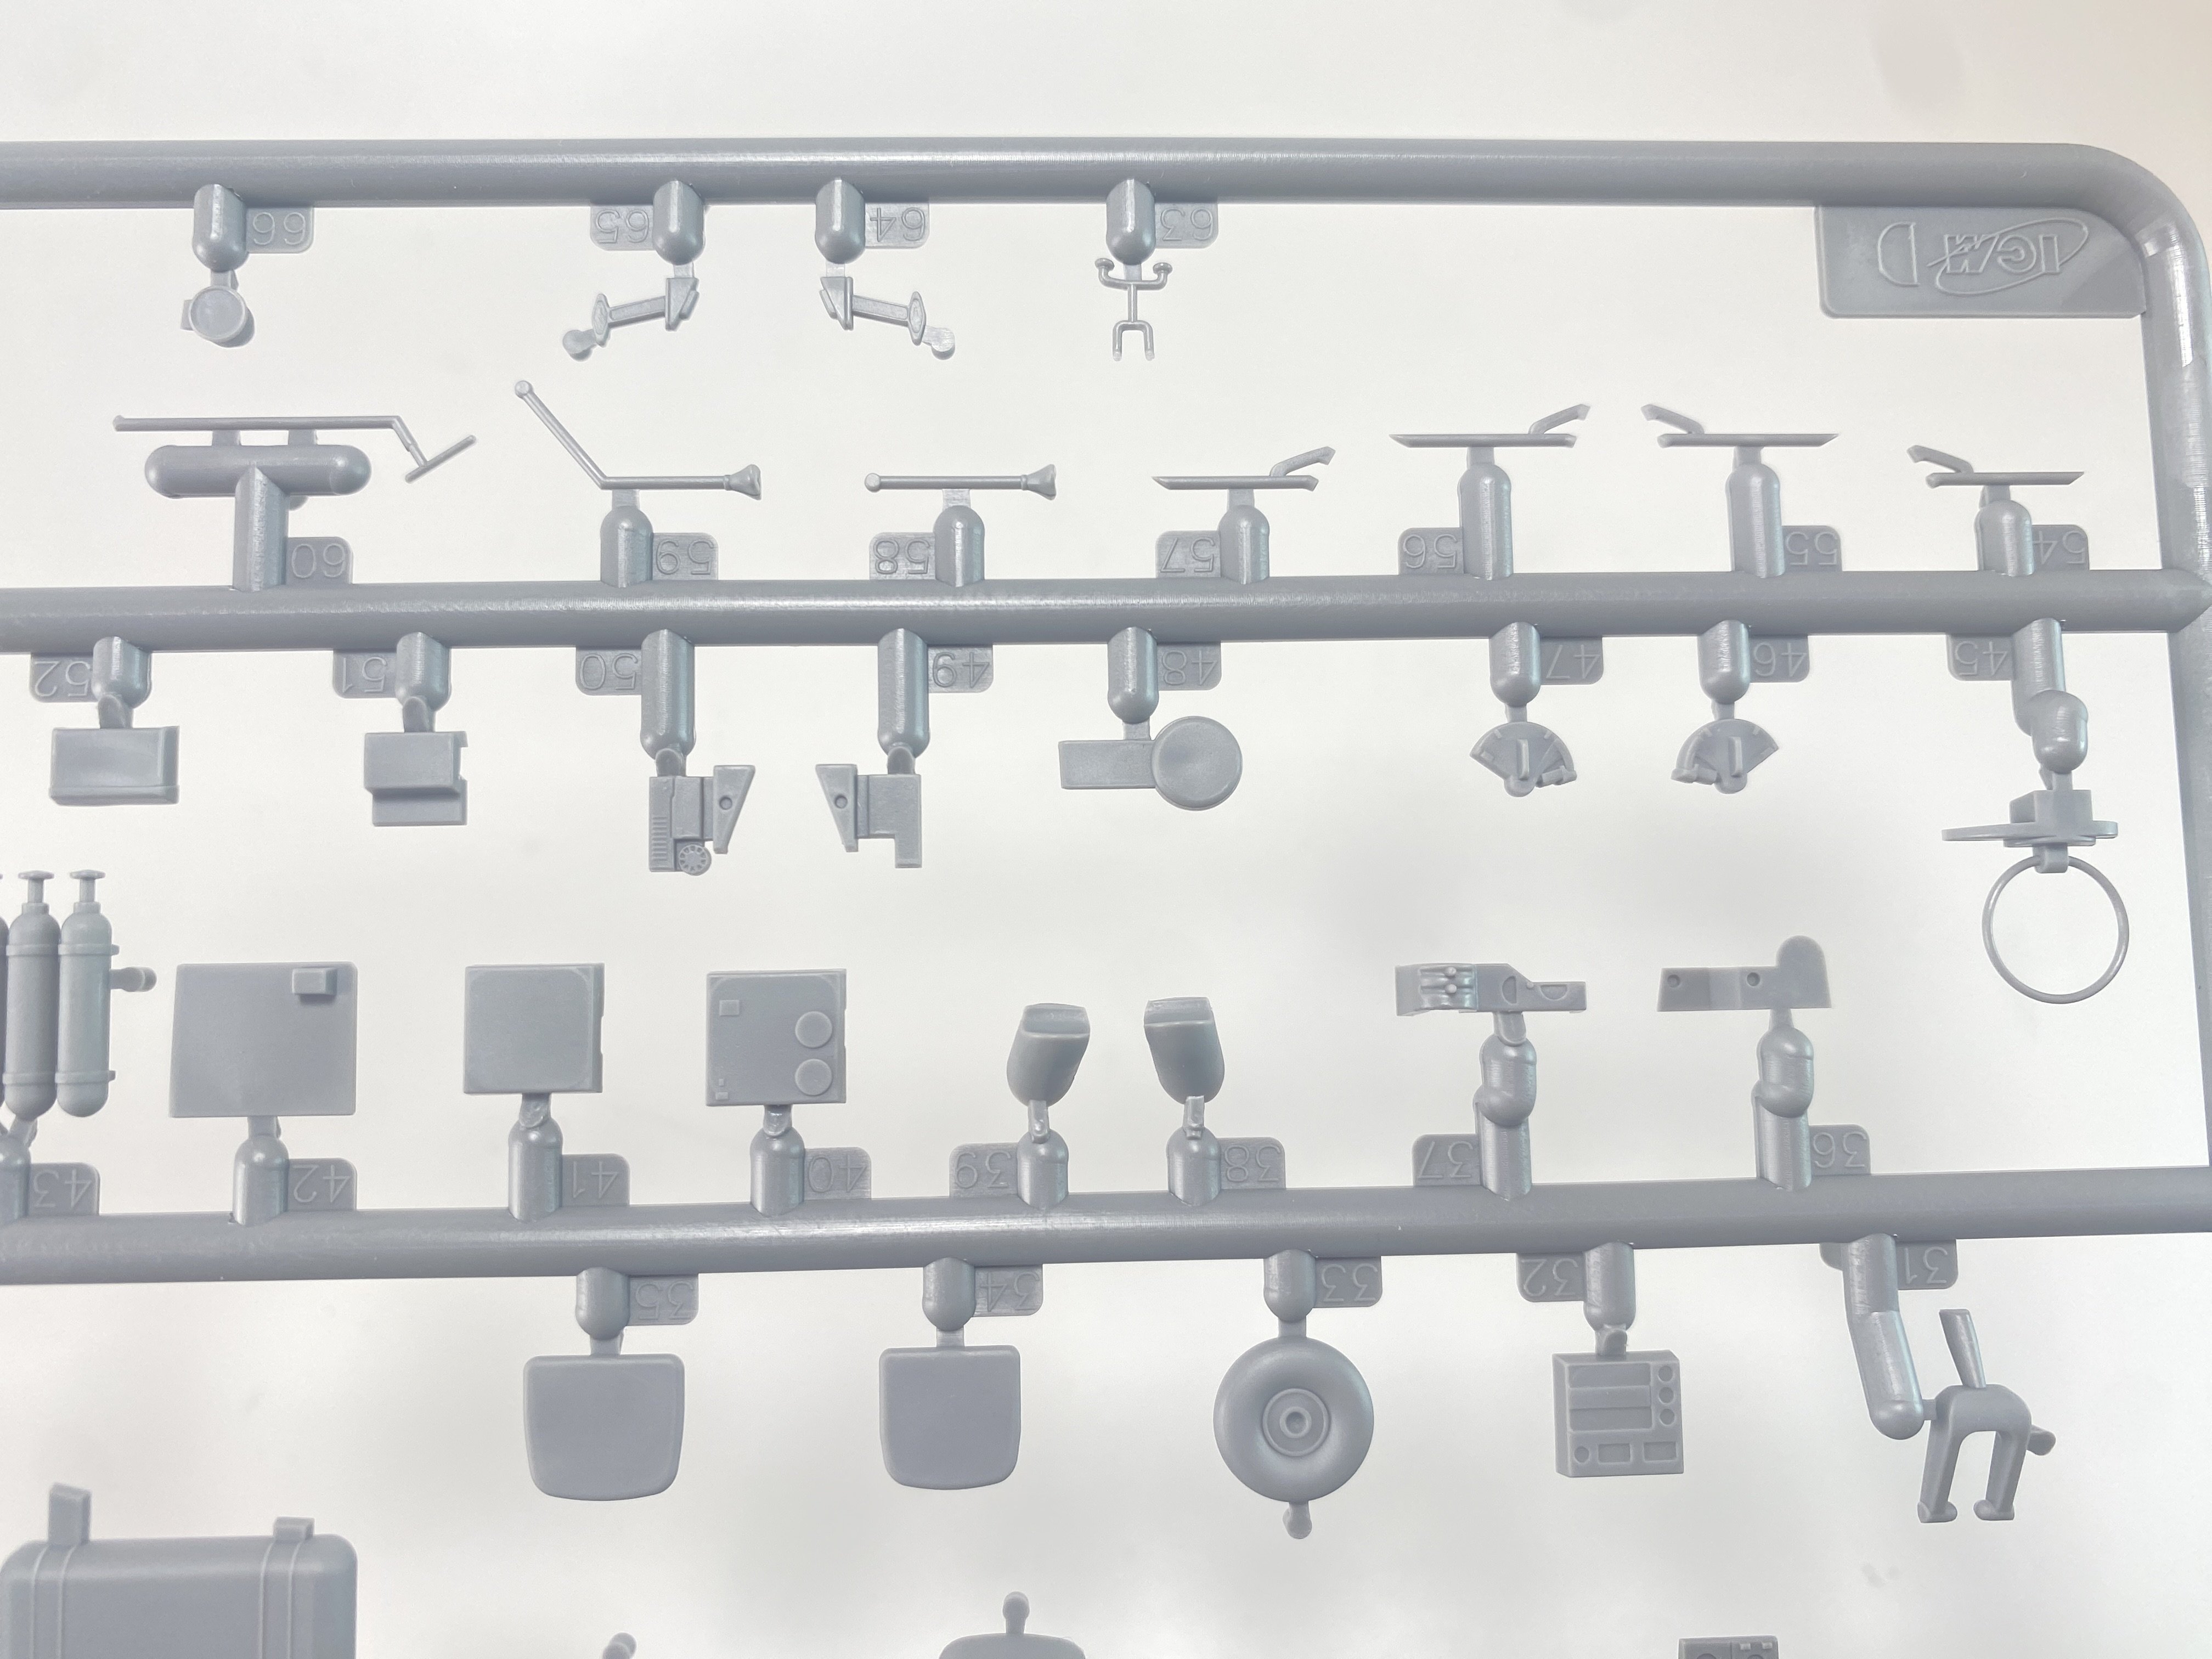
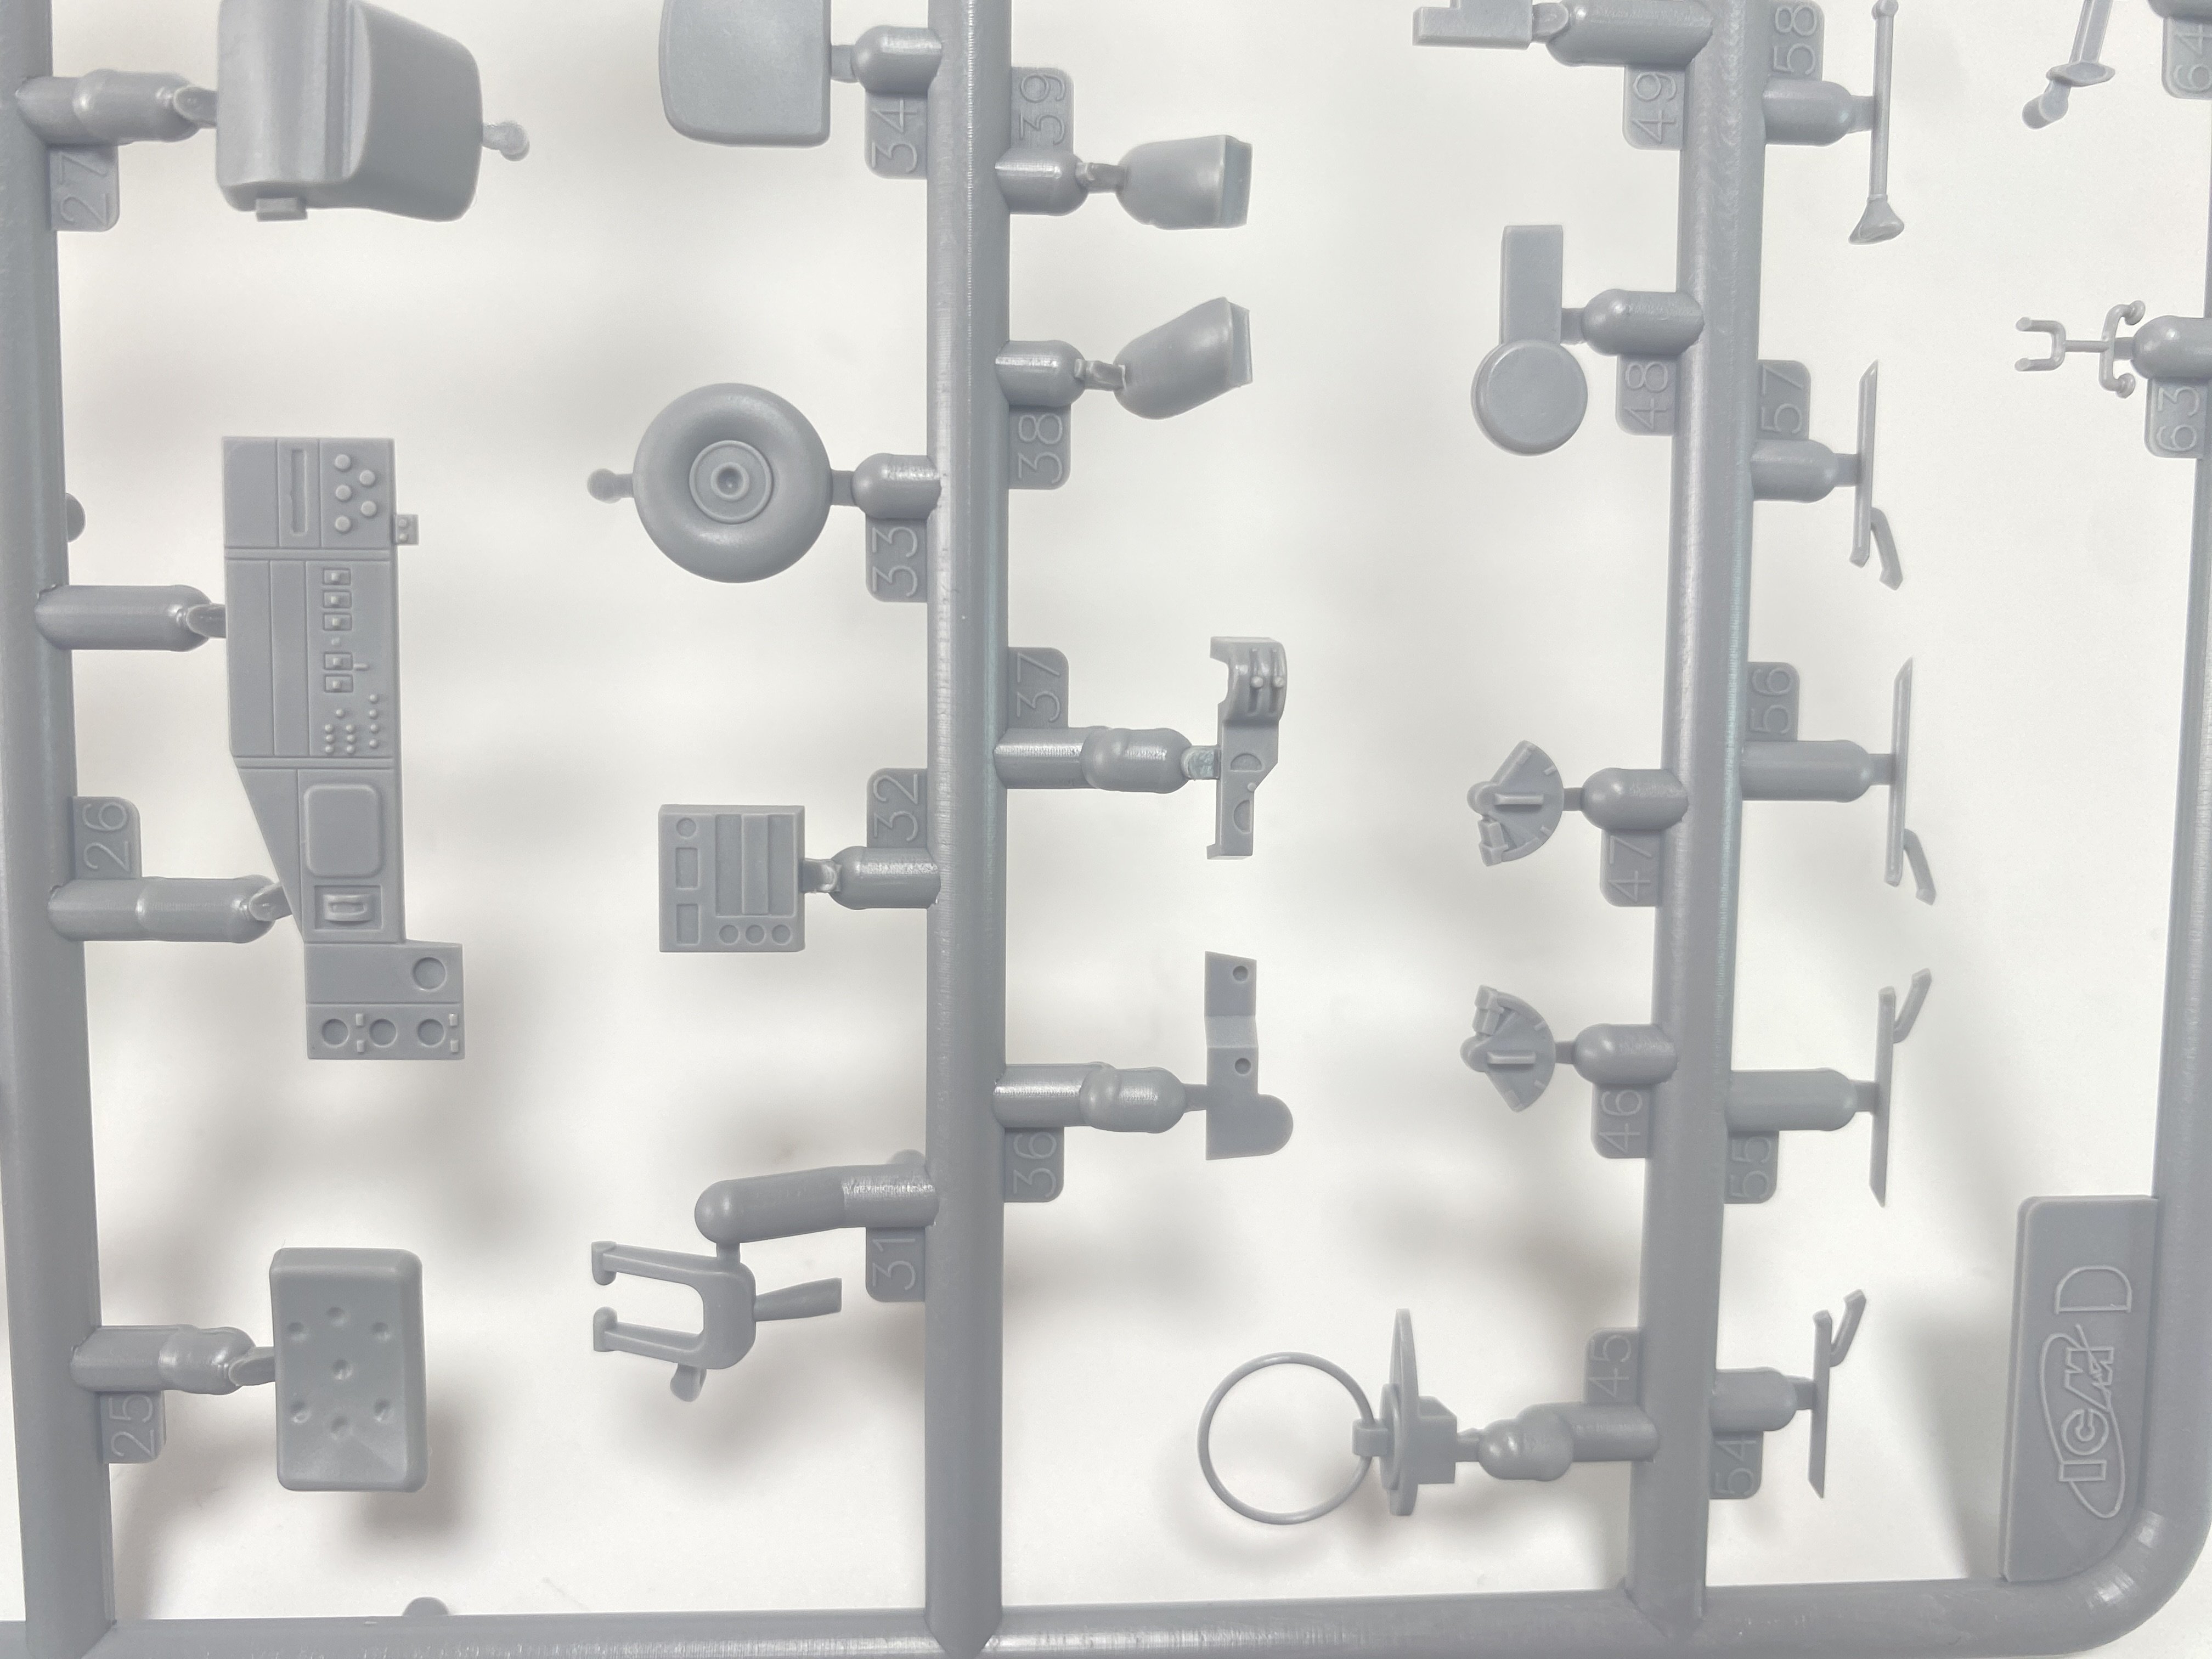
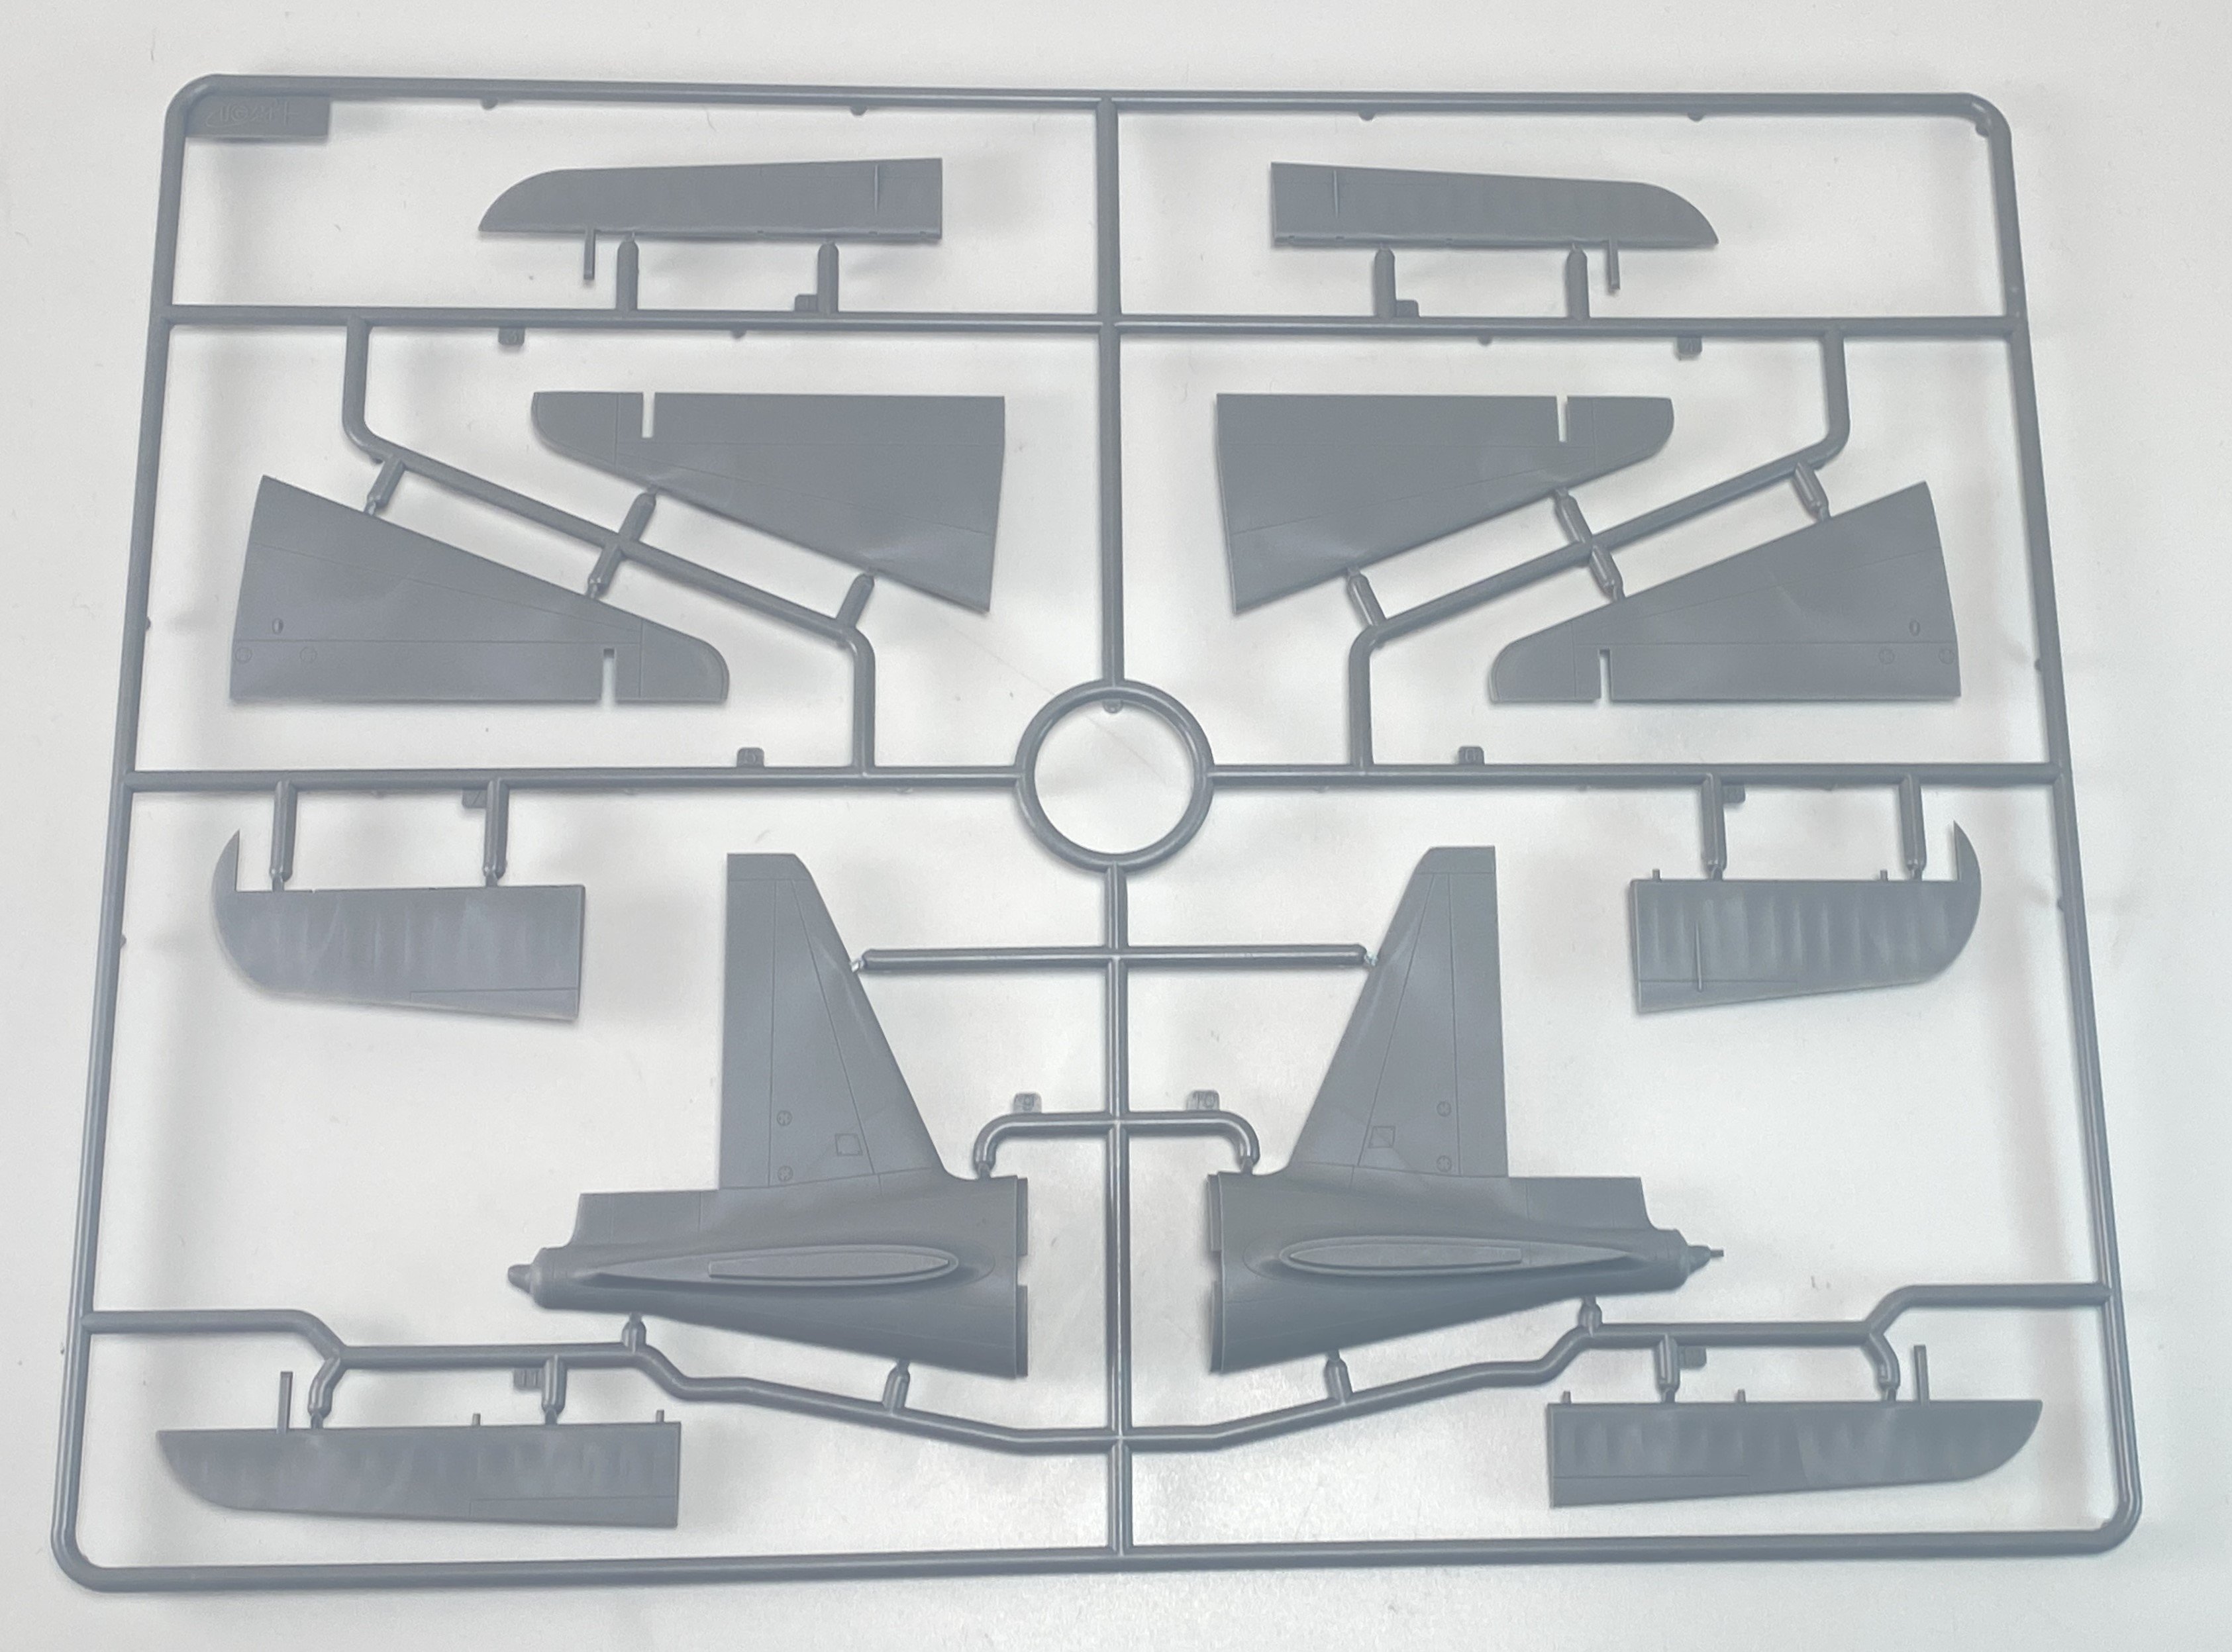
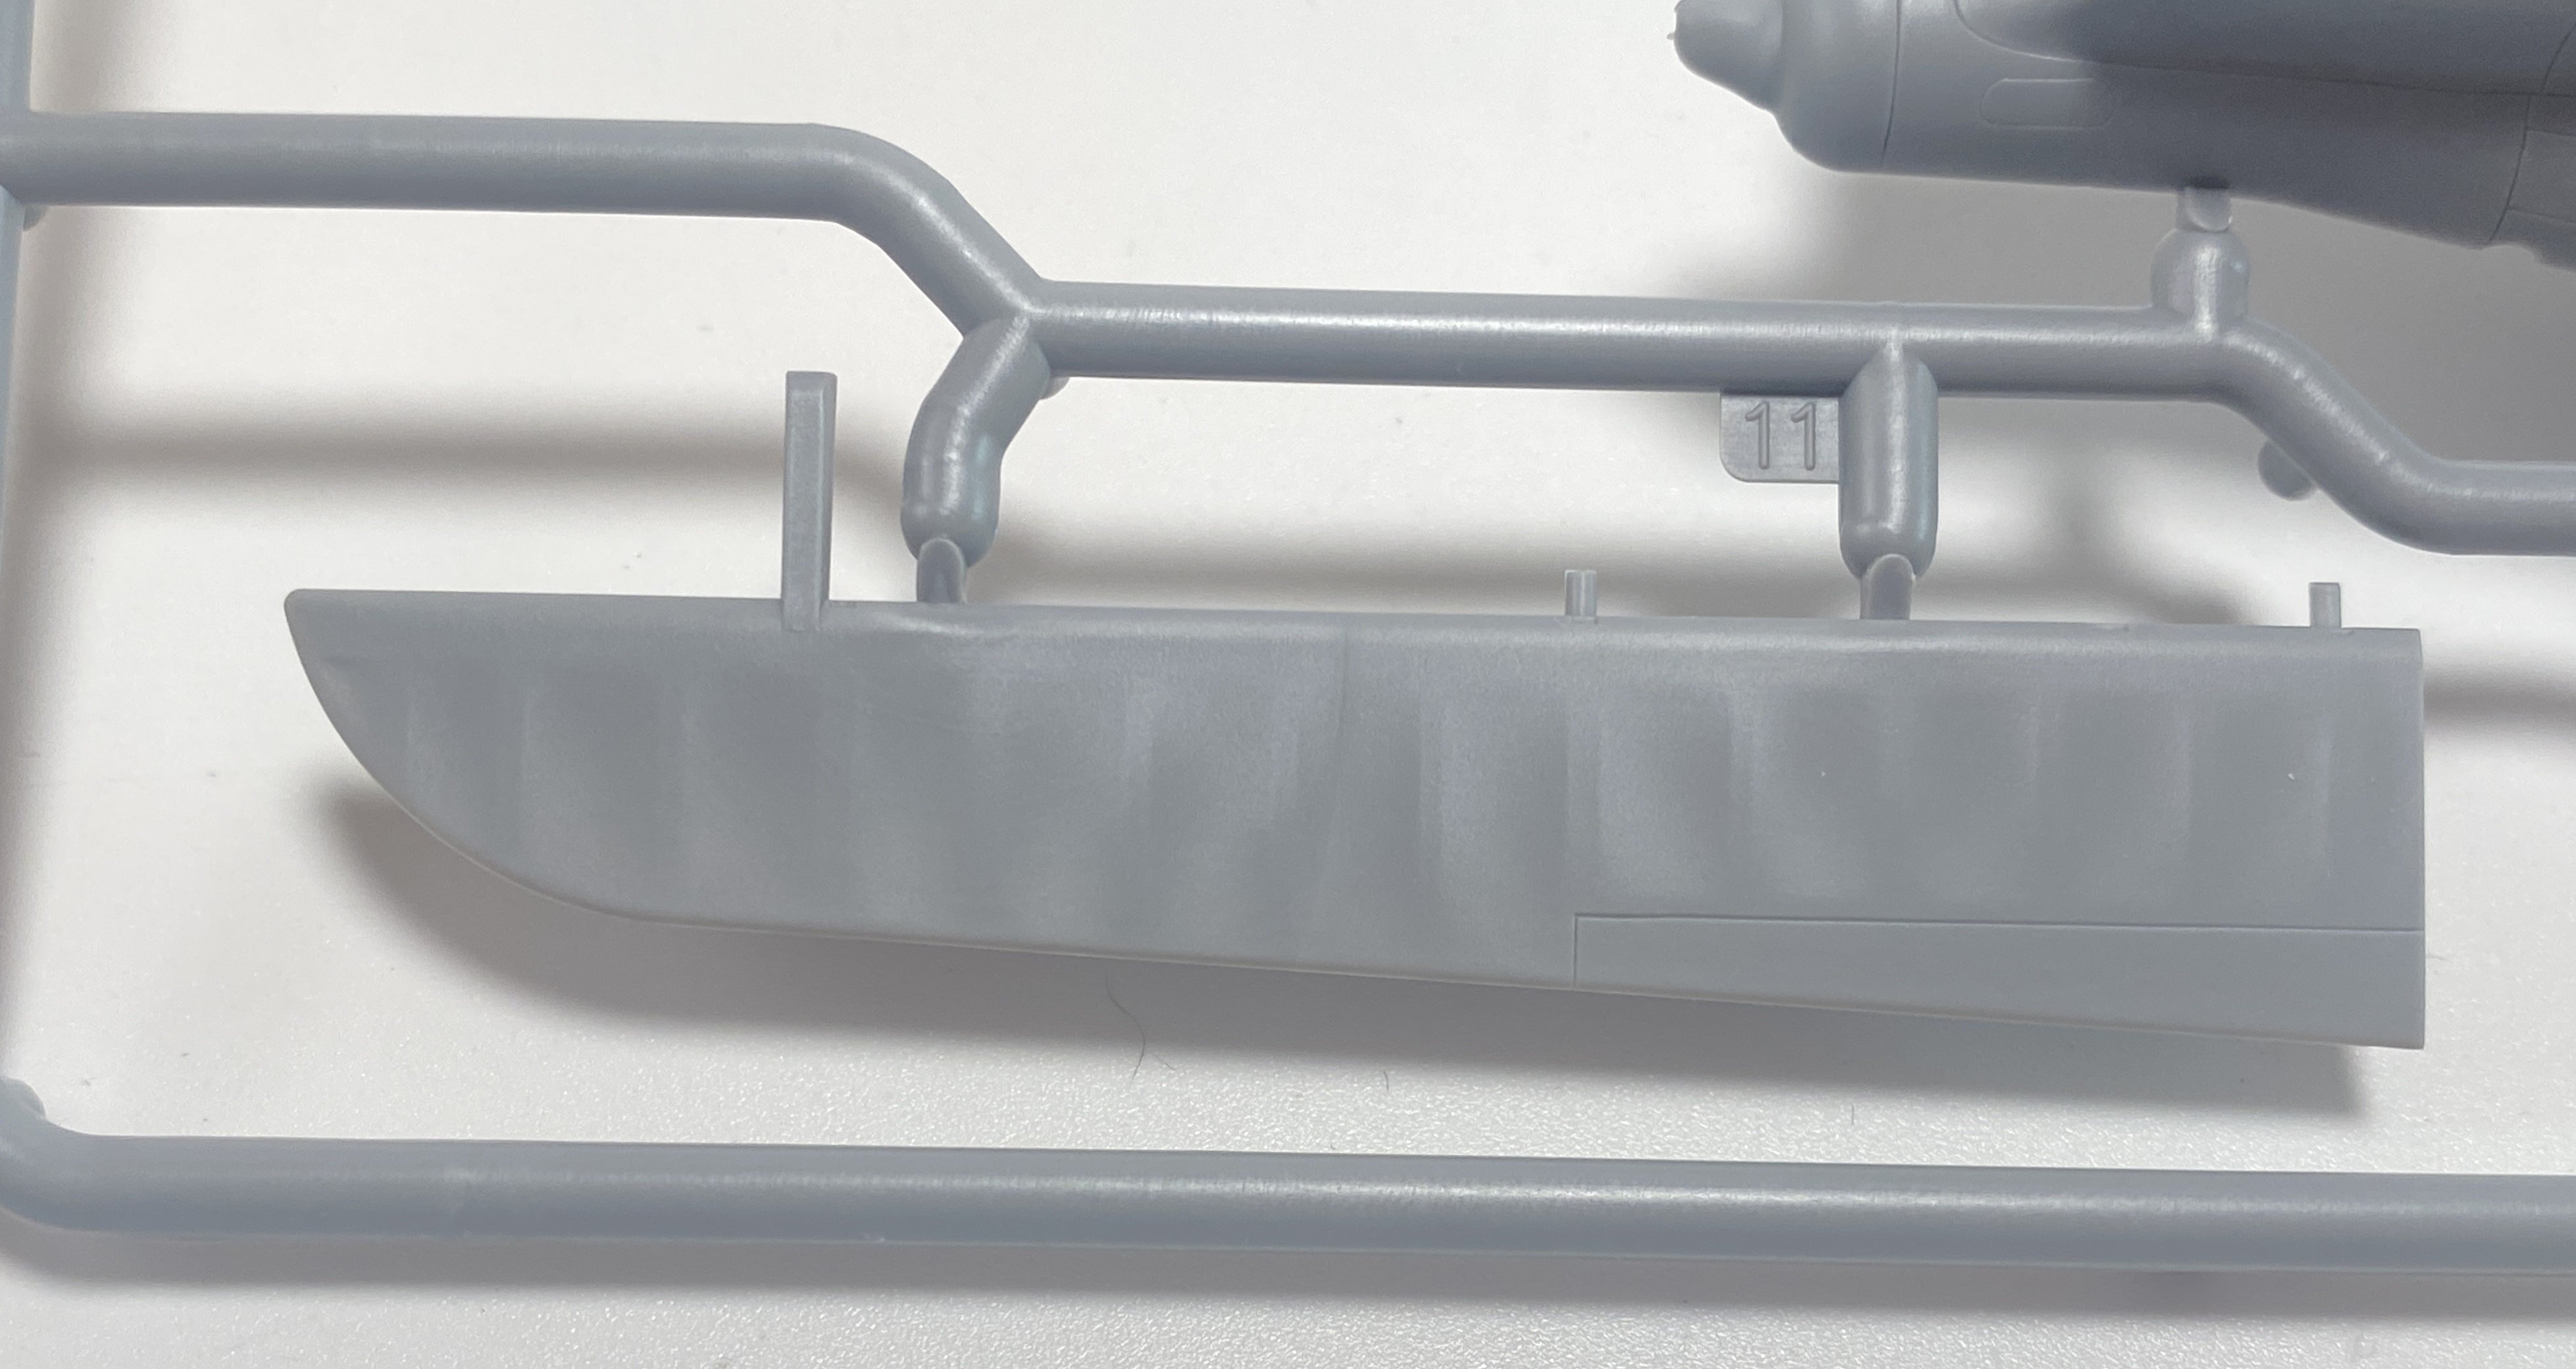
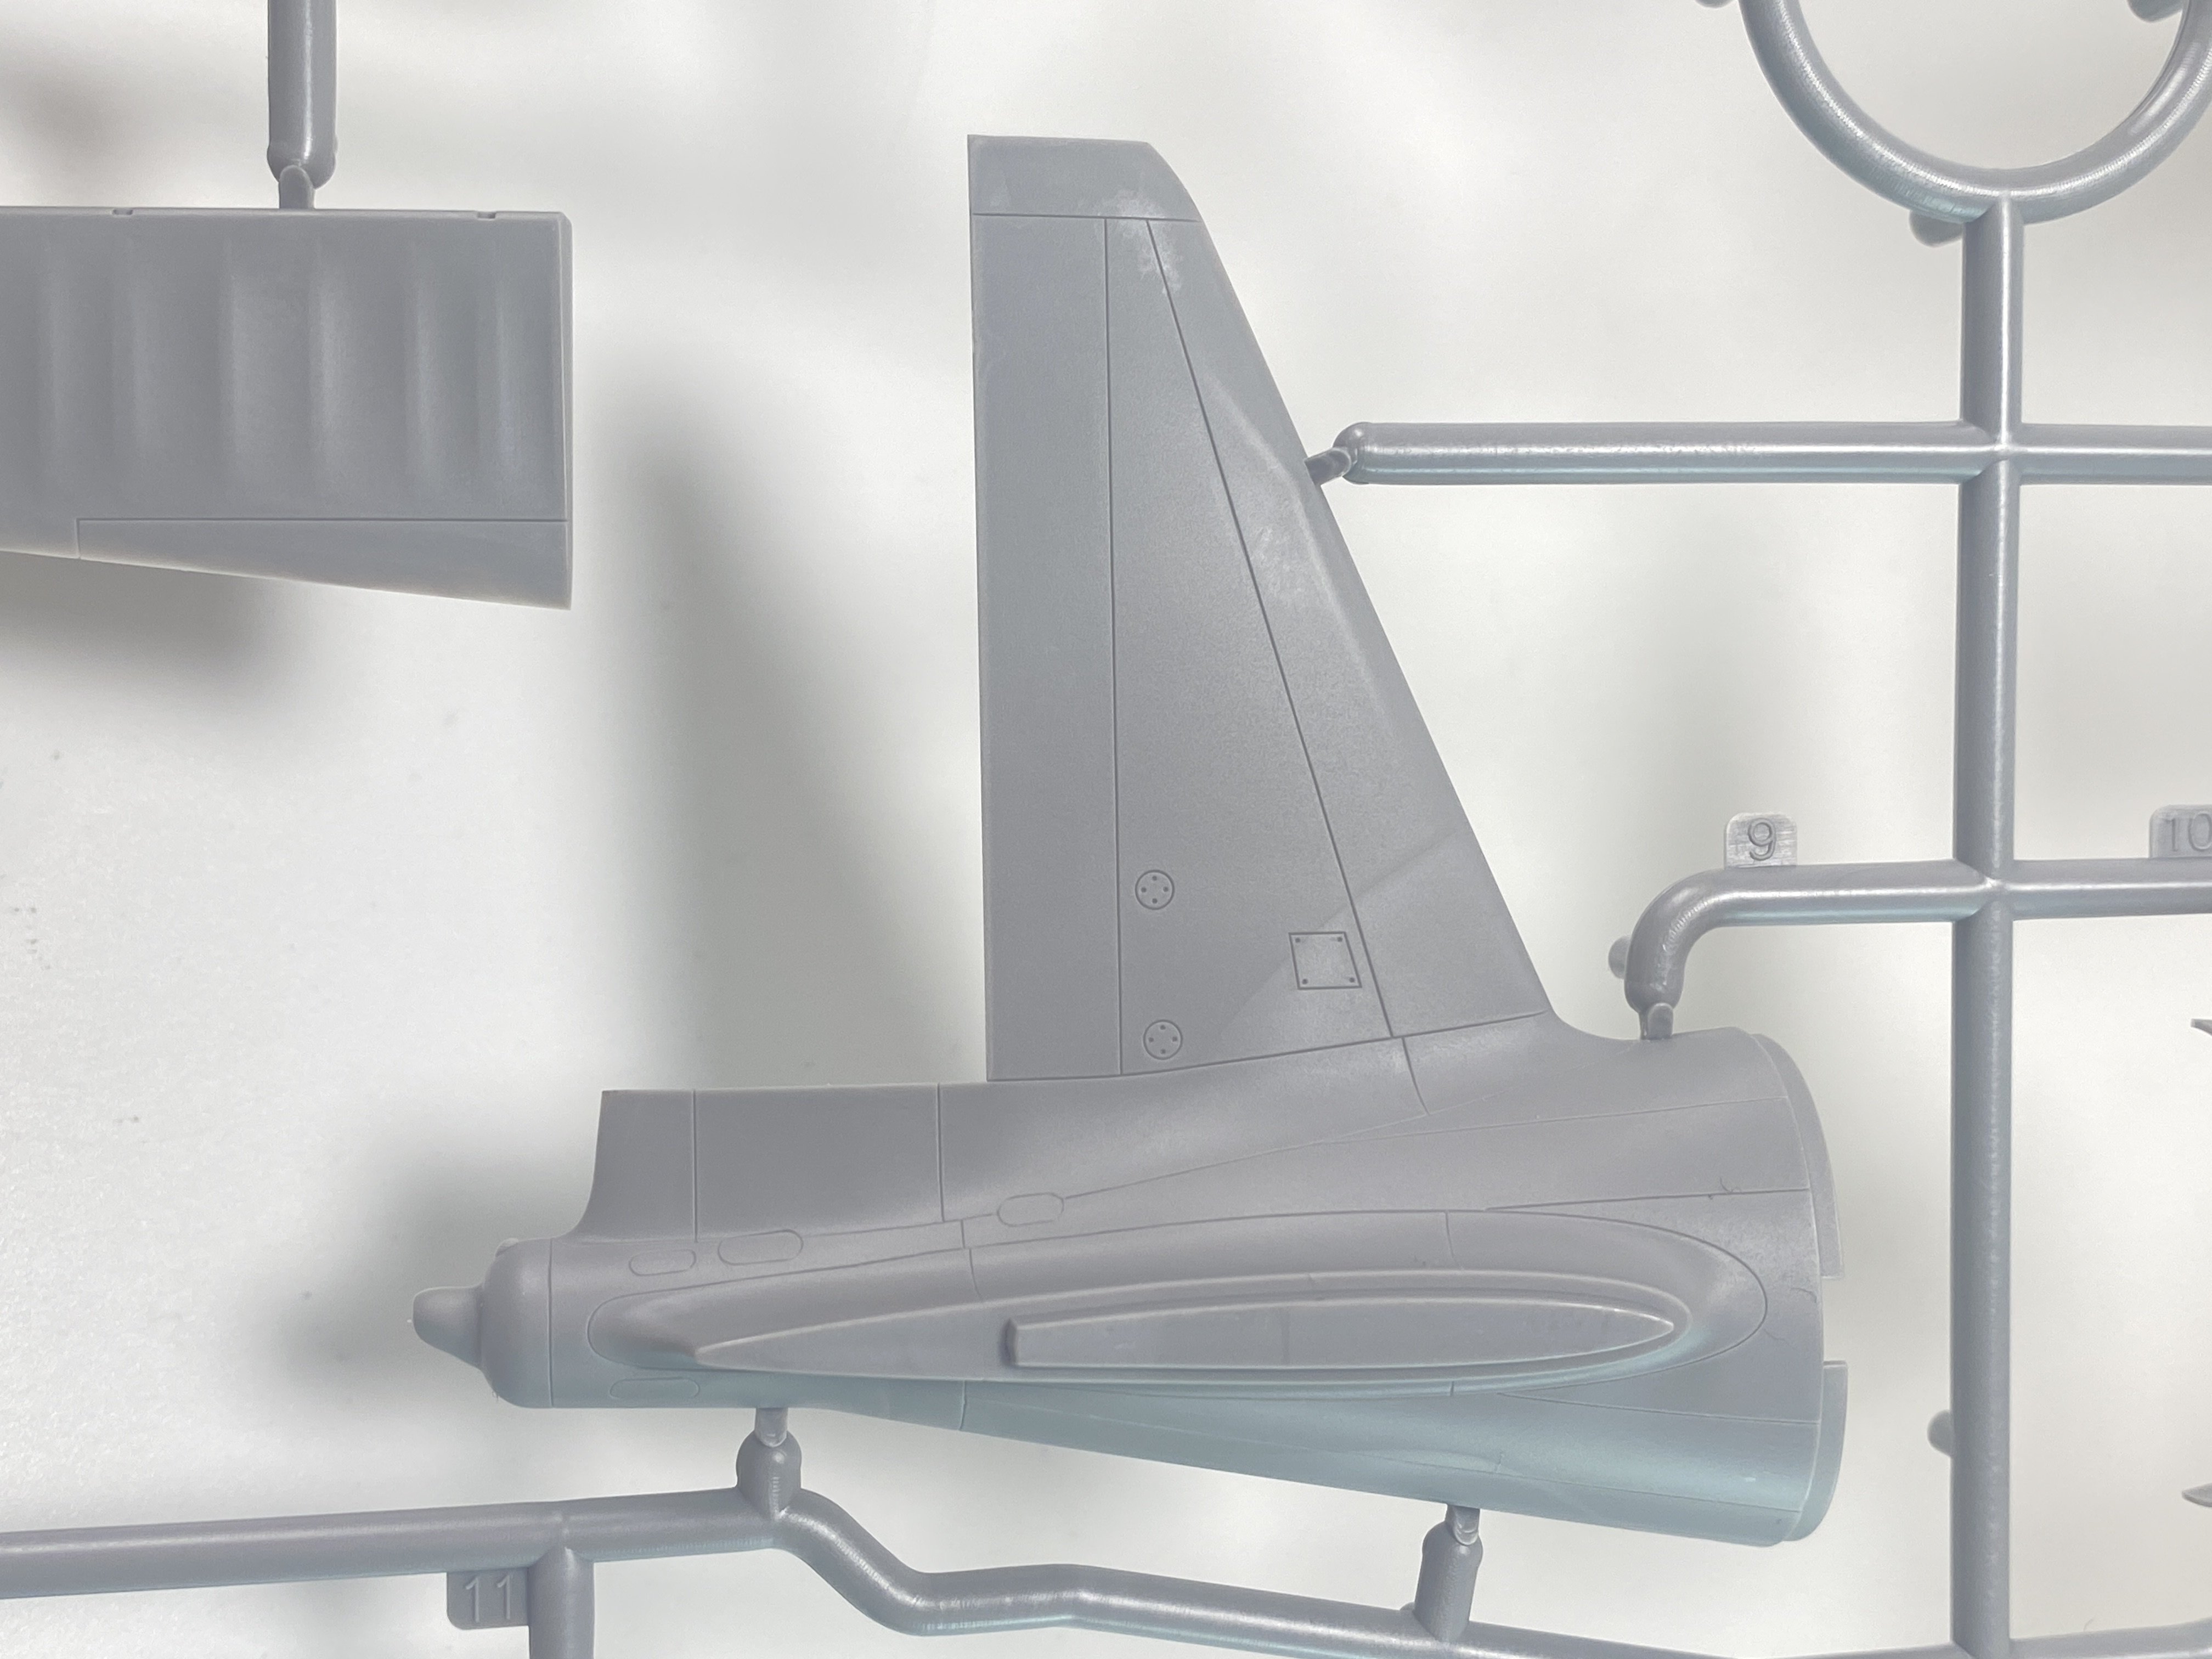
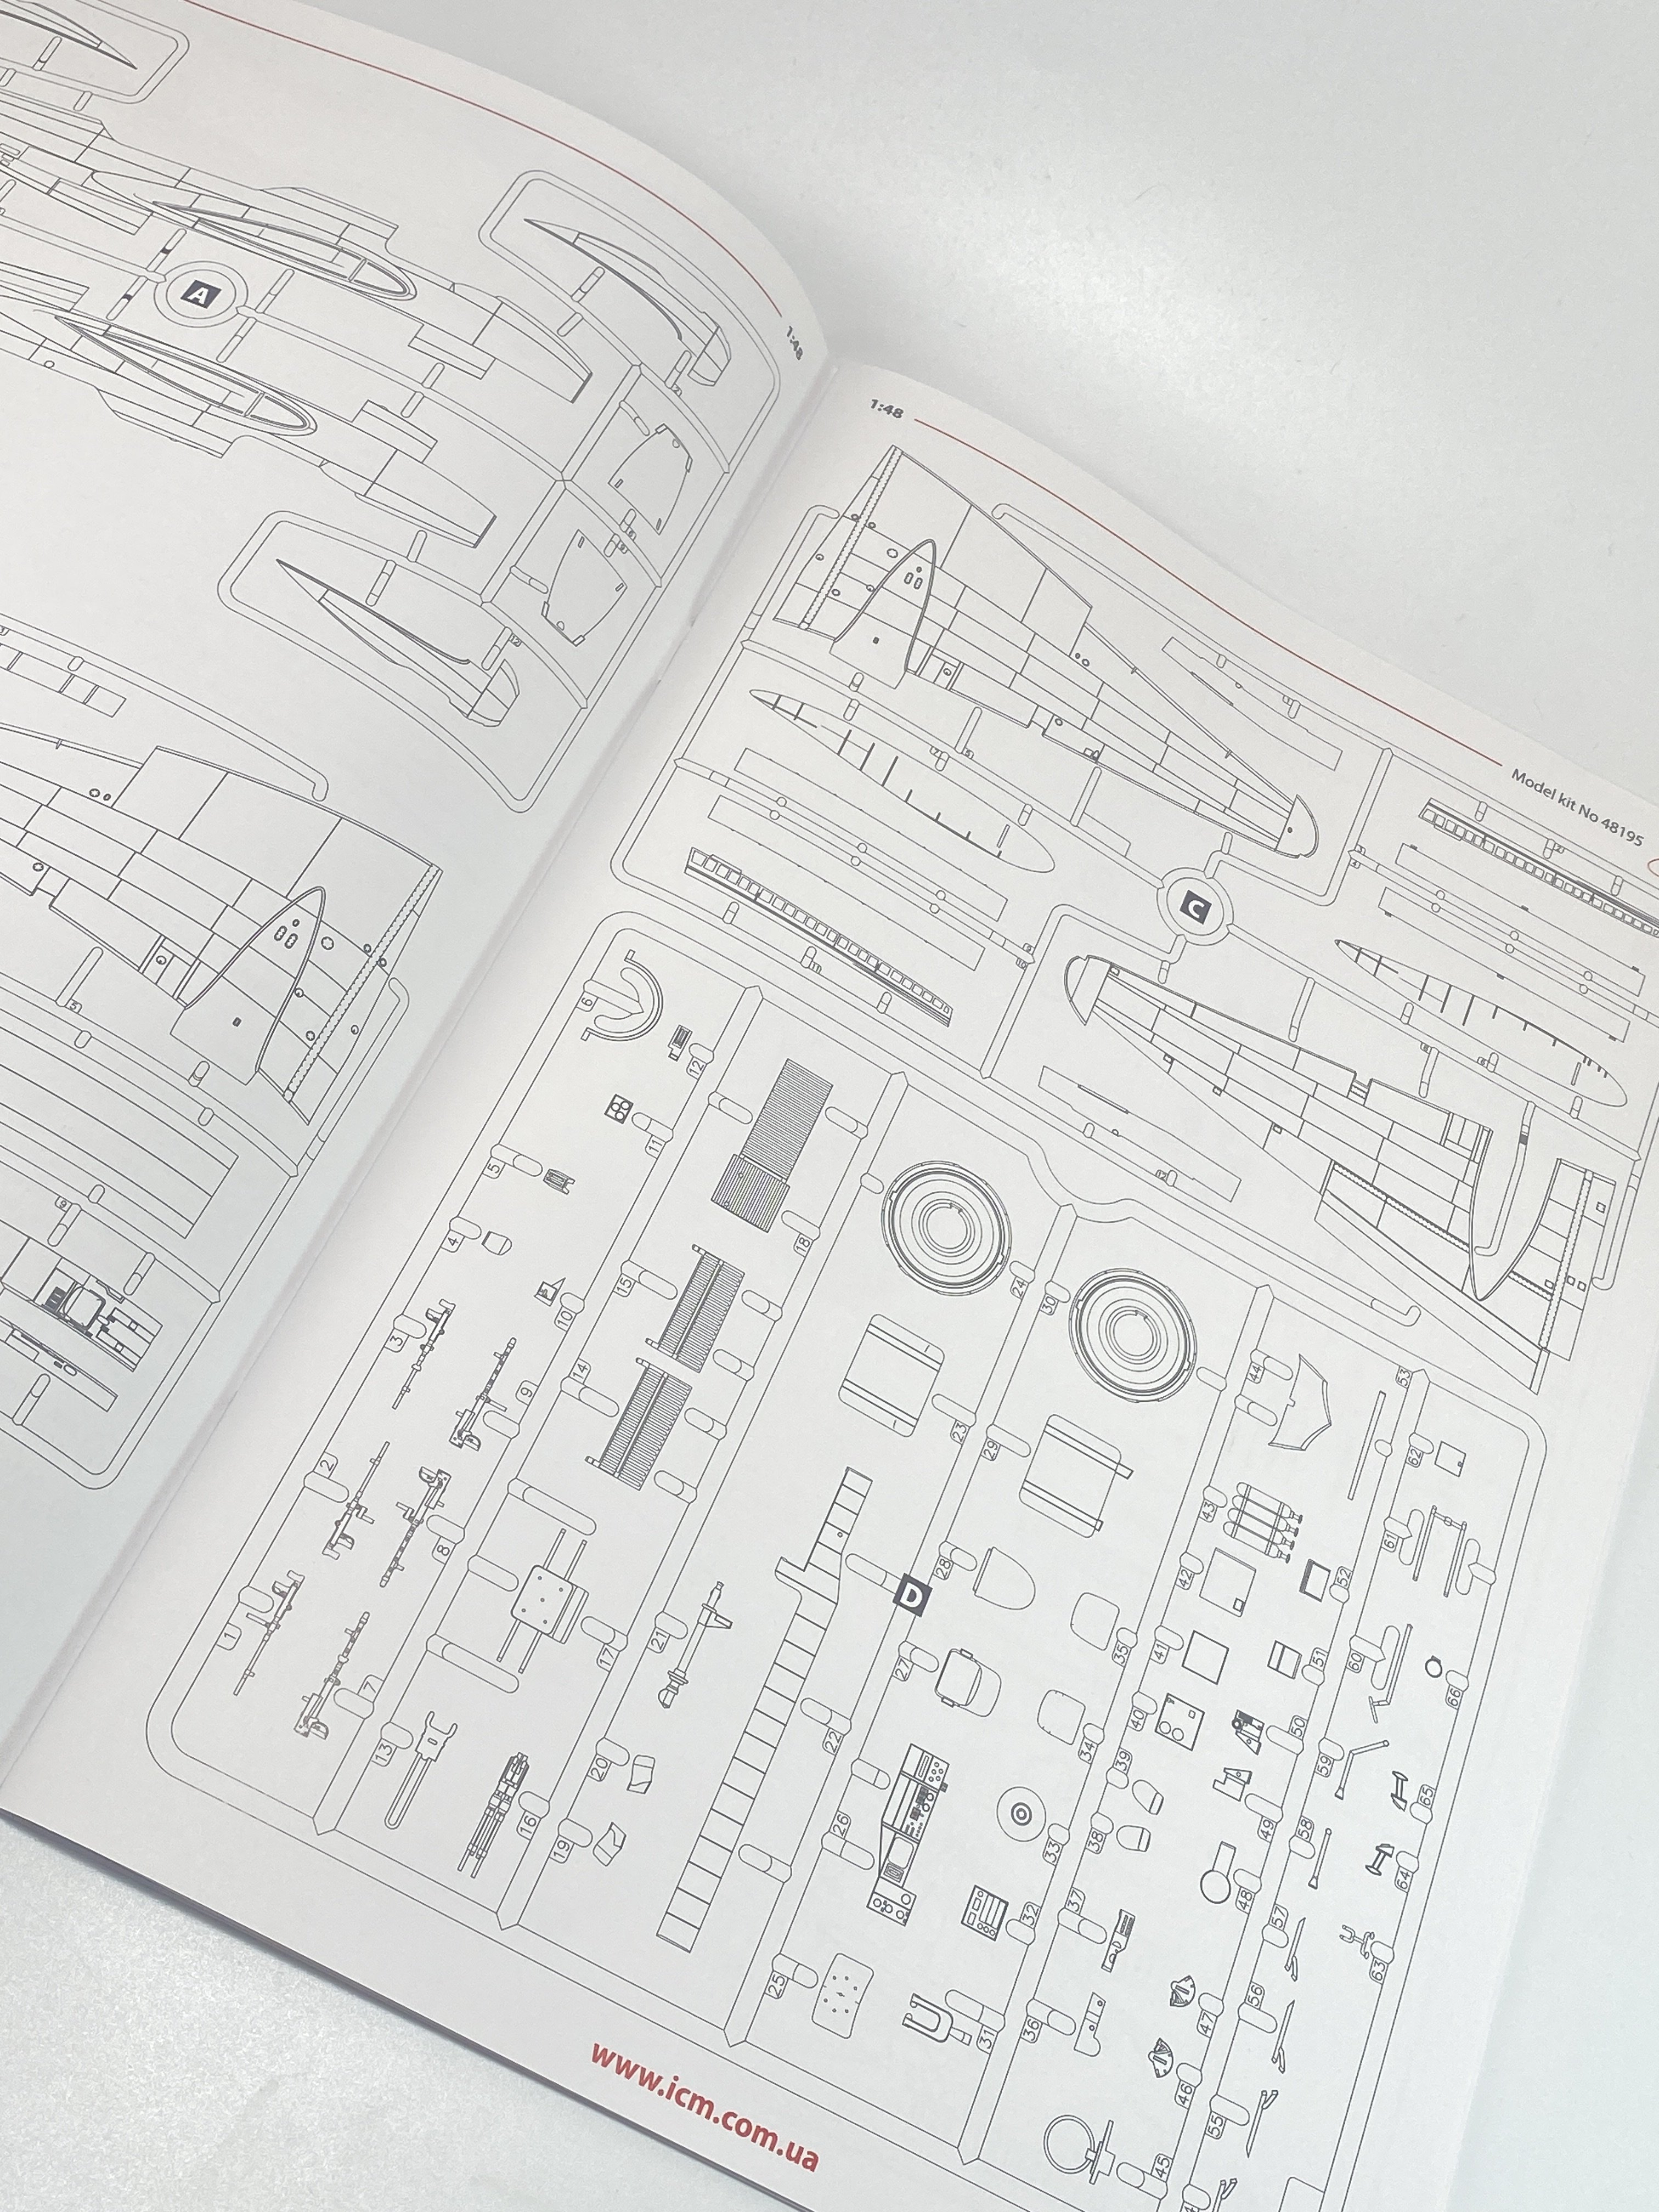
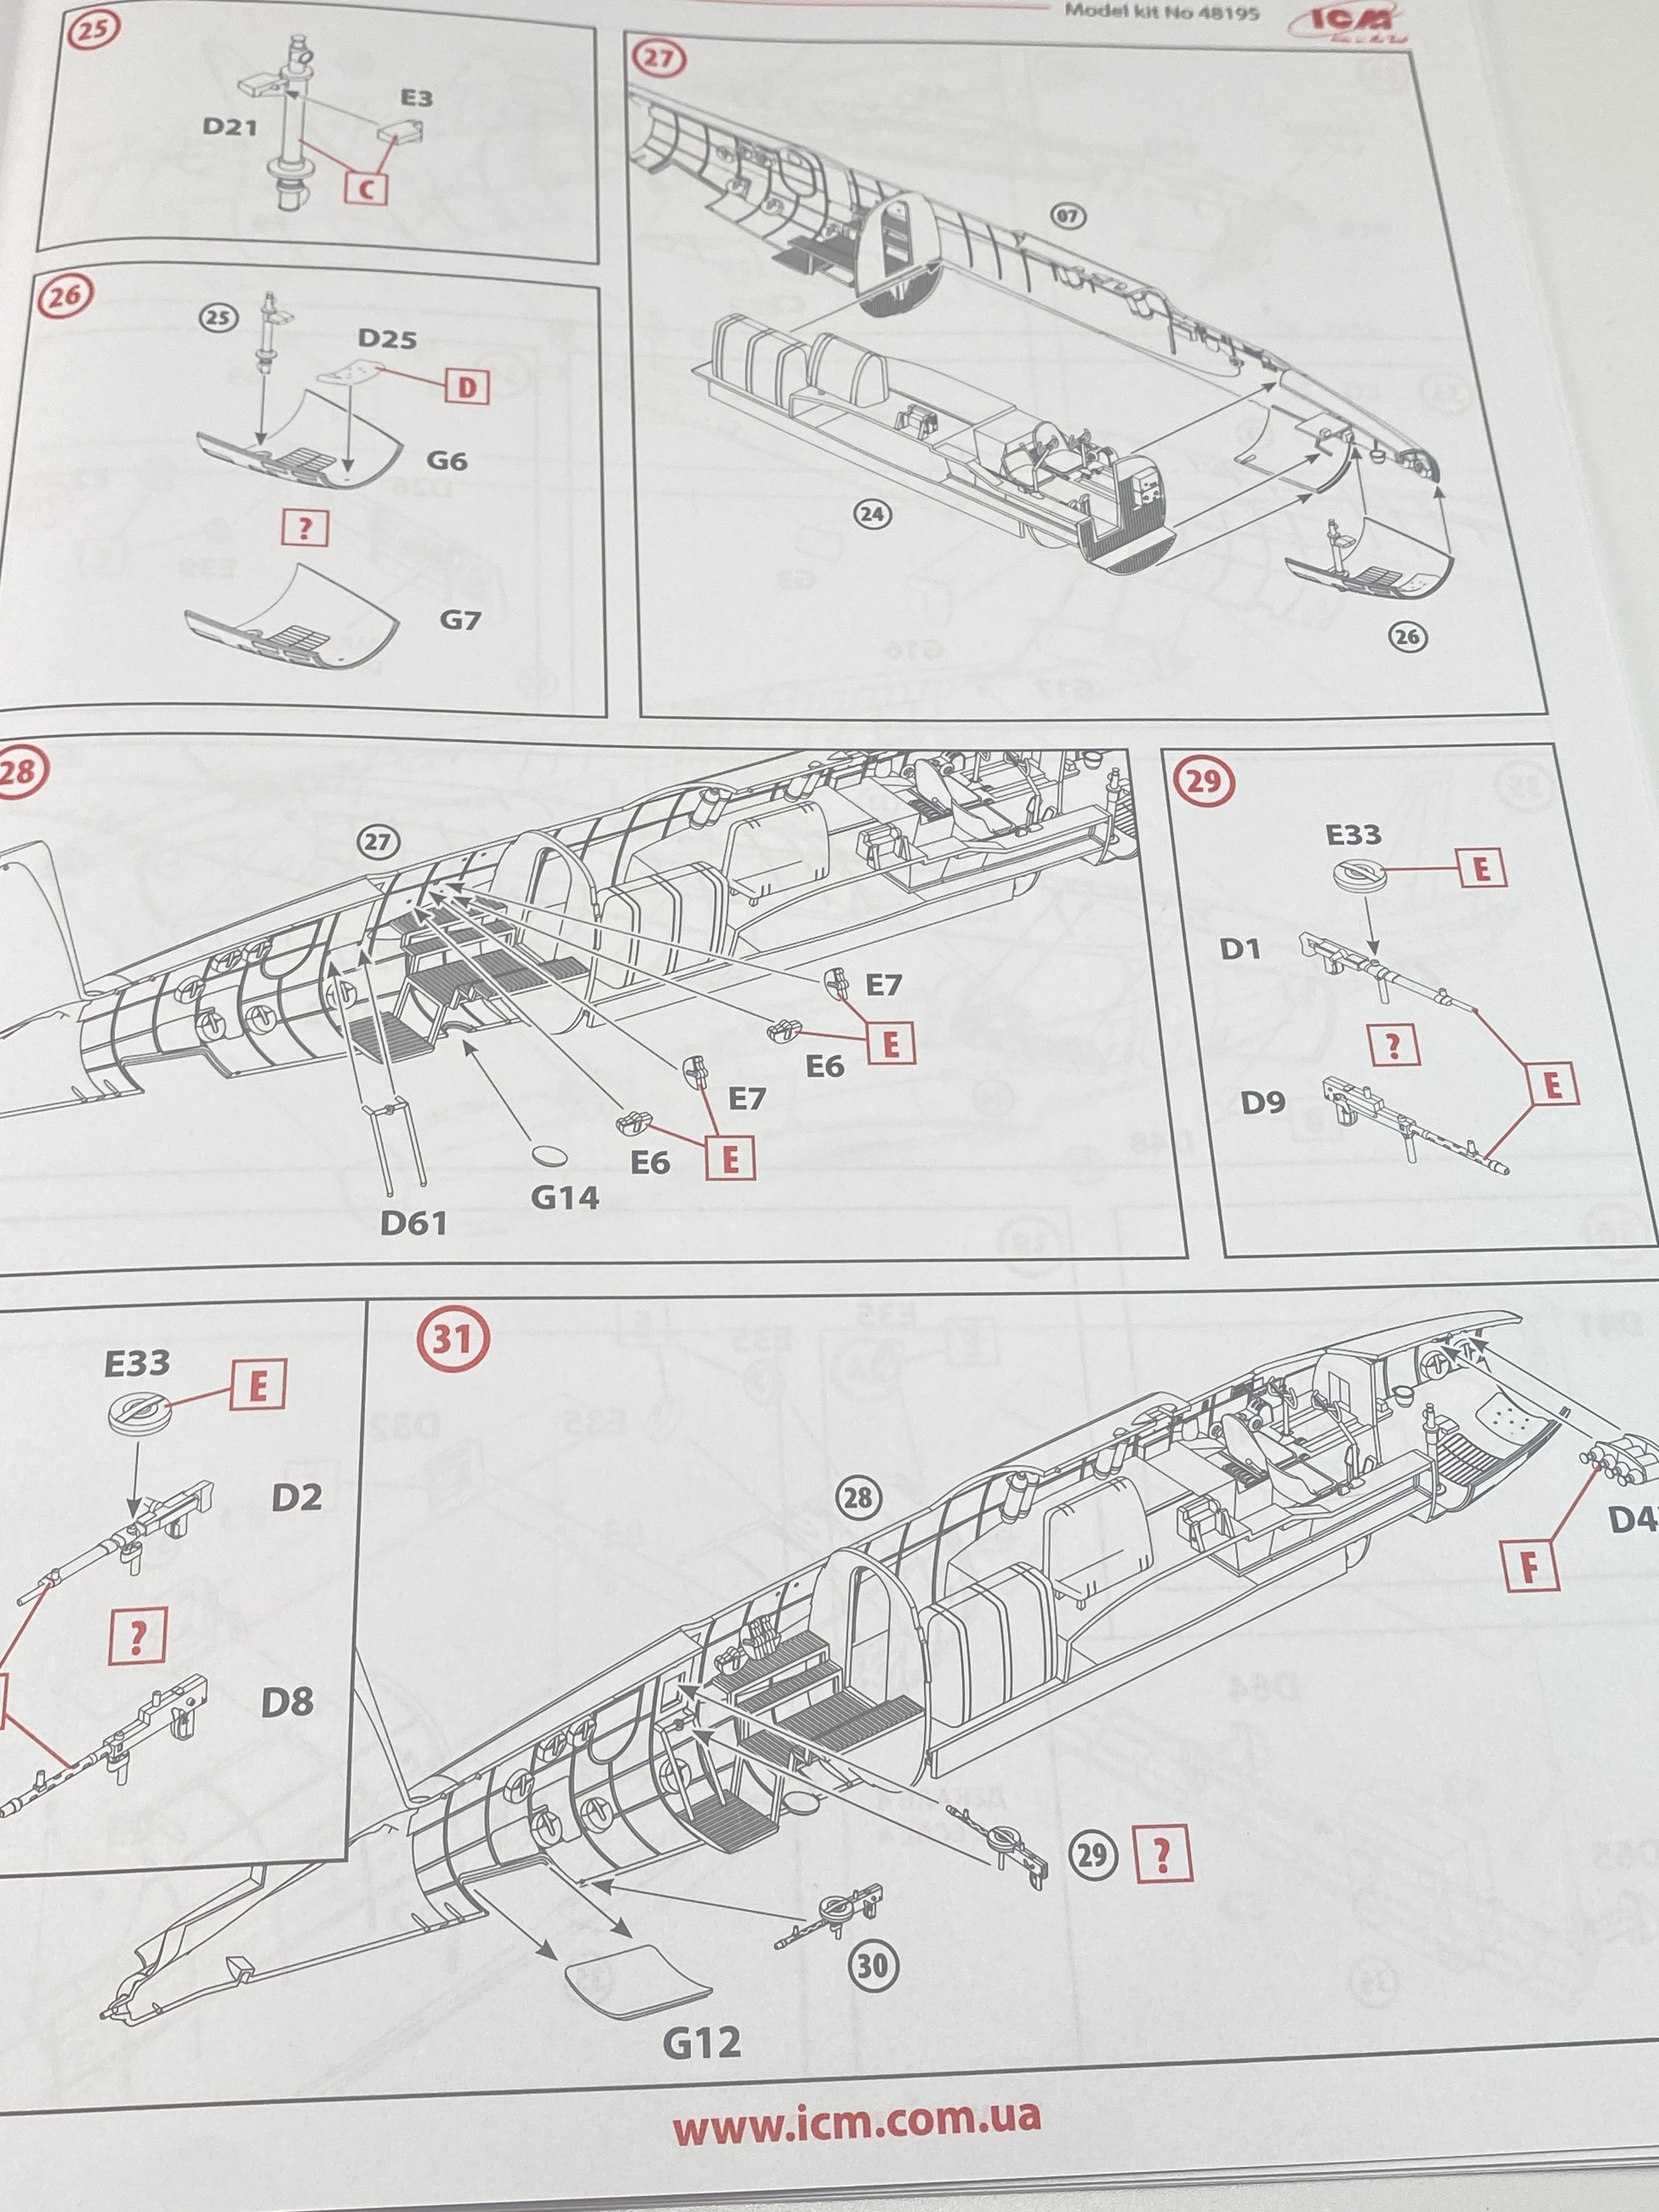
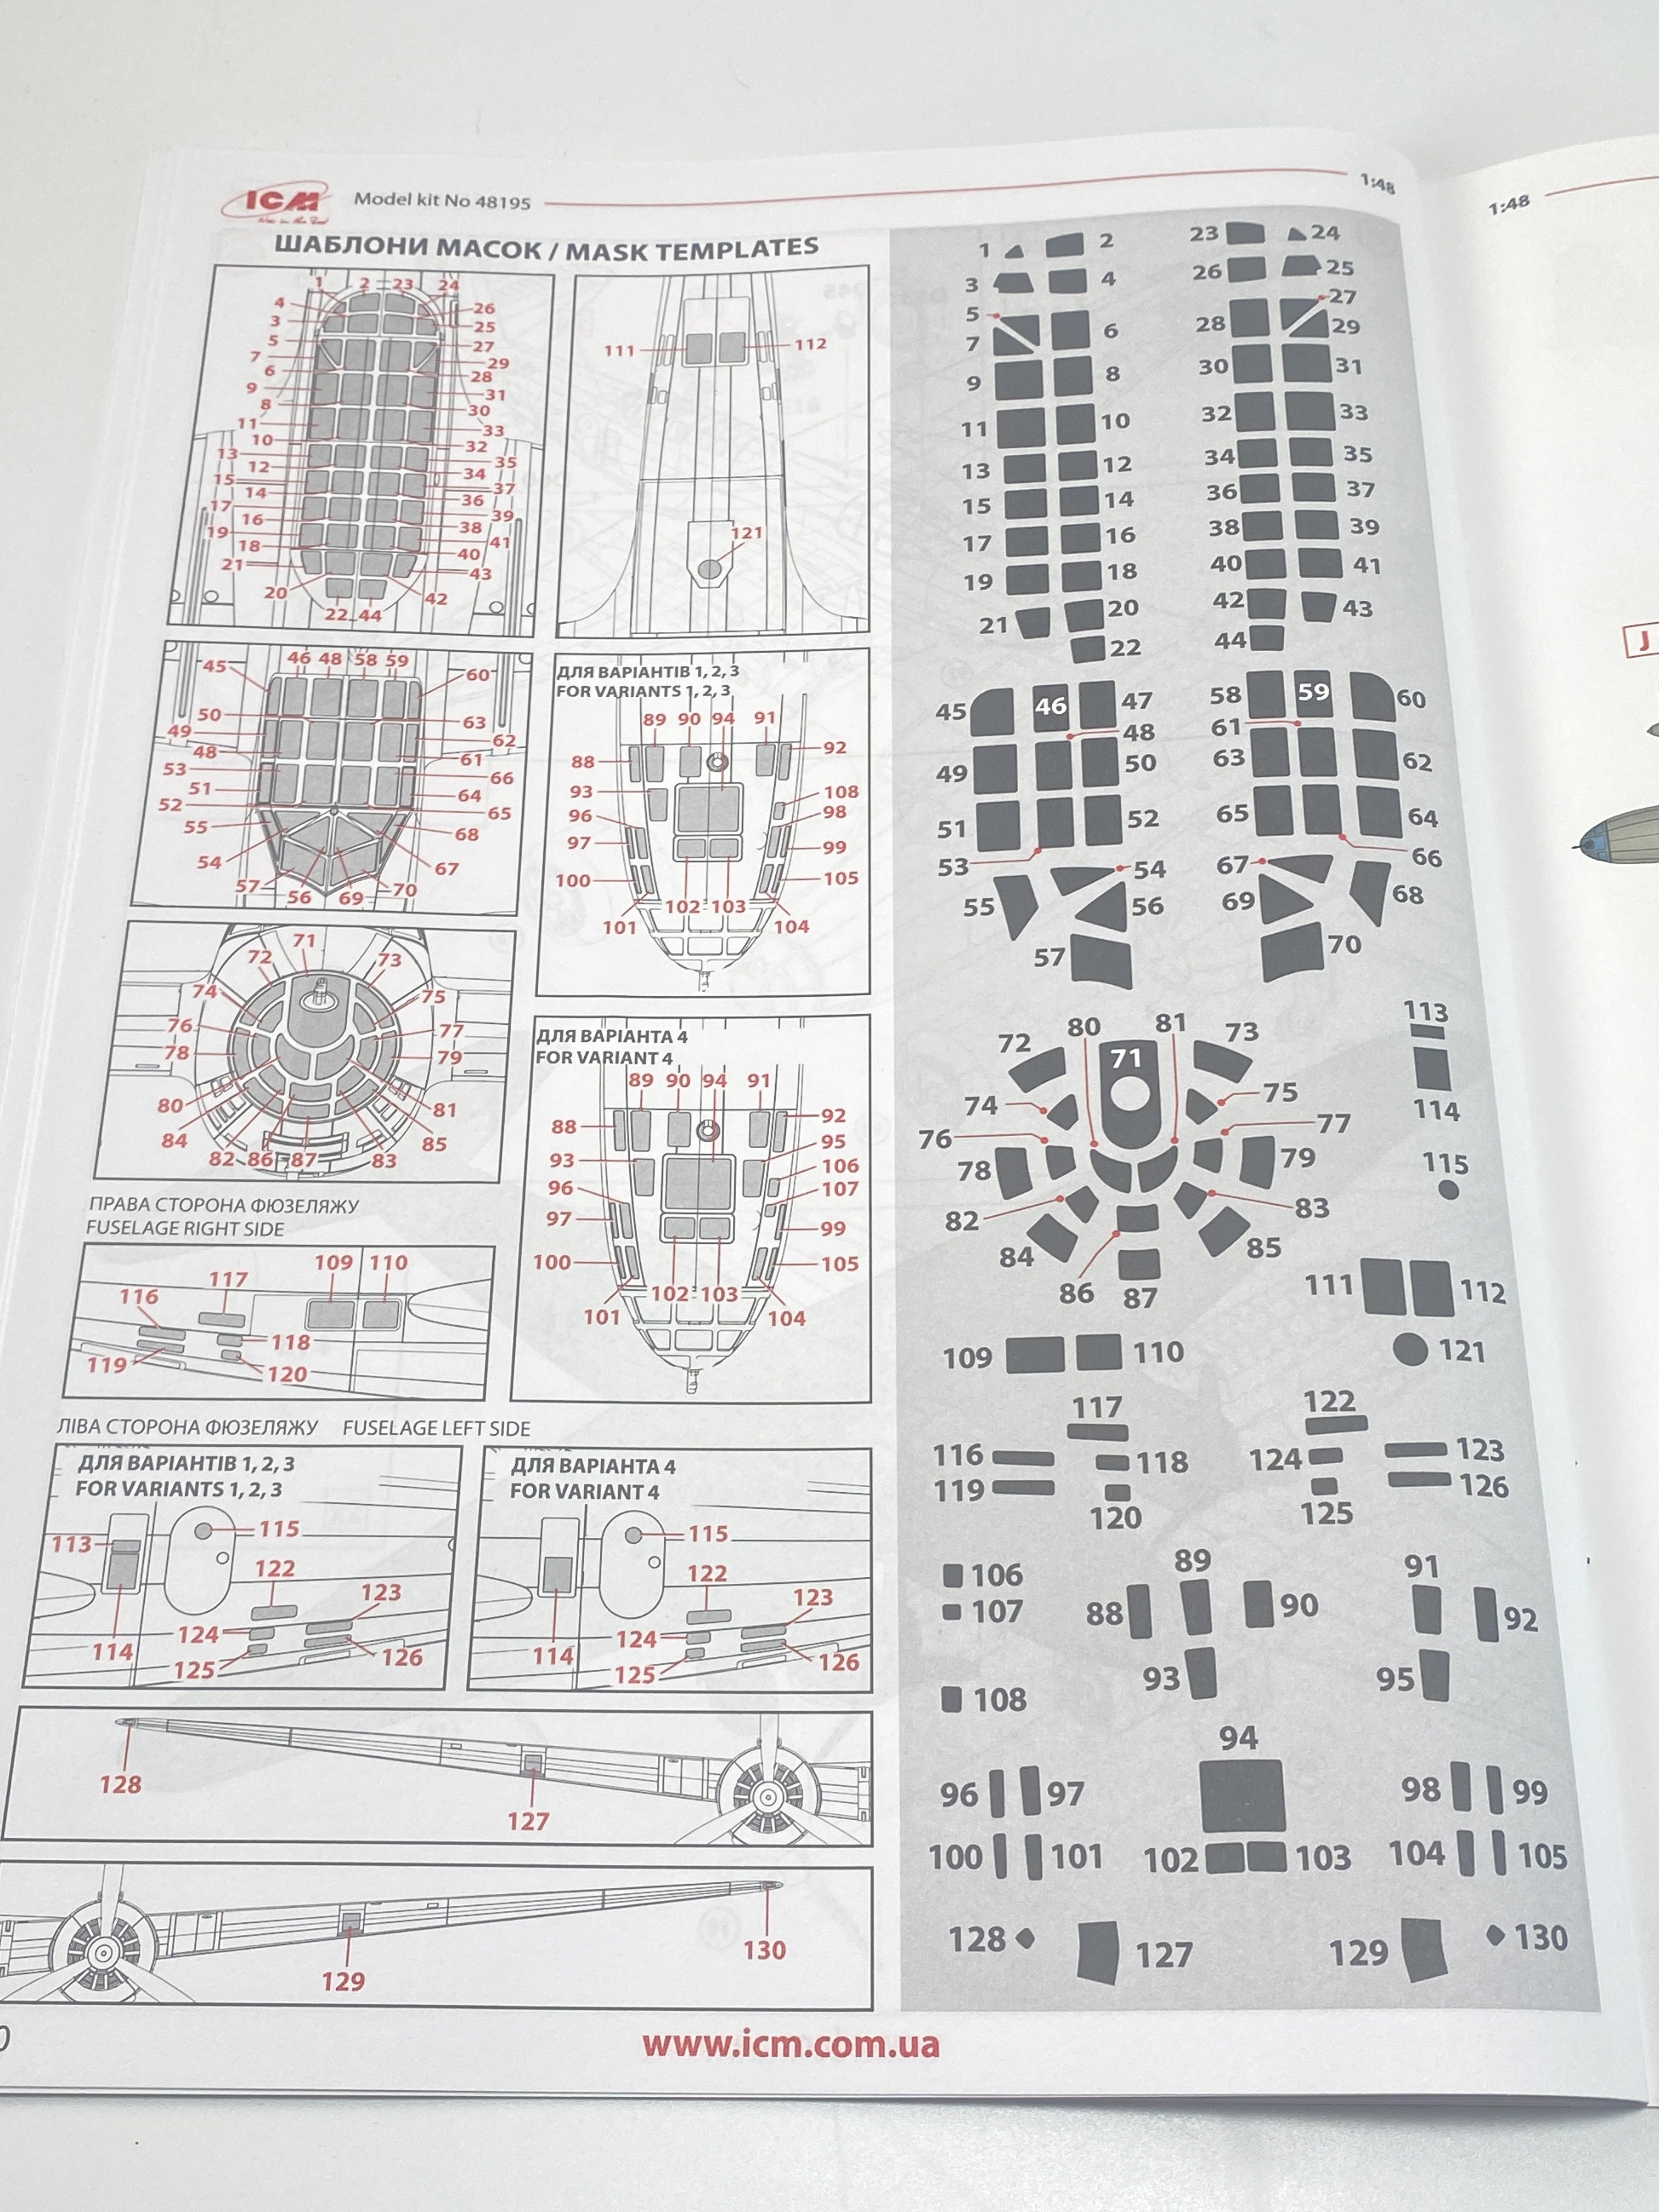
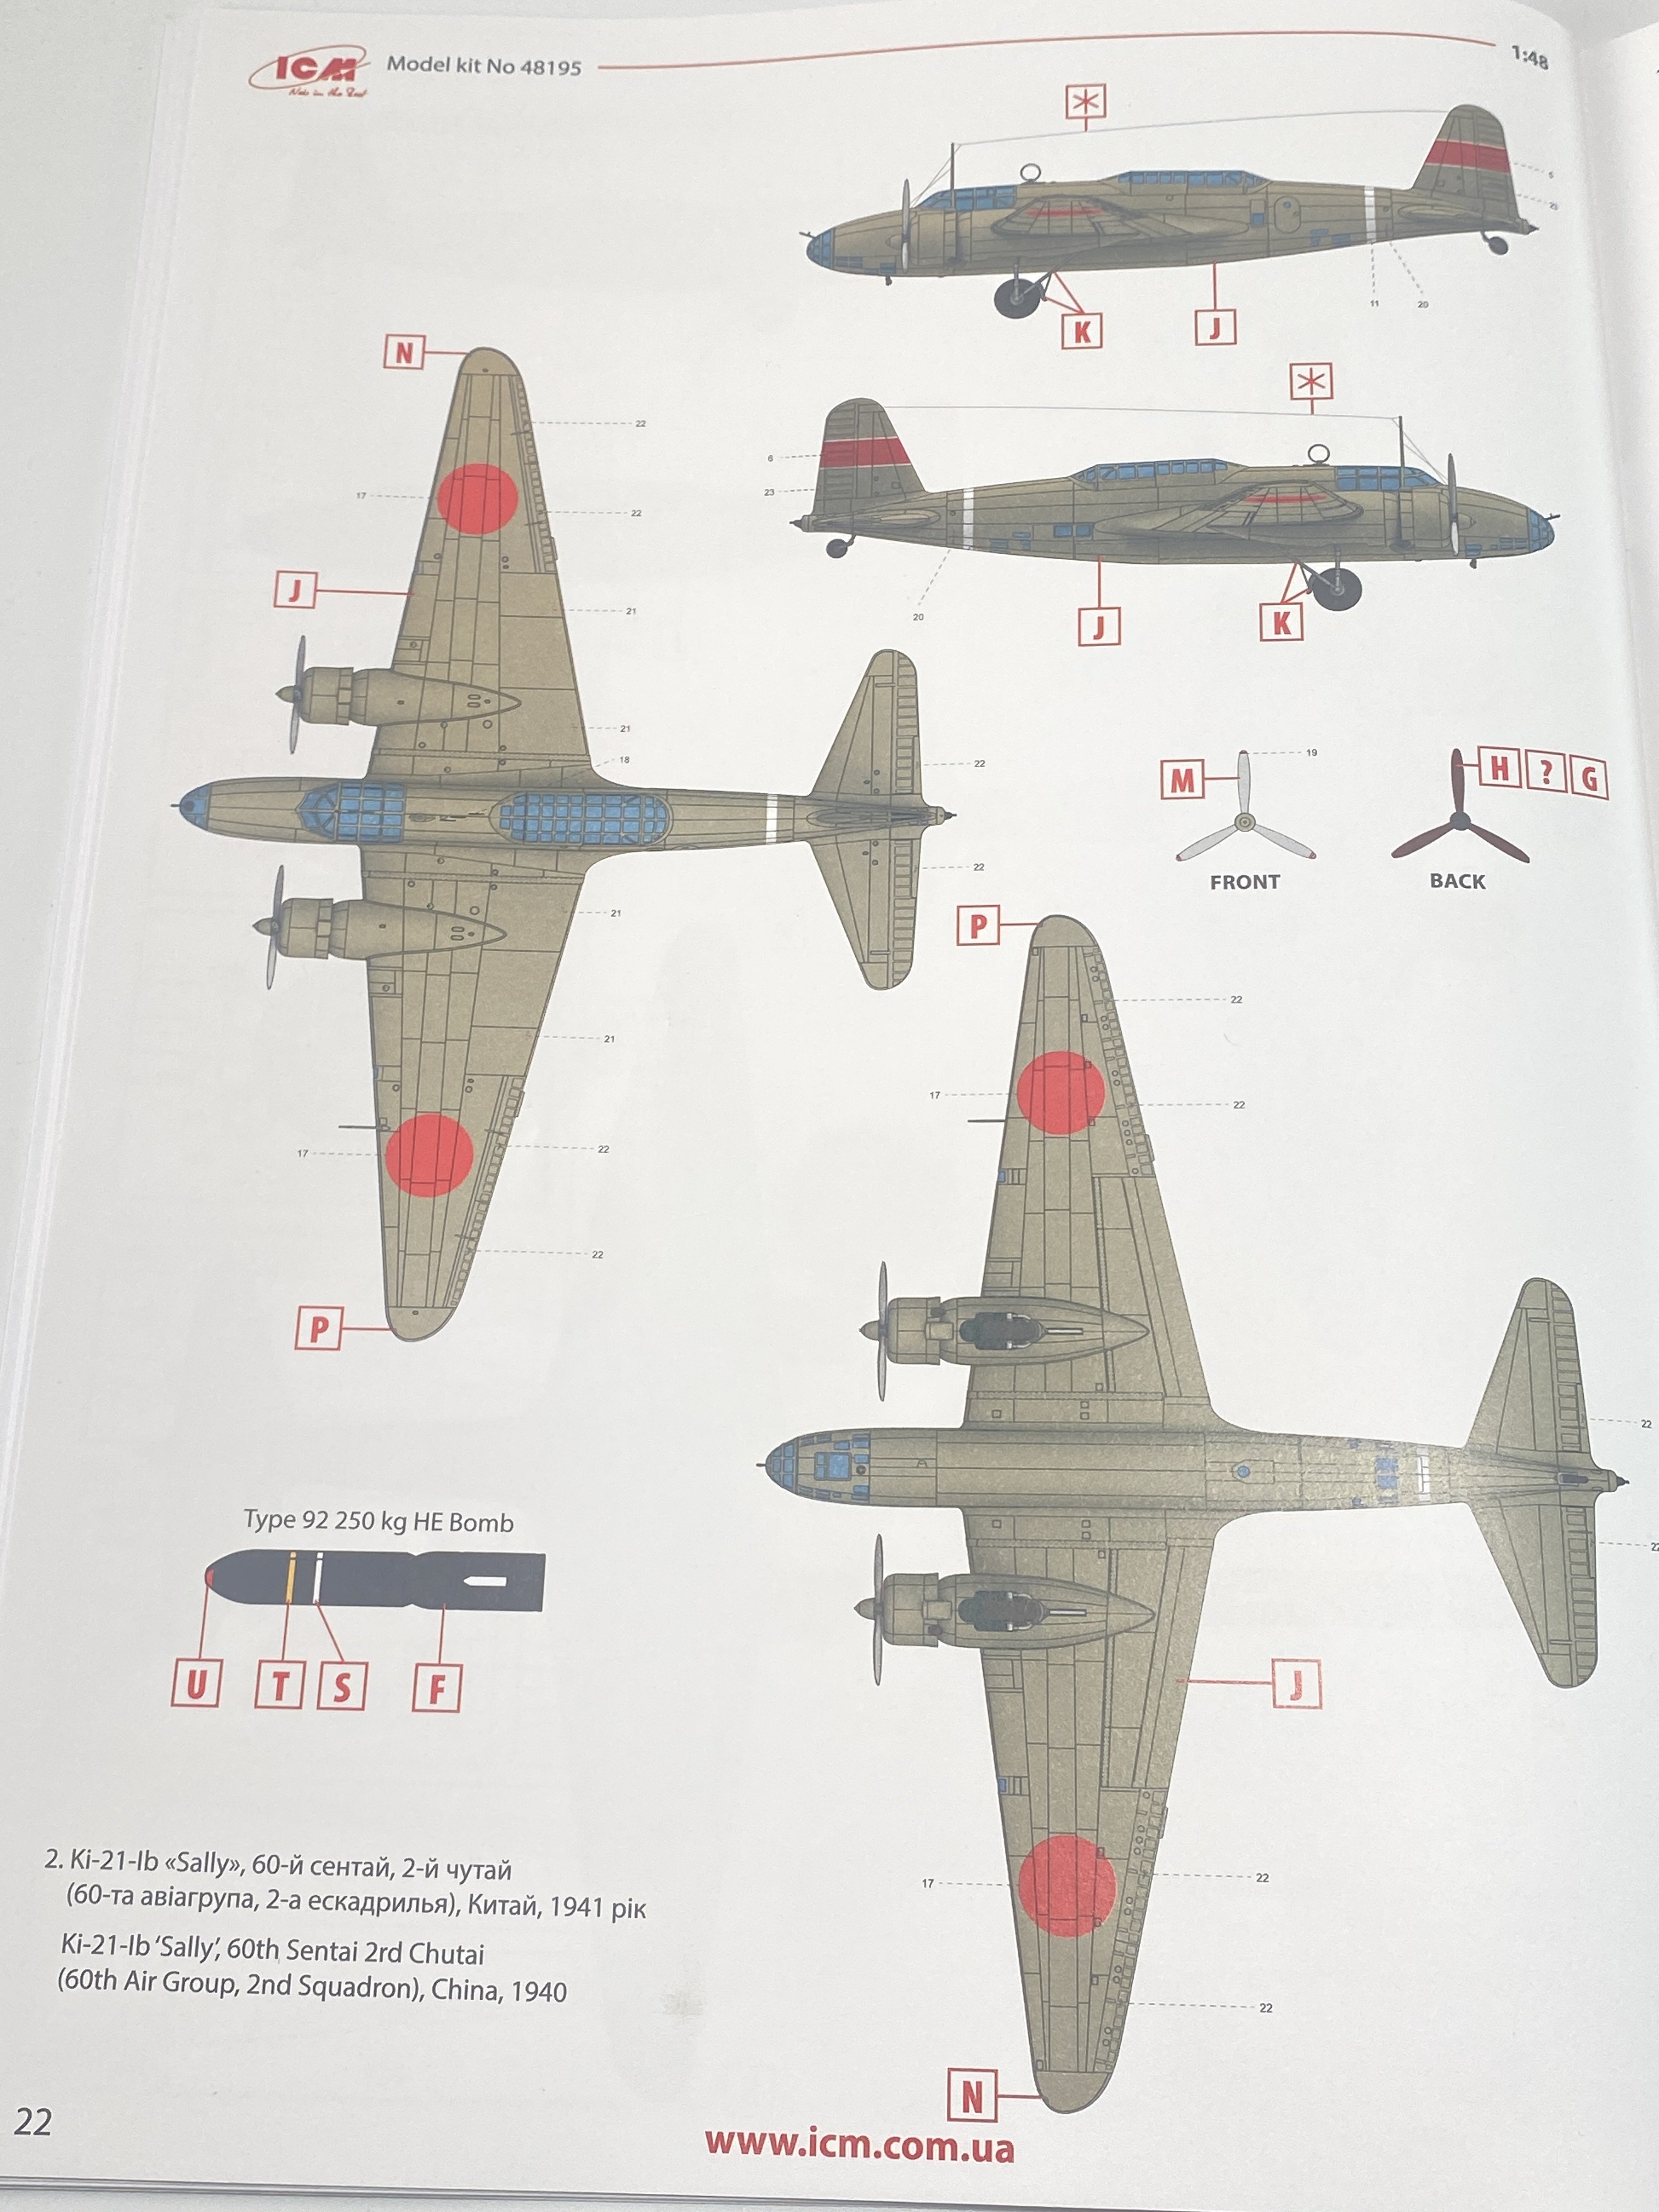
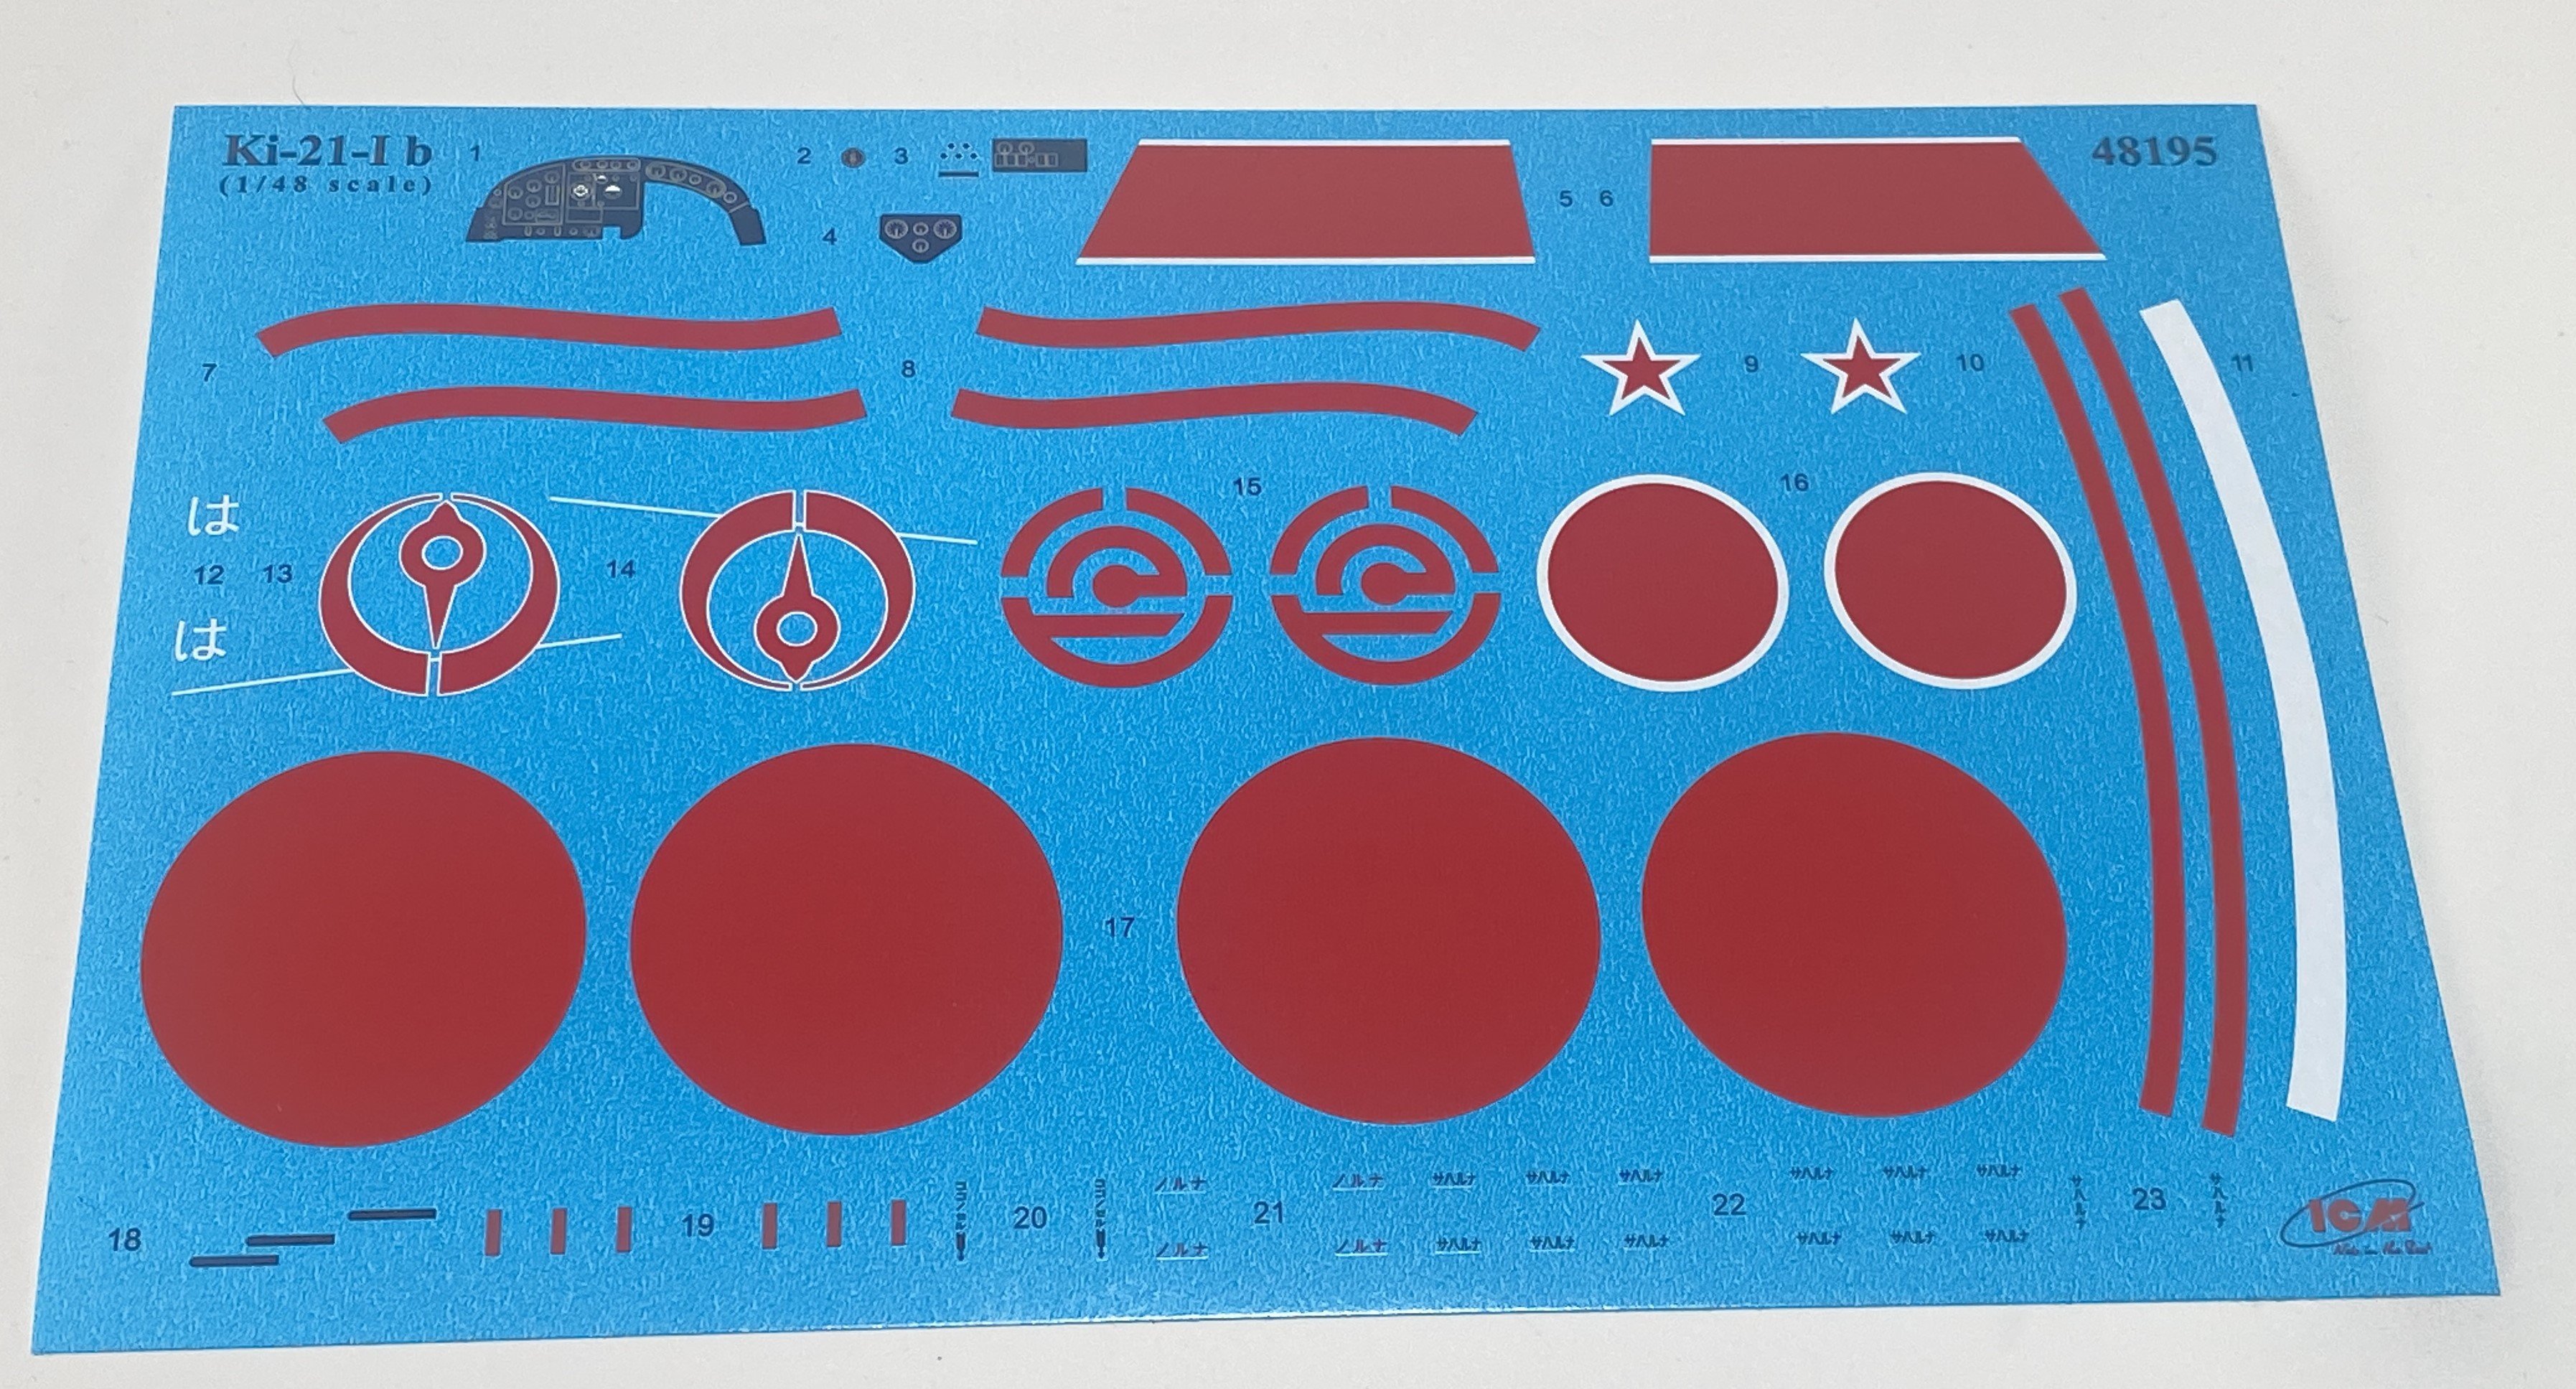
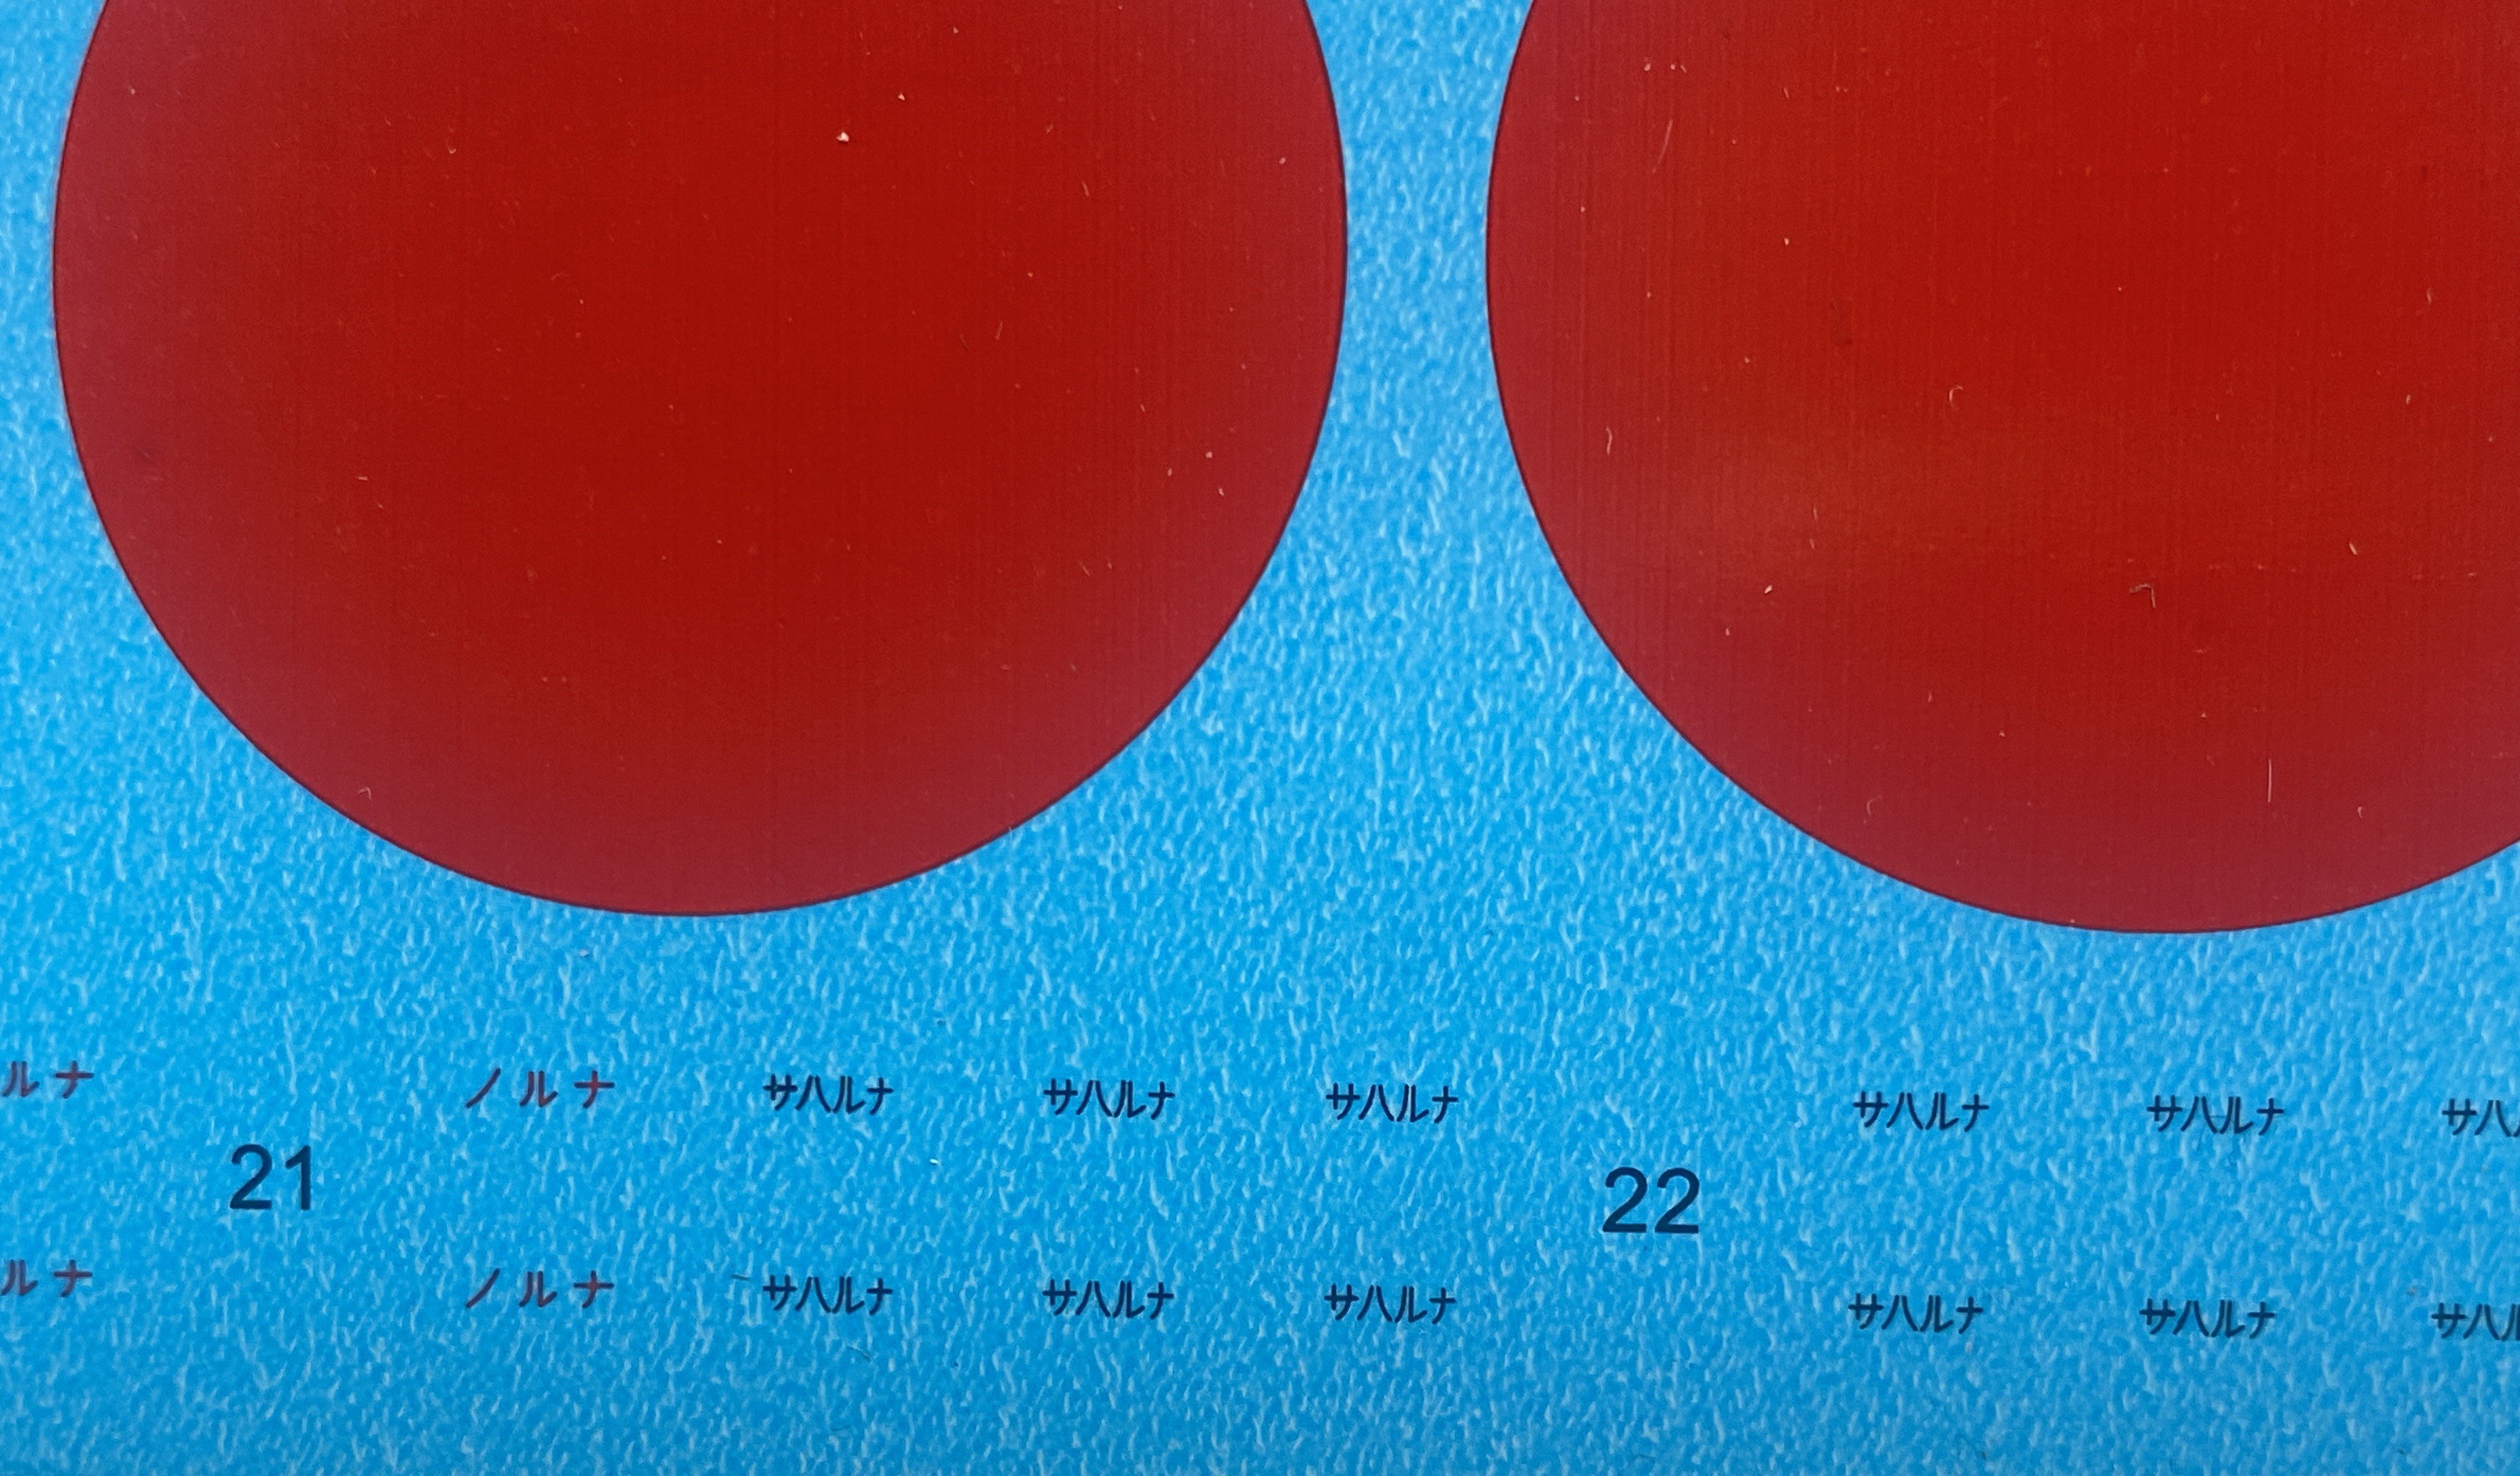
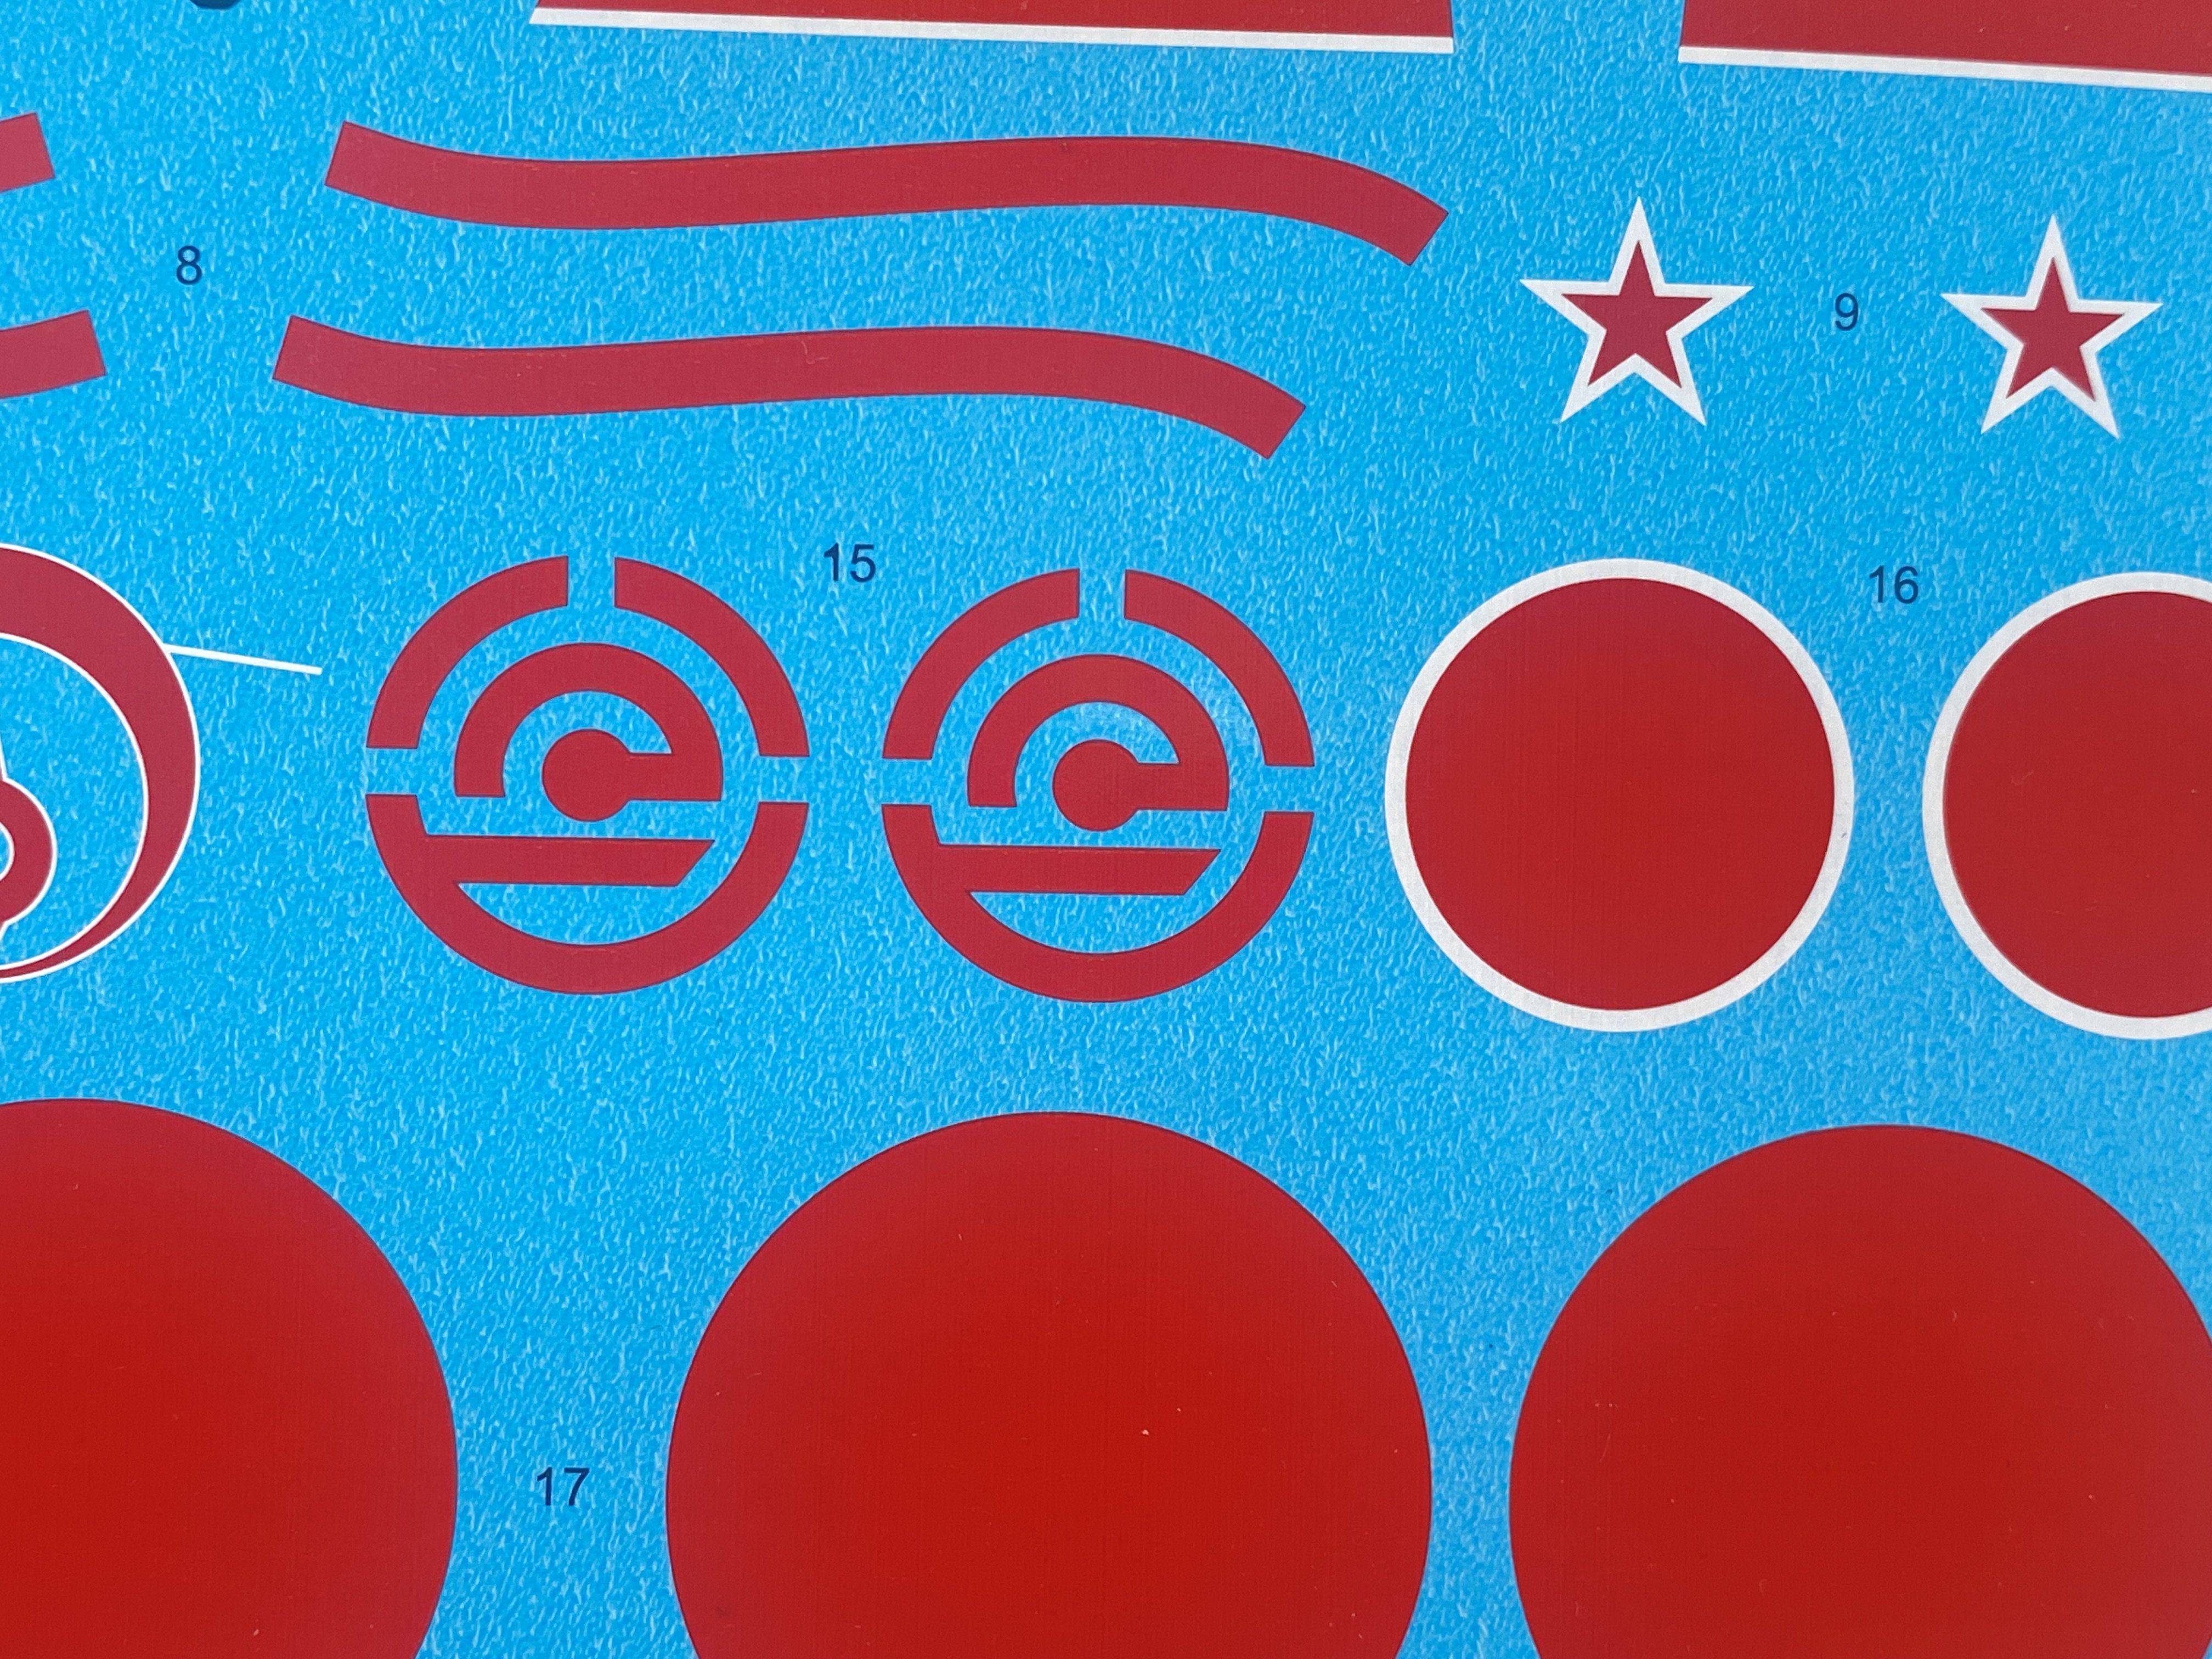
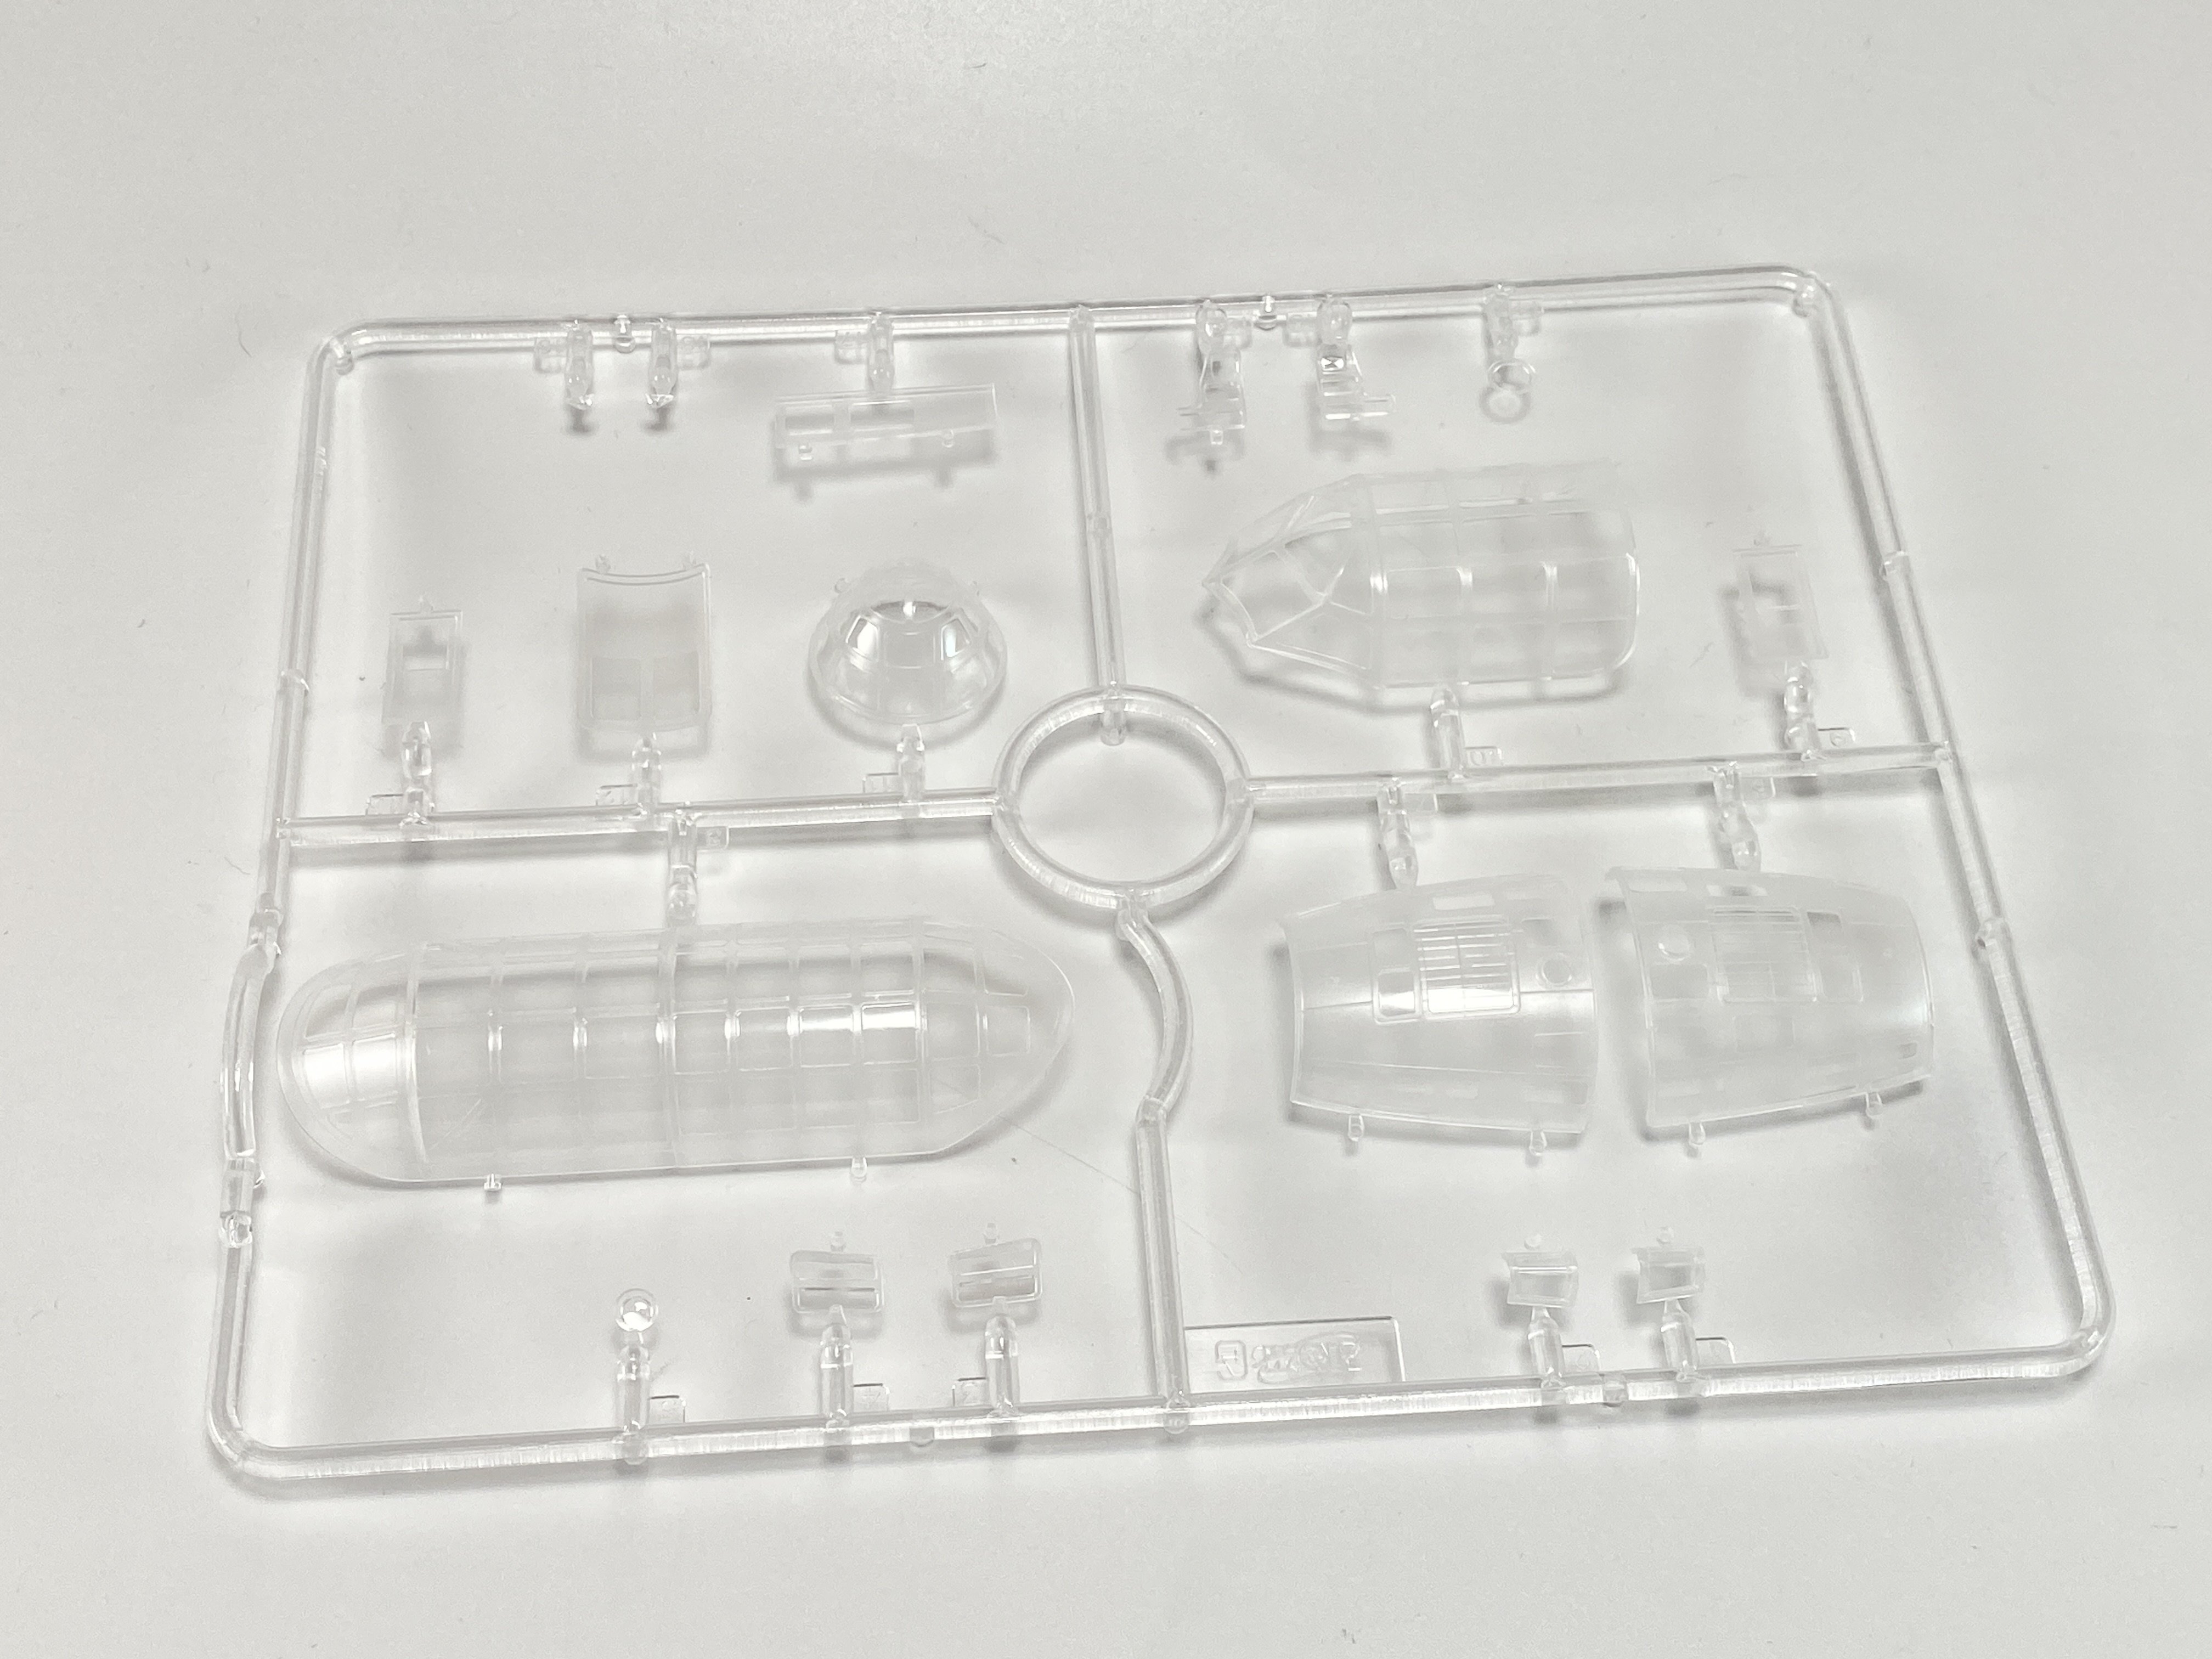
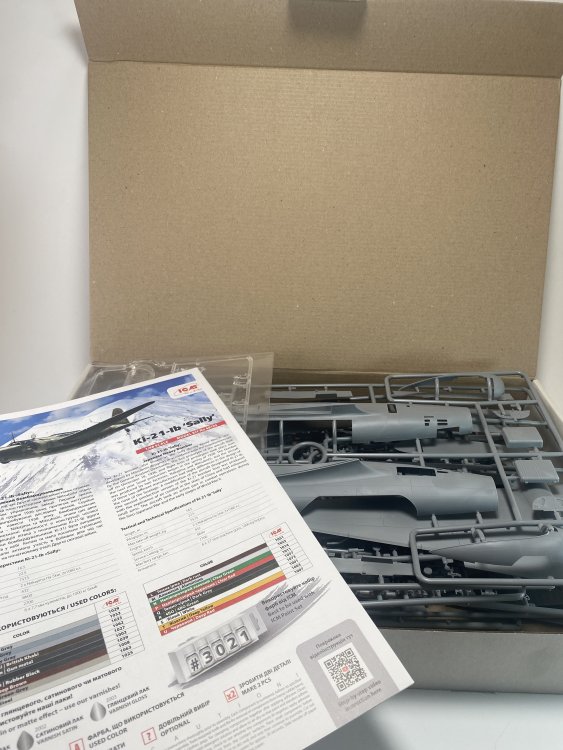
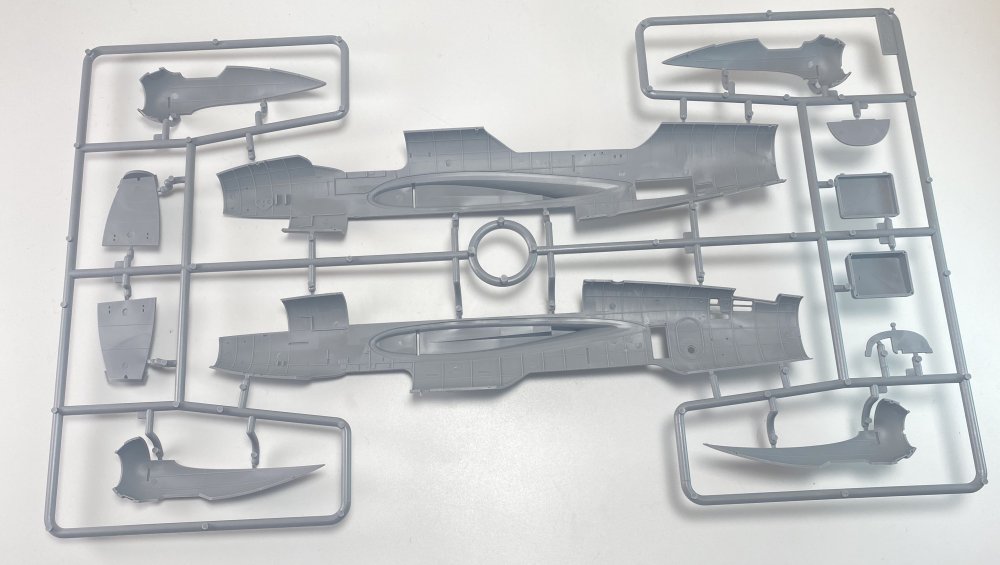
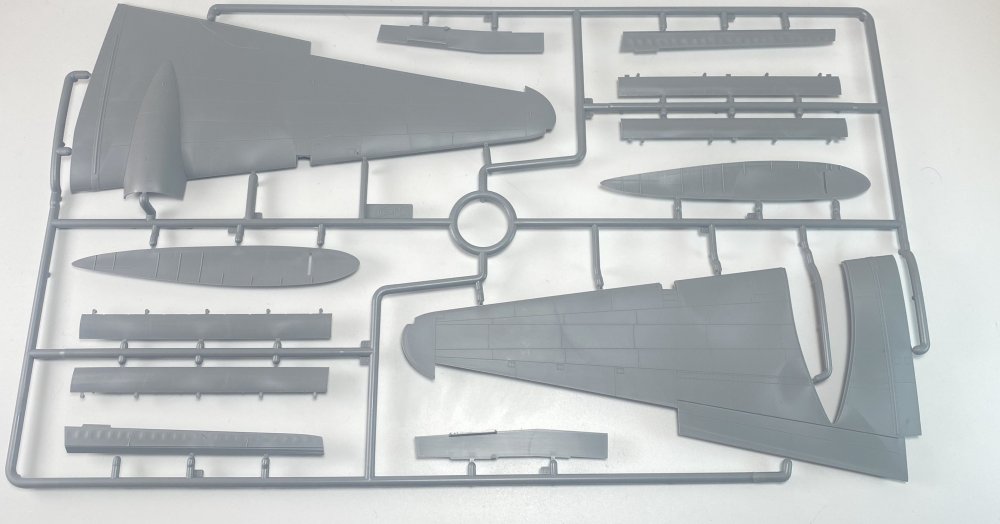
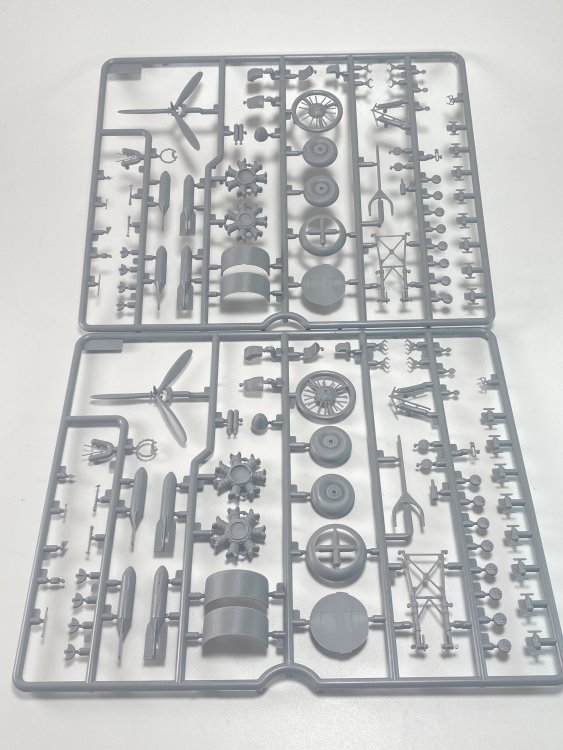
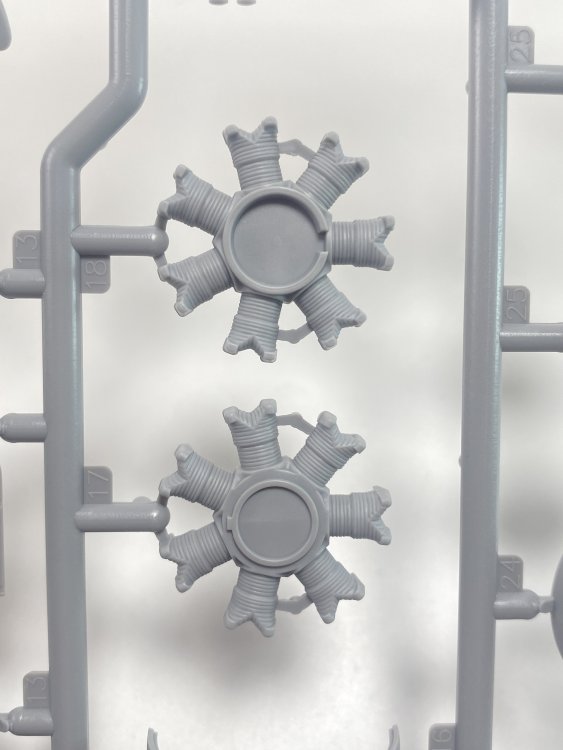
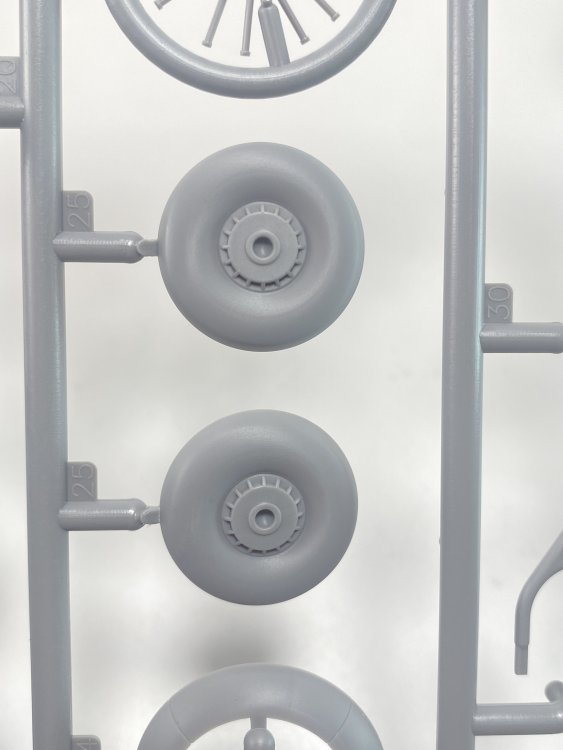
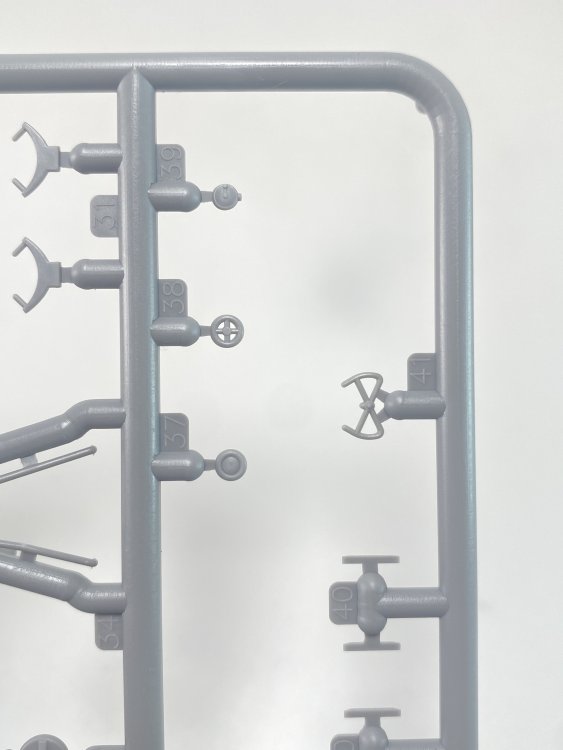
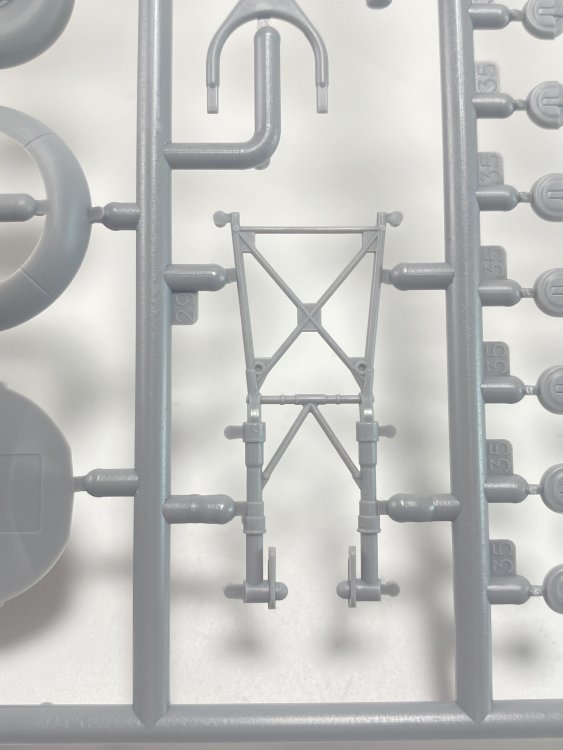
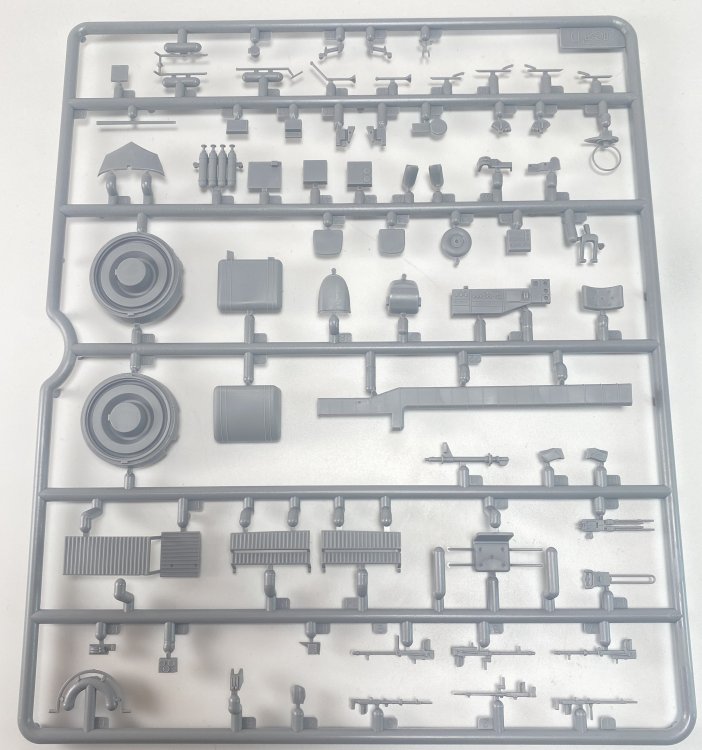
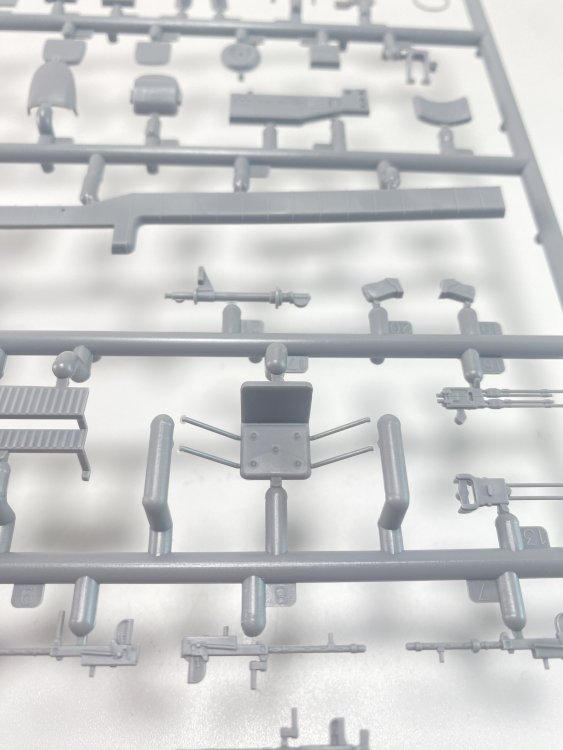
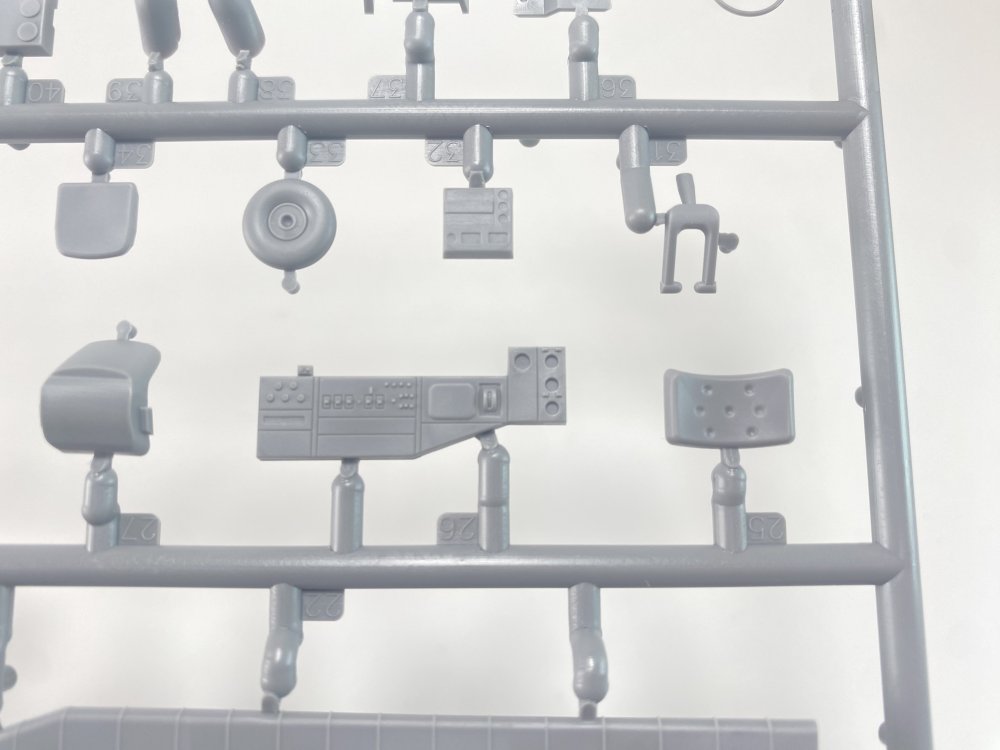
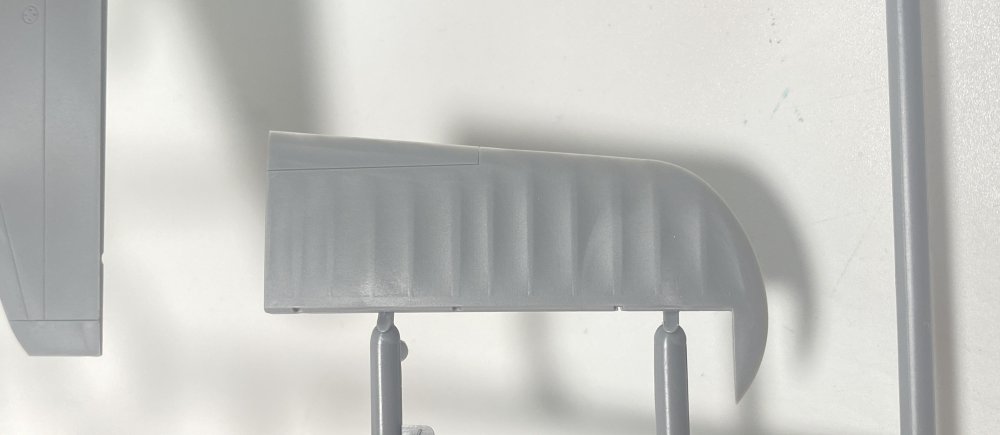
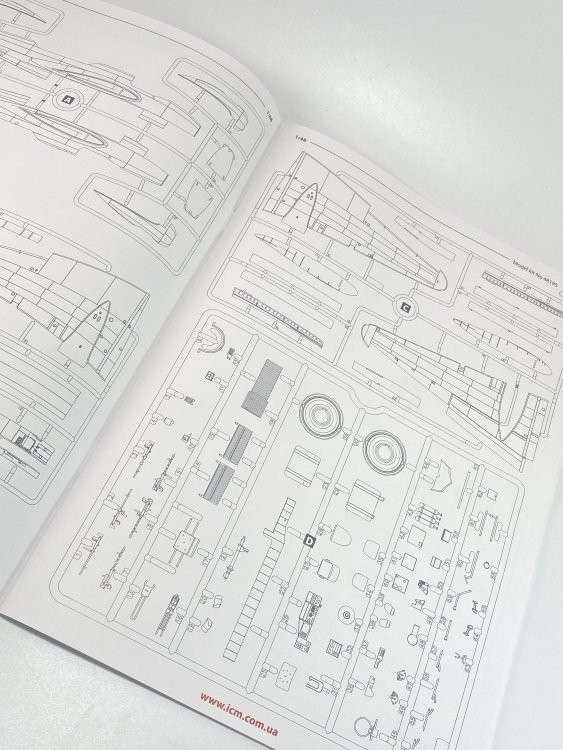
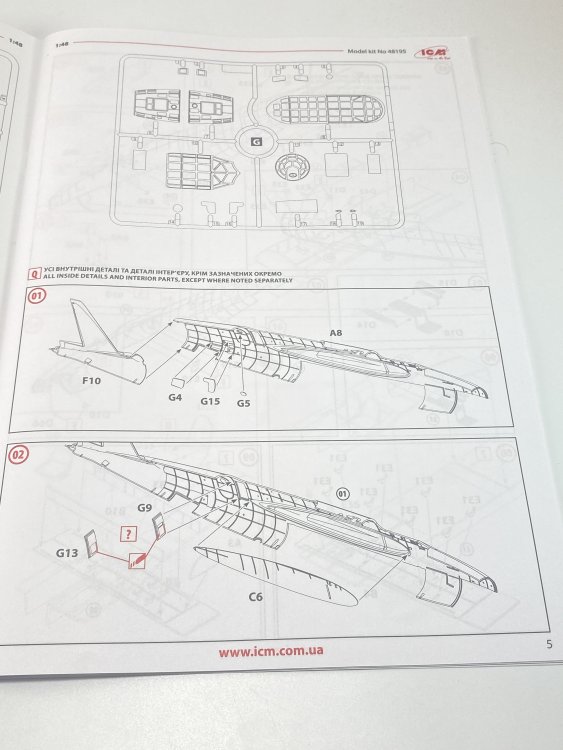
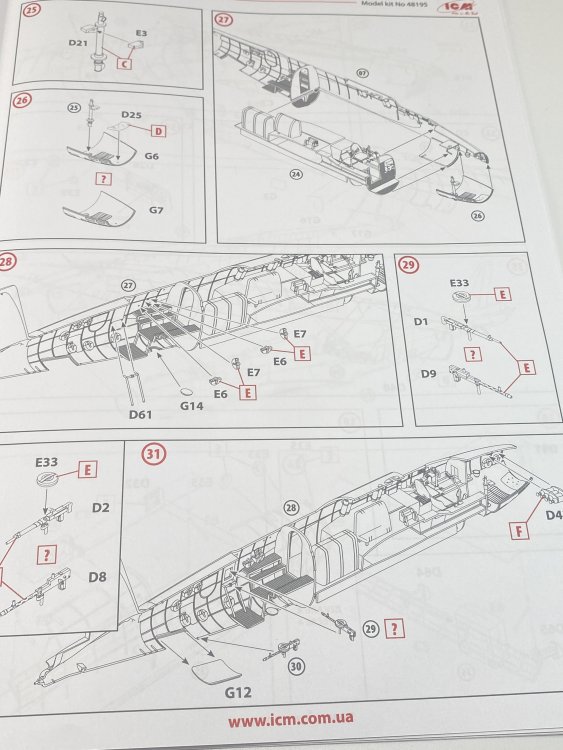
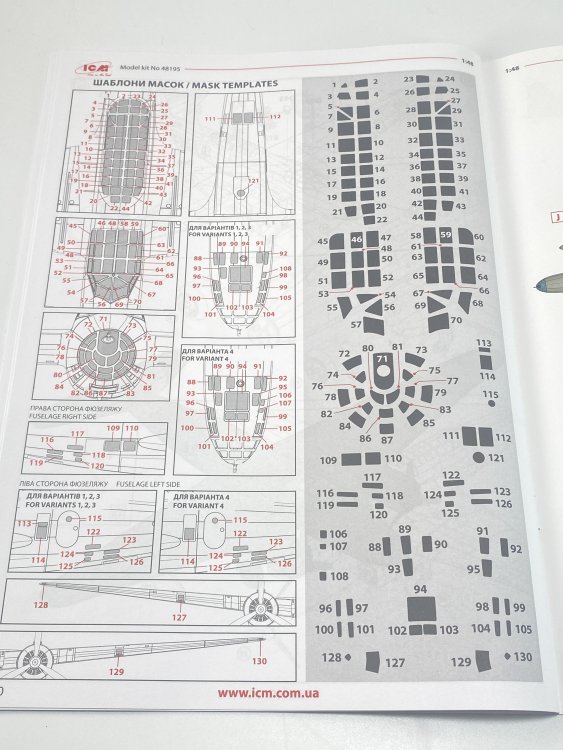
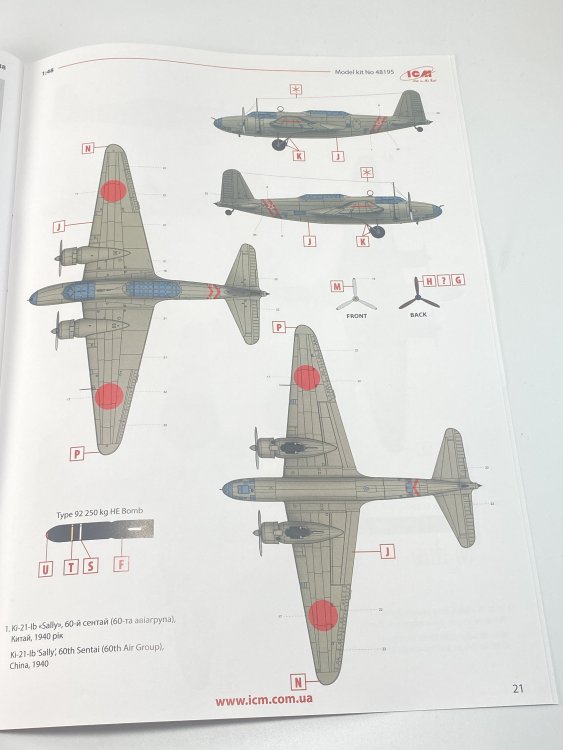
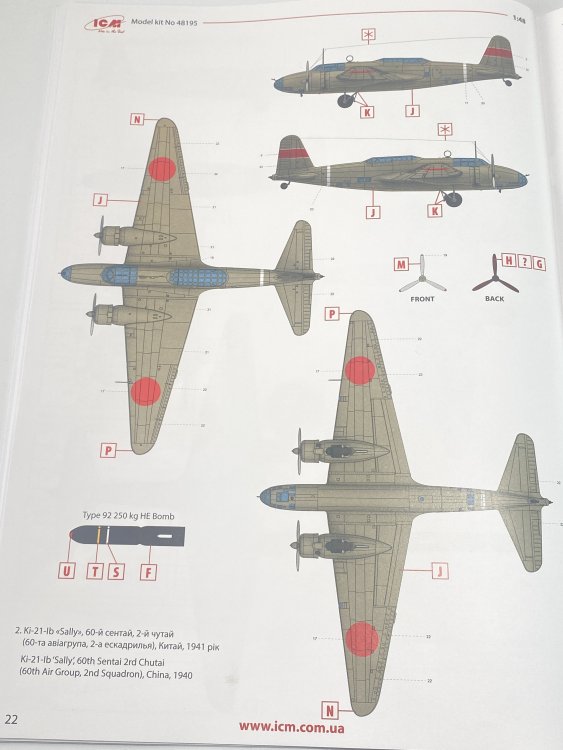
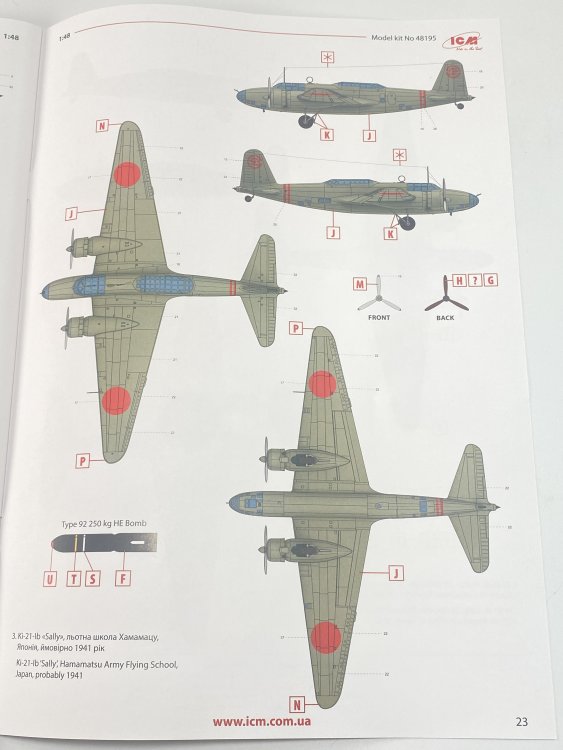
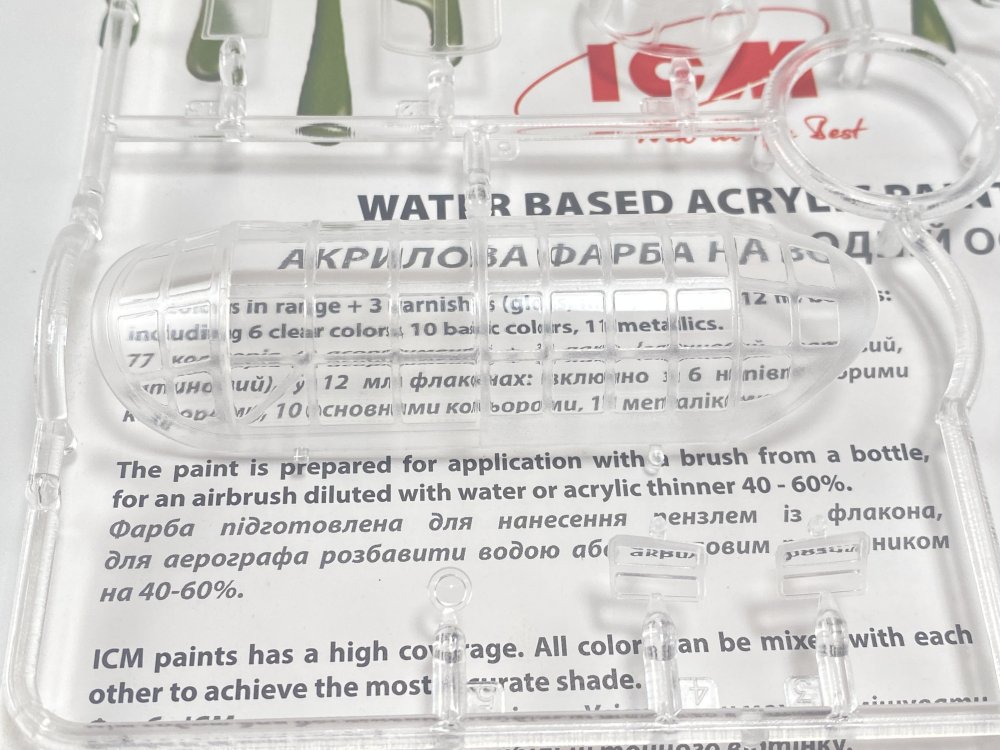
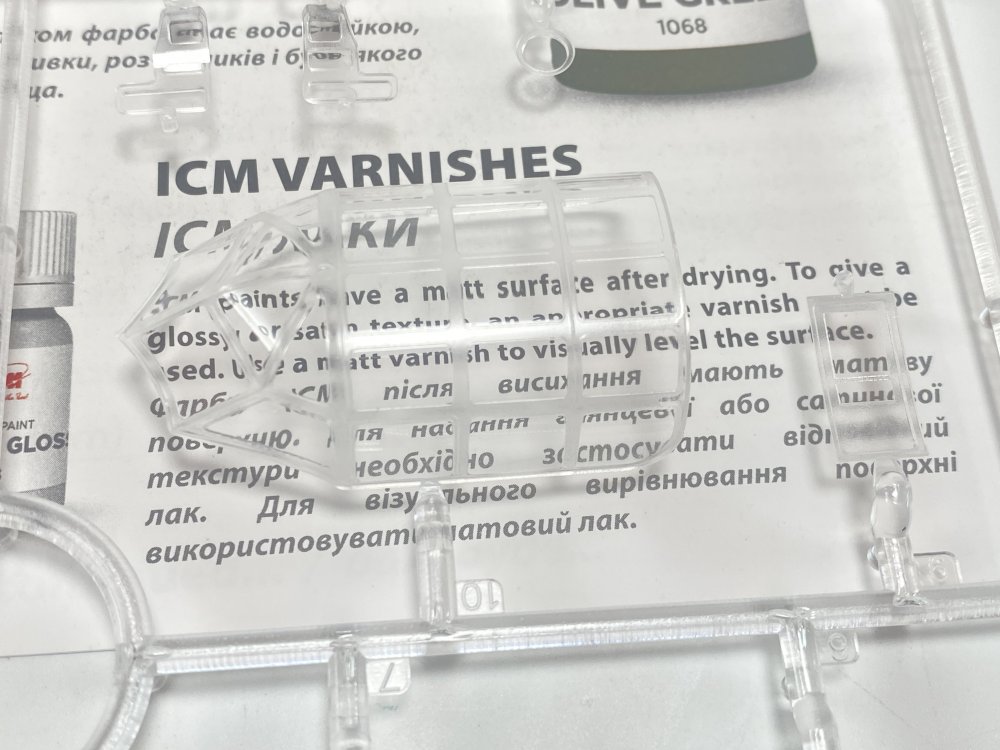
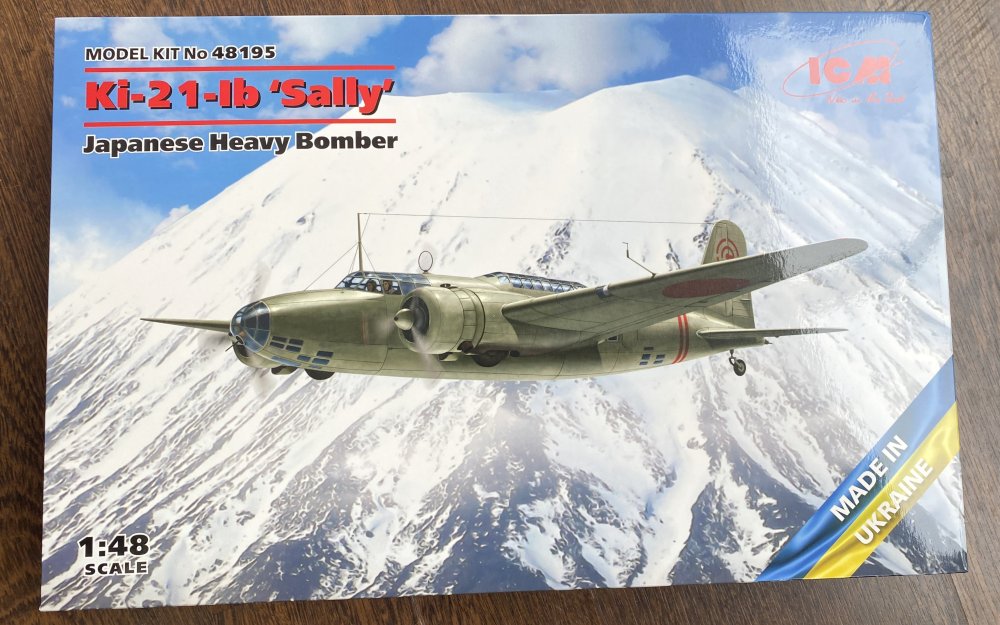
1:48 Ki-21-Ib “Sally” ICM Catalogue n.º 48195 € 54,20 – in Art Scale Kit “The Mitsubishi Ki-21, formal designation "Type 97 Heavy Bomber" (九七式重爆撃機, Kyūnana-shiki jūbakugekiki) was a Japanese heavy bomber during World War II. It began operations during the Second Sino-Japanese War participating in the Nomonhan Incident, and in the first stages of the Pacific War, including the Malayan, Burmese, Dutch East Indies and New Guinea Campaigns. It was also used to attack targets as far-flung as western China, India and northern Australia. The Allies designated it under the reporting names "Sally" /"Gwen". In 1936, the Imperial Japanese Army Air Service issued a requirement for a new heavy bomber to replace both the Ki-20 (Army Type 92 Heavy Bomber) and the Ki-1 (Army Type 93 Heavy Bomber). The design called for a crew of at least four, top speed of 400 km/h (250 mph), endurance of at least five hours, and a bombload of 750 kg (1,650 lb). The design parameters were very ambitious for the mid-1930's; few twin-engine bombers anywhere in the world could exceed such performance at that time. Both Mitsubishi and Nakajima were asked to build two prototypes each, a further proposal from Kawasaki was rejected. The Mitsubishi design was an all-metal mid-wing cantilever monoplane with retractable landing gear, ventral bomb bay and two radial engines. The first prototype flew on 18 December 1936, with the second prototype, which differed in replacing the dorsal turret of the first prototype with a long greenhouse canopy, following later in the month. In the resulting competition Mitsubishi's Ki-21 and Nakajima's Ki-19 were found to be similar, with the Ki-21 having better performance while the Nakajima design was a better bombing platform and had more reliable engines. In order to make a final decision, two further prototype were ordered from both Mitsubishi and Nakajima, with Mitsubishi instructed to change its own 615 kW (825 hp) Mitsubishi Ha-6 radial engines for the Nakajima Ha-5 engines used by the Nakajima design and vice versa, while the Ki-21 gained a revised glazed nose similar to that of the Ki-19 and revised tail surfaces. Thus modified, the Ki-21 proved superior and was ordered into production as the "Army Type 97 Heavy Bomber Model 1A", being ordered into production in November 1937. Production aircraft began to enter service in August 1938, supplementing and then replacing the Fiat BR.20 bombers which had been purchased as an interim measure. Several improved versions followed (see below) before the production of the type ended in September 1944. A total of 2,064 aircraft were built, 1,713 by Mitsubishi and 351 by Nakajima. The Ki-21-Ia was used in combat in the war with China by the 60th Sentai from autumn 1938, carrying out long-range unescorted bombing missions in conjunction with the BR.20 equipped 12th and 98th Sentais. The Ki-21 proved to be more successful than the BR.20, having a longer range and being more robust and reliable. Two more Sentais, the 58th and 61st deployed to Manchuria in the summer of 1939 for operations against China, with aircraft from the 61st also being heavily used against Russian and Mongolian Forces during the Nomonhan Incident in June–July 1939. Losses were high during early combat operations, with weaknesses including a lack of armament and self-sealing fuel tanks, while the aircraft's oxygen system also proved unreliable. The Ki-21-Ib was an improved version designed to address the armament issue by increasing the number of 7.7 mm (.303 in) Type 89 machine guns to five, and incorporating improvements to the horizontal tail surfaces and trailing edge flaps. In addition, the bomb bay was enlarged. The tail gun was a 'stinger' installation and was remotely controlled. Also, the fuel tanks were partially protected with laminated rubber sheets. This was followed in production by the Ki-21-Ic with provision for a 500 L (130 US gal) auxiliary fuel tank, fitted in the rear weapons bay and one more 7.7 mm (.303 in) machine gun, bringing the total to six. Four 50 kg (110 lb) bombs were carried externally. To offset the increase in weight the main wheels of the Ki-21-IC were increased in size.] However, by the attack on Pearl Harbor and the start of the Pacific War, improvements in the ROC Air Force caused losses to mount, and most Ki-21-1a, -1b and -1c were relegated to training or second-line duties. Front line units from mid-1940 were equipped with the Ki-21-IIa ("Army Type 97 Heavy Bomber Model 2A") with the more powerful 1,118 kW (1,500 hp) Mitsubishi Ha-101 air-cooled engines and larger horizontal tail surfaces. This became the main version operated by most IJAAF heavy bomber squadrons at the beginning of the Pacific War and played a major role in many early campaigns. For operations over the Philippines the JAAF's 5th, 14th and 62nd Air Groups, based in Taiwan, attacked American targets at Aparri, Tuguegarao, Vigan and other targets in Luzon on 8 December 1941. The 3rd, 12th, 60th, and 98th Air Groups, based in French Indochina, struck British and Australian targets in Thailand and Malaya, bombing Alor Star, Sungai Petani and Butterworth under escort by Nakajima Ki-27 and Ki-43 fighters. However, starting from operations over Burma in December 1941 and early 1942, the Ki-21 began to suffer heavy casualties from Curtiss P-40s and Hawker Hurricanes. To partially compensate, the IJAAF introduced the Ki-21-IIb, with a pedal-operated upper turret with one 12.7 mm (0.50 in) Type 1 machine gun, redesigned cockpit canopies and increased fuel capacity. Although used in all fronts in the Pacific theater, it became clear by 1942 that the design was rapidly becoming obsolete, and was increasingly shifted away from front-line service. In spite of its shortcomings, the Ki-21 remained in service until the end of the war, being utilized as transport (along with the civil transport version MC-21), bomber crew and paratrooper trainer, for liaison and communications, special commando and secret missions, and kamikaze operations. Nine Ki-21-Ia/b's were sold by Japan to Thailand in 1940 for use by the Royal Thai Air Force against Vichy French forces in French Indochina but did not participate in the French-Thai War as its crews had not completed training. Towards the end of the war, remaining Ki-21s were used by Giretsu Special Forces in strikes against American forces in Okinawa and the Ryūkyū Islands. One of the noted operations was an attack on the Allied-held Yontan airfield and Kadena airfield on the night of 24 May 1945. Twelve Ki-21-IIb's of the Daisan Dokuritsu Hikōtai were dispatched for a strike, each with 14 commandos. Five managed to crash-land on the Yontan airfield. Only one plane landed successfully. The surviving raiders, armed with submachine guns and explosives, then wrought havoc on the supplies and nearby aircraft, destroyed 70,000 US gallons (260,000 L) of fuel and nine aircraft, and damaged 26 more. A number of Ki-21-Ia were modified to serve as military transports for use by Greater Japan Airways, which was under contract by the Japanese Army in China for transportation. Designated "MC-21", these aircraft had all armament and military equipment removed. Used primarily as cargo transports, each could also seat nine paratroopers. Aircraft built from the start as transports were given the separate designation of Mitsubishi Ki-57, with equivalent civil aircraft being designated MC-20. Historical entry by Wikipedia. A video of Ki-21 Sally in action is not quite often. https://www.youtube.com/watch?v=L9Mj3QEjfs8 Let`s take a look at the ICM Sally. Beware, this is not a 1:72 scale! It`s the brand new 1:48, all new mold, Ki-21 Ib “Sally” ICM boxes are quite sturdy, as the art design is just a cover top for a top-opening box, quite sturdy and resistance. It is a nice solution, and I believe probably a lower cost one. The box-art is quite attractive but that would be hard not to be as the Sally is a quite elegant aircraft (at least to me) Inside of the box, seven gray plastic sprue and one large clear part sprue. The gray plastic is easy to work with no being to brittle or not to soft. The fuselage halve is not in an entire piece, with the tail being separate. That is entire related with the difference between the A version and this version, the B as this one were made improvements to the horizontal tail surfaces and trailing edge flaps The main part fuselage has all the internal ribbing, in the cockpit area and all others compartments, upper gunner and bombardier compartment. The details straight from the box are quite good and it will make a busy compartments and a good cockpit. One very good thing that you see in all latest ICM models is the internal frame from the fuselage clear that it will assure you a good and sturdy fit. A few injection marks but probably only one will be visible, and in fact is very soft so no problem in removing it. You can see, in the inside fuselage, the rear fuselage door…. I would love to have the option to open this door. Could be an easy solution to give: an extra with a door so you could remove it for the fuselage with some right tools, with no worries in damaging the door as you would had another extra door to replace it. The tail and elevator fins, which have separate flying surfaces and rudder panel. The surface details on these, with the recessed canvas looks quite good. Moving to the wings. They come in two halfs, as usual, and have separate ailerons but not flaps. Inside the wings, in the fuselage connection there is the ICM usual connection sturdy system to help the modellers in having a quite easy fit between fuselage and wings. The surface detail is limited to panel lines that are very well defined and clean and a few raised panels. The wheels pit have almost no detail so there is lots of rooms to AM. The wheels are in two halfs… I really don’t like wheels in two halves but I got to give to ICM… These are a very good looking wheels with very good rims detail. The engine has a good detail straight from the box but as always there`s space for aftermarket sets. If this was in 1:32, I was all in for a engine detail set. In 1:48 and with in-box detail I will probably stay in the oob details which is quite good. All the parts are very fragile and with a very good detail. I`m in fact impressed with the detail that ICM can get from injection modeling. All the clear parts, and there are quite a few, are made with very good frame detail and they are in fact clear. And this particularly kit does have lots of clear parts but most of all, a lot of windows to mask. ICM gives the modeler a paper template in the instructions but its more than 120 windows. So, honestly, an AM mask it would be most welcome and a really really time saver. Althought is a nice touch from ICM. One single almost A5 size sheet, with all the markings, insignias, instruments and several stencils. The colour and pigmentation looks quite good. I think that they are ICM productions and they usually work well. Options given: There are four options on the decal sheet, all but one in light green-grey, differentiated by their unit markings, the final markings having a dense dark green squiggle camouflage scheme over the green-grey. From the box you can build one of the following: 1. 60th Sentai, China, 1940 2. 60th Sentai, 2nd Chutai, China, 1940 3. Hamamatsu Army Flying School, Japan, probably 1941 4. 25 Hikodan Shireibu Hikohan, Japan, 1943 The instructions is a booklet with good drawings, simple to follow and see where all parts goes. The first 3 pages and the last 3 pages are in satin paper. It`s usually like this (is the same in the Beaufort and the He-111) and I don’t understand why and I don’t see any reason for that. The colour indication. I hear an interview of one of ICM CEO saying that ICM wants to be a all in company so all the ICM production is a vertical one, they made the CAD, the steel molds, the decals and now they are making also paints. So all the colour indication are ICM references. There`s not much colour indication (could be better) and the ones that are, are ICM color… For me that is a downside as ICM are not available worldwide as Tamiya, Gunze or AK. Conclusion: Finally a Ki-21 Sally in 1:48!! Its time to leave the Sanger one and tackle this beauty. The parts are very well mold. It`s really looks like a Ki-21. The clear parts, and this one has a lot of them, are flawless, absolutely gorgeous! So you can get a really nice model straight from the box with the well-known high current ICM quality, even without any extra parts (resin or PE). The lowdown, at least until a massification sales worldwide, is the colour indication, with only ICM colour, each are new and, for example, I never see how they work and how easy its to work with them. For a novice modeler, that can easily get Tamiya, Gunze, or AK paints, could be problematic to get the correct colour. For the experience modeler, that will not be an issue. It`s 9,3 out of 10. A great kit with very good detail OOB. Downside: the colors indication. My sincere thanks to ICM for the review sample.


-
rose of york Hong Kong Model 1:32 B-17 G “Rose of York” Limited Edition
Fran replied to Fran's topic in Aircraft Reviews
Hi Nick. Thanks for your post. I didn`t received the full kit but only the new parts, so the plastic parts are the same of the HK Models B-17G already release. So I assume that the model kit is just the same with no new parts to make the details and differences that you mention. Cheers Fran -
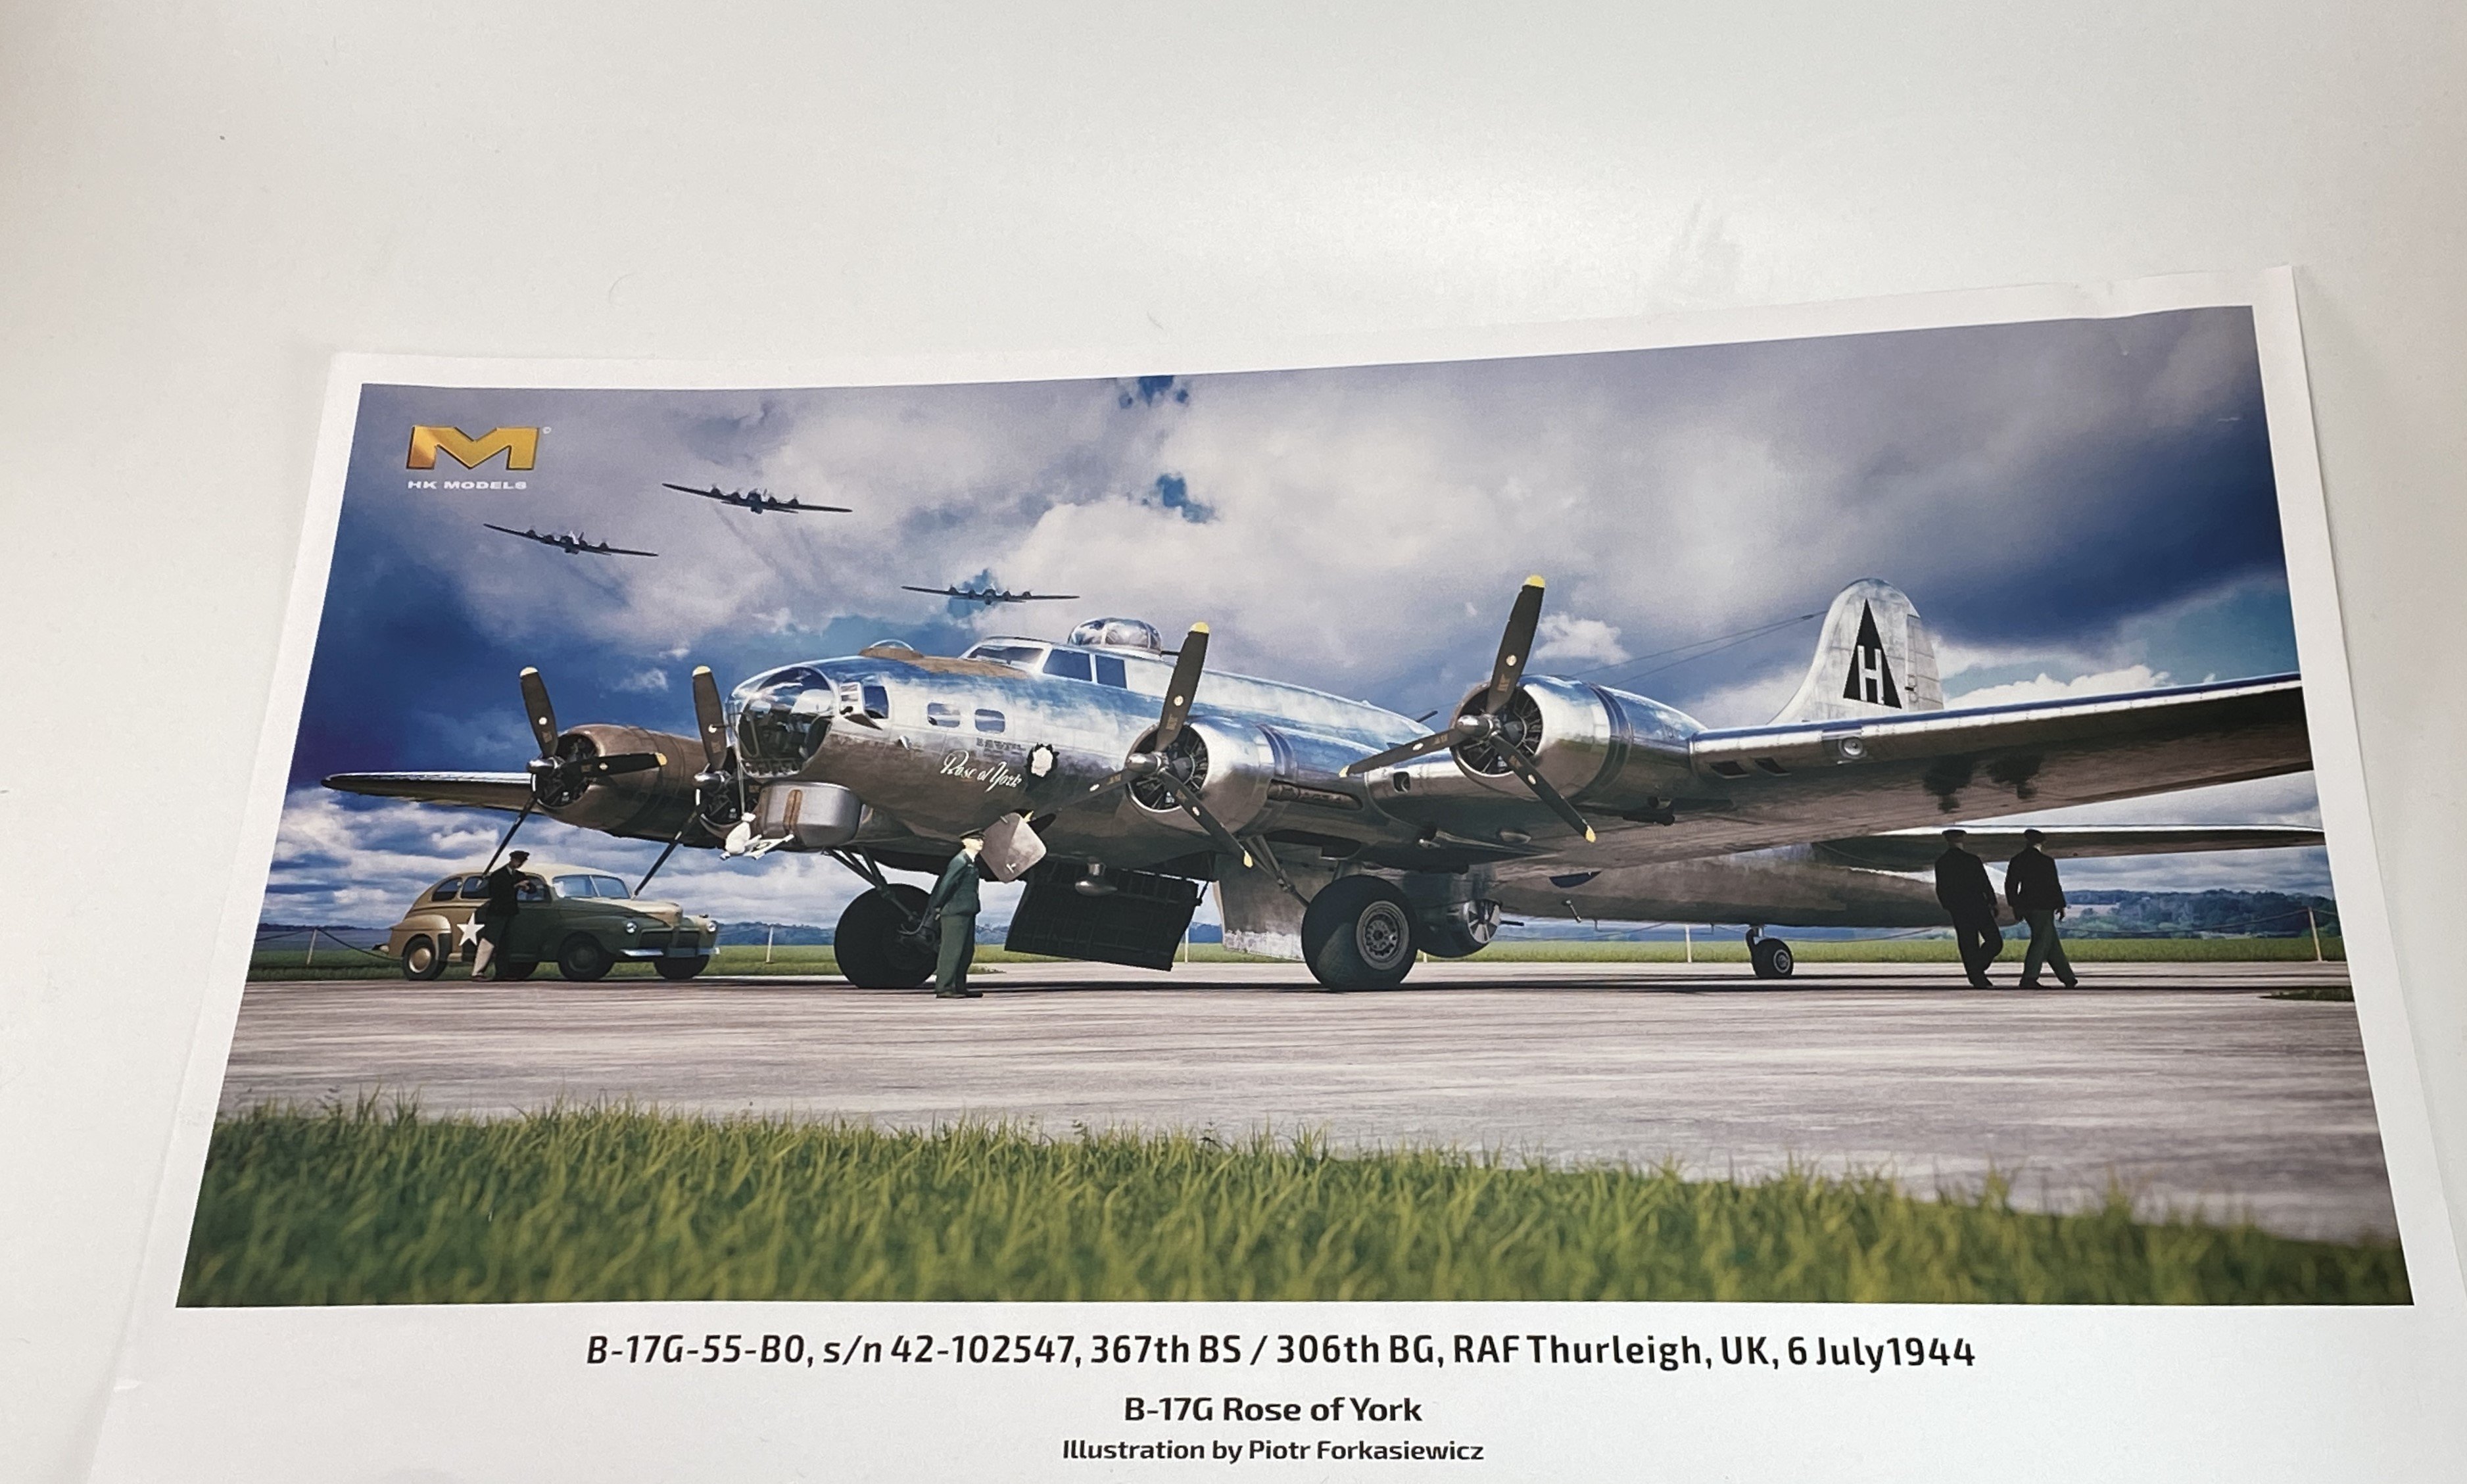
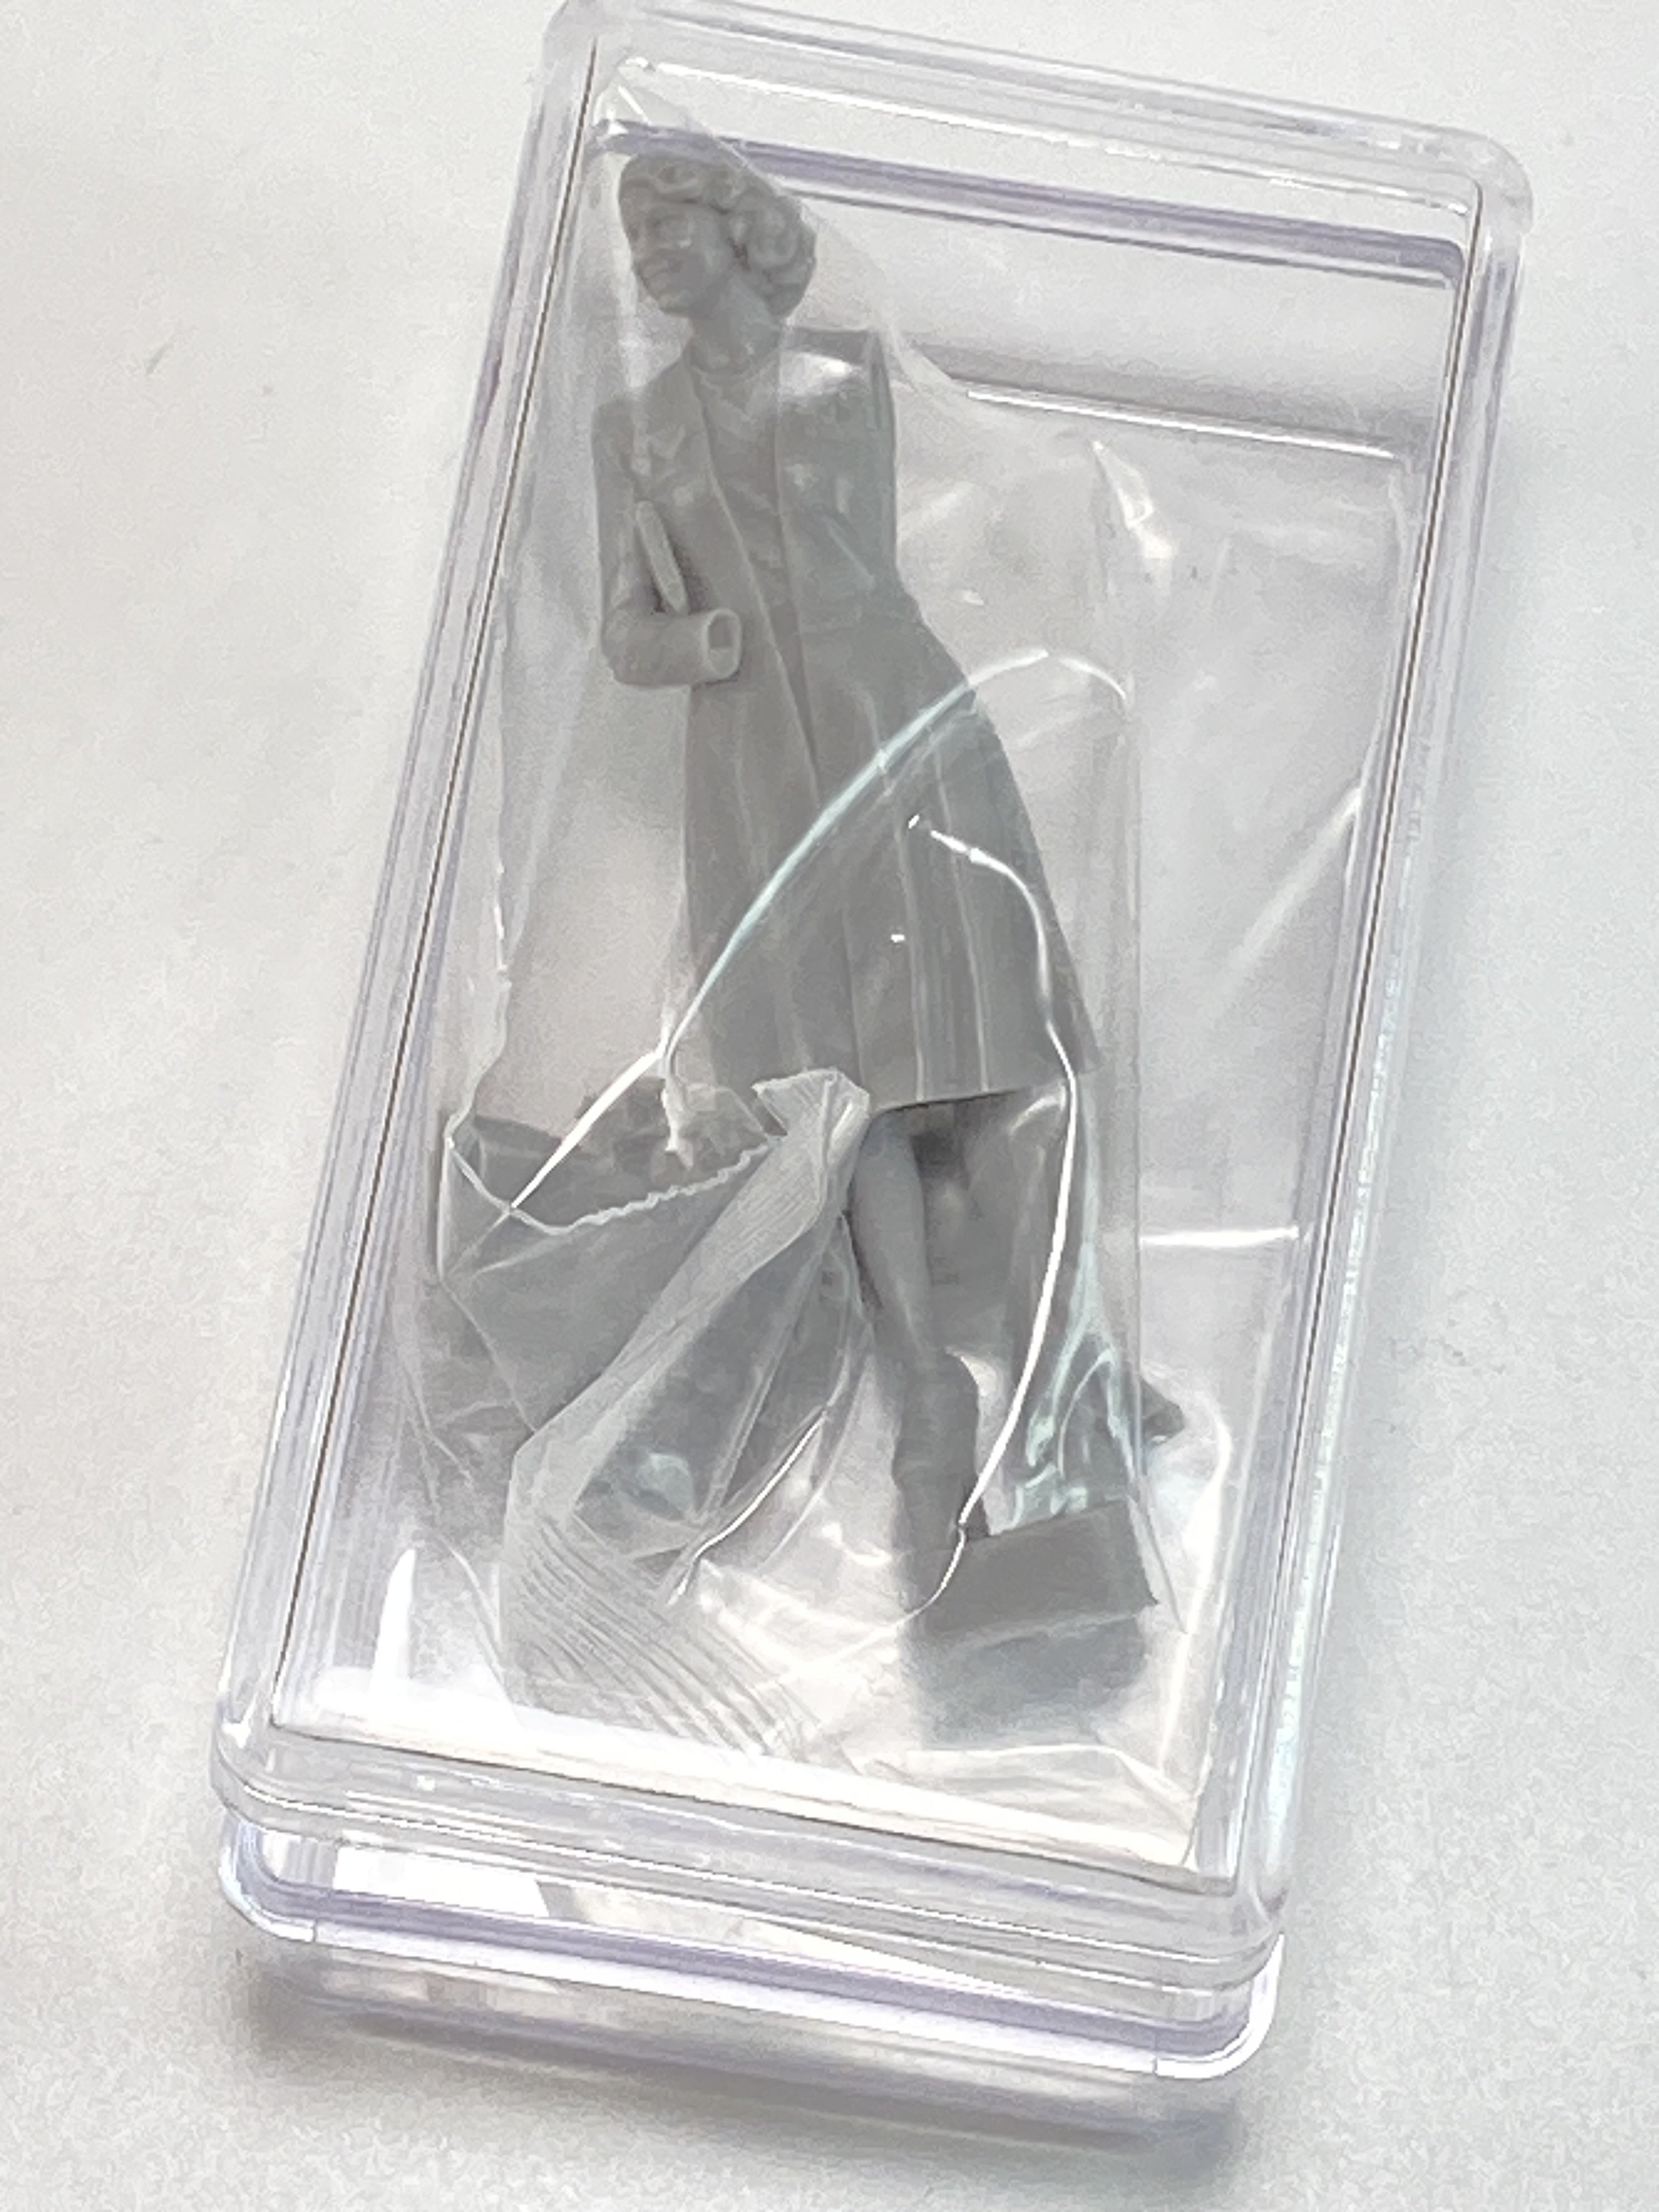
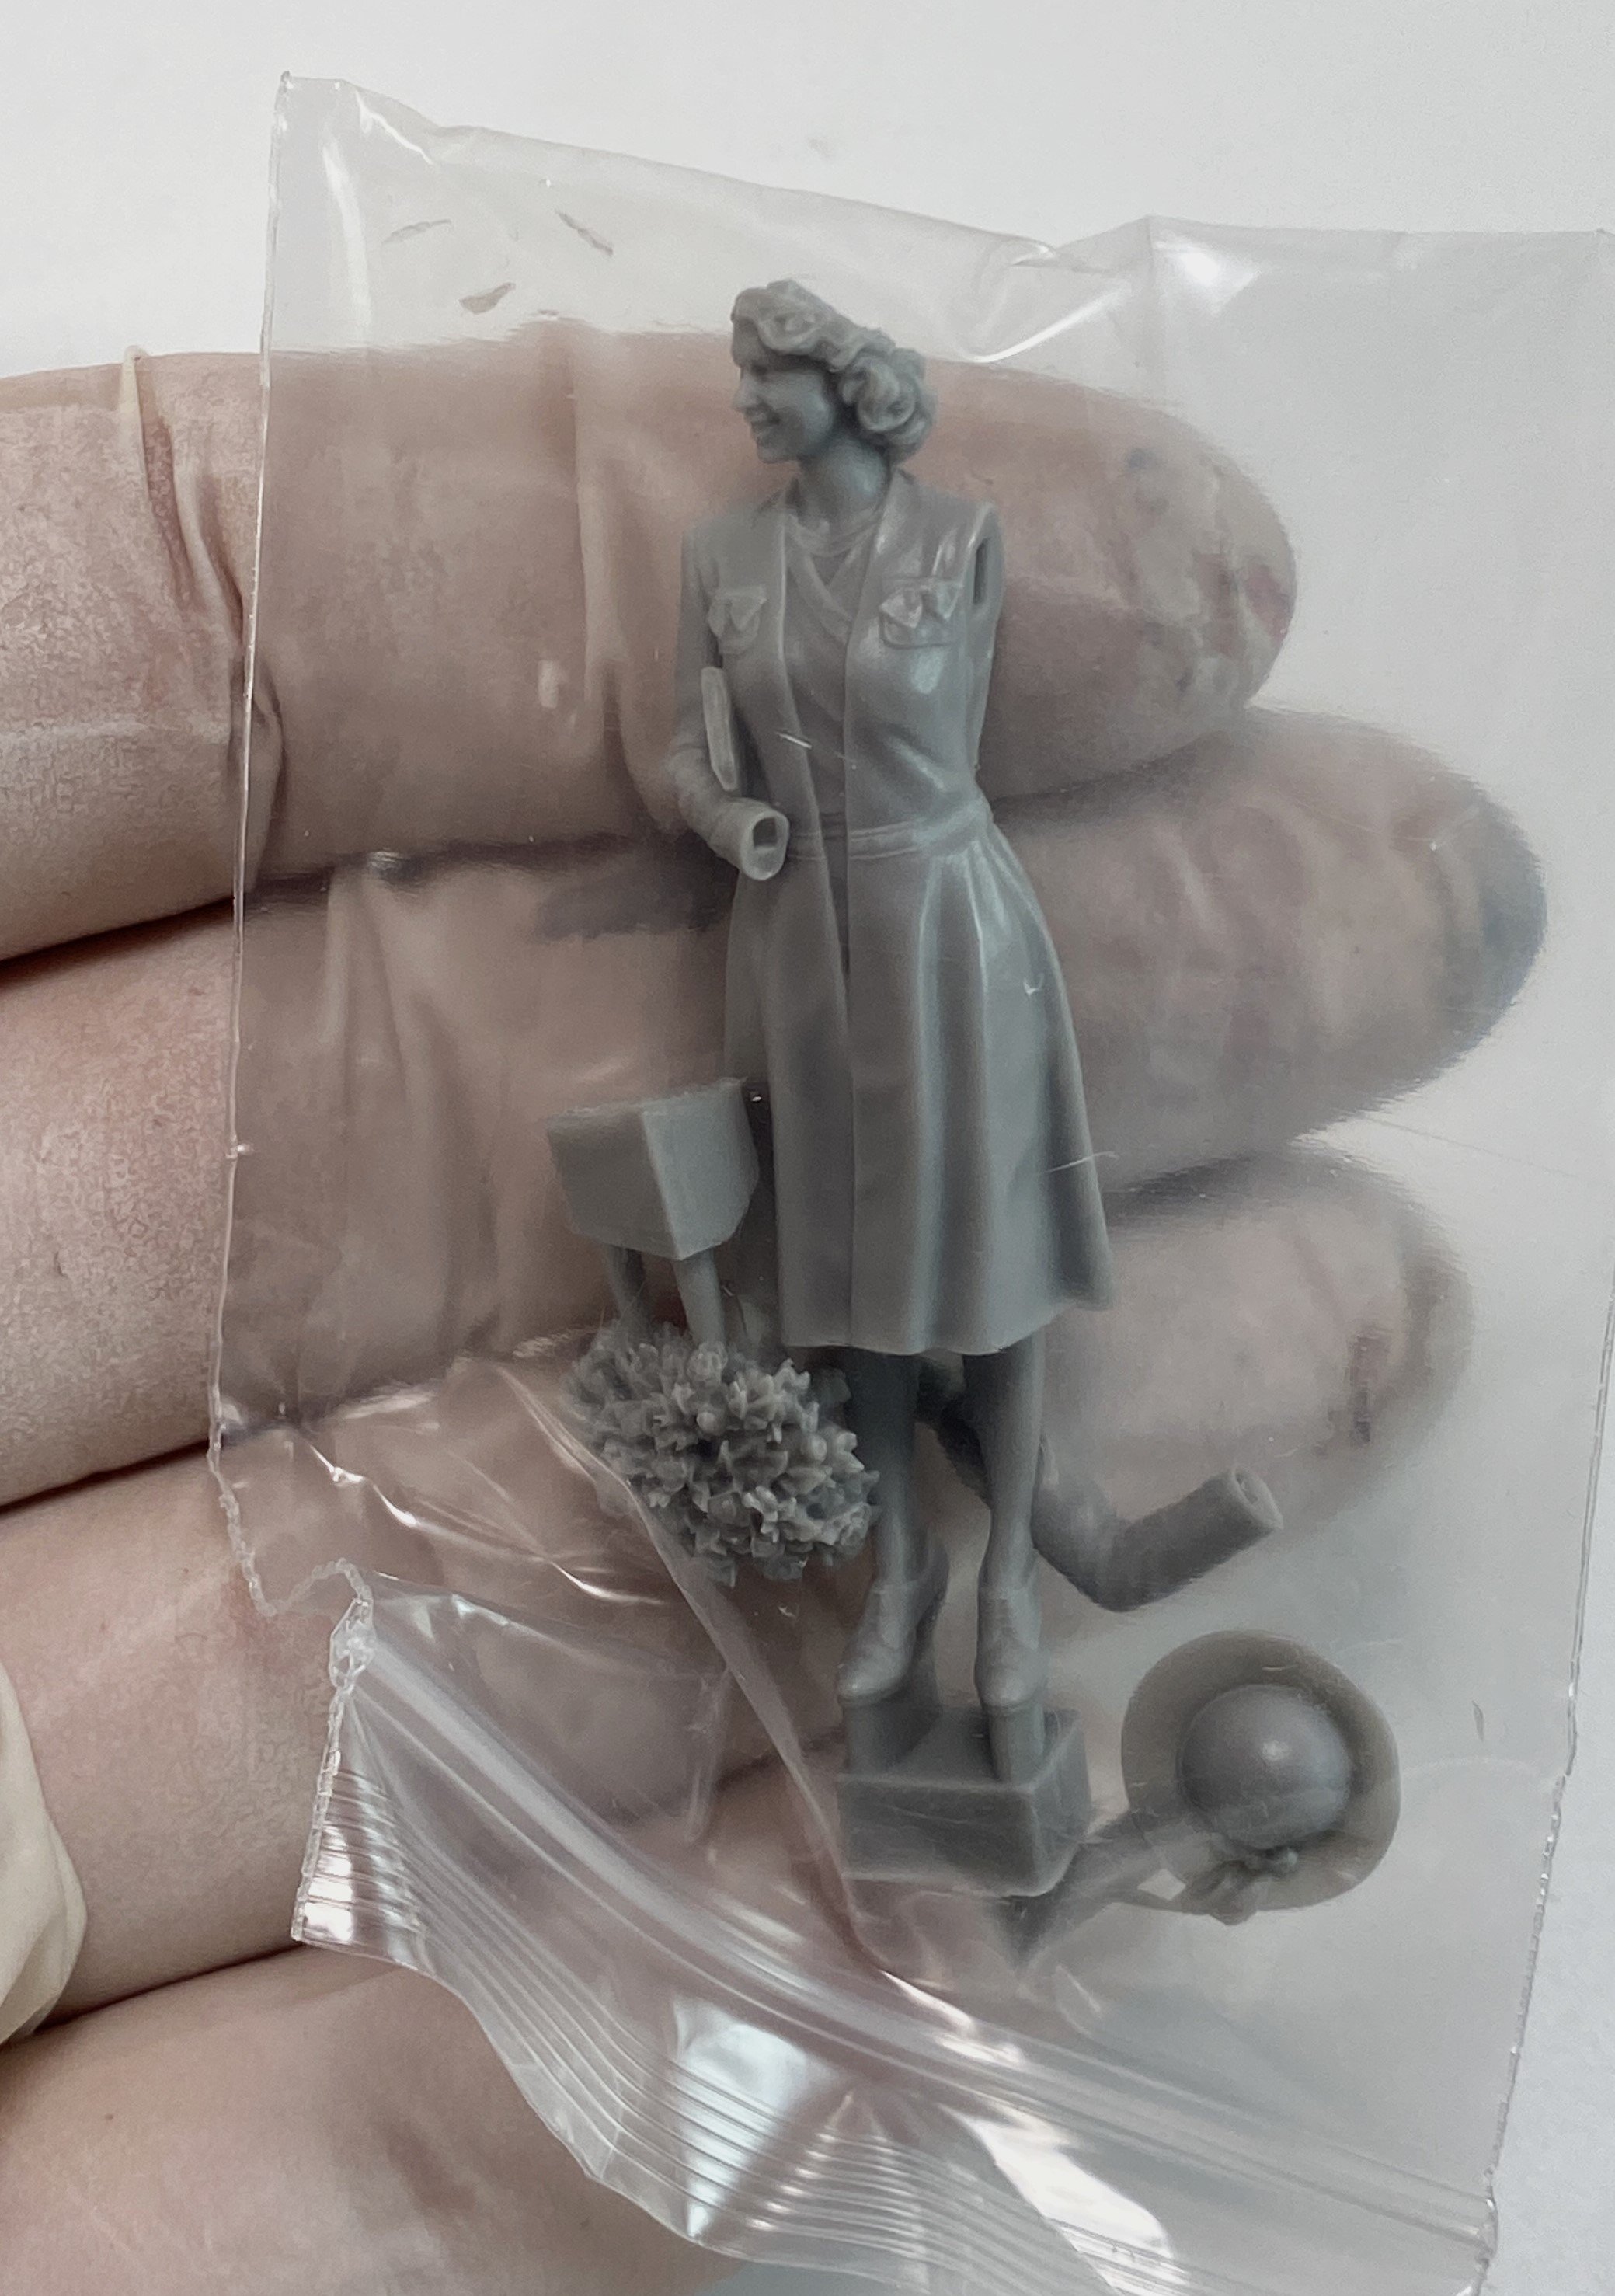
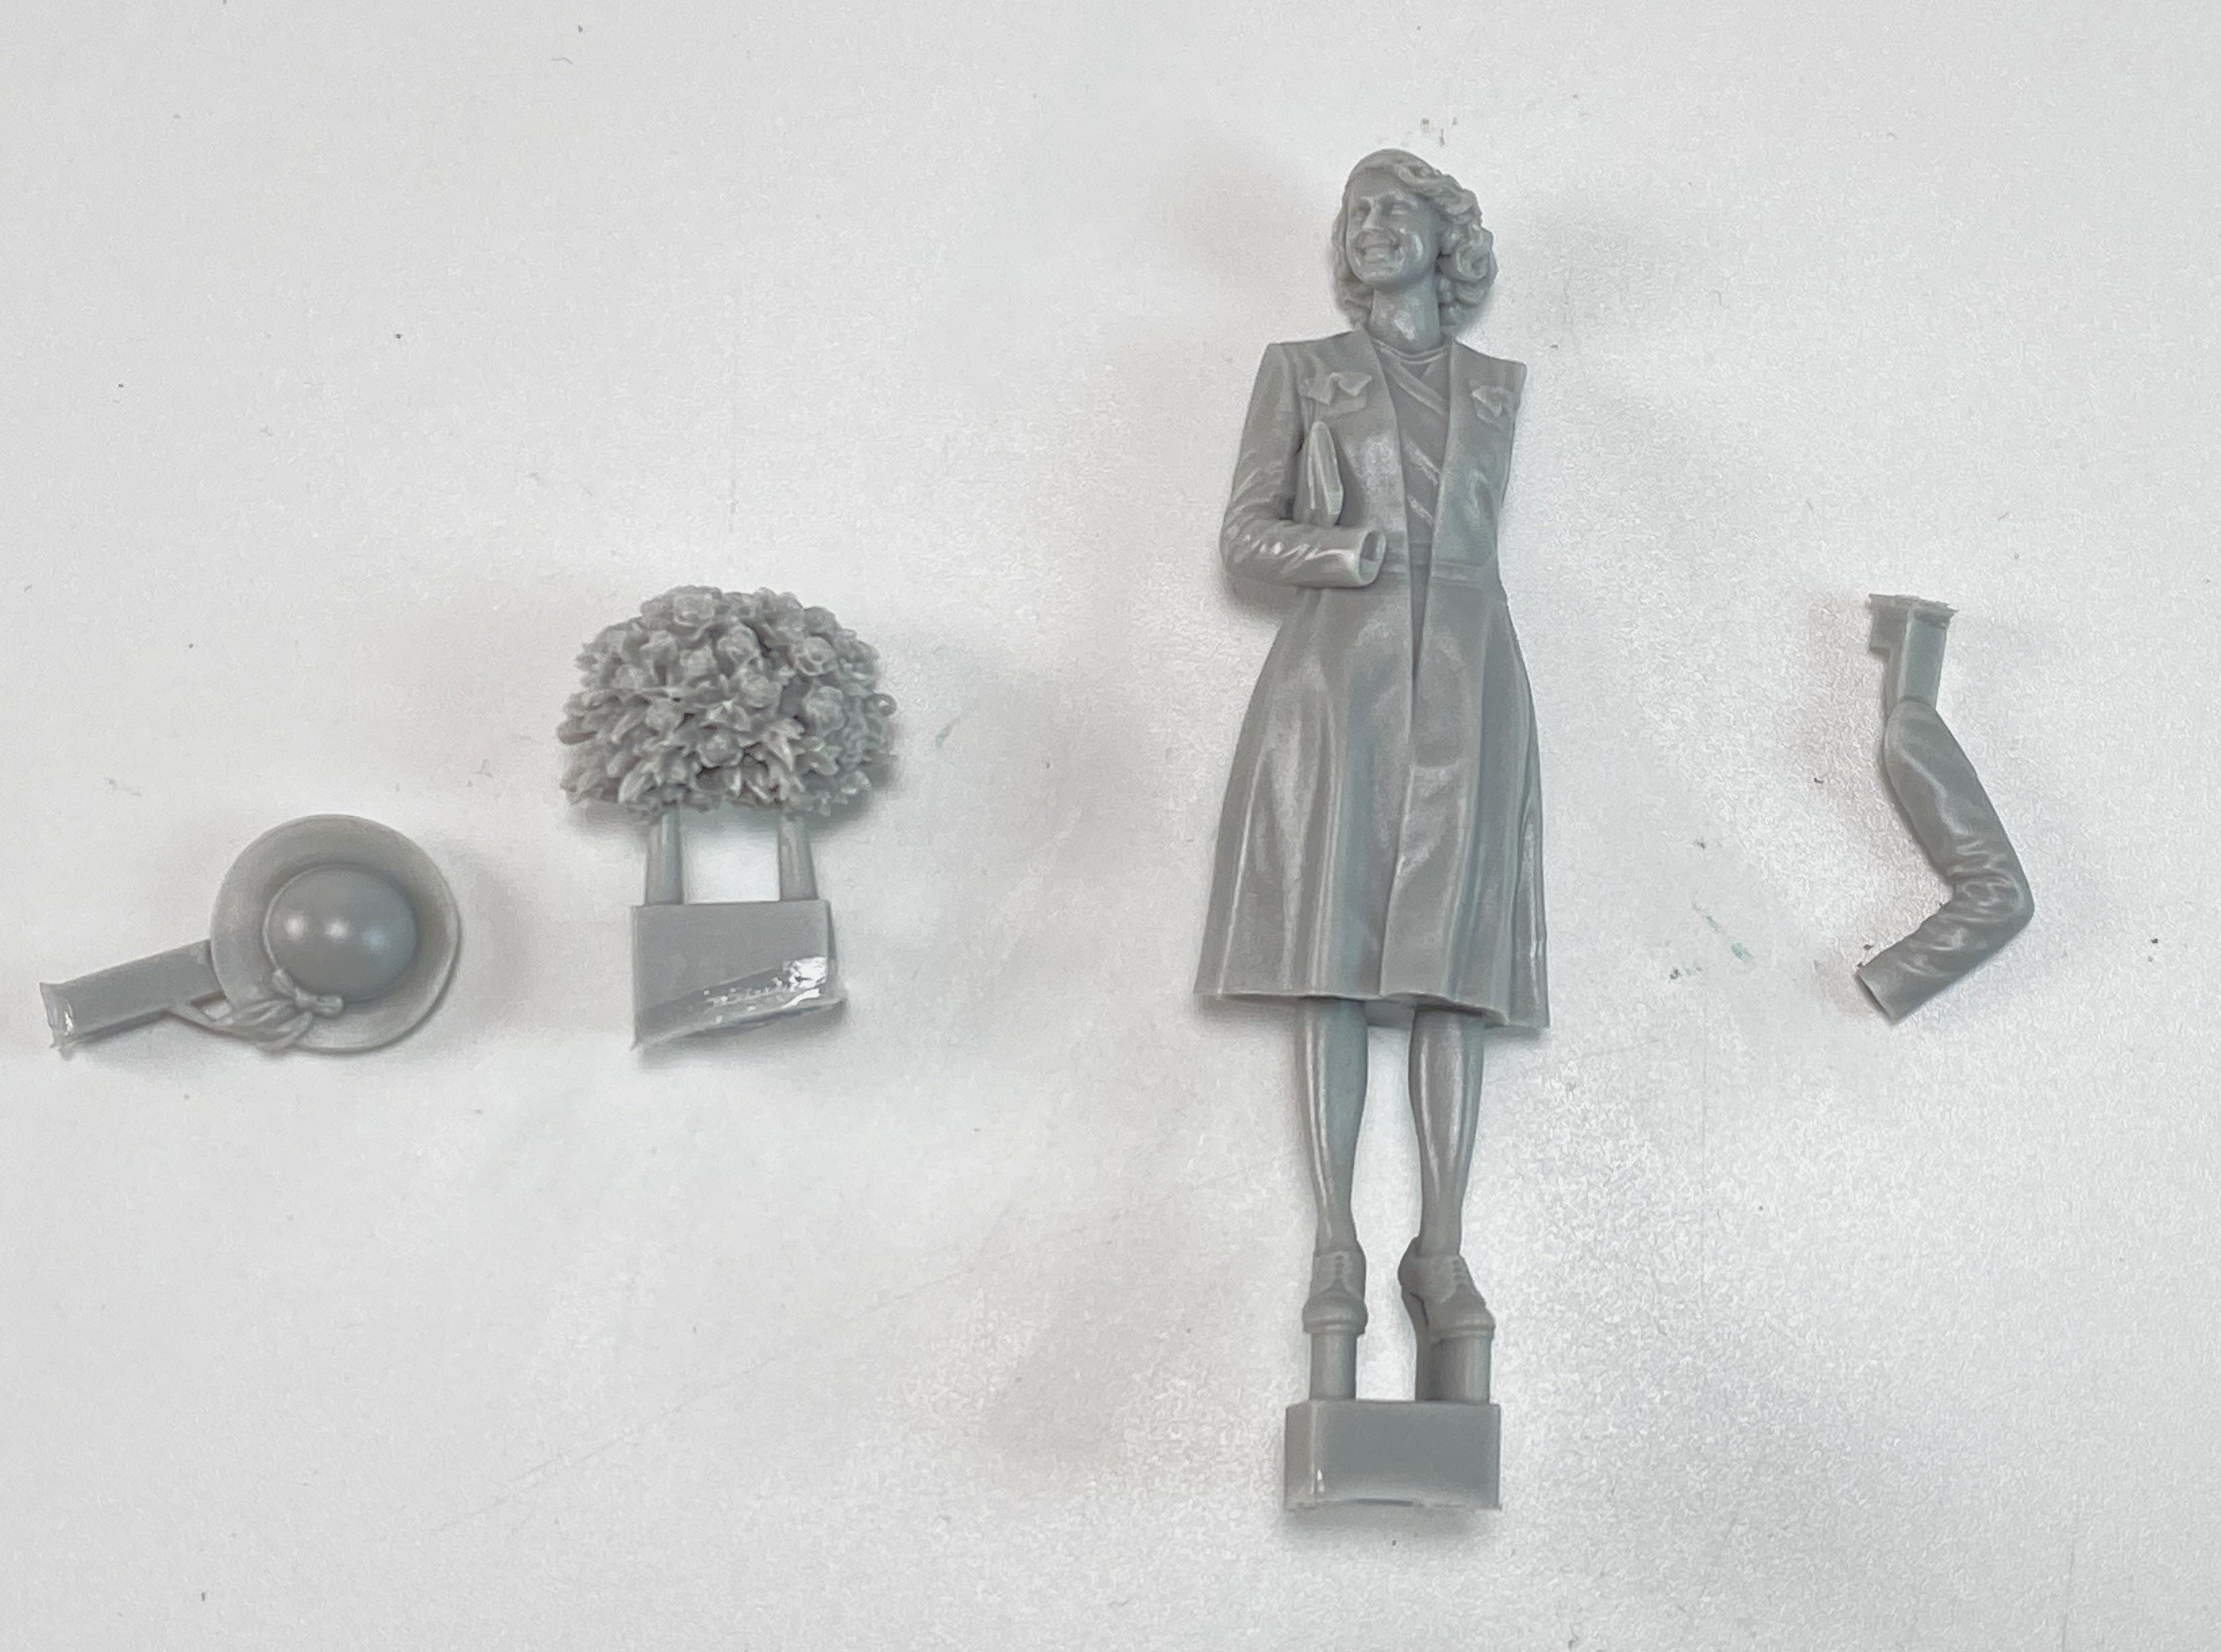
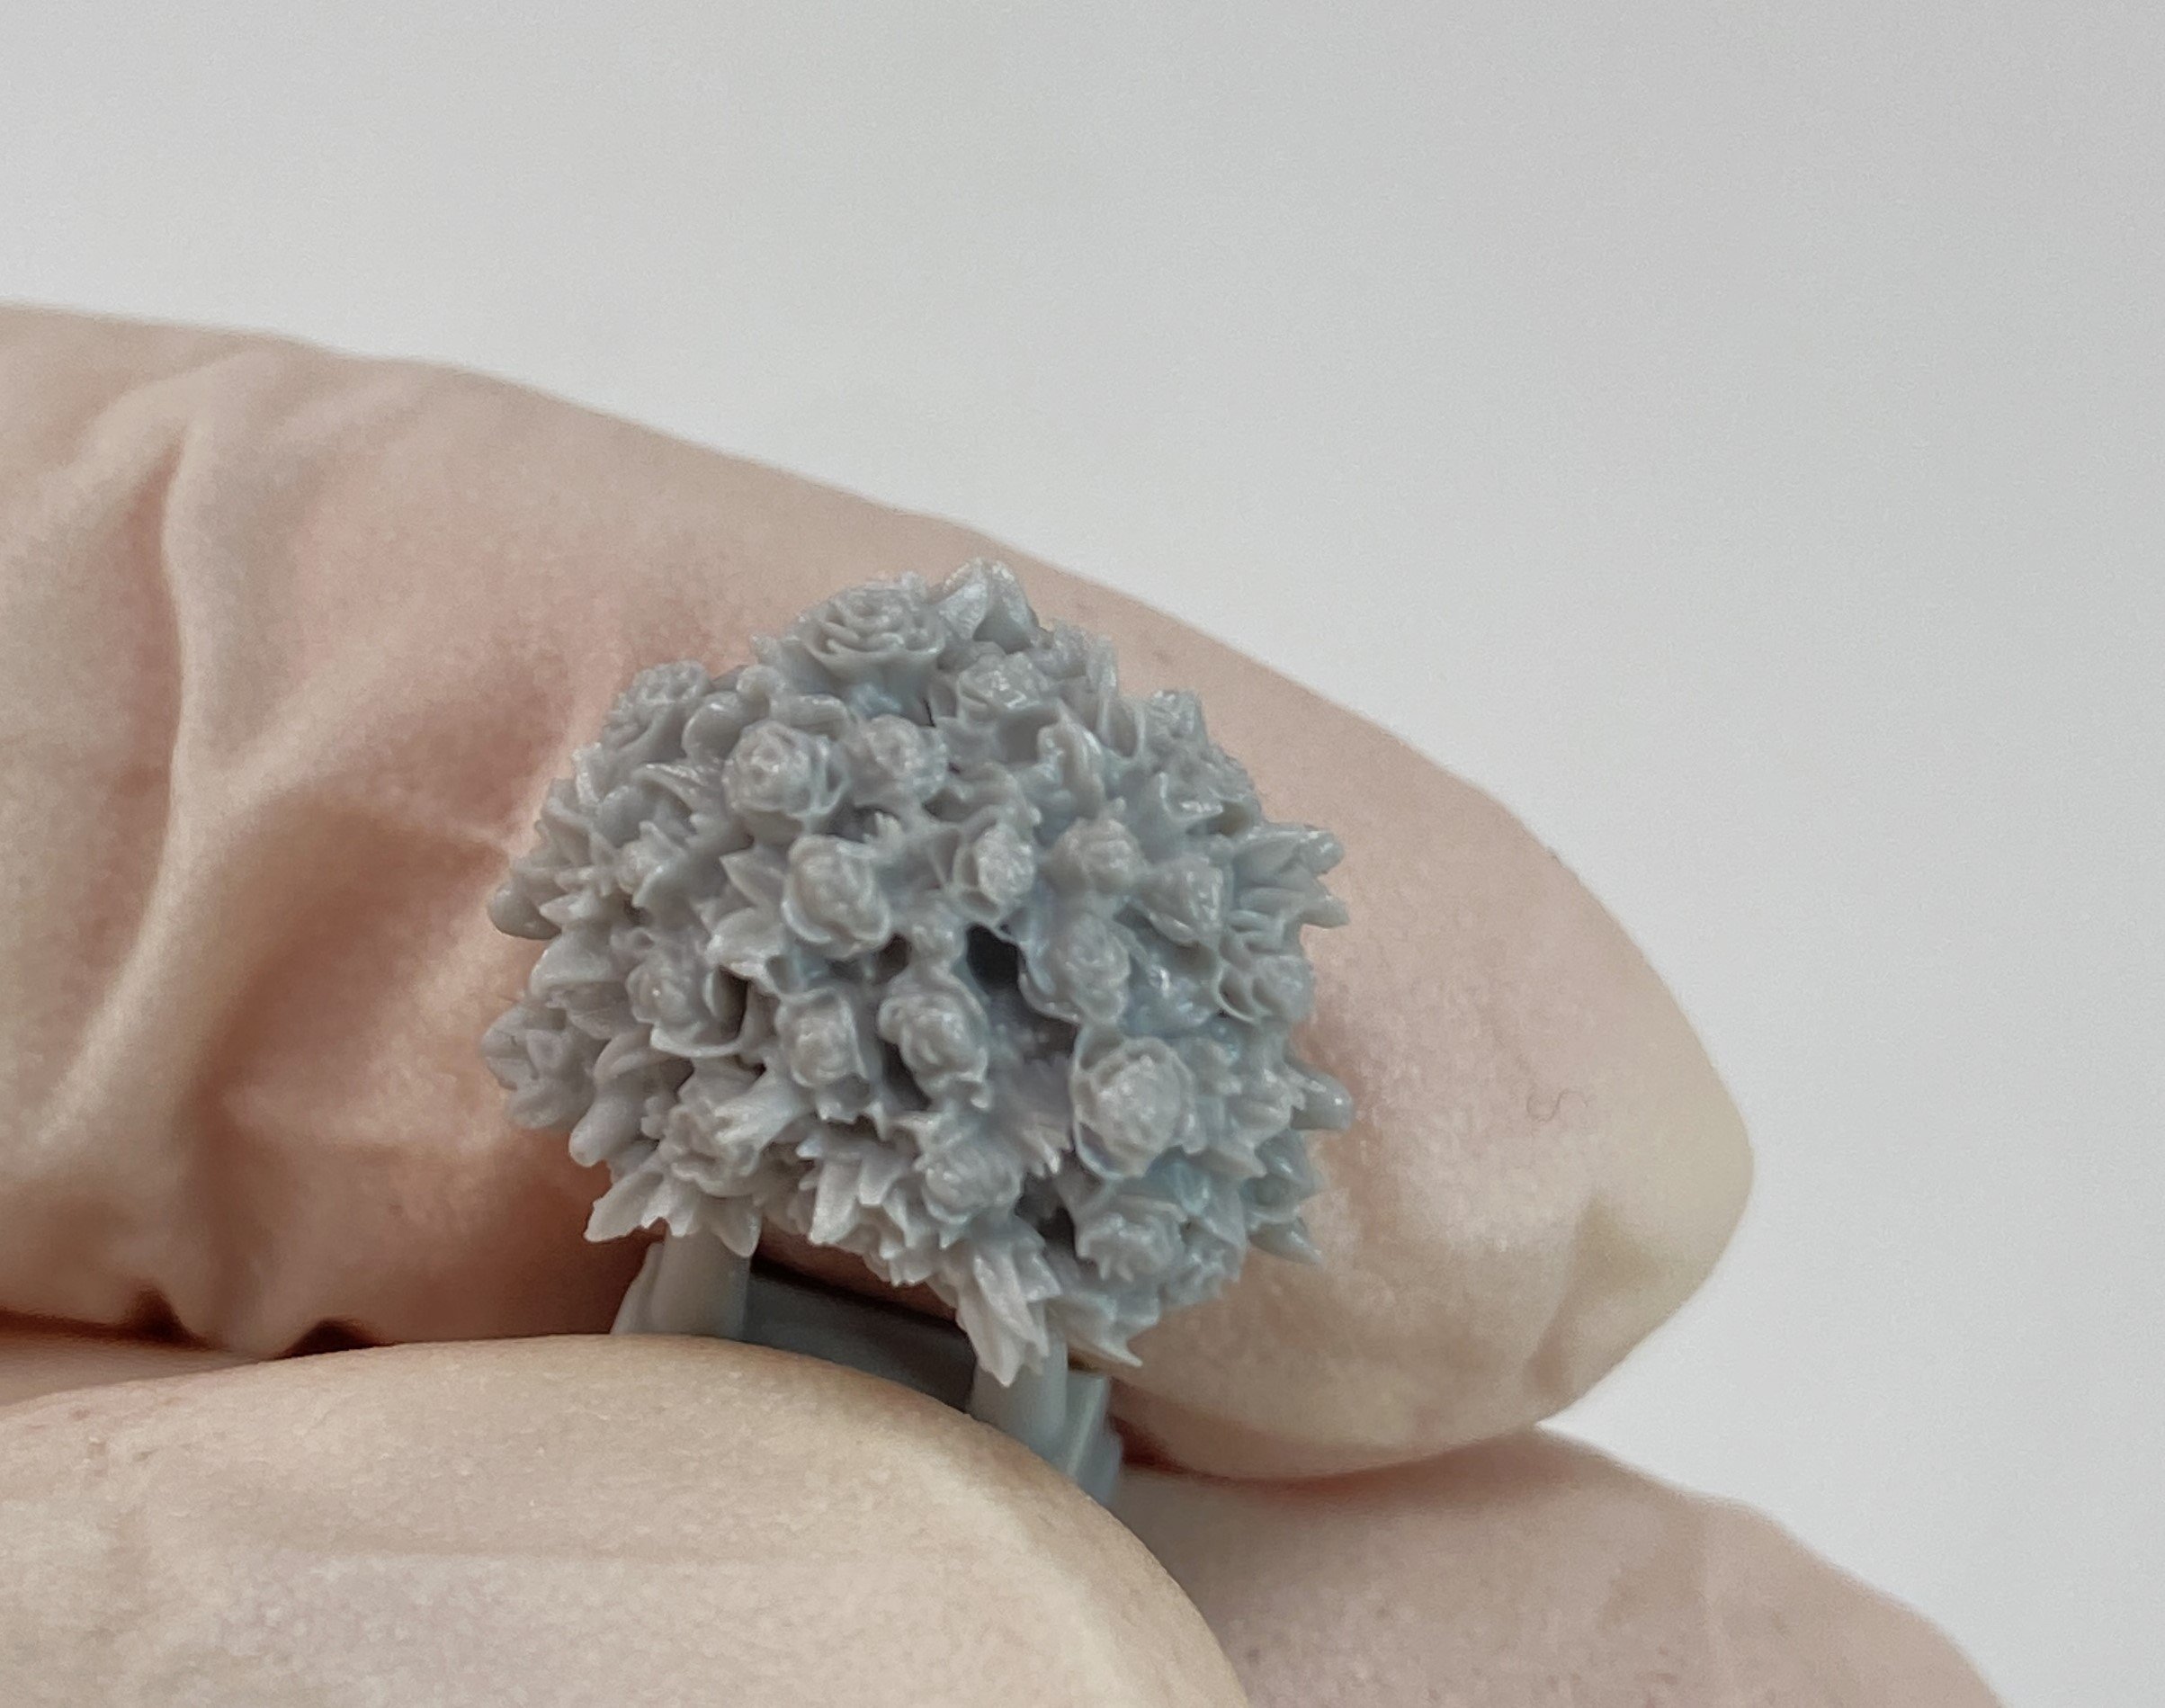
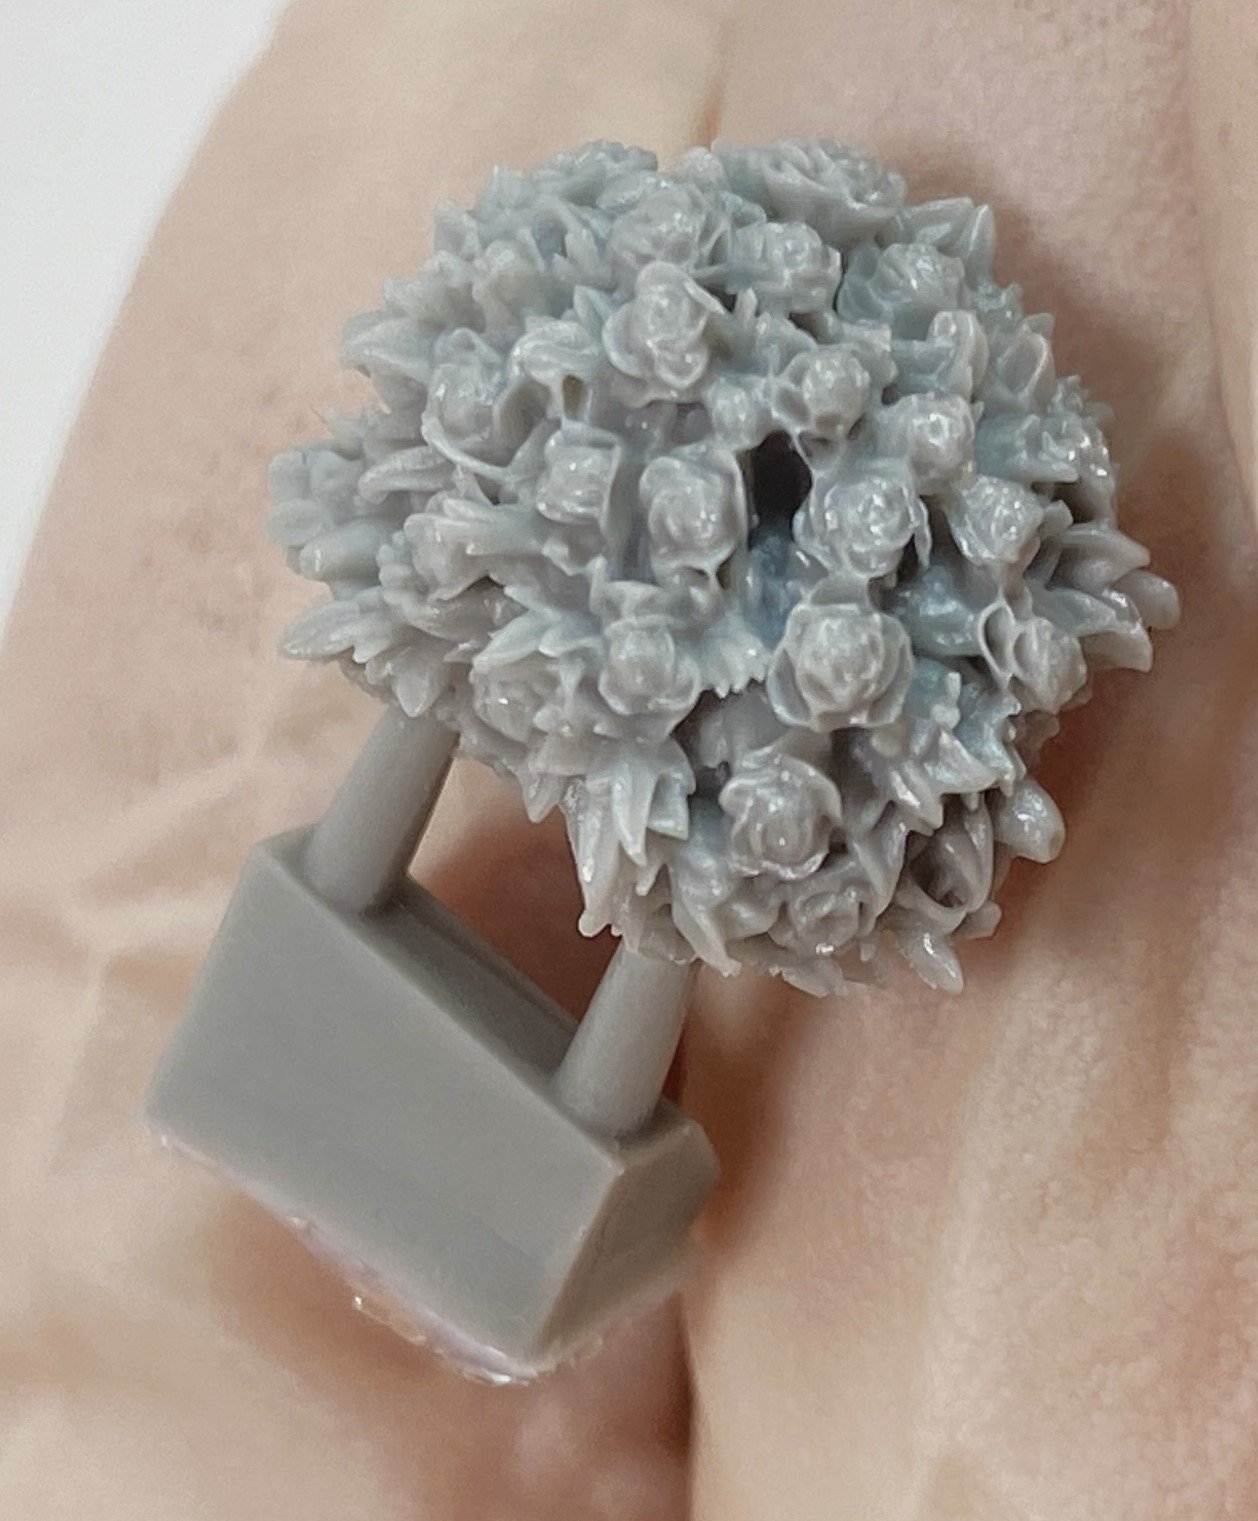
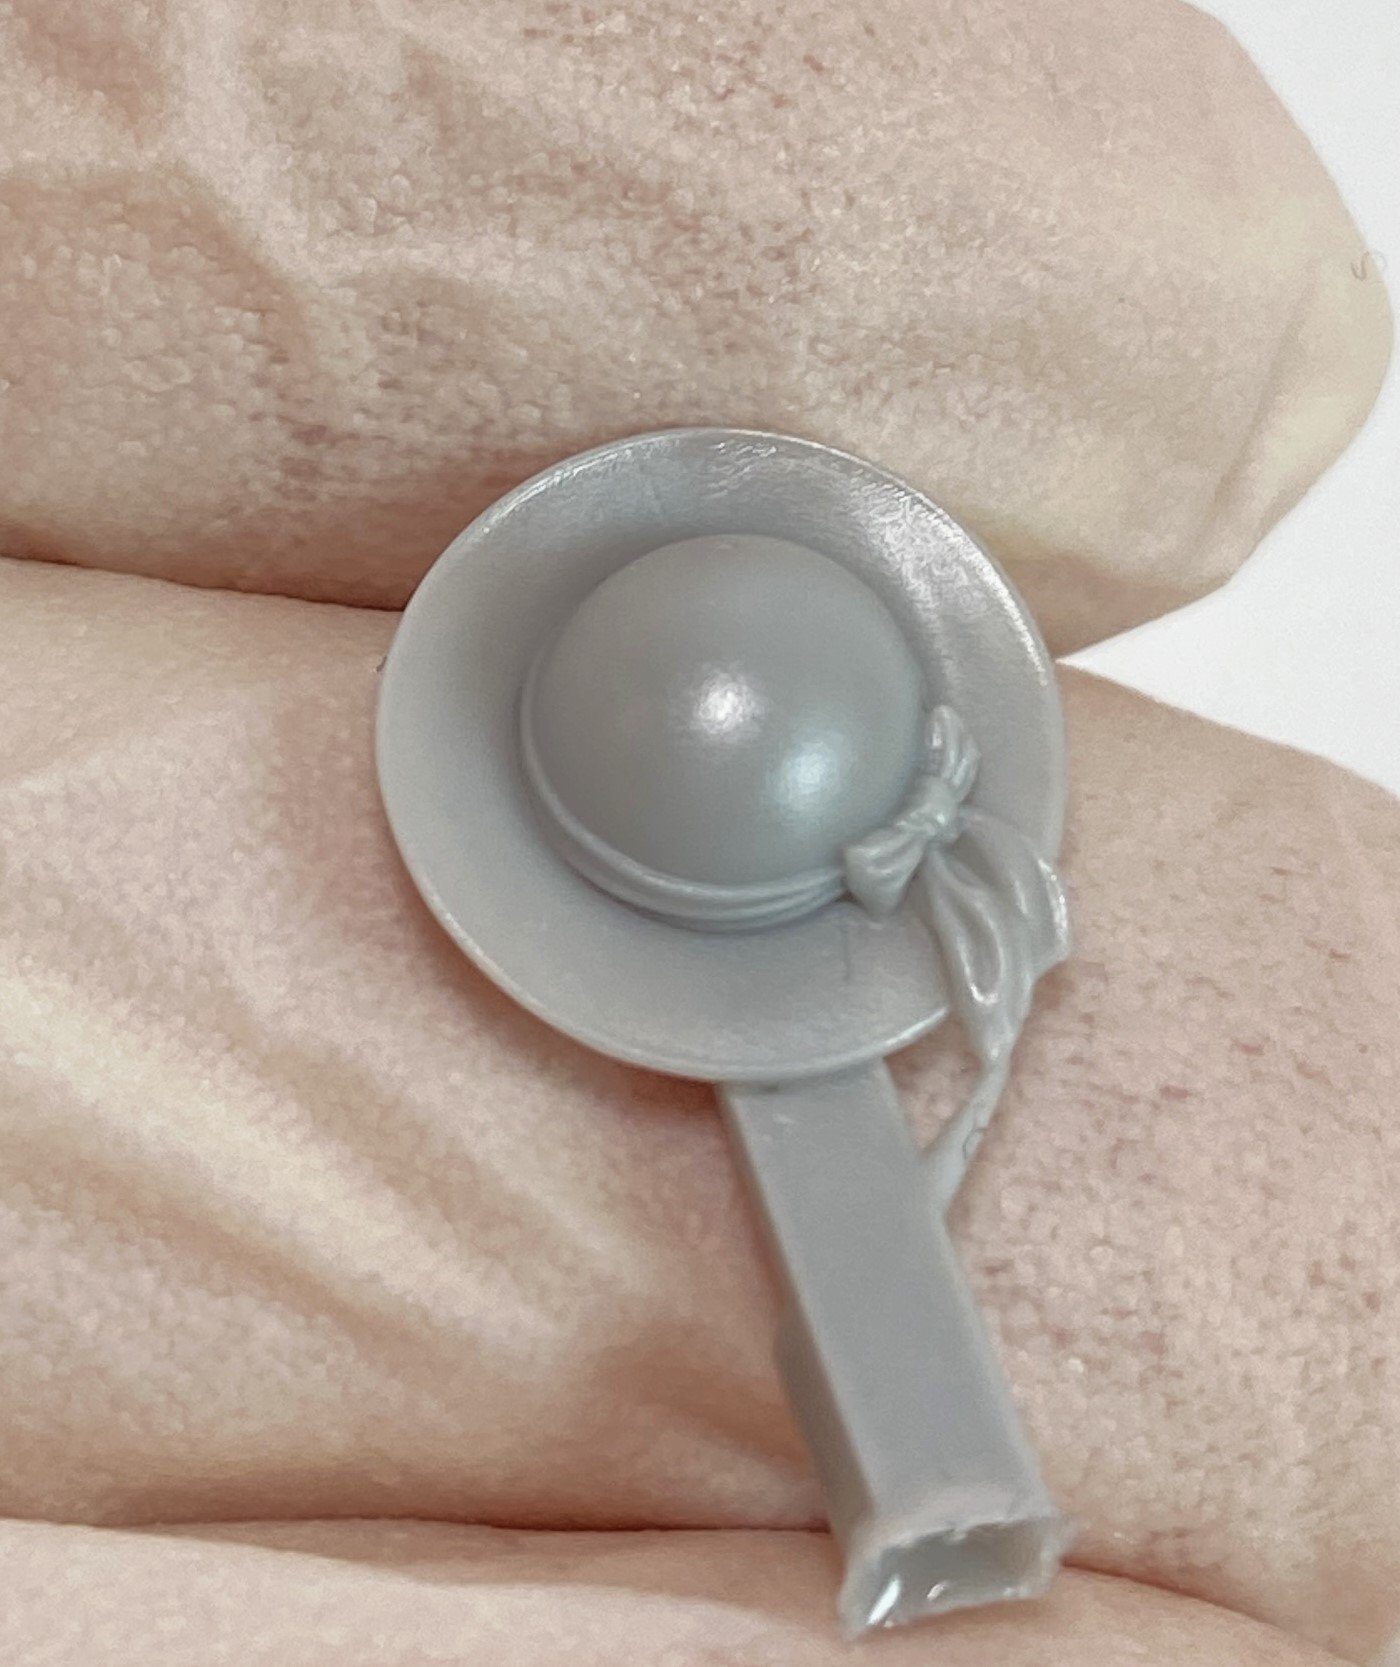
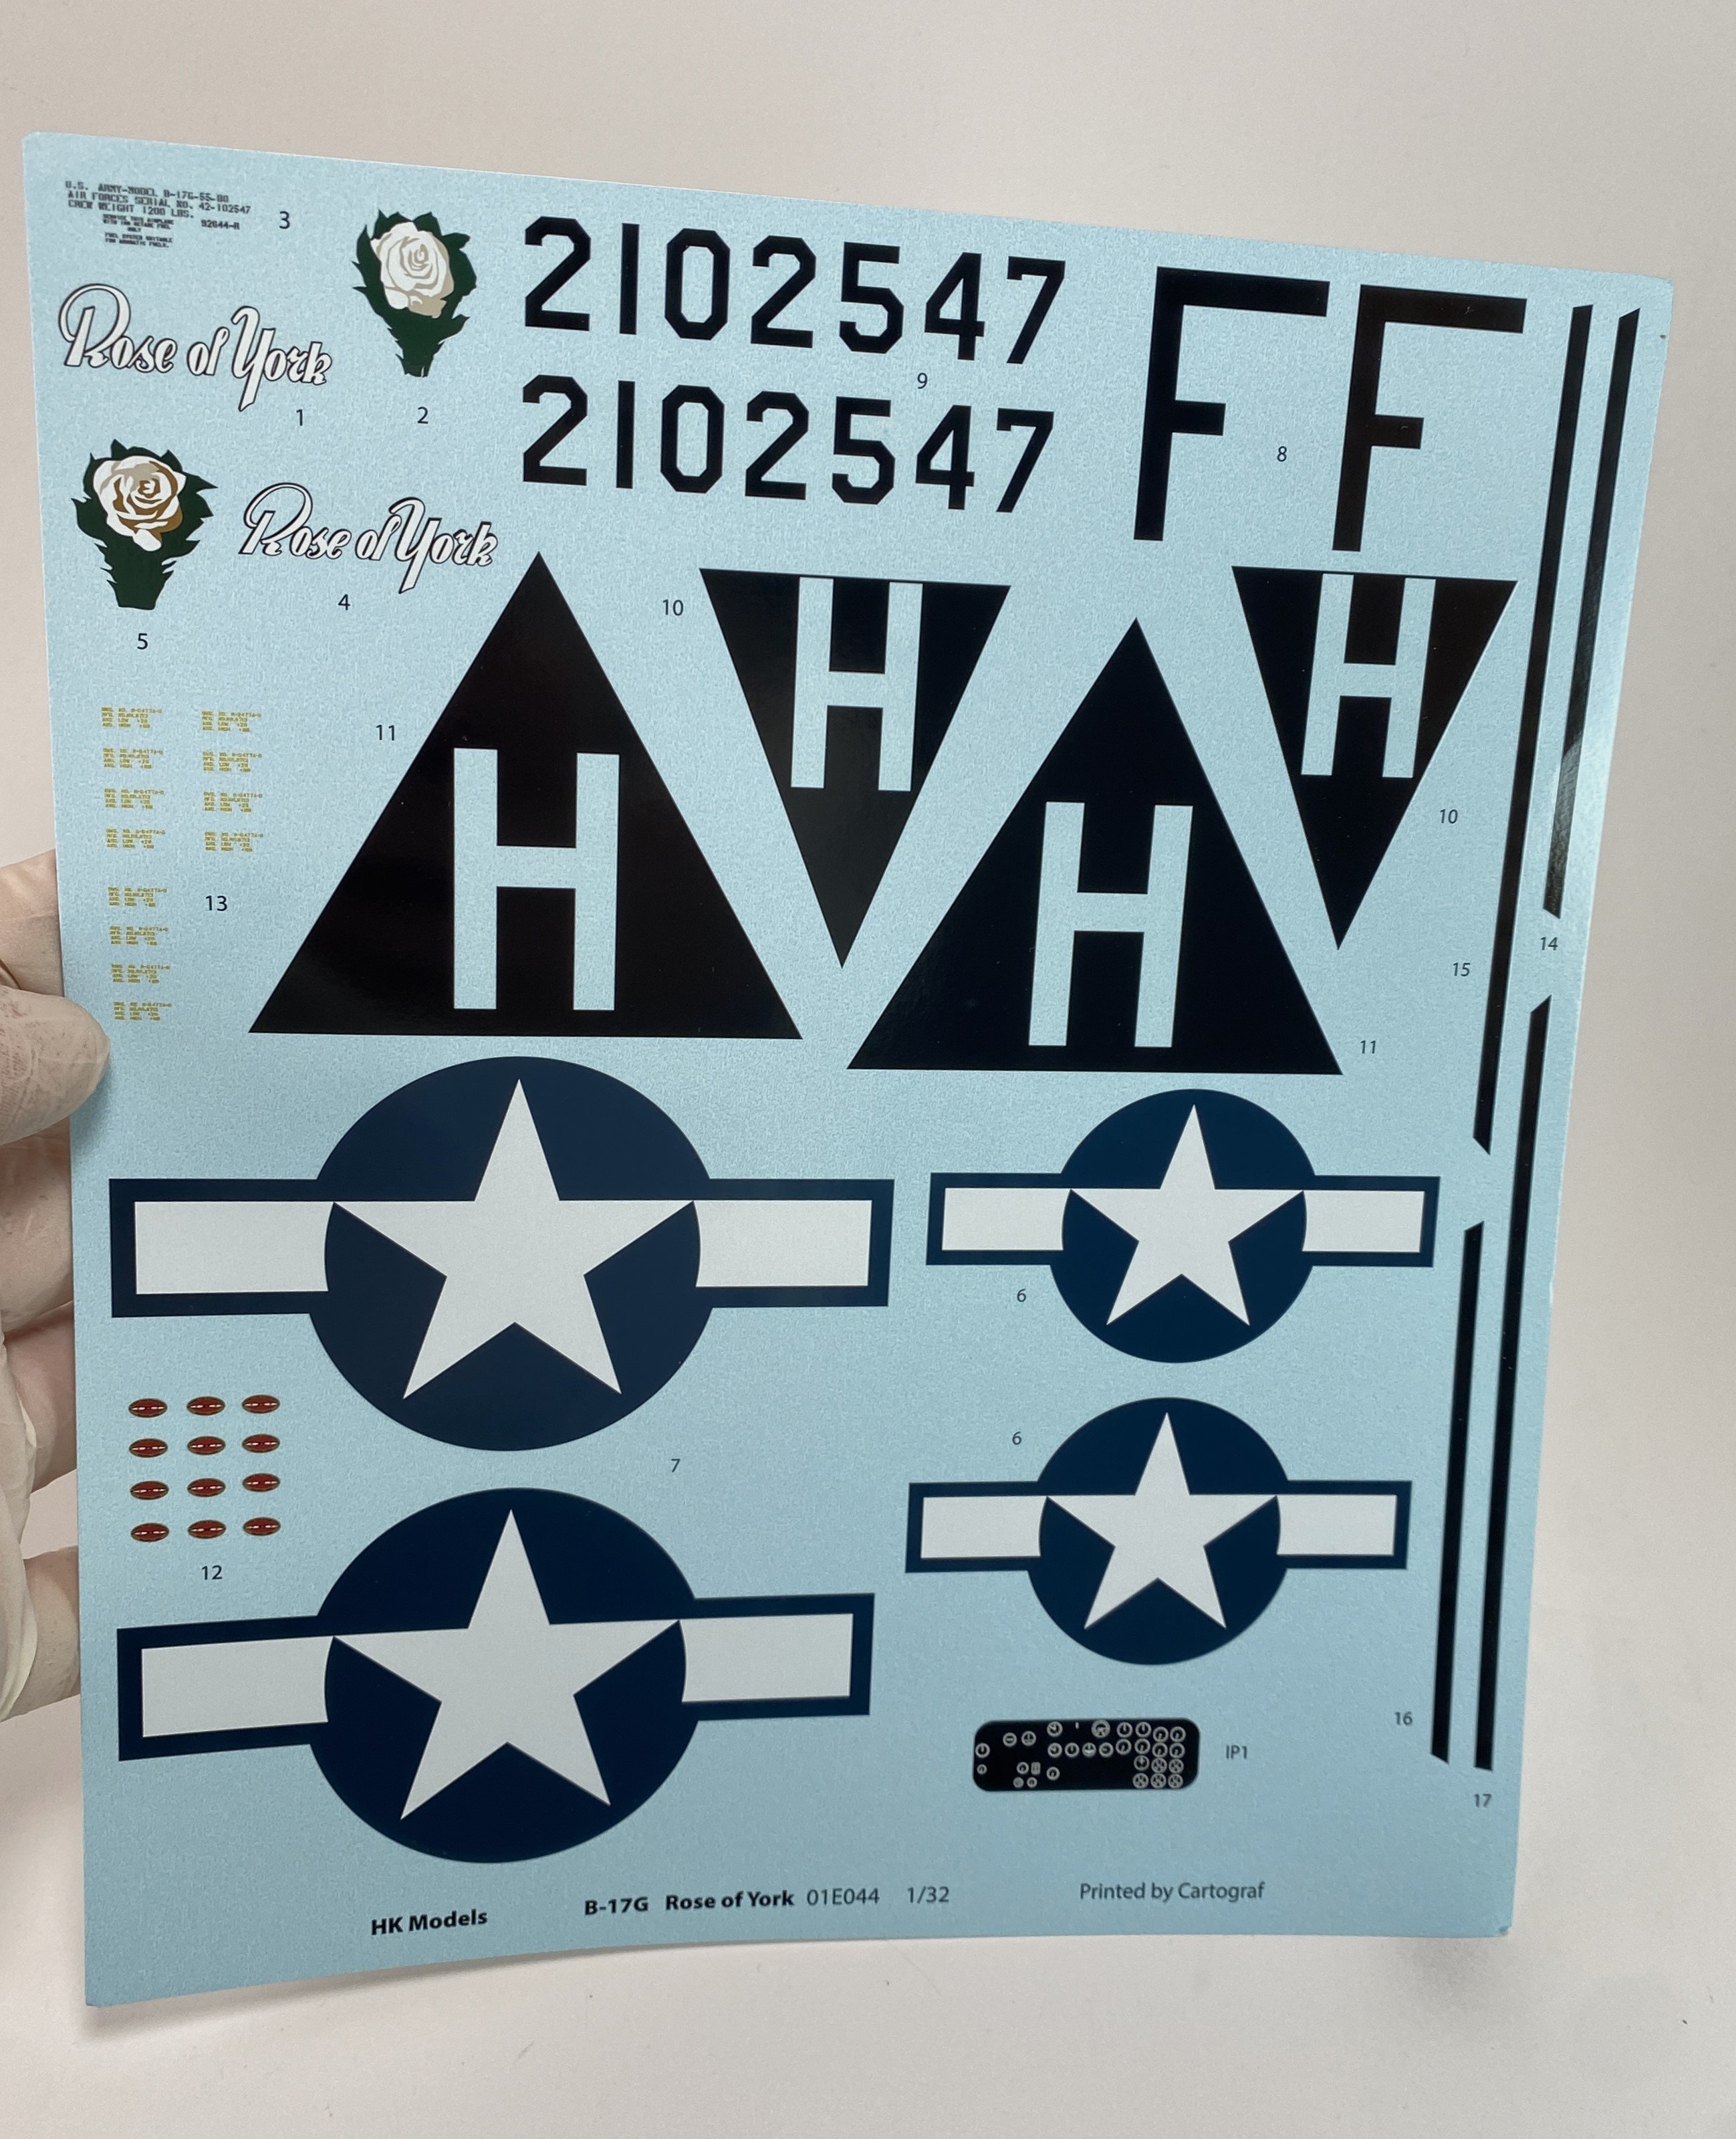
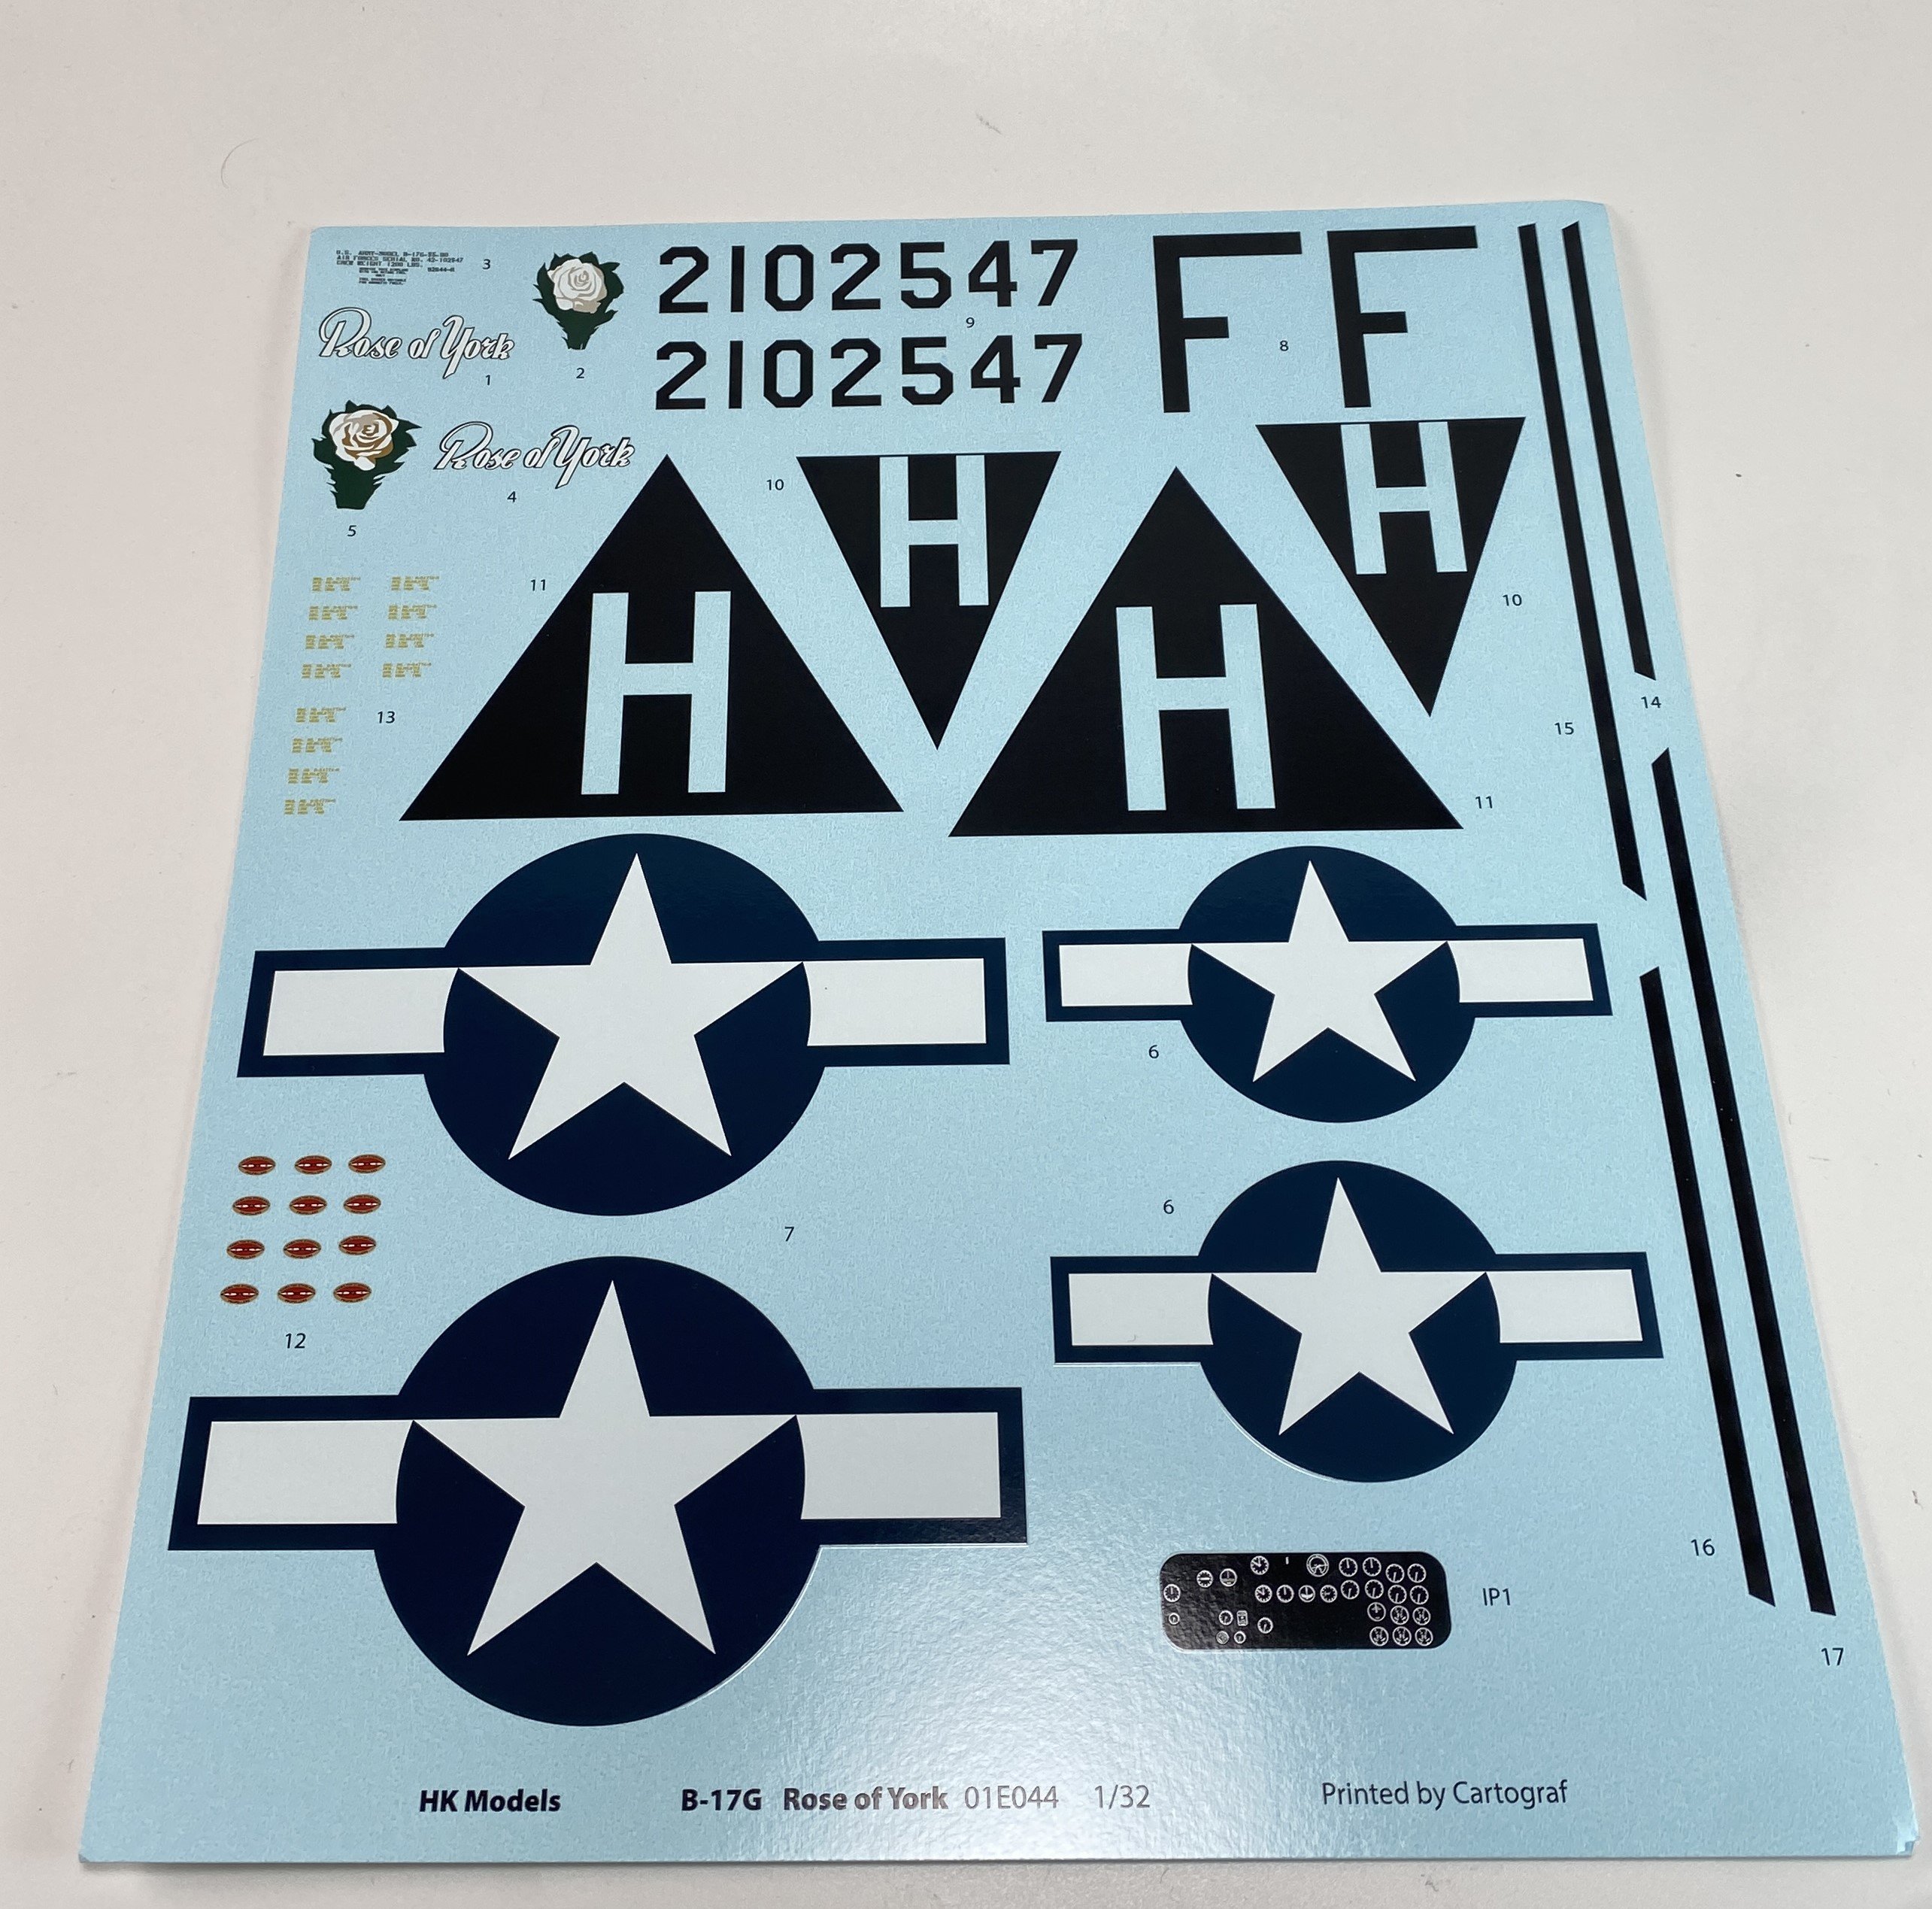
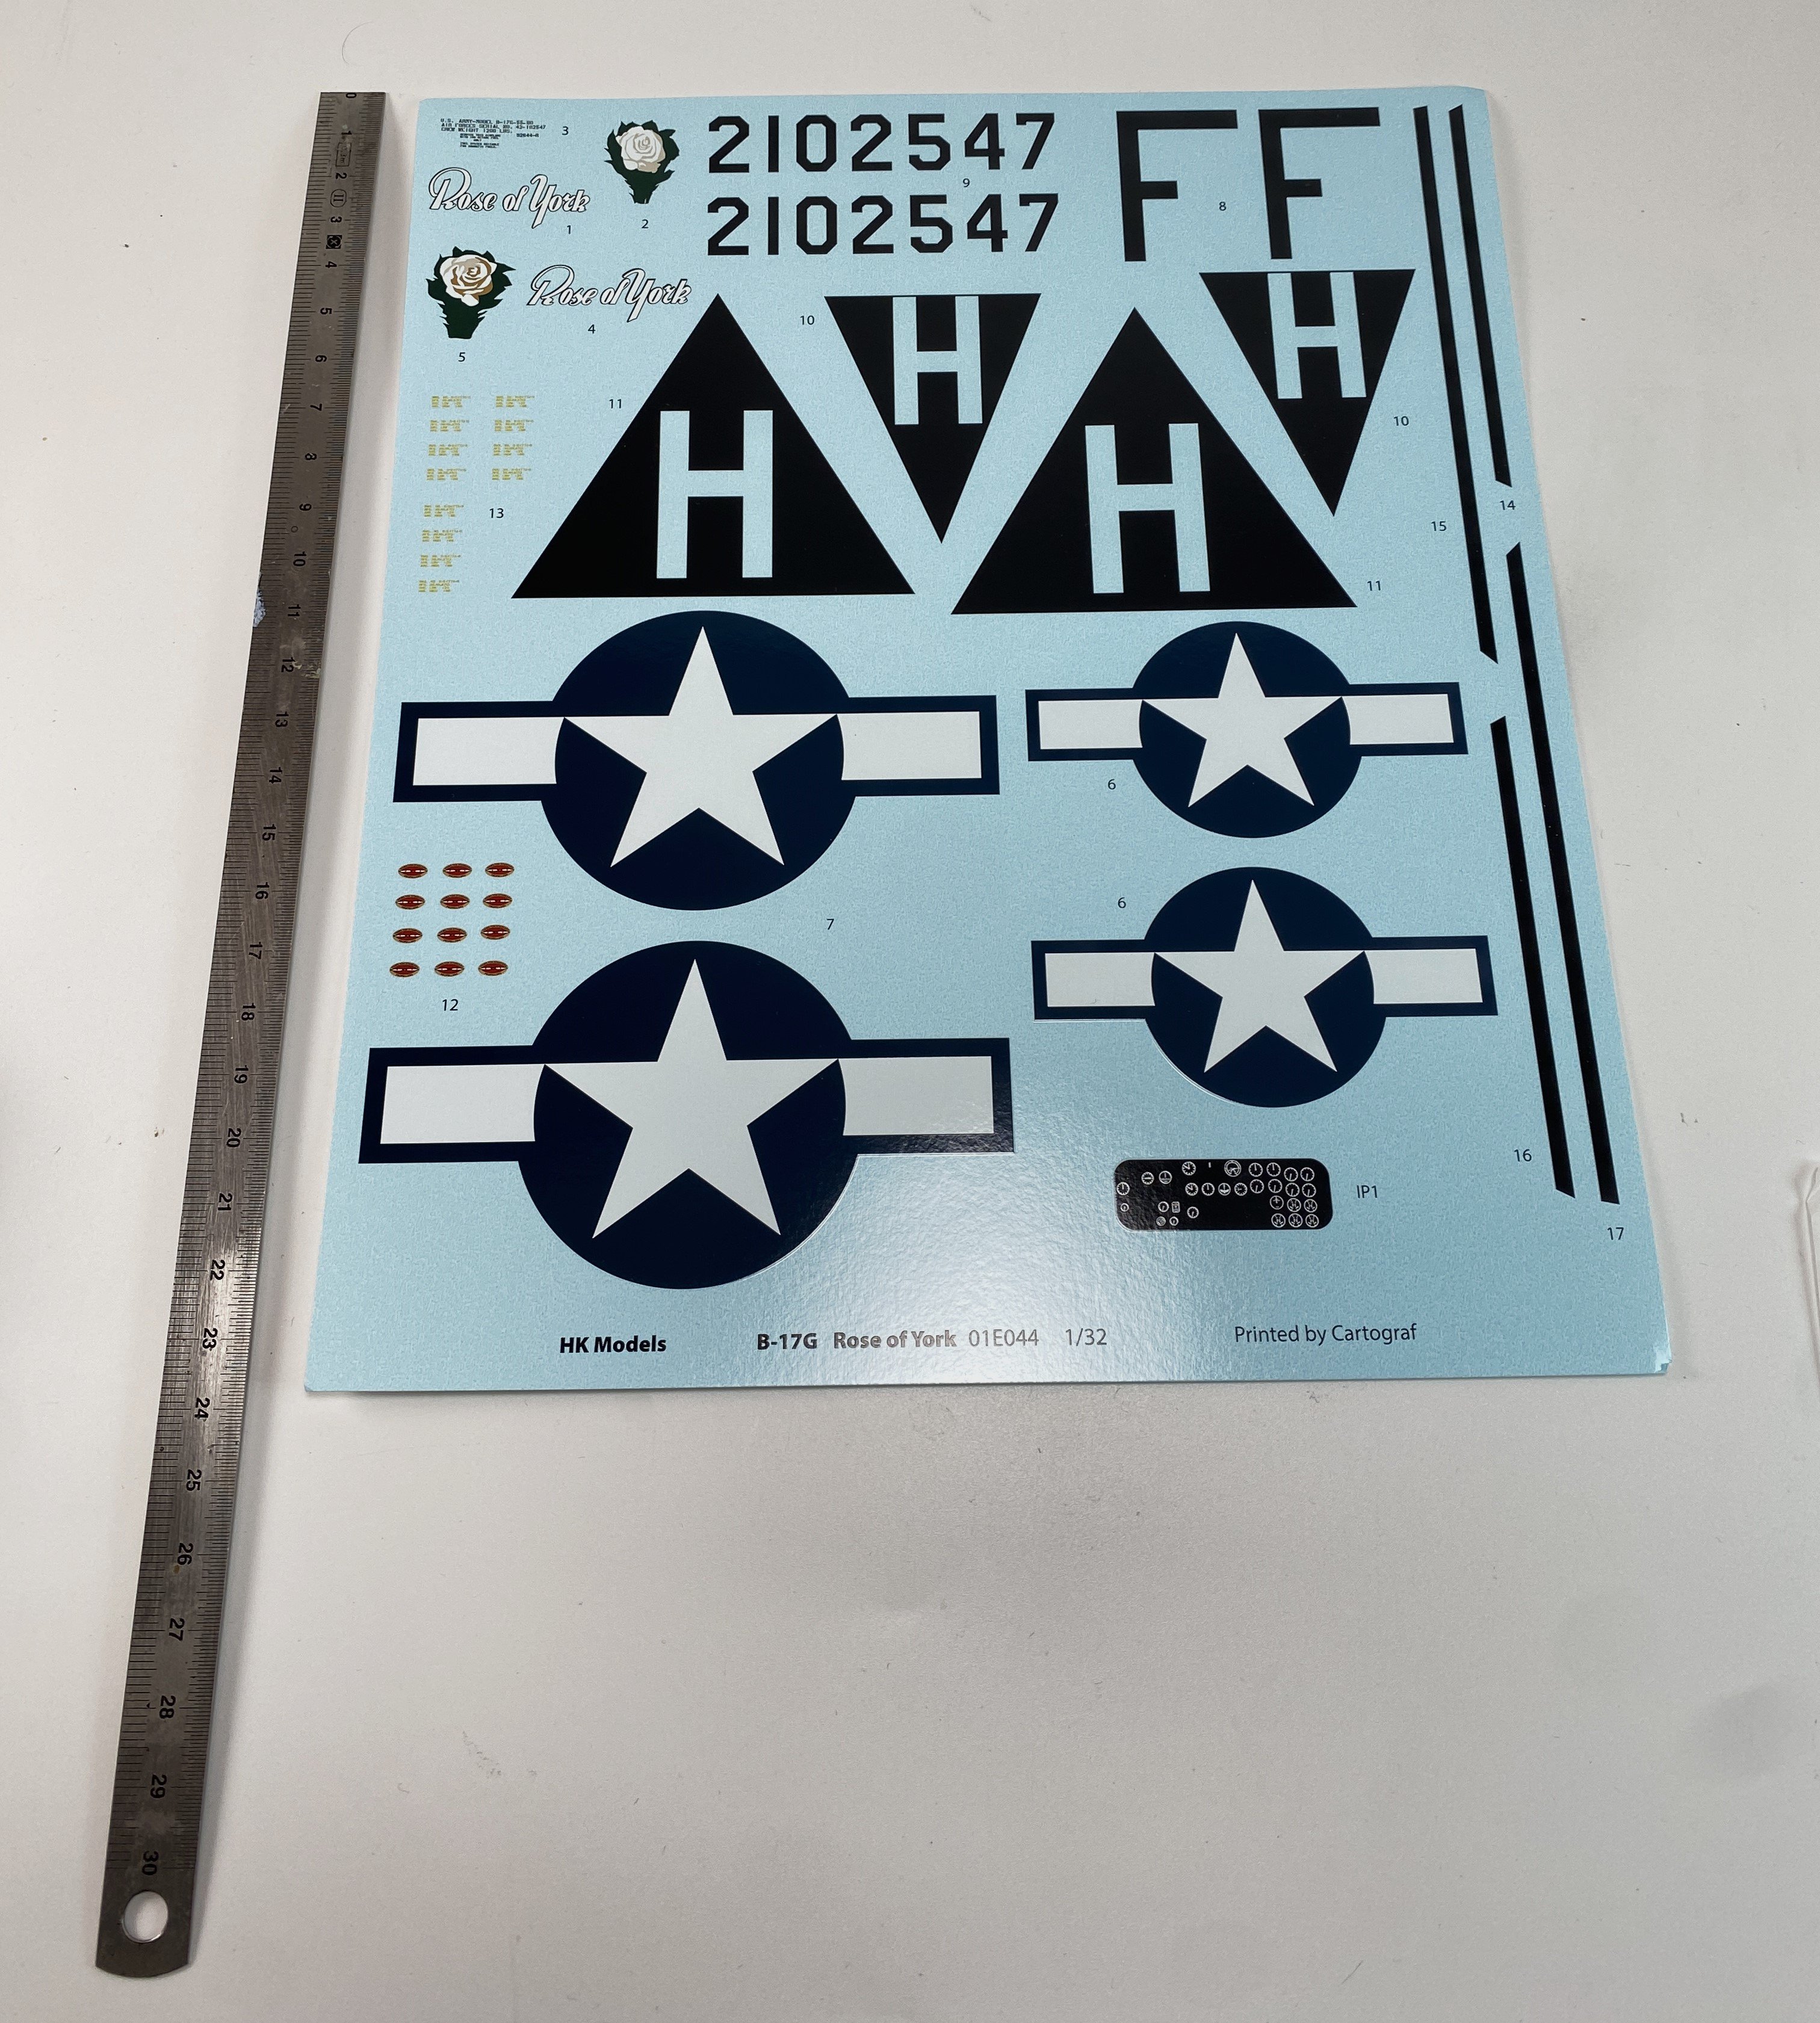
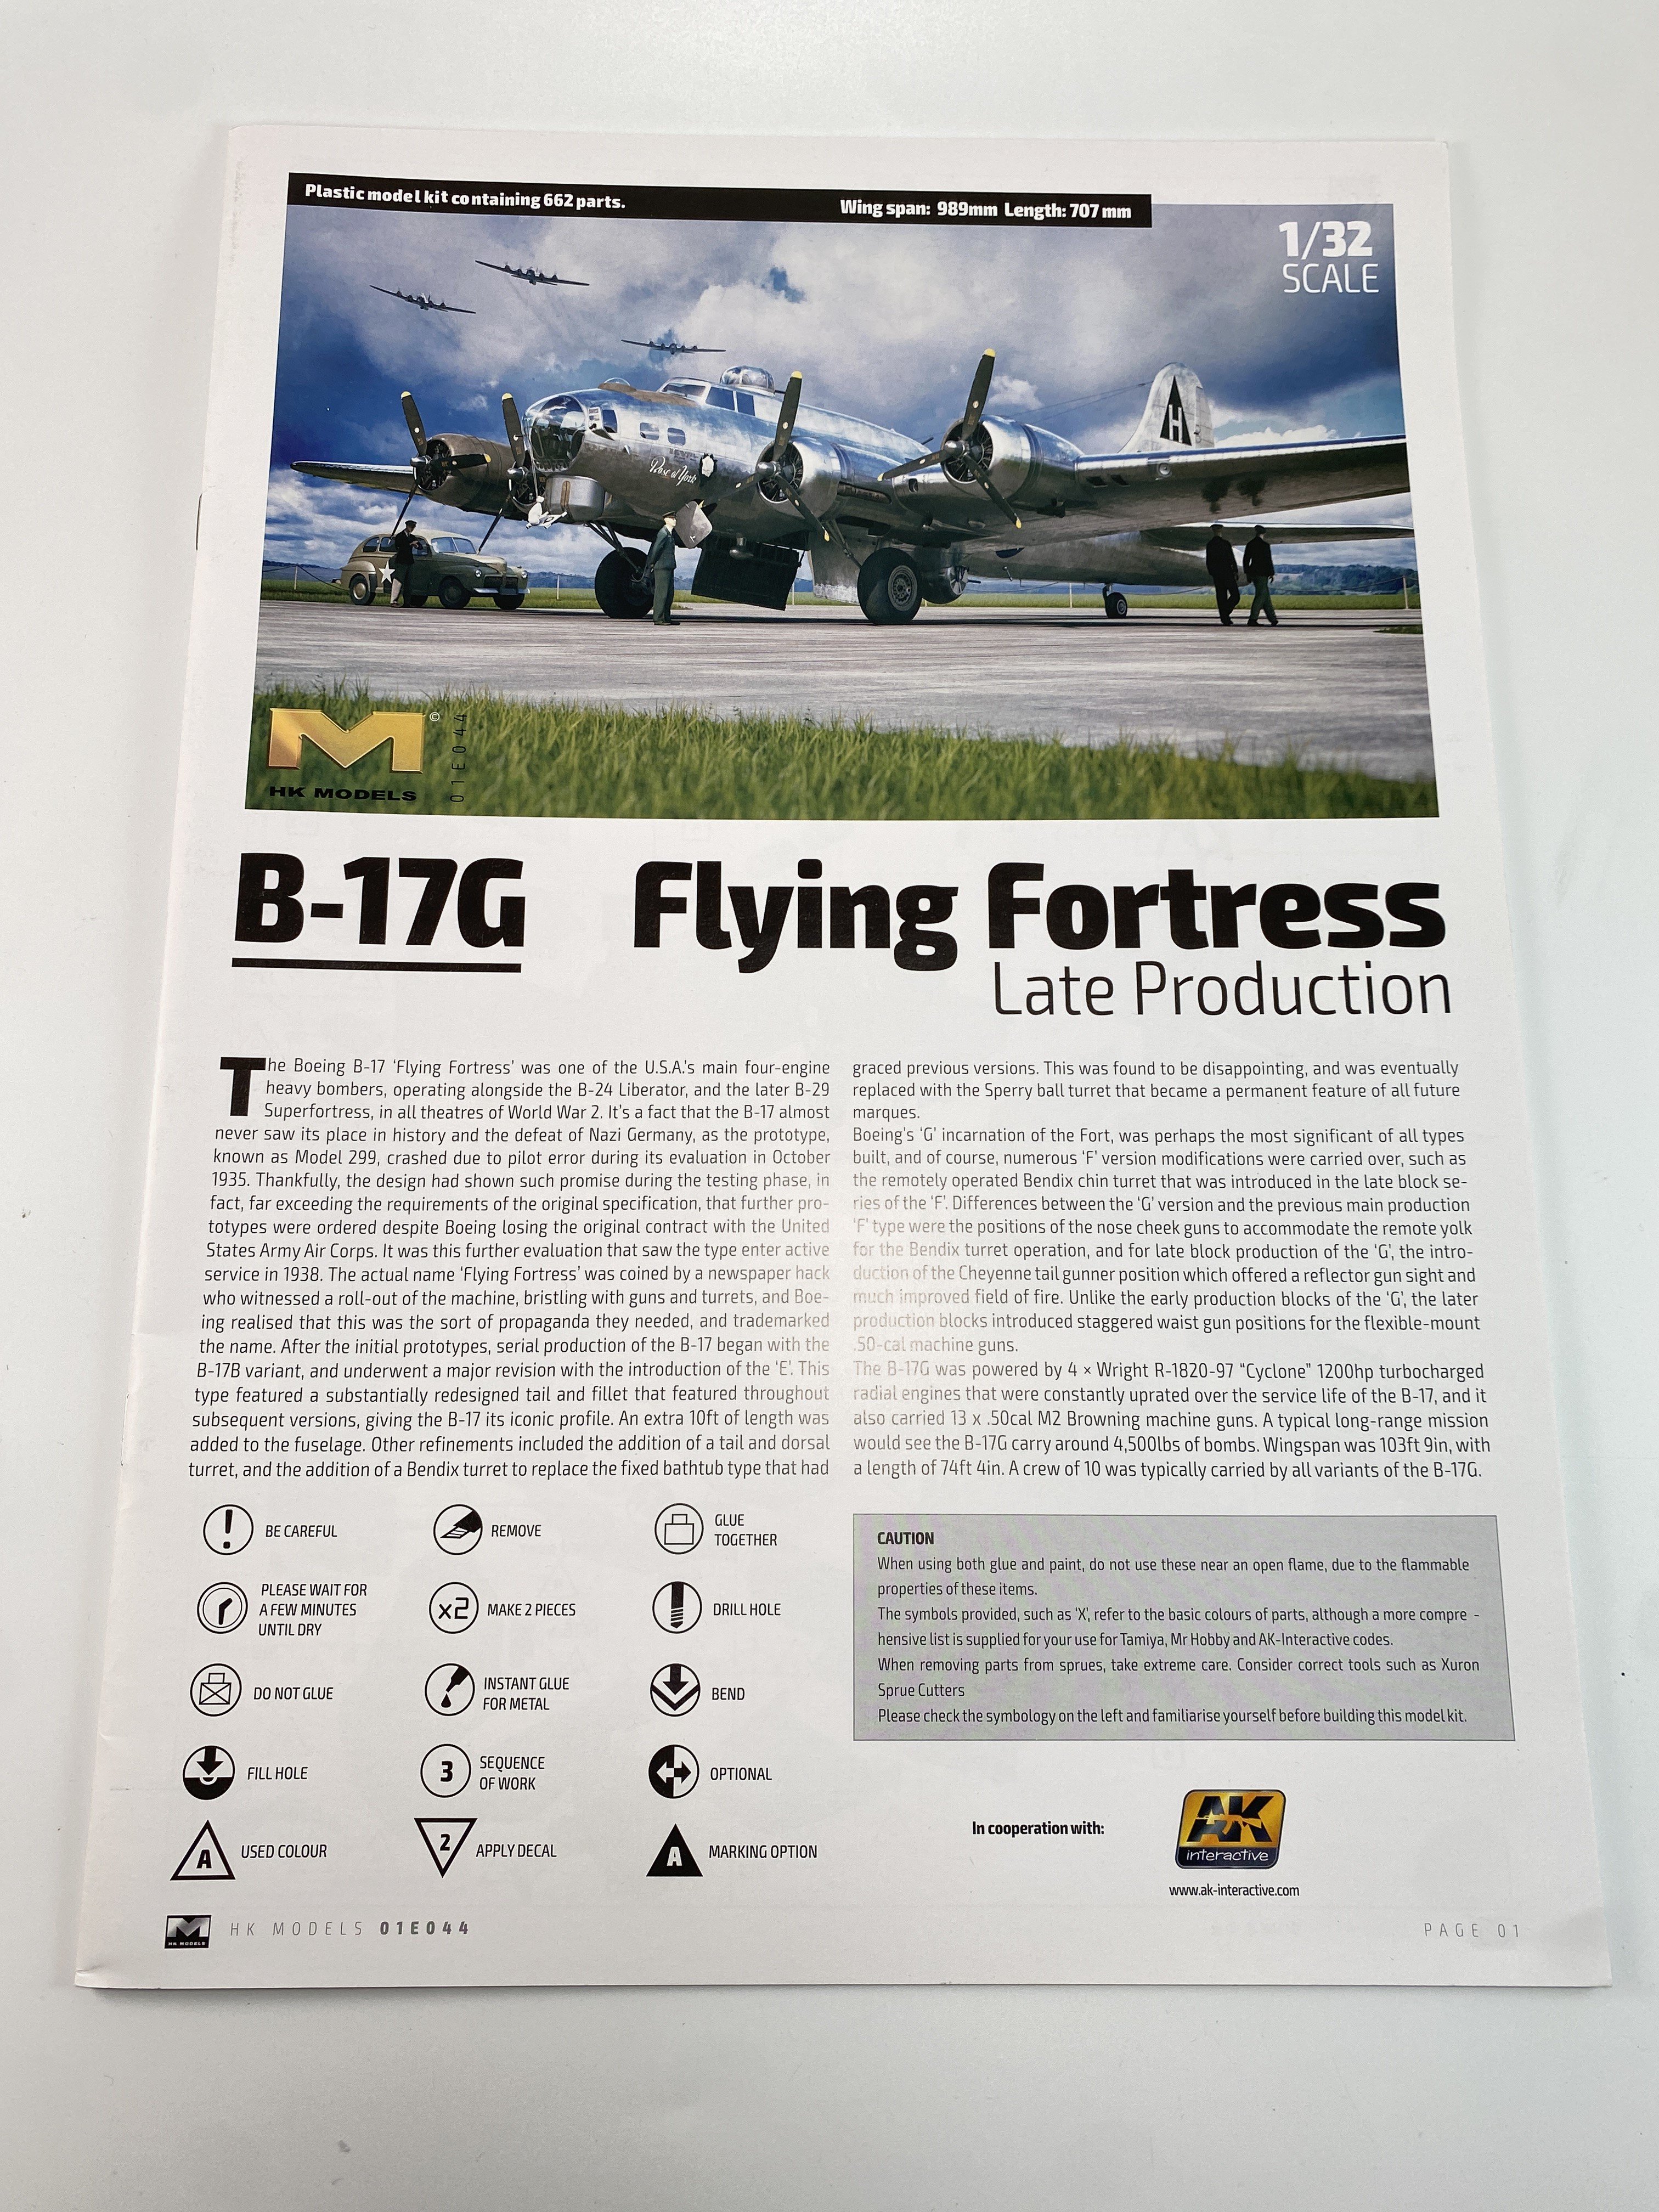
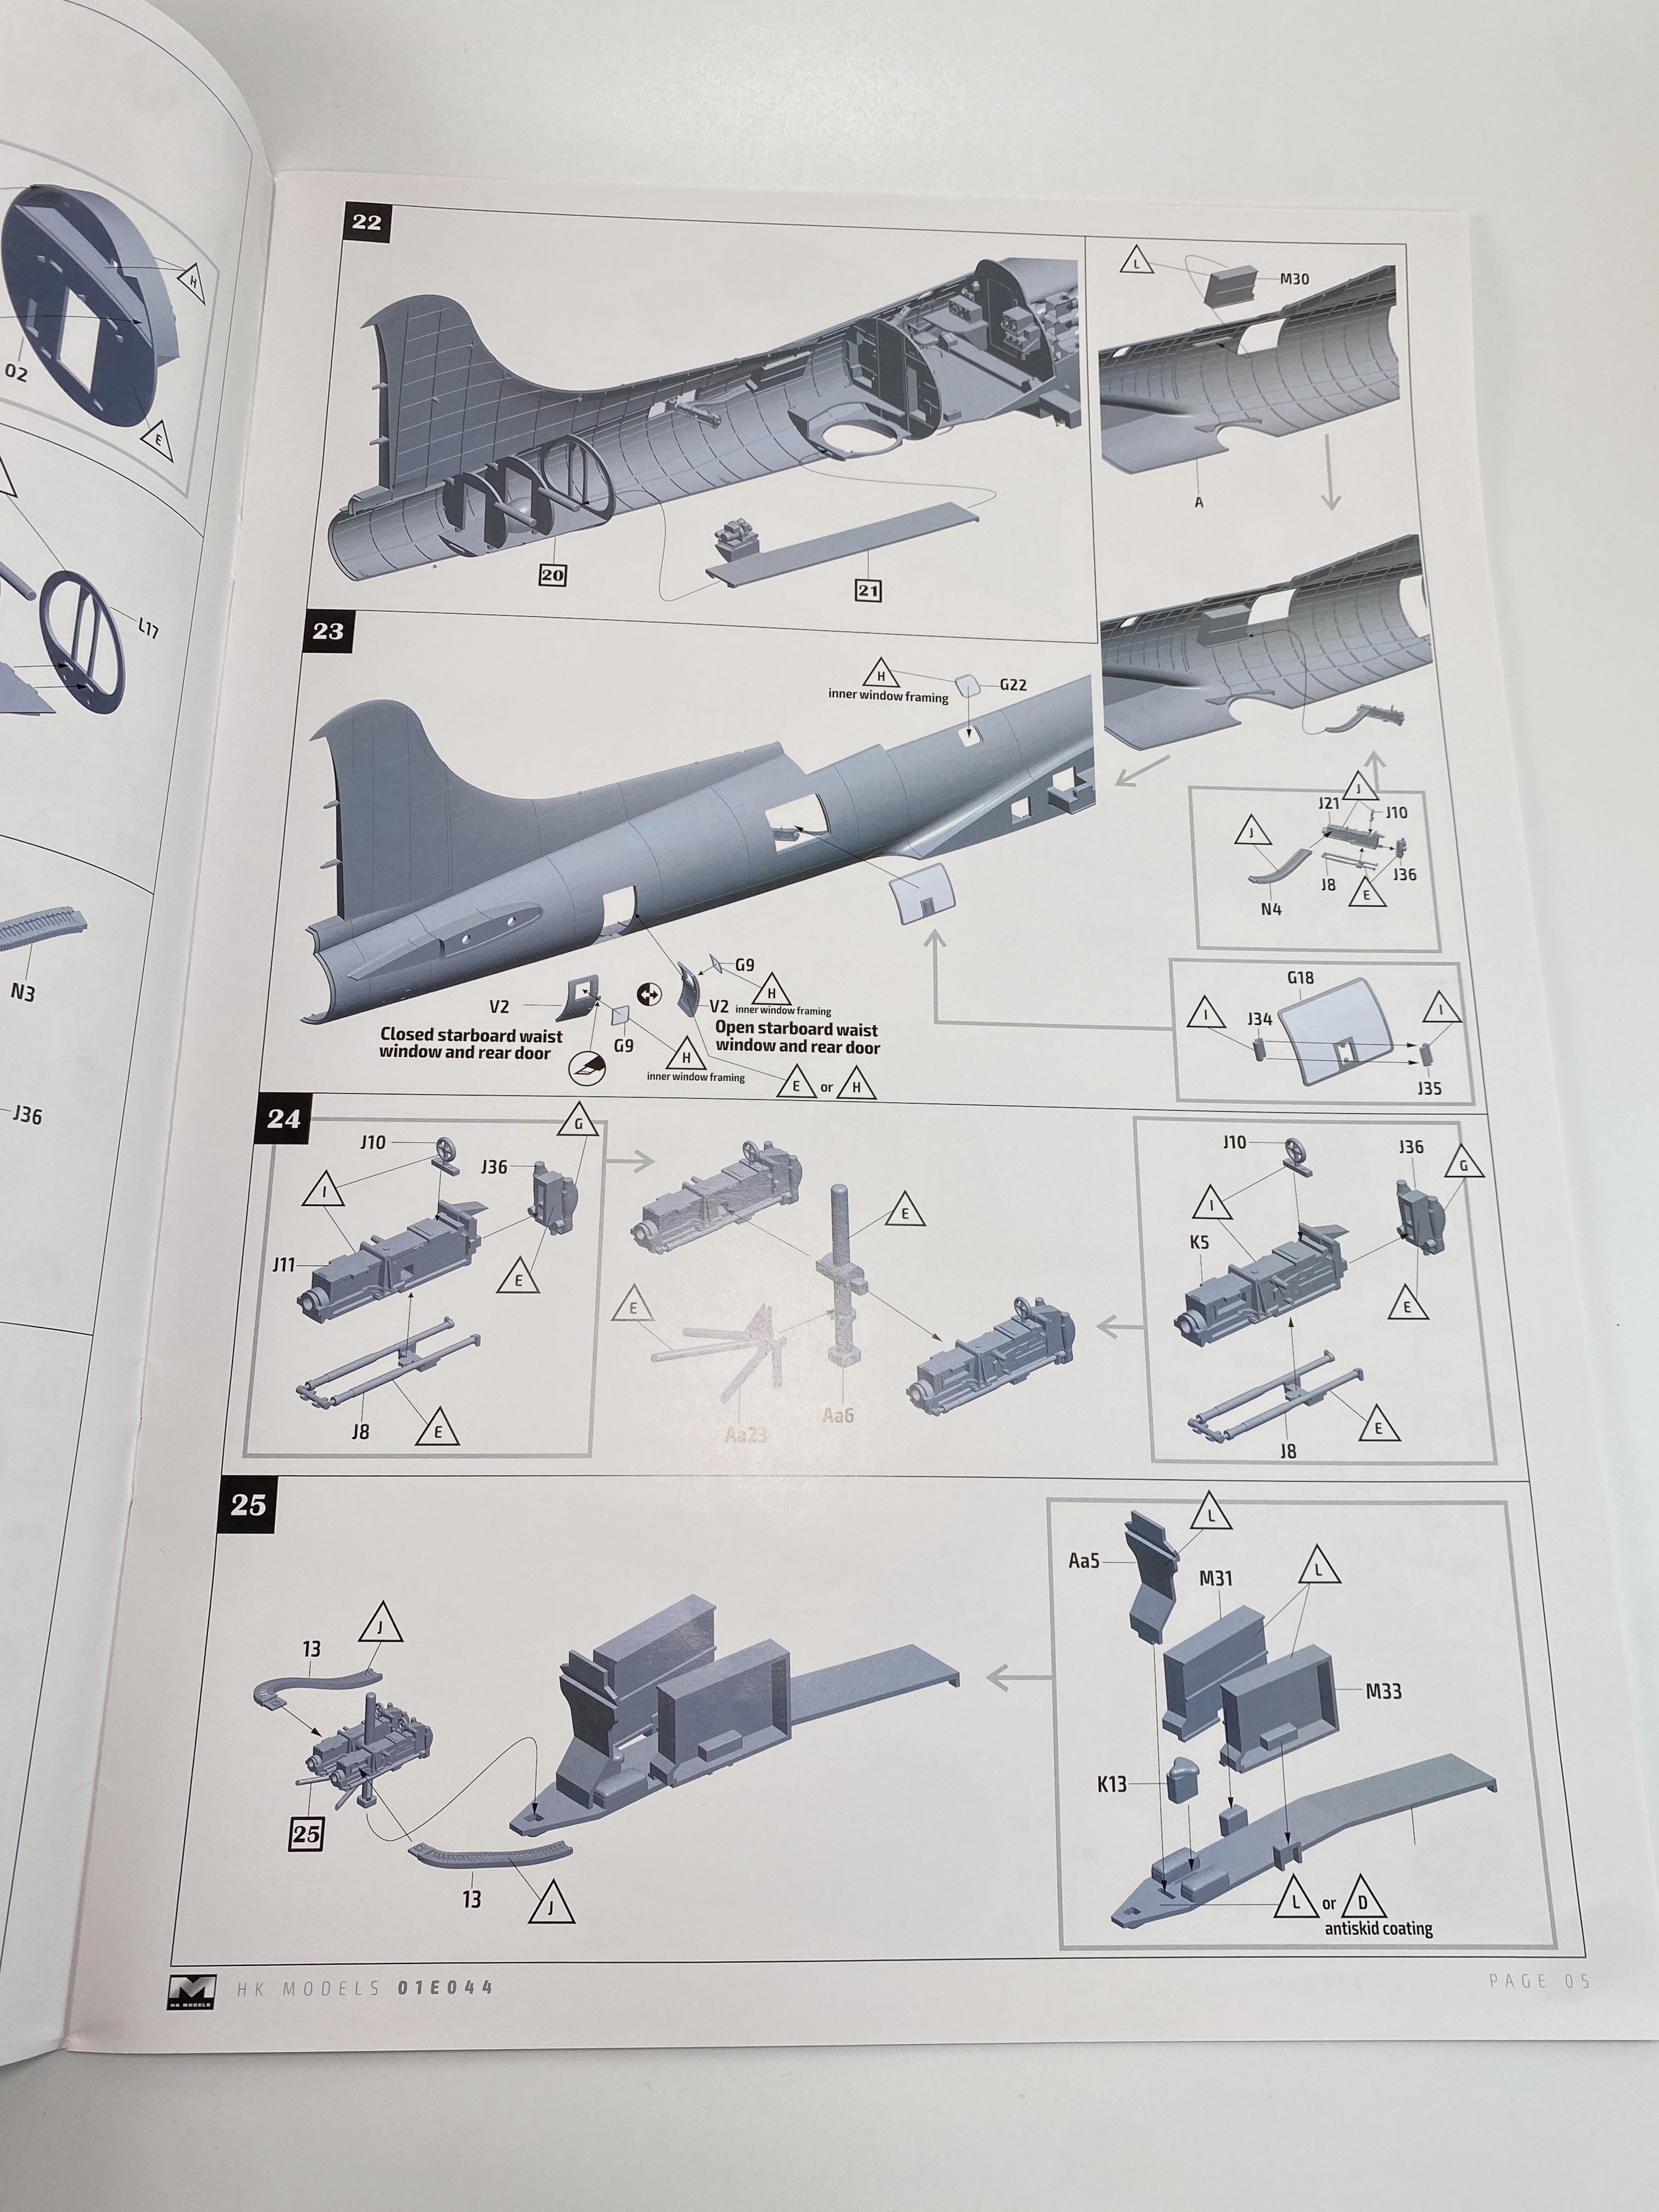
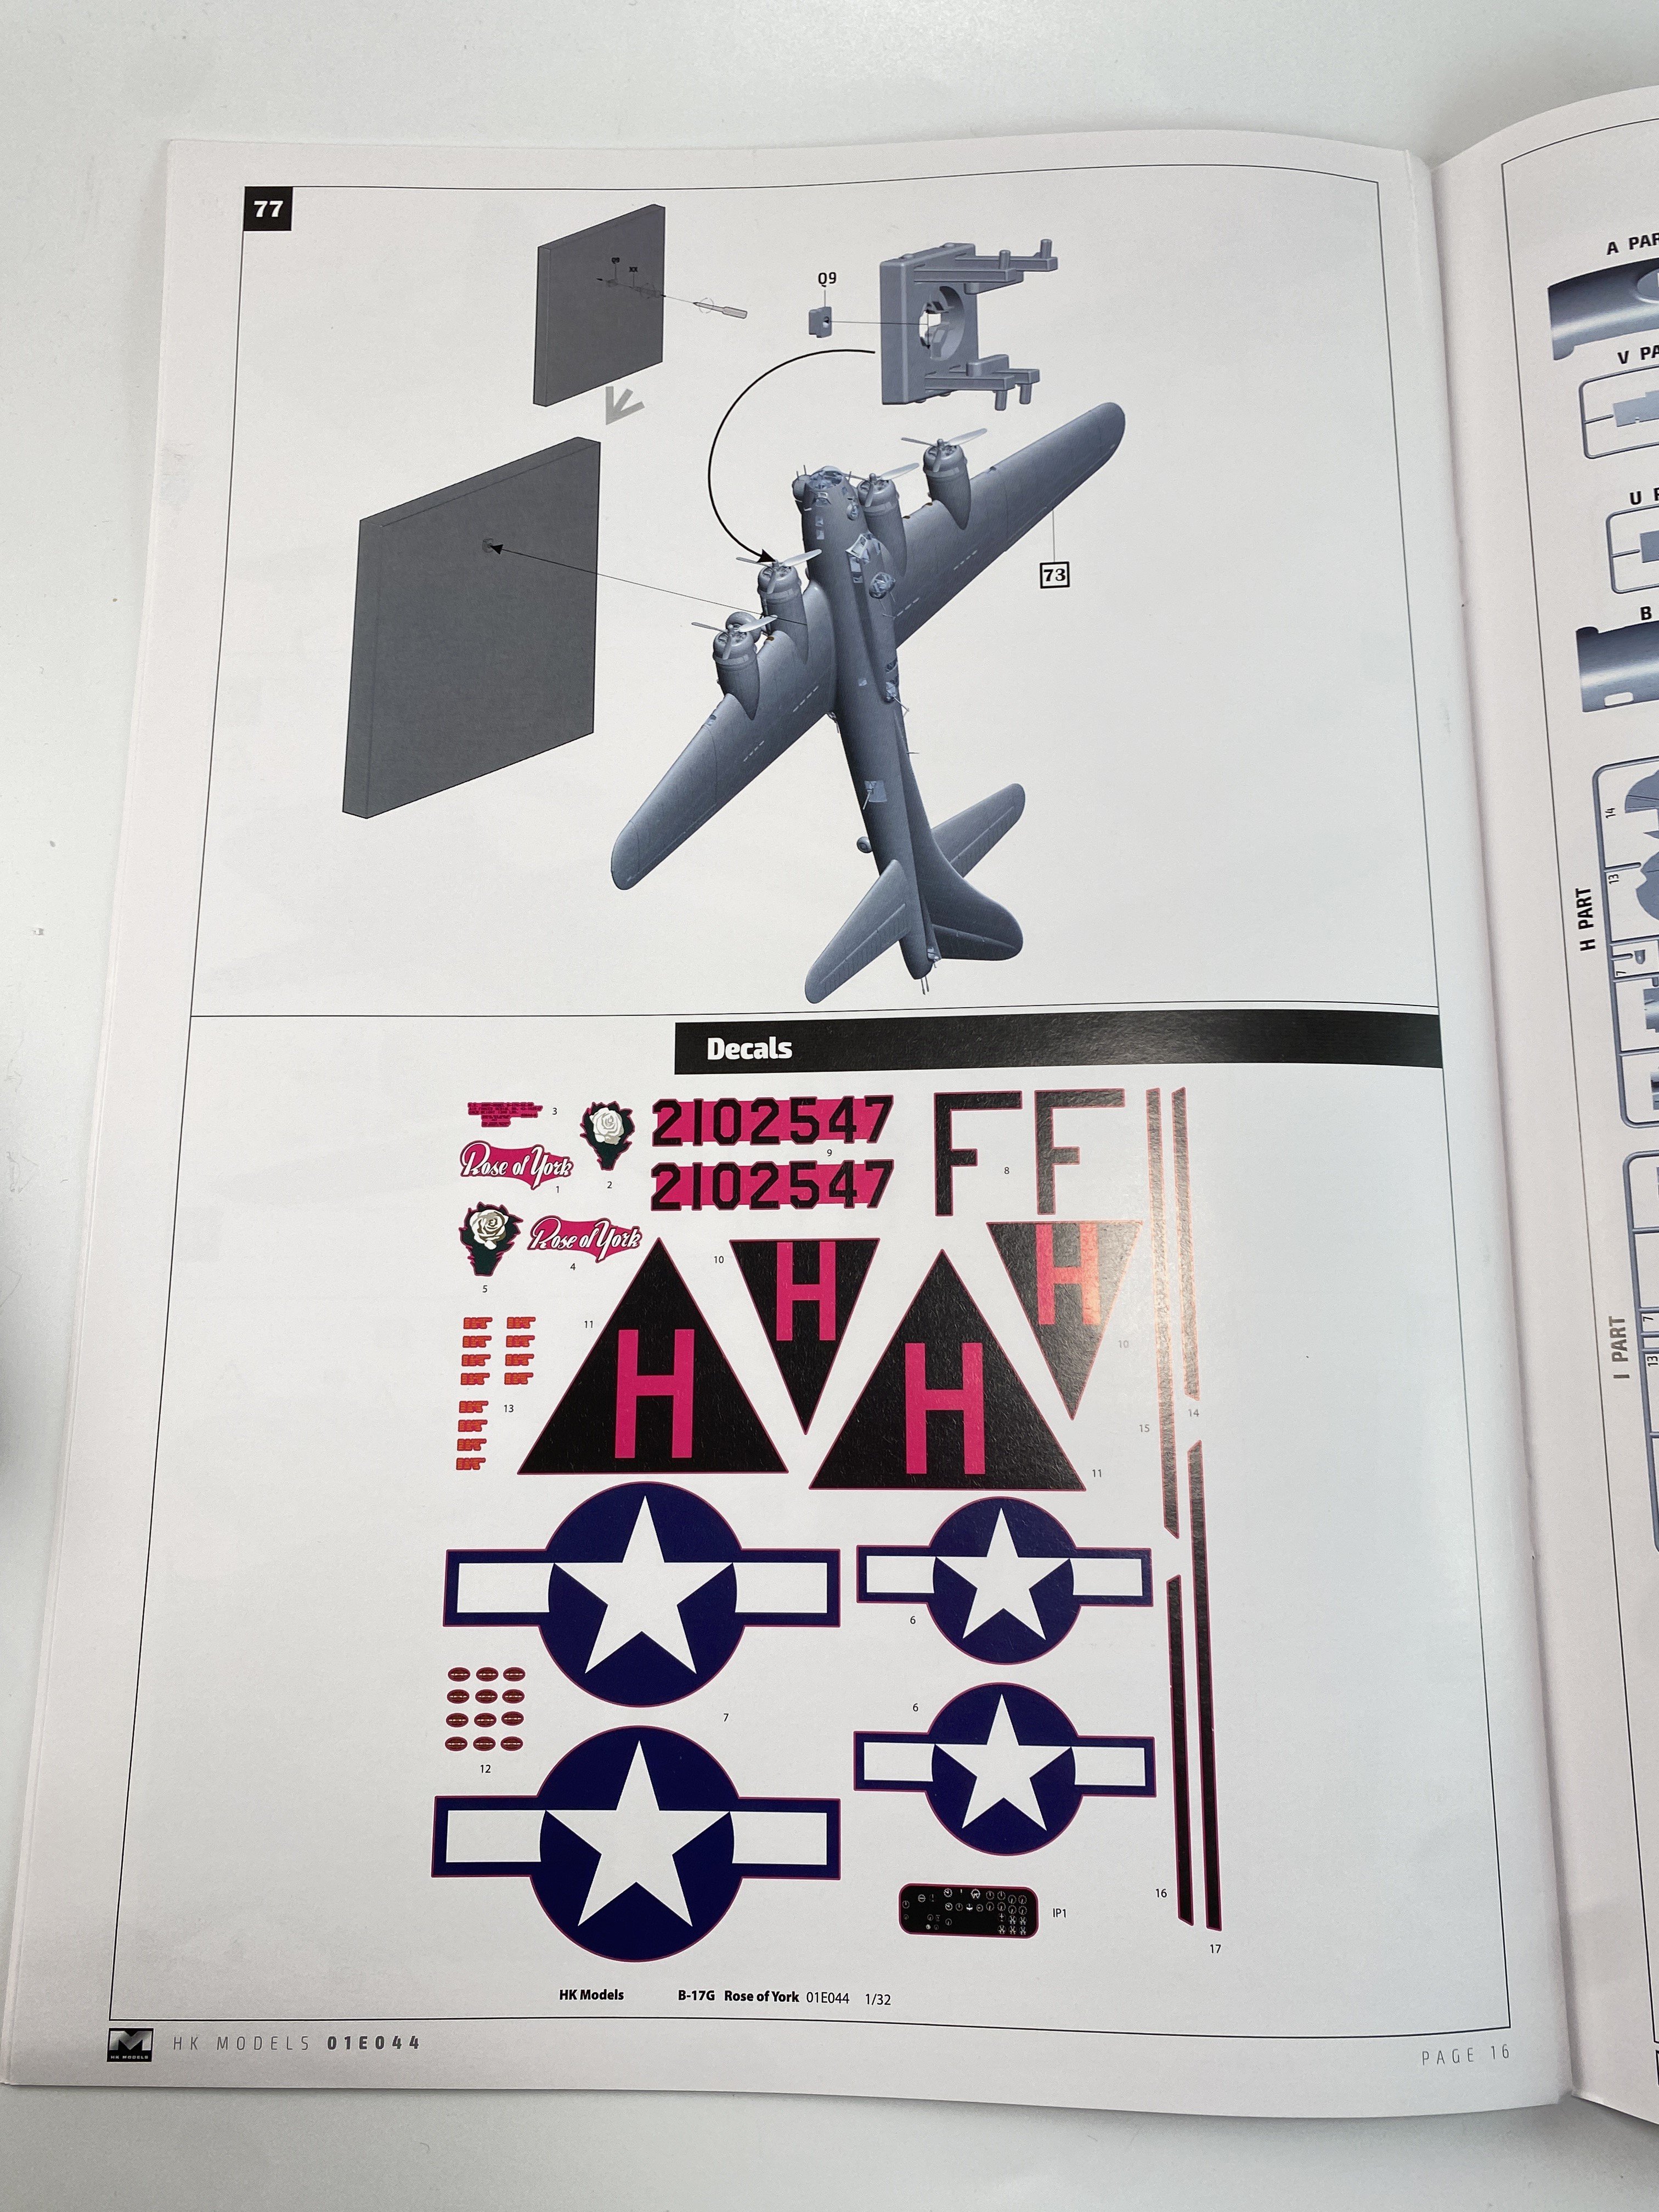
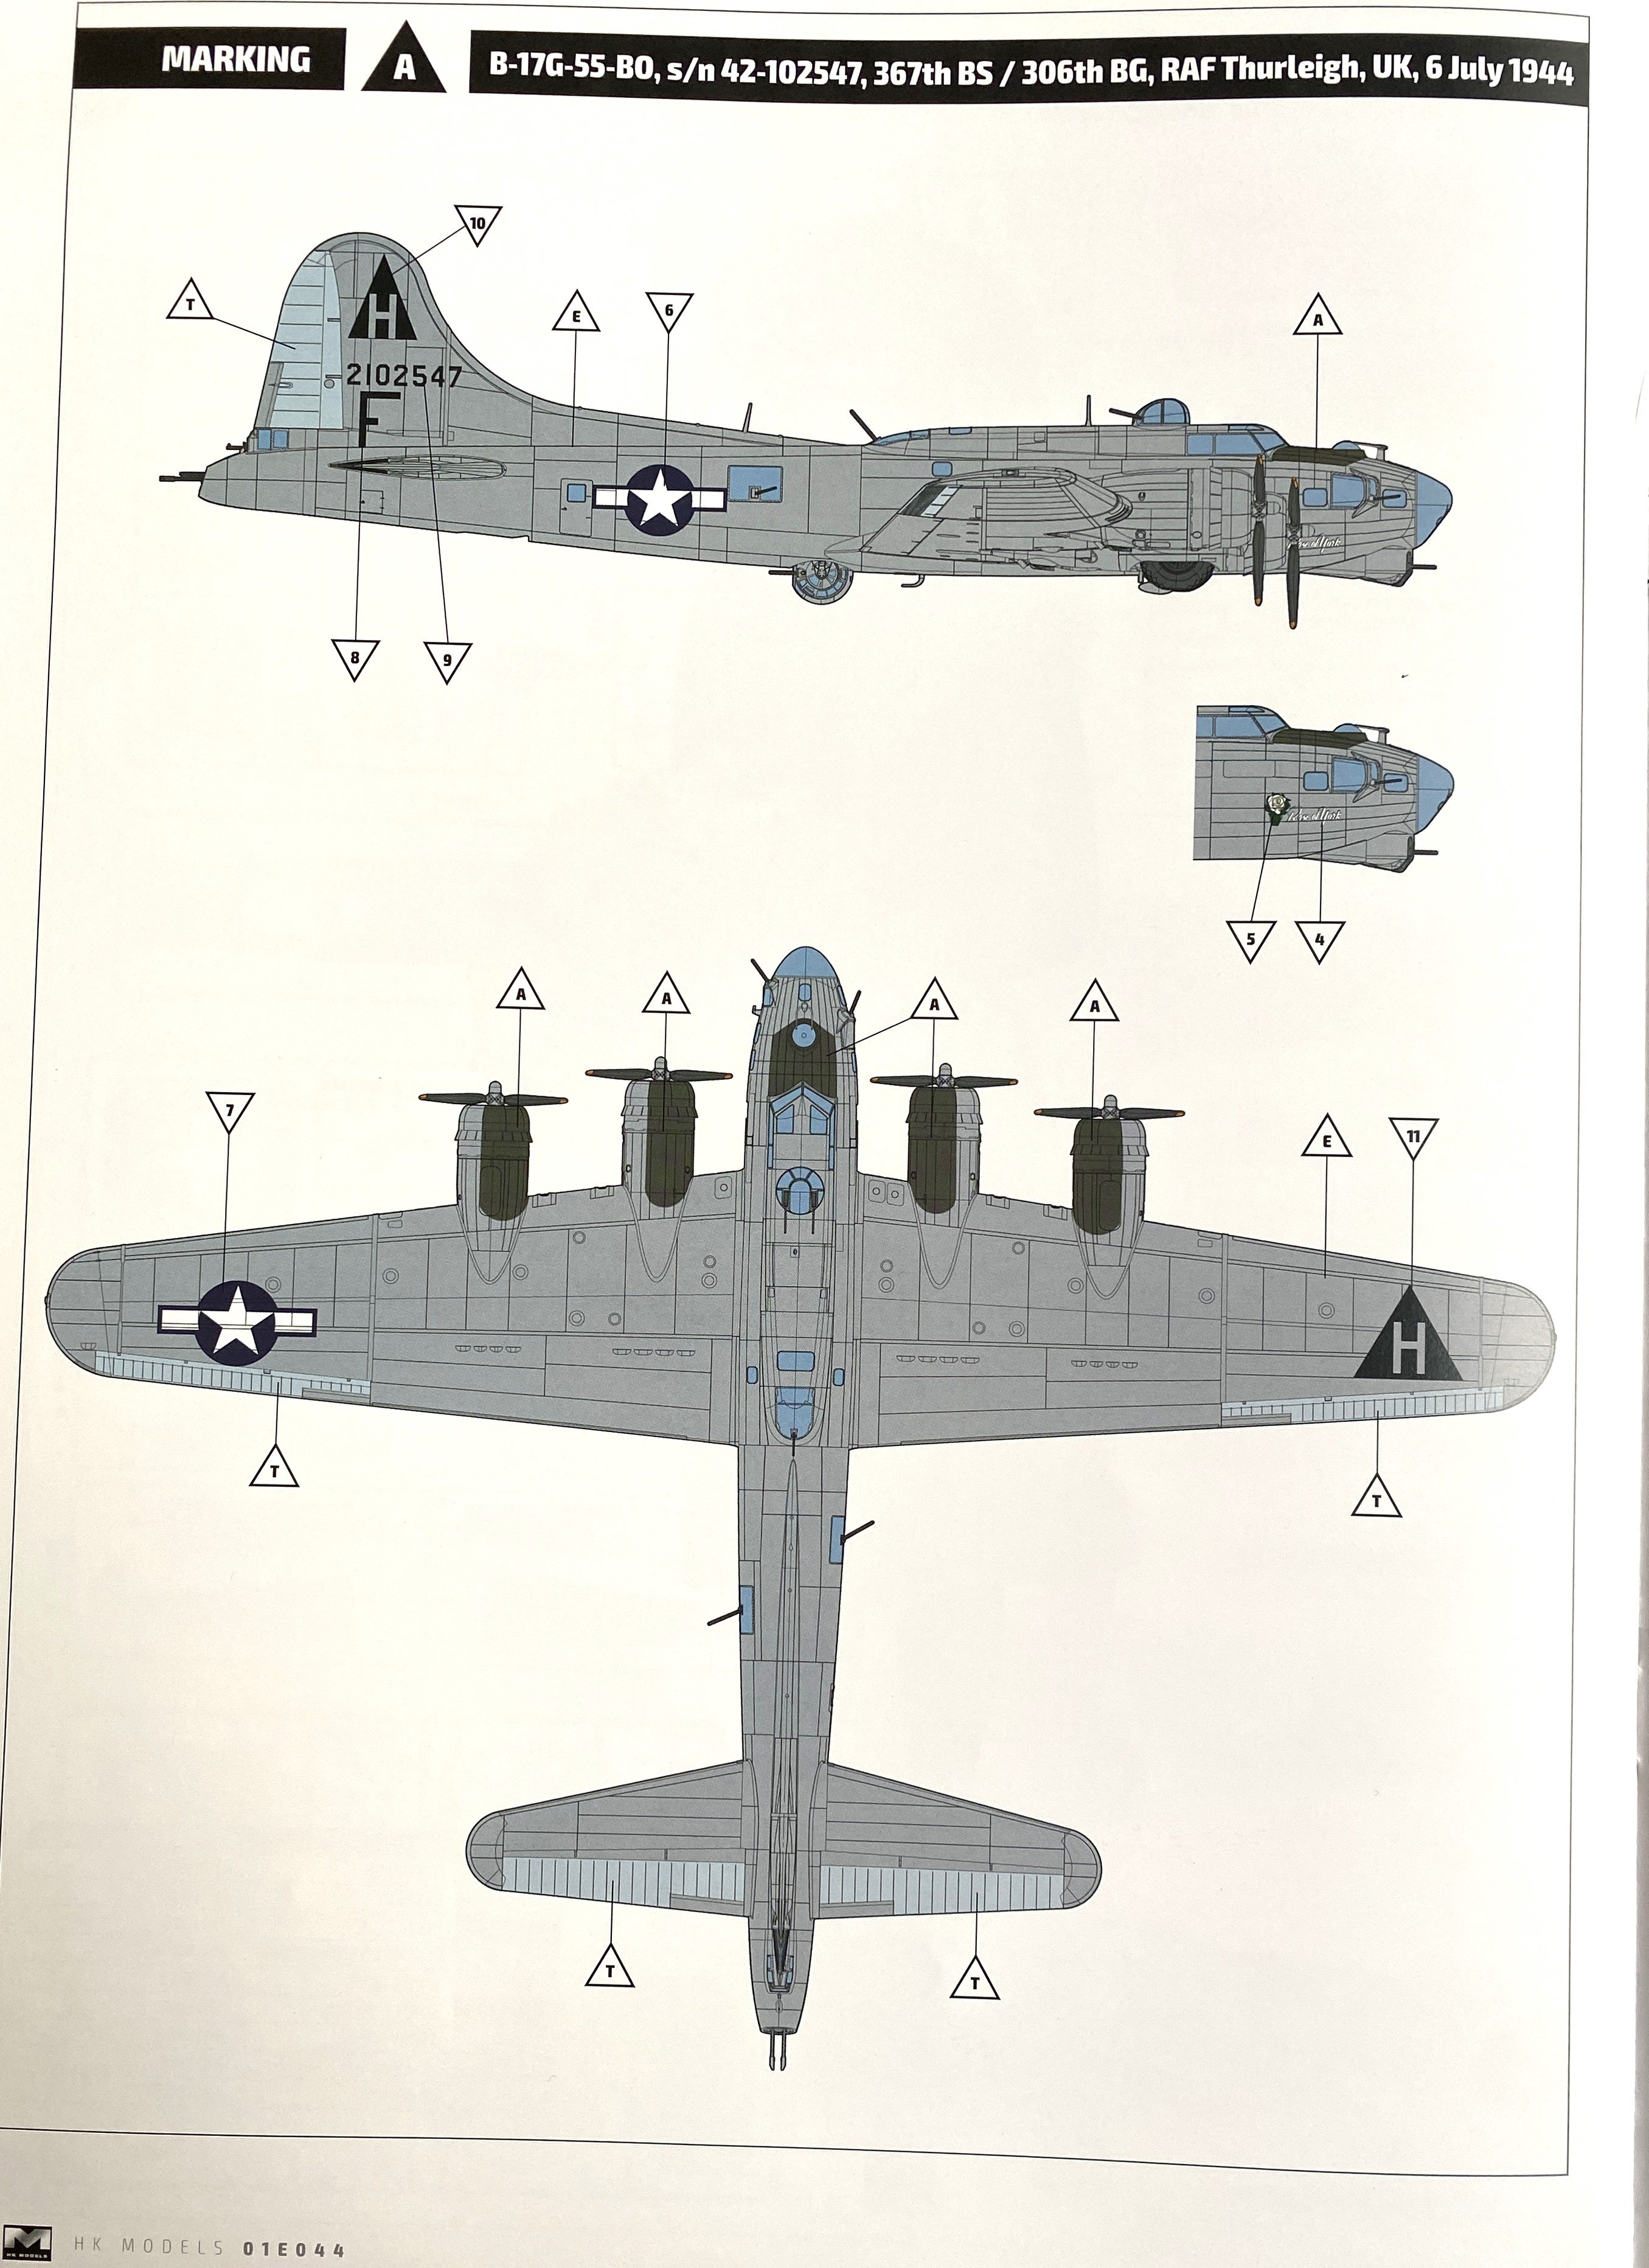
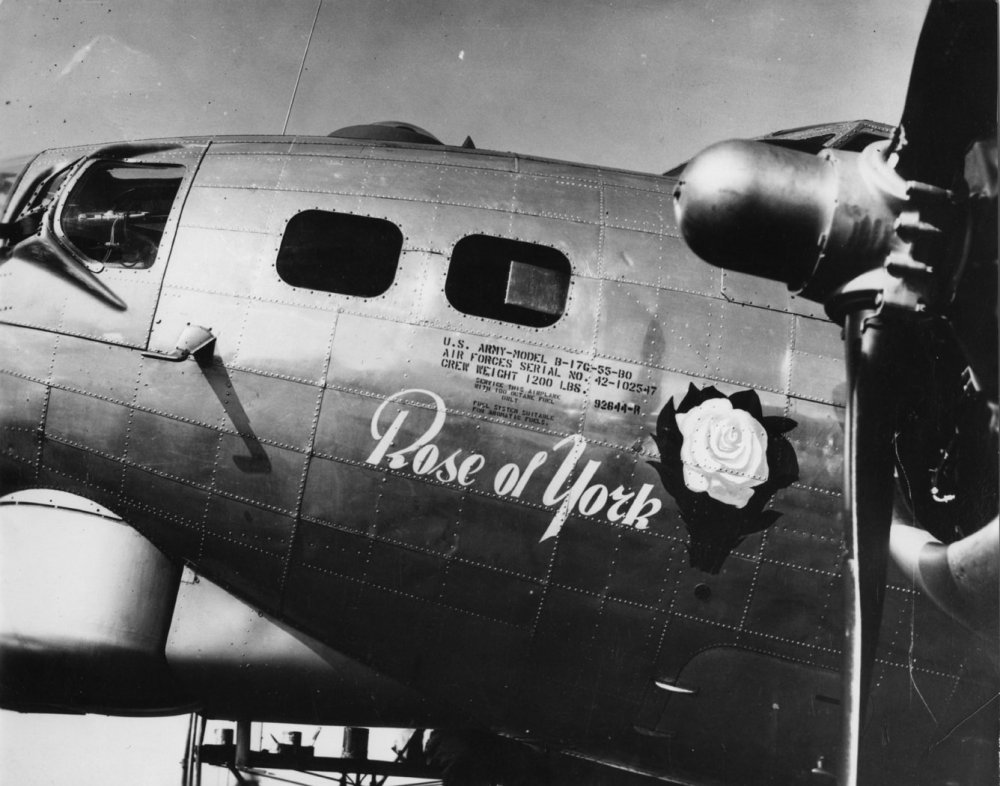
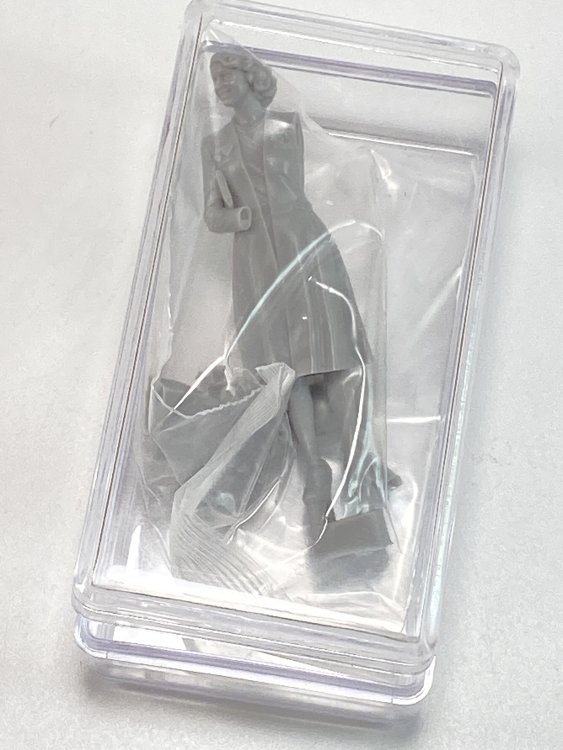
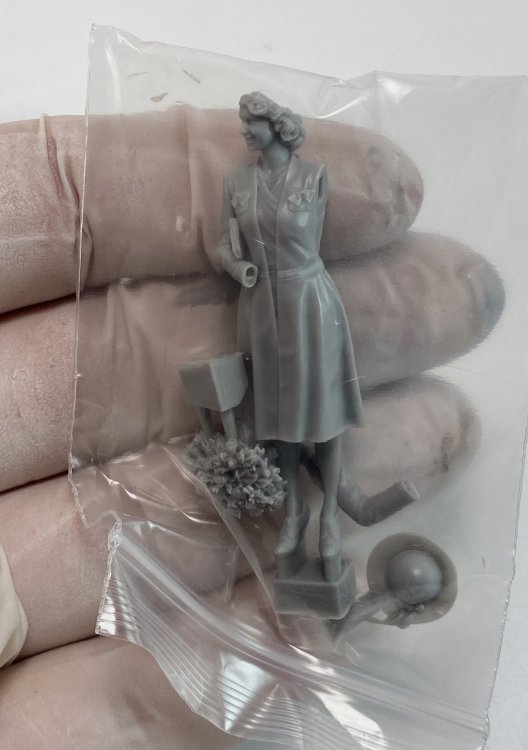
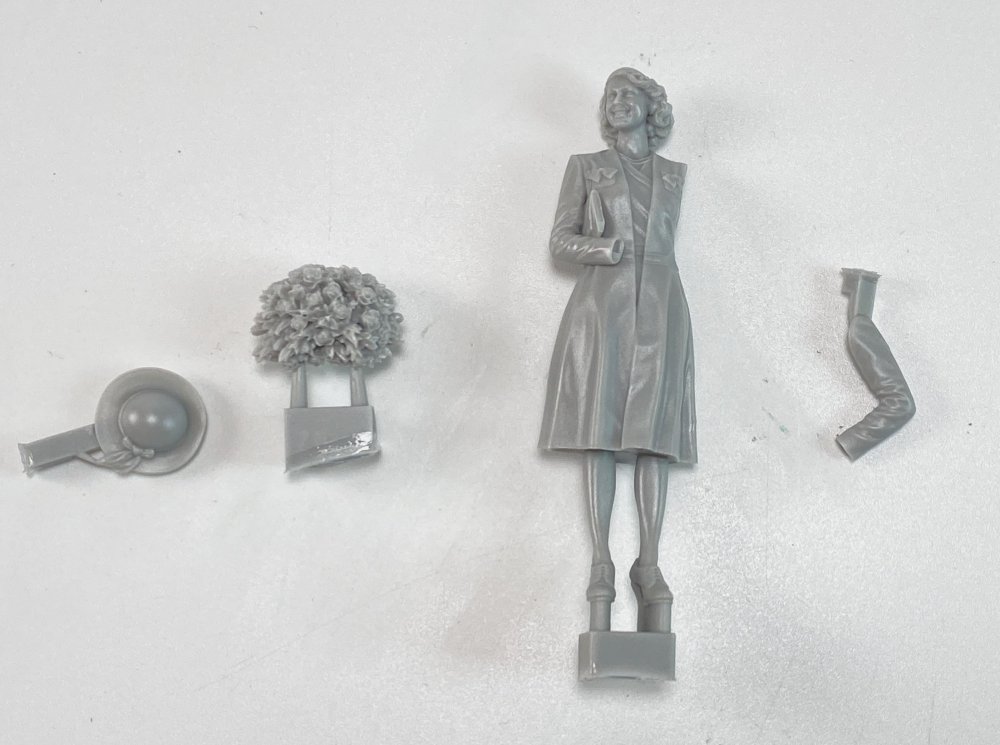
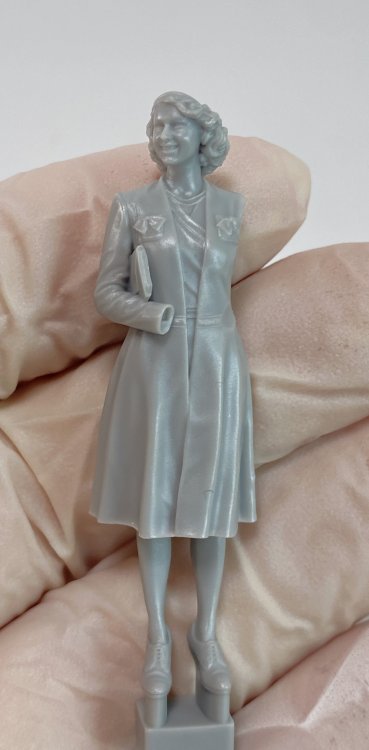
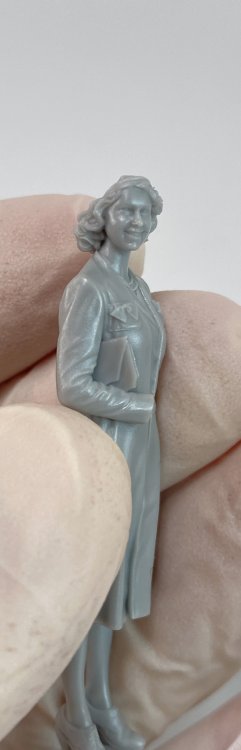
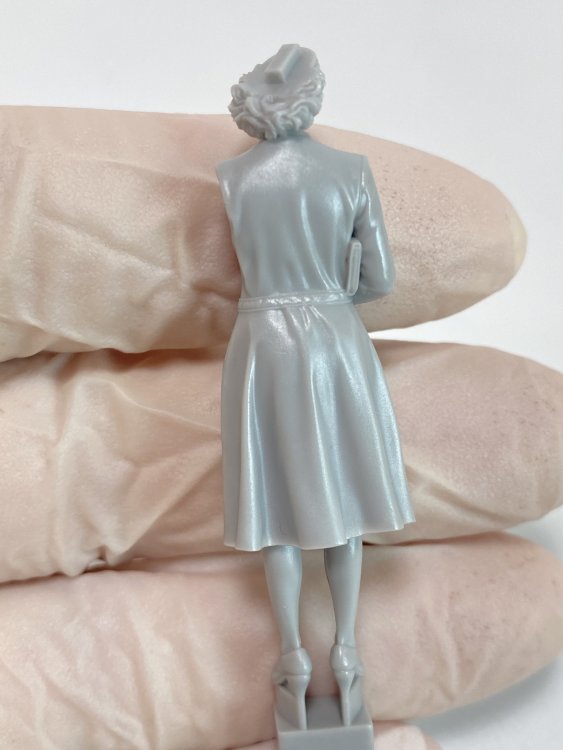
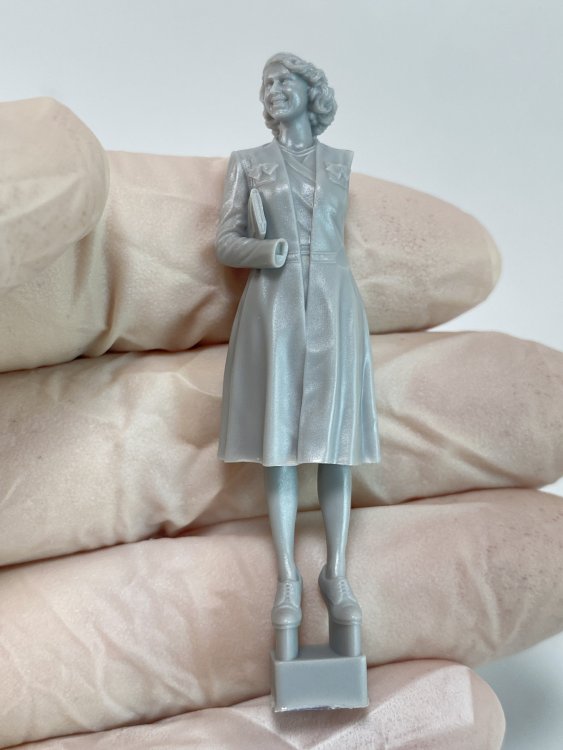
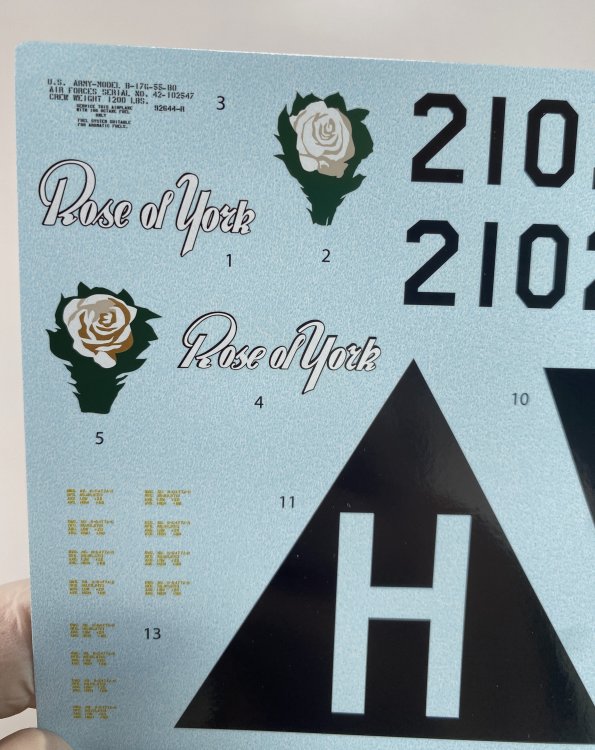
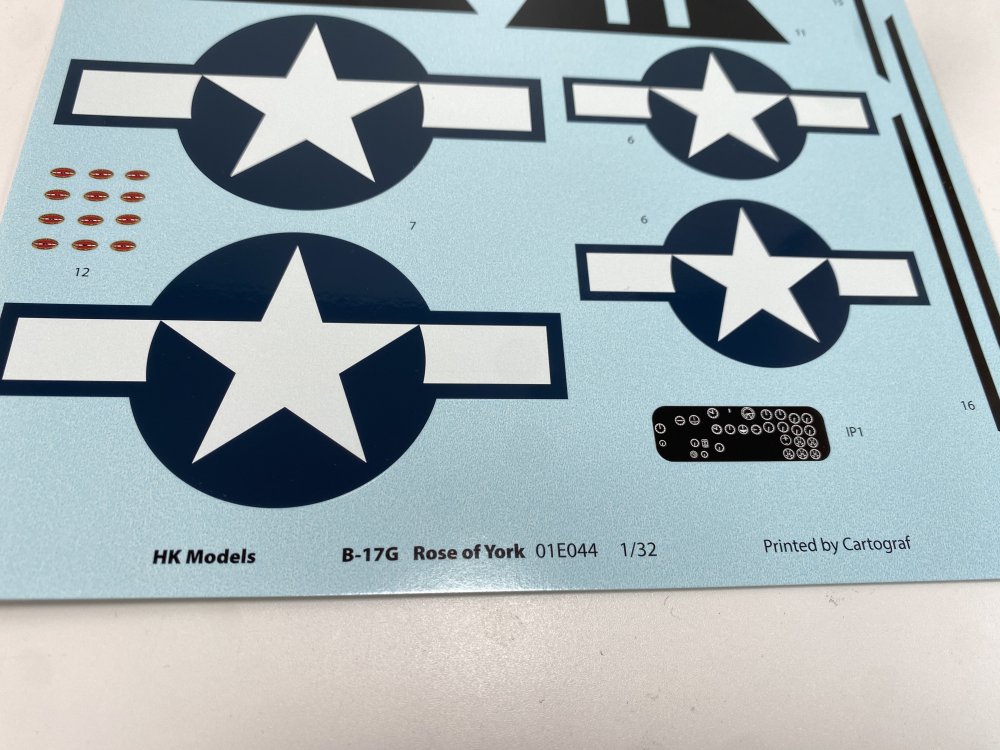
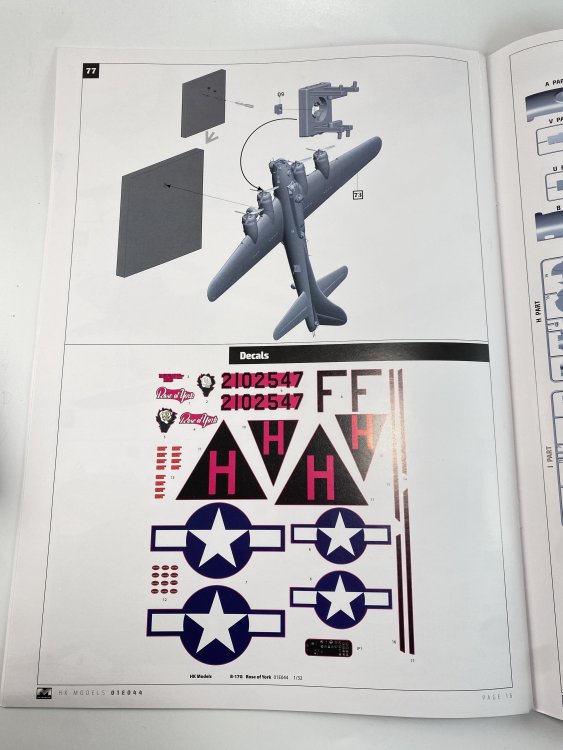
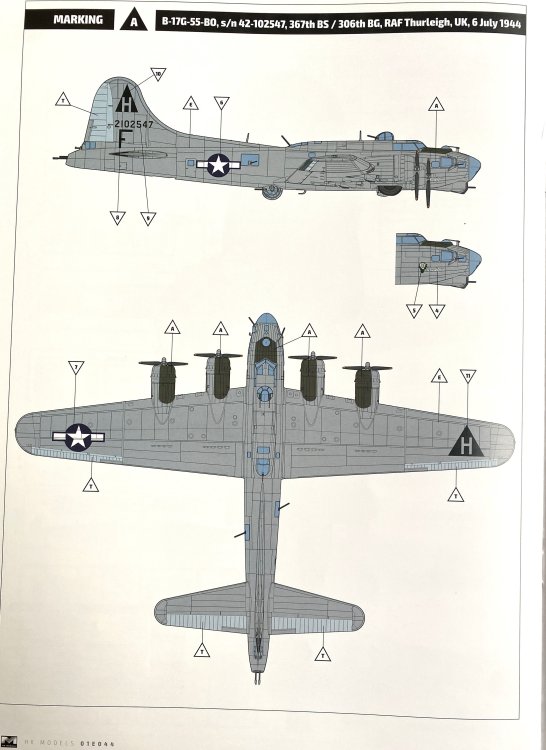
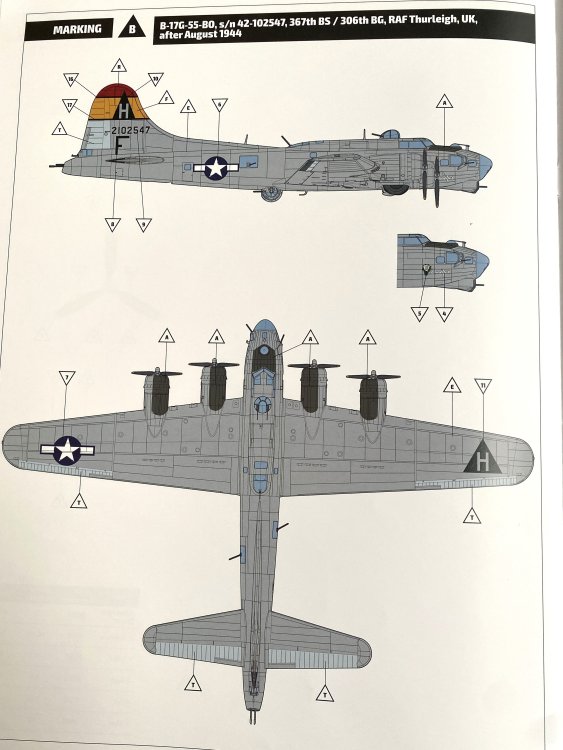
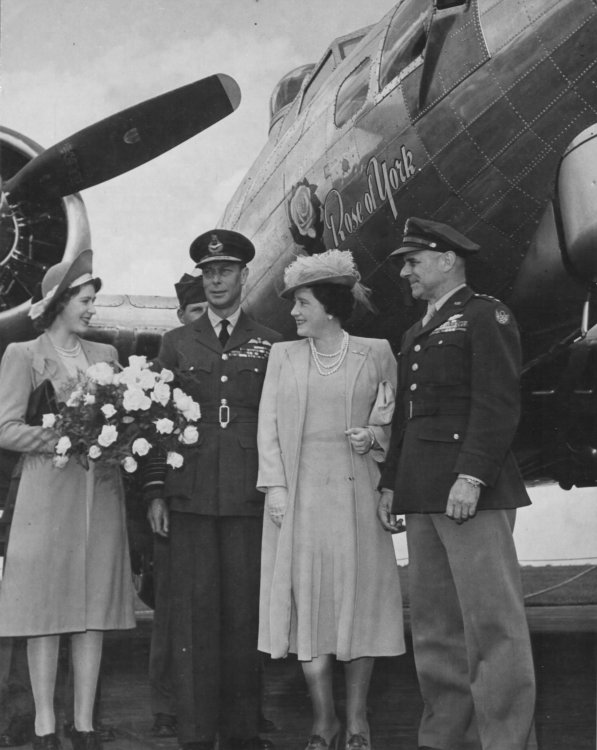
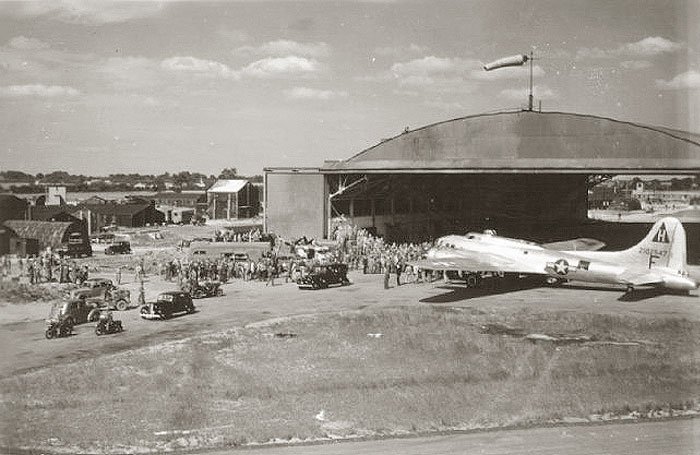
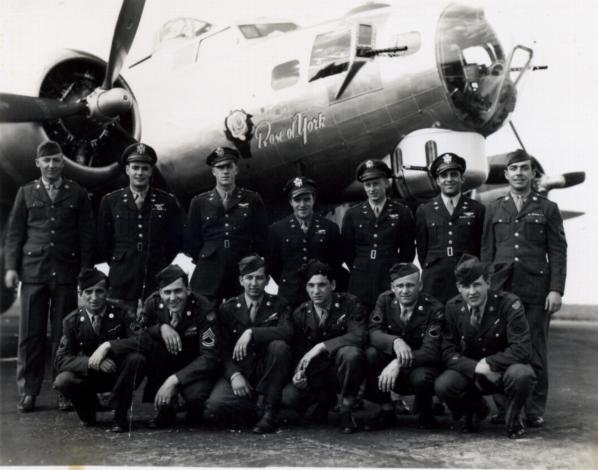
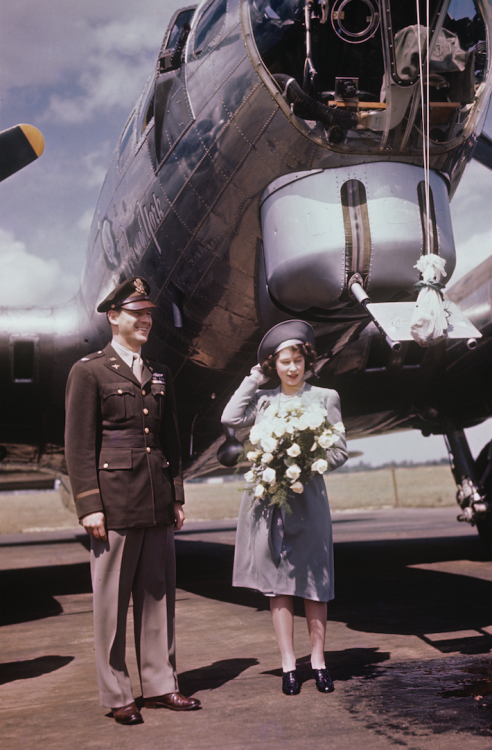
Hong Kong Model 1:32 B-17 G “Rose of York” Limited Edition Price tag – 368$ To buy, click here The Hong Kong Model B-17G has been in the market for quite some time now, more precisely, 10 years. So there`s nothing I can or could tell our readers about the 1:32 Hong Kong B-17G that has not been said. So I will stick to the new items that are in this new limited edition release. Starting for that, this is a 500 limited edition. So if you want this one, you got to be quite agile on our fingers and order one. This release is a homage that Hong Kong Model wants to make to Queen Elizabeth after her deceased. And let me tell that is a fantastic way to homage the Queen. So, Hong Kong Models just pick up a historical moment and is cover on several historical sites over the internet but I will share here a short history about it and leave some links to other sites: “6 July 1944: In honor of Her Royal Highness The Princess Elizabeth, a United States Army Air Forces heavy bomber, Boeing B-17G-55-BO Flying Fortress 42-102547, was christened Rose of York. The ceremony took place at R.A.F. Thurleigh (U.S.A.A.F. Station 111), 5 miles (8 kilometers) north of Bedford, Bedfordshire, England. Named for Princess Elizabeth Windsor (now, Her Majesty, Queen Elizabeth II), 42-102547 was originally named Princess Elizabeth but that did not meet with any official approval. (There were concerns about the propaganda value to the enemy, and the effect on civilian morale, should the bomber named for a member of the Royal Family be lost in combat.) The aircraft was renamed Rose of York instead and was christened by the Princess on her royal visit to the airfield. 42-102547 was built by the Boeing Airplane Company at its Plant 2, south of Seattle, Washington, in early 1944. The new bomber was not camouflaged, but left in its natural metal finish. It was flown to the Cheyenne Modification Center, Cheyenne, Wyoming, on 12 March 1944, for installation of the latest combat modifications. It was then taken to the B-17 training base at Grand Island Army Air Field in central Nebraska. From there, it flew to Dow Army Air Field, Bangor Maine, arriving 3 April 1944, and then ferried across the North Atlantic Ocean to England. The Flying Fortress arrived in England, and on 2 May 1944, was assigned to the 401st Bombardment Group, Heavy, at R.A.F. Deenethorpe (A.A.F. Station 128). Three days later, though, 42-102547 was transferred to the 306th Bombardment Group, Heavy, at R.A.F. Thurleigh. It was assigned to Captain Perry E. Raster of the 367th Bombardment Squadron, Heavy. The group’s identification code, “Triangle H”—a white capital “H” centered on a black triangle—was painted on the vertical fin above the serial number. A black capital “F” was painted below, identifying the individual airplane within its squadron. 42-102547 had completed 13 combat missions by 6 July 1944. On Saturday, 3 February 1945, the Eighth Air Force, under the command of Lieutenant General James Harold (“Jimmy”) Doolittle, executed Mission No. 817. 1,003 B-17 Flying Fortresses, 434 B-24 Liberators and 948 P-47 and P-51 fighters were sent to attack Berlin, the capital of the Third Reich. The B-17s’ primary target was the city’s railroad marshaling yards, while the B-24s attacked the Braunkohle Benzine A.G. synthetic oil refinery at Rothensee. 23 B-17s, 2 B-24s, 7 P-51s and 1 P-47 were lost. 6 B-17s and 2 P-51s were damaged beyond repair, and another 339 B-17s and 58 B-24s were damaged. 18 airmen were killed in action, with 11 wounded and 216 missing. Rose of York was one of the B-17s on that 1,000-bomber mission to Berlin. On its sixty-third combat mission, and with a different crew, 42-102547 was hit by heavy and accurate anti-aircraft fire. The last contact indicated that one engine was out of operation and another was streaming gasoline. The Flying Fortress went down in the English Channel with all nine crew members and a civilian news reporter.¹ The crew of Rose of York, 6 July 1944. Front row, left to right: Engineer and Top Turret Gunner, Sergeant Eugene E. Kelley; Radio Operator and Top Gunner, Technical Sergeant George G. Roberts; Ball Turret Gunner, Sergeant Donald F. Urban; Waist Gunner, Sergeant Herman Shore; Ball Turret Gunner Sergeant William E. Landrum; and Tail Gunner, Sergeant Watson R. Vaughn. Standing, left to right: Unknown, possibly Master Sergeant Edward S. Gregory, maintenance crew chief; Aircraft Commander, Captain Perry E. Raster; Co-Pilot, Lieutenant Talmadge E. McDonough; Navigator, Captain William E. Pleasant; Bombardier, Lieutenant Marion J. Northway; the crew’s previous bombardier, Captain Steven Tanella; and unknown, possibly assistant crew chief Mark Madsen. The box art is beautiful done, capturing the historical moment quite well. So cracking the box, you got the ten-years old, beautiful B-17G and all the parts to make it. This limited edition brings a A3 sheet that you can frame it. There are the new items. A resin figure, a new decal sheet and a “new” instruction booklet. Lets start for the main item on this release. A full figure in 1:32 of Princess Elisabeth. The sculping work was in 3D but the figure is tradicional resin. However, the sculping and the quality of the figure is just outstading. The face is quite similar (at least for me) and has very good expression. The dress and the hat are just equal to the one that Queen Elisabeth II wore that day in 6th July of 1944. The bouquet of flowers has an amazing detail. Its fantastic. It really caption the historical moment, of which we do have some pictures and comparing with those pictures, the Queen Elizabeth (back then Princess) perfect in 1:32. Next is a full new instruction booklet that is almost equal of the original B-17G. So, is given a full A4 color guide of the princess Elizabeth with AK references. Finally the decals. These, as usual of Hong Kong Models are printed by Cartograf so quality is guaranteed. The nose art, the Rose of York. Comparing to the real pictures, the art work is very well achieved. Conclusion Hong Kong Models paid a beautiful and heartfelt tribute to the Queen Elizabeth II. It`s a original tribute from modelling company to one of the most significant characters of the 20th century, capturing all his charisma, sense of state and monarchy. I`m really impressed with this tribute and hands down to HK Models for this. I really hope that the Limited series sells all the 500 models and I hope to see several ones full builds. I know I will be building mine!! VERY VERY Highly RECOMMEND My Thanks to Neil and Hong Kong Models for the review sample


-
It`s a one man show, that release small quantaties each times... BUT 5th November, a new batch will be on sale again Here´s Laminar Flow Design statement on facebook: "Sunday 5th of November 13:00 UTC LFD32-001 Spitfire XIV low back limited restock 20sets LFD32-002 Spitfire XIV high back limited restock 20sets LFD32-004 Spitfire FRIX release 15sets LFD32-006 Spitfire XIV cockpit parts release 56sets And it’s time to announce the next product release. While one printer was prototyping, I put others to good use to resplenish on Spitfire XIV conversions. So here’s the good news, but note it’s not really a full batch, and be sure to check in on time if you absolutely want one. The cockpit parts will include double handles and levers just in case the carpet monster is hungry. Note there is one throttle unit provided, with separate controls (2 pictured to illustrate the difference after assembly)"
-
Jetmads J-35 Draken reservations are open
Fran replied to BlrwestSiR's topic in Modelling Discussion
I just got their X-3... and already took pictures for future review... The quality of the product and the price asked, it`s the first and the last model kit I bought from JetMads... And I was eager to get my hands of the Drakken. -
LSM Modelling News 2023 merged Fran and Artful69’s threads
Fran replied to Fran's topic in Modelling Discussion
Scott, go ahead and ask MFH diretly! -
Great work Ernie
-
Guys I need some good references of the C-47 And the AC-47 (spooky) what are the Best books of it?
- 1 reply
-
- 1
-
-
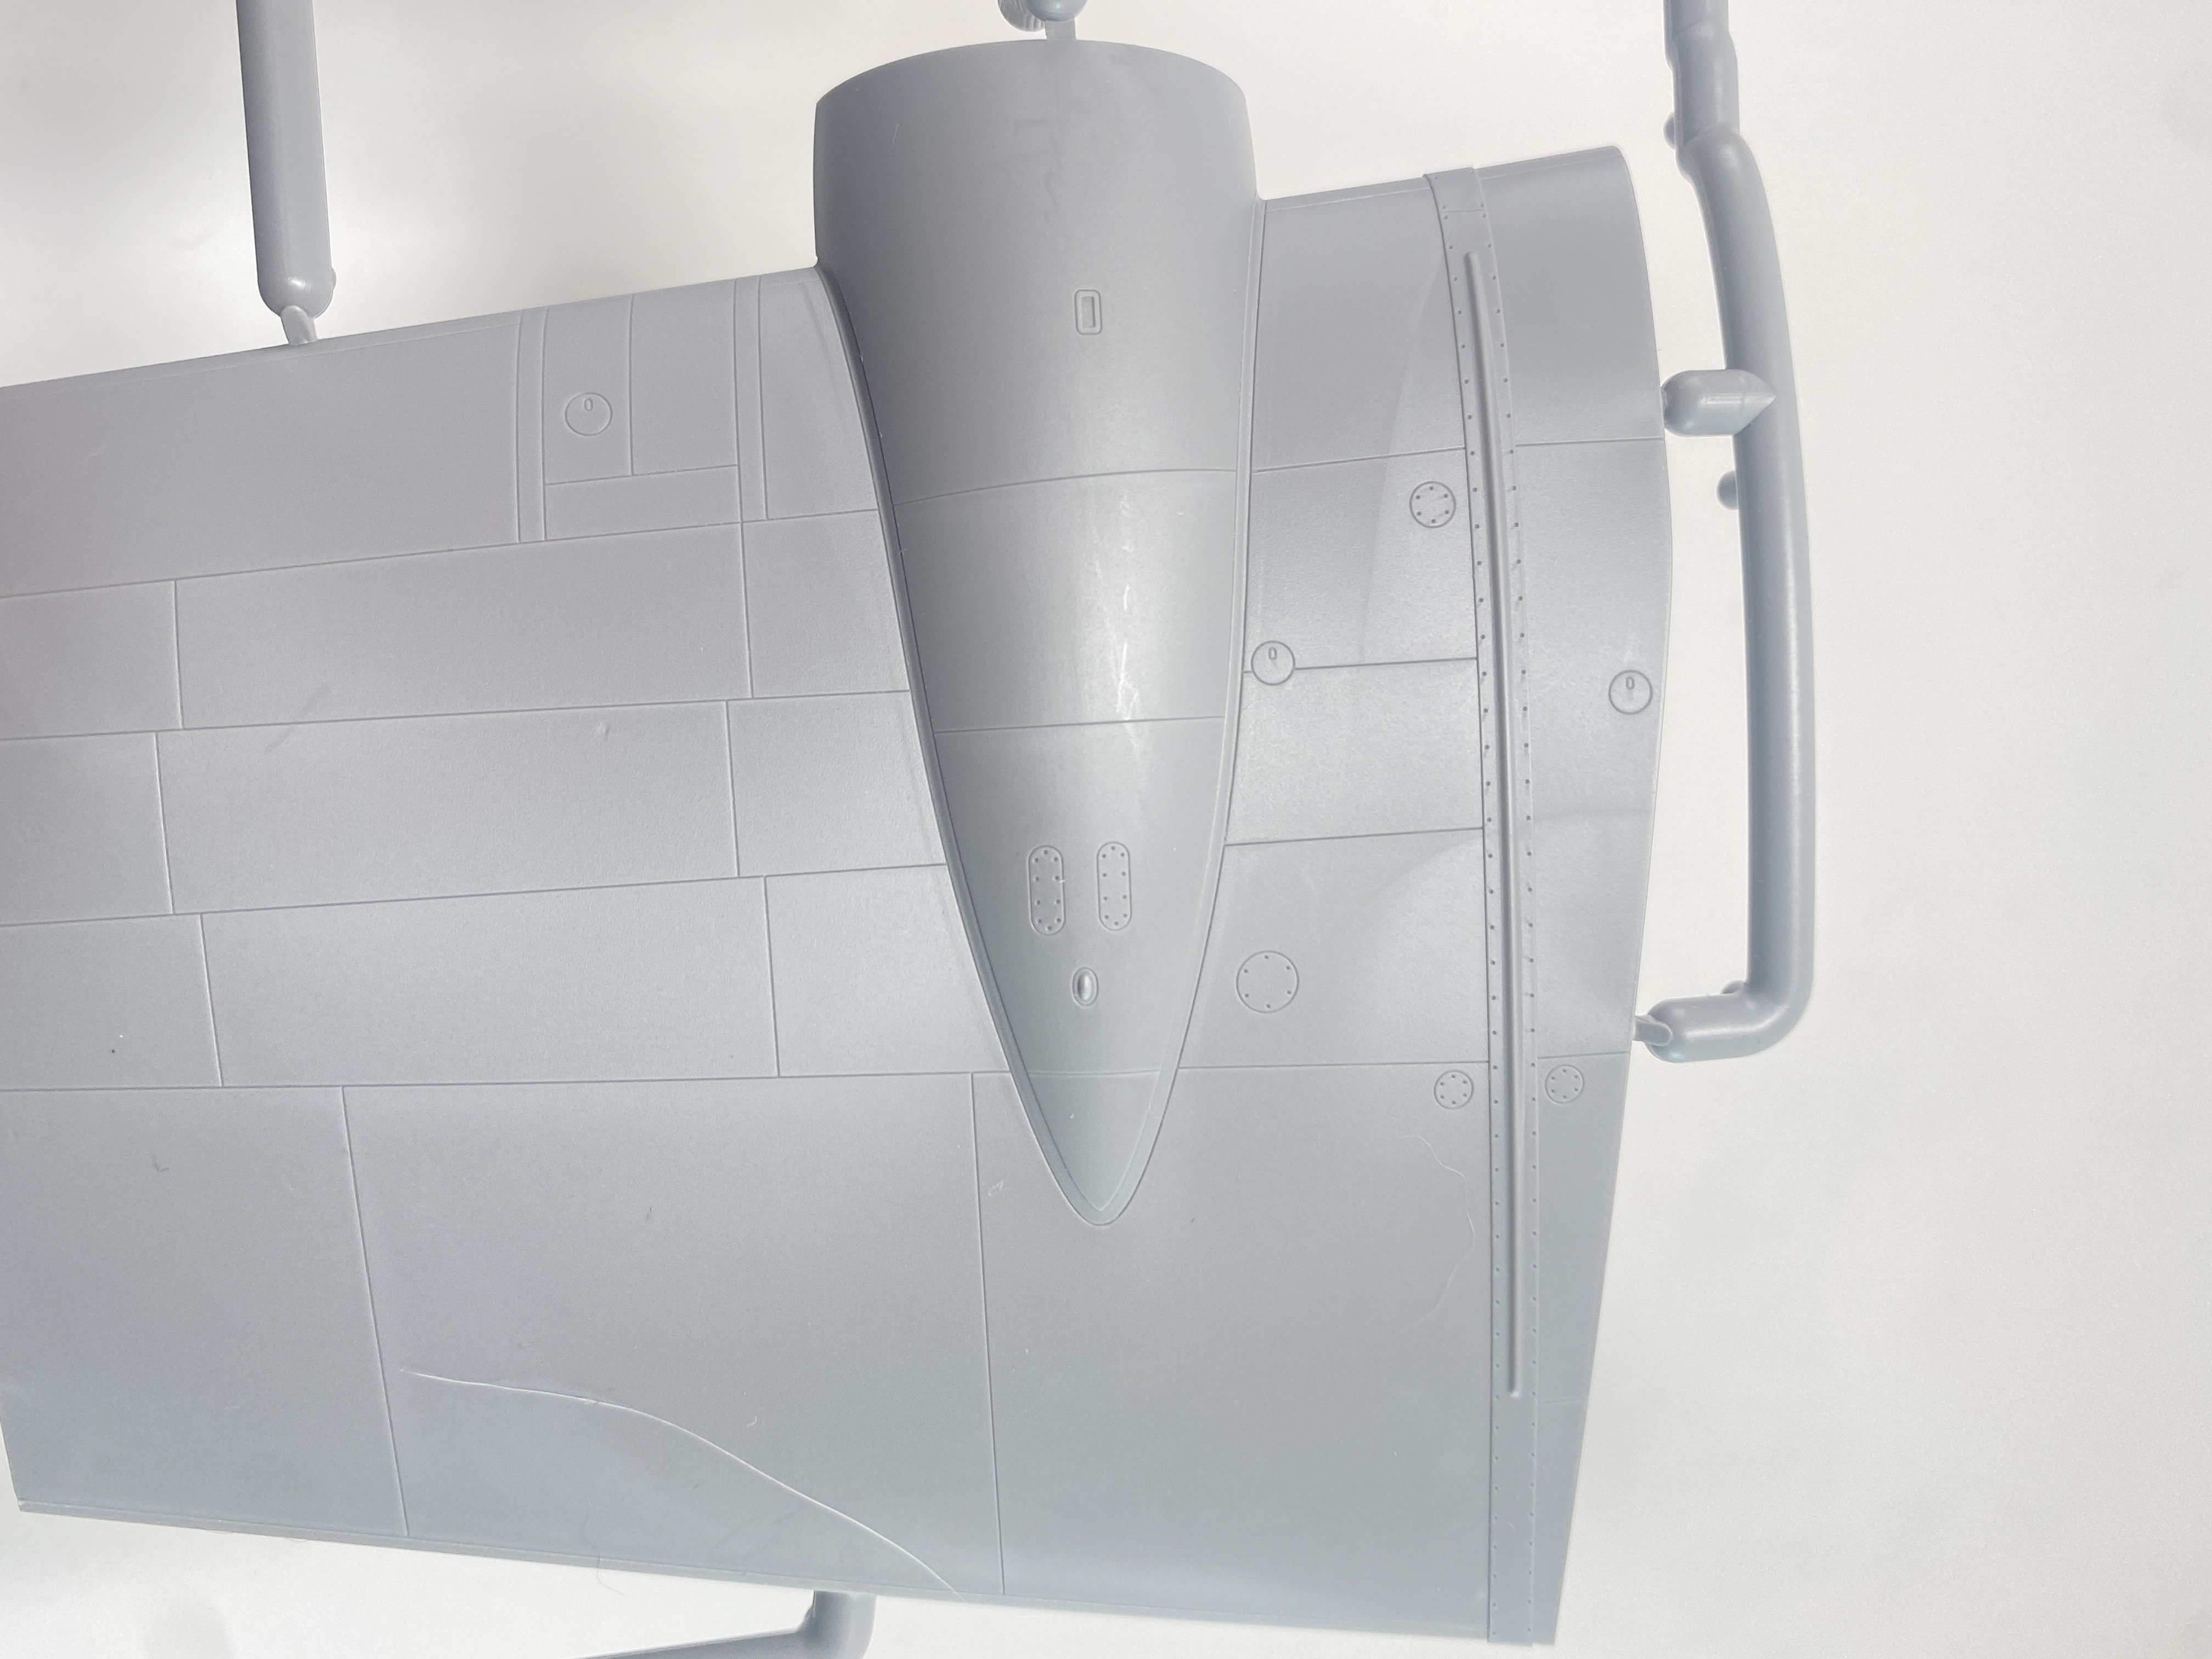
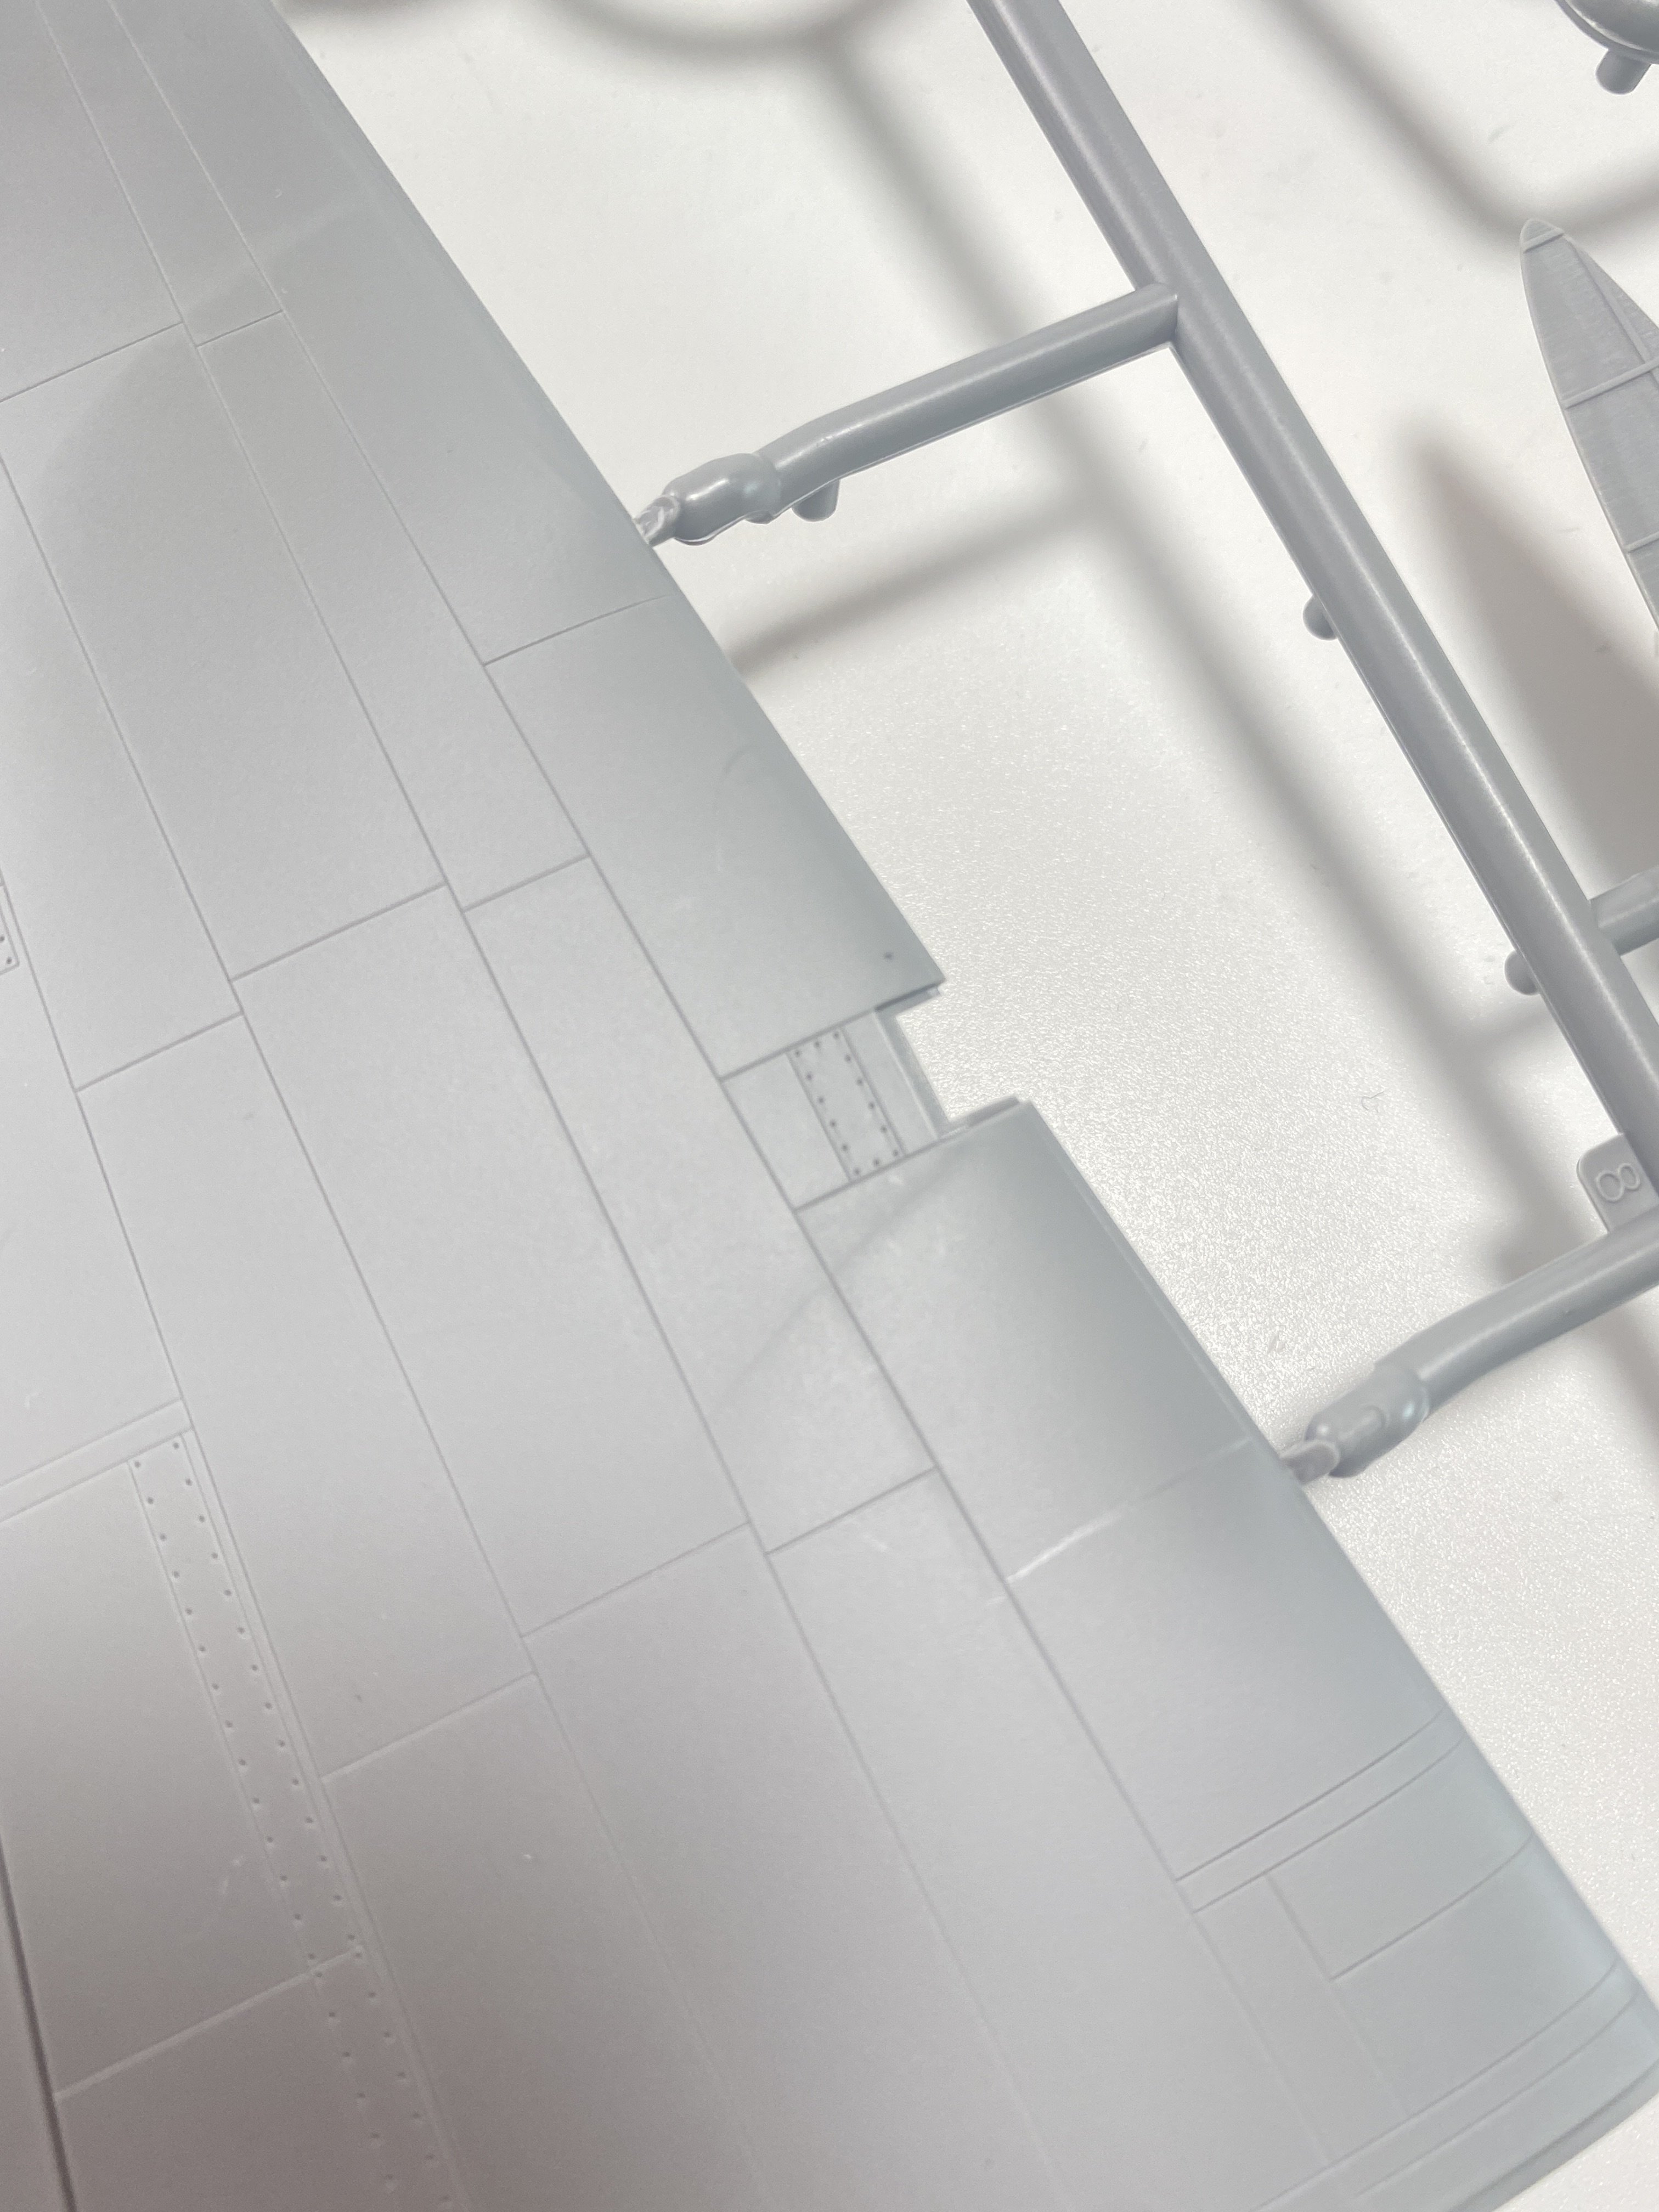
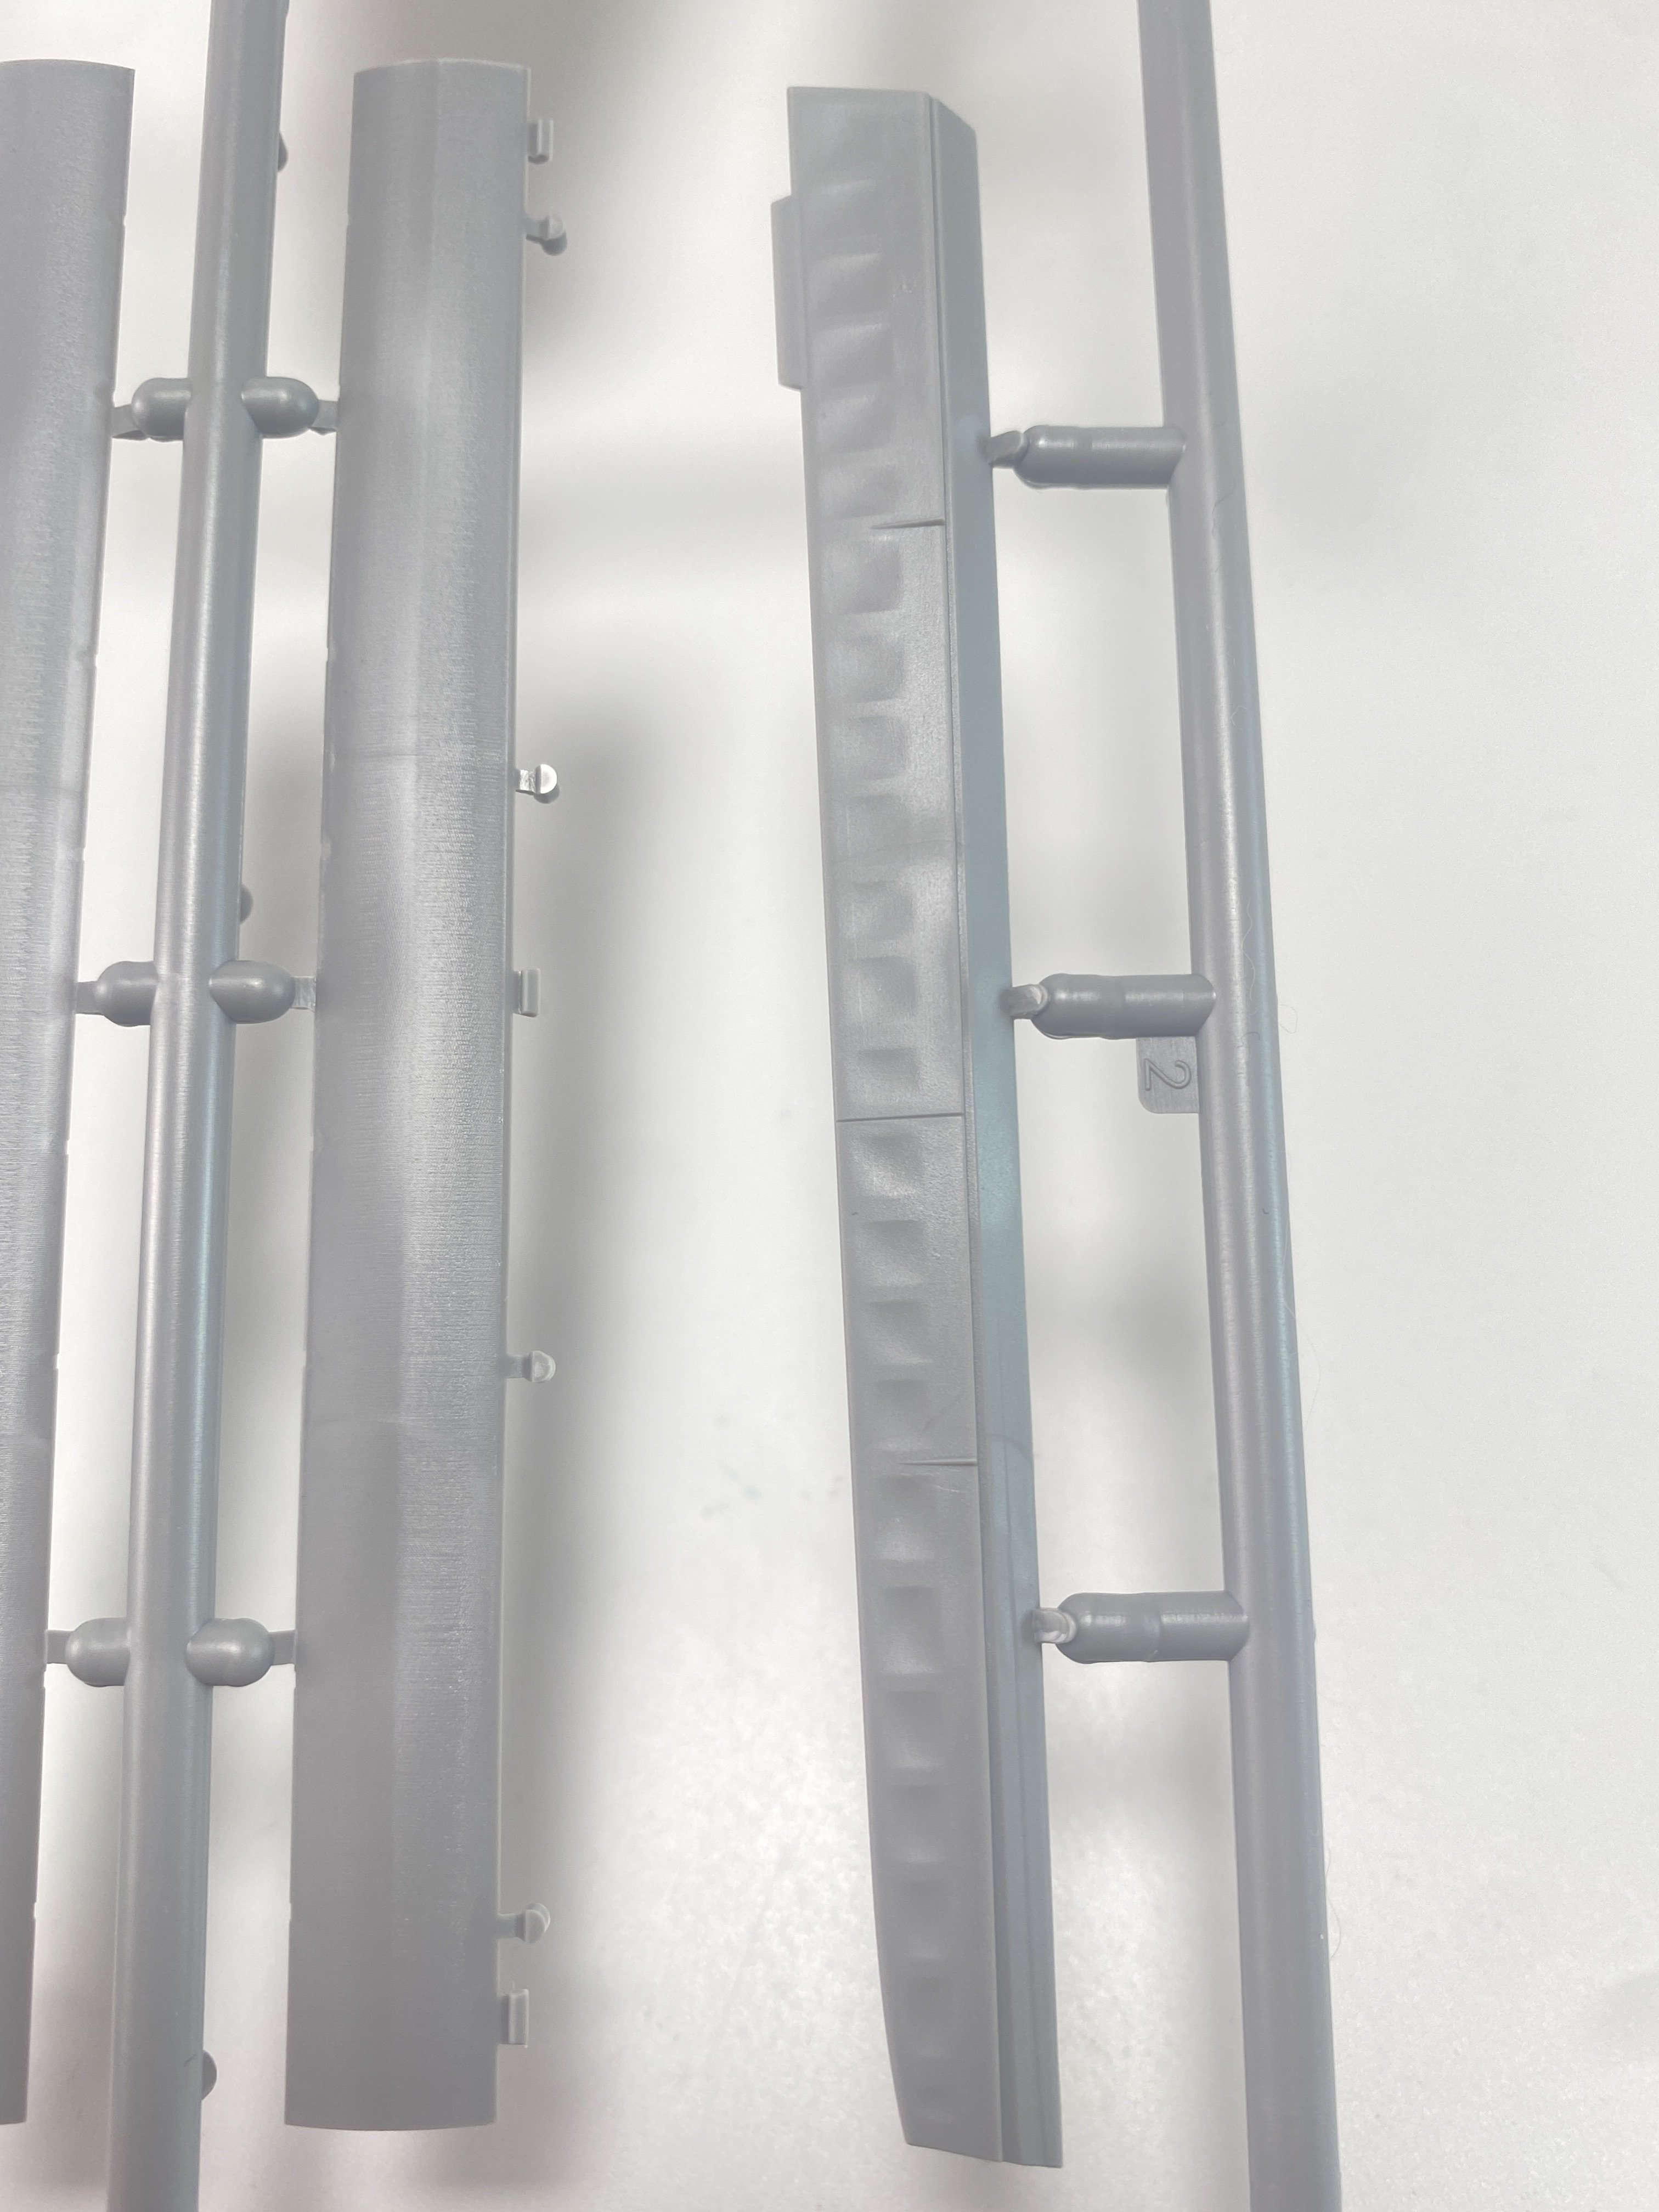
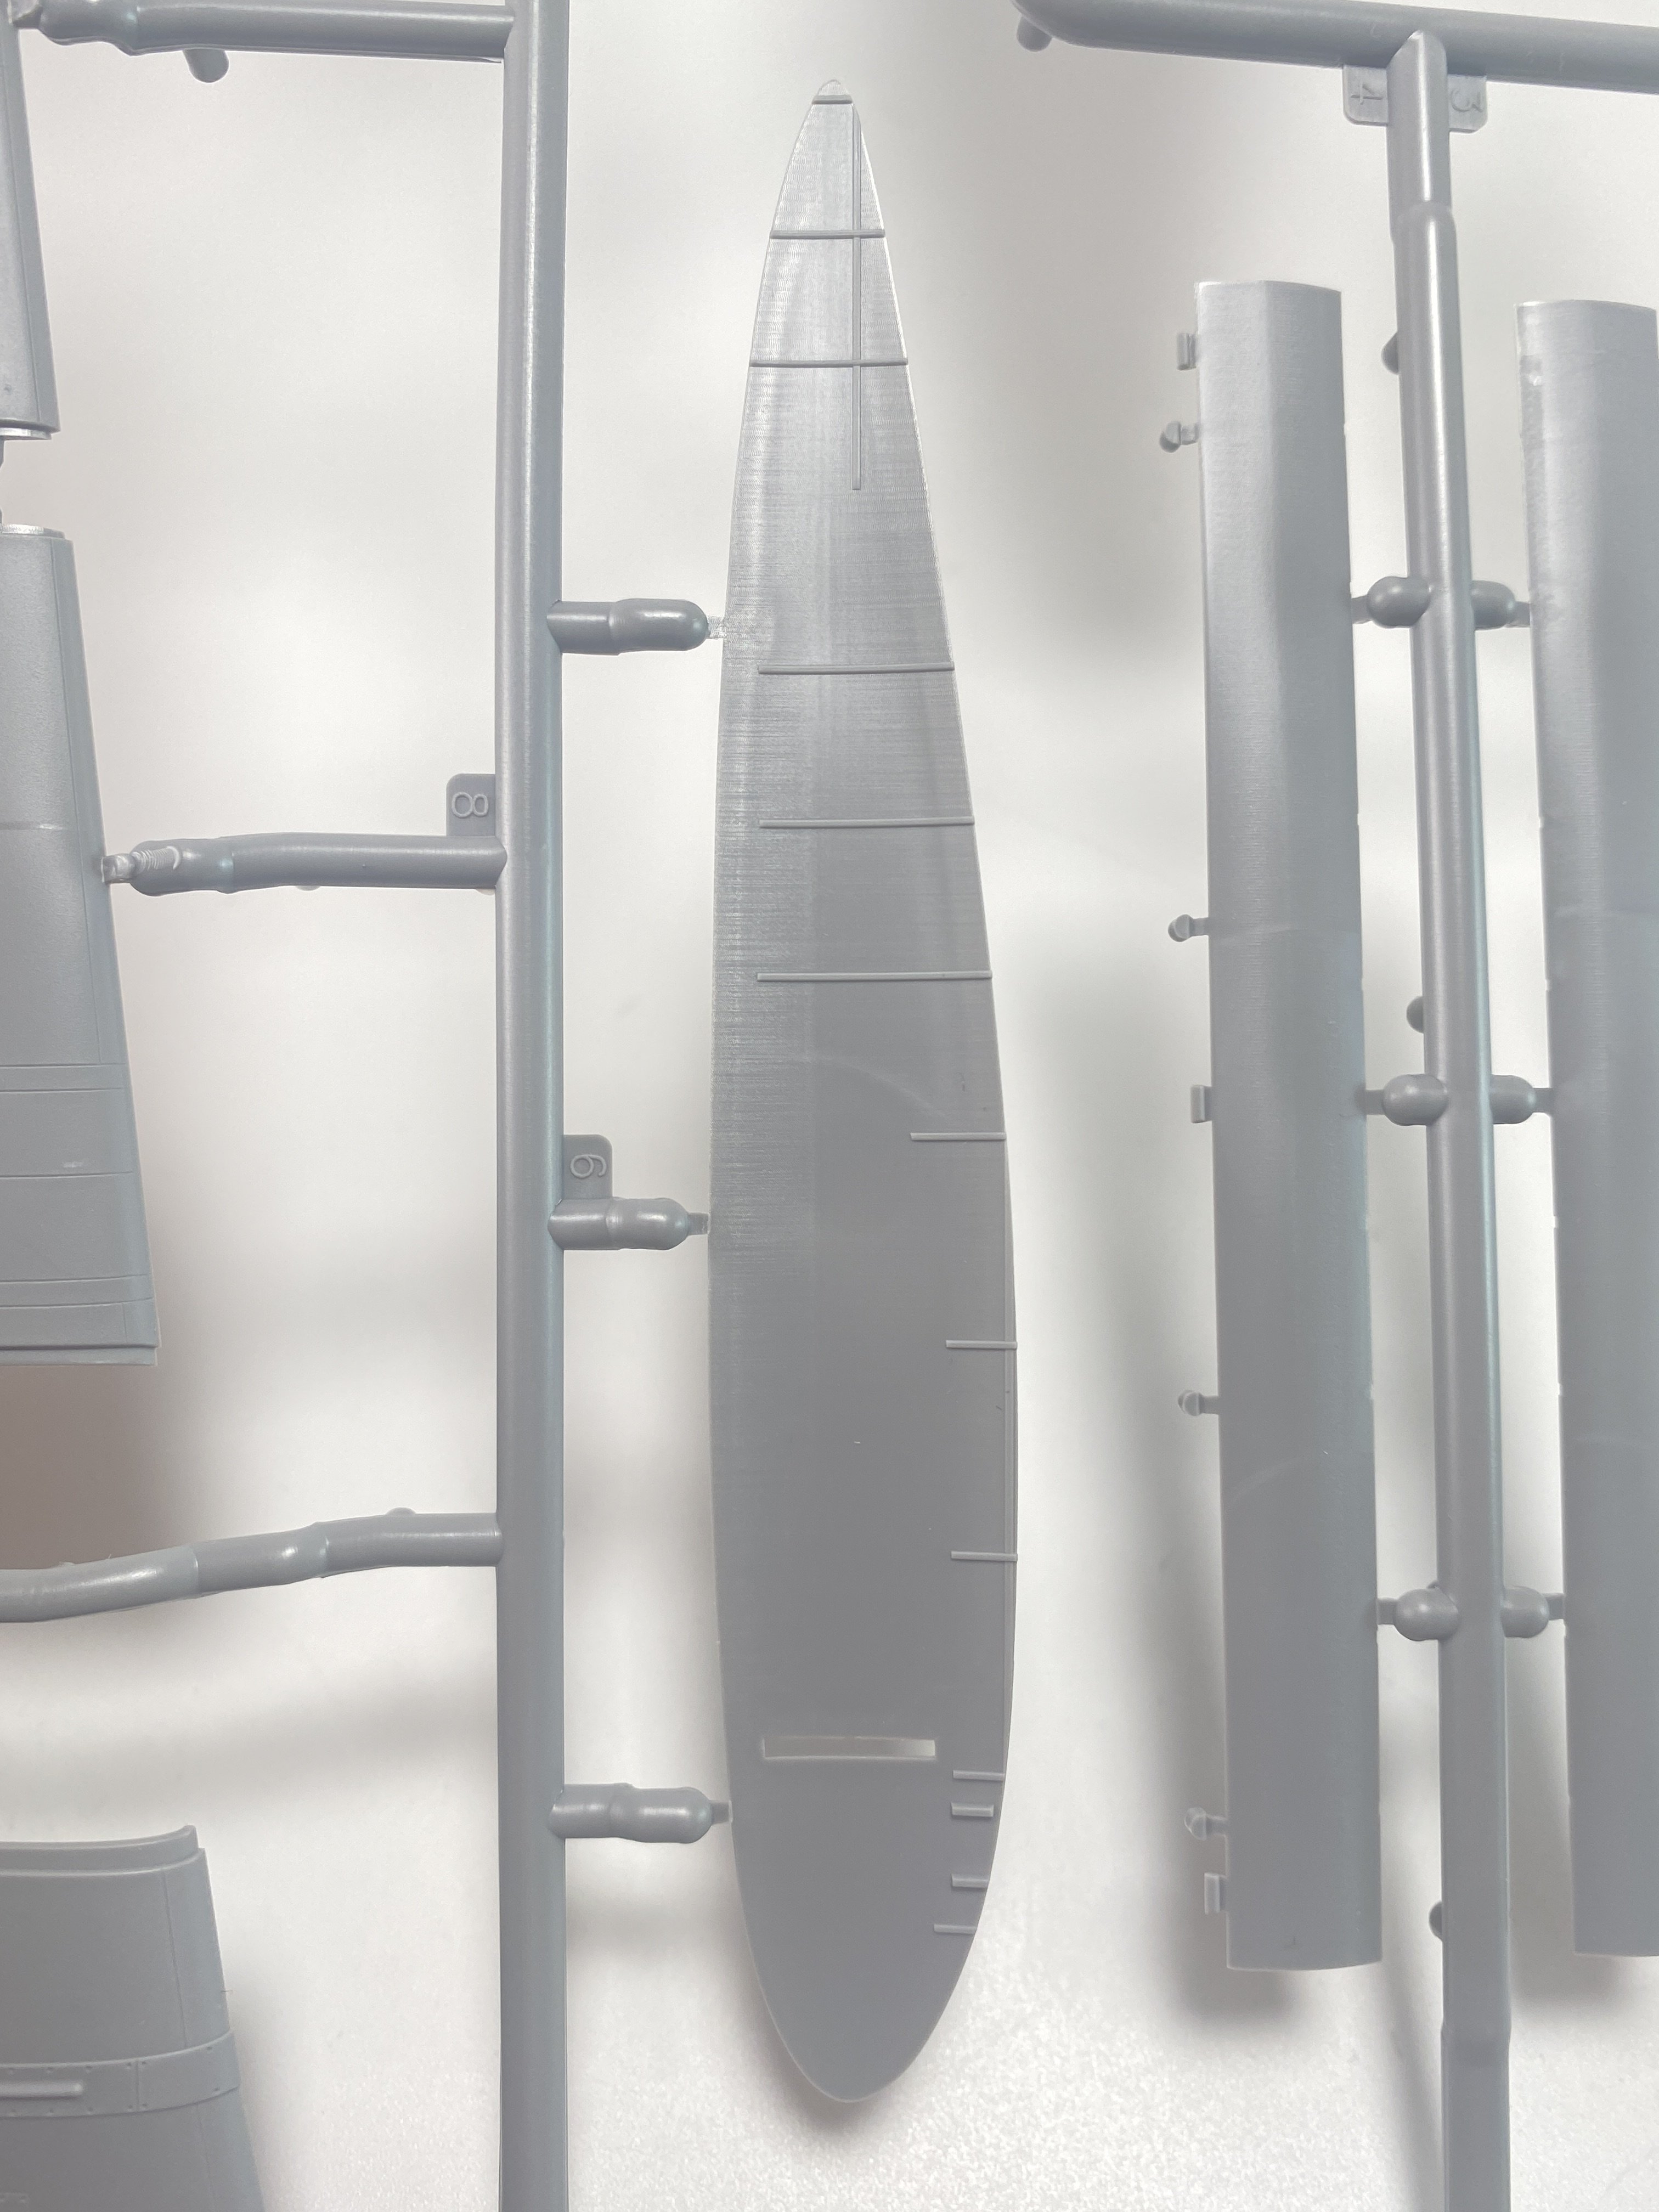
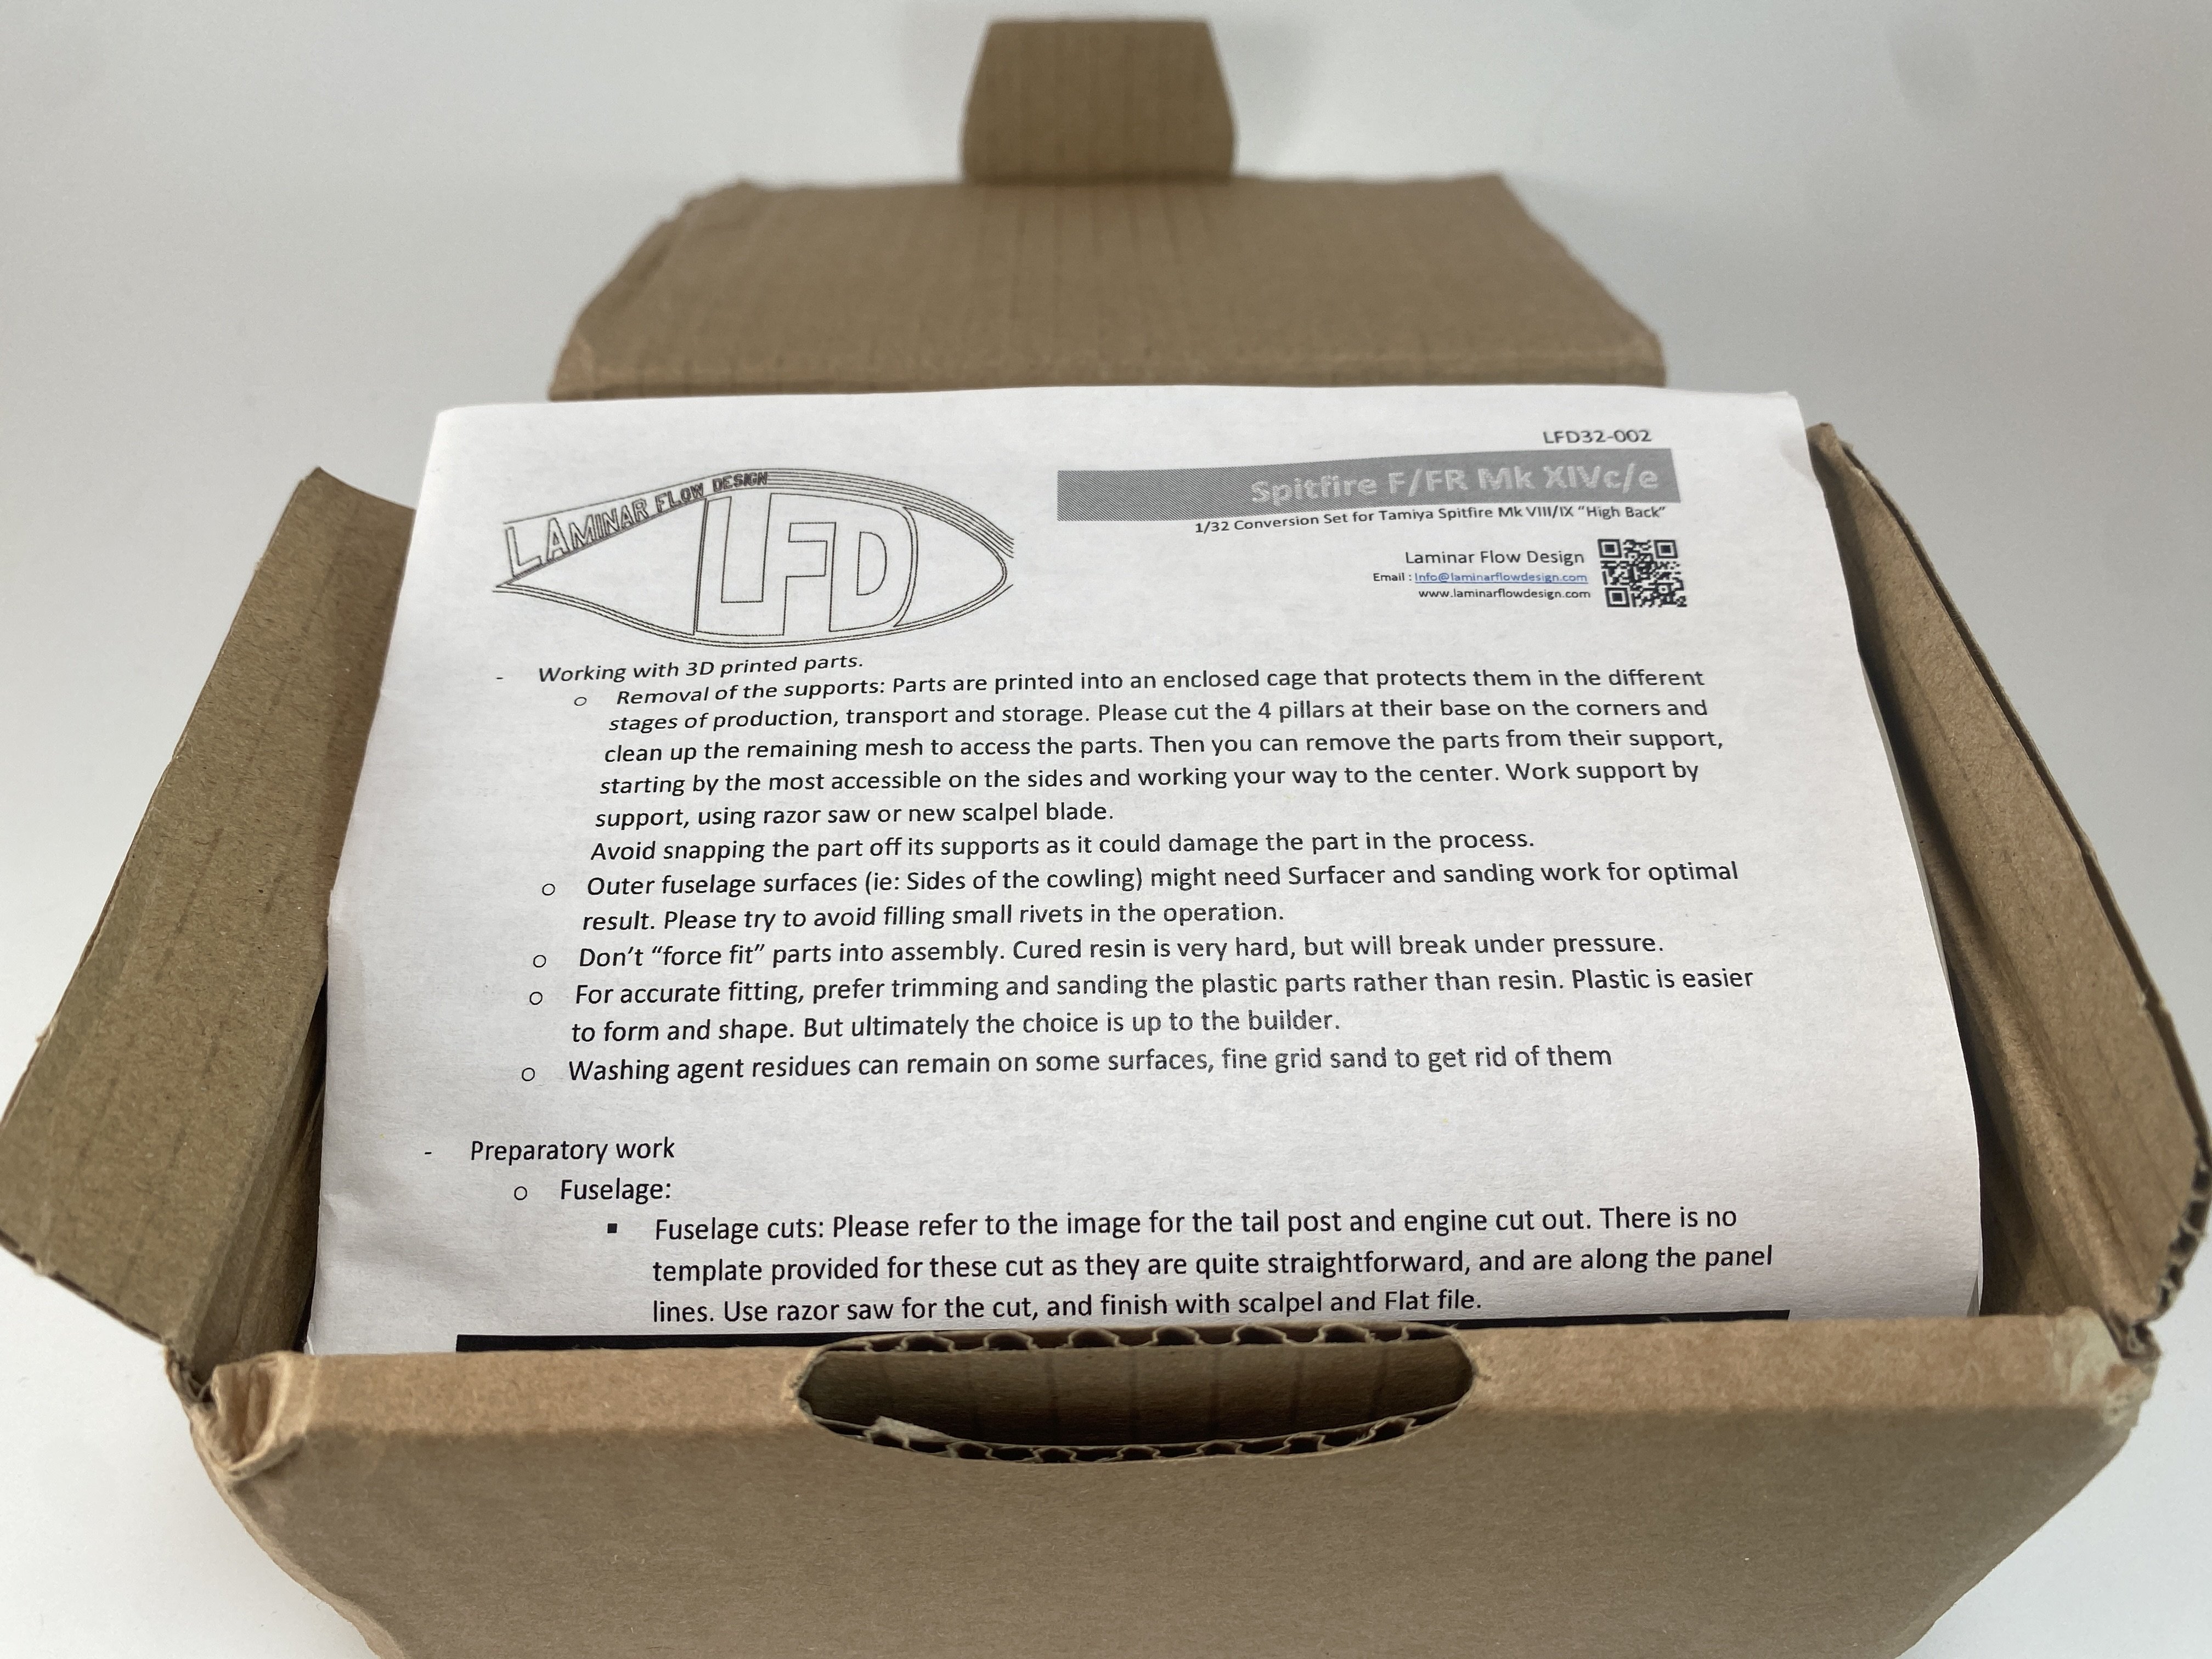
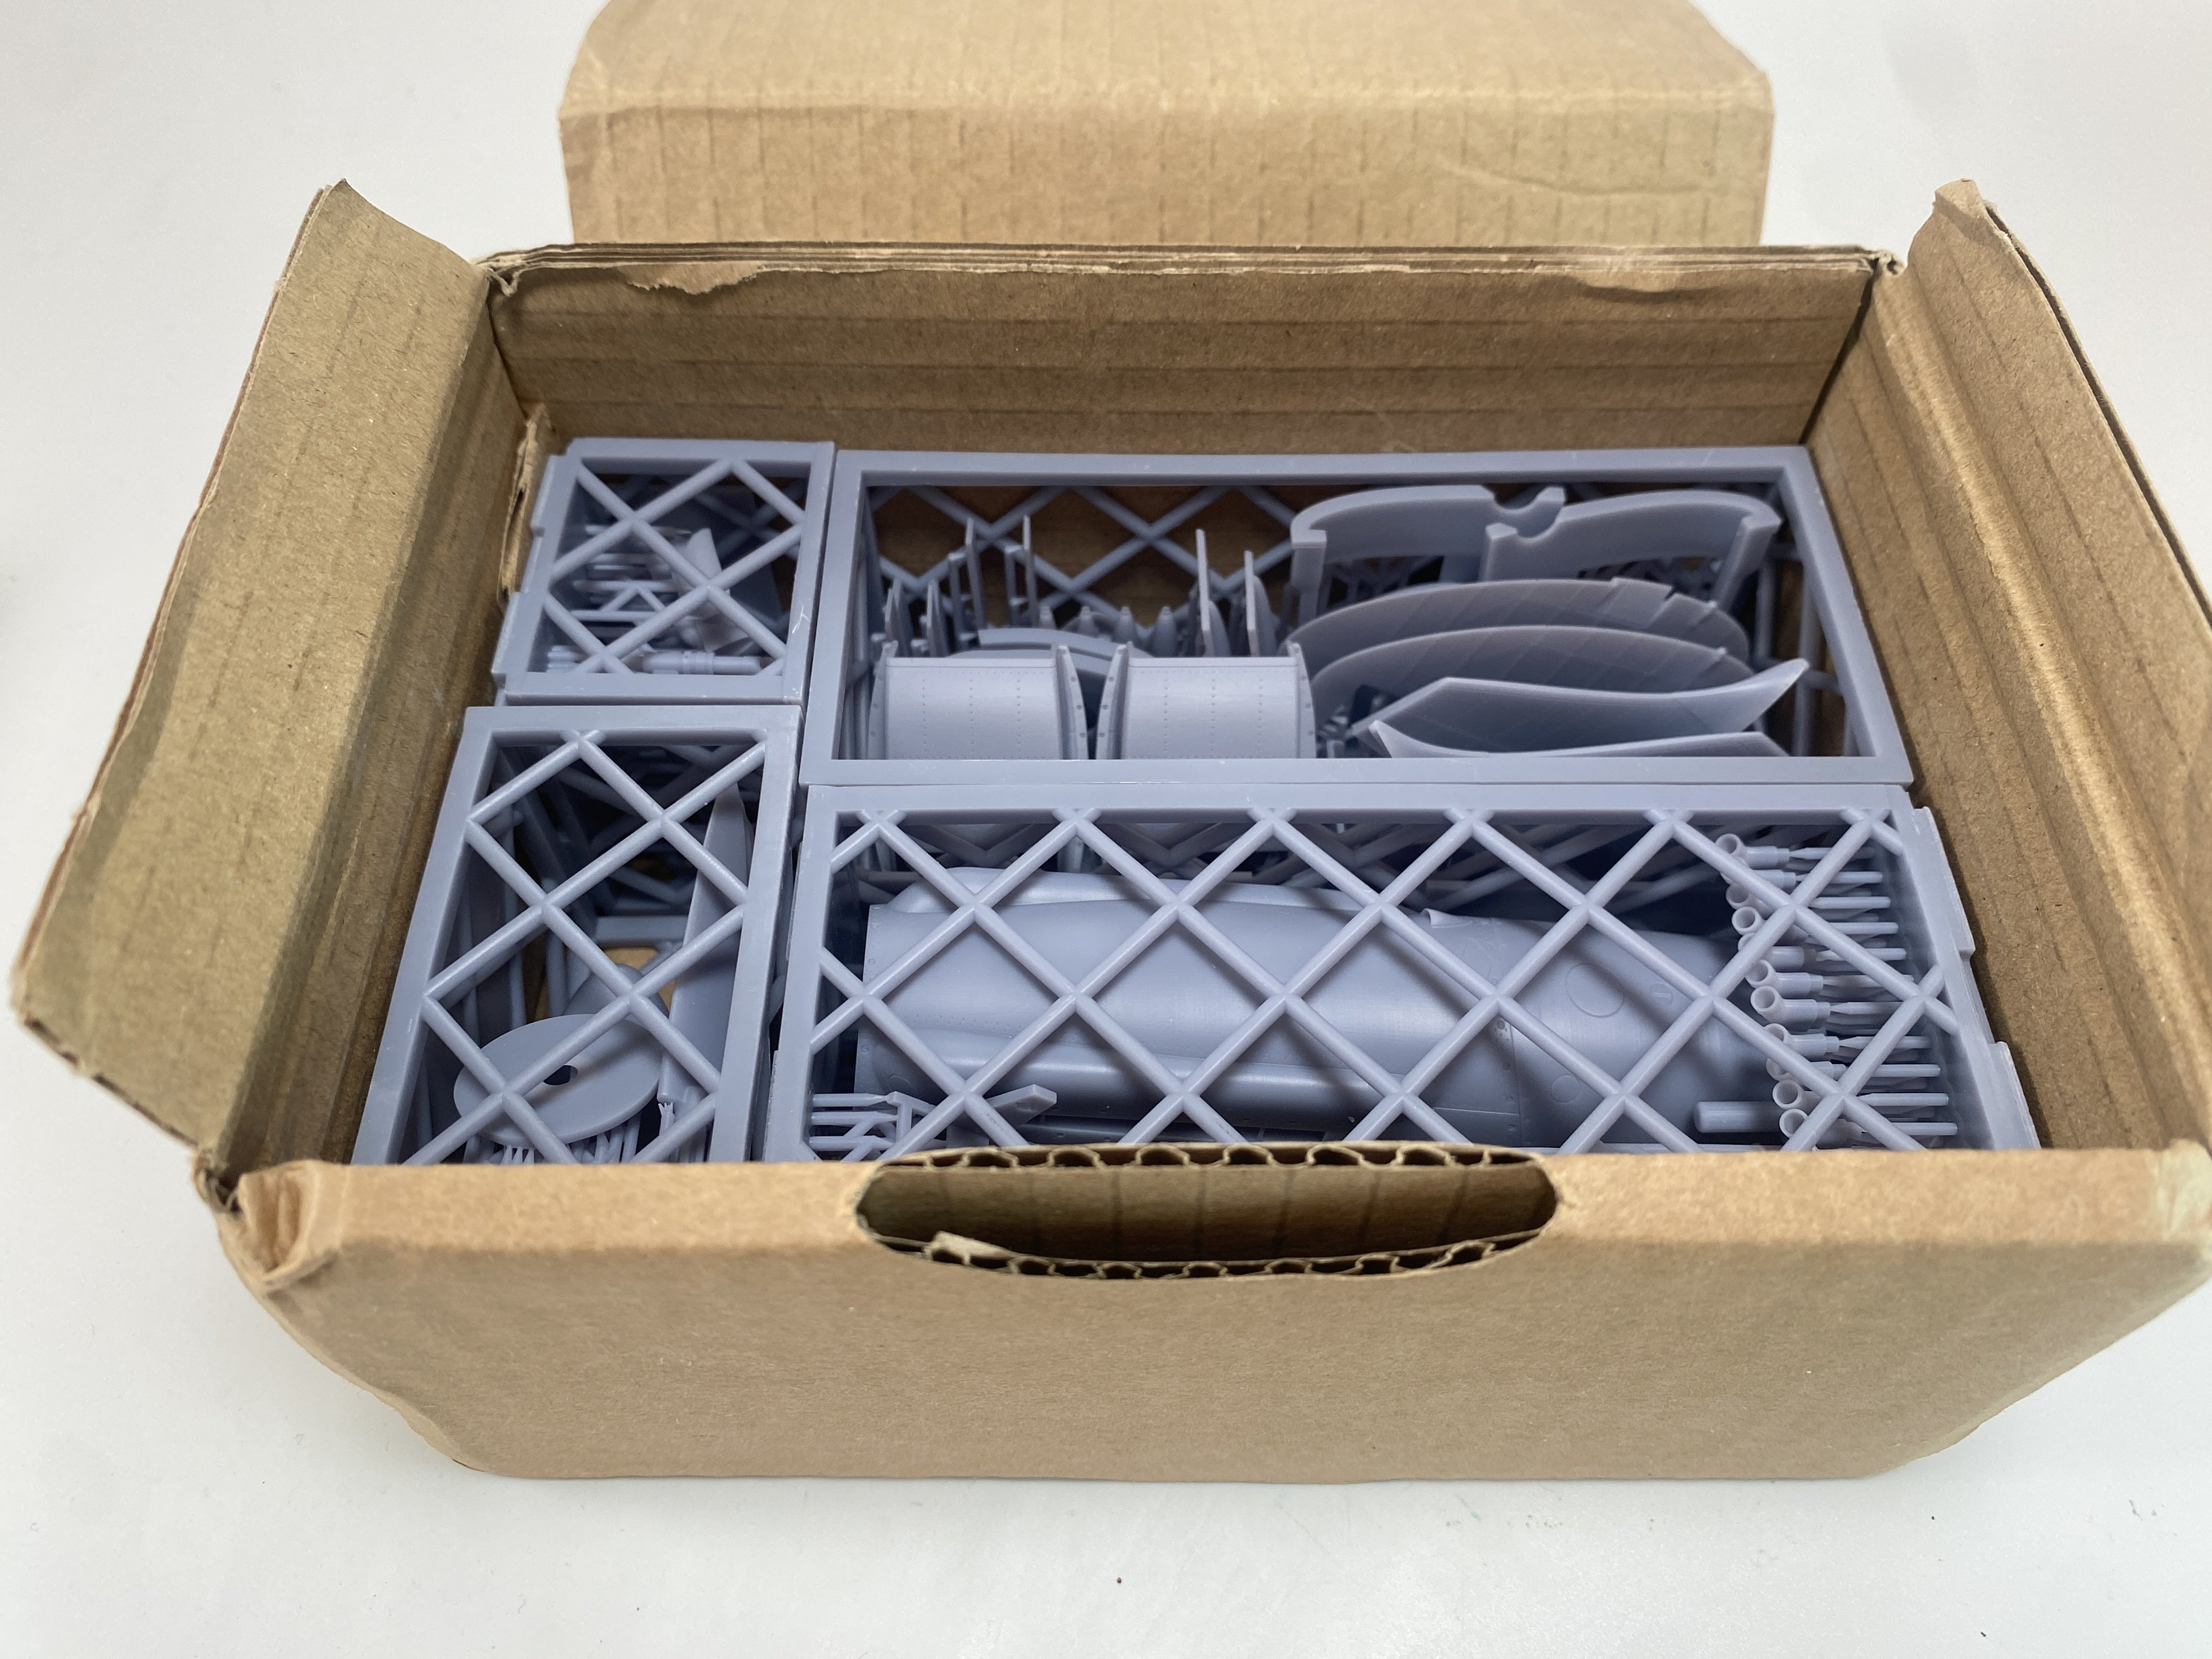
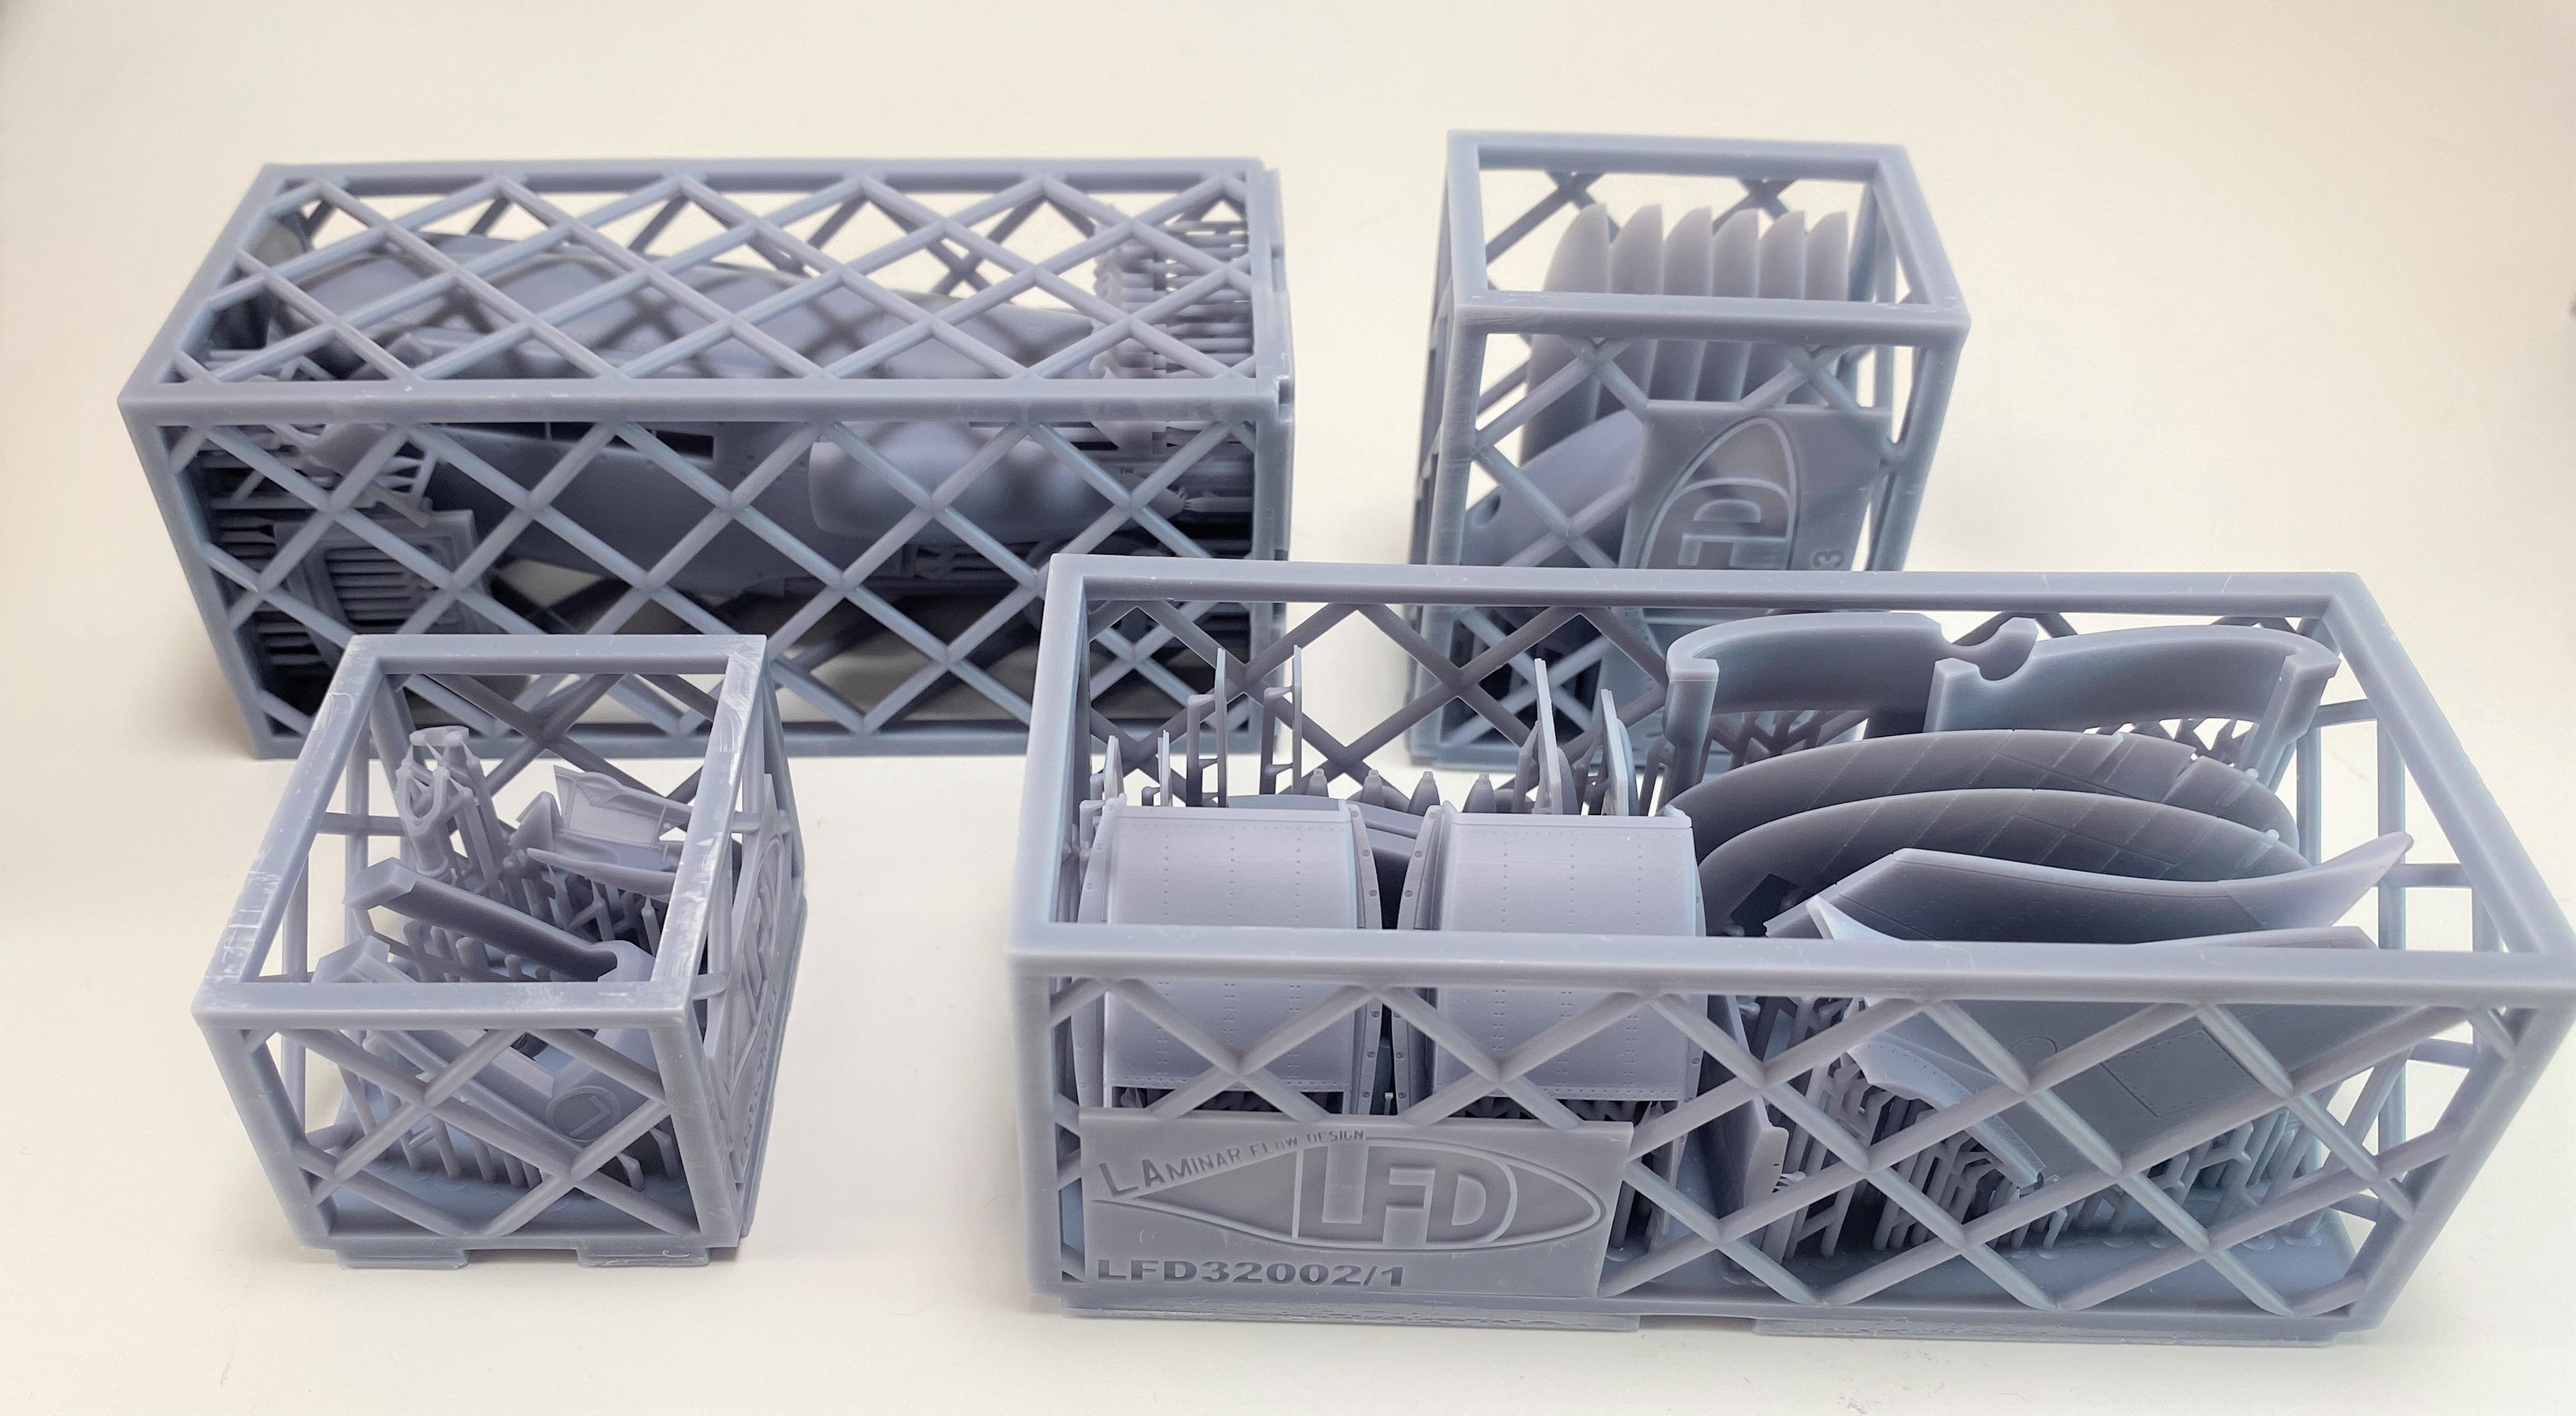
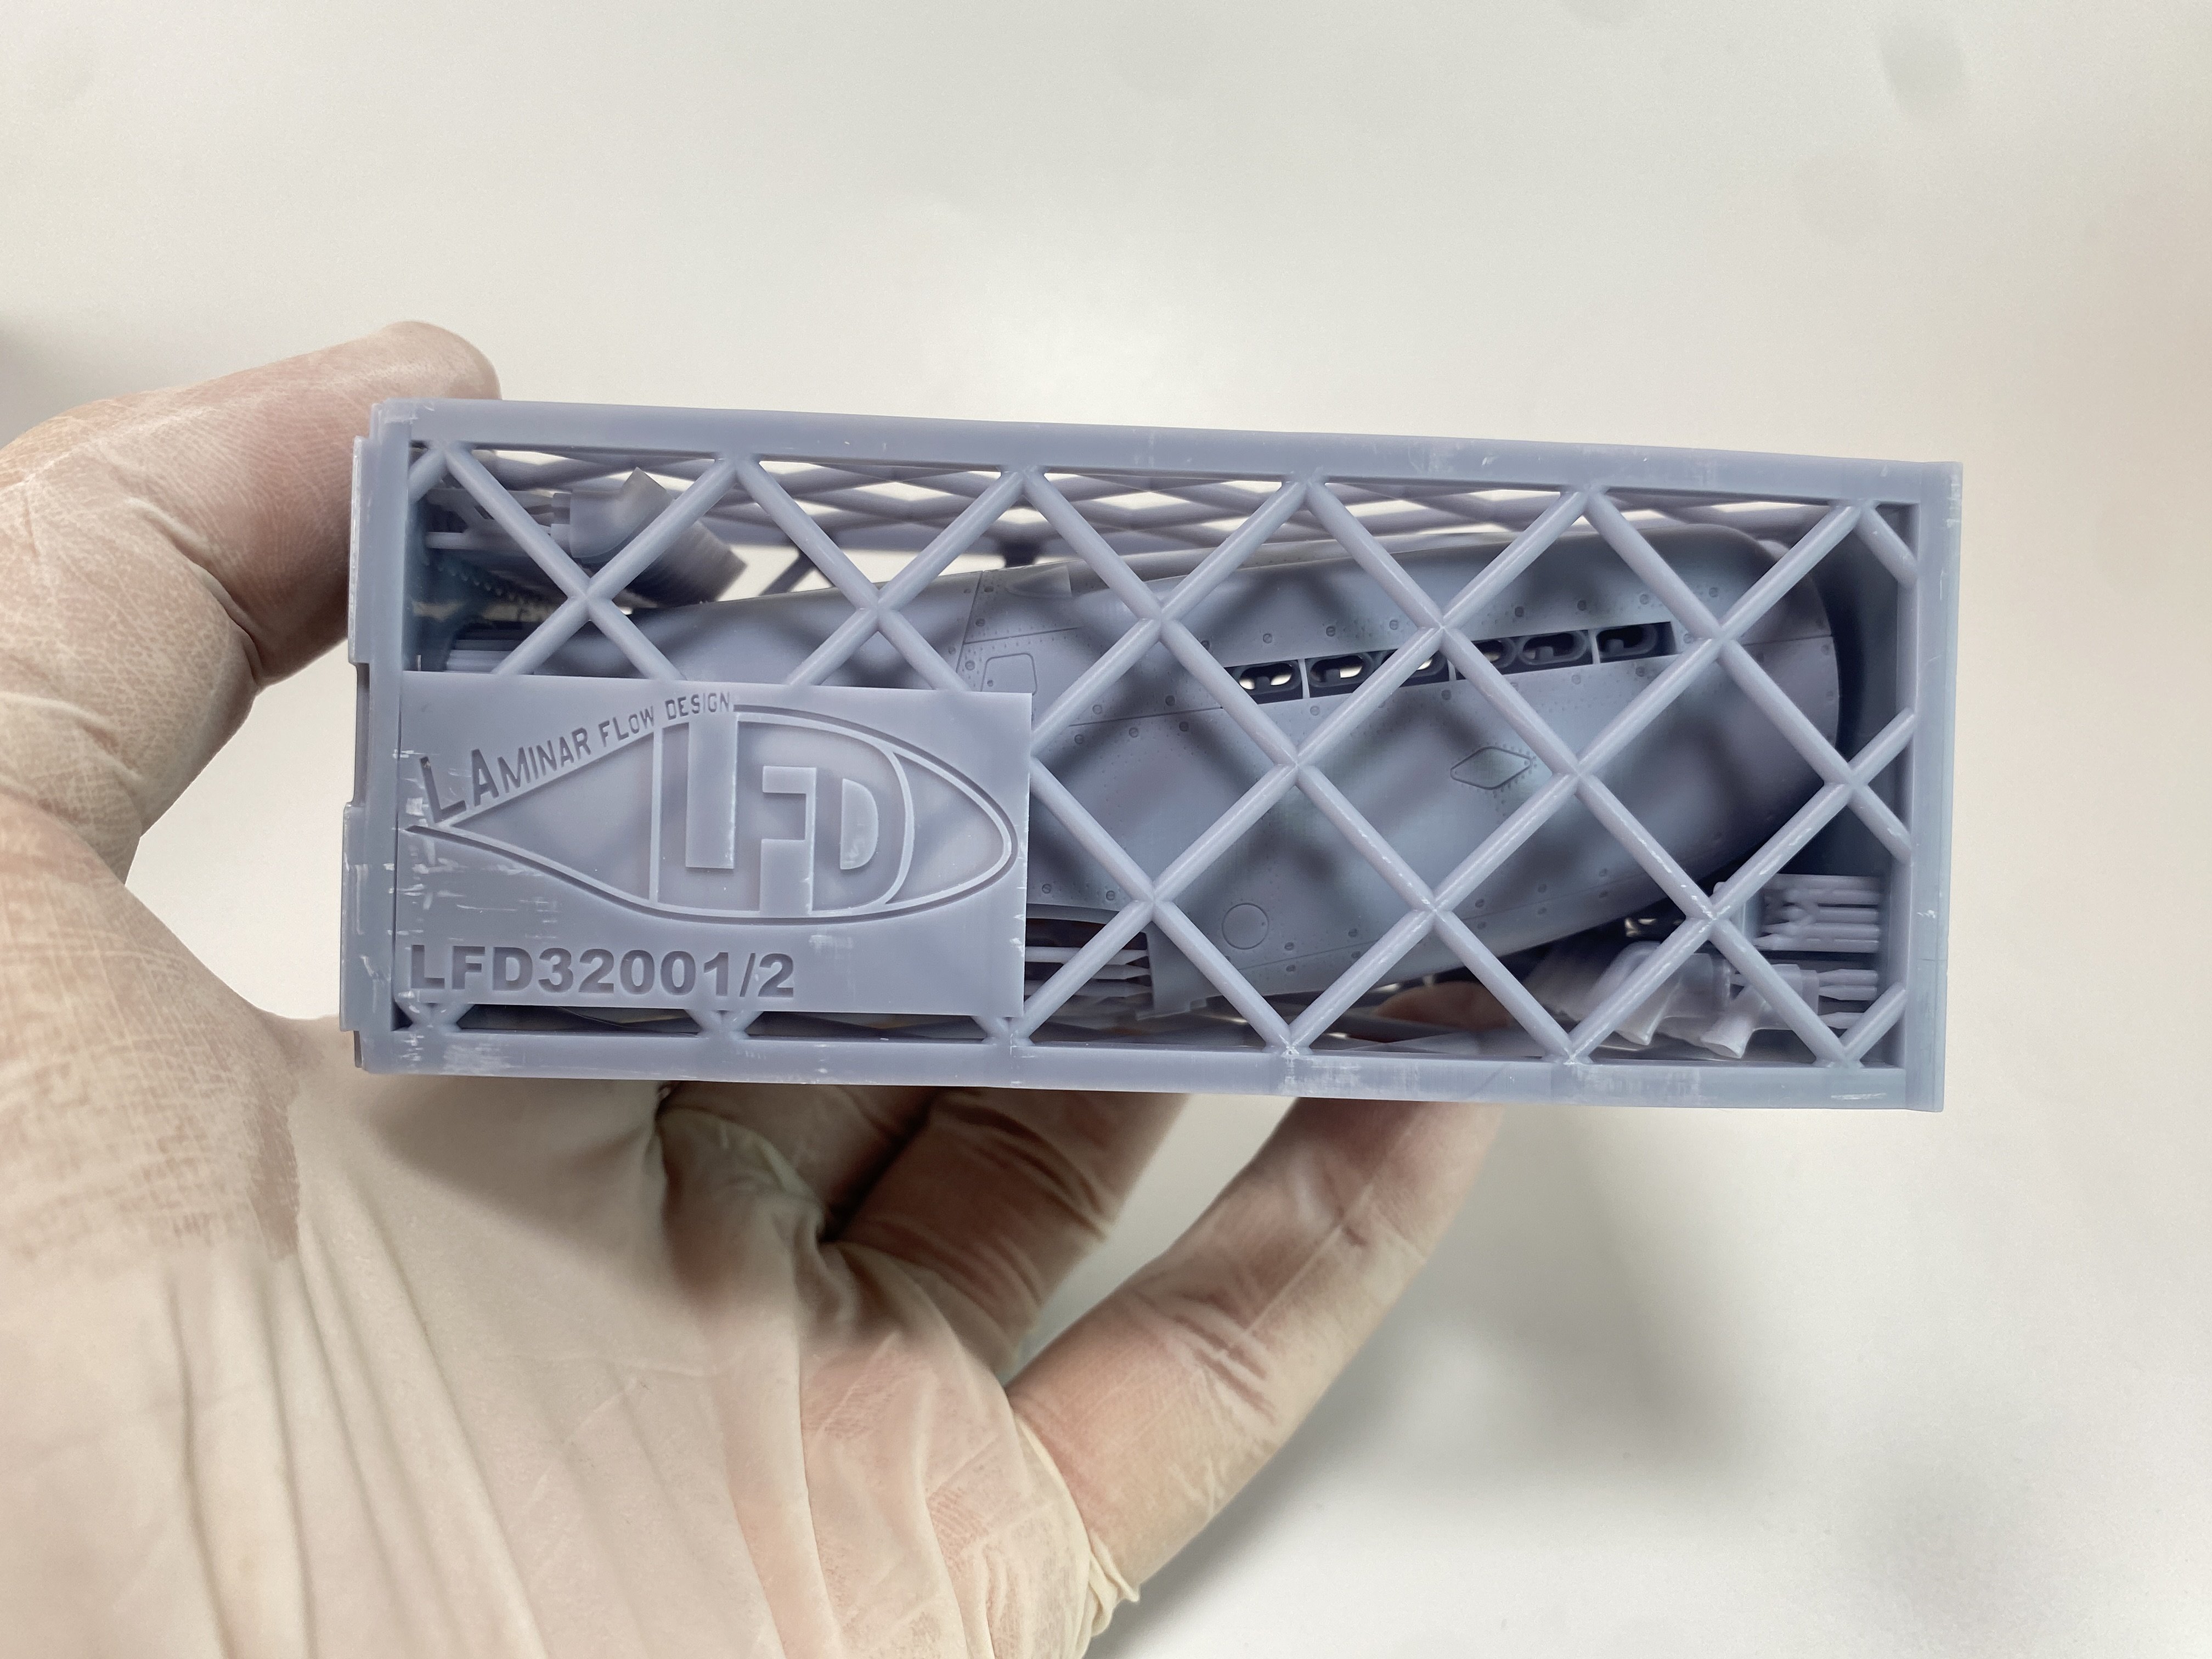
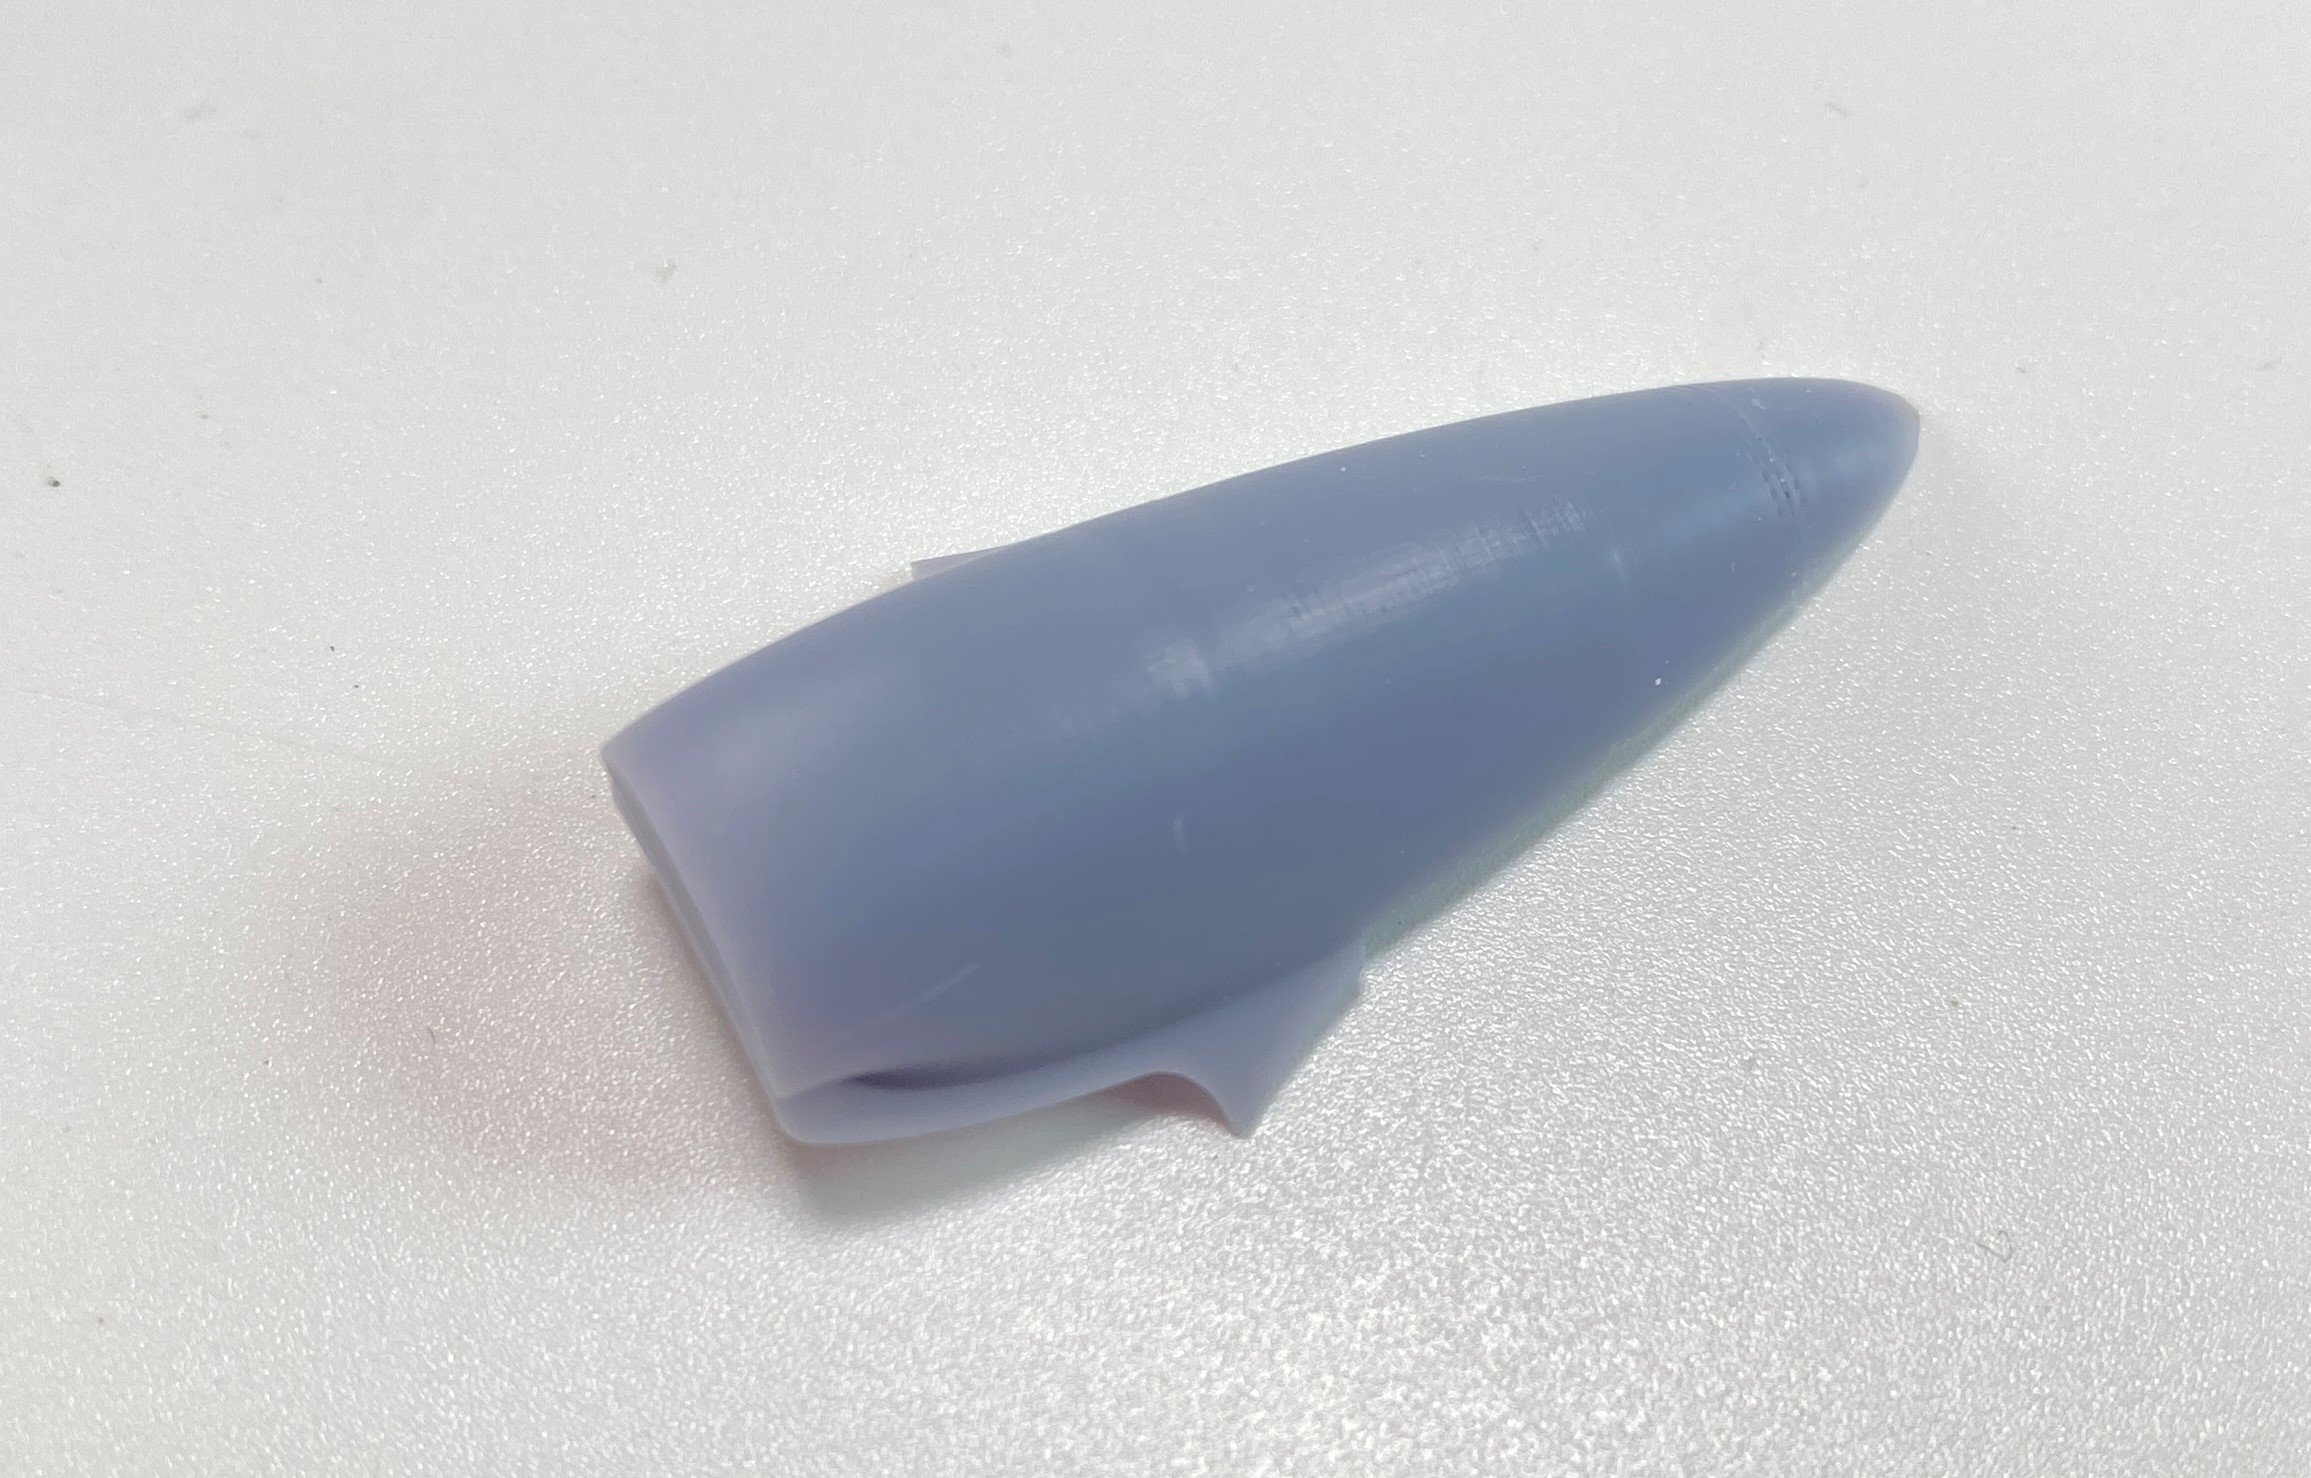
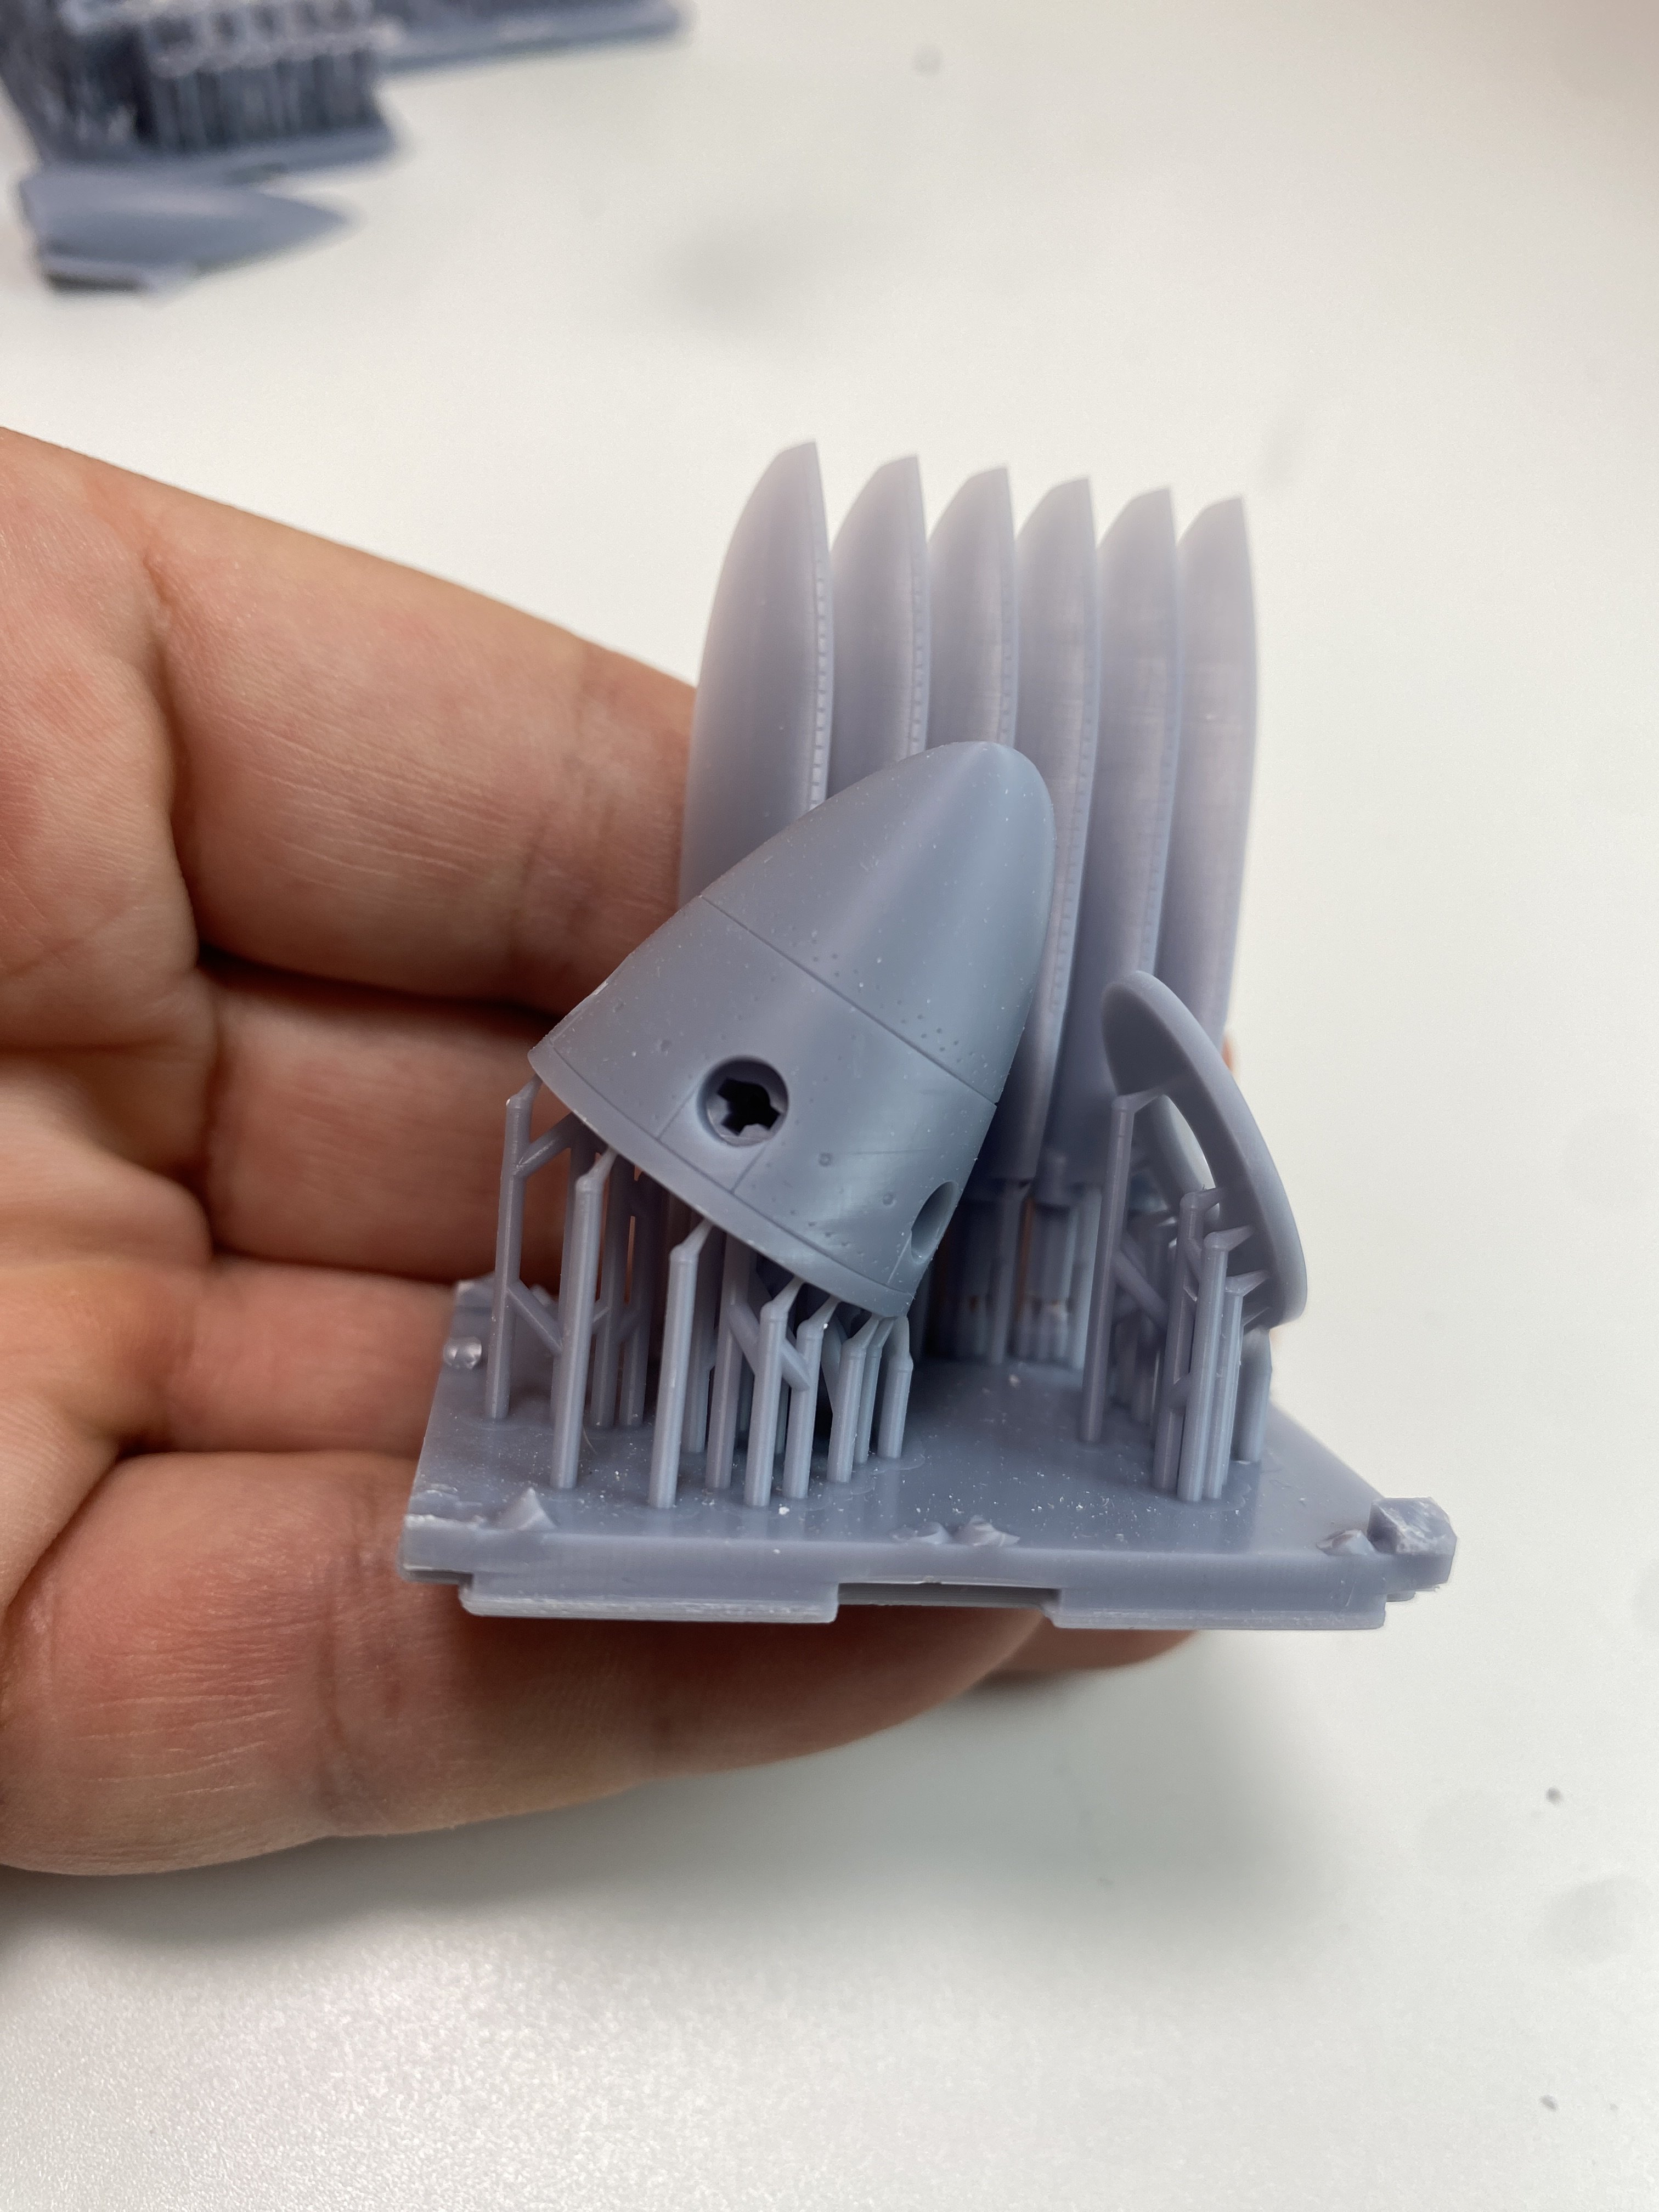
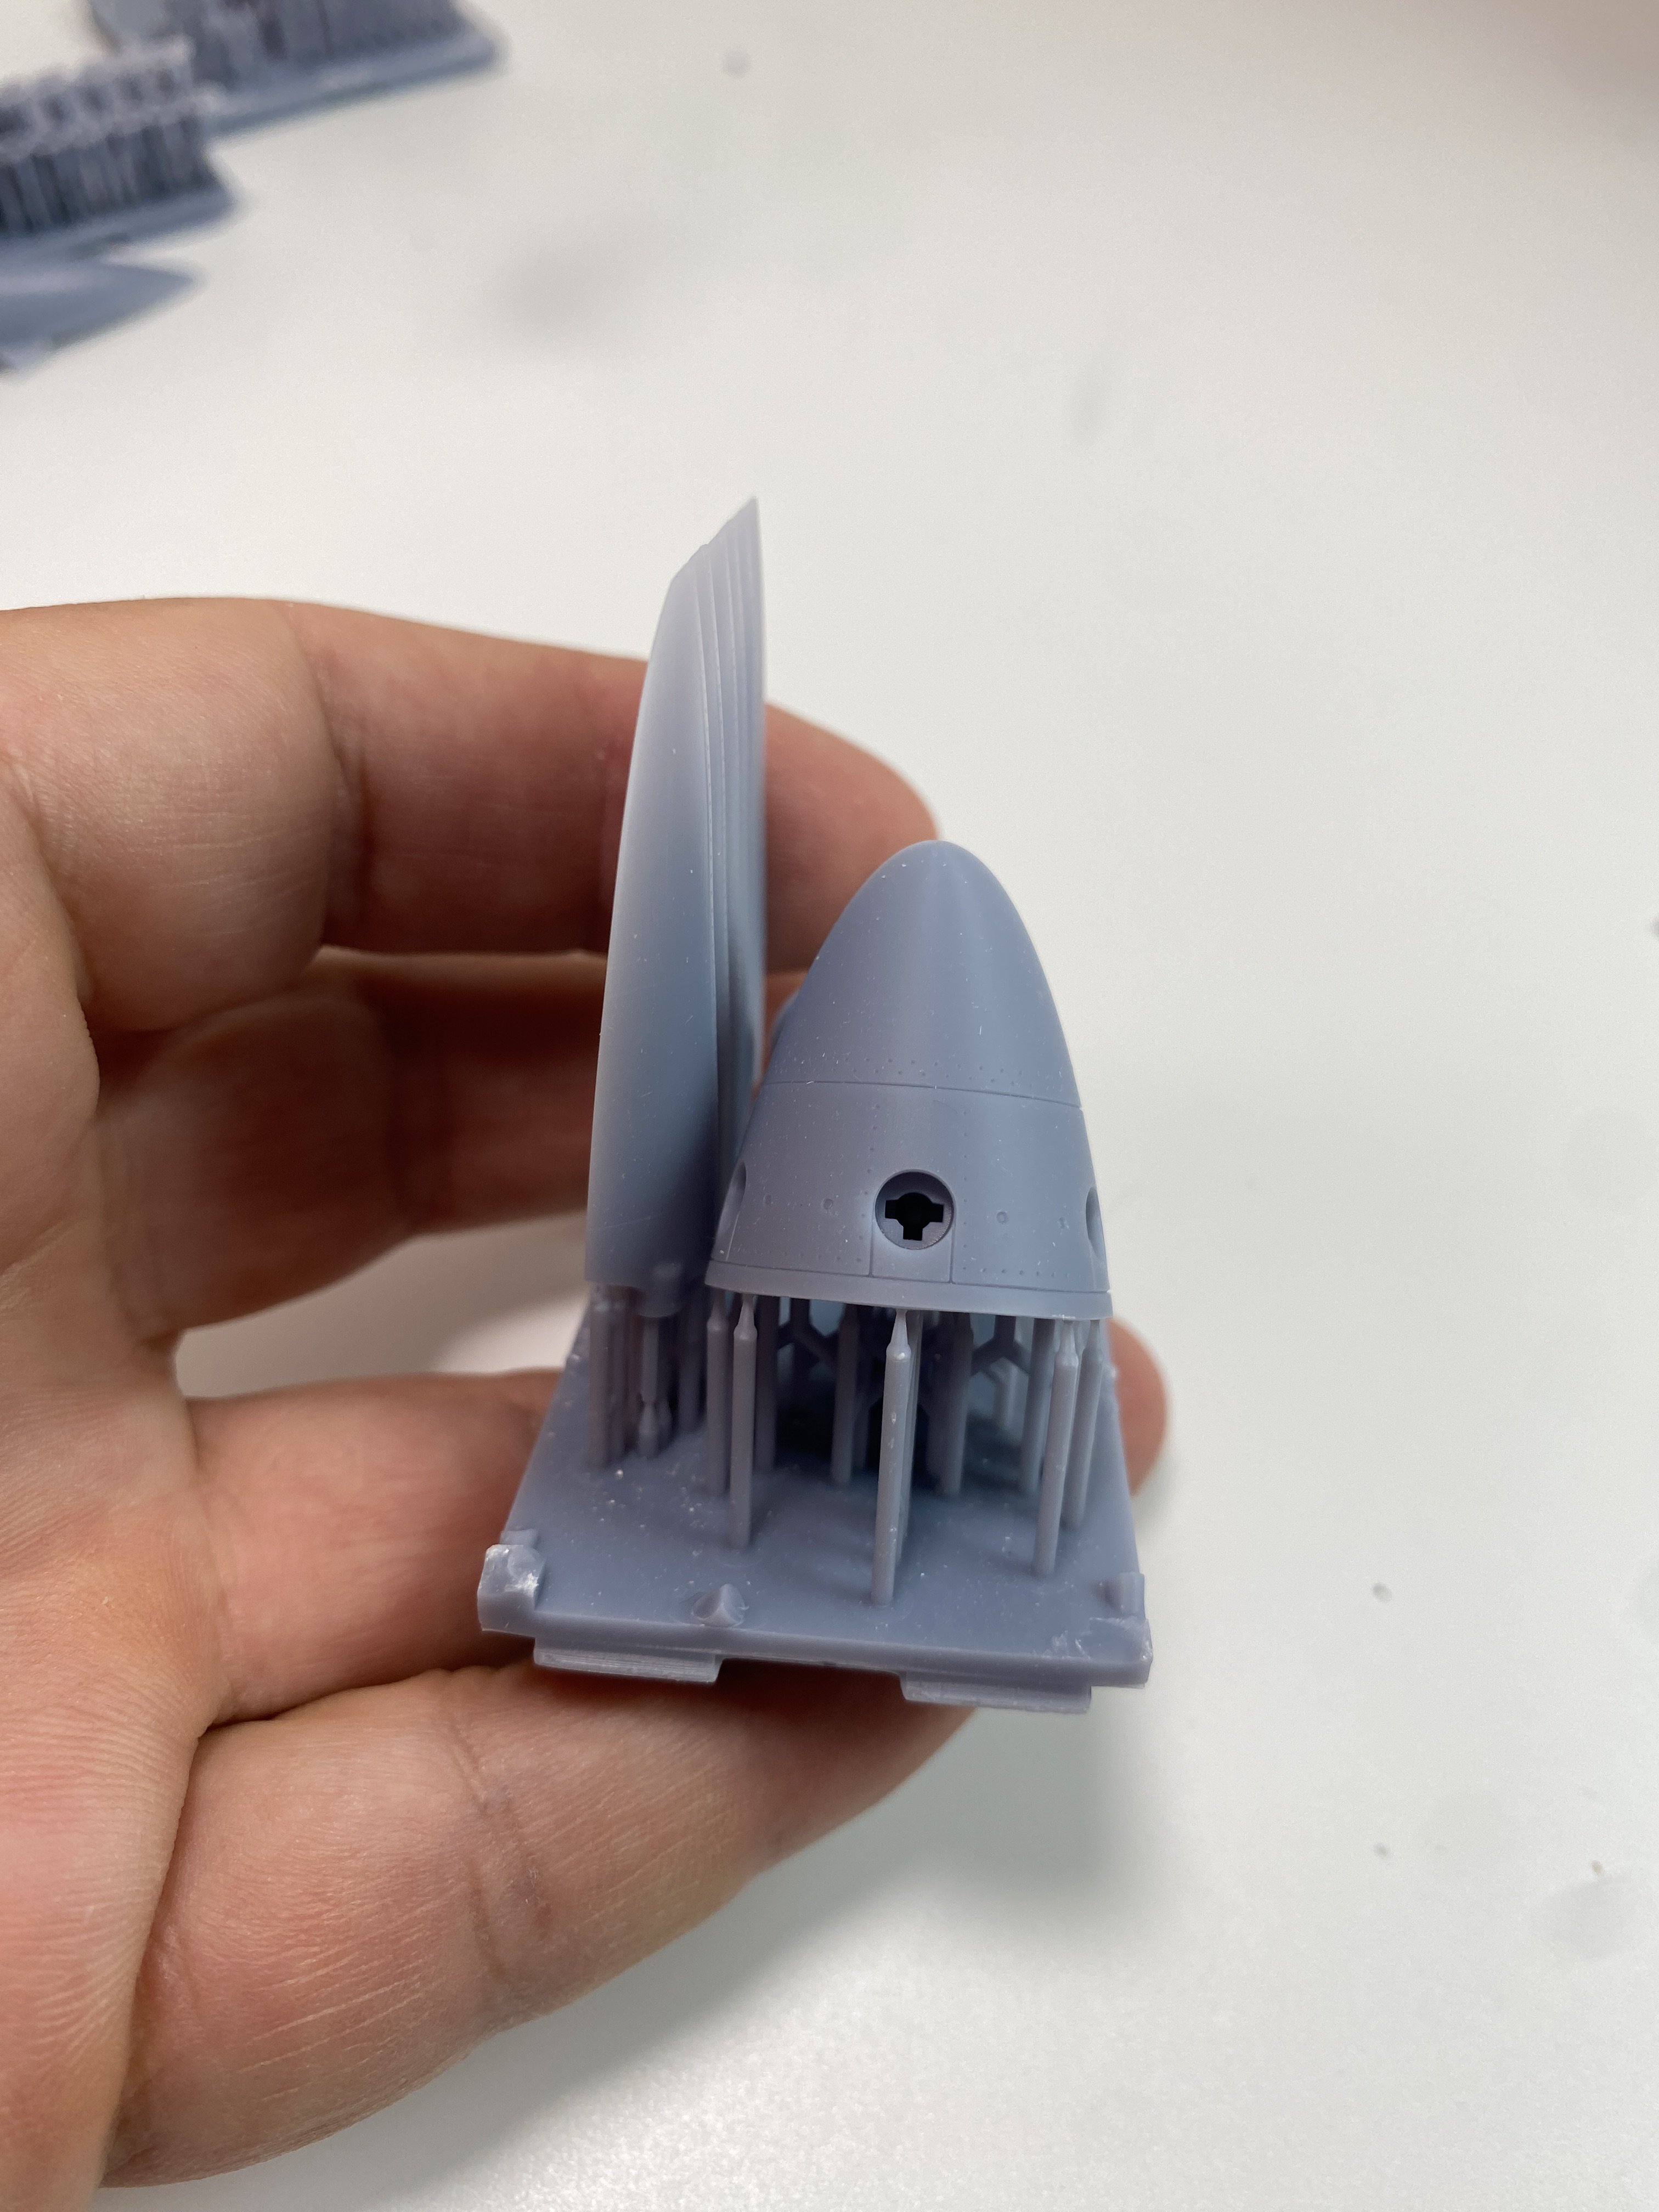
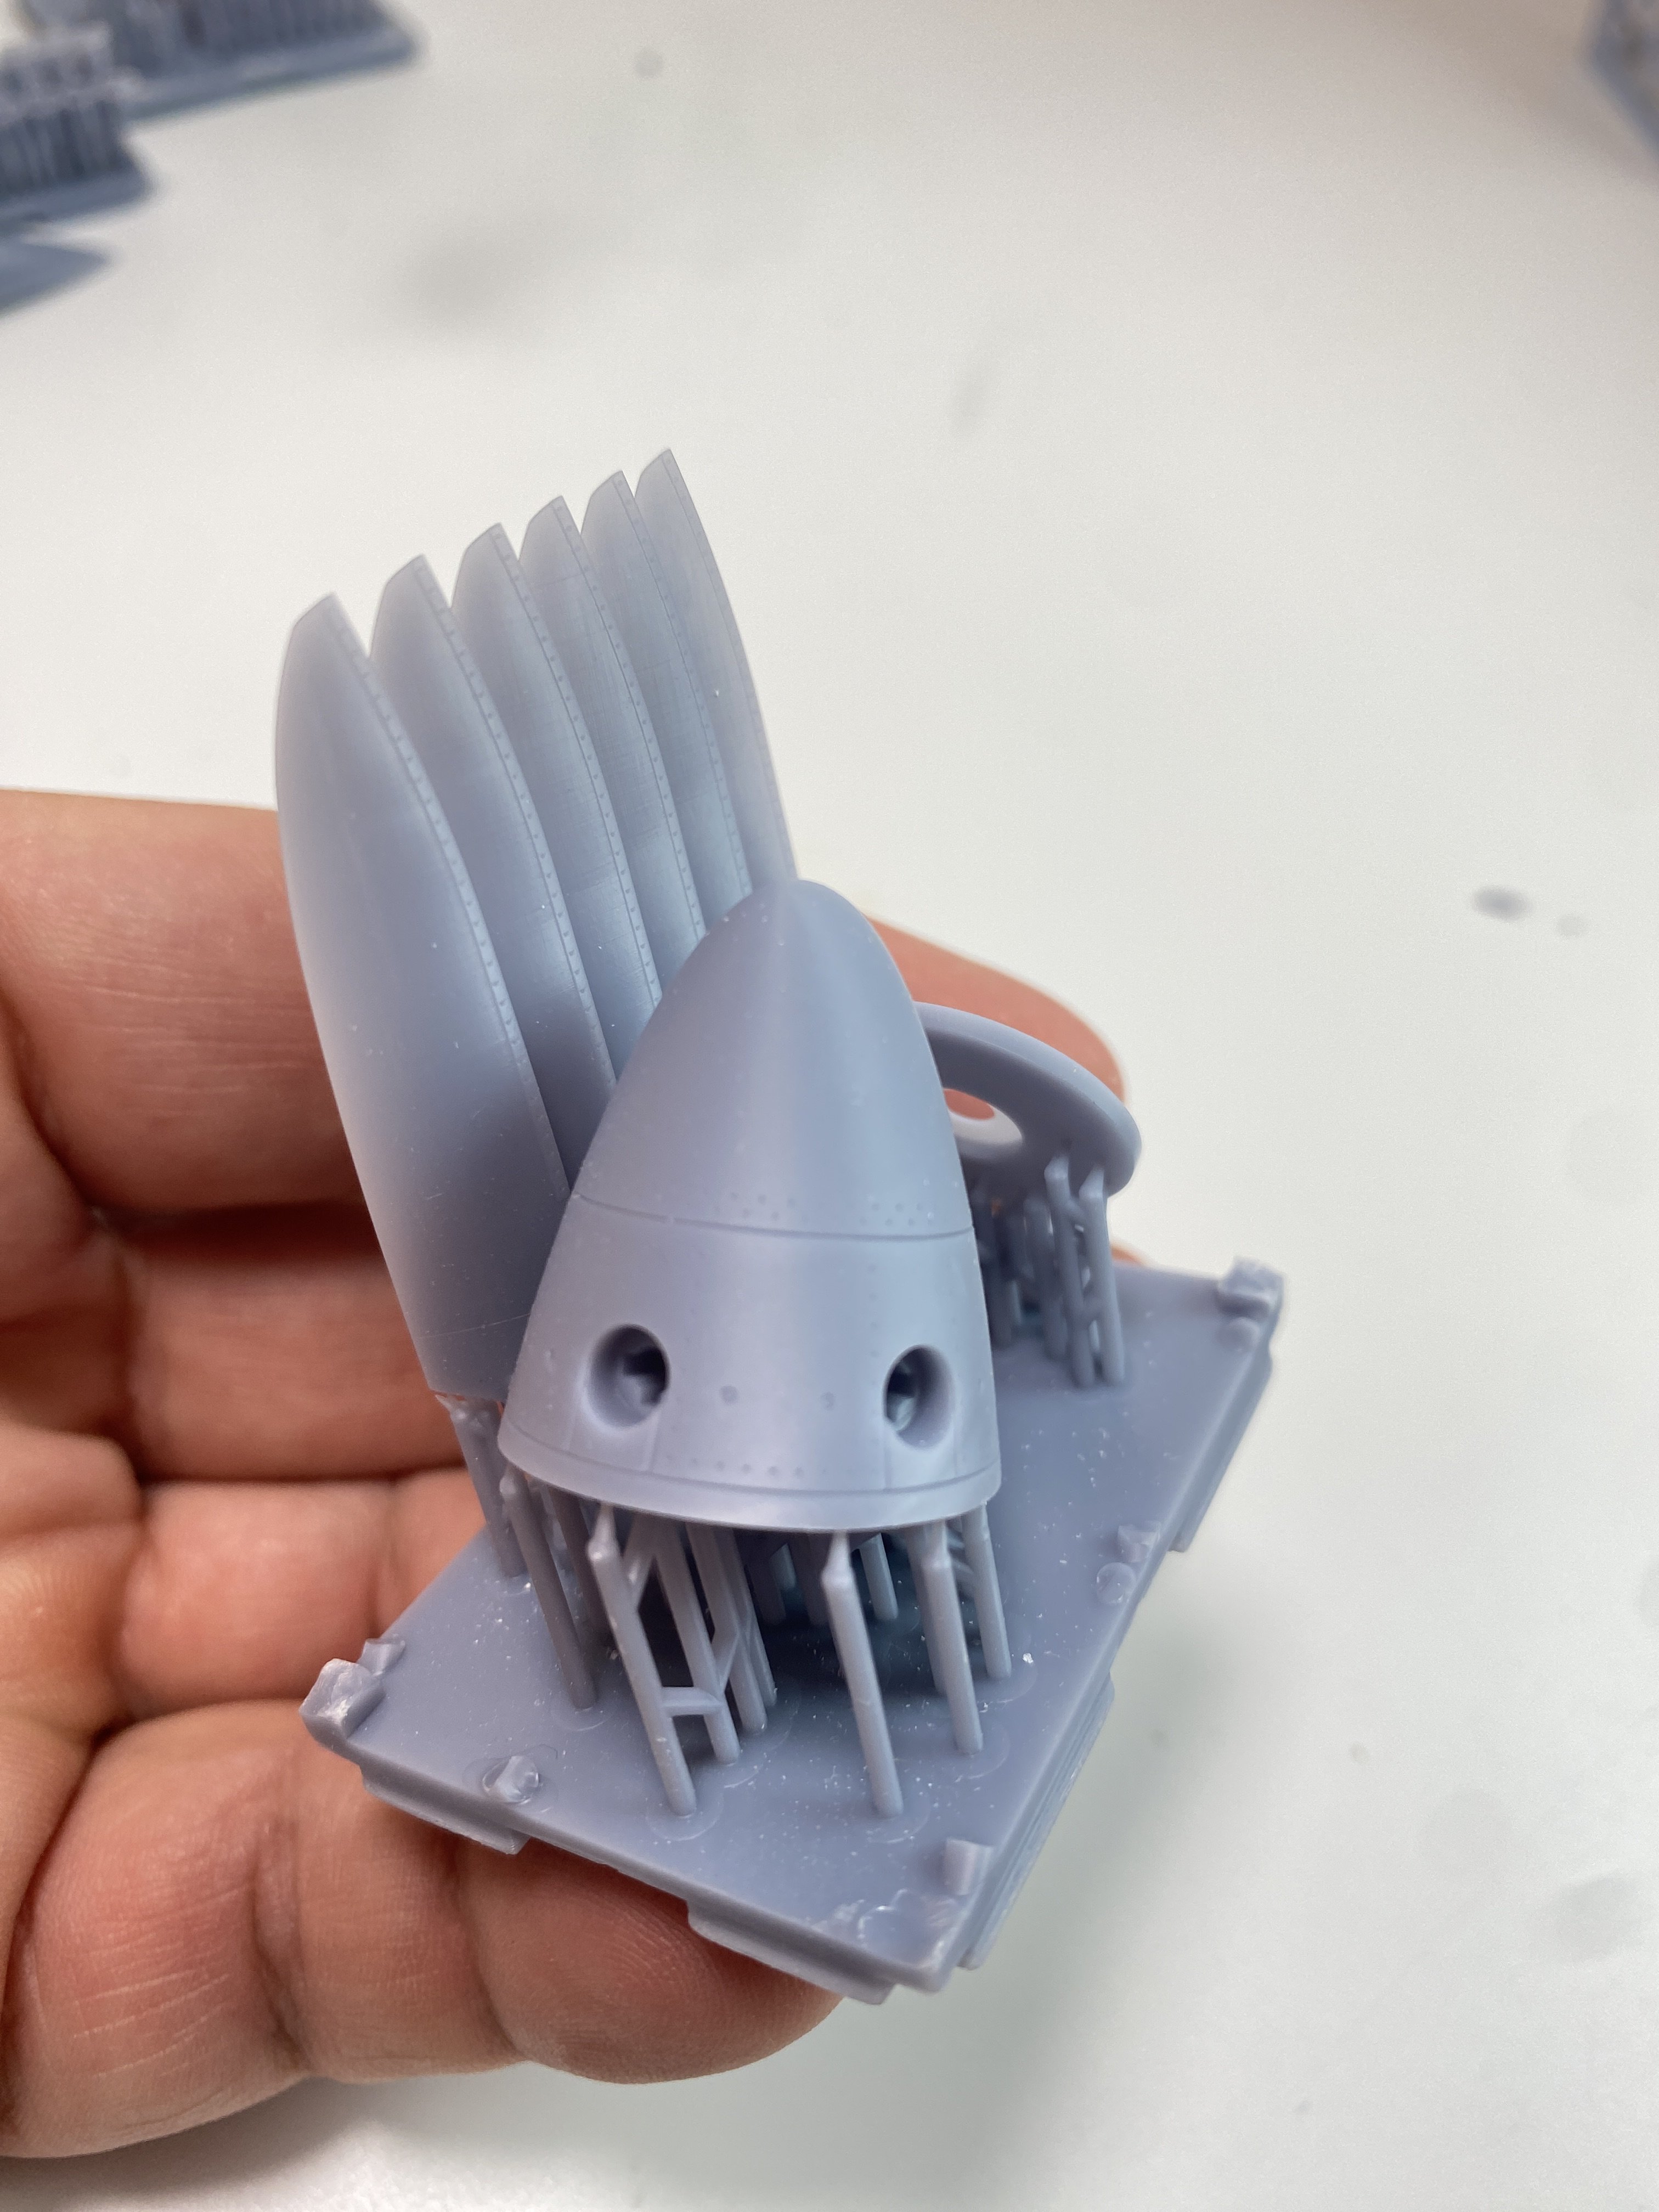
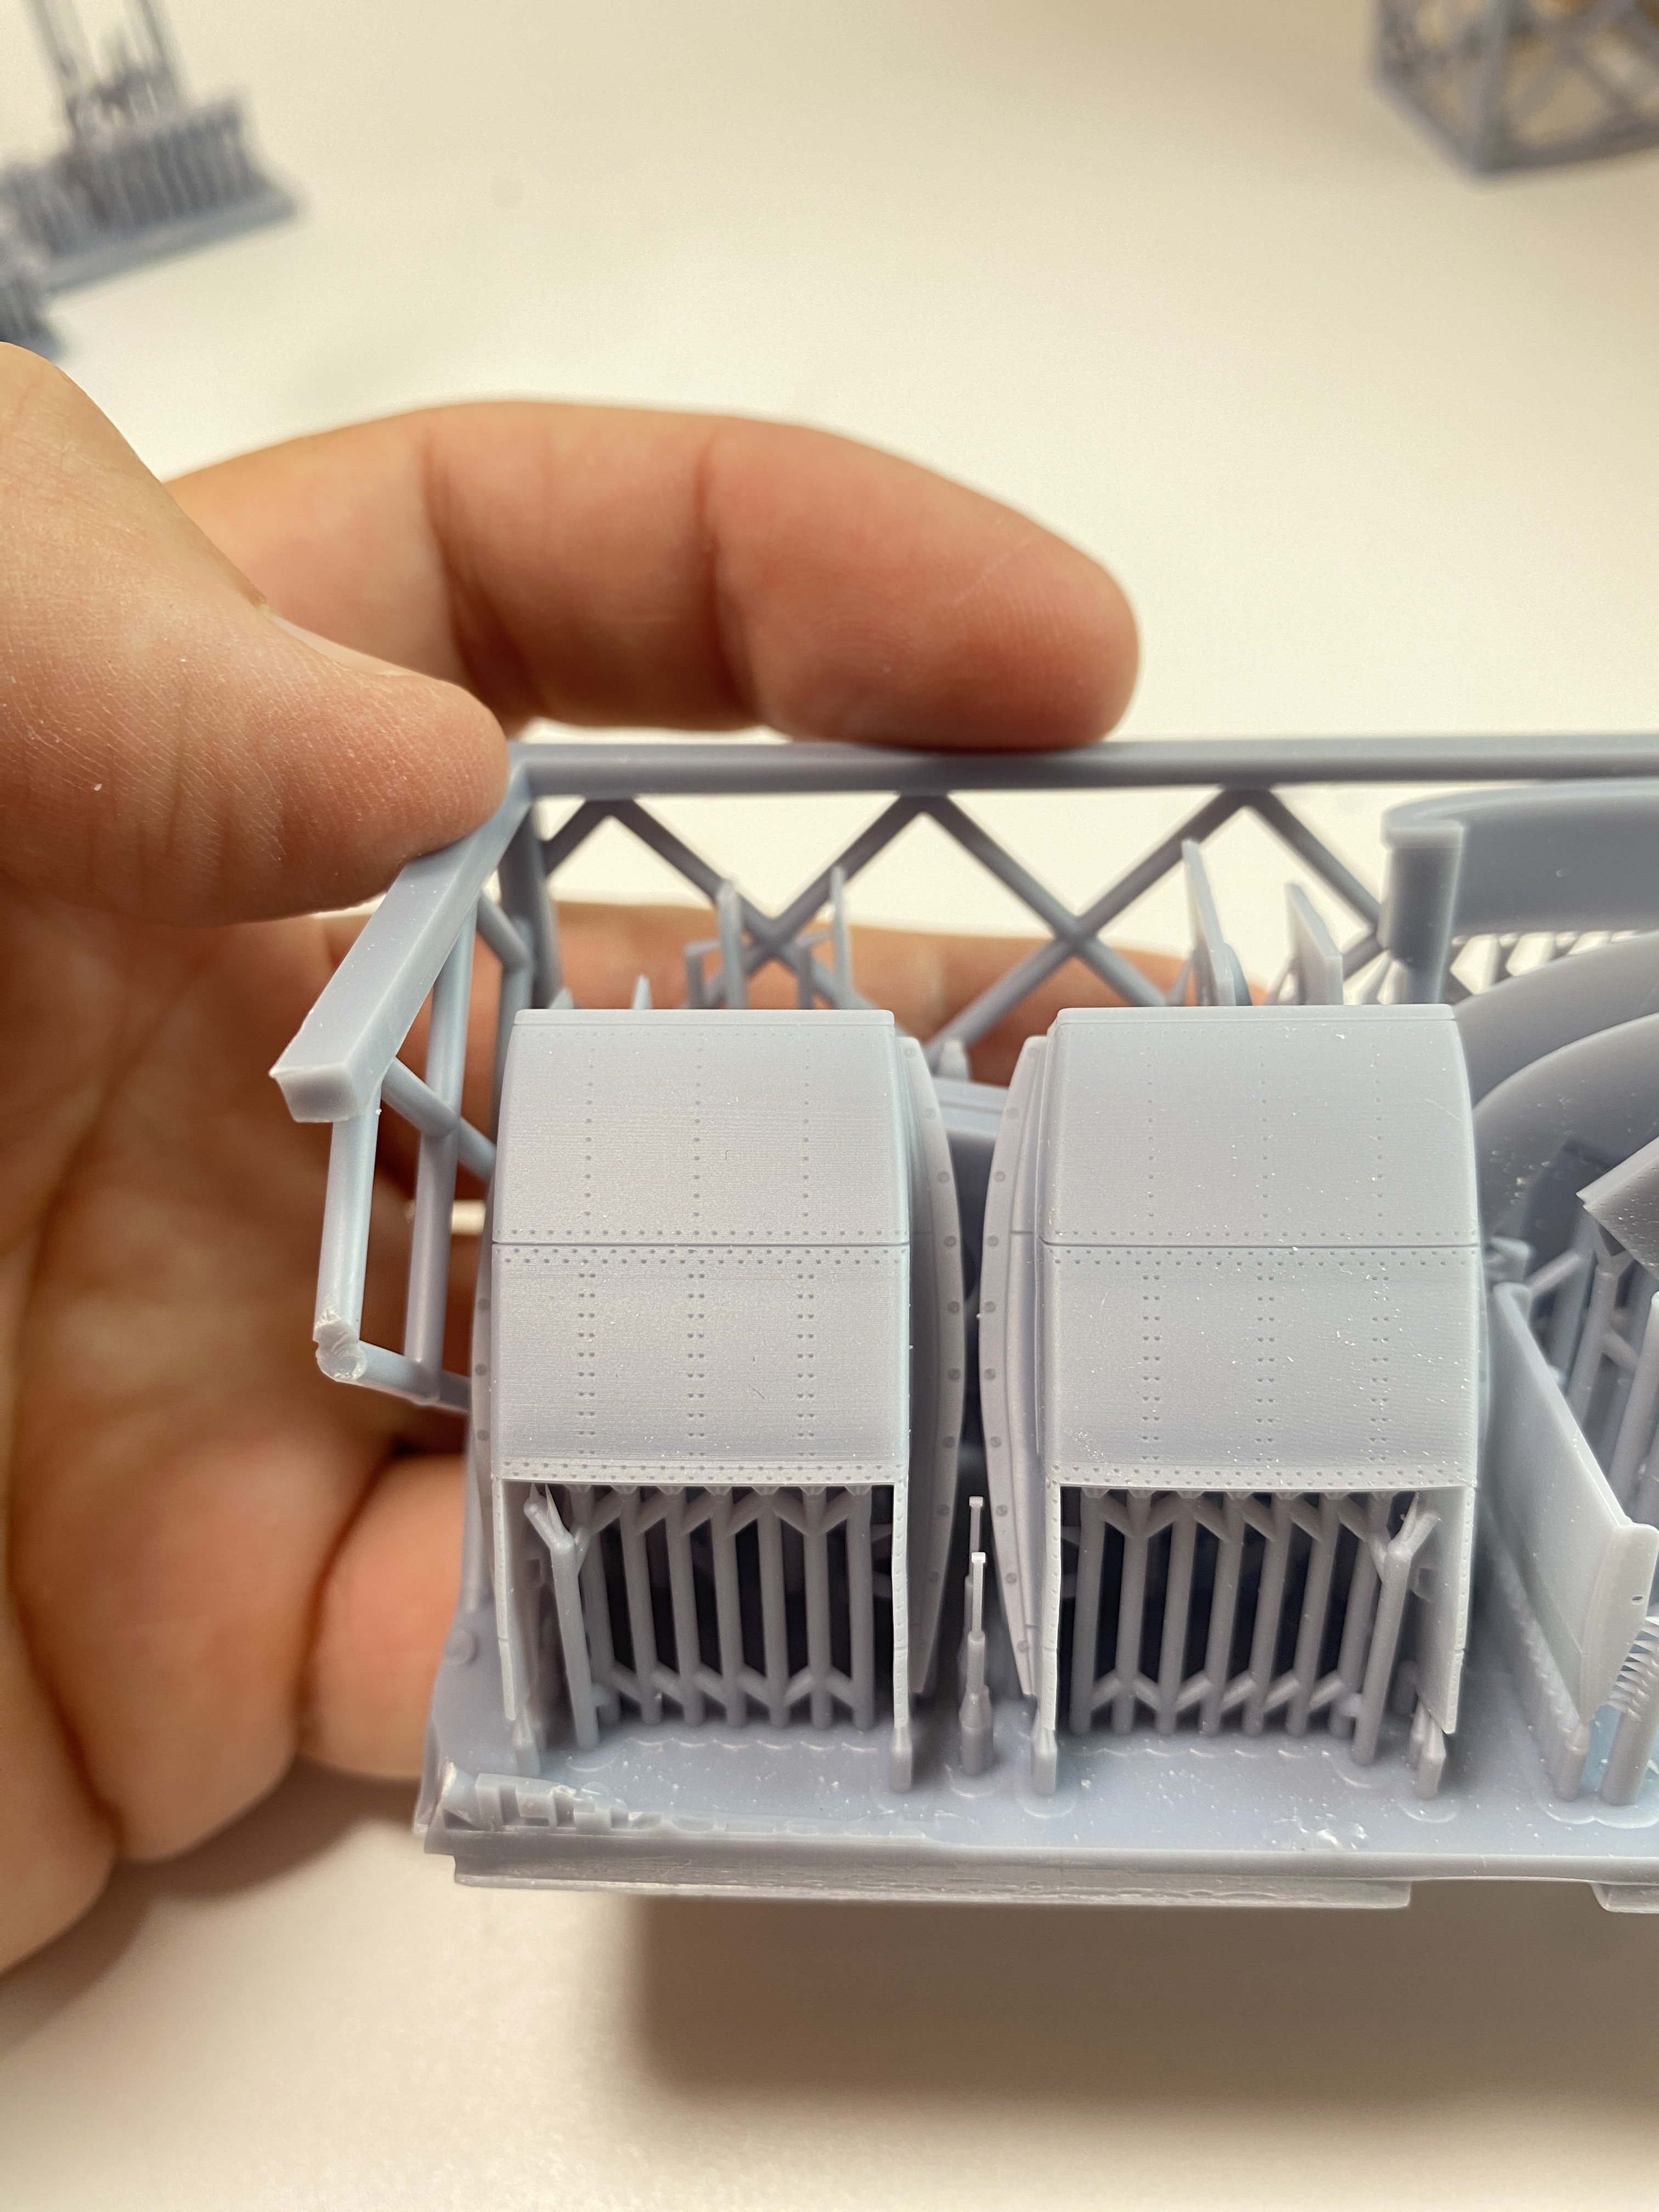
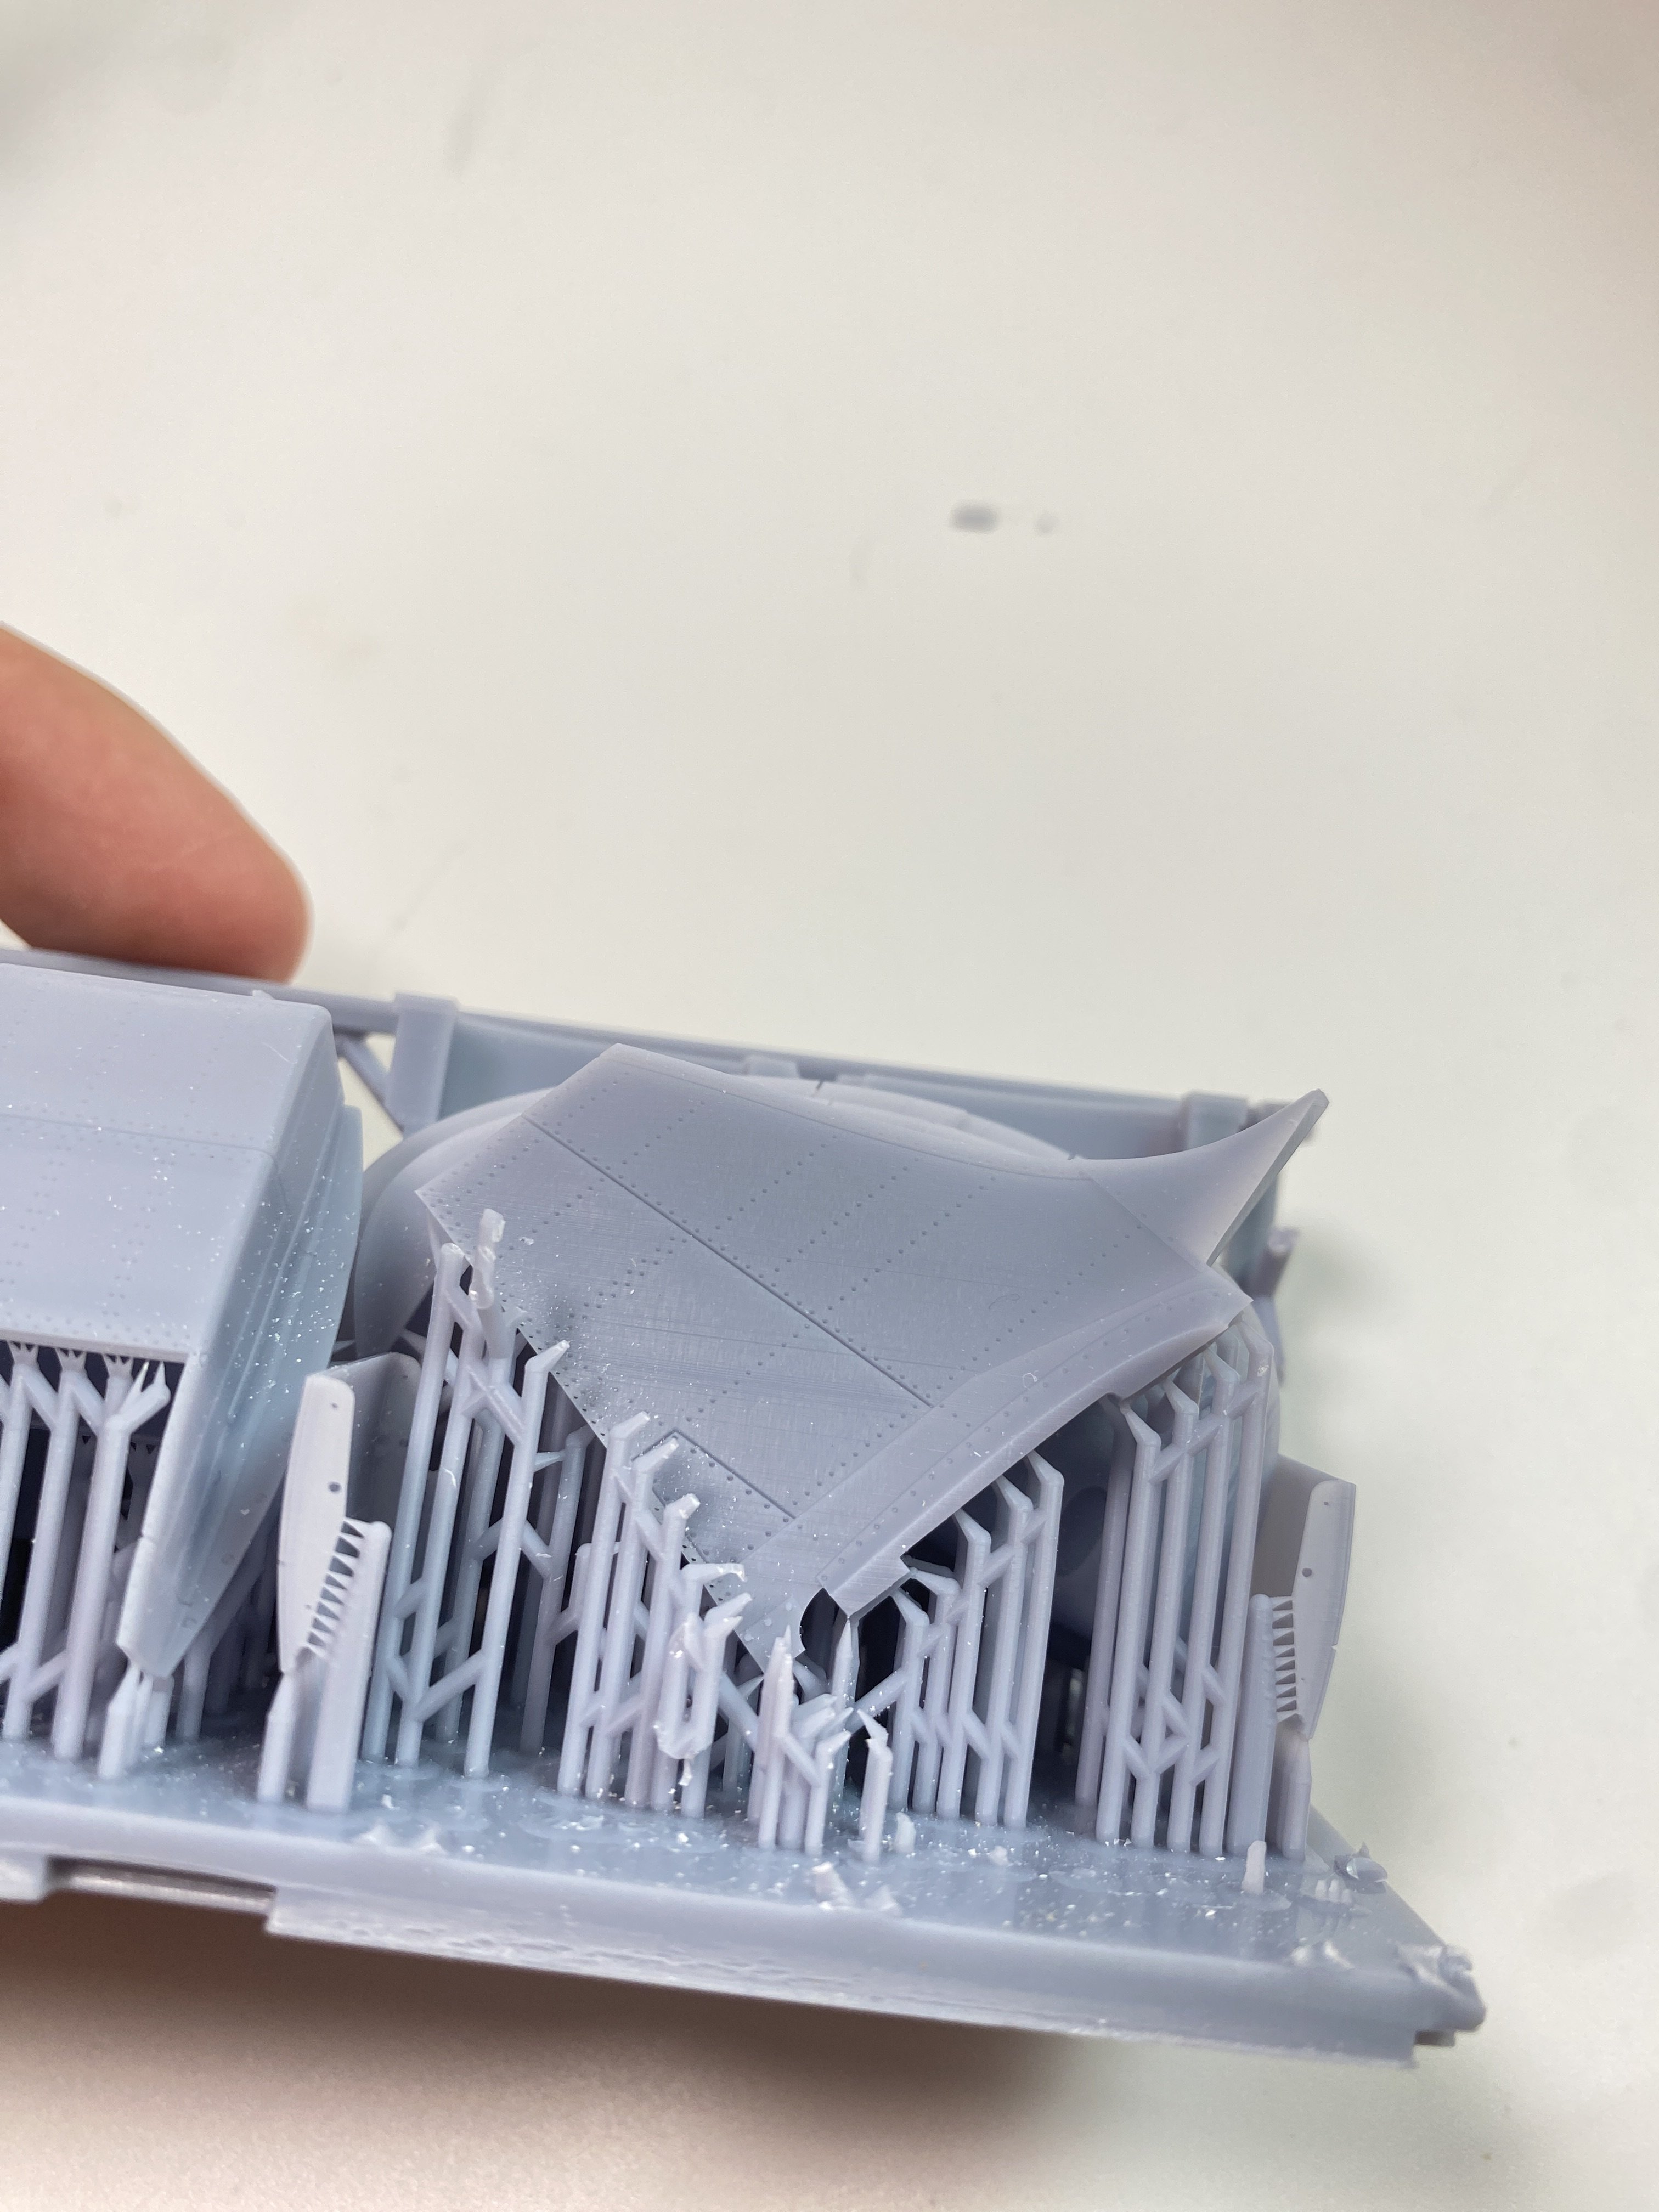
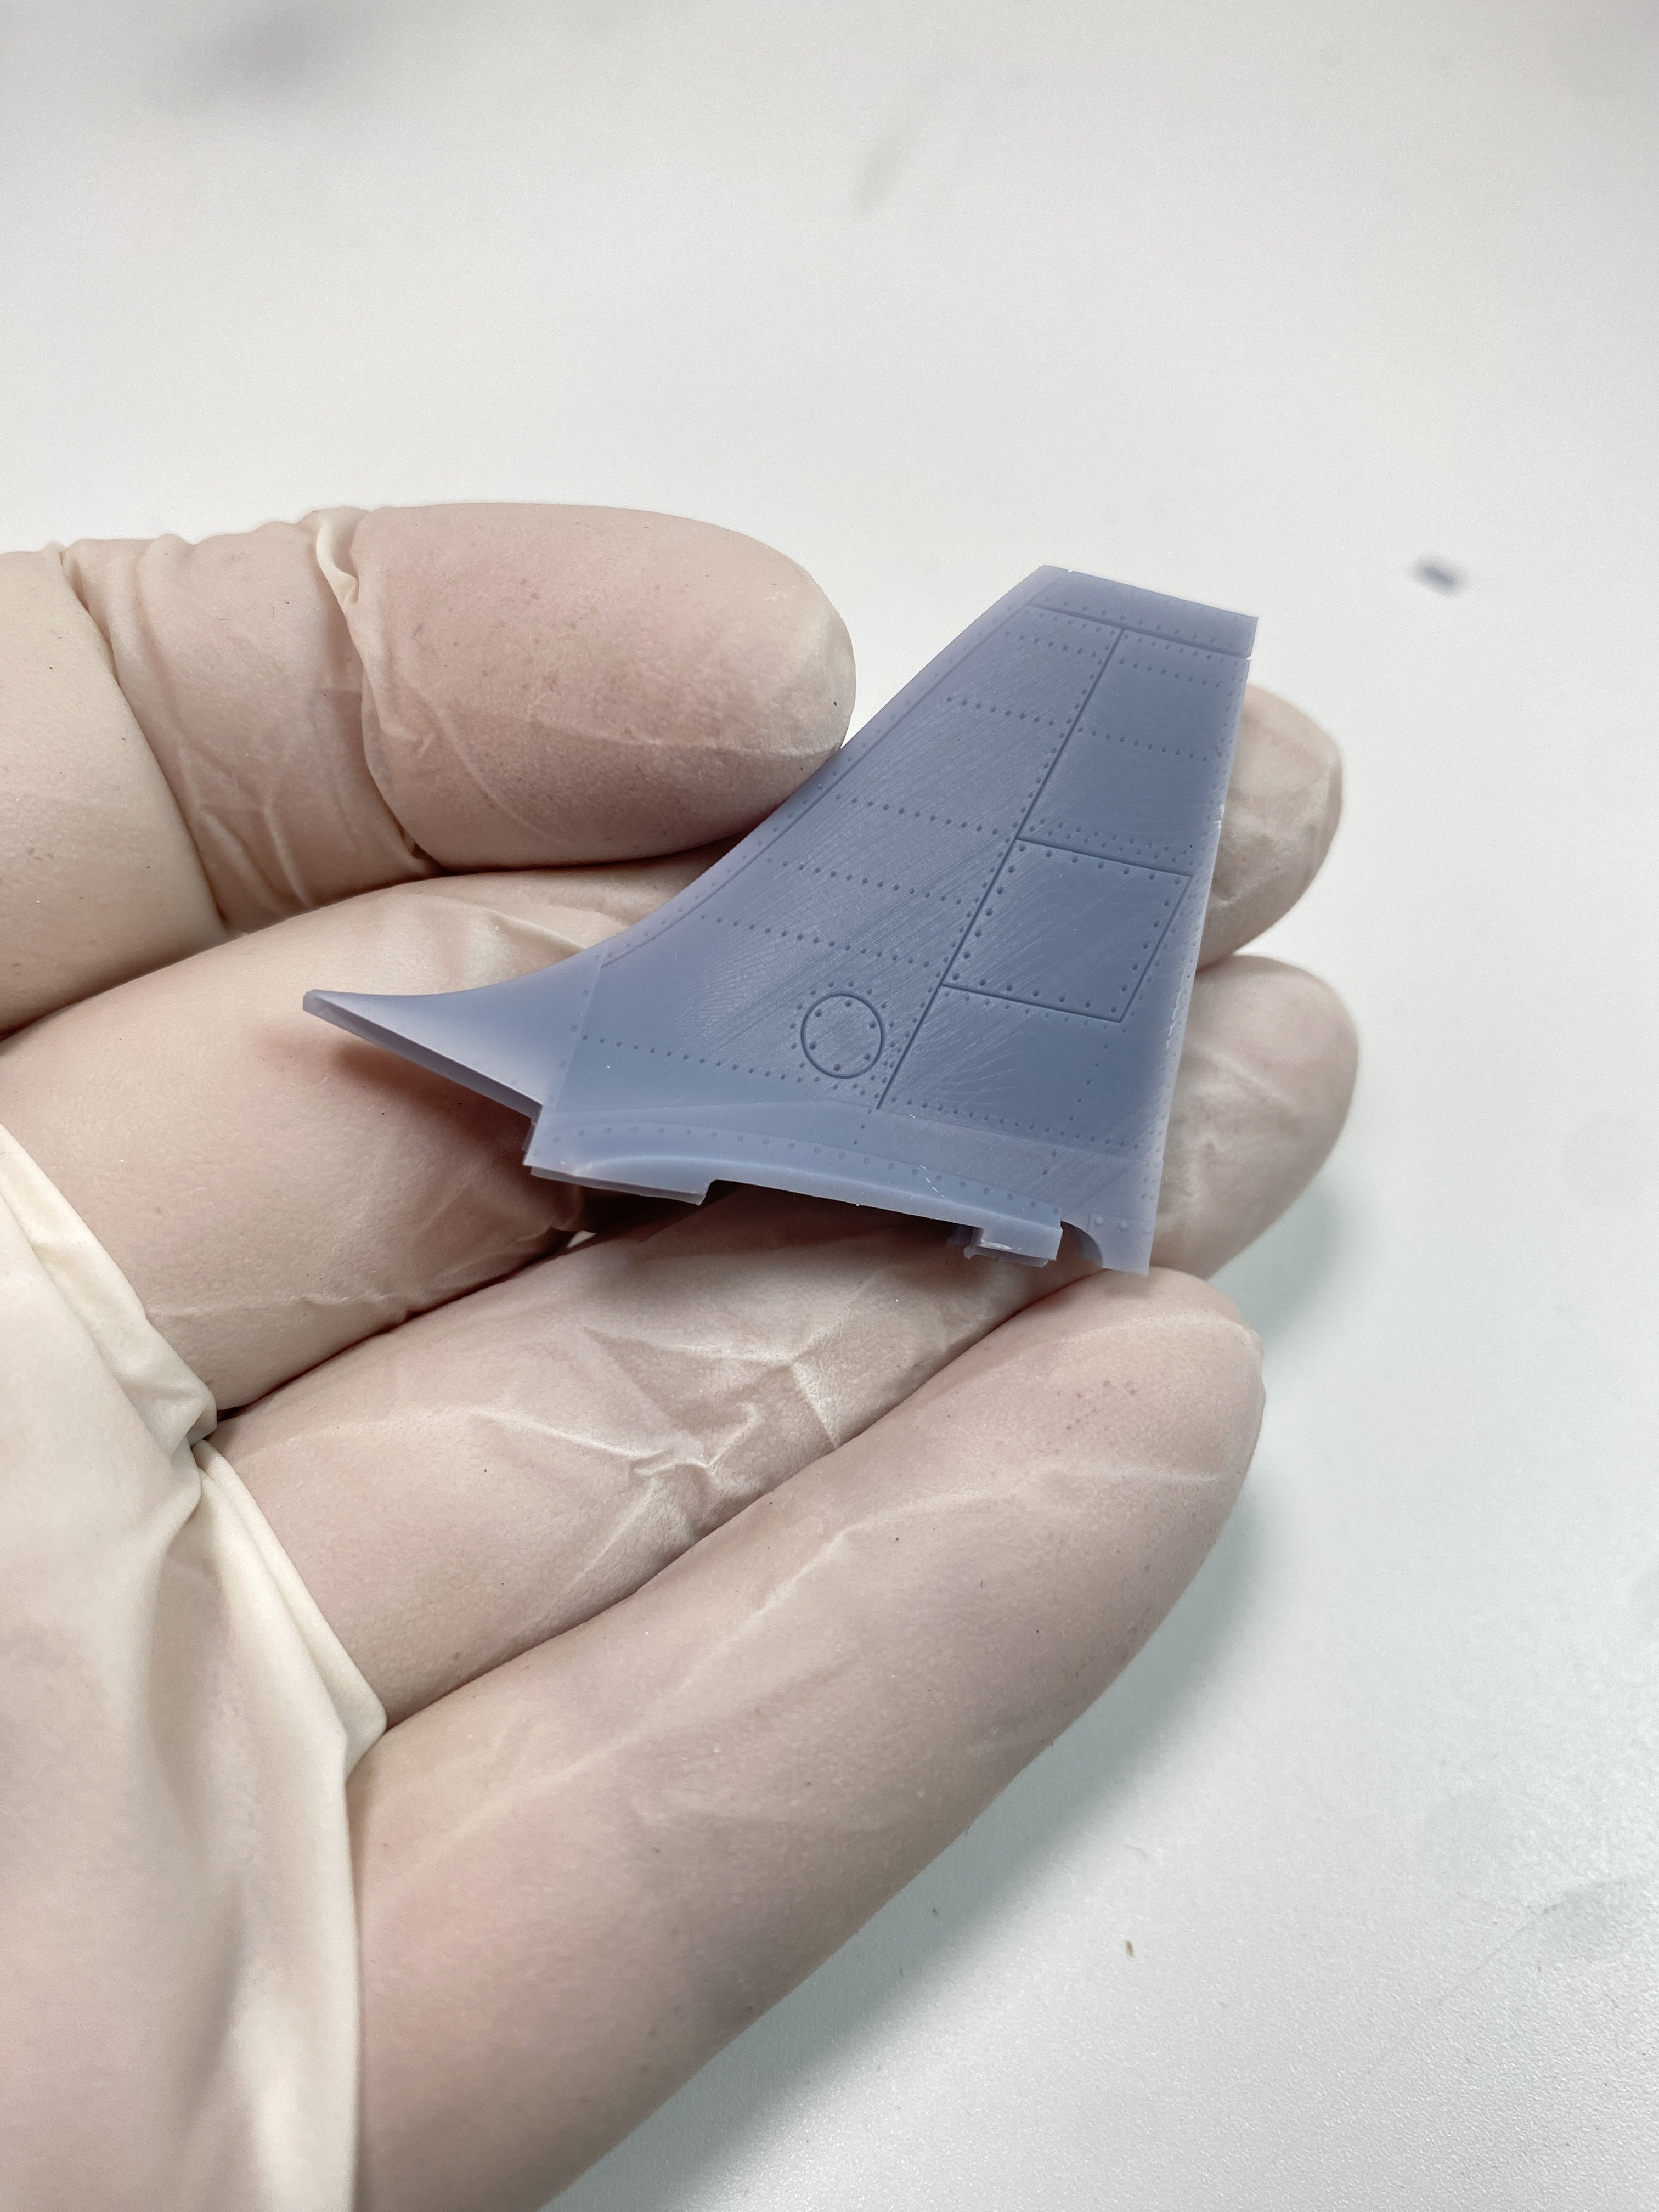
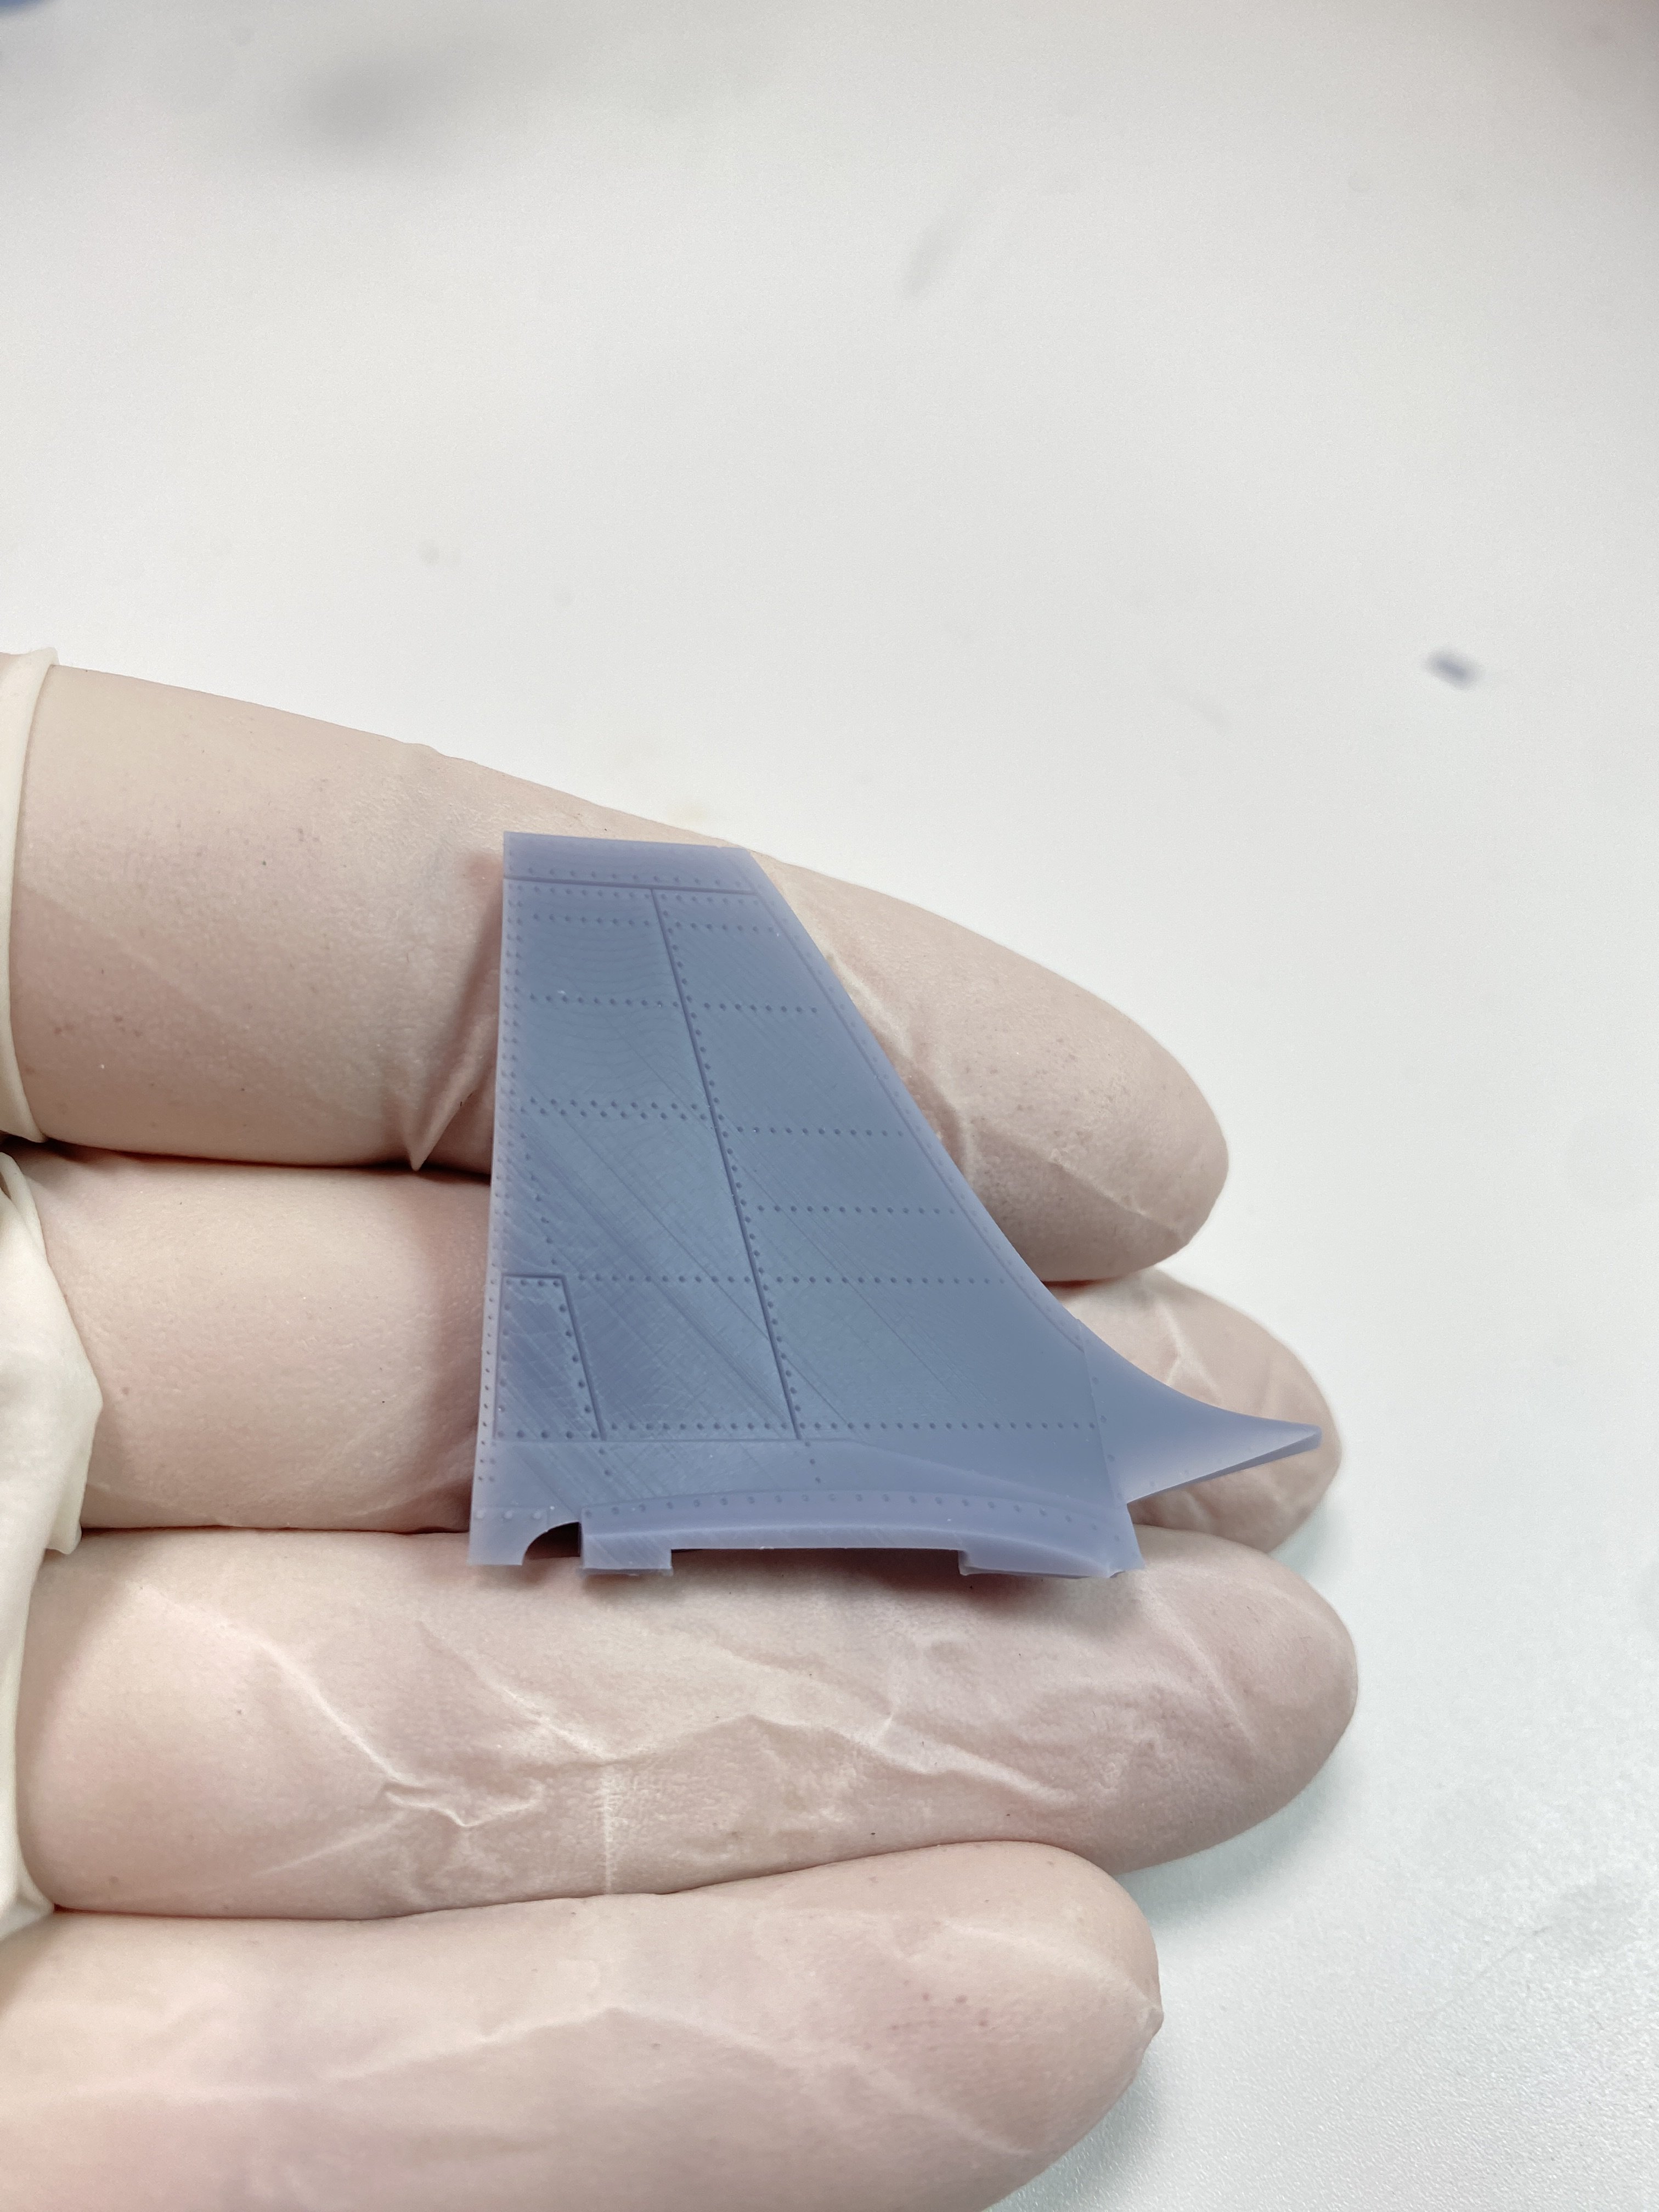
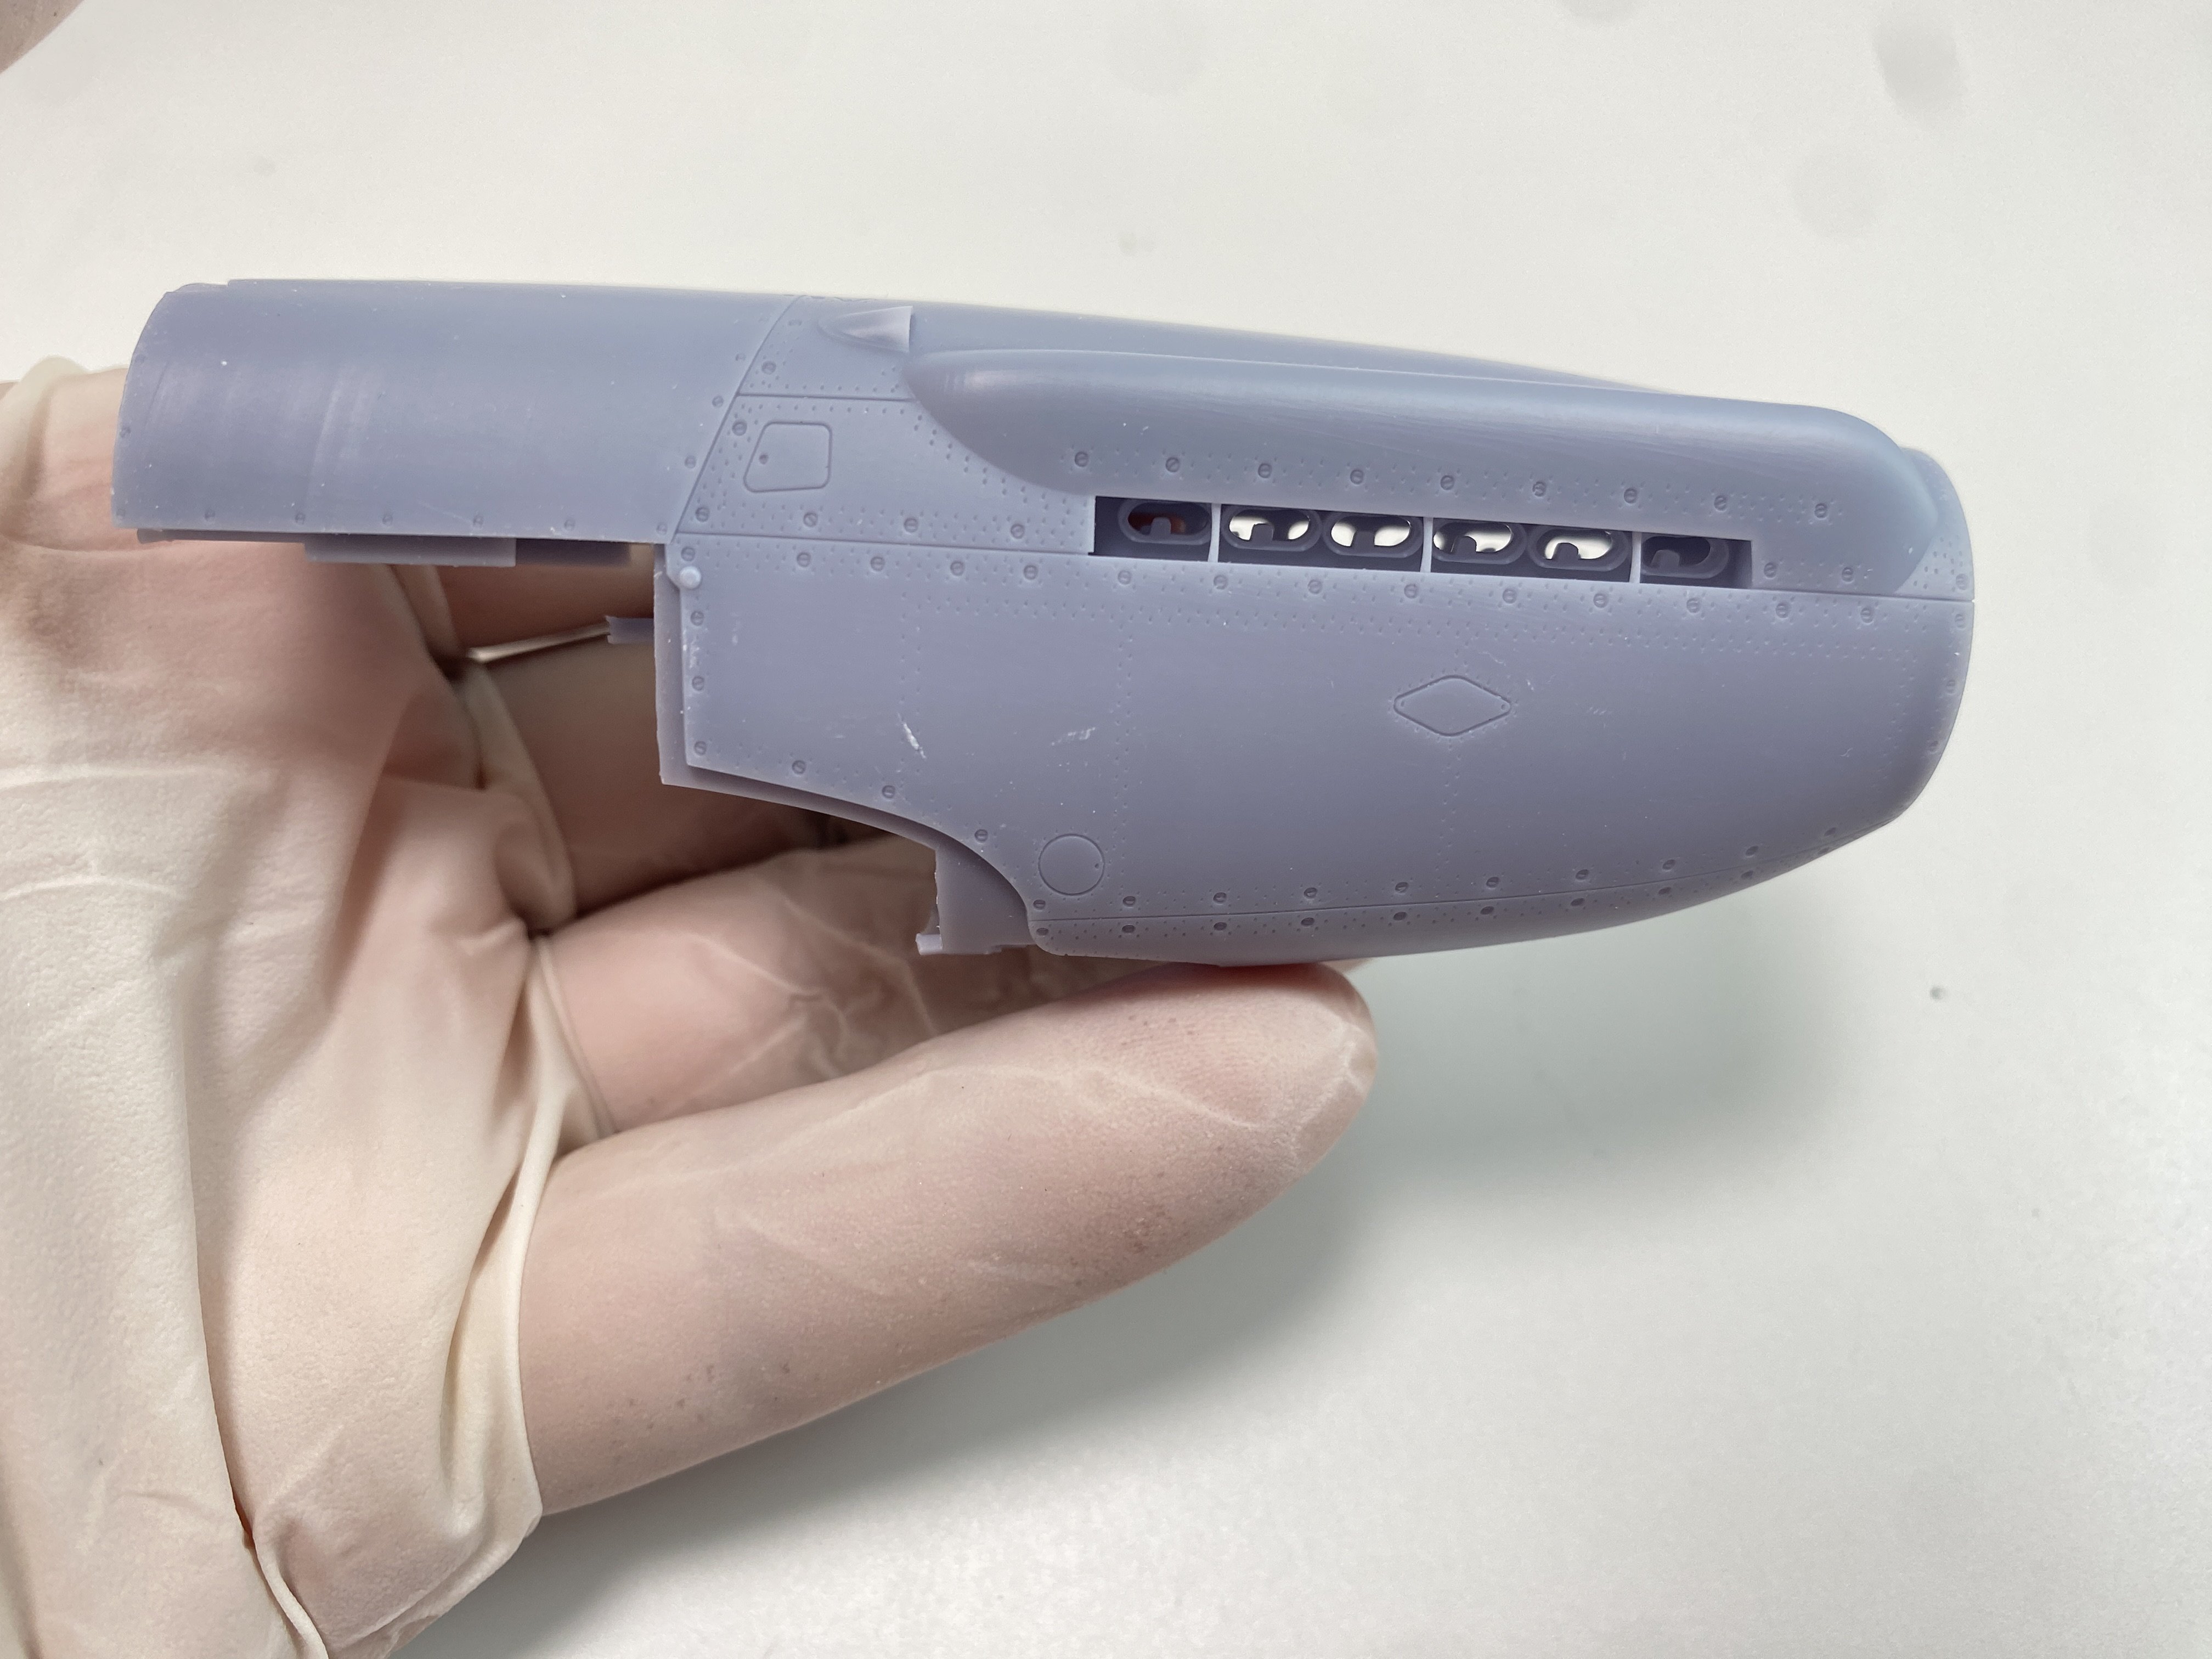
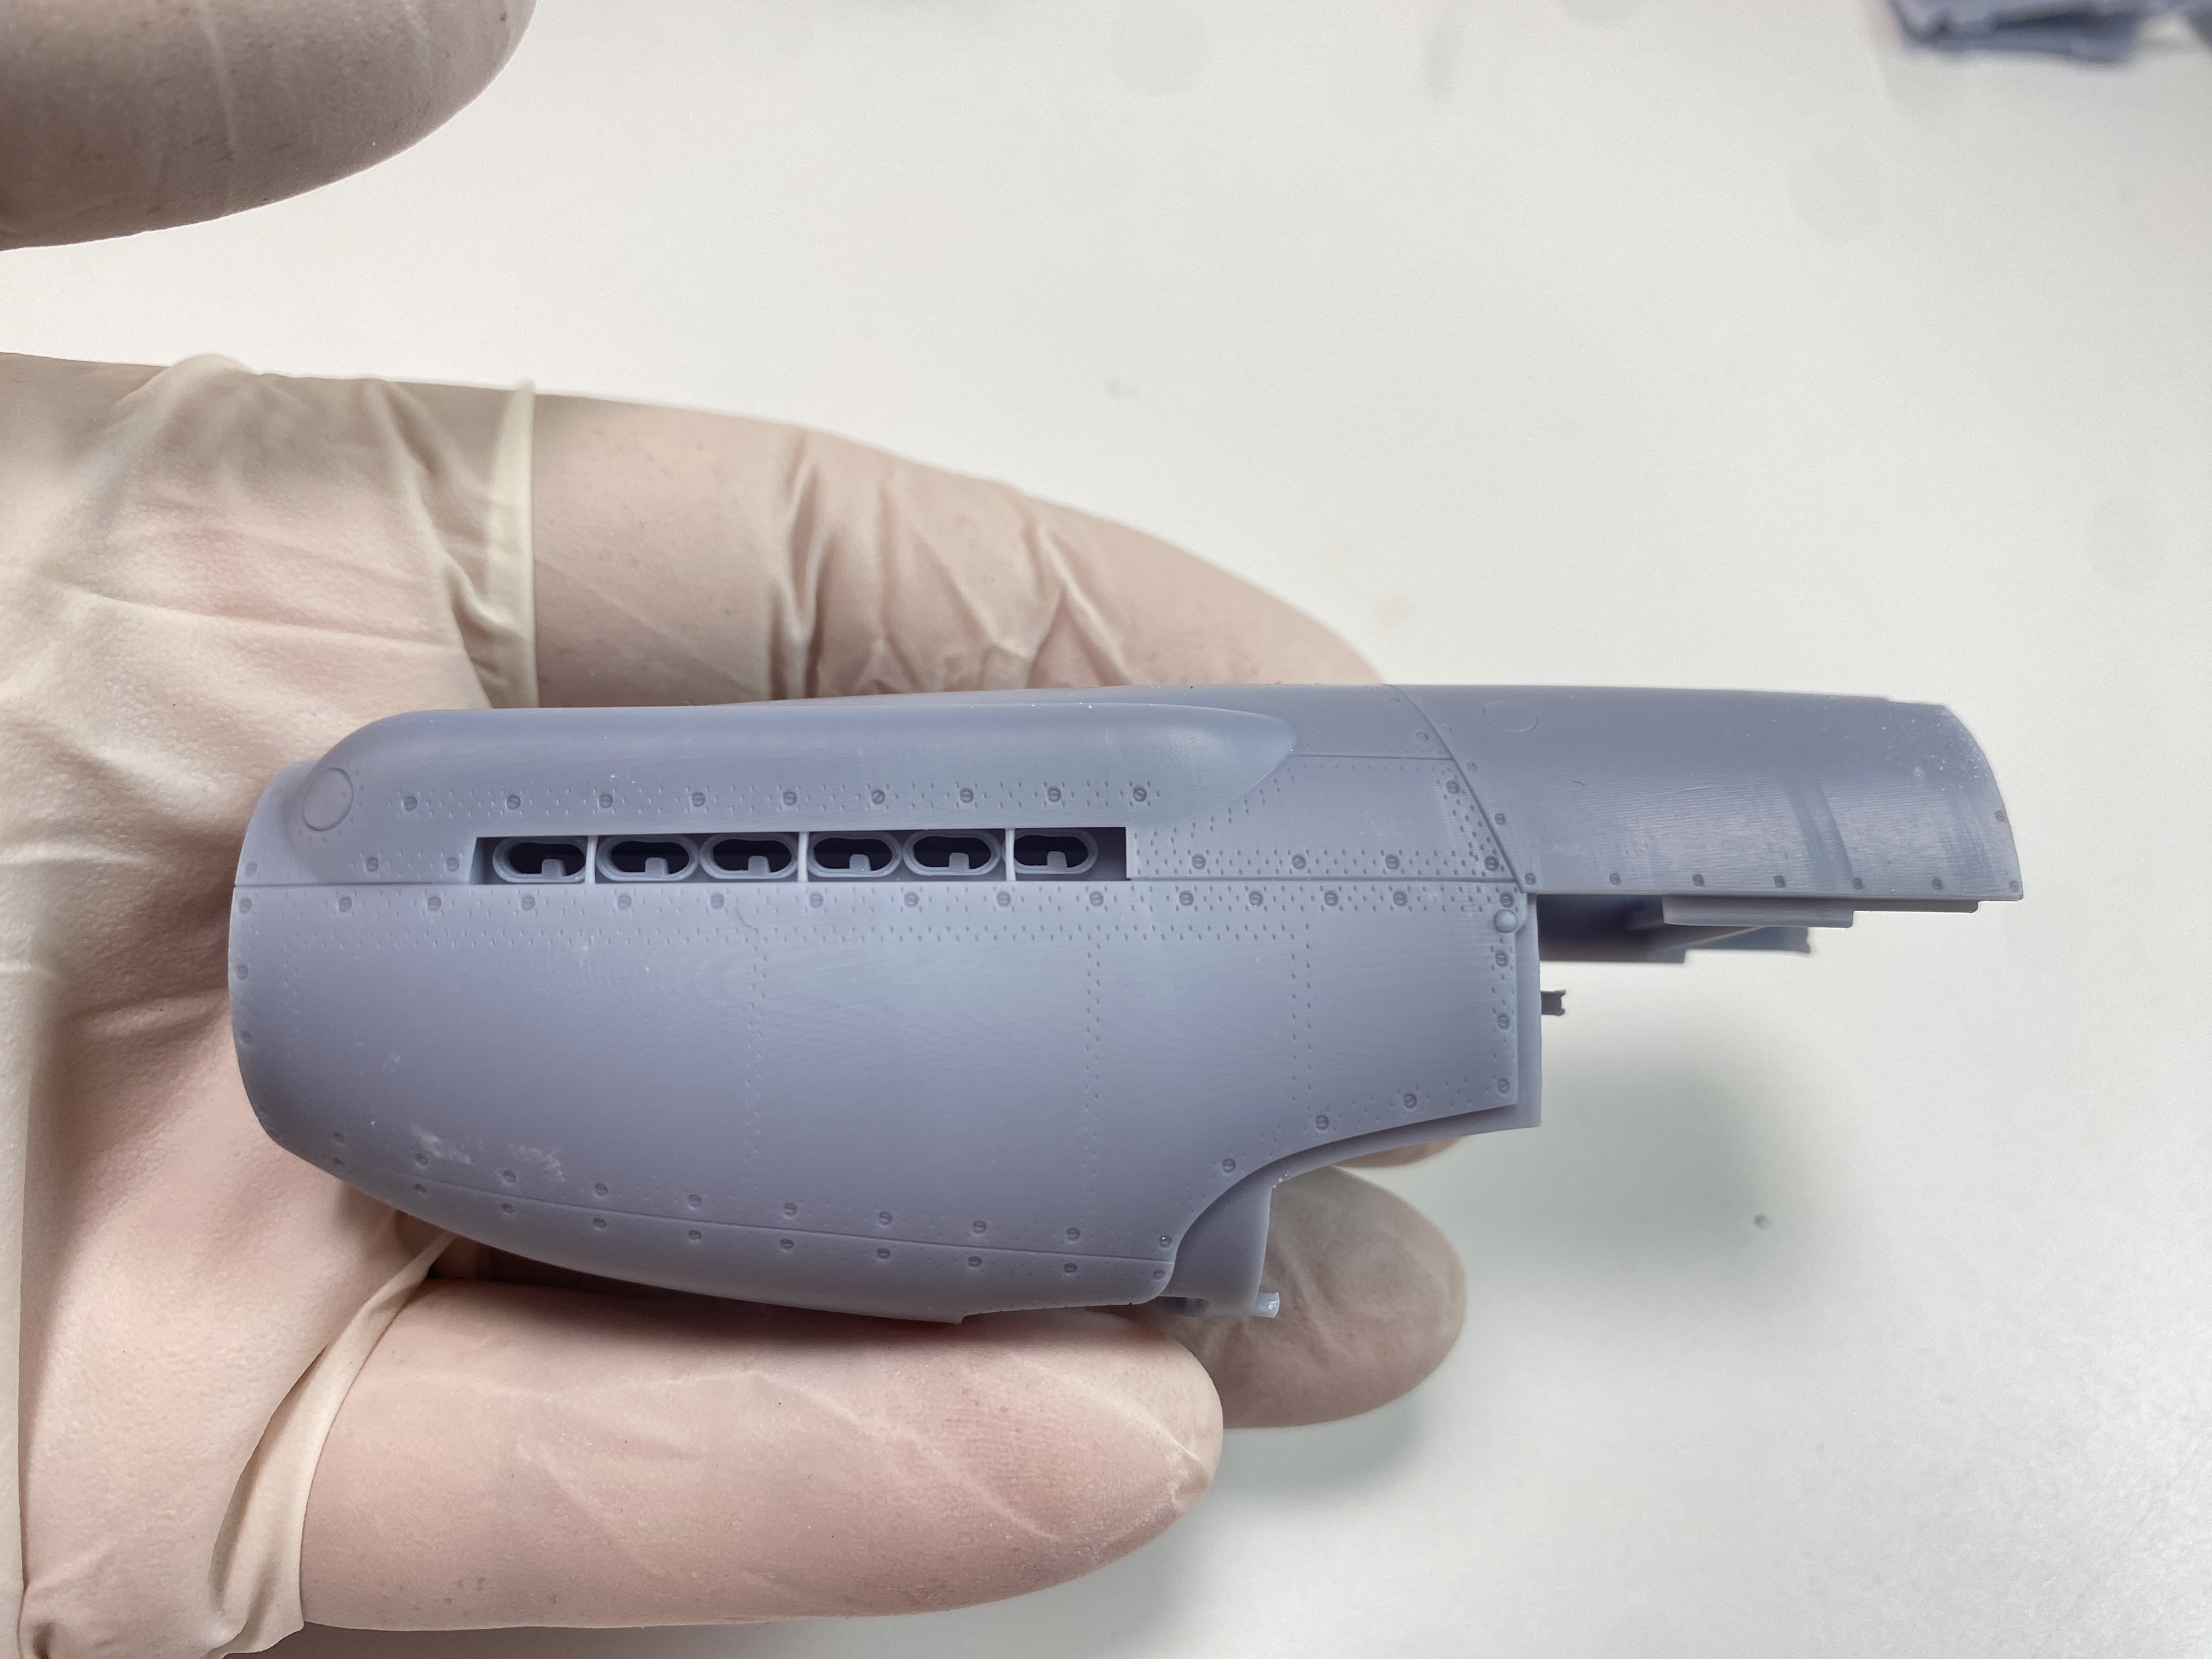
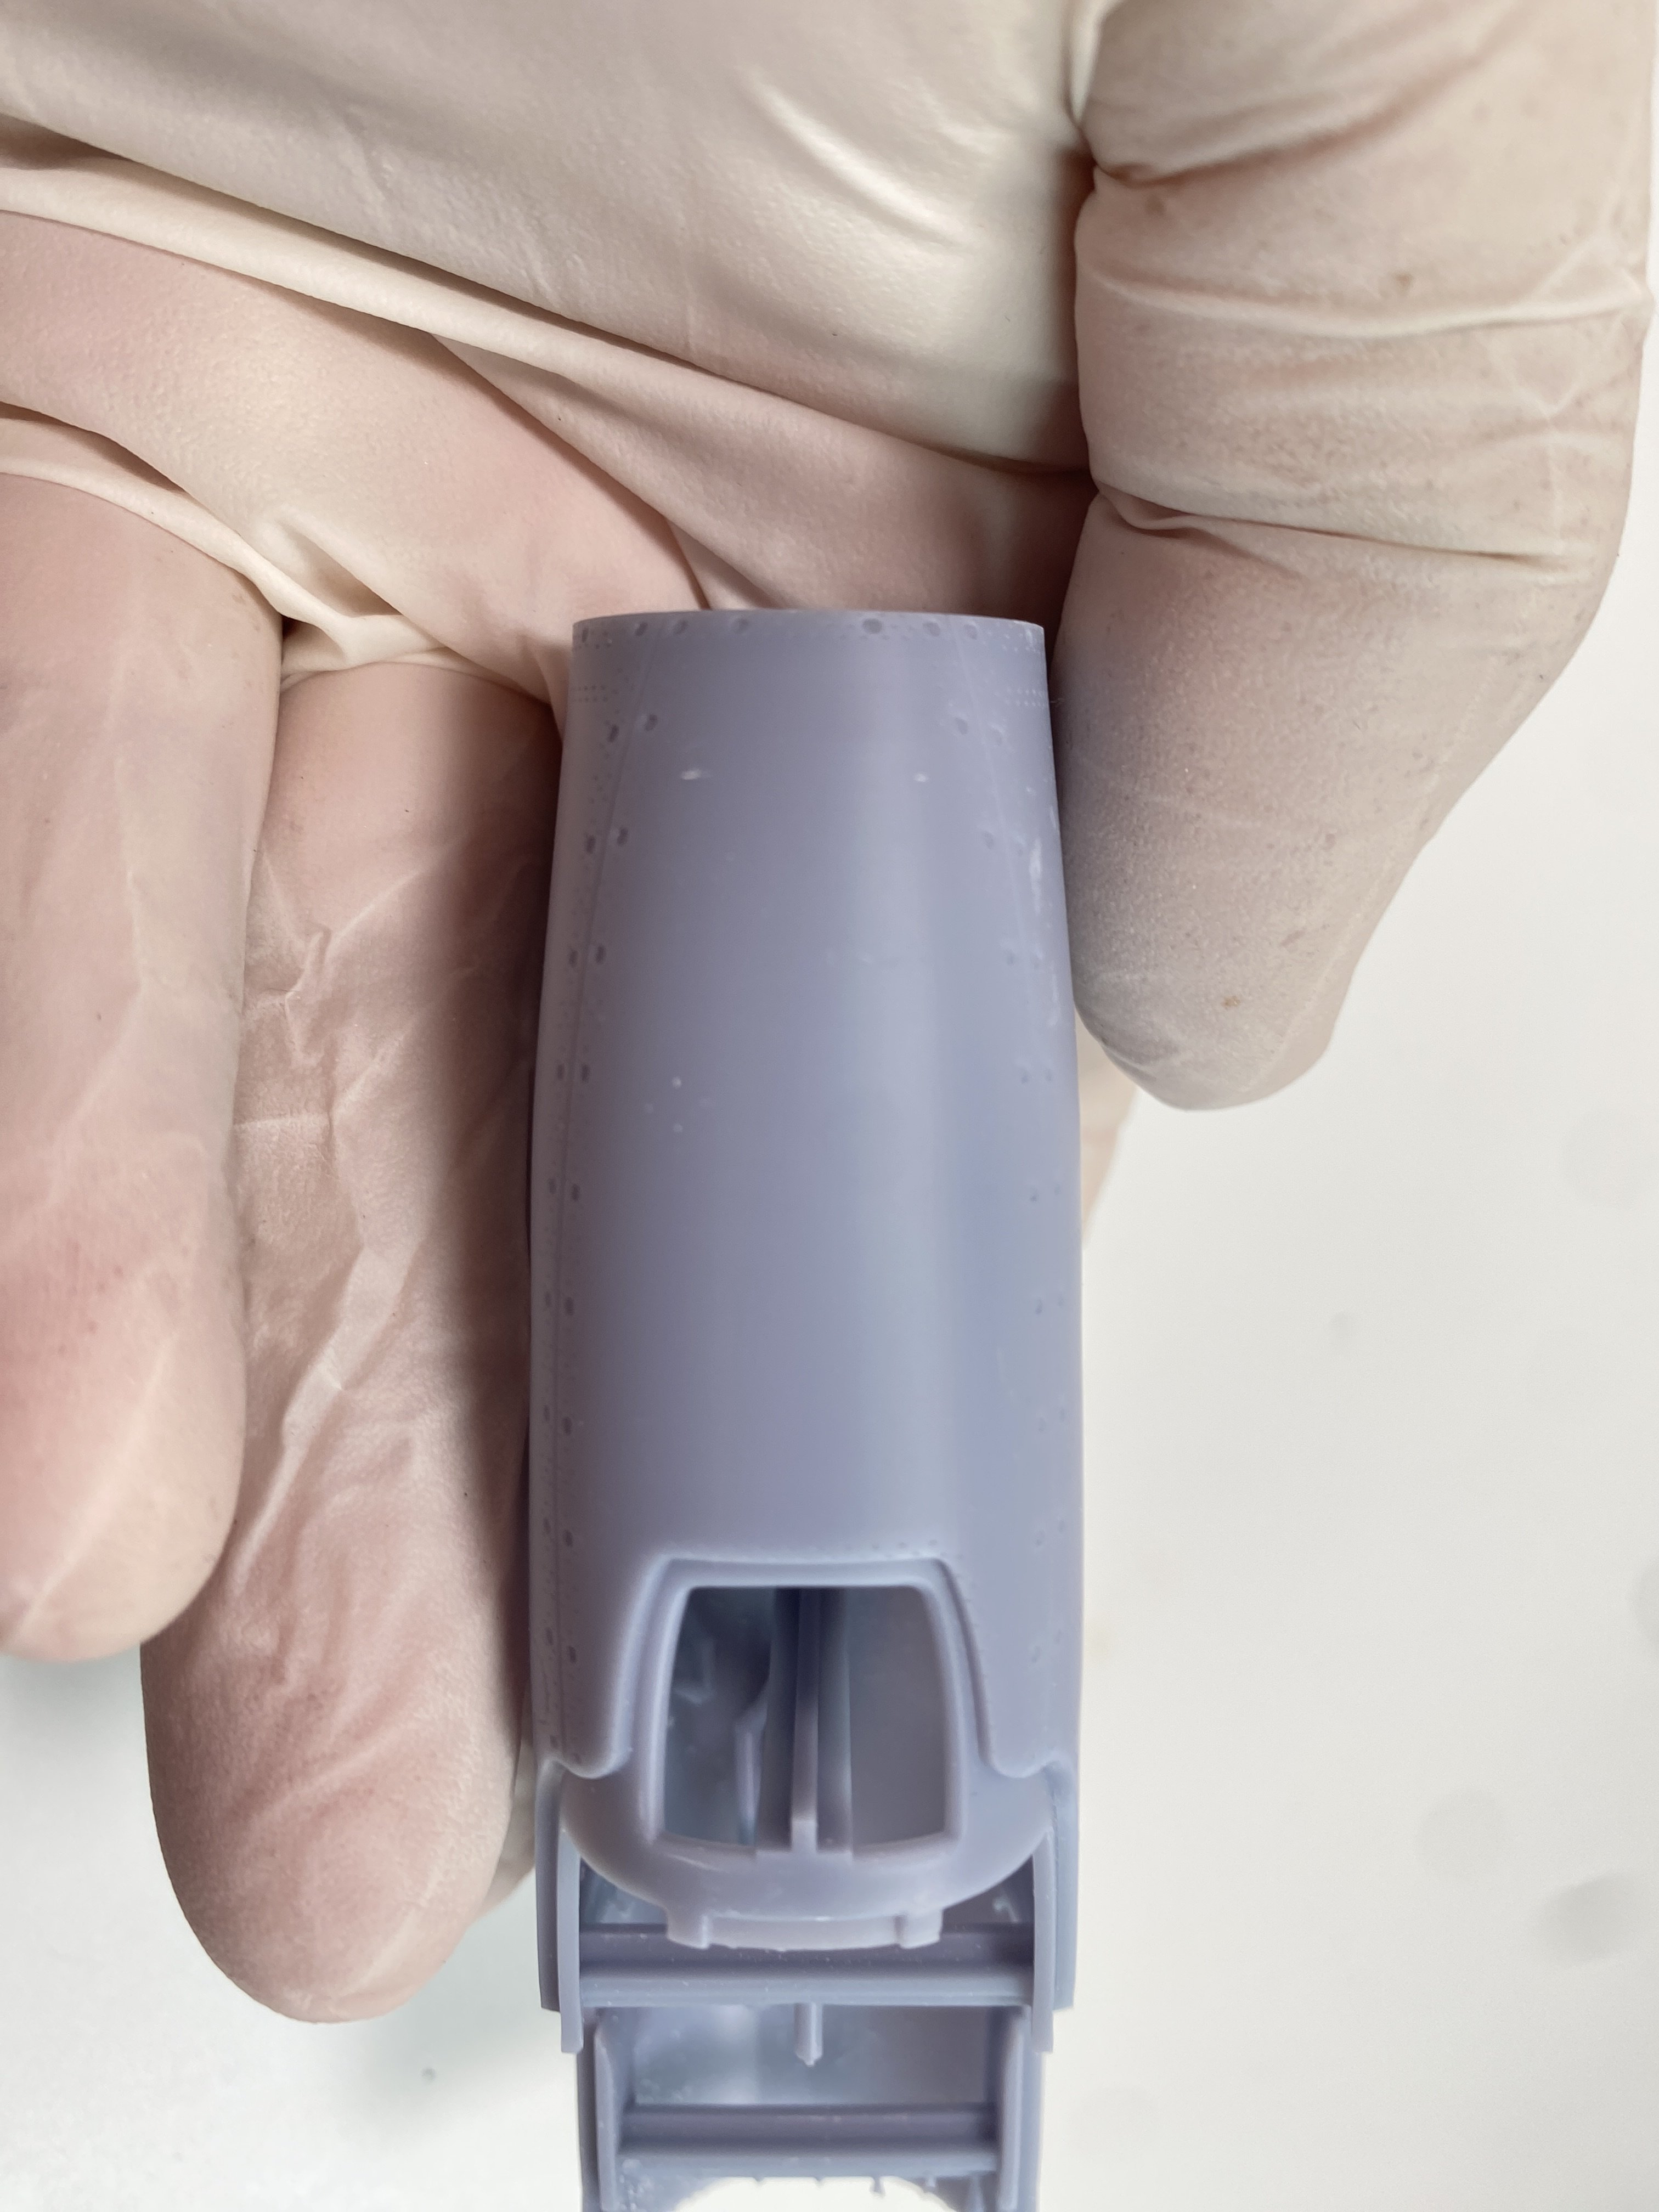
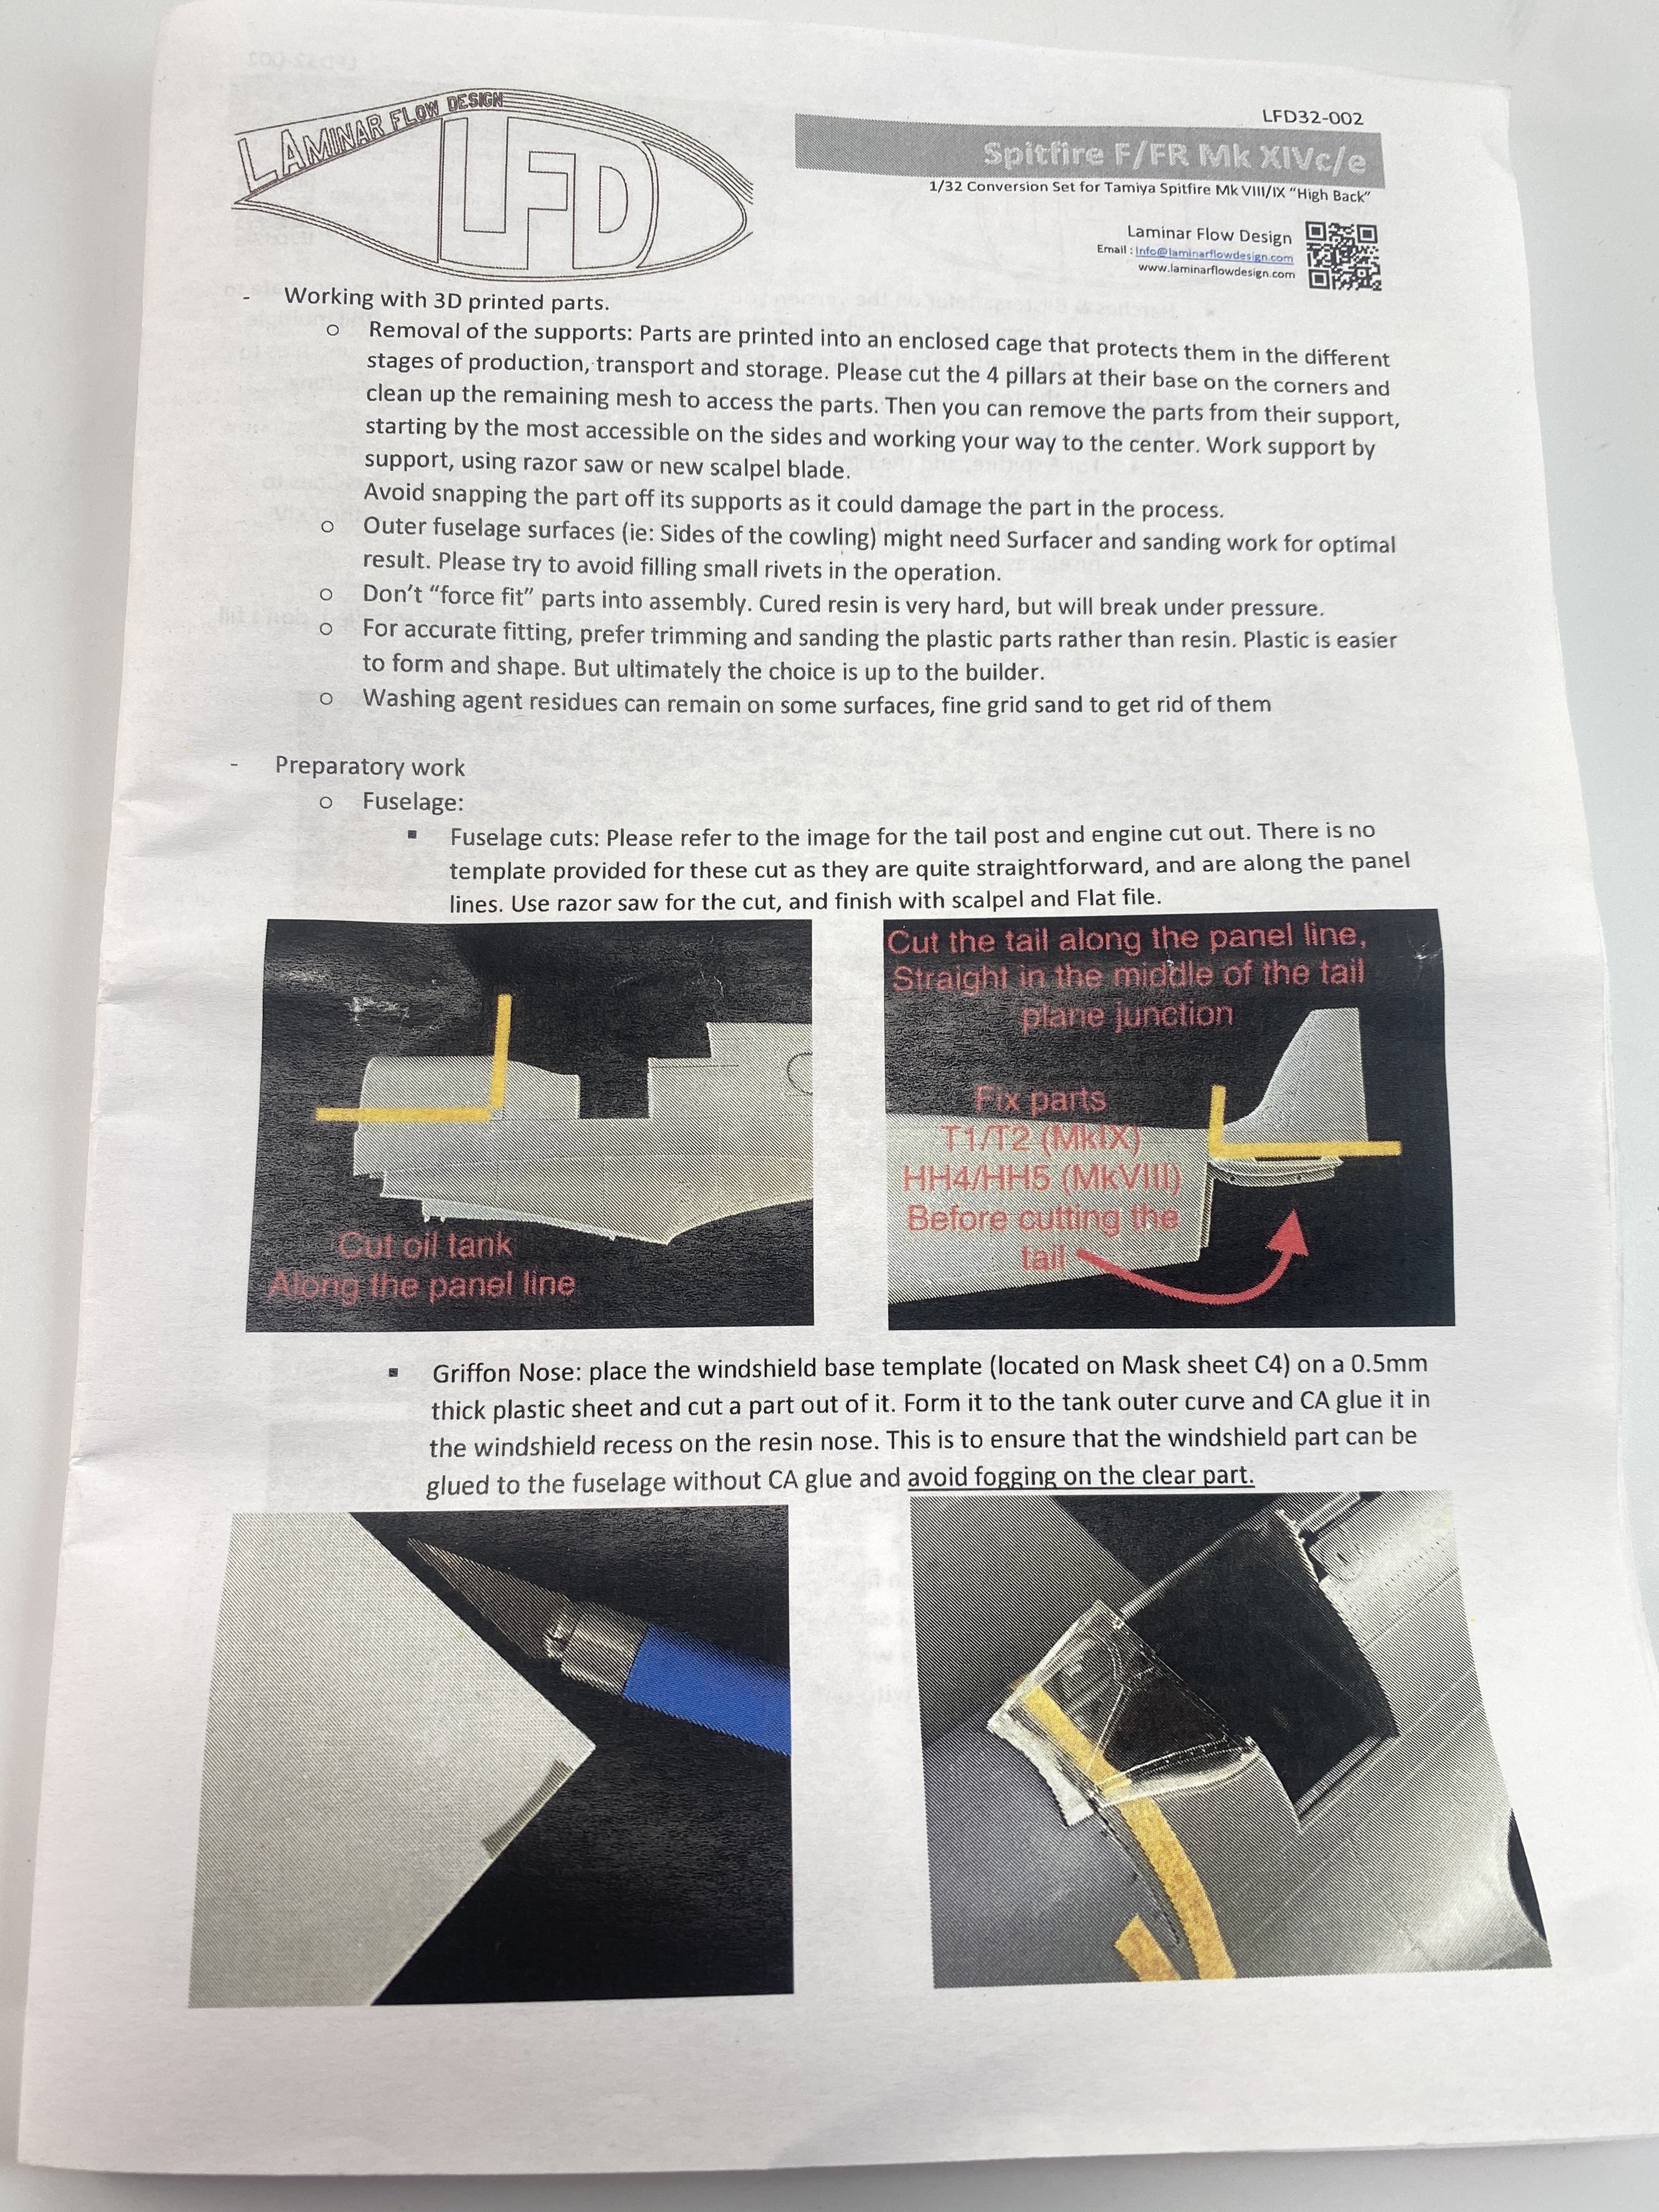
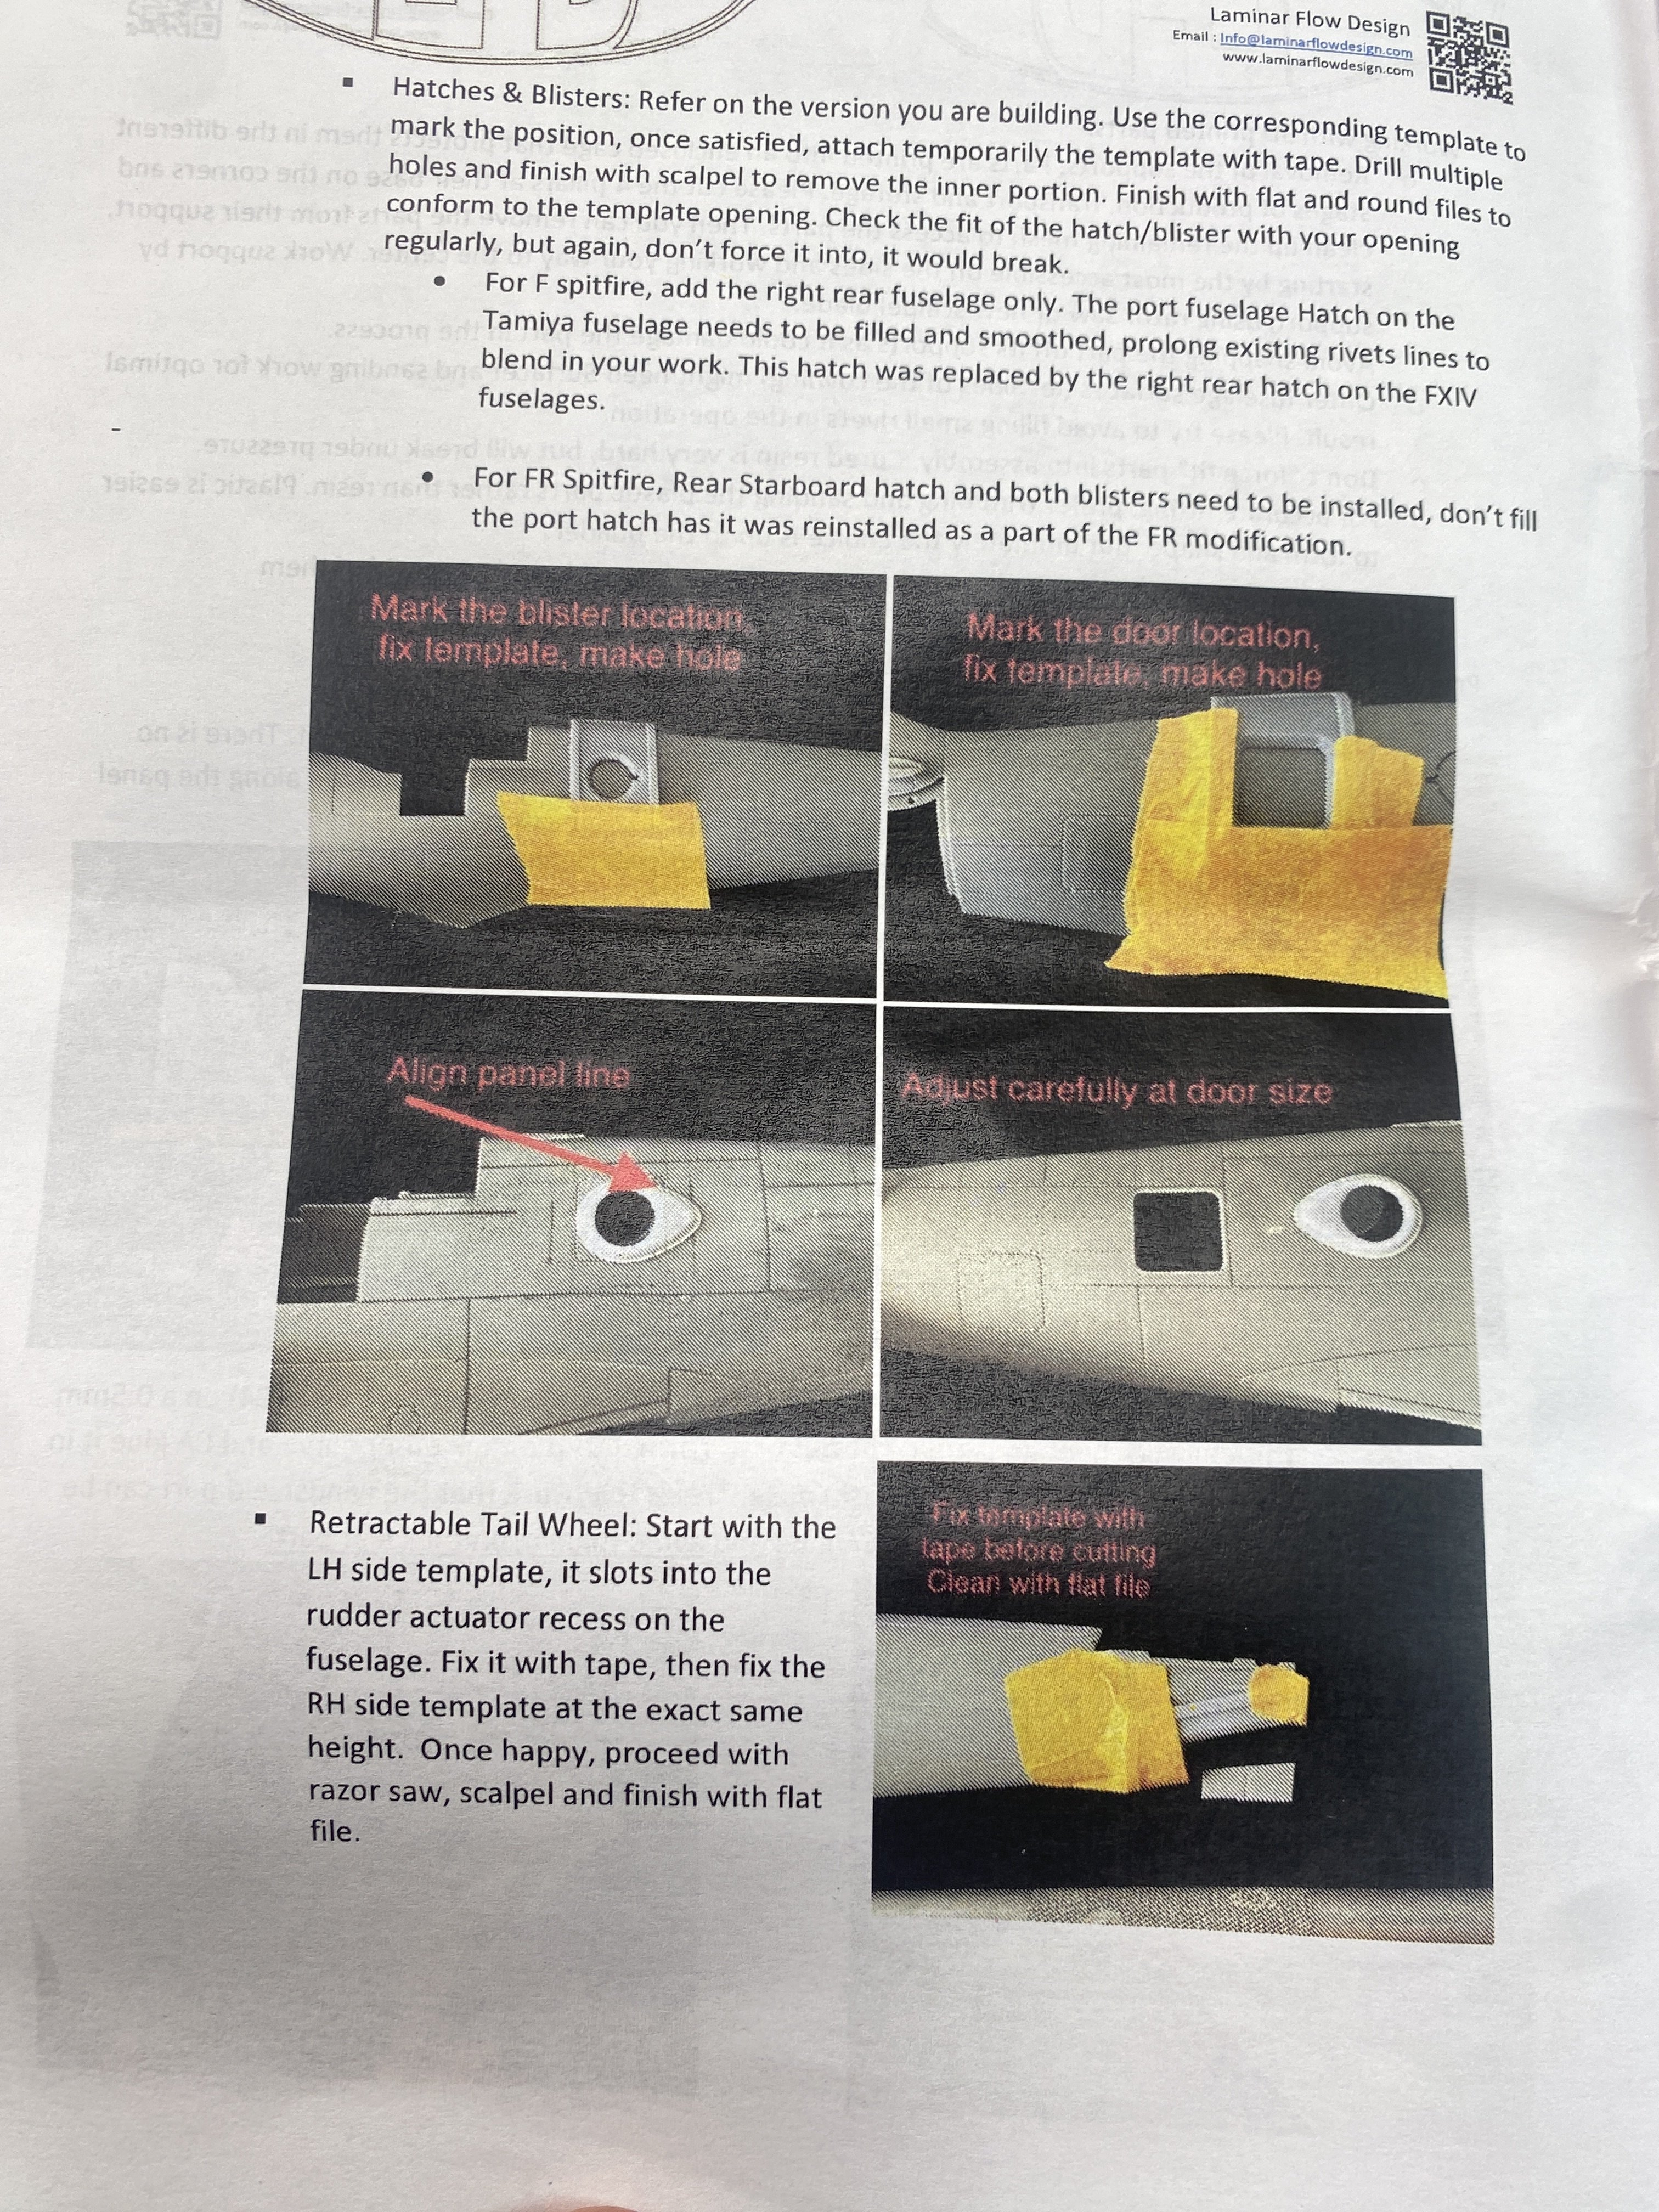
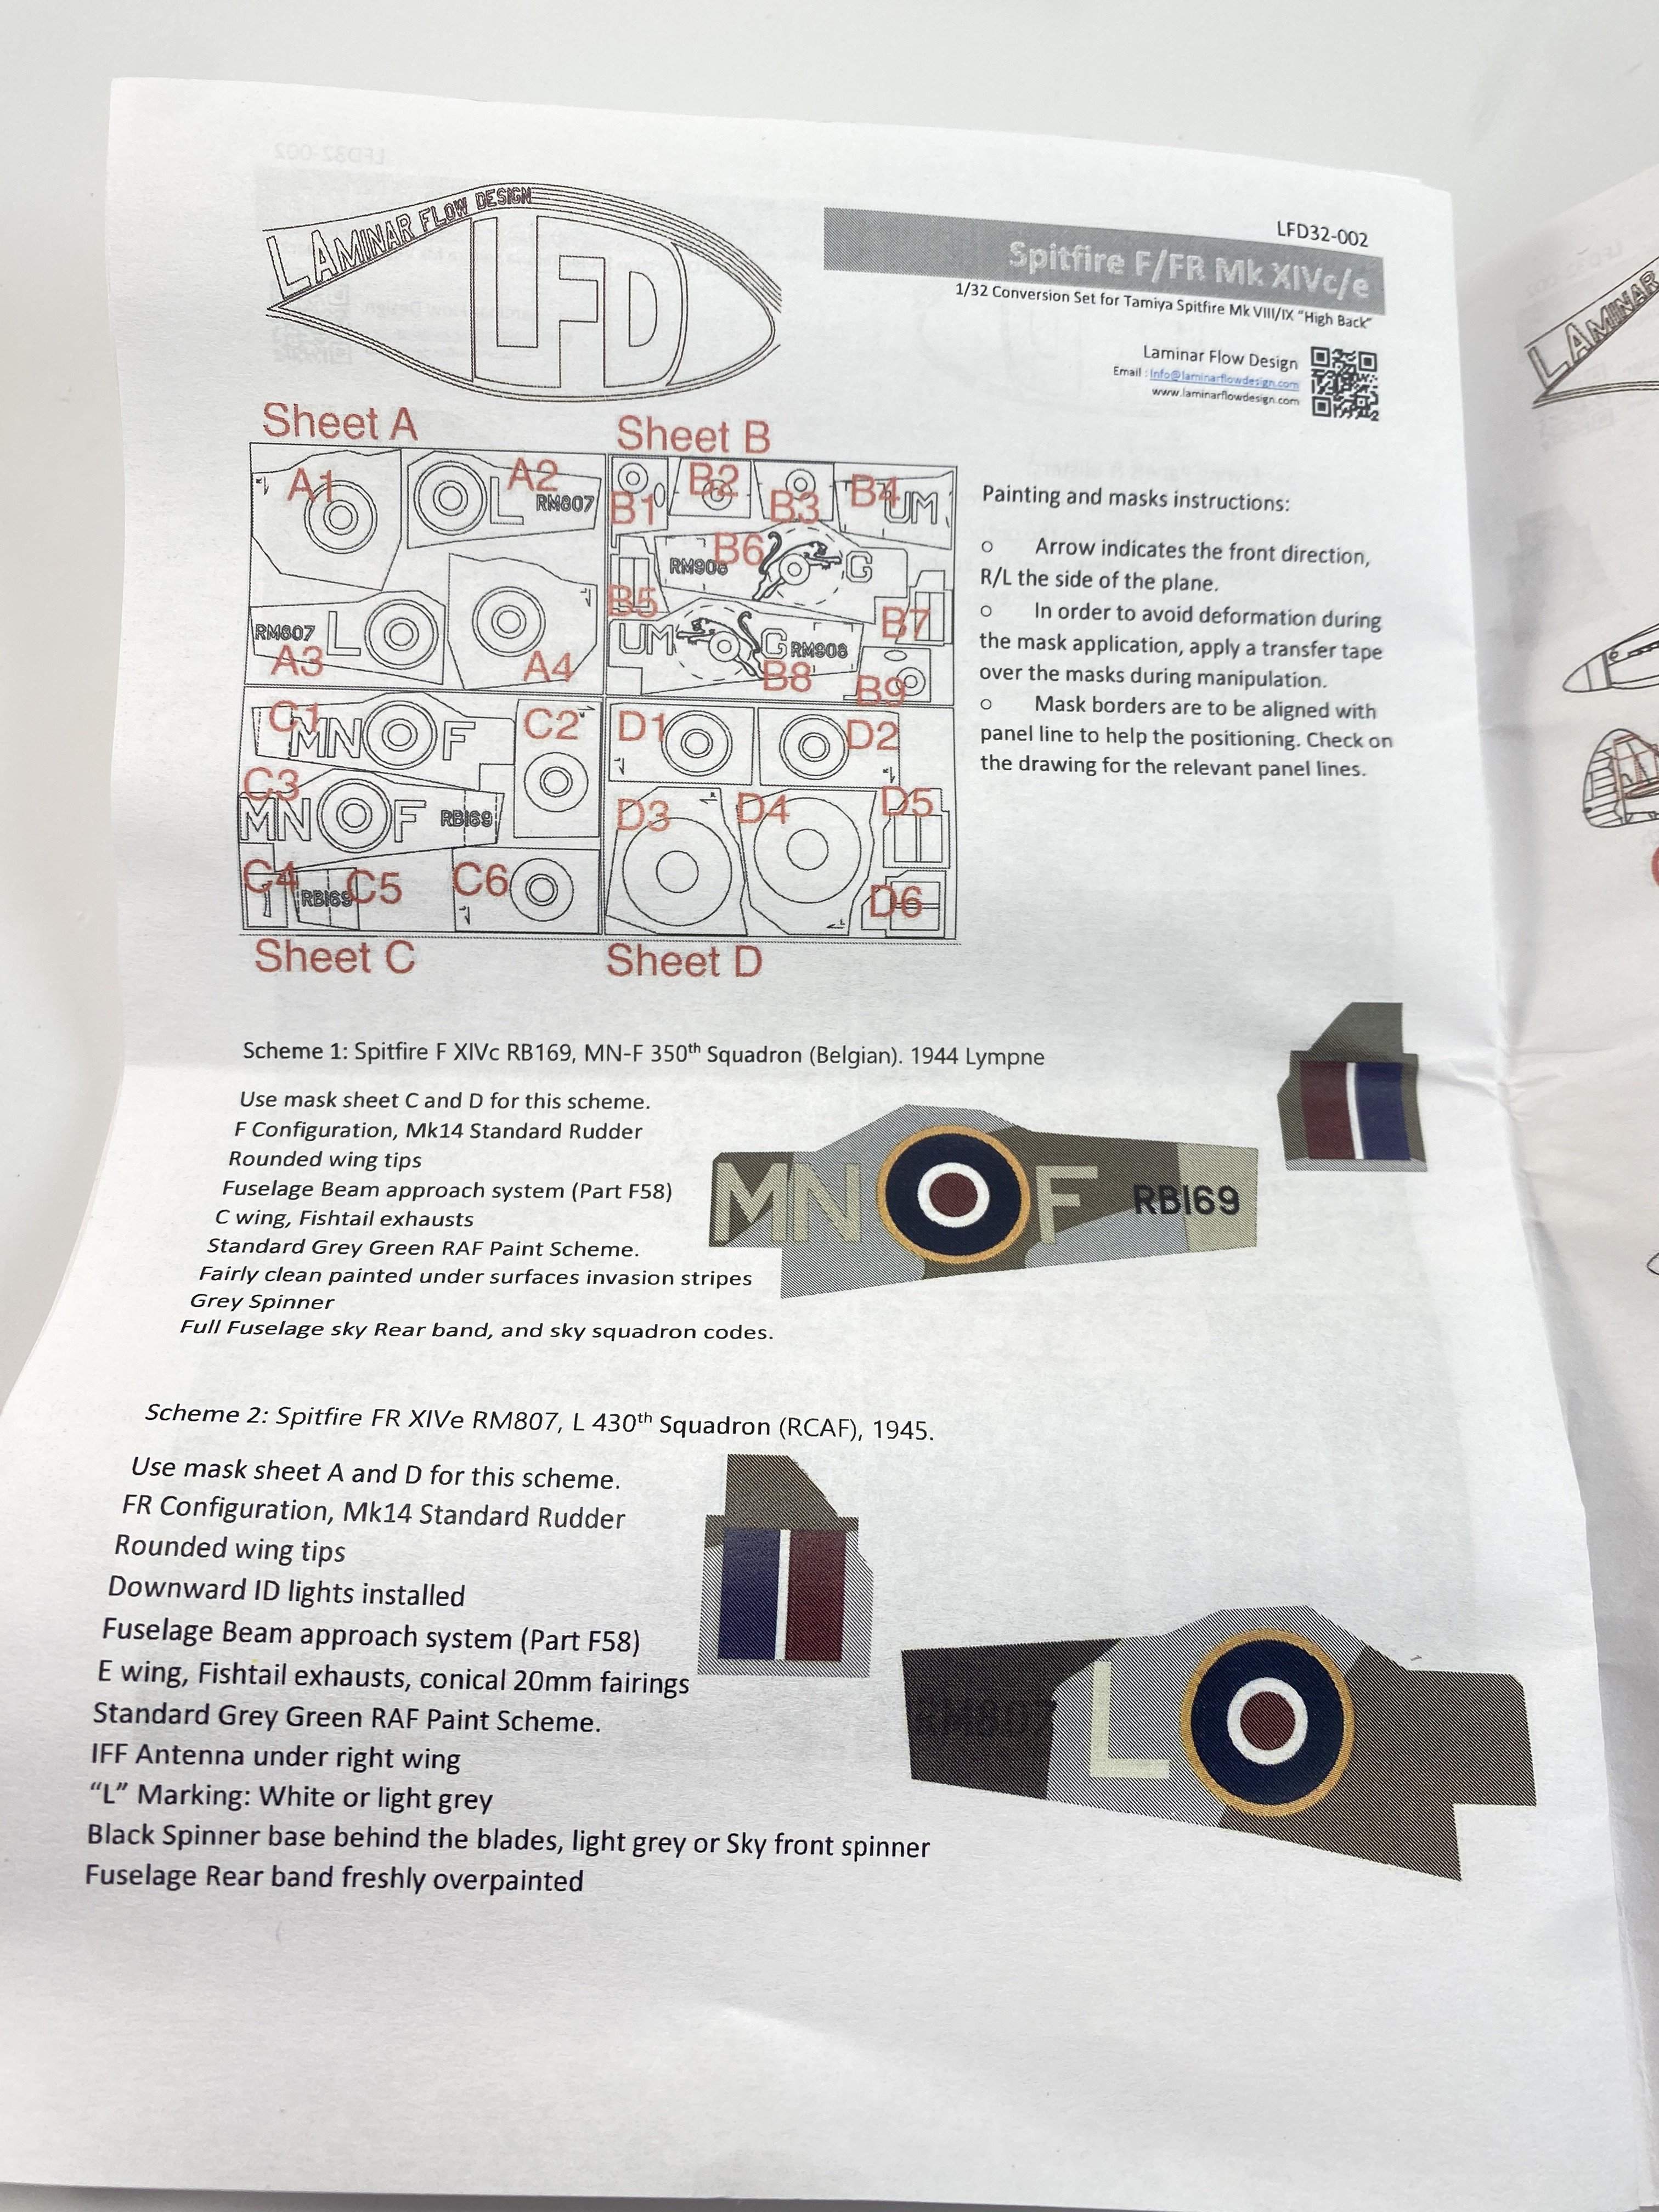
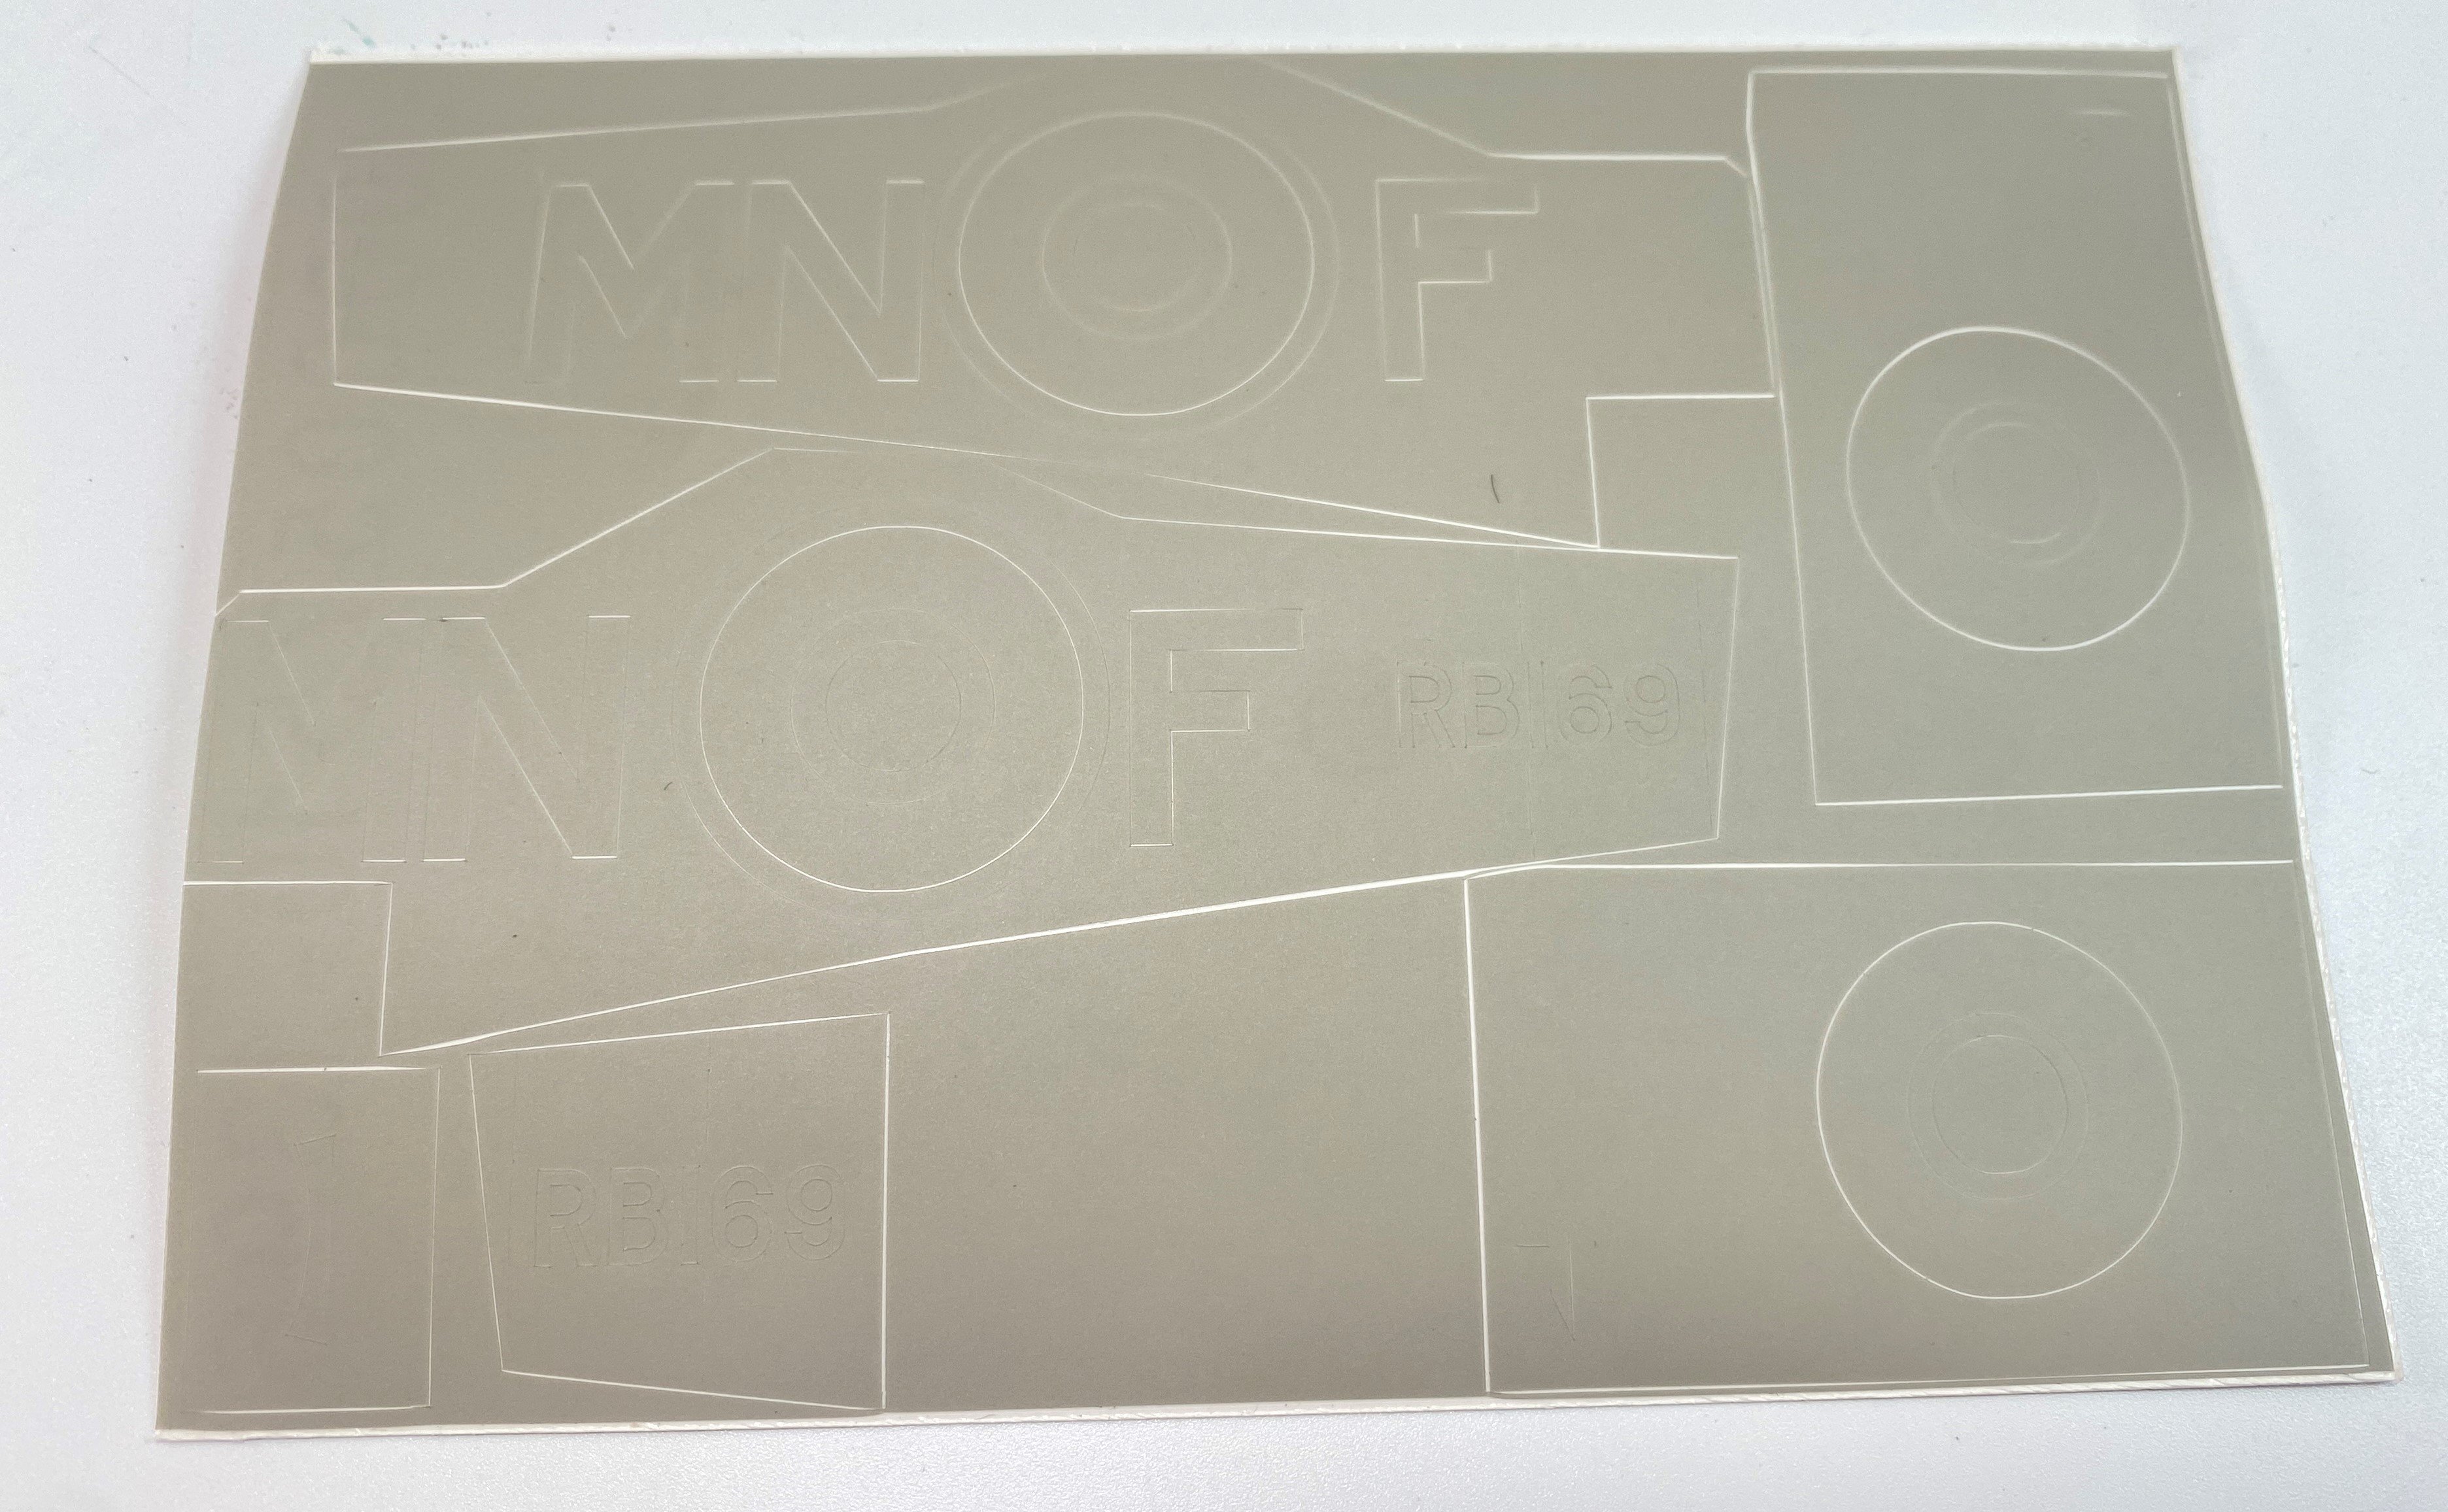
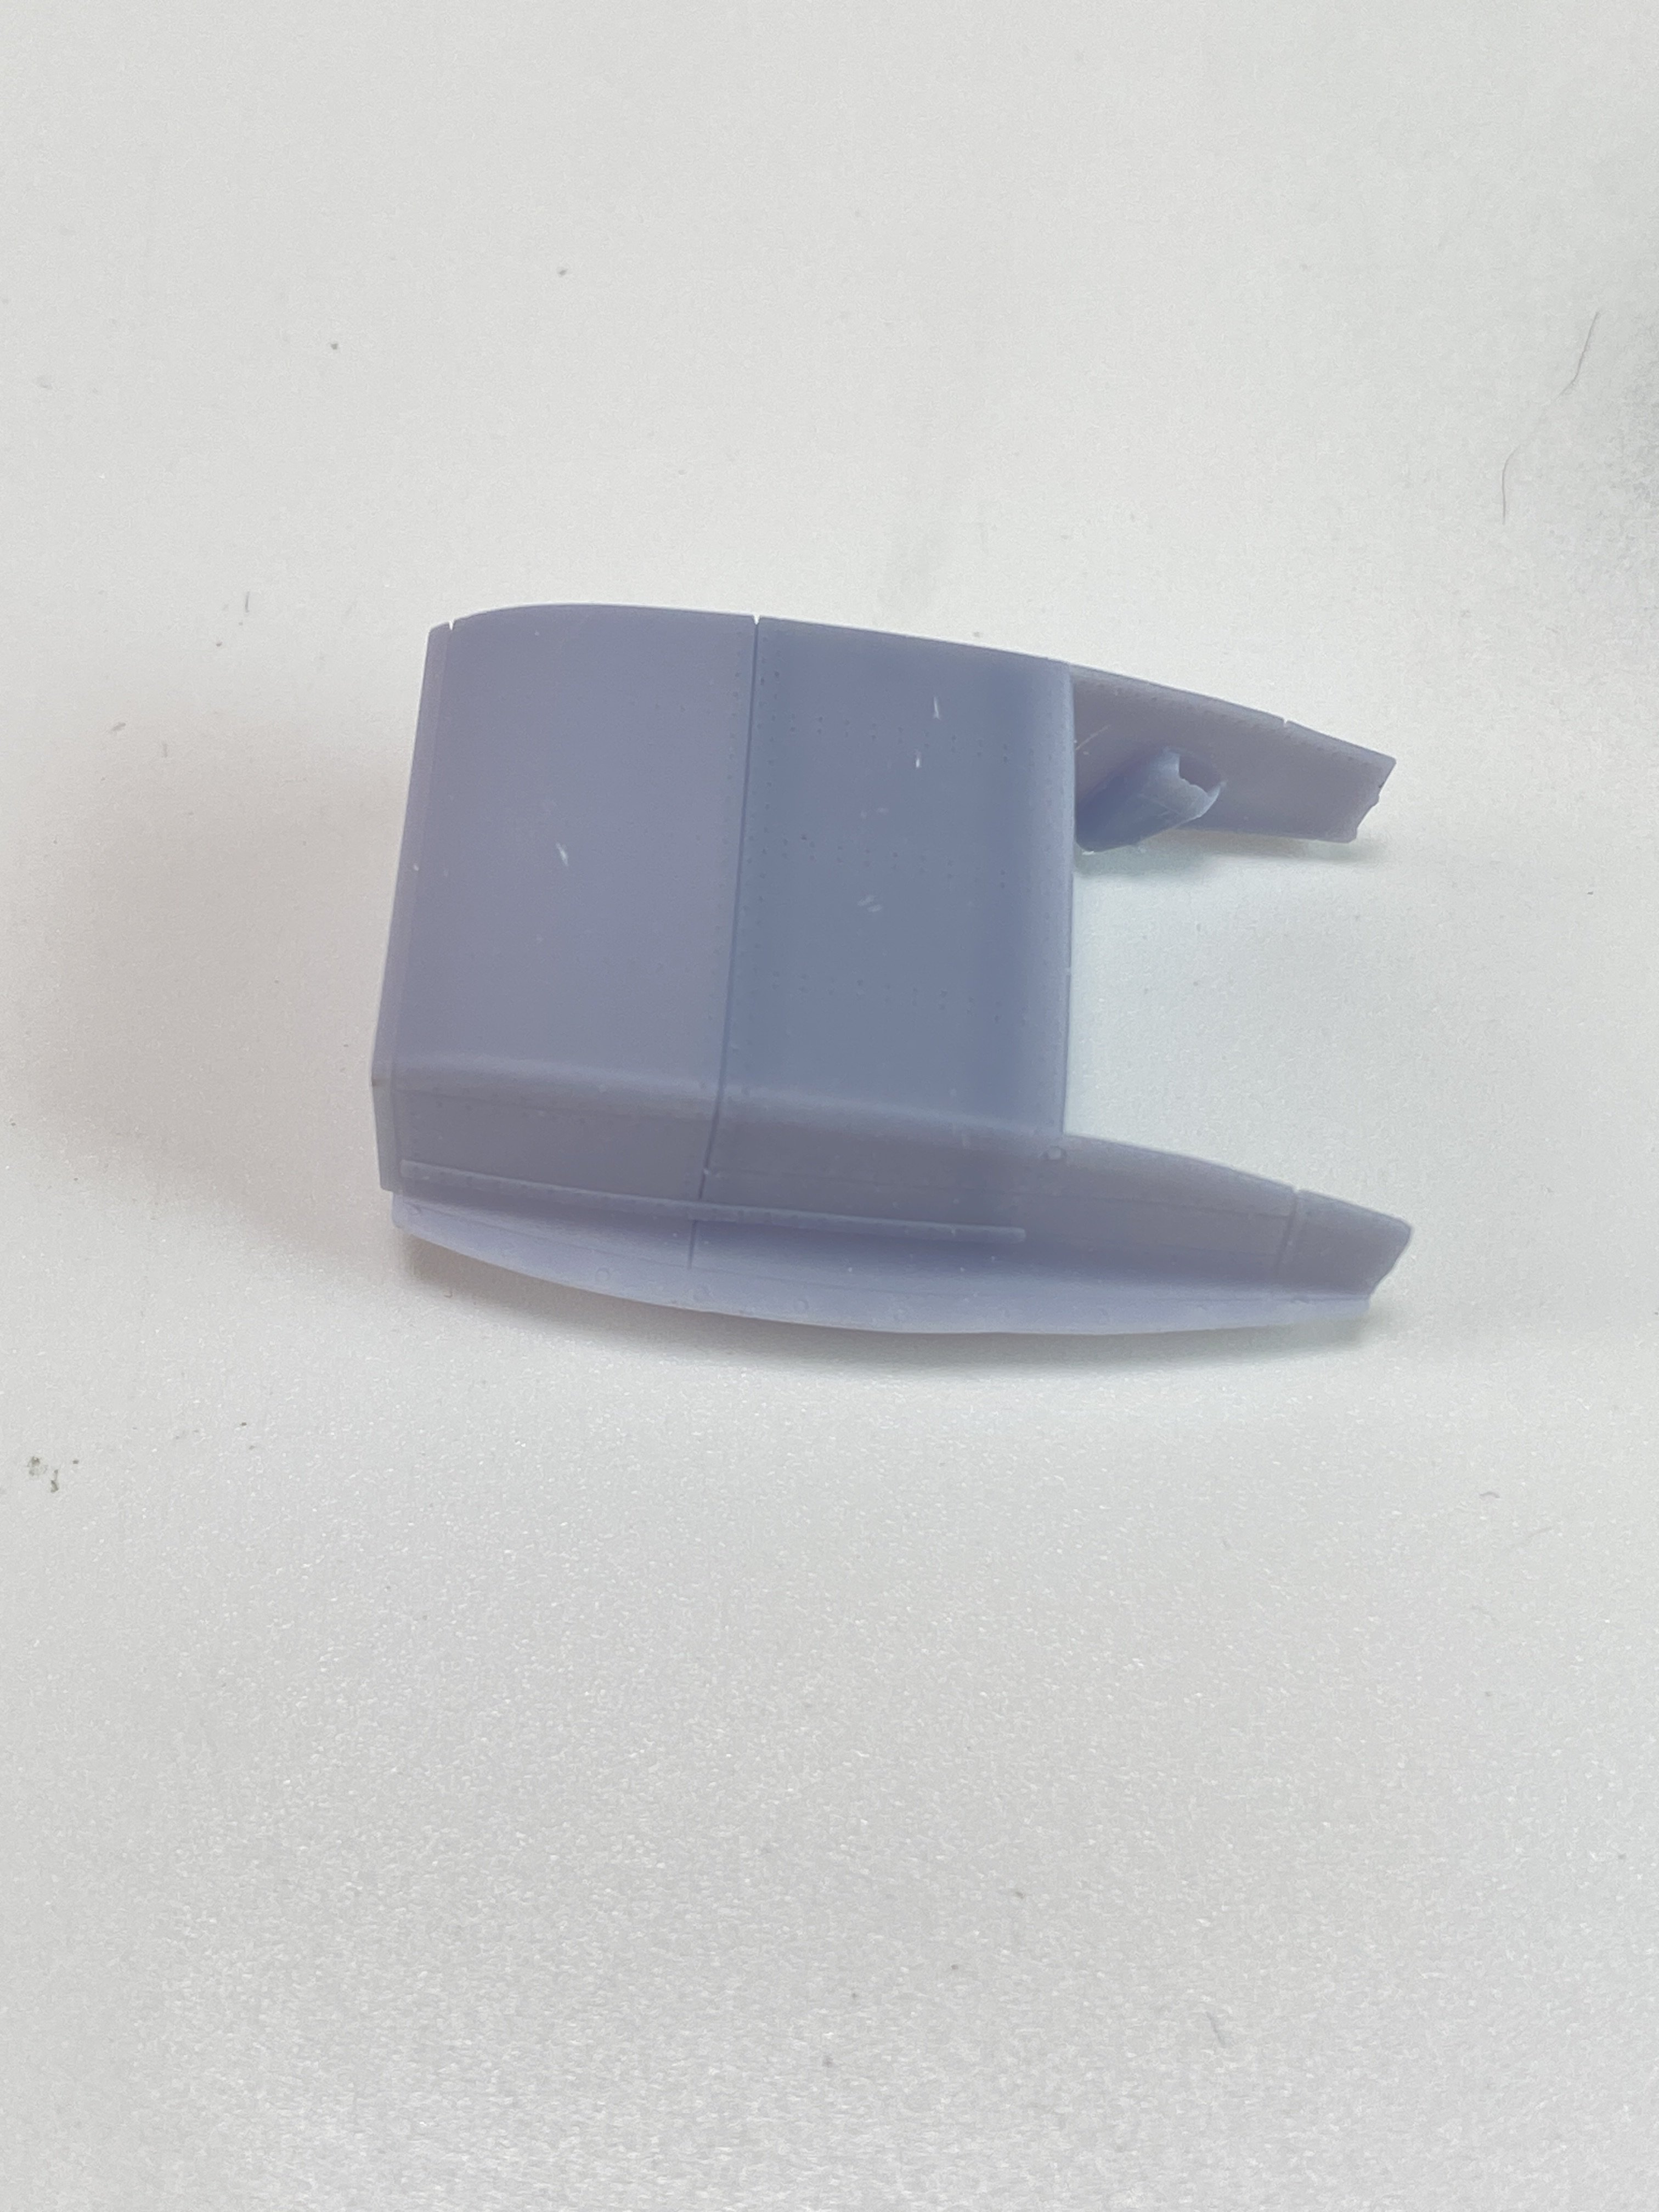
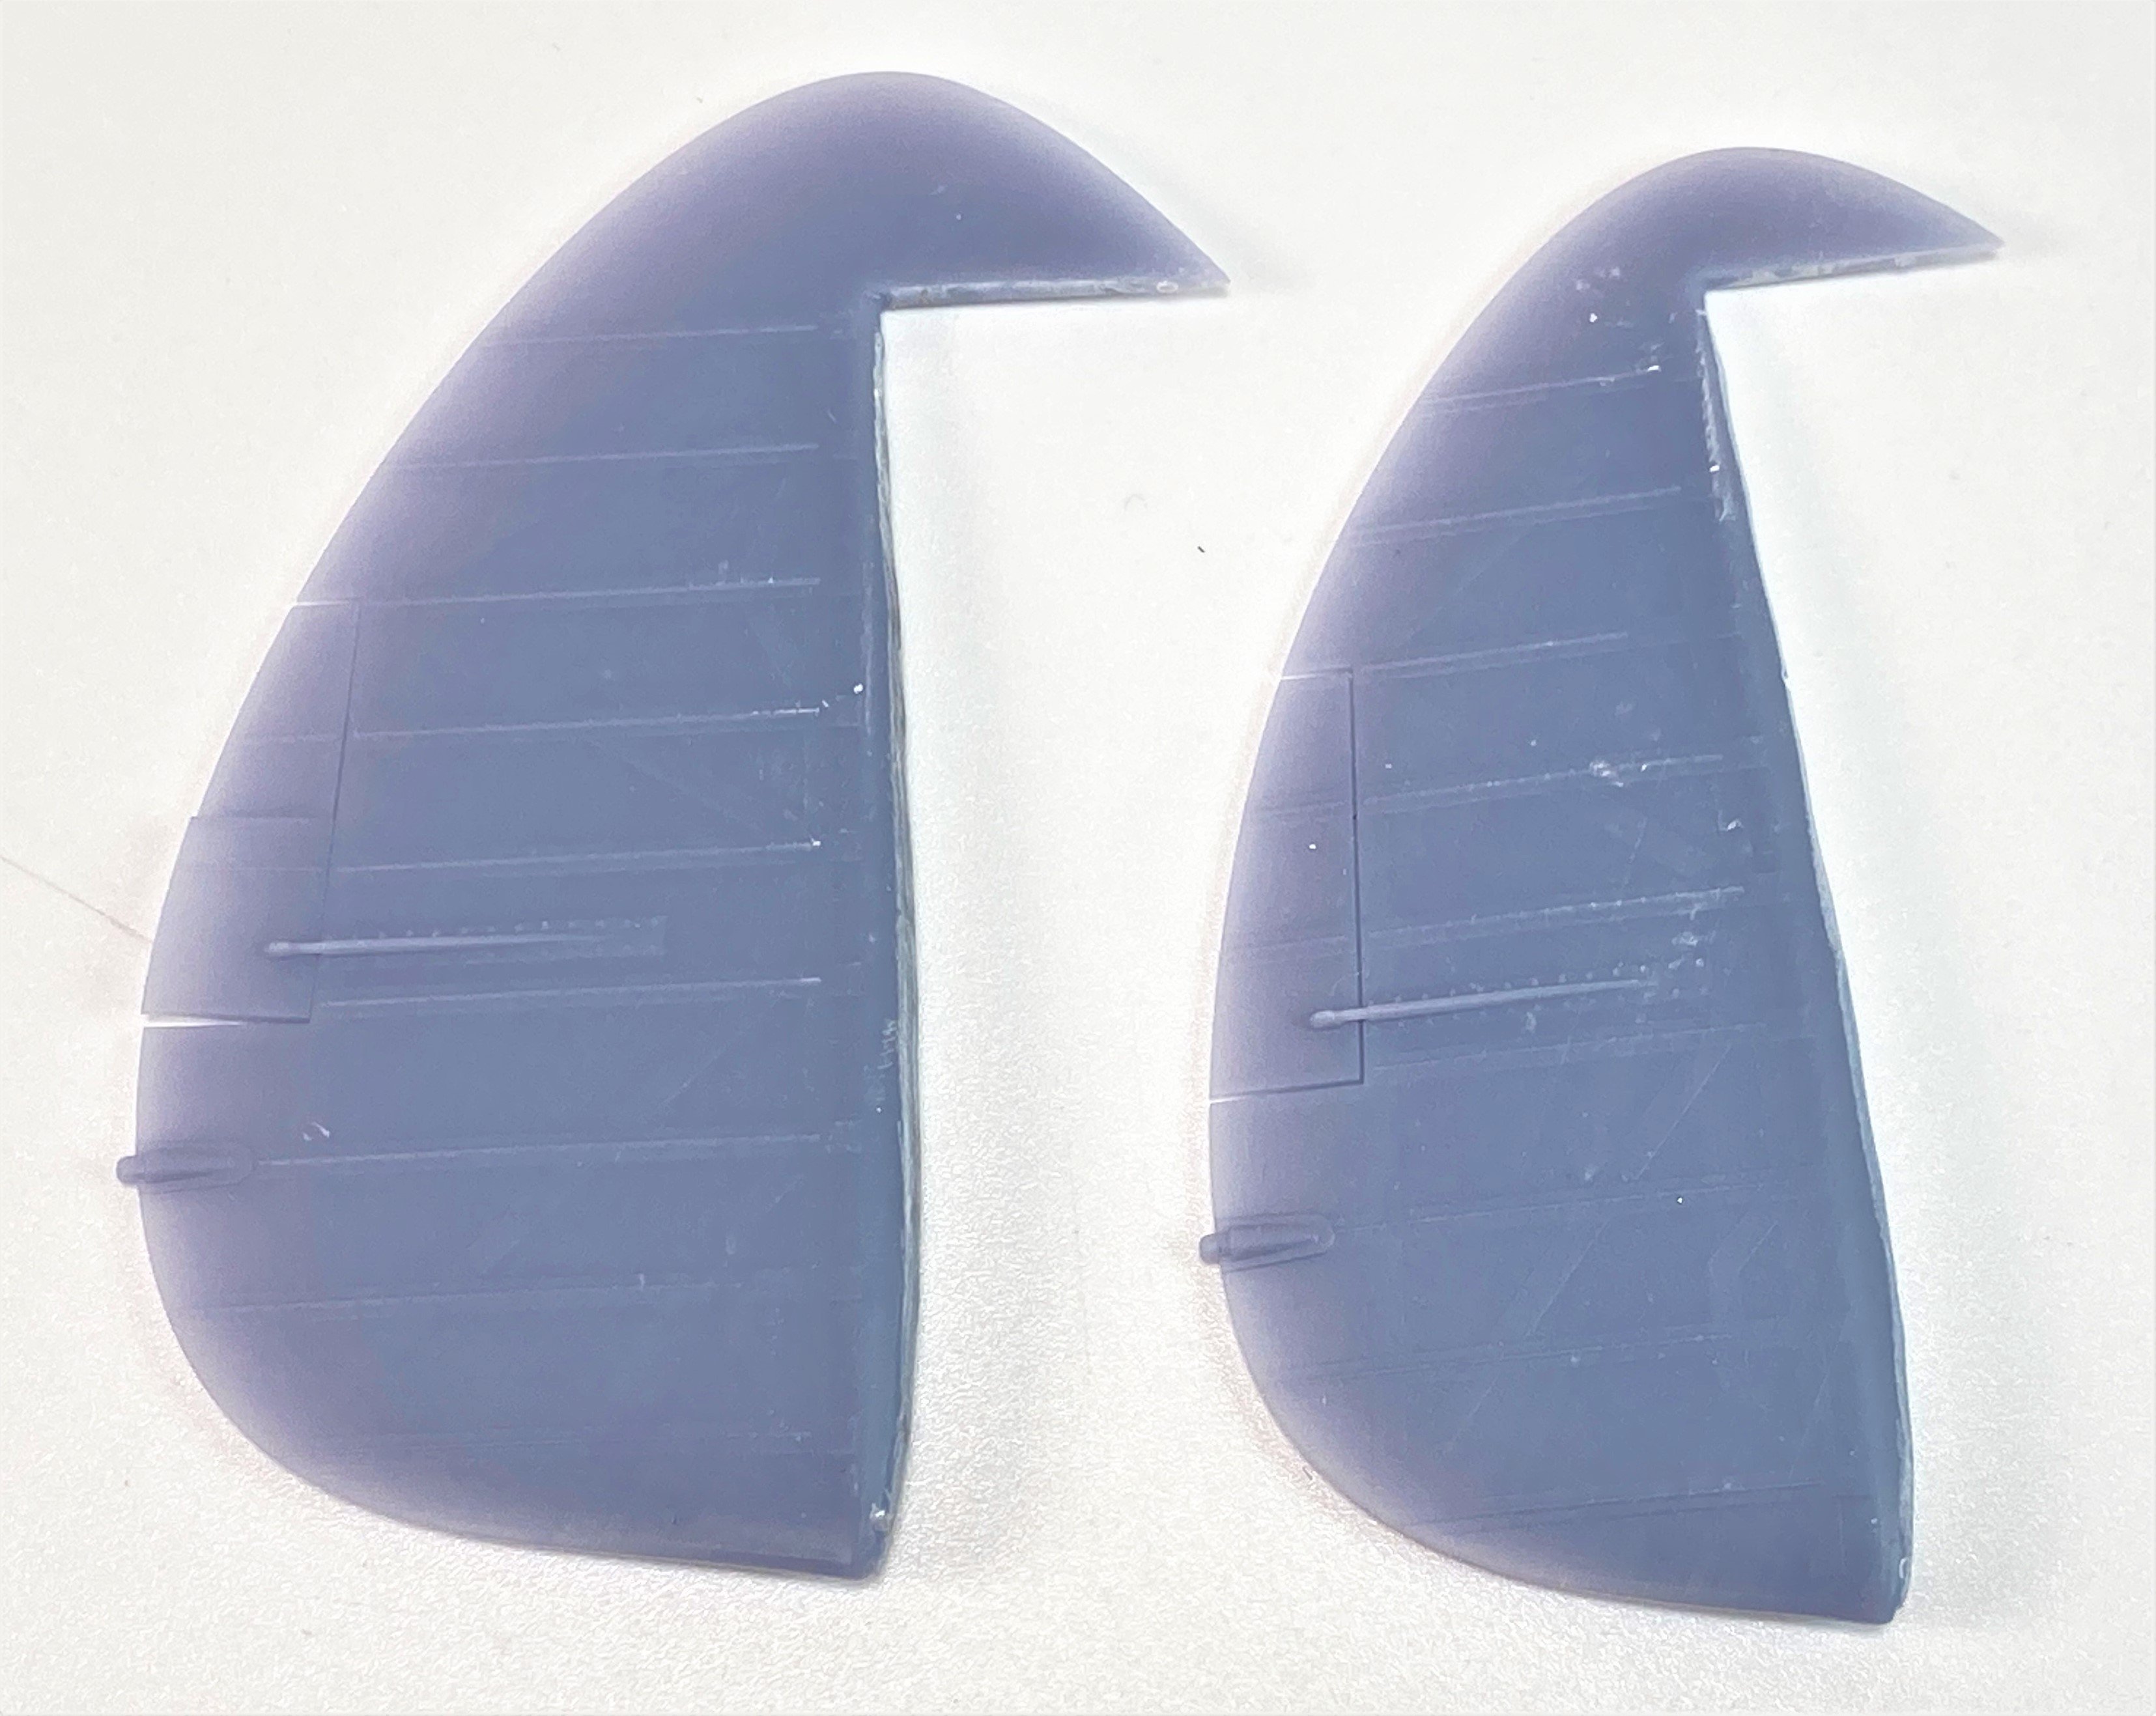
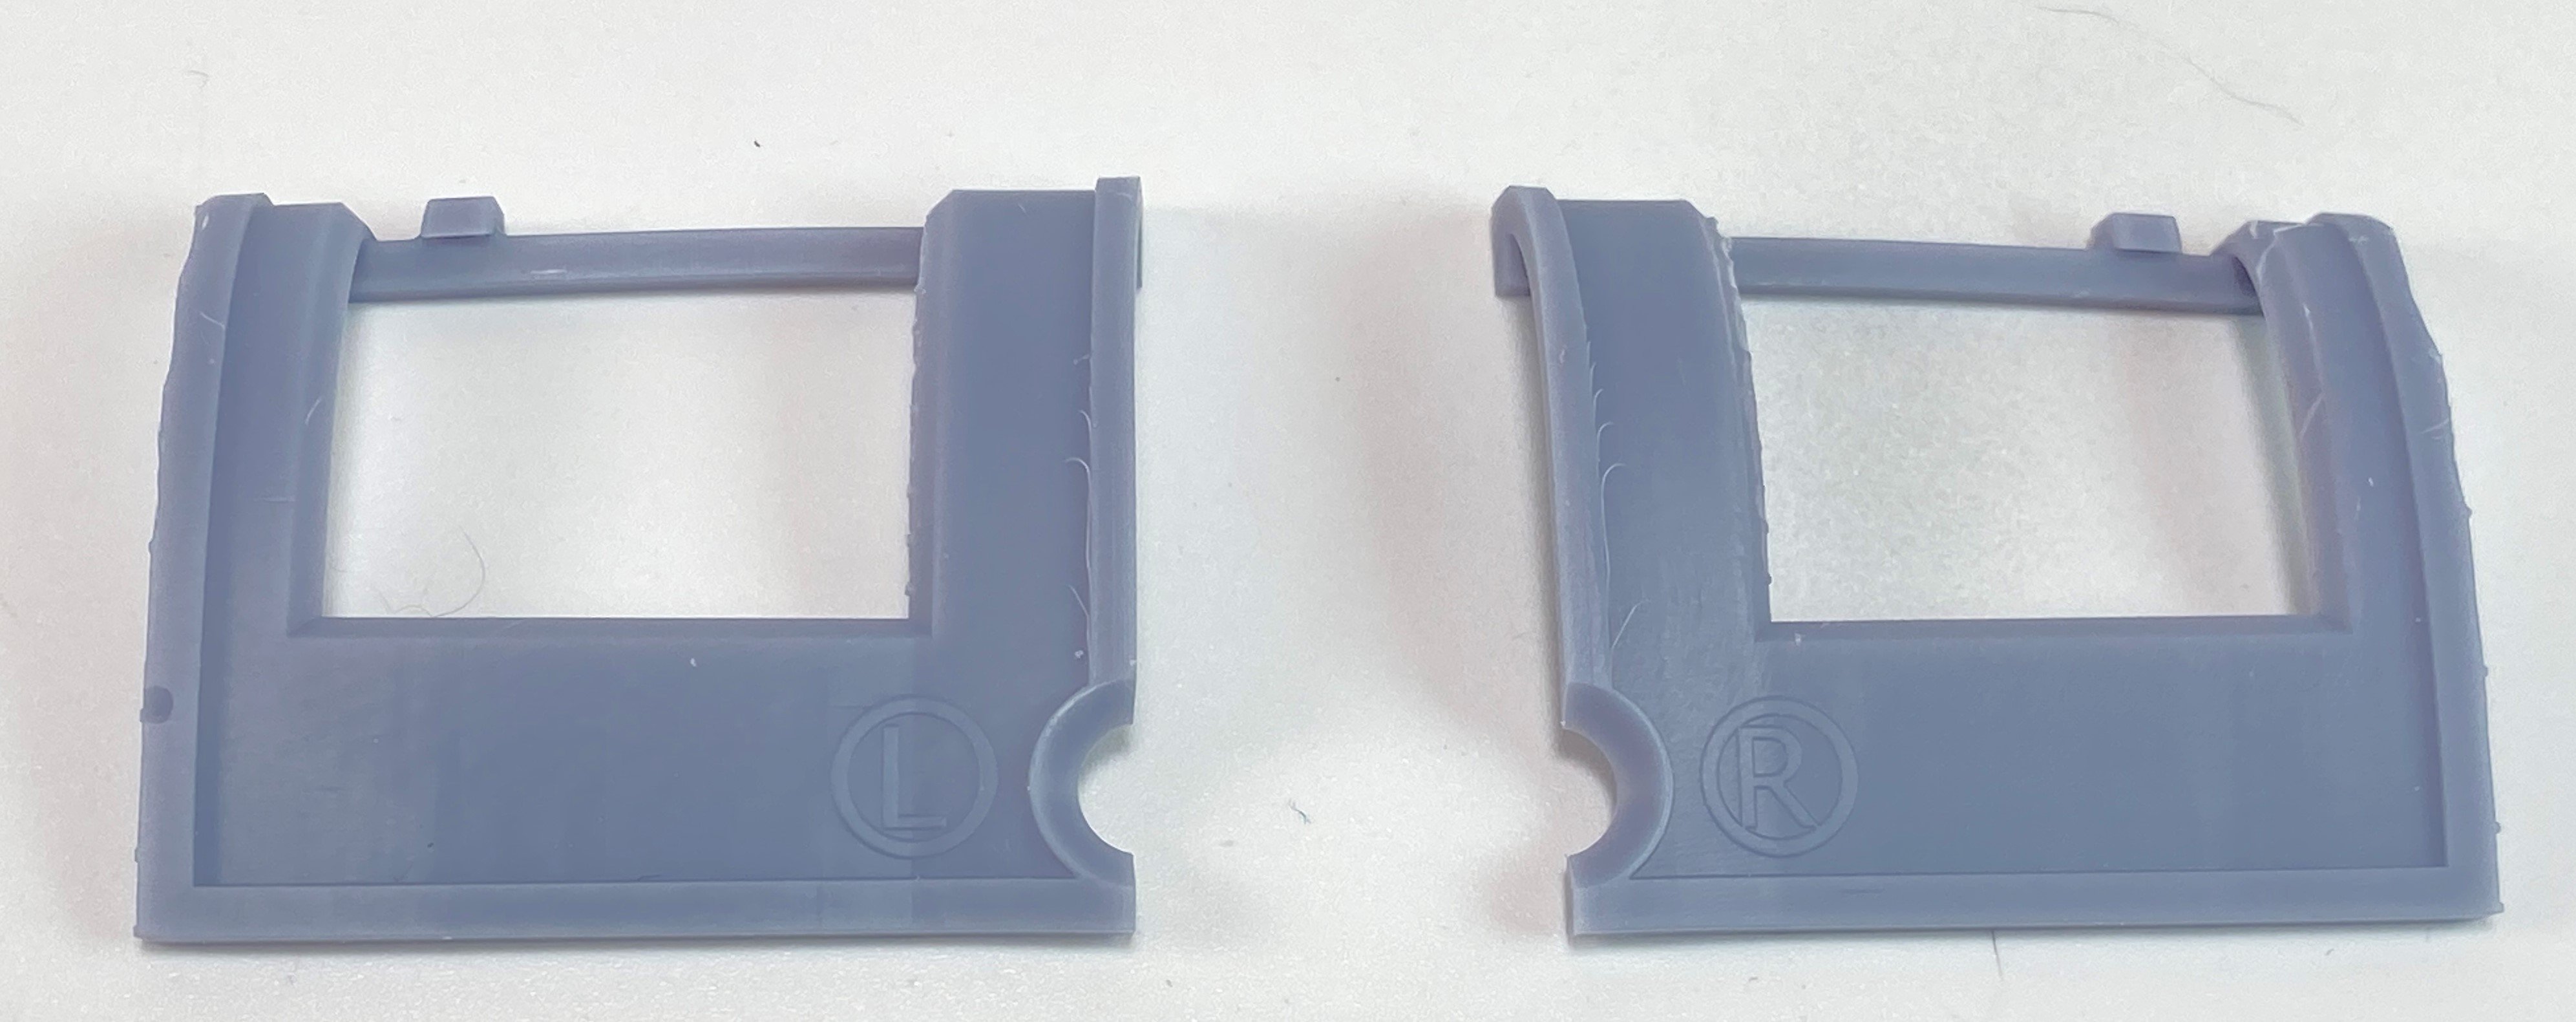
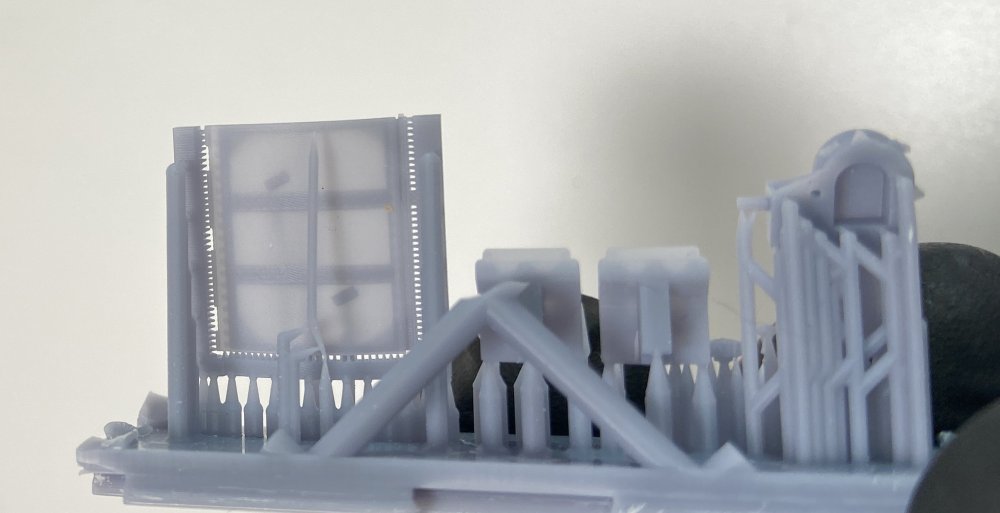
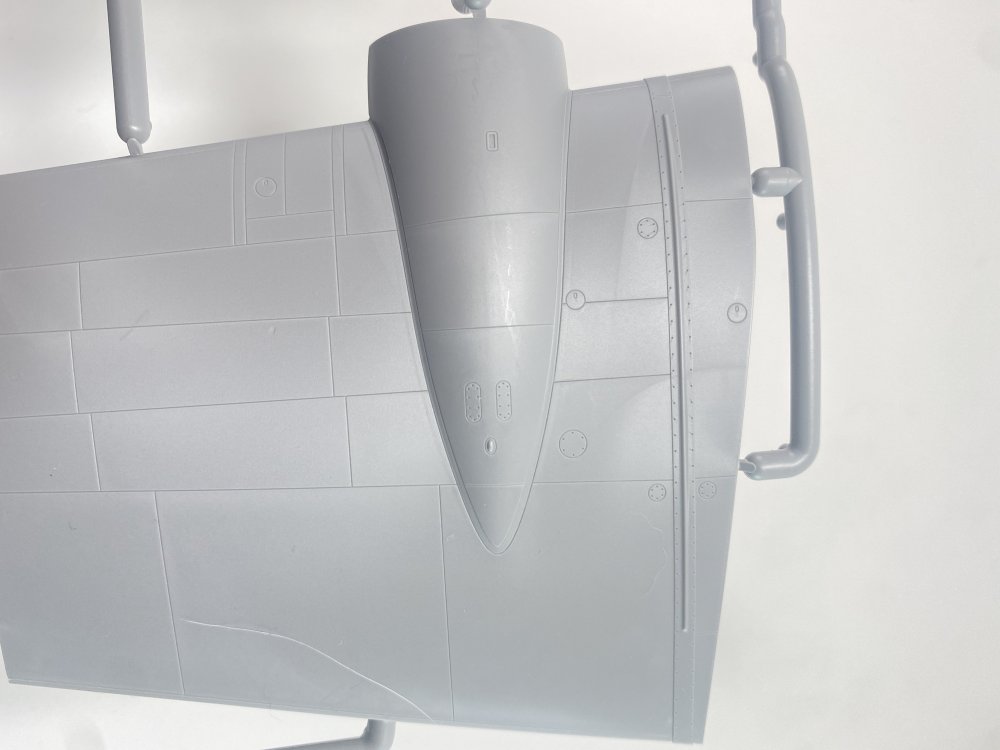
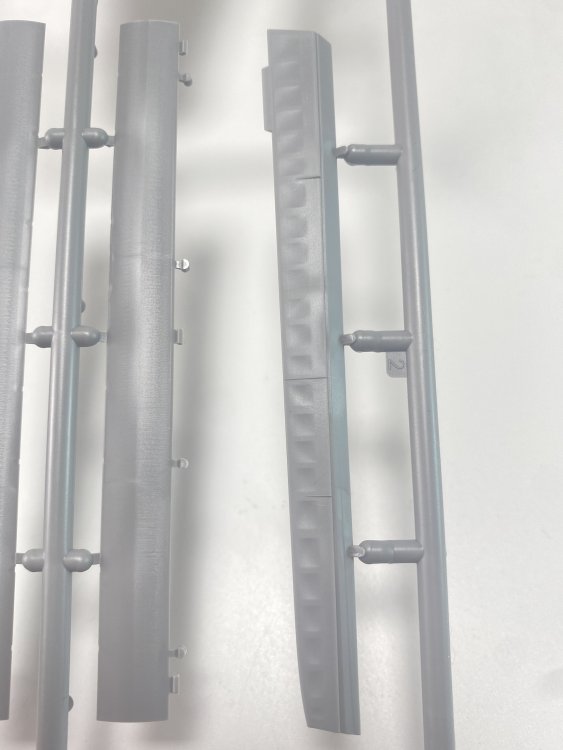
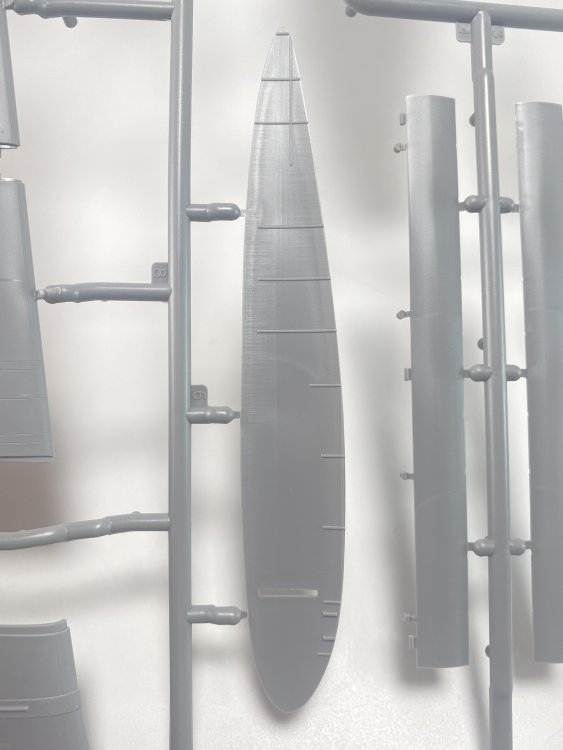
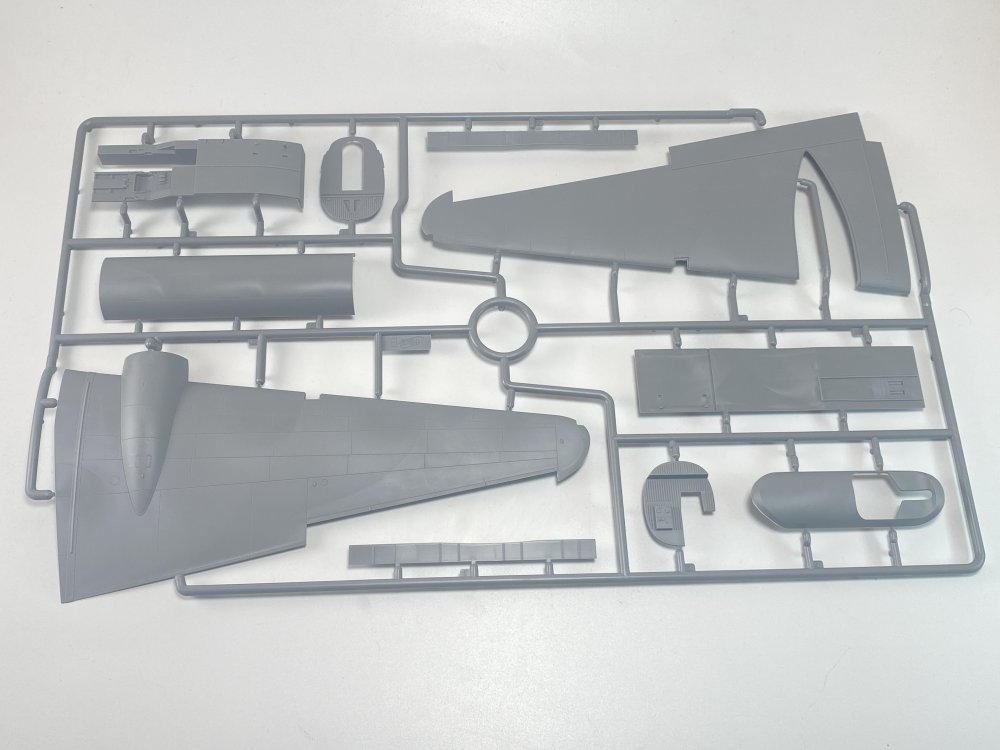
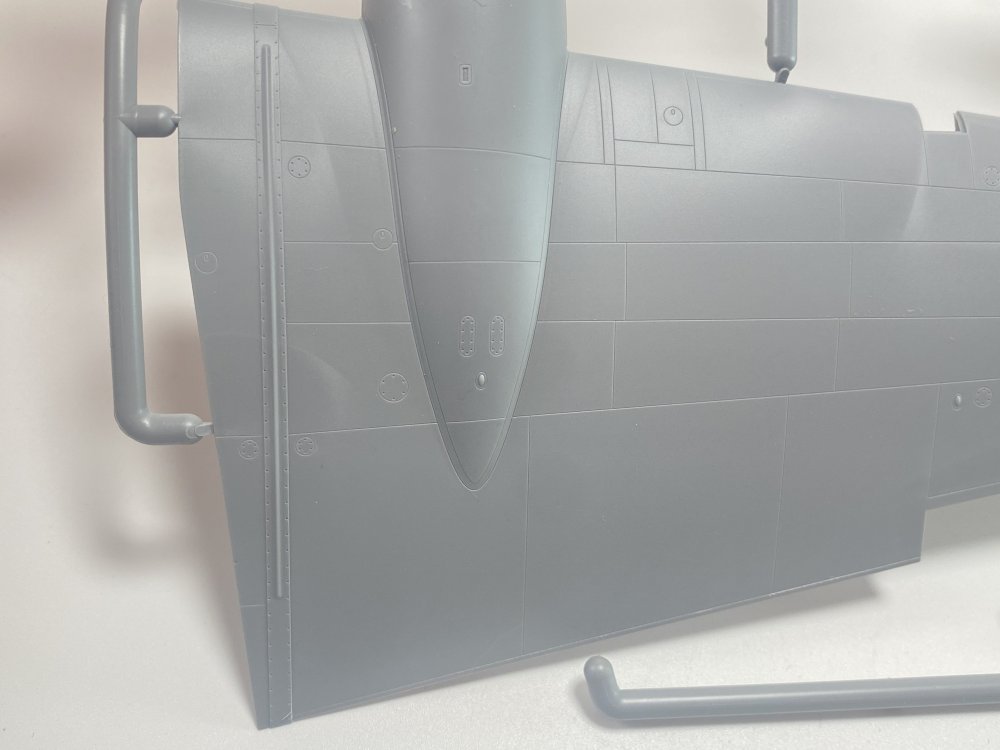
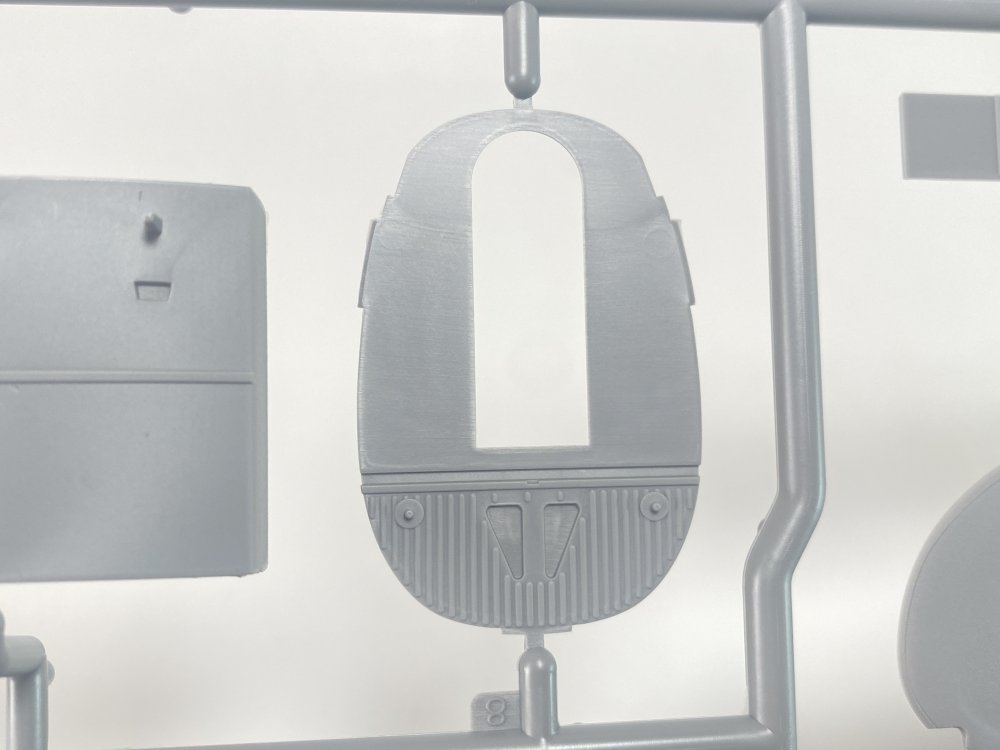
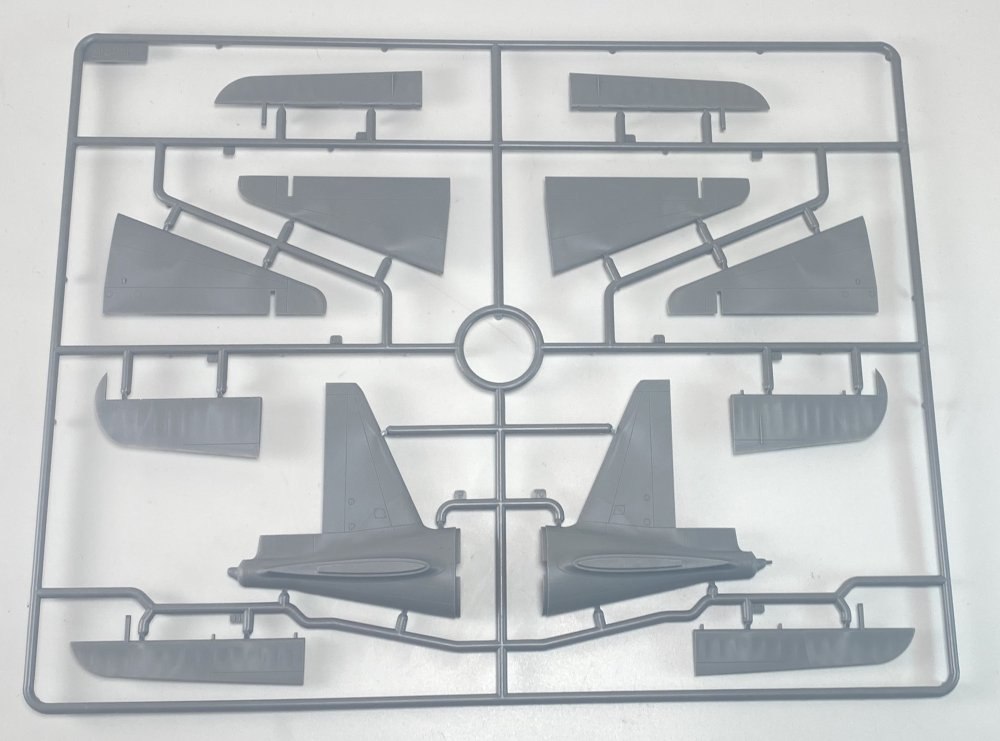
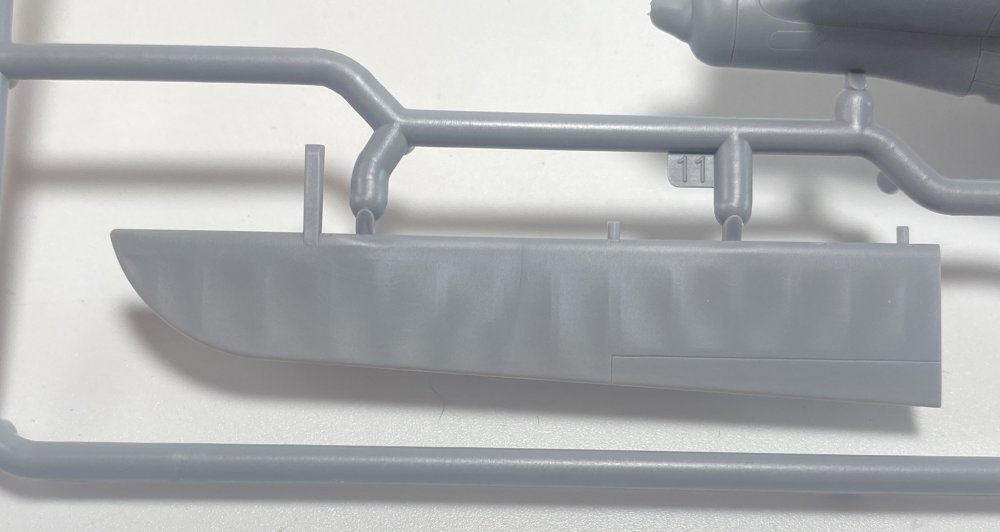
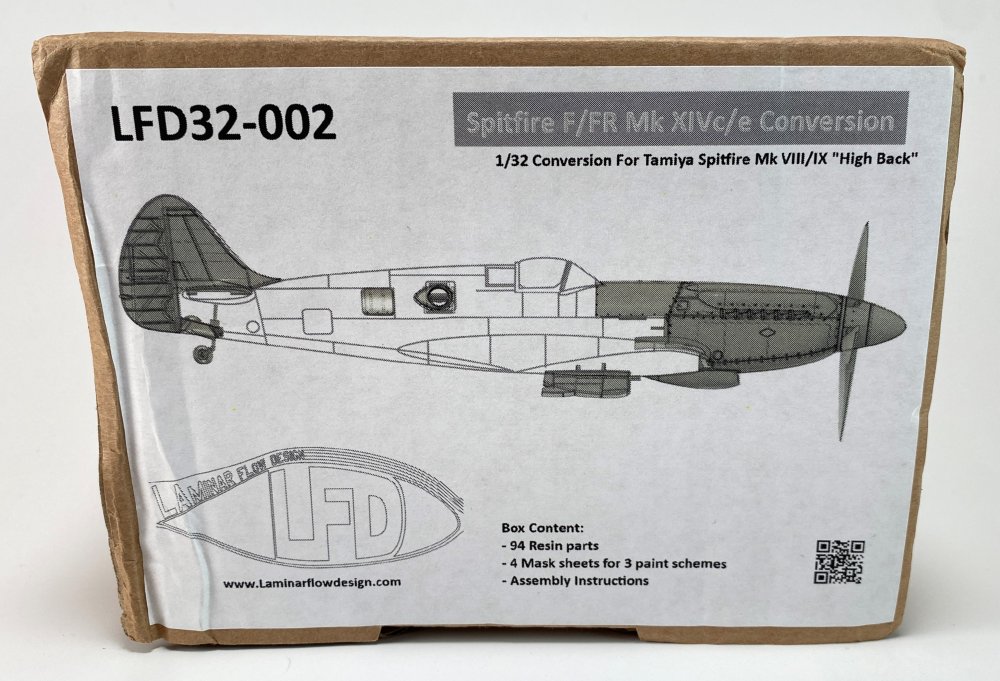
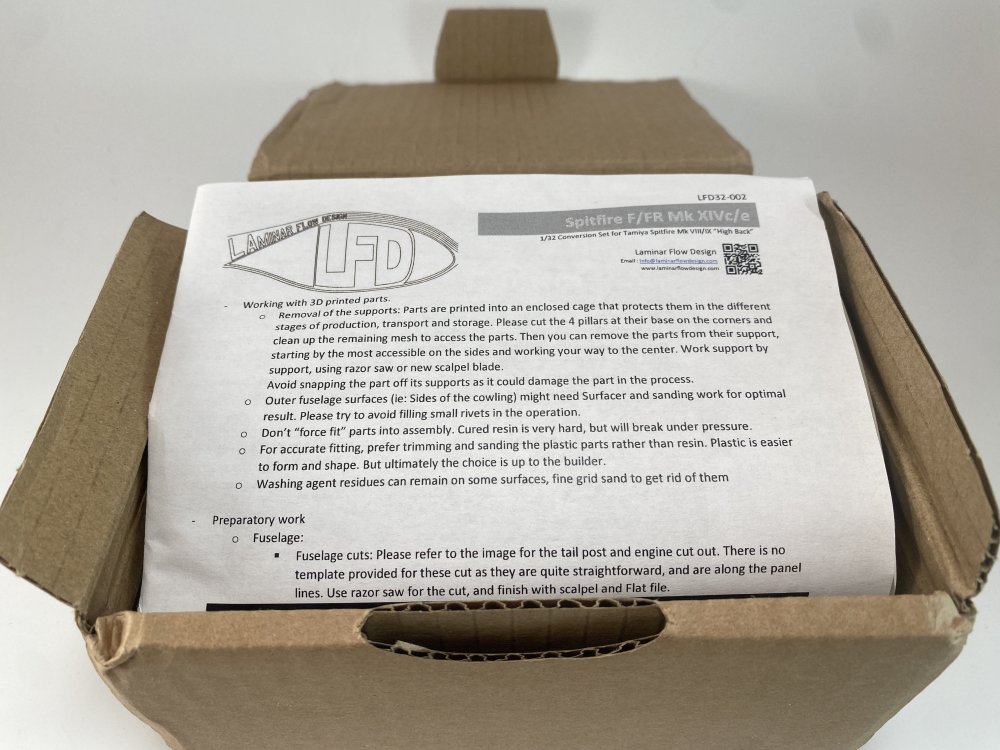
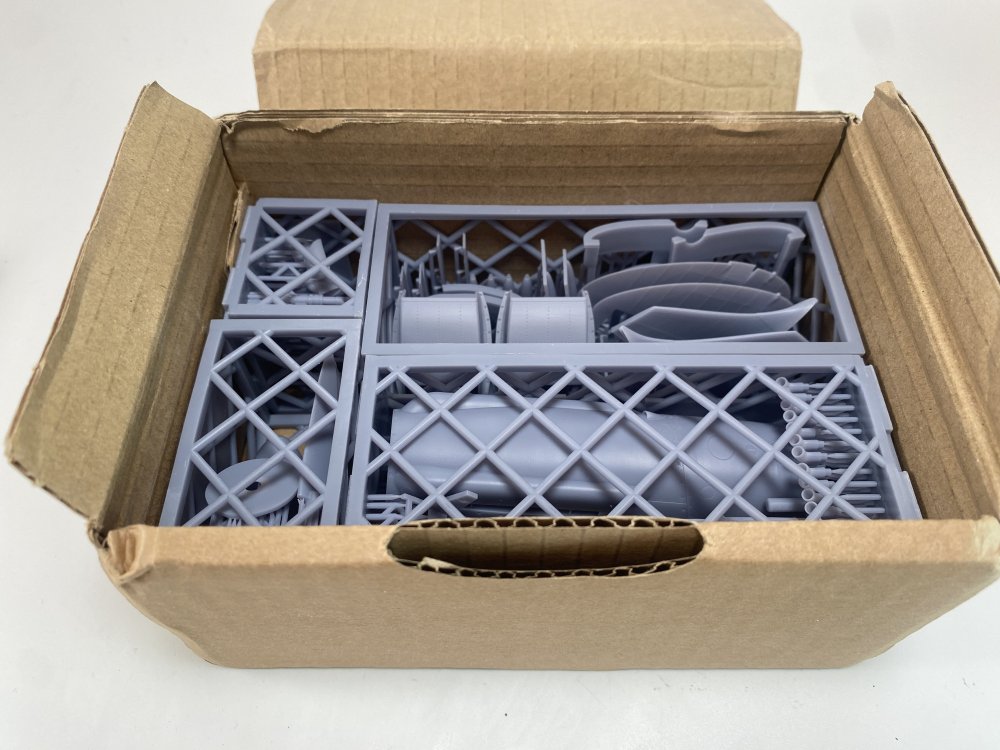
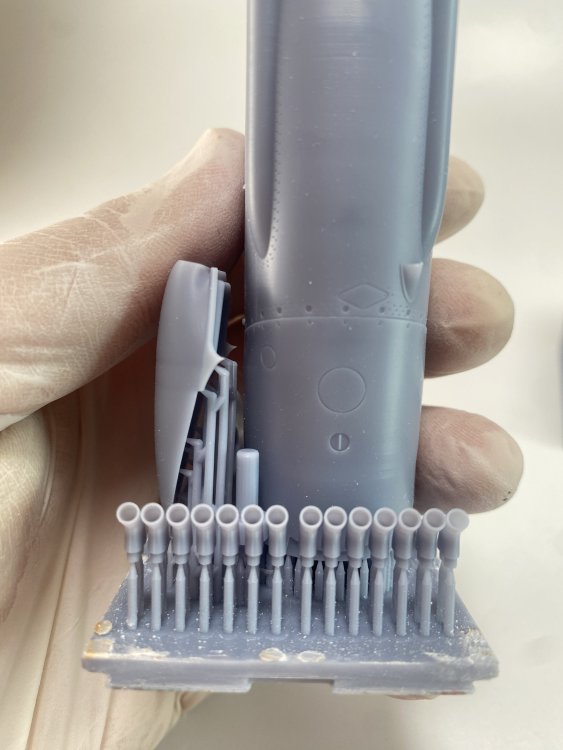
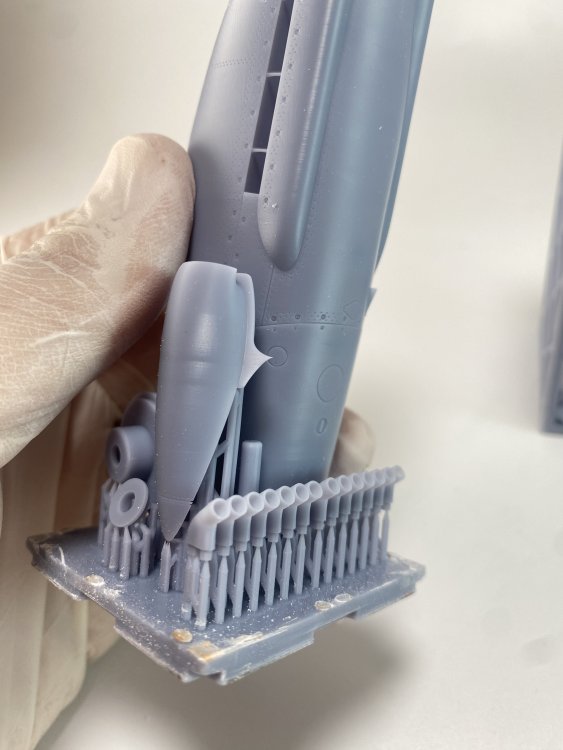
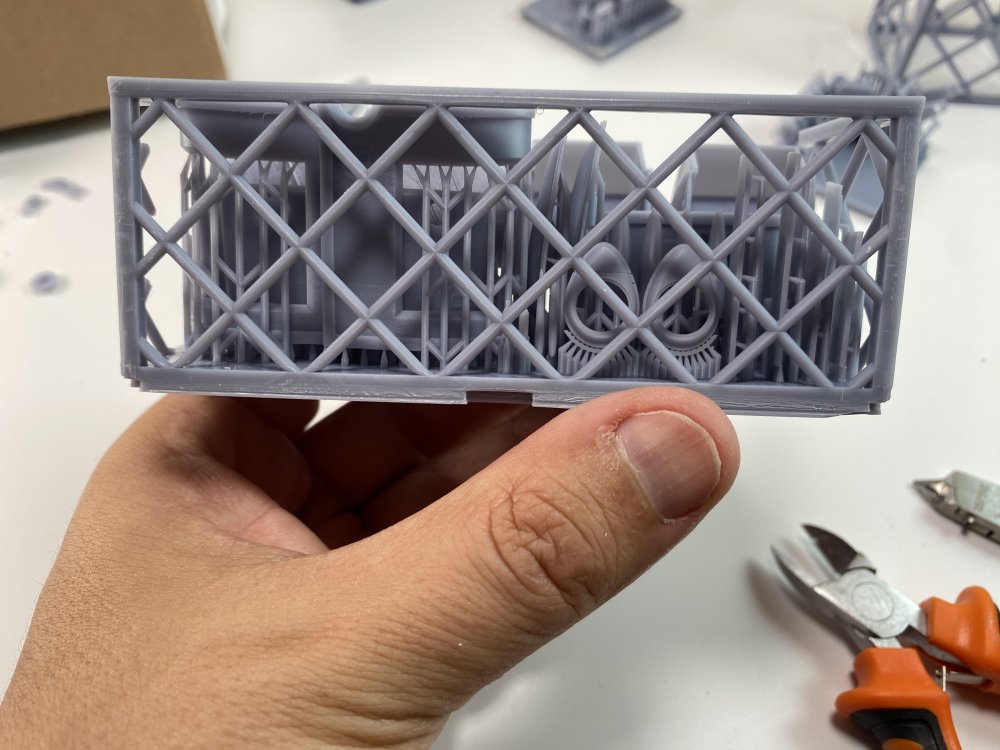
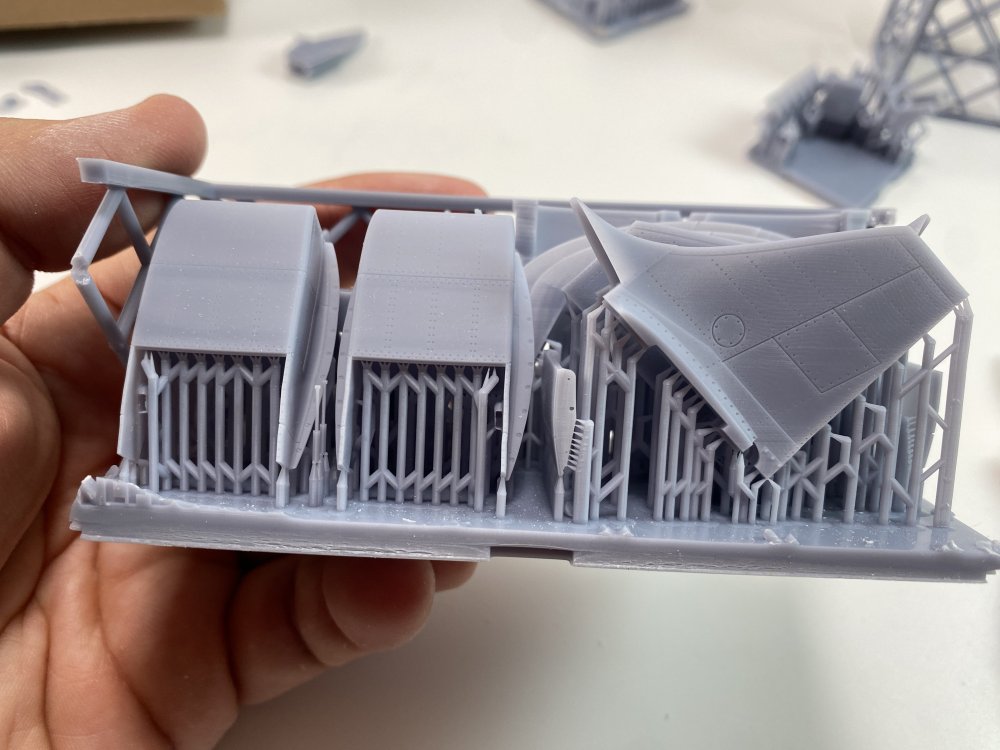
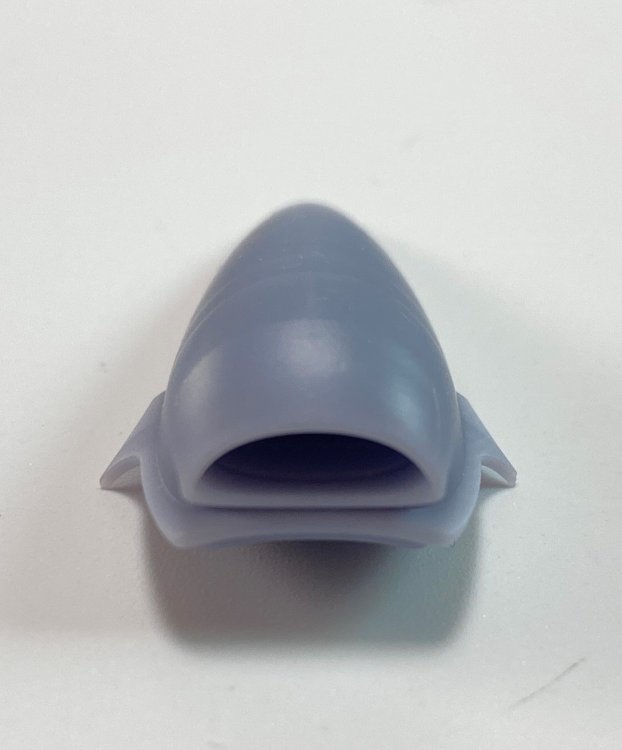
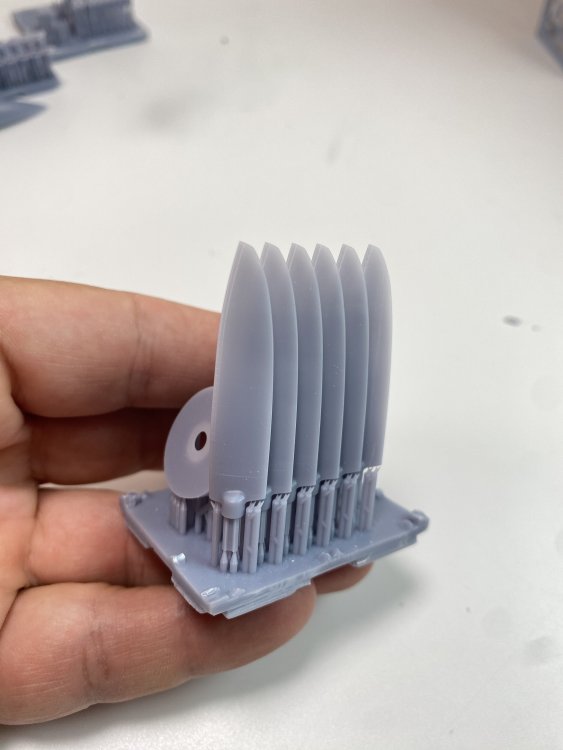
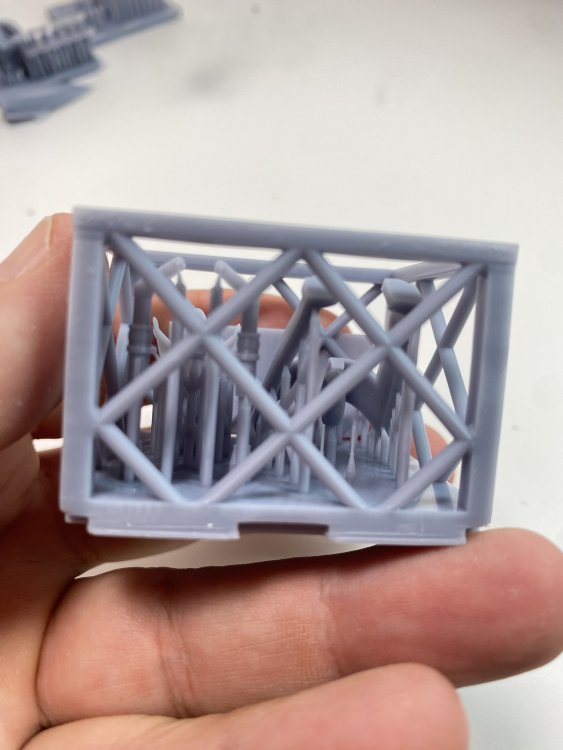
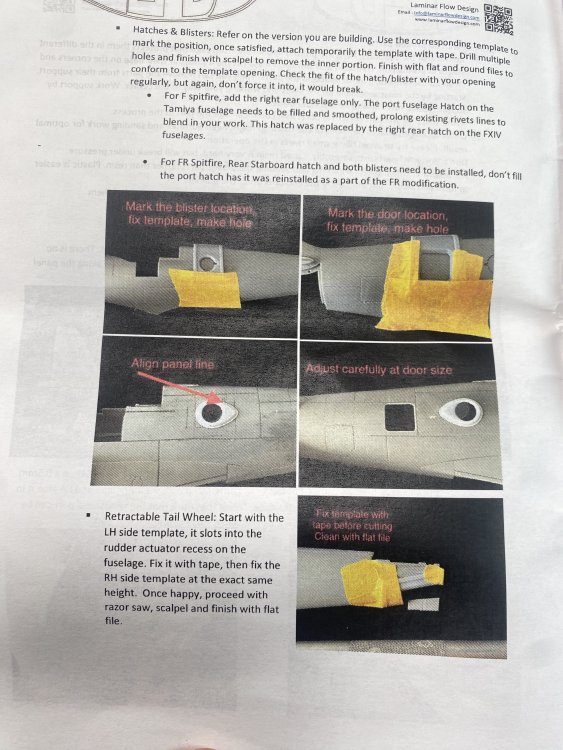
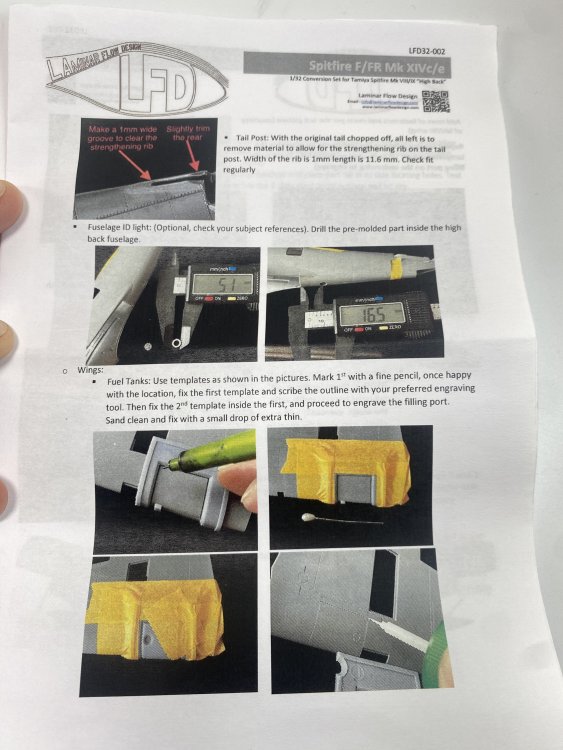
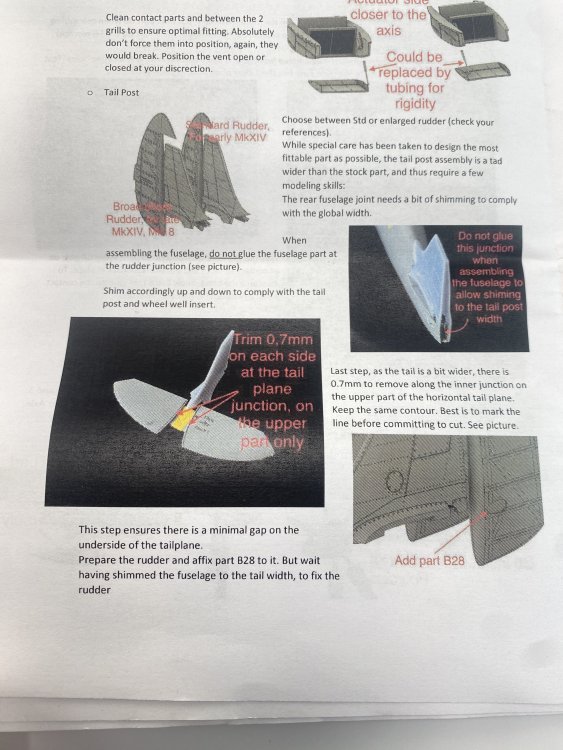
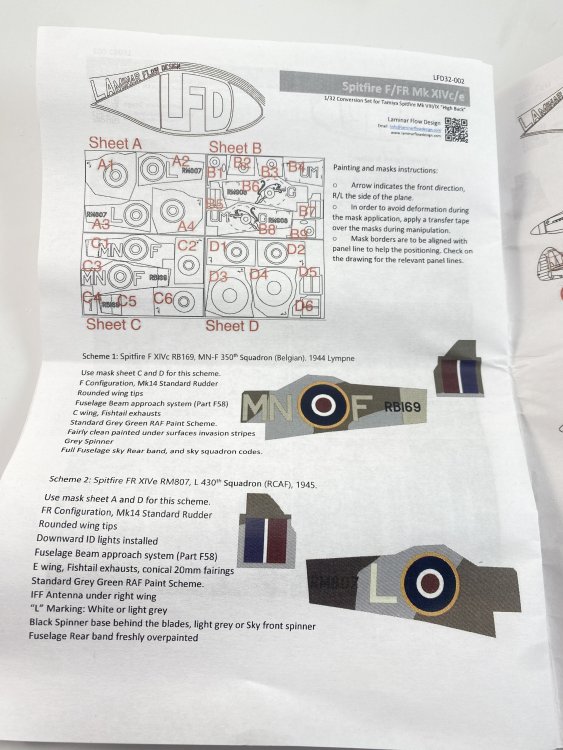
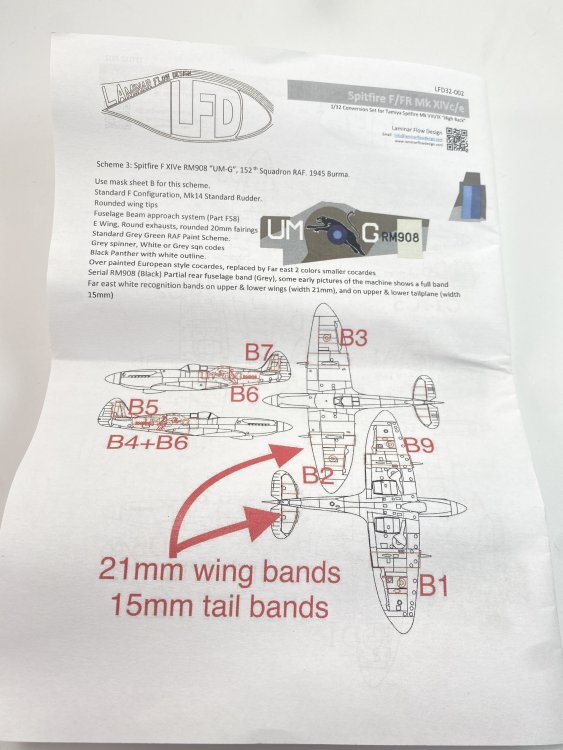
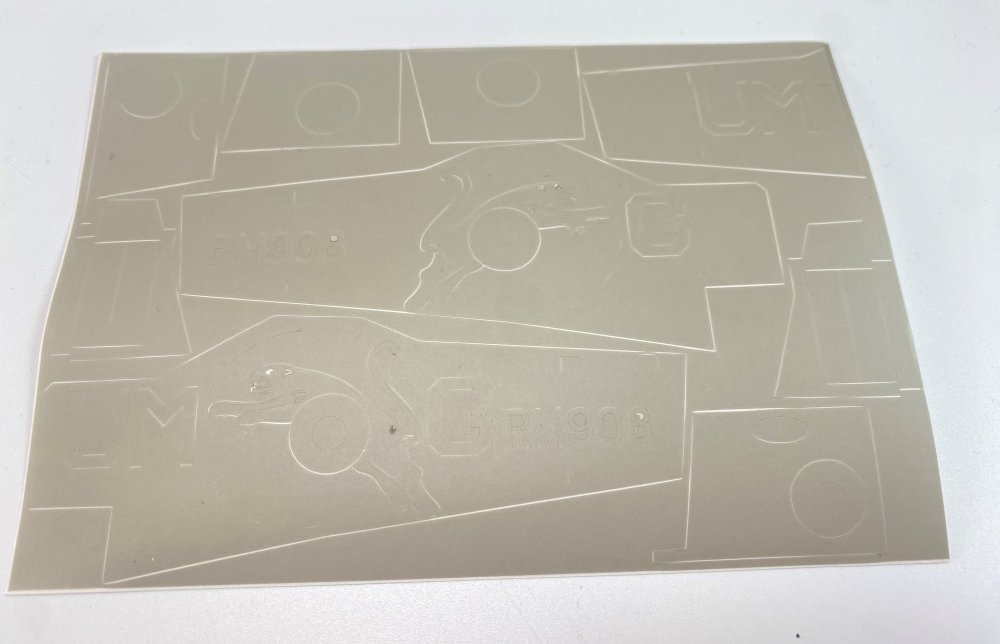
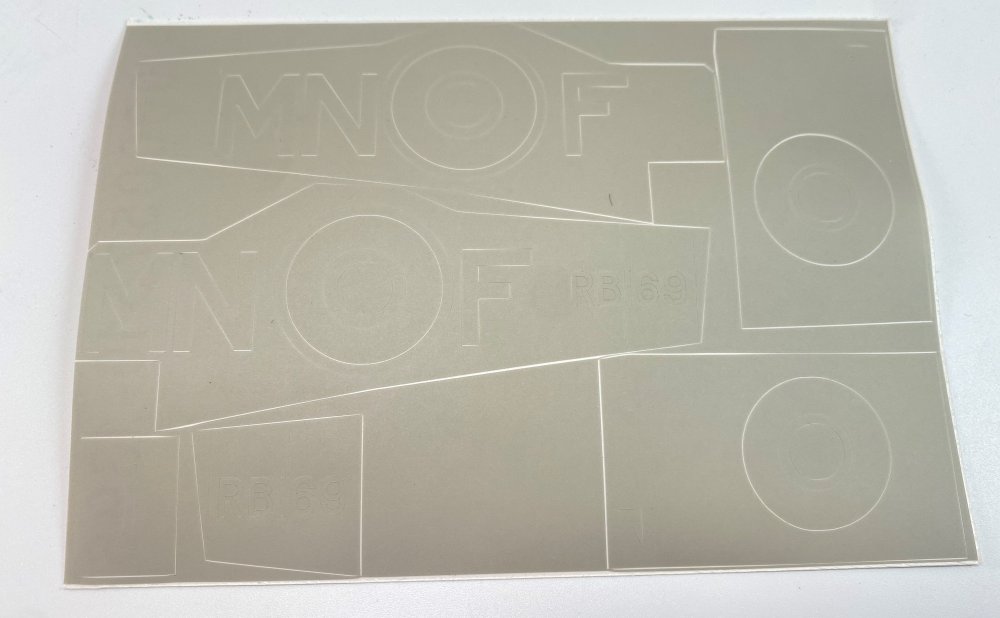
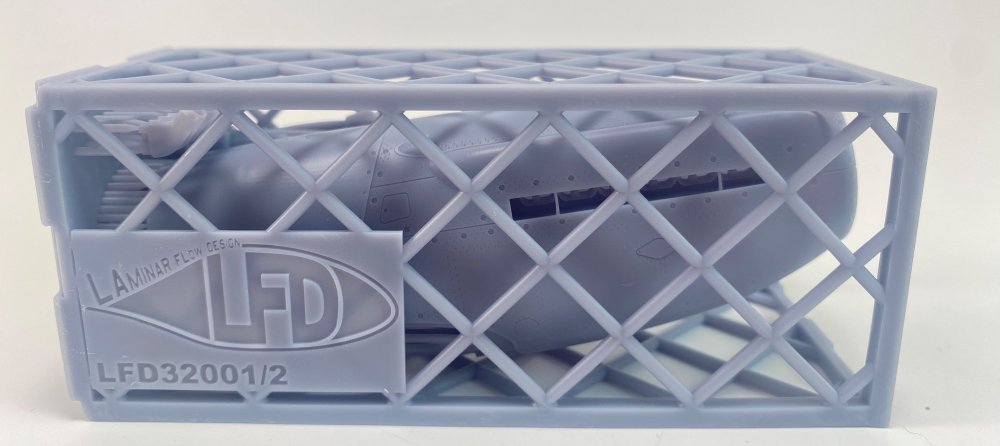
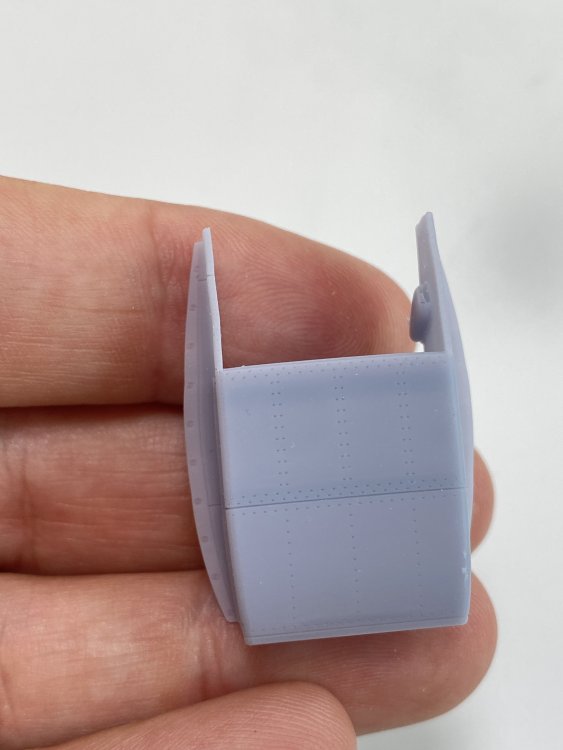
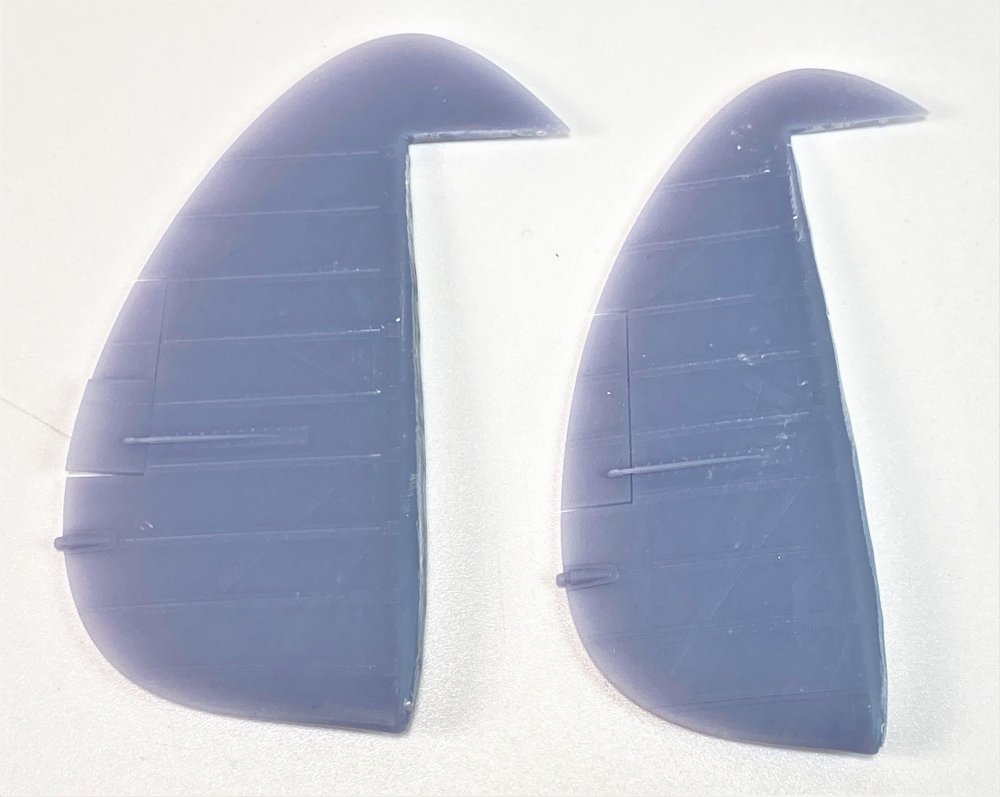
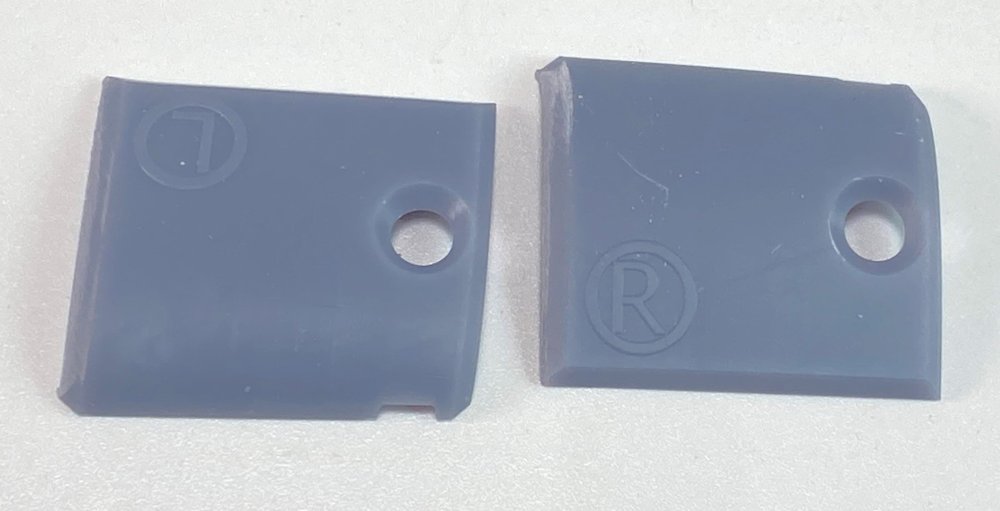
1:32 Spitfire F/FR XIVe Hi-back Conversion for Tamiya's Spitfire Mk.VIII and IX kit Laminar Flow Design, 1/32 scale Catalogue n.º 32002 Price Tag - €83,49 Purchase directly at Laminar Flow Design website – here- Laminar Flow Design is a new company from Belgium with a one man work behind, and Its starting with two conversion in 1:32, and this one is the 32-002. You can see Brett`s full review of the XIVe conversion for the Tamiya Spitfire XVI, here. Today we are checking the second conversion in their catalogue. We can said the second conversion release as the 32-001 and 32-002 were release at the same time The Spitfire Mk XIV is a beautifull aircraft.. I truly honest don’t know which one of more gracious… if the high-back one (of this conversion) and the very elegant Mk XIV low-back. To not chose, I got the other conversion, the 32-001. This conversion set came in a rather small cardboard box, with a “box-art” with a drawing of the aircraft silhouette. All the contents arrived perfectly safe and intact. Inside, just 93 (ninety three) 3D printed resin parts. Die-cut masking sheets and instructions. Looking at the box, I wonder: how the h… all fits in there? And the answer is simply: a fantastic planning 3D print, to reduce space and to protect all the fragile parts. To do that, the owner, producer got a system that is totally new to me… the printing cage around the parts. This set comes with four resin printing cages and inside of those cage, all the parts. At this stage you should and oddly enough, we must read the instructions as it gives some good advices how to cut the cages and to free the 3D parts. The instructions advise the modeller to cut the four pillars at the base of each cage, then work inward as required. It is also recommended that a razor saw or a new scalpel blade should be used to free the parts. To really check this conversion we need to start cutting… And it´s quite a mess! Some parts are not easy to free, so you a new scalpel, a very good cutter and patience and time. Once the parts have been free, you can appreciate the quality of this conversion, at its all splendour. The printing quality is top noch. The surface is very smoth with no printing line visible whatsoever. It’s at equal stage as the Tamiya surface detail of the donor kit with all the panel line, rivets, rib tape, fasteners, you name it! Brilliant work and printed in high resolution. The Mk VIII/IX are quite different from the Mk XIV but this conversion covers it all, at least from the outside. Starting with the most impressive part! The beautiful griffon nose. A single printing piece, as it’s a gorgeous piece of 3D resin!! Simply fabulous! Bye bye seam line in the upper nose!! I will have a smooth nose with no effort!! The carburate intake is also in a single piece totally hollow. Another big difference is the propeller. The propeller cone and propeller itself (yup, a new propeller is needed) is quite easy to make as all the blades have connections/intakes points, so there`s no room to error! Nice touch! Checking the tail, you get two styles of fin and rudder - larger and even larger one. Why? A standard rudder for early MK XIV and a broad rudder for Late Mk XIV; Speaking of two, you also get two wing radiators. The inside mesh is also reproduce in a very fine detail. In fact the 3D printing of this set is top quality! Great work Laminar Flow Design. A full exhaust set all hollow, and all individual… Could be a bit boring to make but the final result should be fantastic! One thing that I was worry about is the F/FR MK XIVc/e has different hatchs, but Laminar flow solve that with resin template that fit right to the kit donor fuselage. There is little chance of miss the lines. All the small detail necessary to make the F/FR are present, again with a perfect printing detail. All the detail are clear and present. It`s amazing how 3D printing have been coming to this in a few years. The tail wheels have a totally new wheel well with doors cast in place. Going to wings, new panels and rounded fairing (late type) and conical fairing (early type) are given! Next, the vinyl masks. So you got 4 vinyl adhesives die-cut masks with insignia letters and even a panther for three option: 1. Spitifre F Mk XIVc RB 169, MN-F 350th Squadron (Belgian), 1944, Lympne. 2. Spitifre FR Mk XIVe RM807, L 430th Squadron (RCAF), 1945 3. Spitifre F Mk XIVe RM908 “UM-G”, 152th Squadron FAR, 1945, Burma. I specially enjoy this last one! The instructions are in A5 format with 12 pages. They are clearly laid out and include text and photographic assembly steps. The instructions are very well need as it has lots of tips and serious warnings and steps that you should consider to get it done. The first chapter is “working with 3D printing” with very good tips. The second chapter is preparing work, or in another words, cutting!! Although this is a very well taught conversion, the cutting the plastic parts of the donor kit are always a bit stressful (at least for me). This particularly case, the nose looks quite easy, but the tail, even cutting for the correct place and looks straightforward, care must be taken as the plastic parts will be very thing and can break. Cautions and patience are needed. The surgery is minimal but is always a surgery! 😊 The hatches is also challenging but with the resin templates, a good measuring and the work can be done eithout too much work. The final chapter before painting is general assembly that is basically where the all this 93 resin parts go. And its quite clear and intuitive the parts place but the instructions very comprehensive and very clear. Conclusion: I really love this conversion and Laminar Flow Design made a terrific work giving us, 1:32 modellers this fantastic conversion. The quality of the 3D parts is astonishing with the surface detail matching the high quality of the donor kit, the Tamiya 1:32 Spitfire. The bar has quite high and these 3D parts don’t disappoint. Its not a beginner conversion, at all, so a few model kits (and some resin) under the belt would serve you good when you start building this conversion. The only thing that this conversion doesn’t give is the interior parts for the Mk XIV but once again Laminar Flow Desing came to the rescue and are already working on that. With the interior detail, a perfect 1:32 Mk XIVe high-back can be obtain. I love this conversion so much that I bought the low-back conversion! Very Very Highly recommend My trully Thanks to Laminar Flow Design for the review sample.


-
Most expensive model ever? Star Wars X-wing fighter
Fran replied to BlrwestSiR's topic in General Discussion
wow!!! -
Takom 1/16 scale Panzer III Ausf N DAK
Fran replied to CrankyCrafstman's topic in LSM 1/35 and Larger Work In Progress
wow!! Amazing work here!!! -
LSM Modelling News 2023 merged Fran and Artful69’s threads
Fran replied to Fran's topic in Modelling Discussion
Probably will be out this year, 2023! -
LSM Modelling News 2023 merged Fran and Artful69’s threads
Fran replied to Fran's topic in Modelling Discussion
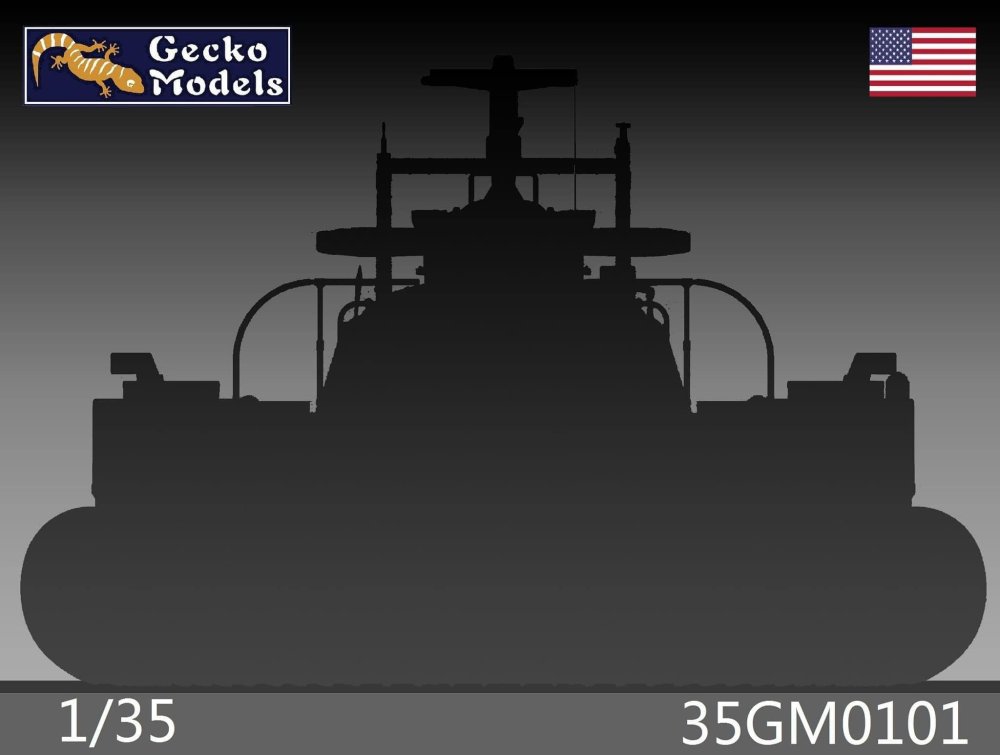
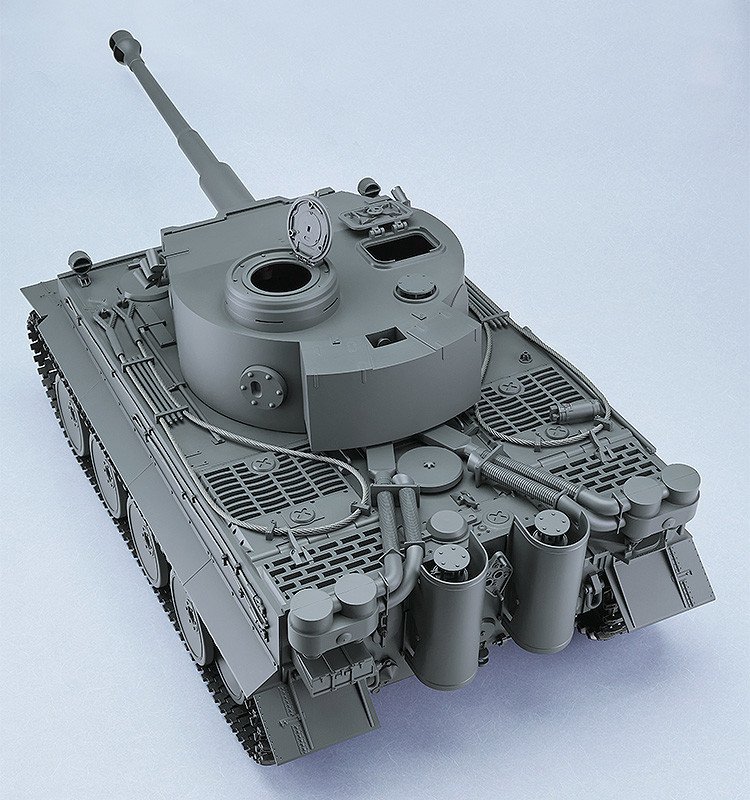
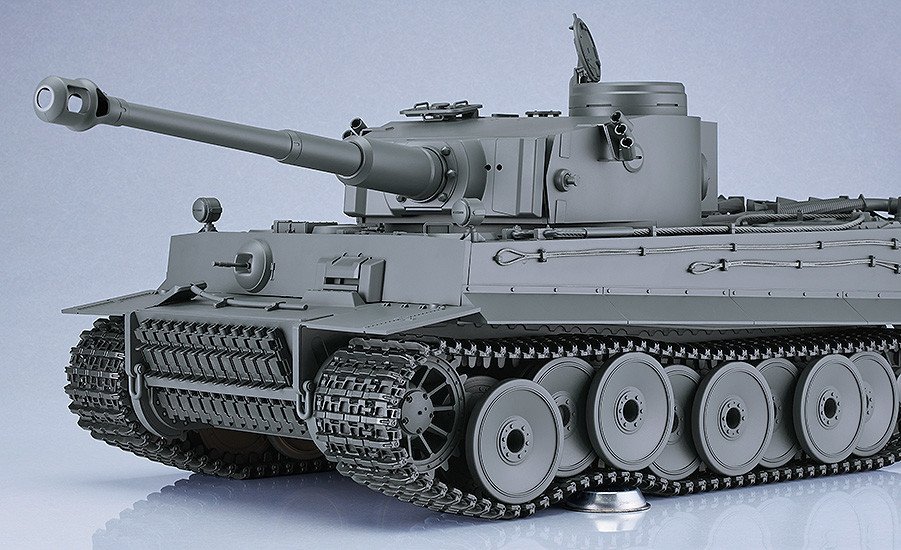
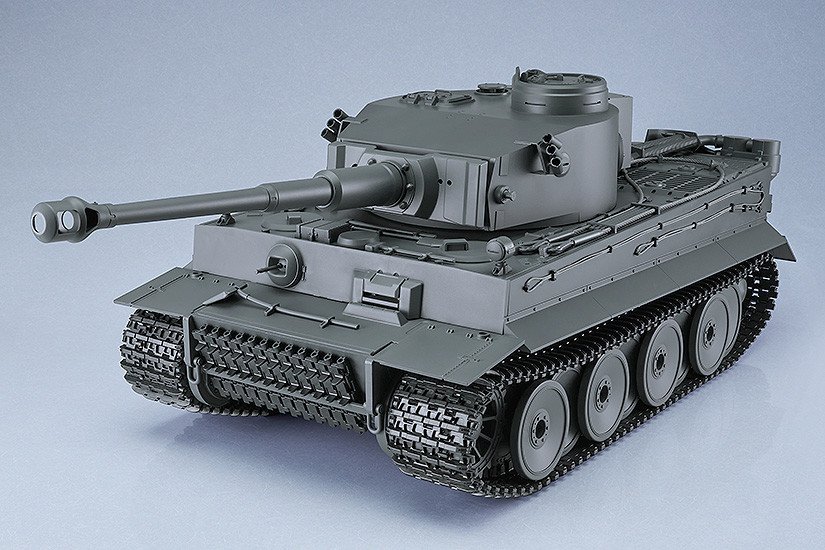
Well, I think is that time where we need to start a new topic for the upcoming news for 2024... And in 2023 news topics, we already have some news from 2024, so i decided to open this 2024 news topic already... @BlrwestSiR show us the new and upcoming in March 2024 Plamax 1:12 Tiger I... Pre-orders already open: https://www.hlj.com/1-12-scale-plamax-tiger-i-max01366 And the future, also for 2024, 1:35 Gecko PACV These two for sure, will only be out to the market in 2024.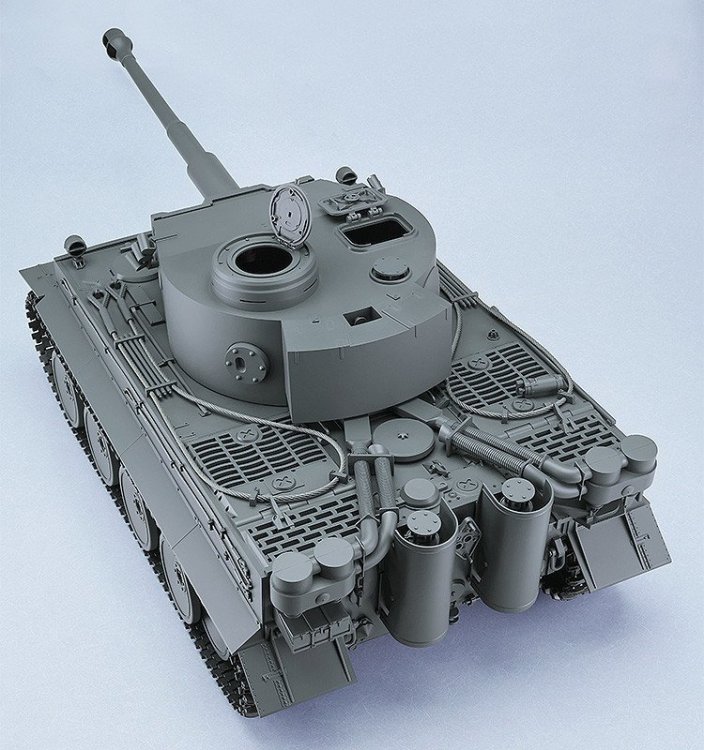

-
LSM Modelling News 2023 merged Fran and Artful69’s threads
Fran replied to Fran's topic in Modelling Discussion
1:12?????????????? -
LSM Modelling News 2023 merged Fran and Artful69’s threads
Fran replied to Fran's topic in Modelling Discussion
OMG!! PACV (Patrol Air Cushion Vehicle) in 1/35th by Gecko Models. Well, my "dream" of having the Masterpiece PACV is gone... Now I will have the Gecko one!