Irishman1
-
Posts
181 -
Joined
-
Last visited
Content Type
Profiles
Forums
Events
Gallery
Everything posted by Irishman1
-
My Airfix 1/24 scale Typhoon
Irishman1 replied to Irishman1's topic in LSM 1/35 and Larger Work In Progress
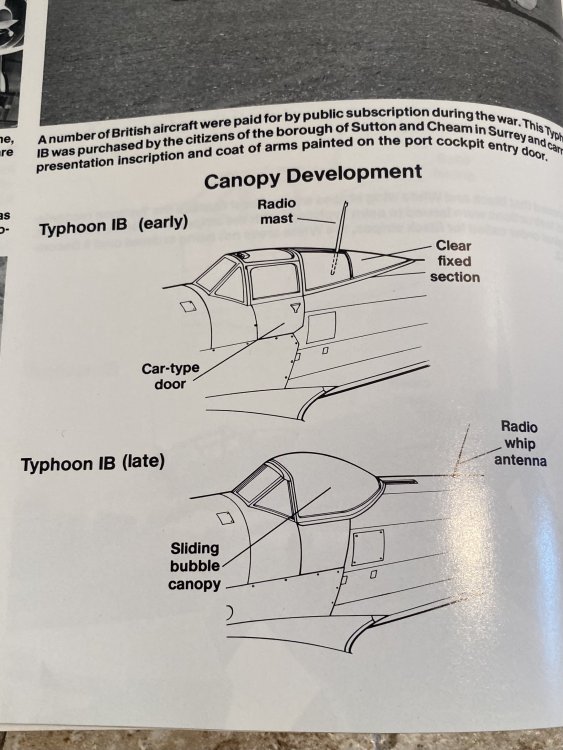
Back to the teardrop canopy!! I’ll chop the car door window frames from the side panels or maybe make a couple of side panels from evergreen sheet first so I can go back to the car door if I mess it up…

-
My Airfix 1/24 scale Typhoon
Irishman1 replied to Irishman1's topic in LSM 1/35 and Larger Work In Progress
I do have another bubble canopy coming!!! teardrop it is! -
My Airfix 1/24 scale Typhoon
Irishman1 replied to Irishman1's topic in LSM 1/35 and Larger Work In Progress
It was! Hard to cut out from the forms too. Ended up breaking the front windscreen. Back to being a car door😒 -
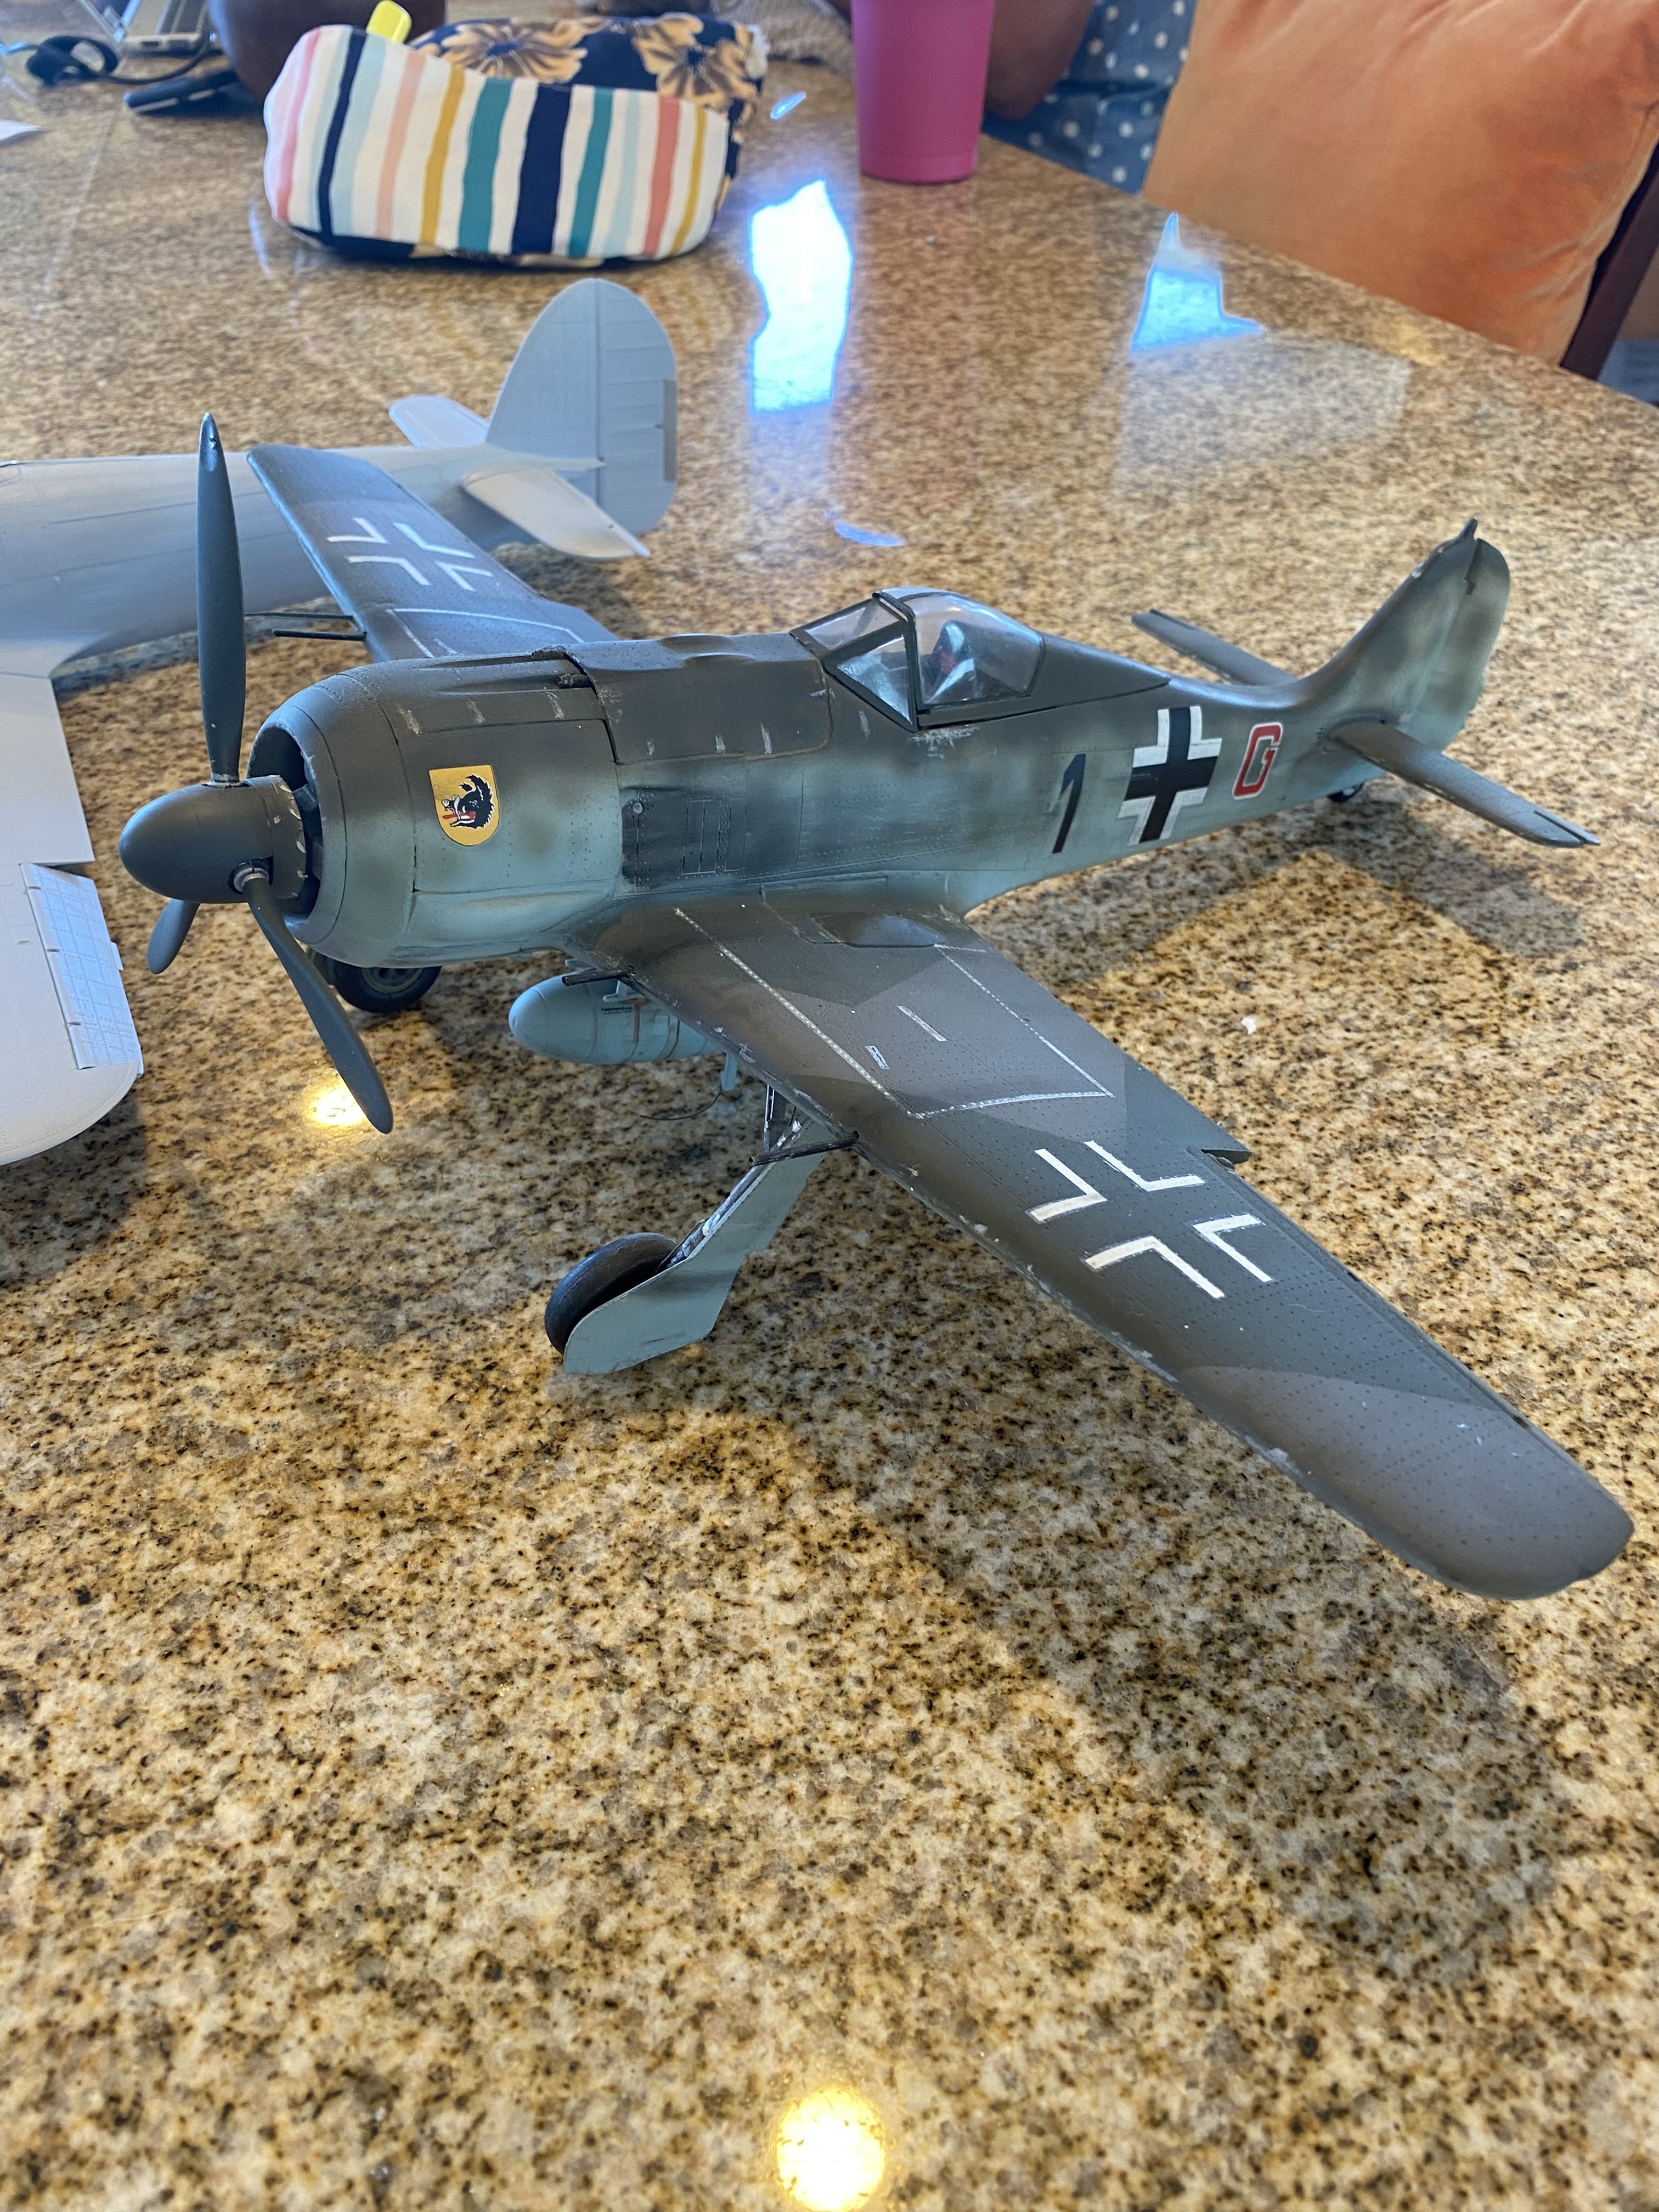
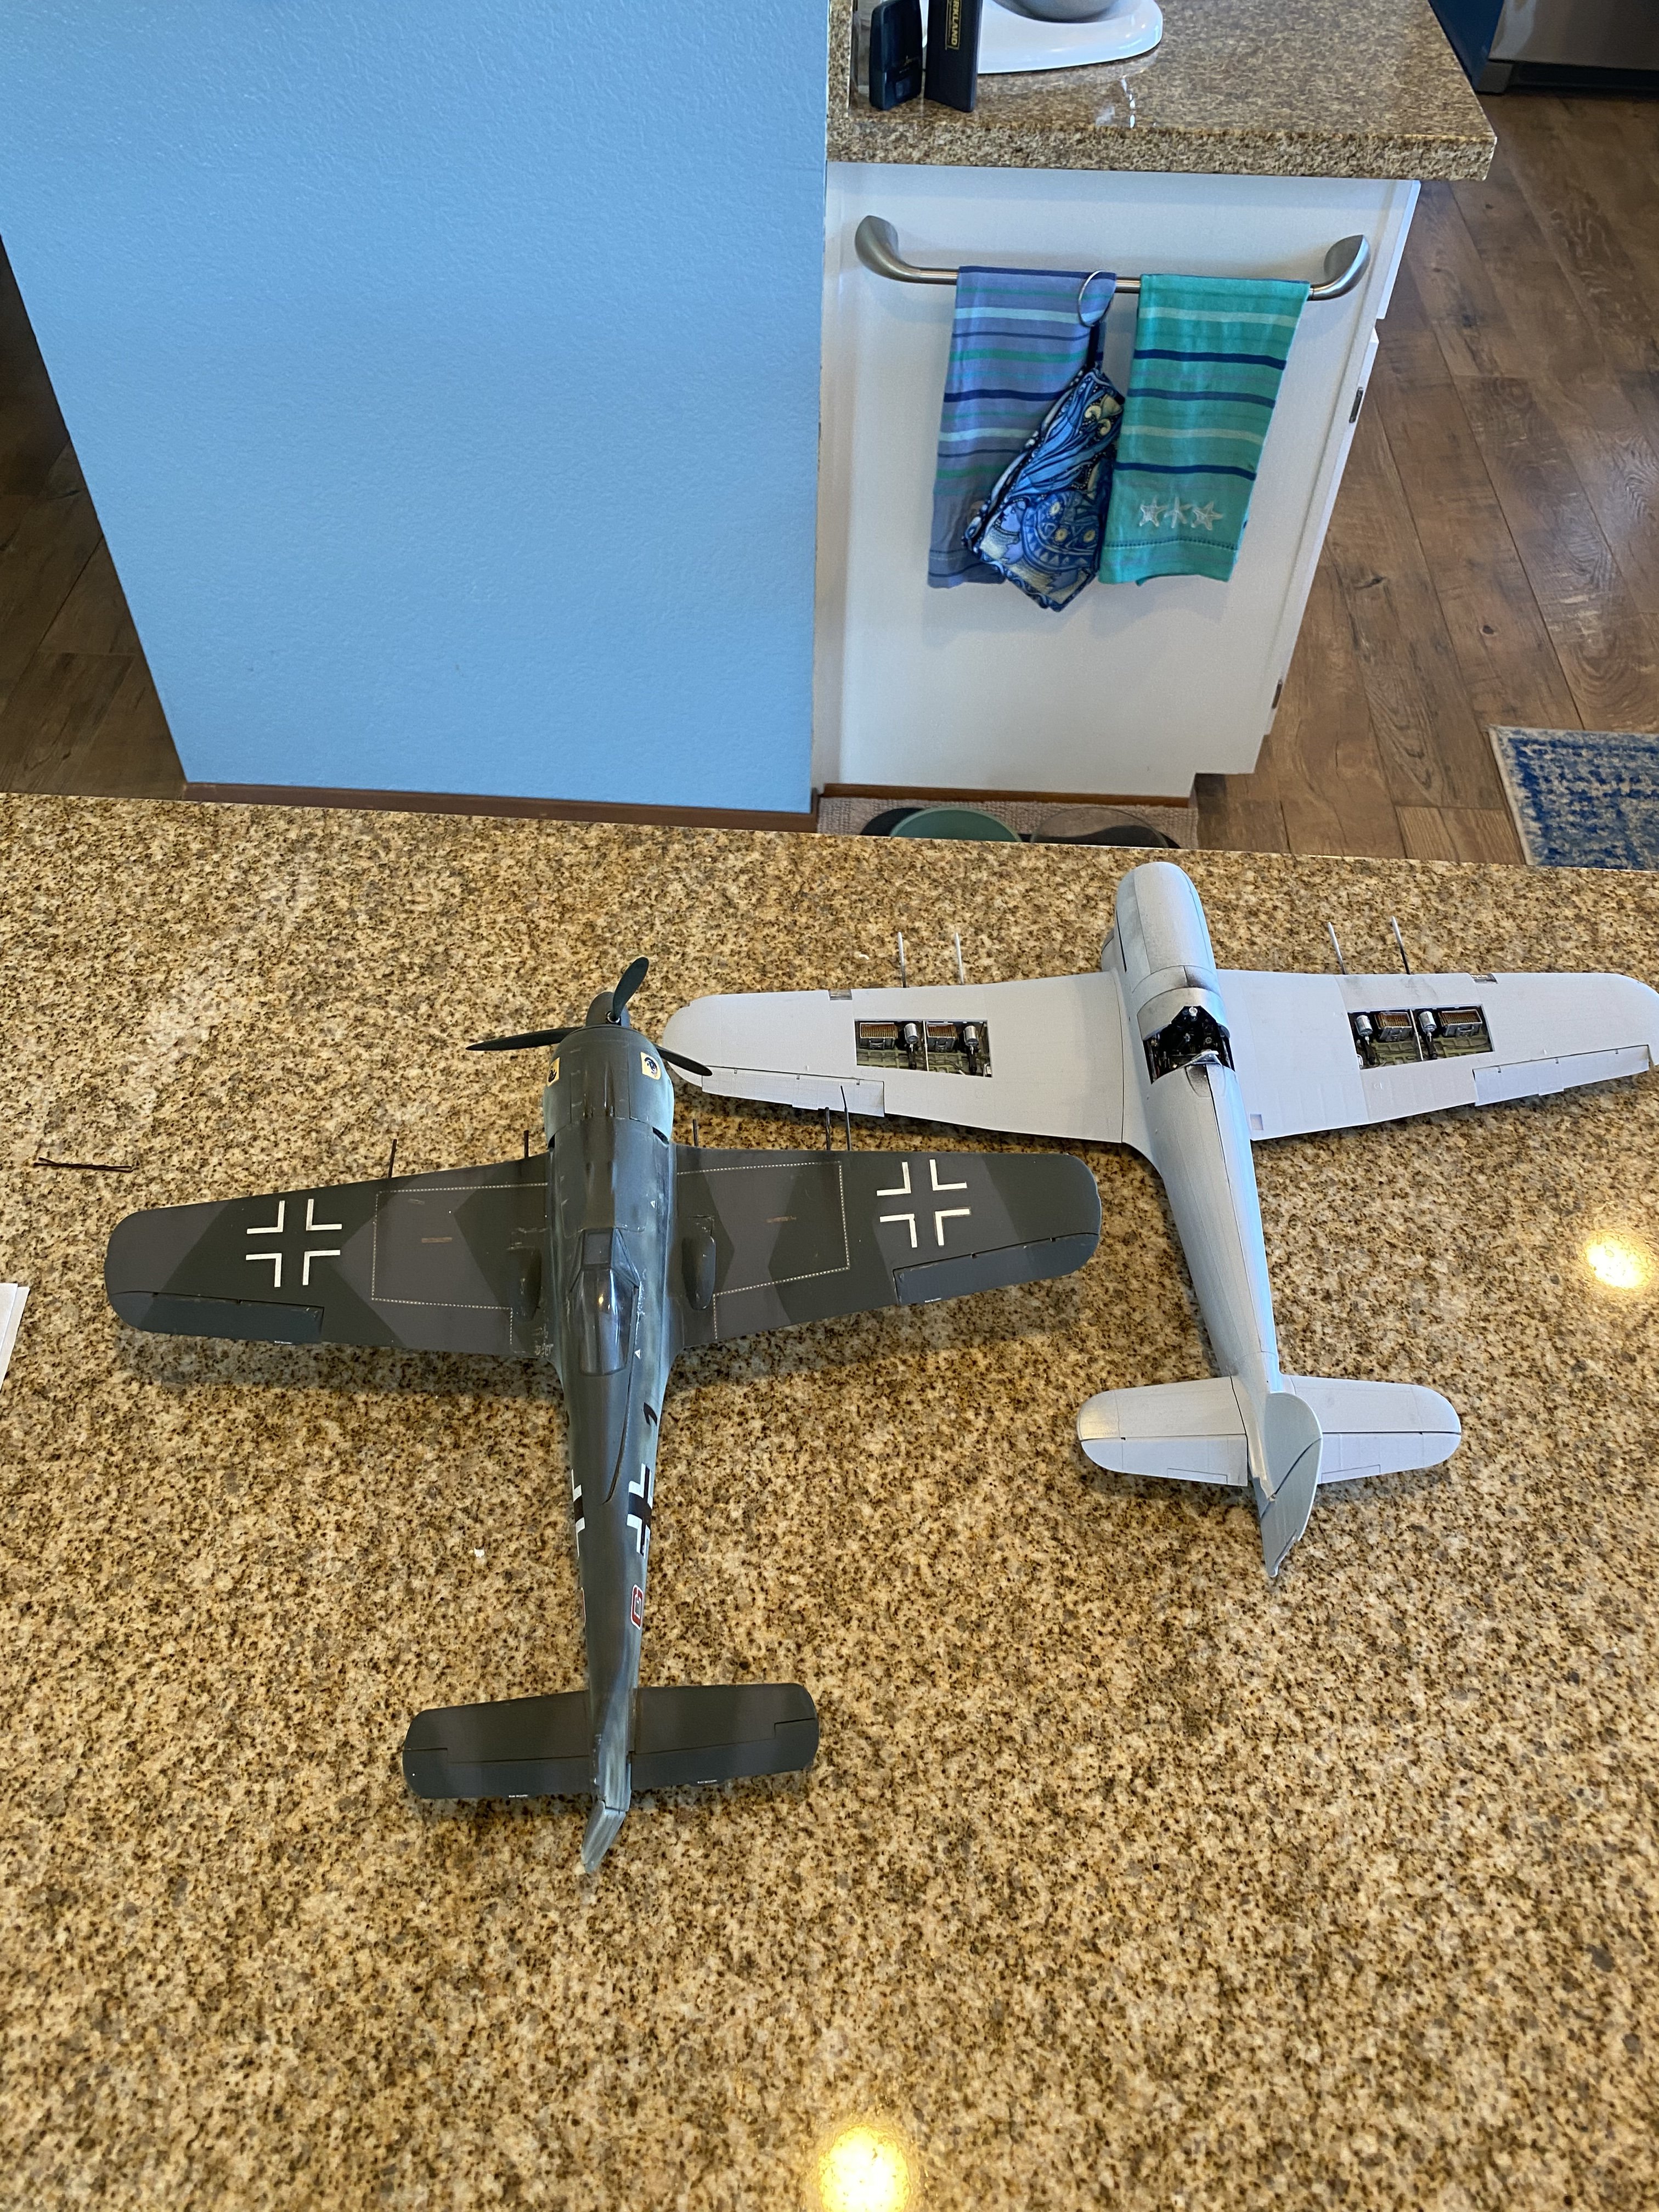
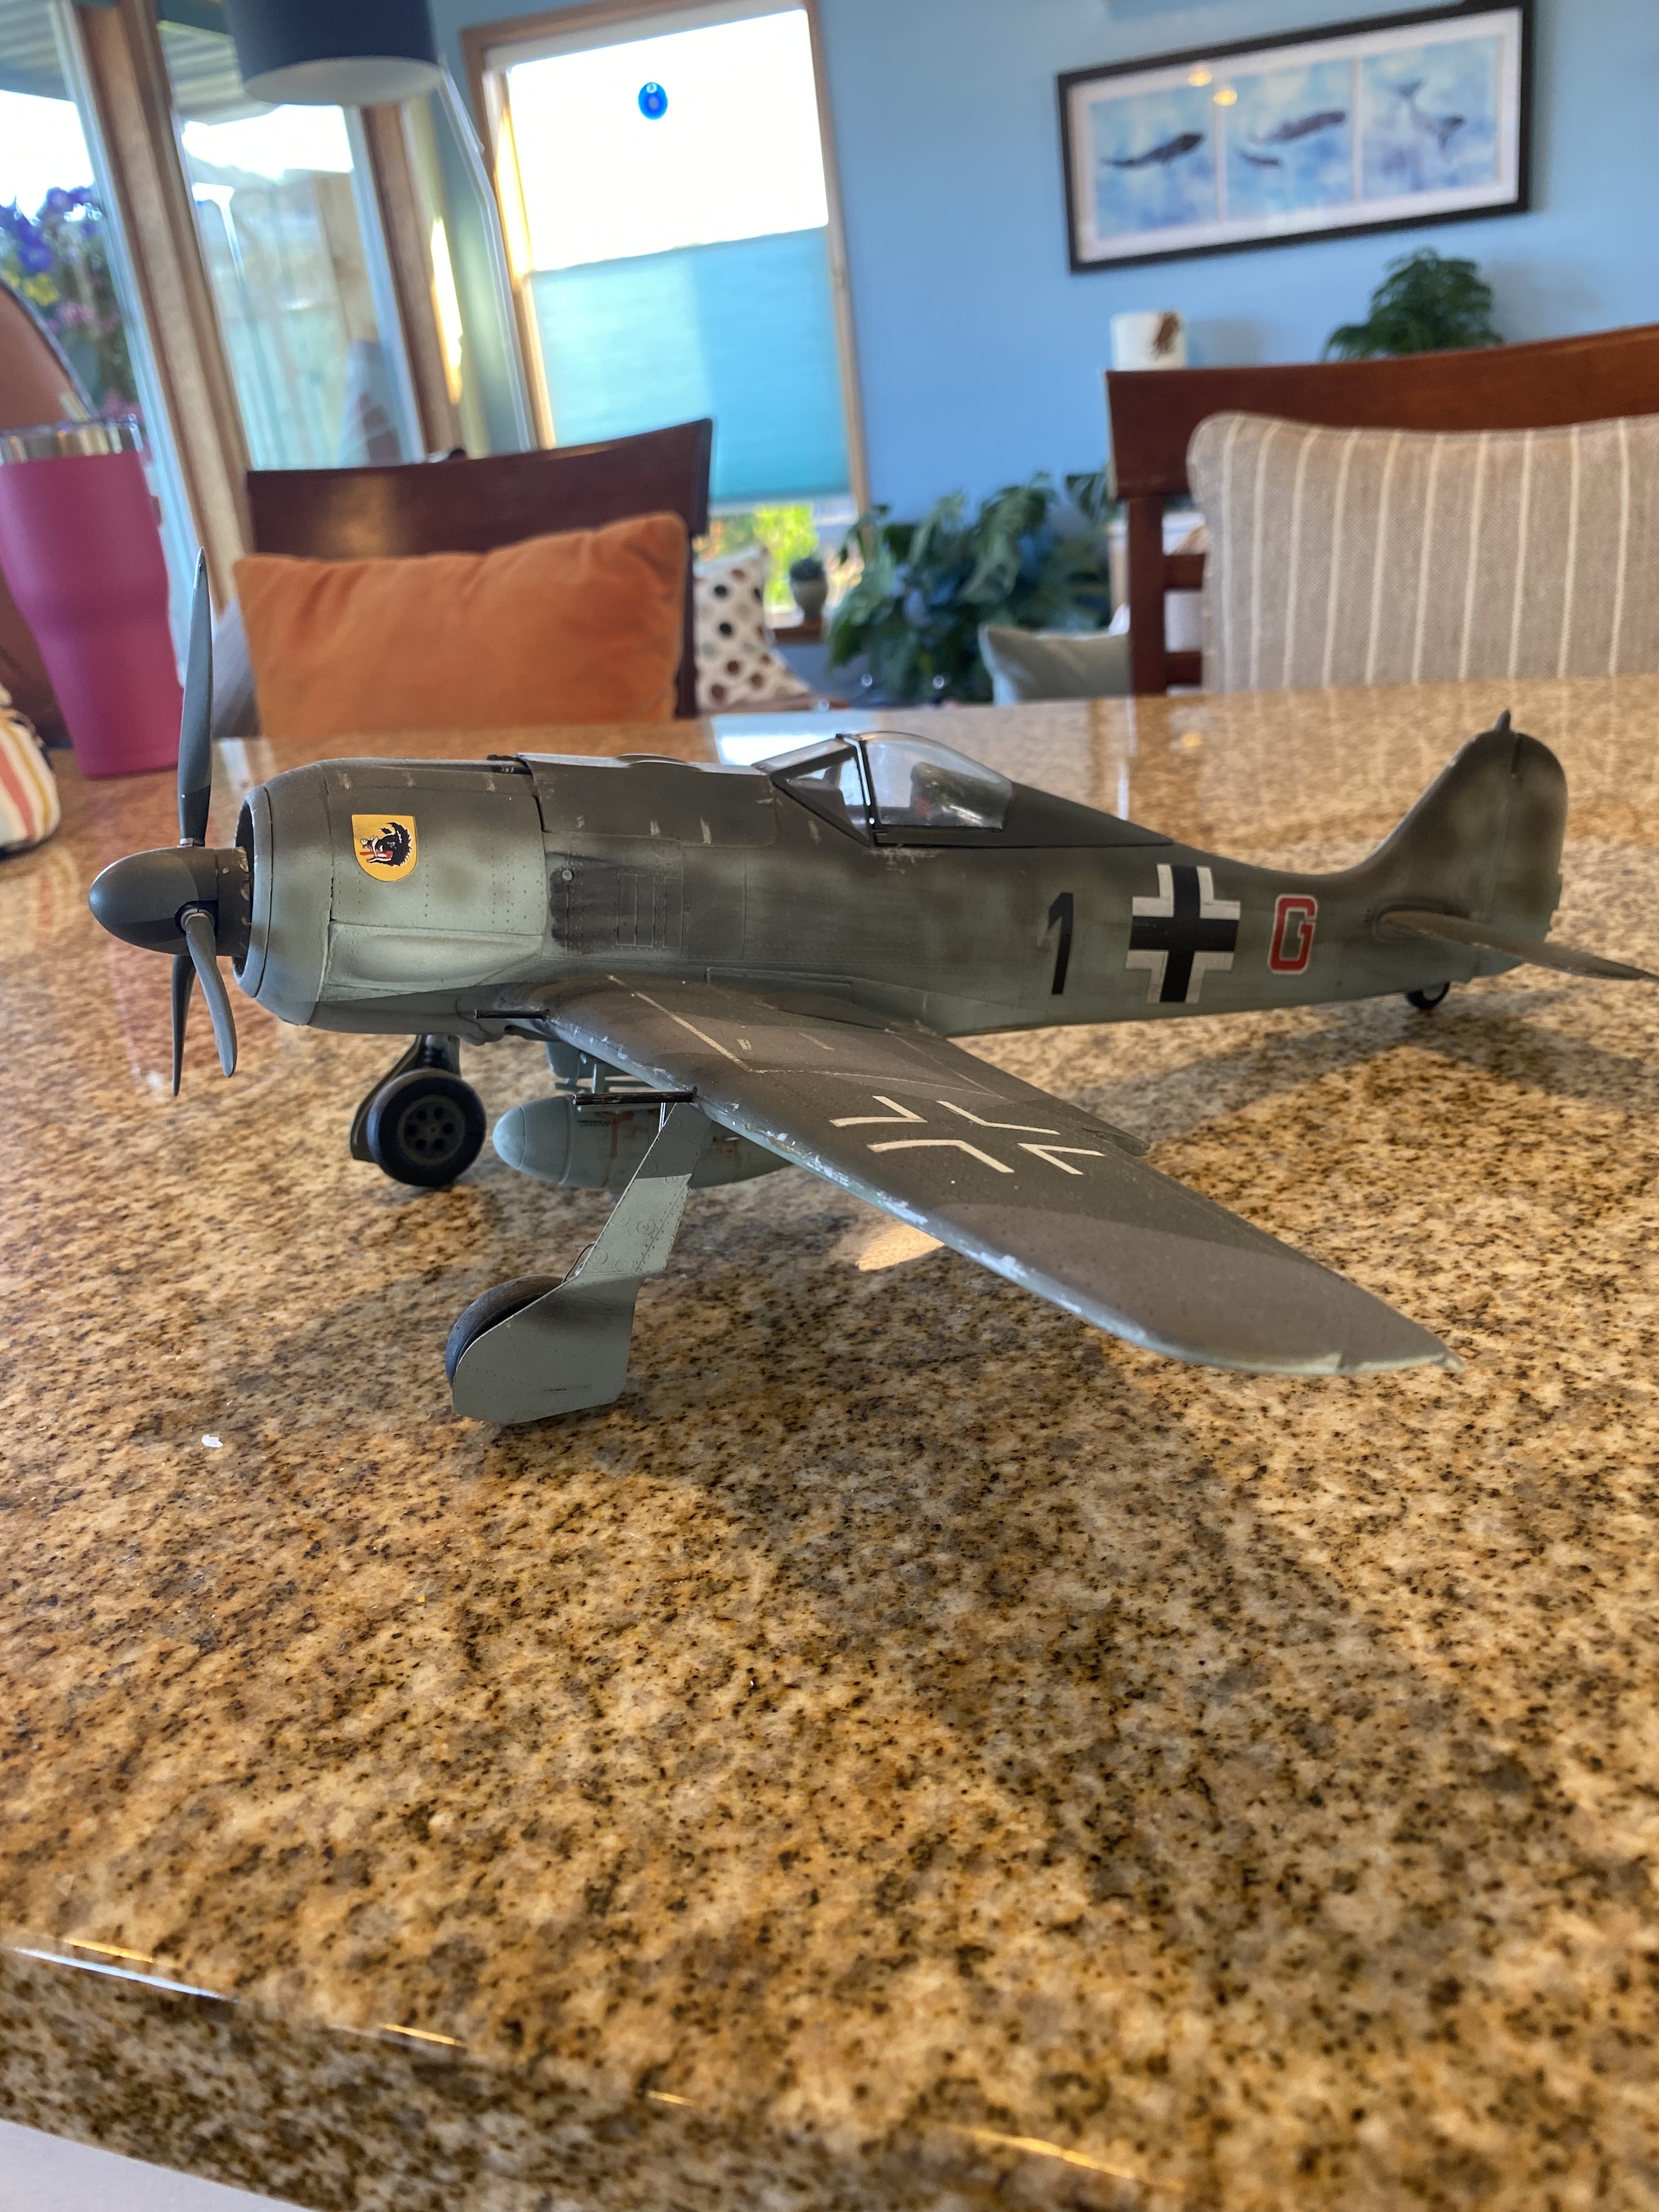
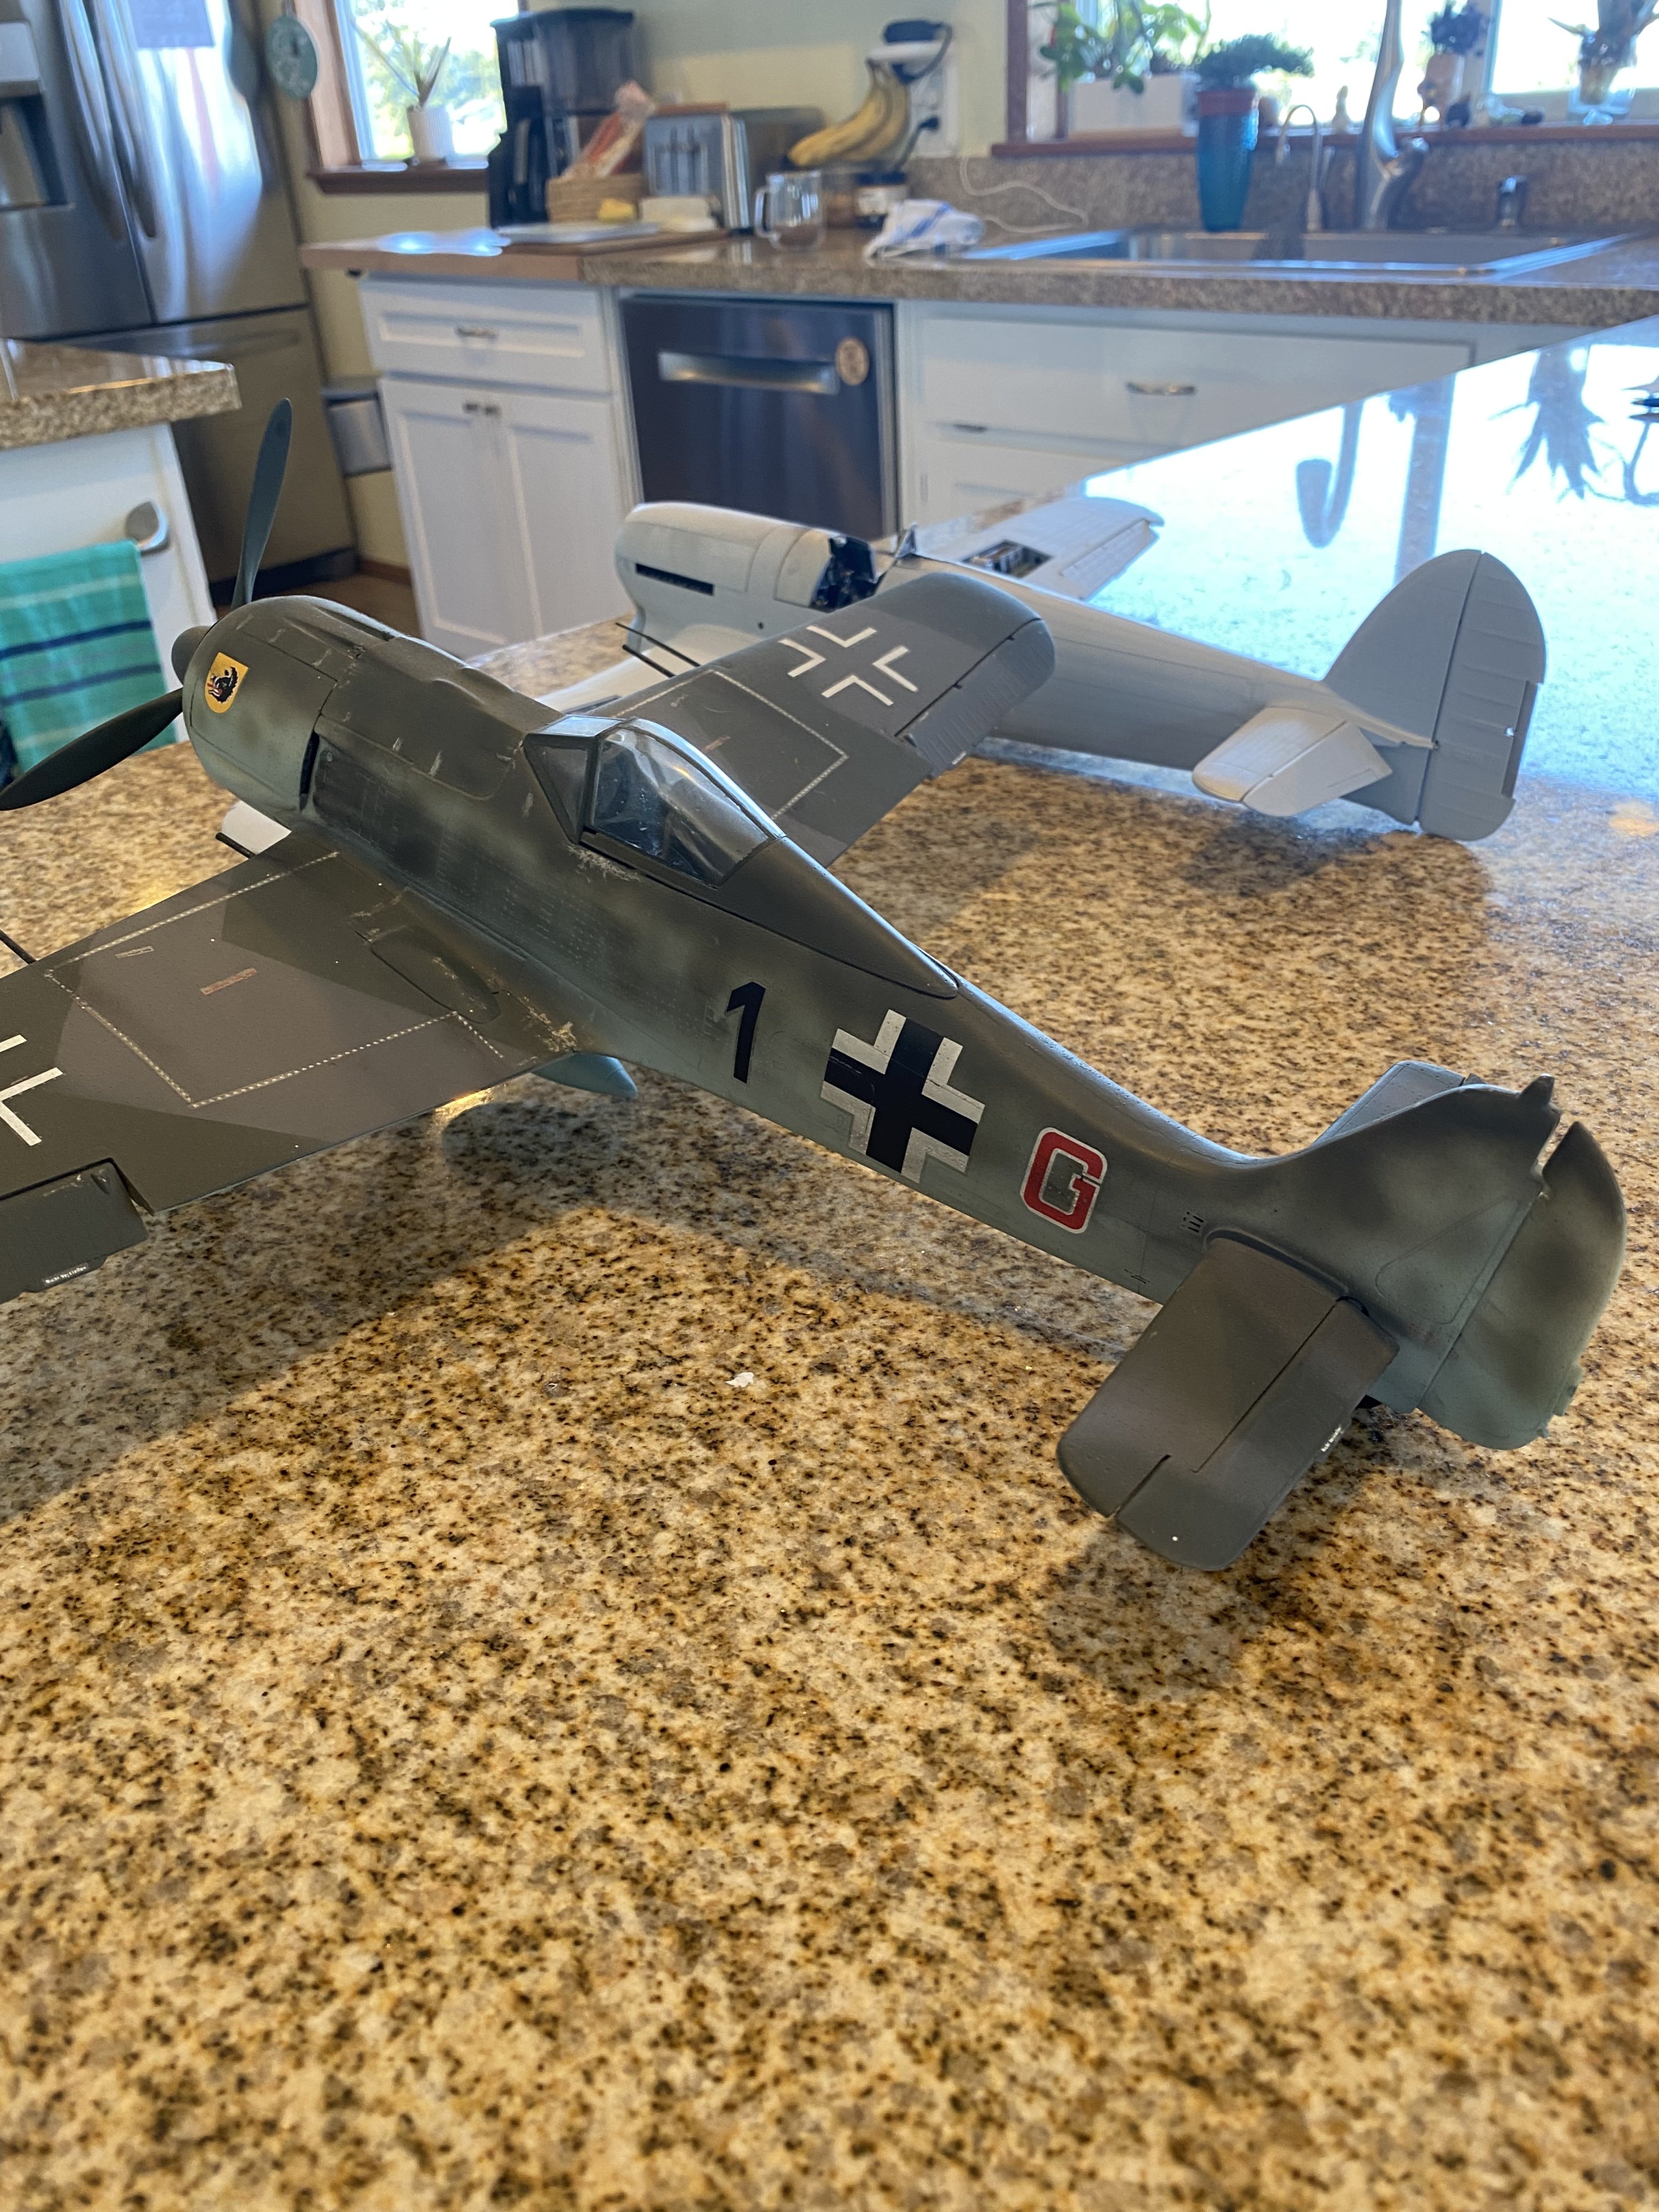
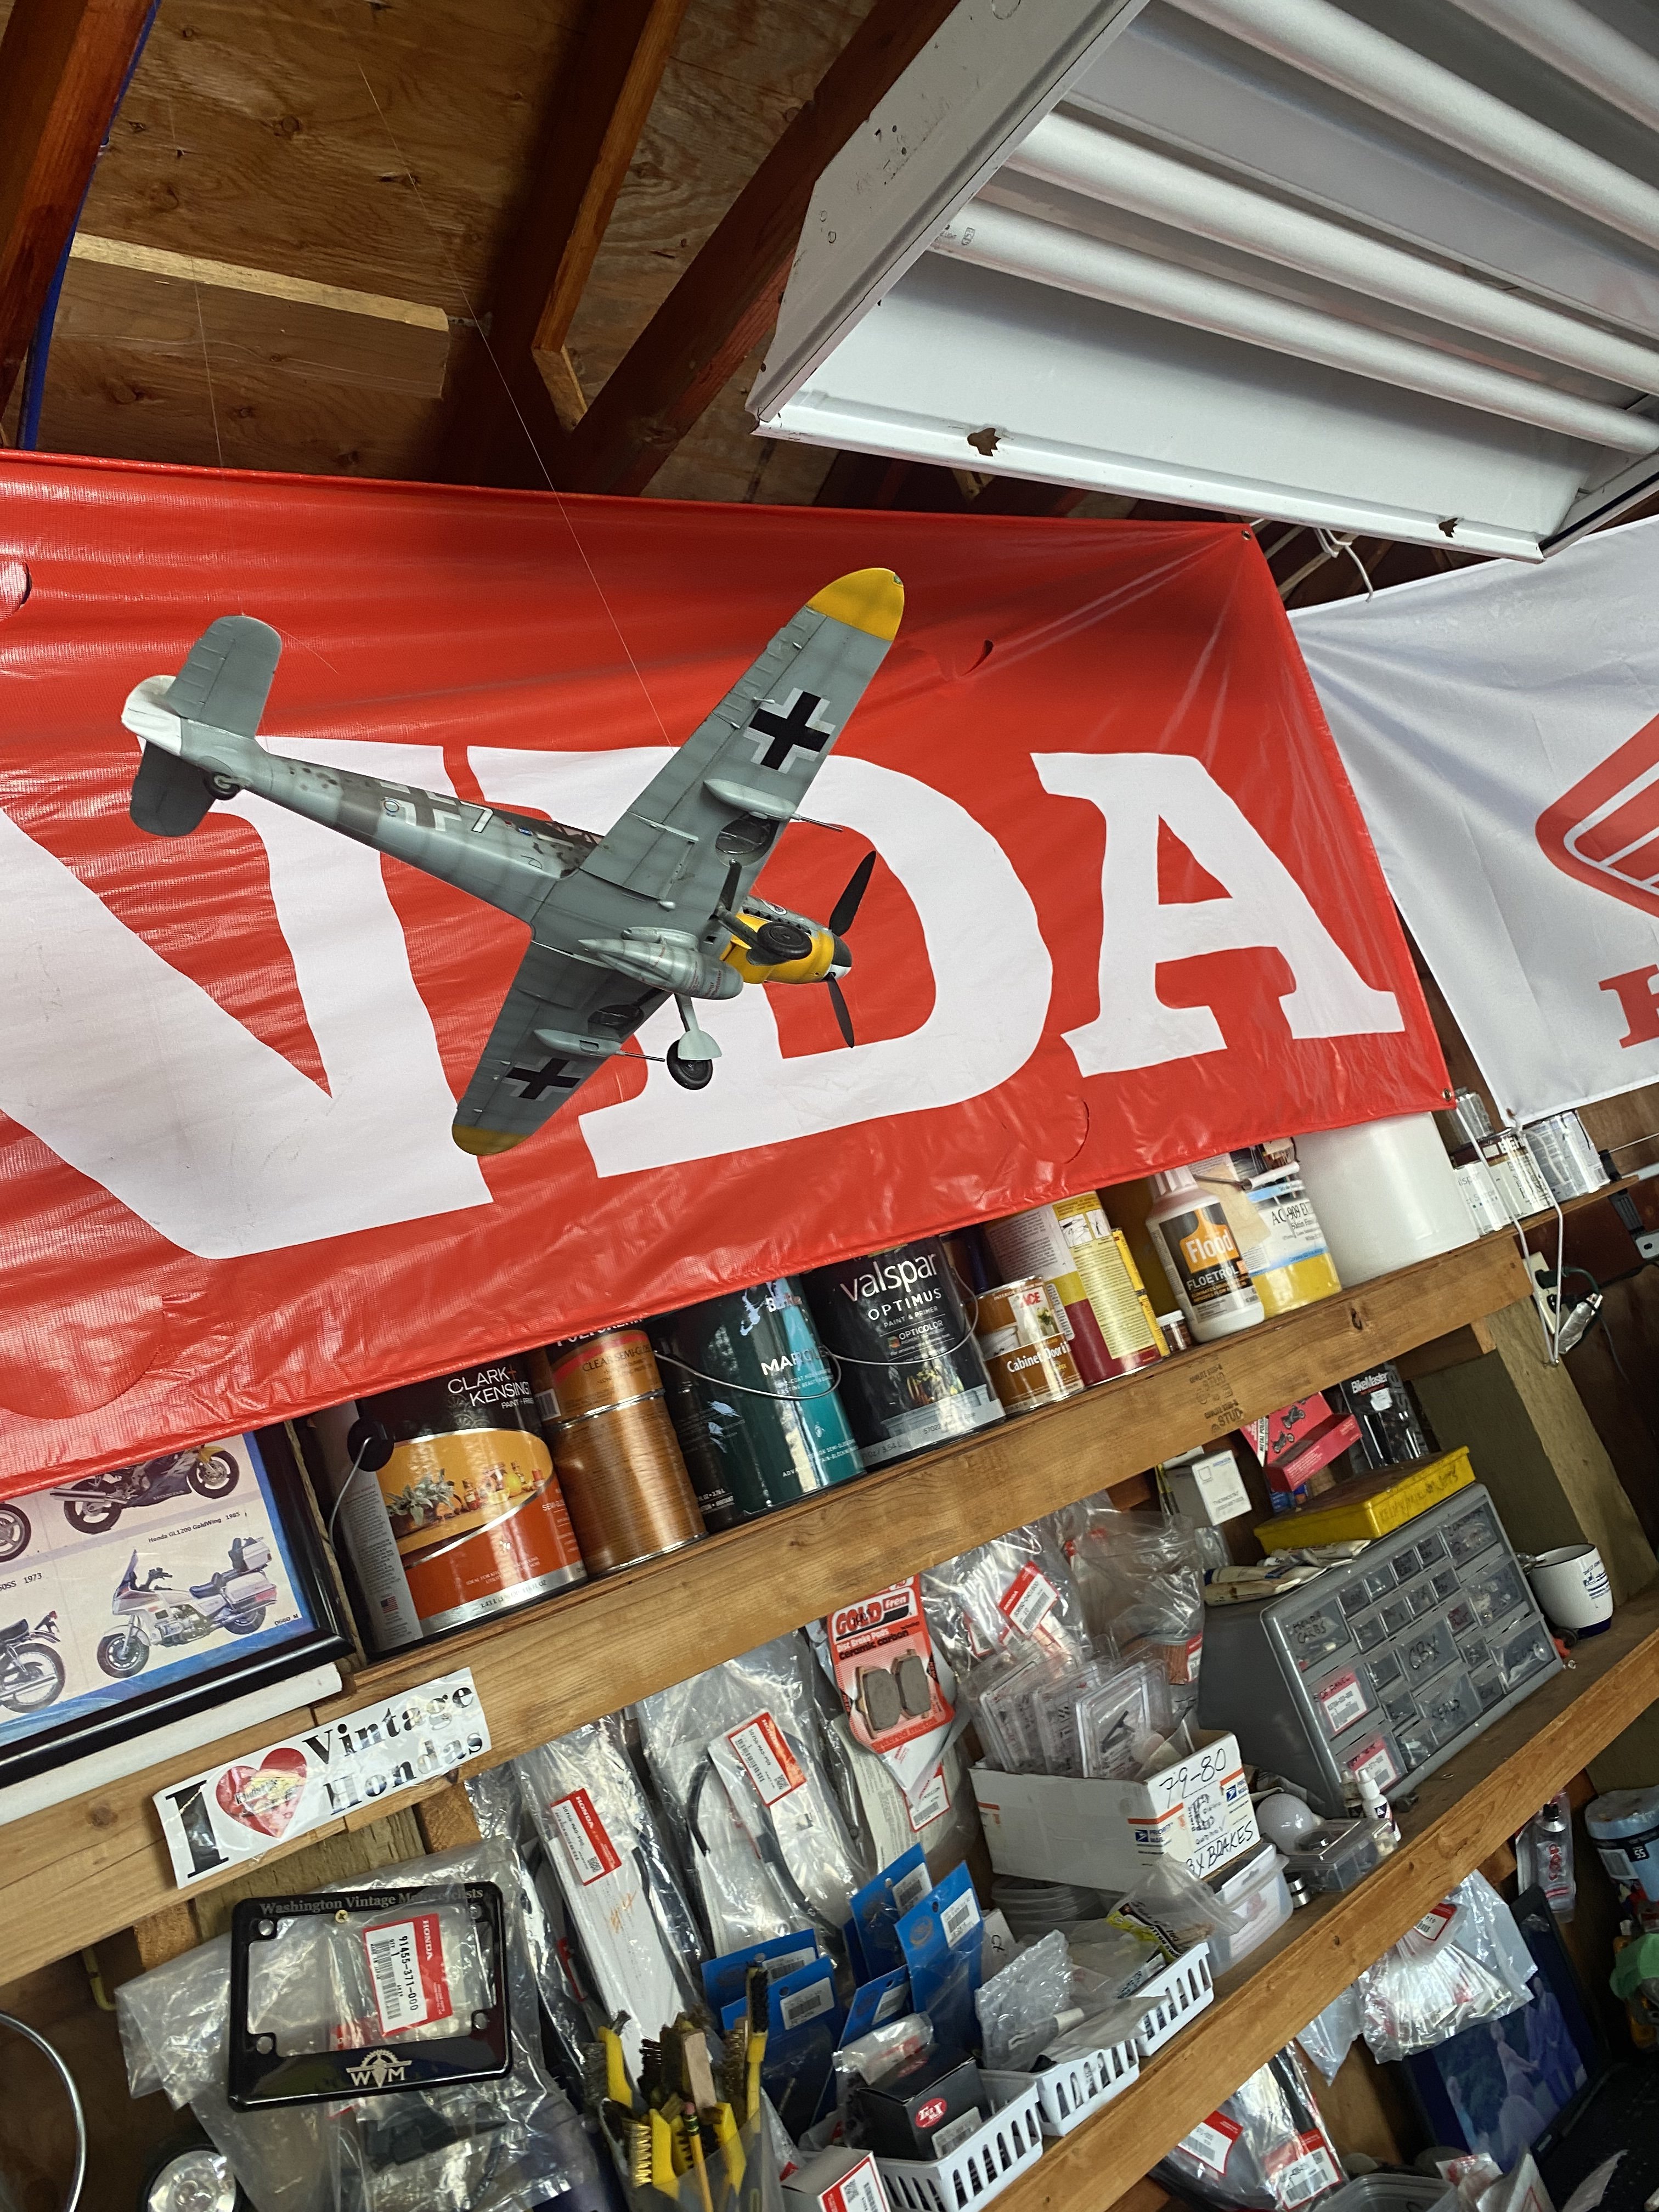
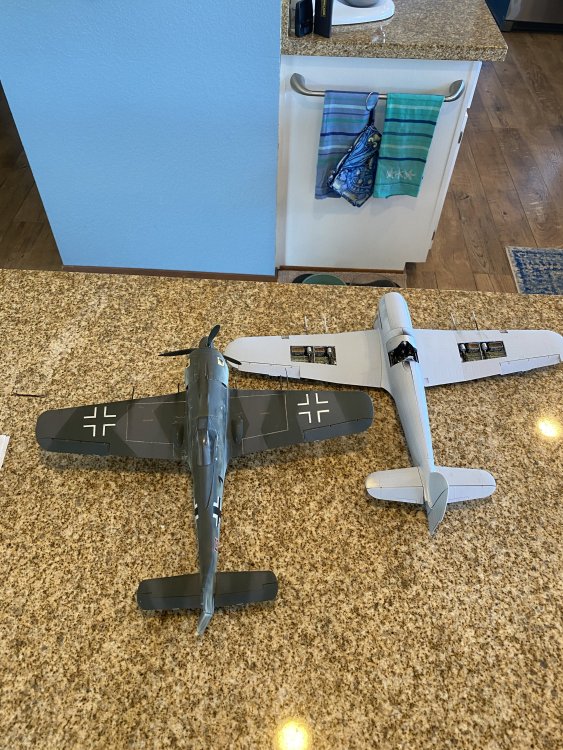
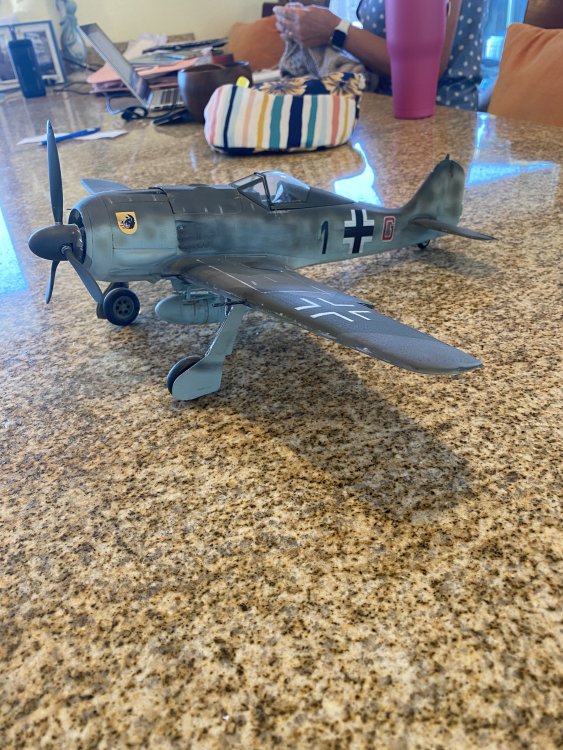
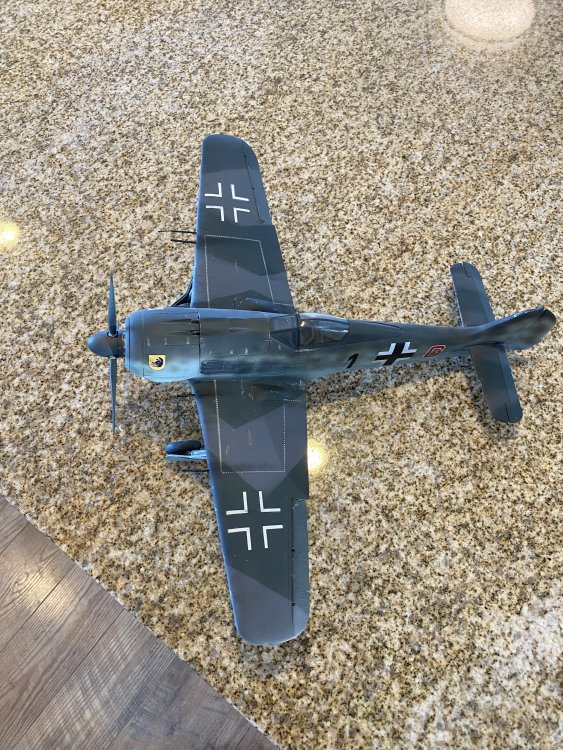
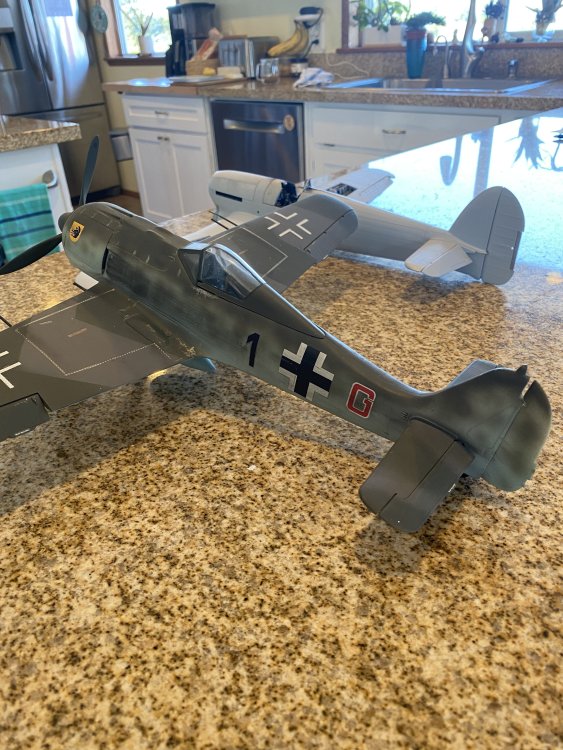
I built this 190 in 1996 while recovering from one of my many back surgeries. Back when the internet was limited and I didn’t do any research on what the letters and numbers meant on the aircraft. It was my first use of an airbrush, it was a car detailing cup fed airbrush which was big and hard to use for modeling. I couldn’t get the fan blades to fit behind the propeller so I ended up just leaving it off!! I now know there was a problem with the kit and how to fix that it to fit the engine in correctly. I would like to build another and build and paint it correctly. I’m going to try to strip off the decals and fix this one first.


-
My Airfix 1/24 scale Typhoon
Irishman1 replied to Irishman1's topic in LSM 1/35 and Larger Work In Progress
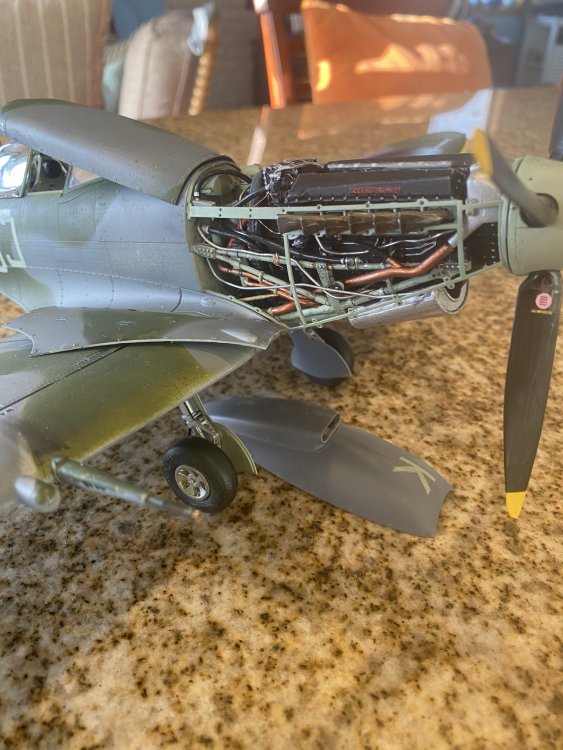
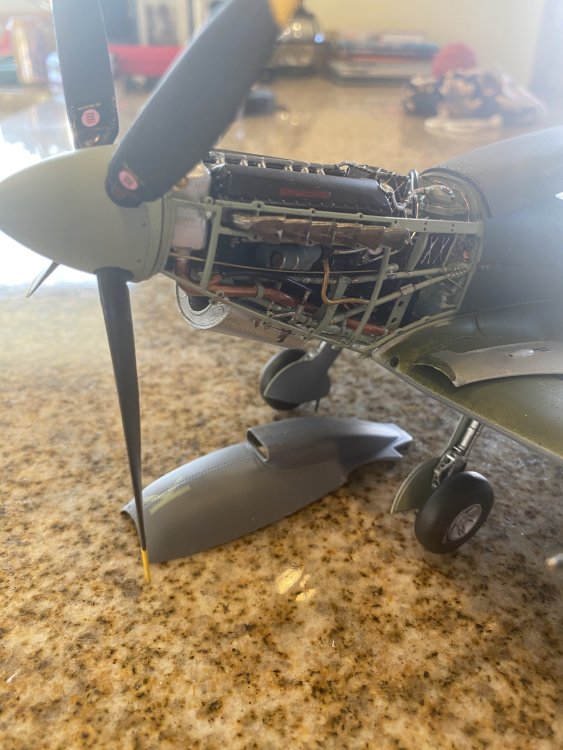
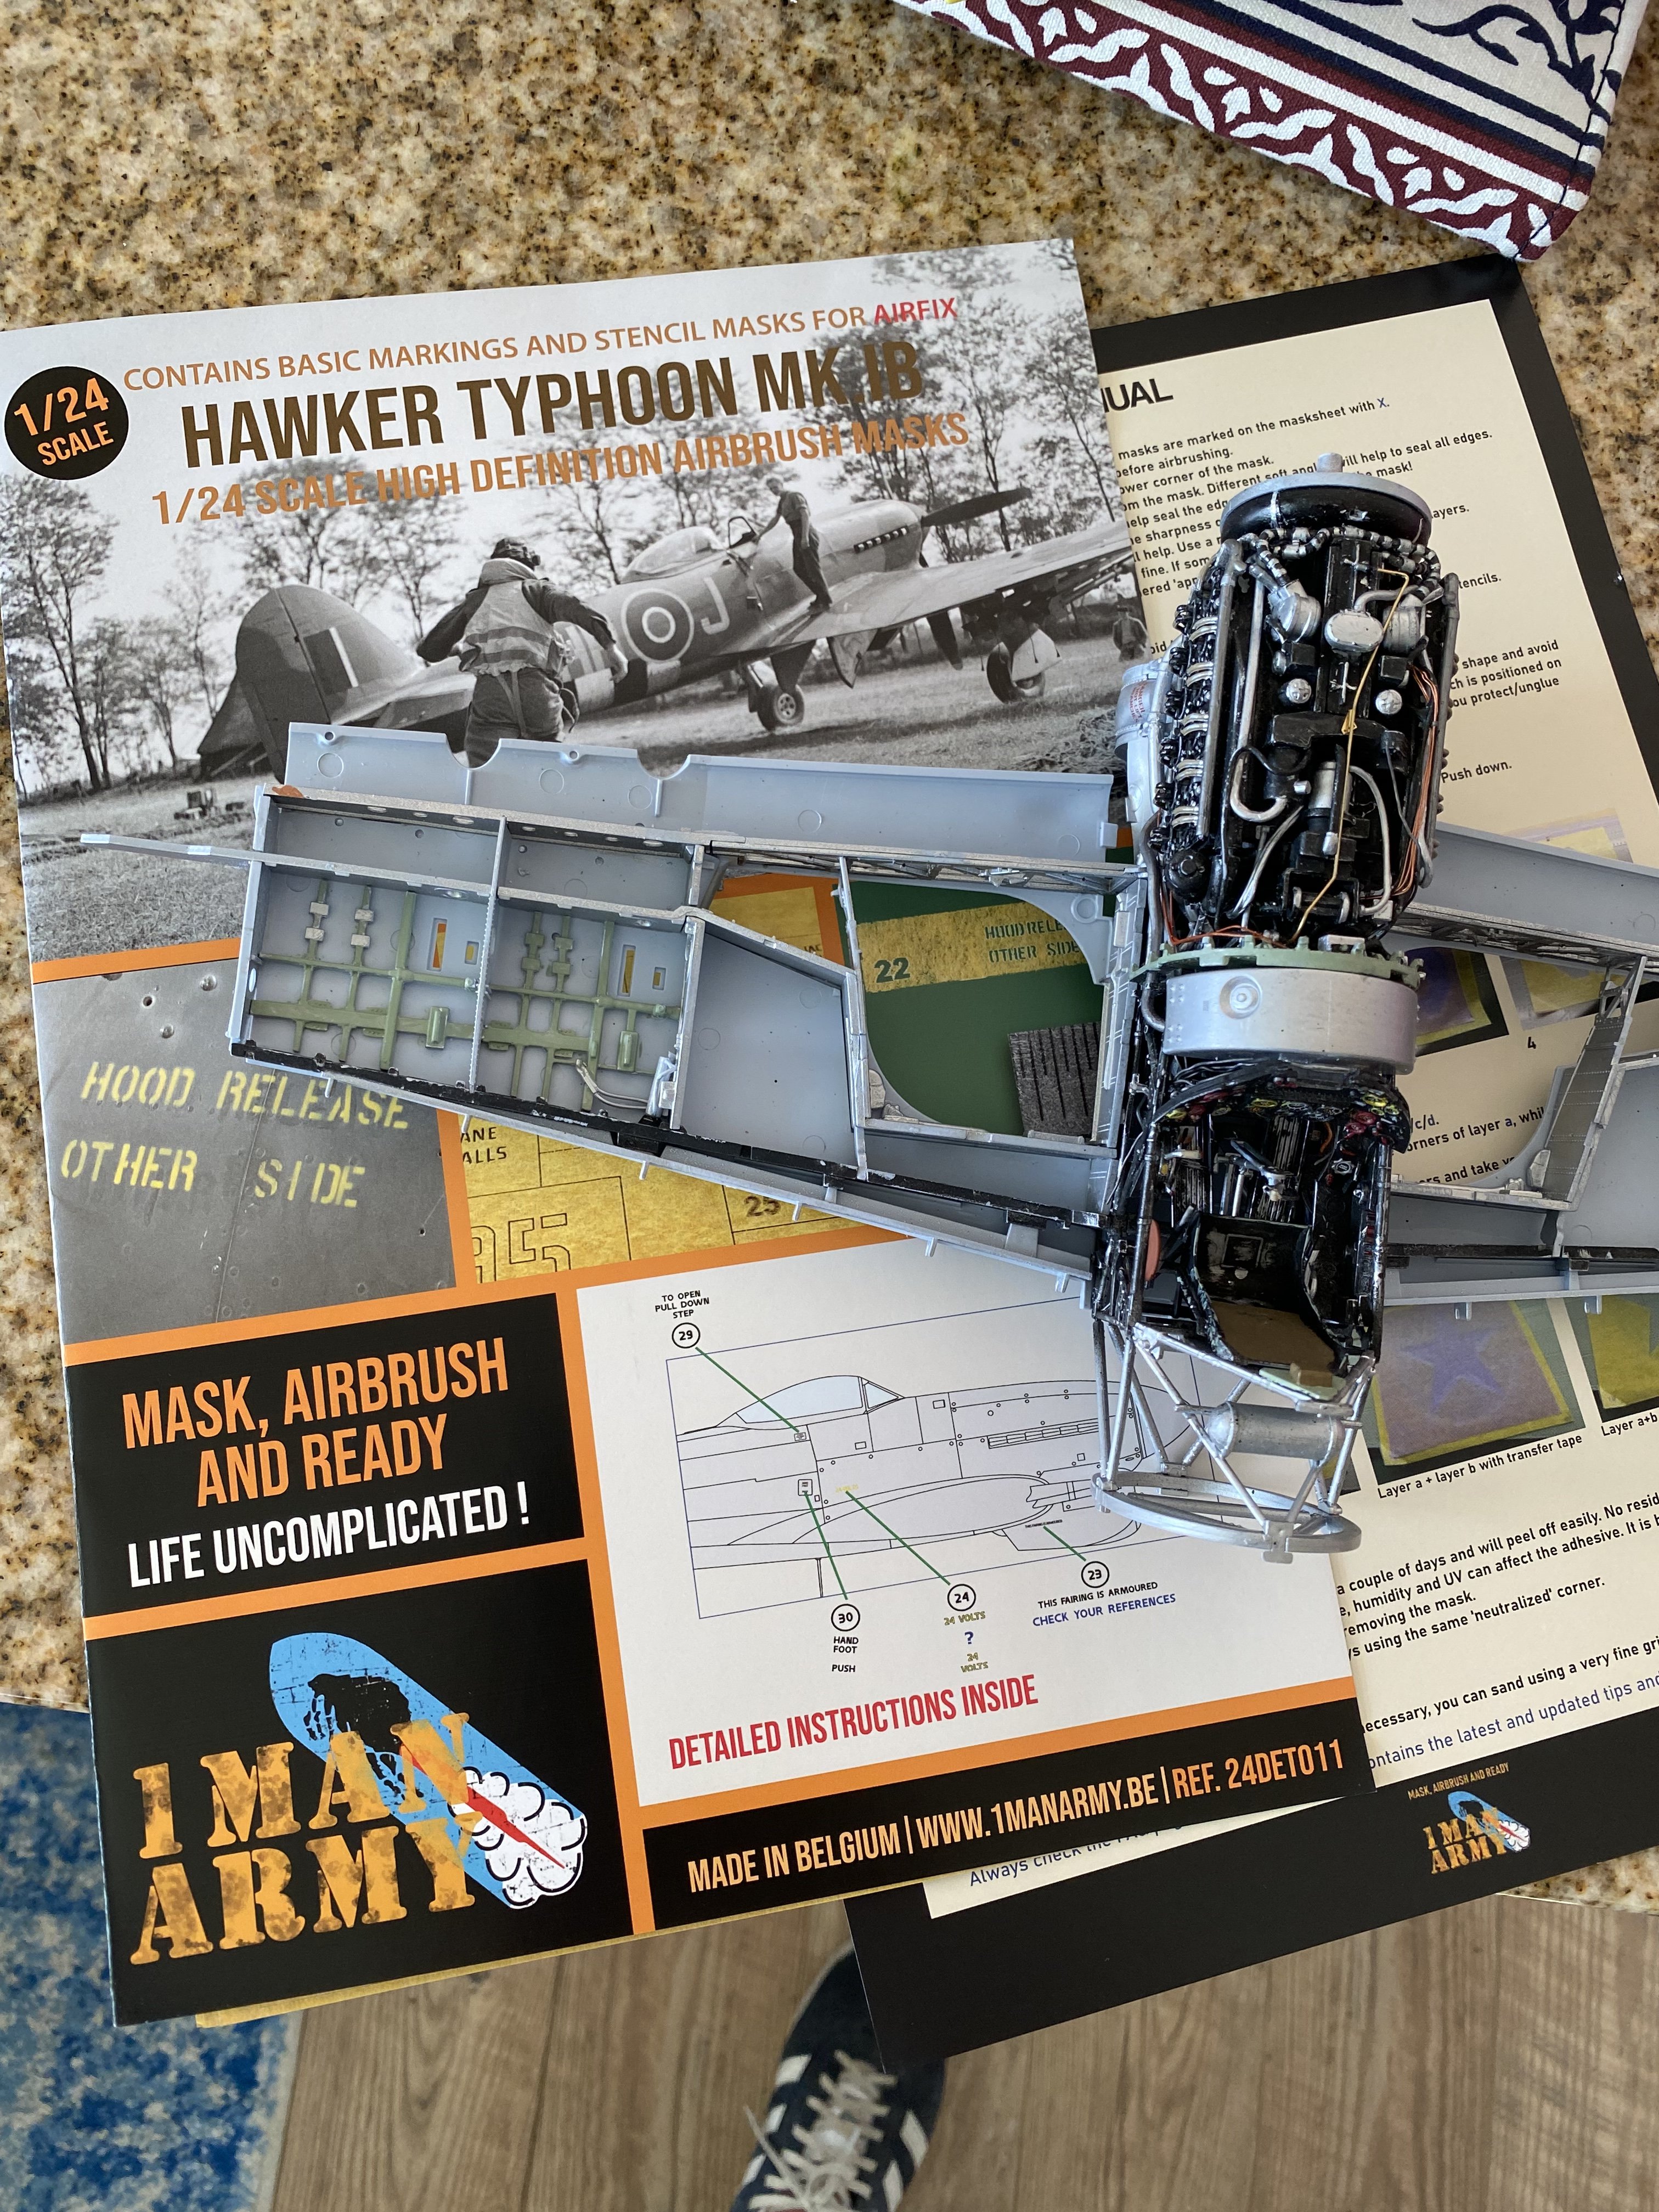
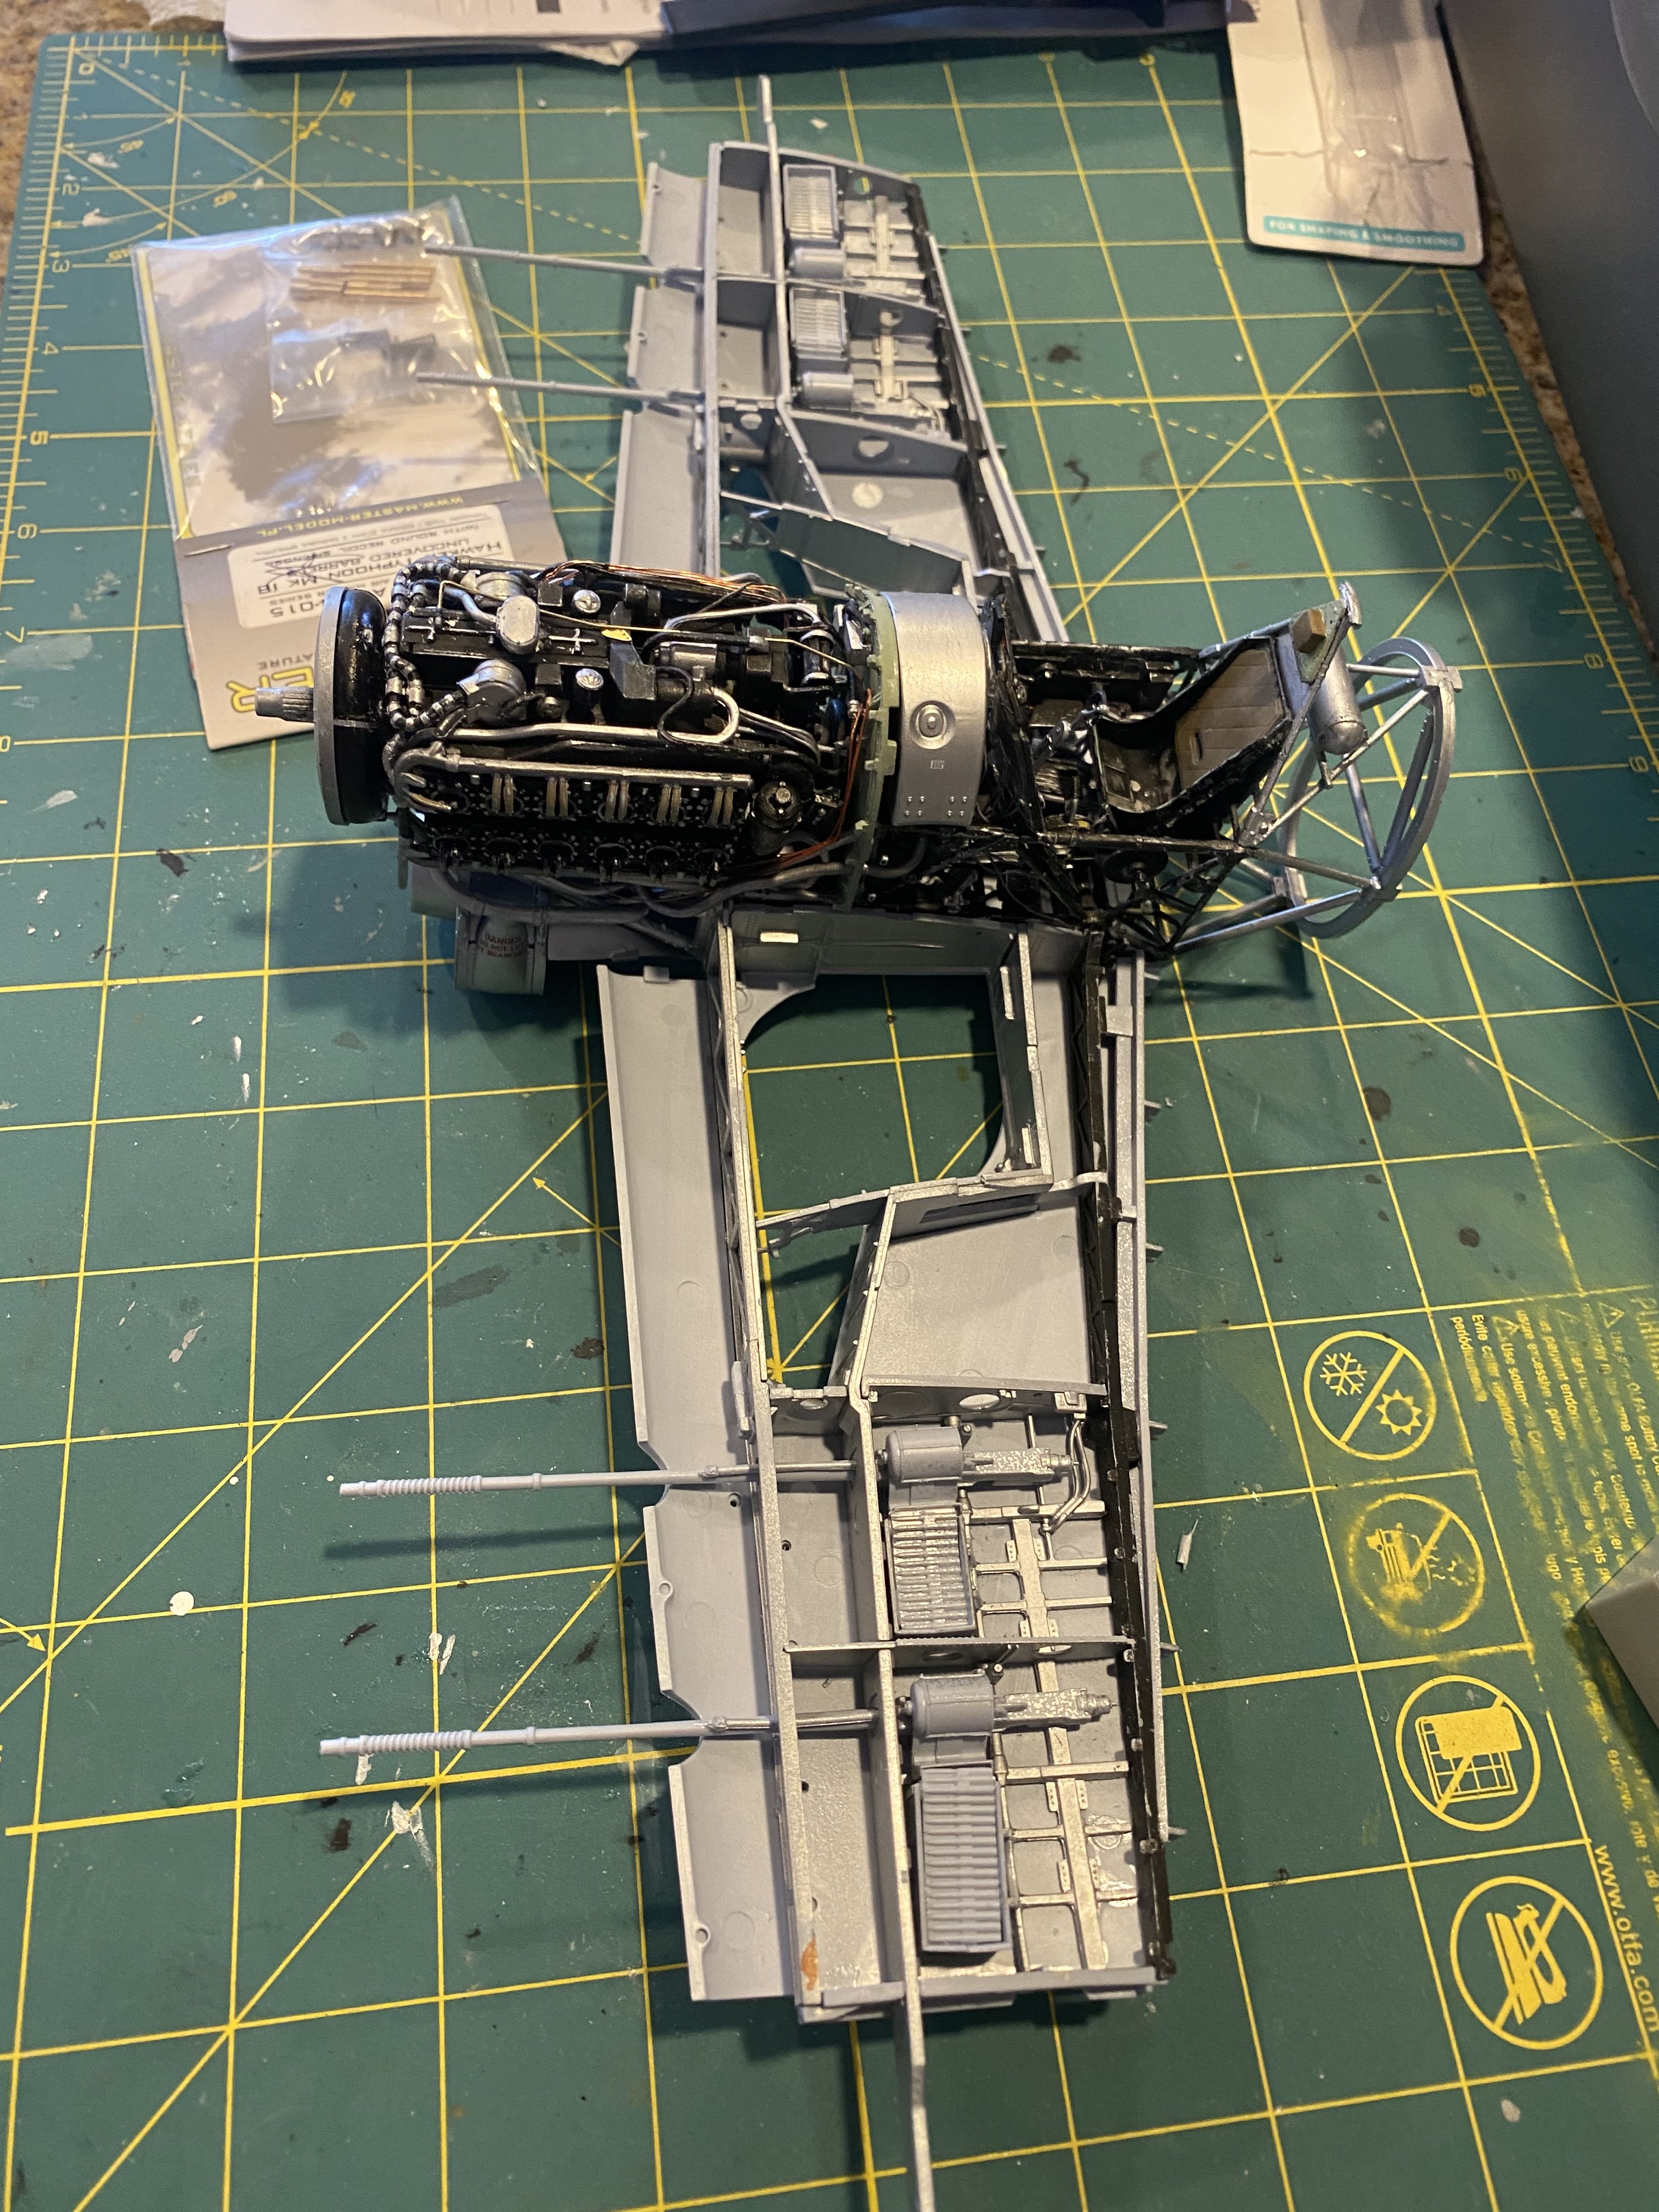
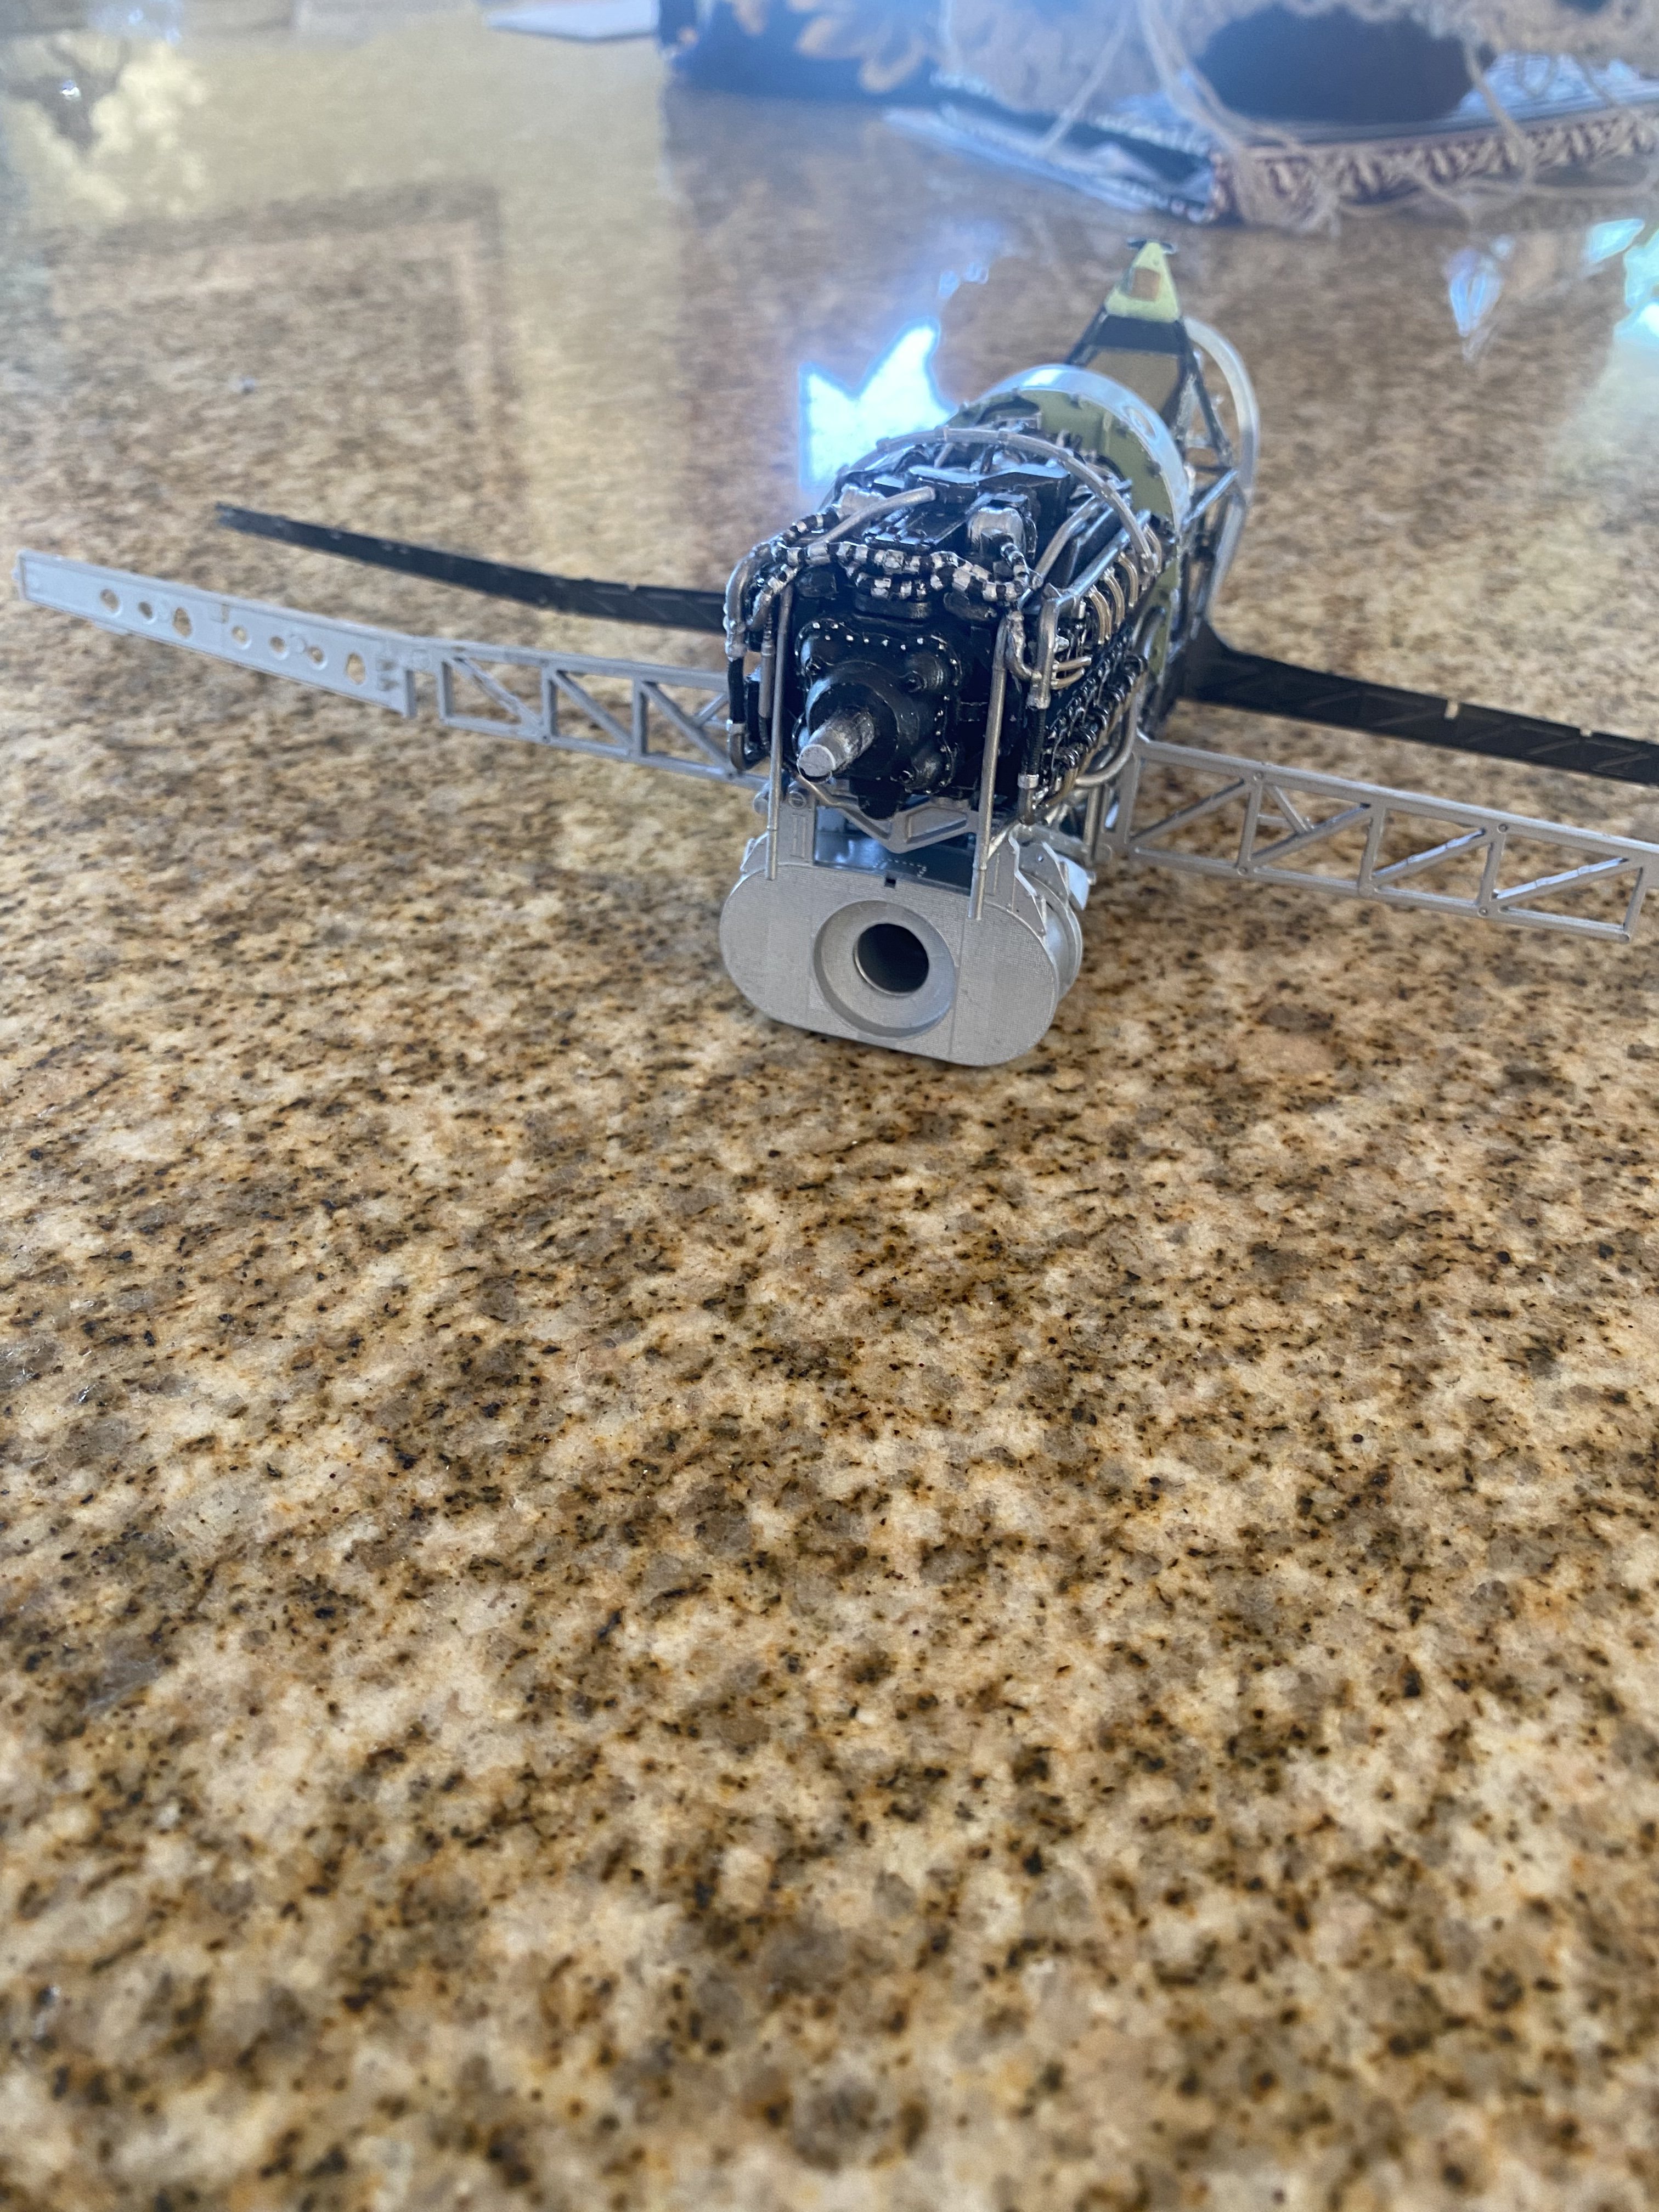
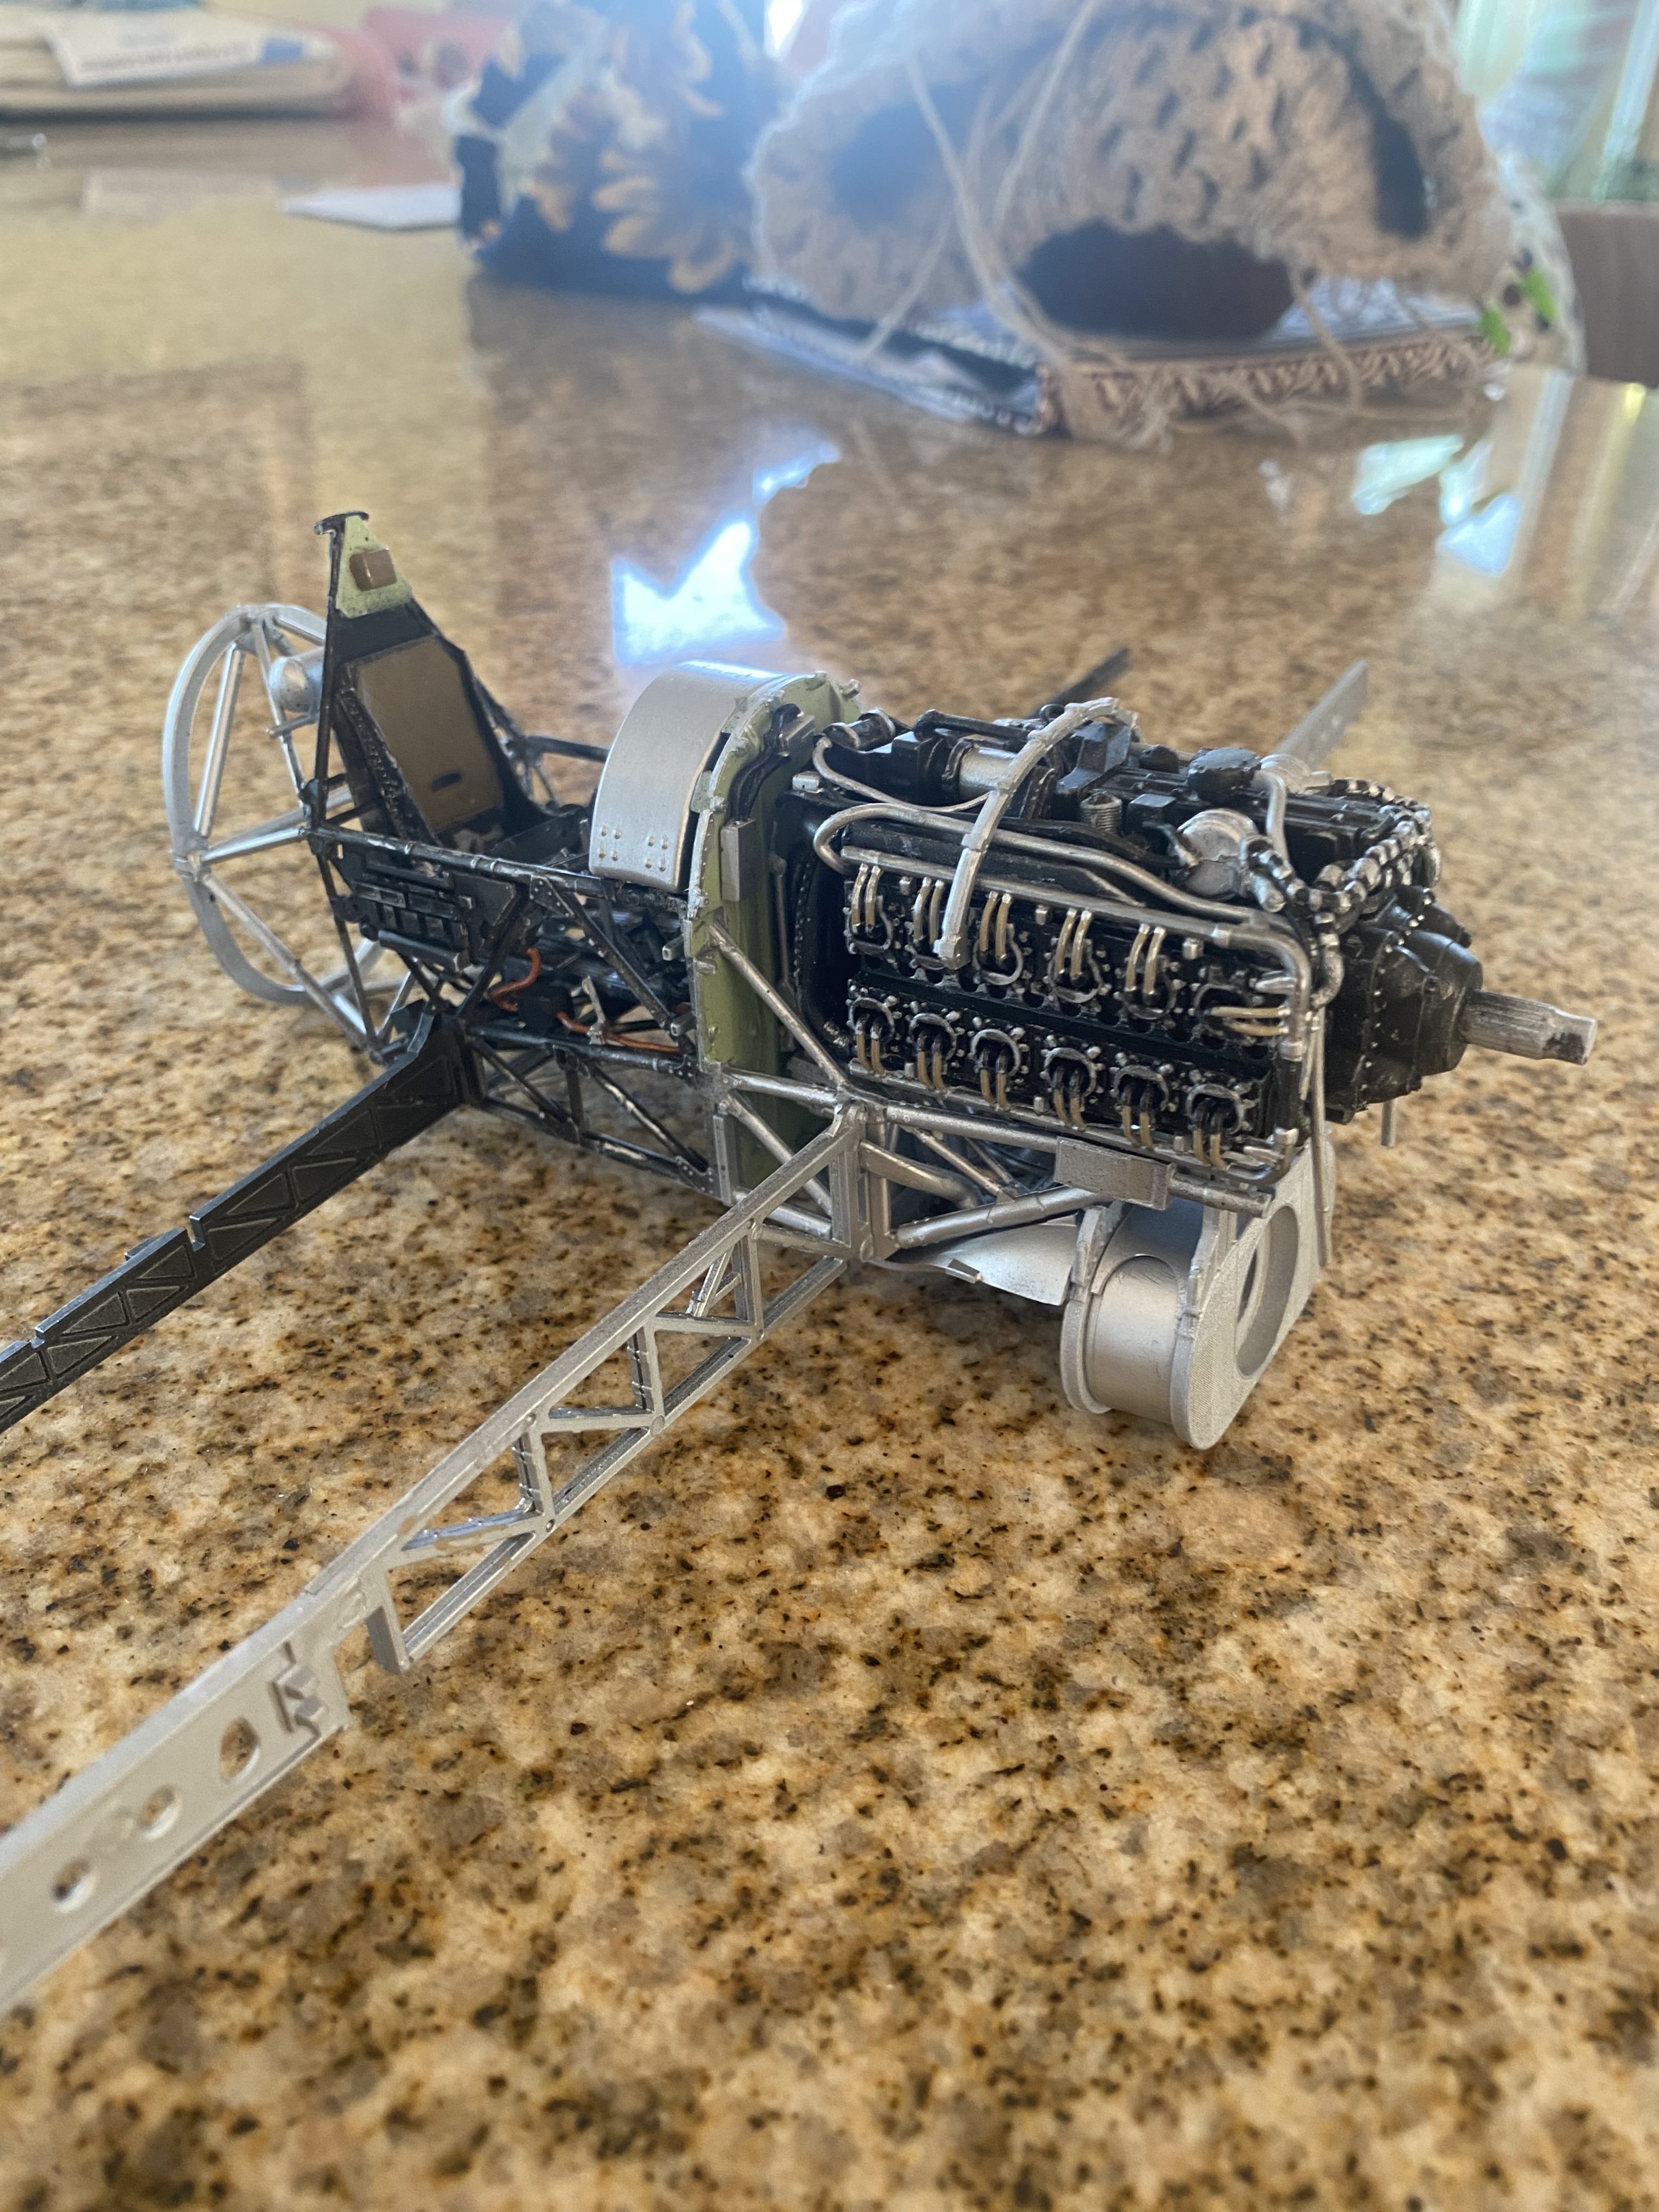
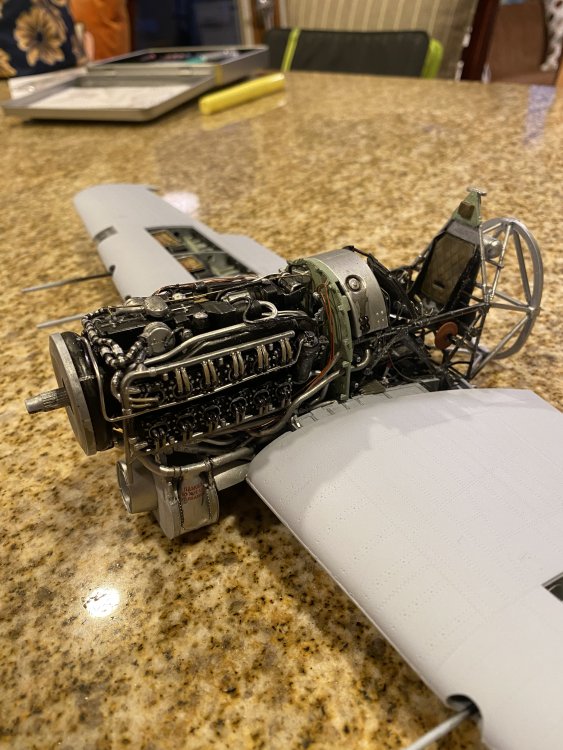
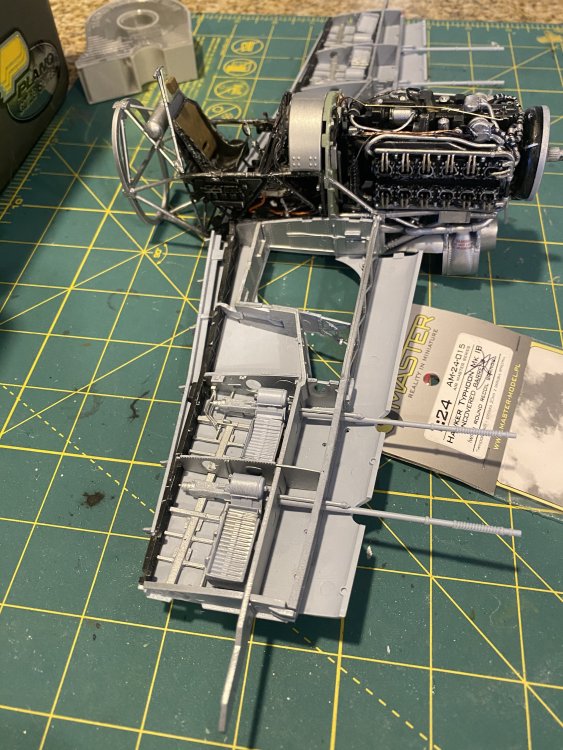
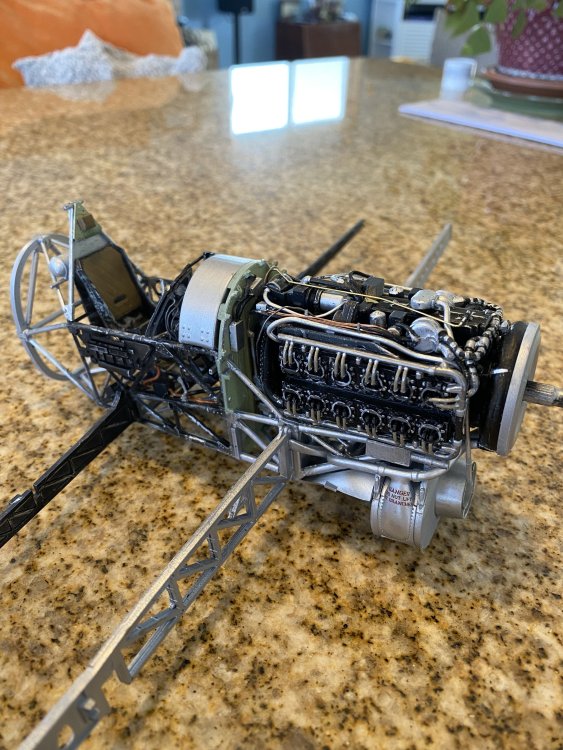
I’ve had quite a bit of trouble getting the engine panels in straight. Much of it might be from my problems with the alignment of engine parts from the beginning. The misalignment grows exponentially with each operation .I’m sure it will all be ok in the end though, just more work!


-
My Airfix 1/24 scale Typhoon
Irishman1 replied to Irishman1's topic in LSM 1/35 and Larger Work In Progress
-
Beautifully done
-
Great subject and exceptional attention to detail!!!
-
My Airfix 1/24 scale Typhoon
Irishman1 replied to Irishman1's topic in LSM 1/35 and Larger Work In Progress
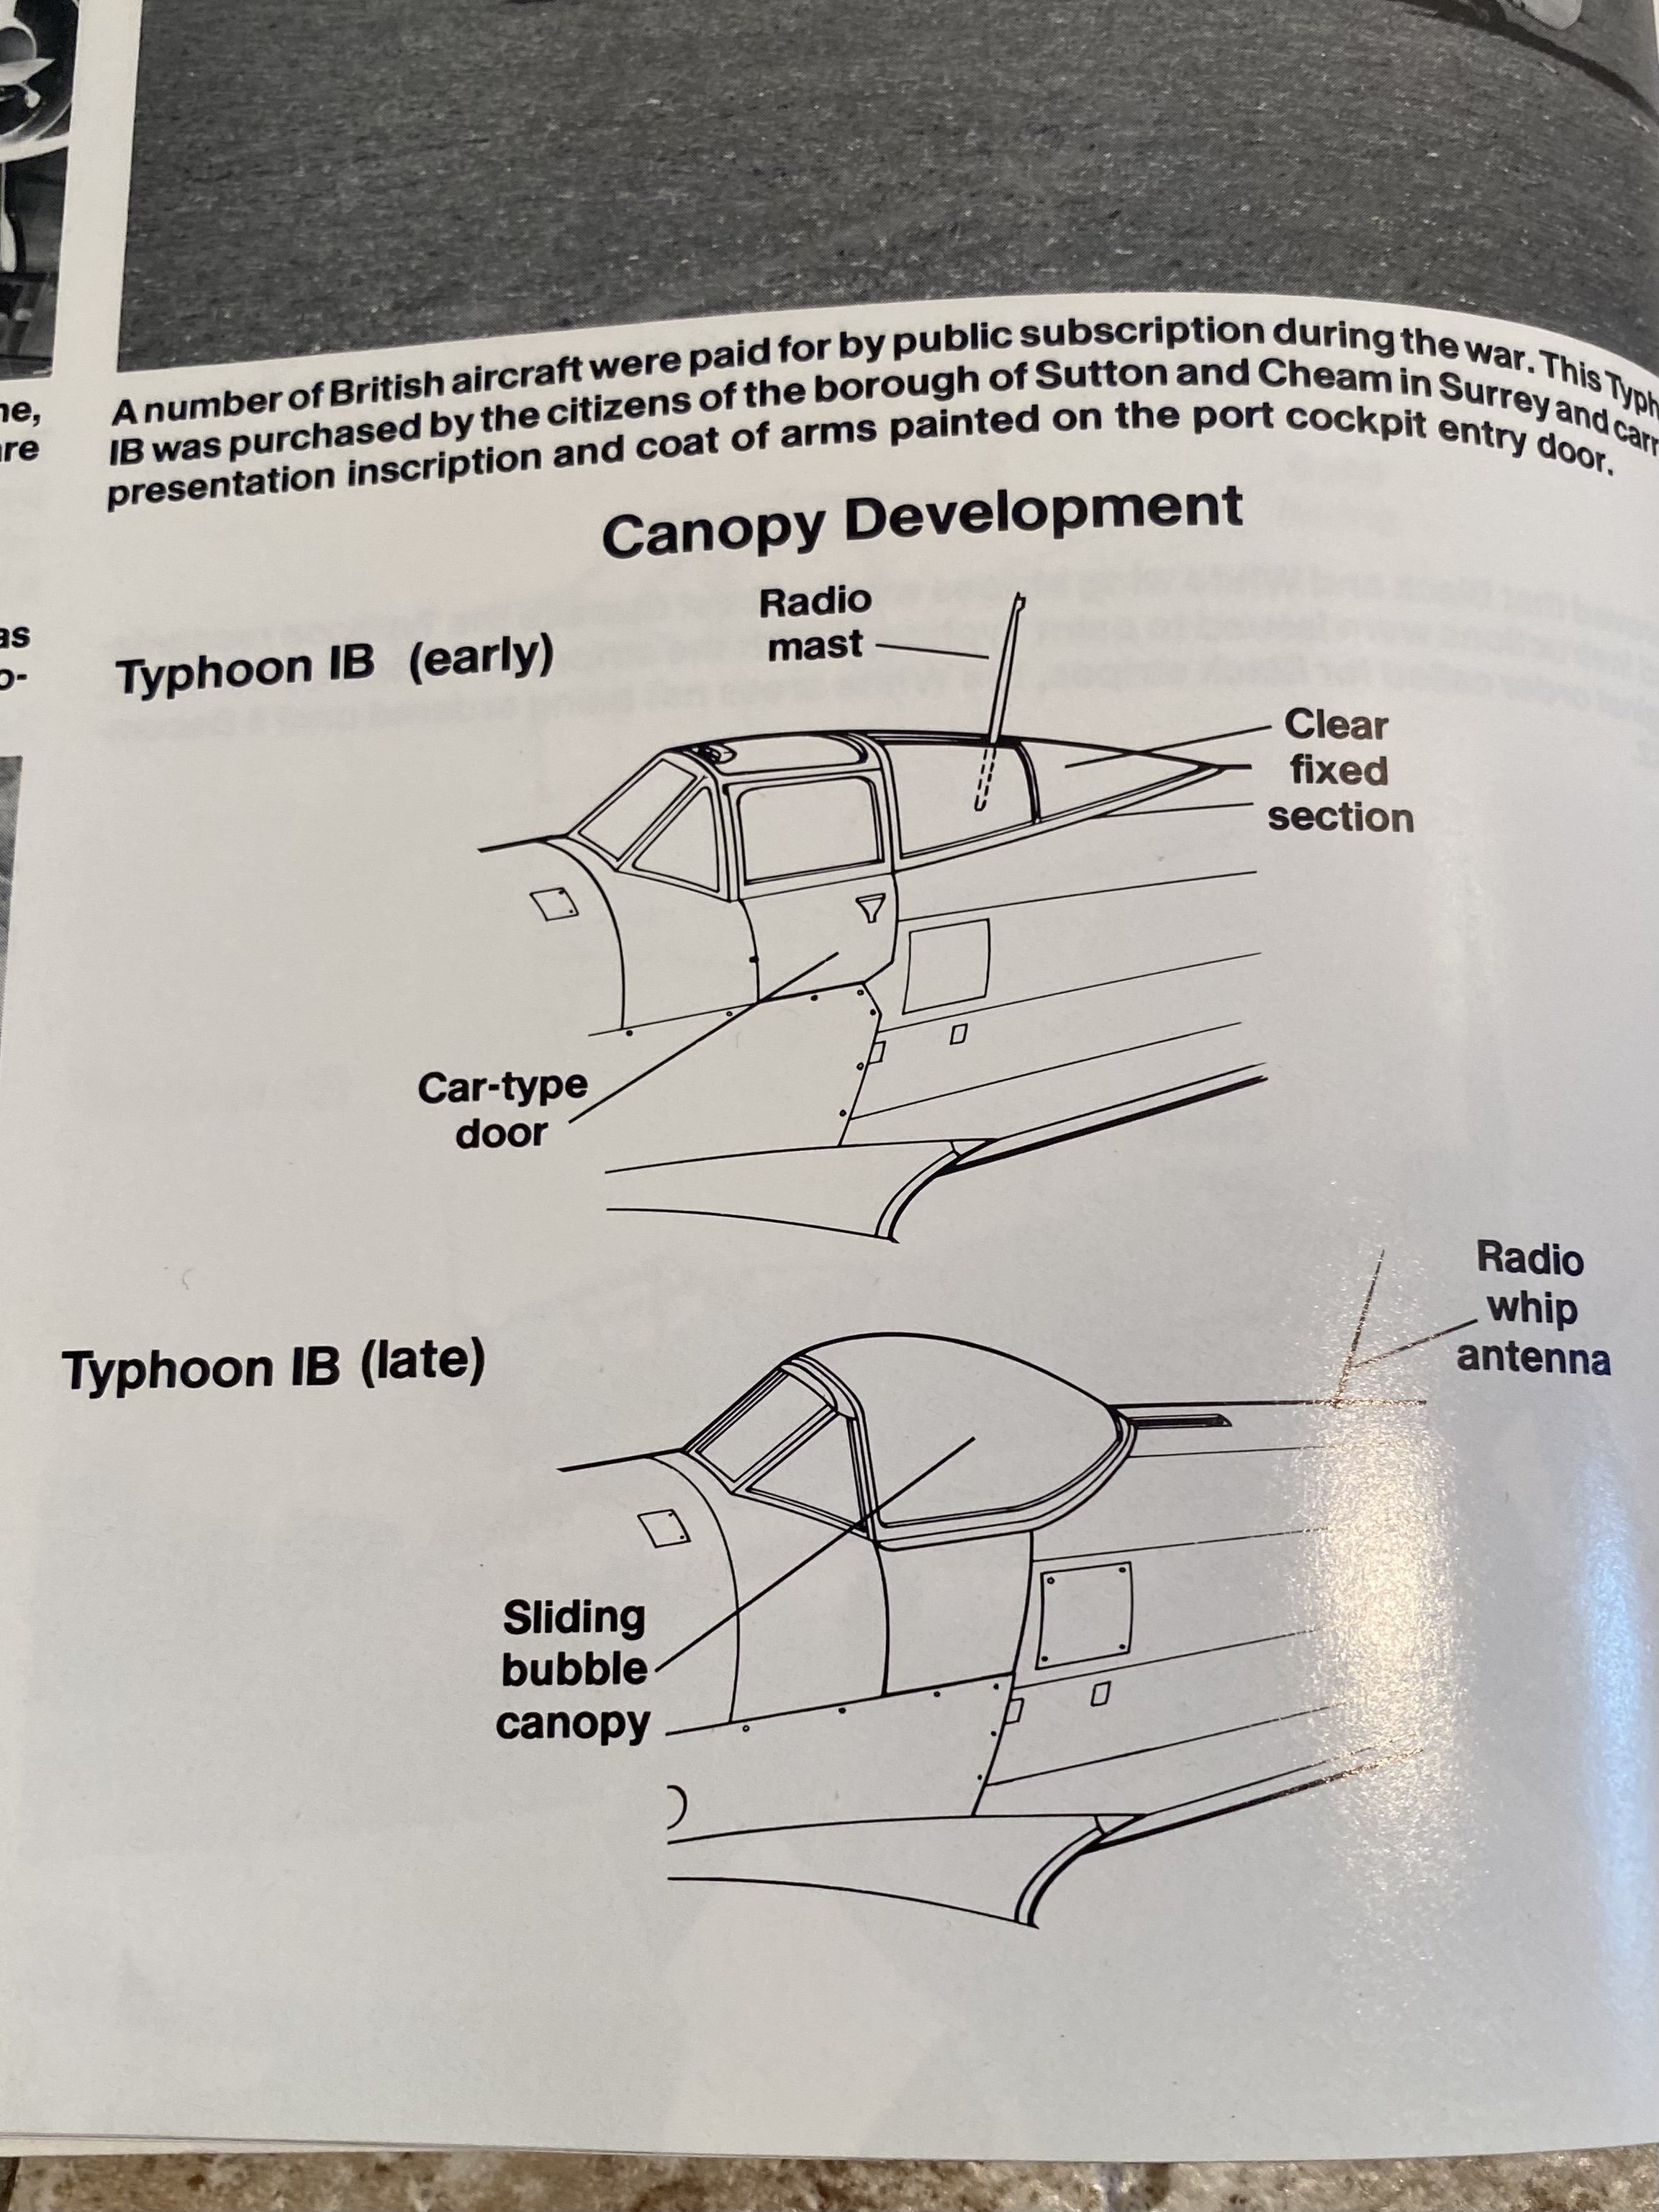
ADVICE NEEDED!!!: ok, I’m at the point where you start cutting the fuselage out to fit the car door pieces. I do have a nice aftermarket teardrop canopy for it though. I kinda like the look of the teardrop better than the car door mark. What do you guys think? Car door or tear drop? and I also did one set of cannon covers open with the master brass cannons, I can still go either way, covered or uncovered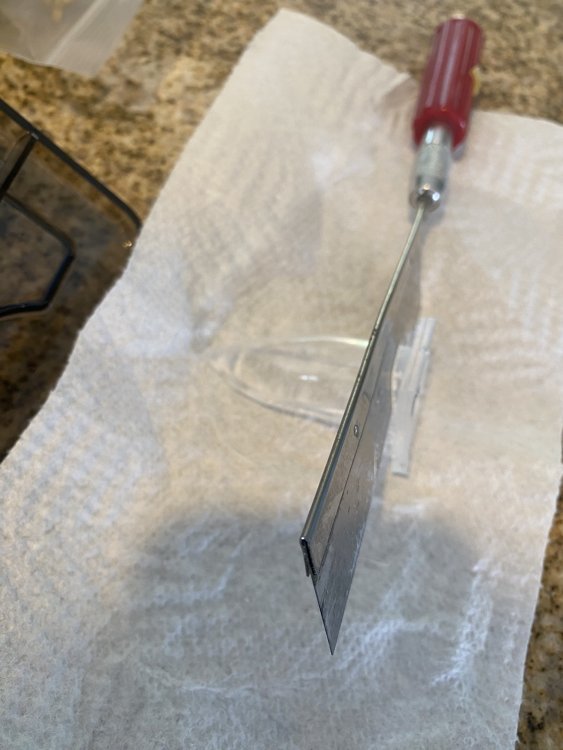


-
My Airfix 1/24 scale Typhoon
Irishman1 replied to Irishman1's topic in LSM 1/35 and Larger Work In Progress
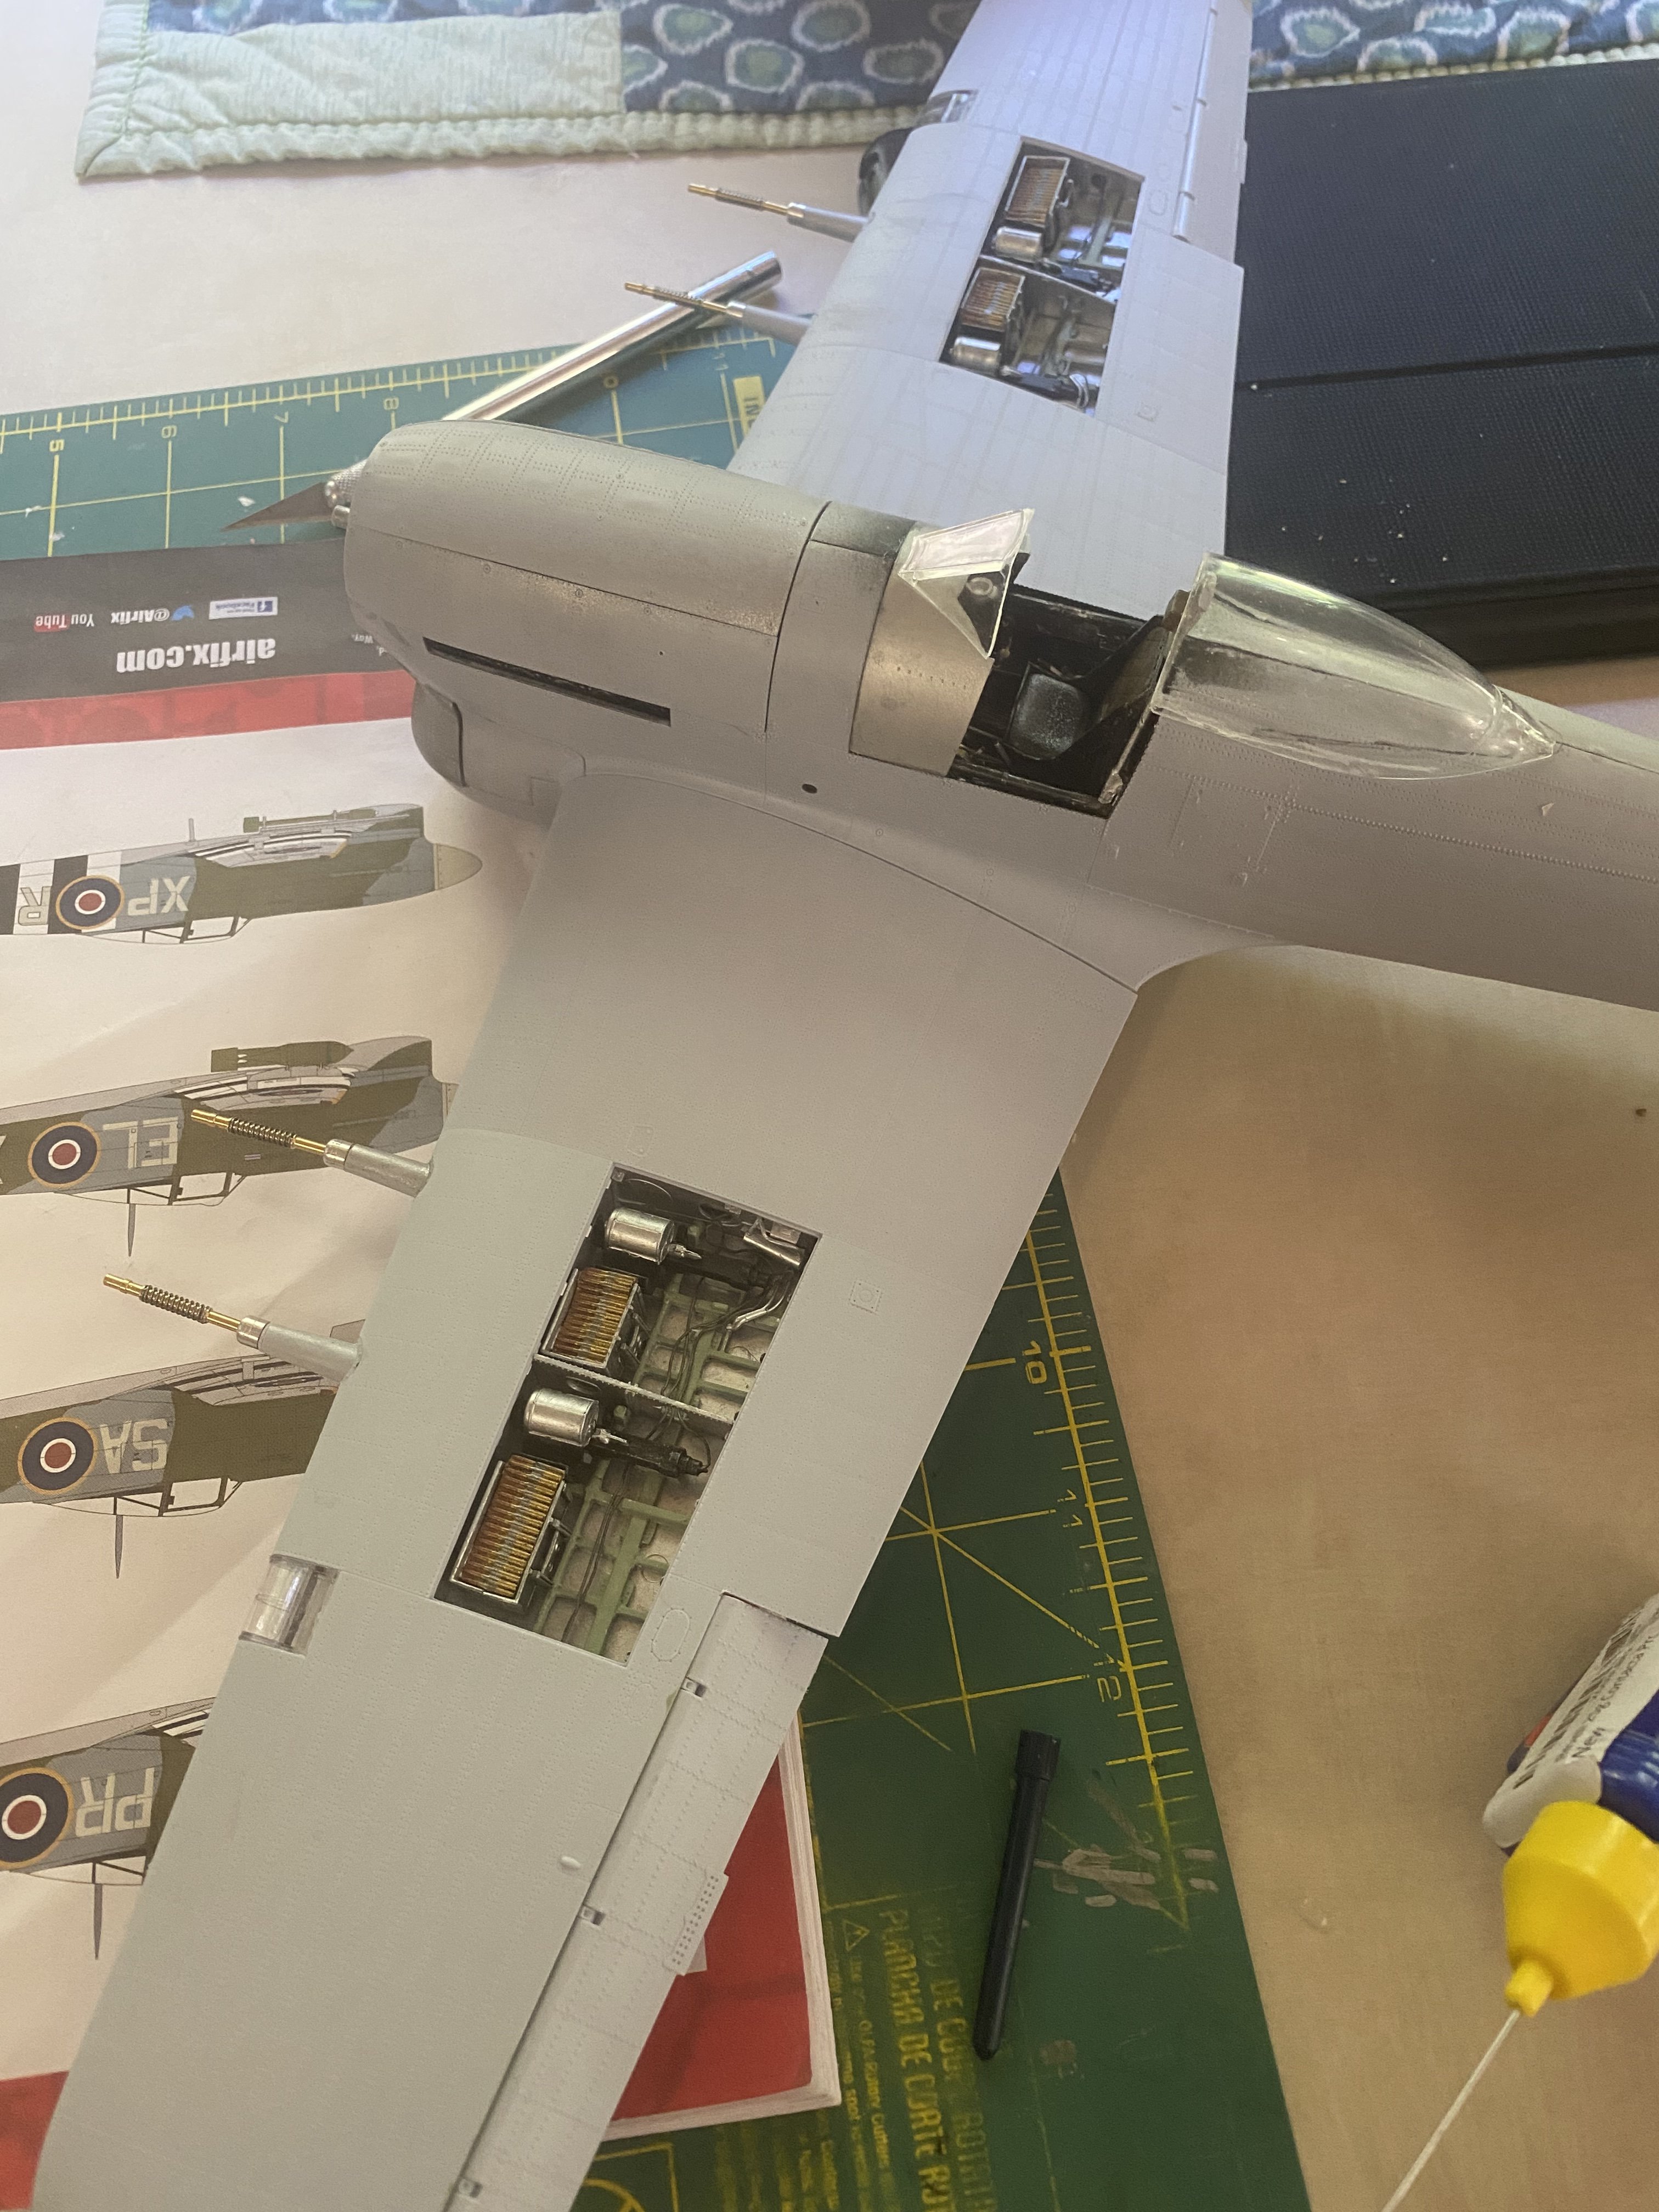
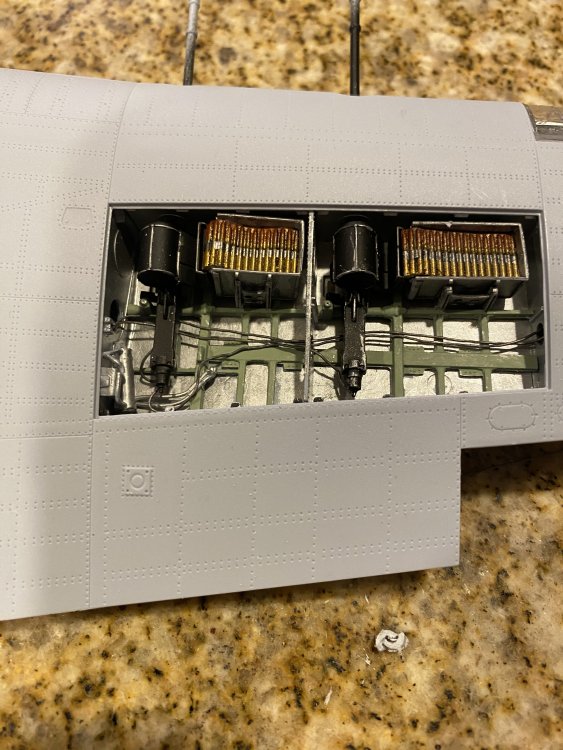
Starting to detail the gun bays, I’ve seen the ammo motors on top of the cannons many different colors in pictures so I guess I can just pick which I like. I’ve seen all silver, all interior green, black with green seams or silver with green seams. Hmmmm, I’m going to try a couple different styles and see what I like best. and damn, I missed filling a injection pin mark in the gun bay.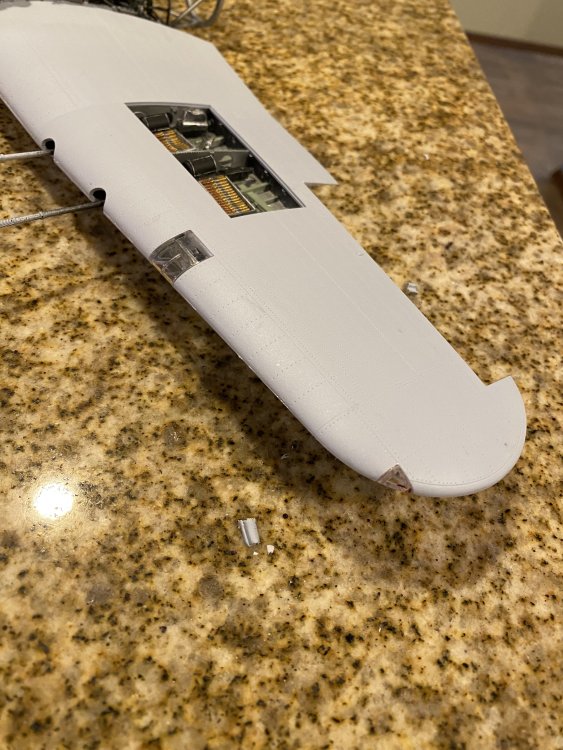
-
My Airfix 1/24 scale Typhoon
Irishman1 replied to Irishman1's topic in LSM 1/35 and Larger Work In Progress
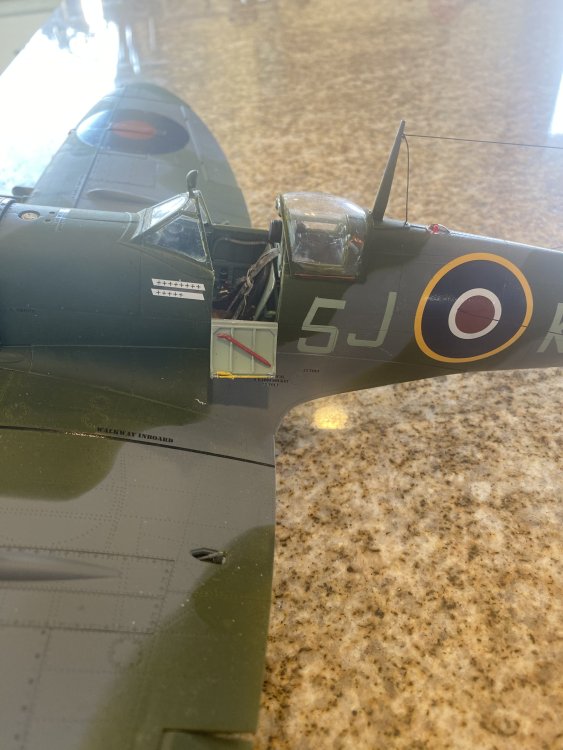
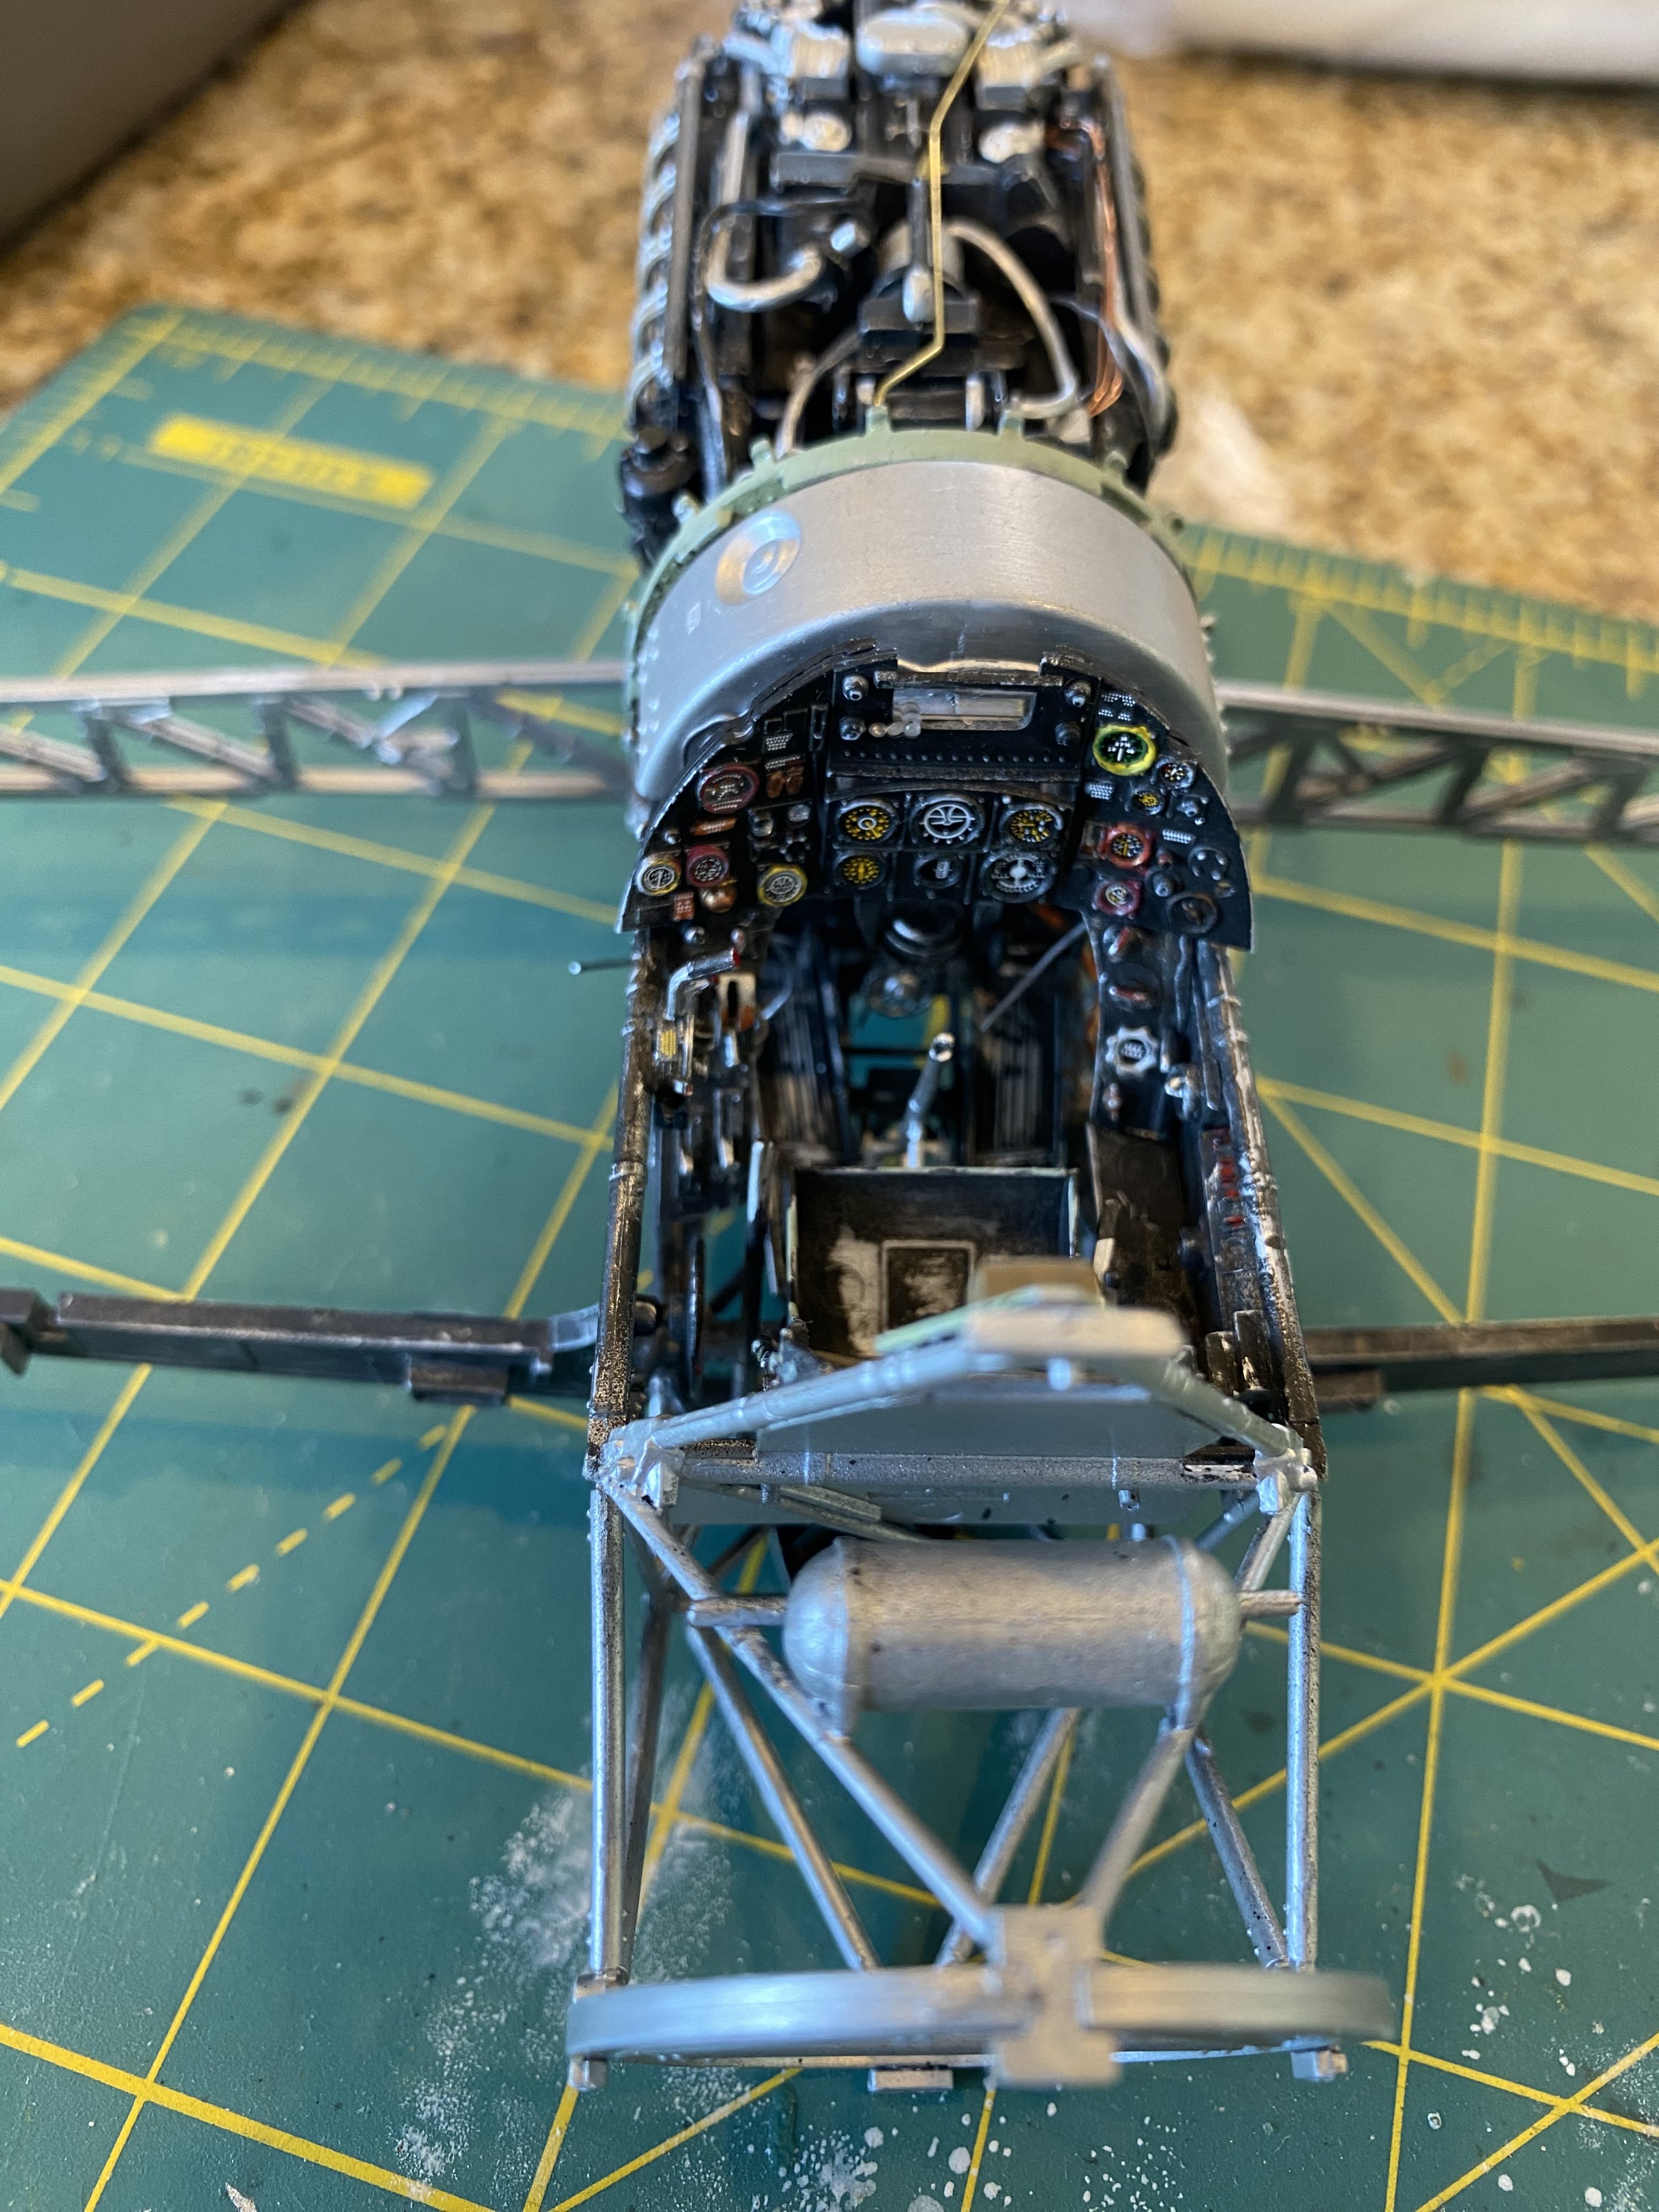
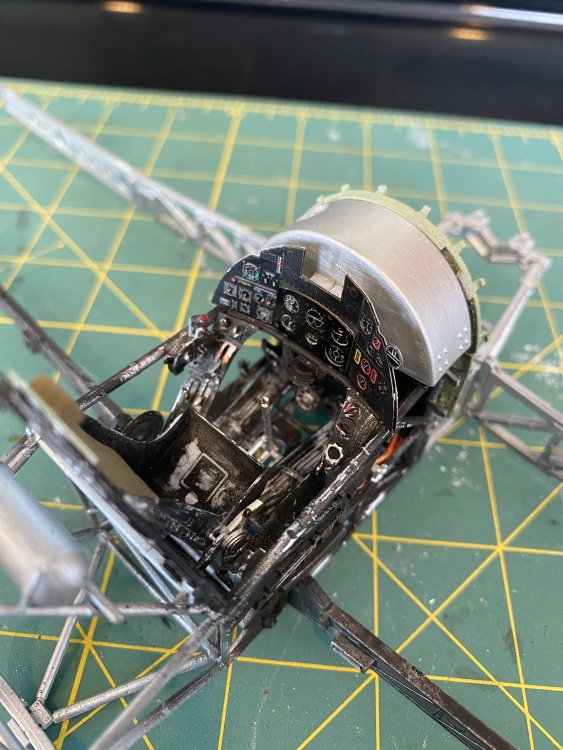
And it was easier to add wiring to the back of the gauges!!
-
My Airfix 1/24 scale Typhoon
Irishman1 replied to Irishman1's topic in LSM 1/35 and Larger Work In Progress
I just think the kit panel seemed more 3 dimensional, more depth I guess. It has a heaviness that suits the typhoon more. -
My Airfix 1/24 scale Typhoon
Irishman1 replied to Irishman1's topic in LSM 1/35 and Larger Work In Progress
My 1 msn army stencils got the typhoon showed up today. Going to be fun to paint this bird!
-
Awesome!!! Camouflage masks too! I wish I had this 1 week ago when I made my own for the spitfire, they don’t have the camouflage one for the typhoon yet but maybe the spit will kinda work.

-
My Airfix 1/24 scale Typhoon
Irishman1 replied to Irishman1's topic in LSM 1/35 and Larger Work In Progress
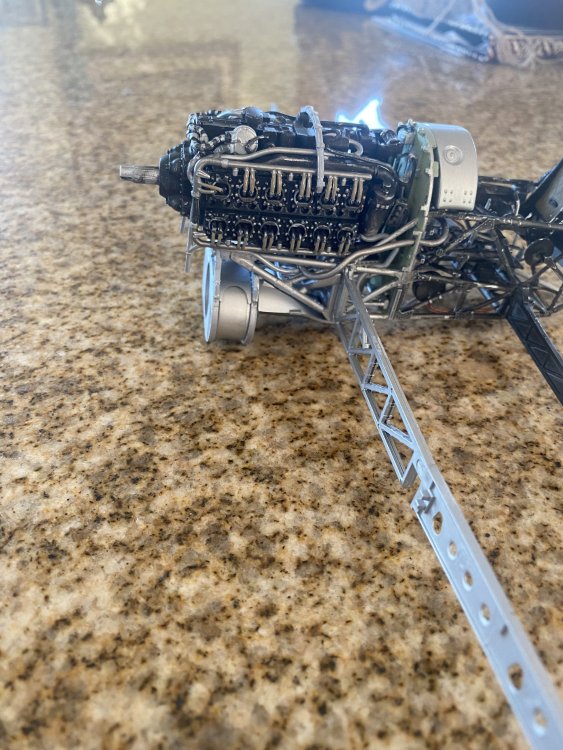
Installed the lower wing snd supports and spars, stock guns, I do have Eduardo brass in guns and máster uncovered barrels
-
My Airfix 1/24 scale Typhoon
Irishman1 replied to Irishman1's topic in LSM 1/35 and Larger Work In Progress
Removed the air scale IP for the stock IP and installed it with the wiring connected to the back. Cut a square of evergreen sheet and added wiring from side panel instruments (need to do the starboard side yet)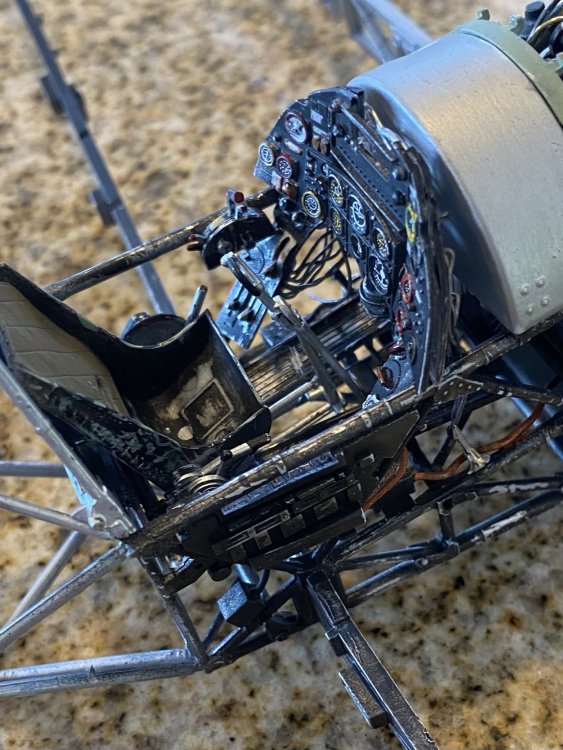

-
Following your builds is always a pleasure, very informative and such attention to detail. They show a builder like me how to do so much, thanks!!
-
Hasegawa Fw-190A5... or 6.
Irishman1 replied to GazzaS's topic in LSM 1/35 and Larger Work In Progress
Looking great! I’ll be following -
My Airfix 1/24 scale Typhoon
Irishman1 replied to Irishman1's topic in LSM 1/35 and Larger Work In Progress
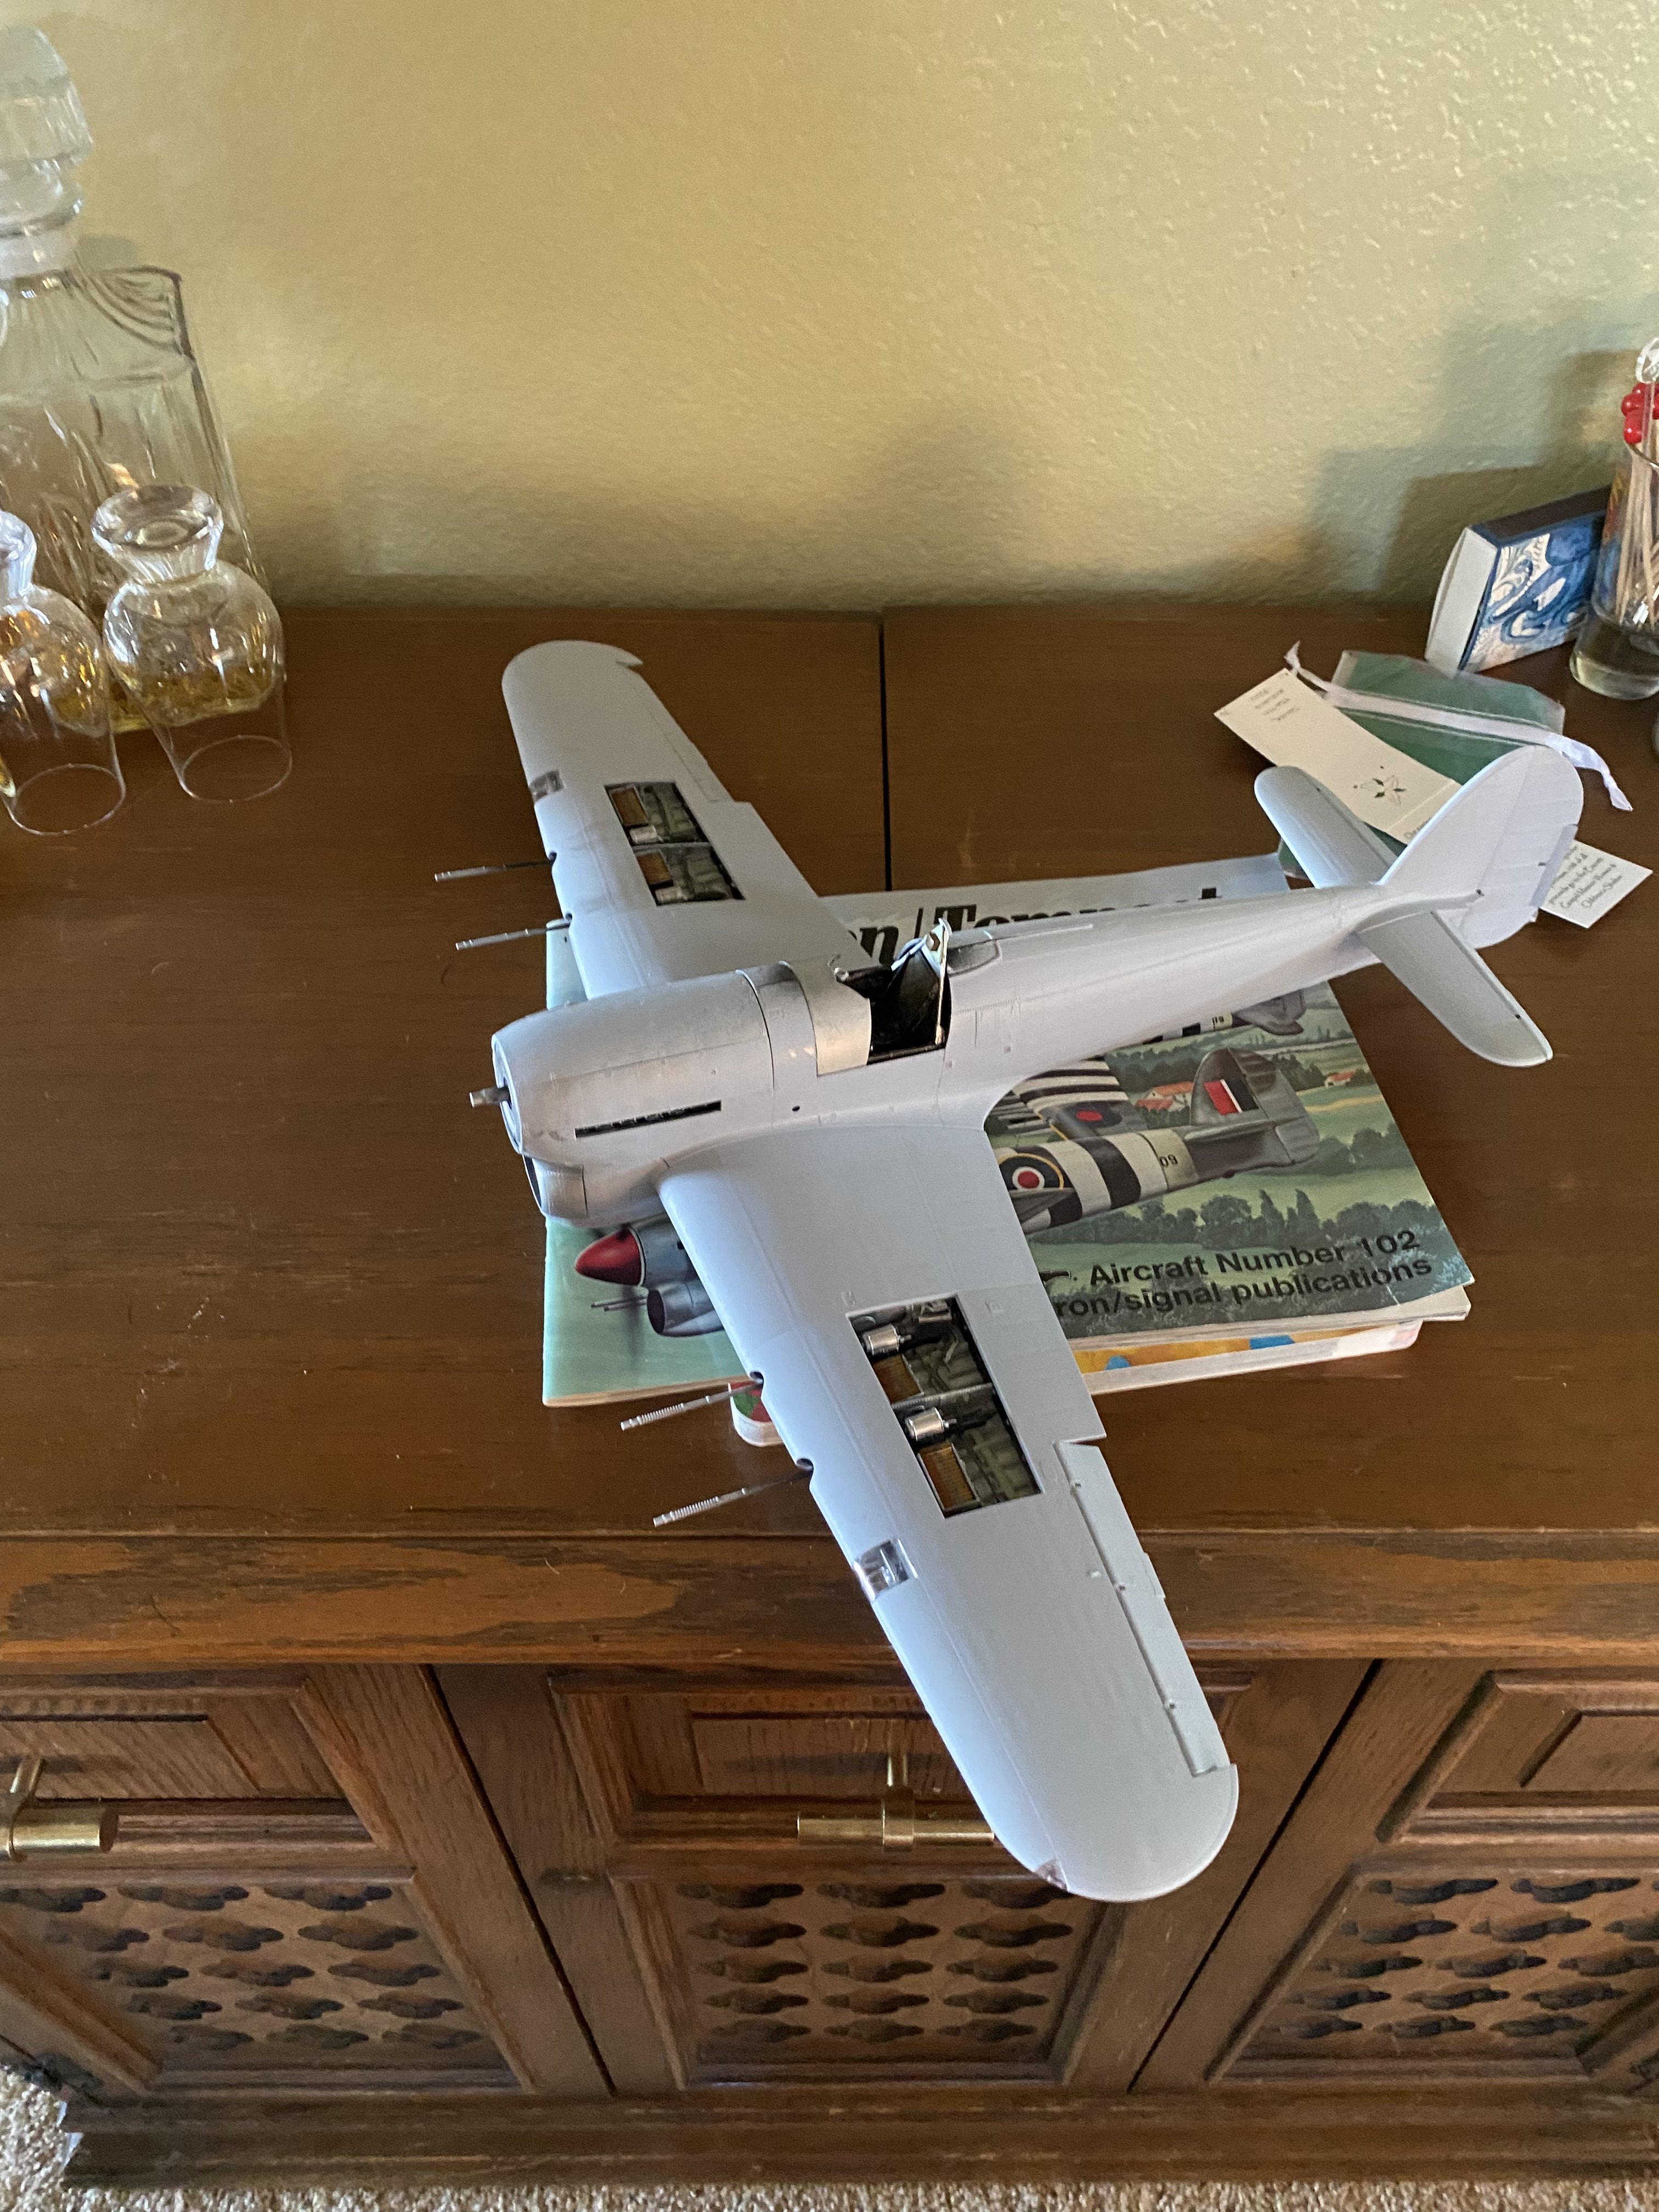
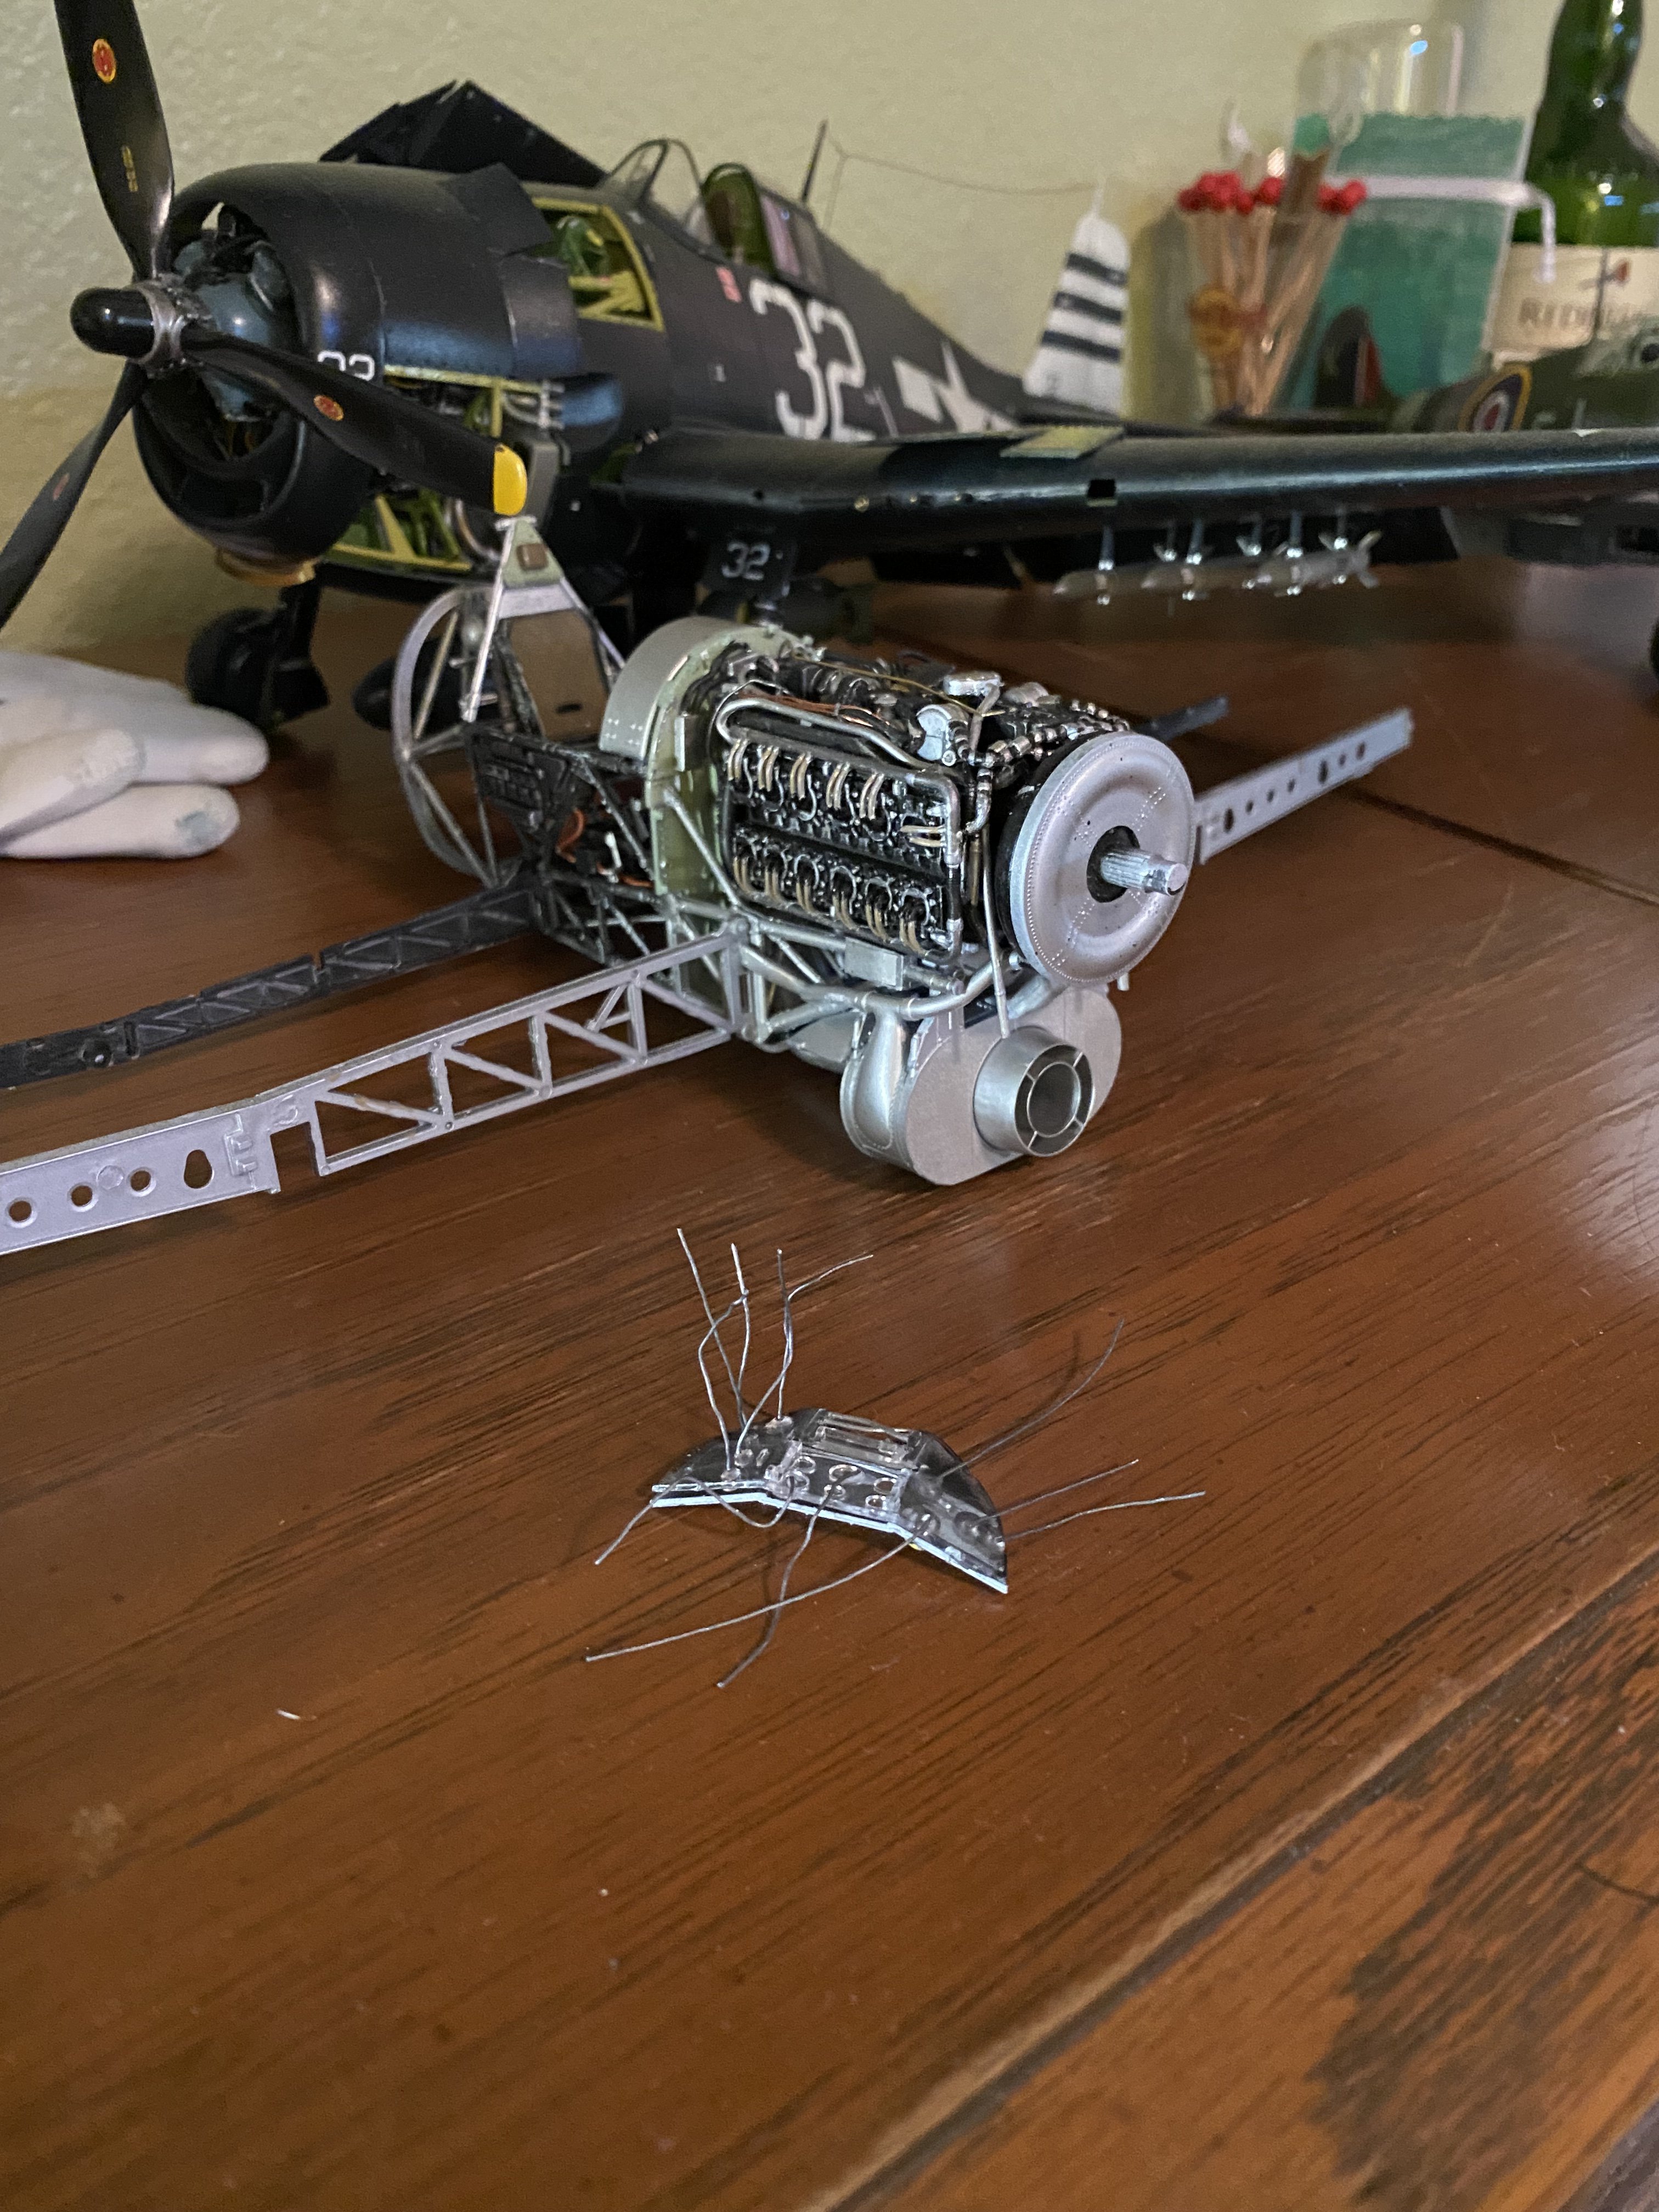
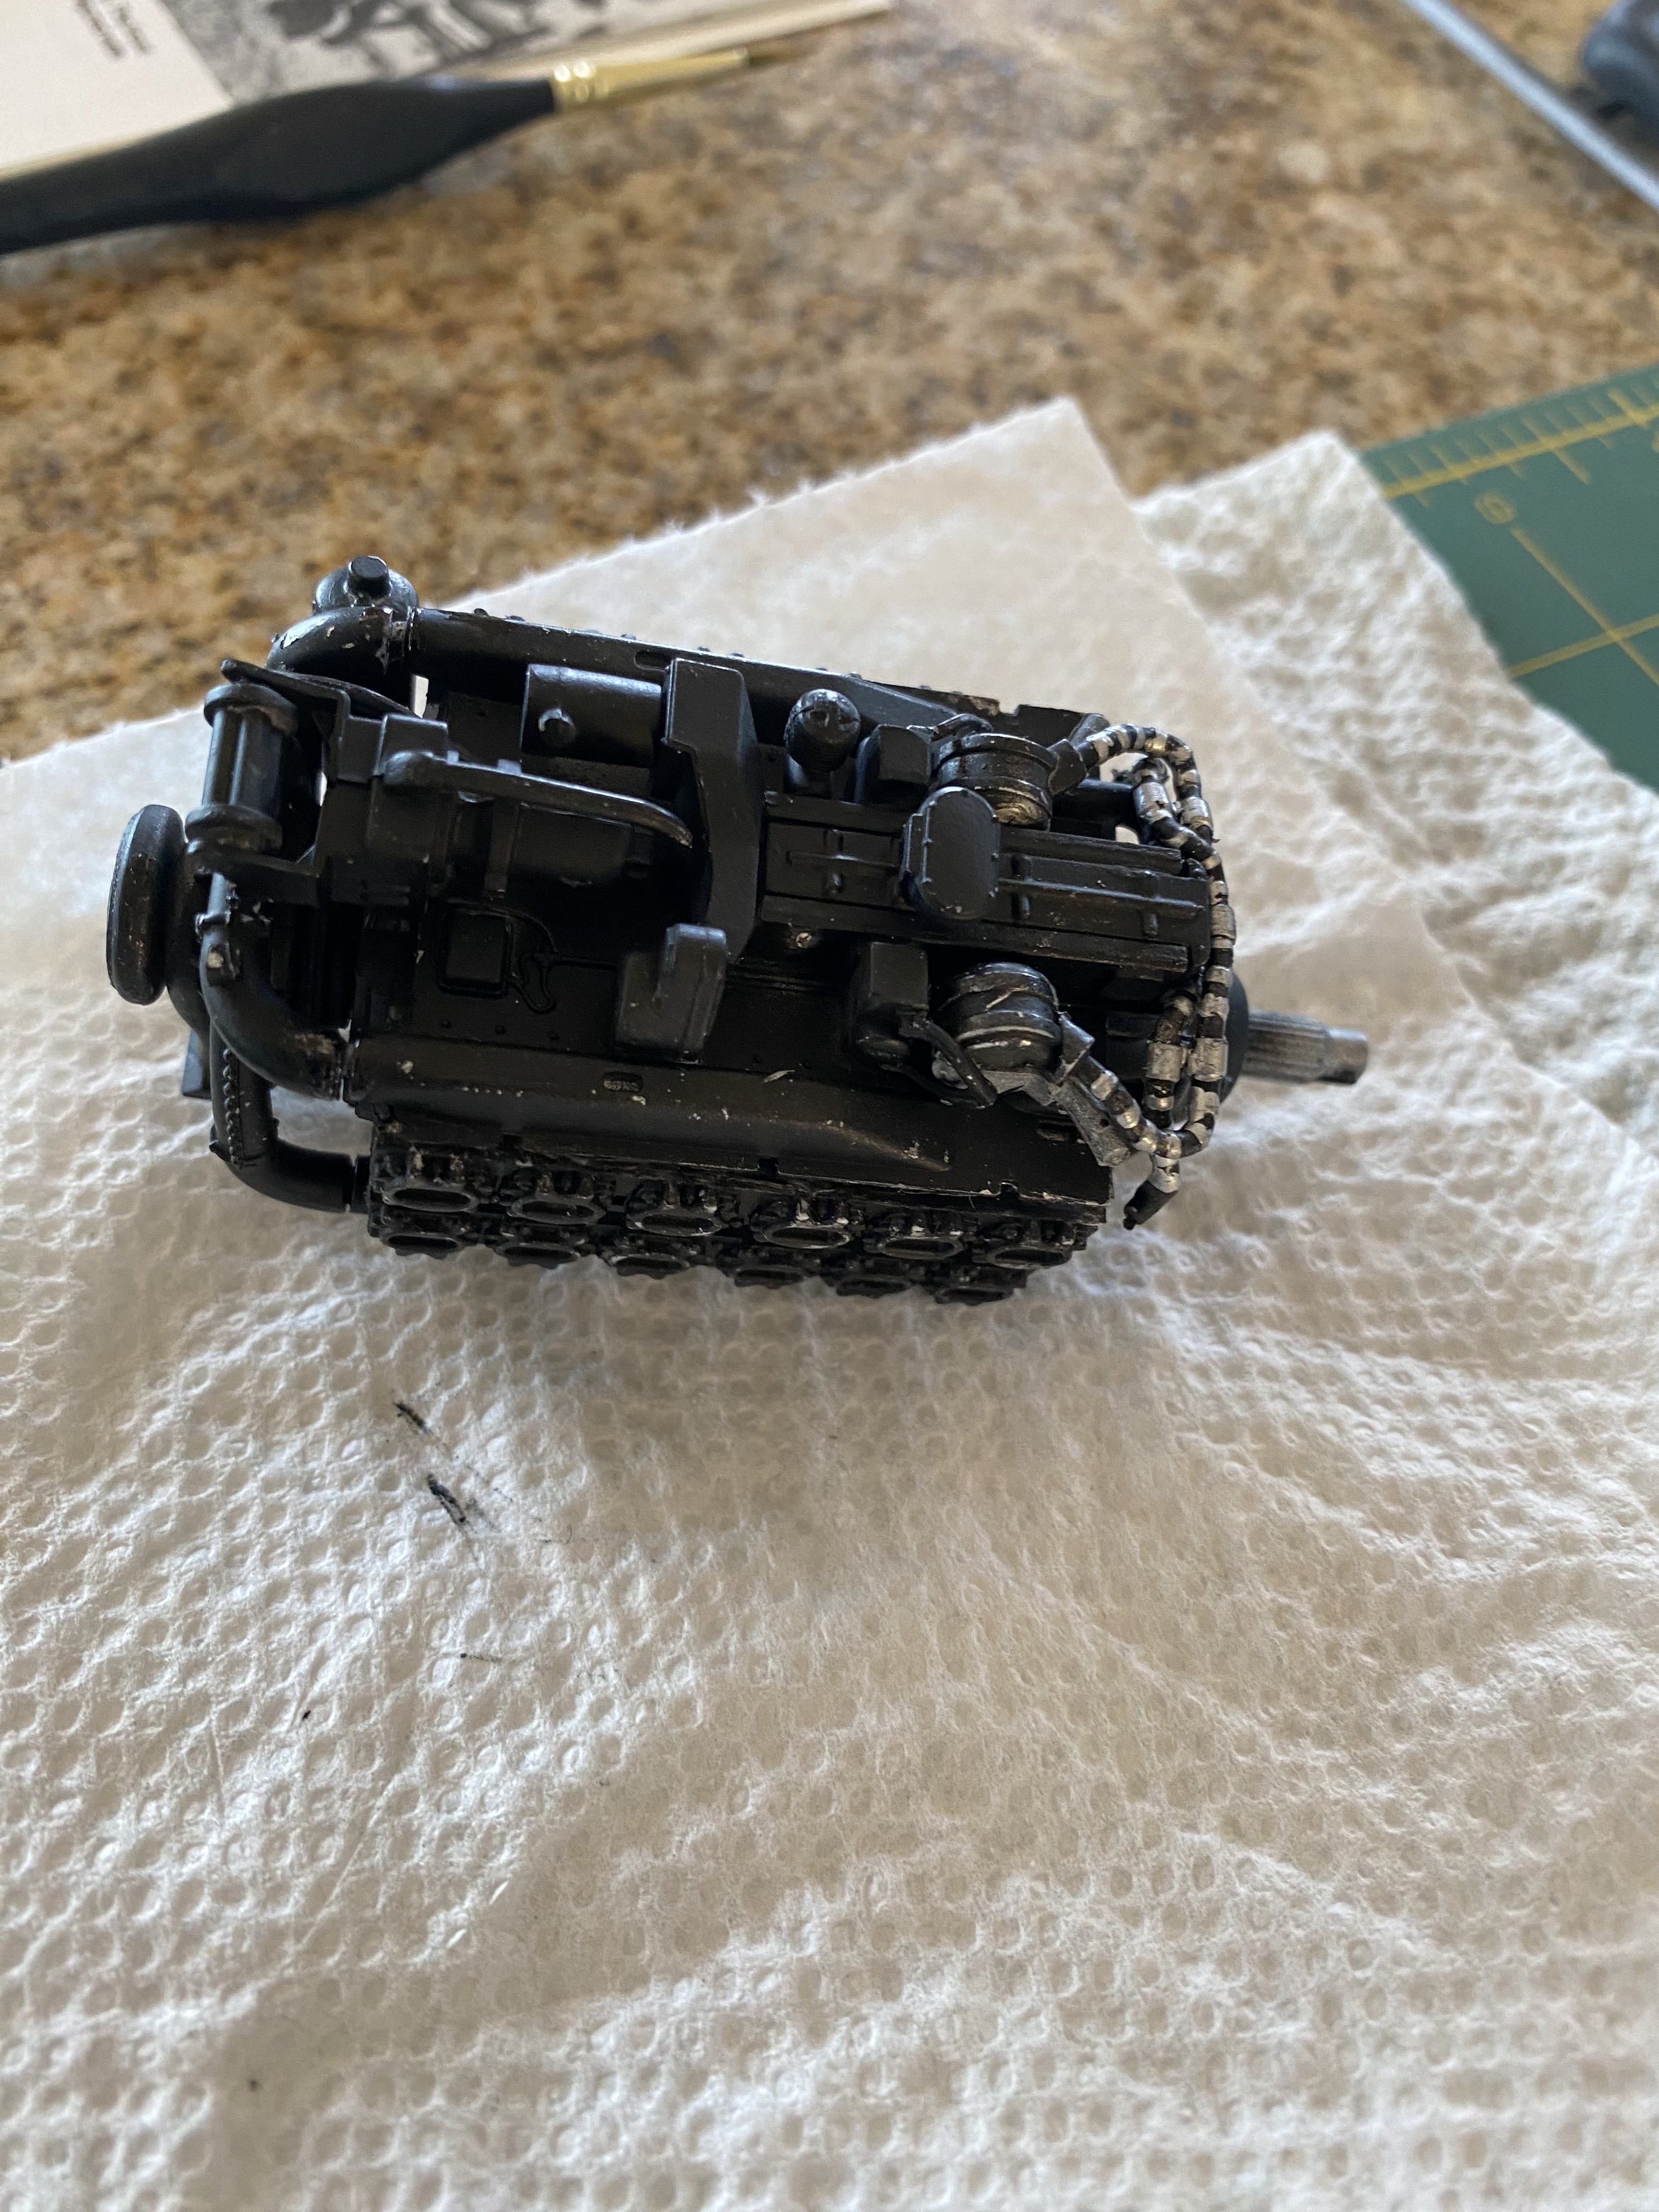
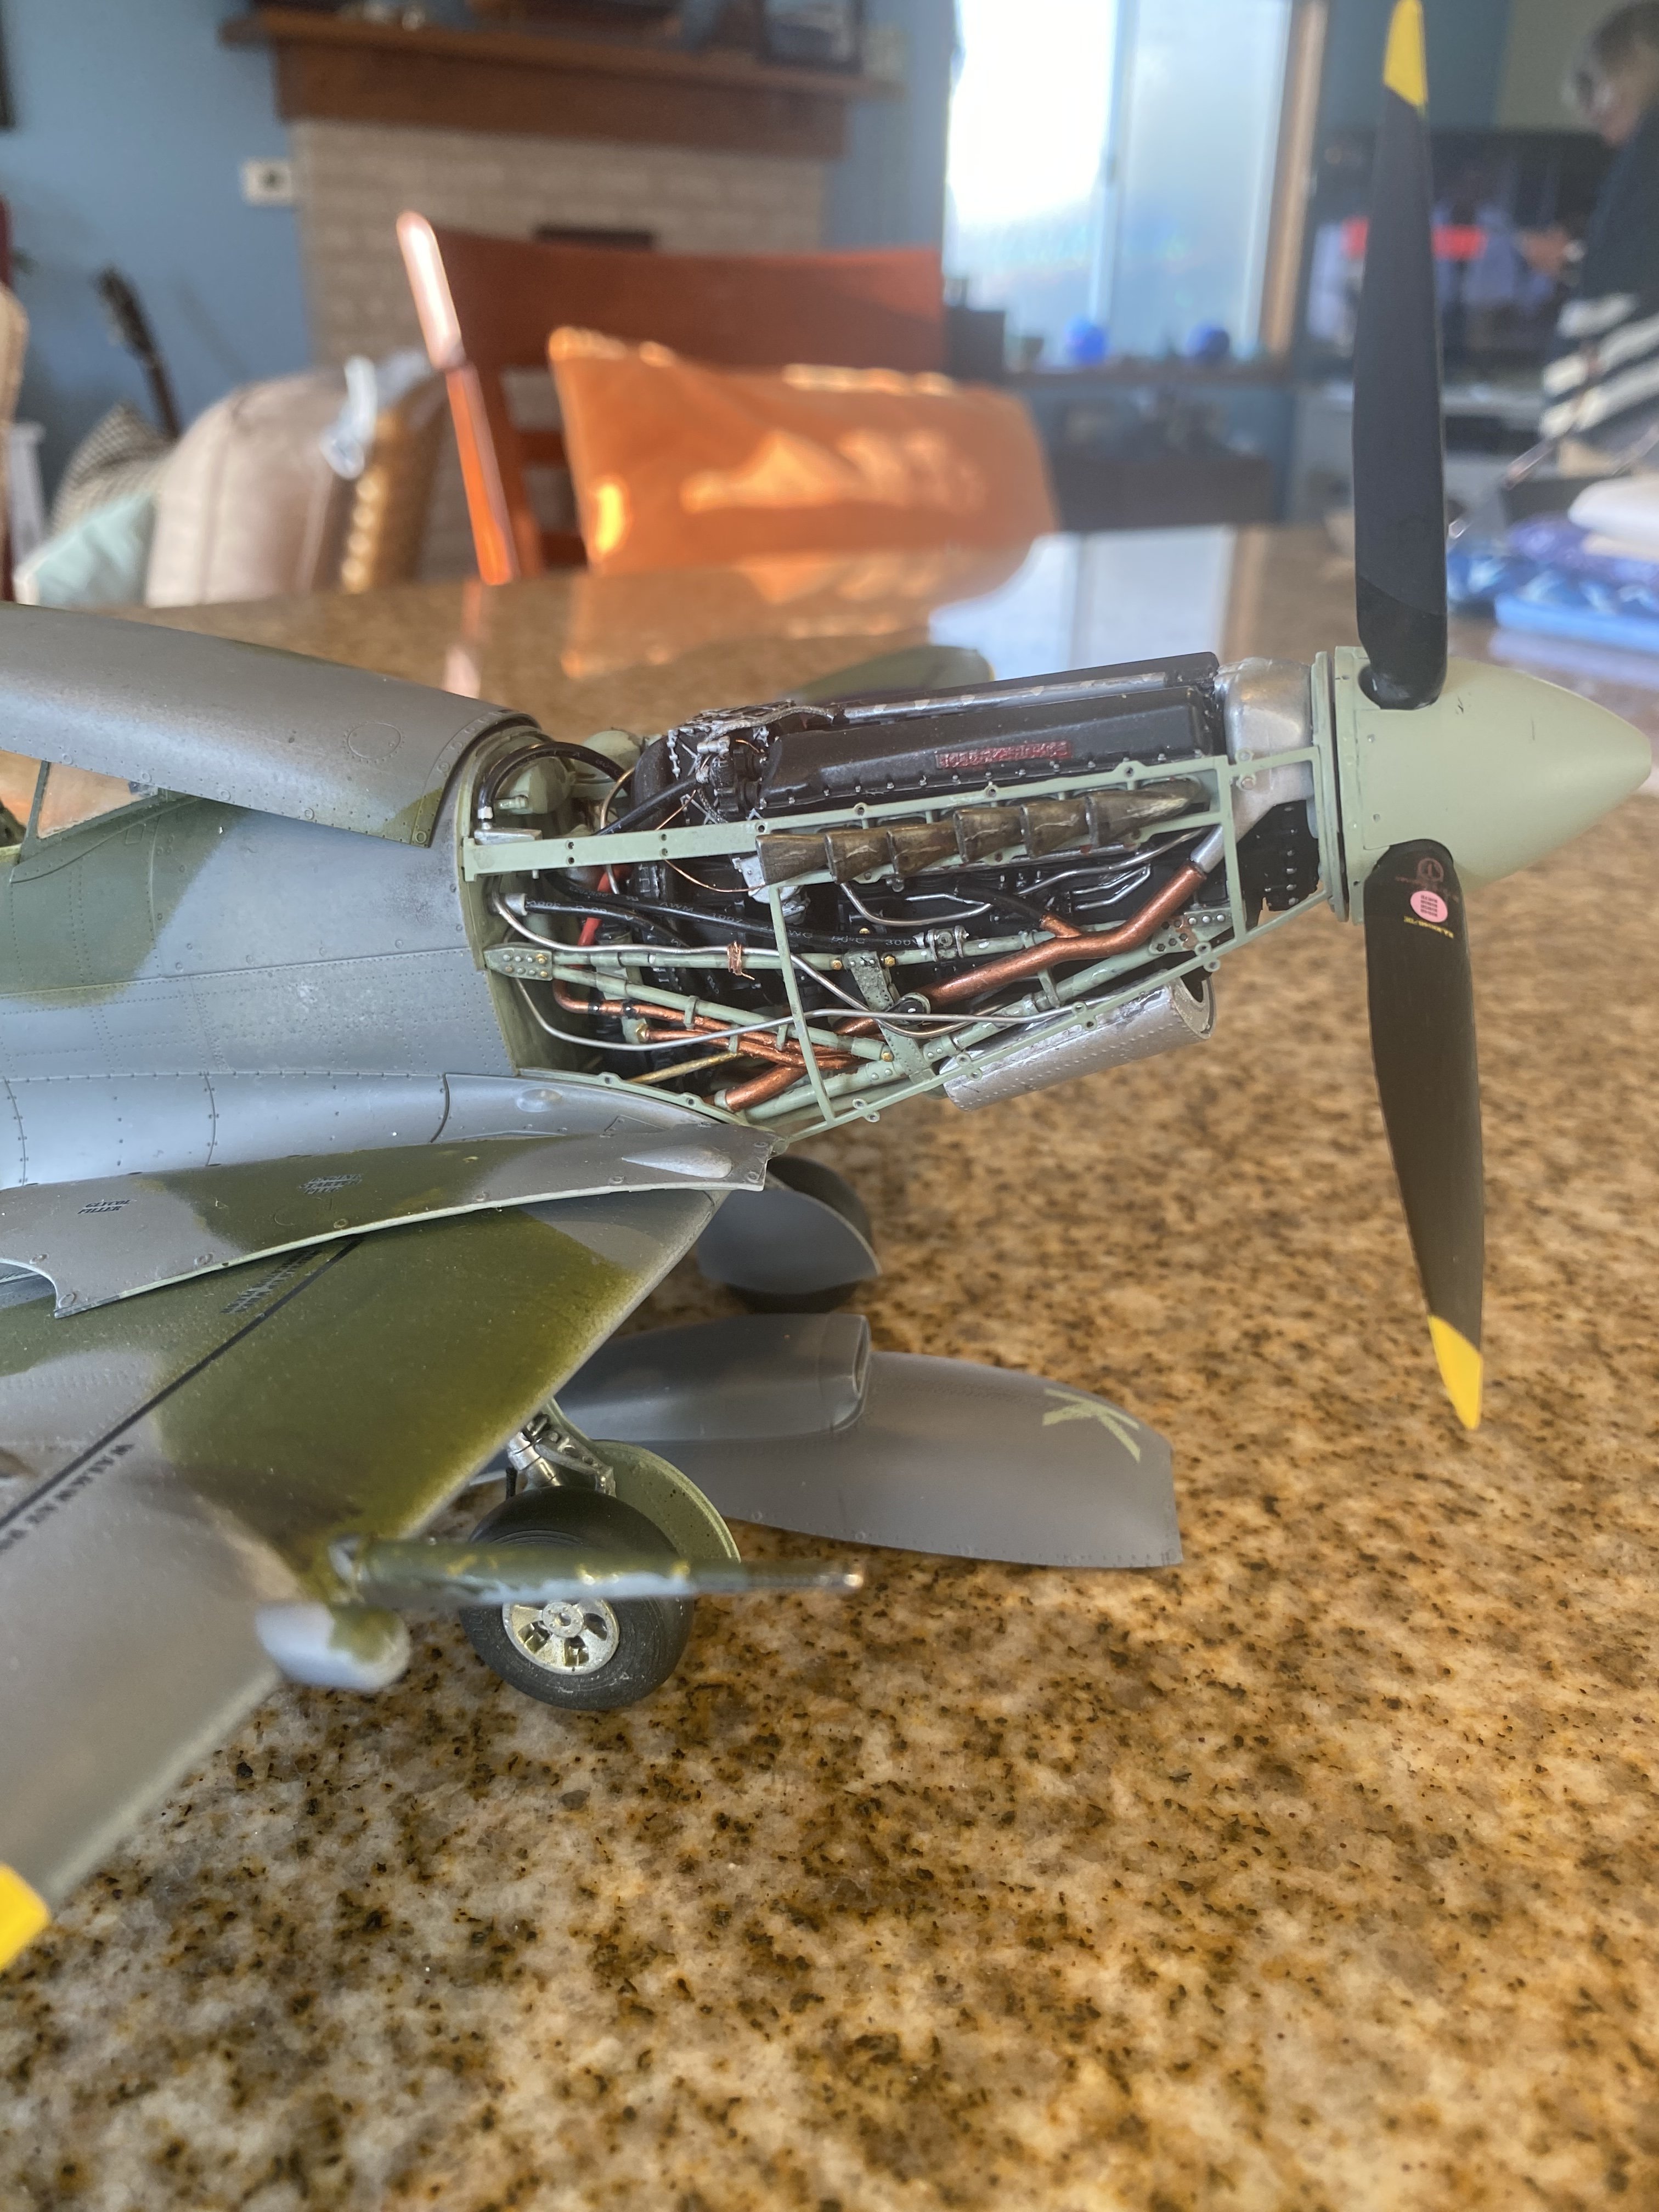
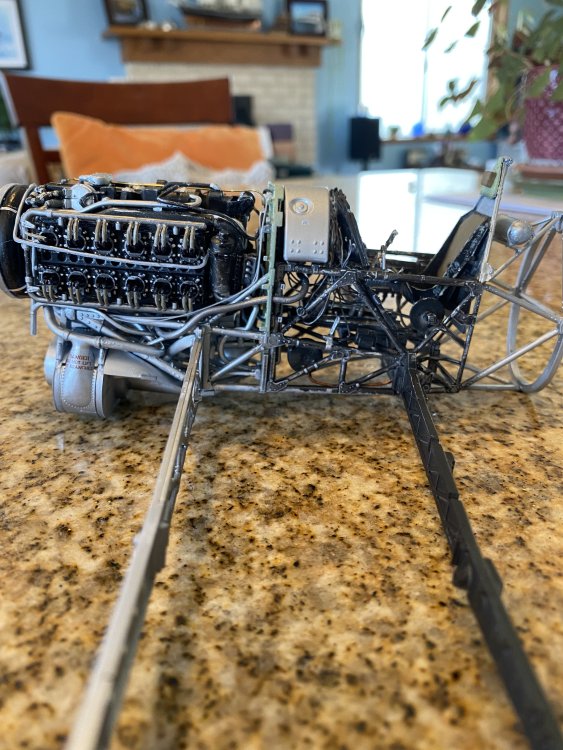
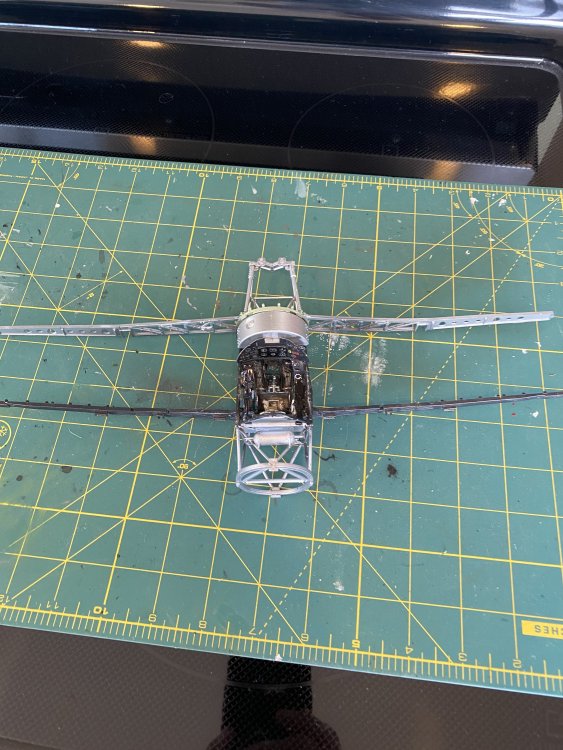
A little more progress on the typhoon. Started building the engine. Painted and assembled and now to add details and some weathering.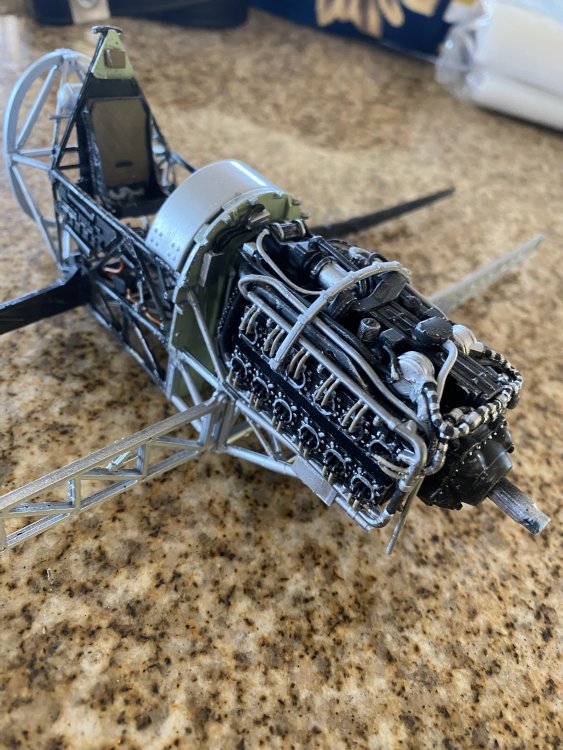


-
My 1/24 airfix Spitfire ix done
Irishman1 replied to Irishman1's topic in LSM 1/32 and Larger Aircraft Ready for Inspection
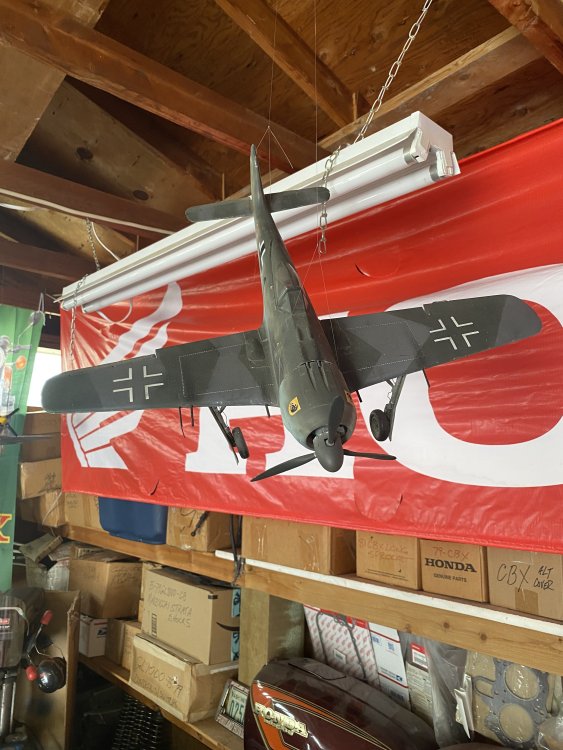
I have that one built hanging in my garage! I’m going to bring it up to the house and redo some things along with the fw-190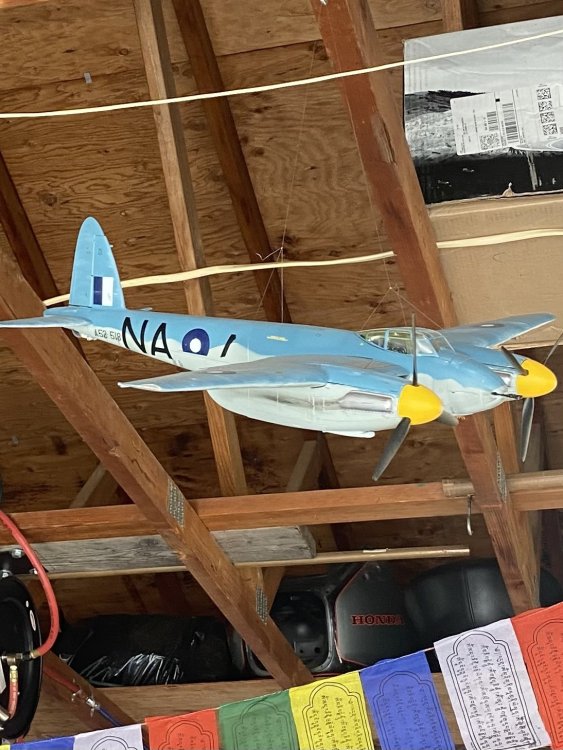


-
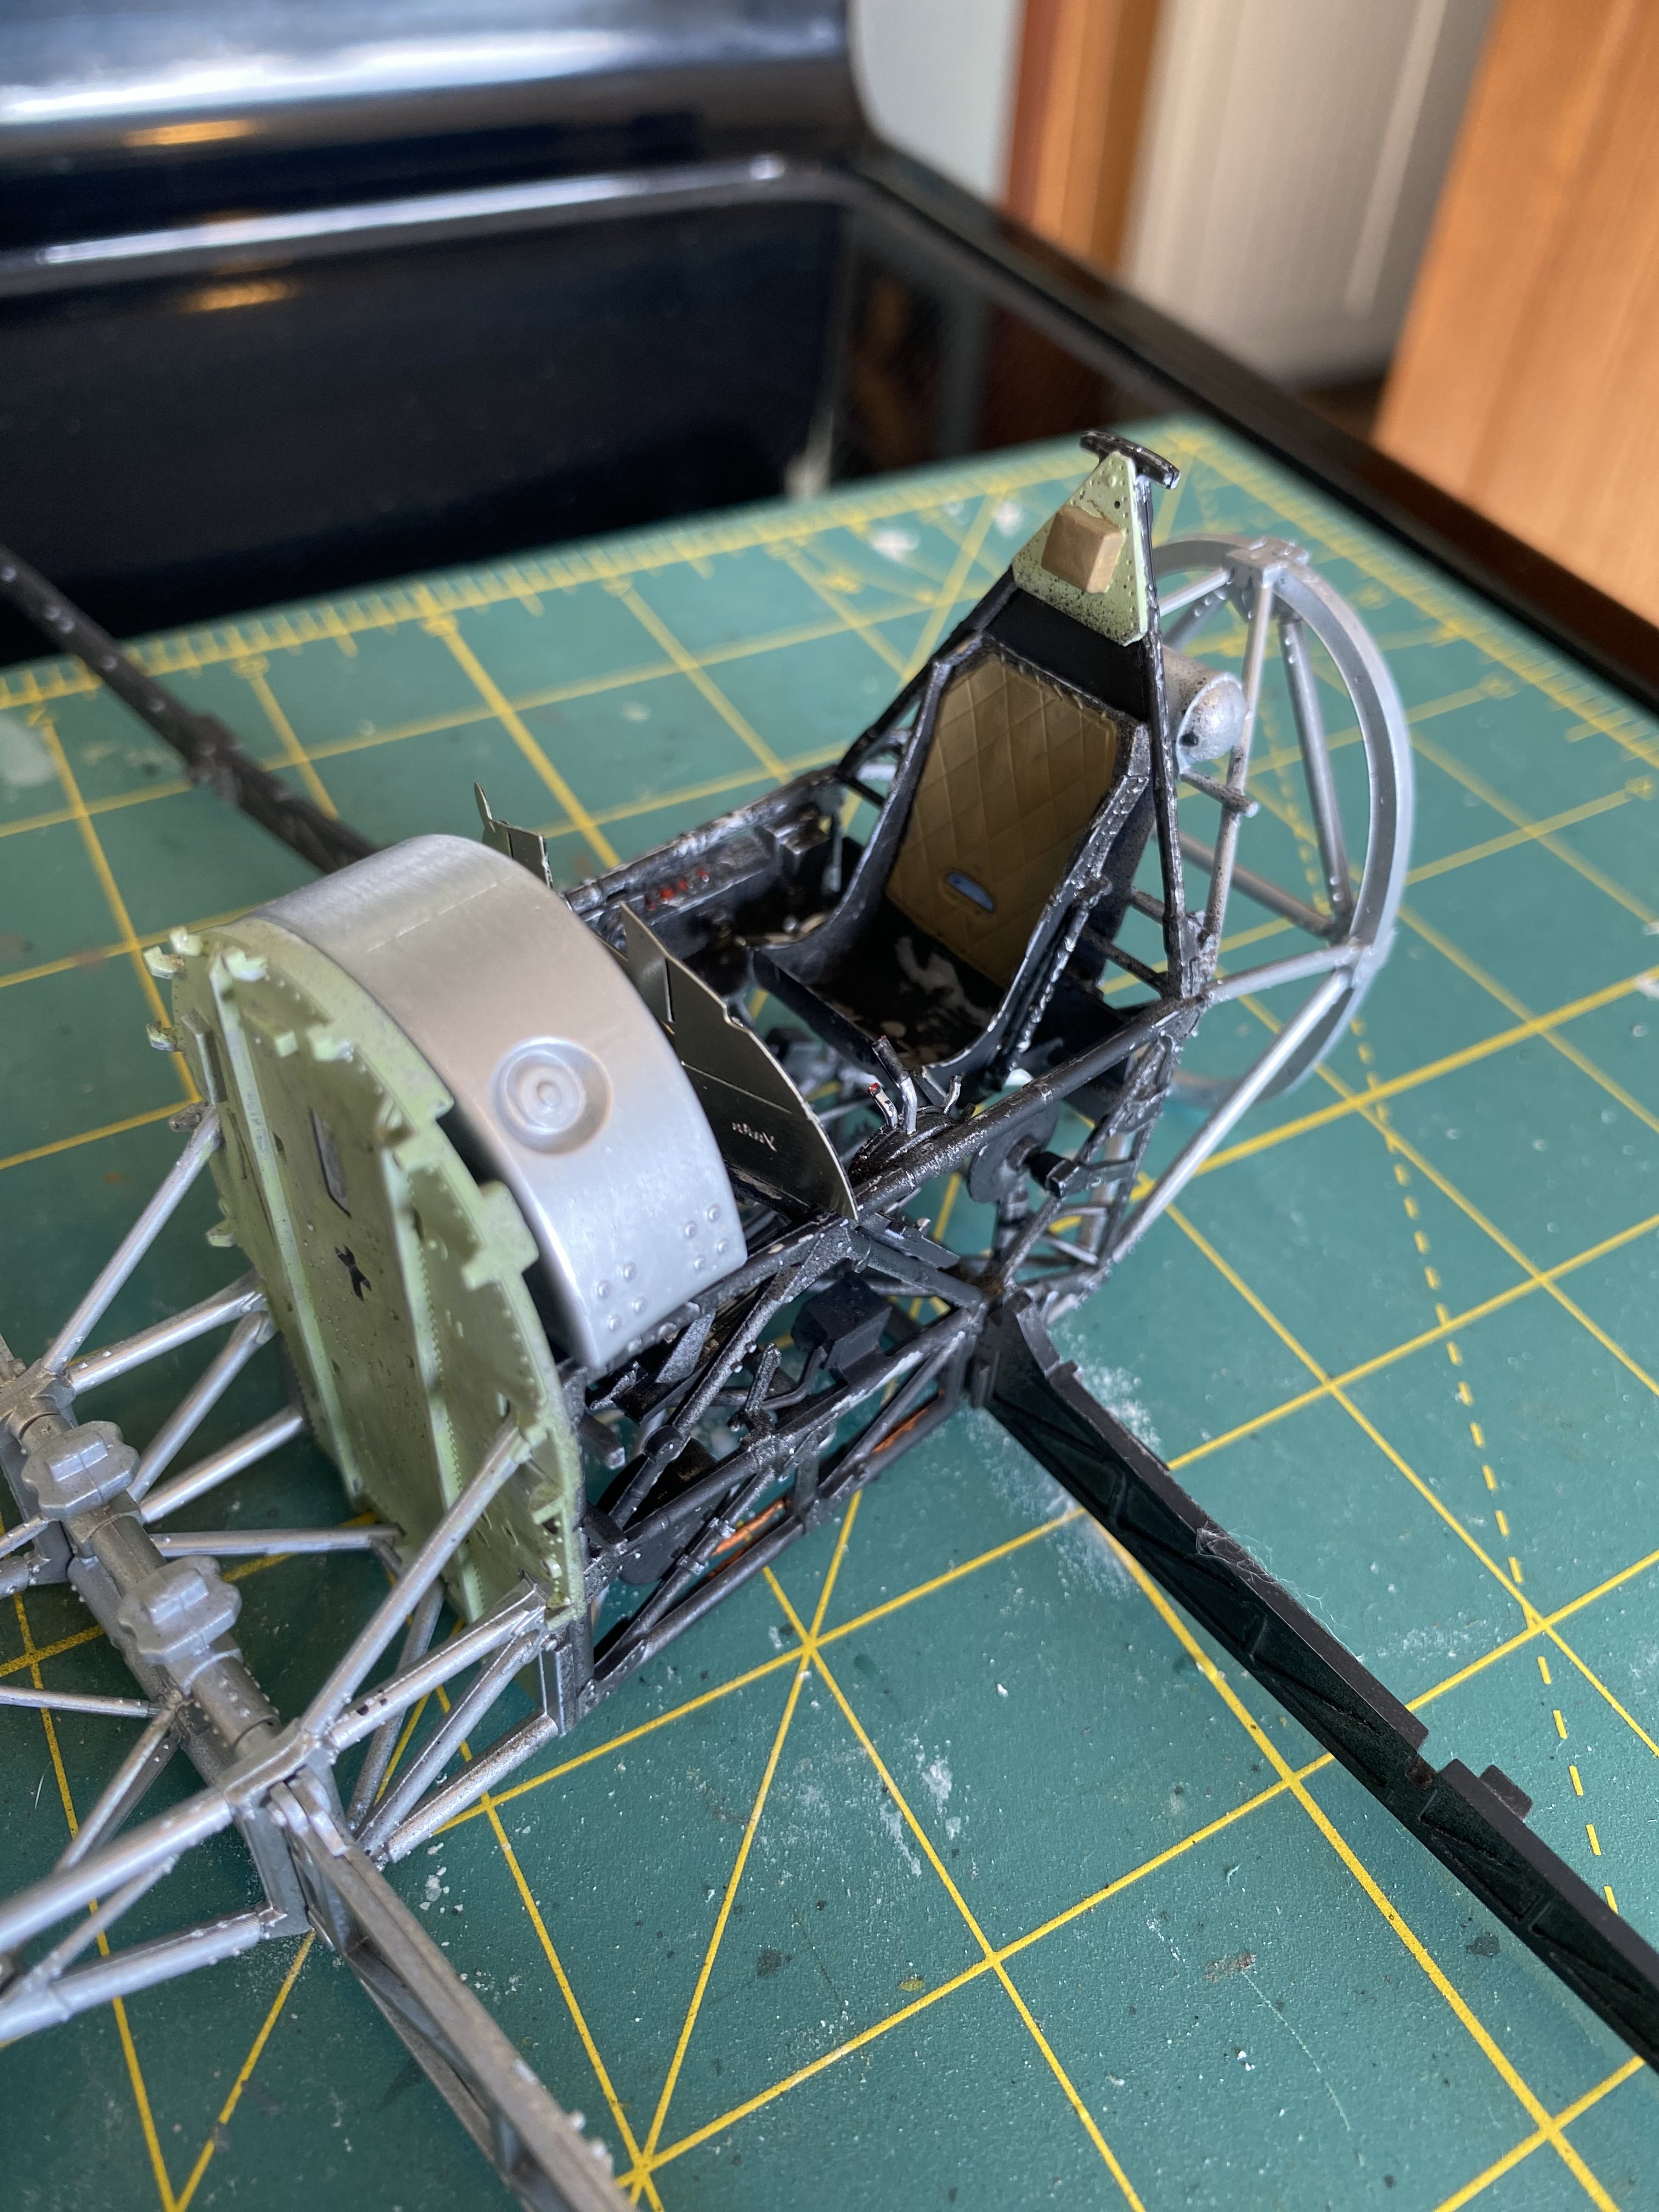
Started the Typhoon this week. Got the cockpit built up and painted. Used Yahu instrument panel. Might used the painted kit panel still.


-
Howdy there!! I’ve a question about building my first ww1 aircraft. I build ww2 1/24 scale aircraft and a couple of wood ships from scratch. I really appreciate the ww1 aircraft I’ve seen here and it looks like the WNW kits stand above most I’ve seen for detail and variety. However, is it a kit I should use as my first dip into ww1 aircraft? I know they are more expensive than other kits but it looks like it’s worth it. What do you think? thanks in advance, Mike (irishman1)
-
RNZAF Corsair completed
Irishman1 replied to JohnB's topic in LSM 1/32 and Larger Aircraft Ready for Inspection
Came out fantastic! -
1/32 Short Stirling
Irishman1 replied to ThomasProbert's topic in LSM 1/35 and Larger Work In Progress
That landing gear came out fantastic! Great skill in scratch building. -
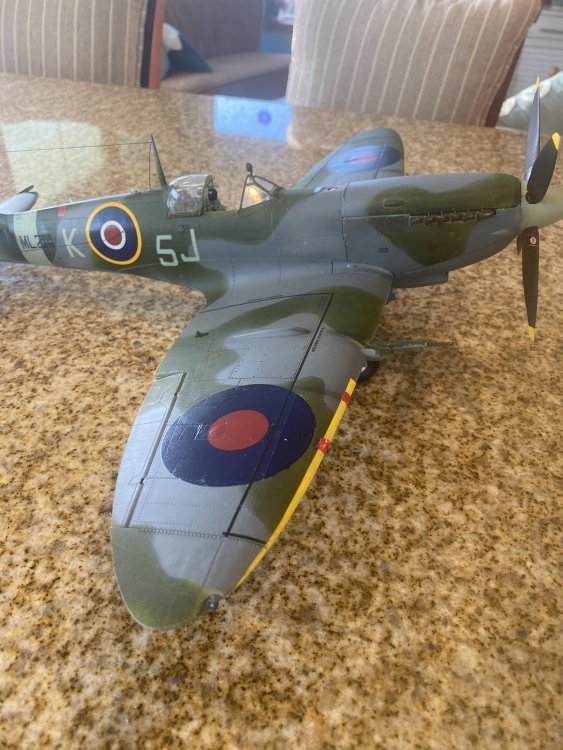
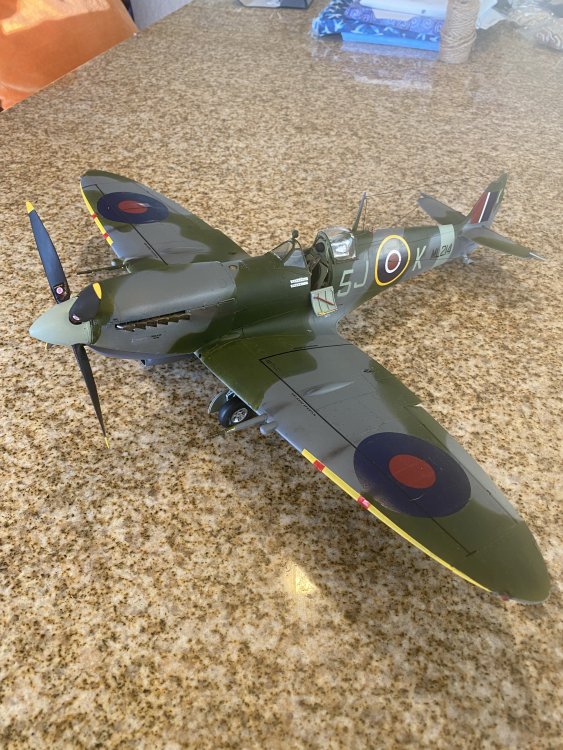
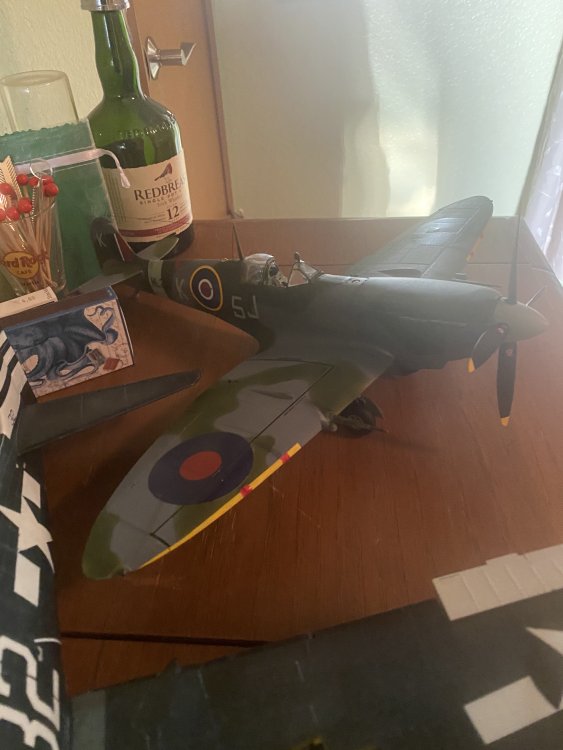
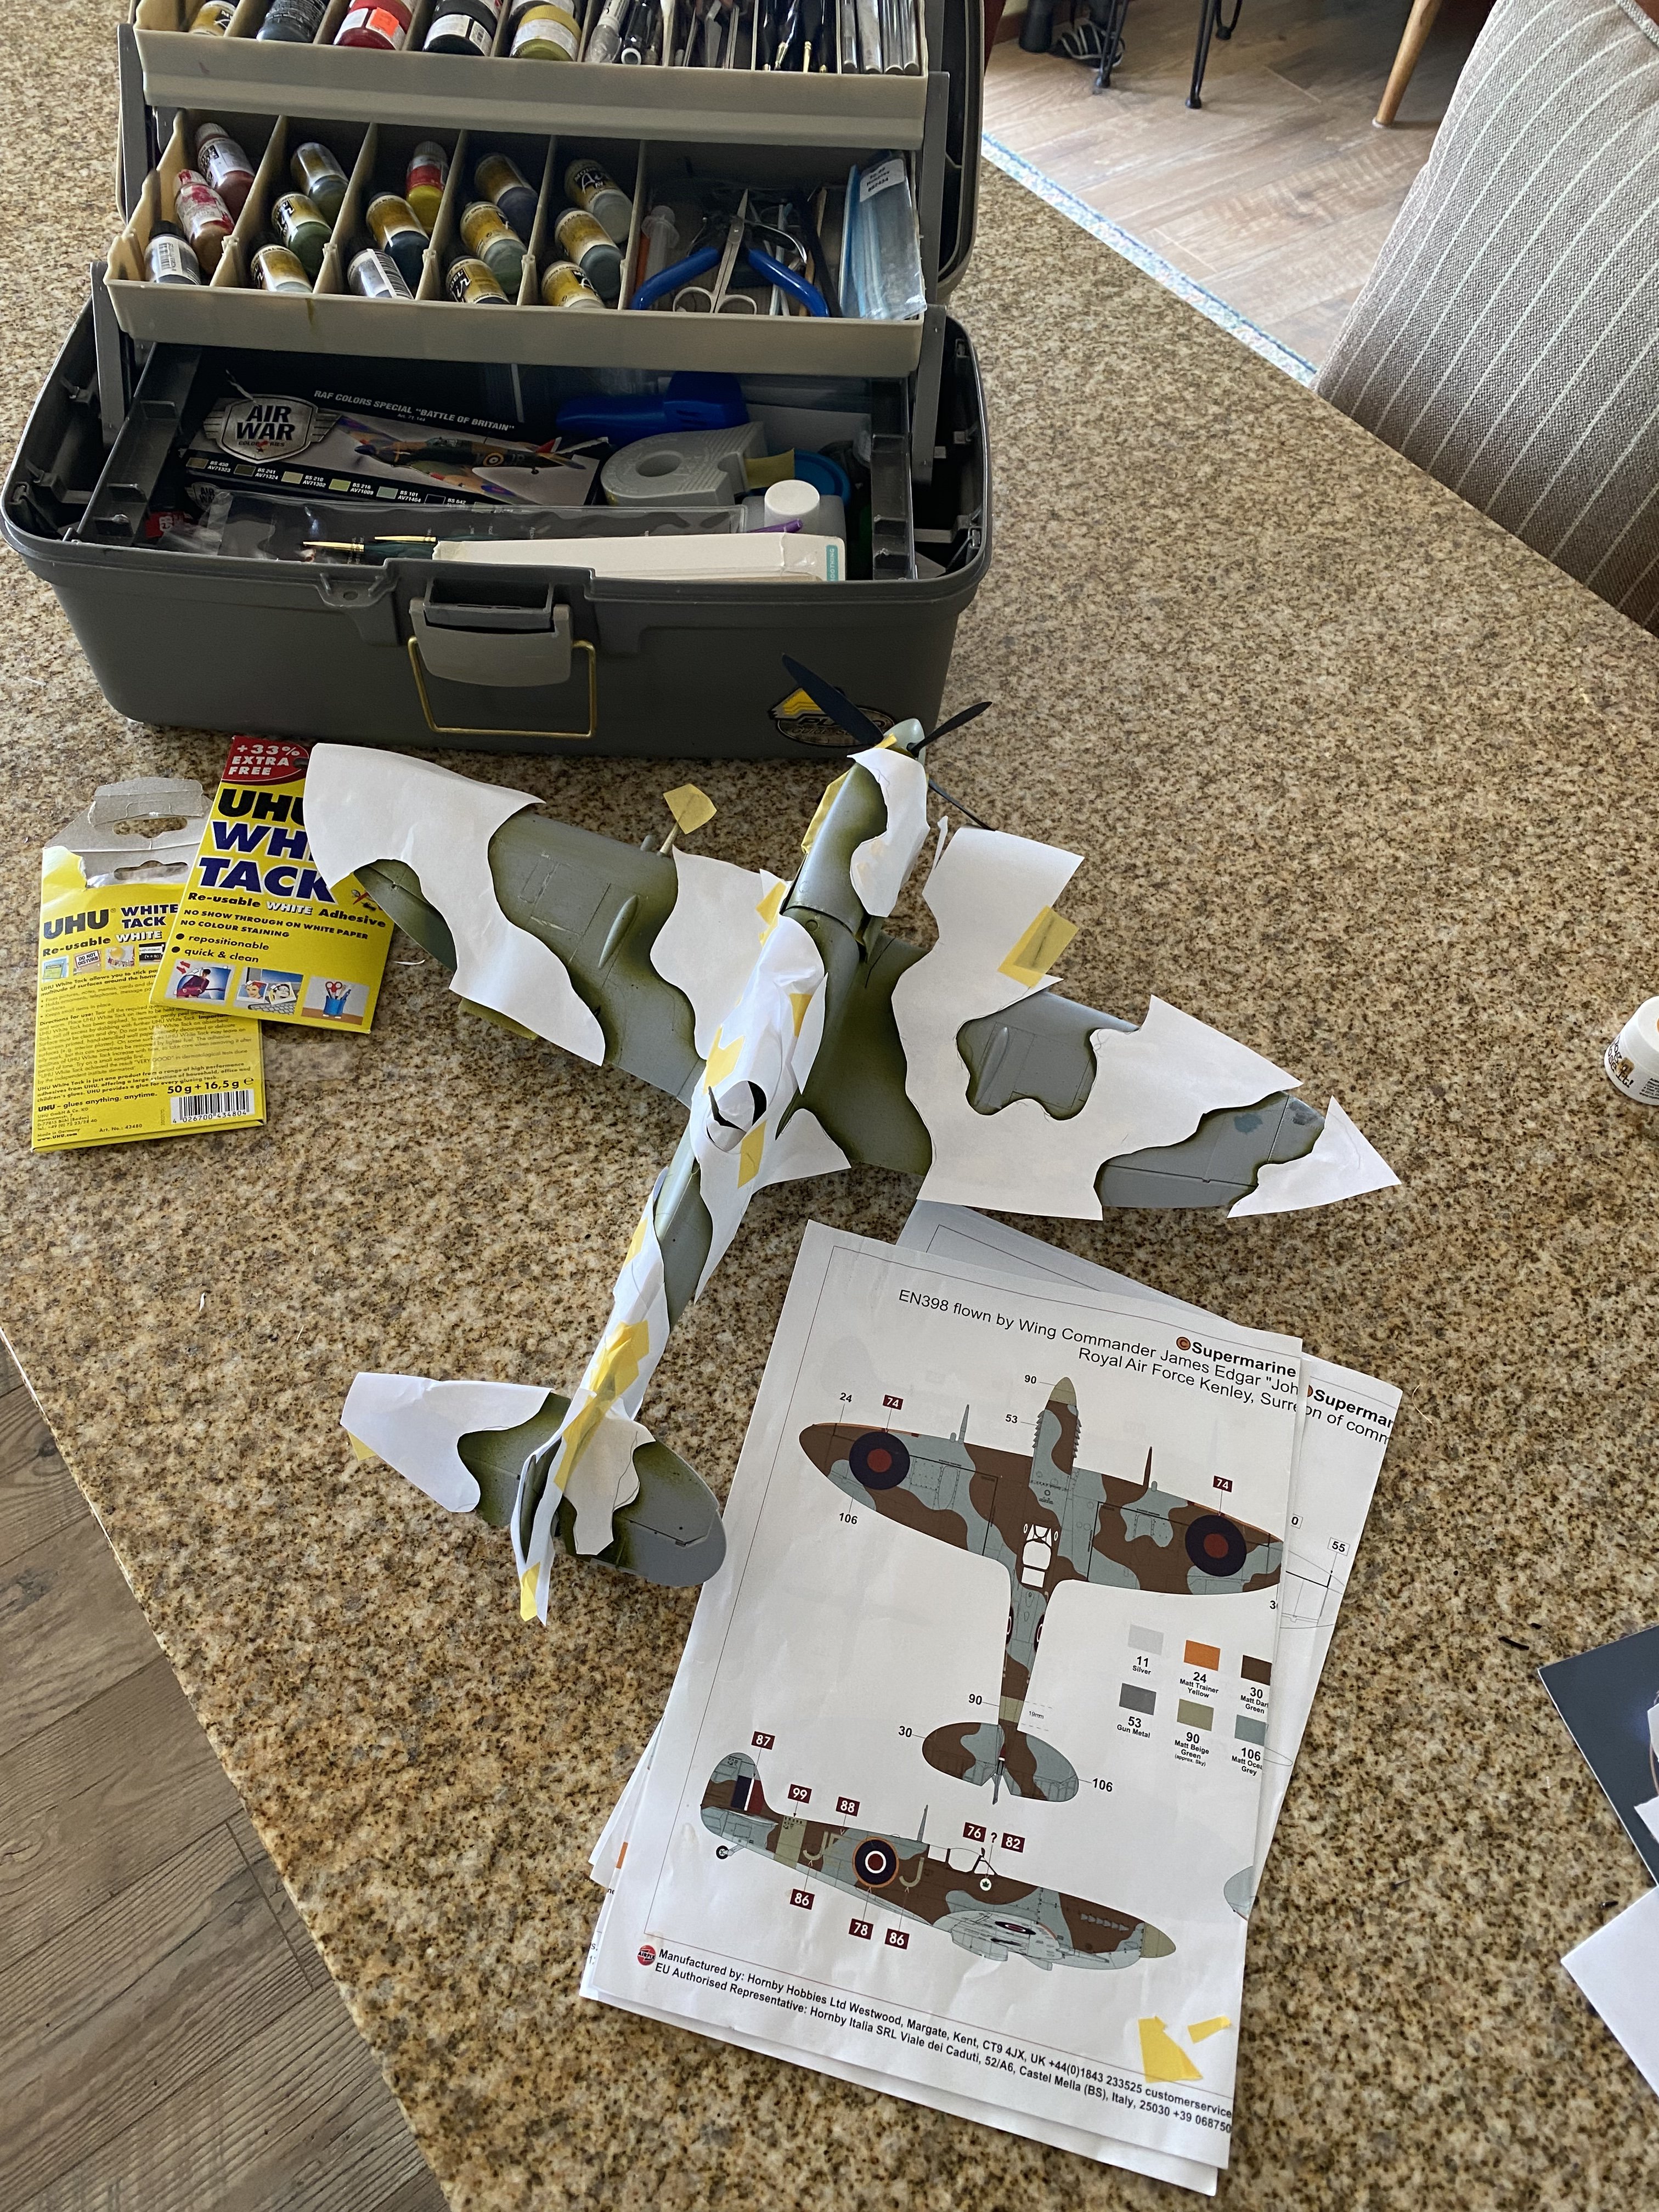
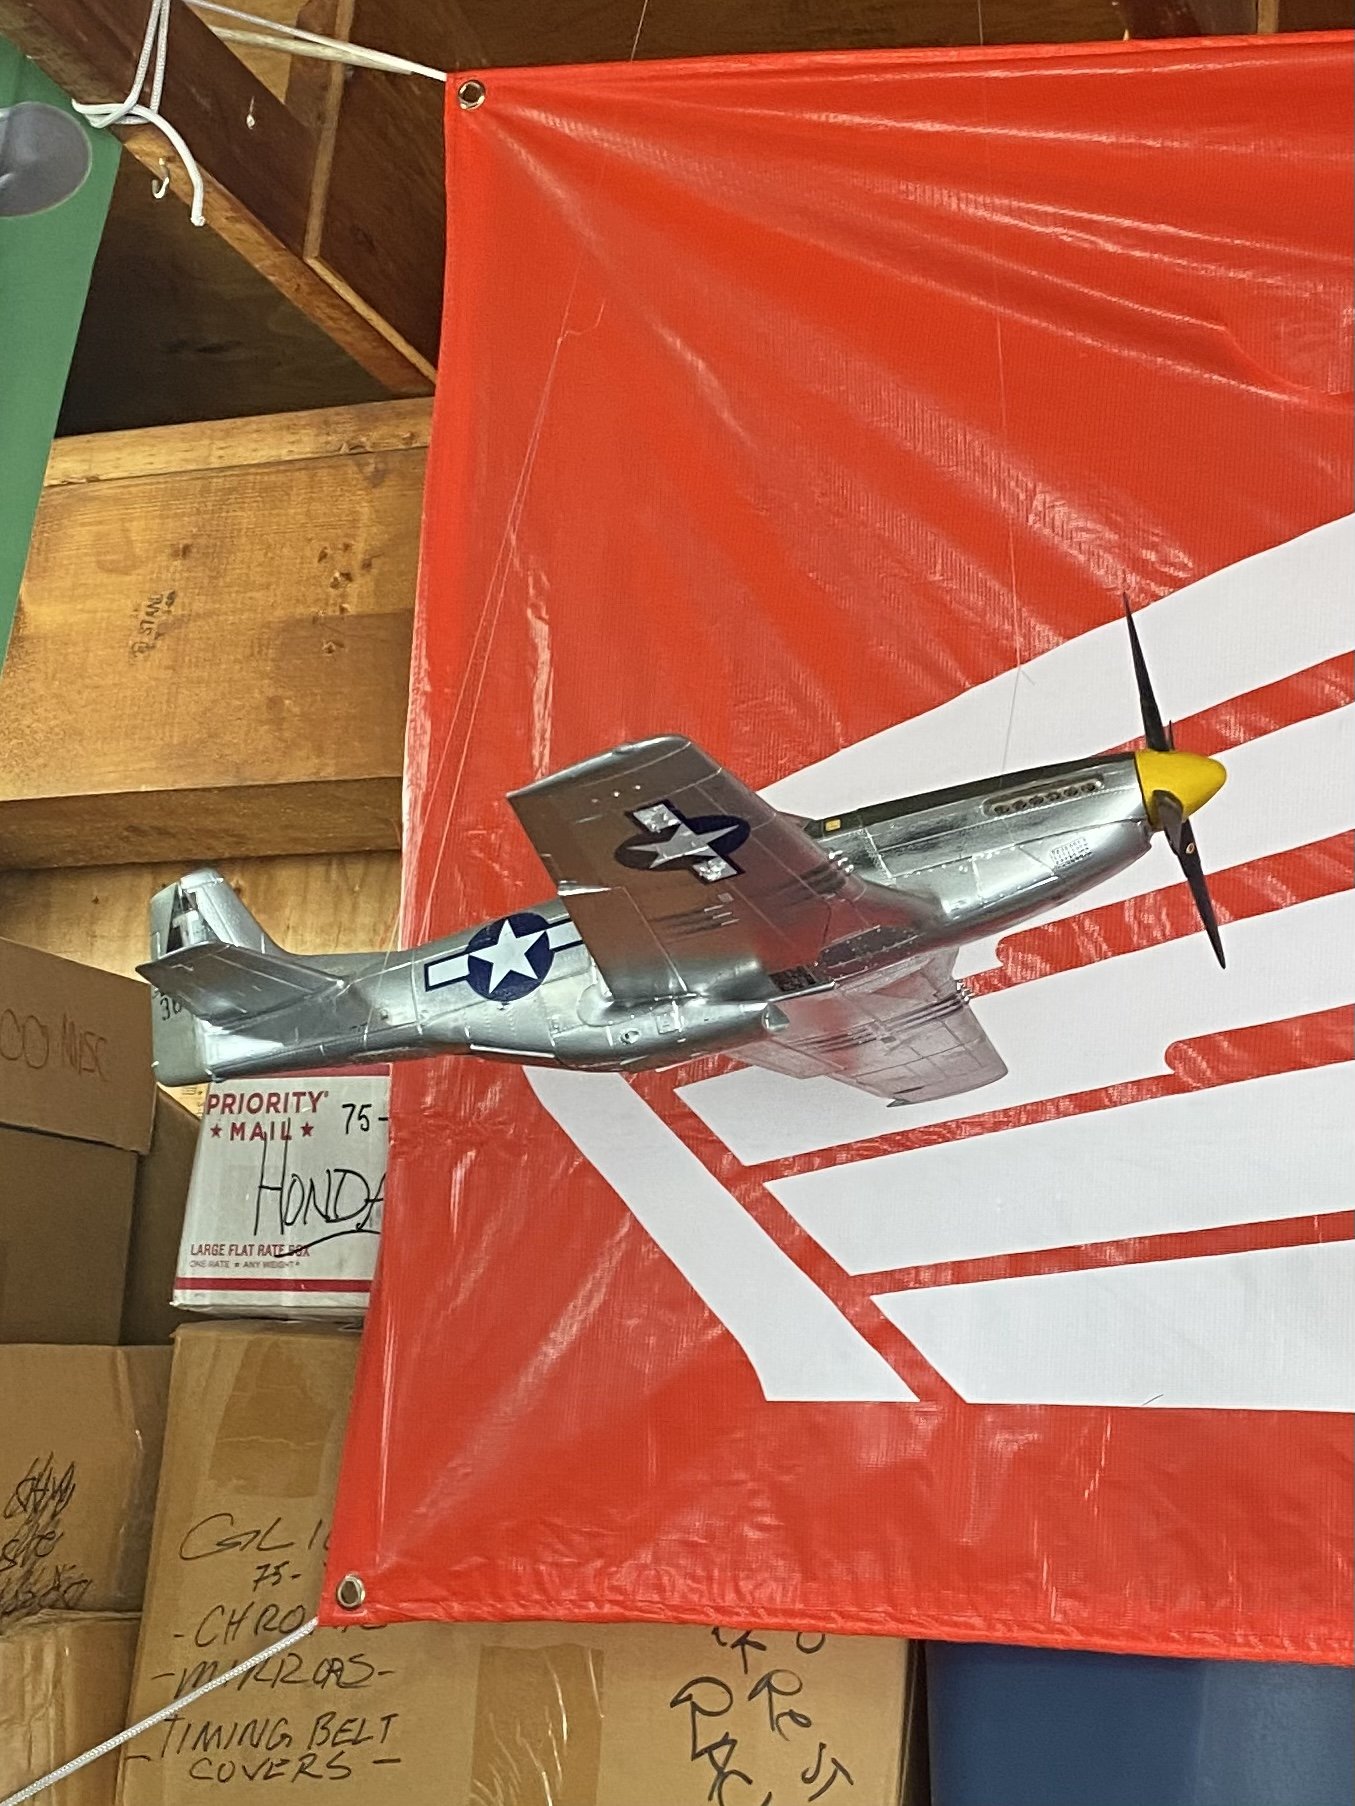
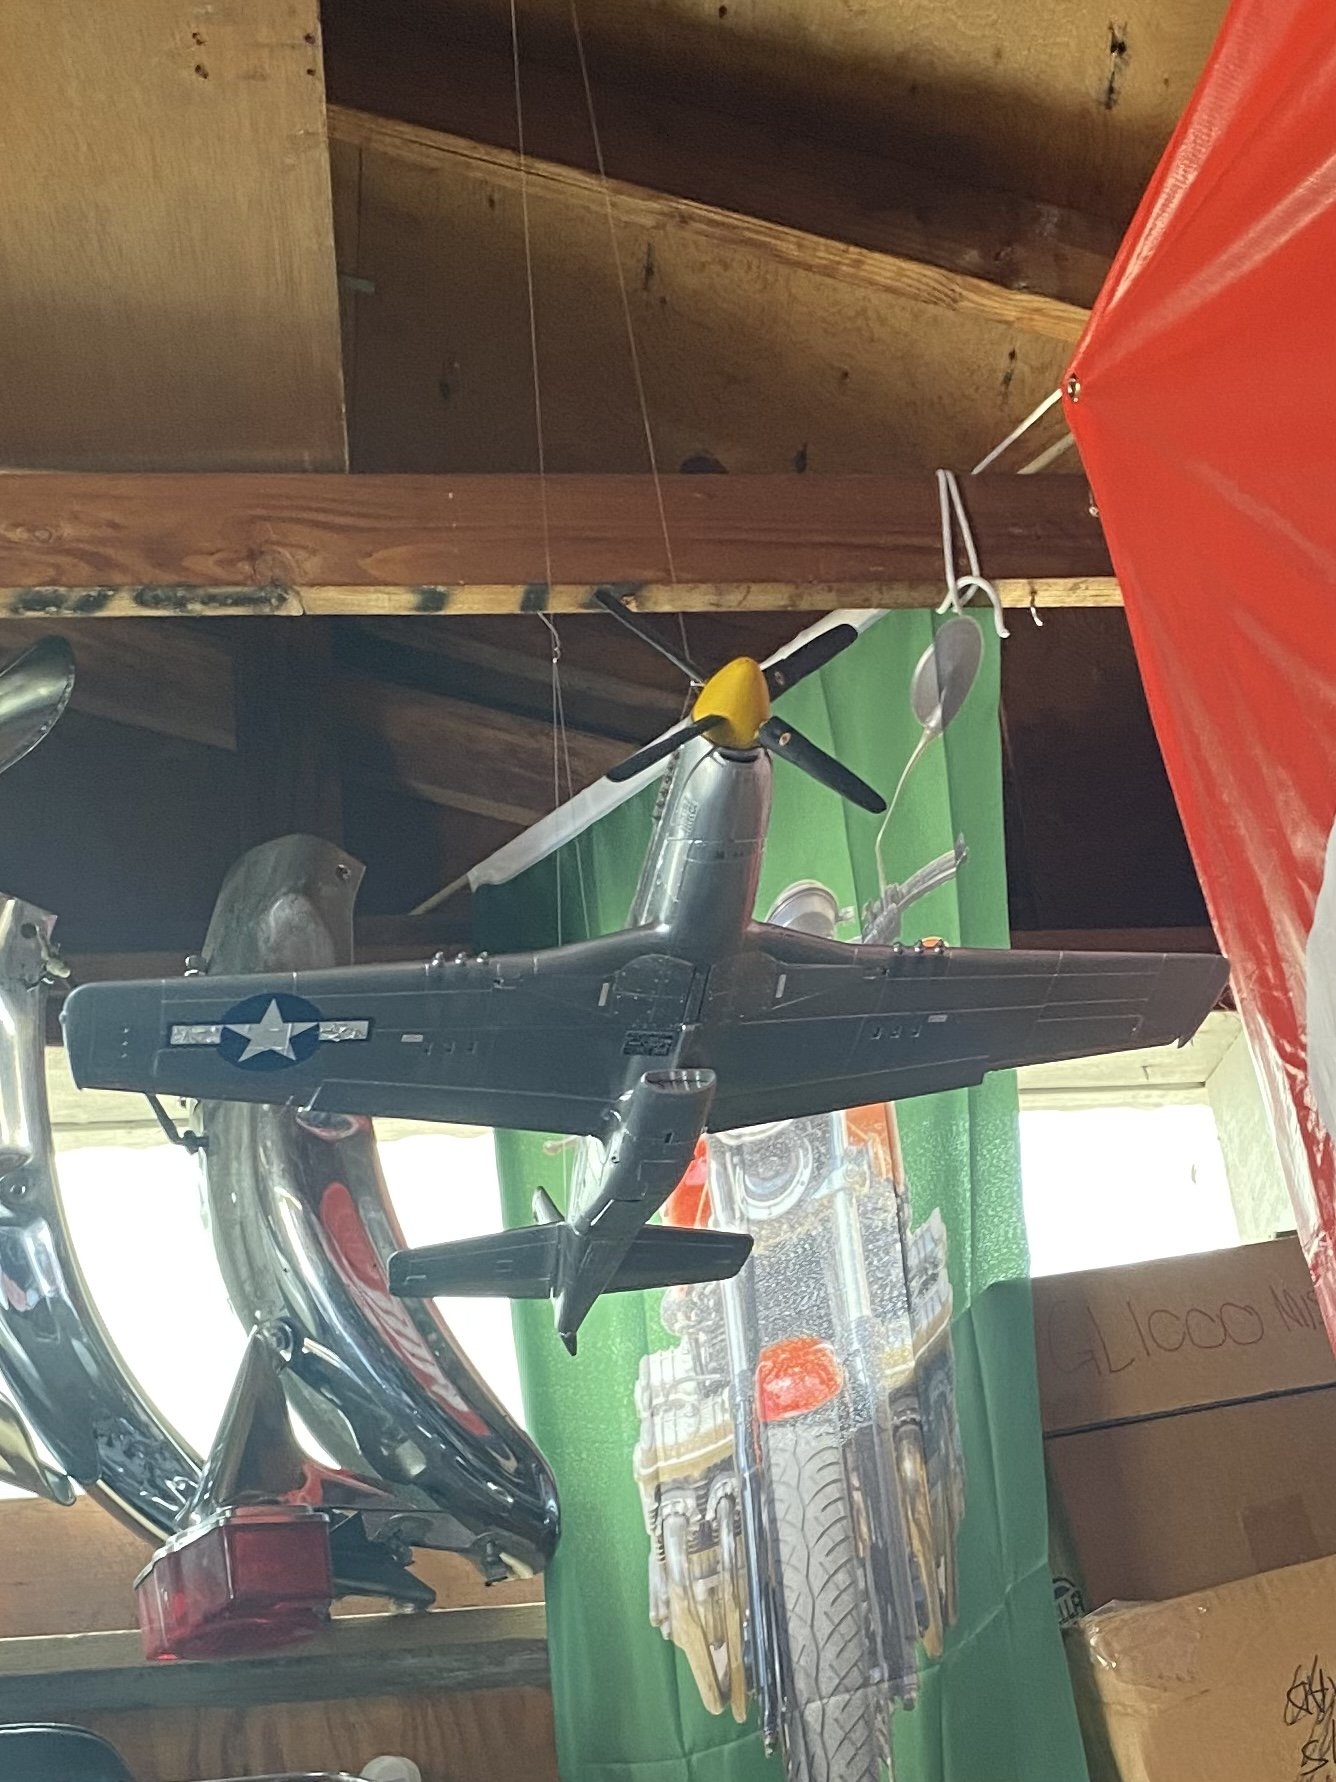
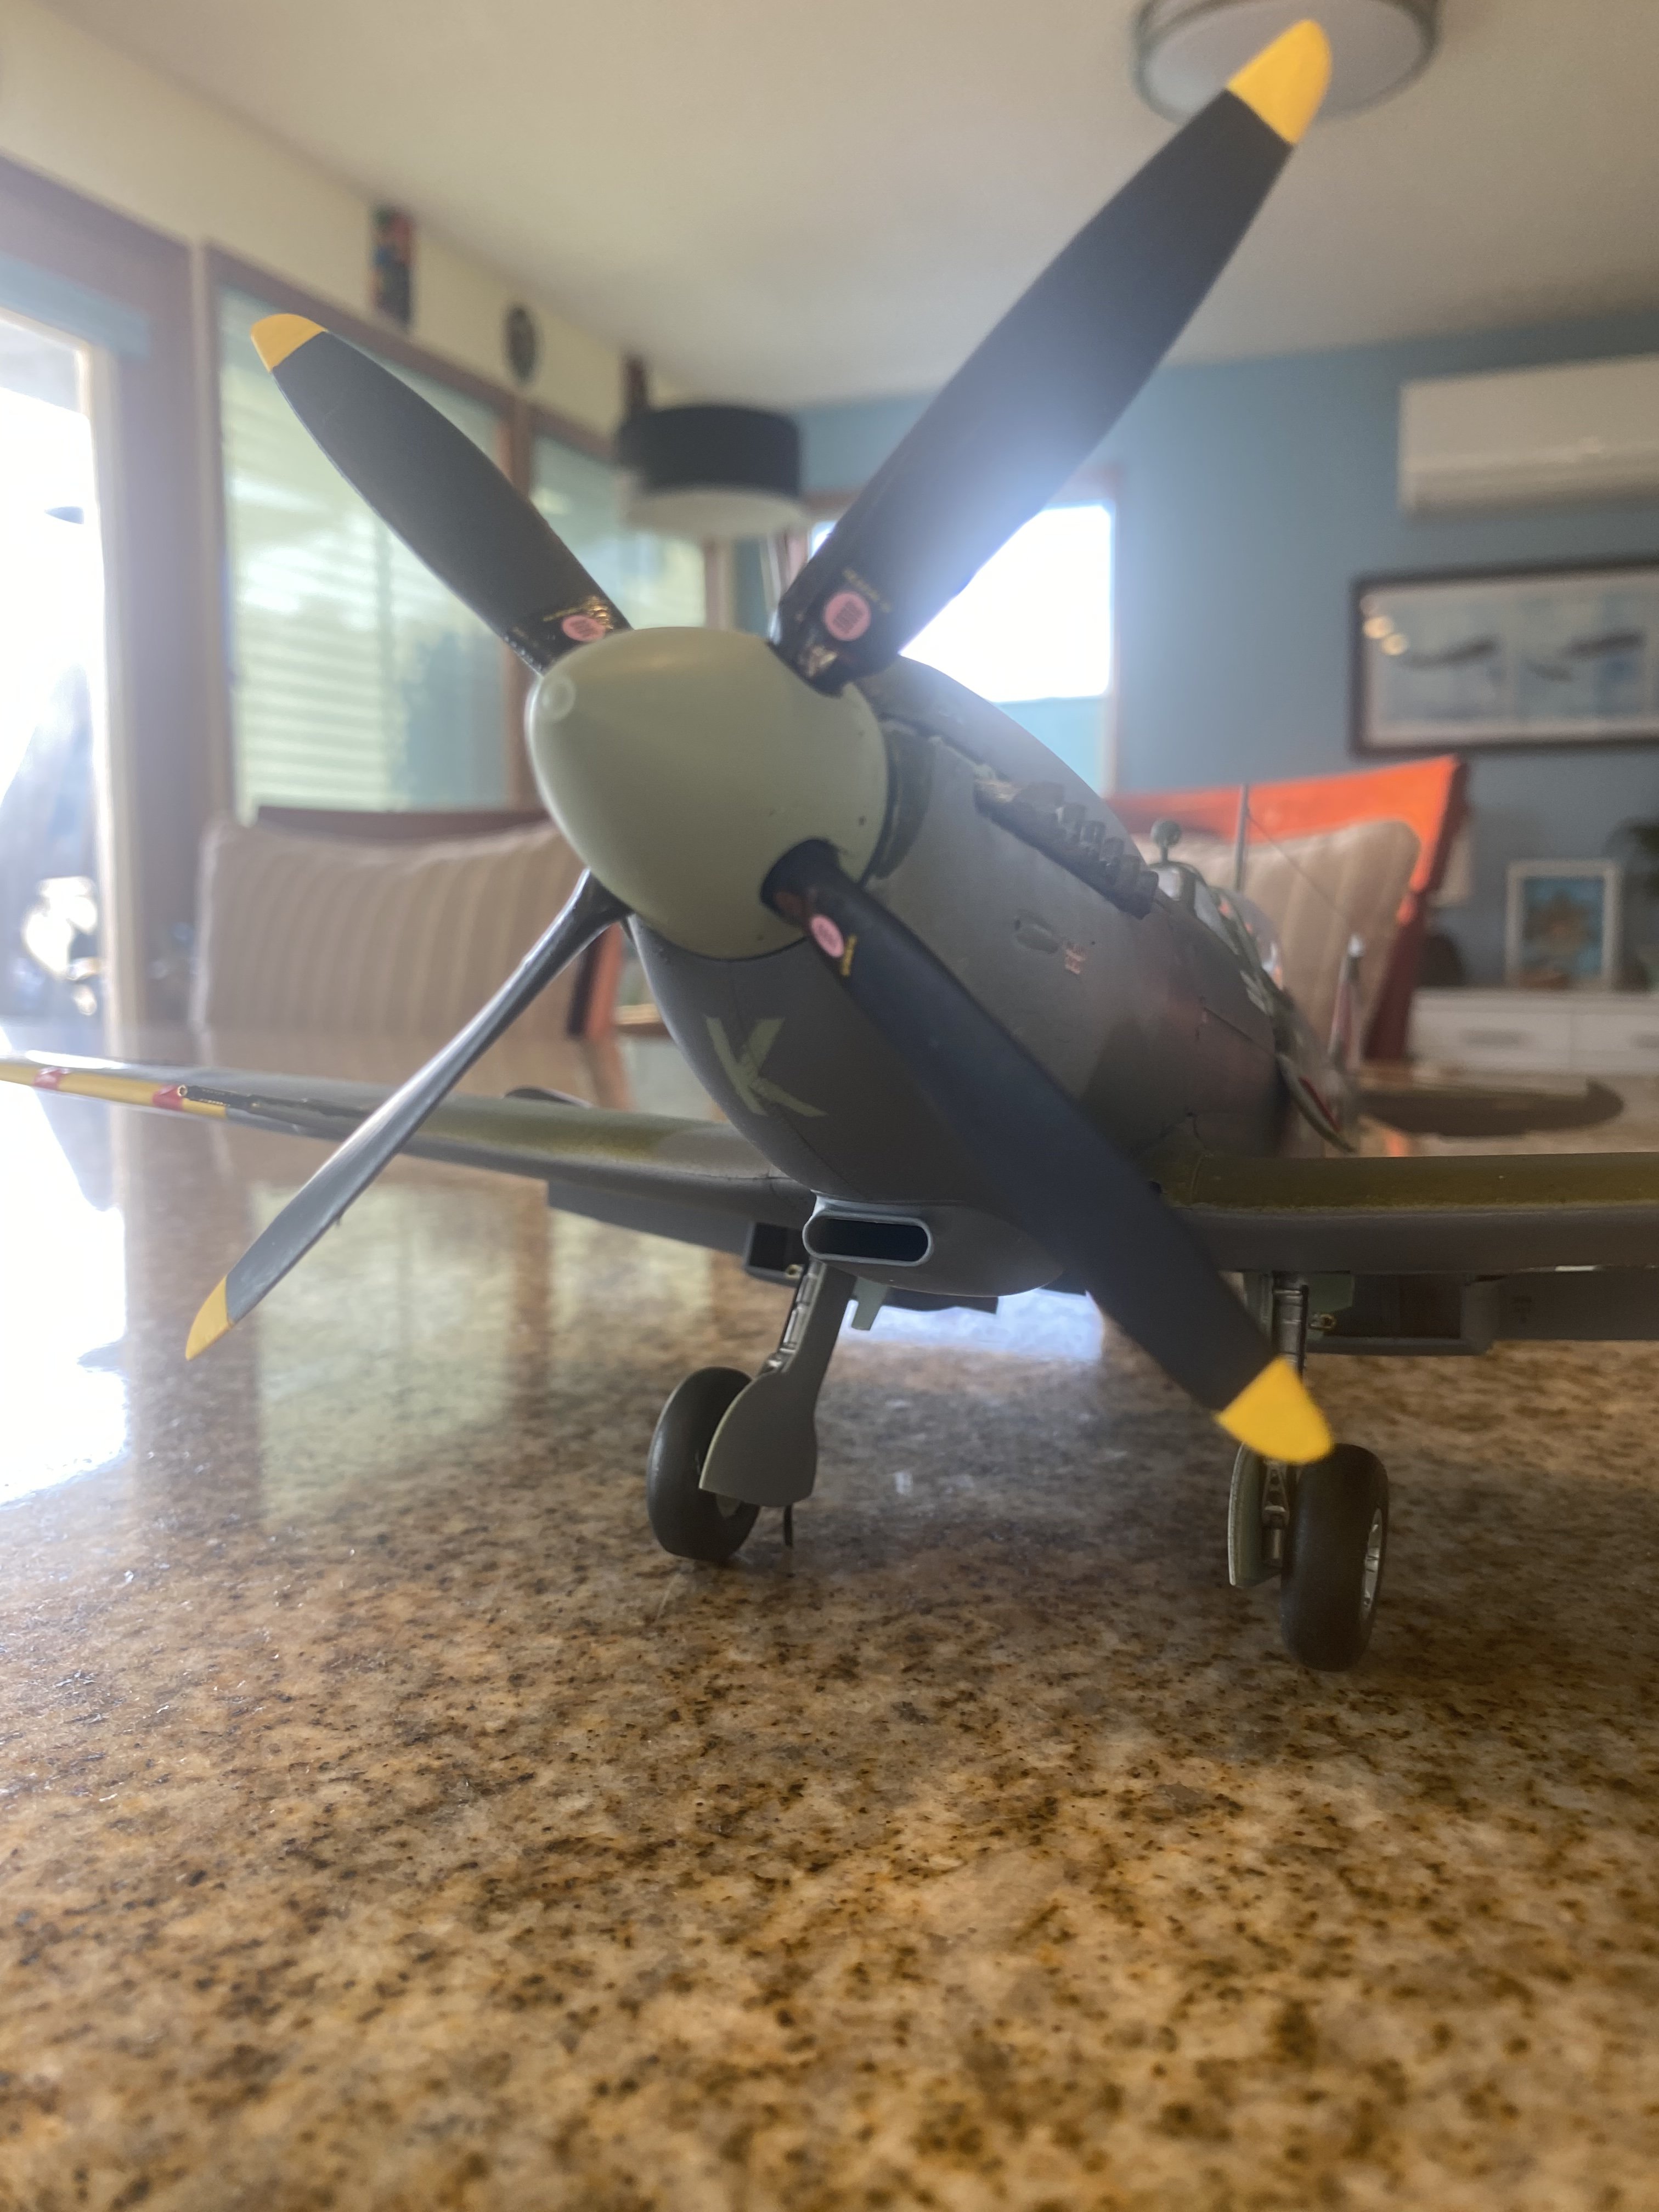
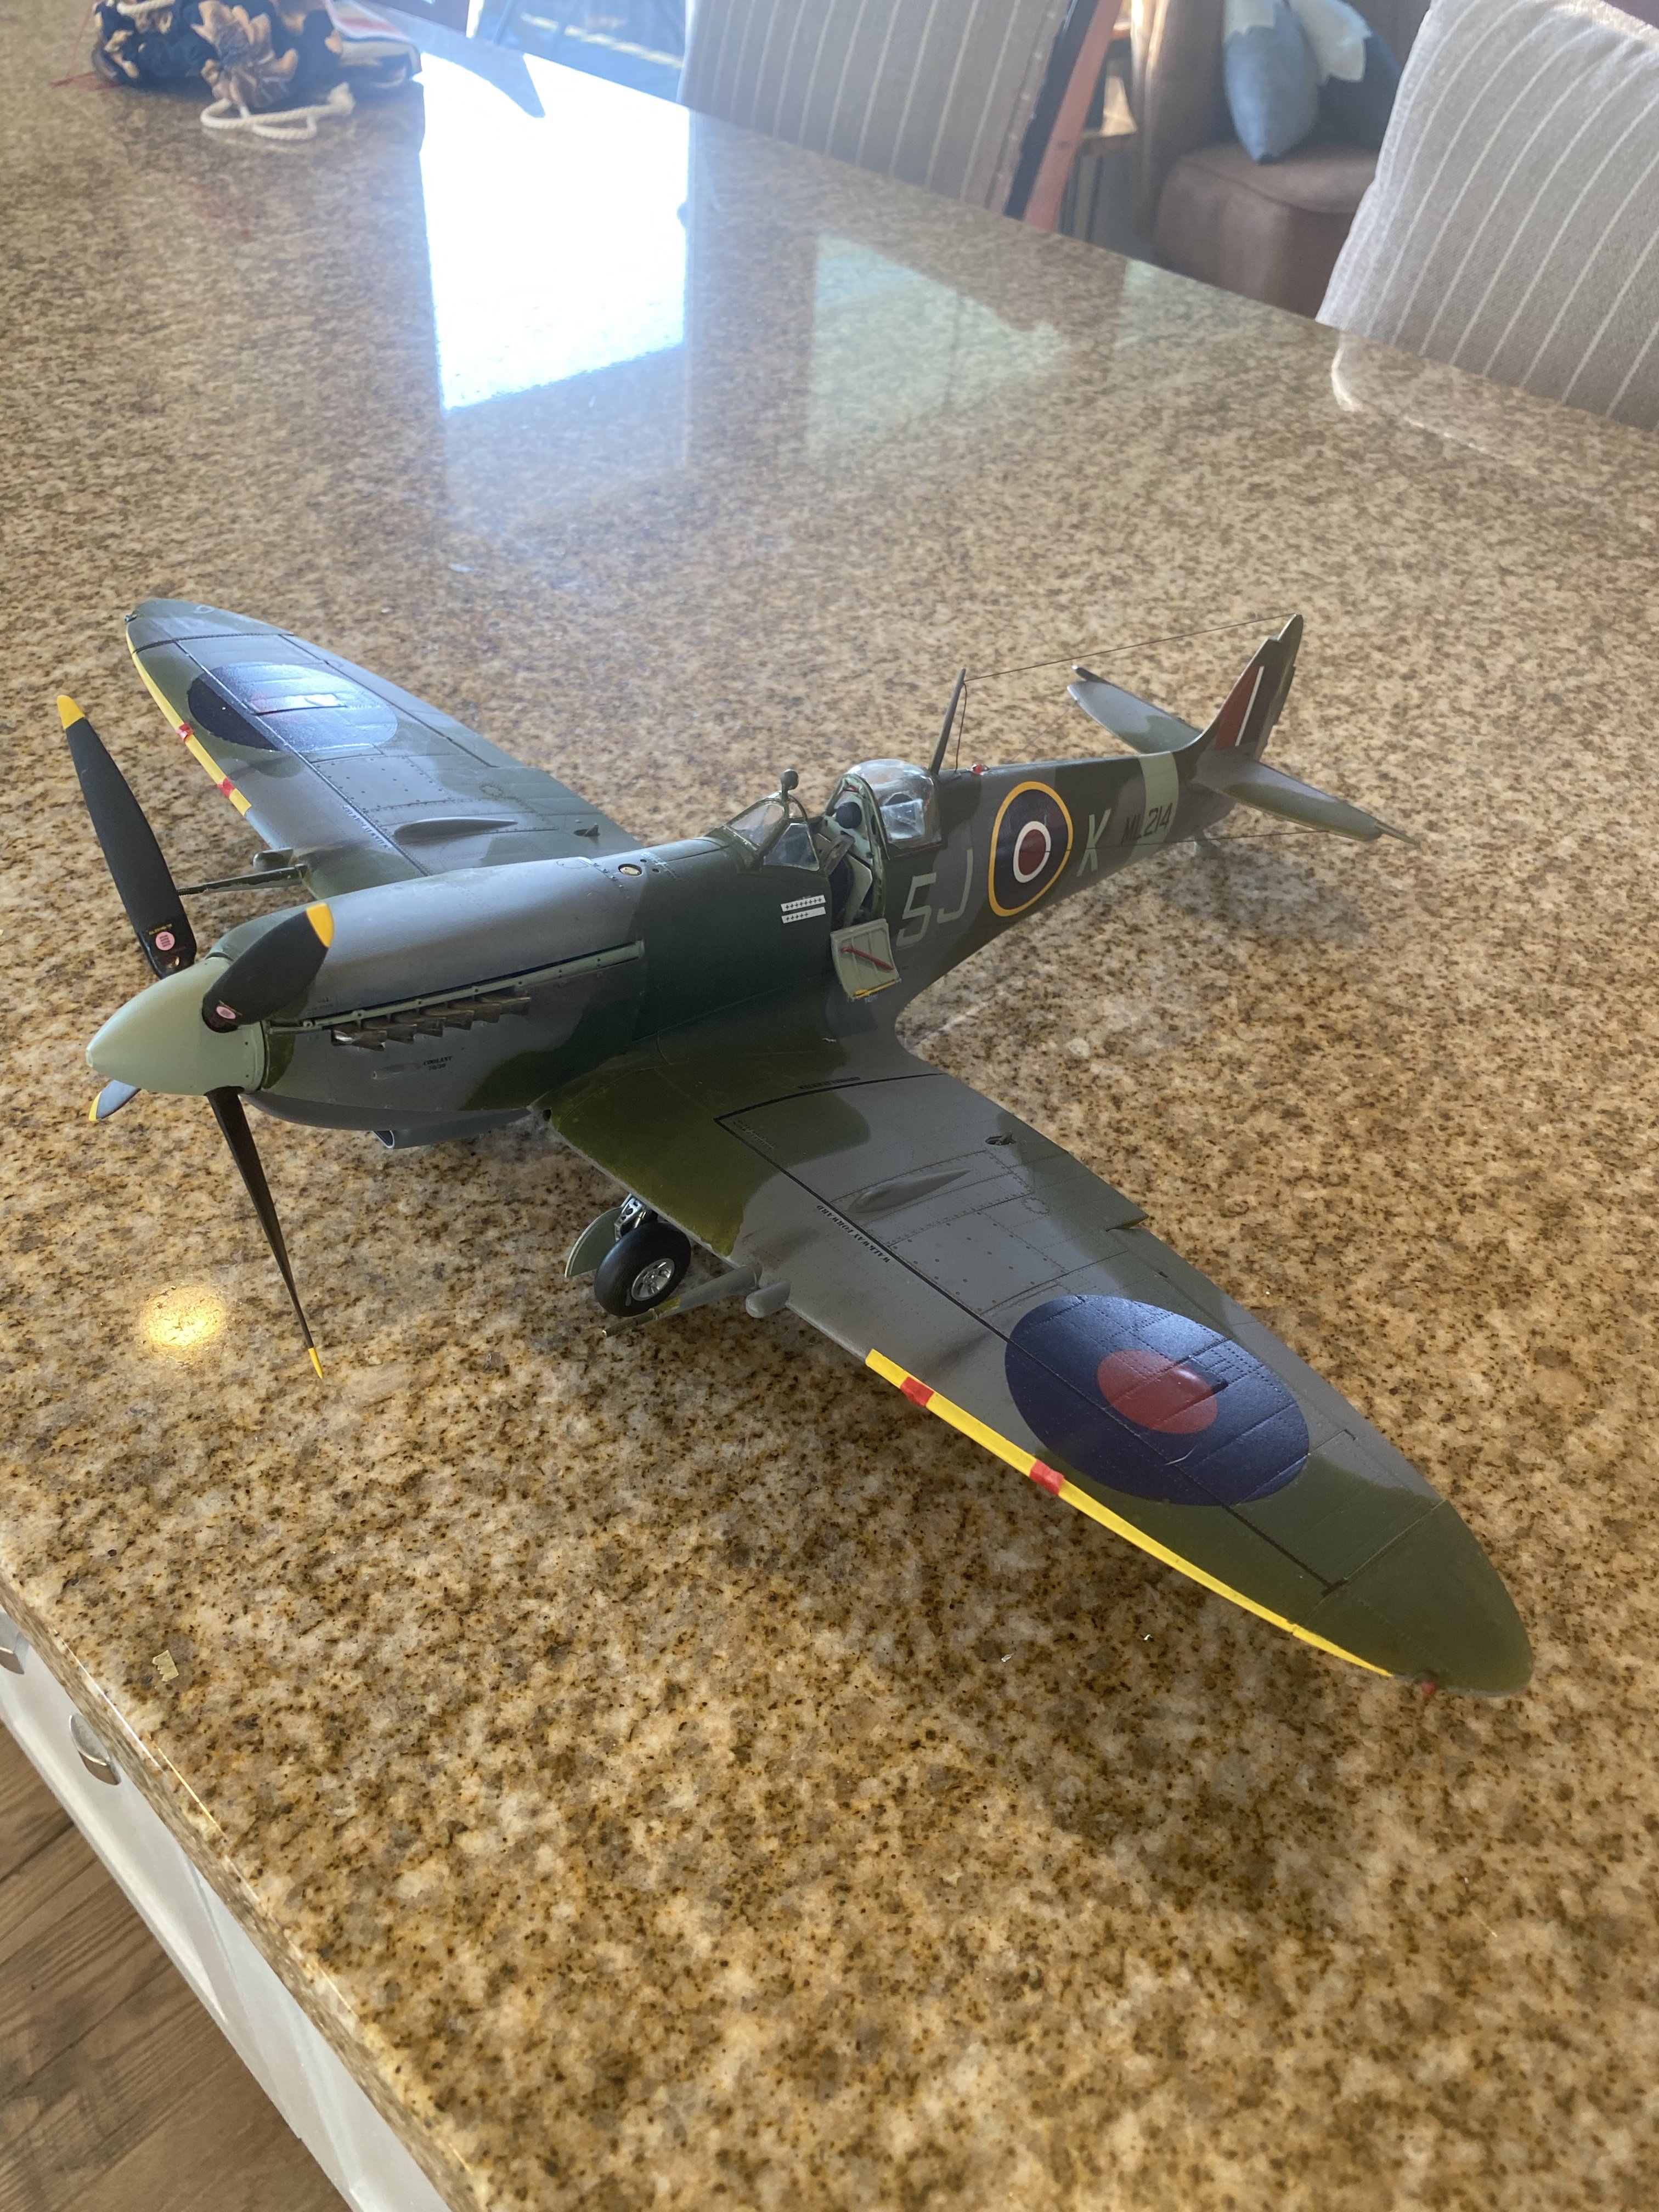
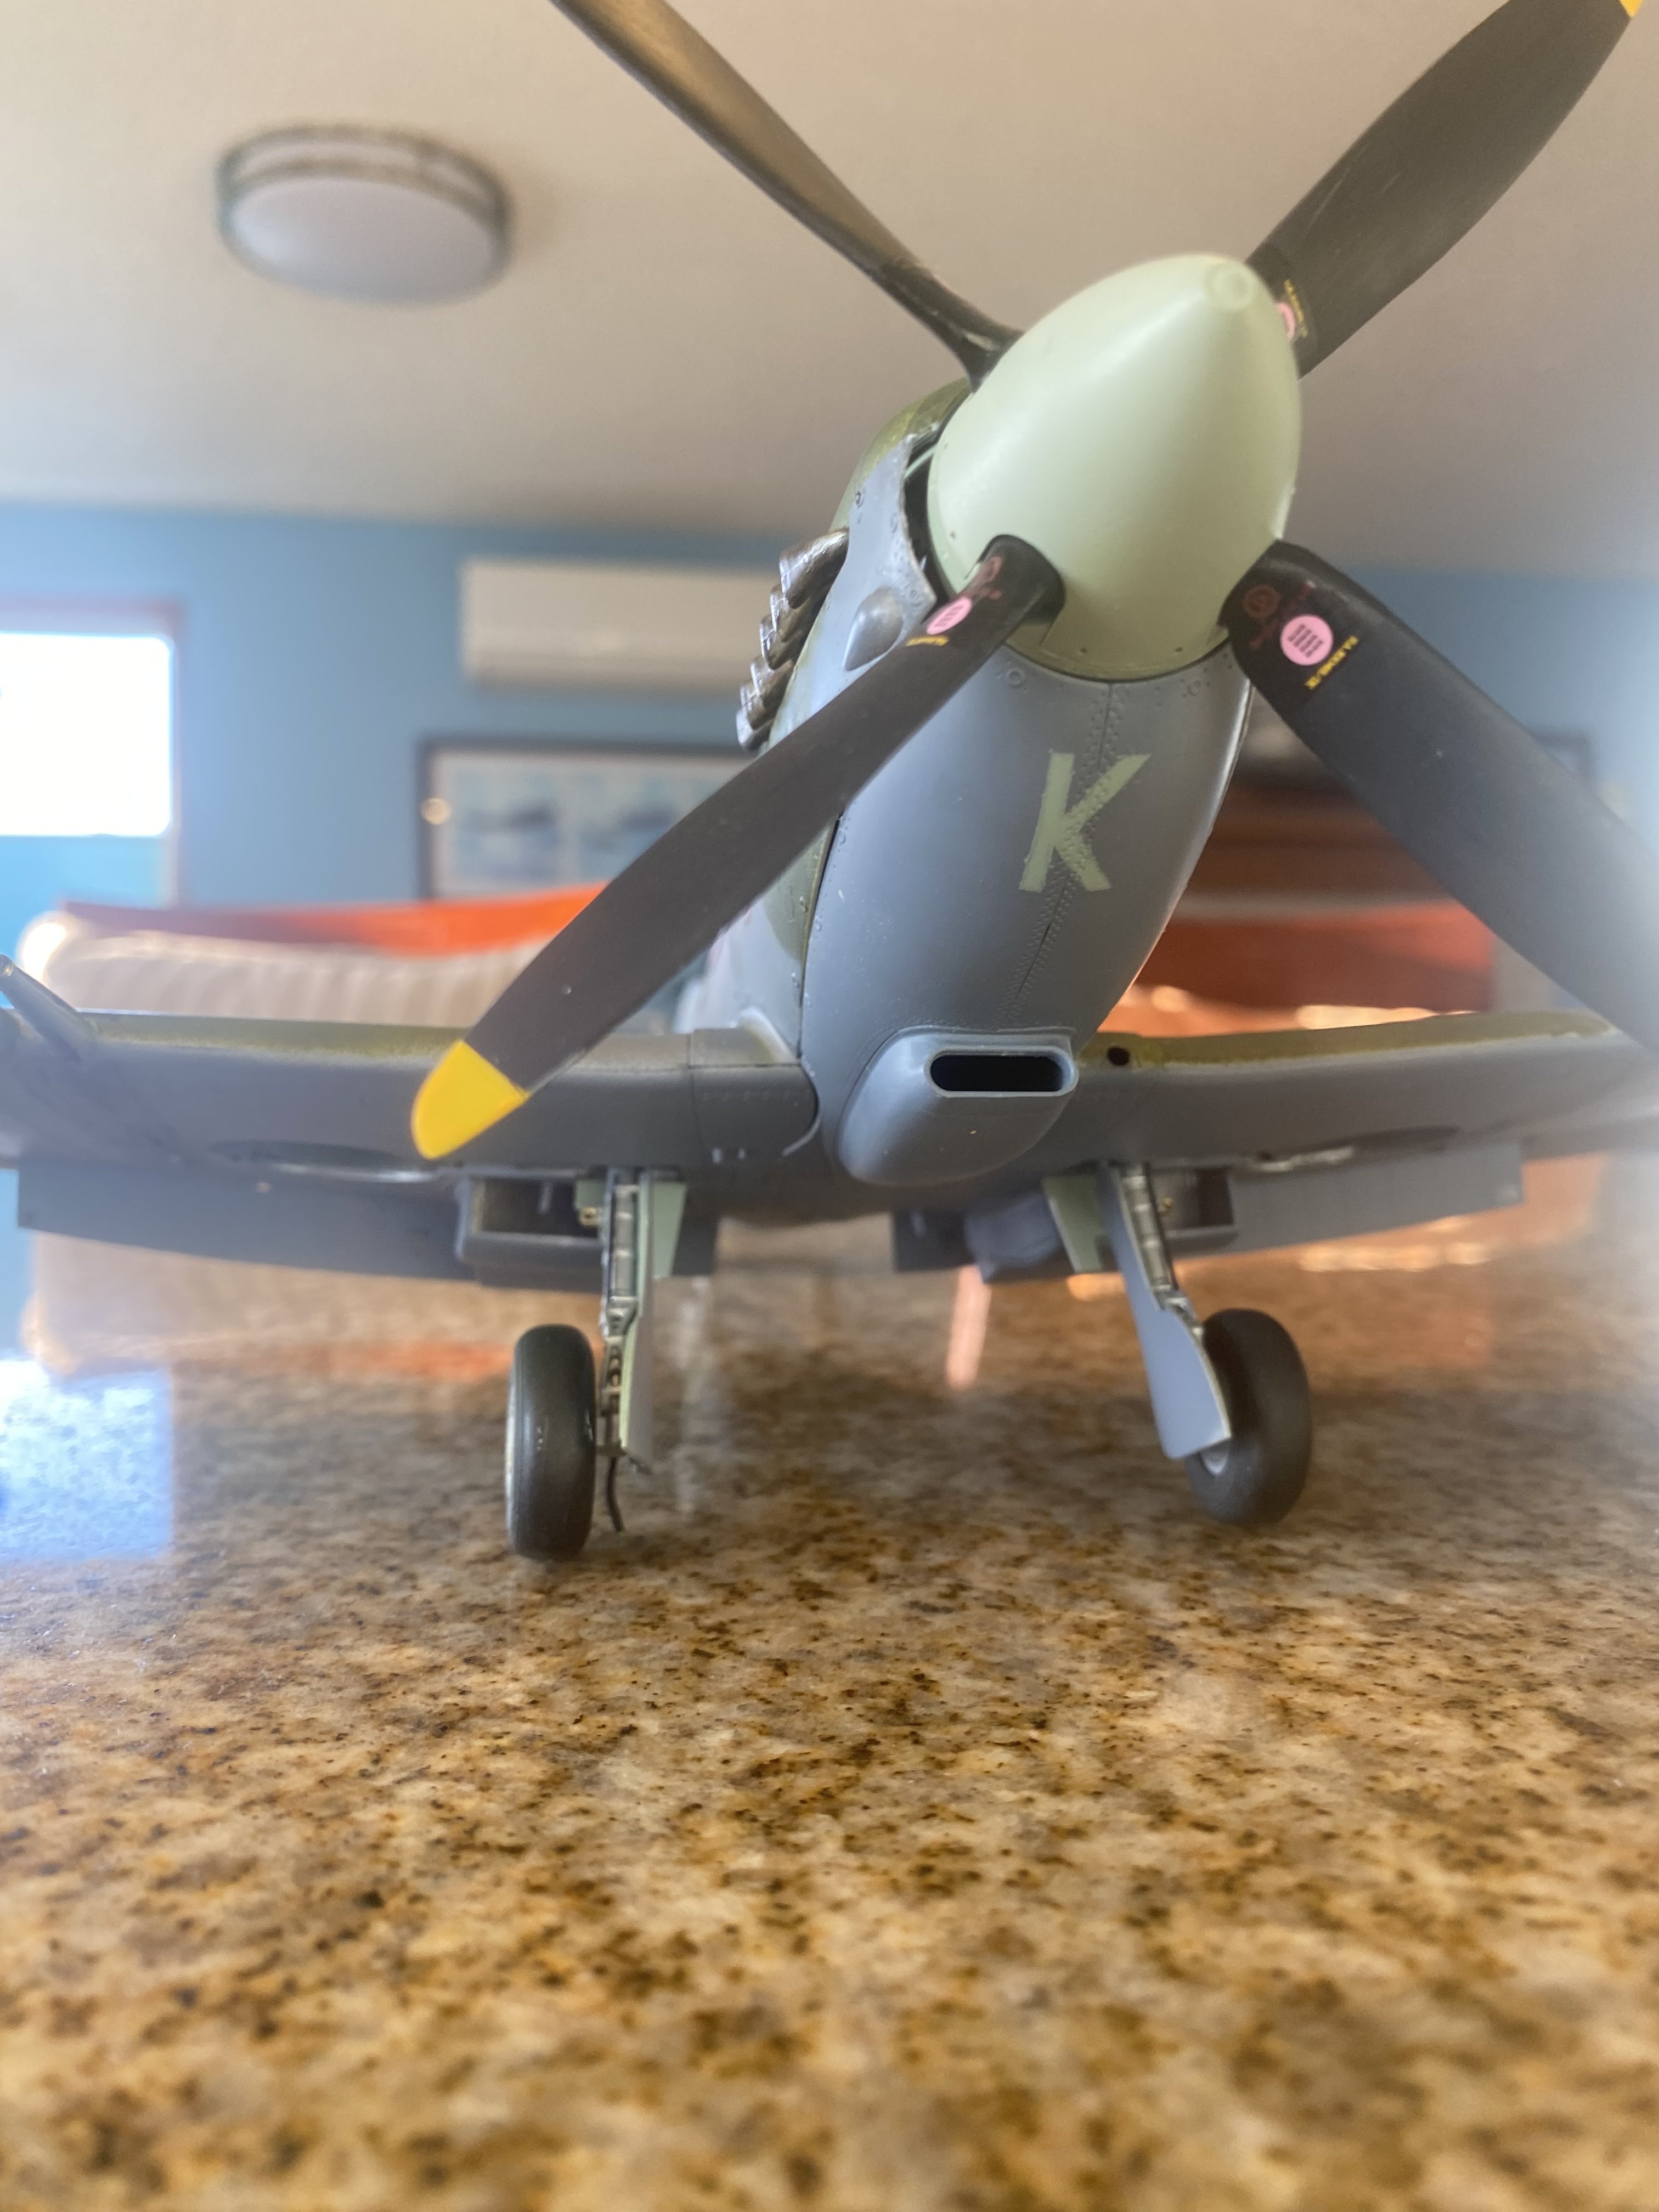
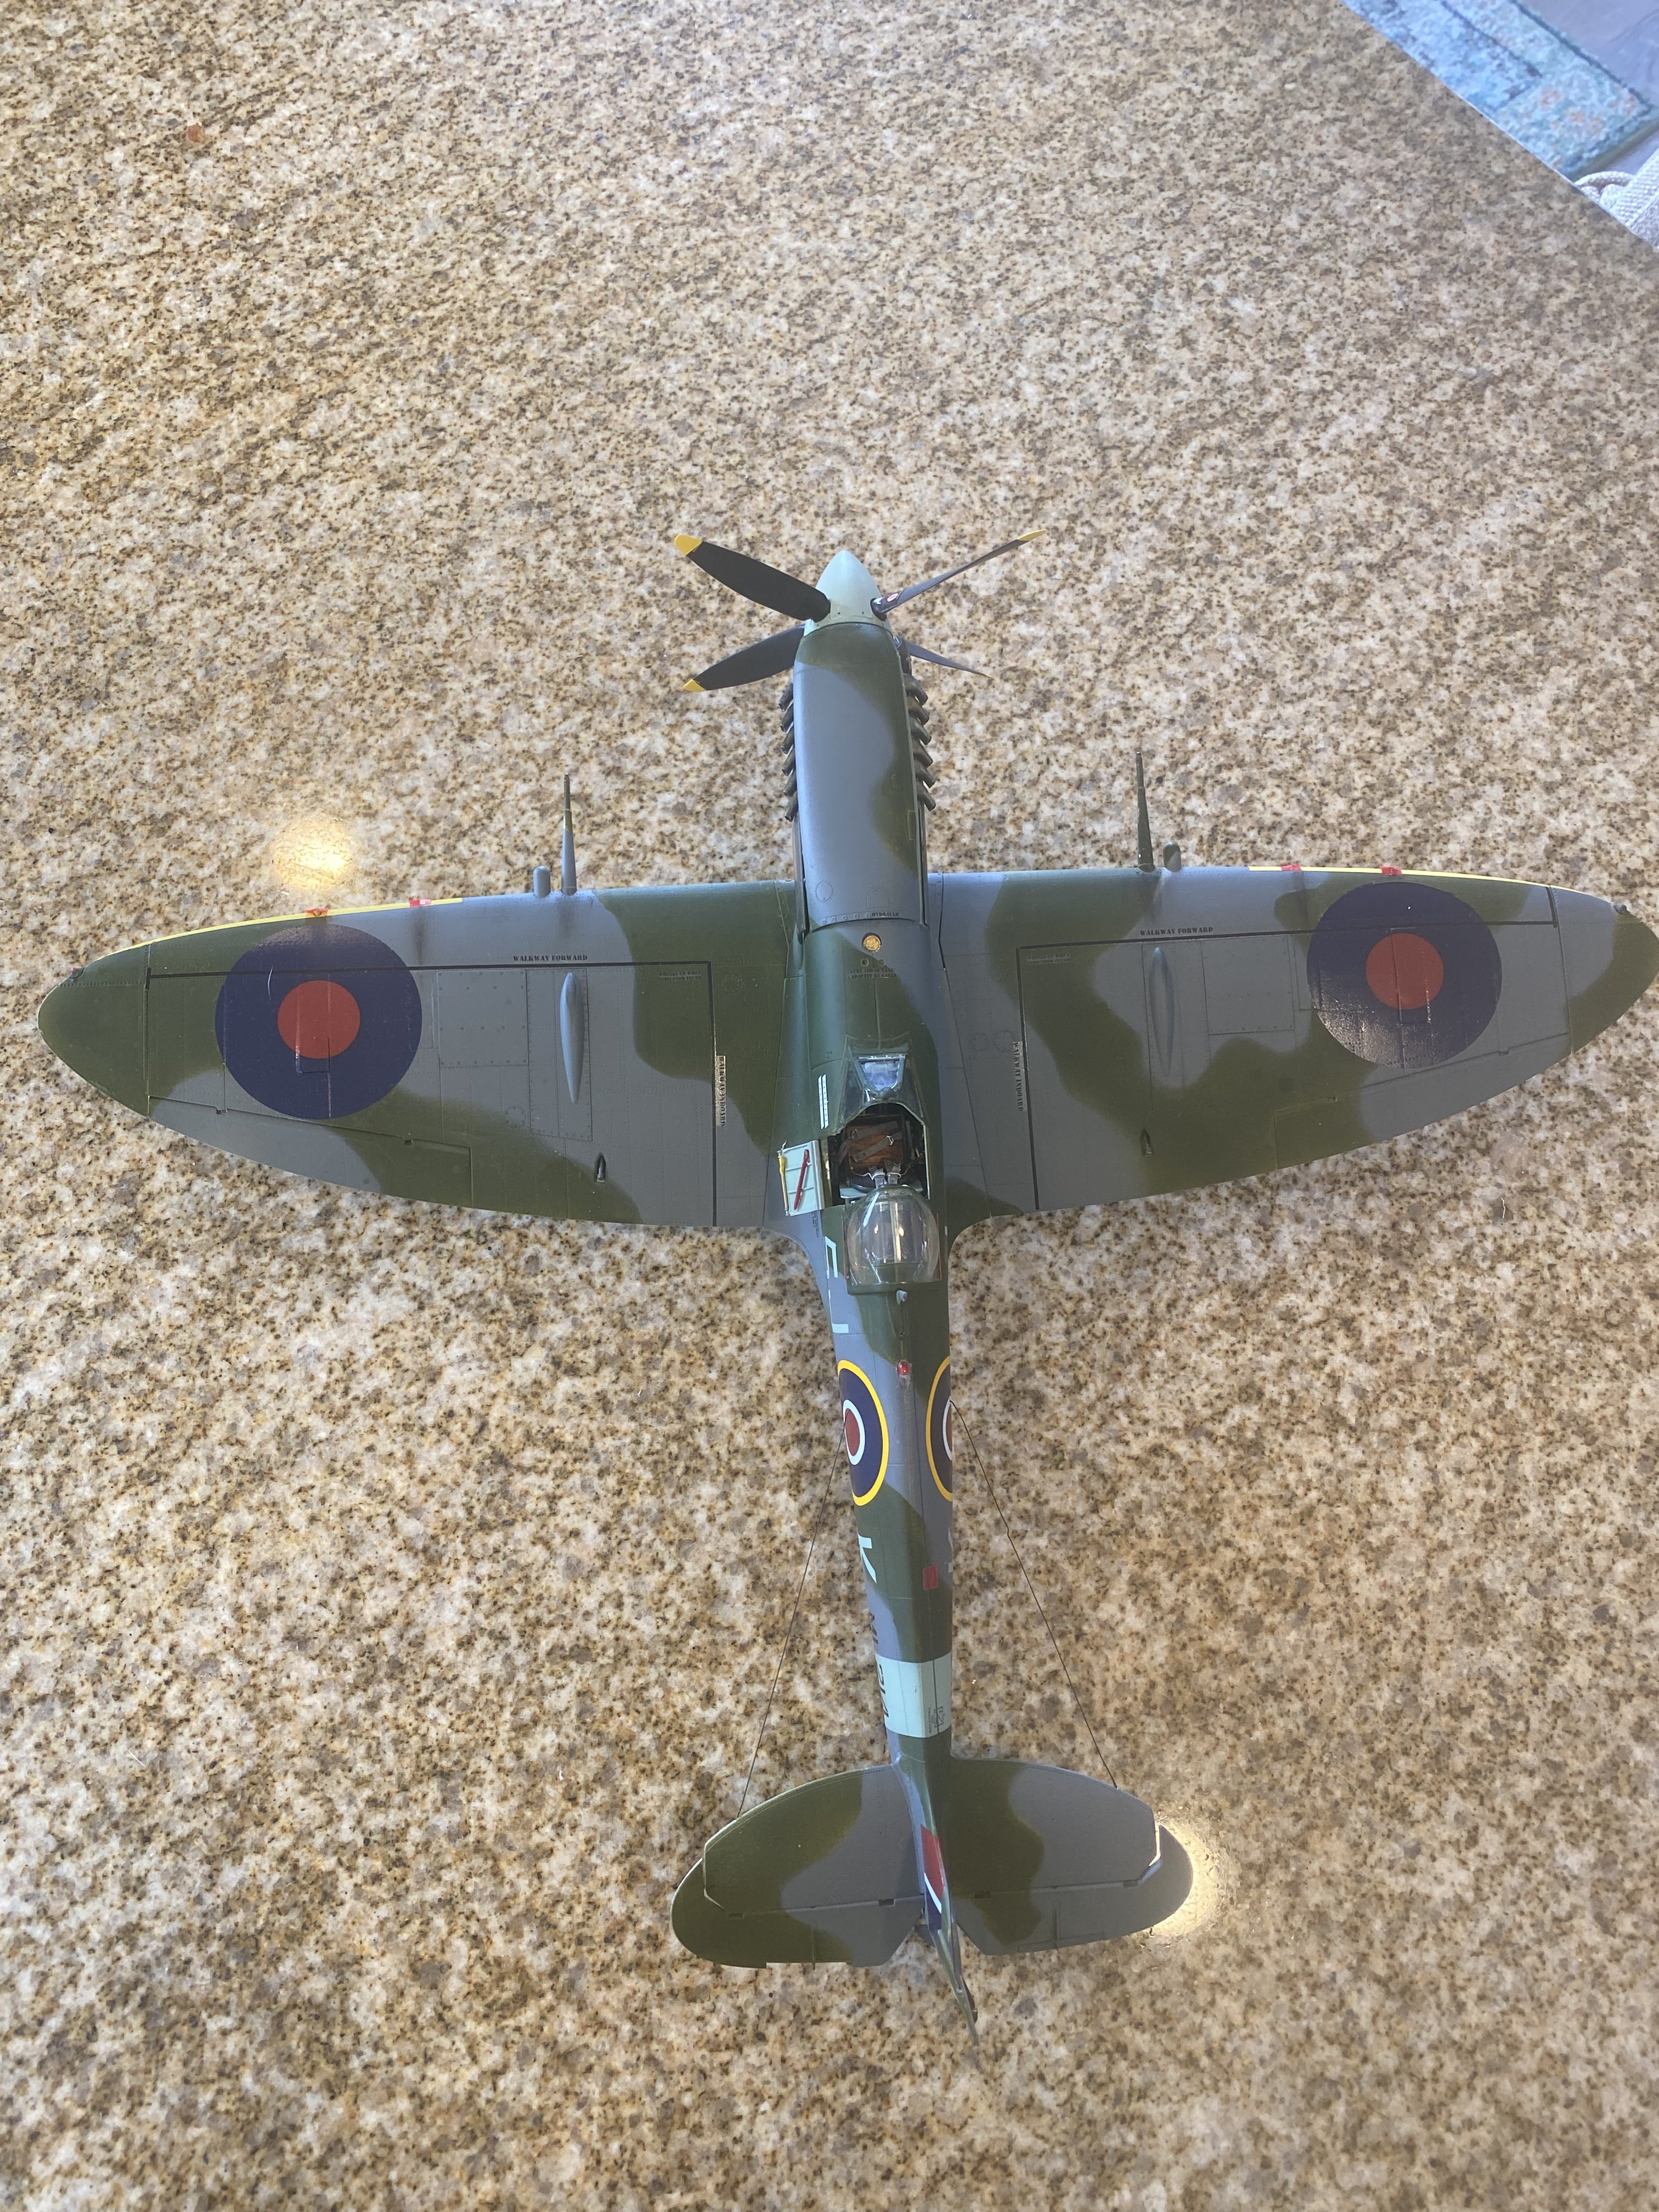
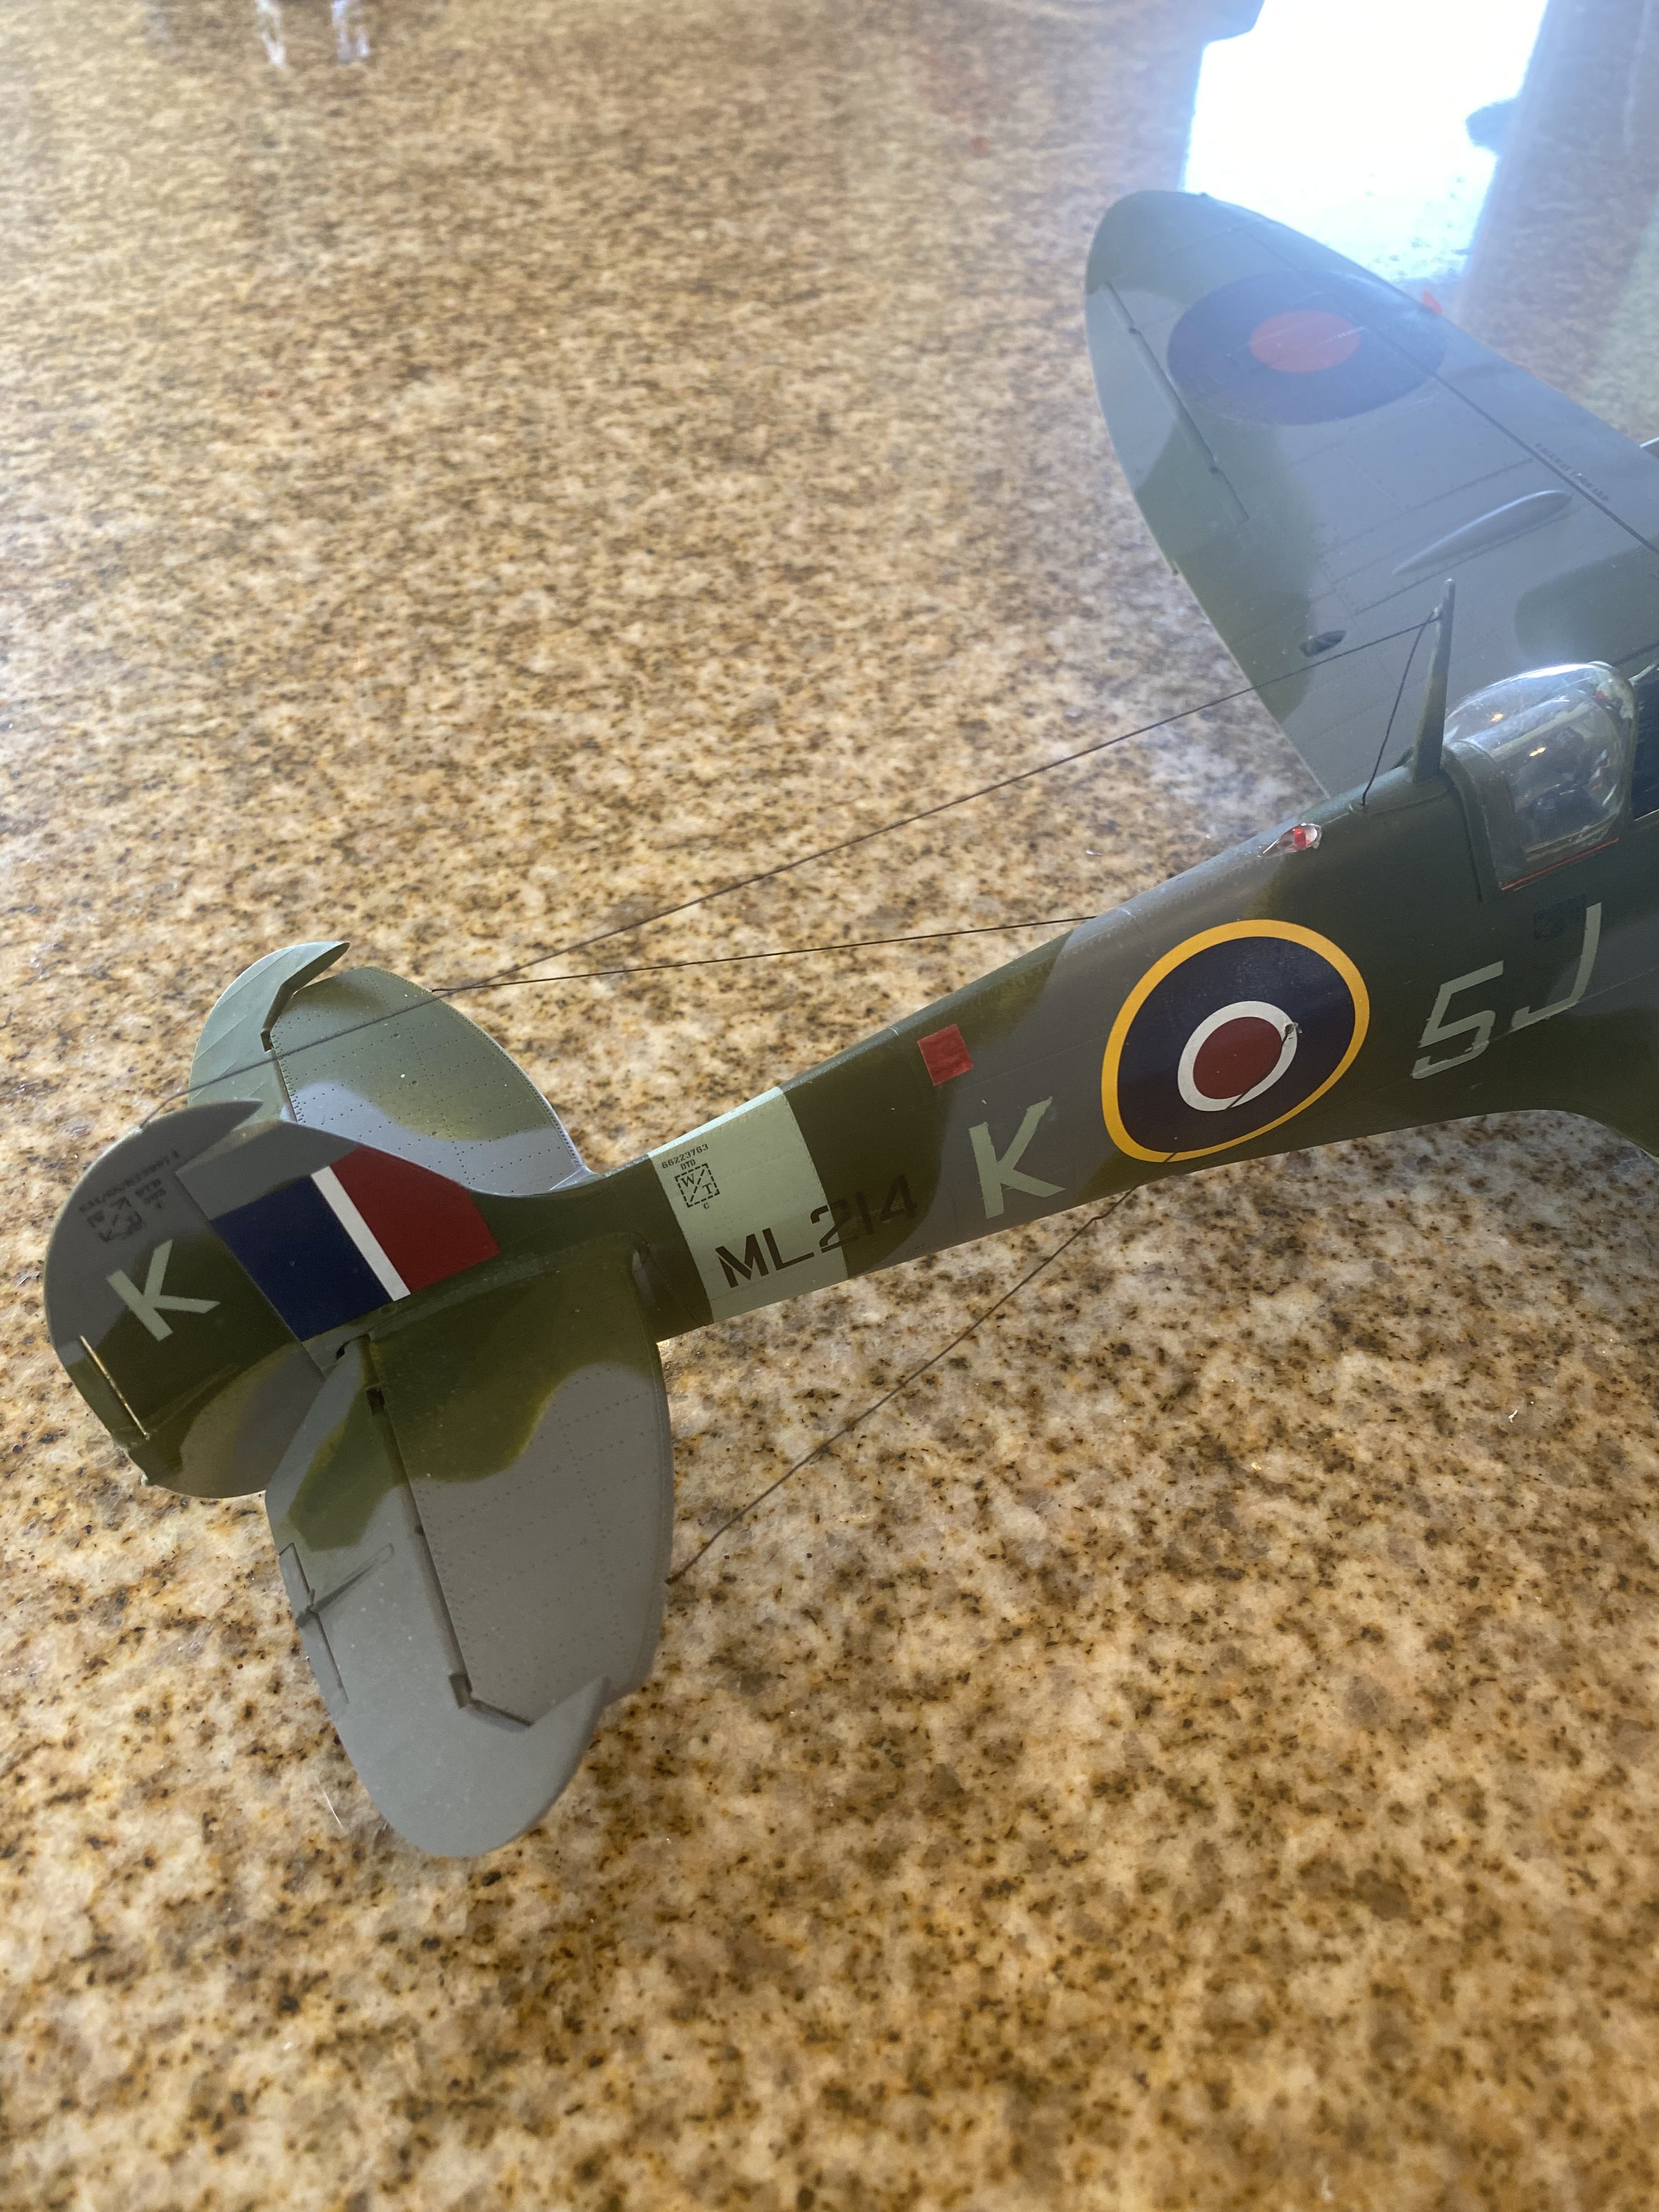
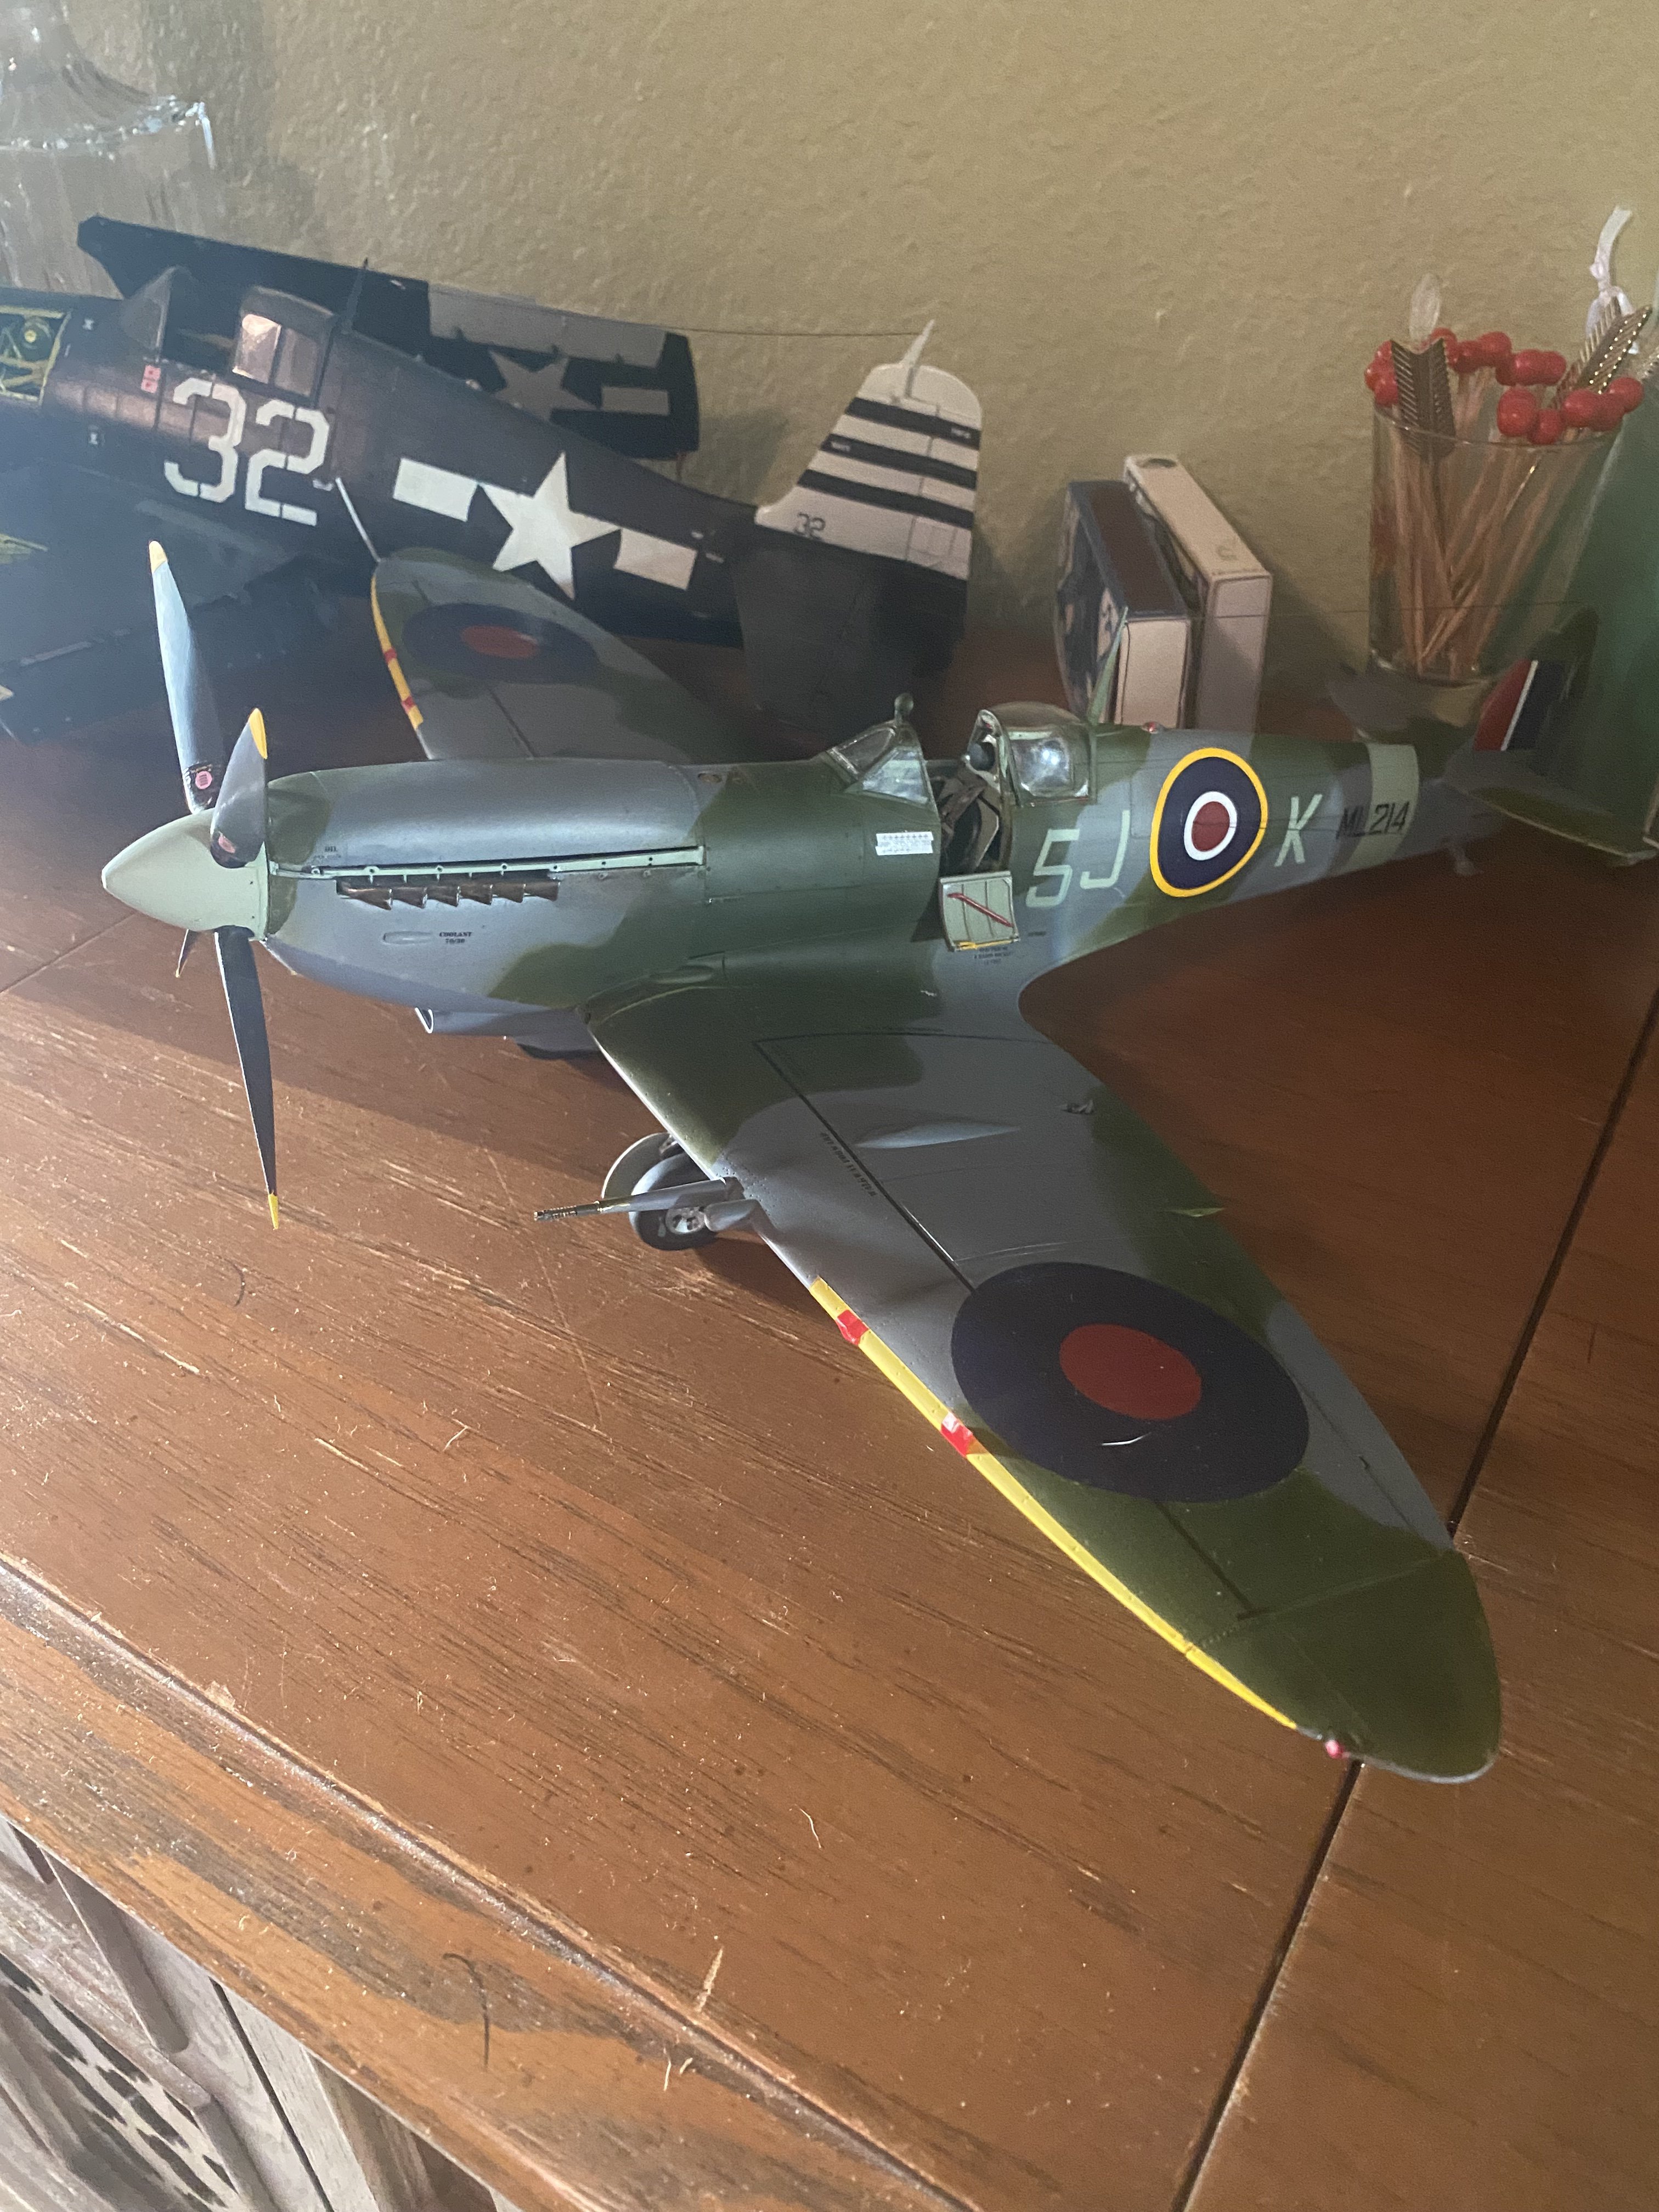
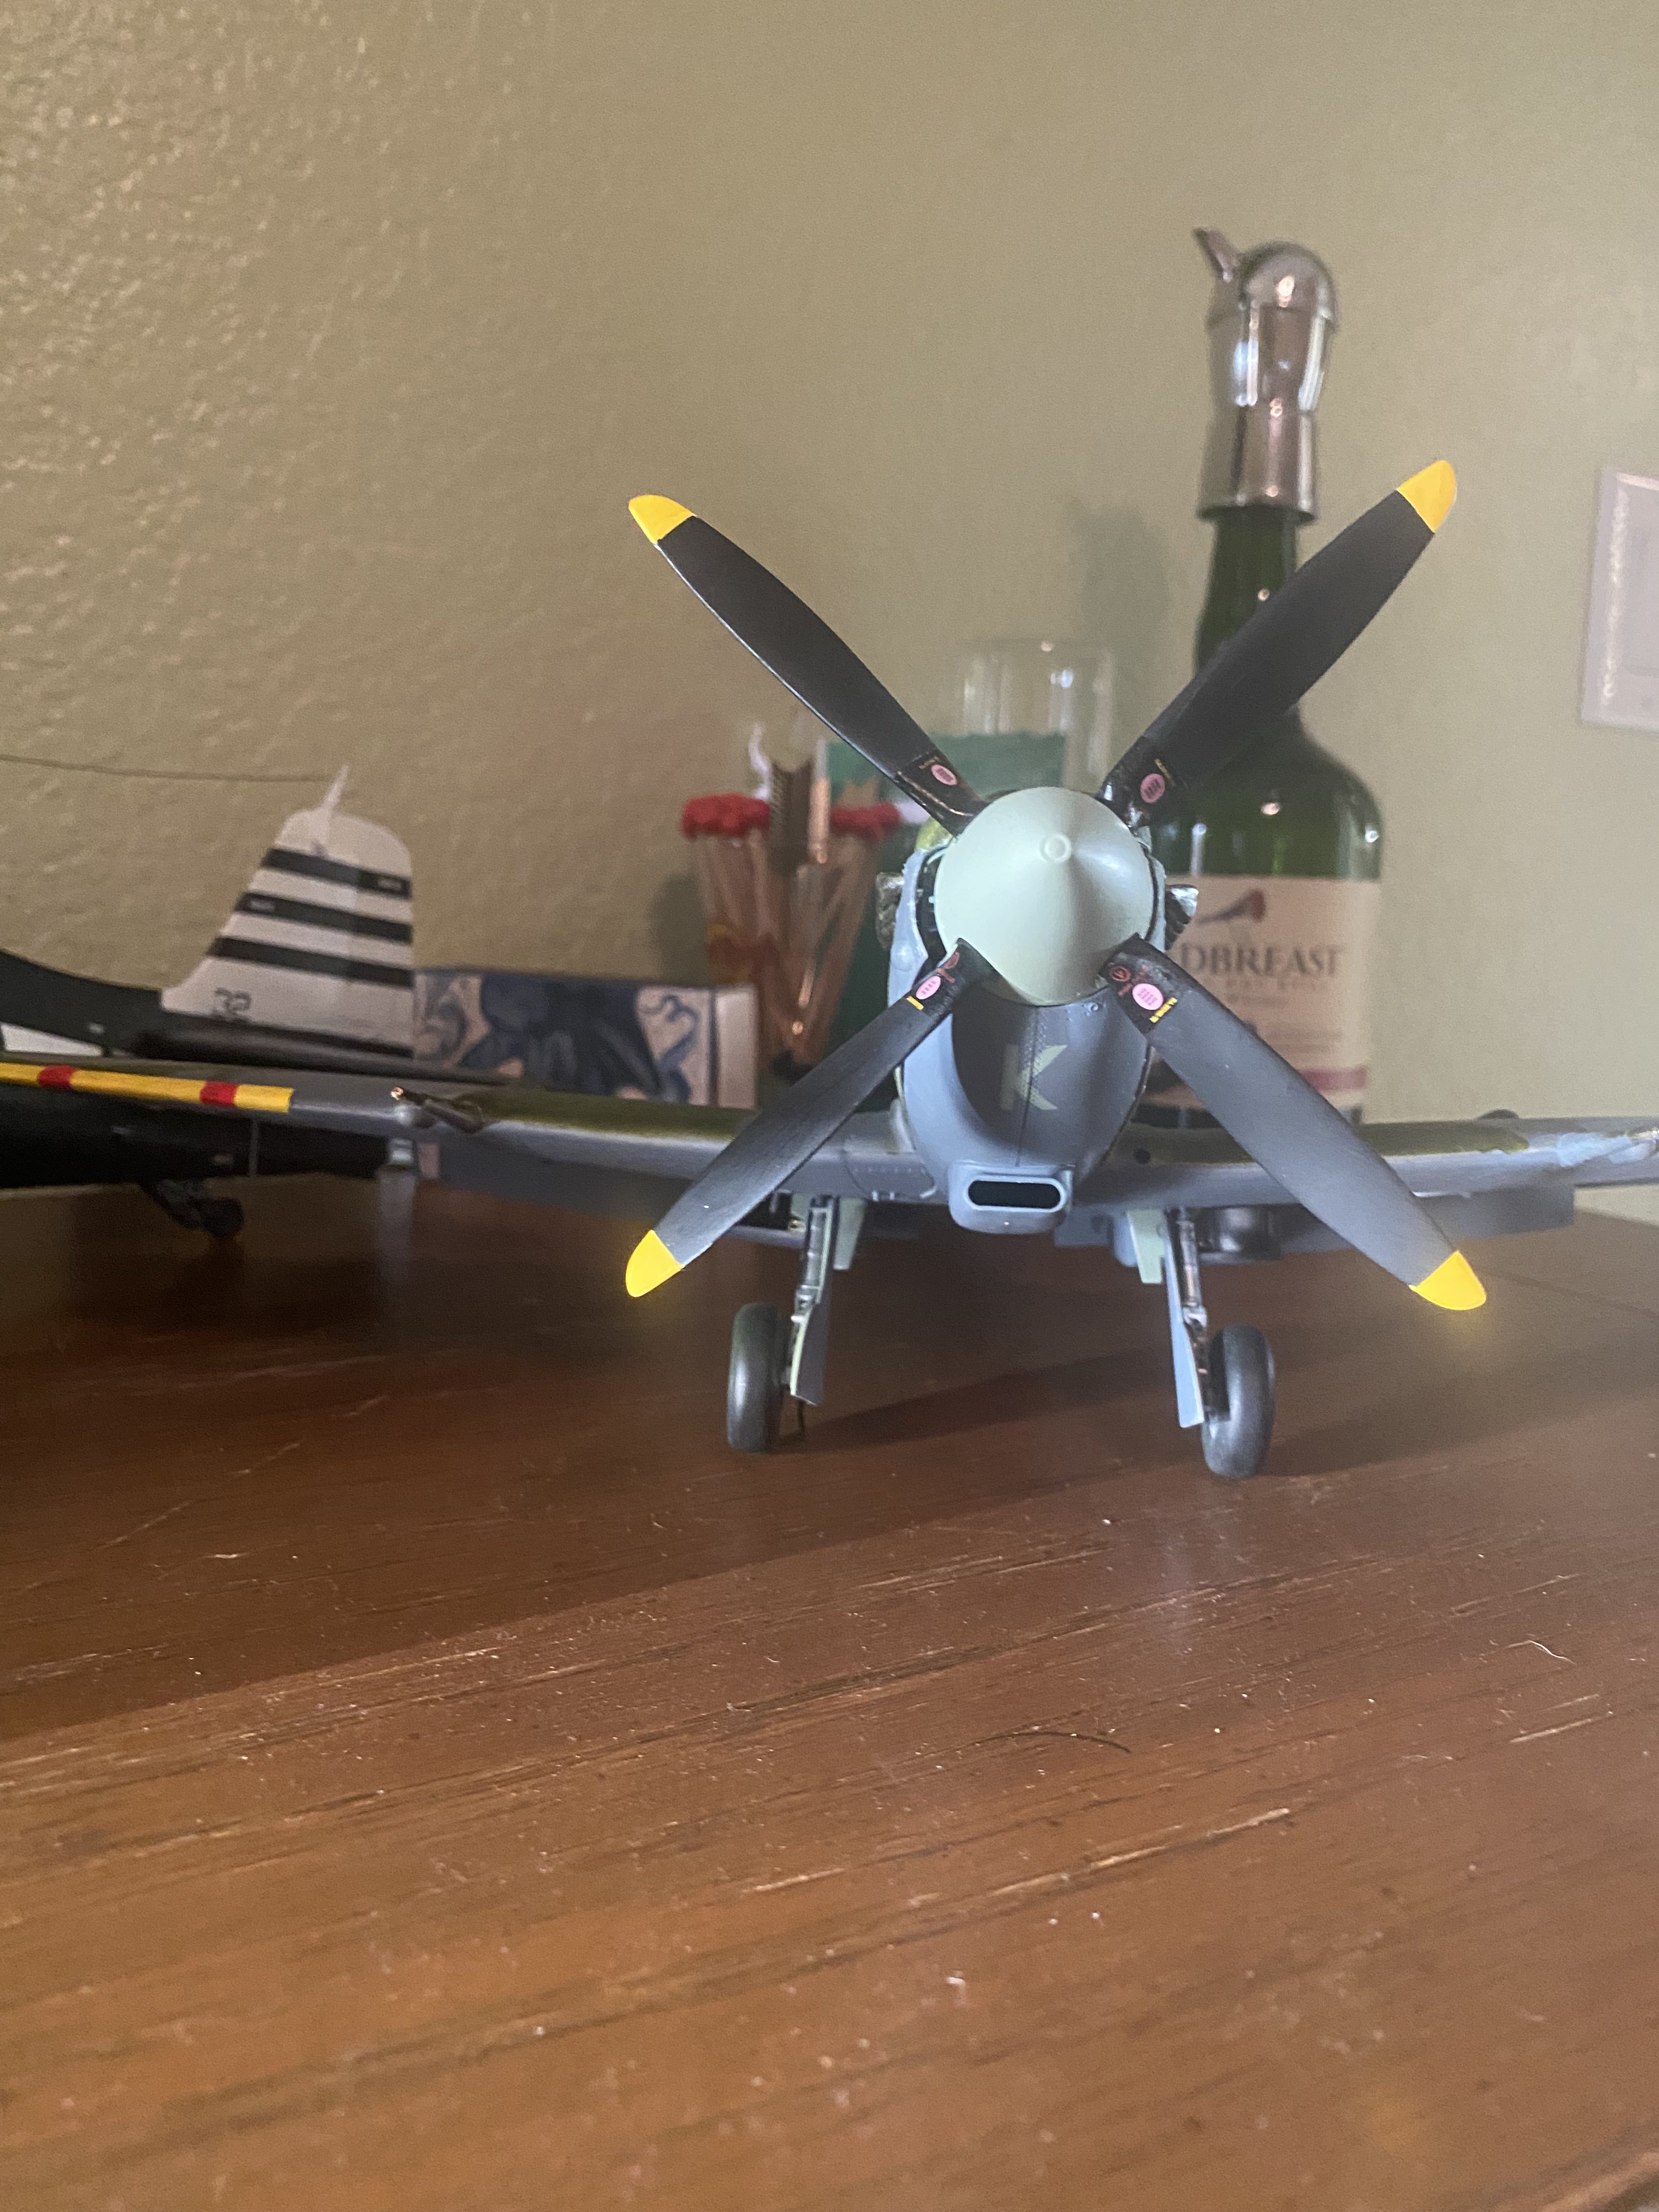
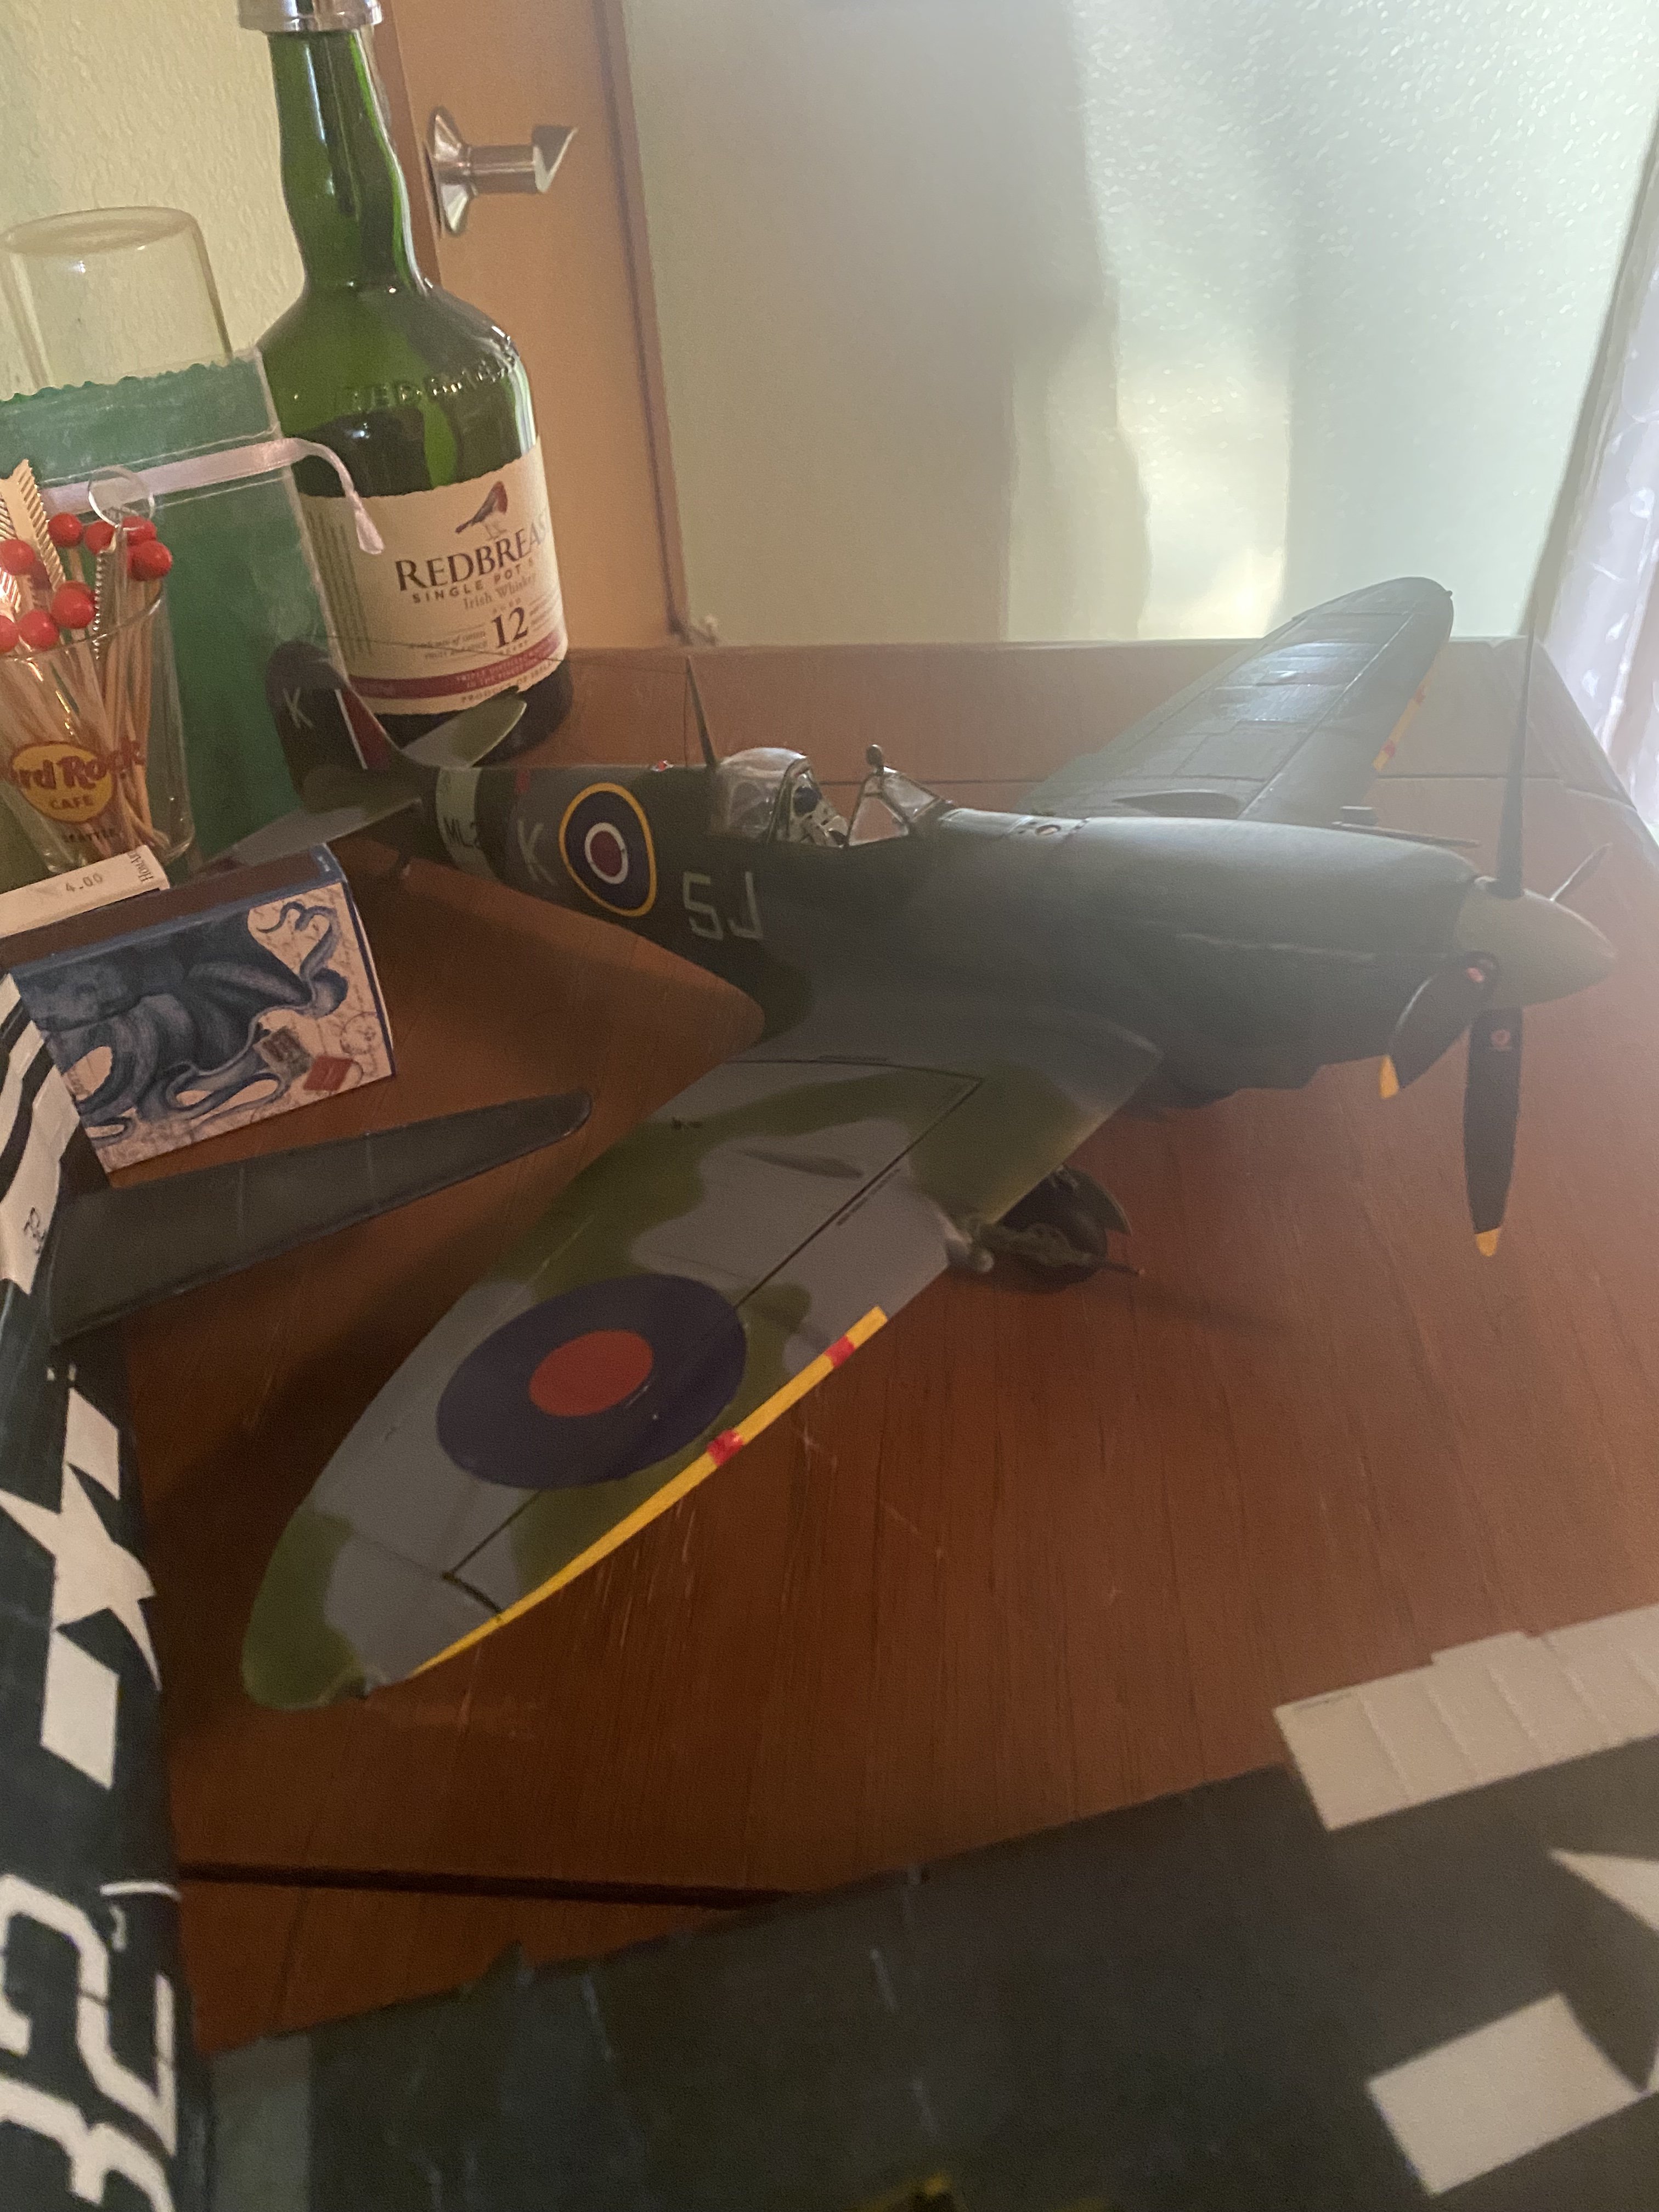
Mostly finished my airfix 1/24 Spitfire ix. I used Vallejo air series paints. Metal master cannon barrels. Surgical suture thread for the antenna and IFF wires. HGW seat harnesses. Some copper and steel wire and plastic casings for hoses and engine wiring. I drilled a couple 1mm holes in the engine cowling pieces and inserted strong 1mm x1mm diameter magnets in the cowlings and engine frame so they’re removable. I used the stock decals for the warning signs but sprayed the stripe and squadron lettering duck egg green. Everything else is painted with 1manarmy masks. I still need to repaint the crowbar silver though!! next up, my Airfix 1/24 Typhoon!