CANicoll
-
Posts
1,928 -
Joined
-
Last visited
Content Type
Profiles
Forums
Events
Gallery
Everything posted by CANicoll
-

Hasegawa 1/32 Bf-109 F-4-Finished
CANicoll replied to KevinM's topic in The Sandbox Ready for Inspection.
Perfect, John! Nice, job. -
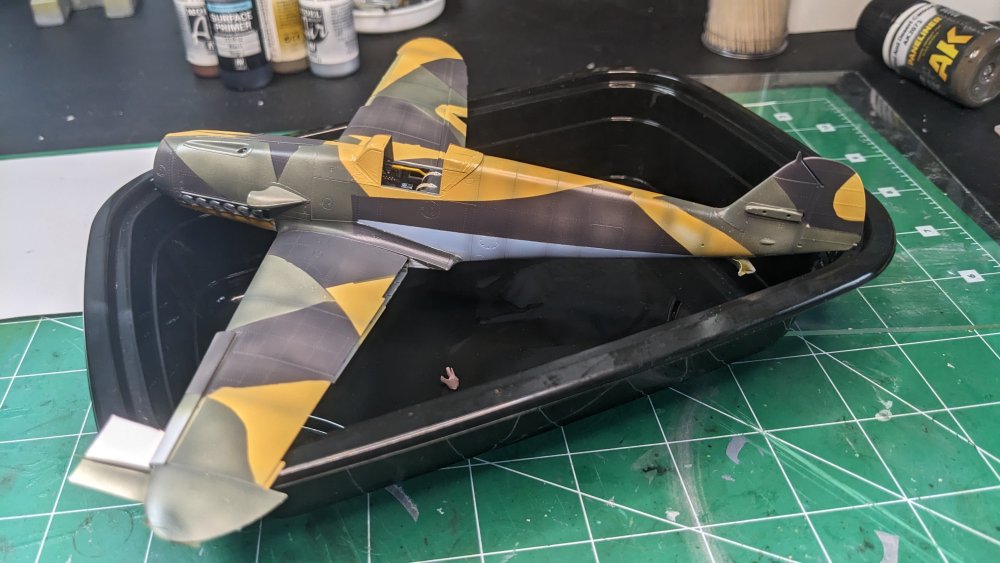
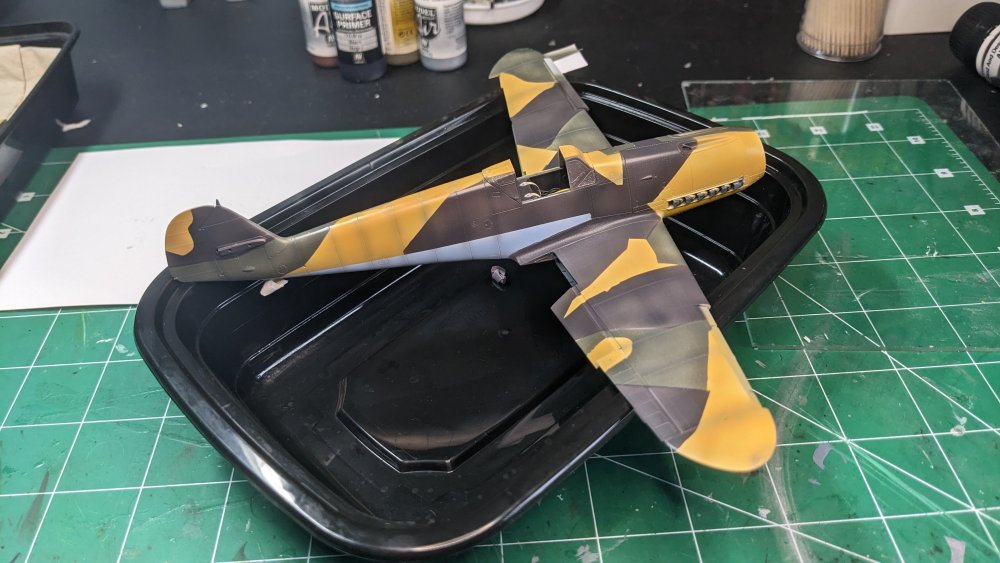
It is not exactly a faithful copy of the Luftwaffe camo scheme, but it is different. Thanks - you are right. It does kind of look like the Assembly ships camo!
-
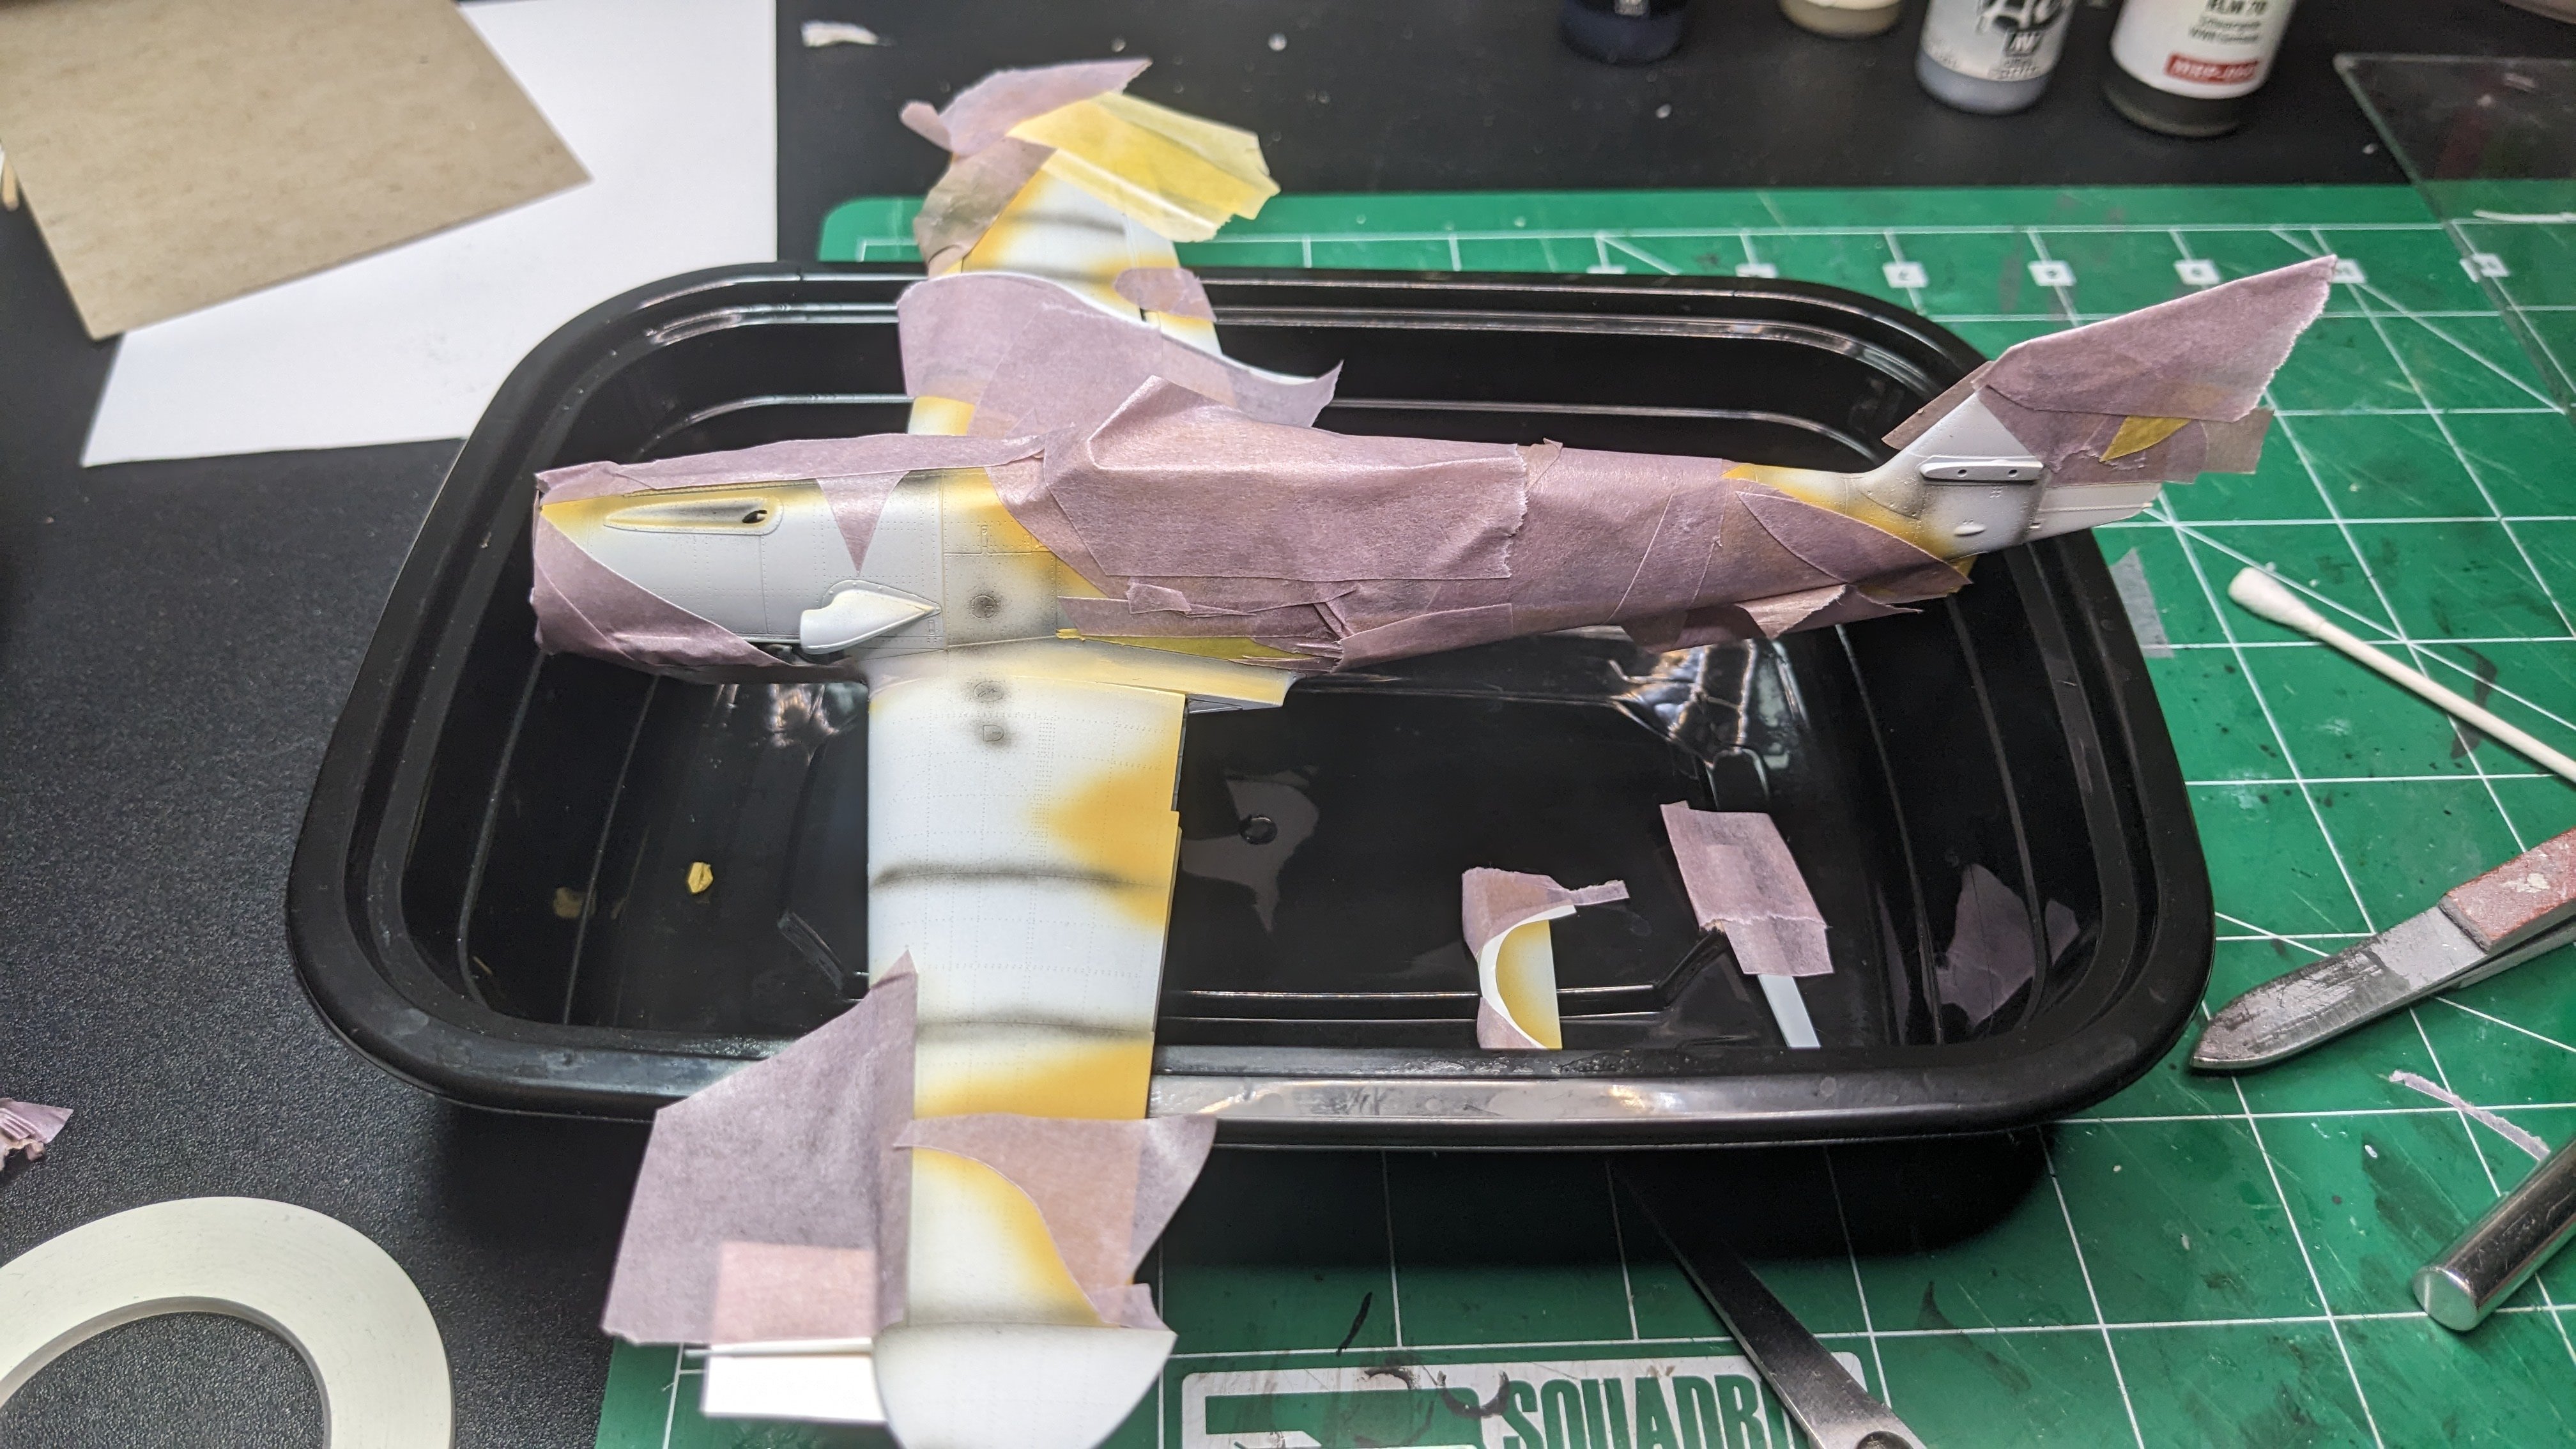
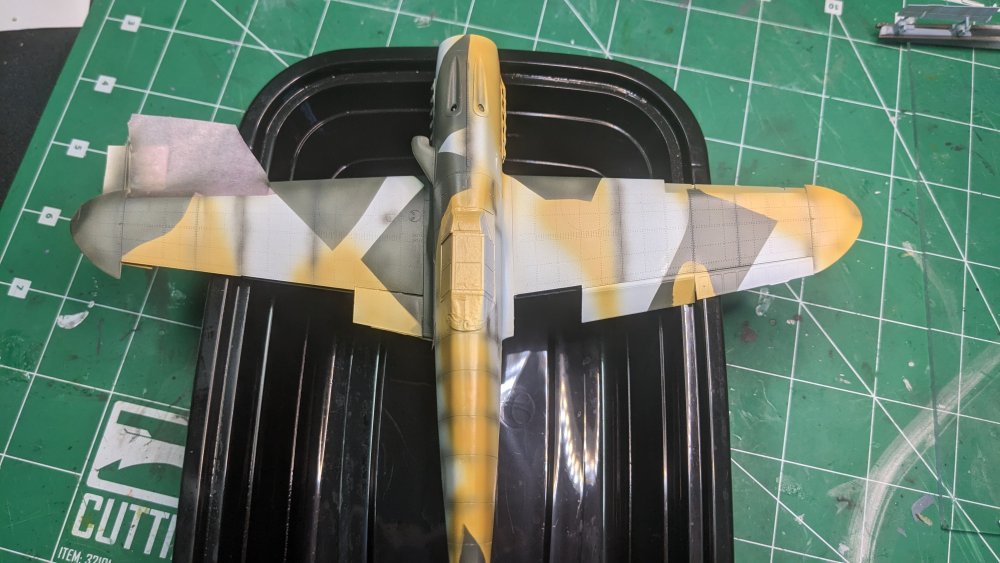
Peter and Carl, Thank you!! I have some touch up where my final masking was a little over the line, but otherwise it is an interesting look. I ended up using RLM 66 as the final color to get a stronger difference in color. Also need to paint the yellow fuselage band around the tail.


-
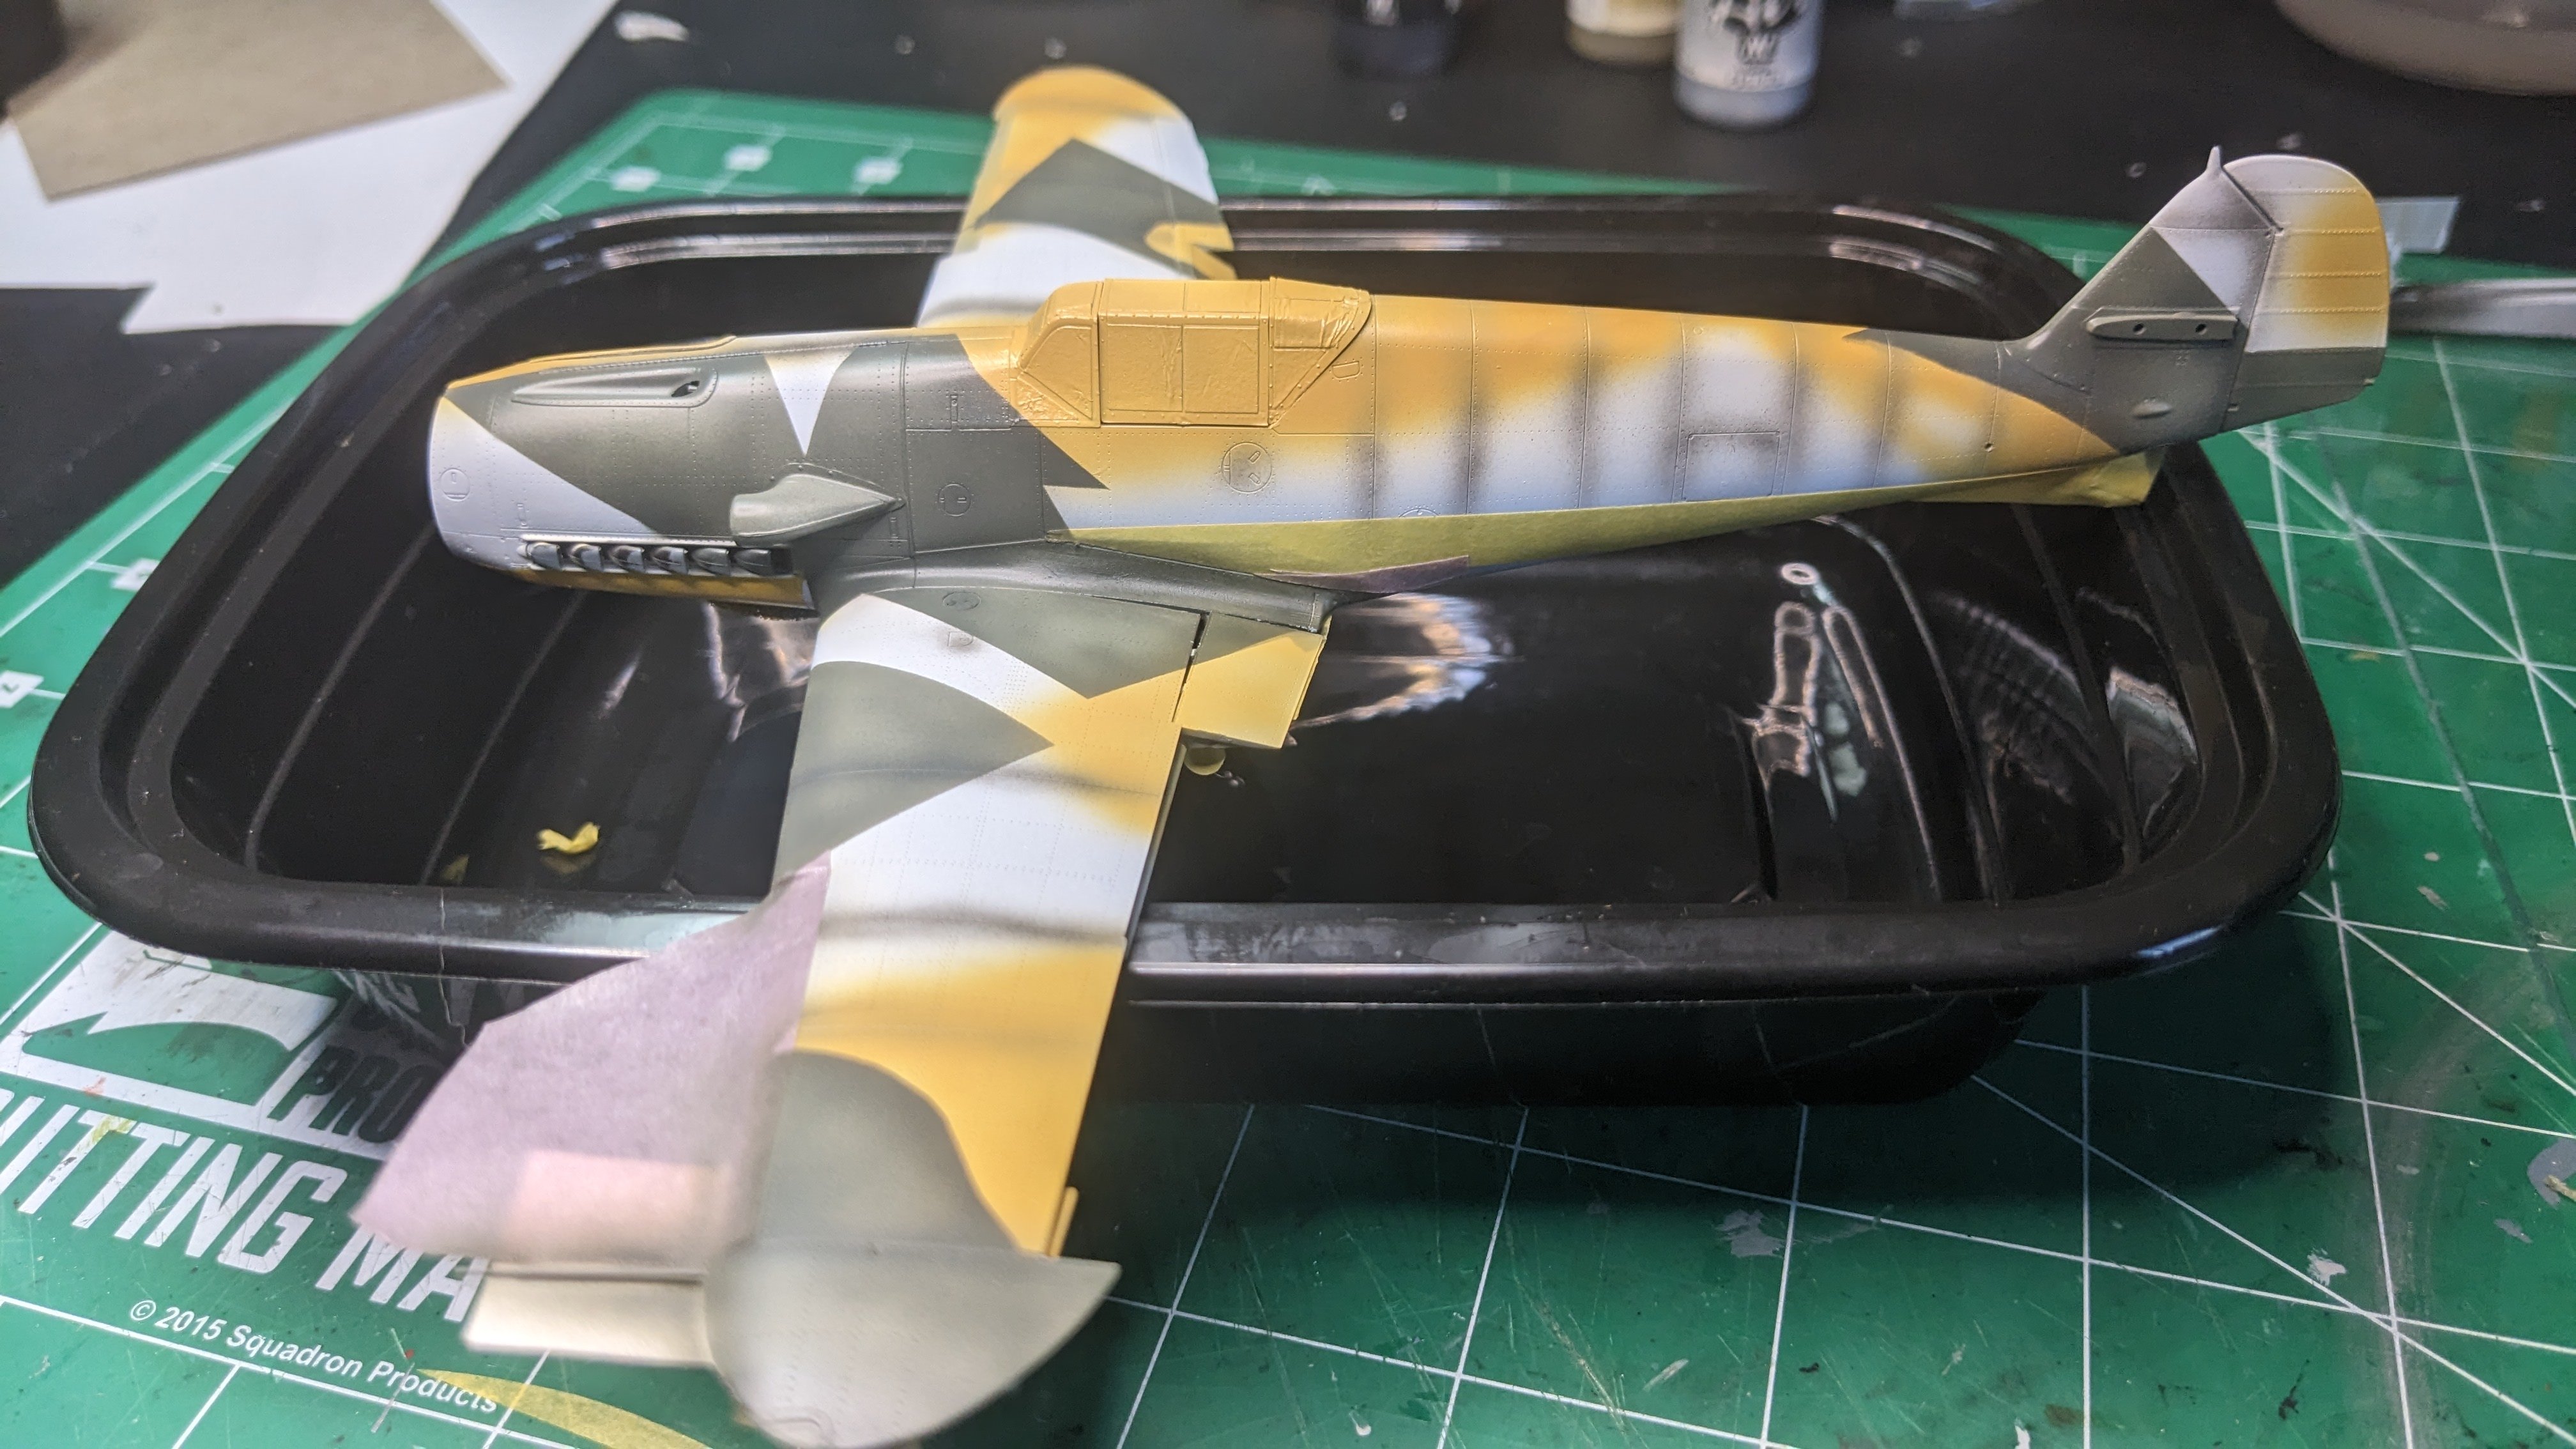
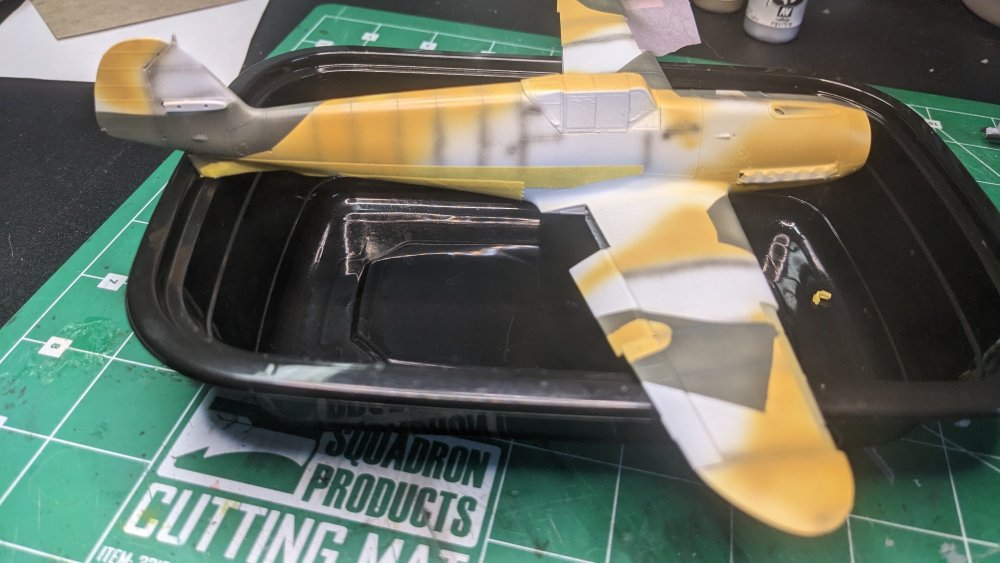
Laid down the second color, keeping where I already had the masking down but starting to do the soft lines on the fuselage. Also working on the fading/shading and finding the pre-shading worked semi-well on the RLM 74 and I can see will be a real challenge on the RLM 70. Once I have the RLM 70 down (the darker gray) will go back and see how the overall effect looks. FWIW, the RLM 70 is on the left wingtip where the tip light is, and the triangle at the wing root also on the left side. To the eye is looks a LITTLE darker but in the photos not so much. Tomorrow should finish the RLM 70.

-
So I went and made a comment about Tamiya paint...
CANicoll replied to Count0's topic in General Discussion
Quite the range! That Zero is terrific. -
Where do you get the VMS stuff? Peter has made me a convert to MRP so I'm reluctant to switch AGAIN to another paint. But I would like to find a good acrylic to replace Vallejo despite I have so many bottles. PW - your thread here is fantastic. Thanks for the step-by-step discussion and show. Incredibly invaluable even if I never plan on doing Zimmerit. But the effect you are generating is excellent.
-
Great news, Scott!! Back and foot issues are debilitating but glad to hear you are on the mend. Whew.
-
I think you were brave to even try putting them on!
-
What is on your bench right now ? Share a picture :)
CANicoll replied to Martinnfb's topic in Modelling Discussion
Looks like that entire room is going to be needed to display those beasts!! You probably already have a lot, but I have quite a few references for the B-17 if you are interested. I can PM what I have. A good friend of mine flew a B-17G 43-38719, out of Rattlesden. I've built several of the Monogram/ProModeller B-17s. Welcome to the friendliest forum on the web. -
Carl, Really nice shading... LOTS of work, there. Nice detail stuff and not inside a cockpit...
-
Forget Luxury Bristol Brabazon. Japanese stuff !!
CANicoll replied to MARU 5137's topic in General Discussion
Looking forward to your next visit to the states! Doing anything fun for your BDay? -
Forget Luxury Bristol Brabazon. Japanese stuff !!
CANicoll replied to MARU 5137's topic in General Discussion
BTW, Happy Birthday! (two days early)... -
Forget Luxury Bristol Brabazon. Japanese stuff !!
CANicoll replied to MARU 5137's topic in General Discussion
Maru, Not quite like Phoenix, huh? Amazing photos, thanks for sharing, as well as the hobby shop info. You are quite the traveler! People must love to meet you wherever you go. What prompted the trip to Japan? I missed that. Cheers, Chris -
What is on your bench right now ? Share a picture :)
CANicoll replied to Martinnfb's topic in Modelling Discussion
Ahh, so a couple of hours south of me, here in NoVA. Glad to hear the trip went well and you got to see family. Your daughter's house sounds terrific! -
What is on your bench right now ? Share a picture :)
CANicoll replied to Martinnfb's topic in Modelling Discussion
Where in VA are you headed to? -
Carl, Really nice work on the panel shading and just putting this all together in the first place. The fit looks really tight.
-
Exactly. Time I don't need to spend!!
-
Peter - I like your thinking. Also, saves an enormous amount of time masking... 👍
-
I have no idea what you are talking about, but it's cool any way, Ernie!
-
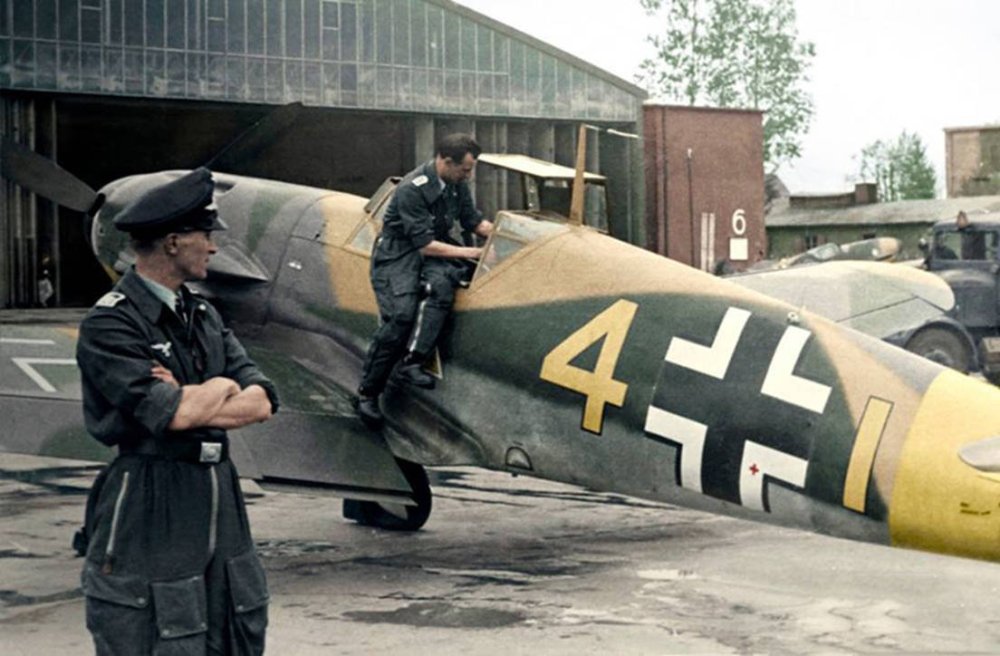
Ugh. Found these pictures, which seems to show more freehand camo rather than use of masks... Also, notice yellow 4 has what looks like green camo color rather than the black/greys called out by Eduard. While this one looks more like hard lines on the back of the fuselage, but soft lines elsewhere... So I get to pick and choose!

-
Dave, Super job and I'm glad you went with the kit intakes - I have a ZM 1/48 F-4C kit so was interested to see how they worked and looked. Great on your build BTW. Your cockpit looks terrific - nice detail with the RF/ZM IP set. And you really don't miss the seatbelts since you are using the pilots. Easy enough to fashion belts for them. You are making me want to break out my ZM kit!!
-
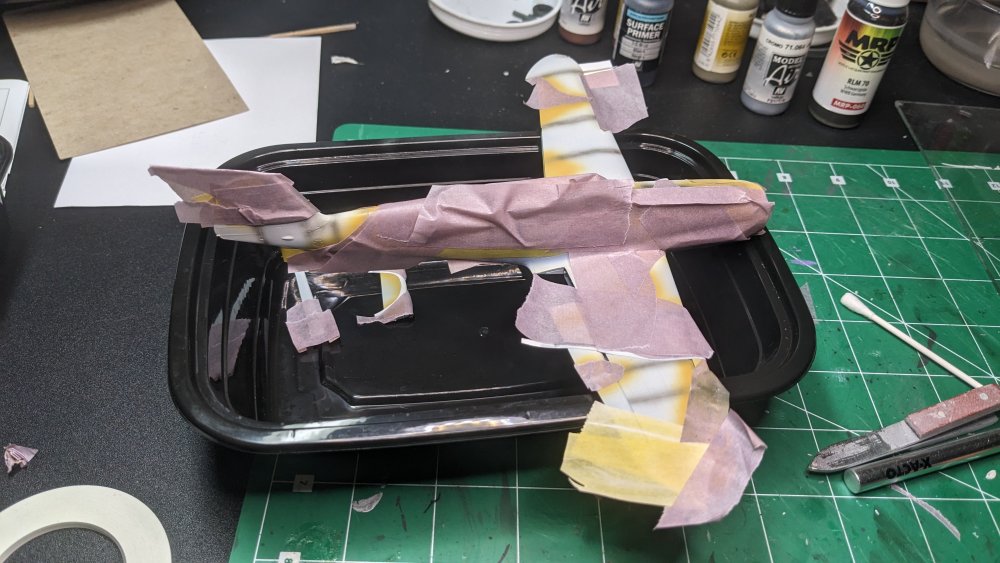
Have I mentioned I hate masking? This is two bench sessions of masking, and I'm still not done. Worse that this is only for color number 2. One more after this... Oh yeah, I did knock off one of the aileron counterweights - but found it on my mat. Whew...

-
1/32 Hawker Tempest
CANicoll replied to JeroenPeters's topic in LSM 1/35 and Larger Work In Progress
Damn, this looks really good. ALL of it. -
Good eye! Yes, the one fell off for the picture - it's in the bottom of the bin in the picture - and the other aileron is a completely different color than the wing so no need to have it attached. Maybe a field replacement?
-
Thanks for trying! Oh well!