aderowlands
-
Posts
97 -
Joined
-
Last visited
Content Type
Profiles
Forums
Events
Gallery
Everything posted by aderowlands
-
One of the unique joys of Texas living.
aderowlands replied to Clunkmeister's topic in General Discussion
Here we have the Tax people. Impossible to irradicate. They bring a tear to the eye every 4th Friday throughout the year. -
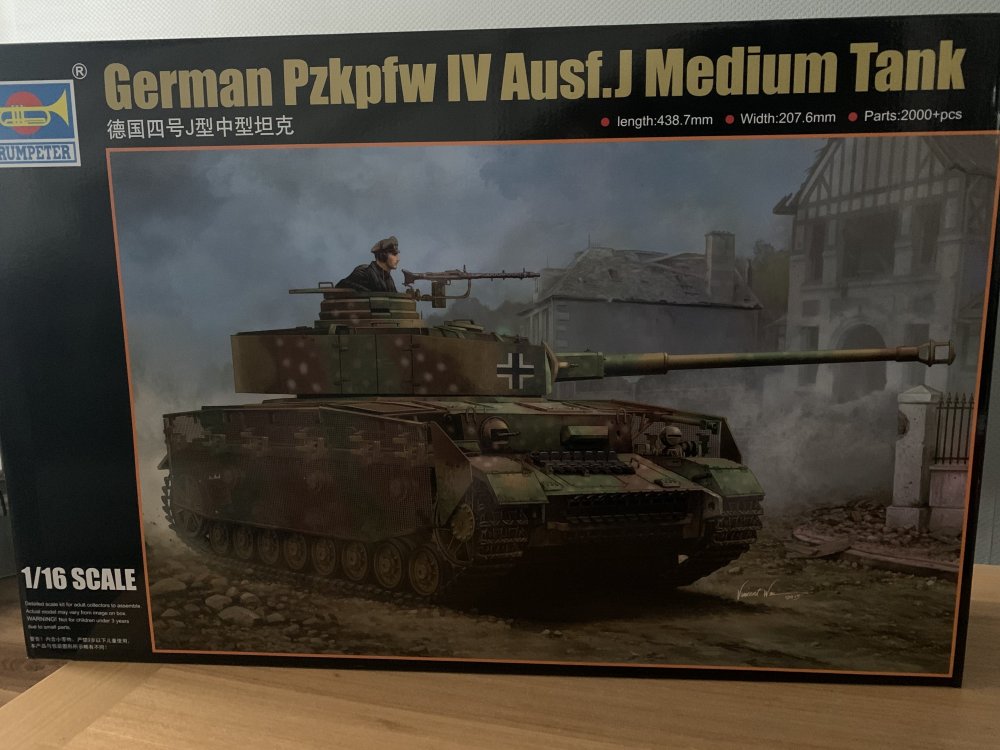
I am not sure what I’ve gone and done, or more to that matter, why I’ve done it. I have built one Tank in all my years of Model Making, a 1/35 Tamiya Challenger 2. A long time ago at that. I know a little about Tanks in general, enough to be dangerous, though little to nothing about Armour Modeling techniques. This one will be a long job, probably a between Plane kits build, a bit here and a bit there. I stumbled on a build of the H version on YouTube and I decided I quite liked it and the size was impressive. I think that’s what sold it to be honest. Already gone and placed a Pre-Order for the Das Werk Stug III too. Oops.
-
Thanks for the offer Martin, but the kit became a paint mule and was far more useful in that guise, what with 4 fuselage halves and all. I may one day tackle another of the large 109 kits but that’s a big maybe. I’d probably go for the G-2 or the G-6 Early should I ever find one of those. I’m also trying to stick to the one scale for display space reasons, though the 109 in 1/24 isn’t that large.
-
Imagine my confusion when I logged in to see a notification on a 1/24 Bf 109-6 Late. ‘I don’t remember commenting on anything to do with one of those’ thinks I. The horrors of that kit have long been sent to the deepest darkest corners of my memory. Martin, I gave up on it. I got to doing the Galland Panzer Armour which for some reason Trumpeter moulded as a solid piece. So I had to remove the solid chunk that should be the armoured glass, and replace with some clear plastic, but I just gave up. Could never quite get the shape correct. Maybe now with 3D printing I could look in to having someone make the parts. This one however just stalled out and ended its days as a paint mule. I have thought about trying to do another, I cant find the Early version anywhere which doesn’t come with head armour at all if I remember correctly so would need that making. I did like the big scale though.
-
I’ve seen that lot somewhere before. I can’t think where though. The F-16 was just picked up 5 minutes ago, should be with you soon.
-
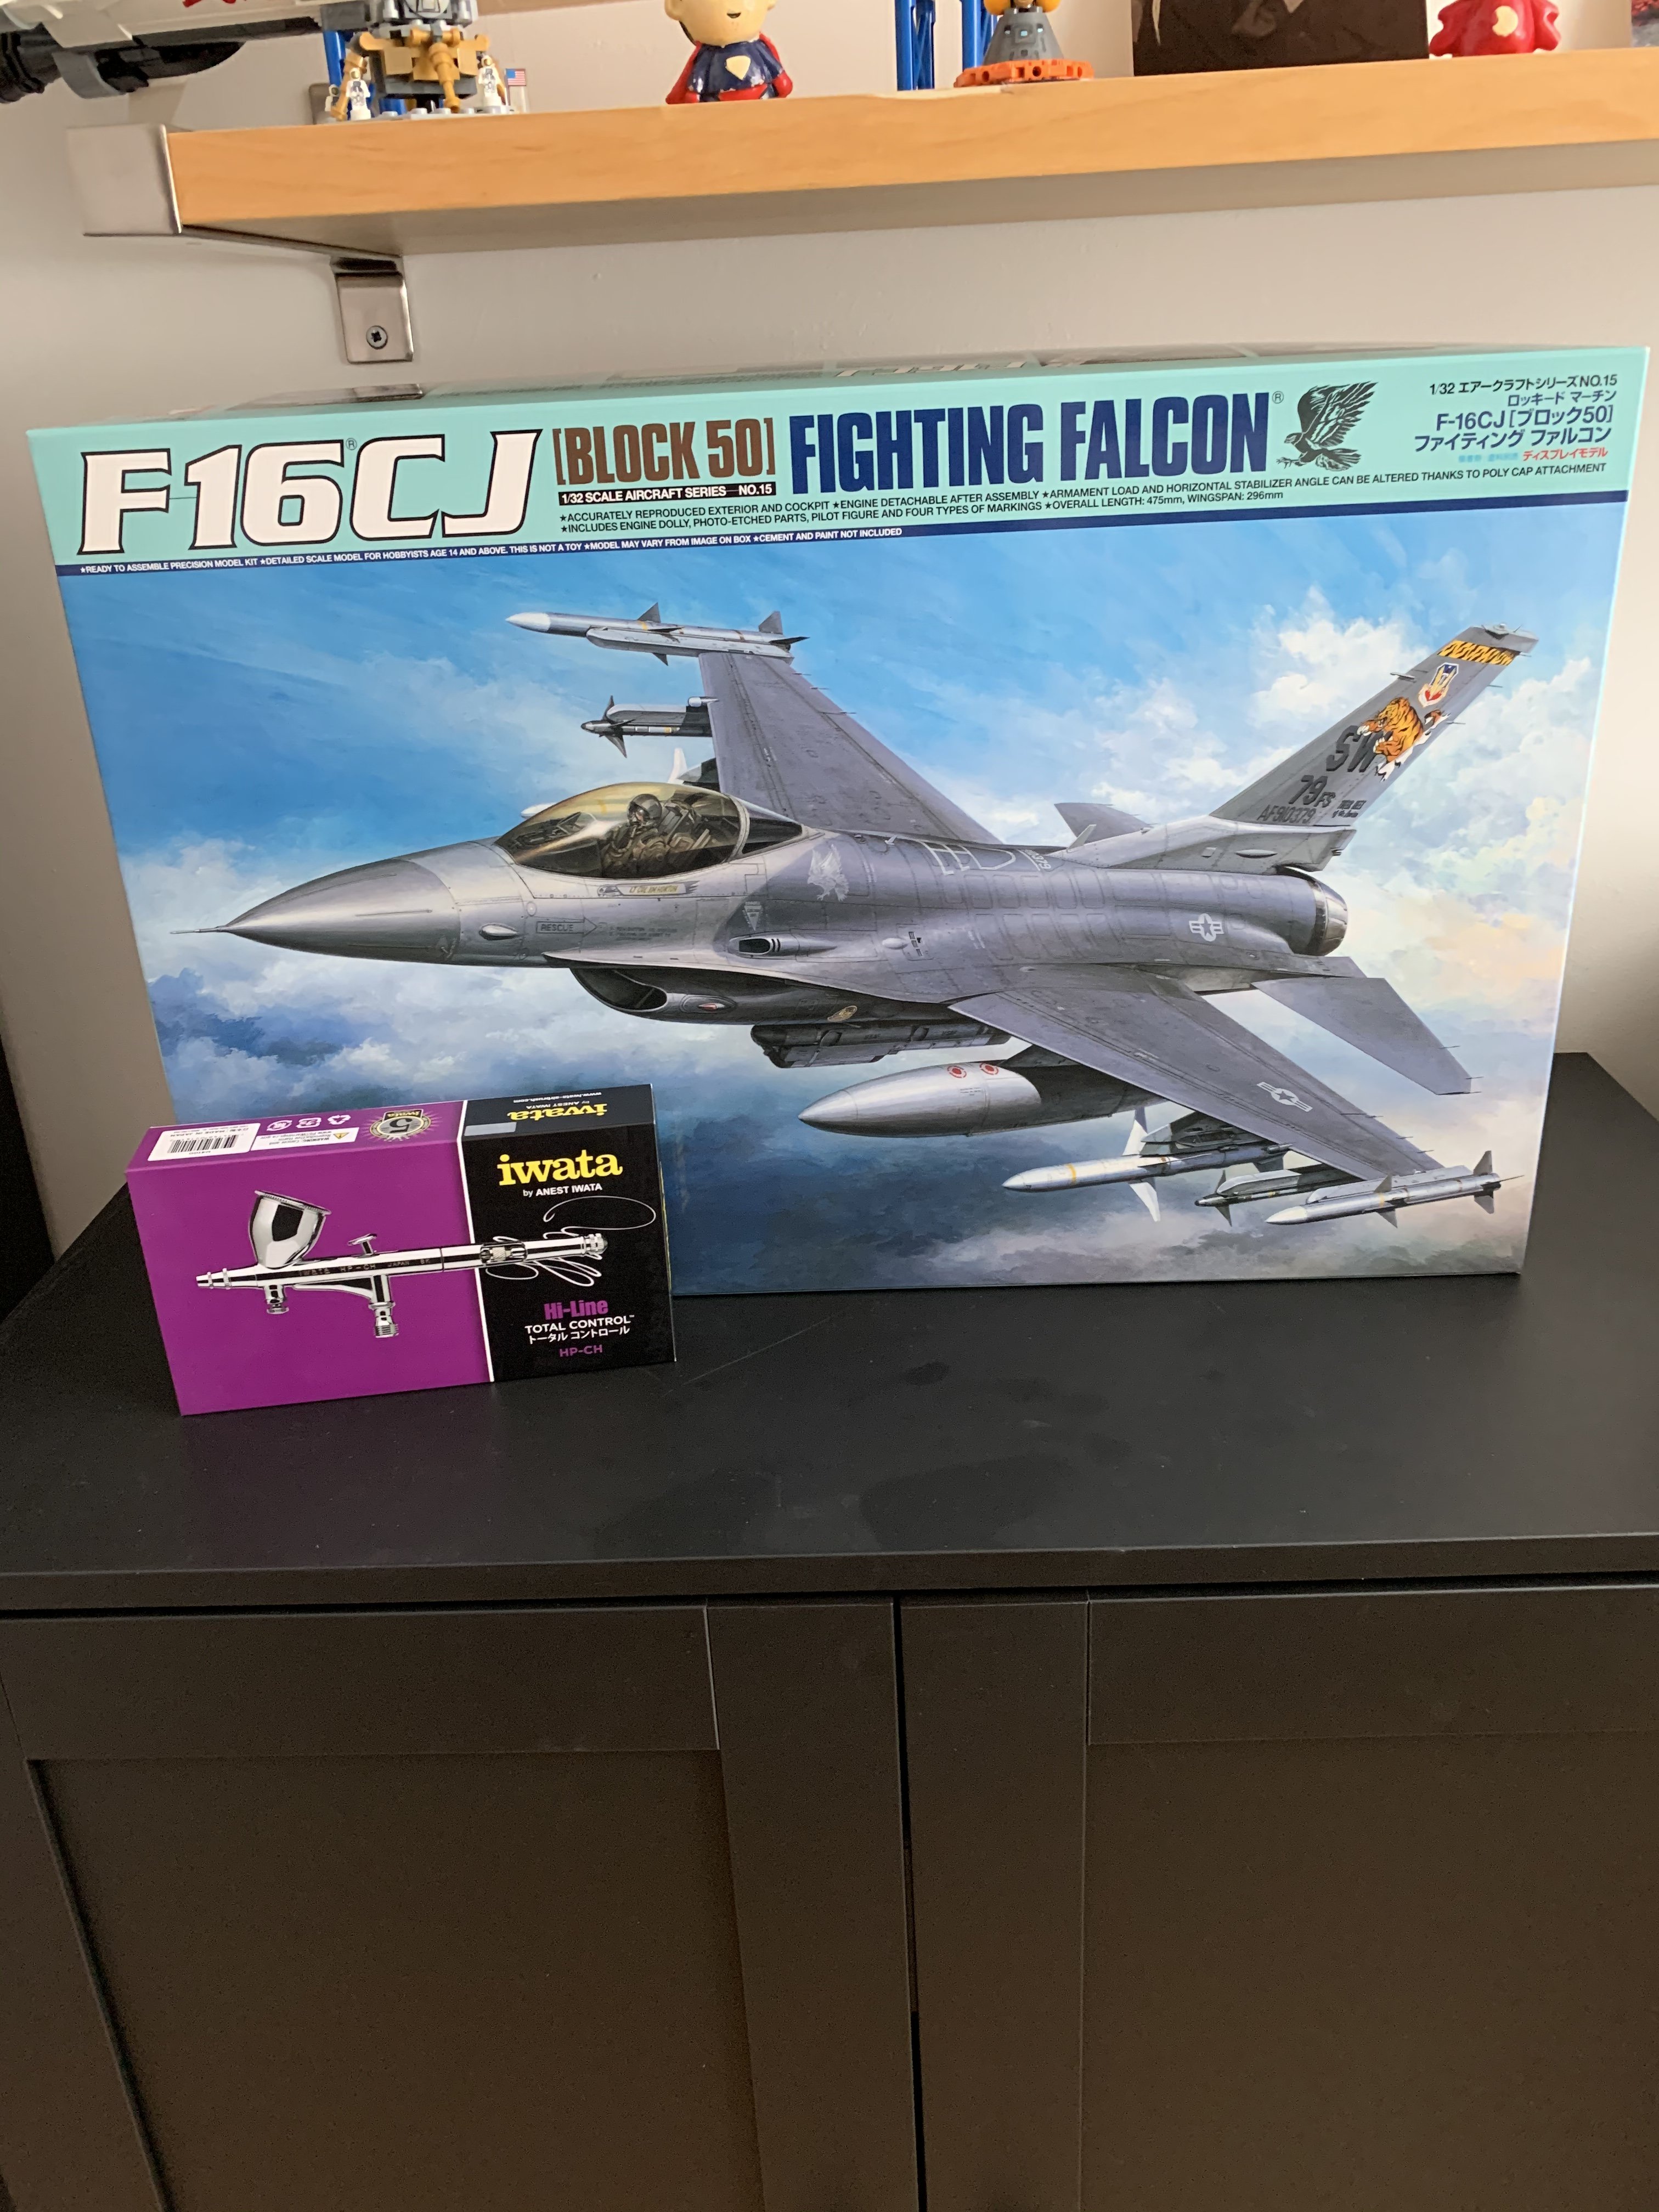
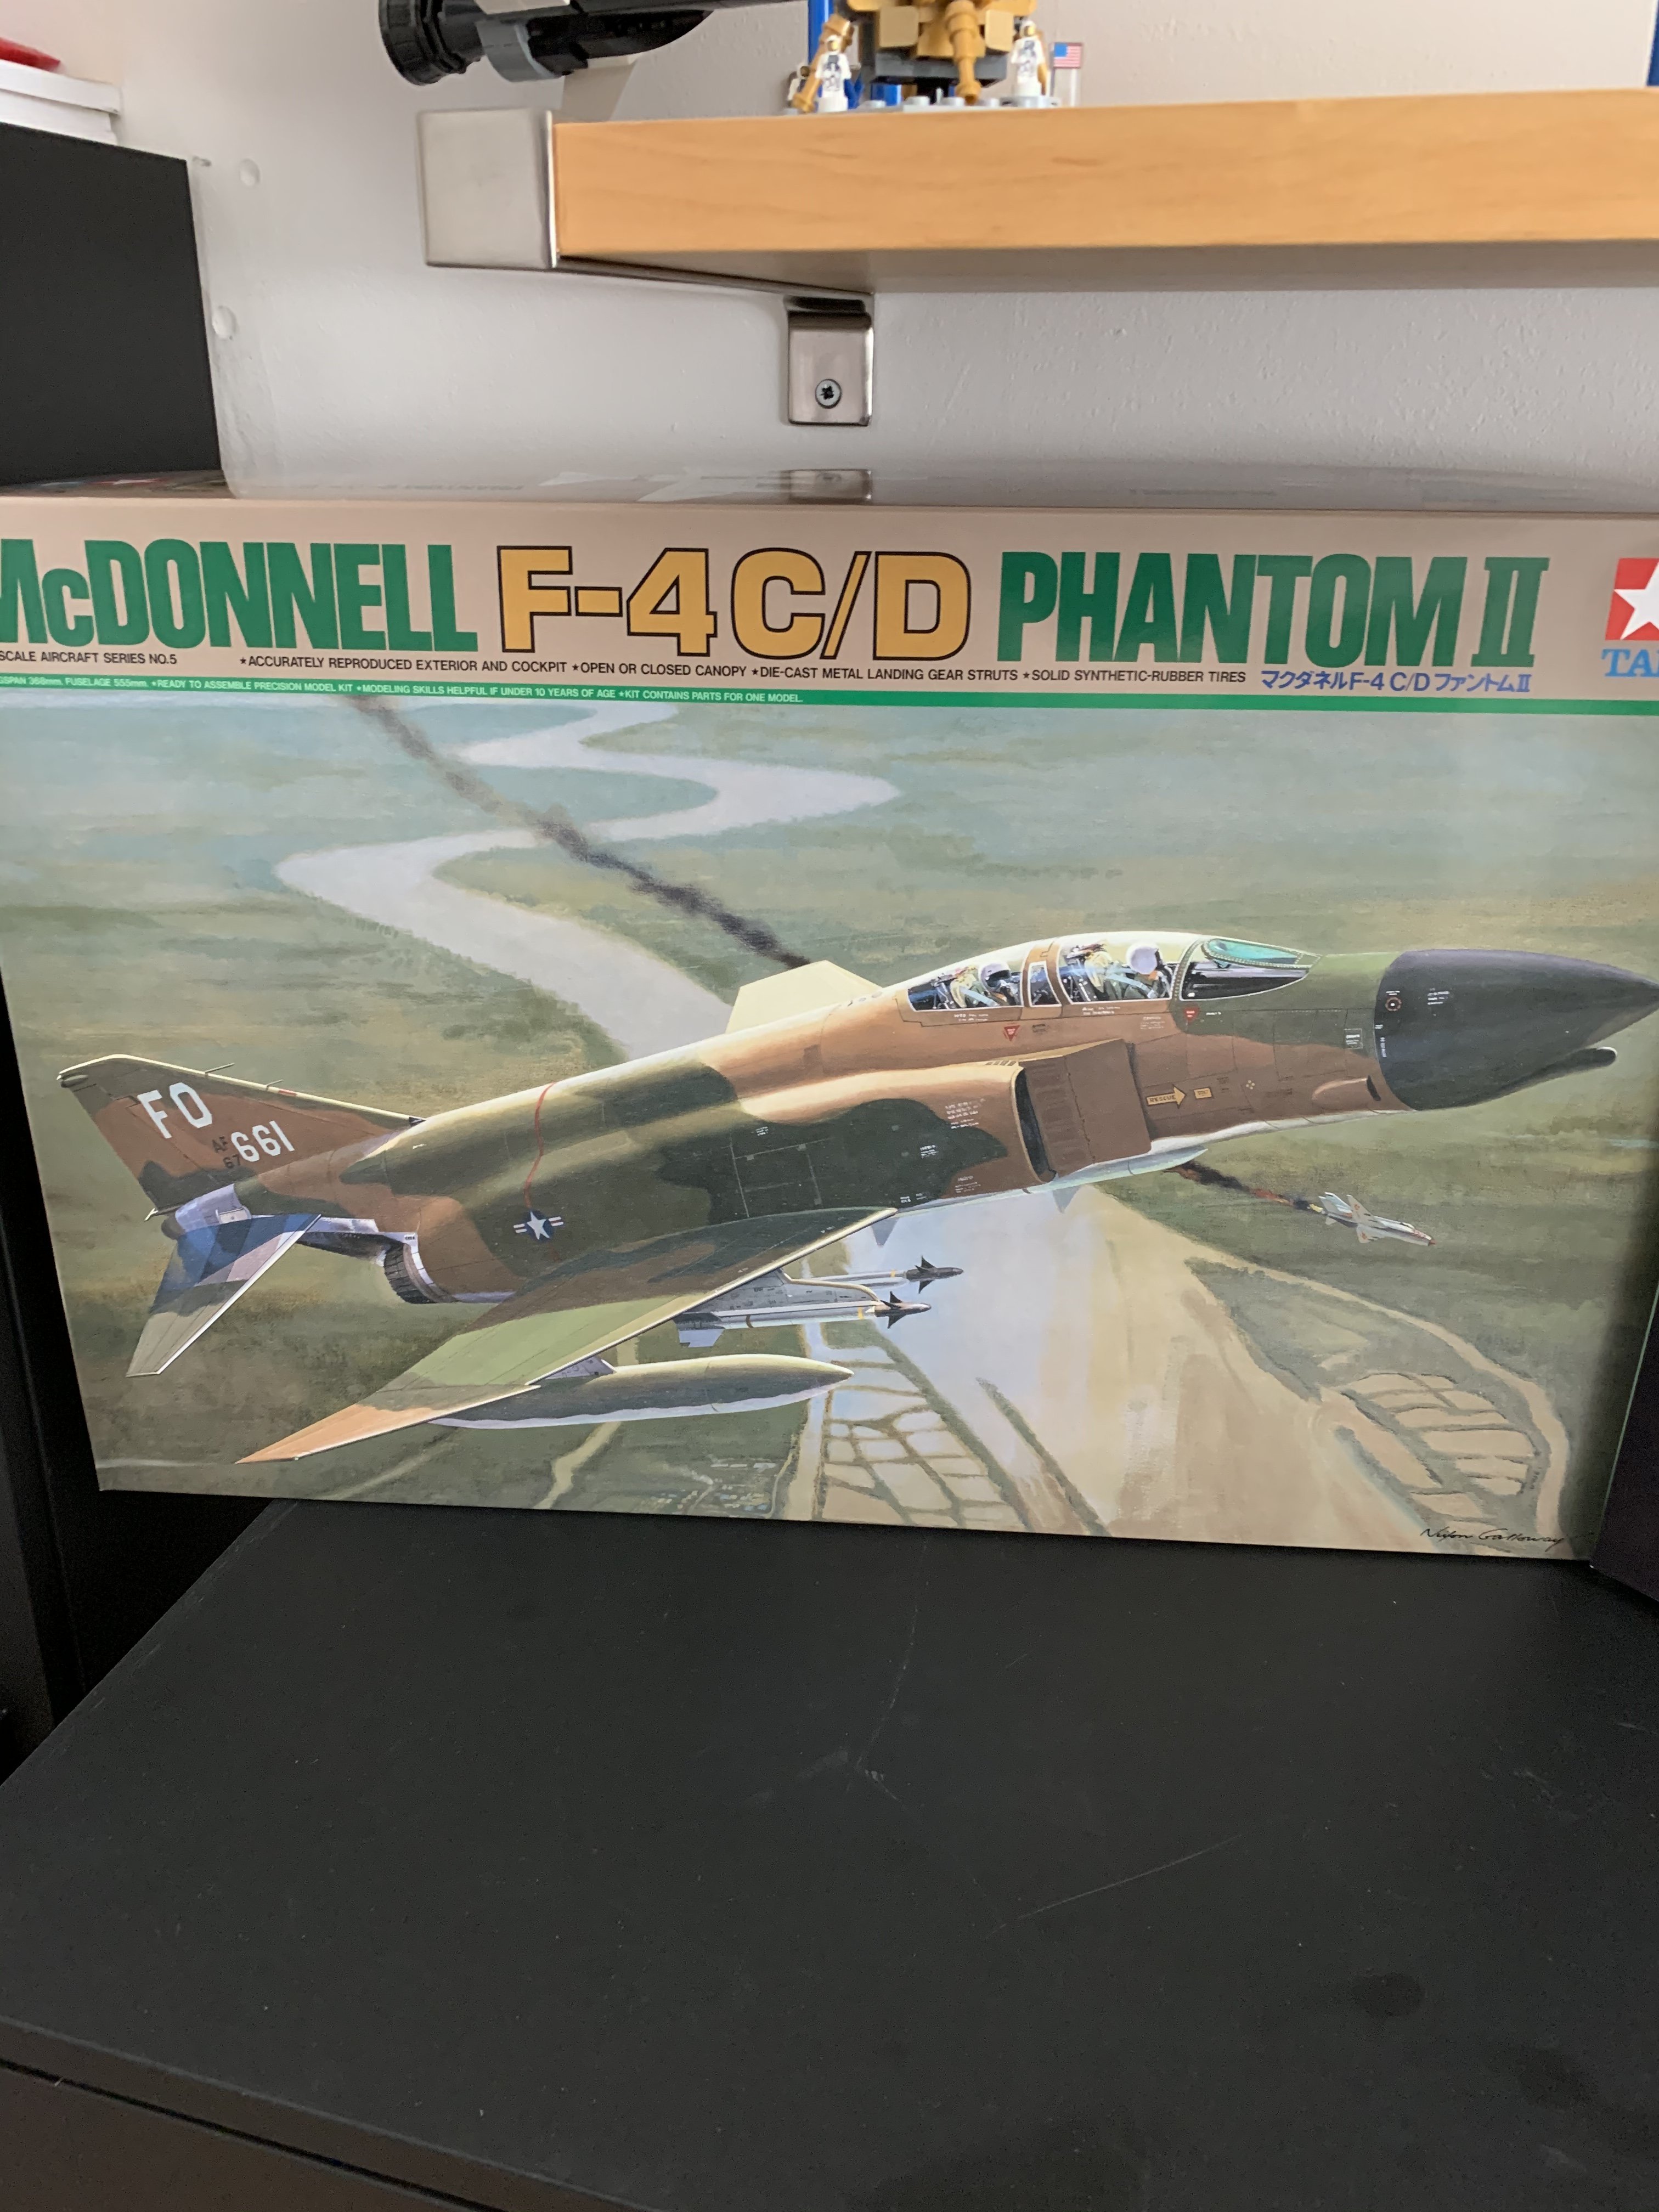
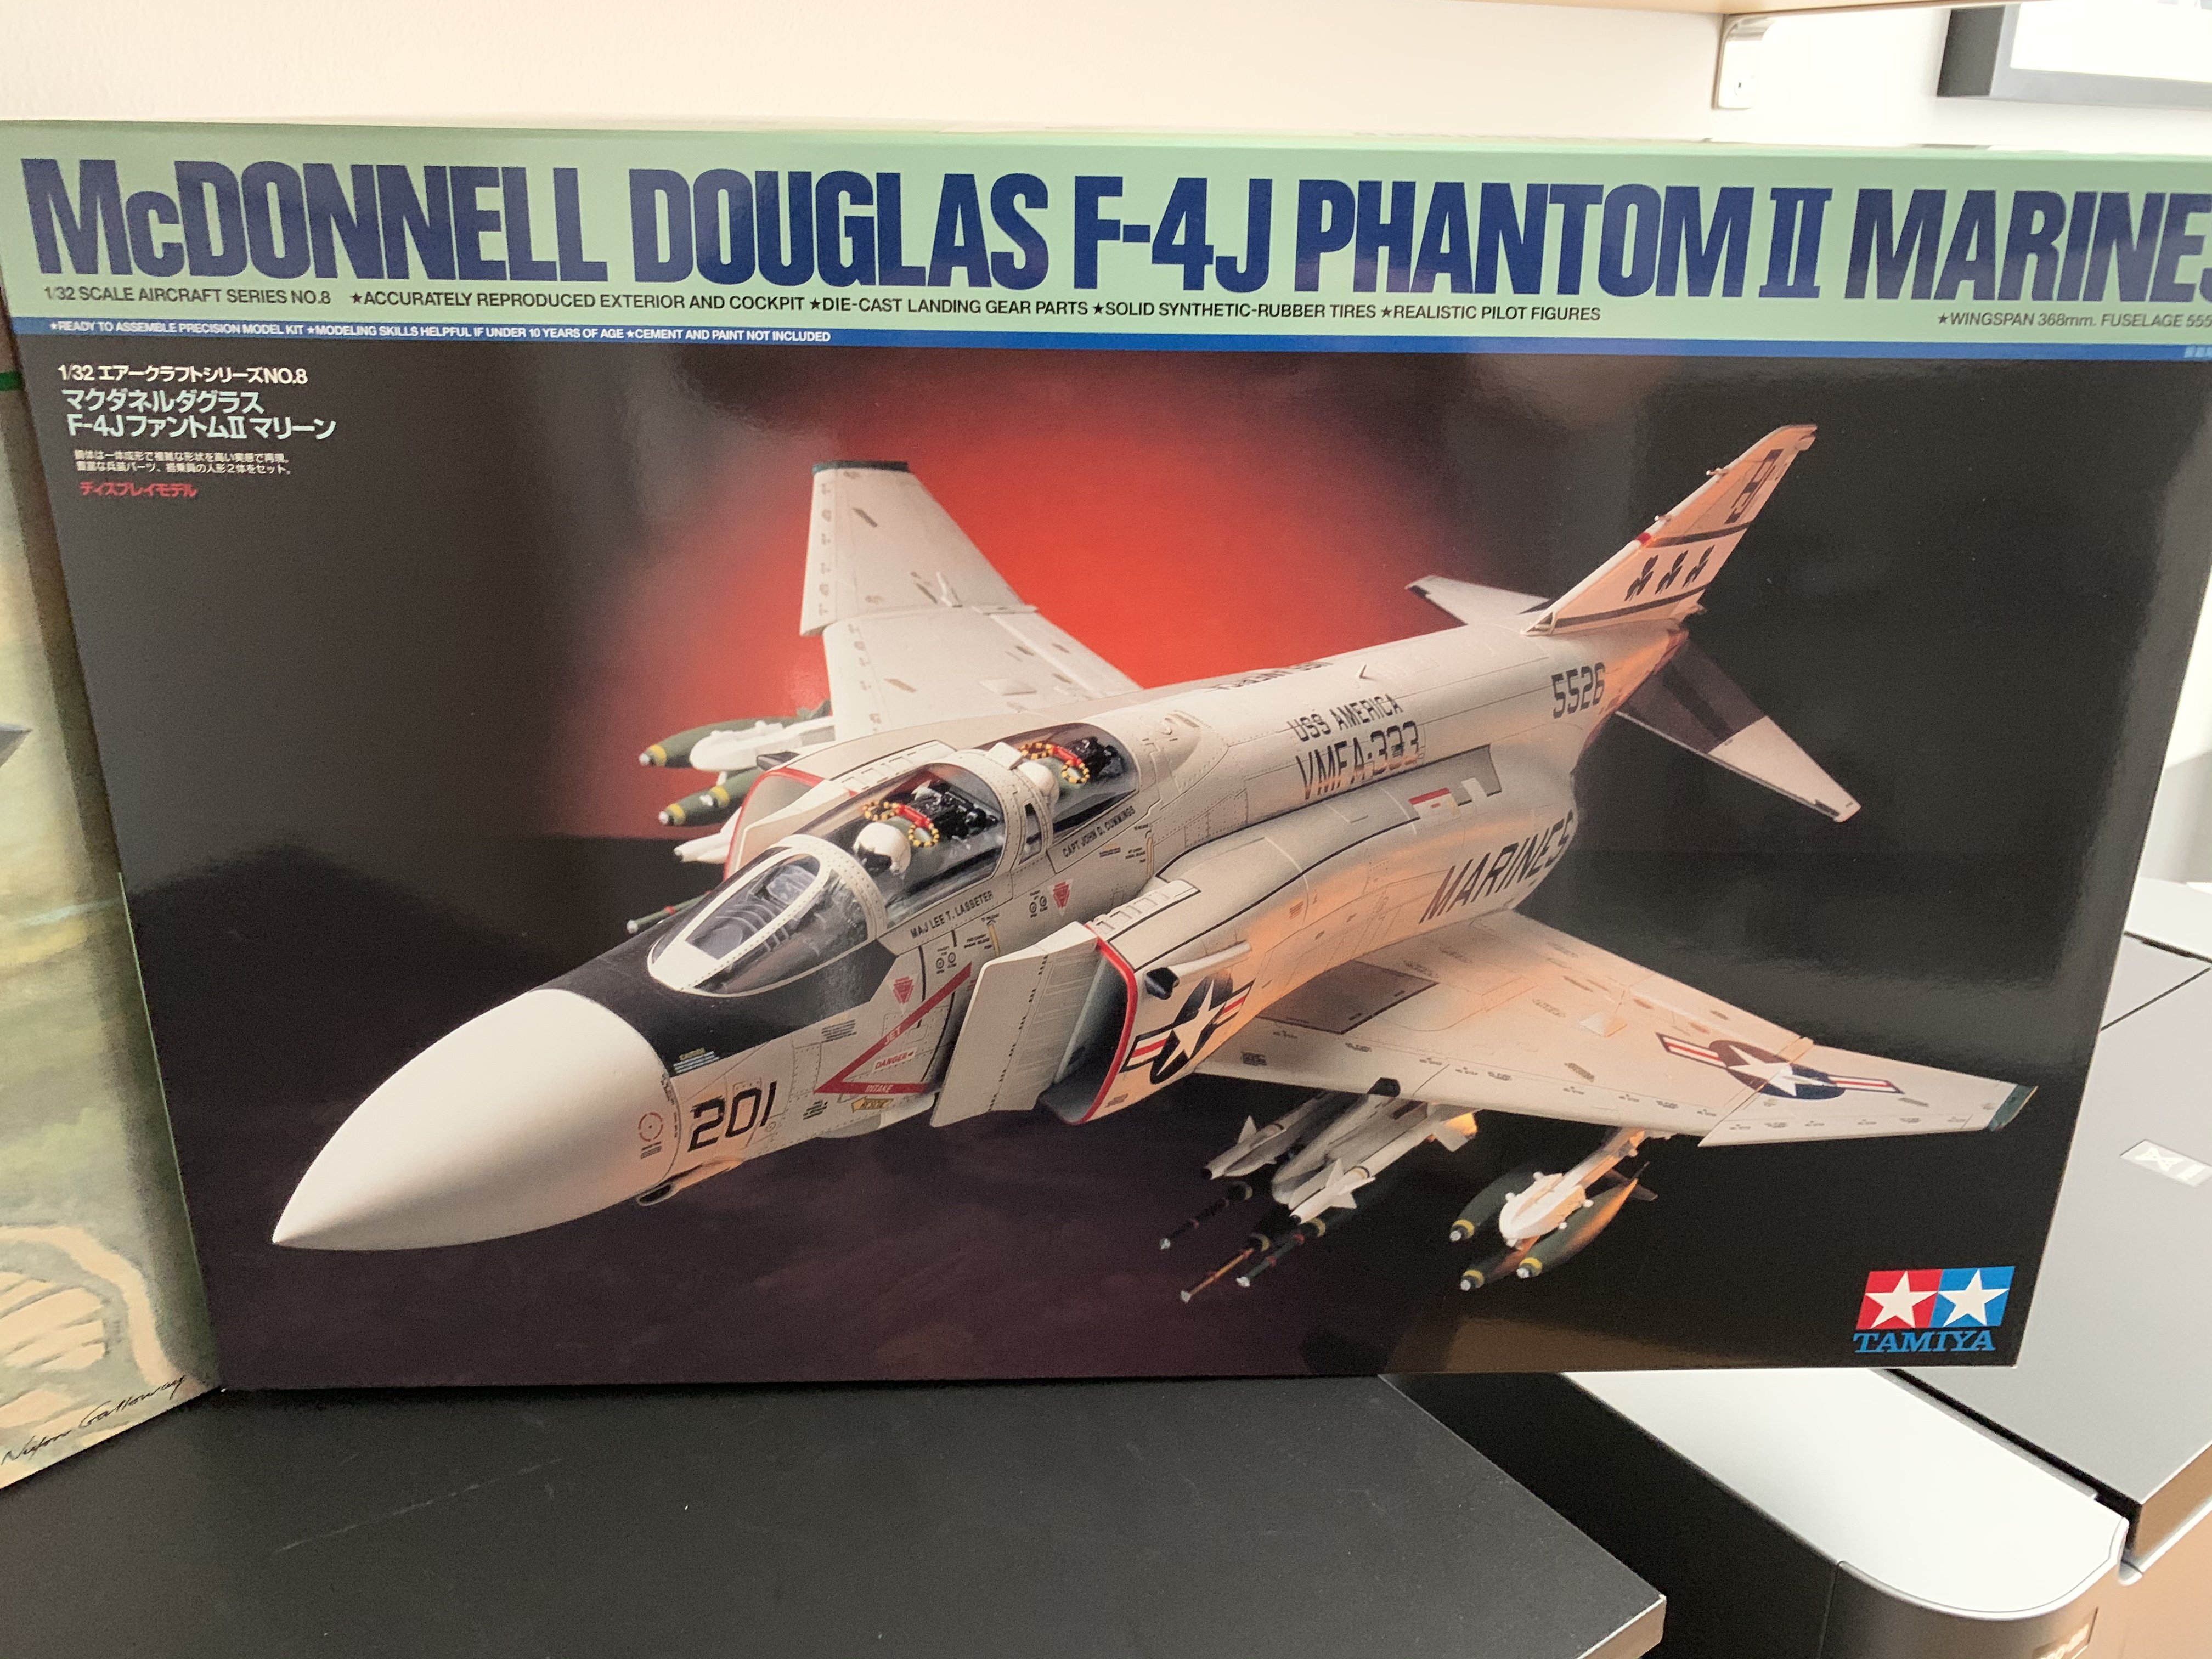
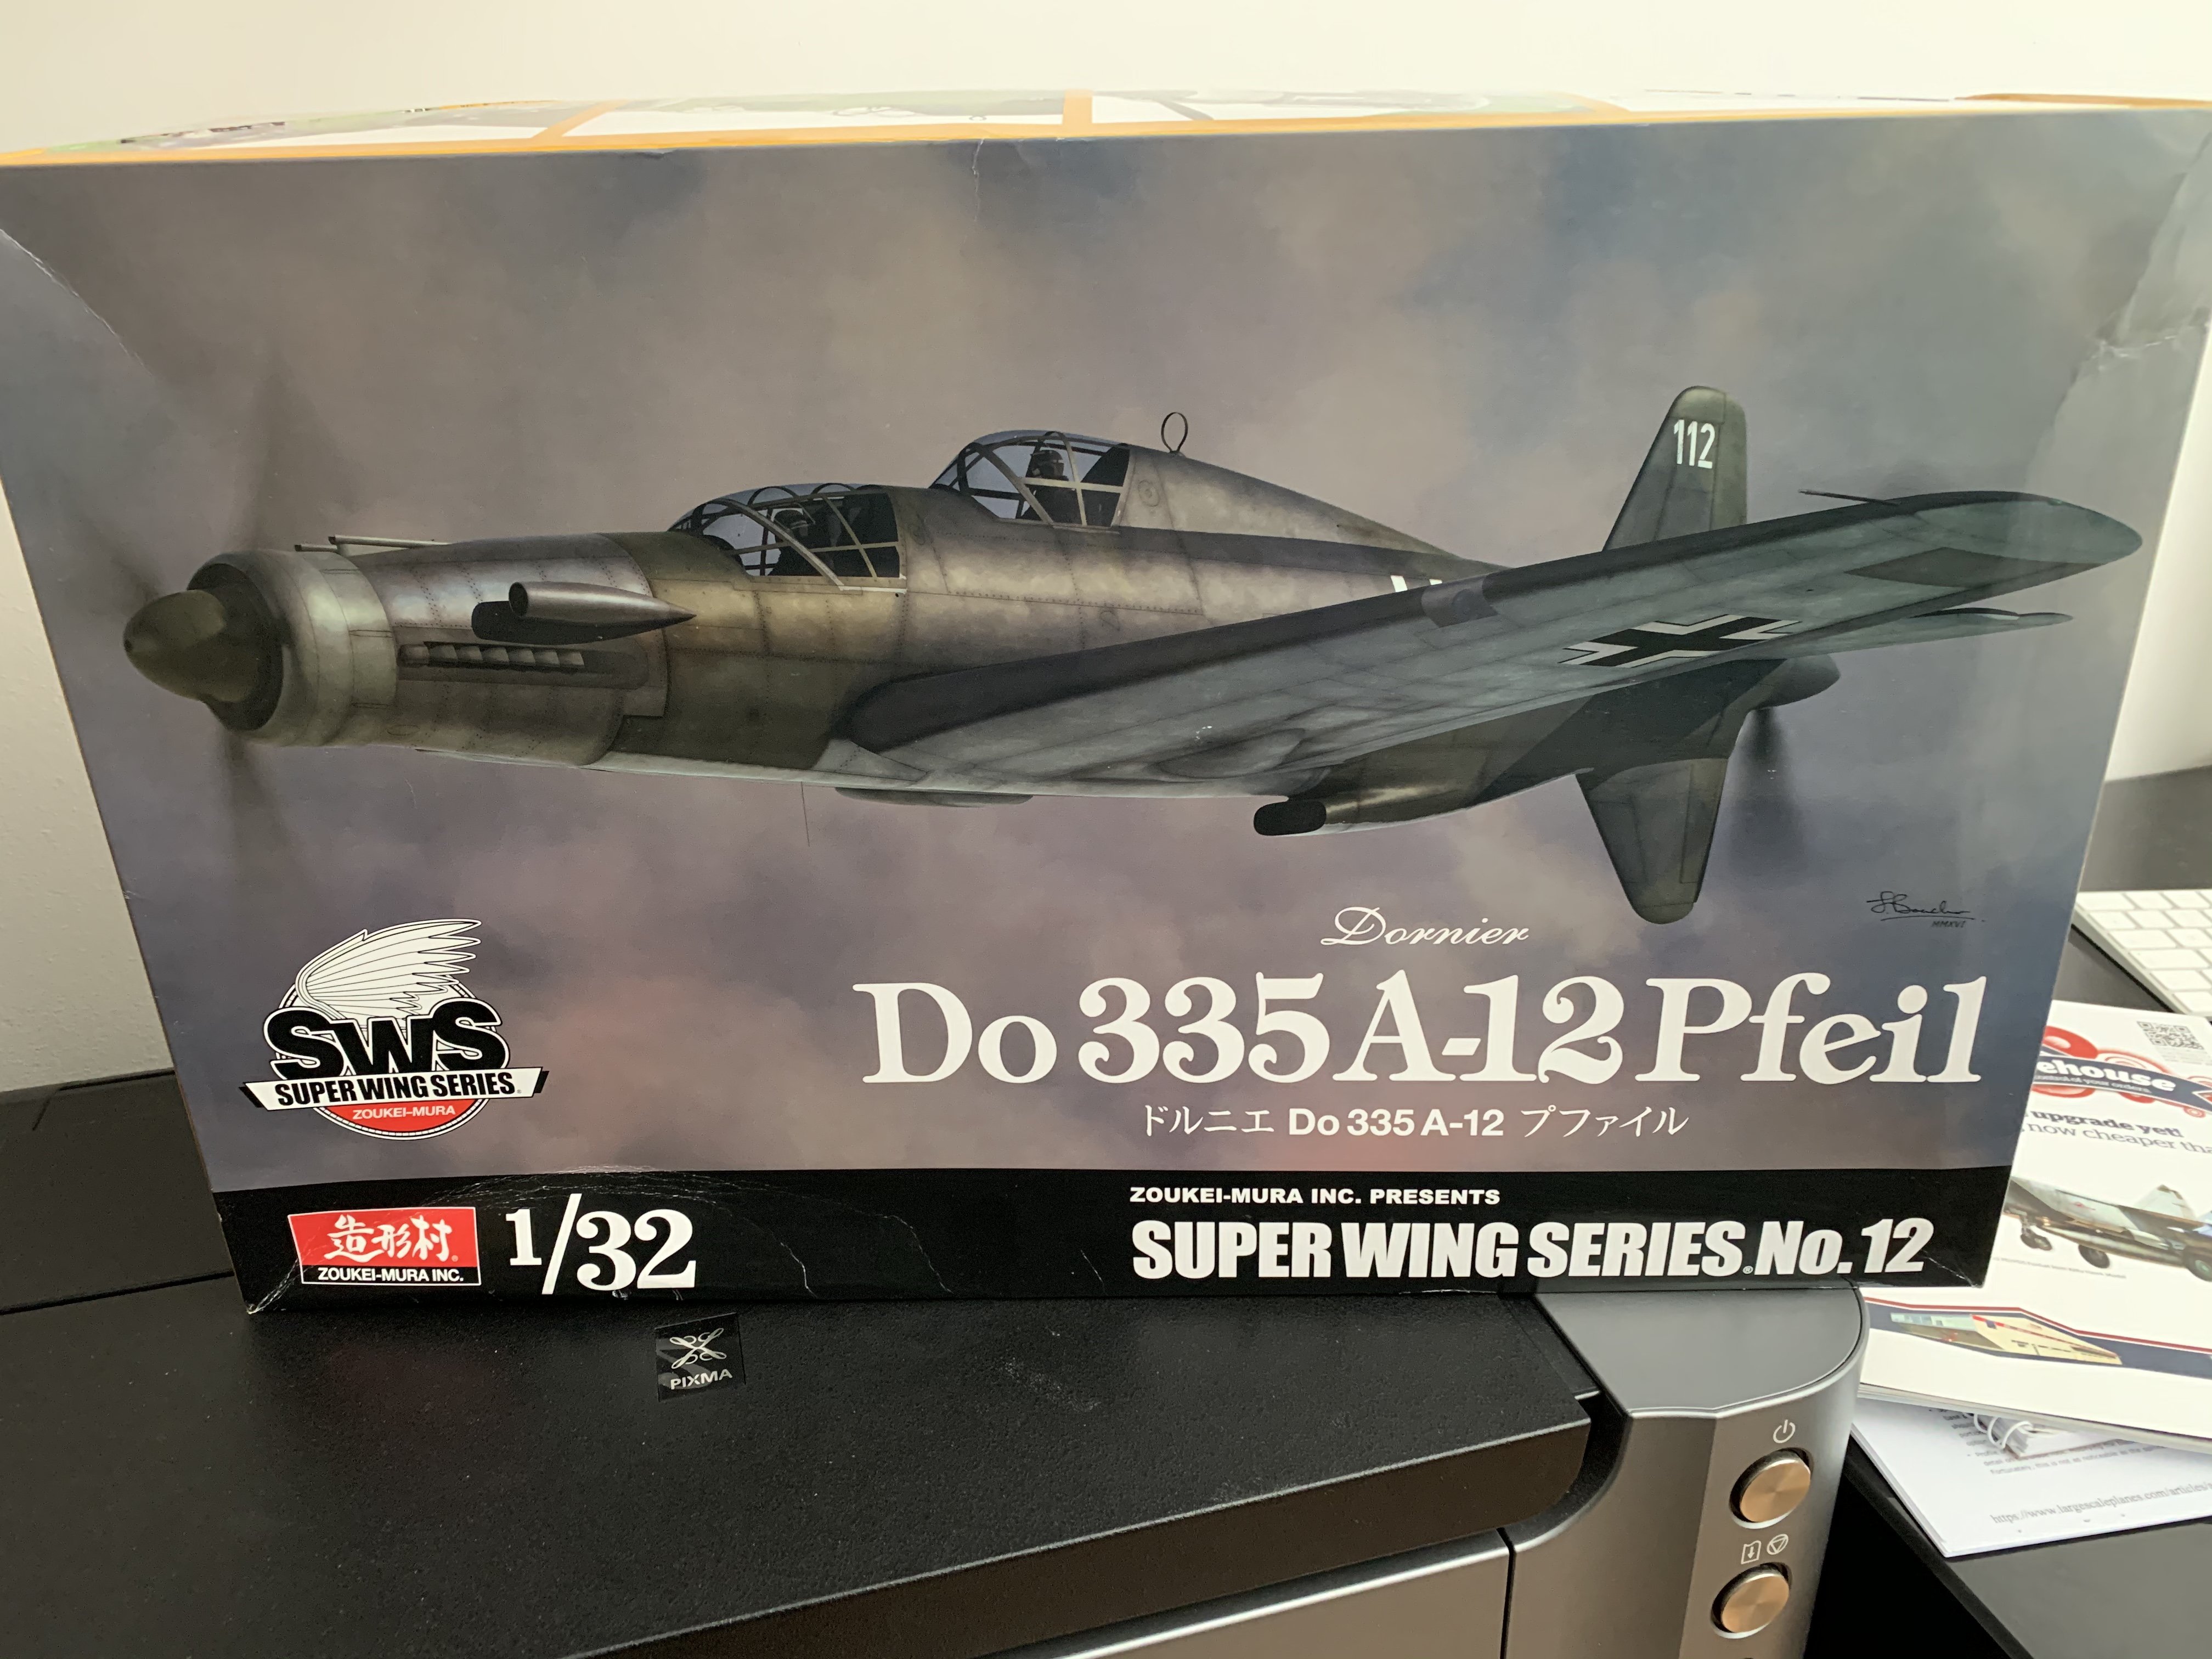
I’m on a jet kit buying spree of late with a majority of my props set for sale. So far it’s 3 Tamiya F-4’s a C/D, J and E on the way, Tamiya F-16, Trumpeter MiG-29A, Trumpeter F-18E, Trumpeter A-4F and a Tamiya F-15J (to be built as a C, the J has the MSIP instrument panel) and in various shopping carts across the interwebs awaiting next pay day are an Italeri F-104G/S, Trumpeter F-8E and maybe a Kittyhawk Mirage need to see a few builds on that before I reach my final decision. To balance the jets out I did buy a ZM Do335 A-12 because just an oddball.
-
After my 1/48th Odyssey I felt it was time to get back to bigger kits as I was struggling with the smaller parts in smaller scale. So sold off what 1/48th kits I had left and used the proceeds for this little lot. Even managed to have them arrive on my day off, usually the plan doesn’t come off that way and I spend the next couple of days after the missed delivery traipsing from the post office or courier depot tracking my packages down. You’d be surprised how many times after a missed delivery you arrange to pick it up next day at the depot and they acknowledge that but still put it on the van to go back out in the morning for a second attempt and you turn up at the depot expecting to pick it up there and it’s gone out for the second attempt. Some courier companies I just avoid.


-
Not done it, have an aunt who’s in to the family tree stuff and she’s traced us back to the same area of Wales, about a 40 mile radius, I think back to the 1600’s or something crazy like that, about as far back as reliable records will allow. I’d not do one of these DNA things myself as the science seems a little shaky in the way they group things together and remember seeing something in the TV and various magazine articles about it. I’d also be worried to find out I’m not the bone fide 100% hairy arsed barbarian Celt that history would suggest. No Anglo-Saxon in my line of the family though supposedly the Surname came over as Roland with the Norman invasion, the Normans being descendants of the Vikings I wouldn’t be to distraught to have the Celt bloodline tainted by that lineage either. That being said there’s probably many versions of how the family name came in to being. If I remember correctly the British Celtic tribes had an Iberian origin so there’d be a good amount of that in the mix but from the history of my little bit of Wales where the Roman invasion had limited success (they conquered the flat bits but left the mountains alone as they knew that fighting there probably wouldn’t go their way). The area was mainly garrisoned by auxiliaries from the Benelux areas of the Empire which was worked out from artefacts discovered at the excavations of the various forts and fortlets in the area. So you can add the possibility of some bored randy troops adding to my gene pool somewhere along the line. As for the Dark ages I have no idea who might have come along to contribute. The Saxons didn’t make it this far and were pretty much stopped at the modern English/Welsh border (those bloody mountains again). I haven’t read anything about Viking raids on our part of Wales, they were further south where the Monasteries were located, they probably thought there wasn’t much worth looting in our mud hut hovels at the time. We weren’t a very well travelled family either, hence the small radius of the gene pool my aunt discovered. About the only travel was Great Grandparents, and other great uncles and such going to France and Ireland for war service in the First World War, other relations doing service in the Second World War, one who was a conscientious Objector at the outbreak who agreed to serve in the Army Medical Corps was then killed in North Africa (Libya) when his Ambulance was Straffed believe he was the only family member to not come back from either war though one Great Grandfather was gassed in the First World War and died young from the resulting complications. Then both Grandfathers who were too young to serve during the Second World War doing their national service in Post War Germany and the other in Palestine and Cyprus. Sadly I don’t know a lot about my Mothers side of the family though again they seem to be contained to a small area of Wales, farming family on my Grandmothers side. Sadly nobody to ask about their histories now as both Grandparents have passed on.
-
Mitsubishi A6M2 correct cockpit color?
aderowlands replied to CrankyCrafstman's topic in Modelling Discussion
No problem. Glad I’d kept my own notes to be honest as I’ll be taking on the 1/24 Trumpeter A6M2 in the near future. -
Mitsubishi A6M2 correct cockpit color?
aderowlands replied to CrankyCrafstman's topic in Modelling Discussion
It's really a very faint tint of blue. I don't have the model anymore, and it didnt really show in photos anyway, it will literally be a drop or two of dark blue in an airbrush pot of black. -
Mitsubishi A6M2 correct cockpit color?
aderowlands replied to CrankyCrafstman's topic in Modelling Discussion
Well if you’re going with a Pearl Harbor attacker it will have been built by Mitsubishi as all the early type 21’s were. Later Nakajima chipped in with production. Naturally they couldn’t use the same Green, that would be far to simple. Well Gunze do both Mitsubishi and Nakajima cockpit Greens in their lacquer ranges (the ones that are coded C not H). Both are quite dark, much darker than any of the Allied Greens used in cockpits. They also do a Cowling Blue/Black colour which has a nice tint to it for the engine cowlings and rear turtle deck, which should be the blue/black colour, not Green should also be raised rivets not sunken ones there. Same for the insert atop the instrument panel the gun sight fixes to. But, again, if it’s a Nakajima built Zero they just used Black. I’m no expert, just things I remember coming across when researching for the same kit. -
Good Deal Alert! F-5E & F-5F cheap! AGAIN!?!?!
aderowlands replied to 1to1scale's topic in General Discussion
I can highly recommend dawngrocerystore on eBay. I’m in the UK and use them quite frequently. One or two boxes have had a little damage as they tend to wrap cardboard around the kit box rather than use an packing box. But other than that minor niggle no issues at all. I have the kit in around 5 - 6 days from ordering and even then I suspect most of the hold up is in this country. As yet to be stung by customs on my orders from them and I’ve had big 1/24 Trumpeter kits come through lately as I seem to be gravitating towards that scale. -
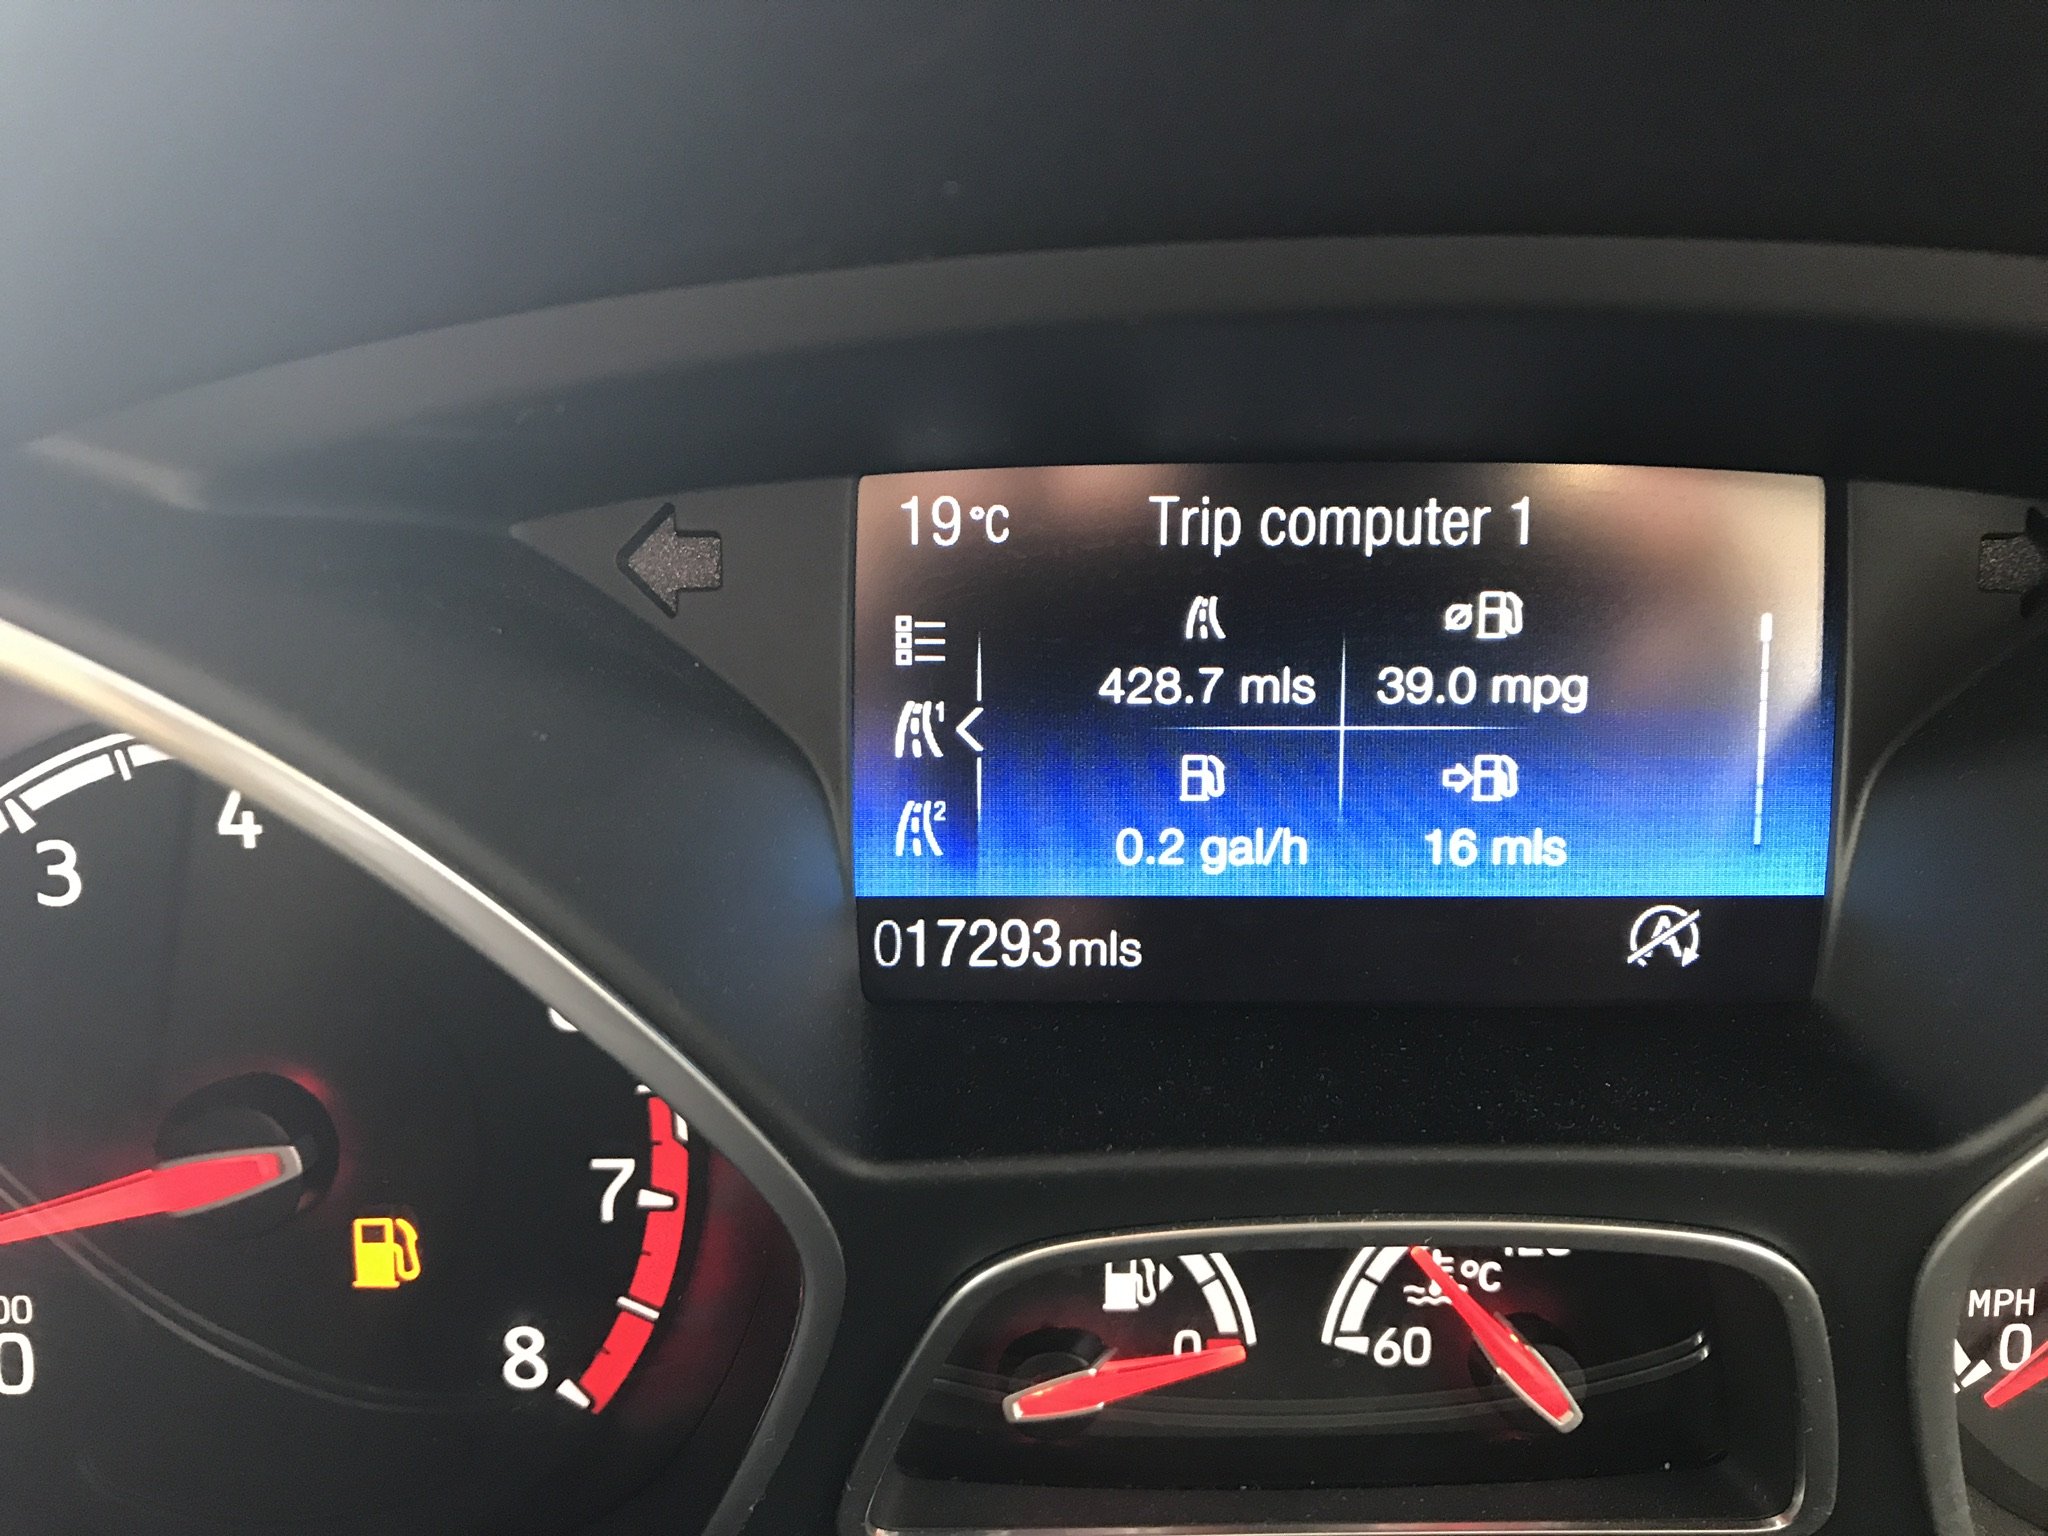
Mines a Ford Focus ST3 2 Litre 250BHP. A tank of the higher Octane stuff which I always favour of the regular stuff as it does actually make a difference cost me around £65 or $82 at today’s exchange rate. It’s about £1.25 a litre here currently though it does tend to fluctuate, that’s about $6 a US Gallon. My maths could be off though as it isn’t my strong suit. I average about 33 miles to a Gallon on a day to day basis of mostly motorway/freeway mileage of the 30 something mile round trip to work and back. Of course that dips when I get to return back to proper rural roads and drive with a little more ‘exuberance’ even then it’s rarely lower than 28 miles to the gallon I have done a near 500 mile round trip to London on one tank that was brimmed to the max on leaving my place and running on fumes on return to the garage nearest to my house which I was happy with and at £65 to refill to the brim, cheaper than taking the train this trip I have done twice in 2 different Focus ST’s I’ve owned and the the first one was marginally better when I got back but the last time the AC was on a higher setting and I was stationary in traffic for a much larger part of the 4 and a bit hours the trip takes on average. I knew all this before buying the first ST I got a few years ago, to me it’s about smiles to the Gallon rather than miles to the Gallon. I’ve just today got rid of a Mercedes C300 I had as a courtesy car after someone drove into the side of my Focus, hated driving it, soft suspension, like driving a boat, vague steeering, plus it’s an automatic gear box which for me having only previously driven one other auto for an hour or 2 was horrible also. That car doing the same round trip to work and back only got 1 more mile to the Gallon than my ST despite the difference in engine outputs. I think the Merc was about 180 BHP or there about. Because im quite boring I took photos at the end of each journey. For the first photo, in my older car, which had more miles on it and was more run in before the trip and the second photo, a much newer car attempting the journey on a barely broken in engine might go a little way to explaining the MPG differences coup,Ed with the 10 degree temperature difference.


-
Yes, I’ve gone right through the kit looking for the blighters. Found all of the ones that are likely to be seen and eliminated them all with extreme prejudice.
-
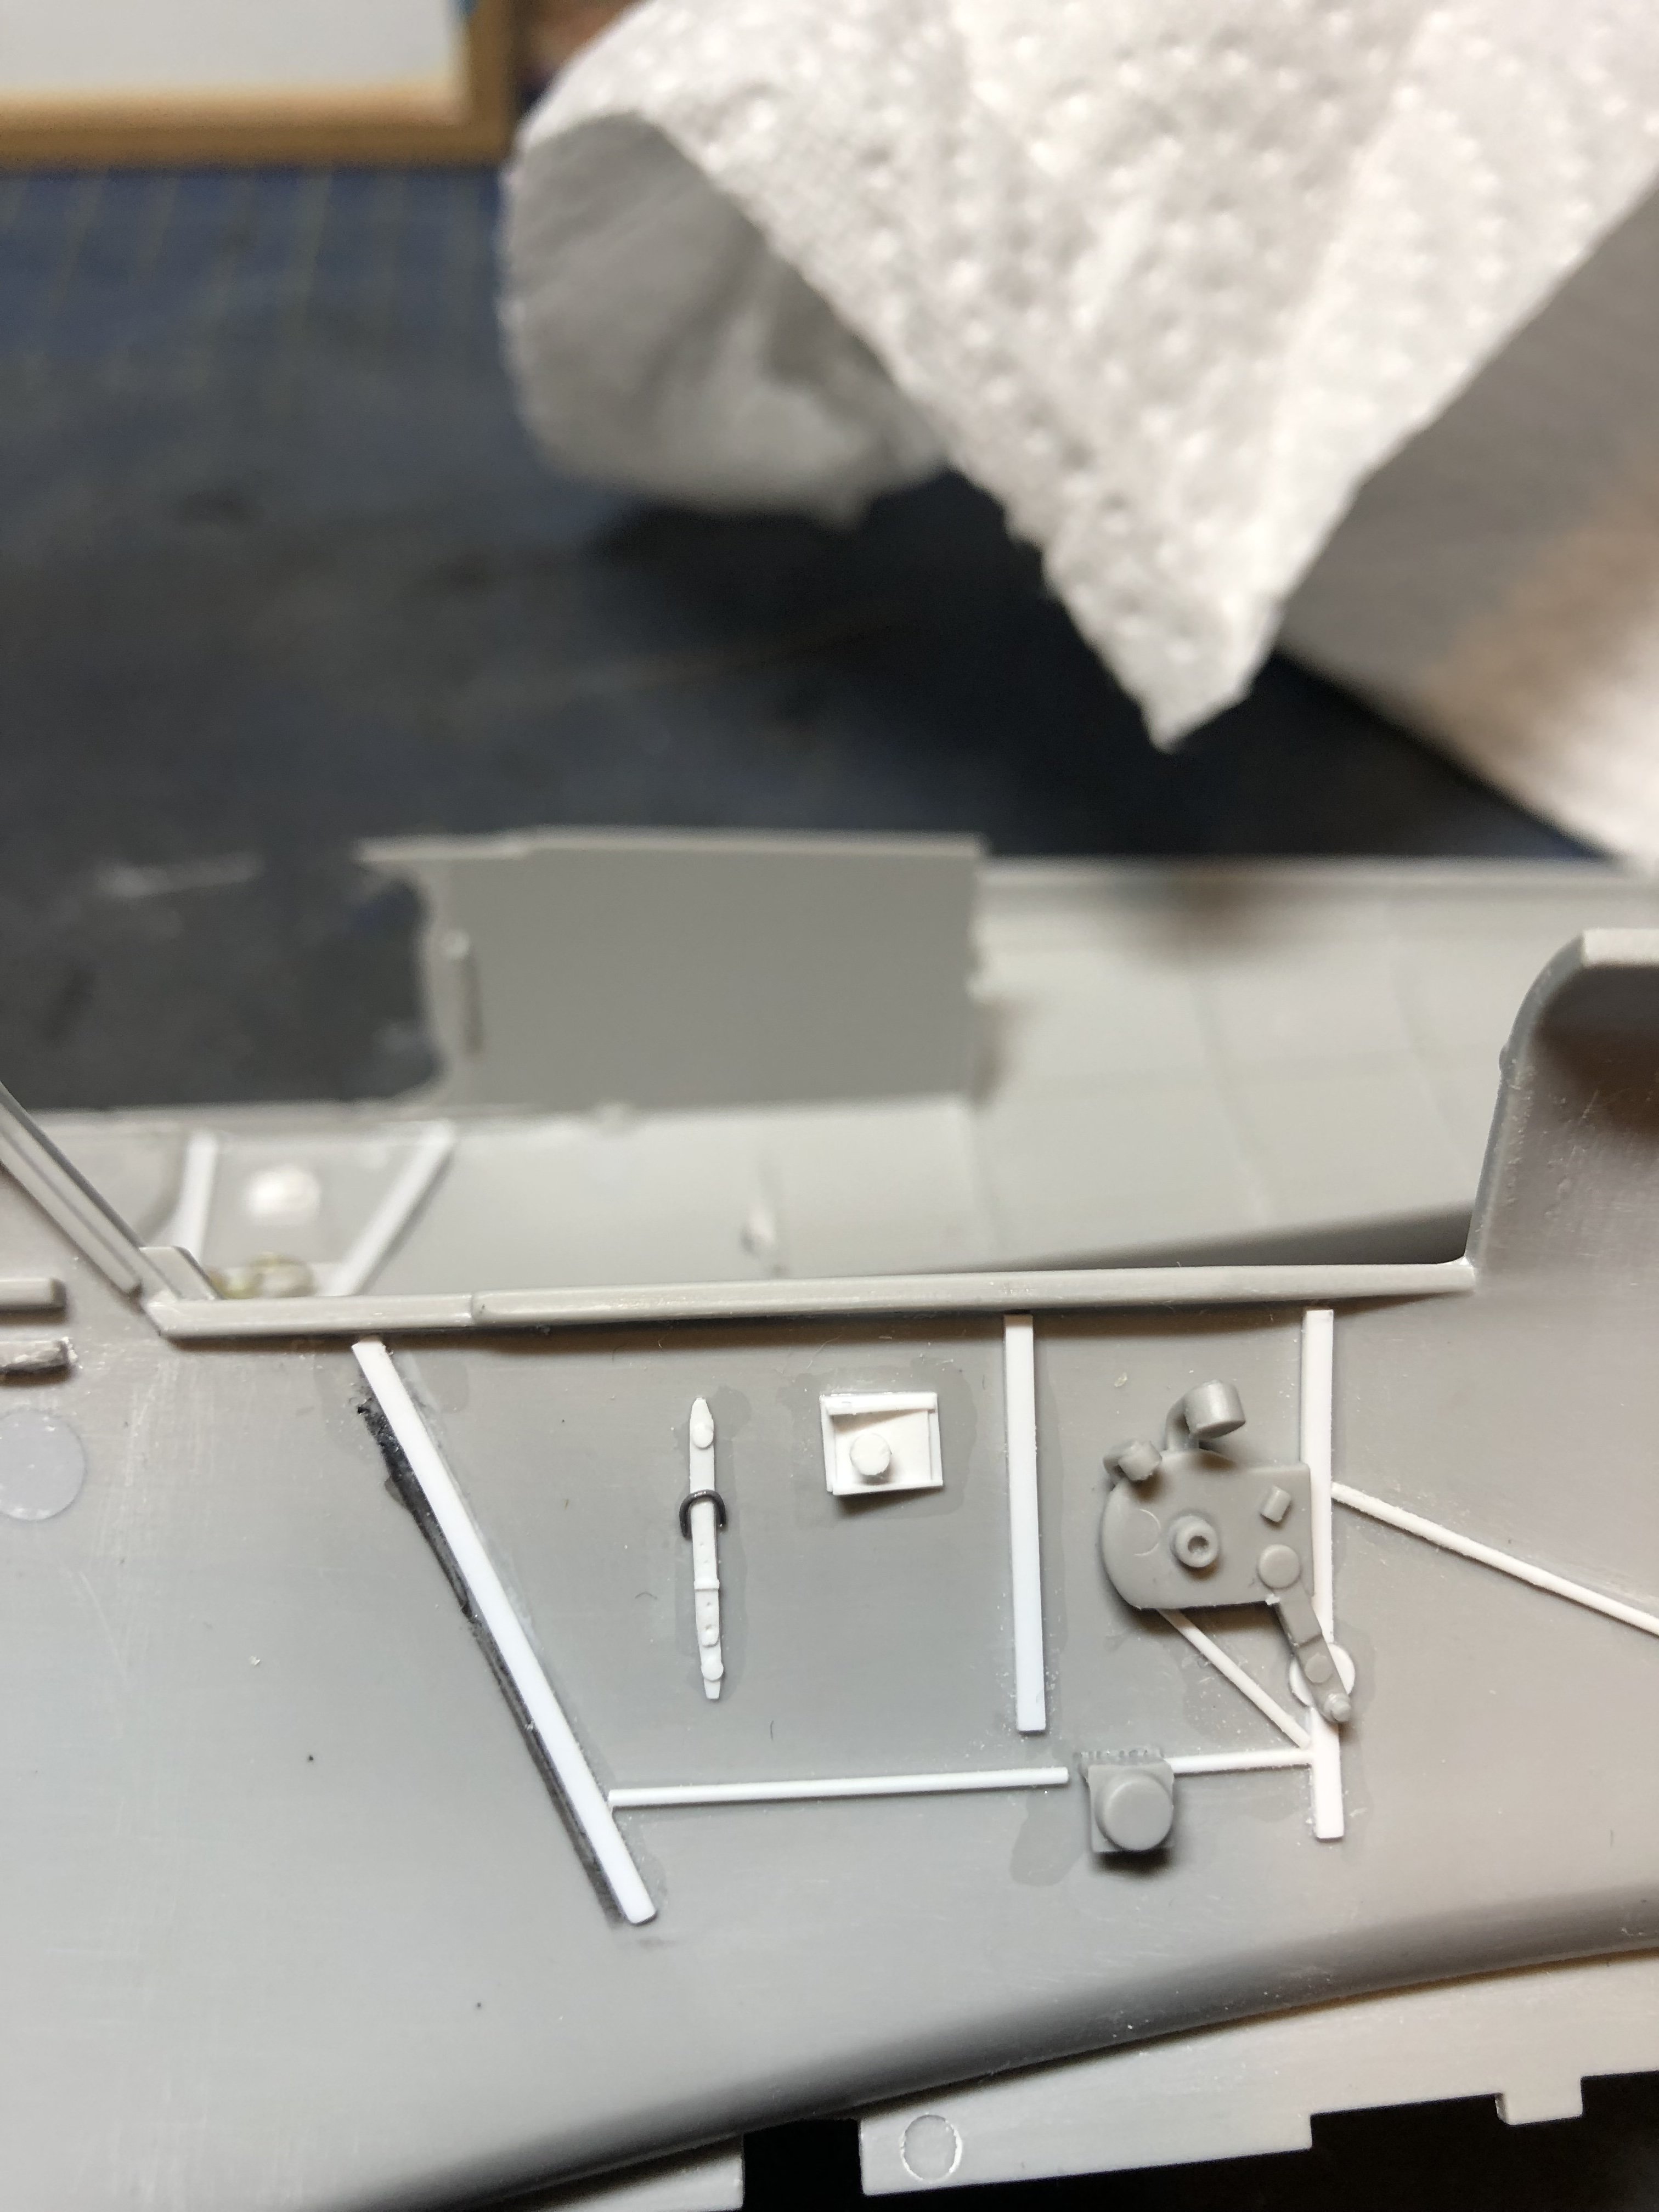
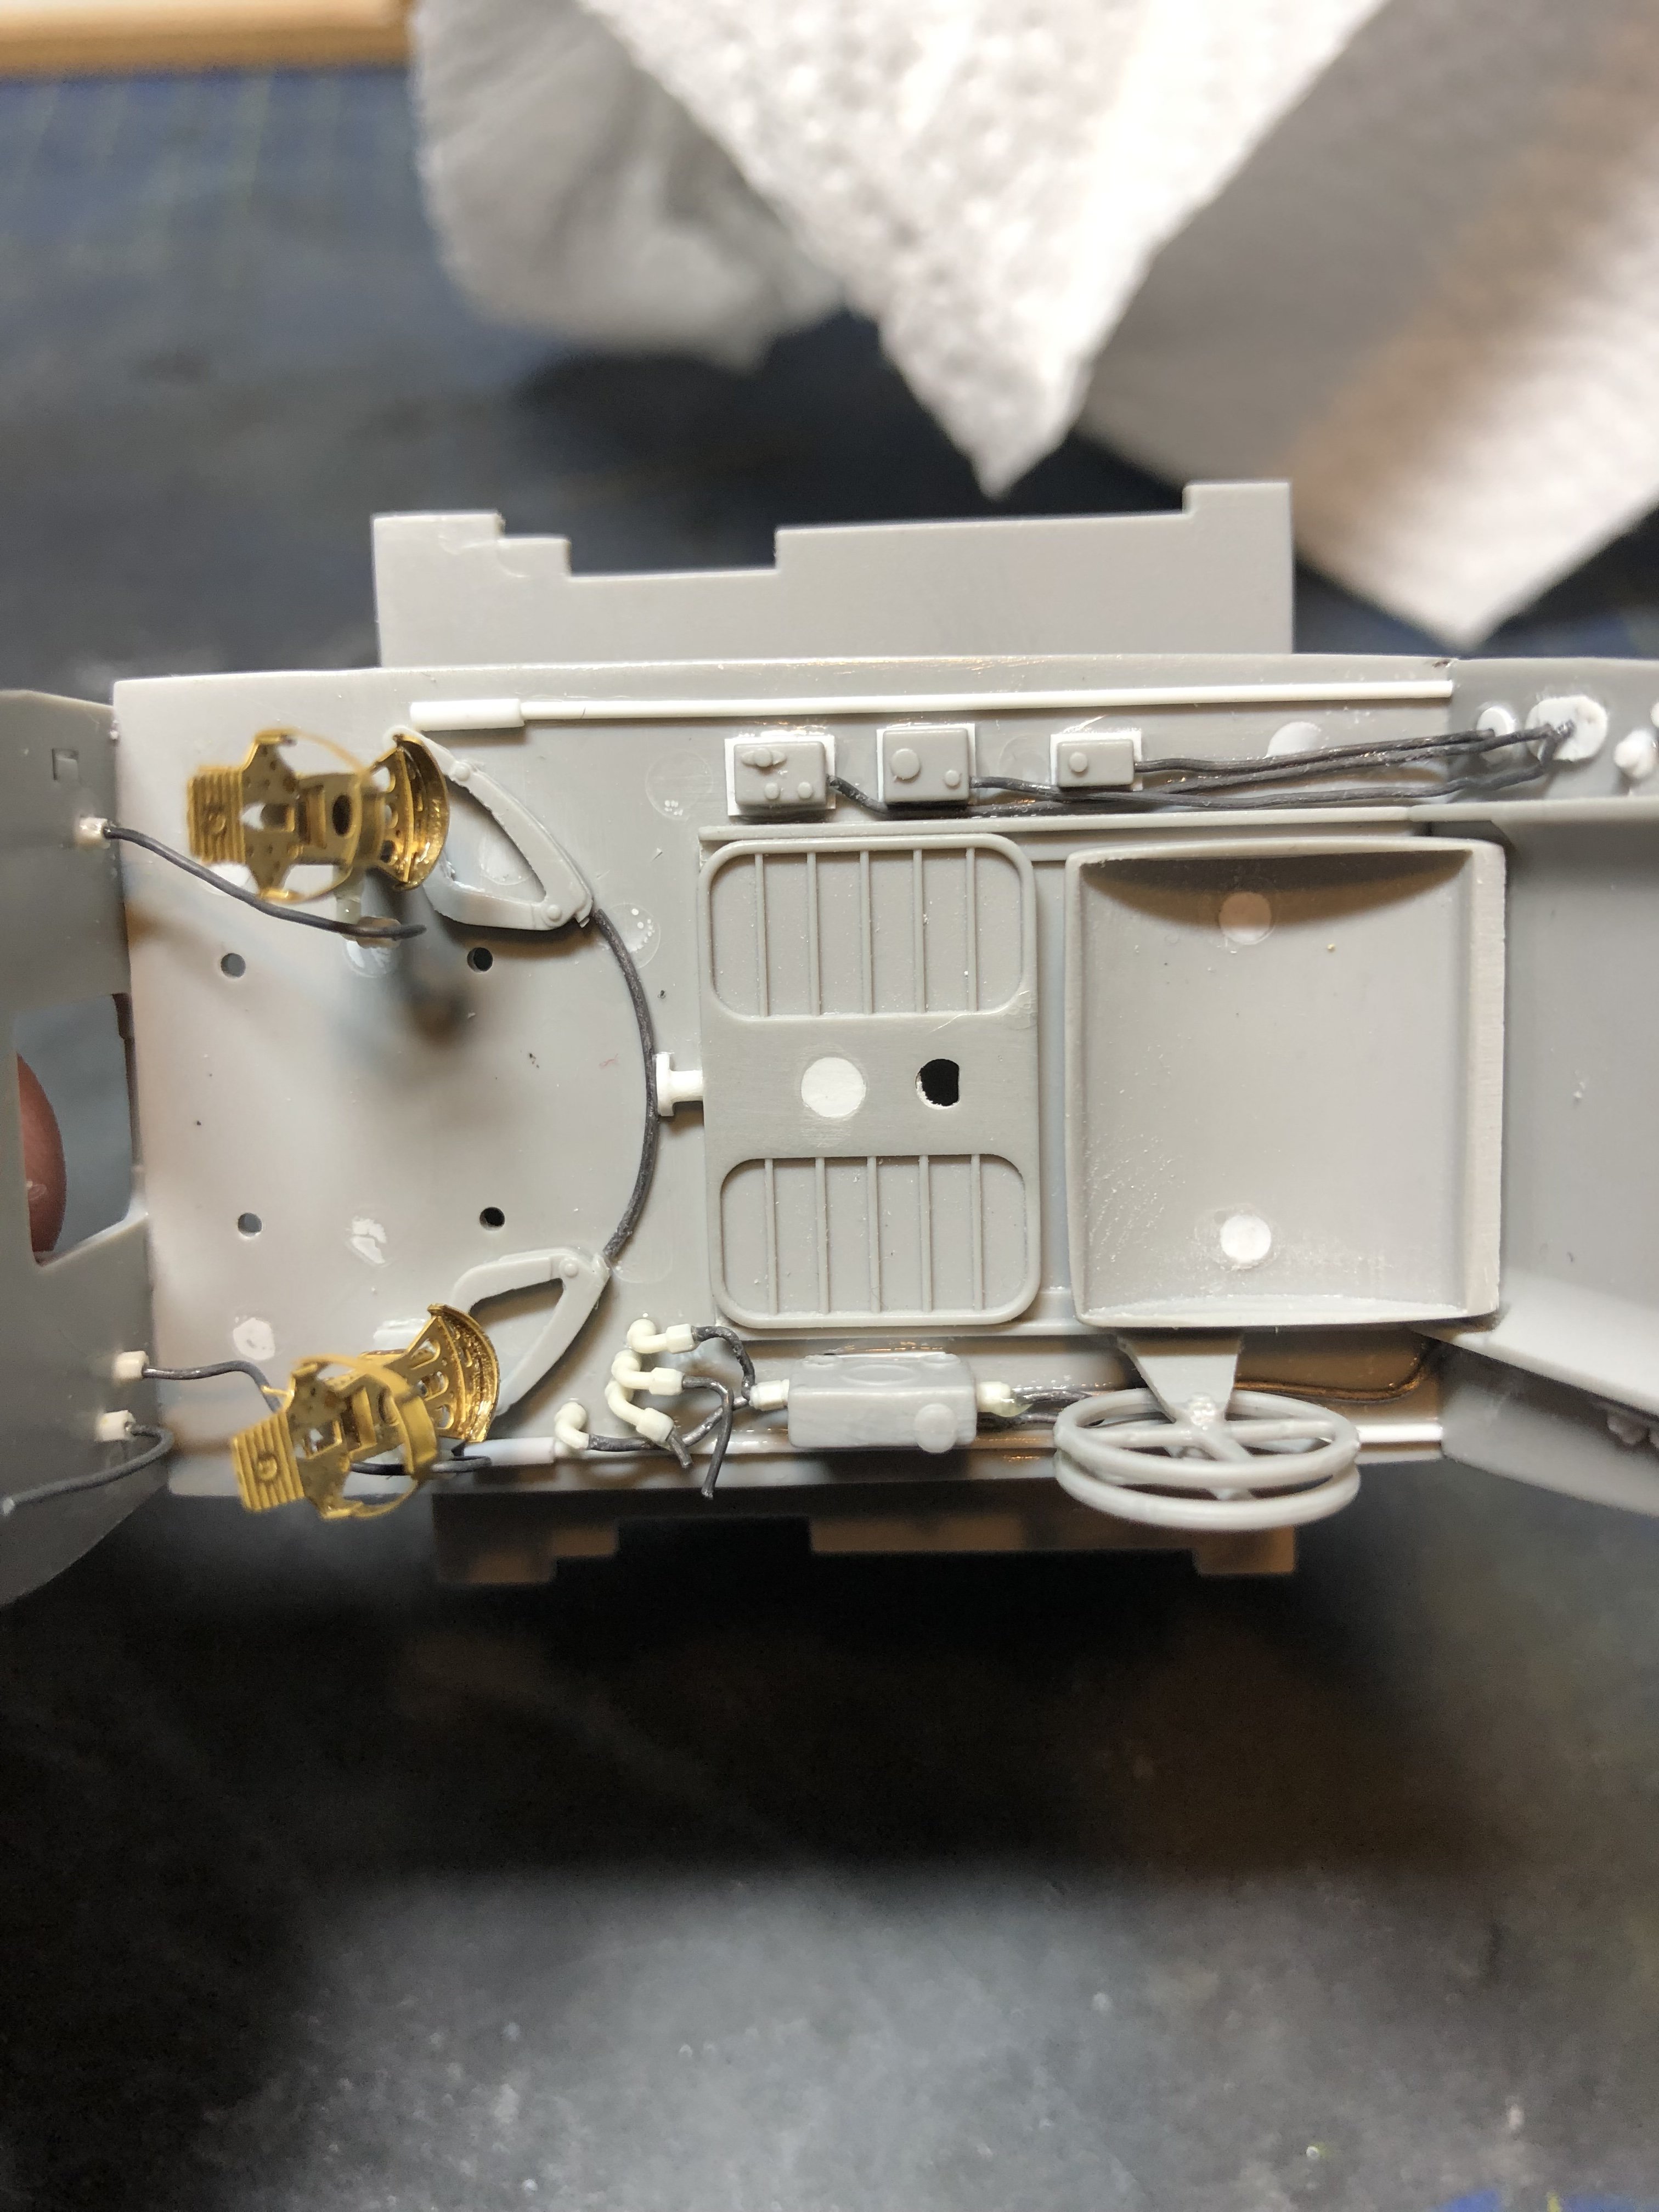
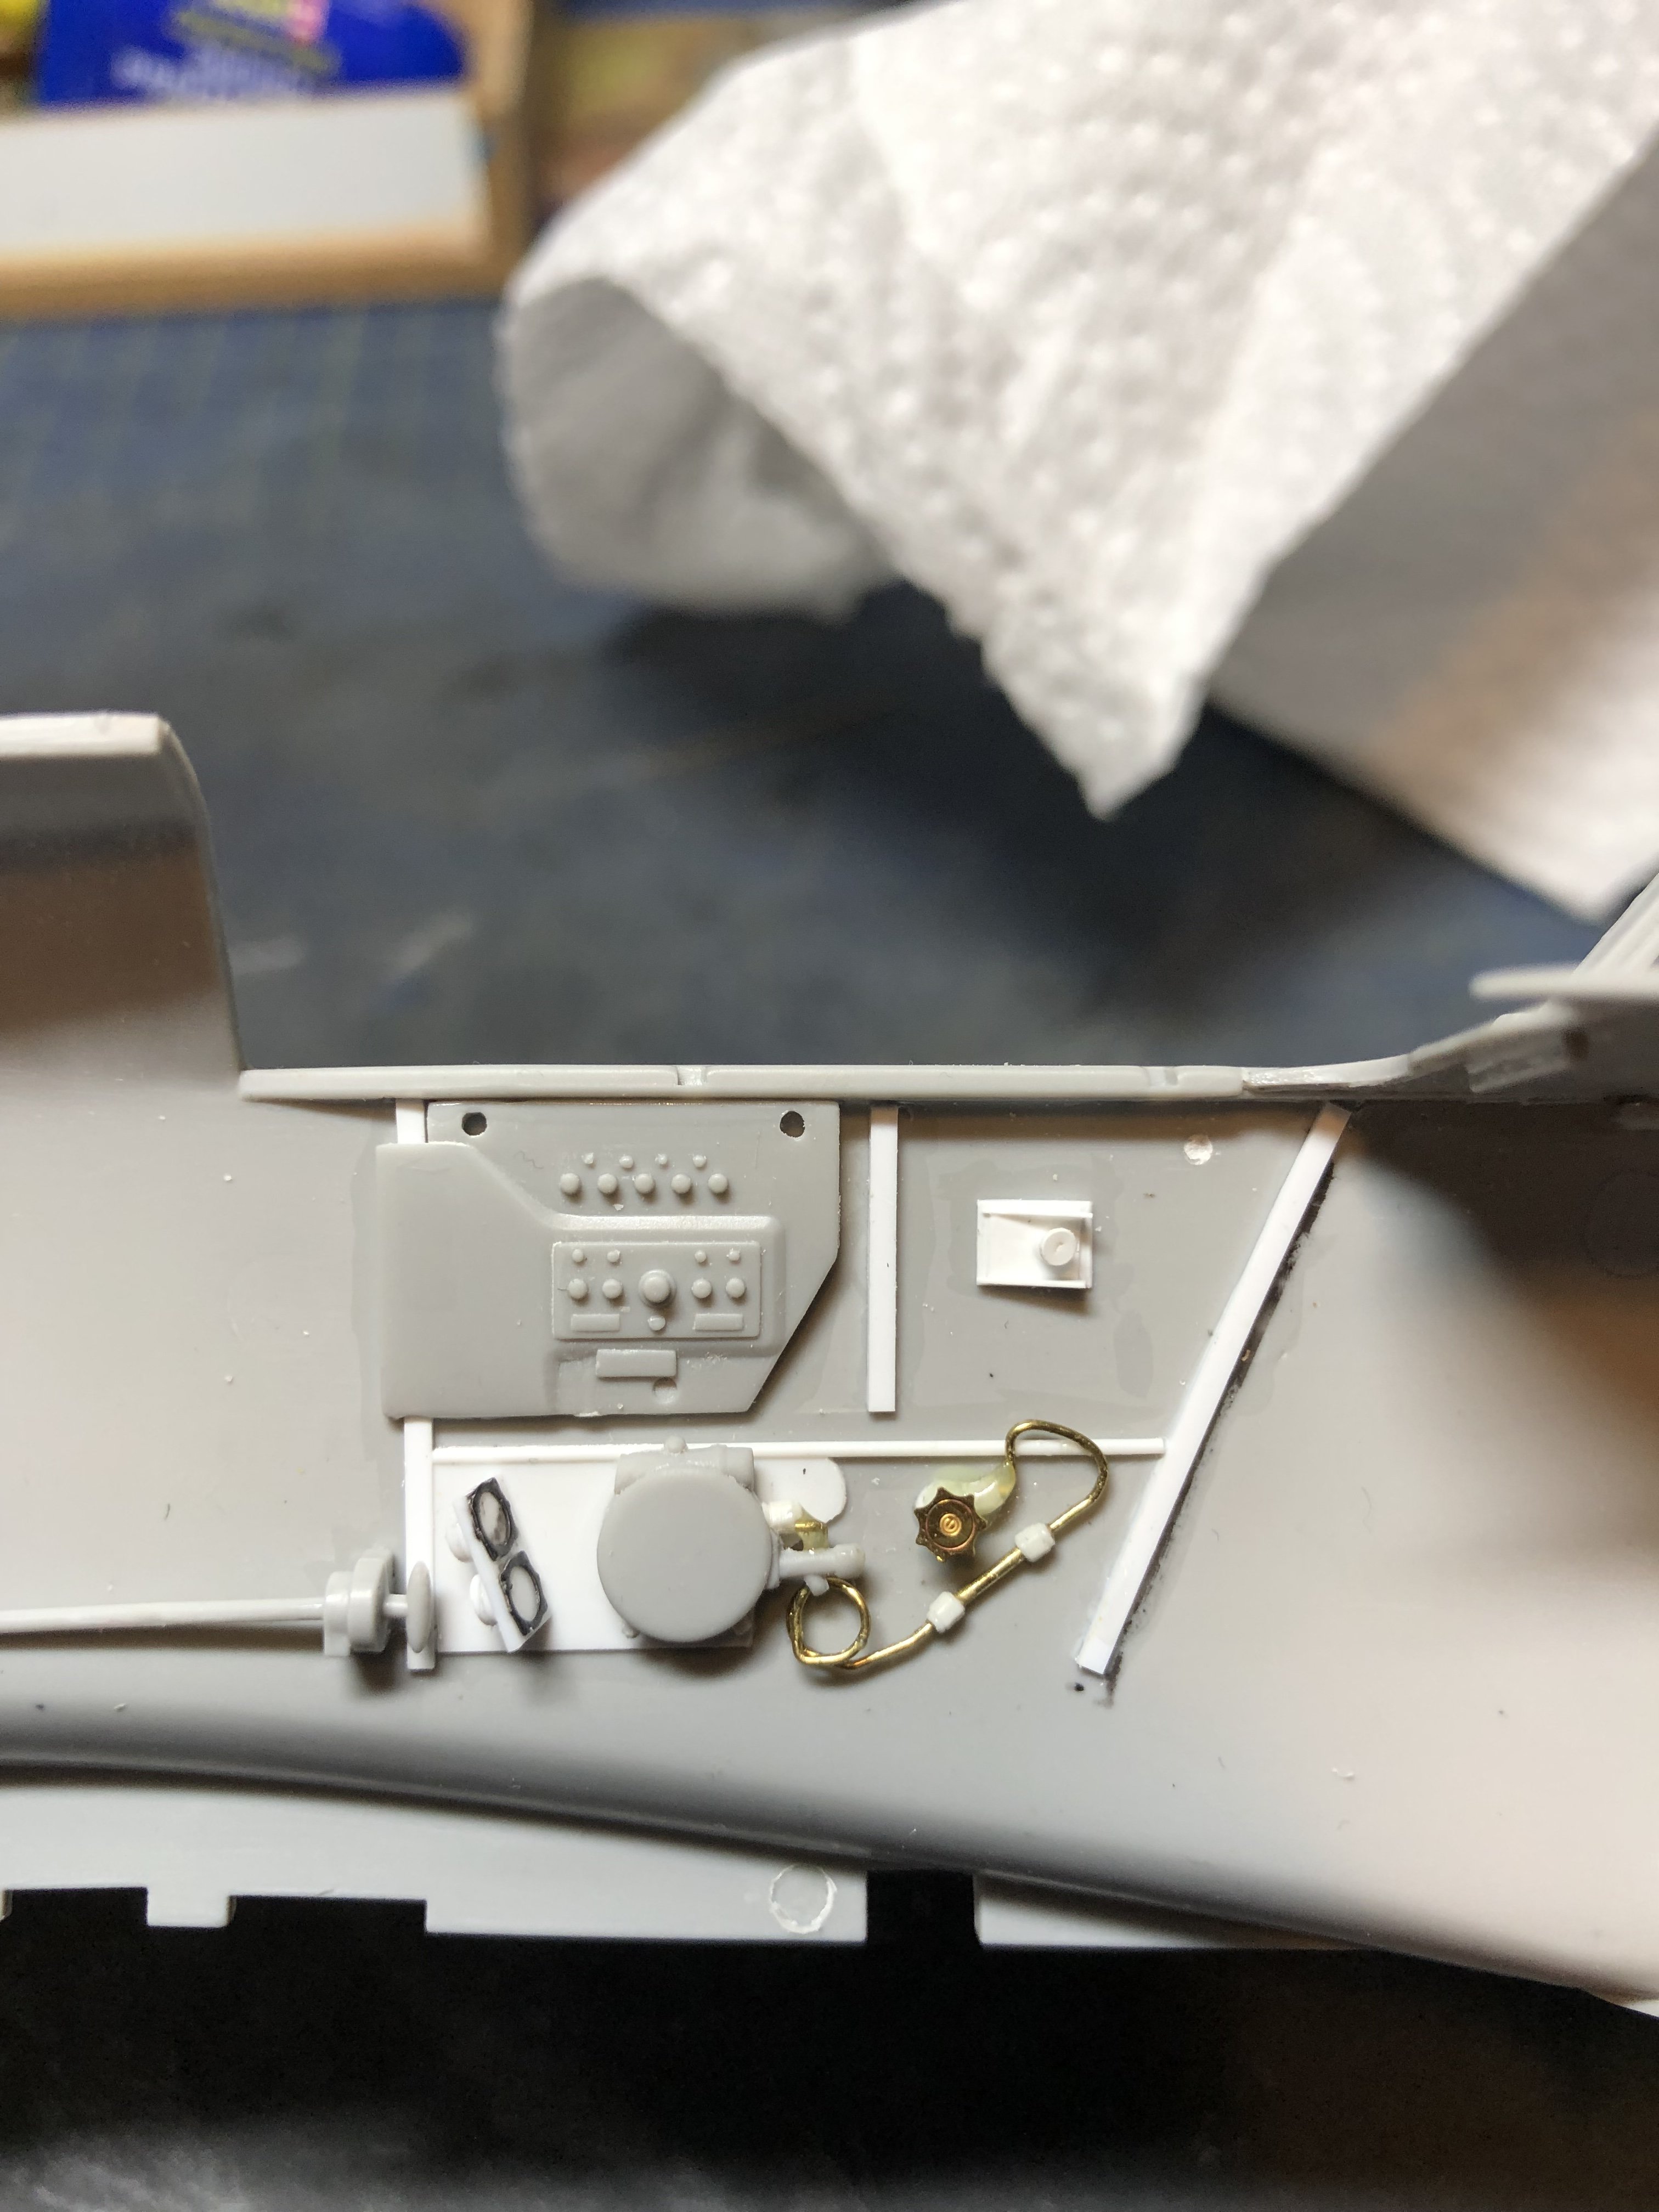
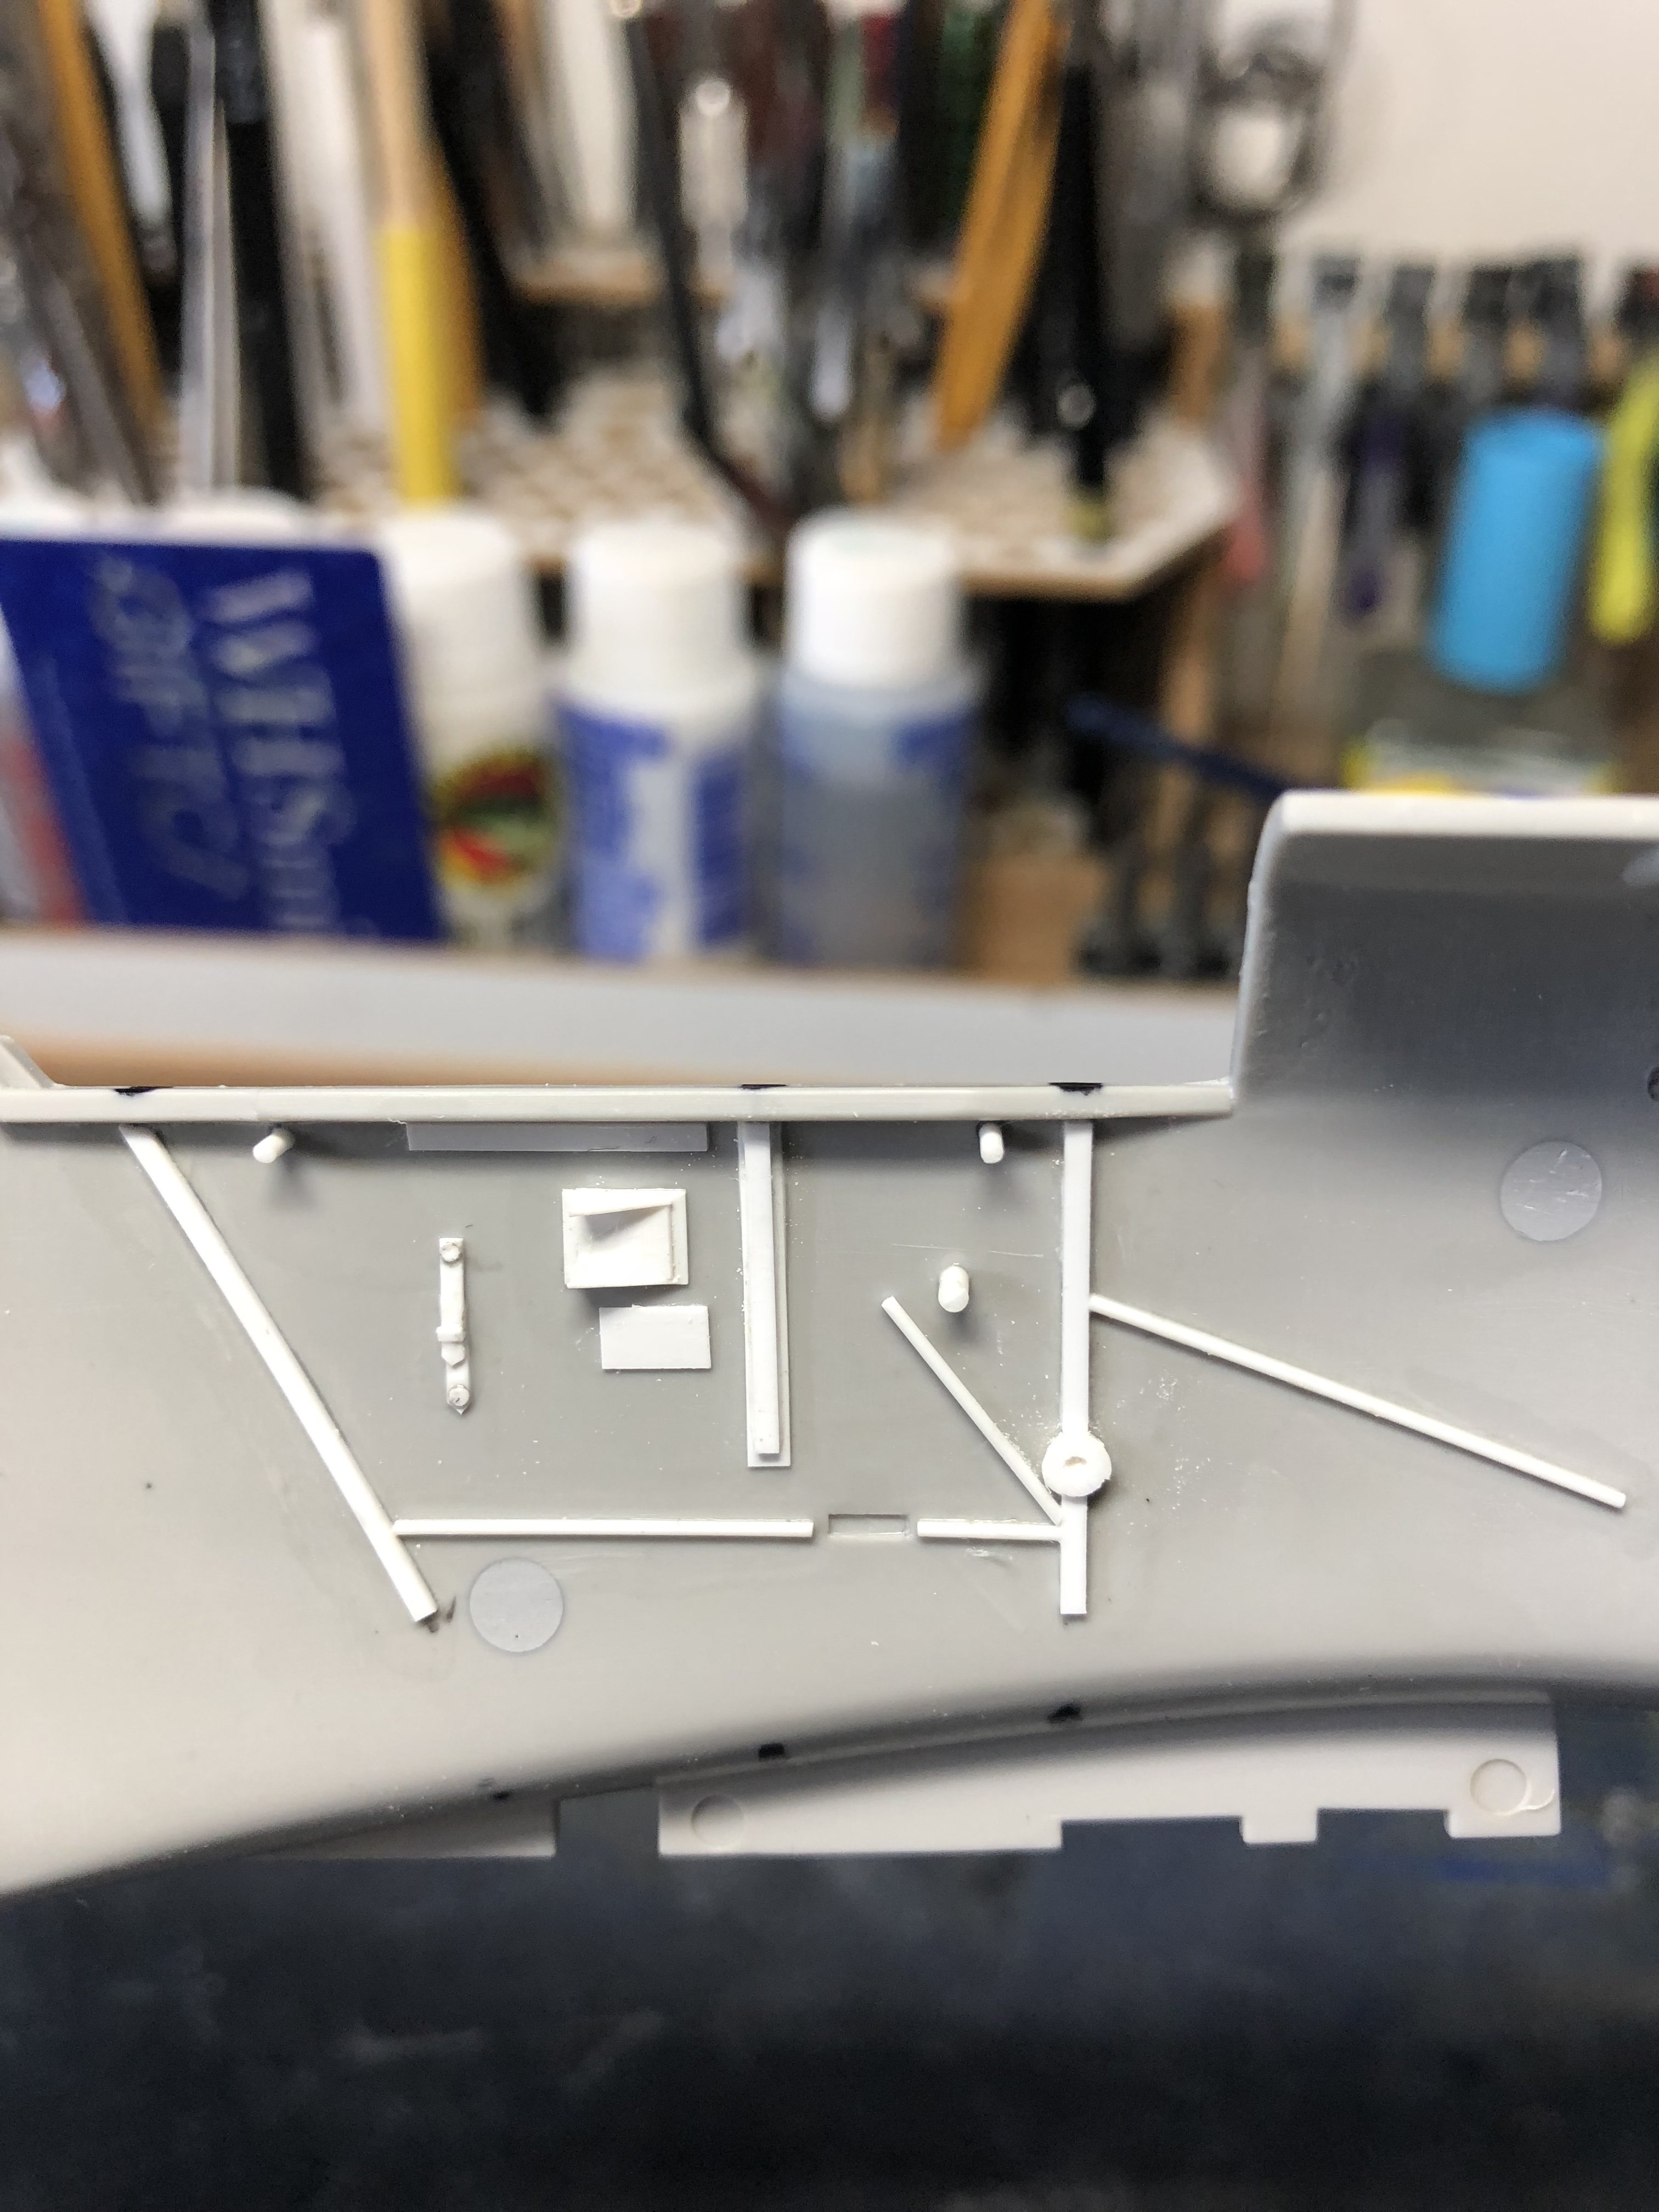
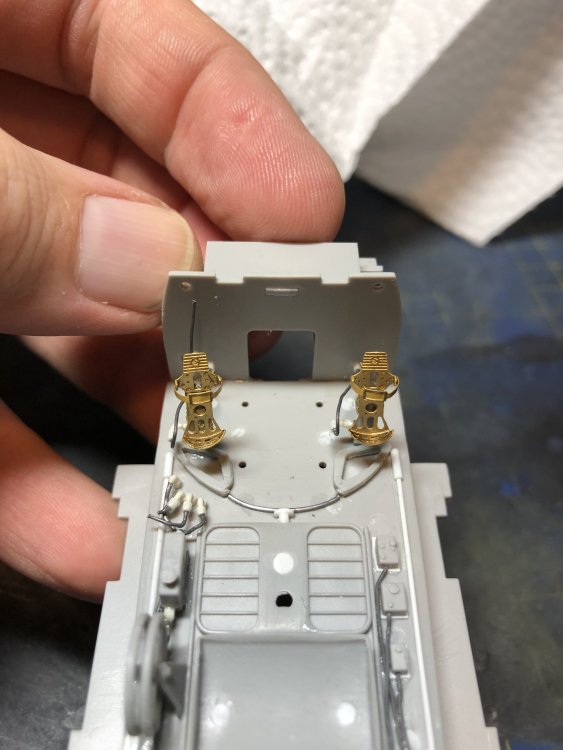
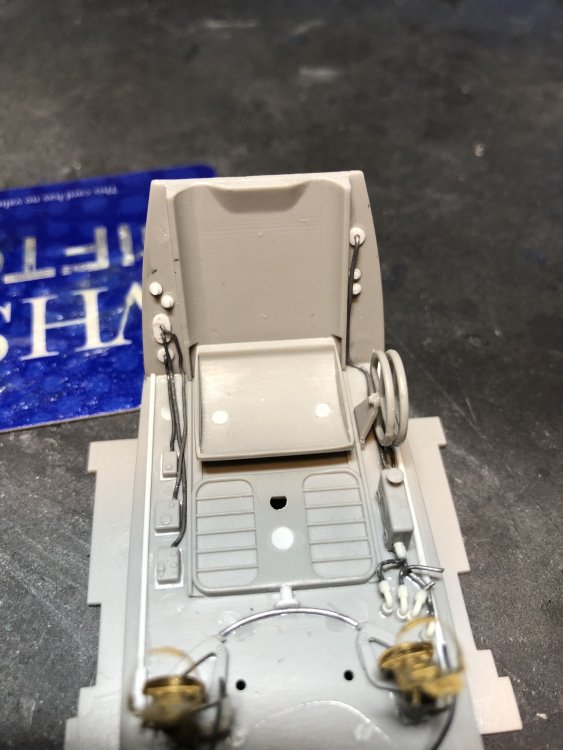
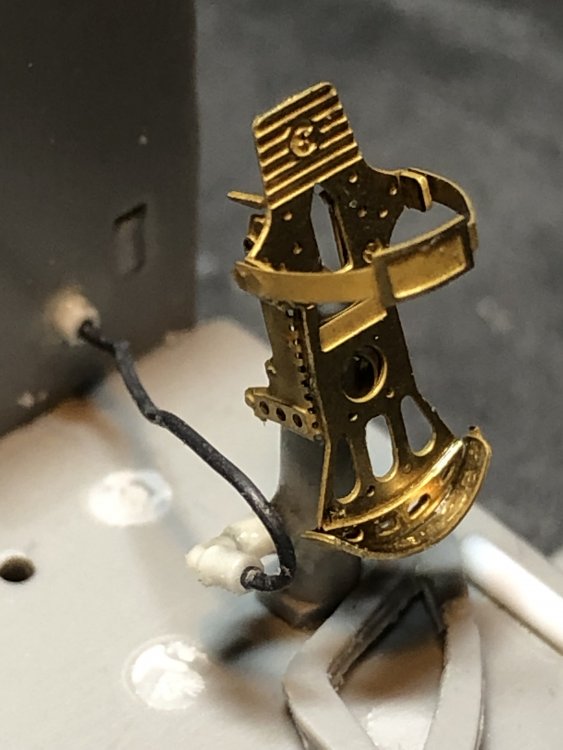
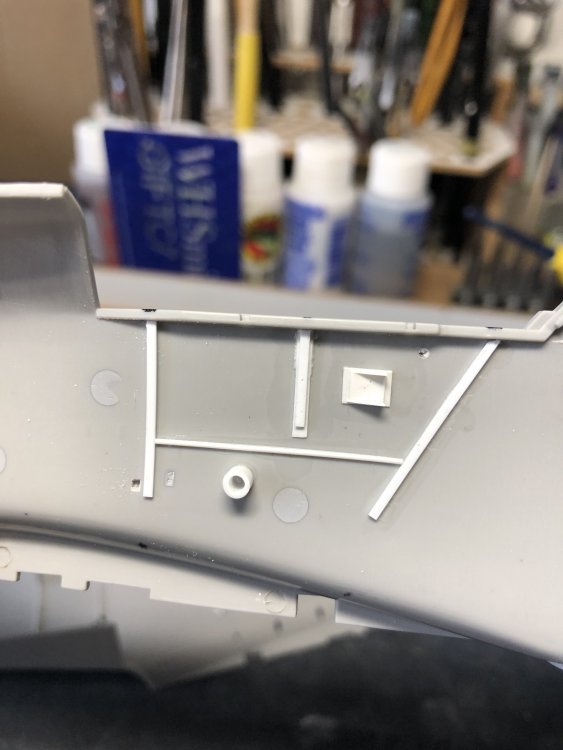
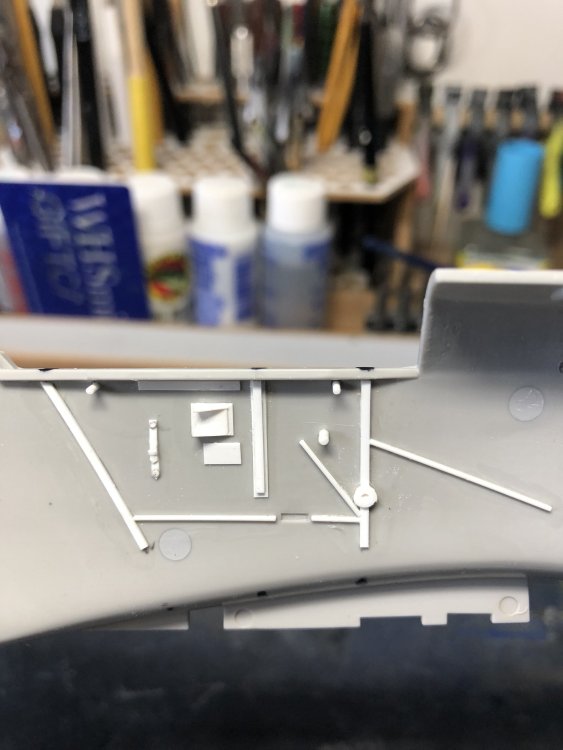
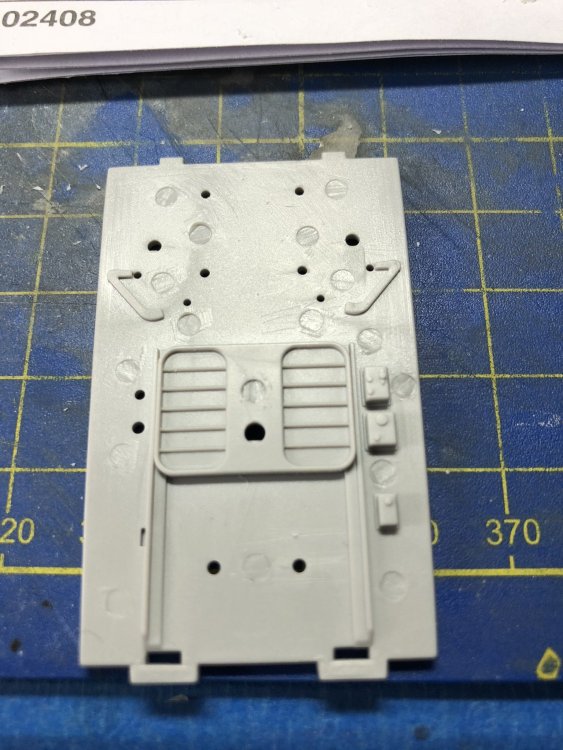
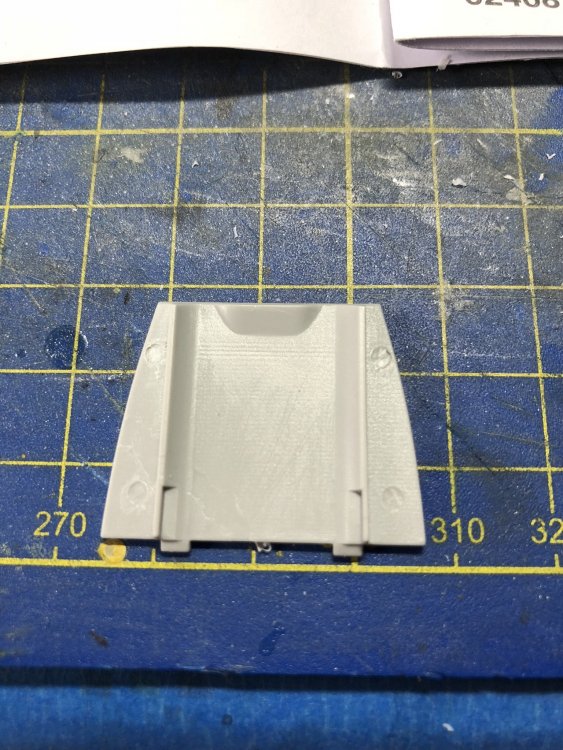
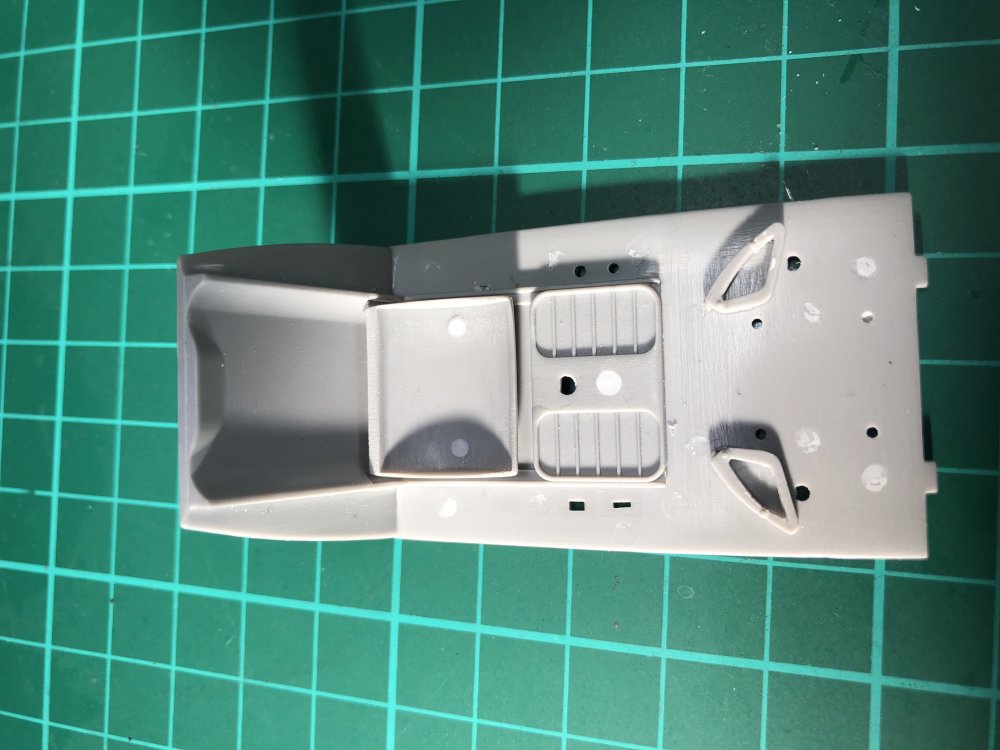
About time for an update. I'd left this kit alone for a while as the bench had been packed away (I work at one of the kitchen worktops). So we left off with some scratch cockpit work that I then found out I'd gotten the angle of the rear part wrong which threw off the lengths and positions of everything else. I decided it needed to be done away with and started over so out it came, sanded out and polished the bare cockpit sides again and prepared to start the cockpit over. What I did this time was add the cockpit rear deck to help aid the cockpit floor positioning and then holding the cockpit floor in place, drew with marker the portion of the rear bulkhead and seat to get the position I needed to add the rear styrene strip to. Did this to both fuselage halves. Worked a treat and building from that rear part I added all the other detail I'd obliterated earlier in dealing with the ejection pin marks. So here we have the cockpit, version 2 with some of the kit parts added to my scratch parts. This cockpit wall was a little more complex and took a little longer to do. Had to make the backing plate you can just about see behind the Oxygen regulator. There is a very vague rendition of it on the kit parts that you'd swear was a moulding flaw if you didnt know there was a plate there on the real thing. Replaced the kit part for the dials of the Oxy regulator and added some punched discs to the rear simulate the back of the dials. Th faces are Airscale bezels. We then have the control valve and plumbing for the Oxygen system. Just 0.4mm Brass rod bent around to approximate the real deal. The 2 things that look like blobs are resin nuts. Using my phone which doesnt do Macro well, thankfully or you'd see more flaws. The plumbing is 2 lines joined in the middle and the 2 nuts simulate the area the join is in, will stand out more once painted. Then there's the tap/faucet for regulating the flow I assume, another Airscale part. Cockpit floor with much added plumbing from Lead wire and some Styrene rod to simulate the rudder cables from the pedals. The angled bits of plumbing sticking out of the floor are resin bits from Top Studio, designed for 1/24 car models for plumbing joints, thought they'd work lively here when trimmed to the required shape. Another view. Cannon breech cover yet to be added. Some more detail added with Lead Wire and Styrene. And finally a close up as well as I can do with my phone of the Rudder pedal. The kit parts are ok for detail but a little thick so I used Radu Briznan etch pedals here. The plumbing again a top studio resin joint and lead wire. This large scale begs for this kind of detail to be added and I thought I'd have a go and oblige. So that’s where we are at currently.


-
Airfix is planning new Hellcat in 1/24 !
aderowlands replied to Martinnfb's topic in Modelling Discussion
Already measured the shelf dimensions in my cabinet versus the kits dimensions. Both wings unfolded is a no go by a small margin, so either both folded or one up and one out. Either way I've placed my order with Airfix. -
I dunno, aerial stub on the real deal photo, narrower shark mouth profile than what the decal profile sheet offers, bomb instead of drop tank? Or am I missing something glaringly obvious? If the kit turns out decent I’ll be getting one and won’t be doing either of those schemes anyway. I’m hoping it turns out decent because I have had several fallings out with the Hasegawa P-40’s of the various N’s and E’s I’ve mauled and we are no longer on speaking terms.
-
My attempts at restoring the kit detail lost when removing the ejector pin marks. There where some ghost marks left from the original kit parts which I used as a template, however I went a little wrong on the rear bulkhead part and got the angle not quite right, which has thrown a few other measurements out as I discovered when I test fit the cockpit floor and seat bulkhead to the fuselage halves so at what is there will need to be removed, the fuselage half cleaned up and start all over again. The RP Toolz Mitre cutter made the job a heck of a lot easier in dubplocating parts, a job I wouldn’t want to tackle without one now. It was at this point I remembered those awful pointless clear fuselage halves Trumpeter included and I’d removed to the spares box on receiving the kit. They are currently on the bench, I was reminded almost right away how awful clear styrene is to work with when cleaning up the sprue gates. I have shot some Tamiya surface primer on them and we’ll see how they come out and if they are acceptable I’ll attempt to tackle the ejector pin marks without removing the kit detail this time. I have also emailed Trumpeter about replacement parts for the cowlings which I will need if I go ahead with the clear halves and asked for a price on the non clear fuselage halves. Their answer to my email will dictate what happens in raged s to progress on this kit now. If I can get new cowlings that means I can forge ahead with the clear halves, if there’s no cowlings I’ll wipe the detail from the non clear halves and start over.
-
Yeah, there is, but Trumpeter kindly made them all in sizes I had punches for. They could have been really shitty and made them in 2.23456mm diameters but they went with nice even numbers
-
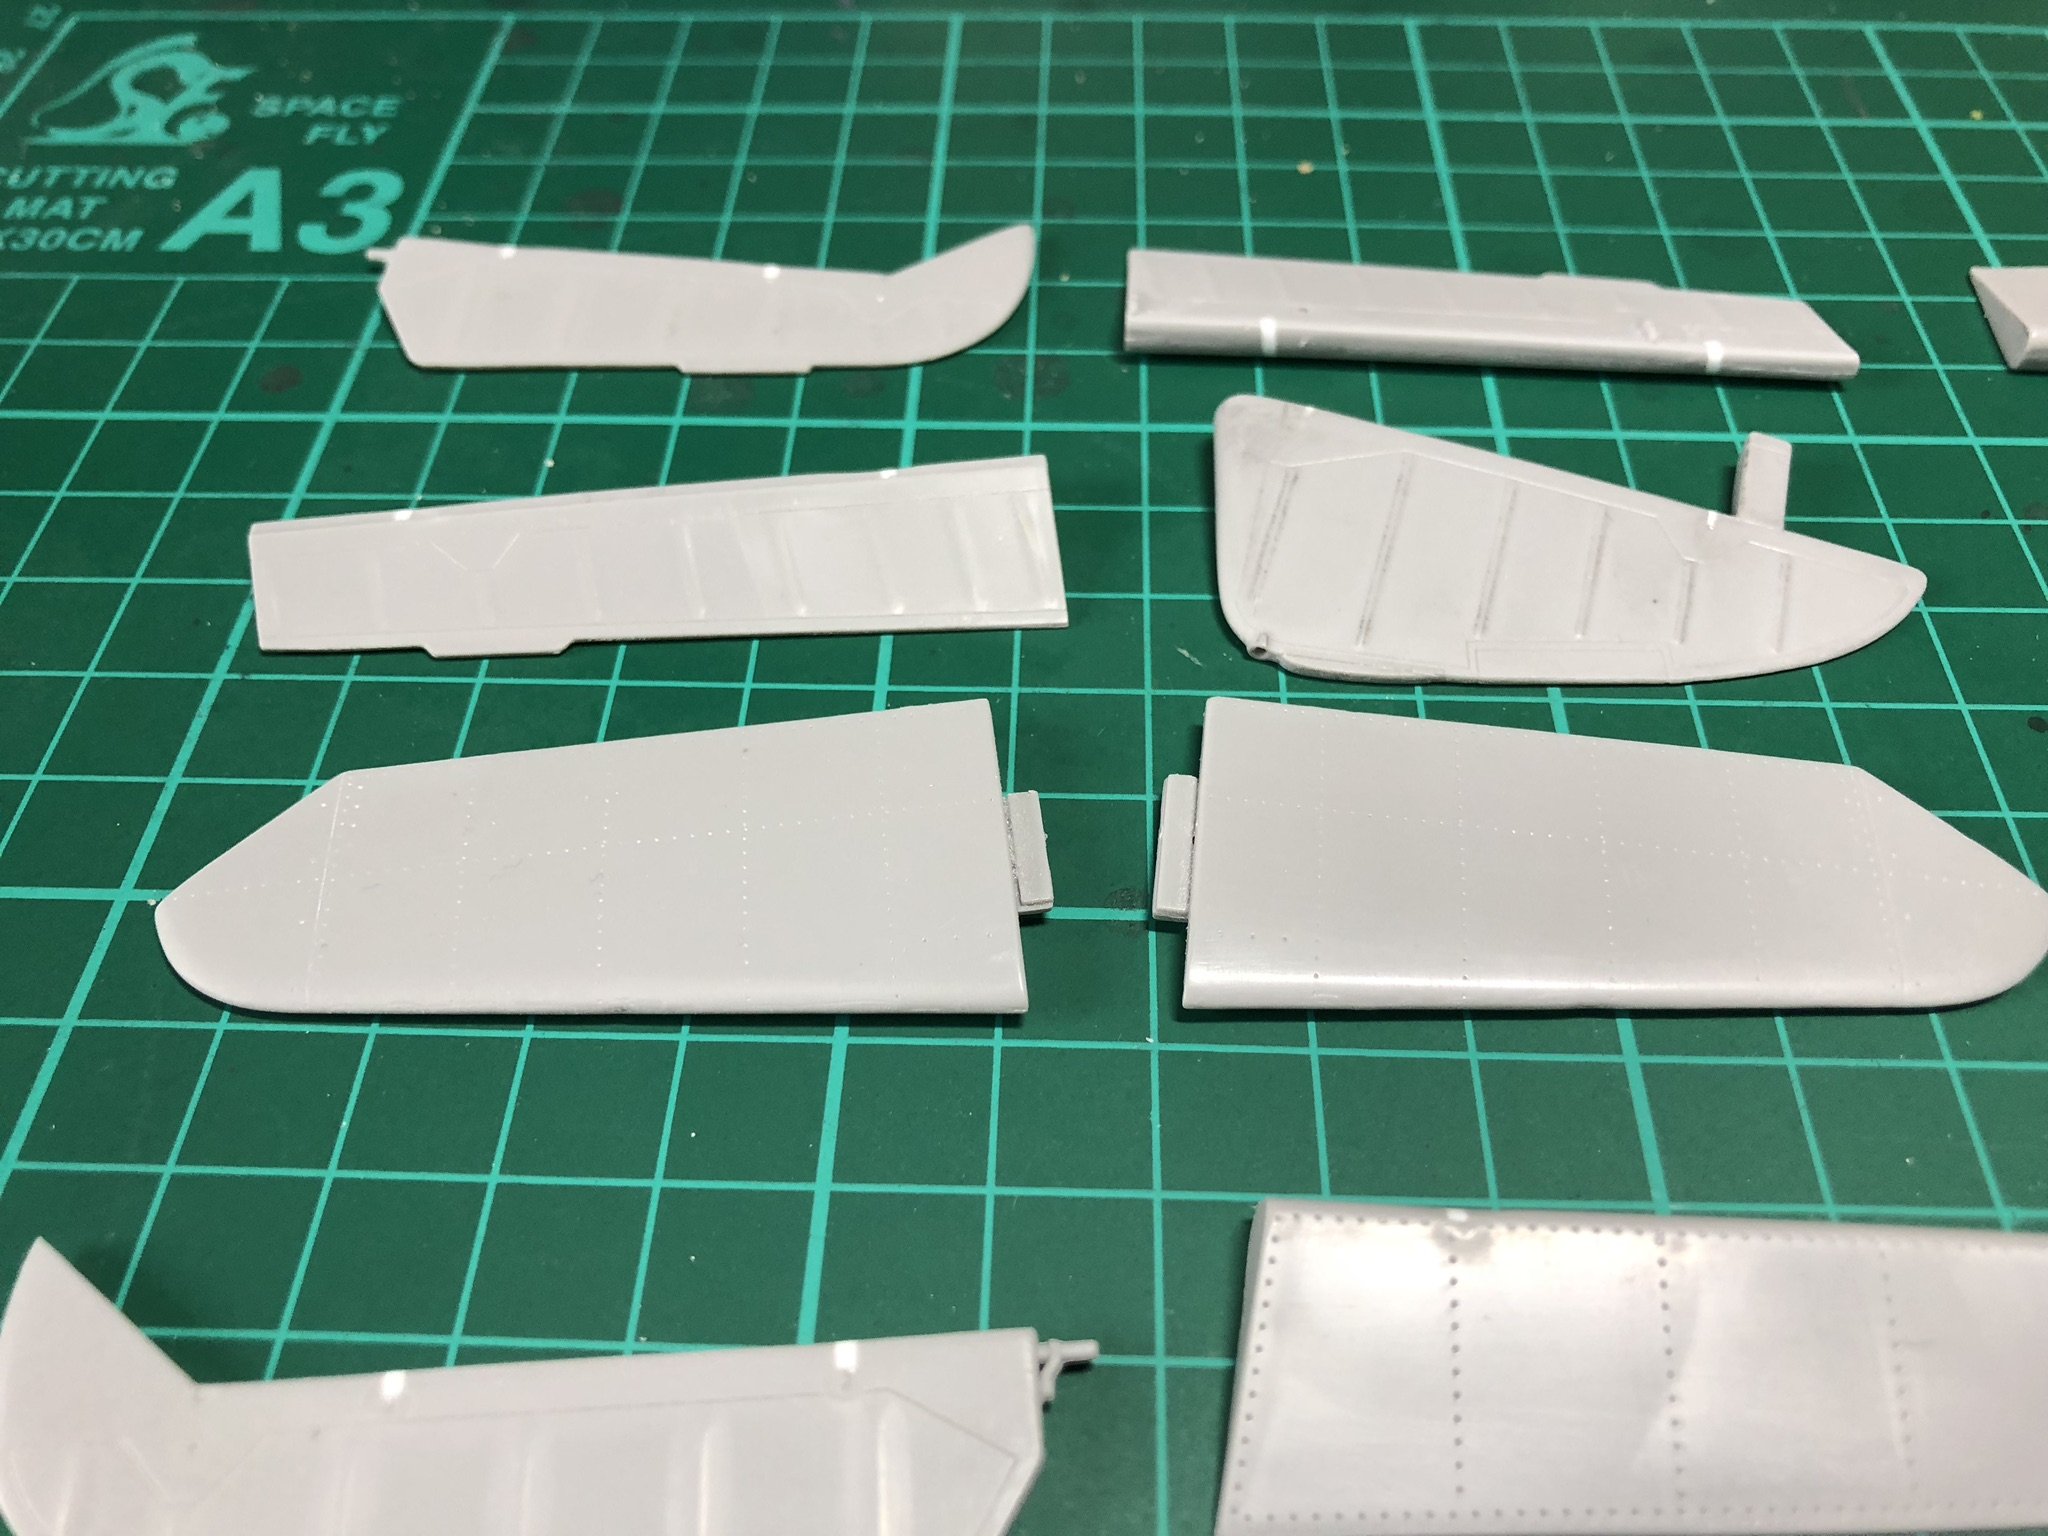
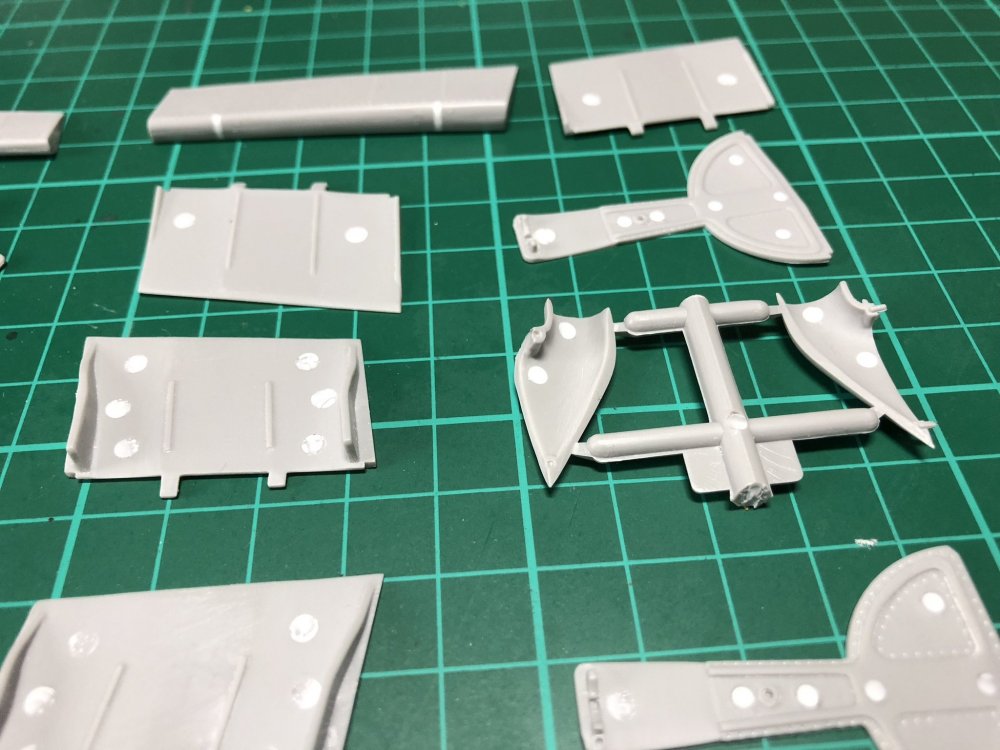
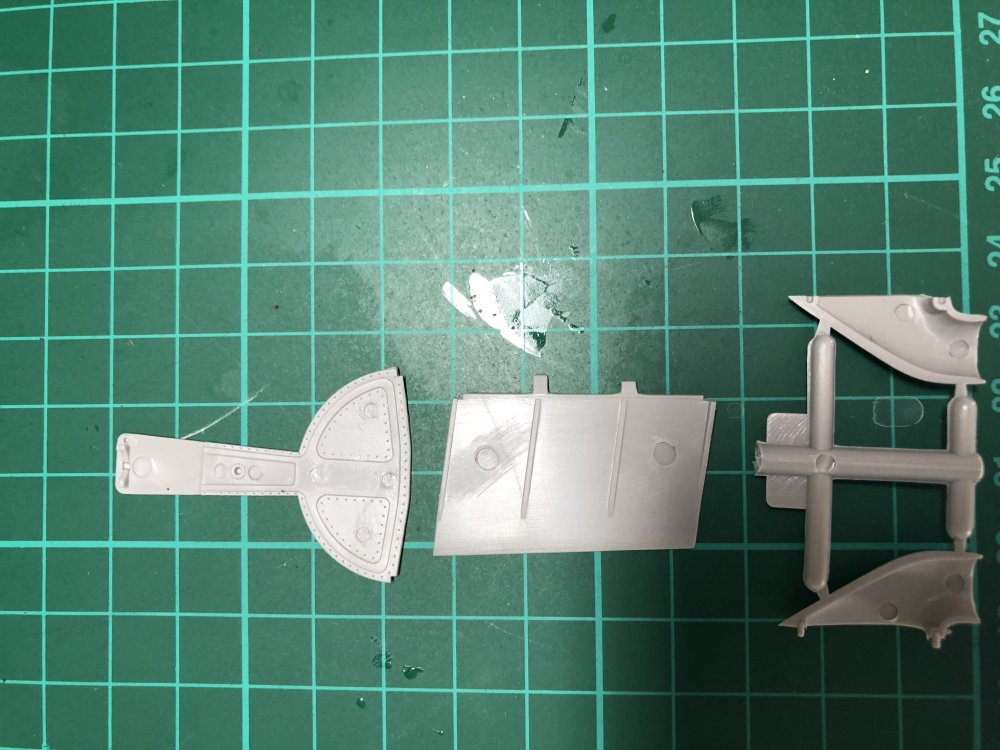
Not really an update, more of a ‘I’m still here plodding along with the build’ post. I built up the flying surfaces having from the outset decided to not use the Trumpeter hinges as they seldom fit nicely in my case and can cause issues later on, it’s not just Trumpeter, I ignore the Tamiya ones too. On joint each half of each flying surface together I noticed a lot of the slots cut for the hinges didn’t match up and were off set anyway which made my decision more valid. I filed them all square and added some styrene rod to each with a fair bit of glue to melt the strip into the kit pieces nicely to fill gaps and let that set for a couple of days. Working night shifts all week I decided to take these parts in to work and work at them in the small hours of the morning so all parts were sanded, cleaned up and polished. The radiator doors, gear doors had the pin holes filled with styrene discs and they were cleaned up also, so that’s where I’m at with the build as of now. I have gone through the kit and think I’ve found and eradicated all the pin marks that will be visible and glad I’ve done it in one go as stumbling across things like this later would maybe lead to me slowing down the build and probably shelving it for something nice and new and shiny from the stash. I’m still waiting a few things for the cockpit and I’m also still wondering what to do about the wheel wells lack of detail.

-
Forgot to mention I also thinned the seat pan on the sides and front part quite a bit. I decided against sanding the rear part as it would leave a gap between the seat pan and rear wall, yes could have moved the seat back a bit but this would have thrown other stuff out of alignment later on.
-
Ridiculous, yes, insurmountable, no. It makes it challenging in some places for sure, the cockpit walls being one place in particular but if I had the patience to cut little bits of sand paper small enough to get in to the corners and around the moulded detail life would have been easier but me being me and having only certain sized sanding sticks I went the route I went. If it was an intricate cockpit with harder detail to scratch build I certainly would have gone the other way but the detail Trumpeter decided to mould in is relatively simple strip and rod stuff with some squares and circles here and there. More complex shapes, thankfully are separate parts. Certainly hasn’t put me off the build or planning to buy their other 109 versions.
-
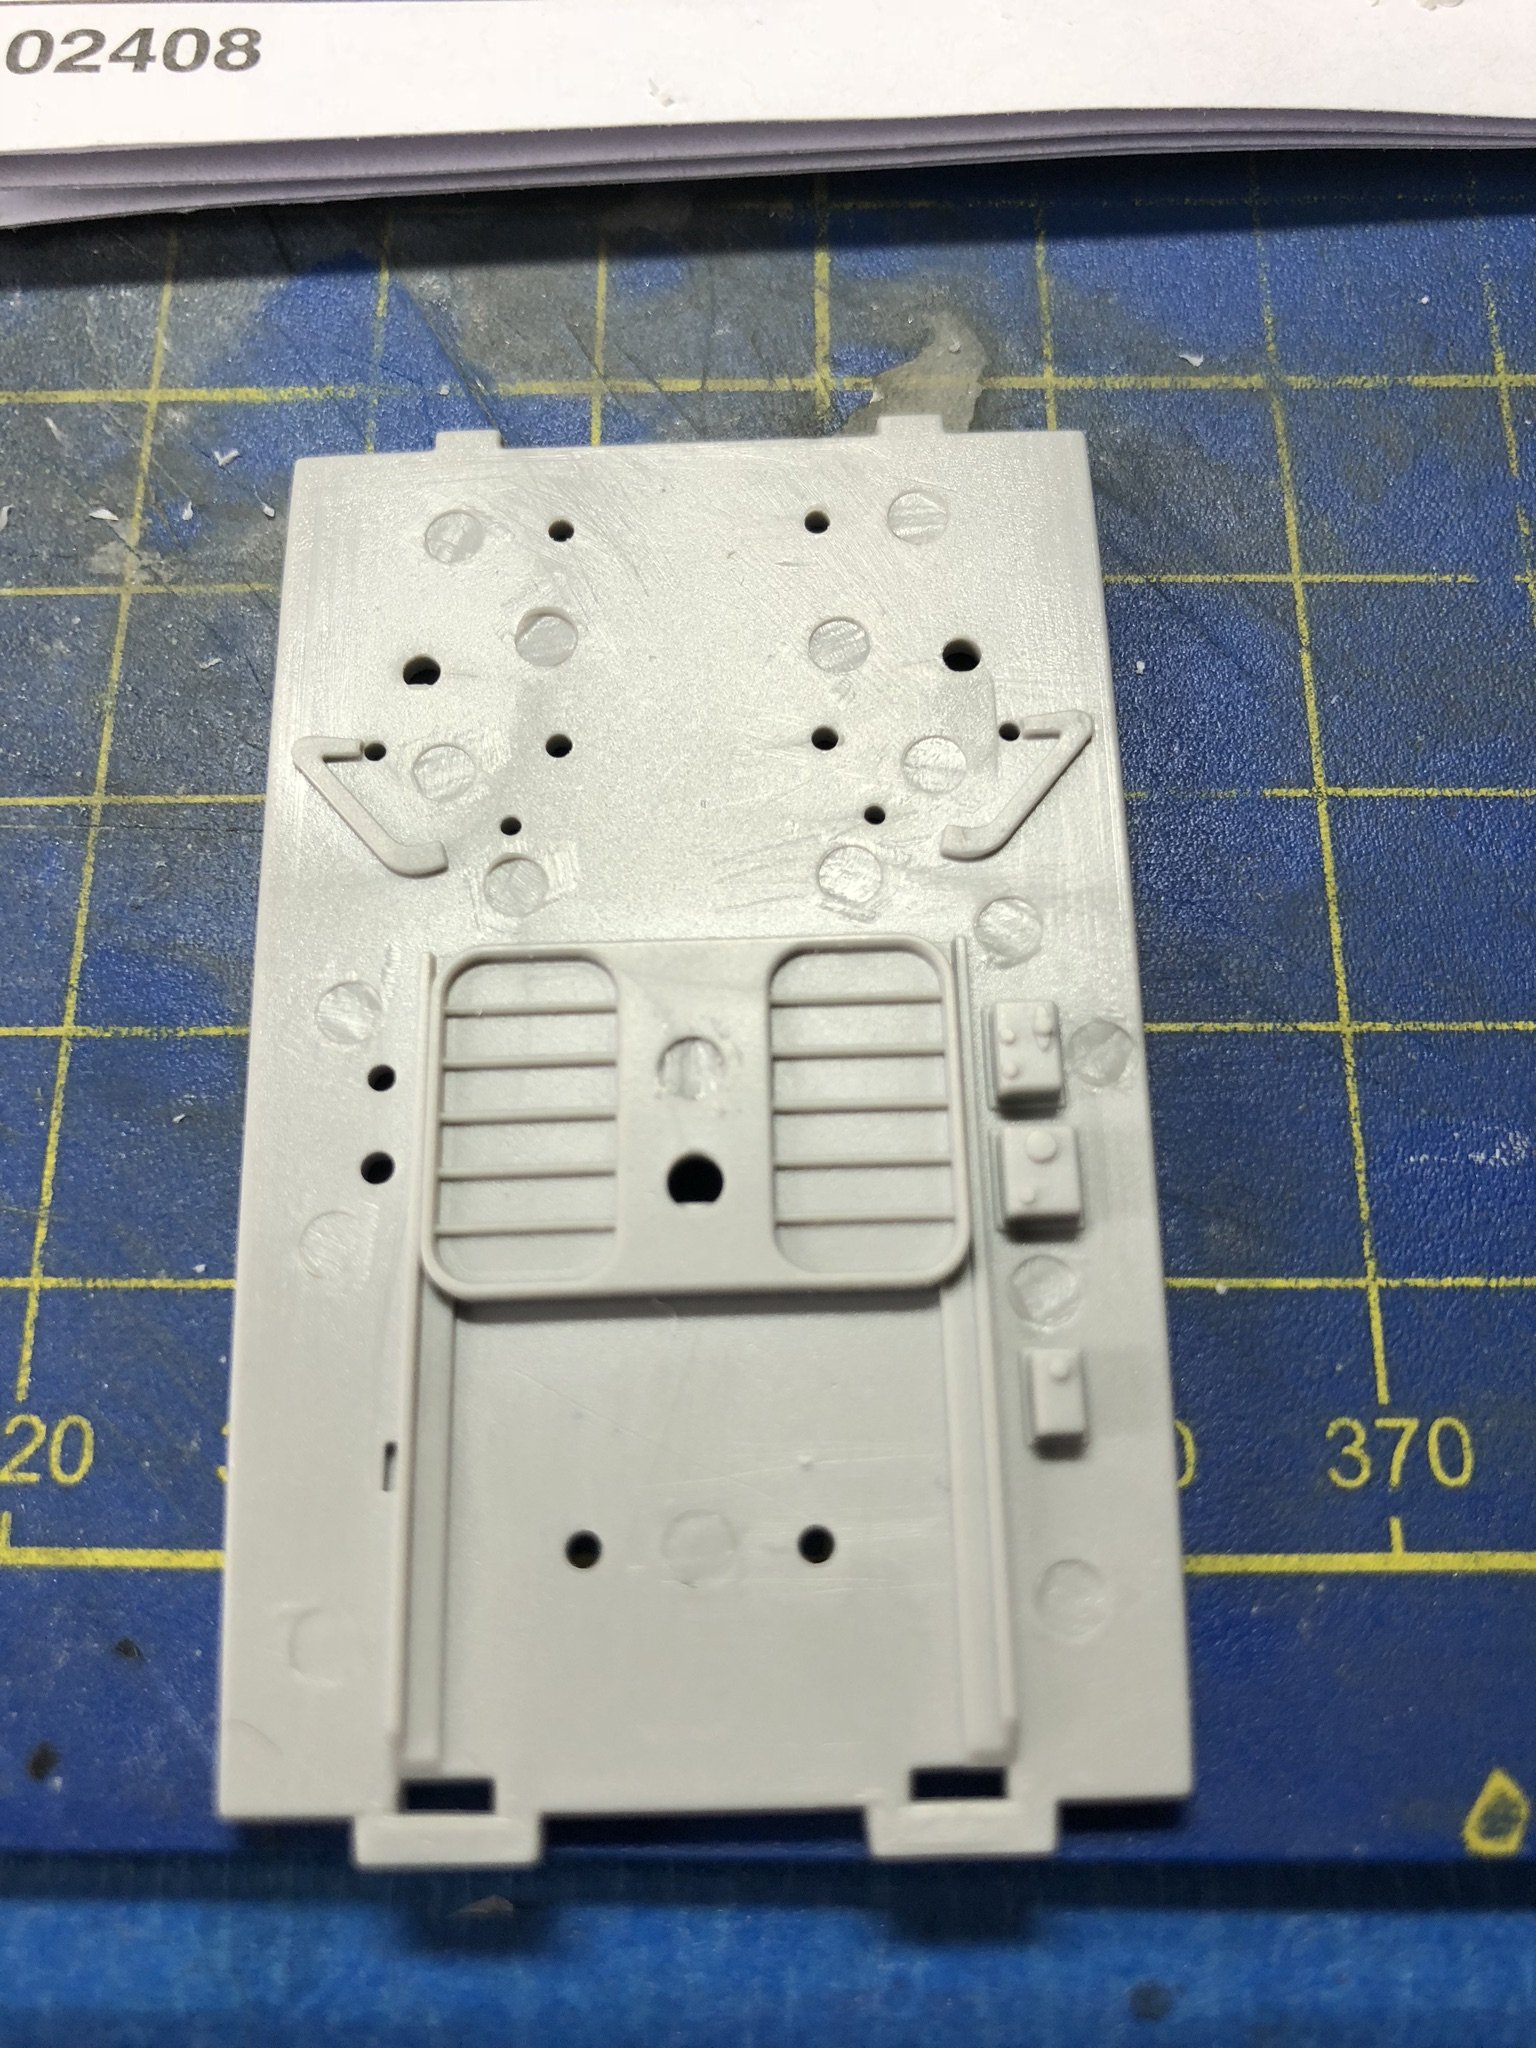
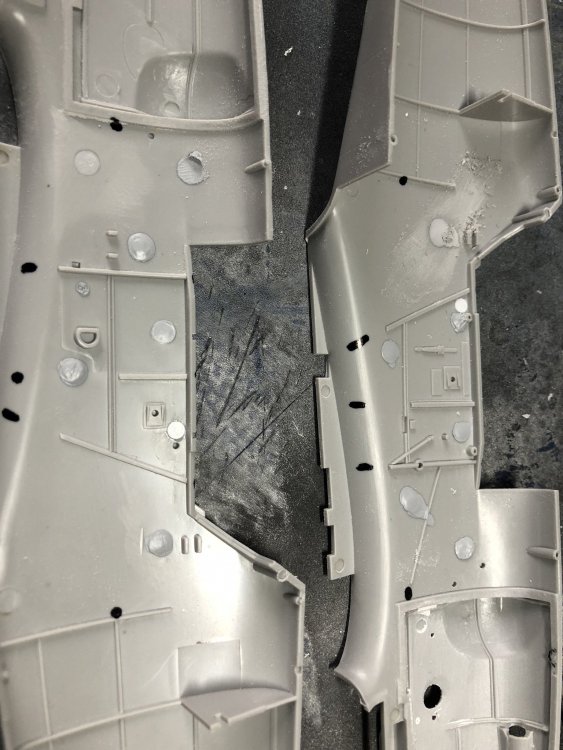
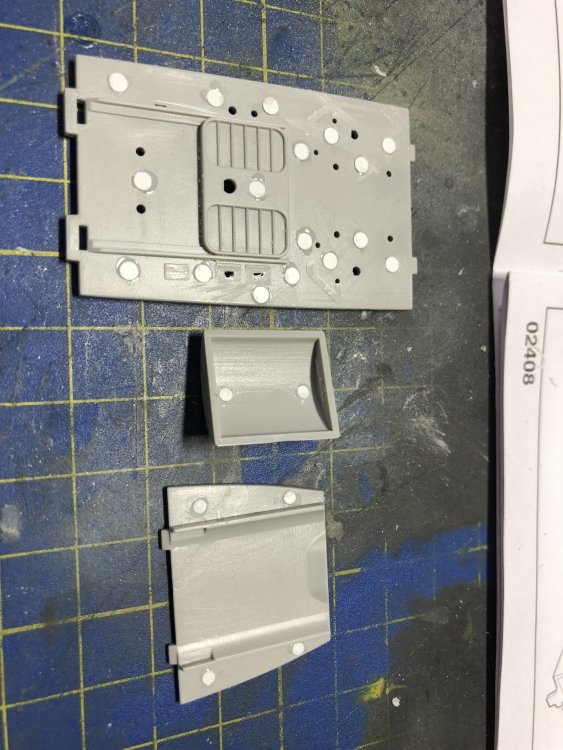
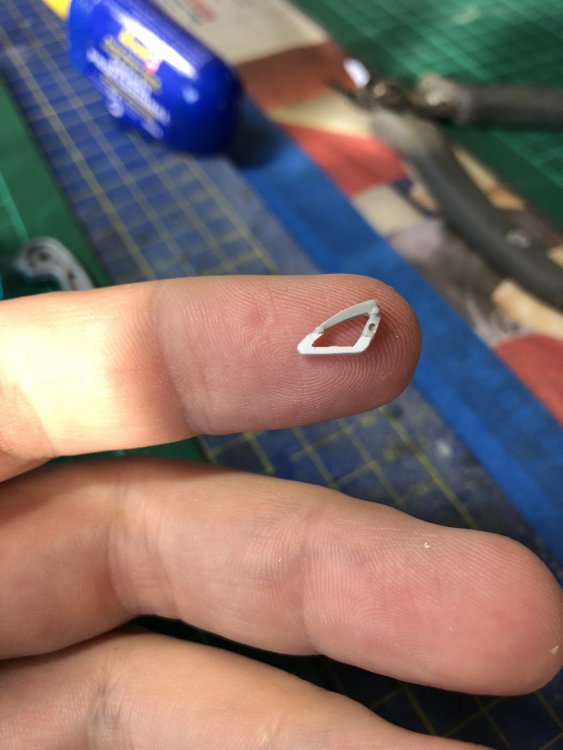
There hasn’t been a heck of a lot of progress to date, which wasn’t the plan as having most of this past week off work I planned to at the very least have the cockpit if not painted the. Ready for paint but it wasn’t to be. The kit cockpit floor, the Mad Riveter of Trumpeter clearly has a son in the injection pin department and he decided to open a whooooole new box of them back when this kit kit the moulds. 17 of the buggers. 17! He didn’t end there, oh no, 4 more of the things here. You thought that was it? Ooooh no, 2 more. Yes, that’s more of the little fellows in the cockpit halves. All needed to be filled and eliminated with extreme prejudice. As you can see, each has a styrene disc punched out and glued in each pin hole. Trumpeter were at least kind enough to make them in sizes I had punches for. The rudder pedal parts moulded to the floor were removed as I knew I would damaging when sanding out the pin holes. I don know why Trumpeter moulded them as they did in 2 halves anyway. The detail taken out was then added to the parts Trumpeter would have you glue to the cockpit floor anyway. So nothing has been lost. Now came a decision. Sanding out the pin holes in the cockpit halves and not eliminating the kit details, some would be fine, some were in horrid places. Sooooooooo..... Thats the Rubicon crossed then. Before blitzing it all away I measured each and every moulded detail in all dimensions and noted them on the instruction pages. Luckily they are all fairly uniform pieces that should be replaceable with standard styrene strip and rod, the relevant packs were duly ordered and I am awaiting their arrival before cracking in with the cockpit. All I’ve done so far other than this work is glue up the rudders, elevators and ailerons. Oh, and go through the kit to hunt out further ejection pin marks that may be visible later on. I found these. Of course, there’s another gear door and 3 more radiator doors to take care off. Again, Trumpeter were kind enough to match my punch sizes. The turbo intake is quite a large bore in this scale and the first hole in might be visible, so they will be tackled also. The kit floor, back wall and seat pan as it is now with the rudder parts added. Once the Evergreen bits I’ve ordered arrive (oh and the RO Toolz mitre cutter I’ve been wanting to buy for a while but didn’t have a sure enough reason to splash the cash on) I’ll get on with the cockpit detailing, but I start my week on nights tomorrow so progress will be Glacial at best.


-
Trumpeter P-47D is next
aderowlands replied to JohnB's topic in LSM 1/35 and Larger Work In Progress
I remember asking Yahu a while back if they were doing a panel for the Trumpeter kit and they said yes and it would appear its about to be released though not showing on Hannants yet. One of the things I will aim to get when it comes time to tackle my Trumpeter Razorback. -
hk models Lancaster B Mk.I, R5868, PO-S (S-Sugar)
aderowlands replied to JayDee's topic in LSM 1/35 and Larger Work In Progress
Such is life. I should really try harder at this saving money thing. To be honest, the stash cull probably isn’t a bad thing, I find I put a kit away if it displeases me, and most will at some point through user error or whatnot and I go start something else, well if there’s less choice in the something else pile I might just be that touch more likely to persevere and crack on and deal with the user error I’ve just committed.