ThomasProbert
-
Posts
410 -
Joined
-
Last visited
Content Type
Profiles
Forums
Events
Gallery
Everything posted by ThomasProbert
-
 The mojo is still alive and well with the Shackleton - this week I've decided to tackle the ailerons. First of all, the basic shape of the aileron is cut from plastic card, and the main panel lines and trim tabs are marked on the upper and lower surfaces: With all of the parts ready, the details are then scribed and rivetted: A strong mounting solution is needed, so the hinge area was lined with Evergreen on the wing itself: Lower section attached: Followed by the upper: A little sanding needed on the trailing edge, but other than that, job's a good'un! All the best, Tom
- 185 replies
-
- 7
-

-
- Scratchbuild
- 1/32nd scale
- (and 1 more)
-
Tamiya 1/48 Lancaster finished
ThomasProbert replied to JohnB's topic in LSM 1/32 and Larger Aircraft Ready for Inspection
That's a really lovely job - as others have said it's an old kit but builds up well. Coming in on three is still something Lancs do every now and again: Lancaster on emergency landing May 6, 2018,,with one engine out. - YouTube All the best, Tom -
Yes she sure is a big old brute! The louvres were all 3D printed - it would have been tough to get those all identical by hand. I can't take any credit for them whatsoever!
- 185 replies
-
- 3
-
-
- Scratchbuild
- 1/32nd scale
- (and 1 more)
-
“Dinghy” Young’s “Dambusters” Lancaster
ThomasProbert replied to Wingco57's topic in LSM 1/35 and Larger Work In Progress
*Head shaking*.... Manchester *cough* ... Spey Phantom *cough*.... Only joking - I always enjoy your builds, Cees - and I'm sure this will be no exception. I've got the standard BI/BIII in the pile and keep getting in out and putting it away - I've promised myself I must finish off some other big projects before I start the Lanc to do it the justice it deserves. I'll be taking notes... Tom -
It's been a while since I've done any work on this, but had the wind in my sails the other day so decided to get the engine nacelles finished off. I made some radiators and oil coolers (got carried away and didn't photograph these) and added these to the interior of each nacelle, before adding the 3D-printed engine fronts. A quick lick of filler to blend it all in and some sanding, and job done. Apologies for the poor lighting in the pics - these have been taken in the kitchen on my phone and the light was fading fast - it's too cold outside to set up the camera properly (this thing is so big and can't fit anywhere else other than the patio!) and there's snow forecast here tomorrow so I took my chances... I'm rapidly approaching the point where I can begin adding the surface details - I've been doing a remedial work on the wings and wing roots (as can be seen by the filler) and these areas, as well as the nacelles, will get a fine wet sanding and then a shot of primer before I can commence on a mammoth scribing session. A few more bits and bobs to attend to first though, but the main construction is more or less done now. All the best, Tom
- 185 replies
-
- 8
-
-

-
- Scratchbuild
- 1/32nd scale
- (and 1 more)
-
You're very kind - this has had some bench time recently actually so there may be an update coming in the not too distant future. Tom
- 185 replies
-
- 3
-
-
- Scratchbuild
- 1/32nd scale
- (and 1 more)
-
RR Spey powered RAF Phantom conversion
ThomasProbert replied to Wingco57's topic in LSM 1/35 and Larger Work In Progress
Every little detail helps move a project along... there can’t be that much more to go now..?- 414 replies
-
- 2
-
-
- conversion
- phantom
- (and 1 more)
-
RR Spey powered RAF Phantom conversion
ThomasProbert replied to Wingco57's topic in LSM 1/35 and Larger Work In Progress
Looks great from where I’m sitting!- 414 replies
-
- 2
-
-
- conversion
- phantom
- (and 1 more)
-
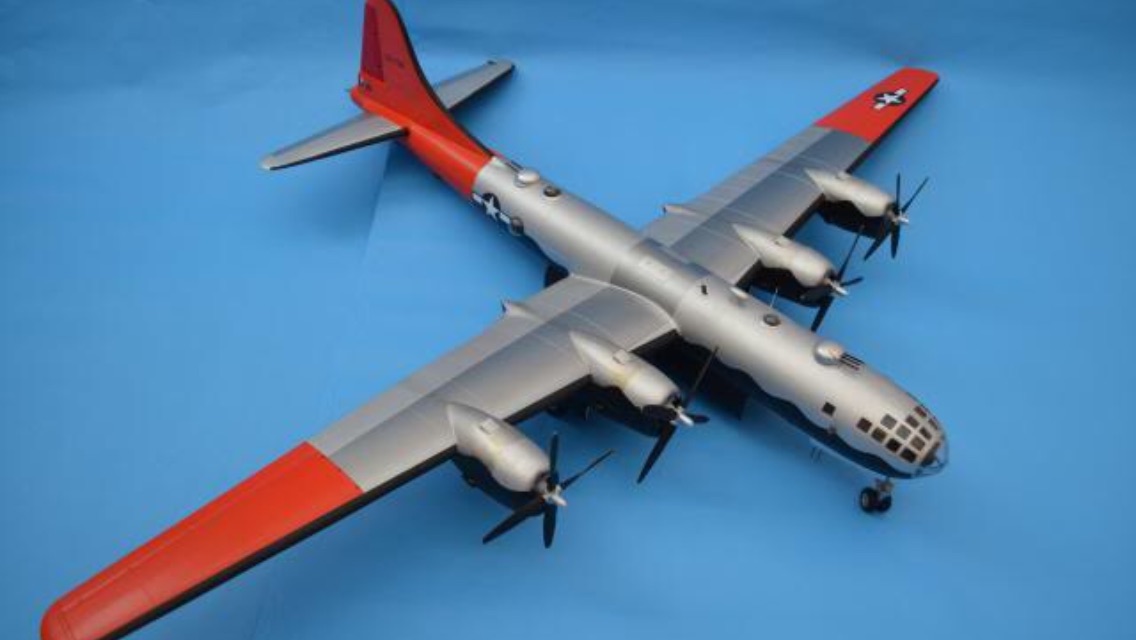
I did it as the famous Kee Bird:

-
Nice idea, Harv - good fun! Here’s me - I hope my models are nicer to look at than I am!

- 77 replies
-
- 14
-
-

-
RR Spey powered RAF Phantom conversion
ThomasProbert replied to Wingco57's topic in LSM 1/35 and Larger Work In Progress
You’re on a roll here, Cees - will she be armed?- 414 replies
-
- 2
-
-
- conversion
- phantom
- (and 1 more)
-
I did indeed build the ID Models kit a few years back and as the entire interior had to be scratch-built I did lots of research - do ask if you have any questions as I became particularly familiar with the internal details of the B-29. There will be a build thread on LSP and Britmodeller somewhere (wasn’t a member we here back then) but I’m not sure if the photos survived the photobucket debacle. Tom
-
RR Spey powered RAF Phantom conversion
ThomasProbert replied to Wingco57's topic in LSM 1/35 and Larger Work In Progress
I love that metal affect on the rear end, Cees. Really looking the part now.- 414 replies
-
- 2
-
-
- conversion
- phantom
- (and 1 more)
-
RR Spey powered RAF Phantom conversion
ThomasProbert replied to Wingco57's topic in LSM 1/35 and Larger Work In Progress
Wow that has come out really well. Can’t wait to see some decals going on. I am missing updates on your Manchester but this is proving to be a great substitute Tom- 414 replies
-
- 3
-
-
- conversion
- phantom
- (and 1 more)
-
RR Spey powered RAF Phantom conversion
ThomasProbert replied to Wingco57's topic in LSM 1/35 and Larger Work In Progress
Oh yes! Now we are talking! Looking great - lovely camo work there! Tom- 414 replies
-
- 3
-
-
- conversion
- phantom
- (and 1 more)
-
MEMPHIS BELLE
ThomasProbert replied to k5ikl's topic in LSM 1/32 and Larger Aircraft Ready for Inspection
And there was me expecting a B-17... Nice Thud! -
RR Spey powered RAF Phantom conversion
ThomasProbert replied to Wingco57's topic in LSM 1/35 and Larger Work In Progress
This is looking really tasty. You could never tell looking at it now the amount of work that's gone into this - the surface detailing looks great from where I'm sitting. I'm keen to see the green go on and then she'll really start to come to life. Tom- 414 replies
-
- 3
-
-
- conversion
- phantom
- (and 1 more)
-
Short Sunderland MkII
ThomasProbert replied to ThomasProbert's topic in LSM 1/35 and Larger Work In Progress
Good evening ladies and gents, I've not updated this thread for a while but I've nevertheless been beavering away with the mighty Sunderland... I've made four small tabs on the sill of each porthole which will support the glazing when the time comes. Once these have been painted black and the 'glass' is in, they should be all but invisible: I've also sprayed the bulk of the interior and the bulkheads black for the areas that won't be seen. The forward section and basic flightdeck structure has been given a coat of British Interior Grey/Green: There's obviously lots more detailing to be done here, but the basic shapes are coming together quite nicely. The 'bomb room' in the centre section has been given a base coat of Aluminium in preparation for more detailing: When the fuselage is closed it should look busy enough when depth charges etc are hanging from the racks: I've begun making interlocking tabs to help alignment and the joining of the fuselage when the times comes - a must for vacs: This will give a lovely strong join: Still lots to keep me occupied on the interior, so until next time... Tom -
RR Spey powered RAF Phantom conversion
ThomasProbert replied to Wingco57's topic in LSM 1/35 and Larger Work In Progress
I’ve been really enjoying watching this come together, Cees - there’s some amazing workmanship going on here. It looks every bit a Brit Toom - just gorgeous! Tom- 414 replies
-
- 3
-
-
- conversion
- phantom
- (and 1 more)
-
Natural metal finishes. I’ve tried and I’ve tried but have never been happy with one. I now done everything I can to avoid them.
-
Short Sunderland MkII
ThomasProbert replied to ThomasProbert's topic in LSM 1/35 and Larger Work In Progress
Evening all, I've been making some good progress this week on the big Sunderland. Lots of plastic card and Evergreen strip to the rescue, combined with a fair bit of reference checking and head-scratching, and I now have the basic structures of the bomb room and forward fuselage/flightdeck completed. The bomb room has been kitted out with the basic structure - the doors are actually open on the real aircraft but as I'm not detailing the areas either fore or aft I've used a bit of creative licence and added some doors: I've made the basics of the bomb racks which will eventually carry the depth charges and added these to the roof structure, which slots nicely between the bulkheads: The whole structure then sits nicely into the fuselage, which has had its sidewalls detailed with Evergreen for the ribs and stringers: I've also been busy detailing the underside of the flightdeck floor and added the stairs: And I've also begun making the basic structure of the flightdeck itself - again the door in the real aircraft would be open but I'm adding large spars to support the wing here so have added a closed door: This again fits nicely in the forward fuselage section, with more Evergreen for the sidewall structures: I've also begun making the floor for the forward nose section which has numerous perforations, I imagine for water drainage. I think I may have made these a little large but we'll see how they look under some paint: The fuselage is doing its best to come apart here, but you can see how the internals sit in the model: Here's a sense of scale - a Halfords' rattle can is dwarfed by this beast! A few more bits to make and add before I can give a first squirt of paint to see how it all looks - a nice mixture of interior green and natural metal should bring it all to life nicely. Until next time, Tom -
Short Sunderland MkII
ThomasProbert replied to ThomasProbert's topic in LSM 1/35 and Larger Work In Progress
Isn’t it funny how you can lose interest in a model for months, sometimes years, and then suddenly you pick it back up and can’t put it down..? The Sunderland is back on the bench, baby! -
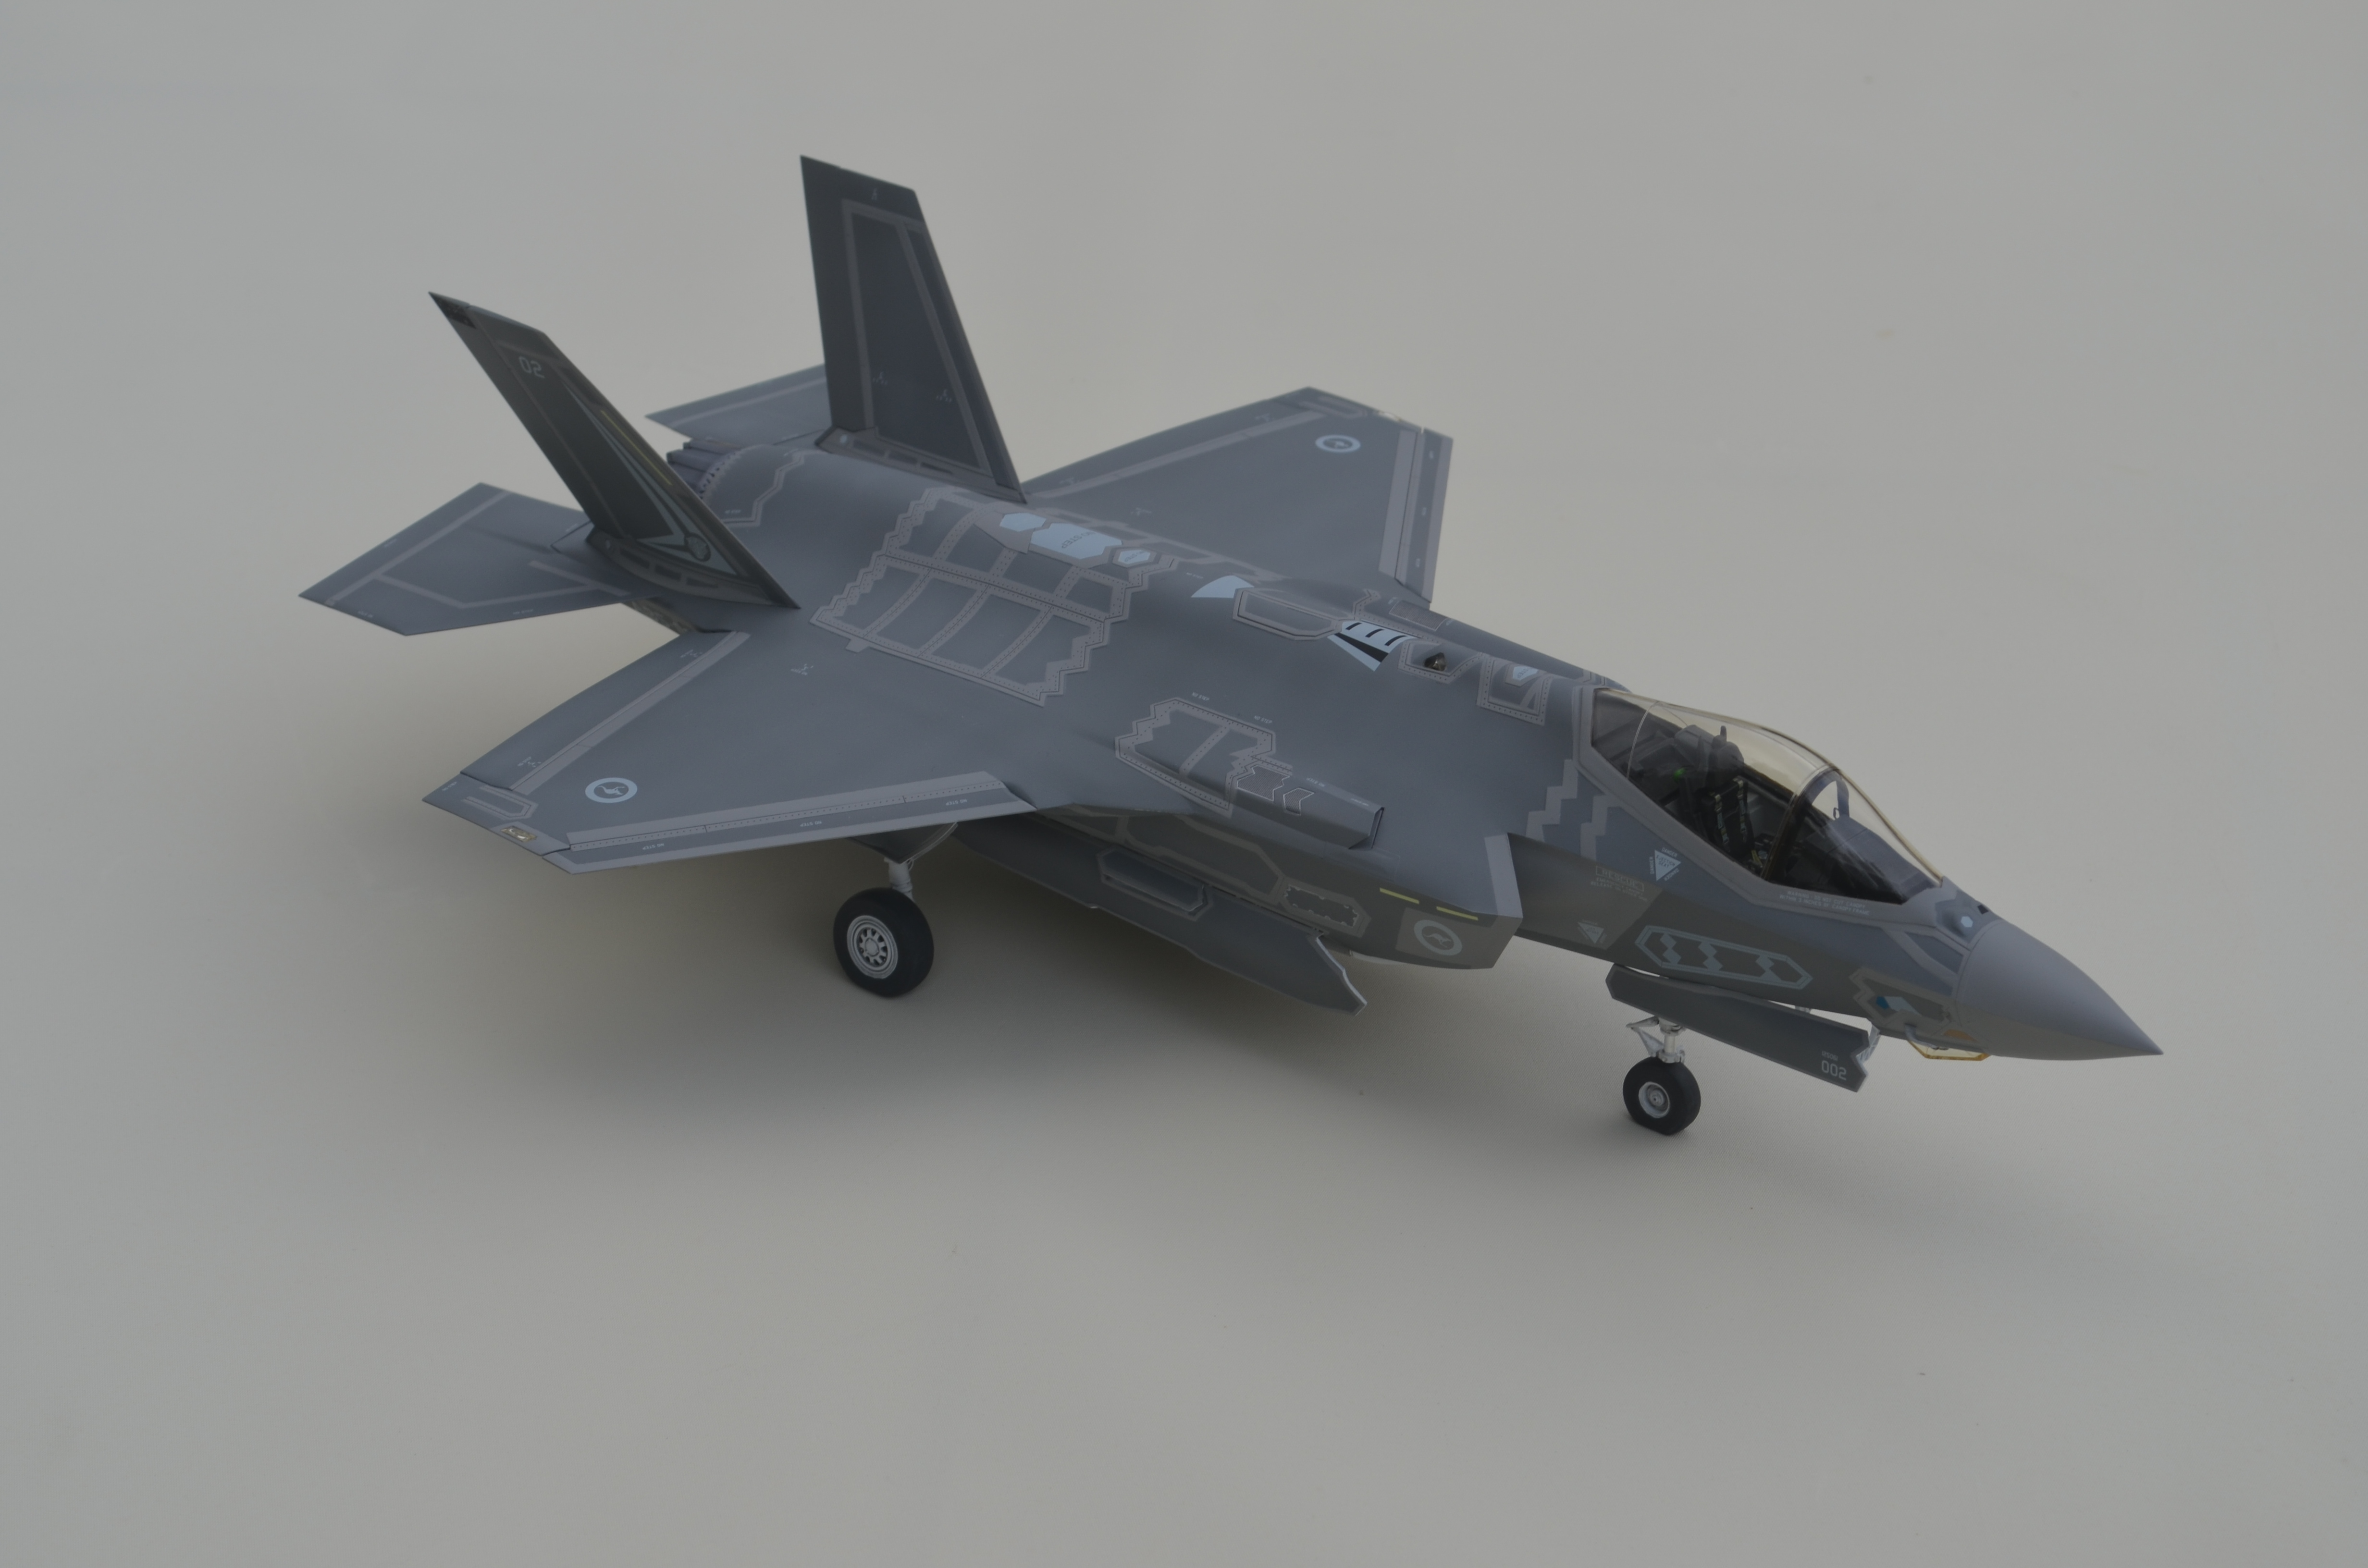
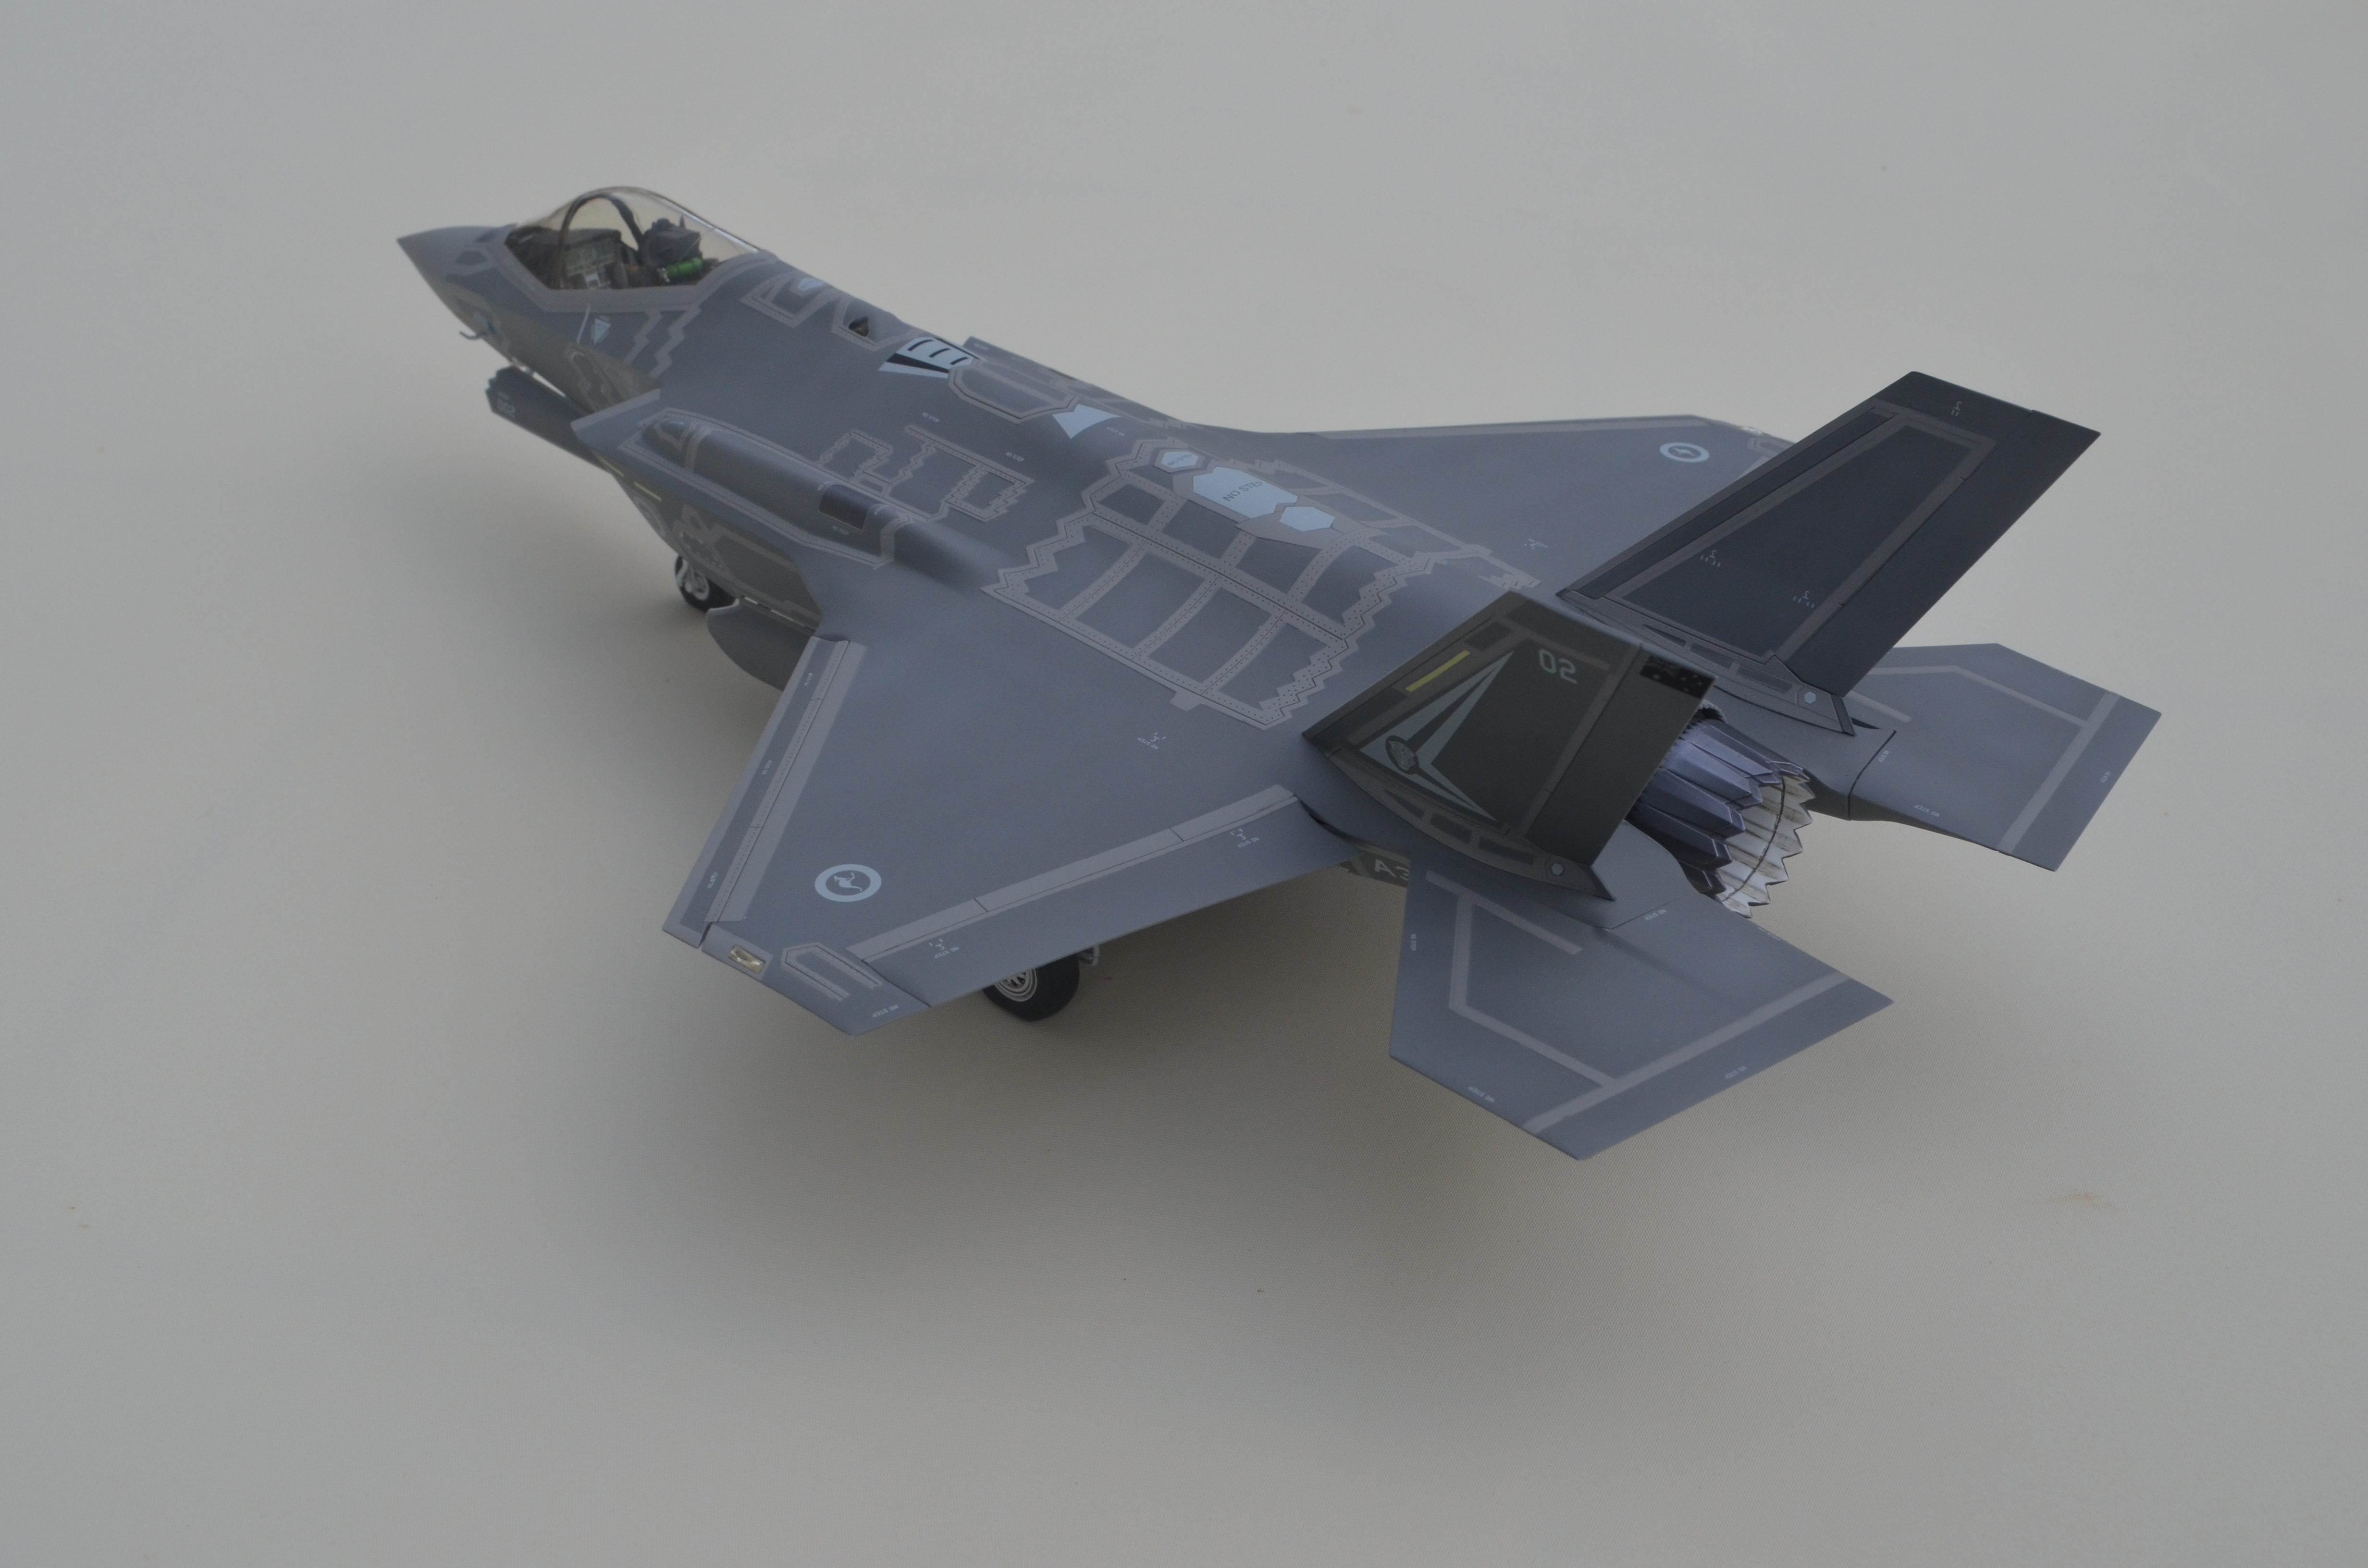
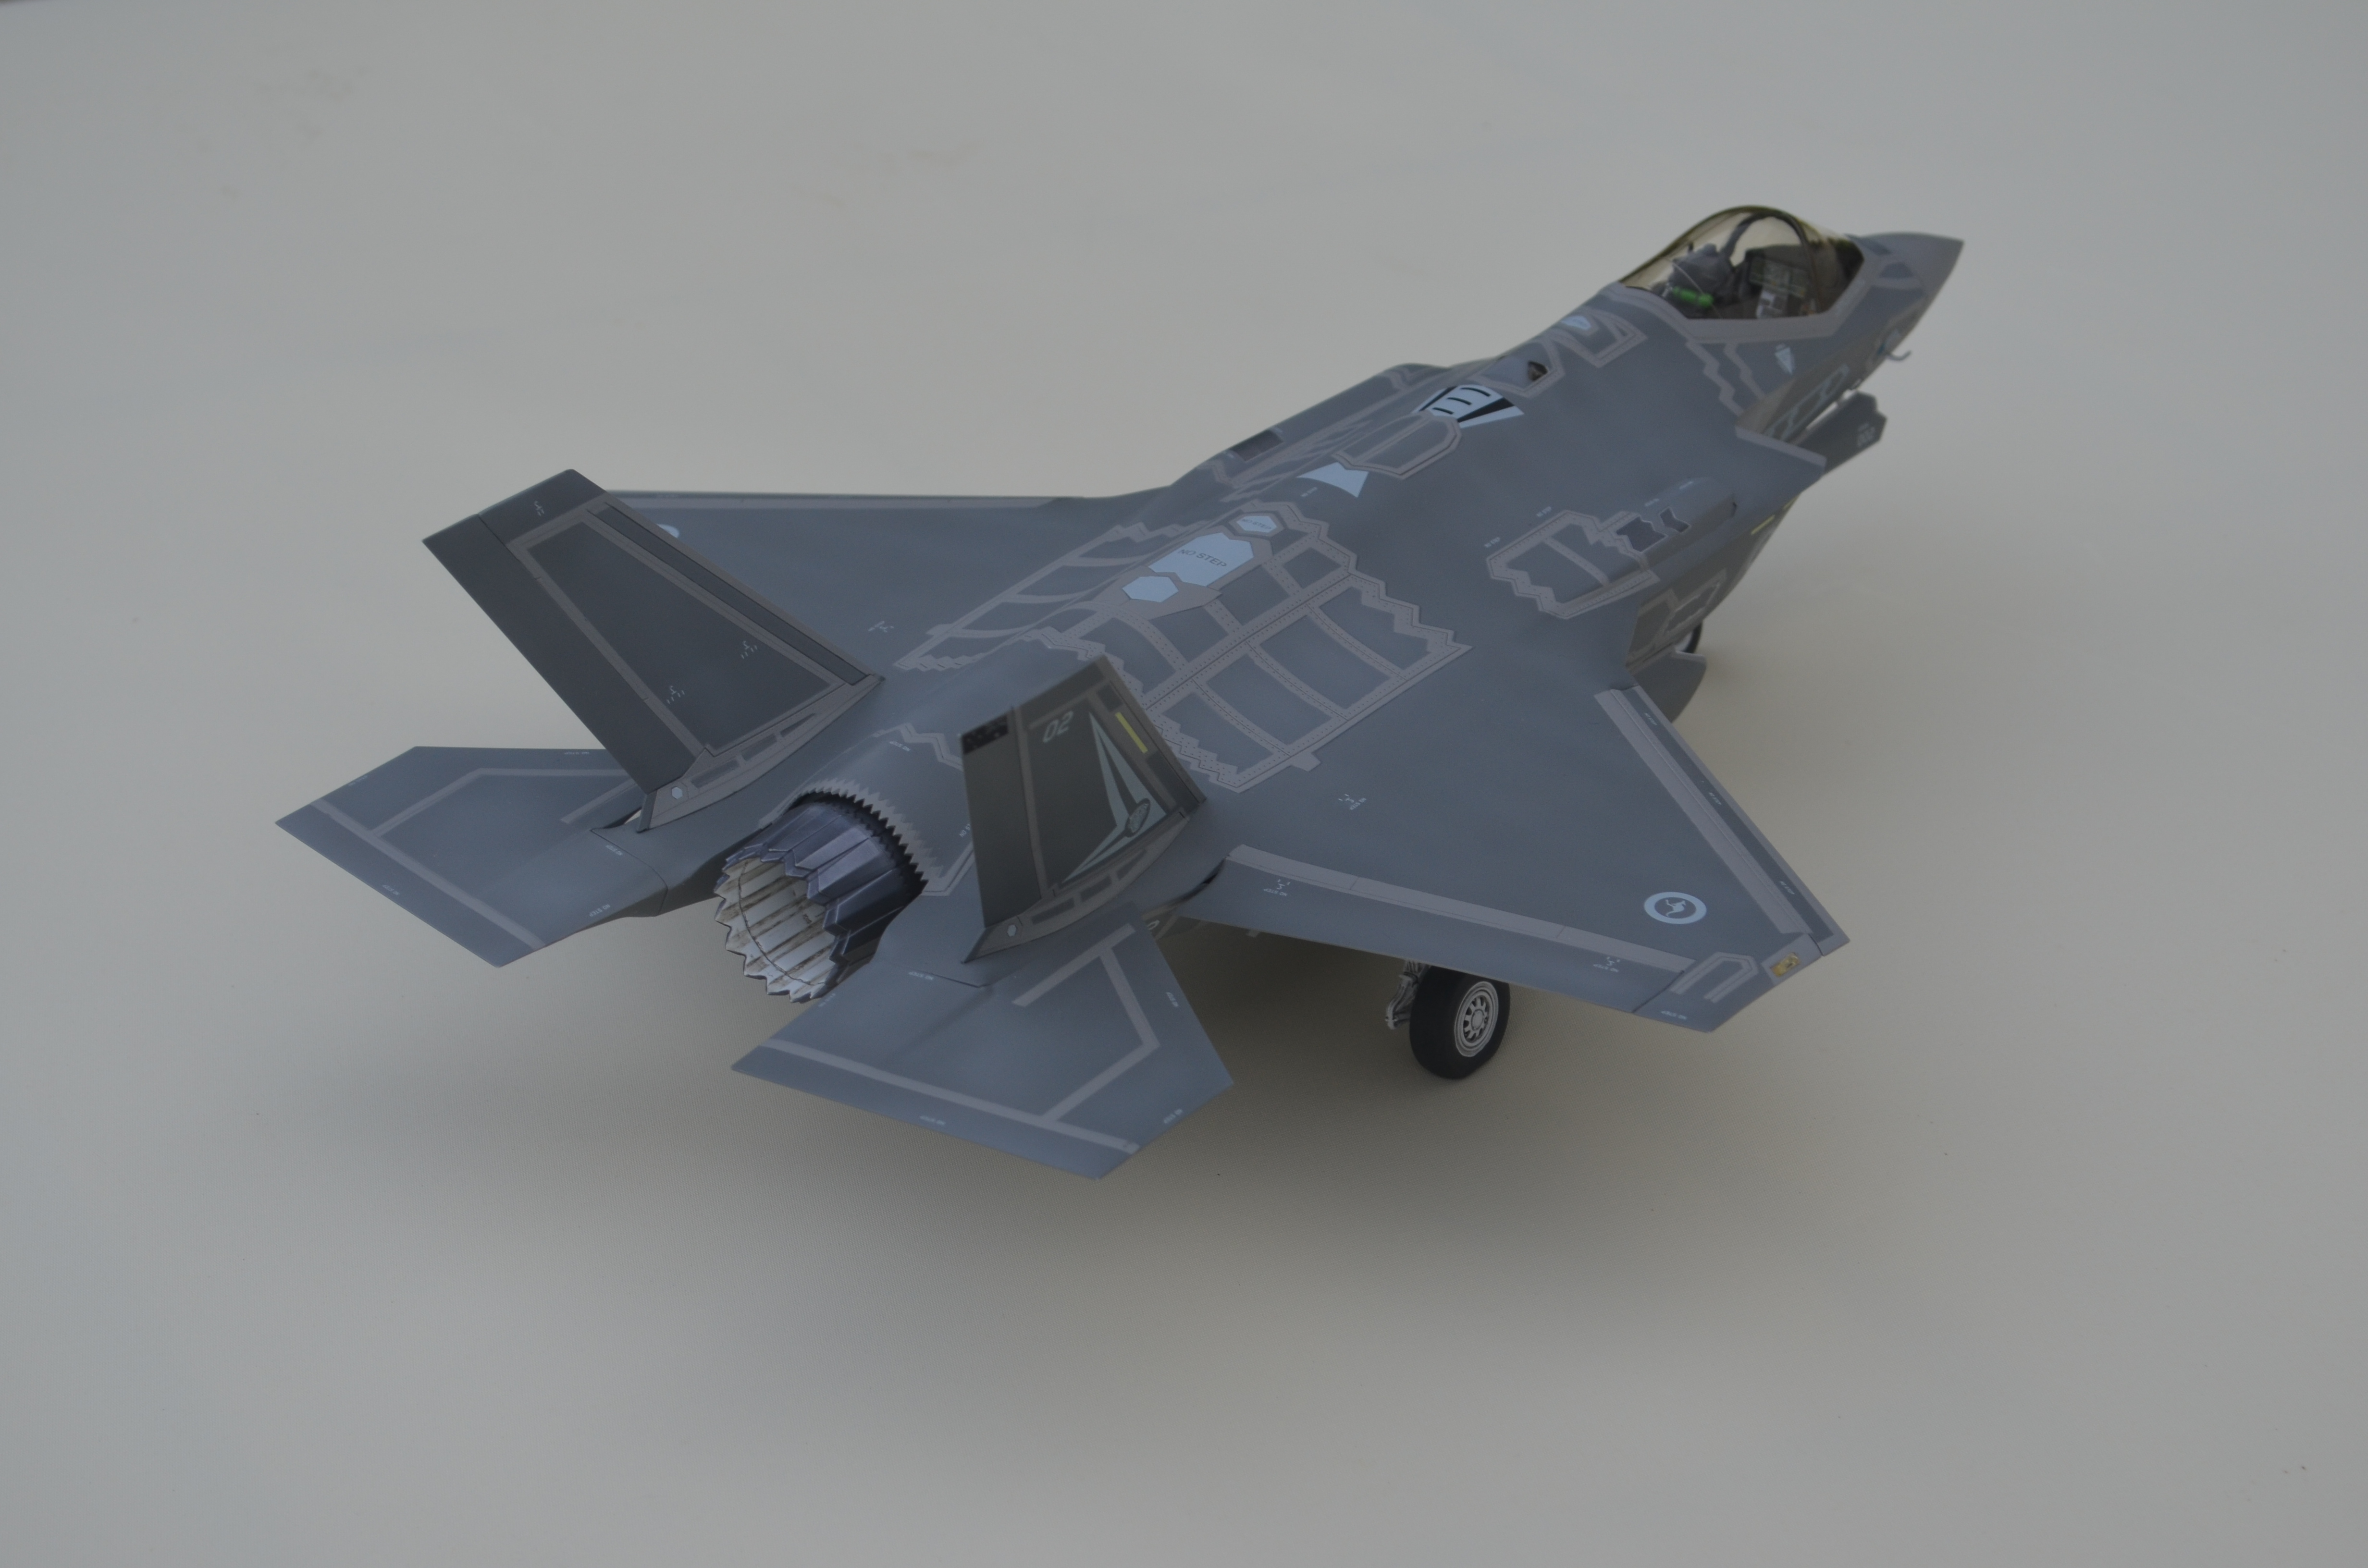
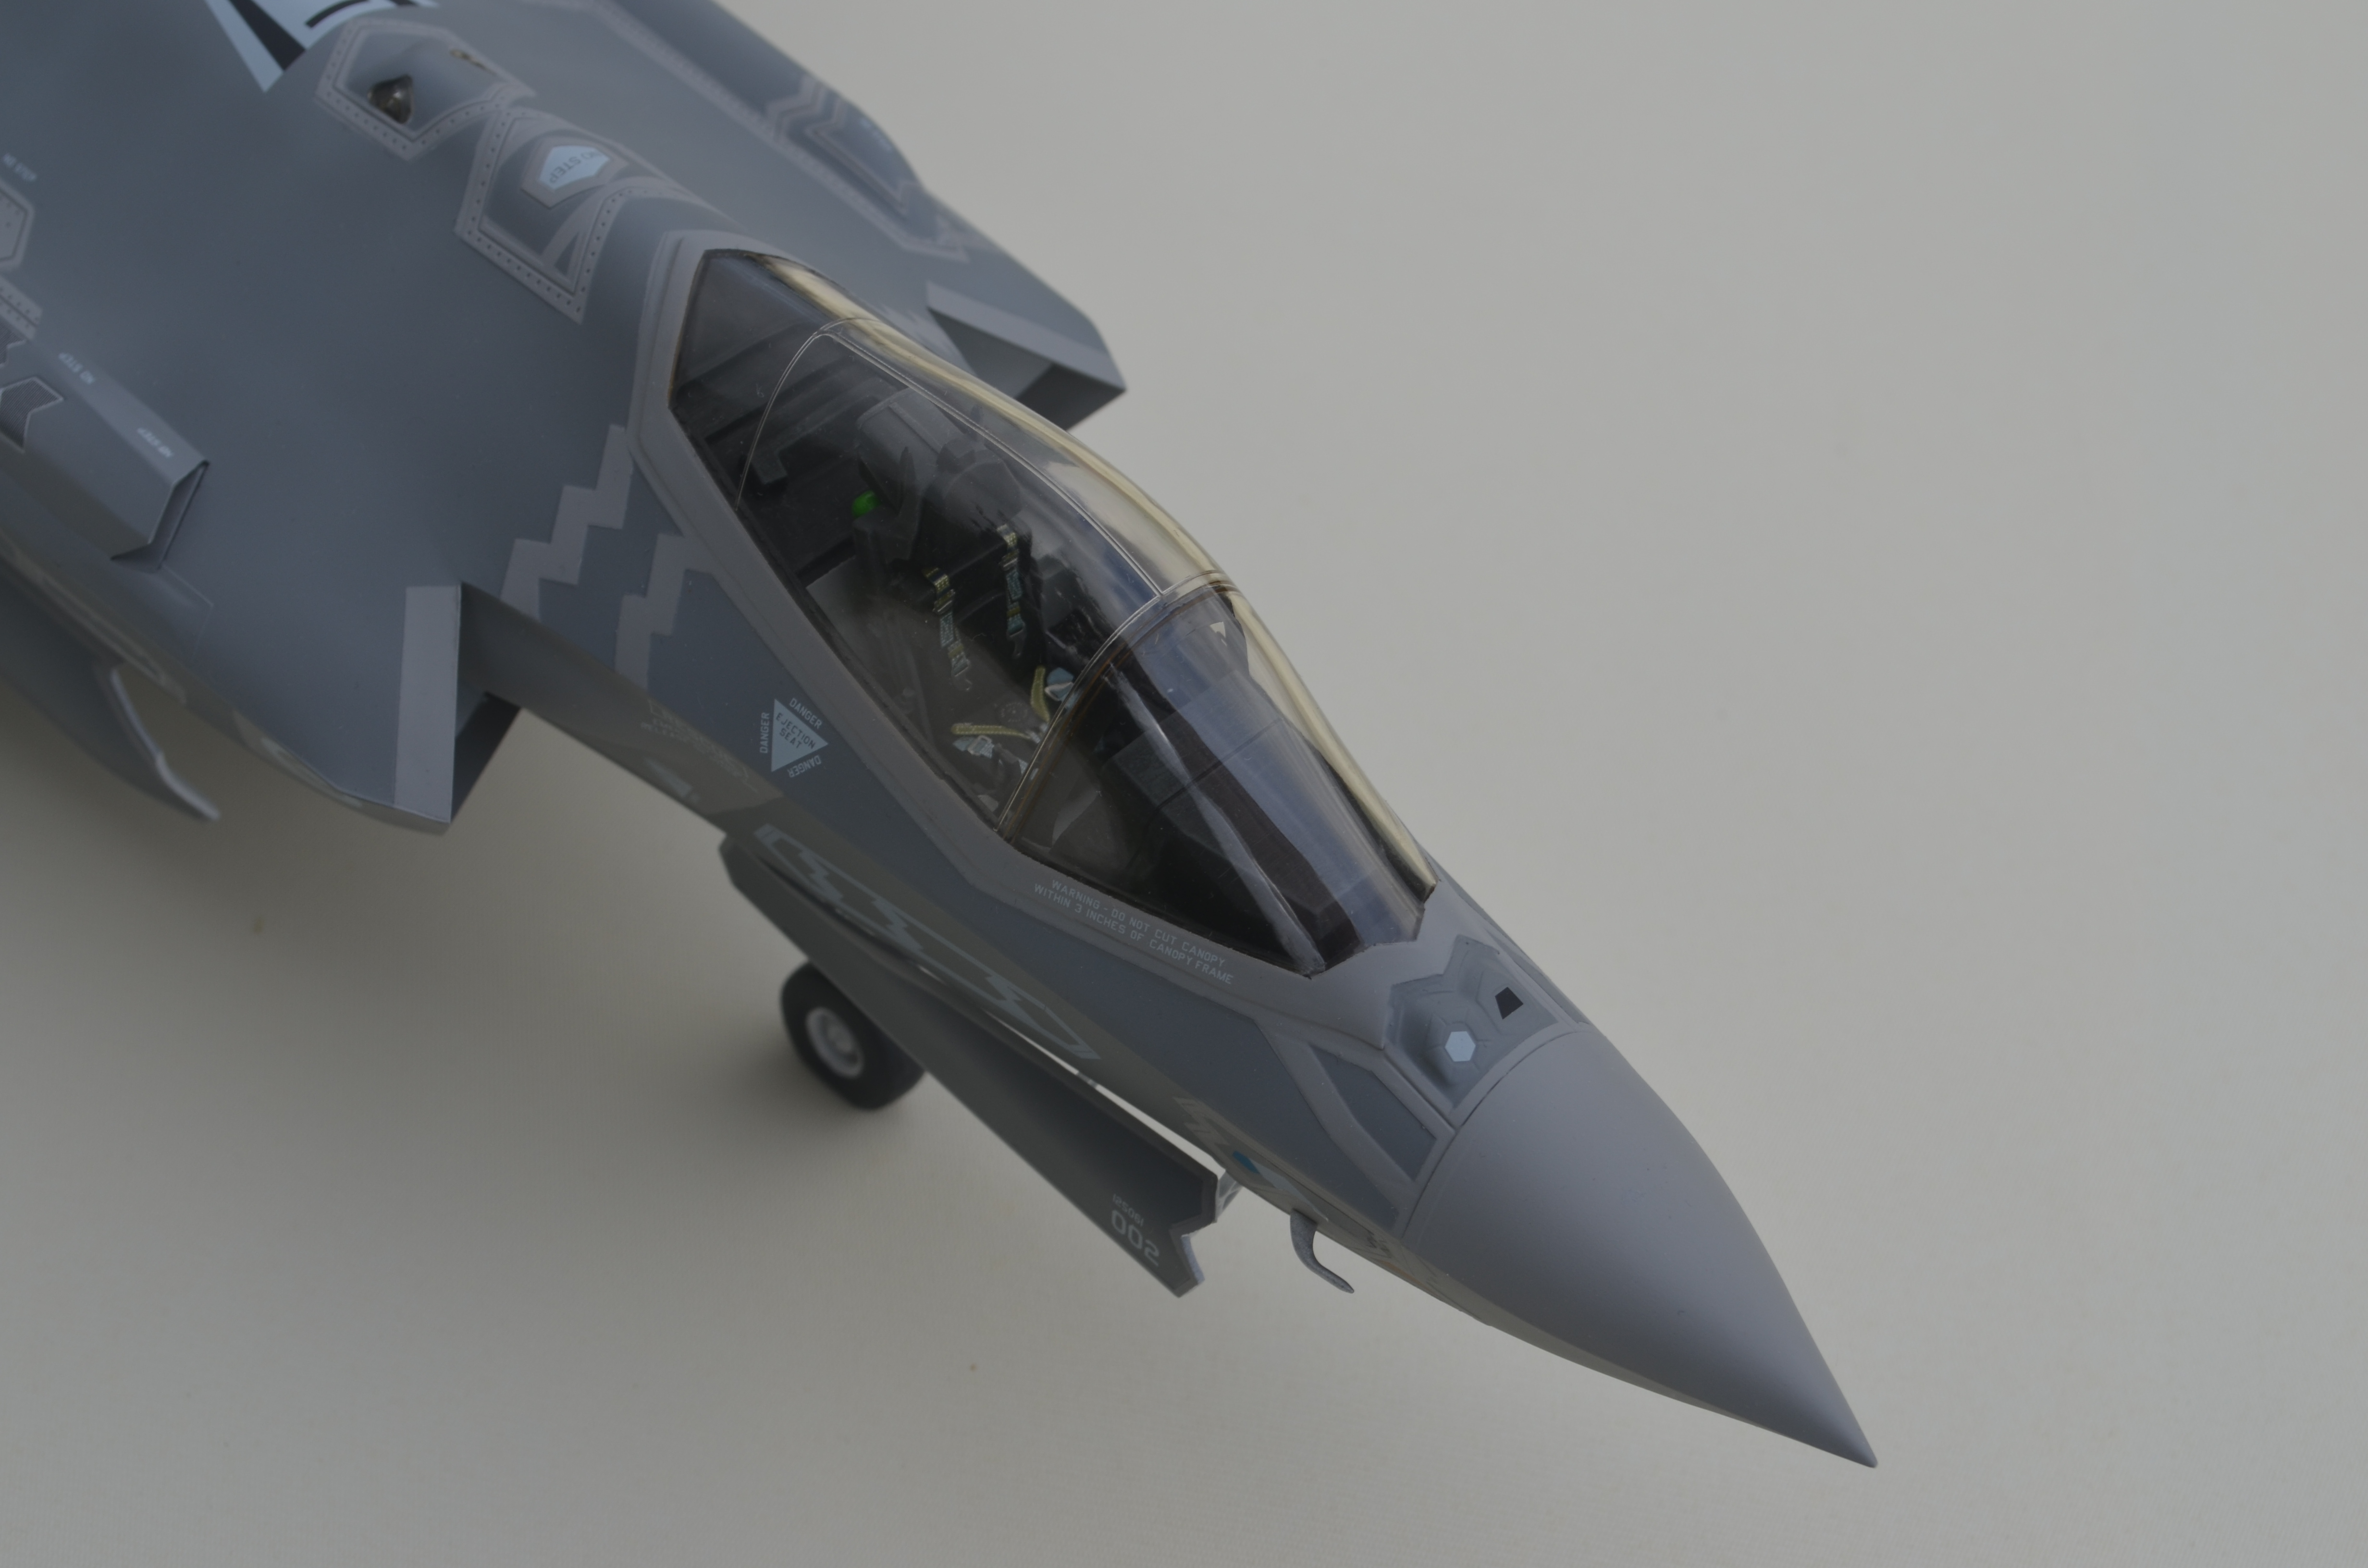
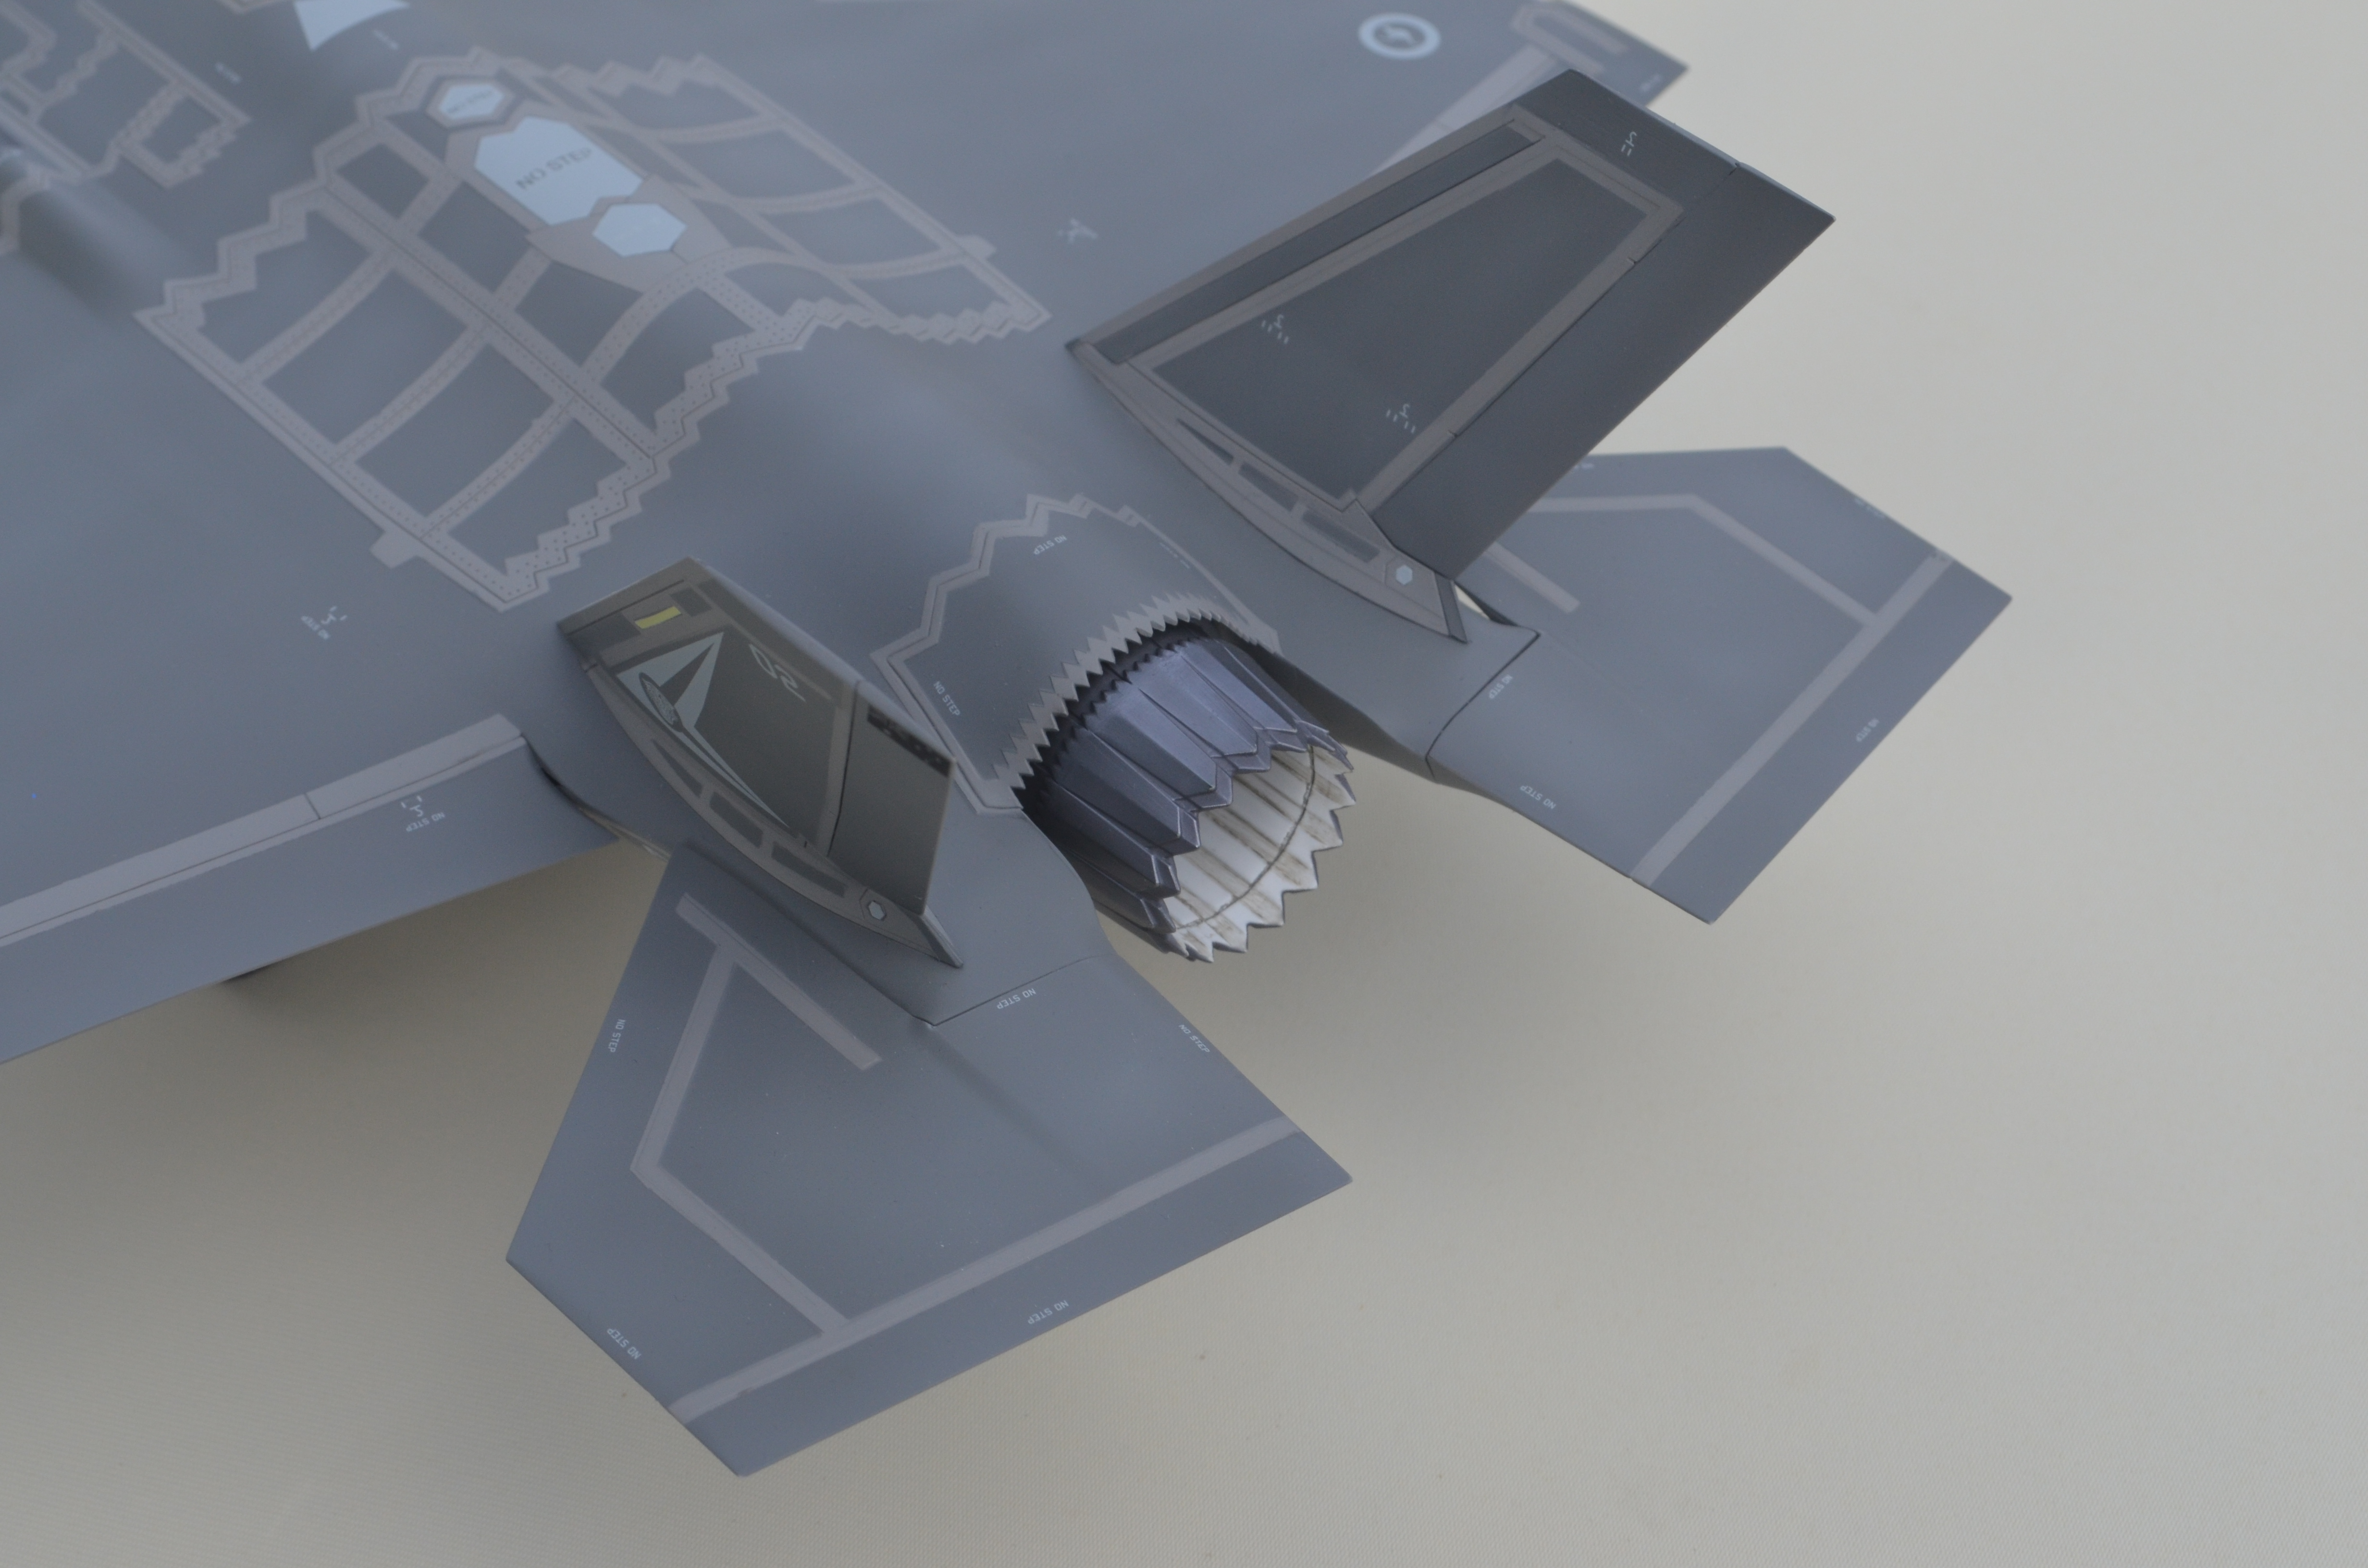
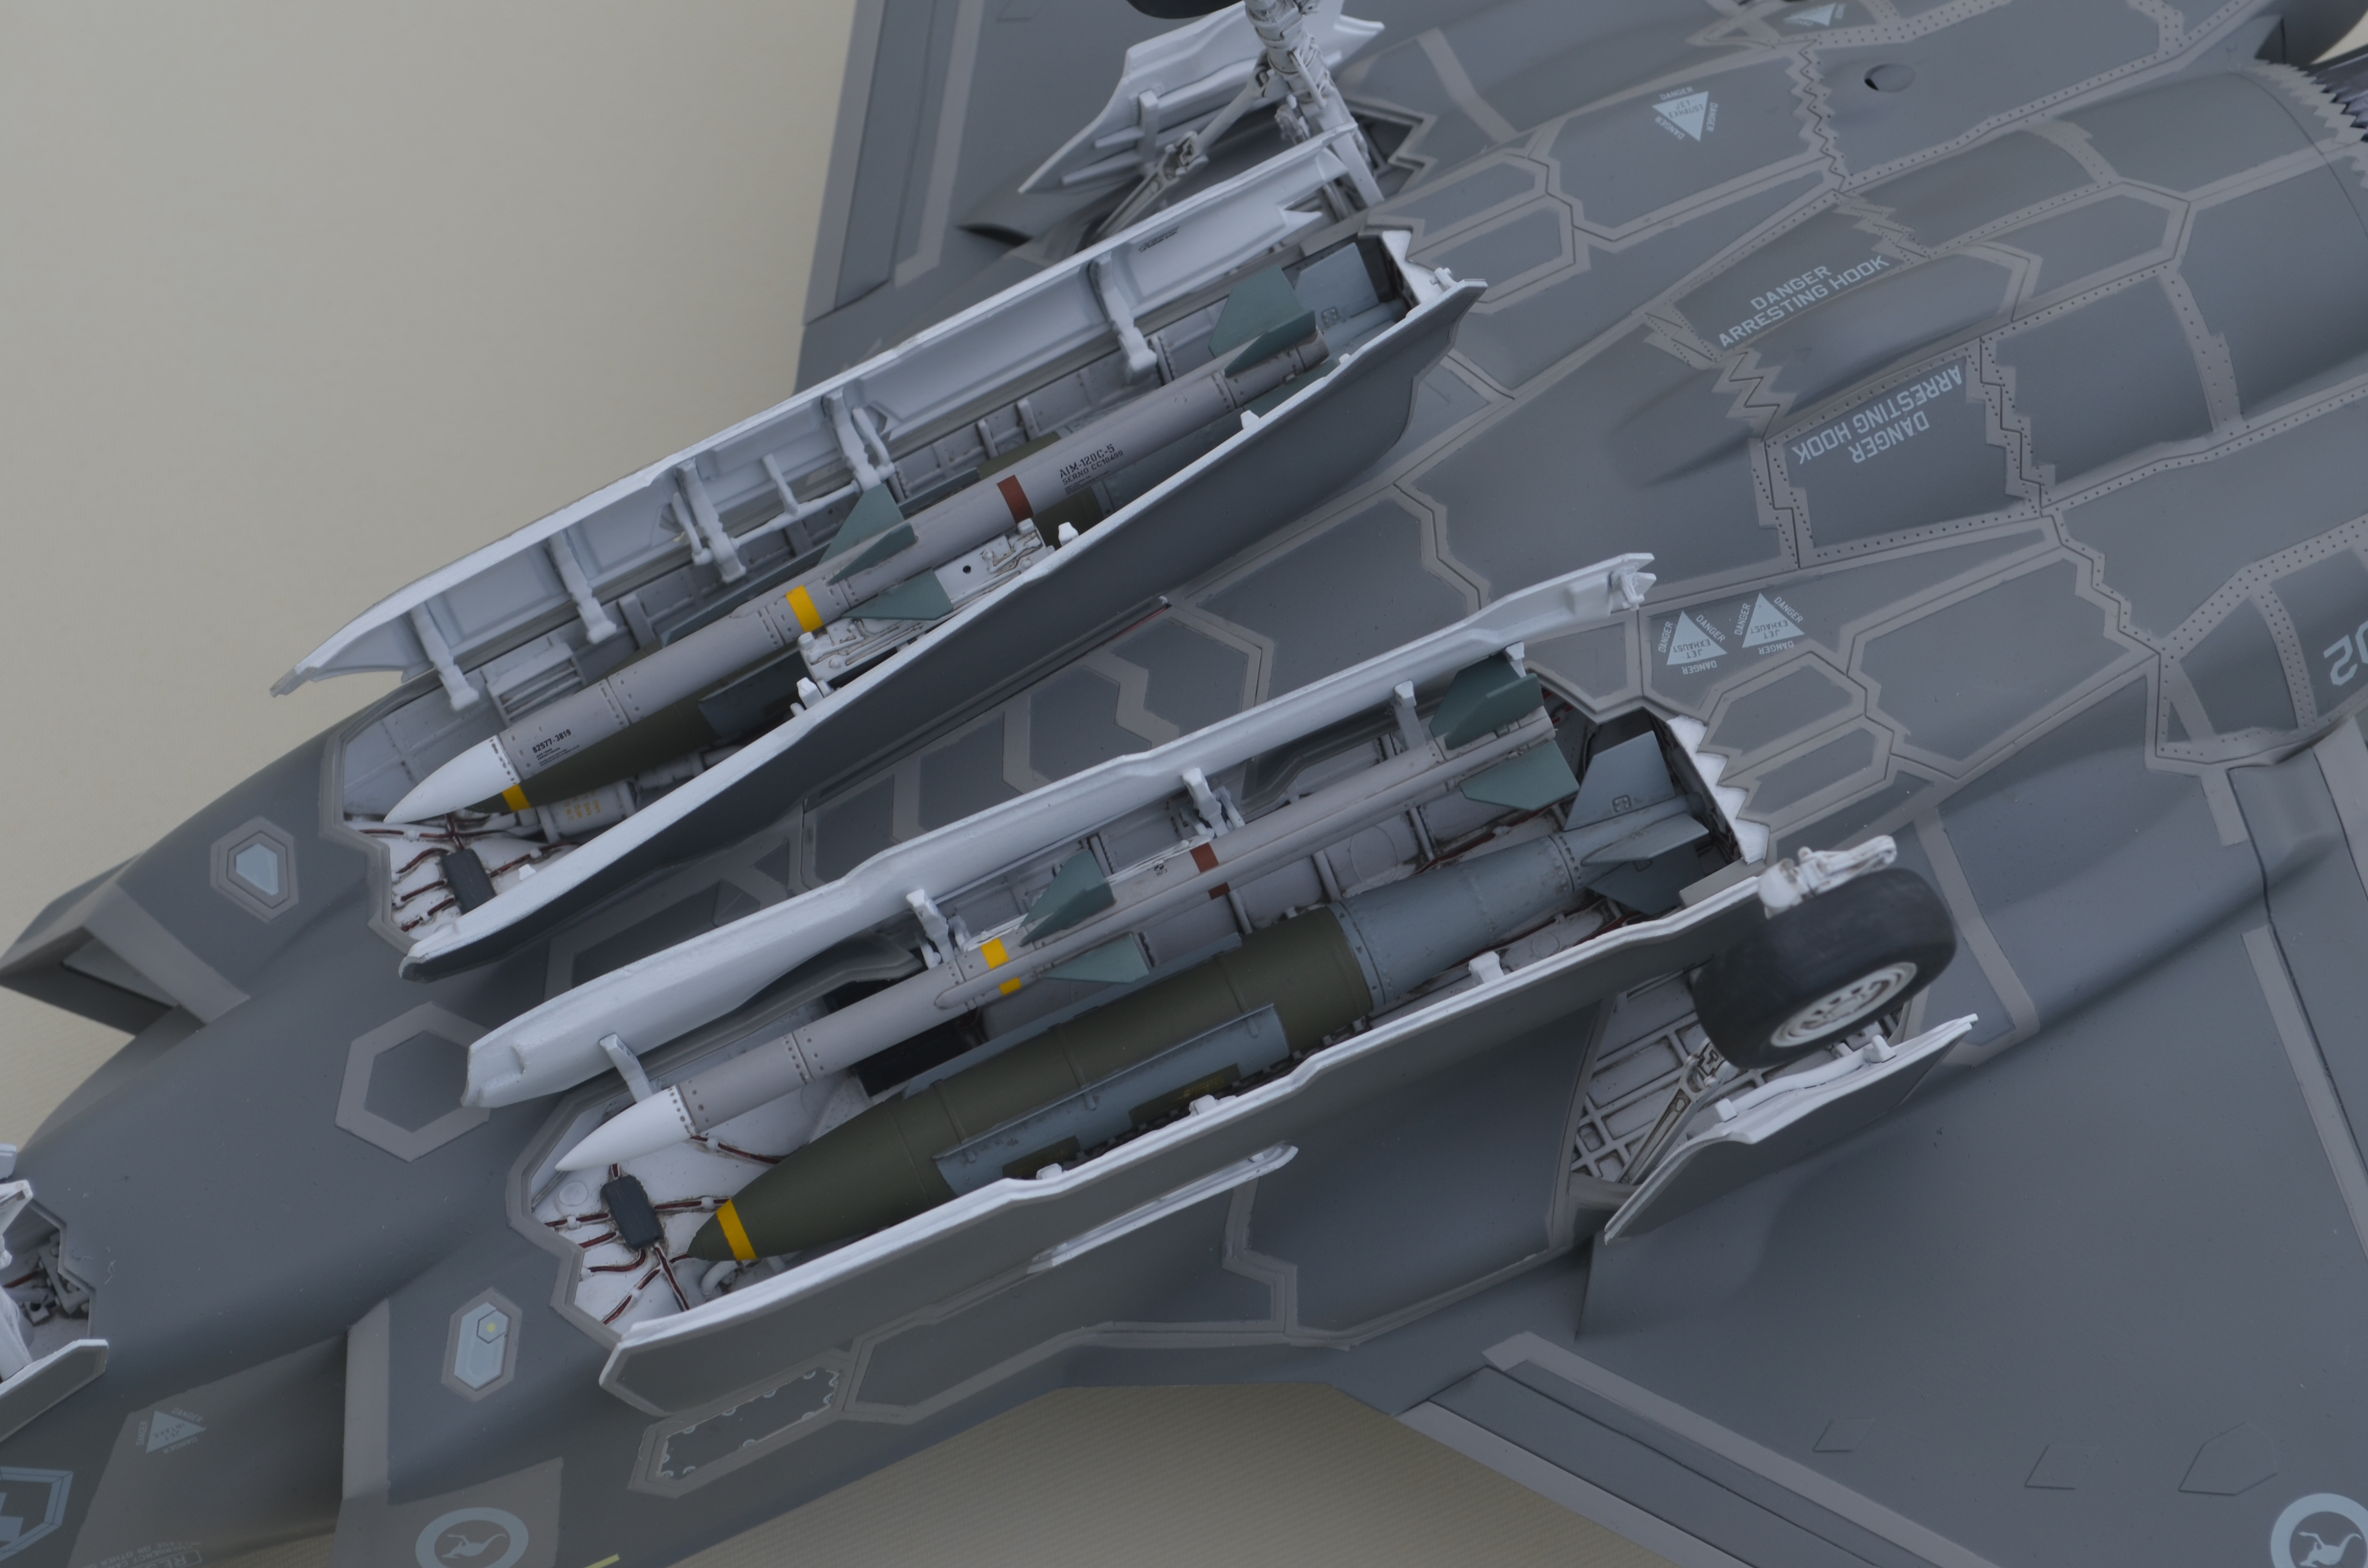
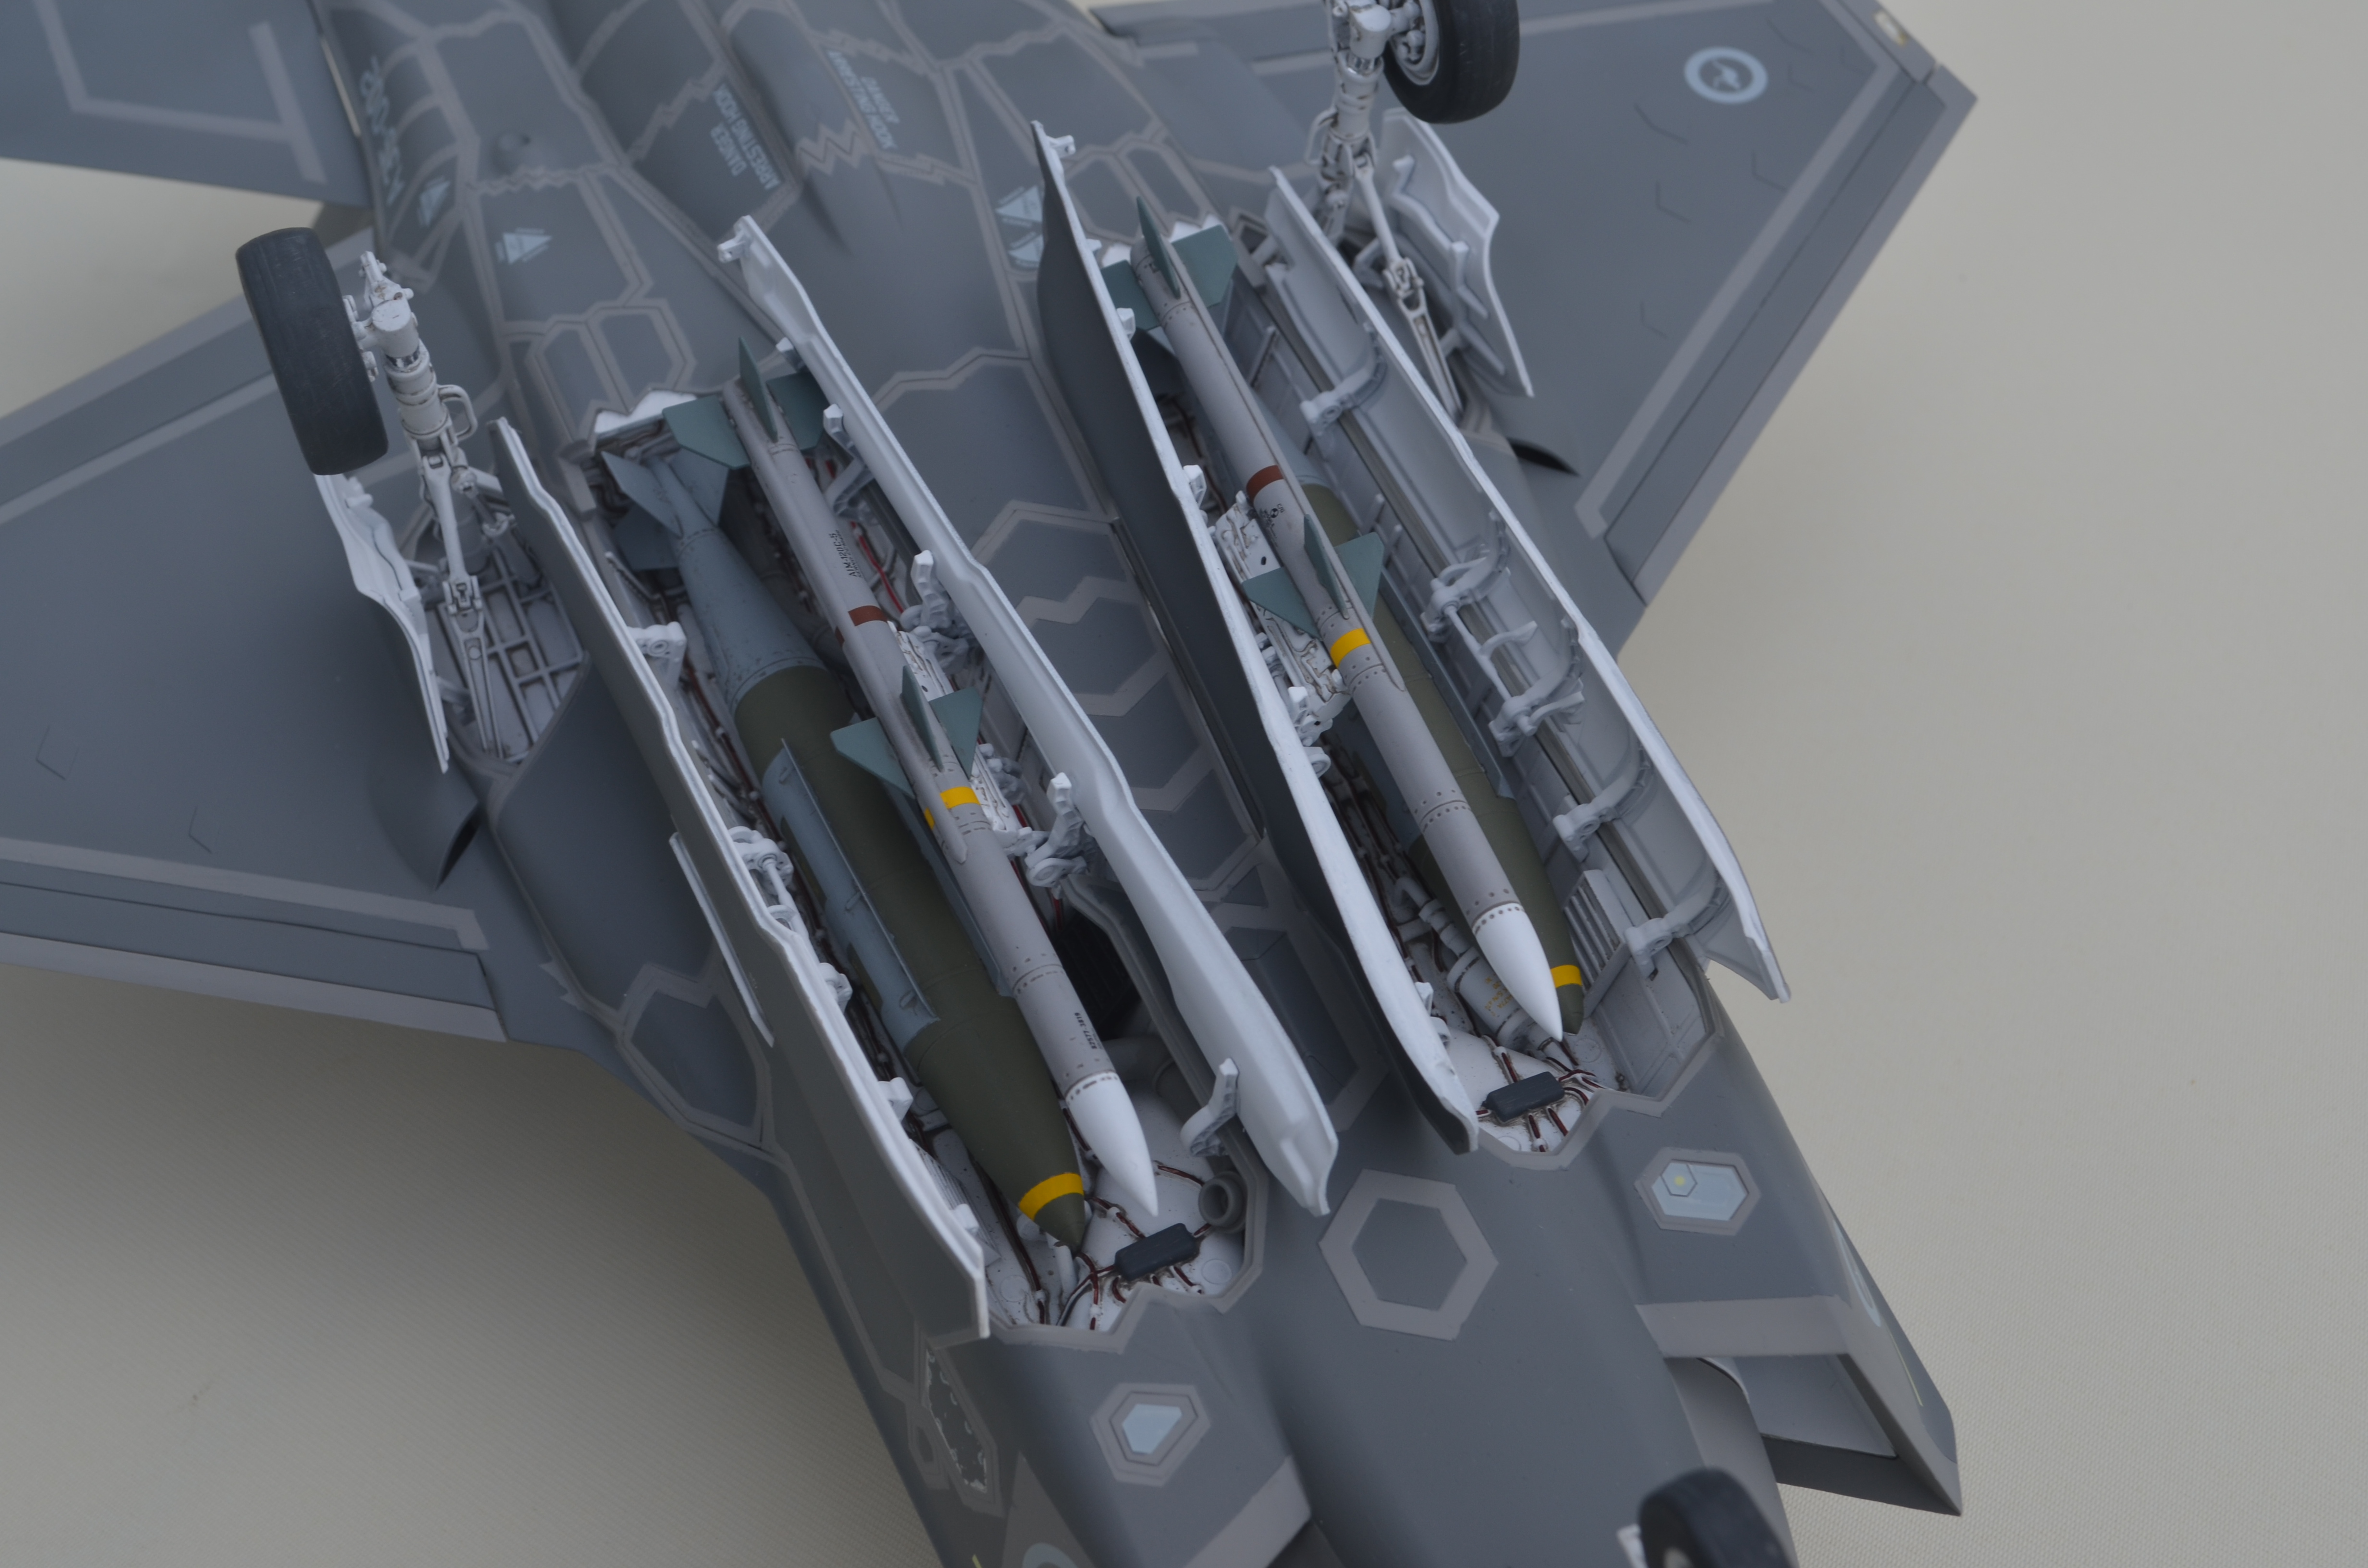
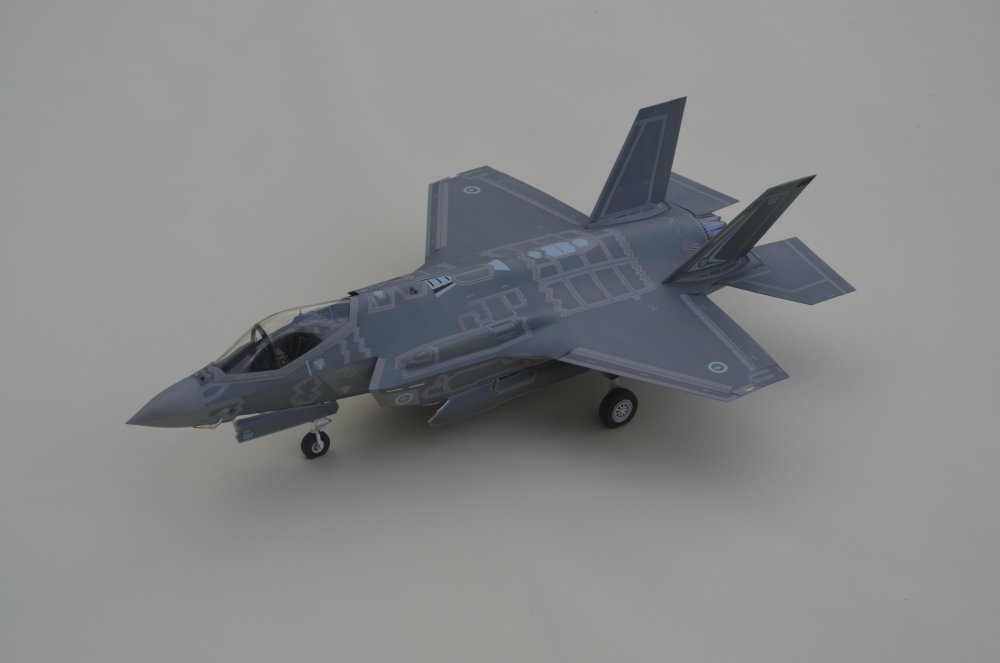
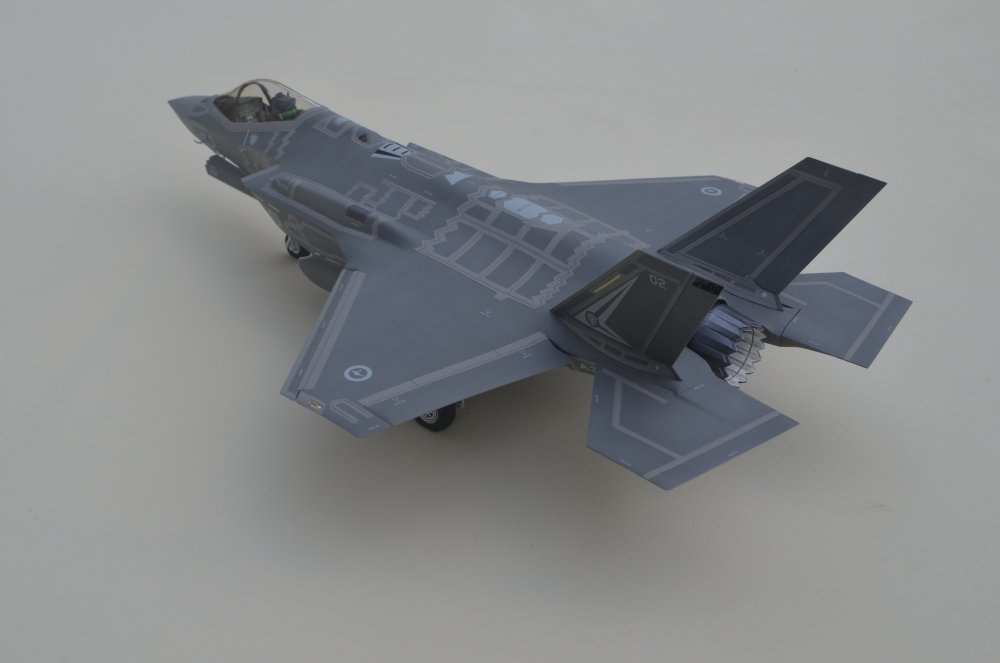
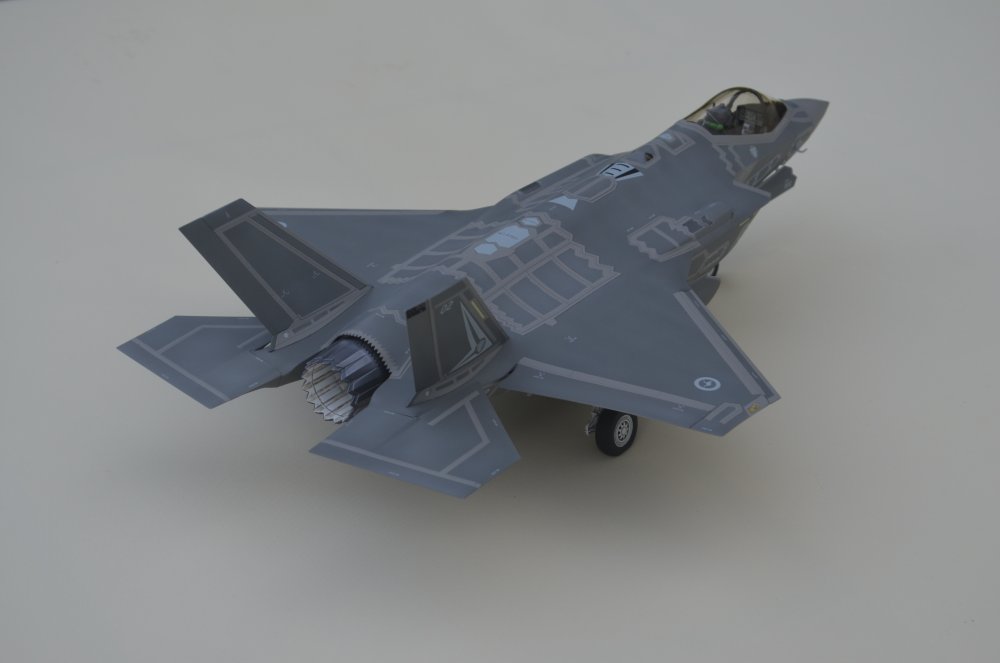
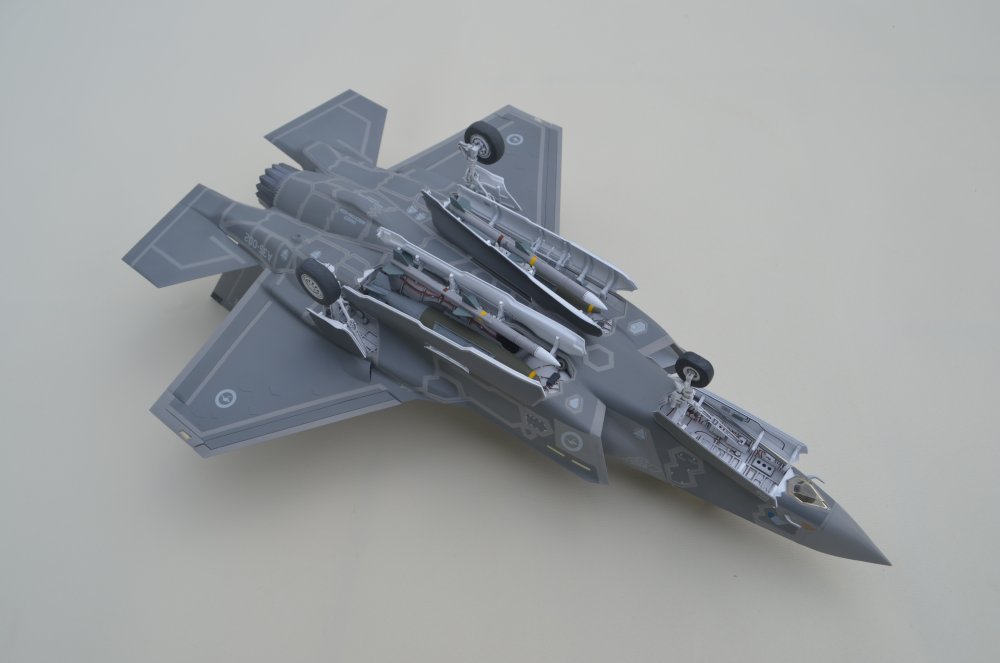
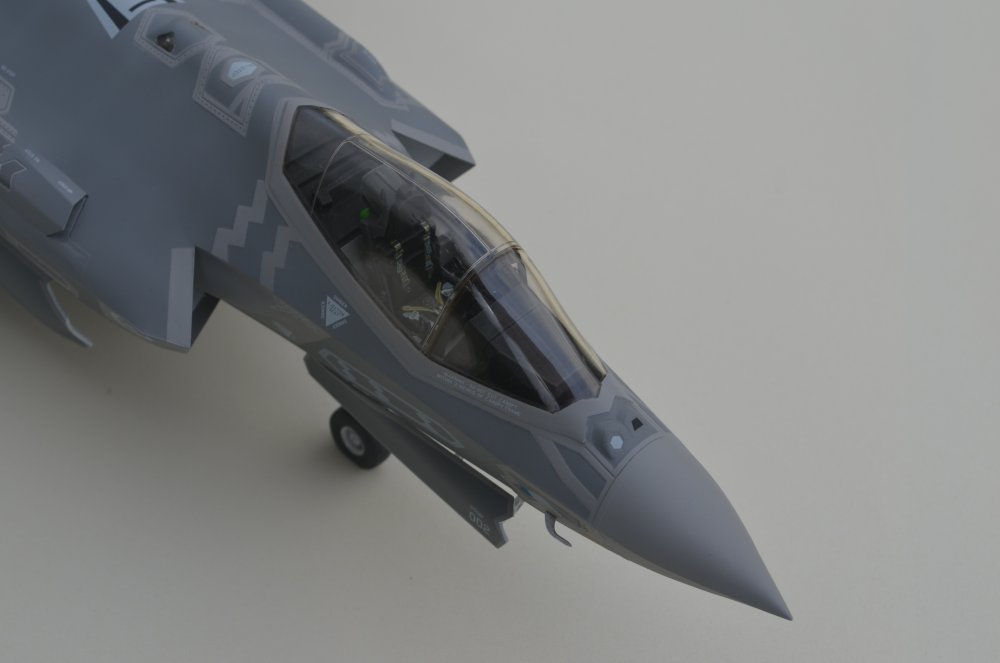
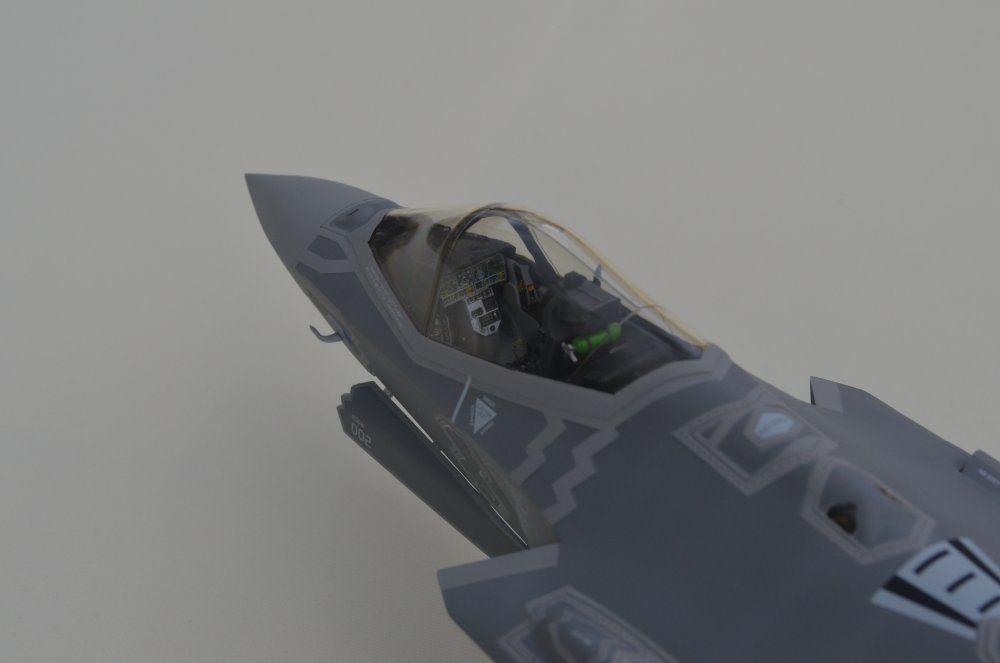
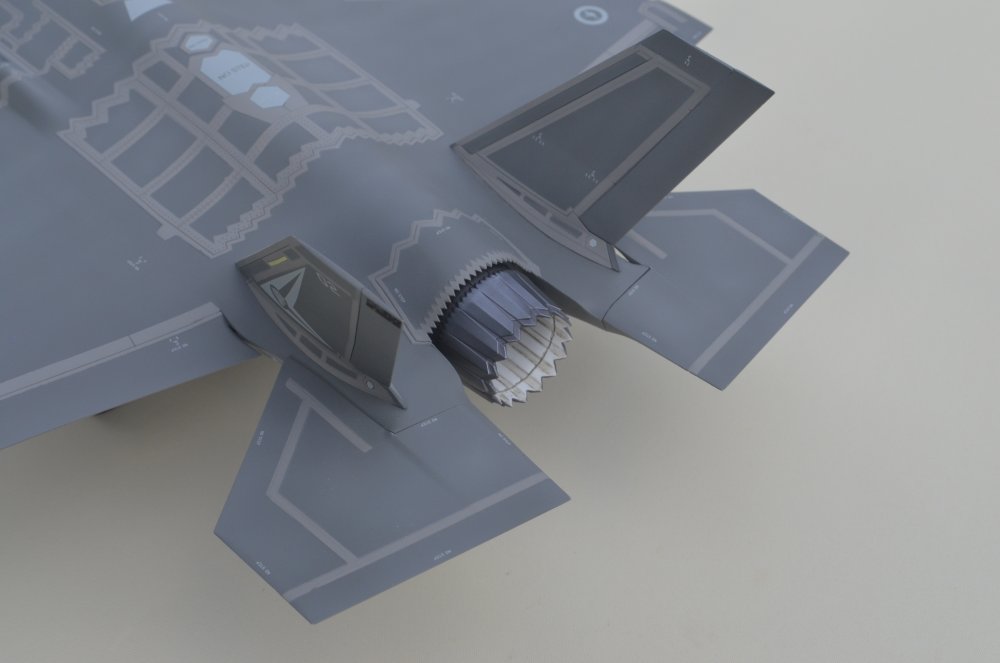
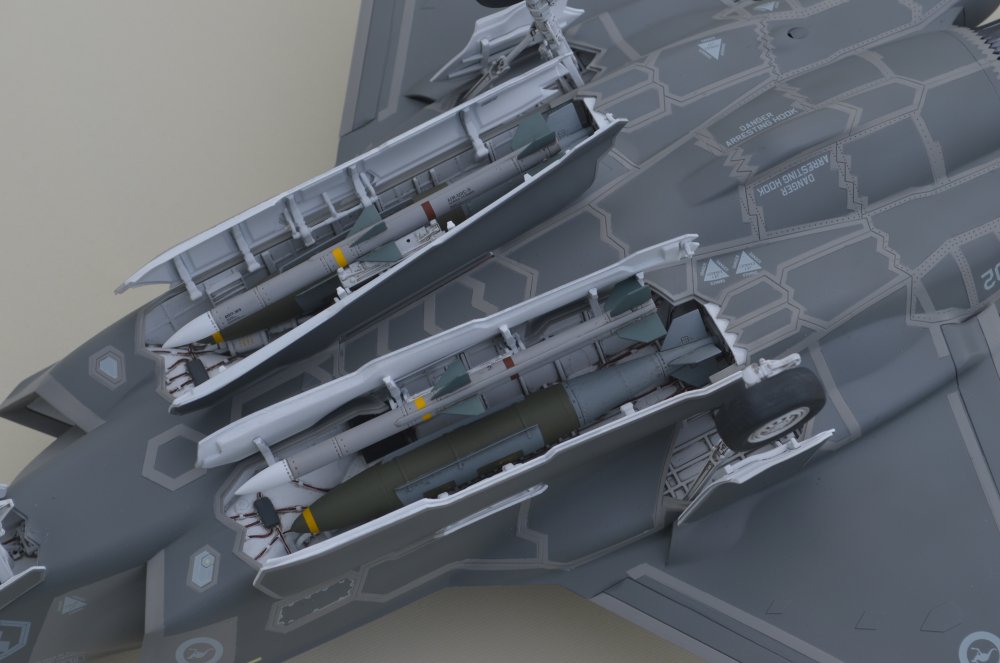
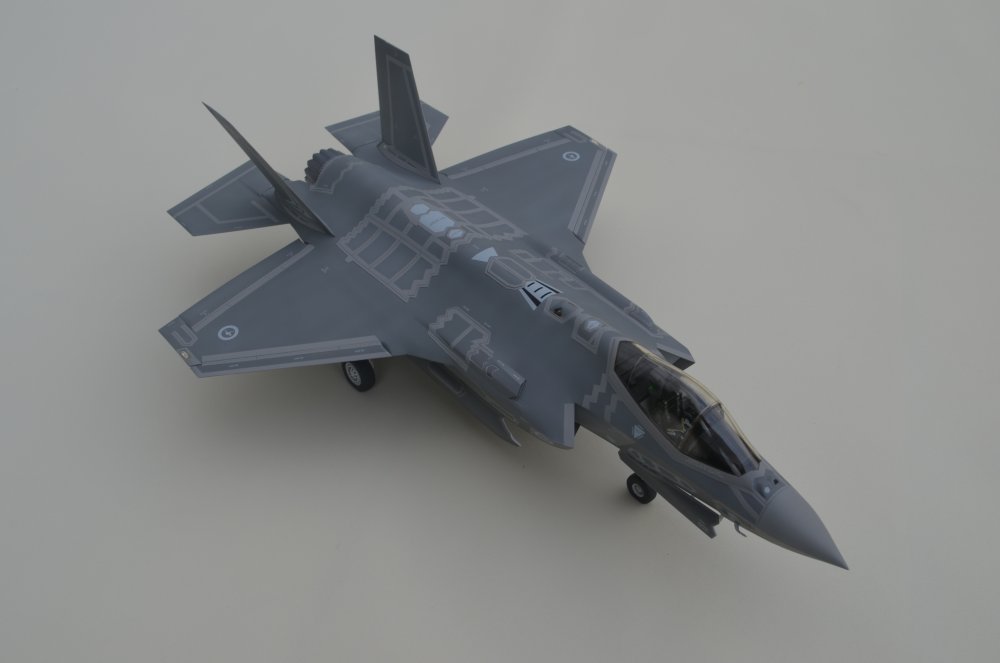
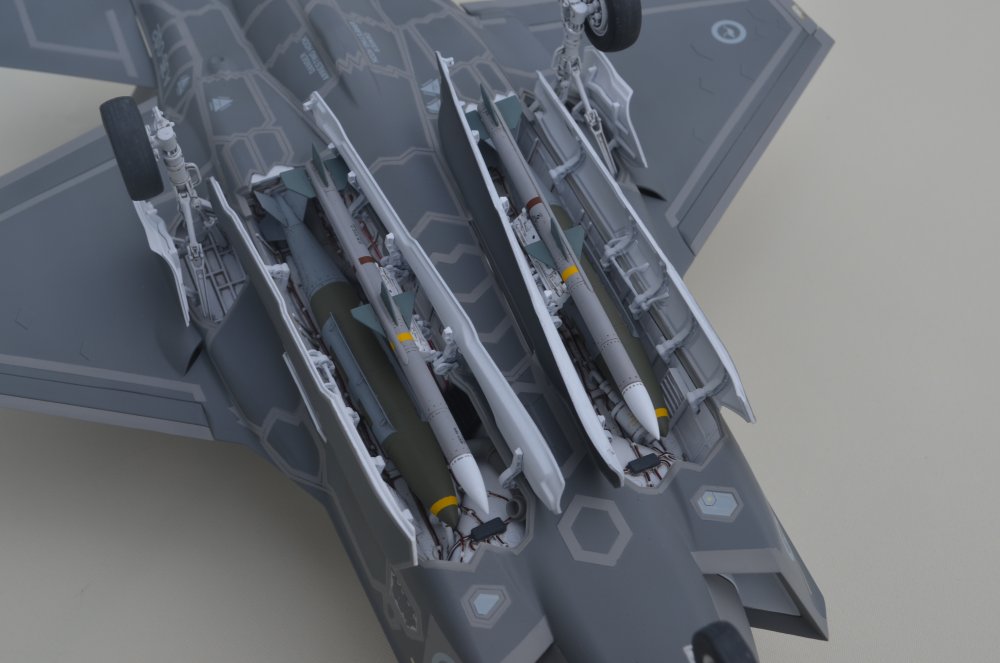
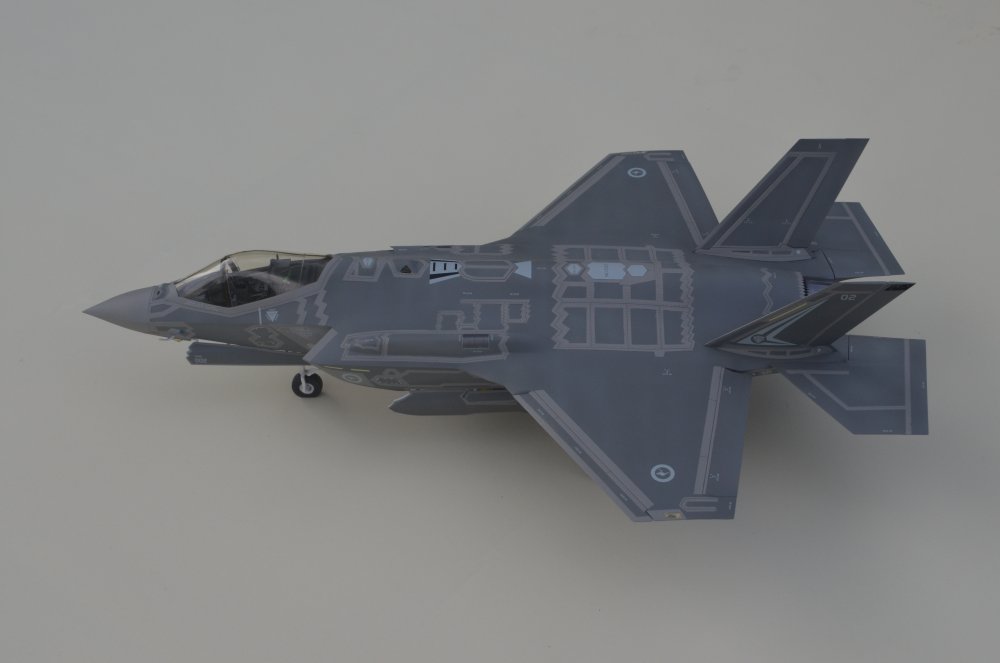
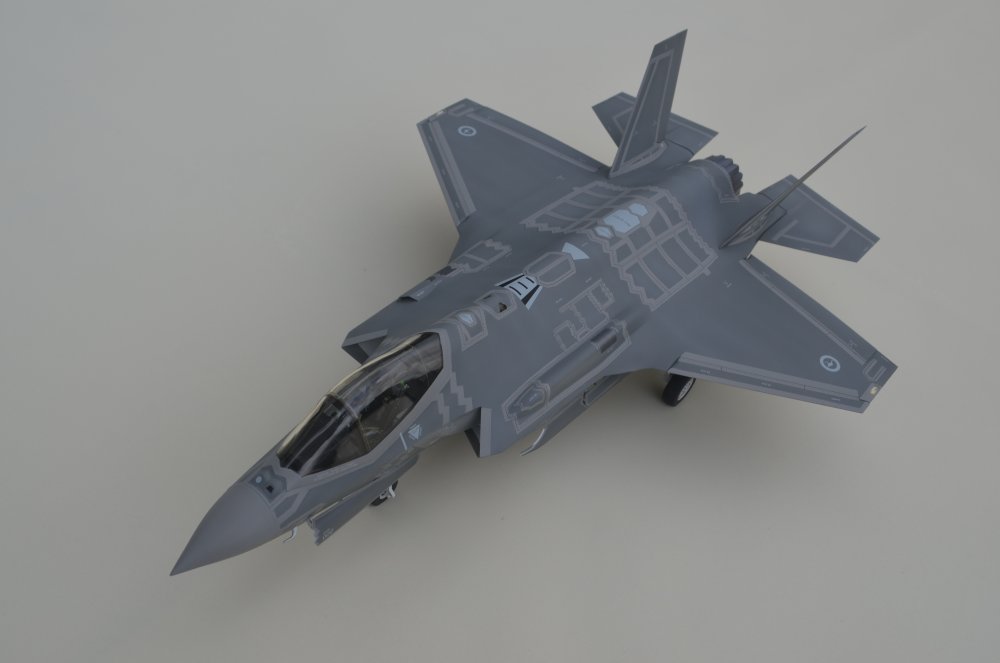
Here's the latest model off the bench - Italeri's 1/32nd F-35A Lightning II. This was built out of the box, with the exception of Eduard's seat belt and cockpit set. The kit itself goes together really well, with the only filler being needed on the fuselage to wing join which wasn't the best. There's lots of nicely moulded detail in the landing gear and weapons bays, which with some careful painting comes up well. The most time consuming part of the build was the painting process - it took hours, and hours, and hours, and hours... you get the idea... of masking the RAM panels. I went for an early-build RAAF machine provided in the kit, which has the higher-contrast paint job. More recent deliveries have a far less contrasting paint finish which would have made life a good deal easier. Still, I think the earlier schemes are more pleasing on the eye. Apparently the jet pipe is a little undersized, but I didn't bother replacing it. Detail is a bit soft here to be fair, and the exhaust is the weakest part of the kit. Overall though, a nice and simple build, that takes up a lot of room on the display shelf! Regards to all, Tom

-
RR Spey powered RAF Phantom conversion
ThomasProbert replied to Wingco57's topic in LSM 1/35 and Larger Work In Progress
Erm.... it’s back in its box in the loft. Maybe I’ll resurrect it one day when the mood takes. I got bogged down with making the cockpit and lost momentum.- 414 replies
-
- 2
-
-
- conversion
- phantom
- (and 1 more)
-
RR Spey powered RAF Phantom conversion
ThomasProbert replied to Wingco57's topic in LSM 1/35 and Larger Work In Progress
Really enjoying this, Cees. I suppose you could argue it's an expensive way to make a Brit Phantom (using two kits) but it still works out a lot cheaper than using the conversions when (and if) they become available! Tom- 414 replies
-
- 2
-
-
- conversion
- phantom
- (and 1 more)