
Kaireckstadt
-
Posts
1,705 -
Joined
-
Last visited
Content Type
Profiles
Forums
Events
Gallery
Everything posted by Kaireckstadt
-
 Thanks for your feedback and the photos. I haven’t seen the last one so far. The White Bunny Vandy 5 would also be an interesting subject to build. But I don’t know if they are available from a decal supplier. For 1/48 they are. Do you have a tip for me?
 -
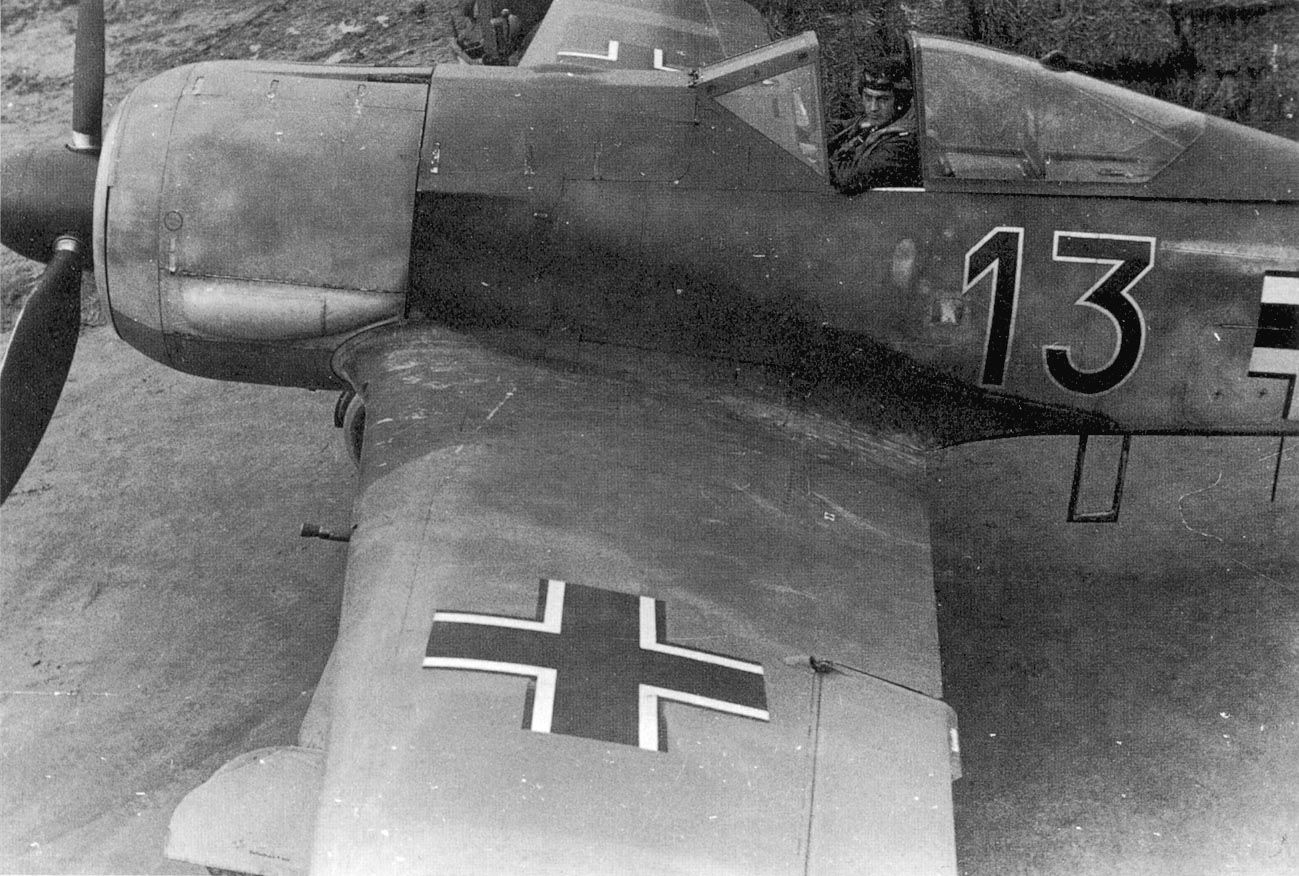
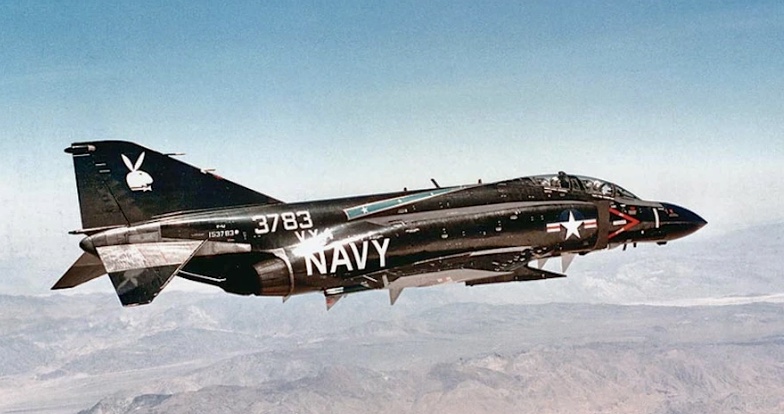
That’s a super foto. One can clearly see that the rivets are countersink ones. The big ones on the wingroot are screws.
-
RR Spey powered RAF Phantom conversion
Kaireckstadt replied to Wingco57's topic in LSM 1/35 and Larger Work In Progress
Great job on the camo and the installed components! With all the problems you already solved during the build you will also solve the one with the canopies. Looking forward to seeing your progress!- 414 replies
-
- 5
-

-
- conversion
- phantom
- (and 1 more)
-
Thanks for your feedback Ian. Much appreciated. When I remember well it took about 2 weeks to apply all decals. I hope that I will never have to do that again. But modelers sometimes have to be masochists ...
-
Thank you Carl. To be honest. I had to paint her twice since the first attempt didn’t turn out as I expected it to be. Revell Gloss Black over Primer didn’t work well. The second attempt was Humbrol Gloss Black on pure plastic. That worked.
-
Thanks Harv. This livery is seldomly seen on exhibitions and I also love the sexy look.
-
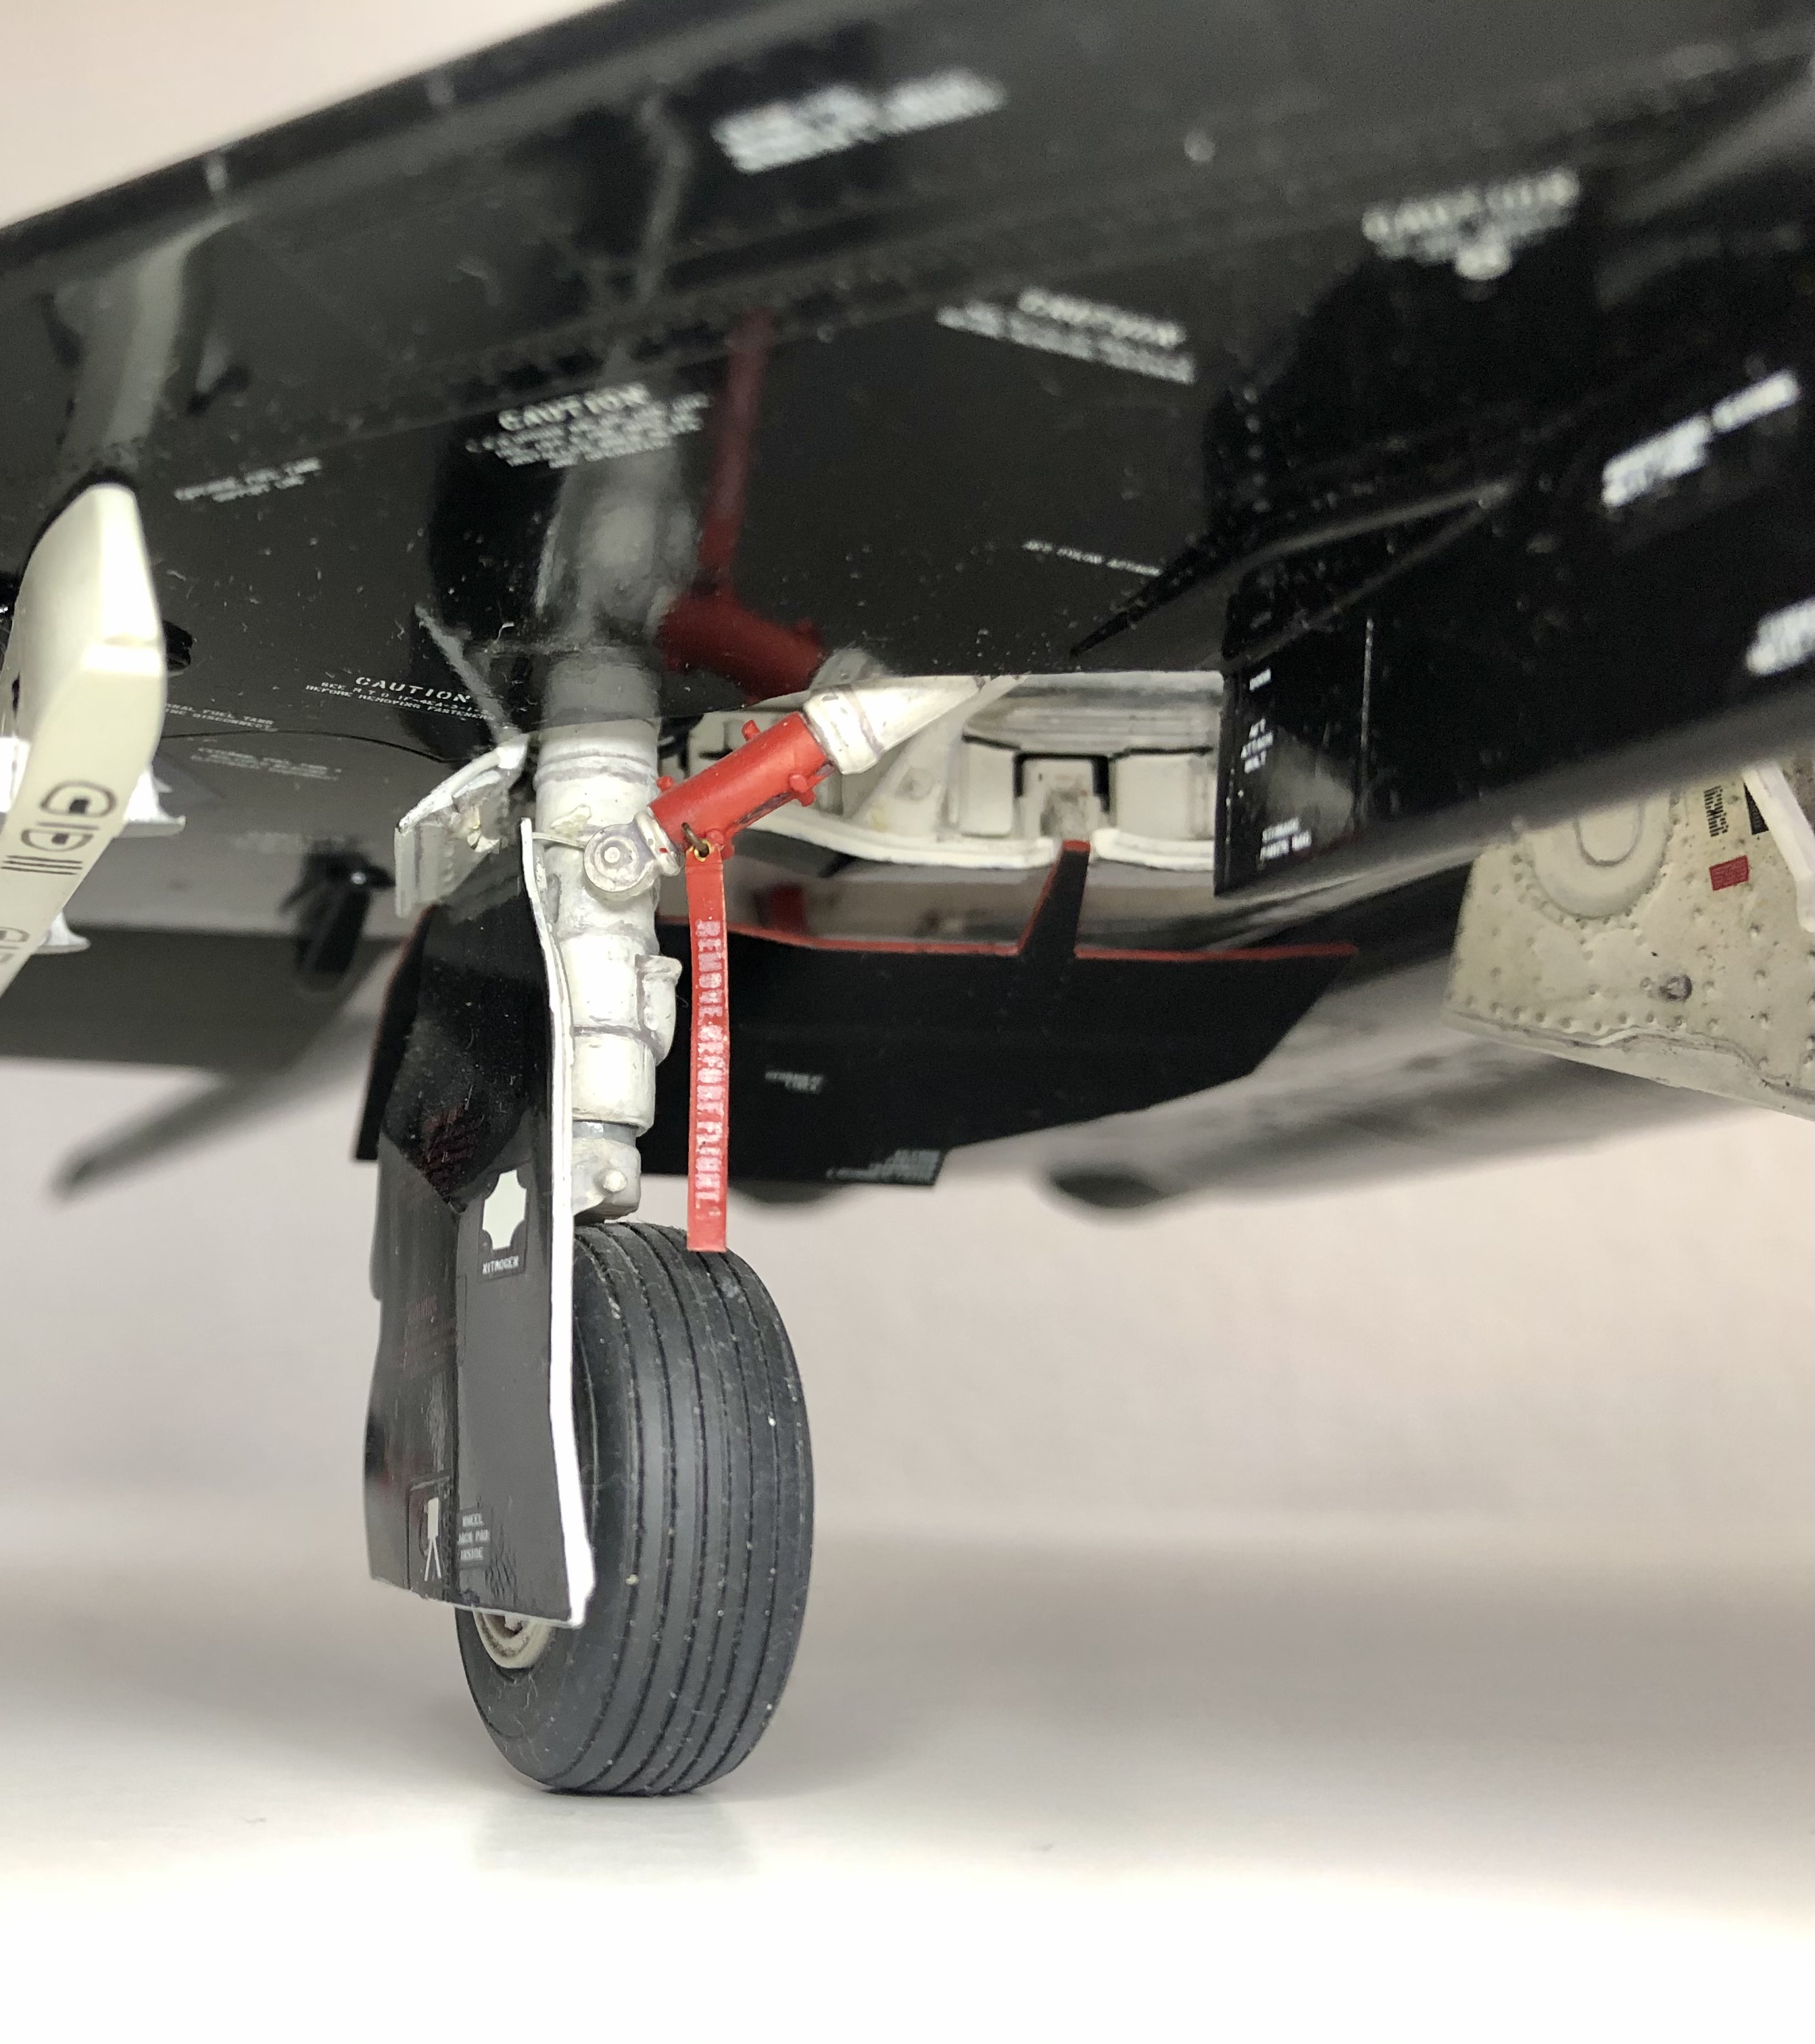
Thanks for your feedback Barry. When I was working in the GAF in the aircraft maintenance of the Tornado it was the first thing to secure the aircraft on the ground and the down locks were one of them.
-
Lancaster ND644 in 32nd scale
Kaireckstadt replied to FME erk's topic in LSM 1/35 and Larger Work In Progress
That’s a lot of work, Ian! But I think when you build one which hasn’t the windows yours is the most convincing method. -
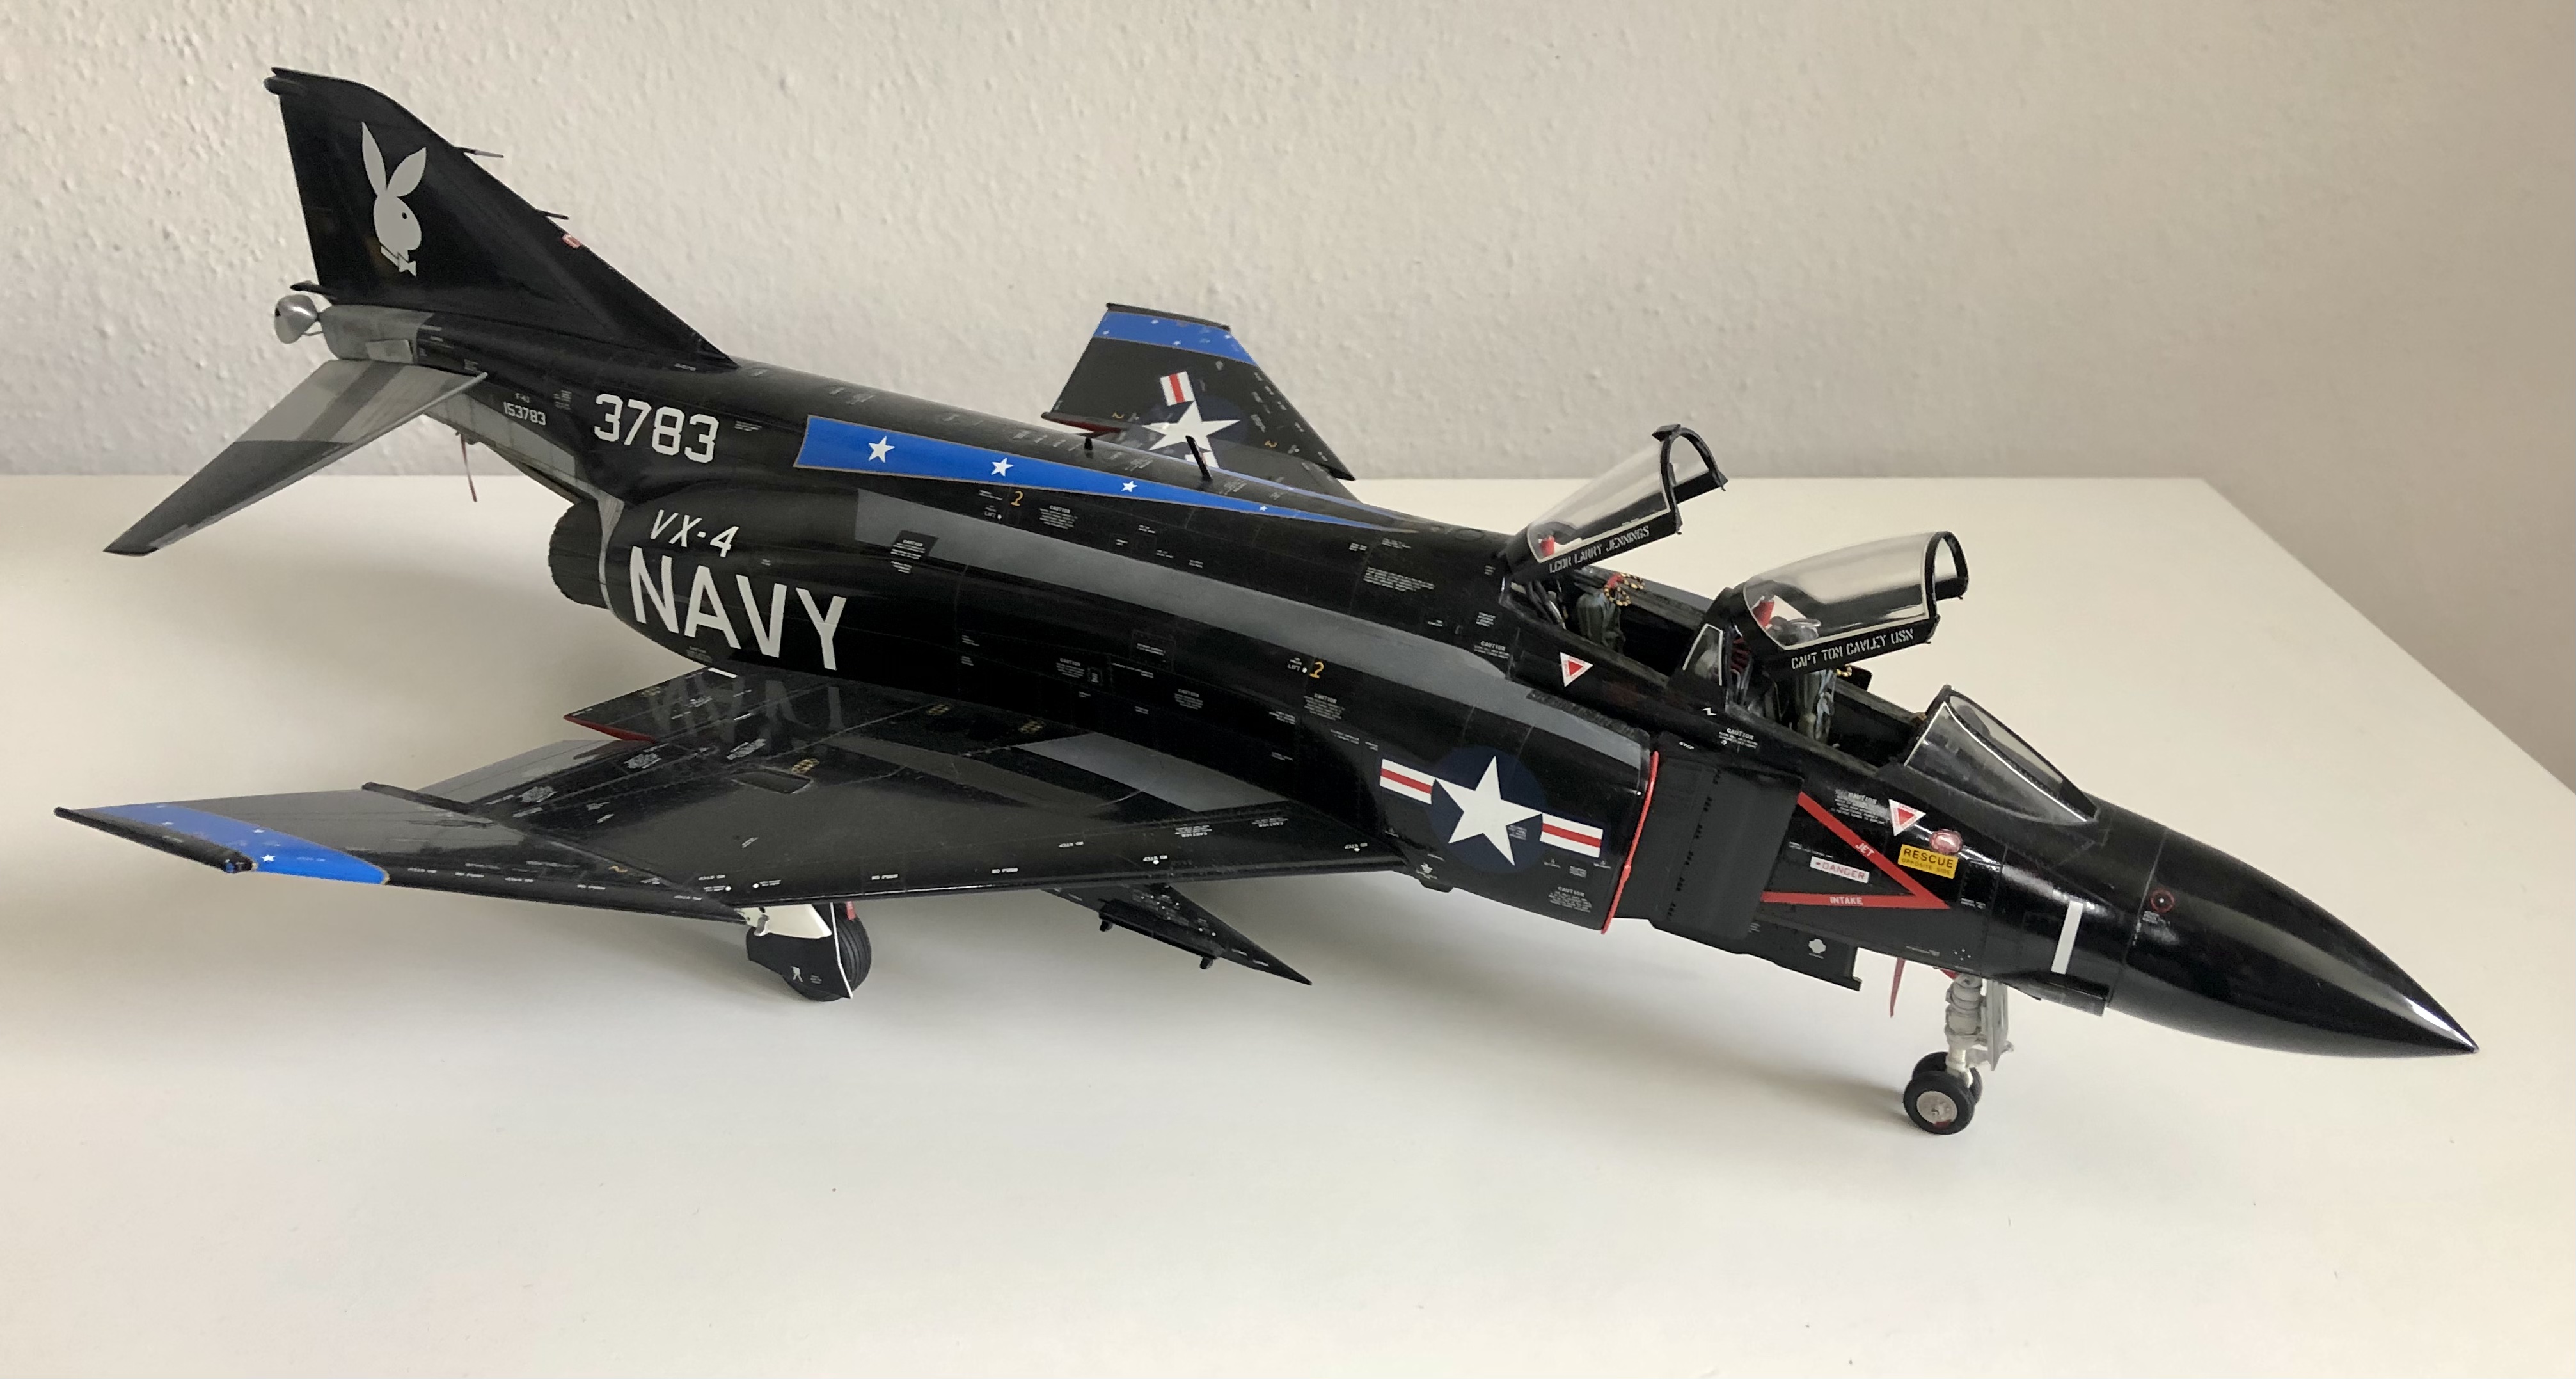
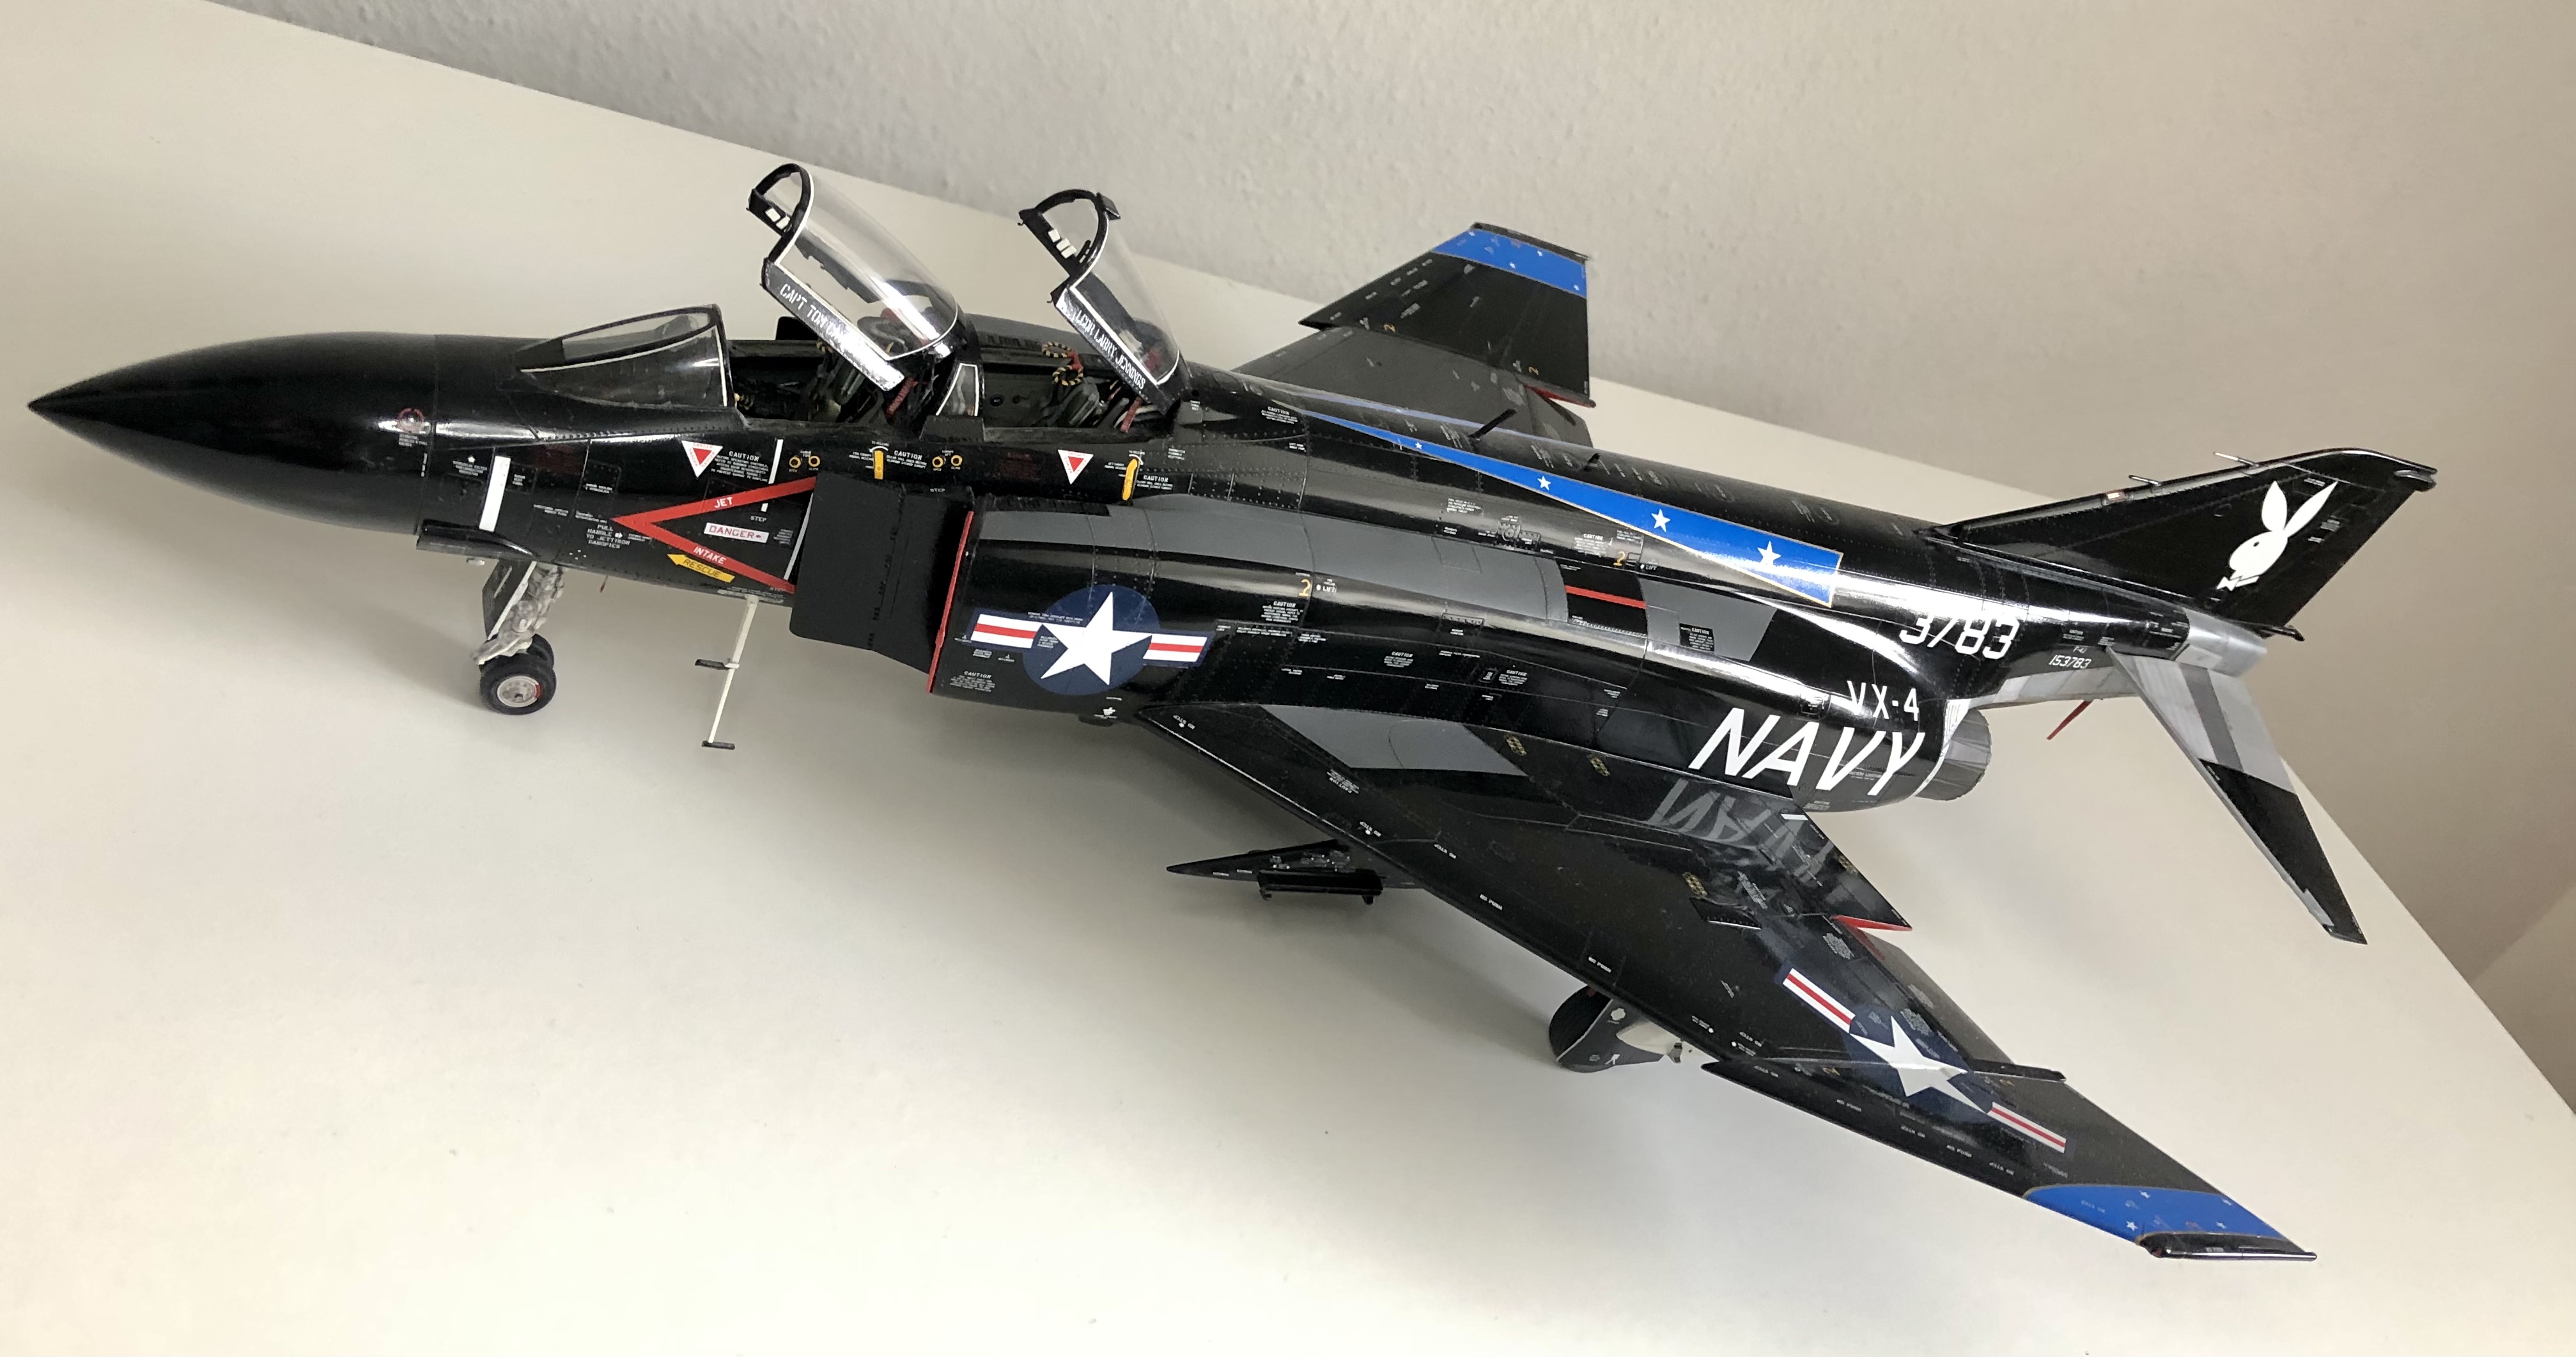
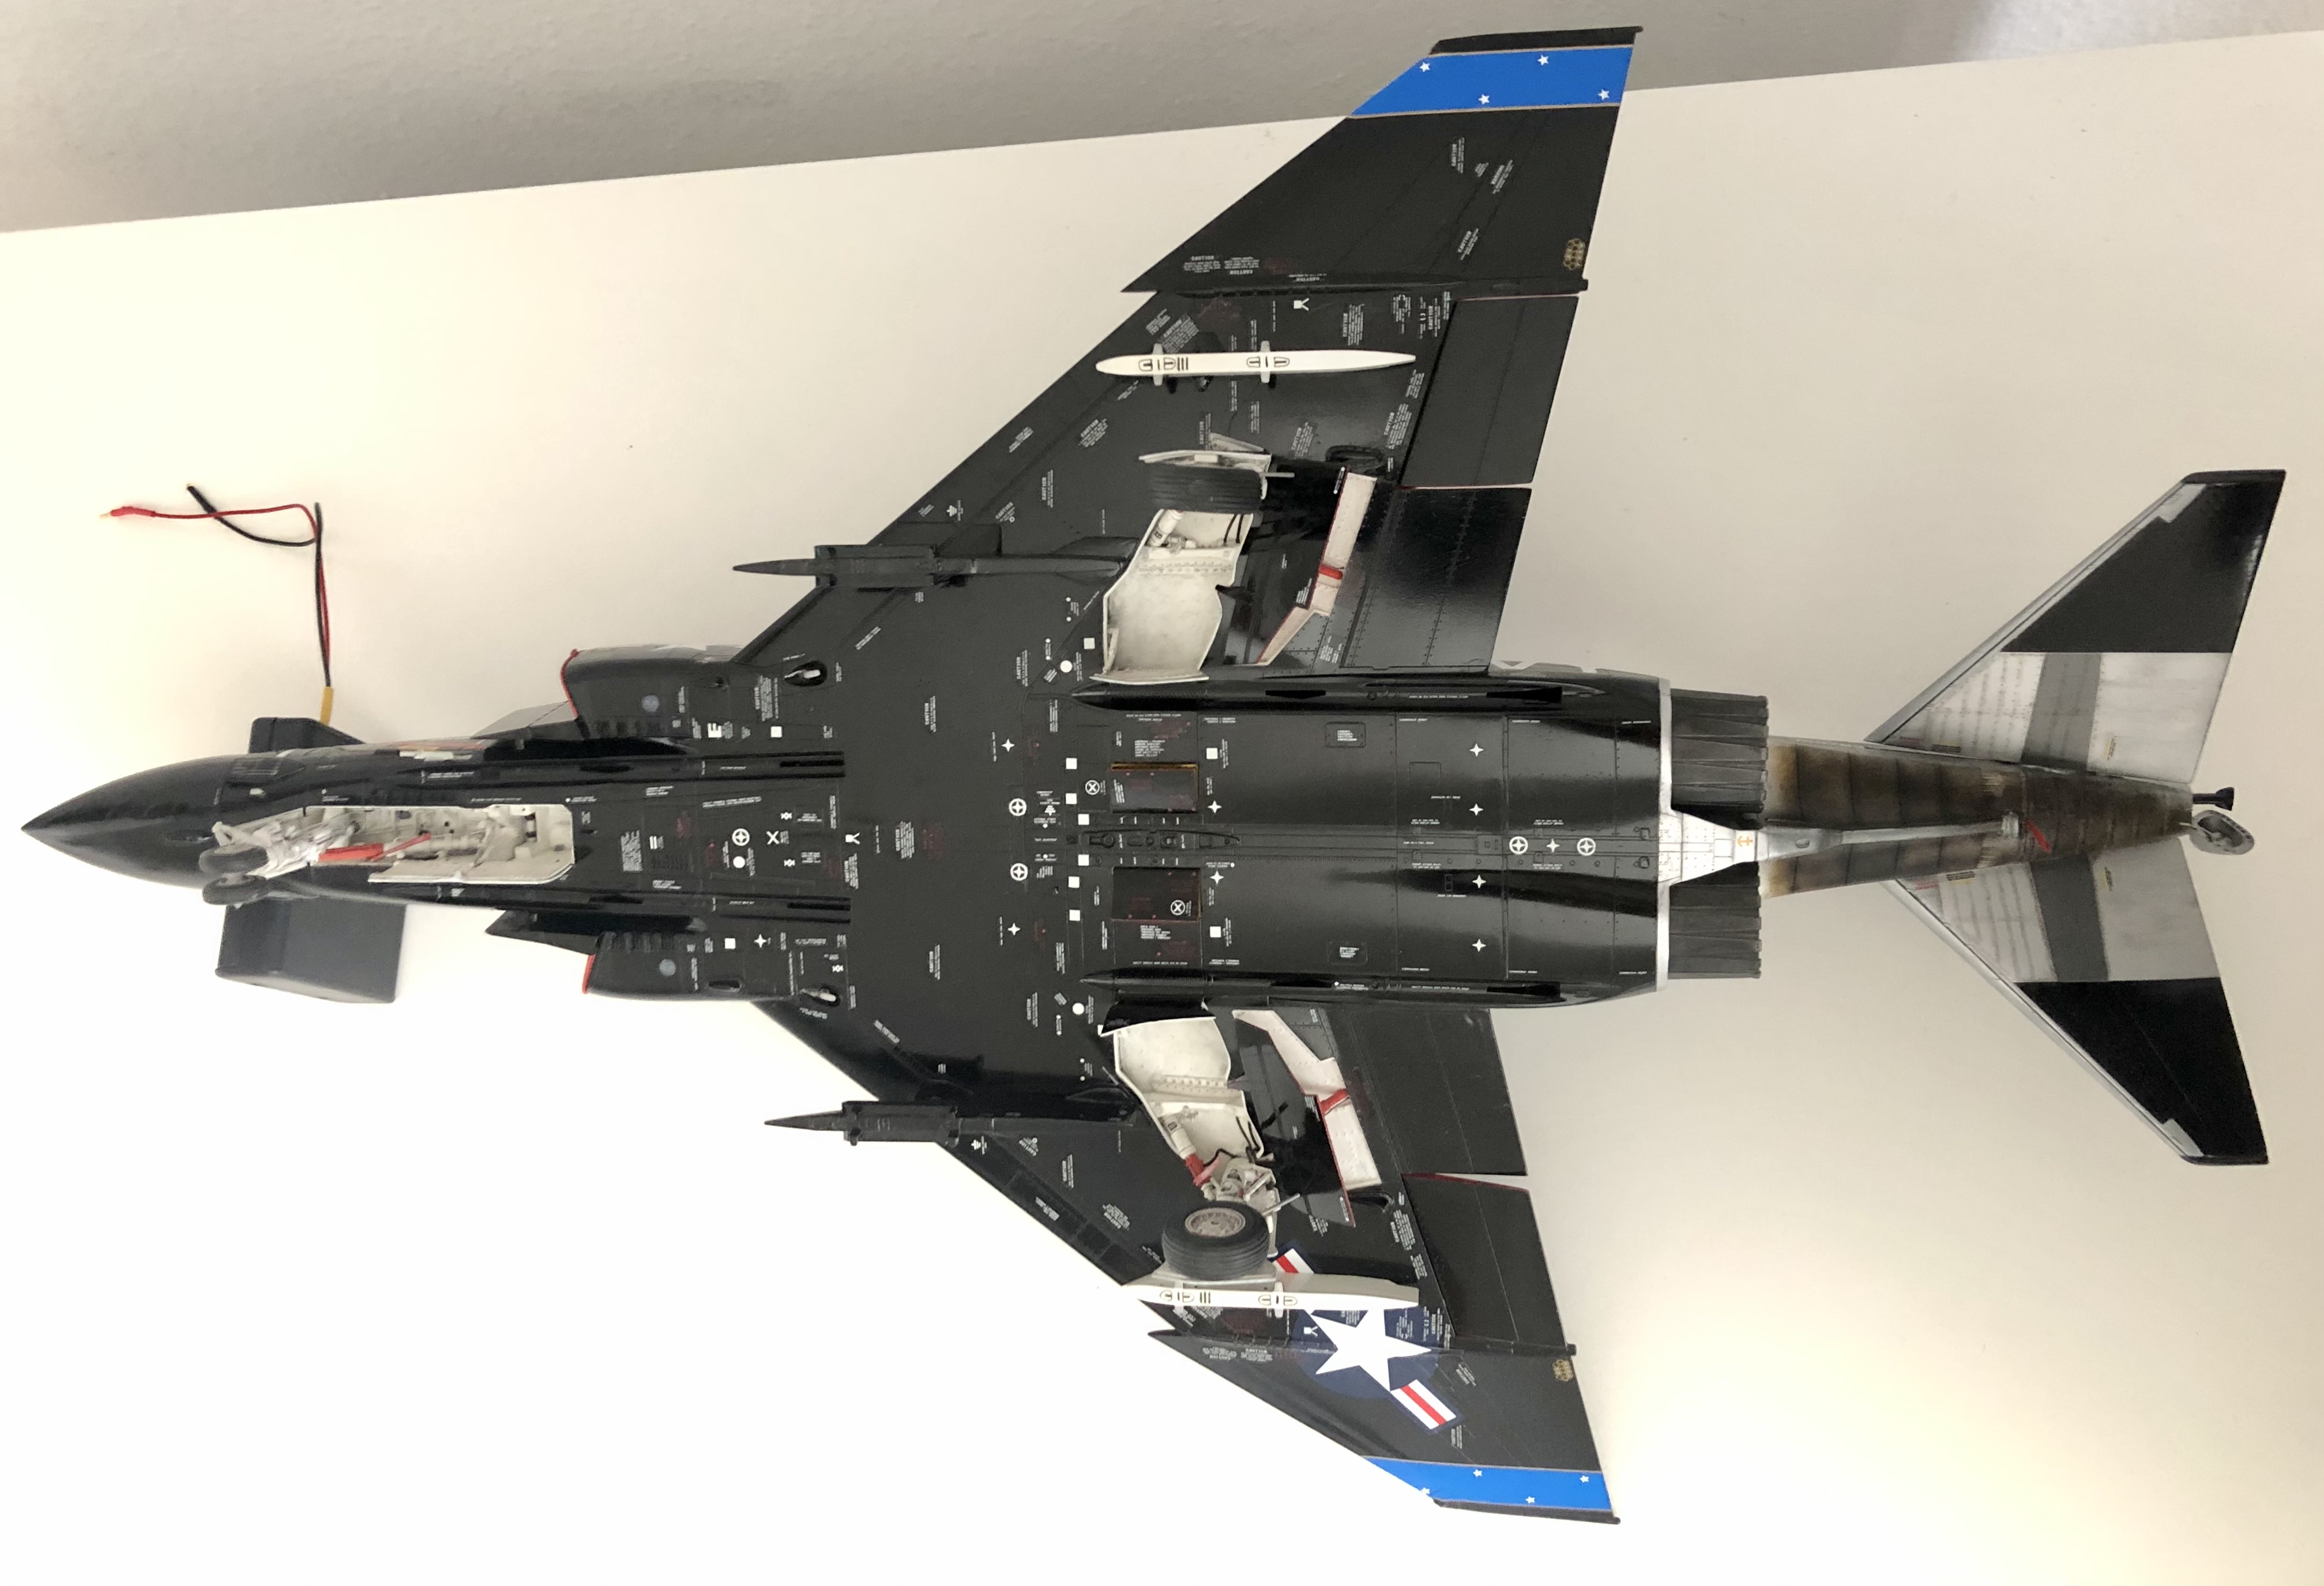
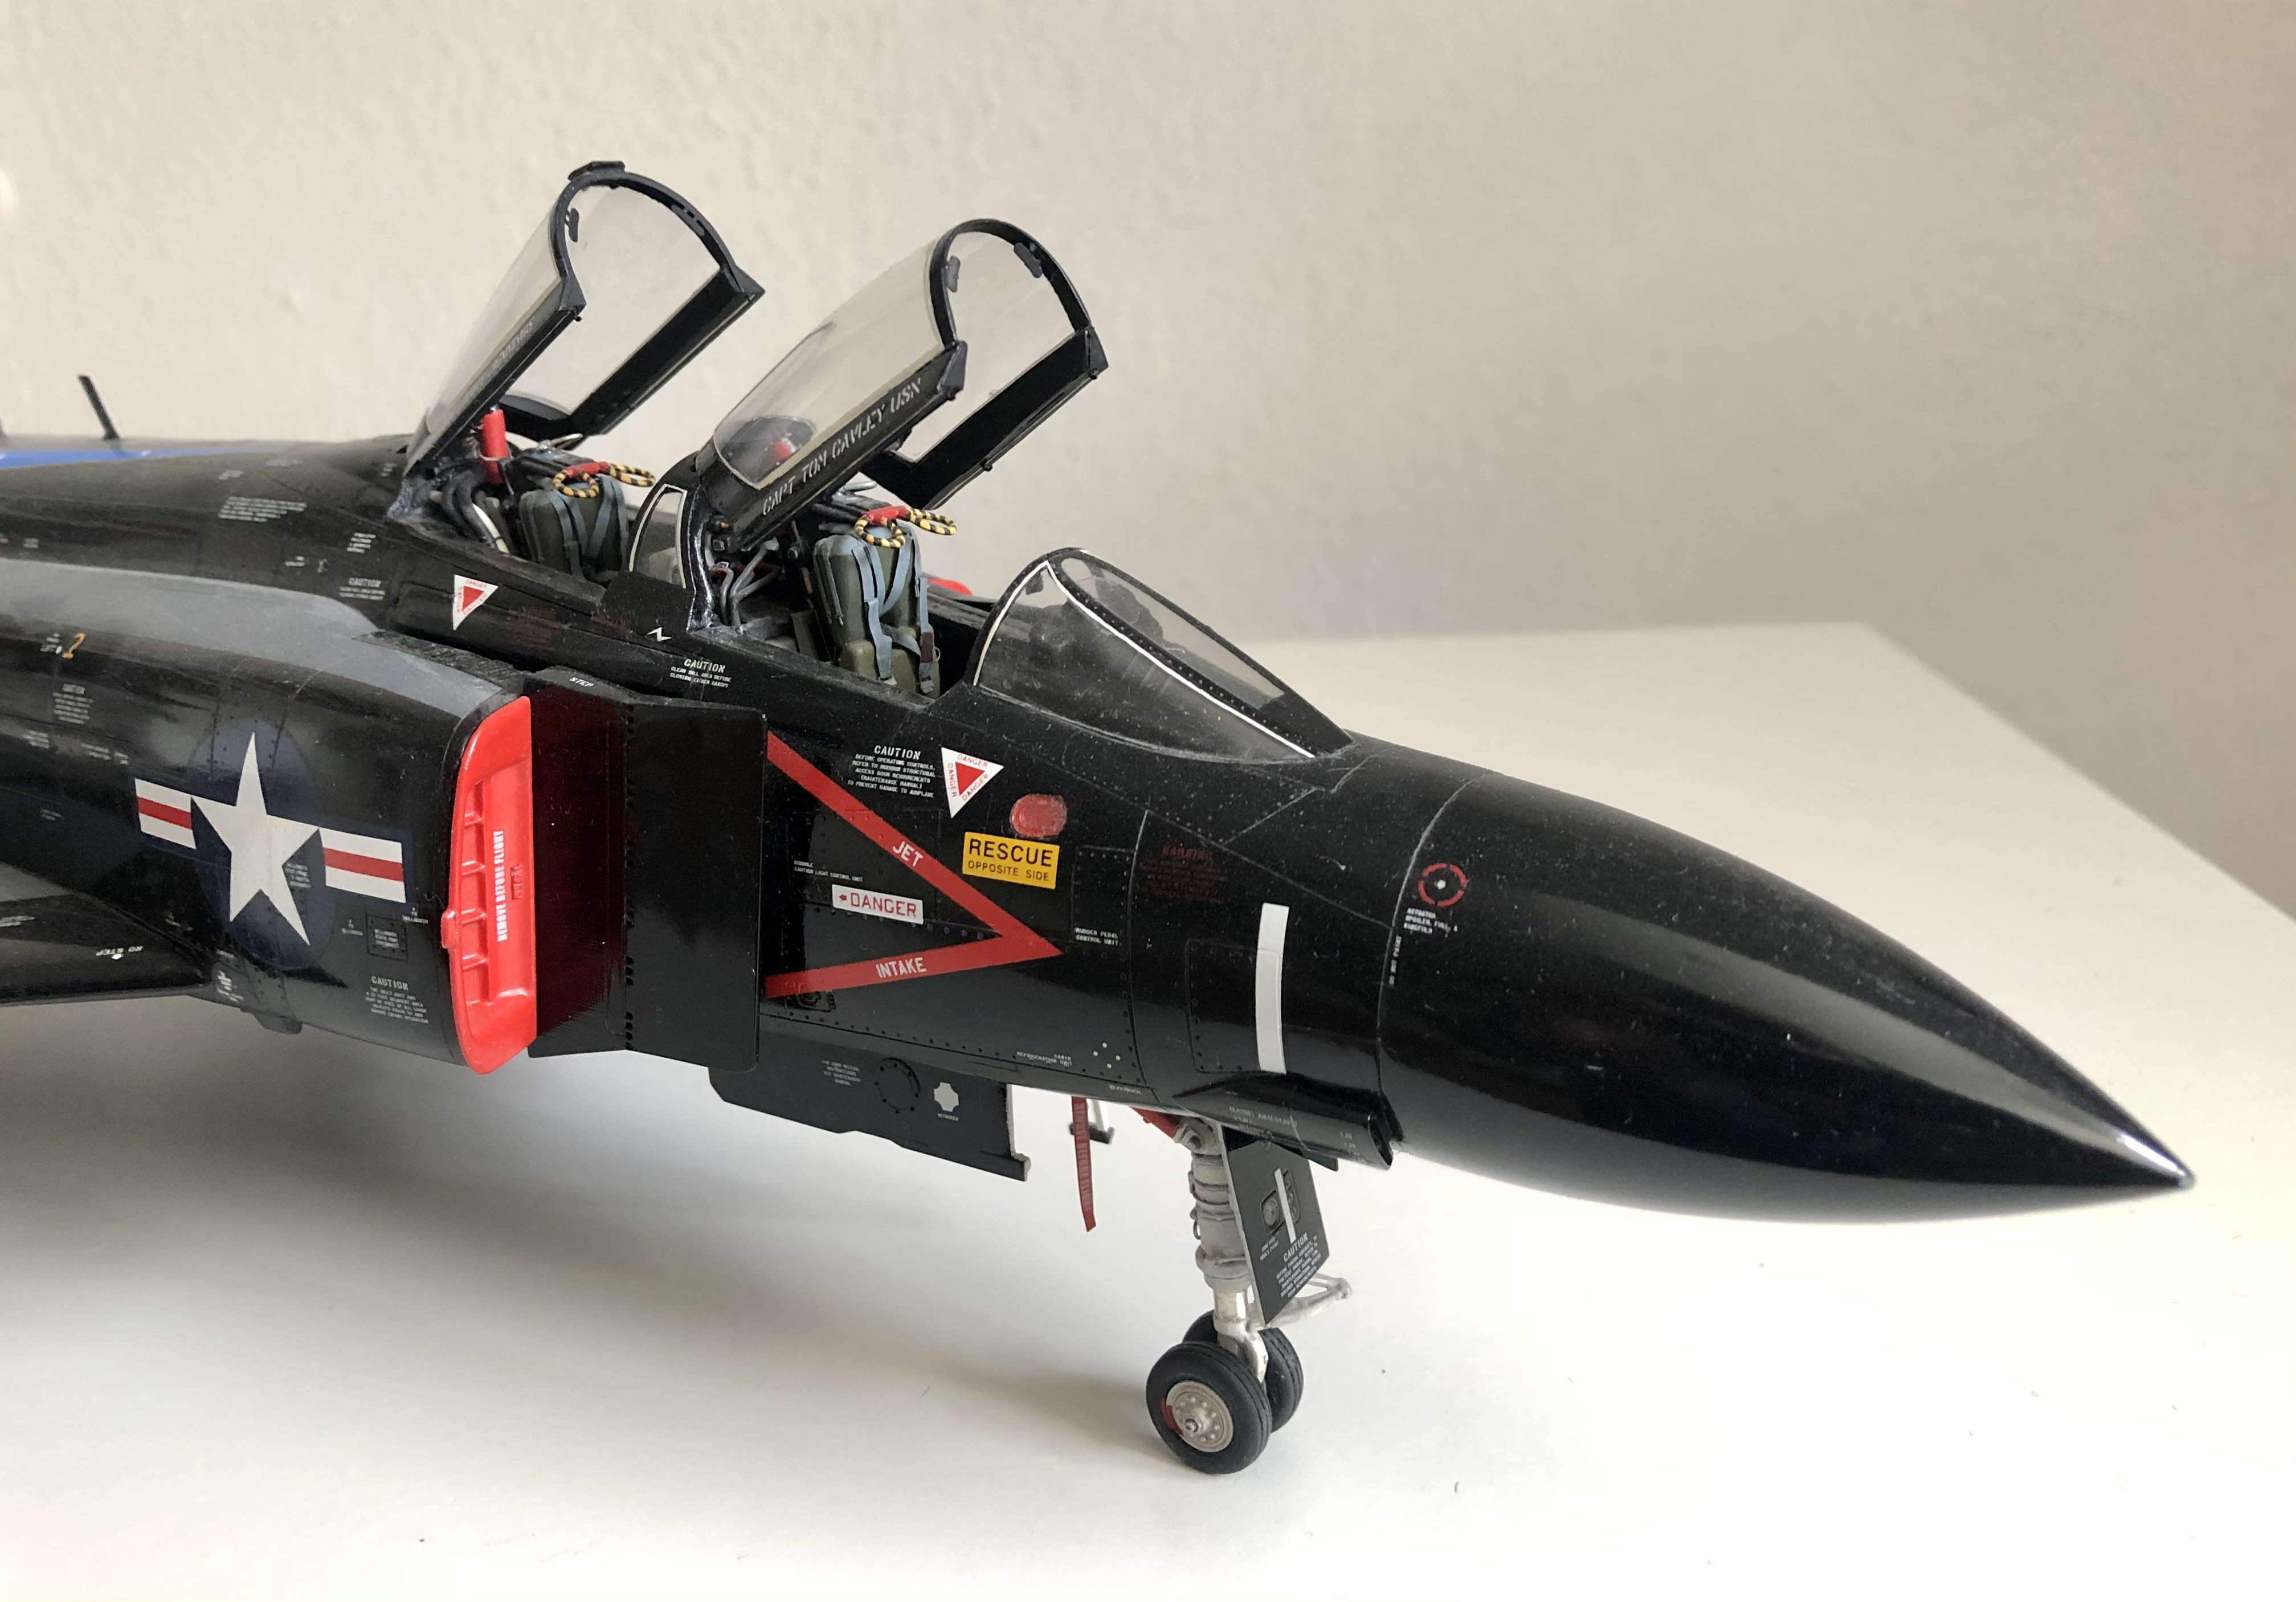
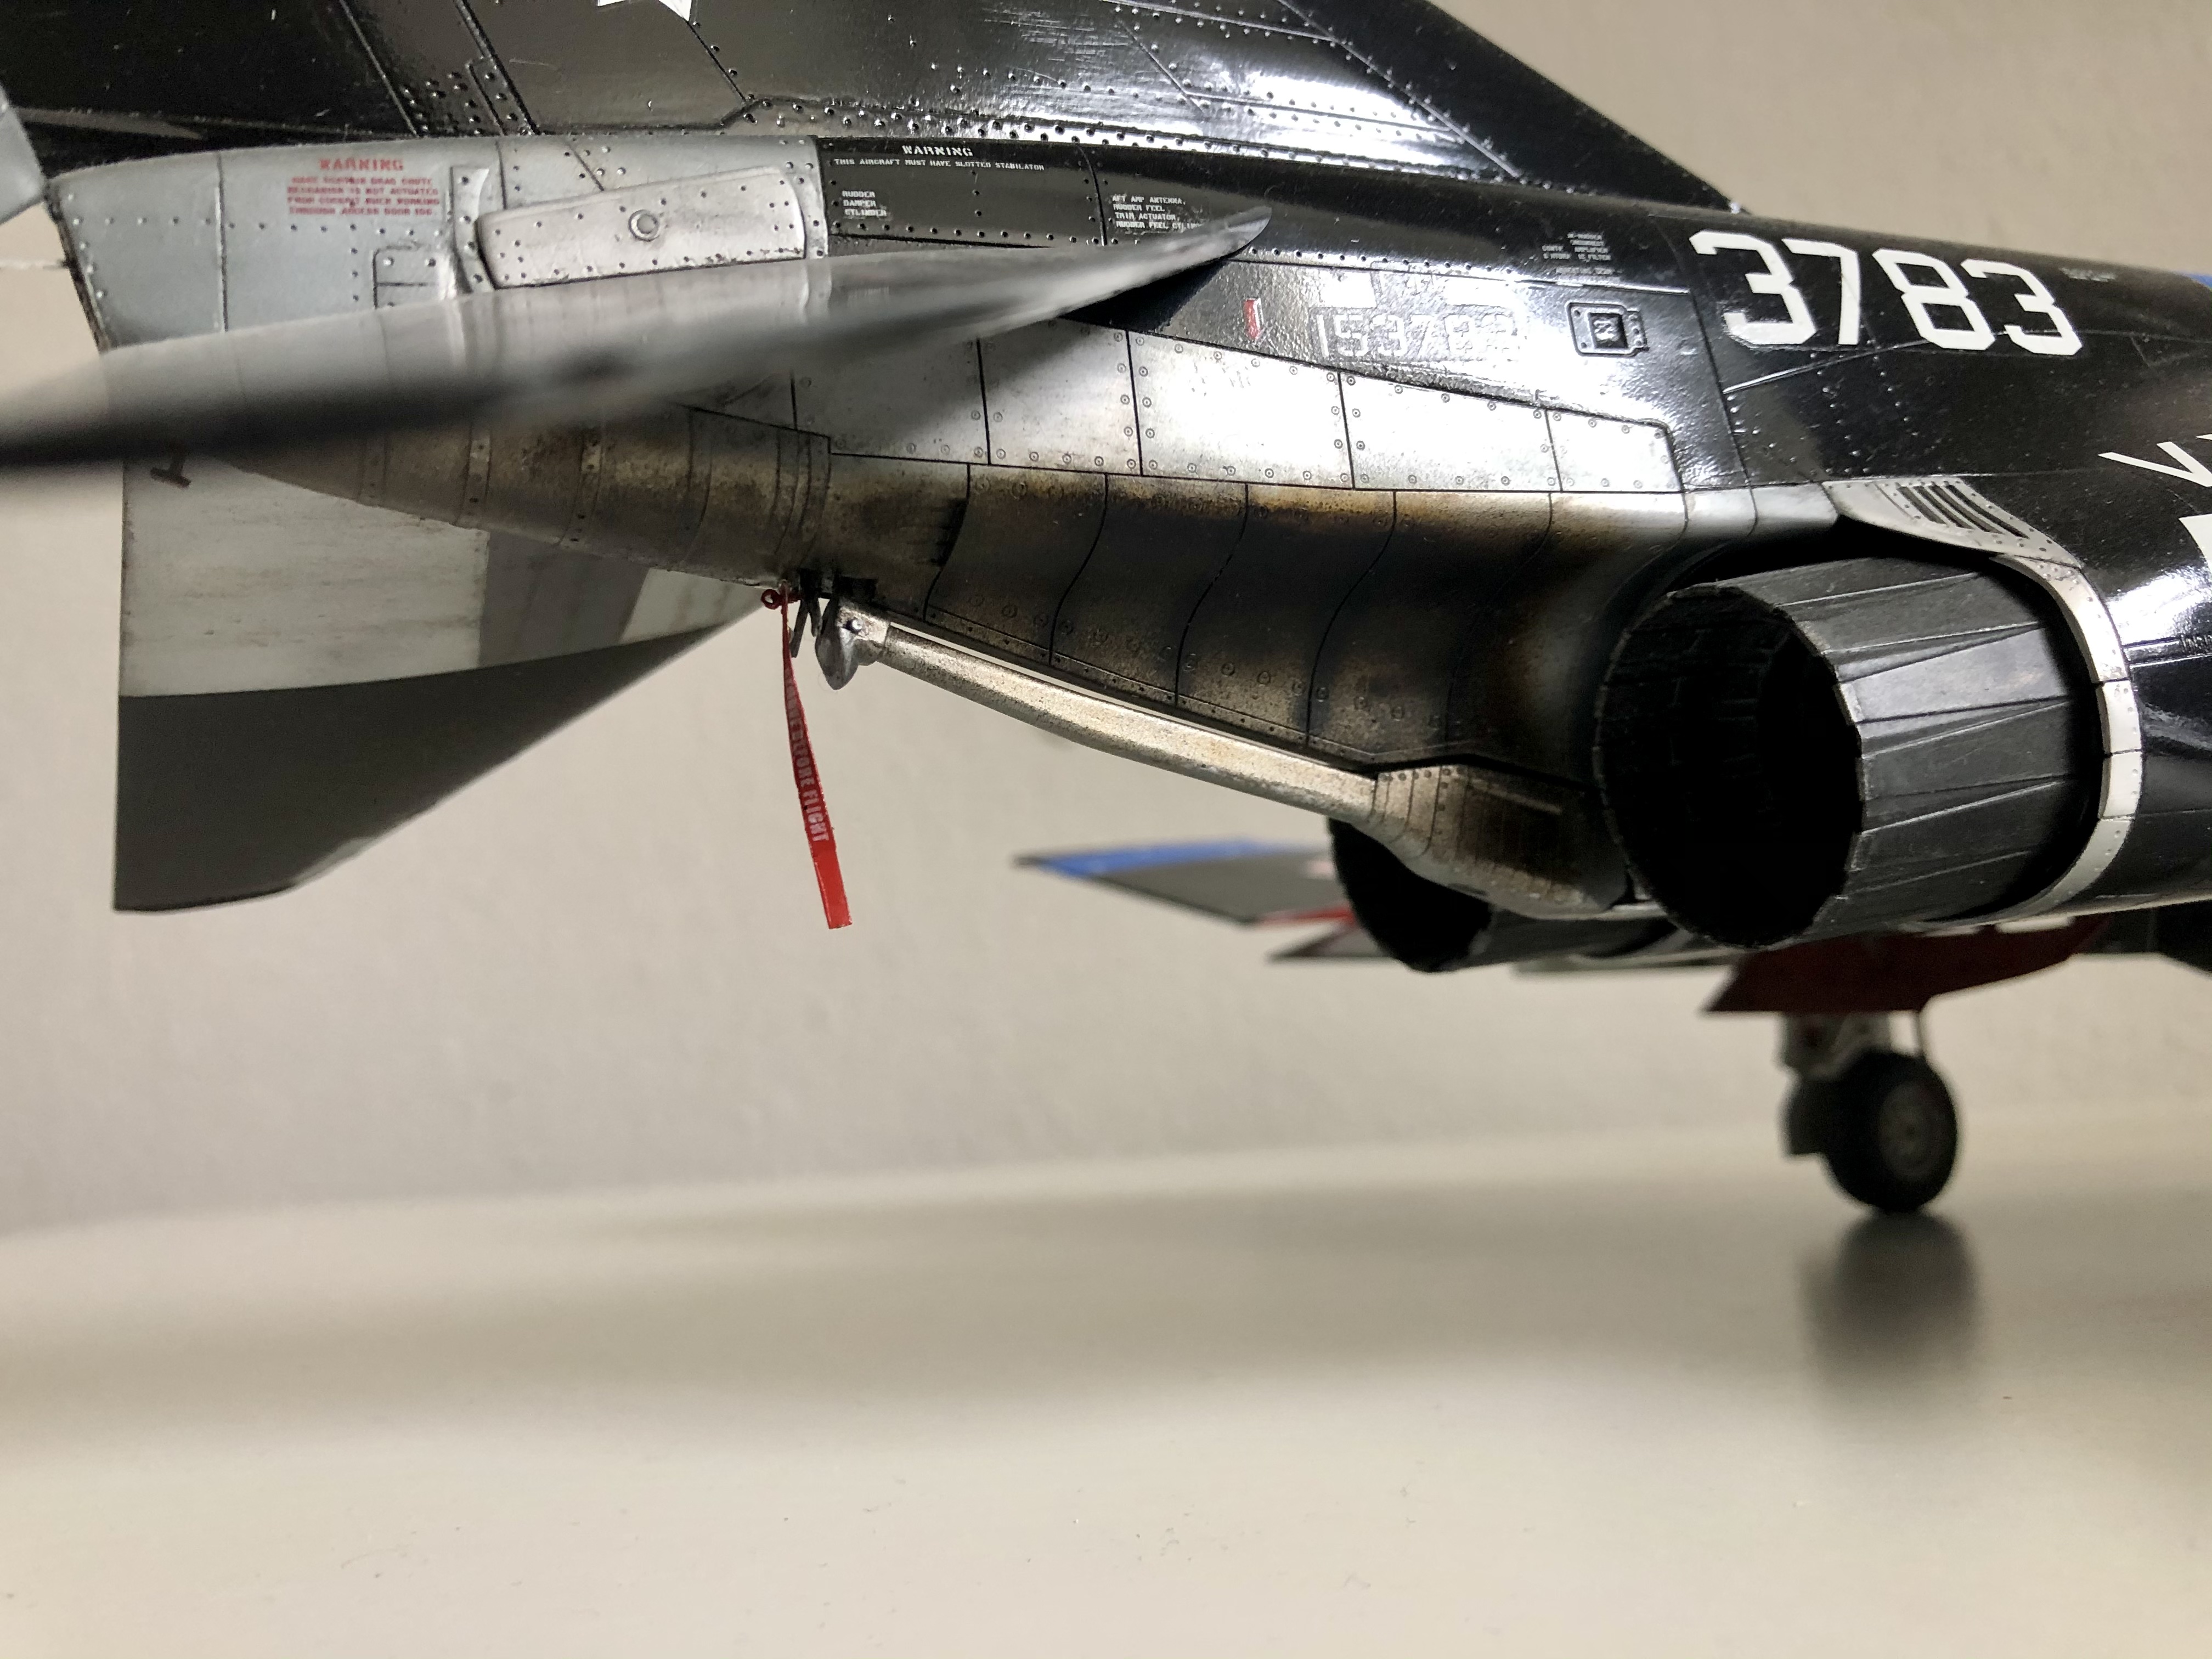
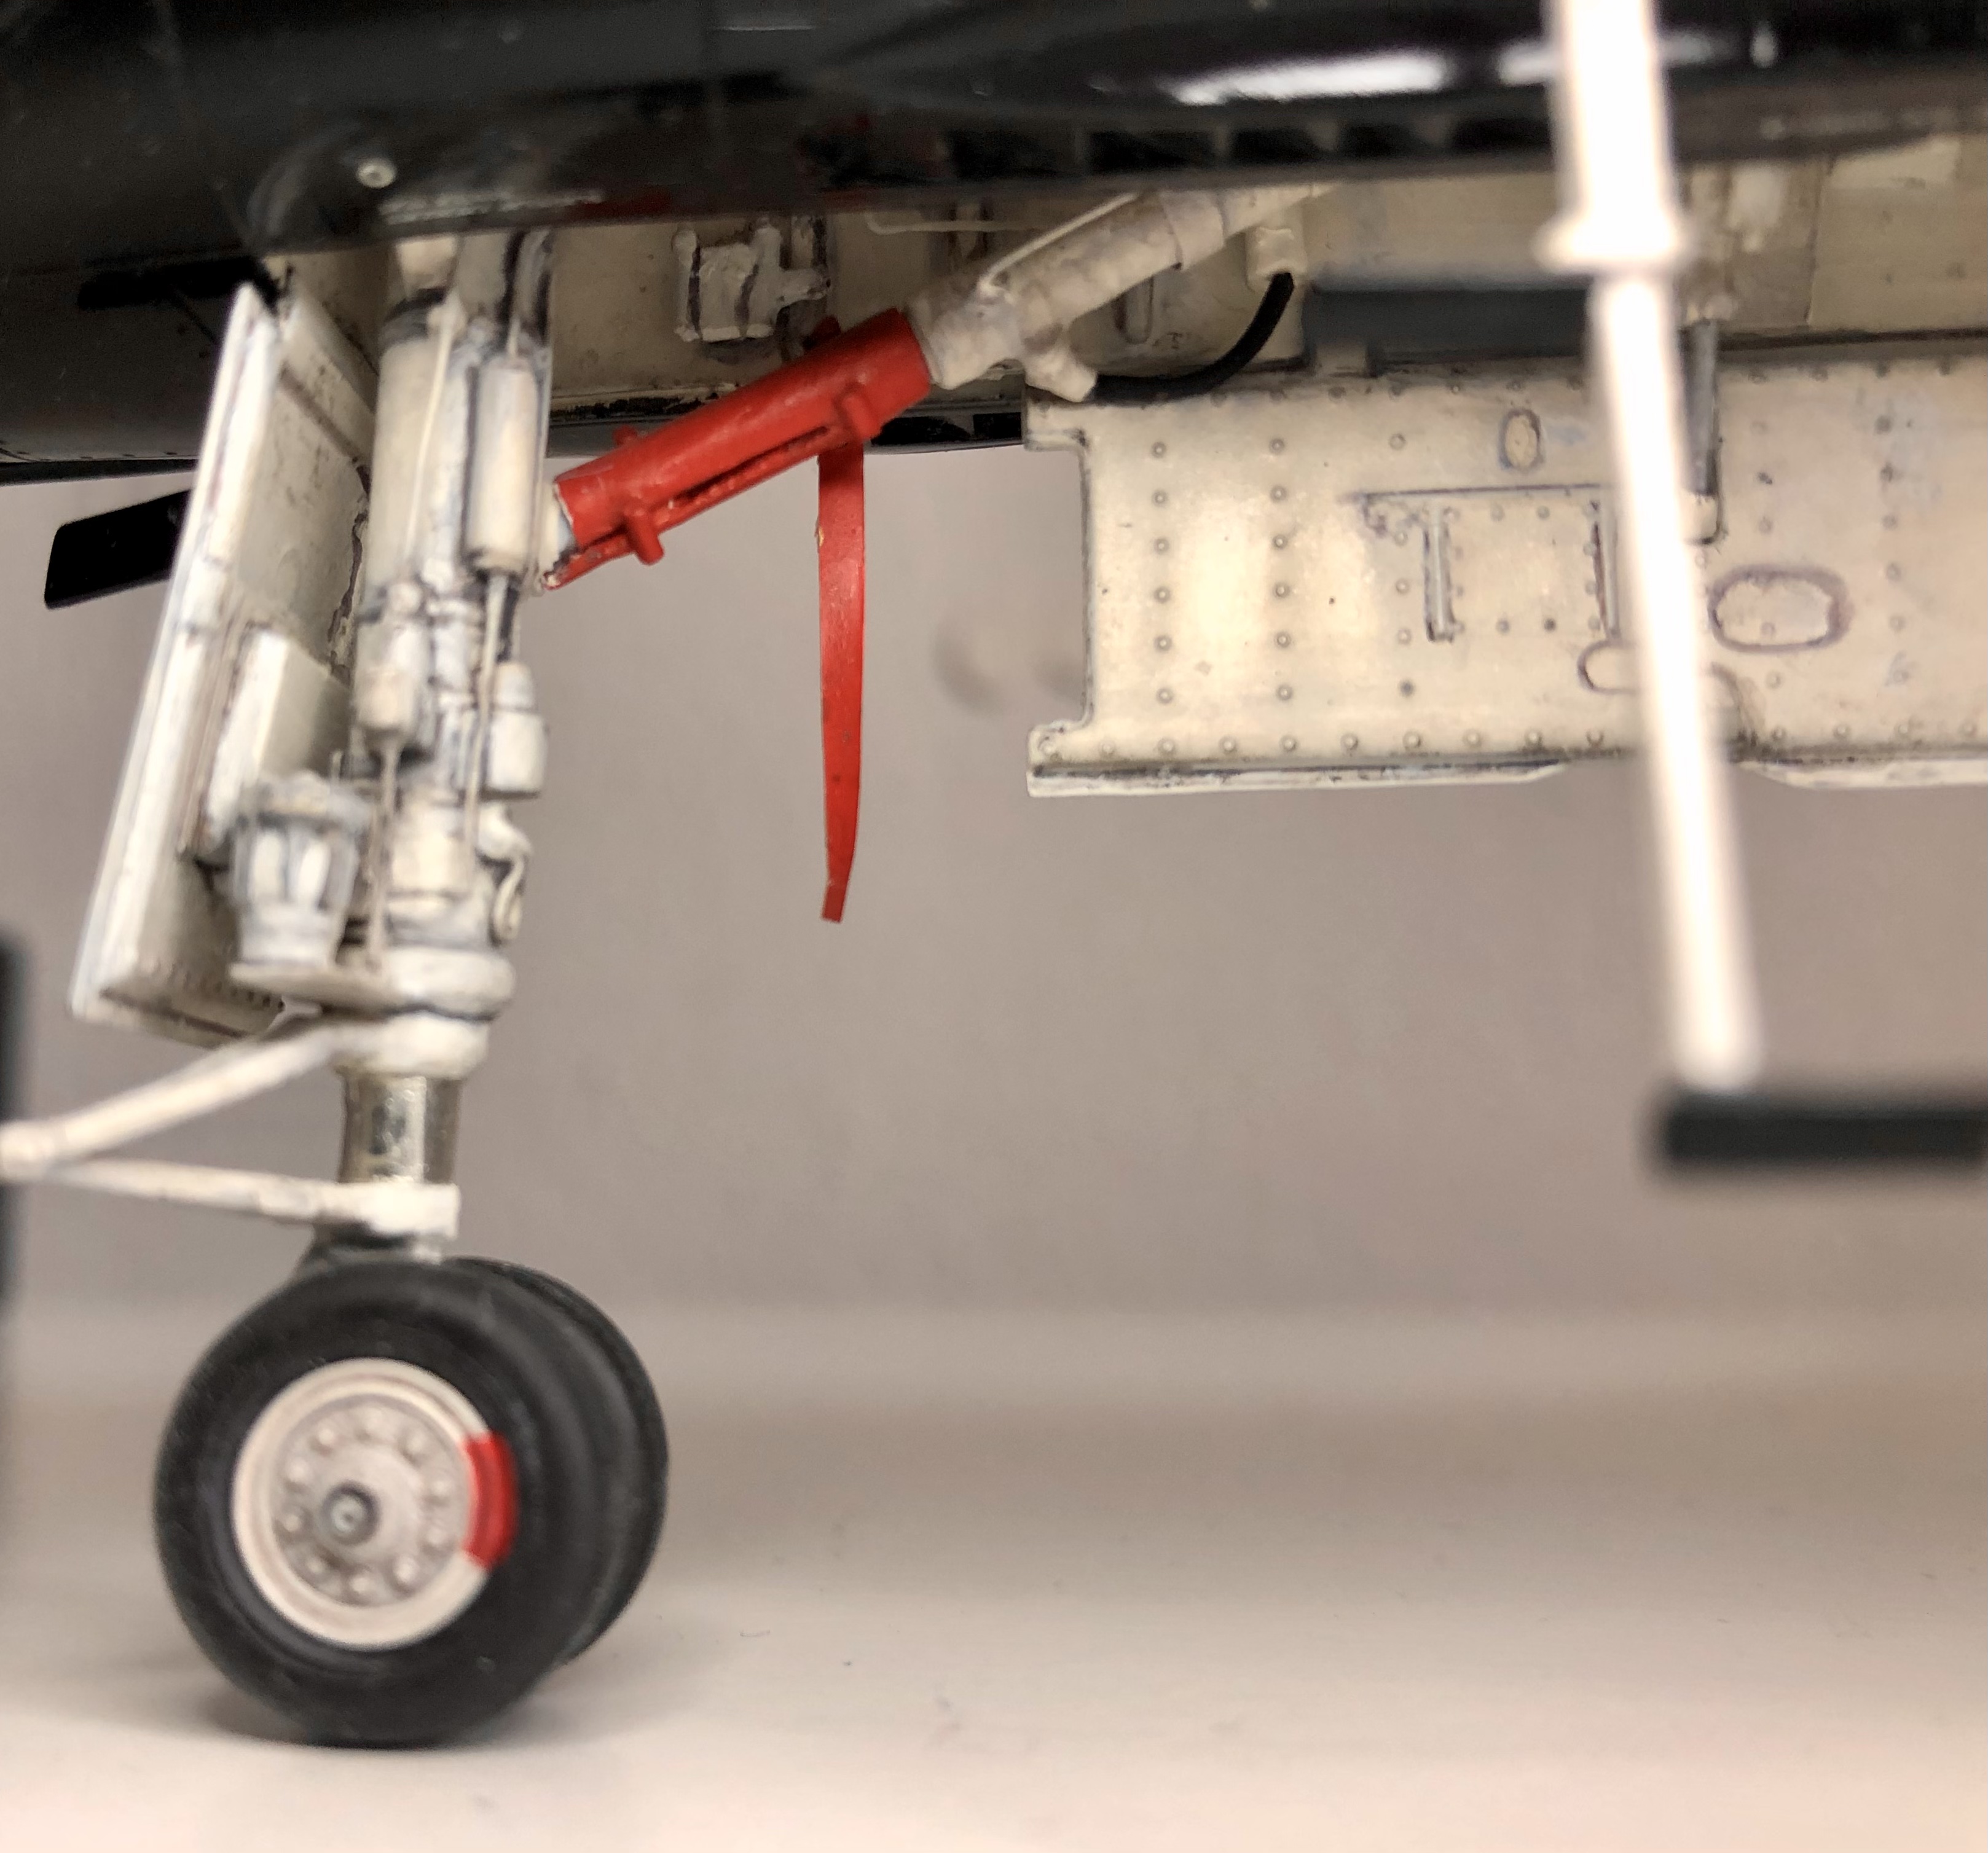
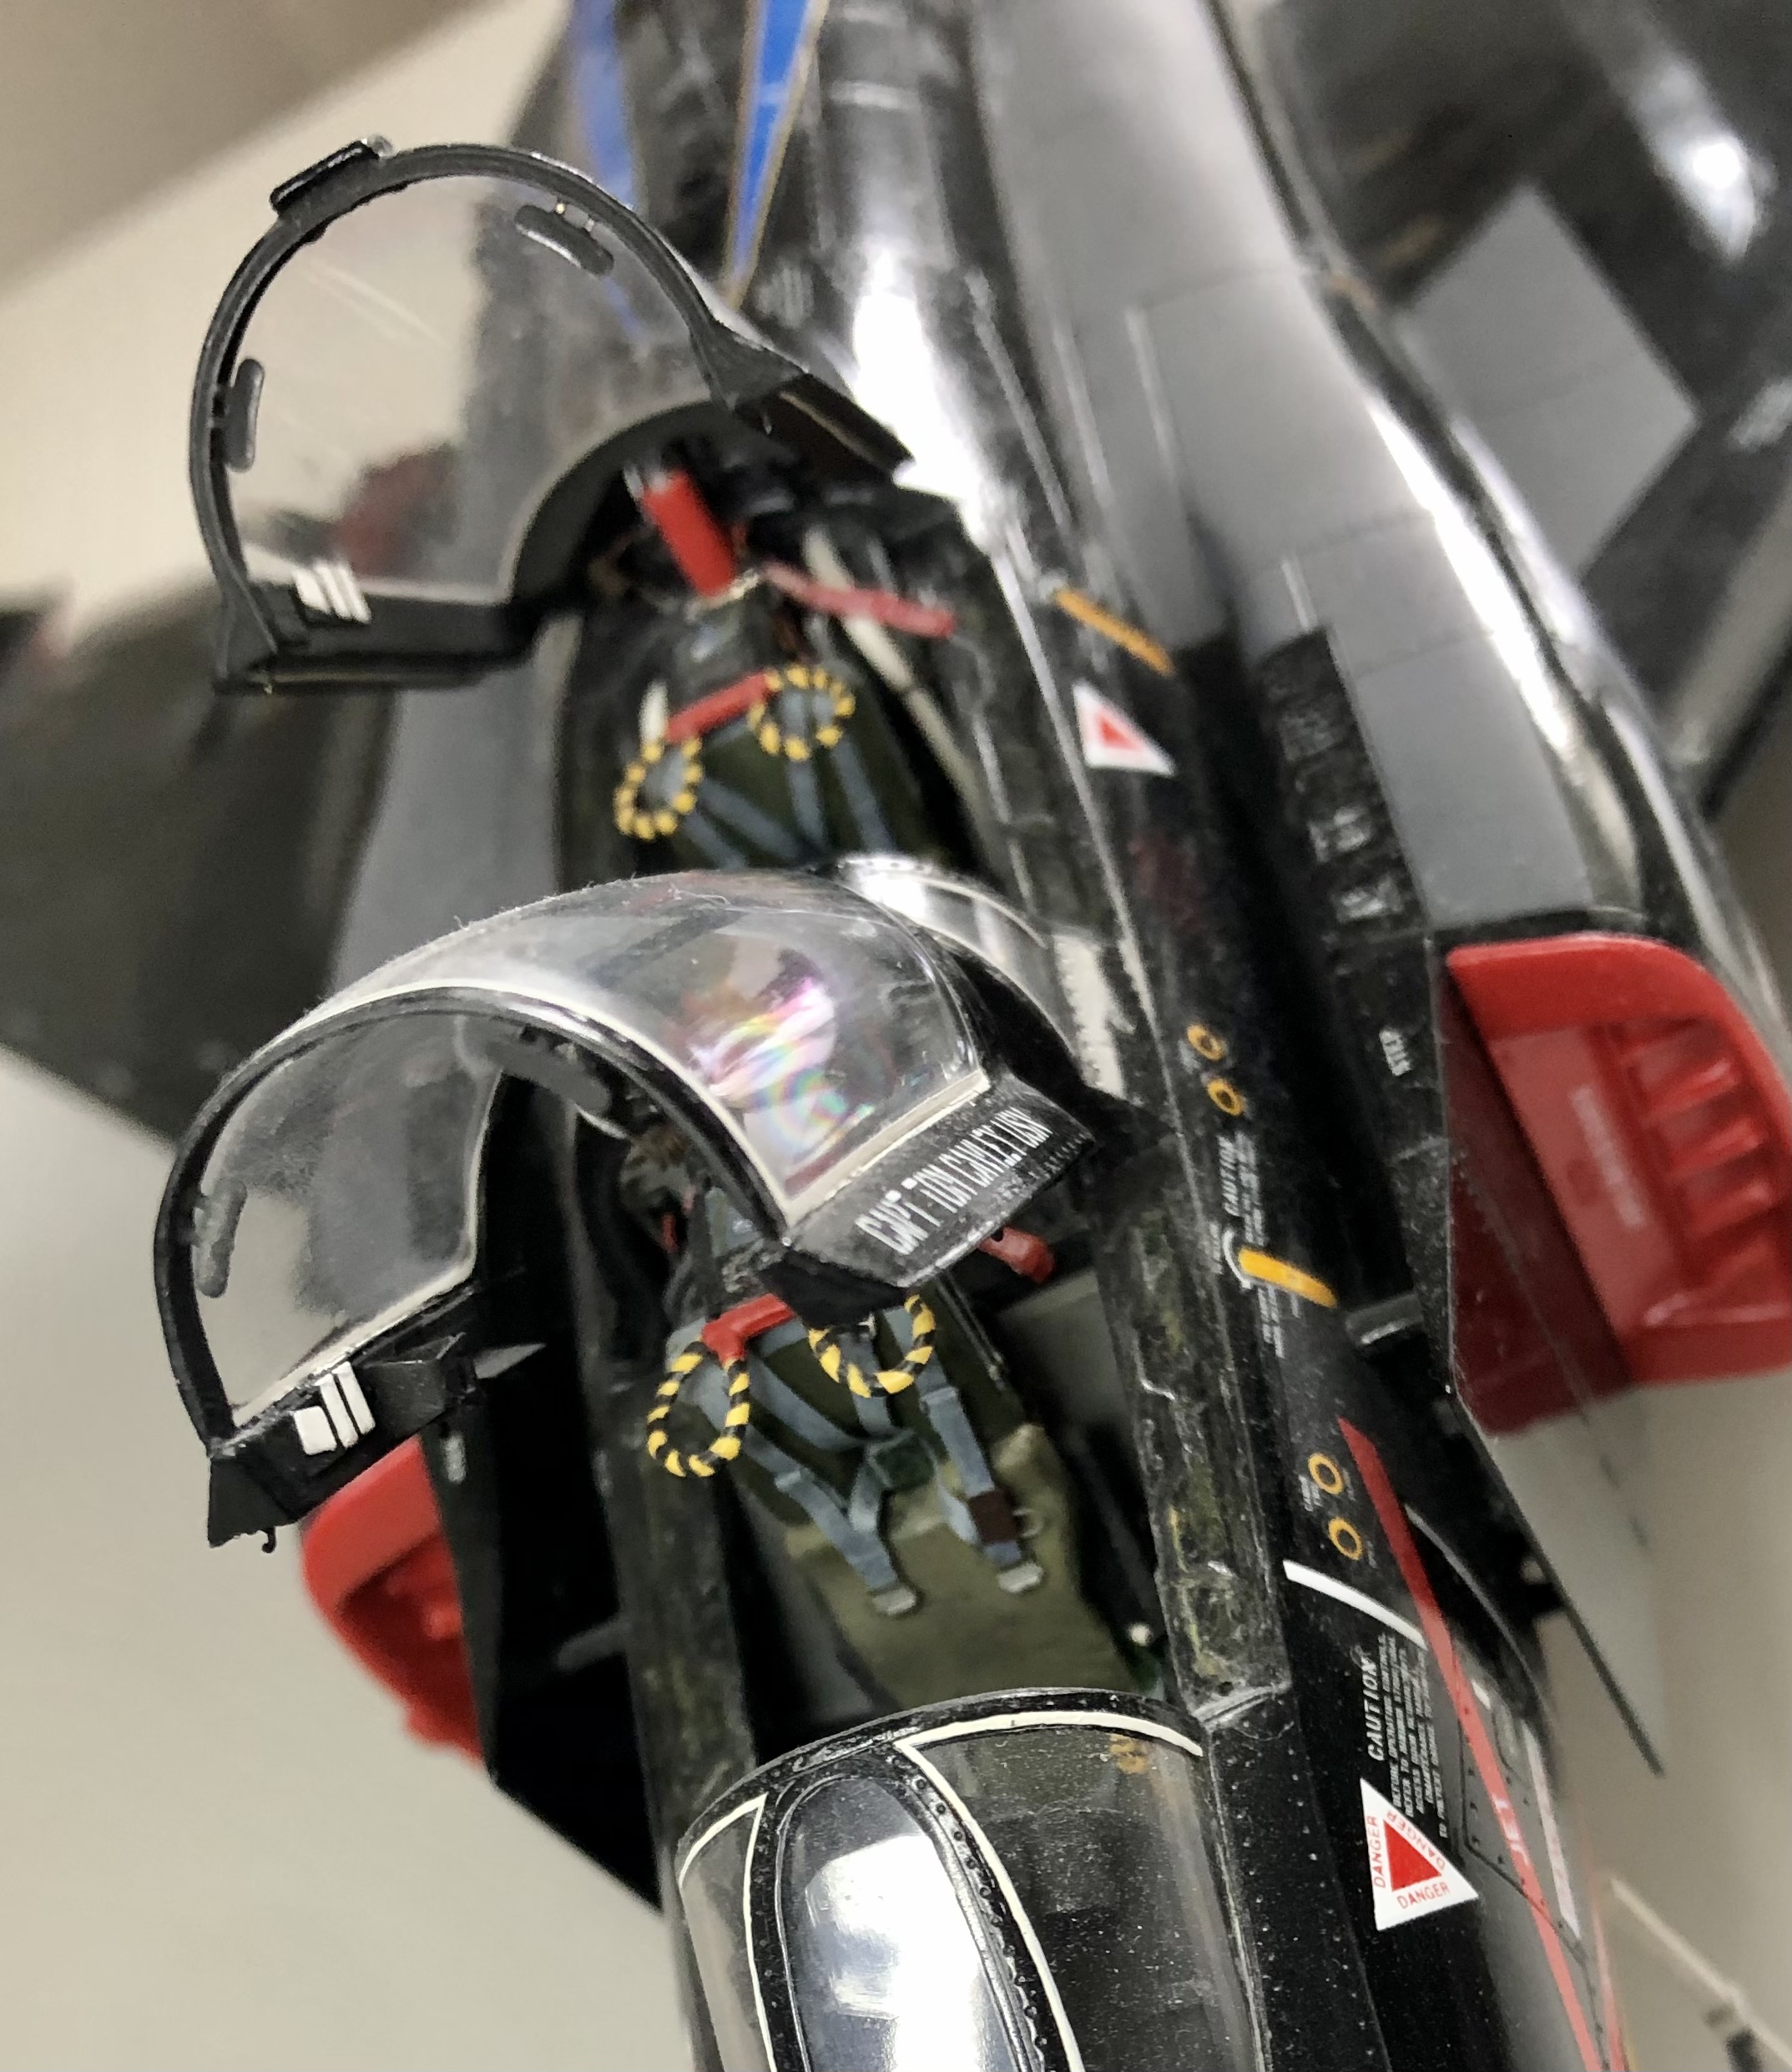
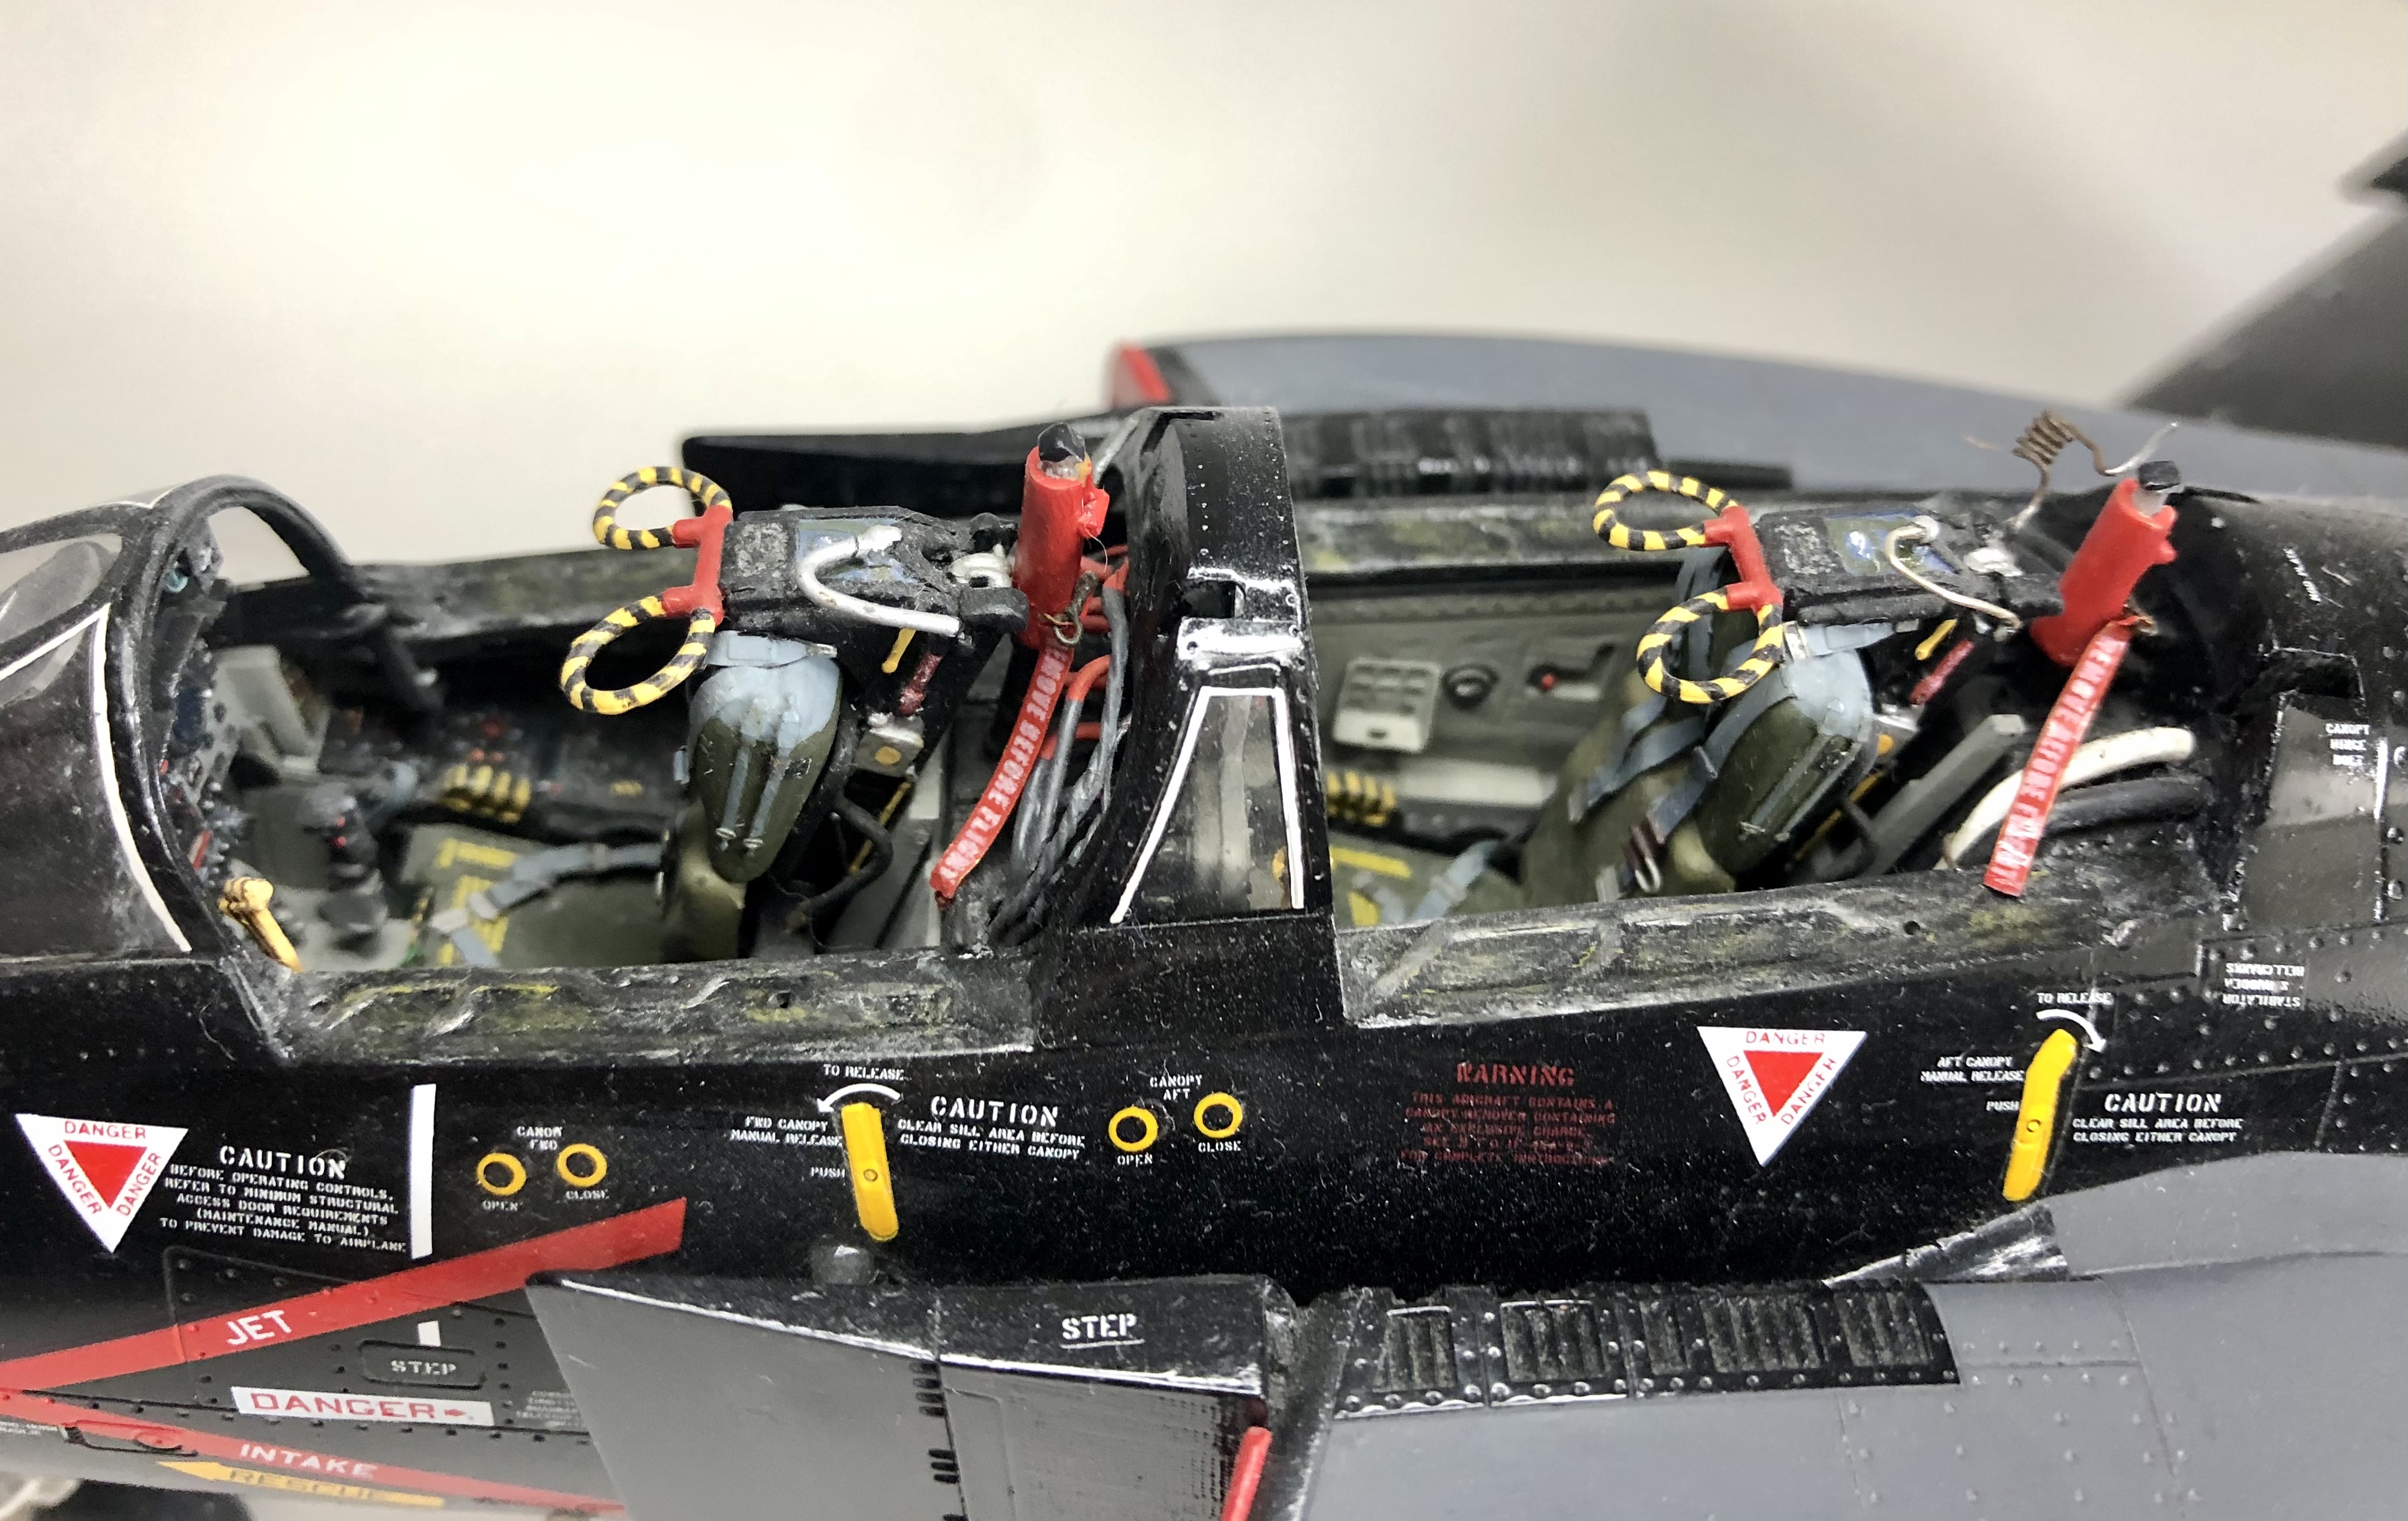
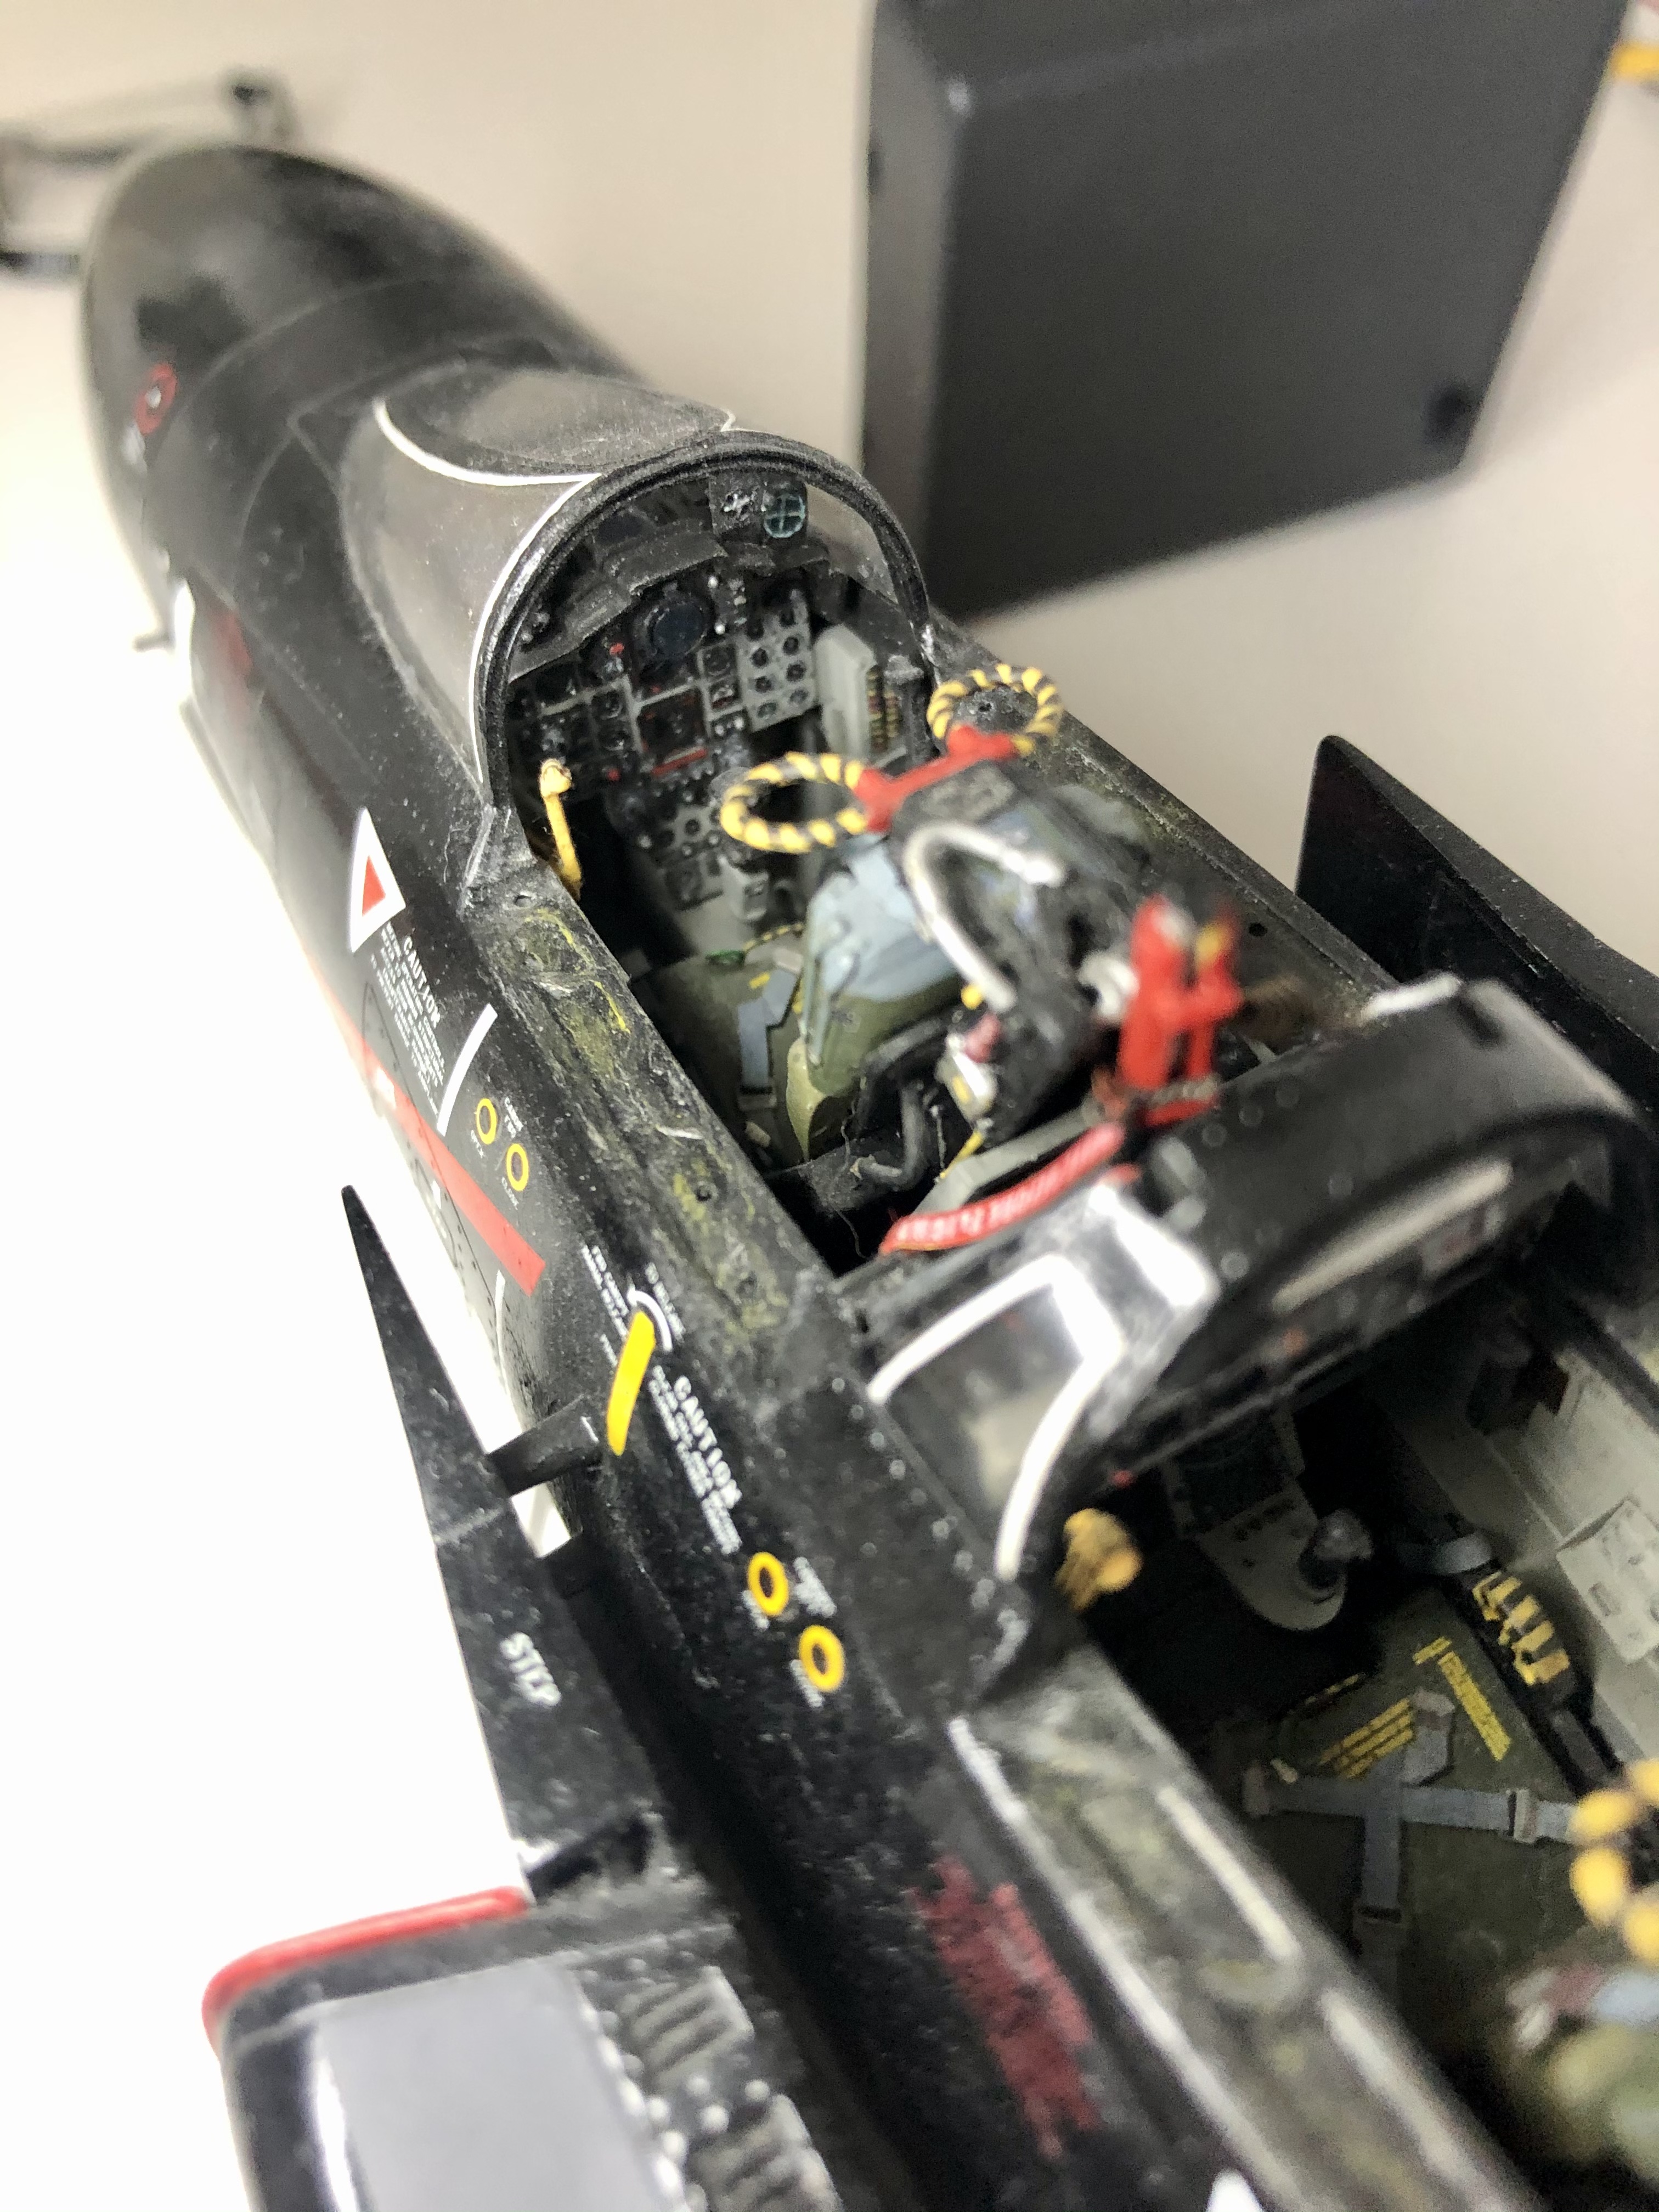
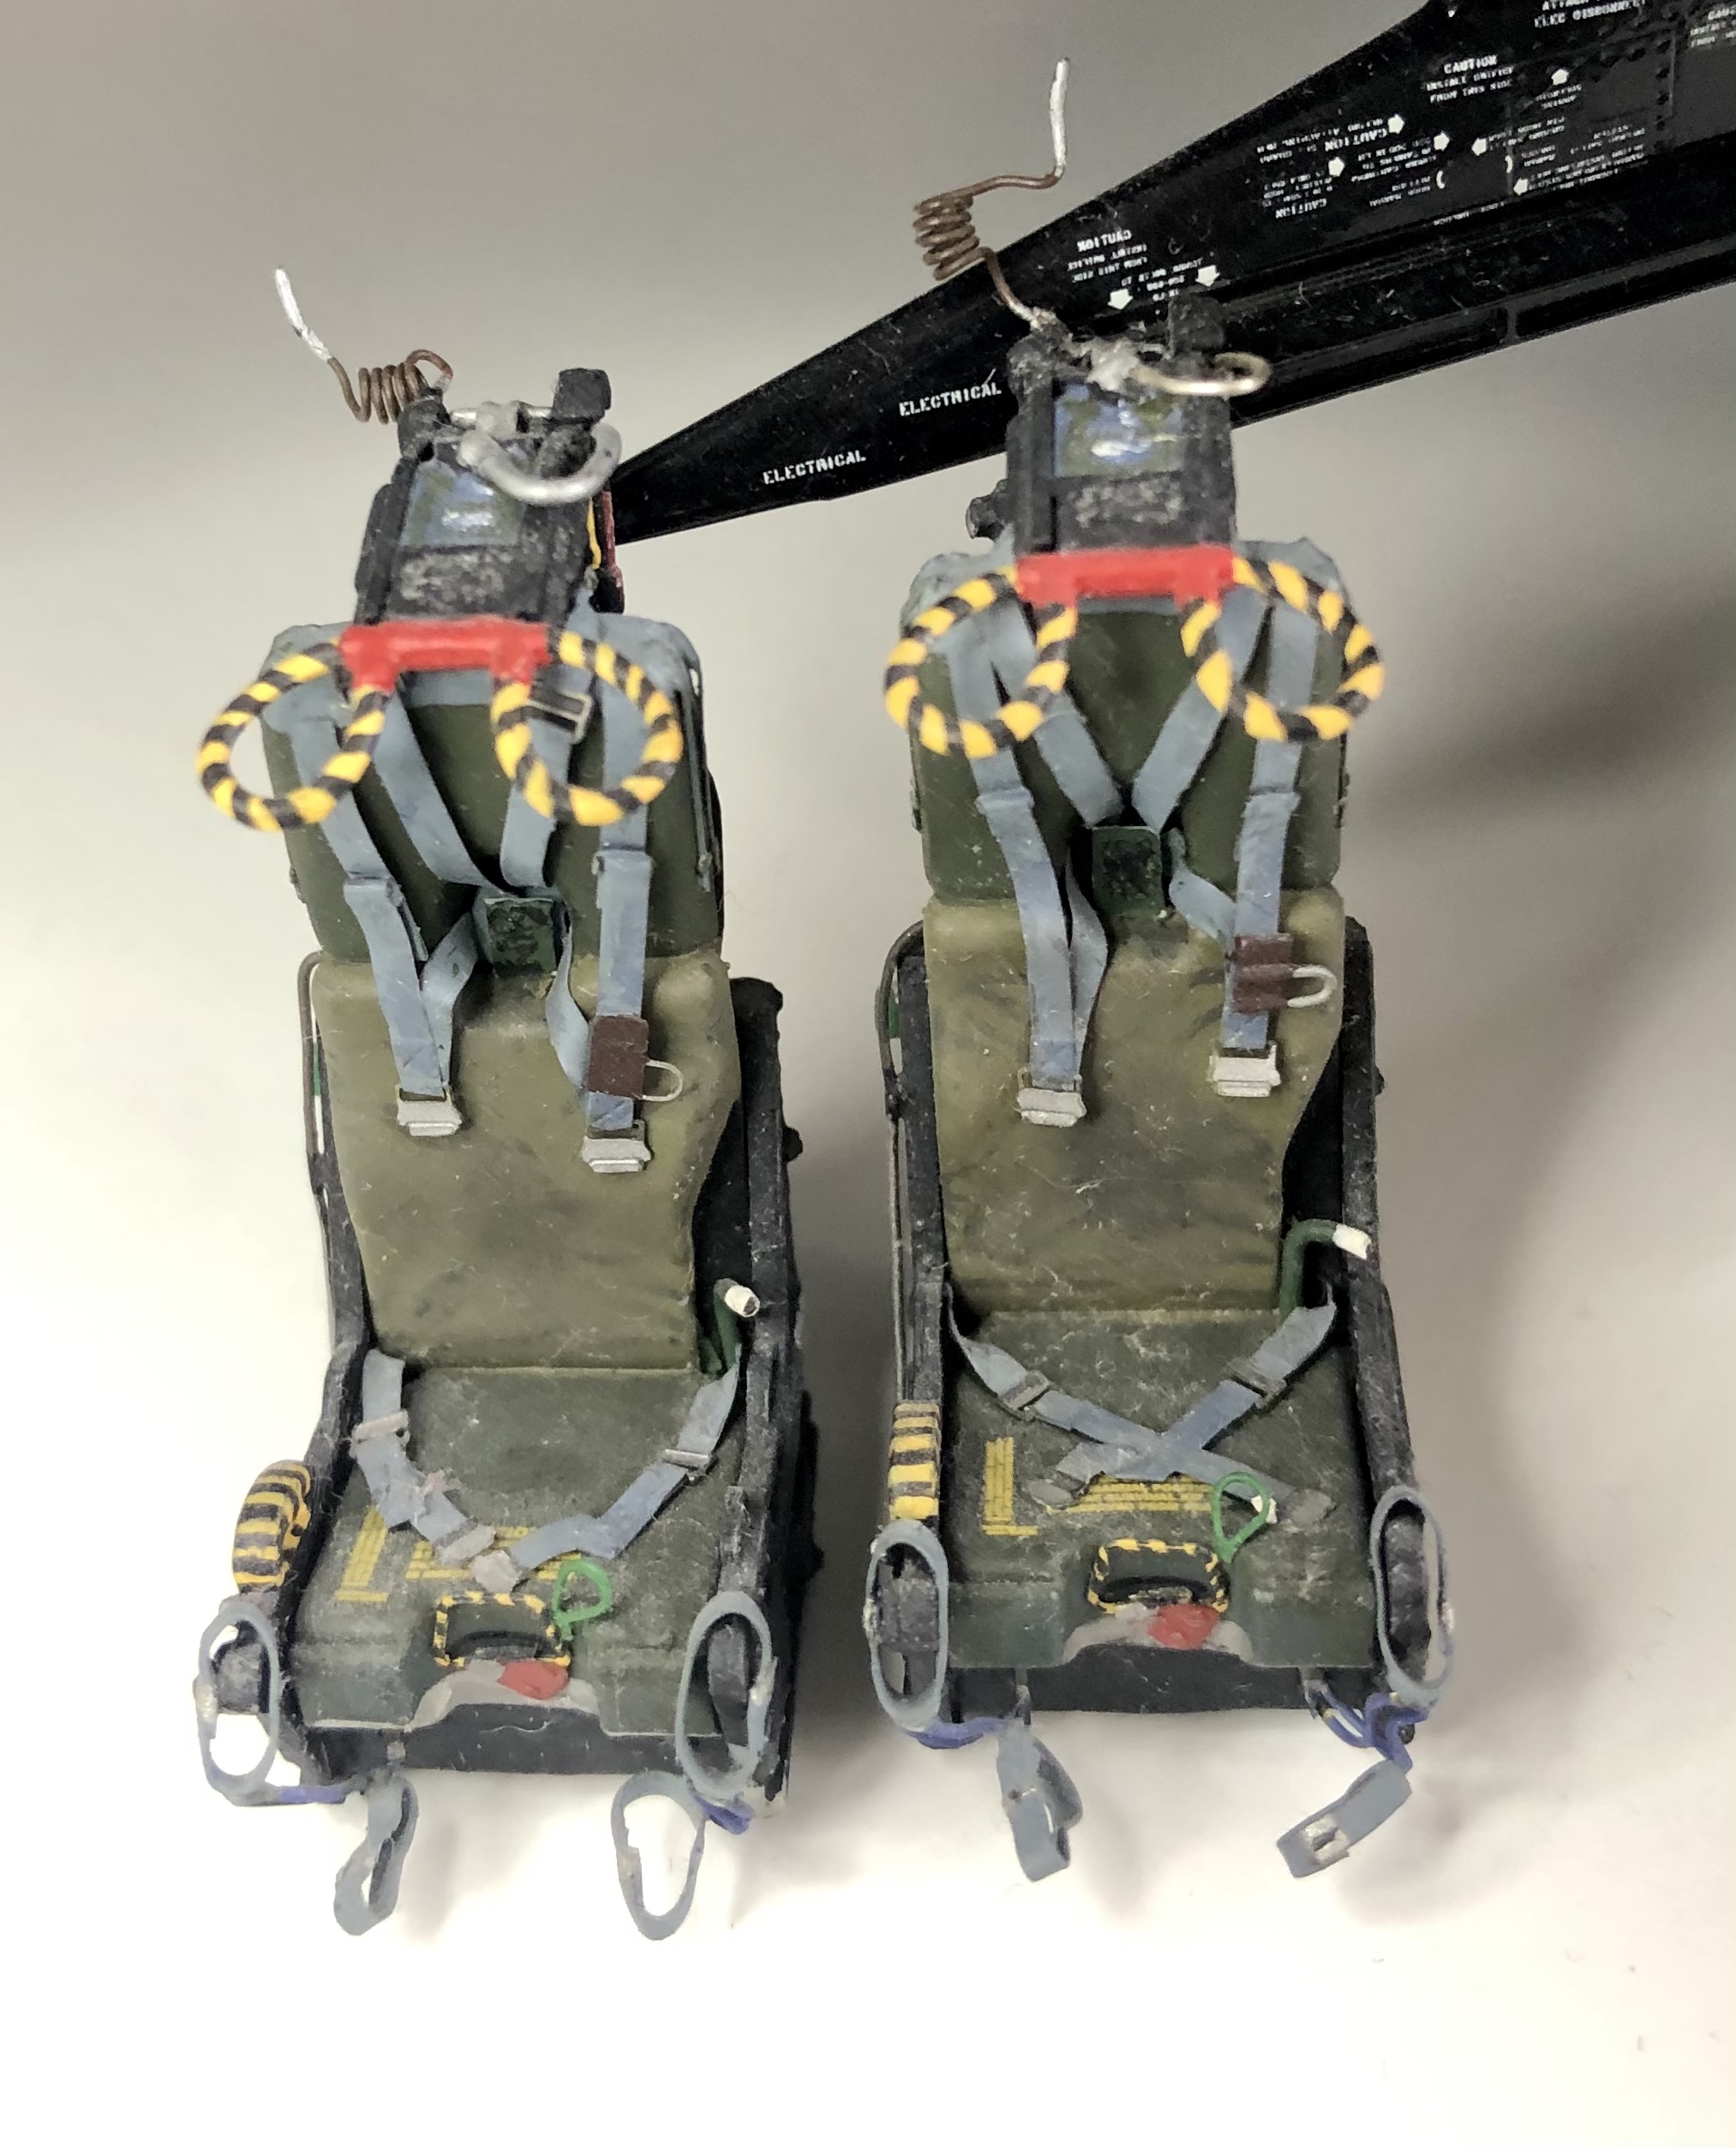
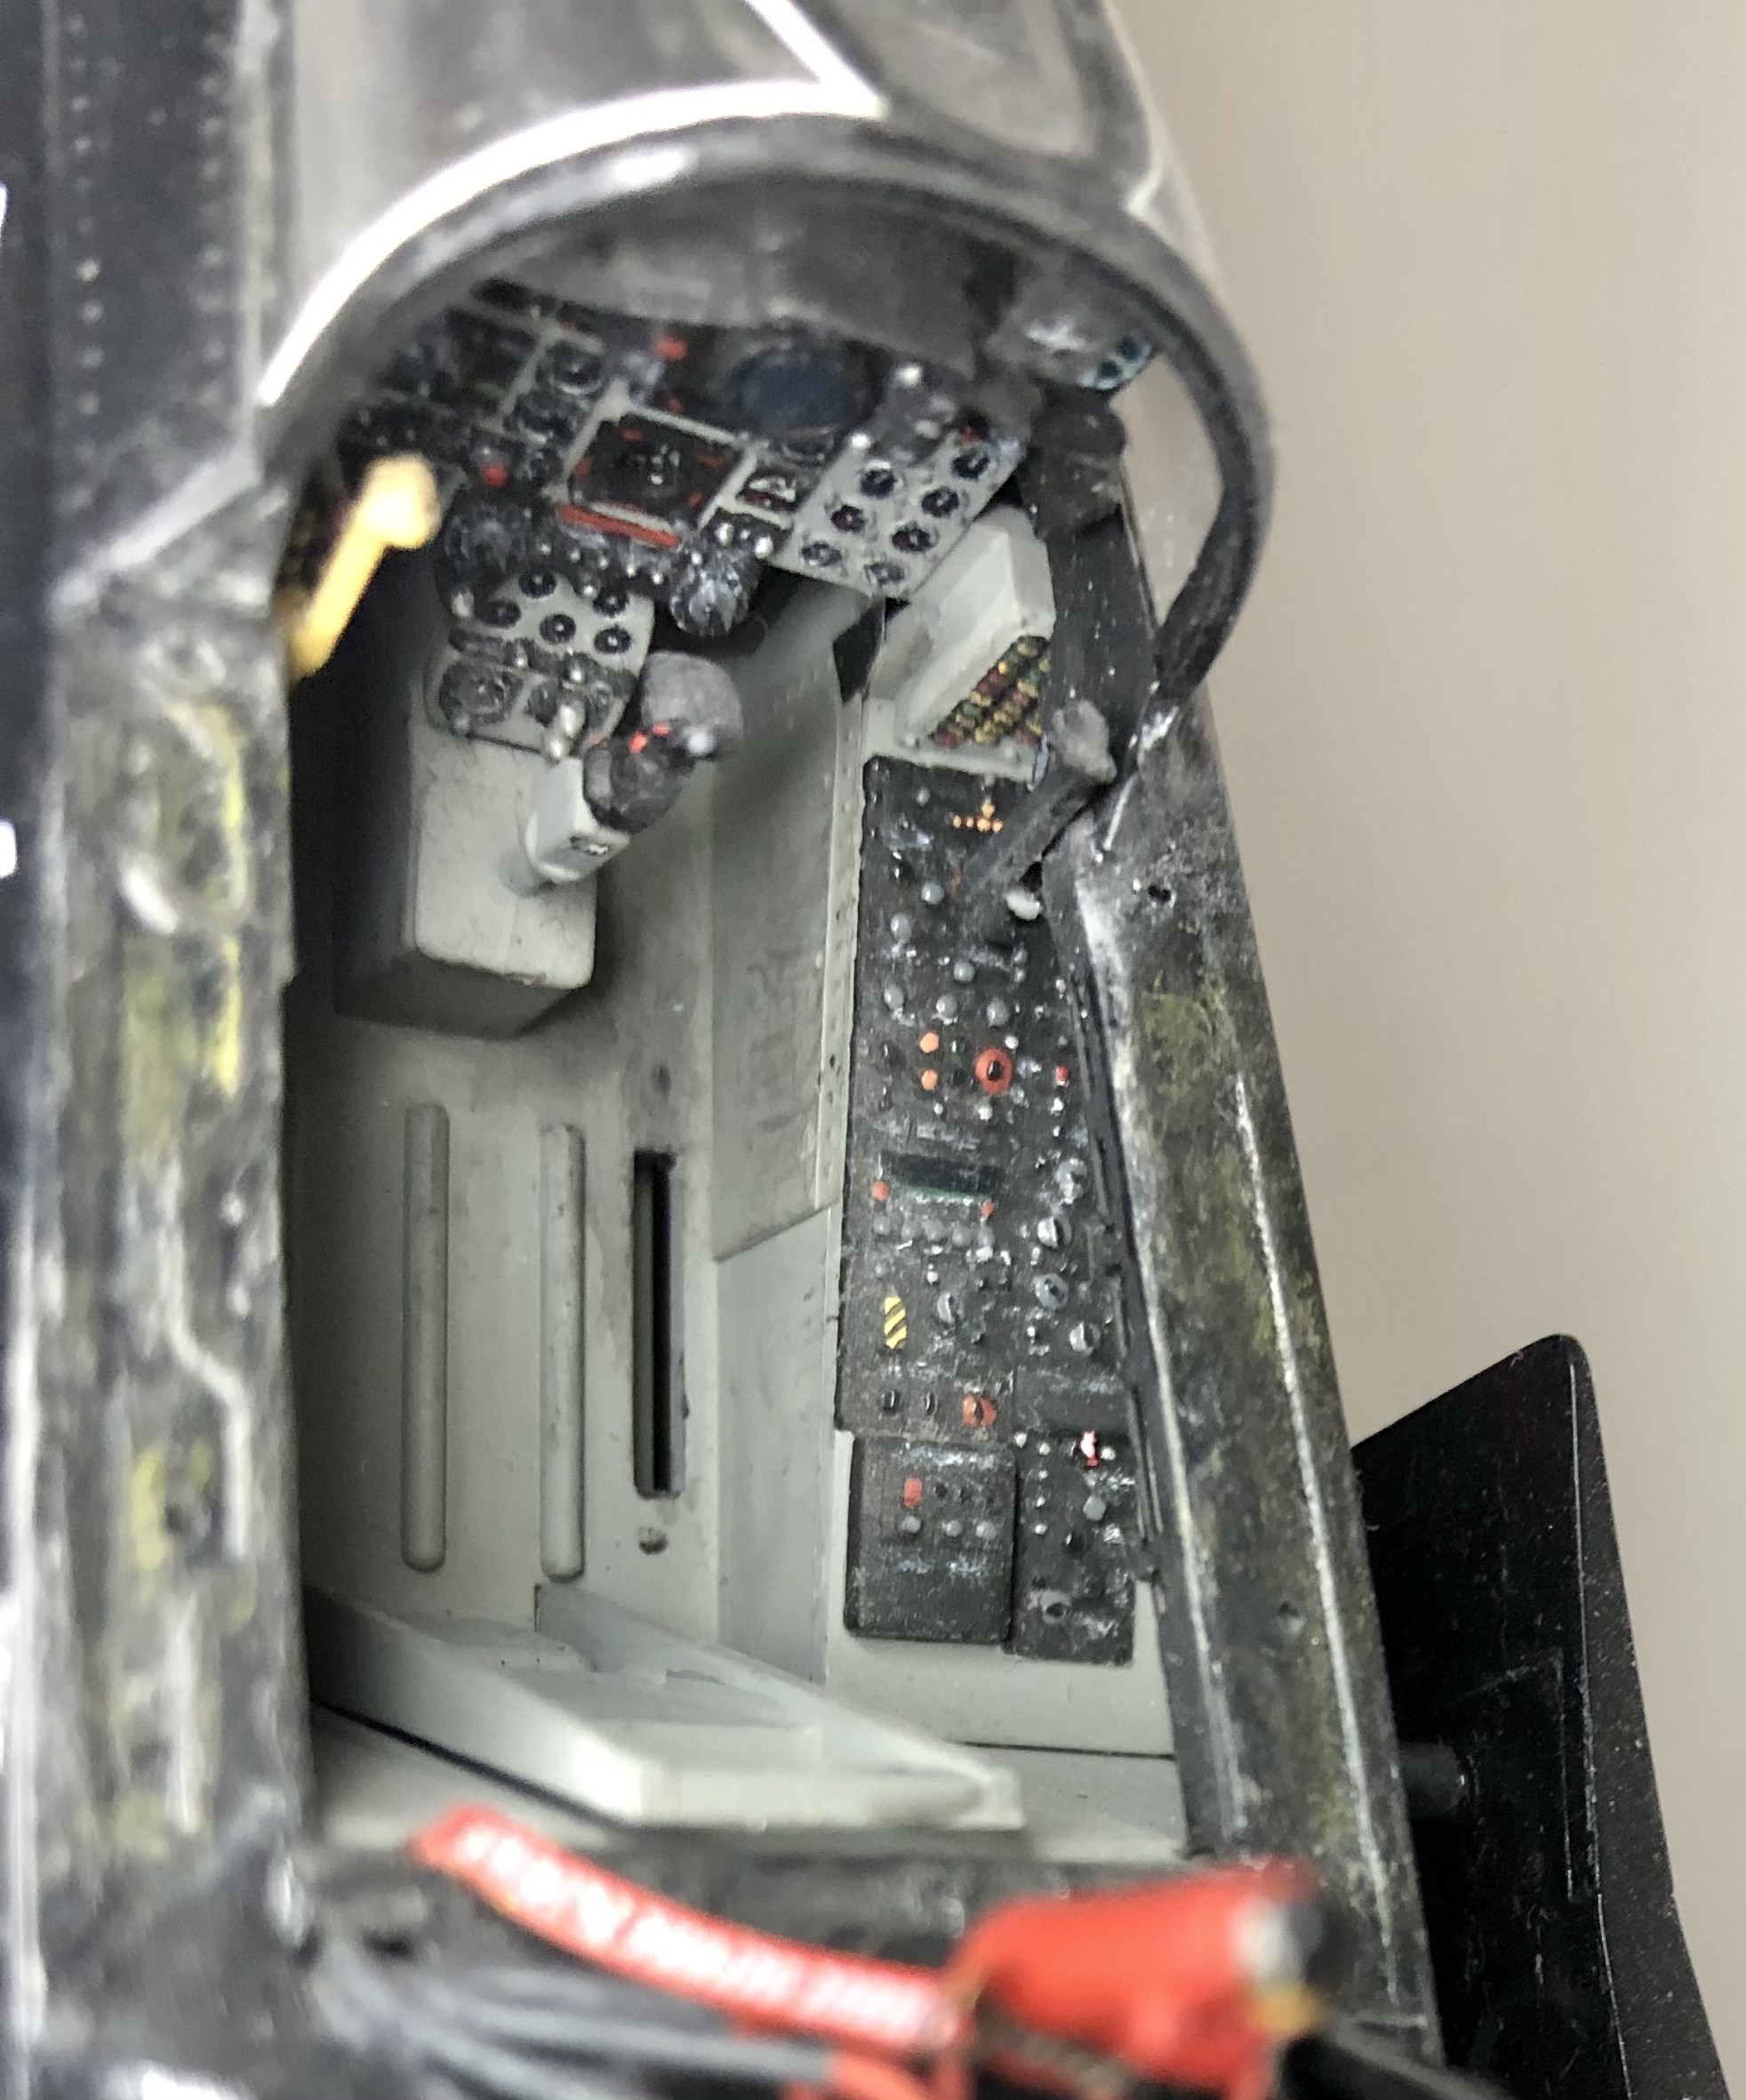
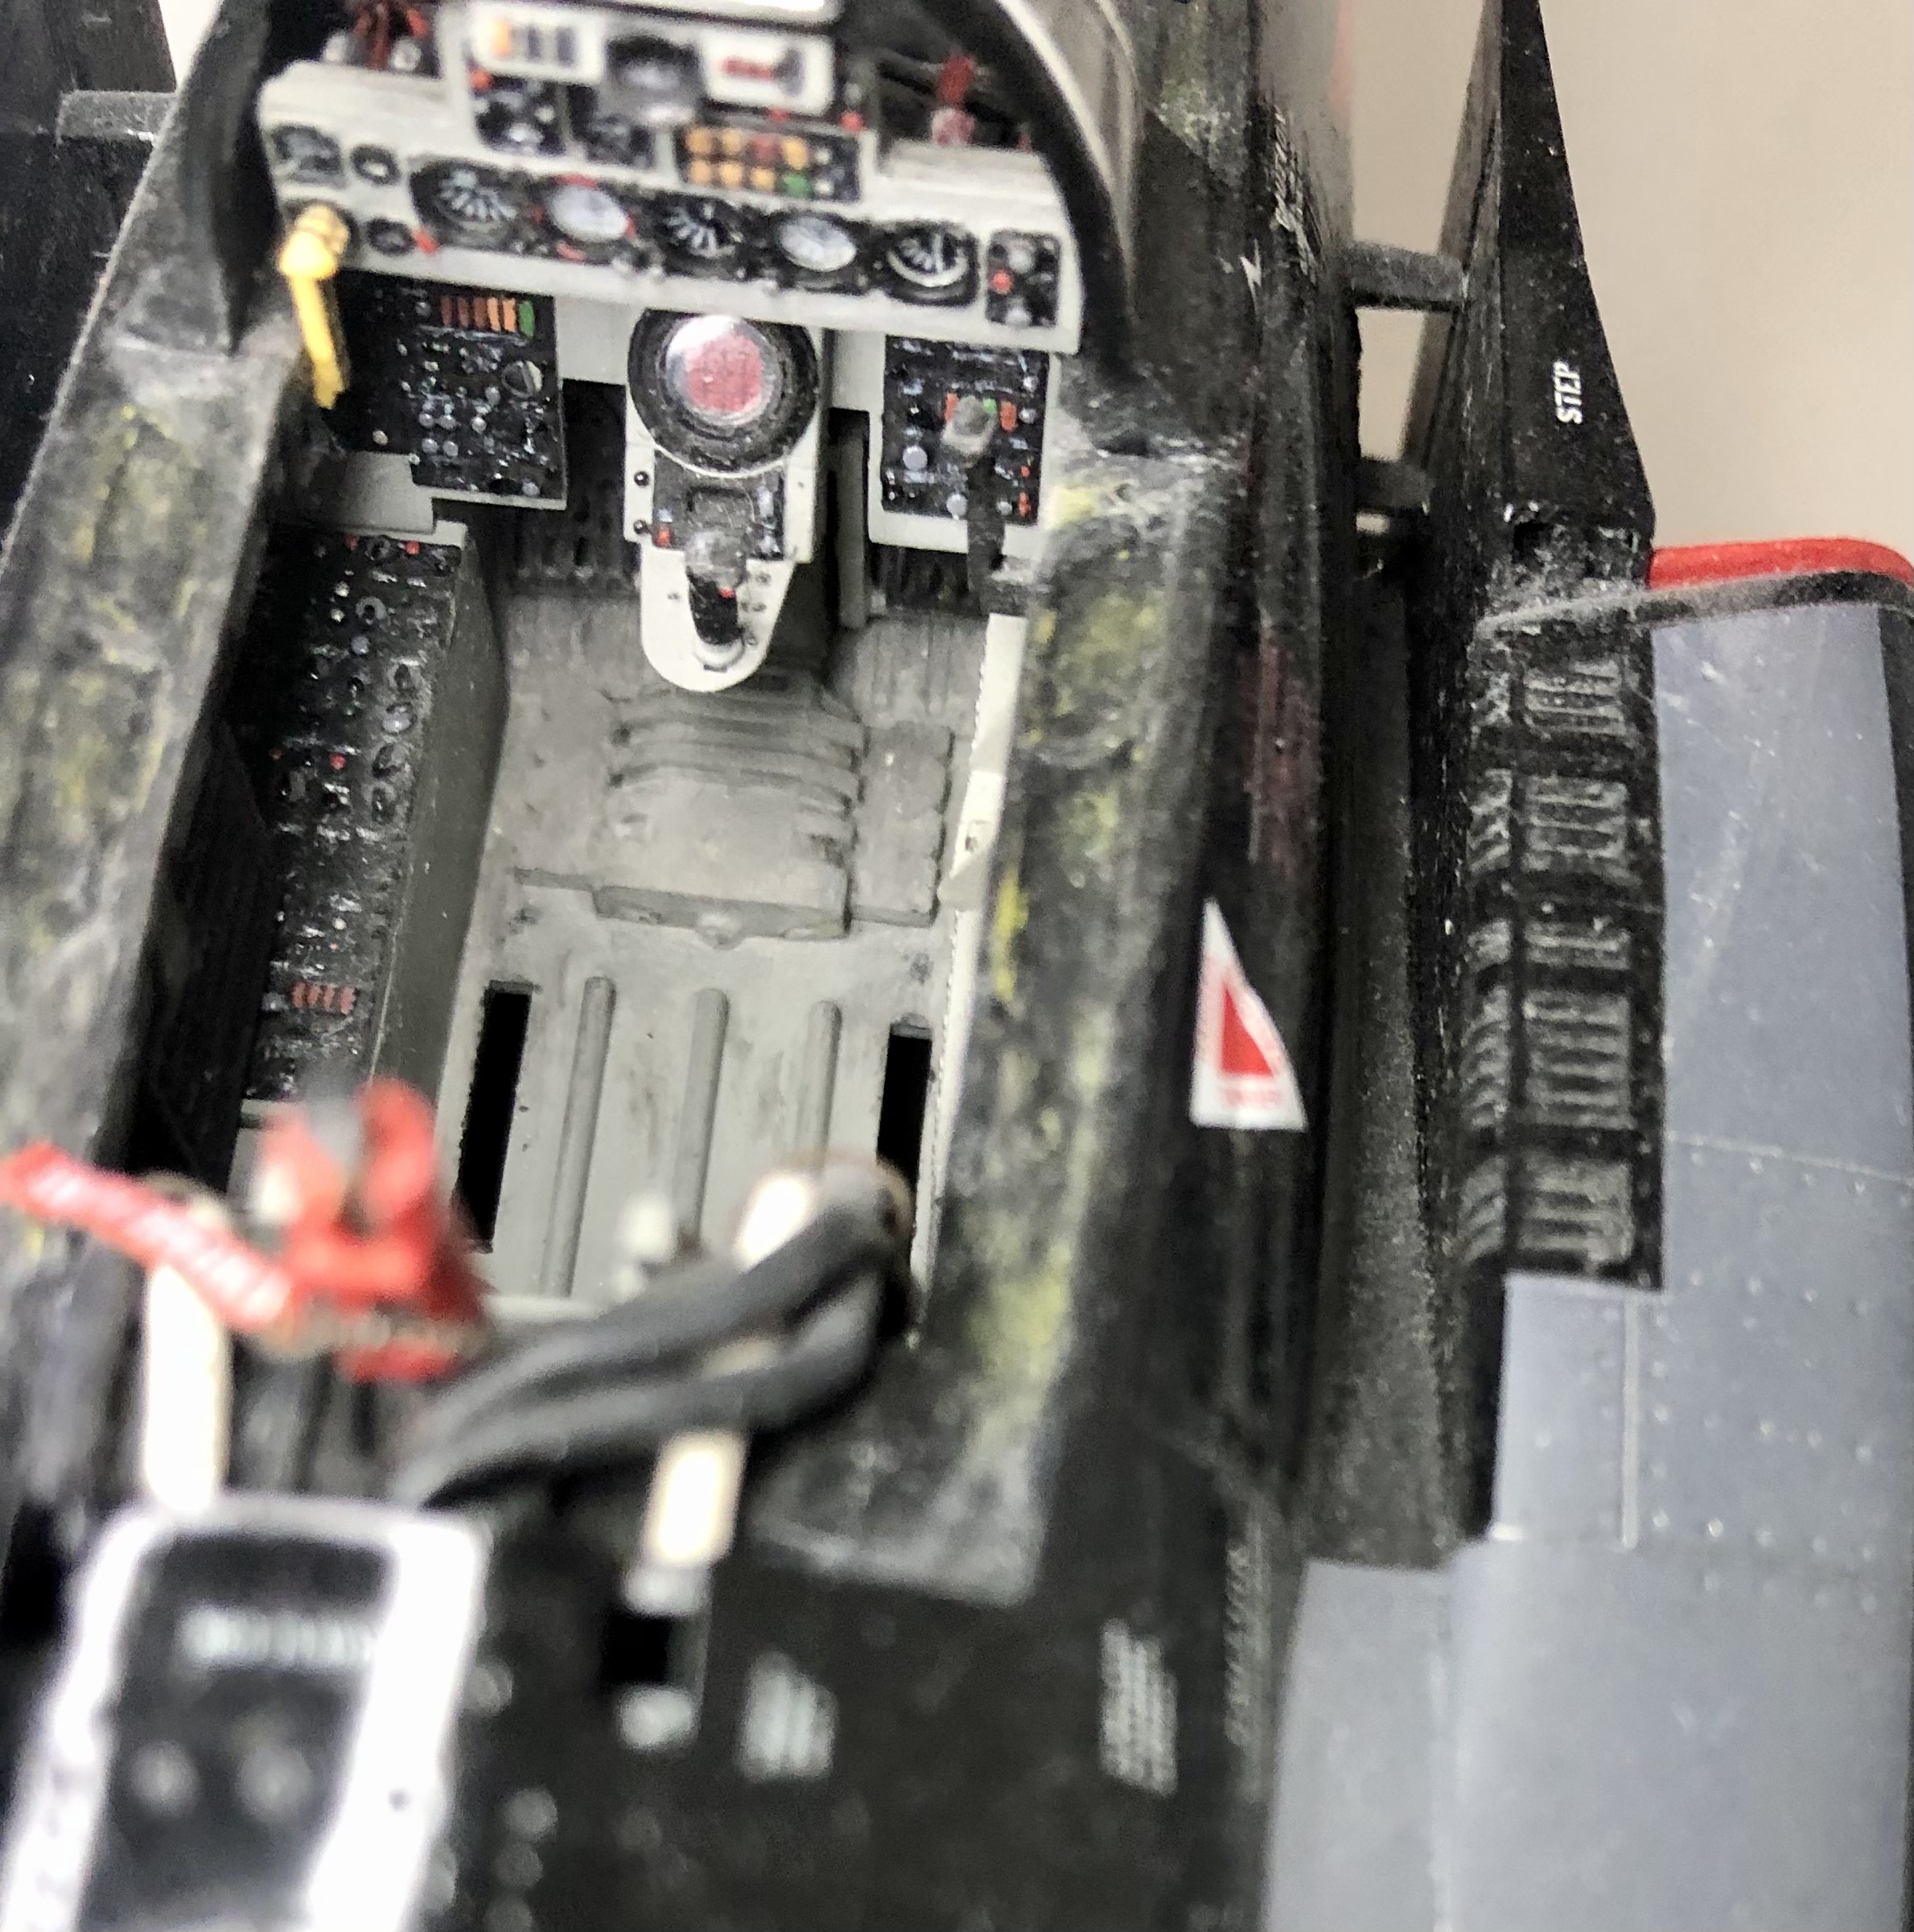
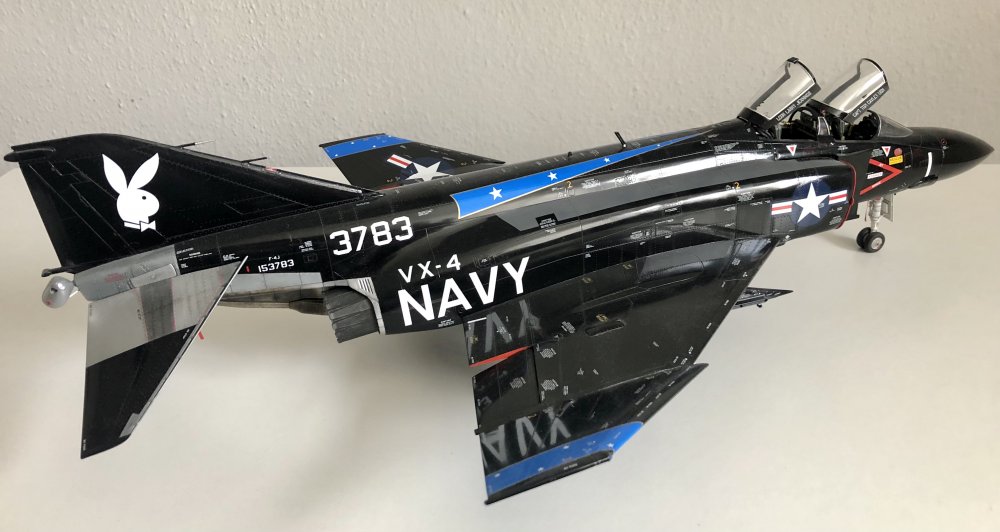
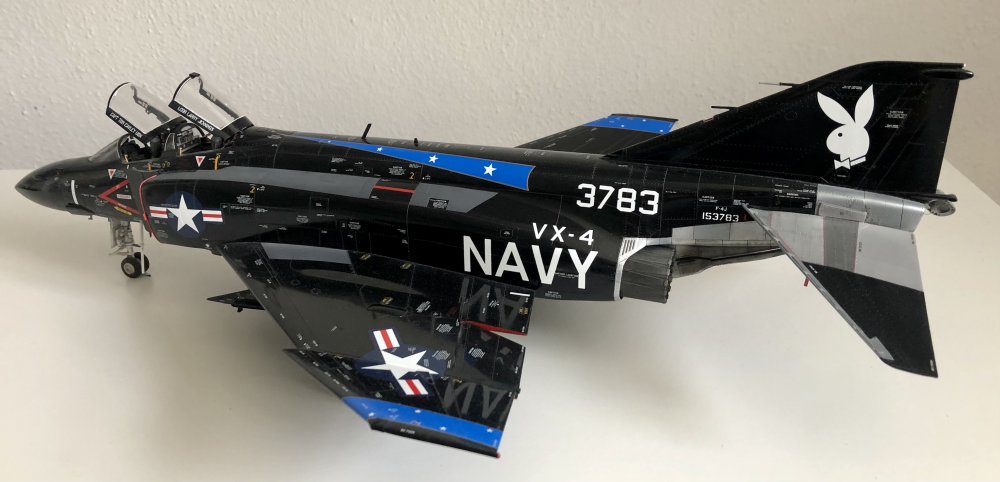
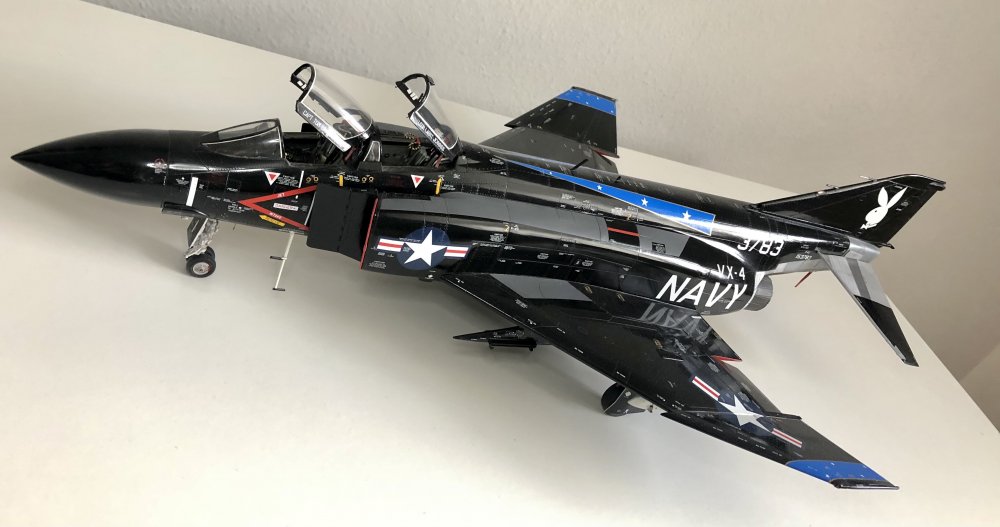
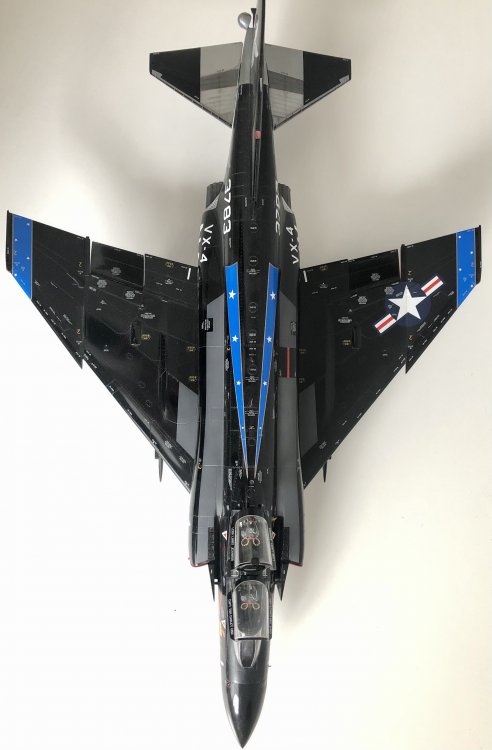
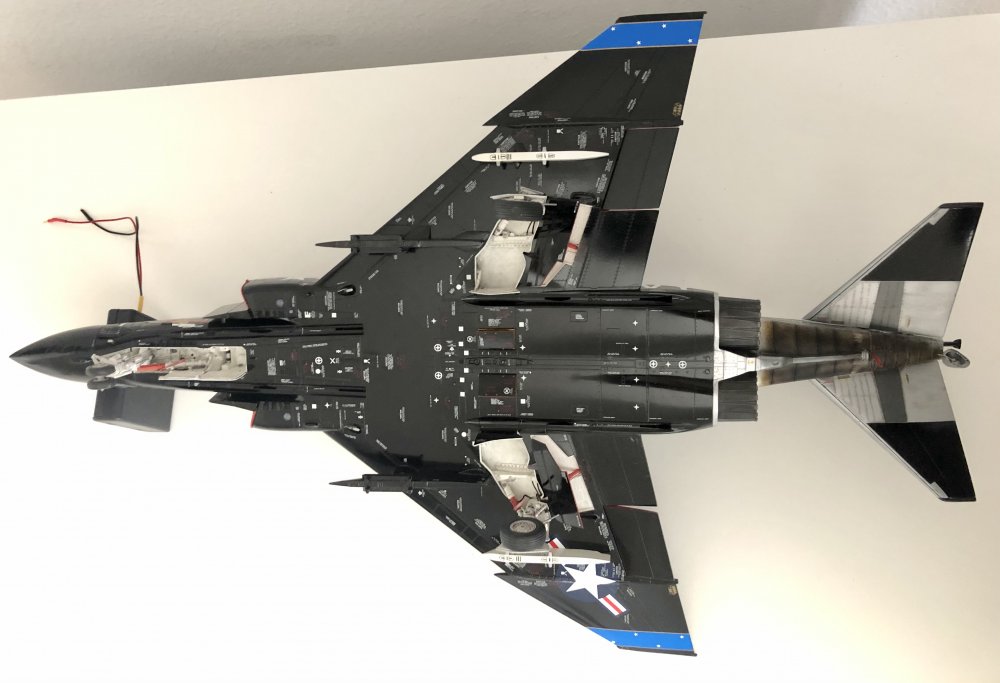
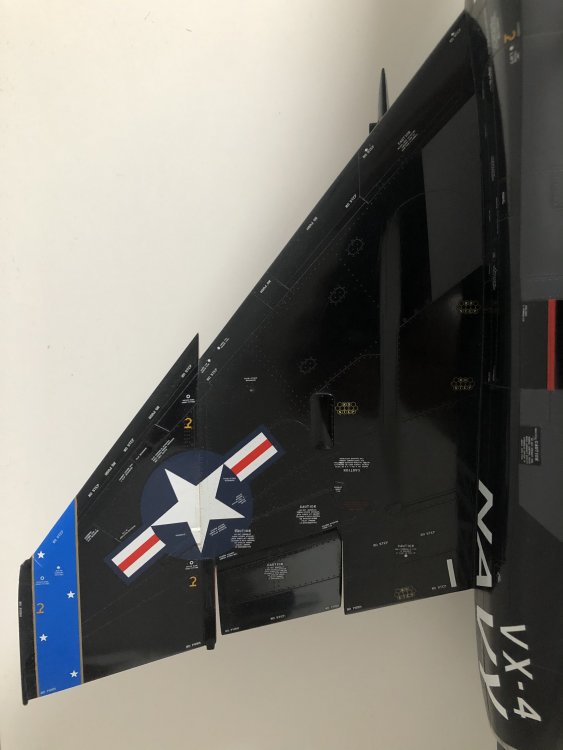
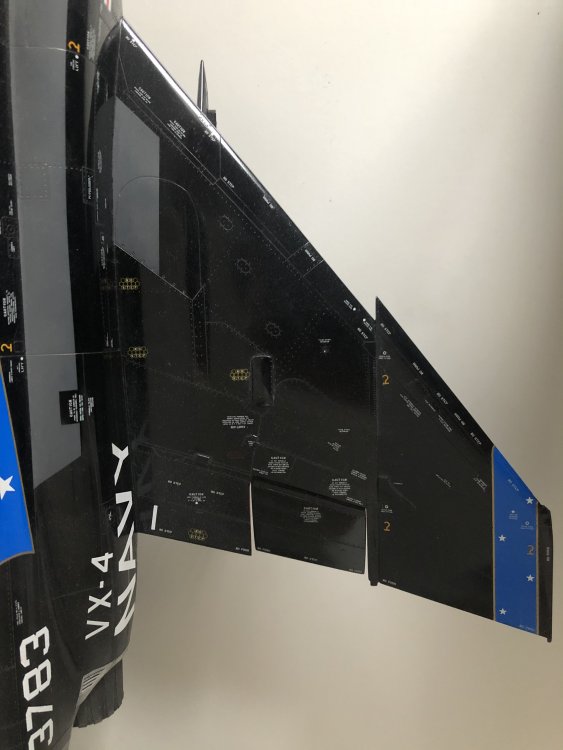
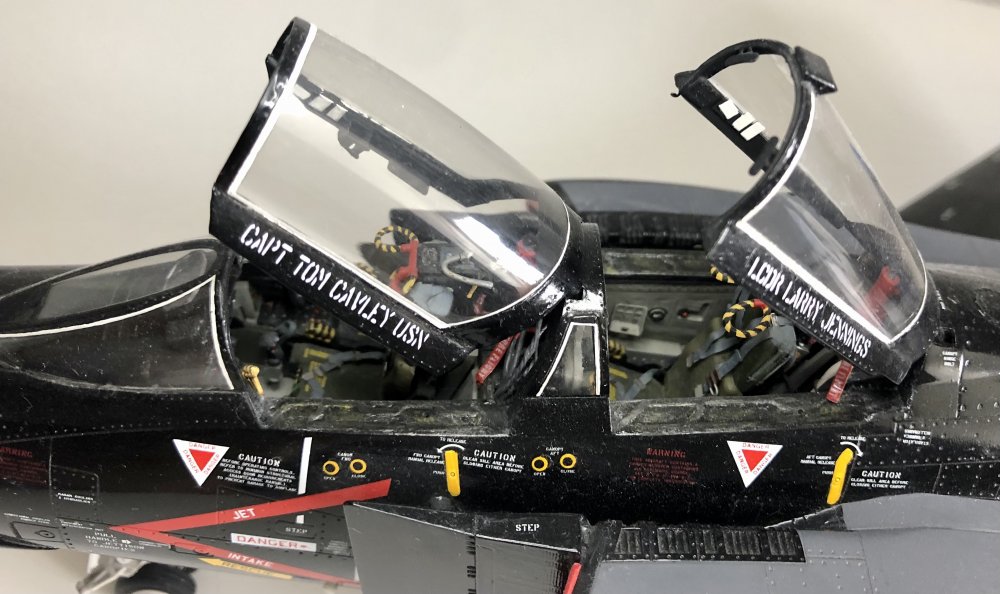
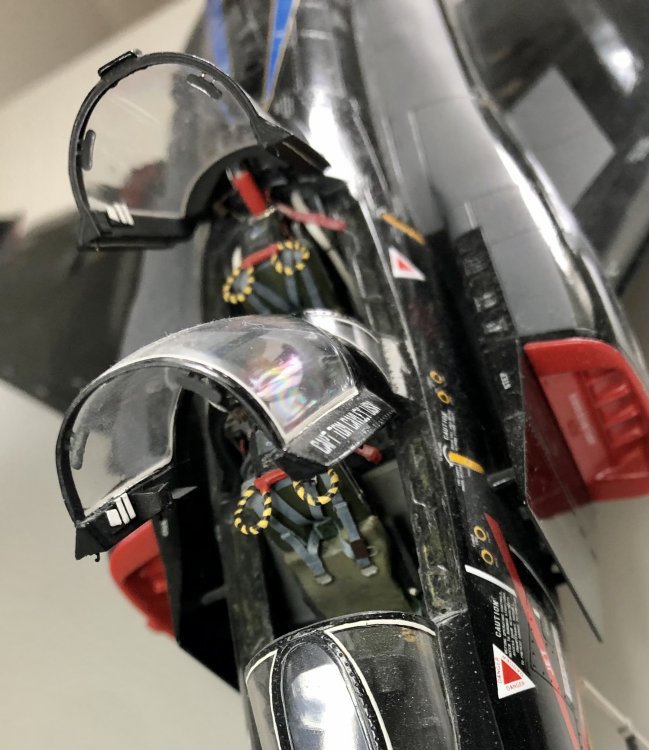
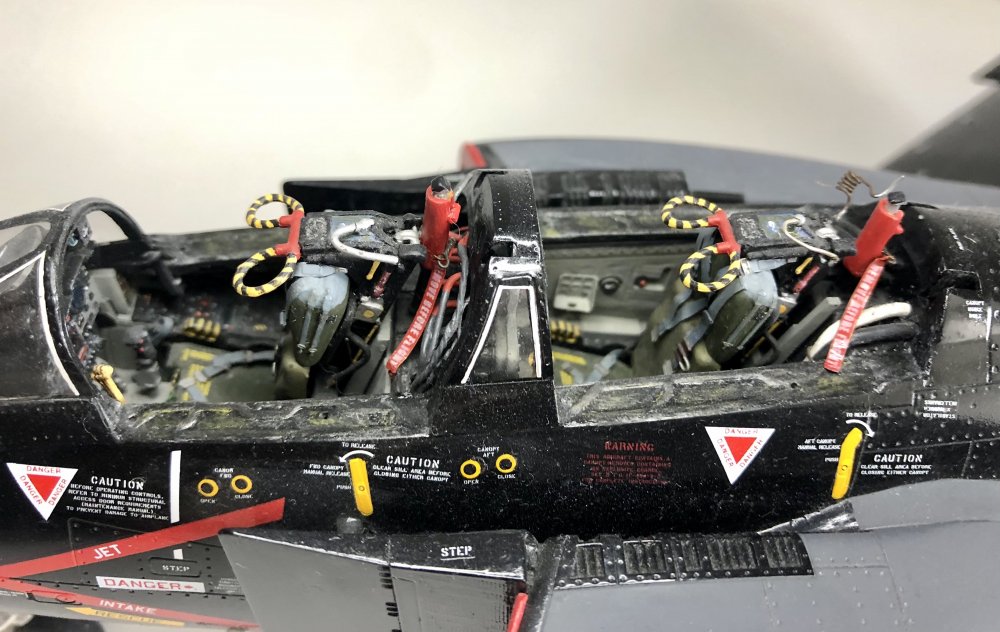
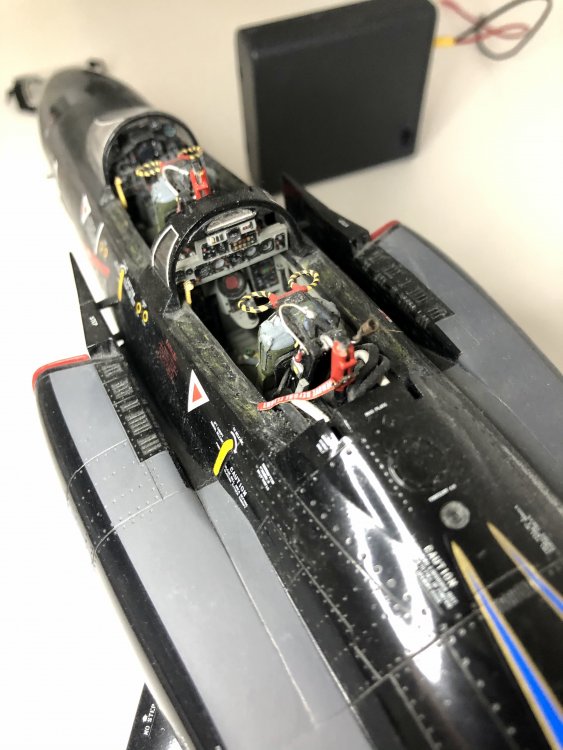
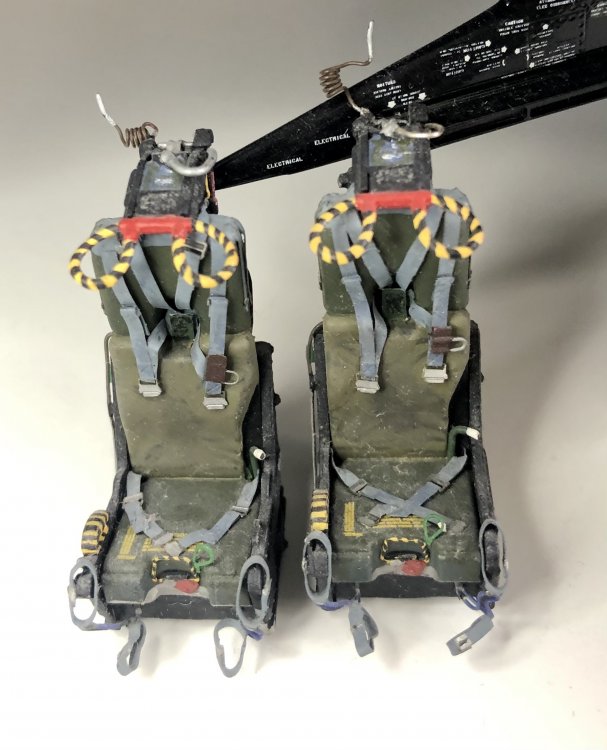
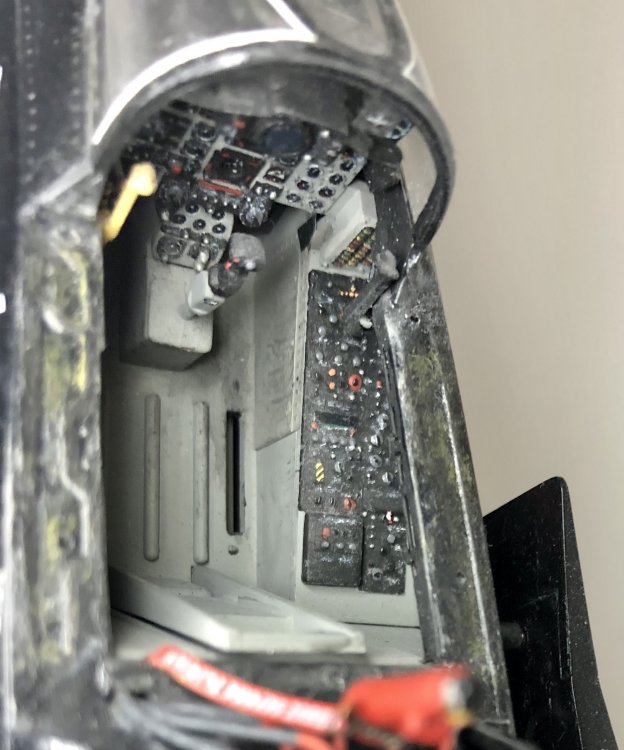
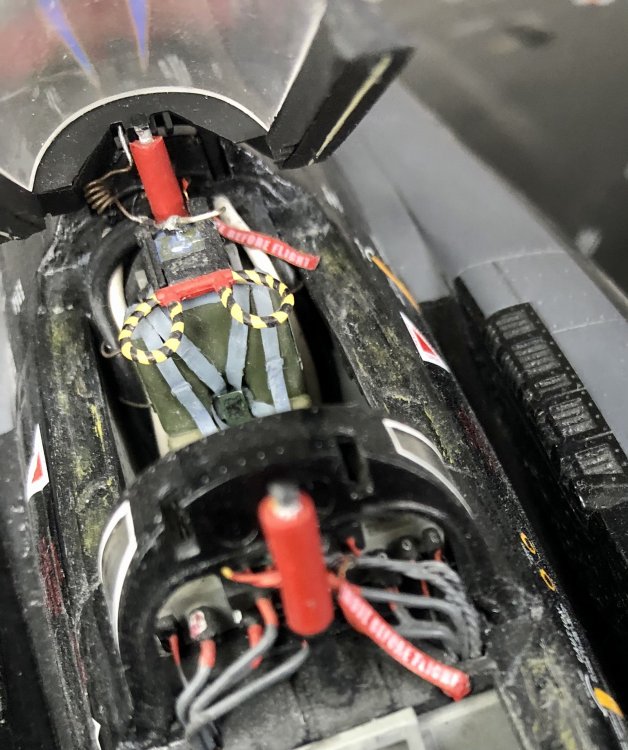
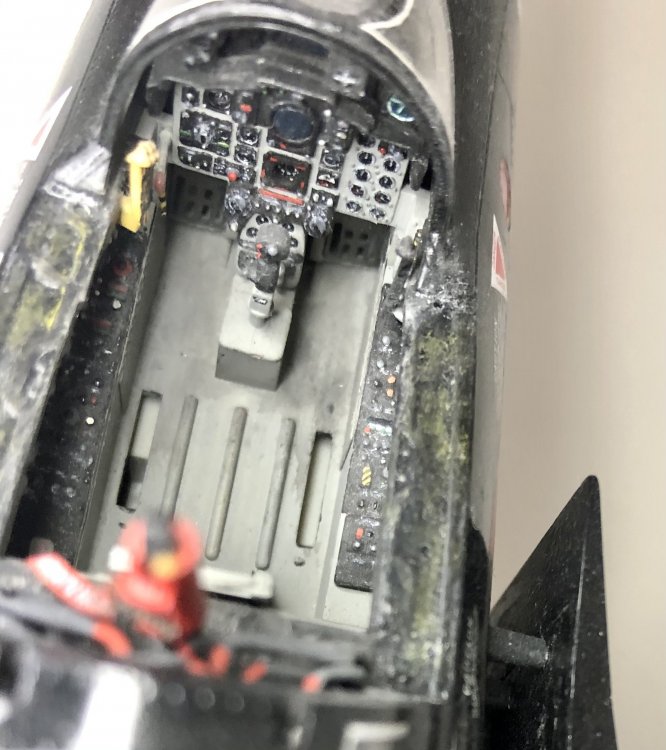
This is my Tamiya F-4J of VX-4 Evaluators in a special livery from 1977 I build several years ago and want to share with you. Decals are from Yellowhammer and stencils from Icarus-Decals. More than 400 to apply because every stencil is a single decal. Painted with Humbrol Gloss Black which makes a nice sheen. Walkways also painted on. I know that the bunny head on the tail should be quenched but I didn’t want to paint it on. I also know that the burner-cans are too small in diameter but there were no replacements available at that time. All ABDR-panels eliminated and rescribed (). Eduard interior used and some scratchbuilding mainly in the landing gear bays. Thanks for looking.


- 20 replies
-
- 11
-
-

-
I have these for a Bf-109 G6 too and probably won’t use them. The fotos of the real aircraft you posted seem to show that it has no raised rivets because of the smooth surface. Gaz is also building a 190 A and has posted a picture in his post here on the website where you only see panellines where access panels are located. He has also build puttied 1/48 scale warbirds which really look absolutely convincing to me. Maybe Gaz or someone out of the community can help? Here‘s a photo Gaz posted:

-
Wasn’t the 190 A puttied at least on the wings and doesn’t the 190 A have countersunk rivets? I don’t know exactly the answers but this would be the criteria for me to decide wether to use them or not. Or is this just a riveting-template? Cheers Kai
-
Lancaster ND644 in 32nd scale
Kaireckstadt replied to FME erk's topic in LSM 1/35 and Larger Work In Progress
Hi Ian, totally agree. Do you plan to go to SMW 2021 and exhibit your Lanc? I plan to go there and display mine together with that of a friend of mine who has build AJ-J in a common diorama. If you go there maybe we can meet and have a look at each others. Kai -
Lancaster ND644 in 32nd scale
Kaireckstadt replied to FME erk's topic in LSM 1/35 and Larger Work In Progress
I was also very angry about these prominent ejector pin-marks and their removal. Also about the many holes to drill in the turret inner structures. I also had to rework the baseplate since the fit of the turret-structure going through it was much too tight. I didn’t realize that the squares at the engine cowling are wrong. Can’t change this anymore. Should have known you before I started my build, Ian! All these faults and shortcomings of the kit are really a mess for its price. Totally I invested nearly 1.000 € in this kit with all the Eduard Stuff, Magic Scale Modeling Set, Colors, Masks, Resin-Parts, etc. And even with this a high amount of scratchbuilding is necessary. But this is modeling... -
RR Spey powered RAF Phantom conversion
Kaireckstadt replied to Wingco57's topic in LSM 1/35 and Larger Work In Progress
I can only underline that! Awesome build!- 414 replies
-
- 4
-
-
- conversion
- phantom
- (and 1 more)
-
Zoukei-Mura P51D Mustang SWS No 4.
Kaireckstadt replied to Bomber_County's topic in LSM 1/35 and Larger Work In Progress
This looks really great and absolutely realistic! Can’t wait to see the progress! -
Thanks a lot for your feedback. I‘m also an absolute fan of the manned rocket.
-
Lancaster ND644 in 32nd scale
Kaireckstadt replied to FME erk's topic in LSM 1/35 and Larger Work In Progress
I forgot to say that I had to rework the canopy because mine had a bad fit especially at the front.
-
Lancaster ND644 in 32nd scale
Kaireckstadt replied to FME erk's topic in LSM 1/35 and Larger Work In Progress
Thanks for your feedback, Ian! To answer your question: I used normal Revell Cement applied thin and fixed everything with Tamiya-Tape. After this had dried I corrected flaws with Mr. Dissolved Putty which can be applied with a brush and excess can easily wiped away with Mr. Color Thinner (not the leveling-version) which doesn’t damage clear plastic. BR Kai
-
Lancaster ND644 in 32nd scale
Kaireckstadt replied to FME erk's topic in LSM 1/35 and Larger Work In Progress
You are right Ian, it was only a misunderstanding. I have already posted photos of my build here on the website (aircraft finished). Please be indulgent with me because I only corrected some of the most visible faults/ missing details of the kit (I even didn’t know some of the necessary corrections you mentioned (e.g. the wrong height of the undercarriage). I really can’t wait to see your build! Cheers Kai -
Lancaster ND644 in 32nd scale
Kaireckstadt replied to FME erk's topic in LSM 1/35 and Larger Work In Progress
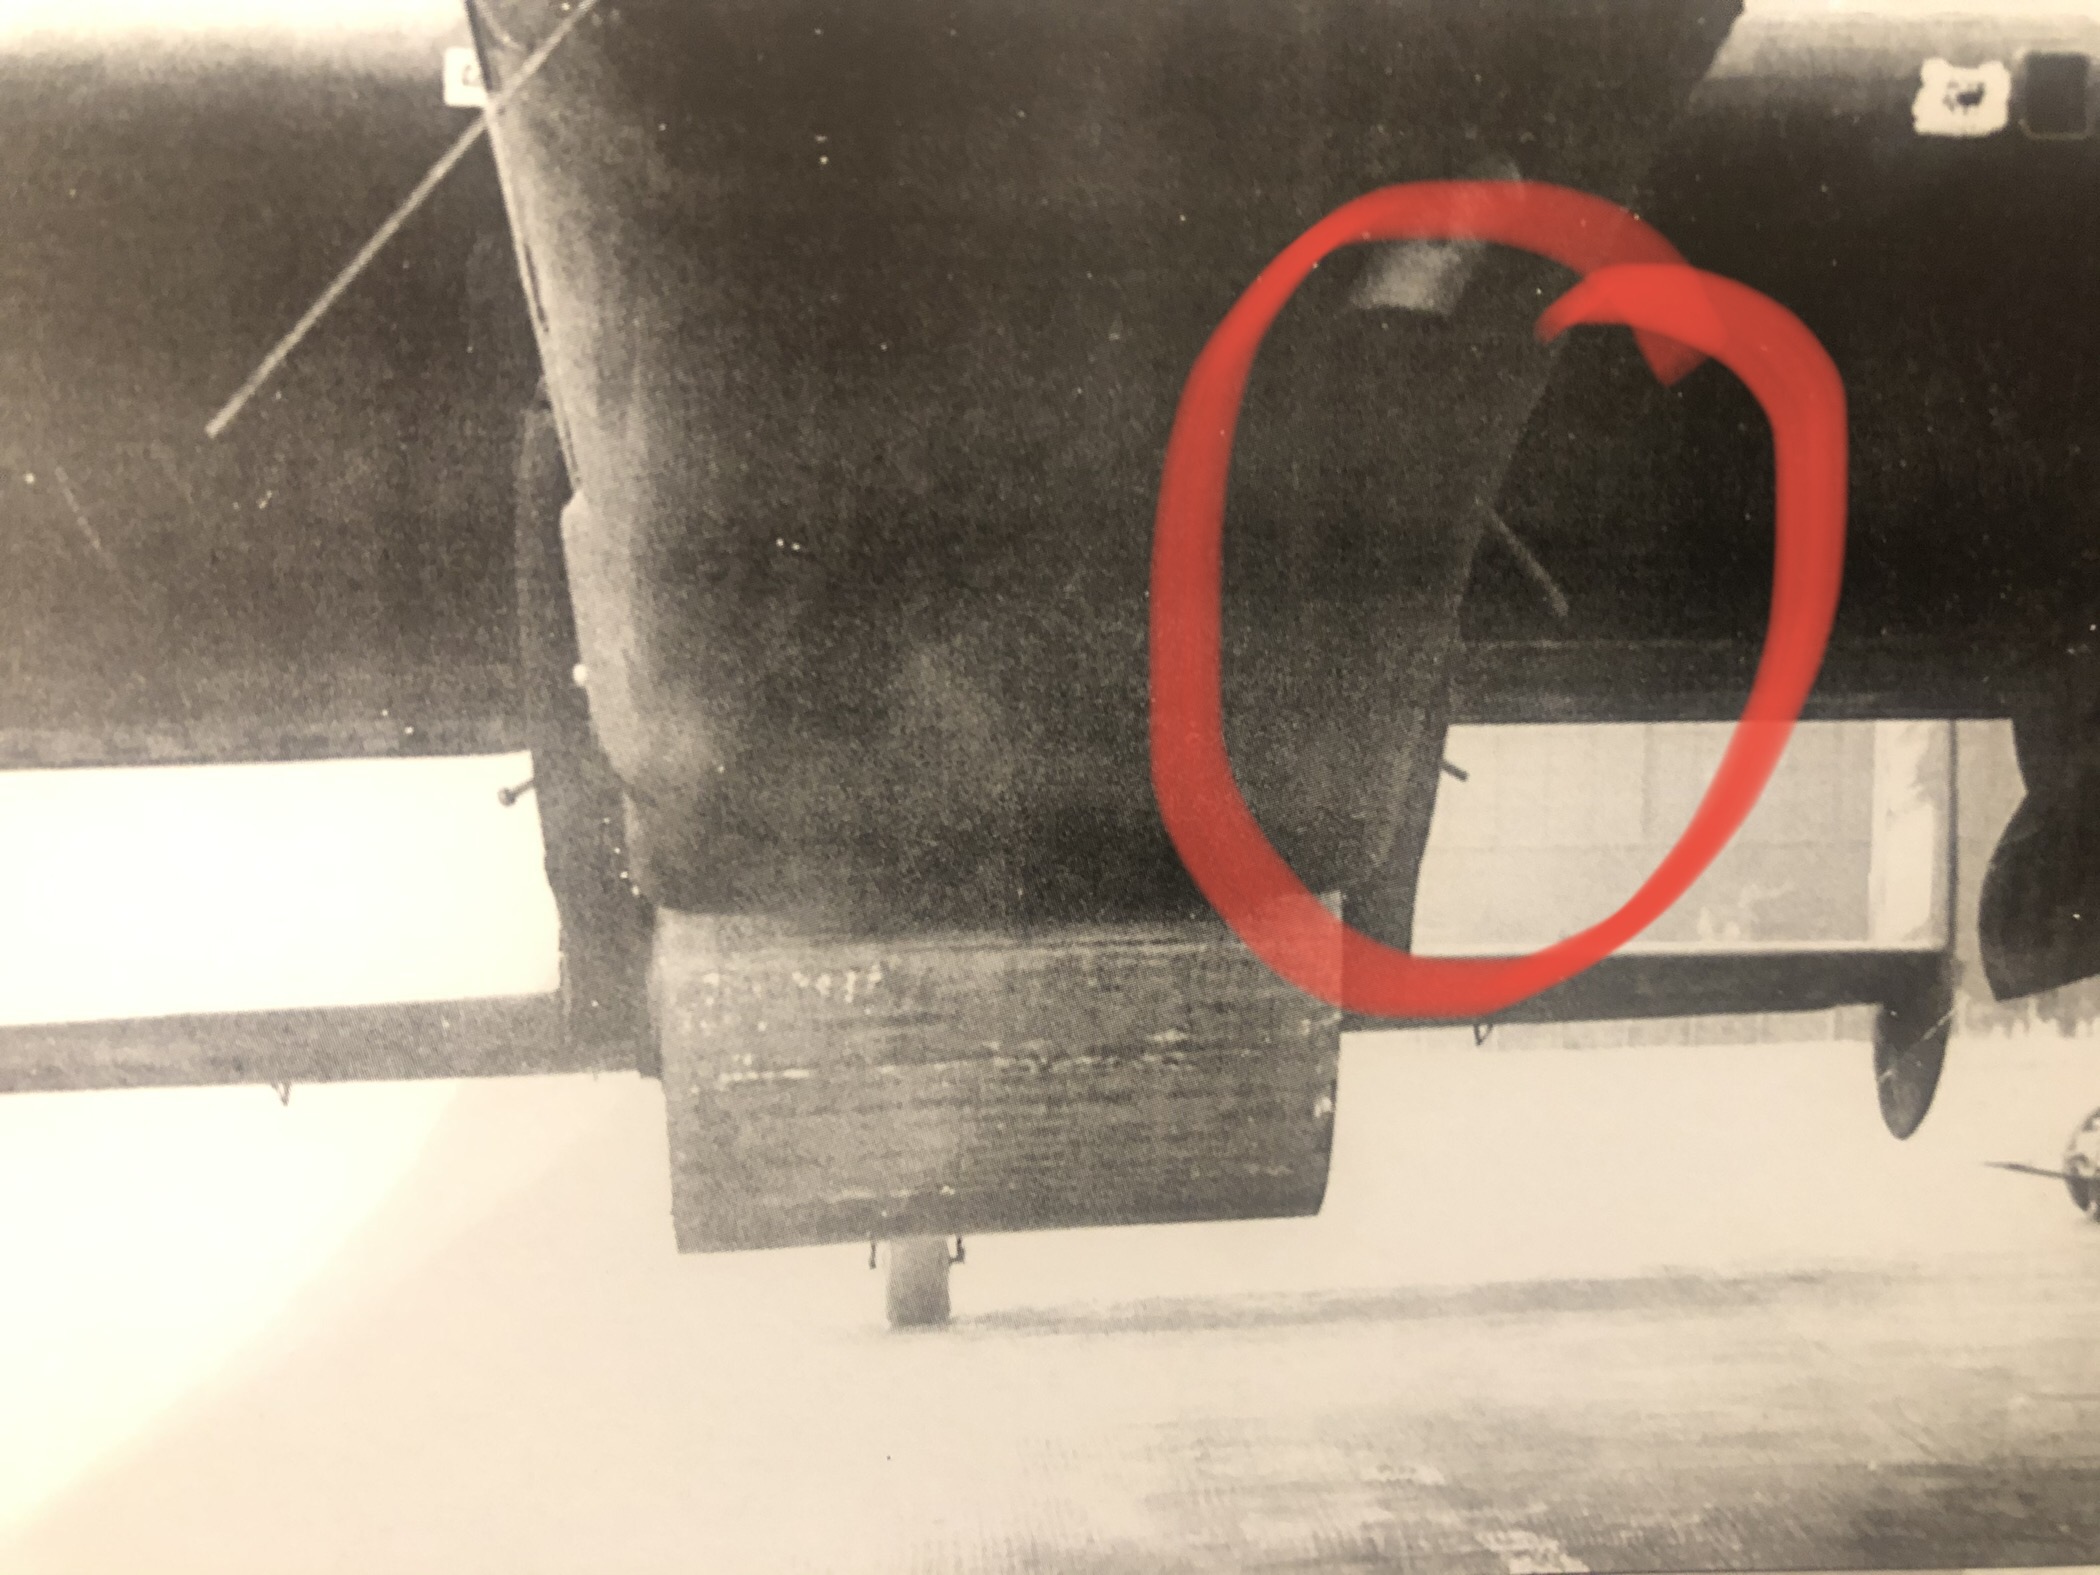
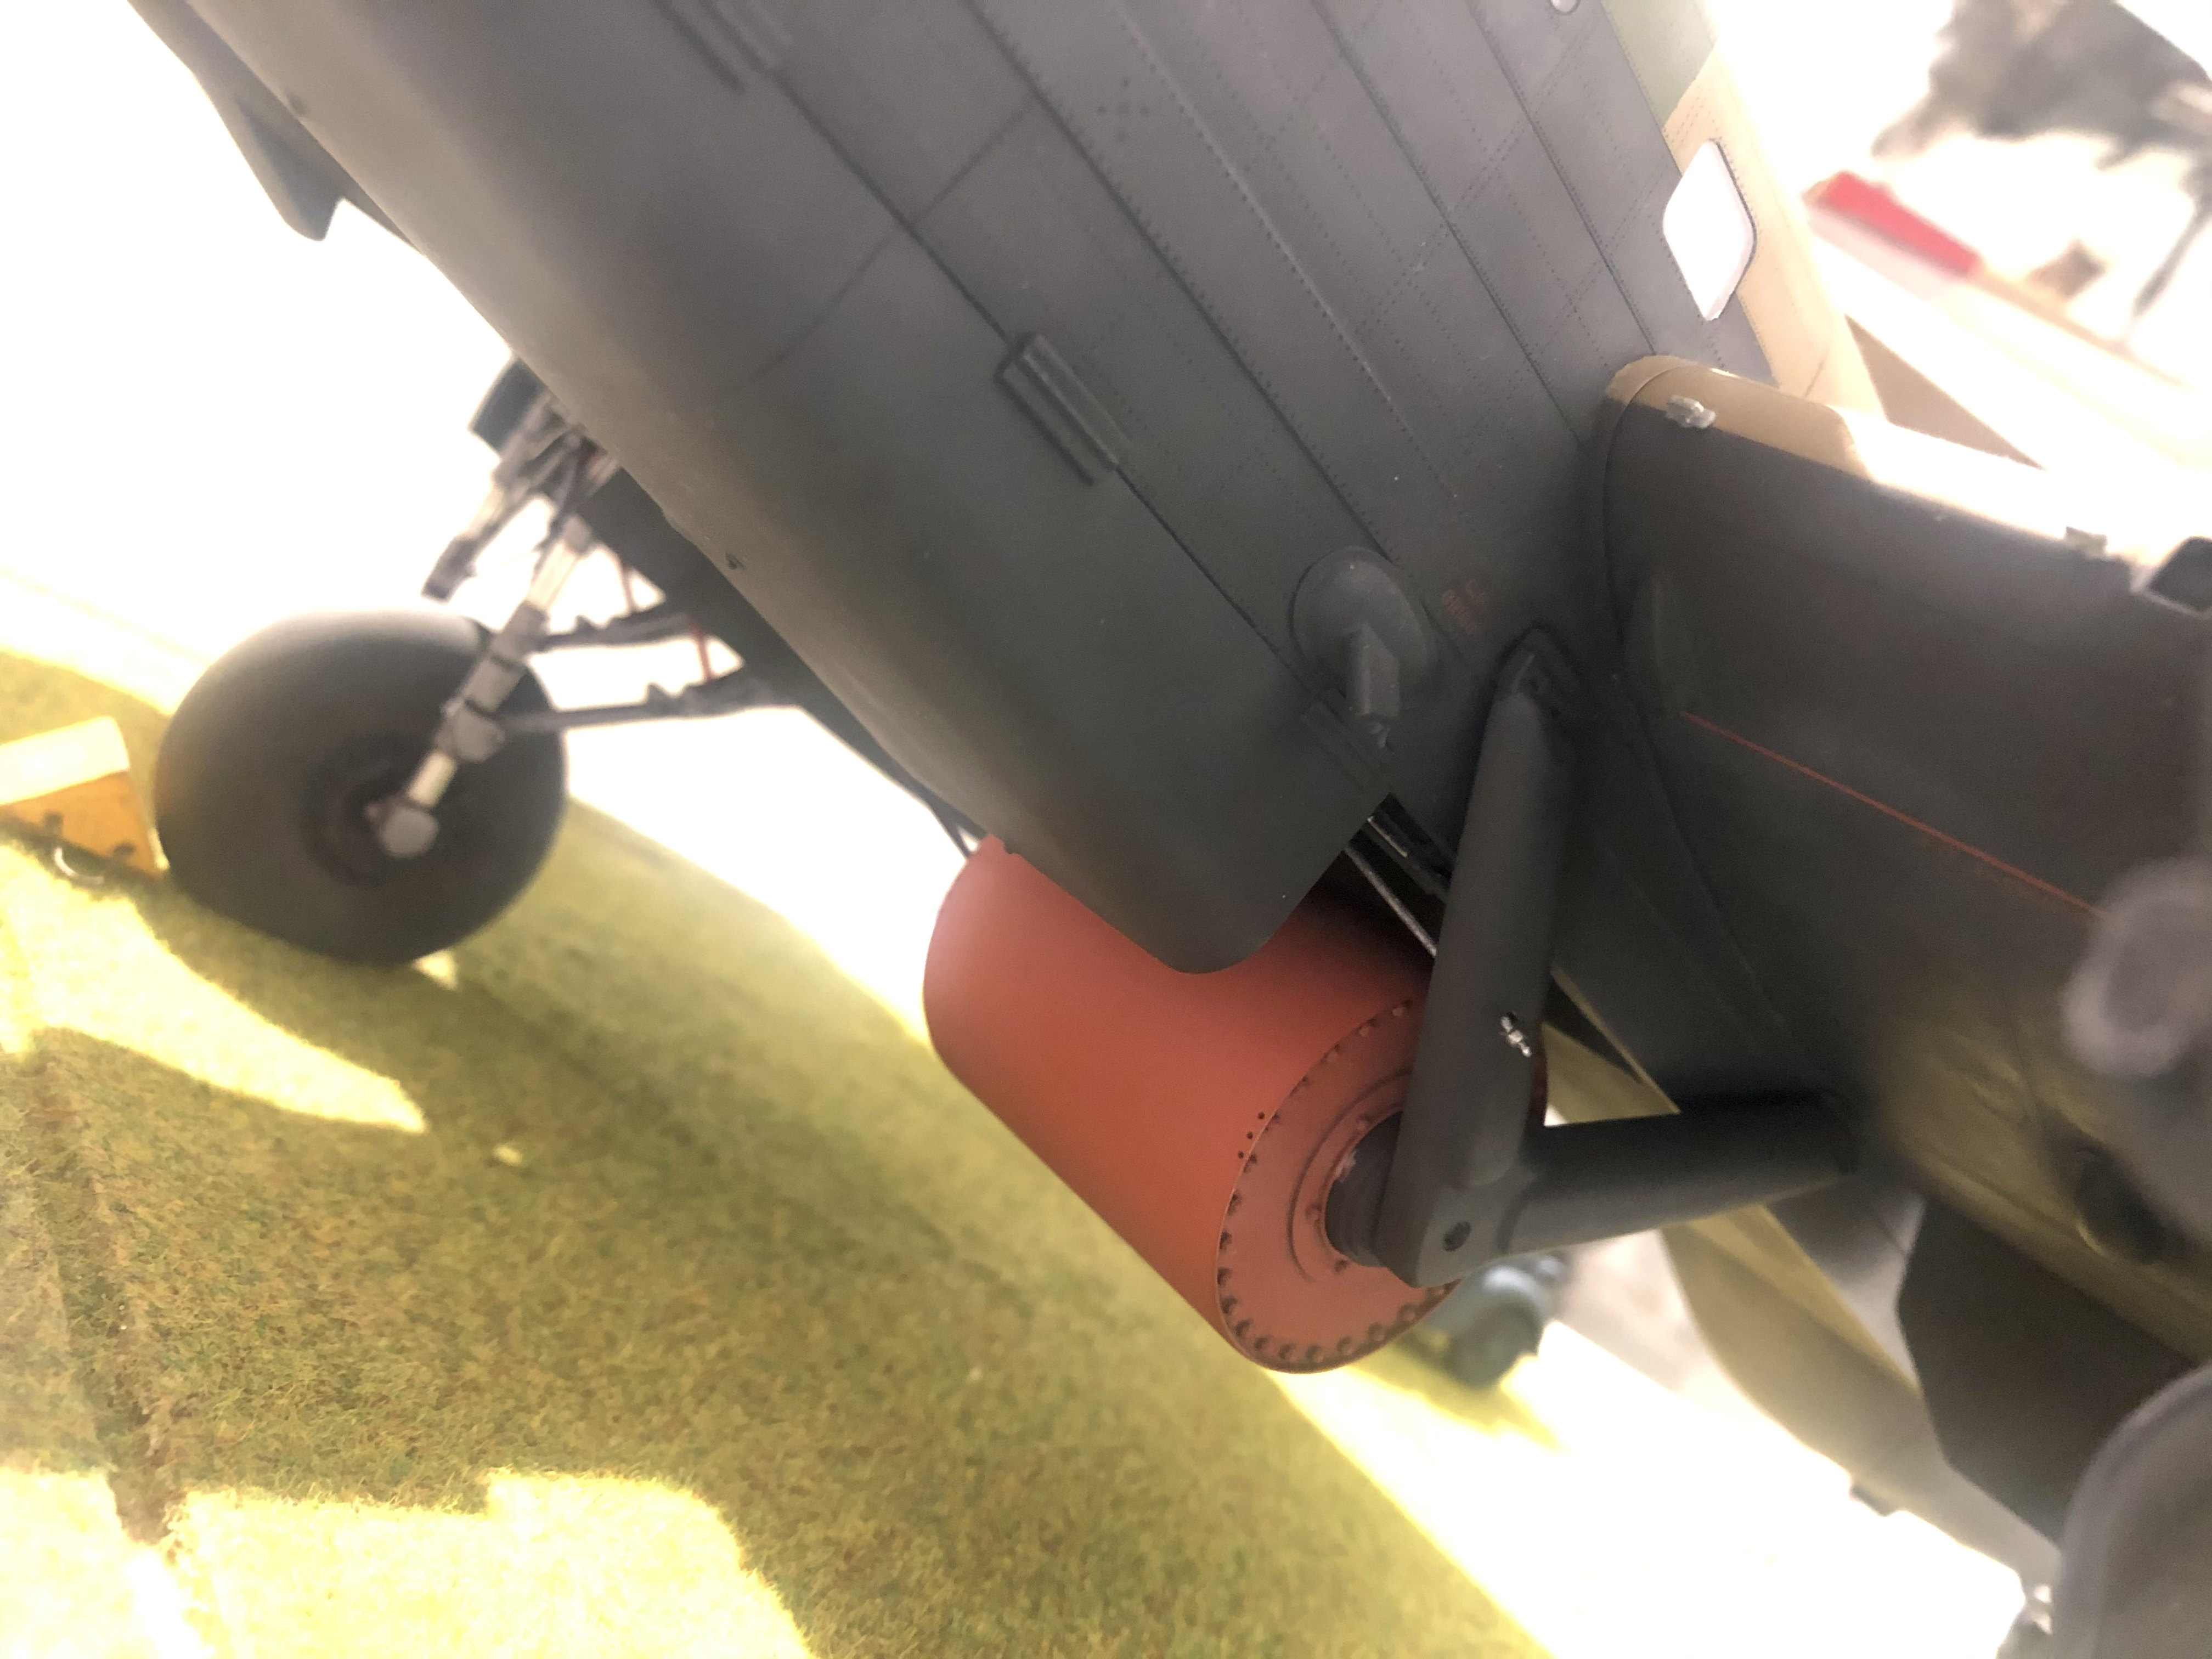
Hi Ian, You are right and this is what I meant: on my model as on the real plane the trailing aerial is on the port side under the wingroot:

-
Thank you! I really appreciate this!
-
Lancaster ND644 in 32nd scale
Kaireckstadt replied to FME erk's topic in LSM 1/35 and Larger Work In Progress
Thanks for your reply. This is what I also thought. In the ED-Series at least the 464-Provisionings also had that feature. The best is to have as many pictures as possible available of the plane you actually want to build. -
Lancaster ND644 in 32nd scale
Kaireckstadt replied to FME erk's topic in LSM 1/35 and Larger Work In Progress
I‘ve seen some fotos even of early build Lancasters with that feature. An example is Metropolitan-Vickers build MKIII DV197 VN-T, first 54 aircraft delivered starting from May 43. Do you know, when the position of the trailing aerial was changed in Production? Or does it belong to a certain batch or the manufacturer? Cheers Kai -
Thanks for your feedback, Hubert! And a happy and healthy New Year to all of you!
-
I‘ve build this one and the Hasegawa too when I was young 40 years ago. Build in 2 days and painted with brush and slivering decals... But I liked it at that time! Do you have a picture of yours?