
Kaireckstadt
-
Posts
1,705 -
Joined
-
Last visited
Content Type
Profiles
Forums
Events
Gallery
Everything posted by Kaireckstadt
-

Special Hobby Whirlwind
Kaireckstadt replied to Peterpools's topic in LSM 1/35 and Larger Work In Progress
Smooth paintwork Peter! Coming along very nice! -
Nice work on the cockpit and engine Gary. I would have replaced the wires you marked with a brace by copper or lead wire. Regarding the wing it’s really a shame that all disappears under the skin. Typical of ZM-kits.
-
Special Hobby Whirlwind
Kaireckstadt replied to Peterpools's topic in LSM 1/35 and Larger Work In Progress
Great surgery on the nose Peter. -
Great progress and the landing gear is awesome 🤩! Amazing work Mark!
-
Great subject Gary and I will follow your build of yellow 10 😉 closely.
-
Duchess of Kingston - Beauty of the Seas - Wooden Sailing Ship 1/64
Kaireckstadt replied to DocRob's topic in Non LSM 'WIP
Just came across your build here today Rob. You really build a broad range of models: planes, cars, figures, ships…! The ship and figures are looking awesome. Great build! I never thought of building a ship. Should think it over. I just build a Mayflower from Revell when I was a young boy. -
Just saw this here today Gary. Great job on the MiG and the dio! The foiling is simply perfect 🤩! And the weathering of the vehicle is spot-on!
-
617 Sqn Tornado Dambuster 70th
Kaireckstadt replied to Kaireckstadt's topic in LSM 1/35 and Larger Work In Progress
Thank you all for your feedback. I’m happy that this challenge is behind me now. Now onto one of my favorites: the paintjob. -
CF-104D Triple Sick
Kaireckstadt replied to BlrwestSiR's topic in LSM 1/35 and Larger Work In Progress
The pit and the main LGB are looking great. The 104 is one of my favorites and I love the sleek look of the fuselage. First big step is completed Carl. -
Special Hobby Whirlwind
Kaireckstadt replied to Peterpools's topic in LSM 1/35 and Larger Work In Progress
Great looking bird so far with a beautiful shape. Good to see that you mastered all challenges up to now. -
617 Sqn Tornado Dambuster 70th
Kaireckstadt replied to Kaireckstadt's topic in LSM 1/35 and Larger Work In Progress
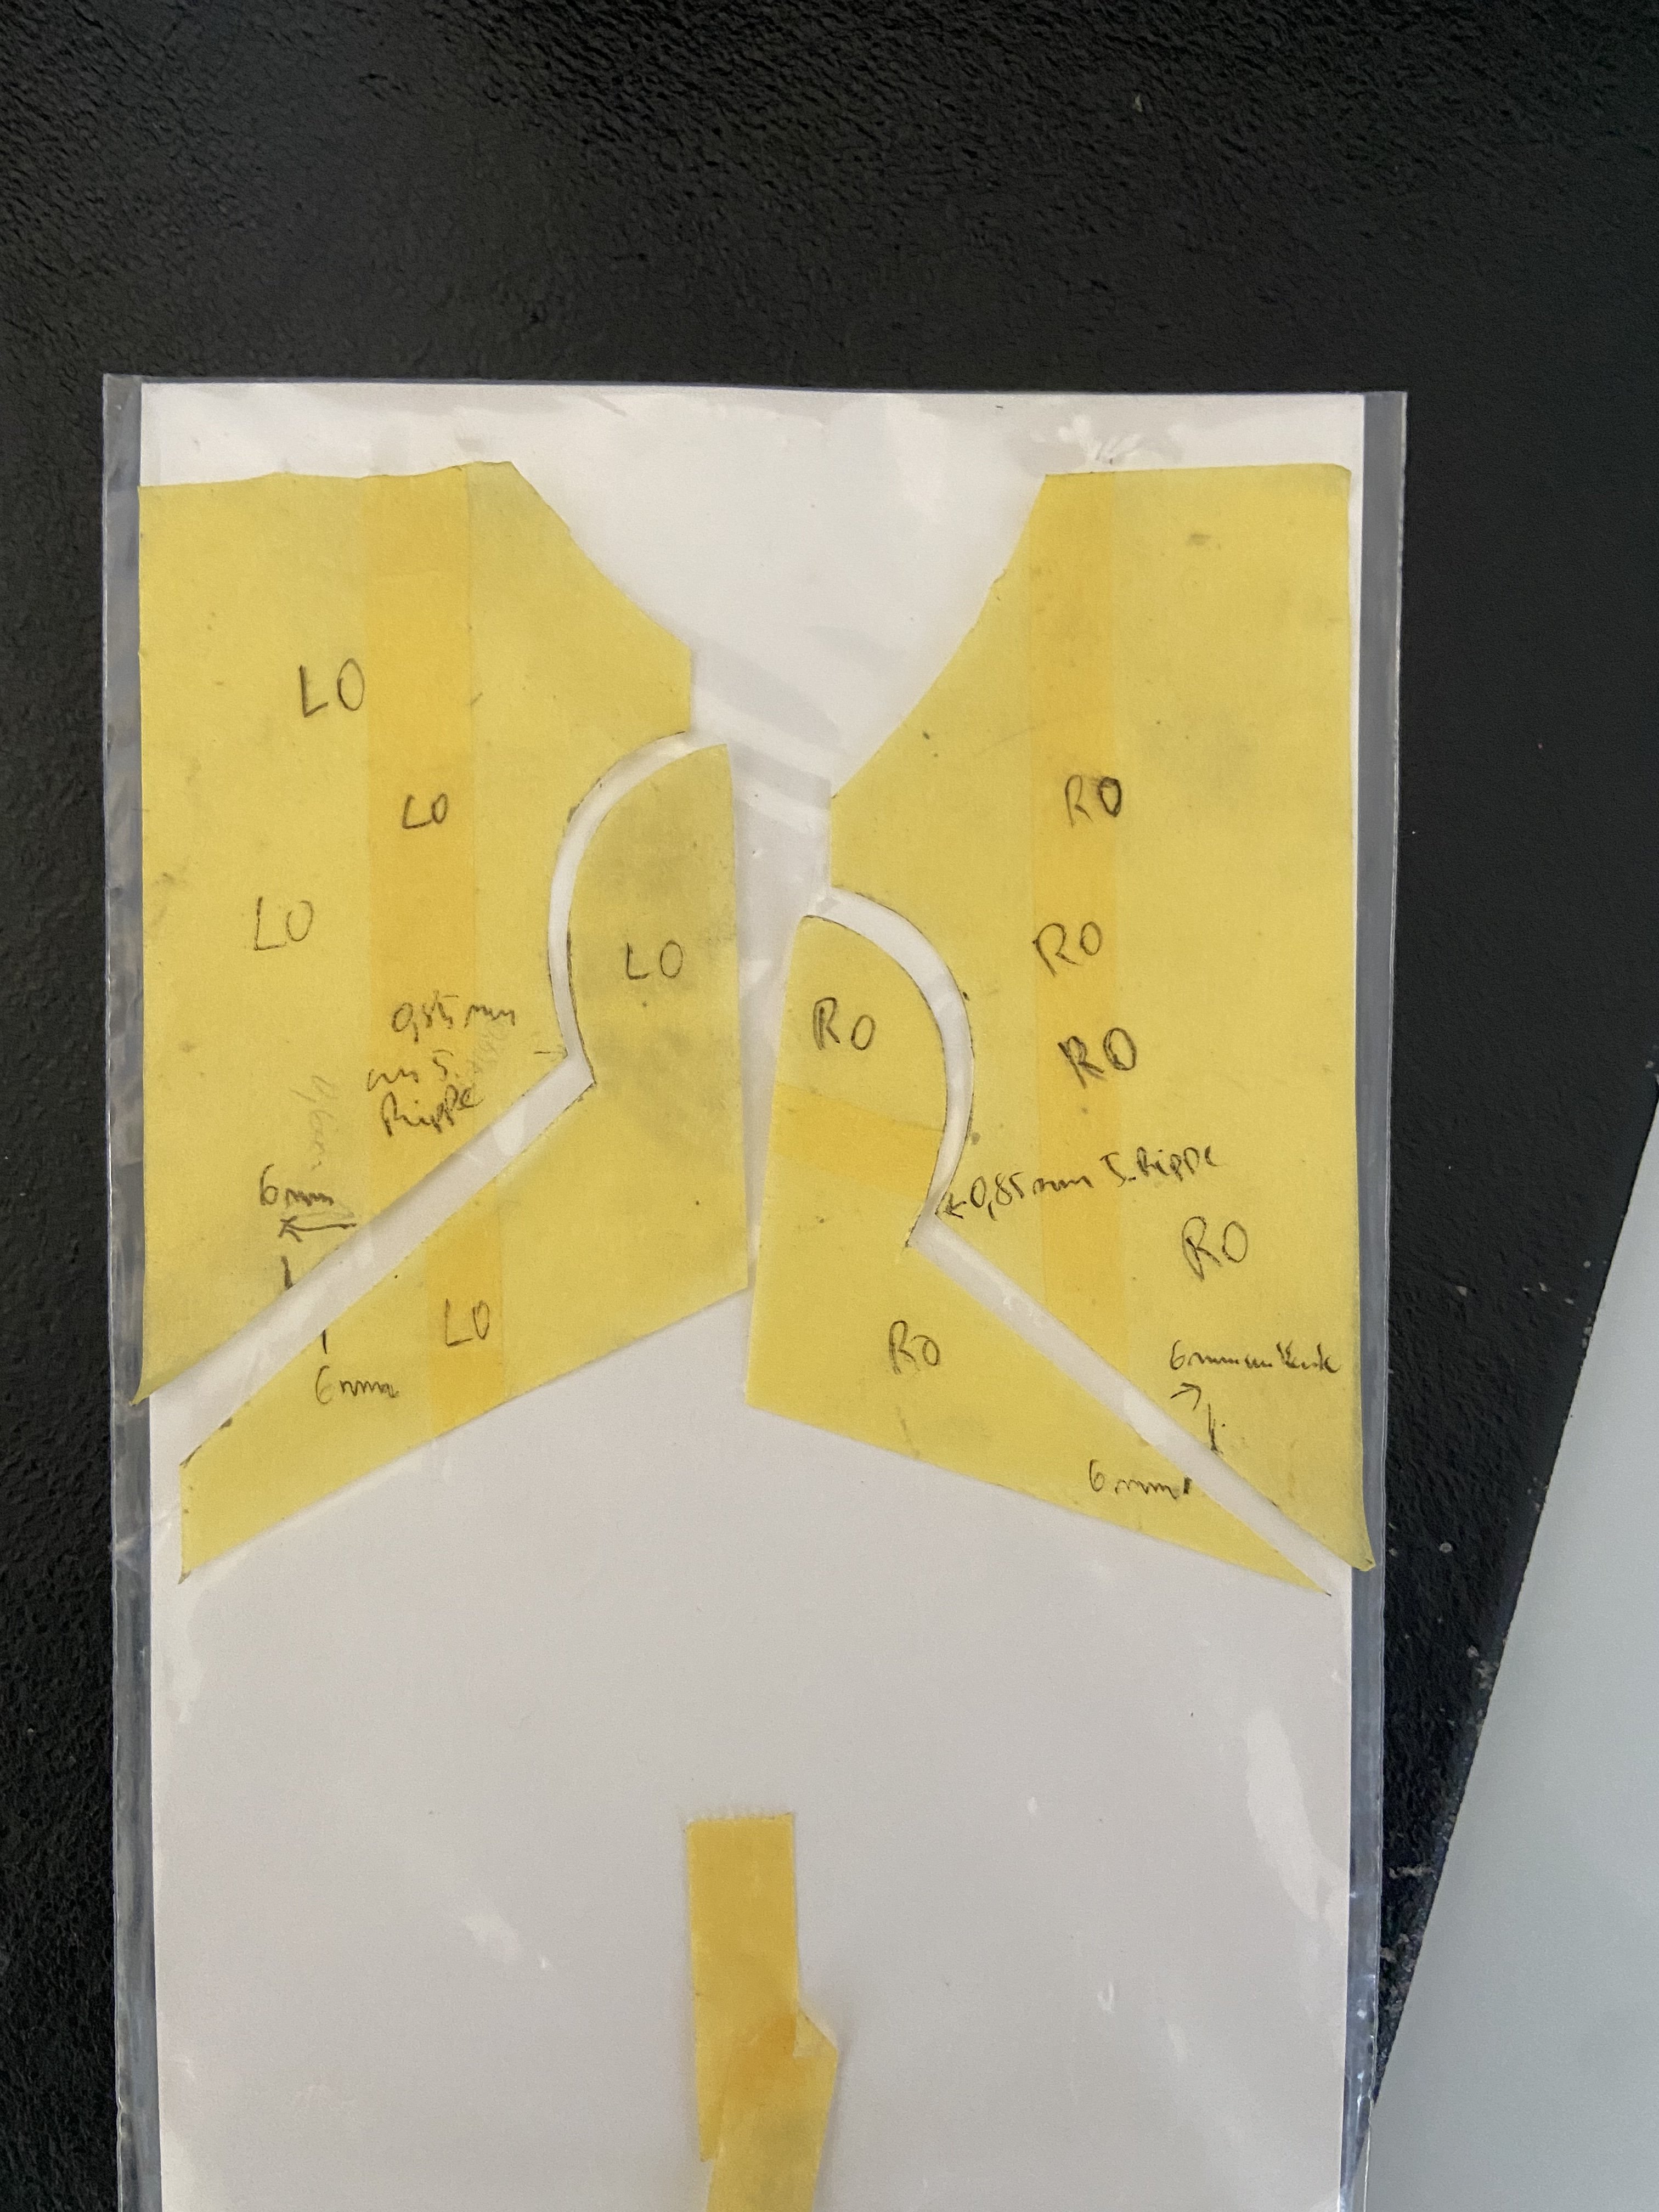
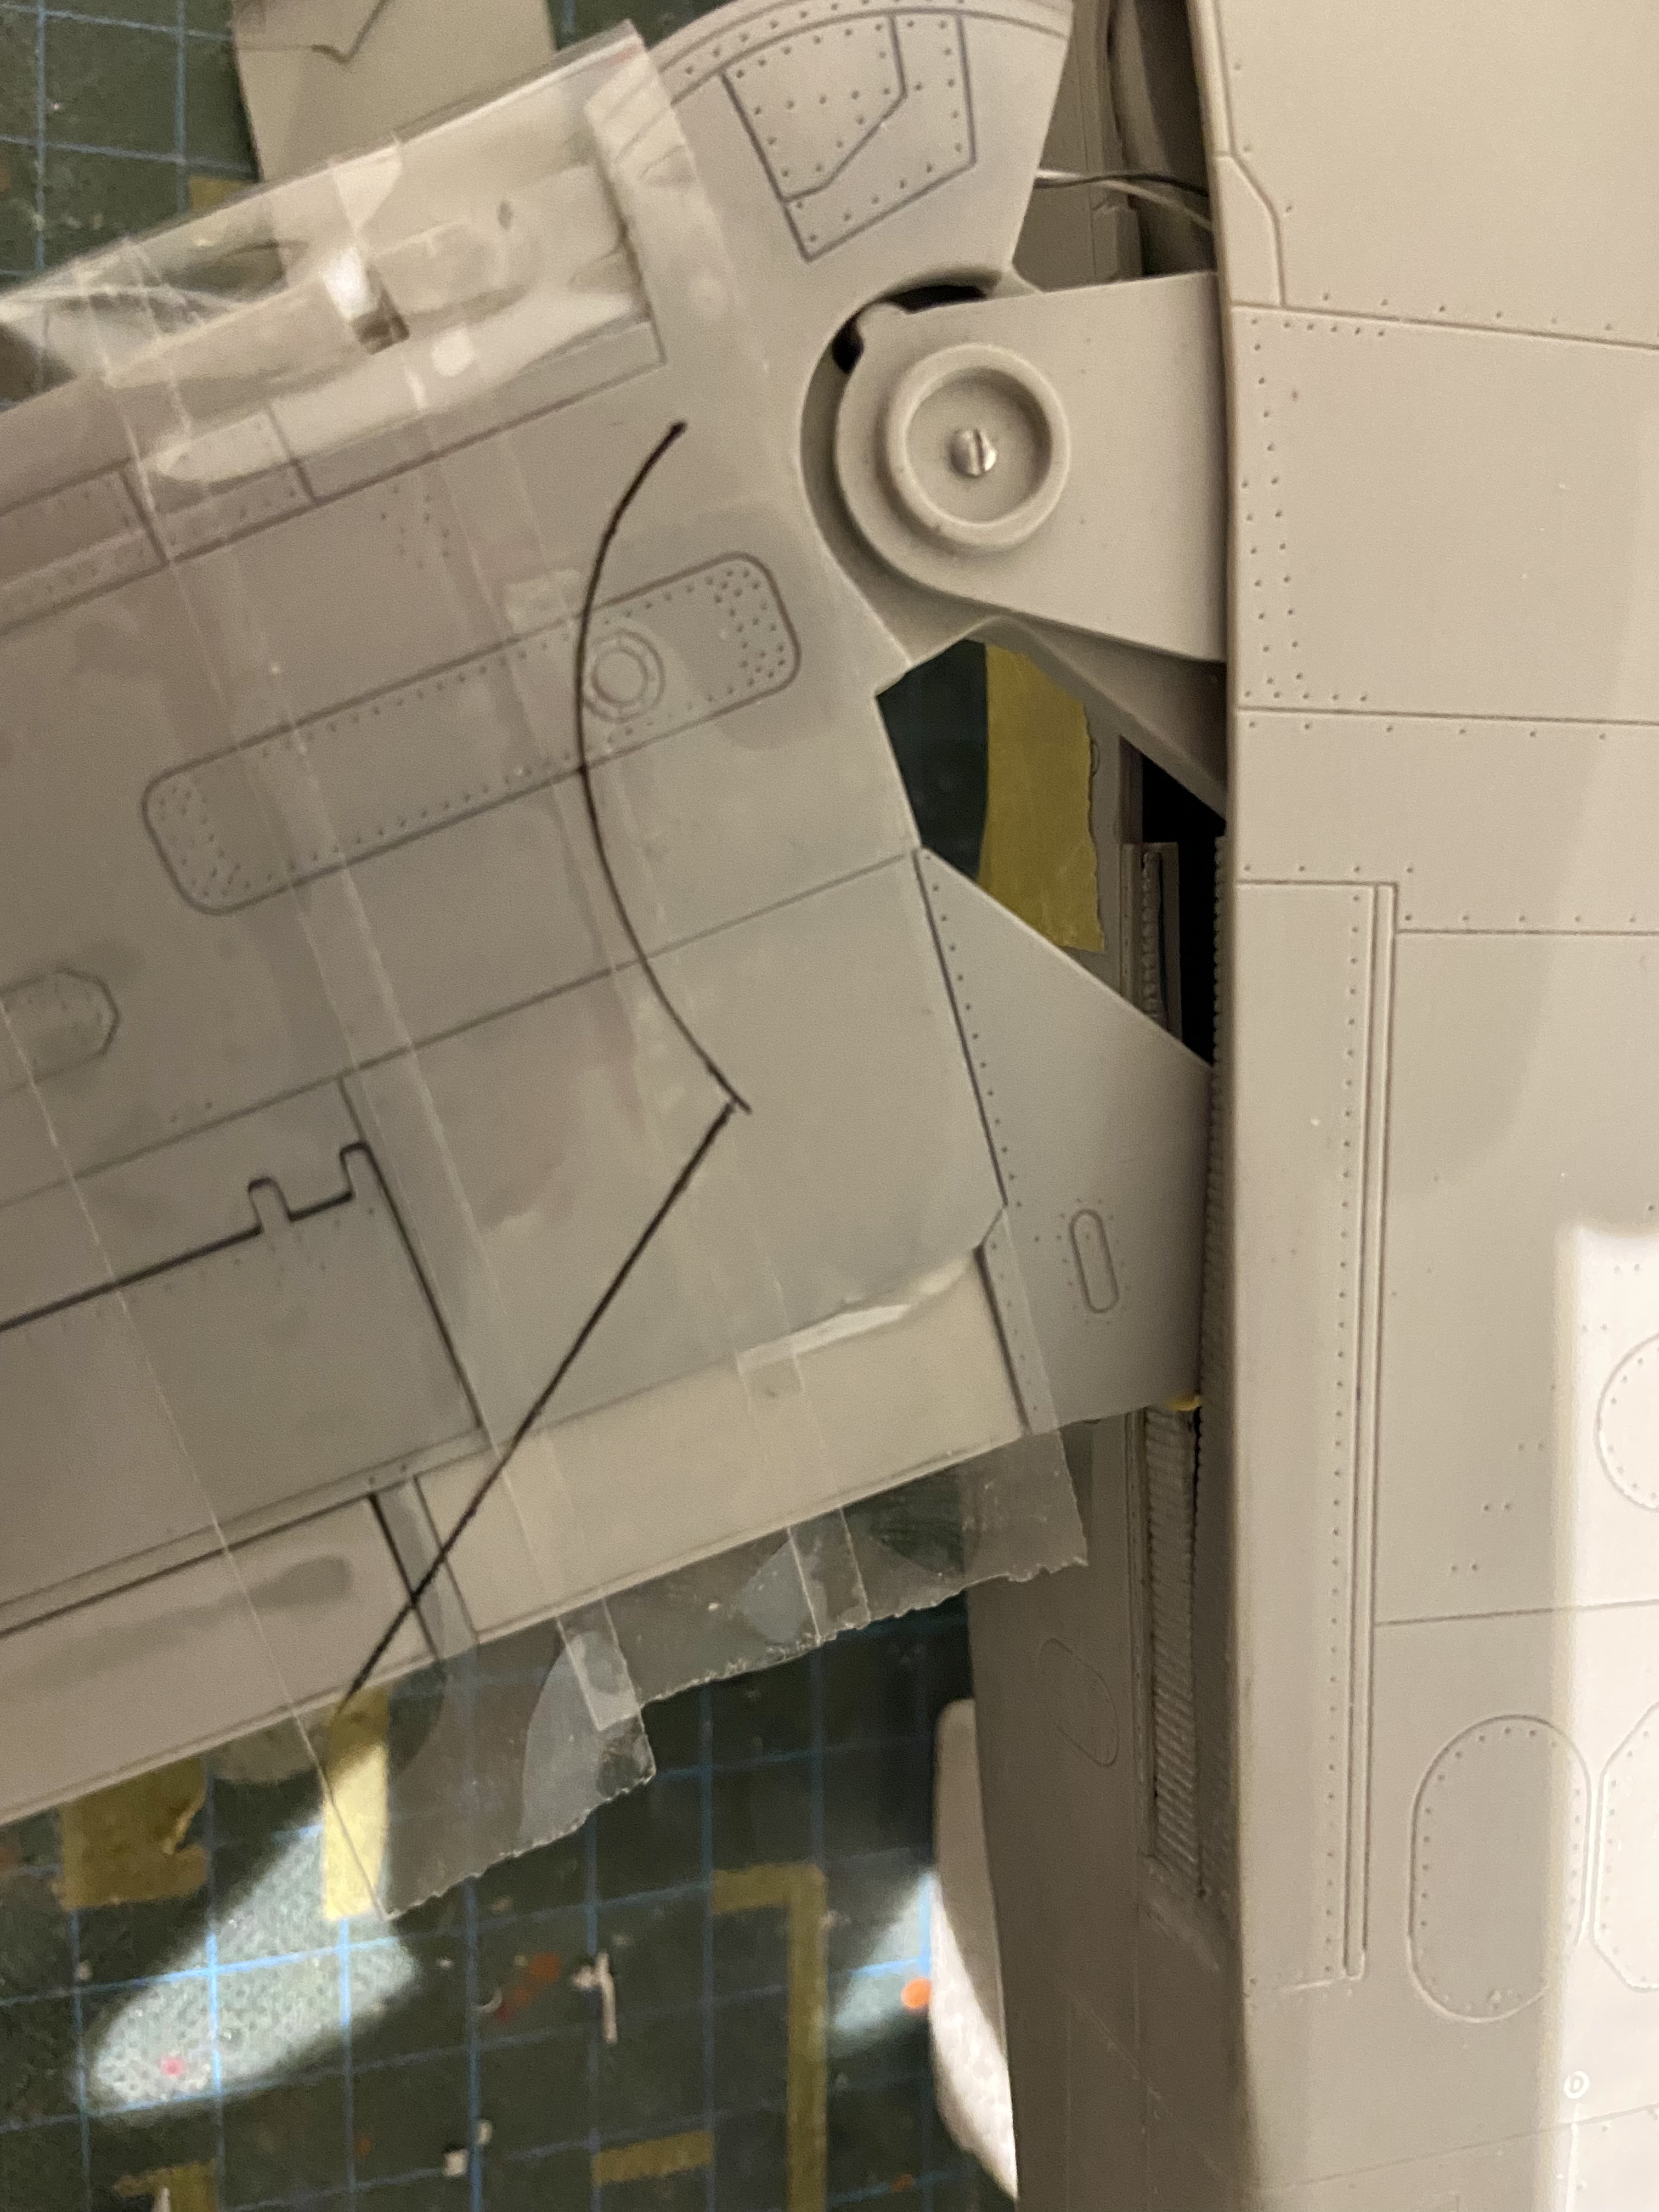
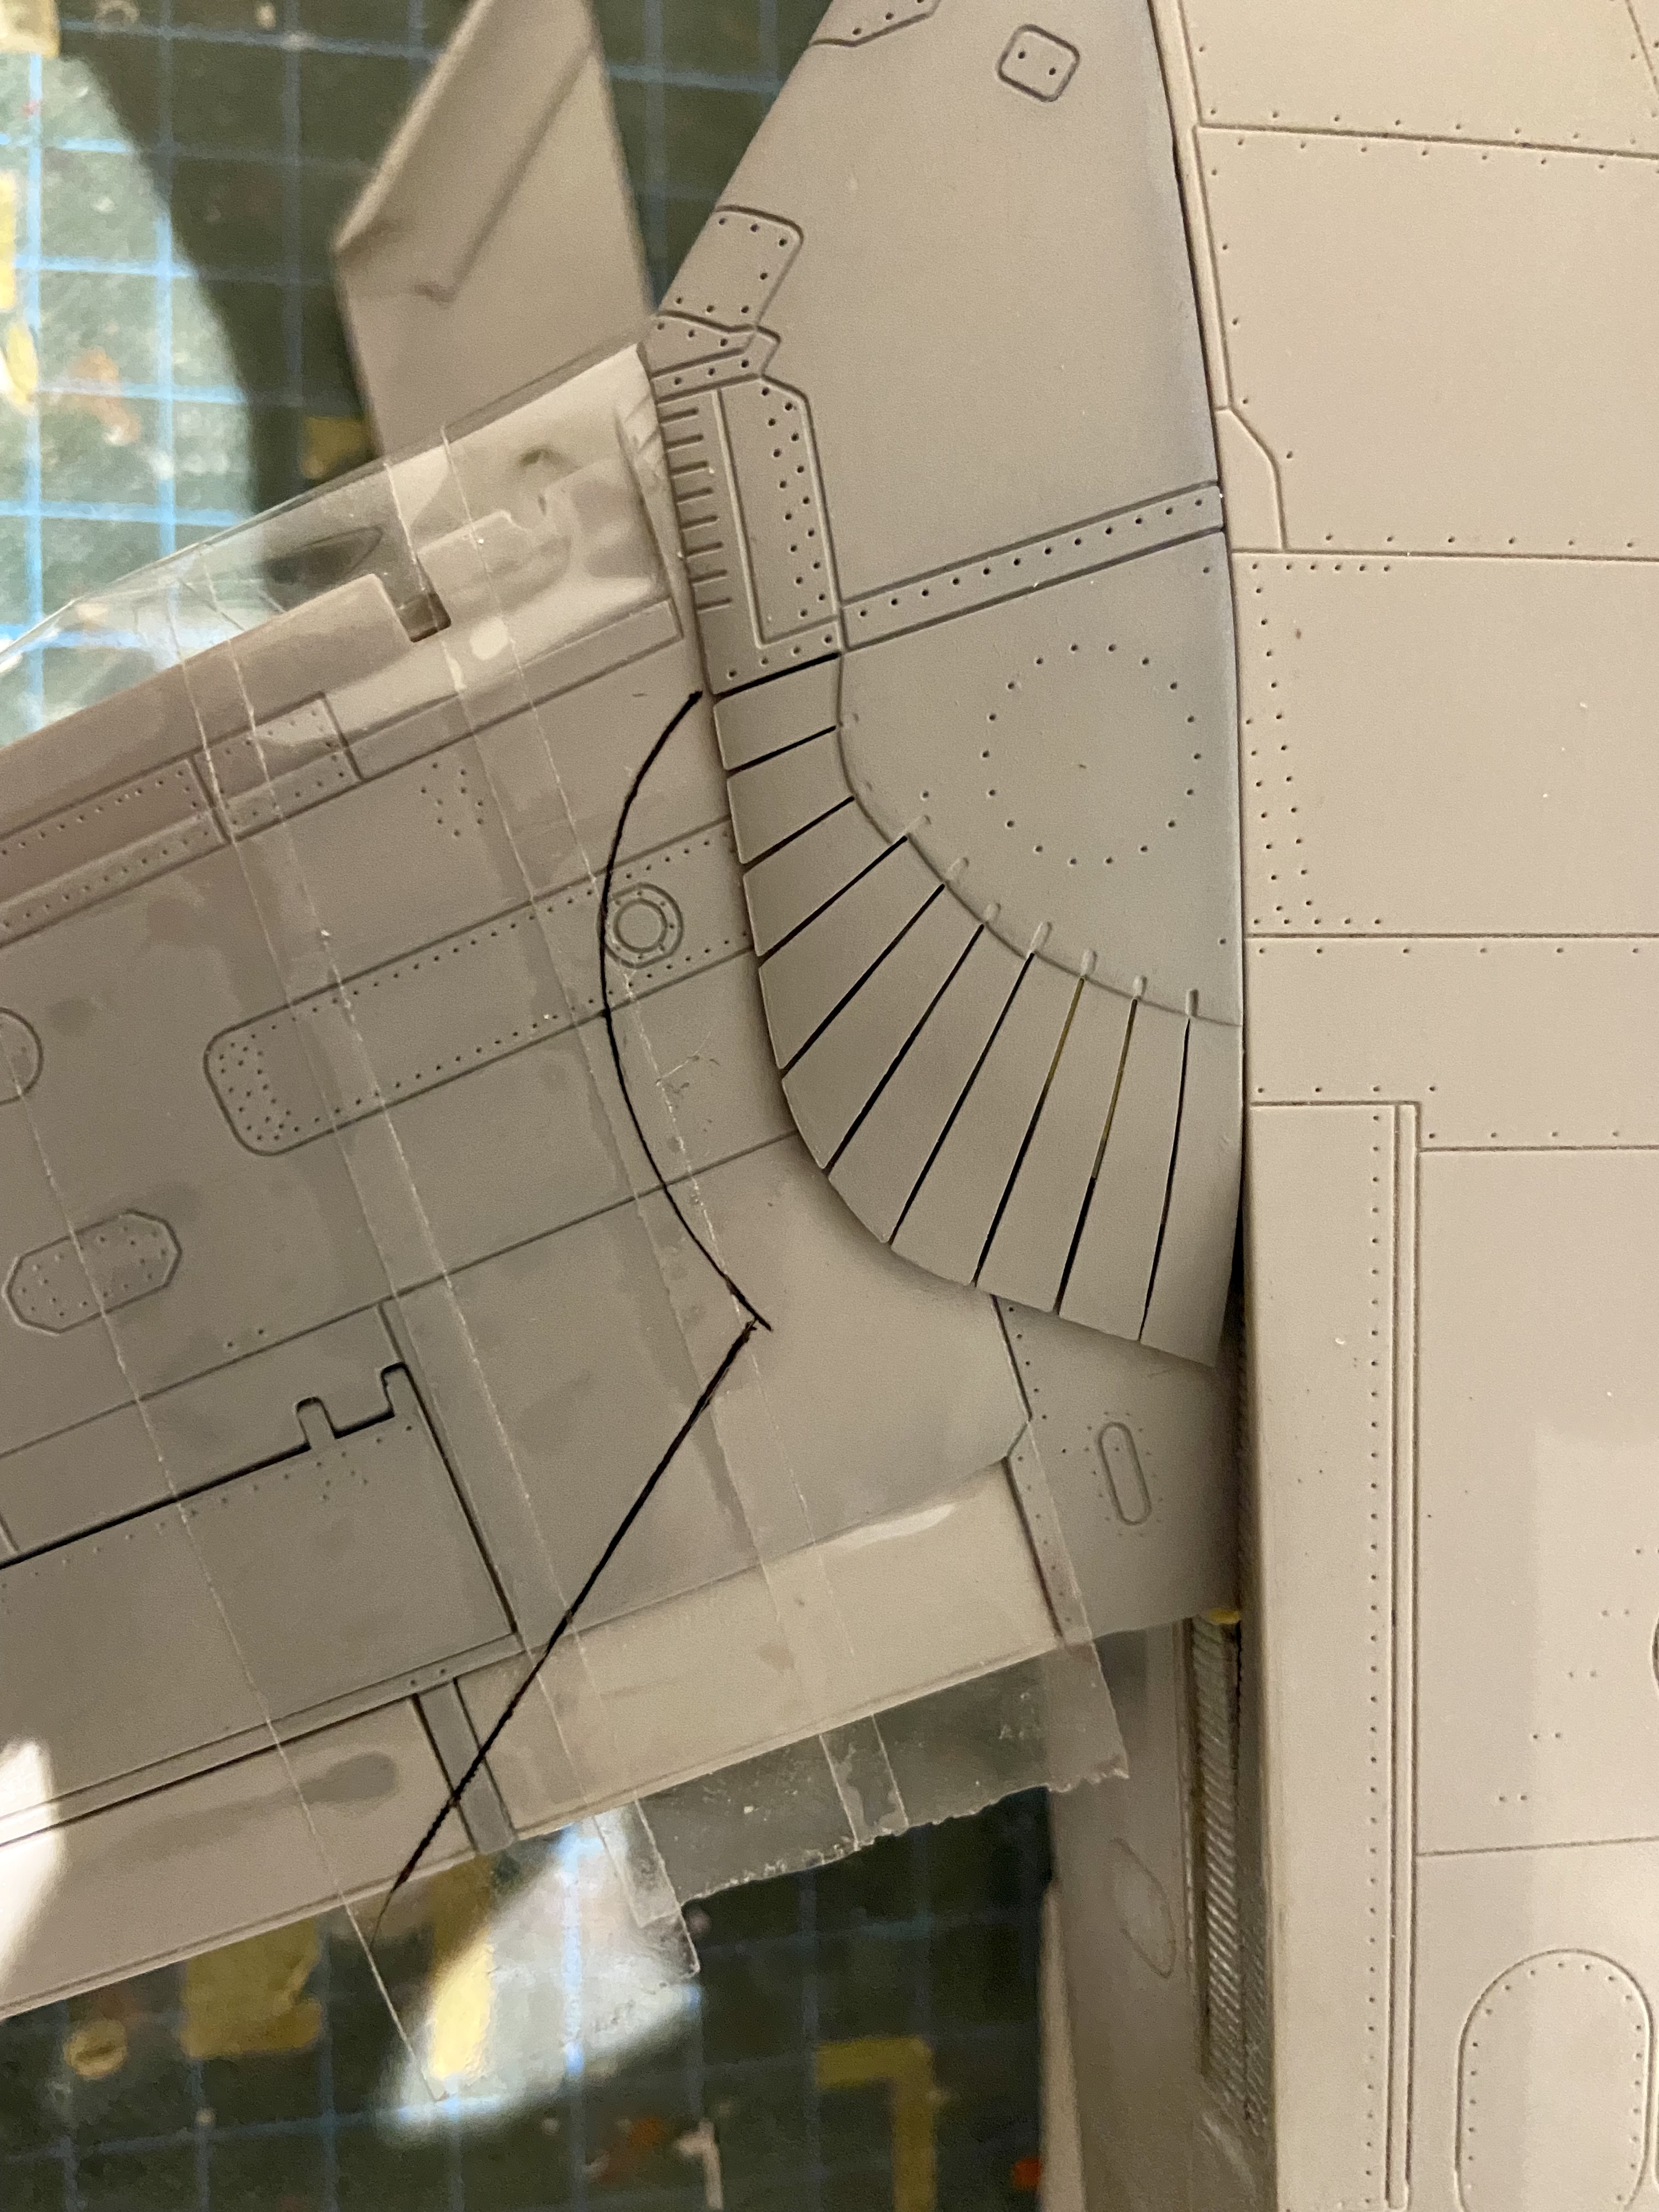
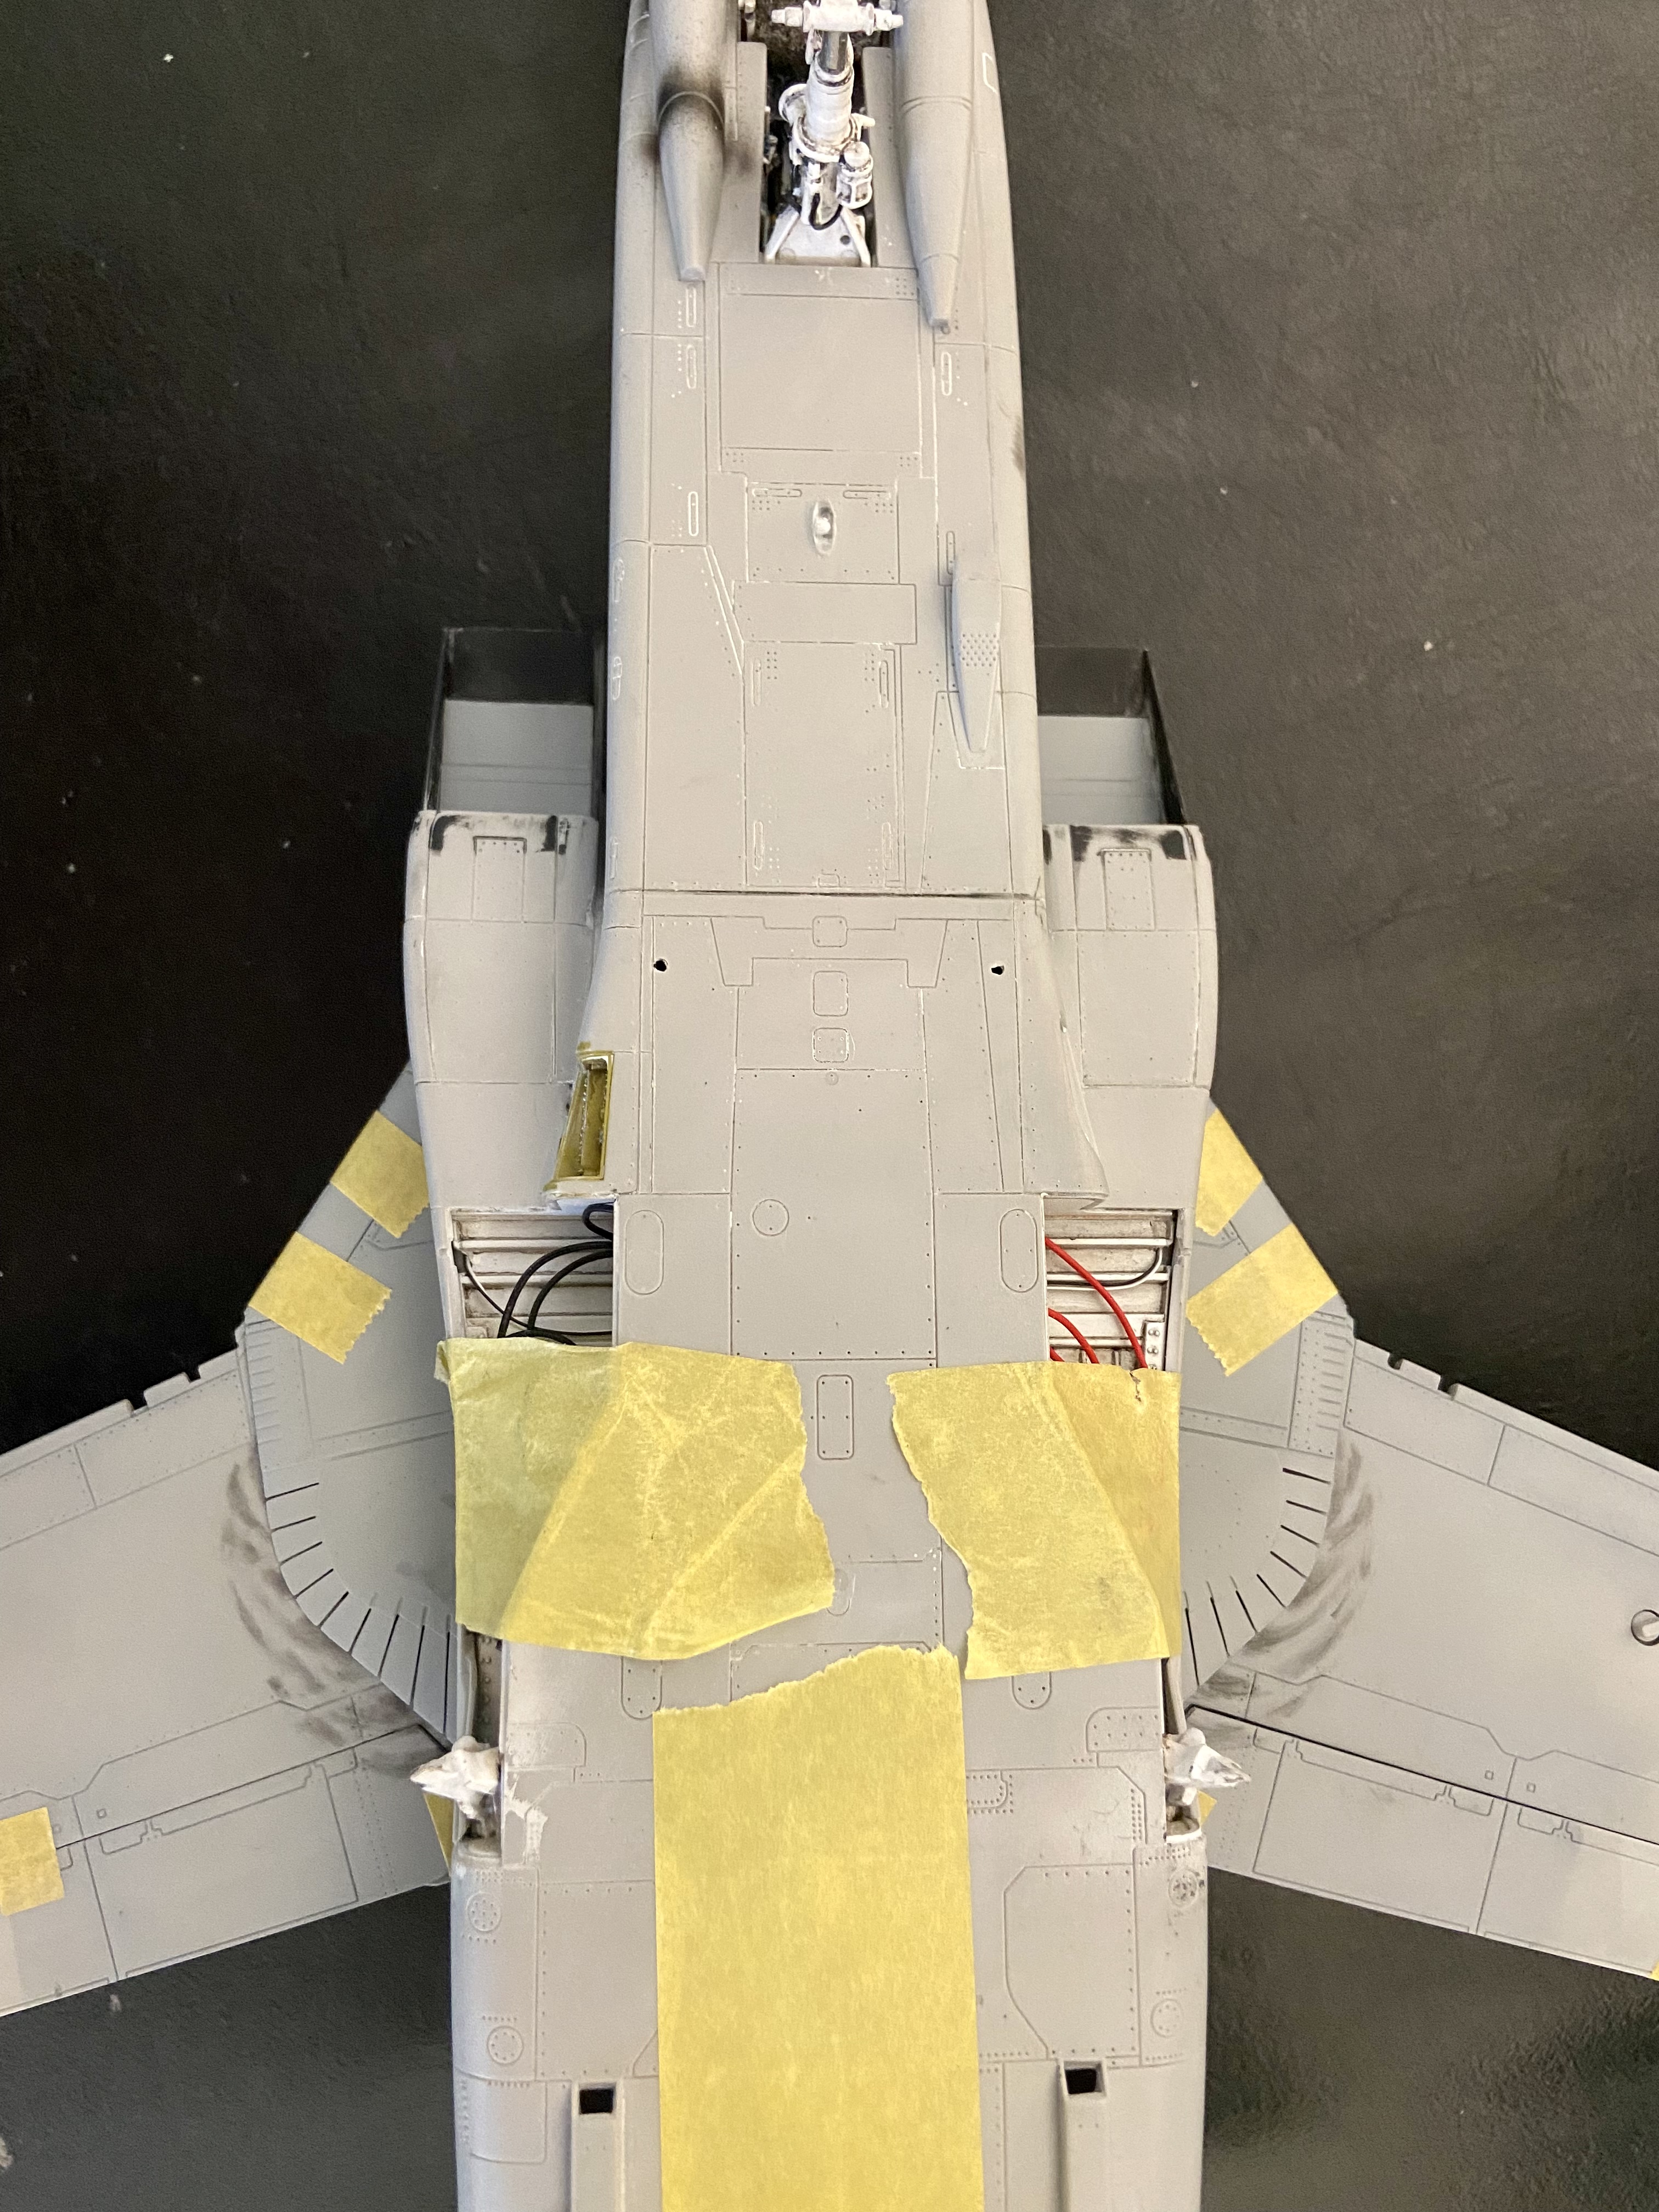
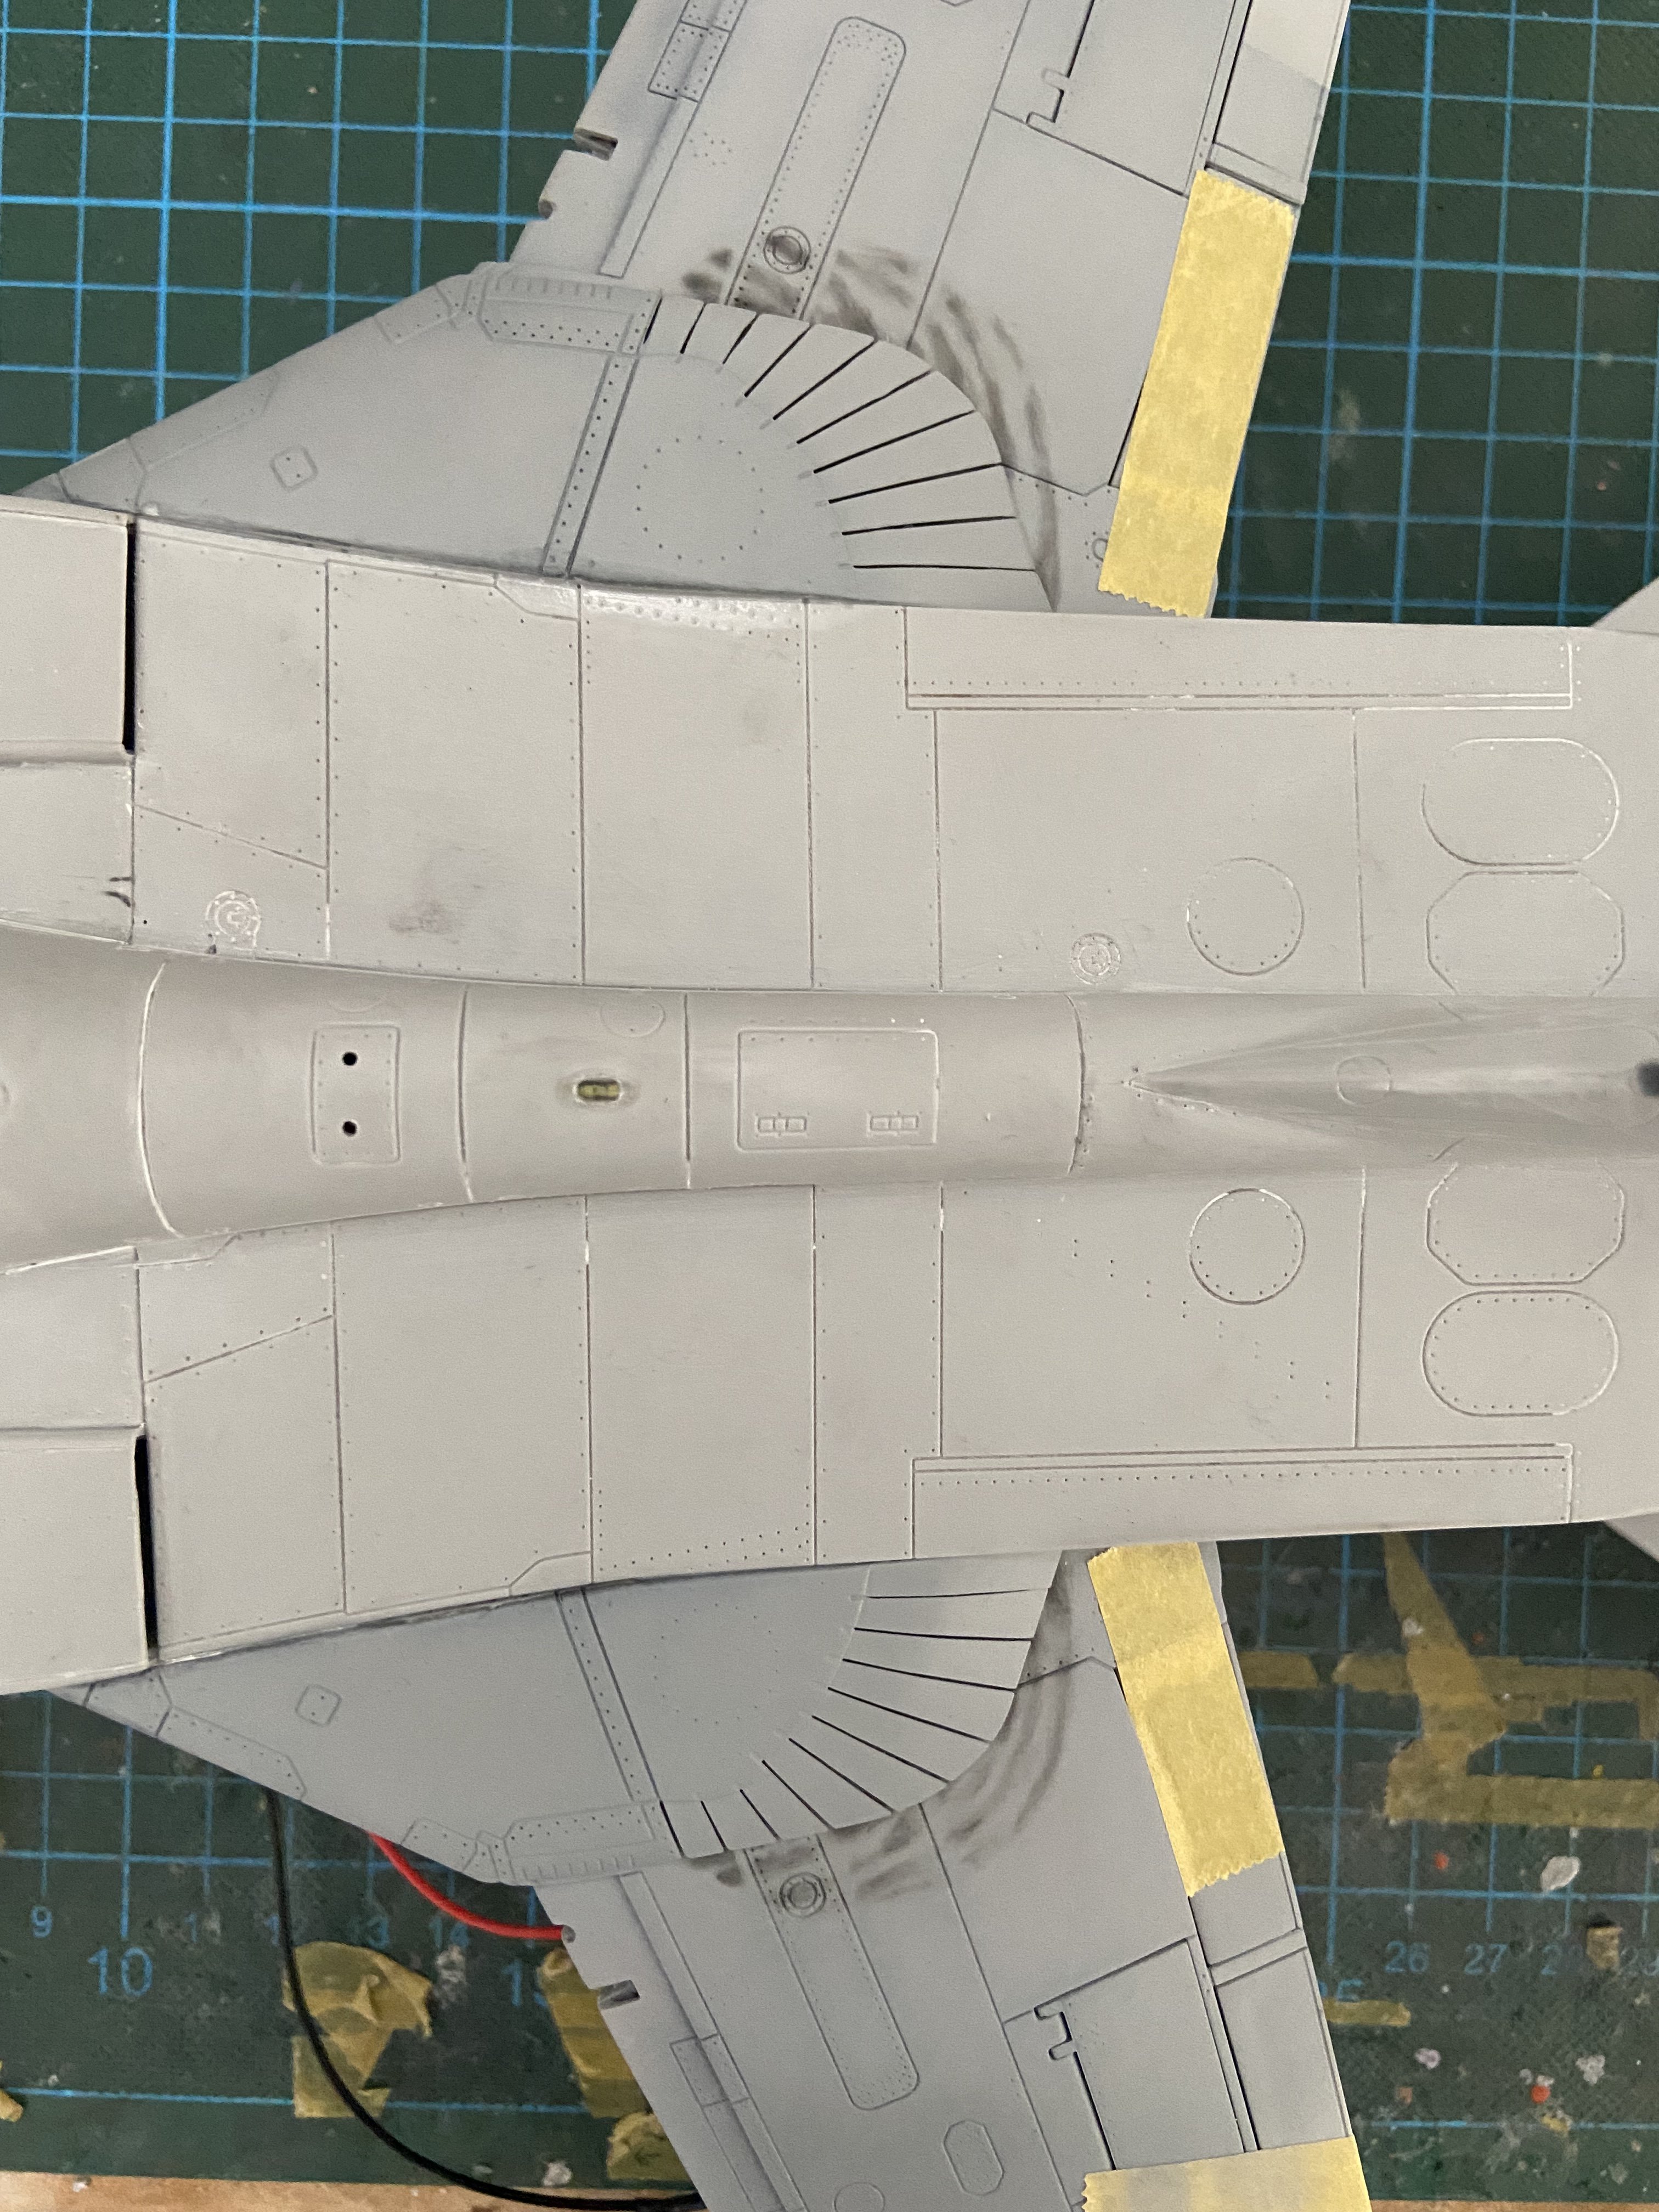
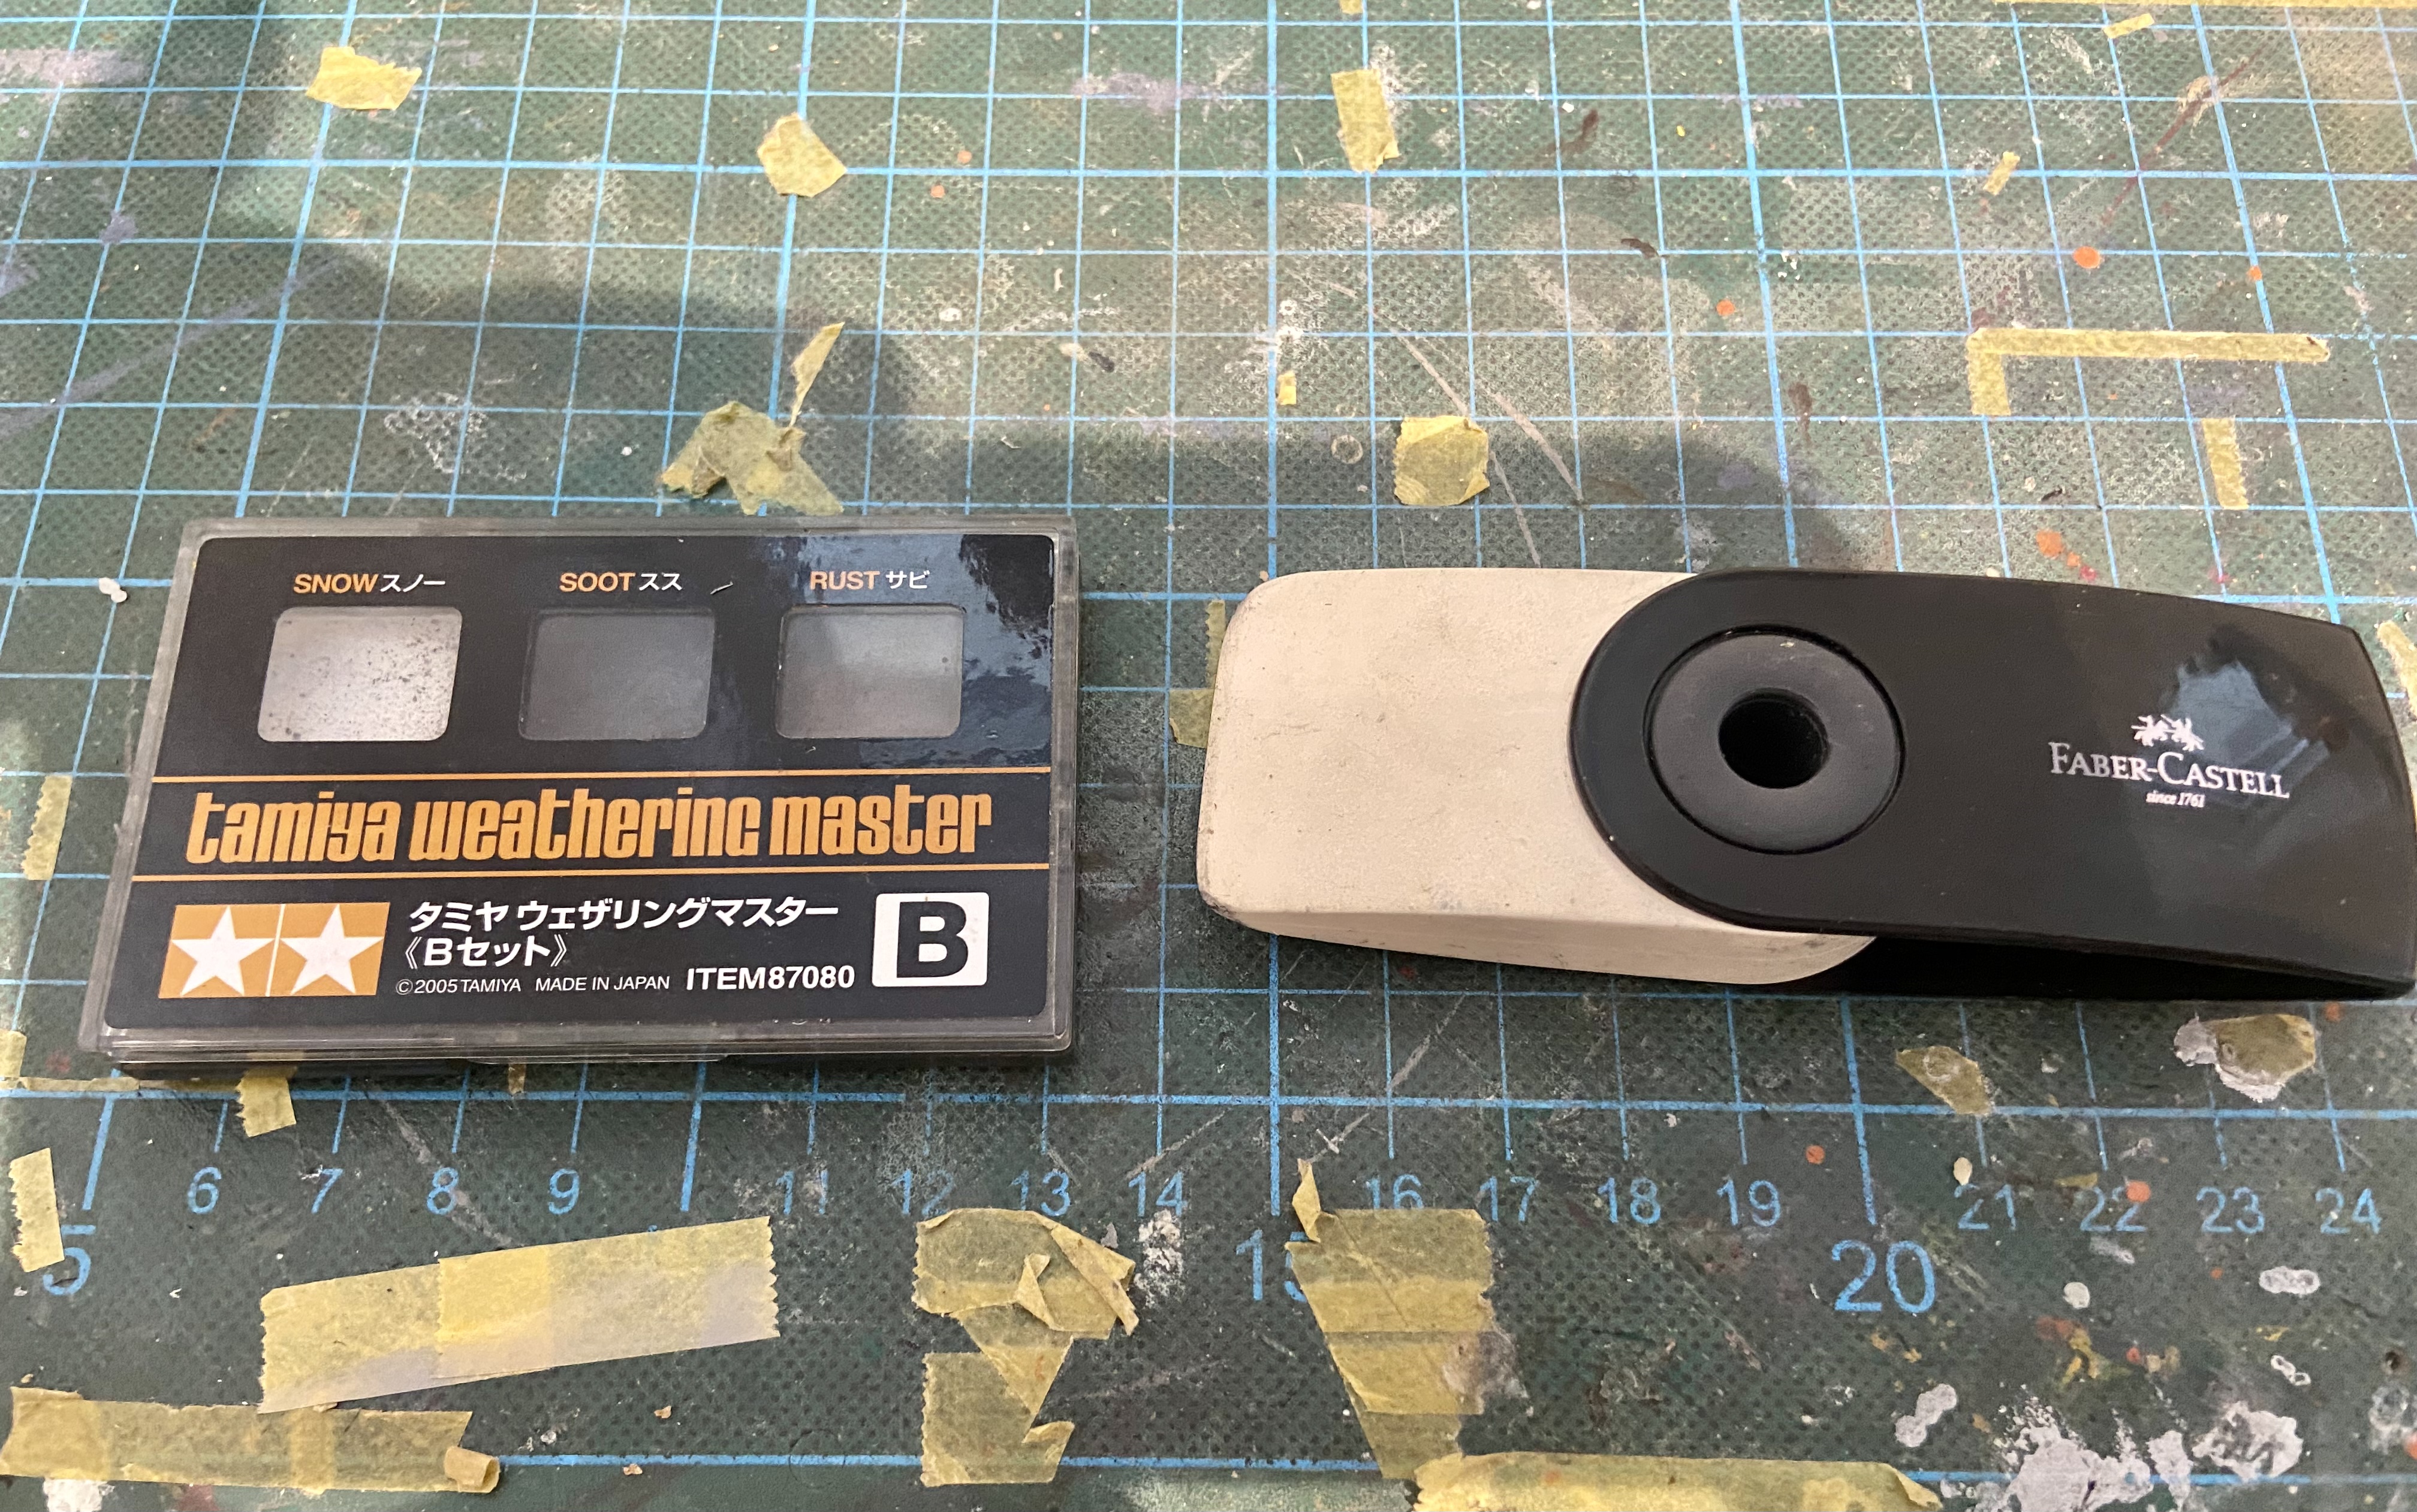
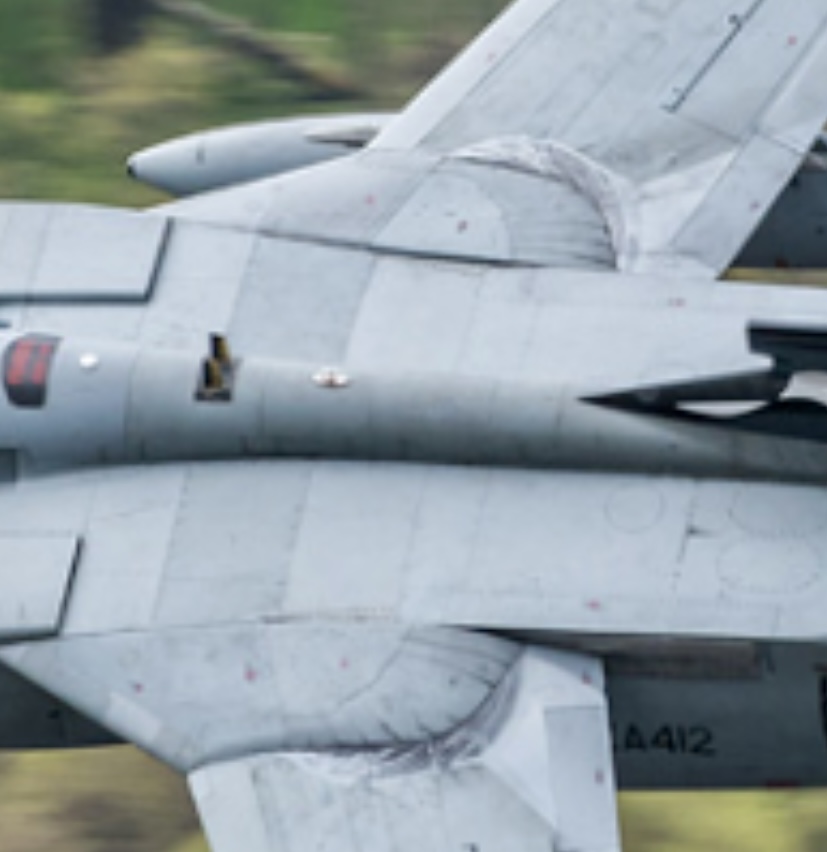
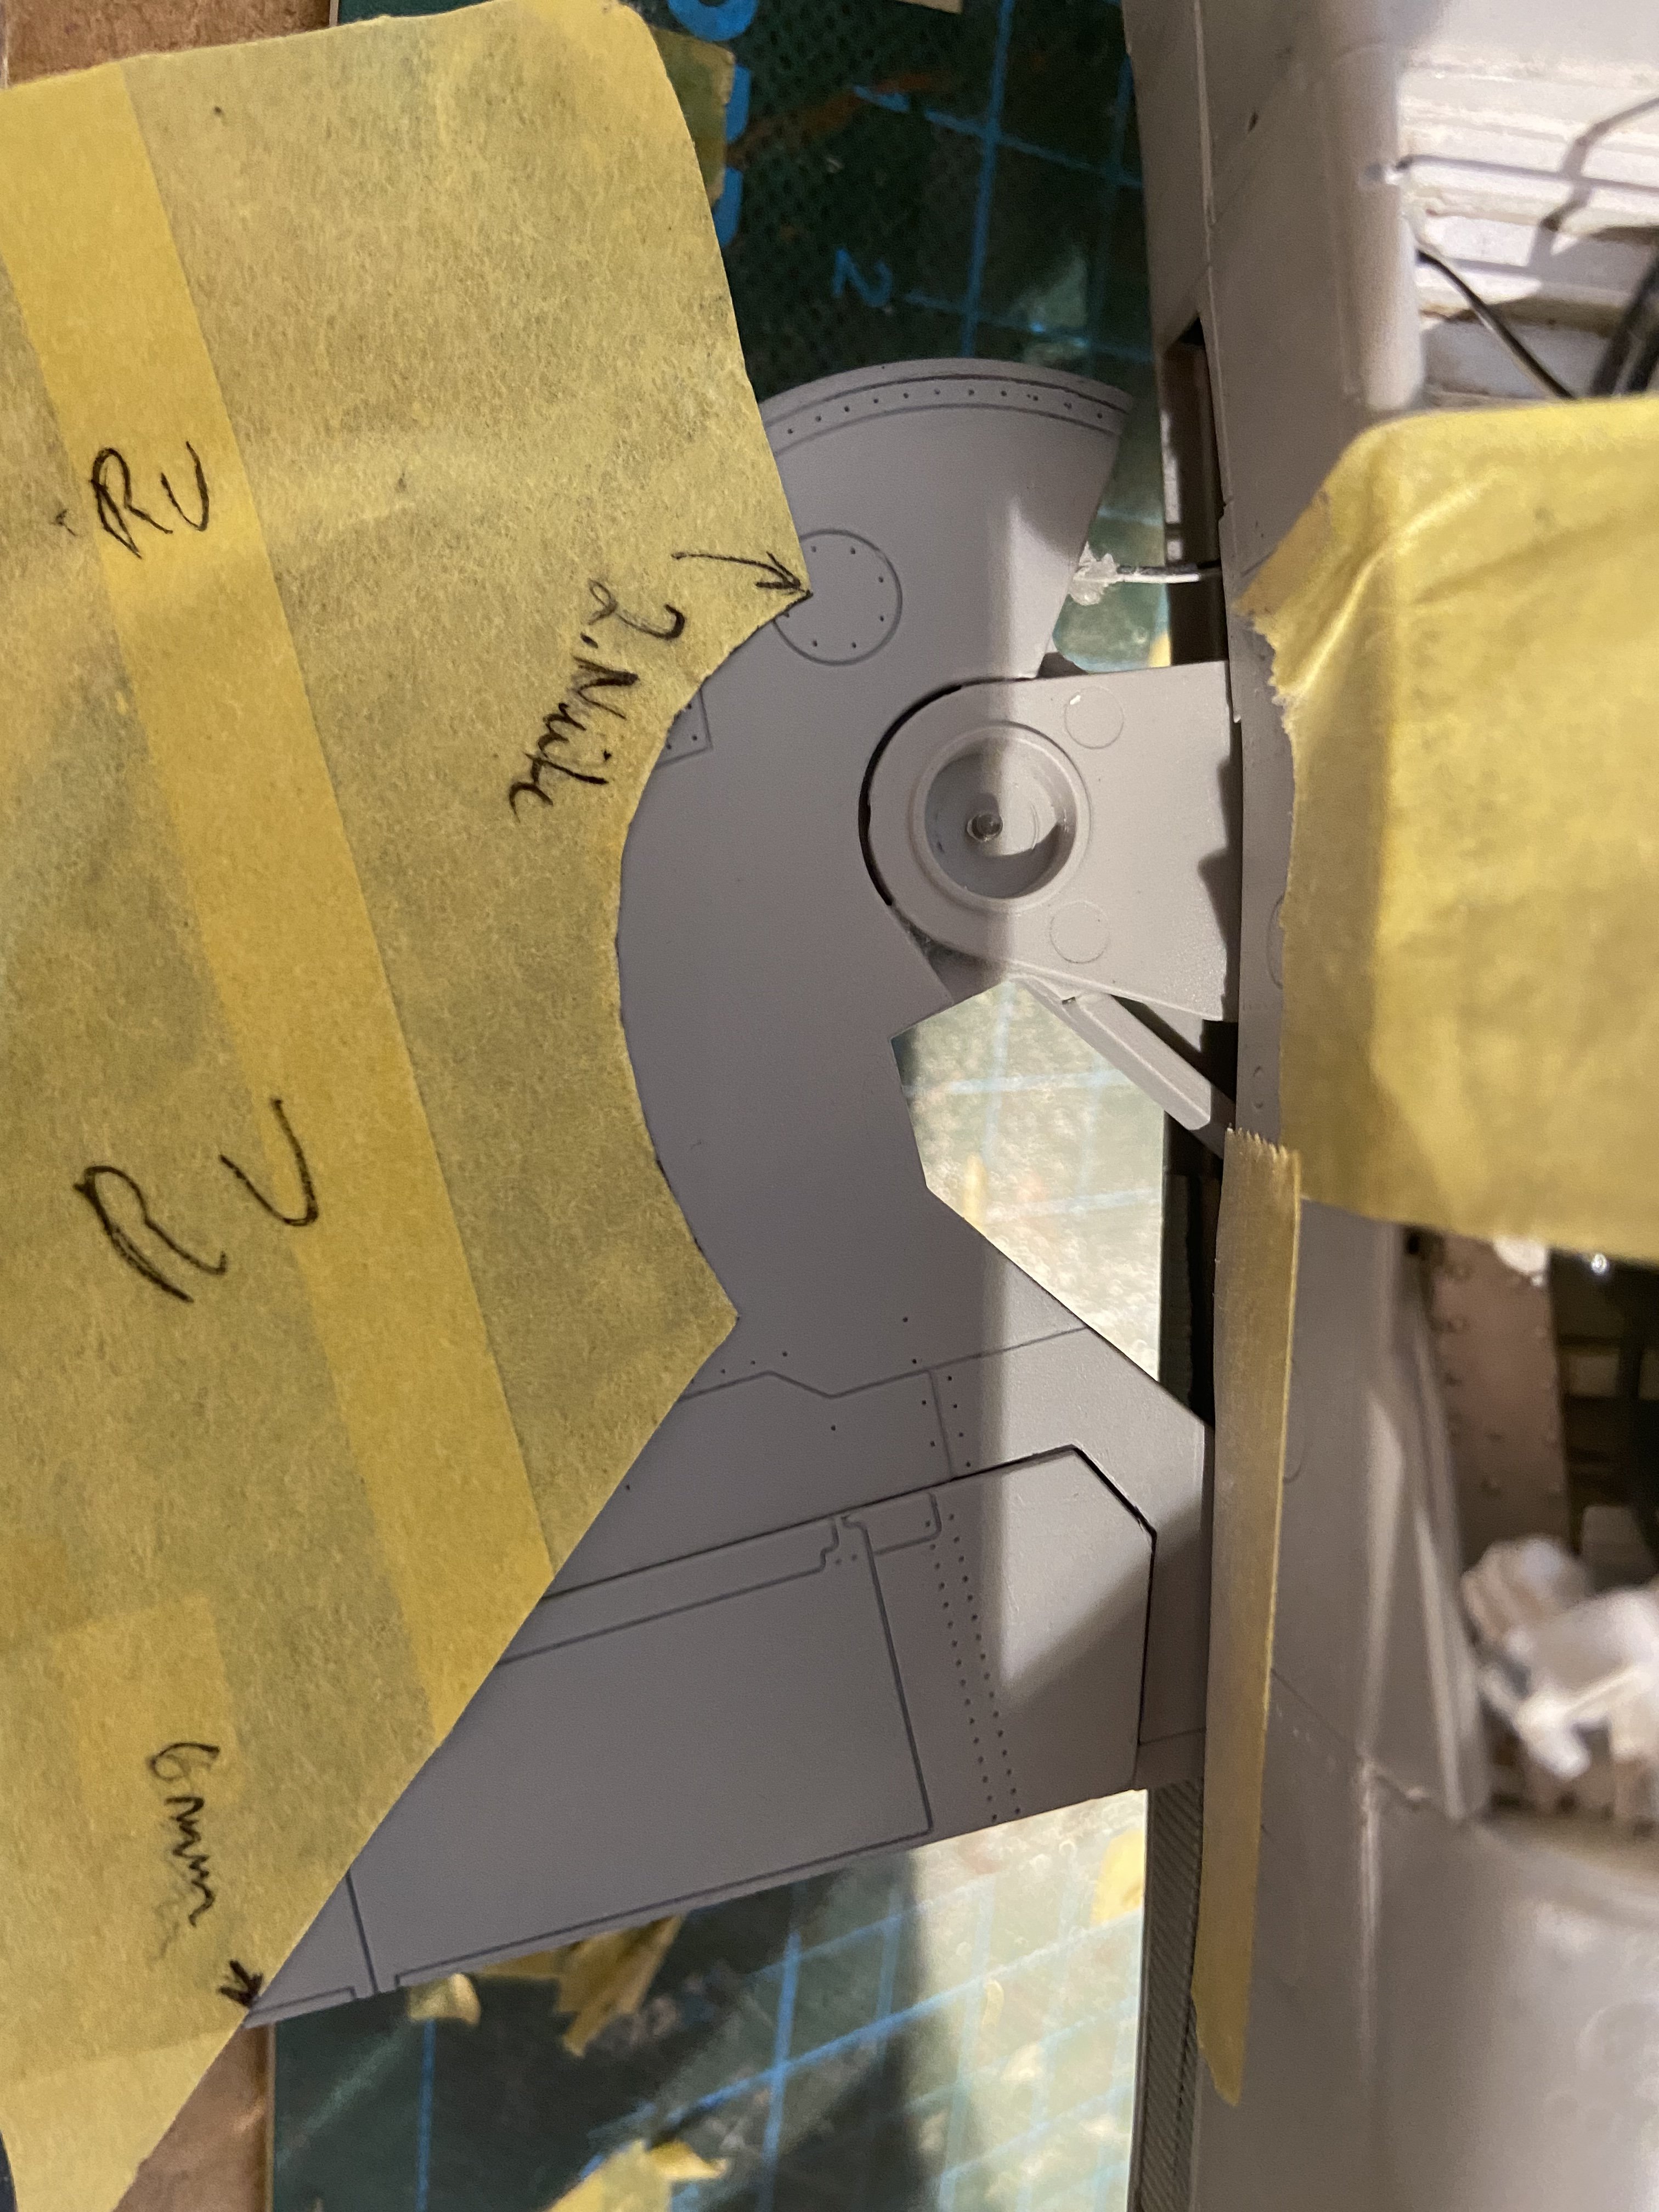
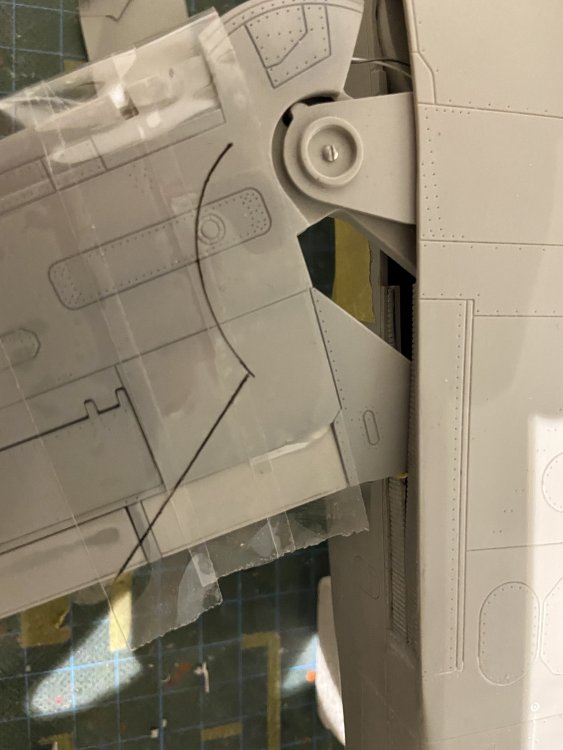
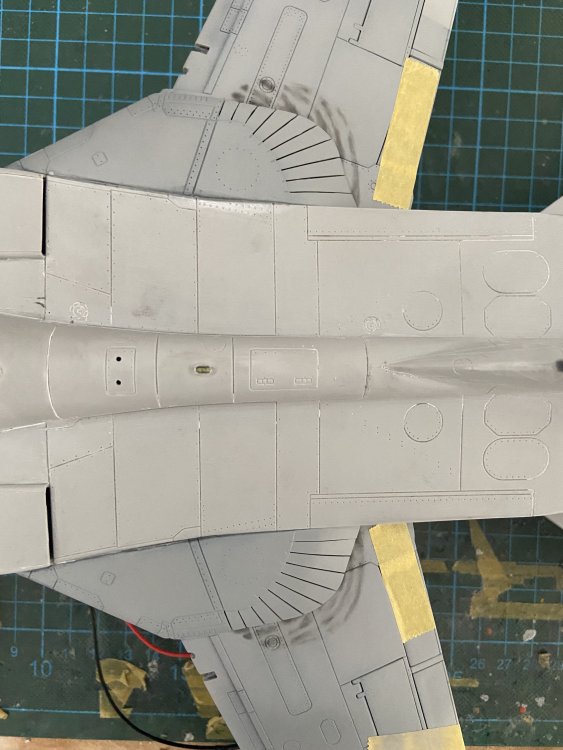
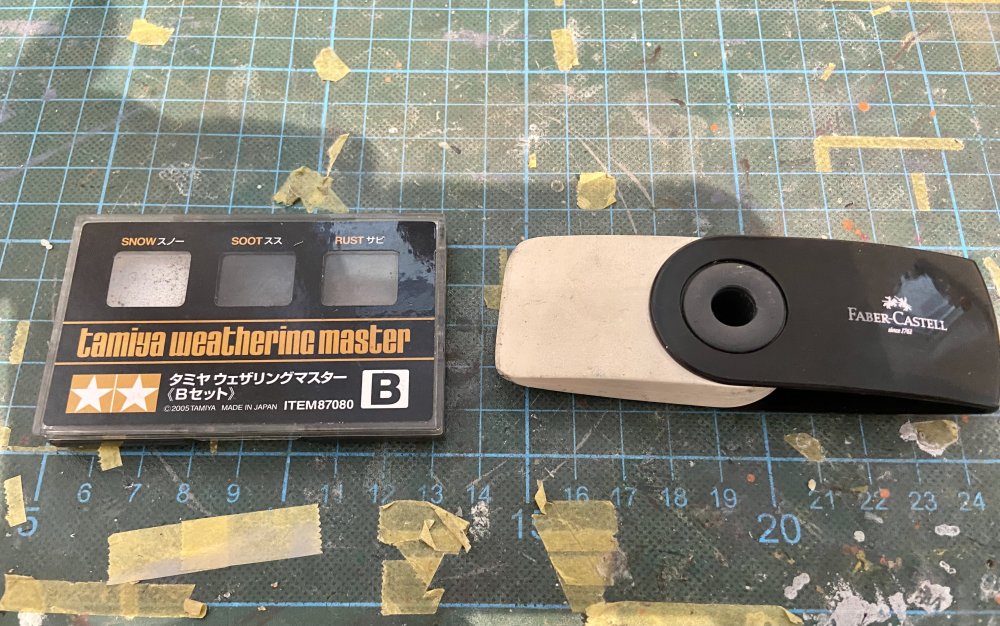
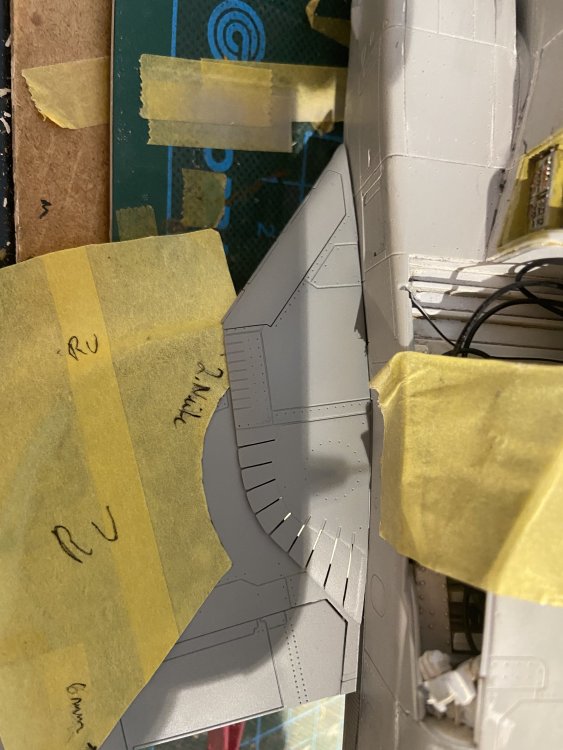
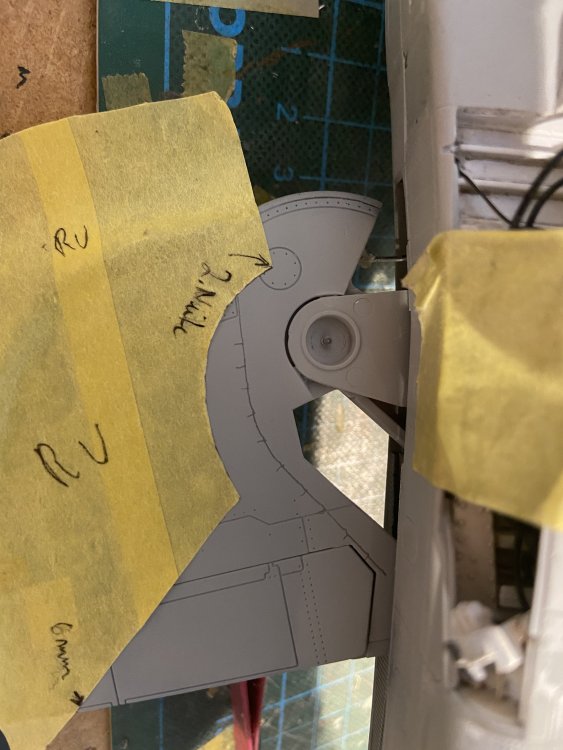
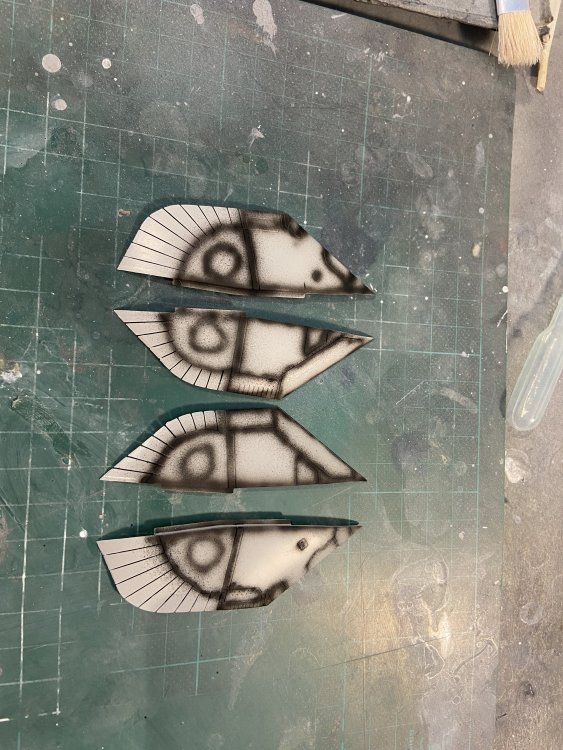
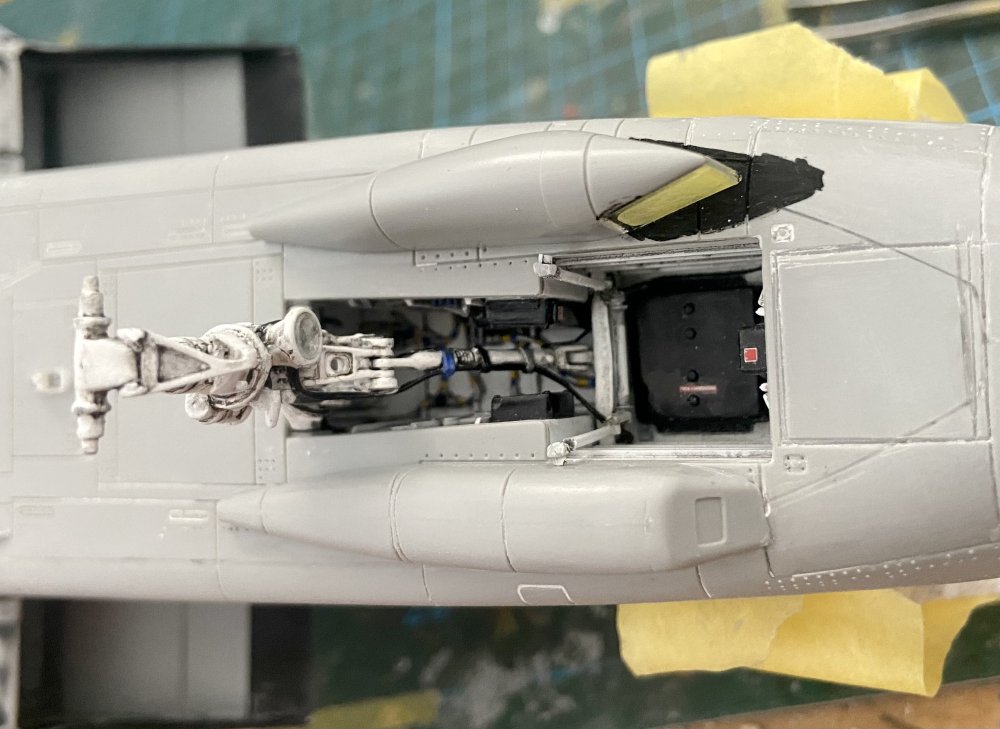
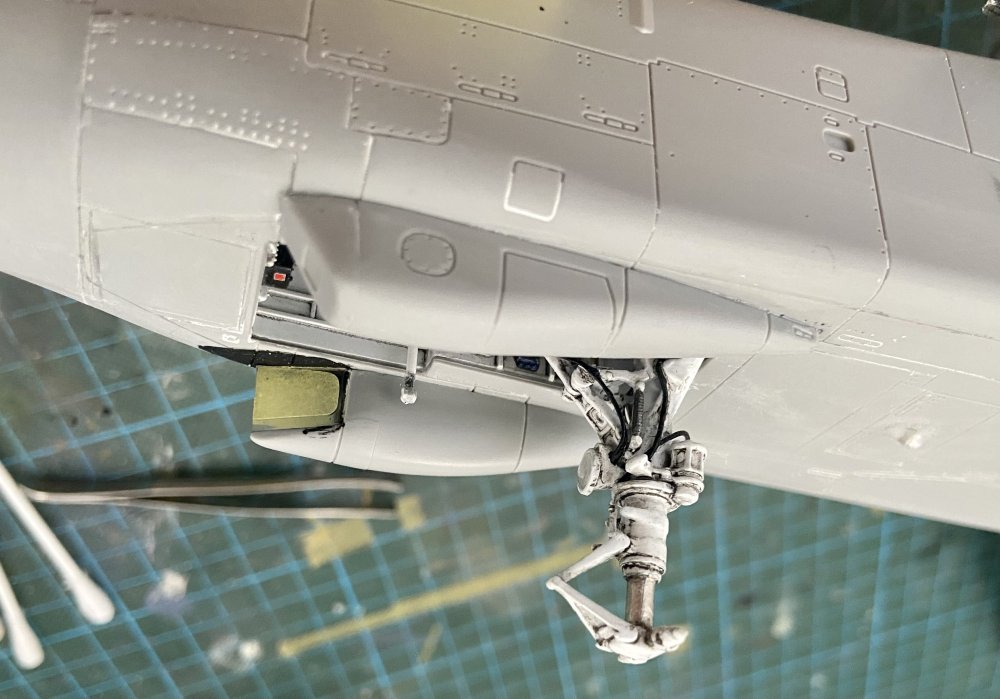
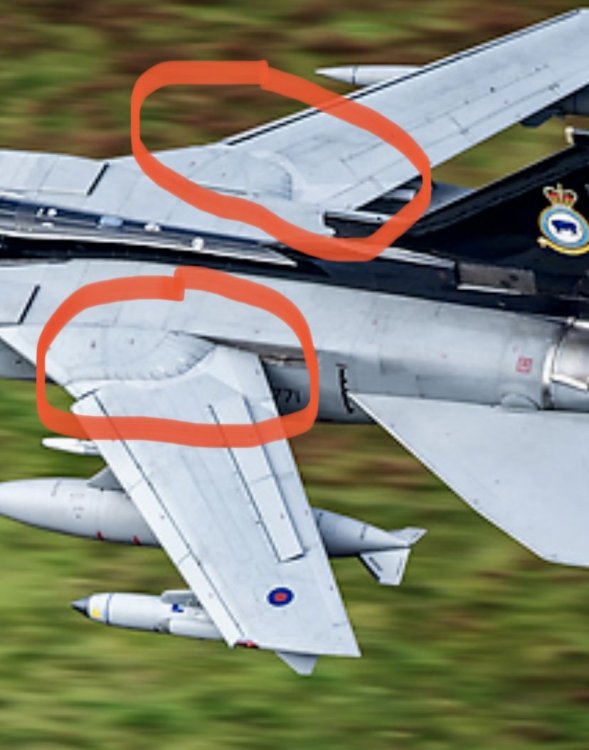
The area of the wing-sweep-mechanism had to be painted and weathered in advance since it’s not possible to reach all areas of it when the covers are attached. For this job I prepared some homemade masks for the sweep-area. I used fotos as reference. Then I started replicating the grinding marks in the wing pivot area by using the masks and a photo of this area of the aircraft I build. I used „soot“ of the Tamiya weatherine set applied with a reworked brush and an eraser. Repeated this on the undersides of the wing and then glued the covers in place. Making of the masks: Preparation for application of grinding marks: Guiding-lines applied with a pencil: That’s how they look like on the original plane: Things used for application: Applied before erasing: Finished result on the lower wings: And on the upper wings: Next step will be the priming of the rest of the plane.


-
Awesome looking Viggen, Mark! Can‘t wait to see her cross the finish-line!
-
Copy Peter, Harv! All the best for you and I wish you a fast recovery and return to the modeling bench!
-
Special Hobby Whirlwind
Kaireckstadt replied to Peterpools's topic in LSM 1/35 and Larger Work In Progress
Great build so far Peter and I’m sure you will manage to overcome all obstacles on the way to your next beauty. -
Tamiya Spitfire MK XVIe
Kaireckstadt replied to Peterpools's topic in LSM 1/35 and Larger Work In Progress
Copy Mark: she’s a stunning beauty and I love the weathering approach you chose. -
Nice paintjob Mark! She comes closer to the finish-line now!
-
Fw-190 A-8/ R-2 "Sturmbock" Revell 1:32
Kaireckstadt replied to Sasha As's topic in LSM 1/35 and Larger Work In Progress
Great paintwork Sasha! -
617 Sqn Tornado Dambuster 70th
Kaireckstadt replied to Kaireckstadt's topic in LSM 1/35 and Larger Work In Progress
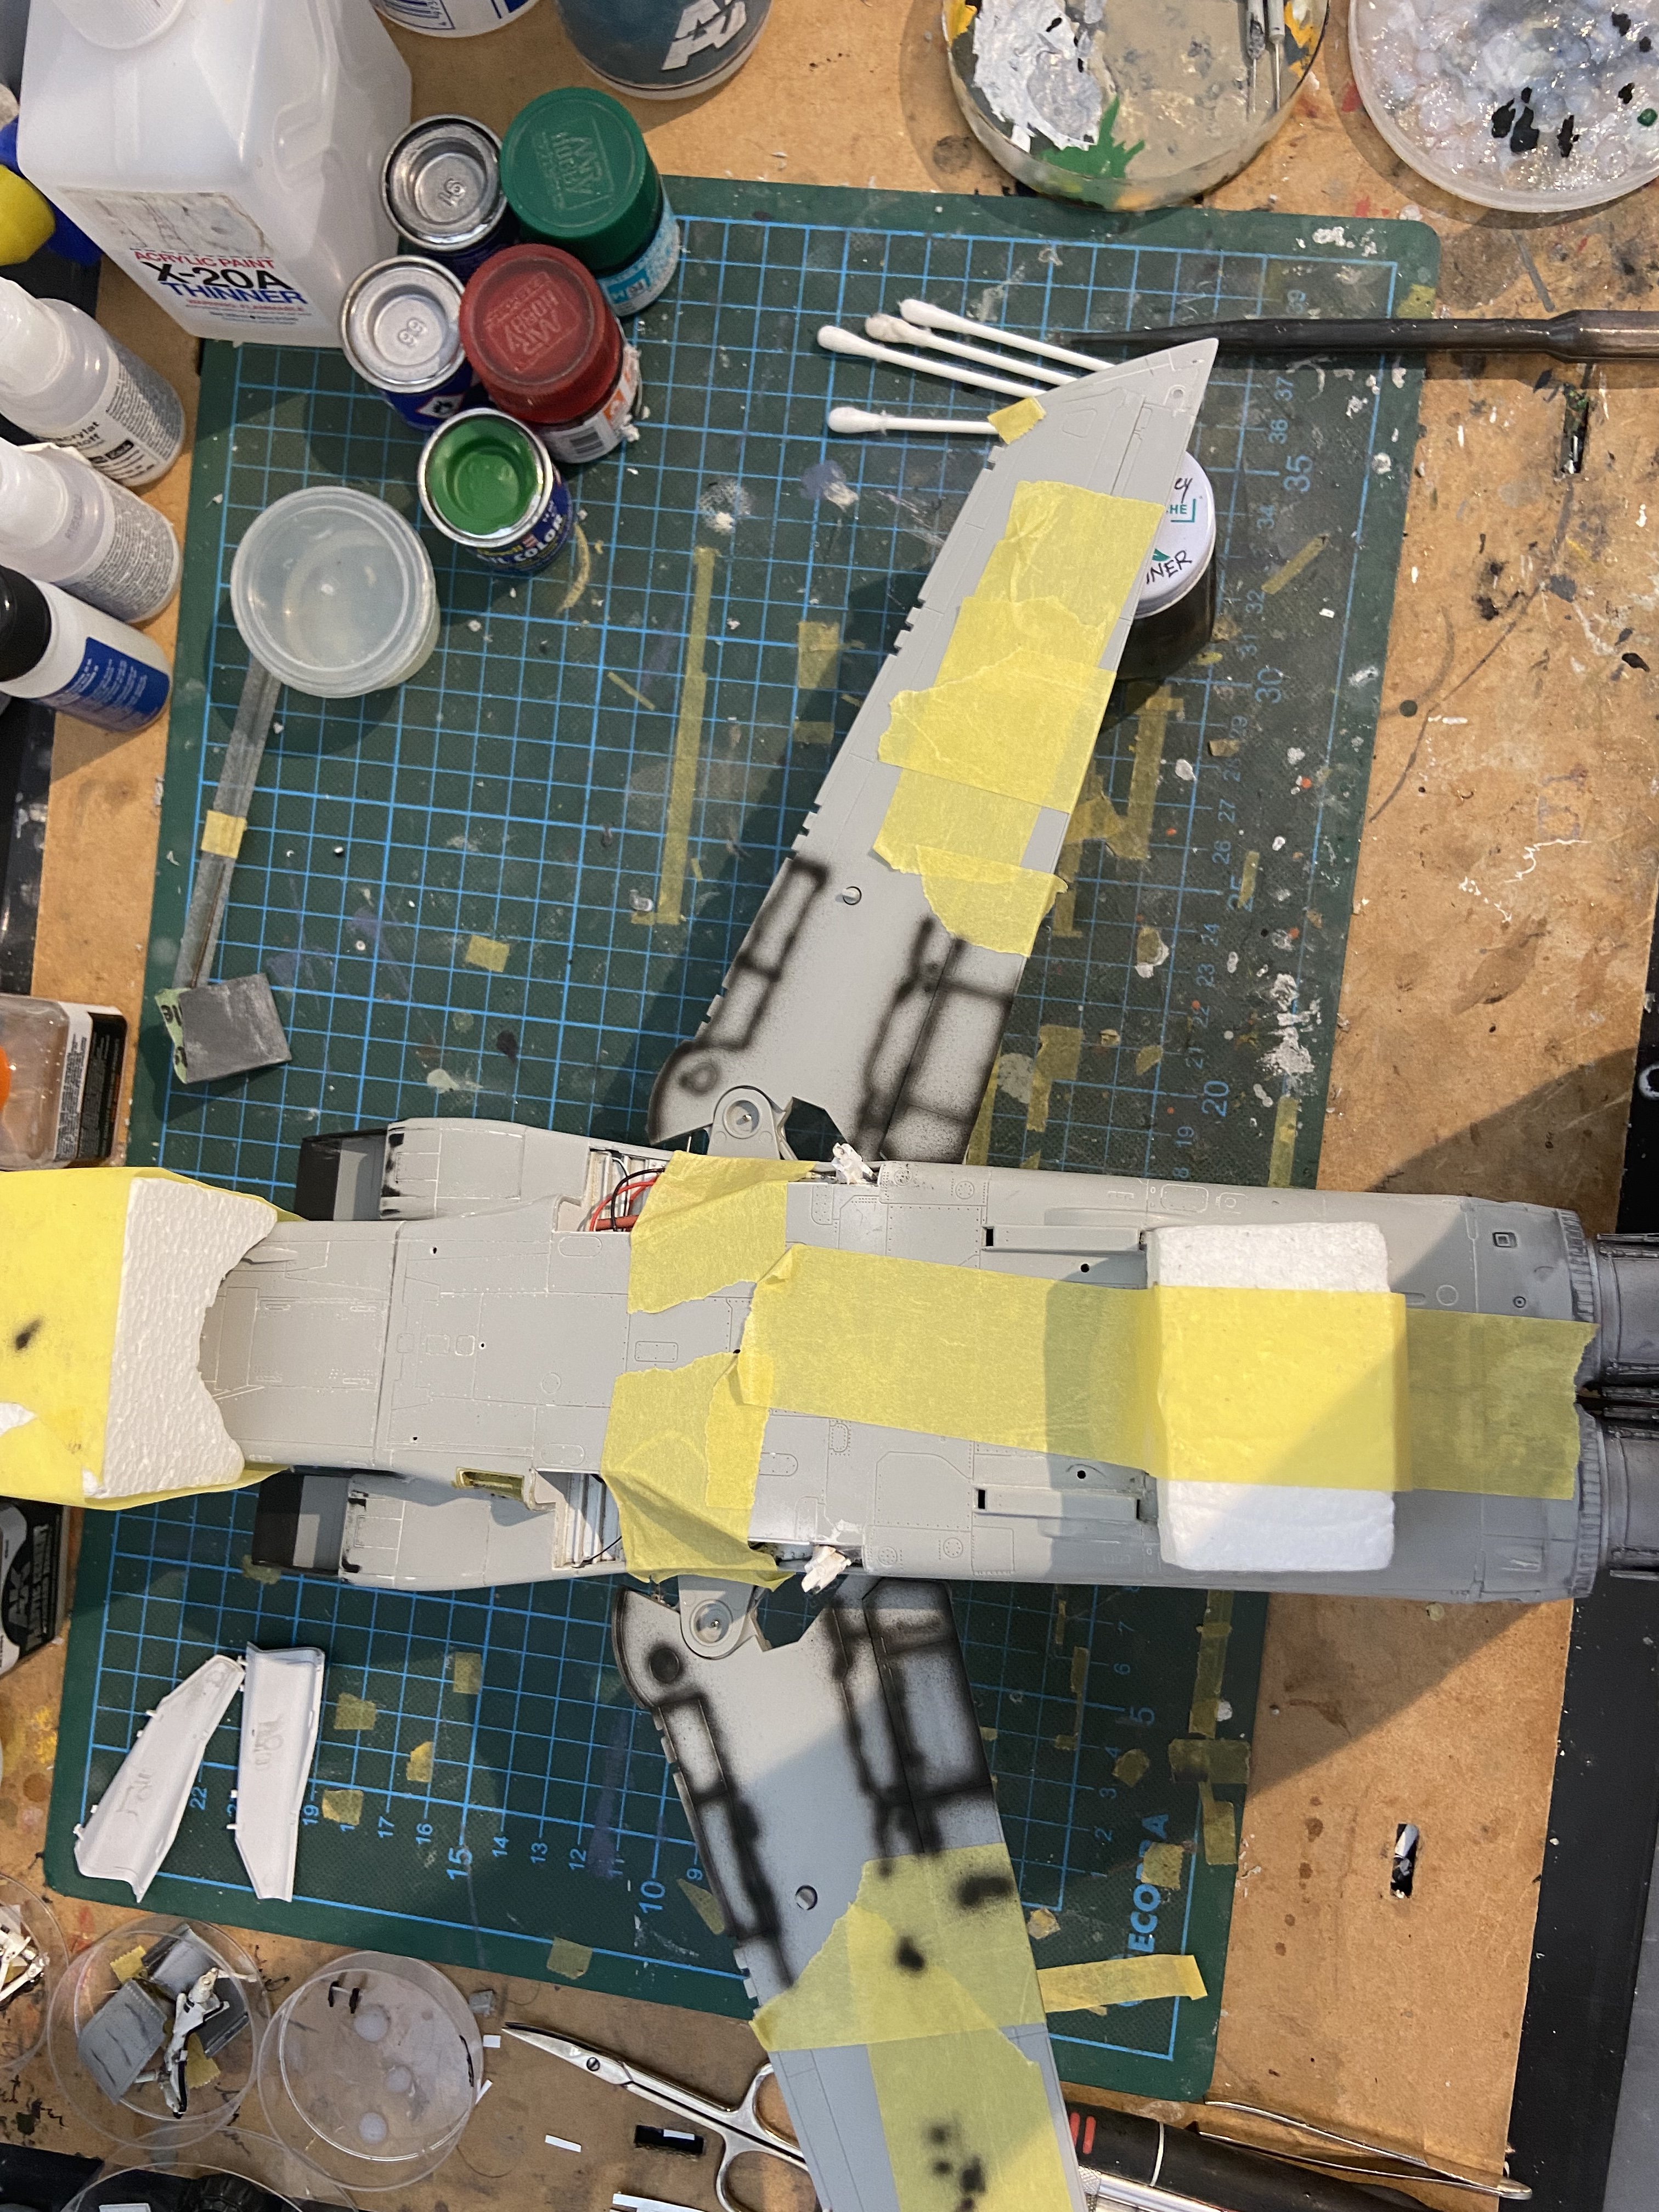
Thank you all for your feedback! Rescribing isn’t my favorite too Peter but is one of the features that defines the quality of the finished model. Small progress within all the rescribing: I have meanwhile preshaded and painted the area around the wing sweeping mechanism: Now back to the bench and the rescribing…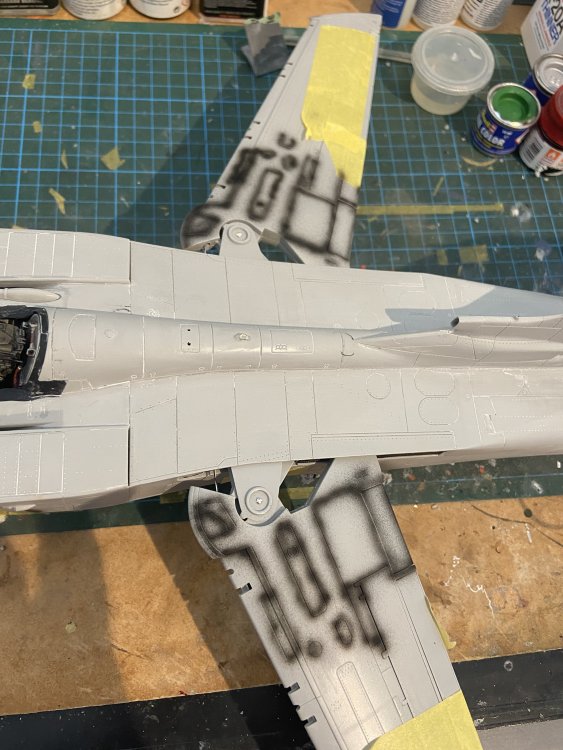

-
617 Sqn Tornado Dambuster 70th
Kaireckstadt replied to Kaireckstadt's topic in LSM 1/35 and Larger Work In Progress
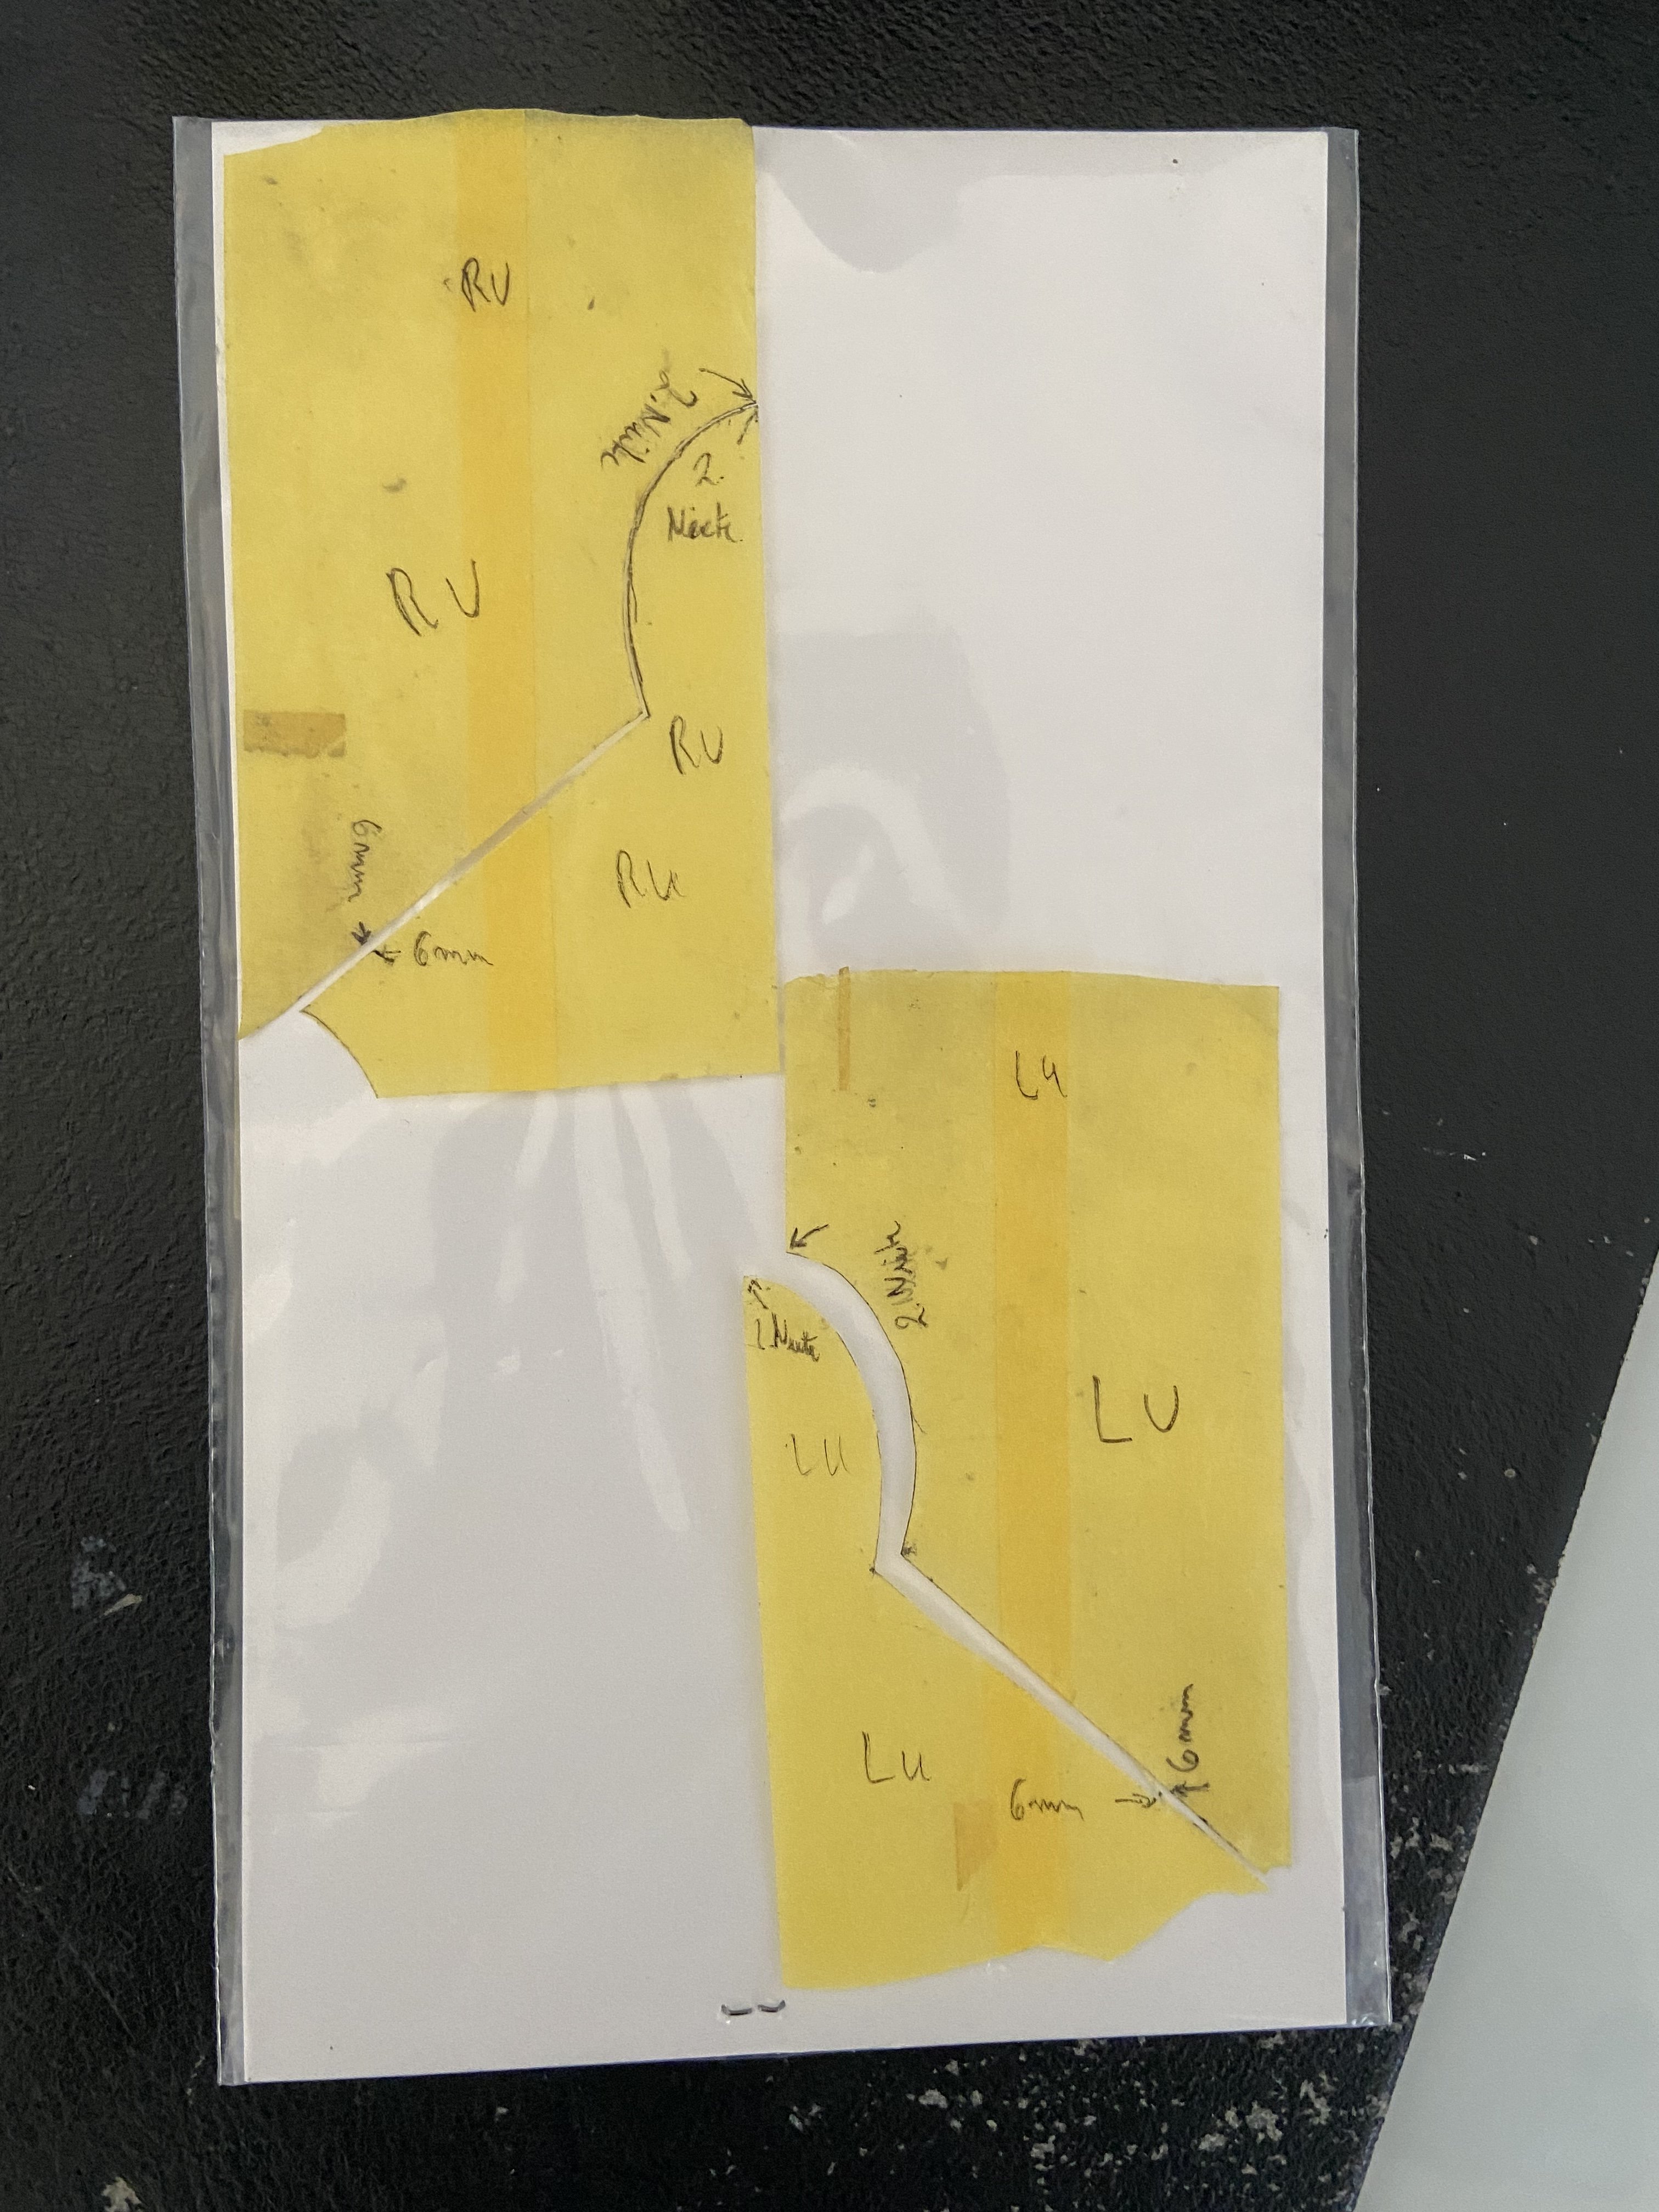
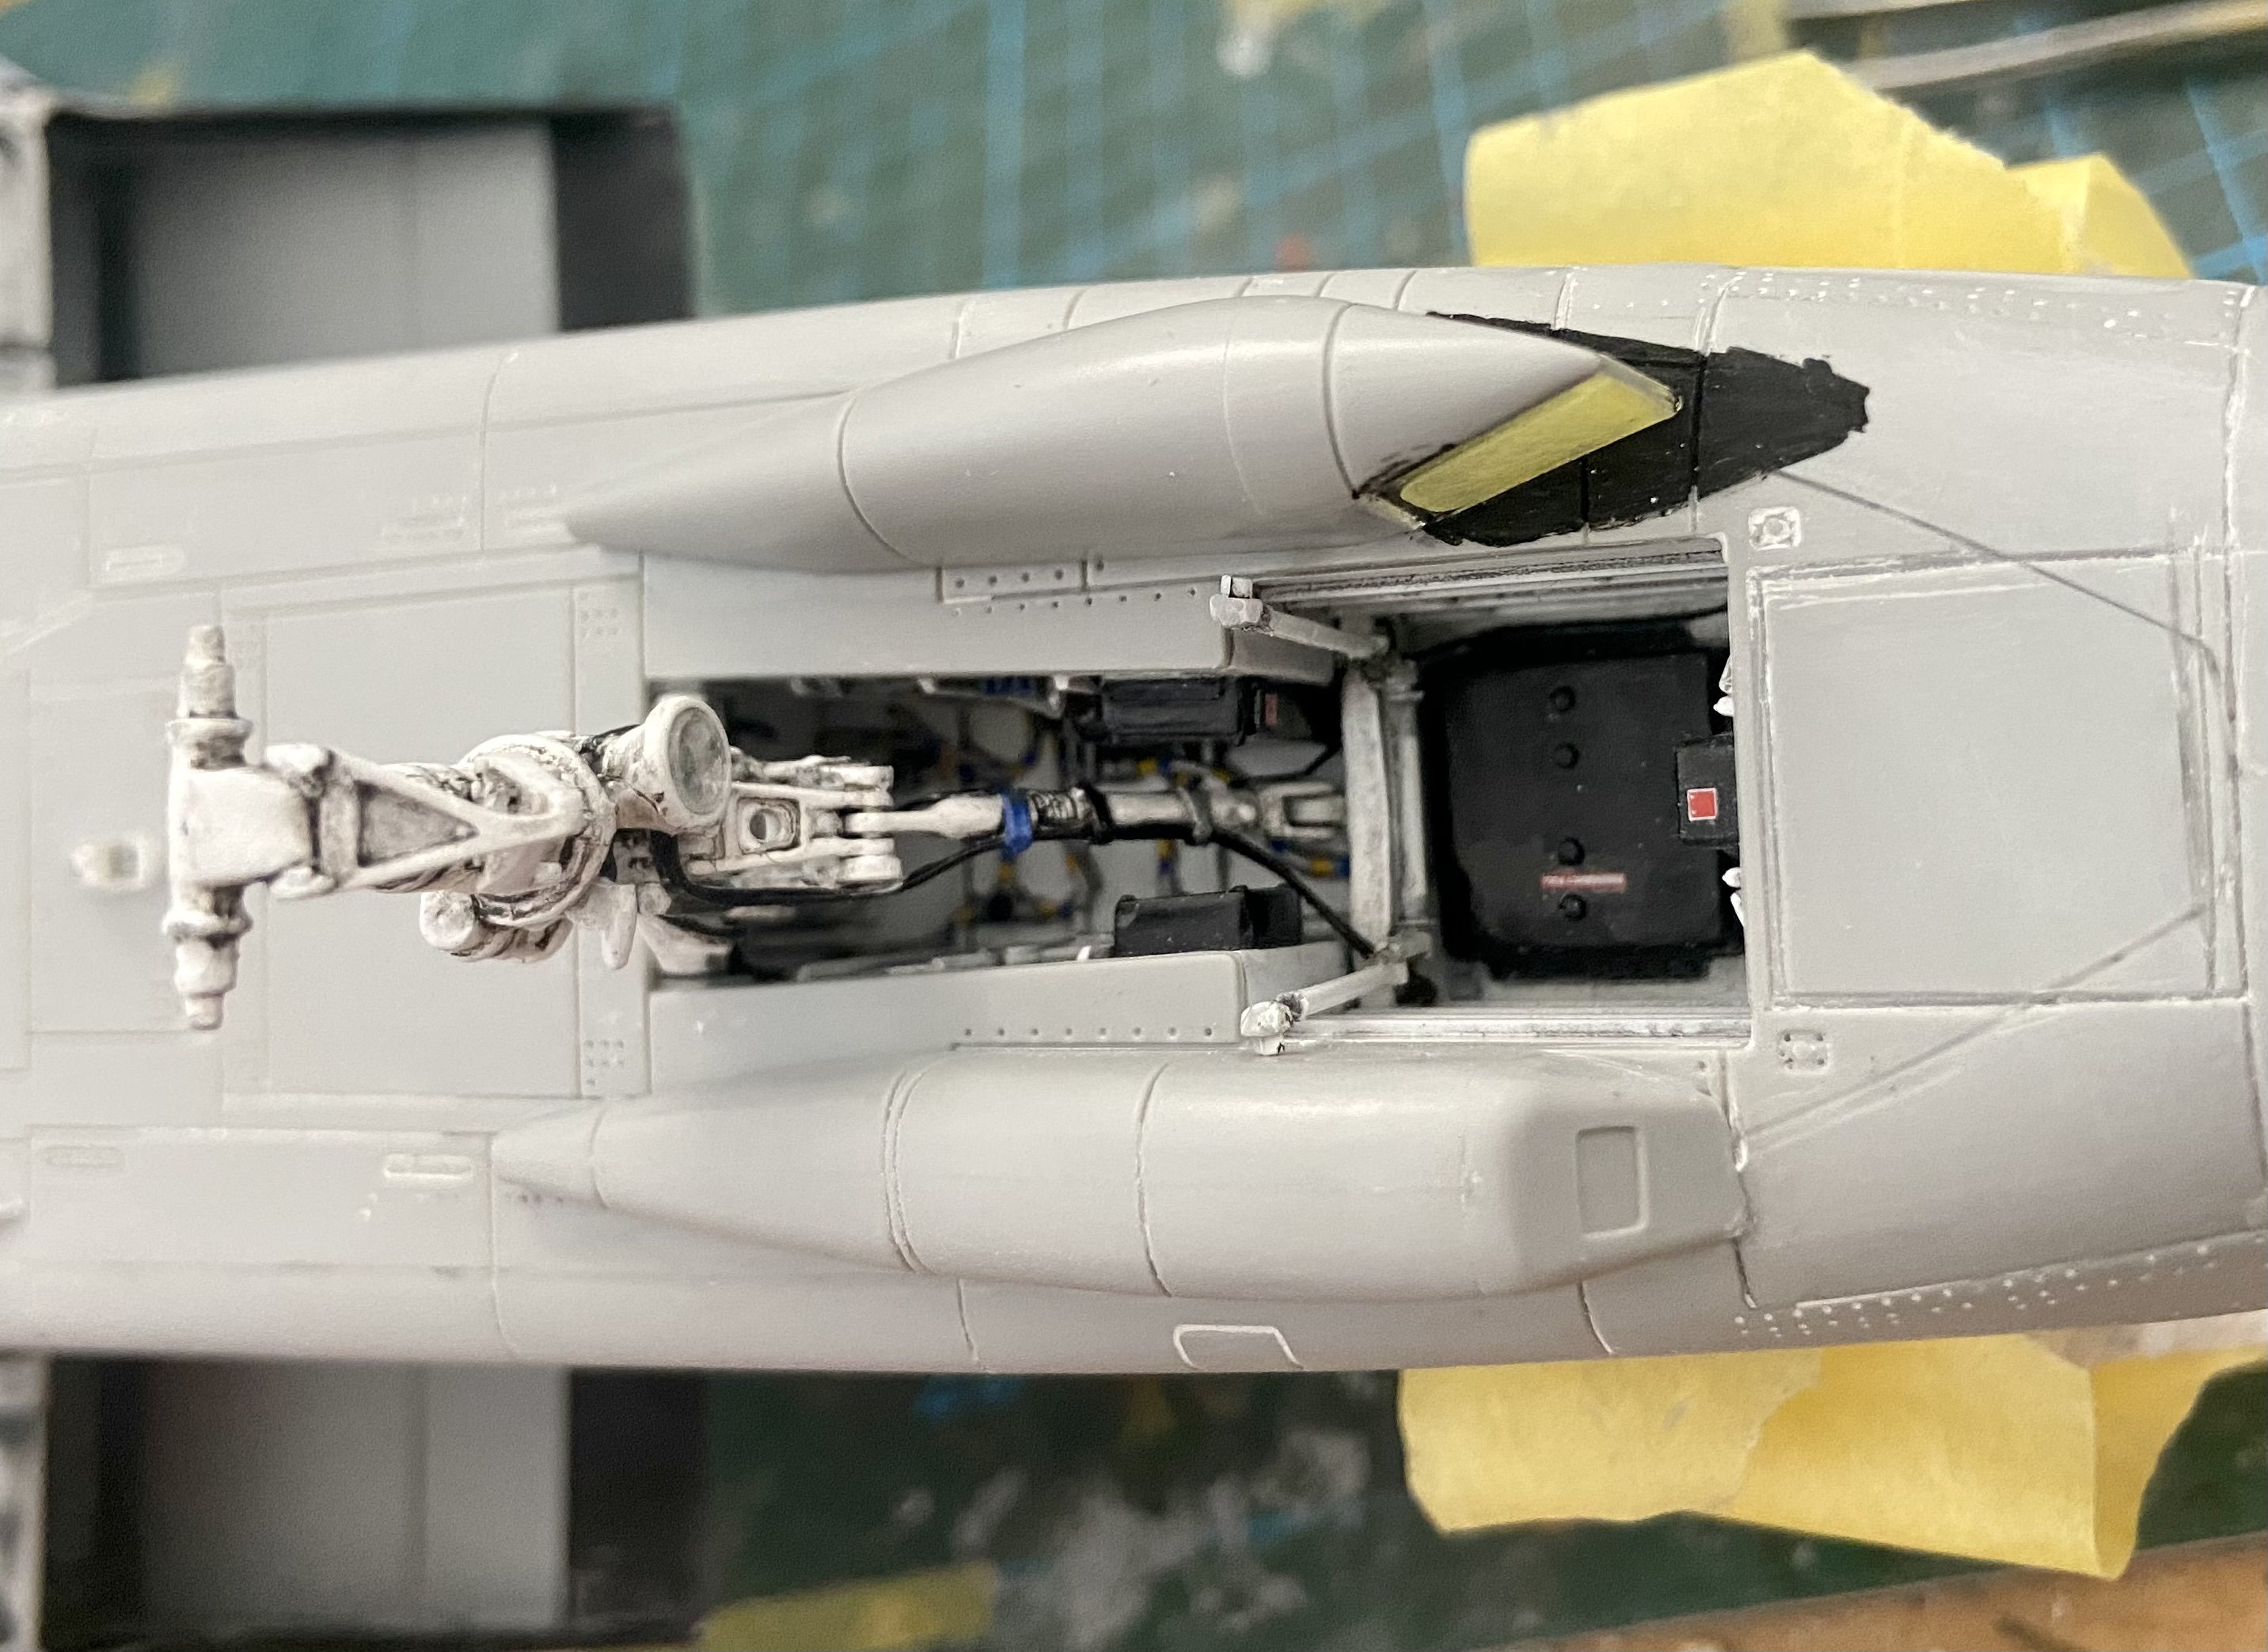
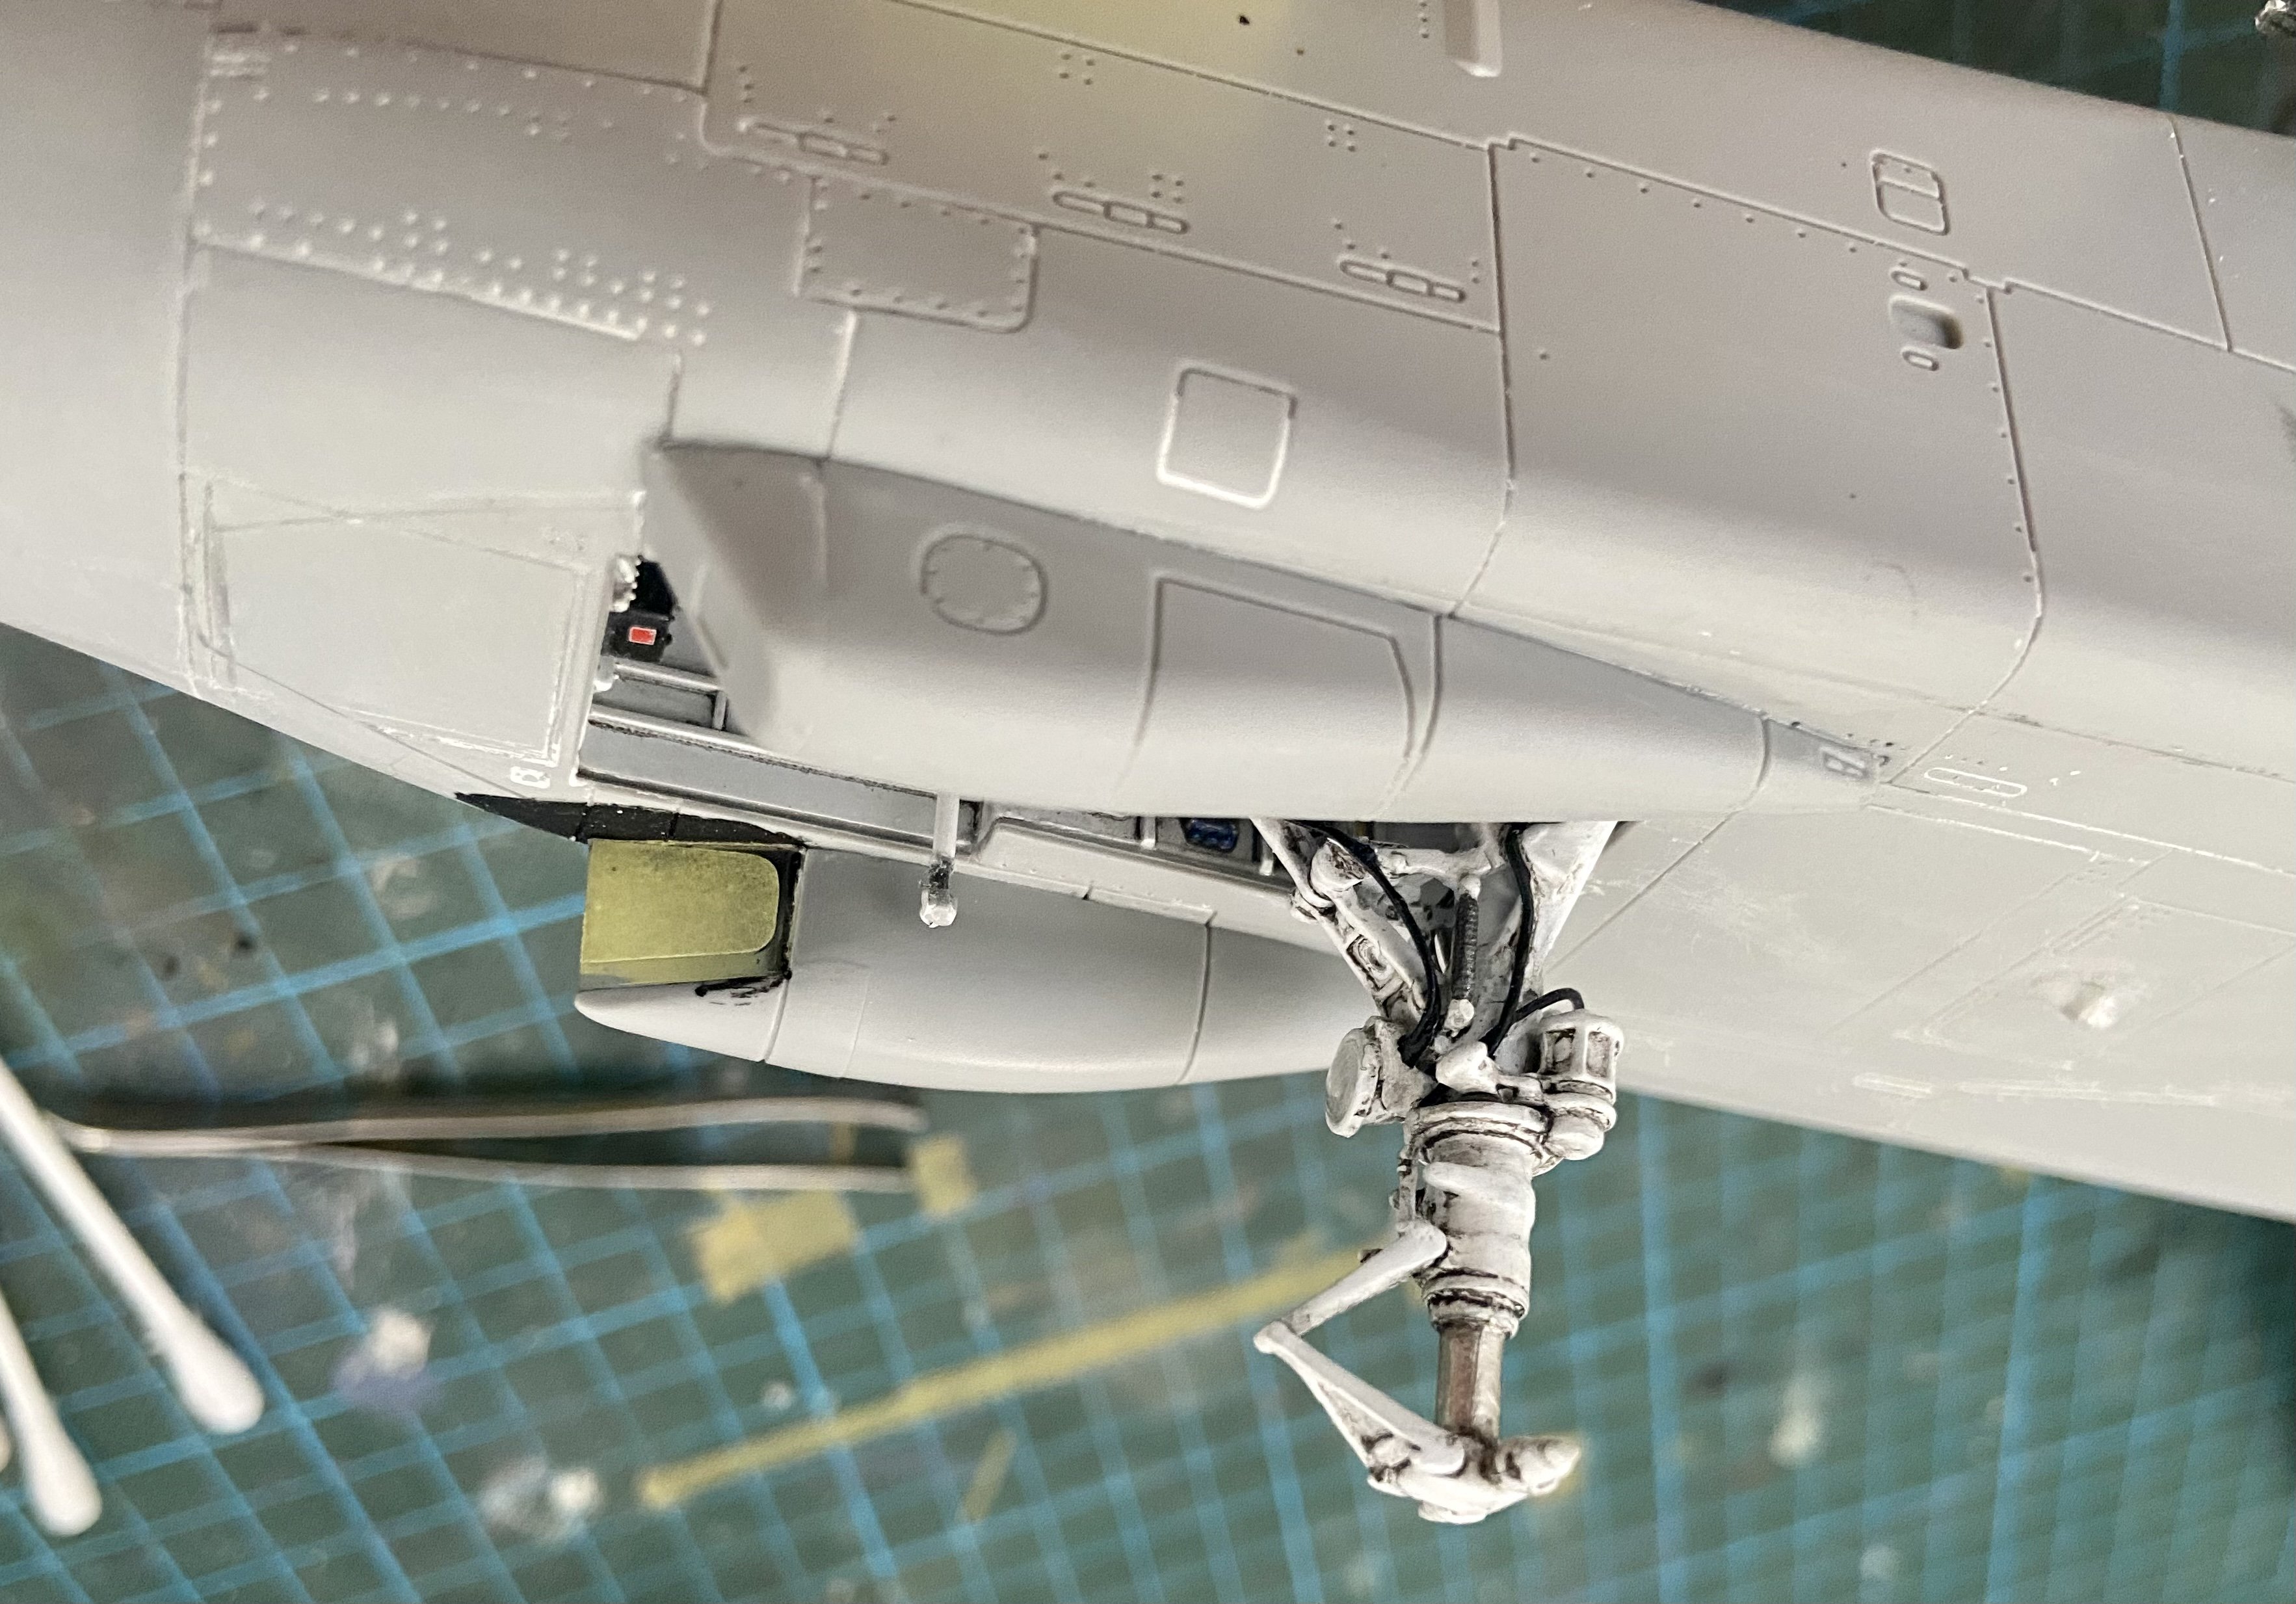
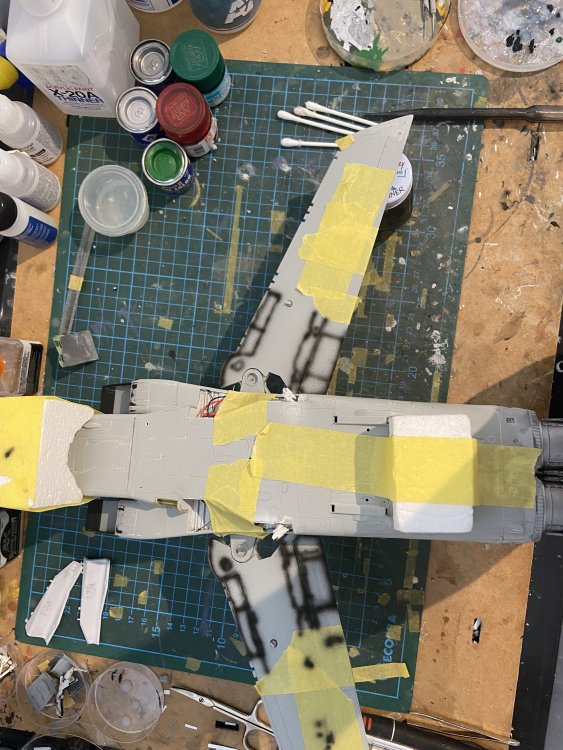
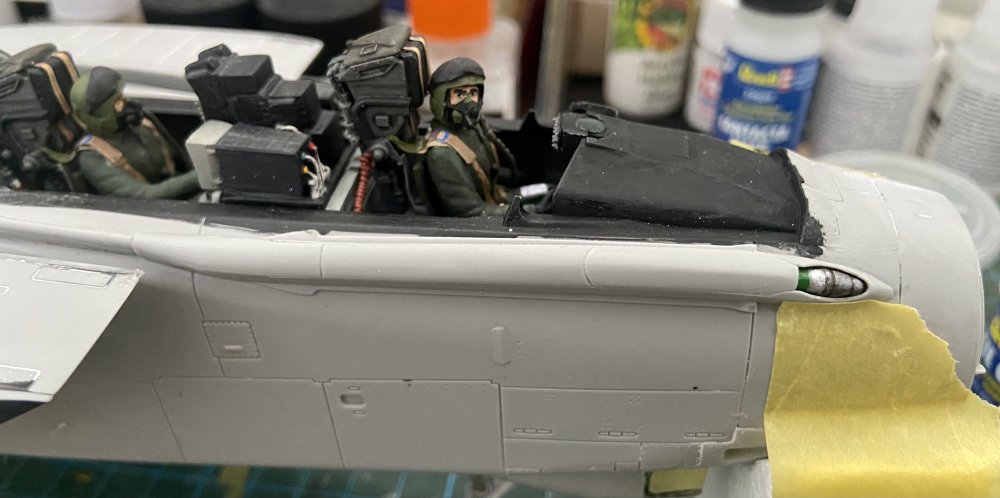
Thank you Peter. I hope the Tonka won’t be a never ending story! 😉 So here is a small update: The rescribing process is ongoing and I’ve assembled the in-flight-refueling boom and 2 sensors at the front of the model: Today I will go on with the painting of the zones on top and bottom of the wing where the wing moves: This is necessary before gluing the housings at the wingroot.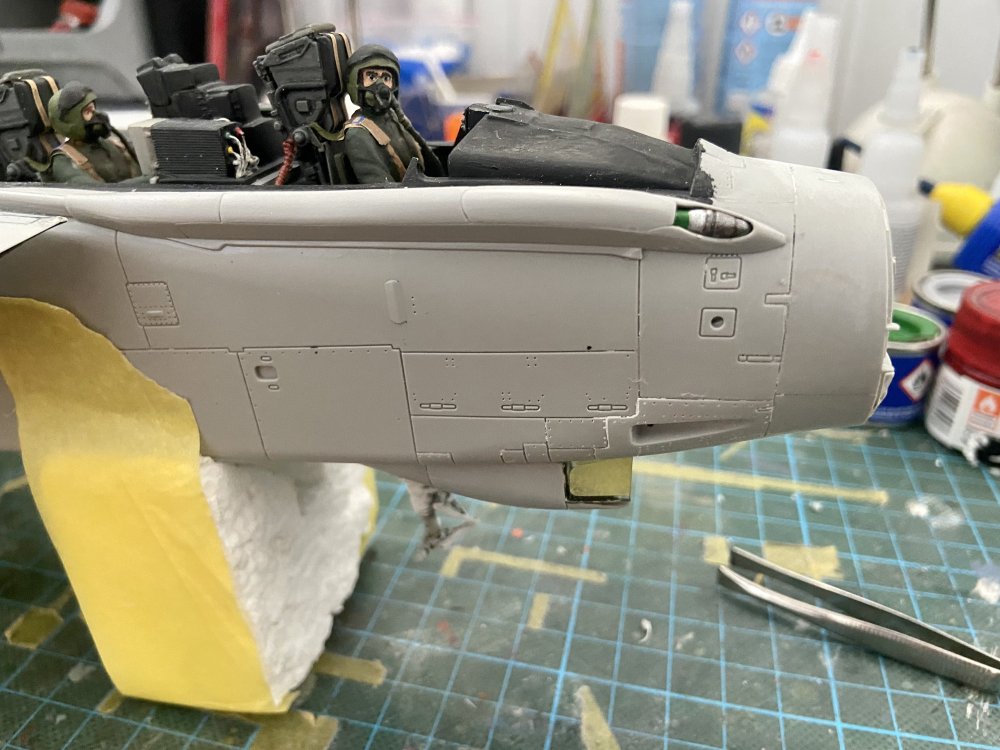

-
Ferrari 330P4 Open top 24Hrs Daytona 1967
Kaireckstadt replied to mark31's topic in LSM 1/35 and Larger Work In Progress
Copy Peter: amazing looking Ferrari! -
Great build and stunning model of a seldom seen subject!
-
RCAF Liberator GR Mk VI
Kaireckstadt replied to BlrwestSiR's topic in LSM 1/35 and Larger Work In Progress
Carl, maybe you can solve the problem by adding a small strong magnet in the front wheel and another one in the ground plate for the finished model. This may solve your problem. Cheers Kai -
Tamiya Spitfire MK XVIe
Kaireckstadt replied to Peterpools's topic in LSM 1/35 and Larger Work In Progress
She’s a real beauty Peter! I have the MK IX in my stash and hope it will turn out as gorgeous as yours once I build it. -
Great work on the Helldiver Ernie. A friend of mine built it too and made the same experience like you: bad fit and lots of rework necessary. Maybe you set it aside for a day and continue with the Corsair?
-
Ferrari 330P4 Open top 24Hrs Daytona 1967
Kaireckstadt replied to mark31's topic in LSM 1/35 and Larger Work In Progress
Lovely detail painting Marc!