shark64
-
Posts
691 -
Joined
-
Last visited
Content Type
Profiles
Forums
Events
Gallery
Everything posted by shark64
-
F-15A Improved Baz 1/32 Tamiya
shark64 replied to Pete Fleischmann's topic in LSM 1/35 and Larger Work In Progress
Another masterpiece in the making. Will follow for sure. -
Revell 1/32 Spitfire Mk IIa
shark64 replied to Peterpools's topic in LSM 1/35 and Larger Work In Progress
Another stunning model in the making. Nice paint job. I really like MRP as well. -
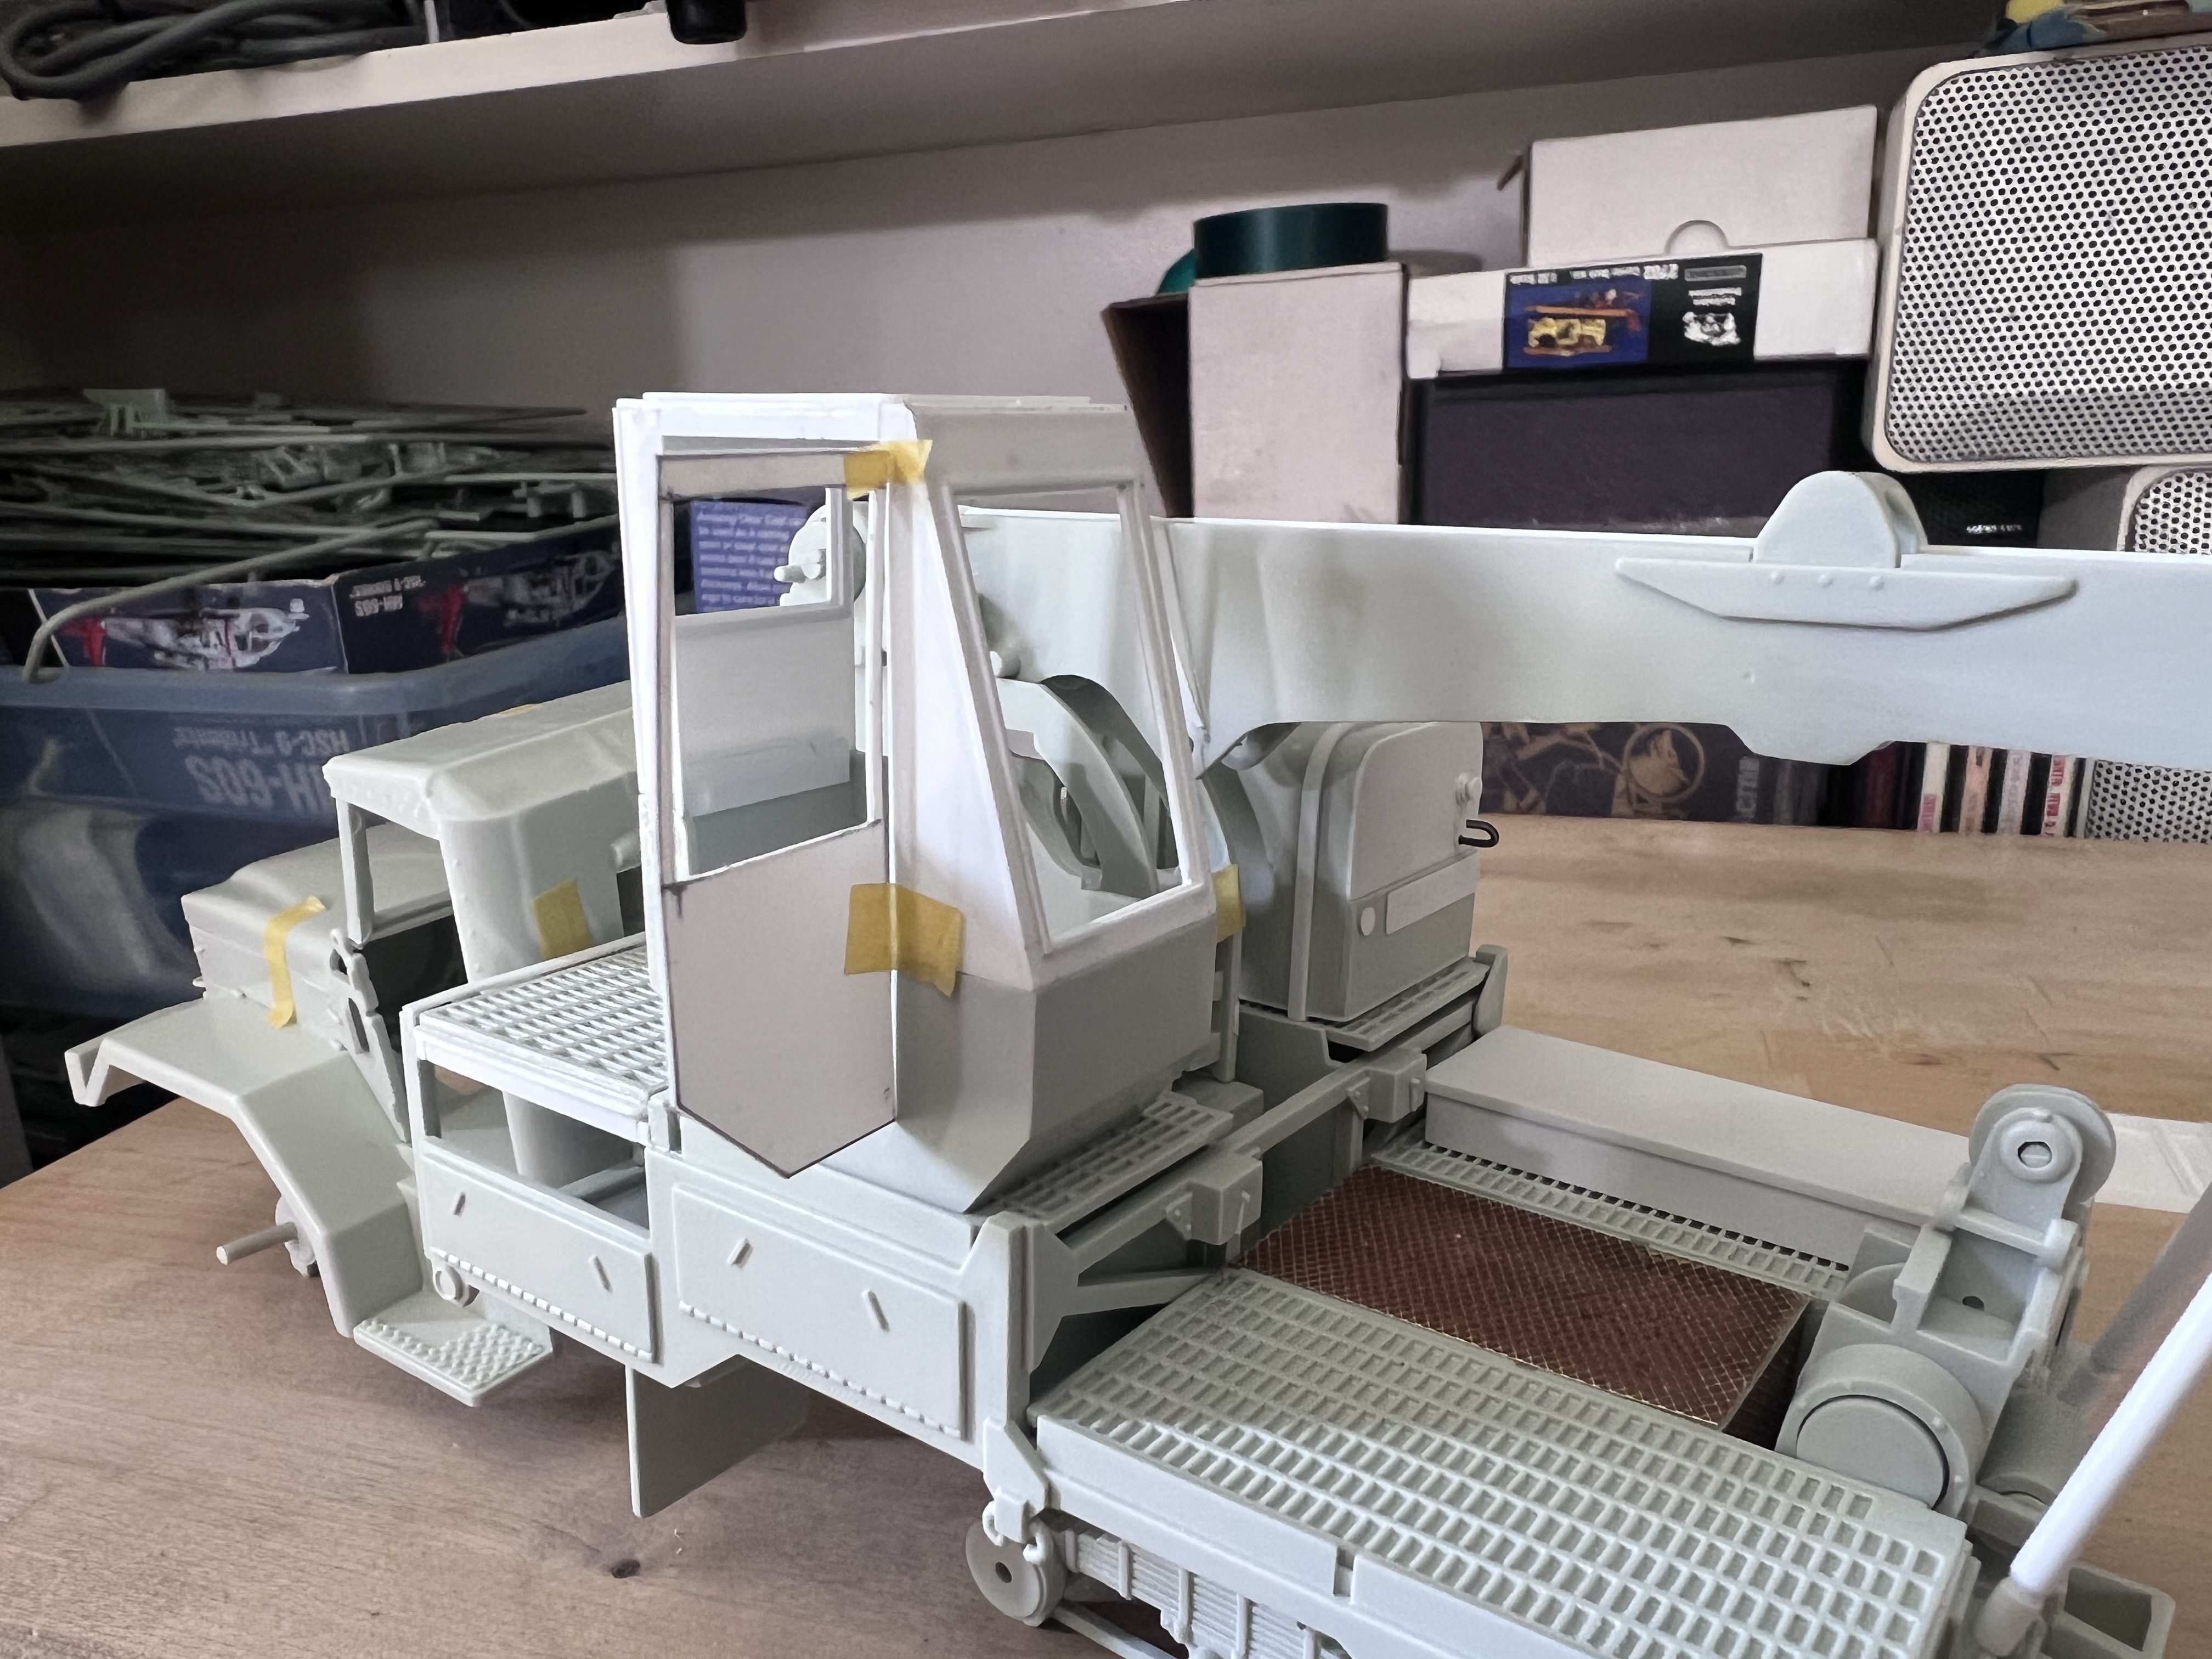
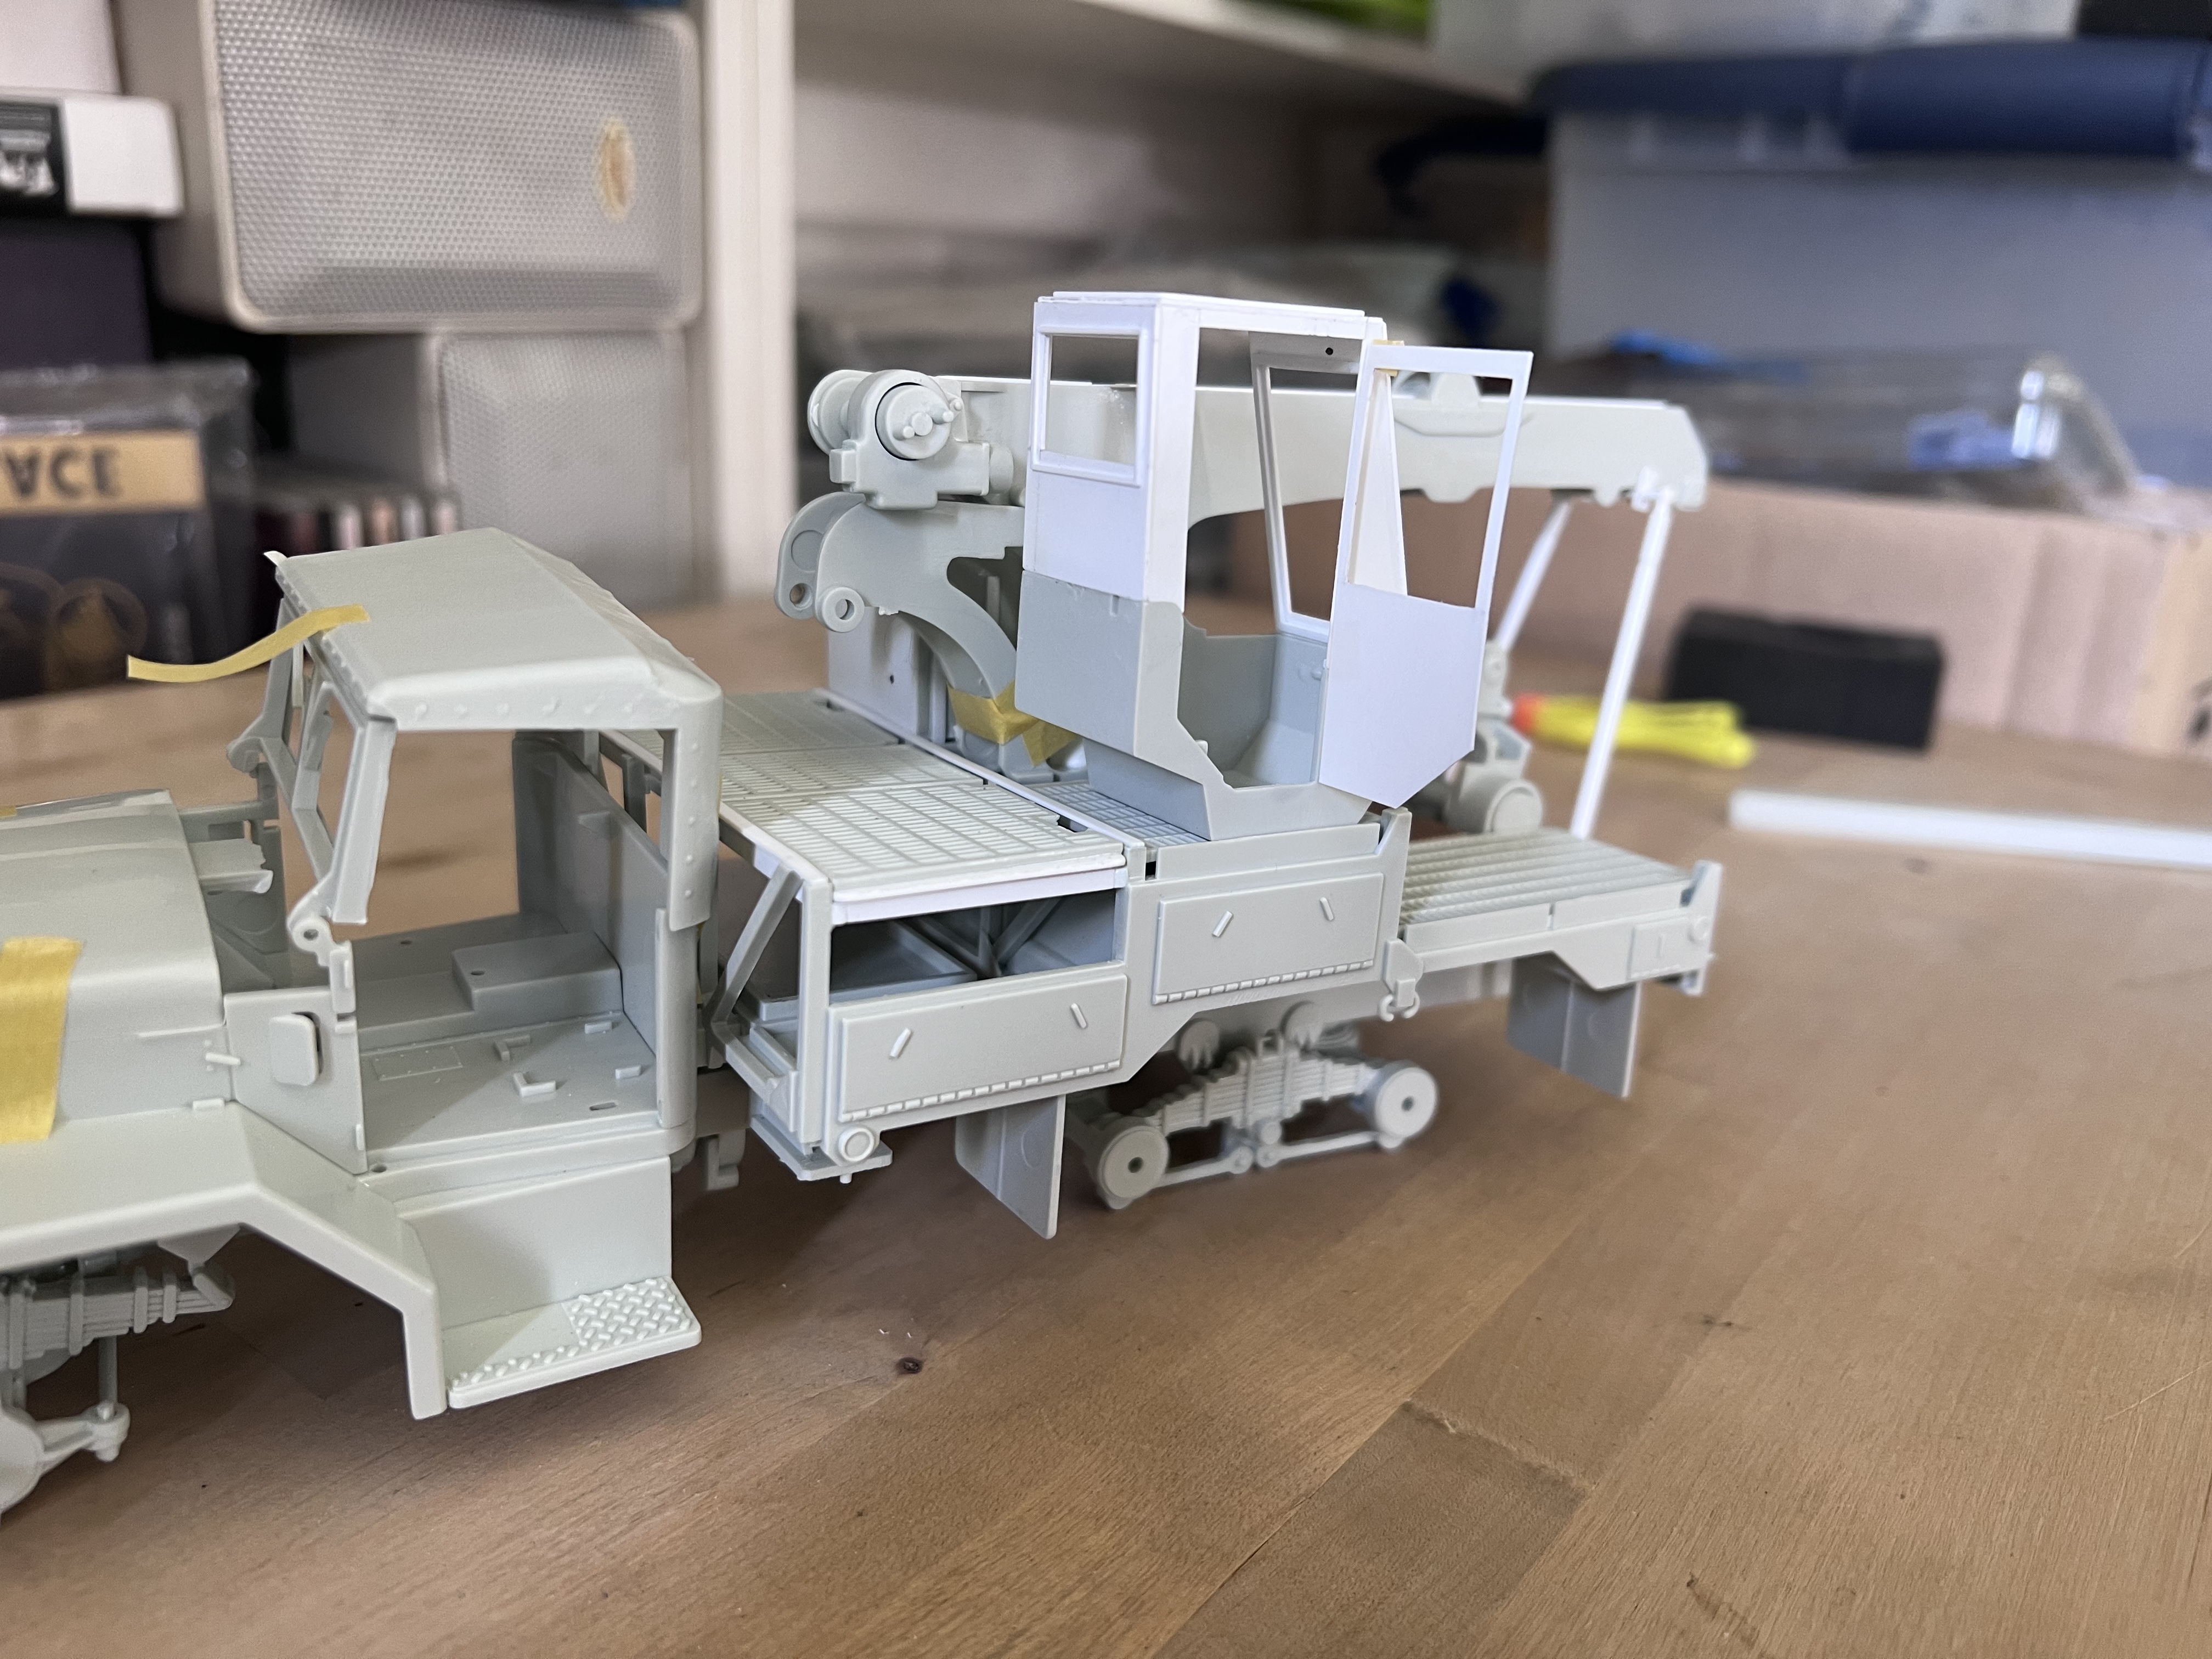
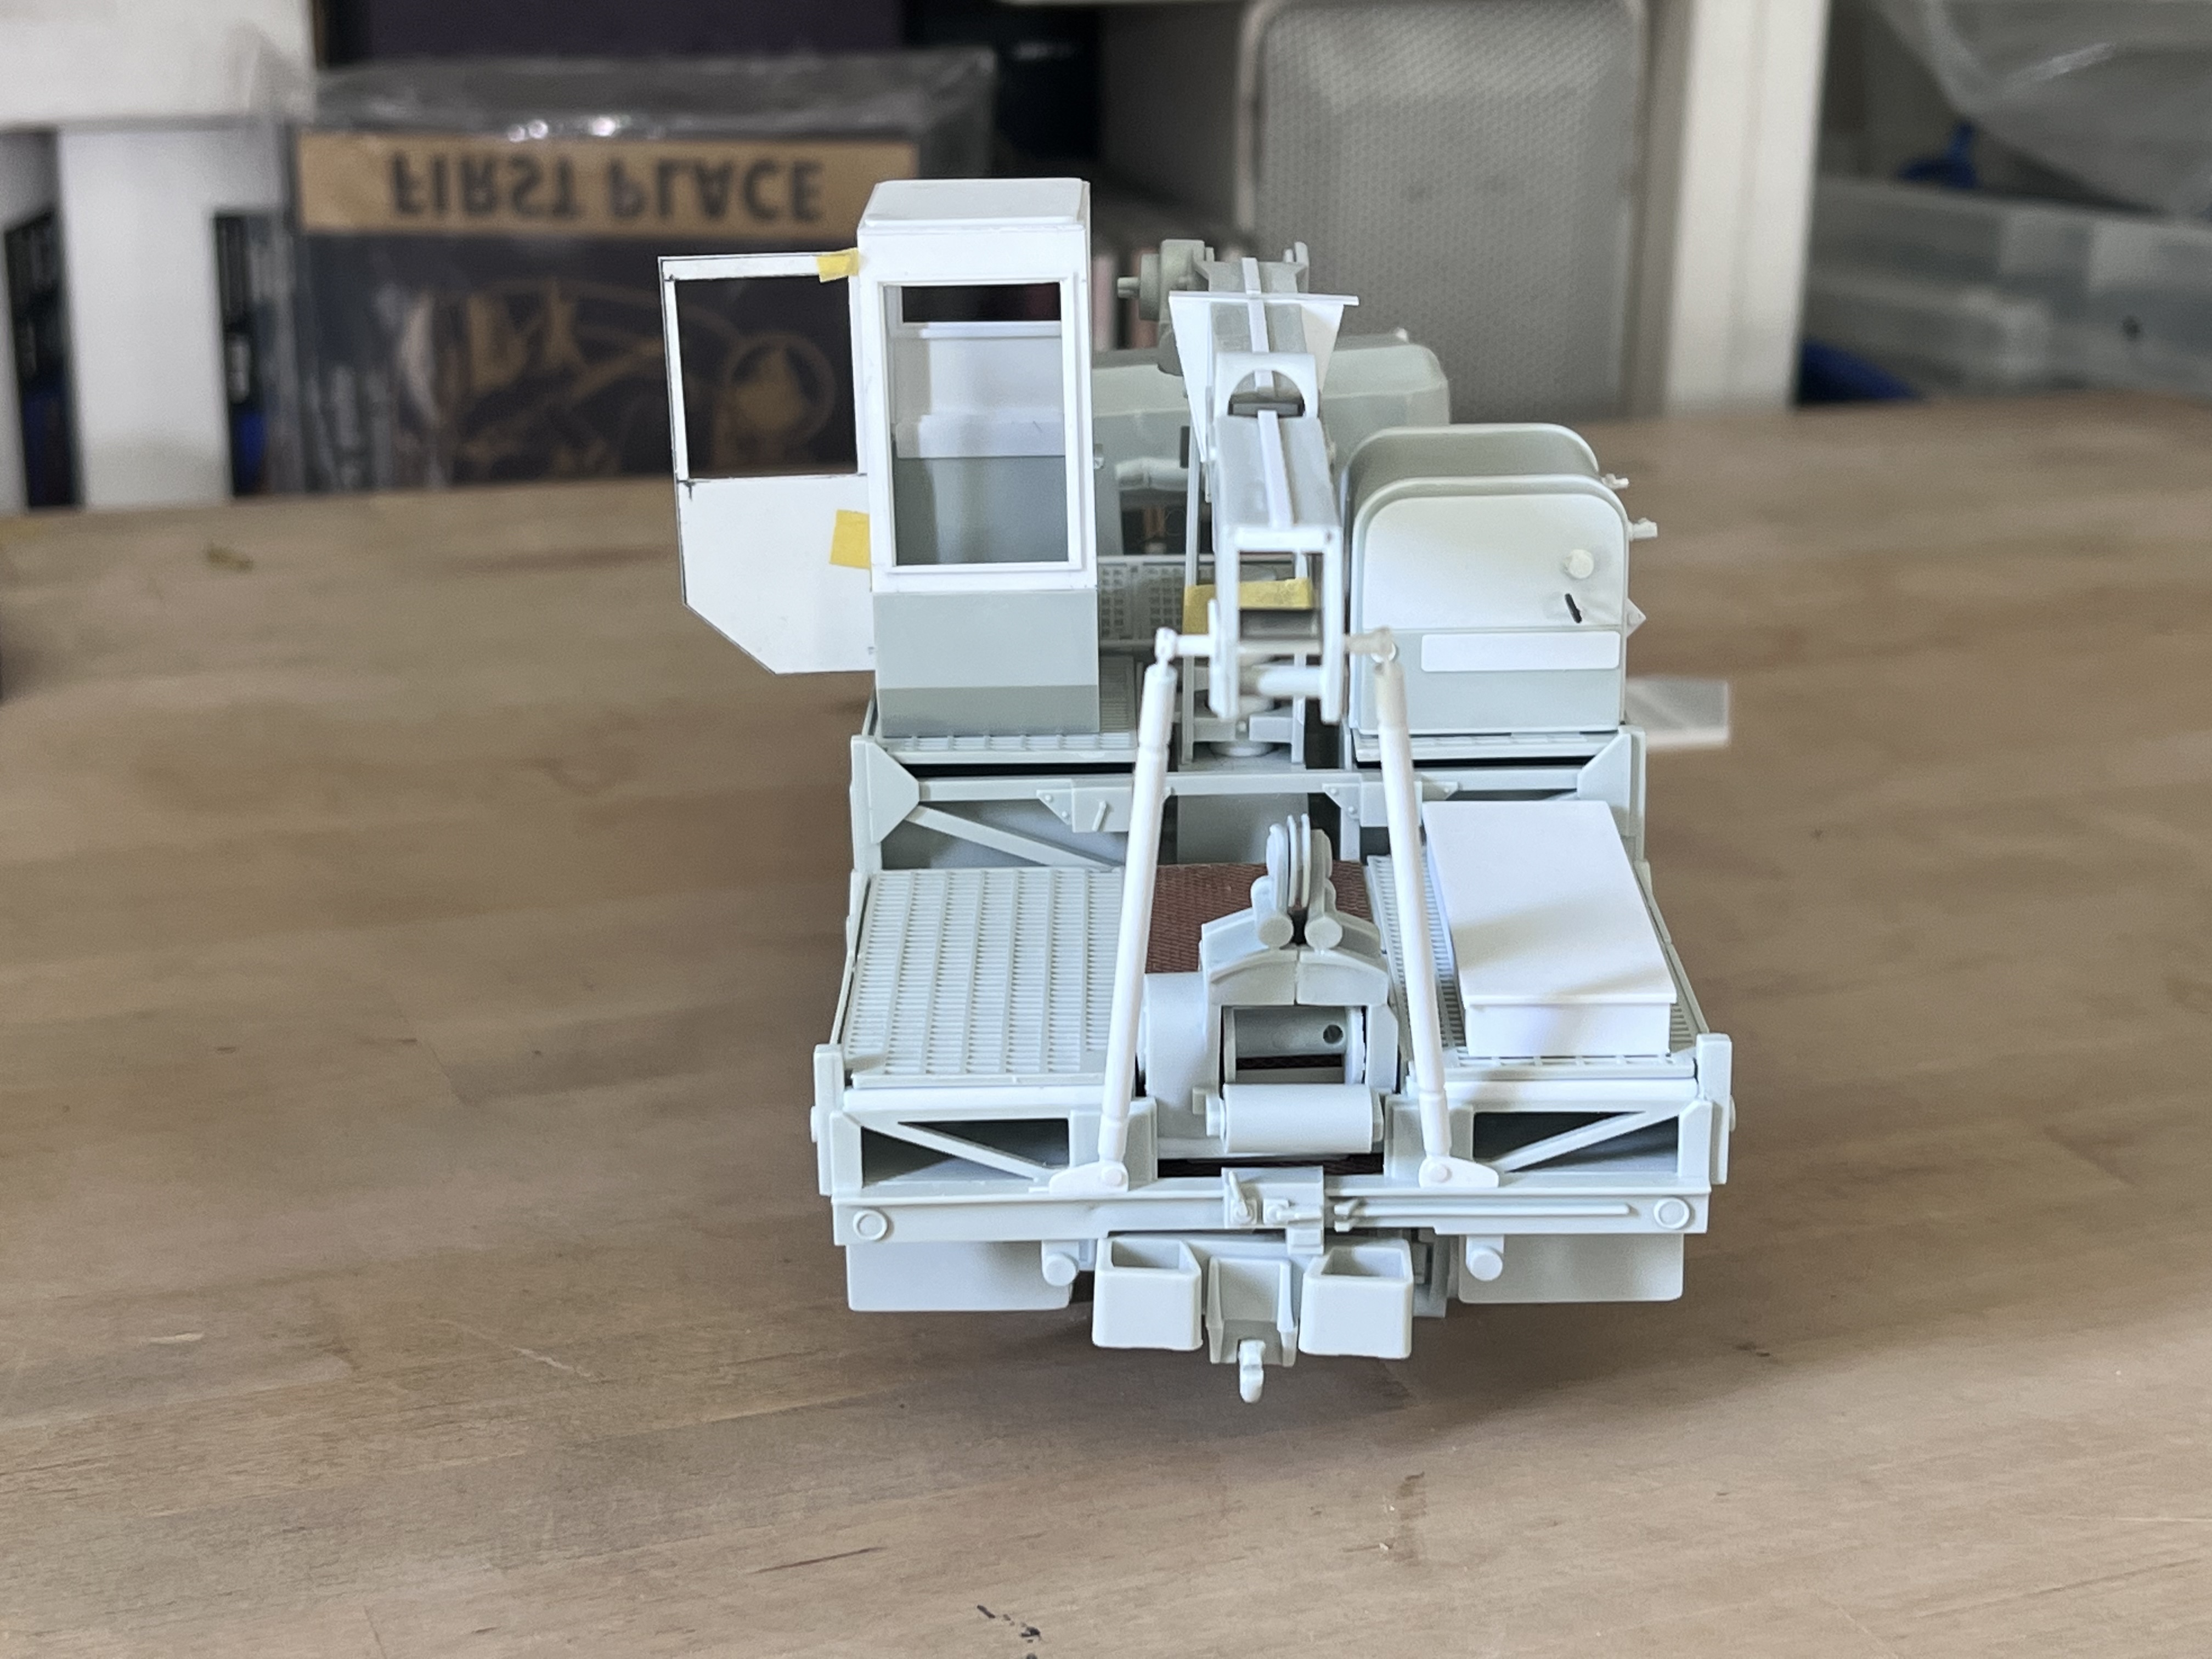
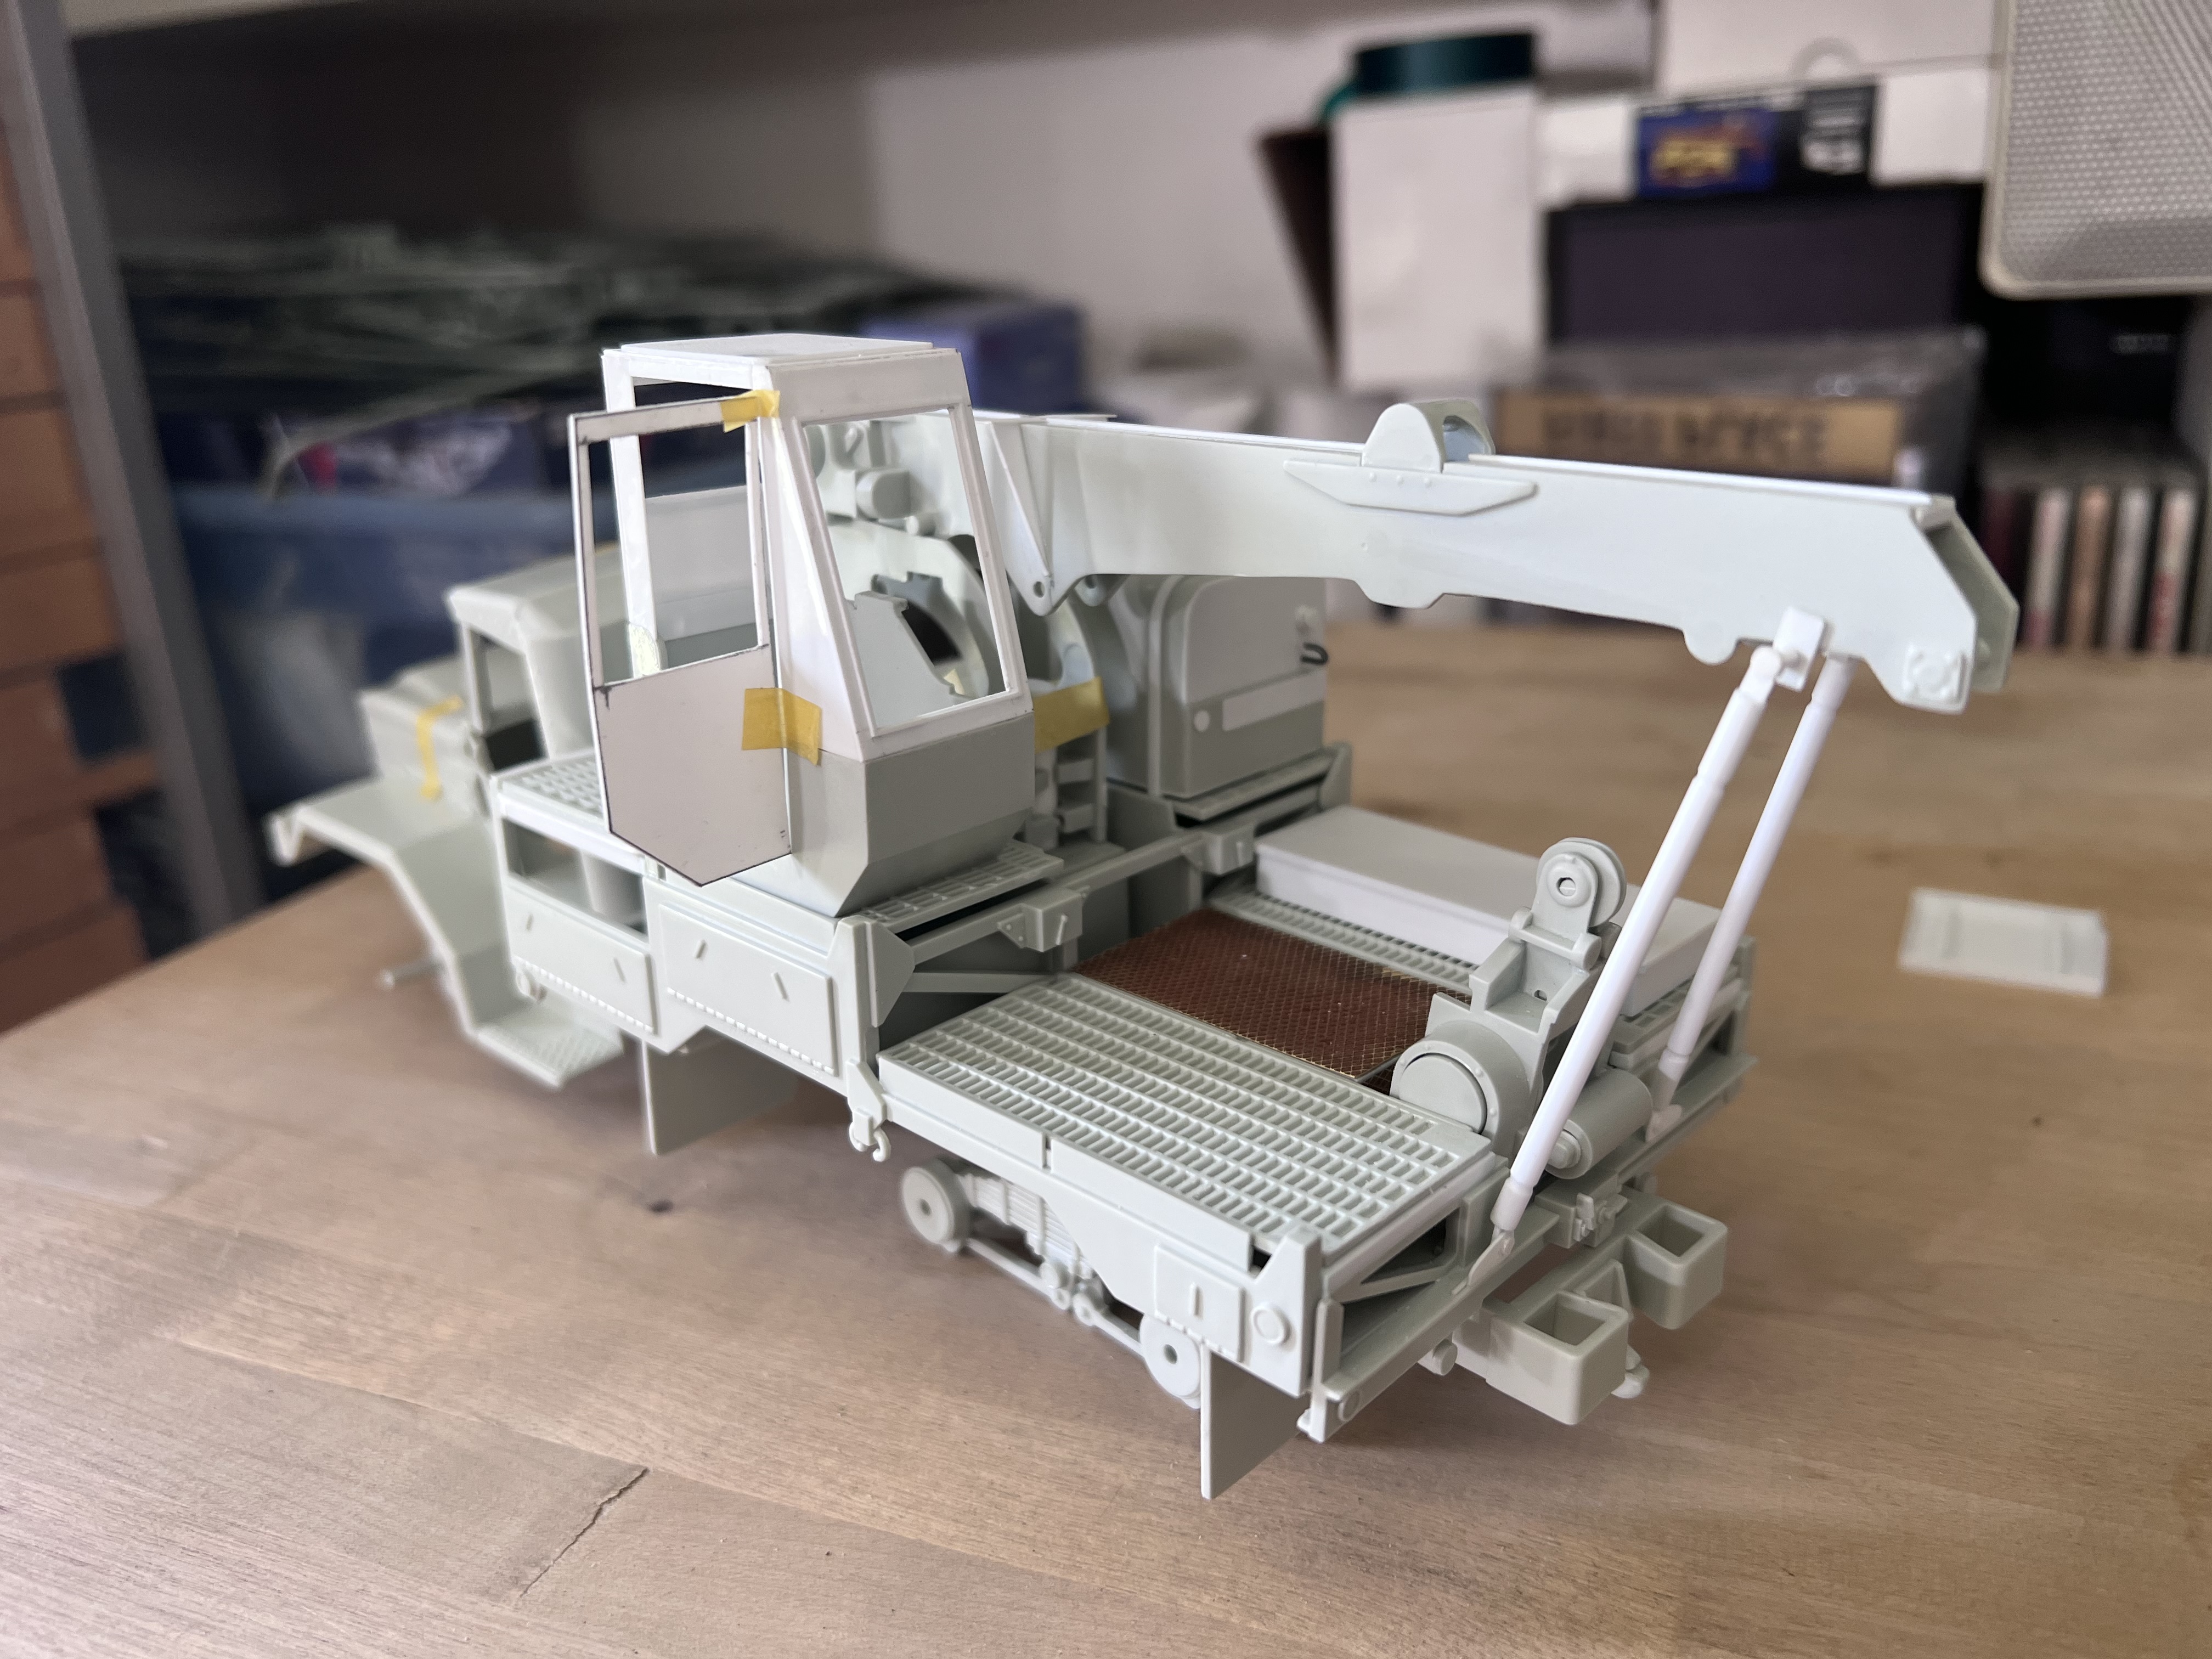
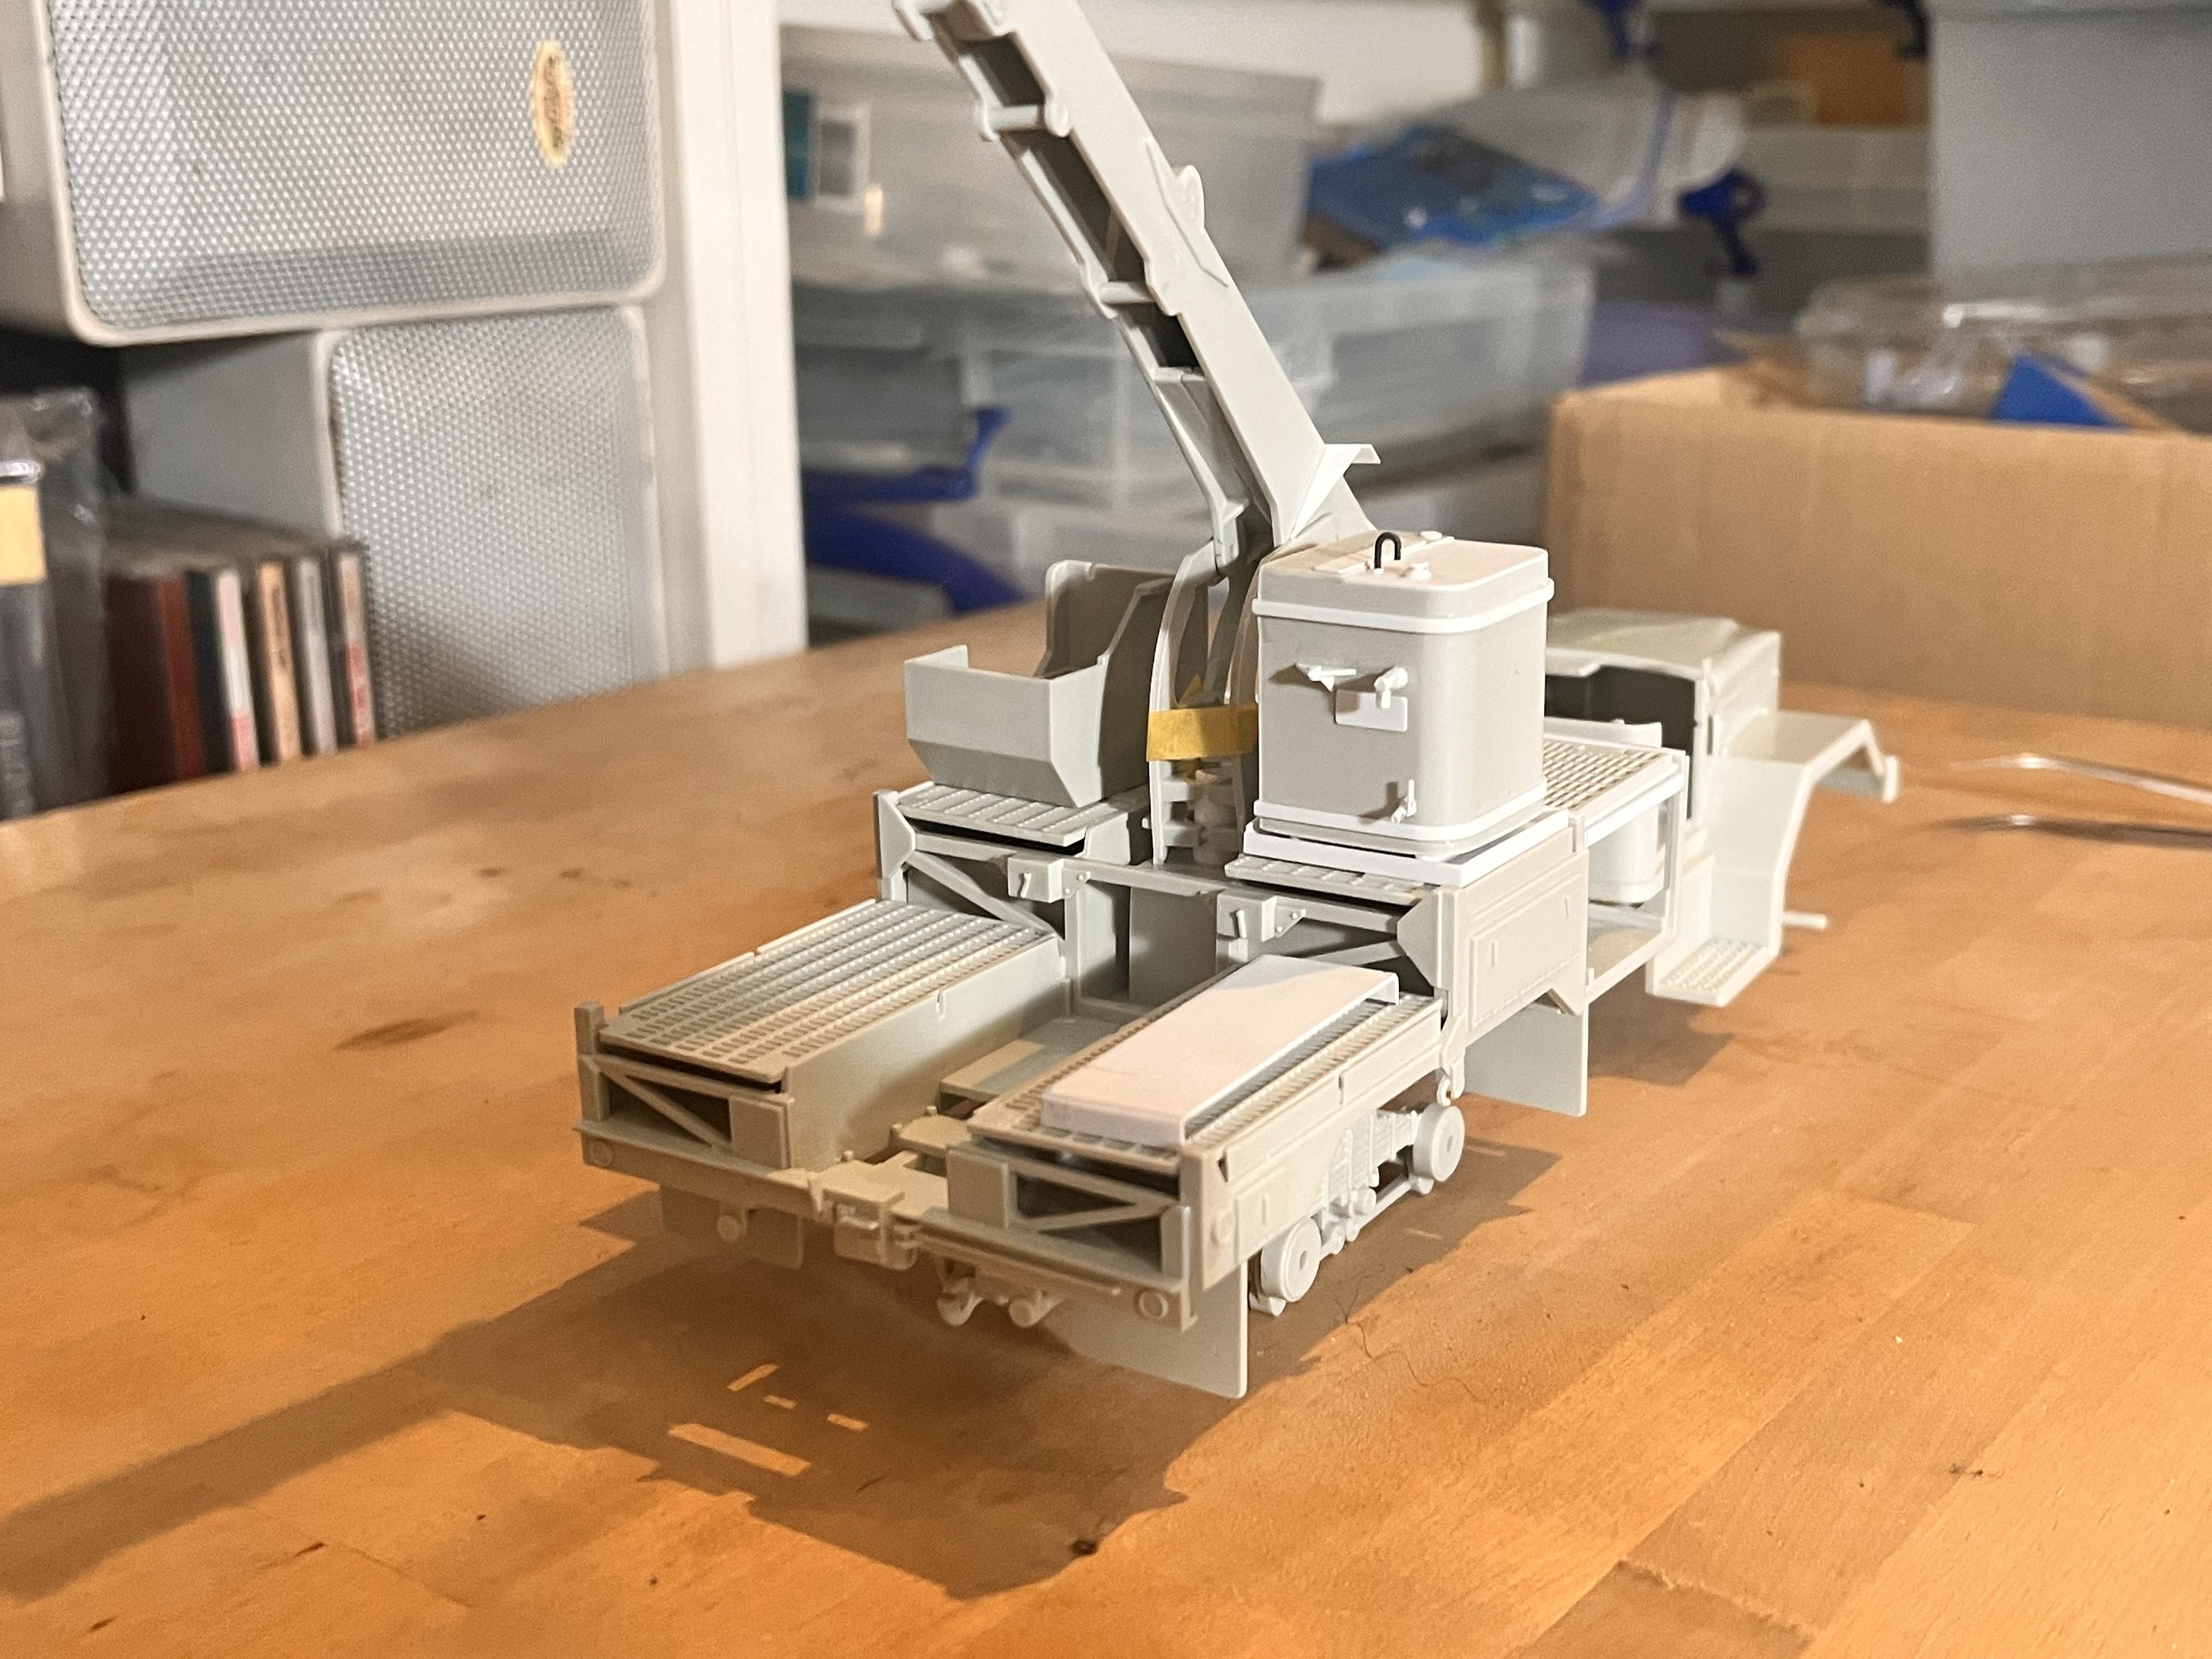
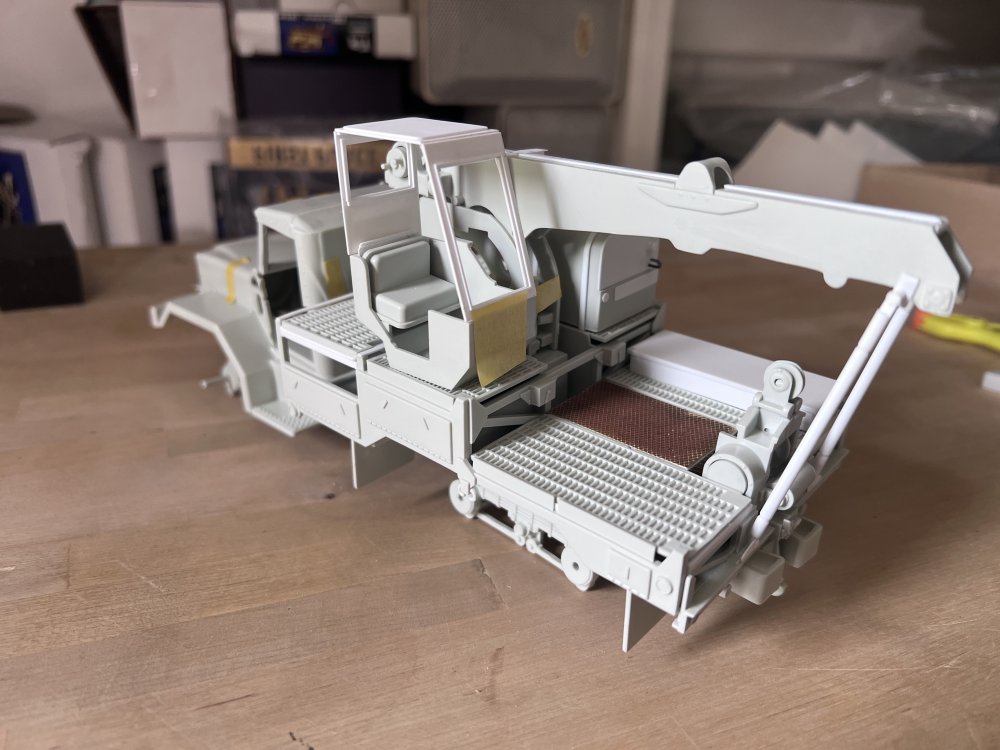
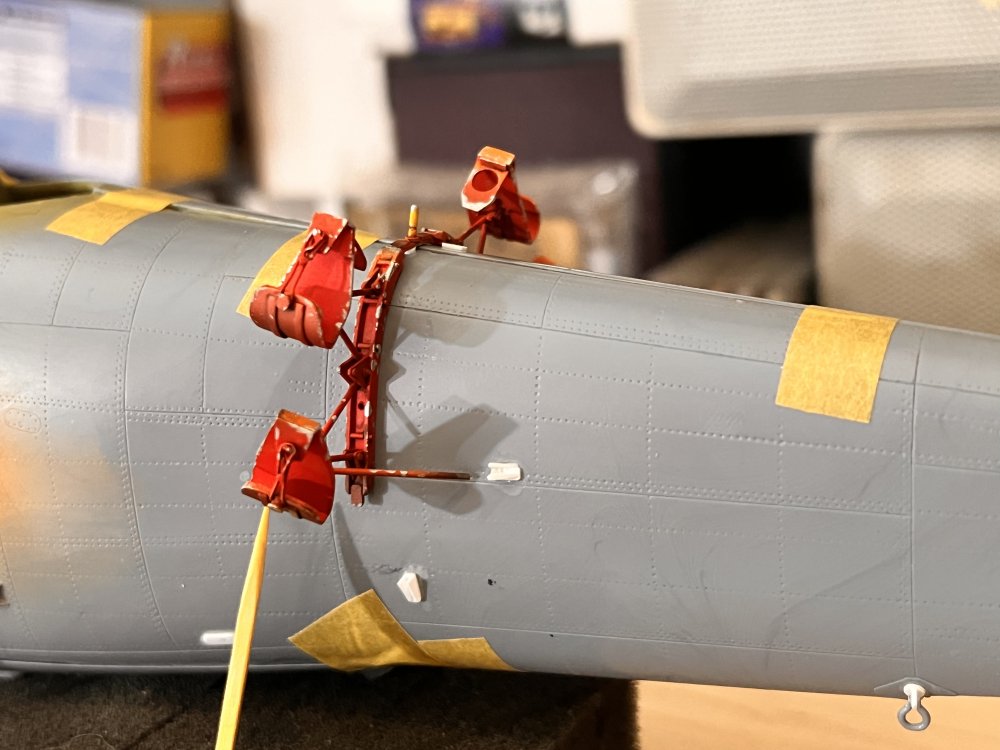
hi Back to work on Friday so pushing to finish the small ....yeah whatever that's called. Small crane cabin????


-
1/35 or 1/32 ? That is the question.


-
Revell 1/32 Spitfire Mk IIa
shark64 replied to Peterpools's topic in LSM 1/35 and Larger Work In Progress
Spitfire over the Mustang hands down. Copy on Painting -
Copy on figures either 3 or 5. Thanks
-
KI-44-II Otsu, 1/20th Scratch build
shark64 replied to 20th Factory's topic in LSM 1/35 and Larger Work In Progress
I am so sorry I missed this post. This is right up my alley and it looks amazing so far. Good work buddy -
Revell 1/32 Spitfire Mk IIa
shark64 replied to Peterpools's topic in LSM 1/35 and Larger Work In Progress
This has to be the most elegant plane in the world. Waiting for the magic of painting. -
Spinners are perfect
-
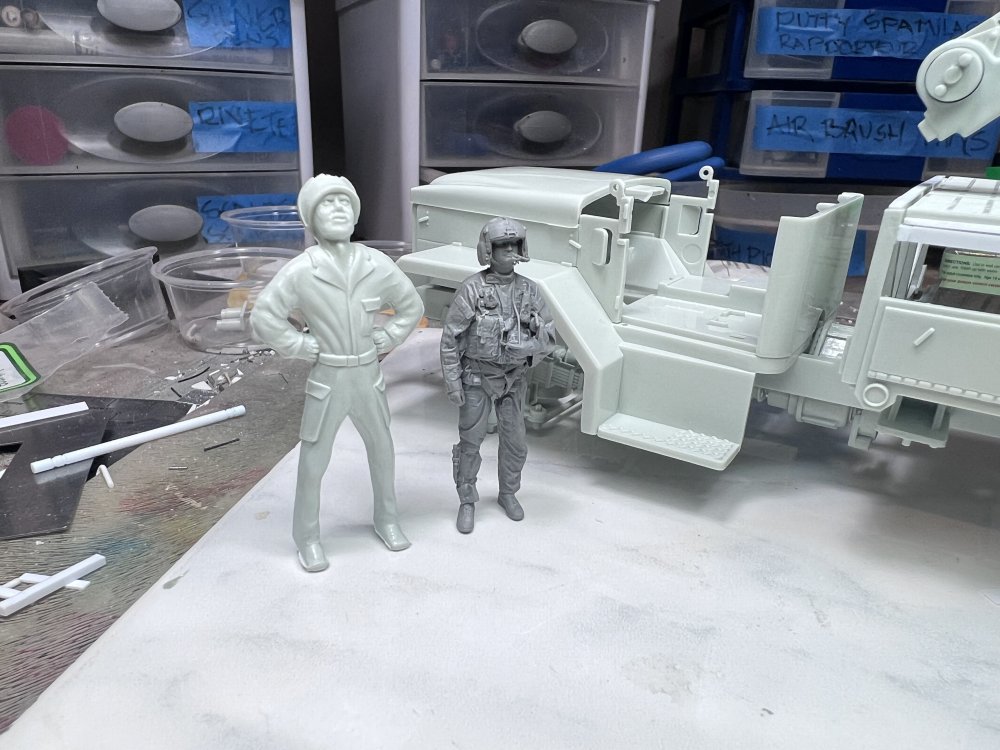
Hi Pete, 1/35 won't work I am afraid, too much of a difference for my taste. I talked to Norbert at Reedoak and he has two mechanic figures . I am still trying to locate something since I wanna to have a least 4 figures. A lot of work on that truck. Oliver
-
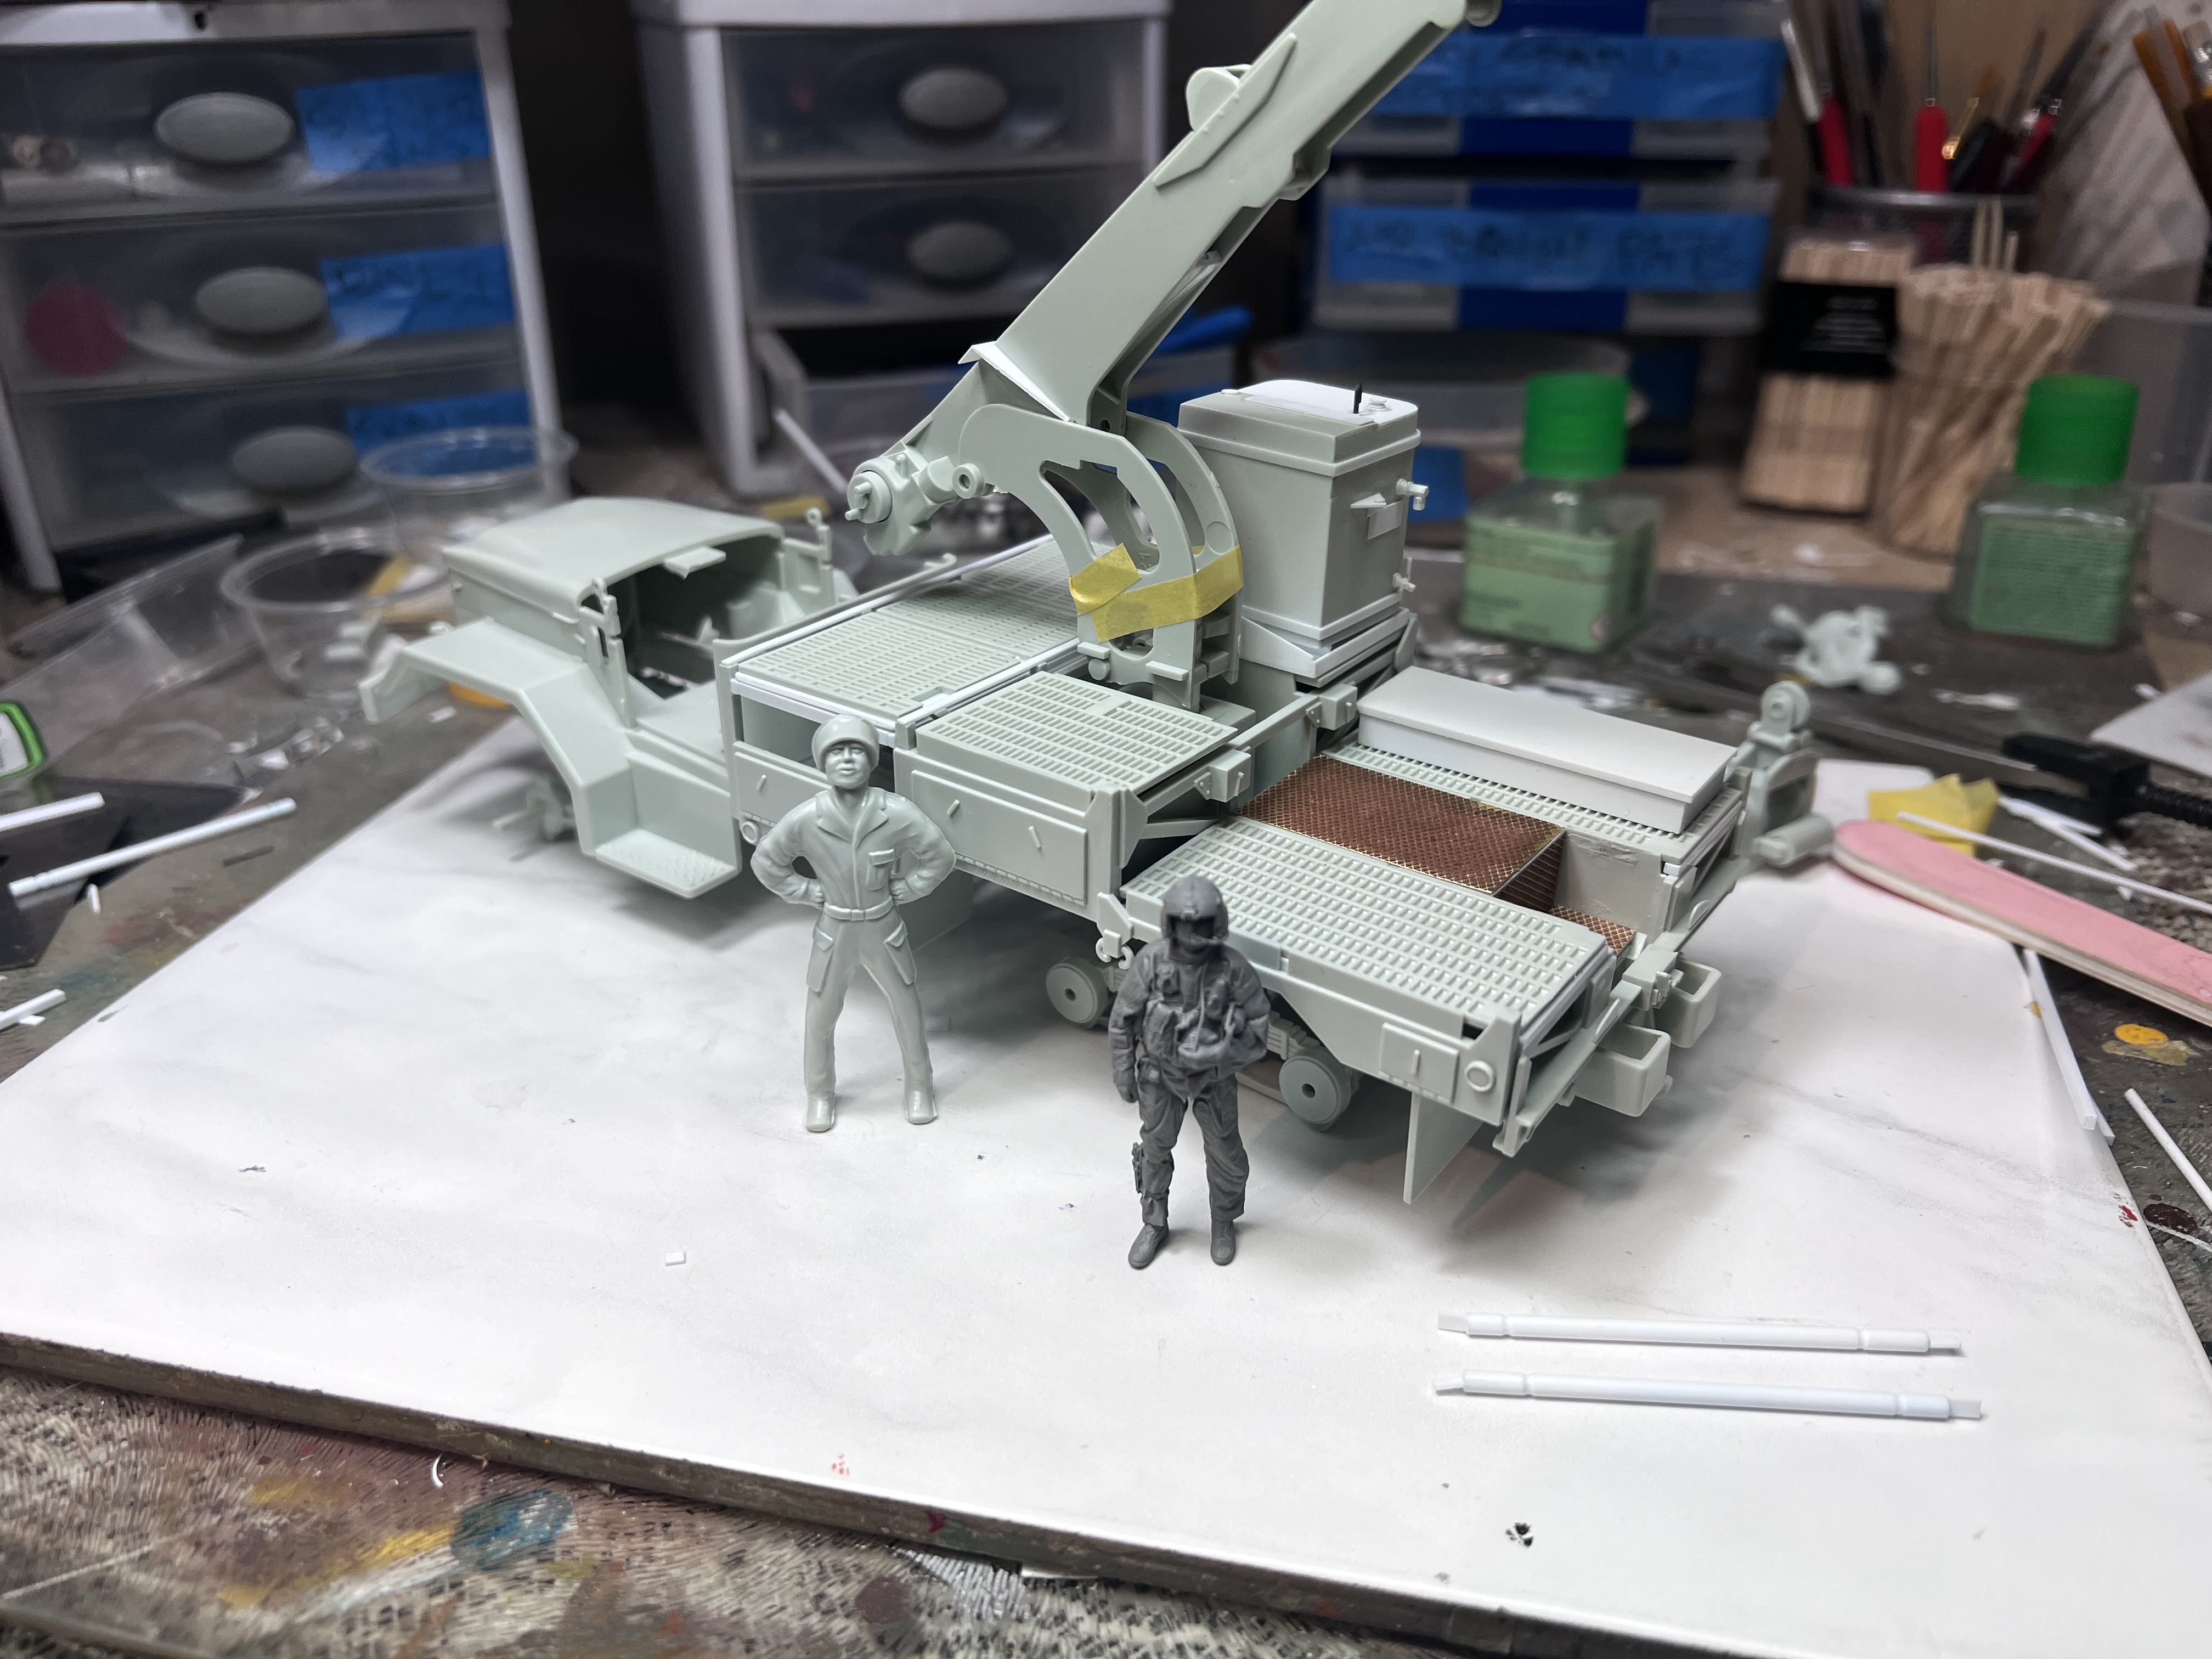
Small update. This is gonna be larger than I was planning but I am going with it. It screams for figures but can't find anything in 1/32. I have found folks that design and print but their fees is more that I make in a week at work. Oliver


-
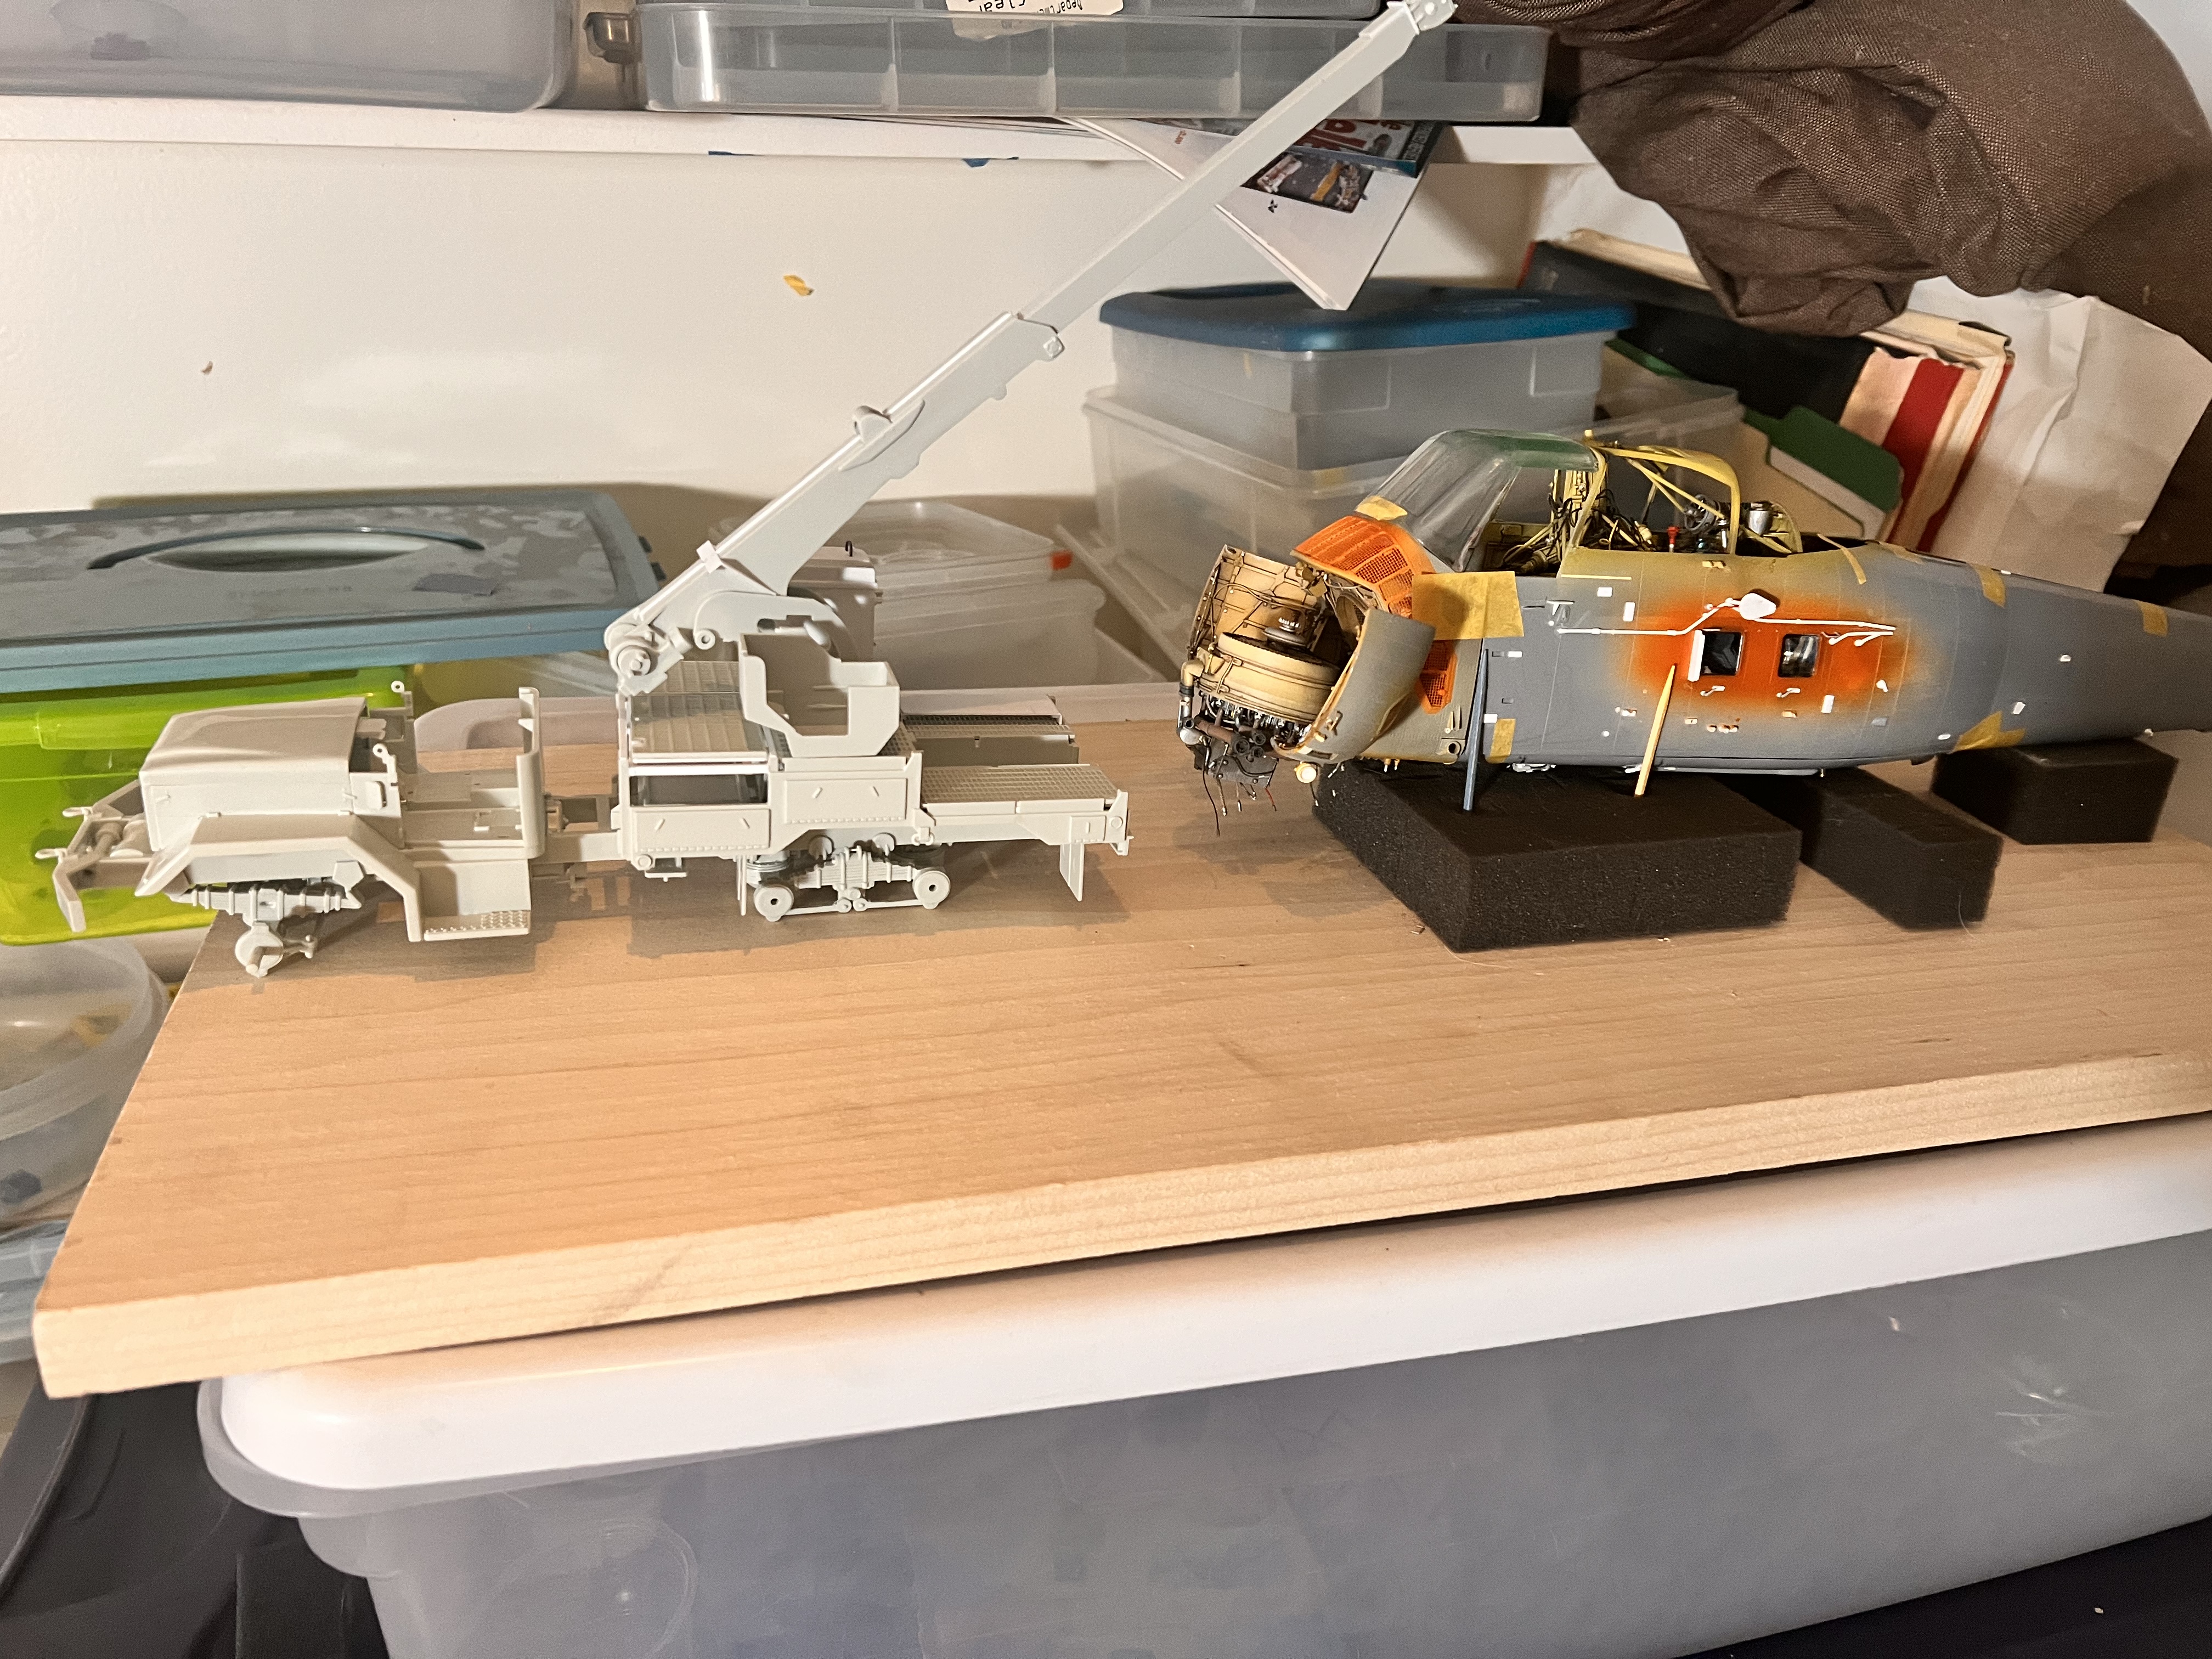
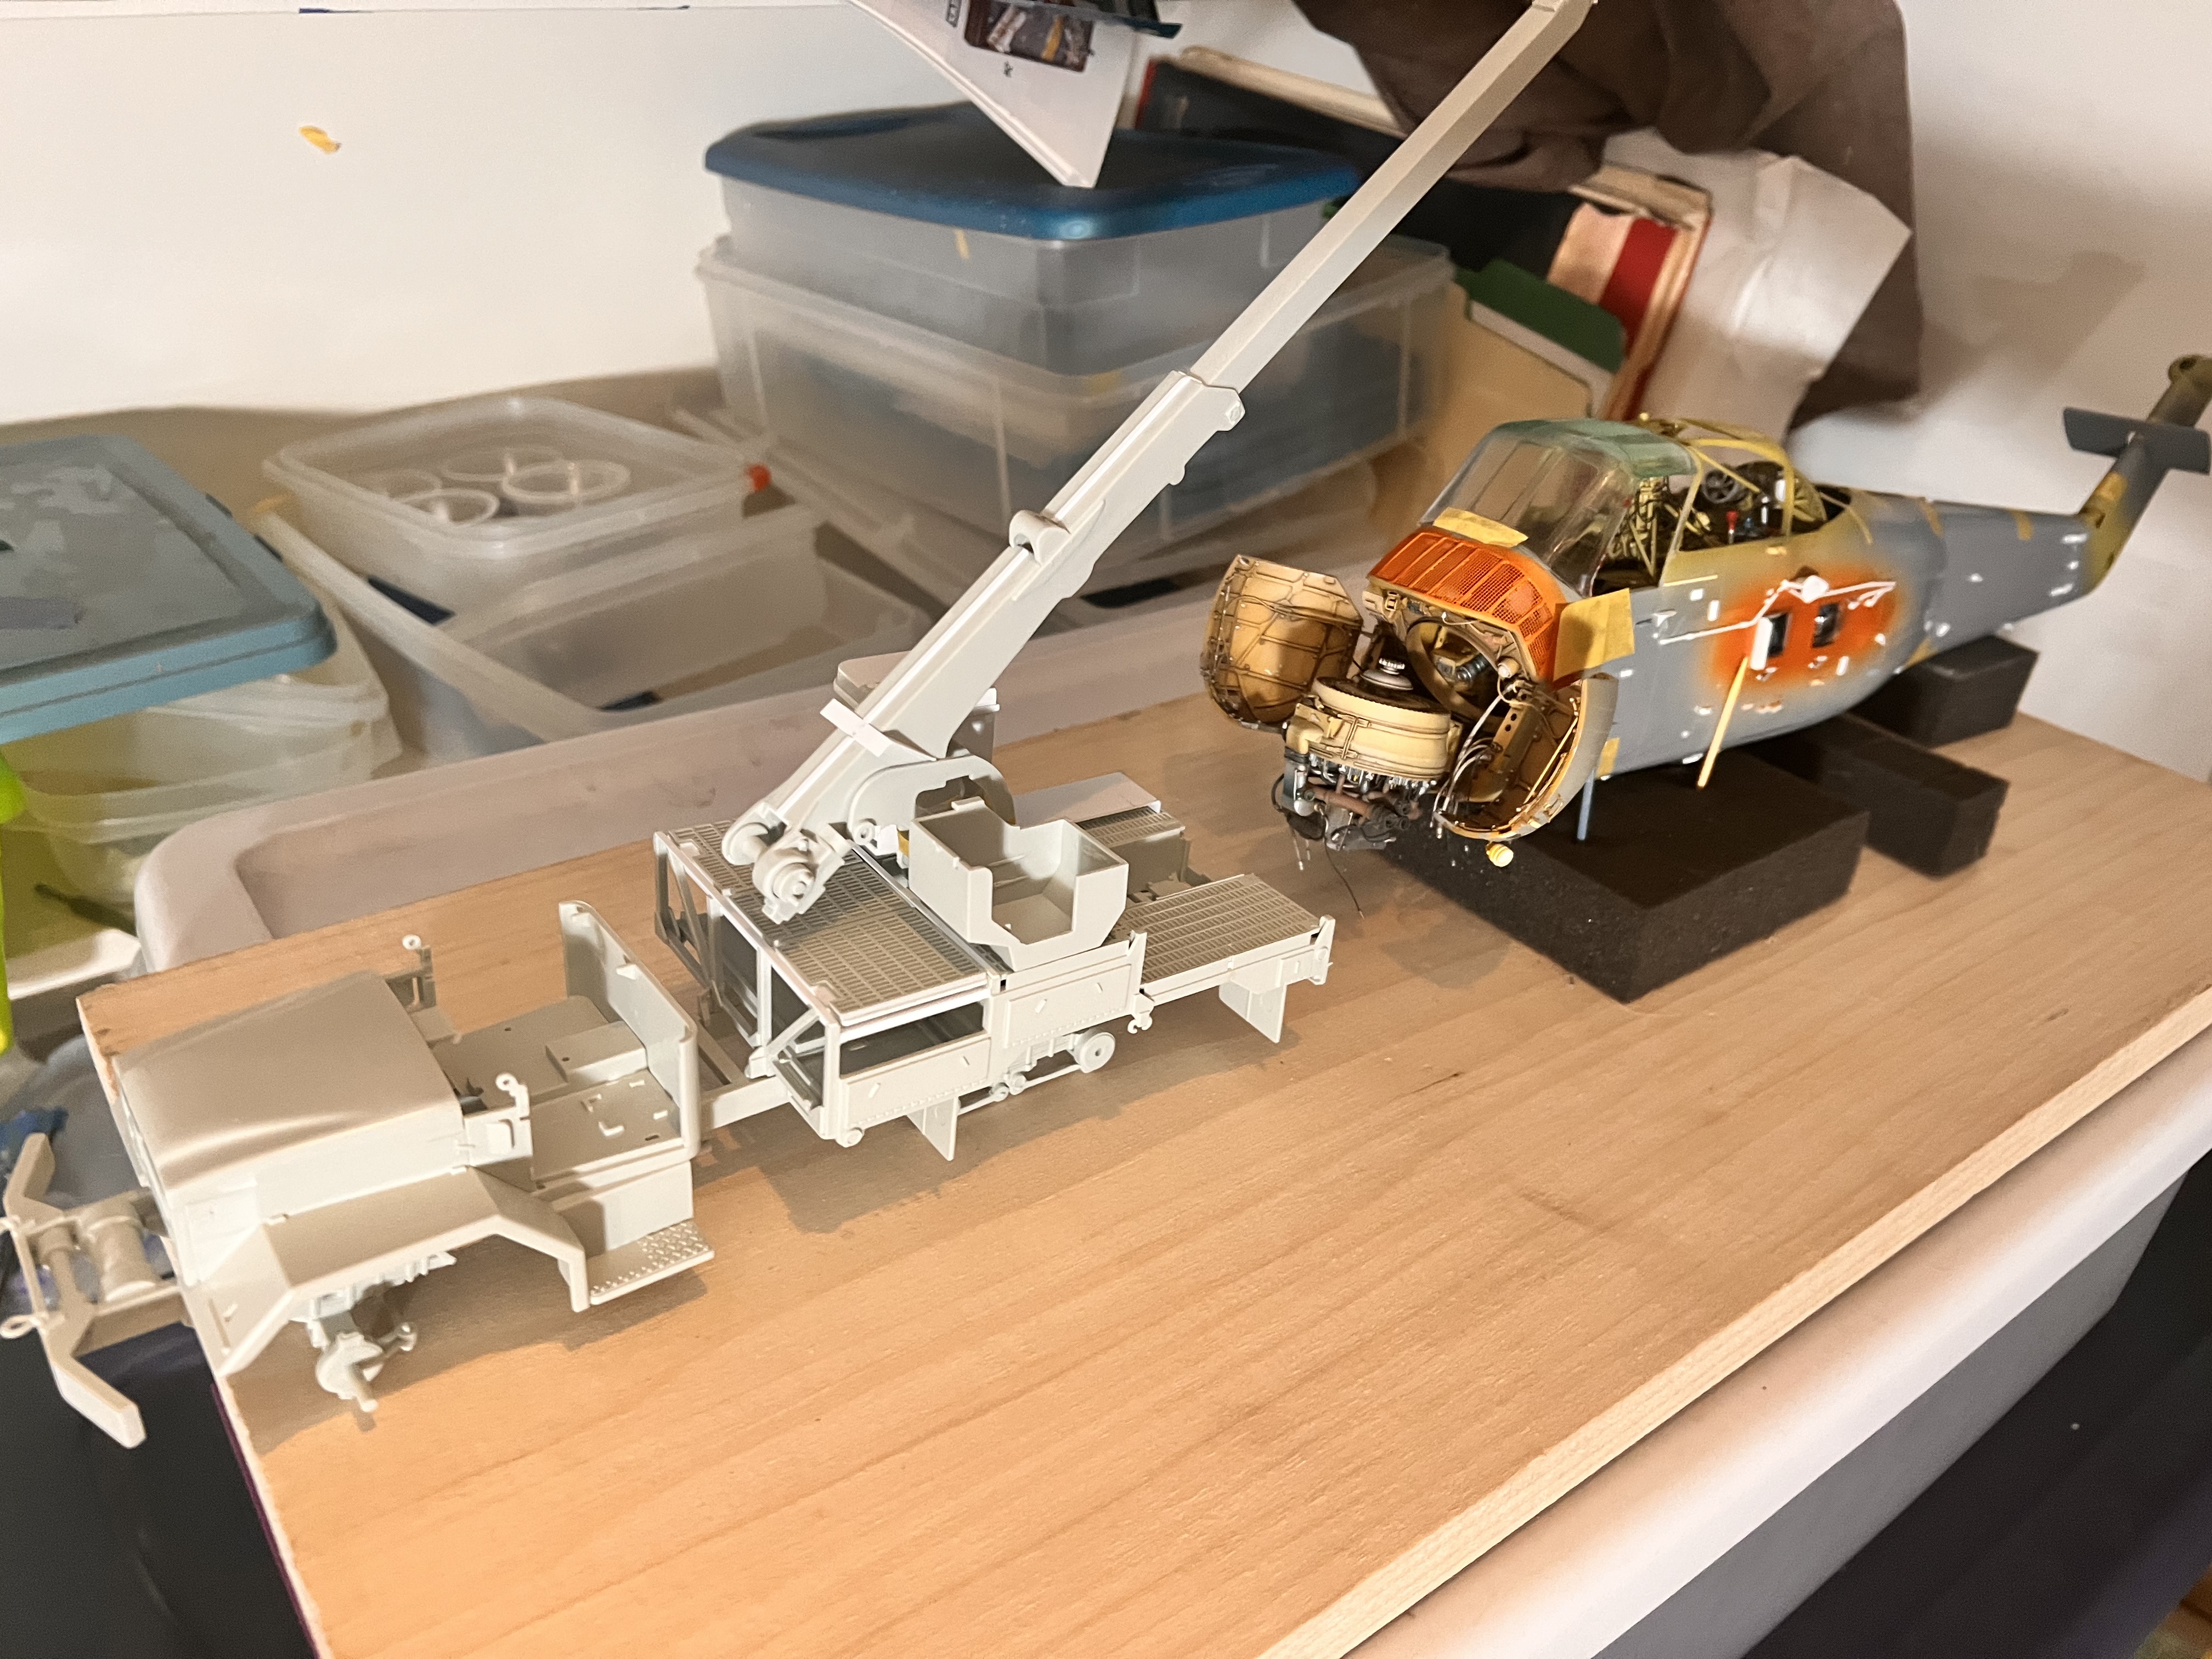
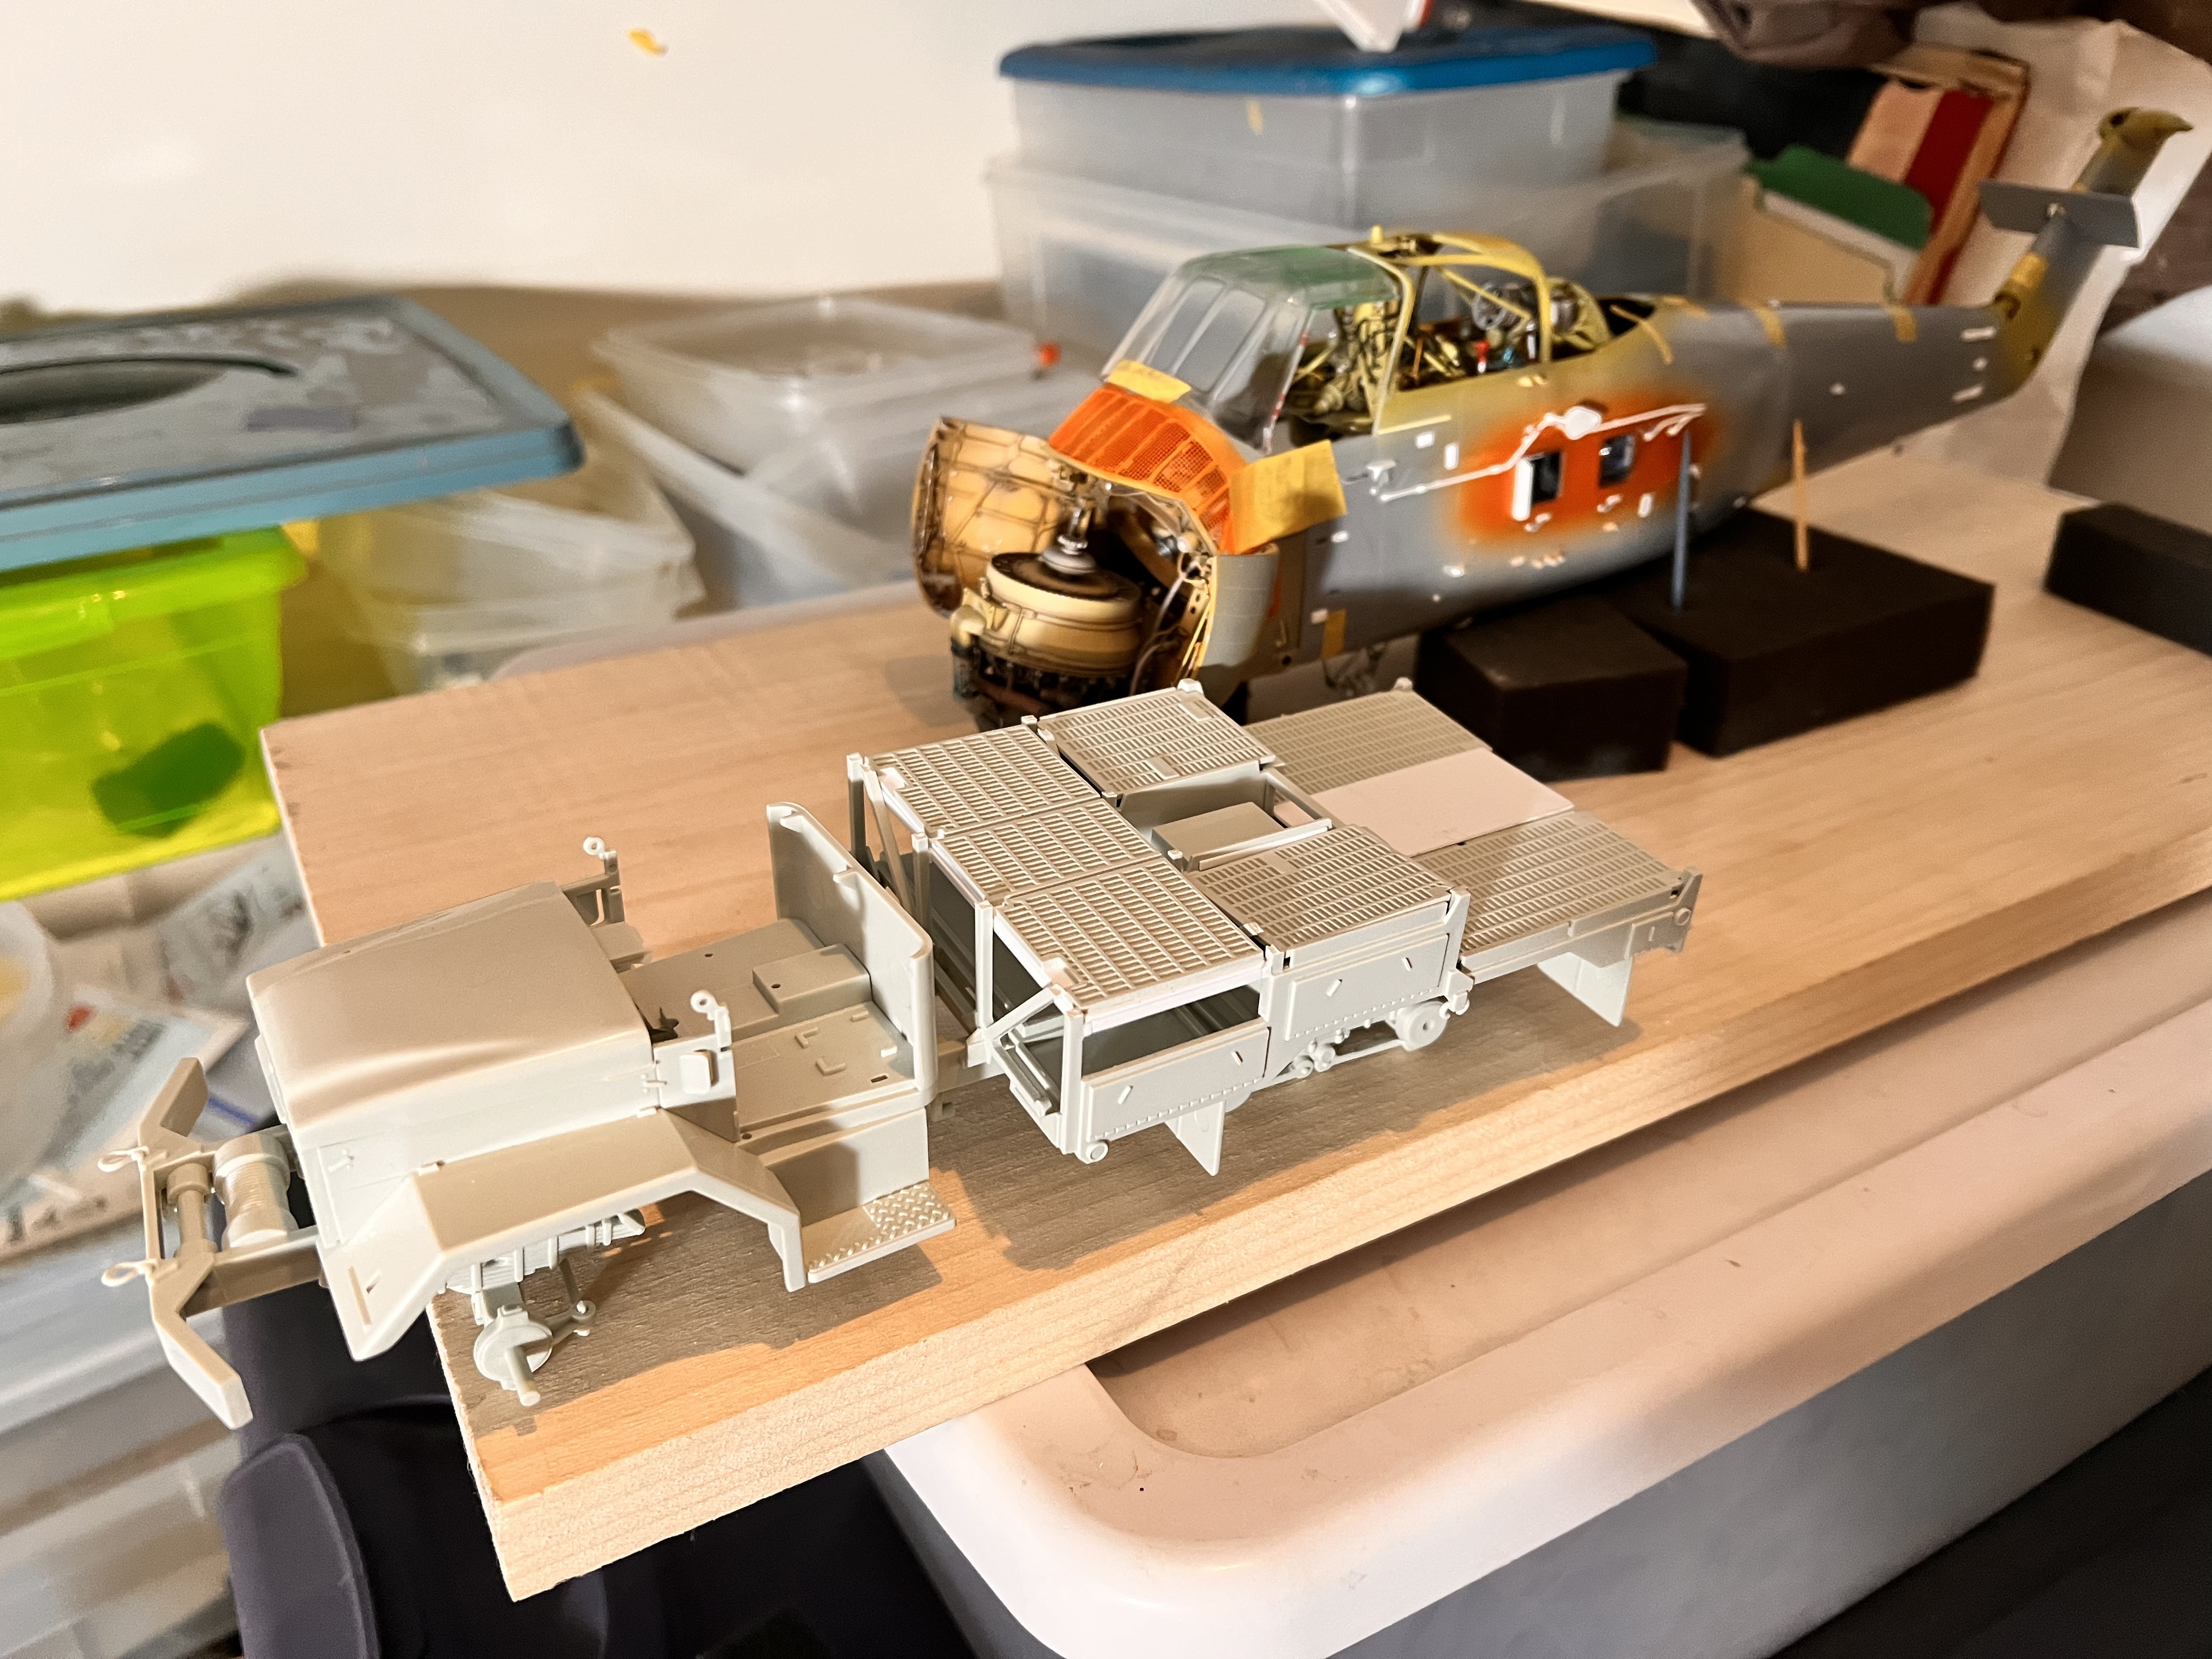
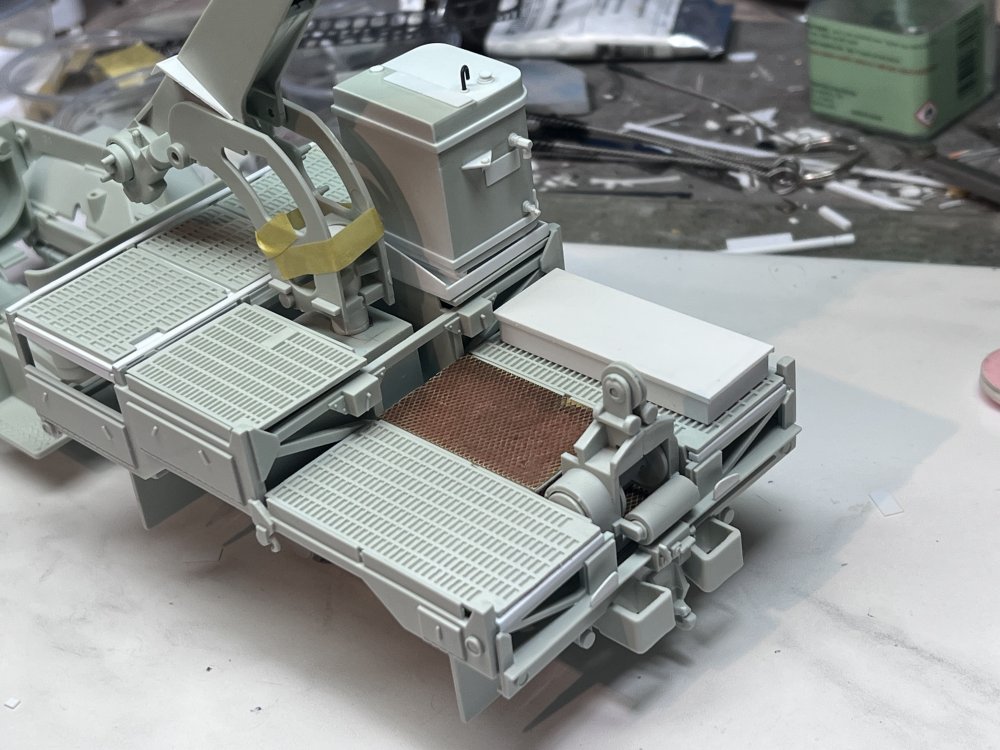
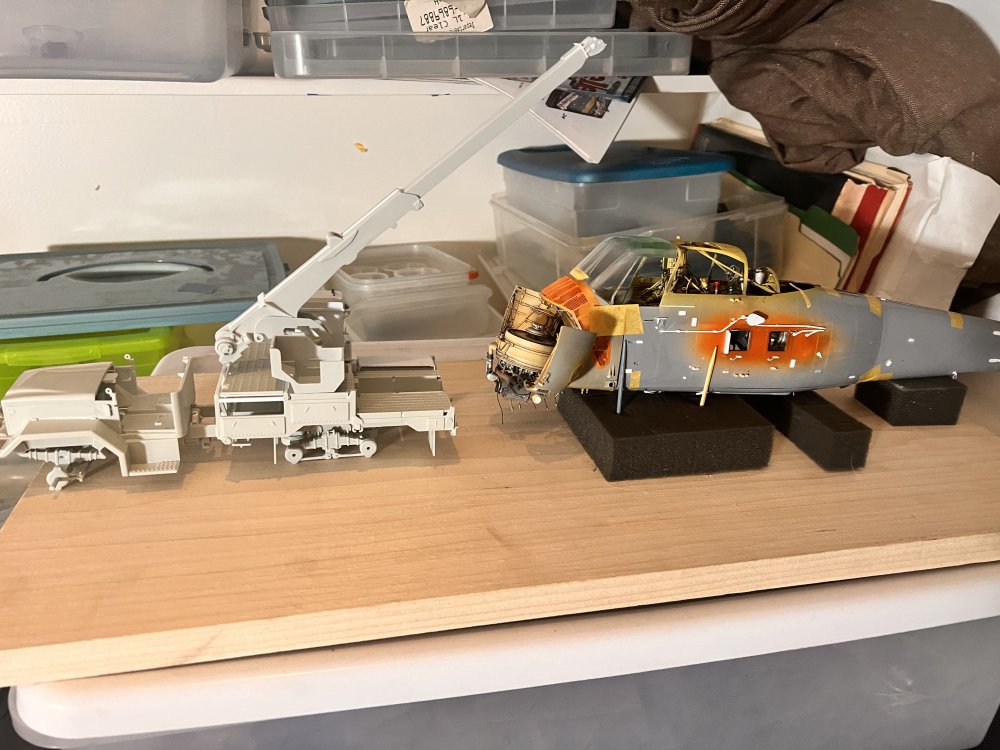
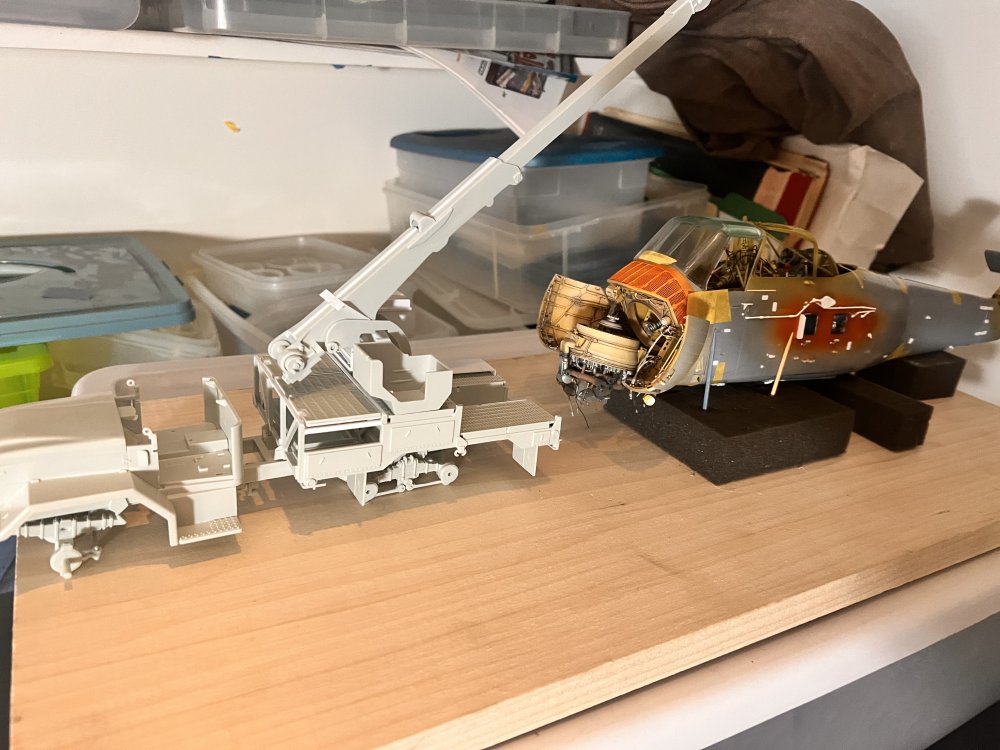
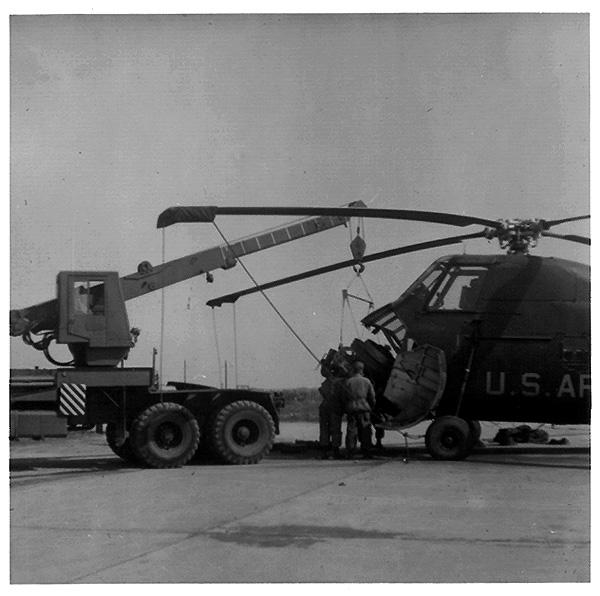
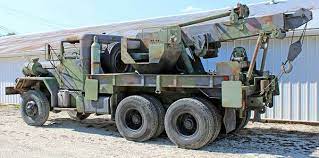
I ended up ordering the Wrecker truck kit but in the meantime I am checking on scale matching the helo and I believe it works. Heres how It looks, this is going to be a large dio I believe. I have started surgery on the flatbed area. Panzerwomble, I am taking your advice on checking the wheels being even on the ground, thanks for the tip.

-
oh my god thats what i am looking for but its in 1/35, I am doing 1/32. . Thanks. awesome photos.
-
How did I miss this? wow thats pretty cool. Great progress
-
Revell 1/32 Spitfire Mk IIa
shark64 replied to Peterpools's topic in LSM 1/35 and Larger Work In Progress
Sadly no photos are loading on my computer. -
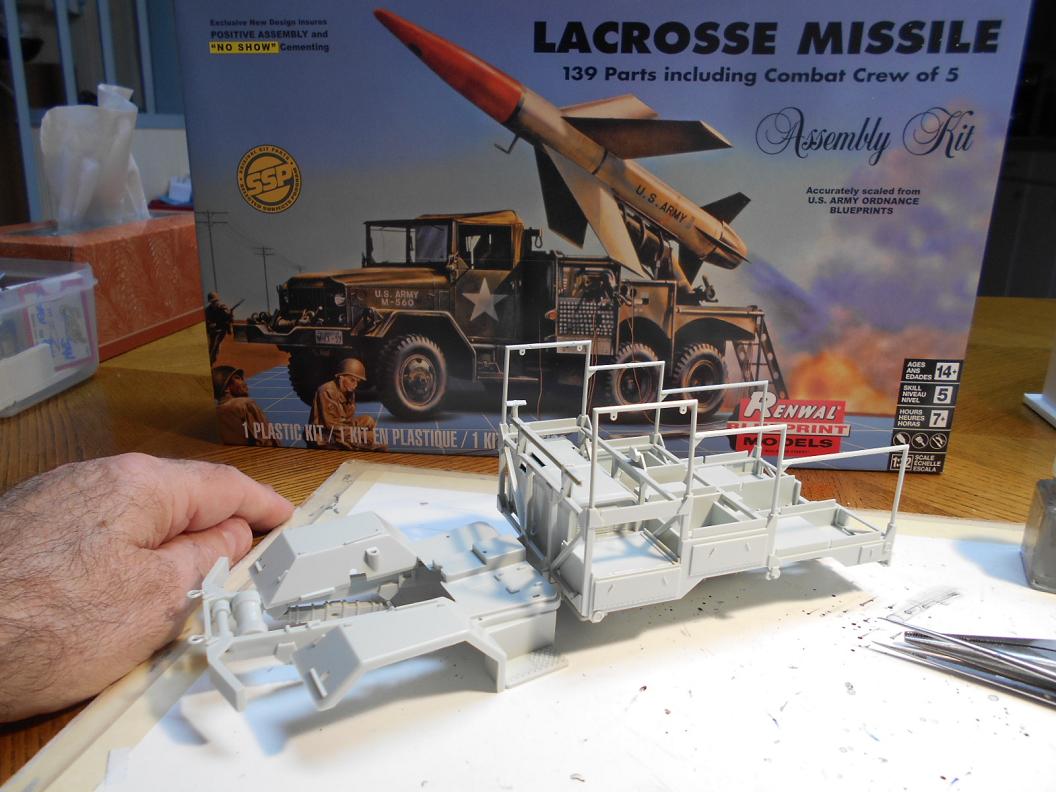
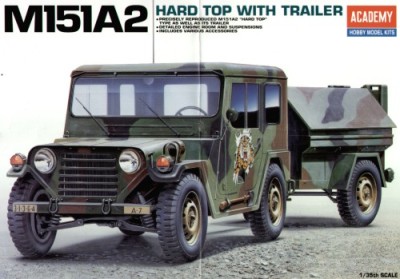
Thanks fellows. Since the engine is in place for now, i started on the Wrecker US Army truck with the hoist( i wanted to minimize the handling of the engine parts since its so delicate). I have never built a truck before or even painted one.....I have to rework the kit since the one I have is a missile Launcher (see below)and not a tow truck. Will post when I got it figured it out. I did order the jeep and trailer to check the size difference. The jeep is in 1/35 and my truck in 1/35.

-
Nichimo 1/20 Cessna 172 N9812J "Juliet"
shark64 replied to Hawkwrench's topic in LSM 1/35 and Larger Work In Progress
Wait a second here Tim, I recall you were doing a Blackhawk....did u finish it? In any case a good start on the Cessna. -
wow, i dig the painting job on the exhaust. Nice job
-
I really like your engine. Good progress.
-
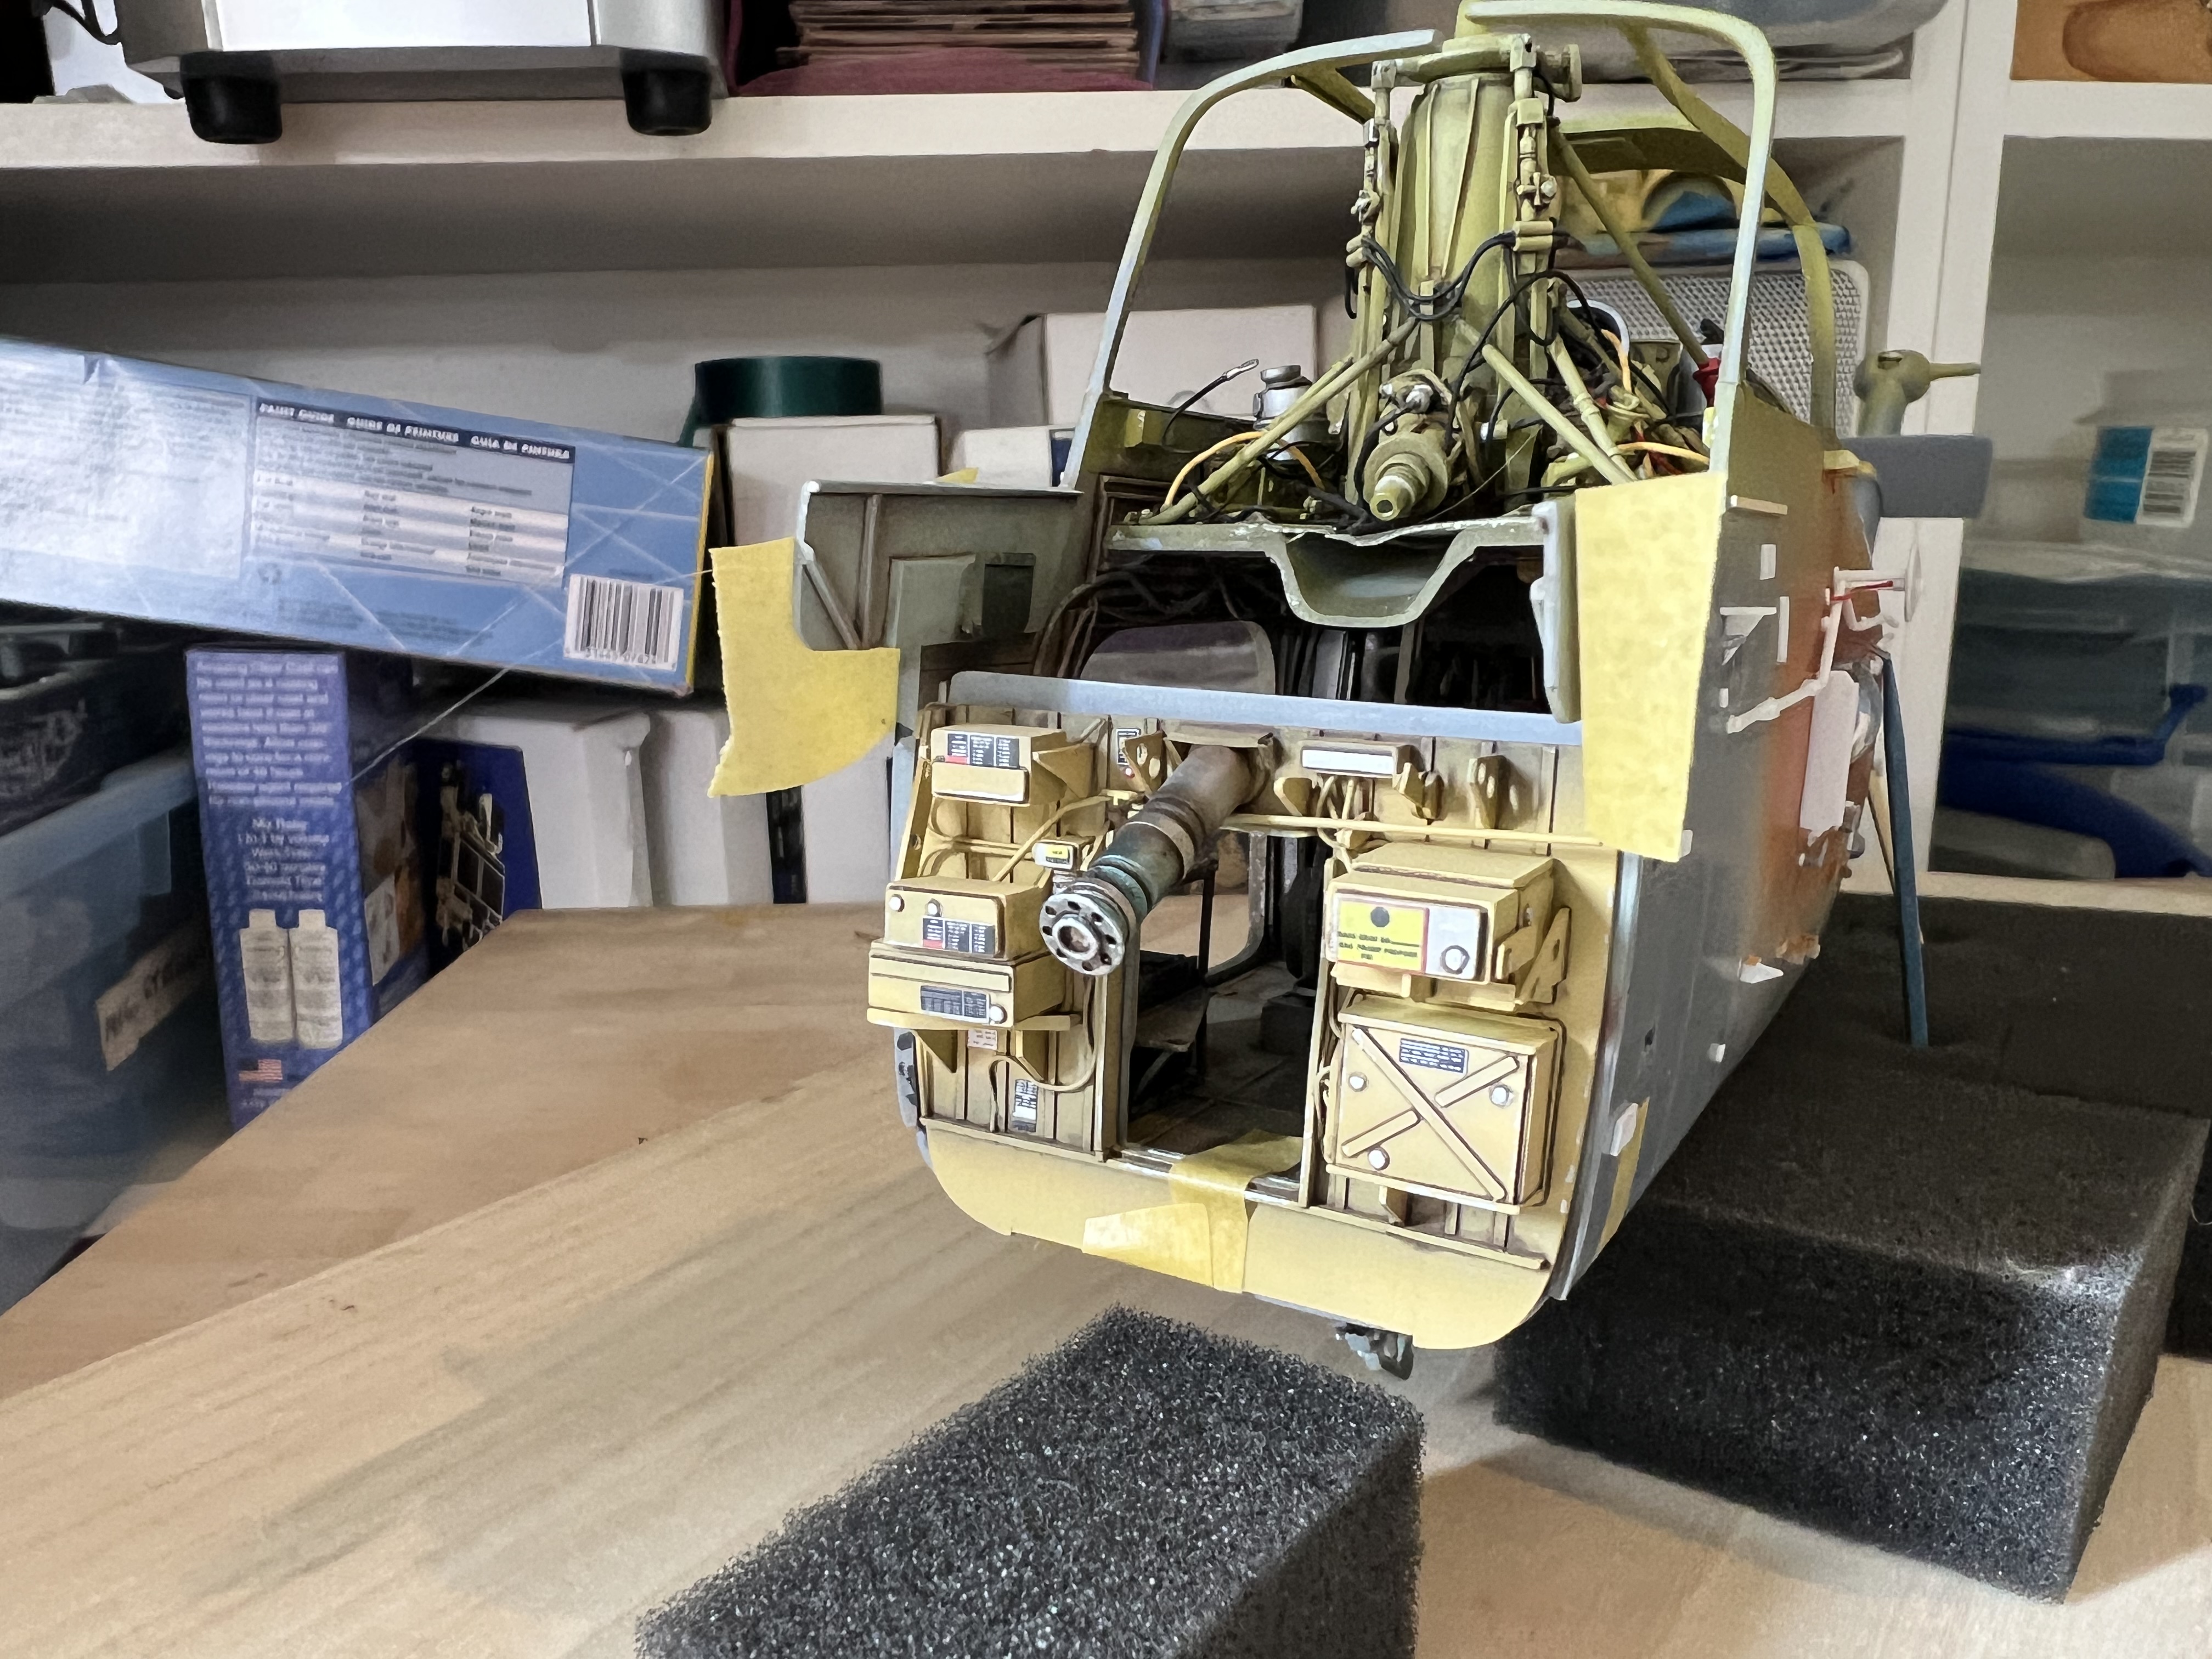
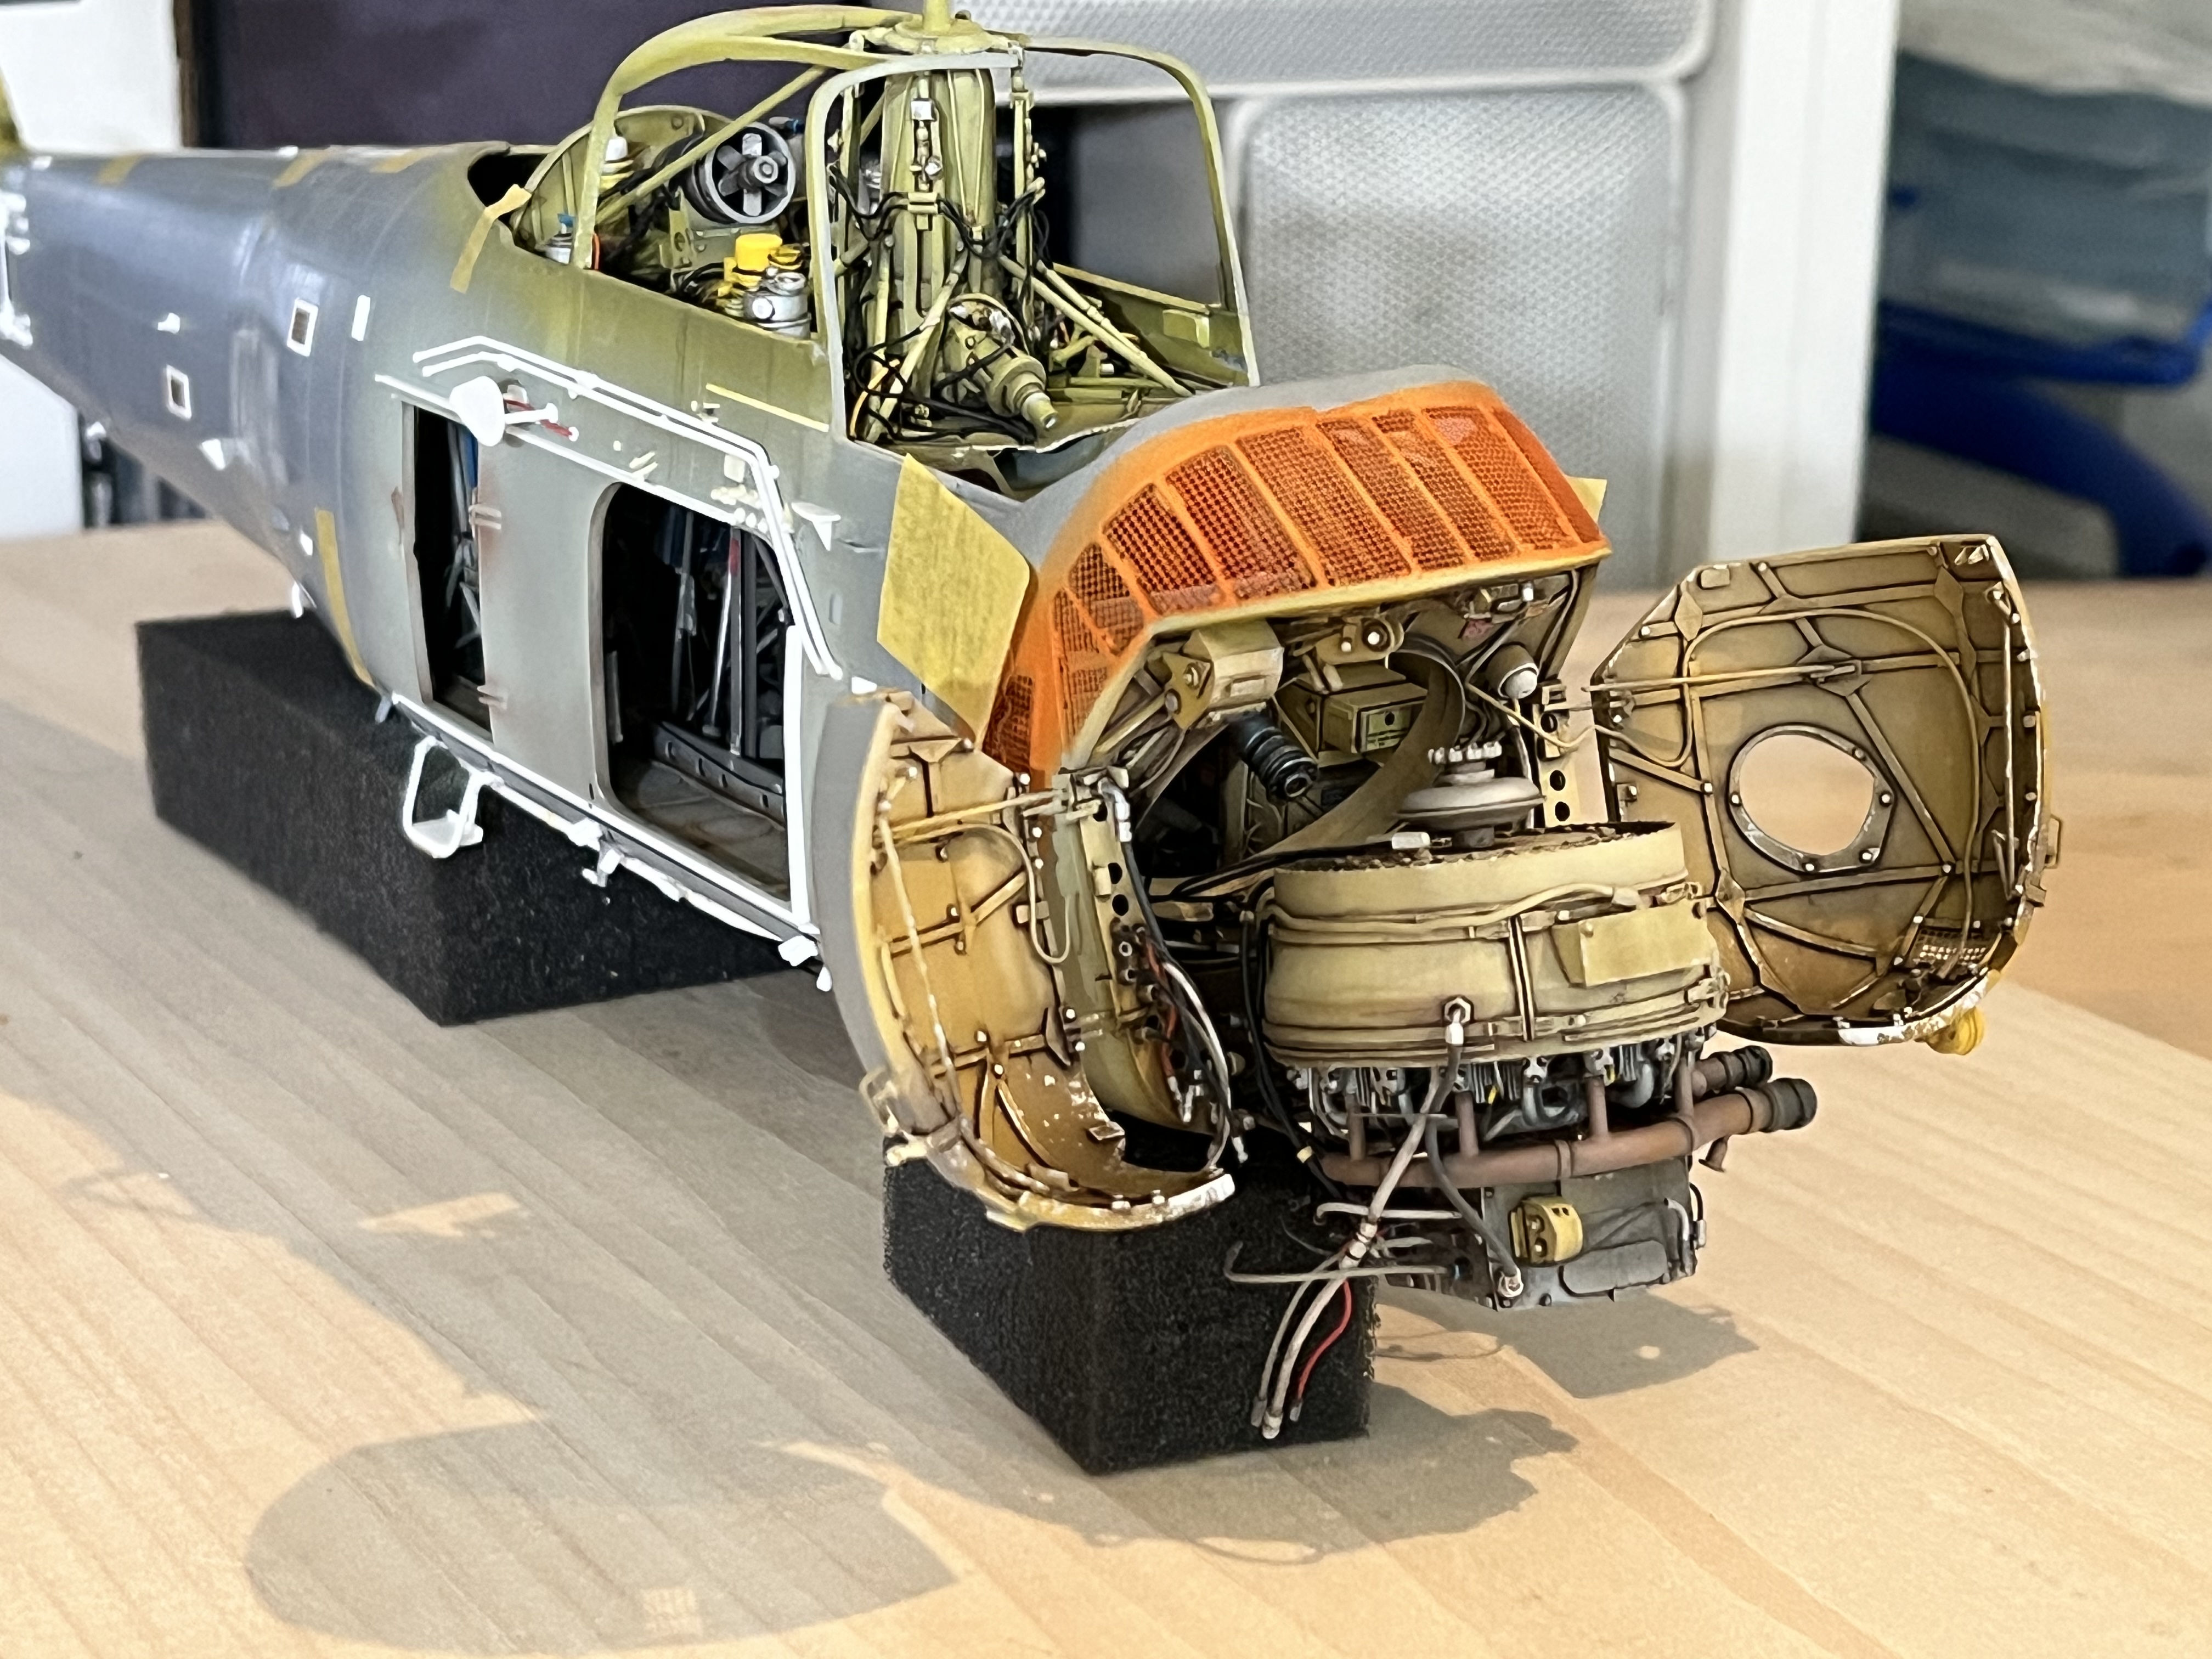
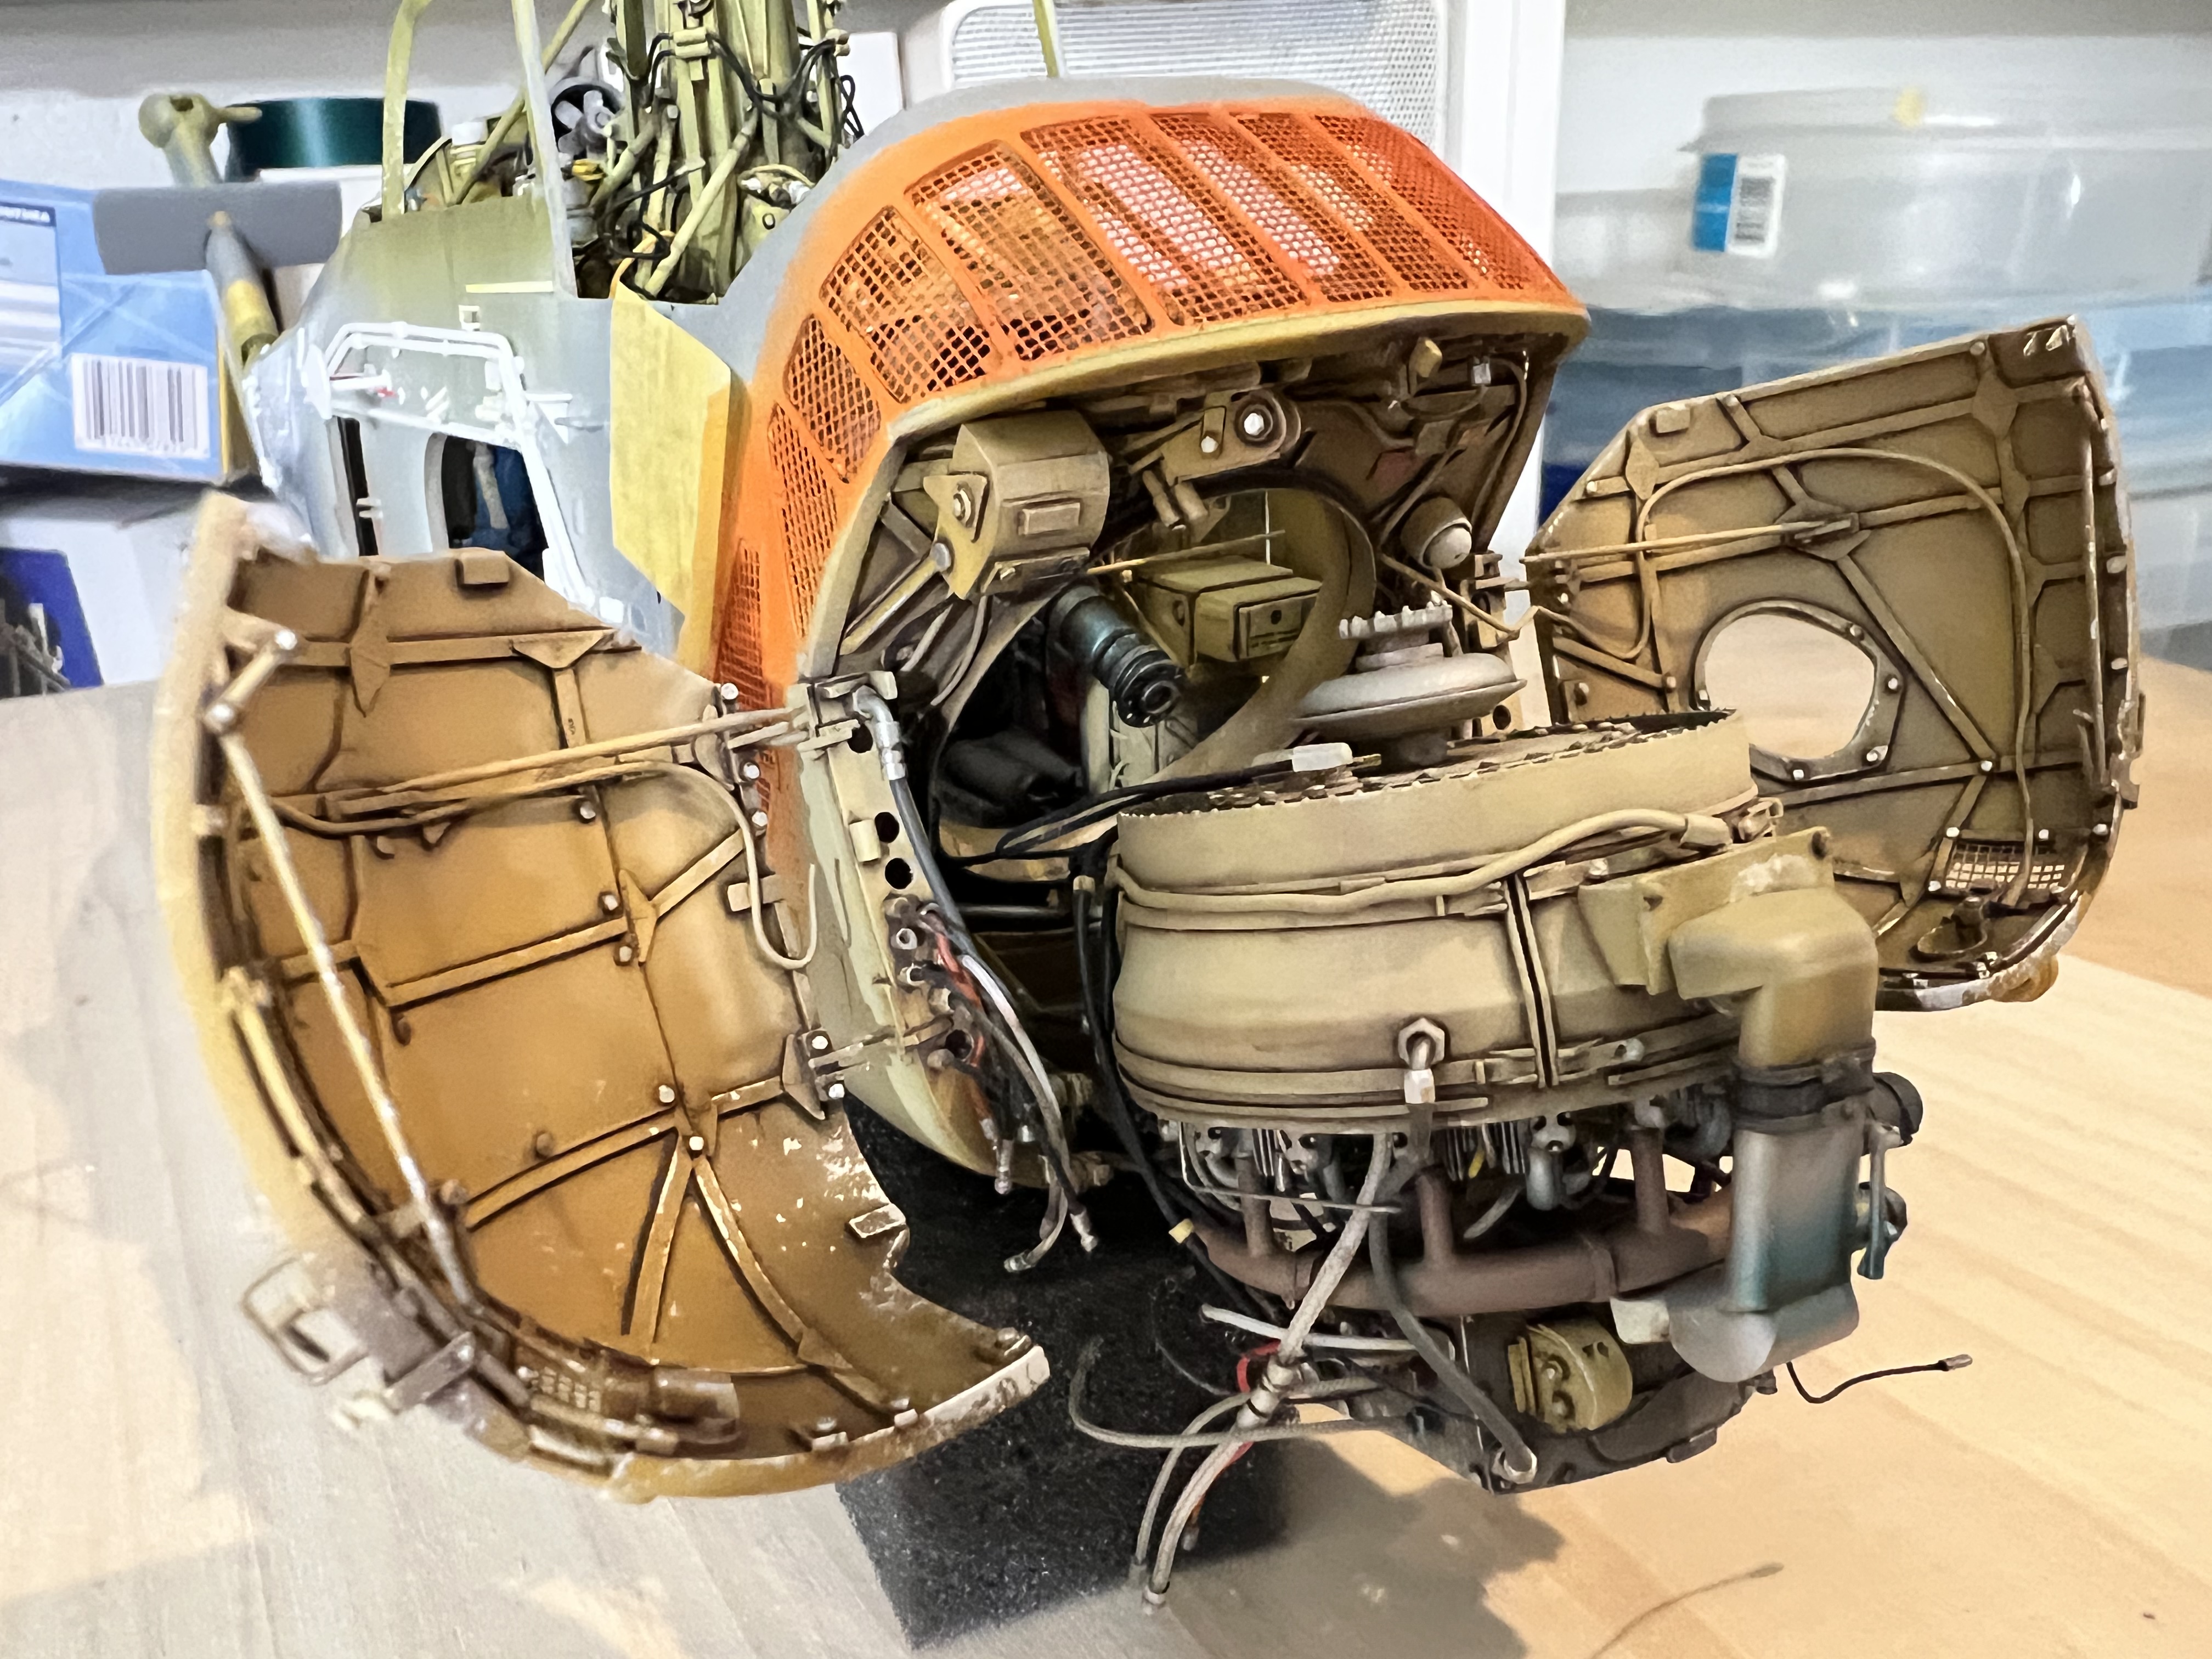
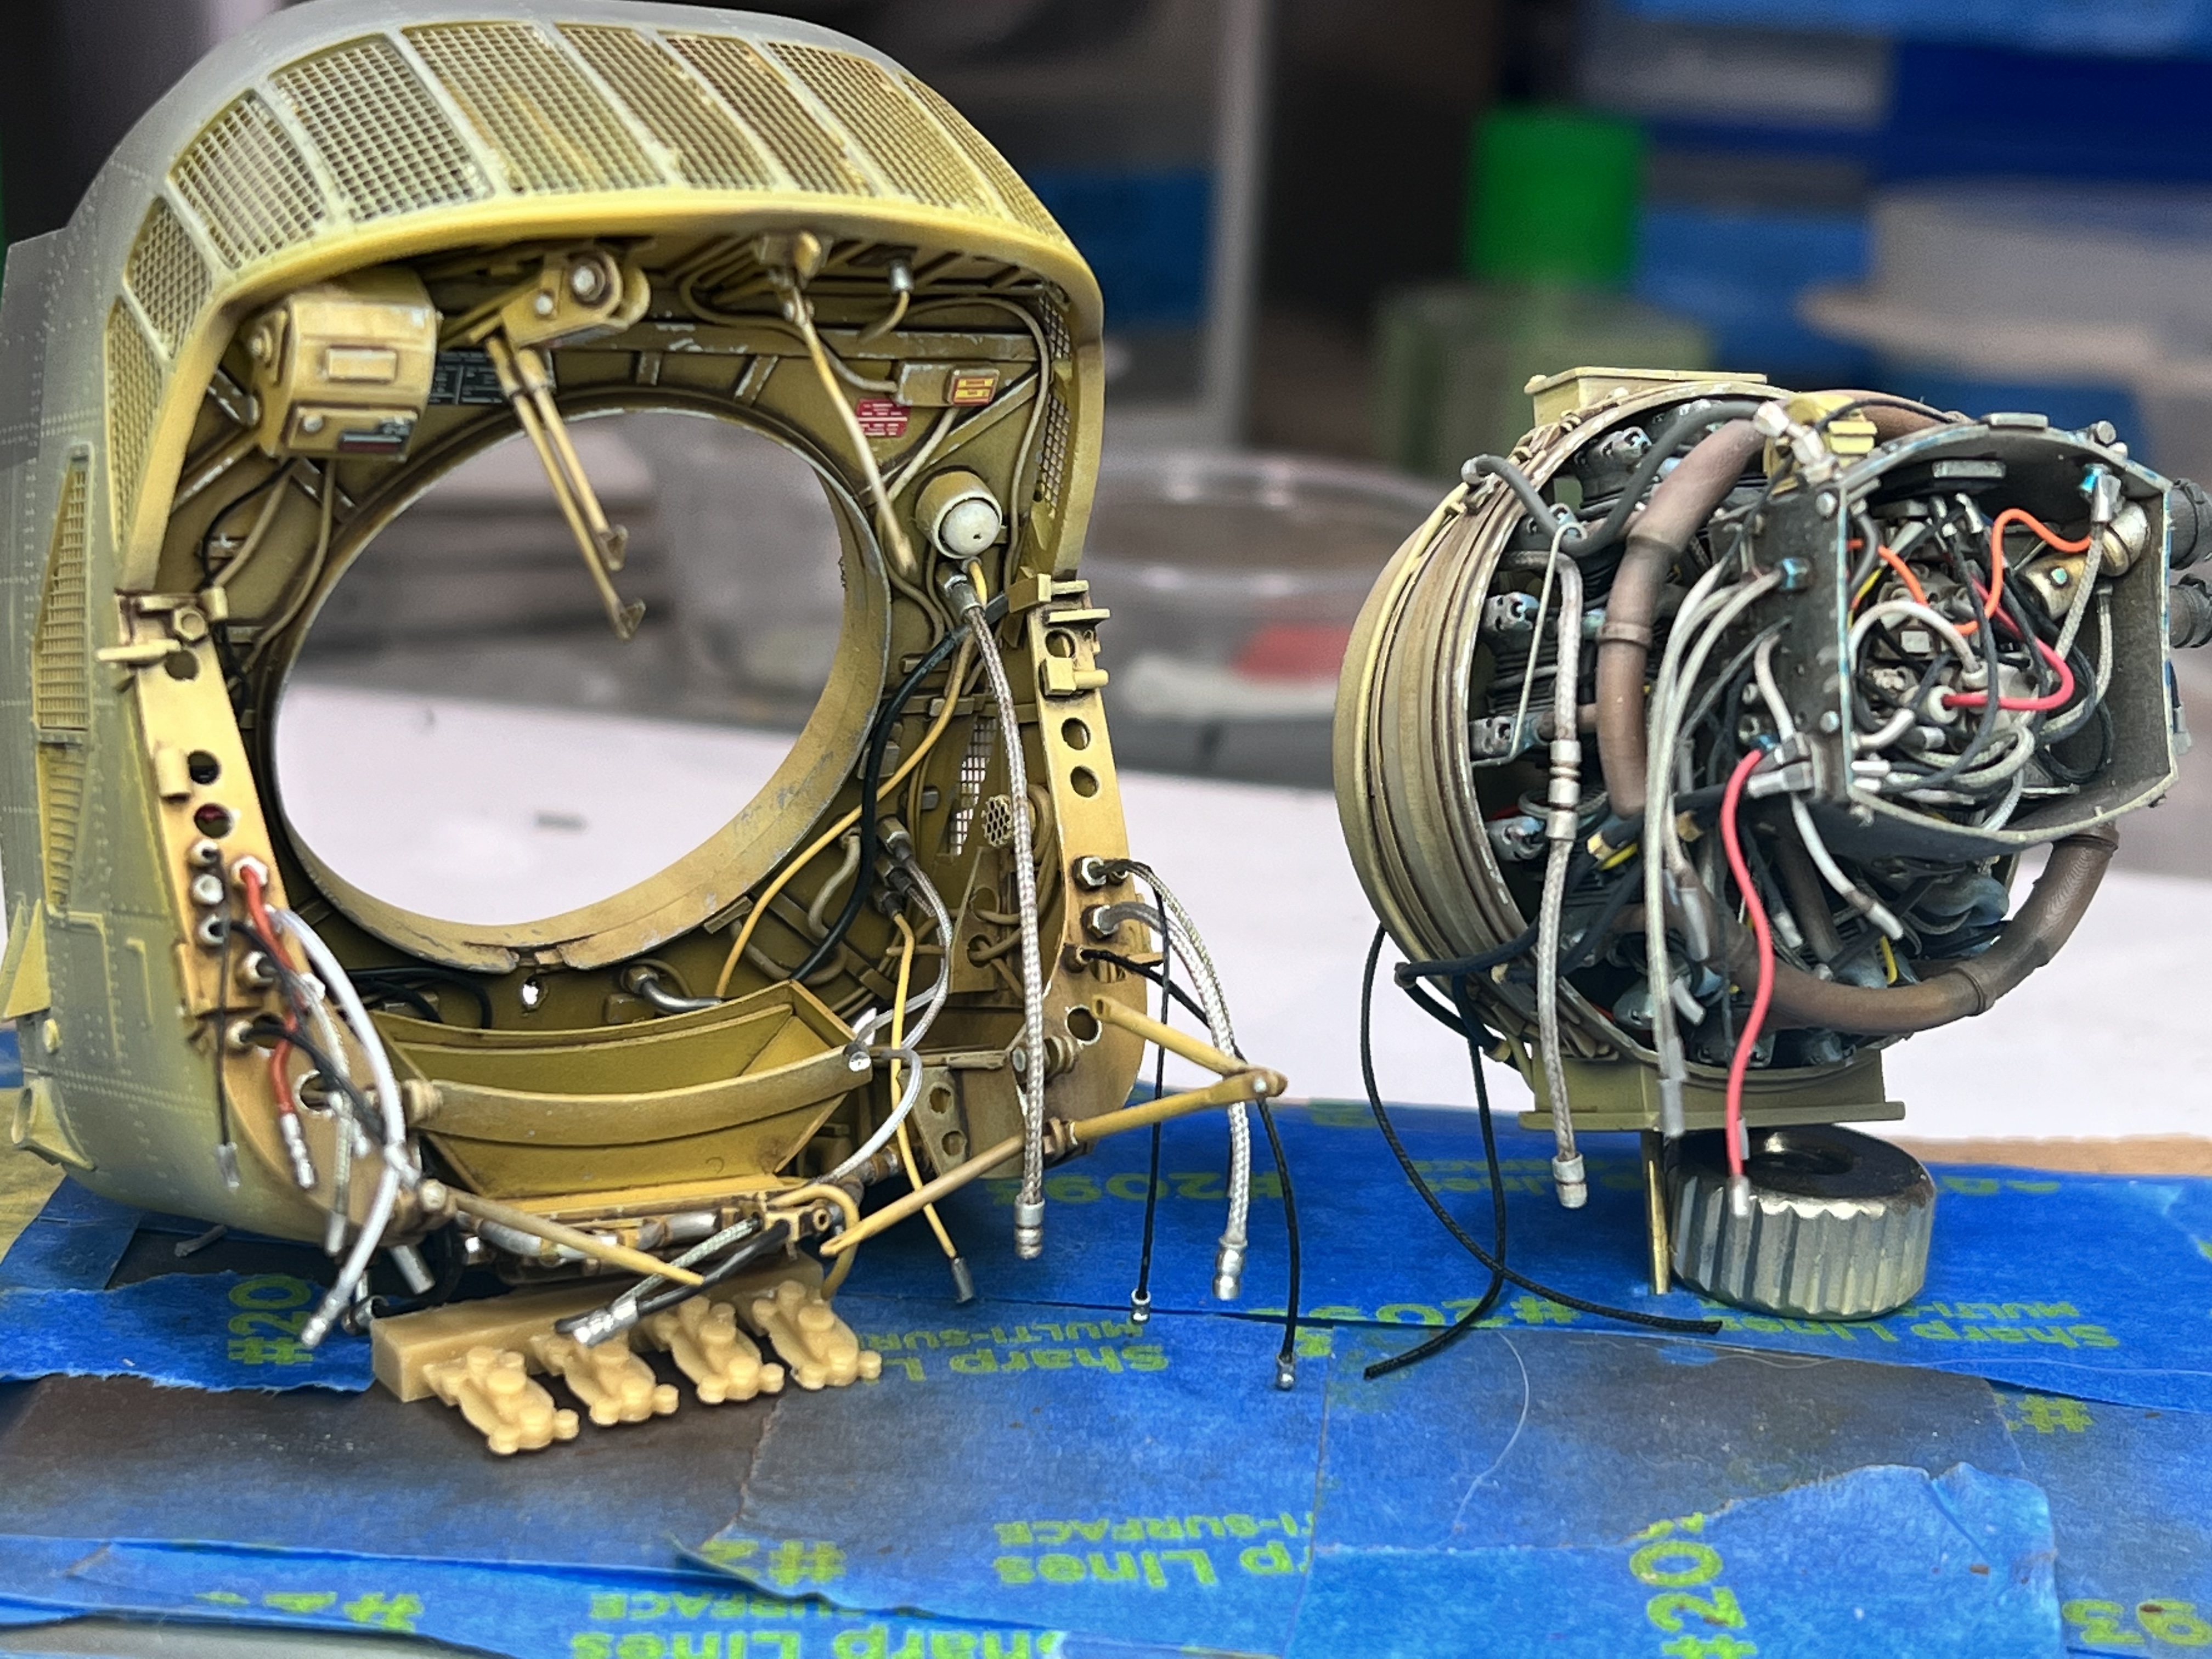
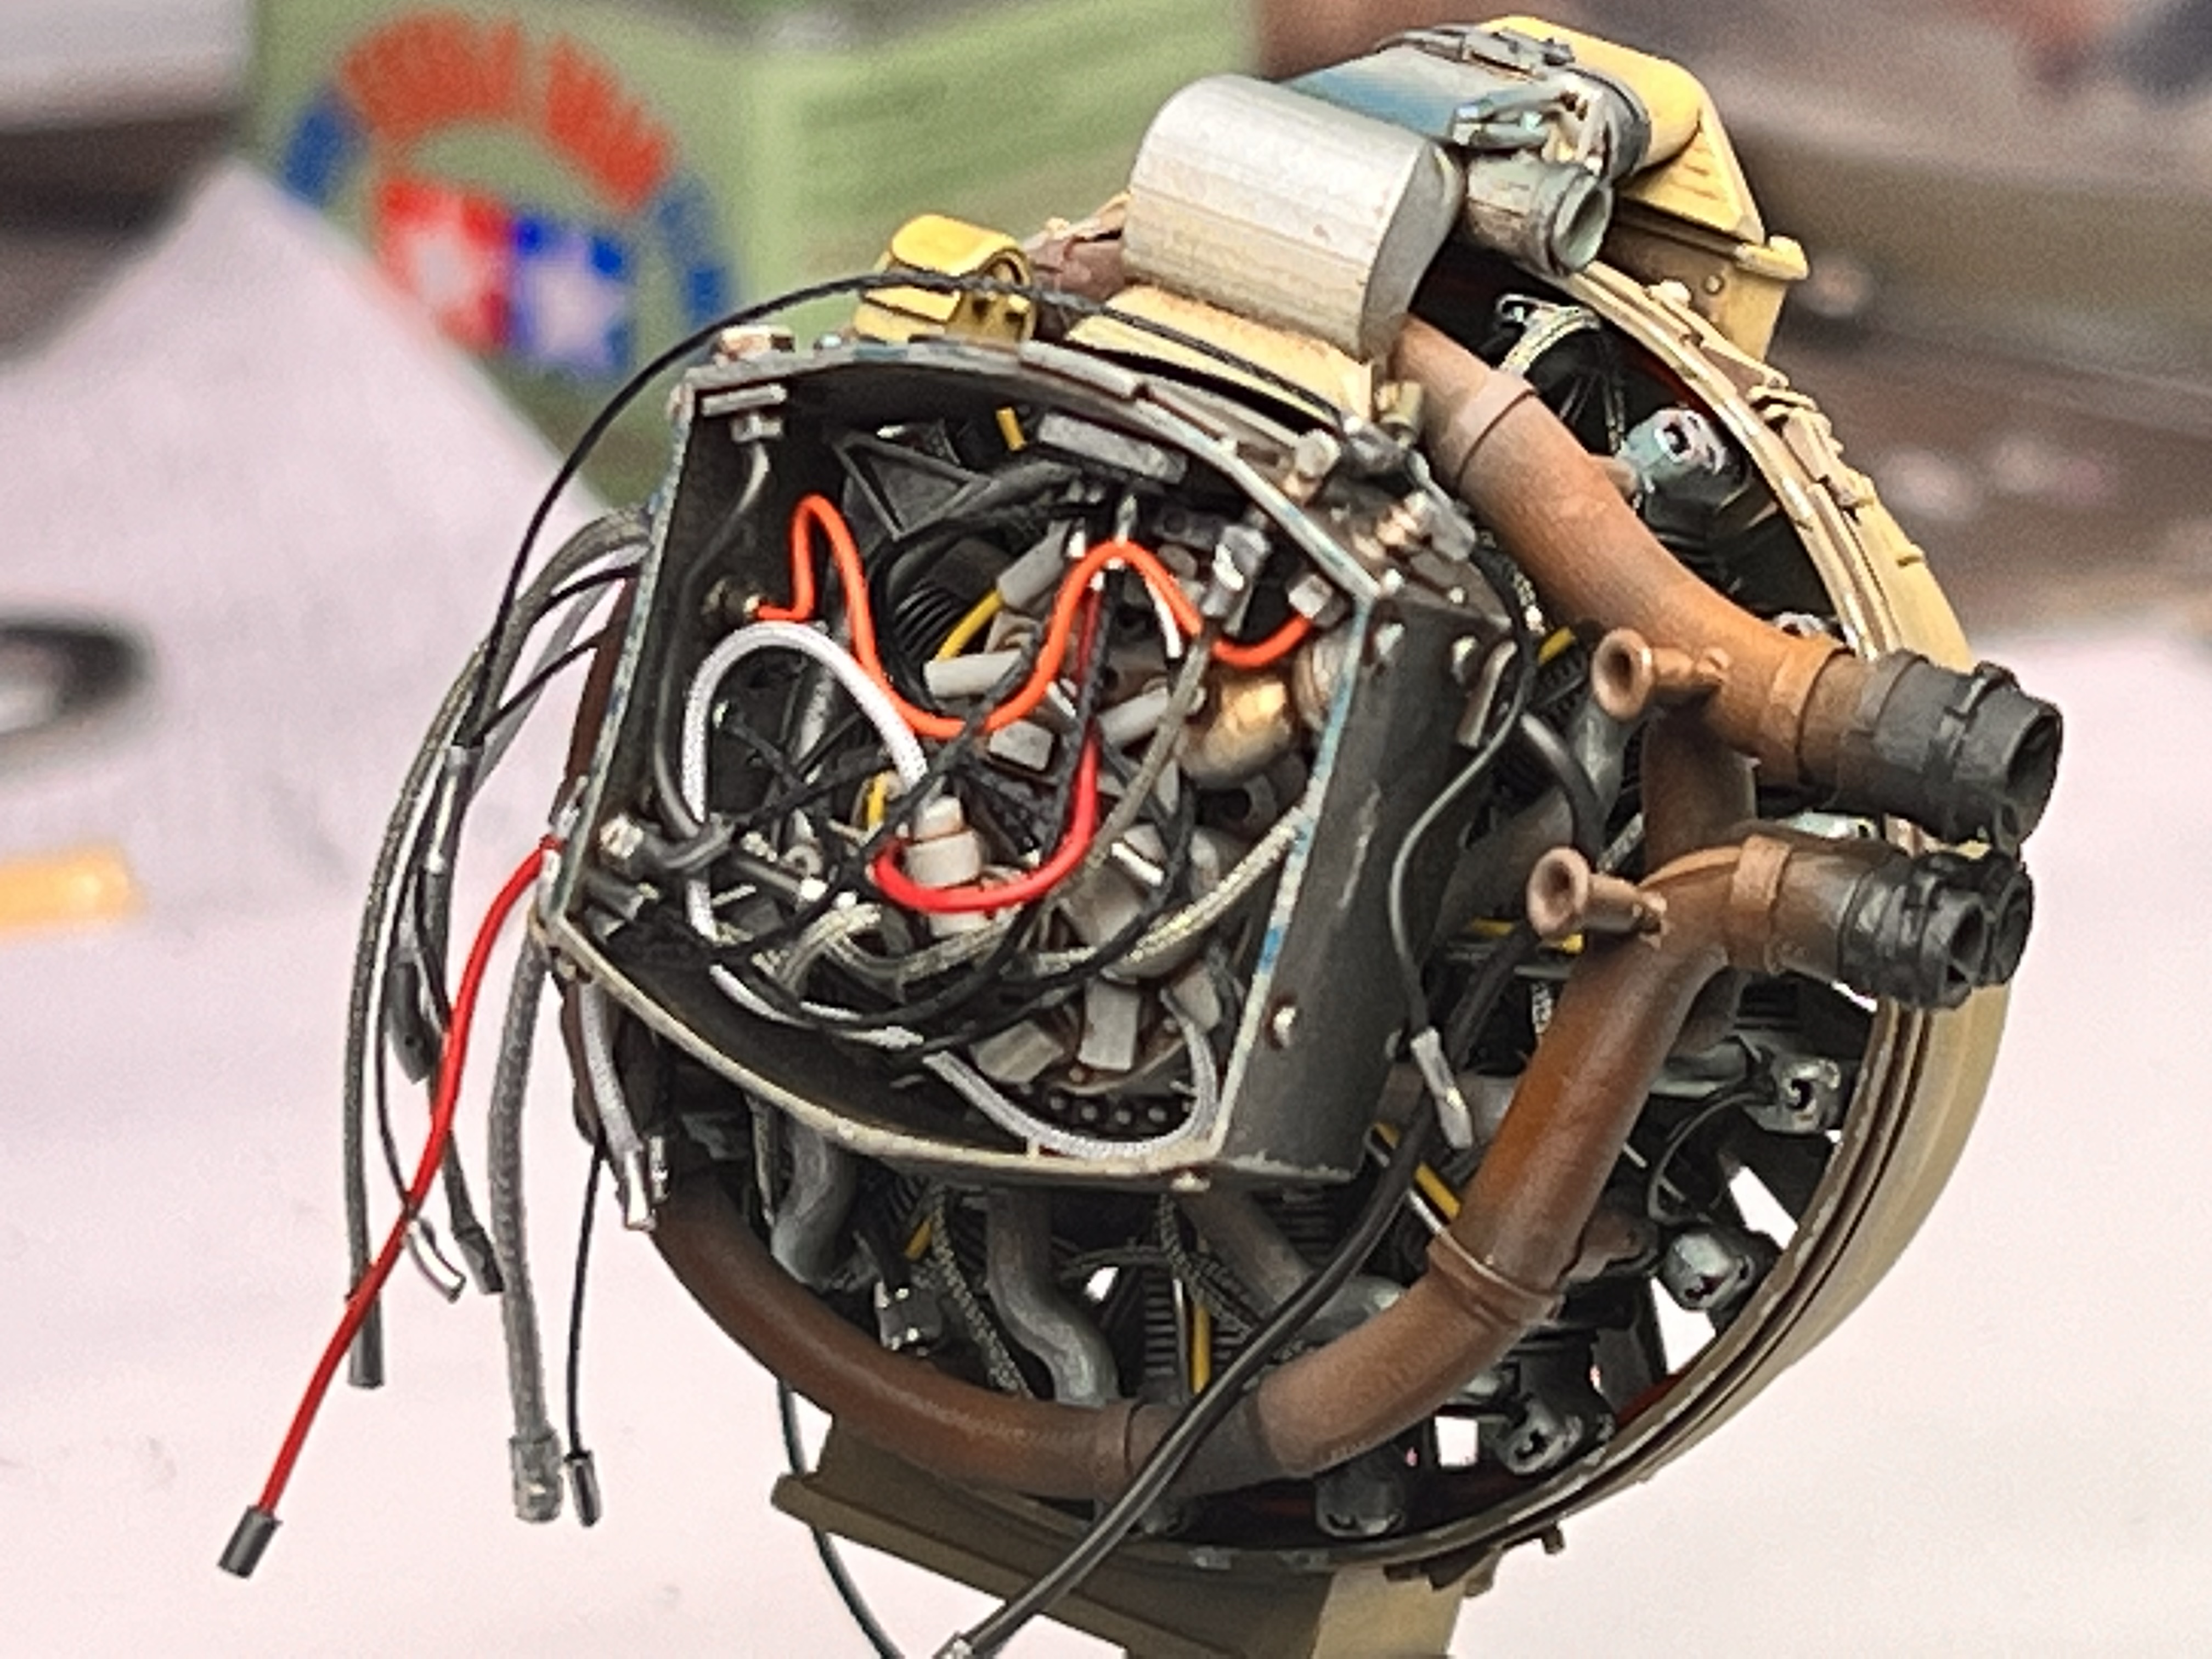
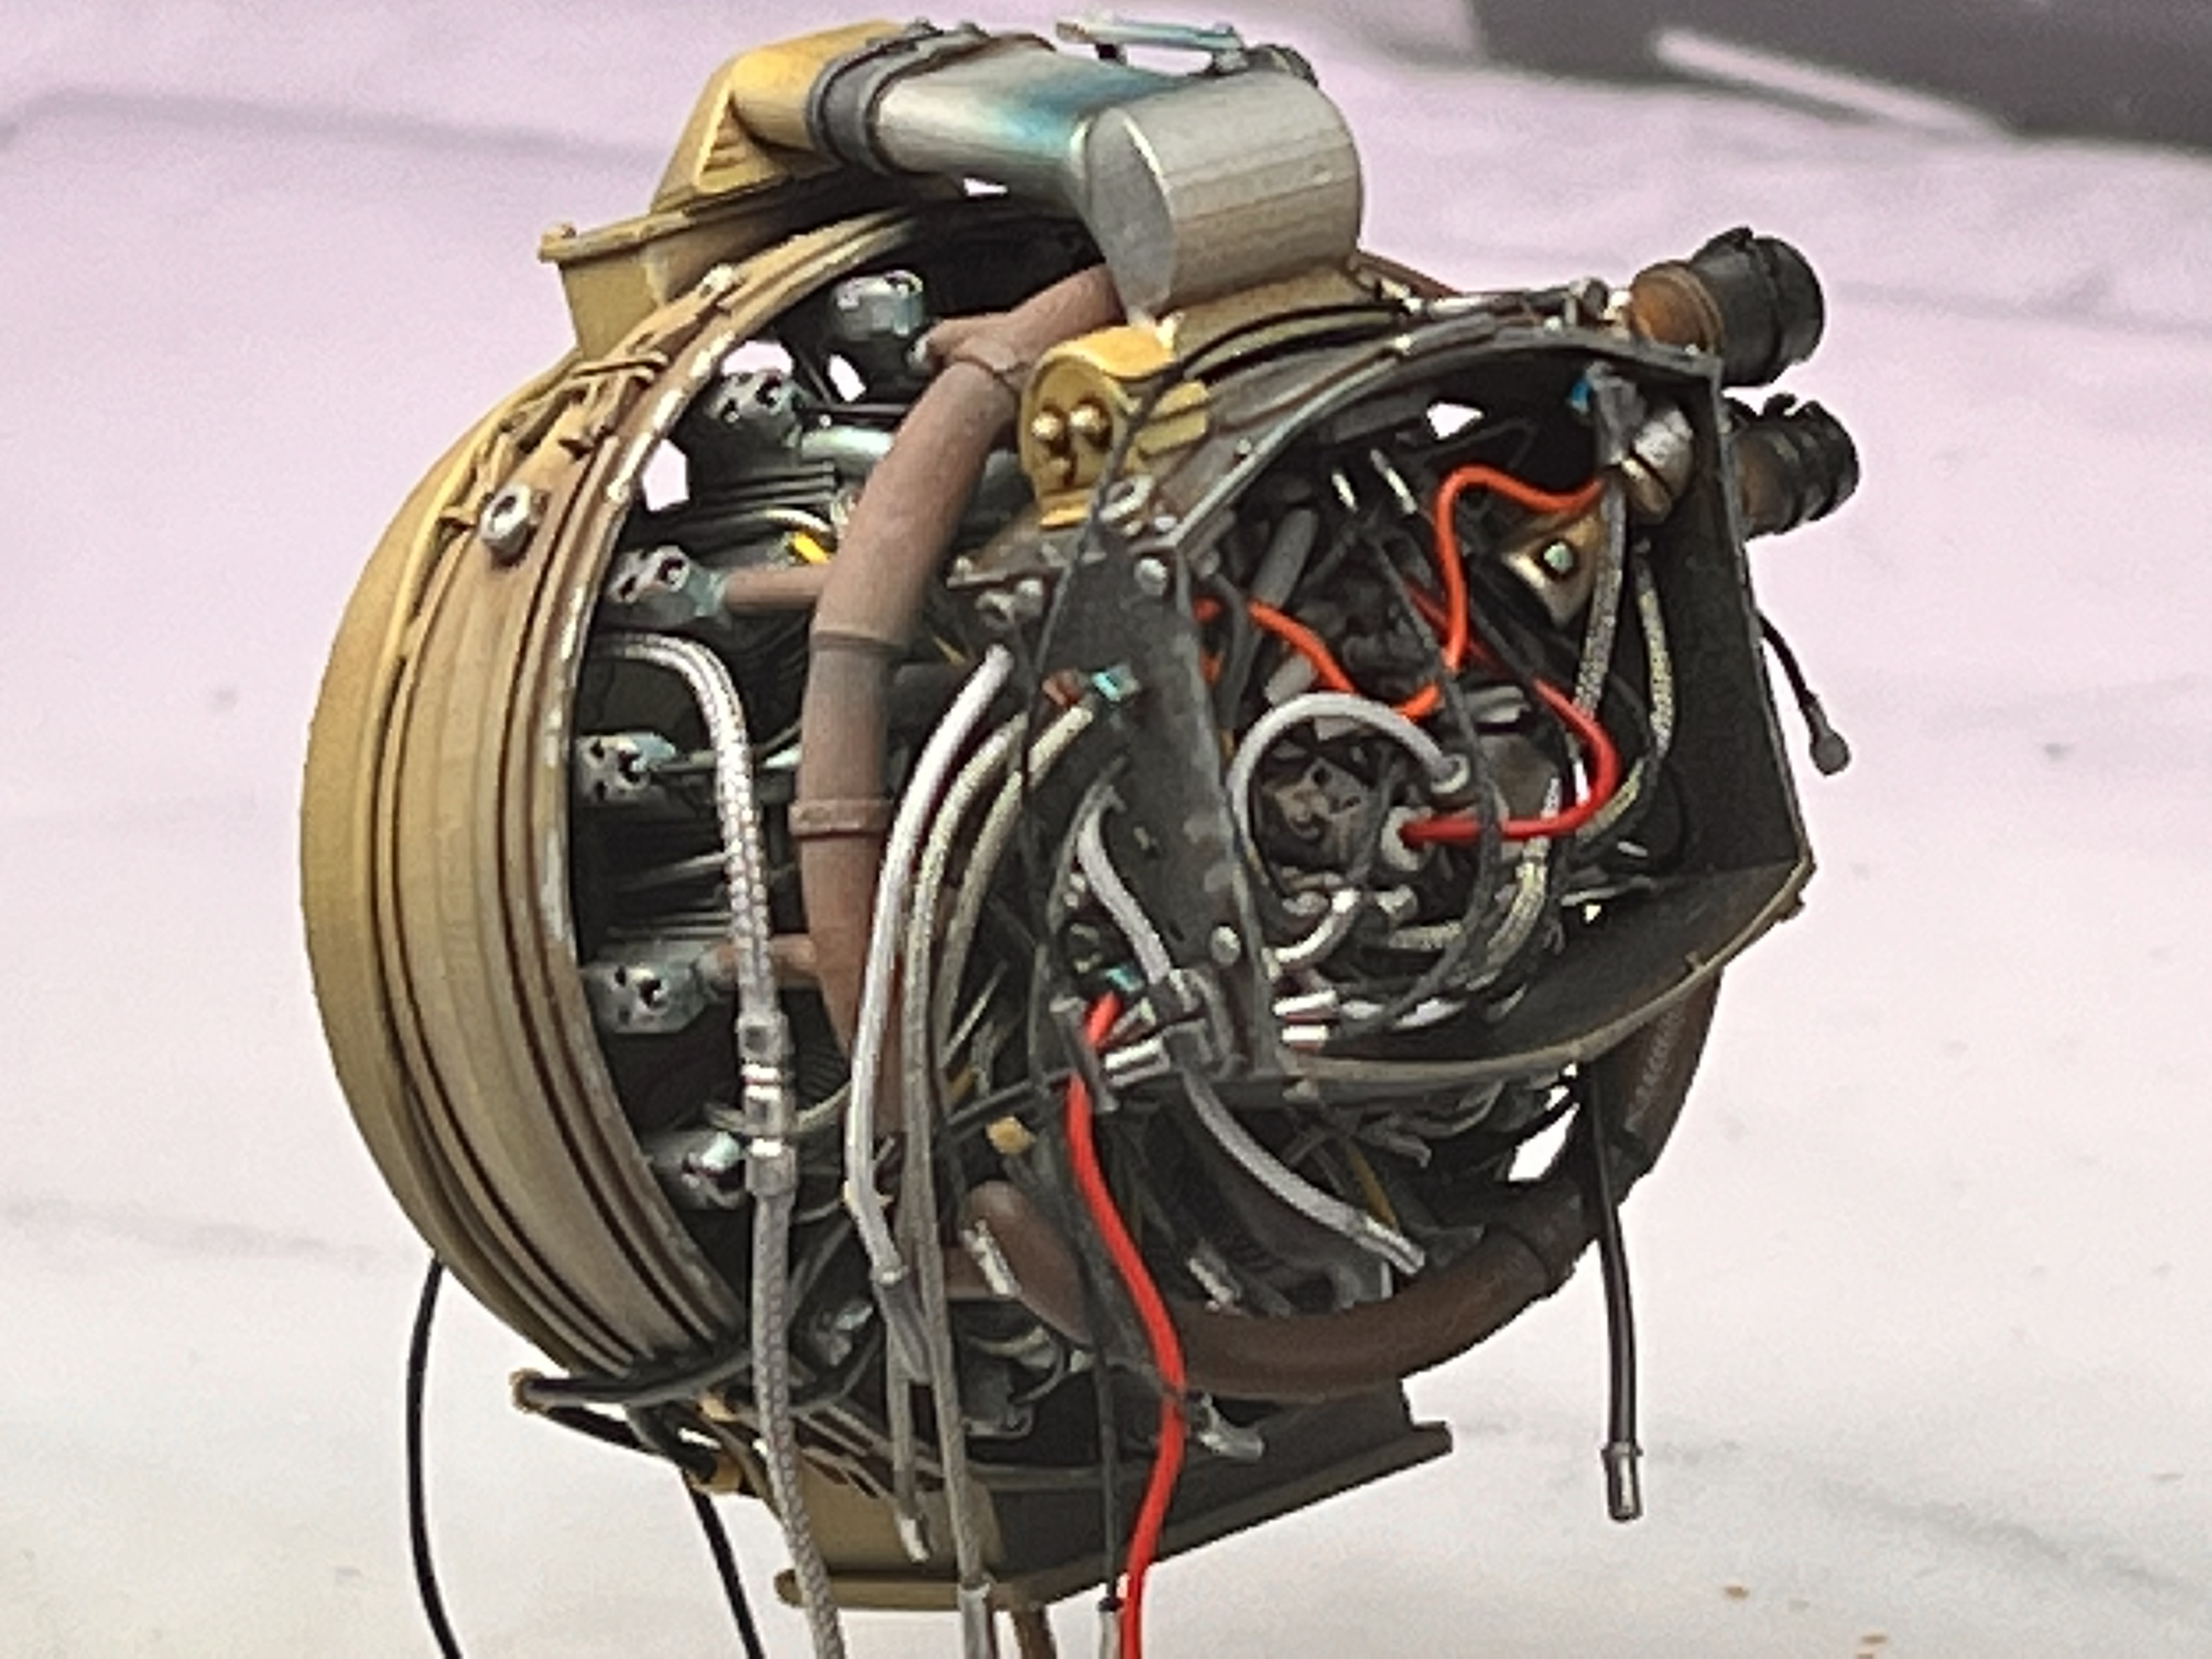
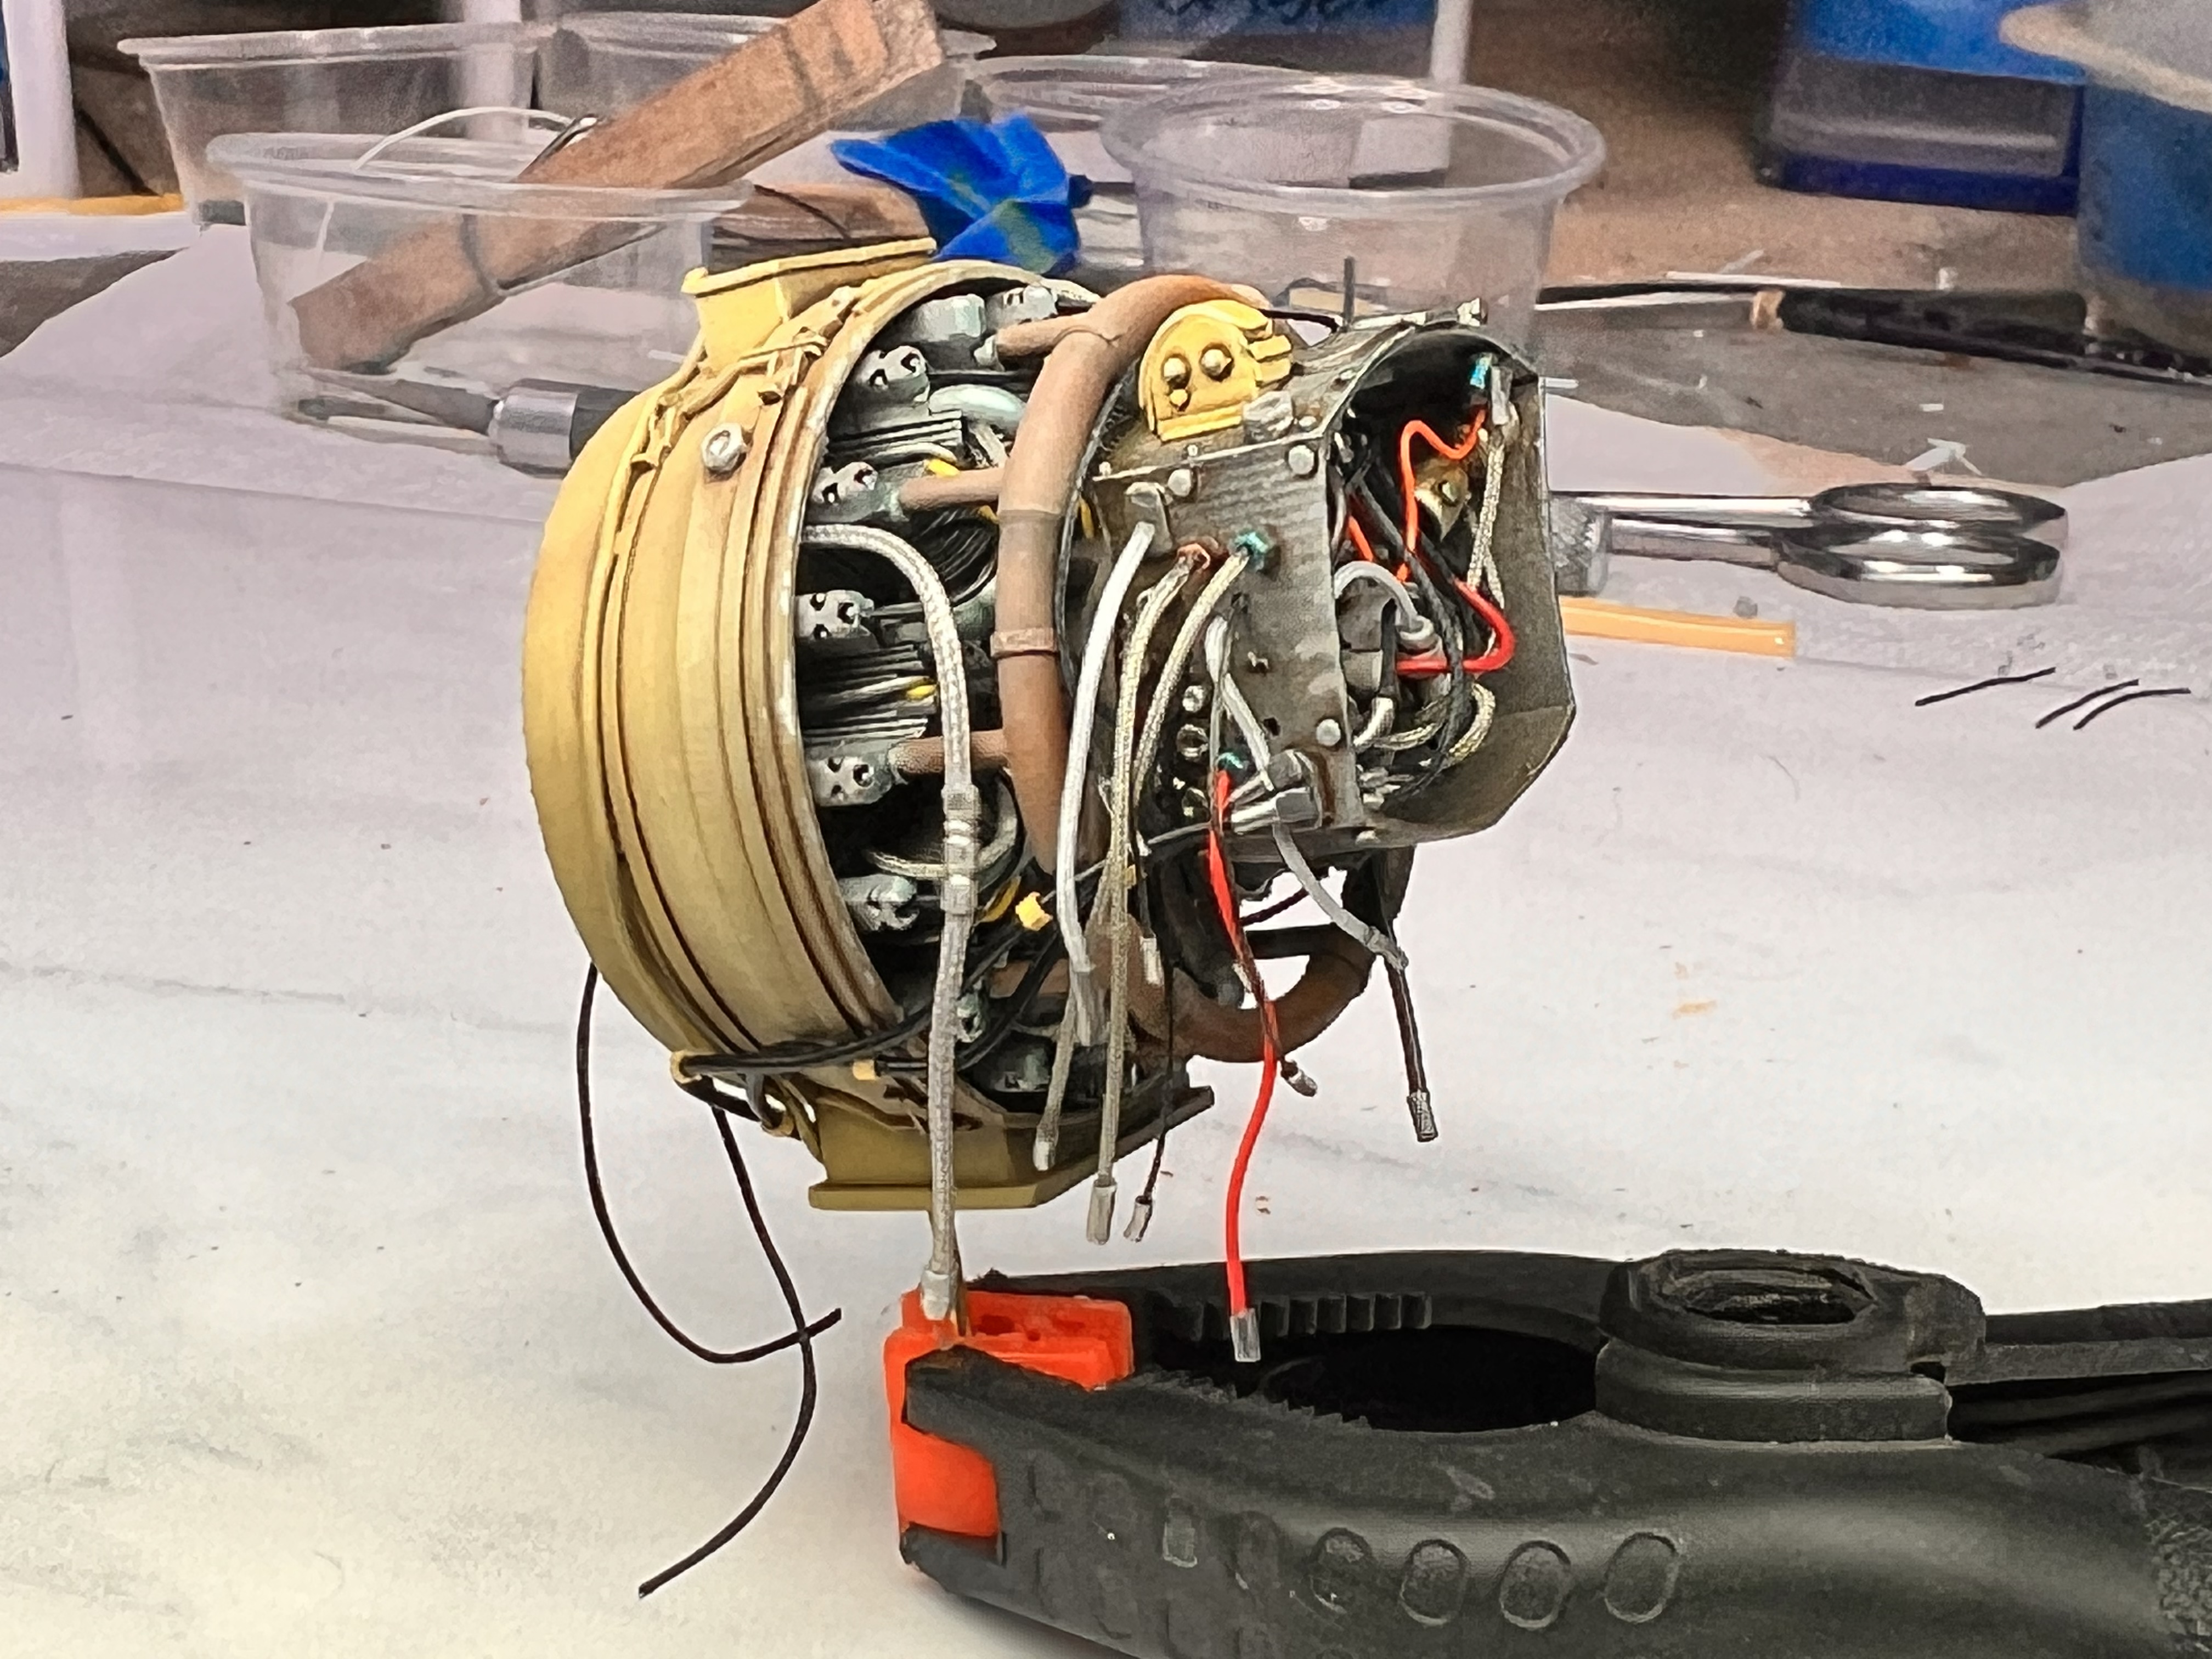
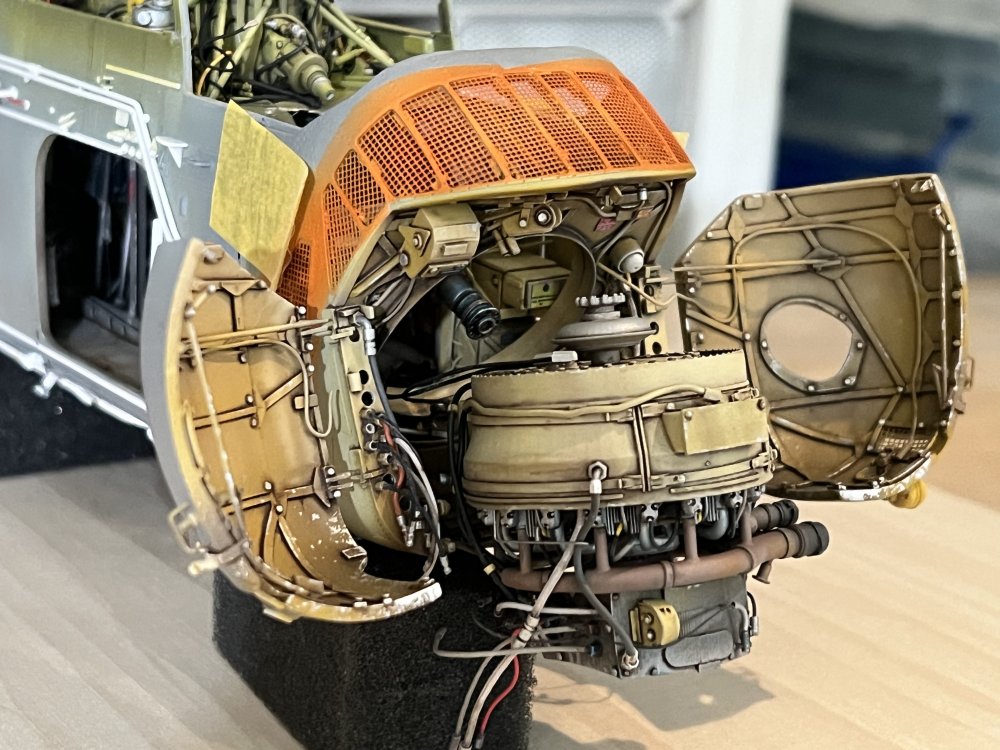
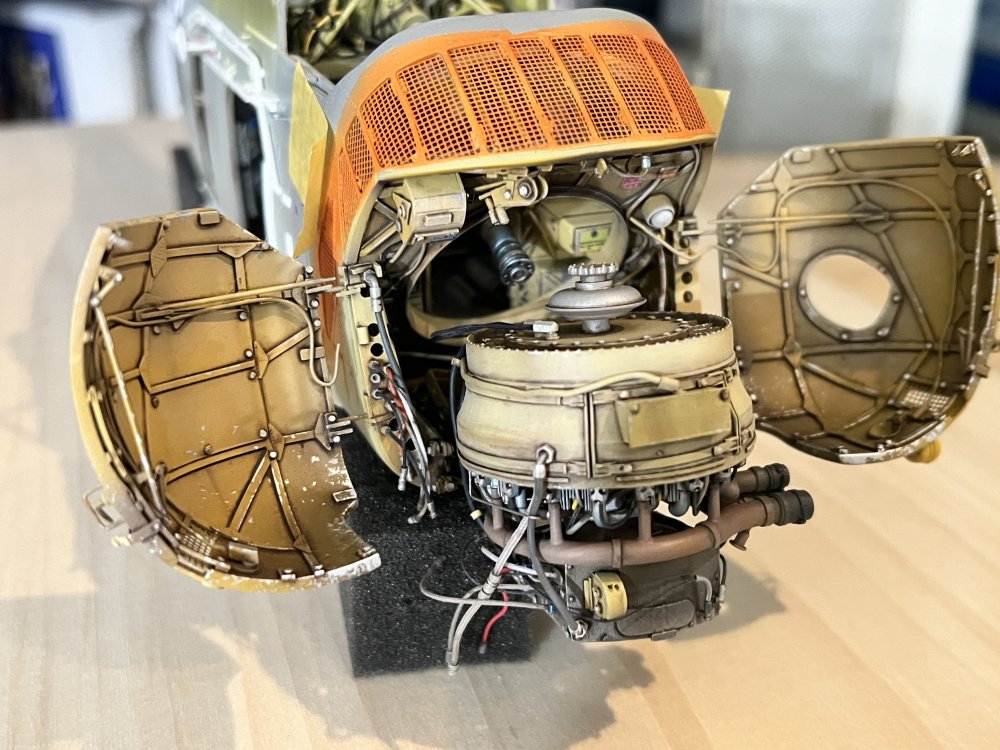
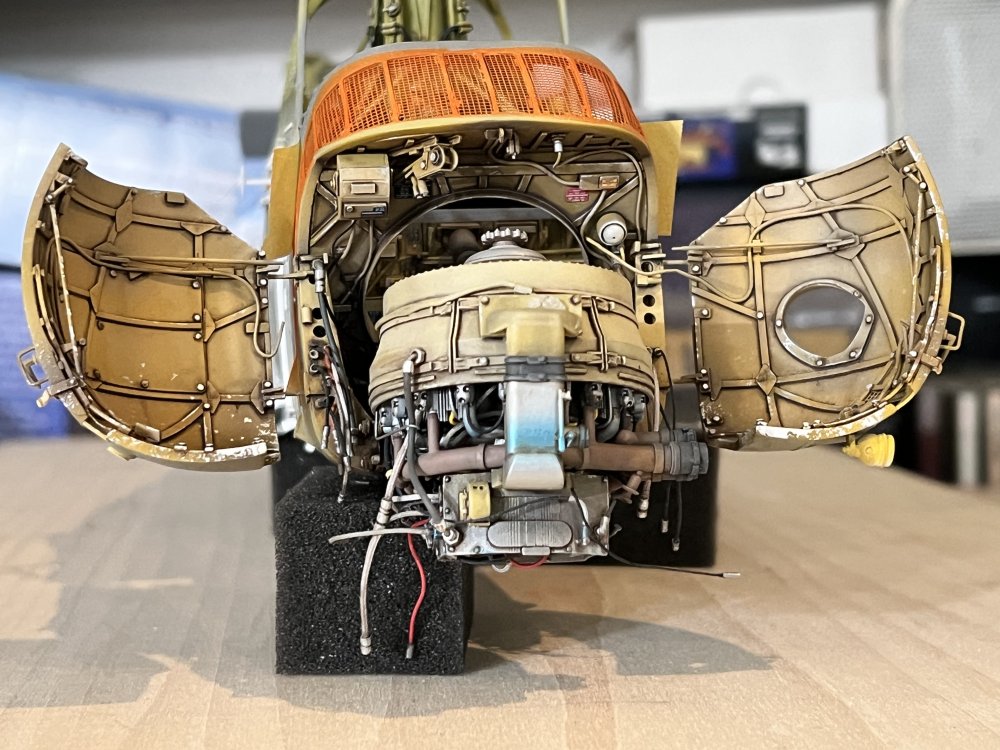
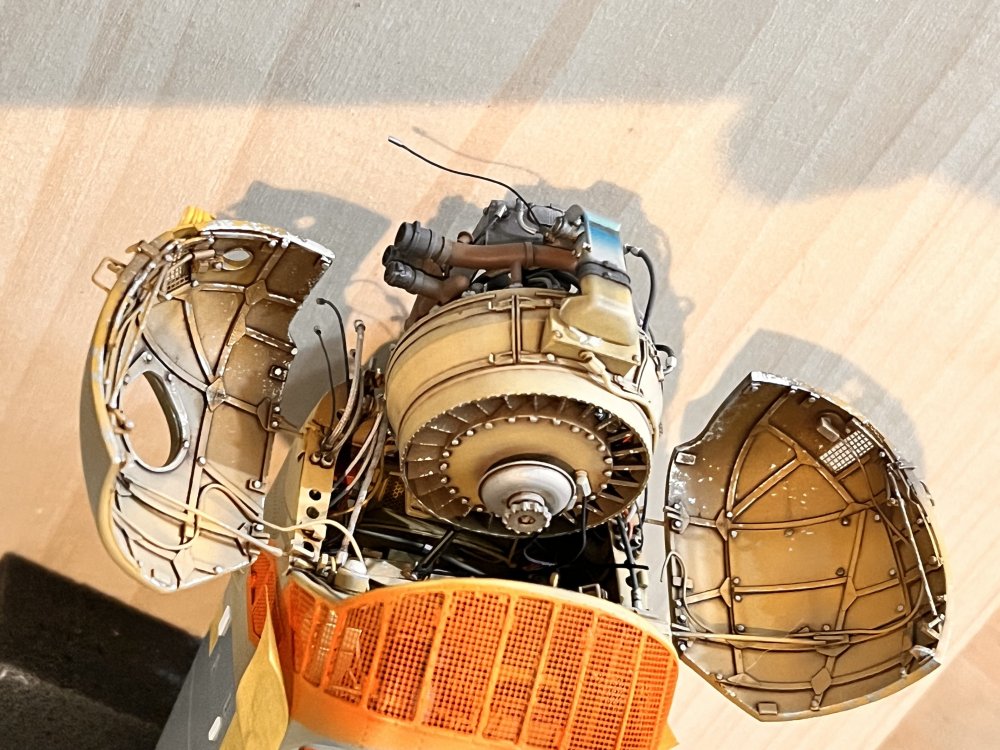
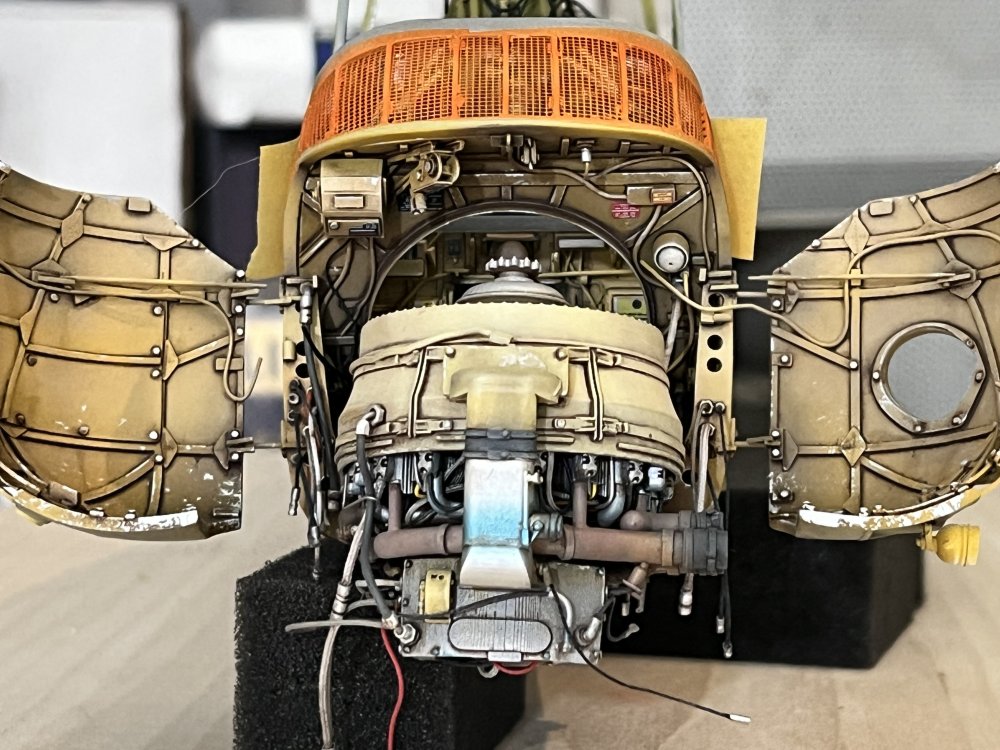
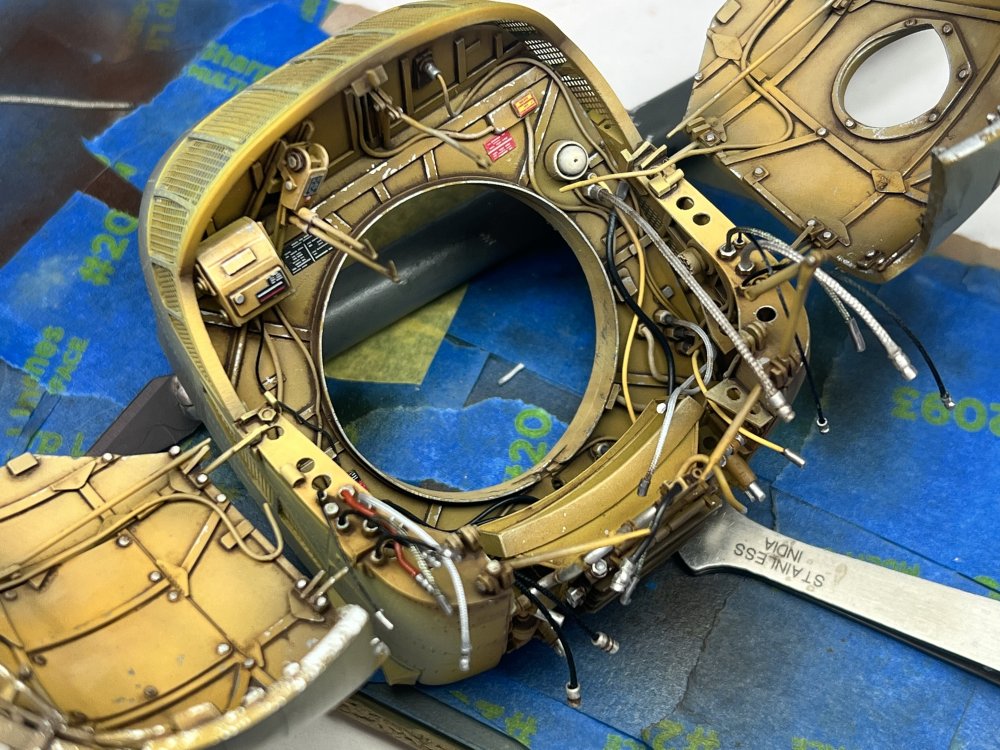
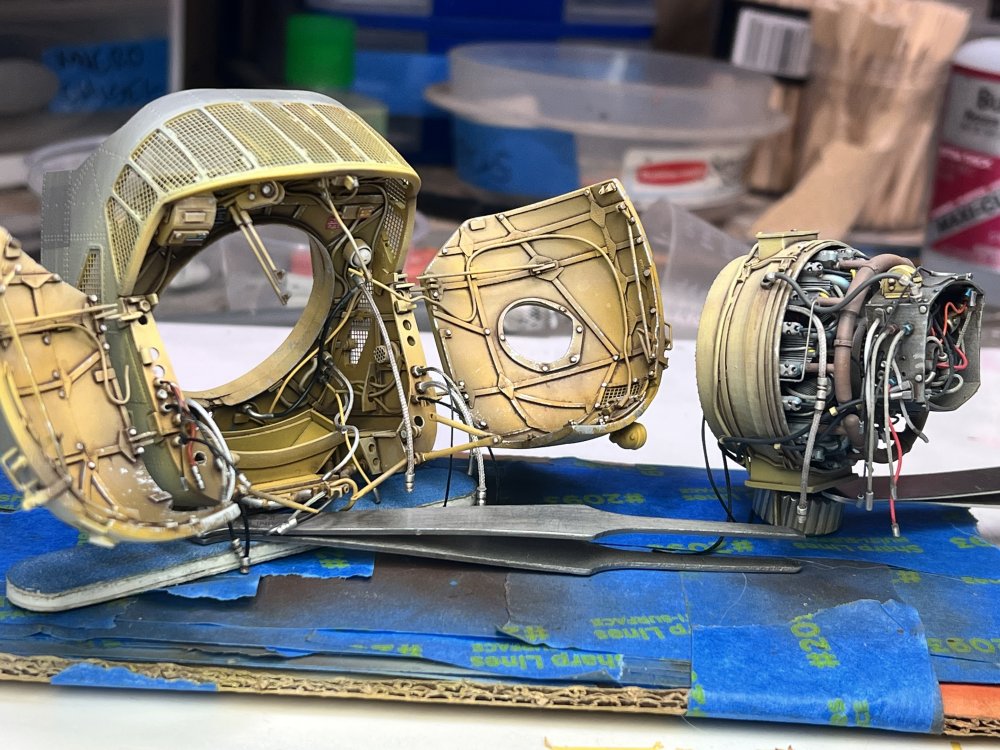
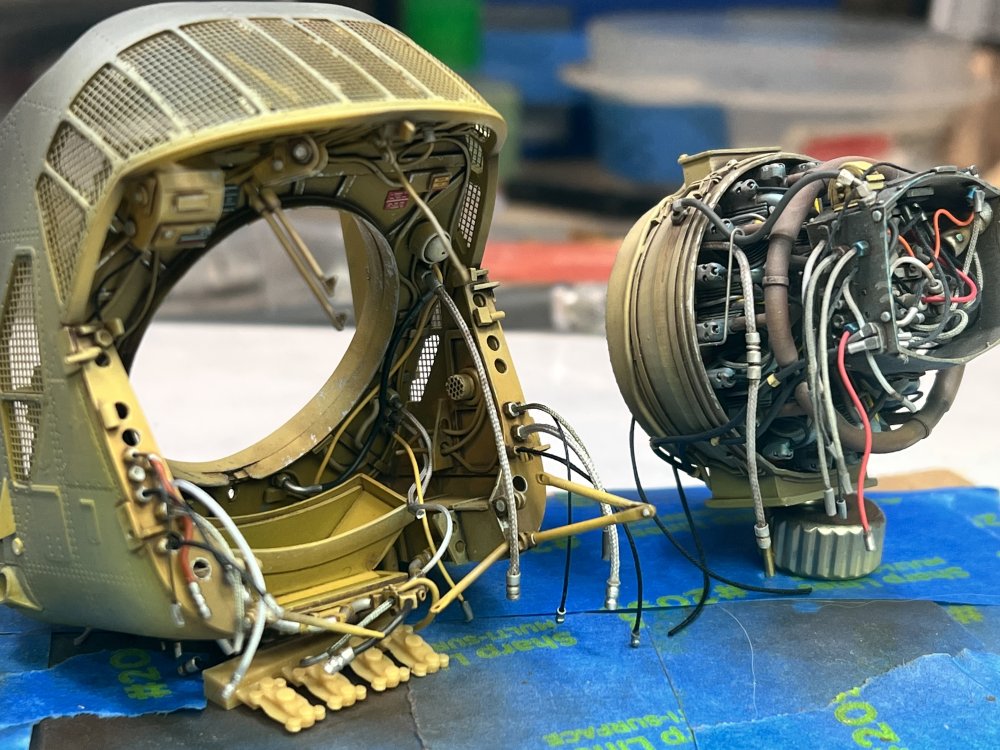
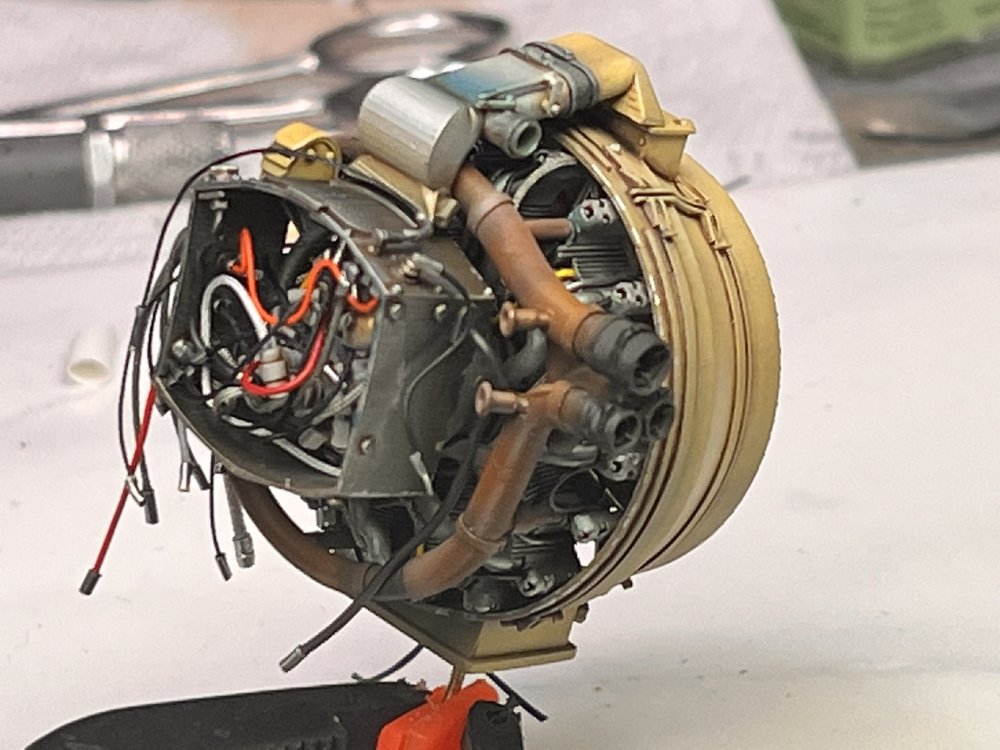
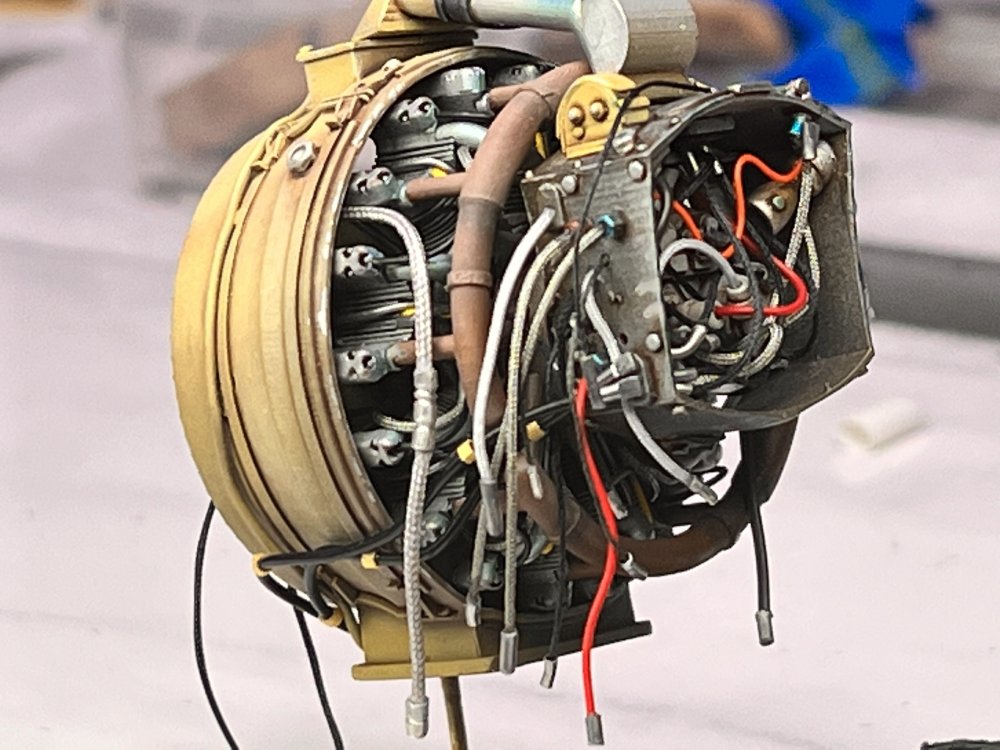
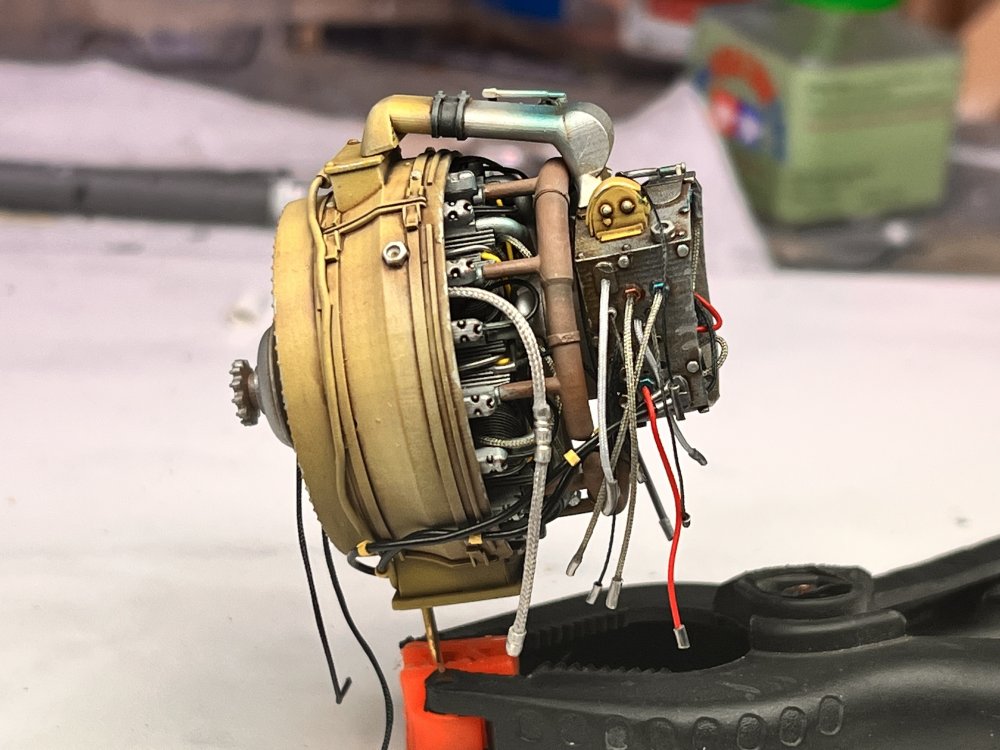
Engine in place(not glued). I had to insert an aluminum rod in the kit and slide the engine on it(much easier to handle). I prepainted the top grills Orange since I was afraid of over spraying the green inside. MRP paint is a dream to spray. Also painted the blades bracket. Moving on to painting the blades next.The engine angle is correct while in maintenace( research photo )


-
Thanks Martin
-
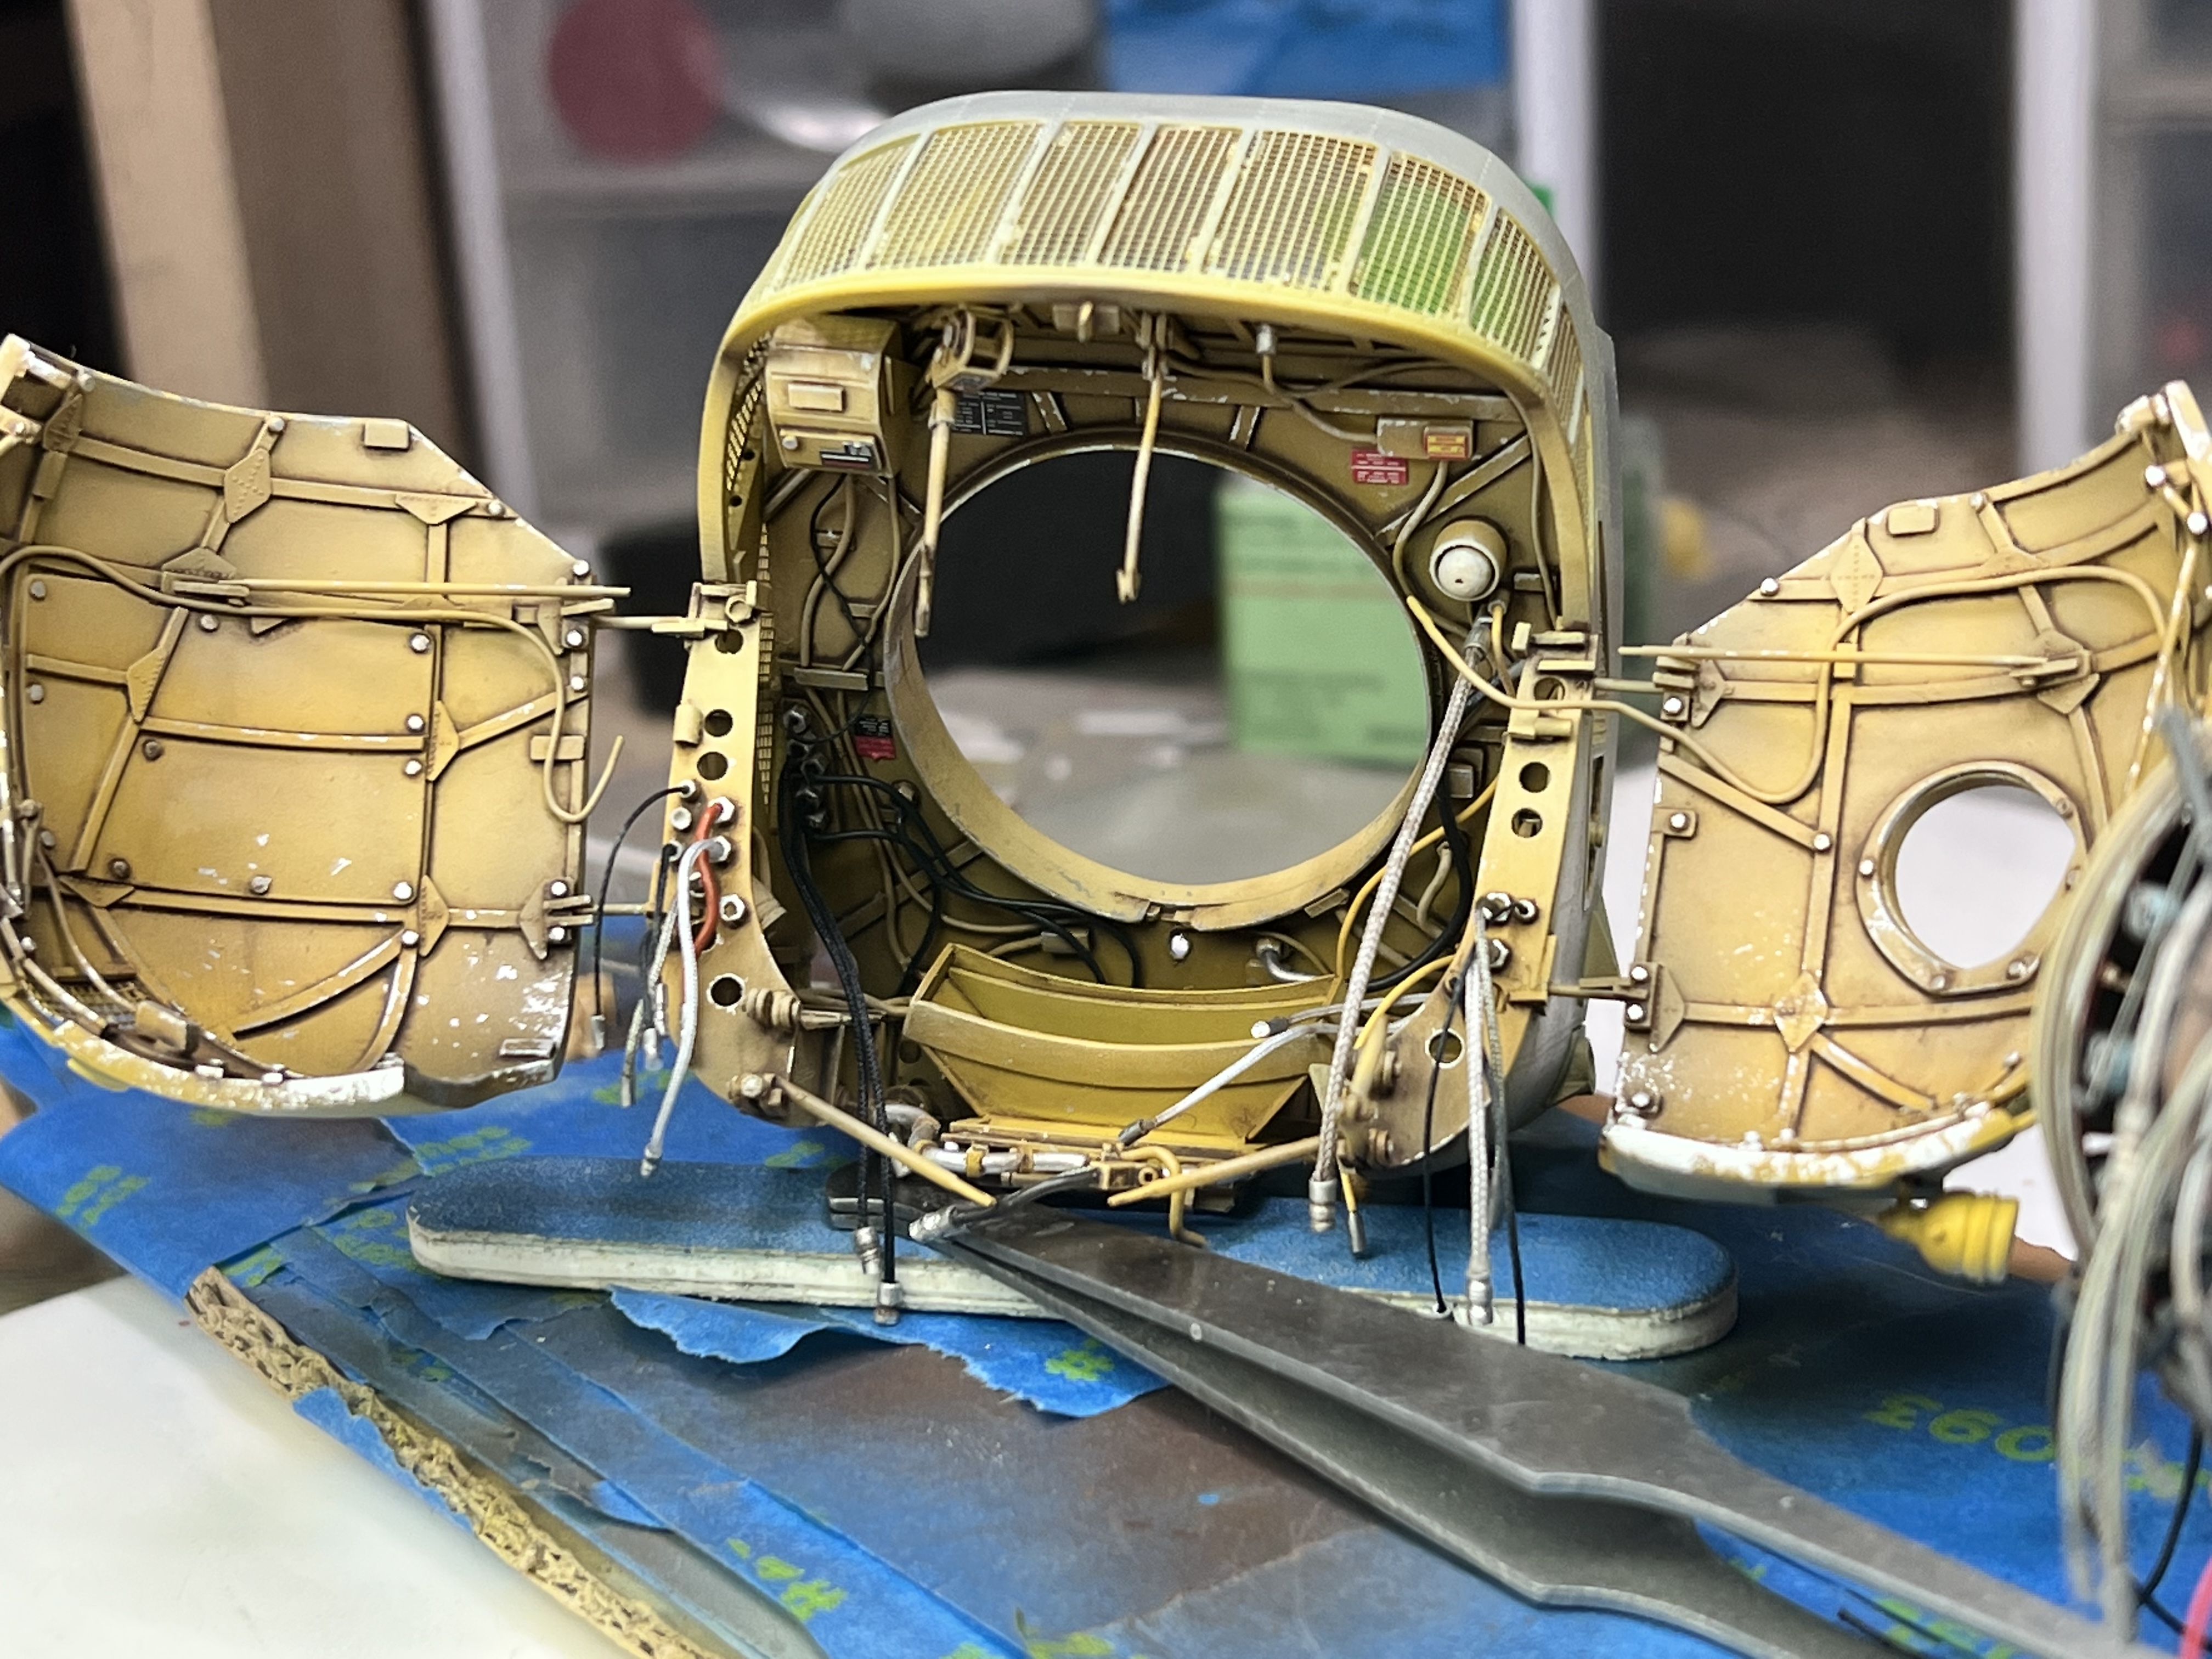
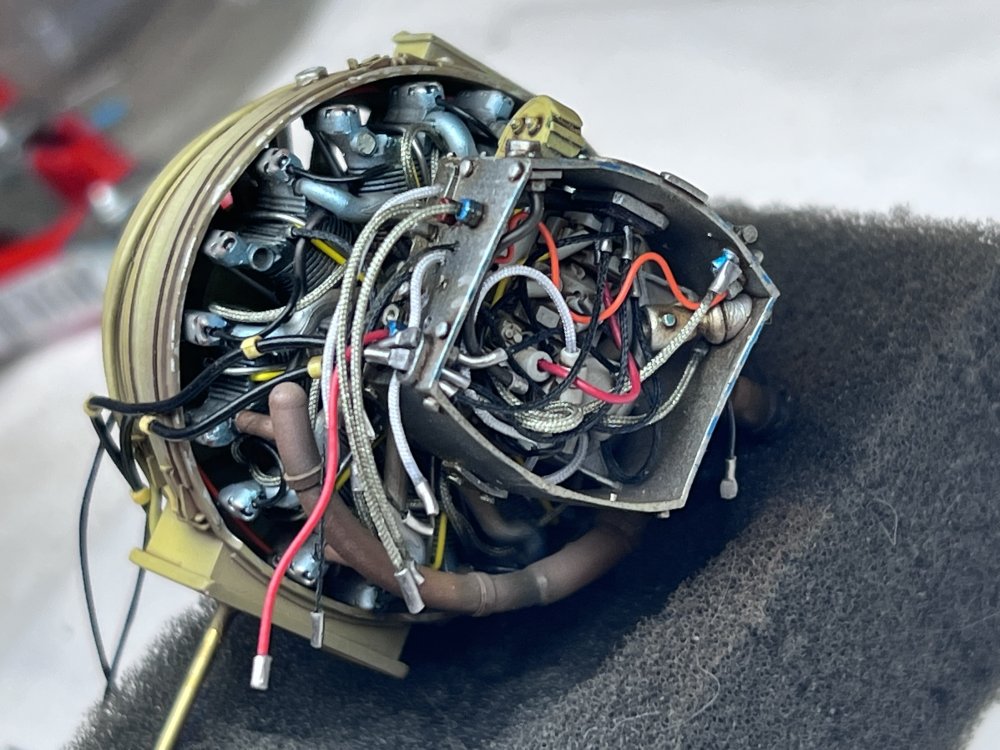
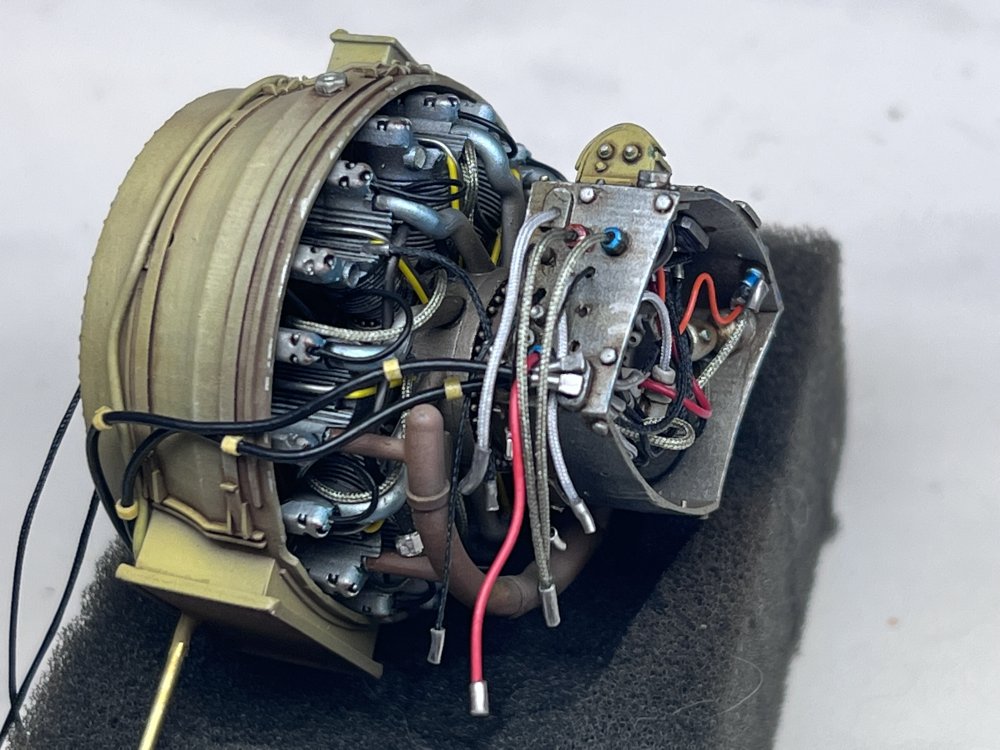
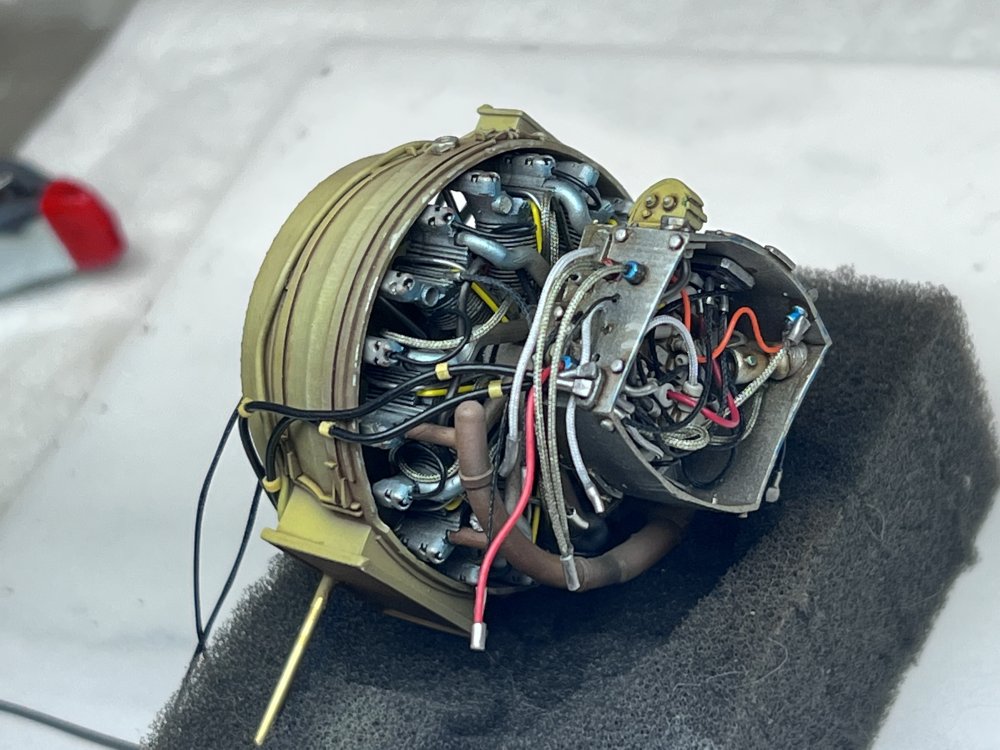
Flat coated engine and backwall, another wash on the wires and cables since it was too new looking. Most of the cables and wires won't be seen once the engine is in place. I know I am posting a lot but I want to get this done. I did another dark wash on the open doors only at the bottom to simulate engine dirt. I


- 843 replies
-
- 10
-

-

-
Pain in the a$@ to do since I need to keep the angle of the engine in mind.
-
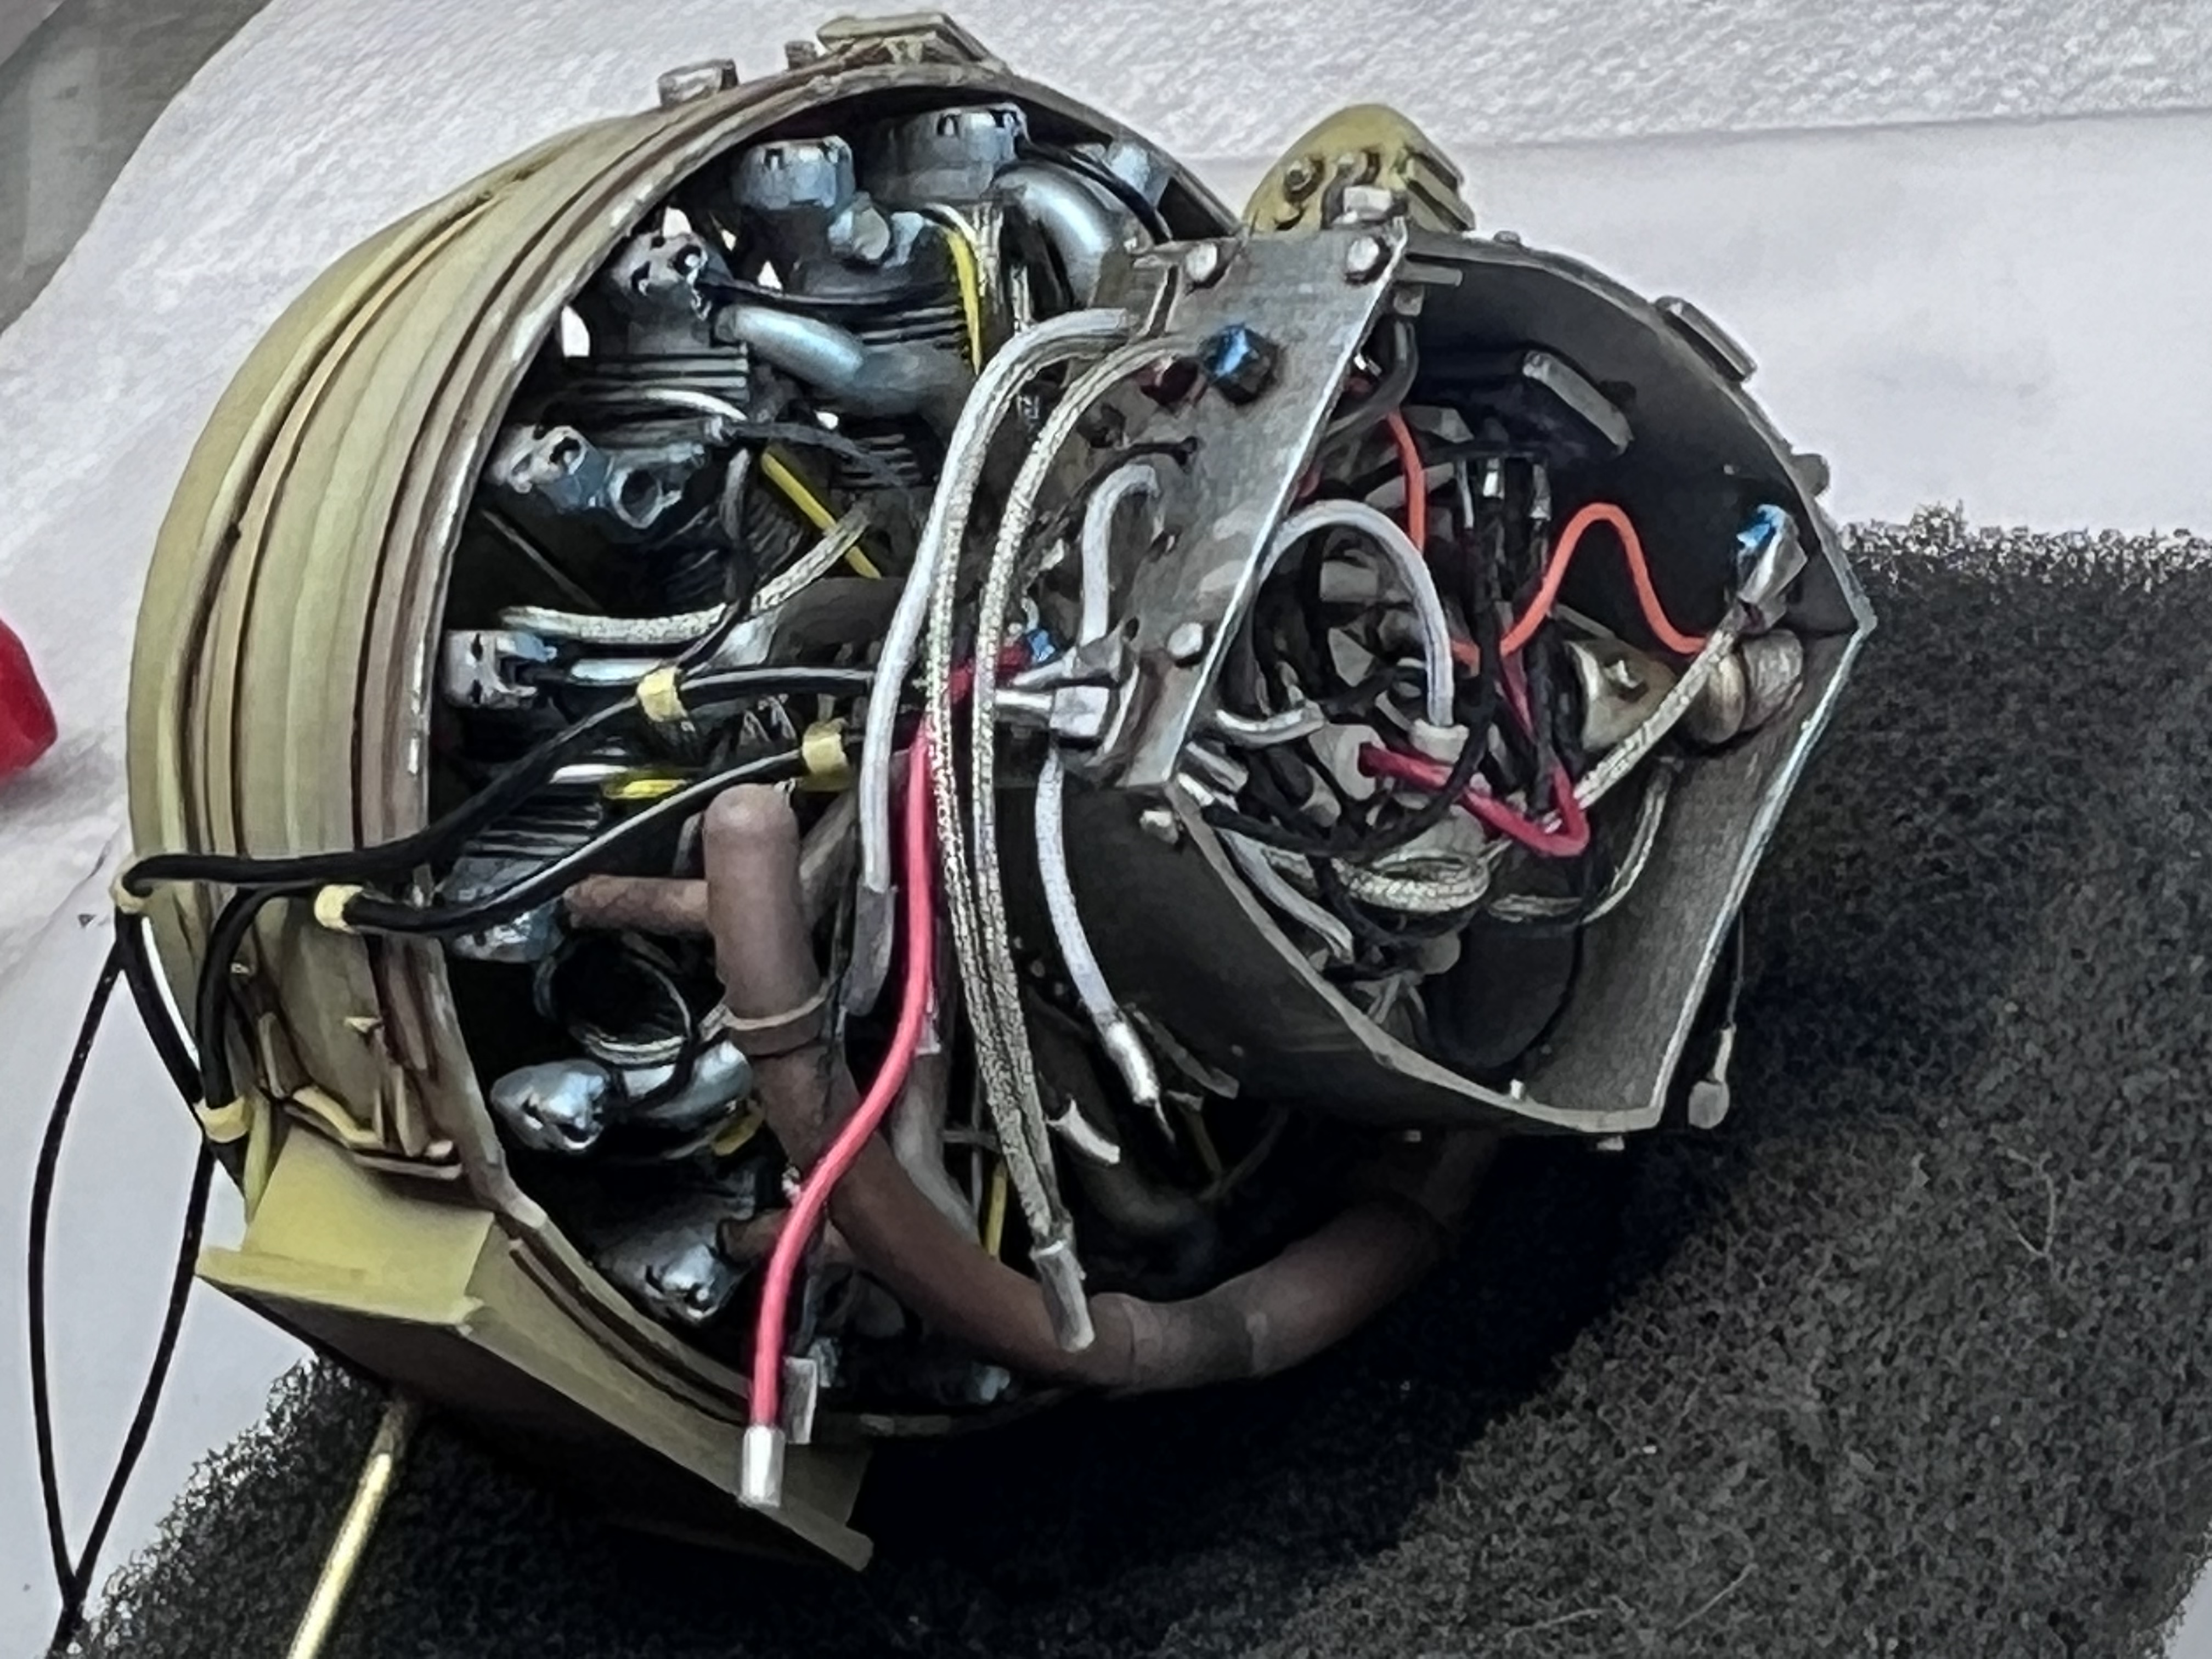
A bit of wire work.


- 843 replies
-
- 14
-
-