DocRob
-
Posts
7,045 -
Joined
-
Last visited
Content Type
Profiles
Forums
Events
Gallery
Everything posted by DocRob
-

Cobra Coupe - Le Mans - Model Factory Hiro 1/12
DocRob replied to DocRob's topic in LSM 1/35 and Larger Work In Progress
Thank you FA and Chris. You want to test fit enough, but as little as possible with this kit at this stage. It pays to have planned everything possible in advance, but something, I always forget . The next steps will decide about the fate of the Cobra. Everything has to fit together somehow, when the body meets the chassis. Cheers Rob -
Cobra Coupe - Le Mans - Model Factory Hiro 1/12
DocRob replied to DocRob's topic in LSM 1/35 and Larger Work In Progress
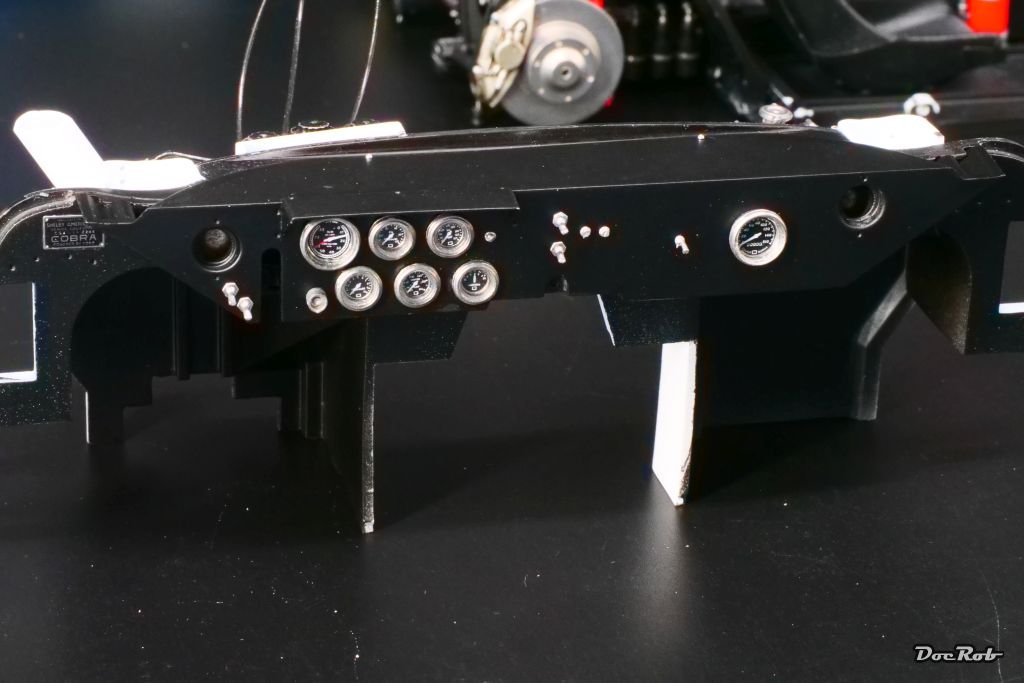
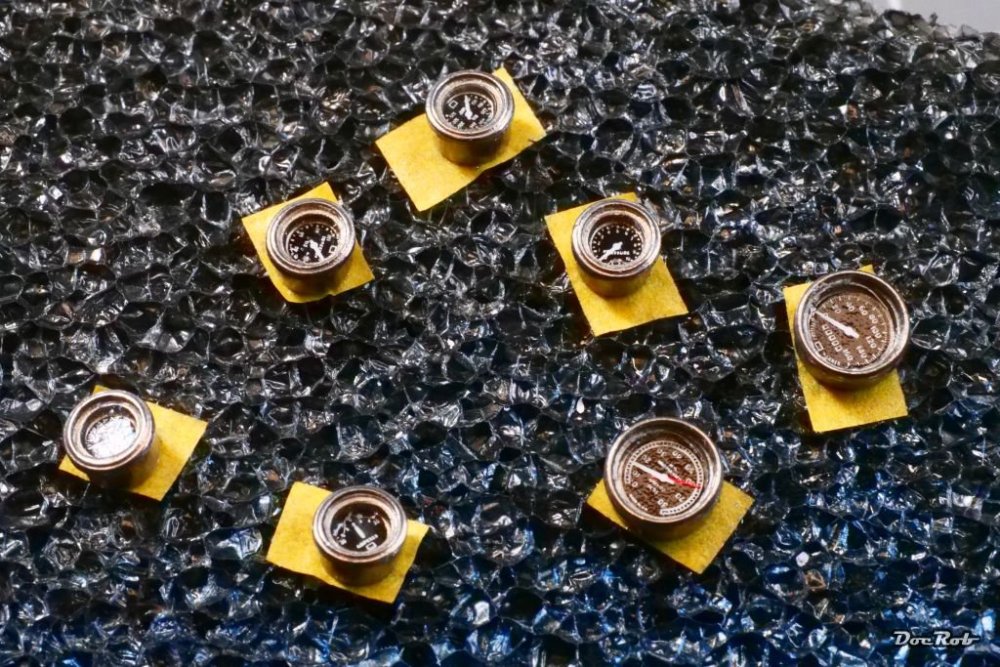
I assembled some more sub assemblies, before mounting the body onto the chassis. Foremost, I finished the dashboard. The dashboard got painted with Tamiya LP-5 semi gloss black and the instruments got decals into their tubs and a pre cut round clear acetate cover, which I glued in with Revell Contacta Clear and had no fogging issues. The instruments received tiny pieces of yellow Kabuki for identification. ...and where built into the dashboard later, accompanied with some toggle switches and rivets. Cheers Rob
-
Fantastic build, paintjob and weathering, Dave. Welcome to LSM, where you clearly fit, building this clearly Large scale kit. I especially like the coherent weathering, which looks very plausible. Cheers Rob
-
Leveling thinner is a real gift, like Paul said. Since I use it, my AB probs are far less. You are correct about the tip protectors, I leave them away. Specially heavy pigmented acrylic colors tend to accumulate there and then BLOB. Cheers Rob
-
1/32 Curtiss SC-1 Seahawk
DocRob replied to BlrwestSiR's topic in LSM 1/35 and Larger Work In Progress
I had none, just an educated guess . Cheers Rob -
Can´t wait for the weathering Kevin, always interesting with these Japanese planes. I used Pledge very often with the airbrush and never had issues with application. I use Tamiya Flat Base to reduce the sheen, when necessary, but never more than about thirty percent. More flat base leads to candy cotton effects. The only issues after application I had was with decal solutions, which left dull spots in the clear, but were removed with a further coat of pledge above. Cheers Rob
-
1/32 Curtiss SC-1 Seahawk
DocRob replied to BlrwestSiR's topic in LSM 1/35 and Larger Work In Progress
Call me Sherlock, gents . No idea about the real plane, but imagination Cheers Rob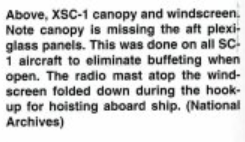
-
Cobra Coupe - Le Mans - Model Factory Hiro 1/12
DocRob replied to DocRob's topic in LSM 1/35 and Larger Work In Progress
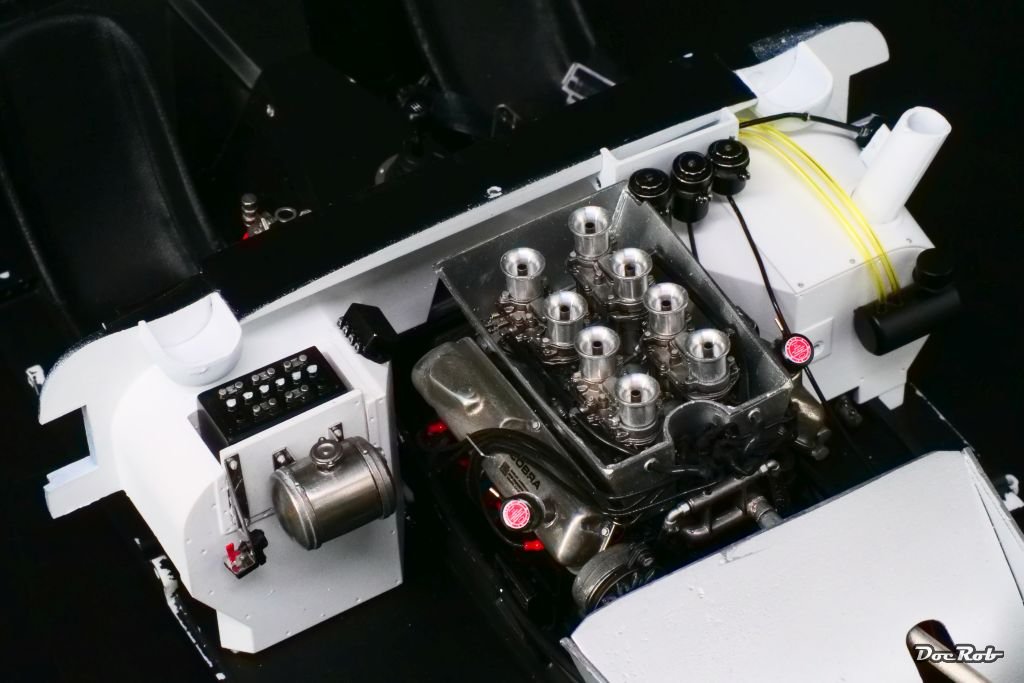
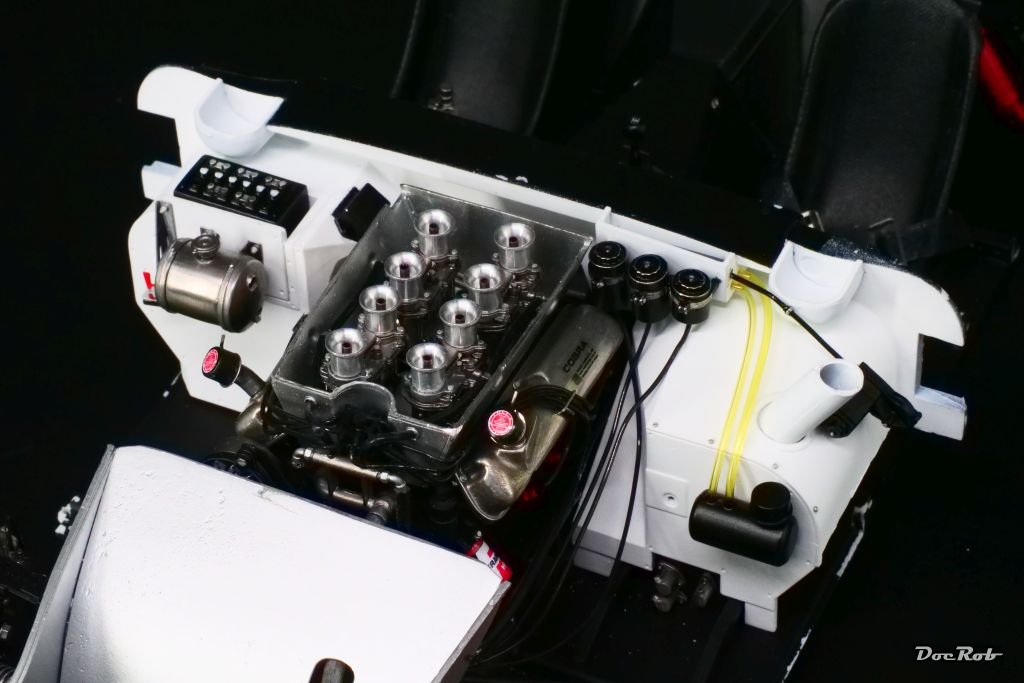
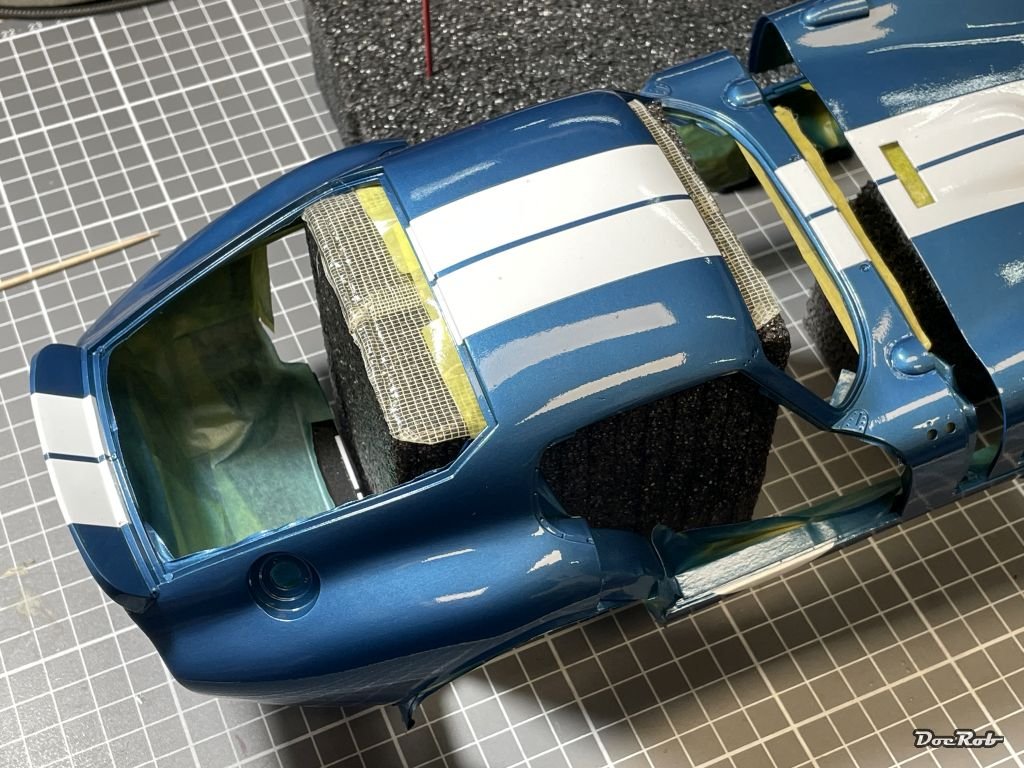
I used the curing time of the body parts to prepare the firewall. I installed all the components except for some electrical wiring and tubing and test fitted the whole thing into the body as well as onto the chassis. I hope, joining everything together later will work out. It becomes harder and harder to test fit and every test results in color abrasion or in knocking off some parts. Cheers Rob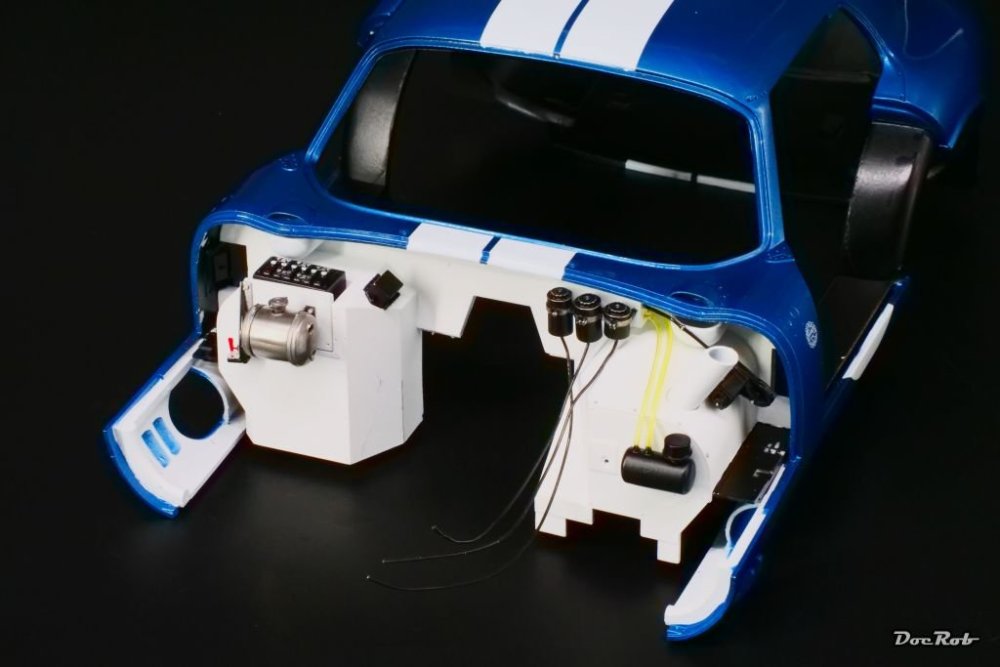

-
Cobra Coupe - Le Mans - Model Factory Hiro 1/12
DocRob replied to DocRob's topic in LSM 1/35 and Larger Work In Progress
Thanks Kevin and you are right, before binning the Cobra, I have to run out of options, but let´s see what the future brings. Cheers Rob -
Cobra Coupe - Le Mans - Model Factory Hiro 1/12
DocRob replied to DocRob's topic in LSM 1/35 and Larger Work In Progress
Thanks Martin, it´s not finished yet. I will wet sand the paint with 4000, 6000 and 8000 grit and then polish the surface. But this will be done after another week or so, for completely curing of the paint and clear. Meanwhile, I started to detail the firewall, pictures will follow. Cheers Rob -
Eduard Spitfire Mk. XVI Bubbletop 1/48
DocRob replied to CANicoll's topic in LSM 1/48 Work in Progress
Nice finish, but you are right about the decals, Chris. It would look strange to have a weathered airframe and the decals are new and shiny. Cheers Rob -
Cobra Coupe - Le Mans - Model Factory Hiro 1/12
DocRob replied to DocRob's topic in LSM 1/35 and Larger Work In Progress
I like the badness of it´s looks momentarily, Scott. No chances for a transatlantic Cobraism right now . Cheers Rob -
1/32 Curtiss SC-1 Seahawk
DocRob replied to BlrwestSiR's topic in LSM 1/35 and Larger Work In Progress
Could it be, that the drag was too big, when flown with the open canopy? There would be a much better airflow with the rear windows removed. Cheers Rob -
Eduard Spitfire Mk. XVI Bubbletop 1/48
DocRob replied to CANicoll's topic in LSM 1/48 Work in Progress
Looking good, Chris. The wash on top blends the camo colors better. When there is a matte coat on, it will be perfect. Cheers Rob -
1/32 Curtiss SC-1 Seahawk
DocRob replied to BlrwestSiR's topic in LSM 1/35 and Larger Work In Progress
That came out nice, Carl, I can imagine your nervousness cutting out the canopy. Cheers Rob -
I´ve seen the GPmodelling engine, but plan to keep it relatively simple with this build. Only some PE where needed and the thinner and tinted Decalcas acetate windows will be used. The rear should be closed, but I have to inspect the kit a bit further to definitely decide. Cheers Rob
-
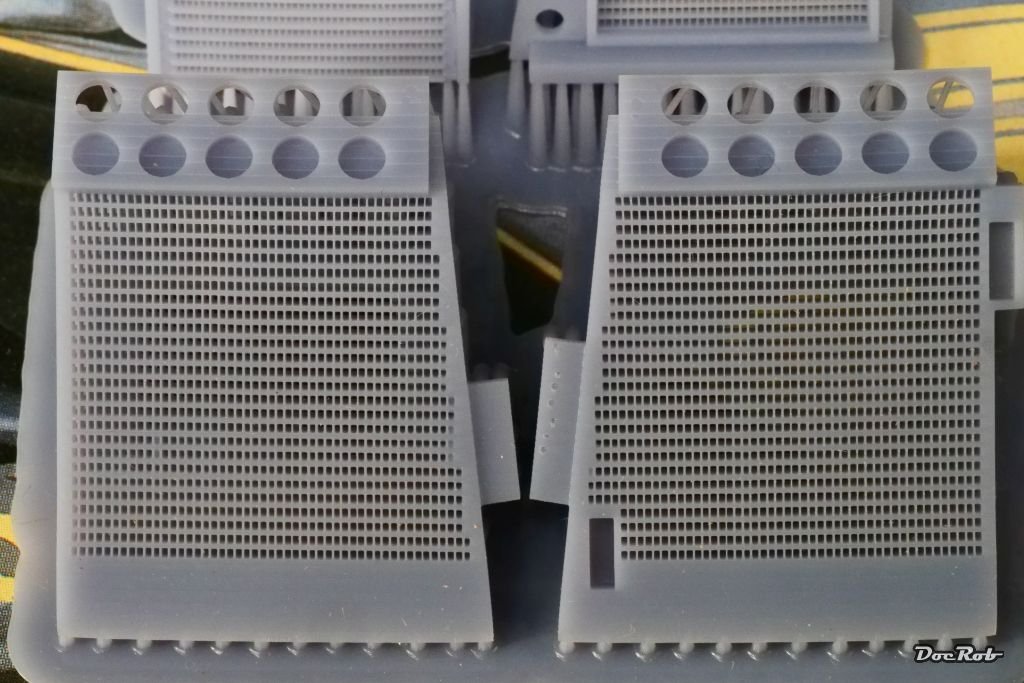
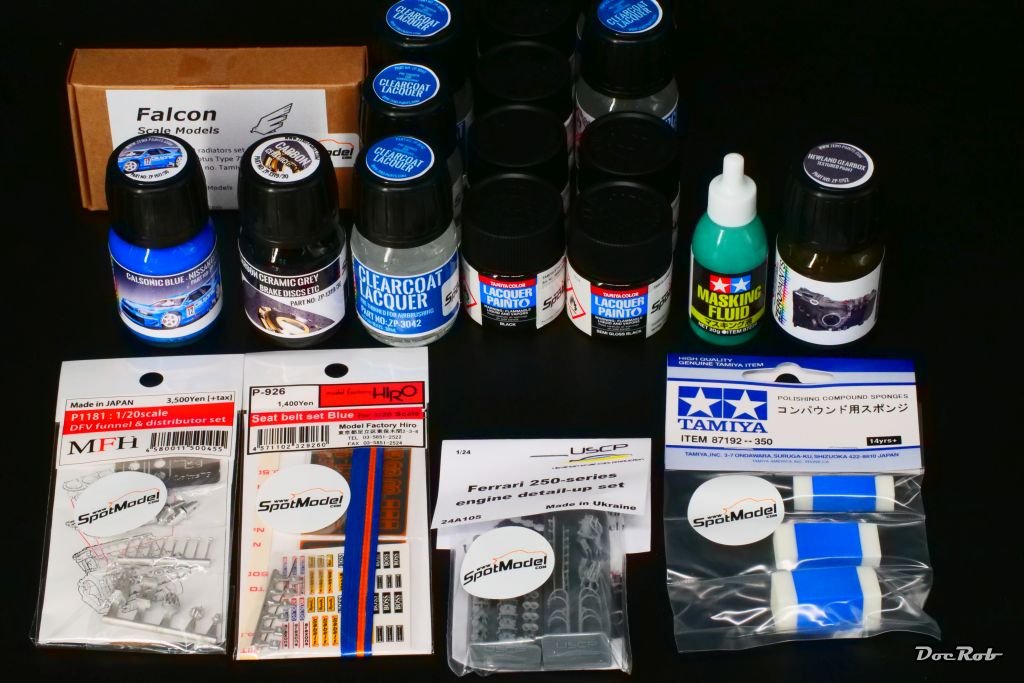
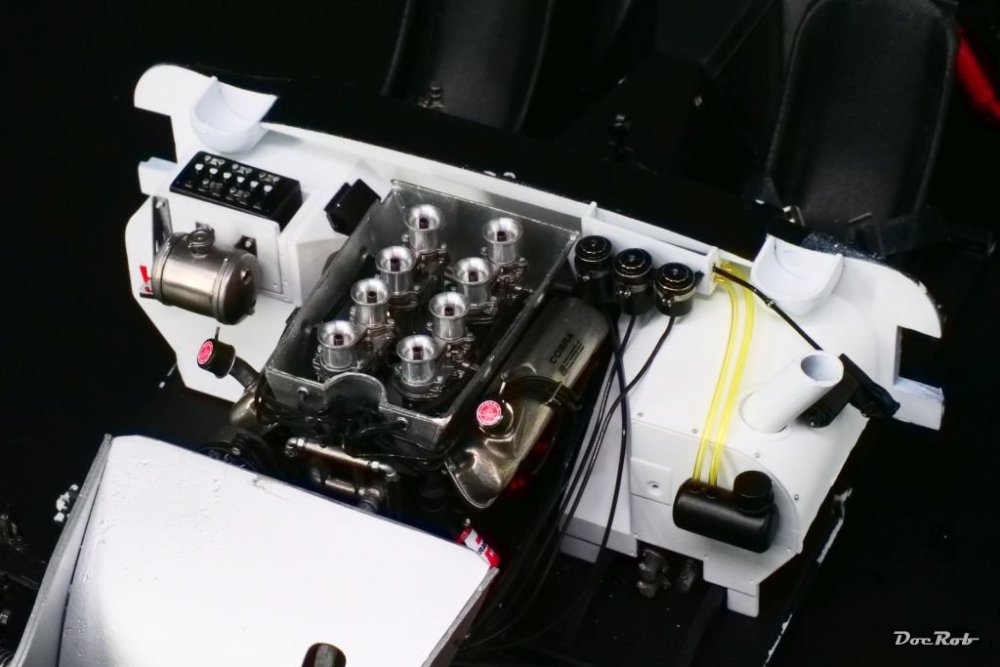
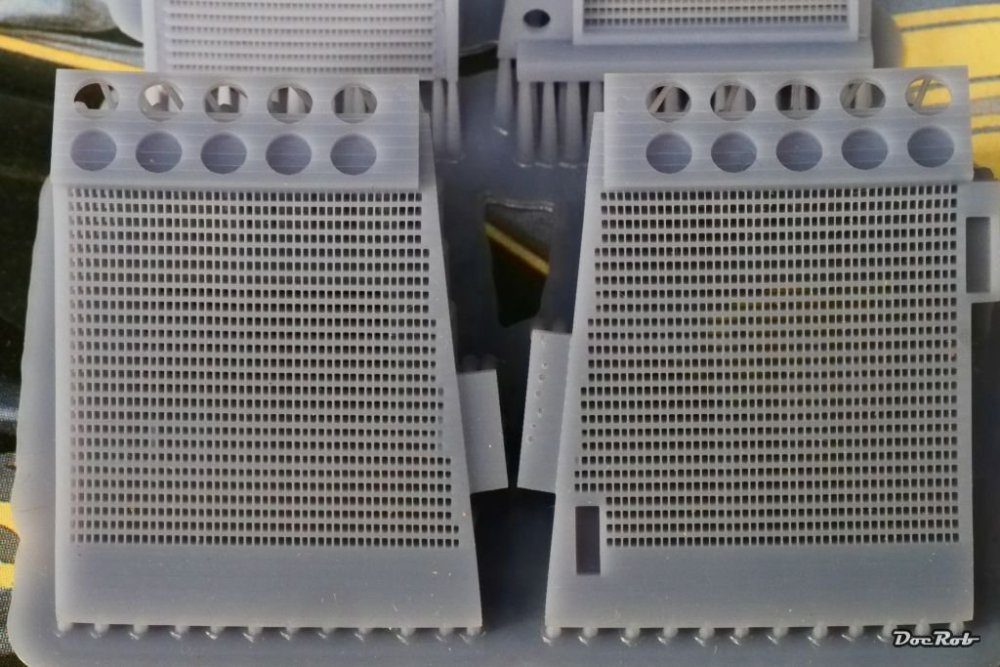
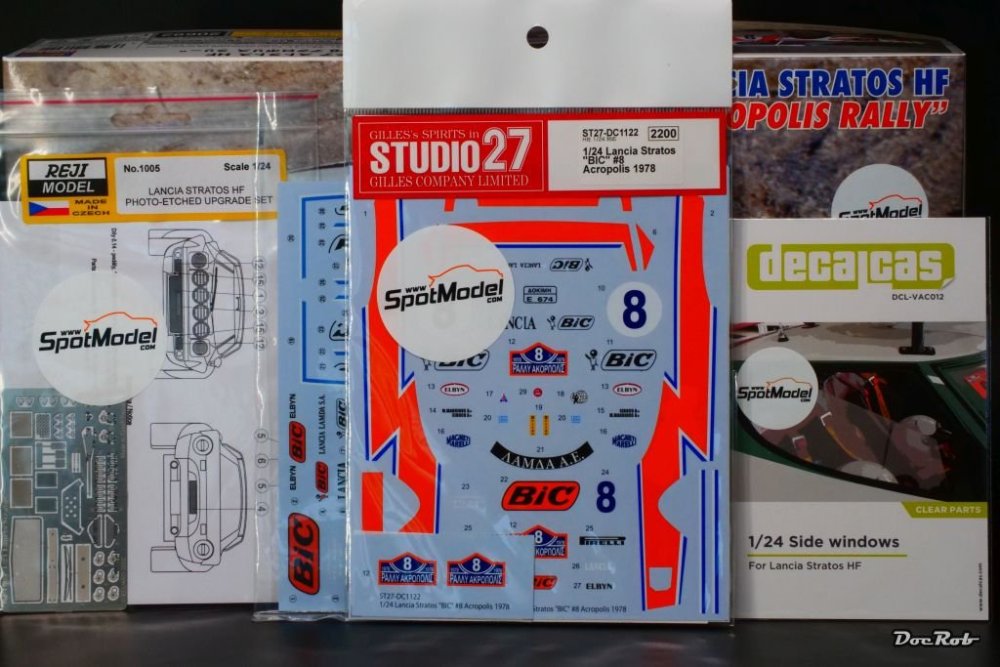
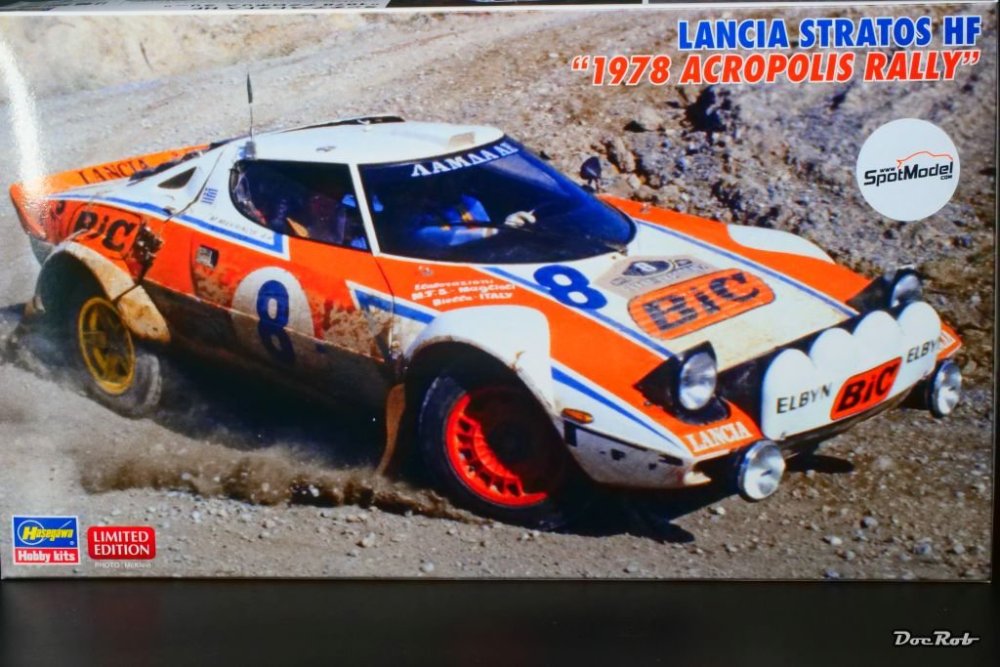
Today, I received a car and some car build supplies from Spotmodel. Besides being always reliable, they have the best packaging in the modeling world. The Lancia Stratos is one of my favorite cars and I didn´t own a single kit of it. I pondered about the new 1/12 Italeri release, but it´s Italeri.... When I saw the Hasegawa 1/24 Stratos in Rally Acropolis livery, I was sold and had to buy it. I added some extras, like Reji PE parts, decals from Studio 27, because Hasegawa only included the blue borders for the orange arrows and I´m to lazy, to mask all of it and very thin green tinted clear acetate windows from decalcas, which give the possibility, to show the side windows half open. Some random stuff, like Zero lacquer clear coat, which is fantastic, some texturized Zero paints for gearboxes and brakes and not to forget Tamiya´s fantastic lacquer gloss and semi gloss black jars. I also added some Tamiya masking fluid, let´s see, how good that is and some tiny sponges to apply polishing paste. Seatbelts and intake funnels for my Lotus Type 88 from MFH , some USCP 3D printed engine parts for my 1/24 Ferrari GTO and Falcon Models radiators, to substitute the kit parts of Tamiya´s 1/20 Lotus Type 79. The detail of the printed radiators is fantastic, you can read through the fine mesh of the radiators, if you like. Cheers Rob

-
You don´t seem to own a smartphone, Scott . Cheers Rob
-
Cobra Coupe - Le Mans - Model Factory Hiro 1/12
DocRob replied to DocRob's topic in LSM 1/35 and Larger Work In Progress
Thank you Paul, Chris and Carl, it´s a 95% recovery and that´s barely enough. Given, there is a lot of further assembling to do, there will be more dents and bruises, I guess. I want to start as clean as possible, as it becomes harder to solve body color probs later on. @BlrwestSiR Washing the parts before priming seems to erase a lot of static. I had to constantly wipe or brush the Cobra´s body parts during the prep process with drilling and sanding. It was like a dust magnet, which bettered with the claeansing. Cheers Rob -
Cobra Coupe - Le Mans - Model Factory Hiro 1/12
DocRob replied to DocRob's topic in LSM 1/35 and Larger Work In Progress
My heart was sinking too, Mike. I couldn´t have lived with that result, given there are more dents and bruises to come during continuing the build. It just has to look good from the beginning and then hopefully stays like it. In this case, the used paint was from Number Five, only the clear coat was from Zero. I had absolutely no issues, while spraying these colors, they behaved perfectly, thinned with leveling thinner. The Cobra has a resin body, which causes no issues with hot colors. I experienced difficulties with Zero Paints during my "plastic" McLaren MP4/6 build, where the Zero white body color ate through the primer and affected the plastic. I solved this issue, after a lot of sanding and re-priming with only misted coats of Zero white airbrushed onto the primer and let dry for some minutes. I also use a higher air pressure (about 1,6-1,8 bar) for quicker drying. With the coats slowly building up, I had no more issues spraying the later coats "wet" for archiving a nice surface. I had no spots or don´t feel a higher sensitivity to finger prints with the dried paint. Thank you Count, the goo was from my airbrush holder, an old piece, where the thinner dissolved some old paint, which waited until the very last second of airbrushing to run in front of the nozzle. I keep my airbrushes very clean, specially when spraying car bodies, but the goo blob had escaped my attention. The post race look was one idea, the other was a barn find, but when I start a project, I render an image in my head, how everything should look in the end and the Cobra was supposed to look brand new. I´m not good at changing ideas and see it more like an epic fail, having to do so and I don´t live easy with fails. Cheers Rob -
Cobra Coupe - Le Mans - Model Factory Hiro 1/12
DocRob replied to DocRob's topic in LSM 1/35 and Larger Work In Progress
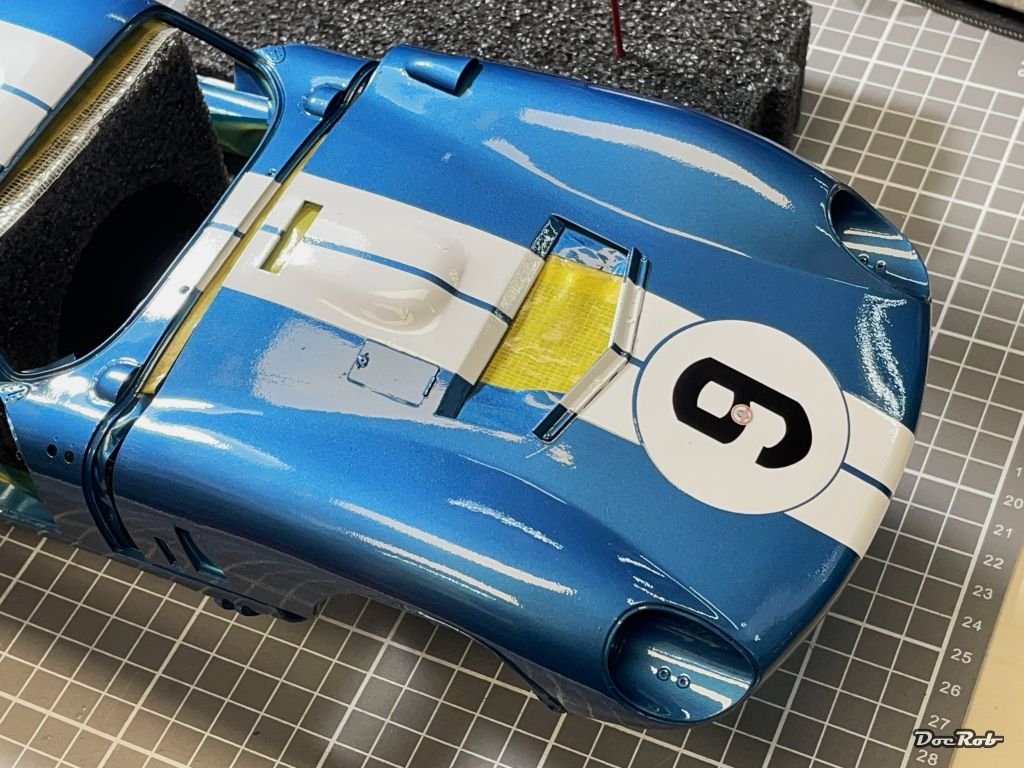
Phew, I think, I have saved the Cobra from binning for now. After carefully sanding the splatter dots. first with 1500 grit, then 4000, 6000 and finally 8000 grit, there was one culprit left, the most visible unfortunately. I carefully dotted heavily thinned Tamiya LP-2 gloss white with a fine brush into the tiny crevice, building up the spot, until the color looked right. After drying the same sanding treatment like the others. After all was wiped clean, I applied two coats of Zero Paints lacquer gloss with about 50% of added leveling thinner and an hour of drying time in between. I think, I have a 95% solution achieved and later, when everything is properly cured, I will sand very carefully and polish until it´s an absolute high shine finish. Cheers Rob

- 418 replies
-
- 10
-

-

-
Cobra Coupe - Le Mans - Model Factory Hiro 1/12
DocRob replied to DocRob's topic in LSM 1/35 and Larger Work In Progress
Thank you for your thoughts, guys ( @HubertB, @BlrwestSiR, @belugawhaleman and @CANicoll). I did one thing some of you recommended at least, I let the Cobra where it was and went to bed and in the morning, I had a long two kilometer swim in the ocean, to get rid off the frustration. Maybe tomorrow, I will look, what I can do and I will try fine sanding, like Carl recommended. The fiberglass pen seems a bit aggressive to me, as it scrapes into the material relatively on spot, where sanding is easier to blend with a clear coat. @BlrwestSiR: Carl, I cleaned the body parts very thoroughly with warm water and some drops of detergent, using sponges and brushes. After all the sanding, drilling and prep work, the resin parts sported a lot of static and it was nearly impossible to get rid of dust. The proper washing helped to reduce that a lot and I had nearly no dust in my paintjob (only splattered blobs in the end . Cheers Rob -
This camo looks great, Gus. Good the Extra Thin only hit the mat. Cheers Rob
-
Nice looking engine and cockpit, Kevin. Hasegawa has some very nice and good fitting kits of Japanese planes. I once built a Raiden and liked the kit a lot. Cheers Rob
-
Eduard Spitfire Mk. XVI Bubbletop 1/48
DocRob replied to CANicoll's topic in LSM 1/48 Work in Progress
The PL made the details pop, Chris, muy bueno. Cheers Rob