DocRob
-
Posts
7,124 -
Joined
-
Last visited
Content Type
Profiles
Forums
Events
Gallery
Everything posted by DocRob
-

What is on your bench right now ? Share a picture :)
DocRob replied to Martinnfb's topic in Modelling Discussion
Fantastic, detailing looks spot on. Cheers Rob -
Unicorn Gundam - Bandai - Perfect Grade 1/60 Scale
DocRob replied to DocRob's topic in LSM 1/48 Work in Progress
He´s so cute, Carl. Painting is another thing, I won´t do it with the Unicorn, there are so many moving parts, where I don´t know, if the paint will be in the way or fell victim to abrasion while articulating. I will build the Unicorn without glue, there are so many moving parts, I´m not sure, I can identify all from the manual and if something happens with the LED´s, I need to de-assemble. Until now, I can´t think that there are many parts to fell apart with the tight fit of everything. Cheers Rob -
Unicorn Gundam - Bandai - Perfect Grade 1/60 Scale
DocRob replied to DocRob's topic in LSM 1/48 Work in Progress
I think that´s not the case here Carl. The manual tells you which sprues you need for the next step, but other ways, I have to relay onto my sharp eyes to get rid of used up sprues. Cheers Rob -
Unicorn Gundam - Bandai - Perfect Grade 1/60 Scale
DocRob replied to DocRob's topic in LSM 1/48 Work in Progress
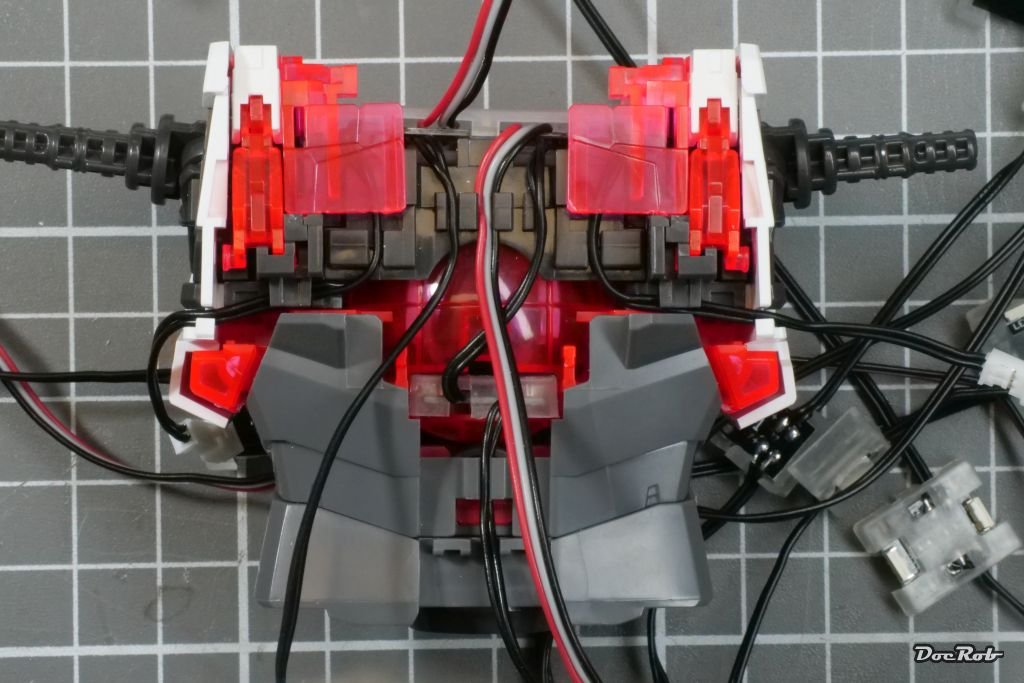
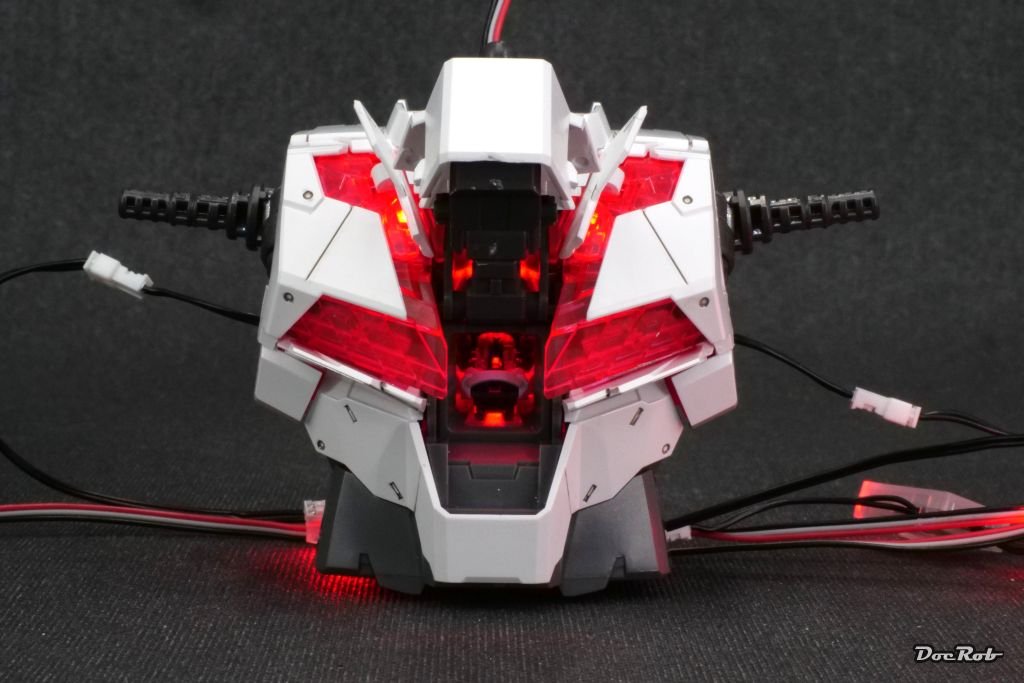
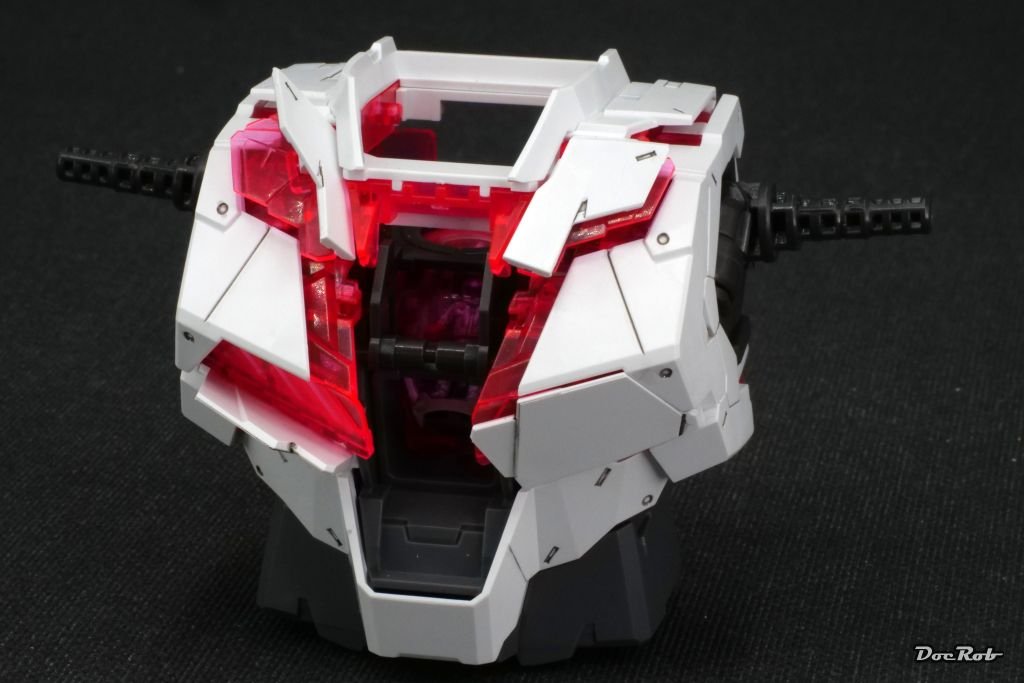
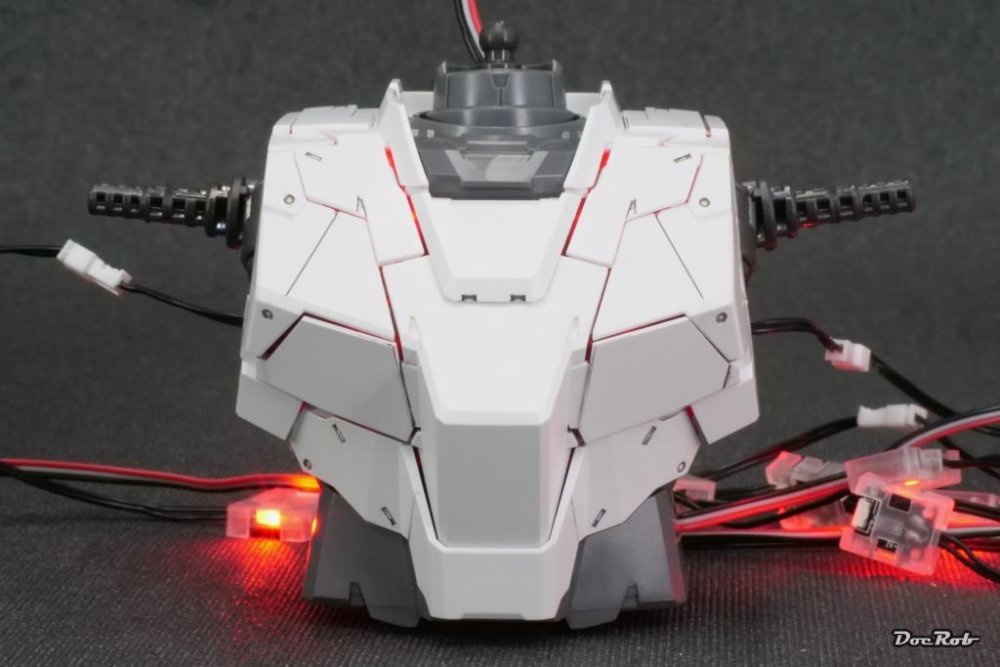
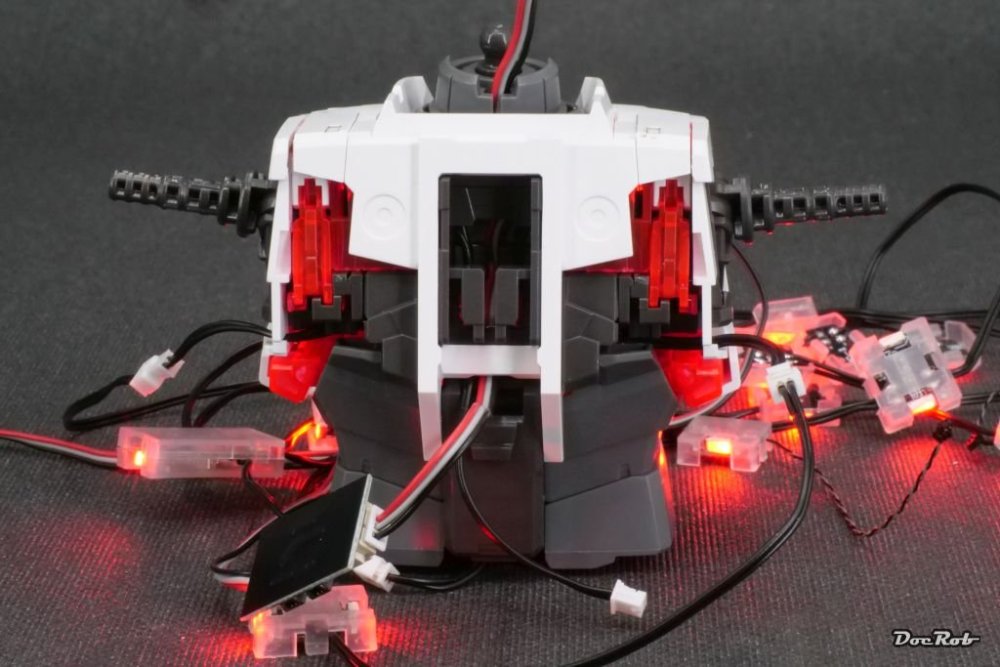
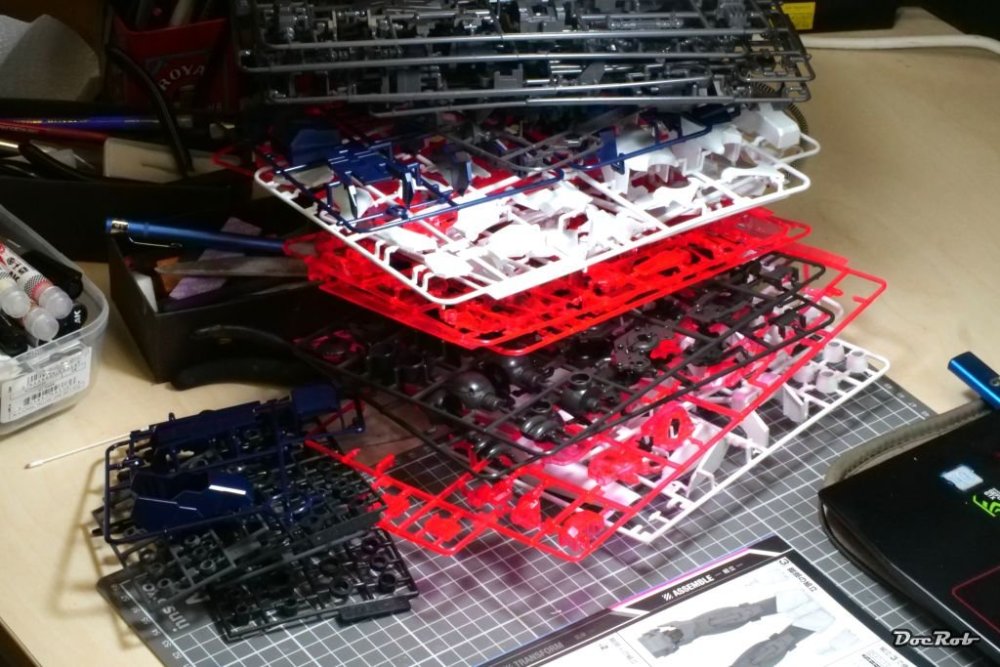
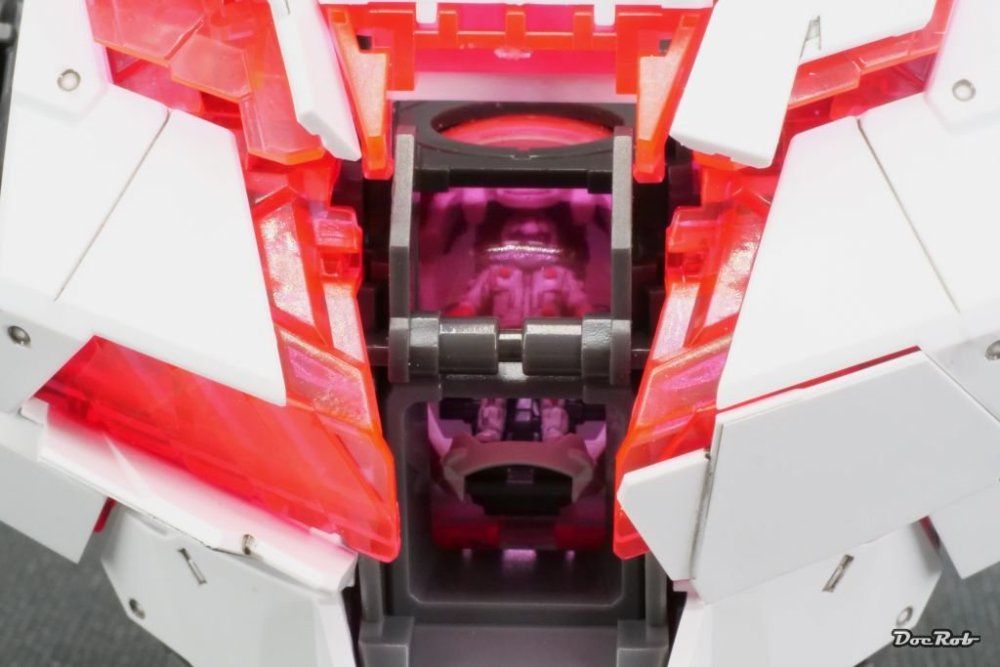
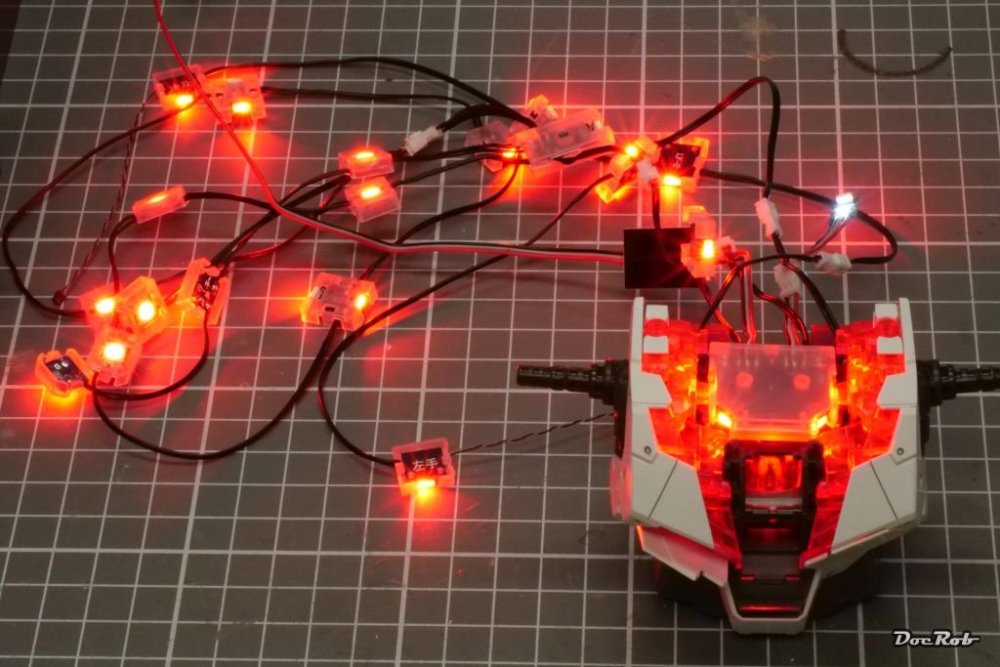
Next was the installation of the LED system from Kosmos. After looking closely into both manuals, it looked to me, that the Kosmos LED set is made very similar than the original Bandai one. That meant, I could follow the Unicorns instructions for these steps. The LED´s for torso, head, legs and arms are already connected, so testing is easy. I installed the main hub on top of the cockpit and fiddled the appropriate wires into the wire routing channels, the torso backside looked like this when finished: Next, all got covered up: Here are pics from the front of the finished torso with all panels closed (Unicorn mode) and all panels opened (Destroy mode): After finishing the torso, it took me more than 10 minutes to only pick the sprues for the next section, which are the legs: Cheers Rob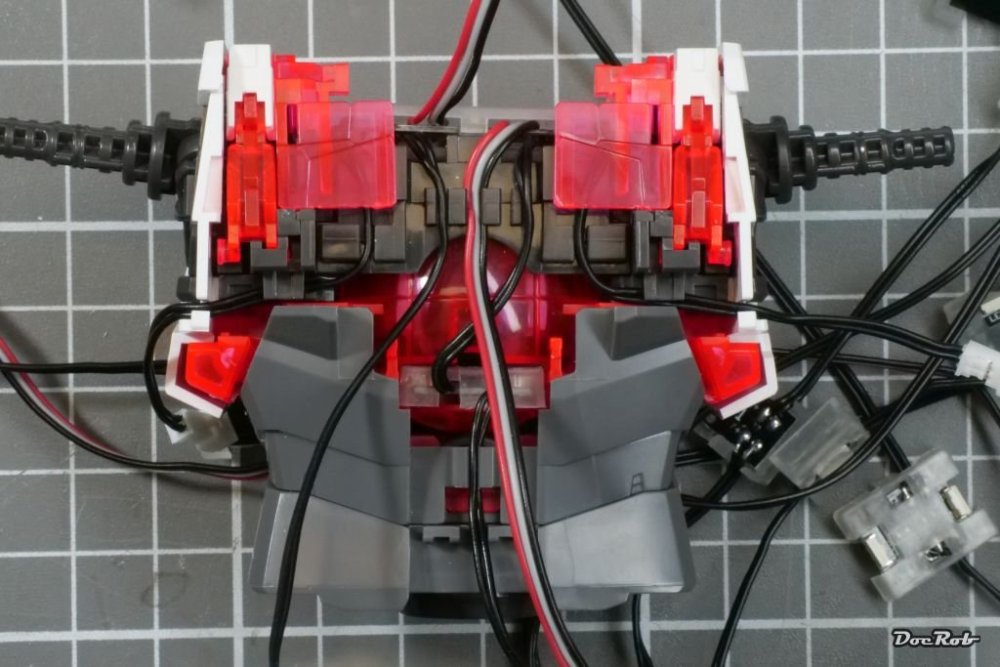

-
Unicorn Gundam - Bandai - Perfect Grade 1/60 Scale
DocRob replied to DocRob's topic in LSM 1/48 Work in Progress
Thank you Carl, it´s indeed a completely different breed than a MFH kit. I powered myself through the BT52 build for some bad weather weeks and needed a bit of a change, therefore the Unicorn kit, which I longed to build since a while. I hear you about the fit and you are absolutely right. It pays to read the tiny diagrams in the manual very thoroughly, as it is not always easy to determine the orientation of parts (guess how I knew ) I have no separator tool and use a blade and sometimes a screwdriver to pry the parts apart. I saw the variants of the Unicorn, but liked the original design better. Cheers Rob -
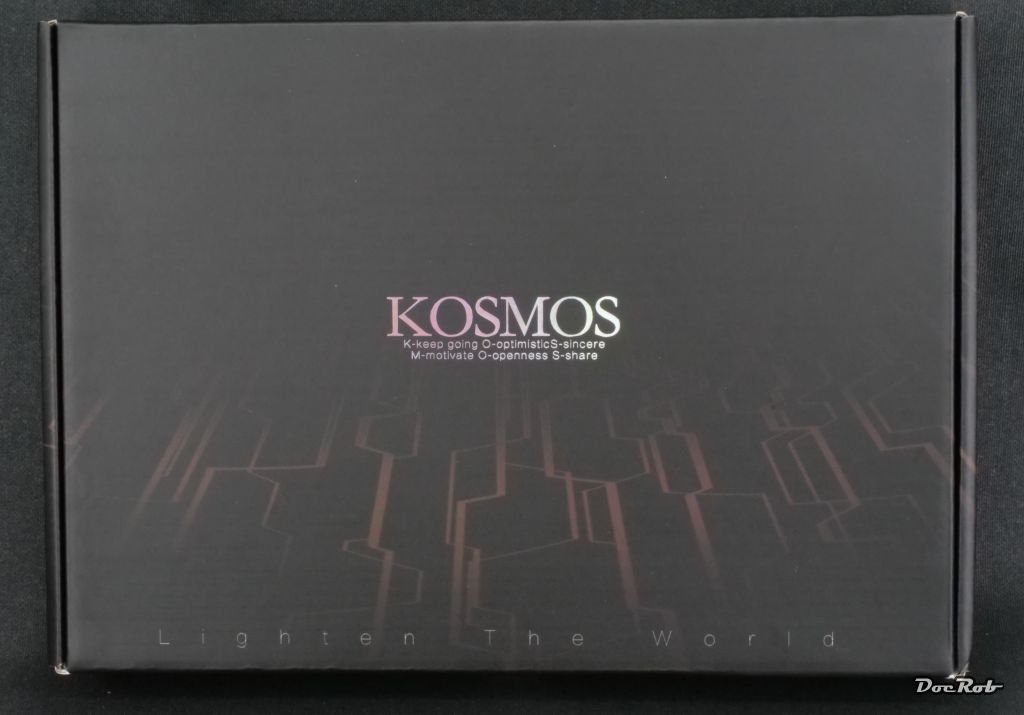
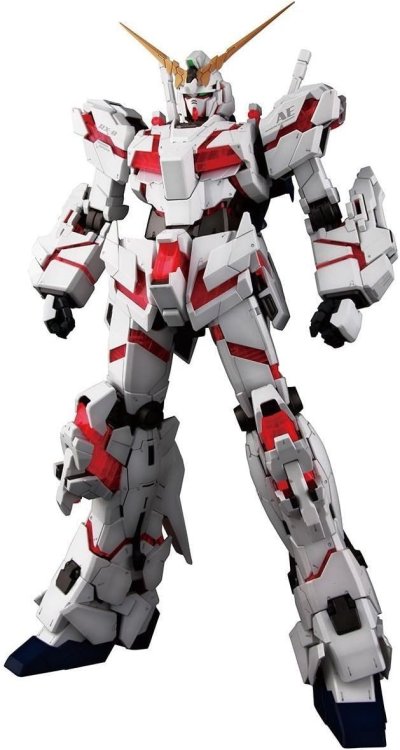
"...and now for something completely different" like the Monty Pythons would have put it. This will be my first venture into the world of Gundam and I have to admit, I have near to no idea about the background and the anime, they were shown in. I was fascinated about the huge Gundam machines and their engineering as a kit and decided, I want to build one. I chose the Unicorn, because of it´s cool looks, the availability of a pre designed LED kit from Kosmos and the two face character of the Unicorn, plain white, with all hatches and ports closed and showing the glowing red psycho frame with everything opened up. There is a lot of terminology involved with these kits. Perfect Grade means, it´s the highest grade of detailing in the Bandai range and the scale is 1/60. Highest grade of detailing means also an absurd part count manufactured in different colors and materials, mainly ABS and some vinyl like stuff. The so called Psycho Frame is a red transparent layer under the white armor, which distributes the lights emitted from the LED´s. The kits are fully articulated, which obviously adds to the complexity of the build. There is no glue needed, and the parts are designed to intersect in many ways, which can be finger bleeding tedious, especially with correcting errors. The manuals are only Japanese and it is recommended to use a translator with camera function, to get the grips. The kit: The Kosmos LED set: ...and that´s how the Unicorn is supposed to look: Cheers Rob

-
What is on your bench right now ? Share a picture :)
DocRob replied to Martinnfb's topic in Modelling Discussion
Well, I started my first Gundam kit, the perfect grade Unicorn (1/60 scale). I thought it would be tons of parts, but easy goin, but it is not that simple and you have to adopt from classical plastic modelling to assemble delicate intersecting parts in multiple layers without glue. It doesn´t help, that either the Unicorns manual or the one for the Kosmos LED kit isn´t in English. Sure a translator helps, but it´s a bit inconvenient. Anyhow, I managed to build up the torso, making and correcting a few errors. The torso includes the pilots cockpit and is build up until the LED unit comes into play. As you can see, there are some body panels movable, they are opened on the left side. I also used some panel liner. ...and it was light, at least for testing: Cheers Rob

-
What is on your bench right now ? Share a picture :)
DocRob replied to Martinnfb's topic in Modelling Discussion
Looks very good. Cheers Rob -
Like PW, I would recommend Alclad chrome, with my experiences it is the most realistic looking chrome. It´s very fragile though and needs proper priming. You said, you strip the chrome off the plastic first, that is definitely the way to go. After that, prime with gloss black, Tamiya LP-1 gloss black thinned with leveling thinner is best. Both black primers for metallics from AK or Alclad are terrible and never dry properly. The best results you achieve, while layering very thin layers of Alclad chrome onto the primer and build up until the blackness completely vanishes. You shouldn´t clear coat afterwards or mask over, as it will ruin the finish. For parts like exhausts, there is AK´s super chrome maybe another option. Other than Alclad or AK´s Extreme Metallics, you need to flood it onto the part. The chrome looks extremely good, but it is also very fragile and I have used it only sometimes now and don´t have enough experience for a clear recommendation. AK Extreme Metallics are great to work with and more durable than Alclad, but their chrome and polished aluminum have less shine than Alclad. Cheers Rob
-
I thought about this one too, Paul. I would be interested, how useful it is. How fast is the change of bits and things like this. I like the low revolution modus, as my Proxxon is to fast for many things. There are hundreds of holes to be drilled in metal or resin with every MFH build and I mainly hand drill, which is time consuming and sometimes finger cramping, but better to control. This thing could be helpful. Cheers Rob
-
Nice one, I may paint another one later, when I have a feeling for abrasion due to articulation, but will do panel lining as well and paint some details with the Unicorn. Cheers Rob
-
Thanks Carl, but no real magic this time, I plan to build the Unicorn straight from the box, only with the added lighting set. No paint no glue and I even read somewhere, that cleanup is minimal, because the sprue connectors are hidden and don´t need a lot of attention. Cheers Rob
-
Finally something other from Japan than sophisticated car kits, my first Gundam kit arrived some weeks ago, but I had to wait for the Kosmos LED lighting kit for almost two months. Initially, I wanted to start the project as a relaxing easter time build, but due to the late arriving of the LED´s, I´m not sur, if I start immediately or not. It´s a ton of plastic in a huge box, but no drilling, excessive sanding, etc. As far, as I know, there isn´t even glue needed and the large perfect grade Gundam kits from Bandai are said to be of extremely high quality. Cheers Rob


-
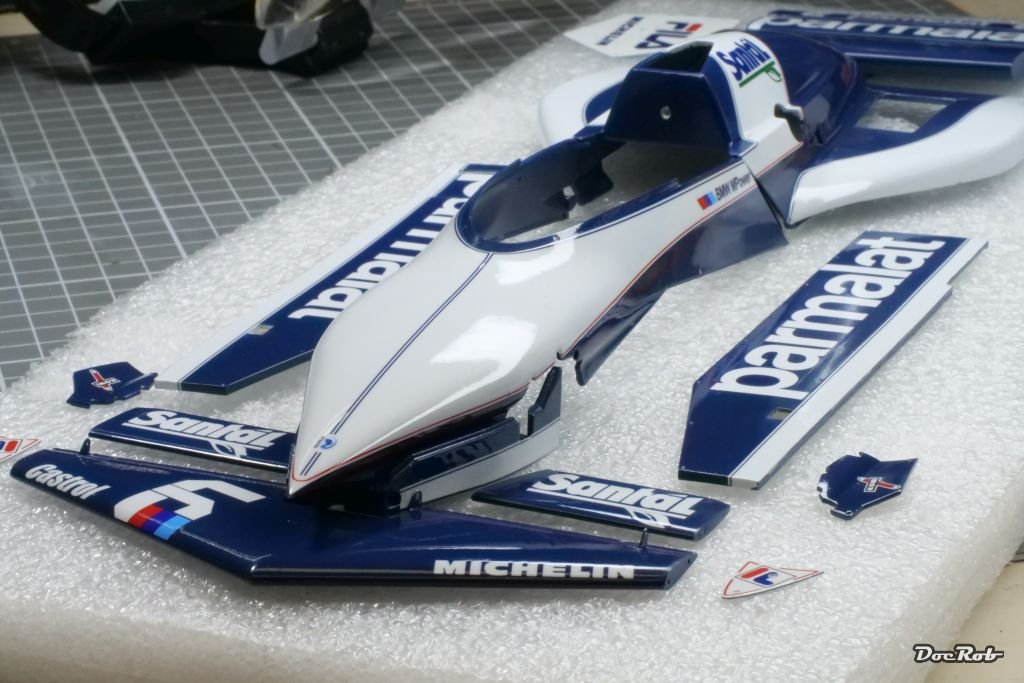
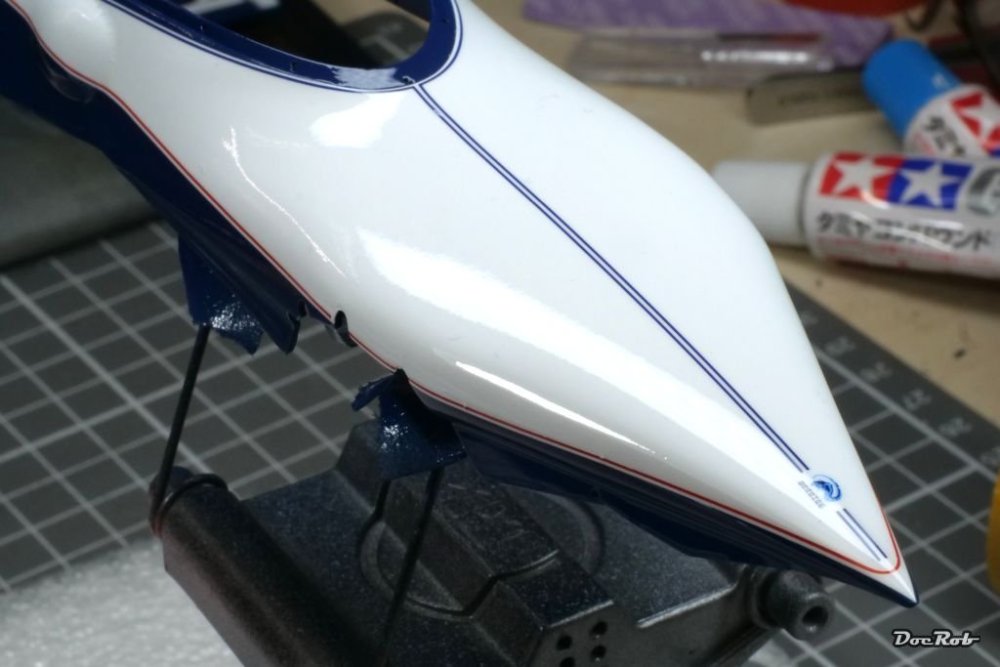
Nice and shiny, as I like it. After putting some hours of elbow grease into the polishing job, the BT52b looks like this. I used Tamiya polishing compounds, first "coarse", than "fine" and finally "finish". I polished by hand with a lint free cloth. I don´t use my Proxxon for the job, too easy it catches an edge and sends the part airborne. After the final assembly, I will clean the body parts again and use some polish wax, to get the last out of my work. Cheers Rob


-
It´s so hard to loose a four legged family member Kevin. I have been there over a year ago, and I´m still sad. I think it´s our responsibility to lighten the burden of an ill pet, as soon, as live doesn´t seem livable for them anymore. To me, it was a hard decision, but I´m still convinced, it was the best, as my dog had pancreas cancer and he deserved a dignified life and a dignified death. I hope, Anna will help you and your wife. We have only some cats now, which happened to intrude our garden, after the dog was gone. I love them as well, but dogs are different. Cheers Rob
-
Yo lighted up your monster squirrel, Carl, good choice. I still wait for my Unicorns lighting kit. It is on my island since one and a half week, but they don´t get it delivered, it´s crazy. I initially wanted to start building it as a relaxed easter build, but nope, no chance. Cheers Rob
-
Thank you Kevin and Paul. I´m happy to got the decaling and clear coating done, always a do or die part of a car build. Cheers Rob
-
Thank you Carl, the decaling was not the easiest part of the build. There are not only curvy shapes to master, but you also need to get different decals to fit to the others. I wasn´t sure about my approach, Decaling one, let dry and then the next or all at the same time, which I did. There are some tiny wrinkles visible in some places, but I can´t do anything about it. Decaling for me is always a love and hate job. Results are often great, specially carbon fiber decals, but there are so many trouble spots to master. Cheers Rob
-
Sure PW, I use my H&S Infinity Giraldez with 0,4 mm needle and nozzle with a bit under 1 bar of pressure. Cheers Rob
-
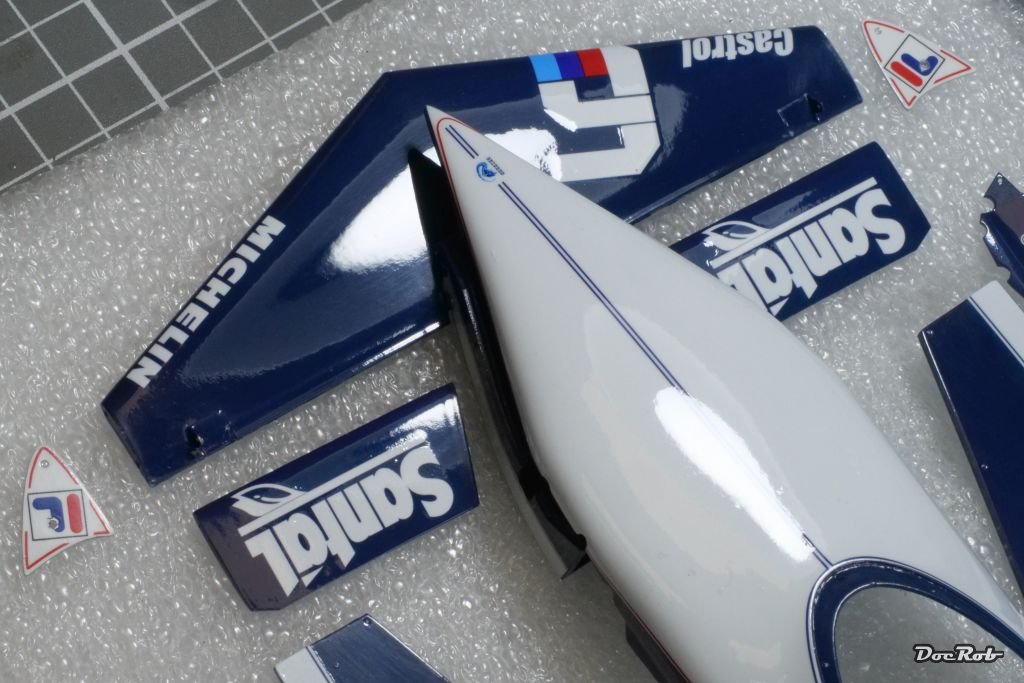
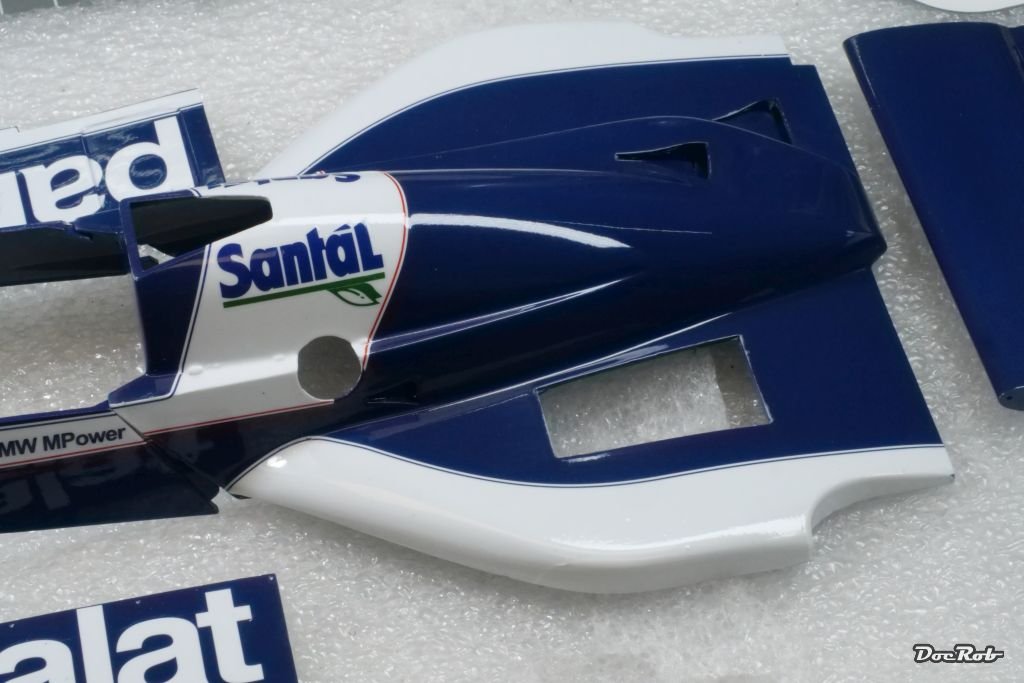
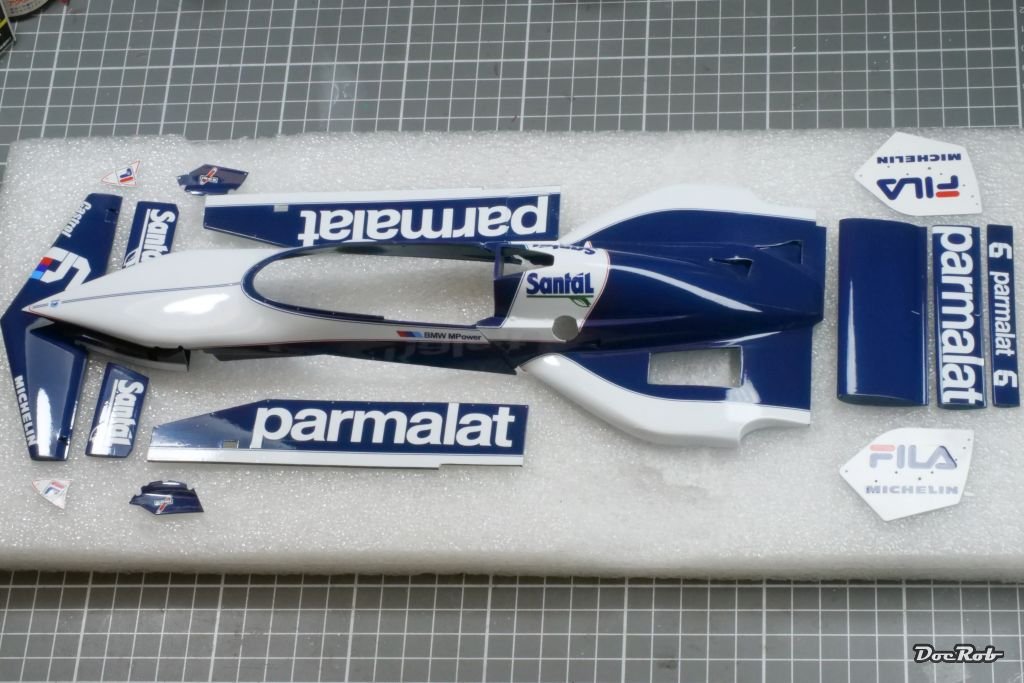
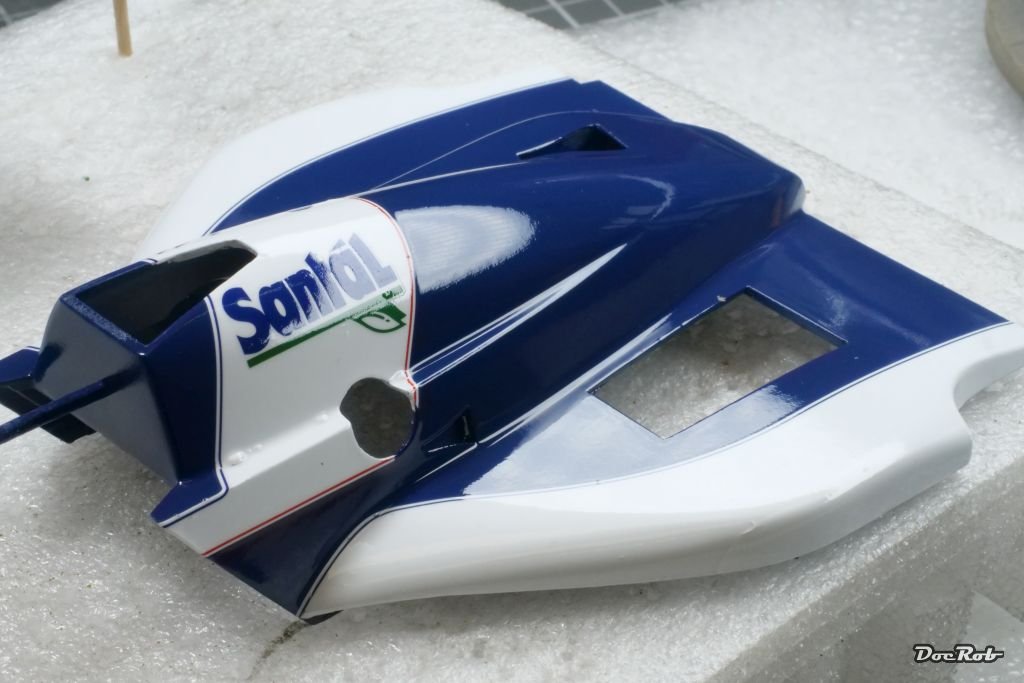
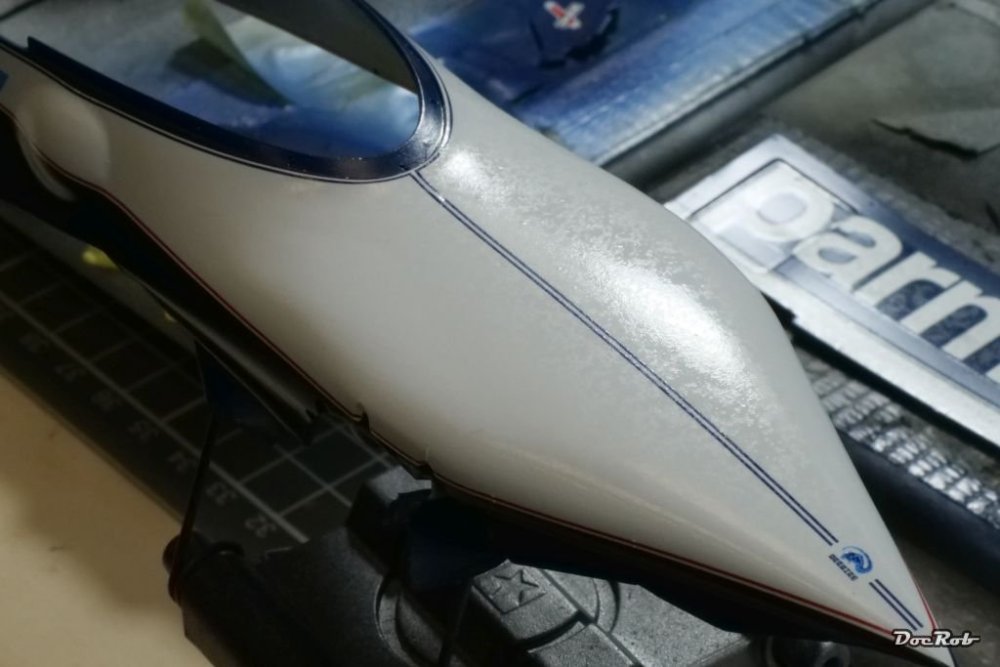
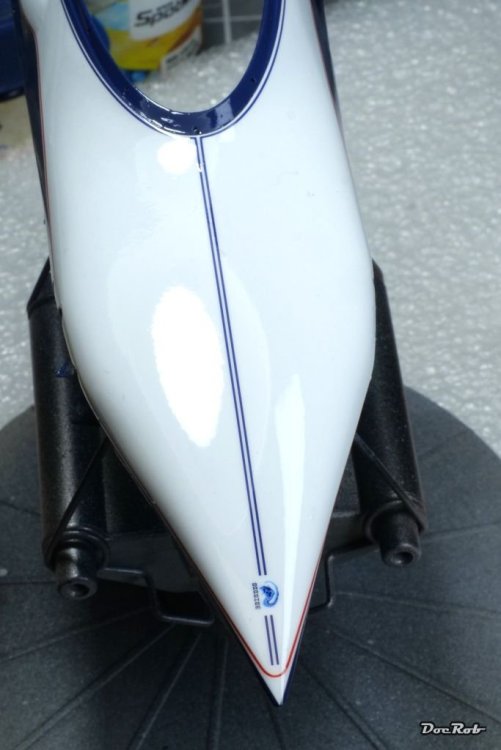
Rainy days, what better thing to do than gloss coating. I finished decaling the body parts before and cleaned all the parts with warm soapy water from decaling residues. The large white decals gave me some worries, as the surfaces where marred visibly, despite them having protective paper on top, like you can see on the following pics. For gloss coating, I used my trusty combo of Zero lacquer clear coat and leveling thinner. First, I sprayed the clear un thinned on, to protect the decals, ensure a fast drying time, as to hinder the paint to react with the decals. The result doesn´t look appealing, but that´s no problem. The next coat is thinned with about 30 percent of leveling thinner, after maybe 15 minutes of drying time. This coat leveled a bit better, but the following coats, each thinned a bit more with levelling thinner, always after 15 minutes of drying time levelled near perfect in the end, each coat "eating" in the coat before. The last coat (#5) was sprayed with about 70 percent of thinner. Luckily I had no runners, but tried to let the parts dry "flat". Now I leave the body parts in peace for two days to dry through before I start polishing. Cheers Rob


-
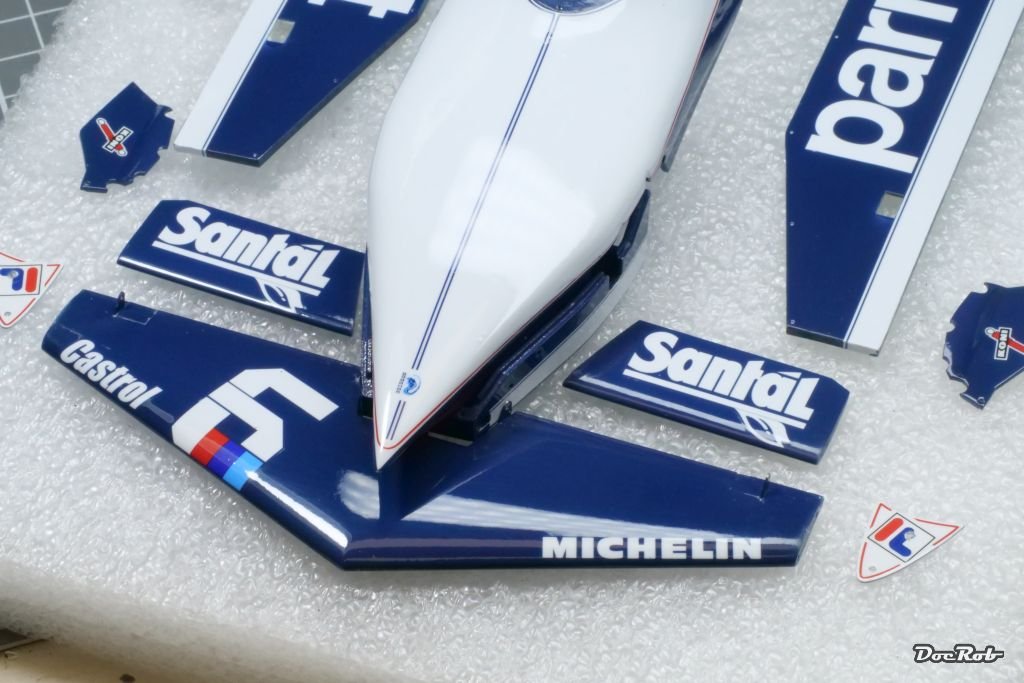
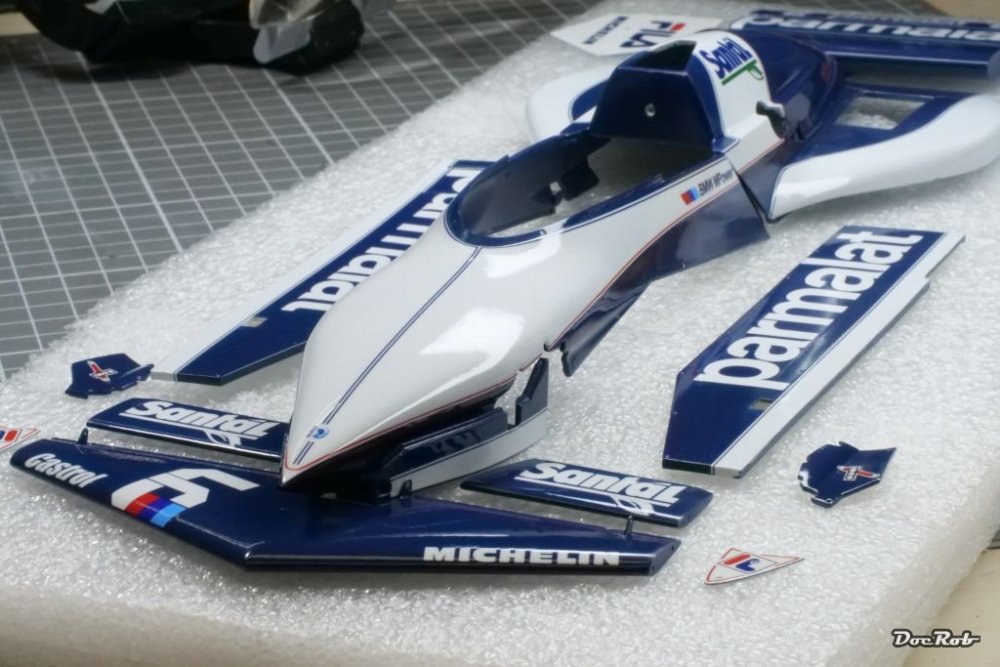
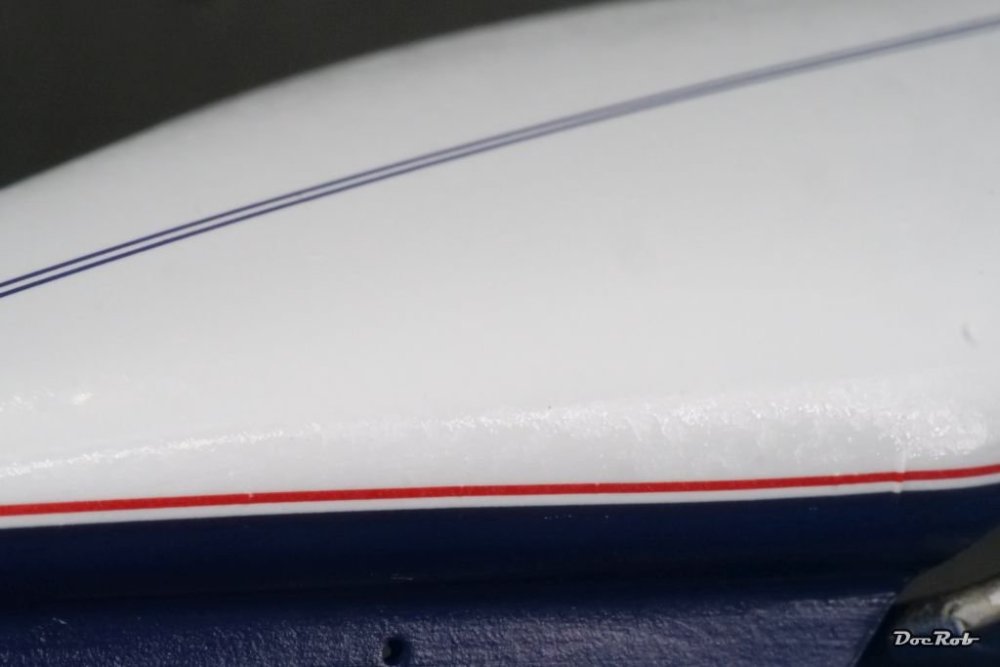
My ranting time continues. This time it´s about Number 5 colors, specially mixed for the Bt52. The blue is near enough but doesn´t fit 100% to the blue of the decals, but the white is way off. It has a warm tint and doesn´t fit to the decals cool white at all, like seen on the next picture. I carefully masked the blue side with the decals on (sweat) with de-tacked Kabuki tape and resprayed the white, this time with Number 5 MP4 white. Much better and luckily the decals stuck to the wing, while removing the mask tape. Cheers Rob


-
Huge Huey .....get yer 'Nam on
DocRob replied to PanzerWomble's topic in LSM 1/35 and Larger Work In Progress
Like Kevin said, nice painting and weathering. Looks like a workhorse. Cheers Rob -
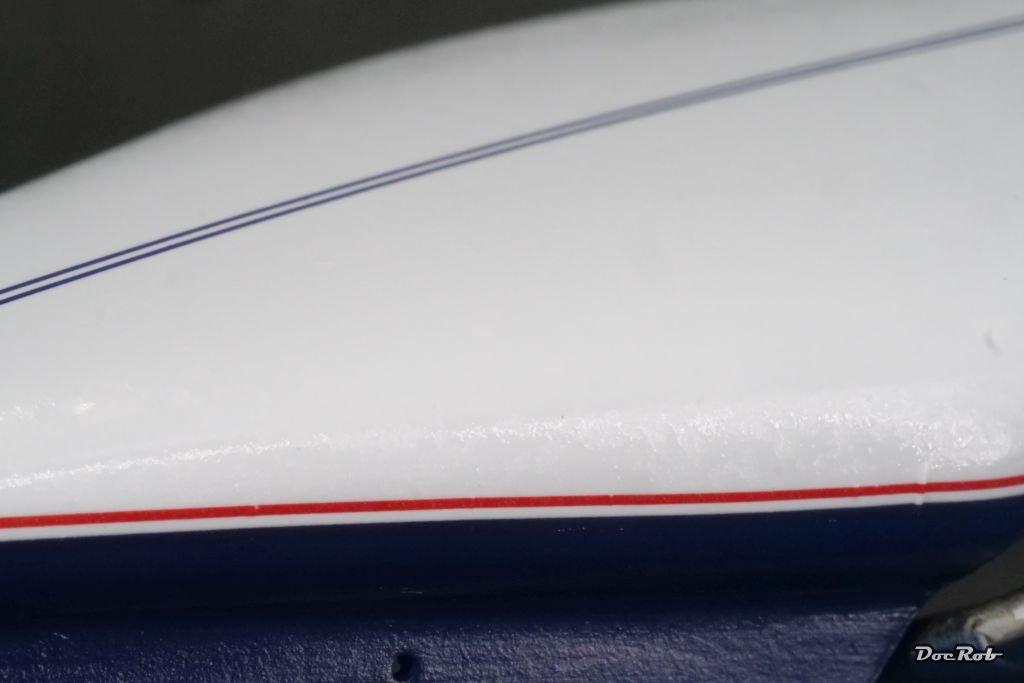
Thanks for looking into your kit, Nick. Good for you, that you plan to build the smaller rear wing. I will use the decals for the large wing and cut away the red pinstripe. I thought about contacting MFH, but it would take some time to get replacements and I don´t want to wait. Cheers Rob
-
Thank you Nick, I would like to know, which version your BT52b kit is, A or B and which rear wing decals are included? There is one main sheet for the white areas and sponsors and in my kit there is one smaller sheet for the rear wing of version A (large wing). I know from pictures of the MFH website, that two different small sheets exist, but mine had only one in the box. The bigger wing looks like it would be sufficient for one or more planes, esthetically not my cup of tea. Cheers Rob
-
I have to take back some I´ve said. It seems, there were two options for the kit, A: with a large rear wing and B: with the smaller rear wing, like I will build. The manual is for both versions and there are all the parts included for both options except the decals, which are on a small extra sheet. I stay with embarrassing and head scratching though, For a 500$ kit, MFH should have included both decal options . Cheers Rob