DocRob
-
Posts
7,045 -
Joined
-
Last visited
Content Type
Profiles
Forums
Events
Gallery
Everything posted by DocRob
-
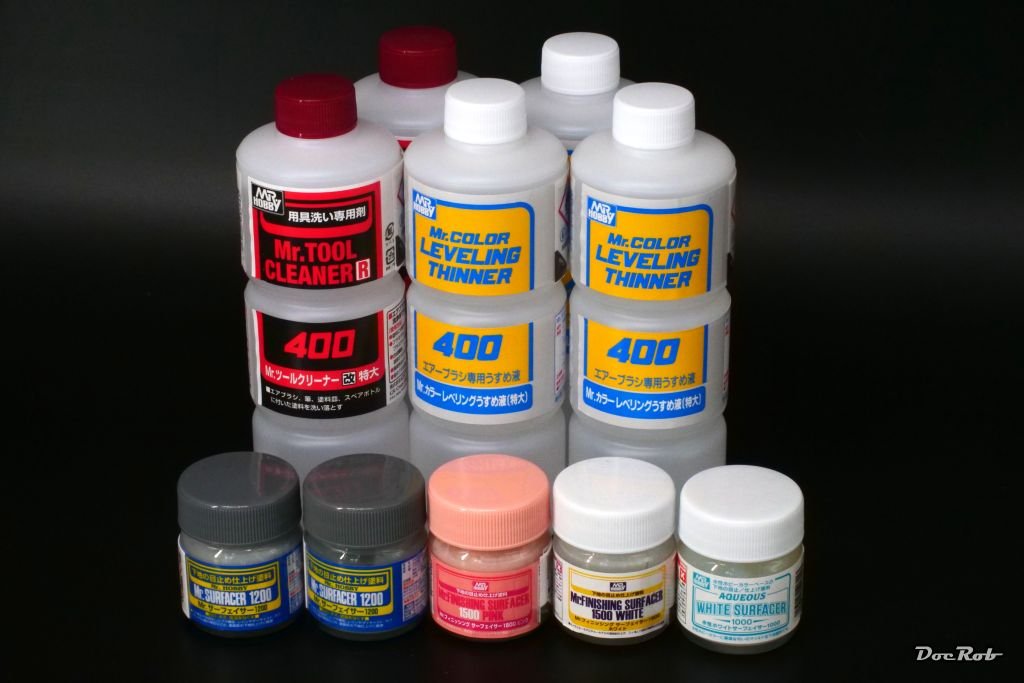
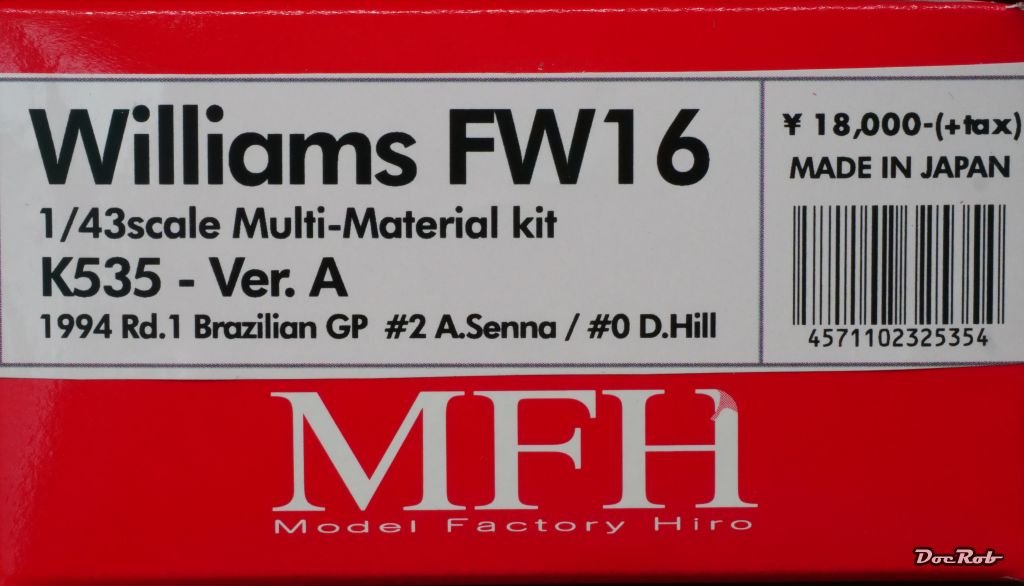
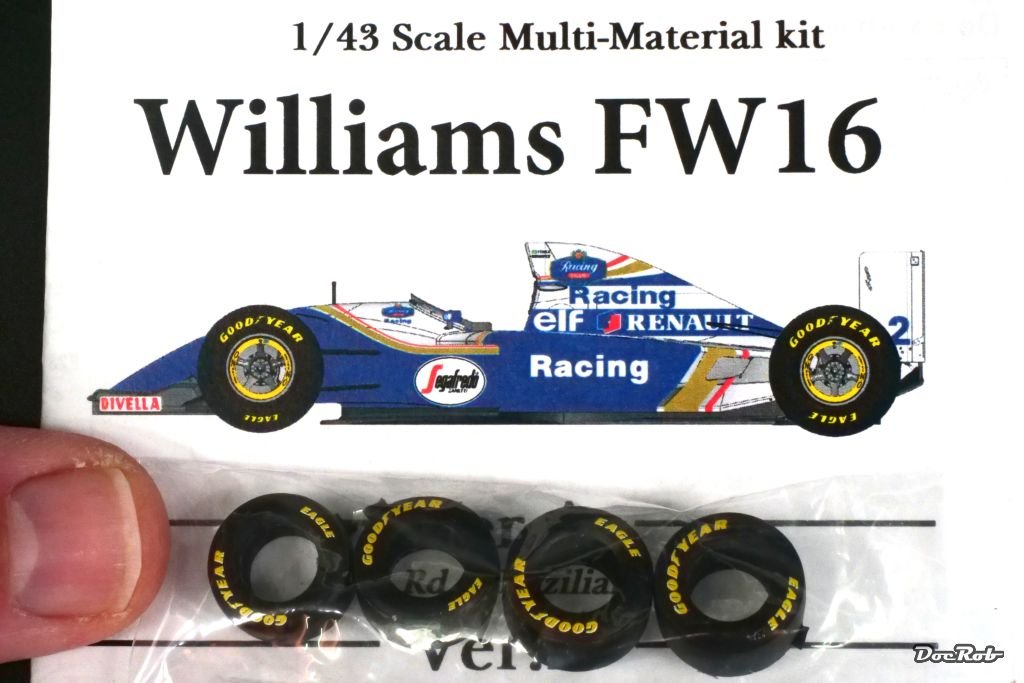
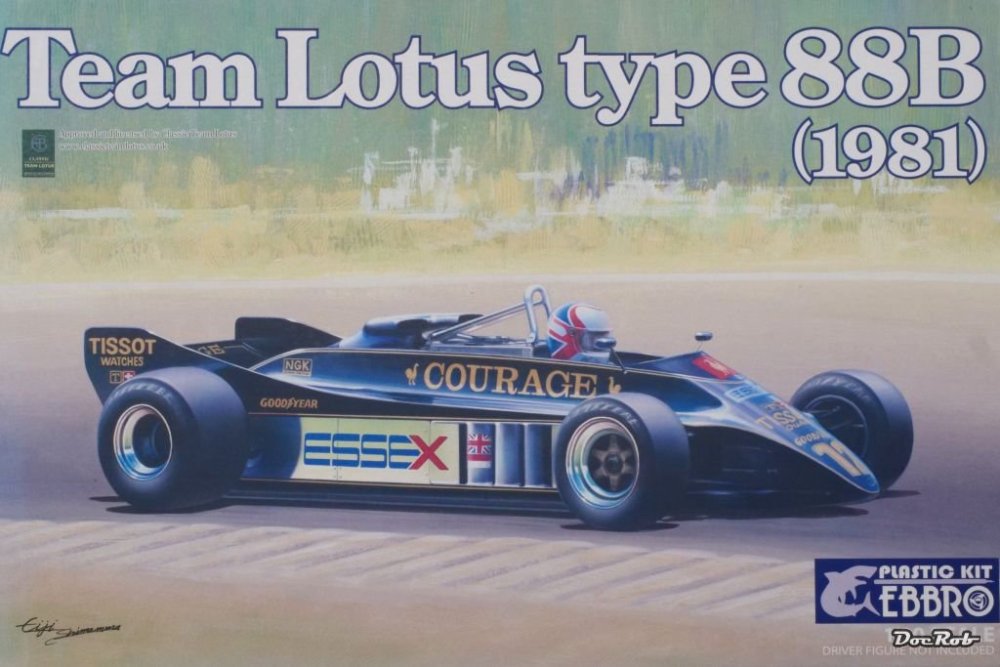
Some items has arrived on my doorstep lately. First, sheer madness, a 1/43 Williams FW 16 from MFH. I will need super magnification for that kit, but I was tempted by a fellow modeler over on MSW to try one of the little things. only to show the size, my thick thumb and the tiny, luckily pre printed tyres along. I pulled the trigger on another 1/20 F1 car. This time the Lotus type 88b from Ebbro. I got it for a good price and because the Ebbro kits are more and more hard to find, I´m quite lucky. The kit has also pre printed tires, which is very helpful and seems to be of very good quality. Last but not least some contraband . It becomes almost impossible to get greater jars than 30ml to my place. There are no hobby shops around and I have only one vendor left, who supplies me with thinner and primer in larger quantities. I´m very thankful for that Robotines.com. Cheers Rob


-

LSM Modelling News 2023 merged Fran and Artful69’s threads
DocRob replied to Fran's topic in Modelling Discussion
There is a comparison build on YT, showing the Yamato´s of Tamiya with Pontos basic, Border and Very Fire. I linked the third part (final analysis of the built models). It´s in Japanese, but you can deploy subtitles and you will get the message. Cheers Rob -
What is on your bench right now ? Share a picture :)
DocRob replied to Martinnfb's topic in Modelling Discussion
The Blob ate my plane . Hope you don´t have any "flow" issues with the blob masks. Cheers Rob -
P-40E Aleutian Tiger
DocRob replied to ScottsGT's topic in LSM 1/32 and Larger Aircraft Ready for Inspection
Completely wow, Scott. I love how you solved the tiger head issue. What blends better than a decal, right, paint. I don´t know, if I had chosen this way or if I would have chickened out. Cheers Rob -
Cobra Coupe - Le Mans - Model Factory Hiro 1/12
DocRob replied to DocRob's topic in LSM 1/35 and Larger Work In Progress
Thanks Phil, with the Cobra, it´s the phase of the build, where everything has to come together and where all the tolerances and little errors show. I will find a way to get it done. Your Triumph must have been a nice one, but exact gaps were never one of the greatest virtues with British cars. Cheers Rob -
Cobra Coupe - Le Mans - Model Factory Hiro 1/12
DocRob replied to DocRob's topic in LSM 1/35 and Larger Work In Progress
It´s nearly the same with this one, except, I can handle it with one hand, luckily. For a kit it is no lightweight though. I´m not sure, if exact gaps where to be found on the real one, as they were build up in great haste. Cheers Rob -
Cobra Coupe - Le Mans - Model Factory Hiro 1/12
DocRob replied to DocRob's topic in LSM 1/35 and Larger Work In Progress
The only possibility lowering the engine would be shaving some material away, where the engine meets the chassis and I will not touch this area if there isn´t an urgent need to do so. The whole engine is like a block, not to be manipulated now. This is the time, where everything has to fit finally and I tike my time analyzing what to do. My hesitation buying my beloved Alfa Tip 33 Stradale was exactly, because the fit of doors and body is so critical with these kits, especially when it comes to swing doors and huge engine rear body parts. Thanks for your good wishes, Mike, I´m absolutely not in panic mode, as I expected this and if it doesn´t work out unforced, two little rivets would be a viable solution. Cheers Rob -
Cobra Coupe - Le Mans - Model Factory Hiro 1/12
DocRob replied to DocRob's topic in LSM 1/35 and Larger Work In Progress
I thinned that part of the bonnet before, Carl, but seeing, how it still provides tension, I decided, I will go a bit further. Luckily, I stopped at the right time. My first approach of thinning was about keeping the inside of the bonnet perfect, which I skipped now. With a tiny bit of force and two tiny rivets, the bonnet will sit good enough, I hope. Cheers Rob -
Cobra Coupe - Le Mans - Model Factory Hiro 1/12
DocRob replied to DocRob's topic in LSM 1/35 and Larger Work In Progress
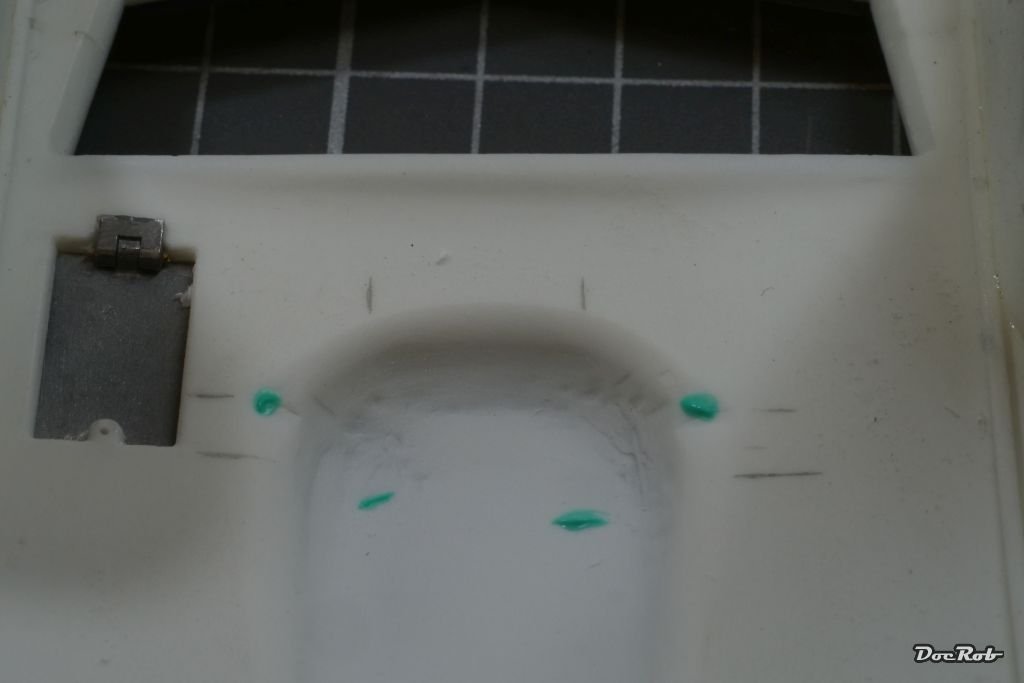
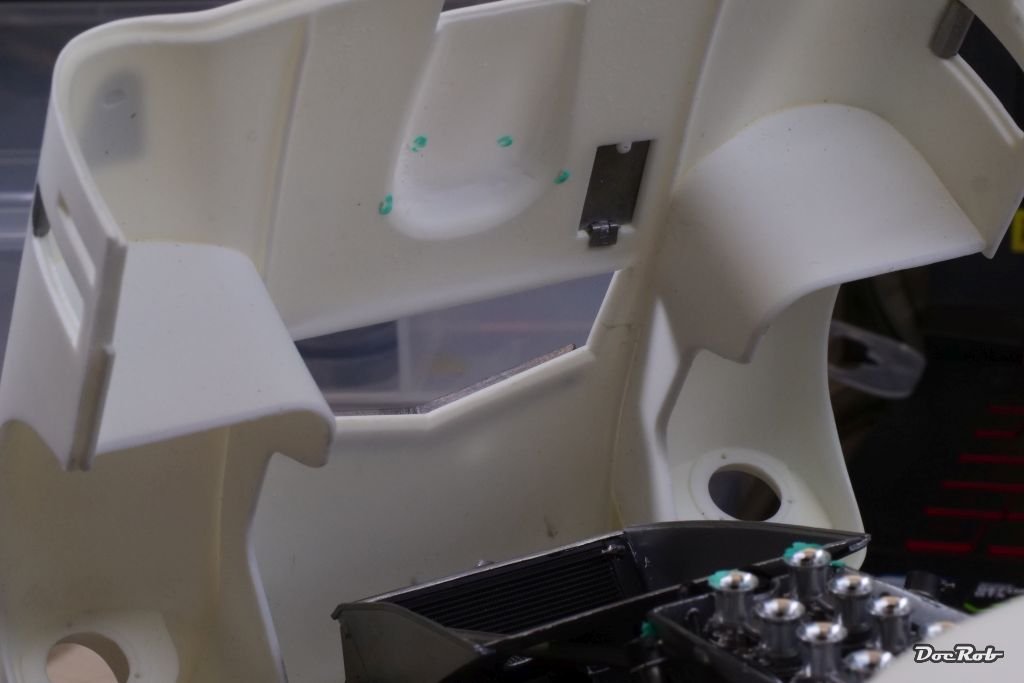
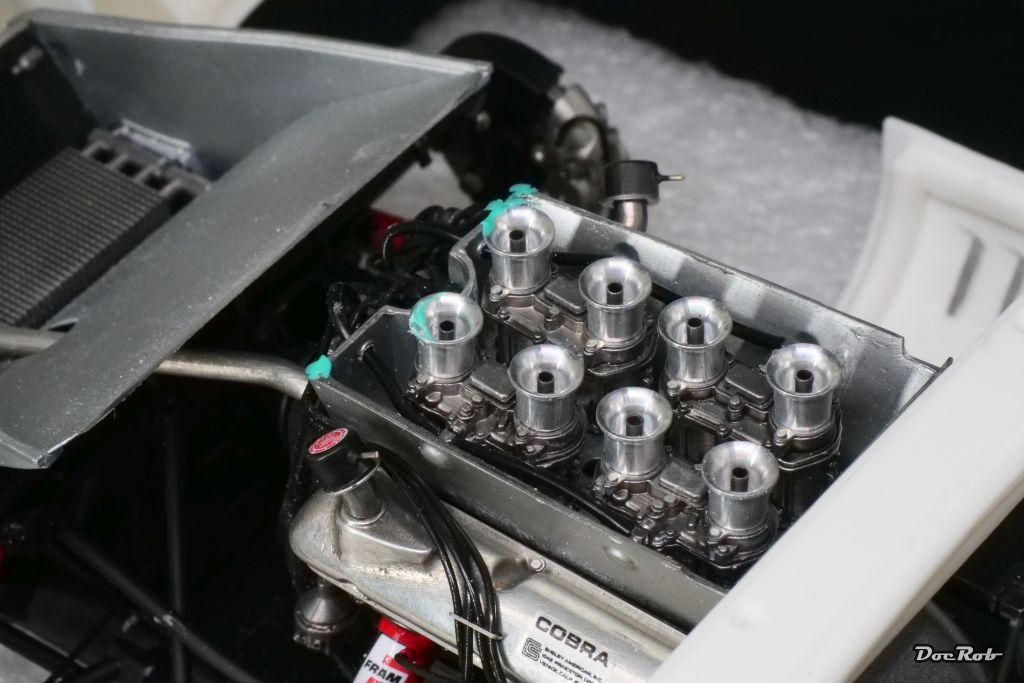
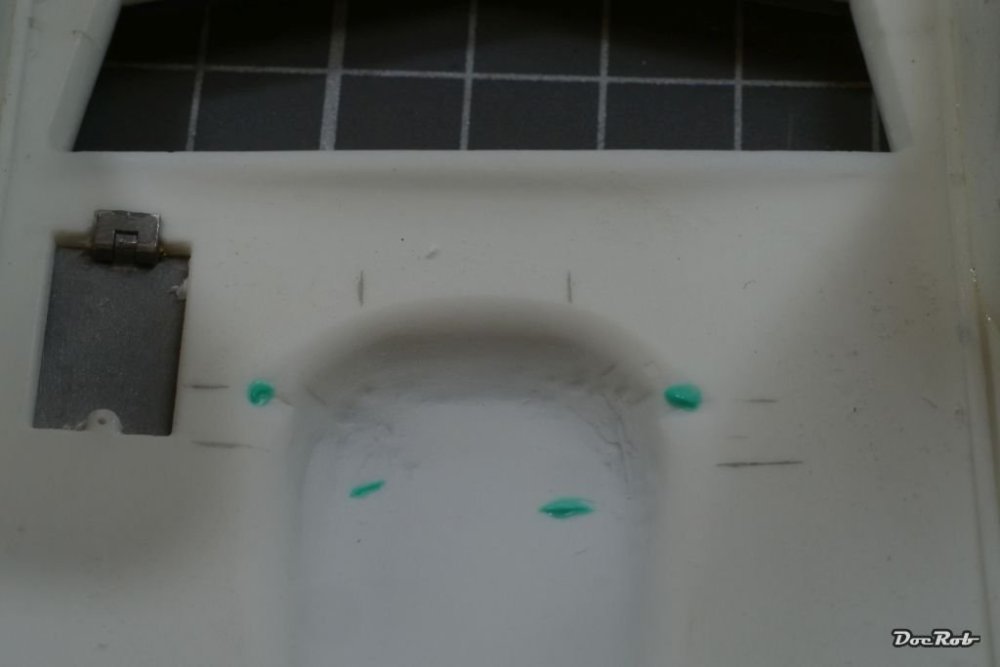
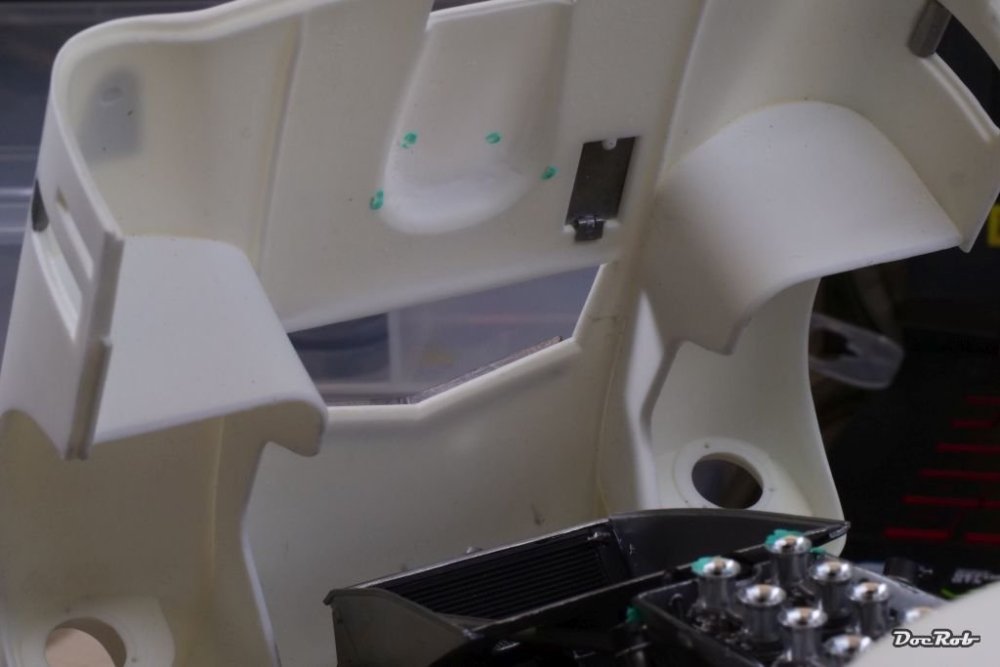
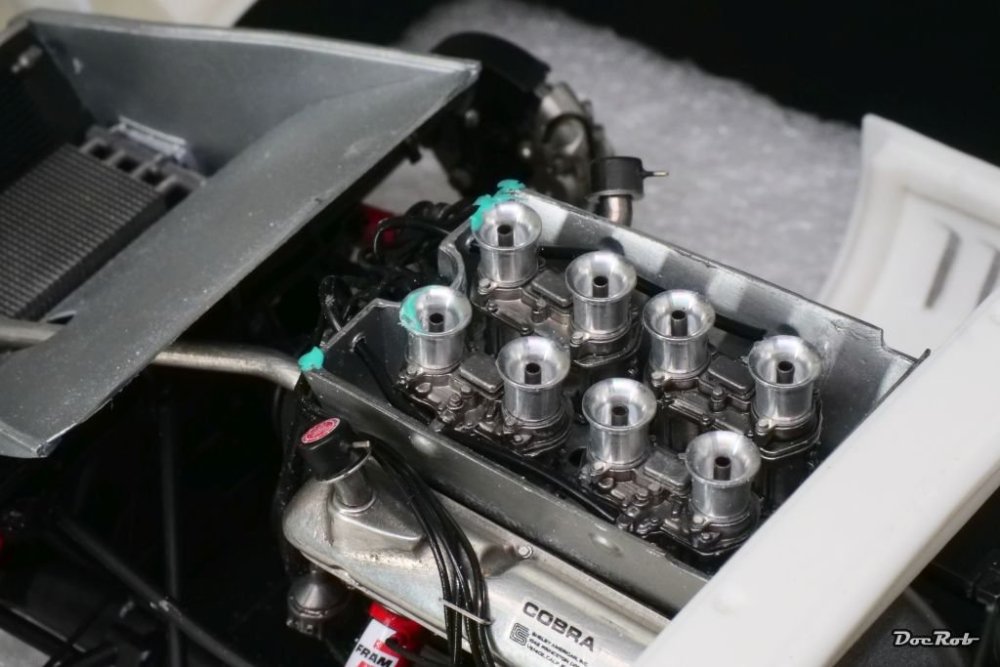
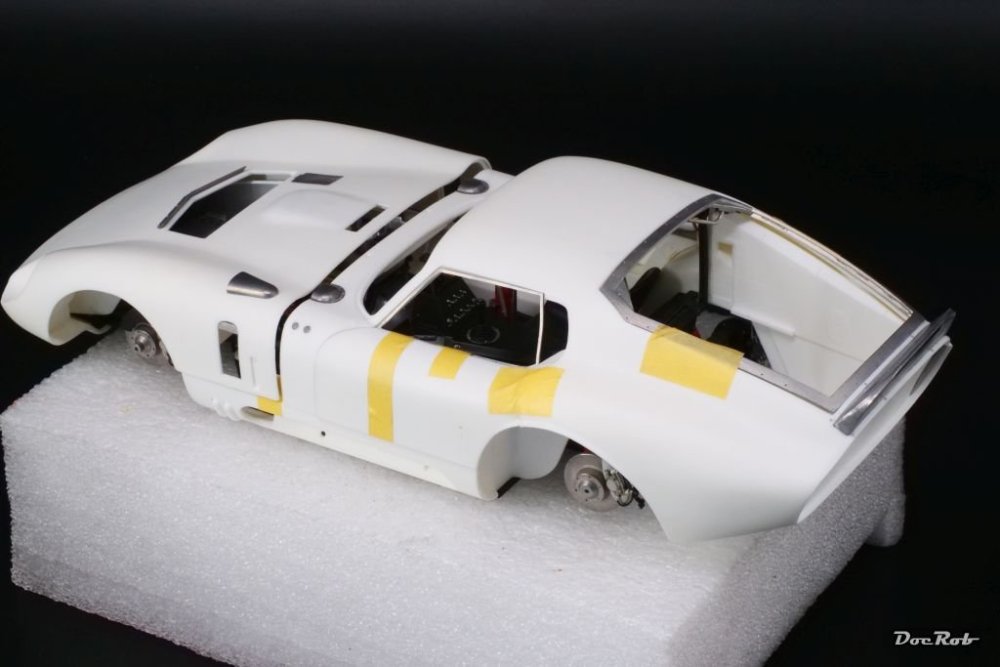
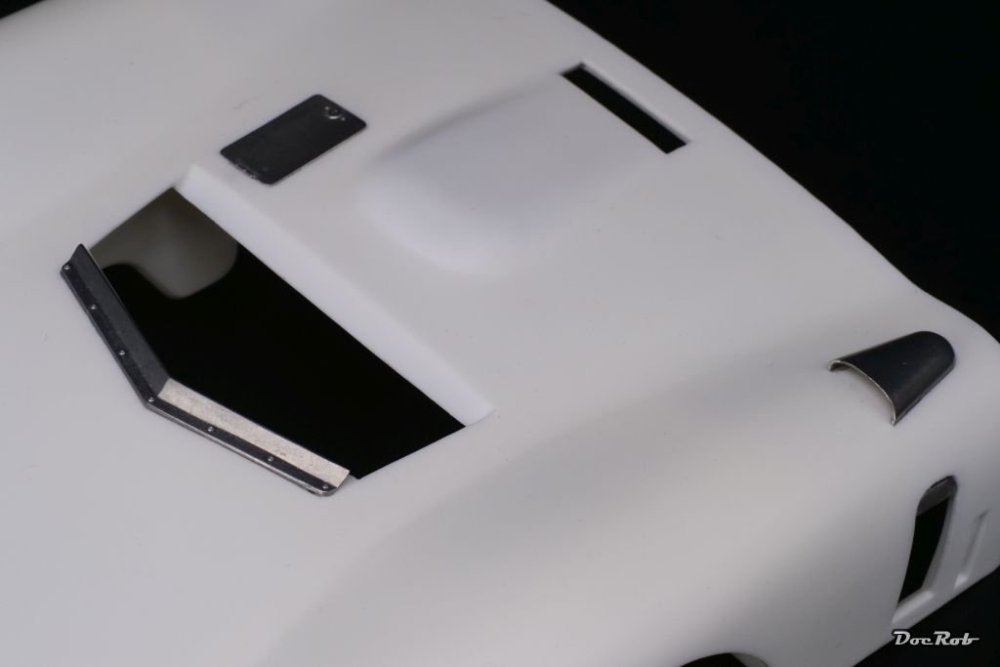
I dreaded the day, but it has to be done. I speak about final test fitting of the main components, in this case the body to bonnet fit. This is quite delicate, as so many parts and sub assemblies are involved and the process is painful with some loosened parts, etc. and takes hours. First, I screwed the body to the chassis. All doors and internal parts are only fixed preliminary. Then I mounted the bonnet to it´s hinges on the chassis and got that: When I force the bonnet down, it will more or less fit, but without locking it somehow, it will open like shown. I tried to identify the protruding parts and attempted to look, where they interfere, not an easy business, with only two tiny openings to see through on the sides of the bonnet. As I identified the possible culprits, I dabbed some liquid mask onto them and closed the bonnet and bingo got the interfering locations. In an iterative process, I removed the material as much as I dared and now the bonnet is paper thin, where the front funnels sit. It closes a bit better now, but not near as perfect as it should. At some point, I have no more possibilities to enhance the fit, as I also thinned the part in front, where the hinges meet the bonnet, to raise the bonnet a tiny bit. I will make a final try and then, I will add two tiny bolts, which force the bonnet into place and can be removed to open the bonnet. Cheers Rob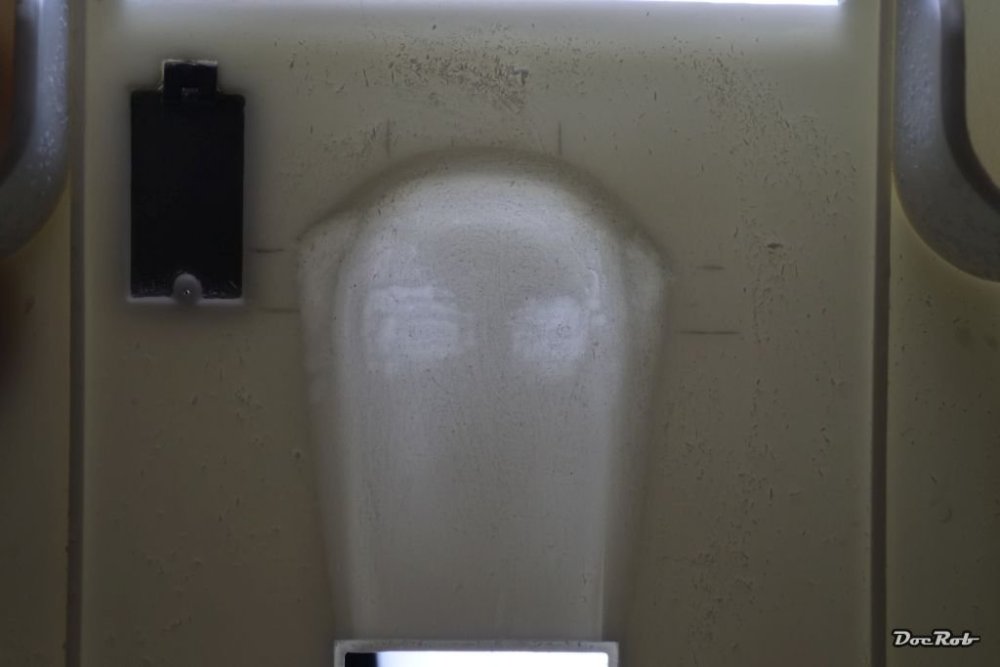
-
LSM Modelling News 2023 merged Fran and Artful69’s threads
DocRob replied to Fran's topic in Modelling Discussion
Do you glue the controllers to the base unit, Carl? is there an assembly manual? Which scale is it? Cheers Rob -
1:32nd scale Phönix C.I
DocRob replied to sandbagger's topic in LSM 1/35 and Larger Work In Progress
Very nice Mike. I´m a bit jealous at your Strutter tool. I couldn´t lay my hand on one, but helped me with wooden brackets for my vice, which worked well enough with brass tubes and inserted brass rods. Cheers Rob -
Iconicair 1/32 Supermarine Attacker
DocRob replied to GusMac's topic in LSM 1/32 and Larger Aircraft Ready for Inspection
Somehow the Attacker skipped my attention in real live as well as a model. Thank you Gus, for putting that right with your fantastic representation of this rare bird. I´m eager to see, where your resin infection carries you. I only built one full resin plane, a Caudron racer made by SBS. It was a very pleasant build and I can recommend their kits, but they are only 1/48 and 1/72 and mostly interwar planes and racers. Cheers Rob -
Cobra Coupe - Le Mans - Model Factory Hiro 1/12
DocRob replied to DocRob's topic in LSM 1/35 and Larger Work In Progress
That proved to be not too complicated luckily. I even left the rear ends unglued for now, because I have to remove the rear inner trim while painting and need a bit of wiggle room. These kits are designed so well, but sometimes you wonder how delicate parts fell together, but they are no shake and bake. Cheers Rob -
Cobra Coupe - Le Mans - Model Factory Hiro 1/12
DocRob replied to DocRob's topic in LSM 1/35 and Larger Work In Progress
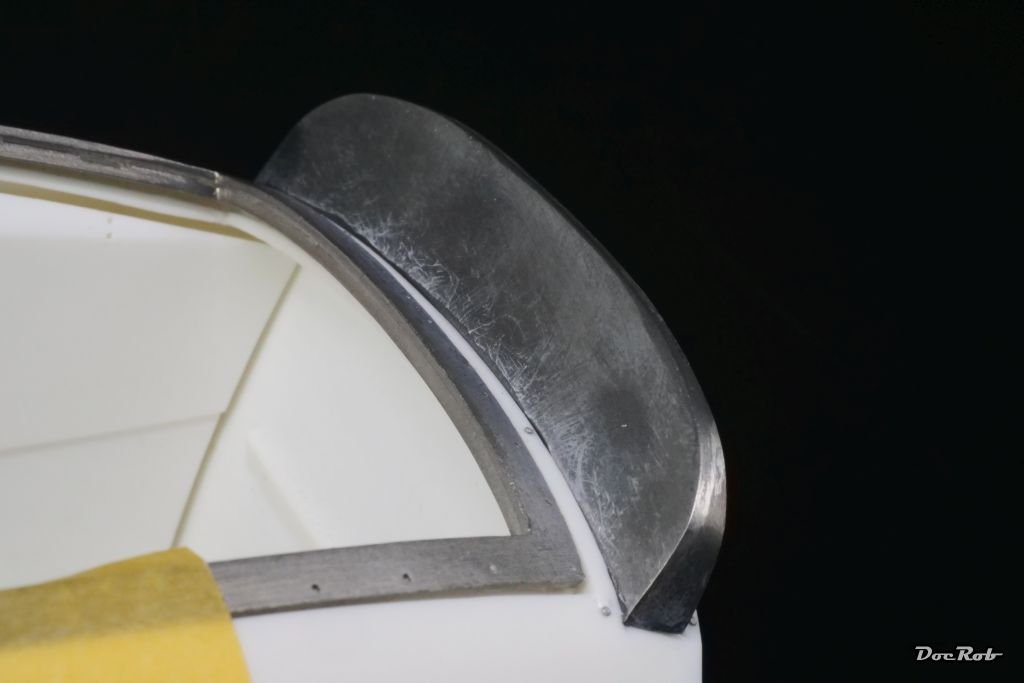
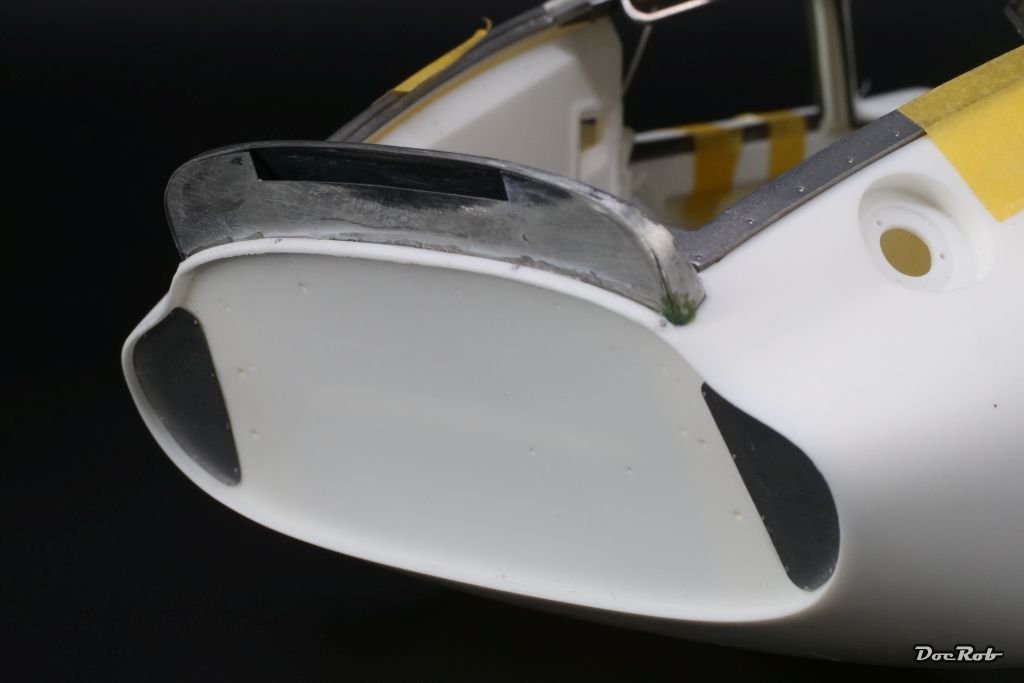
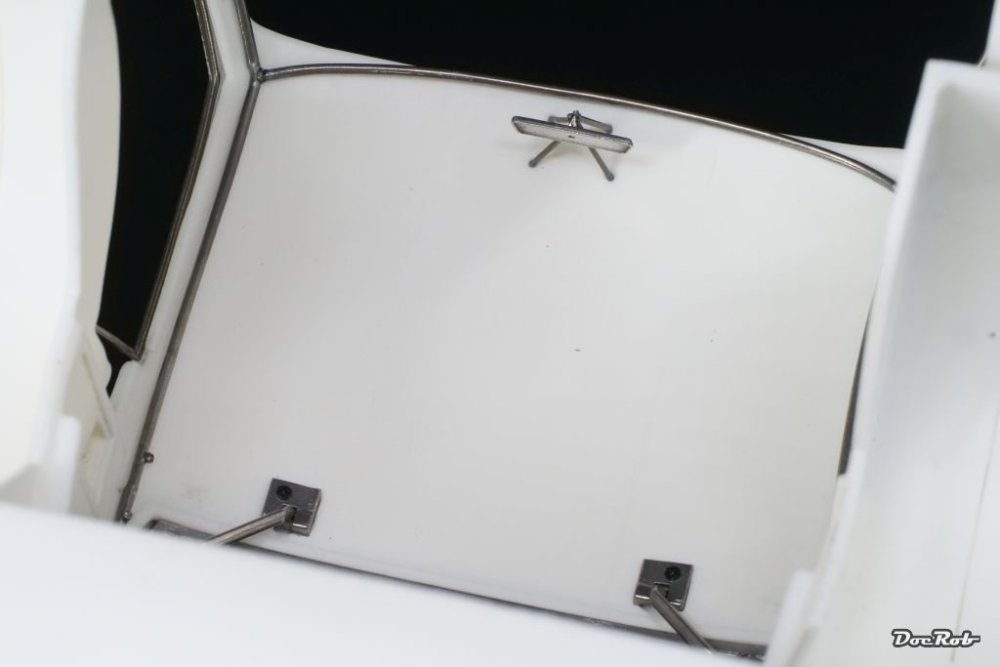
Preparations, preparations and no end in sight. I added the rear spoiler, which was not easy and needed a lot of sanding and bending and a bit of filling to sit right. The bonnet got some scoops and hatches and a spoiler, which is bolted on with tiny rivets. These rivets go everywhere in great numbers now, as they hold the clear parts in place and are added around the rear spoiler too. Painting will start with the interior and I added some internal framing and the rear view mirror as further preparation. I also cut my first clear vac part ever, a task that needed to be done more often in the next steps, as I plan to prepare all the panes and windshield before painting. After a lot of searching, I found some thin clear double sided adhesive tape on my island, which I intend to use, to install the clear parts. Cheers Rob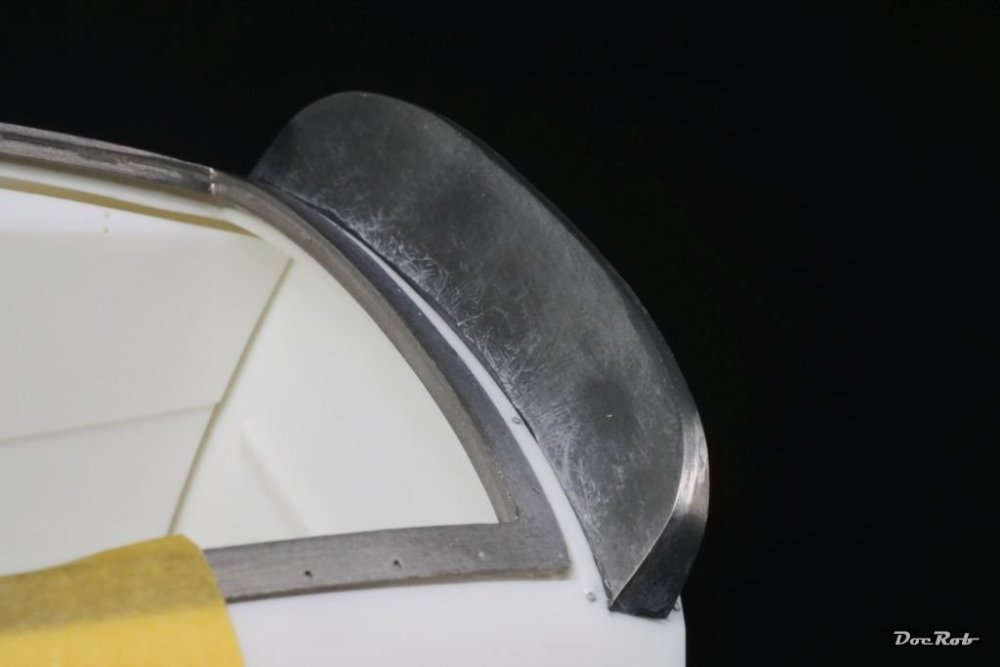

-
Happy belated birthday Kevin. Always good to have family members, who appreciate the hobby. With my wife, it´s a bit different unfortunately, she accepts me building kits, but dislikes the spendings and only once made a kit as a present for me. In fact, it´s the priciest, I own, the HMS Sphinx from Vanguard models, a wooden frigate kit. Cheers Rob
-
Eduard Spitfire Mk. XVI Bubbletop 1/48
DocRob replied to CANicoll's topic in LSM 1/48 Work in Progress
Nice, Chris, will definitely follow, as I have two of these, along a galore of AM including one Brassin cockpit and engine. My plan is to build them together, one in NMF one camouflaged. The NMF bird in flying mode, the other fully detailed with open hatches on the ground. I am very interested, about what you say about the kits quality and fit. Cheers Rob -
Cobra Coupe - Le Mans - Model Factory Hiro 1/12
DocRob replied to DocRob's topic in LSM 1/35 and Larger Work In Progress
Don´t let you put off, Phil. there is a lot of fun in car building and my two examples, the Cobra and the McLaren where not the easiest picks for sure. I´m actually debating with myself, to shove an easy car build in between. The MFH kits are something special, but they need a lot of attention, specially with these huge body parts, which need to fit perfectly and also should stay openable to show the details. Car kits call for a different skill set and I always like to learn new techniques, so it´s a perfect break for me. Cheers Rob -
Brengun 1/32 Rutan Quickie.
DocRob replied to HubertB's topic in LSM 1/32 and Larger Aircraft Ready for Inspection
Fantastic Hubert. I love the little flying thingy and the guy in the Hawaiian shirt. Looks somehow like a scene in a drug trafficking movie, I have the soundtrack in my ear. Cheers Rob -
1:32nd scale Phönix C.I
DocRob replied to sandbagger's topic in LSM 1/35 and Larger Work In Progress
Wow, seems it will be the most comprehensive of your great pdf-build logs. I hope you pull through this difficult build. Cheers Rob -
It heavily depends on the subject. With my actual Cobra Coupe build, as well as other car builds, I try to paint all body parts and body colored sub assemblies at the same time, to have an exactly fitting color in the end. This includes all the steps from priming to final clear coating. With tanks or weathered planes, I try to paint as much together as possibly, but not as dogmatic as with car builds. You can hide slight discolorations behind weathering or a good cover story (replacement parts, etc.) I generally try to build as far as possible before painting. I would never paint on the sprues, except for tiny details. I never painted separate larger body sections at different time, like you do, but it works for you and your results are great. Cheers Rob
-
Cobra Coupe - Le Mans - Model Factory Hiro 1/12
DocRob replied to DocRob's topic in LSM 1/35 and Larger Work In Progress
It is nearly this, Chris, except for the scale and no oily fingers . Cheers Rob -
Cobra Coupe - Le Mans - Model Factory Hiro 1/12
DocRob replied to DocRob's topic in LSM 1/35 and Larger Work In Progress
It´s indeed an iterative process and I hope the tiny threads for the screws hold up for numerous disassembling sessions. It can be a bit trying at times, specially considering, I wanted to spray on first paints on the body parts long ago, but it´s best to take time and prepare and align everything ahead of painting. Cheers Rob -
What I can see looks very promising. There are indeed lots of parts used for the internals, but with the open cockpit and the possibility to leave the hatches open, a lot remains visible. When I remember my build correct, there were no real letdowns. The kit itself is near Tamiya quality and I truly enjoyed building this quirky bird. Here is a link to my build log, if you´d like to take a peep. Cheers Rob
-
1:72 AZ Model Mig-17PF - another one off the bench!
DocRob replied to rverissimo's topic in Non LSM Ready for Inspection.
At least, it was not a space consuming hangar queen , but you finished her beautifully. The paintjob looks great and the airfield is a nice addition. Cheers Rob -
Maybe, got the ZM one. Cheers Rob