DocRob
-
Posts
7,045 -
Joined
-
Last visited
Content Type
Profiles
Forums
Events
Gallery
Everything posted by DocRob
-

McLaren MP4/6 Ayrton Senna Fujimi 1/20
DocRob replied to DocRob's topic in LSM 1/35 and Larger Work In Progress
Yes, I think it is stronger, Mike. I think every type of decal reacts a bit different to solutions, that´s why it is hard to generalize. My greatest weapon of choice here was definitely the hairdryer. Cheers Rob -
McLaren MP4/6 Ayrton Senna Fujimi 1/20
DocRob replied to DocRob's topic in LSM 1/35 and Larger Work In Progress
Thank you Mike, the branding decals were easy and fast to apply, the time consuming part were the carbon fiber decals, which are fragile and stiff at first and need to be settled, by heavy doses of Mr. Mark strong and lots of heat. Many of the carbon parts have delicate, often undercut shapes and you need a good process, to profit from the overlays of the decals perfectly, to cover the corners. Cheers Rob -
These wheels look extremely good, FA. Do you plan to weather/tear the rubber tyres? That hull tub looks gigantic. It will take half a bottle of cement to glue it shut . Cheers Rob
-
A fantastic looking Potez, Hubert. Is that really a spare wheel on the fuselage side, cool. Cheers Rob
-
McLaren MP4/6 Ayrton Senna Fujimi 1/20
DocRob replied to DocRob's topic in LSM 1/35 and Larger Work In Progress
I sanded the body with 8000 grit sanding sponges, cleaned it and gave it another coat of Zero lacquer clear, this time with about 20% leveling thinner in the mix. After drying, I started to apply carbon fiber decals to the wings and air baffles. This is very time consuming and at first, I always think, the decals will never settle around the delicate shapes, but with patience, lots of strong decal solvent and applied heat from a hairdryer, they start to melt in place slowly. It took two days in total and still need a lot of touch up, but they are on. Next was the branding. The TB Decals went on perfectly, with matching colors, not too thin, not too thick, what can I say, it took only two hours, what a relief after the delicate carbon fiber decals Cheers Rob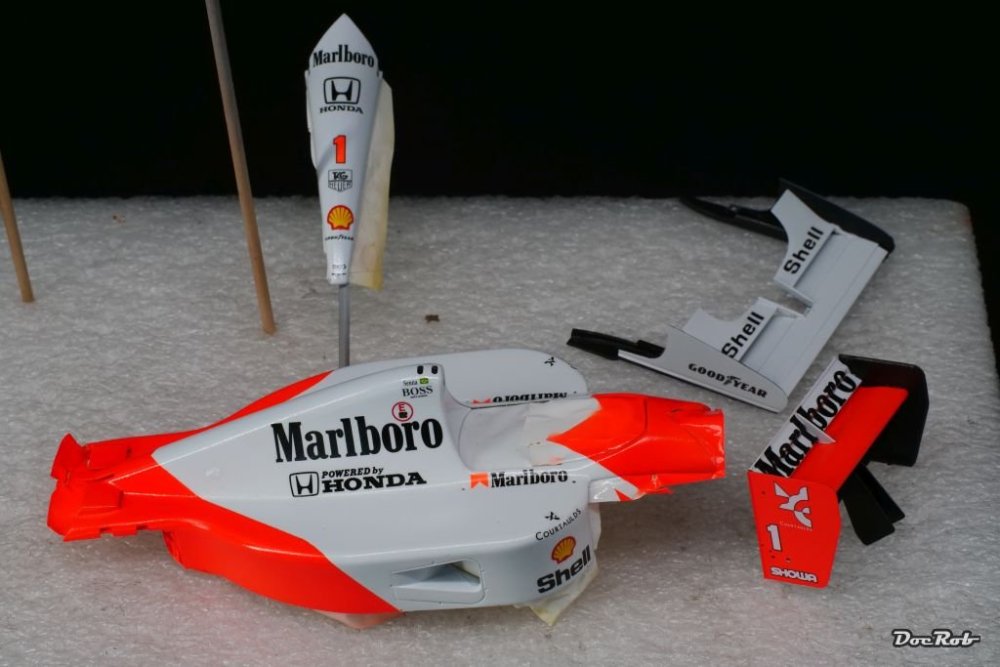
-
What is on your bench right now ? Share a picture :)
DocRob replied to Martinnfb's topic in Modelling Discussion
Watch out Carl, car kits can be addictive . Cheers Rob -
Westland Wyvern S.4 late- 1/48 Trumpeter
DocRob replied to BlrwestSiR's topic in The Sandbox Group Build.
Nice Carl, this strange bird will look fantastic in your magic hands. Cheers Rob -
McLaren MP4/6 Ayrton Senna Fujimi 1/20
DocRob replied to DocRob's topic in LSM 1/35 and Larger Work In Progress
Thank you Carl, the red burns in the eyes and I don´t know, if Zero didn´t do a bit too much, but the TB decals have the same hue. Pictures of the real thing vary from deep red to the fluorescent red, I used and lighting and metering has a lot to do with it. Meanwhile, I spongesanded the body with 8000 grit and gave it a second wet coat of clear, where I added about 20% of Mr. Leveling thinner to the Zero lacquer clear. It now is near perfect. Cheers Rob -
McLaren MP4/6 Ayrton Senna Fujimi 1/20
DocRob replied to DocRob's topic in LSM 1/35 and Larger Work In Progress
The first coat of gloss is on and will be the base for decaling. I used Zero paints lacquer clear for the first time and liked it, besides the horrible smell. I may sand and spray a second layer, but this I will decide after everything dried. The gloss looks actually better than on the picture. I used the same process of painting and glossing on a spare external fuel tank from an airplane kit as a mule. There I can test everything first, before I work on the McLaren body. This will be especially welcome, when it comes to clear coating after decaling, always a risk with the hot stuff. Cheers Rob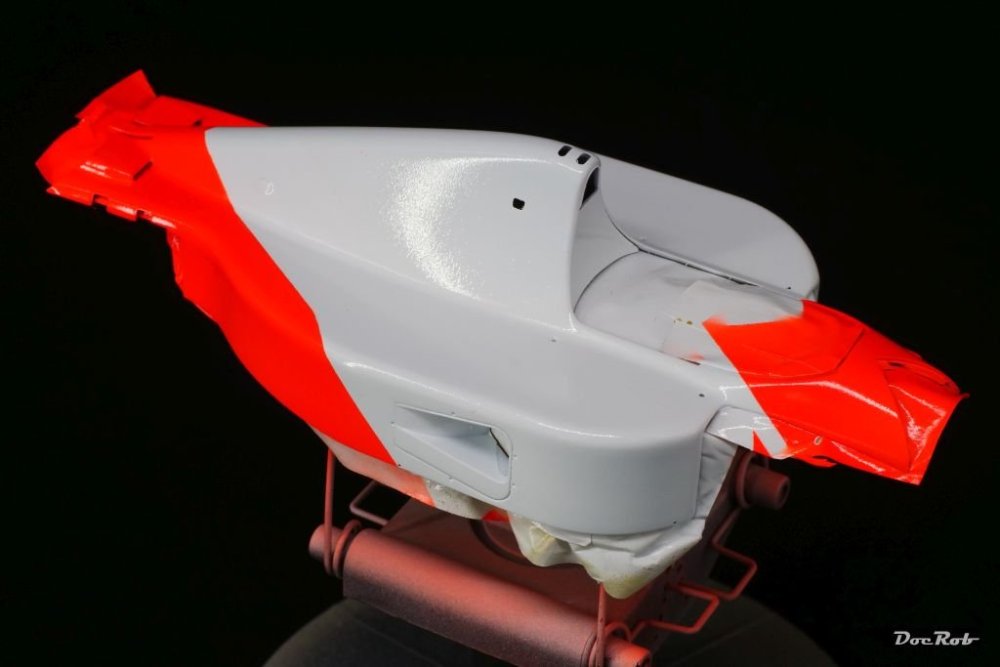
-
McLaren MP4/6 Ayrton Senna Fujimi 1/20
DocRob replied to DocRob's topic in LSM 1/35 and Larger Work In Progress
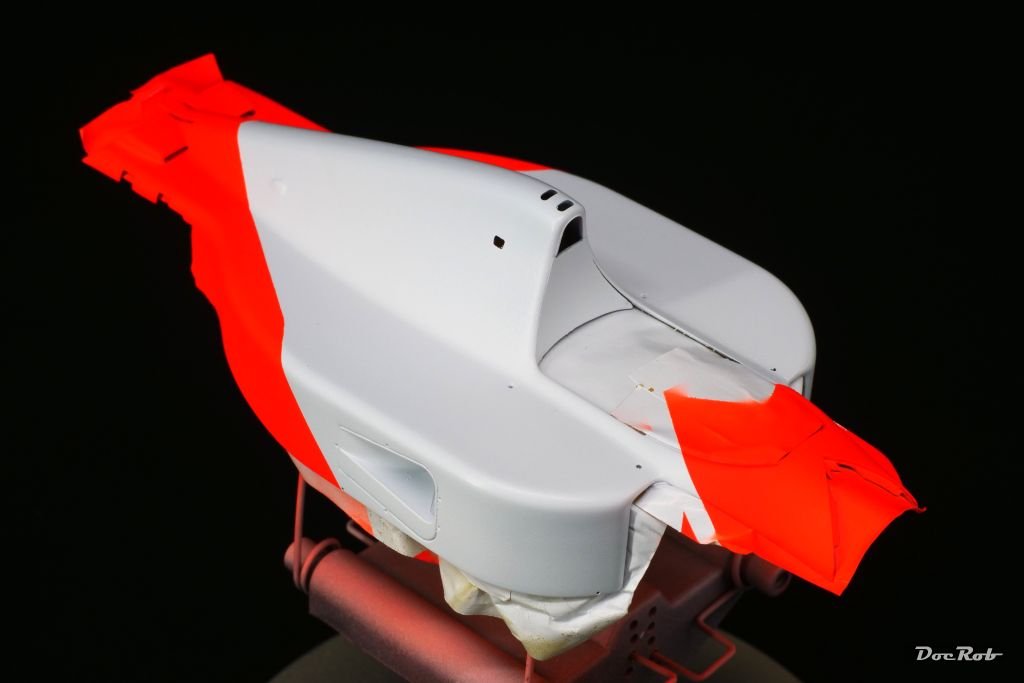
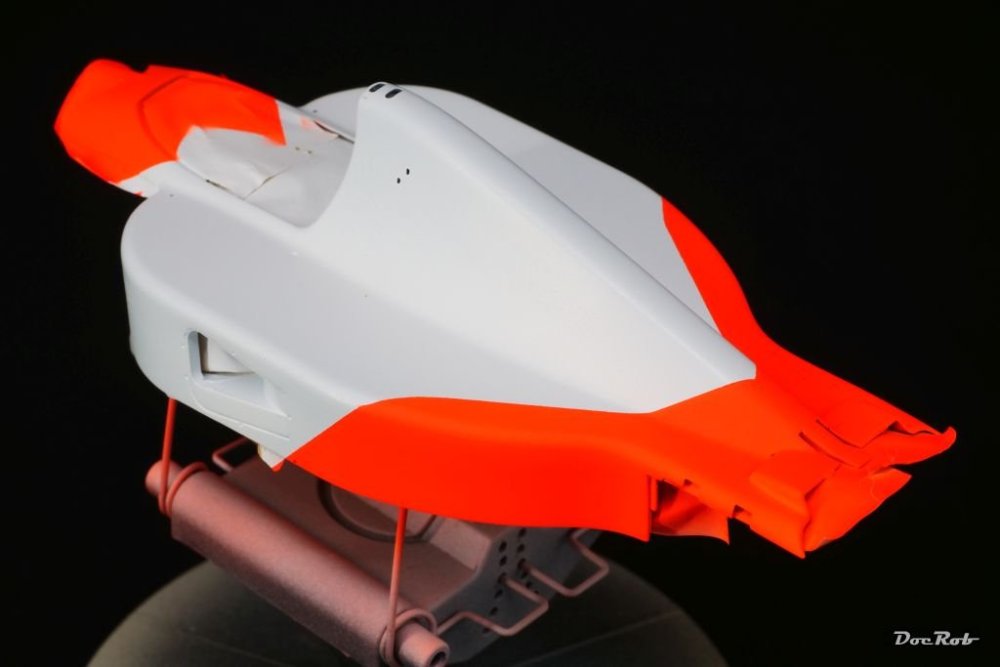
Next will be the fluorescent red on the body and rear wing (not shown) parts. Again Zero paints will be used, but before, I need to mask off the white areas. There is a template included in the kit, which I took as a guide for my own masking strips. I adhered 16mm wide Tamiya Kabuki tape on top of the templates contour and cut it, following the lines and then applied the tape carefully onto the body, masked the front red section with 3mm wide Kabuki tape and sealed the rest of the body off. I double checked the border lines, pressing with a toothpick to hinder color bleeding. On with the fluorescent red. Like with white, I started to mist on three coats, followed by a pause of about 15 minutes between each. The next three coats went on a bit heavier. I now need sunglasses , because of the intense color. With the last coats, I checked with the decals, if I had the right tone. I removed the masks very carefully after only a few minutes, because I like to do that without the colors fully cured and hope for the last bit of leveling effect on the color borders. Luckily, there is no bleeding or overspray to be found. Cheers Rob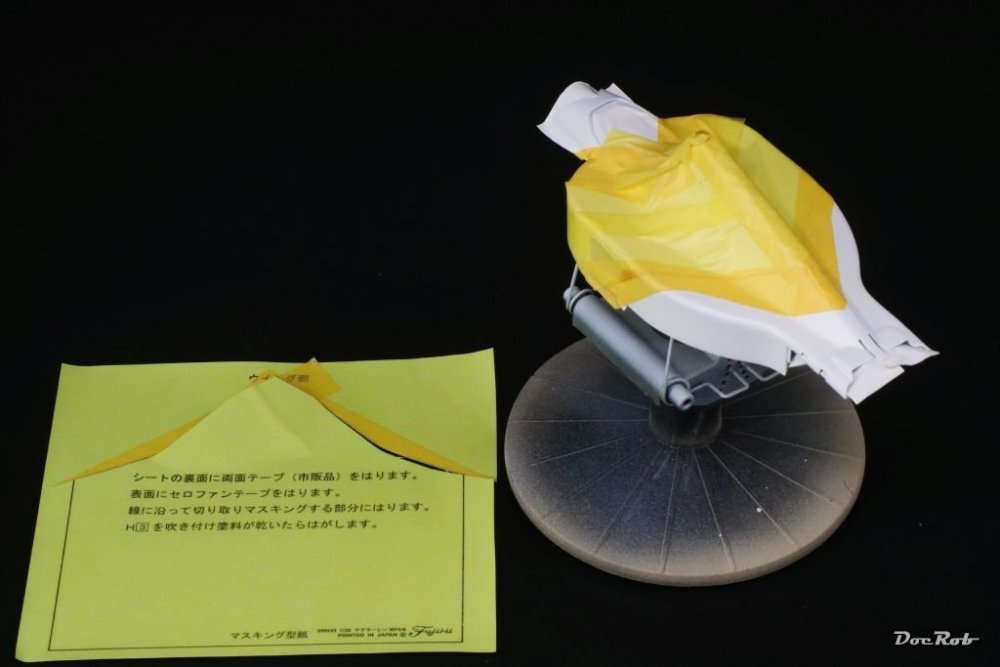

-
McLaren MP4/6 Ayrton Senna Fujimi 1/20
DocRob replied to DocRob's topic in LSM 1/35 and Larger Work In Progress
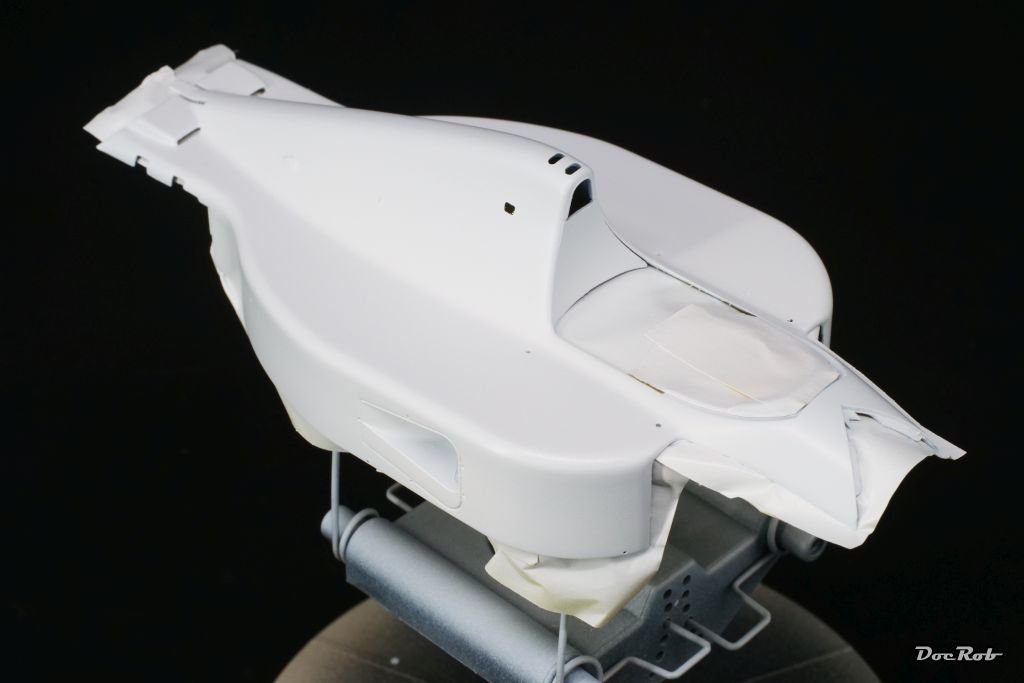
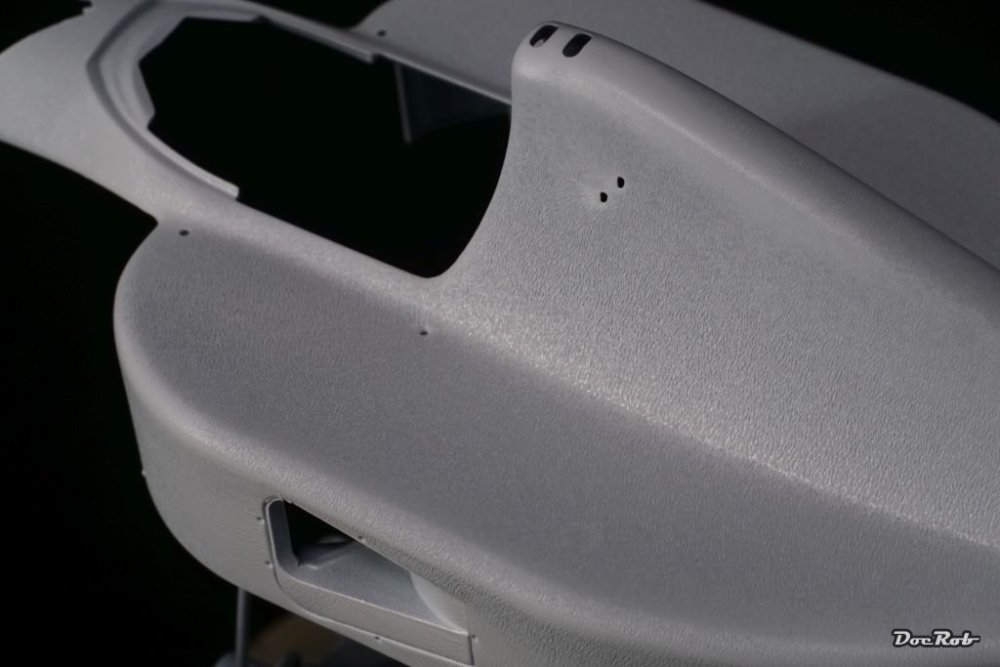
Better now, phew, thanks for all your help and recommendations. This time, I applied a very faint layer, which only lightened the background grey of the underlying Mr, Surfacer 1500 grey primer. This was followed by three more misted layers with a drying time of at least 15 minutes between each. I raised the air pressure at about 2,0 bar and used the paint without leveling thinner. No orange peel and no attacked plastic, luckily. After a pause of two hours, I added four more layers, the last being a bit more rich, with a half hour between applications. Now it looks good. I also sprayed all parts in white, which will later painted fluorescent red, because on the body, these areas are also painted white down under and I didn´t want another hue in the red. Cheers Rob
-
McLaren MP4/6 Ayrton Senna Fujimi 1/20
DocRob replied to DocRob's topic in LSM 1/35 and Larger Work In Progress
Thank you Mike and Carl, for sharing your experiences with these type of colors. I never had this kind of issues with Tamiya lacquer though, Carl, that´s why I thought, application of Zero paint will be more or less the same. I use the Tamiya lacquers a lot and the only issue I had, was that they can affect masked clear parts, but most of the fogging can be rubbed away with a cotton swab. Good (for me, not for you ) to hear, that you experienced similar issues and that misting on coat after coat is the way to go. I guess, that is why these colors don´t dry glossy. Thank you for the information about the even hotter 2K clear. I was planning to use Zero´s 1K lacquer clear coat, of which I heard good things. I wear definitely always a respirator mask when working with this kind of stuff, luckily. I´d like to see your Miura, Carl, I have one in my stash as well, accompanied with some etch and, what else, a jar of ZERO paint . Cheers Rob -
McLaren MP4/6 Ayrton Senna Fujimi 1/20
DocRob replied to DocRob's topic in LSM 1/35 and Larger Work In Progress
I hope so, FA. I stripped the color, which was nearly impossible and showed the quality of the priming, then sanded and some minutes ago, reprimed all the whit parts again. Tomorrow will be the time of truth, with very thin applications of Zero white. Cheers Rob -
McLaren MP4/6 Ayrton Senna Fujimi 1/20
DocRob replied to DocRob's topic in LSM 1/35 and Larger Work In Progress
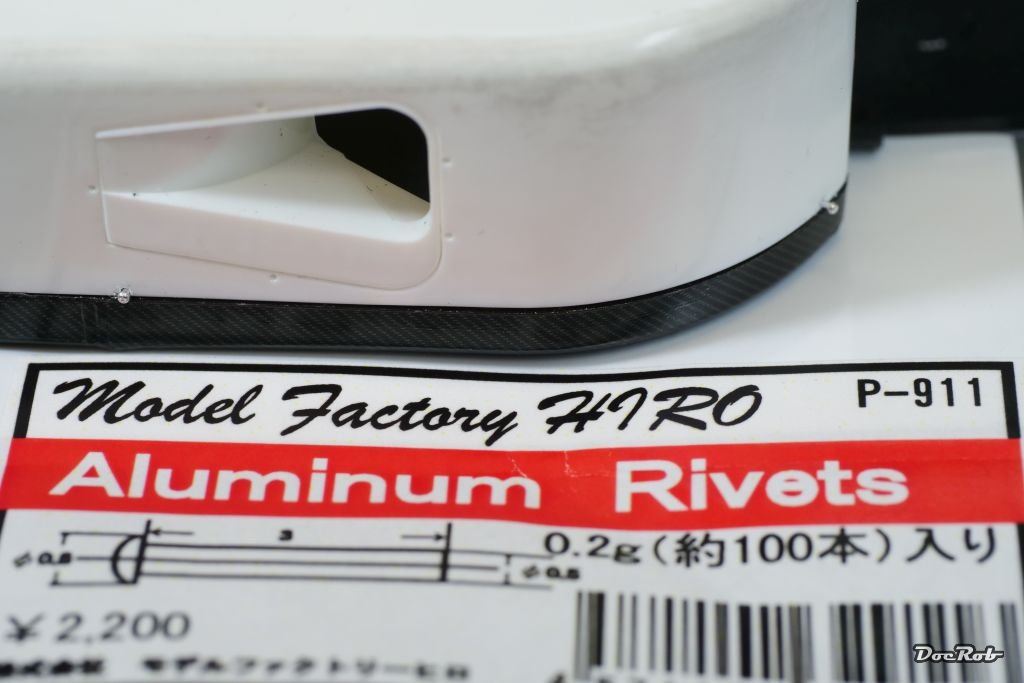
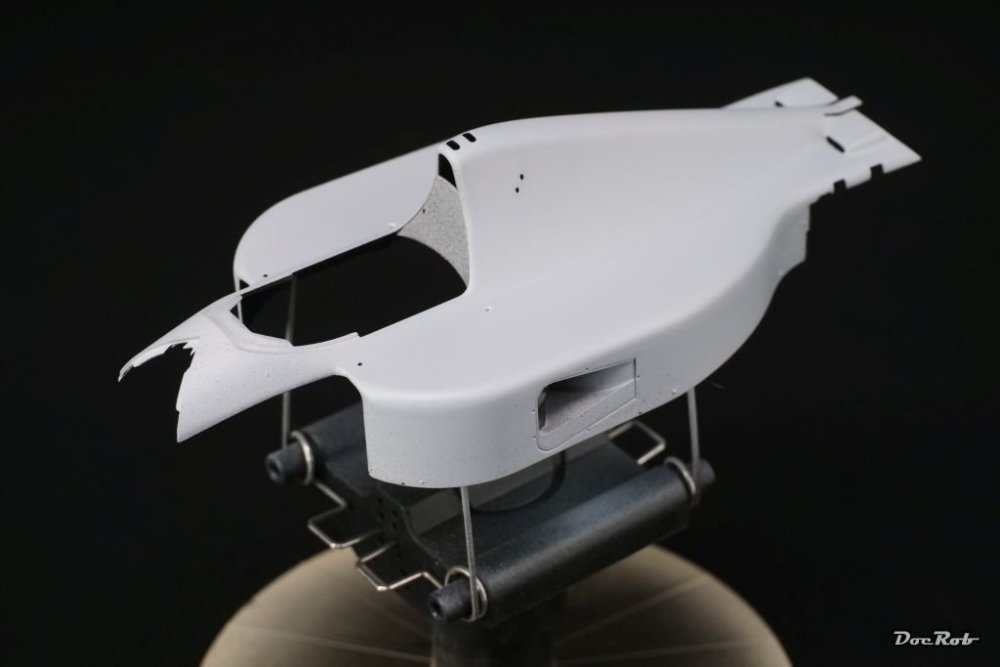
A while ago, the McLaren was shelved, because I couldn´t mount the body onto the floorpan, without having a gap of 1-2 mm between them. I wanted to keep the body removable and because, I had no idea how to tackle this without the gap, the MP4/6 got benched. Then I had an idea. When I bought my MFH Brabham lately, I also ordered some aluminum rivets and when I saw these, I thought, I could drill tiny holes into the overlapping parts of body and floorpan and insert the rivets, which locks the parts in the correct position. Done and almost invisible, when painted later. I caught some fresh wind on that project and started the bodyworks with priming. Mr. Surfacer 1500 went on super smooth. I wanted to accomplish a bit more practice with paints like Zero or Number 5, before I continue with my Cobra Coupe. Good that I´ve done so, because... ... then disaster struck. I sprayed Zero Paints MP White on in a light but covering layer and all looked good for a minute or two. Then, grey shadows loomed through the paint, followed by the late forming of orange peel. Somehow the paint must have reacted with the plastic through the primer. Normally, that would have been the point to bin the kit, but like I said, I´d like to get a better feel for these kind of colors and finishes, so I stripped and sanded the parts for some hours and will redo everything. I found a video abut how to apply Zero Paints best. It states, that you only mist a tiny bit of color onto the primer wait for ten to fifteen minutes for the next layer and so on. You should use 1,5 bar for that. I usually spray low pressure highly thinned for best results, but these colors seem to need instant drying through the air pressure, because they are so hot. Lets see, how the next try works out. Cheers Rob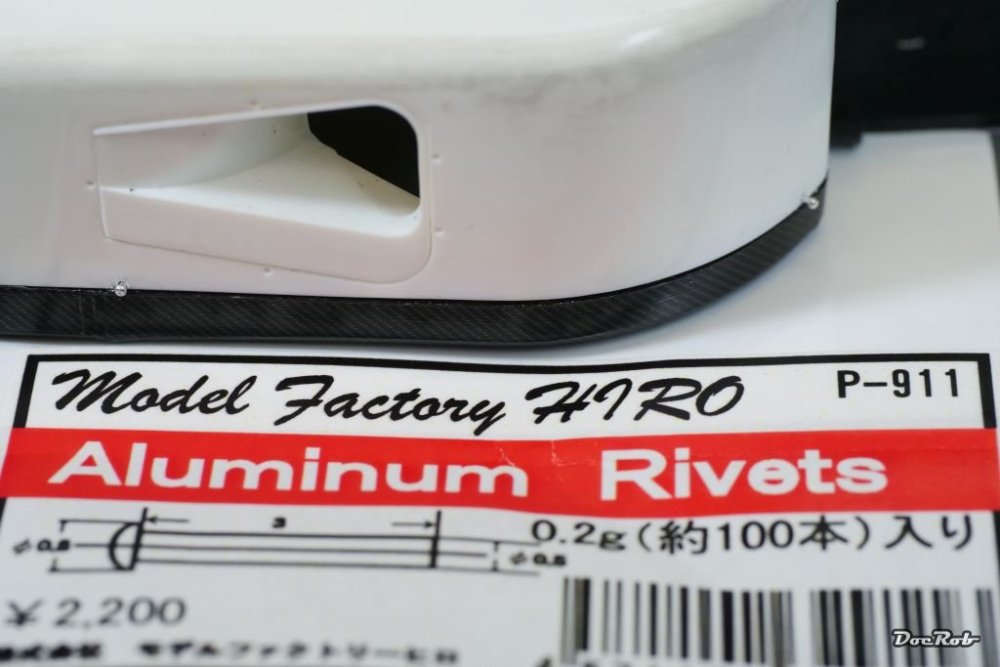
-
Wow Mike, you are going all in with the detailing. The opened gun bay will be an eye catcher, as well are the engines. Cheers Rob
-
Puh, that´s a high amount of trouble you stepped in, Hubert, but it seems everything is manageable, if only the paint lasts. Good luck with the repairs. Cheers Rob
-
Yakety Yak ....1/48 Eduard Yak 3 Profipack
DocRob replied to PanzerWomble's topic in LSM 1/48 Aircraft Ready for Inspection
Nice, PW, painting blends beautiful with decaling and weathering. The same kit was one of the first, if not the first, re entering the hobby many moons ago. Cheers Rob -
Nice and groovy and fitting to the season. Cheers Rob
-
What is on your bench right now ? Share a picture :)
DocRob replied to Martinnfb's topic in Modelling Discussion
Pah, easy, it´s totally broken . Cheers Rob -
Another one bites the dust - Maschinen Krieger Friedrich - 1/20
DocRob replied to DocRob's topic in The Sandbox Group Build.
I guess, the guy had other problems . Thank you Kevin, it was a fun project with a bit of experimenting. What could be better. Cheers Rob -
Ok, I´m green . Cheers Rob
-
Another one bites the dust - Maschinen Krieger Friedrich - 1/20
DocRob replied to DocRob's topic in The Sandbox Group Build.
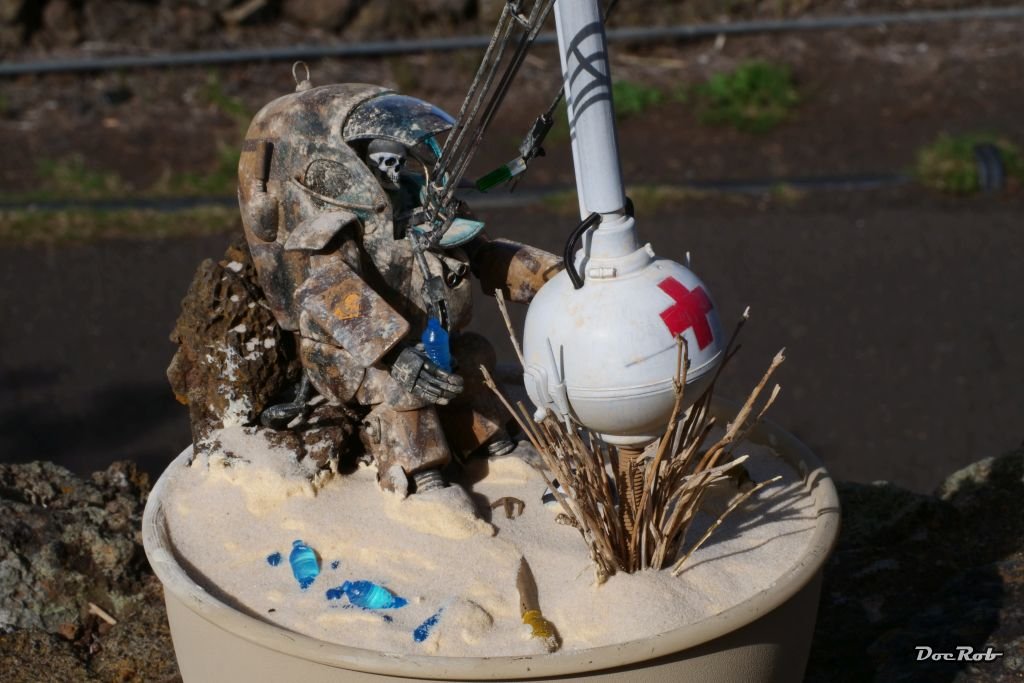
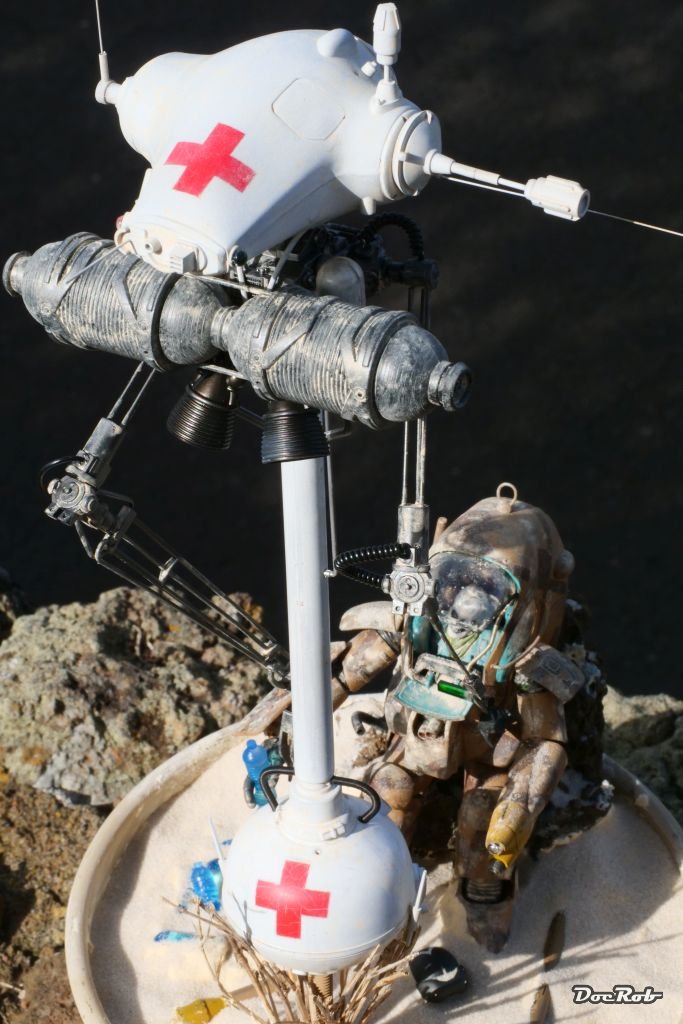
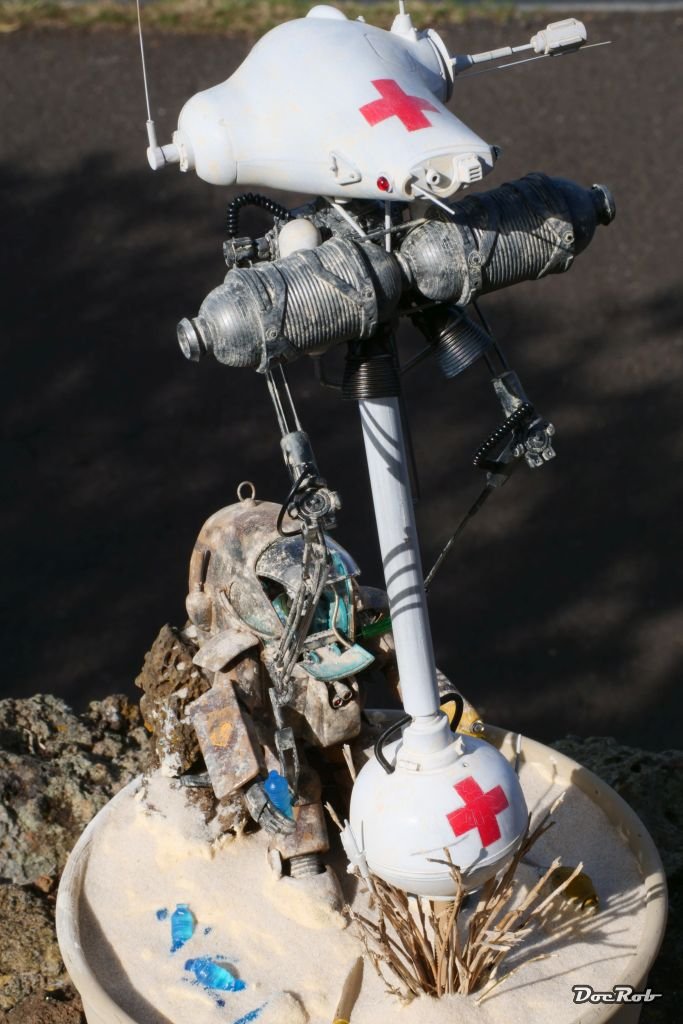
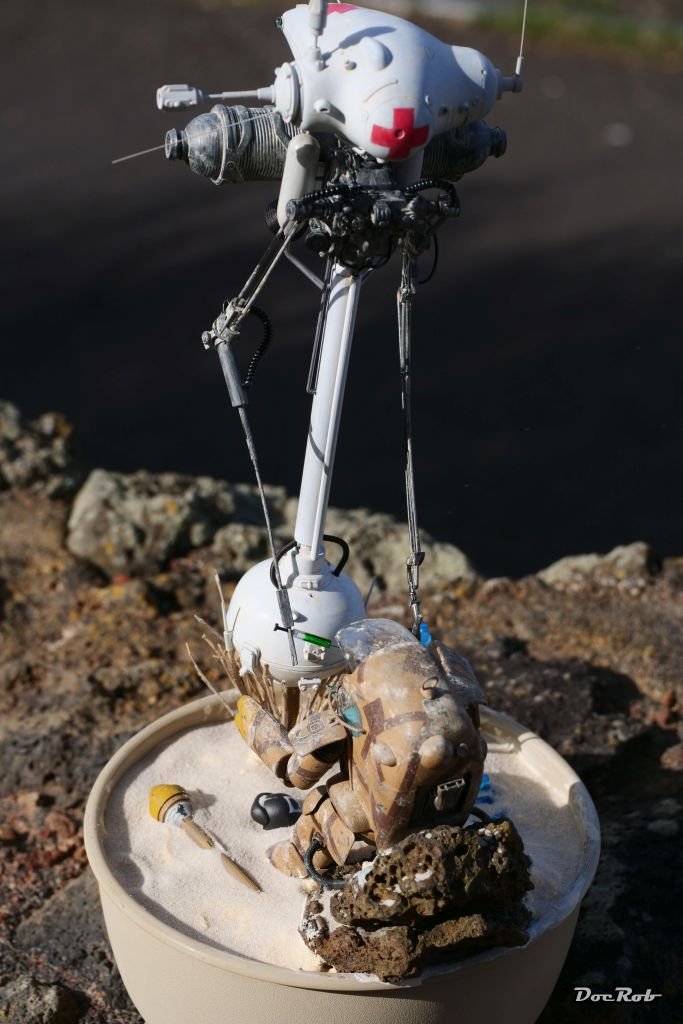
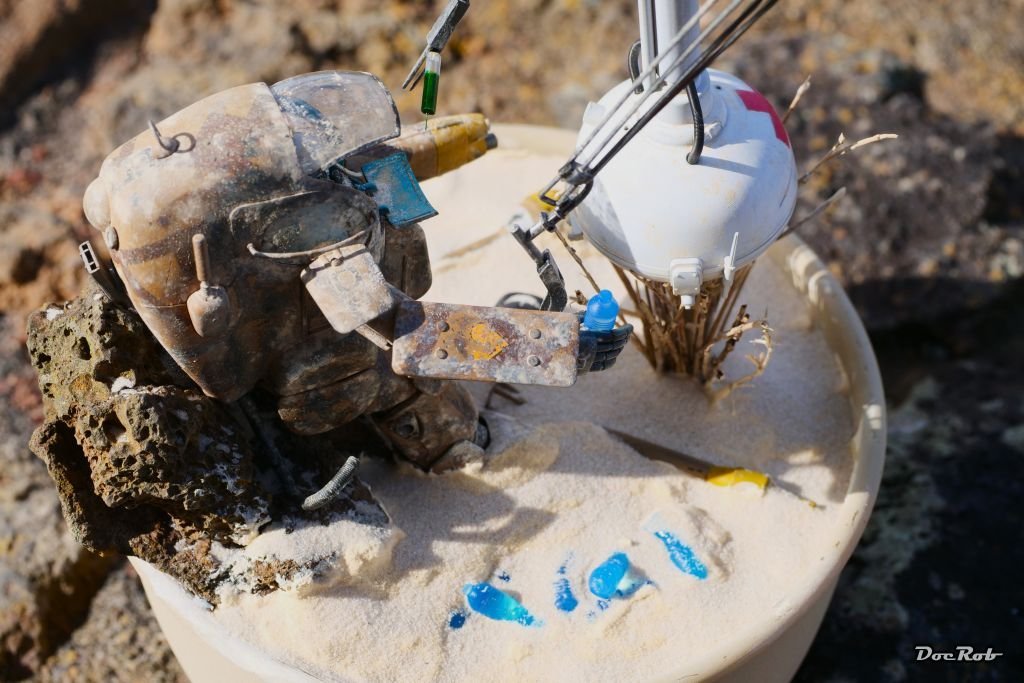
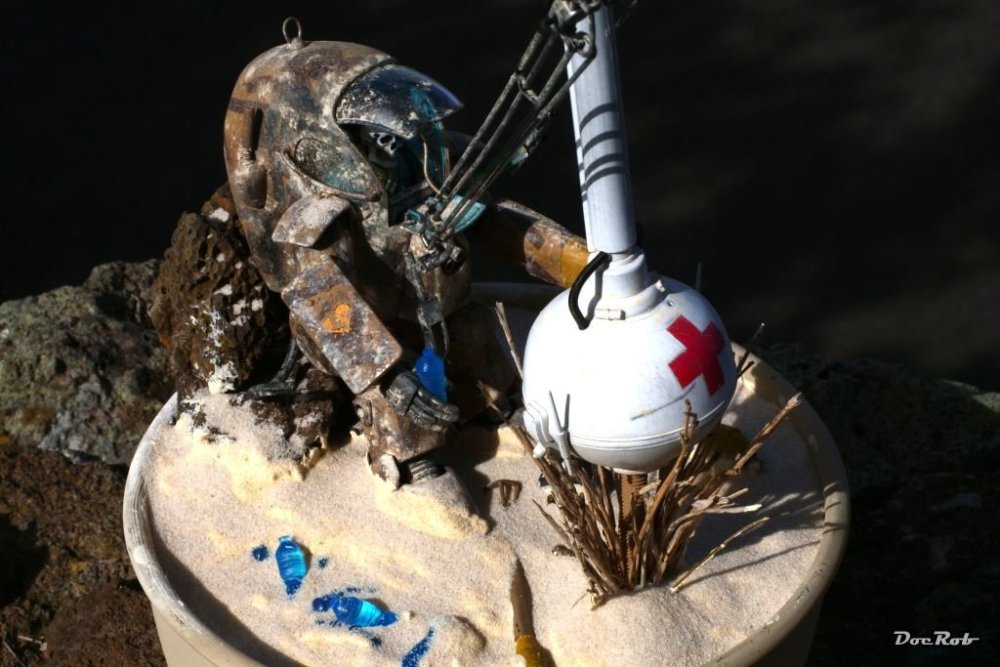
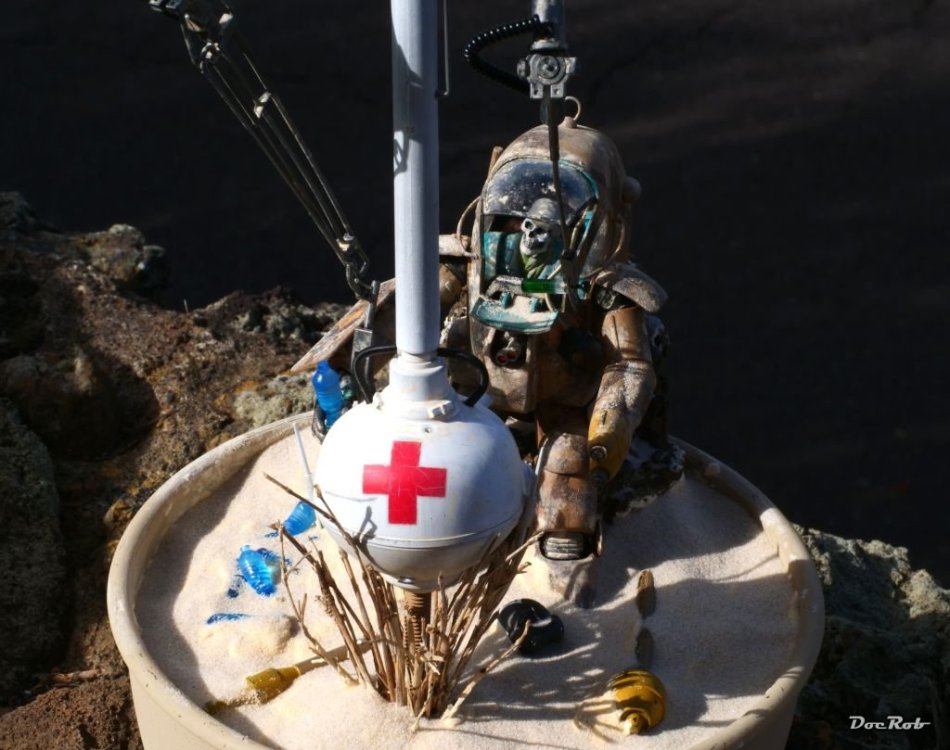
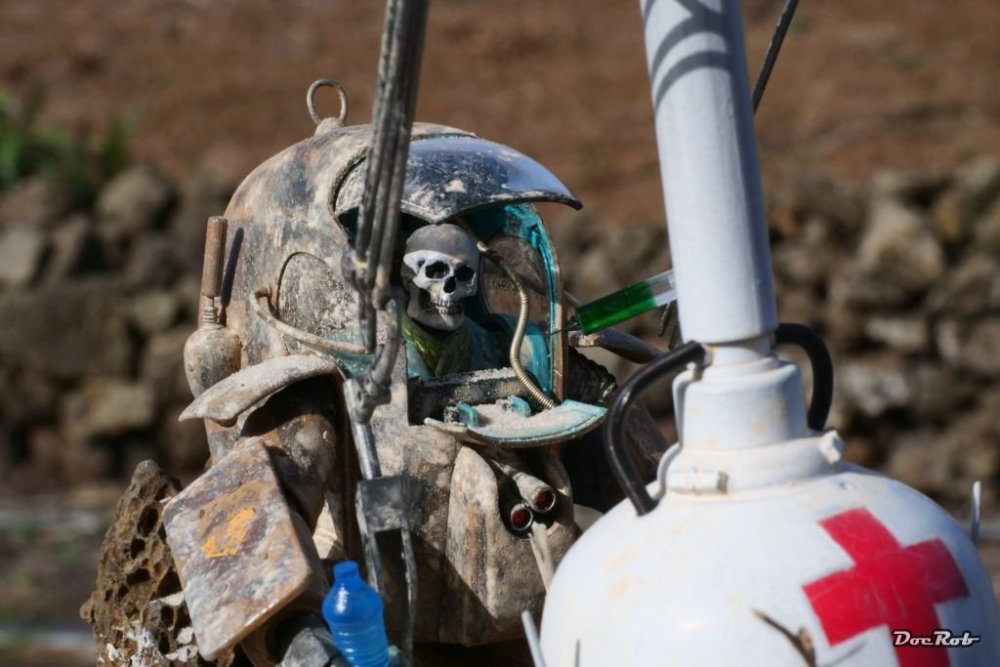
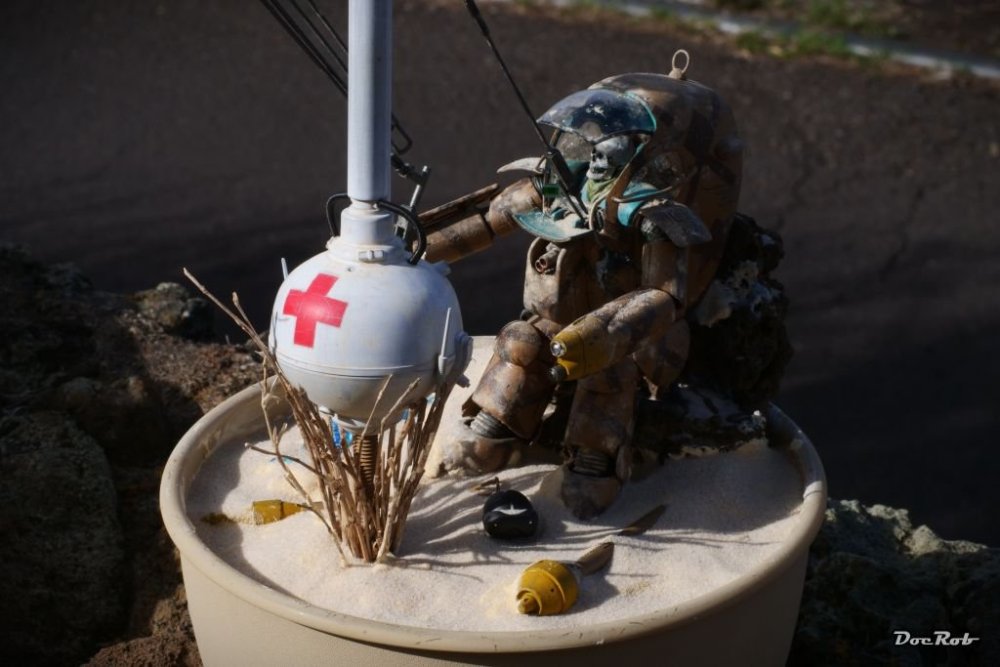
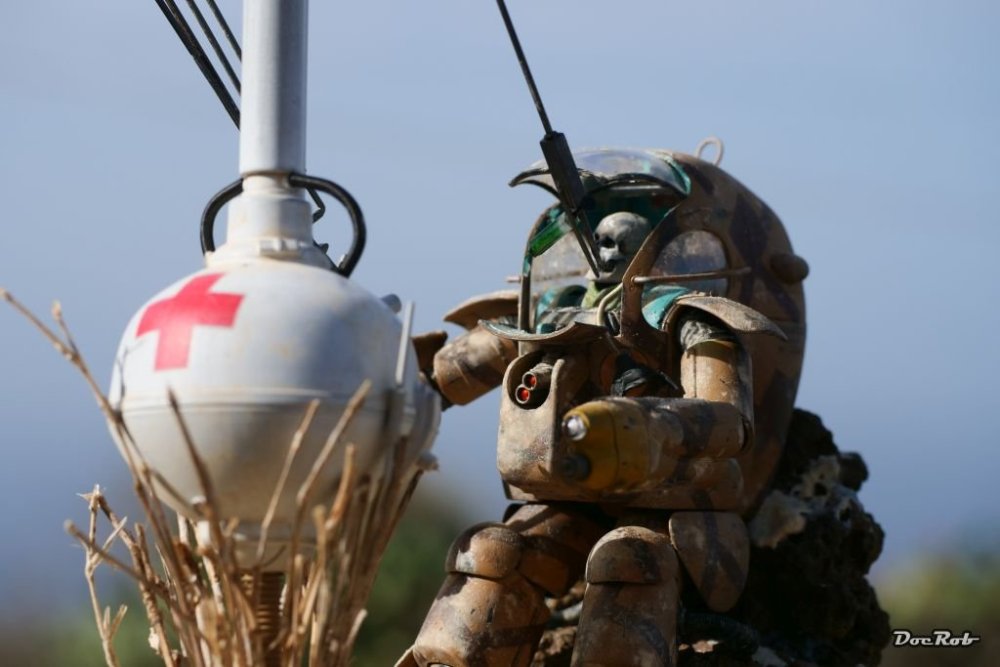
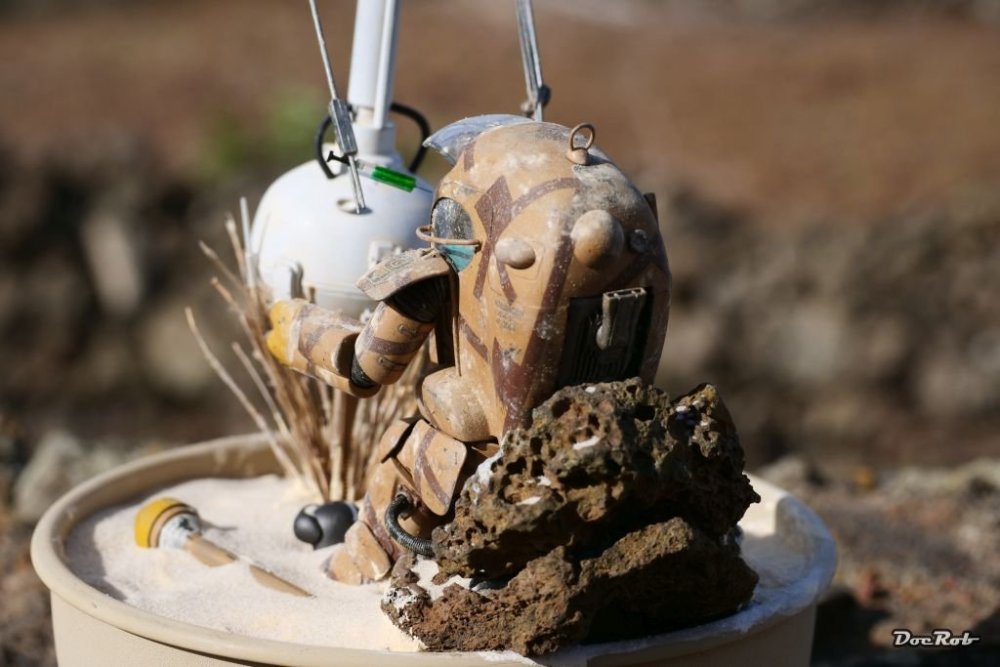
Thank you Hubert, I thought about adding more gras to the scenery as well as more small lava stones, but there were so many things cluttered on the ground, like weapons, bottles, helmet, it would have become too busy for my liking. I wanted to generate a feeling of really deserted desert. I may have to do better photos and bury my dio bowl somewhere in beach sand to enhance the desired look. I think about the bottles, but when you find some on a shore, which lasted in the water or on land for a long time, they look almost unharmed. These PET bottles are nearly indestructible and that´s one twist of the story, they last longer than a high tech equipped pilot in his battle suit. Cheers Rob -
Another one bites the dust - Maschinen Krieger Friedrich - 1/20
DocRob replied to DocRob's topic in The Sandbox Group Build.
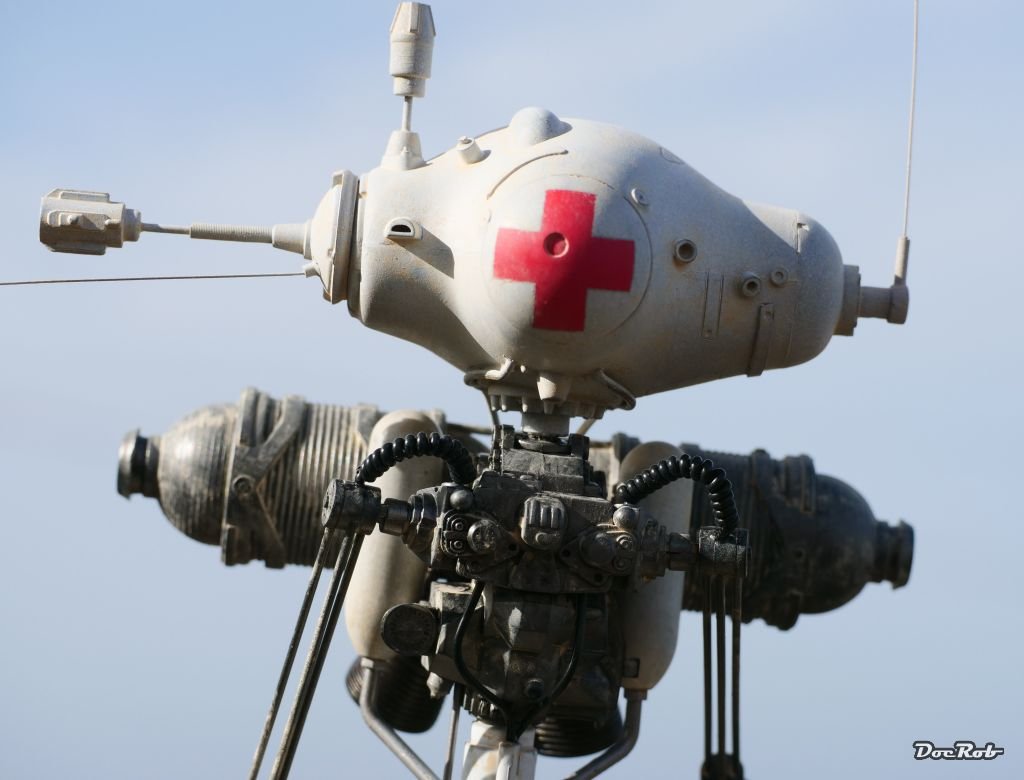
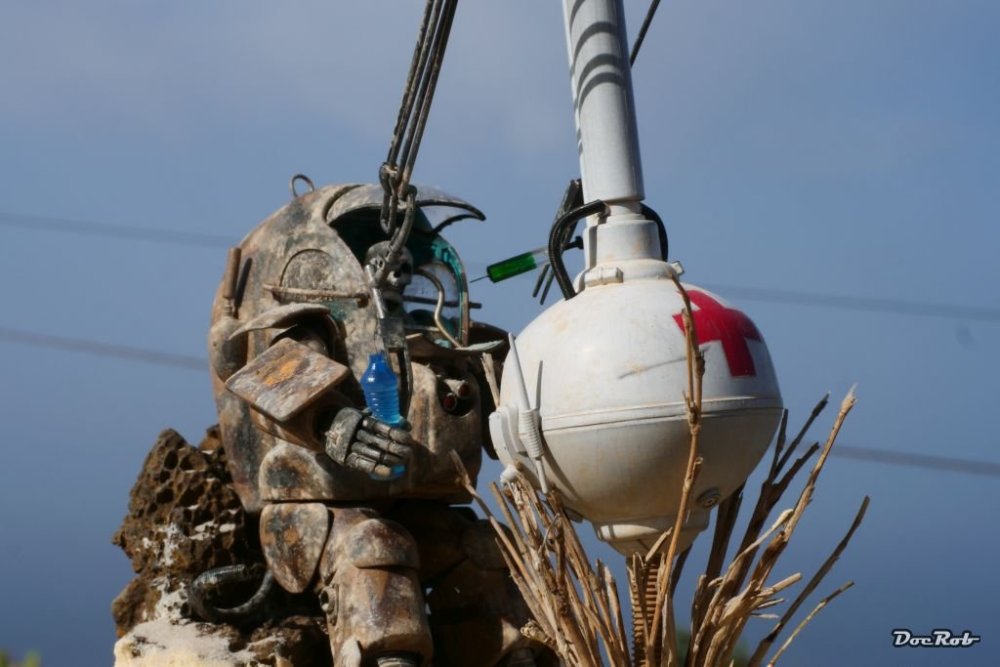
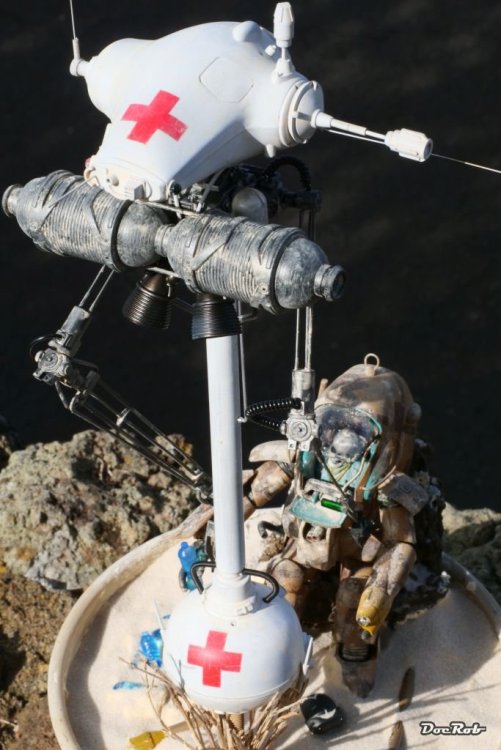
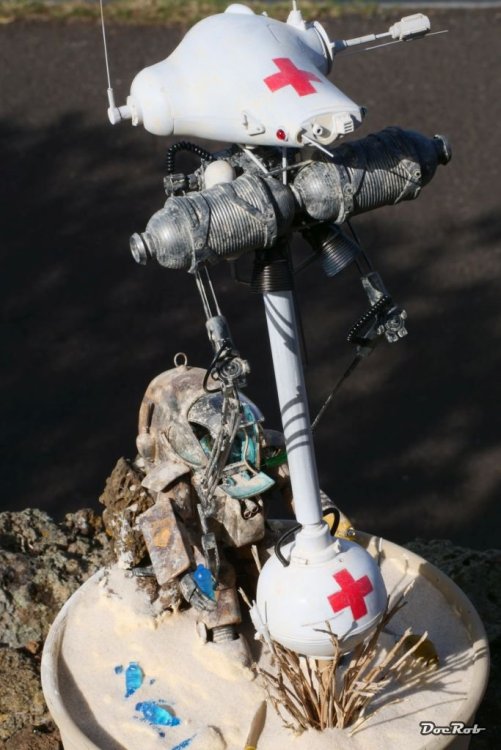
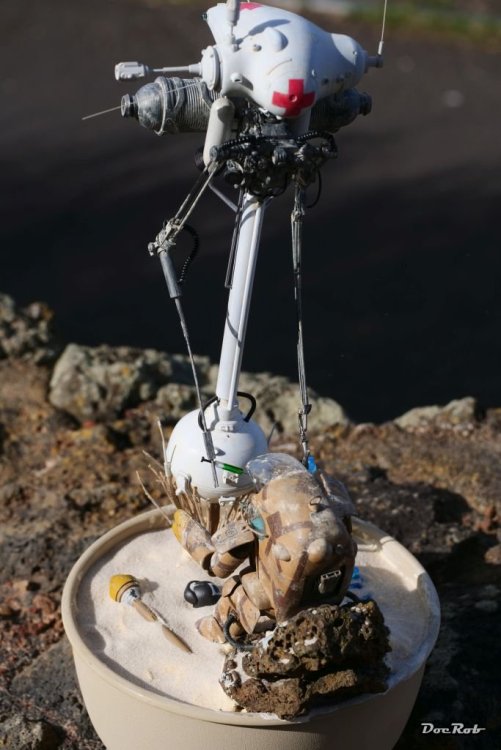
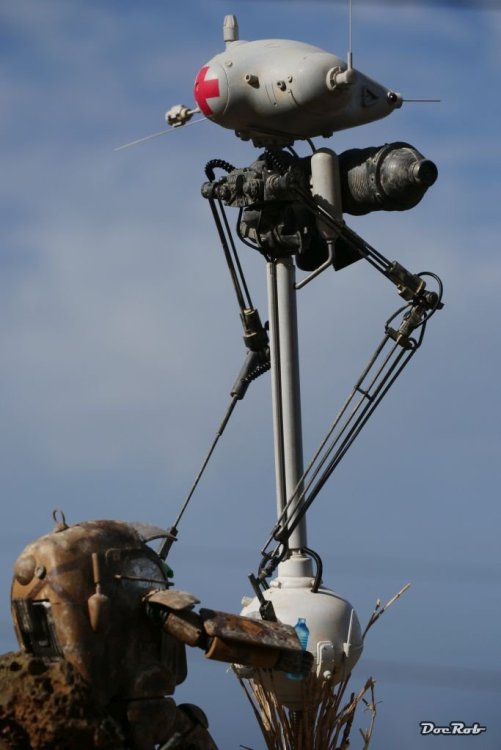
Thank you Paul and Mike. After browsing through my stash, really unamazed by the Sandbox theme, I discovered the Kampfanzug and promptly, I had the picture of the dead pilot in his steel coffin in my mind. A high tech suit, prepared for almost everything but a lasting sandblast in a ruthless desert. The Neuspotter drone was a later addition to the scene, as I wanted to build one since my late teen age, but I found it fitting and adding some sinister twist to the little dio. Cheers Rob -
Another one bites the dust - Maschinen Krieger Friedrich - 1/20
DocRob replied to DocRob's topic in The Sandbox Group Build.
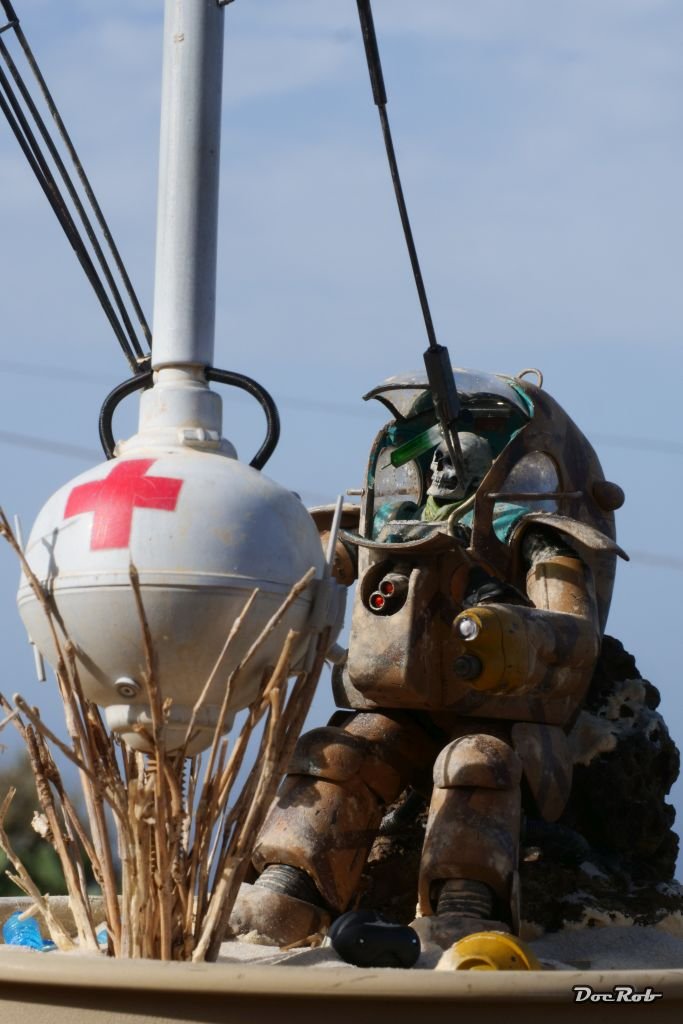
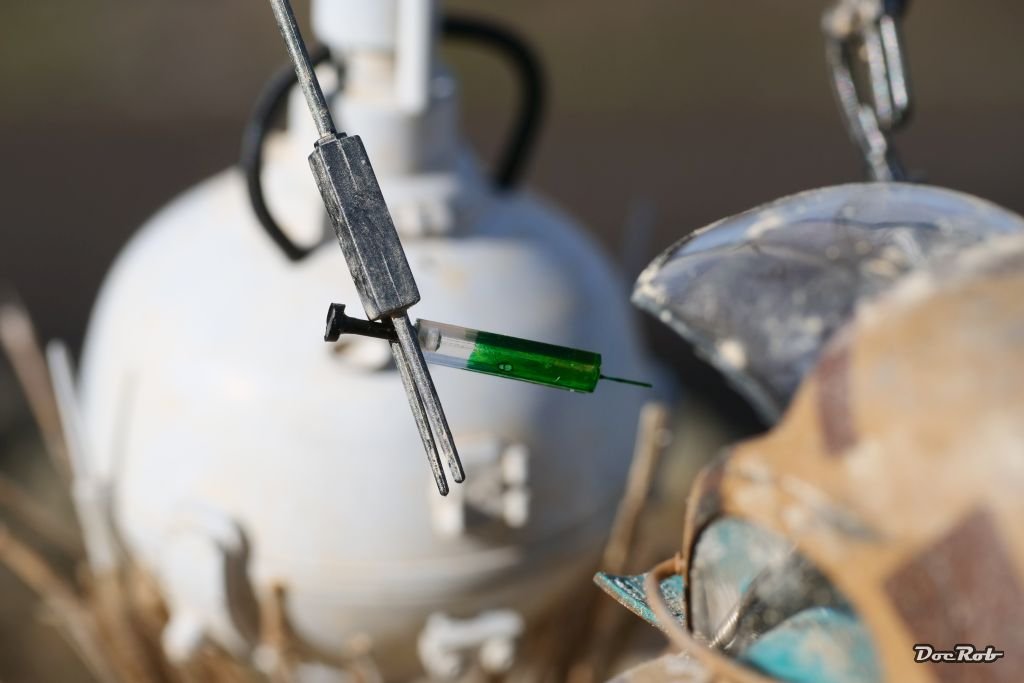
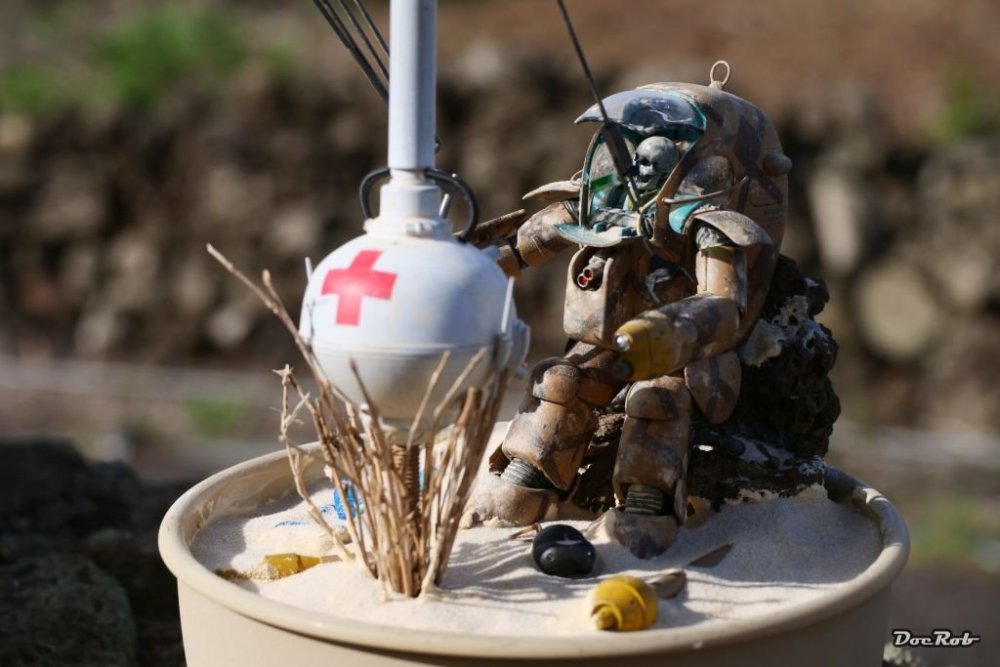
Almost done with the project. I added lots of details to my main acts, like a syringe made from clear plastic sprue and metal rods and a tiny push disc, dipped into clear green. The mask of the pilot was hanging out of his cockpit by it´s tube made from an old guitar string and many more. The threaded rod, holding the Neuspotter was painted in sand color and surrounded by dry grass from my garden to hide it a bit and simulate a hovering effect. Then I glued the Kampfanzug in place on it´s stone and used AK´s desert sand paste to design the ground. With a wet brush, I formed the typical sand ripples and amassed the sand on the front right side, where the blasting storm came from. Next, I pressed the weapons, the pilots helmet and all the empty squeezed water bottles into the paste and added very fine real sand on top. I used the sunny day to get some really harsh lighted outdoor shots, but will later add some from the photo box, when finished. Cheers Rob


-
Welcome to the full modeling go without excuses anymore, Hubert . Congratulations that it was such a seemingly smooth transition. I kind of retired very early and never regretted it and enjoy live full throttle. The Potez is coming together nicely. I like the subtle but noticeable weathering, which blends everything together. Chalk effects are always a bit of guessing, with clear coats applied on top. For these effect, I use weathering pencils more and more, which fade less under clear coat. Cheers Rob