DocRob
-
Posts
7,045 -
Joined
-
Last visited
Content Type
Profiles
Forums
Events
Gallery
Everything posted by DocRob
-
A good looking Hawk, Kevin. Chalky materials and clear coats are always a bit of a mystery, considering the effect in the end. Cheers Rob
-

Iconicair 1/32 Supermarine Attacker
DocRob replied to GusMac's topic in LSM 1/35 and Larger Work In Progress
Looking great Gus. This unique bird has the typical looks of an in between construction. Many modern aspect, but lots of old school approaches as well. There lays a certain charm into. Cheers Rob -
Please keep in mind, this stuff is "flowing" with gravity, especially, when applied thick. I found it partly usable for objects with lots of distinct surface details, for larger flat areas not so much. Kabuki or liquid mask will work better under these circumstances. Cheers Rob
-
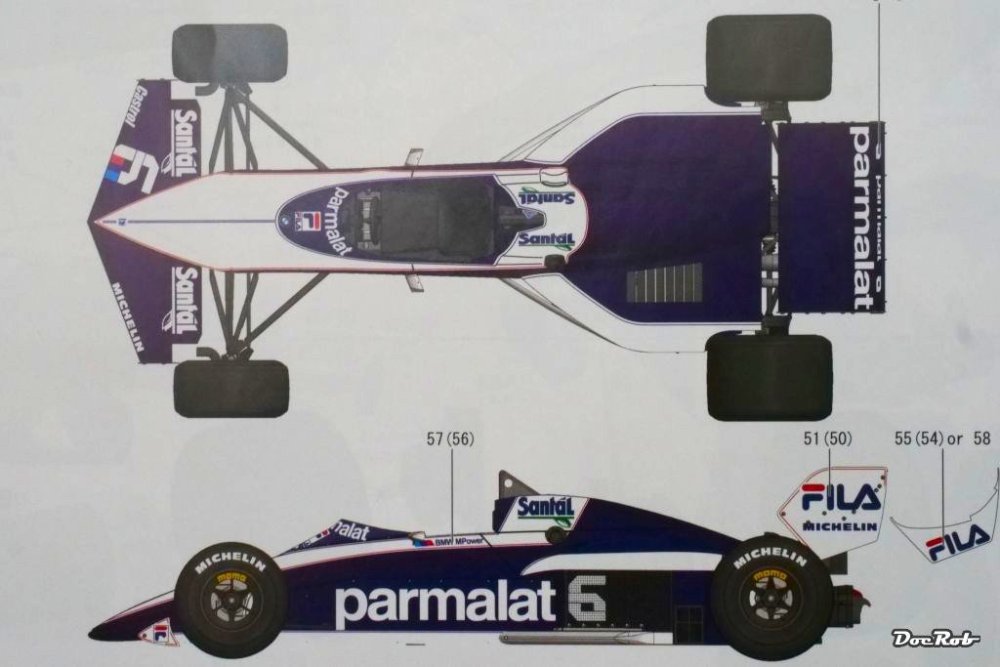
Yeah Gus, the sponsoring has an unsexy hue of dairy megalomania. Somehow, I knew then about their sponsorship through a Lancia Stratos, if I remember it correctly. Fila as well looks to me like a producer of clumsy sports clothing, but the car has some sexiness, which erases all the negs for me. Cheers Rob
-
Indeed Carl, it took me a bit to discover it´s virtues. Such a consequently engineered car in a time, where many cars were hand built curiosities. Cheers Rob
-
I consider none of my kits as a collectors item Paul and I plan to build them all. It doesn´t matter to me how rare or expensive a kit is, my intention is to build it, if my live span lasts long enough . I have a decent vinyl collection with lots of rare and precious records, collected over many years. Each of these is played and none are sealed anymore and I never will sell a record. With kits it´s the same, because I buy kits with a rendering of the finished one in my head. Actually, the BT52 is up on my to build list. Cheers Rob
-
Scary Carl, but I know the game here on my island, where it becomes more and more difficult with the supply of chemical modeling goods. And then there is the hilarious limitation to 30ml jars of paint. Cheers Rob
-
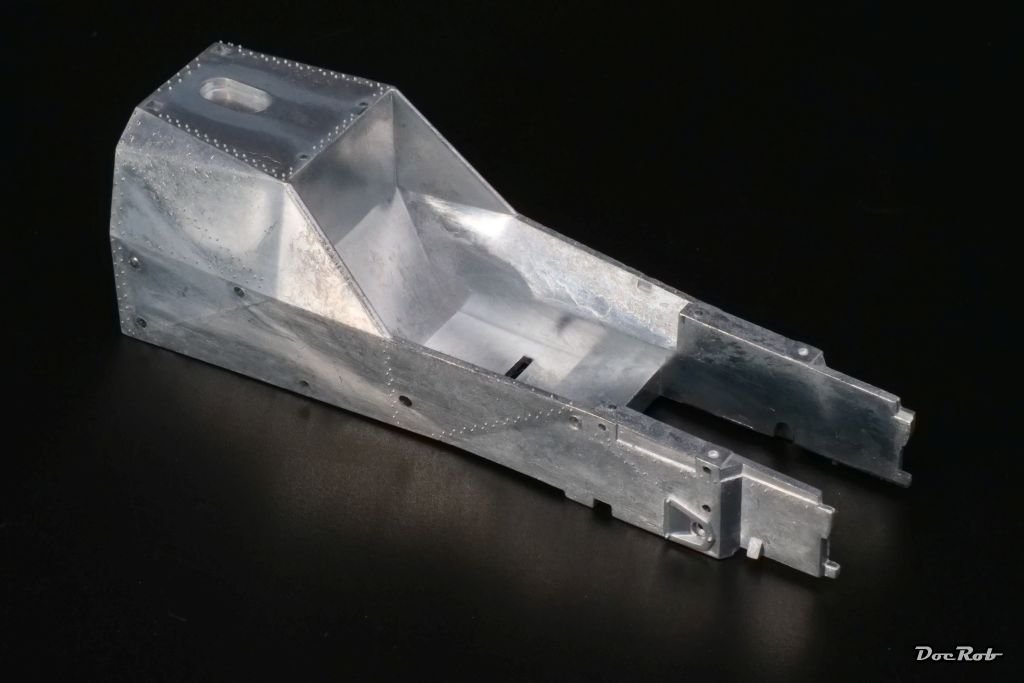
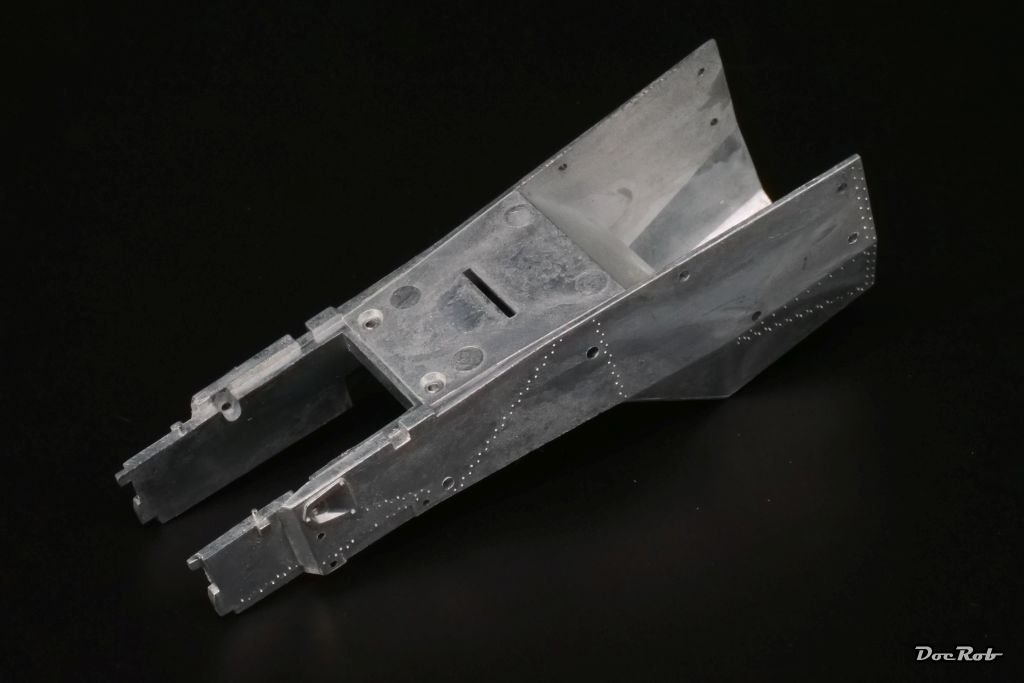
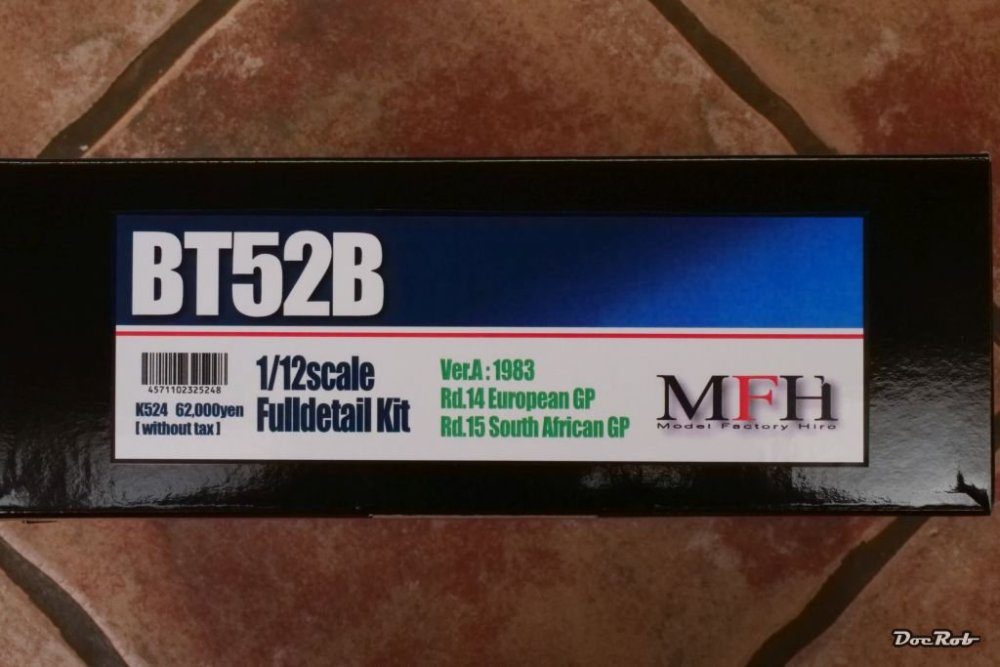
An early Christmas present for myself, due to the super fast shipping of MFH, it arrived even in November. I wanted to have another MFH kit and fought a hard battle between the super nice T1G Eagle and the also very pretty Lotus 77 of Mario Andretti, which was just released. While browsing the MFH page, I saw, there is an older kit still available, which is a rarity with this company. I checked the ungainingly pictures of the unpainted Brabham BT52, realized, it was BMW powered (I don´t like BMW for many reasons, which I´m not willing to share here), checked it was of the turbo age (uncool), apparently from the time, before I got semi interested into F1 racing and forgot about it. Some days later, I found a WIP on Britmodeller and was hooked. The BT52 looks absolutely fantastic under the hood, with asymmetric engine design, early carbon monocoque and a very clean streamlined body shape on the outside. I threw my BMW prejudices over board and bought the kit, which was the last, as it is no more available. Now I have the most powerful F1 car of all times in my garage. The engine could produce up to 1400 horsepower out of 1,5 liter displacement . Cheers Rob
-
Another one bites the dust - Maschinen Krieger Friedrich - 1/20
DocRob replied to DocRob's topic in The Sandbox Group Build.
Thank you Kevin, there is mor youth in it, than you might think. The Neuspotter is a 40th anniversary edition. In my youth, i couldn´t afford these old Nitto kits, with or without psychedelic enhancement . Gracia Martin, it is indeed refreshing to not being accused of have forgotten the tiny bolt heads on the rear of the left arm actuator and do some freestyling. Besides, 1/20 is a great scale and should be used by more producers and different subjects (duck because of burning pyre ). Search and rescue always was a difficult business and it still is in a MaK future, Hubert. These drones have lots at their mind, not to collide with each other, don´t run into mountains, watch your spindly arms, etc. Maybe this example was smart enough not to hover into a sandstorm, decisions, decisions... Thank you Paul, these type of kits are a great canvas to develop own scenarios, there is more freedom, as there are no limitations through real life. Cheers Rob -
Another one bites the dust - Maschinen Krieger Friedrich - 1/20
DocRob replied to DocRob's topic in The Sandbox Group Build.
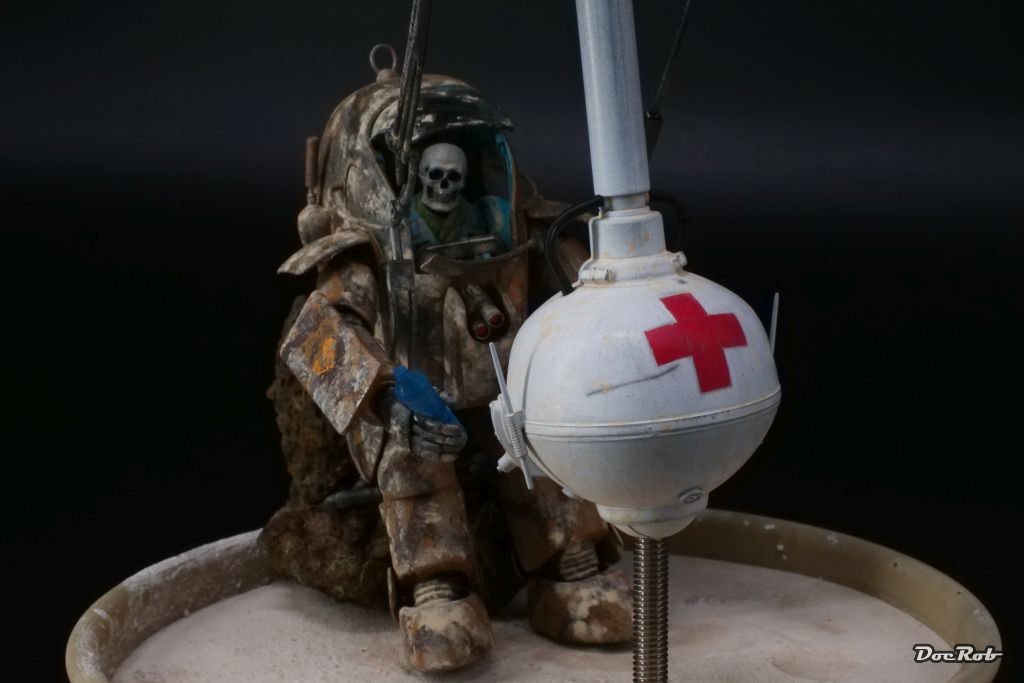
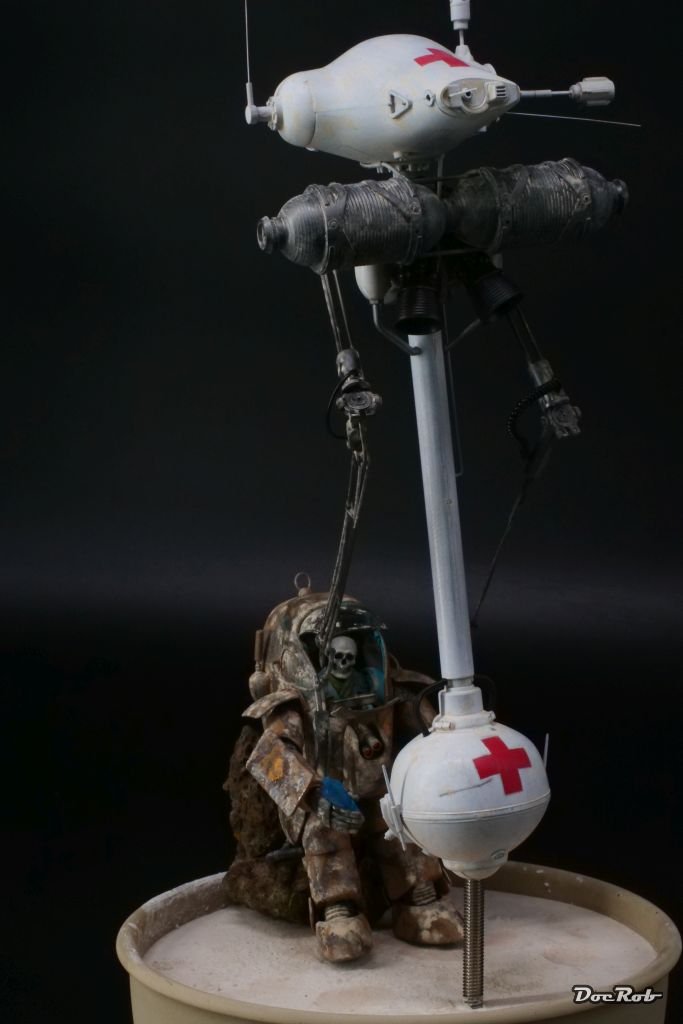
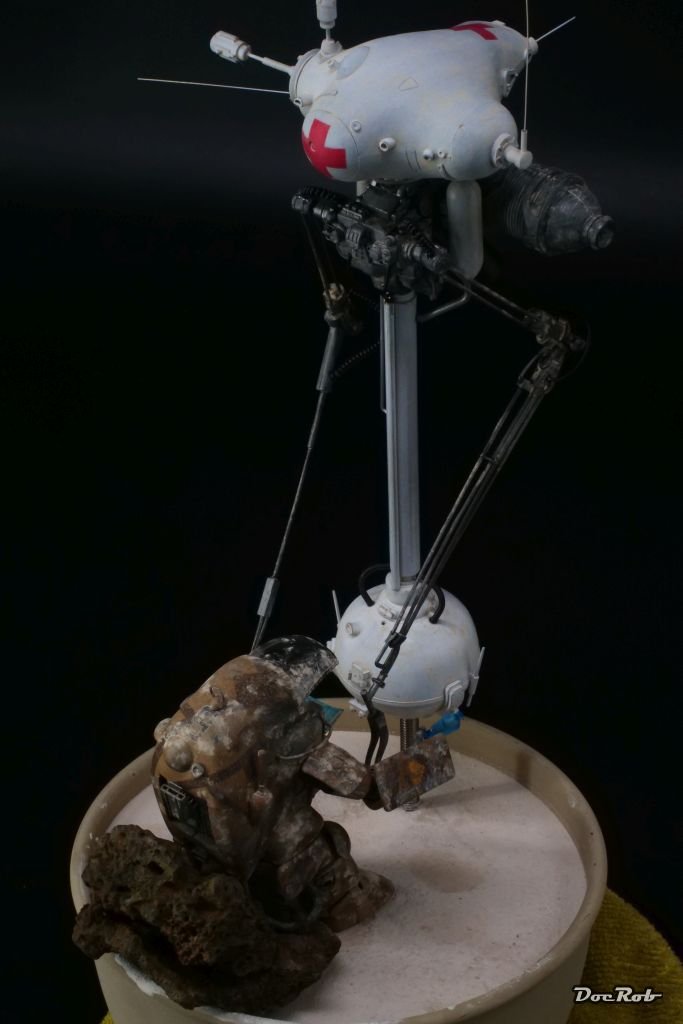
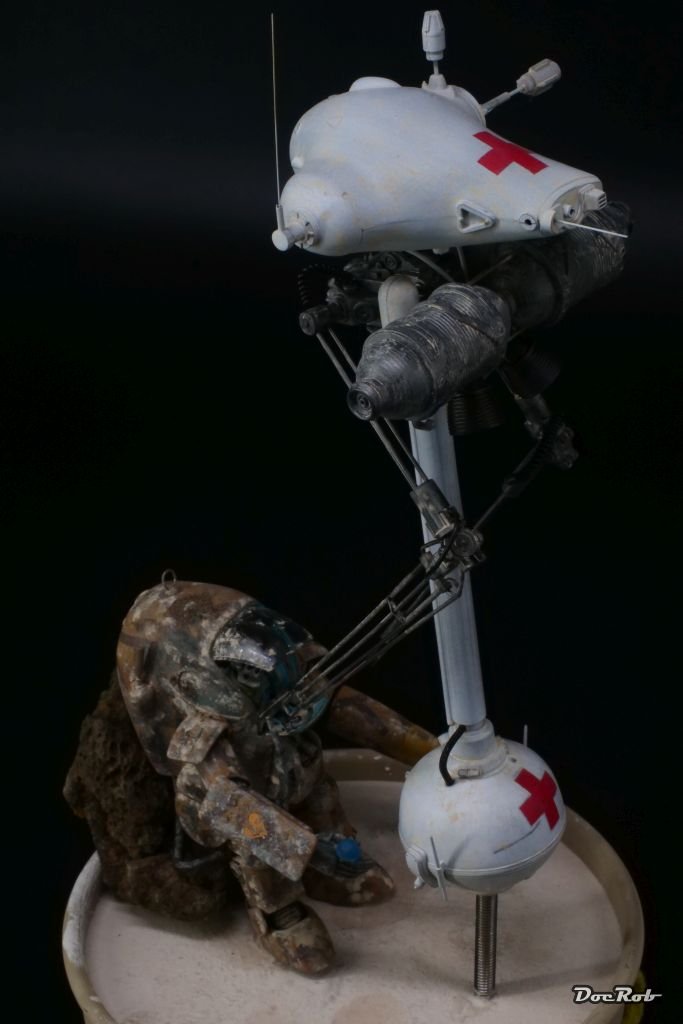
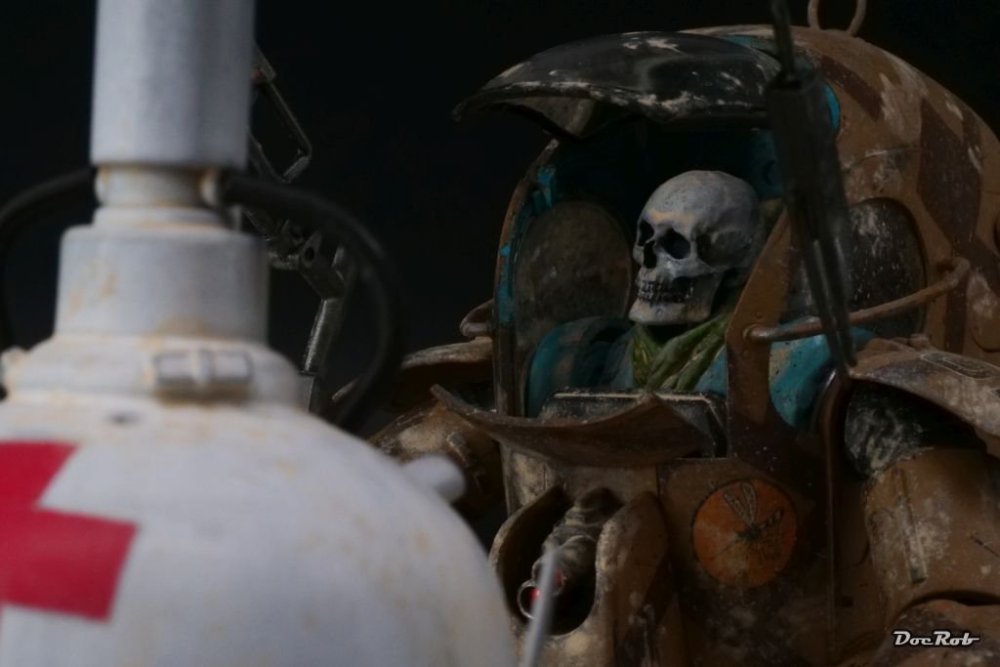
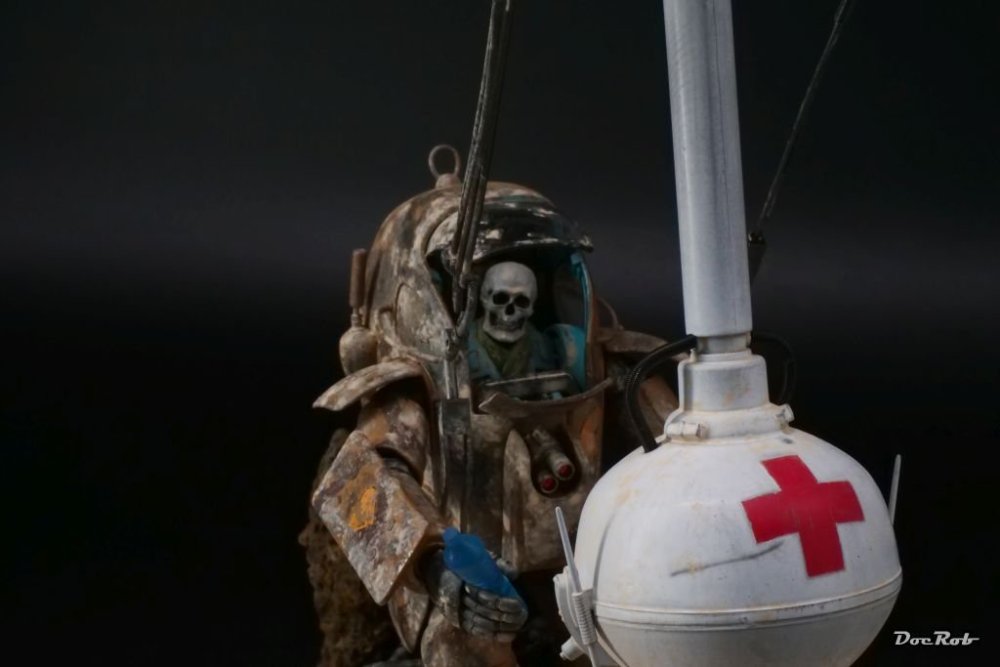
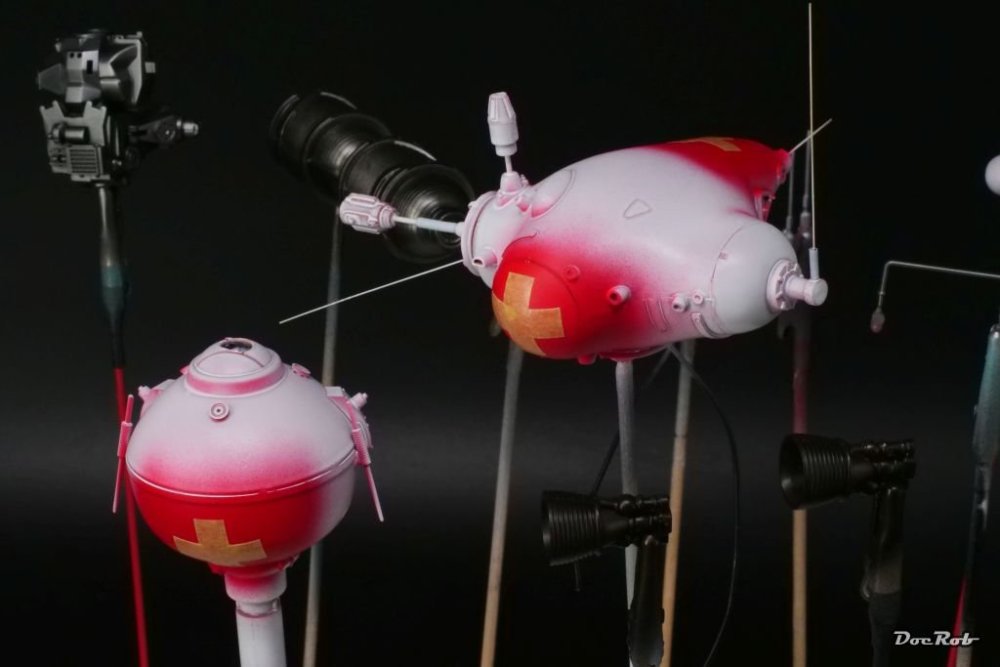
Today, I finished the basic setting. The main components of the Neuspotter were airbrushed with chalky white color (washable white) and then weathered with a stiff brush, but only slightly, as the rescue drone didn´t suffer that much. This was followed by a DAK wash with pigments, dotted onto the white color. After drying and manipulating a bit with a flat brush, I assembled the main components of the Neuspotter and added some wires and coils to arms and "body". Then I threaded the drone on it´s mount and the angle, it was hovering was like I desired. The backrest of the deceased pilots Kampfanzug was made from two lava stones from my garden. I liked the bubbly appearance, as it looks a bit strange. Next, I have to add the various bits and pieces, like water bottles, weapons, helmet, etc. and design the dio with sand baste and sand. Cheers Rob


-
I rig my WW1 planes the same way like Hubert. EZ-Line is too wobbly for that method, but monofilament works relatively trouble free, due to it´s rigidity. Some areas which were harder to reach during my AEG G.IV build (between nacelles and fuselage) were rigged with elastic thread from Infini (0,135mm), which is also threadable. If you make your own turnbuckles from brass or aluminum tube (I prefer aluminum, as there is no need for painting), cut the tube with a sharp blade, while rolling it onto a cutting mat and you minimize the burr. I additionally clean the holes of the cut tubes with a drill bit, which makes threading easier. Cheers Rob
-
Going with Kevin here, Hubert. You half made your own kit and paint it to perfection, what´s not to like. I generally enjoy the rigging phase, but always fear smaller accidents to happen, like eyelets coming off after tensioning, ... Cheers Rob
-
Have you tried to warm the #3 decal with a hairdryer, Chris. I had stubborn decals settled perfectly with decal solvents and some added heat. The black body prep doesn´t look too glossy and I hope, you will not run into silvering issues or visible carrier film later on. Cheers Rob
-
Iconicair 1/32 Supermarine Attacker
DocRob replied to GusMac's topic in LSM 1/35 and Larger Work In Progress
Fantastic progress on that odd looking But therefore interesting plane, Gus. Your patience with filling and sanding will pay off. Cheers Rob -
Another one bites the dust - Maschinen Krieger Friedrich - 1/20
DocRob replied to DocRob's topic in The Sandbox Group Build.
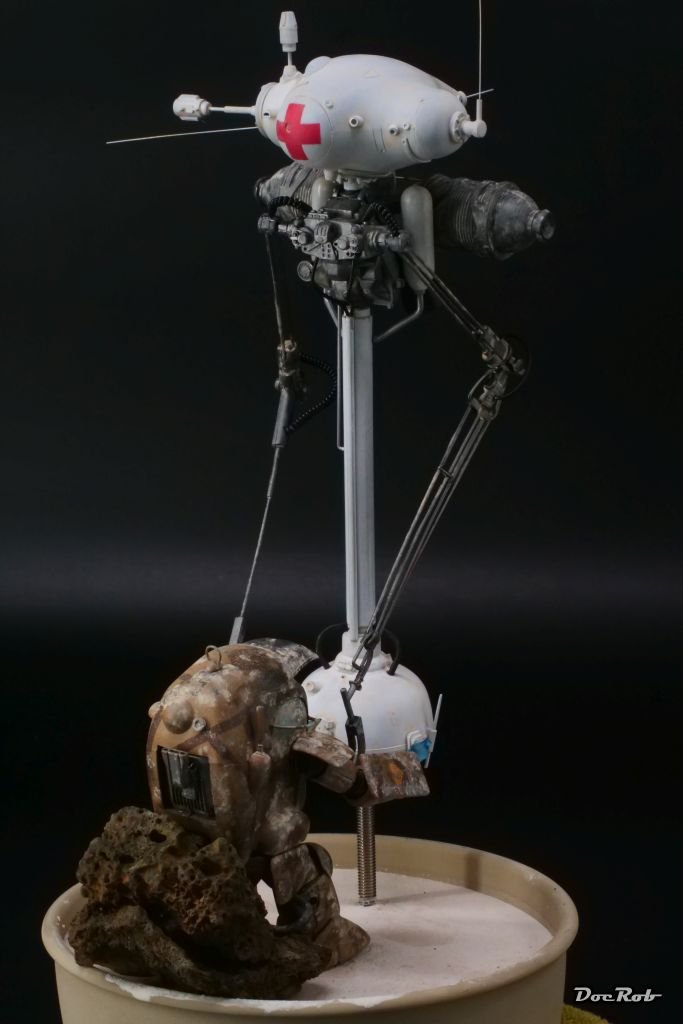
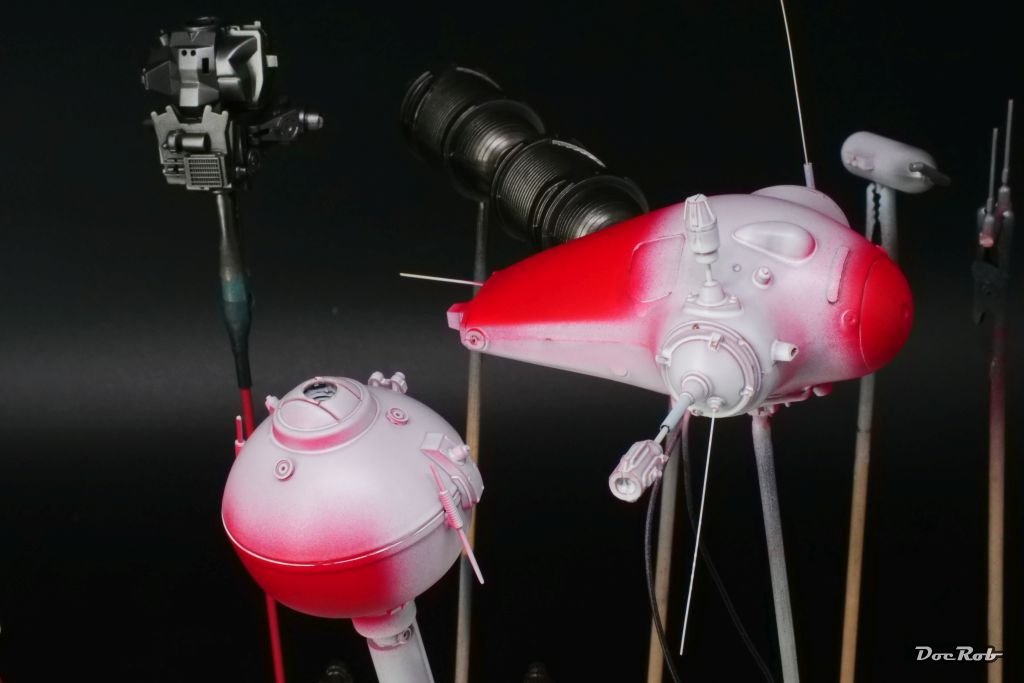
There is not a lot, I have done lately. I like the creative phase of airbrushing and preparing a certain finish, but it comes with unavoidable drying times, which is time consuming. The Neuspotter got red dots, but wait ugly dots, why? Well, the solution to the riddle are the red crosses, which were masked then, using Kabuki tape cut quickly on my Infiny cutting mat. It´s a rescue drone. Next wase the base coloring, sprayed in Tamiya XF khaki. The other parts got different metal shades all from the Extreme metallic range. The exhausts were sprayed with dark exhaust color, the spindly arms with titanium, the drum like anti-grav unit in duraluminum and finally the lower body in gun metal. Cheers Rob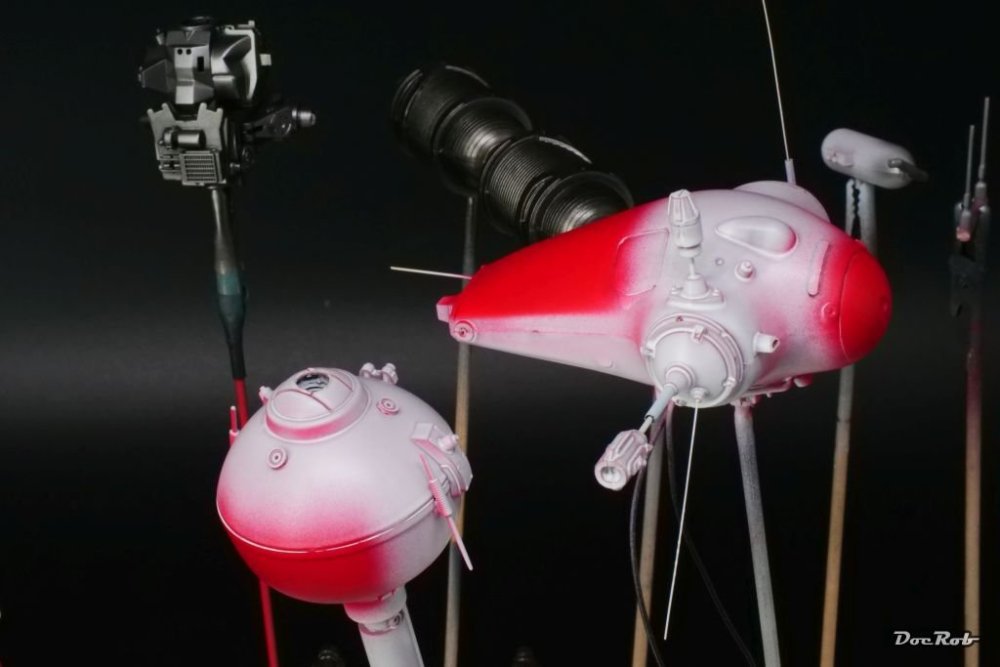

-
I used many Vallejo products in the past Chris, but was seldom really convinced by the result. When it comes to priming, I use Mr. Surfacer thinned with Mr. Leveling thinner since years and am really satisfied with them. As a good base you can also use Tamiya LP gloss black, which is fantastic and if thinned and sprayed properly dries with a near polished finish. Cheers Rob
-
I knew this would come from you, Hubert , but I silently thought the same. Cheers Rob
-
Interesting project Chris, hopefully the decals will behave, as they are the so important for such a kit. Hope your pneumonia will be better soon. Cheers Rob
-
Thank you Paul, this will not be my very next build, unfortunately, but with MFH kits, you have to buy them, when they are available or they might be gone forever or are in the hand of scalpers. I have not that much experience with car body finishes, I only built three, but will continue with the Cobra Coupe, after the GB and painting the body is one of the next steps. You may be right Carl, I only browsed through the contents of the box quickly. It looks like this: I will do a WIP Gus, but not so soon. I like the car, but it is not one of my favorites and I have to do some research about it as well. Seemed to have been racing, before I developed a slight interest int F1. Cheers Rob


-
Another one bites the dust - Maschinen Krieger Friedrich - 1/20
DocRob replied to DocRob's topic in The Sandbox Group Build.
Thanks Martin, you got it right. This dio will be about how weird technology fails to always save you. Cheers Rob -
Another one bites the dust - Maschinen Krieger Friedrich - 1/20
DocRob replied to DocRob's topic in The Sandbox Group Build.
Thank you Gus, I wanted to use mostly natural products for the base and searched the garden for fitting volcanic stones, which add to the strange sensation of the setting. I wanted to use beach sand, but our only sand colored beach is not accessible at the moment and the sand might have been too coarse anyway, as it´s only ground clam shells. I have a bag of fine sand here for decoration and a Mig paste for desert sand. Cheers Rob -
Another one bites the dust - Maschinen Krieger Friedrich - 1/20
DocRob replied to DocRob's topic in The Sandbox Group Build.
Thank you Kevin, I´m not the plan B kind, as usually my plan a is profound and if not, I often bin the project, because, it will not be like I desired. With the Kampfanzug, I thought, I give it a chance. Cheers Rob -
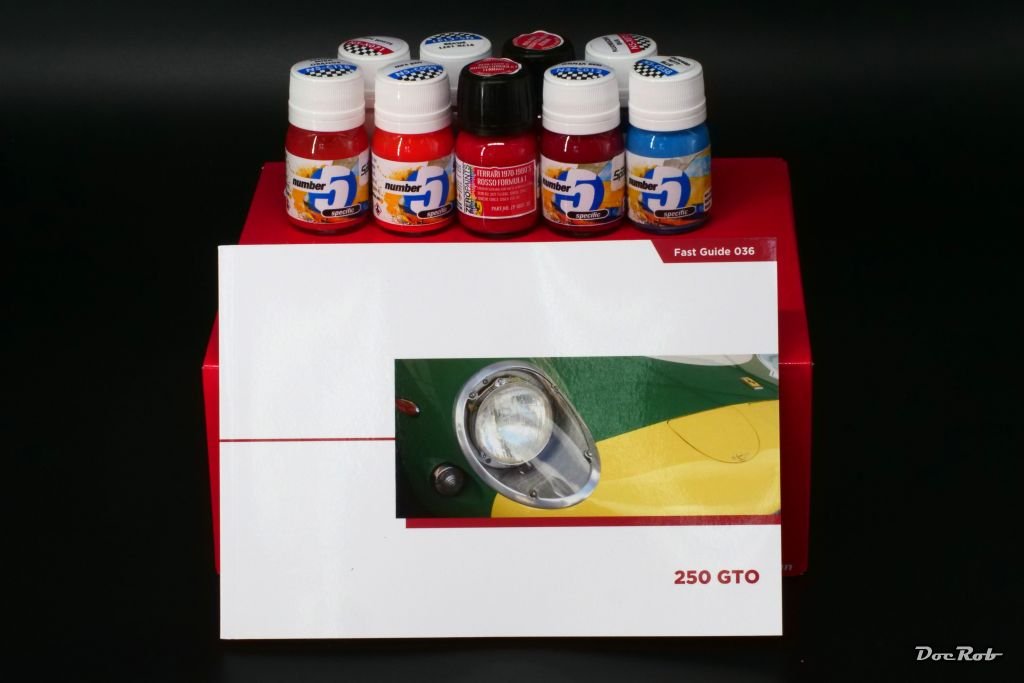
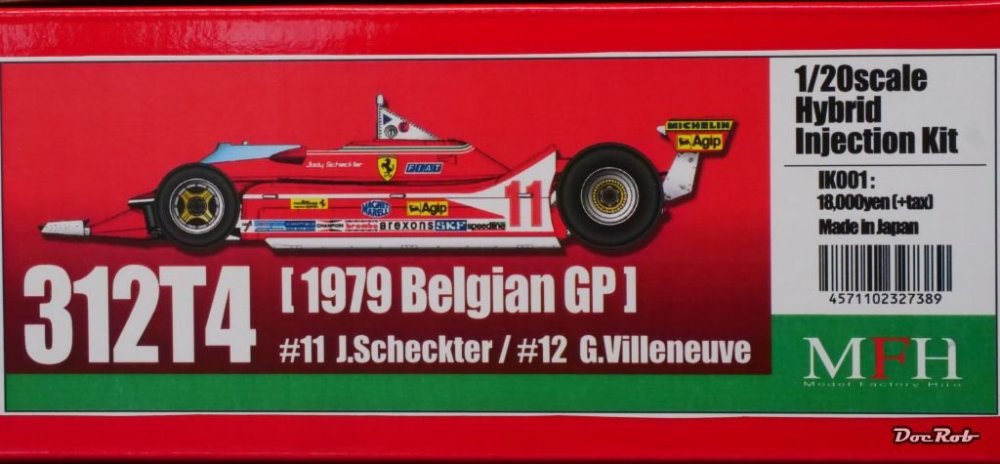
More Italian stuff, I must be infected . The Ferrari is the only so called hybrid in the MFH universe until know. Hybrid means, it´s a multi media kit like the others, but has a "normal" polystyrene body on sprues instead of resin body parts, which makes the kit noticeable cheaper than others of the same producer. This is a re-release, which sports new Cartograph decals and was up on the MFH page only for one day, then was sold out. I missed it there, but luckily Spotmodel had one left. To fill the carton , I ordered some paints from Number Five and Zero Paints for different car projects, as well as a small picture reference book about the Ferrari 250 GTO and some resin and metal detail parts for other kits. Cheers Rob

-
Another one bites the dust - Maschinen Krieger Friedrich - 1/20
DocRob replied to DocRob's topic in The Sandbox Group Build.
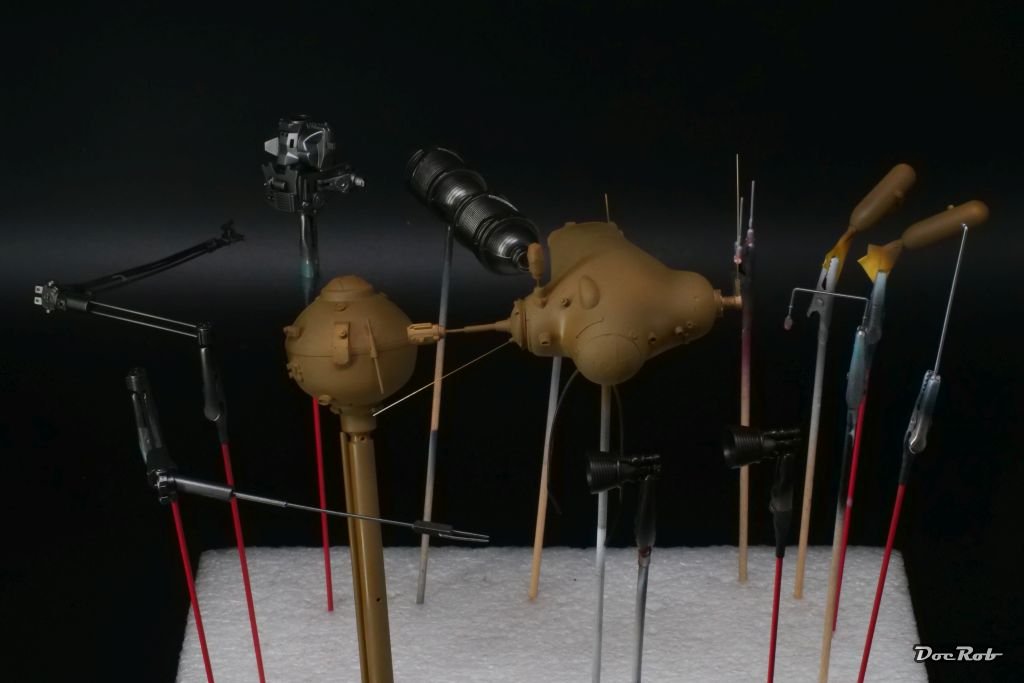
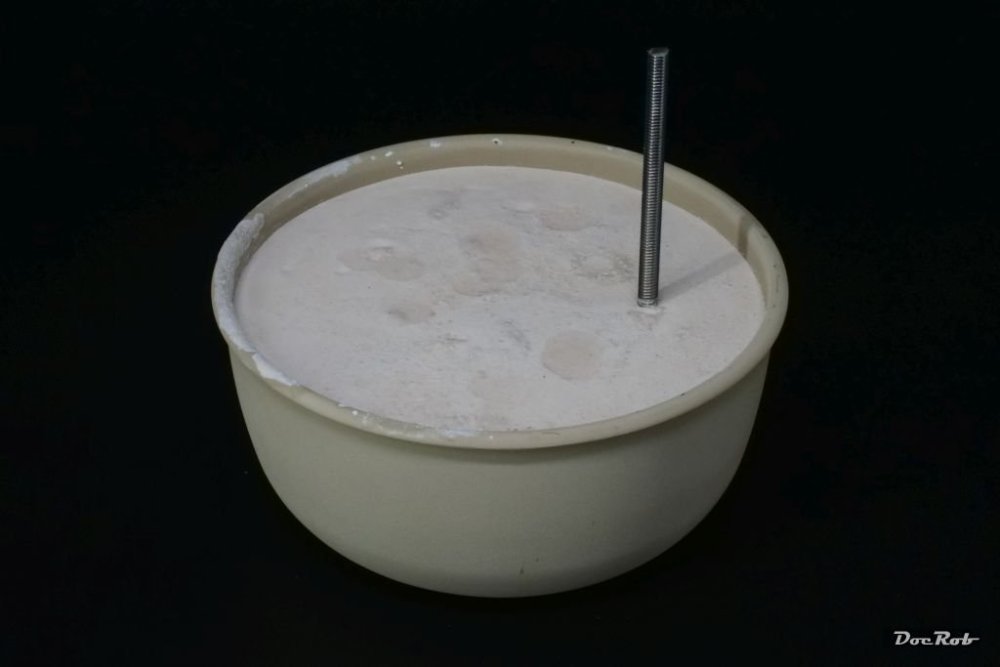
My base will be "framed" by a plastic tub, which I sprayed in sand color. For the hovering drone, I added a threaded rod, epoxied onto the base and a nut also epoxied into the lower part of the Neuspotter. I hope, I can cover the rod with some dried grass later. I used it, because it allows to adjust the height of the drone over the surface as well as the angle, because the nut is not glued in in a right angle. The bowl was then filled with plaster of paris. Meanwhile, I primed the parts of the Neuspotter in black and white, black for the pure metal parts, like arms and exhausts and white for the rest. Cheers Rob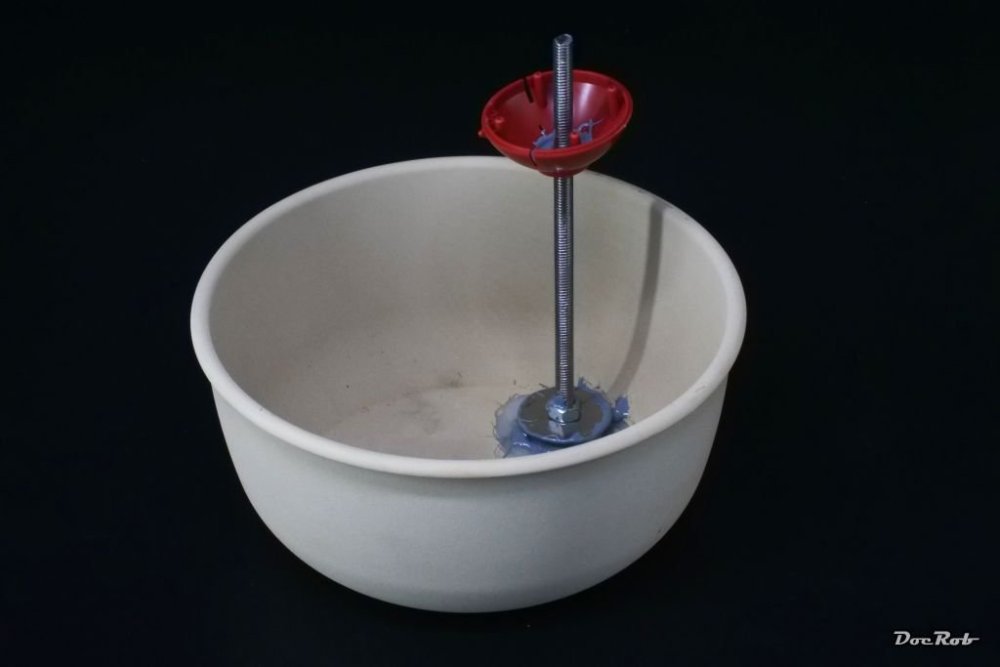
-
Your ZIL looks fantastic, I like your painting and weathering style, very convincing and at the same somehow adds more depth due to the drybrushing. Cheers Rob