DocRob
-
Posts
7,045 -
Joined
-
Last visited
Content Type
Profiles
Forums
Events
Gallery
Everything posted by DocRob
-
 Please keep the file, Martin. I have this one planned as a future build and have no cutter yet. Cheers Rob
 -
LSM Modelling News 2023 merged Fran and Artful69’s threads
DocRob replied to Fran's topic in Modelling Discussion
No Paul, it just run out of luck, at least, when I built it. Cheers Rob
-
Sweet Carl, I never have attempted a mottling camo myself, but hope to do soon. I would be lucky, if it comes out like yours. Cheers Rob
-
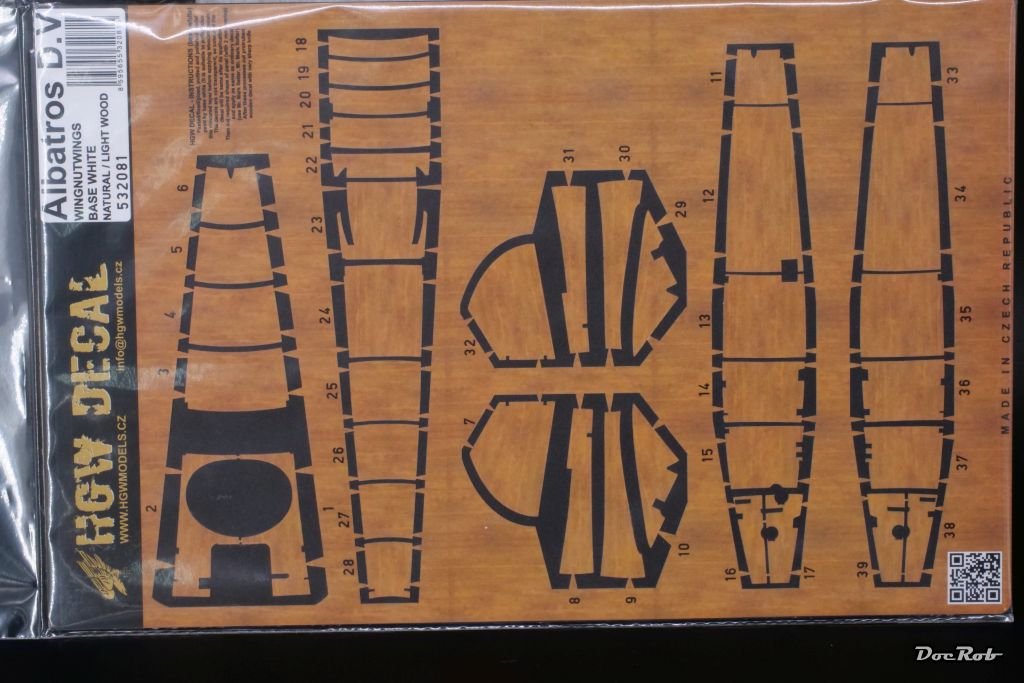
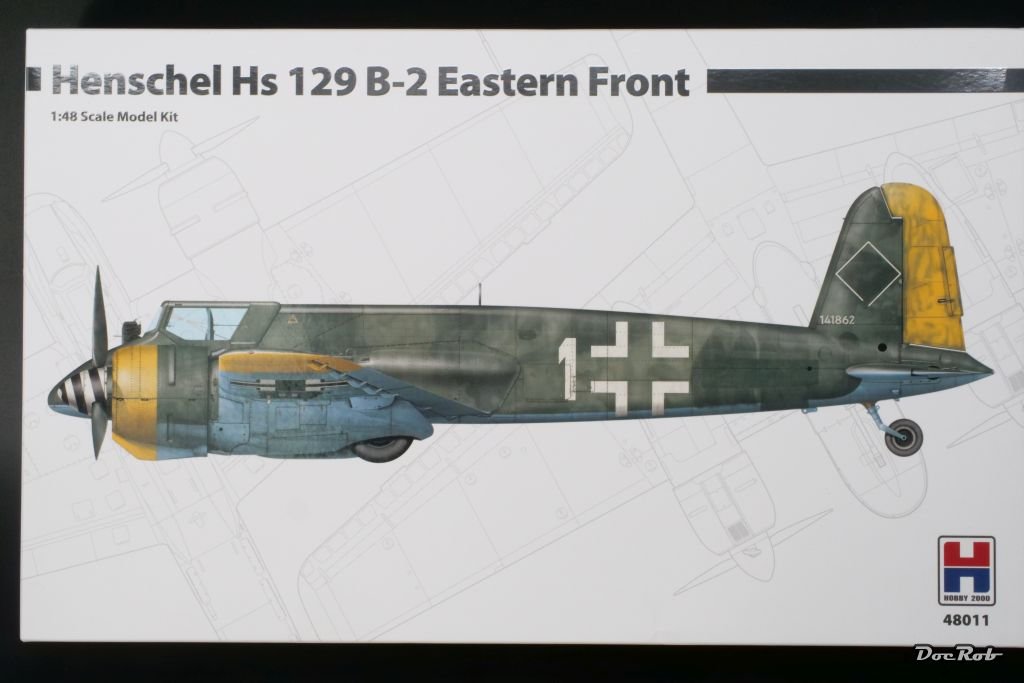
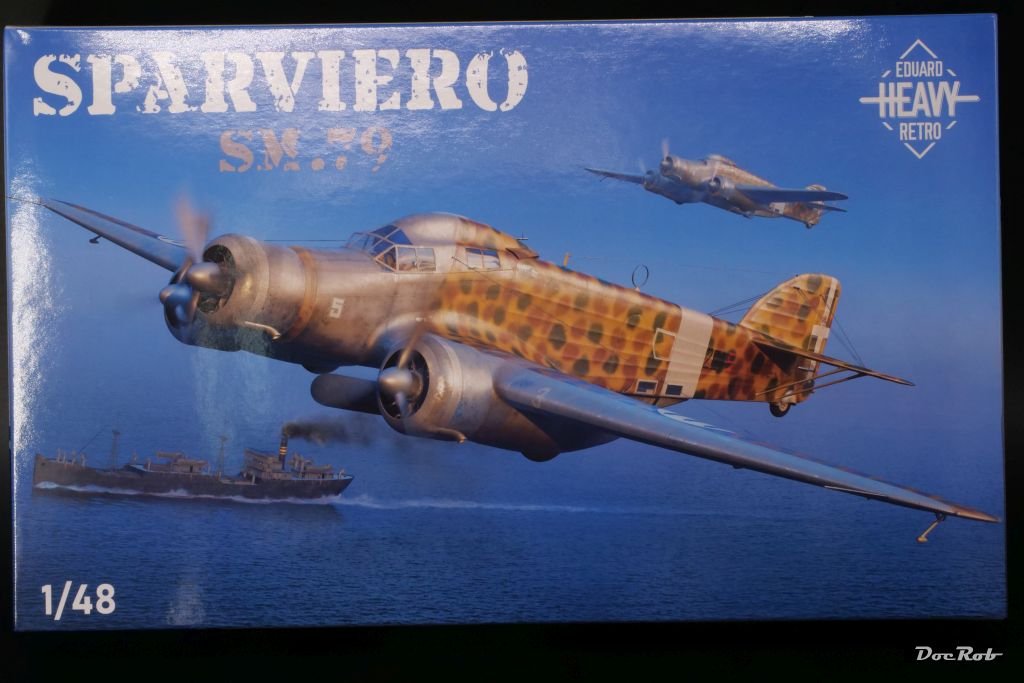
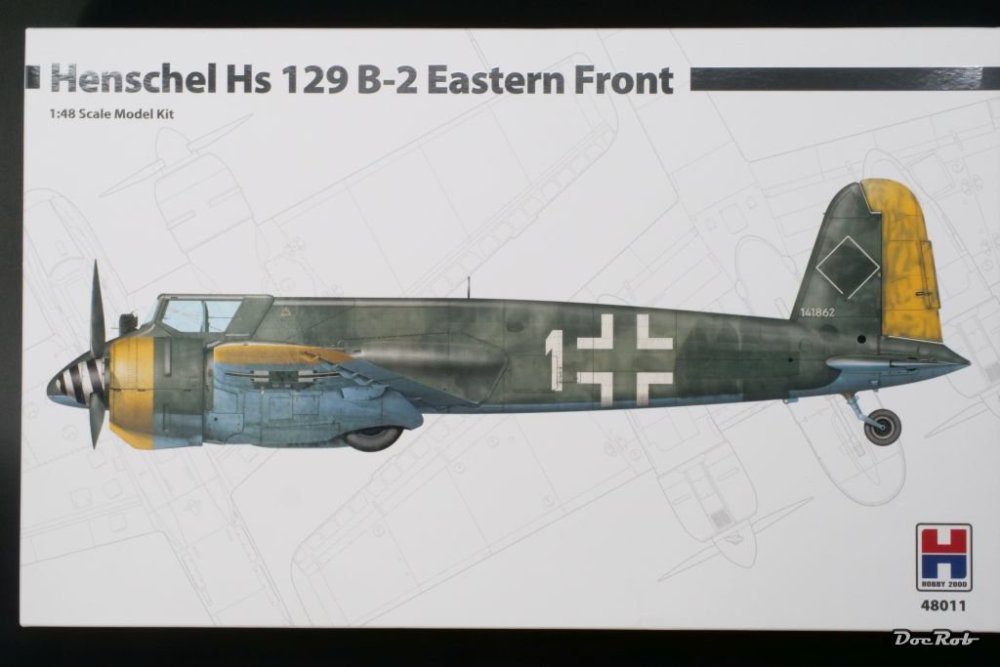
Today, I received some planes and only a bit of large scale stuff. The Savoia Marchetti SM 79 Sparviero was on my list from the moment, I first saw that there will be a re-release. The plastic originates from the old Classic Airframes kit and looks a bit robust on firs sight. Eduard added a heap of resin parts for wheels, engines, props, cockpit,... along with some PE to enhance the base kit. I always liked the quirky looks of the Sparviero and built one (Airfix 1/72), when I was a teenager. Next there is another re-pop in 1/48. I always wanted to build a HS-129 and was amazed to see that Hobby 2000 offers a re-release of the old Hasegawa kit, but with Cartograph decals and masks. I added Master gun barrels and might use the kit as a testbed for a white wash winter camo. The following decal sheet is a last chance buy. I have grown very, hmmh - let´s say ambivalent feeling for HGW´s products over the years. I like their seat belts, even if they manage to get every type of manual wrong. The rest of their range lasts from superfluous like many of their strange designed PE for WNW kits to unusably and crappy, like my set of extra details for my WNW Hansa Brandenburg, where they made none fitting paper inserts for the inside of the fuselage. I can´t imagine anybody used these successfully. In the same set were IP wood decals, that were the most fragile, I ever used. Speaking of fragile, their wet transfers look great in best case, but to achieve this best case, you have to work really hard, to fulfill the requirements. The wood decals for my WNW Albatros are my last try on HGW decals. They claim, the fit should be perfect and I hope they are not as fragile as others I used from HGW. This is a new release and if it doesn´t work, it´s the good ole` oil color wood rendering technique. Not shown is a PE fret for my 1/35 Tamiya Citroen C11, with am etched front grille substituting the plastic. Cheers Rob


-
Fantastic work, congratulations. I really like the diversity of your builds. It seems you get bored easily, when building only certain subjects in a certain scale, like I do. Cheers Rob
-
Great work on the burner can, Gus. The fit generally seems to be ok-ish, but the detailing looks fantastic. You´ll need a lot of patience with this build, I guess. Some years ago, I enlarged my spray booth, using a large transparent plastic container, duct taped to the vent box of my old booth. I described what I did in this thread, a simple fix. You´ll need a bigger booth, Gus to stay in adopted movie terms not Ad bullshit, which is the same here, but I seldom watch it. Cheers Rob
-
1/48 EE Lightning ...how to make at patchwork quilt
DocRob replied to PanzerWomble's topic in The Great Twins Broup Bluild
How could you weather the aluminum in such a short time PW? Did you leave it out in the wild for some years, with snow, rain, sun and wind to abuse it? 1/1 weathering I would call it . Looks really convincing, great job Cheers Rob -
AEG G.IV - Creature of the Night - WNW 1/32
DocRob replied to DocRob's topic in The Great Twins Broup Bluild
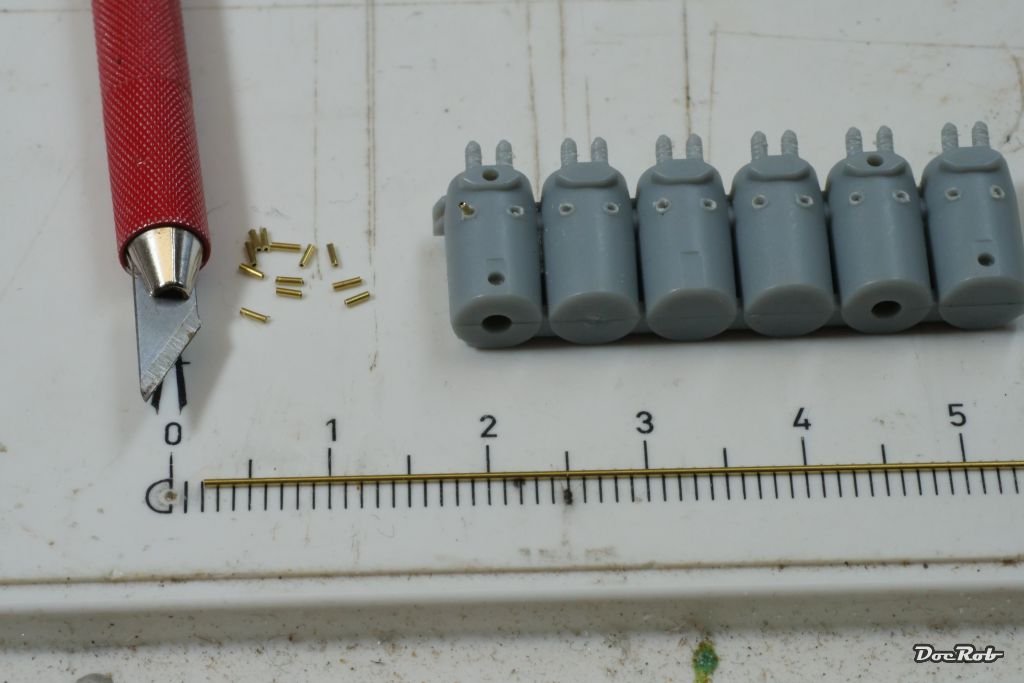
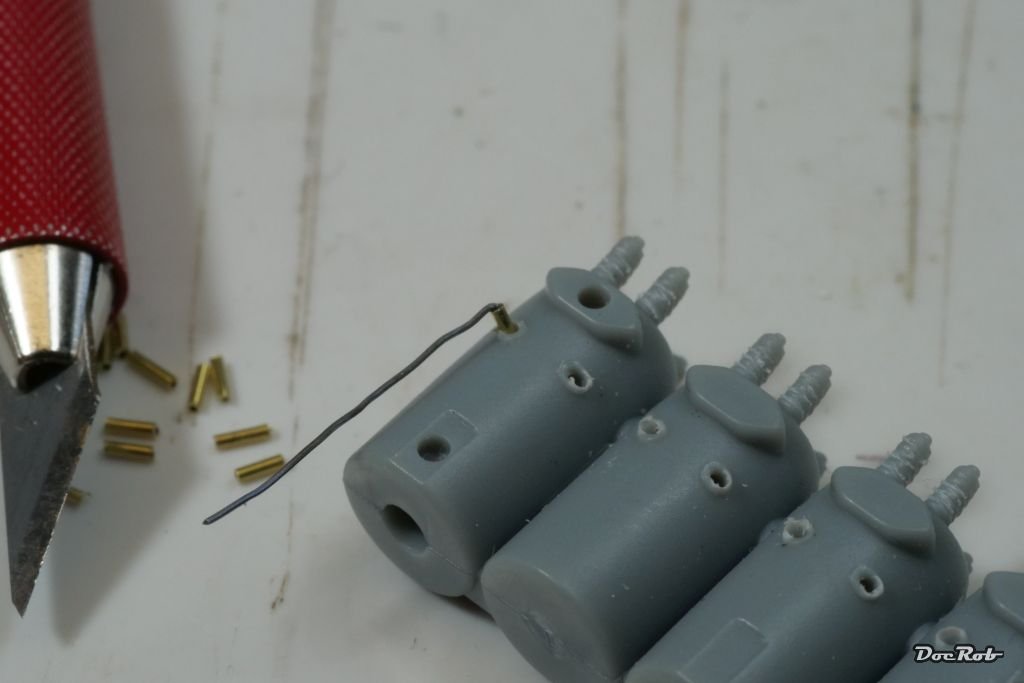
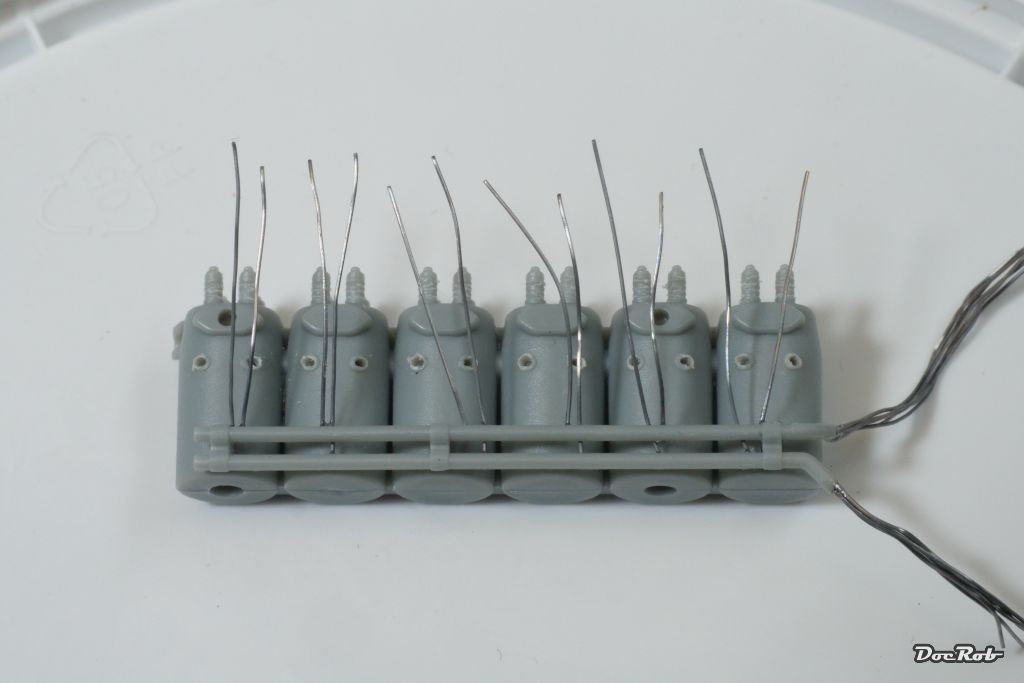
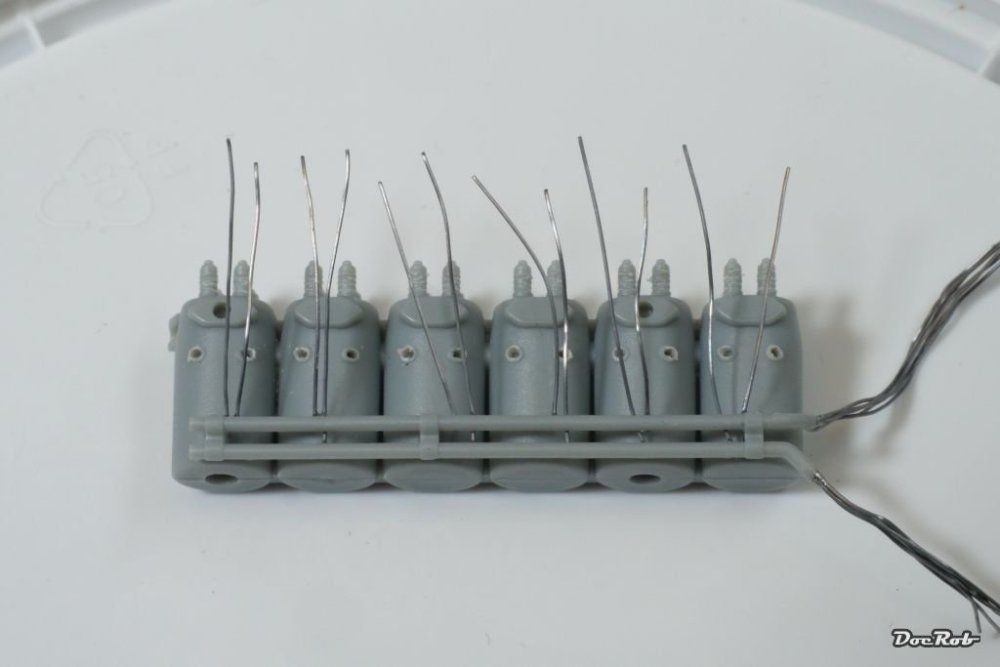
The creature got it´s tail, but without the rudder and elevator for now. The joints are fragile and therefore they will be added later. The intersecting tail parts are pure genius, they hold all three parts exactly in place with perfect fit, I only glued for security. As a break from decaling, I decided to start the engines. One will be covered with cowls and less detailed, the other will be without cowls and receive some updates, to enhance detail level. First, I scratched the top rocker springs for a more coiled look with a sharp scribing needle. Next, I drilled out the holes for the spark plugs with a 0,5 mm drill bit, to accept 1,5 mm long pieces of brass tube with an outer diameter of 0,5 mm and an inner diameter of 0,3 mm. Said tube pieces were cut with a sharp blade, only rolling them on a flat surface with only slight pressure. This way, you cut easily without leaving burr in the hole. These spark plugs will be CA-ed into the holes and will become 0,2 mm lead wire inserted for the ignition cables. Then I prepared the ignition harness, using the kit part and gluing a six pack of 0,2 mm lead wires to the end of the tubes, which will later be connected with the magnetos and glued a pair of lead wires for every cylinder to the plastic part, which will later be inserted into the spark plugs. Cheers Rob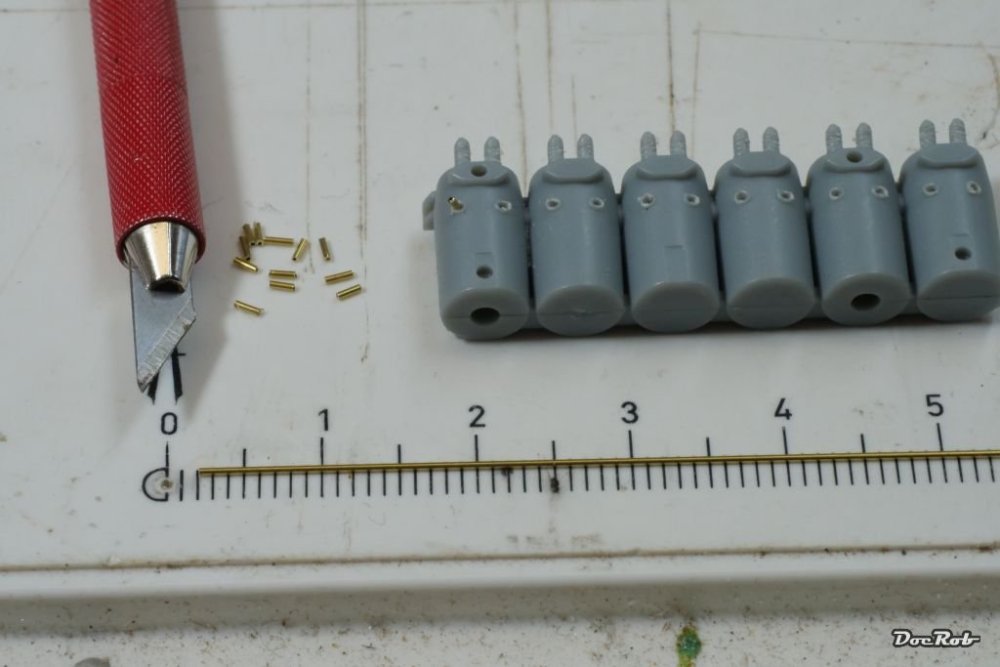


- 263 replies
-
- 10
-

-
AEG G.IV - Creature of the Night - WNW 1/32
DocRob replied to DocRob's topic in The Great Twins Broup Bluild
Indeed Peter, a few days, after I made the purchase, I received the mail, that the homepage of the company will be shut down and maybe reopened under another name later in the year. Glad, that my parcel was on it´s way then. Cheers Rob -
AEG G.IV - Creature of the Night - WNW 1/32
DocRob replied to DocRob's topic in The Great Twins Broup Bluild
Thank you Mike, decaling is definitely testing my patience, but the quality of the decals helps. Nonetheless, it´s hard to do something in between, I permanently visit my bench, to do some adjusting here, some decal softener application, ... . I hope to start with the engines soon and will develop a plan for my weathering approach. I´m a bit lost here, because the opaque character of the decals robs me of my favorite methods of pre shading for WWI planes, I built before. The Rexx exhausts are a treat, not necessarily needed, as the kit parts are not too bad either, but they will look fantastic. I will build one engine with and the other without cowlings or maybe scratch a bit and make one half open. Cheers Rob -
Is it a Heinkel He-220, Carl ? I knew it, these Cylons were evil. Cheers Rob
-
AEG G.IV - Creature of the Night - WNW 1/32
DocRob replied to DocRob's topic in The Great Twins Broup Bluild
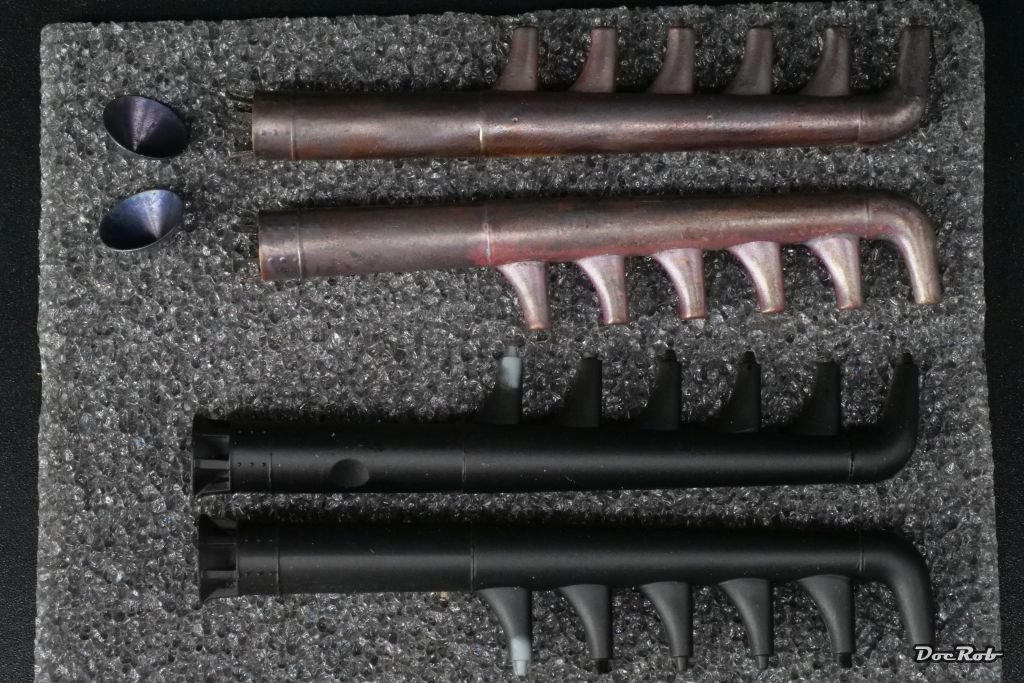
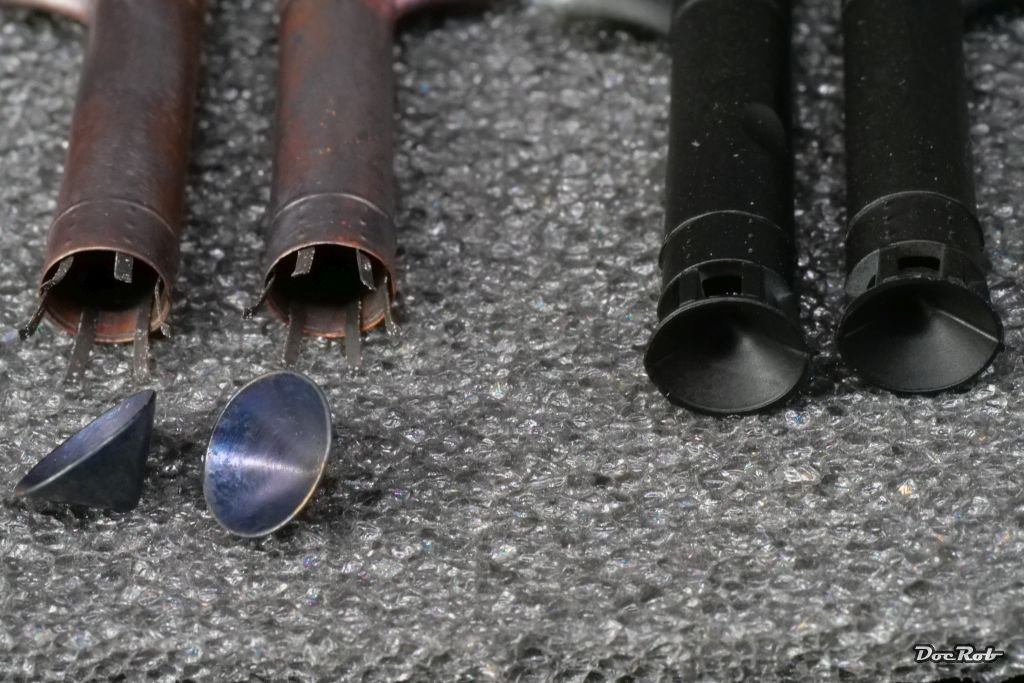
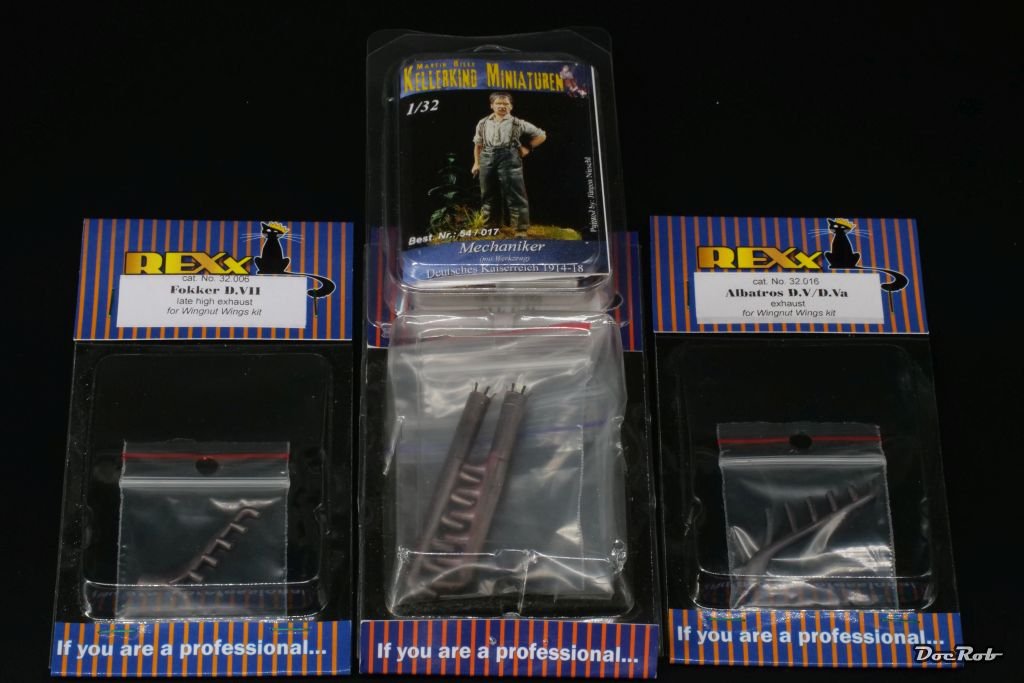
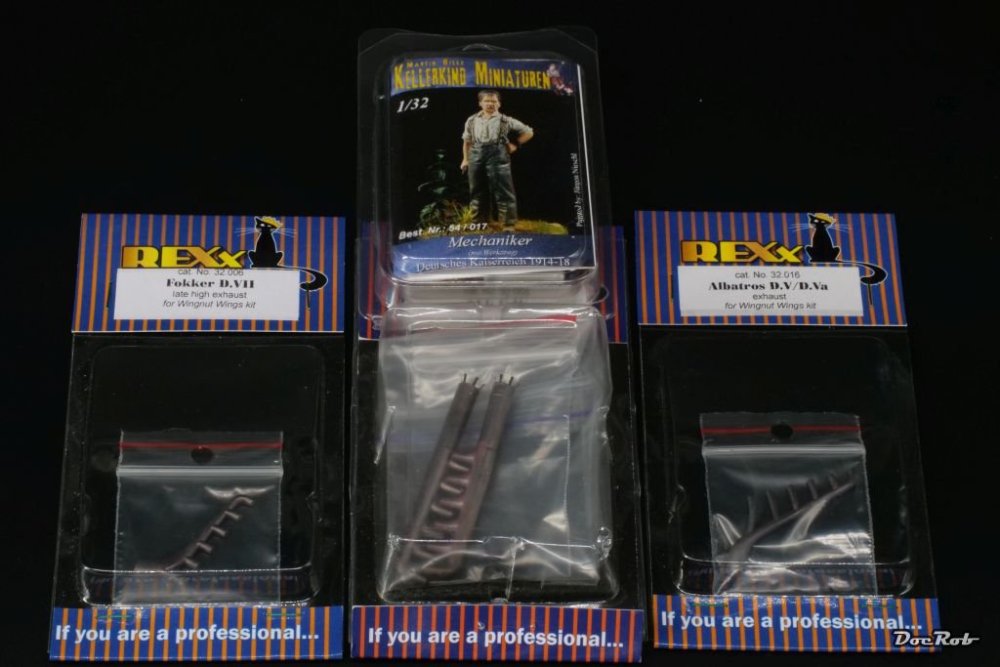
Today, I received some goodies from Aviattic.com the three days after my purchase (temporarily) defunct European distributor for Aviattic.co.uk. I spare you the details, but I was lucky enough to hold these items in my hand. Three sets from the Ukrainian company Rexx, which produces galvanic grown metal exhausts for my AEG, Albatros and Fokker D.VII. The mechanic figure is casted by Martin Hille from Kellerkind miniatures, a company from my old hometown Berlin. Some detail shots from the exhausts, definitely an improvement over the kit parts and fascinating product due to the thinness of the material. Cheers Rob

-
AEG G.IV - Creature of the Night - WNW 1/32
DocRob replied to DocRob's topic in The Great Twins Broup Bluild
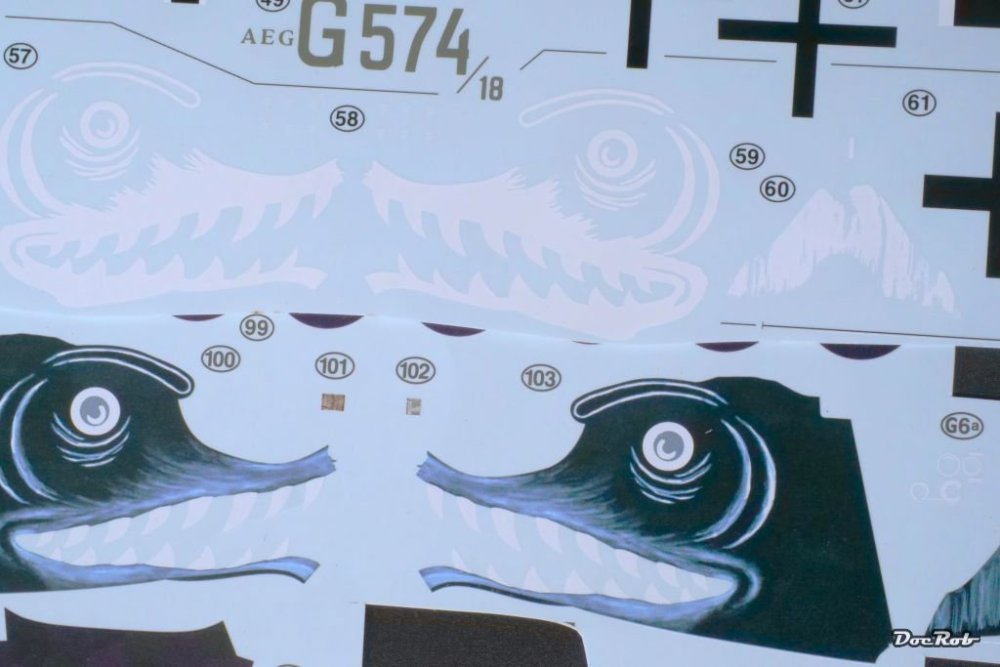
Muchas gracias amigos, the decaling stage is testing. You need a lot of patience, specially for the thin elevators, where the decals have to contour around the corners. Hot decal softeners destroy the decal, so it´s Micro Sol and Tamiya decal adhesive softener type, a hairdryer and lots of tiiiimmmmeeeeeeeeee. When I first saw the kit, when it came out, it was clear, that I would choose this scheme, if I ever build an AEG. What kind of animal the nose art represents, that may remain unsolved. Sharks would not be too typical for Germans, lets call it a monster, which it is for sure . Cheers Rob -
Your new AB did work great, with an experienced guy at the trigger, Martin, love the mottled look. The base paint cries for an oil color treatment for ebven more depth. The tedious work with the walkways paid out, they look perfectly blended. Cheers Rob
-
F-15DJ Kai or Eagle Plus- Finished!
DocRob replied to BlrwestSiR's topic in The Great Twins Broup Bluild
Your dog is even sweeter than your build Carl, I guess, he has some other virtues than laying around and looking cute . Cheers Rob -
"You must think in Russian"... MIG-31 Firefox
DocRob replied to BlrwestSiR's topic in The Great Twins Broup Bluild
Uschi´s iron pigments are always a good idea for highlighting dark colors and give them a nice metallic feel. I like your experimenting with the surface of this tiny movie star. Cheers Rob -
Don´t waste your Sea Blue, you´ll need it, if you ever want to build a night bomber AEG, like me. It´s the base color and works well with the decals. Can´t wait to see this thing drop into the atmosphere. Cheers Rob
-
Looking good Ernie and will look better, when everything got blended through filtering and weathering. I always thought the camo to be soft edge, but looking at period pics shows, it´s hard edge. Cheers Rob
-
AEG G.IV - Creature of the Night - WNW 1/32
DocRob replied to DocRob's topic in The Great Twins Broup Bluild
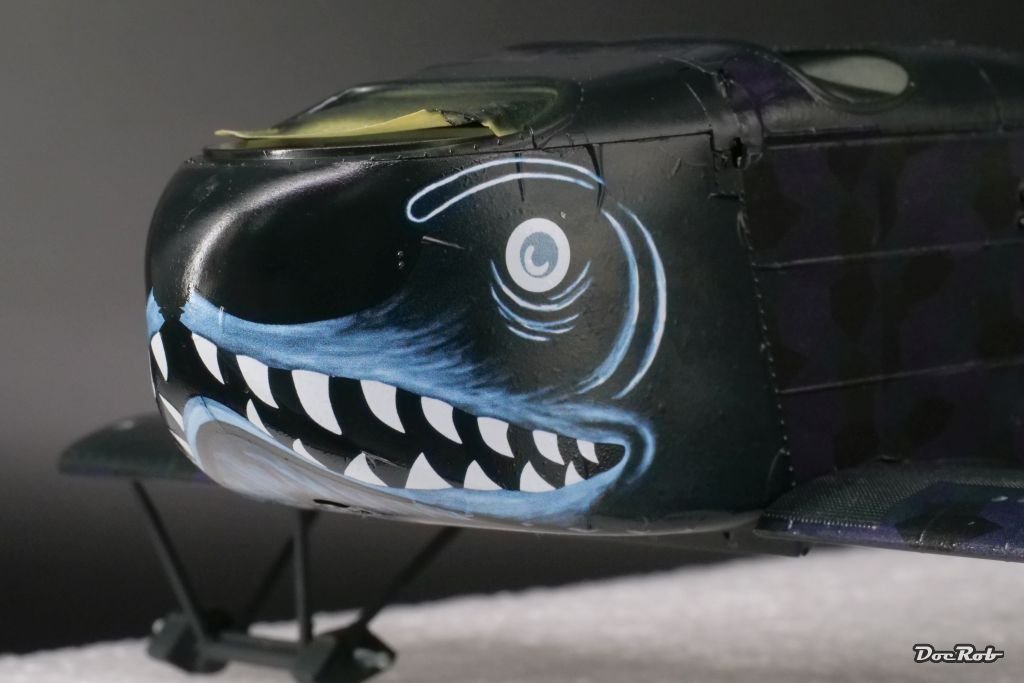
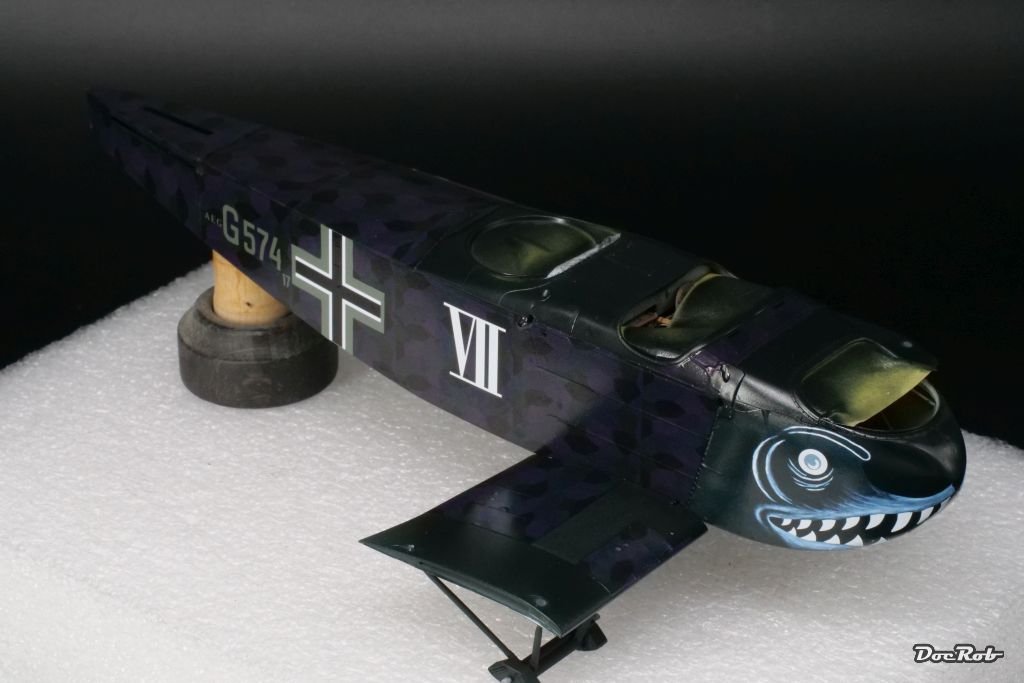
The creature got it´s creature jaws. After finishing the fuselage lozenge camo, I added the shark? mouth and the fuselage markings. The serial number of my plane is not known, but the command is and so I used a fictional number for the correct unit. With the lozenge decals, I had some unexpected troubles, when I used the hairdryer carefully onto one fuselage side, it wrinkled terribly and I was next to bin the kit, but leaned back and continued with Micro Sol and trying to push the wrinkles away, with every tool come to mind. Finally it was ok-ish but not perfect. I hope for the matte finish and tinted overlayer, to look good in the end. I also started with the tail, applying lozenge camo decals. It proved to be hard to fit them around the corners, which needed several applications of Micro Sol and hairdryer treatment. I could have used a stronger decal solvent, but decided against it, after I´ve seen, how sensible the decals are with thinner. Patience is the key here, a virtue I´m a bit short of possession, unfortunately. Then it was decision time about the shark mouth or maybe better whale mouth. WNW supplies two different options, one only in white and one with bluish brushstrokes around. Further, you can decide if the inner mouth should be dark or red. The red was omitted initially and after inspecting the very good existing front section photo, I decided for the one with the blue brushstrokes around. No worries, the last wrinkles will be gone after some more Sol applications. This all looks a bit stark now, but will tuned down a bit due to the use of tinted varnish, matte coat and weathering. Cheers Rob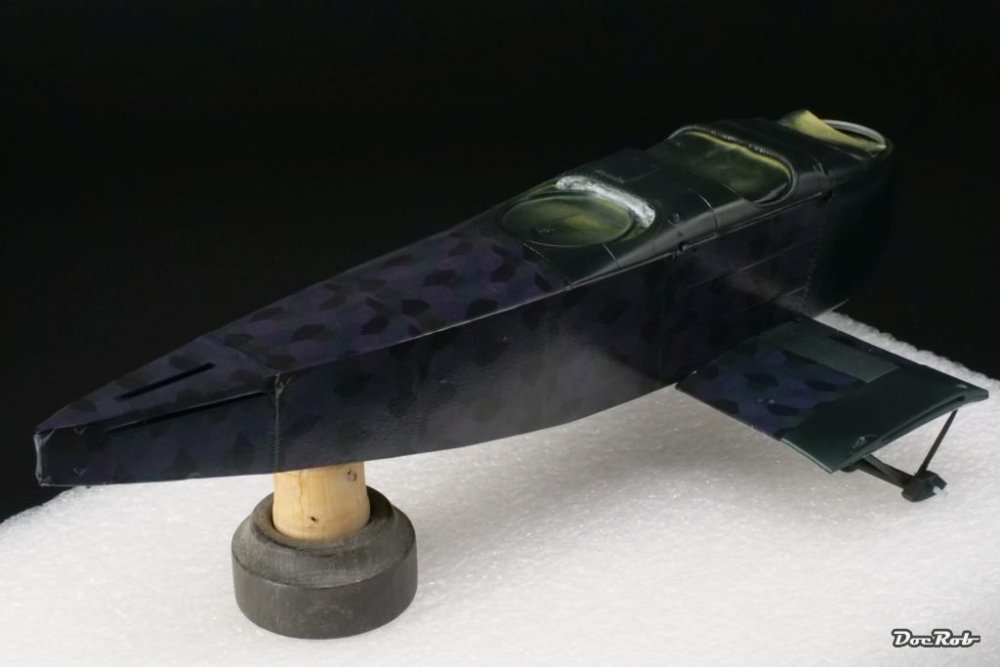


- 263 replies
-
- 10
-
-
1/72 Unterseebooten ...A hole in the sea ....
DocRob replied to PanzerWomble's topic in Non LSM 'WIP
Looking good, PW. I only once worked with clear two component epoxy and the manual said to not apply layers of more than one cm, because if you pour it thicker, it develops warmth as part of the hardening reaction, which results in bubbles. Blowing over the surface with a hairdryer also helps. Cheers Rob -
Sky King's Songbird: Update: 3/2/24 - SOD .. BINNED
DocRob replied to Peterpools's topic in The Great Twins Broup Bluild
What a pity Peter, but like Jeff said, don´t bin it right away. Sometimes it´s better to lean back, relax, have your choice of drug to let your mind freely wander for a while and if you are lucky, there is a re-juicer kit on the horizon. It´s a hobby and meant to be fun. Sometimes the hardest builds are the most rewarding, but there is a certain degree of frustration, where it´s best to step back and let some steam off. Cheers Rob -
AEG G.IV - Creature of the Night - WNW 1/32
DocRob replied to DocRob's topic in The Great Twins Broup Bluild
Today I decaled the lower fuselage and wing stubs with lozenge camo. The provided decals are ABSOLUTELY fantastic, maybe the best I ever worked with. The fit, even for the cut outs and strut holes are perfect, which is a great relieve. I decided to work my way up, in case there are overlaps, which indeed are minimal. I used Micro Set and Sol and a hairdryer for the application along a flat brush, to push the bubbles away. One strange thing, on two of the five decal sheets, the decals need to soak for more than five minutes, where the others need only a minute. Then I changed plans for the umpteenth time in this build and build the undercarriage, which luckily is a very sturdy construction. Not visible on the pic are the eyelets, which I glued in, before painting as a preparation for rigging. Now the fuselage can rest on the undercarriage and the underside decals remain unharmed. Cheers Rob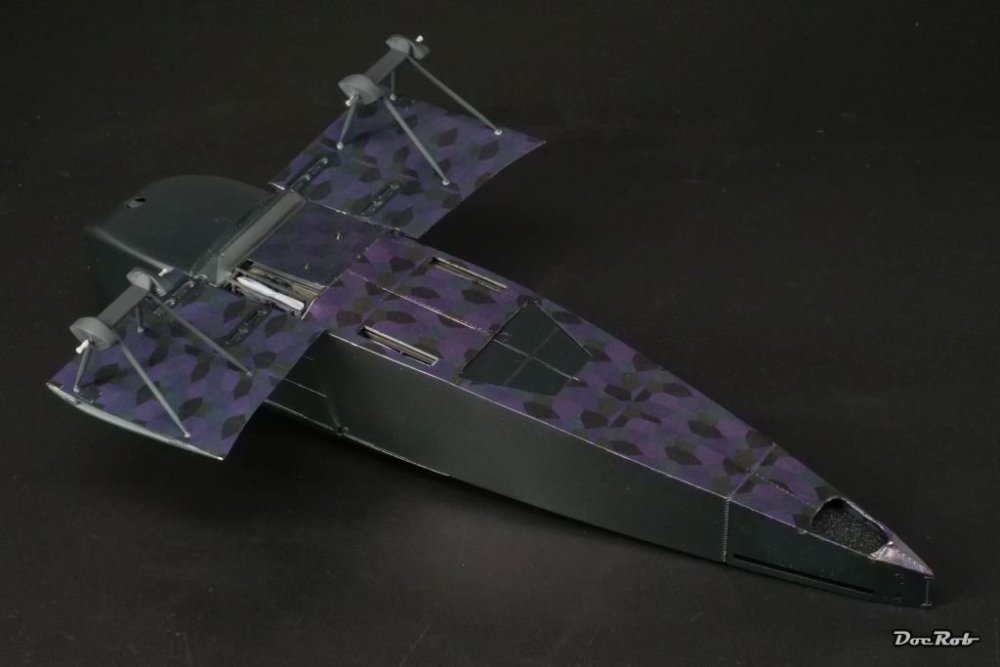
-
AEG G.IV - Creature of the Night - WNW 1/32
DocRob replied to DocRob's topic in The Great Twins Broup Bluild
Thank you Martin and there is enough space for Robin as well in the Batstringbag Cheers Rob -
AEG G.IV - Creature of the Night - WNW 1/32
DocRob replied to DocRob's topic in The Great Twins Broup Bluild
What I´ve seen from your builds, Scott, the only thing you are short off, is actually to have a WNW kit started. There are so many modelers out there, claiming these crates are overcomplicated, but like you, accomplish absolutely stunning builds. Let me tell you, it´s not that hard. The design of the kits help a lot and if you go for German WWI fighters, even rigging is a breeze, as most don´t have a lot. My WNW builds were all demanding, but so rewarding. If I had known, how relatively easy the AEG would be to build, I would have started her some years ago. Cheers Rob -
AEG G.IV - Creature of the Night - WNW 1/32
DocRob replied to DocRob's topic in The Great Twins Broup Bluild
Thank you PW and Phil. Compared with a WWII fighter, a lot will remain visible through the three openings in the deck and the one on the lower fuselage. Well, I asked myself the same question about detailing the interior, but if you built a WNW kit, you might have had the sensation, that you want to continue detailing. These kits are absolute amazing and with their great design, make it a great canvas for extra detailing. Cheers Rob