DocRob
-
Posts
7,048 -
Joined
-
Last visited
Content Type
Profiles
Forums
Events
Gallery
Everything posted by DocRob
-
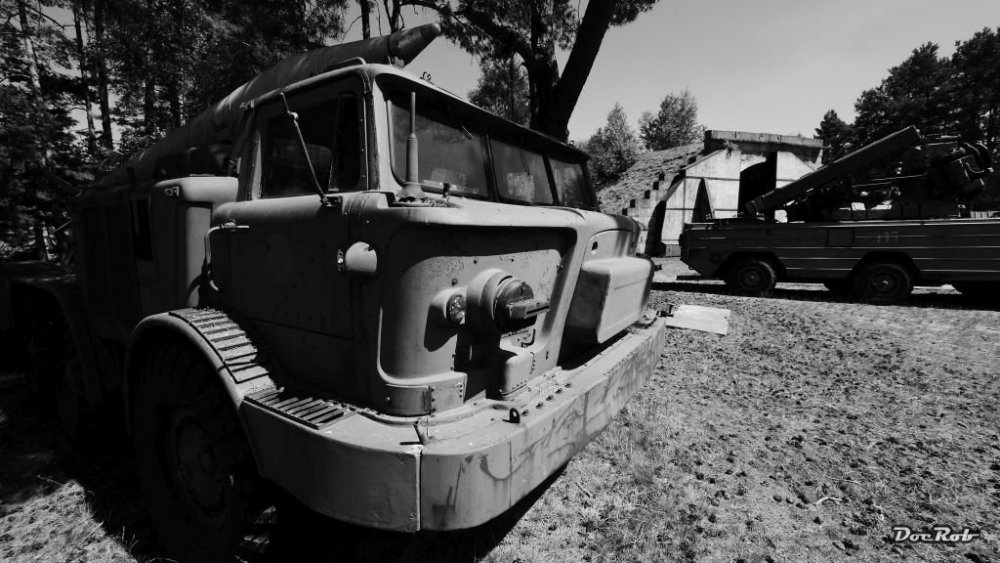
Hi Rich, another of those russian beasts, seems to be an addiction. Yeah these vehicles are very appealing in their brute functionally design. I found one pictue of a Frog, taken by me three years ago north of Berlin in the open air museum "Flugzeugmuseum Finowfurt" an abandoned airfield of the Soviets in the former GDR. It's only black and white and therefore just a teaser. Have fun with that new project Cheers Rob
-

1:1 Spitfire "Simpit" - Sheetmetal & Rivets
DocRob replied to Zeb's topic in LSM 1/35 and Larger Work In Progress
Welcome Zeb, an interesting project you started there. I like the metalwork, you have done, and it's truly large scale. Cheers Rob -
HPH PBY-5A Catalina (Cutaway)
DocRob replied to kkarlsen's topic in LSM 1/32 and Larger Aircraft Ready for Inspection
What a masterpiece you finished here and the figures support the scenery in a great way. I love the Cat and more than once I thought about getting me the cut away Version from HPH. In the end I don't have the courage for her and that leaves me raising my hat and say Chapeau. Cheers Rob -
Thanks for that great review James. That is quite something different and I like it a lot. Since I read all the Hornblower stories in my youth I wanted to build a wooden ship. preferably a frigate. Years ago I started with the build of a French cutter of the legendary Corsair Surcouf of St. Malo. The kit is made by Artesanialatina and is double planked and fully equiped with Details. What stopped me from desiring a frigate was the scale like the Vanguard with 1/72. The Cutter is 1/50 and I find it easier to detail in that scale and it spares you the redundancy of Building 74 cannons with gates and other repetetive works. After finishing the Renard, I will go for the big thing and search for a big scale ship (that's what we are here for) with loads of detail, I hope to find a decent kit of a Corvette or a Sloop in 1/32 or similar. Our member Spliffsecond planted a brainbug recently, by showing his rubber powered wooden SE.5A. I remembered liking to work with Wood and metal and decided to continue the build of the Cutter in near future and maybe a wooden plane in between. So thanks again for feeding the bug with that review of a piece of art kit. Cheers Rob
-
TA-152 Zoukei Moura Finally Done
DocRob replied to DocRob's topic in LSM 1/32 and Larger Aircraft Ready for Inspection
Thanx Gentlemen for your kind words. @nmayhew, you might be right with your assumption about the grill in the supercharger intake. I found some photos and descriptions of a TA-152 H0 without the grille, after you mentioned it. The one awaiting restoration in the US has one and that was the base for me adding one, can't trust nobody . On the other hand I'm not a total rivet counter, if it looks about right it's ok for me and the grille looks just cool and right. Cheers Rob -
Great review, like James said, the comparision made it stand out. I will definetely get me one. Cheers Rob
-
TA-152 Zoukei Moura Finally Done
DocRob replied to DocRob's topic in LSM 1/32 and Larger Aircraft Ready for Inspection
Thank you Joachim, I didn't want to overdo the weathering, because of the short period of action these birds saw. On the other Hand I went with the white wash the first time to simulate the harsh winter conditions, the TA's were used in. Cheers Rob -
1/48 Wellington Mk.X (He727 NA-K)
DocRob replied to JeroenPeters's topic in LSM 1/35 and Larger Work In Progress
Wow Jeroen, that is looking great. As usual with most of your builds you seem to be covered in brass and CA . The bomb bay looks to be a real challenge, shame that you will have to take a dive to see all the detail once the plane is finished. The plate with the applied photo will be an eyecather. Cheers Rob -
Hi Rich, that is flat out fantastic. it was very enlightening to follow your build of the beast and it is great to see that Behemoth in a state of advanced decay finished. Cheers Rob
-
Spad XIII C.1 of the 27th Aero - Frank Luke
DocRob replied to sandbagger's topic in LSM 1/35 and Larger Work In Progress
Hi Mike, what you started here shows a great deal of skilled scratchbuilding. I always wanted to build a decent SPAD, but without that big deal of bending the base kit (WNW, do you hear me?). Can't wait to see yours finished. Cheers Rob -
MH 60 s Knighthawk Academy 1/35
DocRob replied to shark64's topic in LSM 1/35 and Larger Work In Progress
Wow, what a skillful paintjob with the figures. and their poses look really lifelike. Cheers Rob -
The Crew is looking great, ready for Rock'n Roll. Not so easy to paint that many figures with the same uniform and give them something individual with the faces and their posture, well done here. Cheers Rob
-
1:32 Fw 190d-9
DocRob replied to polsen's topic in LSM 1/32 and Larger Aircraft Ready for Inspection
Splendid. I love the mottling and the spare cowl for contrast. Cheers Rob -
takom LSM Pilots: Panther Ausf. A Early Production, full interior
DocRob replied to JayDee's topic in LSM Pilots
I like that new "channel" here in LSM. Great BuReview James. I wish somebody would have done one about the ZM TA-152 . Cheers Rob -
Roden Cessna O-1 Birddog 1/32
DocRob replied to WattsNZ's topic in LSM 1/32 and Larger Aircraft Ready for Inspection
Stunning result with an not so easy to build kit, congratulations. Cheers Rob -
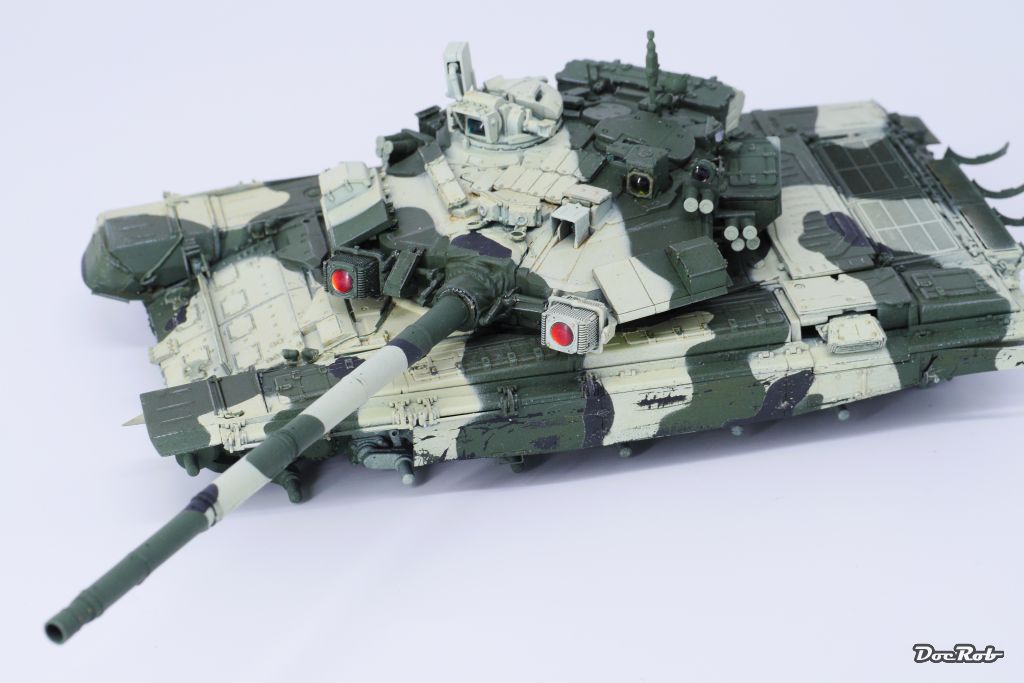
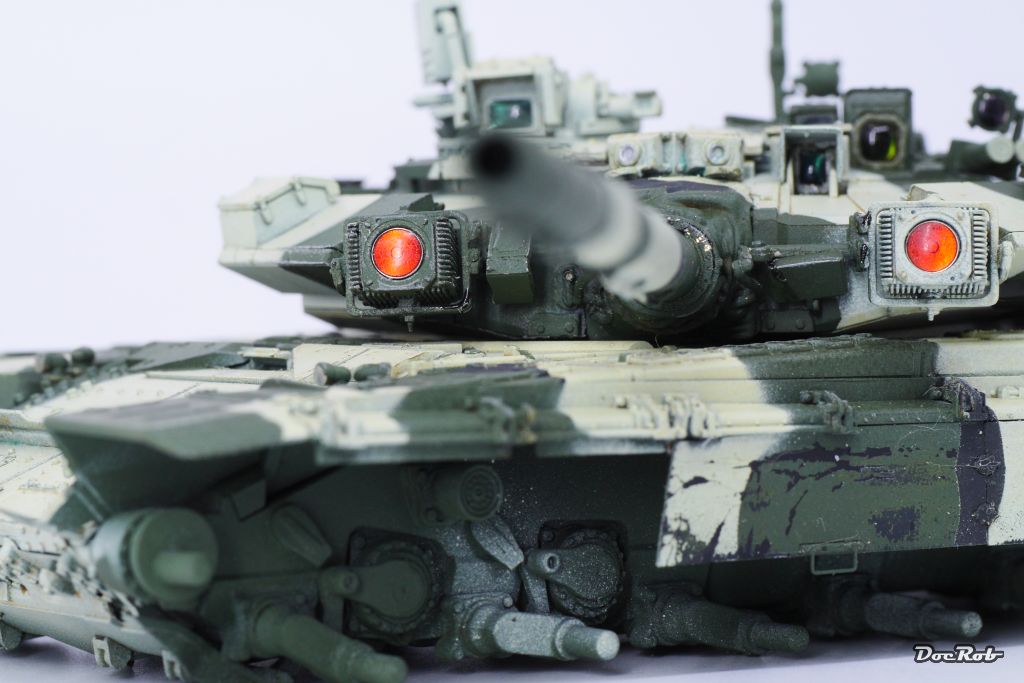
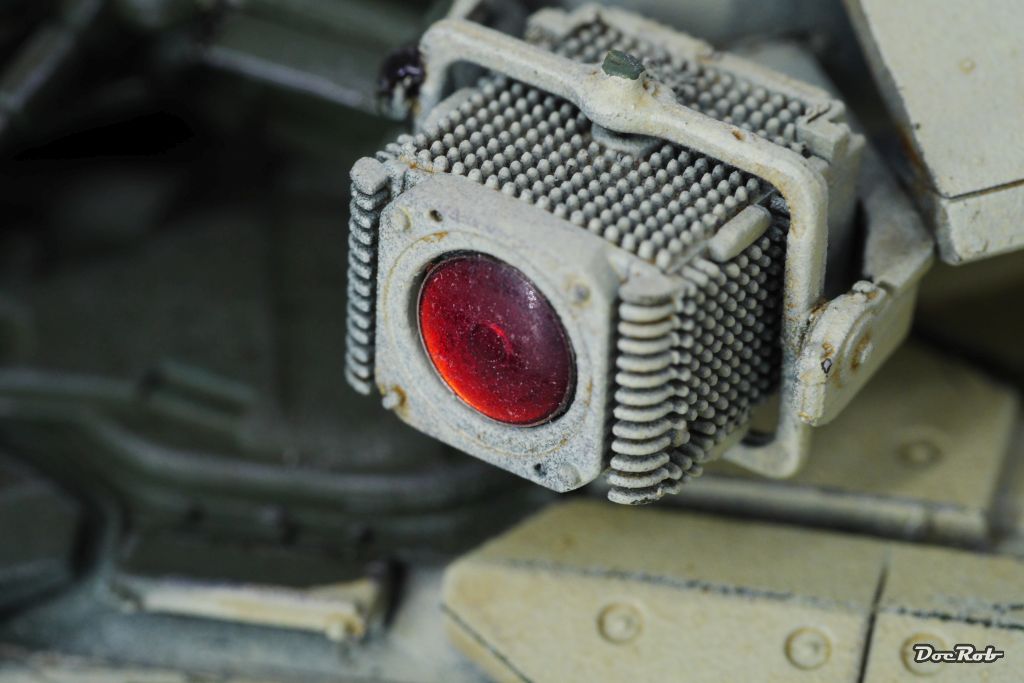
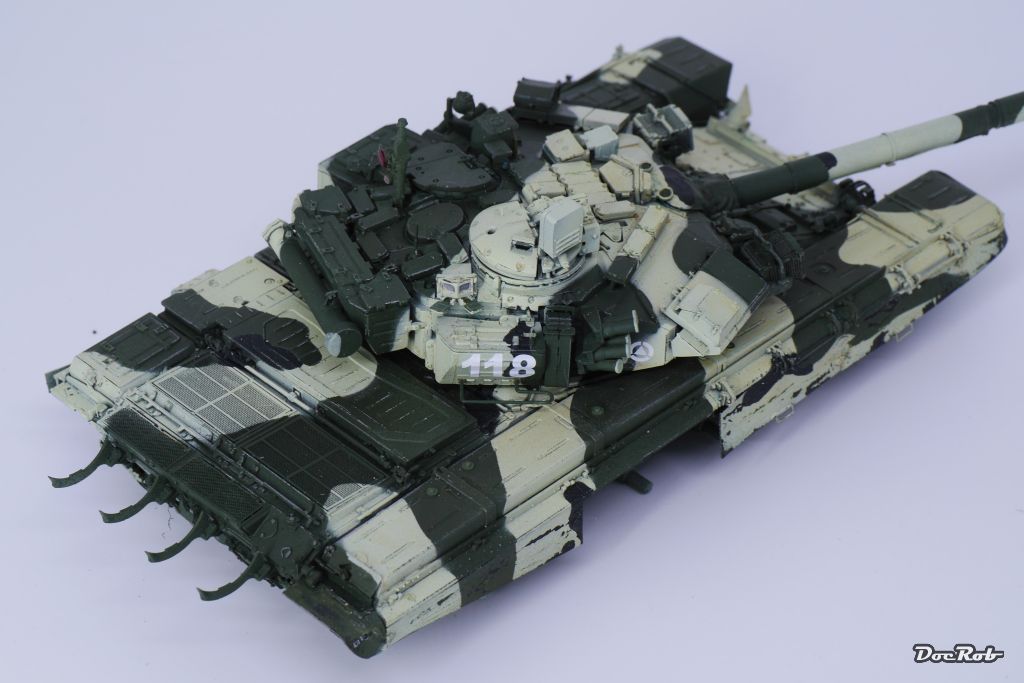
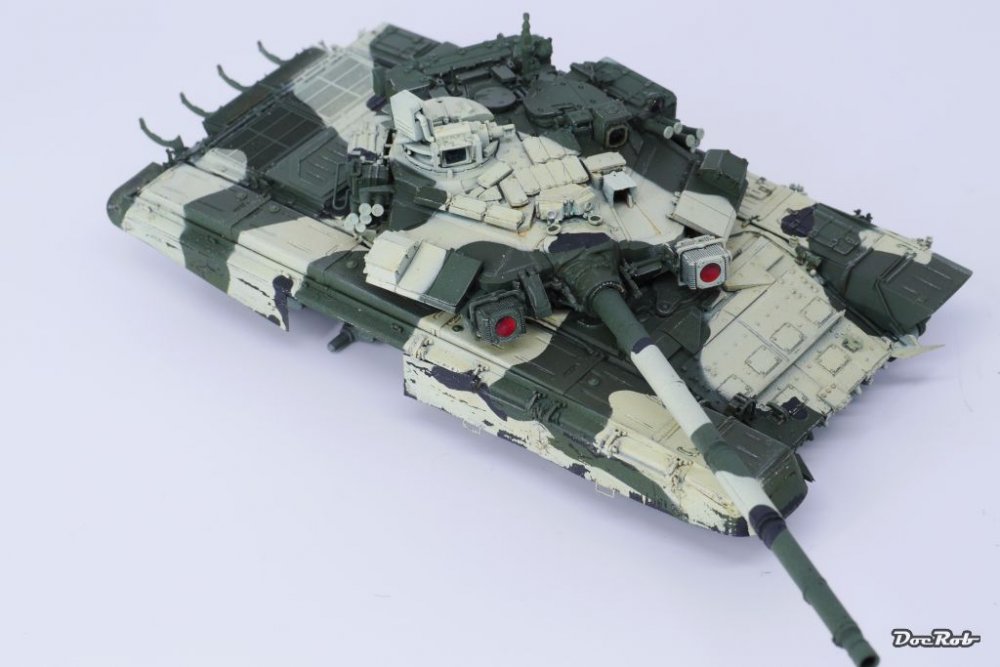
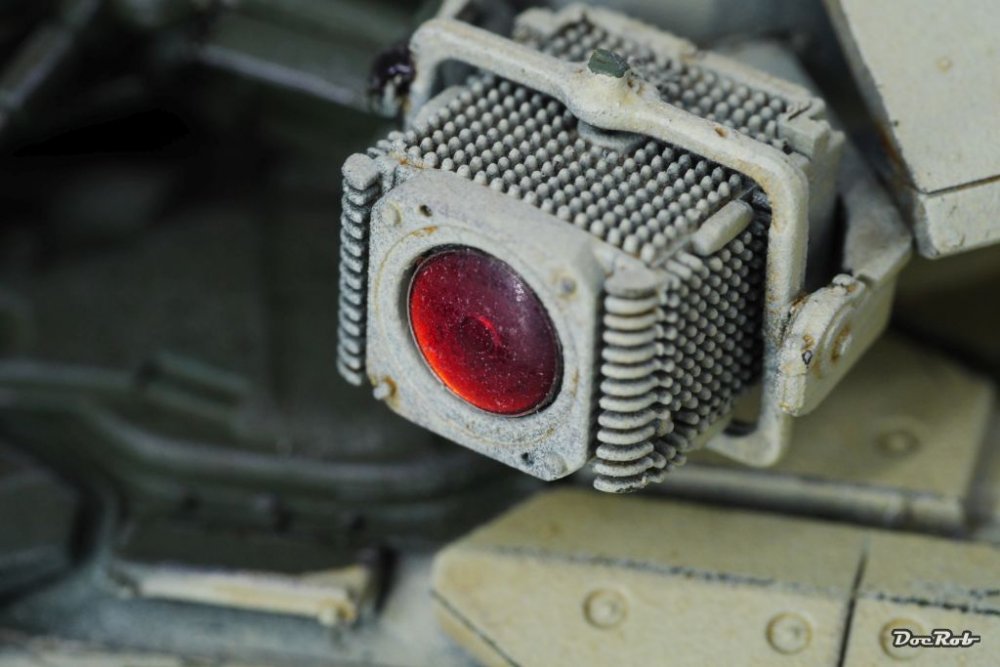
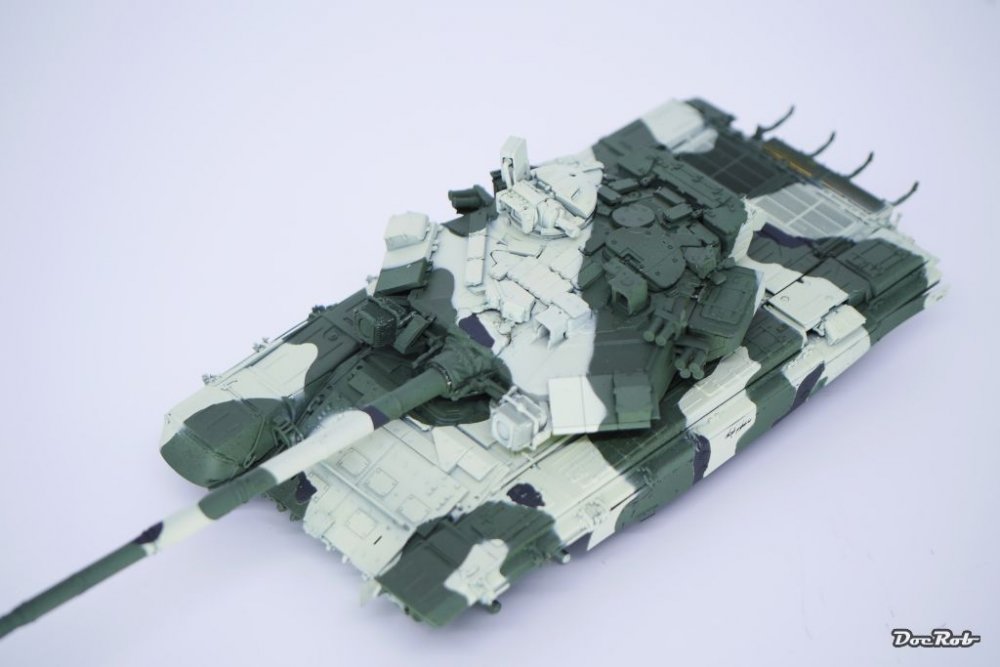
It's time now for the many little things that have to be done to put some live in a kit. First I filterd the camo with a reddish brown MiG filter, which was an important step, because the camo colorus blend more and loose the too seperated look. Then the tank got a treatment of light scratching with knifes and toothpicks, some detail painting by hand with lightened or darkened versions of the original colours and some work with crayons. I wetted the rubber skirts for chipping and liked the look after the removal of the camo, because it looked like rubber, which in this case it is . Except the rubber skirts, chipping is not excessive, because the tank will be shown as relatively new, but completely covered in mud, snow and ice. Then I added the fabulous SKP lights and sensors, which enhance the look of the beast and are highly recommended by the way. Later I will add some reflective coating on the smaller optics. Cheers Rob


-
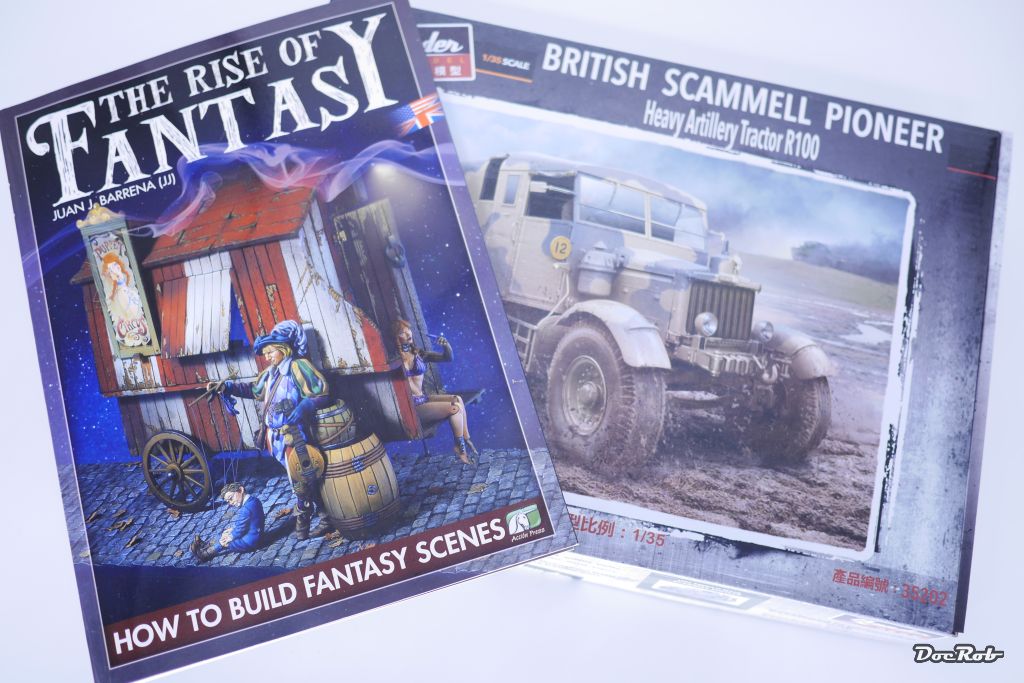
Ladieees and Gentlemeeeen, for this one I need a little of your imaginative powers. Last week I ordered the Scammell Artillery Tractor from Thunder Models. While doing so my first thought was to get the more 'spectacular' looking Recovery version, but then I instantly remembered a great book I bought some years ago about creating fantasy scenes. i will build the Scammell as a circus truck for some weird clowns, wearing medival clothes and looking mean and badass. Combined with some alterations to the truck (maybe a little steampunk) and adding lots of strange details will hopefully lead to something like the initial picture in my head. I will put Crazy Clown Time from David Lynch on my turntable and refine the idea. Cheers Rob

-
Thanks Gus, but there are lots of things to do before the beast earns it's right to get dirty . Some detail painting, decaling, filtering and chipping will be done before it gets messy. And then there will be mud and snow and ice. Cheers Rob
-
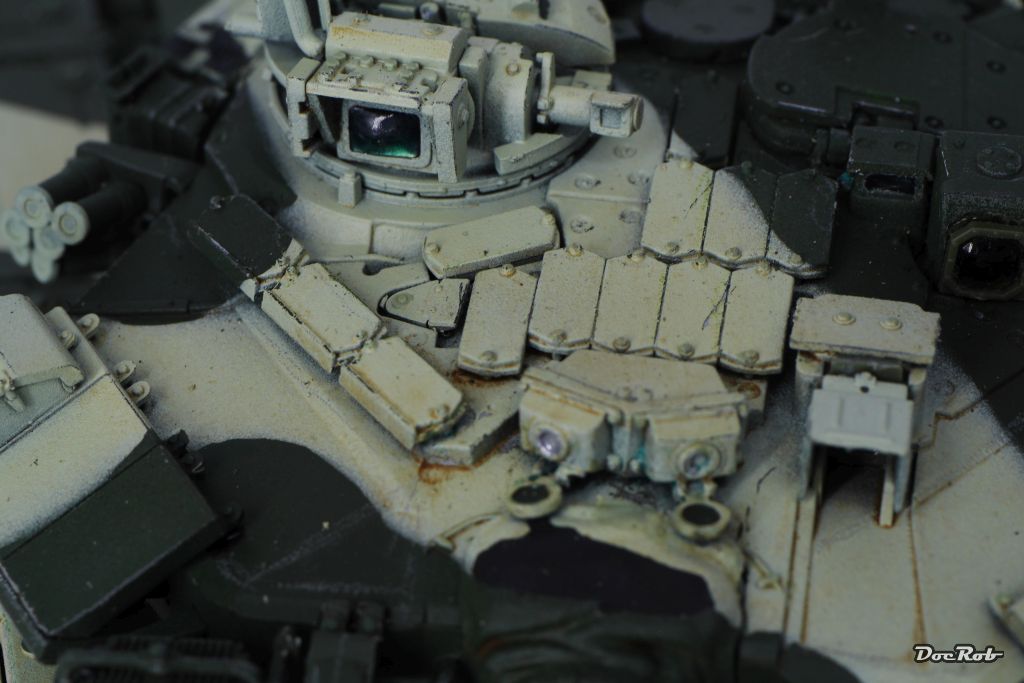
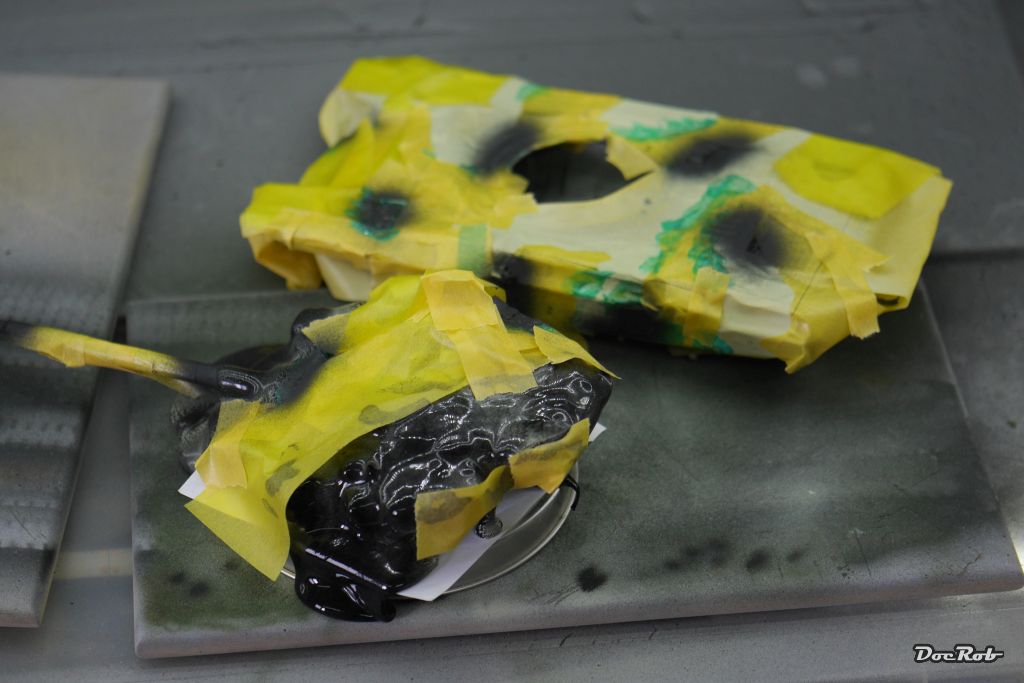
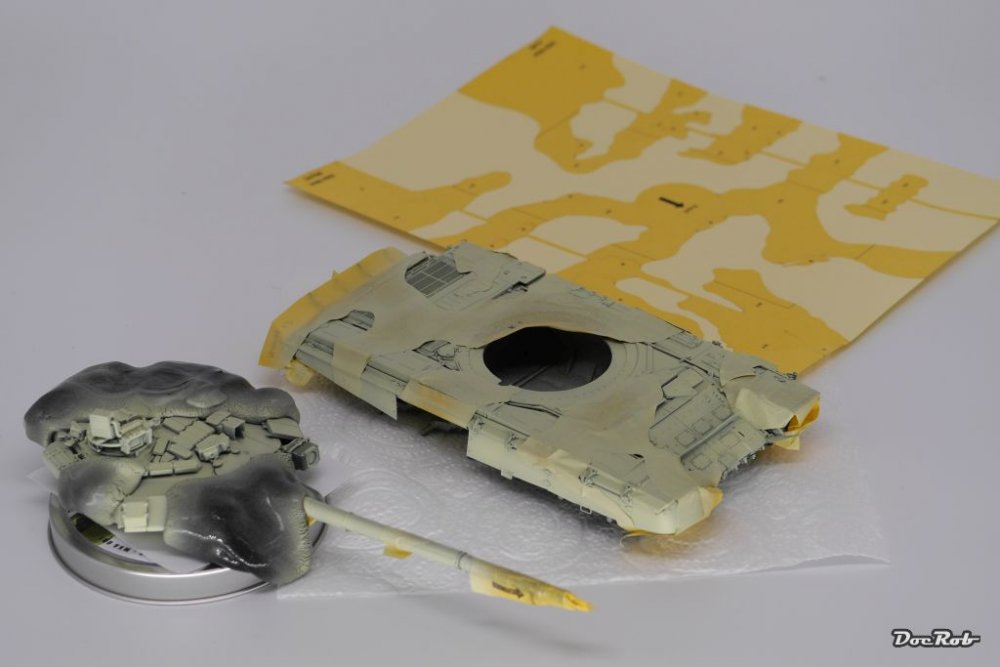
Today I did some more masking for the Nato Black (for a Russian tank ) using tape and liquid mask and got the beast as ugly as possible. After drying of the black dots I removed the tape (easy), the black Panzer Putty (medium to hard) and the liquid mask (very hard). The difficulties arose because of the complicated shapes of the tank and the putty and liquid mask's tendency to flow in every tiny corner and gap. To remove I needed a steady hand, toothpicks, adhesive sticks and tweezers. The best method for removing small residues of the liquid mask is to use a rubber or some rests of dryed mask to rub off carefully. After doing so I got that for a result. There have to be made some corrections, but first I masked the ERA-tiles with the same pattern like the rubber mudskirts. Generally spoken, given the complex shape of the tank, the combination of the three different masking materials were the right choice. As a base for further steps I'm satisfied and if you look from above the fit of the camo-pattern of the turret fits to the camo of the tank body, phew. Cheers Rob


-
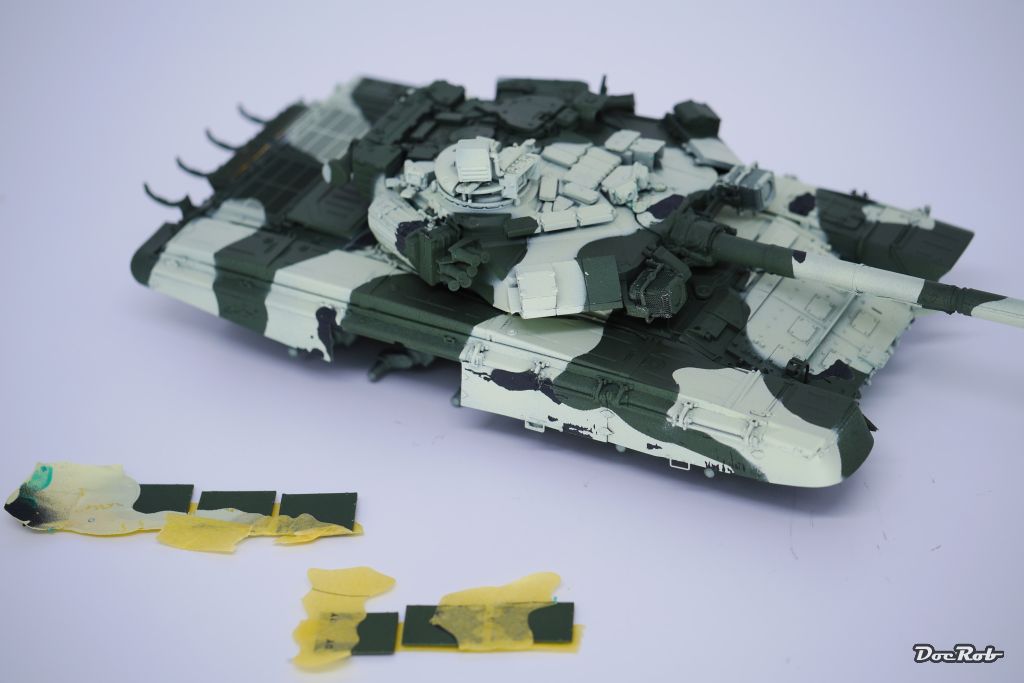
After a short break i got back to the bench and masked the beast for the second camo colour. I used a mix of Kabuki masks for the hull (not that many details protuding) and Panzer Putty for the turret. Applying the masks was not that easy and will have to be redone for the ERA Armour which I will add later above the sideskirts. I used Vallejo Duck Egg Green which looks very pale, but if I have to tone it down, I will use a filter and oils. This time I had no problems with that Vallejo Model Air Colour. Next will be the complicated masking of the small dots of black as the third camo colour. Looks a bit messy at the moment, but i hope it will look good after removing everything, masking a Panther is a piece of cake with all the big plates and sharp angles compared to this one . Cheers Rob
-
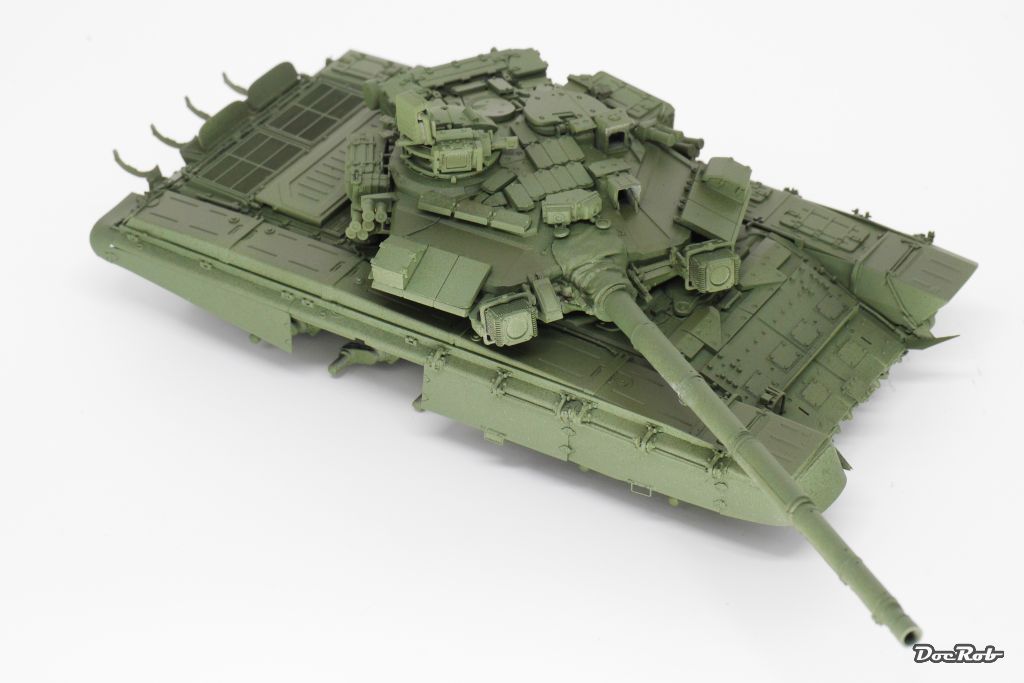
Hola Senhoras e Senhores, the beast went Hulk. It got it's first camo colour not without problems. The planned Vallejo Russian Green was like oil on tin and was not usable and I don't know why. In the end I used Tamiya Olive Green which went on well, but looked a bit greenish to me. I did some lighteneing of the tone in parts to create a little volume. The preshading, as I suspected, was completely worthless. Because of the complicated multi-angled shapes and details of the TA-90 you had to do a lot of spraying from different angles. I couldn't go so thin with the colour to keep the preshading, but no problem here, because of the three tone camo and the planned mud and ice, that will not hinder. For the wheels I used Quick Wheel masks, which are perfect to the rim and they hold six wheels, so it's just four passes with the airbrush for the inner and outer side of the wheels. Anyway, I like that Meng added a PE-Mask for the wheel painting an idea which coul be taken over by other companies. Cheers Rob

-
side tracked again, Se5a 1/20 stick and tissue
DocRob replied to spliffsecond's topic in Non LSM 'WIP
Nice Free, can't wait to see the Se5a to fulfill it's purpose. The trees look pretty close, aren't you afraid. Today is a Paraglider Festival on my island, maybe a chance for some (mid size ) freeflight action on photo. Cheers Rob -
TA-152 Zoukei Moura Finally Done
DocRob replied to DocRob's topic in LSM 1/32 and Larger Aircraft Ready for Inspection
Thanks Mike, it's good to see this one finished and there were lots of things to learn. Cheers Rob -
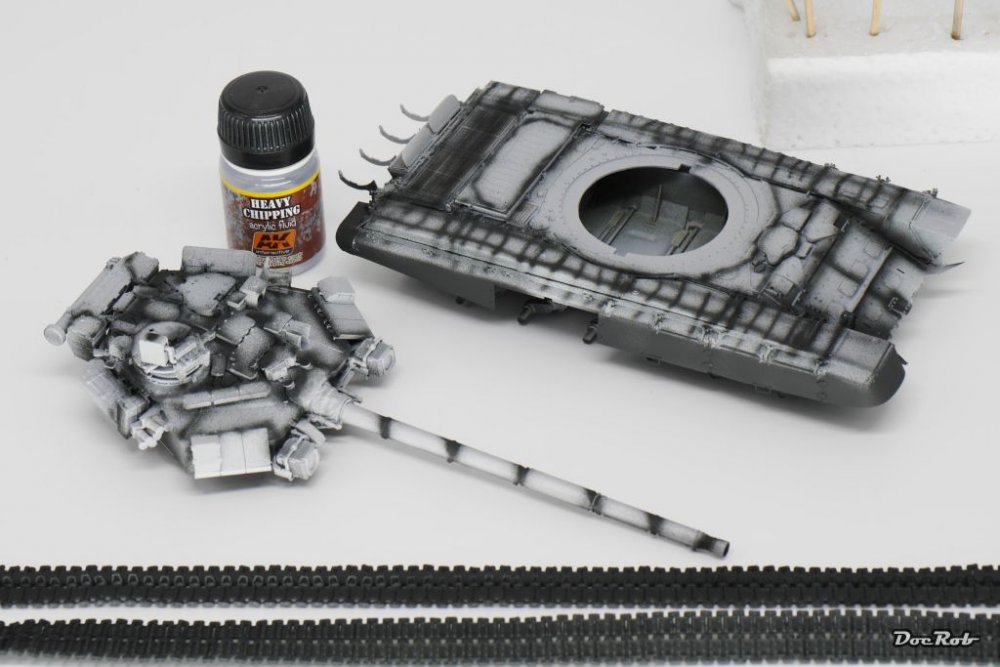
The beast got some Tamiya rattlecan primer applied and after drying the tracks, wheels and rubber sideskirts were airbrushed with Tamiya Nato Black. With the remaining colour I gave the tank and turret a very rough preshading, but I doubt that can be seen in the end whe i'm finished with all the planned painting and weathering steps. The rubber sideskirts were brushed with Heavy chipping fluid, because after painting I will rub () lots of the paint off the rubber. And now begins the fun part, painting and weeeaaaattthheeerrrriiinggg! Cheers Rob
-
Thanx Jeroen, it might be not enough brass for your liking , but in this case it is really not neccesary. Level of detail is very high and you are right, these tracks are among the best I have seen in plastic, that good that I decieded against the Friuls. the only neccesary AM is the barrel, because the kit one is a halved multi part affair. heers Rob