DocRob
-
Posts
7,045 -
Joined
-
Last visited
Content Type
Profiles
Forums
Events
Gallery
Everything posted by DocRob
-

AEG G.IV - Creature of the Night - WNW 1/32
DocRob replied to DocRob's topic in The Great Twins Broup Bluild
What´s holding you then, Jeff , this is the perfect gateway drug, but don´t blame me, when you are hooked on the stuff. Depending on the type of D.VII, there are so many colorful schemes to choose. If you like, there are top notch decal sets around, taylormade by Aviattic in the UK. The lozenge decals look way better, than the WNW ones and they are great to work with. The best, they have a woven linen structure, which looks so realistic. Cheers Rob -
AEG G.IV - Creature of the Night - WNW 1/32
DocRob replied to DocRob's topic in The Great Twins Broup Bluild
Muchas gracias amigos, working on the nacelles and engine was pur fun, even with their fragile multi part character. I´m always afraid, when I start a WNW build, but settle in with the interior and engines, as there is so much to show and the precision of the kit helps, getting everything together. I have to confess, i had to consult the manual several times for getting everything in it´s correct place following a logical sequence. Good to know, that Tamiya now produces acrylic flat and semi gloss, but I had some issues with good old X-clear, which I will describe in the next picture post. Cheers Rob -
AEG G.IV - Creature of the Night - WNW 1/32
DocRob replied to DocRob's topic in The Great Twins Broup Bluild
You should give a WNW kit a try, best for starters are German single engine fighters, like the Fokker D.VII or Junkers D.1 with nearly no rigging. Generally, German rigging is simpler, because of the normal wire used, instead of flat wire with the British planes. A Copper State Nieuport could also be considered or the MengNut Fokker DR.I. Cheers Rob -
Thanks Carl, I got another question considering the gun barrels, I never saw them protruding on a 262 like with yours, secret weapon? sniper version? Cheers Rob
-
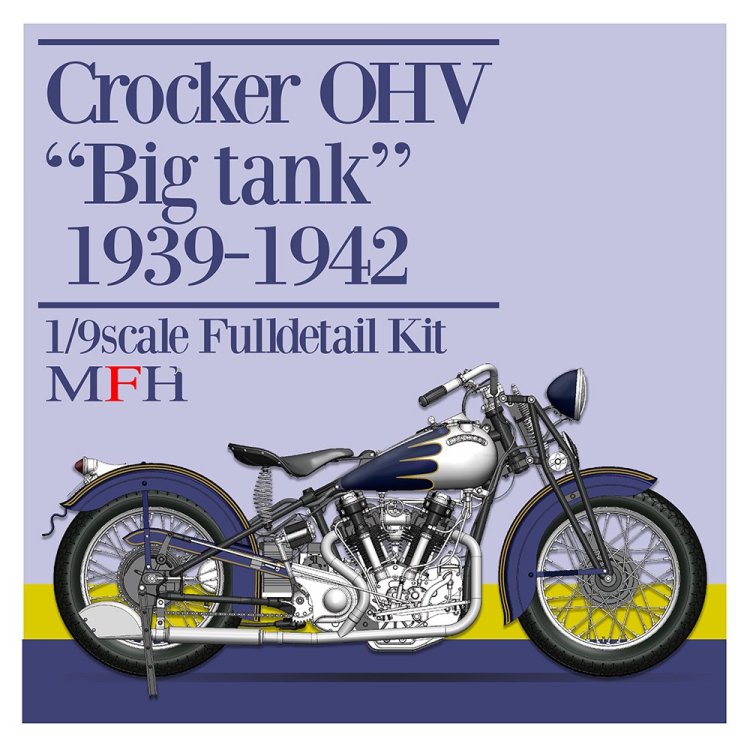
Not anymore on my to buy list, but ordered Saturday. When I saw the announcement of the MFH Crocker with the big tank, I was immediately in love. I never liked Harley´s that much, mainly because I hate the middle section with the battery / airbox?, which ruins the entire design for me. The Crocker shows, it can be made different, what a beauty. Cheers Rob
-
The Scharnhorst 1/200 by Trumpter-Operation Paderborn
DocRob replied to KevinM's topic in Non LSM 'WIP
Woah, this is getting epic, Kevin. I feel your pain about adding all these details, but once you started.... I feel set back to the times, where I build the USS Arizona and I guess, there are not so many small scale ship builds following. Cheers Rob -
Your 262 looks fantastic Carl. Bummer with the decals, were these the original Revell ones. I wonder, because I thought they were of relatively good quality. 1ManArmy masks on German planes are a lot of work, because of the many used colors and walkways, which I experienced with my Arado 234. When I build my 262, I will give the HGW wet transfers a (last?) shot. Cheers Rob
-
AEG G.IV - Creature of the Night - WNW 1/32
DocRob replied to DocRob's topic in The Great Twins Broup Bluild
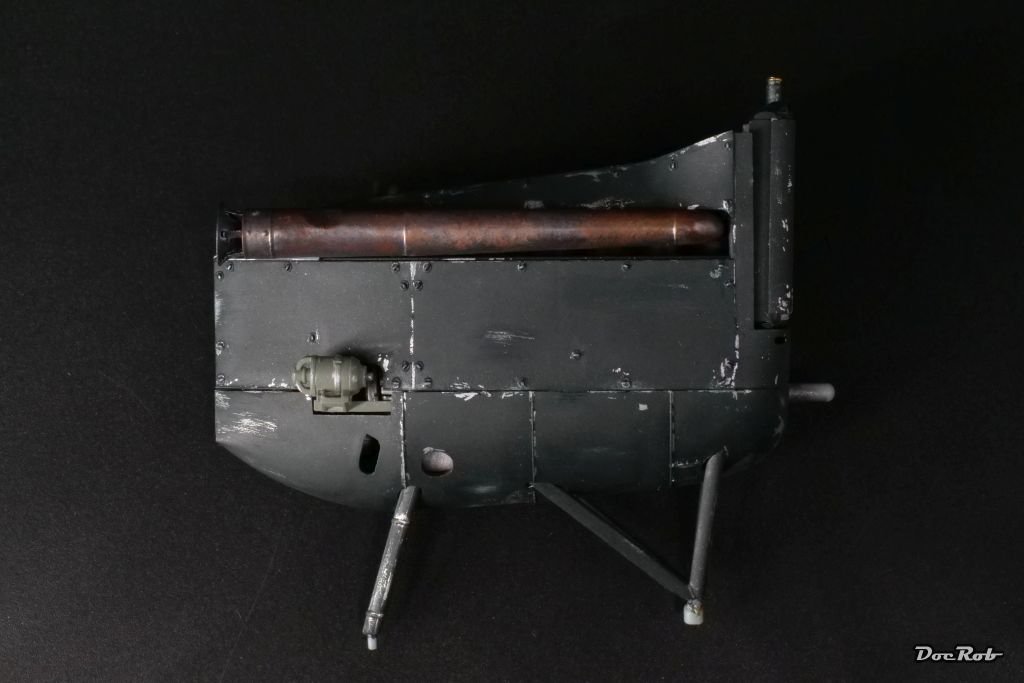
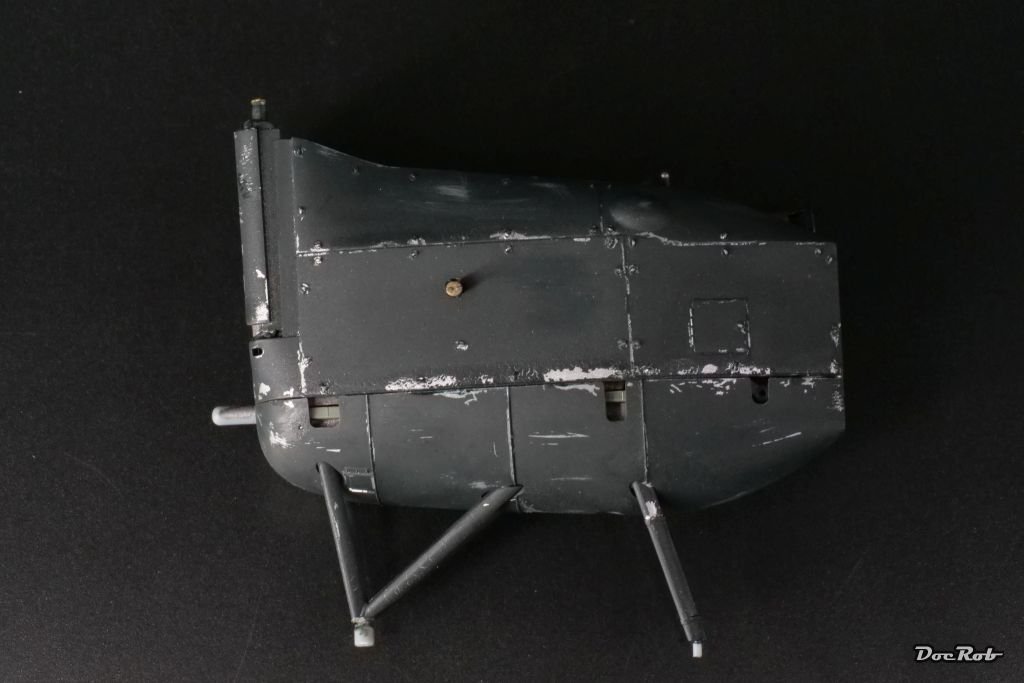
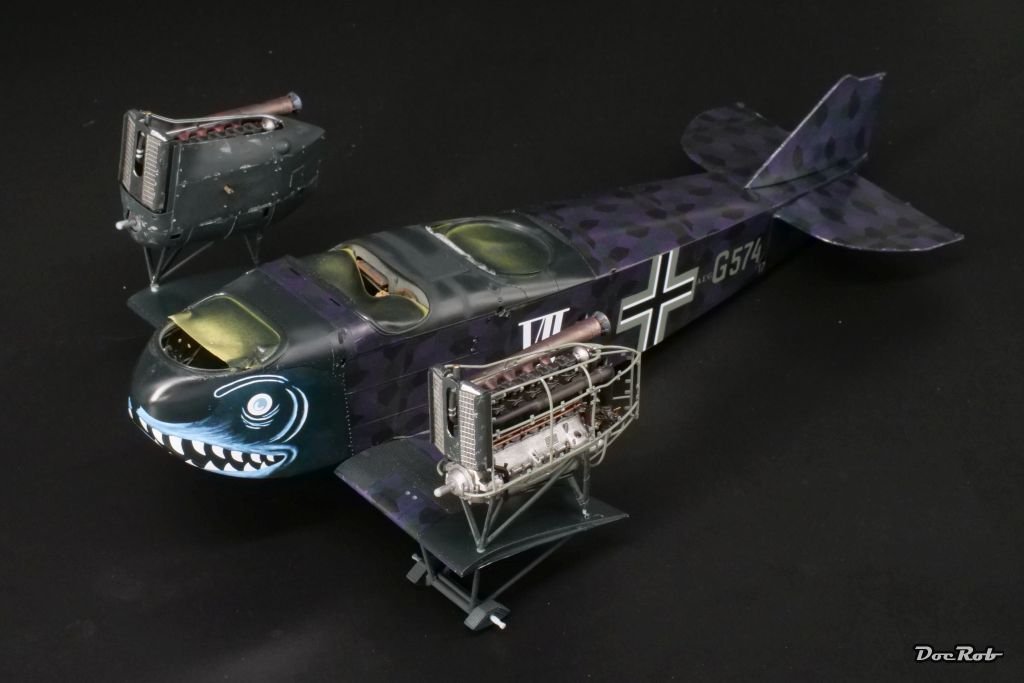
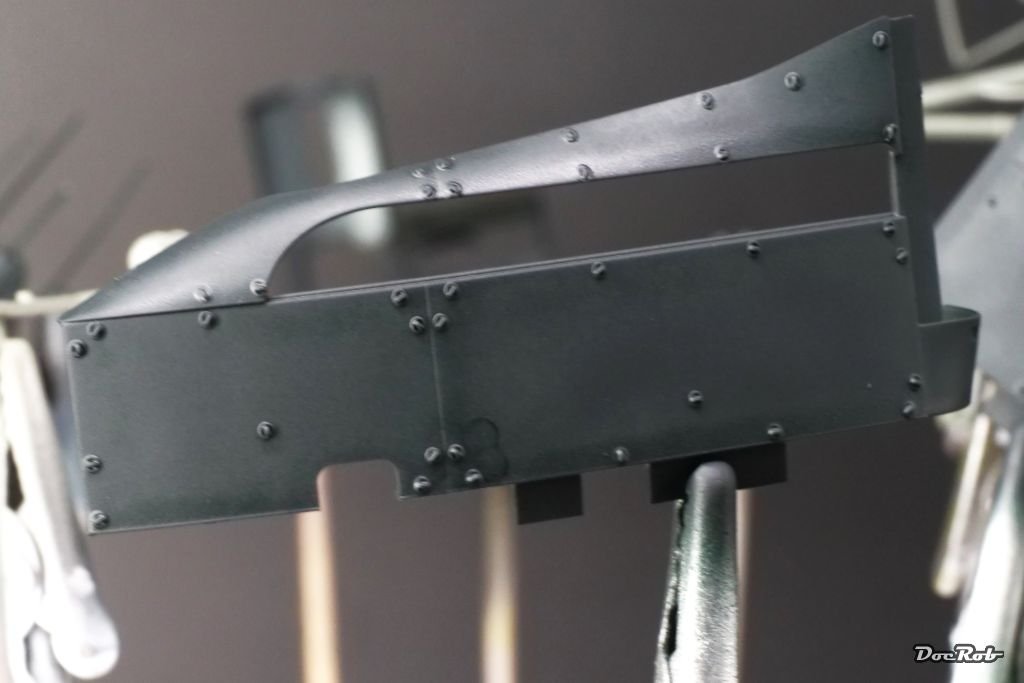
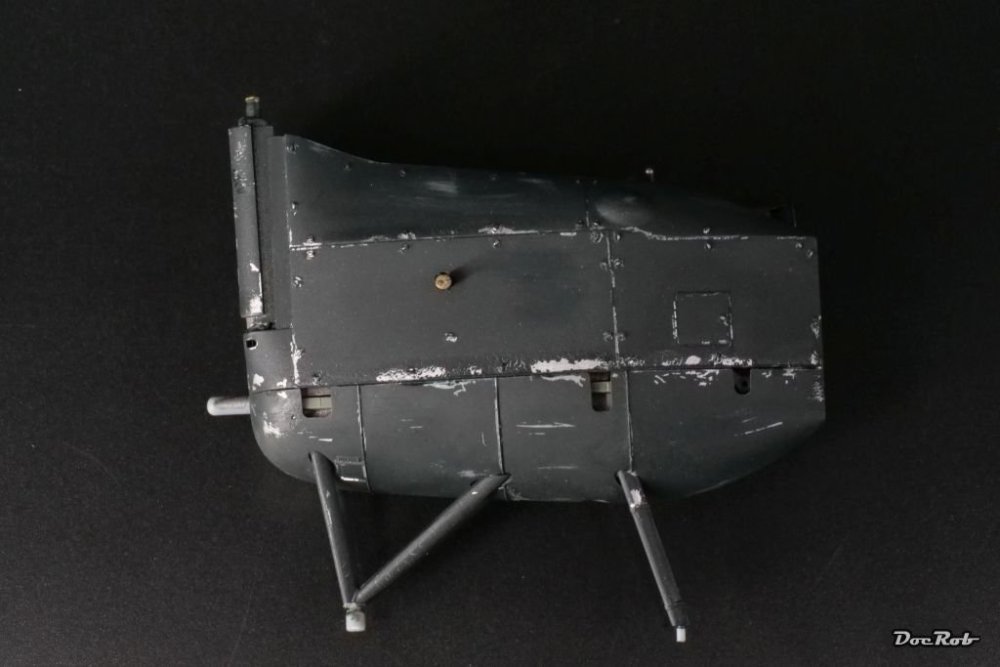
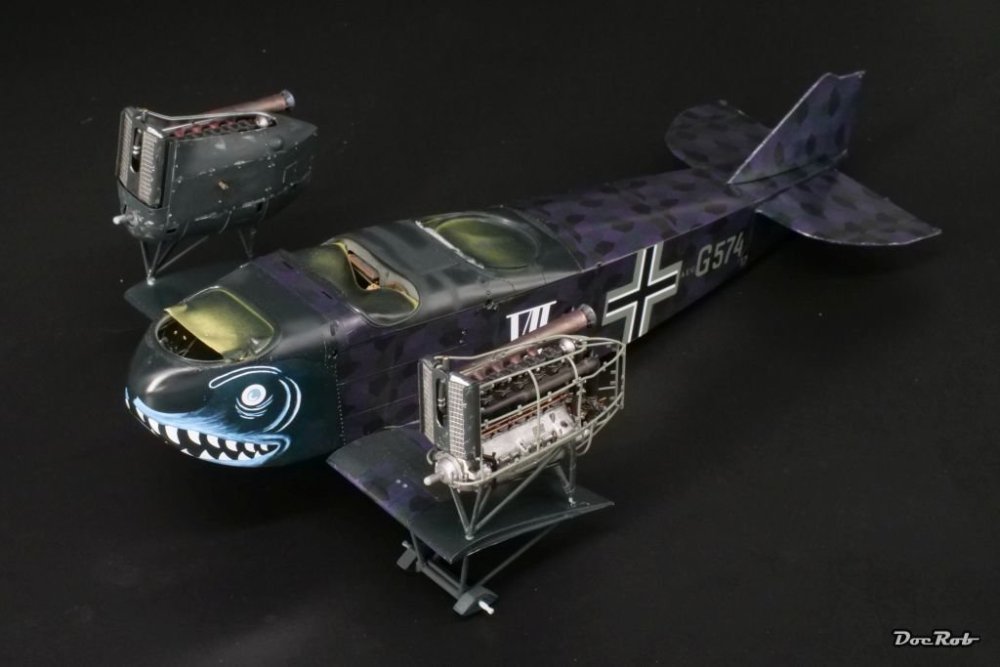
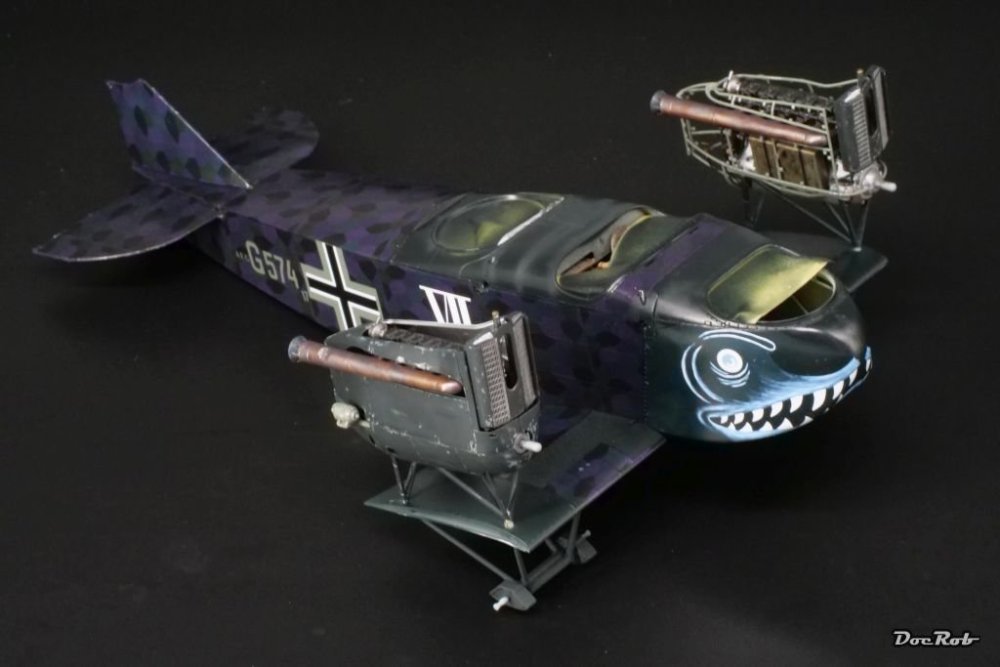
Phew, I got some work done over the last days. The engine nacelles were not the easiest part of the build. Many fragile parts were to paint weather and mount, and I´m really lucky, it is a WNW kit with great engineering and fit. Look alone for the filigrane tubing around the exposed engine, unbelievable. I applied Tamiya XF-17 onto the outside of the cowlings and struts onto the hairspray. When dried, I dampened the parts, activating the hairspray and abused the surfaces with toothpicks, fiber pencil and other scratching tools with an emphasize on the sheet borders and fasteners. Again, all the painted parts were glued together using CA, which I prefer to runny plastic cement with near ready parts. Unfortunately, I broke an engine strut, where it connects to the lug, which will be inserted into the wing later, damn, a very important connection. Out with the 0,5 mm drill bit, drilled both ends and inserted a brass rod along CA Left nacelle Right nacelle Later, I will apply some brown Flory clay wash, but this has to wait, until I have the fuselage weathered, to achieve a similar finish. I mocked some picture, carefully mounting the nacelles to the beast. Cheers Rob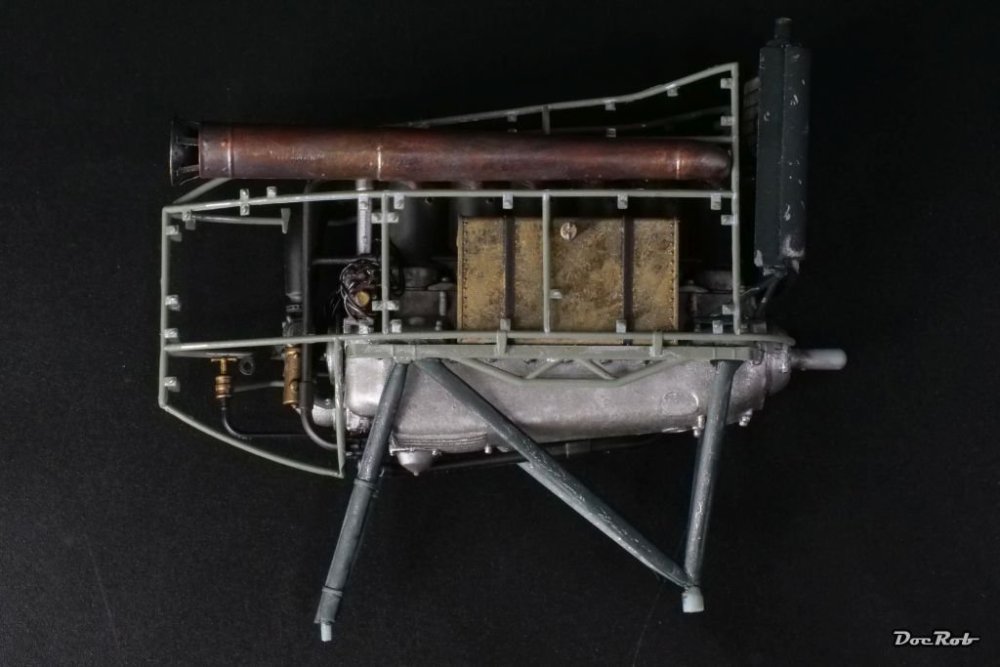

-
AEG G.IV - Creature of the Night - WNW 1/32
DocRob replied to DocRob's topic in The Great Twins Broup Bluild
Thank you Jeff, I´m blushing. The bad thing about the macro pics on a computer, they reveal a few spots, I need to address later, so to me writing a log is very helpful too, besides, I sometimes forget a color used at the beginning and that´s why I mostly describe, which I used. I like to challenge myself with most of my bits, learning new techniques and document them in the thread as a lesson learned and reflection. If this helps others too, I´m very grateful, as this is the idea of a forum to me. Seeing your builds, I have to say, there is nothing to hide, they are absolute beautiful. Considering the quality of the base kits it´s easy to spot your talent. What I want to say with this is, you should try a WNW kit ones. The quality of the kits makes it easy to shine. You don´t have to fuss about the plastic a lot and concentrate on painting and weathering. Cheers Rob -
AEG G.IV - Creature of the Night - WNW 1/32
DocRob replied to DocRob's topic in The Great Twins Broup Bluild
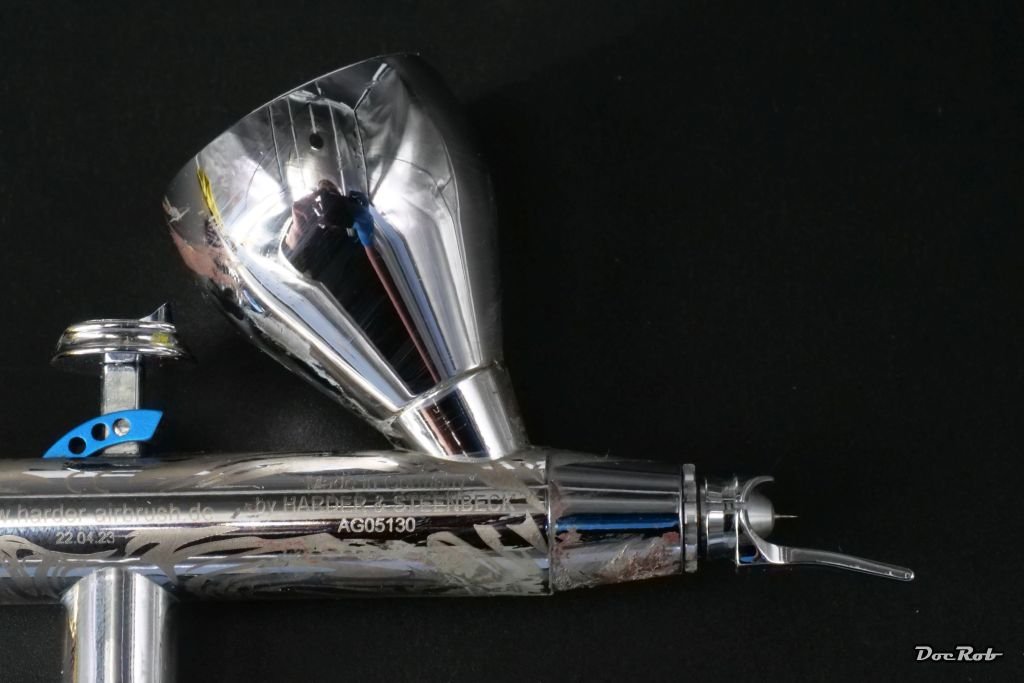
Thank you Peter, the next step will be to decide over the clear coat. I want it slightly matted as a base for my weathering. The H&S thingies are called sketching caps, when I recall it right. With a quick view, I haven´t found them for sale, but there are 3D print files for similar ones out there. Cheers Rob -
Great progress Peter. Like Chris said, thanks for showing the colors used. Will come in handy, when I build my -D. Cheers Rob
-
It´s hard to center a drill bit perfectly for drilling out a gun barrel or similar, because of the dead center. What helps, is to stick a fresh triangular blade to the tip of the gun nozzle and carefully rotate the blade, marking the center. Then it´s easy to finalize the hole with a drilling bit. Cheers Rob
-
AEG G.IV - Creature of the Night - WNW 1/32
DocRob replied to DocRob's topic in The Great Twins Broup Bluild
I don´t know, if H&S sell them separately, but they should fit onto other Infinity muzzles as well. They replace the needle protector cap, which I don´t use normally. X-22 with some added flat base came to mind Peter, thinned with normal Tamiya thinner, which shouldn´t be too aggressive. Applied, like Carl said, a misted, fast drying coat and then more. Cheers Rob -
AEG G.IV - Creature of the Night - WNW 1/32
DocRob replied to DocRob's topic in The Great Twins Broup Bluild
Thanks Carl, misting over a very thin protective layer could really help. I haven´t used the airbrush tips before, but they seem very good for certain airbrushing tasks. It helps to get lines with the same width over a model and like I said, helps aiming. Fine airbrush work, like skin tones or similar on figures will benefit too. Cheers Rob -
AEG G.IV - Creature of the Night - WNW 1/32
DocRob replied to DocRob's topic in The Great Twins Broup Bluild
Sealing them will be the first step, Peter, but with several weathering steps planned, I would have liked to use a durable varnish. On the inner fuselage decals, I tried AK real color matte with leveling thinner, which slightly attacked the decals. I will have to experiment with Tamiya clear matte and the Tamiya X-thinner or worst case with Future and added flat base. Cheers Rob -
AEG G.IV - Creature of the Night - WNW 1/32
DocRob replied to DocRob's topic in The Great Twins Broup Bluild
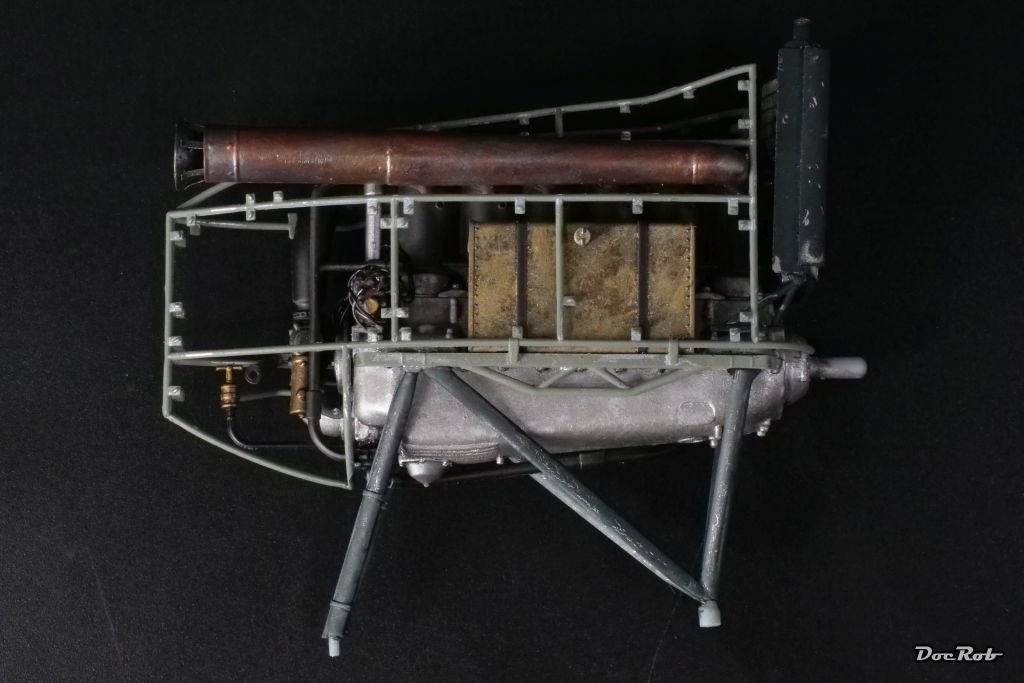
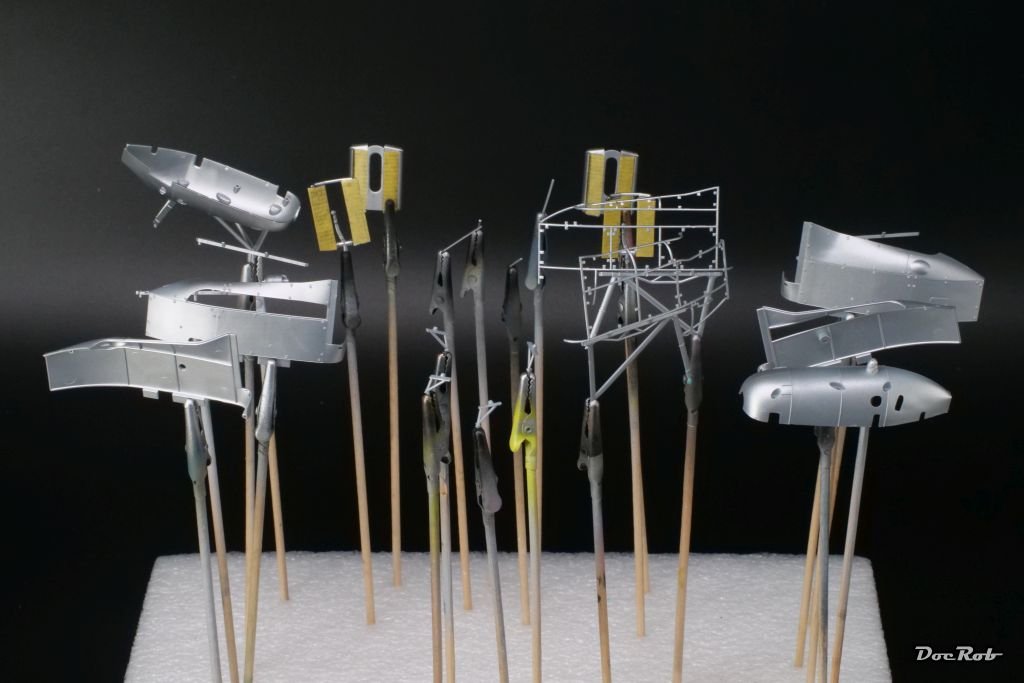
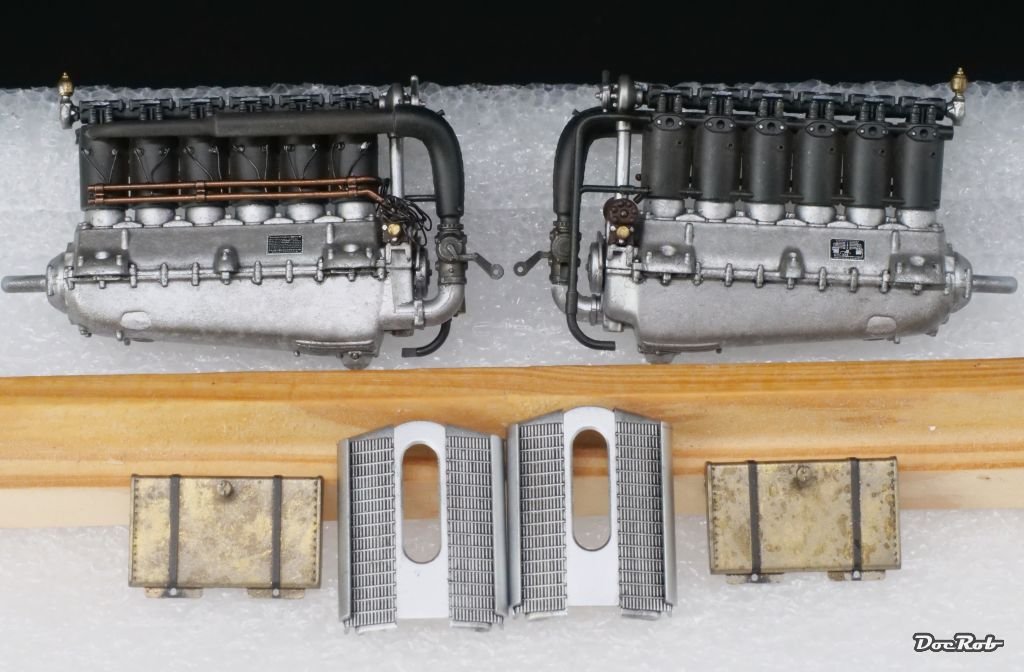
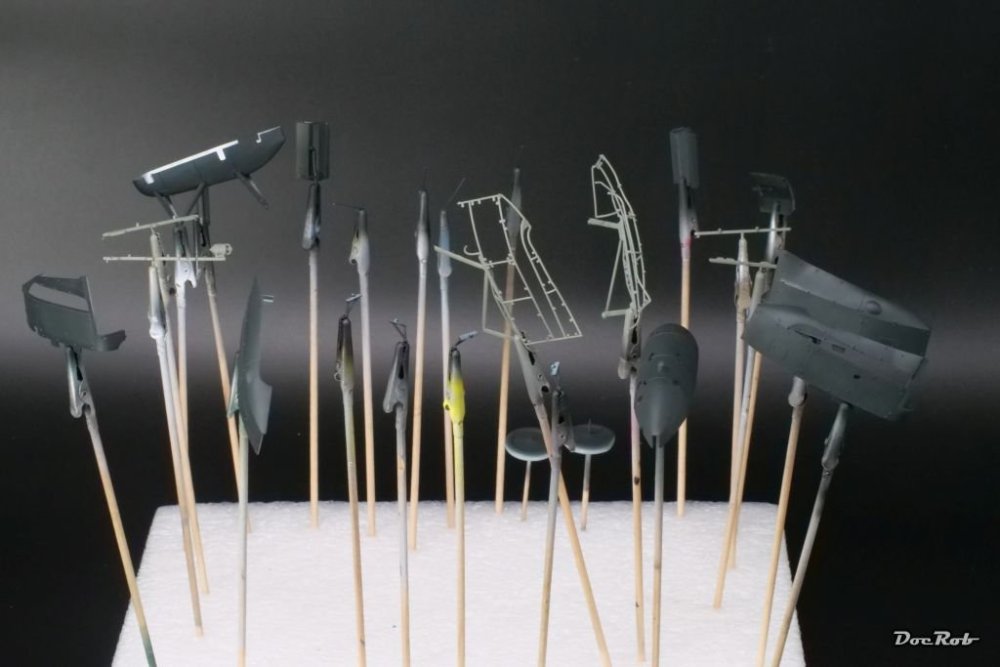
After I figured out, which parts were needed for the nacelles and radiators, I started to paint them. The left engine will be displayed un-cowled, the right one with cowlings. All parts were sprayed with AK matte aluminum, which is not that matte, but covers great and has a nice metallic sheen. It will be only the base layer for weathering and was followed by two coats of horrible smelly hairspray for later chipping. Then the parts were sprayed with Tamiya XF-22 (RLM 22) for the engine bearers and XF-17 sea blue for the outside of the cowlings and radiators. The sea blue was highlighted then, with some drops of sand color added, highlighting the upper sides and the panel borders. The effect is hard to see on the pic, but it´s there. Later, the cowling outsides will be dampened to activate the hairspray and scratched with a variety of tools for chipping. Airbrushing slightly lighted sea blue onto the dark surfaces proved difficult, but I remembered that with my H&S Infinity Giraldez edition airbrush came three different nozzle guide horns (the mounted one is the longest), which were very helpful, placing the slightly lighter dots and will come handy with free hand squiggle camo, as you keep the same distance to the kit and it makes aiming easier. Cheers Rob


-
AEG G.IV - Creature of the Night - WNW 1/32
DocRob replied to DocRob's topic in The Great Twins Broup Bluild
Thank you Peter, I´m looking for a used, weathered look with the AEG. For the engines it´s relatively easy to achieve, with the fuselage not so much. I need a plan for this, as the decals are fragile and I have to think about, which products I can use onto them. Because they were opaque there was no way of preshading, which I normally prefer. Cheers Rob -
AEG G.IV - Creature of the Night - WNW 1/32
DocRob replied to DocRob's topic in The Great Twins Broup Bluild
Thank you Mike, I use the AK waxes frequently, but only on surfaces, I do not plan to cover them with paint or varnish later. It might work, but I haven´t tried yet. They are a good addition to base paint and pigments and spread thin and even, with great coverage. Cheers Rob -
AEG G.IV - Creature of the Night - WNW 1/32
DocRob replied to DocRob's topic in The Great Twins Broup Bluild
Muchas gracias amigos, I have a huge box in my workshop containing all metal colors, waxes and pigments. When I start WWI engines, I open it, like the make- up kit a Grace Kelly would have done and let the contents speak to me . It´s an iterative process, only partly planned. The drilling was partly superfluous, as the CA got soaked into the tubes and I had to but glue the wires, which works good with that easy to bend lead wire, luckily. Cheers Rob -
I guess there is, CMK has a cockpit set and there is the HPH cut away for the He-111, Scott, screams heard . Cheers Rob
-
Fantastic progress Carl, mottling looks super, as does the masked markings. I have HGW wet transfers for mine, but with my experiences with these, I´m not so sure, I will use them. Is the kit landing gear so bad, it needs to be exchanged for AM? Cheers Rob
-
AEG G.IV - Creature of the Night - WNW 1/32
DocRob replied to DocRob's topic in The Great Twins Broup Bluild
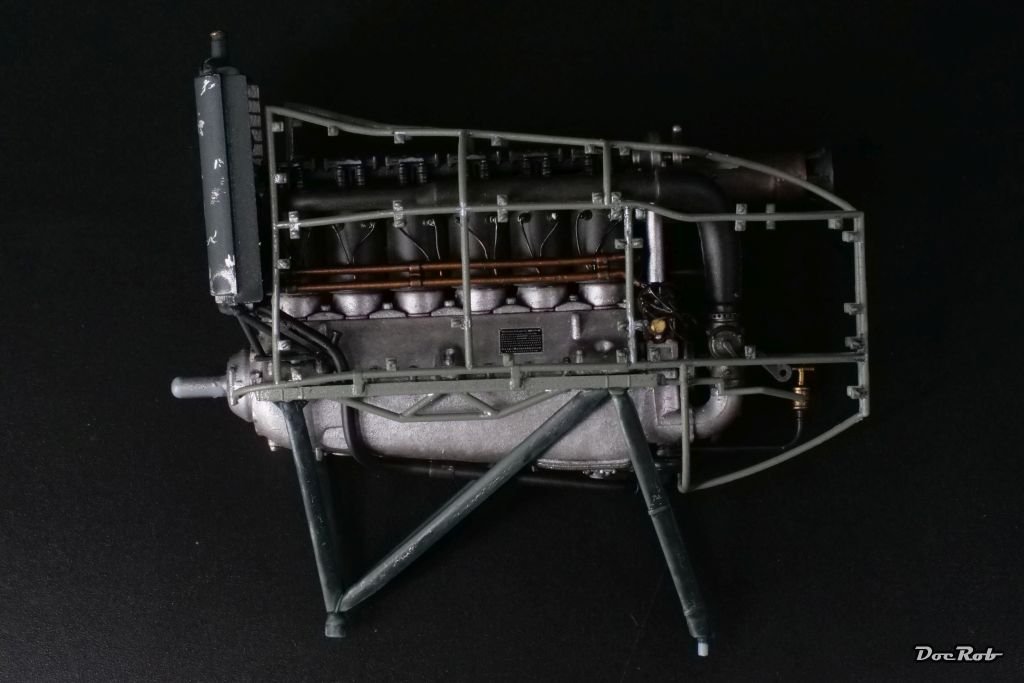
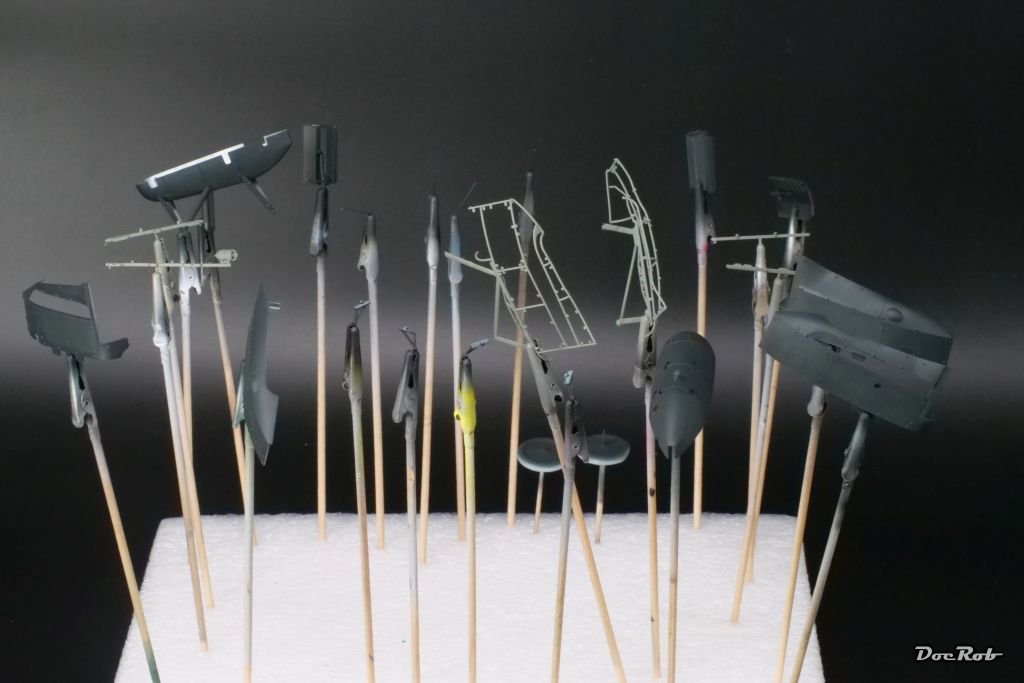
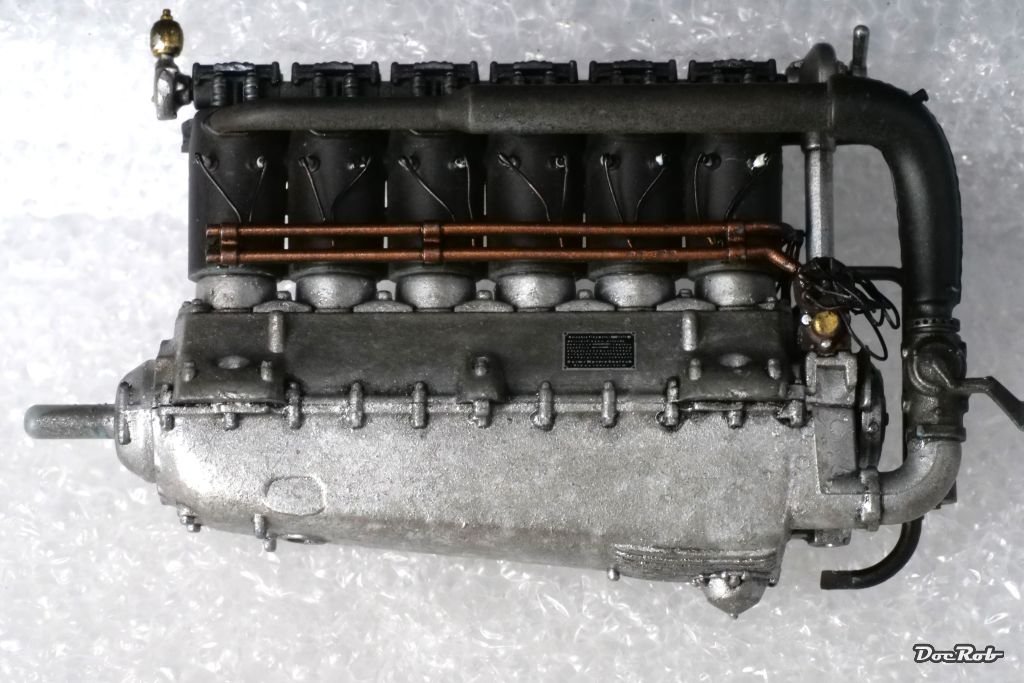
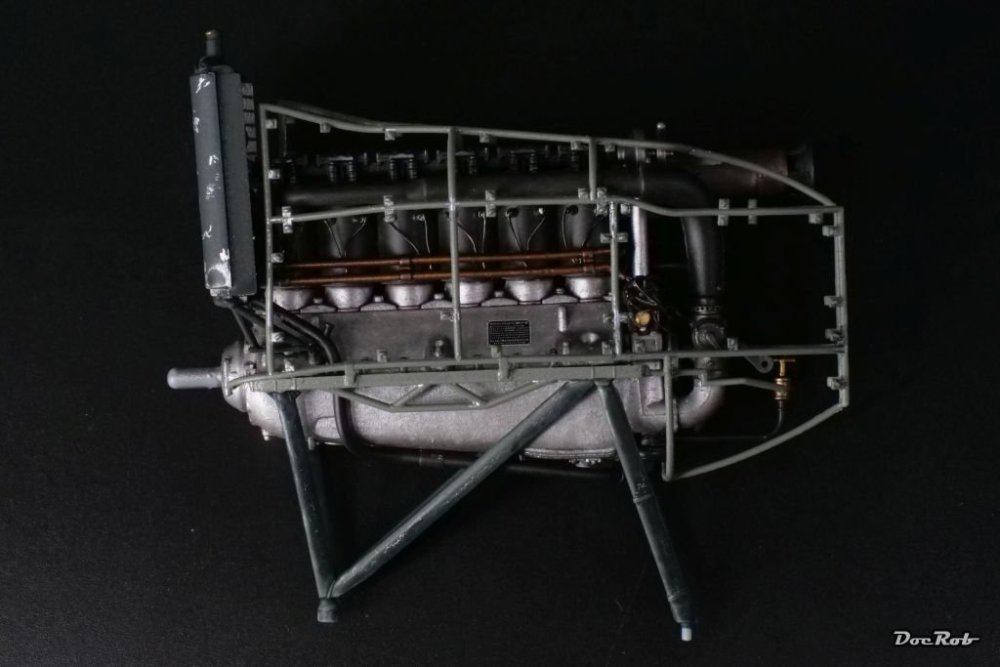
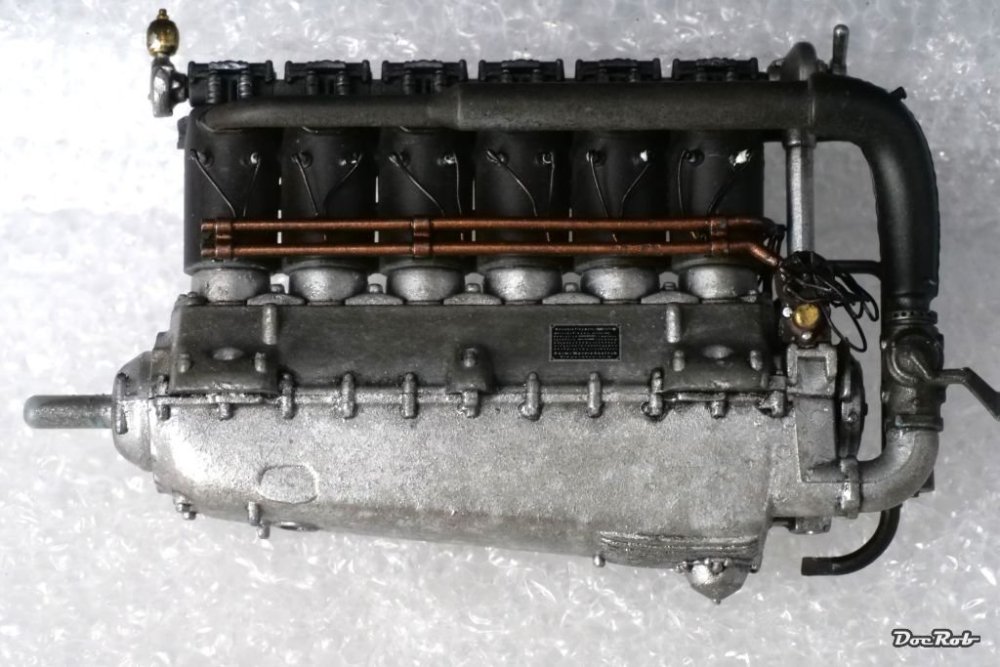
I finished the engines today, which were fun to build, but a ton of work. I wired only the left engine, as the right one will be hidden under cowlings. After priming all the parts with Tamiya LP-5 semi gloss black, the aluminum parts were sprayed with AK´s Extreme metals matte aluminum, the ignition harness in copper and the tiny ´golden´ parts in brass, all from AK. I wanted a blotchy look for the lower aluminum parts and used the salt technique again, spraying dark aluminum on top. After that, I used AK´s true metal wax aluminum, dark aluminum and steel, dabbed on with a stiff old brush and then worked into the surface with a flat brush. The result looks more dotted to the real eye. The tubing received my usual treatment of steel pigment rubbed in only slightly for a tiny bit of sheen, followed by some dark brown pigments on the intake manifold and cylinders. The oil tanks were sprayed brass, salted and followed by pale brass, later waxes of brass and bronze for a worn, but shiny metal look. I applied a self mixed black oil wash, thinned with matte thinner, to enhance the details. Wiring was next, I but glued the ignition cables to the spark plugs with CA and cut the overlap with a fresh blade, easy with 0,2 mm lead wire. The ´bushes´ of 6 cables for each magneto were sorted out and glued into place. Finally, I dabbed some semi matte black onto CA residues. Per my usual practice, I used CA for mounting painted parts, which is more comfortable to me. I use a toothpick to add the CA, a less potential messy affair than using Extra thin, eating through the paint and running into unwanted places. Cheers Rob
- 263 replies
-
- 10
-

-

-
AEG G.IV - Creature of the Night - WNW 1/32
DocRob replied to DocRob's topic in The Great Twins Broup Bluild
Thank you Martin and Peter, some of my efforts didn´t play out as wanted, but I got it done anyway. the CA capillared into the brass tubes and I had to glue the ignition wires flat on top of the ´spark plugs´. The fantastic Colle 21 CA did it´s job here again. Cheers Rob -
Indeed a beauty. Painting and weathering looking outstanding. Cheers Rob
-
A few days off the forum and bang, the big cat is half done. Your cockpit looks absolutely fantastic and I´m glad to hear, there are no real issues with the kit. When I read through your log, I had to smile, thinking of my huge AEG powered by only 520 horses and in contrary the huge amount of power, the Tomcat possesses. Cheers Rob