JohnB
-
Posts
7,206 -
Joined
-
Last visited
Content Type
Profiles
Forums
Events
Gallery
Everything posted by JohnB
-
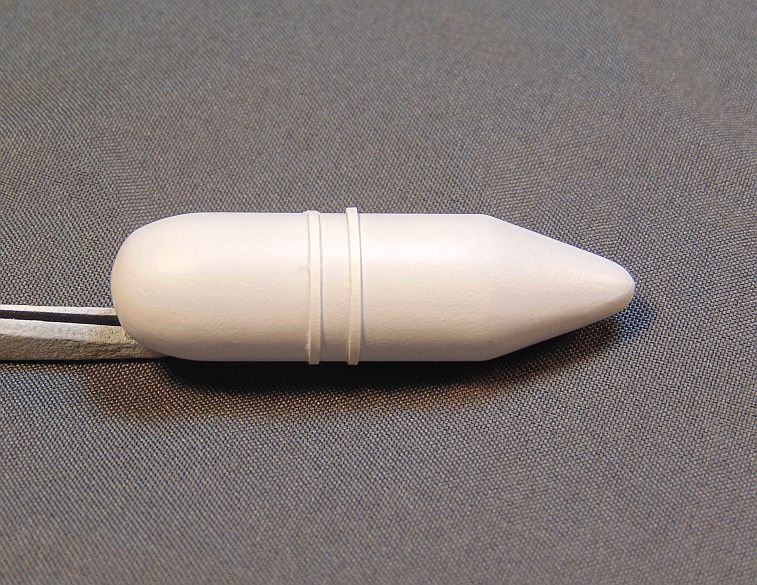
Scratch built AN/APS4 pod ready for install.
-
So have I Paul. I just decided I'd get this one built and deal with all the headaches. I hope to have it finished today or tomorrow.
-
Yes it is. 🤪
-
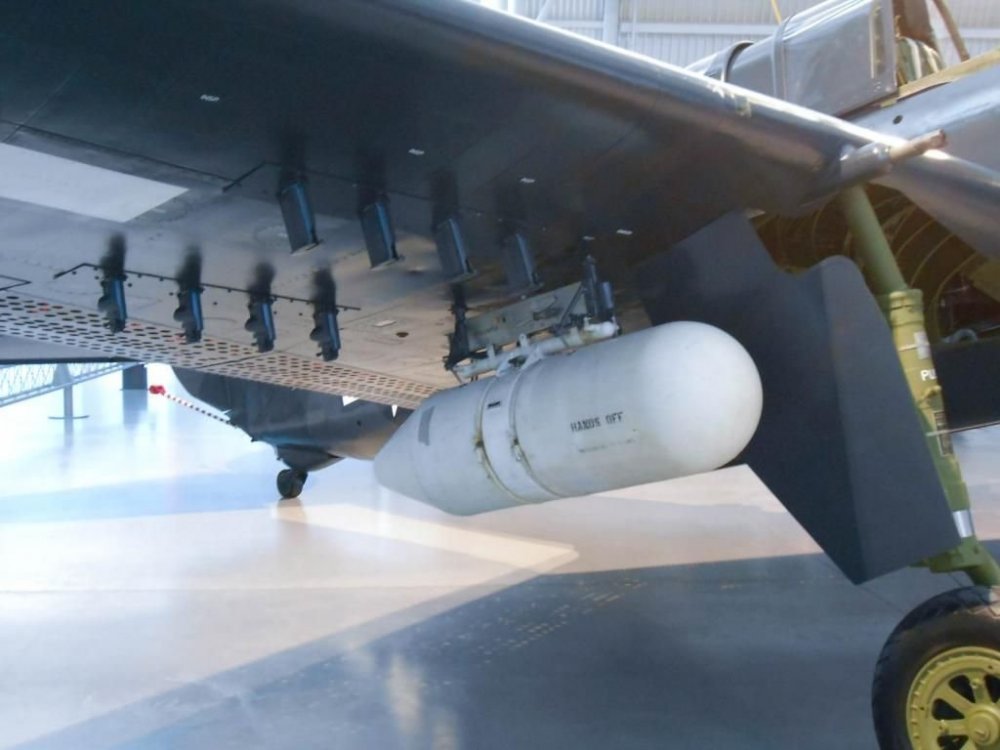
I've decided to delete the yagi antennas and add a AN/APS4 radar pod under the right wing. In the process of scratching one since I haven't been able to find any in 1/32.
-
Thanks Peter. I keep finding more things that need to be addressed on this build. The latest is the wingtip lights. The kit parts are grossly over size. Luckily I was able to find some useable ones in my VAST stash of unused parts.
-
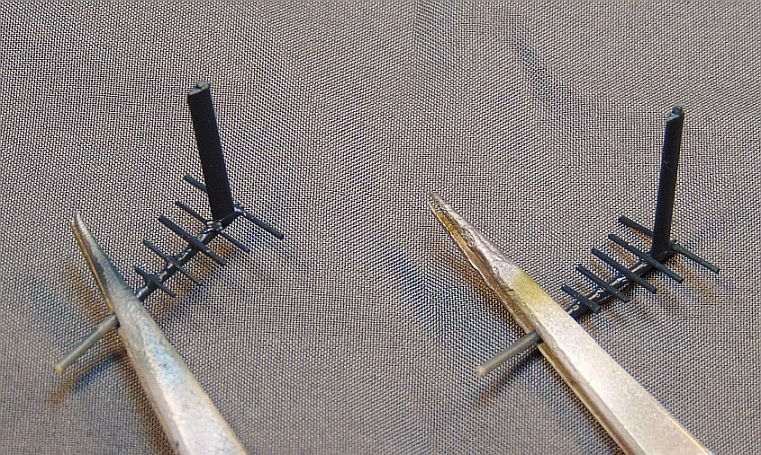
My scratch tagi antennas. Nothing to shout about but they will do.
-
Still have some things to do on it. I'm finding I need to scratch build the under wing yagi antennas. Some of the "wires" on the kit items broke off when I was trying to carefully remove them from the sprue. My scratched ones will be better than they were anyway. LOL
-
That's what I'd do Peter. Flaps up.
-
I'll check. Thanks. Yep. That's what it was. 🙄
-
For some reason we can't send photos via a PM. Wish they would change that.
-
Nice pics but the model is all but complete at this time.
-
Thank you Peter. I've been a fan of their GSB for quite a while as I'm sure you know. LOL
-
Thanks Gaz, I'm glad you like it. And thanks for the tip. I'll give that a try as it sounds like a very workable approach.
-
Thank you Dennis. Me too!!! Plus I'll be glad to finally be done with it.
-
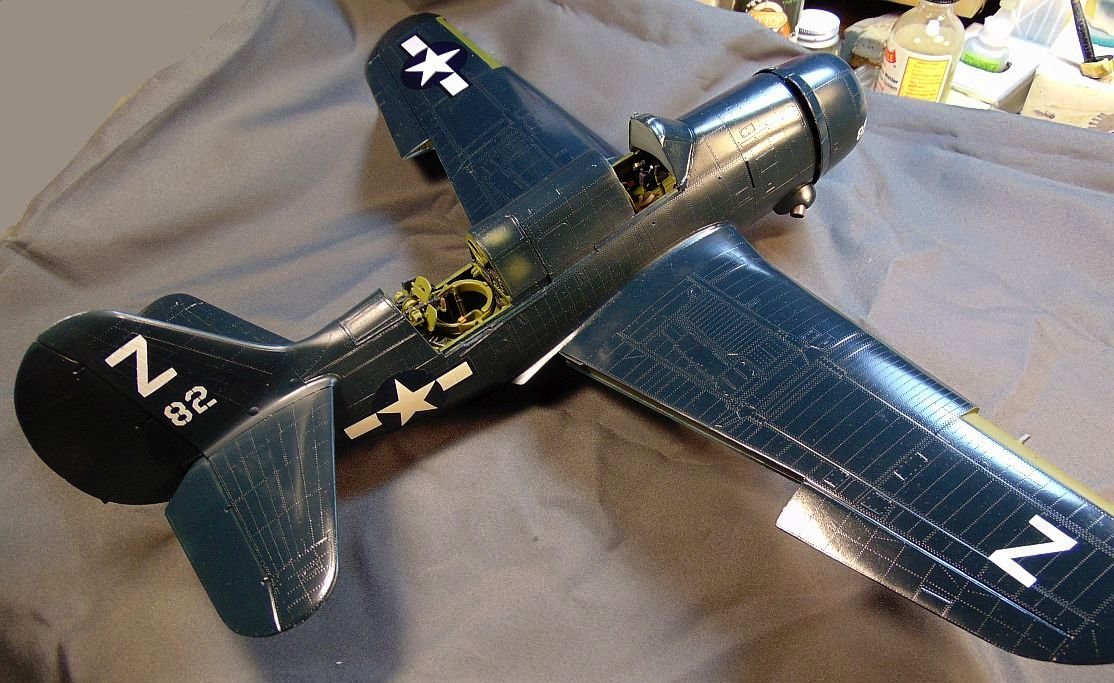
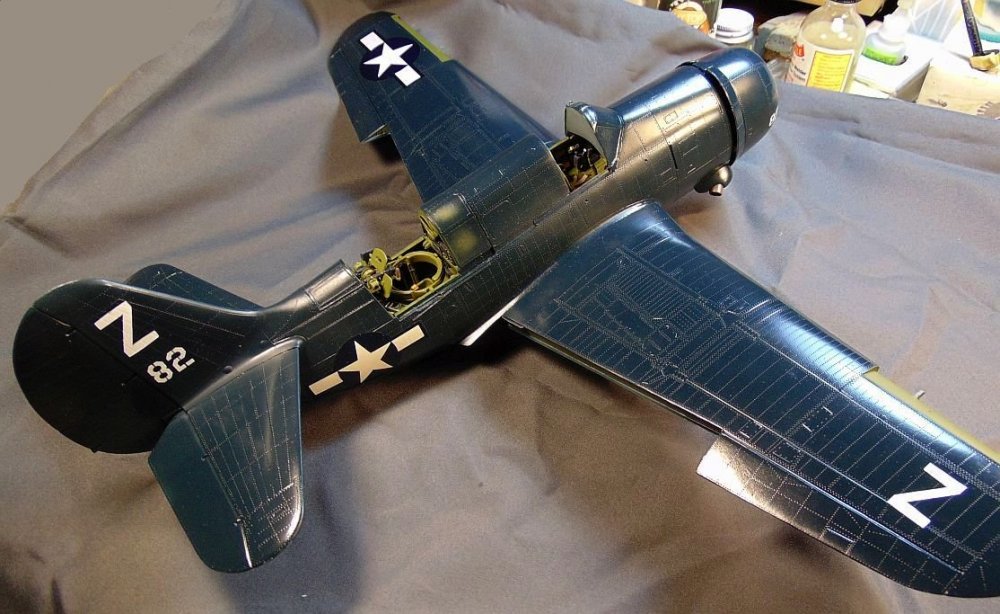
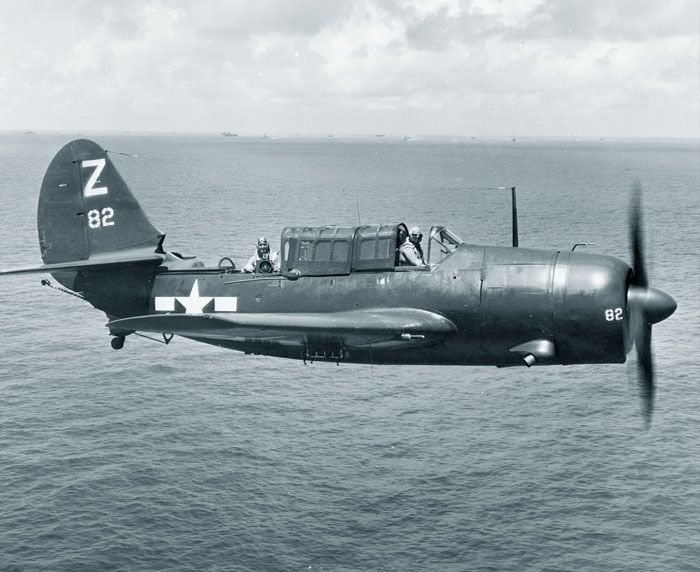
Tail boo boo fixed and most of the markings applied.
-
Barring more buggerups I hope to have it done by the end of the week. Fingers crossed!
-
That soft plastic is a blessing and a curse. I keep files on various a/c on my computer which I refer to as a alternate to the crappy instructions for this kit. The SB2C file sure has been a help. I see in your photo you have CA glue and Zip Kicker. You will need 'em for sure!
-
Always seems to be something doesn't it Peter. I'll get this boo boo sorted out today and finish applying the markings.
-
Maybe so Ernie. It wouldn't hurt to do that just in case. 🙄 At least it was just this one area and should be a easy fix (I hope!).
-
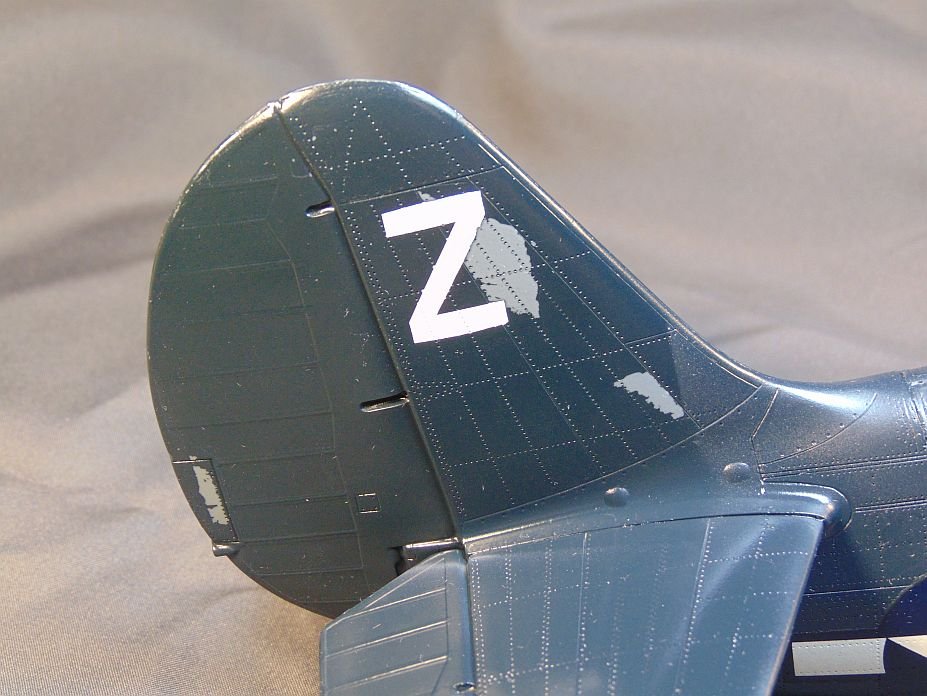
It's always SOMETHING with this model. I used stencils to apply the "Z" code letters and when I removed the stencil and masking on this side this is what happened. Not a disaster but just another thing to "fix". 🤪
-
LOL Peter. Thanks. Can you believe I've finally gotten to the decaling stage!? I certainly had my doubts at times!🤪 I still have to add the gear covers, wing guns, slats, bomb rack under the wings, tail hook and a few other odds and ends. After I get all that done and the rest of the decals applied I'll overspray the whole a/c with a clear semi-gloss. THEN I can remove all the canopy masks. I hope to have this monster completed by the end of the week.
-
-
Thanks Andy. I've been a fan of the ol' Testor's Dk. Sea Blue enamel for years and have used it on numerous builds with no problems (other than self-inflicted!). I will say the surface detail on this kit is outstanding. Too bad the rest of the kit isn't.
-
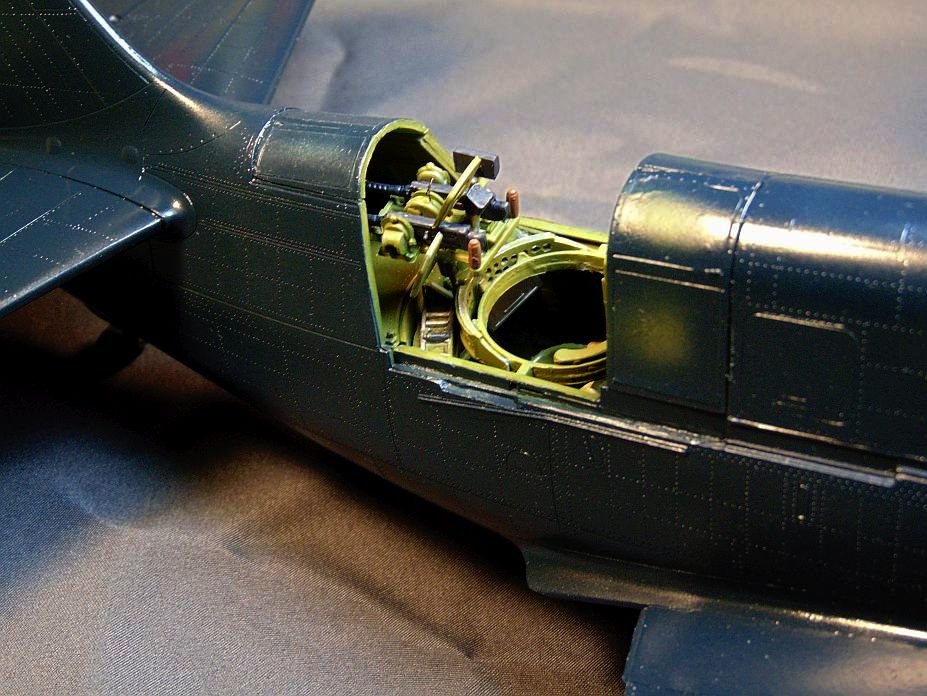
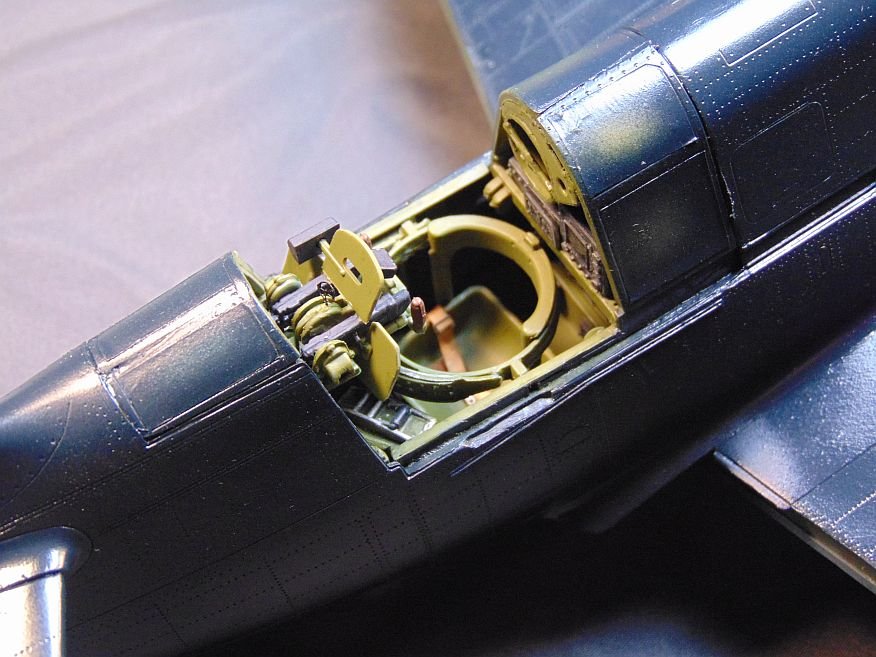
One thing I was sweating out was installing the guns and related hardware in the gunners compartment. I figured it would be a very tight fit to be able to insert the guns/ring/seat, etc. It WAS a tight fit and needed a good bit of patience to get it in place but I managed to squeeze it in without breaking anything! Whew!!!
- 267 replies
-
- 13
-

-

-
Thanks Dennis. I say go for it!